Leaderboard


Popular Content
Showing content with the highest reputation on 05/29/15 in all areas
-
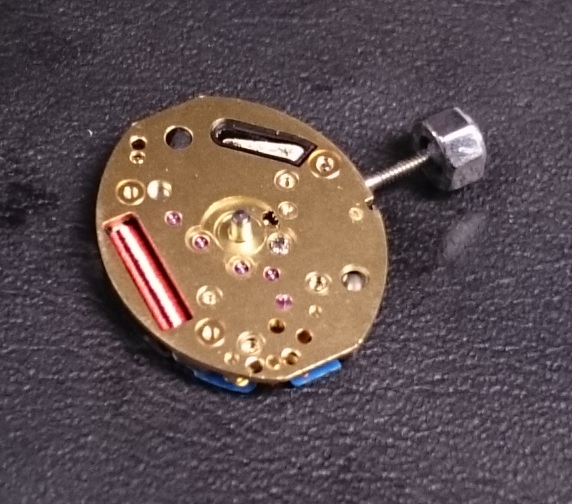
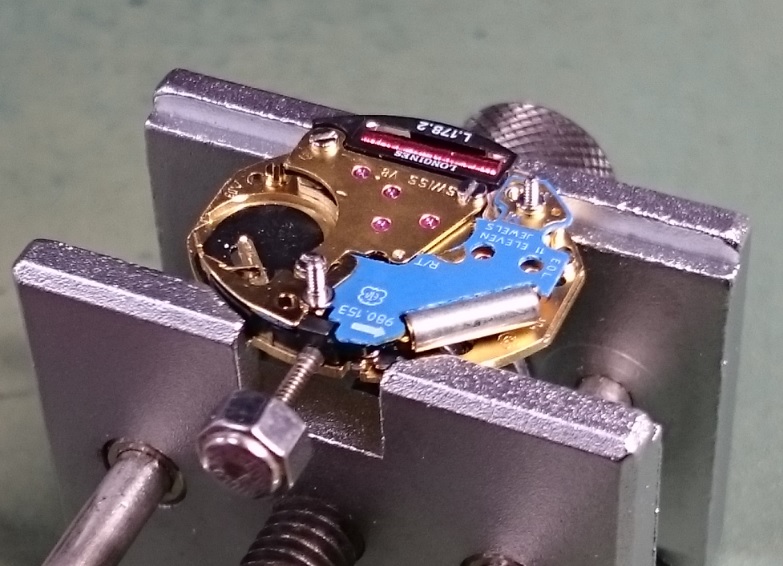
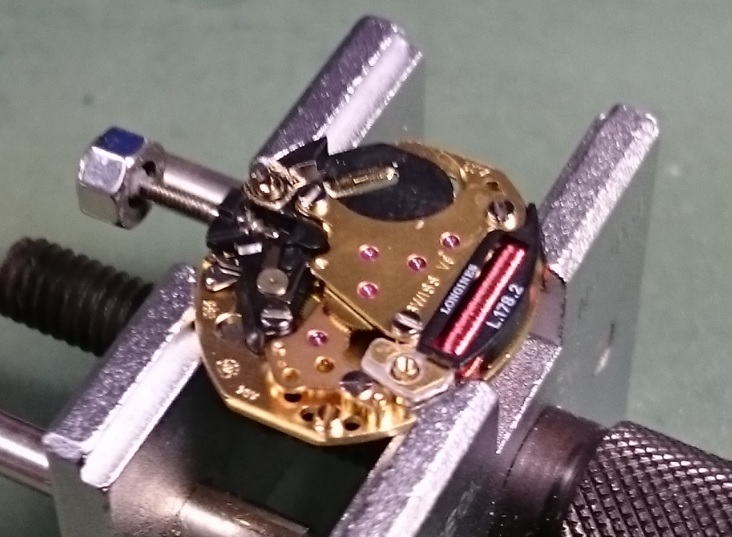
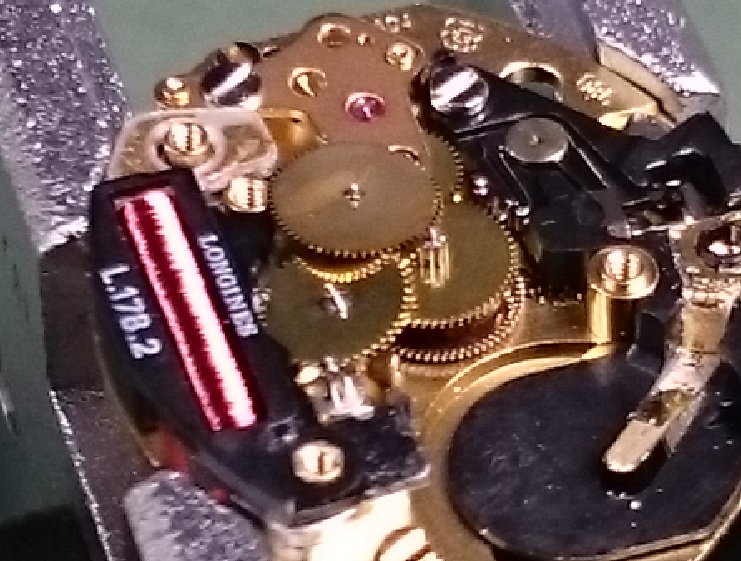
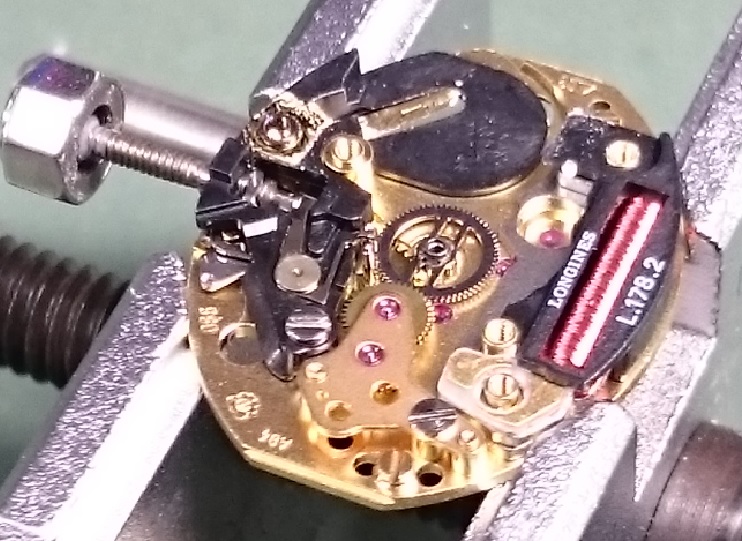
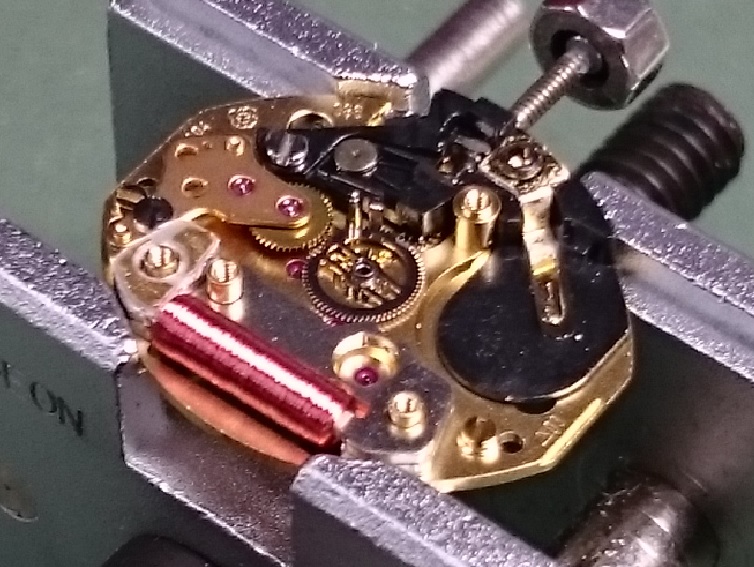
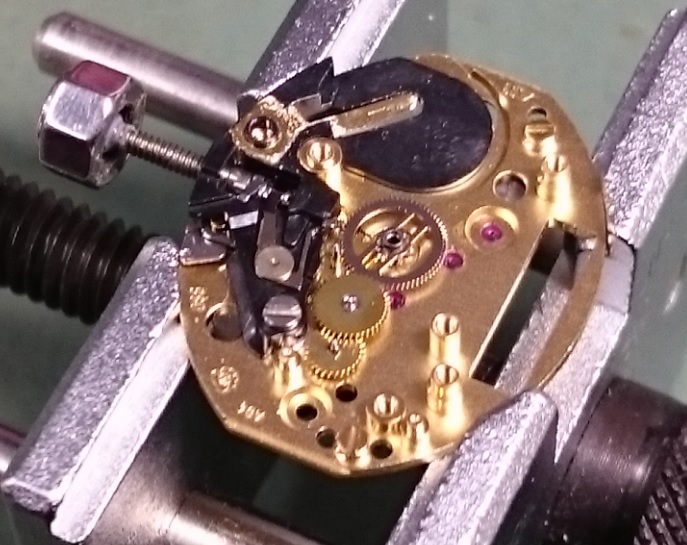
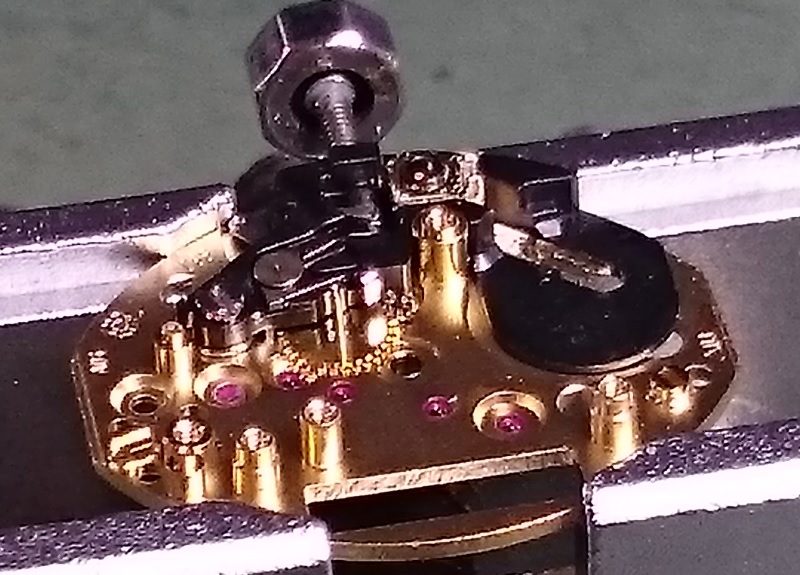
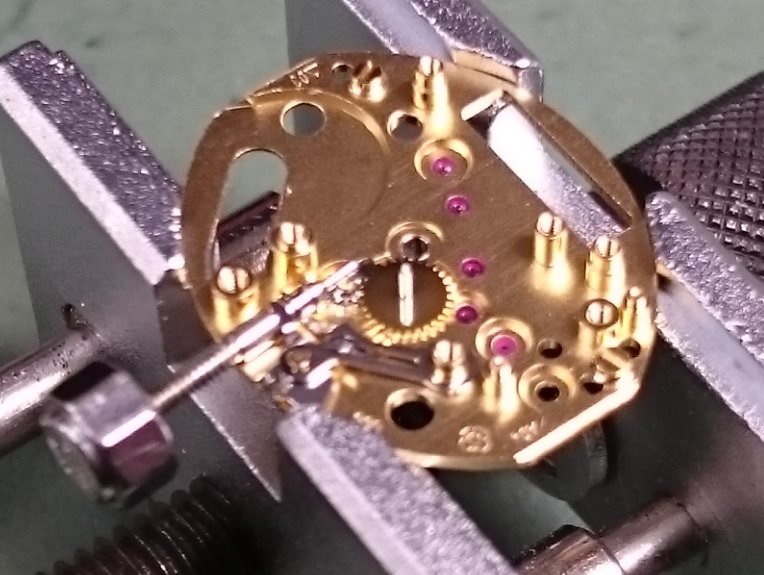
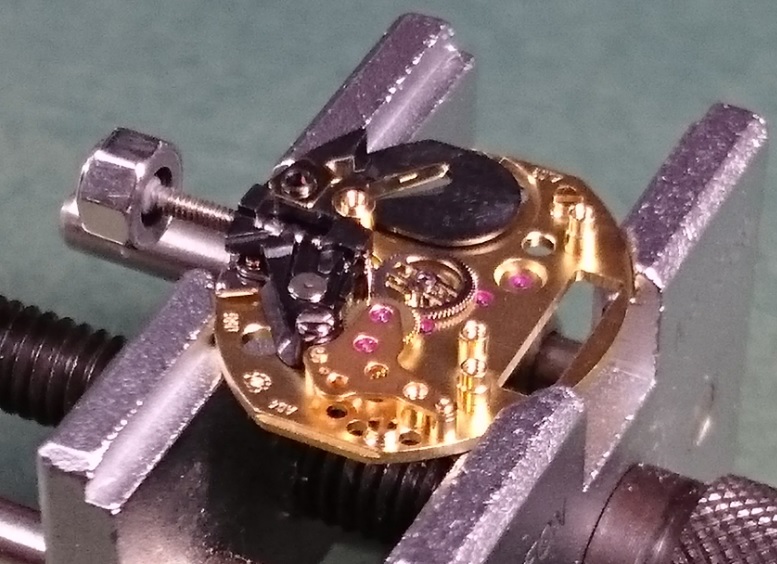
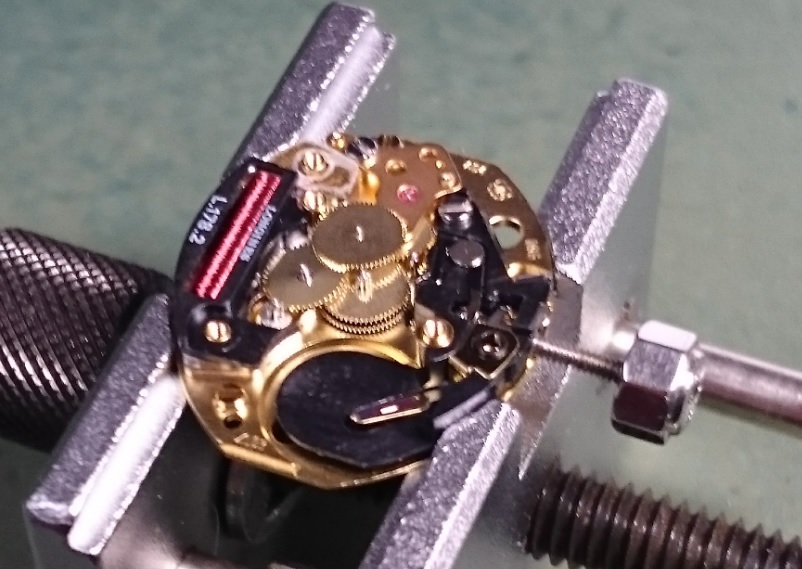
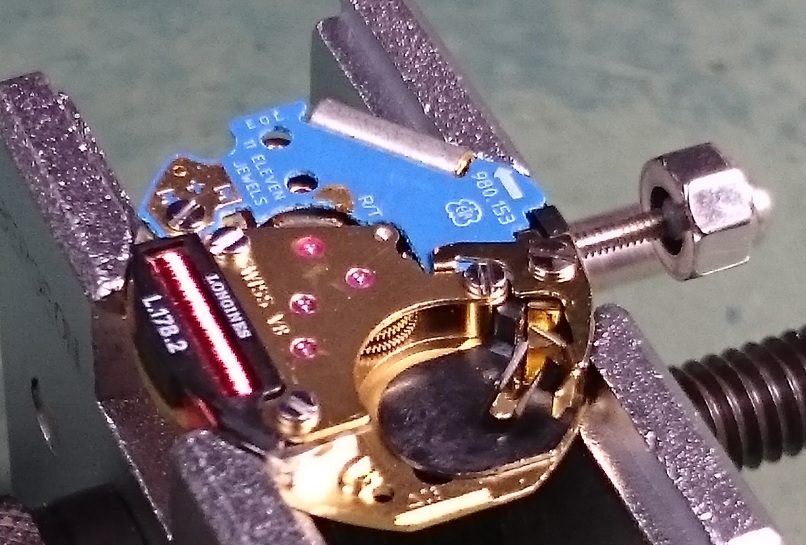
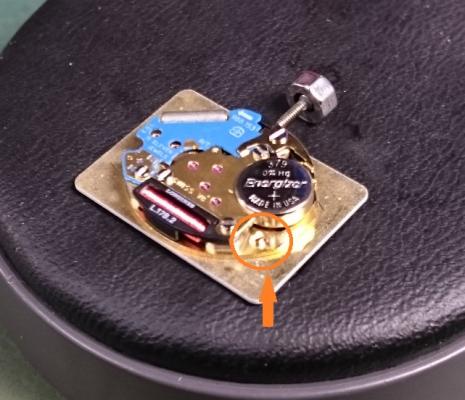
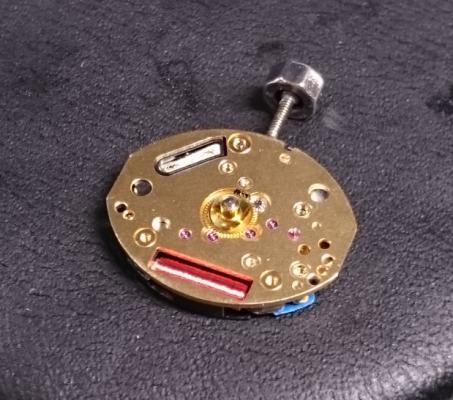
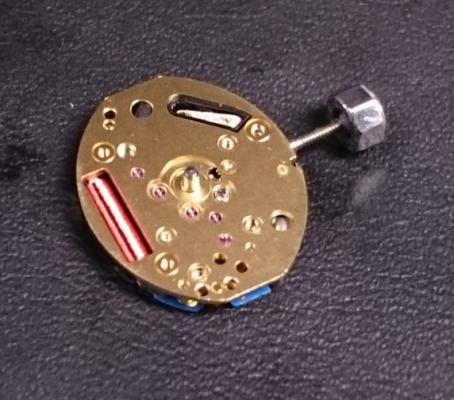
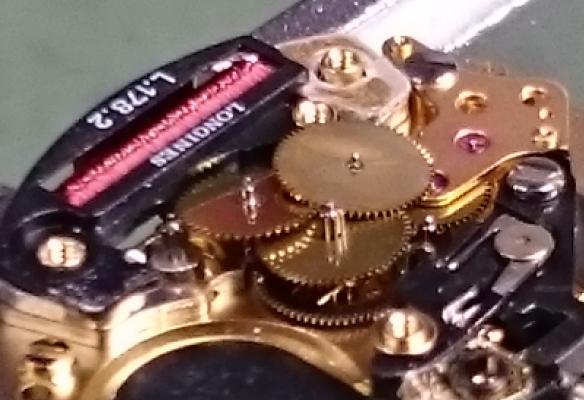
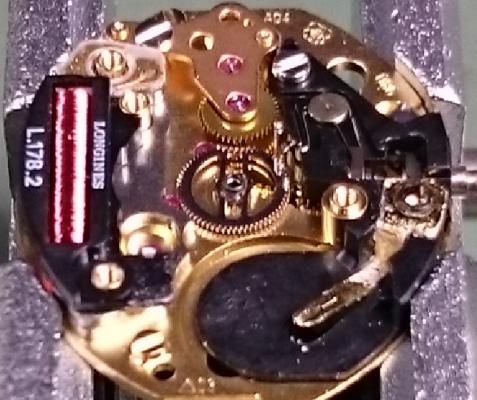
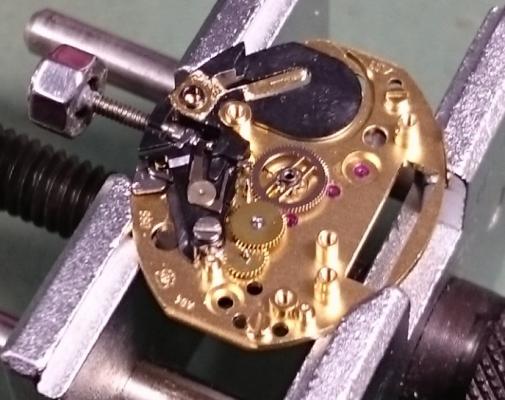
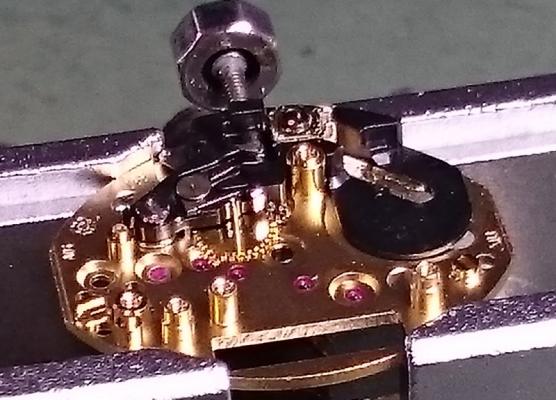
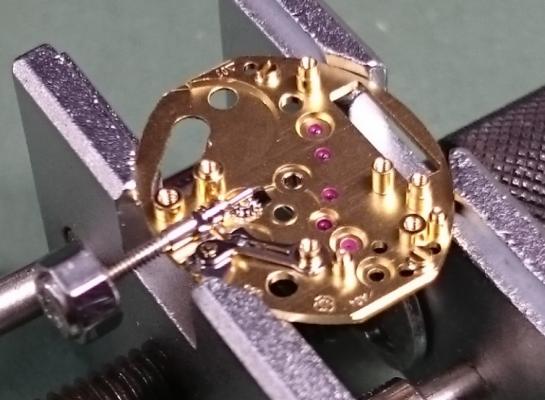
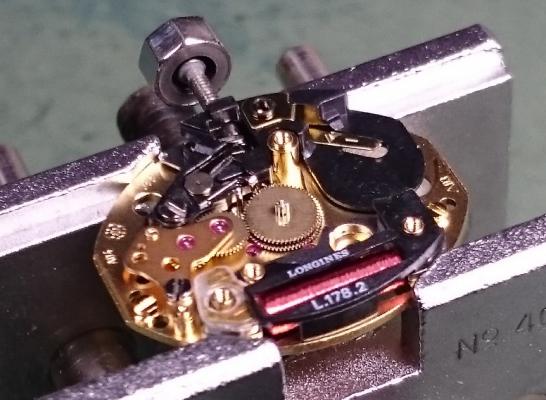
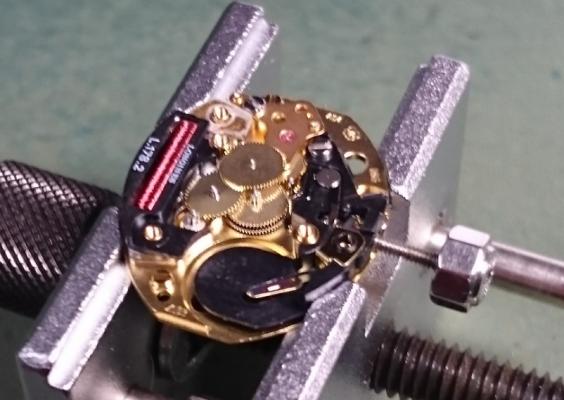
ETA 980.153 Service Walkthrough The ETA 980 Caliber is used mostly in ladies high-end quartz watches. The iteration for this walkthrough is the 980.153, which has the seconds subdial. ETA 980.153 - Technical Communication.PDF I thought this one would interest many of you, as it has a primary and secondary train bridge. Once the Hands are removed, turn the movement over and turn the fastening screws for the Dial Feet (circled in orange) until the flats are towards the feet. This will allow you to easily remove the Dial. Once the Dial is removed, you can take off the Hour Wheel. This is the only item to be removed from the dialside of the movement. Place your movement in the holder and unscrew the two screws holding the Circuit. Note they are two different lengths. Remove the Circuit and Battery Contacts and place the Circuit immediately somewhere safe. Next remove the three screws on the primary Train Bridge, and remove the bridge. Here are some reference shots of the primary train. Once the wheels are removed, you'll be able to see the Canon Pinion. DO NOT try and remove it at this stage! As you can see, it's slightly under the wheels in the secondary train for the seconds sub-dial. This will have to be removed before extracting the Canon Pinion. Before we get to removing the secondary train we must first remove the Coil. Remove the Coil Protector, then carefully lift out the Coil along with the Stator. Next remove the secondary train bridge. This is held in place with a single screw and two locating pins. The locating pins can be a little tight fitting, so very gently rock the bridge and work it slowly off these pins to avoid breaking a pivot or jewel. Now you can remove the two wheels under this bridge and the Canon Pinion. On to the plastic housing that the Swiss lovely refer to as the "Electronic Module Distance Piece" ... yeah, whatever! :rolleyes: Make sure the crown is pushed in, and NOT in the hand setting position, then undo the single screw and lift out the "Black Chuck of Plastic Module Thingie" :P Once this is removed, you can get to the Keyless Work and the Minute Wheel. You can then pull the Yoke, Sliding Pinion, Setting Lever and Stem out for cleaning. The disassembly is complete. After cleaning assembly is just the reverse operation. Here are some reference photos to help you along... I hope this has been an interesting walkthrough, and helps those wishing to tackle this wonderful little movement jam packed with wheels and bridges :)


 1 point
 -
I seldom find the perfect match looking exactly like the original watch . If i cant find an original part that is . The top crystal is a normal low dome crystal . Sternkreuz type N and the flat a sternkreuz CO or CG . You can find them at Cousinuk1 point
-
Have you the caliber No. If so I will have a look in my spares box where I have some old Ingersoll movements.1 point
-
You often see job lots of hands - double or even three figures of quantities - on eBay, for a few pounds. Might be worth taking a punt sometime, though the chances are it will still be like looking for a needle in a haystack!1 point
-
Dear Geo, Thank you for your kind words. It is impressive how helpful and just plain nice everyone here is. Horologically I am a true amateur. I work on my own watches and occasionally put together a unique watch as a gift or thank-you. I owe any knowledge I have to this forum and Youtube videos. I do have some experience with precision small parts manufacturing/prototyping from prior ventures and I hope that can be useful to share with the users of this forum. Again, thank you all for sharing your craft. It is truly appreciated.1 point
-
Good tweezers are also used by surgeons, nice if you have someone working in hospitals as they replace them regularly as a matter of policy, irrespective of condition. I have one branded 'aesculap' which is quite high quality. Anil1 point