Leaderboard


Popular Content
Showing content with the highest reputation on 06/12/15 in all areas
-
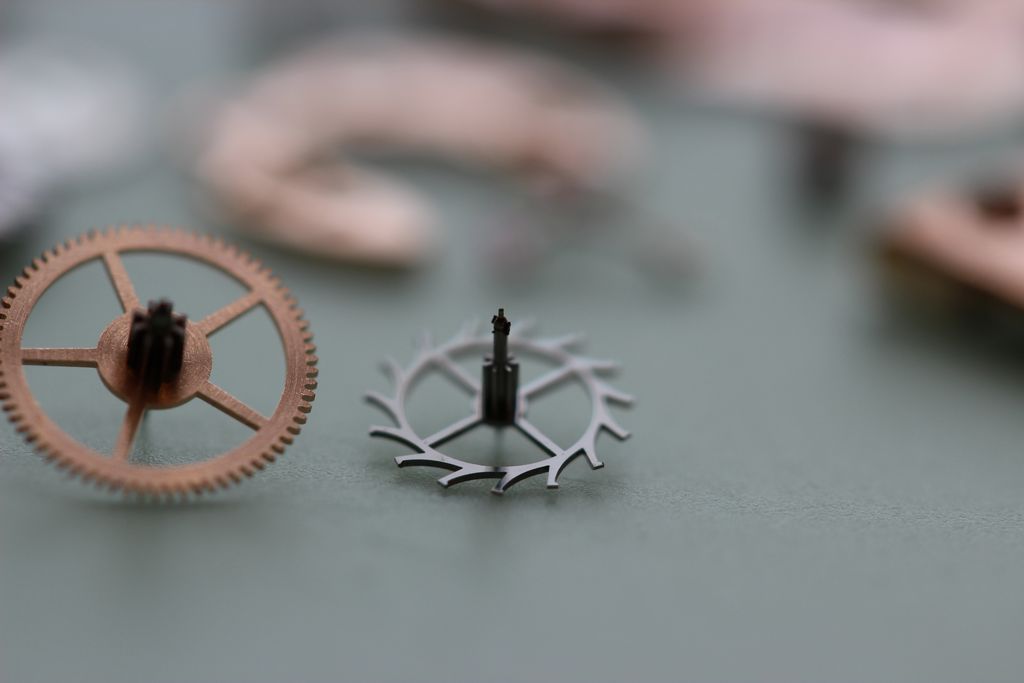
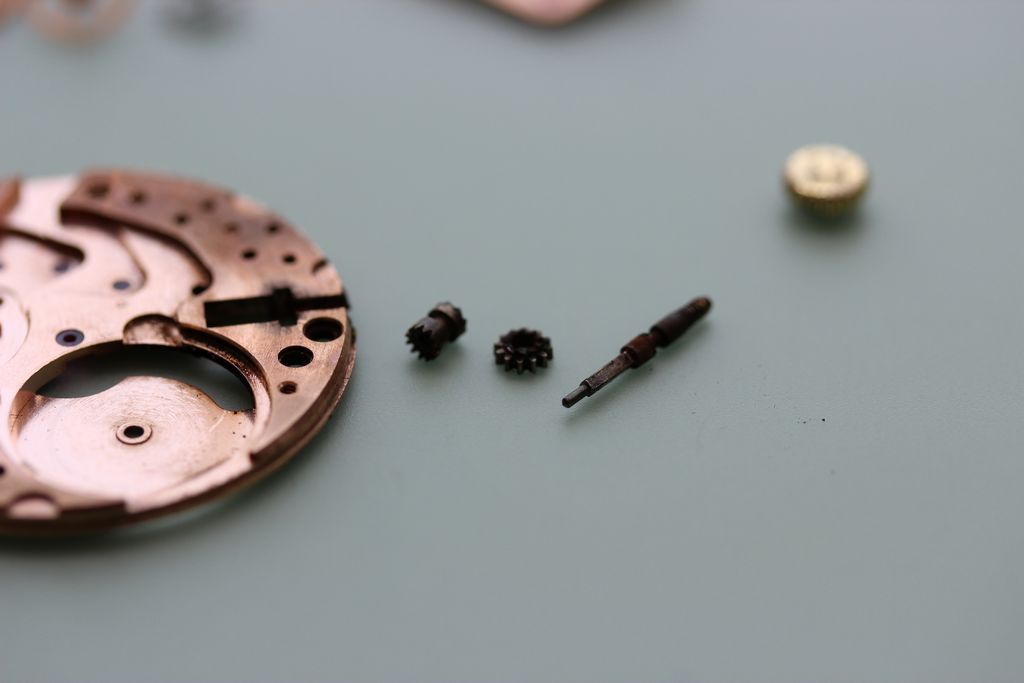
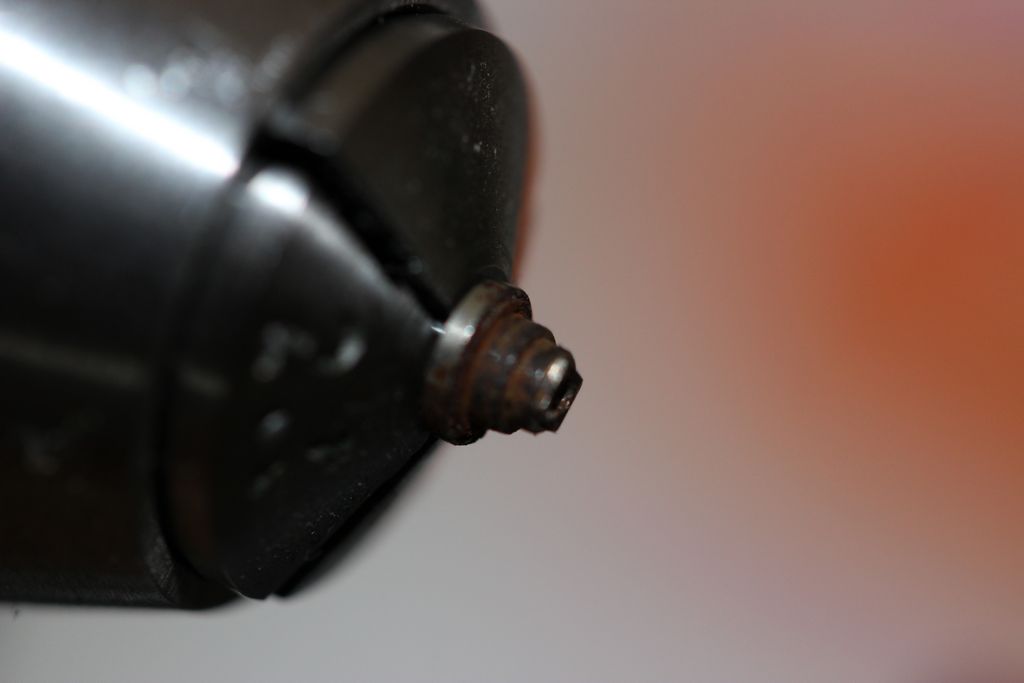
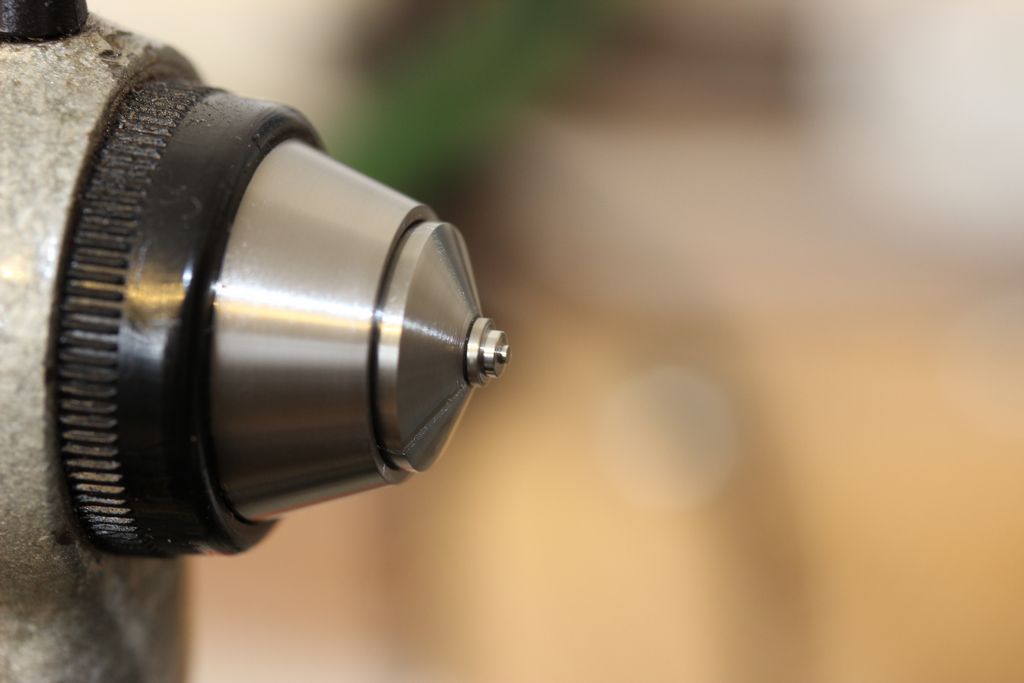
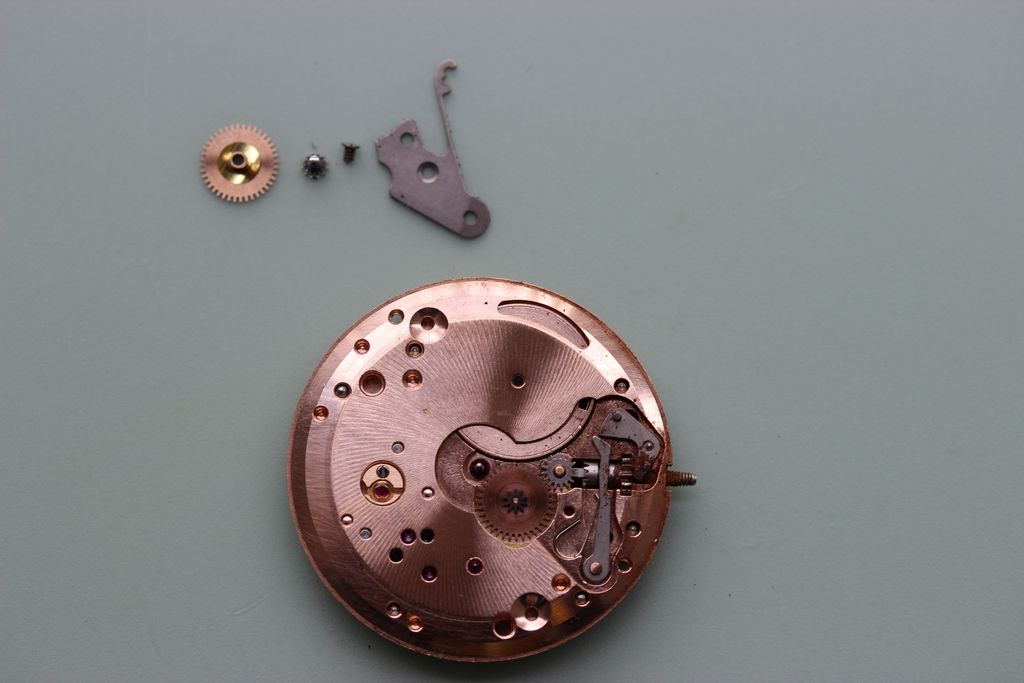
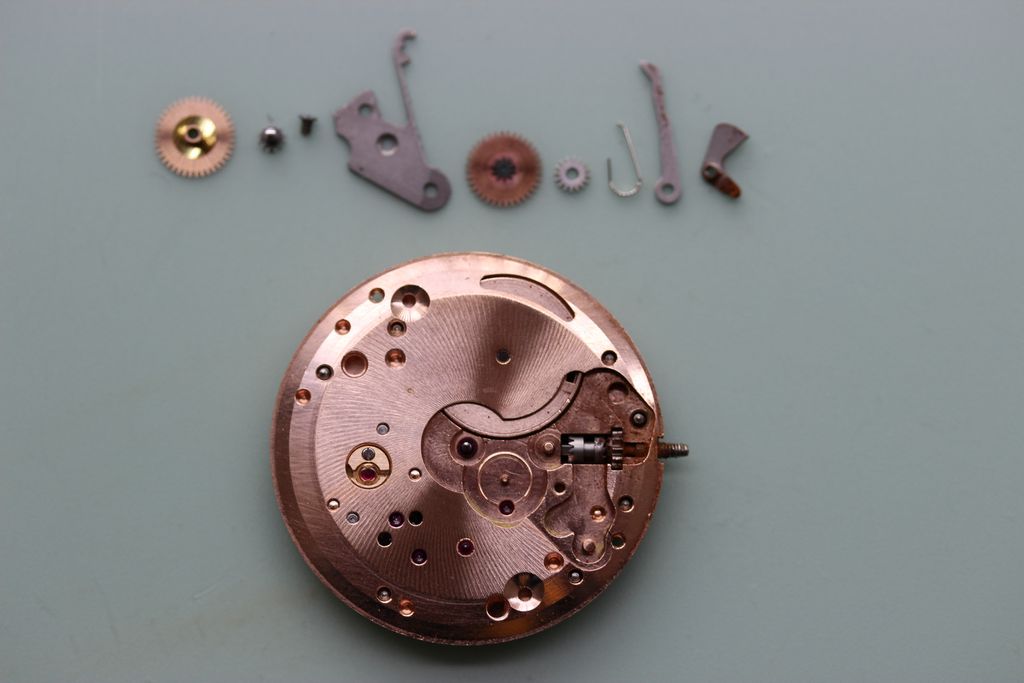
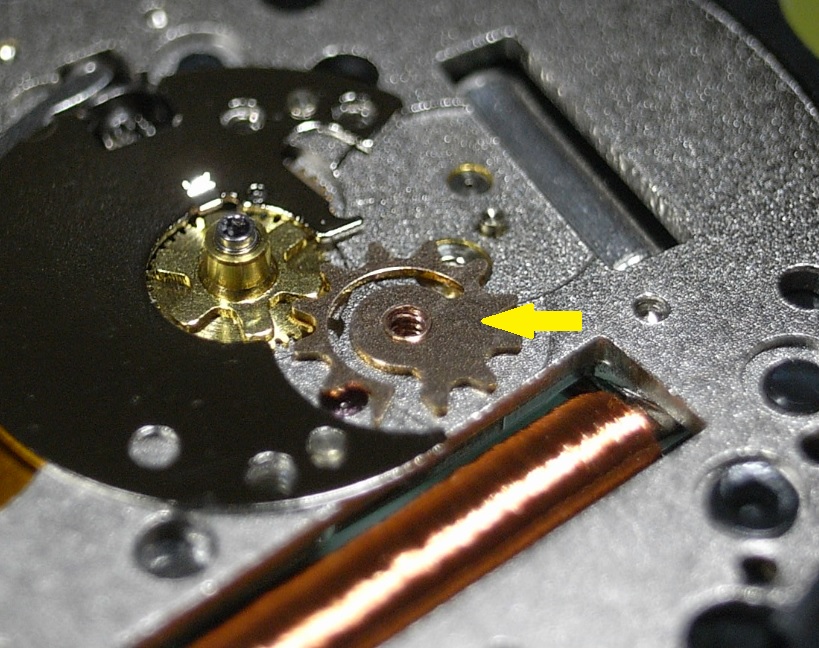
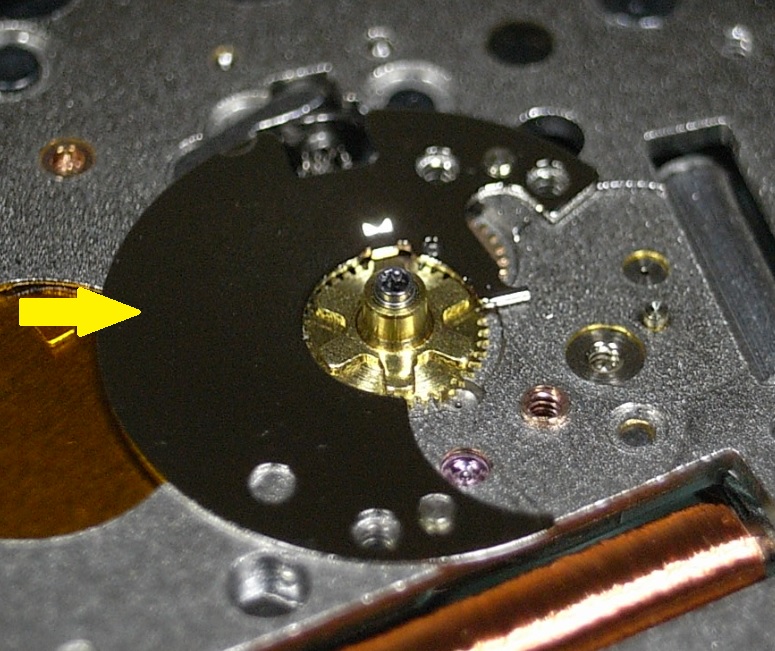
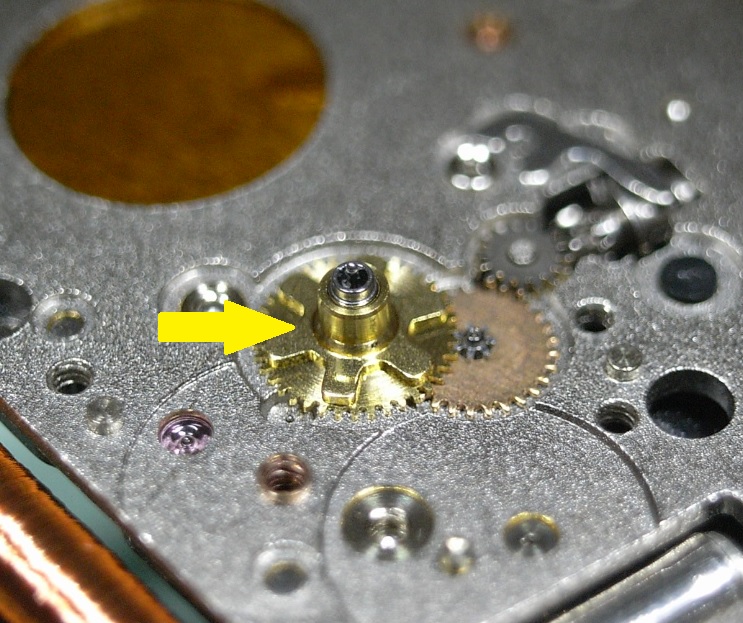
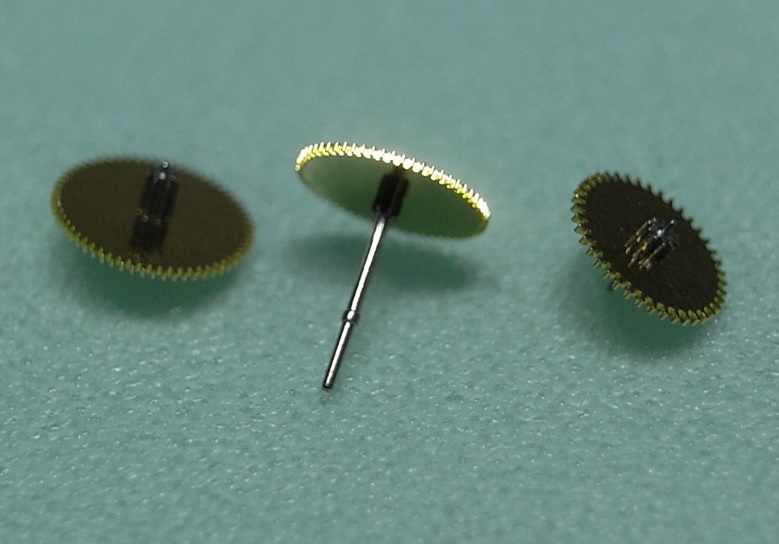
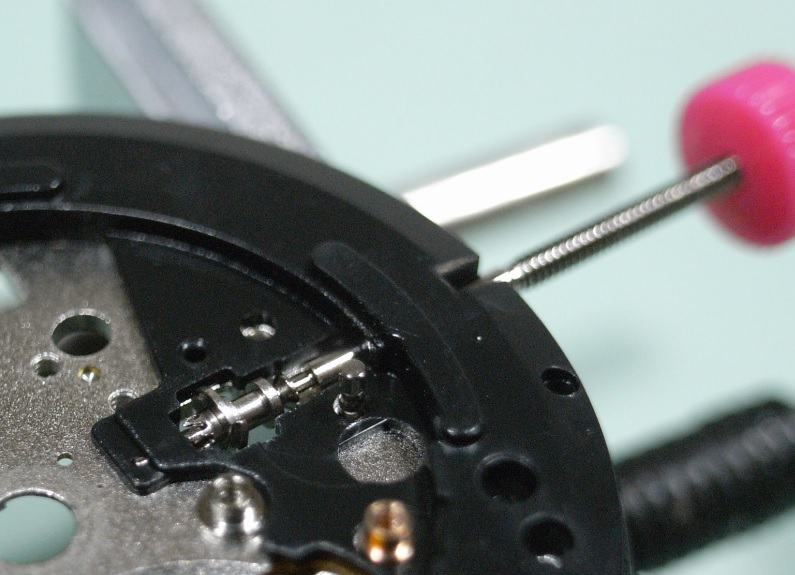
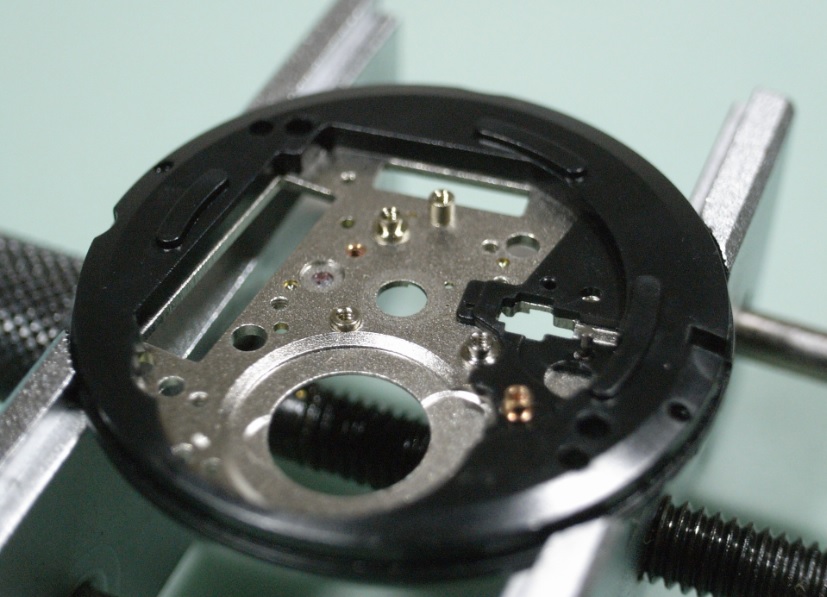
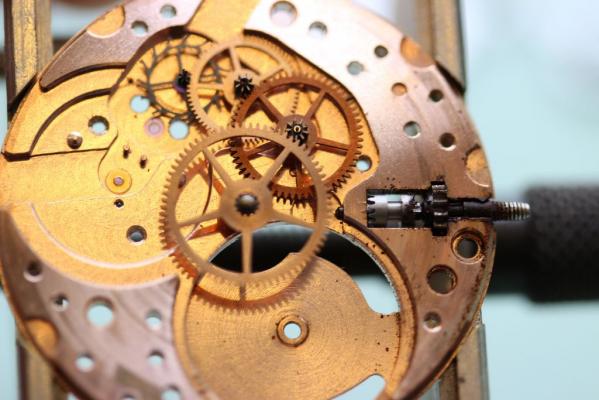
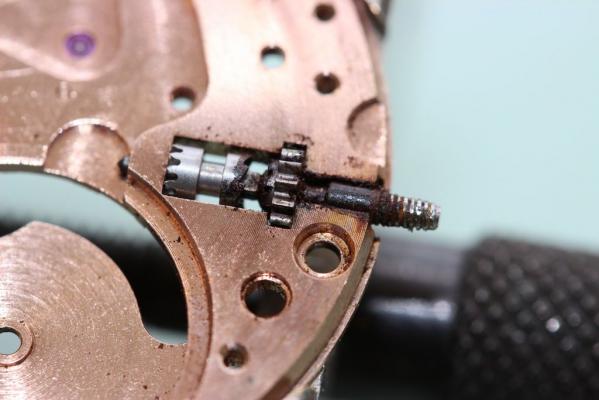
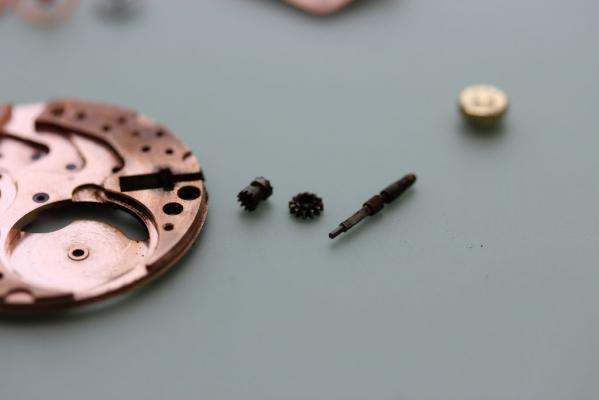
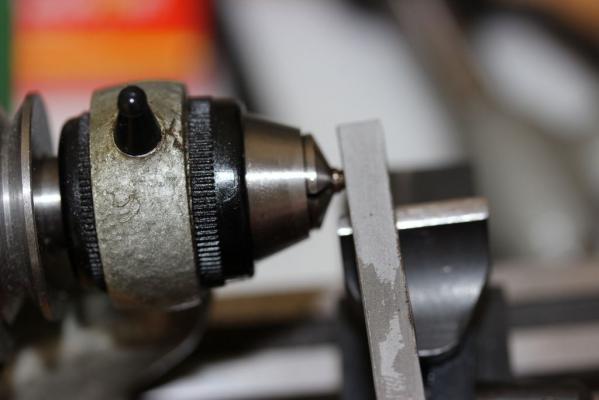
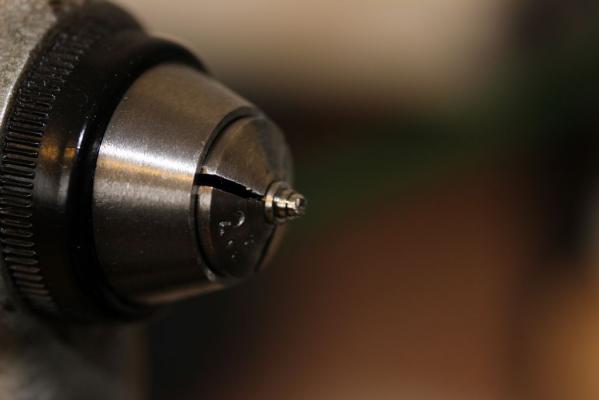
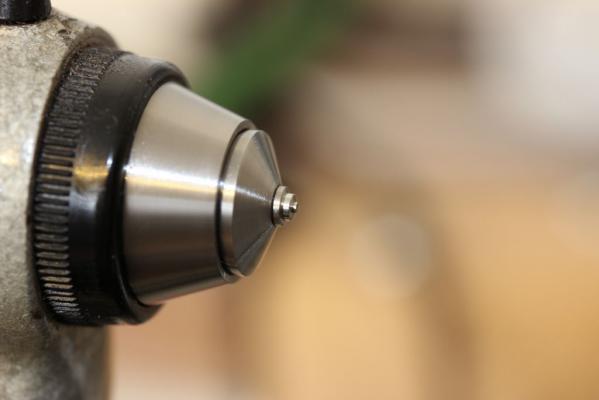
So next off is the main plate exposing the wheels. I was half expecting to find rust in the pinion leaves or pivots but all seems fine. Off with the wheels... A teeny bit of rust on the escape wheel pivot but luckily not attached - brushed off and left no stain. Now back to this bugger of a stem. The oil did not seem to help... But after heating it up with my spirit lamp, I grabbed it with my pliers and gave it a sharp pull. It came away just fine. The barrel arbor was quite rusty so I decided to burnish it - easiest way is to use the lathe... And it came out quite well... Just need to clean up the rest of the parts and clean the watch now. To be continued.


 4 points
 -
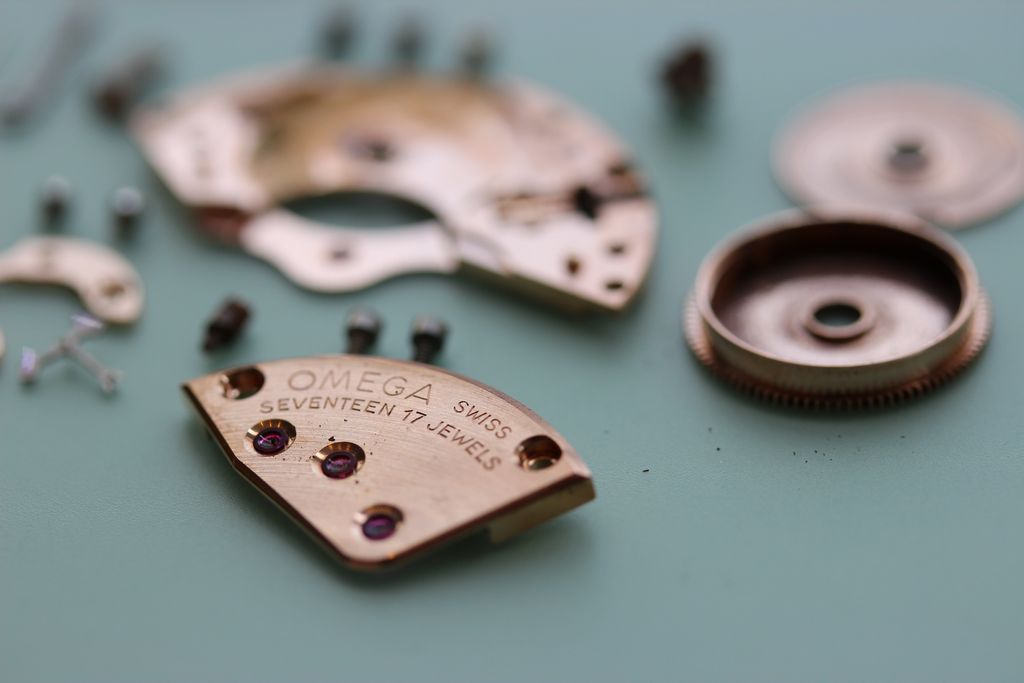
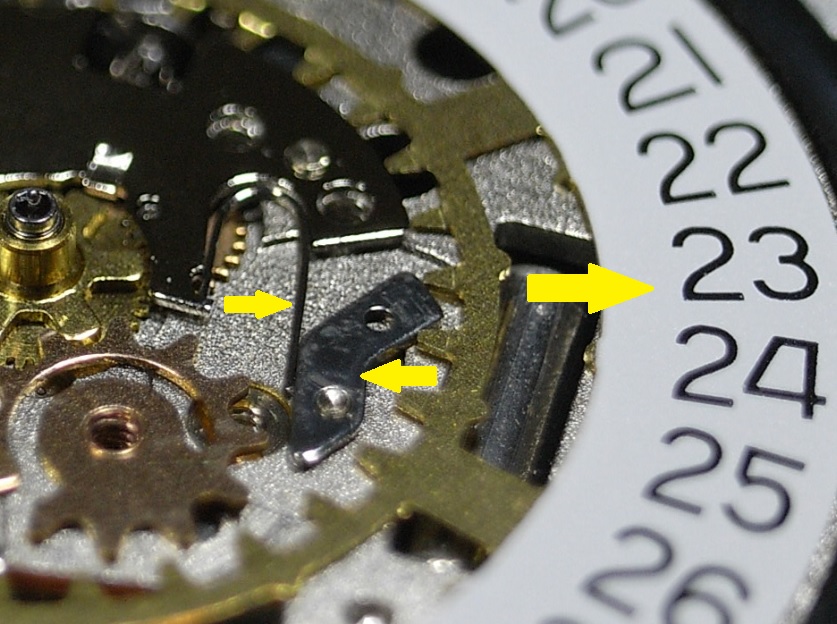
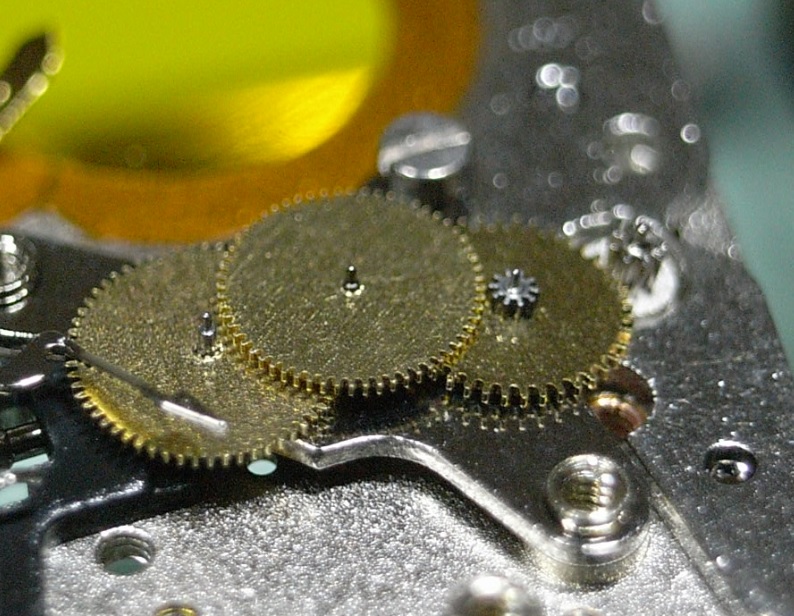
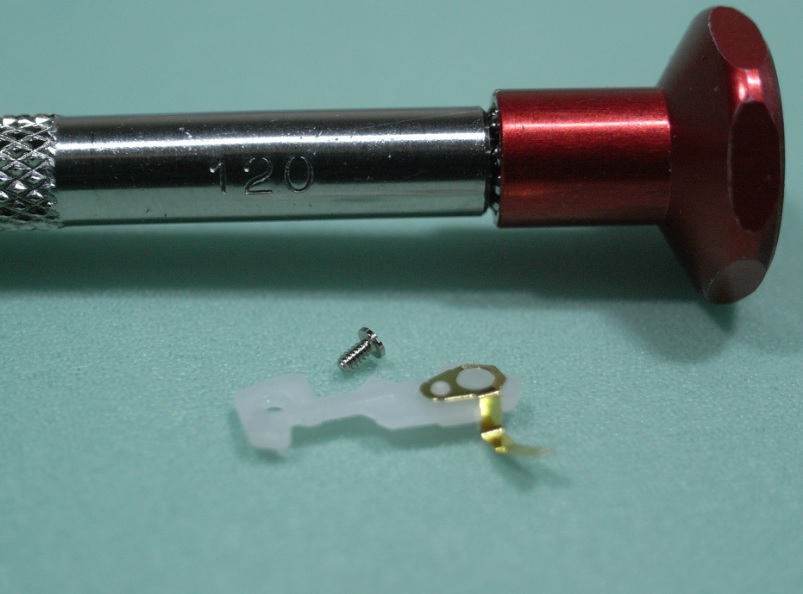
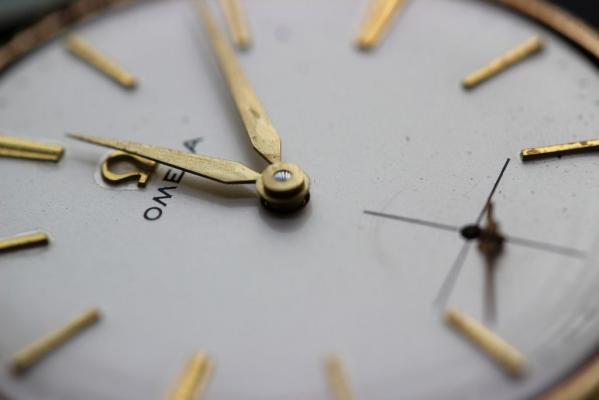
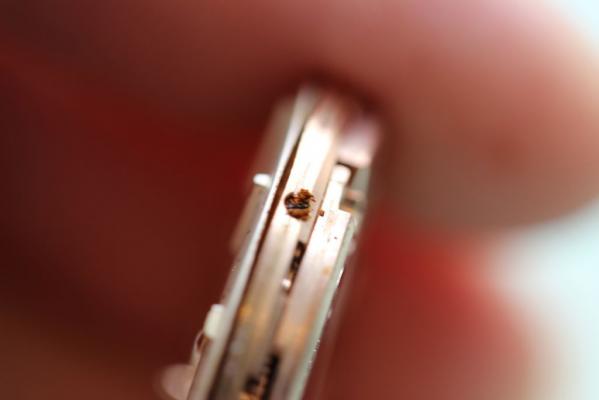
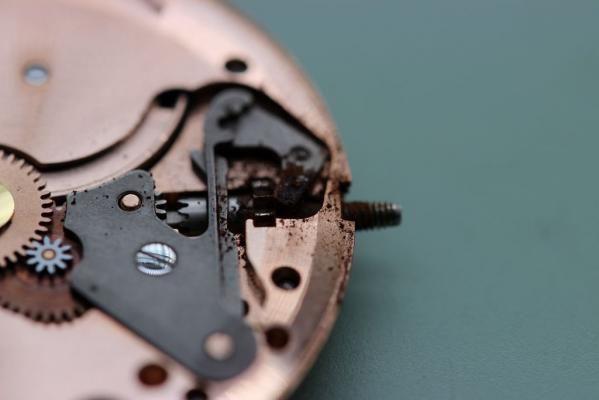
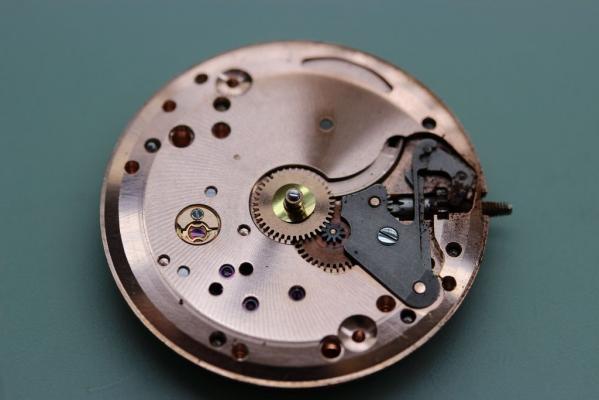
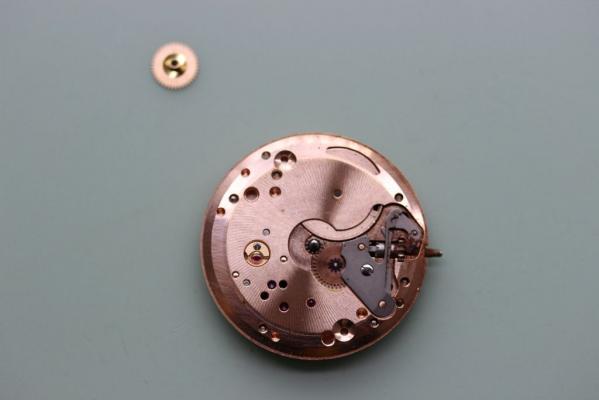
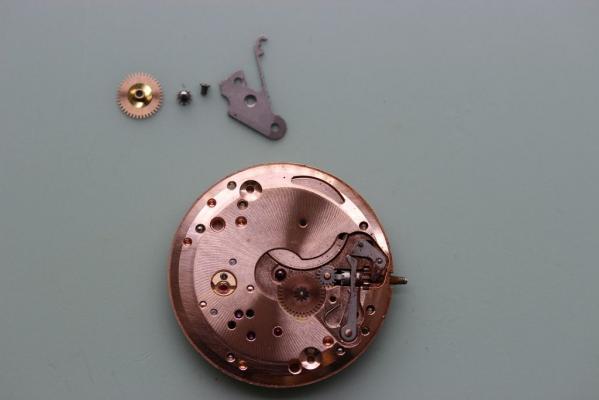
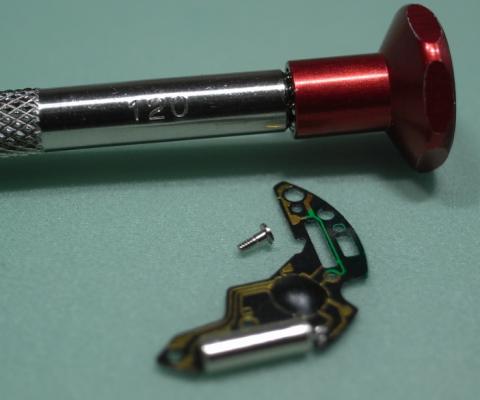
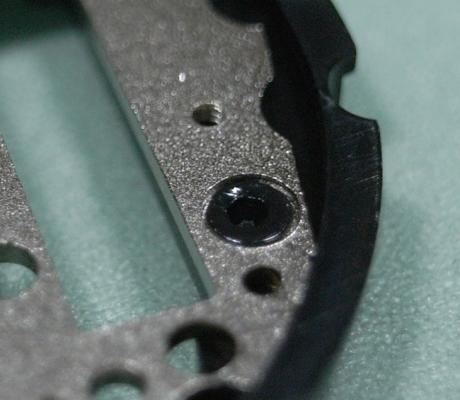
This nice Omega came in with a seized up keyless work. The crown could not be pulled out to hand set position and the watch could not be wound. I immediately suspected rust. Getting the movement out of the case was a challenge because the crown could not be pulled out. But luckily I could unscrew the crown from the stem as the stem was seized. With the movement out of the case, I can see evidence of rust. Time to get stripping (the watch). First challenge was unscrewing this dial screw which was rusted in place. A bit of oil and some gentle persuasion and it unscrewed. With the dial off I can see the extent of the damage which is quite bad - but not the worst I have seen. Off with the hour wheel: And the setting lever spring: And this is as far as I could get. That stem was not coming out, but I have an idea! ...


 2 points
 -
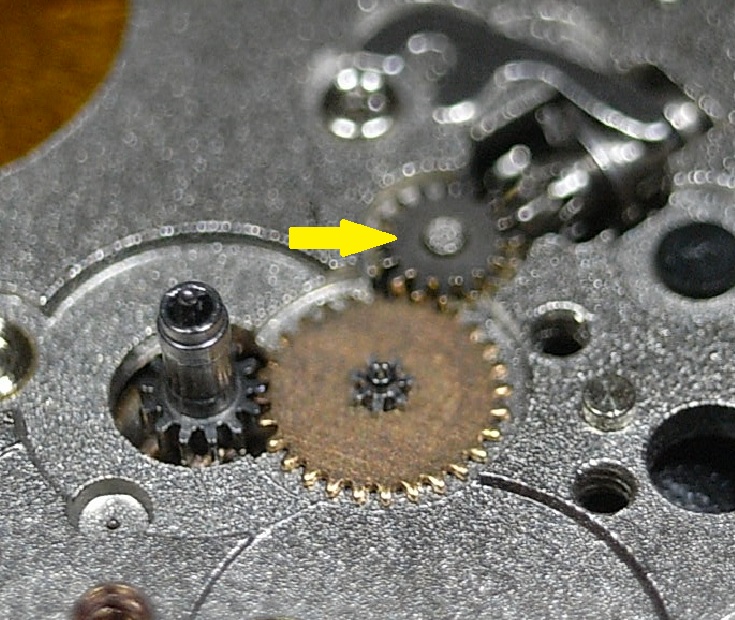
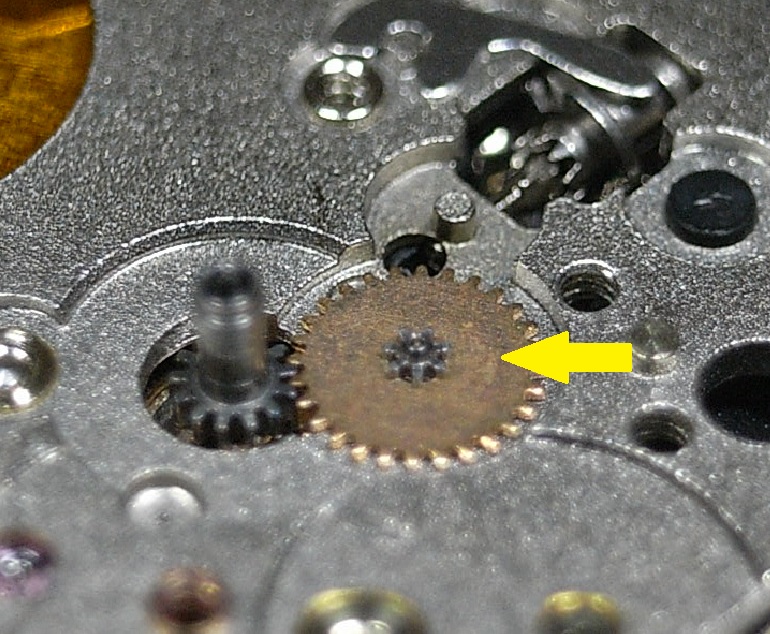
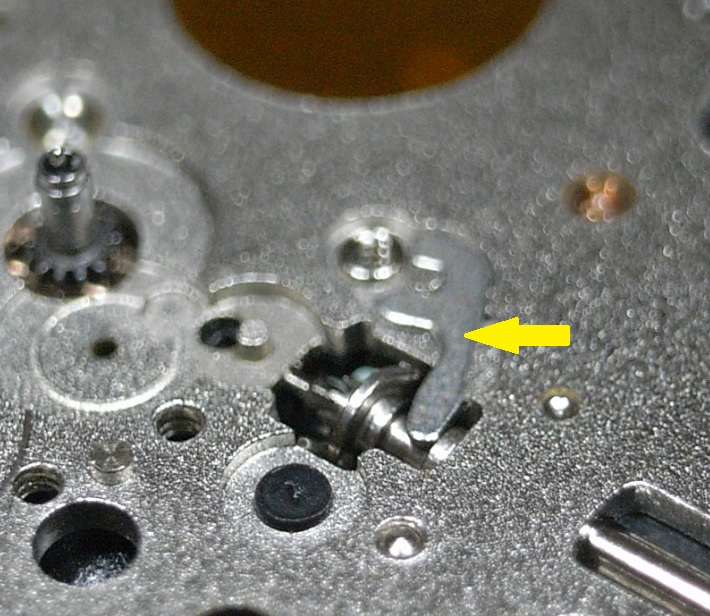
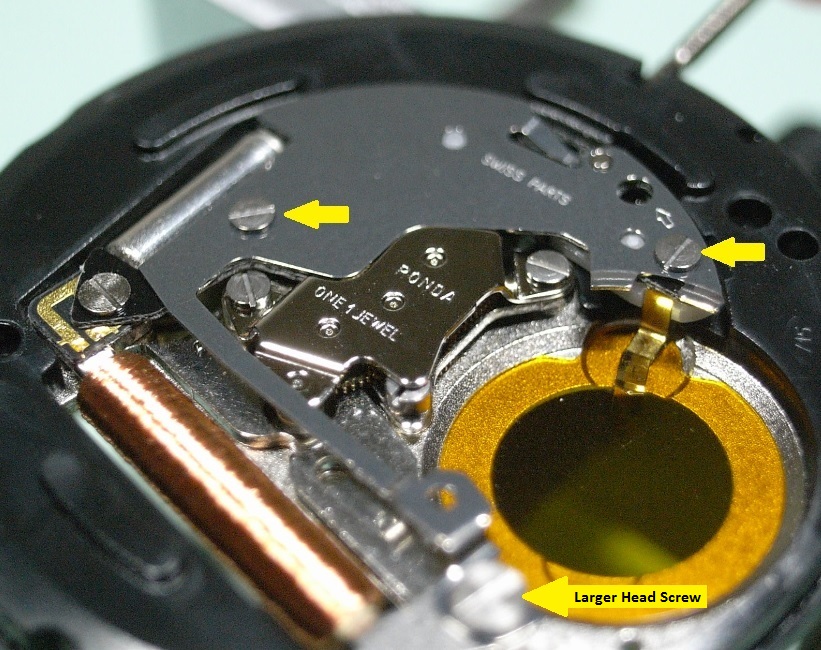
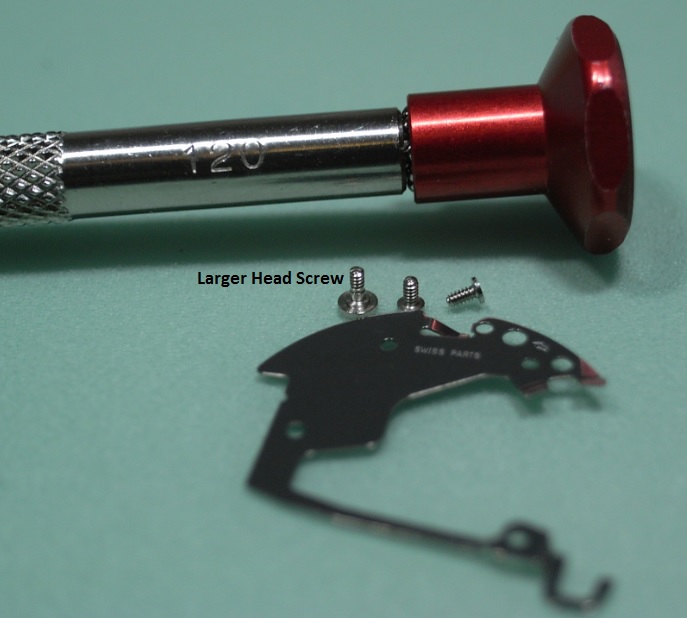
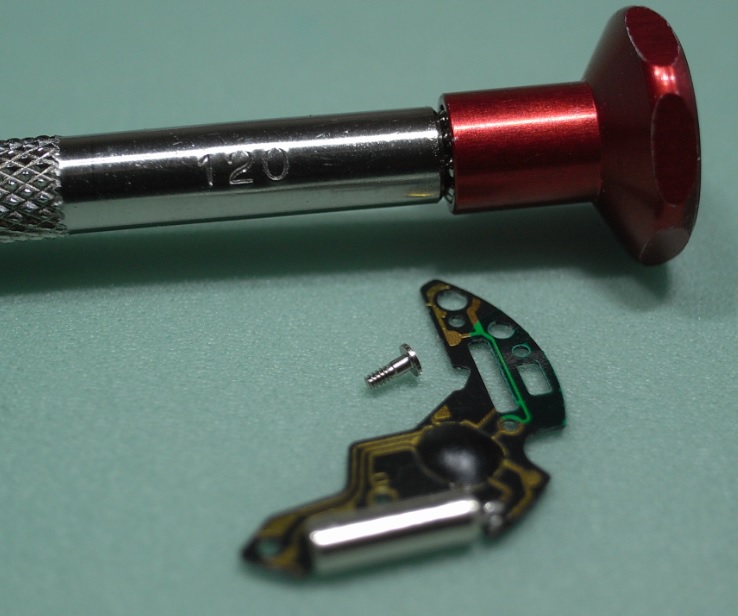
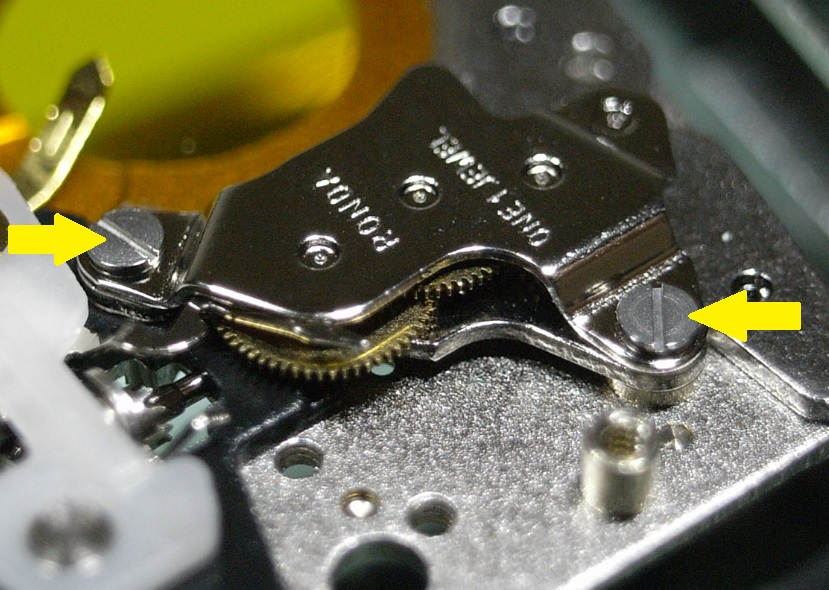
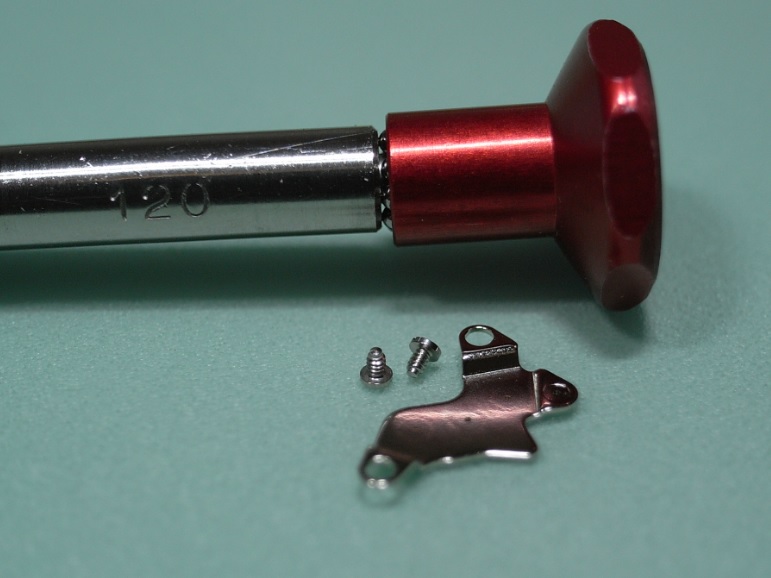
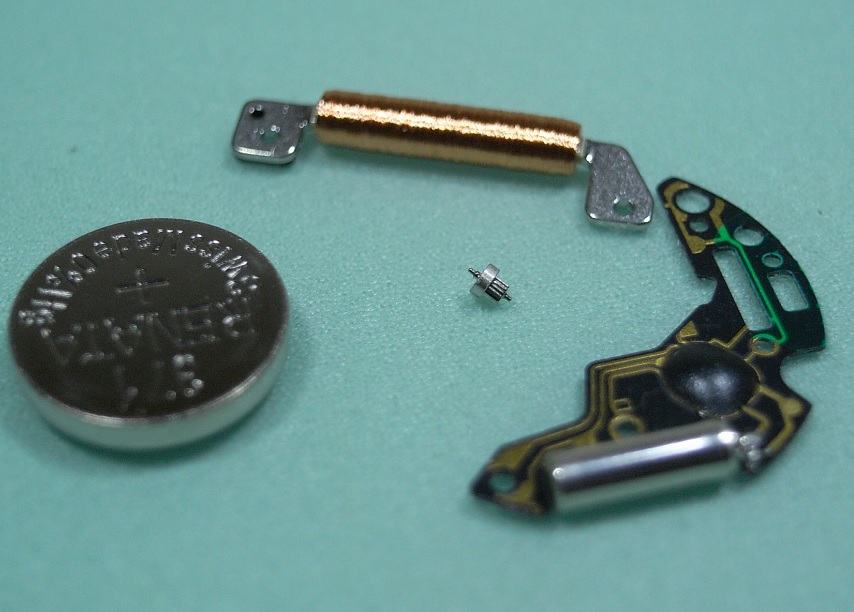
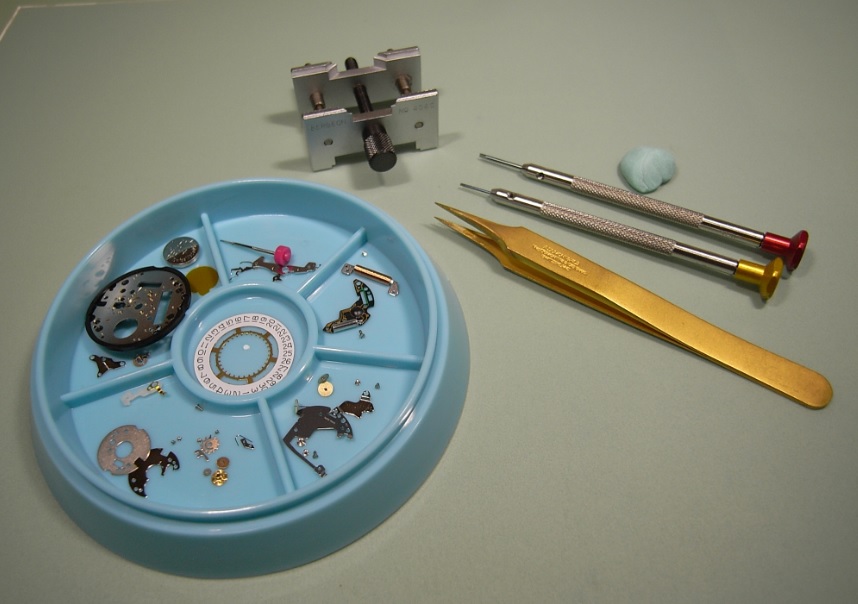
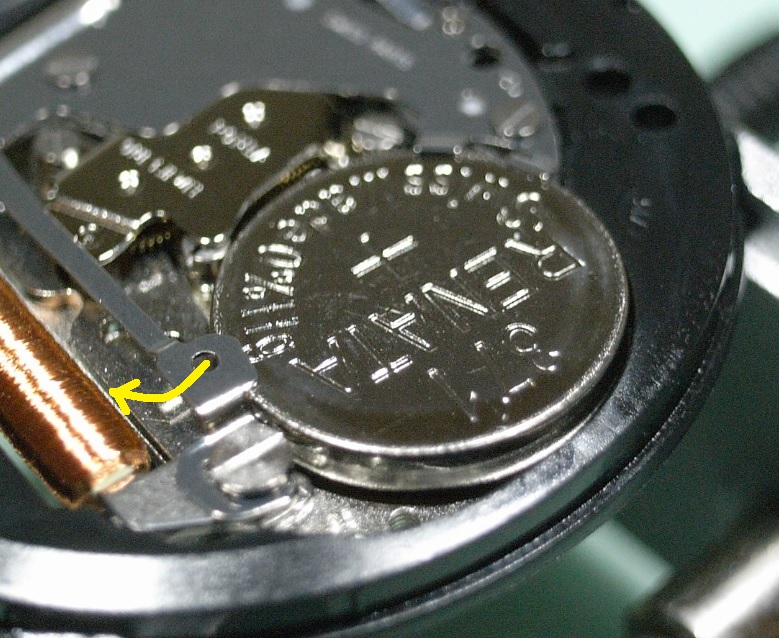
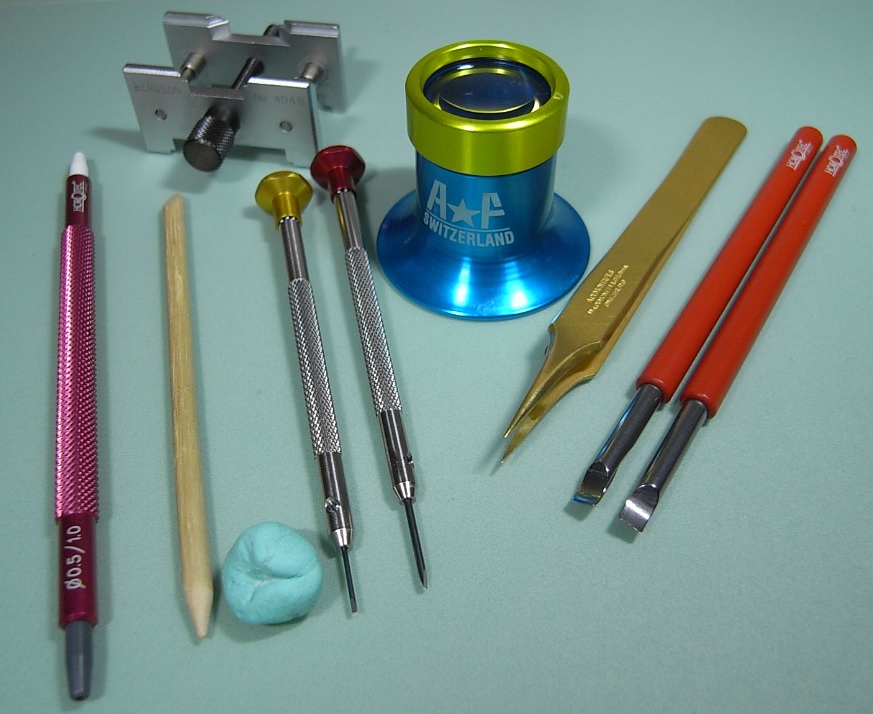
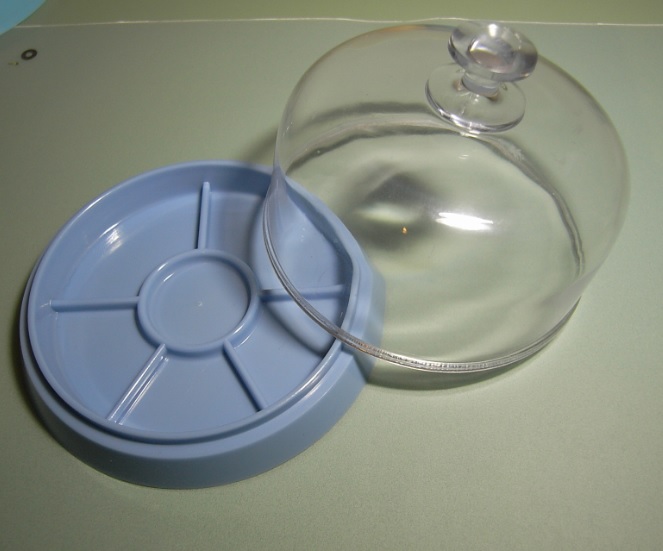
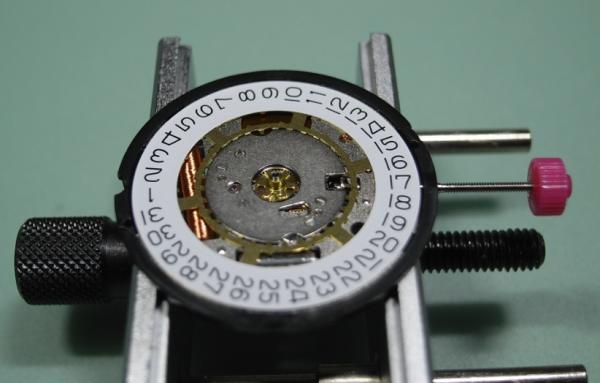
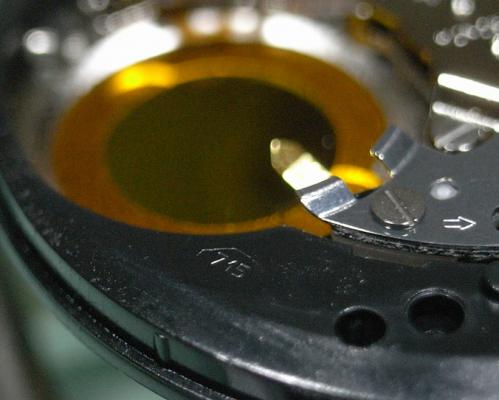
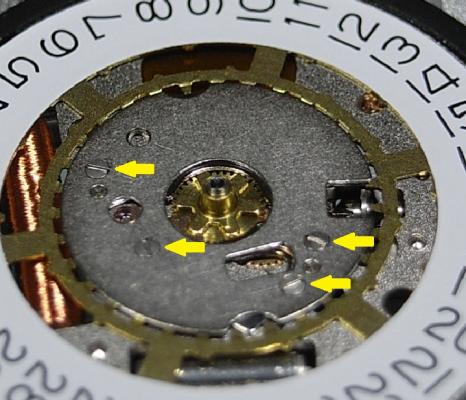
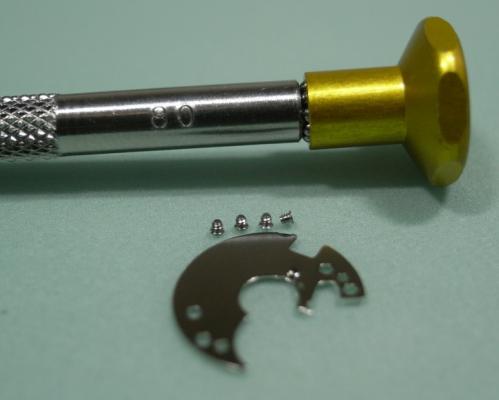
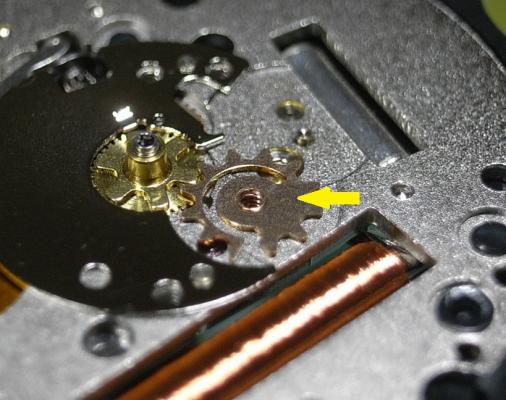
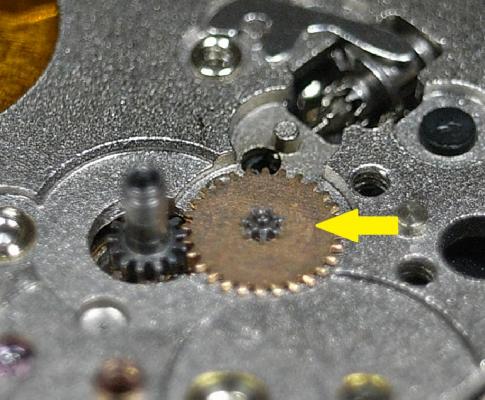
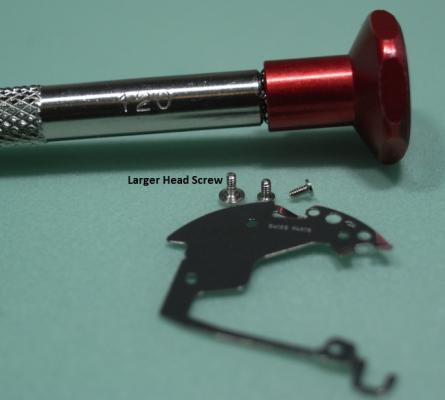
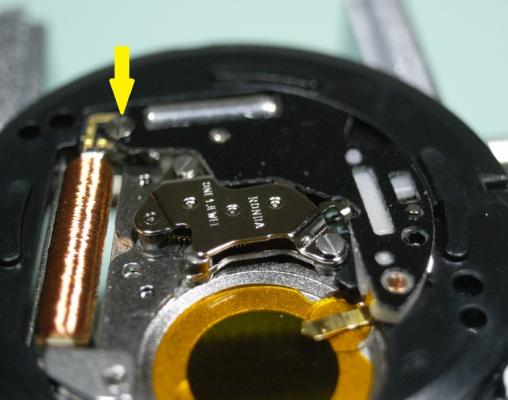
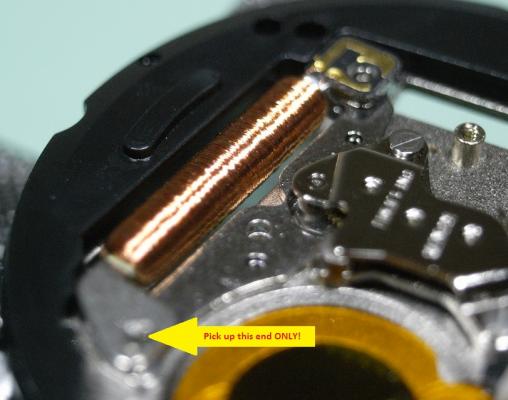
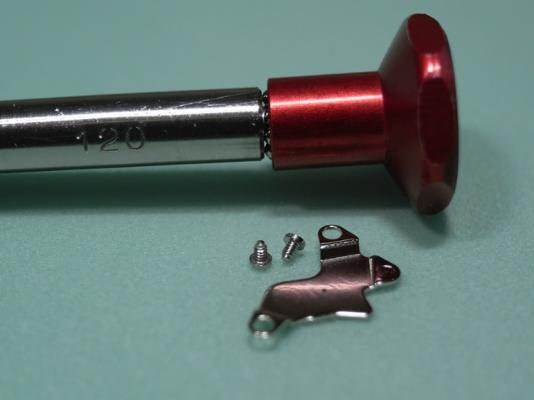
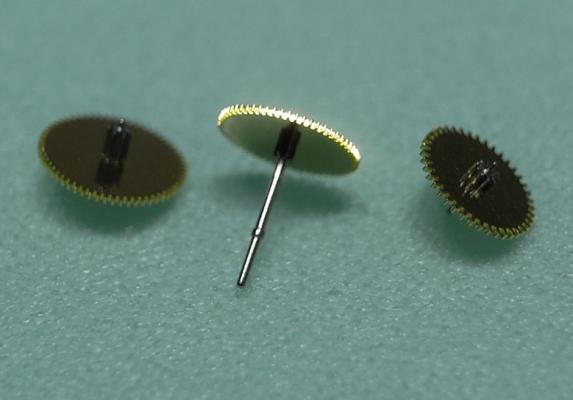
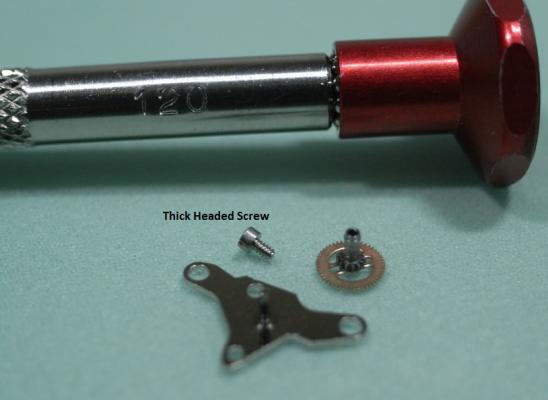
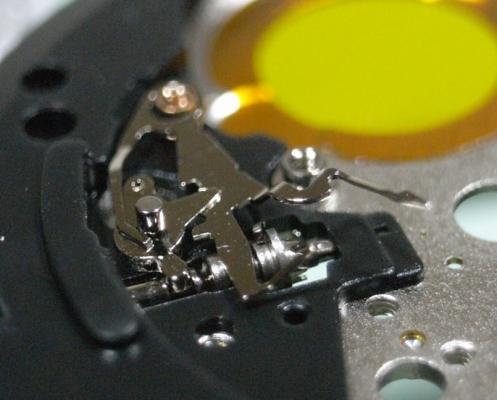
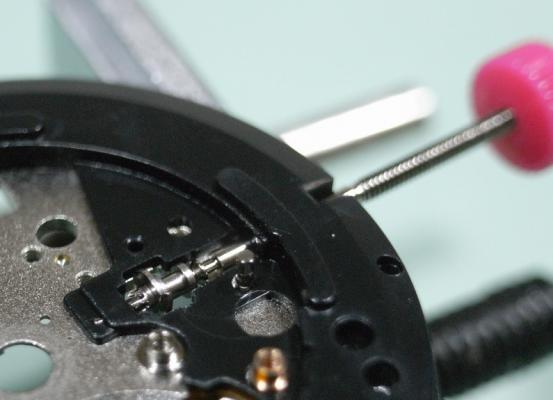
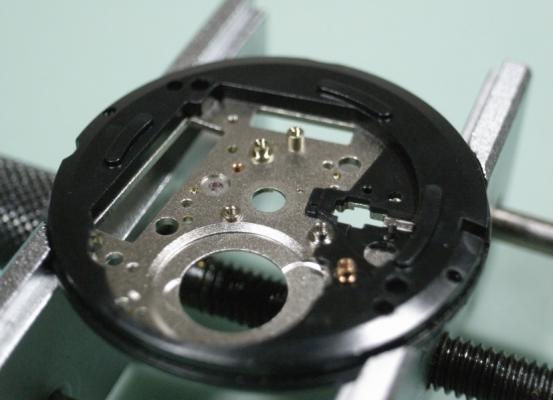
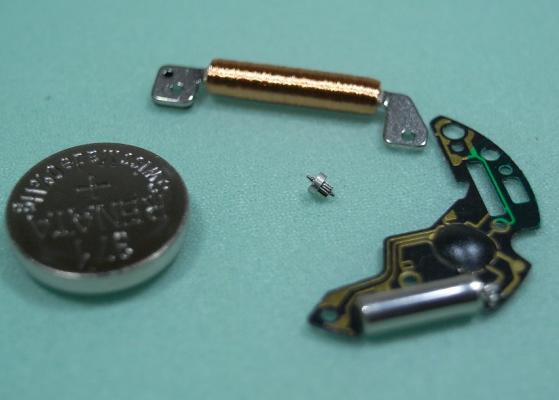
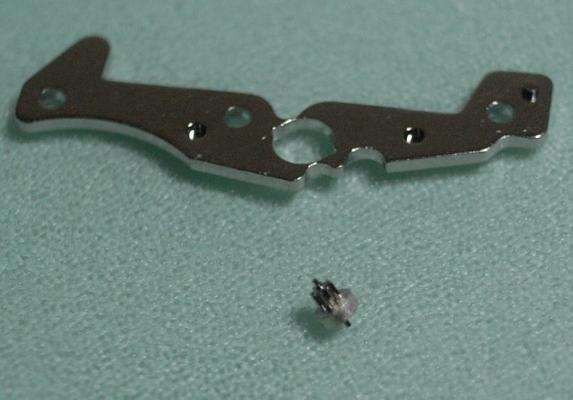
Ronda 715 Service Walkthrough I thought I'd post a walkthrough on a simple quartz movement for people who are just starting out in watch repairing. The Ronda 715 is an excellent movement to begin with, as it's simple in design; but has all the components needed to practice your skills on. Even better is that it only cost around $10 to buy this movement brand new online. So if you break it or loose a part, you learn from the experience, and just buy another one :) Perfect!! The Ronda 715 is found in many of the "Fashion" brand watches, like Guess, JAG, Loyal, etc... As this is a walkthrough for novices there will be arrows to every part as we disassemble this movement. I also recommend you download the Tech Spec PDF and get familiar with how to read them. Here's the link to down the PDF 559_Ronda702,703,705,708,712,713,715.pdf Remember to have fun!! :lol: If you start to get frustrated, just have a break and come back to it later. Patience and perseverance will get you there, and once the skills are mastered it's very rewarding. Ok, lets begin Firstly, you identify this particular caliber of movement by the number stamped into the plastic surround. As you can see this one is stamped "715" The tools you will need for this service are as follows: Bergeon 4040 Movement Holder An Eye Loupe, or some type of optics 3x or better Pegwood 0.8mm Screwdriver 1.2mm Screwdriver Tweezers Hand Lifters A Hand Setting Tool A Parts Tray with cover And a piece of Rodico Since I am using a movement purchased from CusionsUK, I unfortunately don't have Hands or a Dial to remove. If you are servicing a movement presently in a watch, I suggest you watch one of Mark's video's to see how you remove Hands and the Dial. Mark's Videos are a fantastic resource to show you proper technics, and I highly recommend viewing them. They can be found here: https://www.youtube.com/user/jewldood/videos Once the Hands and Dial are removed, we then need to remove the battery, if one is installed, before we begin disassembly. On this movement it is done by gently pulling the Keeper Arm back away from the battery. Be careful when doing this so that you don't slip and damage the Coil. Then turn the movement over and remove the 4 screws, using a 0.8mm Screwdriver, that hold down the Date Indicator Guard, and remove it. Here is a reference photo of the Date Indicator Guard and screws. Next, hold down the Jumper Spring with Pegwood to stop it pinging away, and remove it with your tweezers. Then remove the Date Jumper and Date Indictor Ring. Next remove the Indictor Driving Wheel Then the Date Indicator Plate Followed by the Hour Wheel. Next remove the Setting Wheel Remove the Minute Wheel Remove the Secondary Yoke This completes all the components on the dial side of this movement. Turn the movement over in the holder. Unscrew the 3 screws, using a 1.2mm Screwdriver, that holds the Module Cover Plate, and remove it. NOTE: One of the screw is unique and larger than the others, remember it's location. Here is a reference photo of the Module Cover Plate and the 3 screws. Next remove the single screw that holds the Circuit and the Coil. Then remove the Circuit VERY carefully and store it somewhere very safe. Here is a reference photo of the Circuit and screw. Next remove the Coil by lifting it with the end with no circuit tracks on it, as shown below. Now unscrew the 2 screws, using a 1.2mm Screwdriver, that holds the Train Bridge and lift it off gently. Here is a reference photo of the Train Bridge and screws. Next remove the wheels of the train carefully, then the Rotor and Stator. From left to right there names are: Third Wheel, Second Wheel, and Intermediate Wheel. And here are the Rotor and Stator. Unscrew the single screw, using a 1.2mm Screwdriver, that holds the Centre Bridge and remove it. The Cannon Pinion should be on the centre post of the bridge and come away with it. NOTE: This screw is also unique with a thicker head, remember it's location. Here is a reference photo of the Centre Bridge, Cannon Pinion and screw. Next remove the screw, using a 1.2mm Screwdriver, that holds the Plastic Setting Lever Cover, and remove it. Here is a reference photo of the Setting Lever Cover and screw. Then lift out the Setting Lever and Primary Yoke. Lastly, pull out the Stem and the Sliding Pinion should fall to your work mat. You have now completely disassembled the movement ... WELL DONE!! :) The black plastic outer ring can not be removed, it is riveted to the Main Plate All the parts can be put in the cleaning machine or Ultrasonic ... EXPECT THE FOLLOWING PARTS! Battery Circuit Coil Rotor I hope this was a fun movement to begin your journey into watch repairing, and that it builds your confidence to advance further. Assembly will be posted soon...stay tuned!


 1 point
 -
Ok, so now I'm very discouraged. Figured the lounge was the best place to vent. Hope you'll indulge me. So, I'm working on this watch. I take the hairspring off the balance wheel to correct the terminal coil. I get things looking pretty good--as good as I can get, anyway--and I"m feeling right on! So next I tries to put the hairspring back on the balance wheel and I have some kind of hand spasm or something and I screws up the inner coil near the collet. No problem, says I, I'll just work inward until I get it straightened out. Only, it gets worse, see. As I fix one think I screws up somethin' else, see. There seems no way out. I even think that, like, maybe it ain't possible to fix somethin' like that. And who knows, maybe it ain't? Has anyone mastered such a thing or is the a point at which even an experienced watchmaker dumps it in the can and gets a fresh hairspring. So I give up, figuring once you blow an inner coil your...like...done for--unless you're really good with this stuff, which I ain't. It won't do me any good to get a fresh hairspring 'cause I ain't got no tools for vibrating one an' I'm not sure I could do it anyway without someone lookin' over my shoulder. And I don't know how to figure out how to get a replacement. The books I got is not to detailed on how to figure our what kind of a hairspring you need for your watch. Besides it's a vintage movement an replacements may not be available. Fortunately this was a practice watch so no real harm is done, except to my pride. Seems like I'm gong downhill recently. It seemed like I was getting my "tweezer skills" down and becoming more confident handling those small parts and whatnot. Now, for the past few days, I seem to be getting worse. I feel like a man walking a tightrope who suddenly becomes aware that he's on a tightrope. Maybe I'm gettin' ahead of myself an' shouldn't be spending too much time on hairsprings. Except I really enjoy getting something ticking and most often I encounter a screwed up hairspring or a bad balance staff. If I could fix those, I'd be in hog heaven, or watchmaker's heaven! Anyway, I'm done. Will start fresh tomorrow. Thanks for listening!1 point
-
The main points with the nut & superglue method: 1. It works on any screwback. 2. It works even if it rusted solid. 3. It doesn't mark the back. 4. It comes apart easily. 5. Its cheap. 6. err - that's it. Nuff said.1 point
-
I understood that Geo broke that opening a pocket watch :D A mixture of both as it turns out. Now that's a good idea - I hadn't thought of that.1 point
-
Hello Old Hippy! Welcome to the forum. It IS a mess, but have you ever tried opening one of these casebacks if its never been opened? Even with four prongs, the thing is not going to budge---you'll wind up with a scratched caseback and it will still be sealed tight. The movement--while not the usual swiss-lever type--s of good quality and very robust mechanically. I have many pin-lever watches and also have about 5 or 6 vintage Omega chronometer-grade movements in addition to a bunch of other Bulova, Elgin, Jules Jurgensen (which is very good, by the way!), Seiko, Tissot and Waltham. This runs as good as any of them.1 point
-
I once described dealing with hairsprings is like working on an unexploded bomb. One false move or twitch and disaster looms. However with a lot of practise & mishaps I am now not to bad . It's amazing how with just a little pressure it makes a difference. Little and often rather than one big move works for me.1 point
-
Don't be discouraged Douglas. In the past I have screwed up many hairsprings when I was learning. I am like a dog with a bone and so one time I spent over 16 hours over three days working on a particular hairspring and still did not get the thing fixed. But you are doing the right thing - practice is what it takes. Lots of practice. Keep at it :) Do whatever you feel is most comfortable - there is no rule. But I personally pickup using the stud. One thing I will say though is to always use fine tweezers with perfect tips, size 4 or 5.1 point
-
No - there is a distinct difference. A watch "movement" is the total mechanism which drives the hands around the dial. There are various designs of movements by different movement makers - and each maker has their own set of designs, known as "calibres". So, for example, Arthur Schild was a maker of movements, and his movements are known as "AS" movements to indicate that he was the maker. Within the complete set of AS movements, there are various designs or calibres, each with its unique number - such as "1287". The movement in my Olma watch from the 1940s contains an AS 1287 movement - the "calibre" AS 1287. The movement in my Hamilton Khaki watch is an ETA movement - calibre (or "cal.") 6497. In the US, American watch movements were known as "grades", rather than the more usual Swiss (mainly) "calibres". So my Hamilton railroad pocket watch has a grade 992B movement in it. Hope that helps. Will1 point
-
See this vid. However I found with the cheaper tweezers this is a regular exercise. Dumont is the way to go in my opinion https://youtu.be/injDQHraiLI1 point