Leaderboard


Popular Content
Showing content with the highest reputation on 07/11/23 in all areas
-
There are many discussions about the Jacot tool here on WRT. It's definitely one of my favourite tools as it allows me to restore badly worn and even rusty pivots and pivot shoulders. So, as a little tribute to this tool, I asked my wife to record a few seconds of me using my new Steiner Jacot tool while restoring a centre wheel. Hope you enjoy it and maybe even get some use out of it. Of course, I made a Youtube short video4 points
-
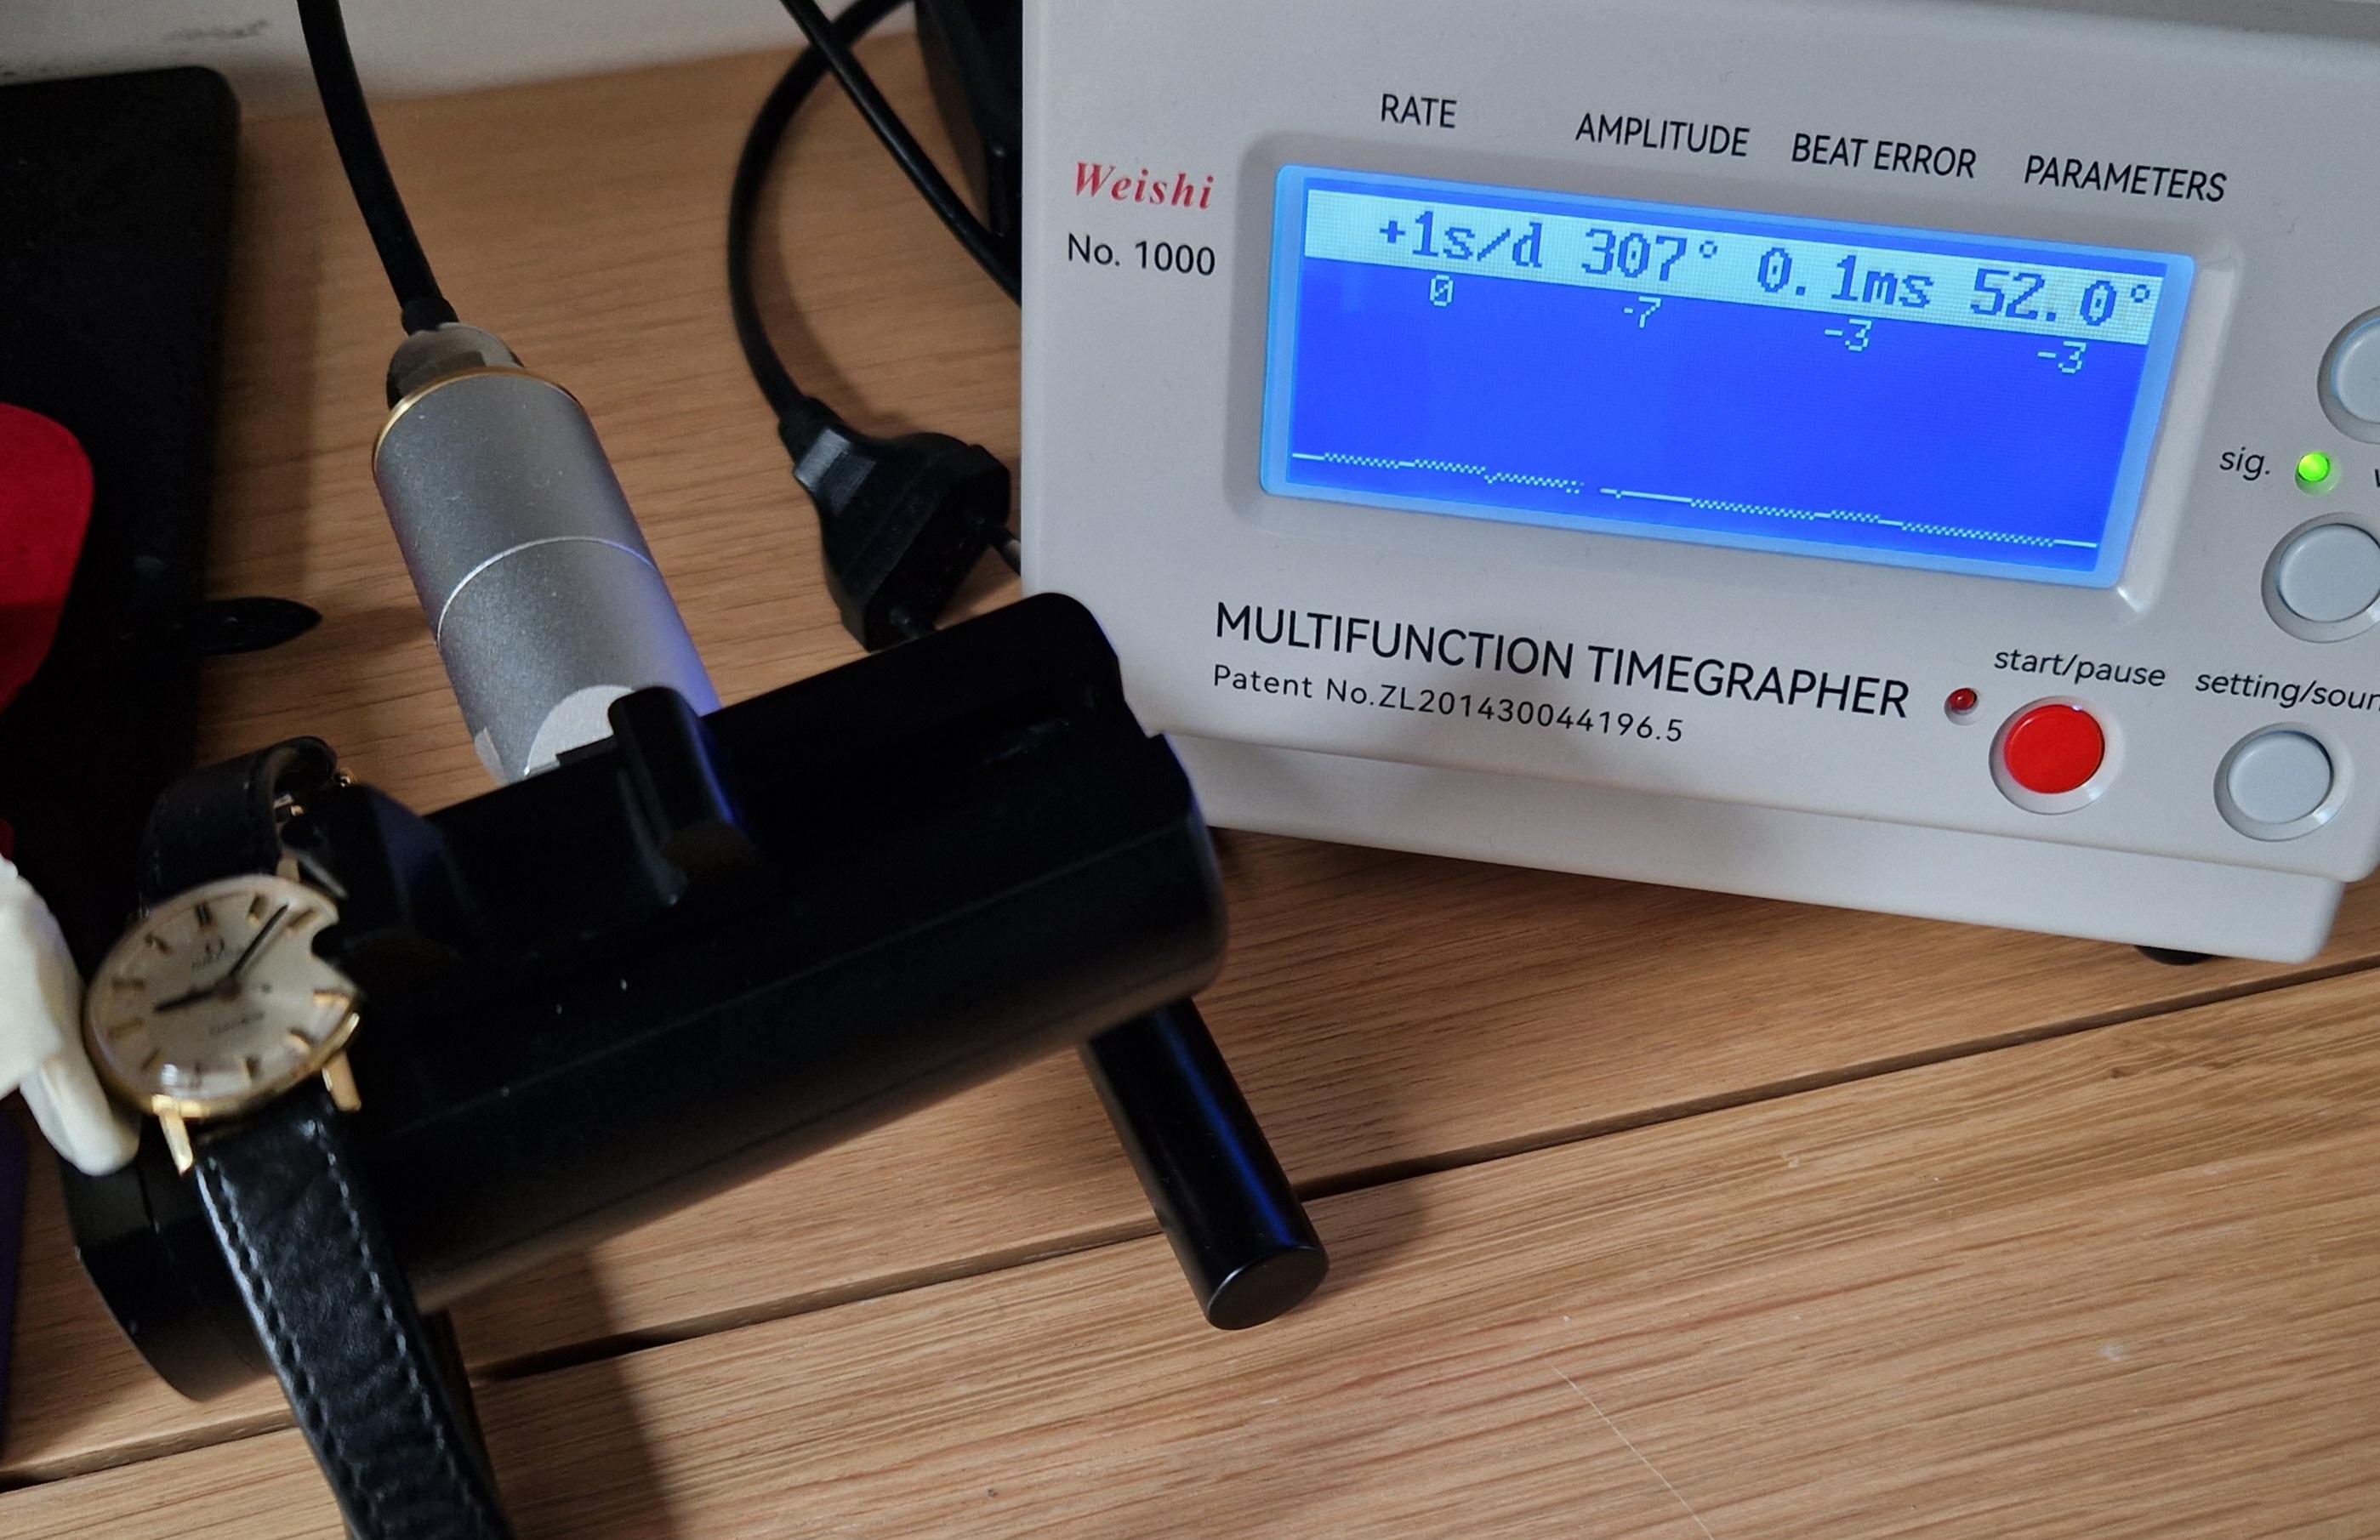
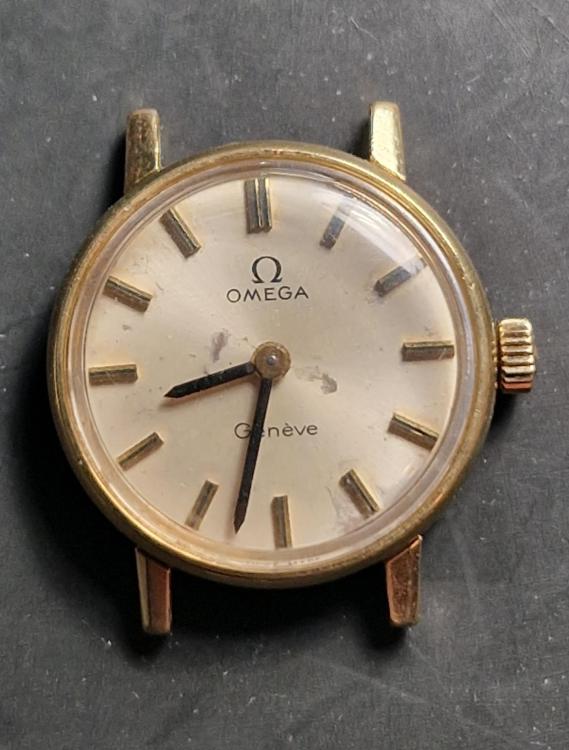
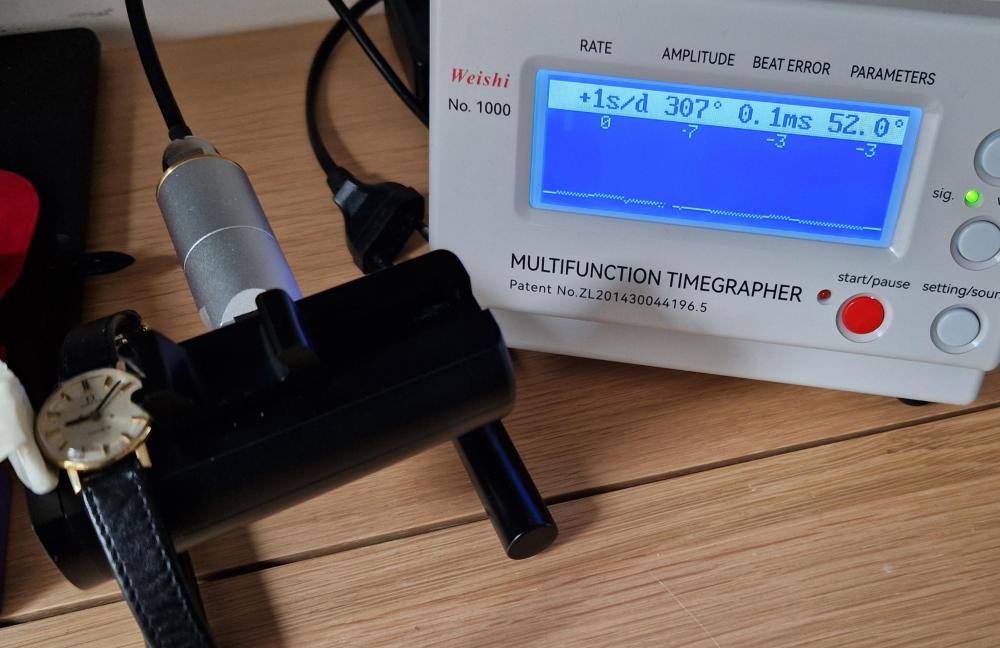
This Omega Genève, cal 625 from 1974 was a non-runner. I cleaned the dial a little bit too, but stopped before making it worse. Simple movement that went back to a strong beat after a good clean and oiling. BTW: pegging the jewels holes made a huge difference. I didn't do that at first and got around 270° amplitude (dial up, full wind) and lines were a bit choppy in the vertical positions. So I then disassembled again and polished the jewels with pegwood... and it went up to 290/300 with nice straight lines. I hope you like my "movement art"
 3 points
 -
I dip a large oiler in fixodrop and quickly transfer the drop to a pallet jewel. Fixodrop evaporates fast so gotta be super quick. I have put fixodrop in a small "acid bottle" that I also use for dipping the escape wheel. I drop it in, pick up with tweezers and dry with hair dryer. Cap jewels I also treat with the oiler method. Really simple and I cannot see why any other way would be better for me.2 points
-
I purchased a 50ml bottle of Horotec Episurf-Neo some time ago now. I'm only a hobbyist so all the expensive application bottles were a no-go. I use a fine plastic tube (actually a cleaned out ballpoint pen ink tube!!). I dip this in the bottle just a couple or so mm and put finger over open end (like we learnt at school with a pipette!). I then transfer this very small amount into a used silver oxide battery case which is set into a piece of rodico.Then, under the microscope I can then accurately dip just the pallet jewels and escape wheel teeth (I also do cap jewels) into the fluid for a few seconds. I dry with a hair dryer set at low temp and speed. Any remaining fluid I tip back into the bottle. As to whether this is effective or not I don't know but I have noticed that the oil applied does seem to stay put. Also no need to clean pivots etc.2 points
-
I thought your technique looked pretty good although if i can make the suggestion of sticking your tongue out slightly which does help with concentration . I'd have just liked the camera panned back a bit to satisfy my rodent powered theory .2 points
-
Not very instructional, but at least it shows how I move the burnisher.2 points
-
don't worry you're not the first to point out their existence. Then somewhere there was a reference they don't sell to I don't remember what? Then as you found they typically don't do watches. although there are some cheap is what I would interpret them to be watches that do have broadens hairsprings but whether or not they would have one to fit would be probably doubtful as I said they do industrial springs. If you want to order custom hairspring is there was a discussion by? @Nucejoe a while back shared his experience of trying to order hairsprings from the Swiss. So somewhere on that discussion were the forms they needed to fill out the problem is they assume your watch manufacturer you have specifications for your balance wheel stuffed it typically we don't have. Although I suspect you probably could've ordered wrought CGS hairsprings if you had asked. But there was the other problem they require to quantity and basically it's expensive.1 point
-
Looks like I will have to design my own. Should be pretty easy!1 point
-
oh just a couple of things to remember. Often times people go bushing crazy because they perceive the hole is too big. As long as the hole is round it's okay even if it does seem to big. then typically anyone who's primarily in watches who replace bushings in a clock will make the holes way too small for the pivots and the clock won't even run at all. Just remember clocks need more breathing room for the pivots if you expect the clock to run1 point
-
When you have the watch on wrist ( dynamic state ) a shake of the hand can imparts energy to balance wheel and increase its amplitude then as the hairspring coil recoils each circle can come in contact with a neighboring one, so in case the spring is dirty/ sticky/ magnetized the two neghboring circles stick together thus shortening the active length of the hairspring, which results in reduction of amplitude and increases frequency. Just so you know why we need to see the coil, which might need a bit of sorting out or a clean and reinstal/demag. Regds1 point
-
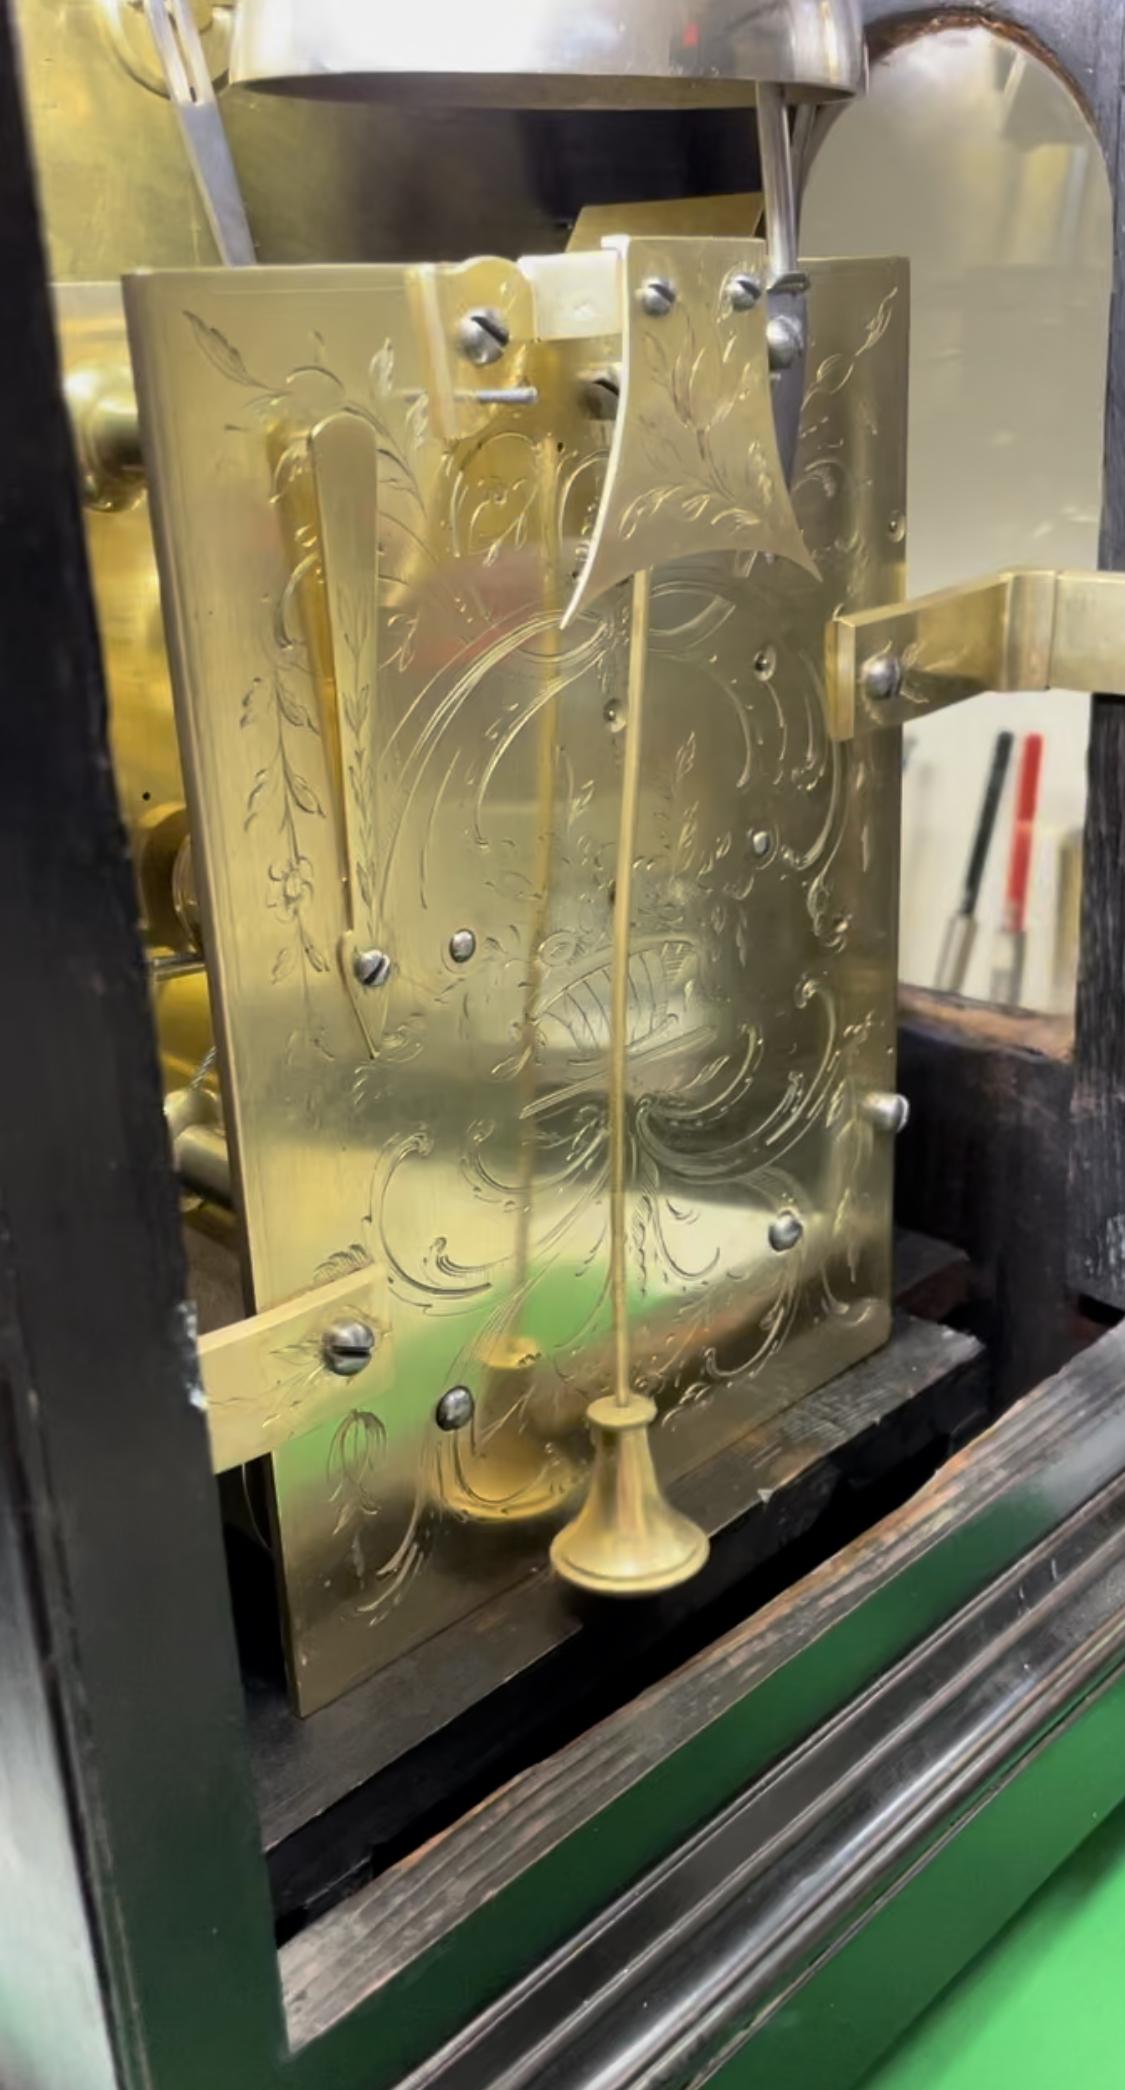
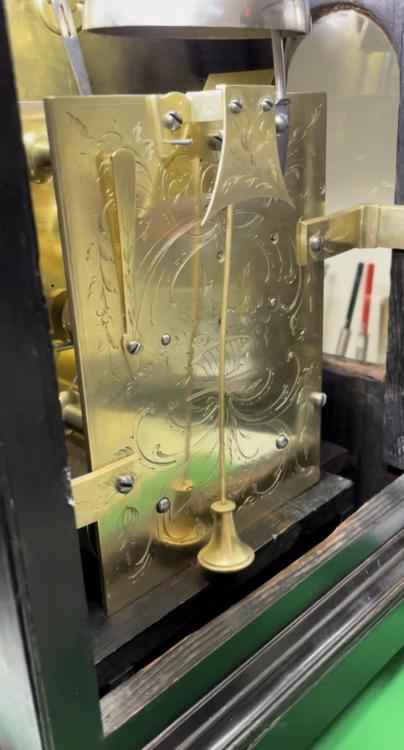
Ok here’s my two penneth worth. I do agree with Oldhippy but also disagree on some aspects here. The video, yes I agree bad work, also using power tools again they are way to fast etc. With regard to the bergeon set up I do have to disagree there, the system is great, reamers, bushes, chamfering bits, the whole lot works together,as for invisible bushes, I’ve just finished a bracket clock and if you look at the inter wheel on the strike side ( the one in line with the bracket on the right ) That bush is a bergeon graded bush fitted using the bergeon tool. Now I may be misunderstanding what OldHippy means by invisible bushing but my understanding is to blend the bush into the plate so that the join between new bush and old plate is not visible. Please correct me if I’m wrong as I know oldhippy has many more years knowledge and experience than my self. For the OP I was taught to broach/file in the opposite direction to the wear in the pivot hole the same amount as the wear, then centre the hole on the bushing tool then ream the hole to slighty under the bush size ( which is easy using the bergeon system if graded bushes and the bushing tool). once reamed out you press fit the new bush from the rear and test fit the arbor assembly into the hole , the check between plates. once checked by itself I also check with the next wheel either side for correct depthing just incase.
 1 point
 -
Me either really, but I had to fix a watch for a friend and needed a donor. Got a lot of five MMs in the deal. Had an orphaned movement.1 point
-
Having watched the video , the man’s a clown , never once checked the bush and hole which required him to try and close the hole ti fit the bush ans then peen the plate with a punch at that point I quit . What ever you. Do do not follow that man’s example. When hand bushing or machine bushing the check the fit of the bush frequently untill it stands up but not slip into the hole at that point it will press in friction tight, if fitted fron the inside flush with the plate any excess in the front plate can be either filed off (protecting the plate) if it’s a flush fit or an oil sink created. In either case it should be invisible. regarding how to bush, manual or machine, The Luddites broke the machines but it did not halt progress. Jenner built bigger and better machines that were more efficient. The same with clocks and watches the likes of timex, and quartz watches are successful because of development. No matter what you think of them they are part of the evolution of the industry and best embraced as that than cast aside as rubbish. If our forbears had thought like Luddites we would still be using Sundials.1 point
-
Finally got some black filament loaded in the printer.
 1 point
 -
Numbers can vary all over the place. Battery: $30 Mechanical service (the Ks): $300 My numbers are accurate to within +200%/-20% Where are you??1 point
-
Actually he did insert the bushing correctly from the inside out. At around 36:00, he started to broach from the inside, creating a "diabolo" shaped hole. Then he inserted the bush from the inside. If a viewer is not observant, he may end up learning something wrong. Actually, I have watched a few videos where the bush was driven in from the wrong side. As no surprise, Scottie's Clock World, did it wrongly. But horrors, Tommy Jobson also did it wrongly in one video.1 point
-
You dilute as you said, as regards how long that's a bit like asking how long is a piece of string It depends how dirty and tarnished the parts are. Rinse with water, when it comes to drying I used to put the parts in sawdust, but you can dry them in a clean cloth, just make sure you dry every part thoroughly. I would advise you to wear a pair of rubber gloves and have plenty of ventilation and wear a mask. One other thing always make sure all parts are covered in the solution if not it leaves a tide mark and you will never remove it.1 point
-
I jumped in when he started to brooch to insert a new bush, which was a joke he is broaching the wrong way, you brooch from the inside out, he is doing it from the outside in. I stopped after that because that was enough for me. I will see what I can find.1 point
-
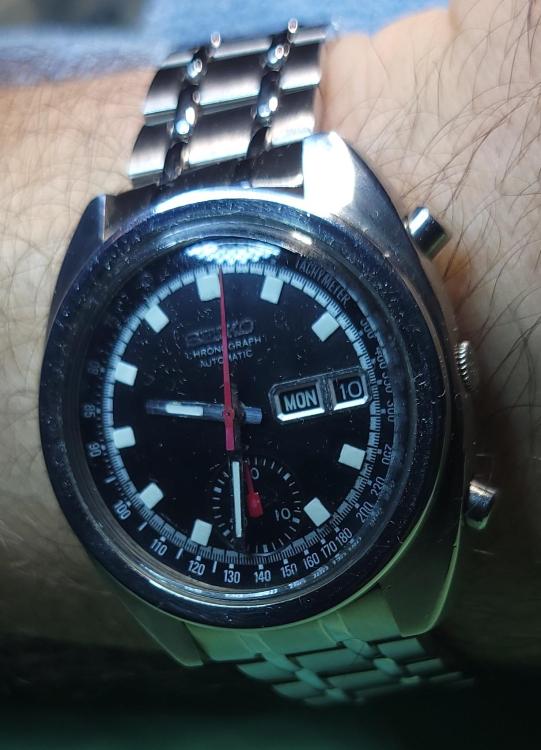
How long are you letting it wind automatically? Moving the rotor a dozen turns or so might wind the barrel like 1/70th of a turn, and that barrel makes 7-8 turns to be fully wound. The reversing gear in this caliber is rather odd, and has to be super clean and sparingly oiled, and there is other gearing under the barrel/train bridge that is inaccessible without full disassembly. Try winding the crown 10-15 turns, and wear the watch for half a day, take it off and see how long it runs. But if you don't know the service history, it almost certainly needs a full service. This isn't a caliber I'd recommend to a beginner though, it's quite complex, like 2-3 times more complex than your average chronograph.1 point
-
Thanks @Neverenoughwatches (makes me feel a bit proud to hear)! I don't use a bow (I would want to try one but haven't been able to find one yet). Instead, I use an extendable key ring with the yoyo function. It was a tip I originally got from a video by @jdrichard. I really think I would prefer a bow but the Yoyo keyring works well enough. I published a picture of the Yoyo keyring and some other thoughts about using the Jacot tool in this post.1 point
-
Thanks! Very, very happy to hear that, and perhaps more useful then than I would have thought!1 point
-
Looking rather masterful with that burnisher Watchie . I would have liked to see the coinciding bow action. I'm guessing you are using your left hand for the bow ? In some strange way i am imaging a mouse running in two direction on his mouse wheel that has the jacot pulley attached to its wheel sprindle, i can even hear his wheel swishing backwards and forwards. Can i ask does that thought make me wierd or is this a new eco friendly power source, one up on Endeavor's .1 point
-
Excellent. Proper stroke and speed. Only vid I've seen that I would point out as good technique .1 point
-
Hi. Ihave used both methods and both require great care, hand bushing requires you to centralise the hole by filing the side opposite the wear before broaching, using the vertical drill on low speed or turning the chuck by hand to make the cut works also, if using the drill method always measure the size if the bush first and drill undersize then hand broach to fit then press in the bush which also will require broaching to fit the pivot. Once done fit the pivot/wheel into the bush it should not lean out from the vertical more than 5 degrees.which should give you the required side shake.1 point
-
I never realized there were so many.1 point
-
I ended up finding out I could increase gain by hitting the up arrow while NOT in Settings mode and I can detect beat now1 point
-
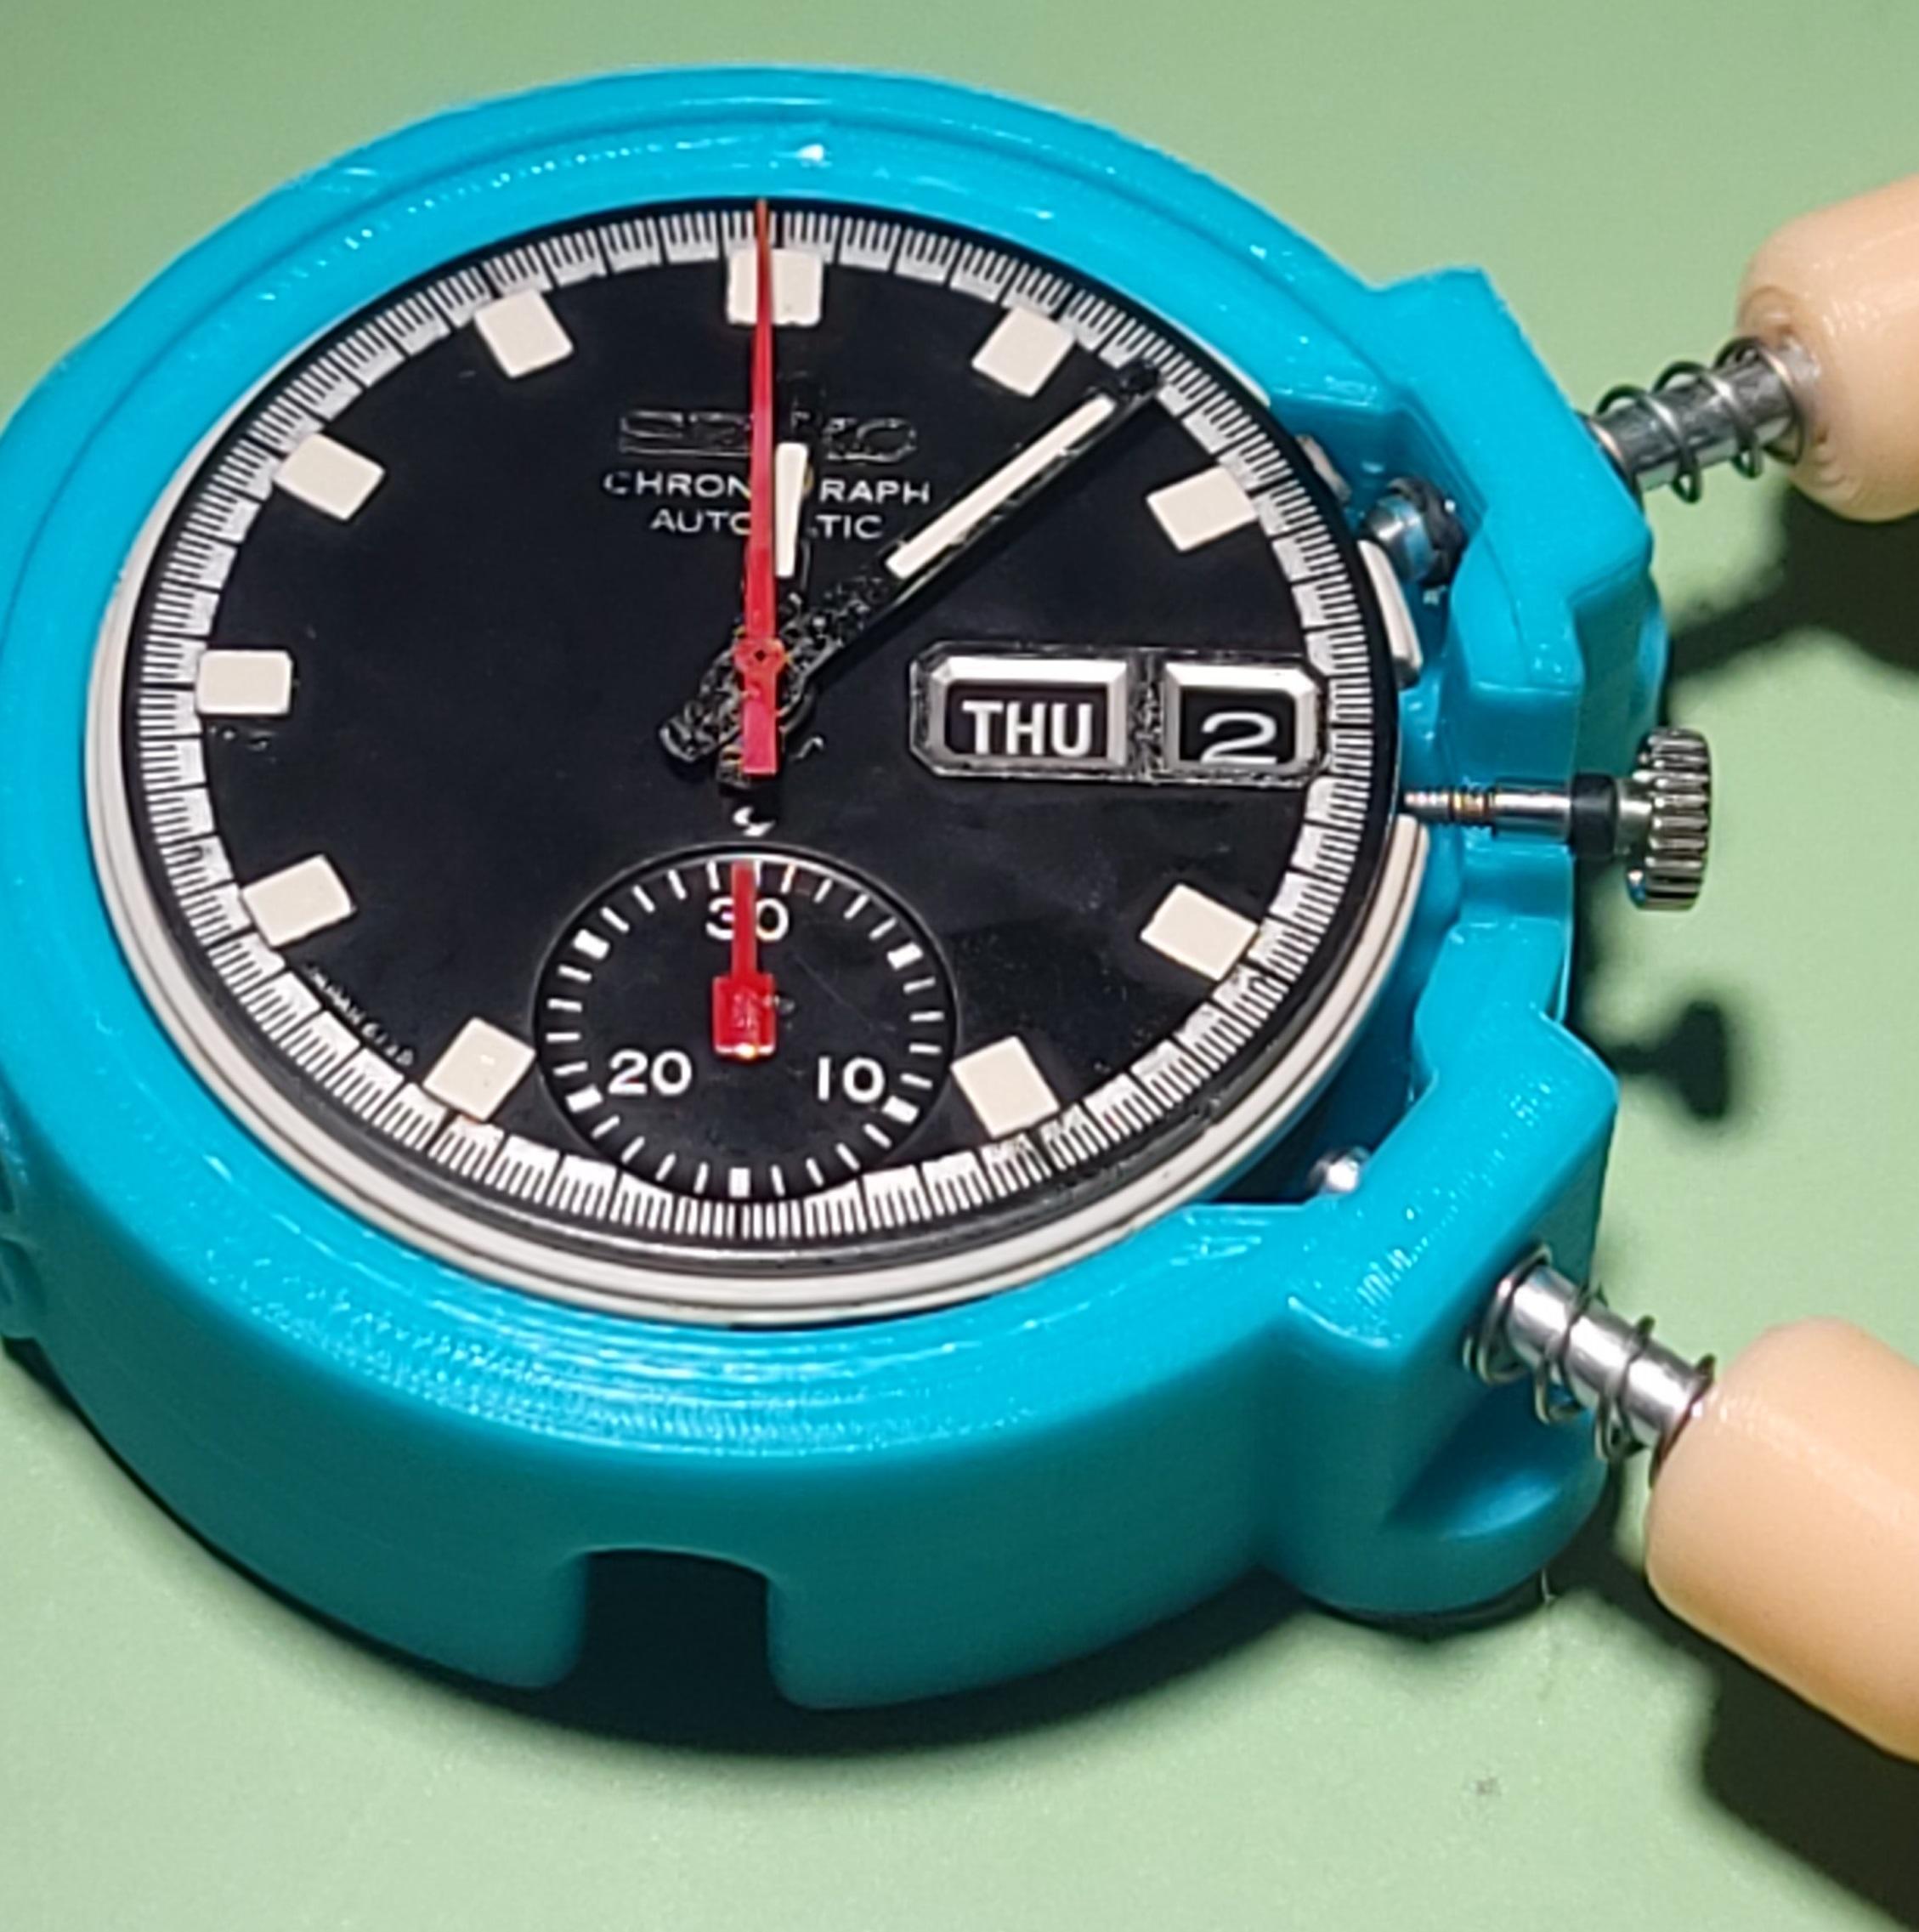
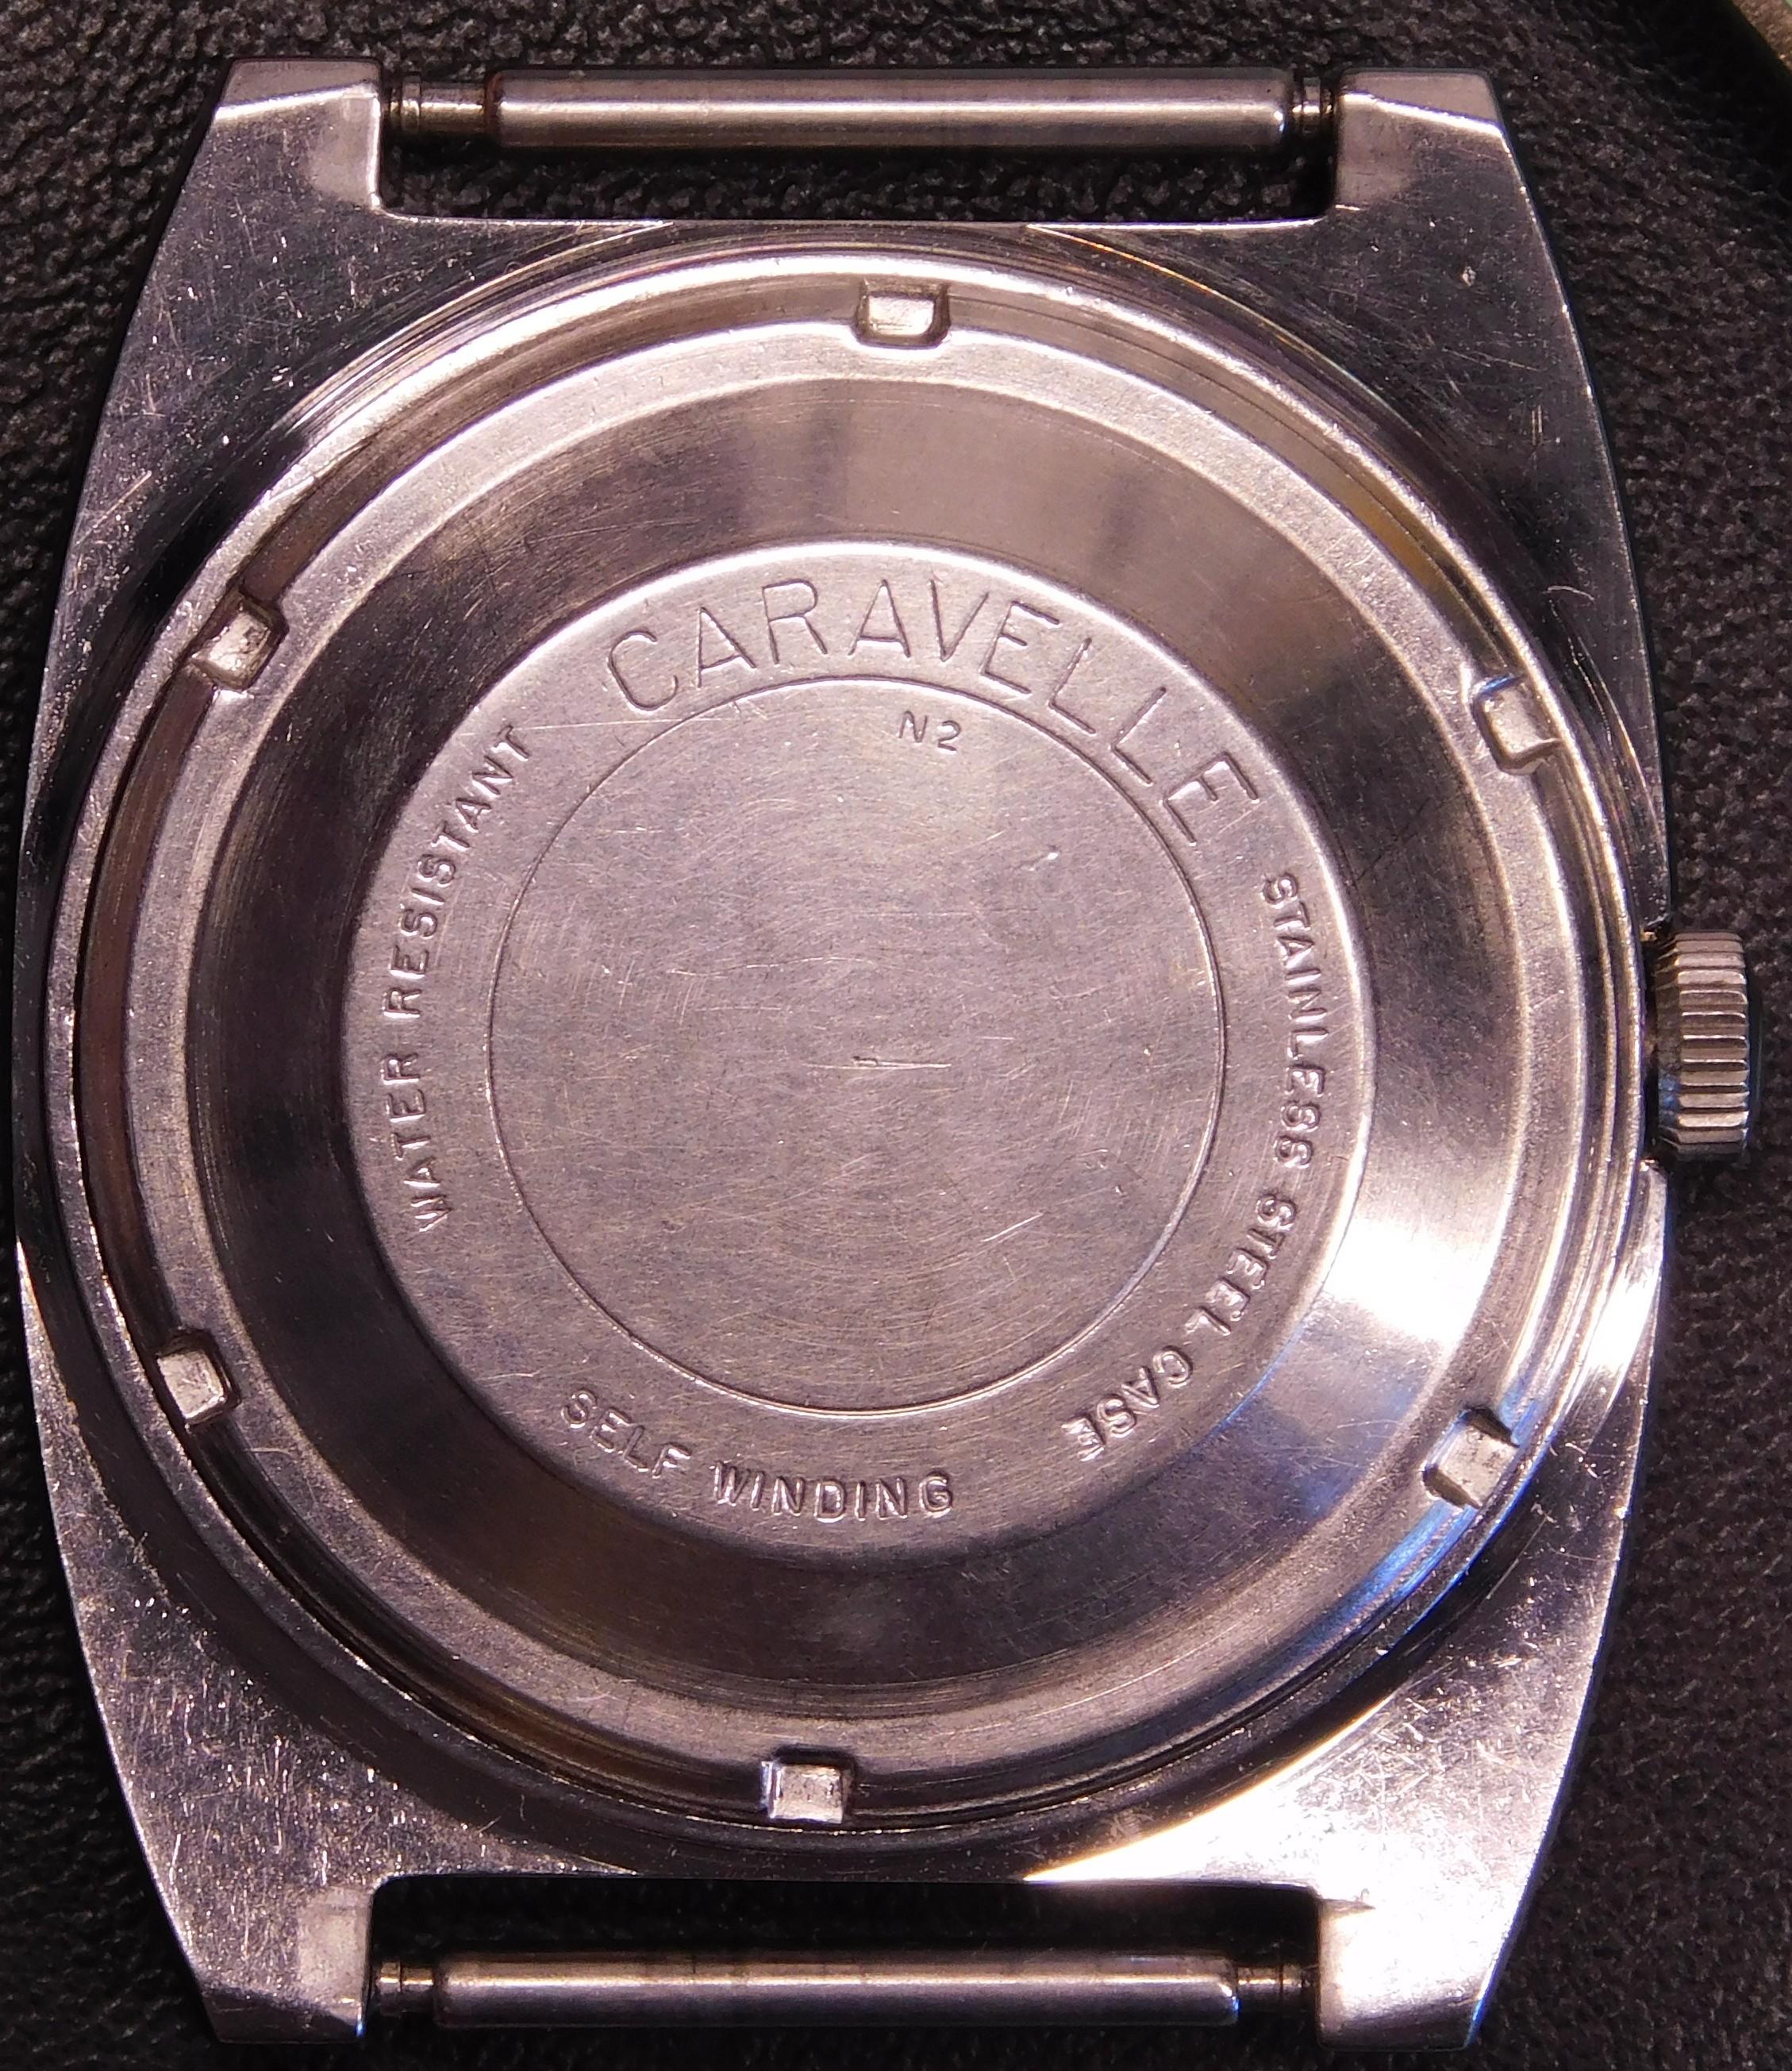
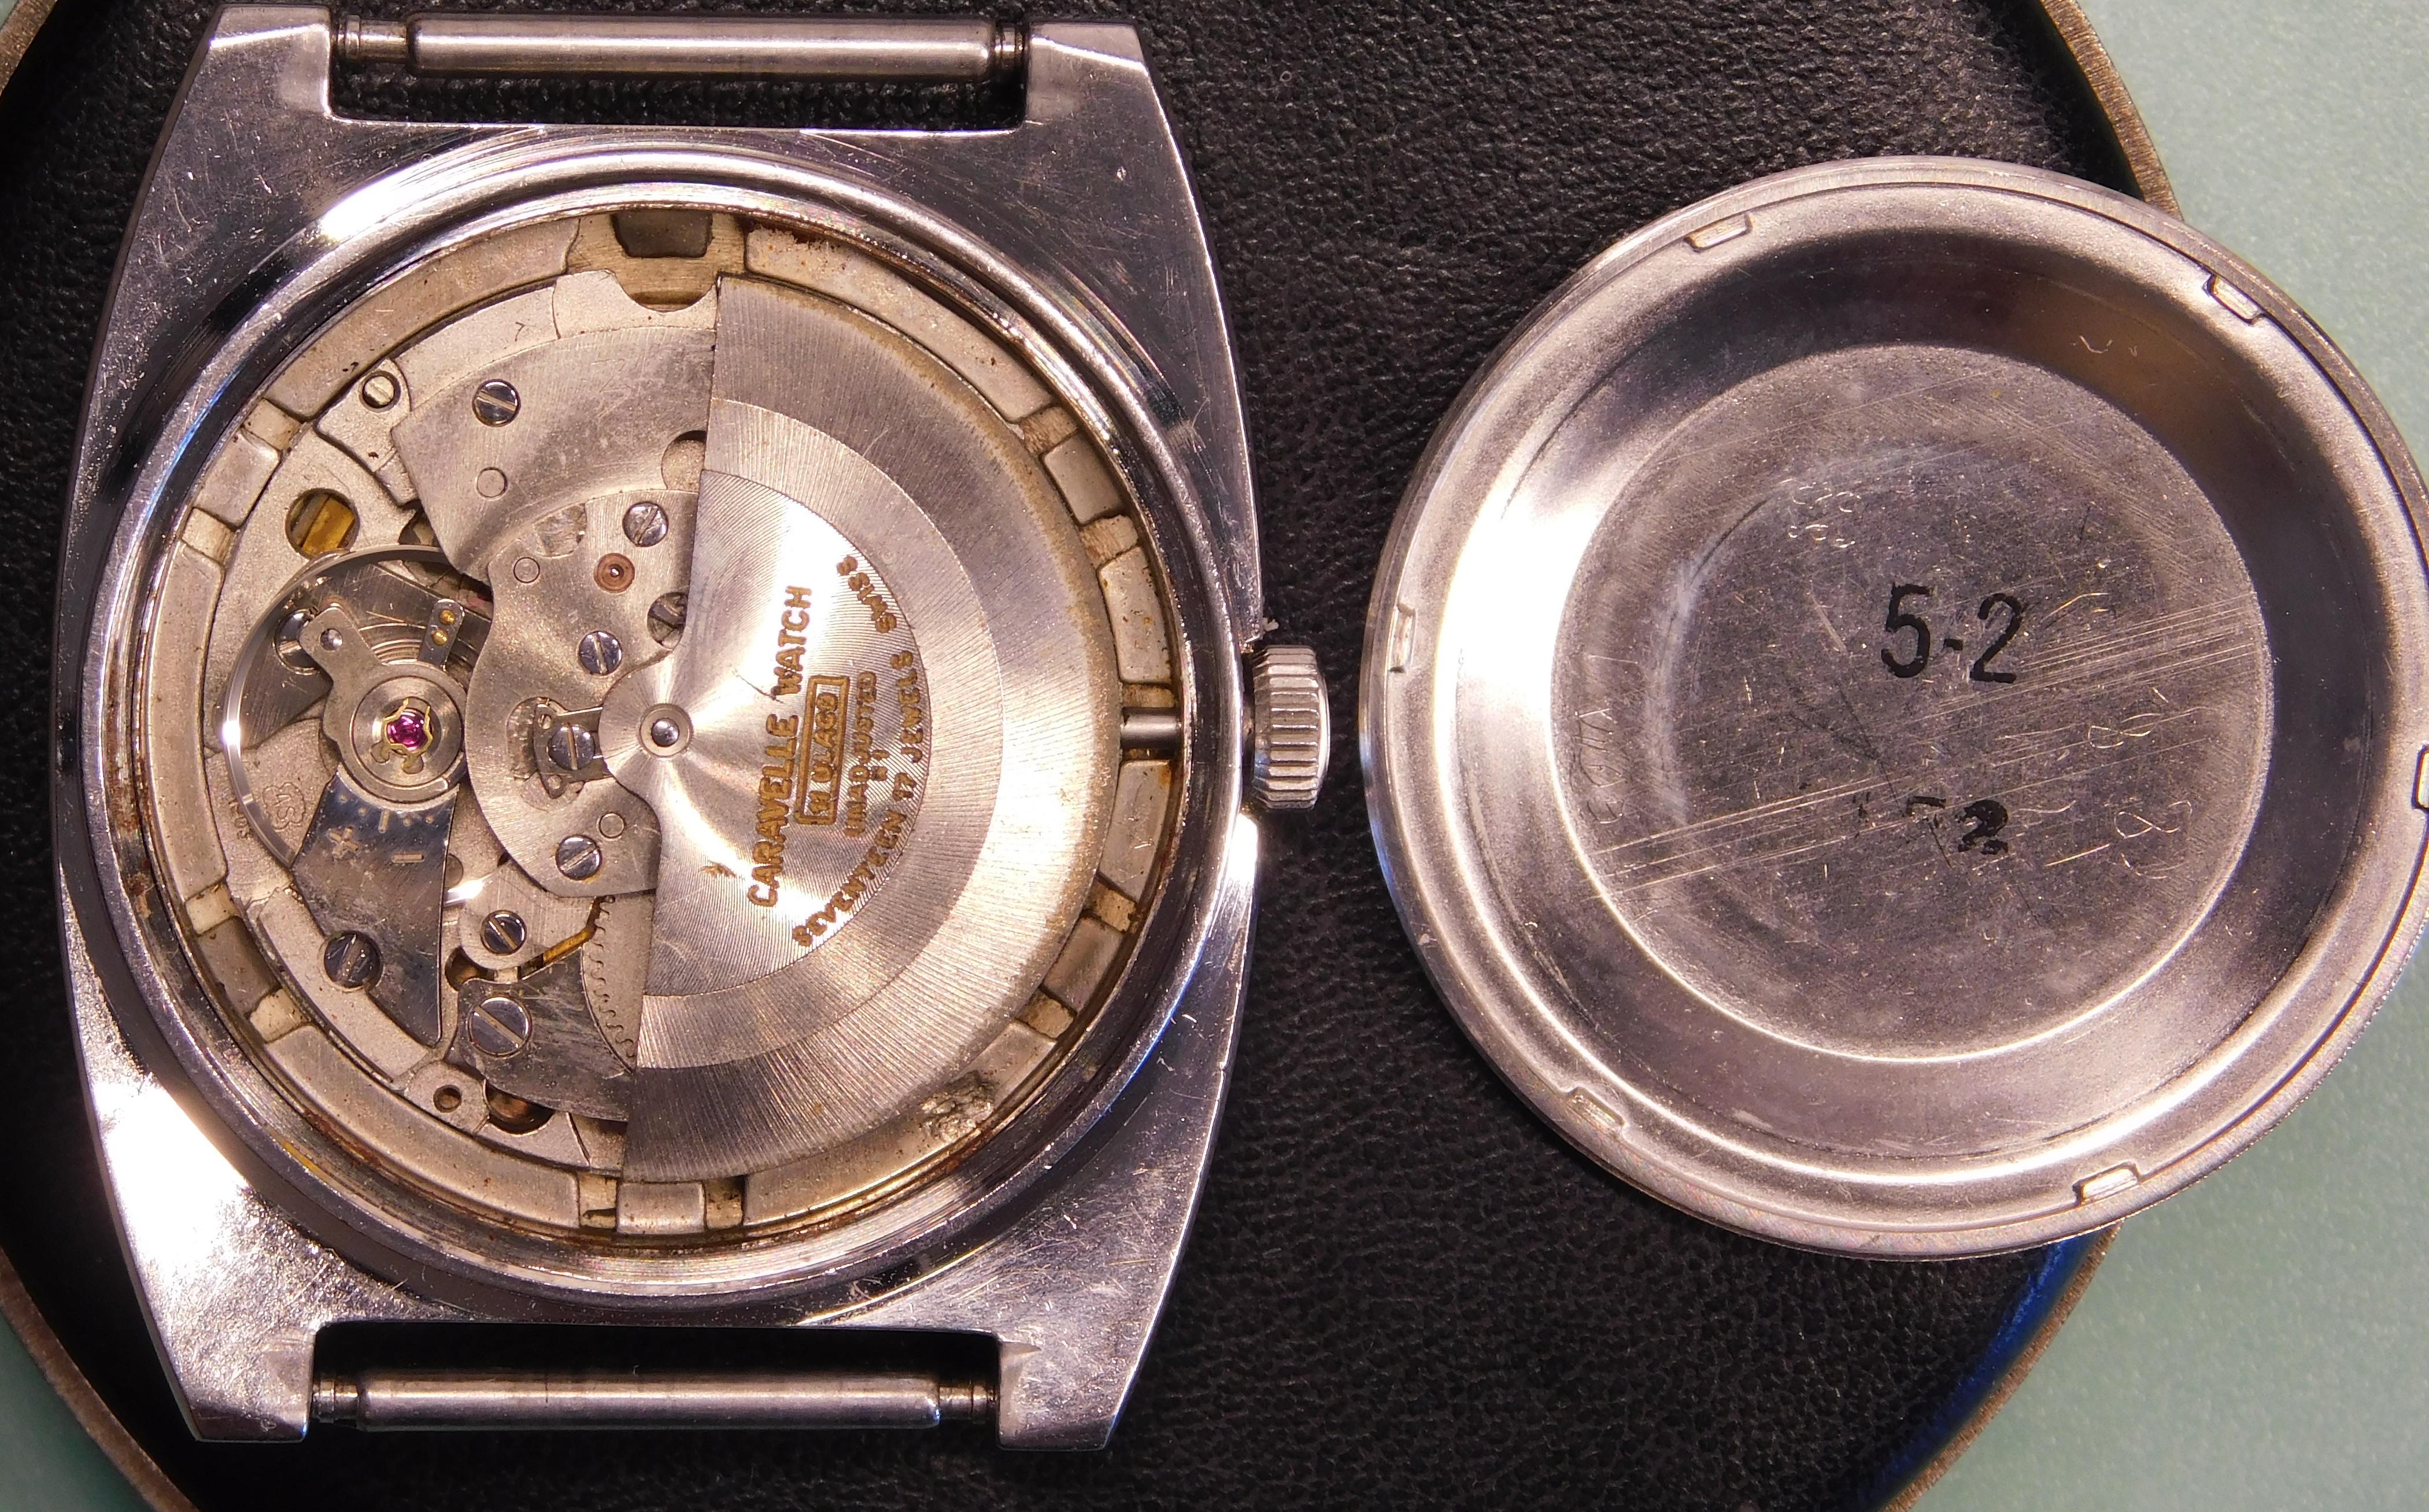
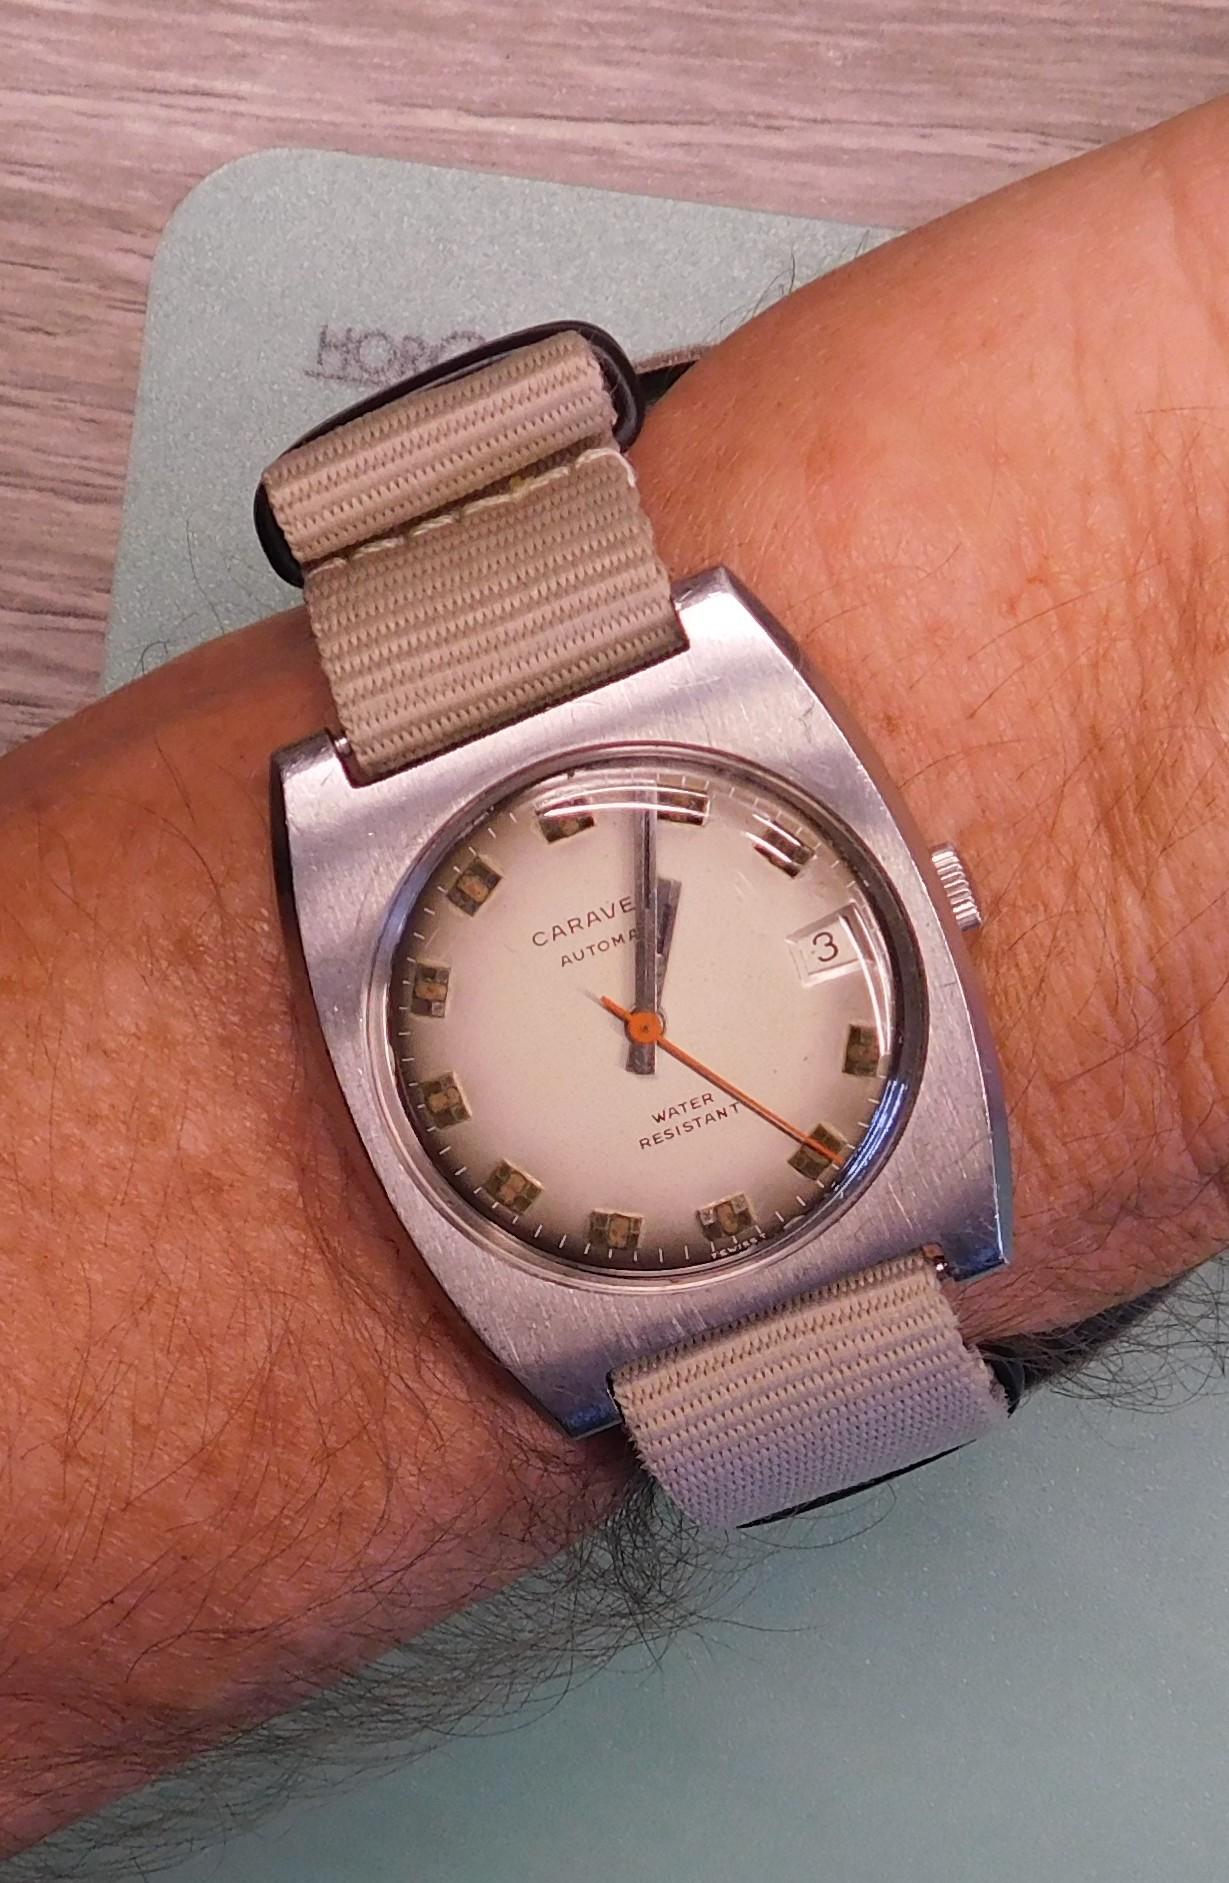
I put it back together and cased it up without the automatic works to get an idea of the reserve, and so I can wear it for a day or two. Wound at 10pm EST The second and chrono minute hands have been really poorly painted red, and I'm fairly certain the dial is a refinish. The price I paid kind of reflects that, so I'm not too upset about it. I'm not looking for a perfect collector's piece anyway. It'll give me an opportunity to try my hand at refinishing hands. That is a lot of lint!Sure looks good on the wrist, though. https://www.youtube.com/shorts/vE-nsV6jYMQ
 1 point
 -
Cousins has a very wide range of hole punches. https://www.cousinsuk.com/category/watch-strap-cutting-hole-making-tools1 point
-
Bushing tool is a waste of money. Buy yourself a good set of clock brooches, if you get the cheep ones they do not keep there cutting edge. What ever you do never ever use power tools to drill out the holes. When it comes to bushing correctly you should brooch as little of the original plate brass as possible. If you make a mistake with power tools you have had it, they run too fast. Bushing by had is slow and you have complete control.1 point
-
I offer these winders individually , or as a complete set. I ship from the US, so you'll need to see if shipping will work out for you: https://www.ebay.com/itm/125578735361 https://www.ebay.com/itm/1254283486751 point
-
Hi folks - I’m new to the forum, and a beginner to the hobby. Hence, I’ve been keen to find accessible tools & solutions, given the costs involved for mainspring winders. I recently came across the RS mainspring winder project - I think it’s a great idea and I’ve been fascinated to read through the history in this thread to understand the evolution of the design. I was able to purchase a starter set in the UK from eBay: https://www.ebay.co.uk/itm/175589279744 It’s also possible to order just additional housings and plungers in whatever sizes required - but you need to contact the seller directly & they will create a listing for you. All orders were well made and safely delivered. My initial springs were both of the ‘vintage’ variety as described by @DavidJ so I had a fair amount of sweating while I got to grips with it, but after growing a third hand I was able to get my spring wound and installed in the barrel.1 point
-
How many watches in need of repair do you have?1 point
-
Depends on where you live: Gouge Eye, NV, or Outer Mongolia. Also depends on what you want repaired. Help us out and we will help you out.1 point
-
Thank you for your introduction and welcome to this friendly forum. We all look forward to your contributions and continued involvement. We need good clear photos of the watches fronts, backs and sides please.1 point
-
Hello and welcome. If you post pictures, we could try but it would be a very rough estimate.1 point
-
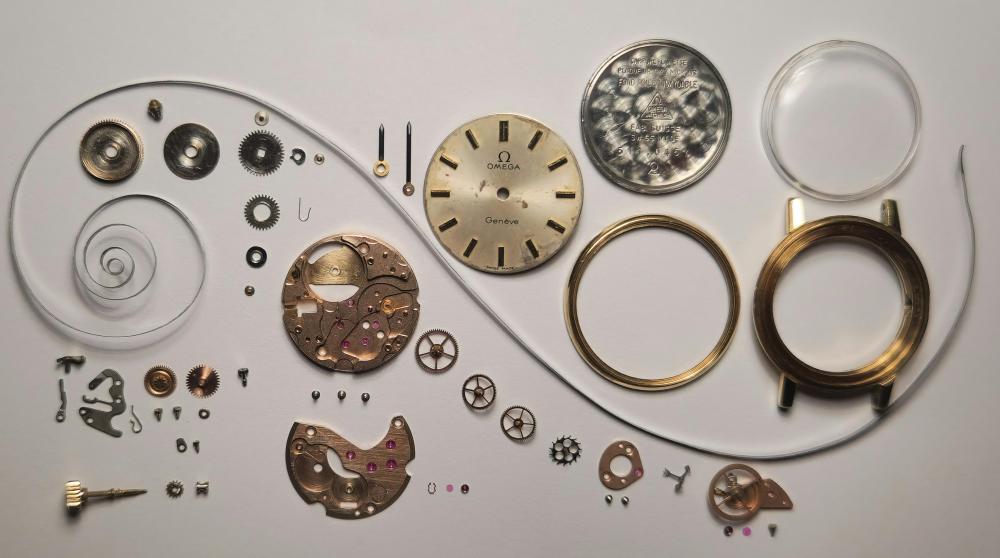
I'm always impressed just looking at these, and lucky enough to own a chronometer grade one, now finally had the chance to work on a repair, and all the positive opinions got confirmed. The owner lamented water ingress and the watch stopping all the time. Seeing no major damage on a first inspection I undertook the work with good hopes. Starting with the dial side the overall feeling of quality and maniacal height saving design becomes evident. The dial fits so precisely that a dial washer was not present or needed. This being a time only version I can't do any praising to the calendar works. As soon I lifted the hour wheel the watch started running strong in all positions with good amplitude, then I pulled the cannon pinion which was quite tight. Note to myself, MUST get a cannon pinion remover. The black oxidation on the contact section was the root cause of the fault, but after 50 years it was time for a complete service, and I have the distinct impression that mine was the first one. One incredible fact is that Omega still updates their technical documents about this long discontinued caliber, I can only think of the aeronautic industry doing something similar for certain "never old" airplanes and engines. The way I did it may be called not fully professional, as I didn't do surface treatment, and used only 9010, HP-1300, and 9415 without an automatic oiler. However I'm happy with the results, and I hope that the owner will be too. That being said I plan to upgrade on the above points in the immediate future. One tool detail that I really recommend is to use soft metal tweezers whenever possible, I have got cheap brass Indian ones which I then dressed to eliminate any sharp edge. These are OK to handle most of the screws and all the bridges and plates. Keyless and motion works are rational, and easy to work with. Some dirt and micro-spots corrosion, but nothing worrying. The stem was the rustiest part, and the crumbles are all what was left of the crown gasket. It is defintely possible with some patience to open these and fit an o-ring, which luckily I had from an assortment box. Even the stem came out very decent after the due care. Just give a tap or two to the washer to make it seat nicely again. I've even refitted the steel ring which matches well the O-ring profile. Two screws hold the automatic bridge, and one can see that also the gib screw was removed. That allows the rotor to be removed even with the mov't in the case. For regular service to the auto works it's enough to remove the larger bridge. One of its screws is thinner due to more limited space. Note the use of a single reversing wheel, yet the winding in bi-directional and the overall manufacture is just amazing. I used HP-1300 on the pivots but probably that another synthetic type might have been better. Note the space above the balance, which hosts the automatic work. At the time of its introduction this was the thinnest automatic movement with sweeps seconds and calendar, at just 4.5mm. And the Reed regulator is nothing less than amazingly beautiful. The balance is then removed and inspected. Note the multiple tiny "drill kisses" on the rim for poising. To save height, the train is different from the common design. Seconds pinion is driven by a pinion sitting above the the barrel bridge, and has a tension spring which controls its end-shake. Releasing power is not easy as the space around the click is very limited, remember to use only something soft like a toothpick to do that. Only then we can remove the pallet bridge, another beautiful execution with two locating posts and screws. Then remove crown and ratchet wheels. We start to see the sophisticated design and the one-way automatic winding clutch. The machining of a cord on the crown wheel round holds precisely the hub of the crown wheel, with an off-center screw. Wow. The auto winding wheel has special profile inner teeth which allows one-way power transmission from the ratchet wheel to the barrel arbor. The small pinion catches only one way to said wheel, otherwise it turns freely. That makes so that turning the crown in the opposite direction has no effect whatsoever, and also that a single reversing wheel is needed in the automatic work, because movement is transmitted only in one direction from the wheel on the arbor to the auto works. I for one find difficult to understand what I wrote above and the principle of operation of that mechanism. We can now remove the train bridge which only holds third, fourth and escape wheel. Al-tough, that does not make it particularly easy to fit back. Finally the seconds pivot spring, pivot, barrel bridge can be removed, followed by the barrel and center wheel. Speaking of the barrel, once opened it I found it quite dry, with the lid slightly corroded and heavily grooved. As an experiment I hand polished this surface with a wide micro-fiber stick, and car polish compound. Grooves were gone, but it remained scratched. I switched then to grade 20 or 30 of Chinese diamond paste until it got better. And better with finer paste, to an acceptable smoothness Now, I must say that I did not replace the mainspring, and not even removed it from the barrel as I don't have a winder, and wanted to avoid any distortion to it. In the end the watch performed well with plenty albeit not stellar amplitude. The stripped main plate in its equally magnificent A and B sides. Cleaning and reassembly was uneventful even if some screw are small enough to require full attention. I had some doubts about the seconds pivot being supported by jewel on the auto works when refitting hands, but in fact that worked OK. After lubricants settled the timegrapher response was completely positive, One last note, you know you're holding a genuine vintage Omega dial when it has a fine clove watermarking, a recess for the balance anti-shock device, and the feet are shaped for the screws to hold without damage. After a long time spent hand polishing the acrylic crystal and other details the complete "Omega Geneve" watch came out stunning, sorry I didn't take a picture Hope you have enjoyed this article.
.JPG.ebef552509aebb23b27abe2b4c32472b.JPG)
.JPG.d95631cad2d41ab3feec17eb8fb20a87.JPG)
.JPG.f43a1a8e19e672578759e83c1b57dd8c.JPG)
.JPG.3e708f5abd4ce81f4dfa0f79a974973a.JPG)
.JPG.4b5fe27443b56b4e8ea8d649abea407c.JPG)
.JPG.3027d89a99ad3fde7d822a7f3b1b579d.JPG)
.JPG.691d1dca0a4c1cdff0fc5e73124fb012.JPG)
.JPG.7c855d8ca8b4cbddf469e059c9f07e5d.JPG)
.JPG.8c112aa1cad5fdc1ee85bd28daa05954.JPG)
.JPG.95c826747cc9d22676938e4a9db60c41.JPG)
.JPG.8924f0b6816f8c30986d05e1dcc7101b.JPG)
.JPG.b7132cc3cc2c3a7cc0f479f35f721002.JPG)
.JPG.272ef88bdd34f790ae567d02a540c474.JPG)
.JPG.b38163bd18b4e5a7966d17a63ec15cf5.JPG)
.JPG.68588fe1a4303db3b0f705b25af5d98a.JPG)
.JPG.4b810fee054d87270655220661fb5467.JPG)
.JPG.eb1763dc2850d38b76efaa612970bbad.JPG)
.JPG.fa4eb9b3c4788d54b1b3ded3763c3593.JPG)
.JPG.7e117f23f11b6fc396b8afa05e8f1a50.JPG)
.JPG.11a5f48960bc9c56eff0017f9186215f.JPG)
.JPG.e16346ef5c458352e0795d4c0b228058.JPG)
.JPG.40ceb4a1ed99956246156fce9e9640f6.JPG)
.JPG.ebf152565316568e6b415c85730d1d88.jpeg.b1d1cfd6d768d8d9530c4c4c4ffa47d4.jpeg) 1 point
1 point -
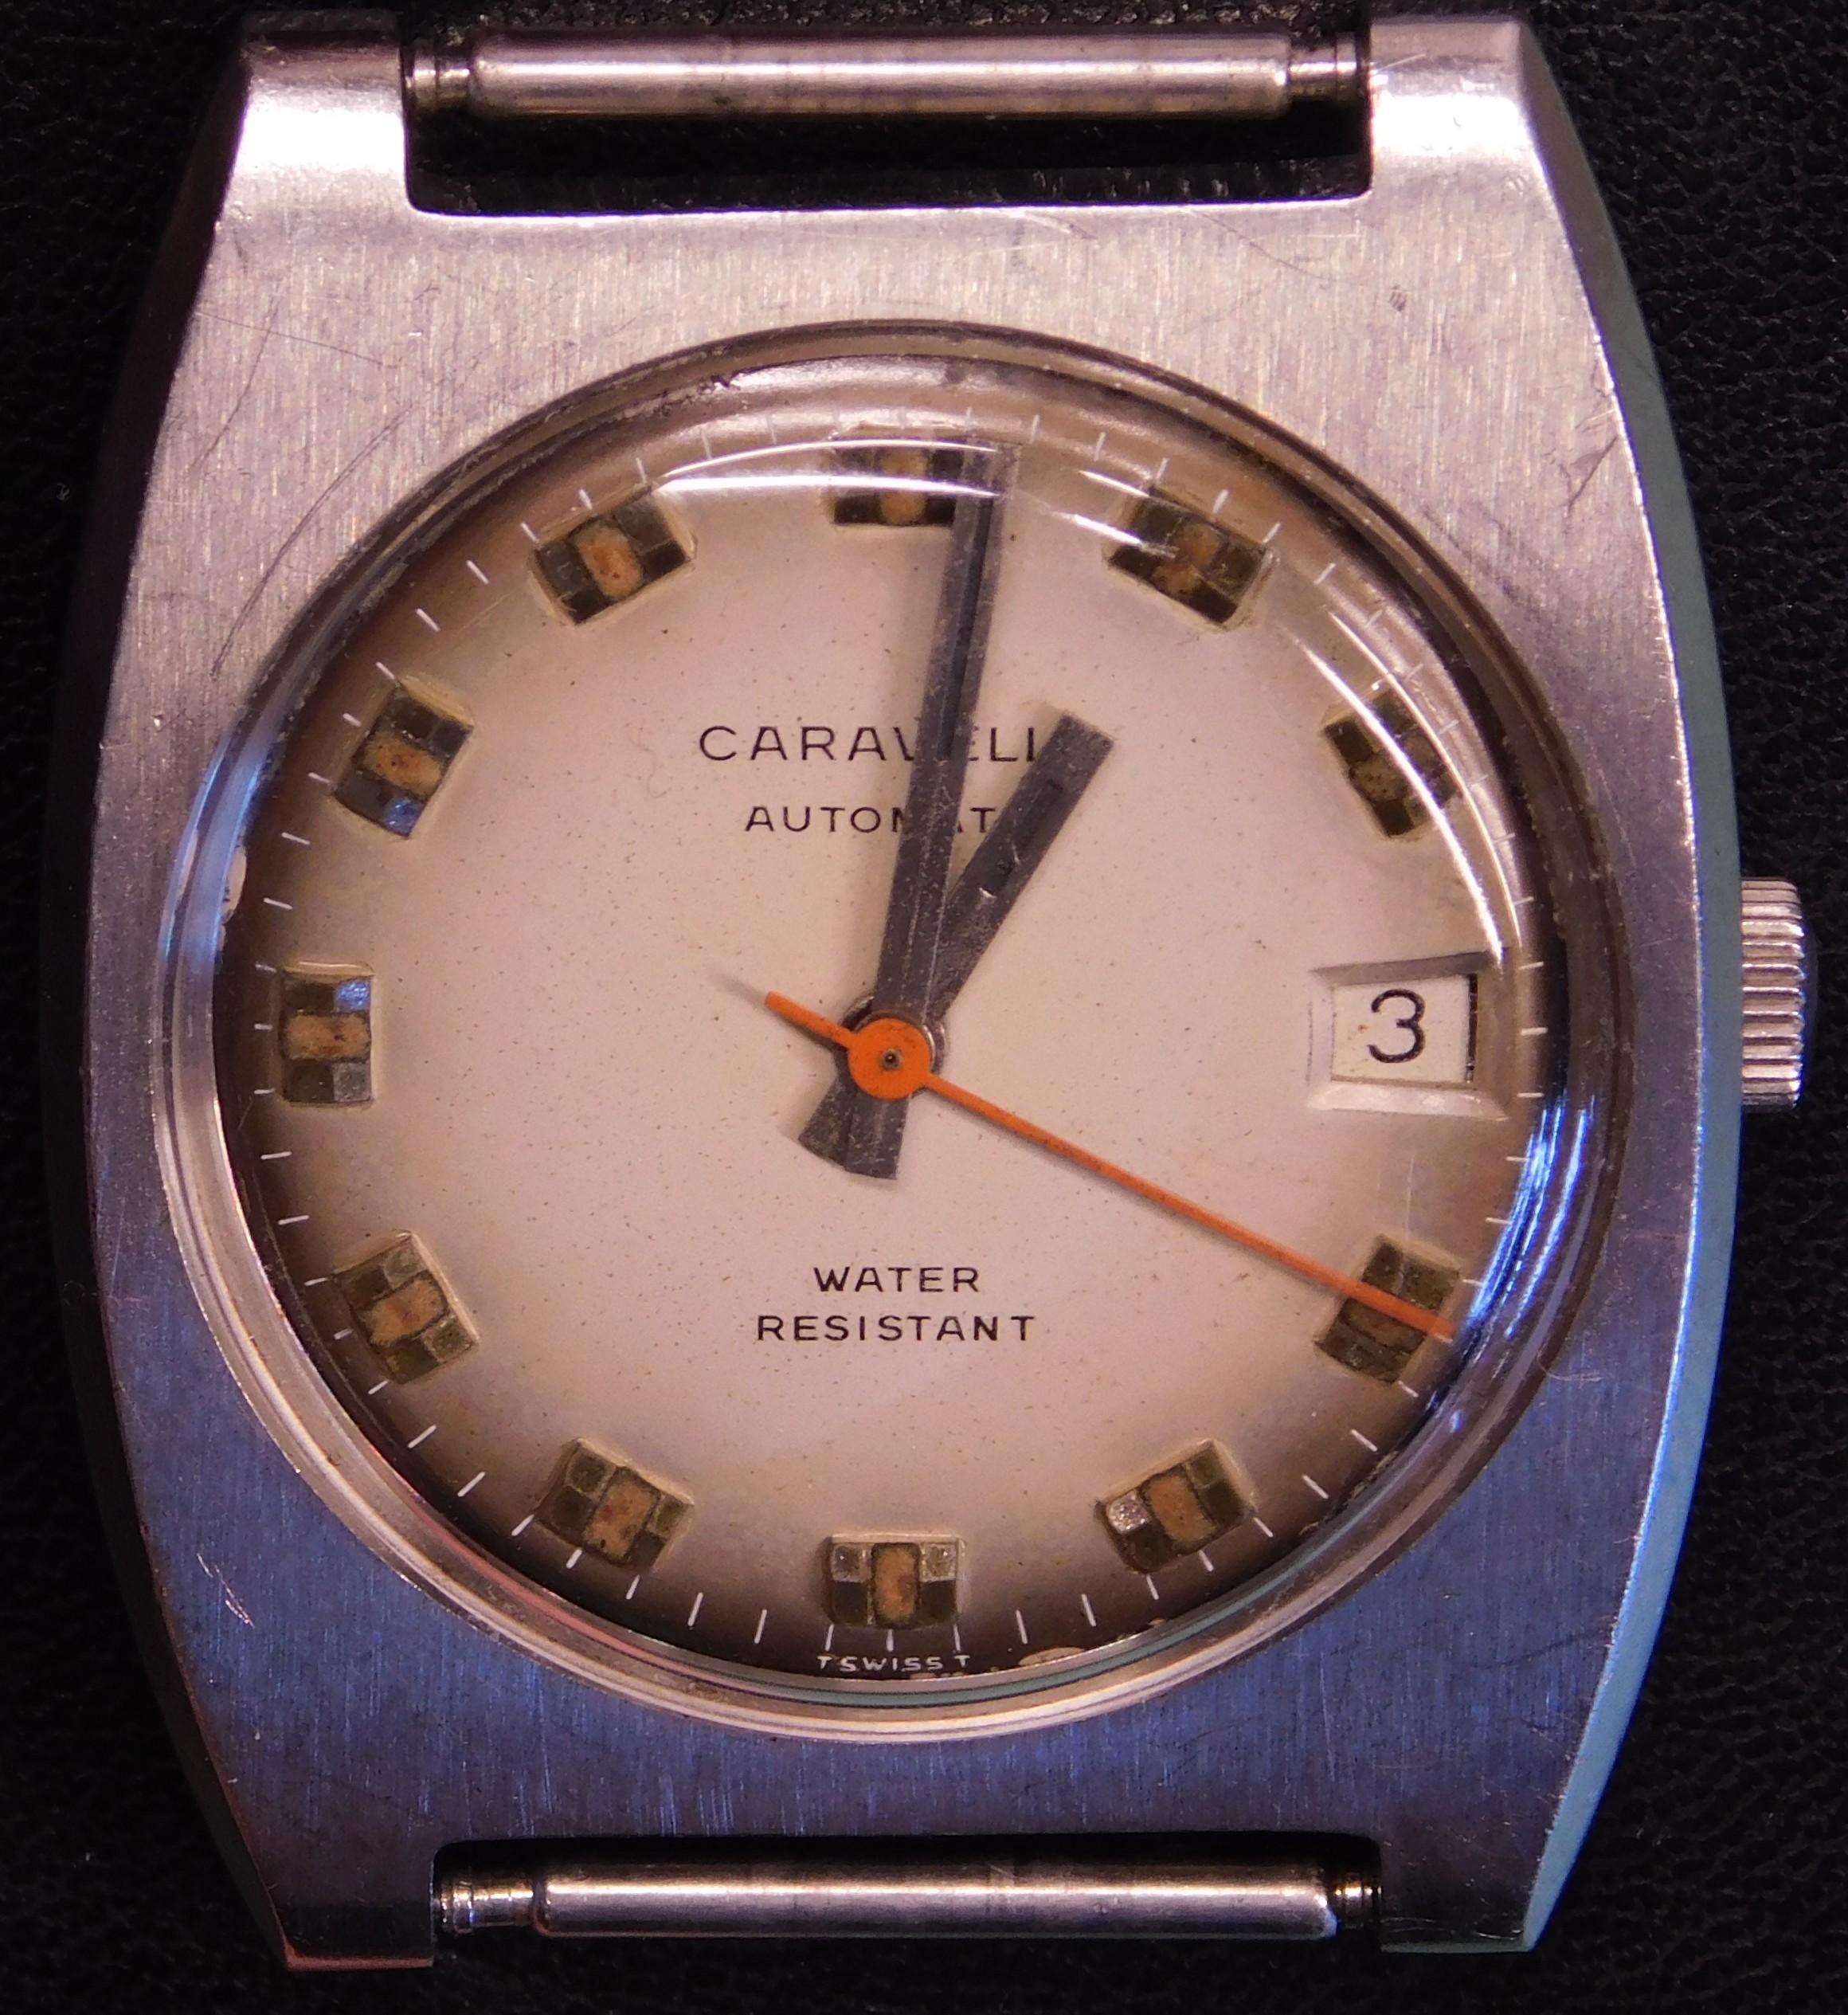
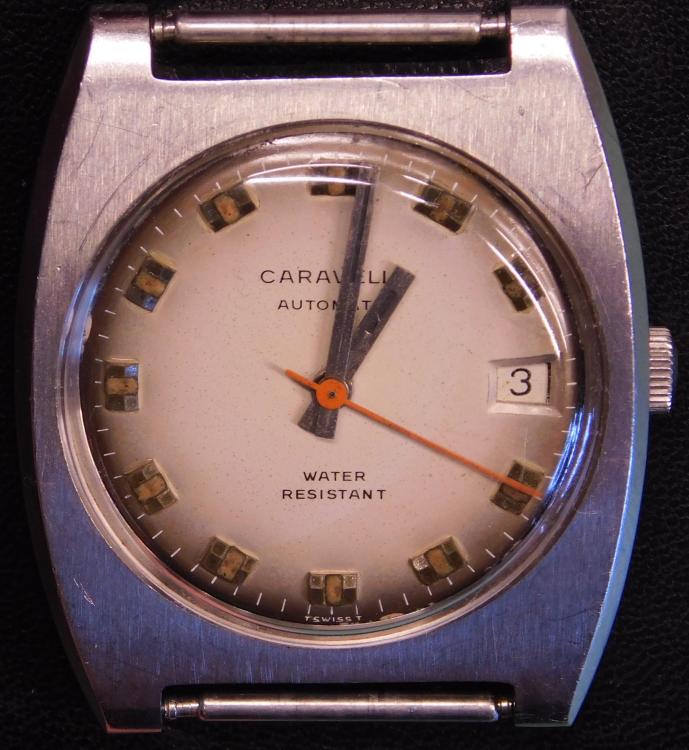
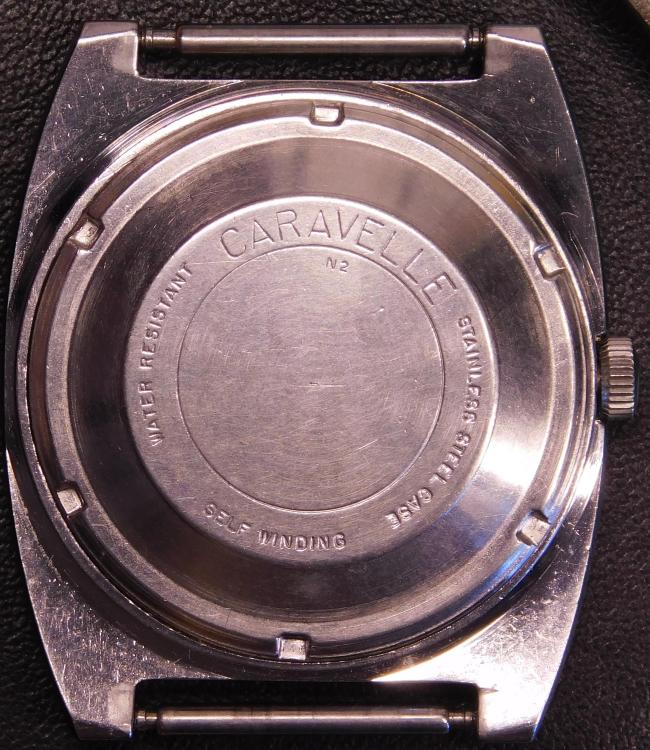
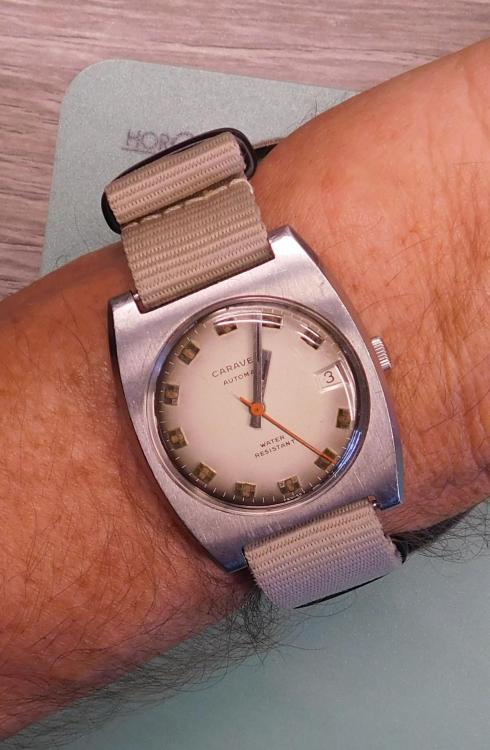
I found one that hit the those 2 metrics plus more: all stainless case, 17j plus is an auto with a date! Another 1972 and looks good on a Khaki nato strap which matches the dial. Edit to add it is an AS 1903.

 1 point
 -
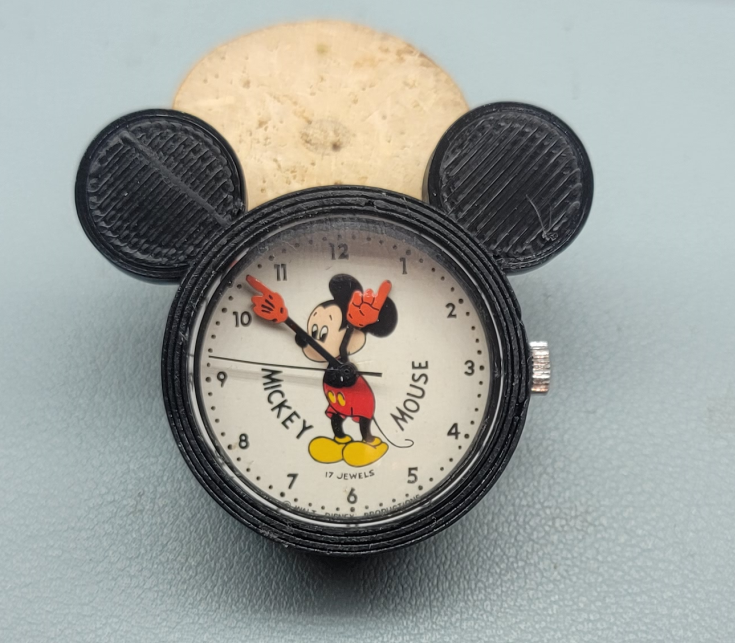
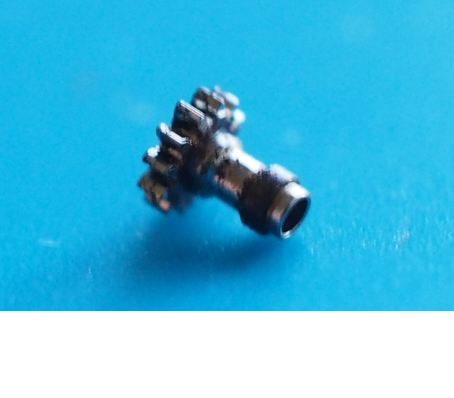
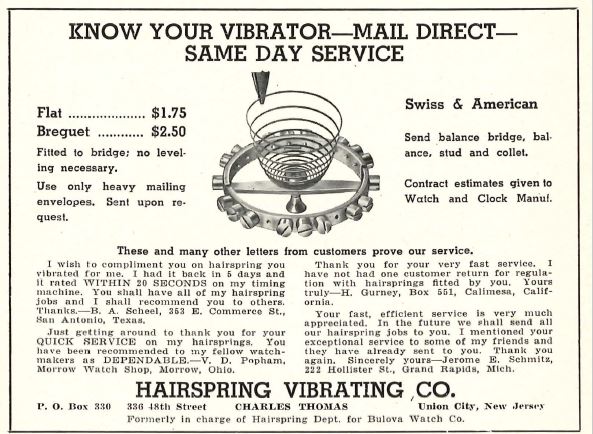
the way the number breaks down is 721 refers to a balance wheel. they use numbers instead of names because they usually put these on the package the package doesn't have a lot of room to spell out balance complete so they just typically use numbers. So 721 says that the balance wheel and the second number that tells you which balance wheel. if you go to the bestfit website you can enter the number it to get a cross reference to see what cross references to and it only cost references to MAR 150. Which is exactly what it says up above there is no other cross reference. there are certain unfortunate realities in watch repair. first re-asking the same question over and over slightly worded differently unfortunately is not going to change the outcome for you. I could explain a whole bunch of paragraphs it excruciating detail but the simplistic is a balance wheel and its flat hairspring always go together. The balance staff can be replaced the roller table could be replaced but they hairspring that came with the balance wheel has to stay with balance wheel. For instance suppose you are in the factory you grab two identical watches off the assembly line and you swap the hairspring you will have timing issues. How much of an issue depends upon how precise everything was manufactured. So unfortunately you cannot find a hairspring visually looks the same and have it work because there's some other complications that will happen worst-case you have a watch that wouldn't even run at all to it would definitely have running issues and of course timing issues fortunately we have eBay. You can set up a active search for the watch and sooner or later if you're lucky one will show up. And yes we all understand we've all had a bad hairspring day or two. then in the old days I'm attaching and advertisements they used to be people that would help you out and as you can see that was quite a bargain price. I don't even think that would cover the shipping costs today. In a case the used to be people who could make a new hairspring for you as far as I know they no longer exist. Your best thing is to find another watch and steal the balance complete.
 1 point
 -
Hey, brand new to the site but I am a chemist by trade. Here's some the best summary I can make. Warning no TLDR. So The fixodrop is purfloroacyrlic polymer, and pretty nasty stuff. The short fluorinated chain or "tail" is what stands up of the surface of the part like a pillar causing the oil to stay in place. The fixodrop will work more effectively than steric acid. It will bind better to the metal parts and the the "tail" of steric acid is lipophilic, while the fluorinated tail of the fixodrop is omniphobic. The lipophilic steric acid will work mainly due to the physical spacing of the tails acting like pillars the oil would have to span, the difference is it wants to touch the stearic acid tails but not the fixodrop ones. I will tell you this right now. DO NOT ATTEMPT TO MAKE STEARIC ACID VAPOR you would need to heat it to over 300C. This is normally done by a process known as chemical vapor deposition and requires a ultrahigh vaccum chamber, a hot plate, and cold plate. The acid is heated in vacuum to make vapor and the cooler parts cause the vapor to deposit. This is the same method used to grow lab made diamonds. It is VERY expensive, and just heating strearic acid to 300c is a really bad idea (even in a lab if you don't have the correct setup.) The Fixodrop priced so high is because of the demanding chemistry, a fluorinated organic compound is massively expensive to make. Plus to get the thin monolayer it provided low concentration in a powerful solvent like tetrachlorethylene (onedip) which are expensive due to hazards. You are applying a nano layer of teflon like material to ensure oil retention/film integrity. Also the use of high grade fully synthetic oils should reduce the need as they have better film strength and more controlled shear viscosity that reduces unwanted flow. Some additional sources. https://www.awci.com/wp-content/uploads/2019/04/Seitz_StopOil_TECH.pdf https://patents.google.com/patent/EP1927648A1/en For those trying to experiment: Read the following and attempt at your own peril but for the love of god use a organic vapor respirator. Add 1g Steric acid/ 100g pure ethanol to a seal-able glass jar. Warm to 40C in hot water. Once solution is warm, place parts to be coated in parts basket suspended above the solution and re-seal. Place jar into a sonicator filled with hot water. (the prewarming was to prevent high pressure in sealed jar). Placing jar the in a sonicator basket improves vapor production. Let sit for 5-10 minutes. Remove jar from sonicator and remove parts basket in a well ventilated area. Blow dry. Placing a drop of oil on a non-critical area should show if its working. Let sit for 10-15 minutes and see if there is any spreading.1 point
-
From a respected (WOSTEP) authority: low-torque oil on the bushing side, no oil (or extremely light) on the spring side. The spring should be tight enough to gather (hold up) 1-1.5 turns of the fourth wheel when the pallets are removed and you wind the ratchet wheel a few clicks.1 point
-
I had the same dilemma with my cal 565. I ended up putting the tiniest smear of oil (9010) under the spring. I hate those springs - very easy to accidently bend, and then break, trying to get the correct pressure on the pinion. And of course, being Omega, not cheap to replace. Too little pressure and the second hand judders, too much and it kills you amplitude.1 point
.thumb.jpg.cb17a66989f1e796fd4217db2e9ca9df.jpg)