Leaderboard


Popular Content
Showing content with the highest reputation on 01/14/24 in all areas
-
One way of cleaning the screws is by hand. While the movement is being cleaned in the watch cleaning machine. If you have made a note of what goes where, clean the screws in some Ronsonol lighter fluid, you need a small pot with a screw lid, fiberglass scratch brush a pair of tweezers some tissue paper and your bench blower. Its time consuming but you can't go wrong, you can even take a photo or two to help you, You will find after repairing a few complicated movements you will soon learn about the screws. My master told me to learn it this way but without a camera. Hope it helps.3 points
-
It will usually come after you've serviced the same or a similar calibre a few times, but getting close and personal with the screws using a macro lens the first time you see them is a time saver. We are in an unusually conservative industry but I don't mind using modern aids. Call me crazy, but it even happens that I remove screws with the help of Rodico, and use magnifying glasses rather than watchmakers' loupes! Please don't tell anyone! Kalle Slaap published a rather interesting section about screws in one of his videos where he shows how you can determine where a screw should go just based on its appearance. See if I can find it... Yes, here it is! There's certainly more to screws than one might think at first.
 2 points
 -
Laughter is because he doesn't want to tell you the secrets you're not at a high enough level yet.2 points
-
I have a new rule when working on Accutrons: no turning screws without a pair of tweezers guiding the blade of the screwdriver. Because I also have a bad habit of bending pawl fingers... But that said, this could not be a more beautiful sight: I followed Rob Berkavicius's procedures here and it runs smoothly from 1.05 to 1.90v, which is more than enough range for a silver oxide cell. Now to clean up the case and assemble the calendar works!2 points
-
I love my Russian watches. The Vostok Amphibia and Komandirskie... maybe not so much. They are rough but robust. Can take a lot of abuse, unlike my Swiss Army watch which uses a quartz movement and just dies sitting on the shelf. It's like an AK47 compared to a M16.1 point
-
Hi I have several jigs all home made, the simplest one is a sheet of wood with a cut out in and screw the clock to that clamped in a vice or with a heavy wood base. As long as clock tools don’t have the name Bergon on them they are quit cheap, another factor is the word “ vintage”. The price goes up. When ever possible I make my own tools. Spring winders , movement stands. And the like. the stuttering could be due tip a badly adjusted escapement, the depthing wrong , bent tooth, worn pallet. It’s usually referred to as flutter. It Wii be in that region.1 point
-
The case isn't English silver no English hallmark. The movement is probably French or Swiss. It is a cylinder movement, hands are in the style called Spade and the decorative dial is typical of French/Swiss the same goes for the case decoration. Date around 1880's to 1890's1 point
-
That's a Vostok Komandirskie. The problem is that they are worth about $20 to $50. Your friend might get insulted if you offered so little. The lugs are quite close together at 18mm, making the strap seem skinny for a diver's style watch. I use a 22mm strap and cut off 2mm off each side to make it look more proportional.1 point
-
Hi being of the older type a good cast frame, strong. I have two. A lever press and a Robur pattern. Never been beat yet.1 point
-
Hi looks clean enough, most Russian watches are not finely finished but are usually robust, is the watch a worker or not . If it’s been in a drawer for some time it would benefit from a service for sure. Oil dries up and dirt does find a way in also the mainspring if been left fully wound and not able to run most likely dry or mane set. Try it for winding and running for say 24 hrs if you can1 point
-
Look at the essential day 1 lubricants in the resource section.1 point
-
Not familiar with this movement but it looks like the dial has to be removed by removing the the dial pins.1 point
-
I checked the resistance of the coil and it turns out I didn't cut the wire, somehow. I applied a tiny dot of epoxy over the scratch to seal it from the elements.1 point
-
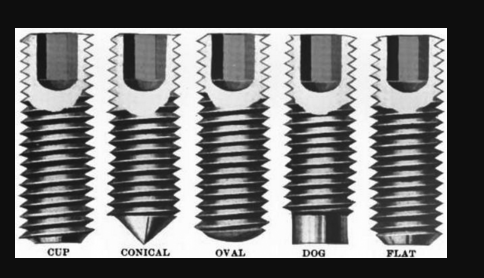
I use the basic, cheap hand removers although polished and thinned, of course with plastic to protect the dial. As to screwdrivers, you will likely be modifying them as you go to fit perfectly, we all do, sometimes several times in the one movement. No one size fits all, some folks have bought pretty cheap screwdrivers then put good quality tips in them and are happy, YMMV. There is no perfect screwdriver, I might love one brand but the other folks here might hate them, but even a bad screwdriver with a good blade will be a world of difference. Tom P.S. Even buying the most expensive tools you will likely still have to fettle them in some way1 point
-
The setting lever is upside down on the picture.1 point
-
Very interesting info, thanks a lot ! Now, looking at all the individual screws while cleaning them, I noticed that the 1980's Highly Reputable "watch-maker" didn't only sheared off a 2544 screw, but also changed one (probably lost) bridge screw (2351) out for a "look-alike". For sure, together with the experience I've had with the "official" service of my Rolex, I'm now fully done with those "in house" watch-makers. I'm sure there are some good, but finding them however, could be very costly.1 point
-
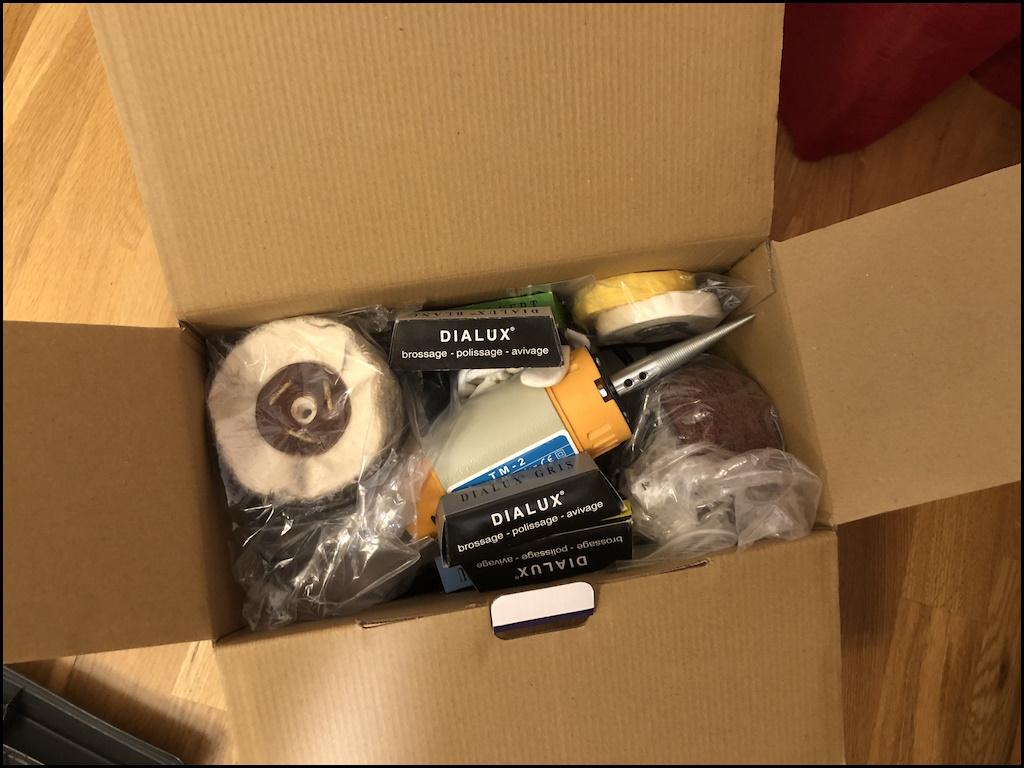
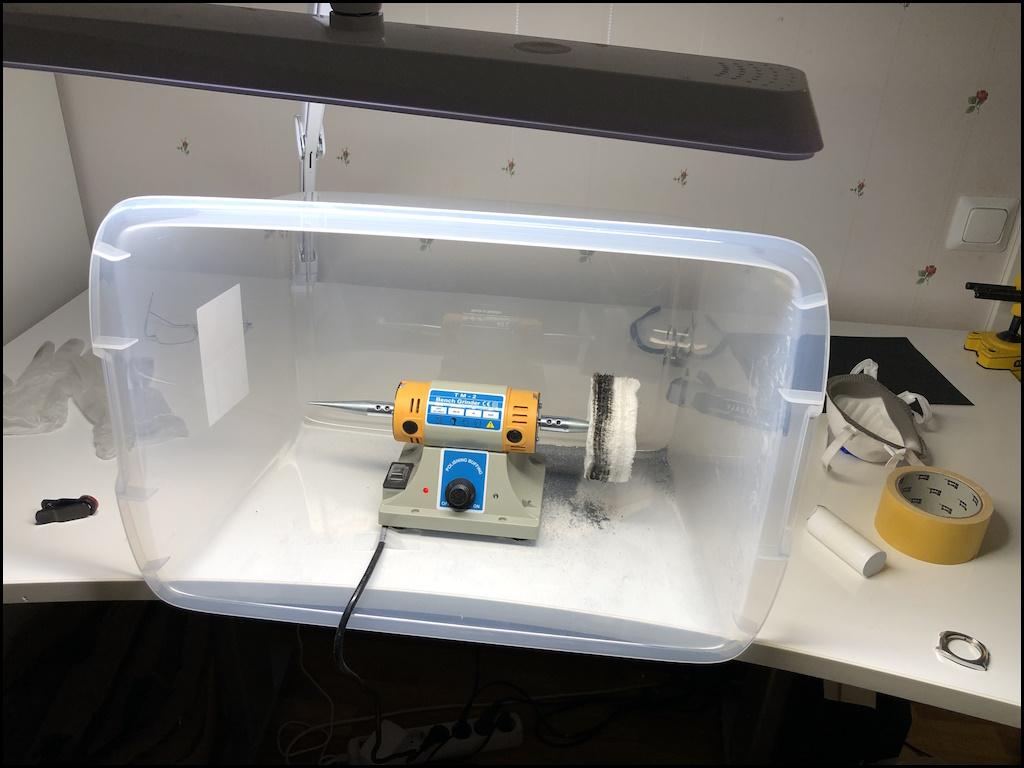
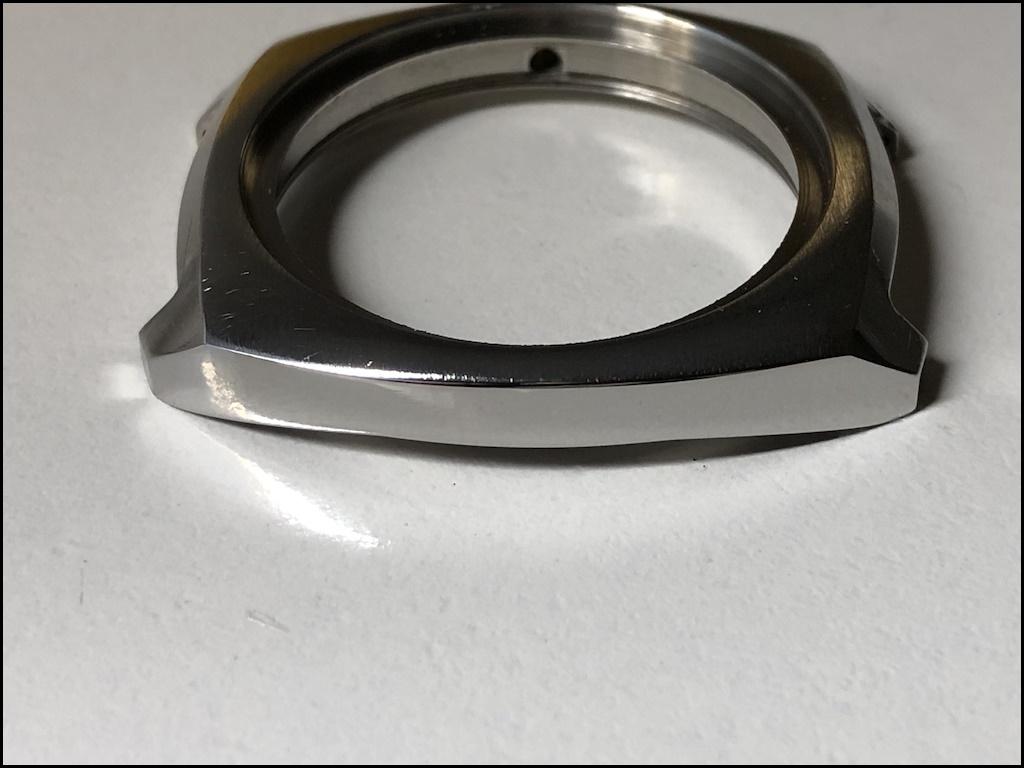
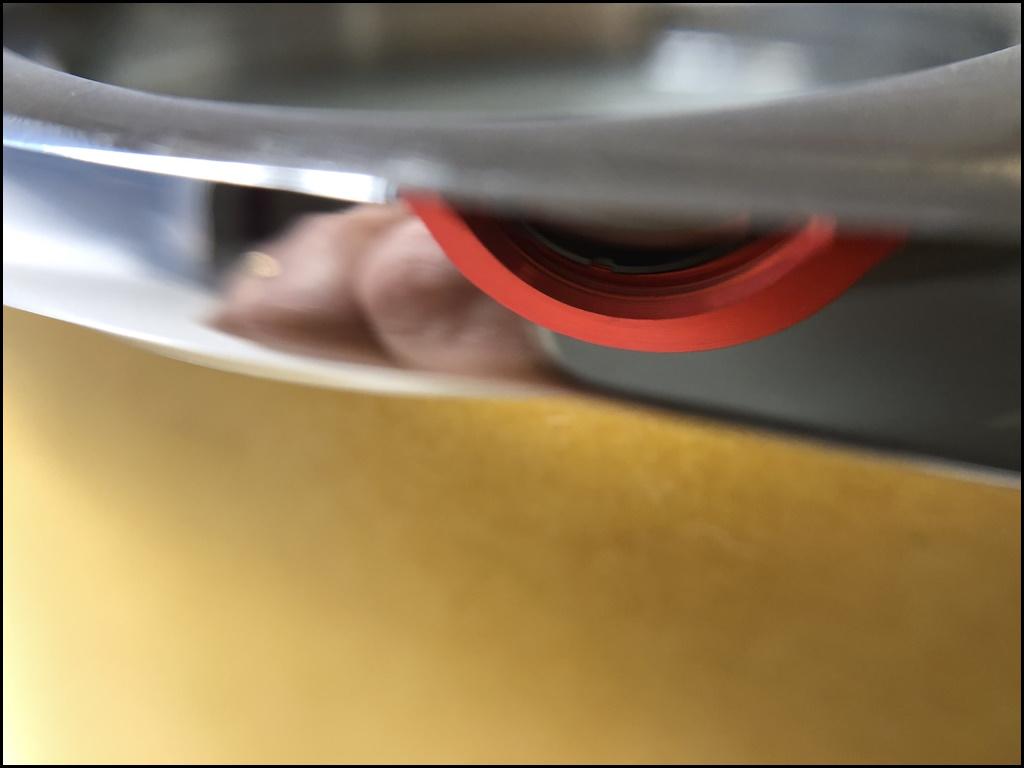
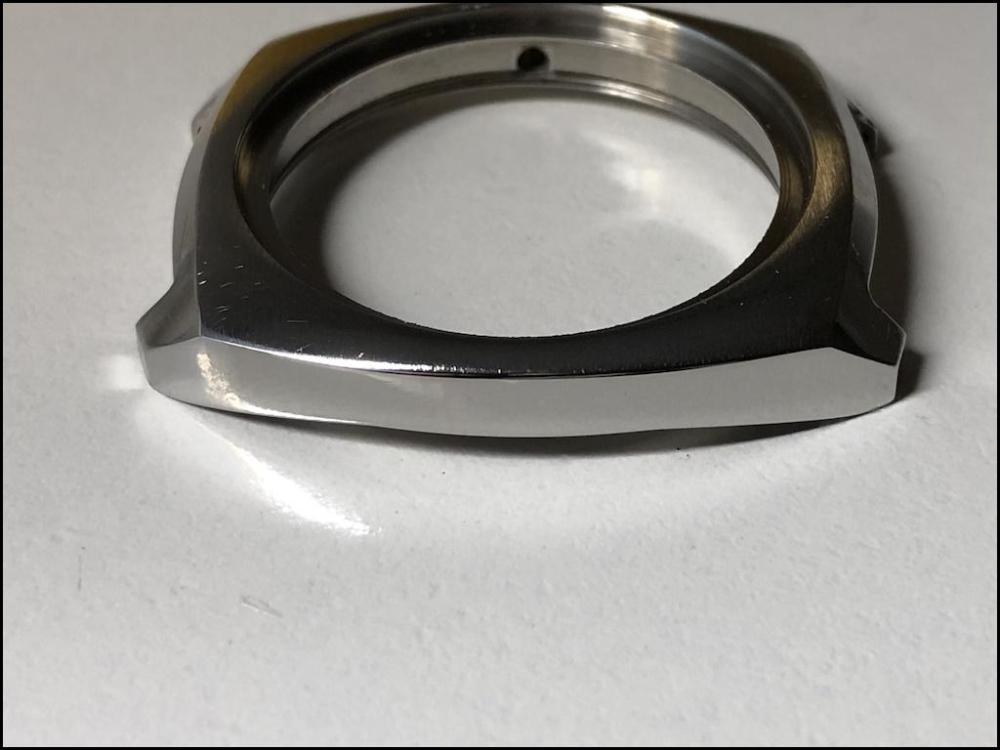
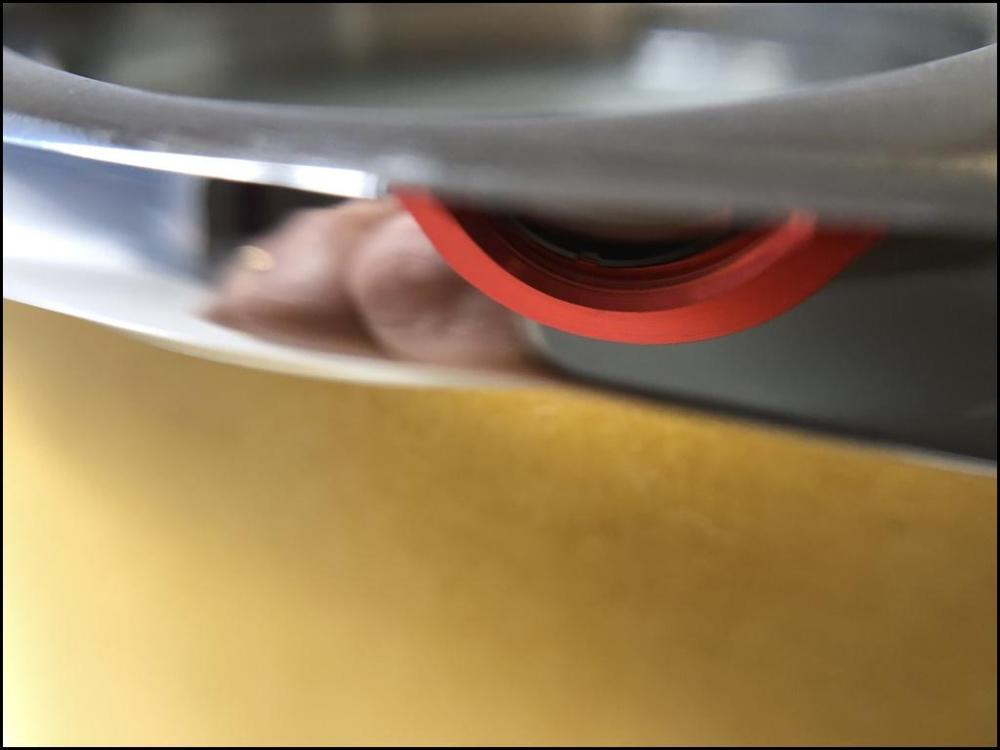
I have now received most of what I ordered from Cousins to start polishing. I'm still missing Kapton tape to mask off already high-polished sections, but it's been ordered and will probably arrive in a few days. As a first attempt, I only tried to polish the left side of the case which should be mirror-polished. I ordered three polishing wheels: One from the 2nd stage (4" x 2" Aurelia (Calico) 112 fold), one from the 3rd stage (4" x 2" Madapolam, 120 fold, UK), and one from the 4th stage (4" x 2" Felpato, 60 fold). I started with grey Dialux along with the wheel from the 2nd stage and got exactly the result advertised on Cousins' site, i.e. all superficial scratch marks were quickly buffed away. However, deeper pits cannot be counted on to disappear. I tried for a long time to polish off some small deep pits but it was hopeless. In the end, I had to get out my wet sandpapers and my mini sanding block, which meant a lot of work. There was so much work that I finally started cramping my fingers. Maybe orange Dialux along with a 1st stage wheel could work to remove some potholes, but I doubt it. Unfortunately, I don't think you can eliminate wet sandpaper from the process. I have ordered a sanding file and a square sandpaper holder from Cousins. Hopefully, that will ease the process. When I had finished sanding, I polished again with grey Dialux and the same 2nd stage wheel. In the next step, I switched to the 3rd stage wheel along with blue Dialux and got an even nicer finish but not perfect. Still, I think most people would be happy with this finish. Finally, I switched to the 4th stage wheel along with Polinoxx polishing compound and I think I got a more than acceptable result if not perfect. I don't think my result would be approved by Jaeger-LeCoultre but at least my wife thought it looked very nice, and that's always something! I have to say that I benefited a lot from Kalle Slaap's video "How to polish your vintage watches - Part 4 Practical Tips". Here are some pictures: Fortunately, the polisher is so small that it fits together with most of the accessories in the same box as it was delivered. Good for me as I don't have a workshop and have to pack the stuff away when I'm done. When I first unpacked the machine, I was sceptical that such a small machine would really work efficiently enough, but that concern was completely put to shame. I have to say it works amazingly well and seems very strong, quiet and efficient, so I'm very happy with my choice of machine. Many thanks for the tip @Waggy As you can see, it's a set inspired by Waggy's set (again, many thanks!) It would have been handy if my plastic box had been 15 centimetres wider, but I was impatient and didn't go to IKEA, but instead found this plastic box in a store (Jula) nearby for just £4, so it will do for now. I'm also very happy that I chose the wider two-inch wheels so I can work the way Kalle Slaap suggests in the video I linked. Here is a picture of the final result, as I said, it is only the left side of the housing that I polished. The rest remains. Another picture of the final result that better shows the mirror shine. If you look at the right side lug, I missed a particularly deep pit. However, it is now so small that I don't want to start sanding again. When you work with sandpaper, the initial rough scratches from the sandpaper hide many pits that you then don't discover until you get to the finer sandpaper and then you just have to start over. So it's worth noting where the pits are before you start so you have a chance to inspect these places extra carefully before you go ahead with the sanding. I'm only including this picture because I think it's funny to the extent that you can see part of the red macro lens. Many thanks to all of you for your input, your pictures and your tips! Incredibly valuable for me and hopefully for many others now and in the future.


 1 point
 -
Hi there, my background is non-technical. When I was about 20 years old I ruined a wristwatch given to me on my 18th birthday due to a complete lack of knowledge and skill paired with plenty of youthful arrogance and overbearingness. Sigh! Ever since then I have always wanted to make good on that, just never had the time. Life has fast-forwarded to 65 and I will soon have some time at disposal (I hope). I have found that the hobby holds a fascination for me and I sincerely want to give it a try. Please consider me a newbie.1 point
-
He tried to lead me off the scent " its all about charity work and looking after each other Richard " he said . yeah ok1 point
-
Blacklab hasn’t been here in almost a year so I’ll try to help stem 351-892 0.8mm tap 11 https://www.cousinsuk.com/product/stems-from-seiko-part-3514 it’s a good bit down the page i can’t find anything for an integrated crown and stem, you should be able to find an alternative crown using the stem tap and looking for a close fit. Tom1 point
-
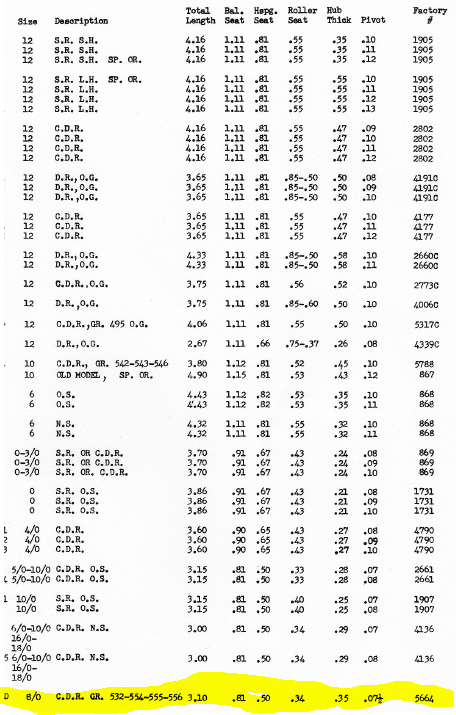
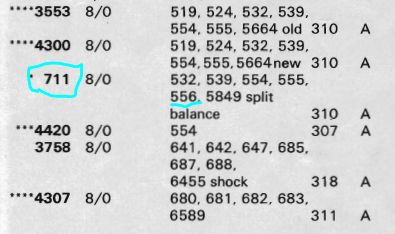
I'm curious how the balance staff damages your jewels? When replacing a balance staffs I have something which we could call a golden rule. That is measured the old staff write all the dimensions down. You need those dimensions when purchasing a new staff to make sure you get the right one. Then you still need to dimensions when the new staff comes to verify that all of its dimensions agree with the old staff. This way you'll hopefully avoid unpleasant situations so here's a page that lists balance staff sizes unfortunately yours is at the very bottom of the page but it is readable Now the unfortunate problem of this is I have to look these up for you and figure out what size they areFortunately the cross reference catalog and it looks like the 711 perhaps Then going to cousins looking up the second number cousins makes an interesting suggestion of Balance Staff (DCN722), Illinois 66-12? I don't quite think that's right at all let's see what it thinks about the other number. For the number of S711 Cousins has no idea what that is but I'm going to assume it's the same as the 711 I have in the book Now because everybody uses different letters for different things found their catalog image for dimensions location I did copy and paste my dimensions up above below the replacement because it makes it easier to look at things oh and of course the listing order is not always the same even letter representations of which dimension is which is not always the same. Plus we don't have your measurements of the original and the replacement just in case there are variations which there almost always are. So the length 3.10 agrees for both of them balance seat original 0.81 versus 0.82 Should be close enough hopefully. Hairspring seat 50 for both at good. Roller seat 0.34 versus replacement of 0.33 Now we run into the minor problem of replacement has dimensions that my source doesn't list in my source has dimensions that the replacement doesn't list but overall the staff looks very very promising. Now I get to make a guess. Replacement does not list the diameter of the pivots. The original is 7 1/2 yours is probably a bigger which would be my guess of you trying to show a big pivot into a small hole in your break the jewel that would be my guess is that's my interpretation of what you are trying to convey. So hopefully I've interpret your question correctly?

 1 point
 -
Lol, 2 of my customers are free Masons, one of them is a master of the lodge. I asked him about the cloak and dagger stuff, he just laughed1 point
-
Have you forgotten the secret handshake? Hehe.1 point
-
I have found this way of being upclose and personal with screws has helped me to recognise their use .1 point
-
It's good, leave it as it is. If you are not experienced, there is a chance that you may screw up for a very, very, very (did I mention VERY) minimal gain. The watch doesn't care if it runs a BE of 1.1 or 0.8 or 0.0ms and in real life you will never notice the difference in timekeeping.1 point
-
I contacted them by email, trying to re-up, and it went nowhere, several times. Mind you, I was doing Ebay transactions before the 21st century- not for lack of web savvy on my part.1 point
-
I believe were in the safe zone that means you don't have to hide in the corner. This is the friendly where everything is acceptable. If that watch was cheap enough it would be fine it would have some minor challenges though but anything of vintage is going to have challenges. the particular bridge style I would prefer something in the 16 size range would be fine. I'm just not a fan of Waltham watches for the most part definitely not a fan of their mainspring barrels. So as you're in the safe zone you can't go hide in the corner well you can but not in the safe zone all answers are welcome here. Okay to be technically correct all polite answers are welcome here which is what your answer is so you're fine.1 point
-
I see where you are coming from I made a bad mistake. But a bridge movement is a good suggestion. I will now go and hide in the corner.1 point
-
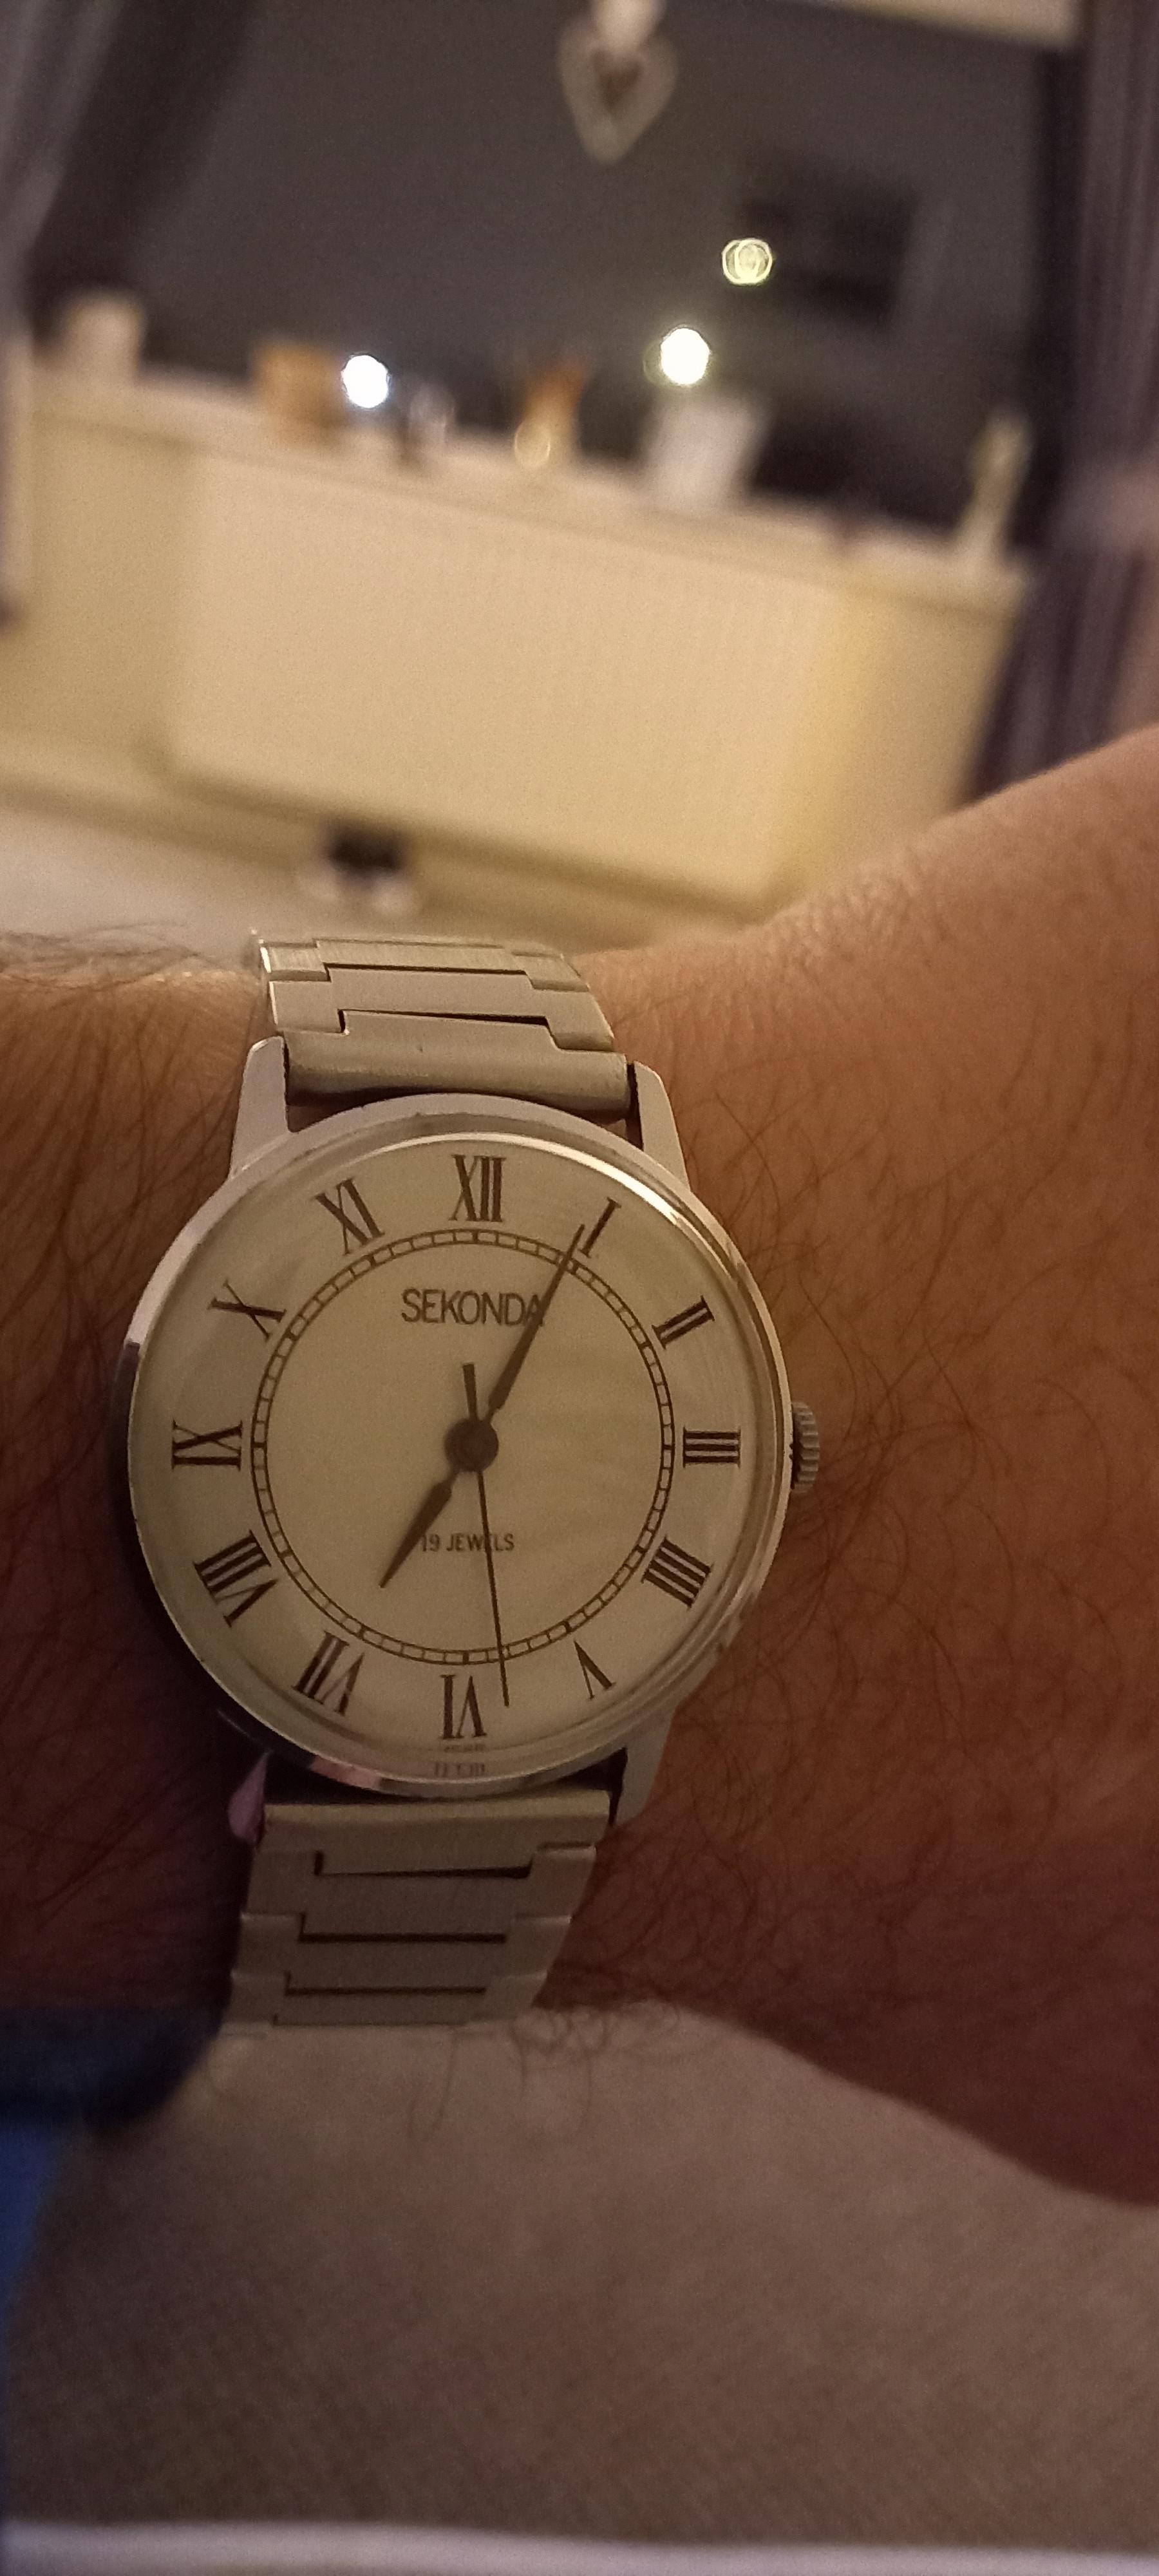
This Sekonda is the first watch i ever took the back off to look inside and see what was there, coincidentally that moment was 50 years before i actually repaired it 30 months ago.At that young age of 5 or 6 i remember looking at the jewels and wondering why they were inside and not outside where they could be seen. It was also the first watch i repaired and made tick after 50 years of not running, inside parts of it now look like it was attacked by a mad axeman. Not far off the mark as i used a dremmel to cut out the rusted solid stem. It was also the first watch i almost ruined by cleaning in soapy water as suggested by a youtuber and using poor quality oils, six weeks later it stopped working. After 2 more repairs ,a few replacement parts it has now been working consistently for 2 years with good accuracy and a full power reserve of 48 hours. This was my grandfather's watch. So all this was the complete opposite of what is usually suggested to start with. I don't disagree with starting to learn on a new fully working unsentimental watch, it just might not be for everyone, maybe only 99% of people . Should i have started with a new working watch to avoid or limit those first mistakes , would i have learnt as much to date by doing that and sticking to more recent less battered and abused watches ? Definitely not, i believe the watches i chose to try fixing has forced me to learn how to. Maybe thats just how i figure stuff out, around 50 watches repaired and half a dozen casulties later i feel i did ok with my method.
 1 point
 -
I know the ship sailed, but for the future when you or anyone else is looking for the same thing, you just gotta know what to look for a little. My preferences are: - European (usually Swiss, occasionally French, German, English, etc.) movement, fully jeweled. That means it's decent enough quality that it'll be serviceable. I'm sure a lot of Japanese watches would qualify as well, but I'm not as familiar with them. There certainly are a lot that come up though, and mostly with all stainless cases (see third point). - Look closely at photos of hair spring and/or make sure the second hand moves around between photos (sometimes there are no movement photos). Pay attention to details like screws/lack of screws. Lots of borked up screws means someone was in there that shouldn't have been. Empty screw holes, ditto. - I like to try to find watches with fully stainless cases. That weeds out a lot of junk right there, and when you're done you stand a chance of it looking presentable. You end up sifting through a lot of junk to find the gems. That's part of the fun of it. Grab a beer, put on a good record/tv show/whatever, and go for a nice evening scroll.1 point
-
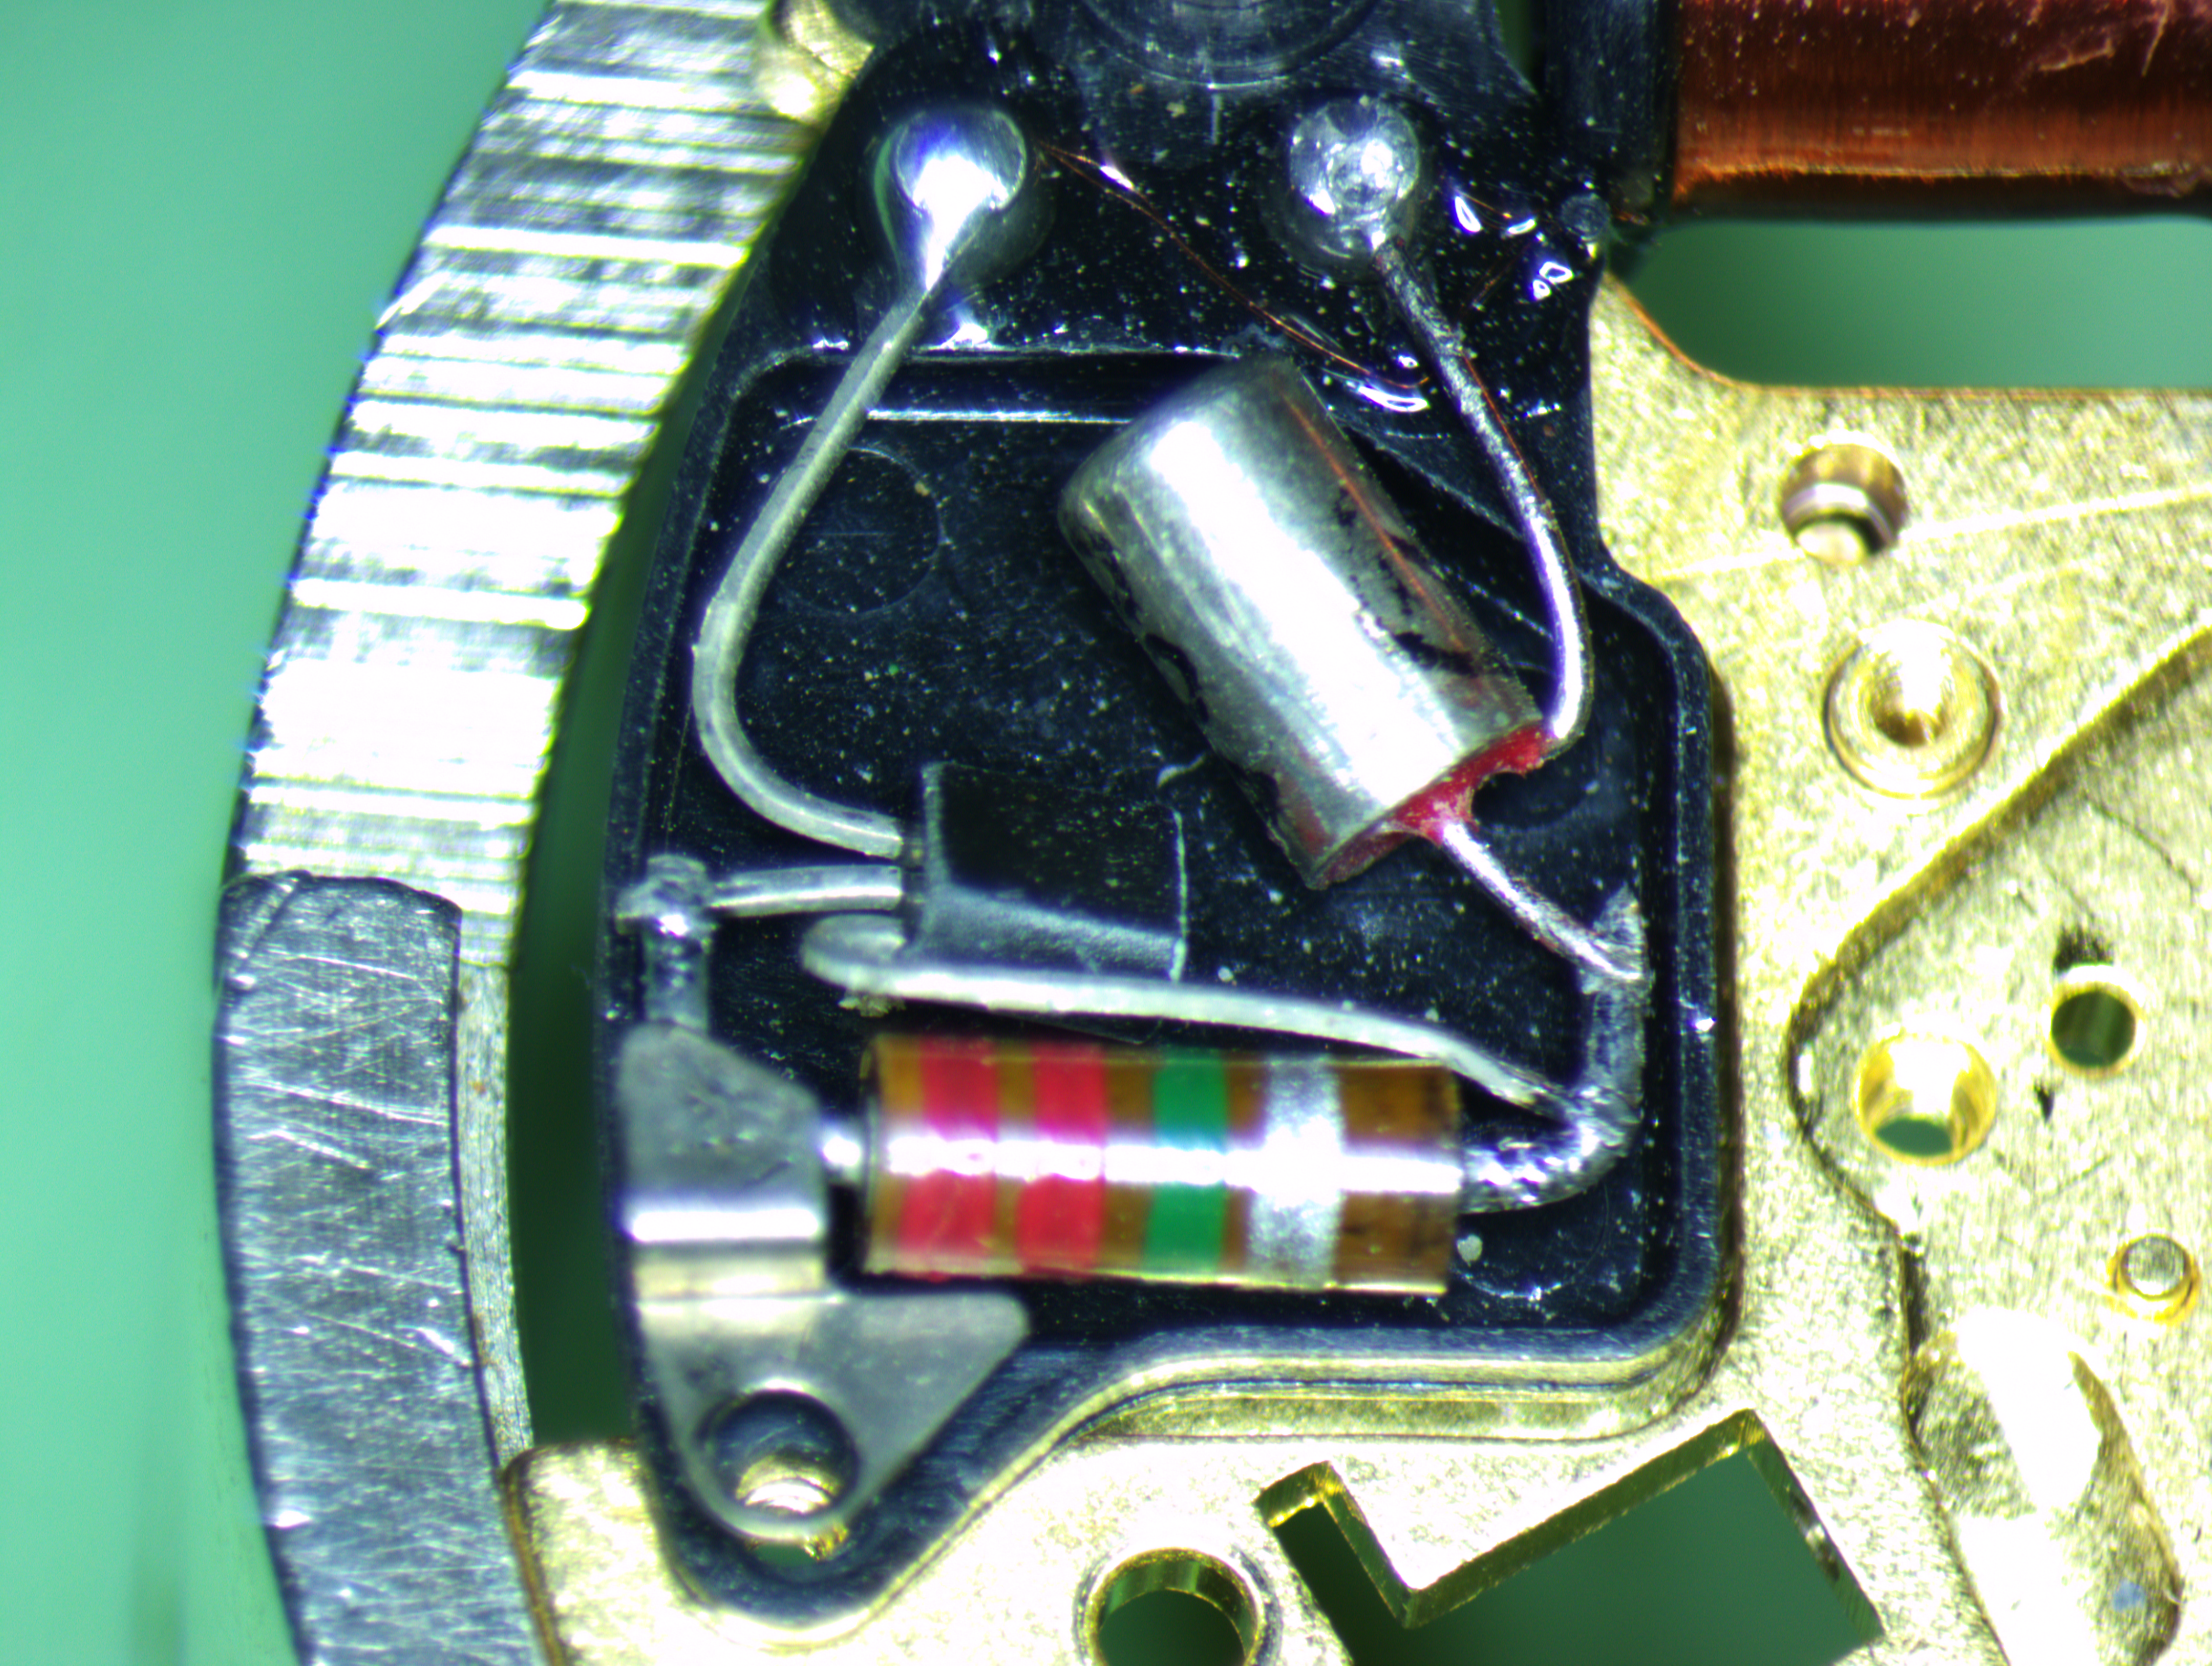
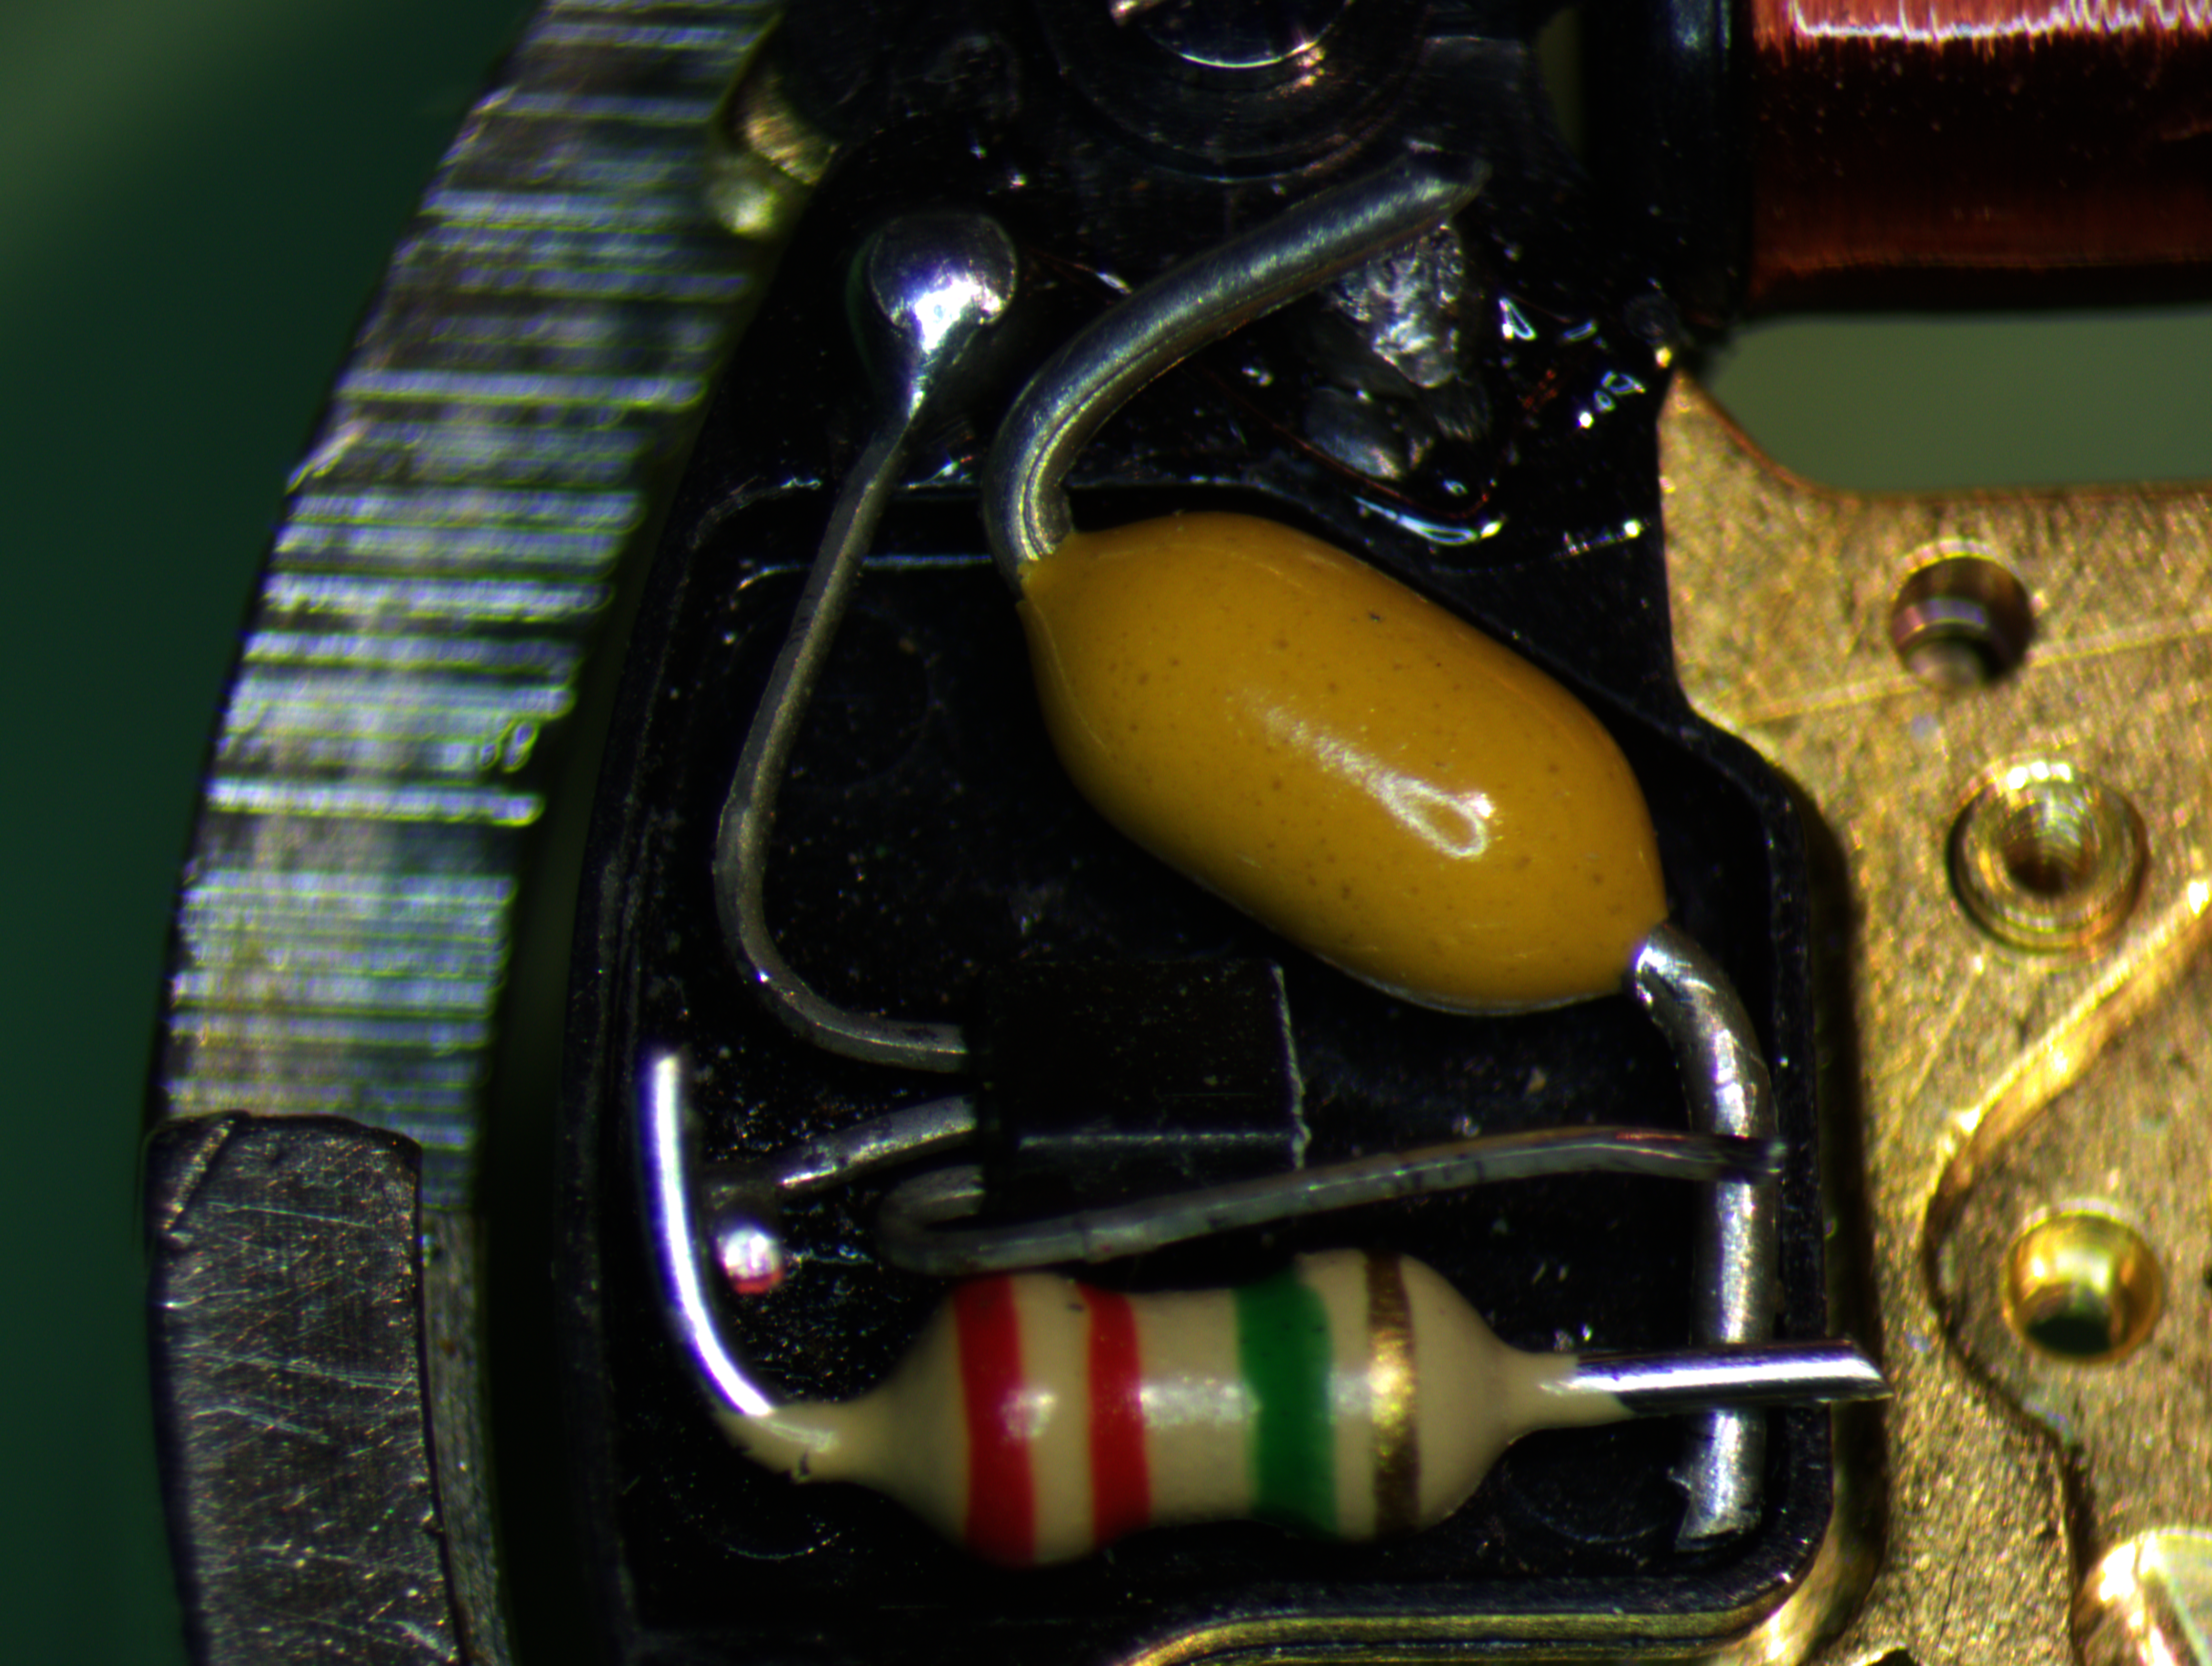
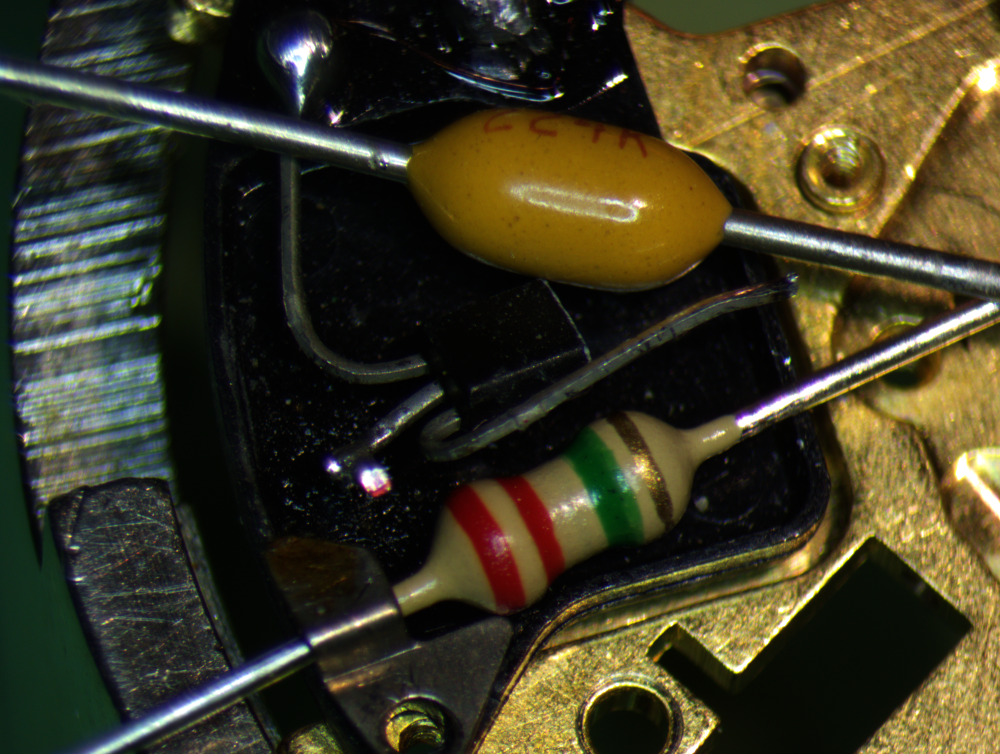
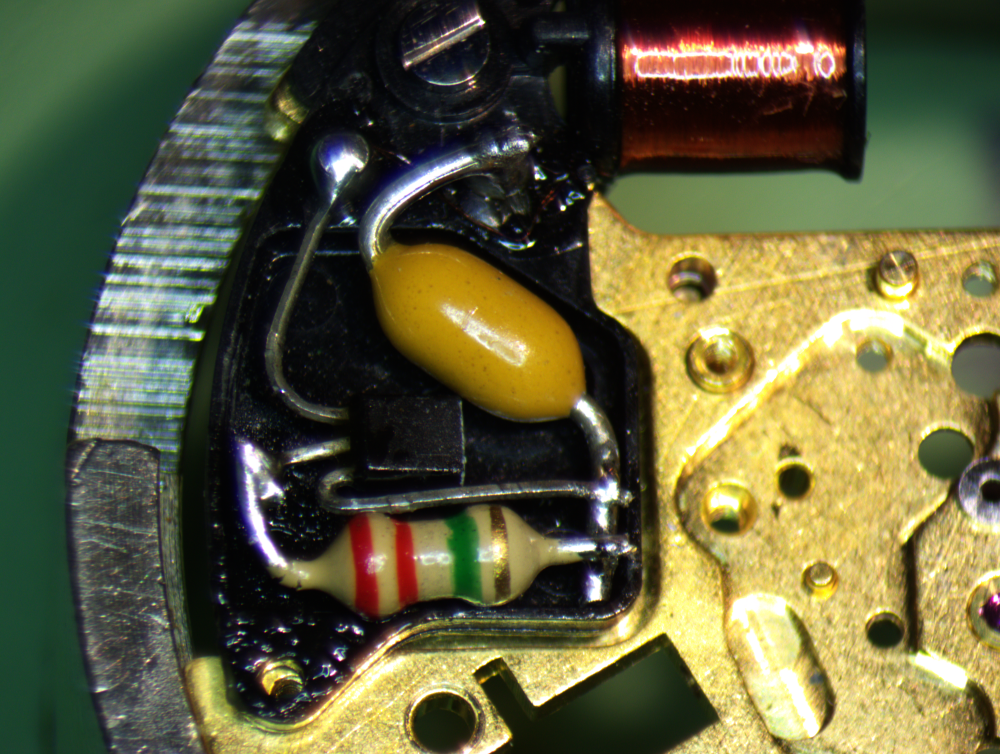
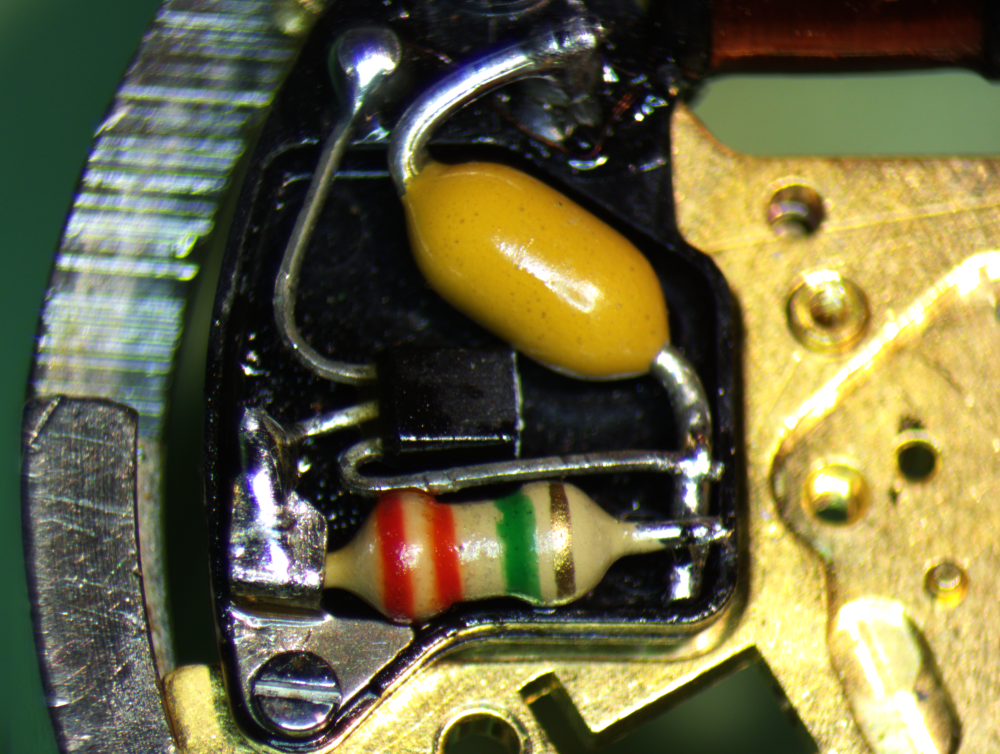
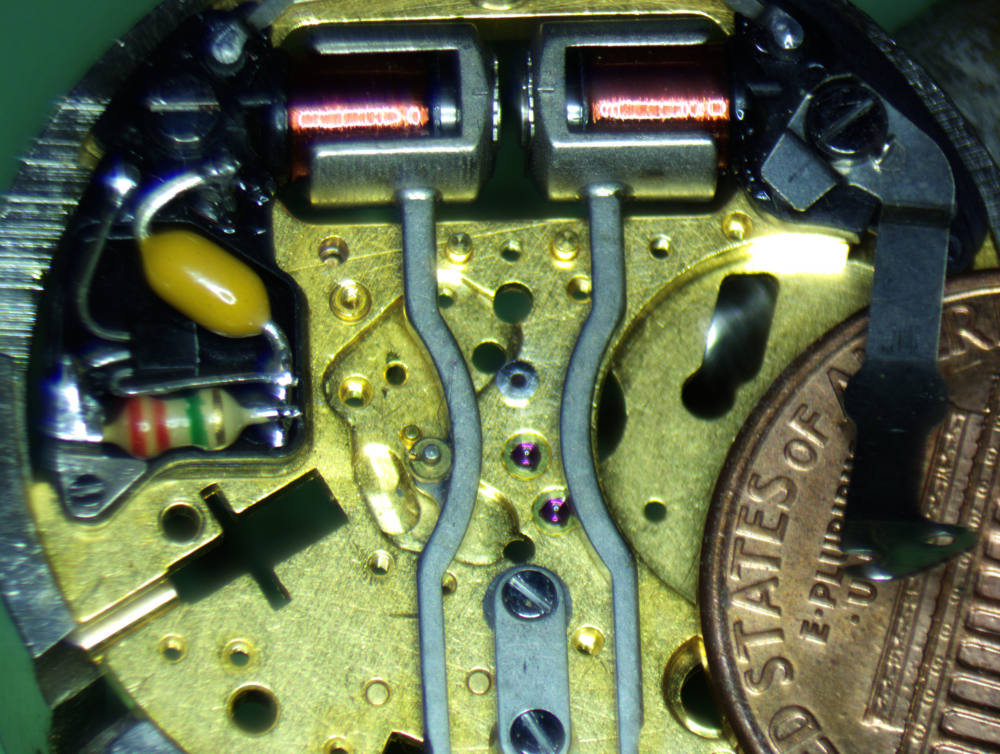
It's pretty wonderful. Heats up extremely quickly, and tip changes are a breeze. I'm using an 0.5mm round point tip. Here's the patient before I started: I managed to get the cap unsoldered, but the connection from the transistor to the resistor refuses to come apart. I decided to just snip it and stop putting heat into the transistor, which I'm reusing. Here I laid out the new components. Snipped the leads and bent them into shape. I tried to mimic the old layout, but since there's room in here I may rearrange things to give me more working room around that lug up top. I'm open to suggestions, here! All right, I'm pretty proud of this. Now to see if I can get that ground strap soldered in. Well, maybe not the prettiest, but hopefully functional. Time to clean it up and test. OH MY GOD IT WORKED! A little tap on the side and the fork started right up at 1.35 volts. Huzzah for tiny soldering! And one more picture in situ. Standard calibrated penny for scale.


 1 point
 -
https://17jewels.info/movements/f/fhf/fhf-96-st/1 point
-
A 3 stage polishing process is usually sufficient. After grinding with silicon carbide, diamond or hand filing, I usually use an abrasive rubber wheel to get a satin finish. I got mine from a hardware store, quite cheap, no brand, no specs. But it works. The closest thing I could find on AliExpress is this. 200*25*18mm Nylon Unitized Polishing Wheel Bench Grinder Tools for Stainless Steel Grinding https://a.aliexpress.com/_mrYAfdO Then I use a hard felt wheel with a green polishing compound. Again from a hardware store, no brand, no specs. Lasts forever, been using it for at least 10 years. Finally, I buff it with a muslin wheel mop with a blue compound. You guessed it, hardware store, no name, no specs.1 point
-
Like most of us, I look for perfection and oiling cap jewels with a regular oiler take a lot of practice and patience. I found myself having to reclean and re-oil over and over before I could approve my work. So, I decided to invest in an automatic oiler for this purpose and although very expensive I think it was worth every penny, and I was so happy about it that I decided to make a video about it. Please bear with me though as this was my very first attempt at video editing.1 point
-
Do the original hands fit the new movement? If so the parts you need are: Seconds: 3AA125F3ANG Hour: 12P93BGH Minute: 12P93BGM I believe these are correct & Cousins have them but you may need to double check. Also the movement inside was not the original.1 point