Leaderboard


Popular Content
Showing content with the highest reputation on 01/16/24 in all areas
-
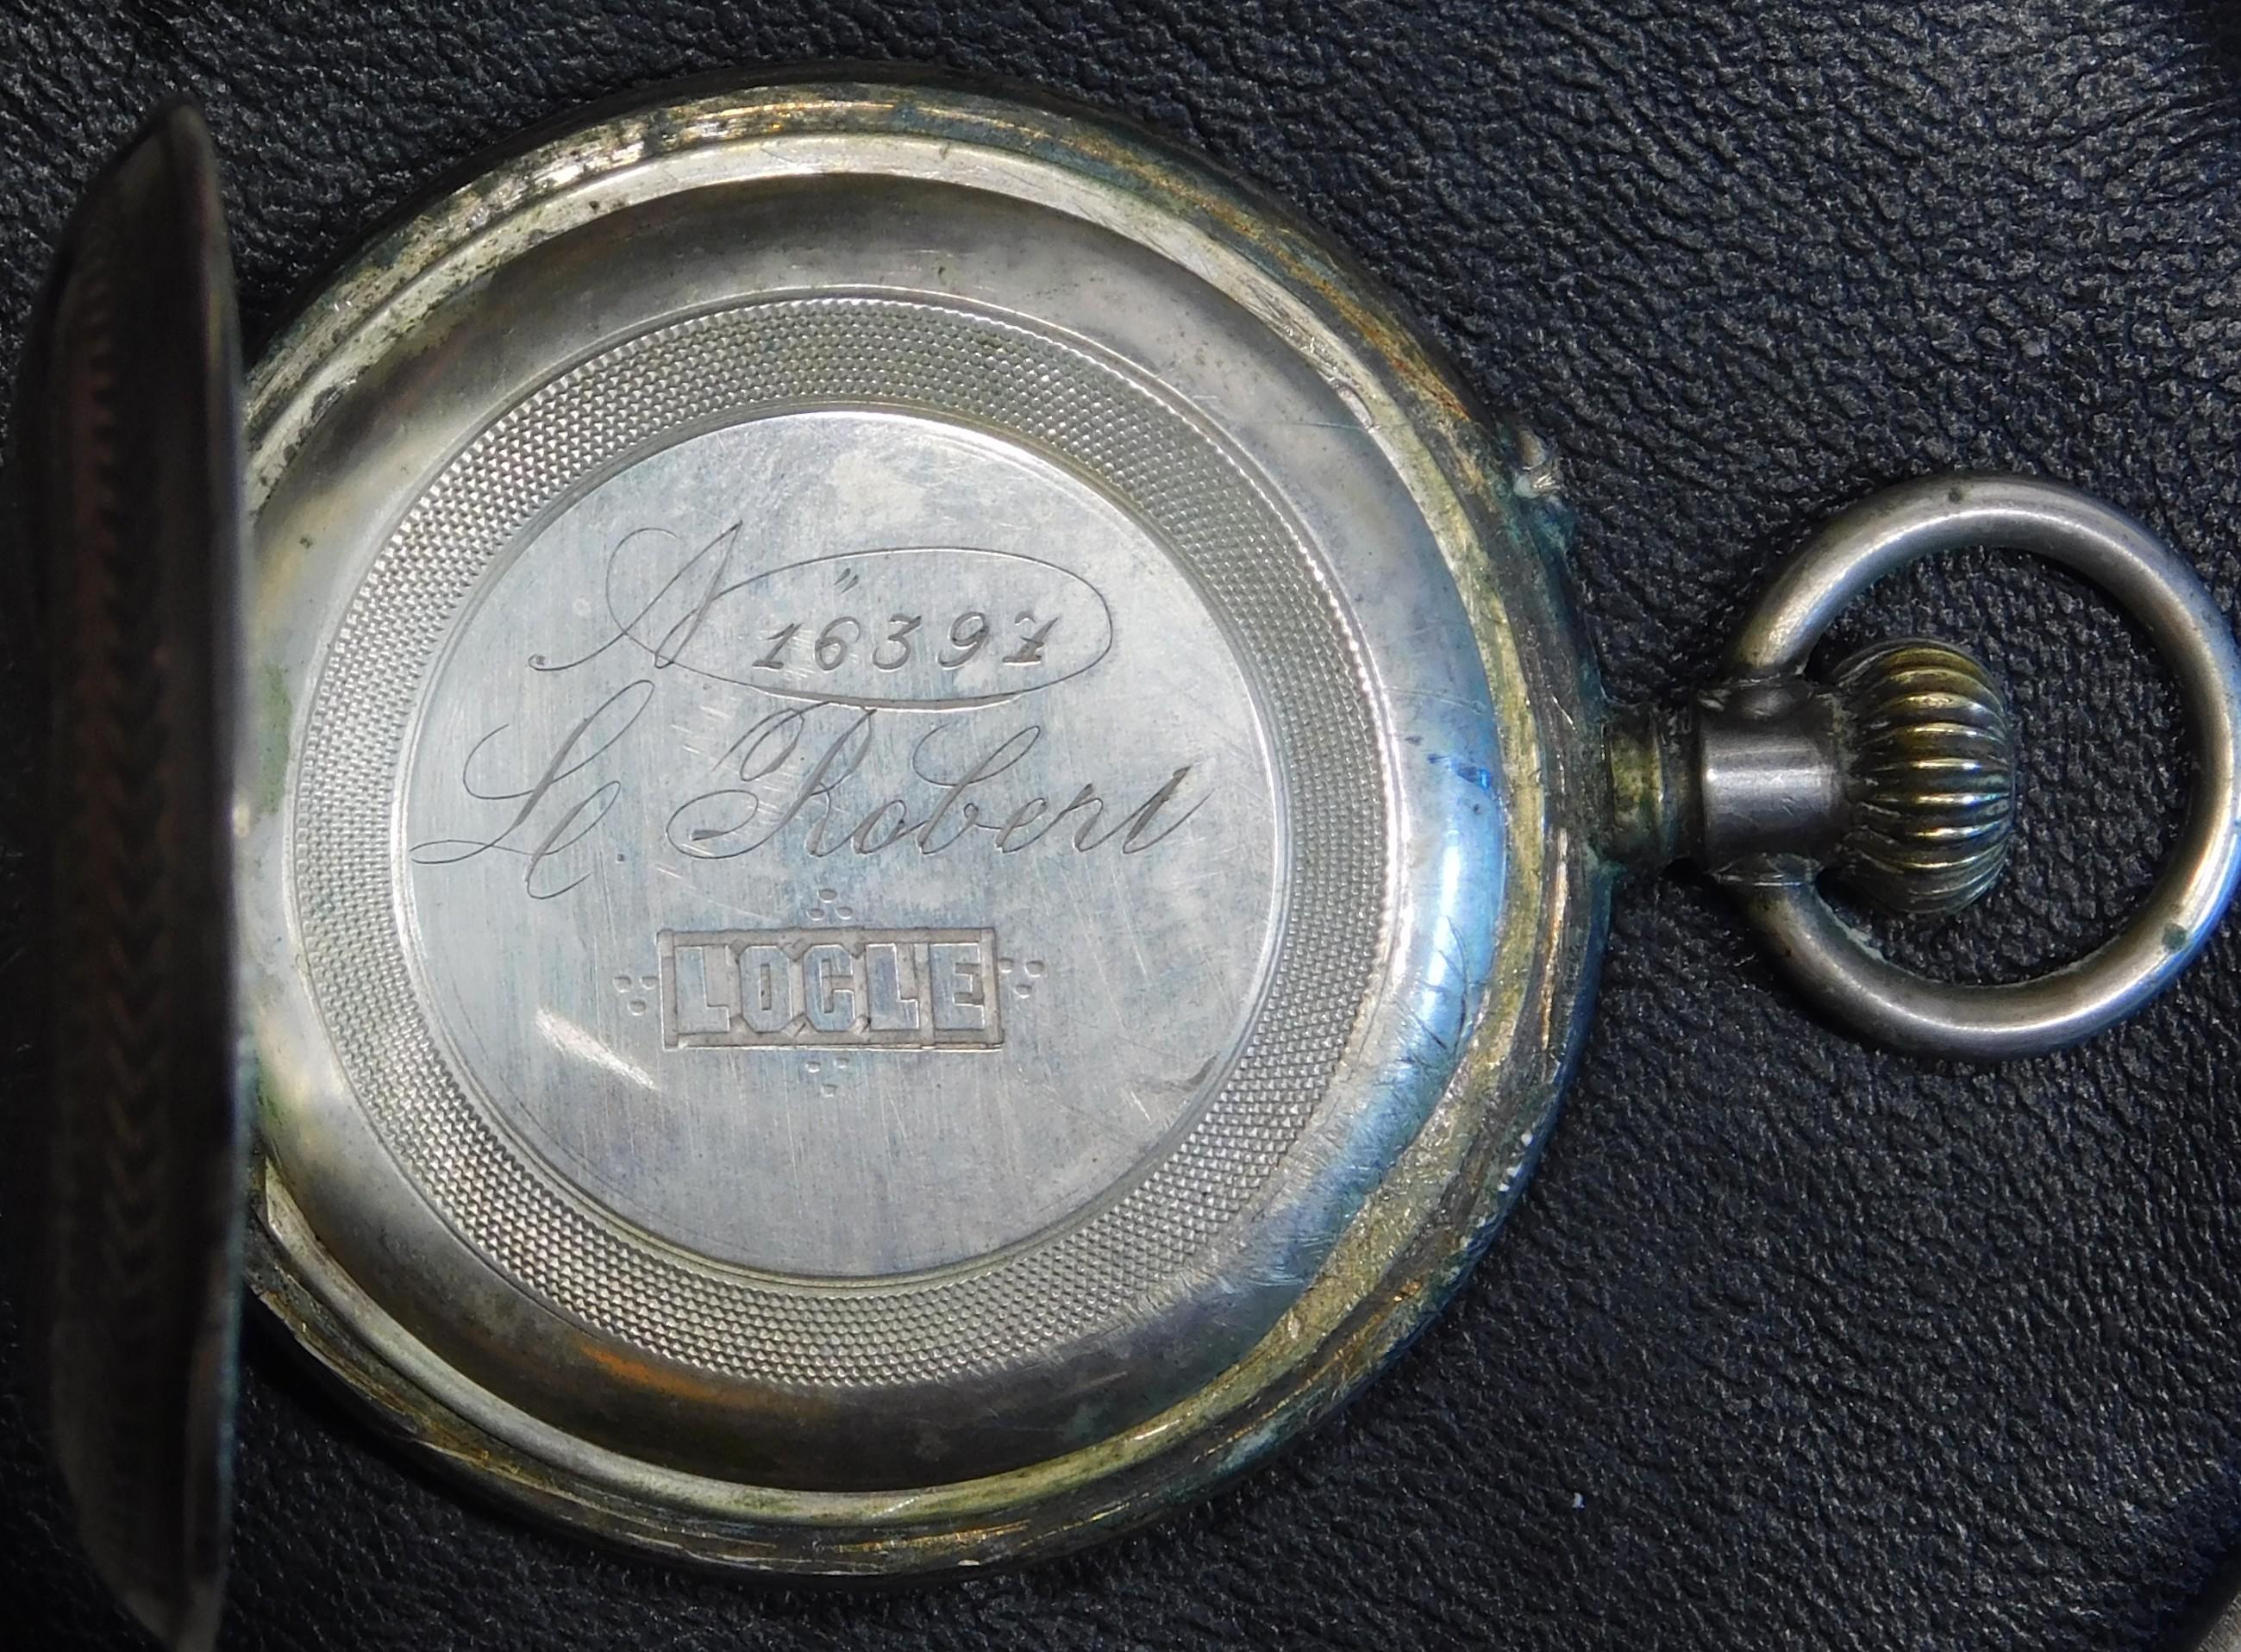
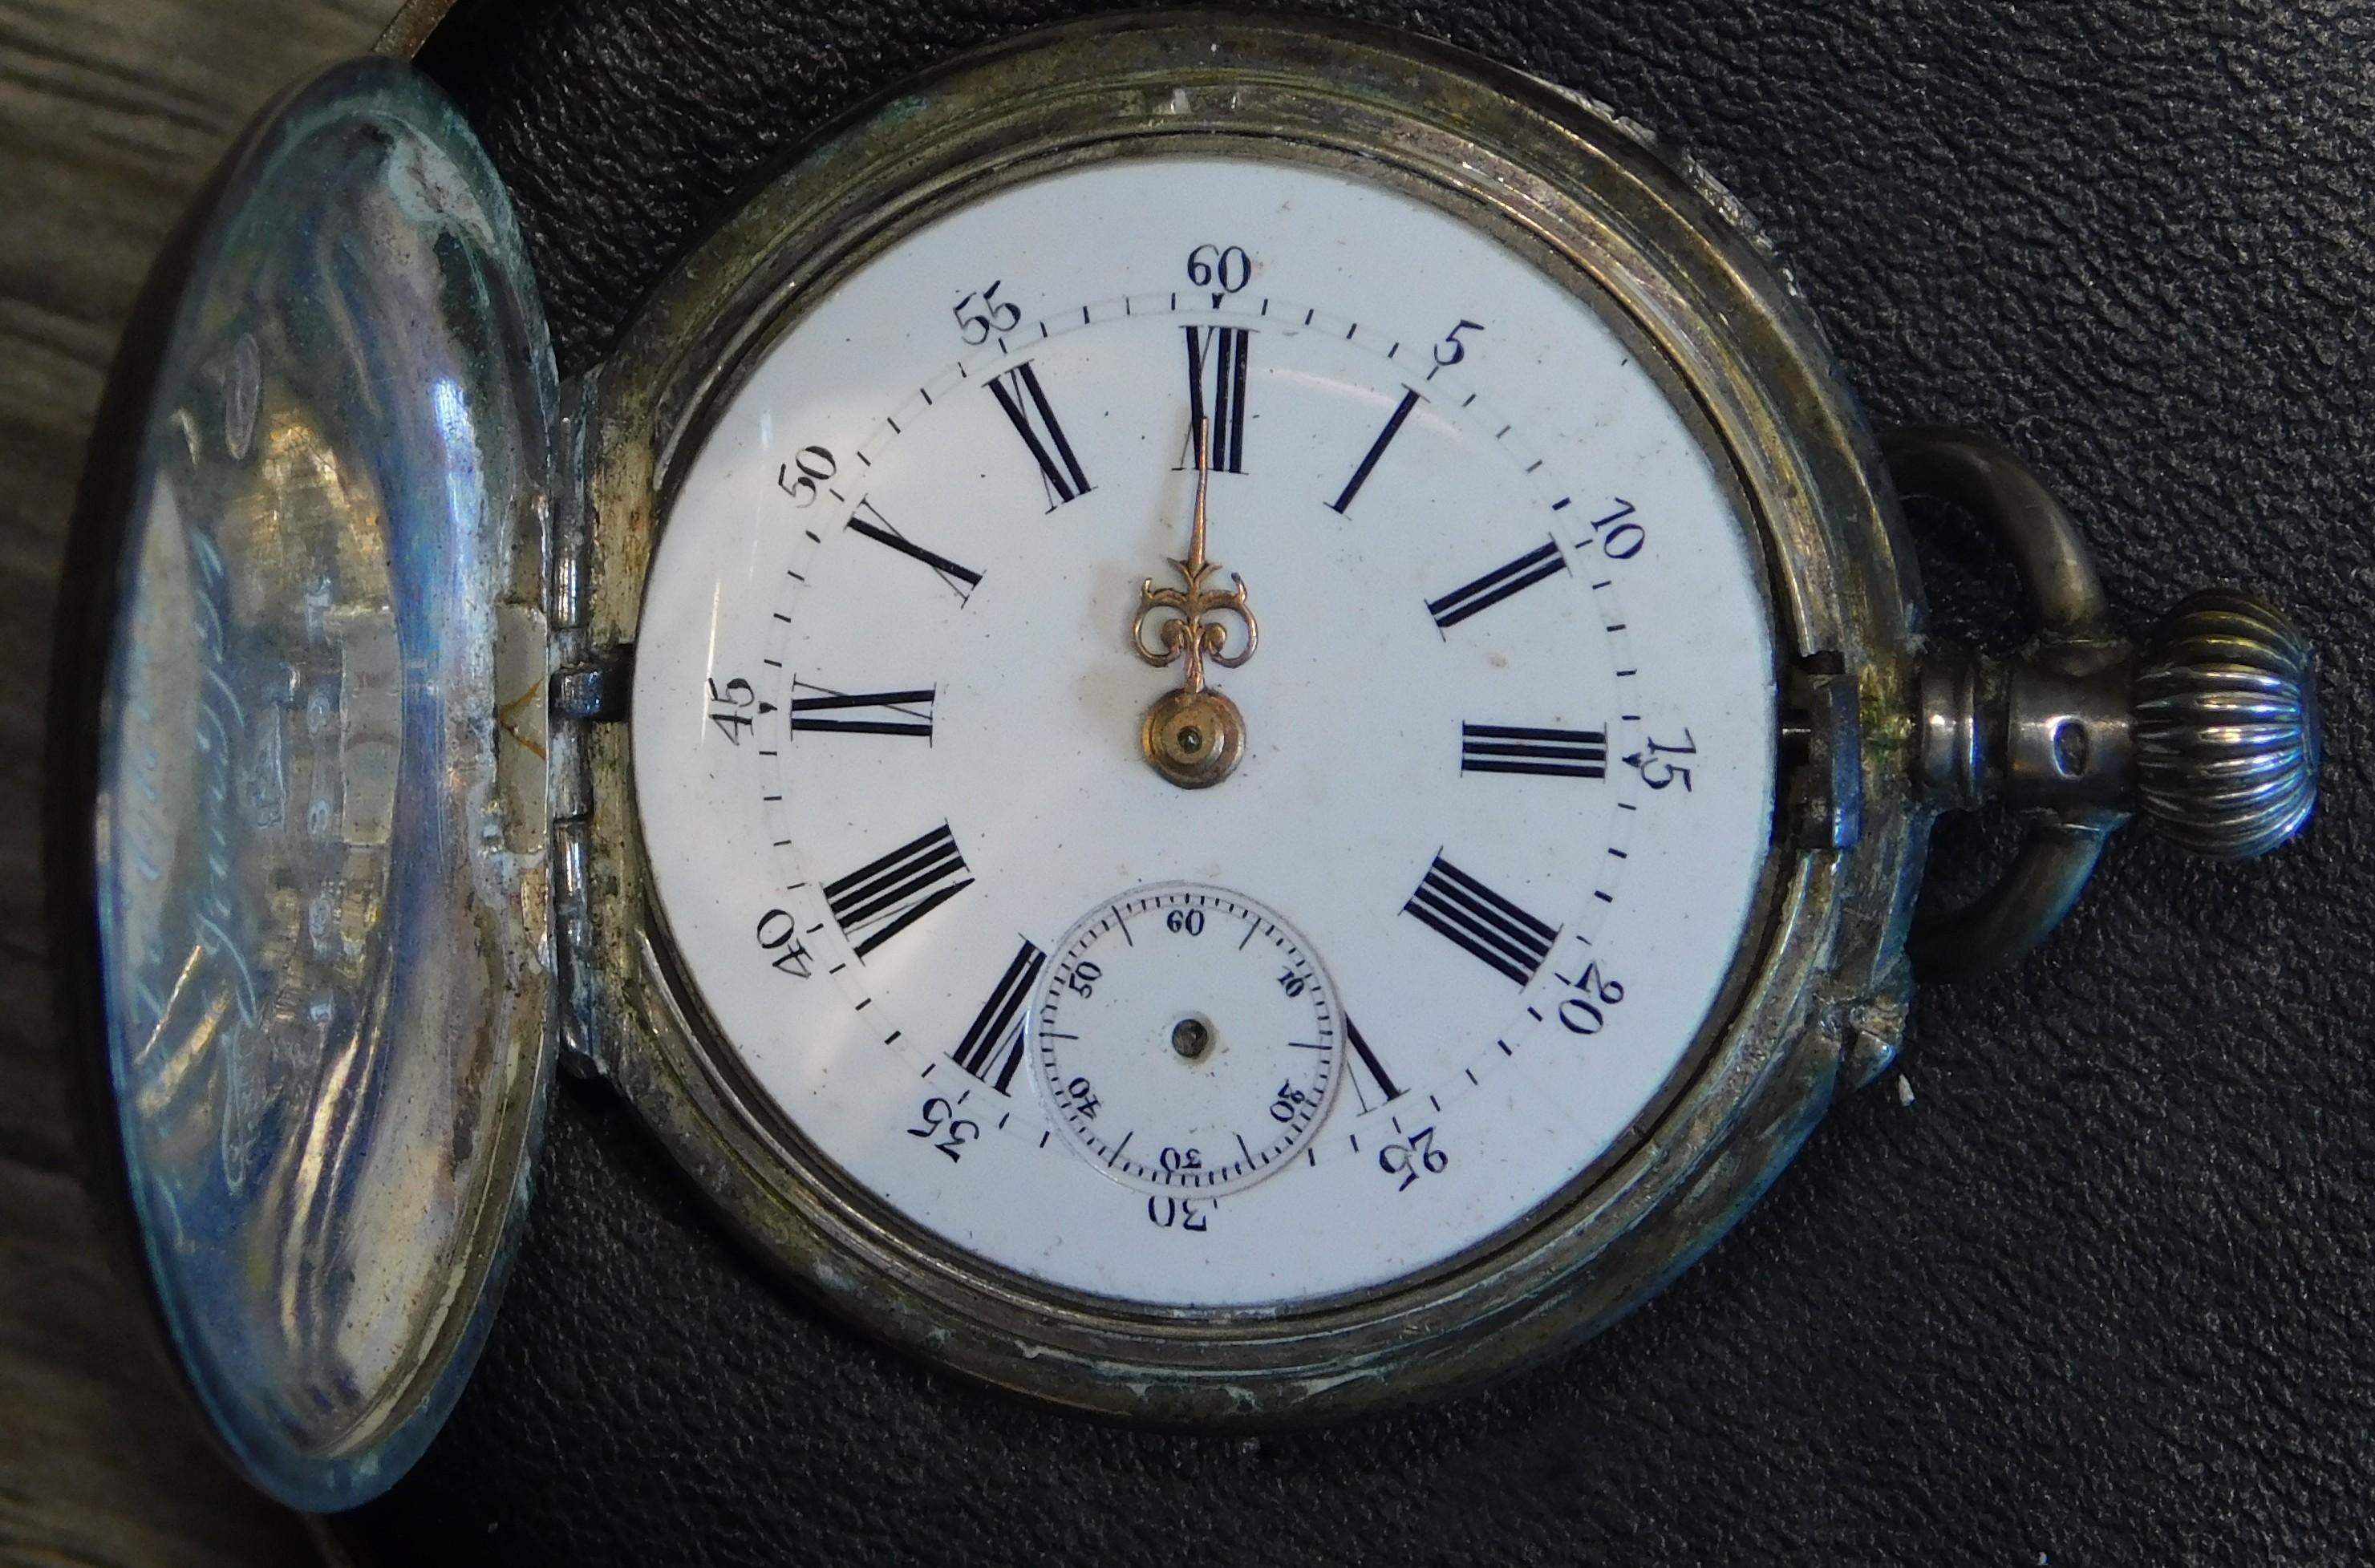
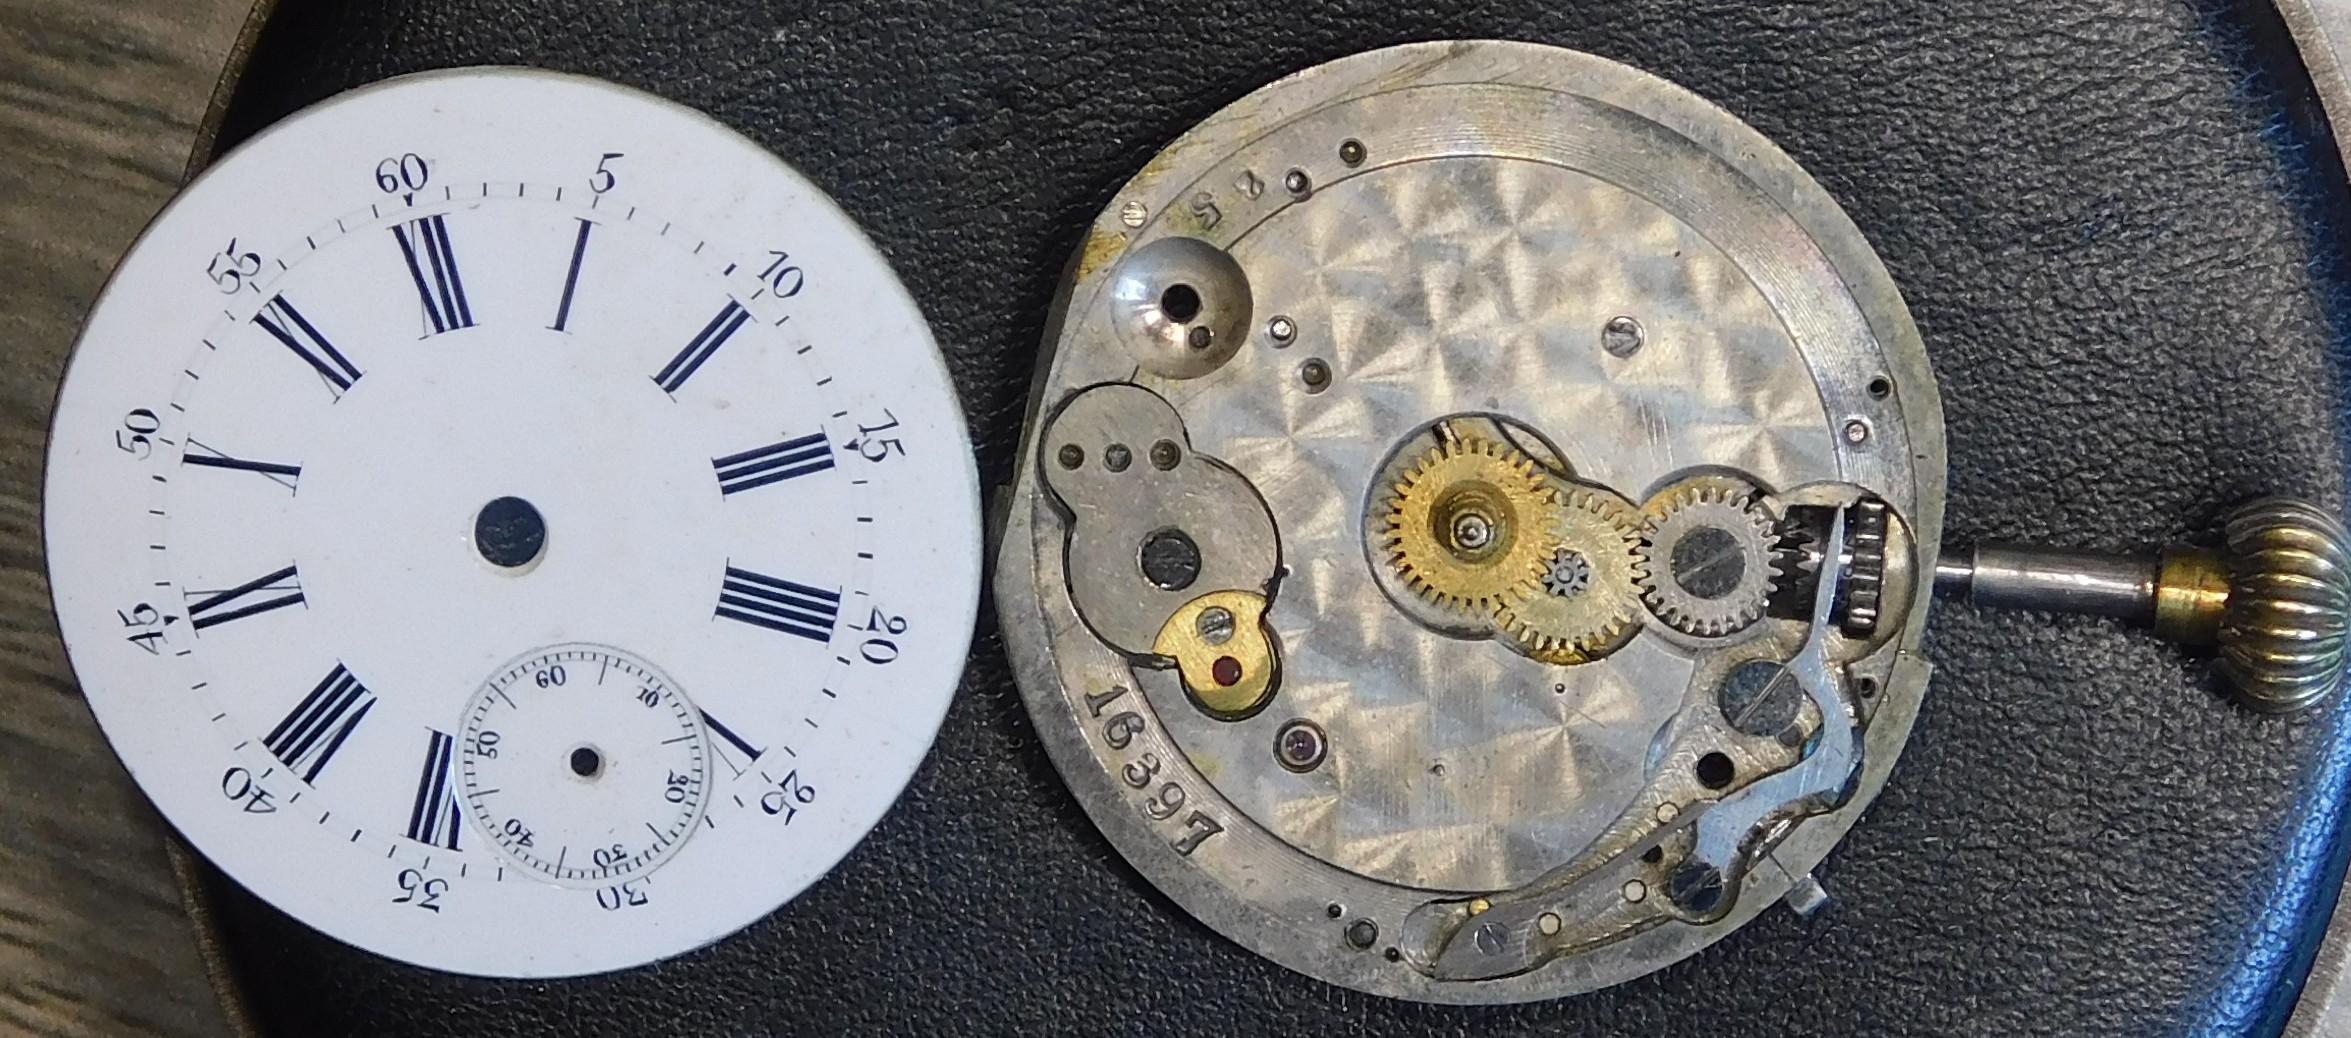
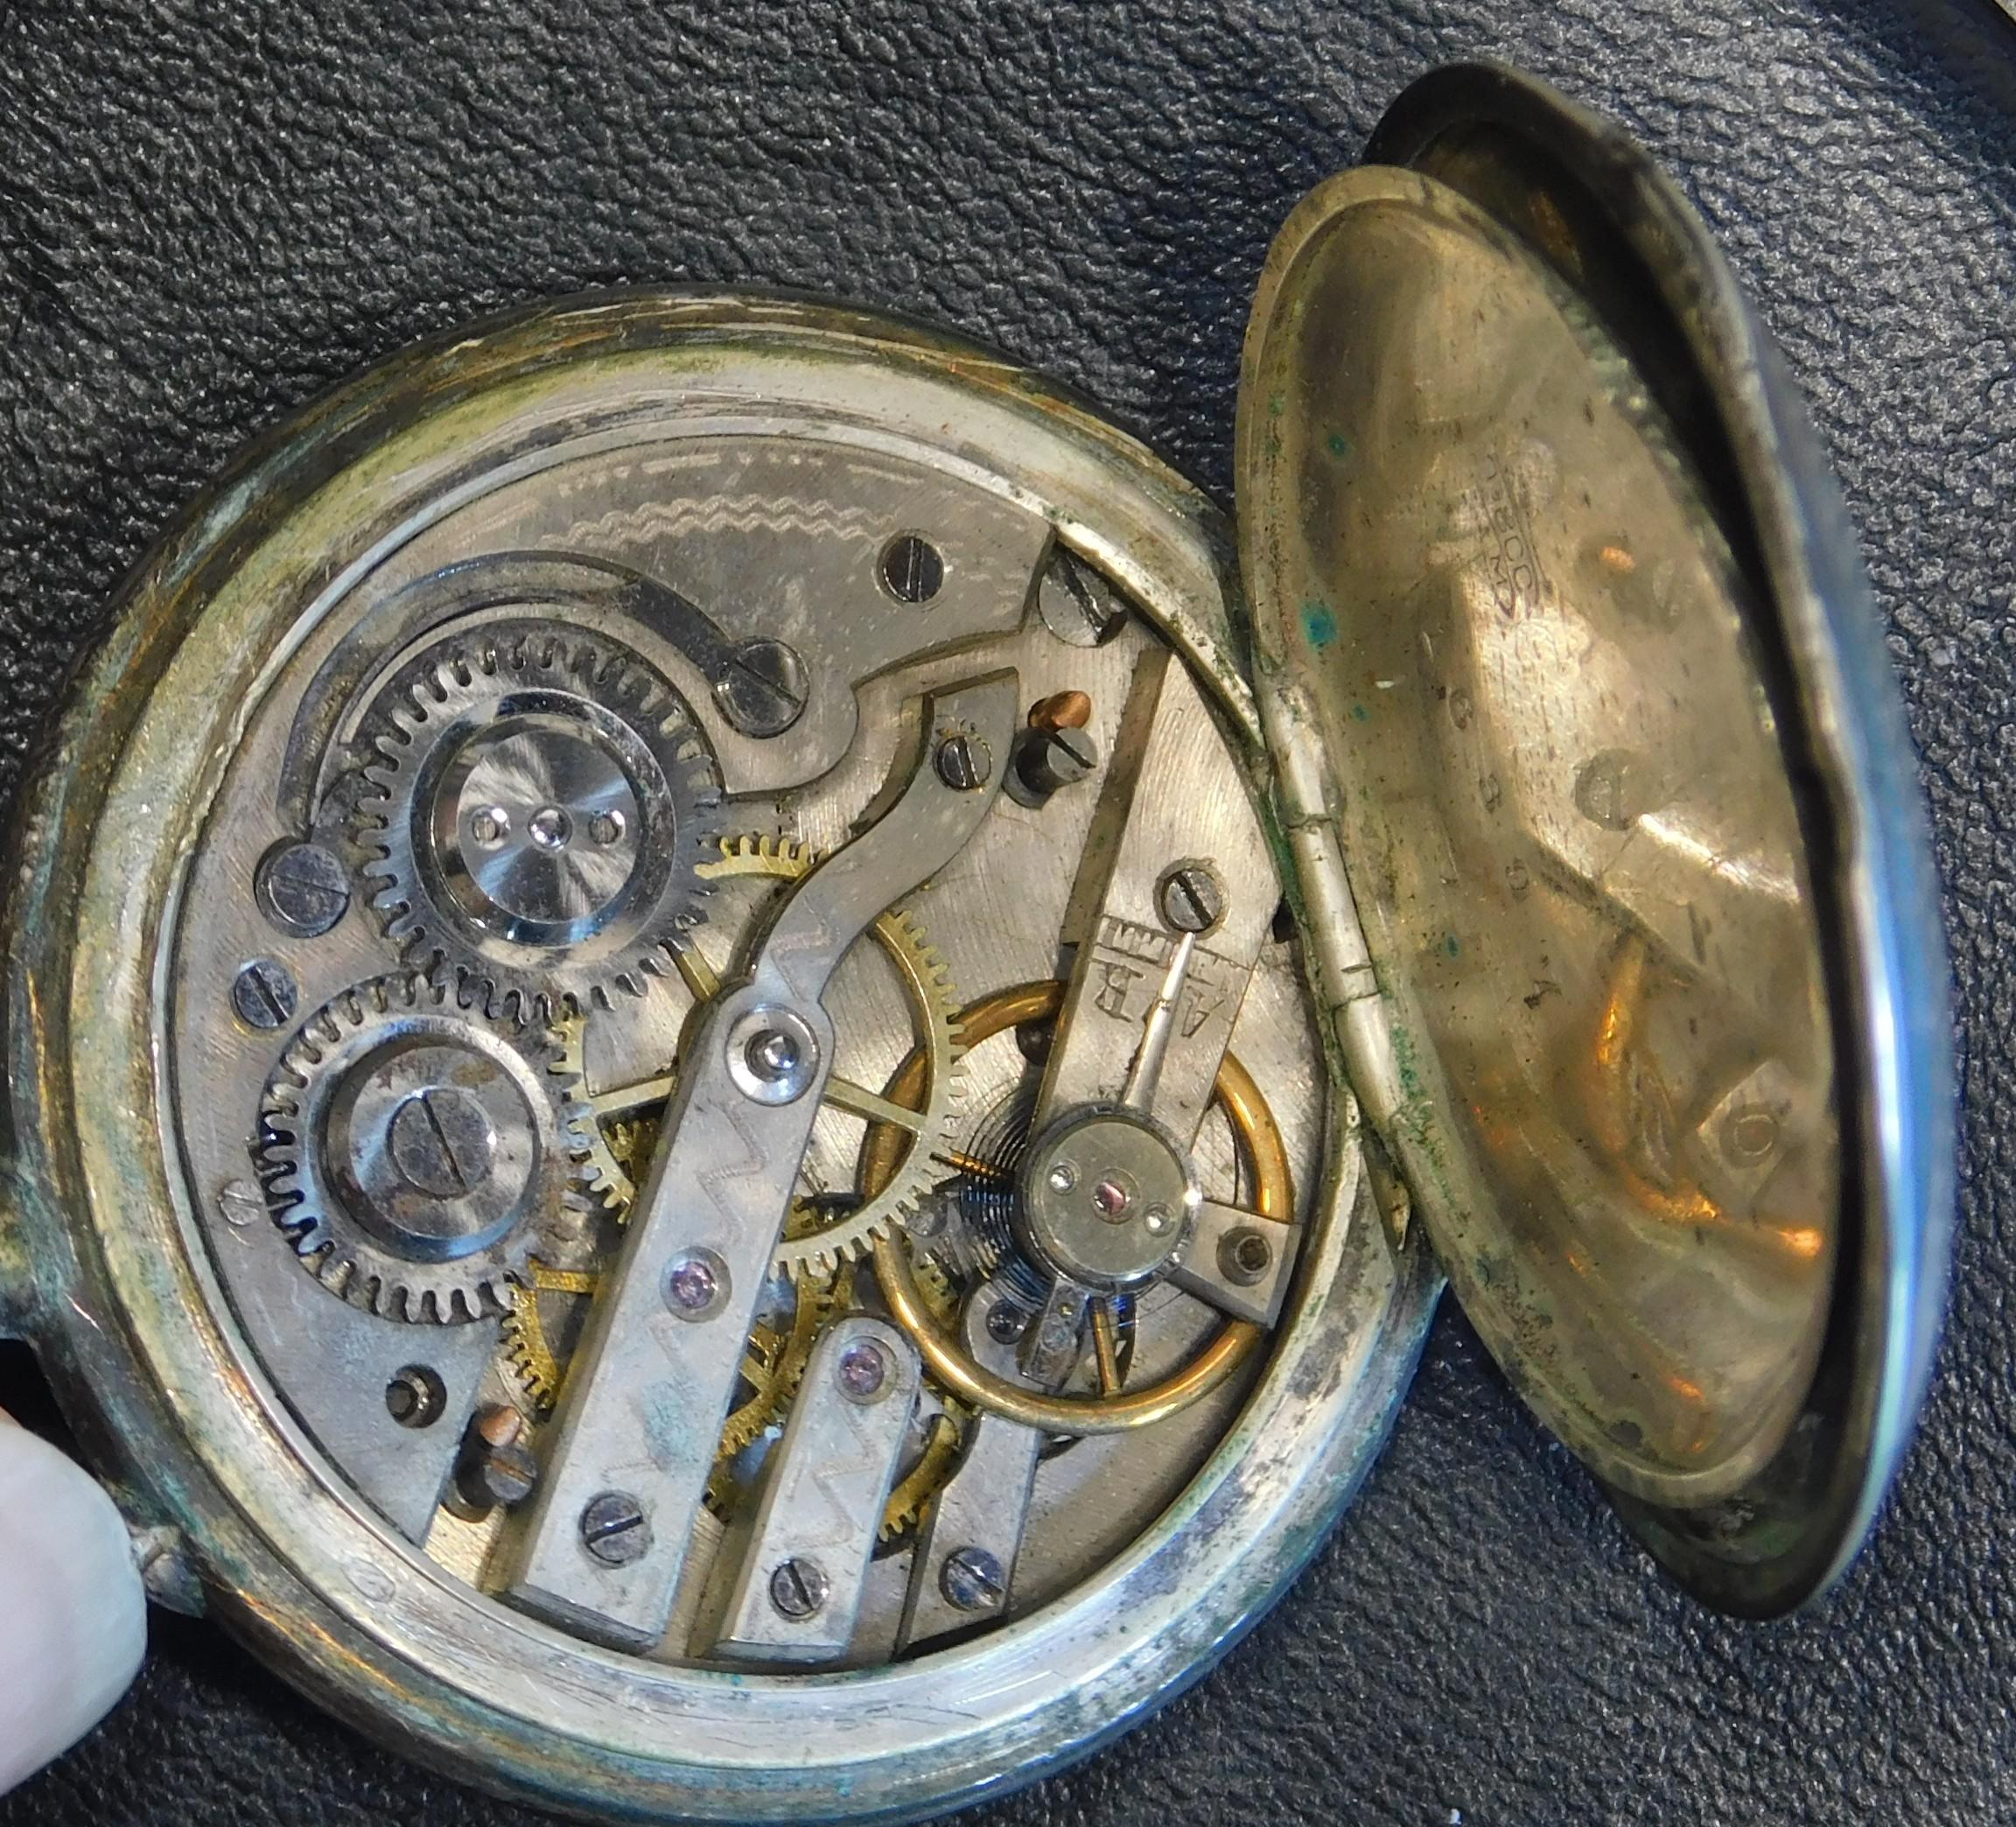
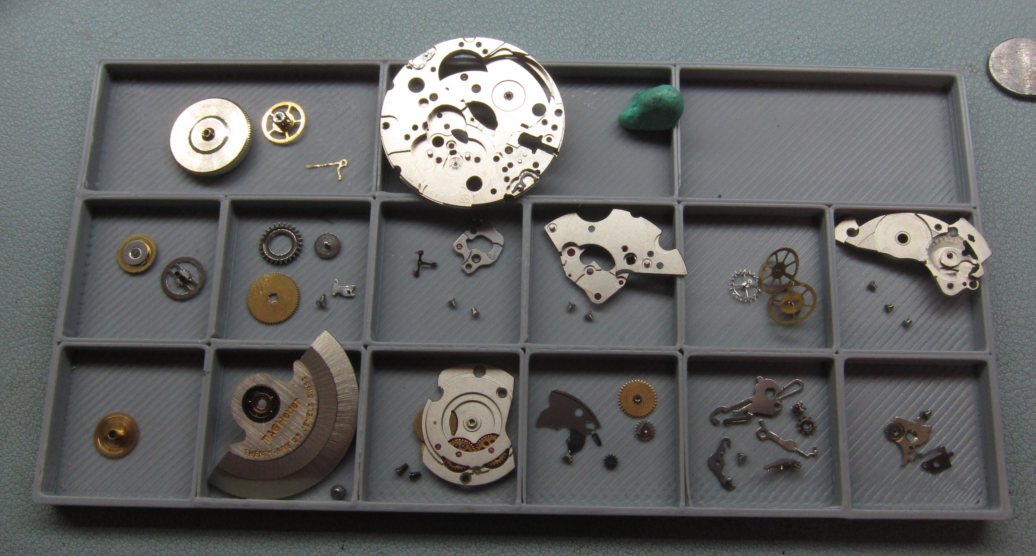
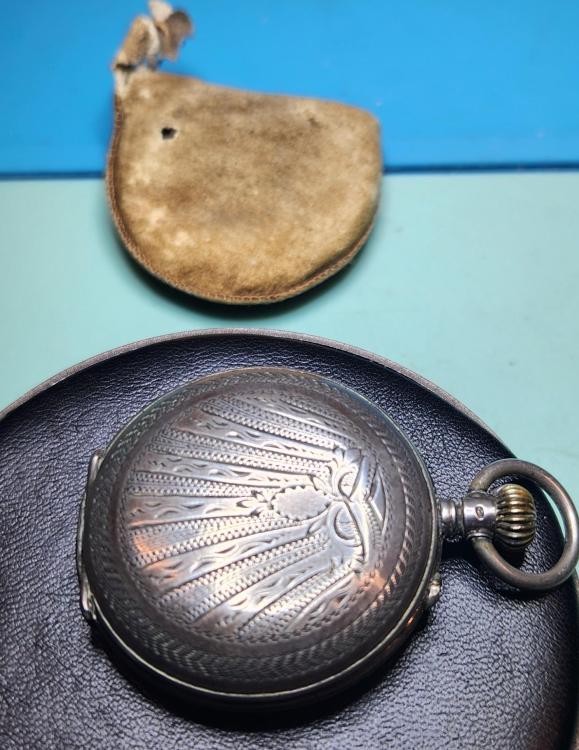
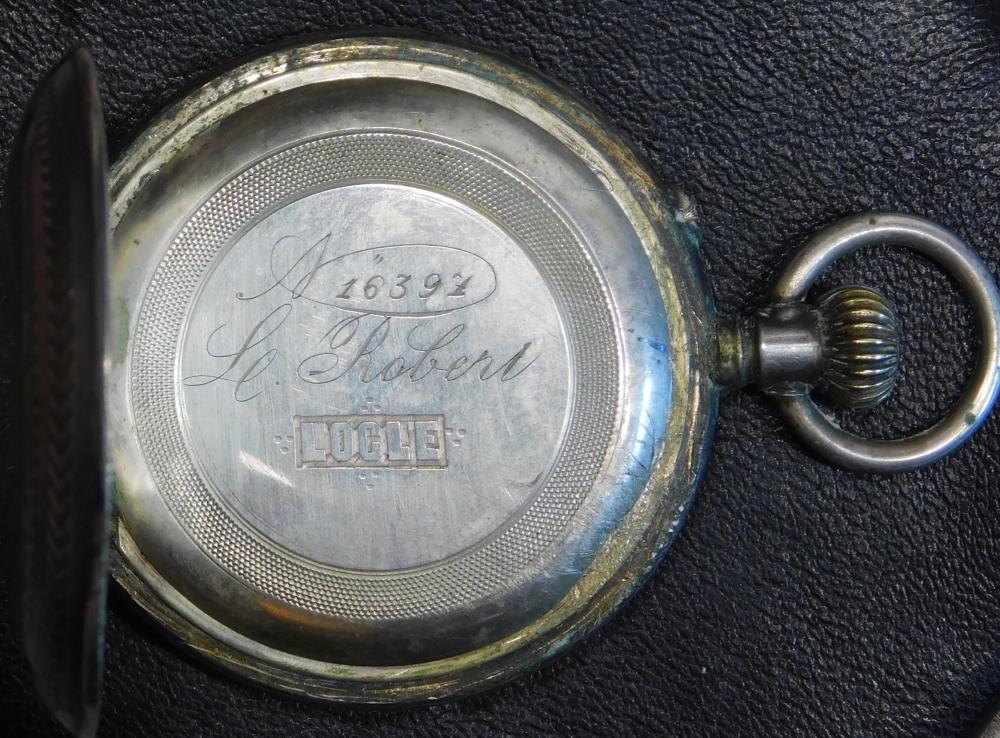
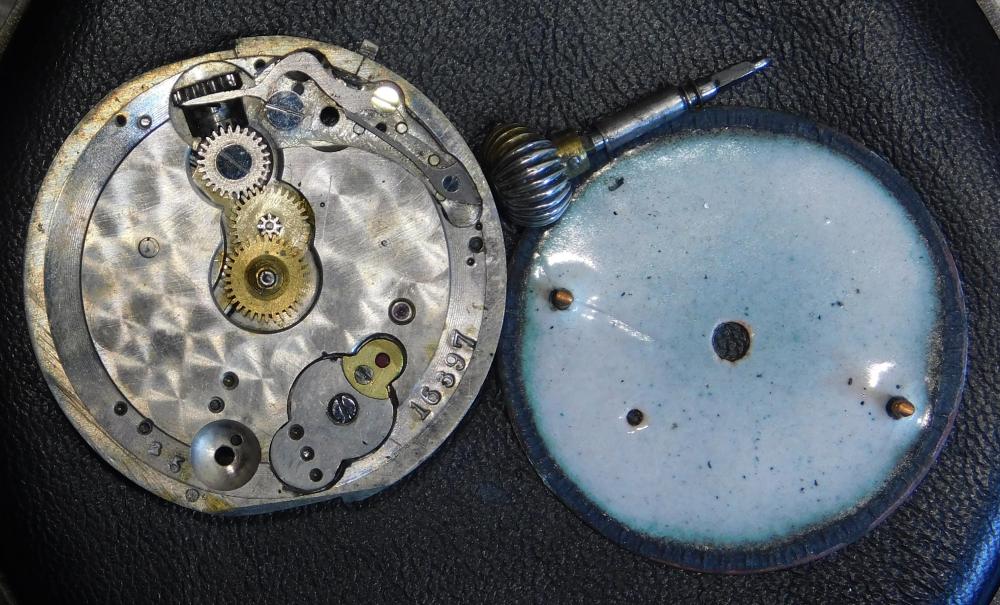
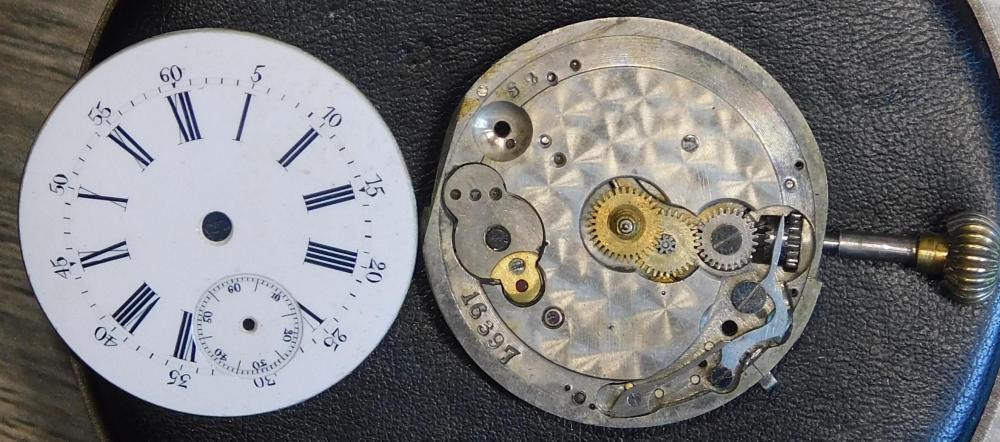
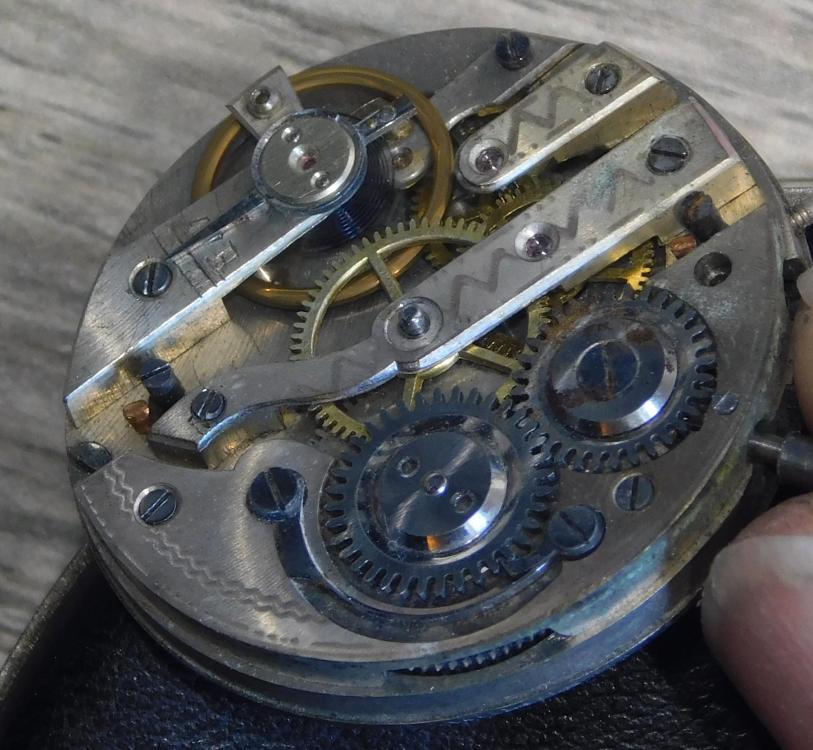
I joined this forum about a year ago after getting interested in watches from digging out 3 inherited watches; 2 pockets and the Omega pie pan that is my avatar. My goal was to get proficient enough to work on my ancestor's time pieces. What I did not expect was how deep I would become immersed and what a great community of sharing ideas, learning, historiy and stories I would find here. I previously spent time in a coin collecting forum but the depth of horology intrigues me much more than numismatics, although that is a great hobby /profession as well. I find myself fairly emotional as I write this post as I just managed to get the worse of the 3 watches running! It is a Swiss pocket watch with a clam shell silver (0.800) hunter case all matching serial numbers. The inscription is to my great grandfather from his father and dated Jan. 9, (18) 91. Yes, 133 years and 6 days from the presentation. There is a ways to go for restoration, but my grandfather passed more than 47 years ago and it is ticking again... I am hoping folks here can help me try to figure out the watchmaker who made this. This last shot is cool in that you can see the paper under the train bridge in front of both screws. The biggest clues I see are the Locle and L or LE Robert engraving on the movement cover plate. This is different than the presentation engraving and is not the name of my relative. Several houses got their start in Locle Switzerland including VC, Ulysses Nardin, and Zenirh I beleive. Thanks for reading.

 5 points
 -
No need to be recommended: traditional amplitude numbers are 270° flat and resulting 220-240° vertical. You see, these are deliberately chosen numbers. If you don't like 220: choose 402 degrees, here is another zero point of the graph Frank4 points
-
These mesh baskets are really good. Much better quality than the cheap ones you can buy from Cousins and very similar to Bergeon or Elma ones for three times the price. I use these for all my small parts and screws the escape wheel teeth don't get stuck in the mesh either. The 10 I bought some months ago aren't for sale anymore, but these look the same. The top doesn't screw on or has a tight fit, but that doesn't matter when used in a rotary cleaner where the top tray keeps the lids in place. https://www.aliexpress.com/item/1005006192329408.html?spm=a2g0o.productlist.main.59.2399715egHxh7H&algo_pvid=19494d80-aaf6-4dfb-a4bb-fb4a5ad410bc&algo_exp_id=19494d80-aaf6-4dfb-a4bb-fb4a5ad410bc-29&pdp_npi=4%40dis!GBP!8.15!8.15!!!72.24!72.24!%4021038e7717054389218812584eb60c!12000036207516935!sea!UK!2256404187!&curPageLogUid=8QbW0xCZafcu&utparam-url=scene%3Asearch|query_from%3A Here are some more at a discounted price: https://www.aliexpress.com/item/1005005546766070.html?spm=a2g0o.detail.0.0.76411b0990nco7&gps-id=pcDetailTopMoreOtherSeller&scm=1007.40050.354490.0&scm_id=1007.40050.354490.0&scm-url=1007.40050.354490.0&pvid=6481242d-aa57-445e-8520-9342c7591c84&_t=gps-id:pcDetailTopMoreOtherSeller,scm-url:1007.40050.354490.0,pvid:6481242d-aa57-445e-8520-9342c7591c84,tpp_buckets:668%232846%238111%231996&pdp_npi=4%40dis!GBP!8.63!4.83!!!10.64!5.96!%40211b801917054393081287742e93c3!12000033489630855!rec!UK!2256404187!&utparam-url=scene%3ApcDetailTopMoreOtherSeller|query_from%3A#nav-review2 points
-
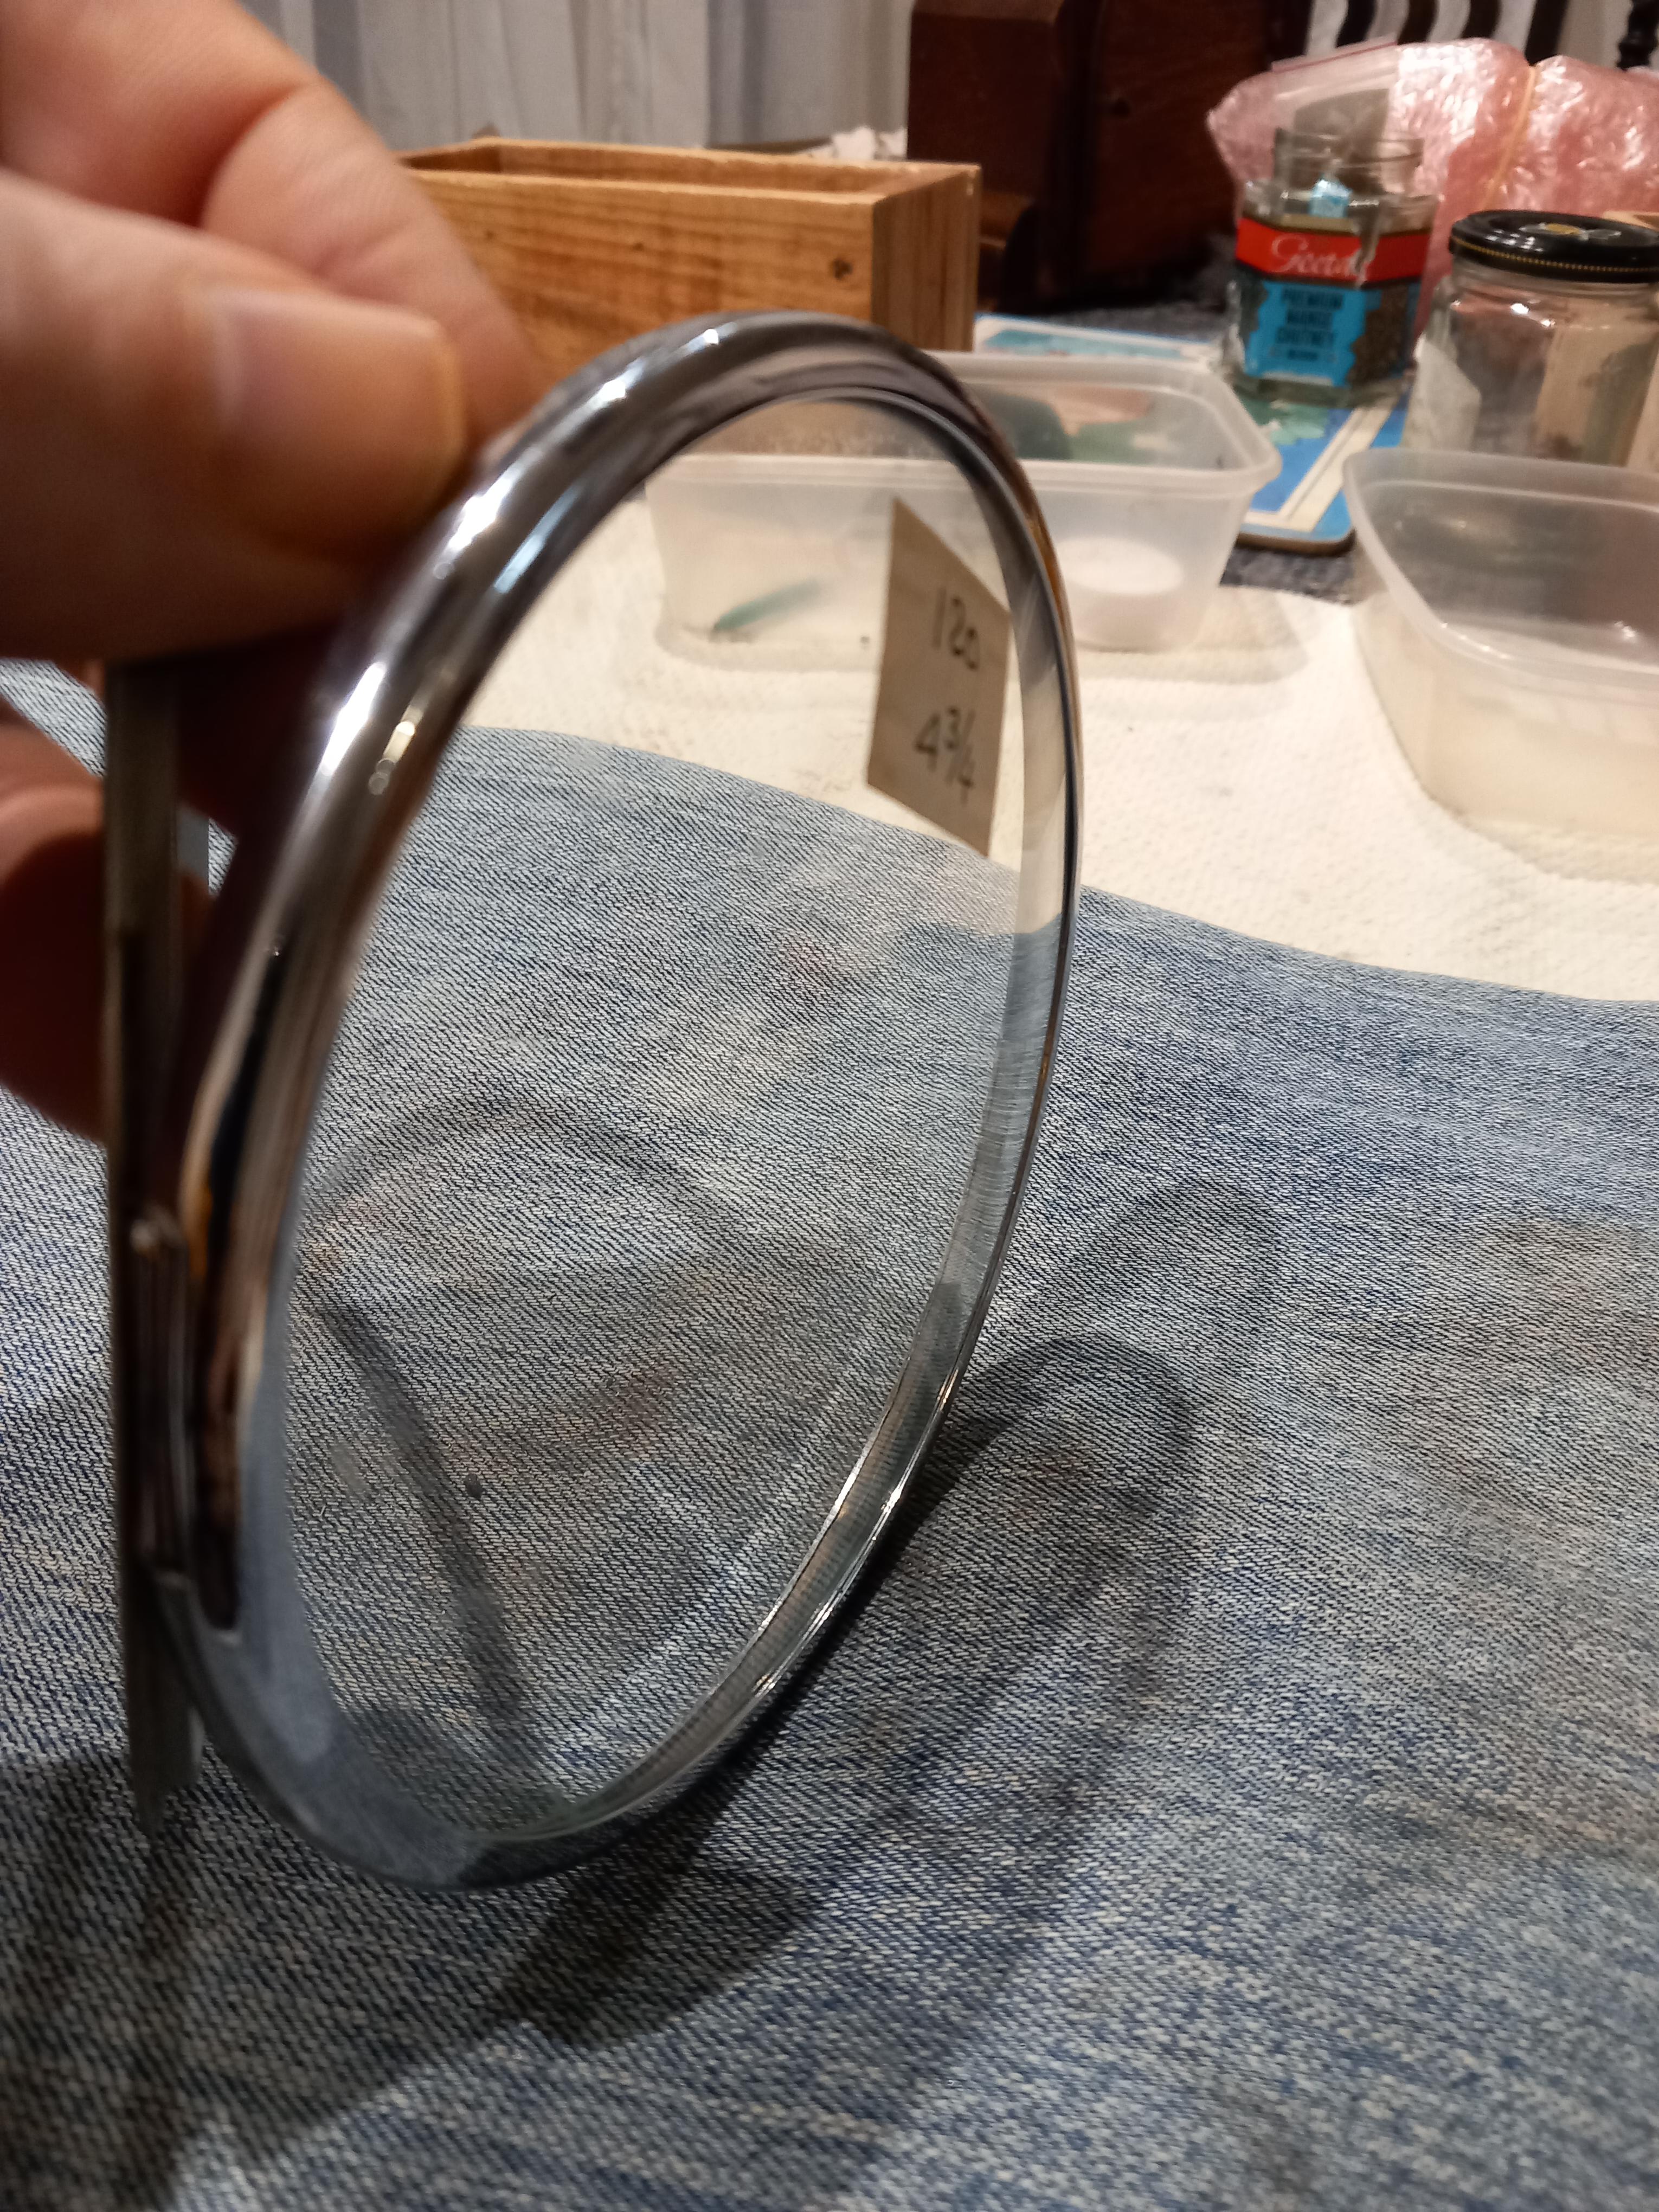
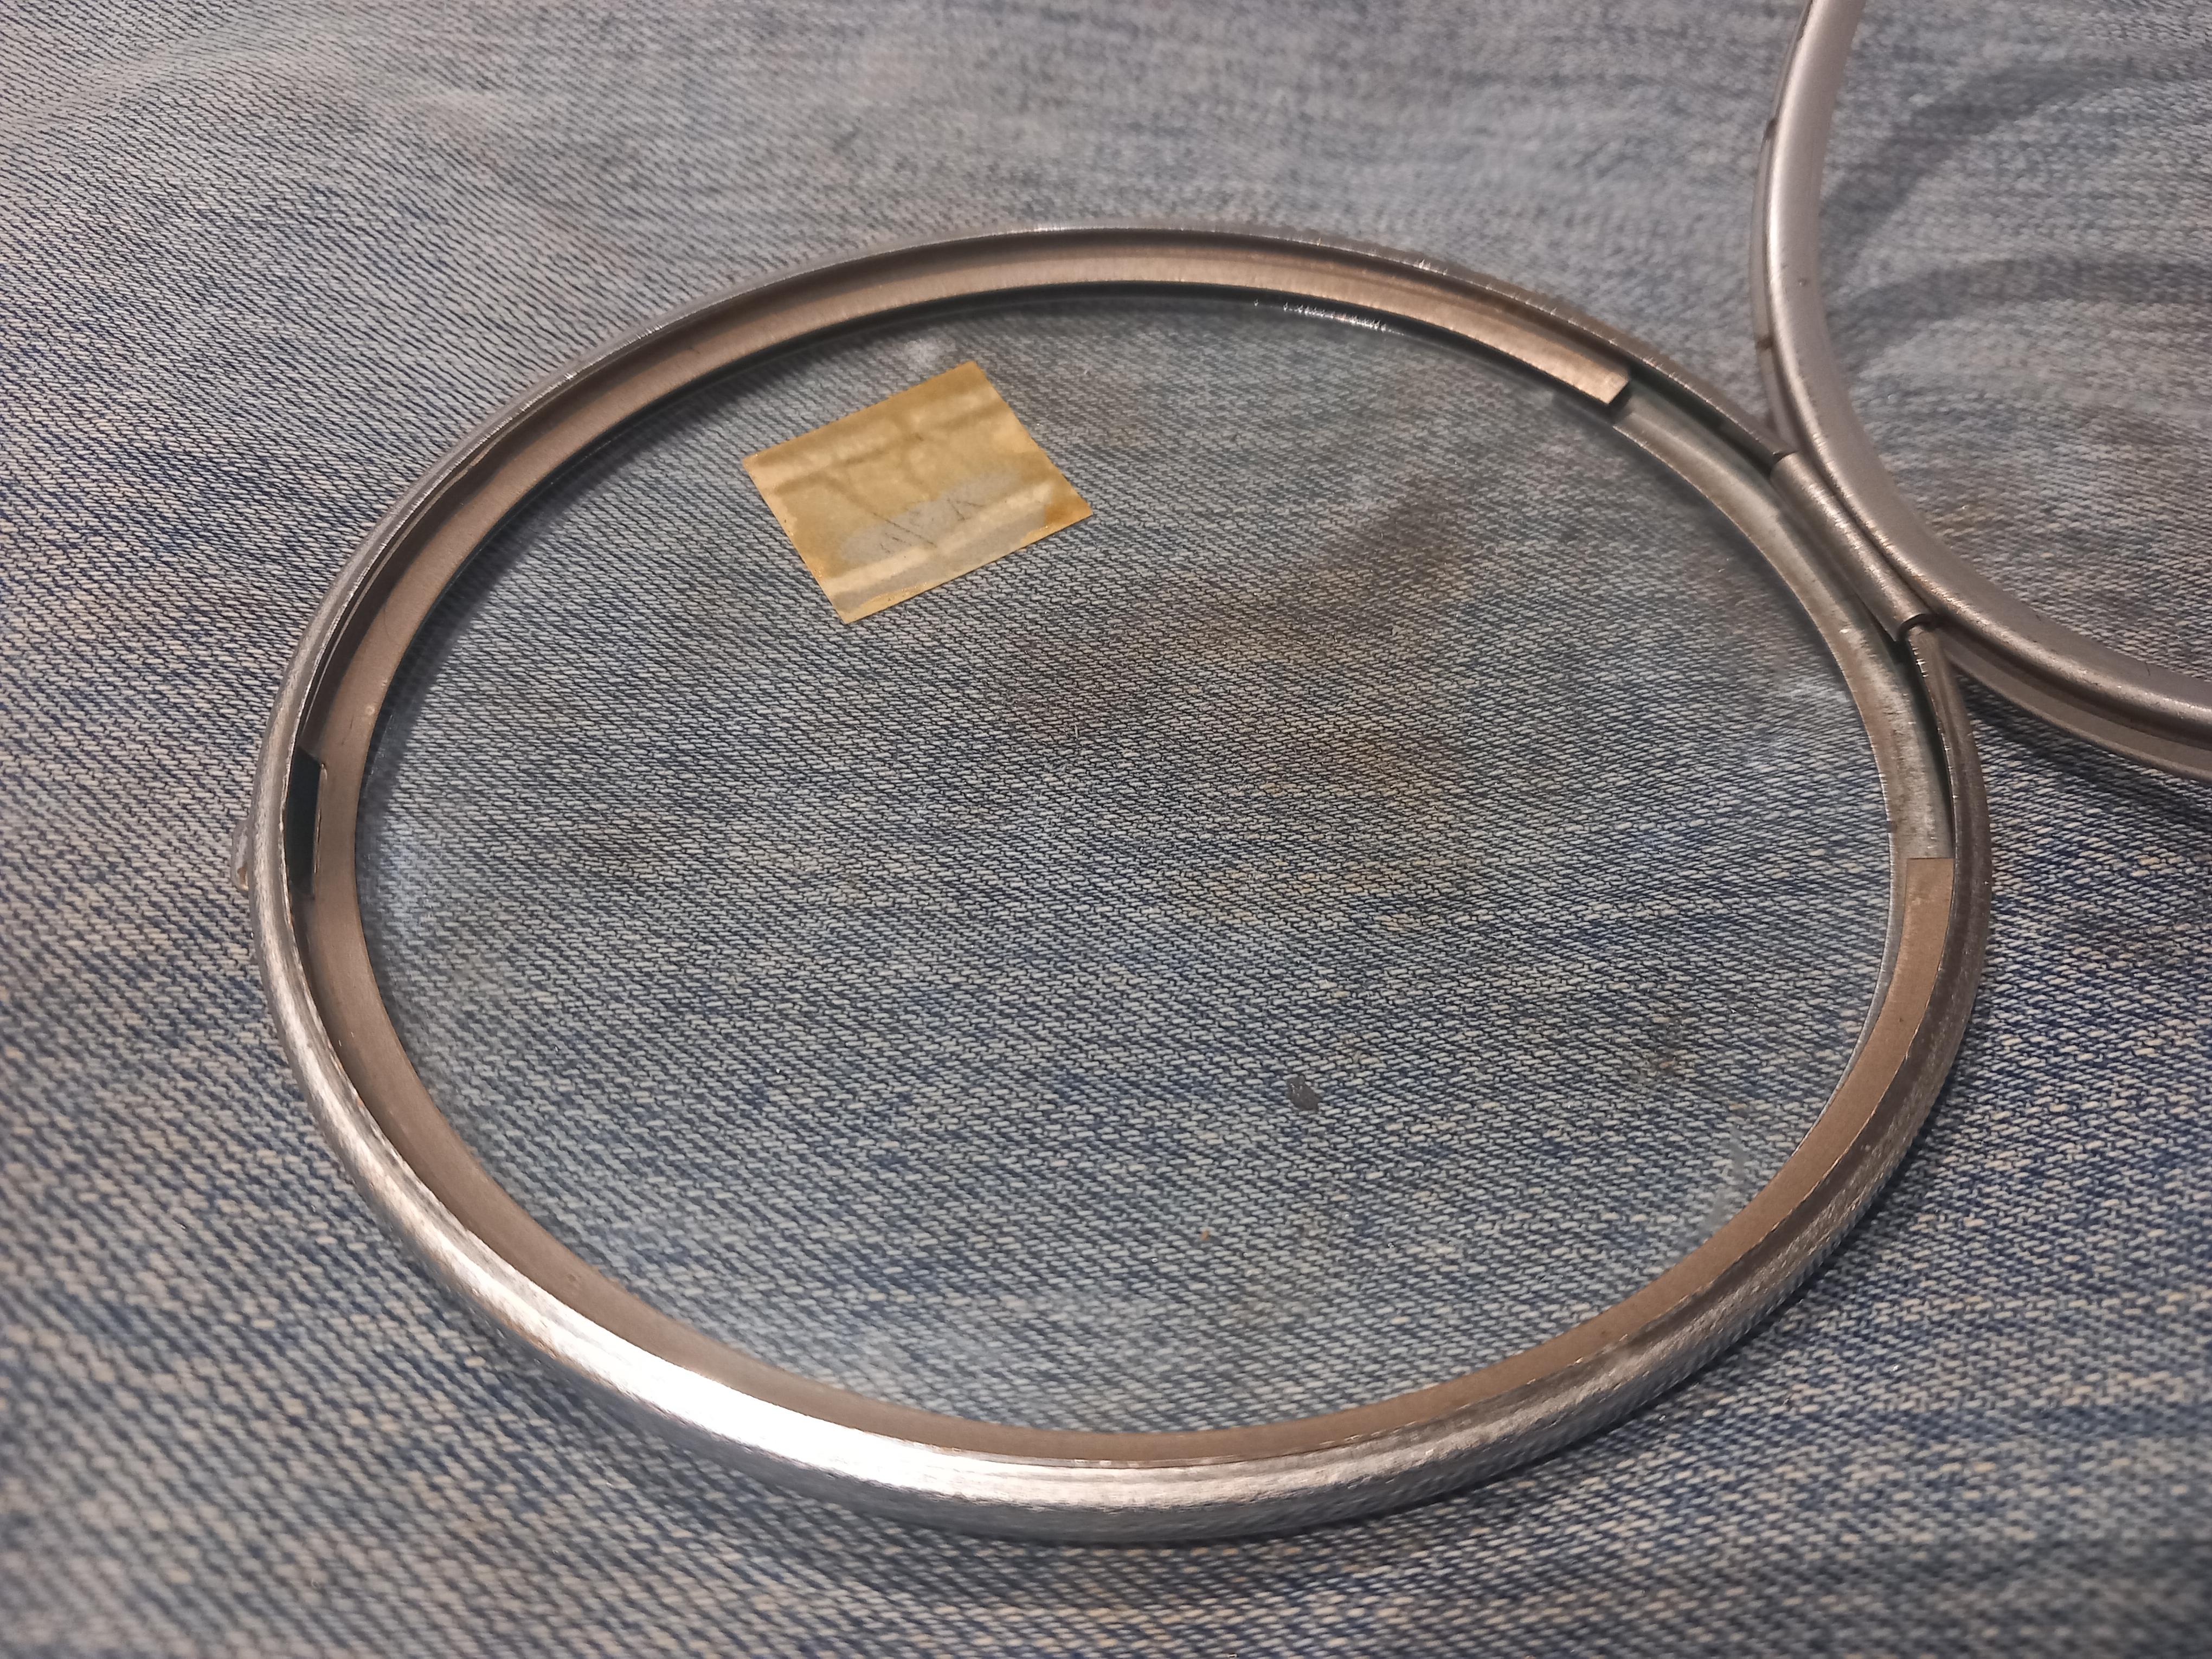
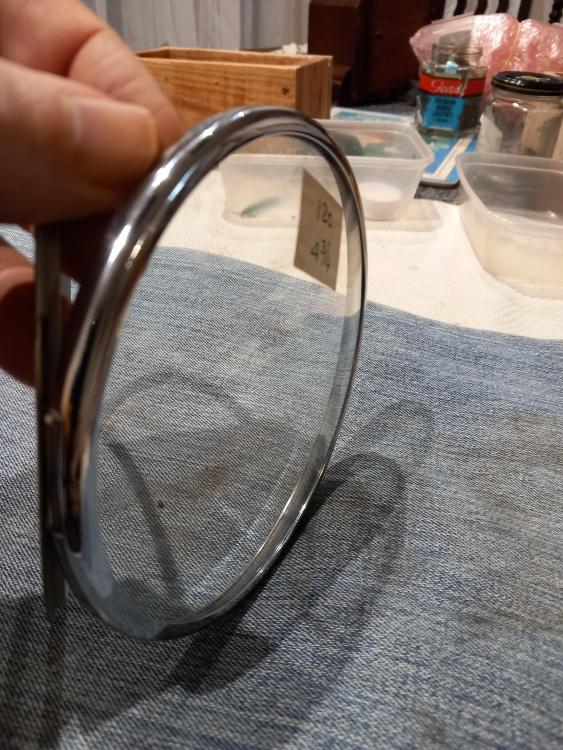
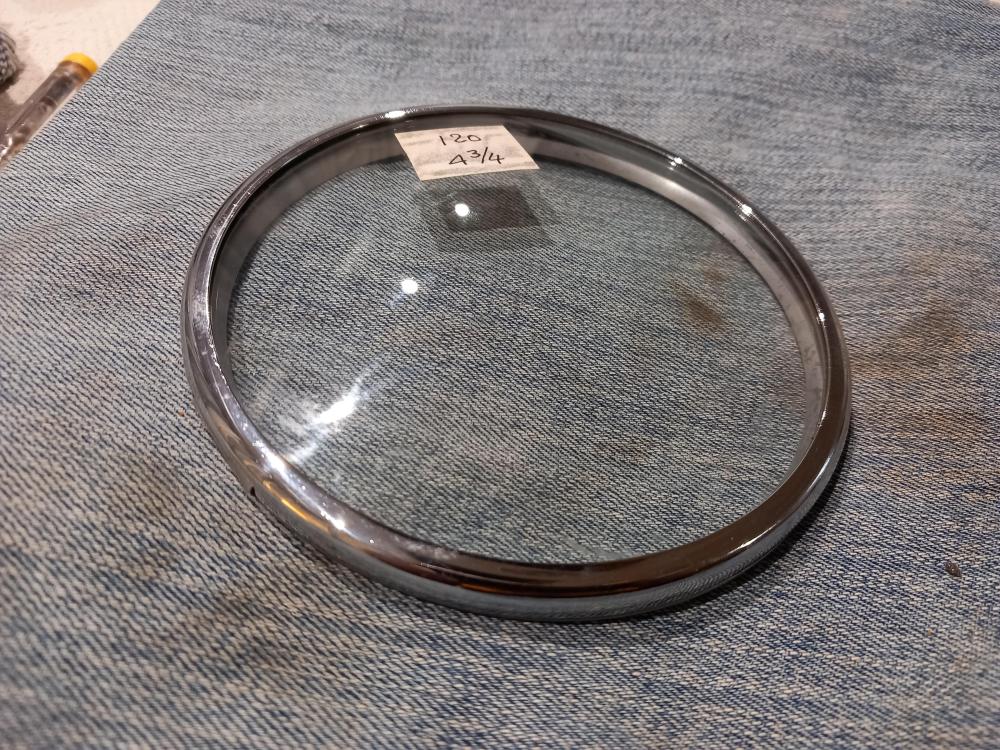
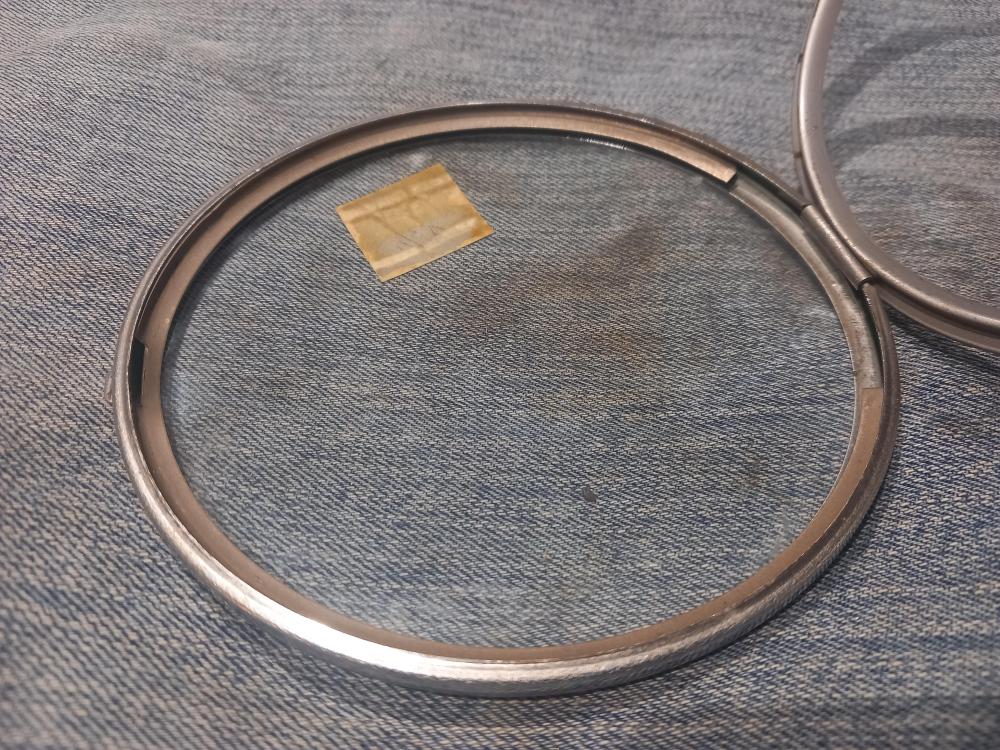
The glass from Marc arrived today. I removed the bezel from the case (it was just pinned), heated up the metal rim (till too hot to handle) and managed to manipulate the glass in. Well chuffed. Thanks!
 2 points
 -
It does indeed.2 points
-
I've caught up on both but I have decided to relax about it. If you become too obsessed with something and you don't reach the results you're trying to, you risk getting fed up and giving up altogether. I have disciplined myself to celebrate the small victories and as time goes by those small victories sometimes become great victories, but these days I don't expect it or demand it.2 points
-
The the pros here and elsewhere lecture to not become a slave to the tg so I don’t. ( Of course I also paid for a service from a reputable shop and was told the watch ‘passed the time test’ but it was well out of beat when I checked it- you can’t move a moveable stud for pete’s sake?) For me the guiding principles are what it will do on the wrist and how will it be worn? The old stuff doesn’t usually become everyday wear, so in beat, regulated, good amplitude, flat lines without a crazy delta is usually okay by me but YMMV. The starting condition matters, too I suppose. Sometimes when it is obvious a movement has seen attention from someone with skills I do invest a few hours with pad and pen and the washer kit or a rub with a file on a balance screw.2 points
-
My intent was self deprecation only- sorry for stoking confusion Me! Sometimes cheap is too cheap. Hunt the tea baskets where the mesh is small or there’s coffee baskets with dotted perforations instead of mesh… The springs slide through the mesh then want to become airborne when trying to free them2 points
-
I've had small screws stuck, thus washing them separately, same with small springs.2 points
-
Dynamic poising is not a modern magic fix for things that aren't quite right. I was at a lecture on precision timing and an image was shown for Rolex watch it had minor issues out of poise out of beat bunch a minor things the next image was perfect. How were all the problems fixed the balance staff was changed. At the time it was the head watchmaker of a shop for a chain of jewelry stores authorized Rolex service and the comment made was they change to more balance staffs for timing issues than anything else. So watch basically should be as perfect as it can be for dynamic poising to be successful. I would be so disappointed if I statically poise and had a one minute positional problem. Often times when I'm looking at the balance wheel were rocking back and forth I think of school where the instructor would shake his head and walk away because it's not perfect enough. Then putting it on the timing machine I can get within 15 seconds. Providing and this is the problem of vintage vintage gets played with a lot and you can end up with all sorts of peculiar timing problems which is why I always look at the watch if there's a problem I'll usually look at it statically and get it reasonably close his otherwise I'll be wasting my time with dynamic poising when they're usually that far off. And yes it's really amazing how far off watches can be previous watchmakers are only looked at the watch in one position. Yes the magic number. There's an image that shows a really nice of this it also explains why you should dynamic poise of a low amplitude. Although I do know people at dynamic poise at a high amplitude but low would be better providing the watch is functioning properly and you not having issues like with the escapement for instance. Here's a nice chart that shows the effect of amplitude and positional errors. Dynamic poising as interesting because somewhere out there a individual claims that Greiner invented dynamic poising. Except you can dynamic poise without a timing machine it takes a little bit of time at least from the reference I saw but it can be done timing machine just speeds up the whole thing considerably. Then Greiner when they came out with the timing machines they grasp the problem the watchmaker and a lack of understanding so they produced a really nice manual like this one conveniently PDF that the link below. PDF page 23 covers dynamic poising the rest the manual should be looked at anyway as it covers all sorts of things that you can do with your timing machine for diagnostic purposes http://www.historictimekeepers.com/documents/Micromat.pdf Oh poising how the light reading I'm attaching a PDF No I haven't noticed that but can I assume that they don't have regulator pins either? What's interesting in the world of horology is with time a greater understanding of things have occurred including hairspring characteristics that can have all sorts of interesting effects. Oh thinking of chronometer certified here's an amusing article because a watch that's chronometer certified may not actually look that impressive on a timing machine. That's because the certification procedure does not use a timing machine. https://www.watchpro.com/robert-loomes-unravels-overcoiled-hairsprings/ But the article was slightly helpful for something that was bothering me an unhelpful because I wanted to see pictures of moderate chronometer certified watches with their flat hairsprings? Yes look flat hairsprings it's hard to make an over coil With silicon. https://www.prestigetime.com/blog/silicon-revolution.html Okay found was looking for but you're right I lost no modern this is from 2005 it's vintage but the indication is it still chronometer certified and it's not entirely flat https://www.rolex.com/watchmaking/features/movement 1946-08-HIA-OCR pages 9 to 13 poise Challacombe.pdf
 2 points
 -
I can find only some pictures of one of my first attempts to make cylinder. [url=http://postimg.cc/image/6xyi2rvir/][img]http://s29.postimg.cc/6xyi2rvir/20151205_105105.jpg[/img][/url] [url=http://postimg.cc/image/avh6efsyb/][img]http://s29.postimg.cc/avh6efsyb/20151205_105942.jpg[/img][/url] [url=http://postimg.cc/image/oqfgwwndf/][img]http://s29.postimg.cc/oqfgwwndf/20151205_135337.jpg[/img][/url] [url=http://postimg.cc/image/60nhg5umr/][img]http://s29.postimg.cc/60nhg5umr/20160306_162909.jpg[/img][/url] [url=http://postimg.cc/image/wkg2iav6b/][img]http://s29.postimg.cc/wkg2iav6b/20160307_100644.jpg[/img][/url] [url=http://postimg.cc/image/6jx636bf7/][img]http://s29.postimg.cc/6jx636bf7/20160307_101608.jpg[/img][/url] [url=http://postimg.cc/image/j67l00dw3/][img]http://s29.postimg.cc/j67l00dw3/20160307_101611.jpg[/img][/url] [url=http://postimg.cc/image/i57cavwwj/][img]http://s29.postimg.cc/i57cavwwj/20160307_103321.jpg[/img][/url] [url=http://postimg.cc/image/t62hfwp5f/][img]http://s29.postimg.cc/t62hfwp5f/20160307_104059.jpg[/img][/url] [url=http://postimg.cc/image/ak4bff1w3/][img]http://s29.postimg.cc/ak4bff1w3/20160307_104630.jpg[/img][/url] [url=http://postimg.cc/image/g70ocw4er/][img]http://s29.postimg.cc/g70ocw4er/20160307_105211.jpg[/img][/url] [url=http://postimg.cc/image/41bh2hpoz/][img]http://s29.postimg.cc/41bh2hpoz/20160307_110258.jpg[/img][/url] [url=http://postimg.cc/image/ryojnoz0z/][img]http://s29.postimg.cc/ryojnoz0z/20160307_111814.jpg[/img][/url] [AMEDIA]https://youtu.be/W4uGP_Fi9X0[/AMEDIA] As You see, it is made of syringe neede. That was my vision at that time... Later I began making cylinders from blied steel. Next time i have to do one will try to make photos or video, but it is time consuming thing, and I only have my phone camera. Sorry, this way of embeding pictures seems to not work. They still can be seen, but URL must be copied and pasted in browser search. Will try to repair it later, have to go to work now.2 points
-
Going against the trend here as I do tend to clean the screws etc along with the rest of the components, but not for any particular reason, just hadn't given it much thought. I segregate my components in my parts tray as I am disassembling the watch much the same as discussed above. Then I place all large components (eg main plate) in the main wash baskets of the watch cleaning machine. However, I put any small parts in those little mesh baskets, sometimes up to 6-7 small baskets, some with only 2 screws in. So I know which basket goes with each slot on the parts tray I make sure I place in a 'clue part' for example the escape wheel, instead of putting it in the main wash basket i include it in the small parts basket, then I know all the small screws and doodads in that basket are part of the escape mechanism. Similarly I may use the sliding pinion as my 'clue part' to flag the small parts in that basket as being part of the keyless works etc. Not sure where I got this from, just something I started doing and it seems to work.2 points
-
Thanks for your kind words, actually when it arrived I was amazed at how good a shape it was in, so there would be little difference in the before and after shots, only needed a few scuffs taken out of the bracelet, and a quick service (which it didn't actually need). If it was in poorer shape I think I would have gotten round to it sooner, but there always seemed to be a watch in more need . In a strange way I was a little disappointed when it arrived in such good shape.2 points
-
I figured it out. It's by a German watch maker:
 2 points
 -
I just finished servicing a rare pocket watch; an Illinois Sangamo Special that is marked sixty hour. Anyway, the watch has gold balance screws but I noticed two of them were brass. Upon investigation, I discovered 20 timing washers around the balance! Couldn’t hardly see them because they were smaller than the screw heads…but really? I found two suitable gold screws, removed all 20 timing washers and the poise and timing was quite good with no other changes. Somebody went to a lot of effort just because they used brass screws. I guess I learned the weight difference between like-sized brass vs gold screws = 20 small timing washers!2 points
-
I’m super pleased with myself. After a week of learning about this watch and struggling through its repair (it’s the first watch I’ve ever worked on, I’m a beginner), it lives! I bought it a new crystal and had to replace the train of wheels but it’s keeping time like a champ (so far). I had some trouble with it stopping intermittently and I believe it was due to the hands being too tight. It took me a while to get it right. The crown wheel was also impossible to turn and after comparing it to other crown wheels of the same watch, found it was practically flat. It was a good learning experience and helped me work on my tweezer and loupe etiquette.
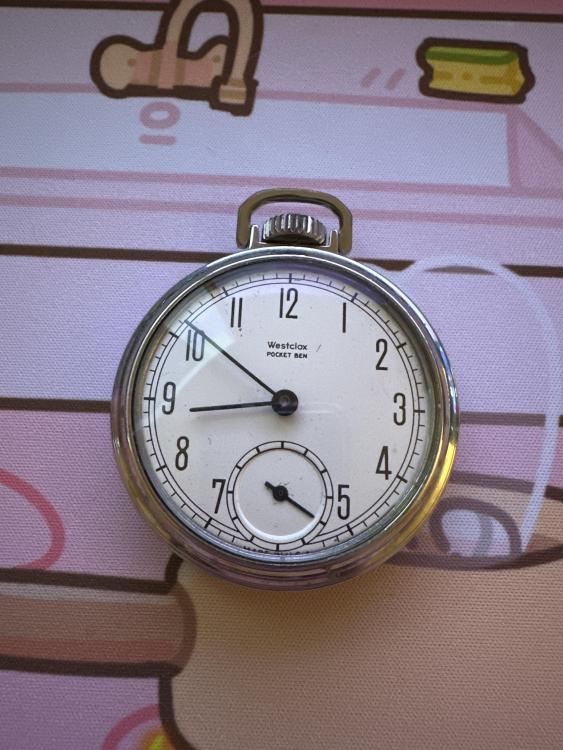 1 point
 -
@Kalanag I took a much more low-fidelity approach with parts on hand:
 1 point
 -
Thanks Jon, these look far better quality than the cousins value baskets.1 point
-
Thanks Rich, I've heard the term branded about but never thought to ask what it meant. It came to mind a few weeks ago while i was messing with one.1 point
-
One of the things to remember with quartz watches are there very very intolerant to well anything affecting the gear train I remember when the quartz watches came out initially there was an assessment of no lubrication needed because there is no friction. But the early metal on metal bearing watches would have issues. Then people try to oil their watch but that would have issues because that whales are all too heavy. I had one particular Seiko watch that with oil didn't work without oil didn't work and I think it even had jewels it was a small line Seiko watch that they would put insurance case. And then the Swiss came out with oil for quartz watches which is a very light weight oil and the watch worked perfectly. So I do find that the Swiss quartz oil works really well but if a quartz watches so sensitive the lubrication that would also imply anything with the gear train is going to be an issue then typically with quartz timing machines they use basically a capacitive pickup. So basically they're not putting a load on the oscillator because of course that's a really tiny micro-powered oscillator and everything is going to be a load. Unless you can figure out how to tap into one of the outputs like the stepping motor.1 point
-
Thanks everyone. As a result of this dicussion, I've decided to jump into the world of lathes and pivoting tools but before I dive in, I have a few questions, which I'll raise under a separate, lathe/pivot-tool specific post.1 point
-
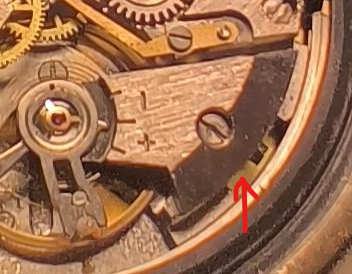
I think so, I believe I can see a line between the table and the safety roller, but I guess Ill find out when I get it apart.1 point
-
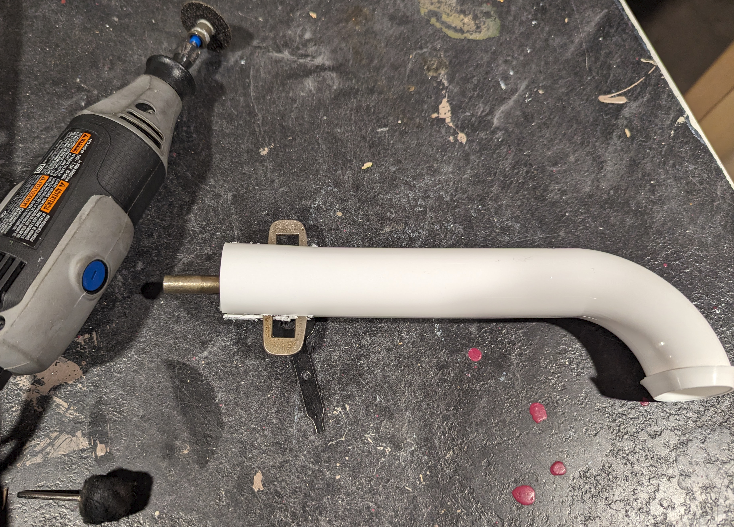
I haven't had the best of experiences with a rotary tool for polishing. I've had a lot more success using a dedicated polishing machine so I'd recommend that.1 point
-
Are You sure that the safety roller is separate? Looking at the picture, it seems to me that it is just usual double roller.1 point
-
I use one of these but a good make bradux, something in my head tells me bradux is a subsidiary of bergeon. The cheap indian and chinese are not fit for the job. This lifts the roller free from the staff or at least starts its depart, instead of pushing the staff through the roller, different but same difference . The jaws need to be thin to get between the roller and the wheel and there is technique involved to stop you slicing a good staff, but worth trying to find a preference. I also have a seperate tool that works on the same principle as your staking tool accessory but is used free hand. I prefer the Bradux.
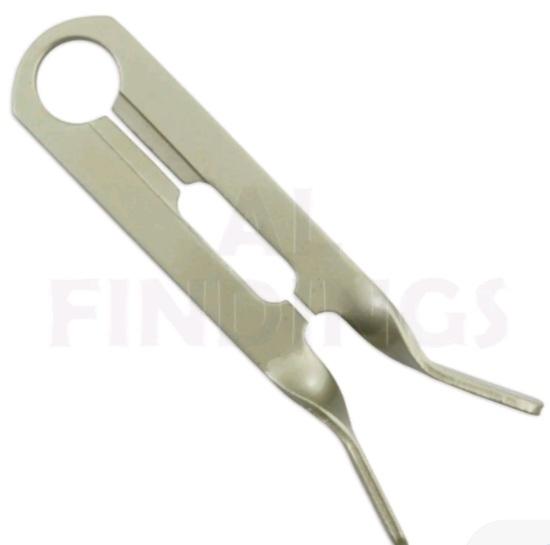 1 point
 -
Interesting architecture. Measuring accurately using an oscilloscope is a challenge, if not impossible. You are correct about the load. Additional capacitance will pull the resonant frequency a small amount. They used to make testers that measured the frequency of a quartz watch without adding a physical load. I have a couple, but I don't think they work. Moreover, with two oscillators...it would not work. I would give up on the temperature compensation and simply adjust the frequency of one of the oscillators by wearing for a month, adjust, wearing for a month, adjust, etc. I have to say that Seiko was clever by half. The human body is a regulated thermal mass. While the watch is external, to the body, it will still benefit from being in close proximity to the body. I applaud you tenacity to do this the right way. Often the project itself is more fun that the end result. I did some research...these were supposed to achieve 5 seconds per year accuracy. This was in the 80's. That is indeed pretty damn good. Remember that you have to reset your watch twice a hear, so if 5 seconds error is the goal, all you need is 10 seconds per hear. Here is an interesting article from the NIST.1 point
-
Ah okay i didn't realise that. I feel attaining 402° might just have caused a different problem. thanks Frank1 point
-
Haha i dont know where nickelsilver aquired it , but in the UK the term is " belt and braces " Perfect attitude towards a difficult problem. The post was mainly inspired by the 220° disappearing poise error magic trick.1 point
-
Some folk can get really caught up on accuracy same as amplitude. 2 minutes a week still sounds ok. I must try wearing my 70s sekonda every day for a month winding it each morning to see what time it has lost or gained.1 point
-
yes it gets you like that , i was still filling up an hour after i got my grandfather's watch ticking 50 years after he died. Funny hobby this , for another the next day you can end up vocalising loudy multiples of expletives joined in a variety of unimaginable ways.1 point
-
I seem to remember it was suggested that was the case, my memory is terrible sometimes.1 point
-
So the arbor square was off the arbor axis too?1 point
-
…not from my pov- you're constructive as always and I’m interested in how you and others are addressing this issue. Cheers…1 point
-
I doubt it , but larger bits of oil and debris might get trapped between the two combined threads and not washed through ? Or possibly pushed out during unscrewing and screwing ? It just seems to make sense to me to have a completely free screwhole for the cleaner to get in there and do its job. Screw threads can be handled quite easily with a small stiff bristled brush, i justed like the idea when i started of getting a good look at the screws while i was cleaning them to help recognise what they are for, now it has become a habit. Its what works for each person, if you've tried it and never had a problem you tend to stick with it until you do have a problem. Actually reading again my wording might have come across wrong, i completely apologise if it did. I think i rushed my reply ( my daughter's 30th birthday today ) without realising how it might be perceived . If it offended in anyway then i do apologise for that, my turn to sit cross-legged in the naughty corner .1 point
-
I just found this forum earlier today and I'm already finding some incredibly valuable discussions. I can't wait to learn more and get to know you. I've been a lurker to this hobby/skill for a while, taken apart some movements and watched a ton of YouTube videos, but maybe one day I'll reassemble something and it will work. I'm originally from Texas but currently live in the Atlanta, GA (USA) metro area. Thanks for letting me join such a cool community! -Philip (OldMarine)1 point
-
Would that be fully wound ? Russian watches are renowned for sloppy tolerances. The barrel can suffer from wear inside and arbor seats. You haven't mentioned servicing as yet and the low amplitude might not be providing accurate readings. When you get to servicing, pay particular attention to the condition of the barrel components, wear around the plate and barrel bridge is common, look for scuffing of the plating where brass shows through. Strip it down in readiness for service and post up some clear detailed pictures .1 point
-
Hi depending how you want to go about it, you could remove the mainsprings as they are mounted in as separate piece. Firstl let down the power of the springs. Get a seven inch of broom shaft and bore a hole in the flat end the same size as the key then saw a slot down the hole so that it fits over the key handle and on to the key shaft, this is your let down tool . Sand the handle smooth, no splinters. Place over the winding square and take the tension of the spring off the click pawl and allow the shaft to rotate slowley in your hand untill all power has been released. Do this with the other two springs. Now all power is off the clock the spring barrels can be removed. Once the springs are coming off the movement mark each one Striking barrel. Going. Barrel. Chime Barrel and the positions they were in. Take pictures at each stage. Now you have the mechanism separated from the barrels you can wash the movement in petrol outside the house or shed or wherever you are, plenty of ventilation. Stand on an old towel or such like to drain and dry off. When completely dry inspect all the pinions and wheels for impacted dirt and remove if found. Check also the pivot holes for wear oval and not round. The pivot should move in the hole but only a tiny amount of what is called side shake. Any pivot holes with excessive shake will need re bushing but as it’s a modern clock it should be ok. If every thing checks out you can relubricate the movementpivot holes sparingly, for this I would recommend Windles Clock oil it is the best but any light machine oil will suffice. Once done re fit the springs and the plate. Now check the escape wheel and pallet for wear or bent teeth. If that checks out ok mount the clock in th jig and give each spring three or four turns replace pendulum and start the clock. Listen for the even tick. Tock and move the movement in the vice up or down at the side to achieve it. If it runs ok for 24 hrs turn your attention to the front plate and lubricate all the pivot points and pivot holes again sparingly. A further 24 hr run and if successful re case and check for time. That’s enough for now. Come back when it’s cased up or before if you are not sure of anything or require any more help. All the best1 point
-
Have You noticed that no modern COSC certified timepiece has overcoil? They all are with flat springs. There is certain position of the outside end against the internal end, that helps to minimise misspoising effect of hairspring breathing. Also, this certain position of beginning/end is used to compensate lo amplitude frequency error due escapement influence by oposite sign lo amplitude hairspring error (or wice versa).1 point
-
Well, this is big amount of writing... Statical poising is for the balance wheel and the roller as a assembly. If balance well poised statically, the movement should have performance within 1min/day for the vertical positions, and if we need beter performance, dynamical poising should be done. Why statical poising does not give perfect results? Well, it is done without the hairspring. Adding the hairspring changes the things... The hairspring has a mass and it affects the poising, especially when not correctly centered. Centered means the imaginable center of the spring, which does't exist, to be in the middle of the hole of the collet. But, as we know, the hairspring is attached to the periphery of the collet, not in the middle. No mater, the spring can be centered as if the missing center of it would be in the center of the collet, but it is true only in static position. When the balance is rotated, the spring gets deformed (shrinked or enlarged), and together with this, the effective center of the spring moves, it shifts from the static position. Thus, the hairspring constantly brings error to the balance poising when balance rotates and thus affects the position errors. The dynamical poising helps to compensate this error from the hairspring by adding or removing material on the rim. The compensation is possible for certain amplitude, not for all amplitudes, but still it gives beter results than only static poising. The dynamical poising can be done by modifying the internal hairspring end too, by making changes to hairspring centering.1 point
-
Gorgeous watch!1 point
-
For the time when these were introduced, the technology was truly leading edge. The 218 movement seems solid...not difficult to service. But...and this is a BIG but, Accutron (really Bulova) fails at the non-tech stuff. While I like the two-piece back, the case quality is generally poor. The dials seem fine enough, but the hands are low quality compared to a nice swiss watch. I have one case where the crown interface appears to have been milled incorrectly. Not sure...still investigating.1 point
-
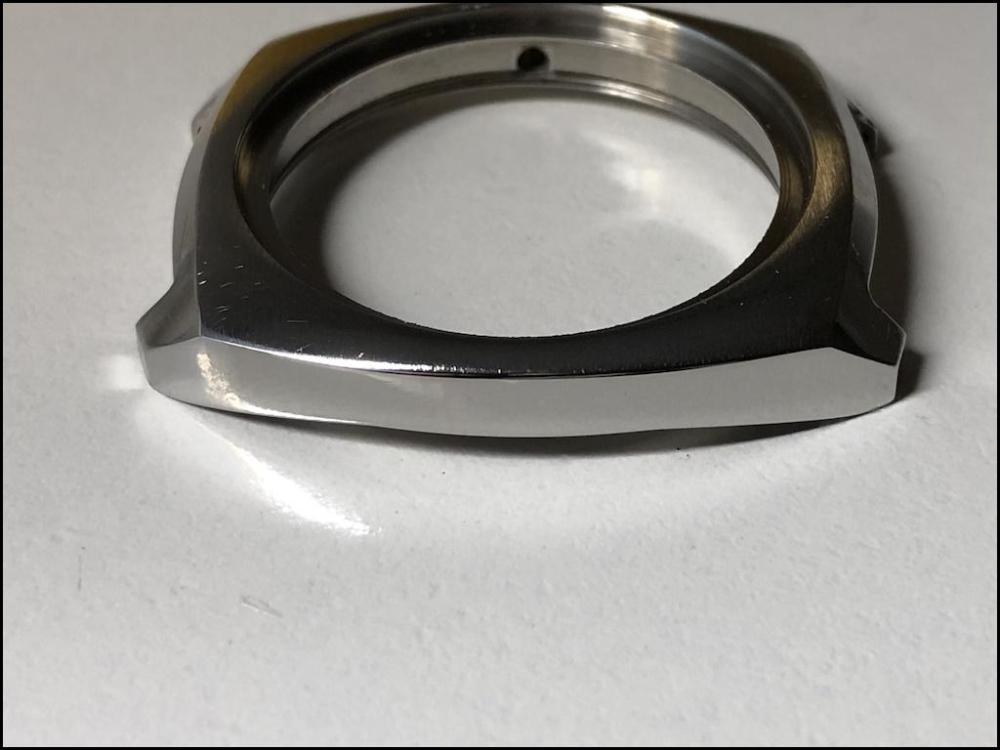
Finally got around to fixing up my Tag, been on my to-do list for over 6 months. Got it as a treat for myself and after parts arrived and I got motivated I finally finished it over the weekend.
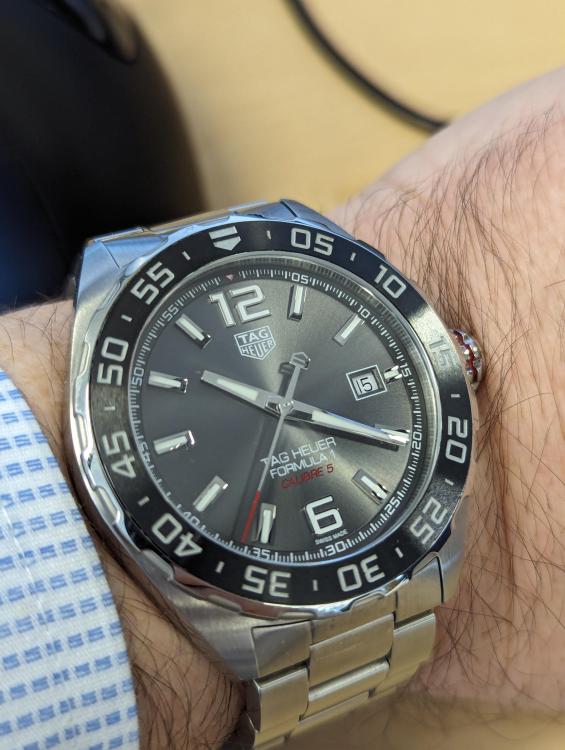 1 point
 -
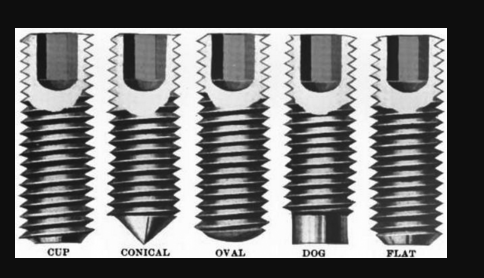
It will usually come after you've serviced the same or a similar calibre a few times, but getting close and personal with the screws using a macro lens the first time you see them is a time saver. We are in an unusually conservative industry but I don't mind using modern aids. Call me crazy, but it even happens that I remove screws with the help of Rodico, and use magnifying glasses rather than watchmakers' loupes! Please don't tell anyone! Kalle Slaap published a rather interesting section about screws in one of his videos where he shows how you can determine where a screw should go just based on its appearance. See if I can find it... Yes, here it is! There's certainly more to screws than one might think at first.
 1 point
 -
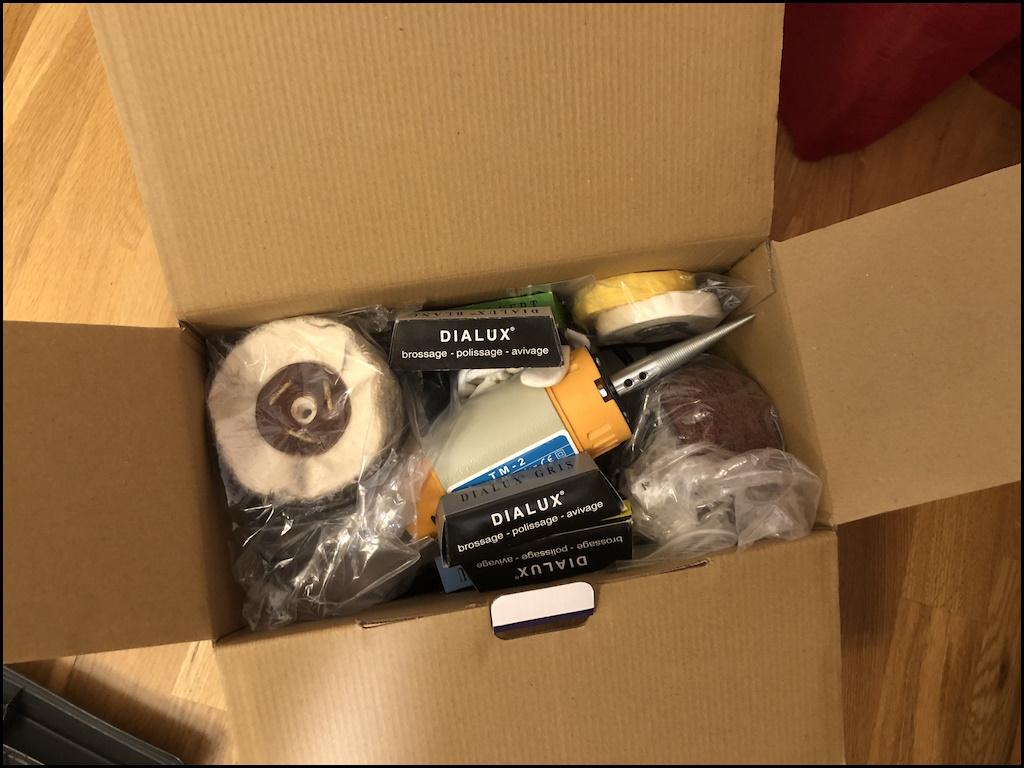
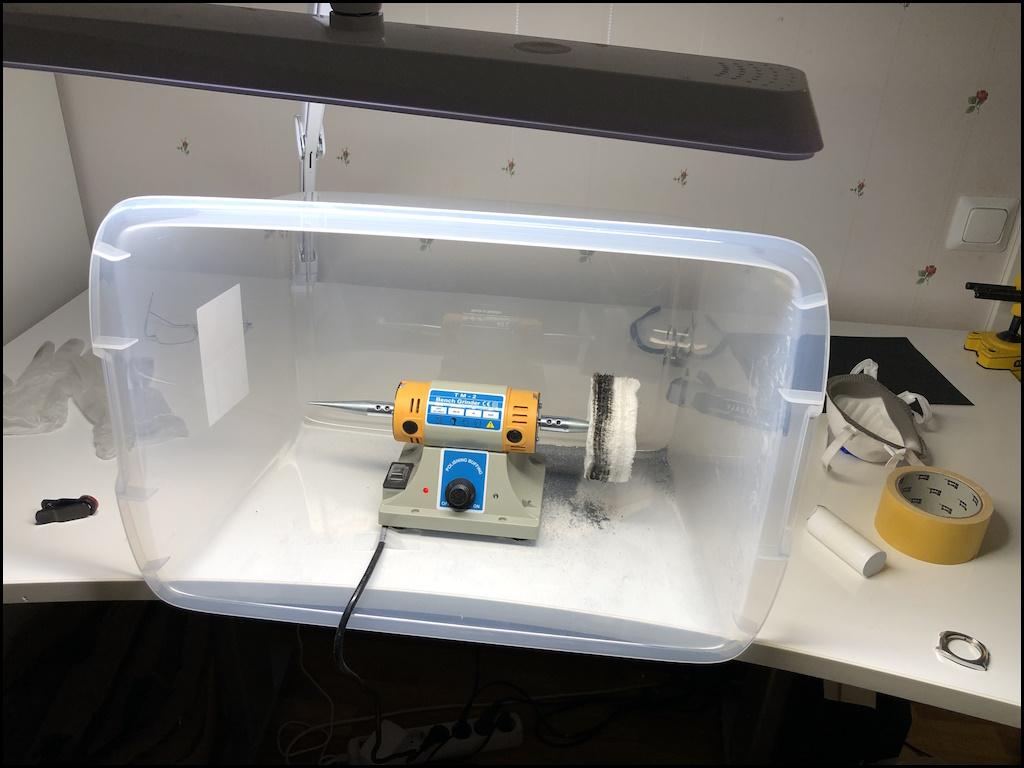
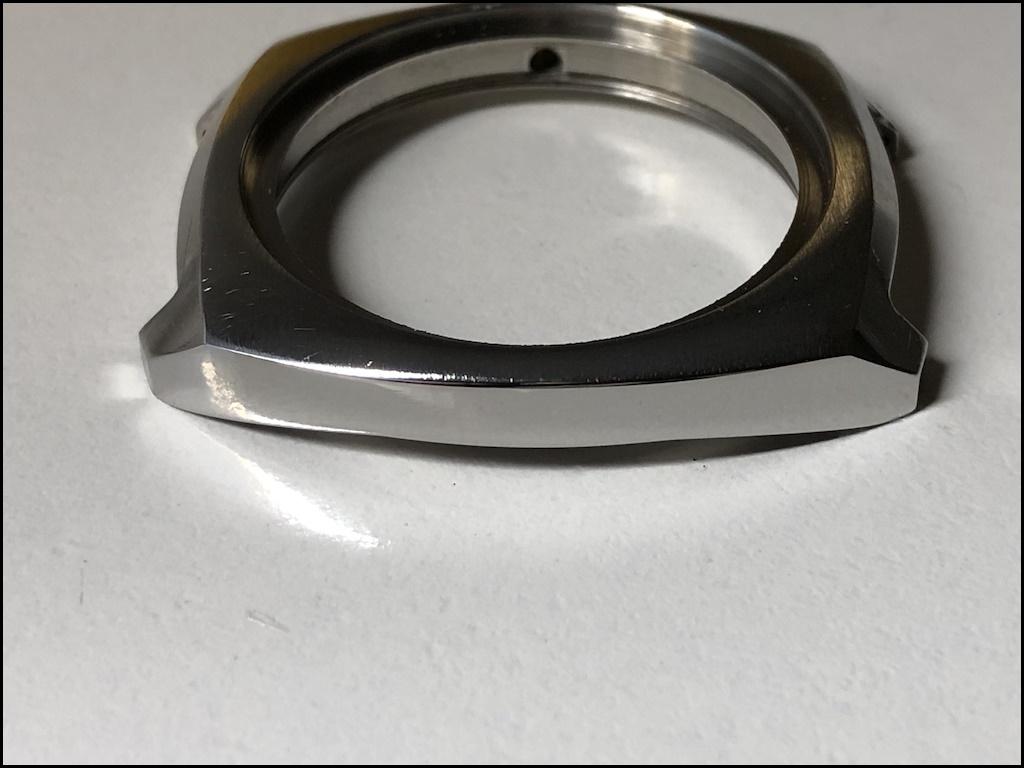
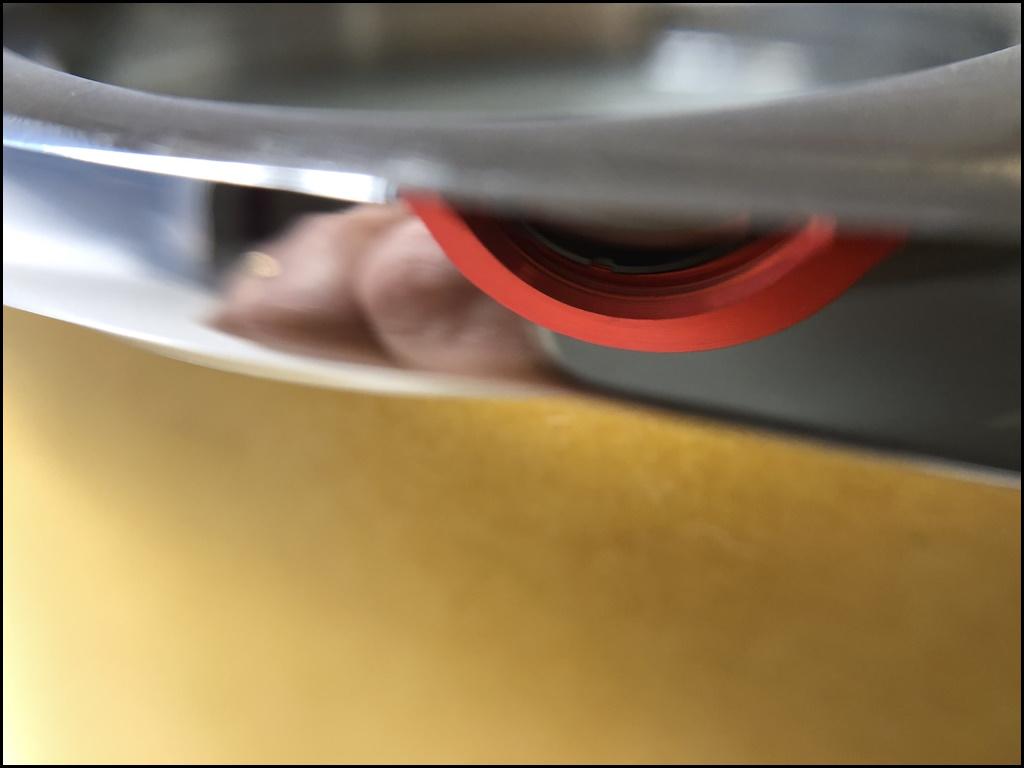
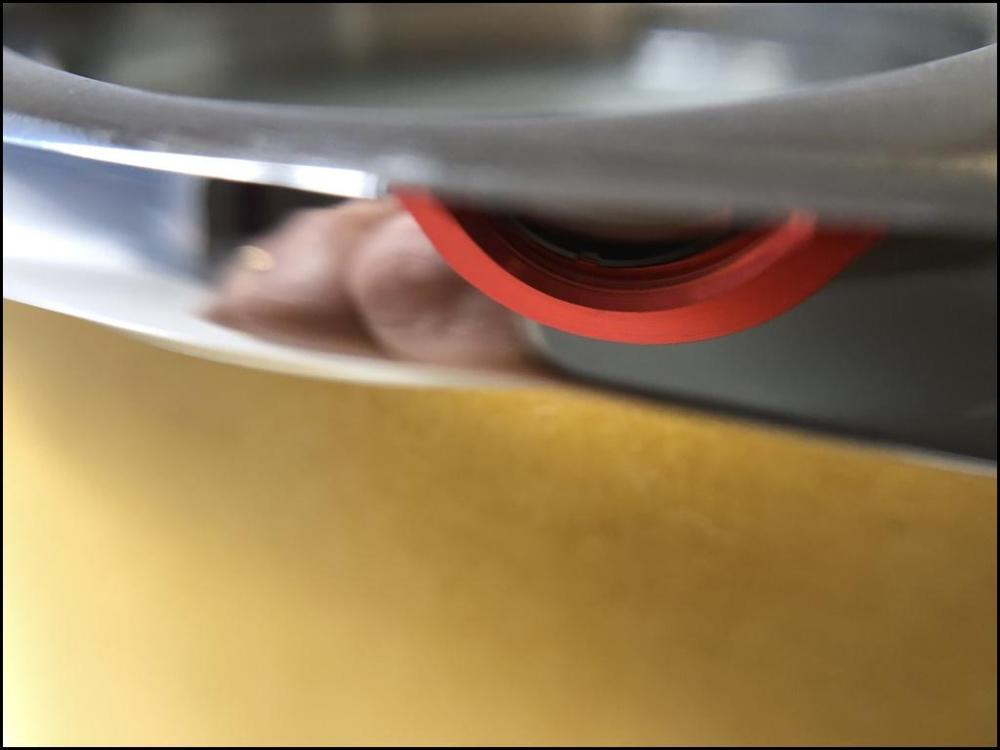
I have now received most of what I ordered from Cousins to start polishing. I'm still missing Kapton tape to mask off already high-polished sections, but it's been ordered and will probably arrive in a few days. As a first attempt, I only tried to polish the left side of the case which should be mirror-polished. I ordered three polishing wheels: One from the 2nd stage (4" x 2" Aurelia (Calico) 112 fold), one from the 3rd stage (4" x 2" Madapolam, 120 fold, UK), and one from the 4th stage (4" x 2" Felpato, 60 fold). I started with grey Dialux along with the wheel from the 2nd stage and got exactly the result advertised on Cousins' site, i.e. all superficial scratch marks were quickly buffed away. However, deeper pits cannot be counted on to disappear. I tried for a long time to polish off some small deep pits but it was hopeless. In the end, I had to get out my wet sandpapers and my mini sanding block, which meant a lot of work. There was so much work that I finally started cramping my fingers. Maybe orange Dialux along with a 1st stage wheel could work to remove some potholes, but I doubt it. Unfortunately, I don't think you can eliminate wet sandpaper from the process. I have ordered a sanding file and a square sandpaper holder from Cousins. Hopefully, that will ease the process. When I had finished sanding, I polished again with grey Dialux and the same 2nd stage wheel. In the next step, I switched to the 3rd stage wheel along with blue Dialux and got an even nicer finish but not perfect. Still, I think most people would be happy with this finish. Finally, I switched to the 4th stage wheel along with Polinoxx polishing compound and I think I got a more than acceptable result if not perfect. I don't think my result would be approved by Jaeger-LeCoultre but at least my wife thought it looked very nice, and that's always something! I have to say that I benefited a lot from Kalle Slaap's video "How to polish your vintage watches - Part 4 Practical Tips". Here are some pictures: Fortunately, the polisher is so small that it fits together with most of the accessories in the same box as it was delivered. Good for me as I don't have a workshop and have to pack the stuff away when I'm done. When I first unpacked the machine, I was sceptical that such a small machine would really work efficiently enough, but that concern was completely put to shame. I have to say it works amazingly well and seems very strong, quiet and efficient, so I'm very happy with my choice of machine. Many thanks for the tip @Waggy As you can see, it's a set inspired by Waggy's set (again, many thanks!) It would have been handy if my plastic box had been 15 centimetres wider, but I was impatient and didn't go to IKEA, but instead found this plastic box in a store (Jula) nearby for just £4, so it will do for now. I'm also very happy that I chose the wider two-inch wheels so I can work the way Kalle Slaap suggests in the video I linked. Here is a picture of the final result, as I said, it is only the left side of the housing that I polished. The rest remains. Another picture of the final result that better shows the mirror shine. If you look at the right side lug, I missed a particularly deep pit. However, it is now so small that I don't want to start sanding again. When you work with sandpaper, the initial rough scratches from the sandpaper hide many pits that you then don't discover until you get to the finer sandpaper and then you just have to start over. So it's worth noting where the pits are before you start so you have a chance to inspect these places extra carefully before you go ahead with the sanding. I'm only including this picture because I think it's funny to the extent that you can see part of the red macro lens. Many thanks to all of you for your input, your pictures and your tips! Incredibly valuable for me and hopefully for many others now and in the future.


 1 point
 -
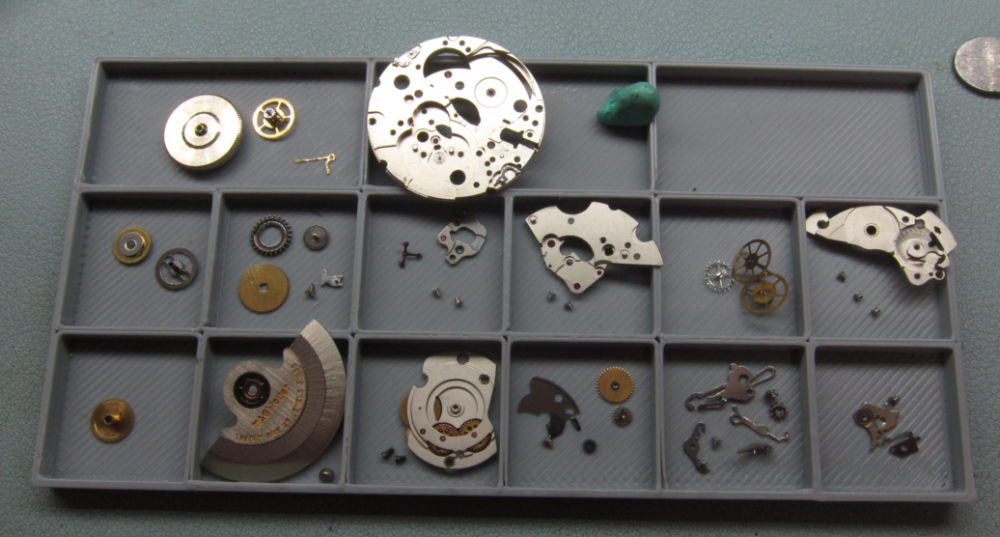
I never clean the screws unless there is an obvious reason to do so. I make my own multi-section parts tray and the screws go in the compartment with their associated part. Once fully disassembled, I take a picture. After cleaning, I put the parts in their compartment where their happy little screws reside. Done
 1 point
 -
Good for you we all have to start with something. Tweezer and loupe etiquette soon comes so will using your screw drivers. What will be your next project? try to keep it simple.1 point
-
Looks just like the 2414 I have. They run pretty well once cleaned and oiled. The movement looks in good condition, what's wrong with it? Do you have timegrapher plots? They usually have a shim under the balance cock. It looks like yours may be too far out, so check the balance end-shake.
 1 point
 -
pm received, will sort out some packaging and hopefully post this weekend.1 point
-
Thank you, but that type of repair is way above my skill level!1 point
-
Hi, got hooked when i stumbled upon Alex’s youtube channel and i was looking to restore my uncle’s Longines and Omega that i inherited. setup my watchmaking corner and been practicing on an ST36. Glad to joining the community.1 point