Leaderboard


Popular Content
Showing content with the highest reputation on 01/29/24 in all areas
-
I have successfully completed my first attempt at electro-plating. I have a few cases that were prepped by stripping the old plating and fully polishing (which took ages doing by hand). About 2 weeks ago I bought a book on the subject of electro-plating. I read the book cover to cover a few times (it was a very small book), and I thought I had a pretty good understanding of the process of electro-cleaning, surface activation, and the application of bright nickel plating. I also received some incredible help from a member of this forum who provided me with some info and tips that they've learned throughout their time in plating. I'm happy to say that my first try at this wasn't a total failure! Here are the results just after the final rinse. I wanted to plate about 20 microns on the case. My thought was that it would give me a little cushion to smooth out some of the defects. Thankfully the defects were actually quite minor. There was a small section where the plating looked to have a slightly rough surface. I believe this occurred when I was adjusting the position of the case in the tank. I bumped the anode and it came into contact with the case for several seconds. Everything else turned out quite nicely, with the exception of that rough patch. About 1 minute on a soft cotton buff with some white Dialux smoothed it out beautifully. I'm really pleased with the results!
 2 points
 -
Great advice I recently had mine serviced and the lack of complications puts it in a different category than a chrono. All that being said I hope in 5ish years I feel comfortable enough cracking it open. Time will tell thats for sure. I love it enough to not ruin it lol. Thanks again.2 points
-
As long as the chips are at the end, you can still use the tool. I ended up buying 2 tools, the first had a big chip which I knew about, but I could work around. However this was not the only chip and the entire length was peppered with tiny micro-chips which made it unusable. I then bought a second tool, this time I got lucky and the jaws were in mint condition. So its a matter of getting lucky, but an expensive game of chance!2 points
-
Quick update, I have the dial back together and looking OK, not great just OK (pictures to follow). I also have the watch ticking....However, its a little like 'Triggers Broom', AKA Ship of Theseus, below are the parts that have been replaced: Main plate - the dial feet retainer eccentric screws were rusted away and these are riveted in place so I wasn't sure if/how these could be replaced, also the mainspring hole was beyond repair due to a previous badly executed "hammer time" attempt - I suppose I could have bushed it, but I had a spare.... Ratchet wheel - badly corroded and about 1/3 of the teeth gone Second reduction wheel - this disintegrated upon removal Pawl levers, one leg snapped after rust removed Bridge of wheels - the post for the rotor was corroded Click spring - disintegrated/snapped after rust removed Center wheel - Corrosion had made the bearing surface too rough so it would not spin freely in the jewel Hour wheel - was rusted to the cannon pinion so ID was damaged Cannon pinion - was rusted to the hour wheel so was damaged Rotor - bearing race was corrosion damaged and thread was corroded away - easier to replace then repair First reduction wheel - this had corrosion damage, but still serviceable, however the wheel was cracked Crystal - was polishing ok, but slipped from my hands and broke on the floor Escape wheel - bent (not broken?!?!) pivot Third wheel - broken pivot Balance - balance staff pivot broken Still need to re-assemble the dial side Just thinking... it may have been quicker to list the things I did keep! But all good practice and fault finding. ***Forgot to mention, that the initial timegrapher readings after quick adjustment less than an hour after reassemble were: +5 seconds/day 180 degrees amplitude 0.1 ms beat error Nice straight parallel lines (after demag.) Note: the amplitude is low but hopefully this will improve over the next 24/48 hours to the usual Seiko mid-low 200's
 2 points
 -
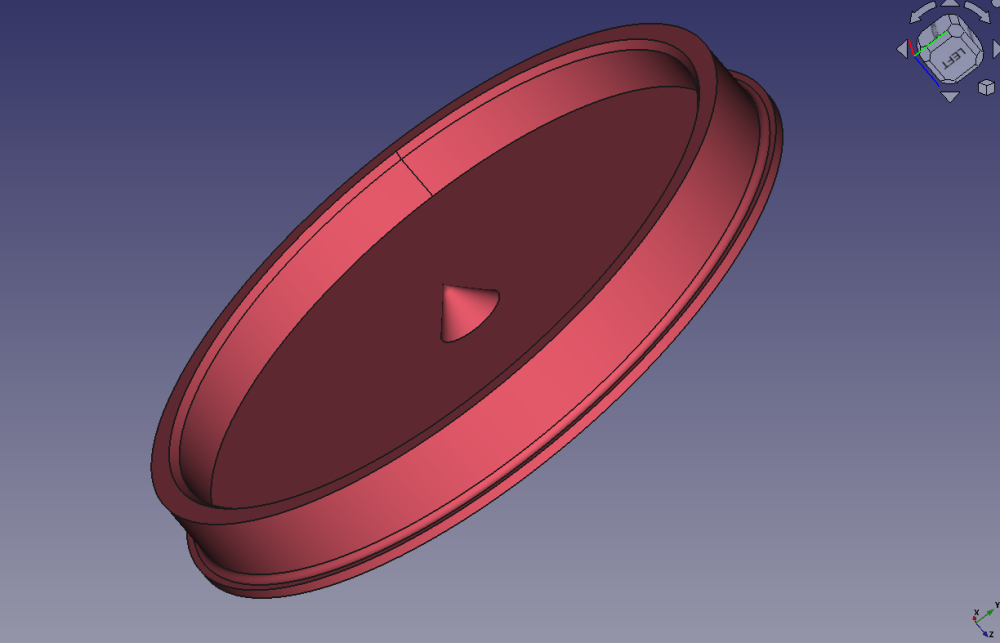
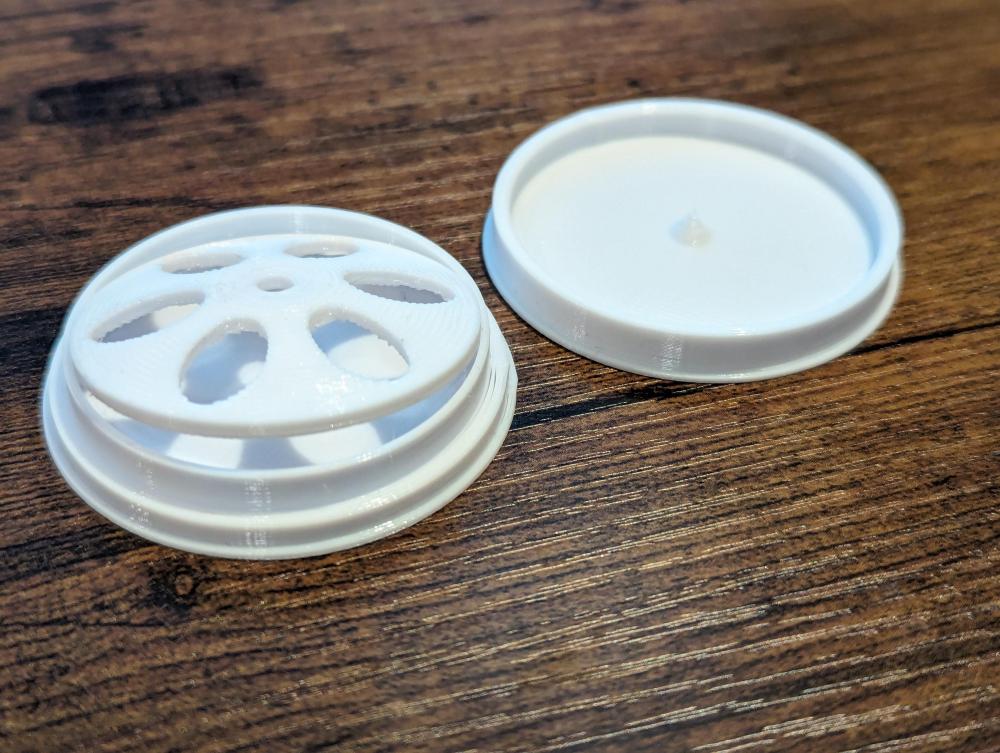
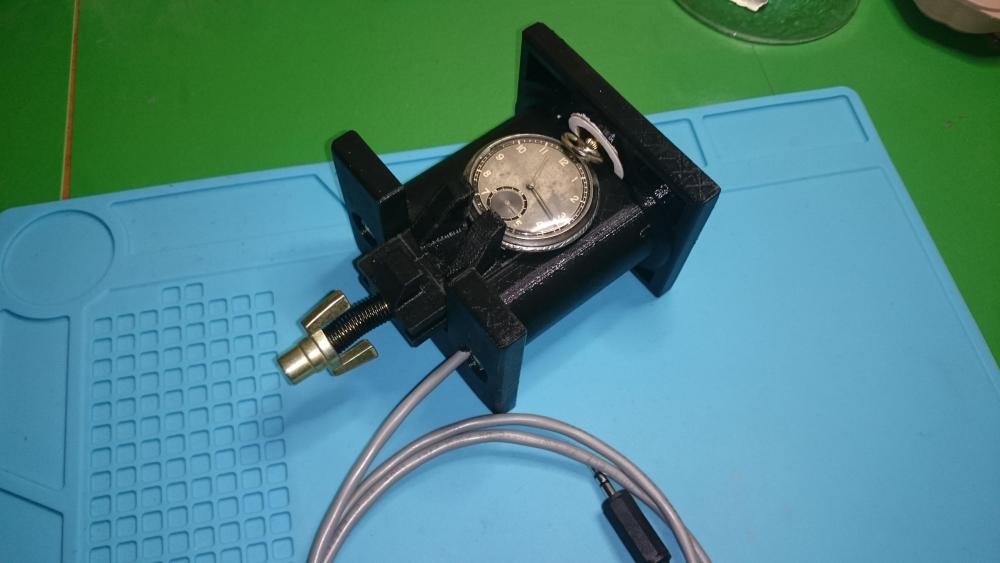
Hi there, been working on a few projects today, and the below is one of them. I have modelled the watch crystal protector trays and printed a prototype (see below picture in white). I printed all 3 parts in white PETG just to check fit and form. My plan is to print the base in white PETG (same as the prototype) but the lid in clear PETG. The clear PETG will not be crystal clear, but should let me get a good idea of what's inside without having to open the lid. For the 'spring' (blue mesh thing in picture below) I plan to use TPU which should give some springyness.. Once I have the real ones printed, I'll post pictured and the CAD files. Base and 'spring' Lid: Prototype:
 2 points
 -
Awesome advice, I ordered an inexpensive demagnetiser today. Hoping that does the trick. Otherwise I've been happy with the performance of the set I have. The fit nicely in my hand and I can manipulate the parts well. Thanks everyone!2 points
-
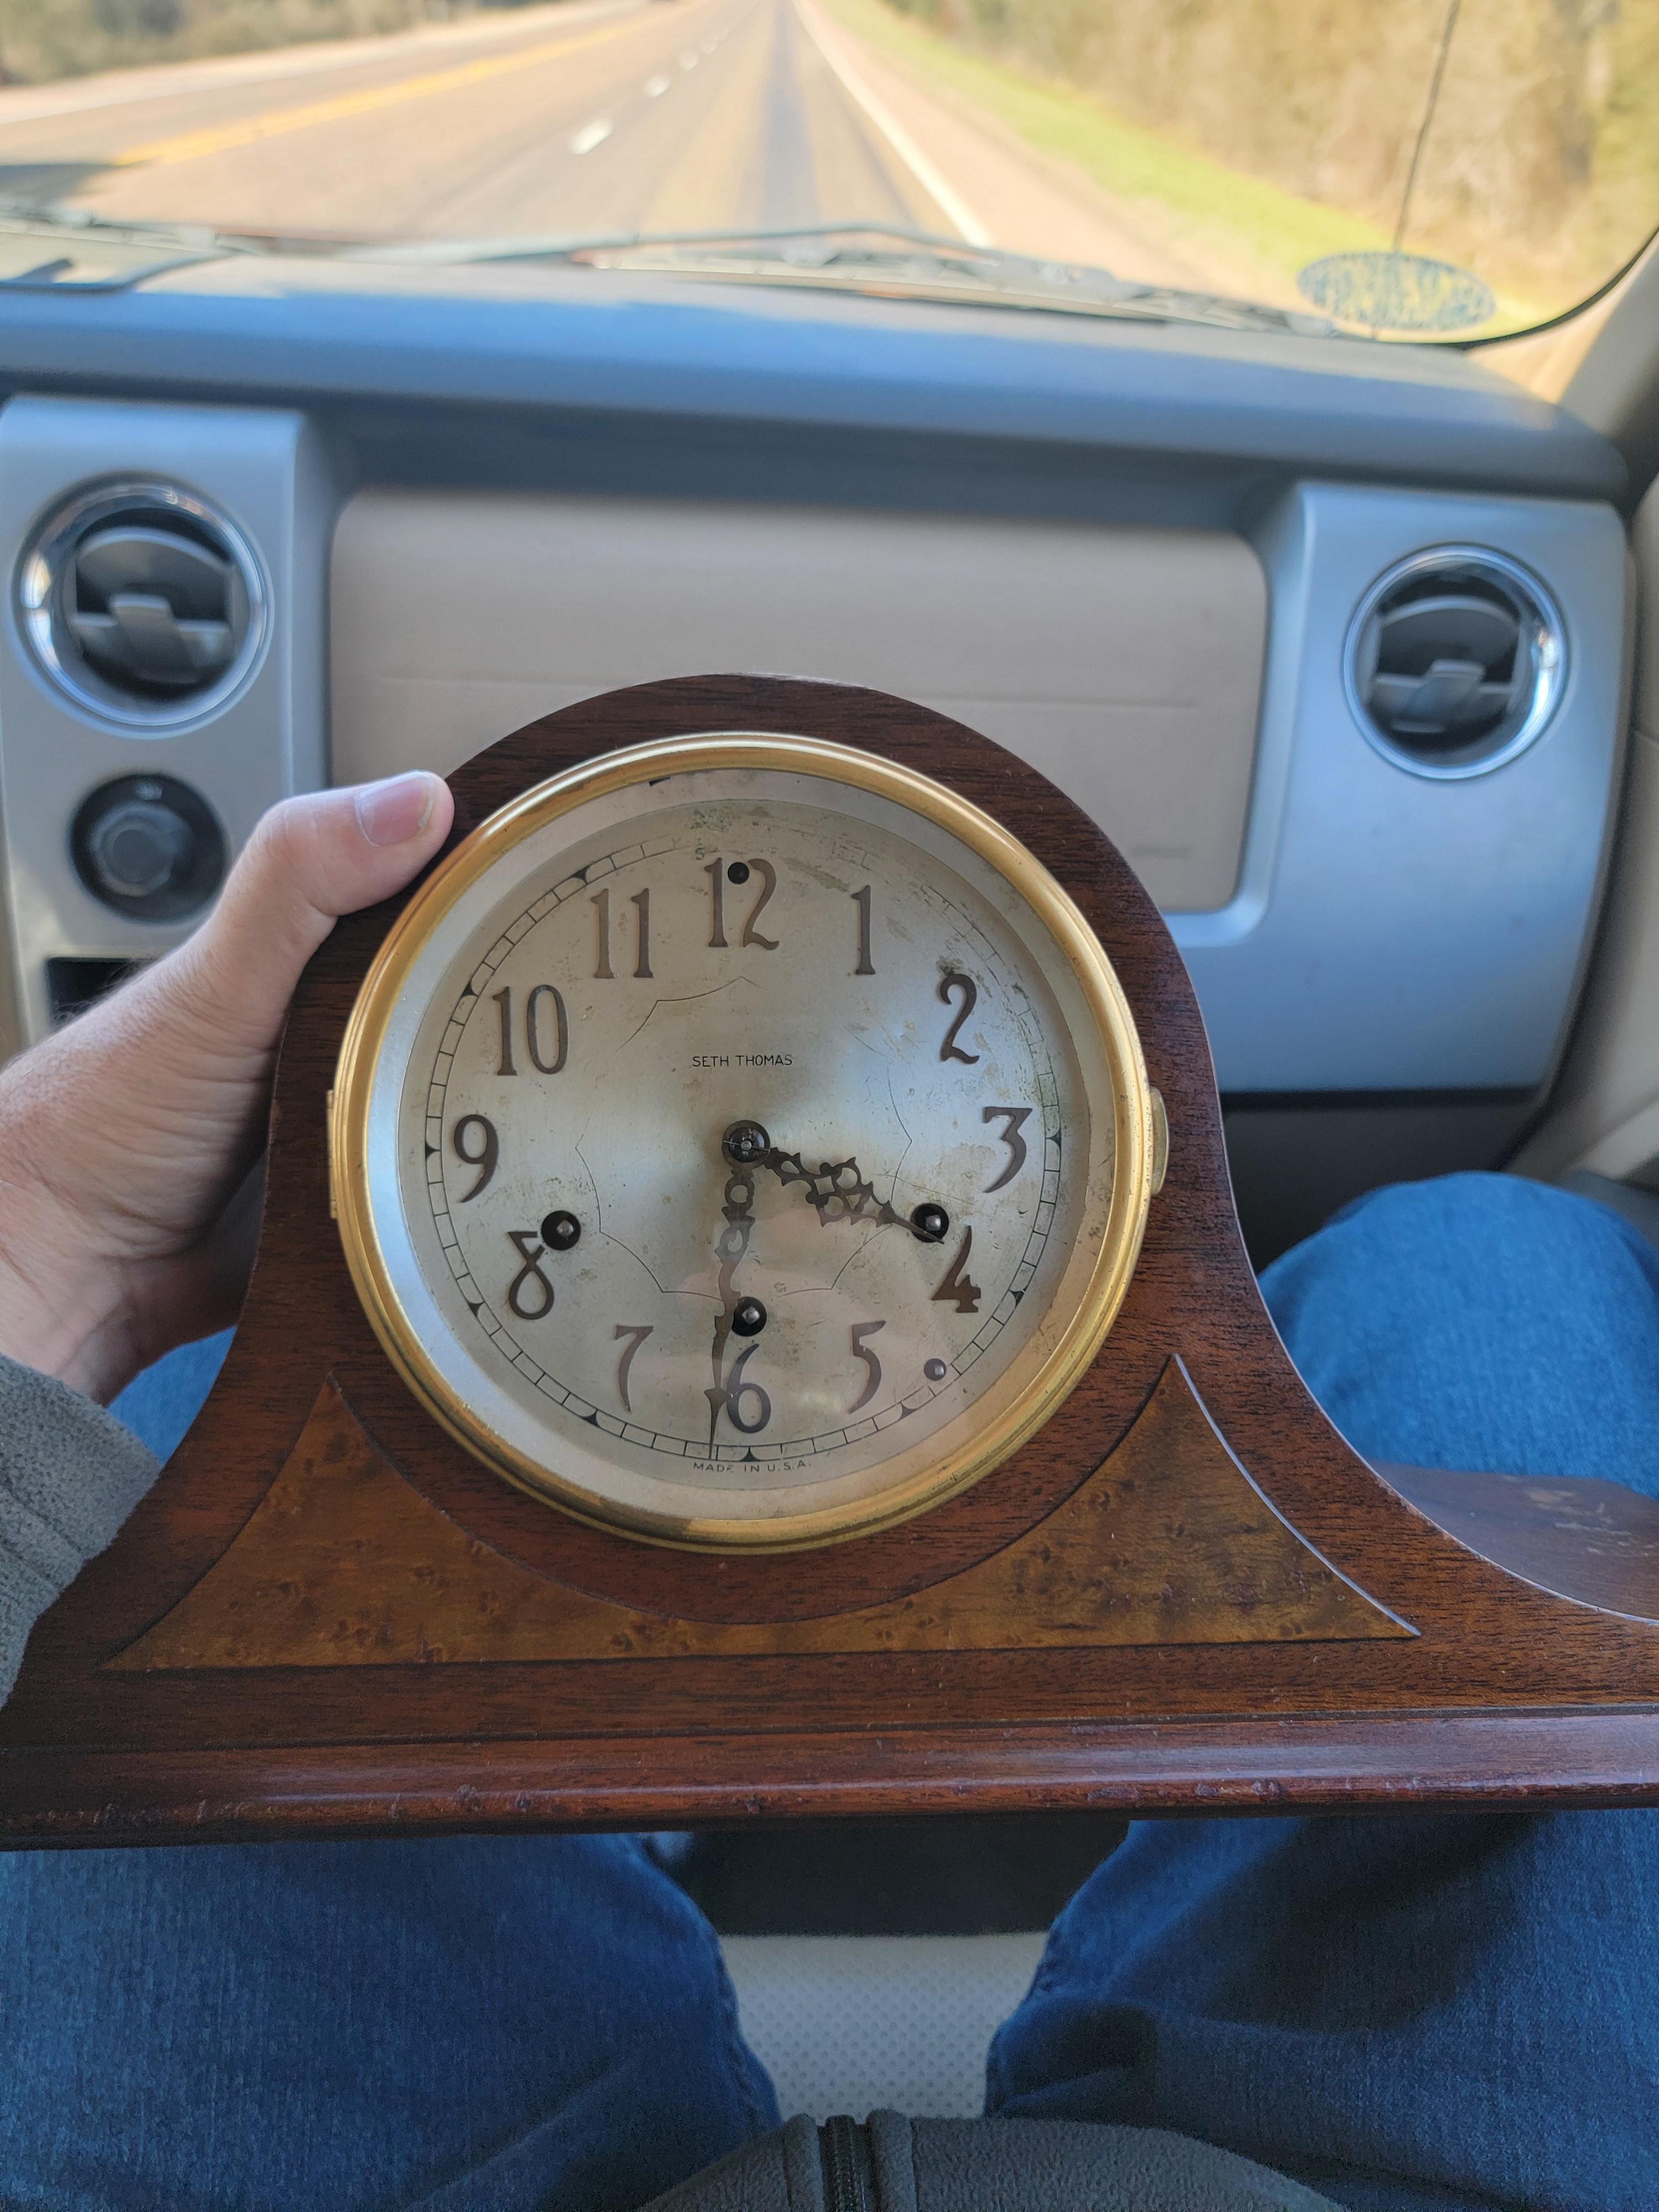
Picked this up today outside of Madisonville, TX. $70. It is running! I will do a full service soon, however.
 1 point
 -
Is the ST 96 basically the same as an FHF 96 but produced by another company? Yeah this community is superb, did not know such nice places existed on the internet these days1 point
-
ST 96 are made in India now and are inexpensive, a brand new movement can be had for $ 30 or less. Just thought to inform you cuz here at WRT we wouldn't want members overcharged by non members .ha ha See how friendly this community is. lol1 point
-
The pivot on the escape wheel is indeed broken. I managed to find someone close by that sells vintage watches and has some more FHF 96's, so I'll pick one or two up soon to practice on and resume this wonderful journey! Thanks for the help everyone!1 point
-
1 point
-
one of the things you have to be careful with American pocket watch staffs and jewels are. Despite having a parts book that says a exact specific staff and perhaps exact specific jewel goes in that watch you oftentimes find variations. Elgin intended to be better at documenting their variations so you can have one staff number that's actually see the three or four different staffs by GNU style and old-style slaves physical differences in the staff itself and then each staff couldn't have up to five different pivots sizes. Which is why of course you always need to measure before the staff came out in the staff that's going and just to make sure that they agree then sometimes the aftermarket parts can be a different size. For instance the Hamilton 992B only has one balance staff but I've seen a replacement staff for it physically would not go in and it's a friction staff because it was too big. so yes American pocket watch parts is not an exact science because there can be so much variation. But you can have a parts book that specifies a very exact part because maybe the book was written the early in the life of the watch and the watch was made for number of years.1 point
-
I dont know about you but i can see about 20 years into the future with one. I will be found in a locked room, a skeleton behind a bench in a chair surrounded by old watches and dusty tools.1 point
-
Haha now i know what to get you for xmas John .
 1 point
 -
the replacement jewel are you sure it's exactly the same as whatever the original was? Like is the pivots size exactly what it's supposed to be? Then visually if you look at the amplitude and not rely on the timing machine when it's running at 300 and something does visually the balance wheel look like it's really running that that? oh and other minor little thing your lift angle is probably not 52°. oh another thing you want to look at is the hairspring regulator pins how close together are they. The farther apart they are and they're not supposed to be there supposed to be as close as you can get them without actually grabbing the hairspring for an over coil. But when you have amplitude changes lower amplitude in particular it watch will go slower because your regulator pins are too far apart. Although you really do need to fix the amplitude issues but still the regulator pins will really amplify this problem1 point
-
The slot for the missing pallet stone seems to be bent - opened. Be verry carefull when closing it, as it is easy to break. Put something just a little thinner than the stone in the slot to limit the closing. The hairspring is repearable, it is big, so charge with patience and go ahead.1 point
-
Could be perfectly normal. When the balance is at rest, are the coils evenly spaced? Ideally, post some photos or a link to a video1 point
-
These things are HEAVY. On the order of 65 pounds if memory serves. Comes in two large, well padded boxes.1 point
-
Good question Ocean. Good Answer Never. Working on hairsprings is my next learning curve endeavour. Starting today. Hairspring, hairspring and hairspring. Practice, practice and practice.1 point
-
A picture will help. The best way to center the coils is to remove the hairspring from the balance . Mount the hairspring back onto the balance cock and make adjustments at the stud to center the collet over the balance jewel. This might only be one half of the adjustments needed to fully adjust a hairspring for roundness and flatness. As you can see the hairspring is held at both of its ends so how the hairspring exits the stud AND the collet has an effect on how the hairspring behaves So adjustment at the collet may also be needed ( often not depending if any clumsy previous repair work ) by fitting the balance and hairspring into truing calipers to true the hairspring from its collet point. It can also be done by skeg of E ( eye ) by fitting the collet onto a needle or a broach. Hairspring then has to be remounted back onto the balance in the correct position ( its position should be marked on the balance wheel before removing ) fitted back onto the movement all without disturbing the adjustments that were made. This might sound a lot for a beginner to deal with but it is proper way and a goal to aim for as experience grows. A short cut without all those checks and adjustments, could easily be just one or 2 adjustments at the stud while the balance is fitted to the watch. A simple push pull or twist of the hairspring right as it leaves the stud may be all thats needed to round-up or flatten the hairspring into shape as long as the hairspring is exiting the collet reasonably well ( extra manipulation at the stud could compensate for very slight error at the collet ). If the balance has an Etachron adjustment system things will be much easier to set up. Dont forget the regulator pins also play a part as well, the hairspring has essentially 3 points of contact 1. At the stud 2. At the collet 3. Between the regulator pins. Pay attention to all 3 areas, but generally its most often exiting at the stud and adjustment of the pins that need looking at. Post up some pickies and folk here will walk you through it.1 point
-
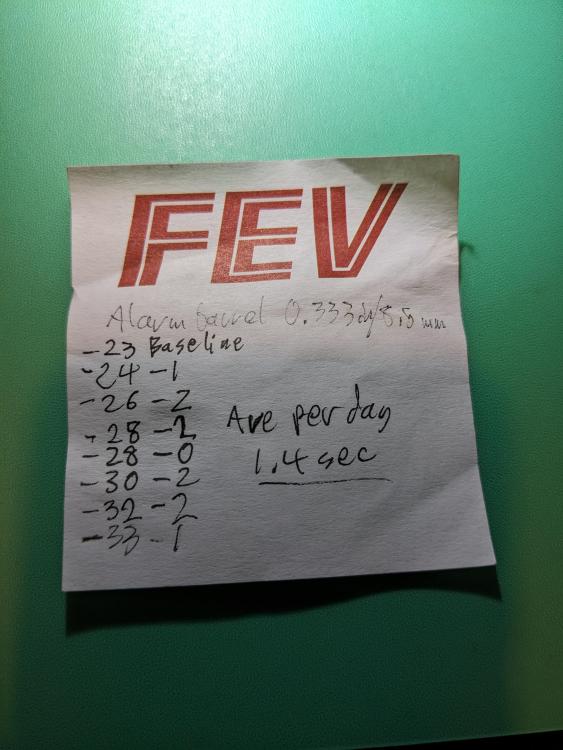
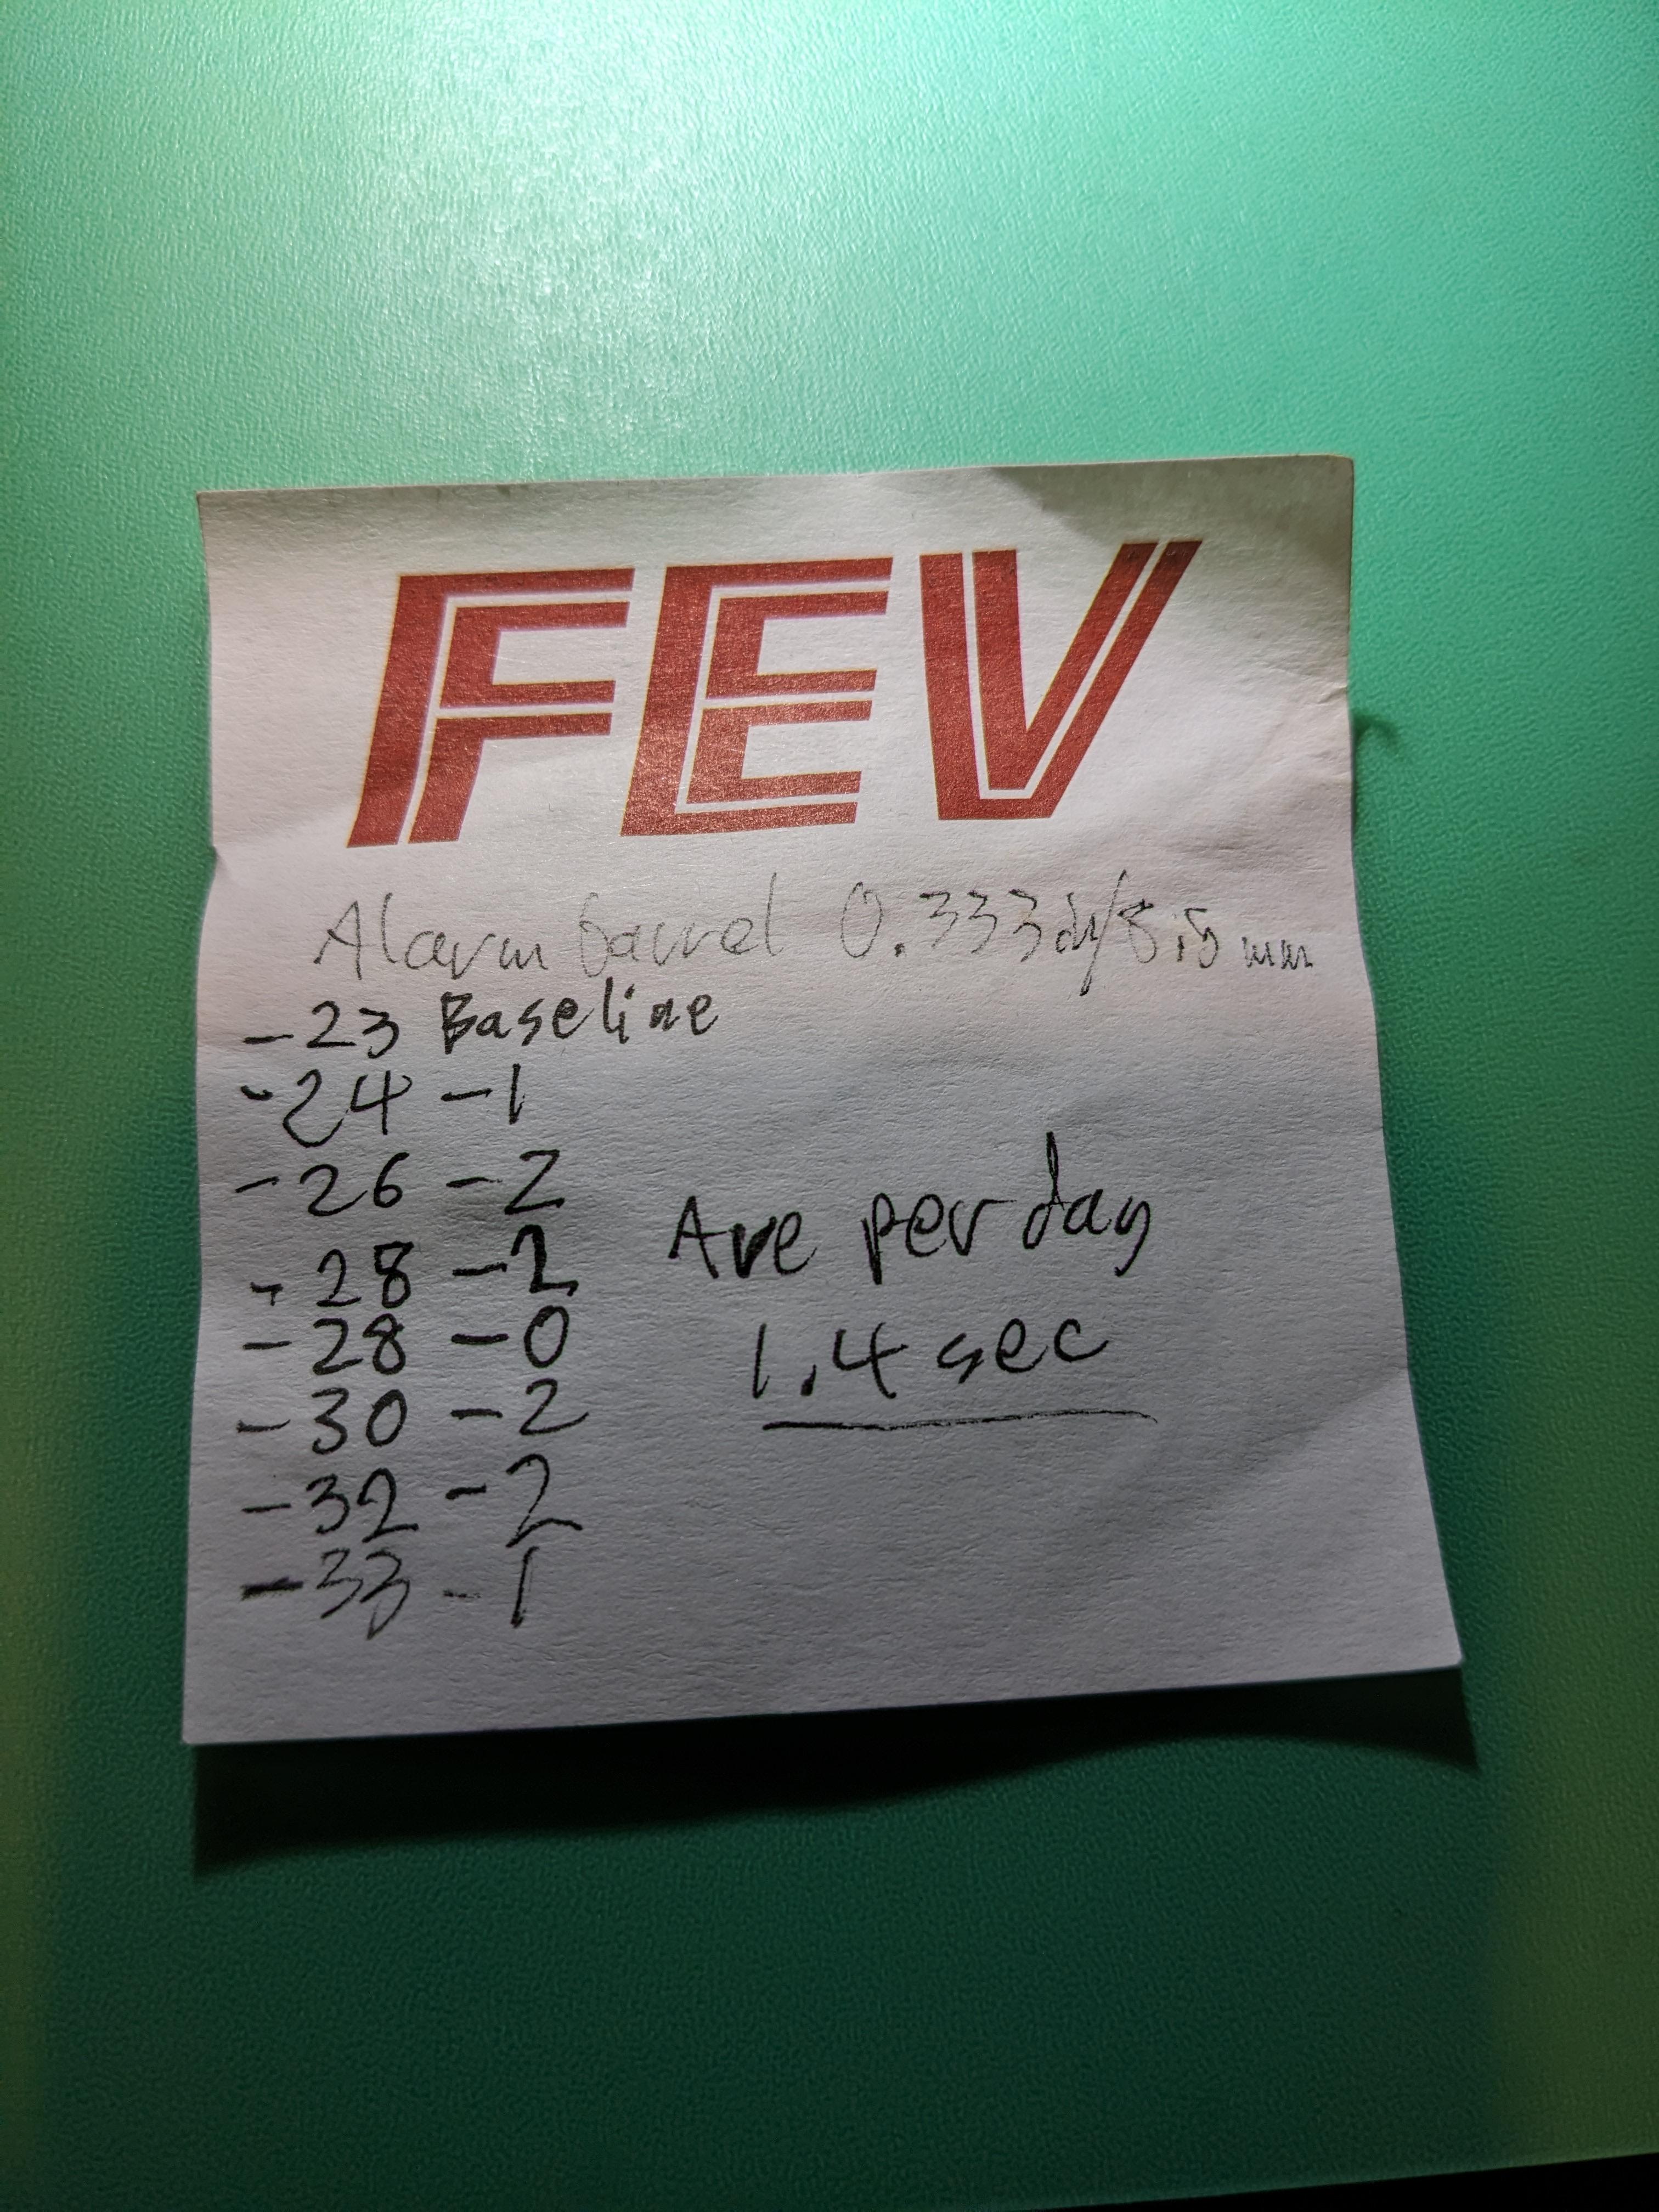
Ok here it is. 7 days on the wrist. 1.4 seconds average deviation.
 1 point
 -
Hi Mizinski, In order to be able to help, we will need more information, than You give us. When You did that swap, was the amplitude normal in DU position? Is there difference between amplitudes when You cnange the upper setting with the new one? And, what hapeened with the axial free play - is it normal now? So far, we know nothing about amplitude - is/was it normal in any position? We don't know if the new setting is the right one for the caliber. I wouldn't worry about that, but I will need to know if it lays prefect in the incablok, is the axial free play correct and if the internal diam of the new hole jevel is correct for the pivot. If the hole is narrow, a little burhishing of the pivot will solve the problem. Furdher more, if the axial free play is still big, I would need to know if there is enough clearence between the staff shoulder above the hairspring collet seat and the bottom of the incablok in DU position. And, I am sorry if it is under You level, but are You sure that the pivot and pivot head is normal, and the hairspring is not rubbing on the bridge in DU position only? I will advice to dissassemble all and leave only the balance with it's cock on the plate. This will ease the observations needed to understand what is not correct, also doeing the free oscillation test. This test will show is the problem with the balance solved, without need to assemble and test the whole movement1 point
-
It's easiest to just pick the manufacturer from the list below the search feature, then pick out your movement. That database has zero forgiveness for search terms that don't fit their exact naming conventions.1 point
-
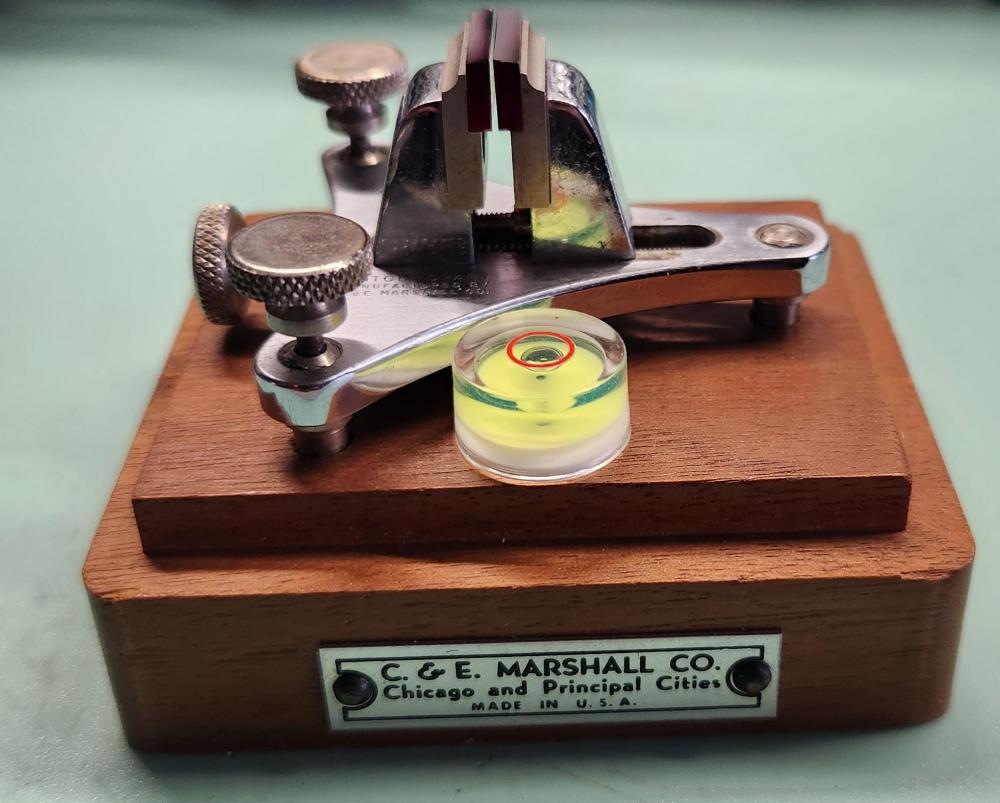
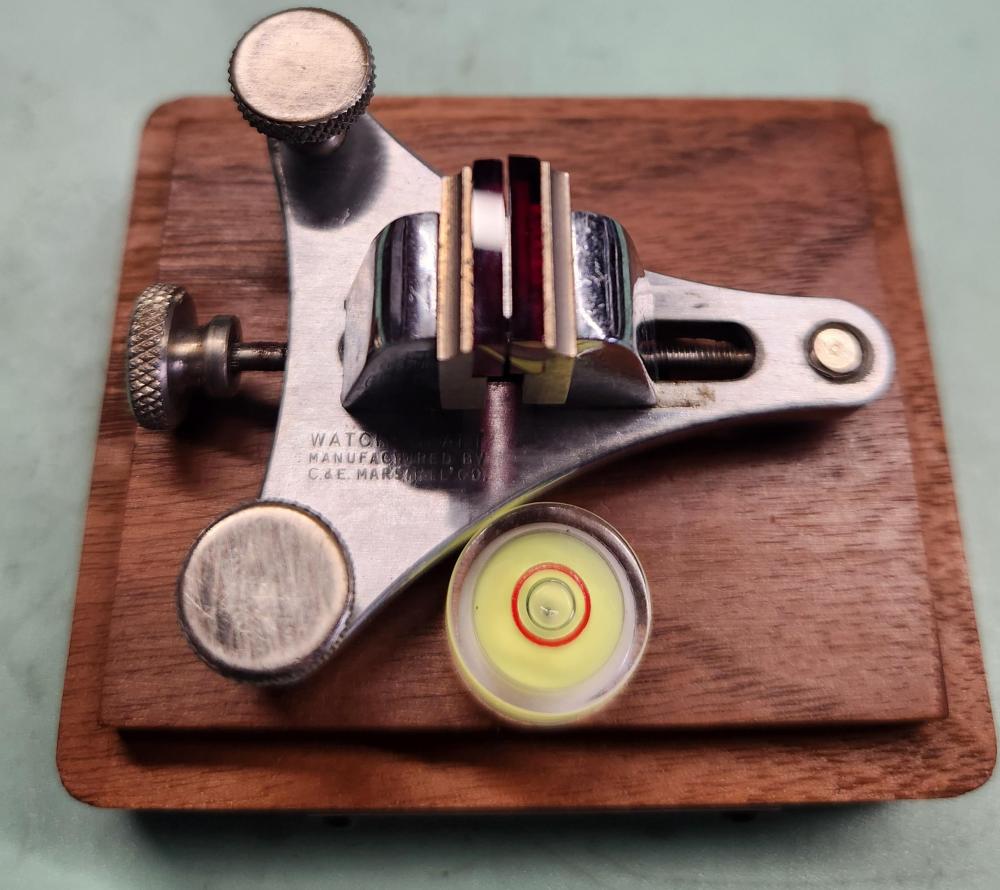
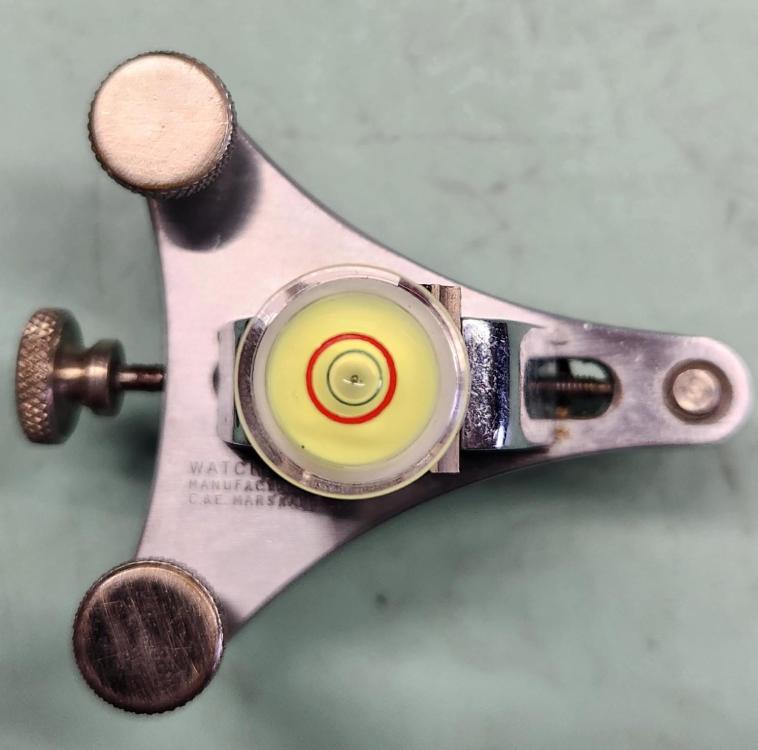
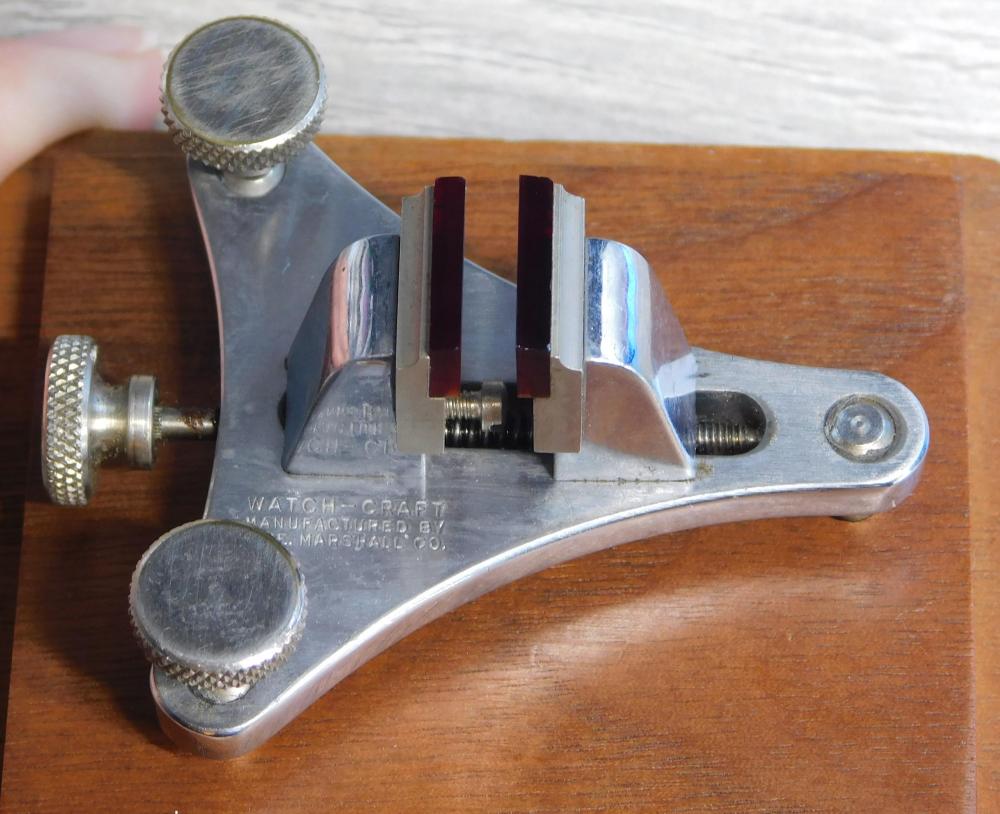
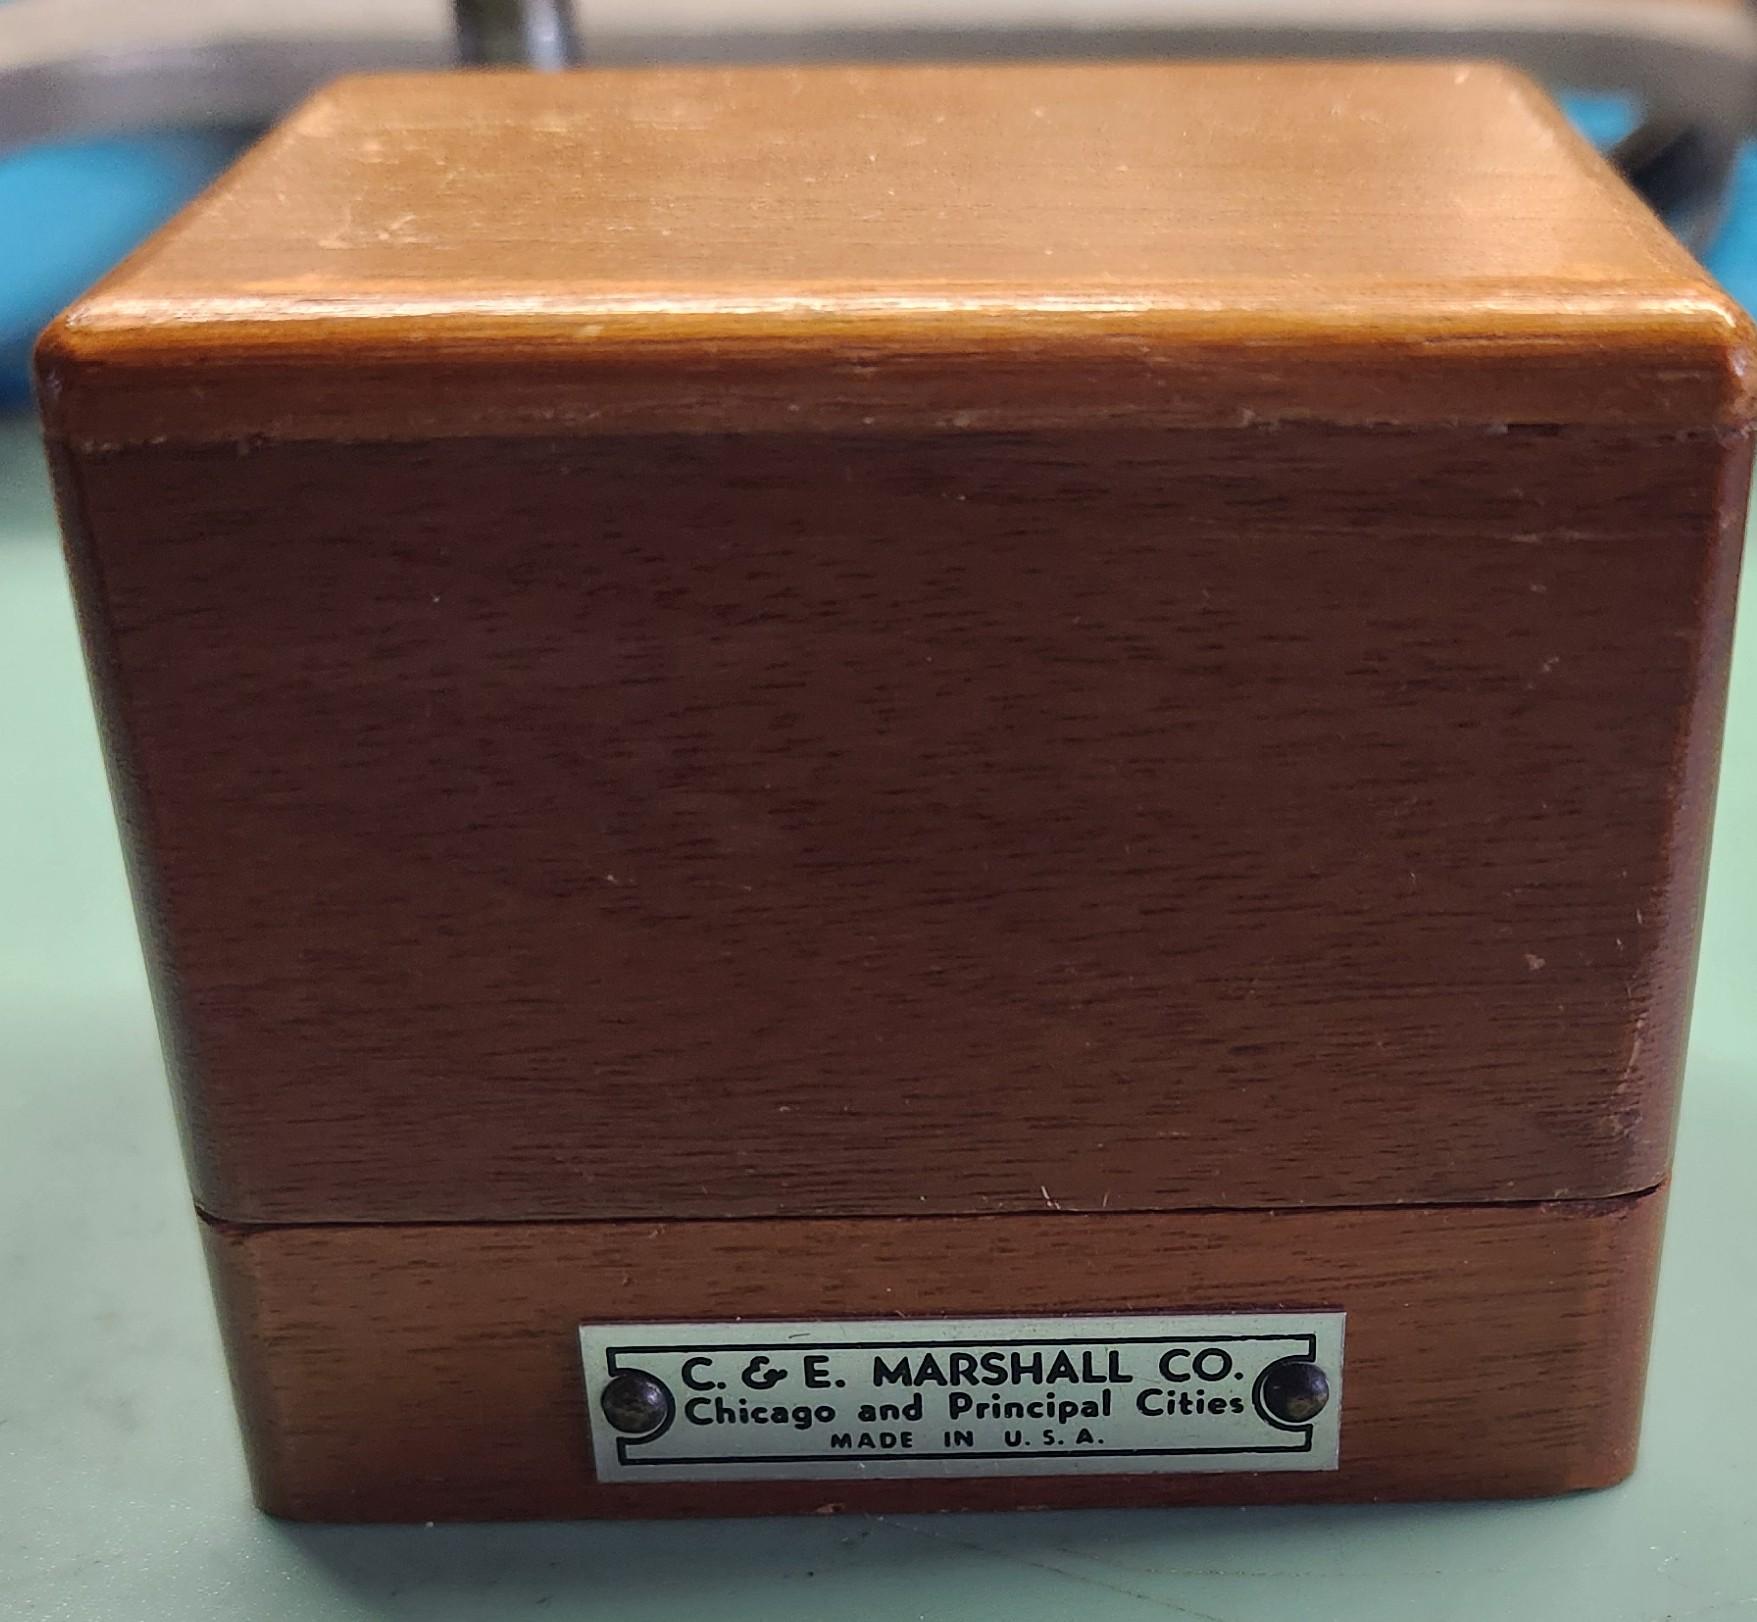
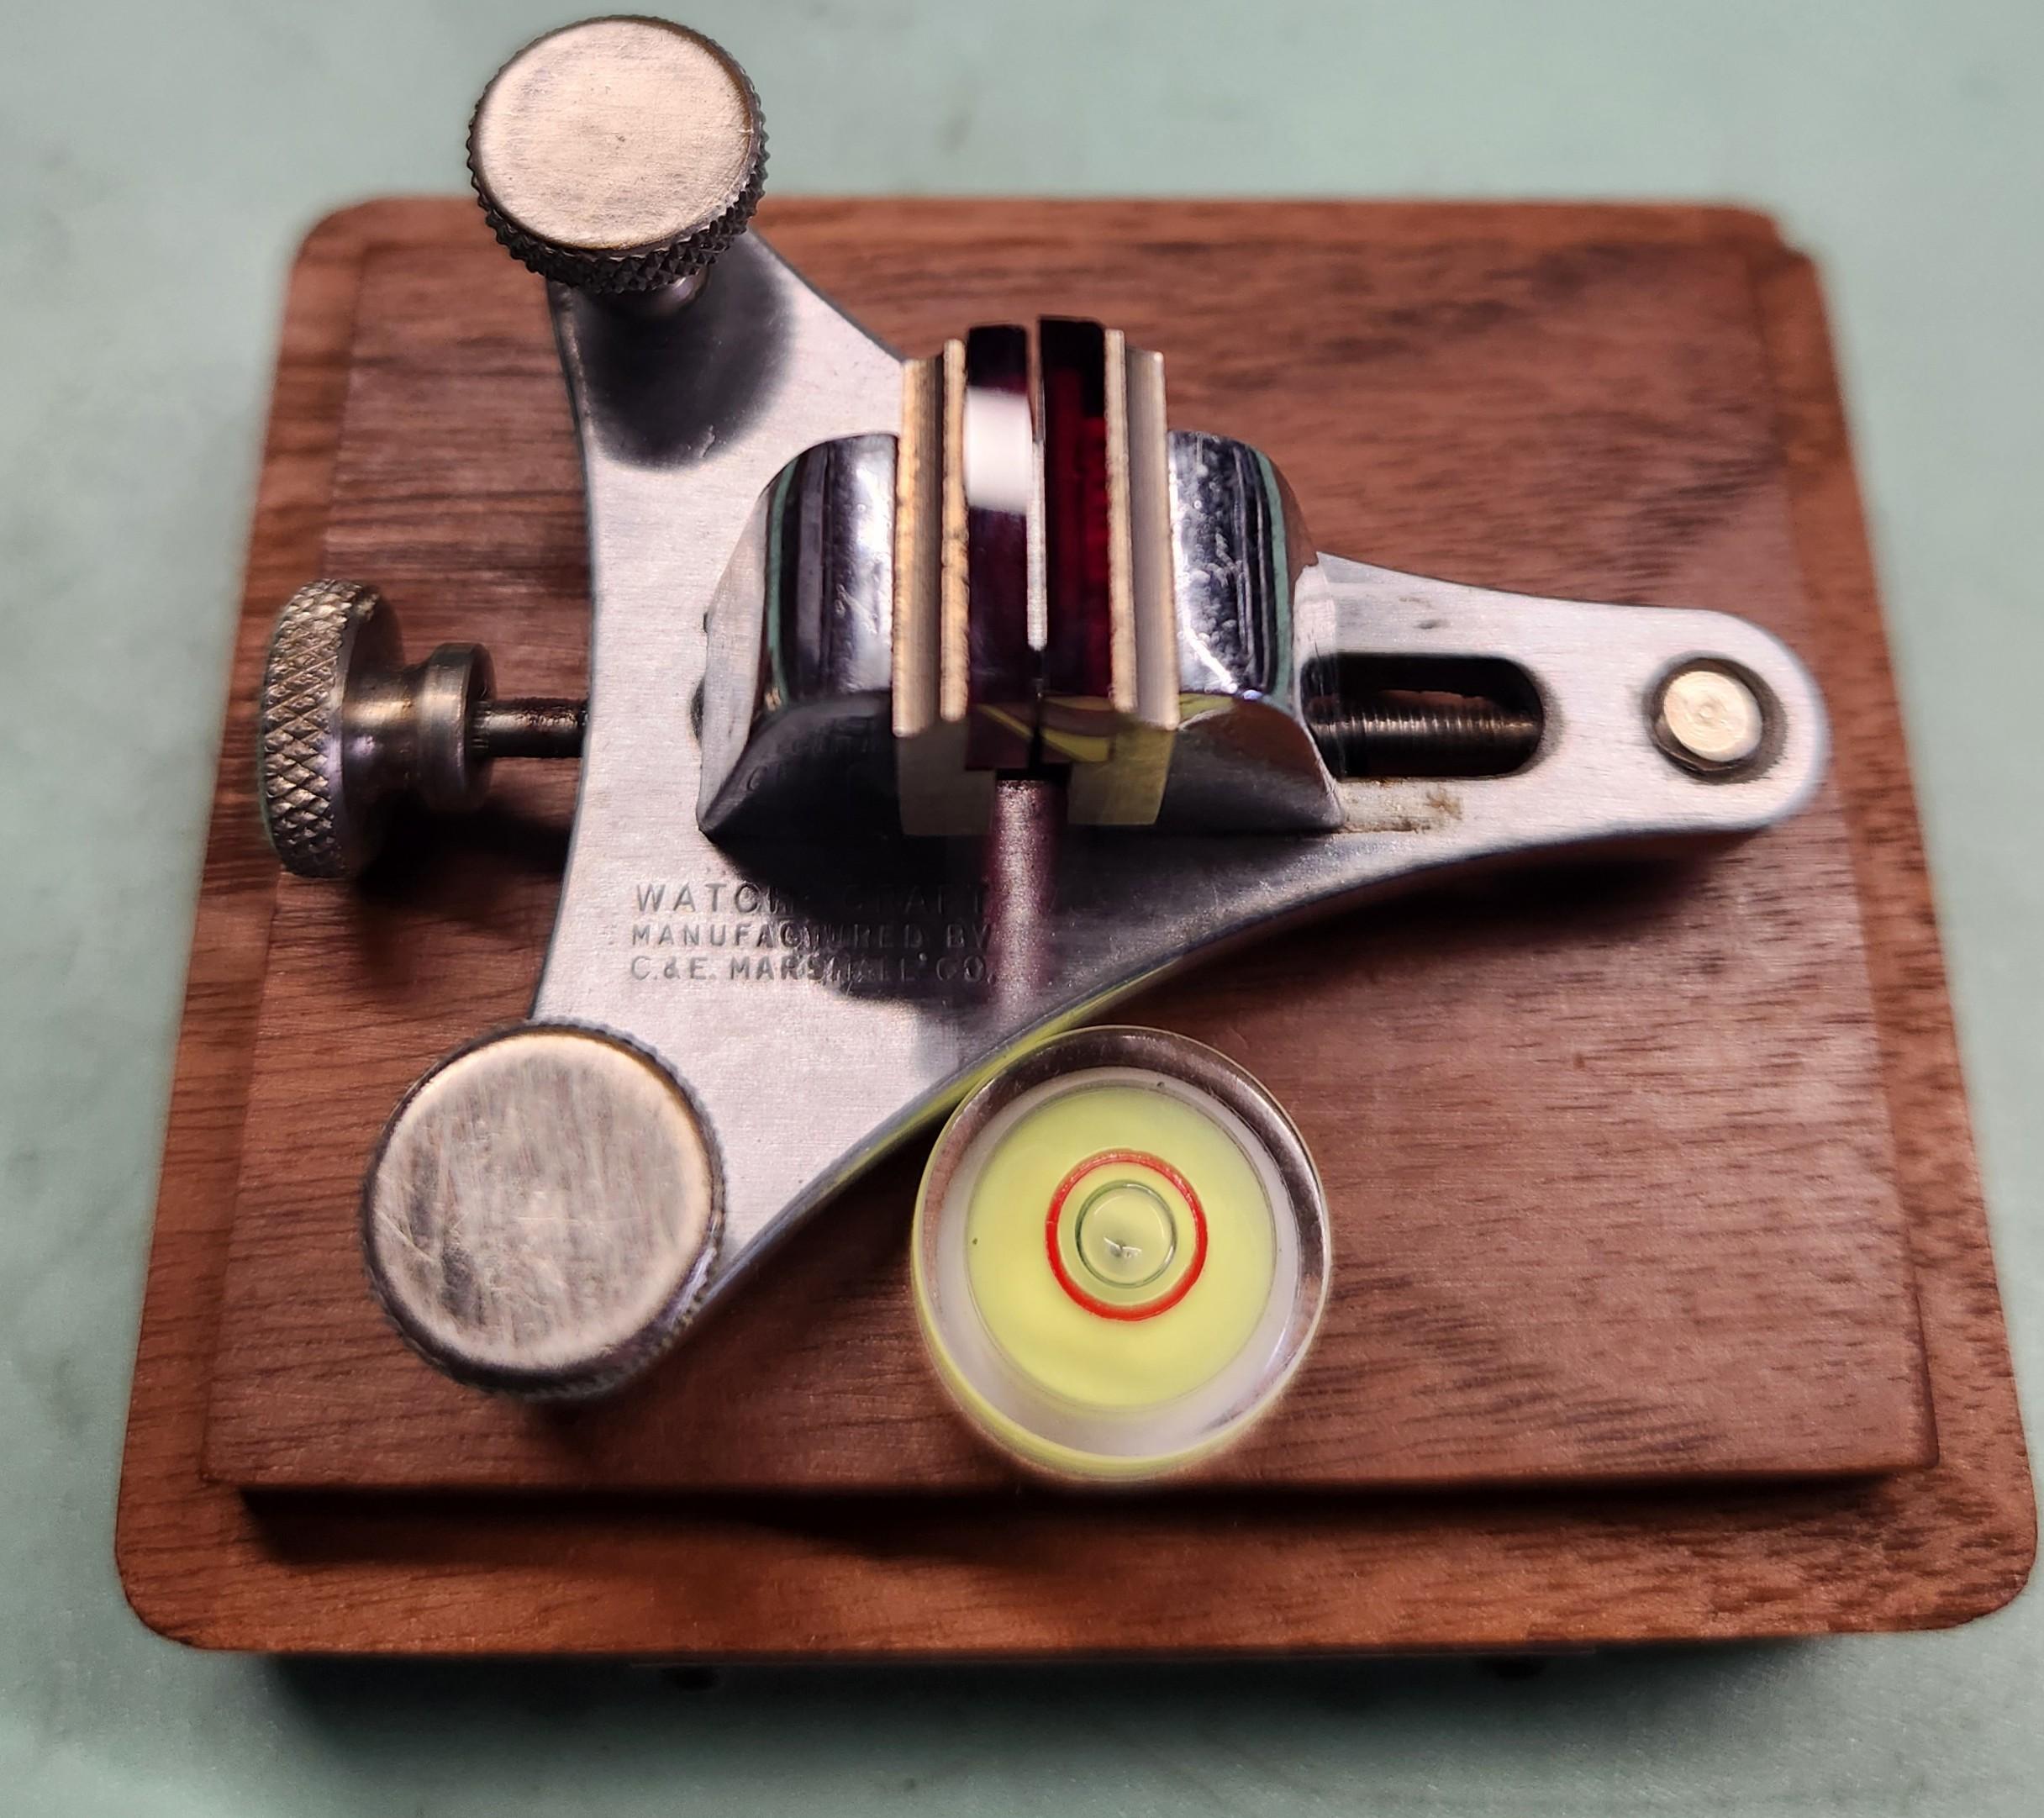
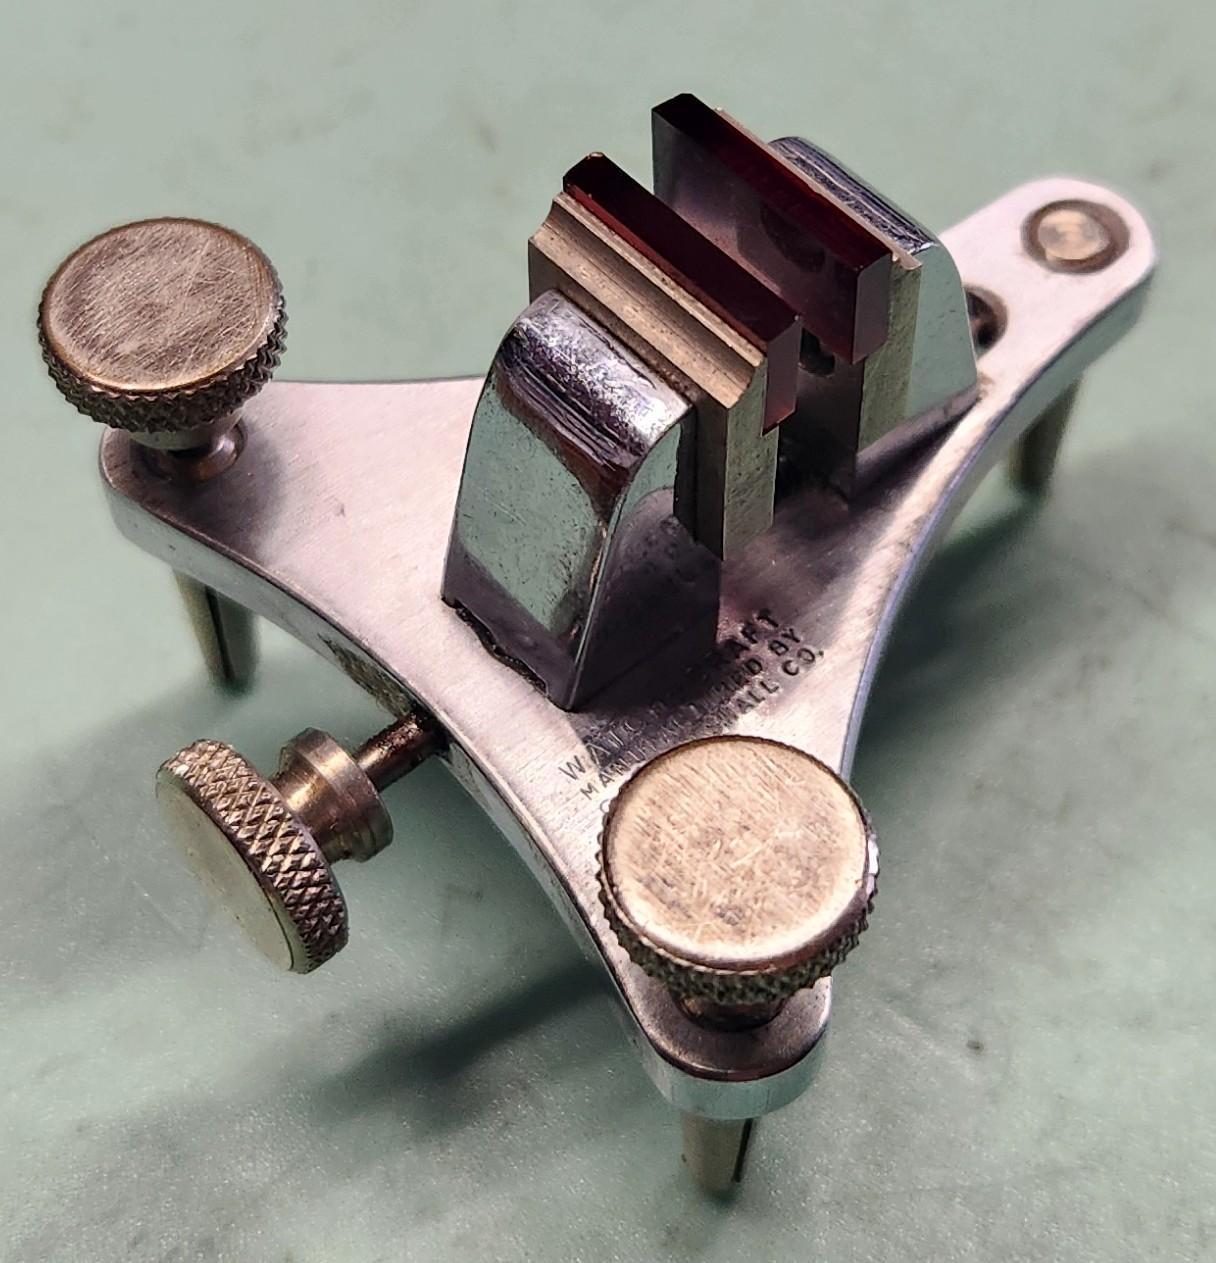
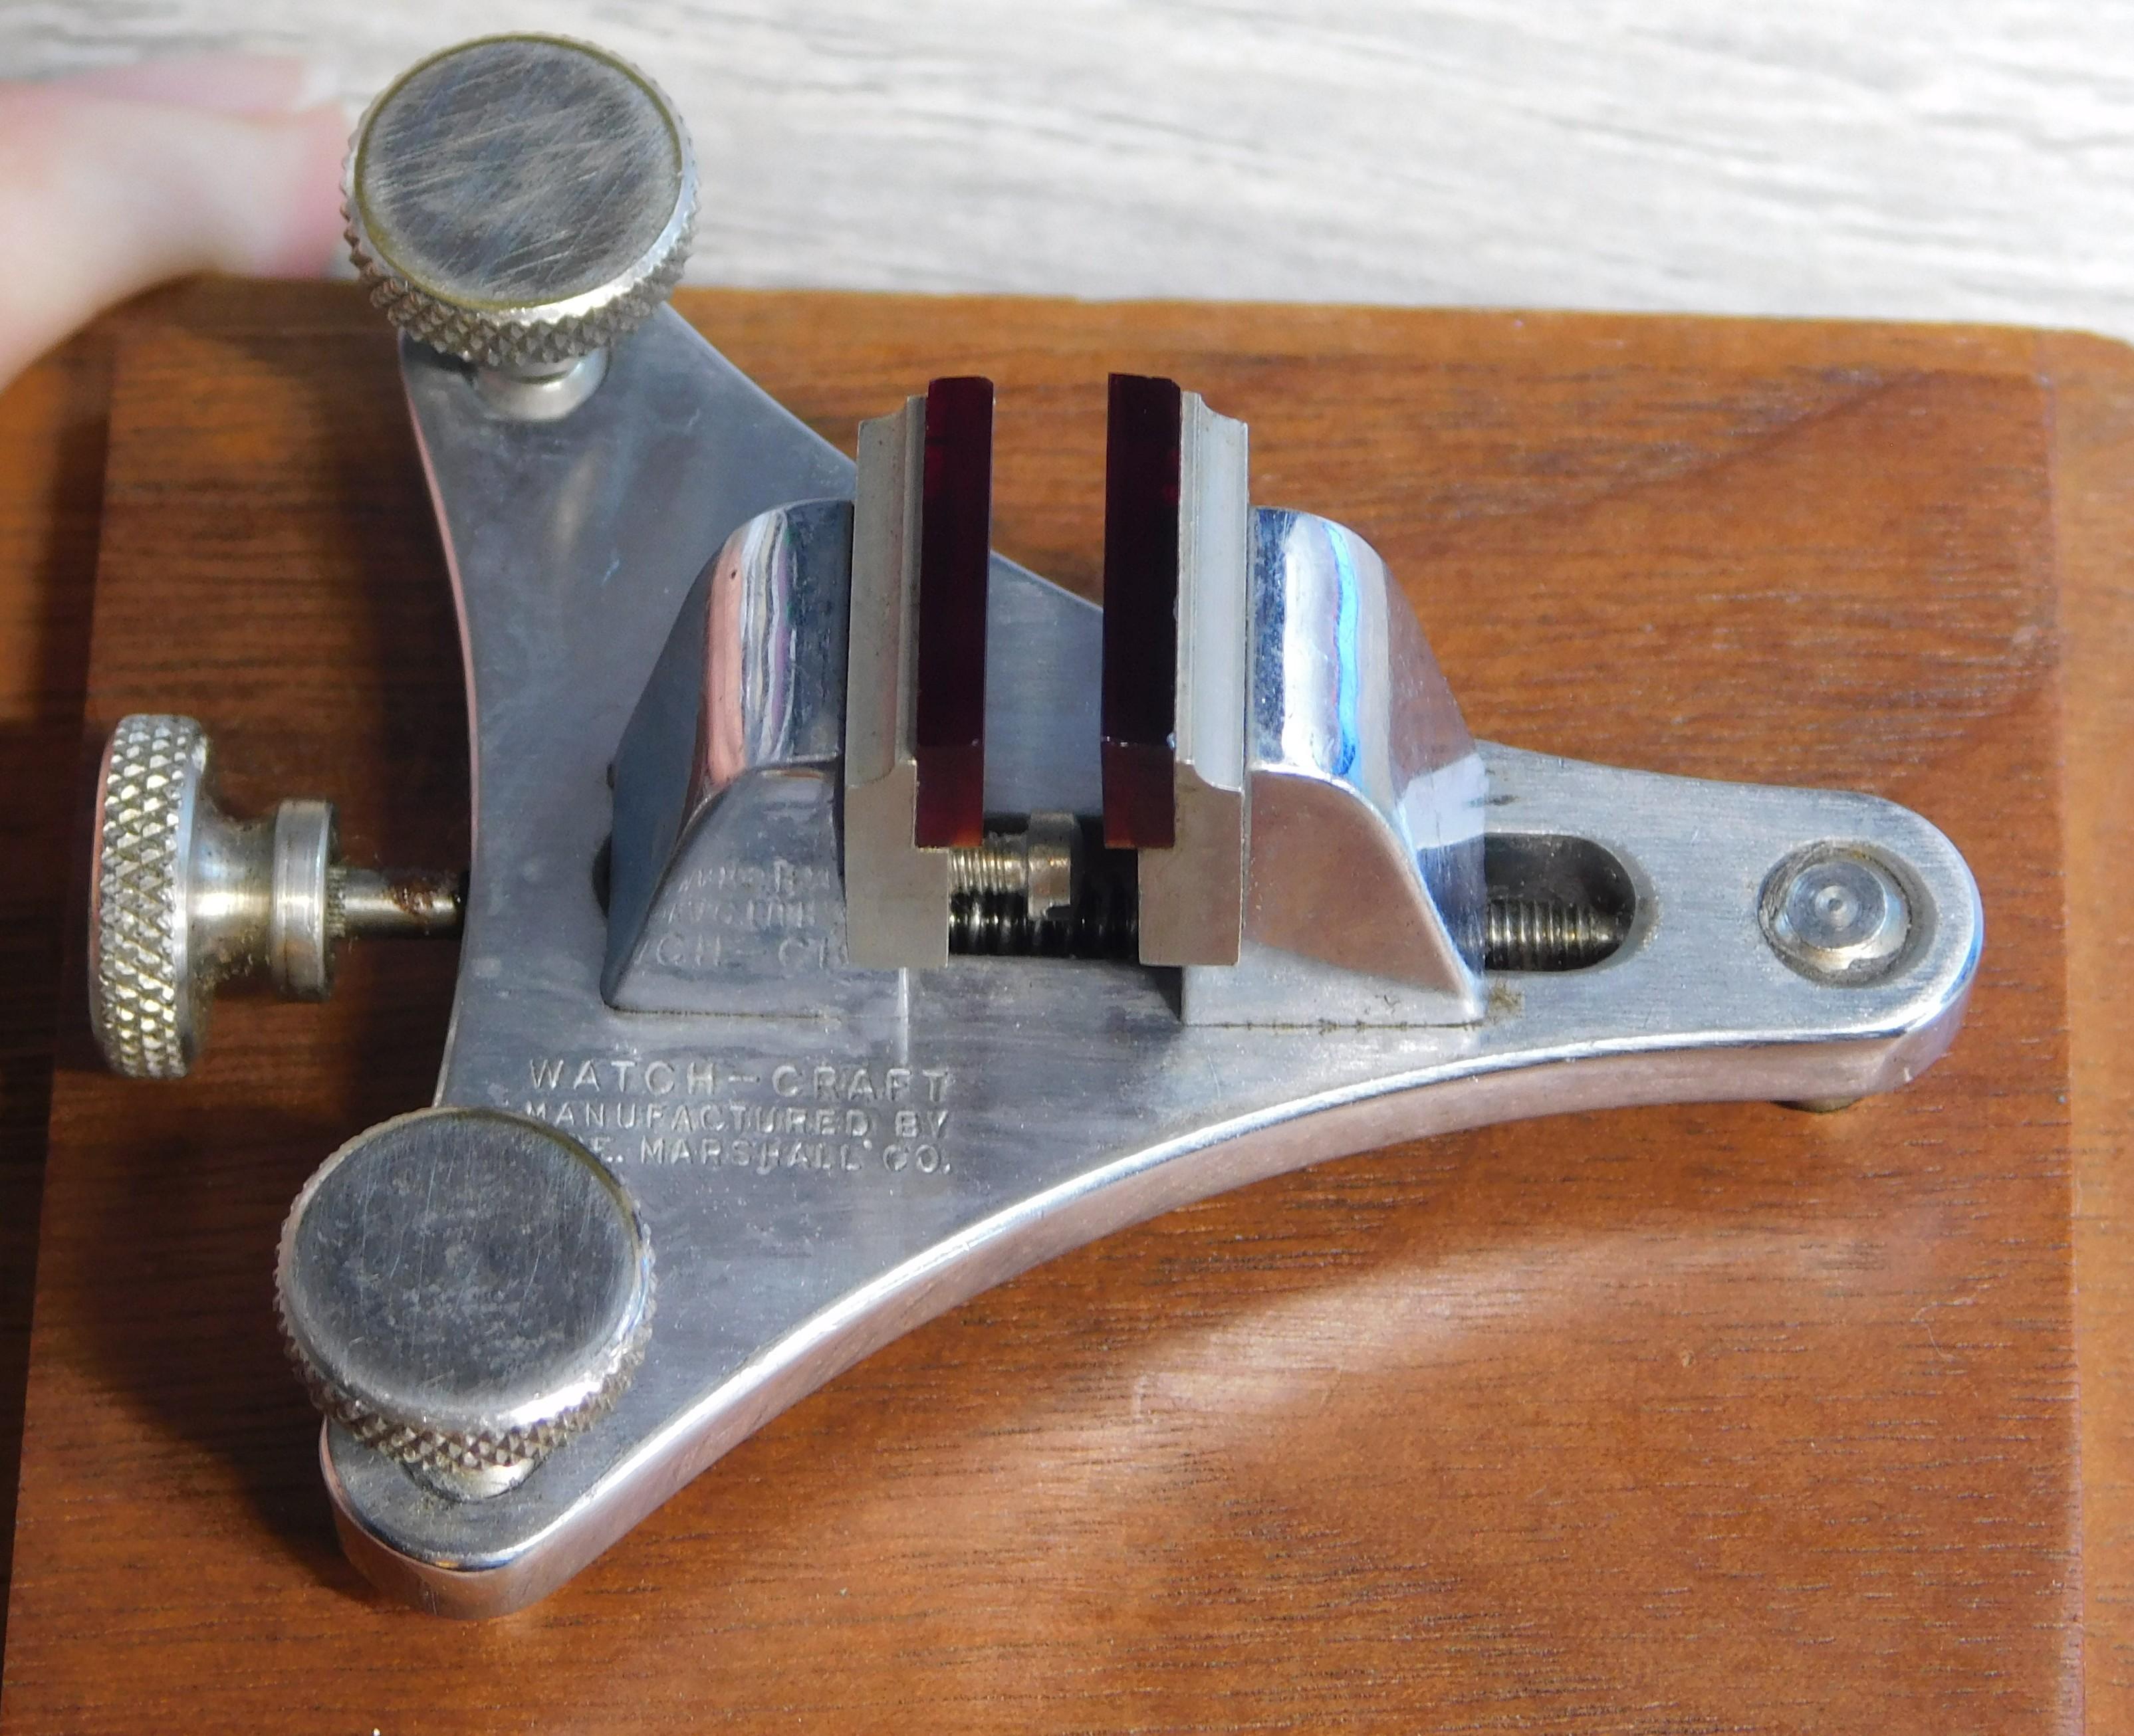
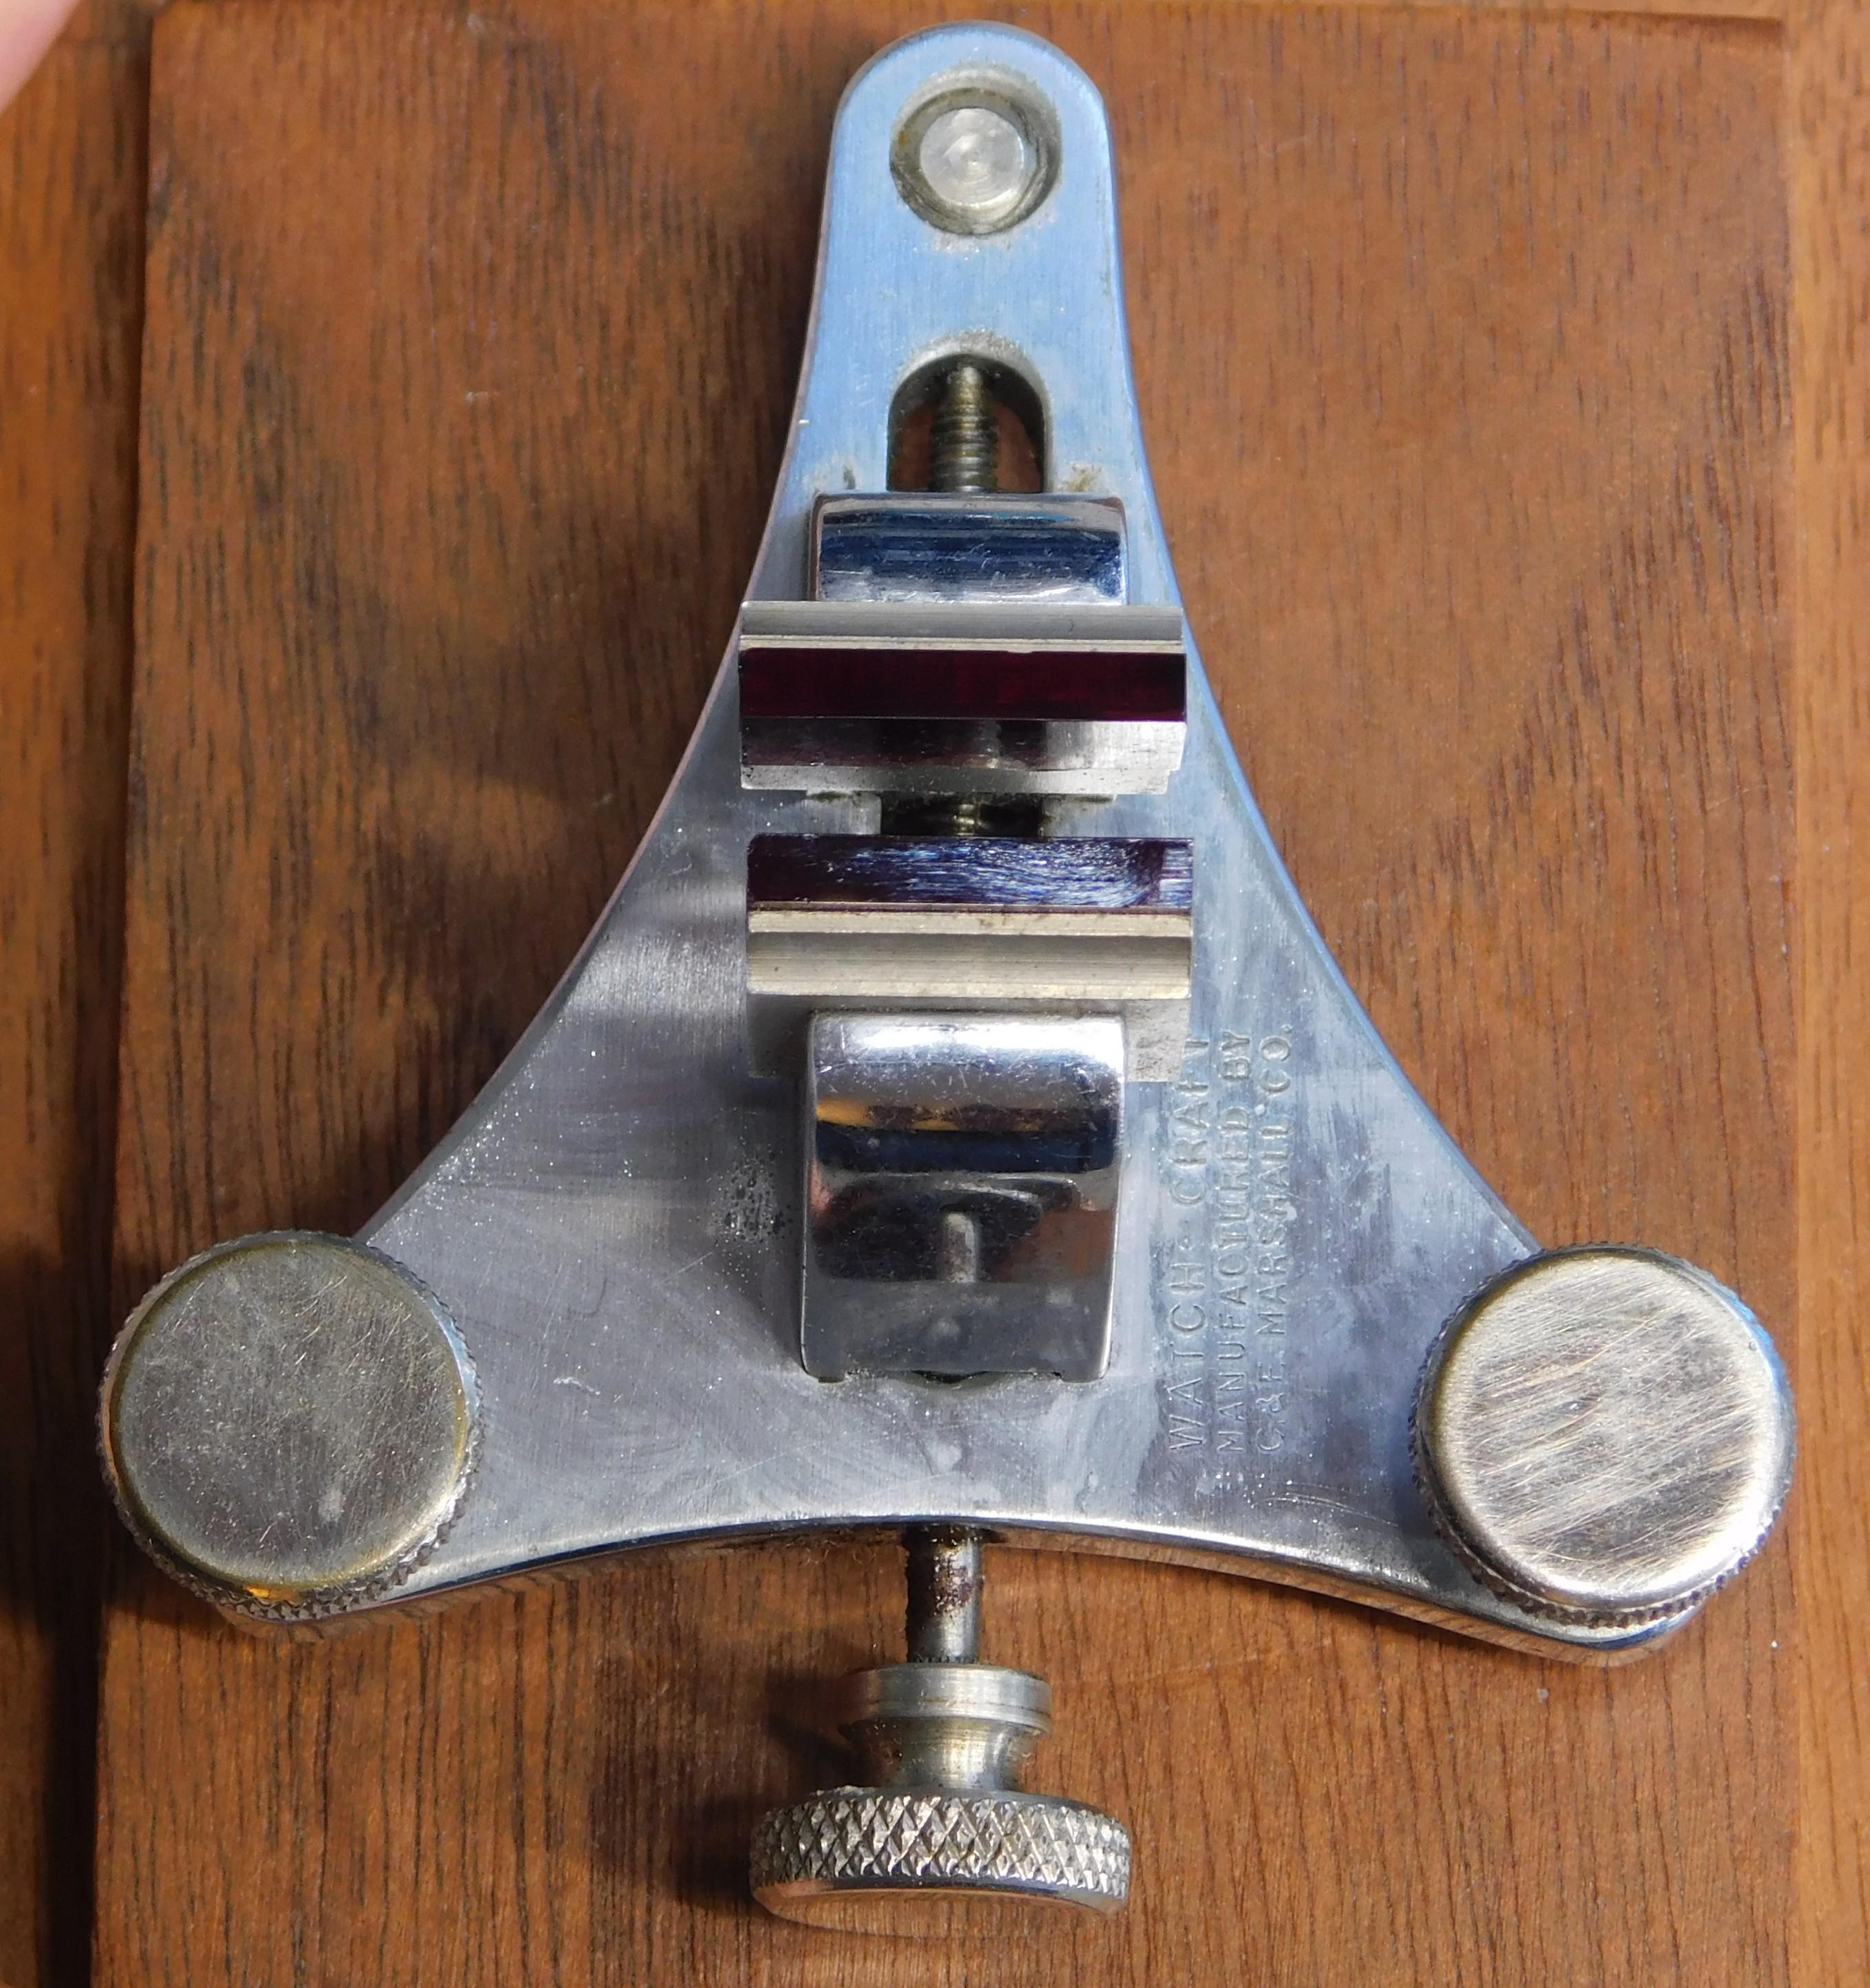
I got mine a few weeks back. The jaws have a couple of chips on the ends. I immediately cleaned with IPA and inspected the jaws. These C&E Marshall's come up time to time. Nice box and added the bubble level from Cosuins for 4£. There is a stop so the jaws never actually can close all the way and touch. Cousins has replacement jaws for 330£ but not sure about the dimensions to see if they would even fit.


 1 point
 -
I have no complaints with my mill after tramming it and setting up the gibs, did knacker the sacrificial nylon gear once but that was my fault being to greedy with the cut but easily replaced , if I was to buy one now it would be the later belt driven one but we live and learn. Dell1 point
-
Hello and welcome.1 point
-
Thank you for your introduction and welcome to this friendly forum. We all look forward to your contributions and continued involvement.1 point
-
You will have fun...share your adventure with us.1 point
-
Welcome to the forum! Sounds like a fun retirement I started out with a soviet watch. It's possible but not necessarily the easiest. Just make sure you start with a watch that already runs. You could also buy two identical watches (or a spare movement) right away to have spare parts ready to go -- an additional movement won't break the bank and probably save you some frustration when the first shock spring disappears into the "kosmos". Cheers and good luck1 point
-
I had to re CAD most of this in SW 2017, but here is my version of matabog's mic holder. I'm using a single transistor on the mic input and with all the info I gathered off this thread it is working very nice. Working with Watch-O-Scope, TG (timegrapher) and PCTM. The EqualizerAPO64-1.3 with Peace makes a big difference. The Virtual audio cable as stated earlier ads a voice to announce it is a demo. The work around to this is to use the Virtual Audio Cable Lite. All the best and thank you to the software authors and those that contributed to this thread.
 1 point
 -
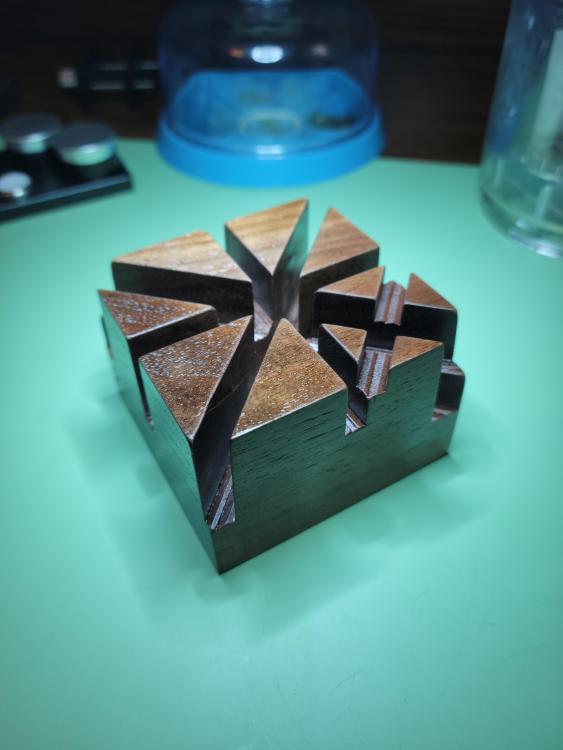
After struggling to put a Spidel band on one of my watches (and firing a springbar across the room), I ran to the internet to buy one of those watch band holder jigs. Then I remembered I have a woodshop! Found this chunk of thick walnut in the scrap bin, cut some varying width and depth slots, and sprayed it with some rattle-can lacquer. I love little projects like this. Fun and useful.

 1 point
 -
If I train her on repairing watches, I will be embarrassed over time:)1 point
-
Tractors! Yes in a sence but the 72C is one of my absolute favorites. I made a compilation of how one could lubricate this beaty out of some old service instructions. The rest of the watch one can service as an ordinary movemment just as @nickelsilversaid. Valjoux 72C HSL Edition.pdf1 point


.thumb.jpg.cb17a66989f1e796fd4217db2e9ca9df.jpg)