Leaderboard


Popular Content
Showing content with the highest reputation on 04/28/24 in Posts
-
have you ever noticed a nicely waxed car when water droplets hit they literally just run off. That's what you would have with epilam. The whole purpose is to keep the oil from spreading and if you put directly on top of the epilam it might not form a nice round ball but it has nothing to stick to which is exactly what is supposed to happen.2 points
-
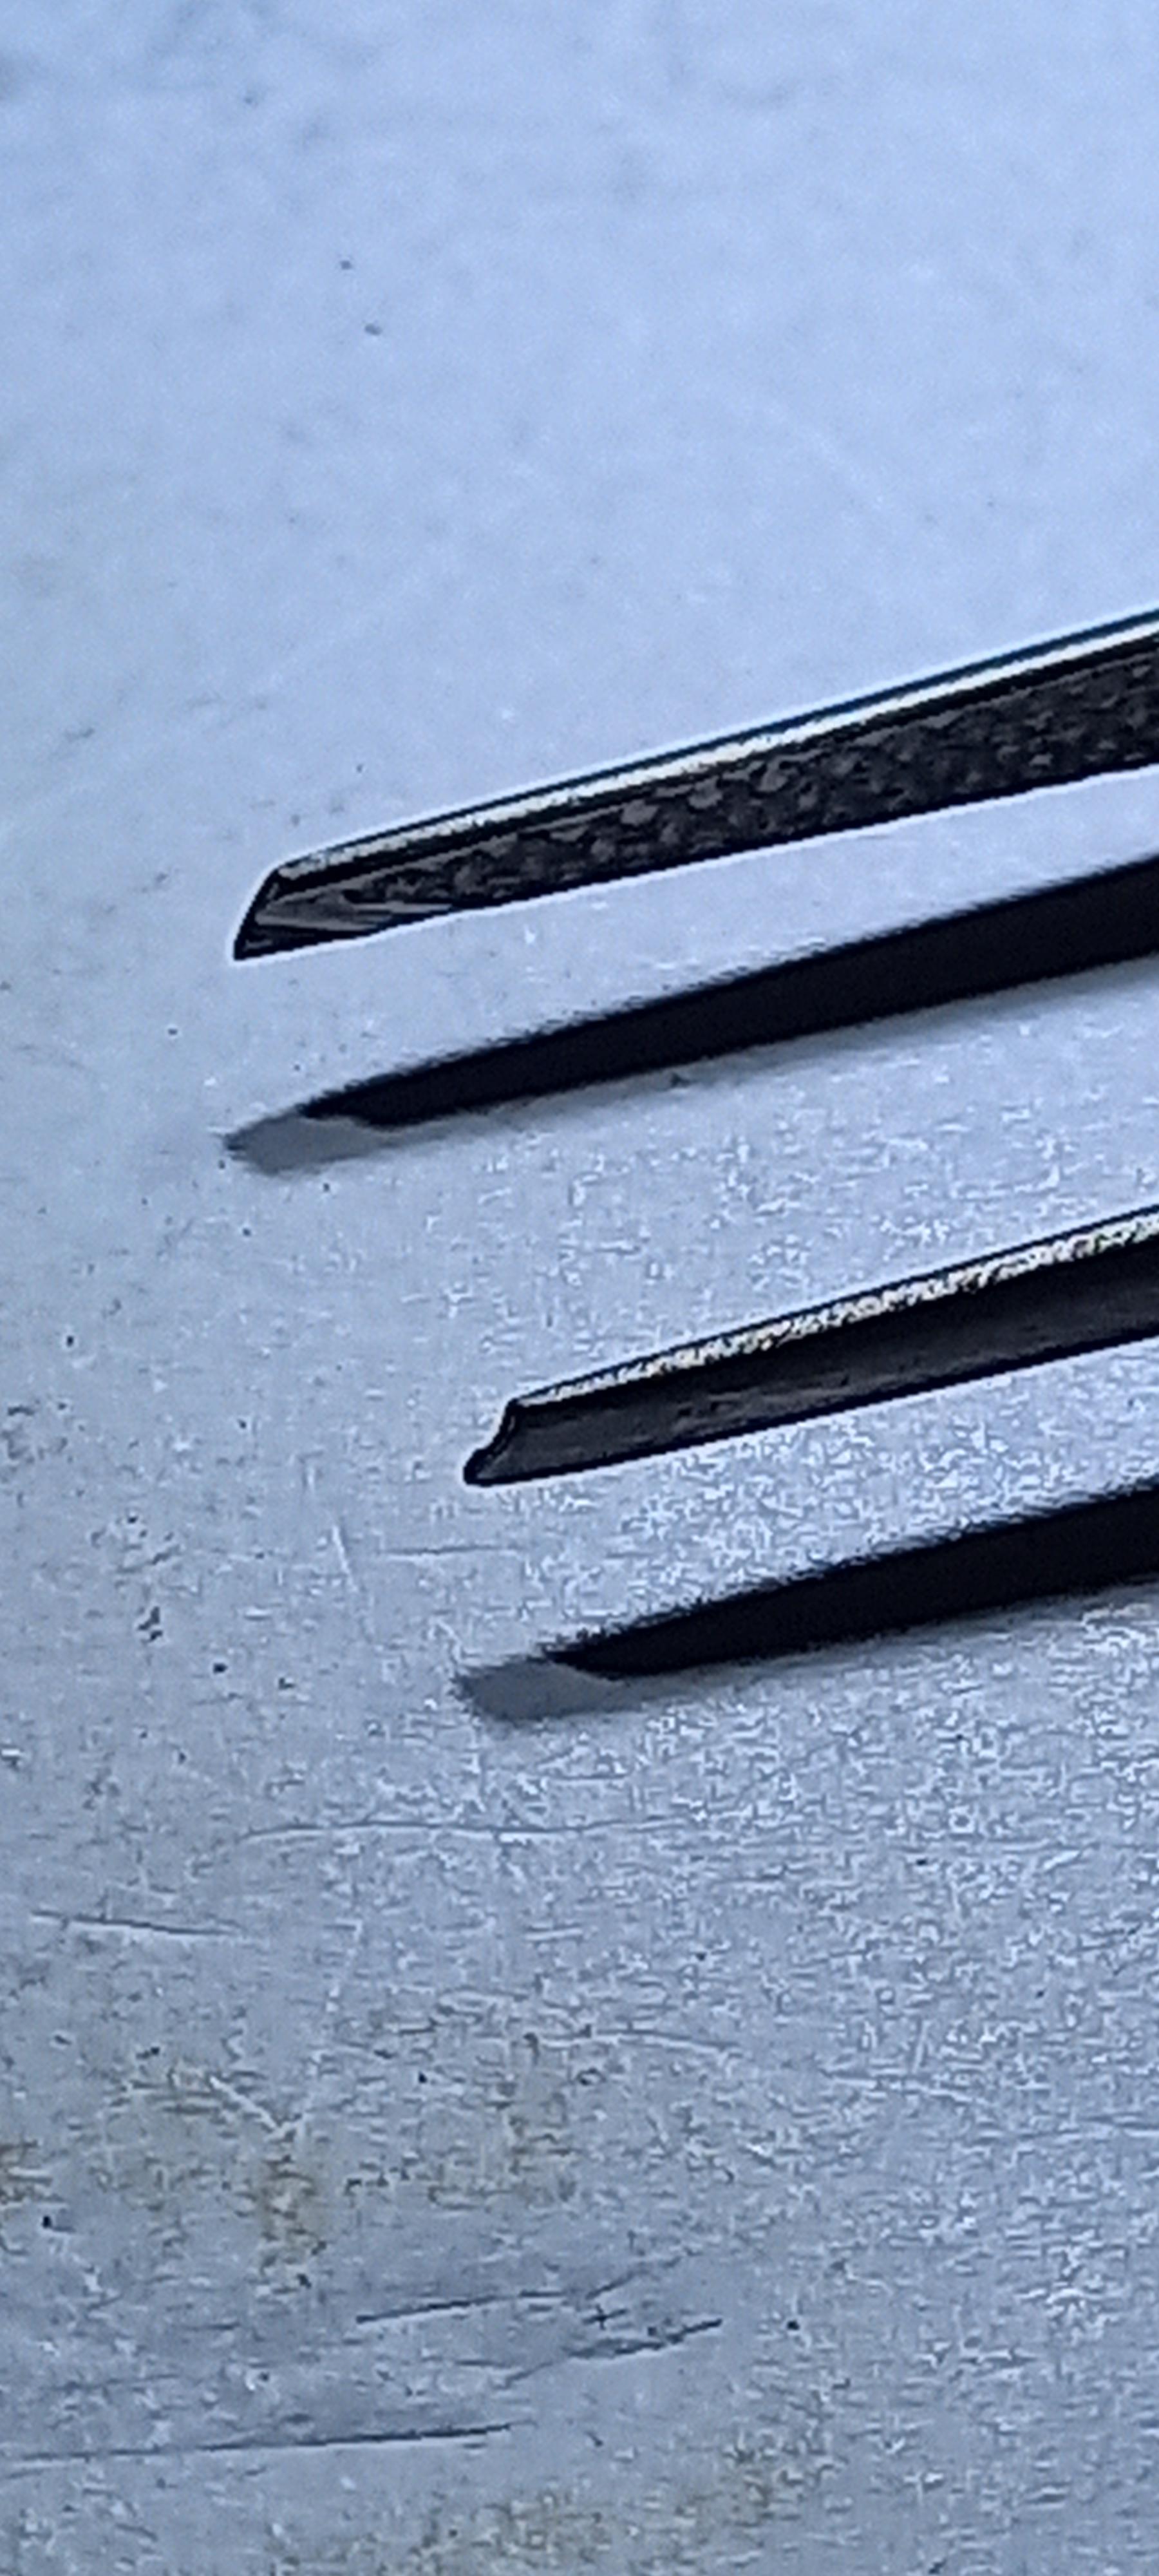
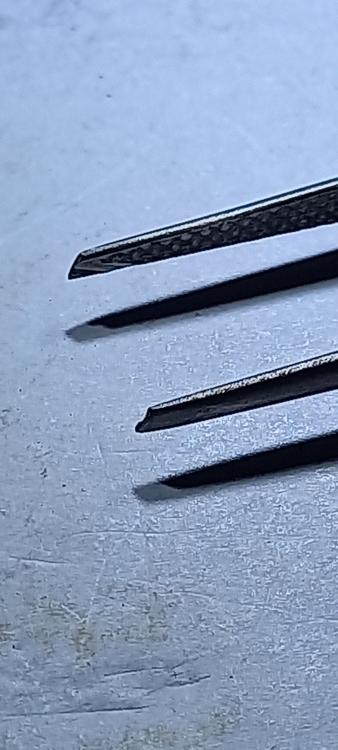
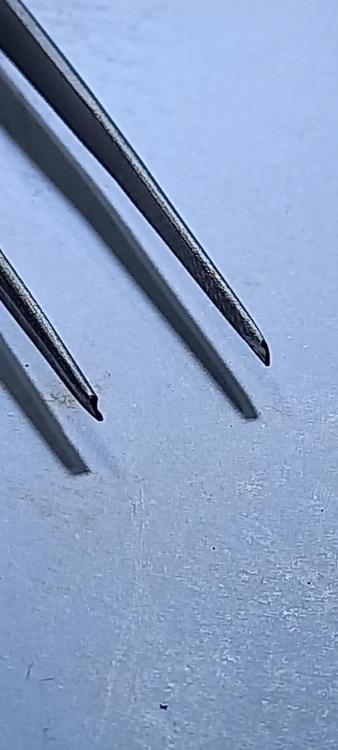
If you tend to be a little heavy handed then heres something that might help you to prevent cap jewel loses if you have some spare tweezers. File a round into each of the tips so you can grip a capstone or chaton while oiling or moving them around. Instead of filing along the length, angle file the tips first then file the rounds perpendicular to the angle. This way the tweezers wont get in the way of the oiler. Choose an angle that suits your natural hand grip position. The tweezers can now grip round parts on four sides Instead of two that often flip that part away.
 2 points
 -
You haven't lost it , its just hiding from you..2 points
-
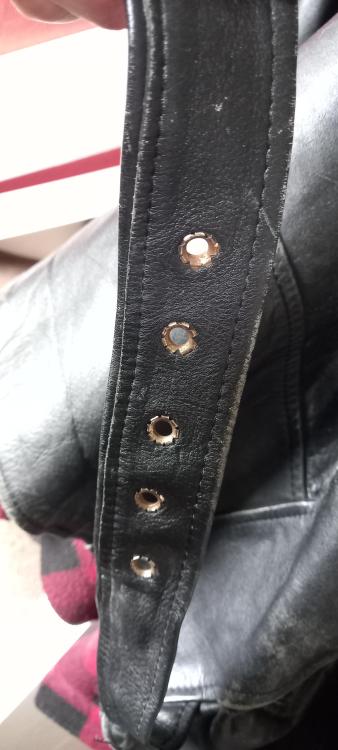
Very strange, i started to think for punching holes in a leather watch strap , but mine is also 1/4 inch drill bit. This is my bike jacket so maybe correct.

 2 points
 -
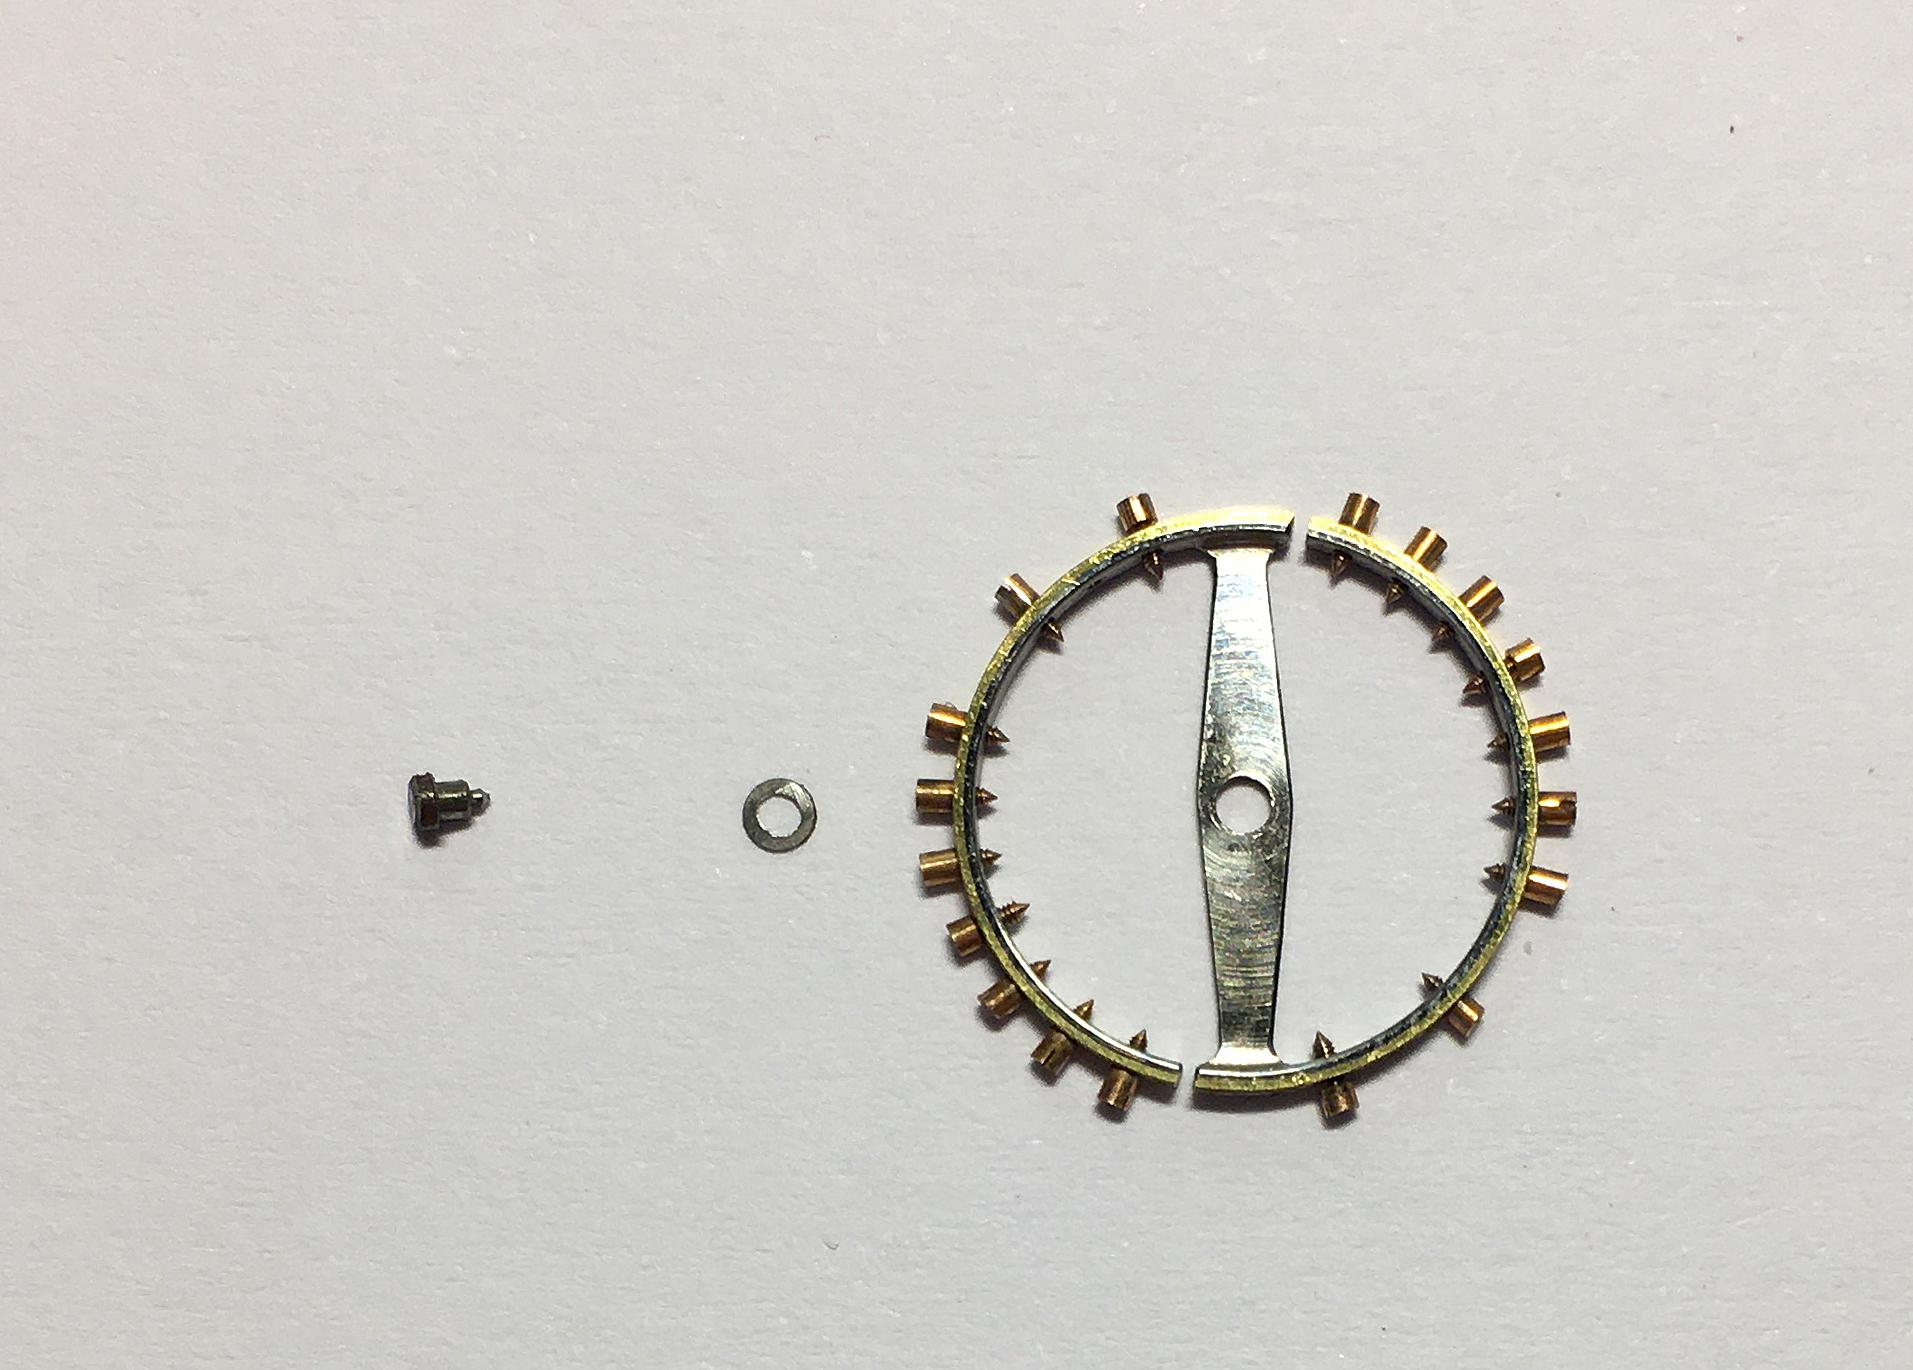
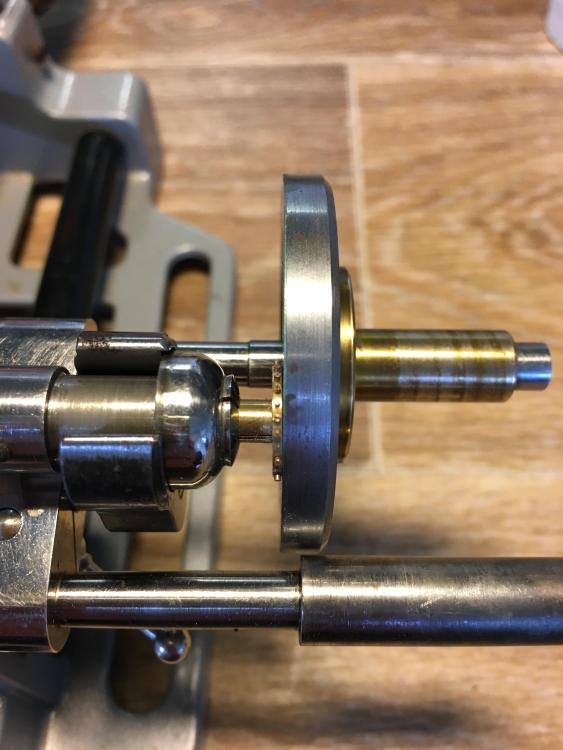
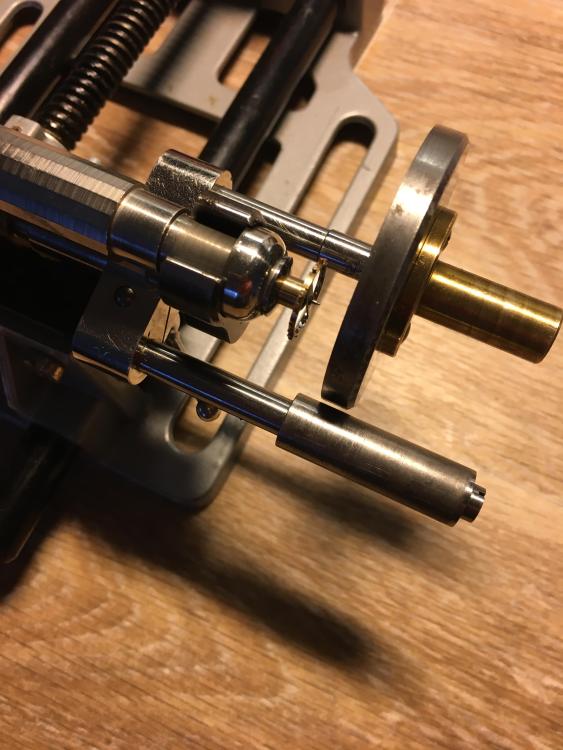
Thanks everyone for your helpful replies. I think between us we’ve worked out what’s going on. Next job is to have a proper look at this great wheel assembly, see if I can remove the clip and the friction fit pinion, give the bits a good clean, then put it back together with a bit of blue grease. I’ll also get the pallet fork under the microscope to see if it’s ok or been damaged.2 points
-
That link is so cool! I will read through it as it looks like interesting reading!! Thank you.1 point
-
I've never done it, however just today I was reading about it! P.24 - P.38 of this explains the truing procedure for damaged balance wheels. I have no idea if this is still the accepted way of doing it, the learning material is rather old . Hopefully one of the veterans will be along to give you an easier solution. Good luck Joseph Bulova School of Watch Making.pdf1 point
-
Sure, but that means you remove the crown, add the extender, install the crown...only while on the bench. Is that worth the effort?1 point
-
Hi. I used to live in Tadcaster nor York , there for 40 yrs moved Aberdeenshire as the place was falling apart. If you need anything just ask the members on here are very good and patient.1 point
-
There are a lot more oils and grease in the trade for clocks now then when I was clock making. This is how I went about the job I used a paint brush the sort that an artist would use, first brush around the barrel arbor, I went around the top of the spring when it was in the barrel and a round the few coils to the barrel arbor. Just a few drops to the top and bottom of the barrel. Tommy Jobson who has a youtube channel and is a very high class clock maker likes to use a spray on oil. There is no need to flood the barrel some think the more oil the better which is not recommended because it will just run out and go all over the place.1 point
-
I'll almost certainly find it now I've ordered another.1 point
-
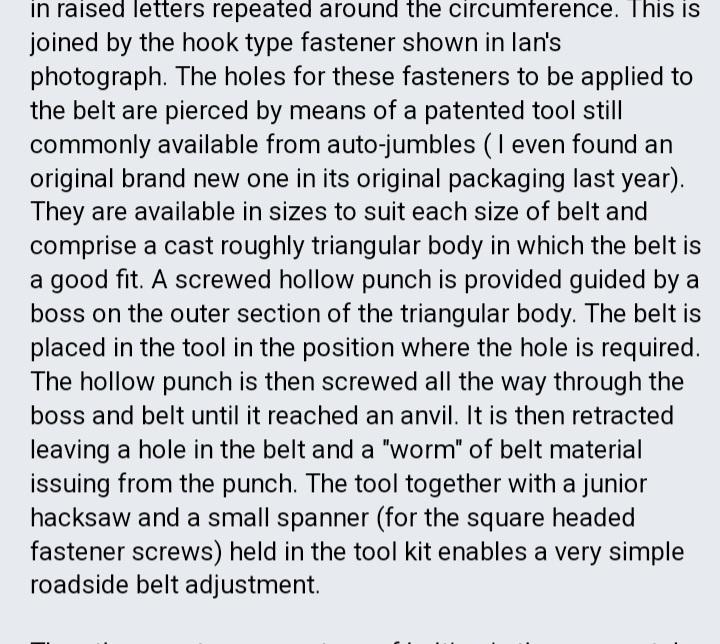
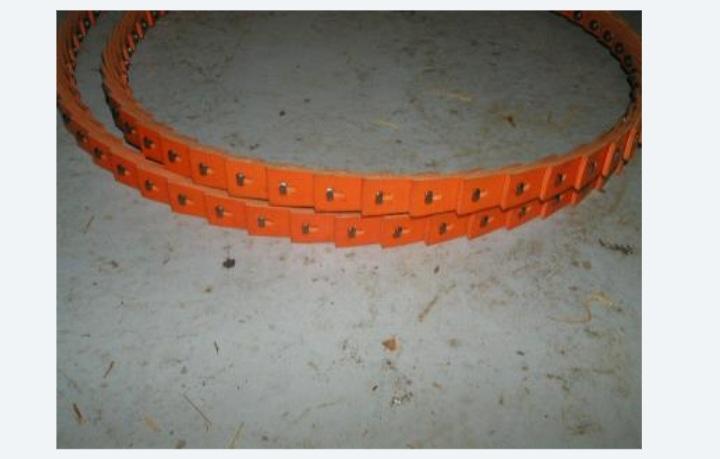
I used Google Lens on the pic and it suggested "motorcyle belt punch". And googling pics of that does show very similar tools. The end on mine is sharp, and does look suitable for punching holes in leather. I've no idea what belts on motorcyles would need piercing? The hole is about 1/4", so I cannot see a use in watchmaking. So, why have we both found one in a collection of watchmaking tools?
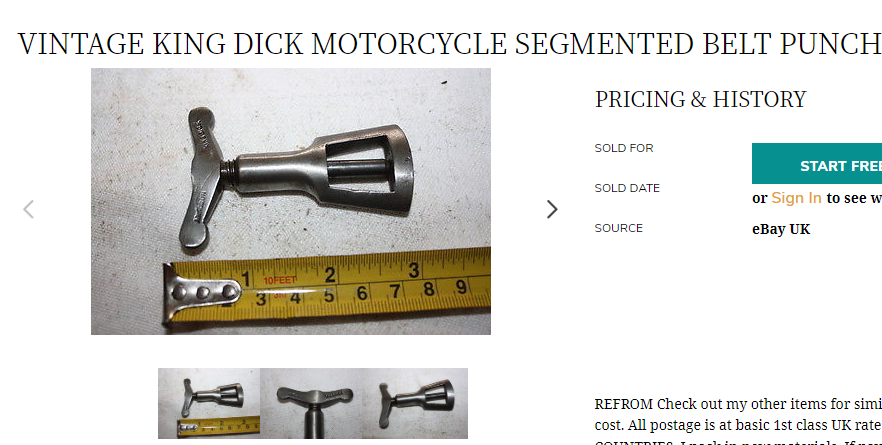 1 point
 -
You often see the term used on old watch part boxes. Staffs for bracelet watches, timing washers for bracelet wstches etc.1 point
-
The Boro has changed quite a lot over the last 20 years, and not for the better. I actually moved out of the town 15 years ago to a small village not far away. Thanks for the pdf! Looks a great read. I'll get it printed today and put it on my work bench!1 point
-
Not having all the fancy equipment, this is a way I came up with. I never said it was the best, the most ideal or the safest way. Working on balances is always a delicate task whereby full concentration & common sense should prevail. I was well aware of the "dangers" / short comings involved, hence my "warnings", as quoted above. The balance wheel of the Omega was nice true, flat and one could clearly see how much gap there was left before the grinding wheel would touch the balance wheel. I stopped when the generously applied diamond paste started to touch the rim of the balance wheel, which turned out to be with a seat thickness left of 0.1mm. Tapping the remainder of the staff out went easy and flawless. My idea of penning this article was to show/share a way which, in my case, succeeded perfectly. If deemed to risky, or if the balance wheel is not true or has a wobble, other methods have to be followed (which BTW, as you can read in this thread, are rife with "dangers" as well)1 point
-
I also see a bit of danger for the wheel, at least you have to keep away from it and may get a too thick rest ring. My rest rings are about 0.05 mm. Better way would be a grinding wheel touching the staff with its circumference. Frank1 point
-
Not easy to find this one everywhere, so it depends where you are located. Joining it back together might be possible, i have silver soldered mild steel before even with traditional plumbers lead and its a pretty strong joint, but bere in mind this is only 1mm diameter. The join would need to be very accurate, it not something i have heard of anyone trying before. The part no 401 is the swiss code number and relates to watch winding stems in general1 point
-
The cannon pinion (be it conventional style or what you see in this movement) should slip on its arbour so the hands can be set independently without affecting the gear train. If there is too much friction between the cannon pinion and the second wheel, turning the hands to set them backwards can sometimes force the escape wheel teeth to overrun the pallet stones, creating the behaviour you describe. The train is running in reverse when this happens. This can often chip the pallet stones. I’d say at least half of the watches I’ve inspected with very tight cannon pinions had chipped pallet stones. Hopefully this isn’t the case with your watch. I’m not familiar with this movement but you need to get the friction in the cannon pinion adjusted correctly. Hope this helps, Mark1 point
-
Hi Find attached parts/repair notes for the JLC 911, might be useful. JLC_JLC 910, 911.pdf JLC_JLC 910, 911 Repair Notes.pdf1 point
-
Hello and welcome to the forum Dan. Used to know Middlesboro quite well, that was twenty years plus ago. Attached a little reading to get you started. TZIllustratedGlossary.pdf1 point
-
https://perrinwatchparts.com/products/jaeger-lecoultre-caliber-911-winding-stem-tap-120-measurement-58-110-smooth-shoulder-l-550-thread-l-420-with-addition-shoulder-before-thread One here but it's from America, not sure what the shipping will be. I don't think the 916 would fit, another problem is JL parts are restricted. Only other option is to measure the stem and get a generic replacement.1 point
-
Hello and welcome from Leeds. Ask away, that's what we're here for.1 point
-
Welcome to the forum Dan, enjoy.1 point
-
RichardHarris123: Hello and welcome from Leeds, England. I have family all over Australia, went as £10 poms Thanks Richard. Hope you’re able to visit your family here and that they’ve all done well My relatives arrived from England in the 1790s transported on the ‘Second & Third Fleets’—a story of timber sailing ships, of convicts and doing well in this huge Country of Australia. When I visited the UK in the 1980s, I was too young to comprehend the depth and breadth of its history… Best wishes, Mike William Chapman, my 4th great Grandad’s charges, at age 23 read at the Old Bailey; sentenced to 7 years of transportation to Sydney.
 1 point
 -
The whole process and the progress are closely observed, it's hand-driven and very controlled. I can't see the "danger", unless you are watching the TV while doing it. As you could have read, and in this quote "wheel" is the balance-wheel.1 point
-
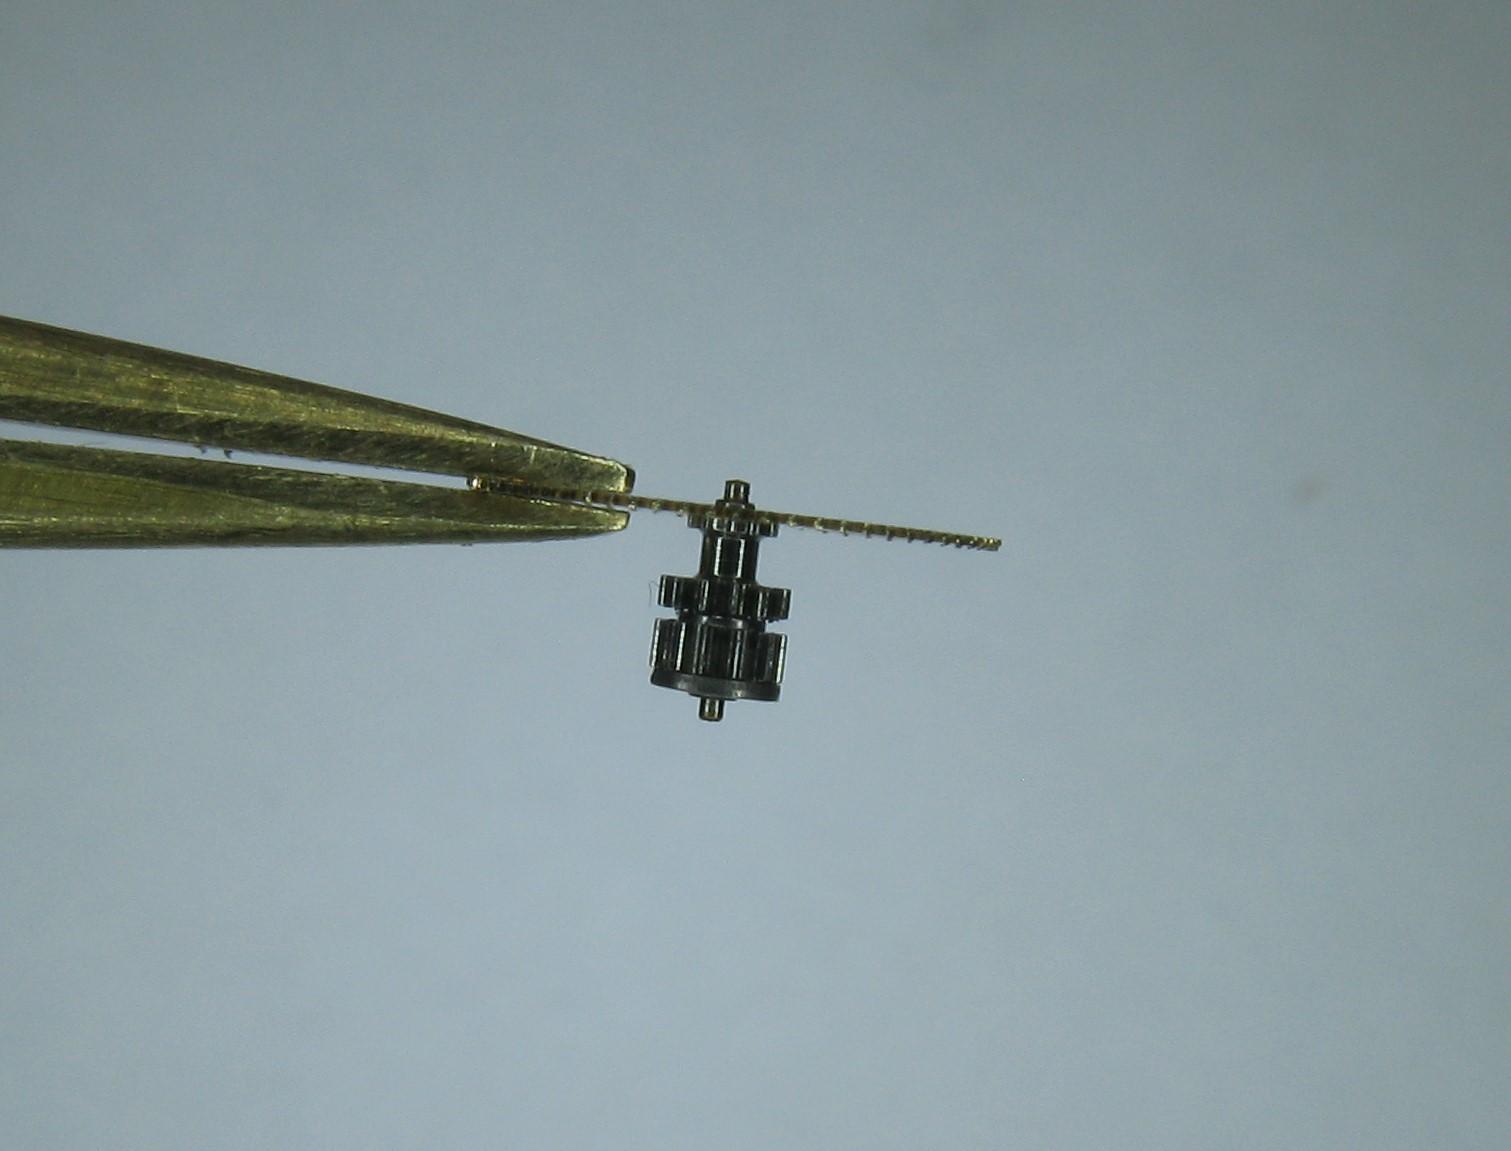
Have you got the pallet fork installed in the movement when you see the train move when using the setting works? As nevenbekriev said, without the pallet fork to lock the train, the behaviour you are describing is normal. If this is happening with the pallet fork installed, you have a problem in the gear train, it should be immobile when the pallet fork is locking the escape wheel. The fit of the circlip above the pinions on that wheel is crooked in your pictures, it should sit flat up against the upper pinion as in Marc’s picture. Hope that helps, Mark1 point
-
thinking of where epilam should be removed did you know there was a patent that covers this? At least for the escapement I'm attaching it. GB1057607A-1 epilame.pdf1 point
-
It's a little circlip style retaining clip to keep the pinion from riding up out of position.1 point
-
Doctor, If the train turns when hands setting, this means that the train is not blocked. And this is true for all kinds of trains design. The train is normally blocked by the lever. So, put the lever in place and try again. If the train turns again, search where You have placed some wheel upside down and it is not meshed with the next one in the chain. The other thing is the amount of friction that is needed to overcome when setting hands. Yes, the friction part here is in the great wheel, and it needs lubrication. If the parts are dry, then friction will arise, seizing will happen and thus risk of breaking of teeth in the train or breaking of joint wheel/pinion. I don't know this calibre, but I guess the clip is part of the friction device. But for sure it stays tilted, which is not normal. So, pay attention to it and see what is wrong there1 point
-
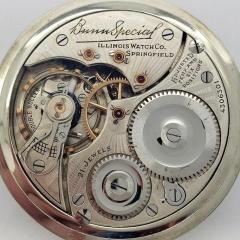
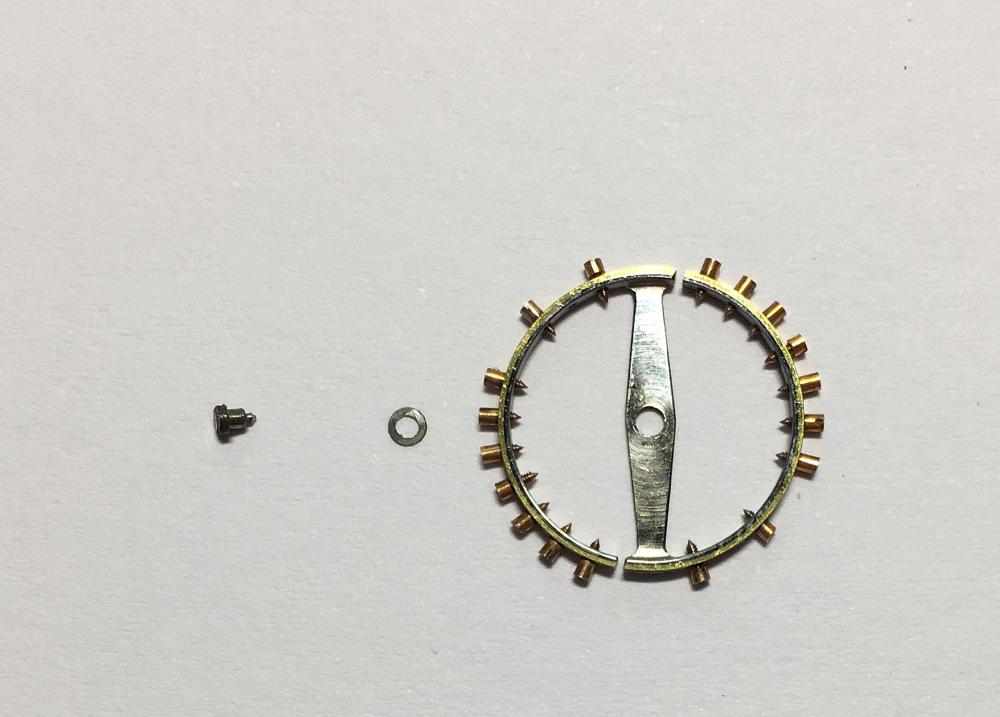
It most certainly should be there, but it should fit better than that. Here is what it should look like.
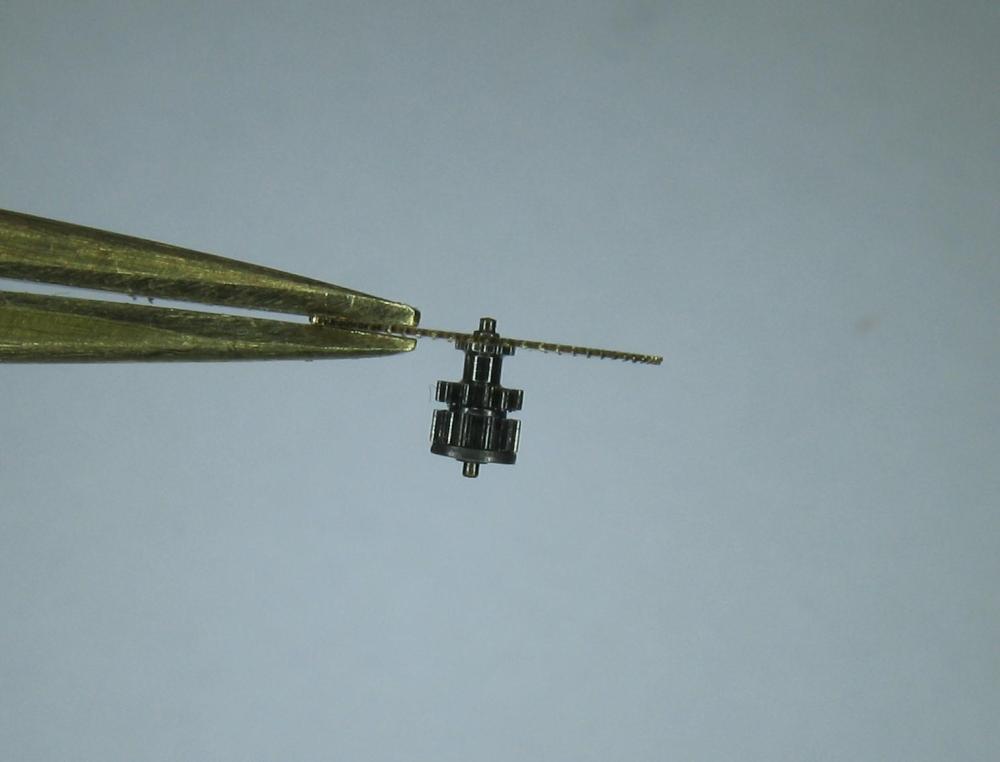 1 point
 -
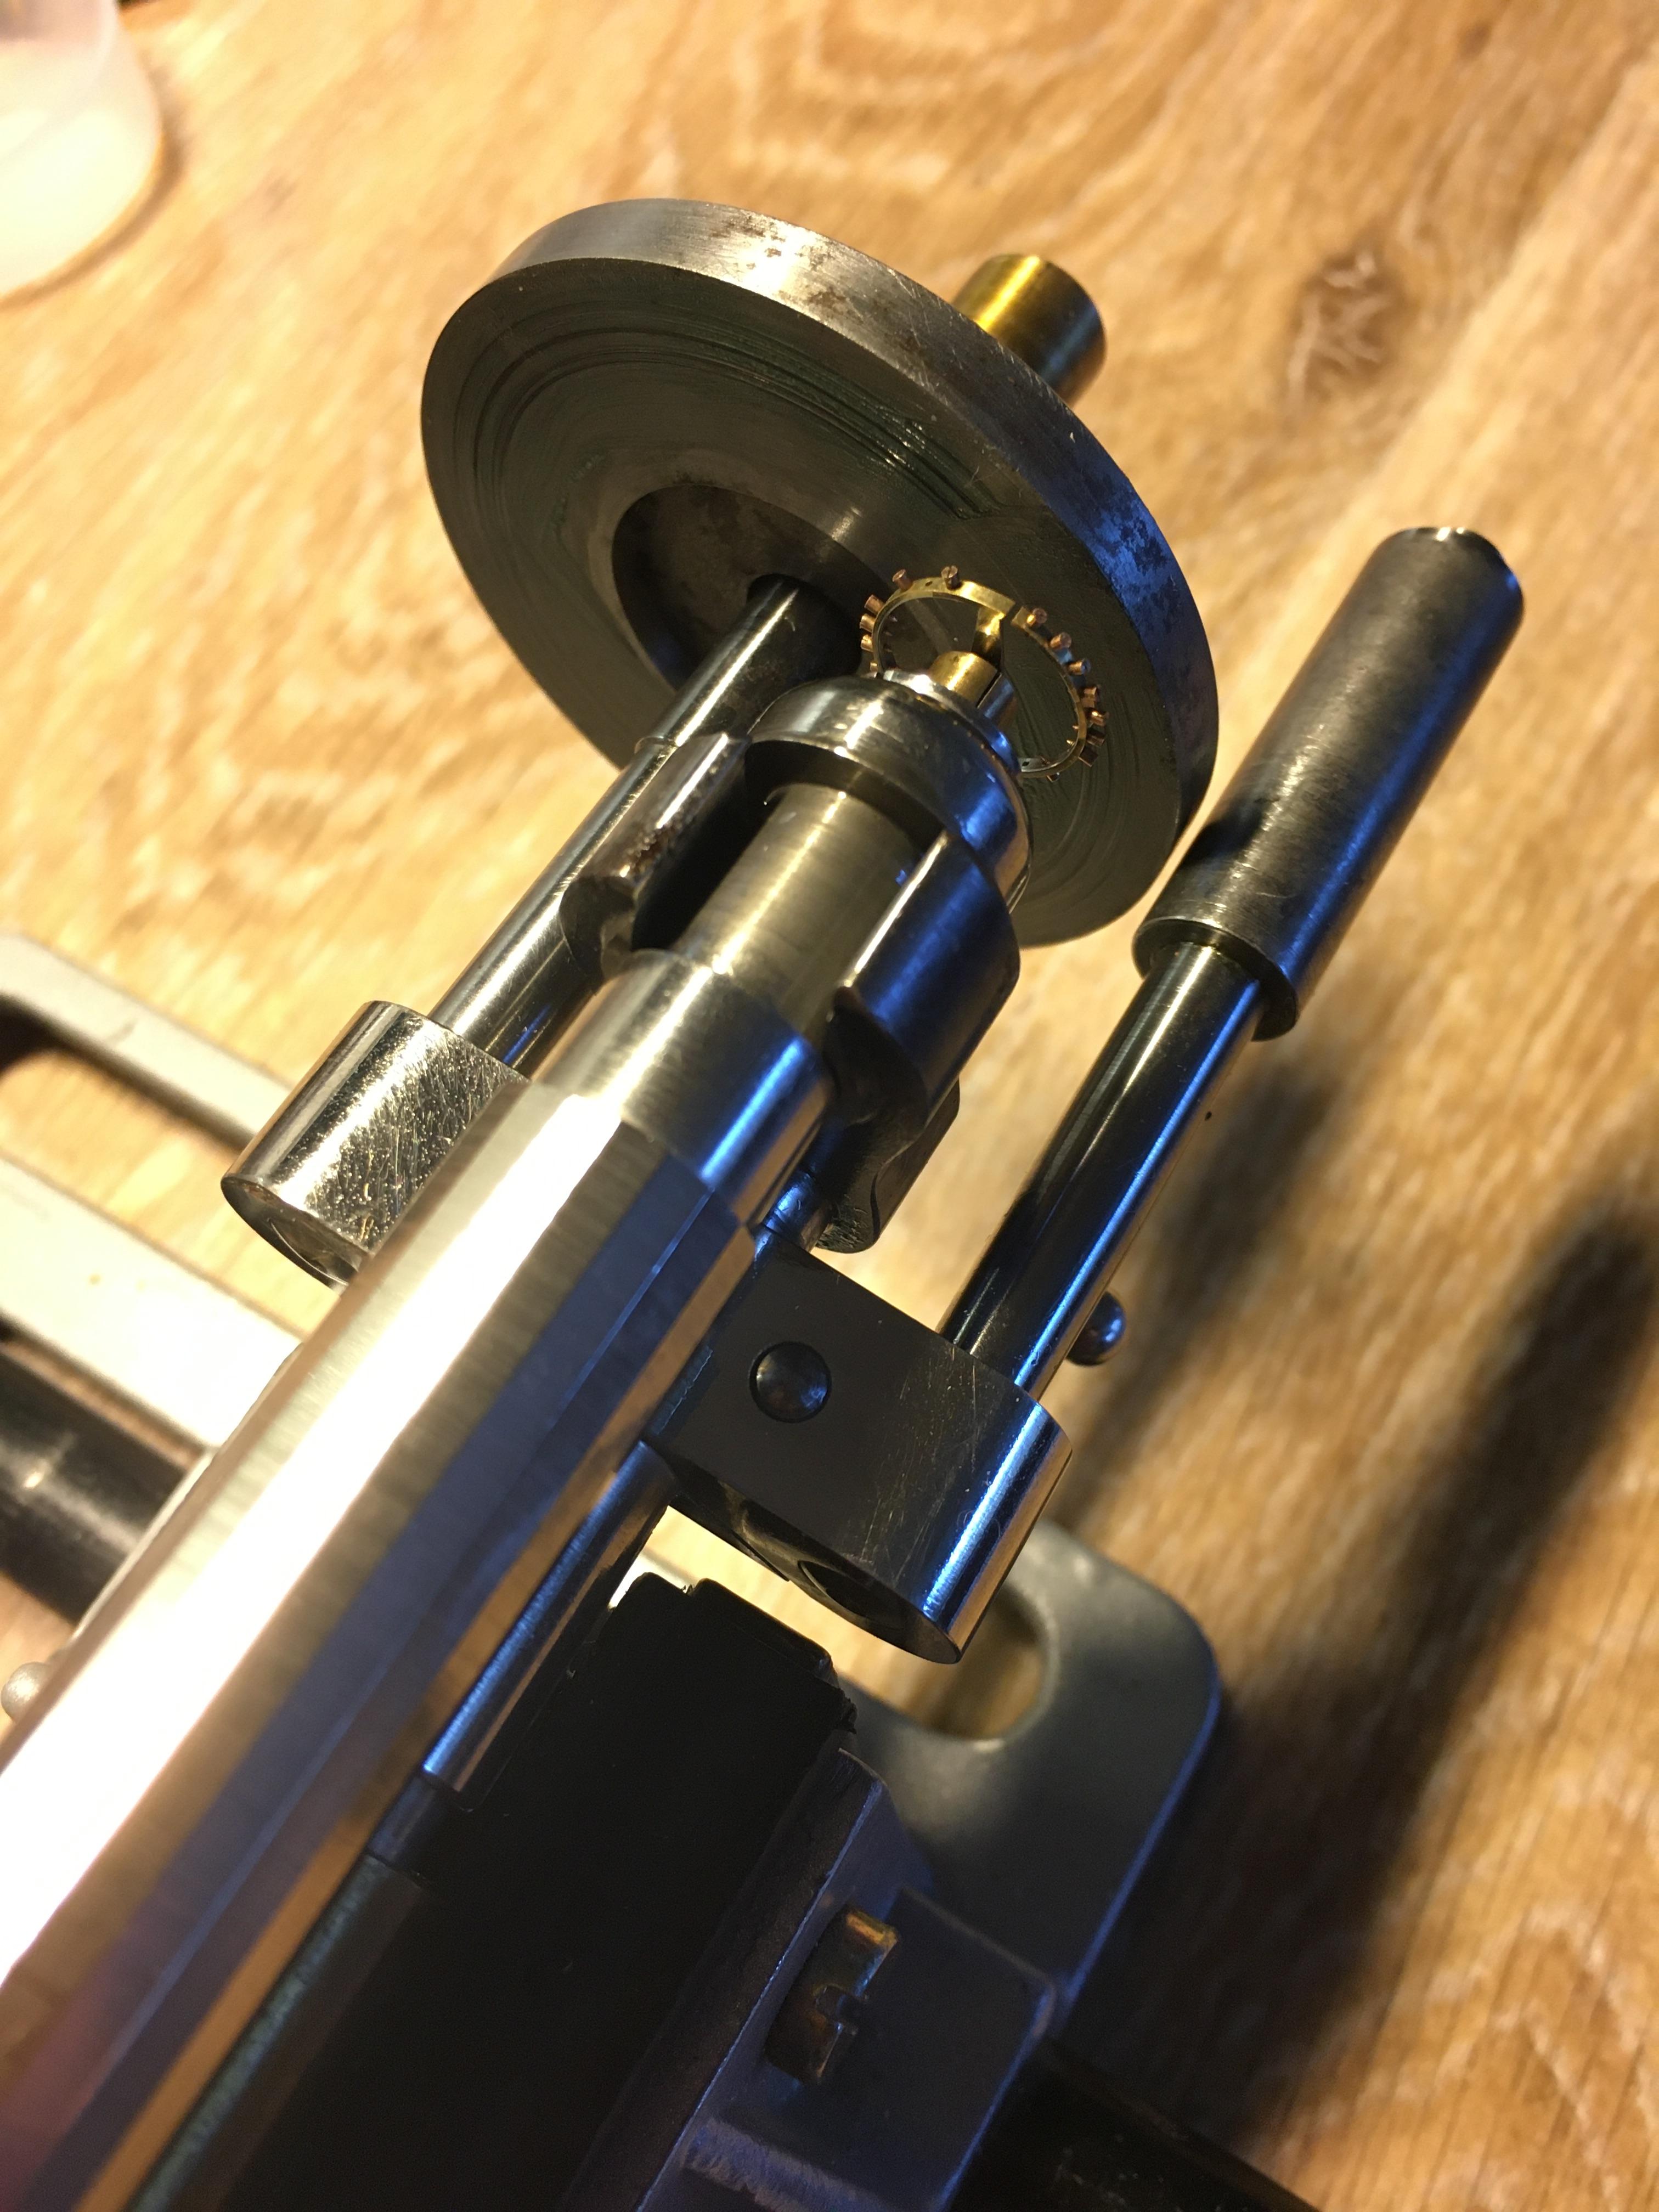
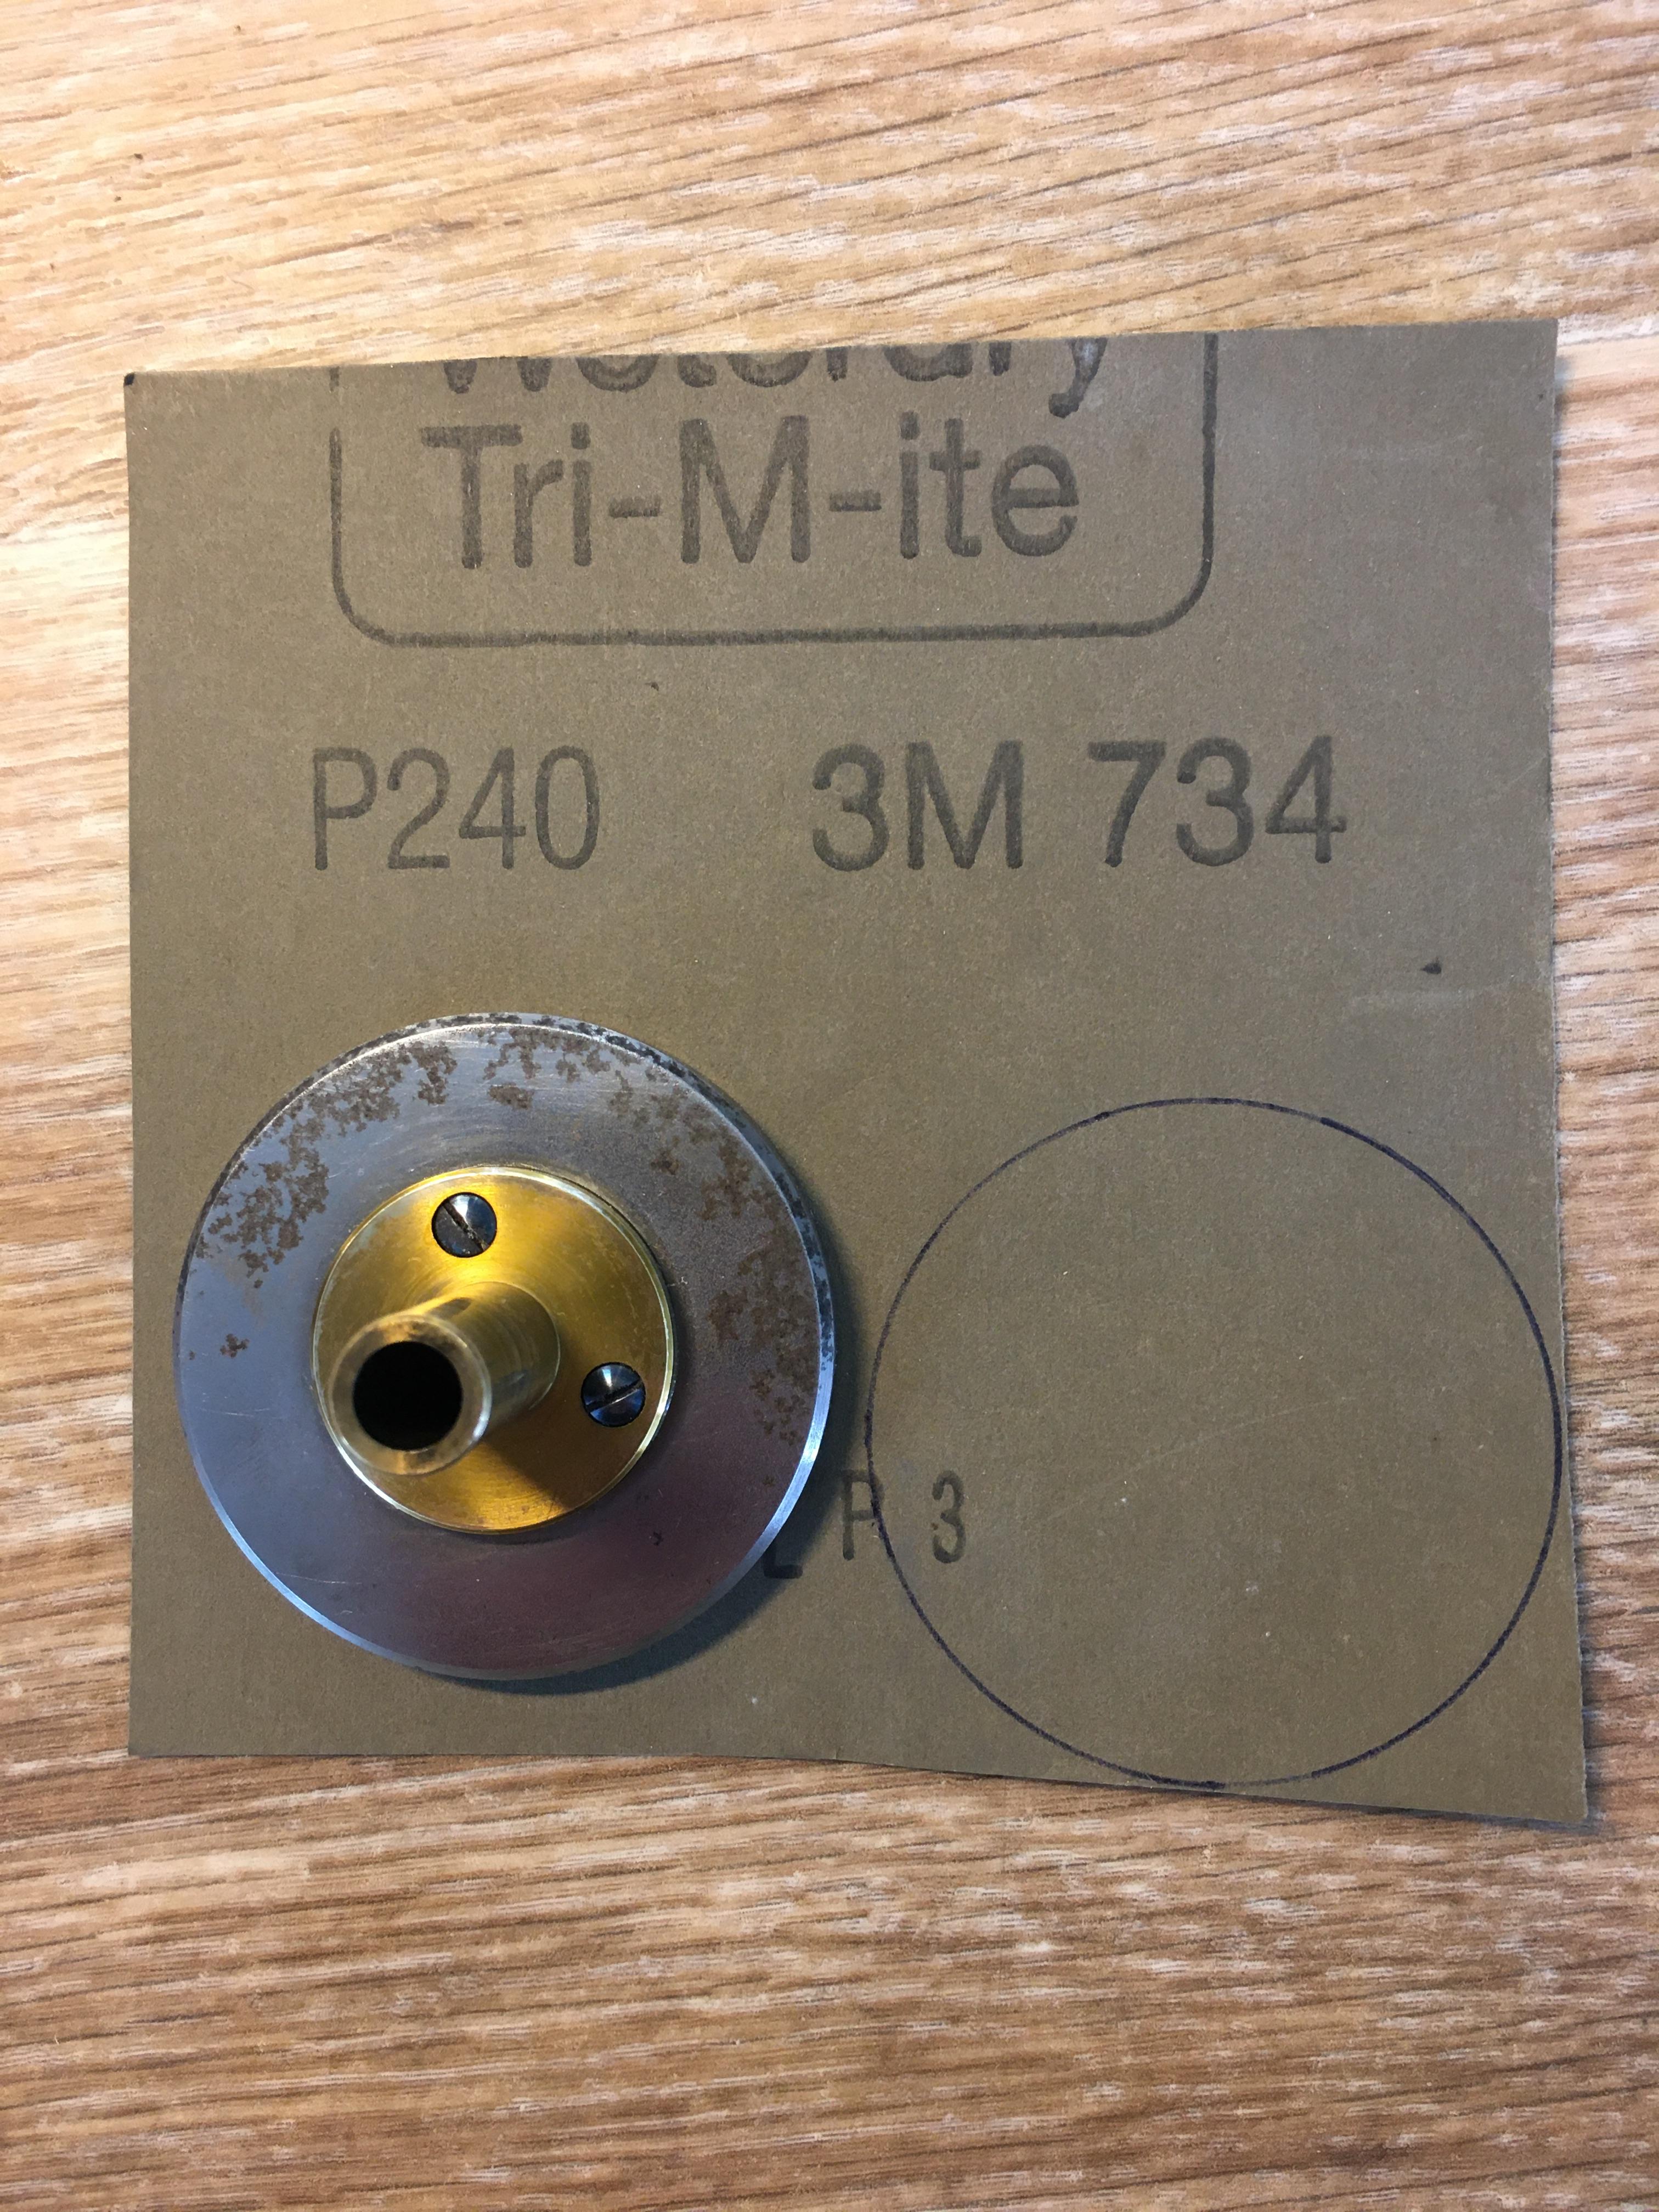
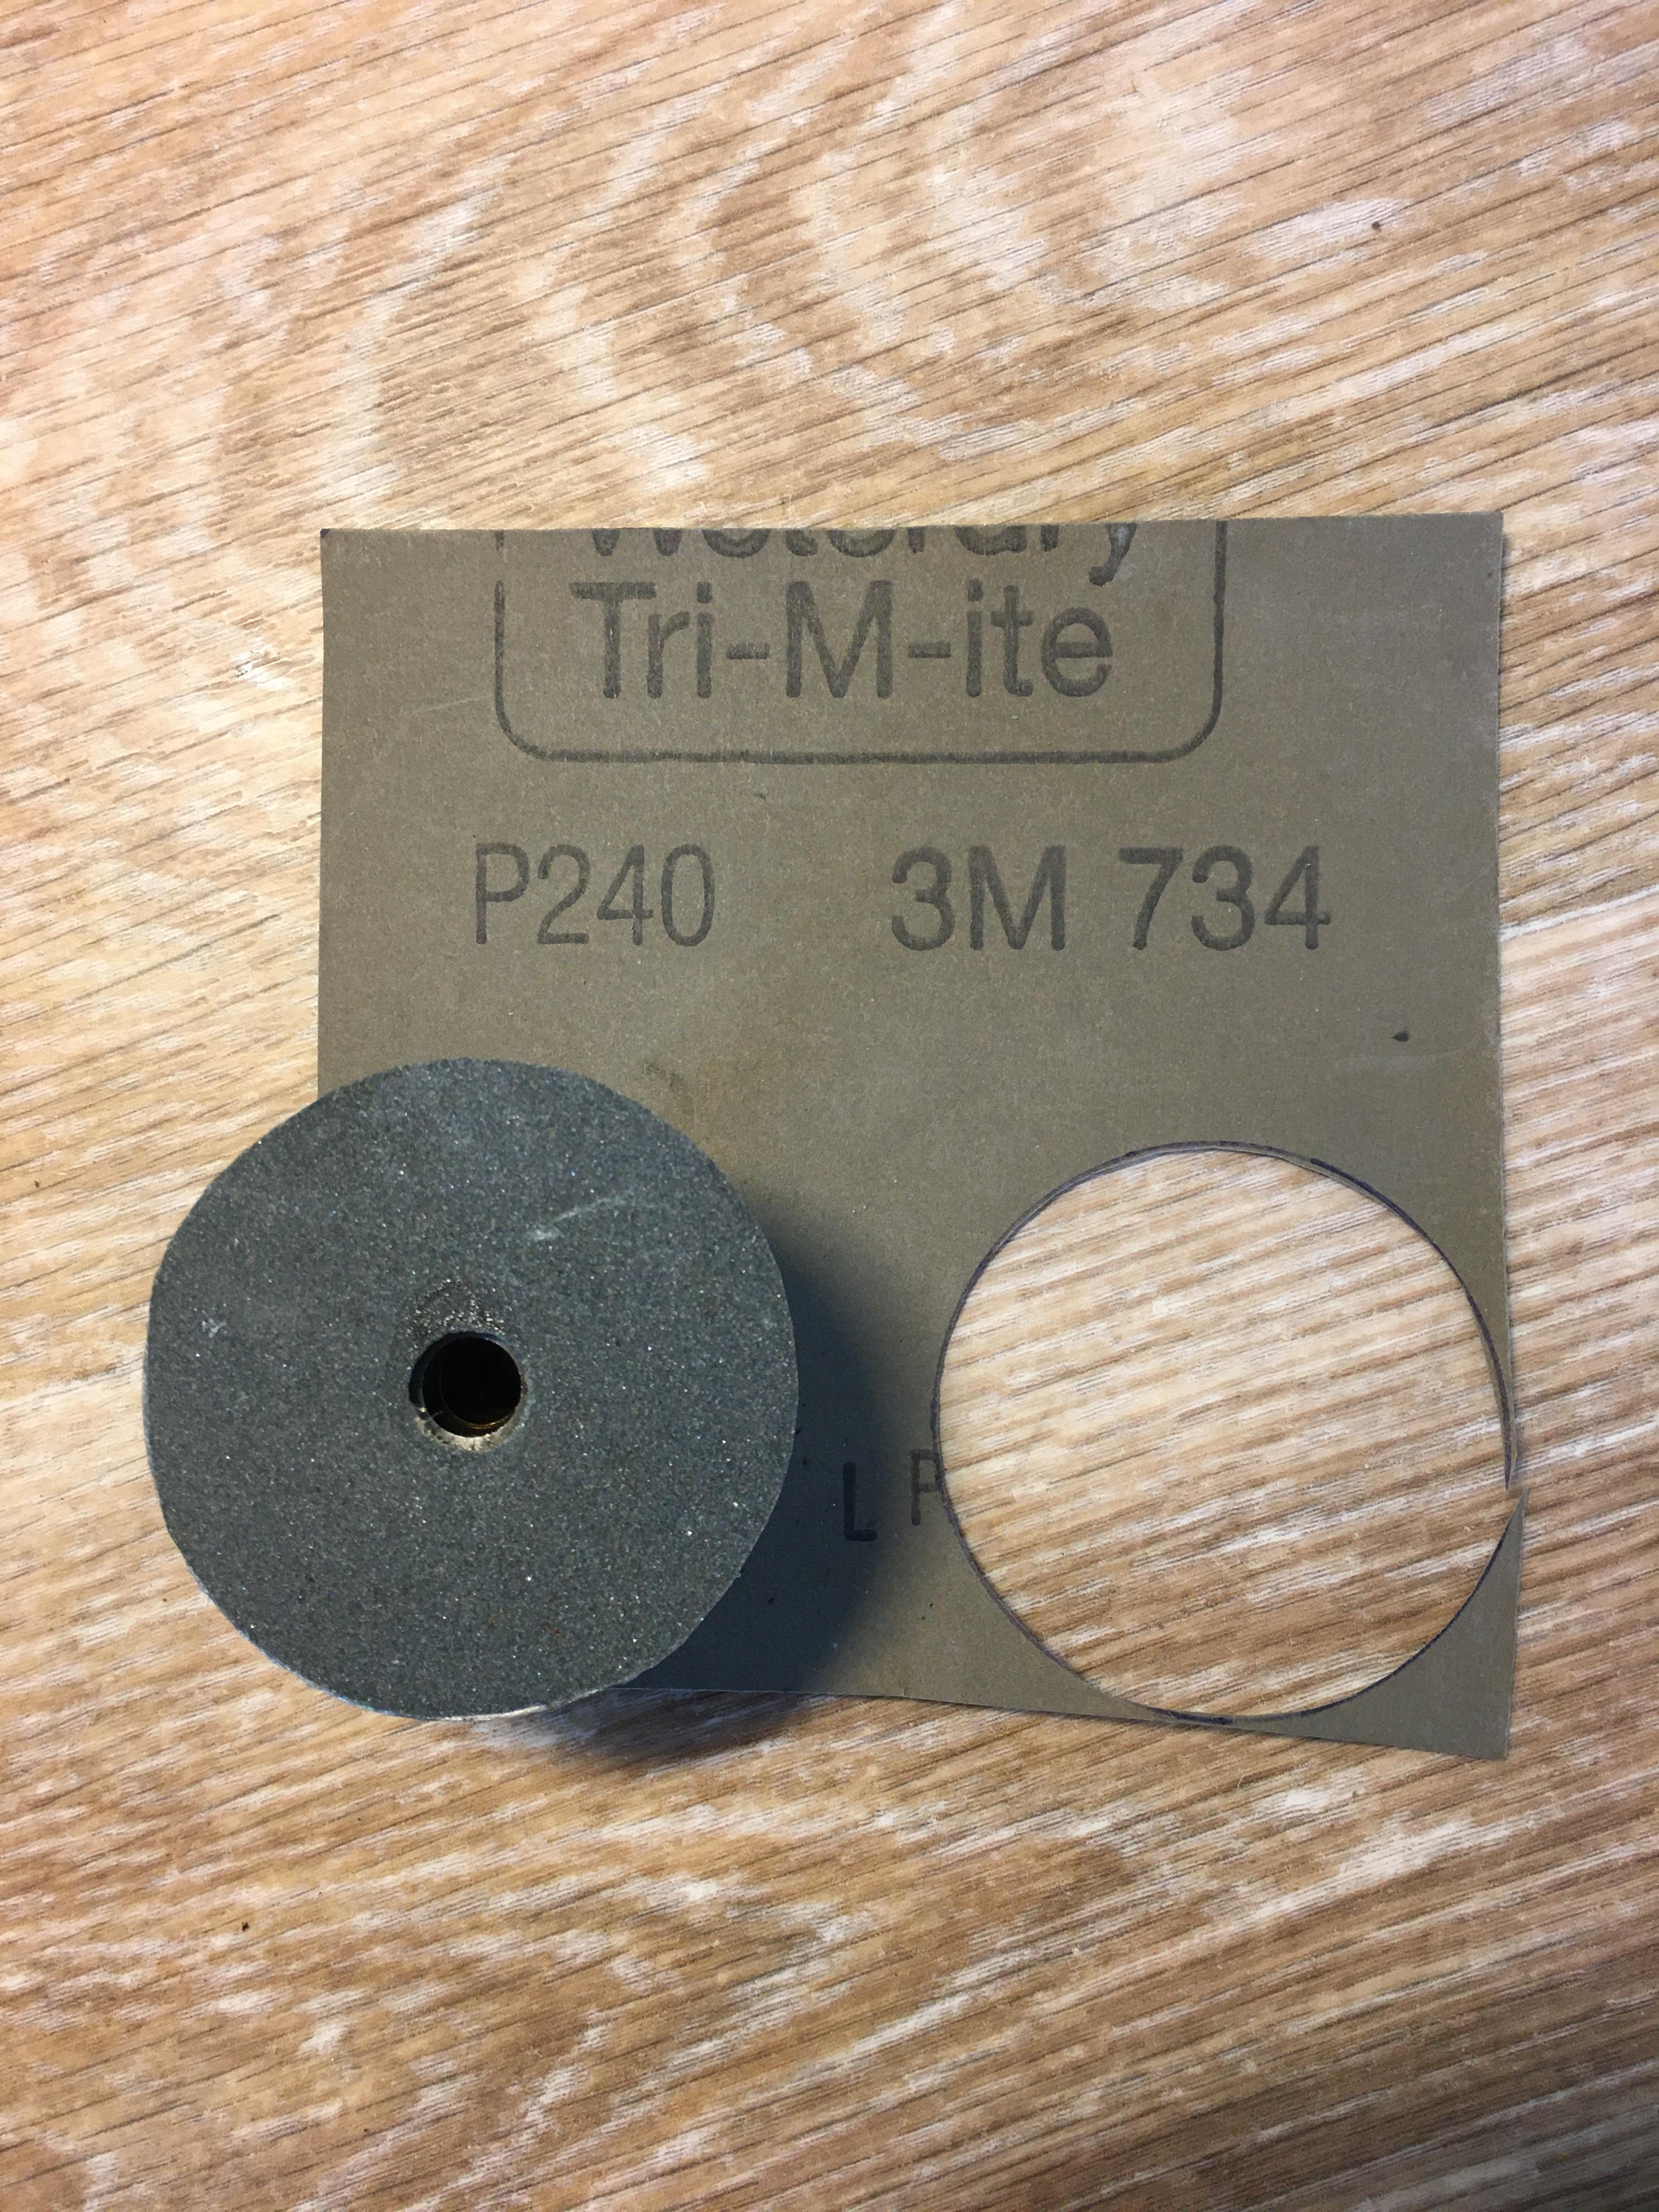
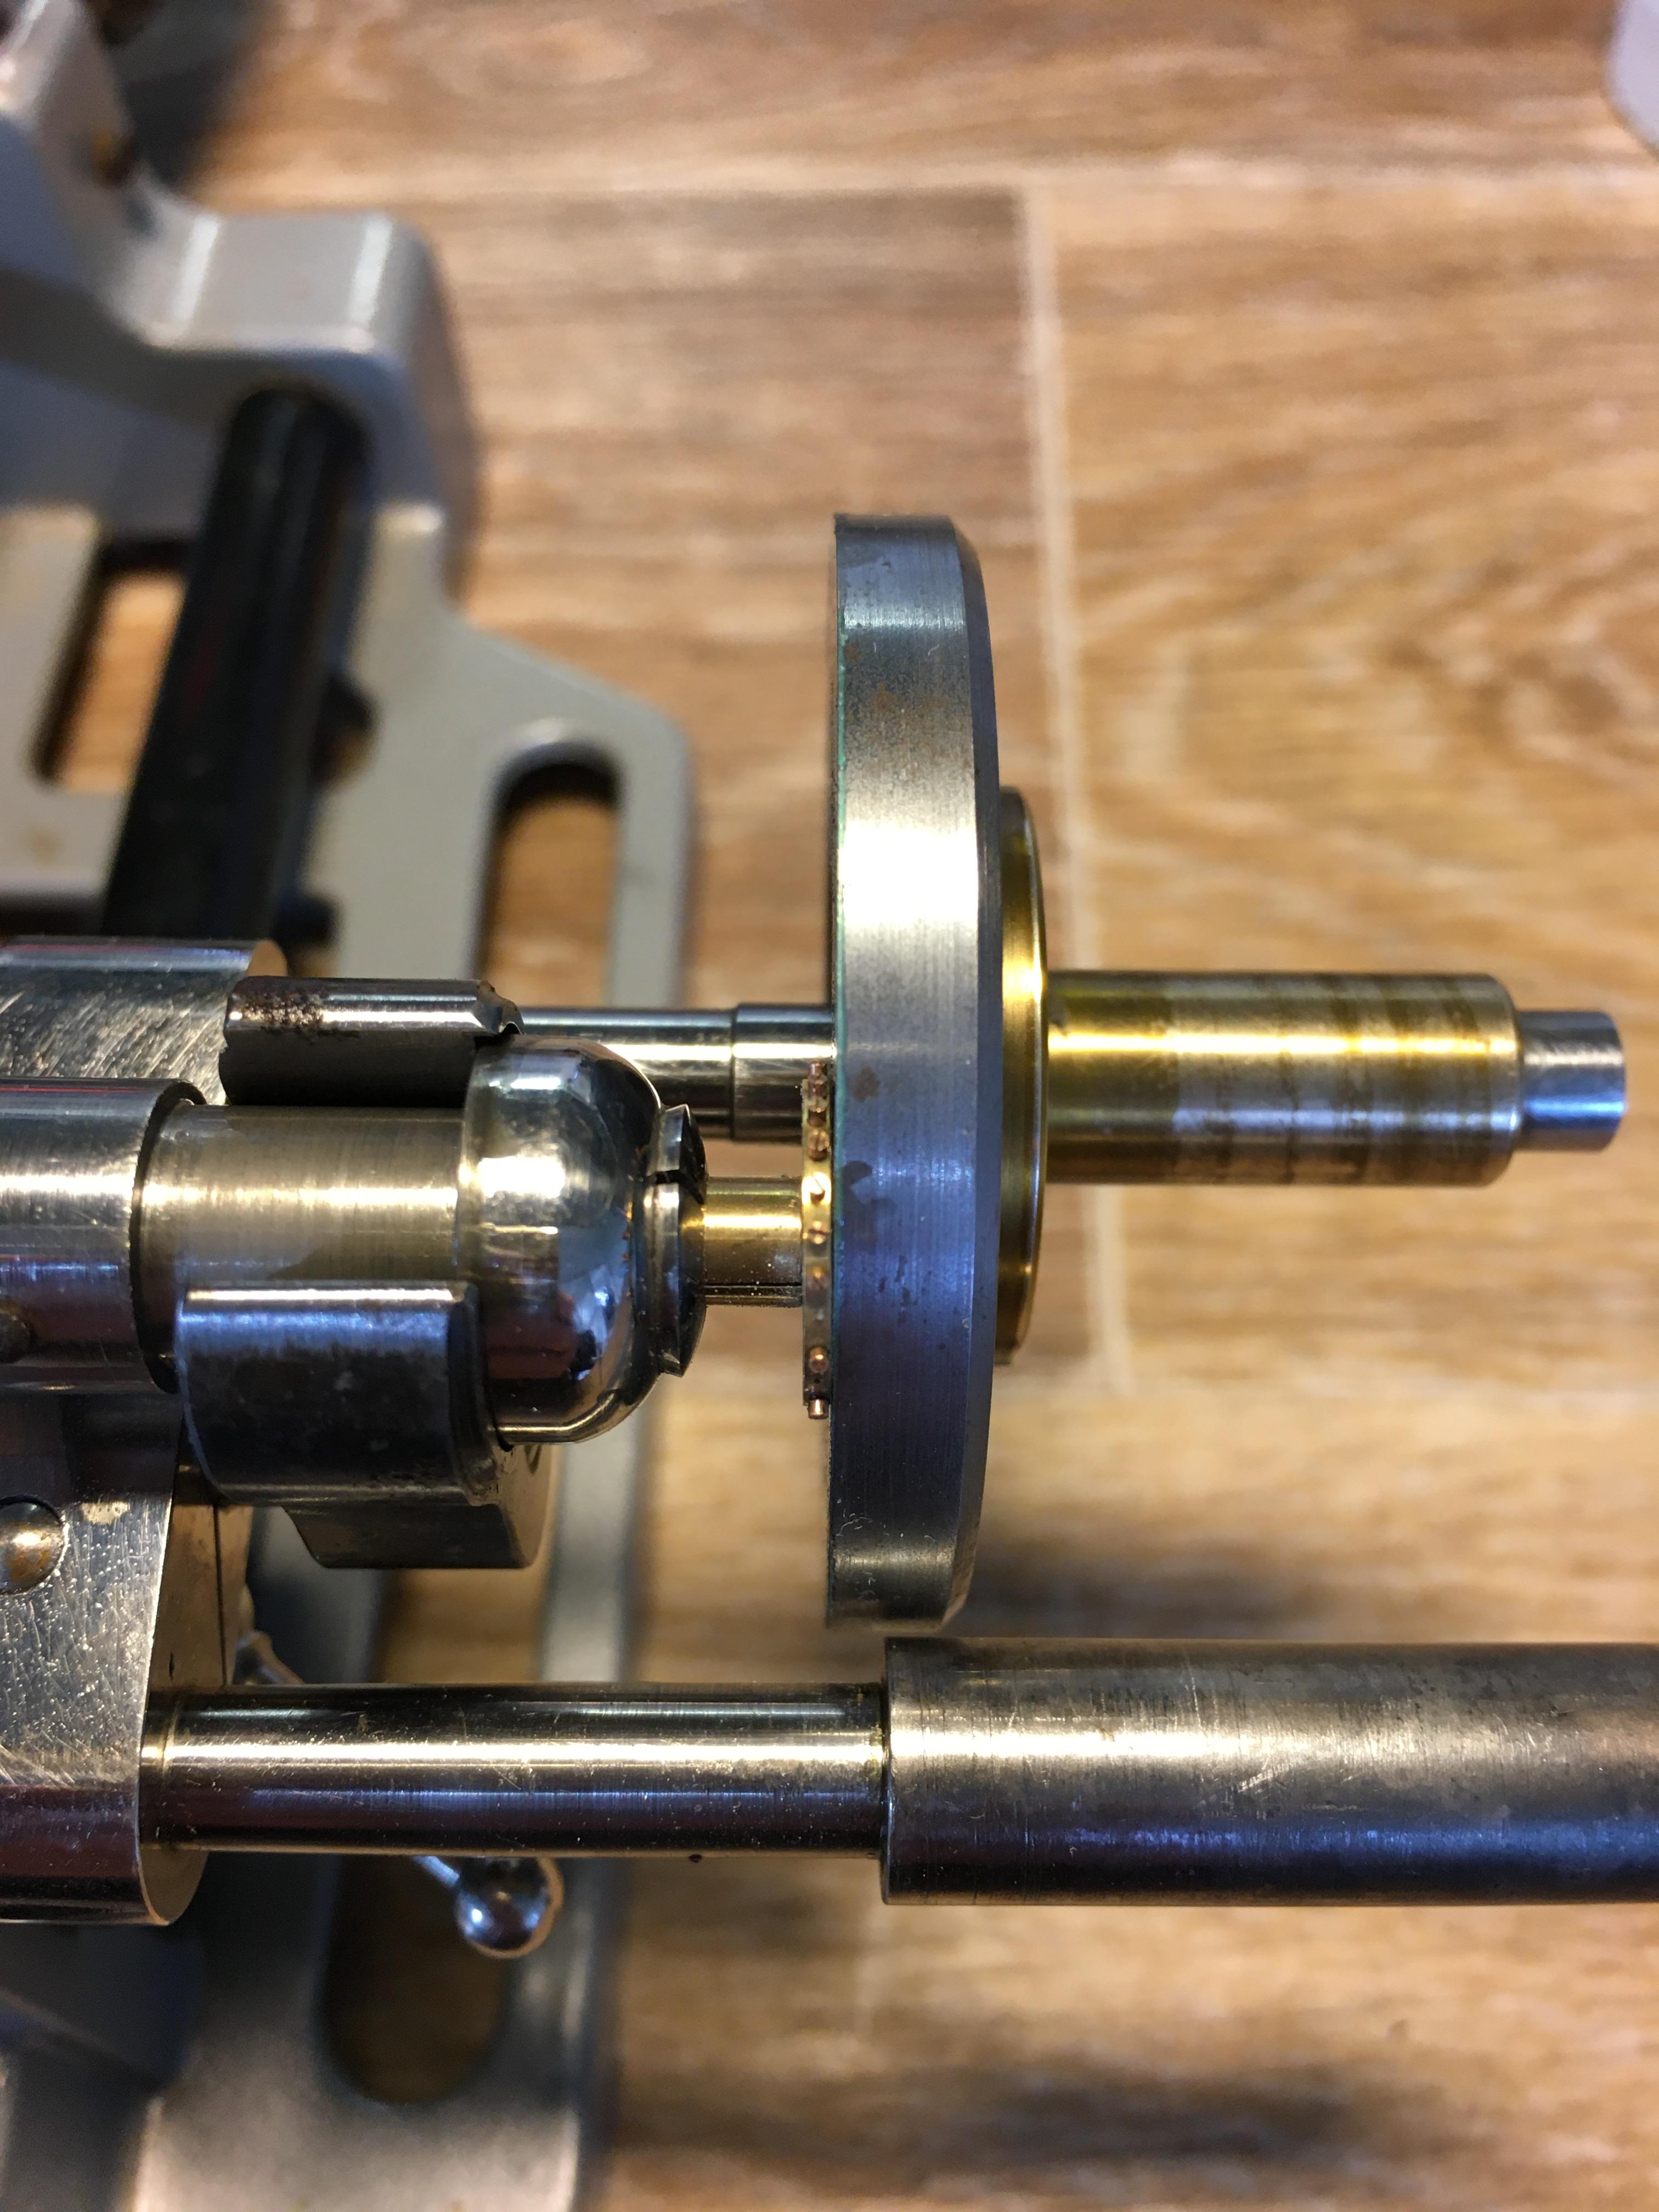
Picking up this side-tracked post again as I just removed a balance staff of a 1920's Omega (35,5L-T1) I was impressed by the way @Delgetti had his setup when he had to change out a balance-staff (https://www.watchrepairtalk.com/topic/28854-new-balance-staff-not-riveting-to-balance/page/2/#comment-244054 Not only that, but also the idea of removing the seat first before punching the staff out from the seat-side, avoiding the whole discussion of the rivet yes/no enlarging the hole. I didn't have the fancy clamps & tools Delgetti has, so I used my screw-head polishing tool. Initially I used #1500 grit diamond paste on the steel wheel, which kinda worked, but very slow. I changed to #800 grit diamond paste, which worked better, but still slow. Then I glued #240 sanding paper to the steel disk; That worked and the disk was hand-driven. Once close to the balance wheel, I took the sanding paper off and continued with #800 diamond paste. One can only do this when the balance wheel sits true on the staff and has no "wobble". I went on grinding until I saw some diamond paste on the rim of the balance wheel. This was as far as I could grind and it seemed that at that point there wasn't much left of the seat. Carefully, with my staking set, I knocked the staff from the seat-side out. Turns out that the thickness of the seat left, now a small ring, was only 0.1mm. The balance wheel hole is in perfect shape and no damage done to the wheel at all. Of course, if the wheel has a "wobble" or isn't seated true on the balance staff, you can't get as close and there will be more left of the seat. In my case, it worked perfect I'm very happy how this method worked out !

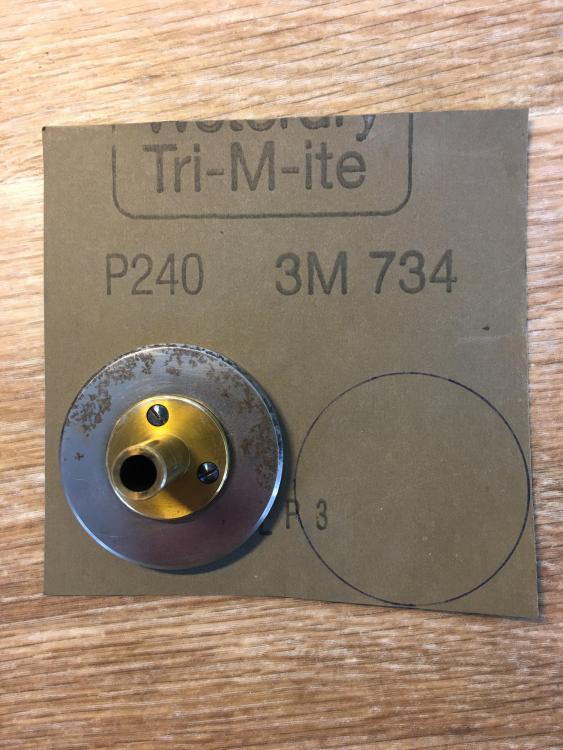

 1 point
 -
Hi New. More of a get you out of a hole than a bodge. There is no substitute for a new coil.1 point
-
Hello and welcome to the forum. Attached a little reading TZIllustratedGlossary.pdf1 point
-
In think you are effectively shortening the coil by shorting out damaged tracks. In my case as long as the continuity was good and the resistance not too greatly affected it should be ok . One was on an era movement,1 point
-
Would the paint increase the resistance of the coil ? Effectively joining the wires that are painted. I imagine its important to only paint the smallest of areas to make the repair.1 point
-
Hello and welcome from Leeds, England. I have family all over Australia, went as £10 poms.1 point
-
Hi. It’s always better to replace the coil but in the event of being unable to find one it’s nice to know that repairs can be effected. I prefer the conductive paint option because of the lack of heat and the chance of causing further damage.1 point
-
Yep, i pulled that up as well when i was looking, there is definitely parts out there if you are prepared to go out and find them. I watched that video years ago, I'm not so sure about probing the coil like that. If you are going to touch the coil use the side of the probe or at least shape a nice round end to it.1 point
-
I've seen a movement with a power reserve indicator in a video, and with that one, the dial mechanism self-set once fully wound. I'd try fully winding the watch then fit the indicator hand pointing at the 9 o'clock position, let it run down and adjust slightly if needed to equalise the scale ends.1 point
-
*I meant to say toward maximum power. It will move toward that.1 point
-
I'm assuming, bracelet staff is a wrist watch but I could be wrong .1 point
-
Hi the 497. Has a 27hr power reserve although at max is 30hr it never reaches it.1 point
-
Hi have a look at the attached manual JLC Futurematic Repair Manual.pdf1 point
-
I don't know myself. But what you could do is temporarily put the hand on right in the middle between red and blue, the wind the watch only a few turns, and see which way the hand moves. It'll move toward "0" power.1 point