Leaderboard
.thumb.jpg.cb17a66989f1e796fd4217db2e9ca9df.jpg)


Popular Content
Showing content with the highest reputation on 05/29/24 in all areas
-
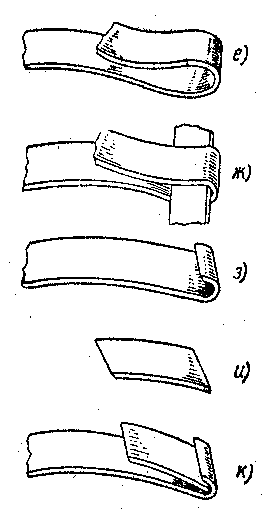
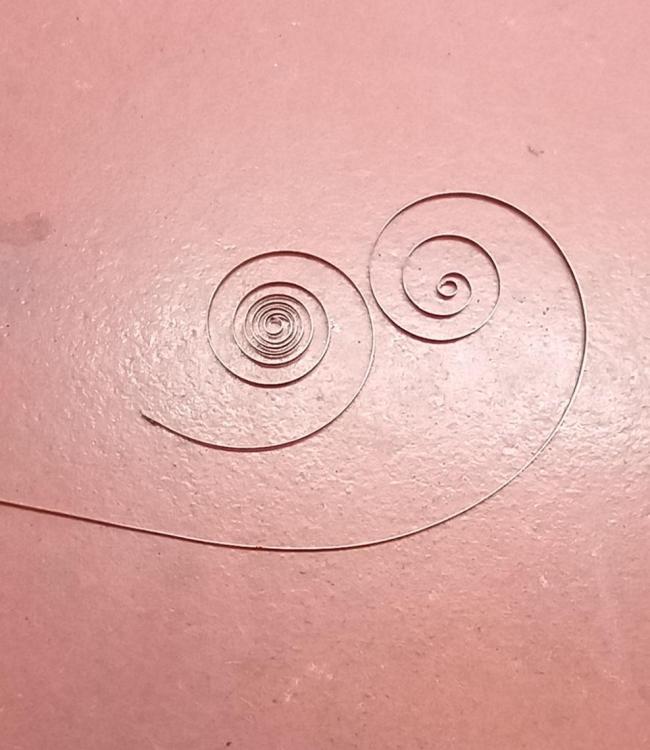
Instead of just folding the spring end back, it is beter to use this way, shown in old book. Jus folded back end often breaks after some time The small aditional piece can be hardened (rather not anealed). No hardening of mainspring neither of internal , nor outer end needed as @nickelsilversaid. I prefer riveting and drill the holes without anealing. Never thought that there may be problem with centering the holes, may be that's why I never had
 3 points
 -
This video might help Tom3 points
-
Providing spares is what Swatch don't want to do. They make authorised dealers jump through hoops to be authorised dealers. I'm sure Swatch want to have the monopoly of watch repair of their watches, then they can charge as much as they like to repair and sway people into buying and not repairing.2 points
-
It doesn't magically make them all fall into place, but it has helped me a few times. Actually not. You can angle them. Well, depends on the model, but I believe most people on the forum use similar types that can definitely be angled. .. theoretically even to the point that you look sideways into the movement, but practically not really (because then the eyepieces are in a very weird position and hard to look into. But the magnification, lighting (with LED ring) and overall (stereo) clarity of vision really help a lot. E.g. you can see a pivot through the jewel when it touches the jewel but hasn't gone into the hole (when looking straight down) - then you can nudge the wheel and see the pivot move towards the hole. Just an example. I worked without a stereo microscope until March this year, so I know it's possible without. But having one now, I wouldn't want to go back. Kudos to you for sticking up for the traditional way and persevering. You got the skills and experience.. Looks good! By the way, another tip that is rarely talked about: Invest a few minutes in dressing your tweezers and screwdrivers. That'll help a lot in not slipping and not loosing parts. As for screwdrivers, it's really worth adjusting them to the screws of the particular movement. E.g. I was working on a vintage Omega where the screw slots were very thin/narrow. It was imperative to sharpen the tips of the screwdrivers to get in properly. Afterwards I worked on a Rolex where the slots were rather wide. Leaving the screwdriver tip as thin and sharp as before would have resulted in slippage, bad grip and damaging the screw slots. So had to file down the screwdriver again. It can feel annoying to do this when you're eager to get started on the watch, but you'll thank yourself if you take a few minutes beforehand. It'll save you a lot of pain. Tweezers the same. If they aren't dressed properly, everything becomes more difficult and you'll loose parts. This video is helpful:2 points
-
Here's a picture of it:
 2 points
 -
I repaired one of the rechargeable spot welders for my mentor a couple of years ago. It used a flat, 12V lead acid cell, like those found in uninterruptible power supplies. I was surprised that at the maximum setting, it was more powerful than my dental tabletop unit. The only problem with these spot welders is the power supply. The battery is so small that it is easy to overcharge it and cause sulphation. And if not charged regularly, it would go dead and short out.2 points
-
Spot welding is the best, and is how Generale Ressorts does it. Rivetting is good, but it's an absolute bear getting the holes in the spring and tongue, centered in the spring, then making a rivet that fits well while being as low profile as possible and actually holding up to use. I would by far rather make a balance staff than rivet a tongue on a mainspring. There are a number of spot welders aimed at watchmaking on Aliexpress, I've been meaning to get one. They can do dial foot soldering (using a carbon rod) and spot welding.2 points
-
Yup, that is the same as mine. Use a watch mainspring. Find one the correct width and cut it to length! This is why you NEVER throw anything away.2 points
-
Maybe because I have a spot welder, my prefered method has always been to spot weld another piece cut off from an old mainspring.2 points
-
Ohhh, hahaha, yea, I thought you were complaining that I didn't quote you. Well, I'm relieved that you're happy with me and quoting ME! That's truly exciting2 points
-
Hi Arron, The hairspring looks pritty normal seen from above. May be You don't know how to fix the studd to the cock. See, this kind of studd carrier alows the studd to be placed to a different distance from the stone. So You don't need to pres the studd as much to the stone as it can, but let the spring take it's natural shape an only then tighten the screws of the carrier. Of course, if the radius of the overcoil is wrong, this will not help to make the spring stay as it should, but I doubt that You didn't do the things like as I just described. The stoppng may be caused by different reasons. Yes, it can be pivot/stones problem, and it can be hairspring too. Of course, another possible reasons exist, like balance rubbing on the center wheel... You need to make some checks to see what is wrong. I will advice first to remove all from the plate and leave only the balance assembly with it's cock. Then make free oscillations test in both horizontal positions and see what happens. Then, if the problem still there, remove the hairspring and put the balance only with the cock, then make balance turn and observe how it stops in both positions, if there is difference, and write here.2 points
-
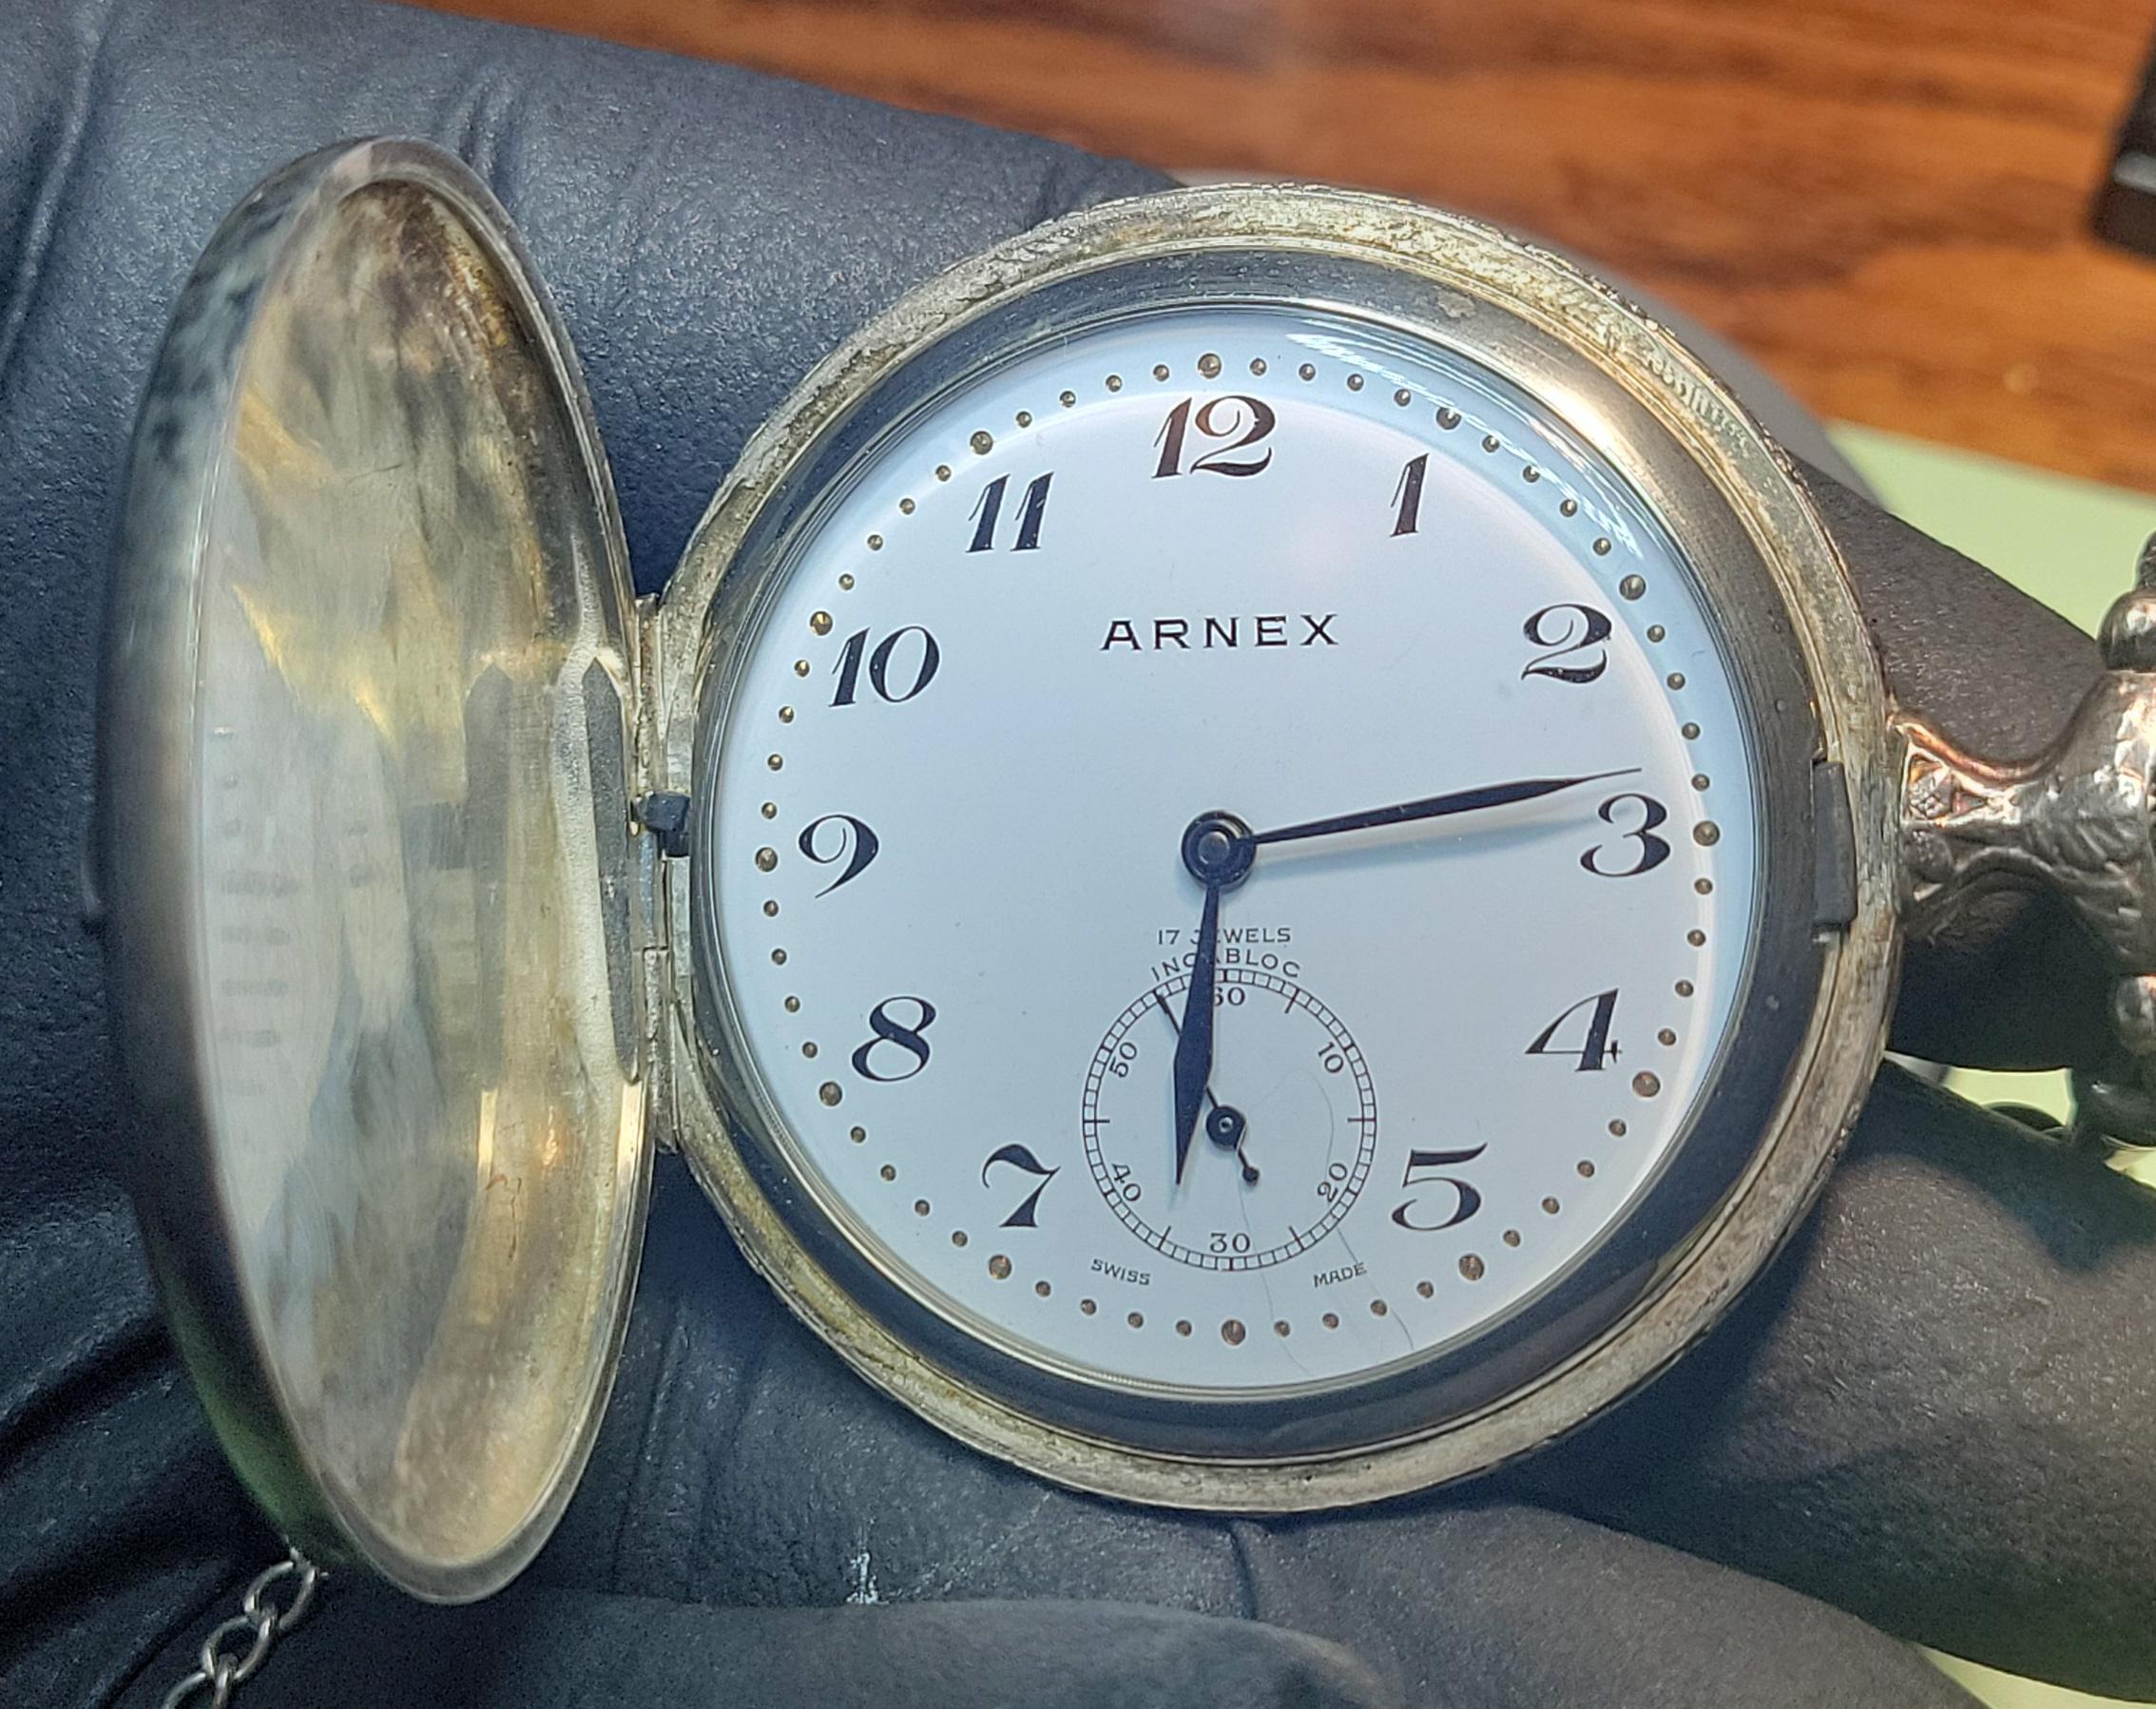
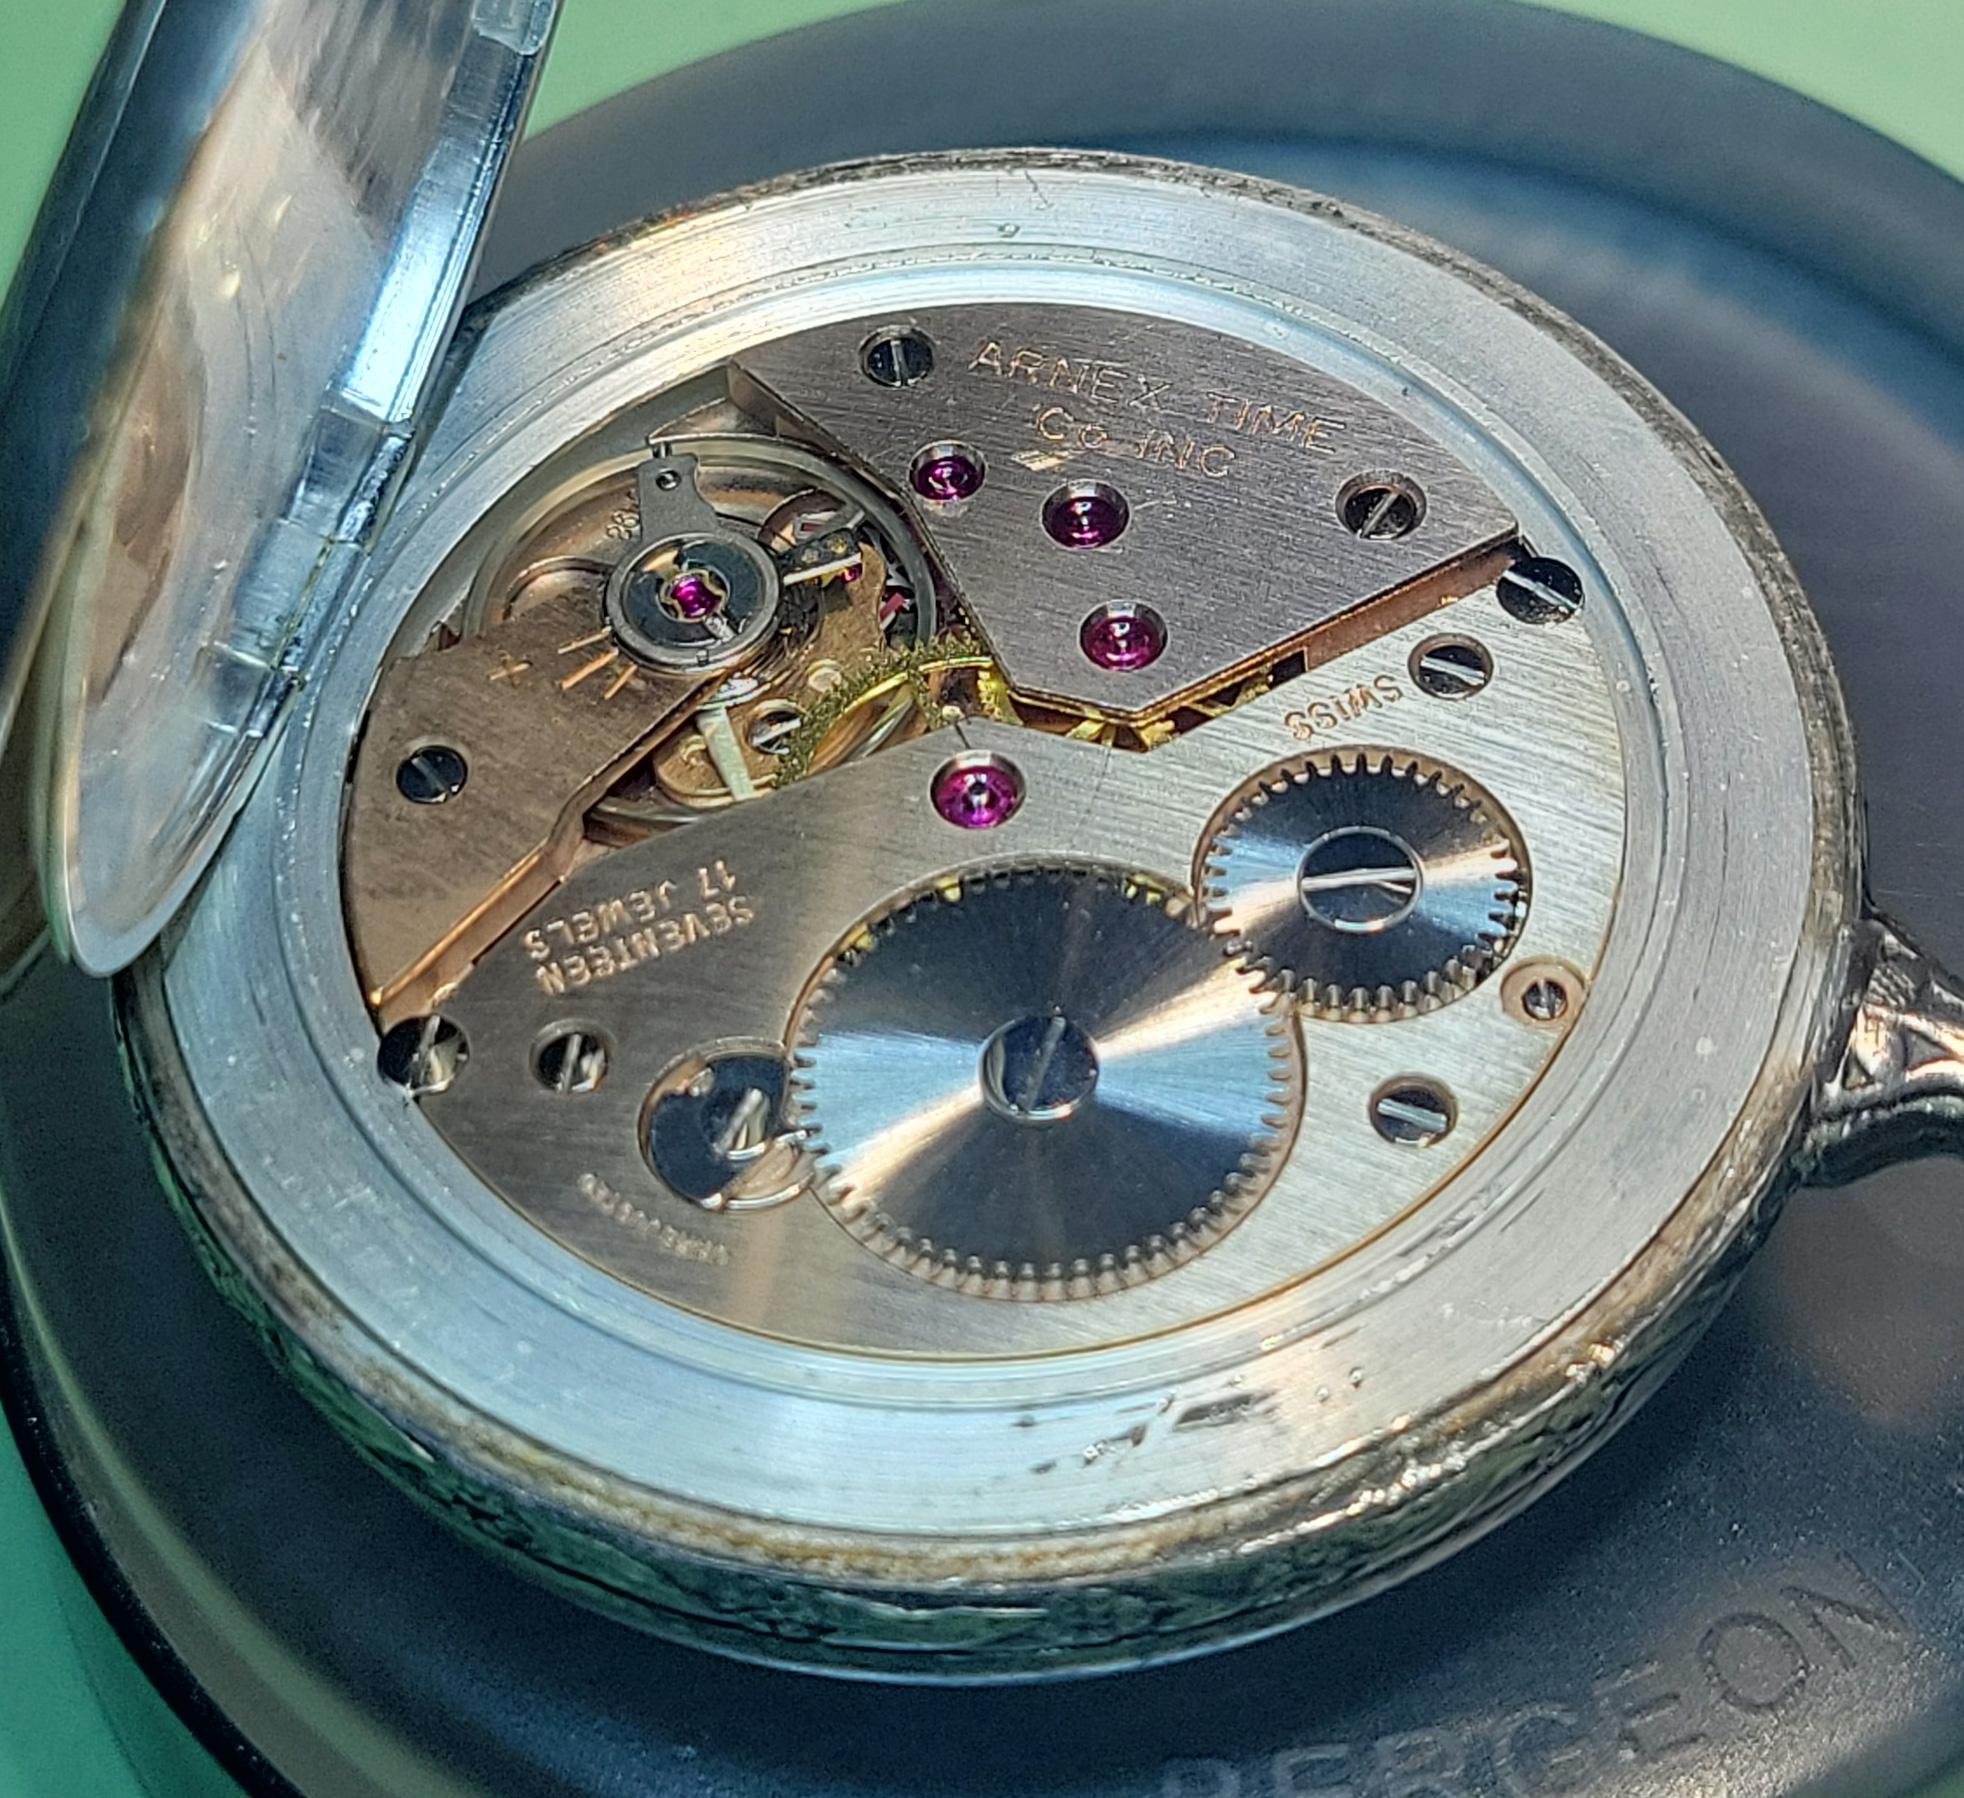
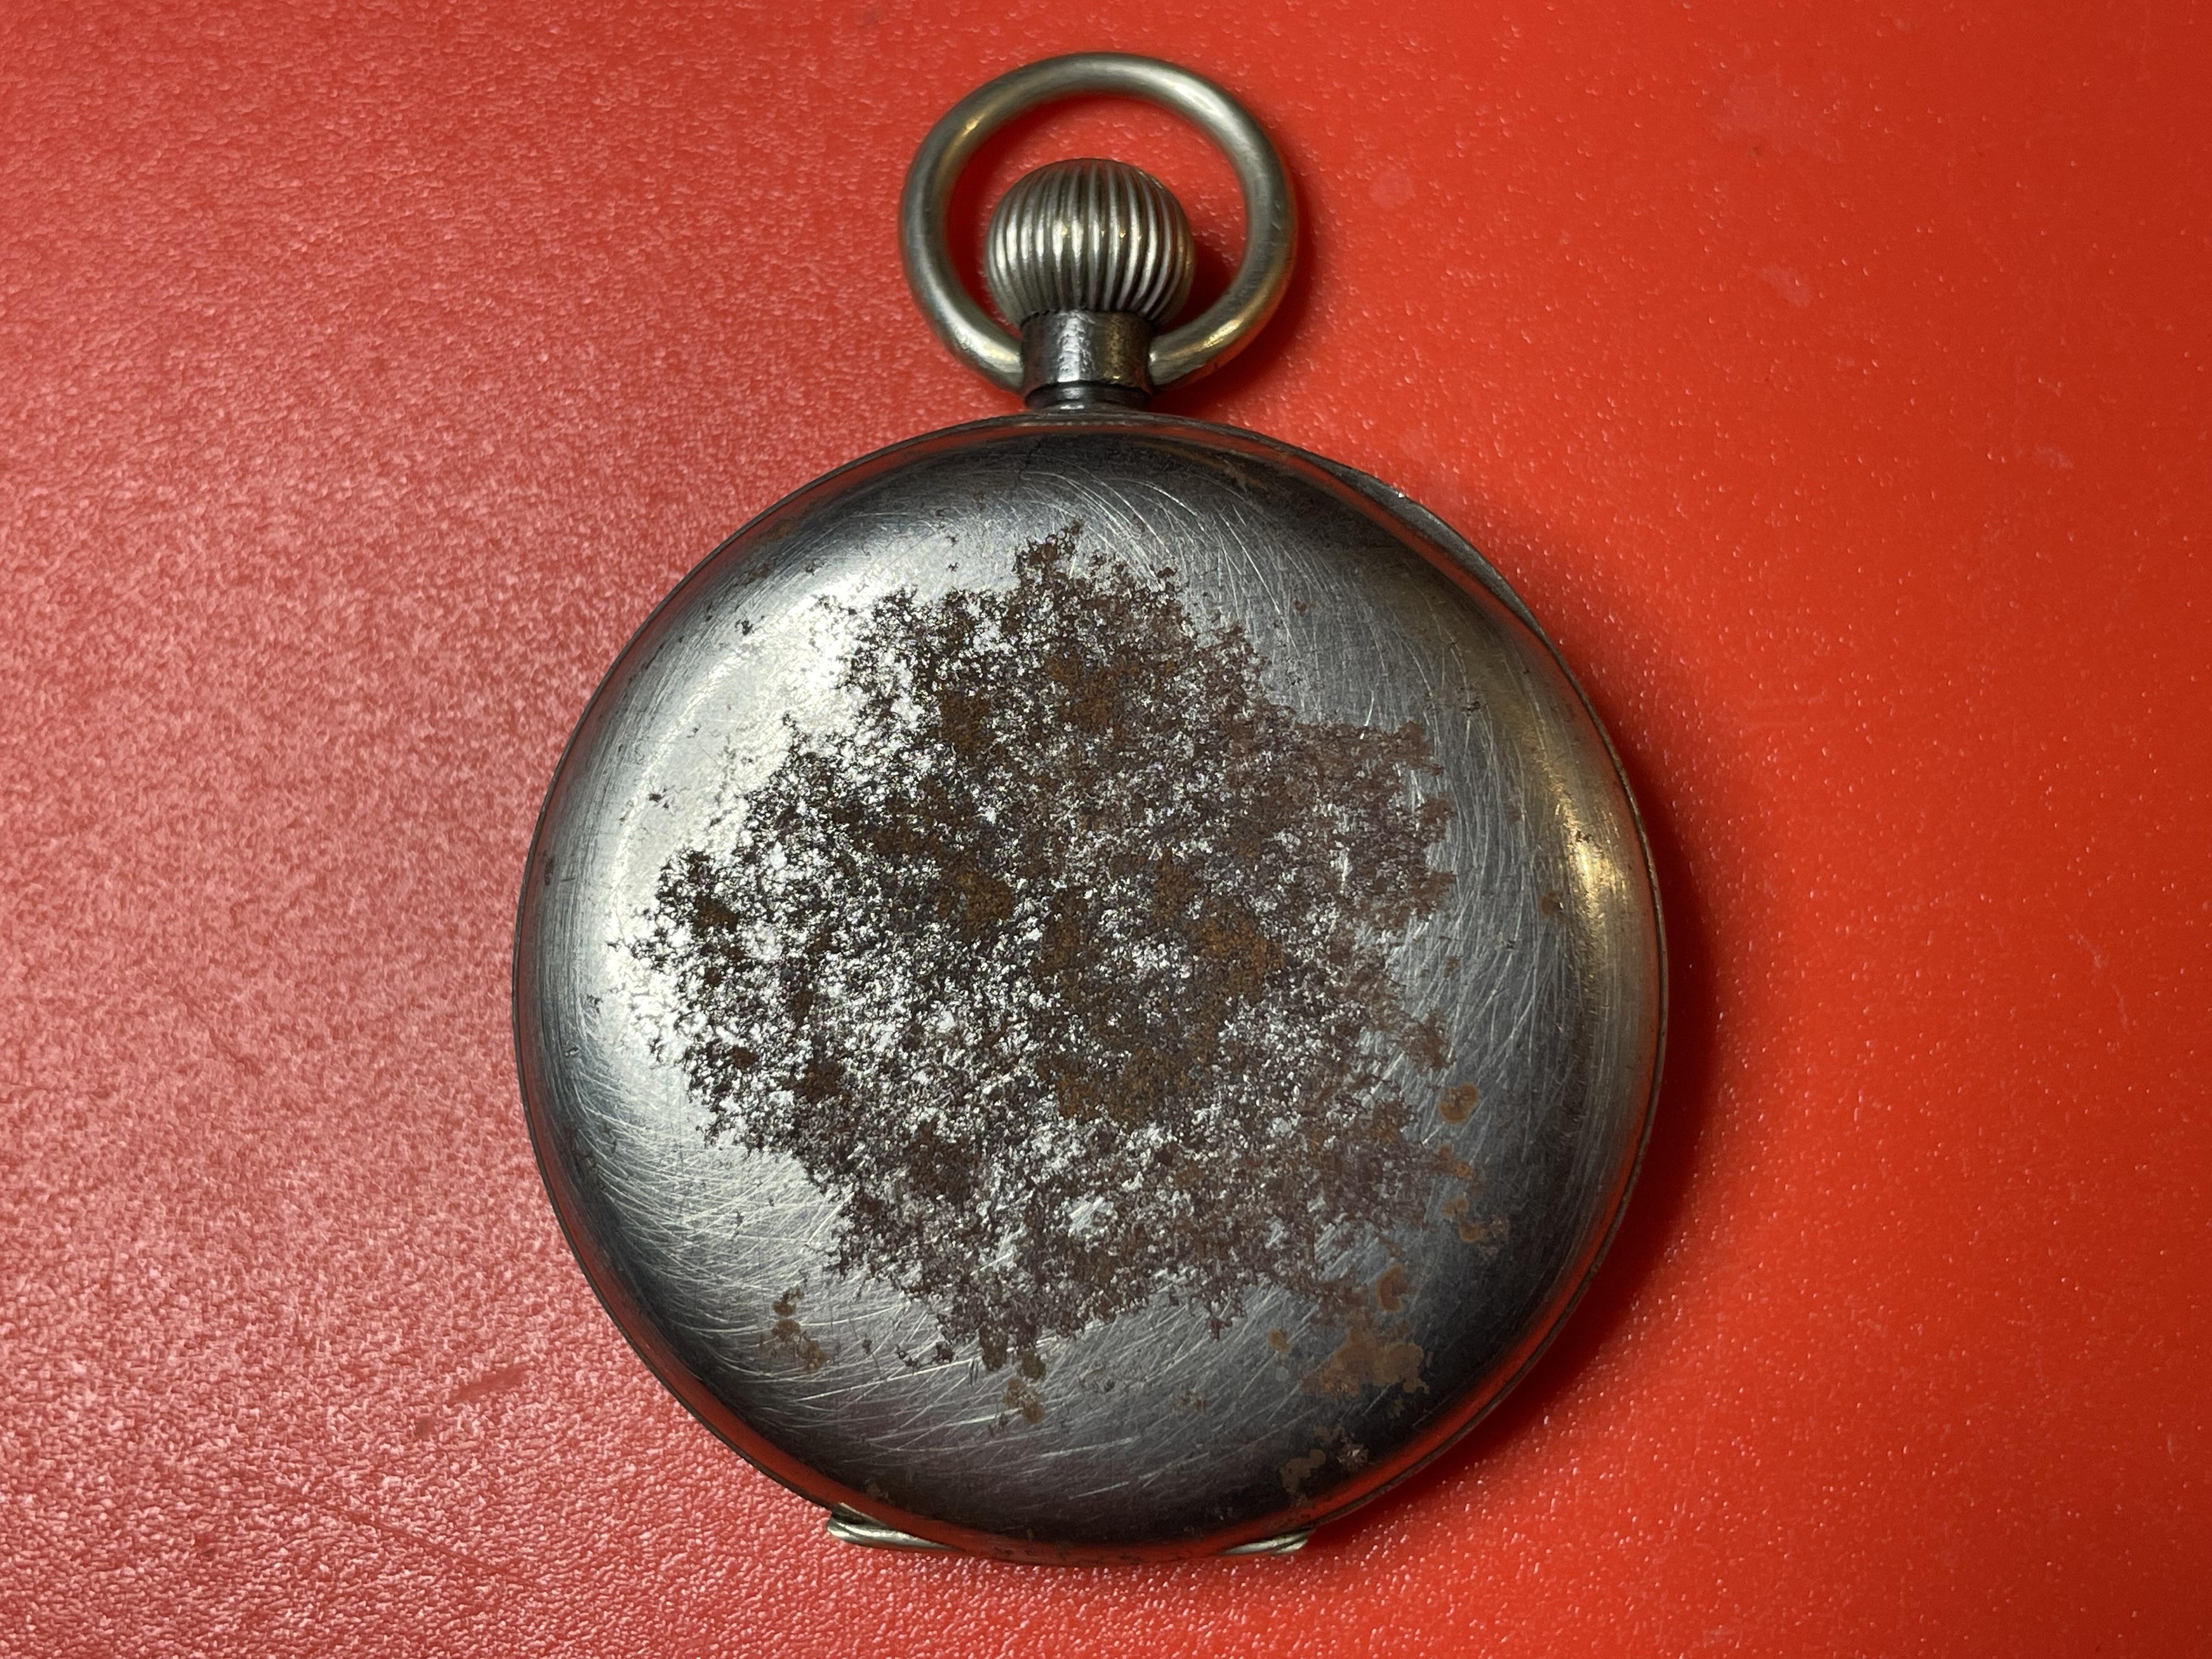
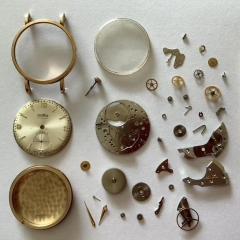
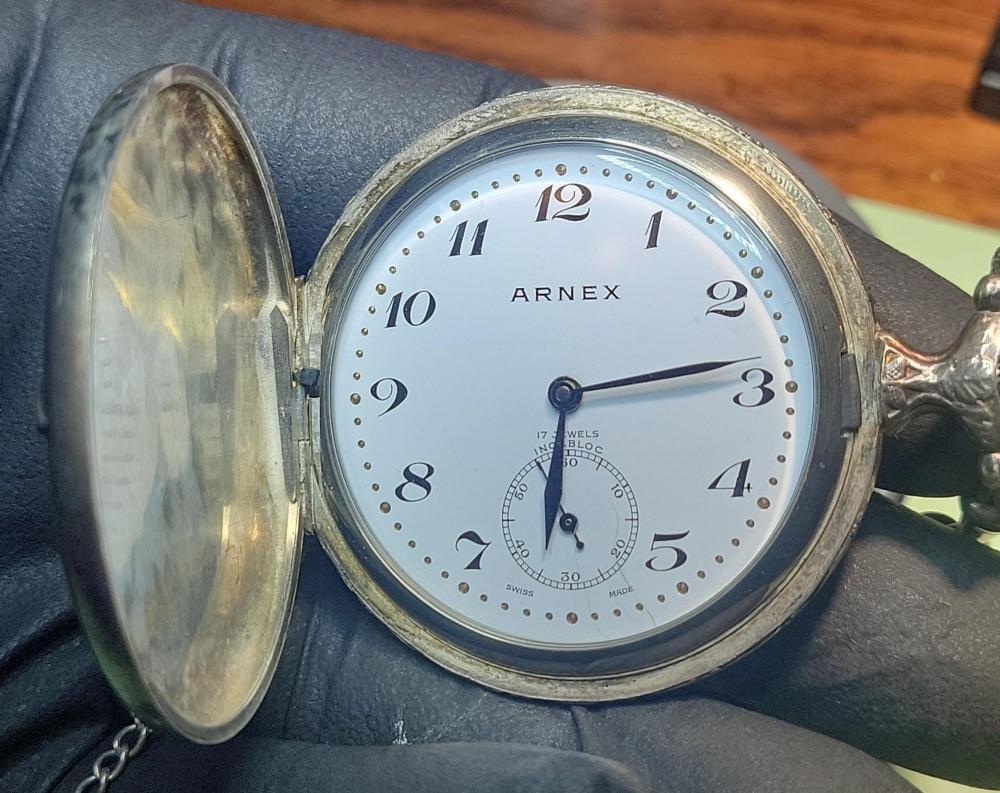
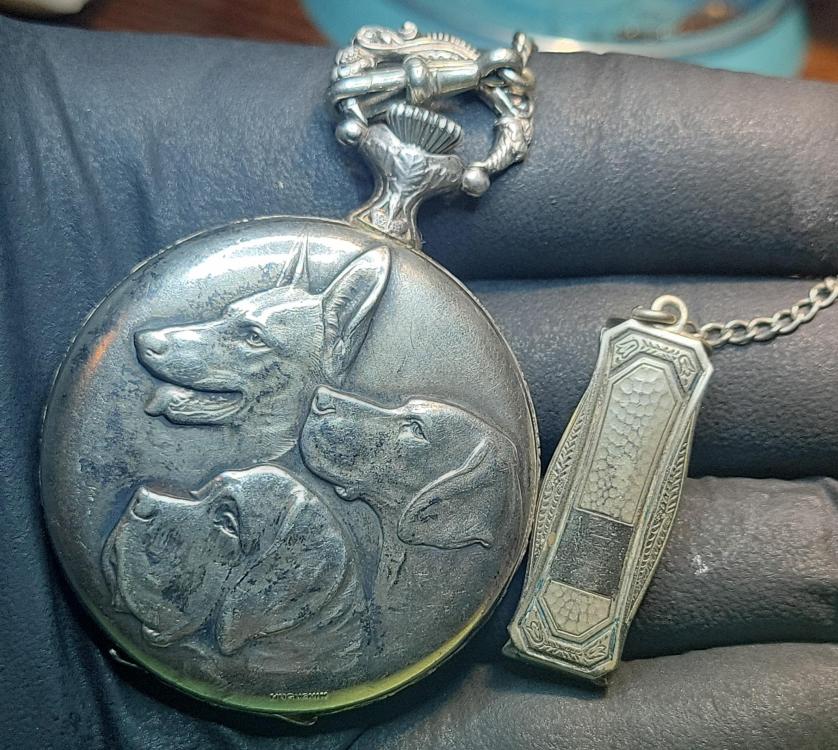
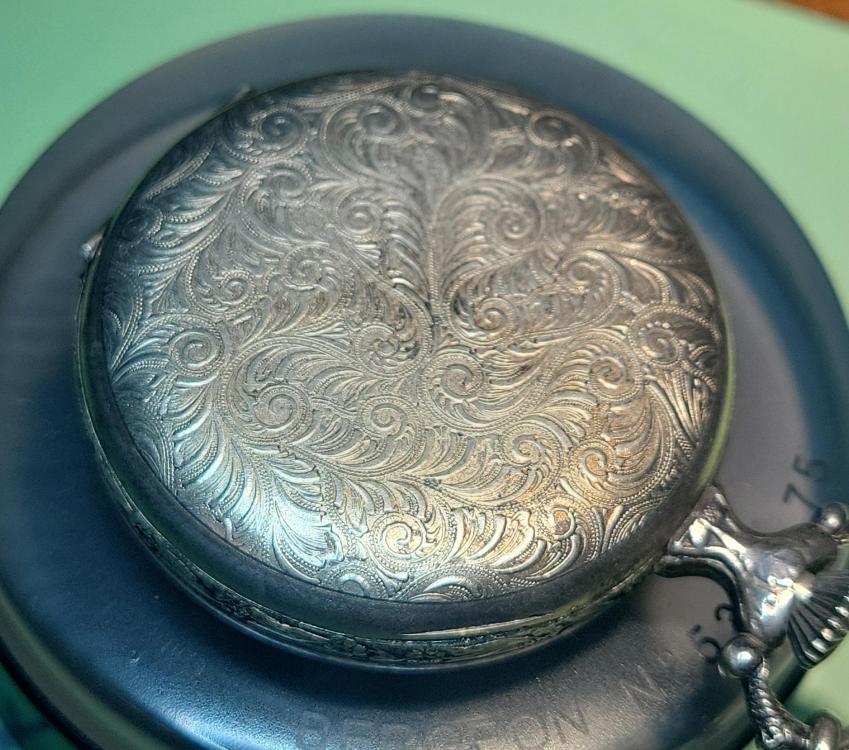
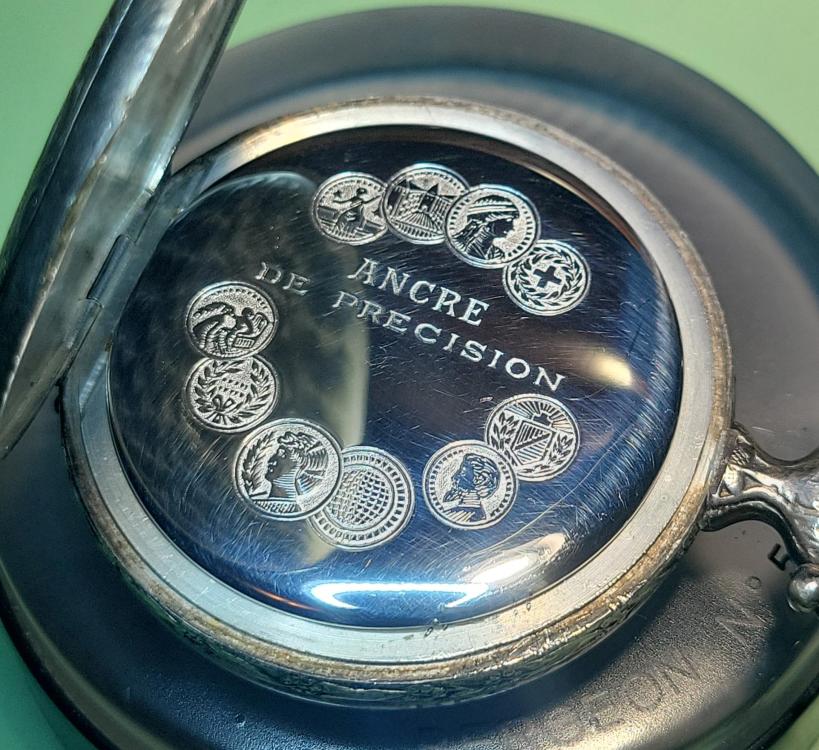
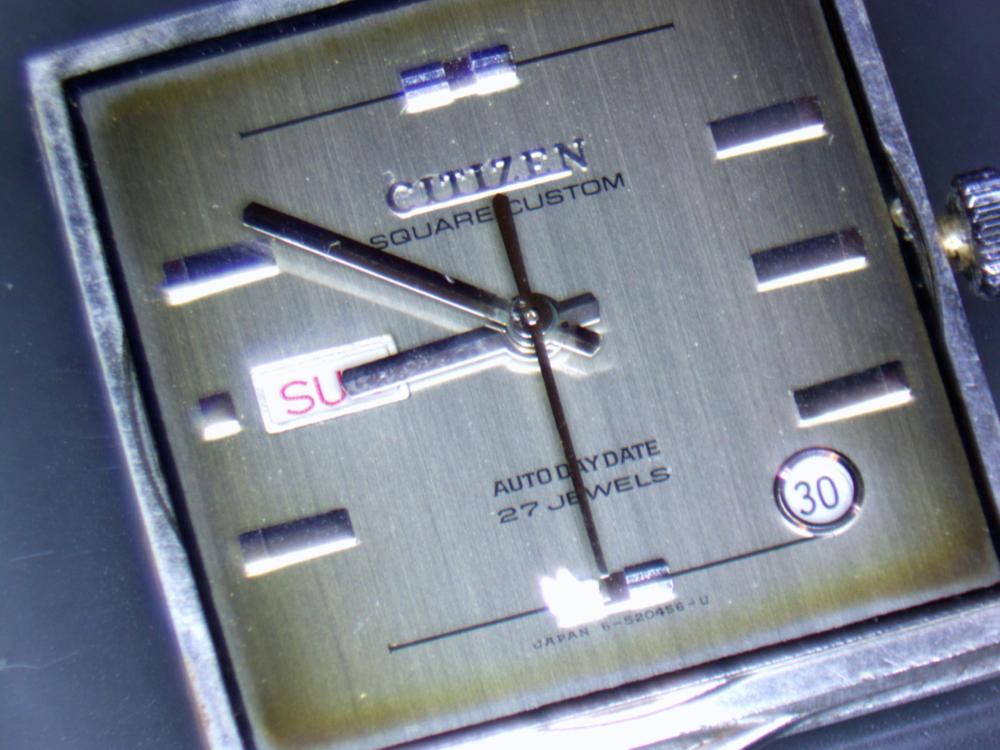
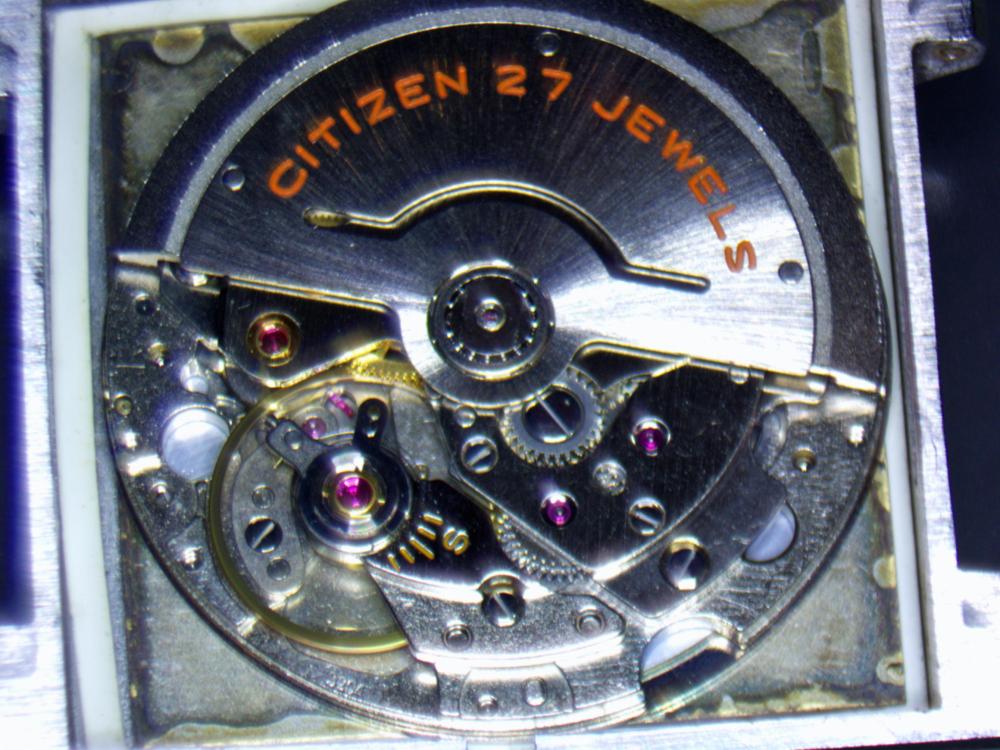
Finally got the mainspring in and I am pleased with these results. The case came up pretty nicely, too. Especially that inside cover. I'm assuming it's highly polished stainless, but it's so shiny if I didn't know better I'd say it's silver. I found an antique silver fob to complete the look. And yes, I noticed the cat hair under the crystal and popped it back off.
 2 points
 -
When I started in service and repair, Arnex pocket watches were by far the cheapest way to get Unitas Cal. 6498. I bought four NOS examples from the USA for about 350 US dollars. That was a few years ago and long before the pandemic, so I think you would have to pay at least double that today as the general interest in watches and watch repair exploded during the pandemic.1 point
-
No sorry but the right to repair in general, not just electronics and phones.1 point
-
Well, what You ask is similar to ' I have car with 4 wheels, 4 doors, V 6 cylinder 4 stroke petrol engine with two carburators. Does anyone know age, origin etc of that car...'1 point
-
It is a very new law and I think there is an intention to uphold it. It will take time. In particular since the initial target for that law seems to be more about electronics in general and phones in particular.1 point
-
They are braking EU law but will probably get away with it, as the saying goes " the law's an ass" or is it arse? Joking apart, under EU law, Cousins should of won, part of the EU or not , what is the point in a law that isn't upheld?1 point
-
I will often relate learning watch repair is similar to learning to become a doctor. It requires studying may be reading a book definitely reading tech sheets if you can find them but studying understanding. Then practicing continuous practicing forever practicing. Everybody preparing a watch no matter what the level is still practicing exactly the same as a doctor. There are no absolute experts everybody has room to learn. Typically for Springs a magnet will work really well. Then by magnet I don't mean a little magnet something much larger at work we have something that's mounted on a handful with a rather powerful magnets that we can sweep across the floor and sometimes across our bodies looking for hoping to find which for the most part we do. Unfortunately there's a lot of problems with YouTube watch repair videos. For instance the video that you have says servicing? Did he actually service the watch in other words were repairs made or is this really a how to clean the watch video? Then even just for servicing no problems you just disassemble clean the watch put it back together how long does it take can you do it in 15 minutes? How long did the video last versus how long did it take you to service the watch? They skip steps lots of steps so many of the watch repair videos are really entertaining videos that don't cover everything and usually definitely do not cover repairs. At least not a lot of them. This presents an interesting problem? Watches like this were assembled with automated machinery gears all drop in the place the plates drops on top no human hand touch this watch. But a lot of watches specially vintage stuff tapping Is wishful thinking if you think the pivots will go into place. This brings up a problem with stereo microscopes you're looking straight down. In the dark ages of watch repair when I learned we didn't use microscopes and we were instructed to sit in such a way that you're basically looking into the watch's you can see in the pivots you can see what's going on. Often times I've seen when people are looking straight down even with their super high-power microscope they just really aren't getting a clear picture of what they're doing. It be better if your microscope could be angled at an angle so you can see things a little better as opposed to looking straight down. But I'm sure the entire group embraces their microscope so this would go against the group so carry on with your microscope.1 point
-
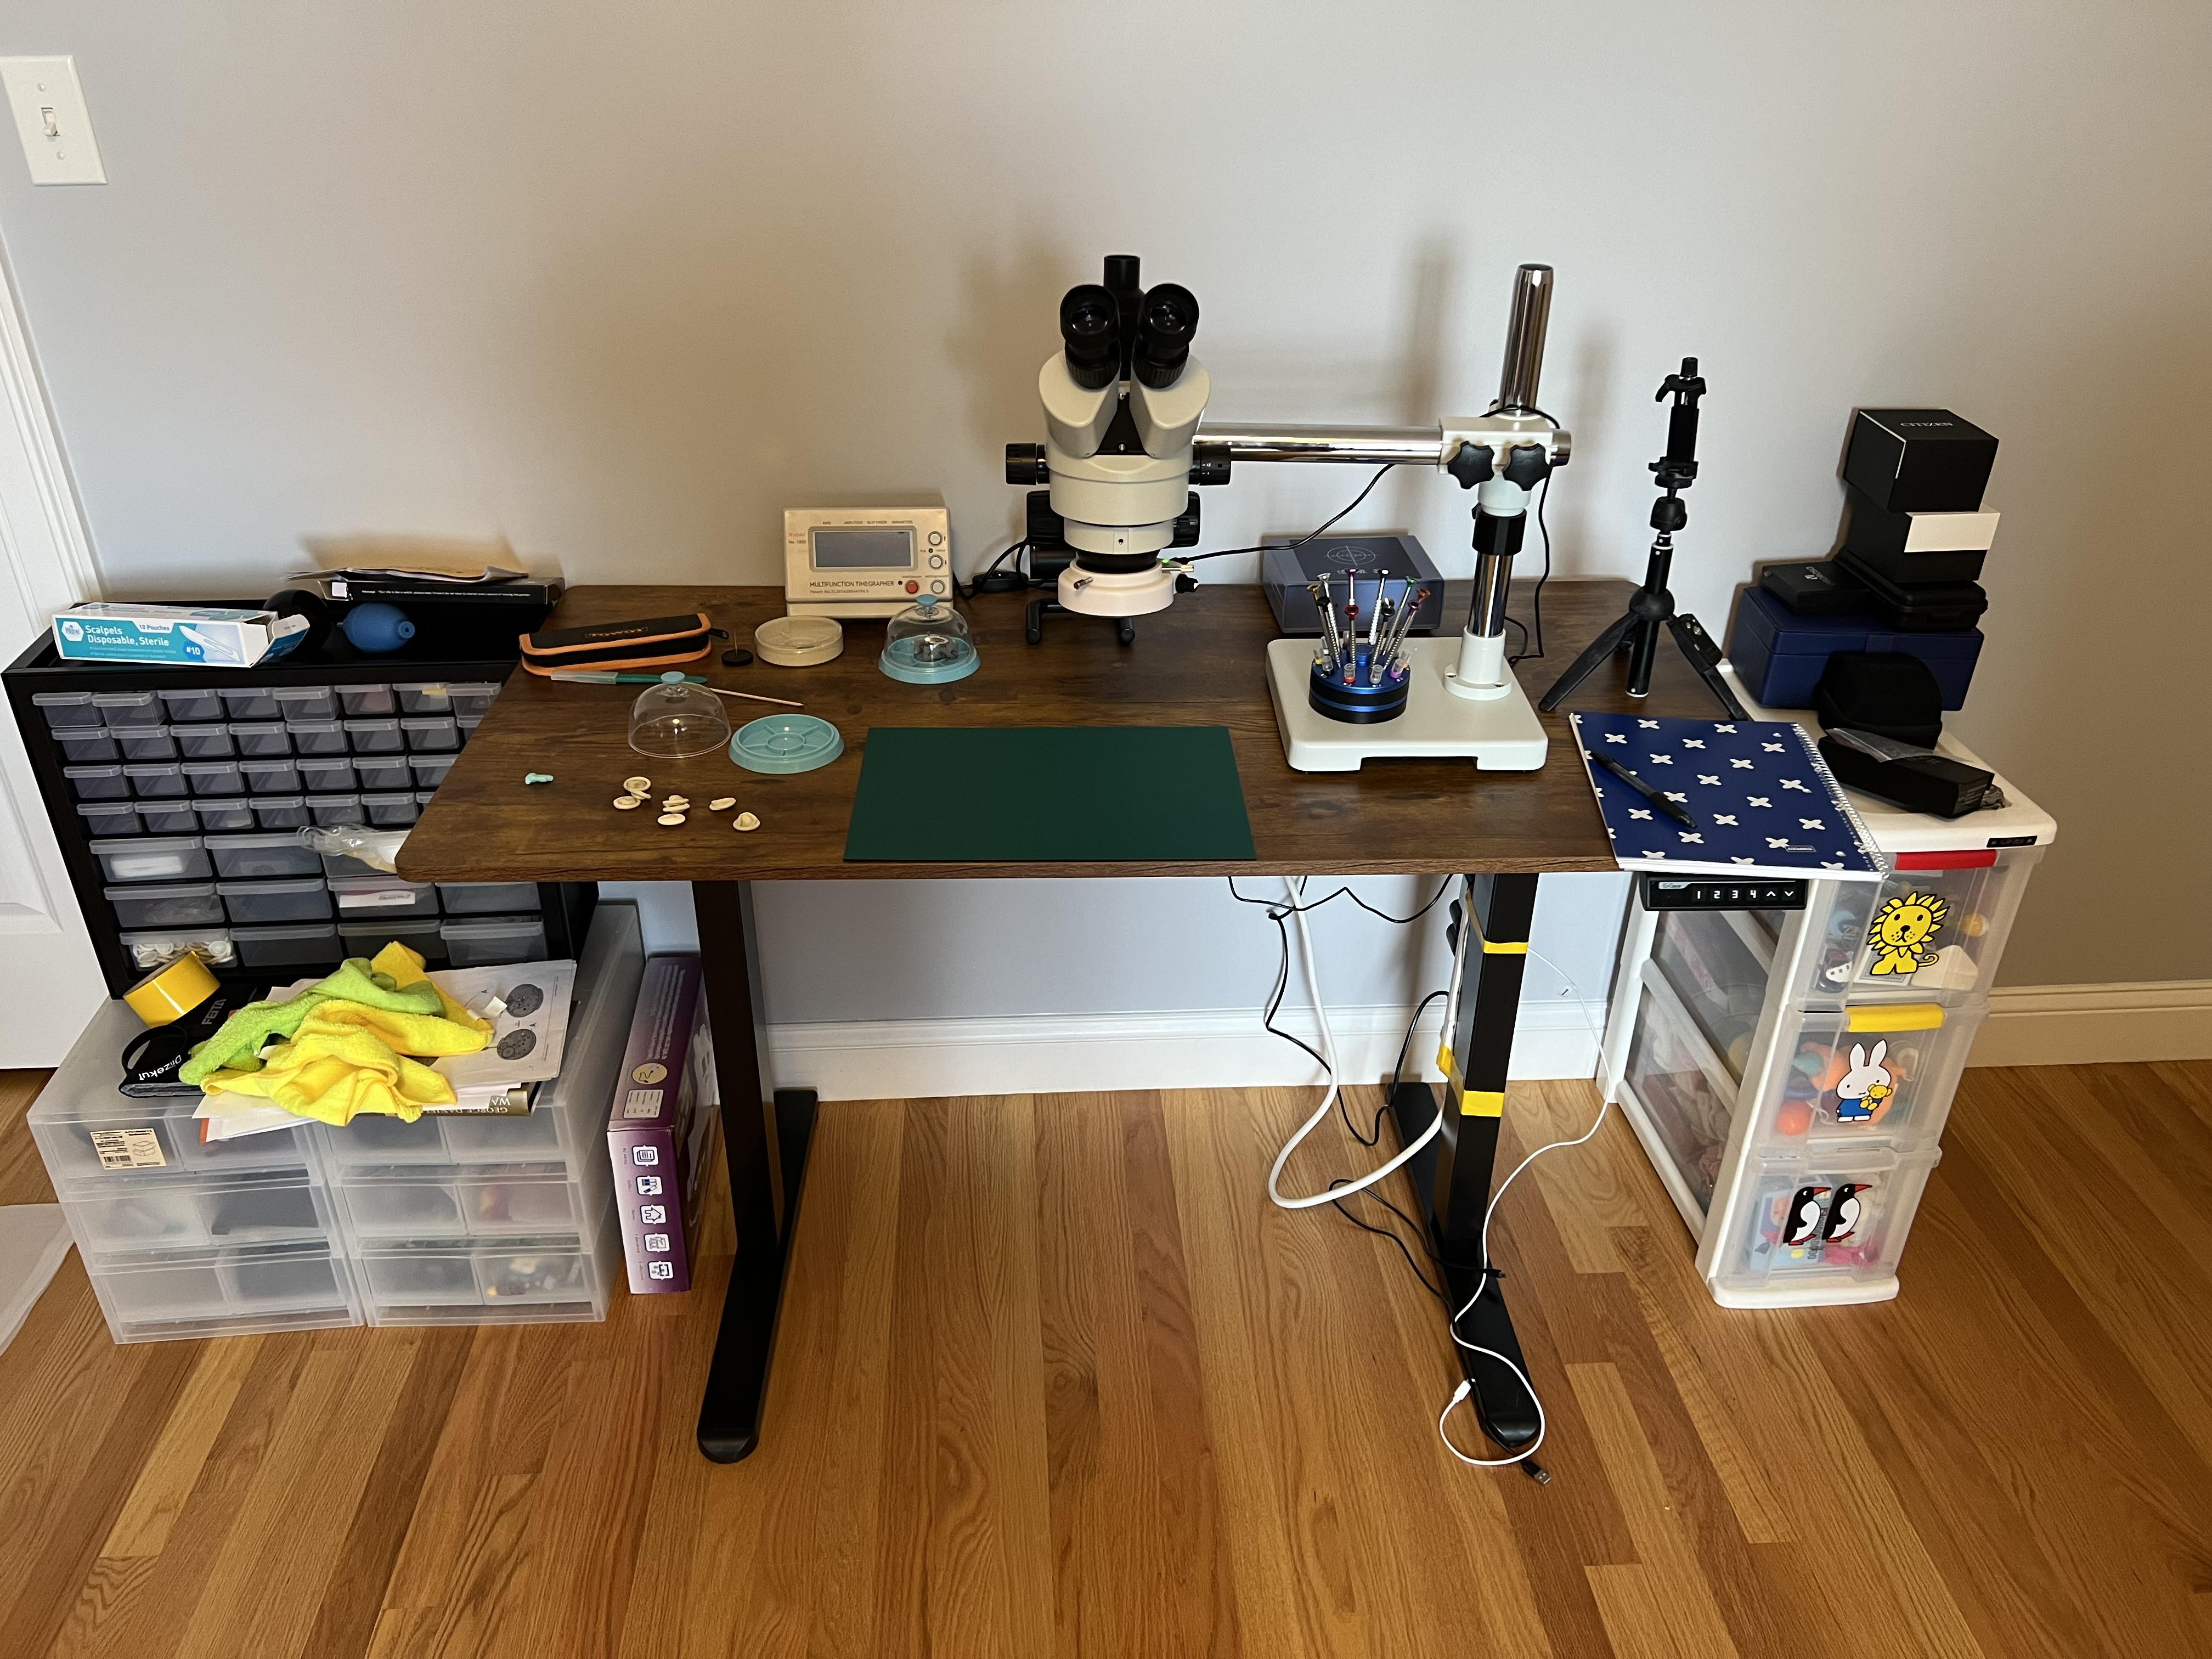
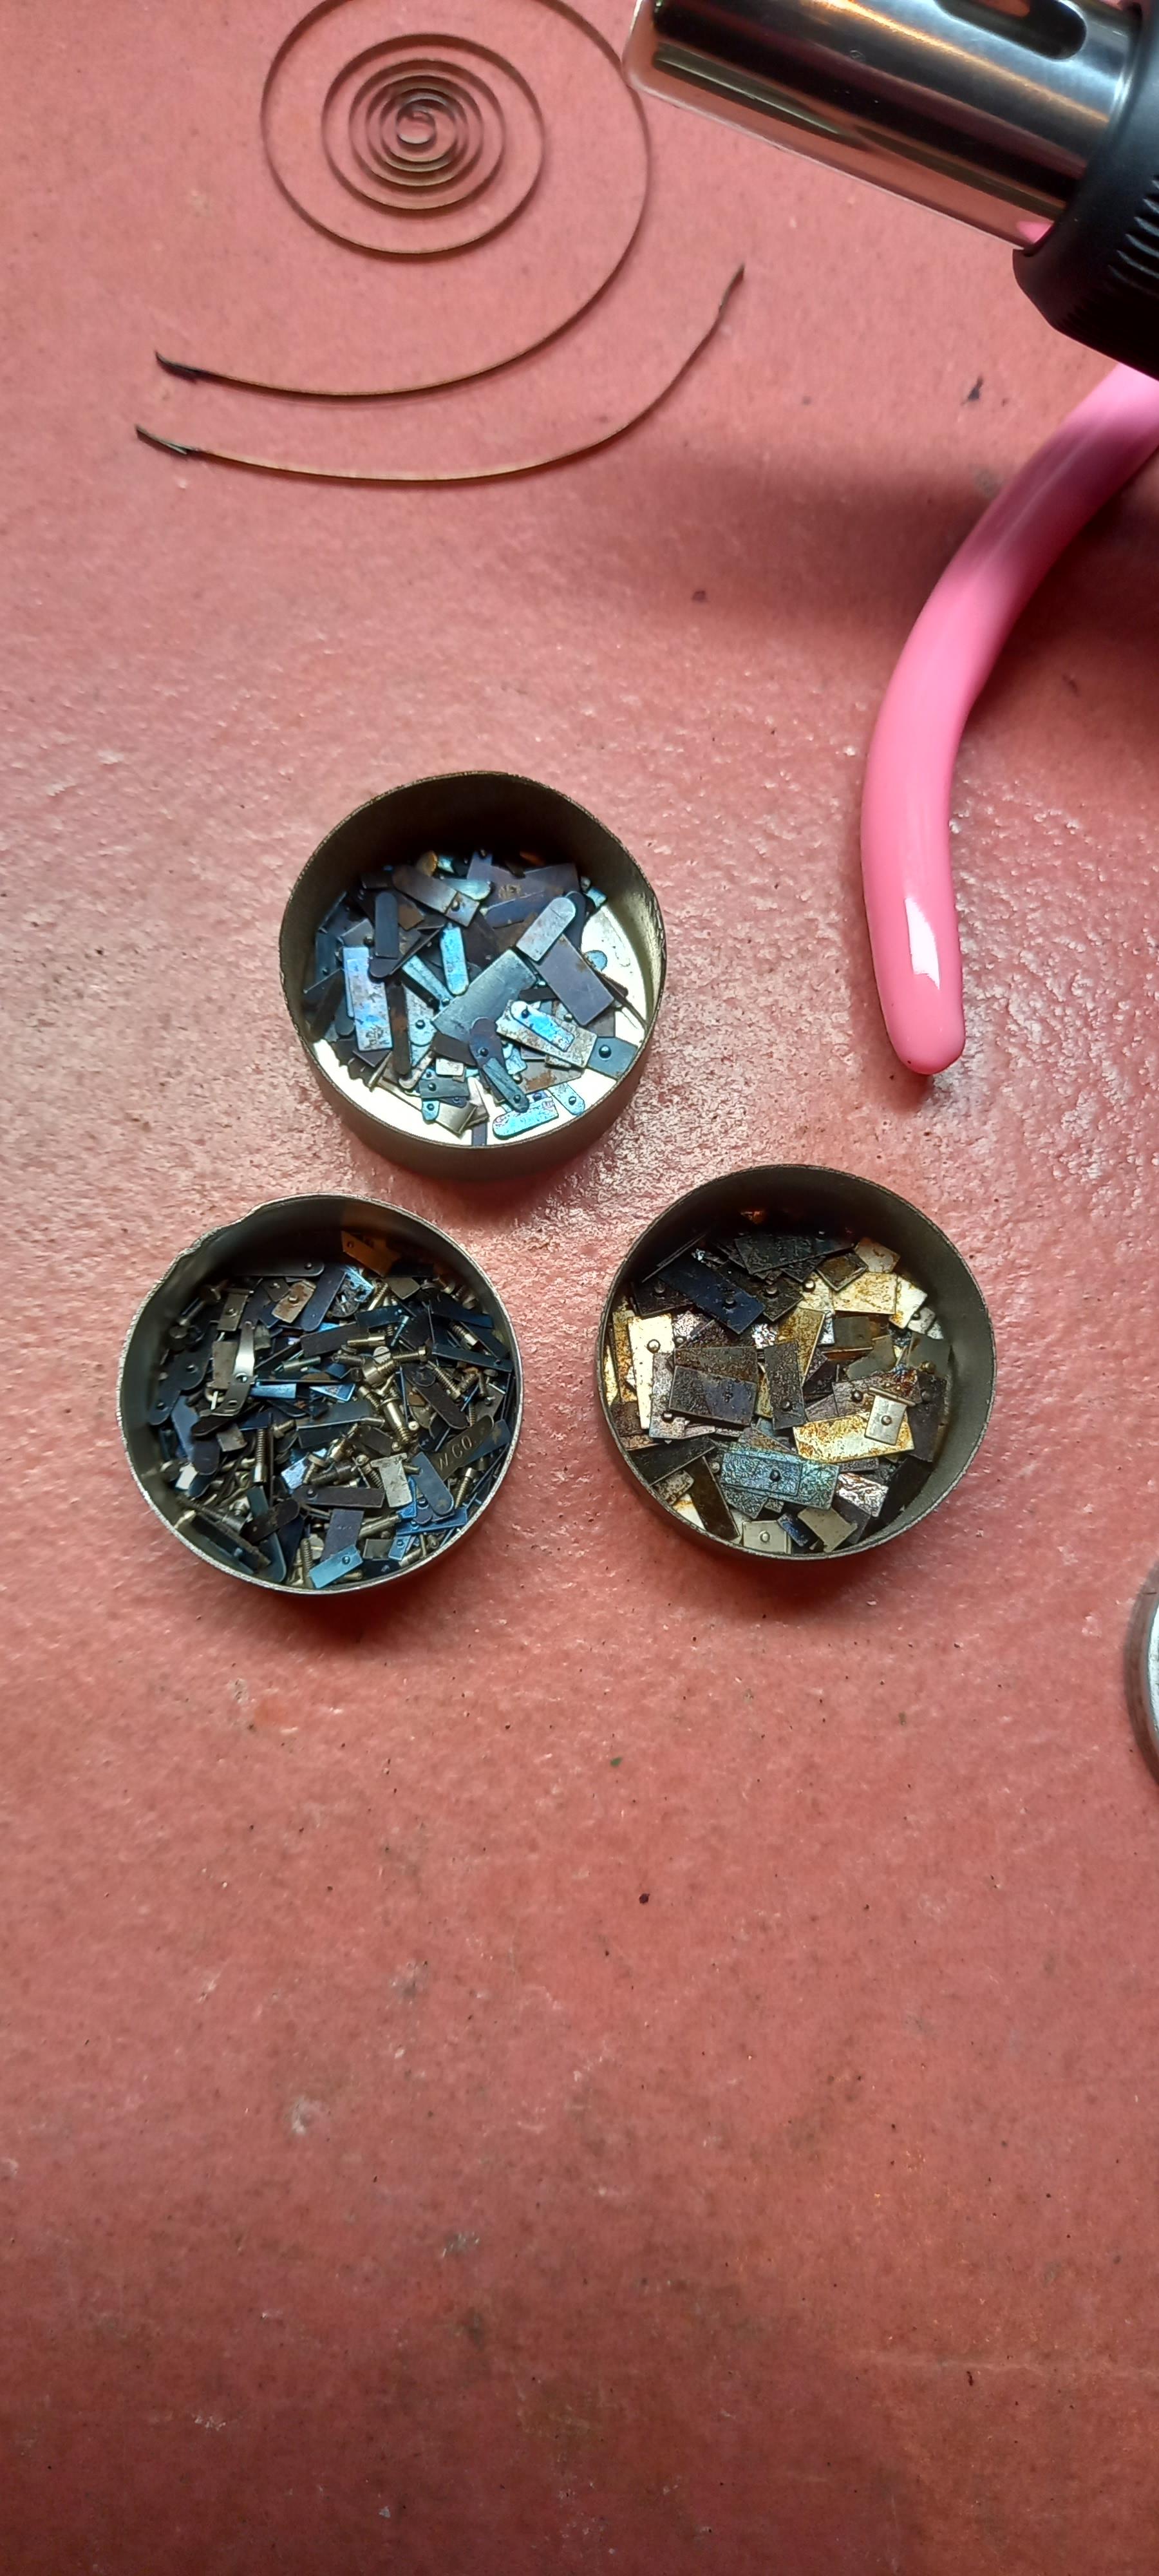
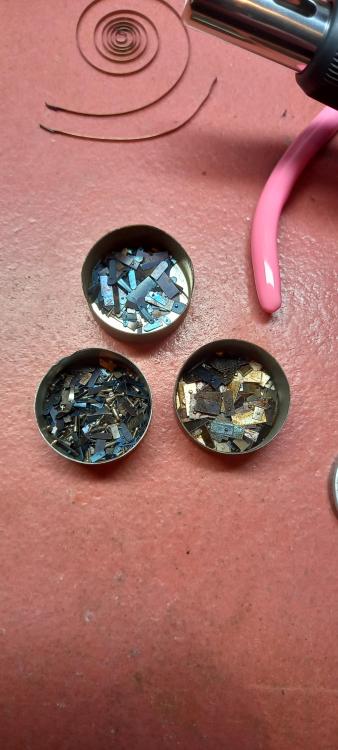
By the way this is my watchmaking (more like watchbreaking) setup. I still haven’t found the lost spring. The date jumper “jumped” from the mat where the movement was to the top of one of the citizen boxes on the right storage drawers. I don’t know if the spring went in the same direction or how far it did. @ManSkirtBrew I feel you. I have tried looking with magnets I have attached a strip of magnetic tape to a piece of foam board which I use a bit like a broom. It never found anything though the magnets are pretty weak though and it is likely the reason

 1 point
 -
@Bluescrew I have just measured the balance staff length in both a shock protected 12.15 (38 60461E, no idea if that means anything date wise), and a non-protected 12.15 (CO10086, dated as 1951 from the inscription on the back) and can confirm that they are different lengths, with the non-protected one coming in at 3.55mm and the shock protected one at 3.74mm, so I don't think that the Ronda 4818 is going to help you.1 point
-
Thank you all for the advice, I may have another go at the bend using the advice given, my other option is to source the barrel complete and I believe this is the tissot part 180-1, there are several new old stock around online1 point
-
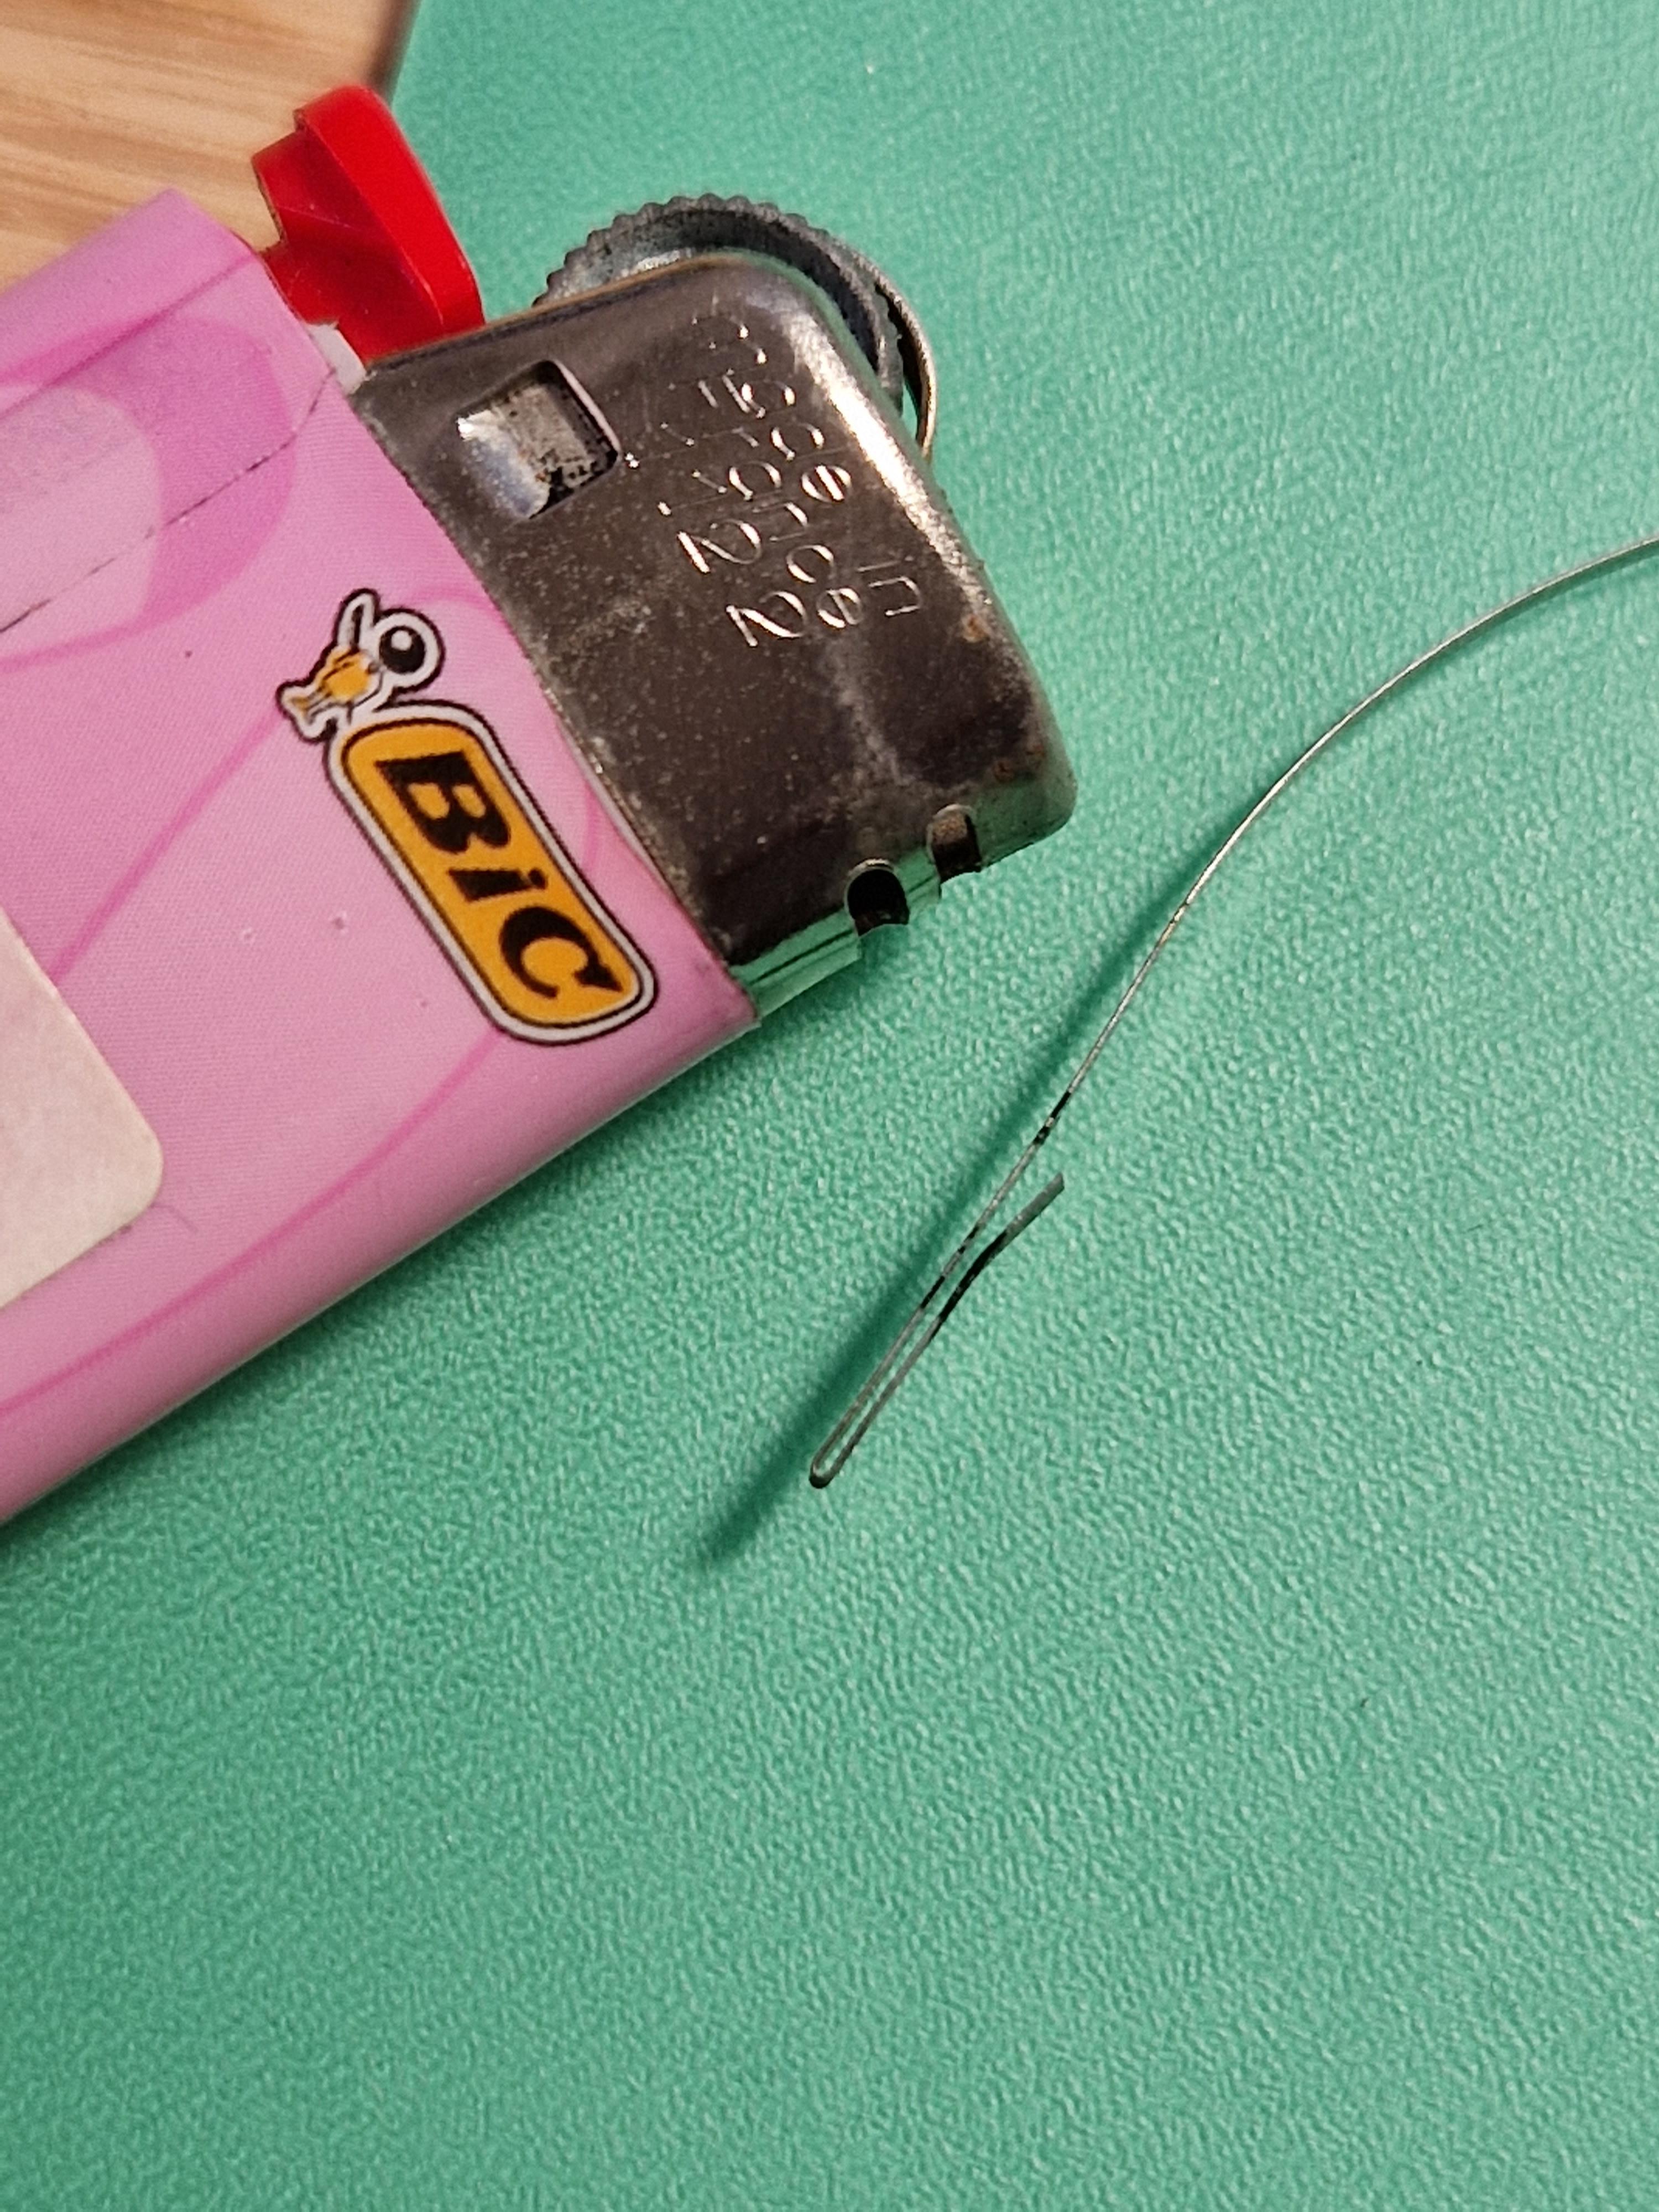
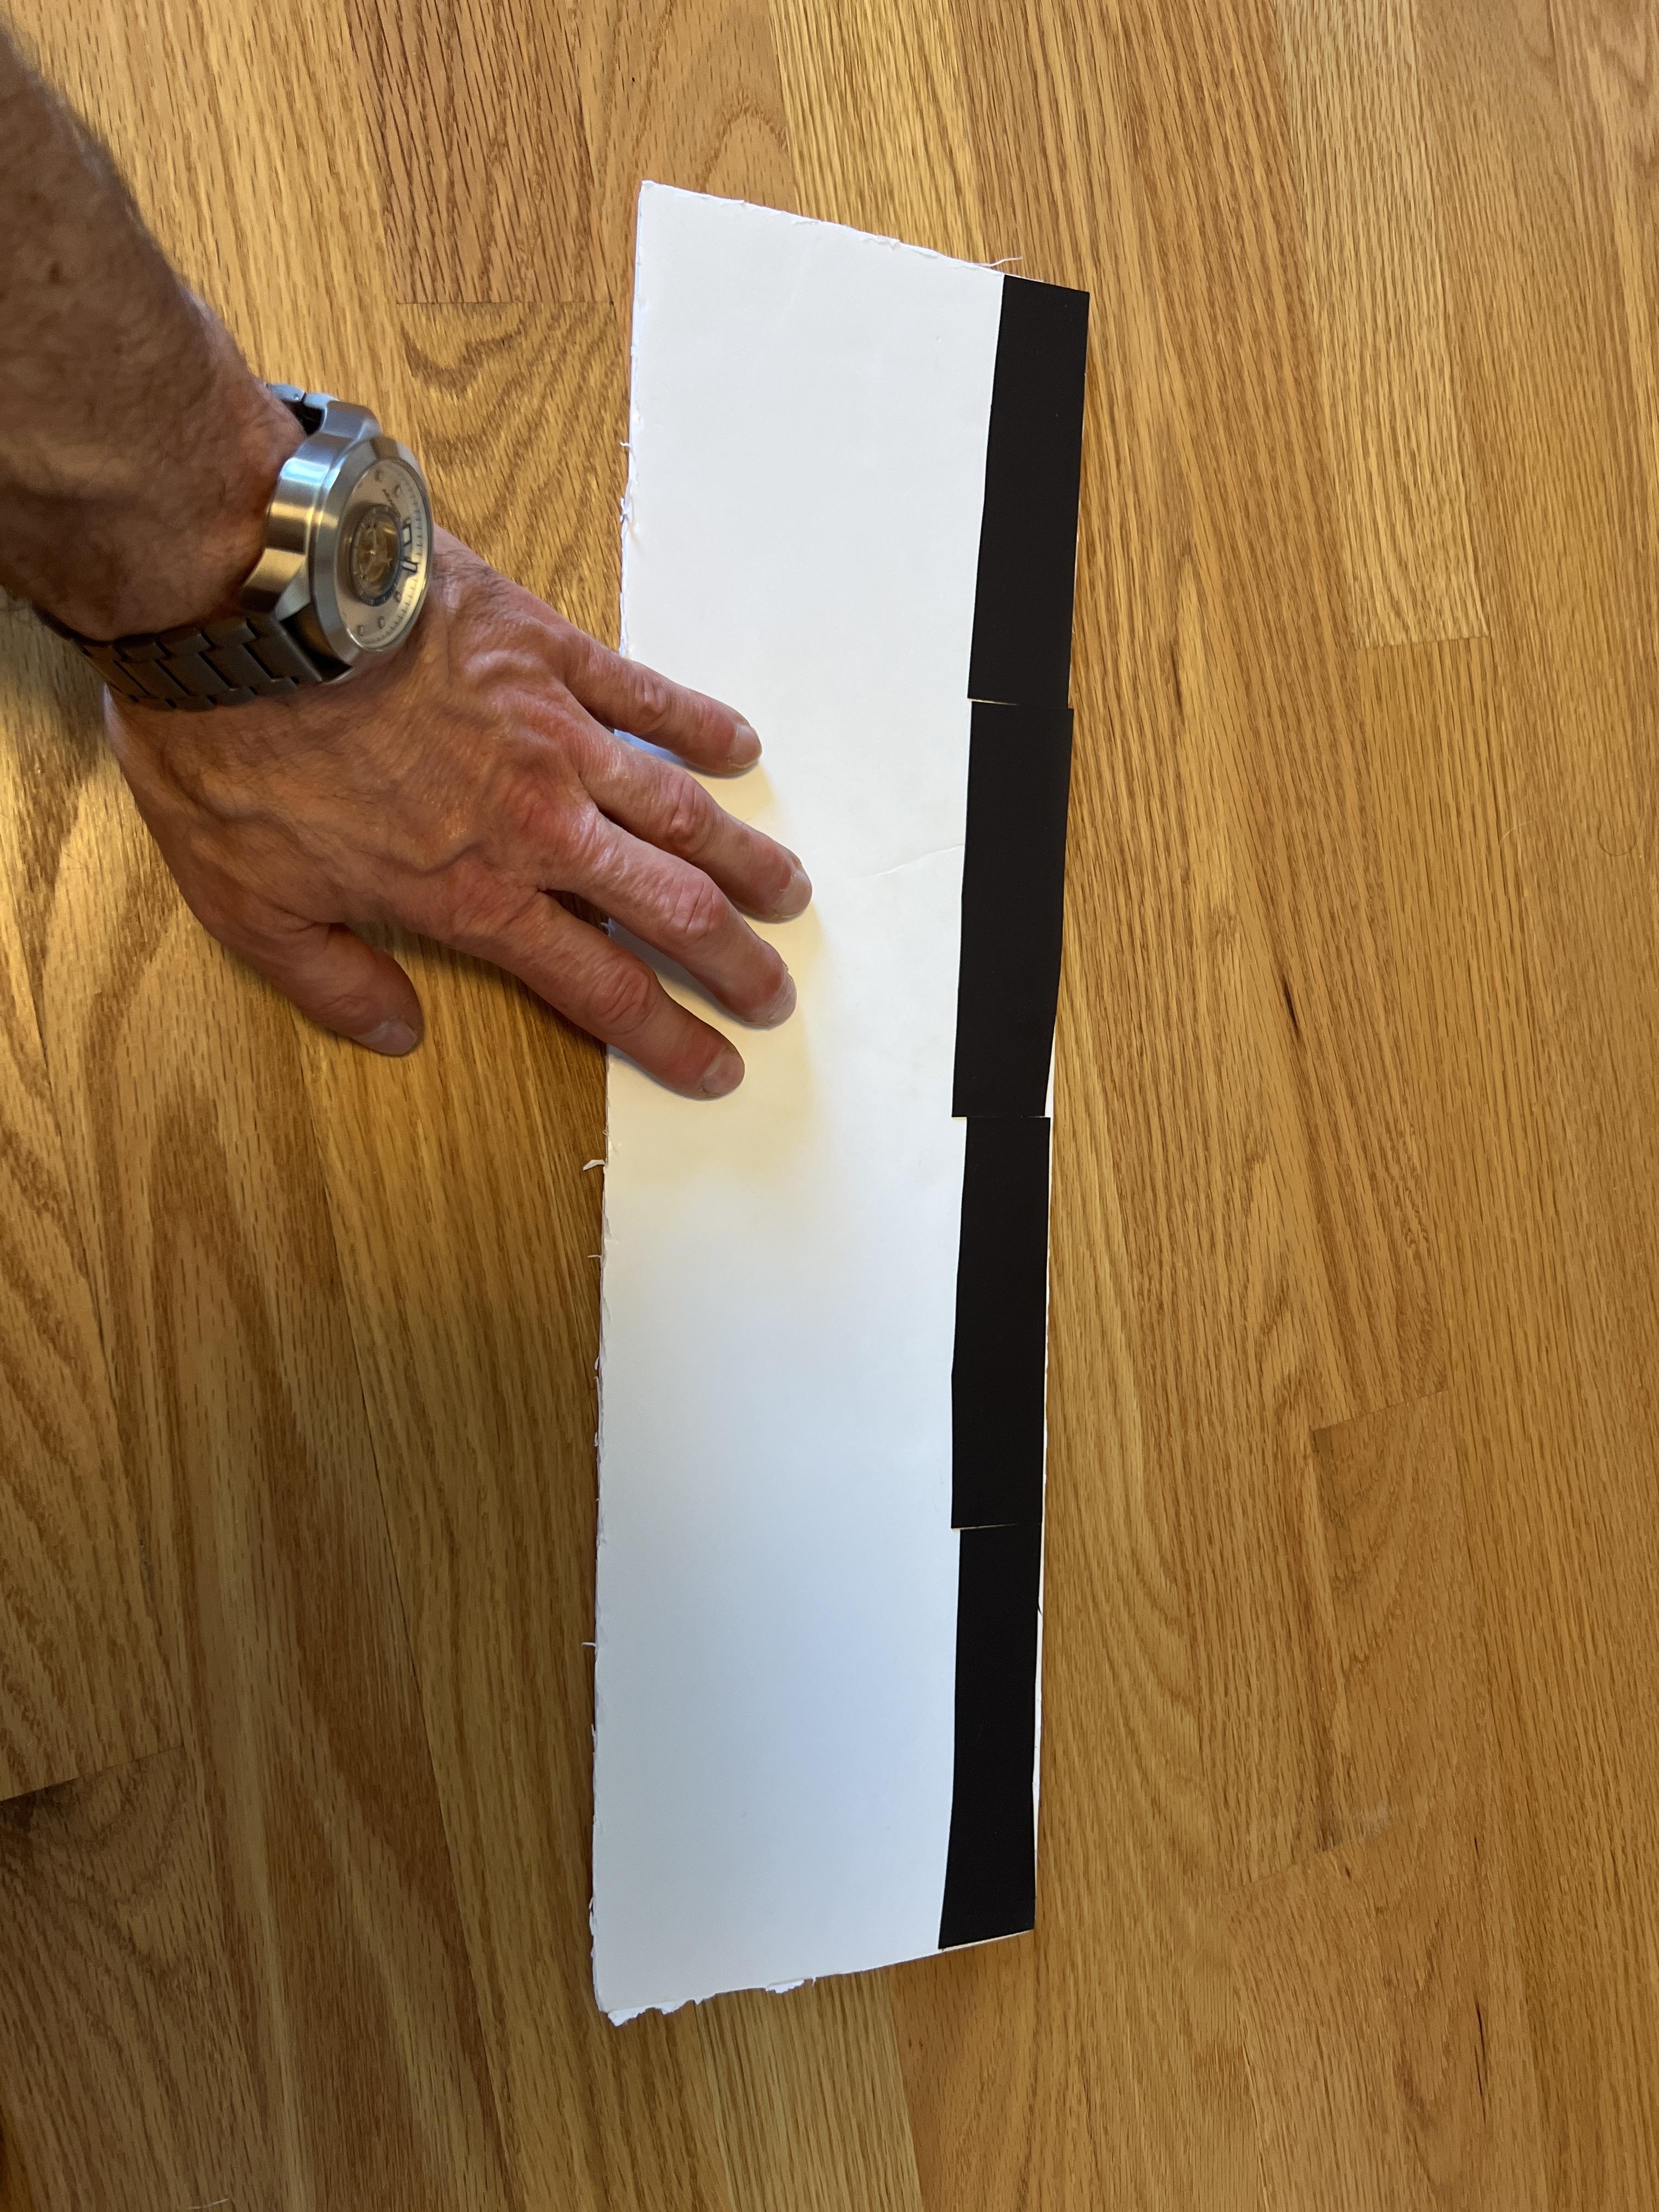
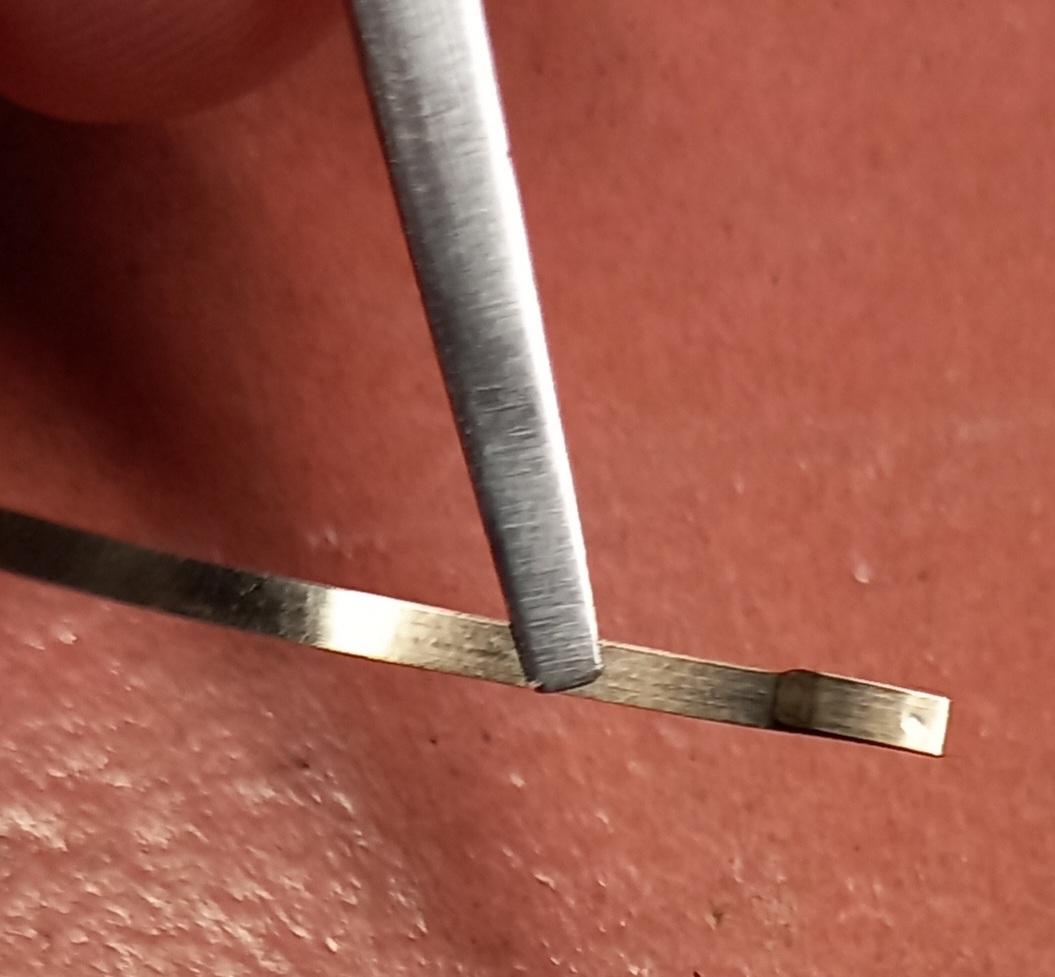
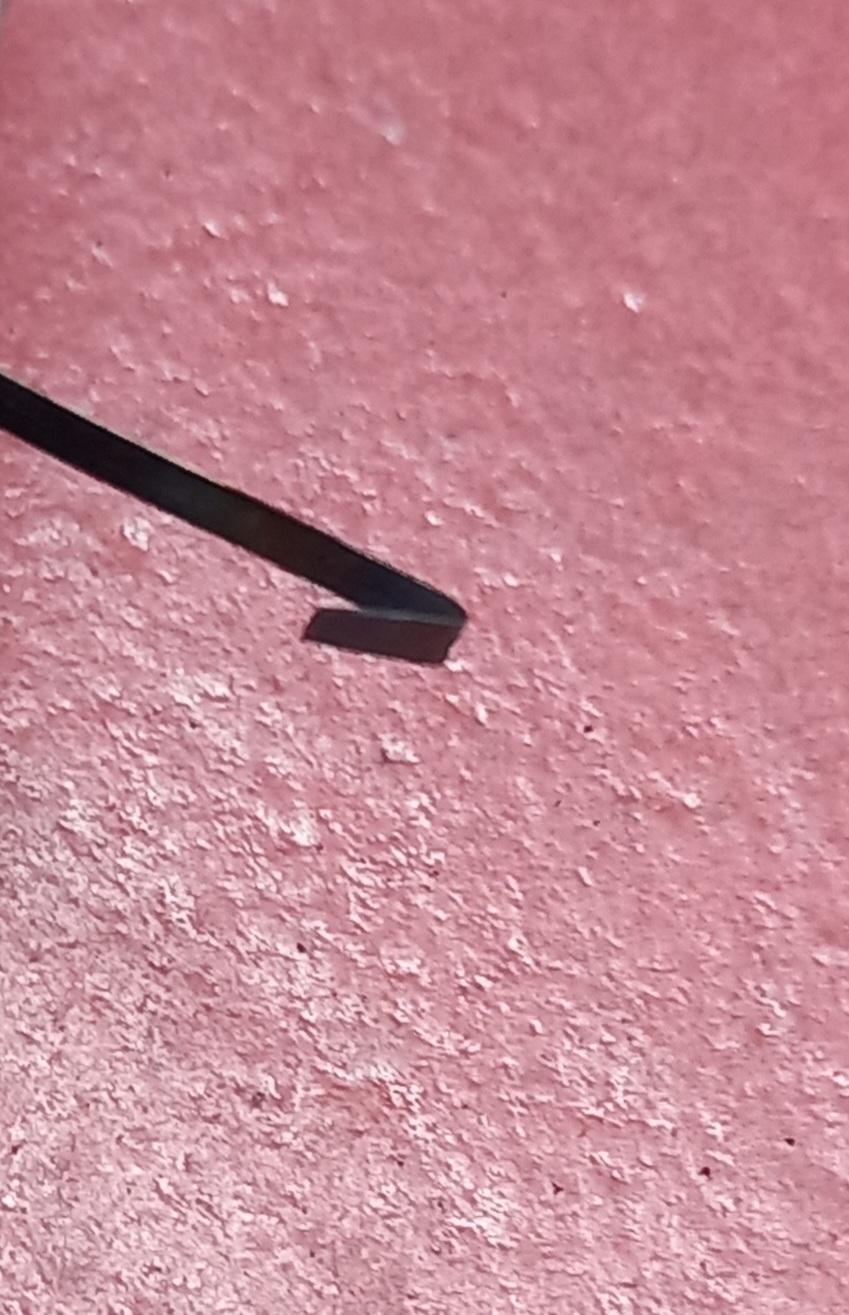
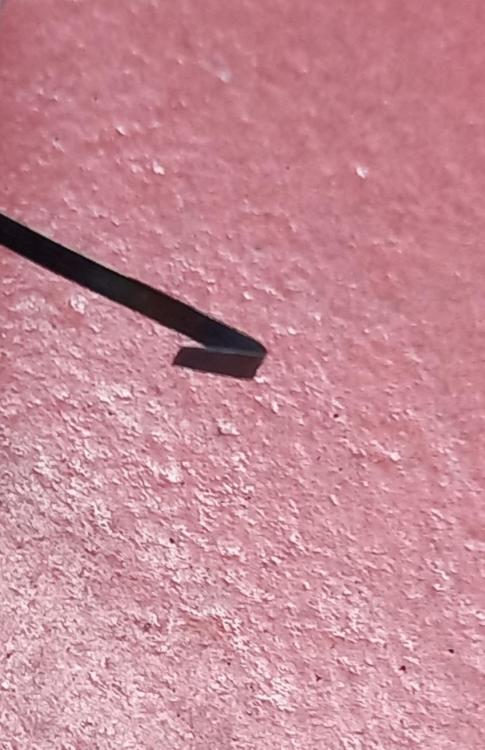
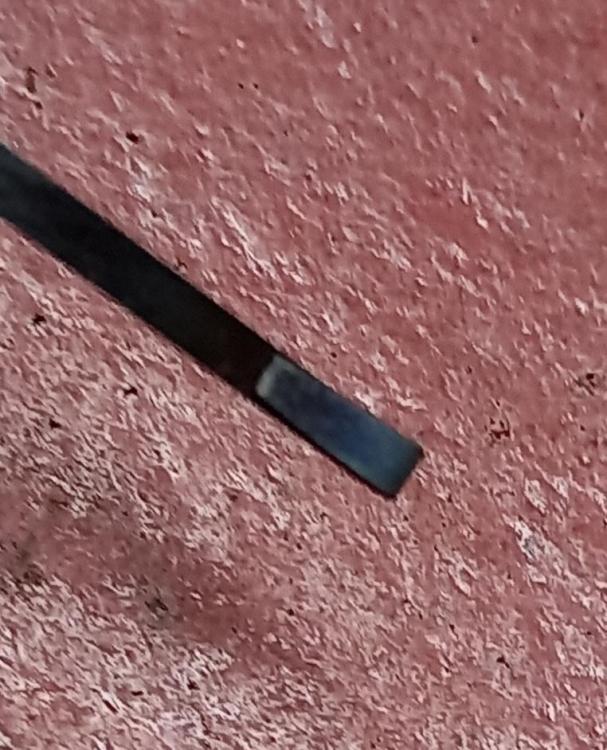
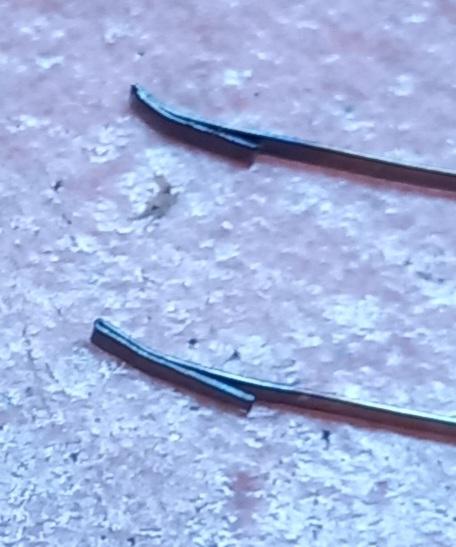
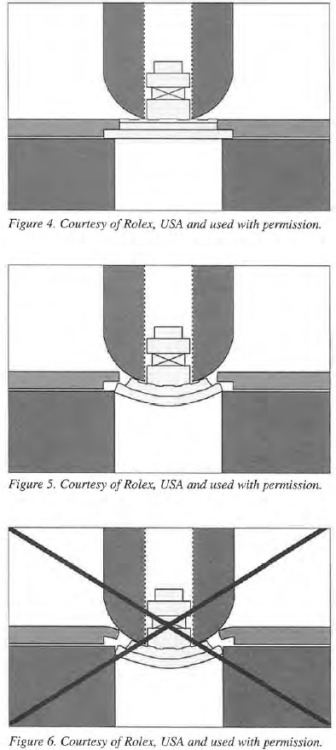
Hi watch people, what would be the preferred method here , pros and cons ? The options are 1. a riveted end piece 2. A loose piece fitted into a formed socket 3. Bend and crimp the end of the mainspring to be used. I've started to experiment with a piece of mainspring cut from the one that i am going to use to replace the original set spring taken from an Oris 291 pic2. old spring left, new uncut spring on the right. My first attempt is idea no. 3 which seems to be the easiest to carry out. I'm not quite sure what the spring is made from, it has a slight gold tinge colour to it, but it was easy to anneal and double over. The original spring has been modified by a prevo ( previous repairer ) picture 3, this has a piece riveted to it. The spring I'm going to replace it with was too long but the profile dimensions matched up, the bridle on it is factory doubled over and punched pic1. I'm optomistic that the remaining shape of the replacement will be ok . After annealing the end of the test piece, it's then shaped with a slight taper to both sides and a knife edge at it's tip created to help catch the barrel wall ledge pic4 then folded over pic5 and pressed tight at the fold to crimp it pic6. shows the original modified riveted spring top and the test piece ready to reharden below it.The shaping is to overcome any error that may occur with squaring up with the mainspring after folding, tbh probably not necessary as the steel is soft enough to easily straighten up. The end is then rehardened and tempered to light blue. Next attempt is to rivet a piece, a lot more accuracy I'm sure will be required here.


 1 point
 -
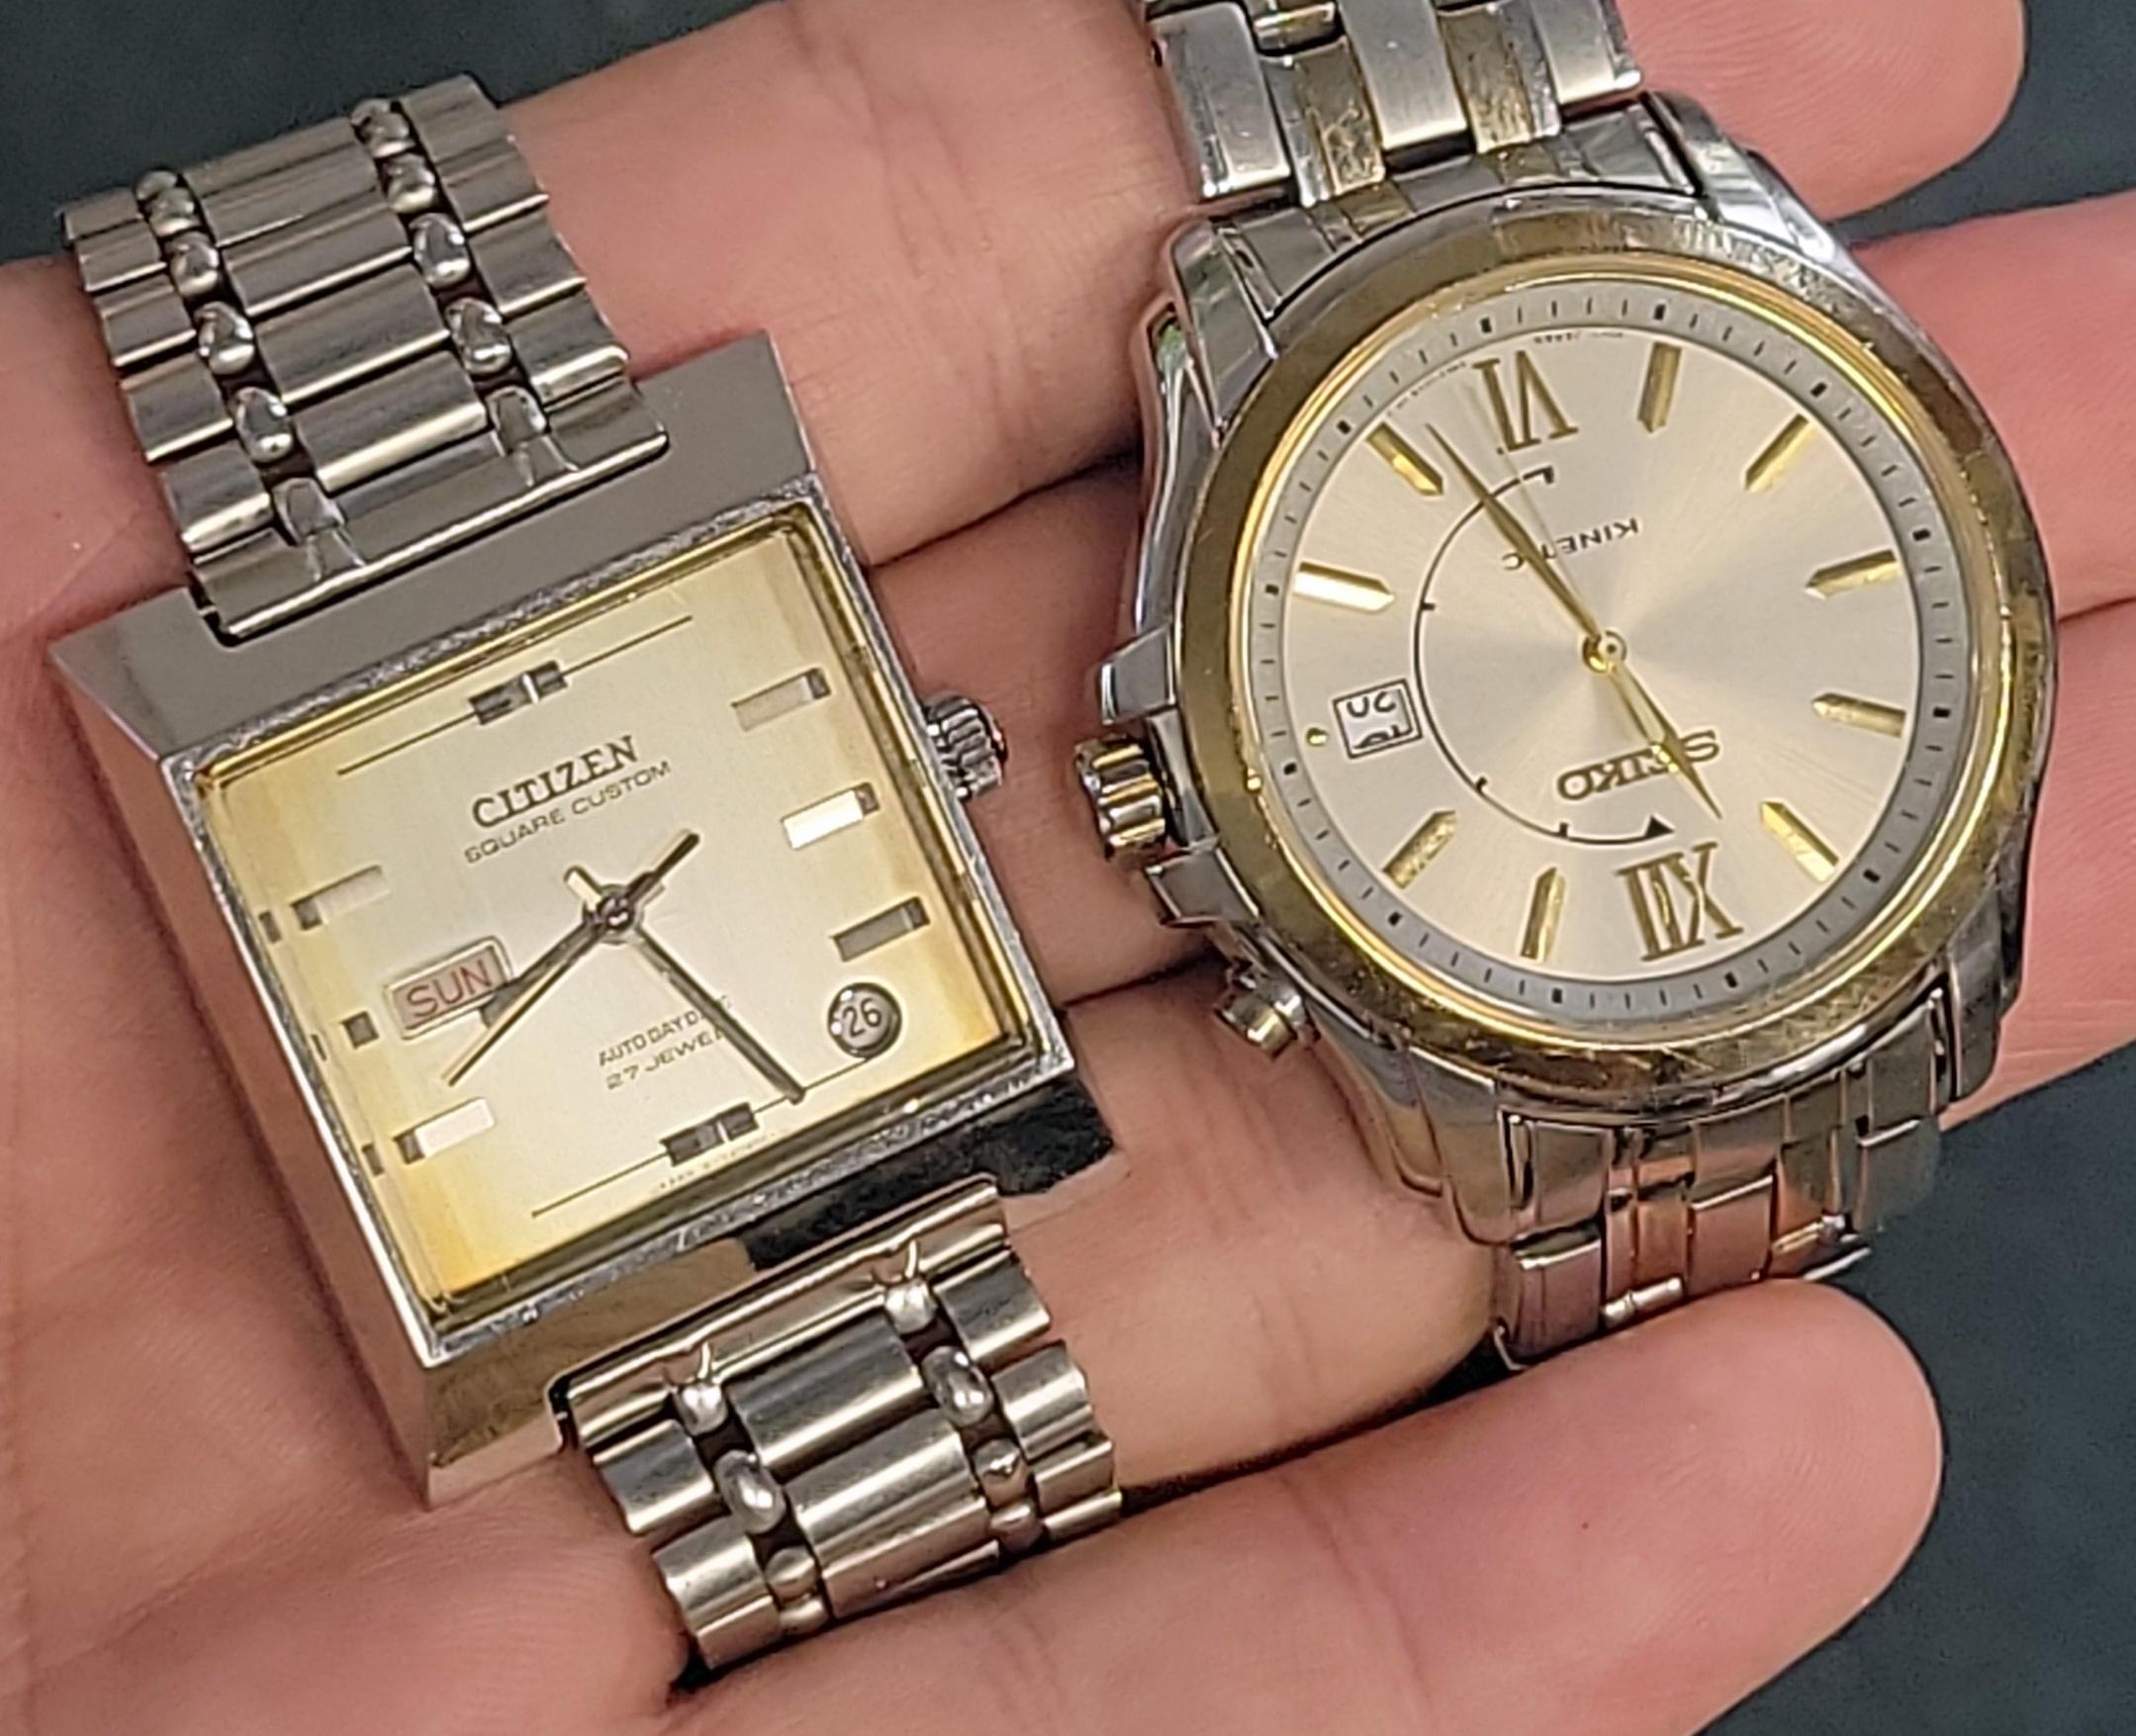
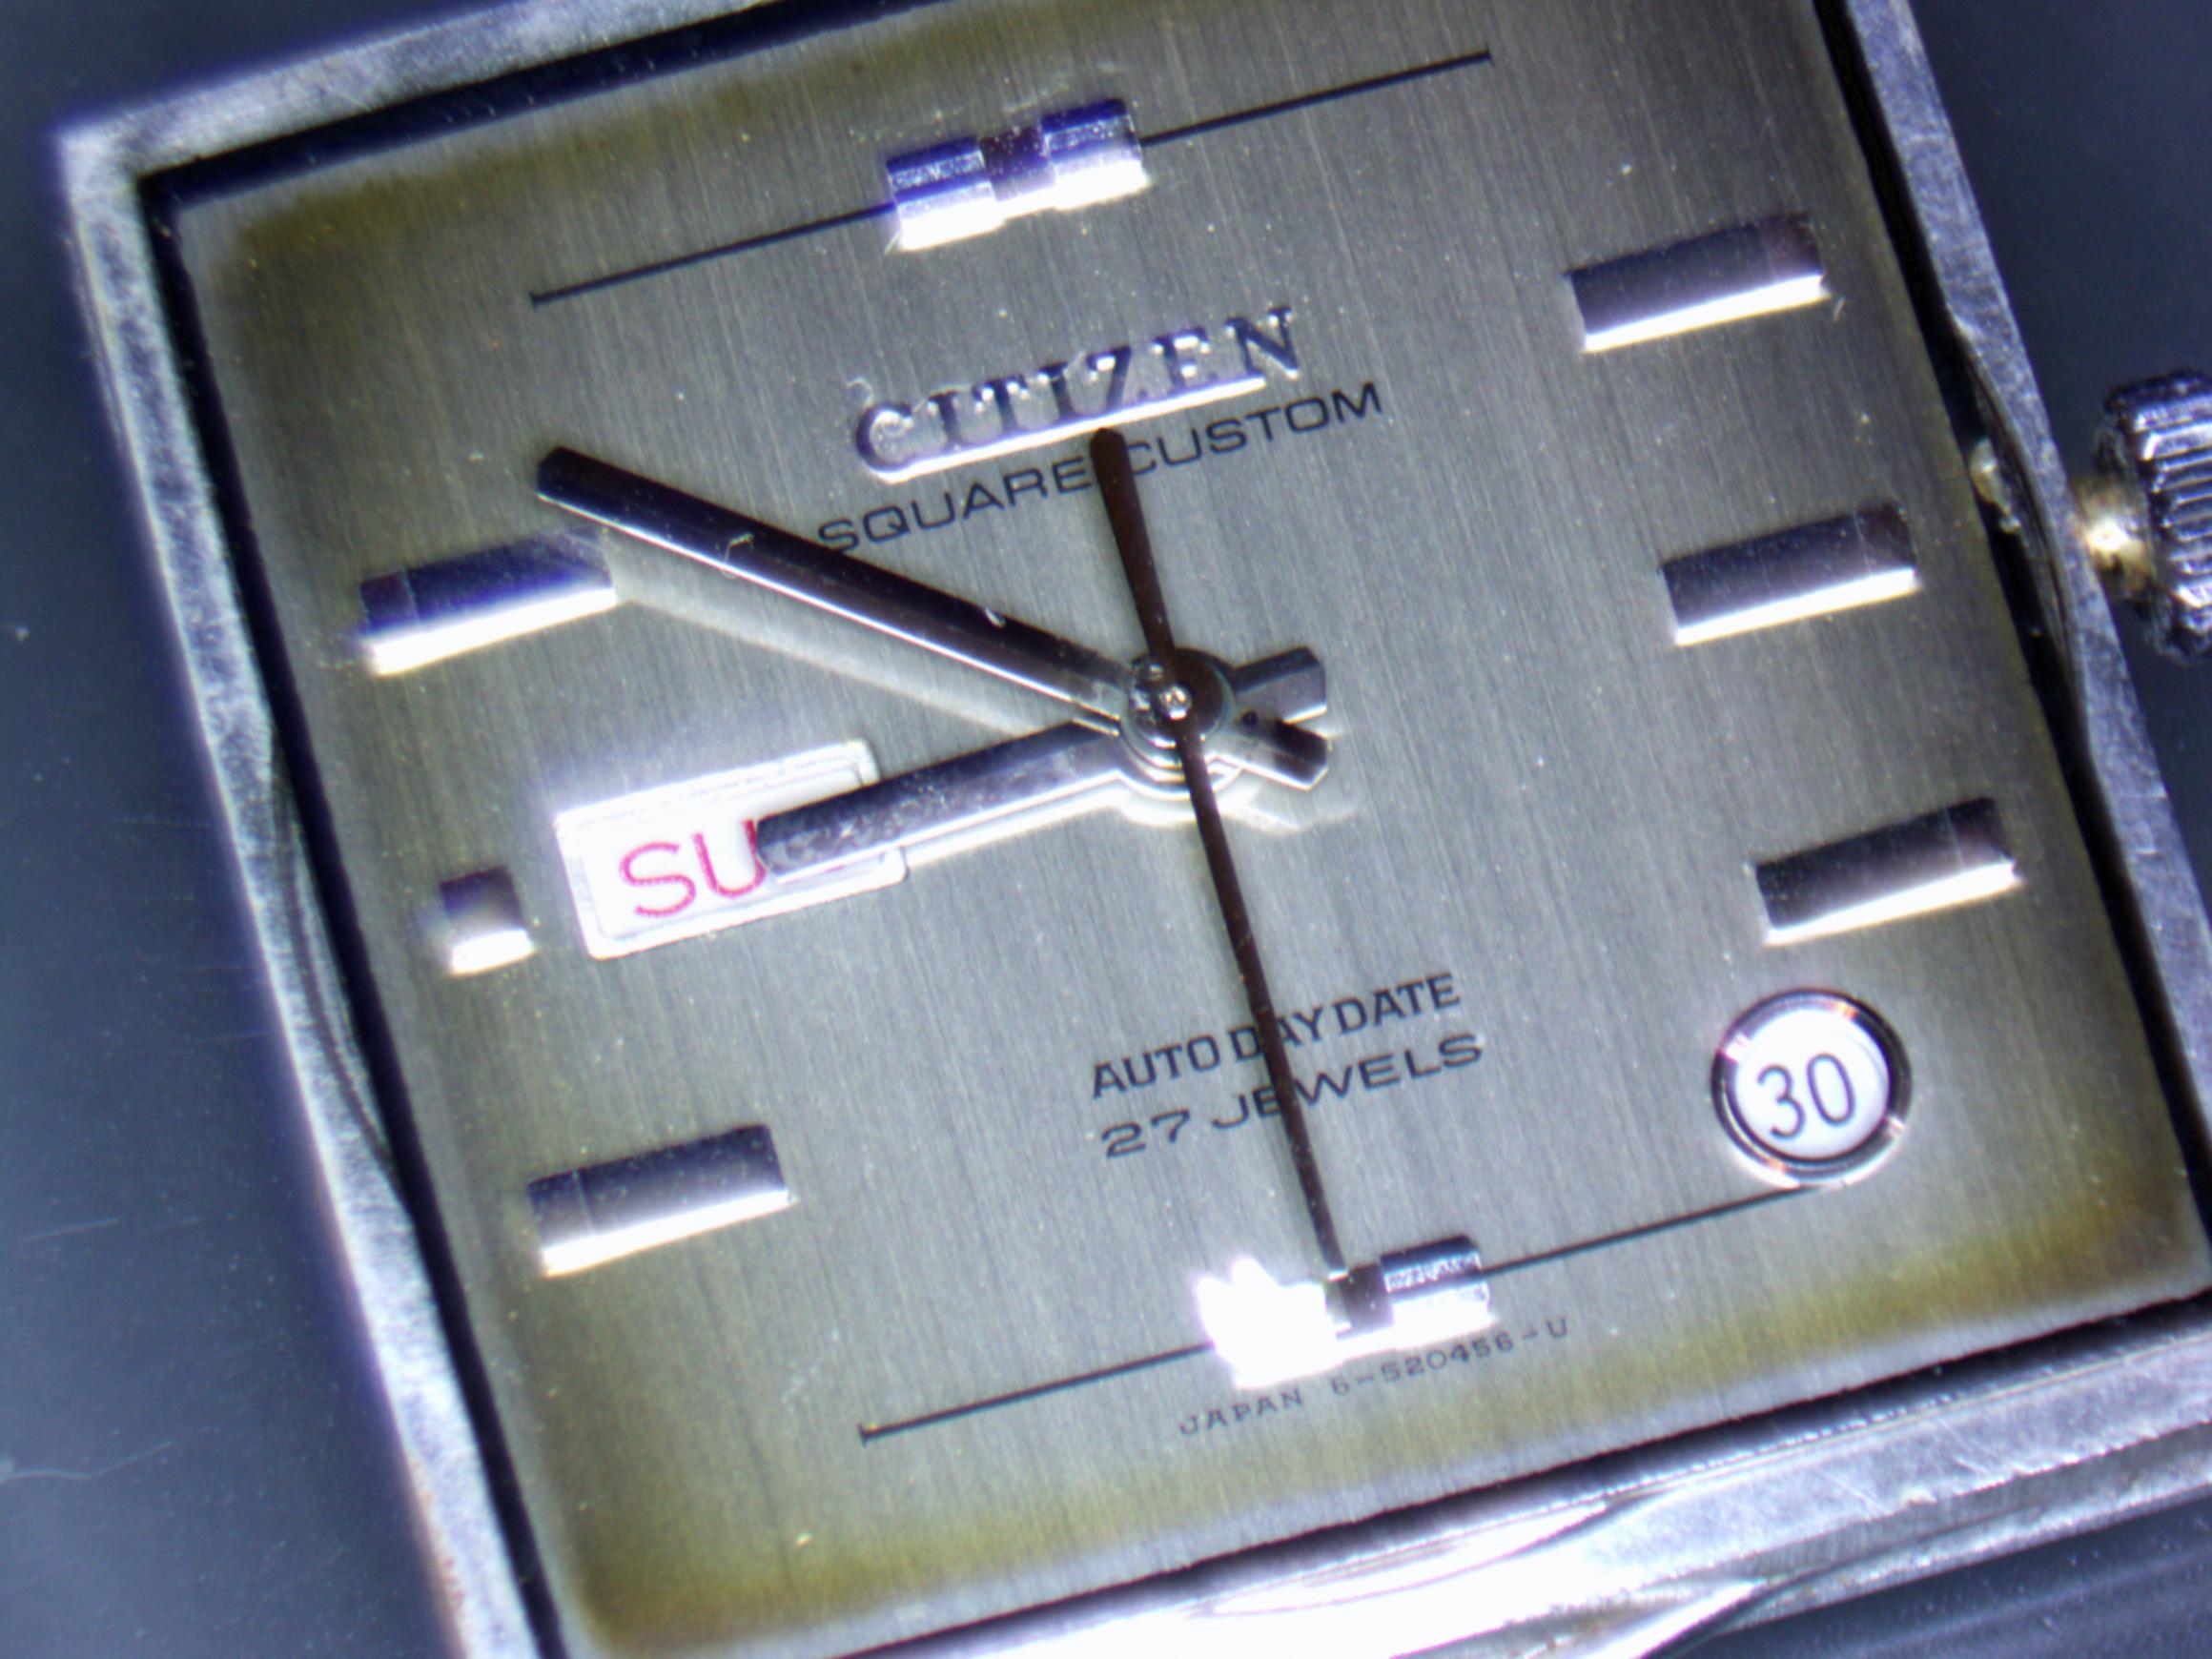
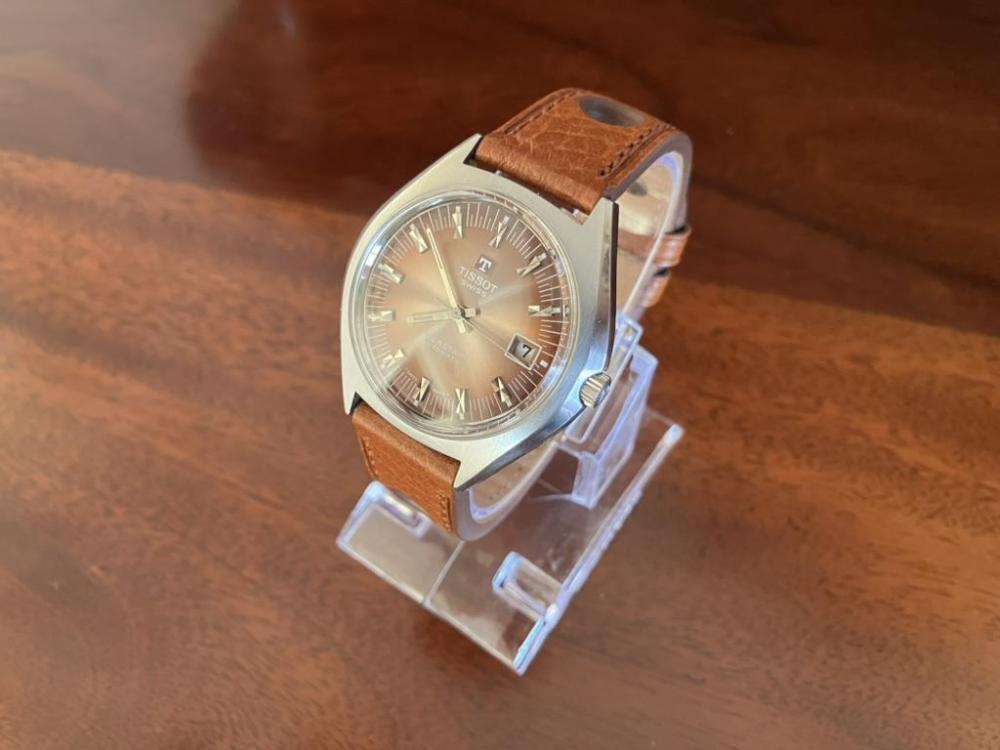
Well it showed up from Pakistan, and it looks like my gamble paid off. There's some staining on the dial, but I think that's to be expected. Otherwise it looks great and I can't wait to clean it up! The only issue is the bracelet is too small for my beefy wrist. Size comparison with my Seiko Kinetic 5M62.

 1 point
 -
Heating to cherry red and leaving to cool at room temperature will anneal the metal.1 point
-
The K way is what I was taught. I never thought of a spot welder which I'm sure would be the best bet, but how often are you going to use it £50 plus is a bit much if that is all you are going to use it for.1 point
-
The set of four punches are marked 2235, 2135,3035 and 1570, so they do those calibres and others. The punches are v4.6 mm, but don't worry about the play in a staking set. Buy the Bergeon copy and a set of Rolex dies. Get away from using a Jaxa tool as soon as you can. These dies have the attachment to fit the Bergeon copy tool https://www.aliexpress.com/item/32987526226.html?spm=a2g0o.productlist.main.15.75d7m9kDm9kDgG&algo_pvid=fafdc008-007b-4947-8501-03c1720baa09&algo_exp_id=fafdc008-007b-4947-8501-03c1720baa09-7&pdp_npi=4%40dis!GBP!8.45!8.45!!!76.03!76.03!%40211b613117169978322718053e7400!66836057892!sea!UK!2256404187!&curPageLogUid=ruJc60lDrzjp&utparam-url=scene%3Asearch|query_from%3A I also use neoprene suction cups most of the time. I would never use a Rolex die on an 18 carat case, as it's too soft. That's when I use my Horotec suction dies https://www.cousinsuk.com/product/suction-grip-dies-sets1 point
-
Yes, I also struggled to find the individual gaskets on Cousins. I ended up buying this assortment - it'll have you covered: https://www.cousinsuk.com/sku/details/generic-rolex-case-bracelet-parts-by-list/g47251 And yes, I'm pretty sure you'll need the both gaskets. Interesting. Does it include two different clips in the two sizes? That would be nice for you. Yes, it'll be the generic part. But it's probably fine. Finding NOS (don't get used ones) original ones on eBay is possible but more expensive, of course. The rotor axle and the spring clip are steel, I'm pretty sure. From my experience with the 3135, I don't see any possibility of brass shavings coming from the rotor assembly. Unless, of course, the rotor axle is badly worn (so your case, maybe) and the oscillating weight starts scaping on the movement bridges. Frankly, most people on the Rolex Forum have no clue what they are talking about when it comes to the movements. Also, I often read that the rotor (and axle) are the a "weakness" or even "design flaw" of the 15xx, 30xx and 31xx movements. And it is true that in 3 out of 4 Rolex watches that I've serviced so far, it was an issue. BUT, I still disagree with the popular verdict. ALL of the 3 watches that had issues hadn't been serviced for more than 10 years. I'm pretty certain that none of them would have needed any rotor/axle repairs if they had been serviced after 6-8 years.1 point
-
You wouldn't be able to reharden just the bit that has been annealed, without annealing a bit further along. By the time to get to the center the whole thing would be annealed- except the center! They work fine un-hardened at the end, it's actually less likely to break, and you would almost certainly break something in the winding system before deforming anything.1 point
-
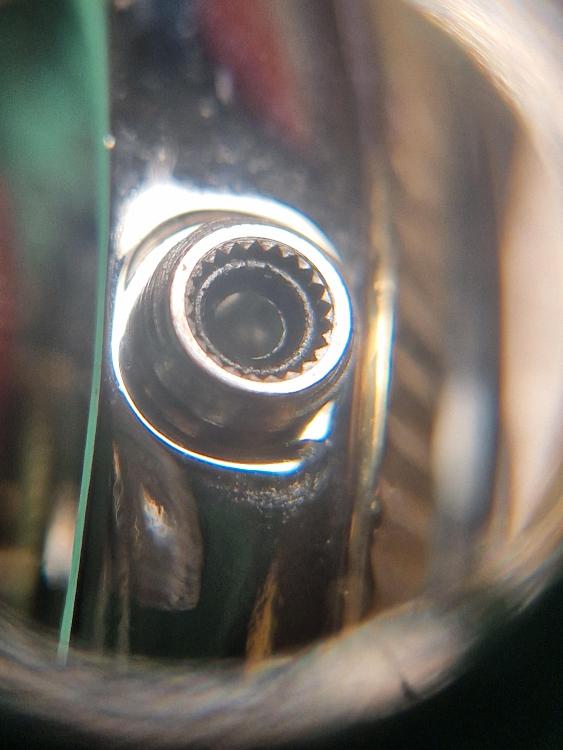
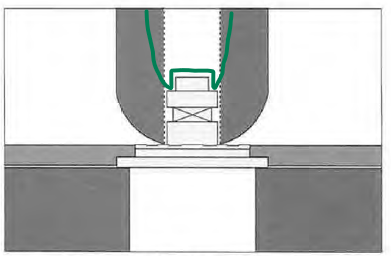
I assume the watch will have a twin lock crown and therefore two gaskets. One in the crown itself (which is a flat ring and replaced like any other crown gasket) and one in the crown tube (which is round). The latter is a bit fiddly to squeeze in without damaging it. But not rocket science. See a picture of the crown tube gasket below: By the way, if the rotor axle is badly worn, you'll probably also want to replace the rotor sping clip. Part 560. It exists in 3 versions/thicknesses: 560-1=0.18mm, 560-2=0.165mm, 560-3=0.195 I think the 560-1 is the default.
 1 point
 -
Yesterday evening I worked on the reassembly using this video as a guide: This was an exercise in frustration. The first problem I had was that I think Alex is taking a shortcut in the video editing. He turns the movement over to install the keyless works after setting the barrel. However that barrel is held by nothing so I couldn’t find a way to perform the installation in that order. Instead I installed the gear train and main bridge before the keyless works. Second problem was there. The bridge on this movement (and I understand it is the same on the 8215 it is based on) is extremely finicky as it covers 5 pivots and has a spring in the center. I finally installed the bridge and realized I forgot to install the click. This seems to also be missing from the video At this point I turned movement around. And I installed the first part of the keyless works. This part should skill of Alex, who had no problems with it. On my side, I kept having either the yolk or the setting lover jump out of the way whenever I was trying to install the plate which is supposed to secure them. I finally managed and went to the next step. I turned the movement around again. Remove the bridge, installed the click and took an over half an hour putting the bridge back on. I sincerely expected that I was done with the hard and frustrating part, but it wasn’t the case. Back on the side it was time for the calendar system, and the motion works. Mostly that was fine, except for the last part of the calendar setting system. I had put the date jumper in placed as well as it spring, and when I was trying to set the jumper in the correct place in the date ring, true to its name, the thing and it’s spring jumped all the way across my desk. I found the jumper, but never found the spring. I will look for it more this evening, but I doubt I will find it and this movement will pretty much end up without a working date jumper. The worst part was, I thought I was done. I was feeling happy about myself and being there goes the jumper in the spring. This will be a lesson. I guess this is why practice is necessary.1 point
-
I didn't mean my Longines needs a new staff (I already did that), I meant the OP1 point
-
Thanks nickelsilver I thought it might be a tricky job, but now that you've made it sound so......well riveting i guess, that i just have to try it I have these i forgot about , making life a bit easier.
 1 point
 -
Good point Rich. My Longines I just serviced had this exact problem - years of running with no lubrication. It definitely needs a new balance (and possibly jewels)1 point
-
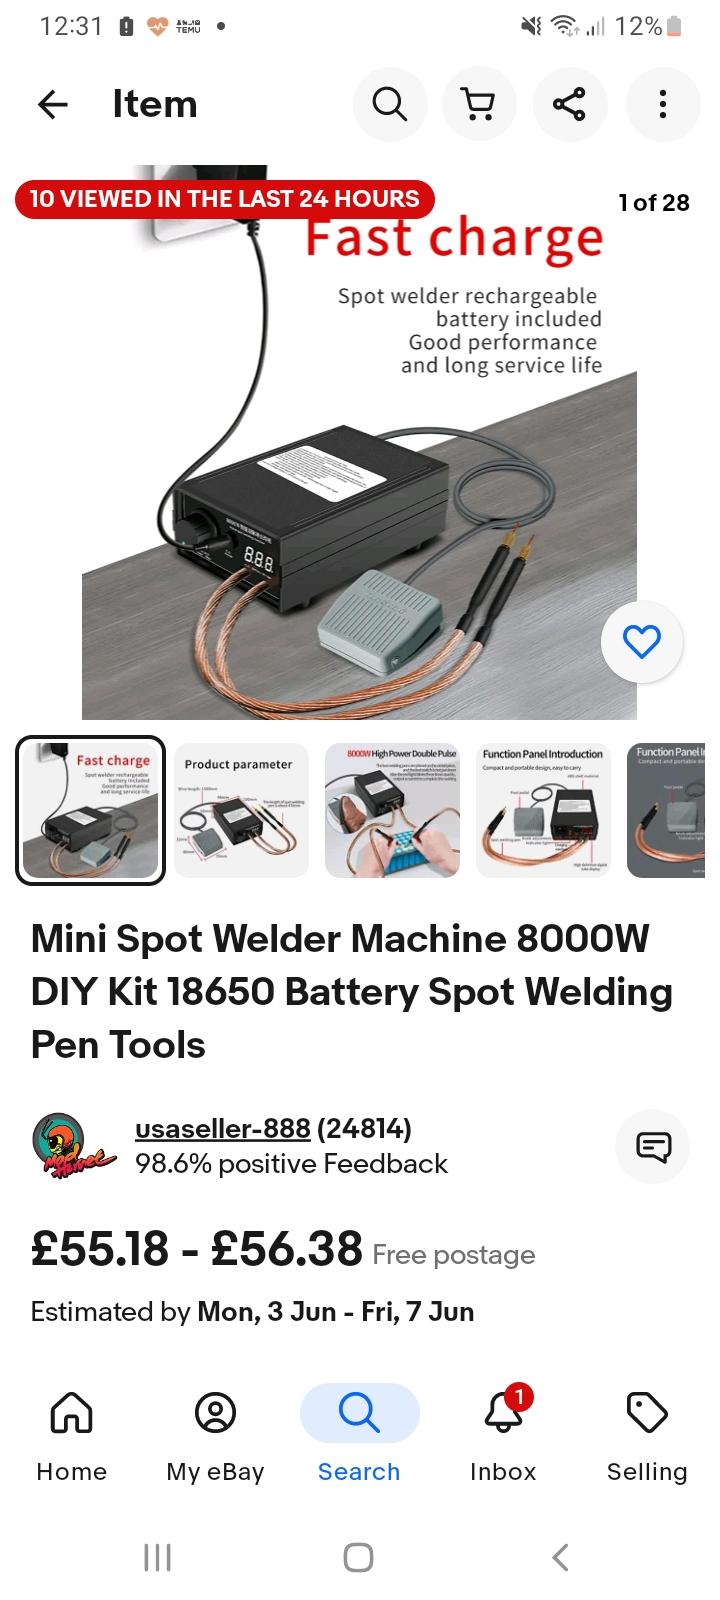
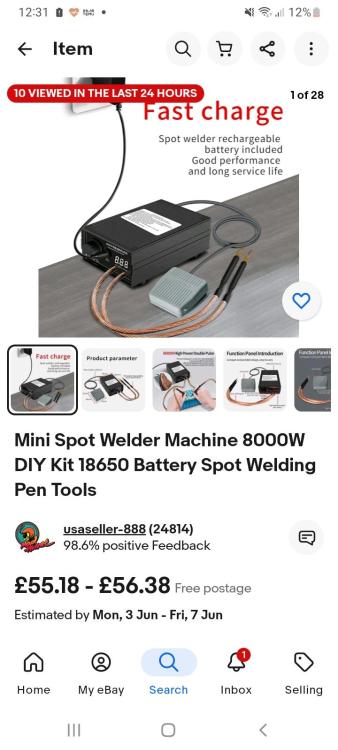
I like gadgets but I'm tryin to keep that down , for the odd time that i have done this ....... Though i might be doing it more often, its a simple process that saves waiting time and cost of a new one. maybe something like this that welds upto .15 nickel strips.
 1 point
 -
For interest, I looked up spot welders. The cheap ones, used for battery packs, amongst other things, have decent reviews. Probably not very powerful but should be enough for a mainspring.1 point
-
The heat is so intense and sudden that it can harden the spot.1 point
-
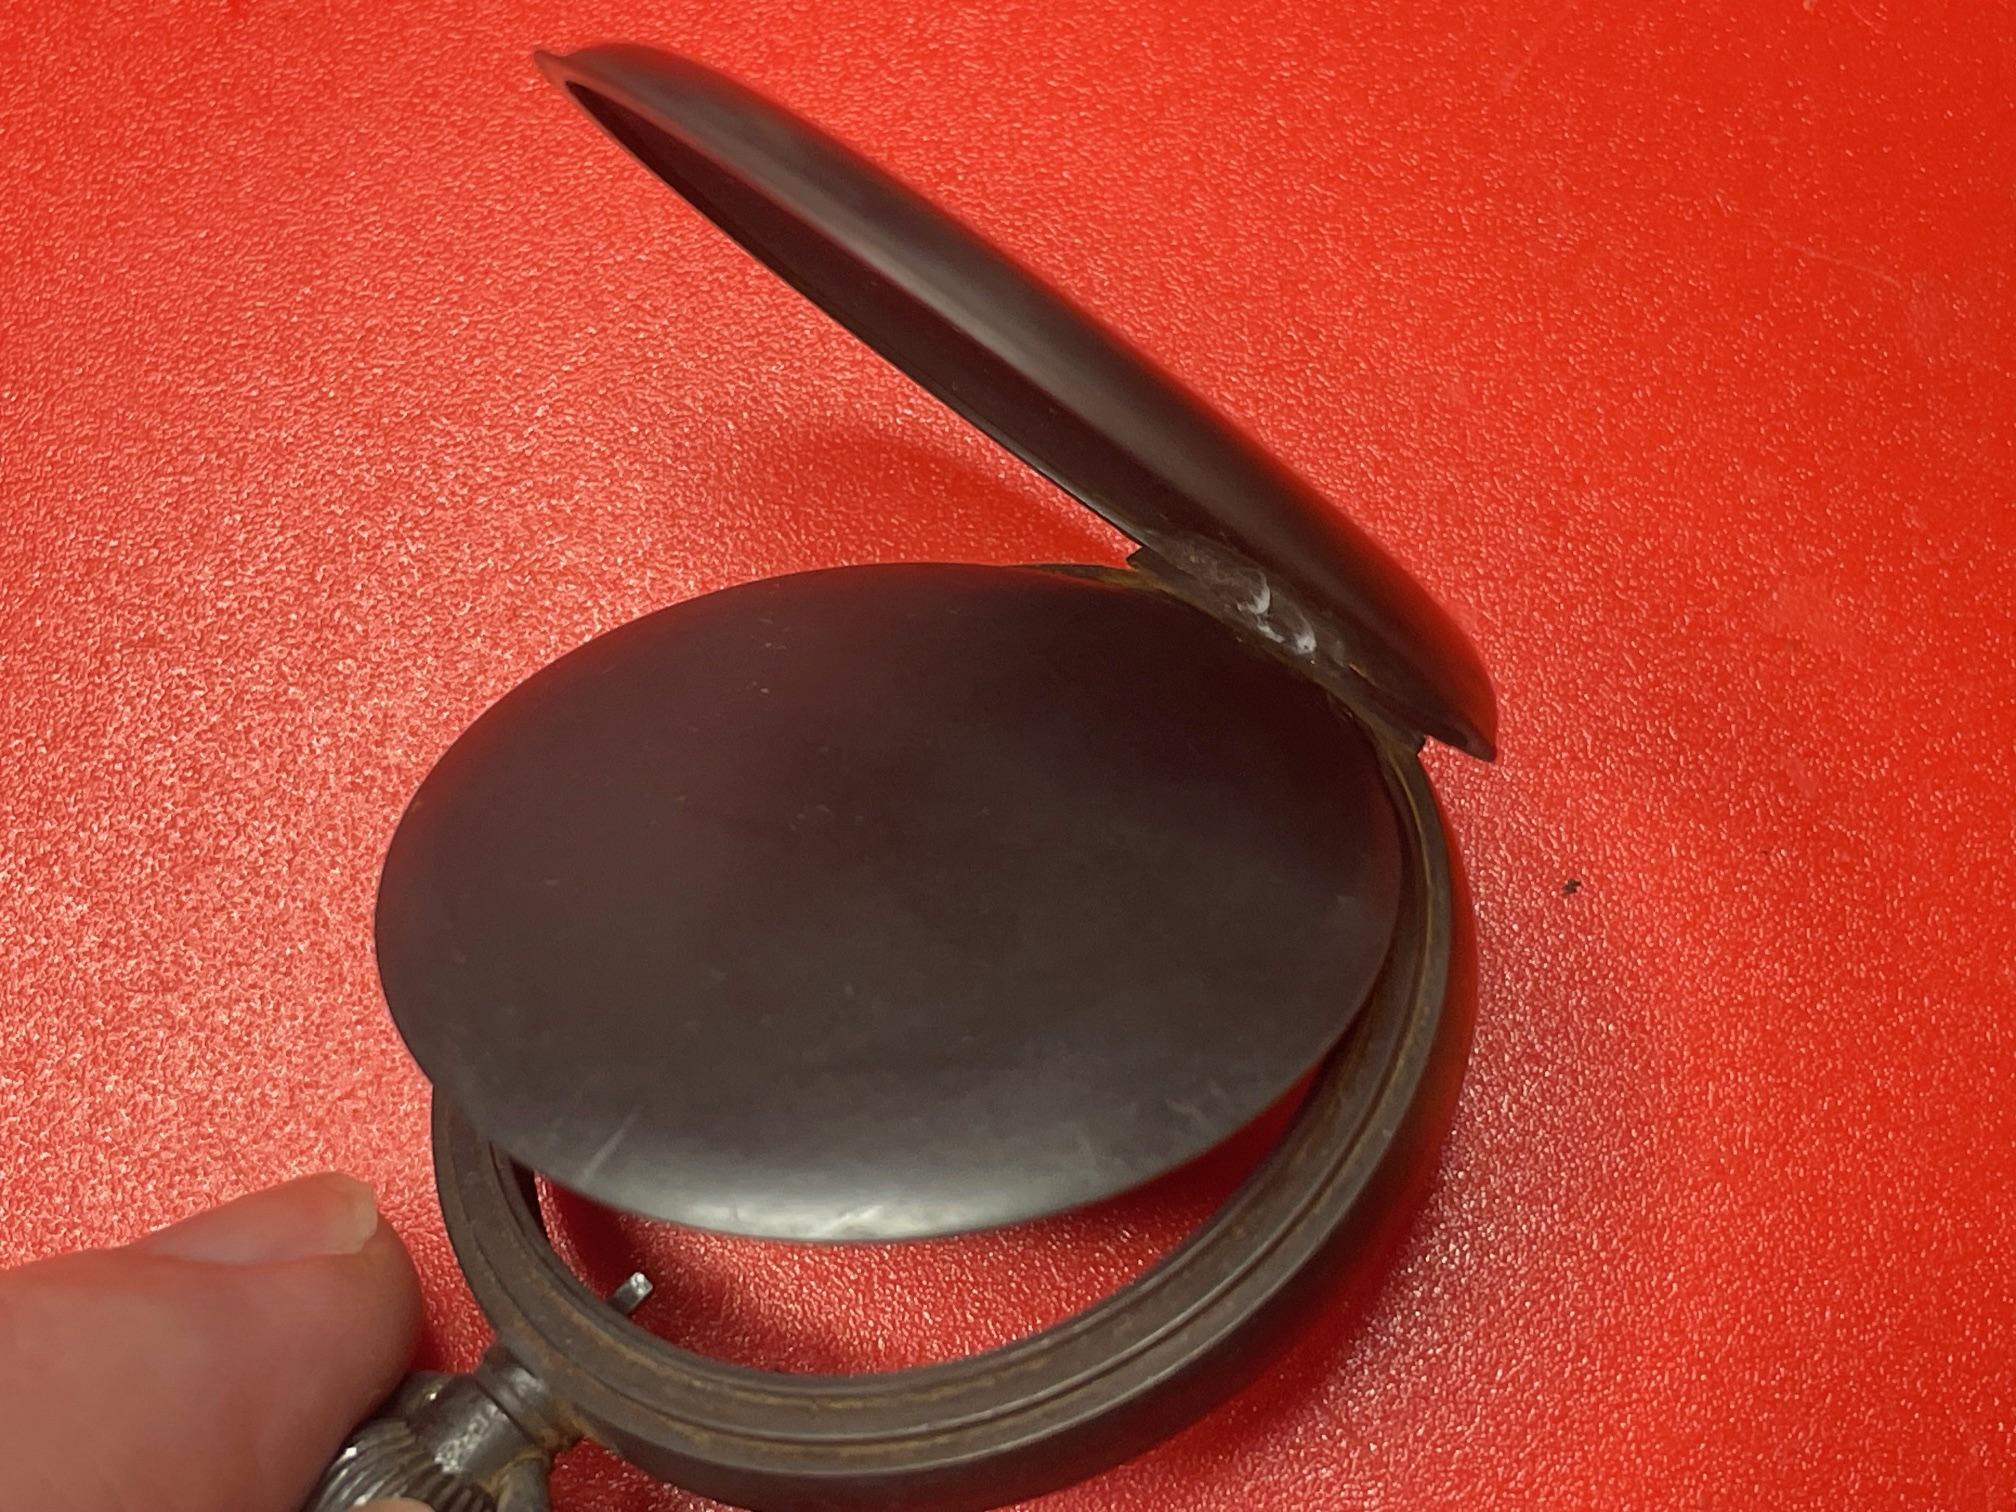
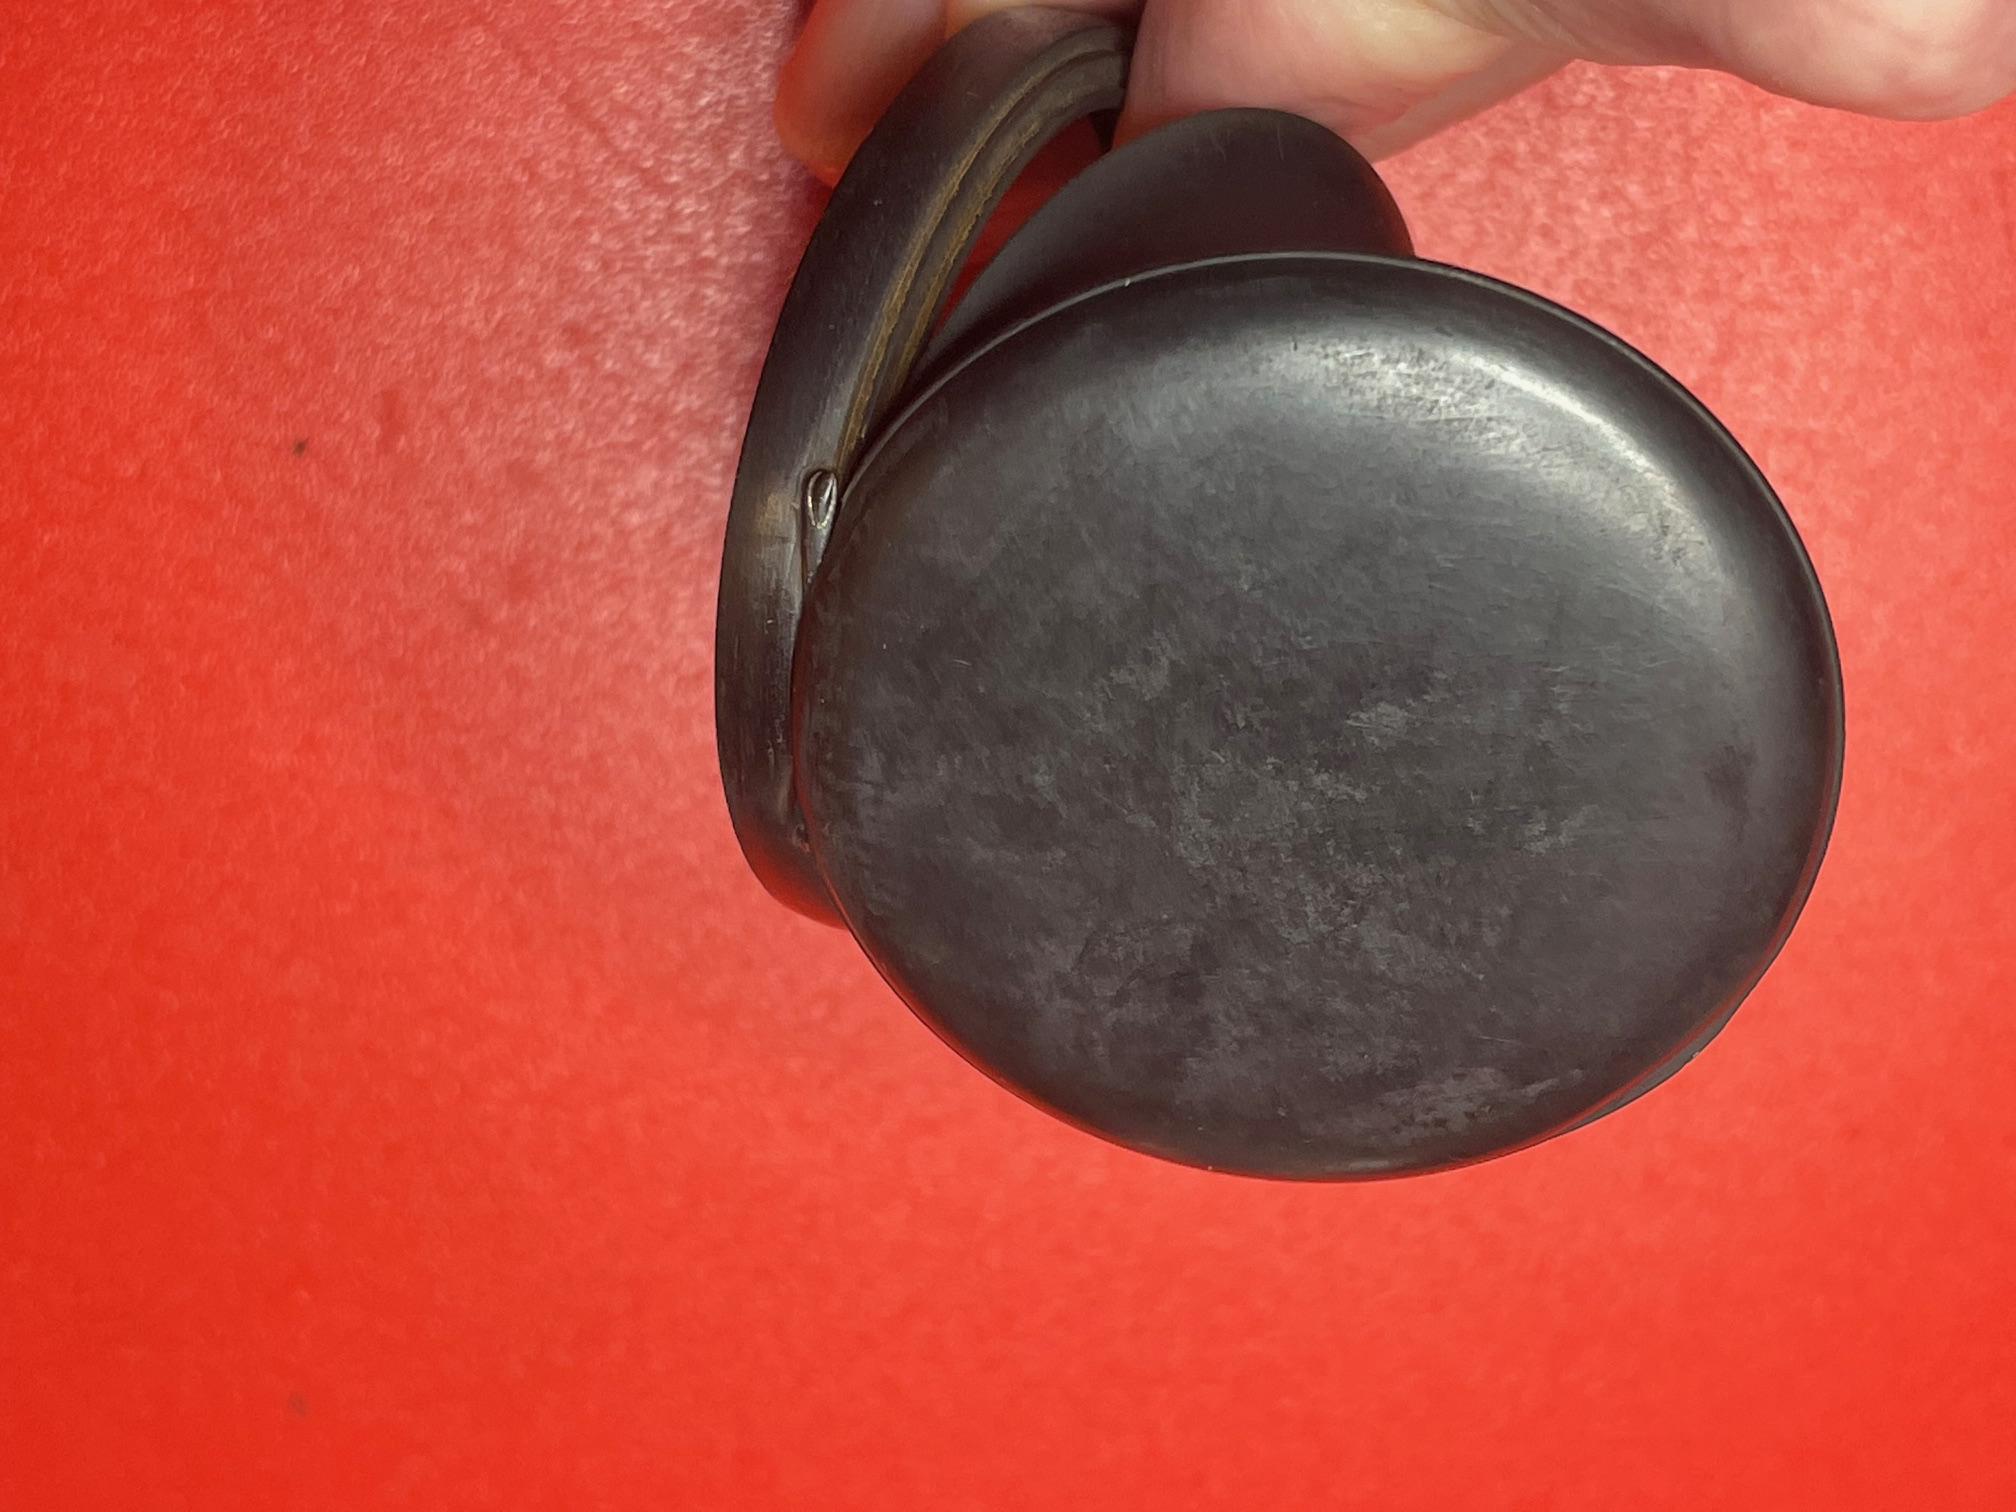
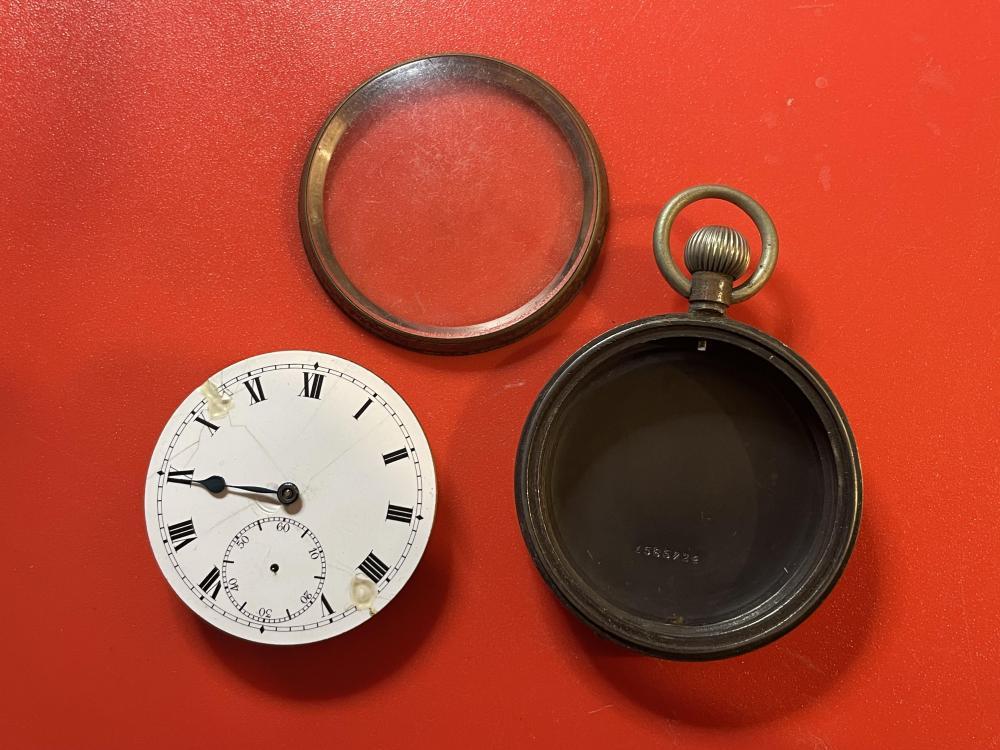
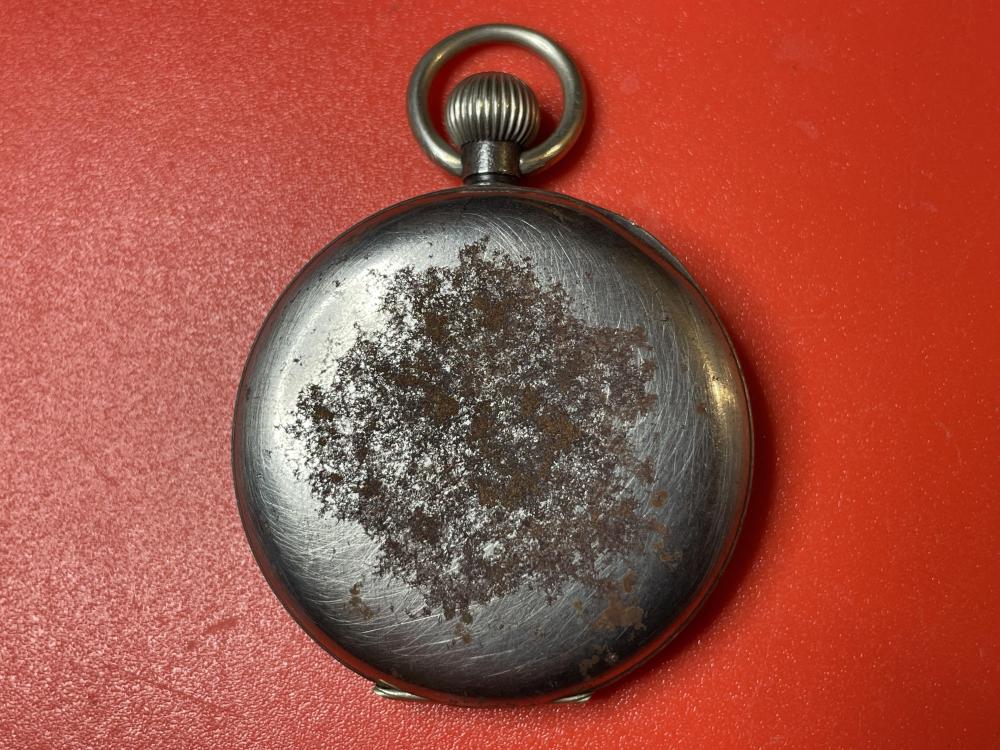
I was given a 1920s? Limit pocket watch in very poor condition a few days ago. The case back was very badly rusted with deep pitting. Someone on here advised me that the case was originally blued gunmetal, so I thought I'd see what was possible with it, to make it not quite so bad at least! Heat bluing seemed out, as the hinge looks to be brazed in place & I did not want to risk it falling apart! I got a bottle of "Jenolite gun blue" to try. First, I sanded the back to remove all visible rust, working from 1000 down to 7000 grade. There was no visible brown at that but still remains of deep pitting, that I though would take too much metal off to fully remove. An ultrasonic clean in weak Ajax floor cleaner solution for a degrease, as I usually do with case parts, rinses in the ultrasonic then a wash with deionised water followed by IPA to ty and ensure no parts would be "un-wet" in the chemicals. The gun blue mixes 1:3 with deionised water, then soak the parts for 15 minutes; I used a glass jar just big enough to completely submerse the case, and moved it around every couple of minutes to try and ensure an even effect. I did the bezel with a cotton bud, flat in a jar lid, glass in, and the solution applied around the outside with a cotton bud every few minutes, so it did not get on the inner silvered surface. Everything had a good rinse under the tap once done, then a brief deionised water rinse & dried. The finish it totally matt black as it comes out the solution, with the black sediment rubbing off on anything it touches! There were some traces or brown rust after it dried, so I tried boiling it for half an hour, as apparently that should convert brown rust to black?? Once everything had cooled and been dried out, I tried burnishing the surface with thick kitchen towel dry. That seems to work quite well, removing the loose particles and gradually brining it to a dull shine - but it's quite sensitive to pressure and a crease or fingernail pressure leaves a different level of shine to a smooth pad, until that wears through and creases.... It's not finished, my fingers are aching so giving it a break. I'm hoping the finish will even out with further burnishing, though the residual pits in the back are probably there for good & I'm not sure what to do about the traces of brown that have re-appeared. The instructions for the chemical blue say it should be oiled as soon as dry, then left to cure for 24 hours - but I'm not sure about soaking a watch case in oil? I did leave it overnight before boiling & burnishing. It still need more work and detailing! But the effect looks promising. Before: After, still needing further burnishing. All the streaks are pressure marks, where the burnishing has smoother or removed more of the surface material. I'm hoping that a fine brush will clean the details and edges, where a cloth cannot do anything.


 1 point
 -
Hi, I've serviced a Tissot 2481 movement which had a broken mainspring, I used the following from Cousins a GR 2973X mainspring which fitted with no issues. Your issue is a common problem that is often mentioned on this site, that you source a mainspring that matches your original mainspring dimensions but on arrival the mainspring eyelet doesn't match your arbor, generally too open. Regards CJ
 1 point
 -
Two ways in which i tighten up the inner coil. 1st which has always worked up to now when the spring is new or very good shape, a brass/wooden rod inside the coil to press against, i just use small pliers to manipulate the spring. The wooden rod has that extra give so you can overcompensate with your bend to allow for the steel's elasticity. If you want less breakage risk then anneal just the arbor coil, then reharden and temper when you have the shape you want.1 point
-
Have you looked at other suppliers. I don't know what you tried to bend it with I always used round nosed pliers.1 point
-
I think you misunderstand what I was getting at I was quoting you. You're the one who found the color Rolex manual and that's definitely worthy of an acknowledgment. So you don't need to apologize for anything I wasn't offended. As I said I was quoting you because you brought something exciting I color Rolex manual a PDF color manual. I just wish you'd remember where it came from and whether they had any other color or any other Rolex manual's.1 point
-
Dear @JohnR725, sorry if I didn't refer to you in my answers -- without a doubt, most of the things I've learned about the 3135 (and most of my watchmaking knowledge in general!) benefitted greatly from your kind contributions in this forum. My answers to VWatchie here are expressed in my own words and add my own experience. Since I serviced the 3135 myself and having saved some of the documentation on my hard-drive, I internalized some information and didn't go back to see where I found them. I was just trying to help @VWatchie. Sorry if that caused offense.1 point
-
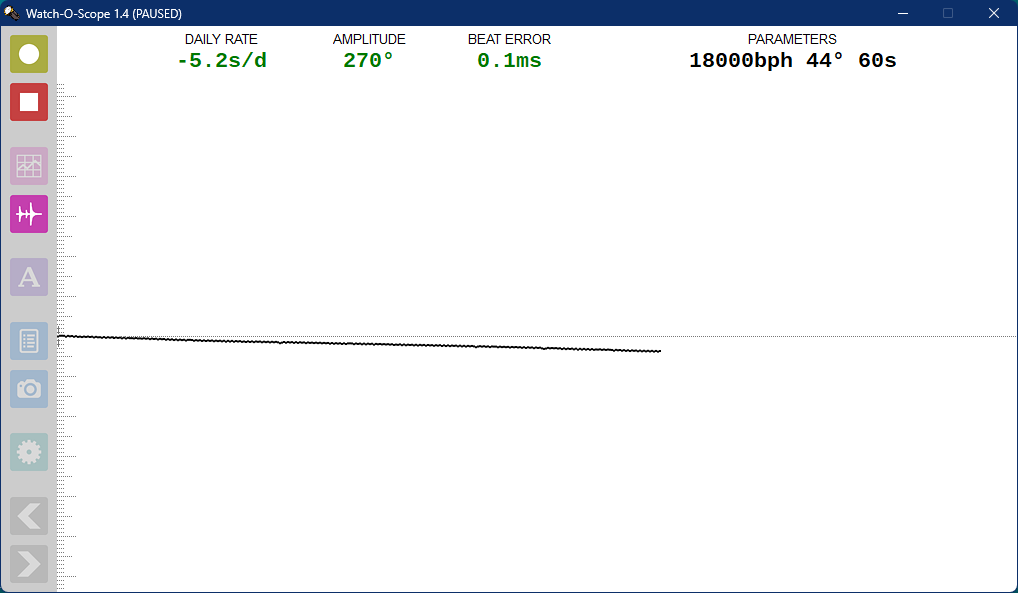
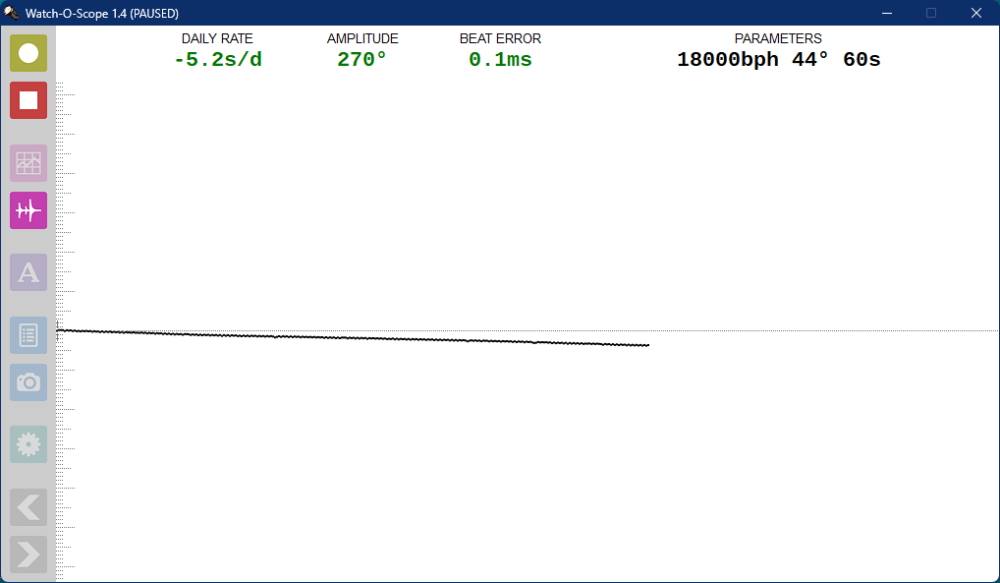
Actually it gets really exciting when people start to quote your answers like this for instance. Then what makes this reply with the files attached to down below it interesting is the service manual let's in color? Yes Rolex printed them in color but typically anything available out there if you can find it was scanned in black-and-white. So somewhere this color manual came up and I wonder if any of the other stuff was scanned? Then on page 36 of the colorful PDF you get your timing specifications. Yes Rolex has a procedure for timekeeping a very specific procedure of timing in various positions fully wound up 24 hours later etc. Then yes you are failing in that the amplitude dropped below 200° in one of the positions at 24 hours. As far as the timing specifications you can work out the math for yourself. One of the problems of using a timing machine to determine service interval is it's not always the best way to do that. If you service your watch every X quantity of years ideally your watch should last forever if you wait until your timing machine indicates a problem it could be a problem of thing is wearing out and wearing out especially in a Rolex is not a good thing. Then there is the other problem of course which is the gaskets need to be replaced as they will start disintegrate with time. So your timing machine may indicate everything is perfect up until the gaskets fail and then the timing machine may not always indicate how bad the condition is inside the watch until the watch totally disintegrates. Which is why anything that's a wearable watch should be serviced on a regular interval. Oh and then the minor irritation I have with Rolex service information beyond the fact that it's very difficult to come by is the supplemental information that were missing. So a lot of procedural stuff like how to replace the axle would've been in a manual someplace and probably all sorts of other interesting things it be nice to know but conveniently Rolex doesn't want to share with us.1 point
-
Ok, good luck with the repair! We are all jealous if you received the machines originally as gifts... Sorry about the steep price of the replacement part. You will also find that the glass jars with the embossed L&R logo fetch a pretty price as well. However, the very first L&R jars didn't have that detail but had the manufacturer mark of "5371" on the bottom and these have the same lid threads and squared-off bases. They sell for less but are still "original" and if you can find them they will fit the same lids and wall wave breakers while more securely sitting in the machine base than some of the modern replacement jars that have been suggested.1 point
-
Most welcome @VWatchie! I'm actually getting pretty excited when I'm able to provide ANSWERS instead of just asking questions all the time. Don't hesitate with any questions about this calibre. The rate and amplitude are just about acceptable, I guess. But if I bought it like this, let's imagine, I'd service it. When/if you service it, make sure you know how to deal with the reversing wheels (Epilame..). Also be careful not to break the balance stop/hack spring. The escape wheel jewel settings are easier to oil from below. In the date mechanism, be careful that the cam yoke, it's jewel and spring don't join the Rolex space programme.. Apart from these little details, it's an absolute joy to work on. PS: another detail: the casing screws release the movement in the opposite way, i.e. tighten the screw to release. Then turn the movement until the casing screw-rings line up with the two cut-out areas of the case (one is at the winding crown). The the movement can come out. PPS: to open the case, have you tried the rubber ball? Sometimes it works..1 point
-
This one is easy and I can give you the definitive answer. See below picture. First, loosen (not remove!) the screw indicated with the red arrow. Second, adjust the beat error via the stud holder (orange arrows) as usual. Don't forget to tighten screw 1 afterwards.
 1 point
 -
Yes, I have the set of punches and they are 4.6mm. And my staking tool (Boley) has the standard 4.7mm. It does, unfortunately, produce a little bit of play... in my attempt to use it, I wrapped a layer of aluminum foil around the stake to reduce the play. I think that worked ok (I failed for other reasons). A professional (Rolex trained) watchmaker told me that I don't need to worry about the play because it would somehow not matter when you actually hit the stake (with the axle and rotor flat on the anvil.... but I wasn't convinced. There are specific punches for each calibre. I doubt that they are interchangeable. This is indeed meant to be done that way. In my case, no damage was caused at that stage. I don't think you need plastic protection. The attached (as PDF file) article from the Horological Times is brilliant and goes into a lot of detail, see pages 10-14: 2009-03-web.pdf One screenshot from the article is below. NOTE: If you don't have a punch that fits as perfectly as shown in the picture above (and if you want to reduce the risk of hammering too hard and consequently hitting the rotor with the punch as the axle breaks away), you can use a punch that just fits over the top of the axle like drawn in green in the picture below.
 1 point
 -
Hi All, I started this forum over 10 years ago and never intended for it to me a 'for profit' concern. Since then, I launched an online course and I draw funds from that business in order to fund this website. There is also a little bit of funding from Google ads but I don't rely on it because they keep changing the goalposts. The forum costs a few hundred pounds per month to run and Im comfortably managing it. Why a few hundred pounds? I am OCD about backups and not relying on a single company to host those backups, I use amazon S3 to backup hourly and daily, I also use Digital Ocean. I use a separate mail service to handle the serious amounts of emails sent from the site, I am on here most days admin'ing and updating the site or servers/applying security patches and the like - its not a big deal, I enjoy it. In short - you might not see me a lot posting (for my sanity as it's addictive (same on all my social media)) but I certainly do a lot behind the scenes. I can't control my mortality and so there's always that - but other than that, I'm damn committed to this site as I am committed to my commercial site watchfix.com which supports this site. I have no interest in shutting down, selling or otherwise changing this sites format. Having said that, if anyone wants to consider taking on moderation tasks to help (in particular, making sure people post in the correct place and moderating new members posts) that would be very helpful. (Only members who have been active for more than a year please). Finally, thanks very much for your support and kind words - I truly appreciate that. This forum has to be one of the friendliest I am part of - a massive refreshment after reading some of the Facebook groups I'm part of - except mine FB group - that's also great with great people1 point
-
Rolex_Movement_Calibre_3130_3185_5.pdfRolex 3135 parts (1).pdfThat's not bad for 7-8 years after the service! Congrats on a good job back then. But I guess it's time for a service indeed. It should be above 190-200° in VERTICAL positions after 24h. Don't wait too long. I recently serviced a Rolex 2035 had it's last service 10 years ago and both the reversing wheels and the rotor axle needed to be replaced. Cost of 350 EUR (for NOS, original parts))... and I'm pretty sure that this could have been avoided if it had come for service 2 years earlier. You'll find my thread about that service on the forum, too. Here is everything you could possibly find on the forum in one place. Except my "special notes" (sorry, only phone pictures of those). CALIBER-3135-3155-3175-3185-TECHNICAL-INFORMATION.pdfRolex oil chart 3135.PDFRolex 3135 parts (1).pdfRolex_Movement_Calibre_3130_3185_5.pdf Indeed. It seems to be irresistible to lubricate the centers and the clicks of the reversers...1 point