Leaderboard


Popular Content
Showing content with the highest reputation on 06/13/24 in all areas
-
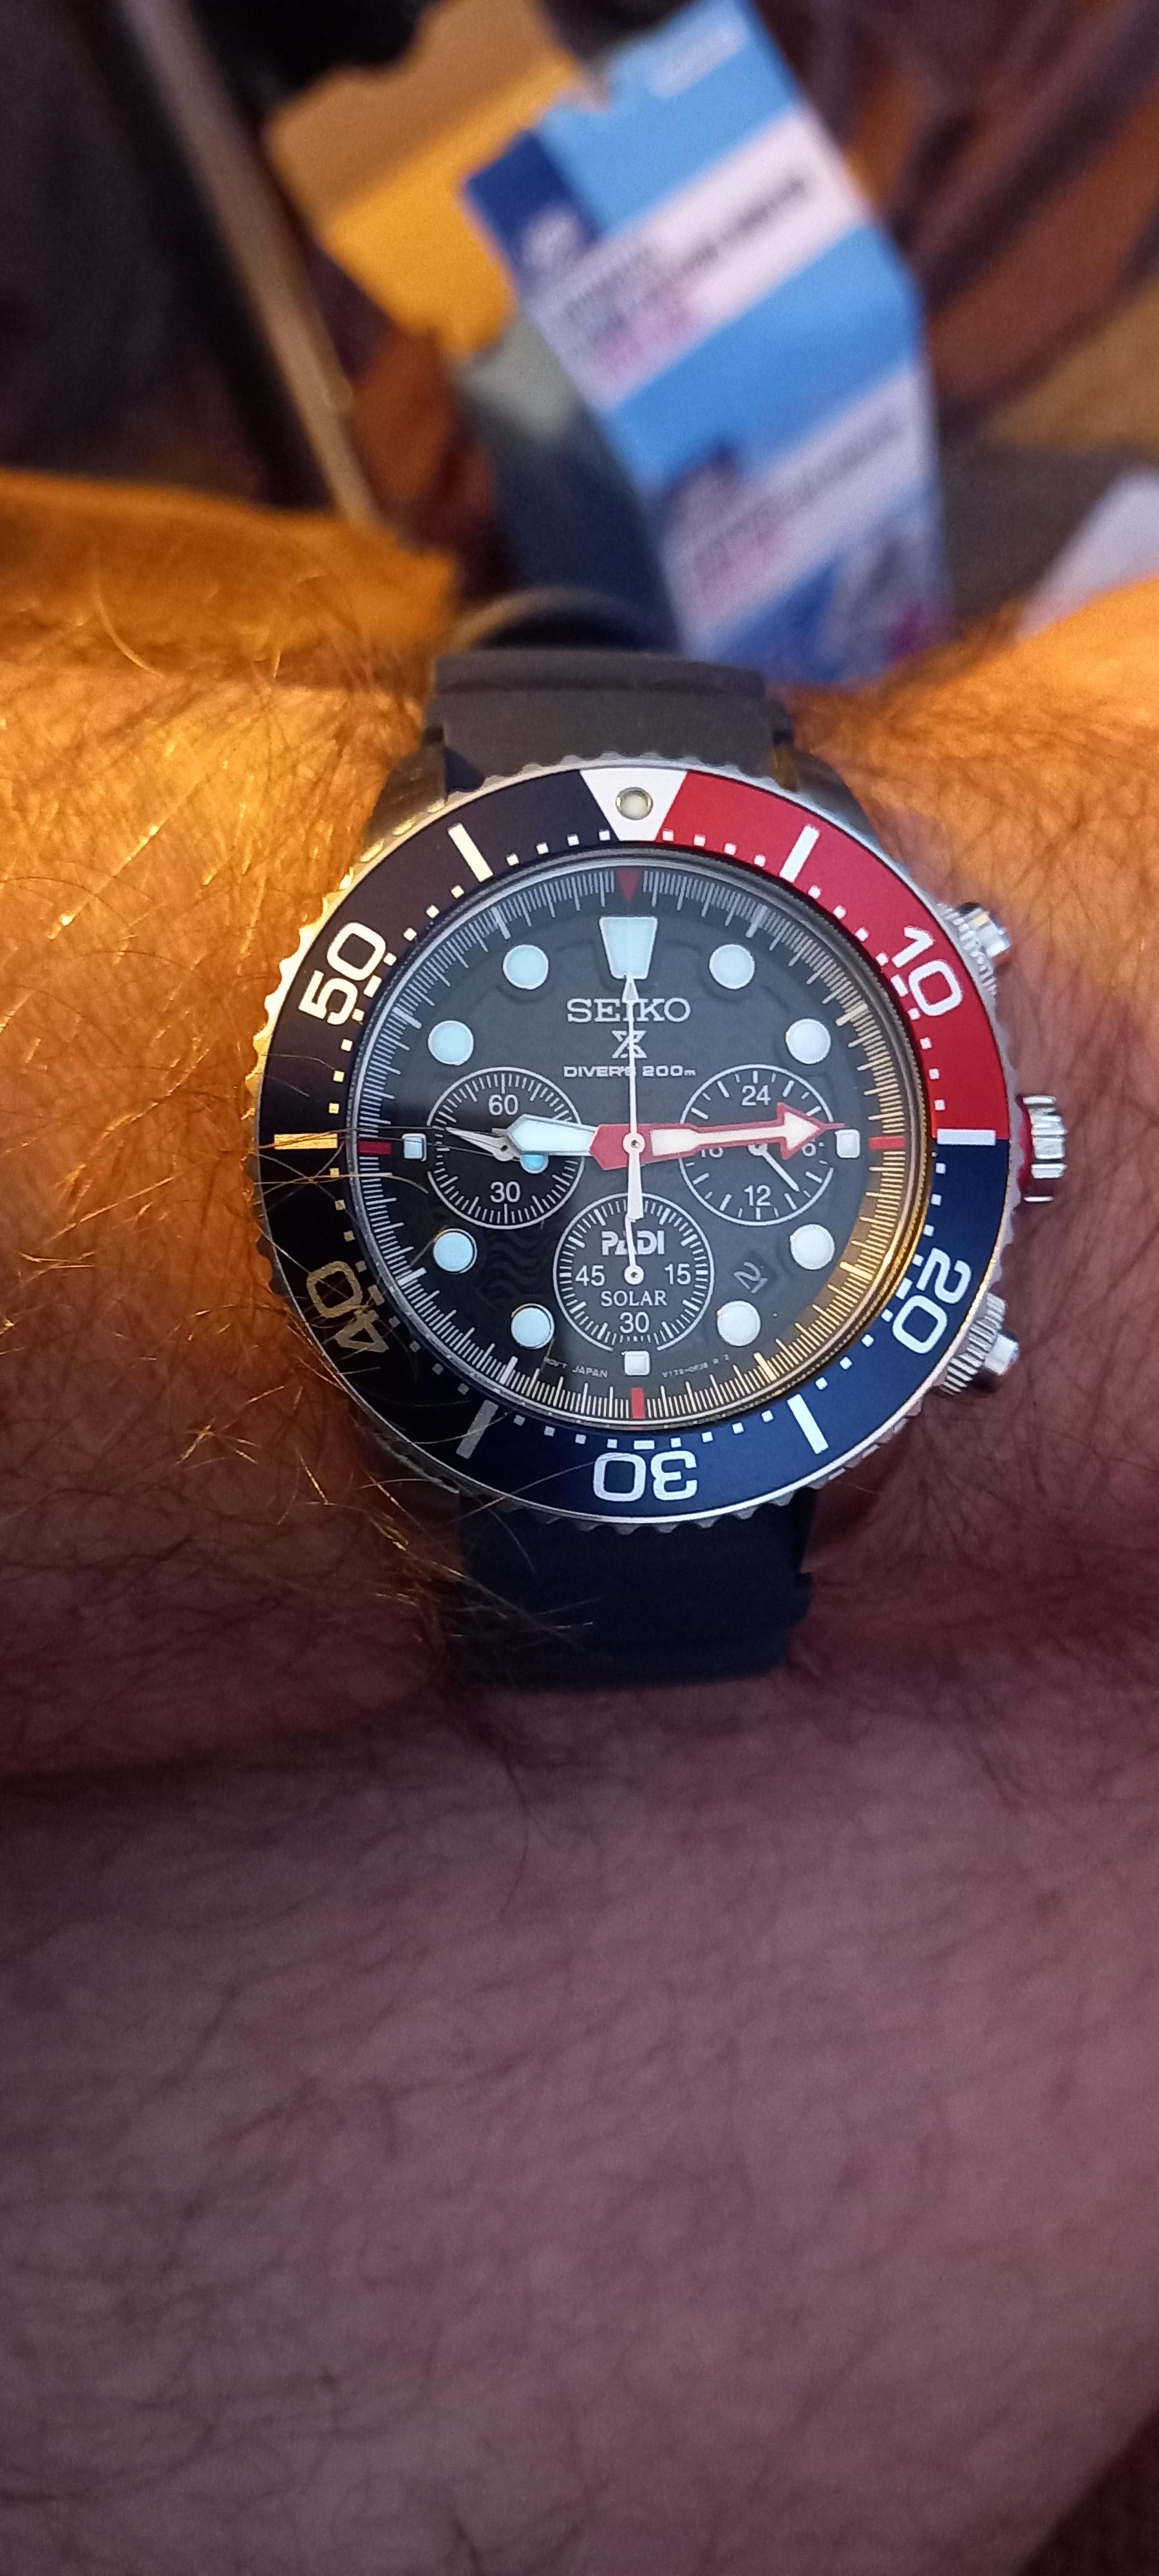
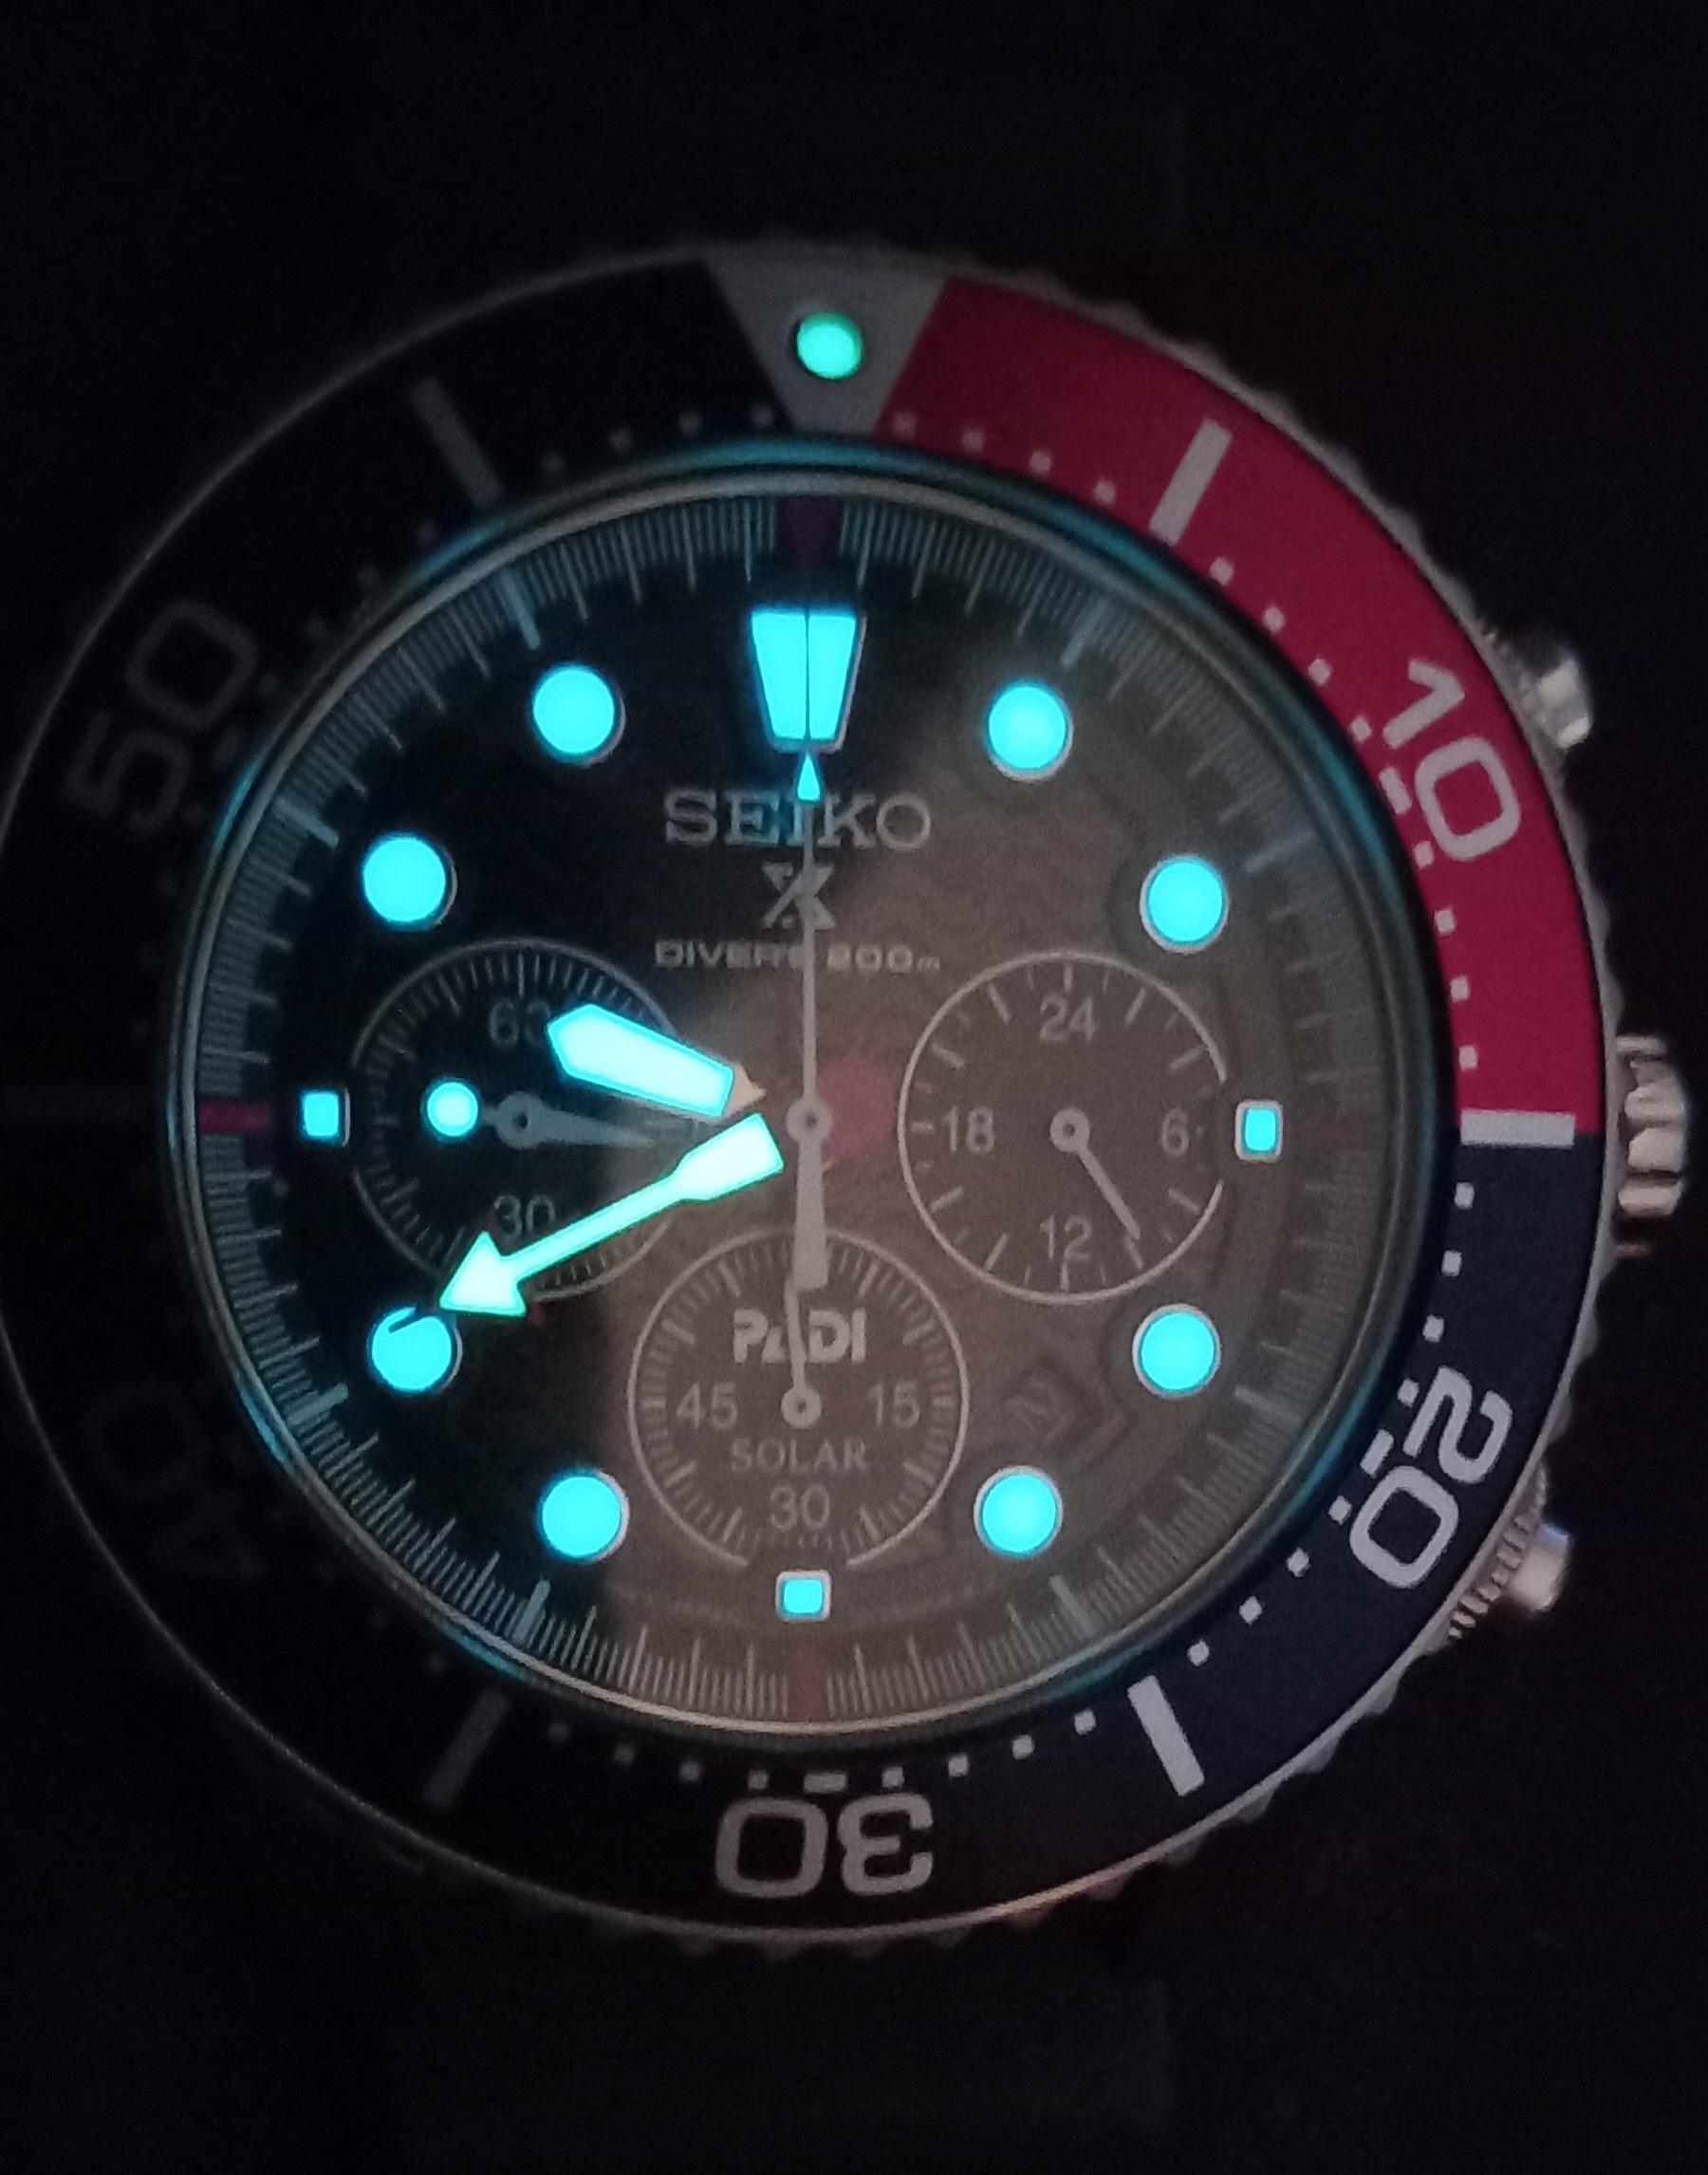
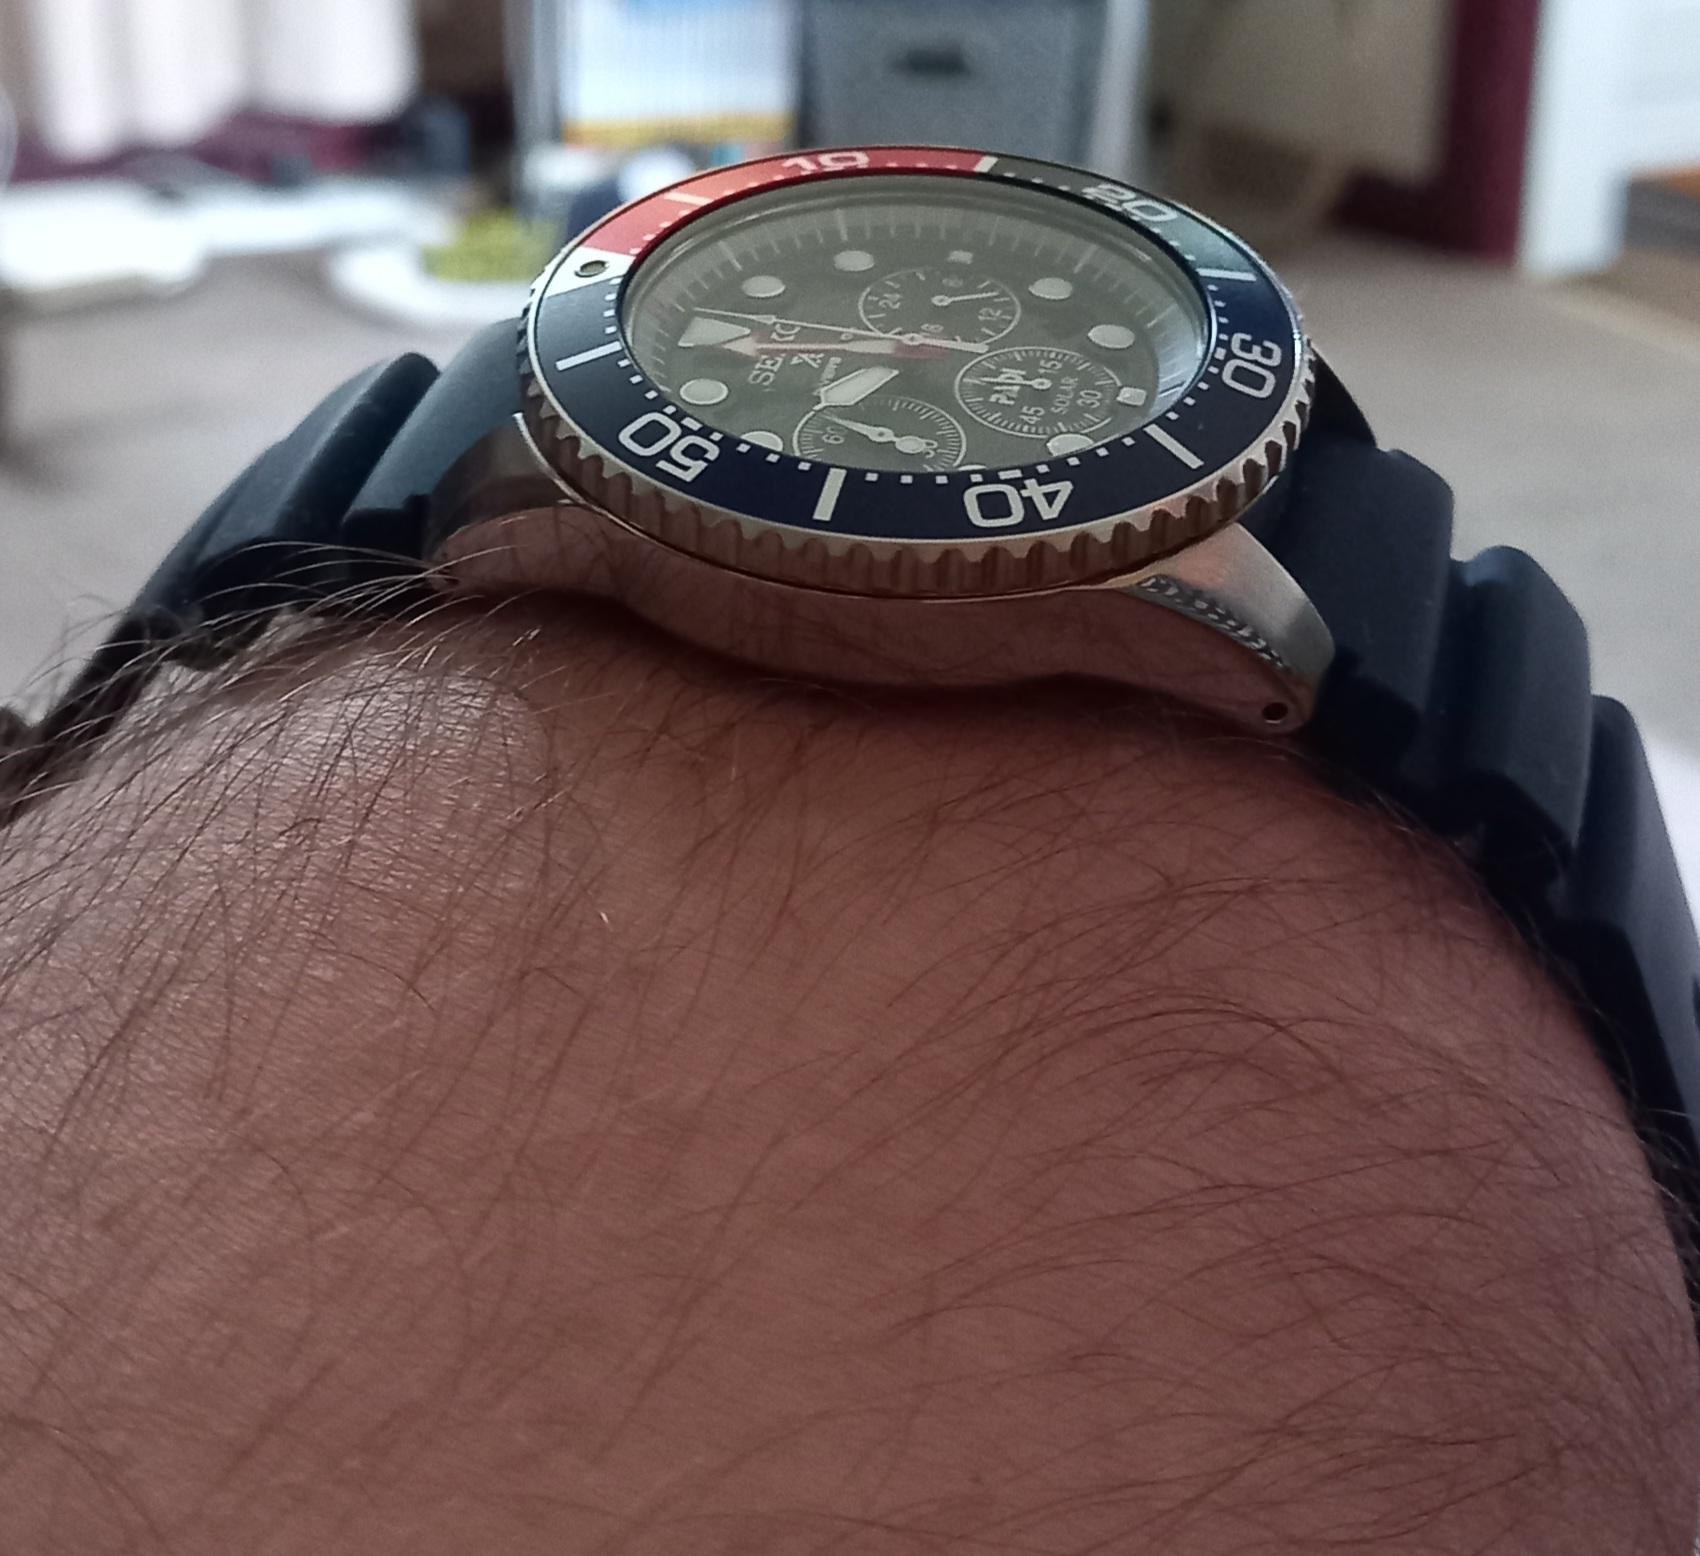
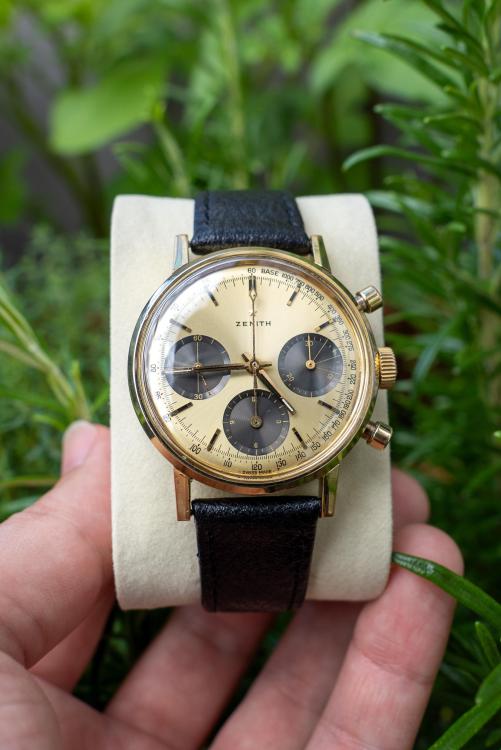
Wearing a big lump of a watch today. Feels like i have a kettlebell on my wrist. Aw no and i promised no more bare leg shots , good god our lass needs her legs shaving and before anyone asks no she didn't lay the watch on top of my head and take a picture


 4 points
 -
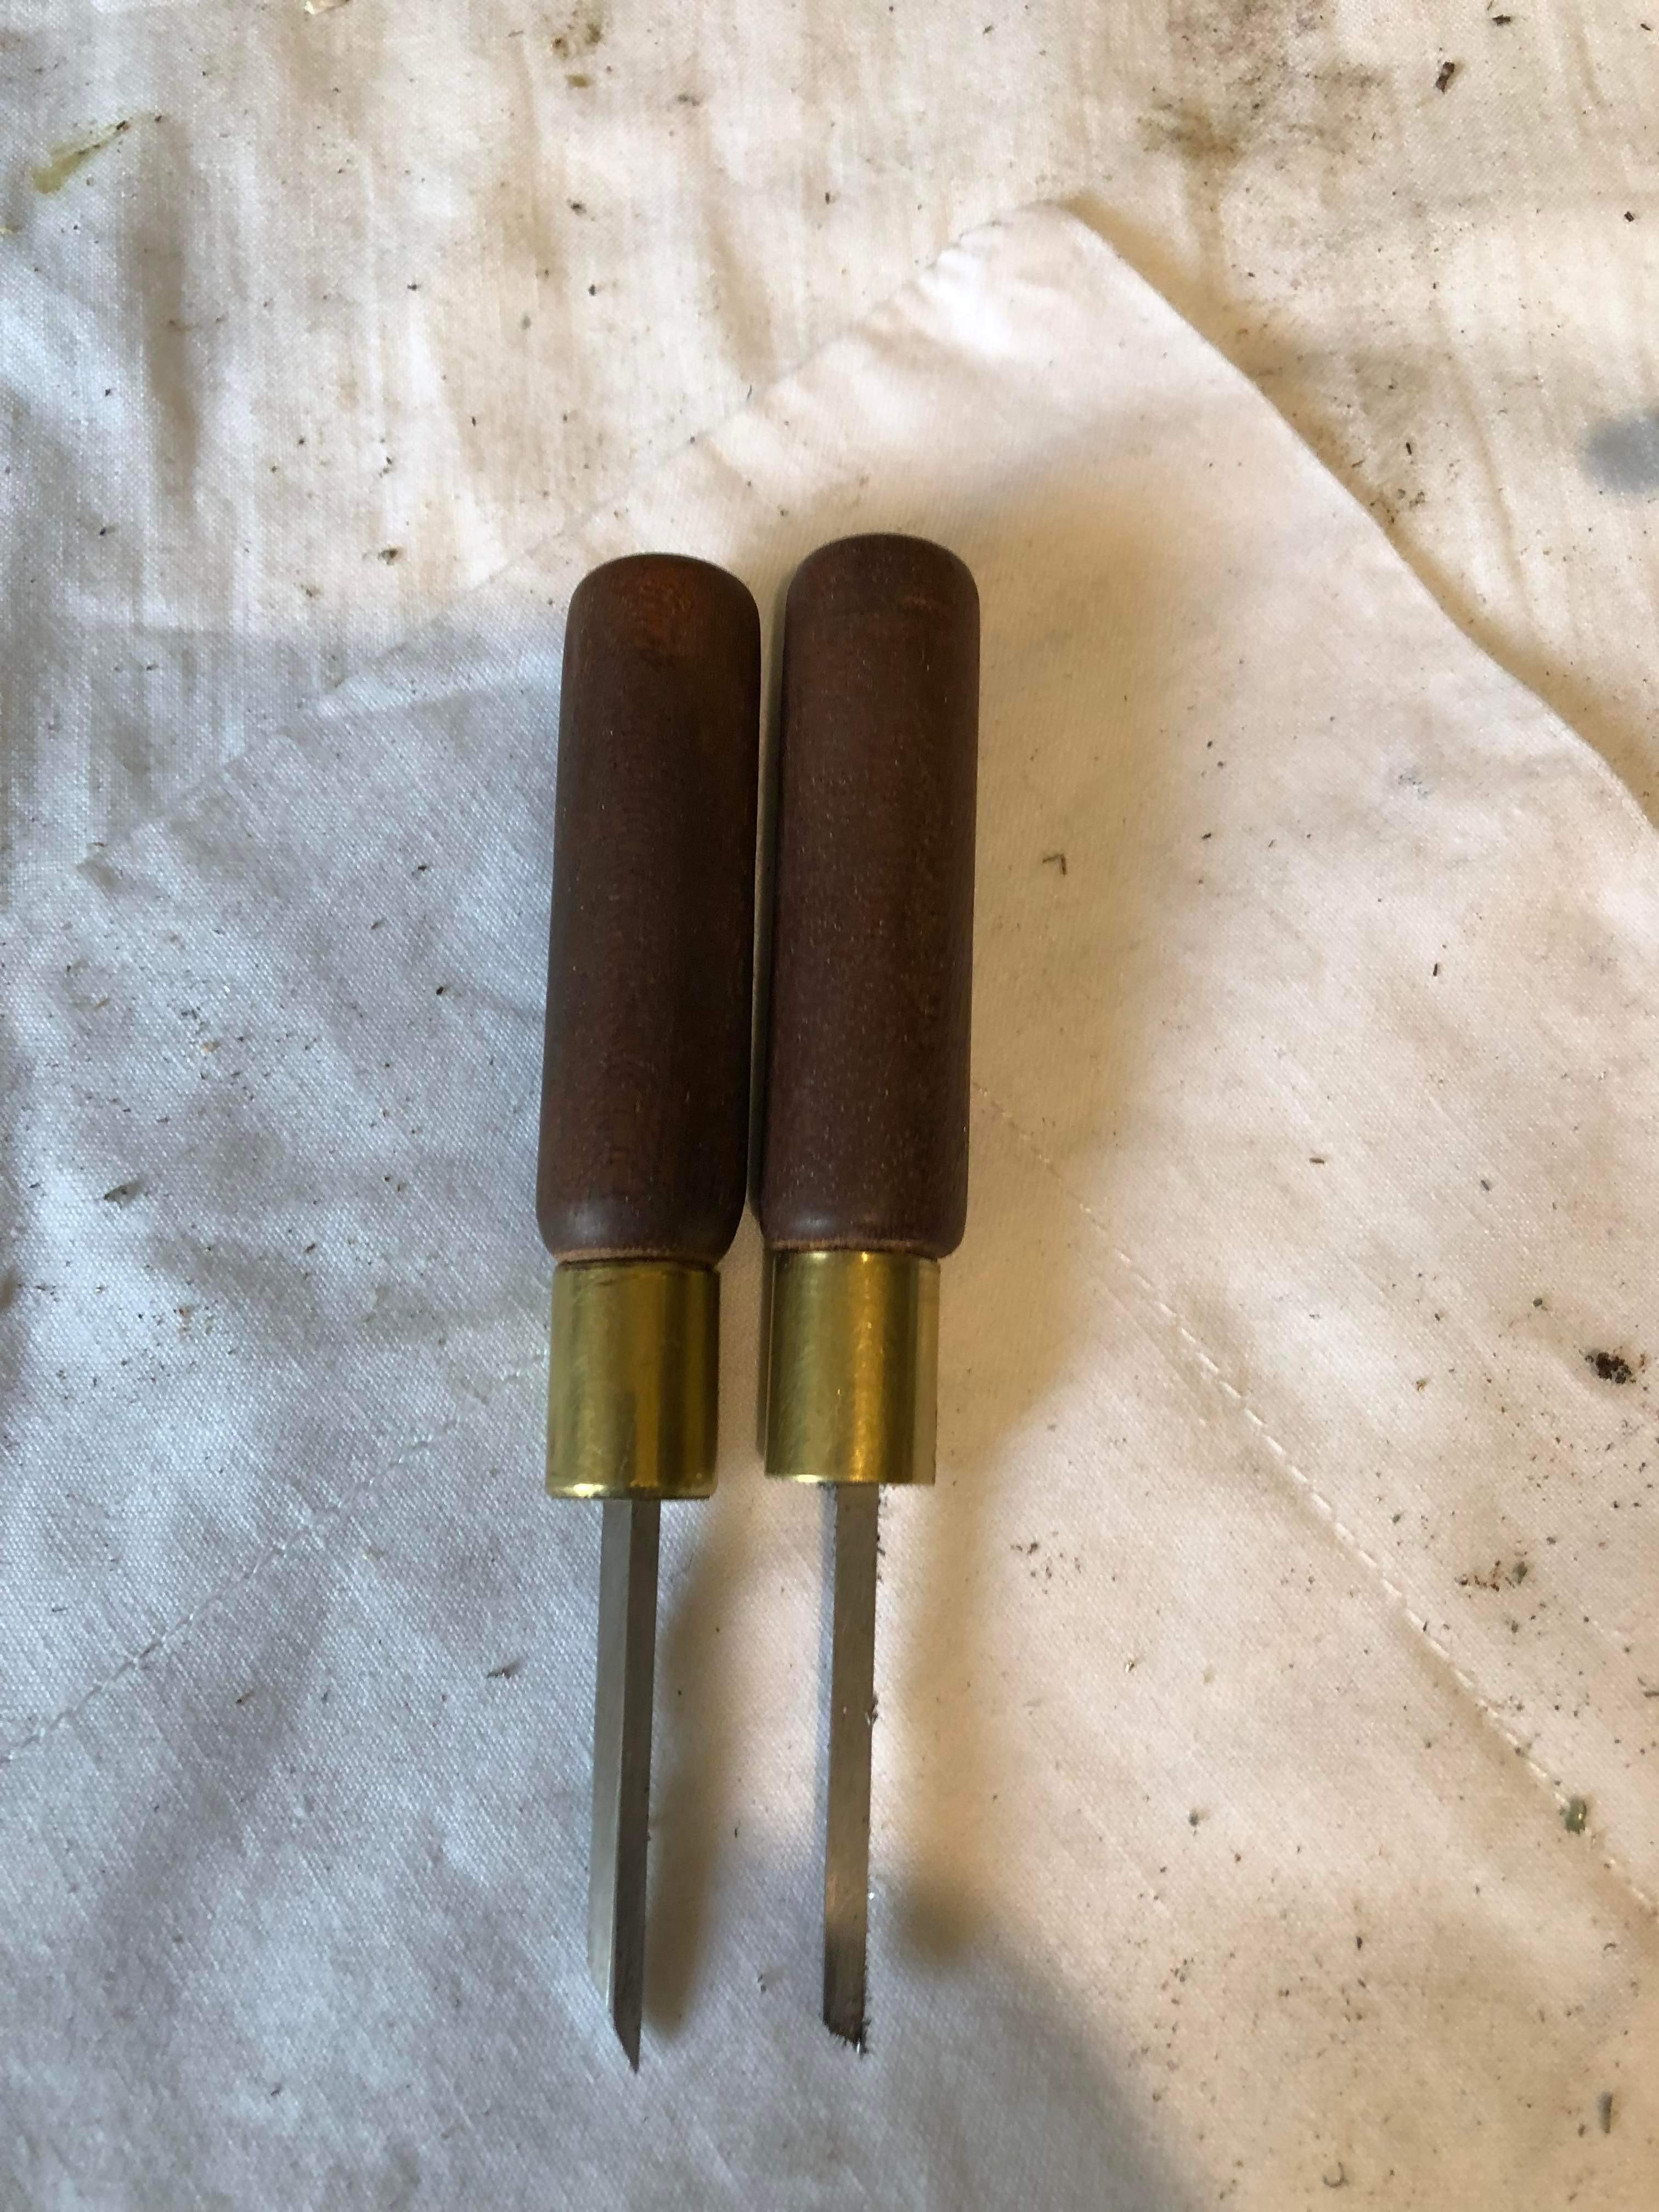
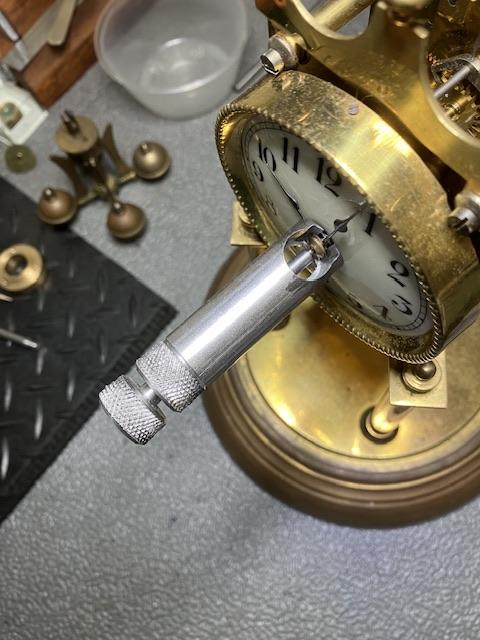
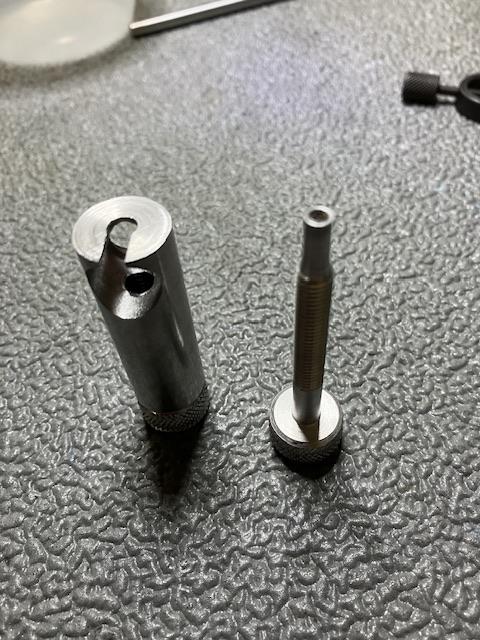
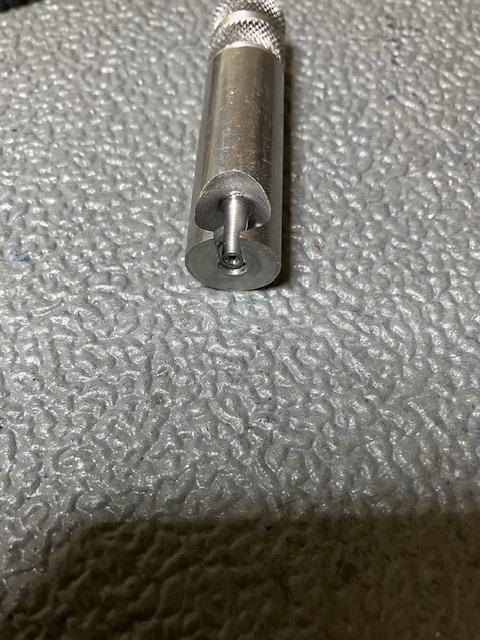
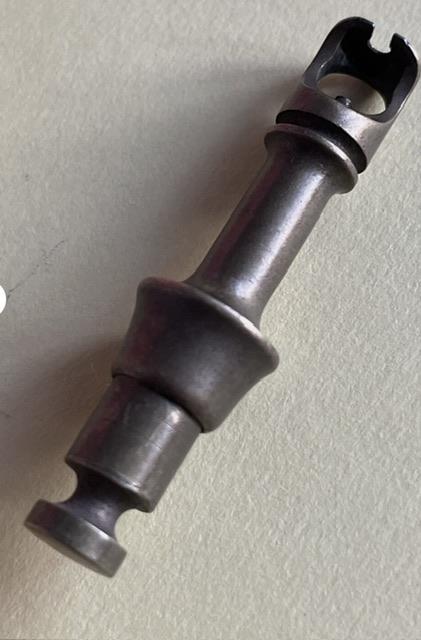
Wasn’t sure where to put this but Because of the problem I have with my hands ( gout in both )I have trouble holding things especially torsion clock hands to remove them, I have tried the usual tools but not impressed with them but to be fair one was for watch hands anyway I see an antique one on eBay so put a bid on it needless to say I was out bid but decided I could make something similar and I must say it works a treat, I decided to thread my one but it looks like the one on eBay was a push operation . Dell

 3 points
 -
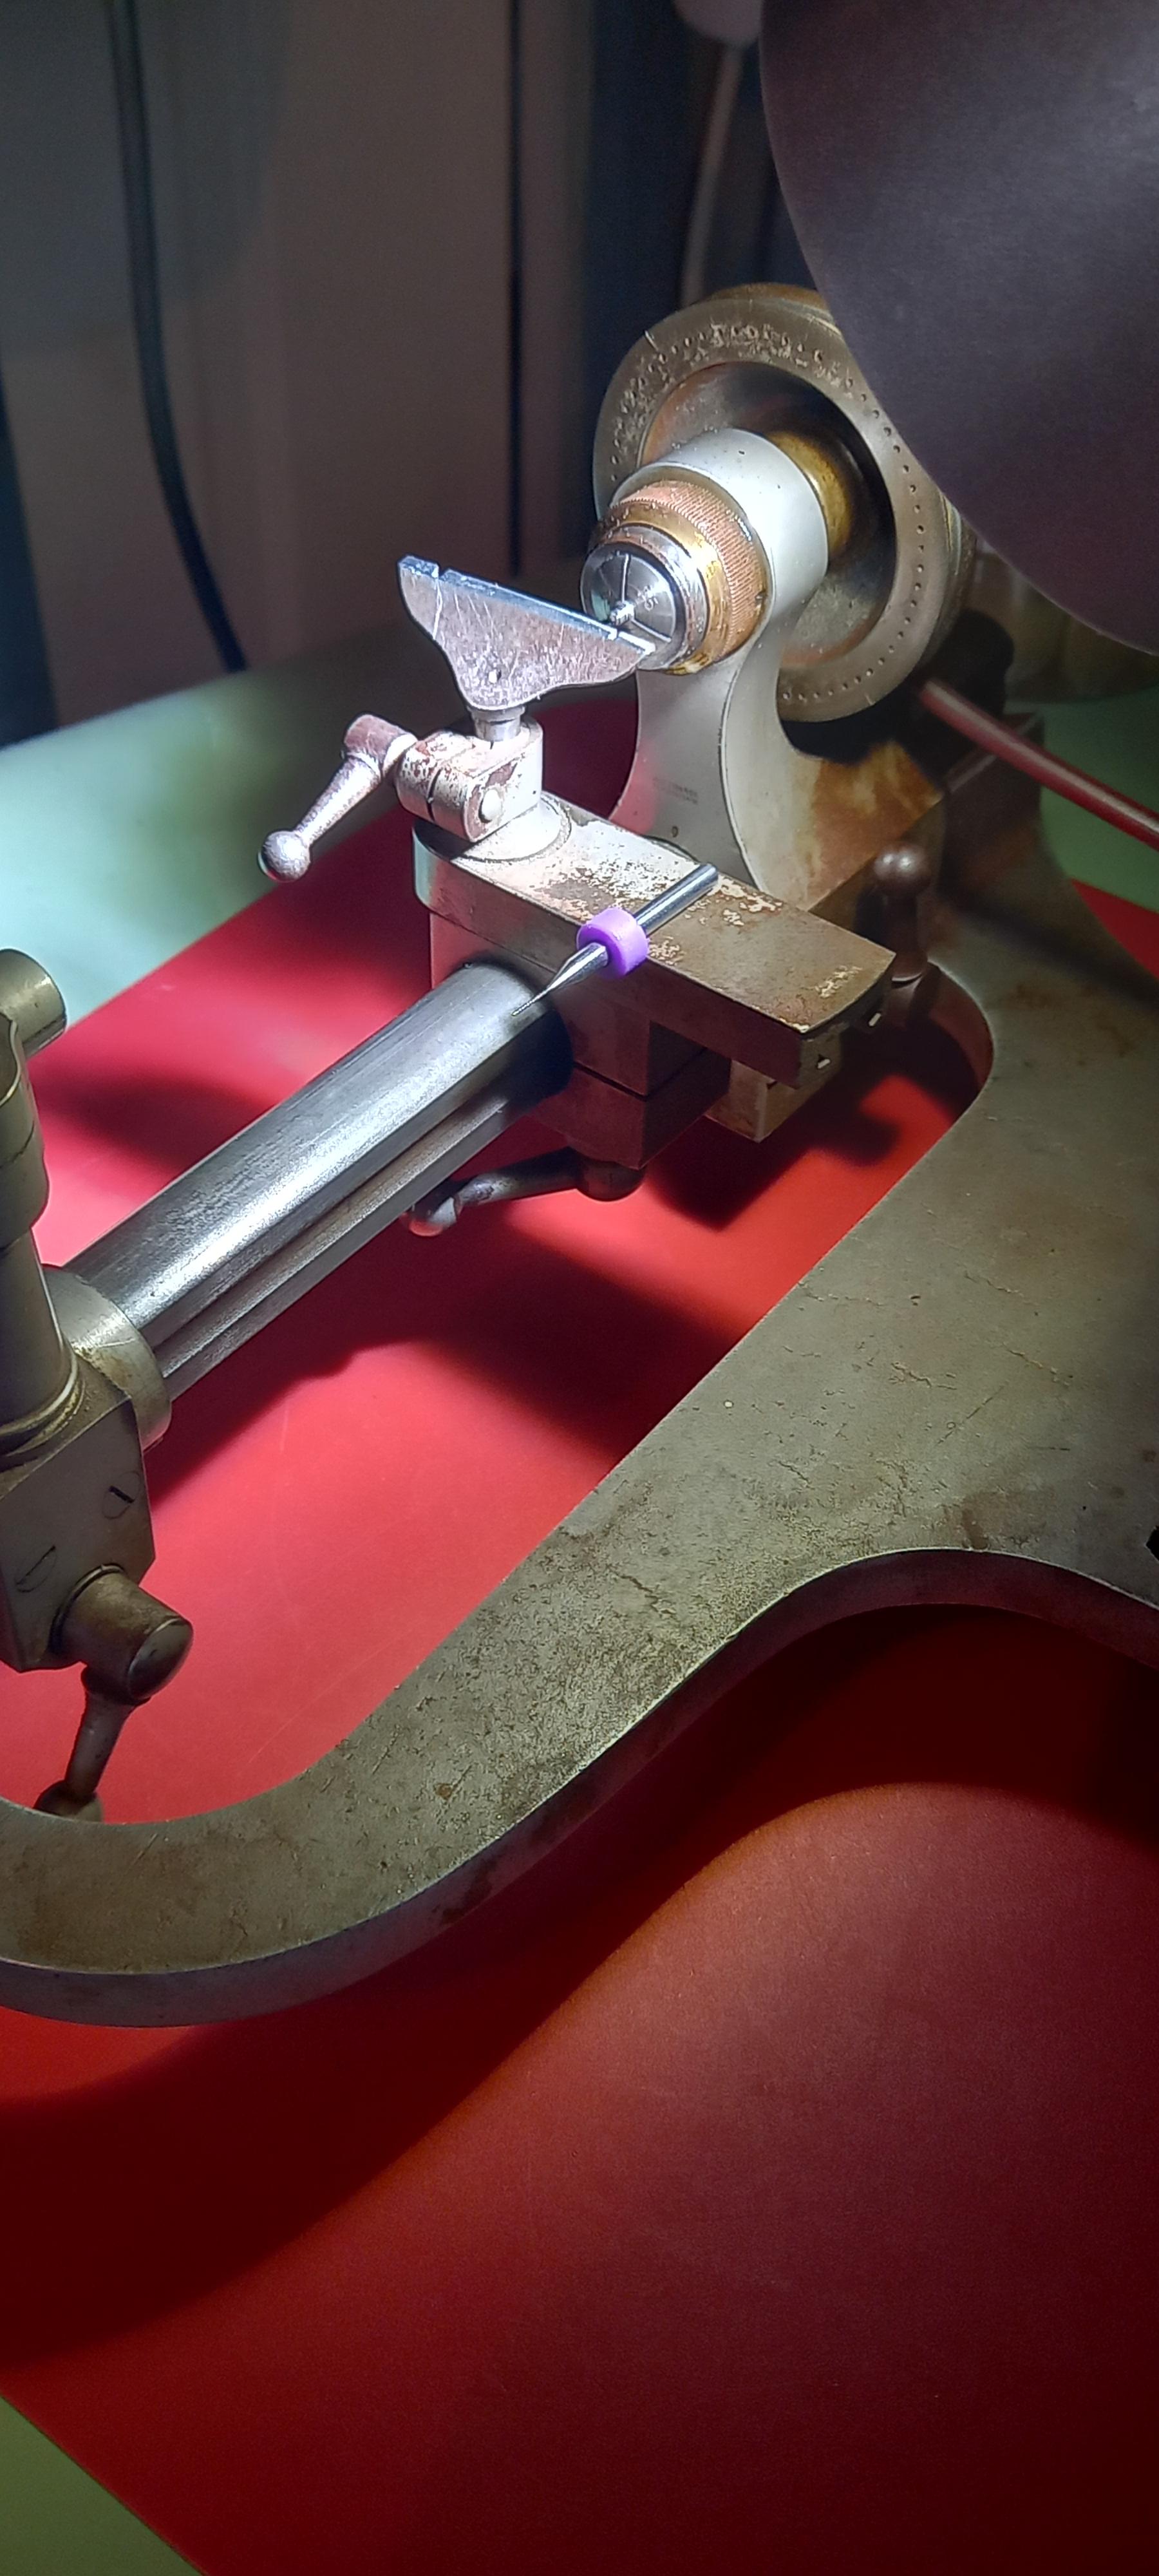
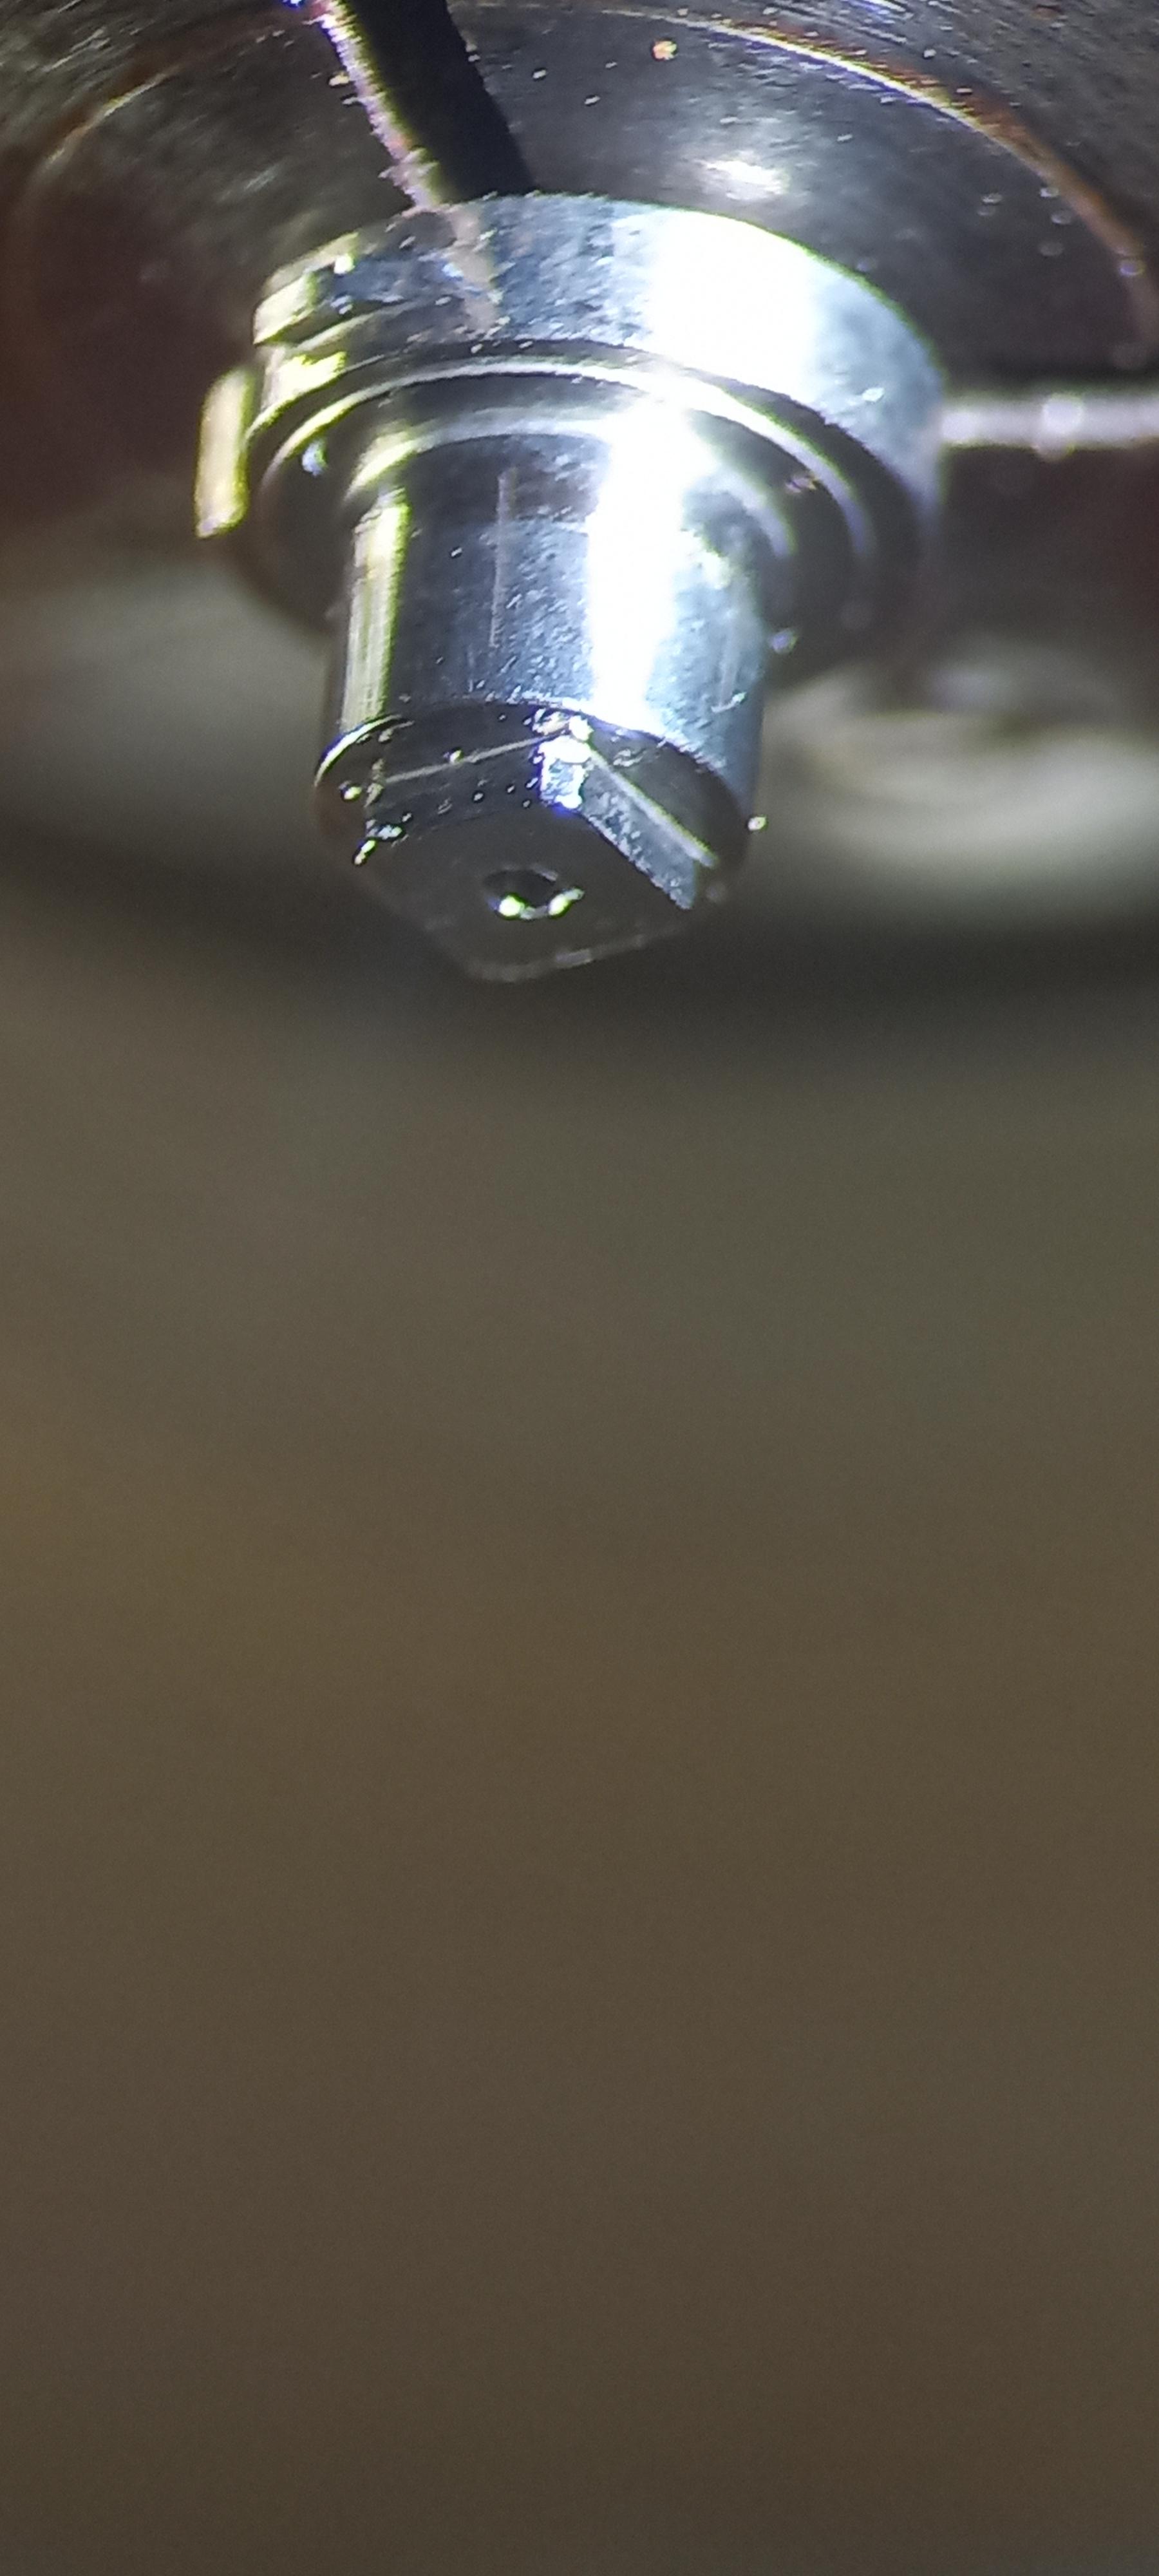
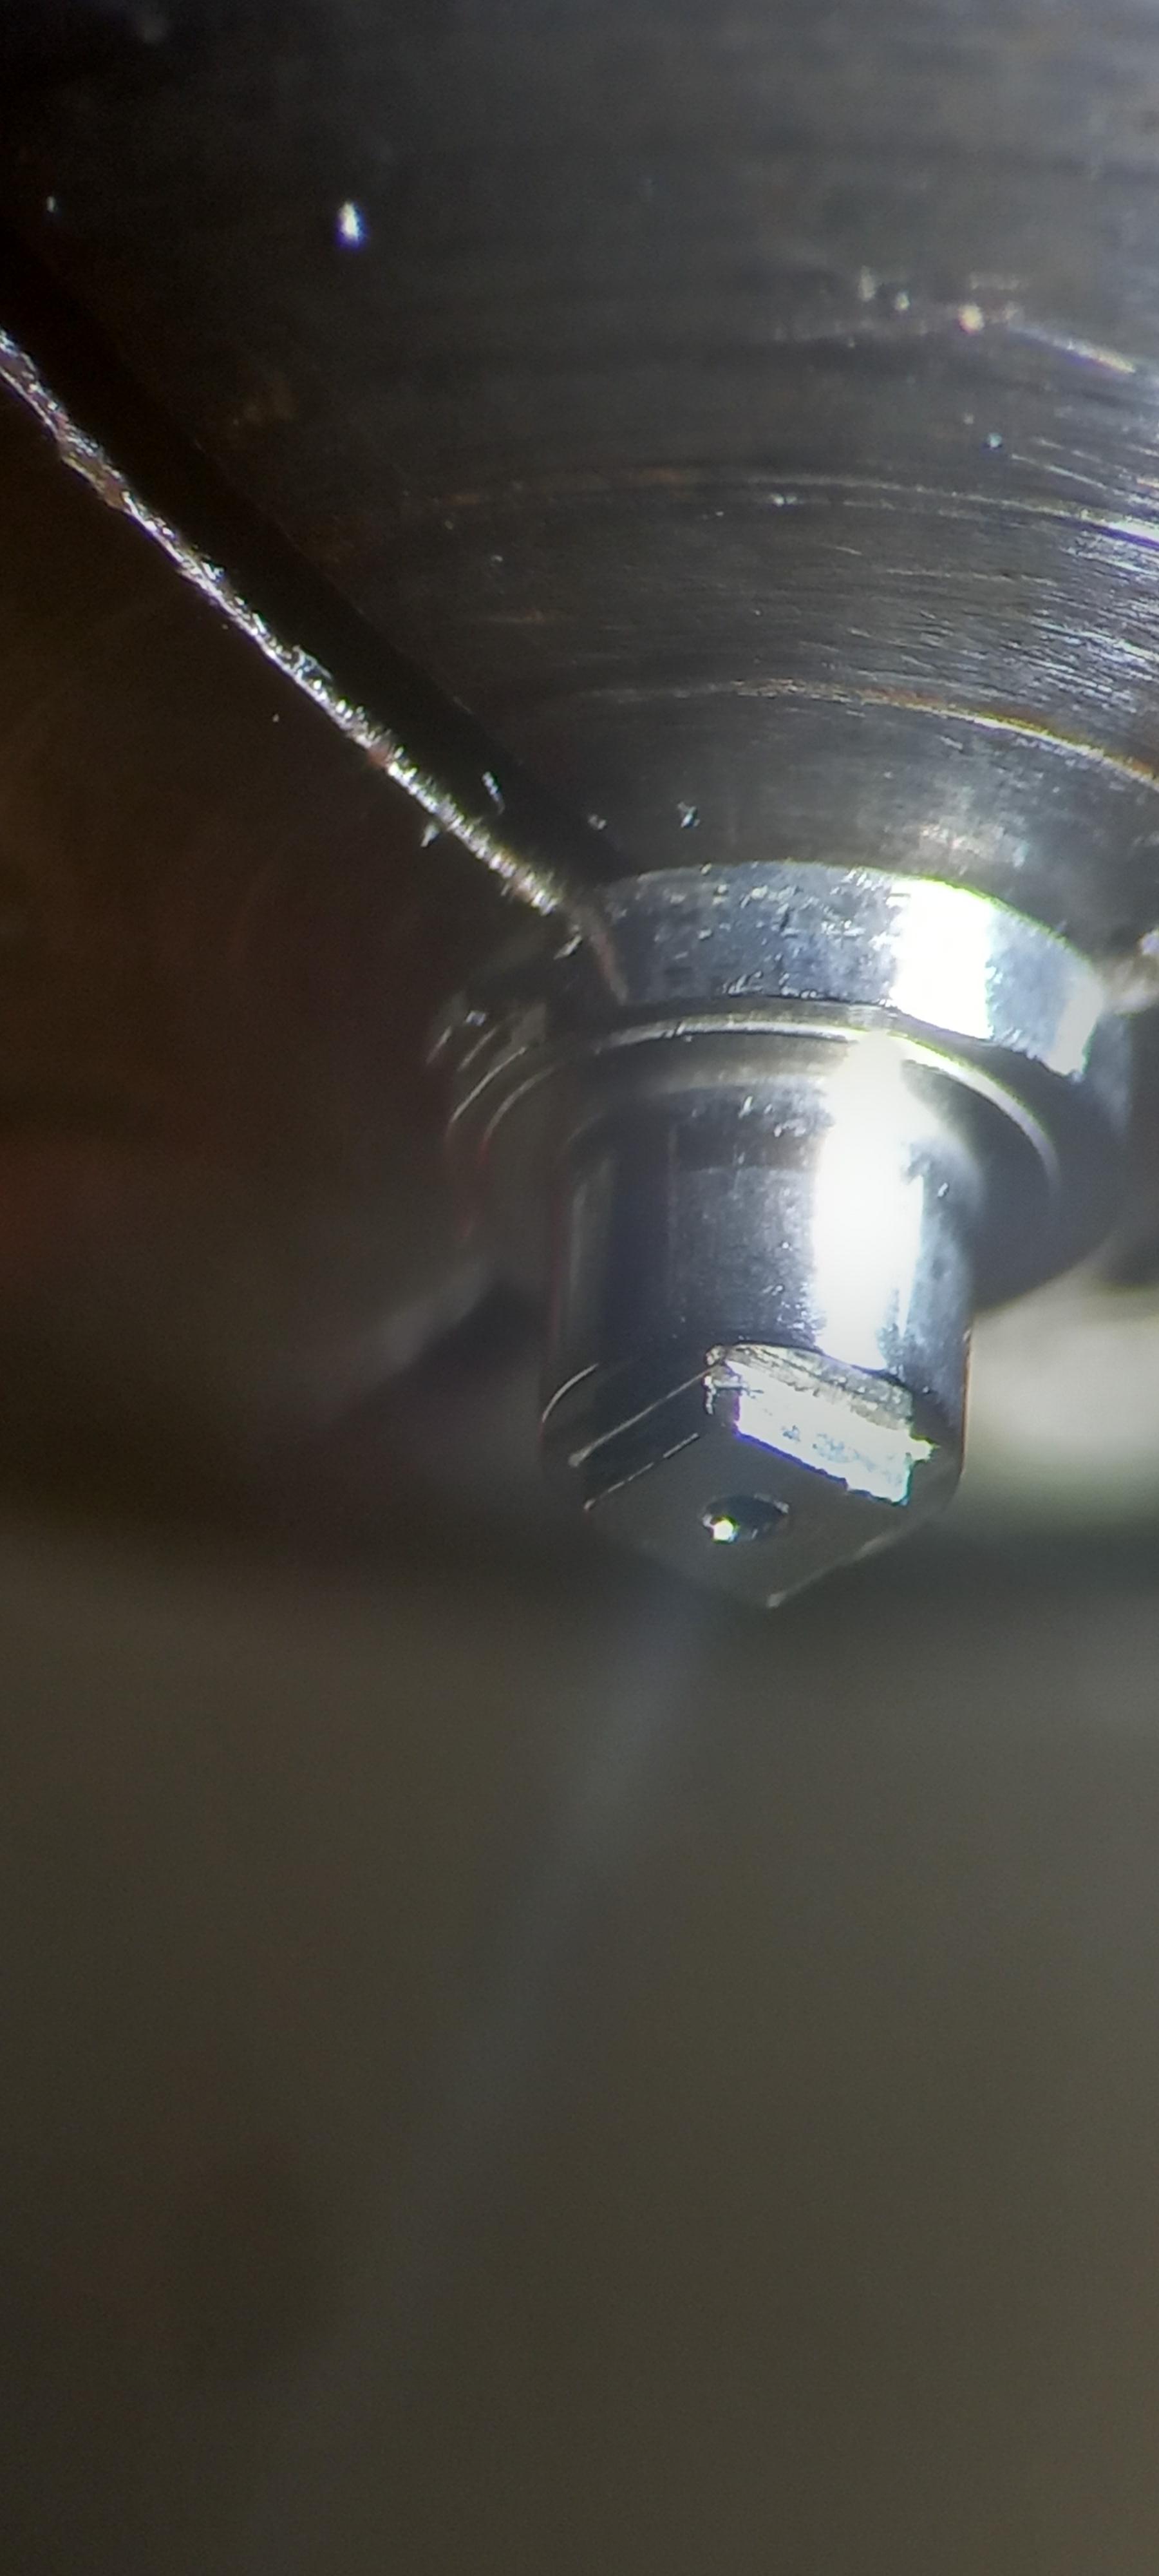
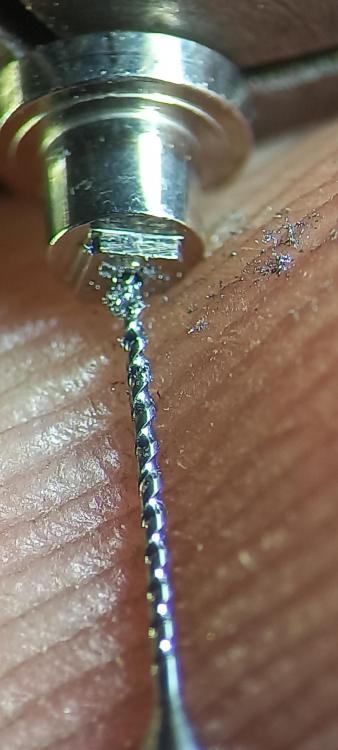
0.3mm hole drilled which was surprisingly easy and went a whole lot better than i expected considering i did it free hand with a carbide bit in a small pin vice,and no breakages. I only have some 0.34mm and 0.5mm blue steel so my plan is to open up the hole to 0.5mm and reduce the pivot down to size to fit the plate bearing before fitting it in the arbor. I'm not entirely sure on the hole depth, my head is tell me 3x the hole diameter . I dont have a 0.4 mm Nev or i would have. Turn a new arbor me thinks you overestimate my ability Nev Only Nev knows that secret Rich, The only thing i know is i wont be doing it !!


 3 points
 -
I made my own because most people’s hands are different so making your own means you get the most comfortable fit , just hardwood dowling brass tube and a length of HSS. Dell
 3 points
 -
I think Bergeon says Fixodrop will stick around for a few cleanings; that may have been the case with the old formulation, but it seems to disappear when I clean them. I use Greiner cleaning solutions, which seem quite similar to L&R 111 and their rinse. So I re-apply.3 points
-
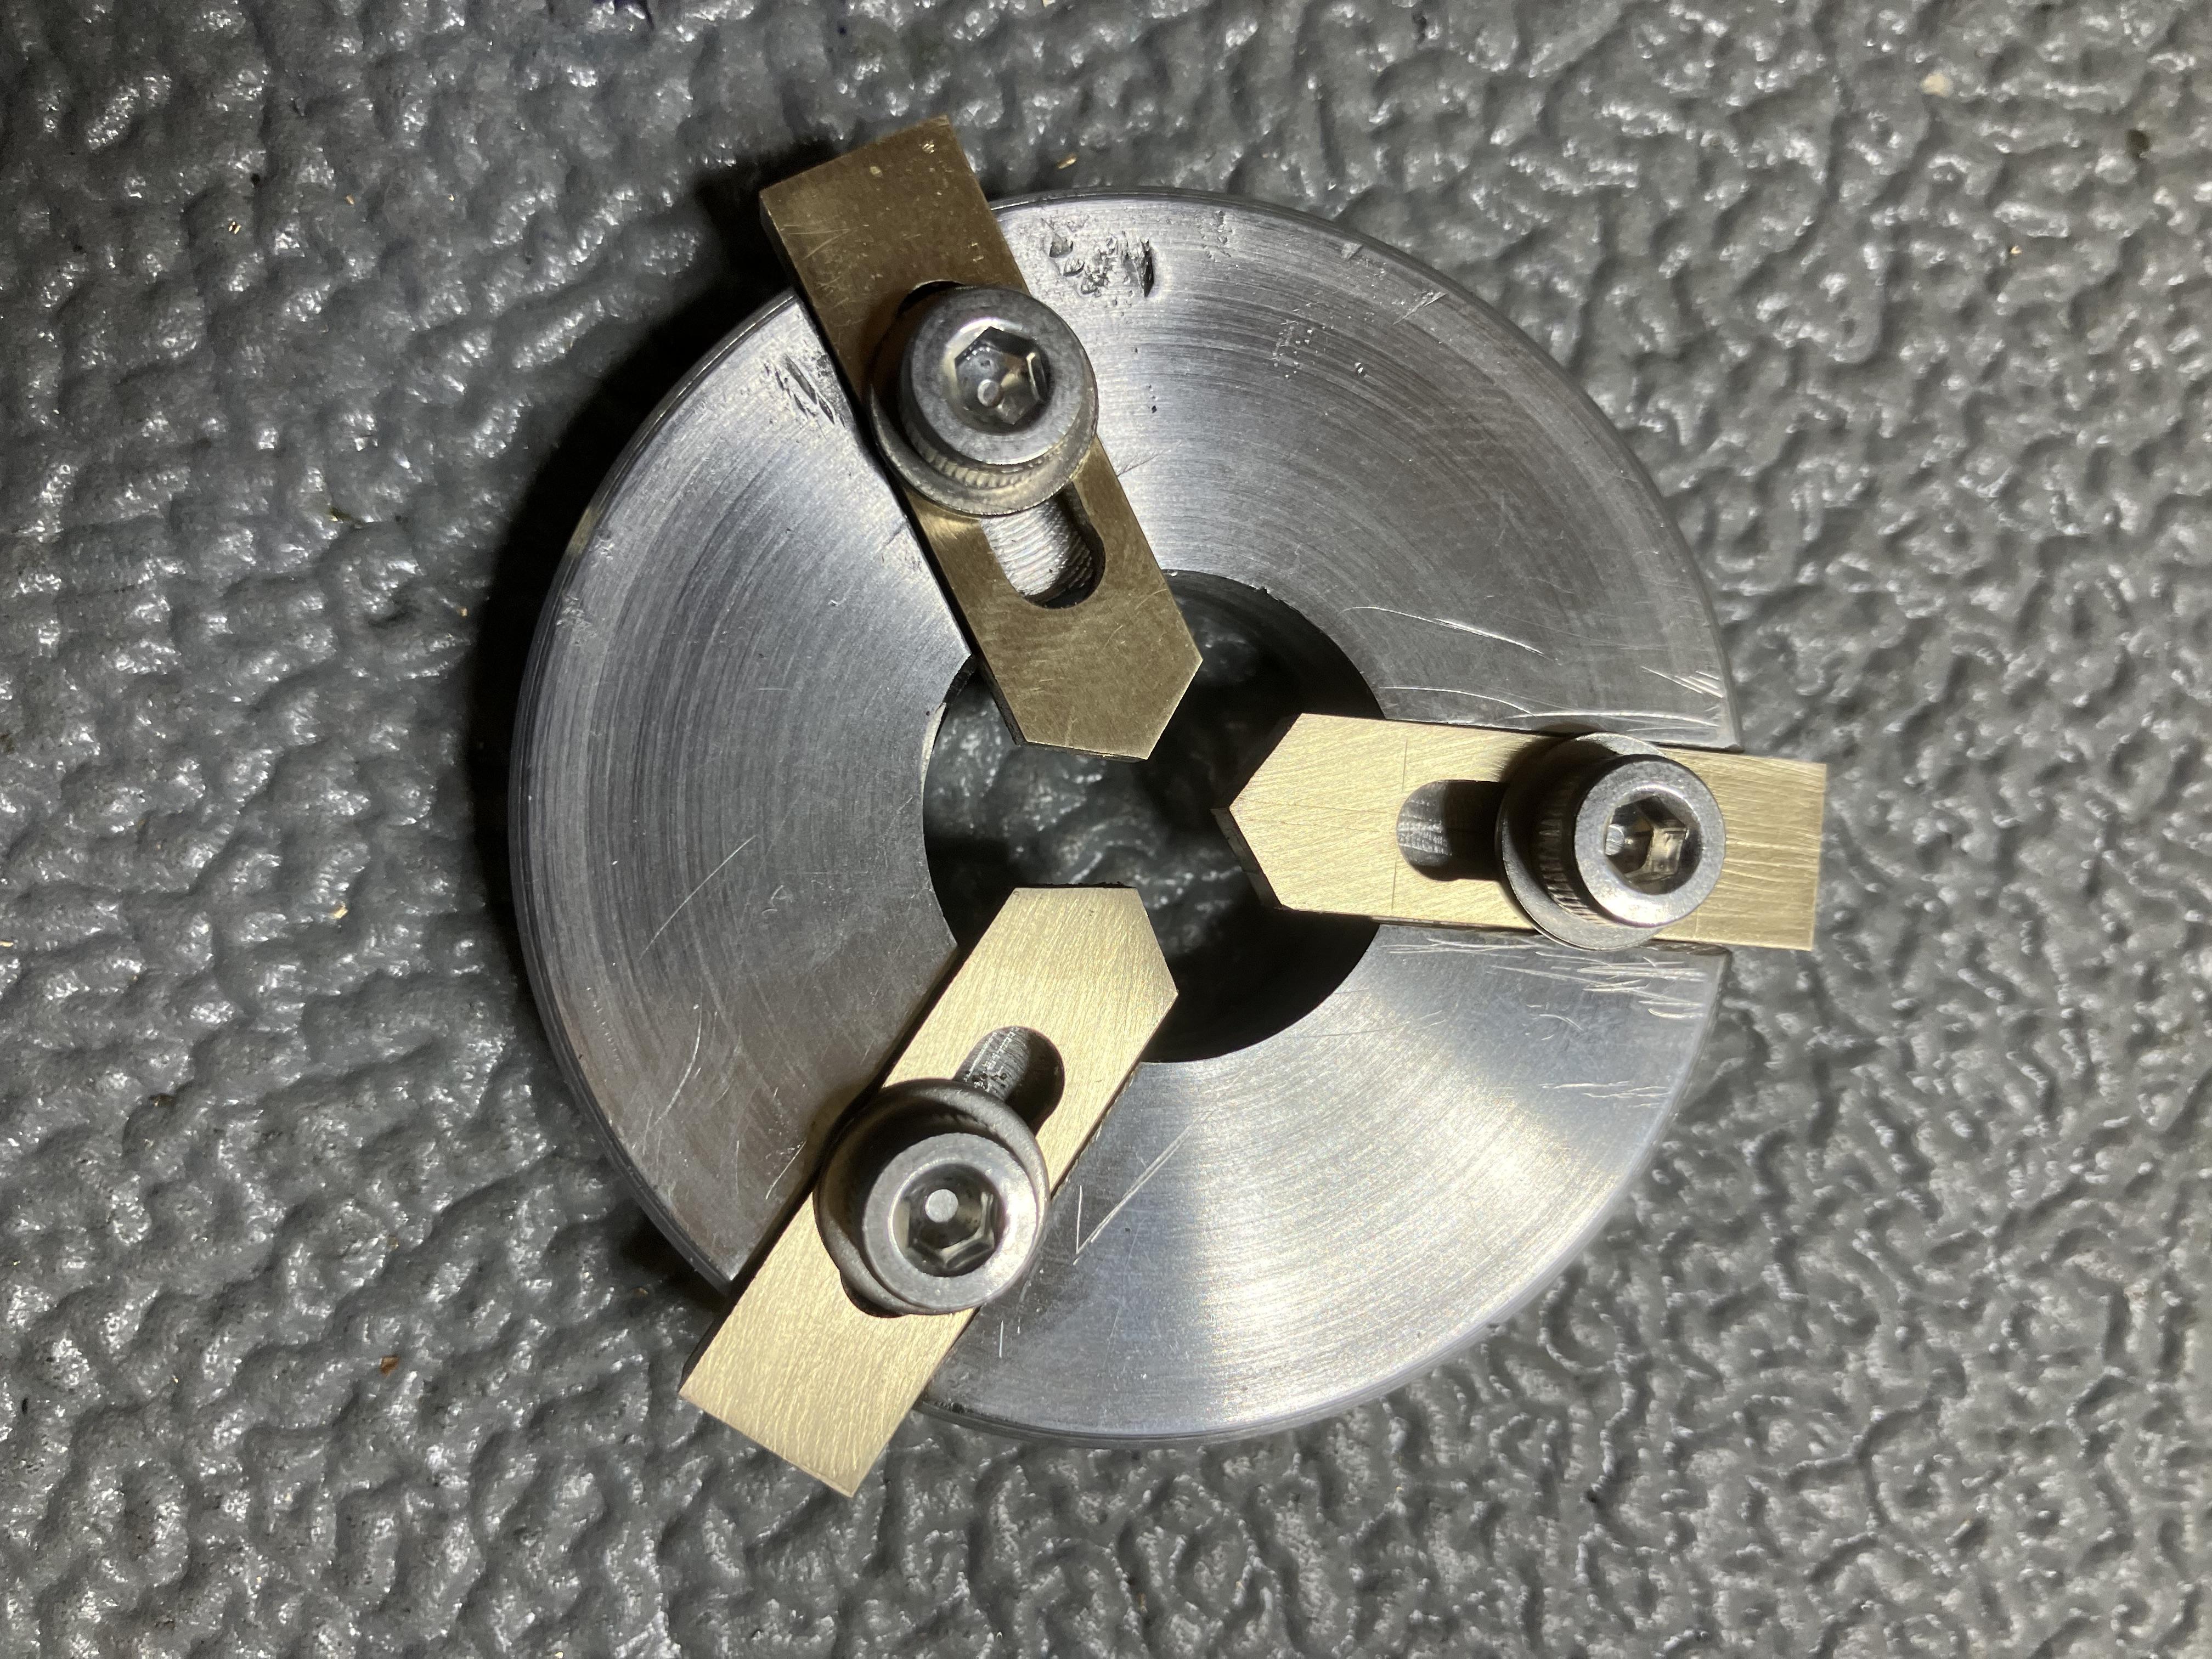
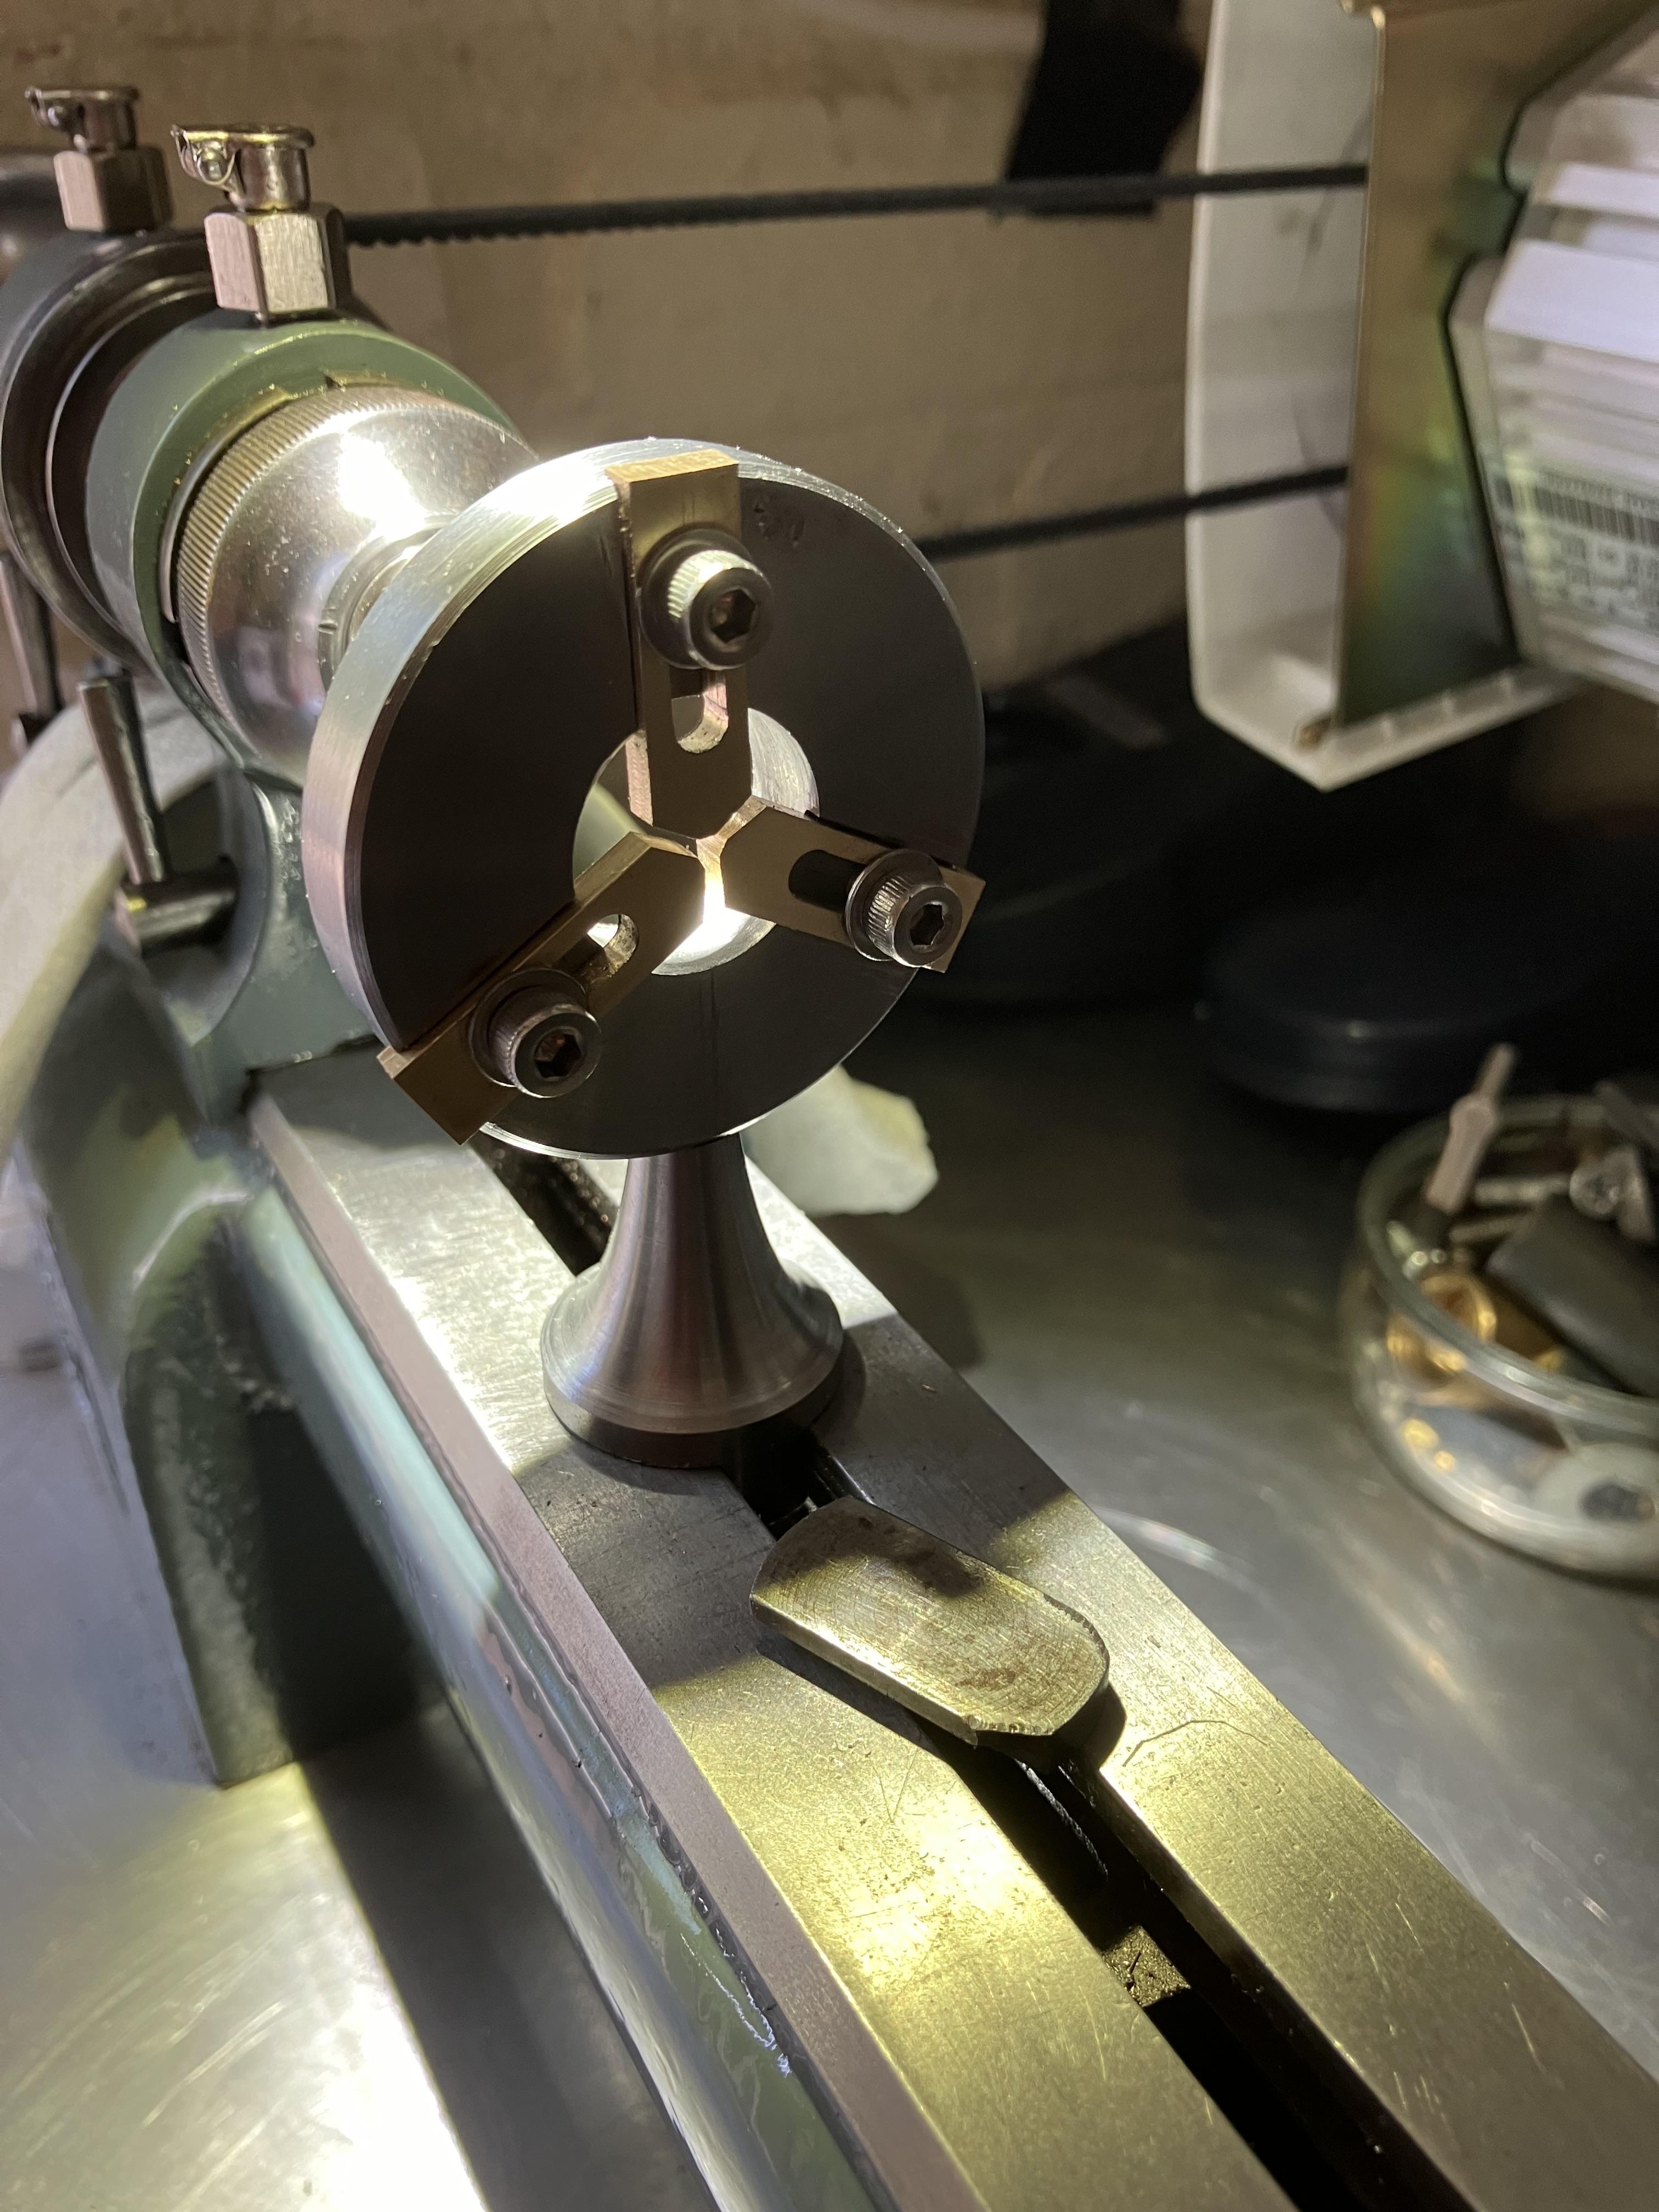
Thanks yes it’s nice to make tools and equipment if we can , I needed a fixed steady for my Pultra I had one for a Pultra with 70mm centre and I was going to cut it down to be able to use it on my P type ( 50mm centre) but it seemed a shame to butcher such a rare item so made one. Dell
 2 points
 -
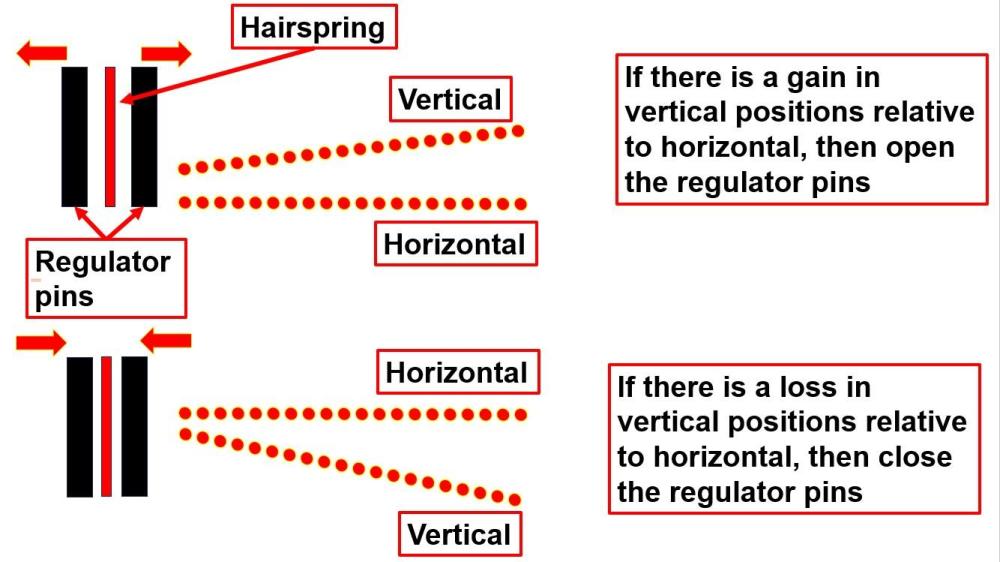
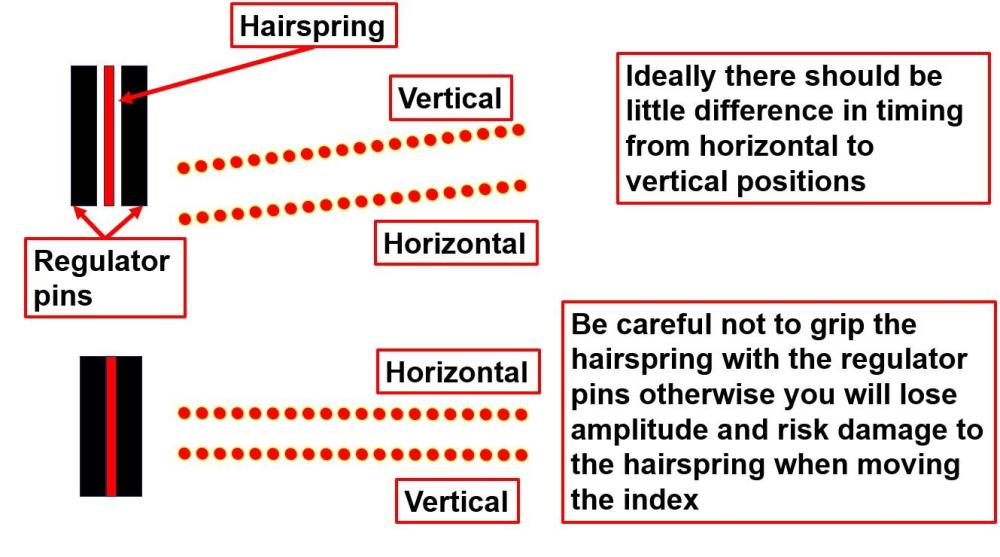
If the coils of the hairspring are equidistance from each other and the end-curve is perfectly formed, so the regulator pins (curbpin and boot) don't push or pull the hairspring regardless of where the index is at the extreme of '+' or '-' and the balance is poised (consistent + or - timing in vertical positions) then it may be the gap between the regulator pins. These slides may help explain which way to open or close them. This is why an EtaChron system works so well, as you can set where you want the hairspring to exactly be and set perfectly distanced regulator pins every time!
 2 points
 -
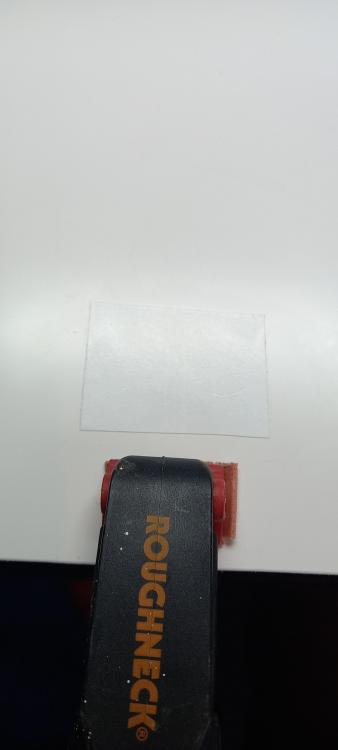
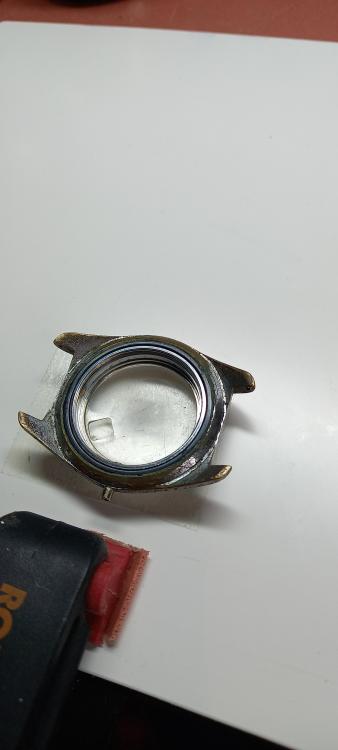
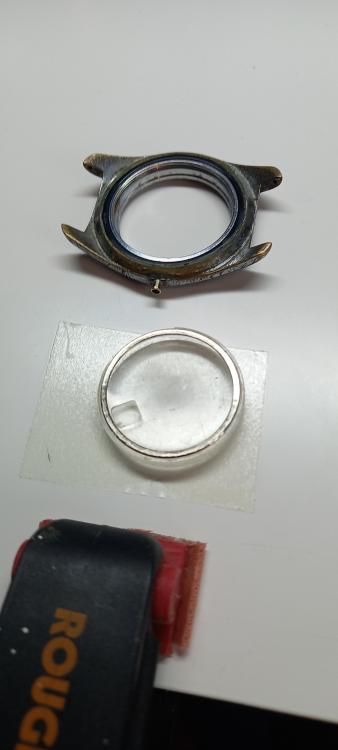
They do exist, i had a Lucerne front access a couple of years ago that had a false looking screw down case. At this stage if you are positive that the case and back are in one piece and the split stem is unsure then start thinking about pulling off that crystal. If its waterproof then it should have an armoured ring but in any case there is some good height on the sides to try a crystal lift tool. If it wont budge then some double sided tape stuck to your bench , place the watch face down and let the tape set for an hour before pulling up. If the crystal has a distinct dome to it look for a good matching surface to press into to get a positive seating for a good adhesive contact. I have even had a small suction cup pull off a crystal before.
 2 points
 -
If it's a push on back then it could have a notch in it for the stem which would mean the wording position would stay the same across all watches no matter how many times the back was removed. I've never seen a watch of this era, even a front loader, that doesn't have a removable back.2 points
-
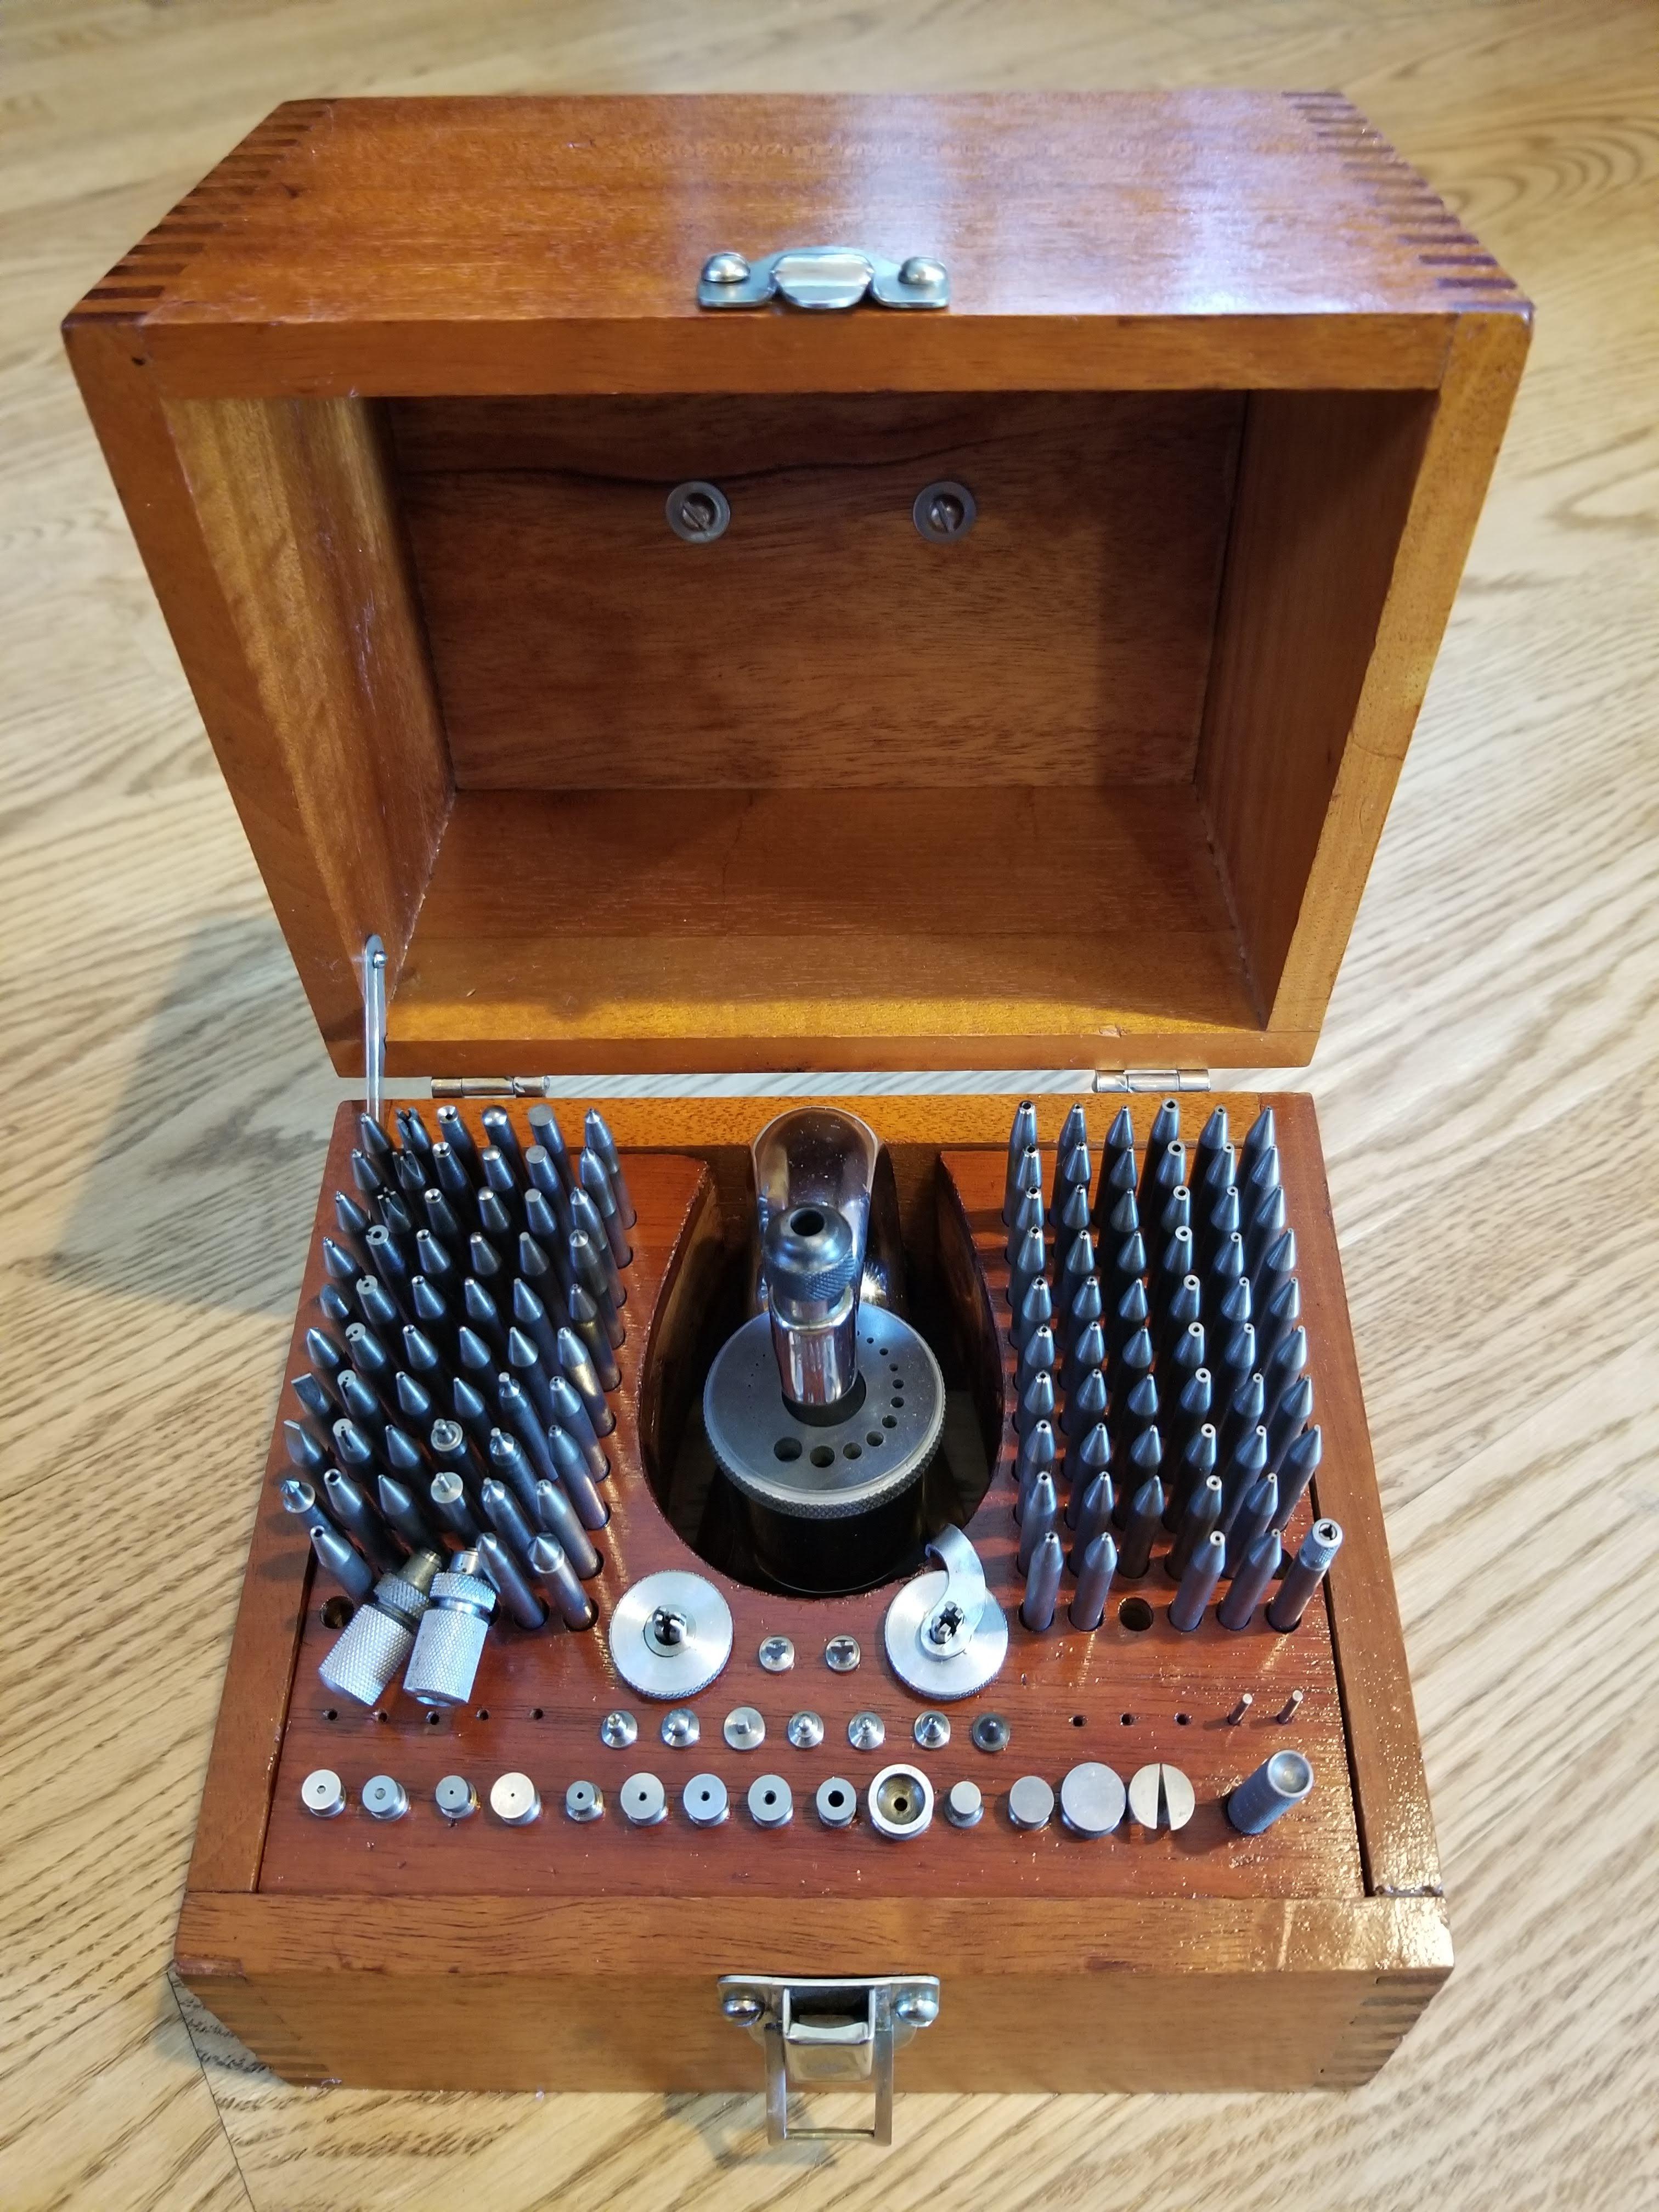
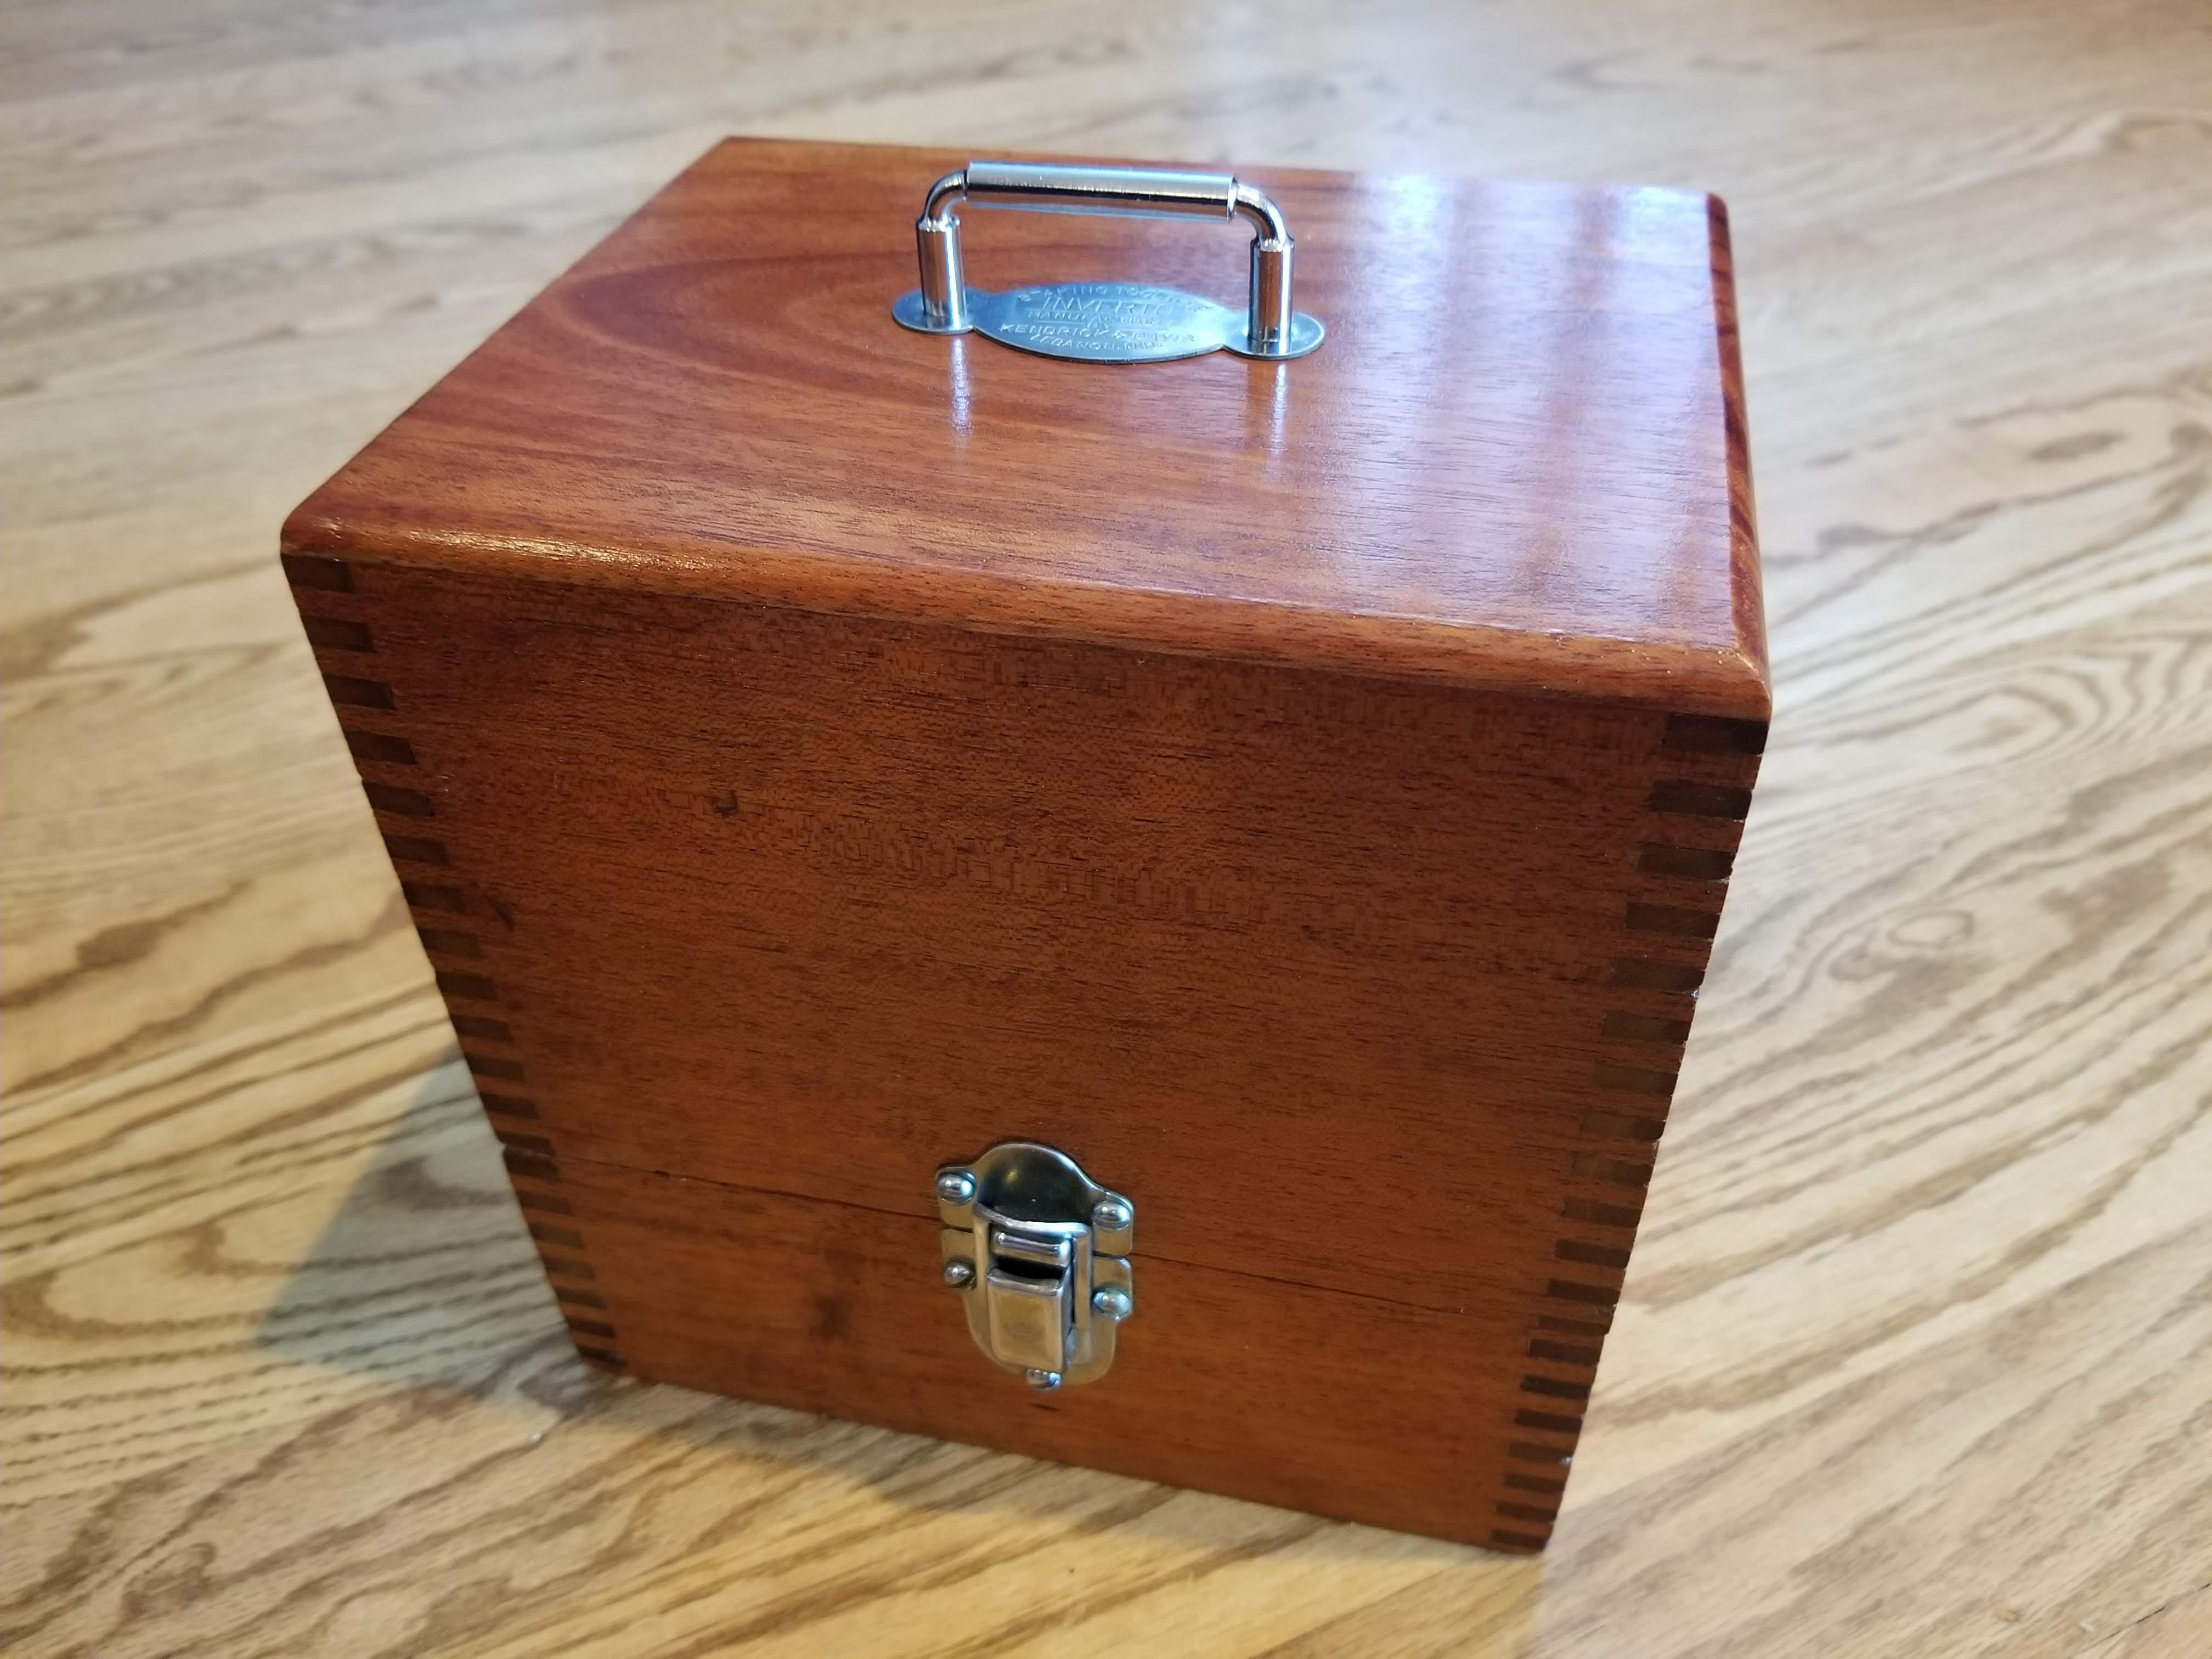
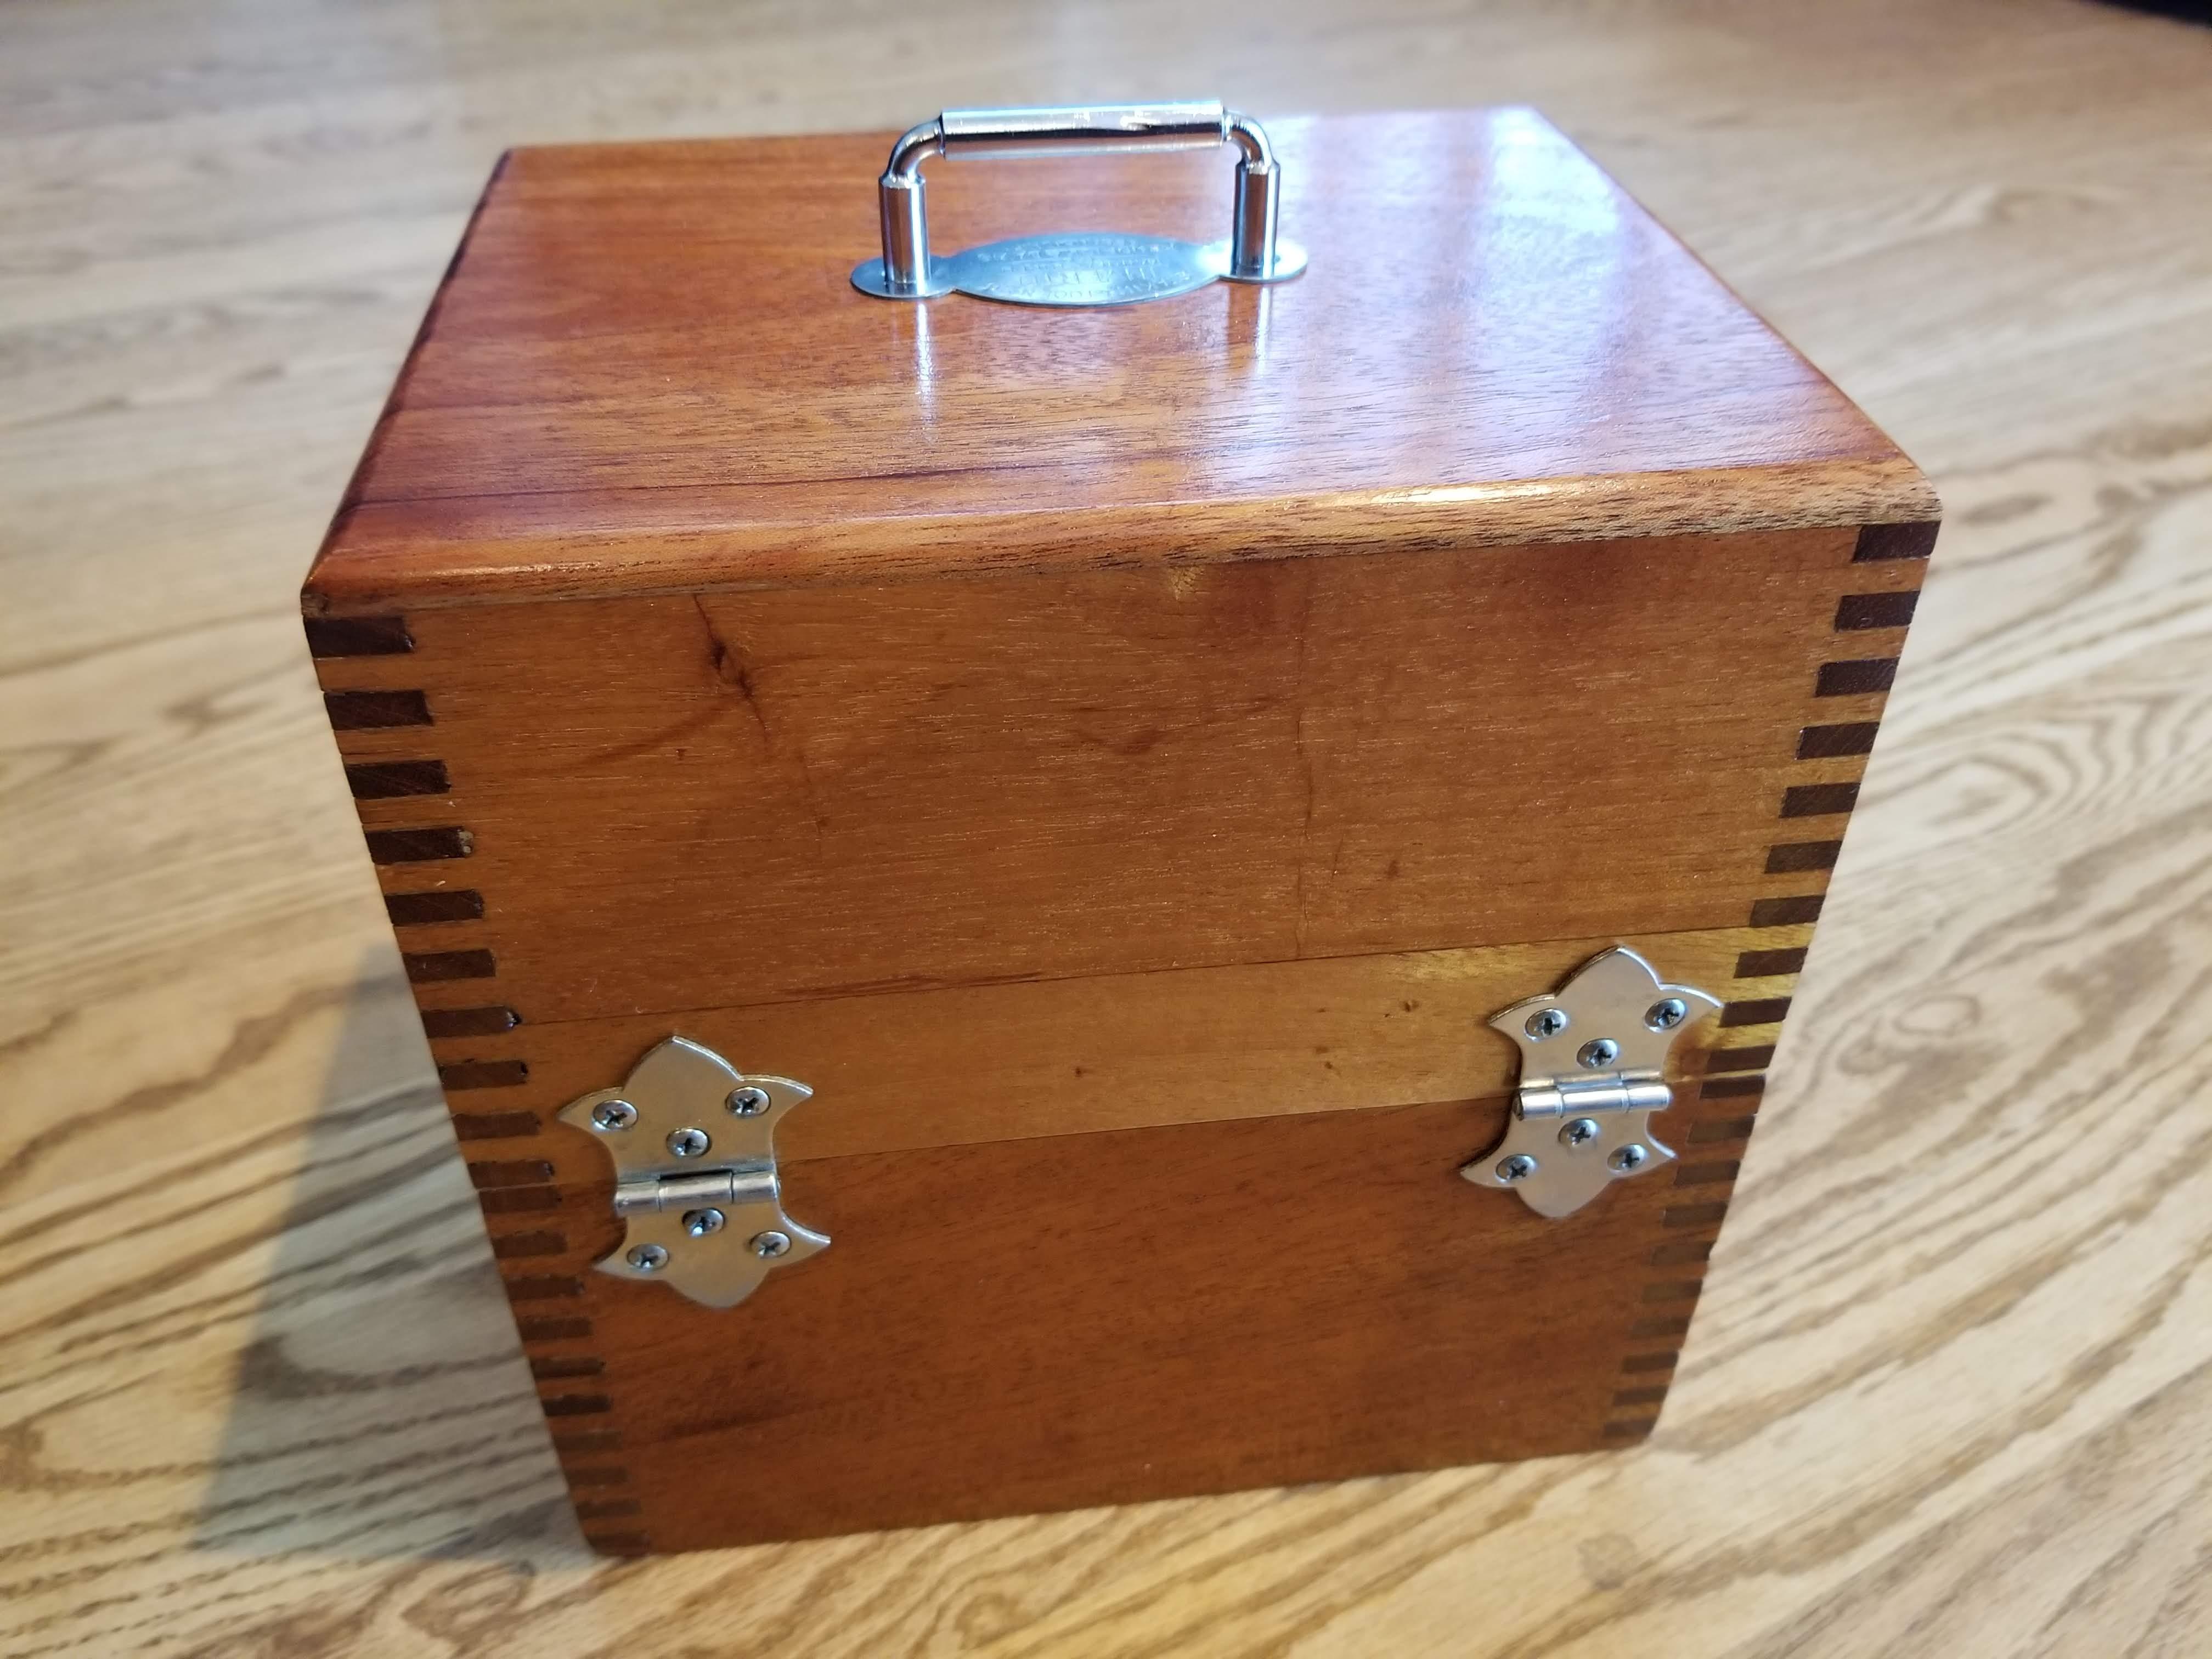
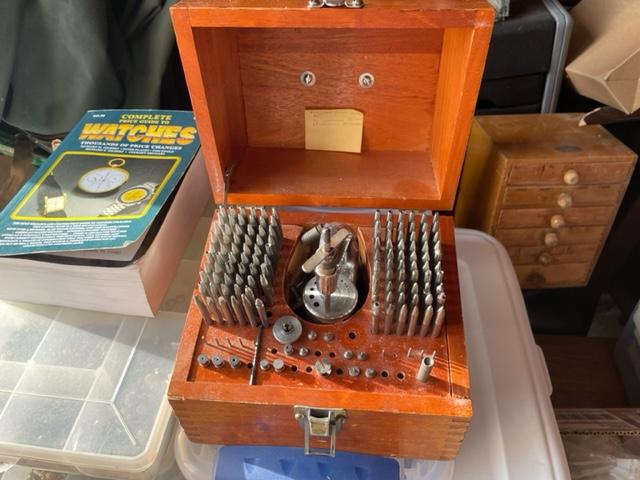
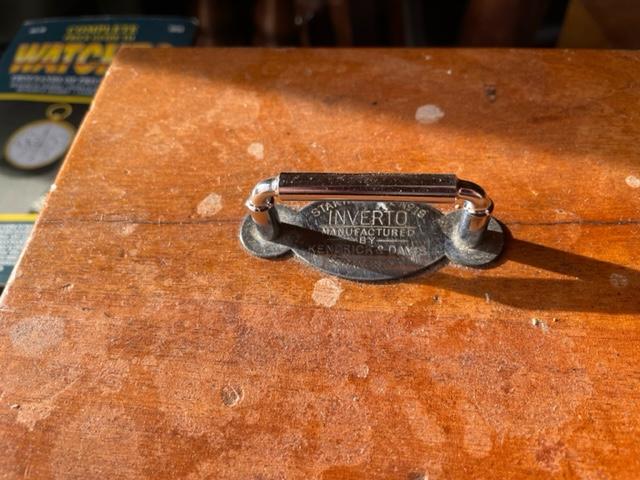
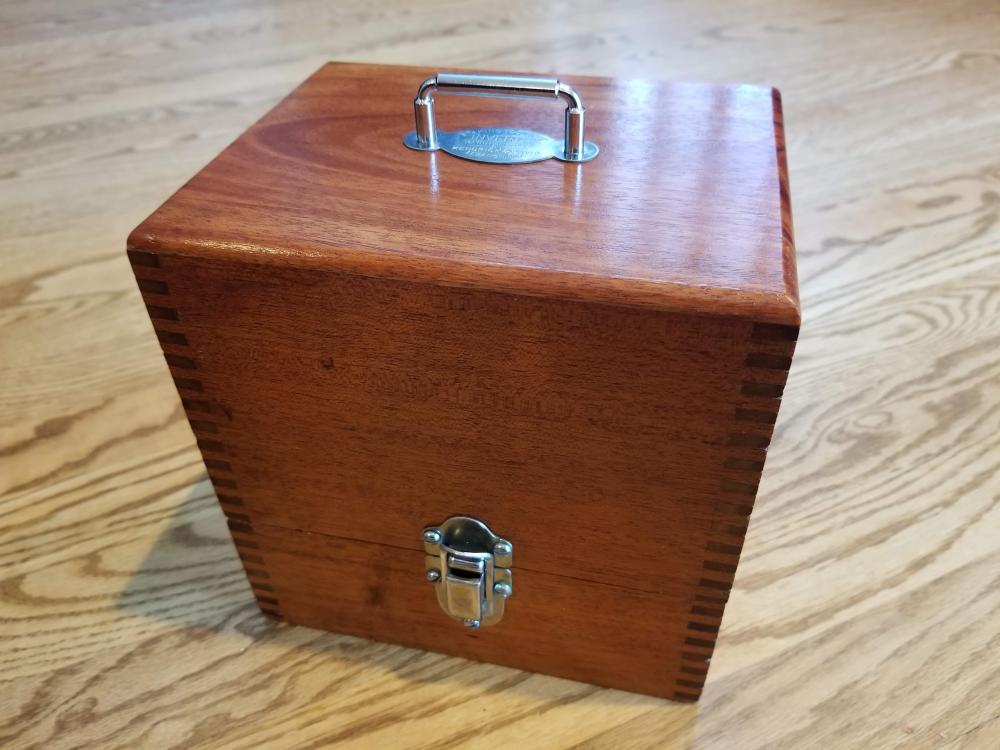
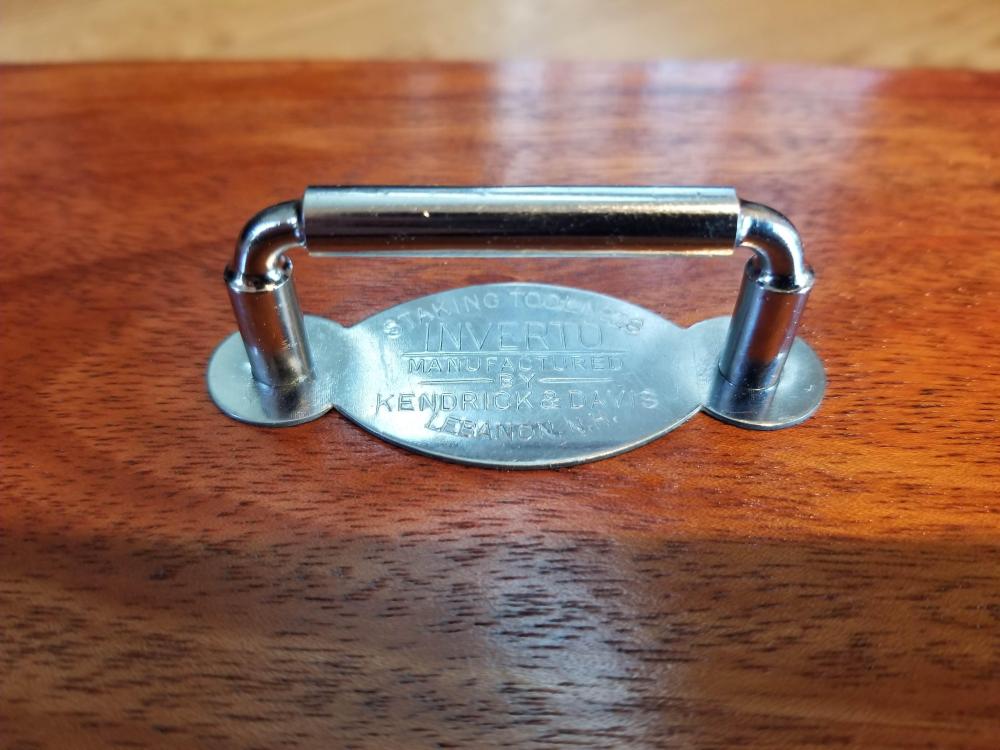
Several months back I came across this K&D 600 Series staking set from an old jewelry store that no longer services watches. I finally got around to restoring it. The case top had a crack running through it, by the handle. I cut that part off and replaced it with a new piece of mahogany. Sanded and stained the wood. Cleaned up the hardware. De-rusted all of the stakes, stumps, etc. and cleaned and lightly oiled them. Disassembled the frame to clean, lubricated and re-blued some of the parts. It turned out better than I expected.


 1 point
 -
Never. Brilliant work and photographs. Thank you. On my very first watch I knackered the arbour. I think the screw I put in was the crown screw. I didn't know about left handed screws then. Head sheared off. Thread broken just below surface. If I had the space, then a lathe would be my wished purchase. 2 1/2 years later and I still get the arbour out now and again and...... I can dream. It's a lovely pocket watch. Ah well.1 point
-
Don't give up. You just need patience and practice. Don't use force or try to screw down the plate before making sure everything is in place. My first few watches took me like 45 minutes to get the train wheels in. Now it usually takes me less than a minute. Make sure that all the bottom pivots are in their respective holes before putting on the top plate. Then apply gentle pressure with a pegwood or gloved finger. Start from the barrel, 2nd wheel, 3rd wheel.... and finally the escape wheel. You can feel the plate drop each time you get a pivot in. If you experience the pivots that you have already gotten in coming out of their holes when you work on other wheels down line, you can put 1 or 2 screws nearer the barrel side in but don't exert any force on the screws. Just lightly turn the screws until you feel pressure and backoff 1/4 turn. This will prevent the plates from separating. I use a homemade tool with a brass wire, shaped like an oiler to lightly touch the wheels to guide them into place. I find that an oiler made of hardened steel can leave scratches on the brass wheels. Once you think you have gotten all the pivots in, test it by using a blower to blow on the escape wheel. It should spin freely. Continue applying pressure on the top plate with the pegwood or finger until you lightly tighten all the screws. Don't tighten fully yet until you reconfirm that the wheels are able to spin freely. And reconfirm again after you have fully tightened all the screws. What you are experiencing is normal. All of us have gone through it. Don't work on watches when you are tired or frustrated. All of us can tell you what that leads to. But I'm sure you'll experience a few hard lessons even after reading this advice. It's only human. Go forth and practice. Good luck!1 point
-
See, the problem with widening to a little bit wider diam is that the bit will 'grab' too much at a time and will get in too fast by itself, then it will stuck and break imediatey. If enlargening from 0.3 to 0.5 needed, complitelly different drill bit must be made - it must be similar to the ones they use for weapon cannons, with one cutting edge and with angle that will not cut fast. The other option is to enlarge the hole like they do on big lathes with cutter for internal turning, that will be small enough to get in the hole The idea with the plugging could work, but I haven't try it. The pug should be only a little bit softer than the piece and must get in completelly to the botom of the hole.1 point
-
I think that if this is a spring wire like piano string or similar, it will not break and wili be srong enough. What You could do is to drill straight with 0.5 . Then it would be beter, but now it is good enough to do it with 0.3. See, the watchmaking is actually a piece of cake, just some practice and skills to develope needed and to believe in own strenghts1 point
-
I knew you would say that, i was thinking the same , i wasn't particularly happy about opening up the hole. Should have gone with the 0.5mm to start. On the positive side i now know i can drill a hole for a 0.3mm pivot, looking at it through x25 while i was drilling it looked MASSIVE1 point
-
Enlarging the hole is dangerous and it is almost sure that the drill bit will break inside and it will be hard or even impossible to get the broken pieces out. 3X diam is enough. Just prepare the piece that will get in the hole in a manner that it will have 0.3 X10 part that will enter the hole and wide part that will be outside and will be able to turn it tio size.1 point
-
Now don't hurry to enlarge the hole to 0.5. Hope I am not late saying that.1 point
-
As a general point, as you are learning, I would spend some time practicing on shock springs. As a general rule, Incabloc are probably the easiest to deal with as they are anchored and the main risk is removing and replacing the jewel and setting (a jewel picker upper, (a pen like device with gel on the end) or a bit of Rodeo can help here). Springs that are removed entirely, like the one above or the notorious Seiko Diashock are a challenge. What worked for me when I was learning (having pinged a few springs into orbit) was to buy a gash movement, one of those nasty frankenwatch Seiko's are ideal (try and find a 21 jewel as they have diashocks on the bridge too). Then don't try and fix it (you'll go insane) just practice removing and replacing the springs and jewels from the balance and the bridge. Keep going until you are comfortable. I have made a couple of probes with a sewing needle glued into a drilled length of peg wood, which work really well. as do no5 tweezers. I usually use either the jewel picker upper thingy to transfer the spring to the movement, tipping it off the end with the probe onto the setting and then, with the probe towards the inside of the spring (to stop if flying away, as suggested by others, rotating it with the tweezers. Once you have one tab in, gently apply light pressure to either side and twist. If the tab not other side is sitting too high for the slot, hold the other side down with a probe and gently depress it with the tweezers / other probe and then gently rotate. It take practice. Just be gentle, they require no force to move. If you are tensing up or shaking, stop take a break and come back to it. Keep practicing and it will become easier, trust me. We've all been there1 point
-
Thanks Nev, its my first attempt at repivoting anything, but yes its big so it eases me into the operation. Pivot is only 0.34 thats small as far as I'm concerned1 point
-
You can do it Rich, just a repivoting and the part is big.1 point
-
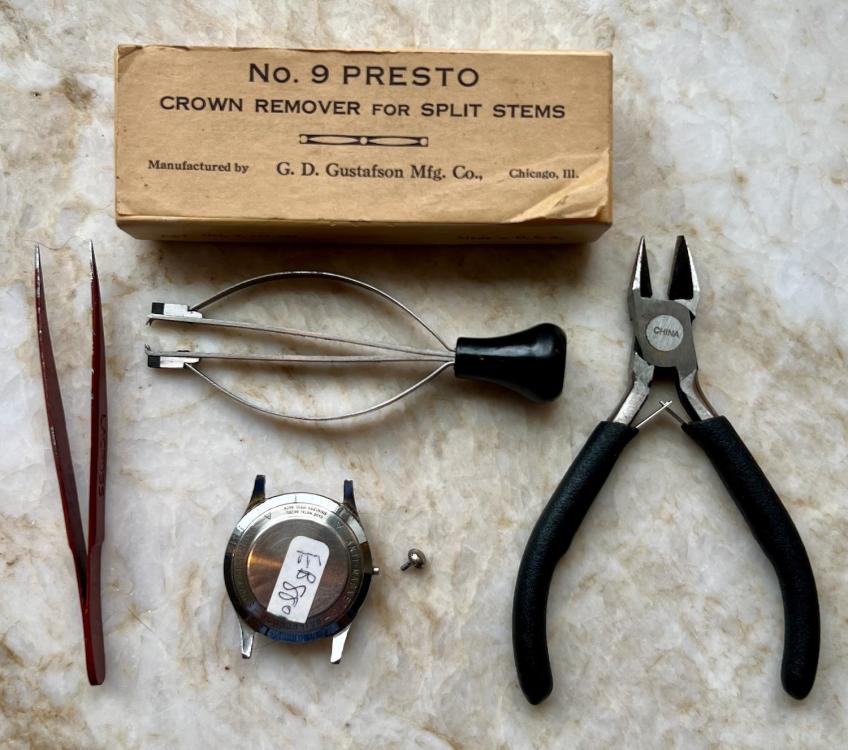
Check out this other post. I think it's hiding under the strap tab. Should have added about the battery. What 301 Battery? Should be SR43SW not LR43SW1 point
-
Yes but my own pc is a desktop in a different room. I have a work laptop but that is work only.1 point
-
I have a Bergeon set, a Chinese set, and and anonymous set (in aluminium), and all of the handles and winders are interchangeable. There are slight variations in the fit but essentially they all fit and work.1 point
-
I have Bergeon winders #6 and #7. I don't have a handle, probably using a handle it's a much nicer experience but they are perfectly usable without one.1 point
-
Rule of thumb I have is that if the dial is larger than the case back (or the thing pretending to be a case back) then it is probably a front loader. Appreciate it's sometimes not easy to tell, but lots of times it's obvious and you kick yourself for not realising it earlier.1 point
-
Hang on. If this a Japanese type movement, many of the Seiko front loaders i have worked on will not have a split crown, but a gap between the dial and the case, hidden by the bezel, that is just enough room to slide a small screwdriver or oiler to press the release lever. I think getting the bezel and crystal off is paramount at this point.1 point
-
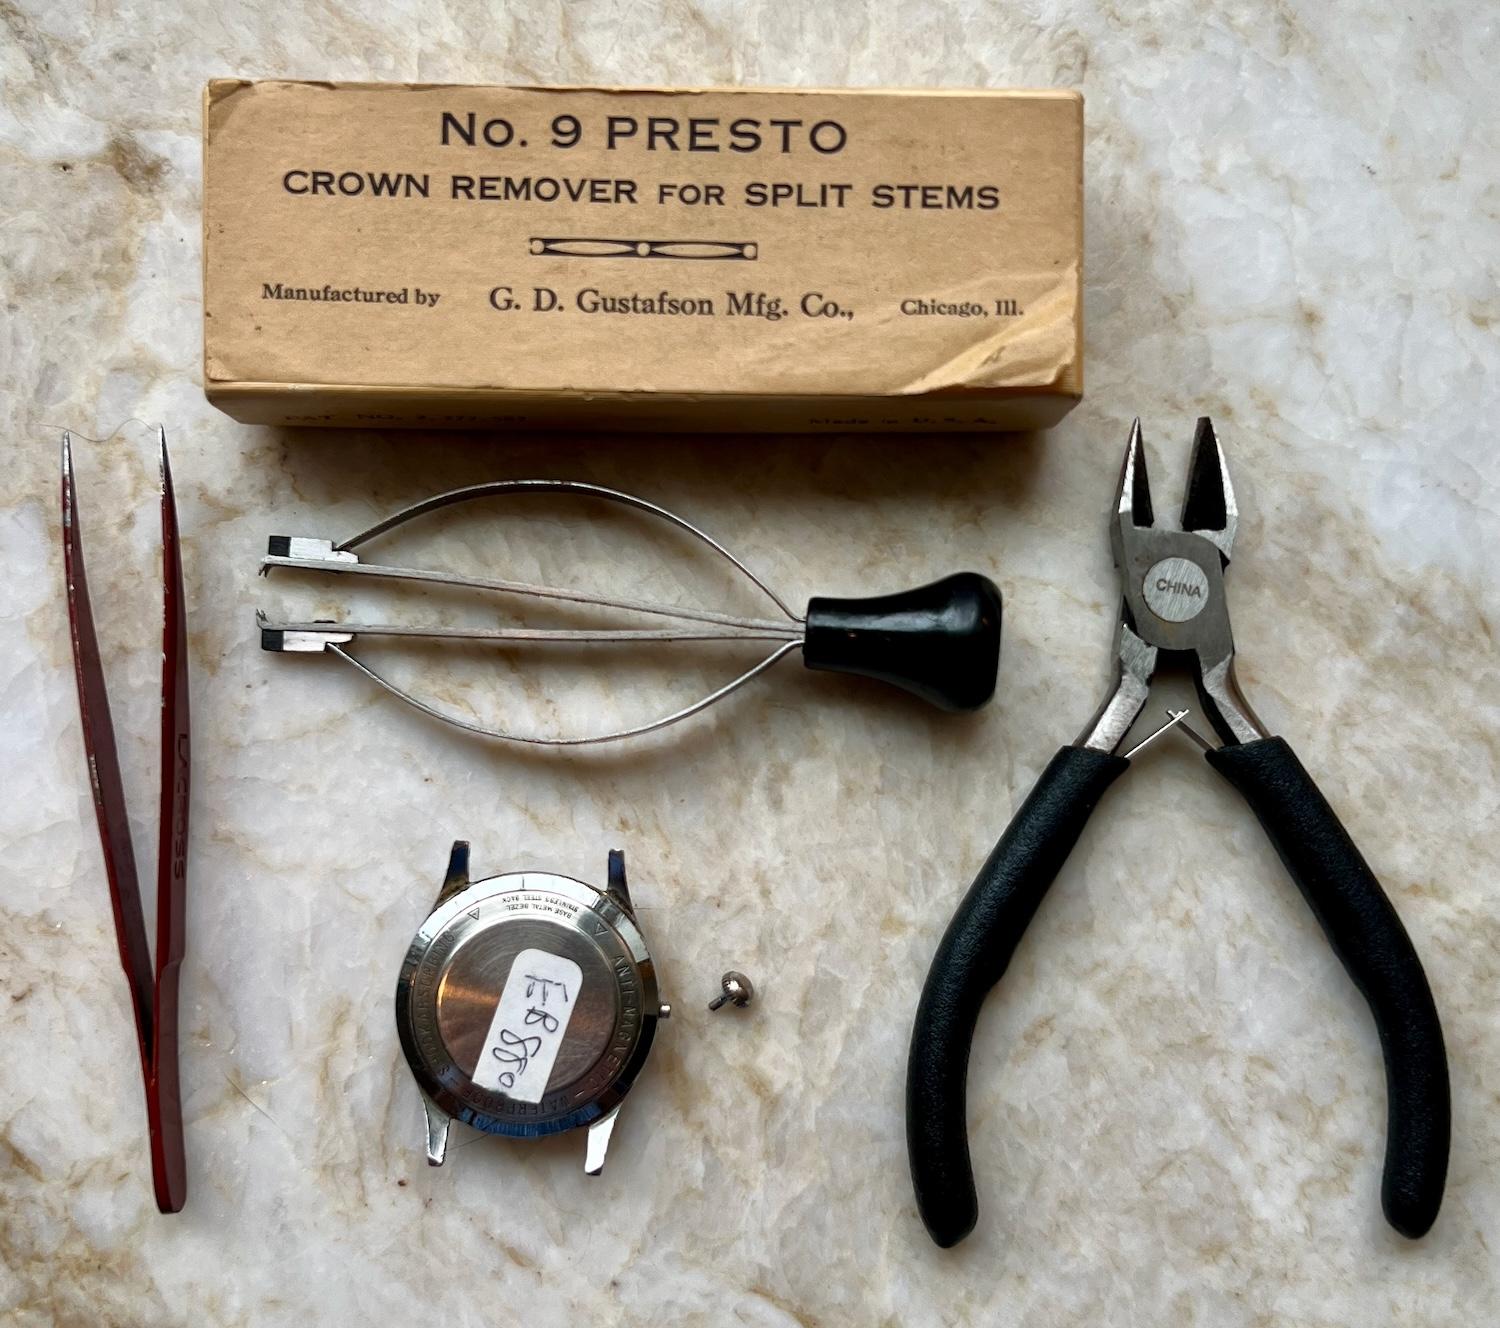
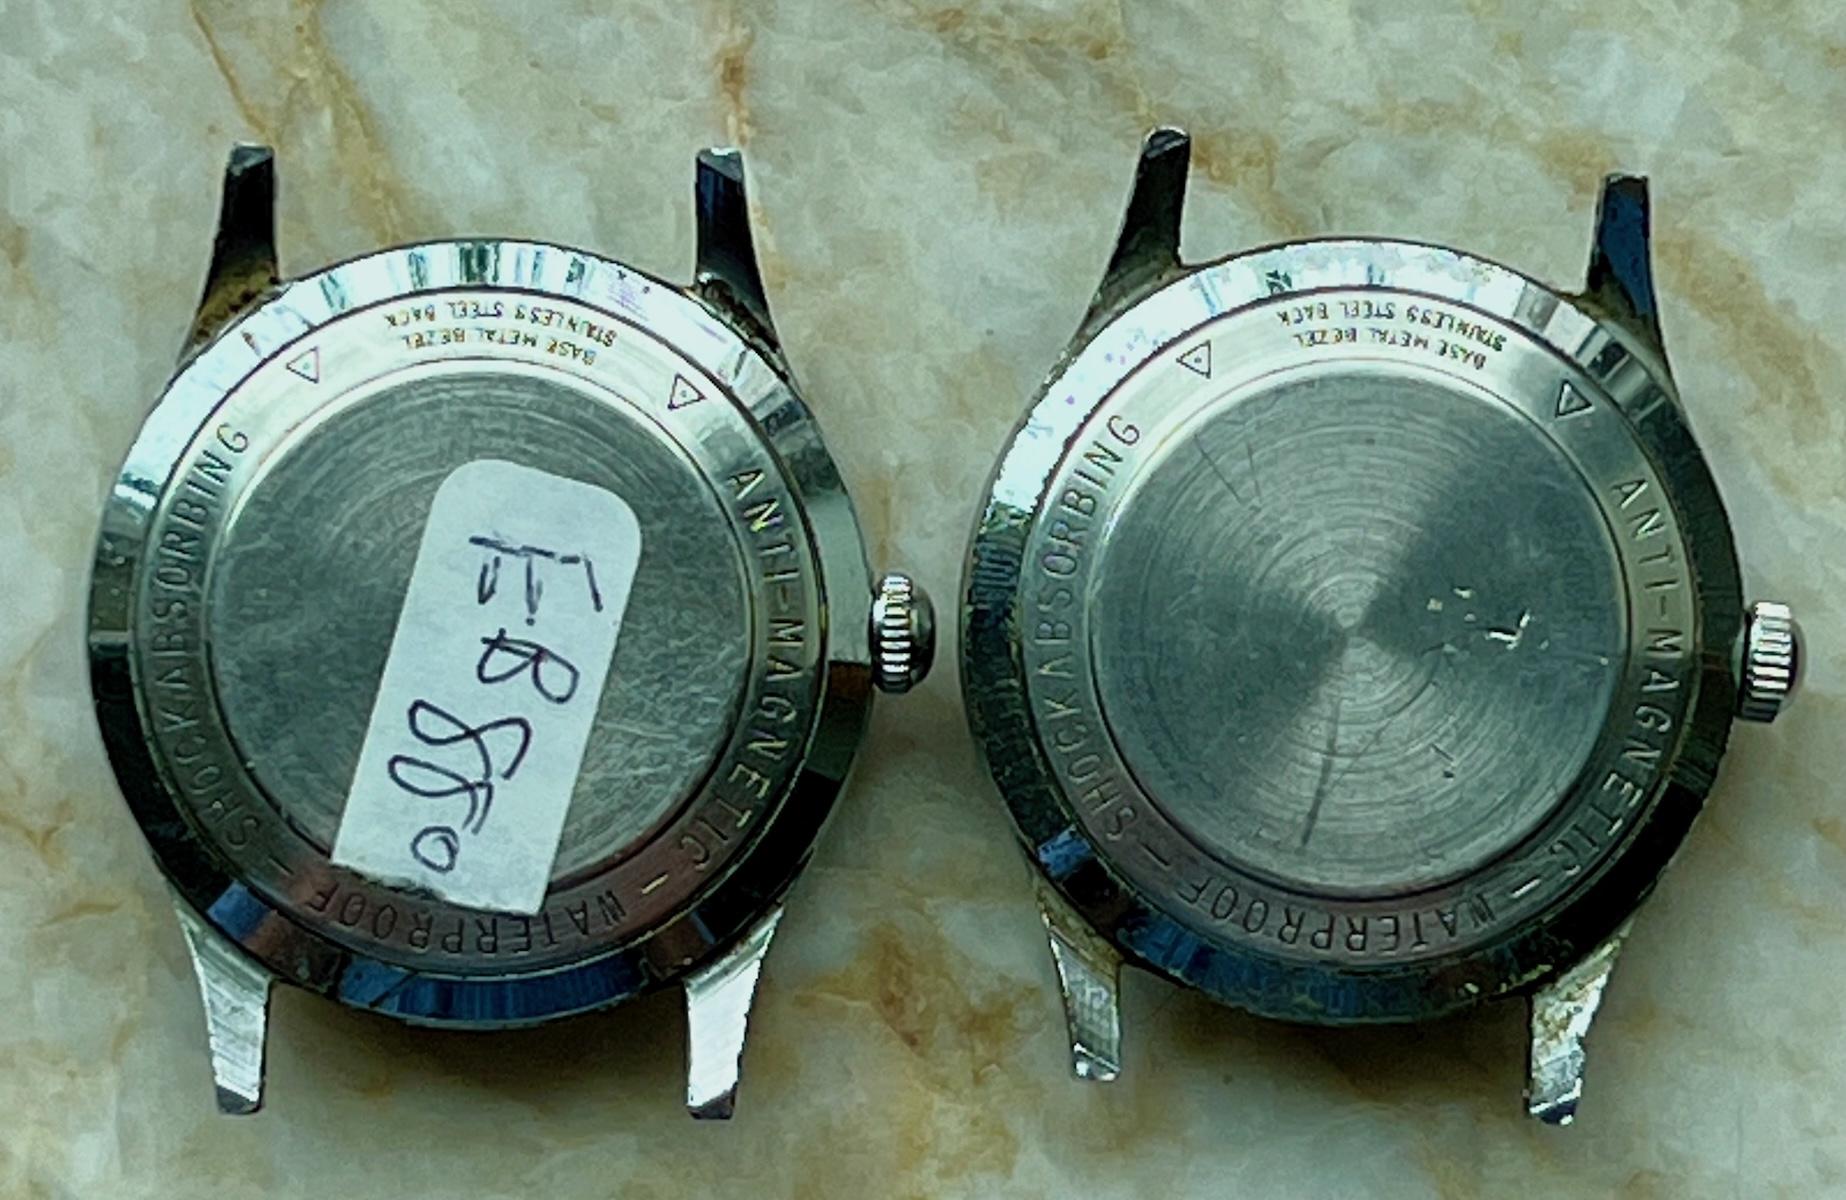
LTTG - As for the two pictures you posted, those do not have their backs removed, they are both actually a poor-man's display back (a thin case with crystals on both sides) that was sold by the Benrus brands at the end of their life. They switched away from ETA movements but valiantly tried to show off the jewels of their Seiko and other non-Swiss components as a defense against the electric/electronic watches and the pin pallet competition. It's not surprising you didn't realize that because they are admittedly weird... I'm only giving you the best advice that I can. They used mold marks to simulate joints in the side of the case, so you could do some scrubbing and polishing there with magnification to see if it's a real joint. However, I think the giveaway is the location of the lettering. Here is a photo of two one-piece cases I have, and it can be seen on both of them that "Waterproof" is centered between the lugs and the stem hits right at the M in "Anti-Magnetic," which seems identical to yours. Removable case backs don't act like that. So, I'd still focus on pulling the stem if it were me. This doesn't take just a little effort. Benrus actually suggested careful use of side-cutting pliers. But use of a stout tweezers will work. There is also a bulky Presto-style tool made just for this, but they aren't really necessary. Just be careful because the crown can go flying!
 1 point
 -
Hadn't looked though your post from it's origins and looking at the side photos the centre as marked with the red circle does now look correct. I hadn't realised how raised it was. Good luck with the nut and glue.1 point
-
Do you reapply epilame to recleaned cap stones?1 point
-
Episode 5: Done and done. One mainspring, 2 bolts and some thorough cleaning, adjusting, a bit of oil here and there and voilà! Mainspring: Although the watch does run pretty good, I would still love to have an original mainspring, or at least the one I mentioned in an earlier post as it matches the original spec a bit better. Screws: Well there was more than one bad screw. I did end up buying some original ones from this movement. Came out a tad more expensive, but I couldn't find anything alike from Cousins. Also I would have had to polish them. Which to be honest is not a bad thing, as I was preparing for that and built my self a little screw polishing jig. Case: Case has some wear, and its sadly gold-plated. Sadly because repairing such a case is a pain in the butt, or 1500.- euro if someone else is going to do that. Frankly I do not know if its worth it. You tell me? Other than that, I am very happy with the results. Thank you everyone for the support and let me know what you think.
 1 point
 -
Thats not really the issue, a piece of trapped finger cot you can see and remove. Hand winding can distort the spring in way that you can't exactly see when it is in the barrel. A spring can be become coned, it can become coned even just from removing it, but hand winding it back in will only add to it. Look at the next one you take out and honestly ask yourself if it looks raised at the center coils. Look inside a barrel, can you see wear ? Not saying i dont do it but there are better ways that cause less stress to the spring. I think we try to find ways of justifying why we hand wind when really we know we just shouldn't do it1 point
-
VWatchie I have followed Adam since his start just over a year ago. His videos are full of information and usually diplay a full disassembly and build. What is interesting for us beiginners is that he shows screw removal and placement. Plus he talks about what he is looking for when completing the install of items. Also, he includes the errors so that we can see where not to make the same mistake. His oiling and cleaning process has altered. Less is more, but enough to be enough. Adam of 'Weekend watch repair' is a member of this forum and has given information freely to many. As do you members. I am doing another build of a Seoko Mellmatic 4006, so am using https://www.youtube.com/watch?v=H2UOIUcUEYA&t=3290s His latest shows the difference in his oil and cleaniing application. Like him, I also have adapted. Don't have his equipment, but feature his system. ish... https://www.youtube.com/watch?v=_UCNqdRq6mI1 point
-
I've never done any tests, though I imagine it would be easy enough to do with glass. For pallet stones, if they don't come out of the machine spotless (it does happen), I clean them with freshly cut pithwood soaked in benzine. Any bits of pithwood left come off with a blower. If I mess up oiling an Incabloc, back in the machine it goes; I'm never happy with how clean they look even out of fresh clean benzine, and I can do other stuff while the (automatic) machine re-cleans them.1 point
-
100% agree- I would rather make a balance staff than a pallet fork arbor. Unless: -unless they are threaded. Not that making the thread is so hard (though it can be), but you have to really have all your measurements spot on as there is no recourse for height adjustment. Funny thing, well funny to me- the first fork I made was because of a threaded arbor. Watchmaker tried to knock out the arbor thinking it was friction fitted, but it was threaded, and the fork split in two. Maybe it's funny to me because it was my brother who did it .1 point
-
I would say it all depends on the watch you are working on. With vintage watches which to my mind is anything pre 70's then my first go to tool is my thumb nail this can often work with something pre 60's. Then i try the tool suggested by Hector with the yellow handle, i have two one has a more sharpened edge than the other. Finally a razor blade, if a sharpened 0.2mm hardened blade isn't going in then probably nothing will.1 point
-
These aren't generally used for removing bezels. If you're careful you can sometimes get away with a stanley knife blade or these are designed for the job.
 1 point
 -
For rotating bezels, yes. For watch crystal bezels, I would use a thinner blade to start first, like what Jon showed in his video.1 point
-
I knew they would be cheap buts thats ridiculously cheap.. I have H . I find i can control them better and exert more pressure safely with them, only on vintage though which are not as difficult to remove as modern watch bezelsI, I don't work on anything modern.1 point
-
Direct is my middle name, if you want direct then call me, i am as direct as direct can be, master of directness, if i was a phone book i would be "THE DIRECTOR OF THE DIRECTORY" if i was traffic controller i would be " THE DIRECTIONS MANAGER " I was gonna join the pop group " One Direction " but they wouldn't let me change the name to " Only Rich's Direction "1 point
-
I'm pretty certain that Rotary never made their own movements. I have only ever seen AS, ETA, and Peseux movements inside Rotary watches, and some Chinese in more recent examples.1 point
-
This is a supershock spring. Rotate until one of the arms reaches the notch in the setting then lift out the spring. The cap jewel may be held in with dried up oil. If you are finding it difficult to remove place a drop of lighter fluid on the jewel and let it soak in to loosen up the oil.1 point
-
@nevenbekriev has already voiced where I was going next. The primary cause of the kind of symptoms you describe is either worn or sticky reverser wheels. I believe that at one point ETA's policy was simply to replace them at each service. If they've been cleaned and properly lubricated but the problem still persists then my next step would be to replace them.1 point
-
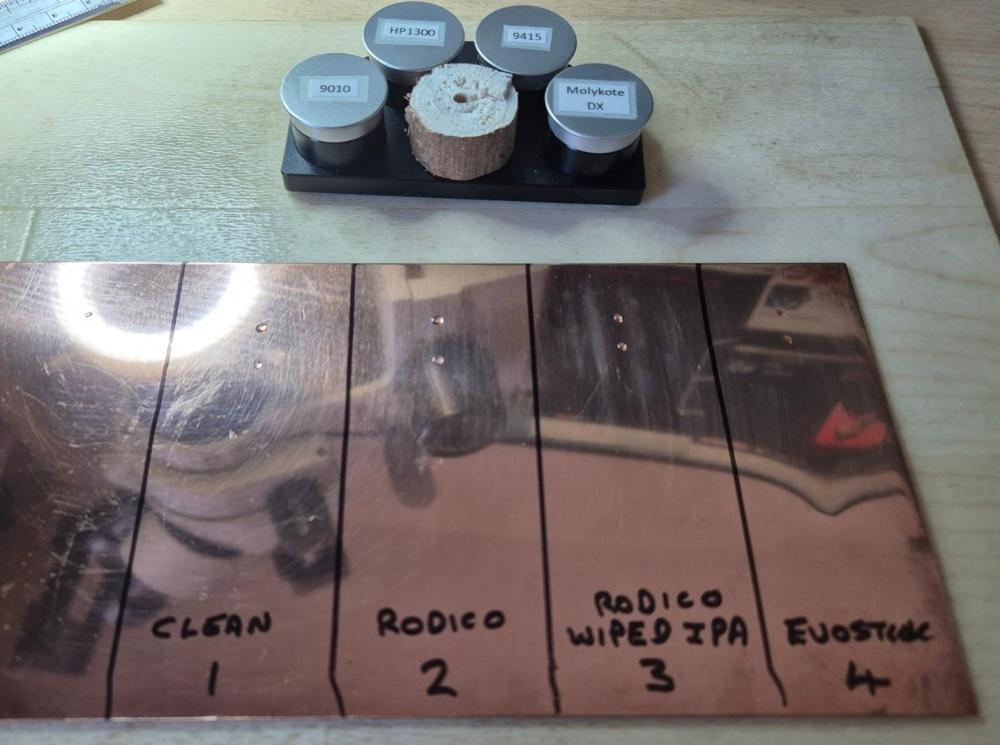
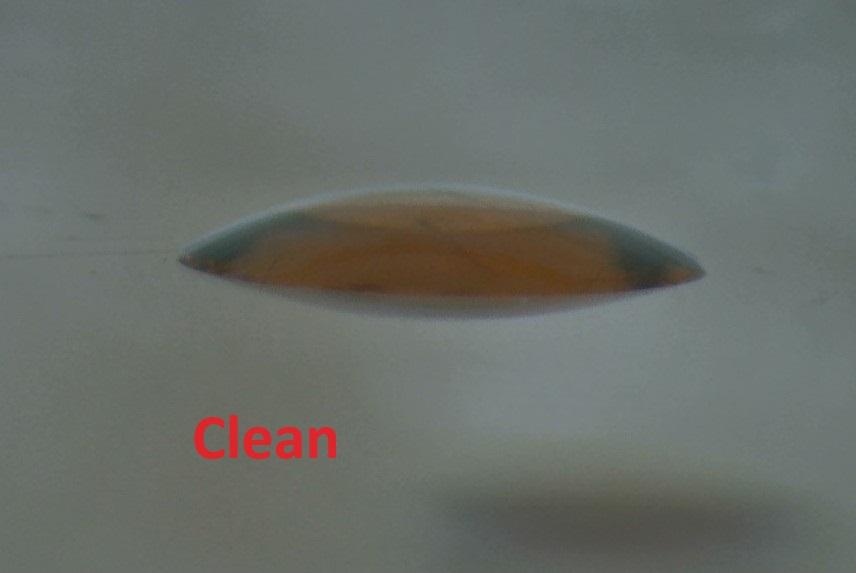
I thought a little experiment was due (as I currently have no watches to work on ) I cleaned a copper plate (scrubbed with soap, wiped with 99.9% IPA, so it passes the "water break test") On test were : (1) a clean section (2) one where I'd wiped with some clean Rodico, (3) wiped with Rodico but then wiped with IPA on a cotton bud (4) clean, then wiped with dried Evostick on pegwood (to see if Evostick leaves any residue) I put on drops of HP1300 and 9010. Unfortunately I don't have an automatic oiler to put same size drops on each section. So the drop size did vary a bit. After 30 minutes - all the dots look similar. Maybe the Rodico section have spread a touch? Looking under the microscope at an angle, there is definitely less surface tension on the Rodico drops (the drop is flatter) for both HP1300 and 9010. See pics below. All other drops look similar. (Maybe I should have done multiple drops) Conclusions. a) The Rodico wiped section did seem to effect surface tension on the oil droplets. b) After using Rodico, a wipe with IPA seems to remove the residue. c) Evostick does not seem to leave a residue d) I desperately need to get a watch to work on, so I stop doing silly experiments
 1 point
 -
High frequency day: 36000 bph.
 1 point
 -
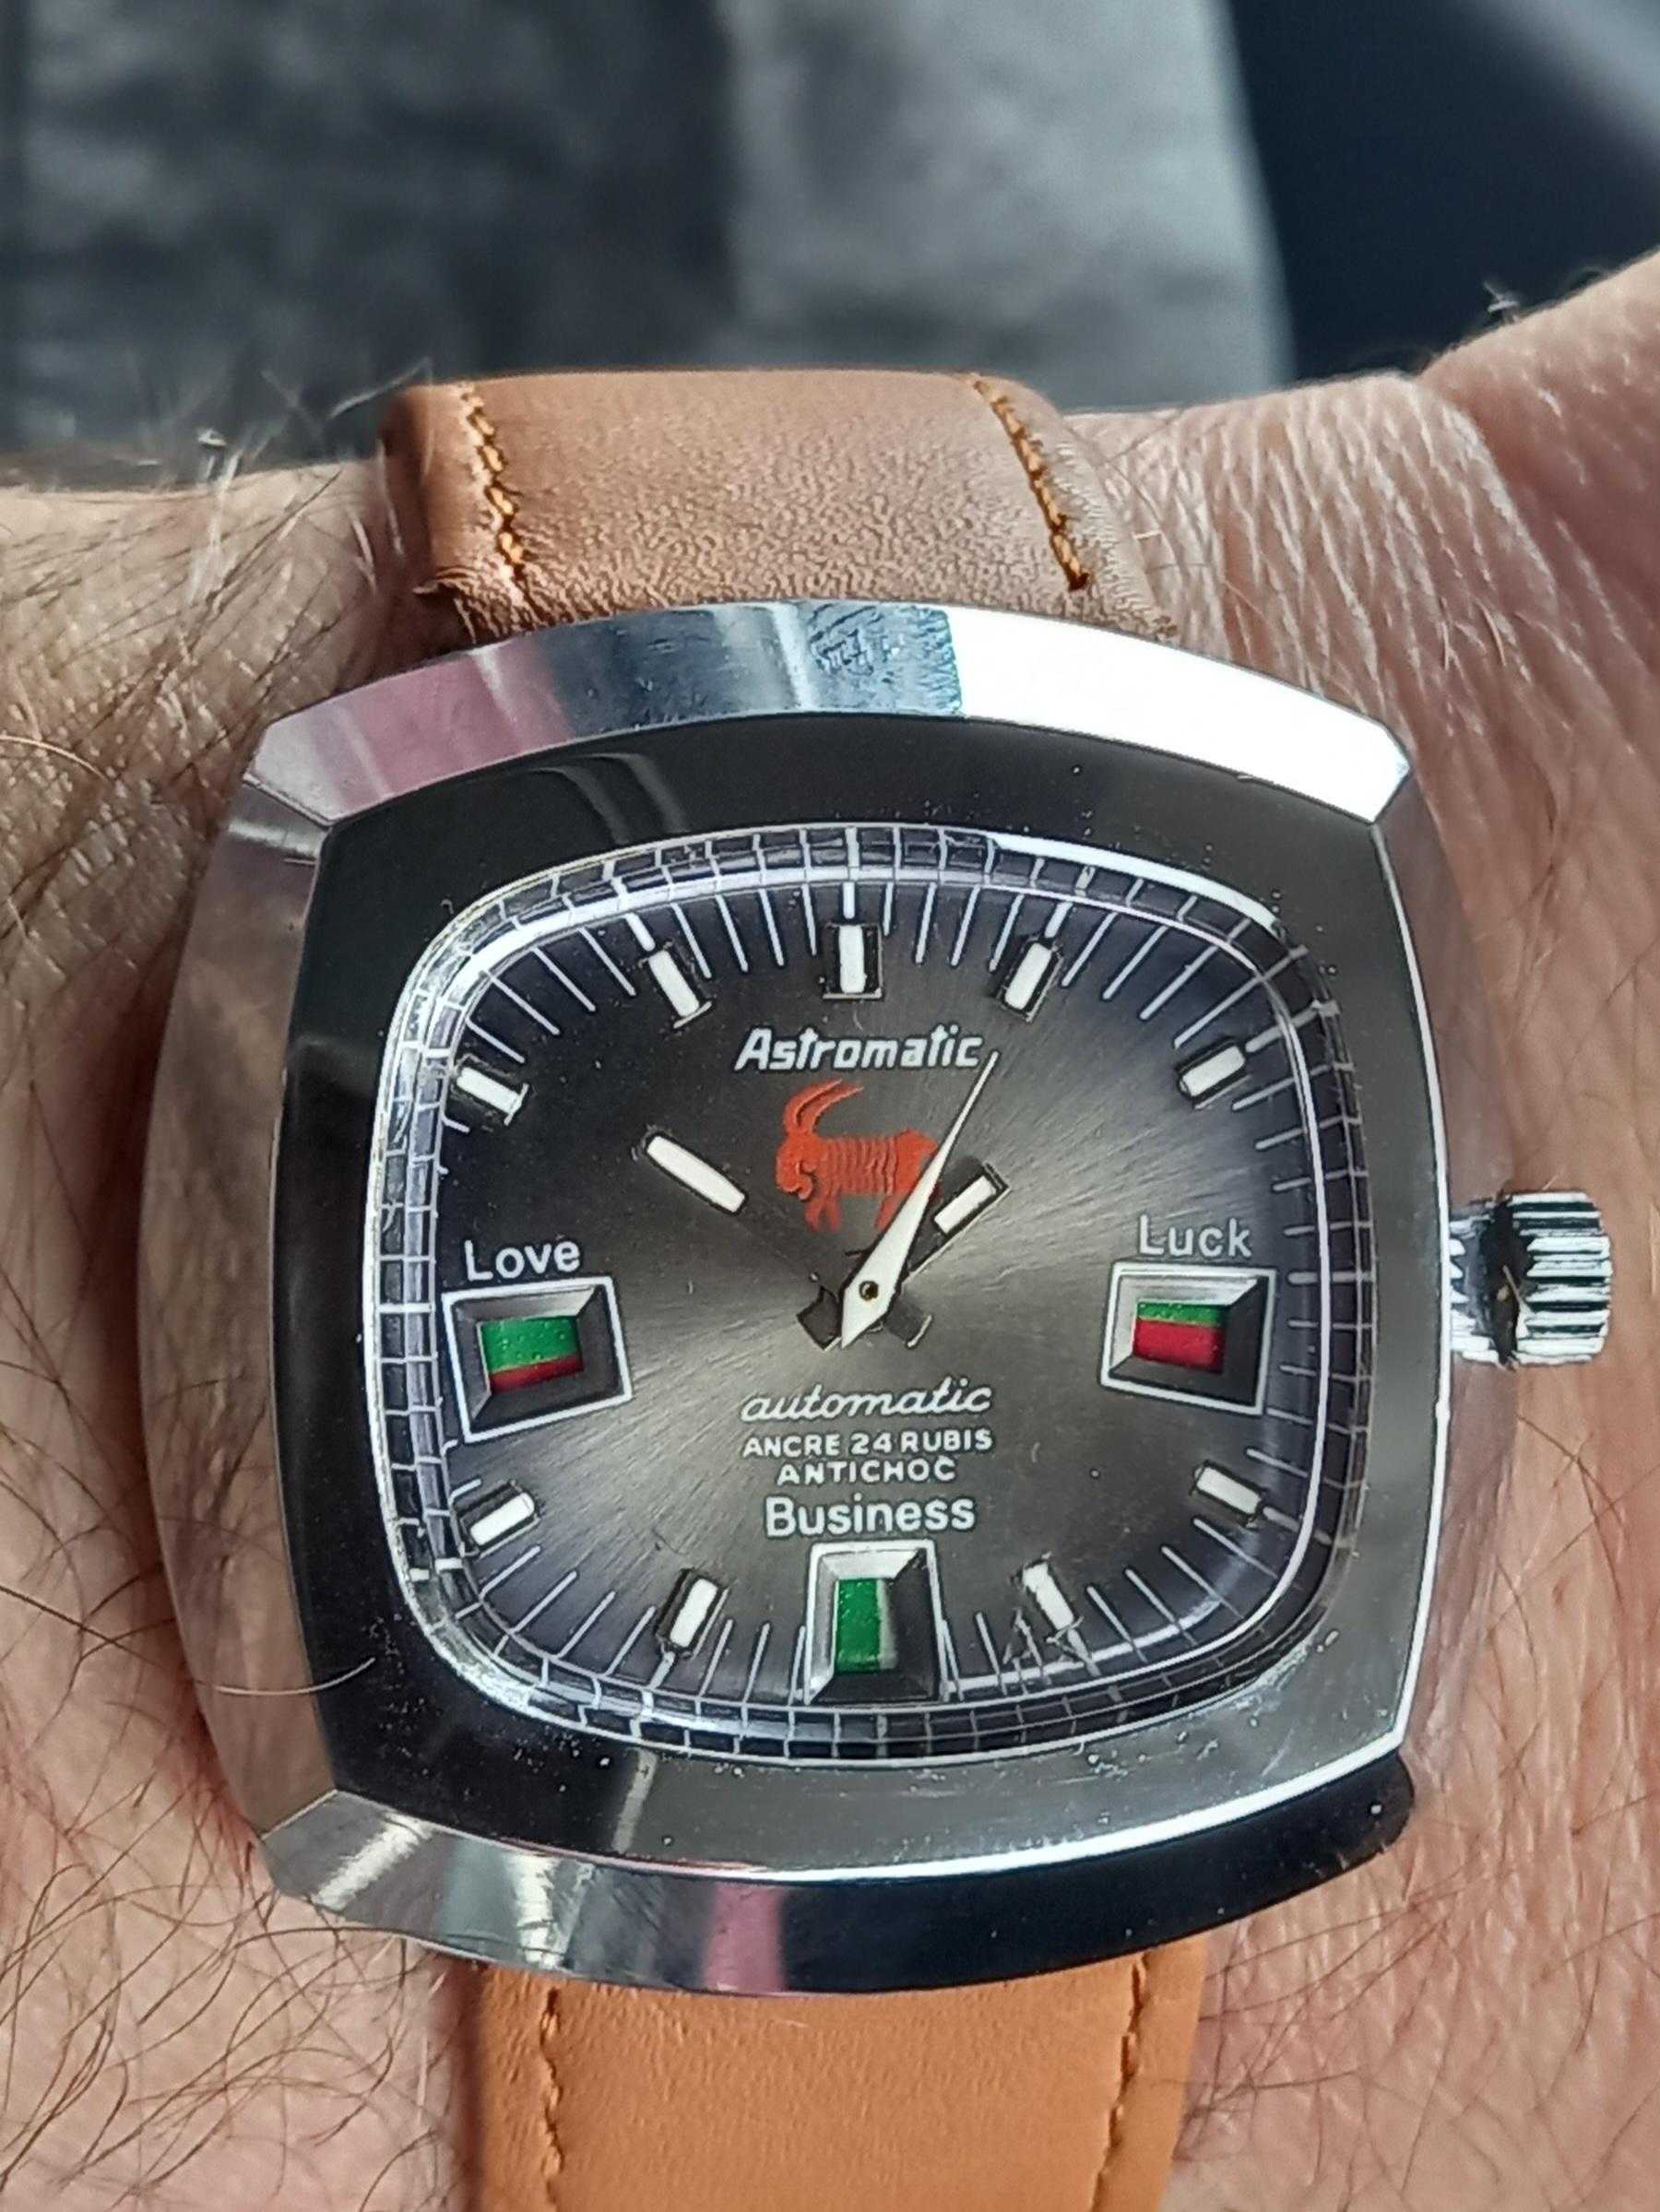
An unusual one today, i picked this up a few weeks ago at an antiques fair. A Recoh Astromatic with a Baumgartner movement. It has changing colour dial windows to indicate your luck and mood thoughout the day. Apparently I'm getting my leg over in about half an hour , I think i should go home first
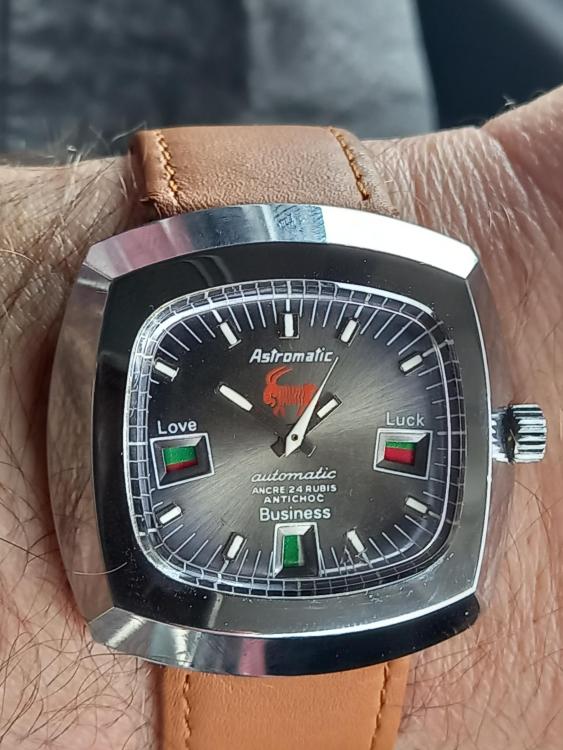 1 point
 -
Great website reference JohnR725! Very informative. The seller took another 10% off the price and I noticed Bergeon jumped their price another $200 (with a plastic case? wth!), so the K&D set is now mine. Looks to be in great condition and maybe I'll rehab the wooden box a bit. Thanks for all who replied!1 point
-
Maybe another question you want to ask yourself is if they've cheapened out on the box have they cheapened out on anything else? In other words the prices Swiss tools keep going up and up and up does the quality of the tools go up to match? Vintage because they were meant to last forever. I would definitely go with this set versus a modern? Yes just because the Swiss are selling it doesn't mean the Swiss made it and I'd be concerned about the quality of things. I don't think just because you spend lots of money that you necessarily to get a quality tool anymore. But a lot of times for people in the group it's more about look at my impressive new set then something is necessarily functional here's a website that talks about the used one you're looking at https://kanddinverto.weebly.com/1 point
-
I think you should attempt it. I did my first balance poising a couple of months ago. It was a cheap Russian alarm watch that was behaving so badly that I couldn't make any worse. So I just bit the bullet and poised it. Would I dare poise an Omega? Probably not. Let me practice on a few more Mumbai specials first.1 point