Leaderboard


.thumb.jpg.cb17a66989f1e796fd4217db2e9ca9df.jpg)
Popular Content
Showing content with the highest reputation on 06/14/24 in Posts
-
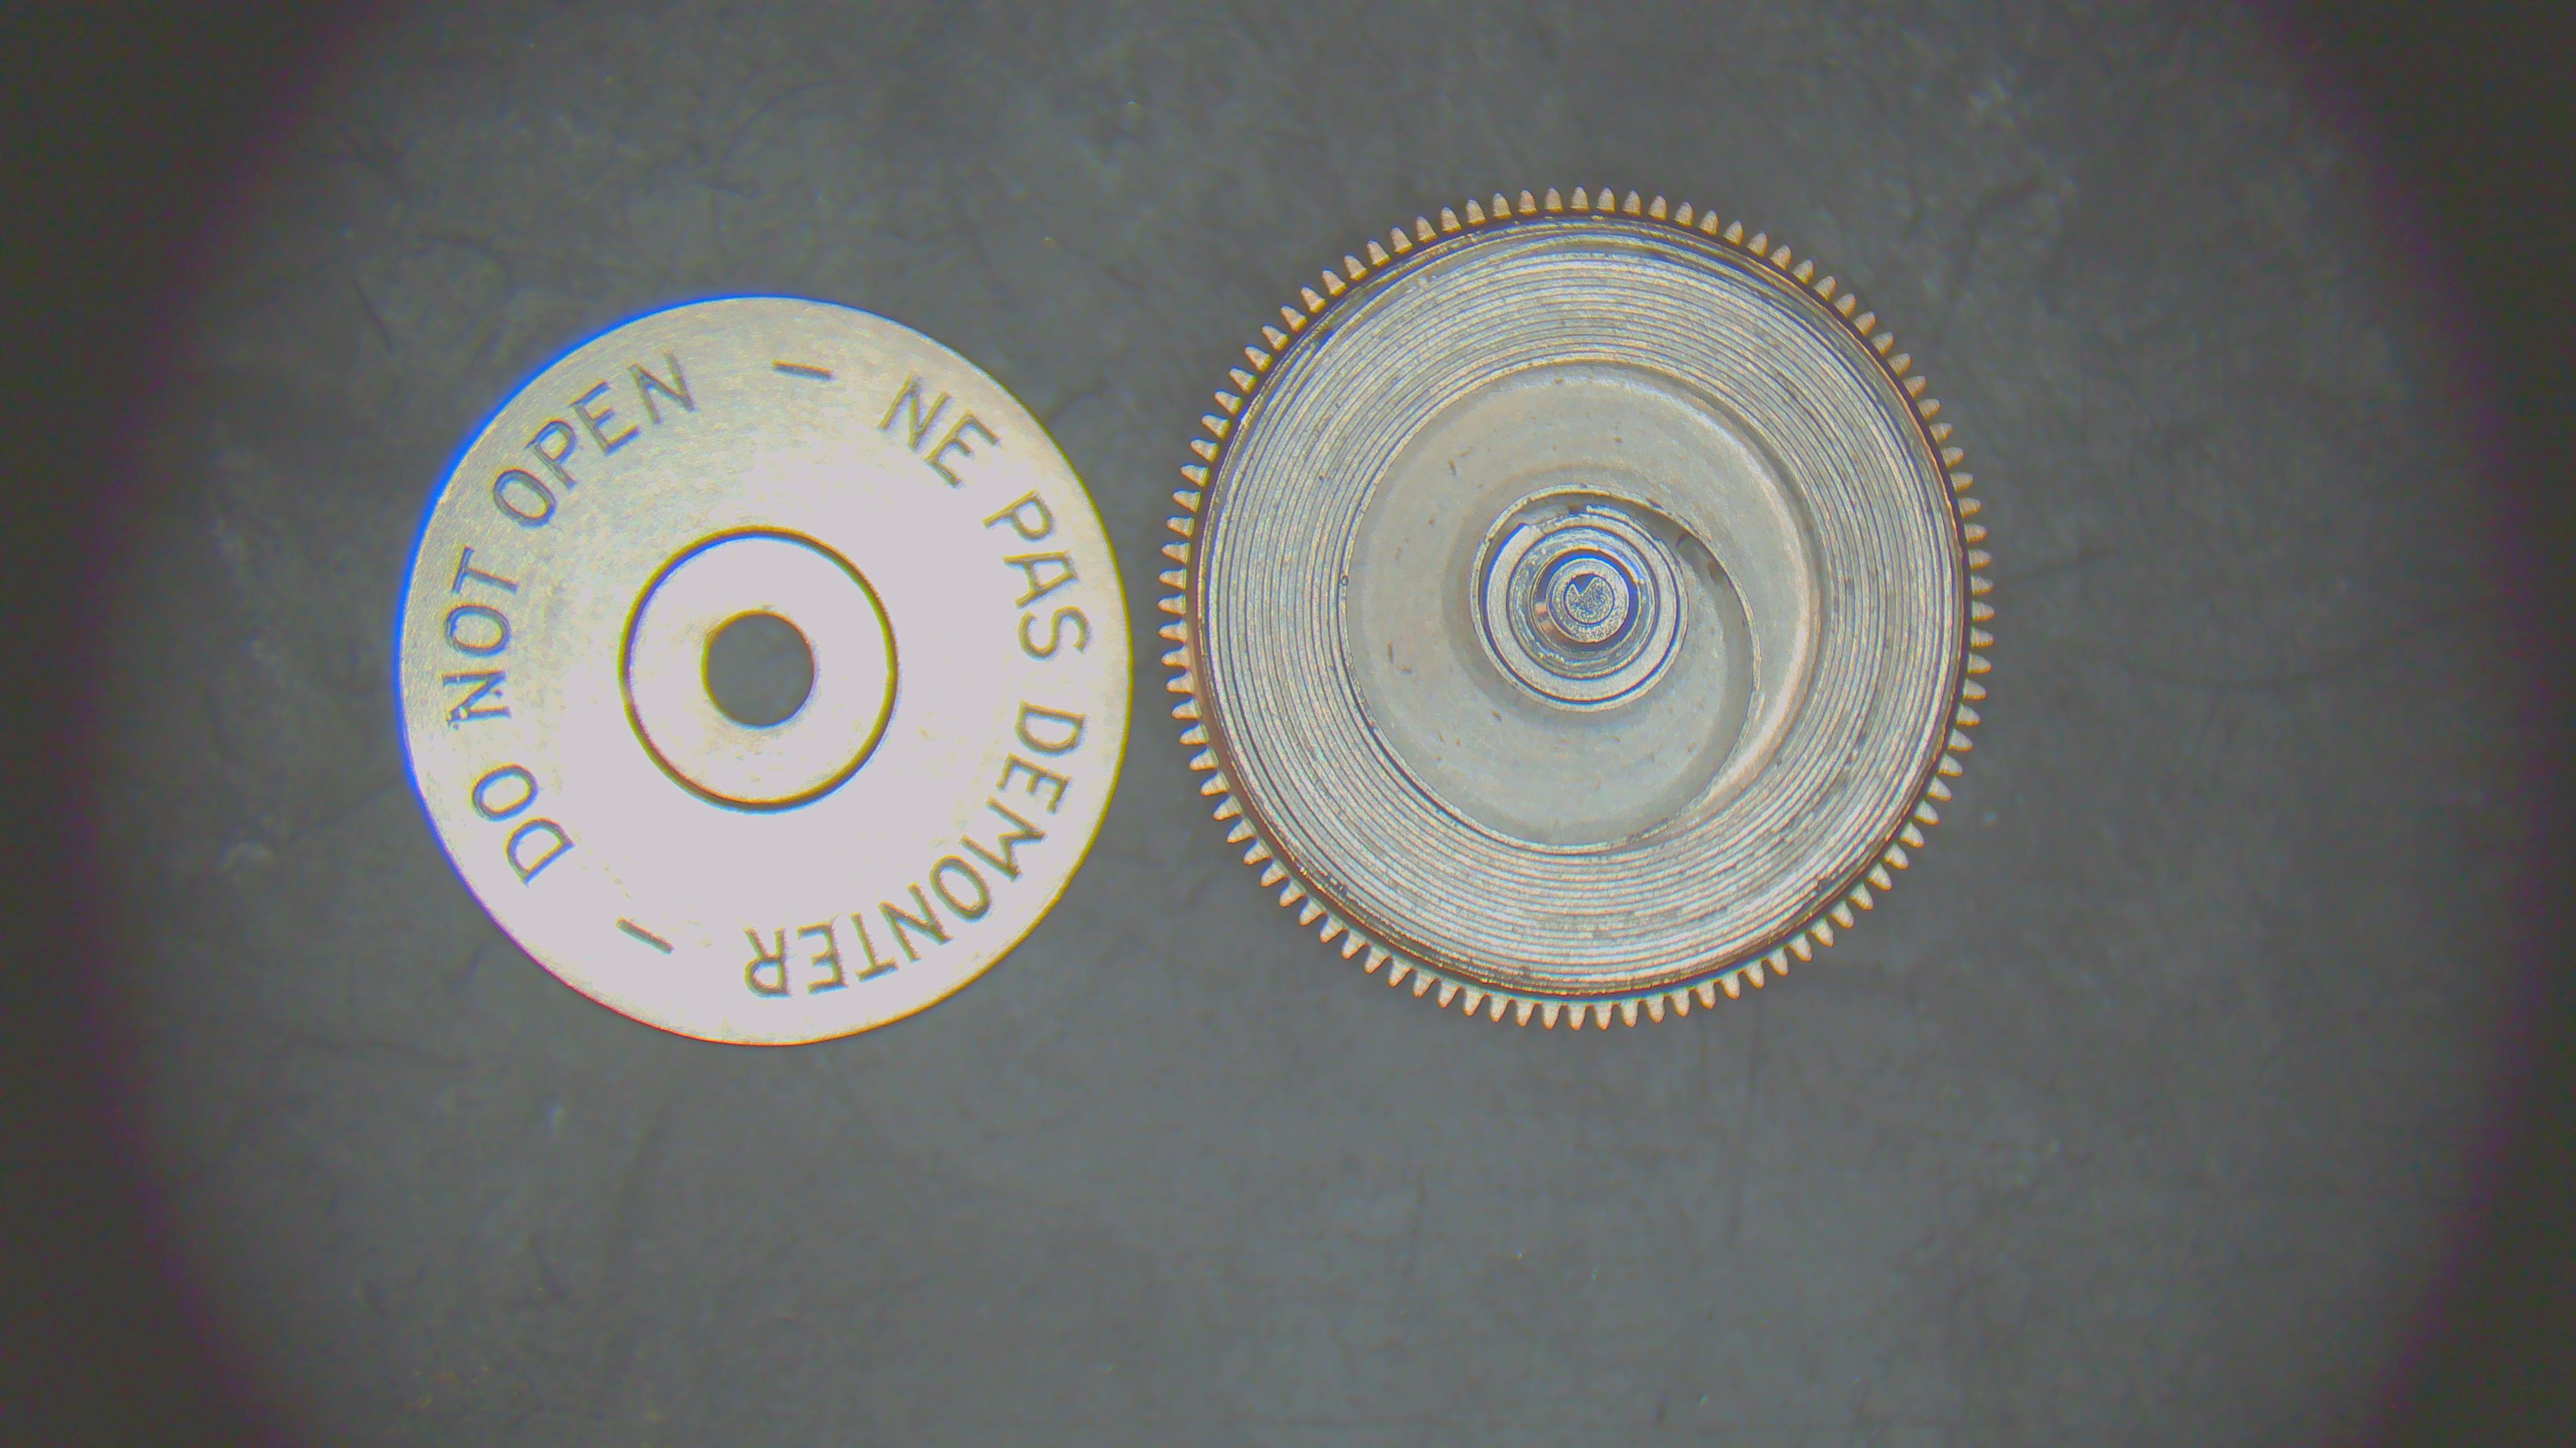
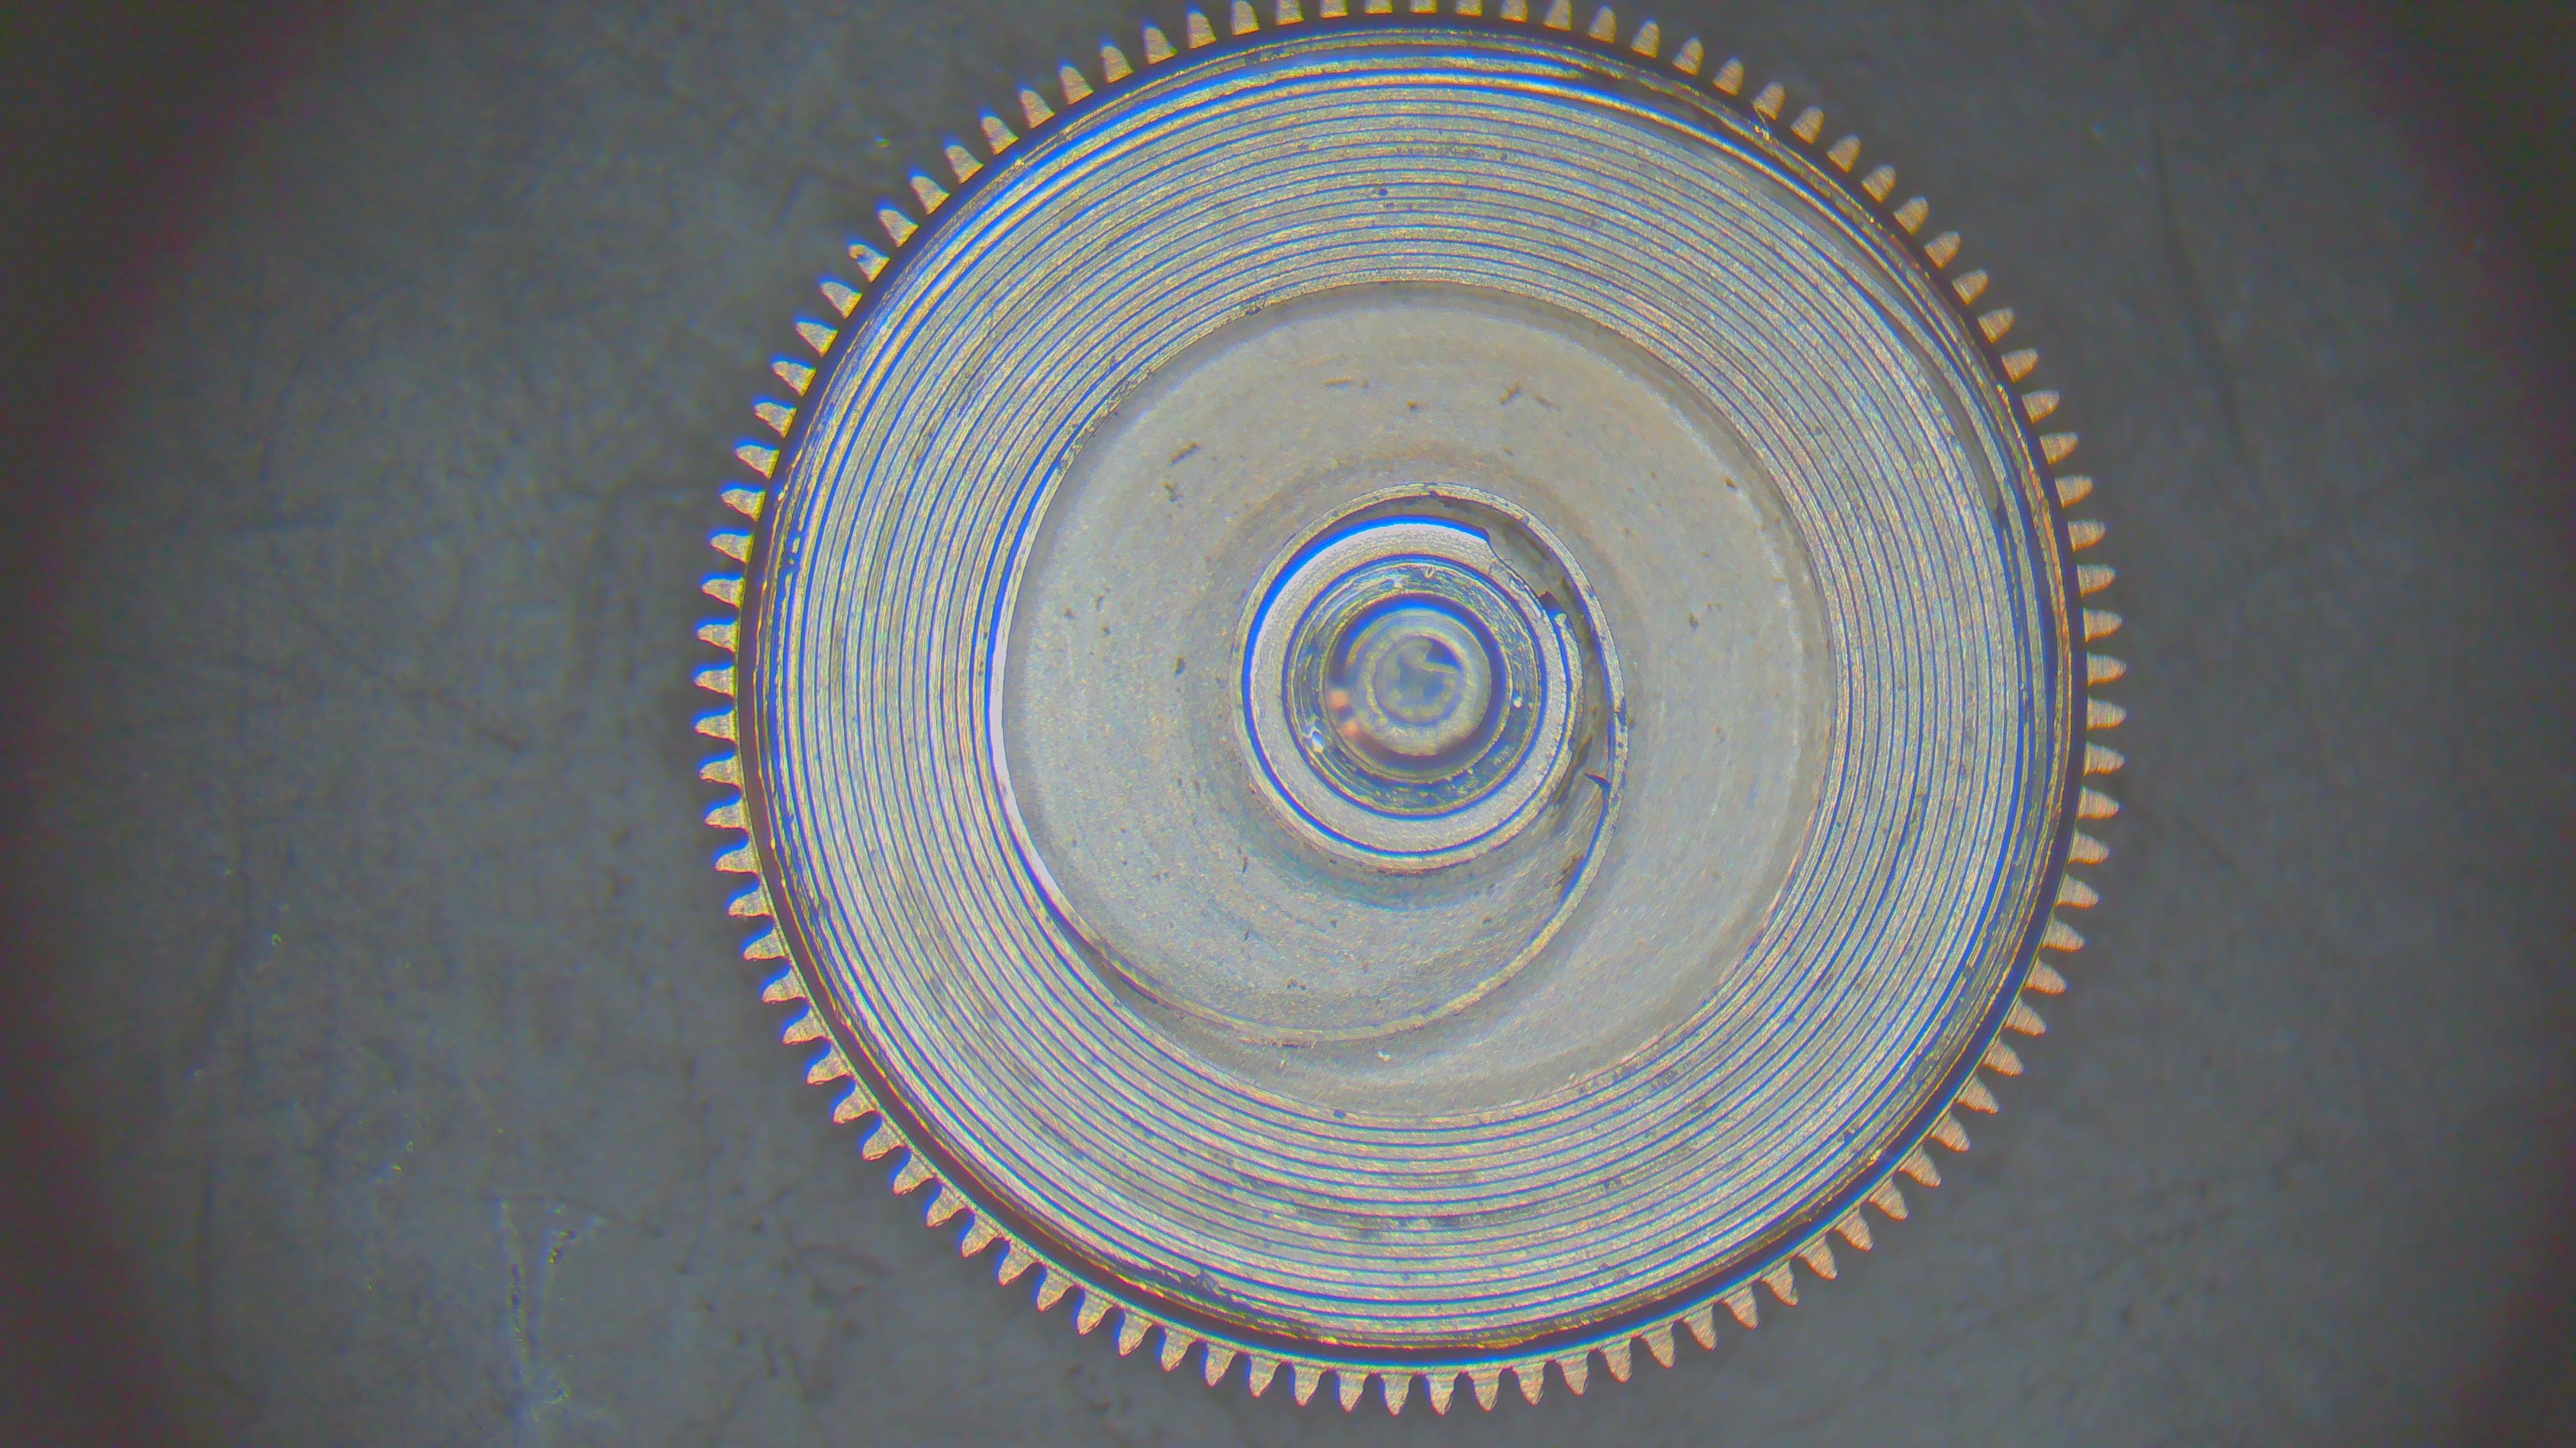
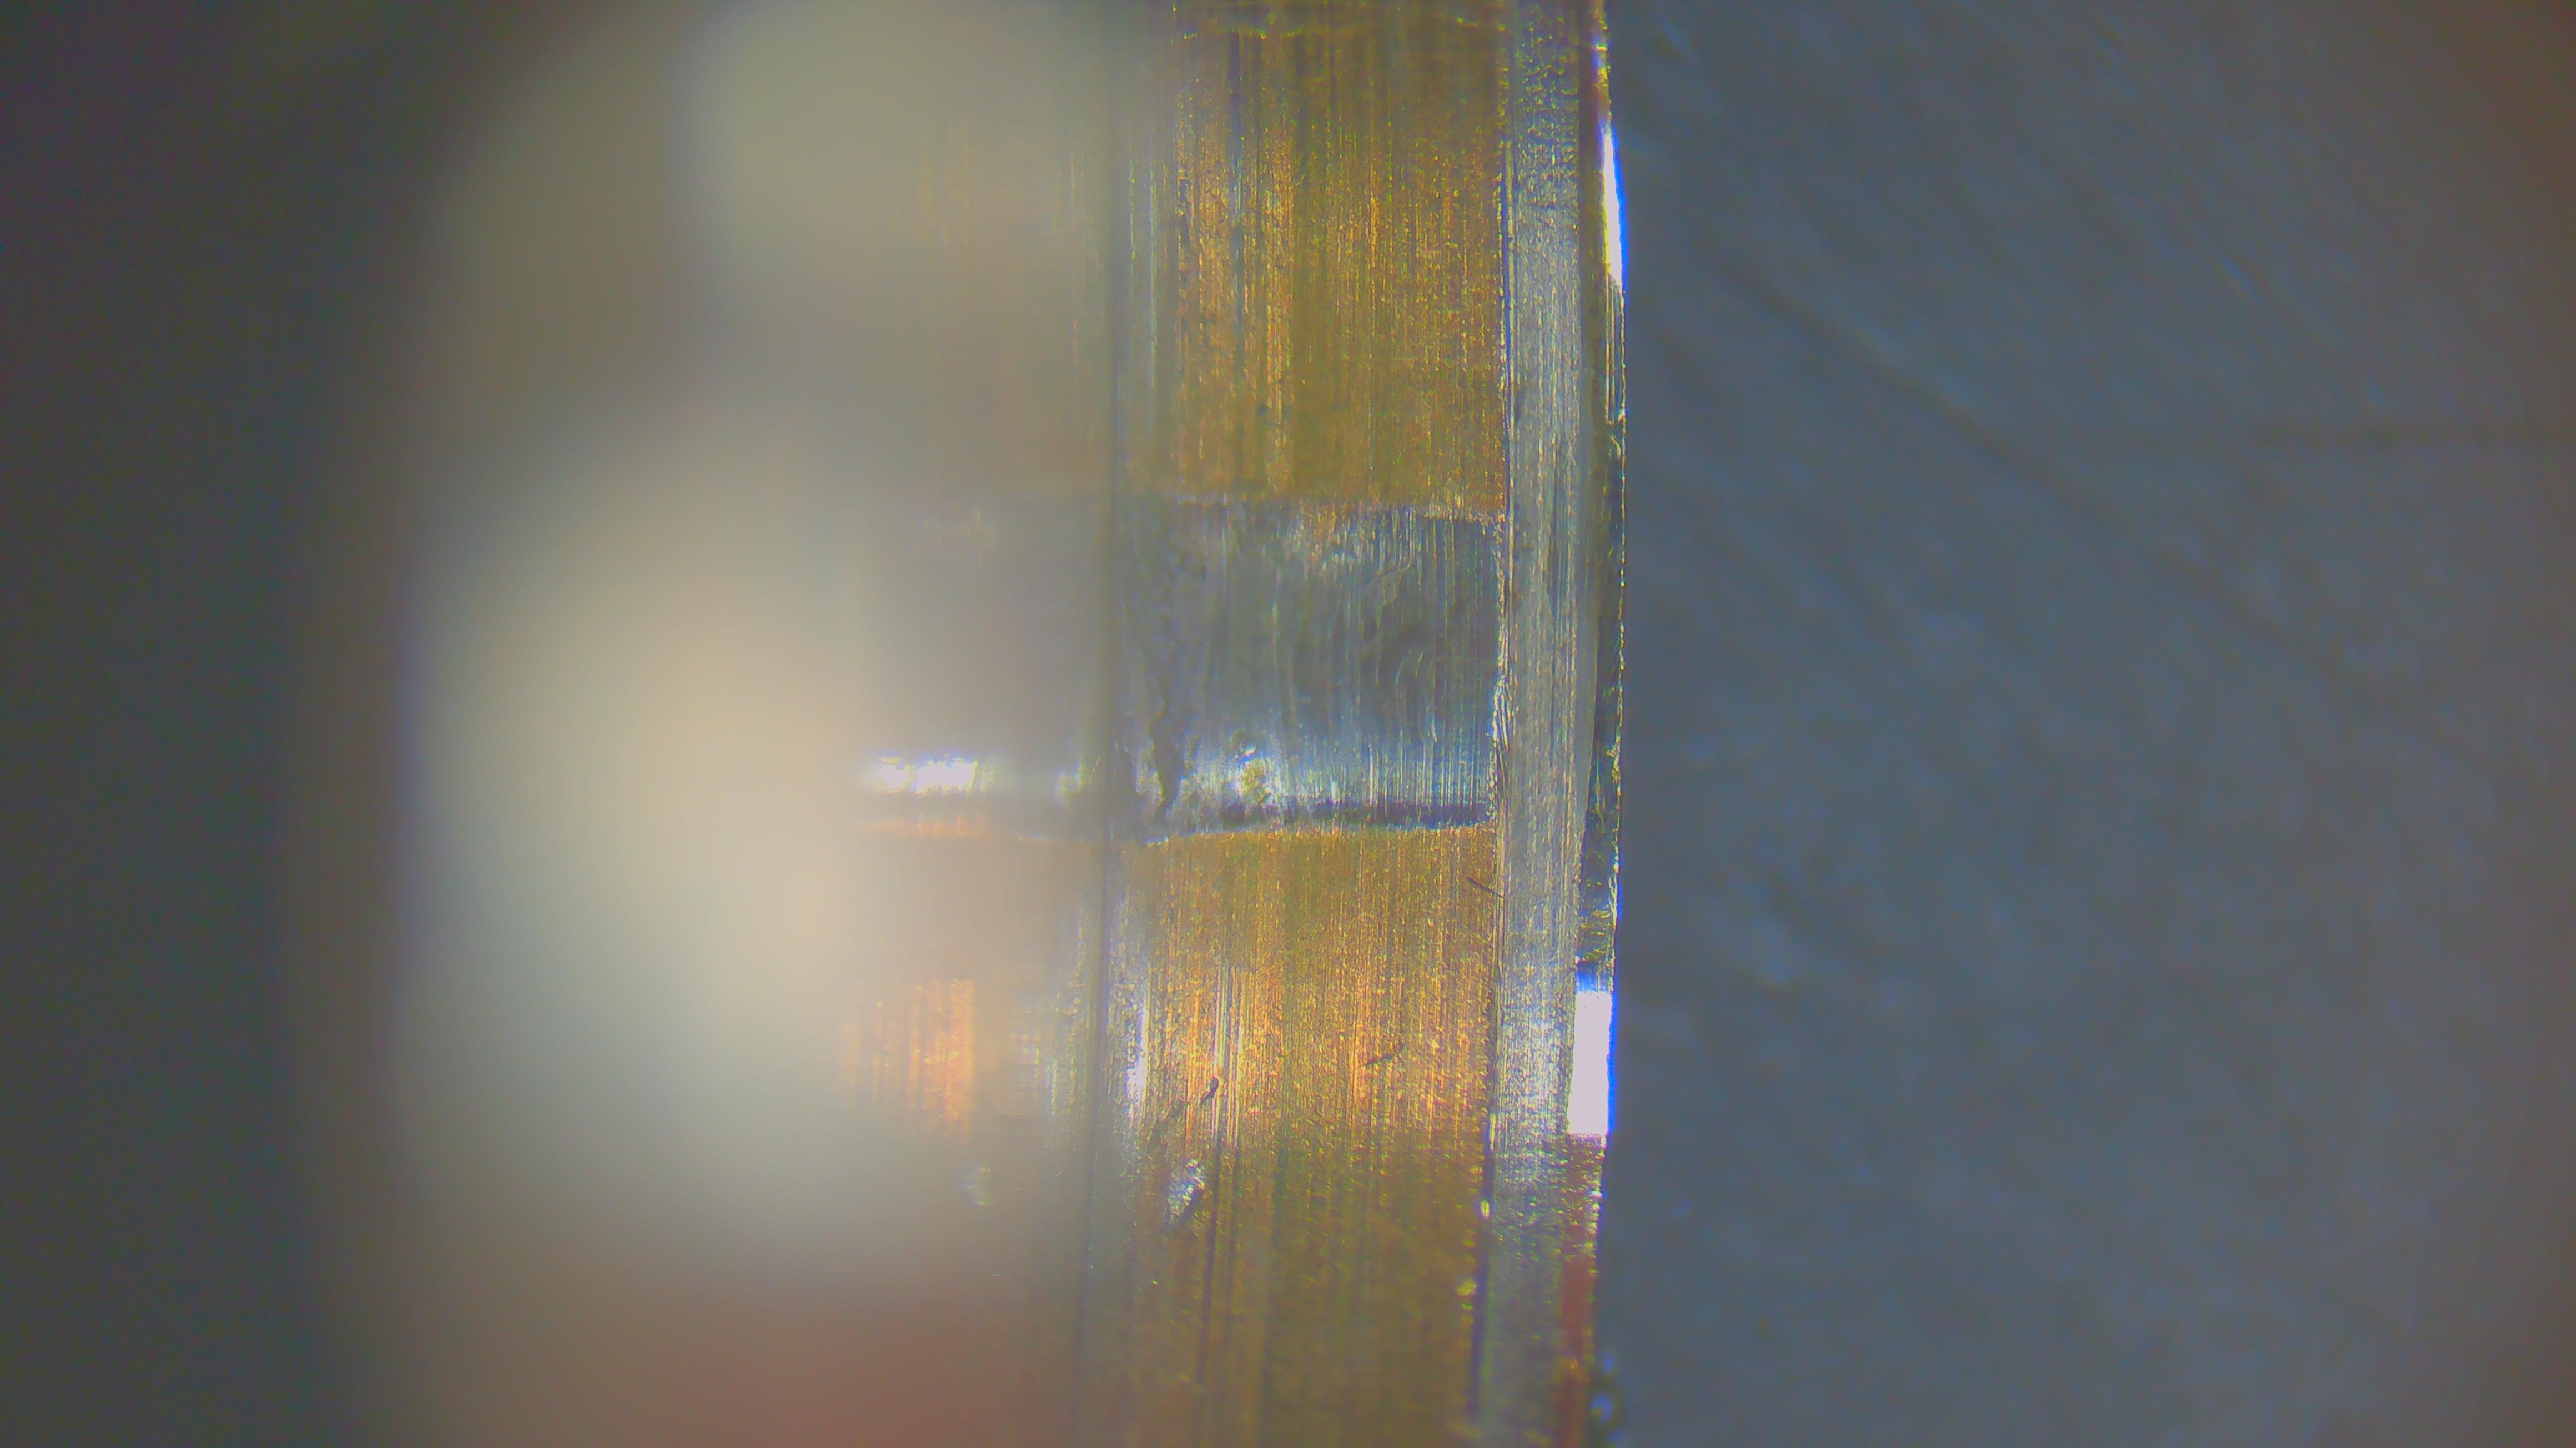
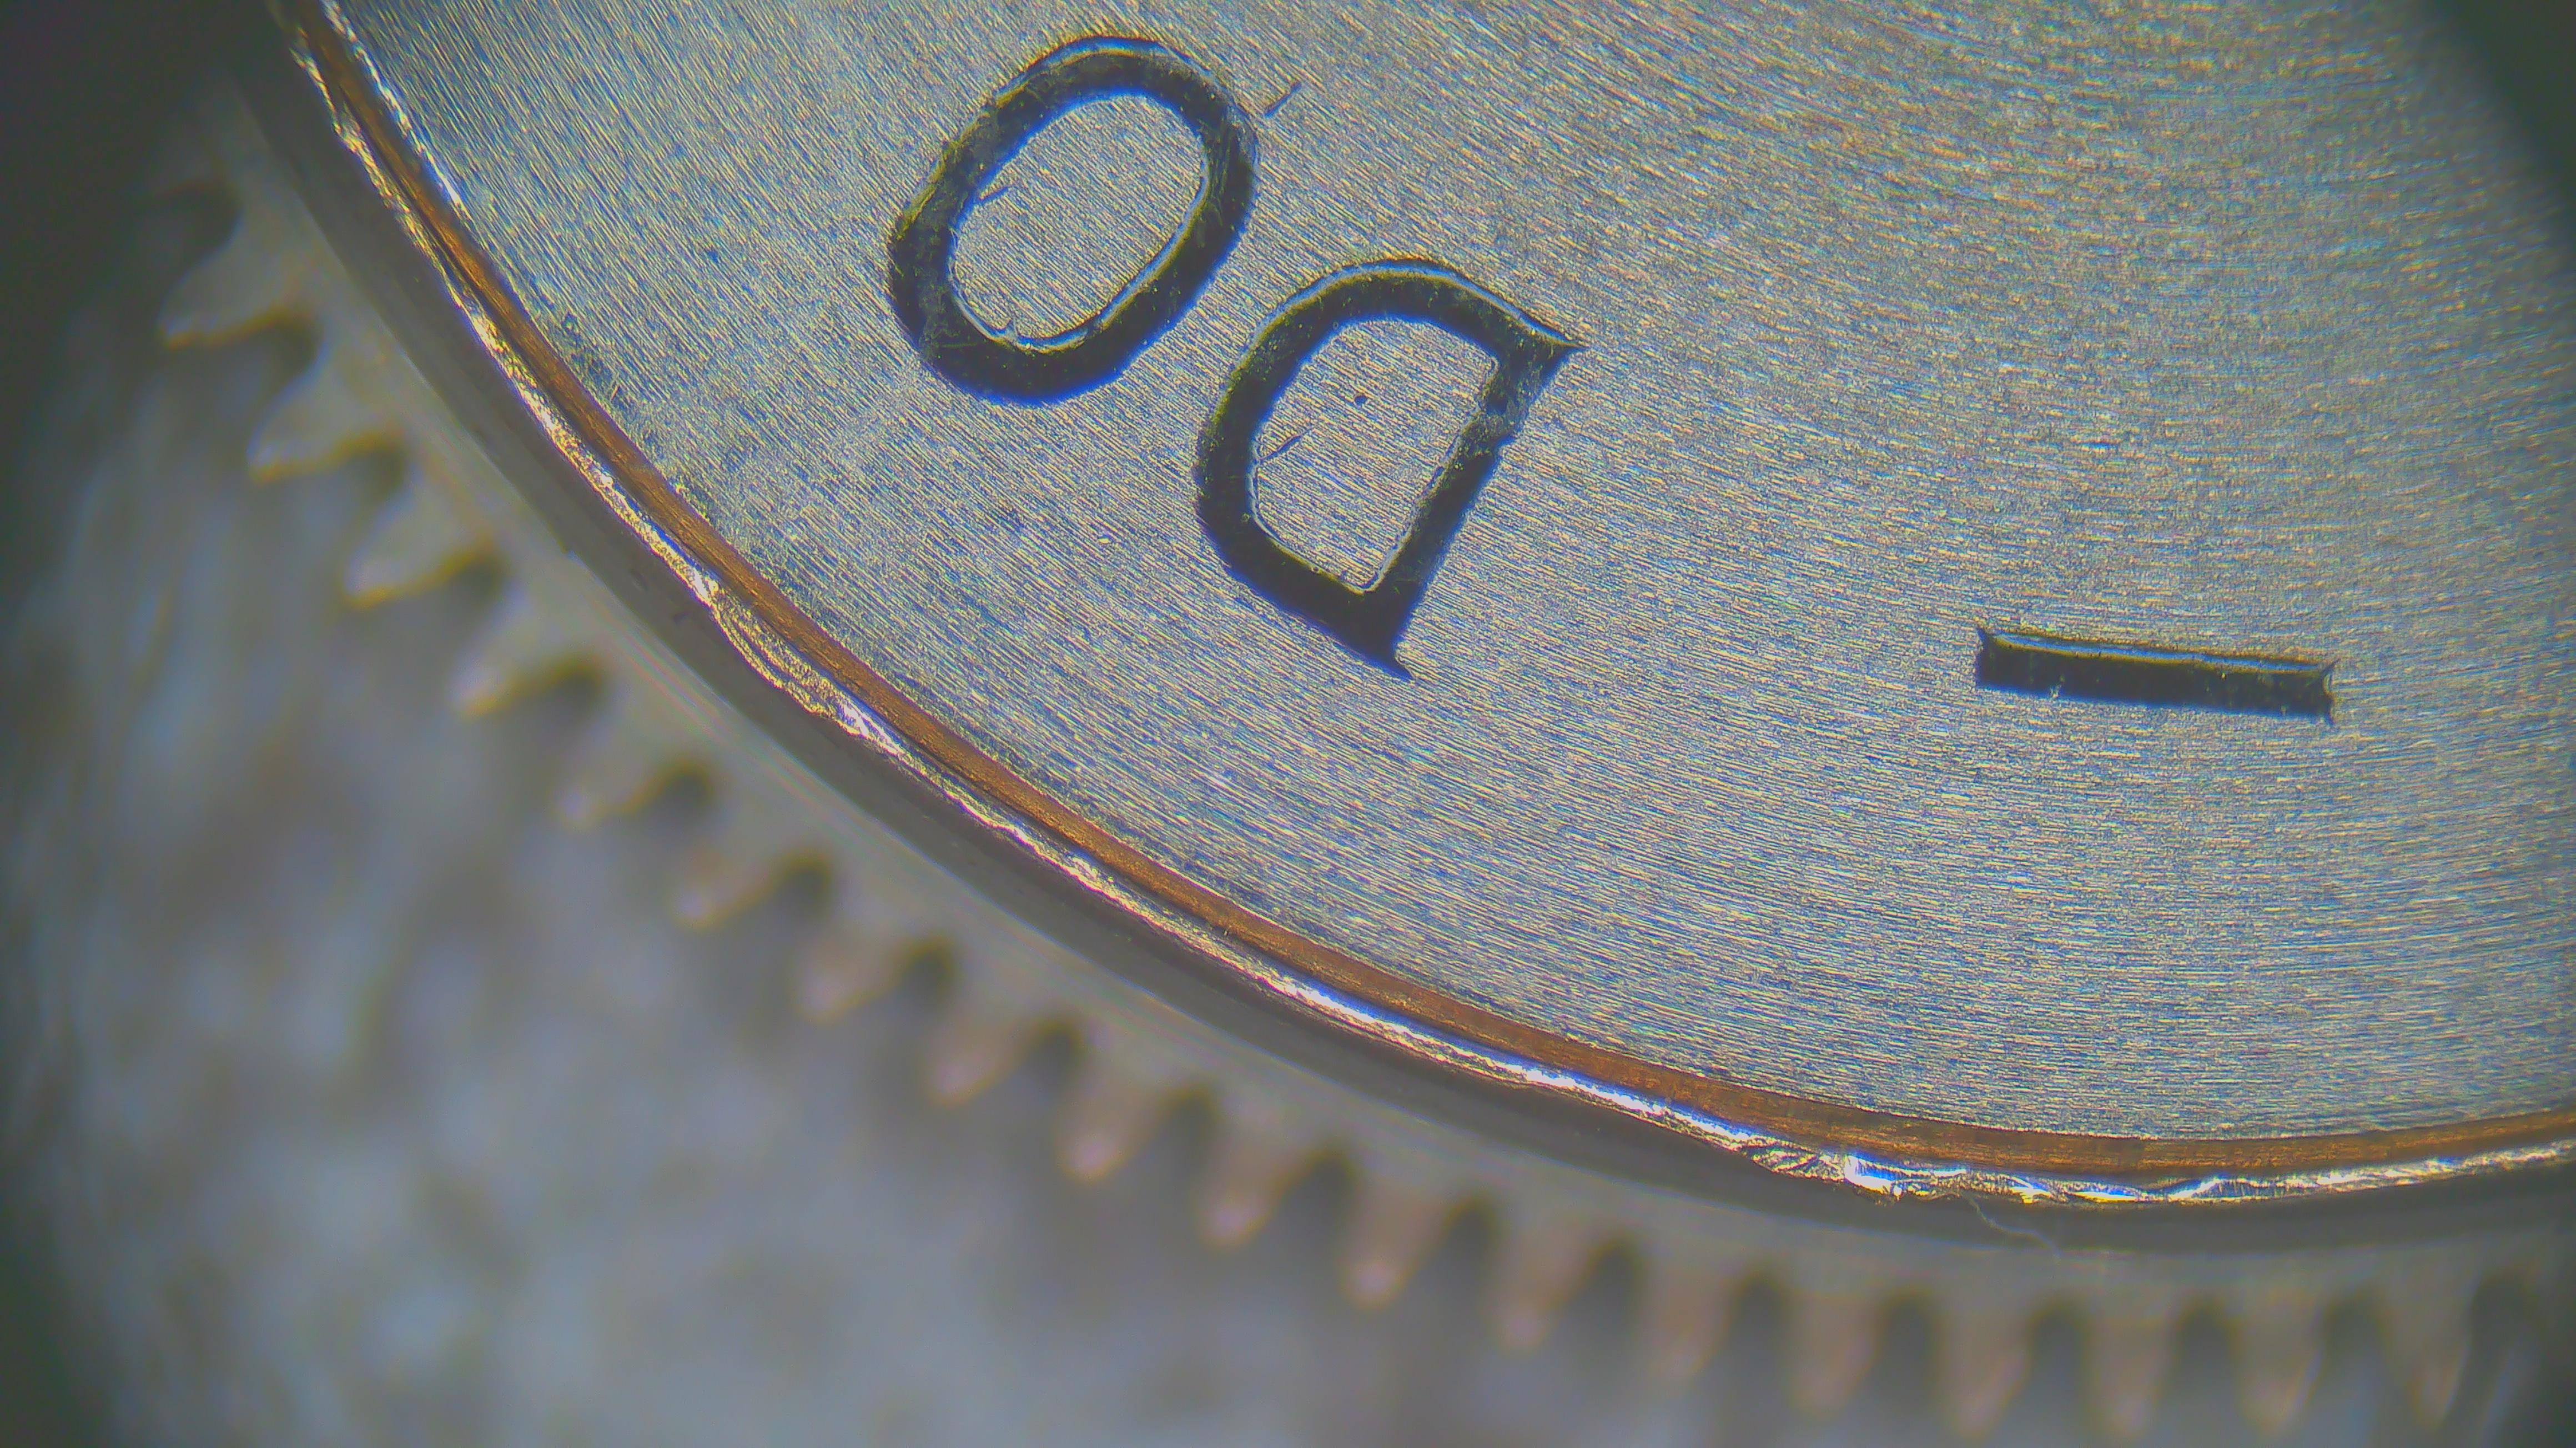
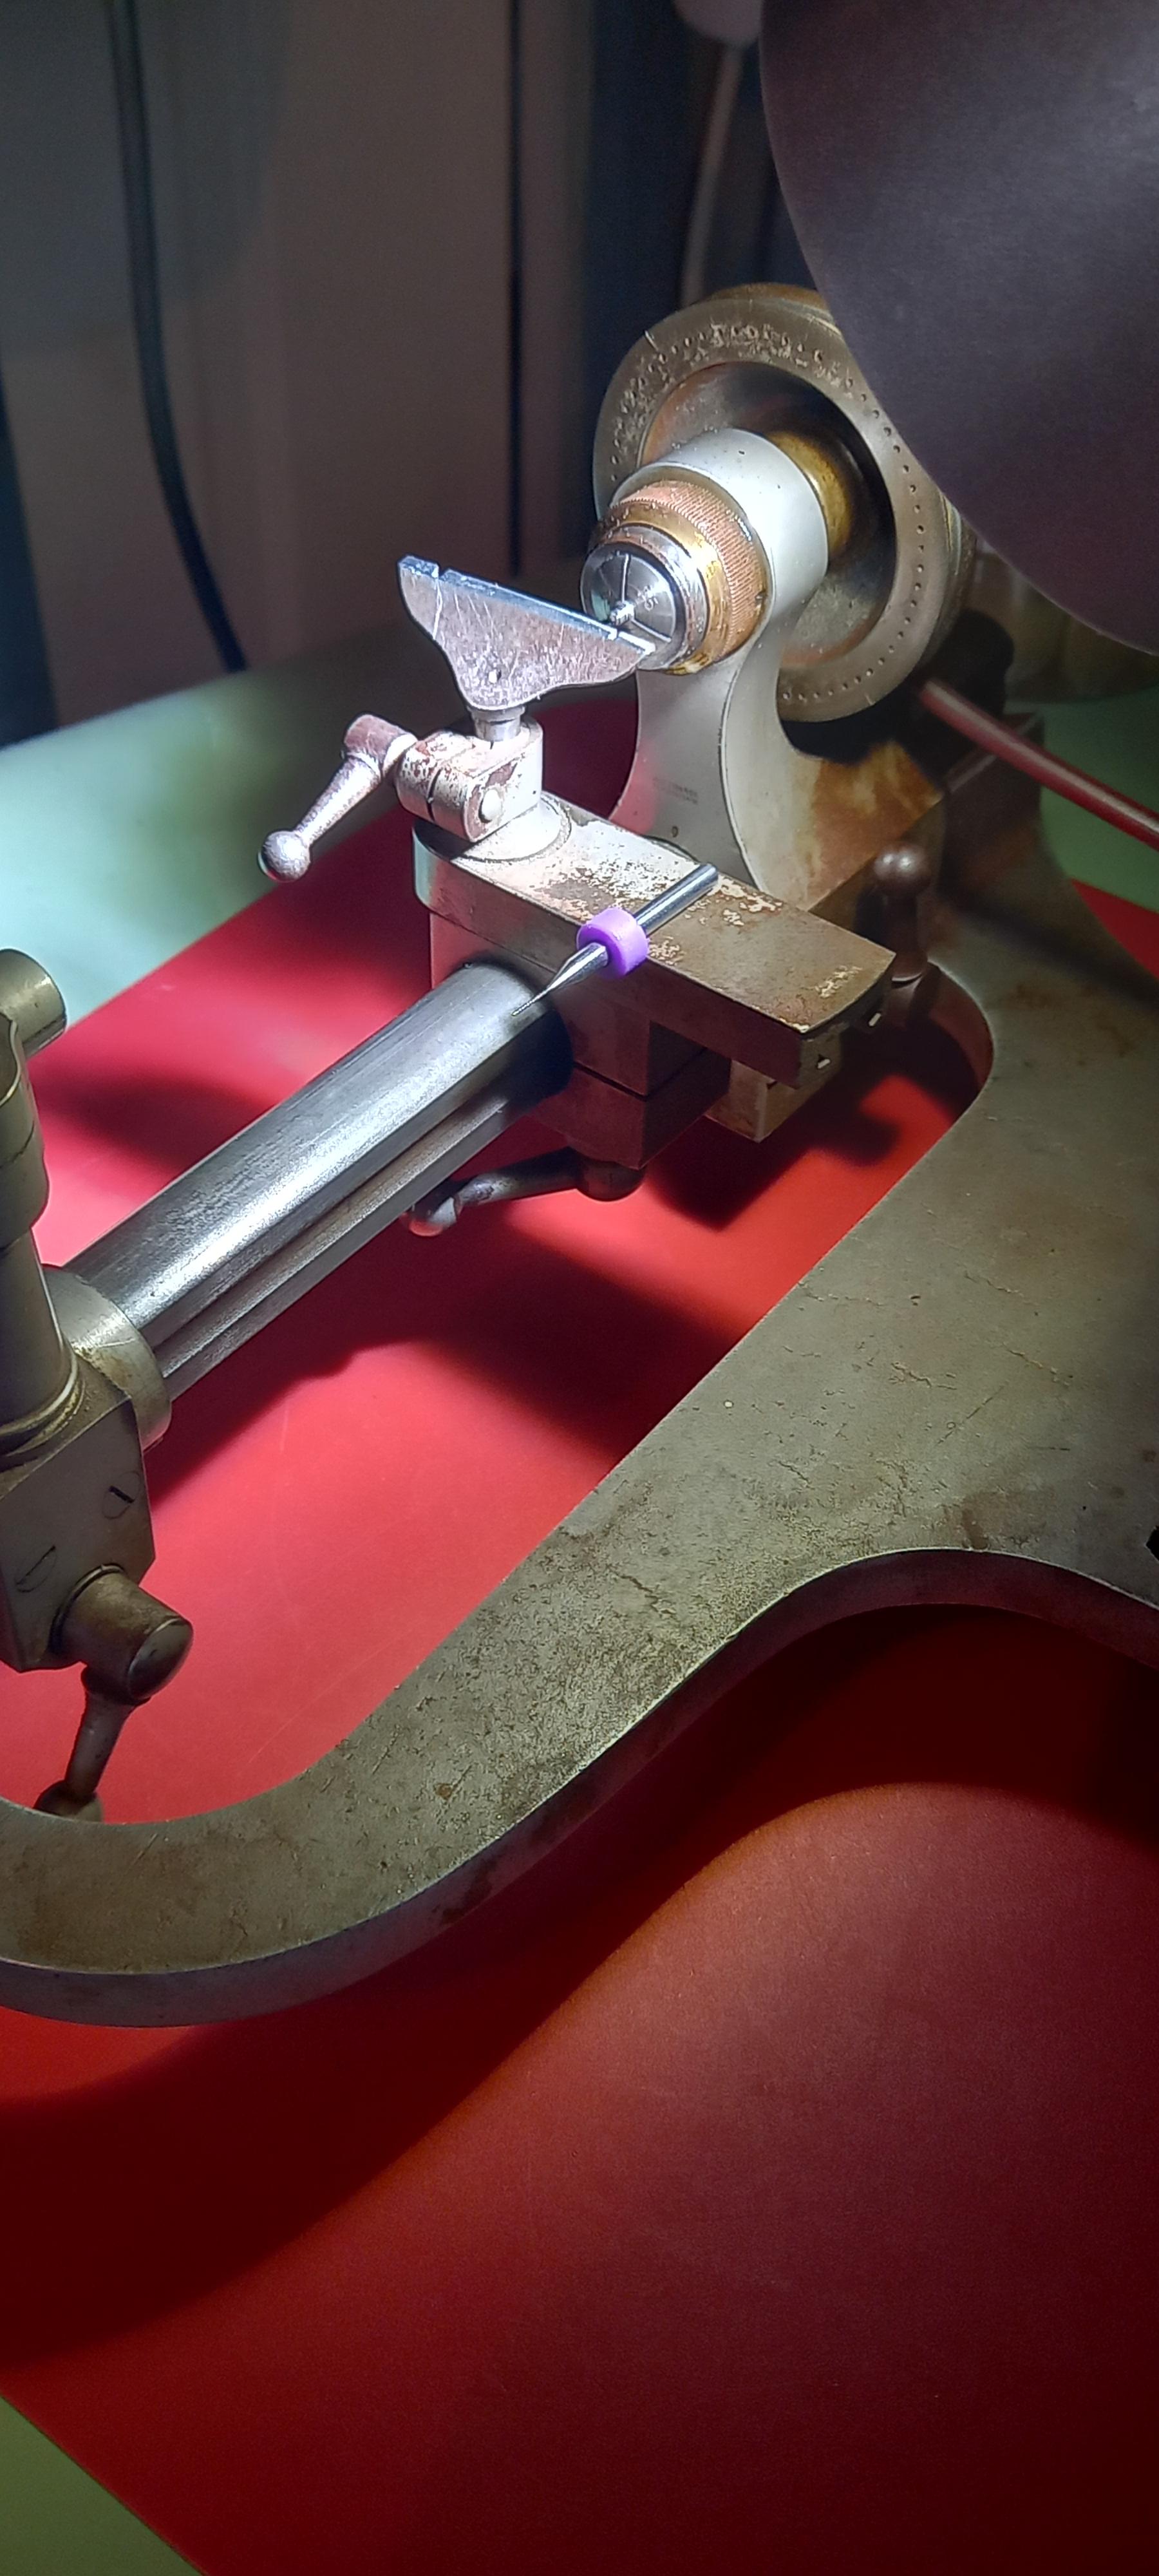
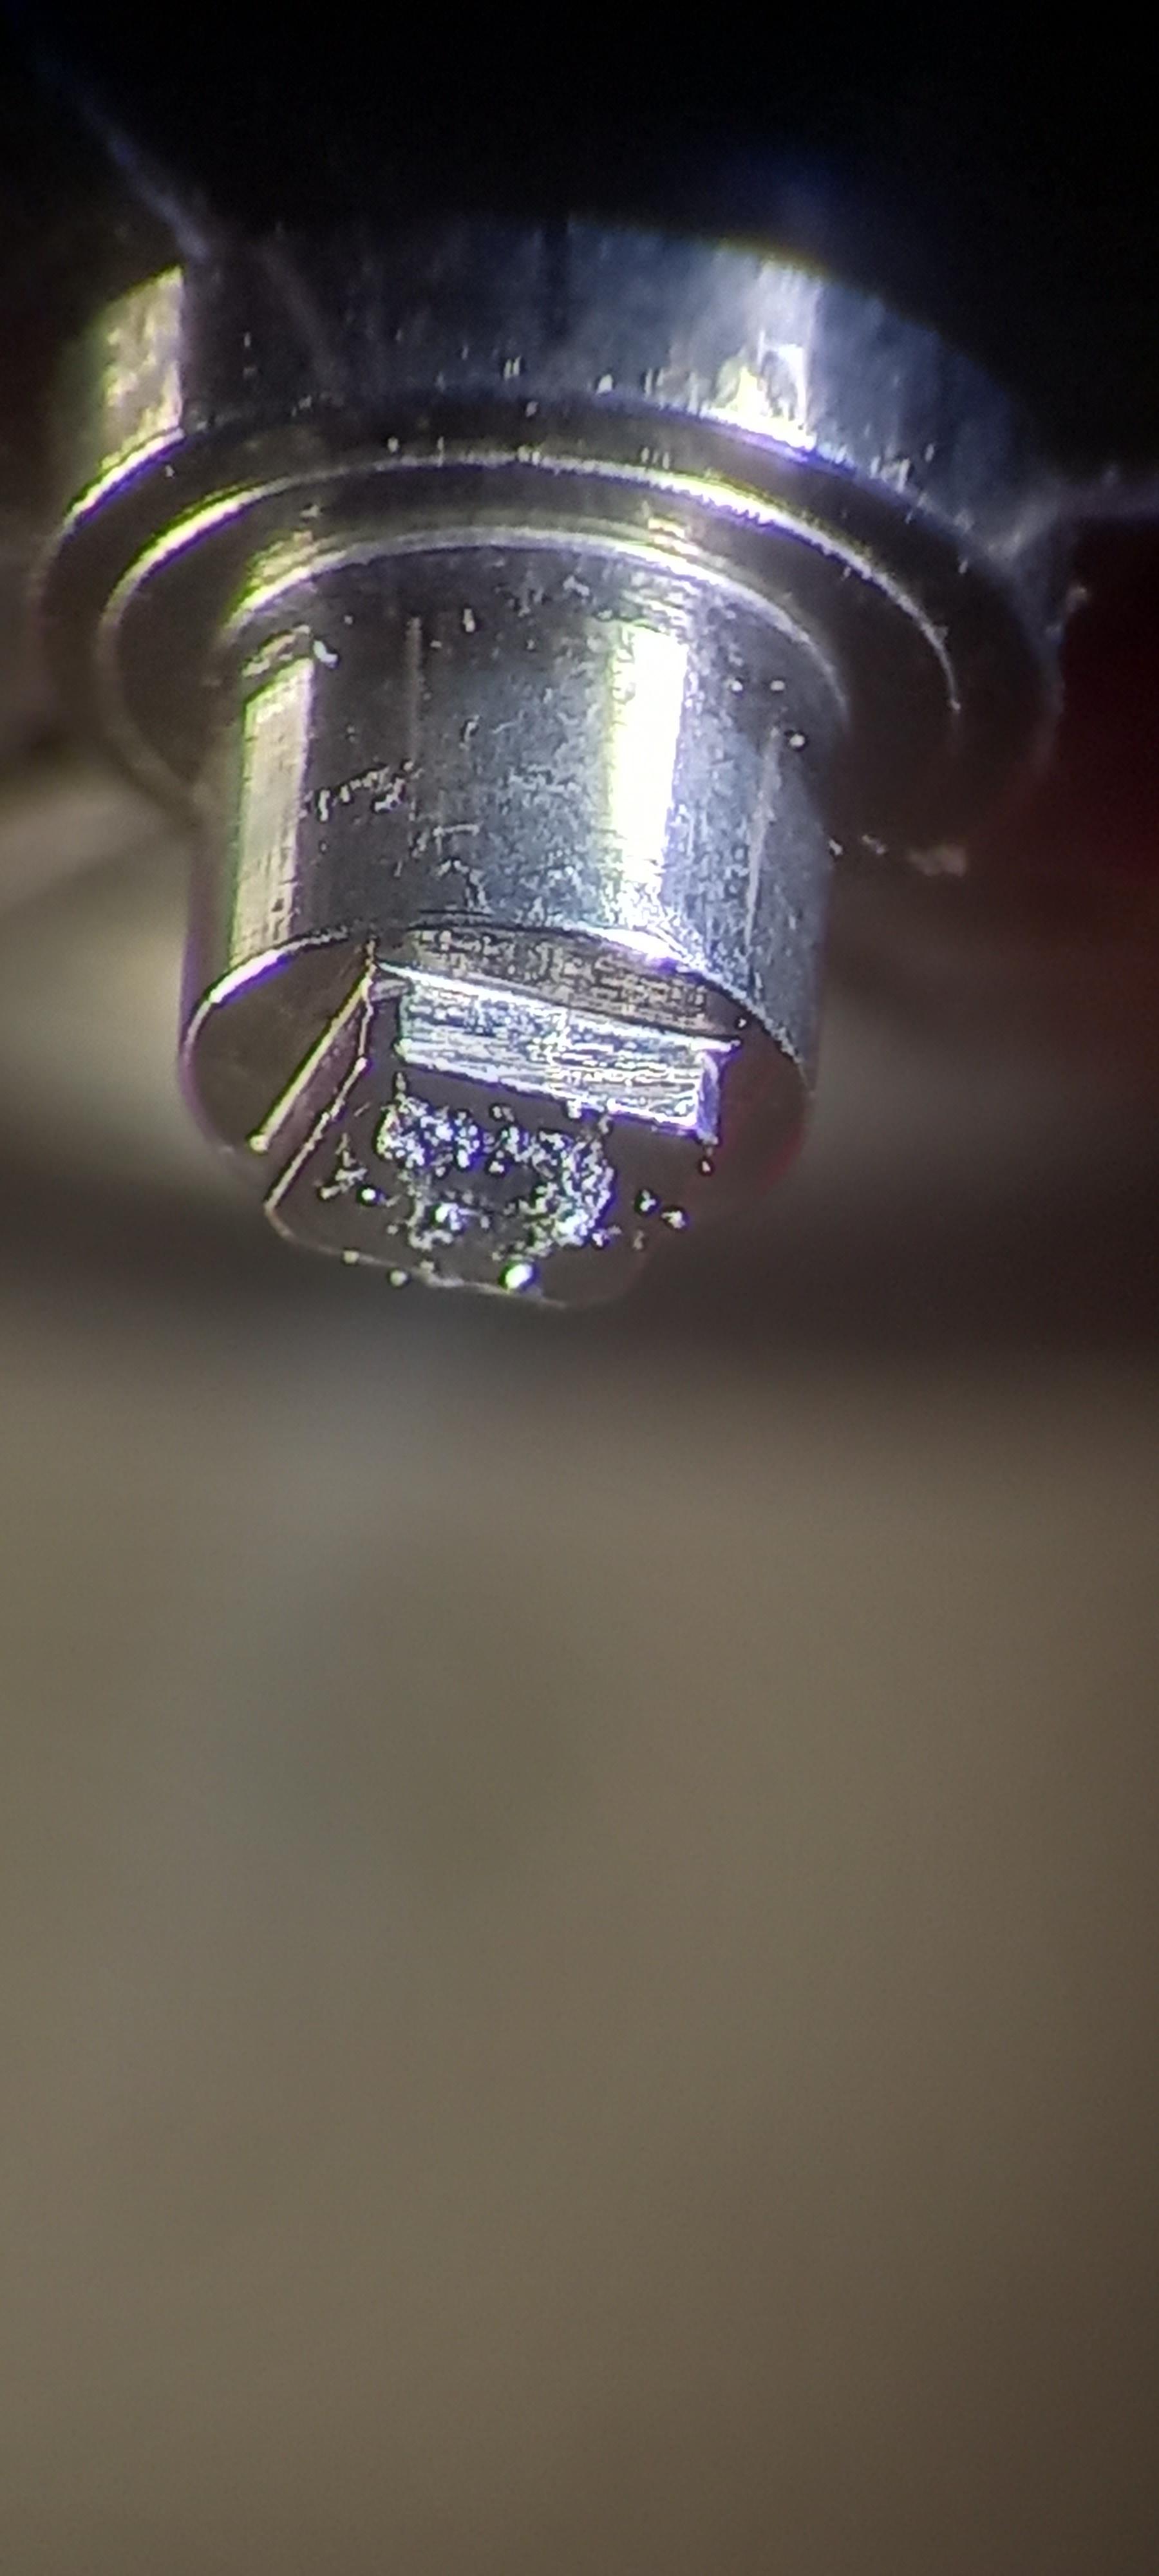
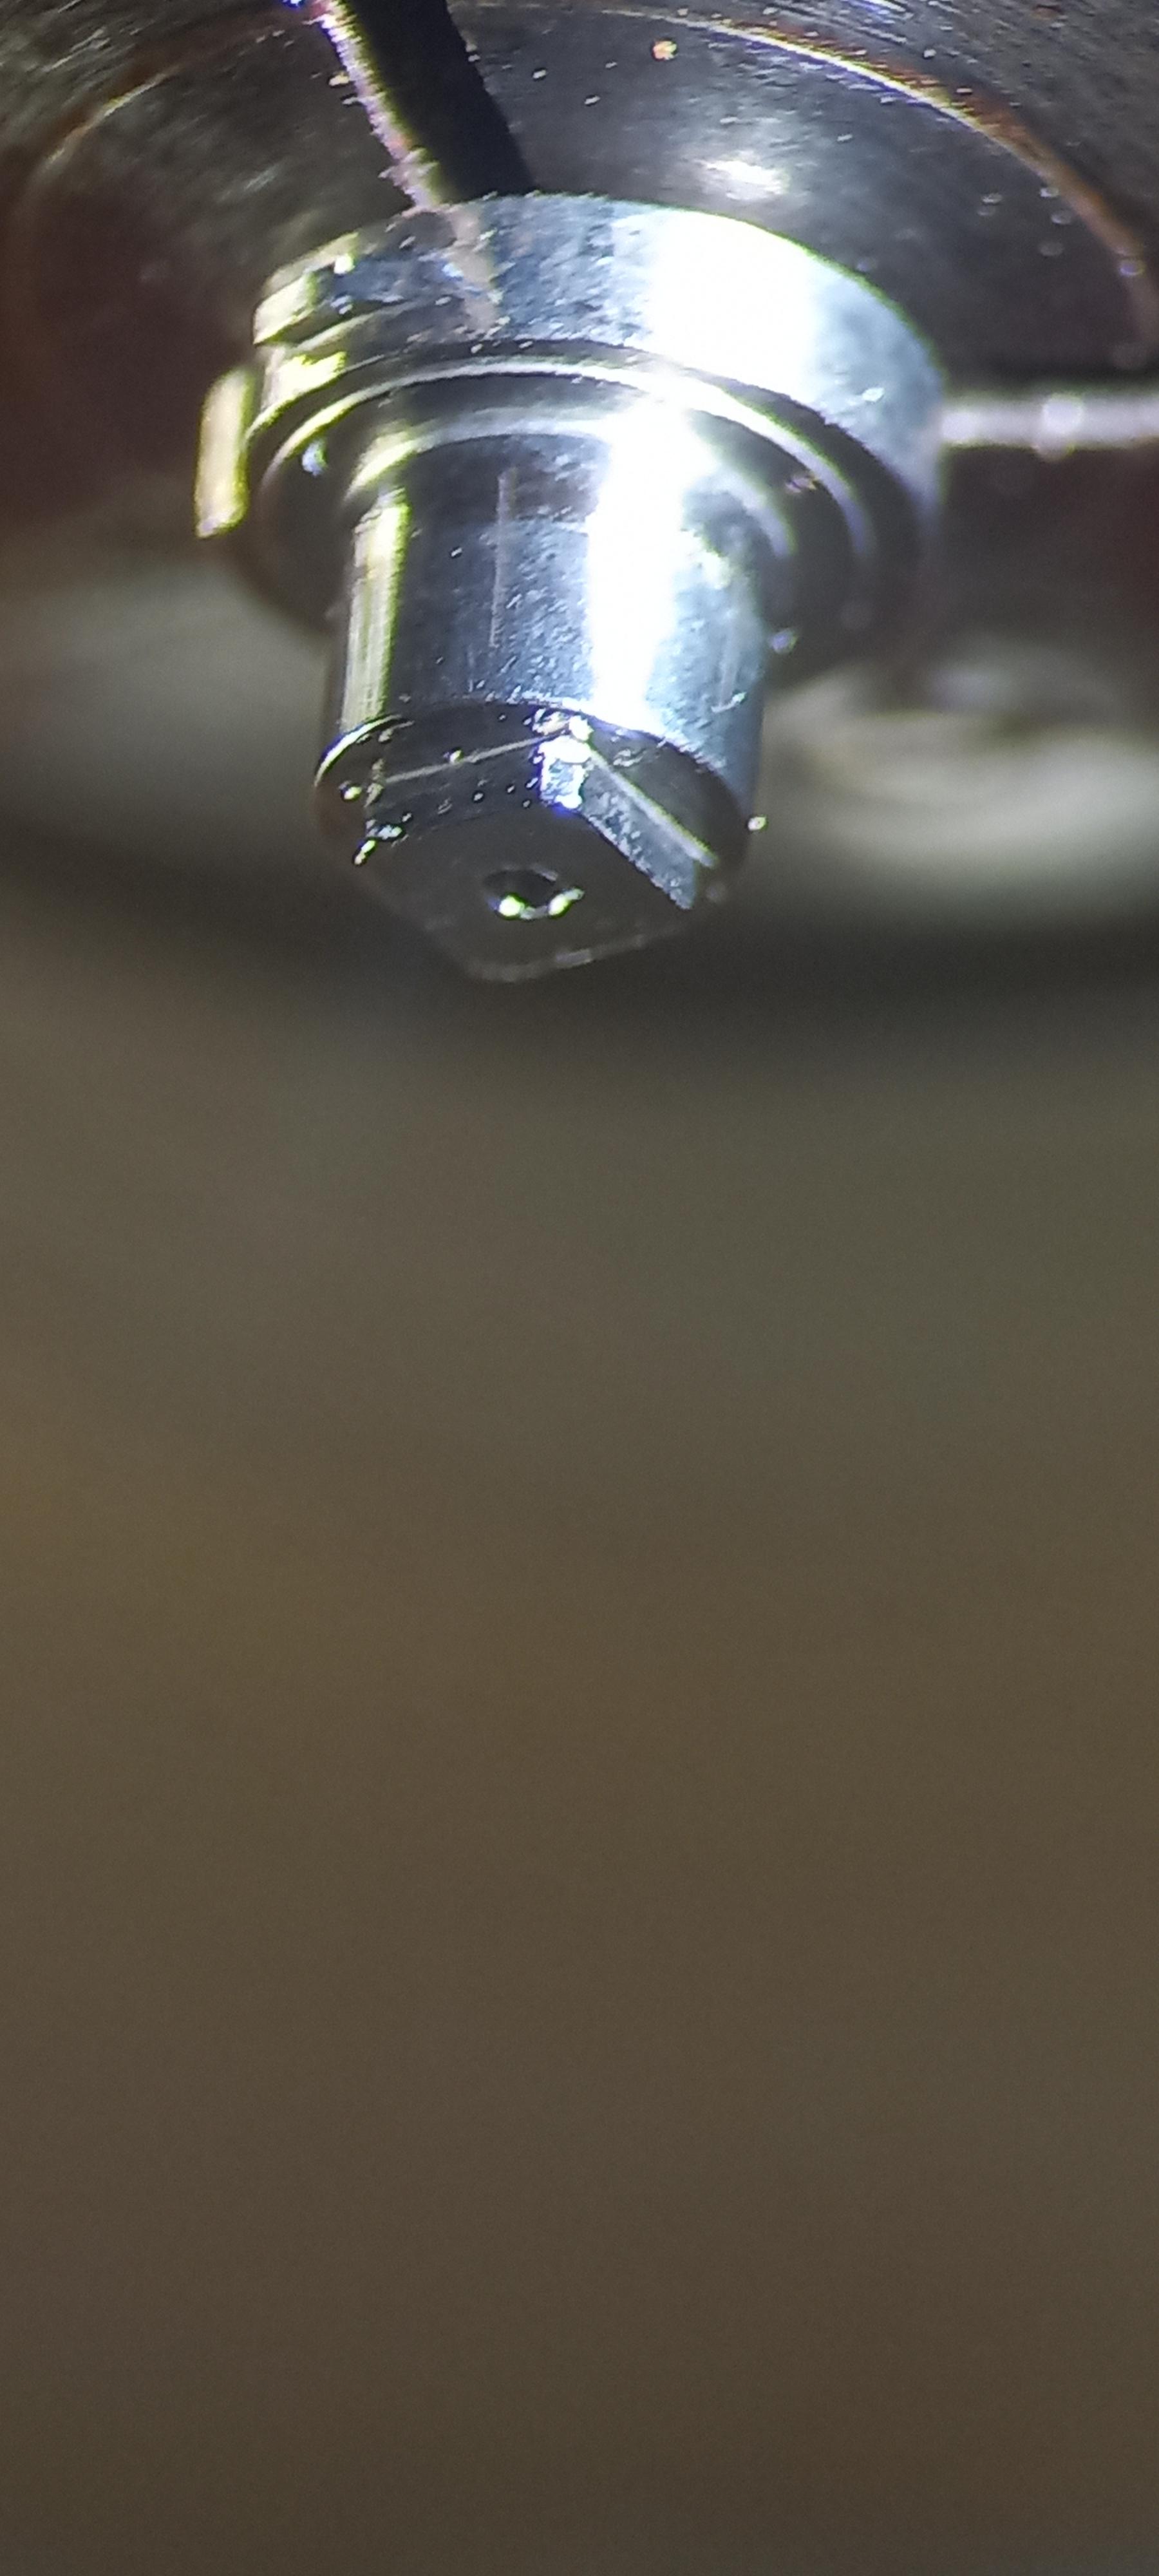
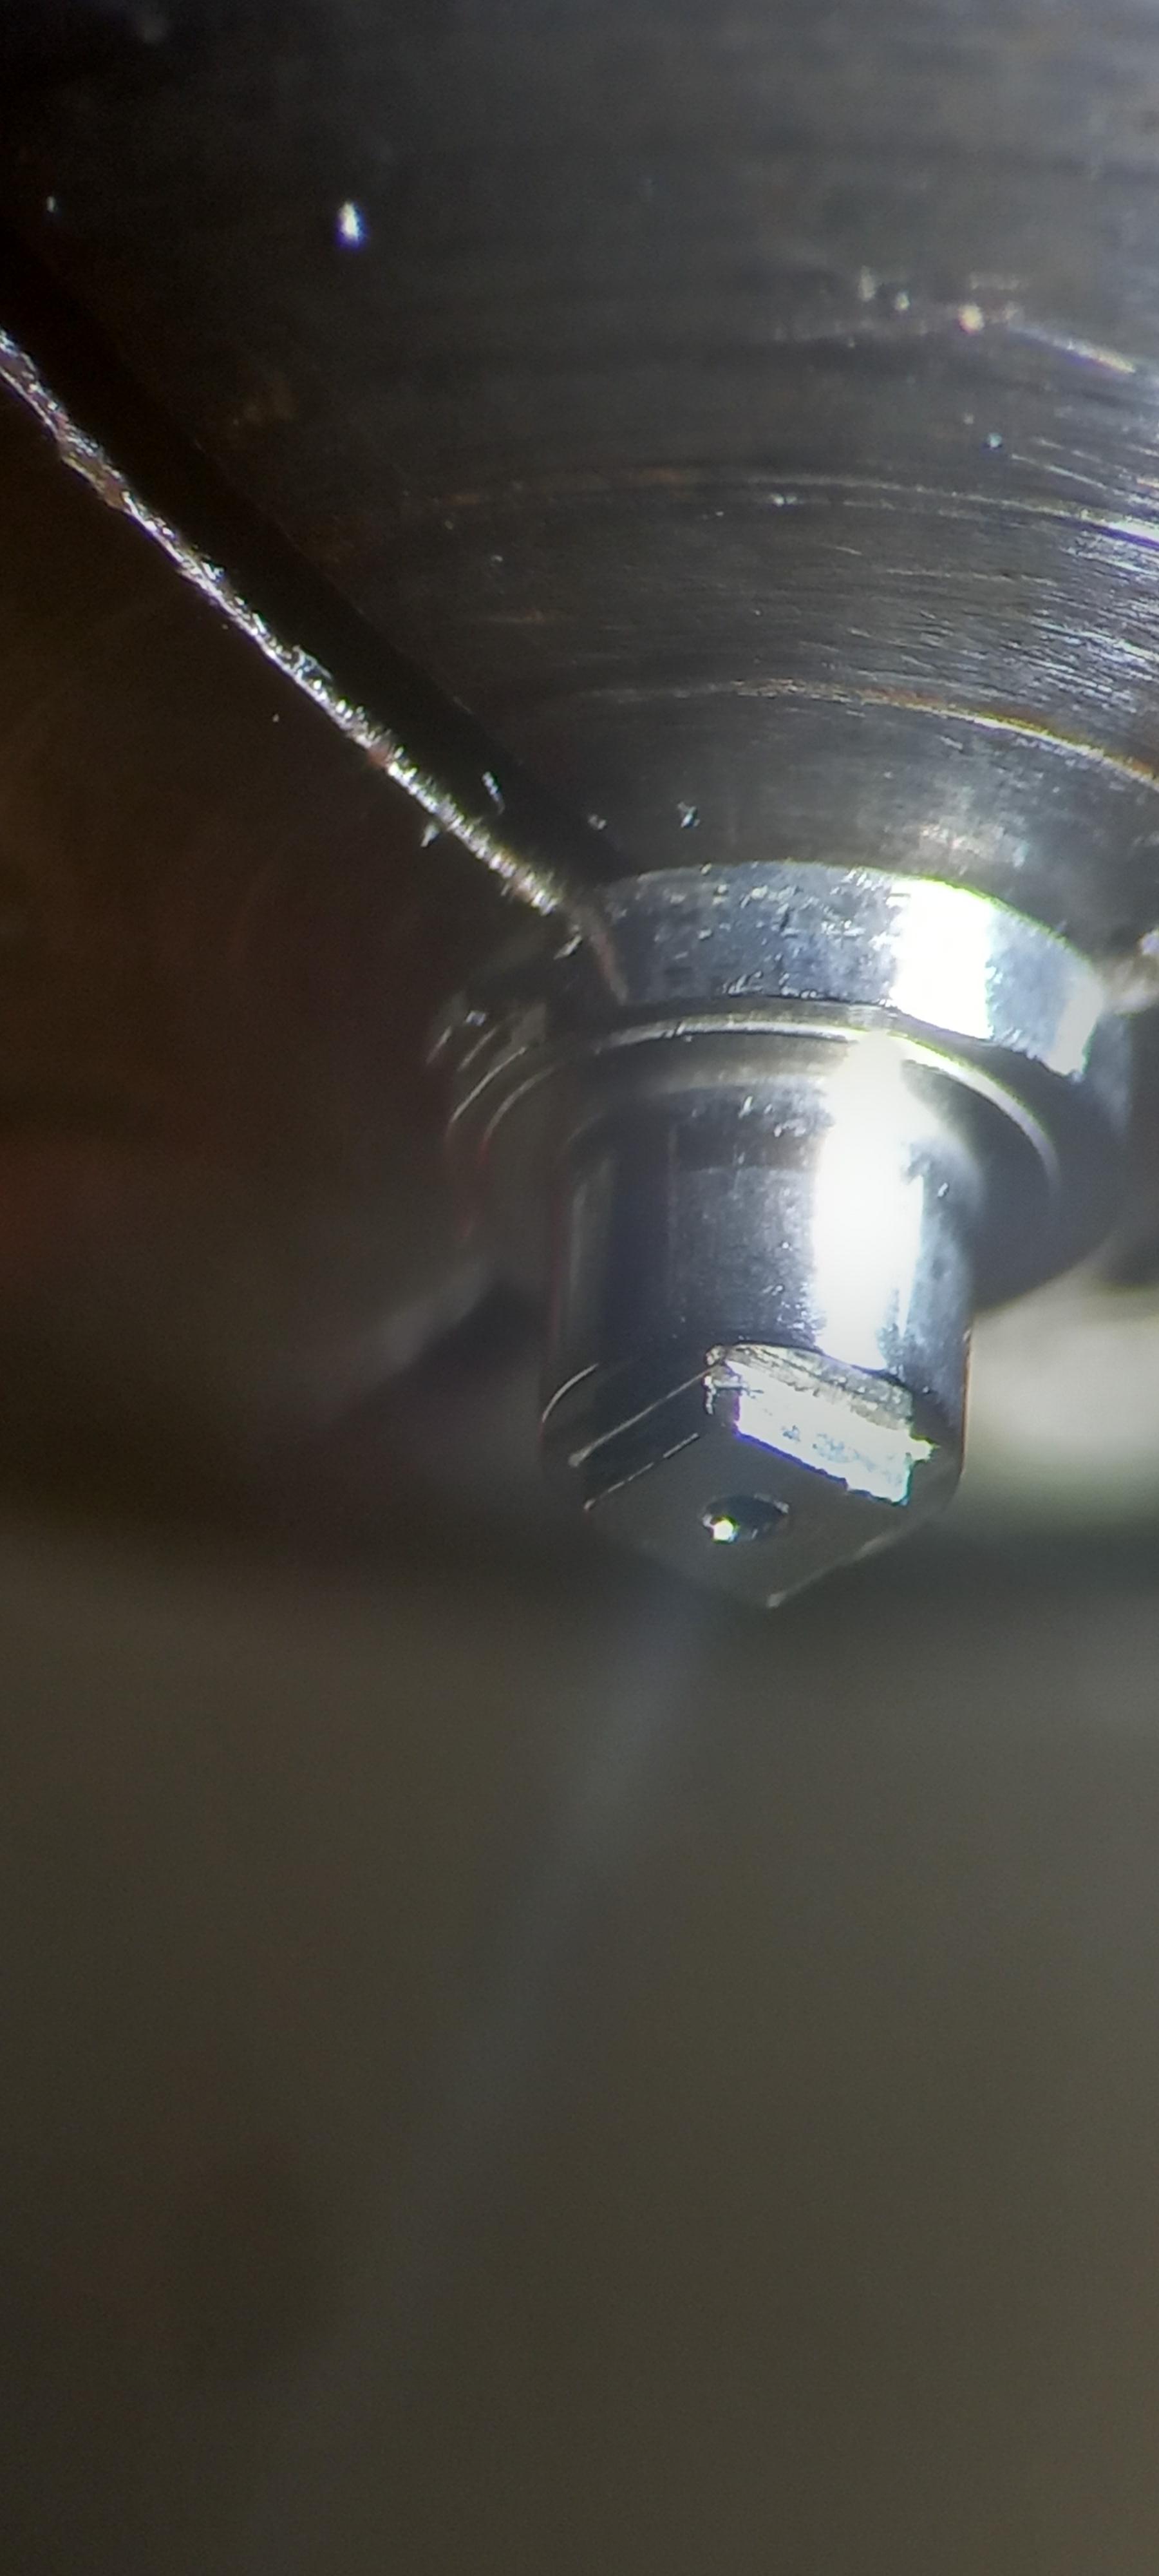
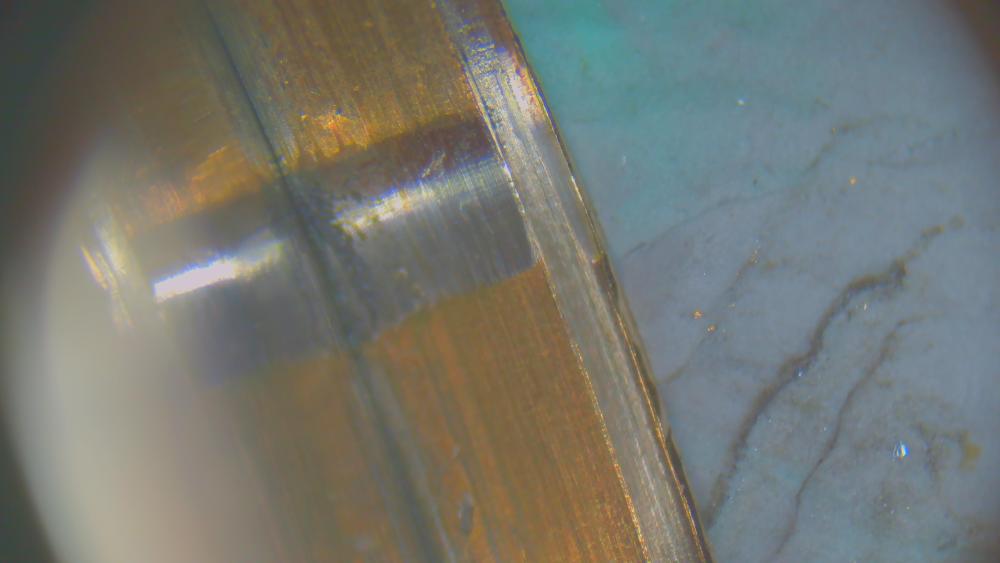
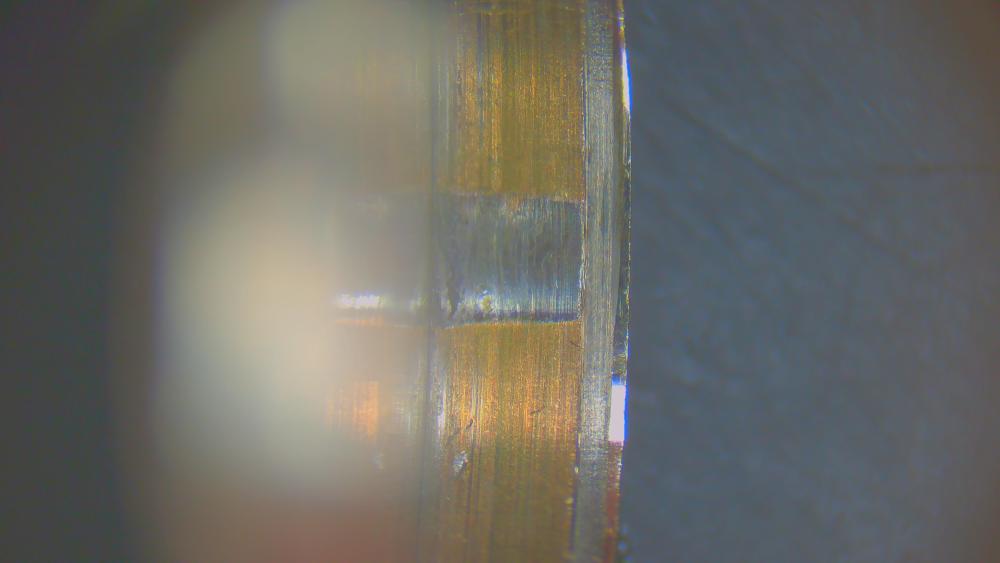
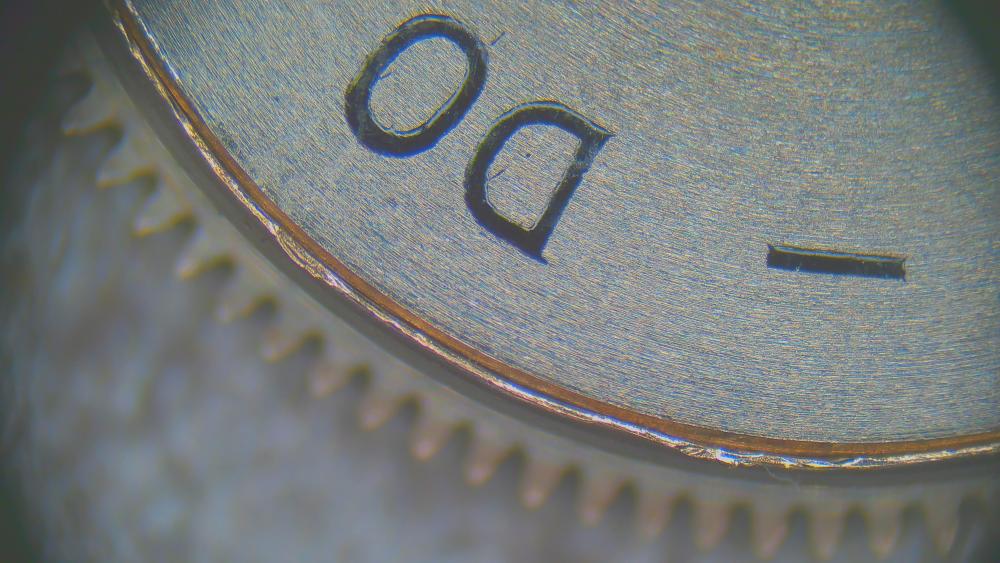
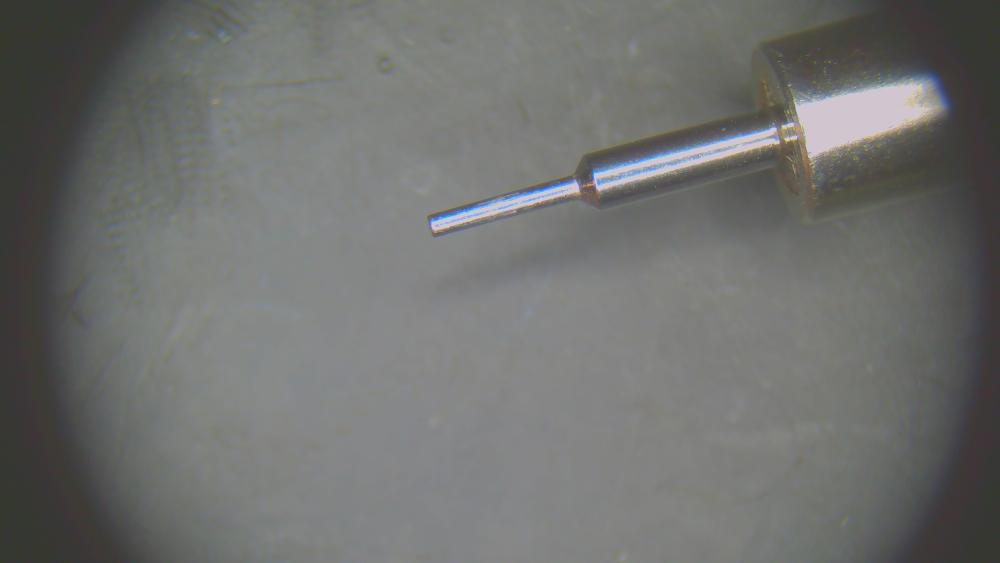
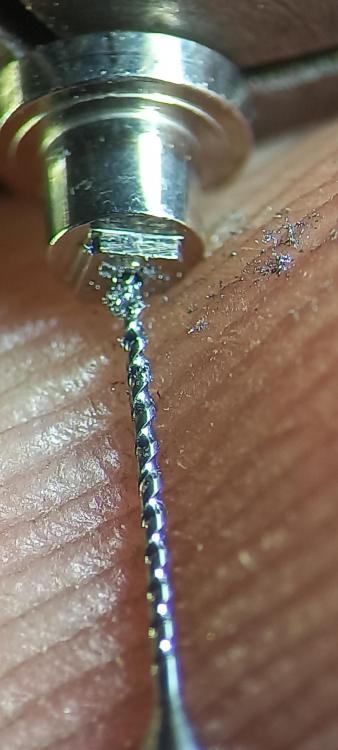
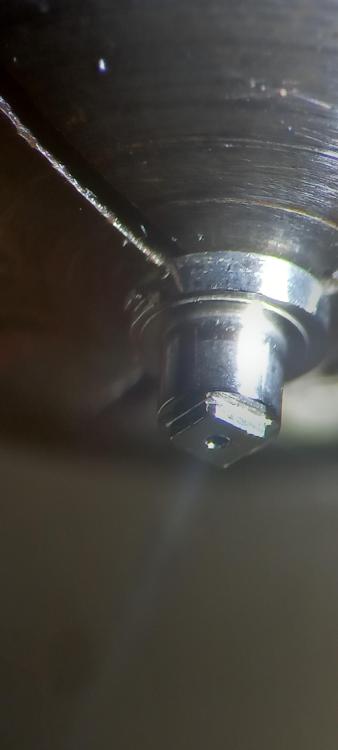
Thank you @Jon and @nickelsilver again. I took the plunge and opened it. It came off with no problems at all. However, upon close inspection, I could see the "lip"/burnishing. So I followed @nickelsilver's advice and tried to gently bend the metal back out. I used a bracelet tool for it... and quite frankly, I'm very happy with the result. I tested my success by reinstalling the lid. Went back in smoothly. And off again. I guess when I install the new mainspring and the lid, I'll try to burnish the edge of the barrel back towards the lid. Pictures below: 1. Before (took of barlow lens for even better magnification) 2. Opening the usual way was no problem. Not crazy dirty, but for sure wouldn't have been a good idea to just re-use. The breaking grease was had turned into more of a powder. 3. This is what I used. The pointy end of a bracelet tool. 4. Here you can see the flattened-out lip up until the notch (included). Then the still burnished inwards lip below that. 5. After two-three rounds, I'm satisfied. 6. After closing the barrel again, you can see more space between lip and barrel edge (if you compare to picture 1). The lid installed with no problems. Not perfectly pretty, I'll admit. But hopefully it'll look ok and be fully functional (secured/closed) when I burnish it back after installing the mainspring.


 4 points
 -
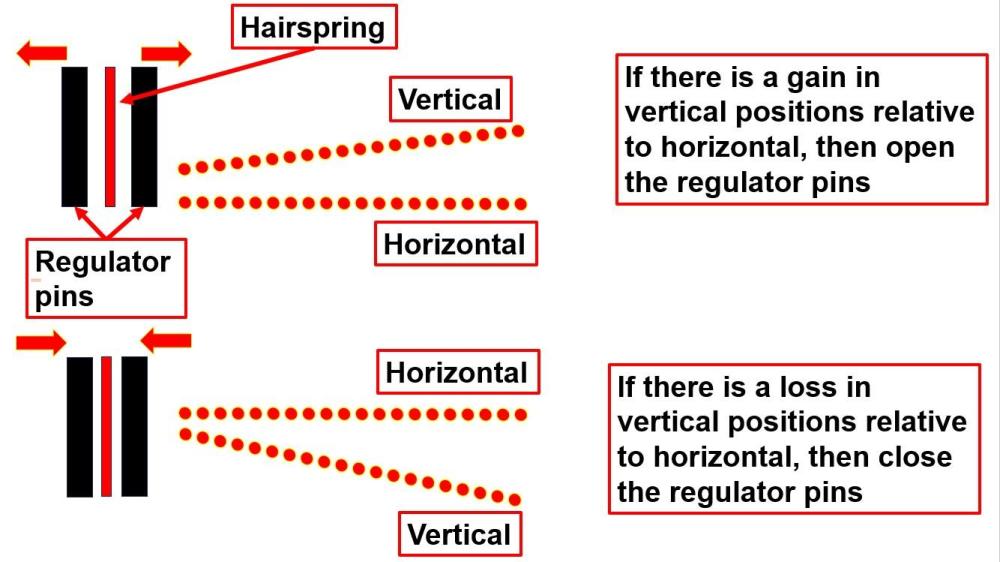
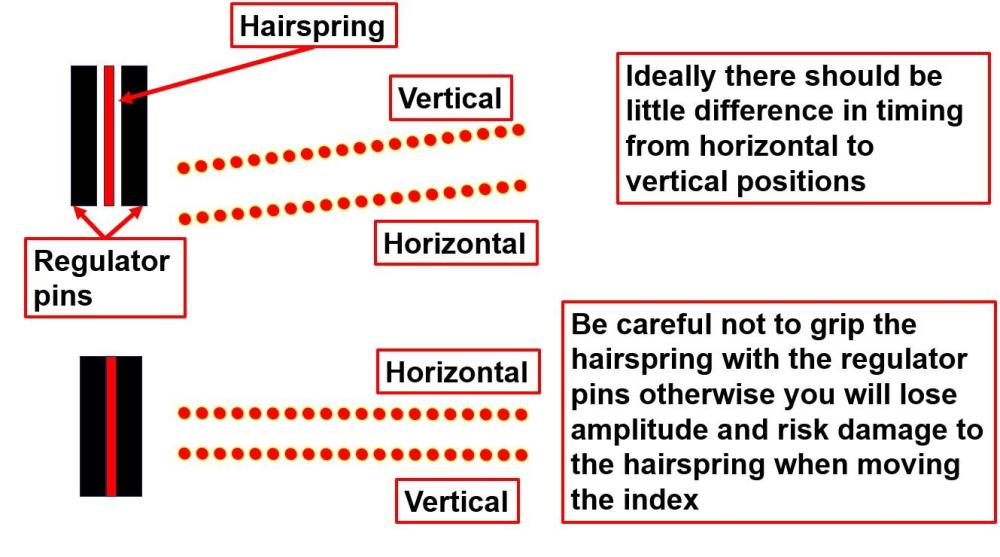
If the coils of the hairspring are equidistance from each other and the end-curve is perfectly formed, so the regulator pins (curbpin and boot) don't push or pull the hairspring regardless of where the index is at the extreme of '+' or '-' and the balance is poised (consistent + or - timing in vertical positions) then it may be the gap between the regulator pins. These slides may help explain which way to open or close them. This is why an EtaChron system works so well, as you can set where you want the hairspring to exactly be and set perfectly distanced regulator pins every time!
 3 points
 -
A new mainspring £10, a new barrel complete £100. Any questions?2 points
-
I take it if you look at the bergeon complete set then ???? . Do we have a forum system error or is there an echo in here2 points
-
I would always open a barrel, regardless of what is written on it. The idea of leaving a mainspring inside a skanky old barrel with old grease or maybe a break or two and not no it doesn't sit with me. It's like Schrödinger’s Cat. Is it alive or dead or both based on quantum indeterminacy. Same goes for the mainspring, rather than the cat, so to speak. You will never know until the barrel is opened. My old Master always told us never to remove the crown wheel! WTH! and this was someone with decades experience. As they say, 'Take what is good and leave the rest behind'. That one got left behind very early on! @nickelsilver gave an excellent explanation how to manipulate the barrel with rod once opened to facilitate closing it again without damage.2 points
-
0.3mm hole drilled which was surprisingly easy and went a whole lot better than i expected considering i did it free hand with a carbide bit in a small pin vice,and no breakages. I only have some 0.34mm and 0.5mm blue steel so my plan is to open up the hole to 0.5mm and reduce the pivot down to size to fit the plate bearing before fitting it in the arbor. I'm not entirely sure on the hole depth, my head is tell me 3x the hole diameter . I dont have a 0.4 mm Nev or i would have. Turn a new arbor me thinks you overestimate my ability Nev Only Nev knows that secret Rich, The only thing i know is i wont be doing it !!


 2 points
 -
I use a 3mm carbide rod with a crisp flat face (steel is fine too), and, holding the barrel vertically, under the microscope, teeth resting on a hockey puck, I carefully slide the rod along the part of the barrel that clips to the lid, pressing quite hard to deform the metal back out. If you don't do this, when you go to press the lid on it will catch, causing damage to the lid and barrel, often with no feasible repair. It's actually ok to tilt the rod a little after getting the lip straightened, to form a slight bevel around the perimeter to facilitate the lid going back in. It's not a fun job to do. As for mixing lubricants- that can be a real issue. One would imagine that given its age it was probably lubricated with non-synthetic, so probably best to use D5 or similar rather than an HP oil. I don't know specifically which lubricants aren't compatible or what the real results of mixing those are, but D5 is a pretty safe bet.2 points
-
Size would help narrow down possibilities.1 point
-
First question is what are the issues you are experiencing and second question is what is leading you to think that the balance is the cause. As far as the pivot goes it looks all there but the photos are not really clear enough to determine much else. Hope this helps to look further into the problems. Thats a confused face right there, pivot which pivot , bottom pivot top pivot choose a pivot, we seem to be having a day of randomness. ??? Bottom of side of pivot ?1 point
-
Escapement and balance designs can be good indicators Keyless works ID is the usual method if the movement is within a set time period1 point
-
Ok you win1 point
-
Thanks Nev , i really appreciate all that information you have given me. Yes i fully understand what you say about the sharpness and approach angles for the gravers and developing a feel for the cut. I used to turn timber years ago the principles are similar especially aquiring the feel for turning. I think now that the graver was not sharp enough. I play the guitar so I may try your method with the guitar strings , thanks again Nev1 point
-
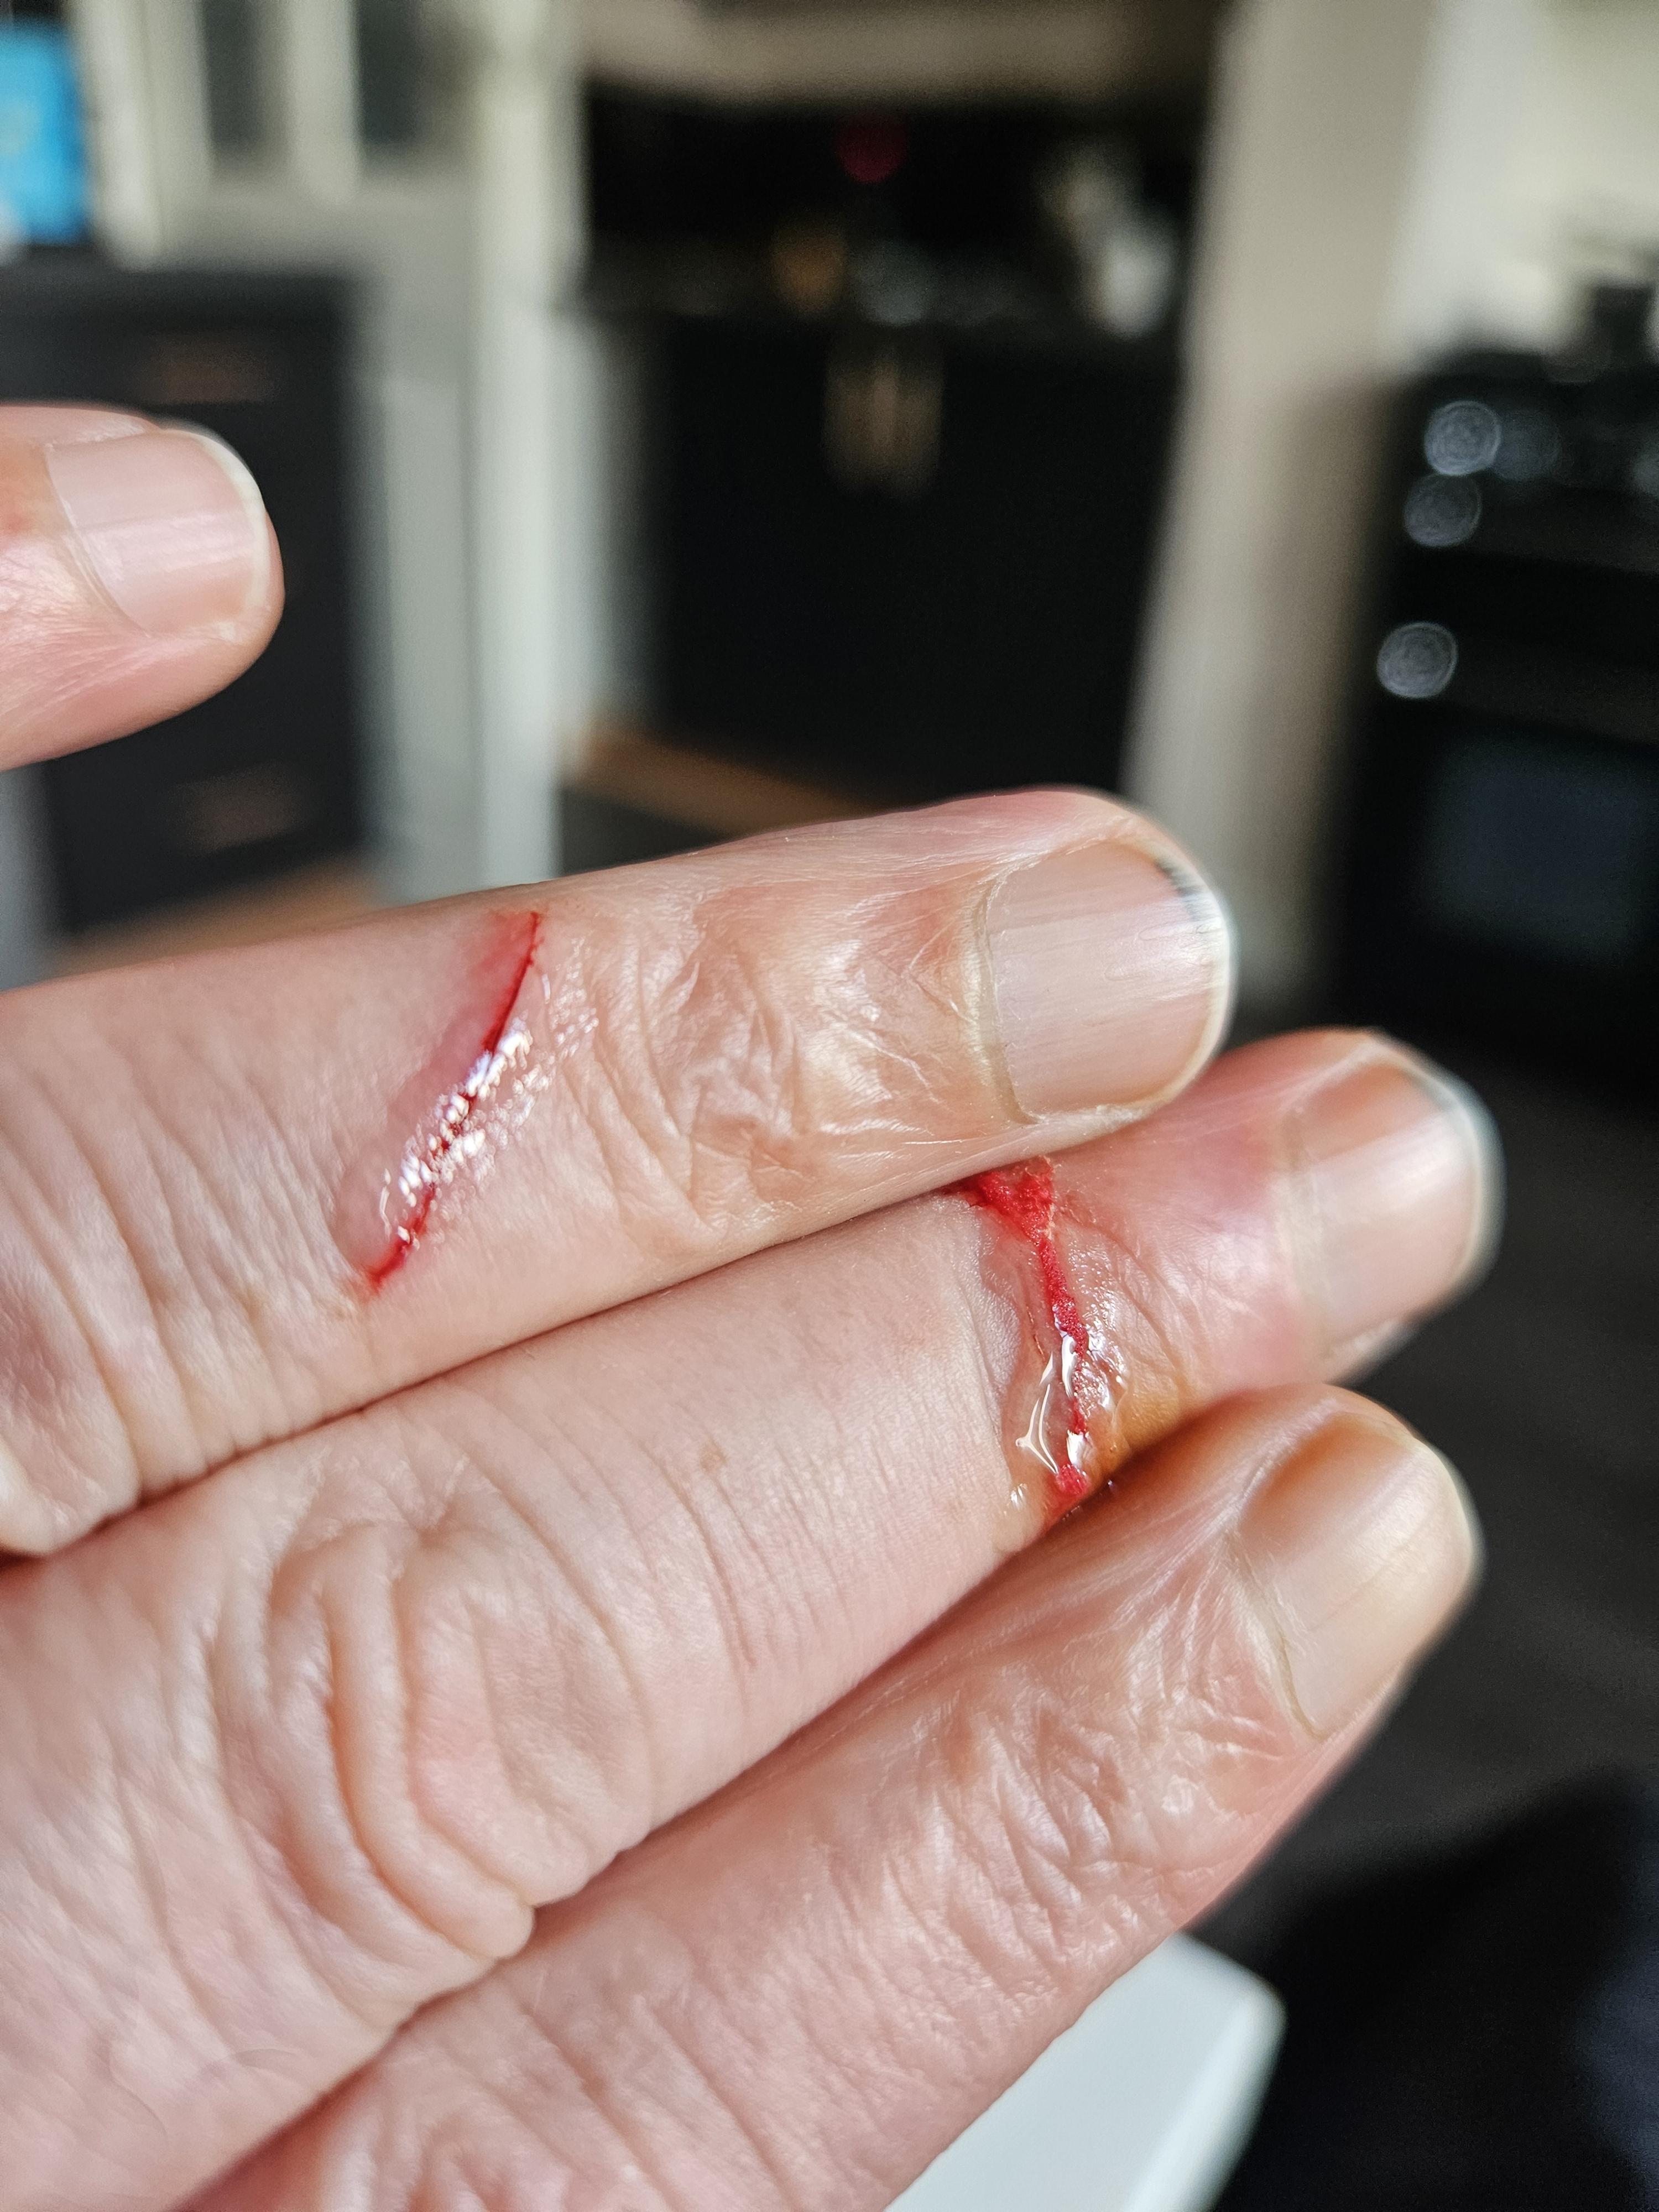
Softy, a great white bit me in half, superglue is brilliant.1 point
-
Nice work Knebo, that looks great! Just a note (I'm sure I've mentioned it before but anyway)- of the barrels marked as sealed, the one I've encountered that's really really sealed is Zodiac. The burnishing is so tight the lid deforms to be point of being useless, requiring making a new one, at least in my experience. And I just got one in... haven't looked inside, hoping it not actually a Zodiac movement .1 point
-
Thanks @Jon for the kind words. Indeed, for the others out there: not much force is required to flatten out the burnishing. However, you need a steady hand and a good view on it. I cannot imagine doing it without my stereo microscope..1 point
-
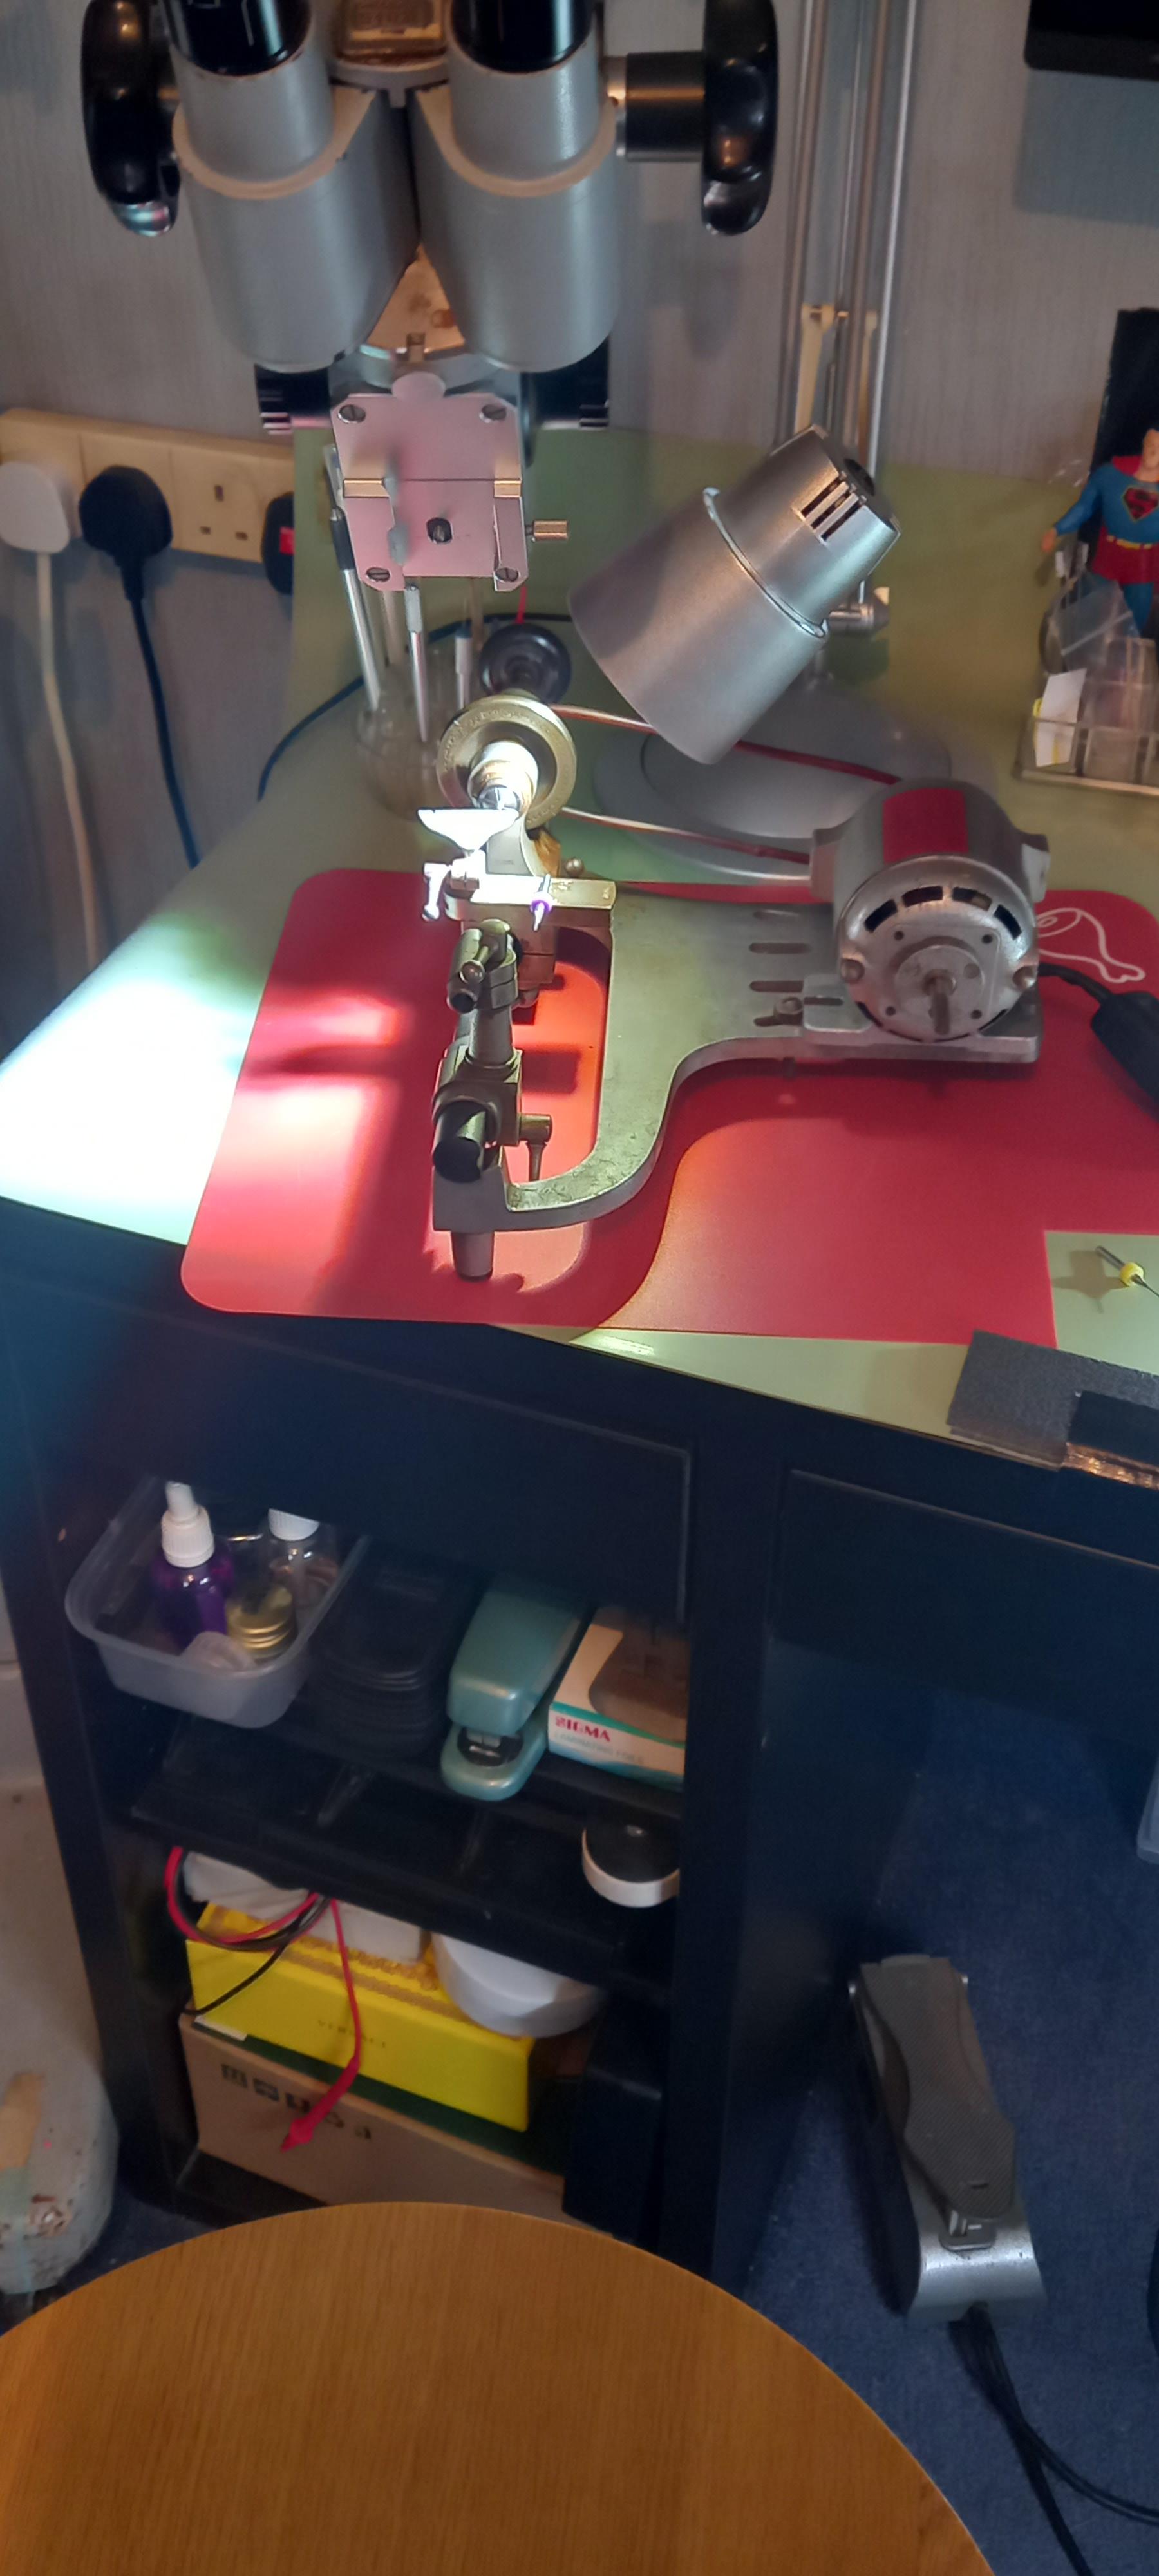
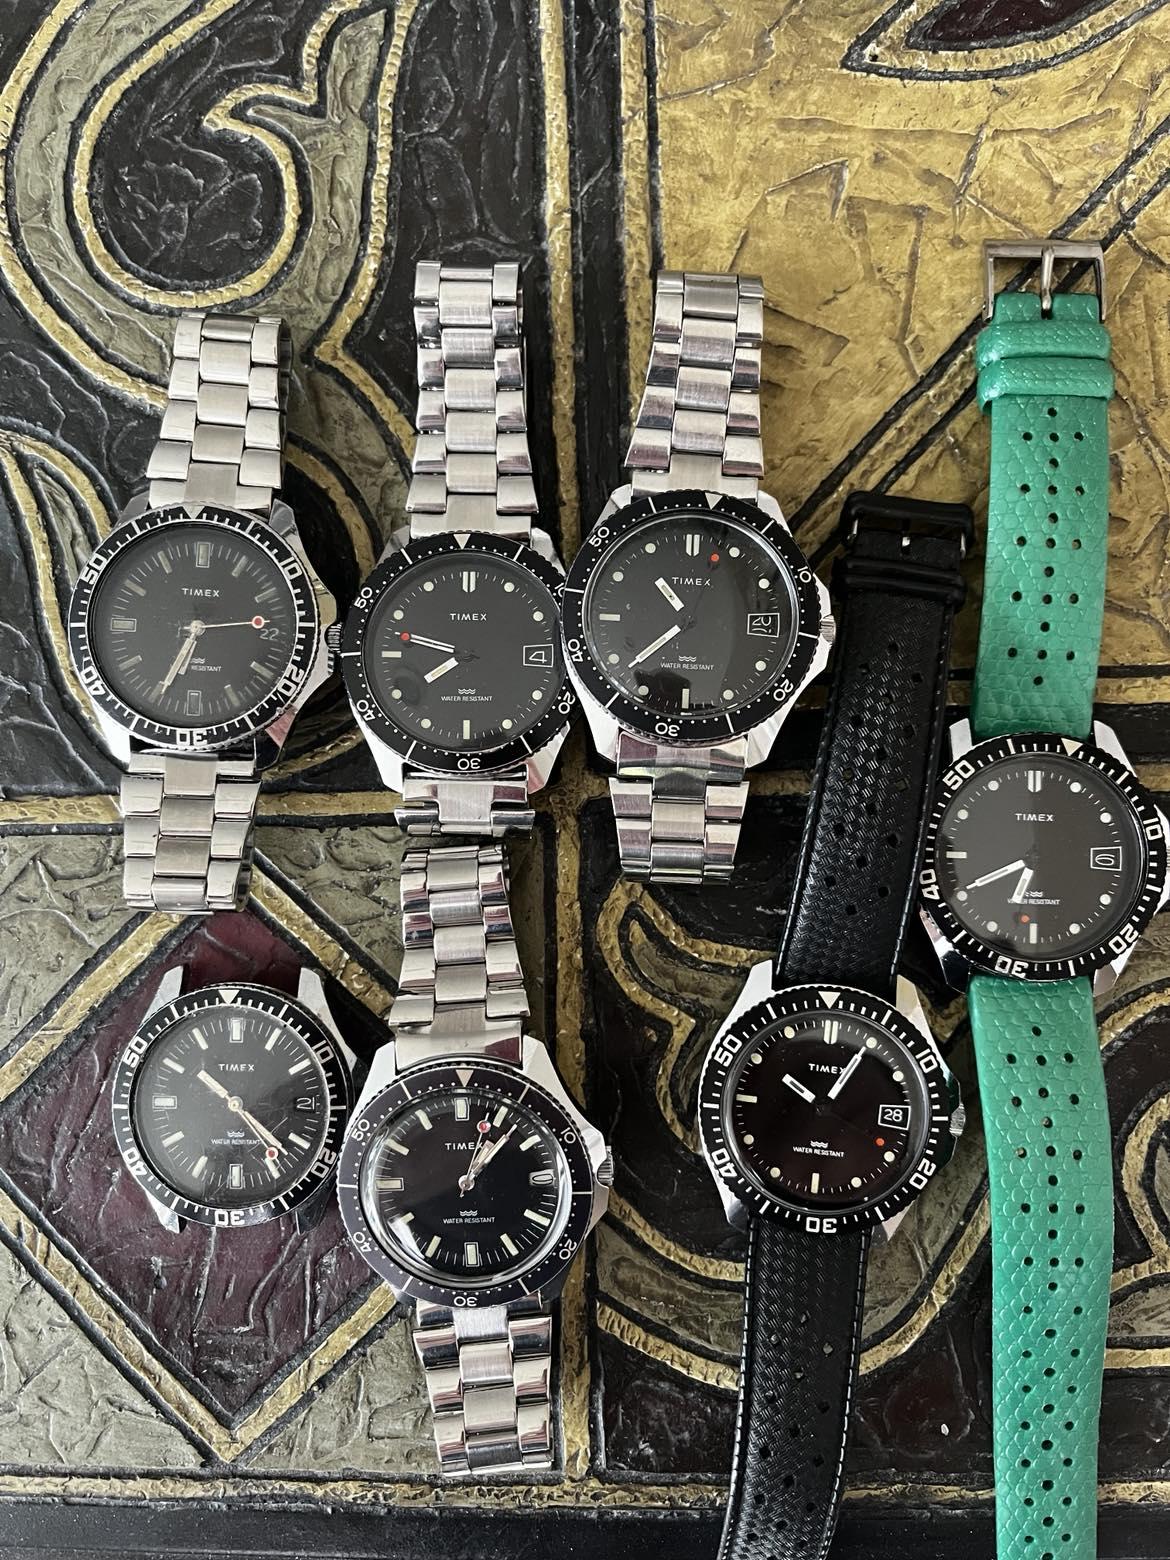
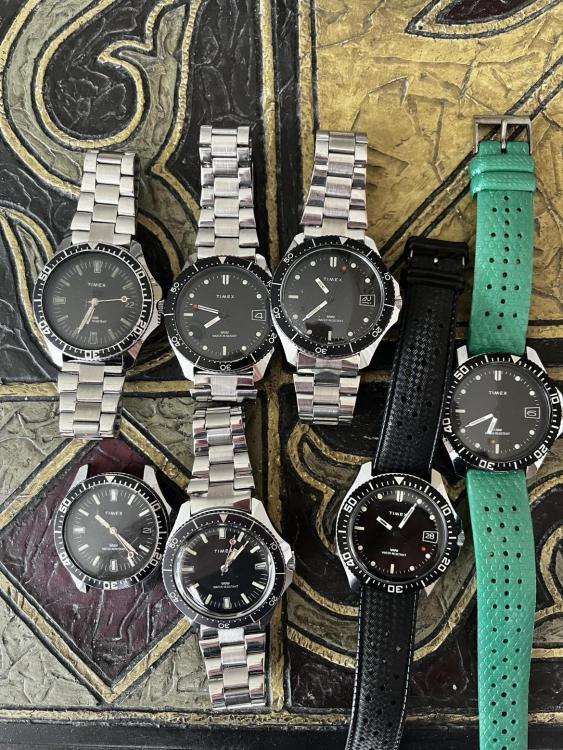
For some reason I like to collect these! They are not so friendly to repair and parts are like hens teeth. Getting one back to running order is very satisfying!
 1 point
 -
Nice one! Anything outside our experience is always going to be nervy, but you've more than likely helped a lot more who have encountered this 'Do not open' barrel malarkey by showing the great photos you've taken and @nickelsilverexplanation.1 point
-
Bit of a random one there Tom ?1 point
-
Sorry i didnt get that Tom, can you repeat it please.1 point
-
It wasn’t accepting the submit so I may have hit the button a couple of times1 point
-
The alum attacks steel parts only, my thoughts were if the alum solution could be localised to the inside hole only it may break up the screw before it damages the arbor threads. Just a thought.1 point
-
Sorry to say but it doesn’t look like a quality part Tom1 point
-
If you don’t have the watch or bracelet why would you need to know anyway with only one link? Tom1 point
-
Show pictures of the watch and the rest of the bracelet along with lug measurements, you haven’t given enough information for us to possibly help Tom1 point
-
Making tools is always fun. With a lath we have to put our thinking caps on for us to overcome problems.1 point
-
Good news is that the arbour is very hard and the screws are much softer material, so drilling out is a viable option Unfortunately we can't do the alum trick.1 point
-
One way is to file it by hand. Good file with sharp edge is needed. Another way is with the aid of milling attachment. There is one more way, thyat is really only on the lathe, but the arbor has to be attached perpendicular to the axis of the spindle. Will be easier to show pictures than to explain this. I must say 'Good night' as my wife is now awake and is roaring when I get closer to the computer...1 point
-
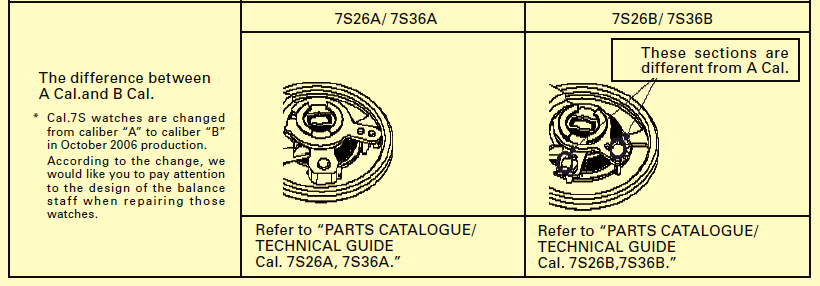
by the way this is very confusing to me? You have a 7s26a and you're comparing it to a 7s26b which is confusing to me because they're not the same? Watch companies are rather amusing when it comes the part numbers seemingly watches with similar numbers as you're implying should be exactly identical but in this case they are very very dramatically different for instance the 7s26a balance part number is 0310 020 the 7s26b has a different part number 0310 197 as the part numbers are entirely different there must be a reason it noticed that I made two terms in the quote above in bold regulator pins are versus the etachron system. In addition to changing the regulation part more than likely they change the hairspring. So this would typically main you wouldn't build a swap balance completes from one type to the other because they will be entirely different. this is where looking at the technical guide might yield some amusing information. you'll note in the 7s26b service guide it explains what the difference is. It makes a reference to the balance staff which is totally inconsequential for this discussion. But the really big difference is the A version has conventional regulator pins and the B has is the Etachron system. In @Jon excellent images up above he didn't explain something? if you look carefully at the images below you'll notice that the outer terminal curve is different as a guest to accommodate the etachron system it looks like the terminal curve is farther out. So yes exactly as the parts list indicates the balance completes will look different because they are different. Because they are different there are not interchangeable. so basically because the letter changes at the end in this particular case we end up with two separate balance completes as proven by the parts numbers. Balance completes that are entirely different to accommodate the regulation system conceivably with entirely different characteristics of timing as they are entirely different. So your observation of the balances are different shape is correct they are different.
 1 point
 -
See, the problem with widening to a little bit wider diam is that the bit will 'grab' too much at a time and will get in too fast by itself, then it will stuck and break imediatey. If enlargening from 0.3 to 0.5 needed, complitelly different drill bit must be made - it must be similar to the ones they use for weapon cannons, with one cutting edge and with angle that will not cut fast. The other option is to enlarge the hole like they do on big lathes with cutter for internal turning, that will be small enough to get in the hole The idea with the plugging could work, but I haven't try it. The pug should be only a little bit softer than the piece and must get in completelly to the botom of the hole.1 point
-
I think that if this is a spring wire like piano string or similar, it will not break and wili be srong enough. What You could do is to drill straight with 0.5 . Then it would be beter, but now it is good enough to do it with 0.3. See, the watchmaking is actually a piece of cake, just some practice and skills to develope needed and to believe in own strenghts1 point
-
Wow, this is fantastic information! Never seen this in such clarity. Thanks!1 point
-
Rotary usually have either ETA or AS movements in them. I work on them a lot. Vintage Rotary are under appreciated watches, usually with a nice movement. You can pick them up dirt cheap, spares are easy to find and they're usually really nice to work on.1 point
-
I agree with a lot of this post. First of all, particularly with older movements, replacing the spring is a good idea, for a number of reasons, depending on the age of the movement and the material the original spring is made from. You can also buy a lot of new springs for the price of a Bergeon set of winders. I also agree with the point about buying a small selection of Bergeon winders. 5,6 and 7 RH are going to be the ones you use the most, so you could start with that. IMO the Chinese metal arbor winders are actually pretty good and, I find, they do get some use. You can also reuse the handle from the Chinese set on the Bergen winders which goes a way to paying for the Chinese set. I have both (including a size 0-6 generic Bergeon + an additional size 7 L and R) and a Chinese set, that I started with. One thing to note is that the Bergeon set is not a panacea. I expect a lot of people have been frustrated buying the full set only to find, after spending over £600, that the first barrel they come across doesn't fit any of the arbors or the arbor that fits has a barrel too small for the spring (I've been there!). Remember, it is generic, and isn't going to be a perfect fit, there's often a tradeoff. An option is to find the the arbor that fits and then find the next winder barrel up. They usually work ok, without too much slop.1 point
-
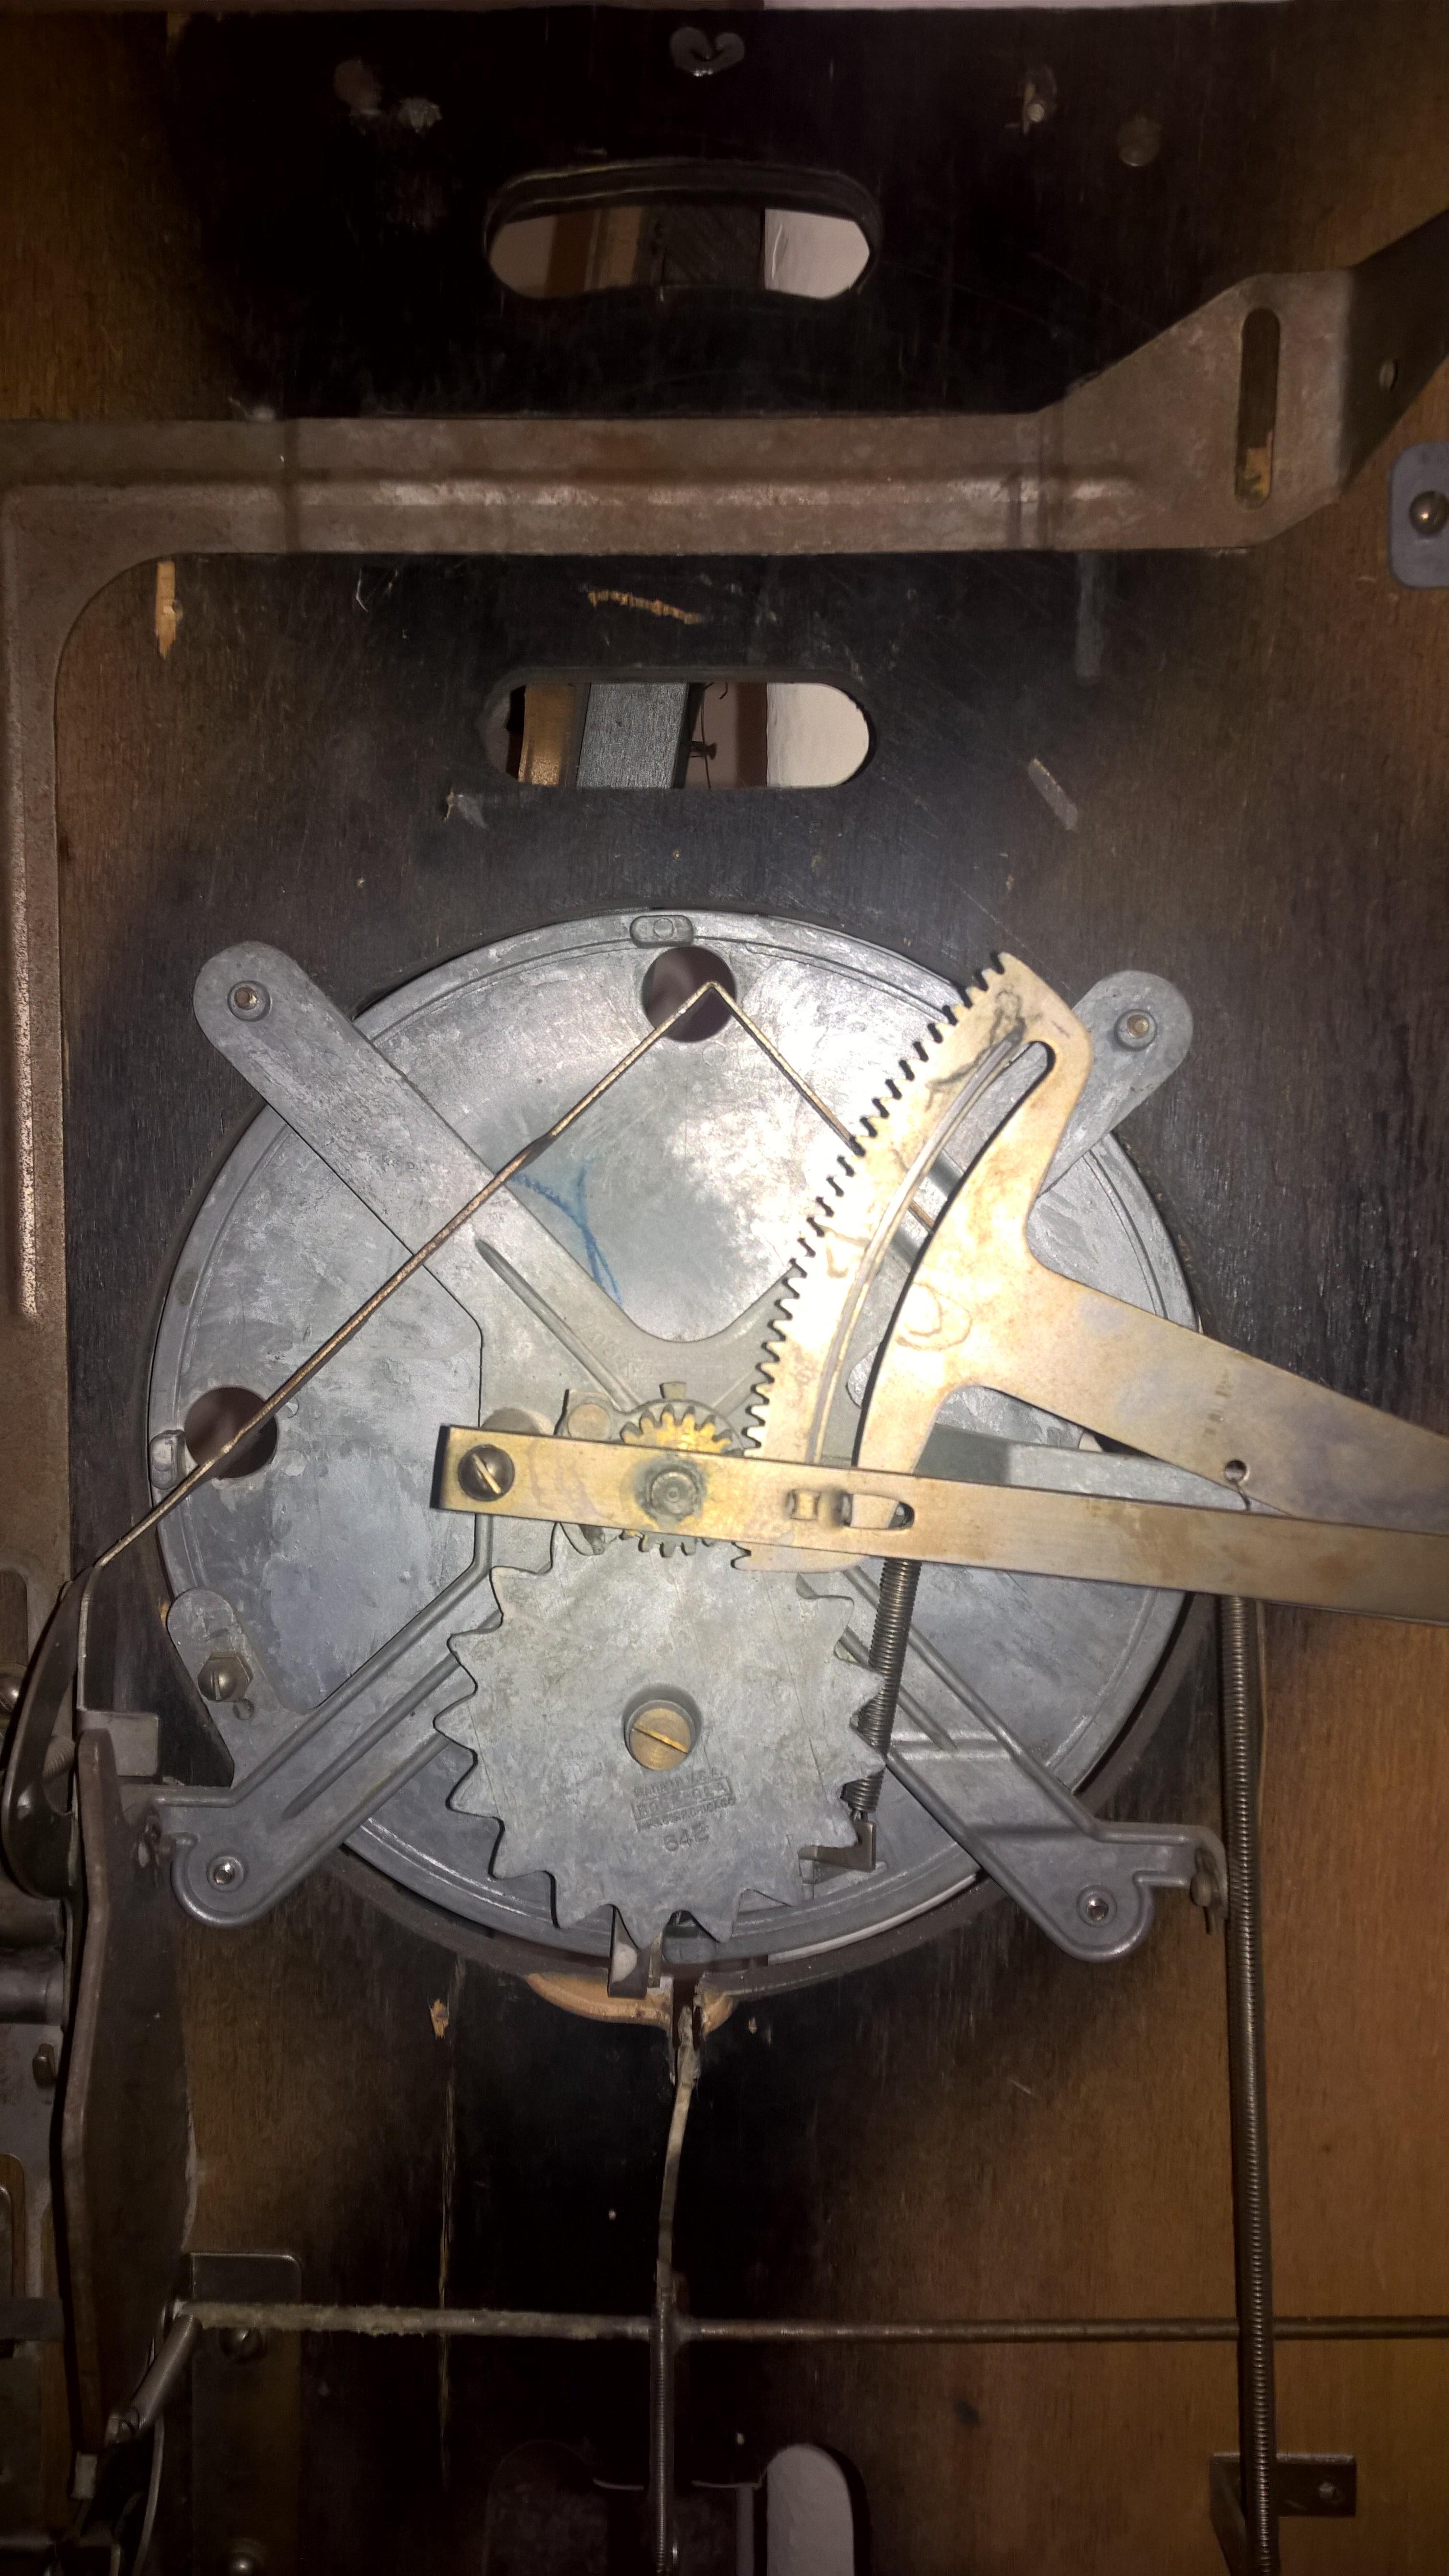
Oldest i have is 1931 Which is when modern pinball started. Ive picked them up all over in the US and had them shipped over from the UK as well. I like projects so im normally in the 200-800 US dollar range when i buy, After repair and restoration they are worth anywhere up to 20k or more. In the above pics the pricing is 1932 JuggleBall 1200$ 1934 Worlds Series 3500$ (This game was sent to england with a Amusement park theme as Pleasure Island as Rockola didnt think that american baseball would go over well) 1933 Jigsaw $4000 Heres an example of the mech under the worlds series. The rachet get pushed back when you load a ball. The spring holds the tension and the actuator in home plate releases the wheel to spin against the second gear to spin the bases. The Star gear determines if the wheel will spin for a single double triple or homerun.
 1 point
 -
Swing the rod 90 degrees, it's the side that does the work. If you have a lathe you can grab the barrel in a wheel chuck and hold the bar in the slide rest, turn the headstock by hand while applying pressure- much less awkward than holding the barrel by hand.1 point
-
The JLC sealed barrels I've dealt with are sealed, with the lip burnished over like Nevenbekriev says. They can be opened, but you have to push the lip more open to get the lid to seat again correctly and it's still a bit hairy. They aren't as bad as Zodiac (those you can forget about opening much less closing without issue). The chances of mucking it up are high enough that it's probably safest just to add a little lubricant at the arbor and call it good.1 point
-
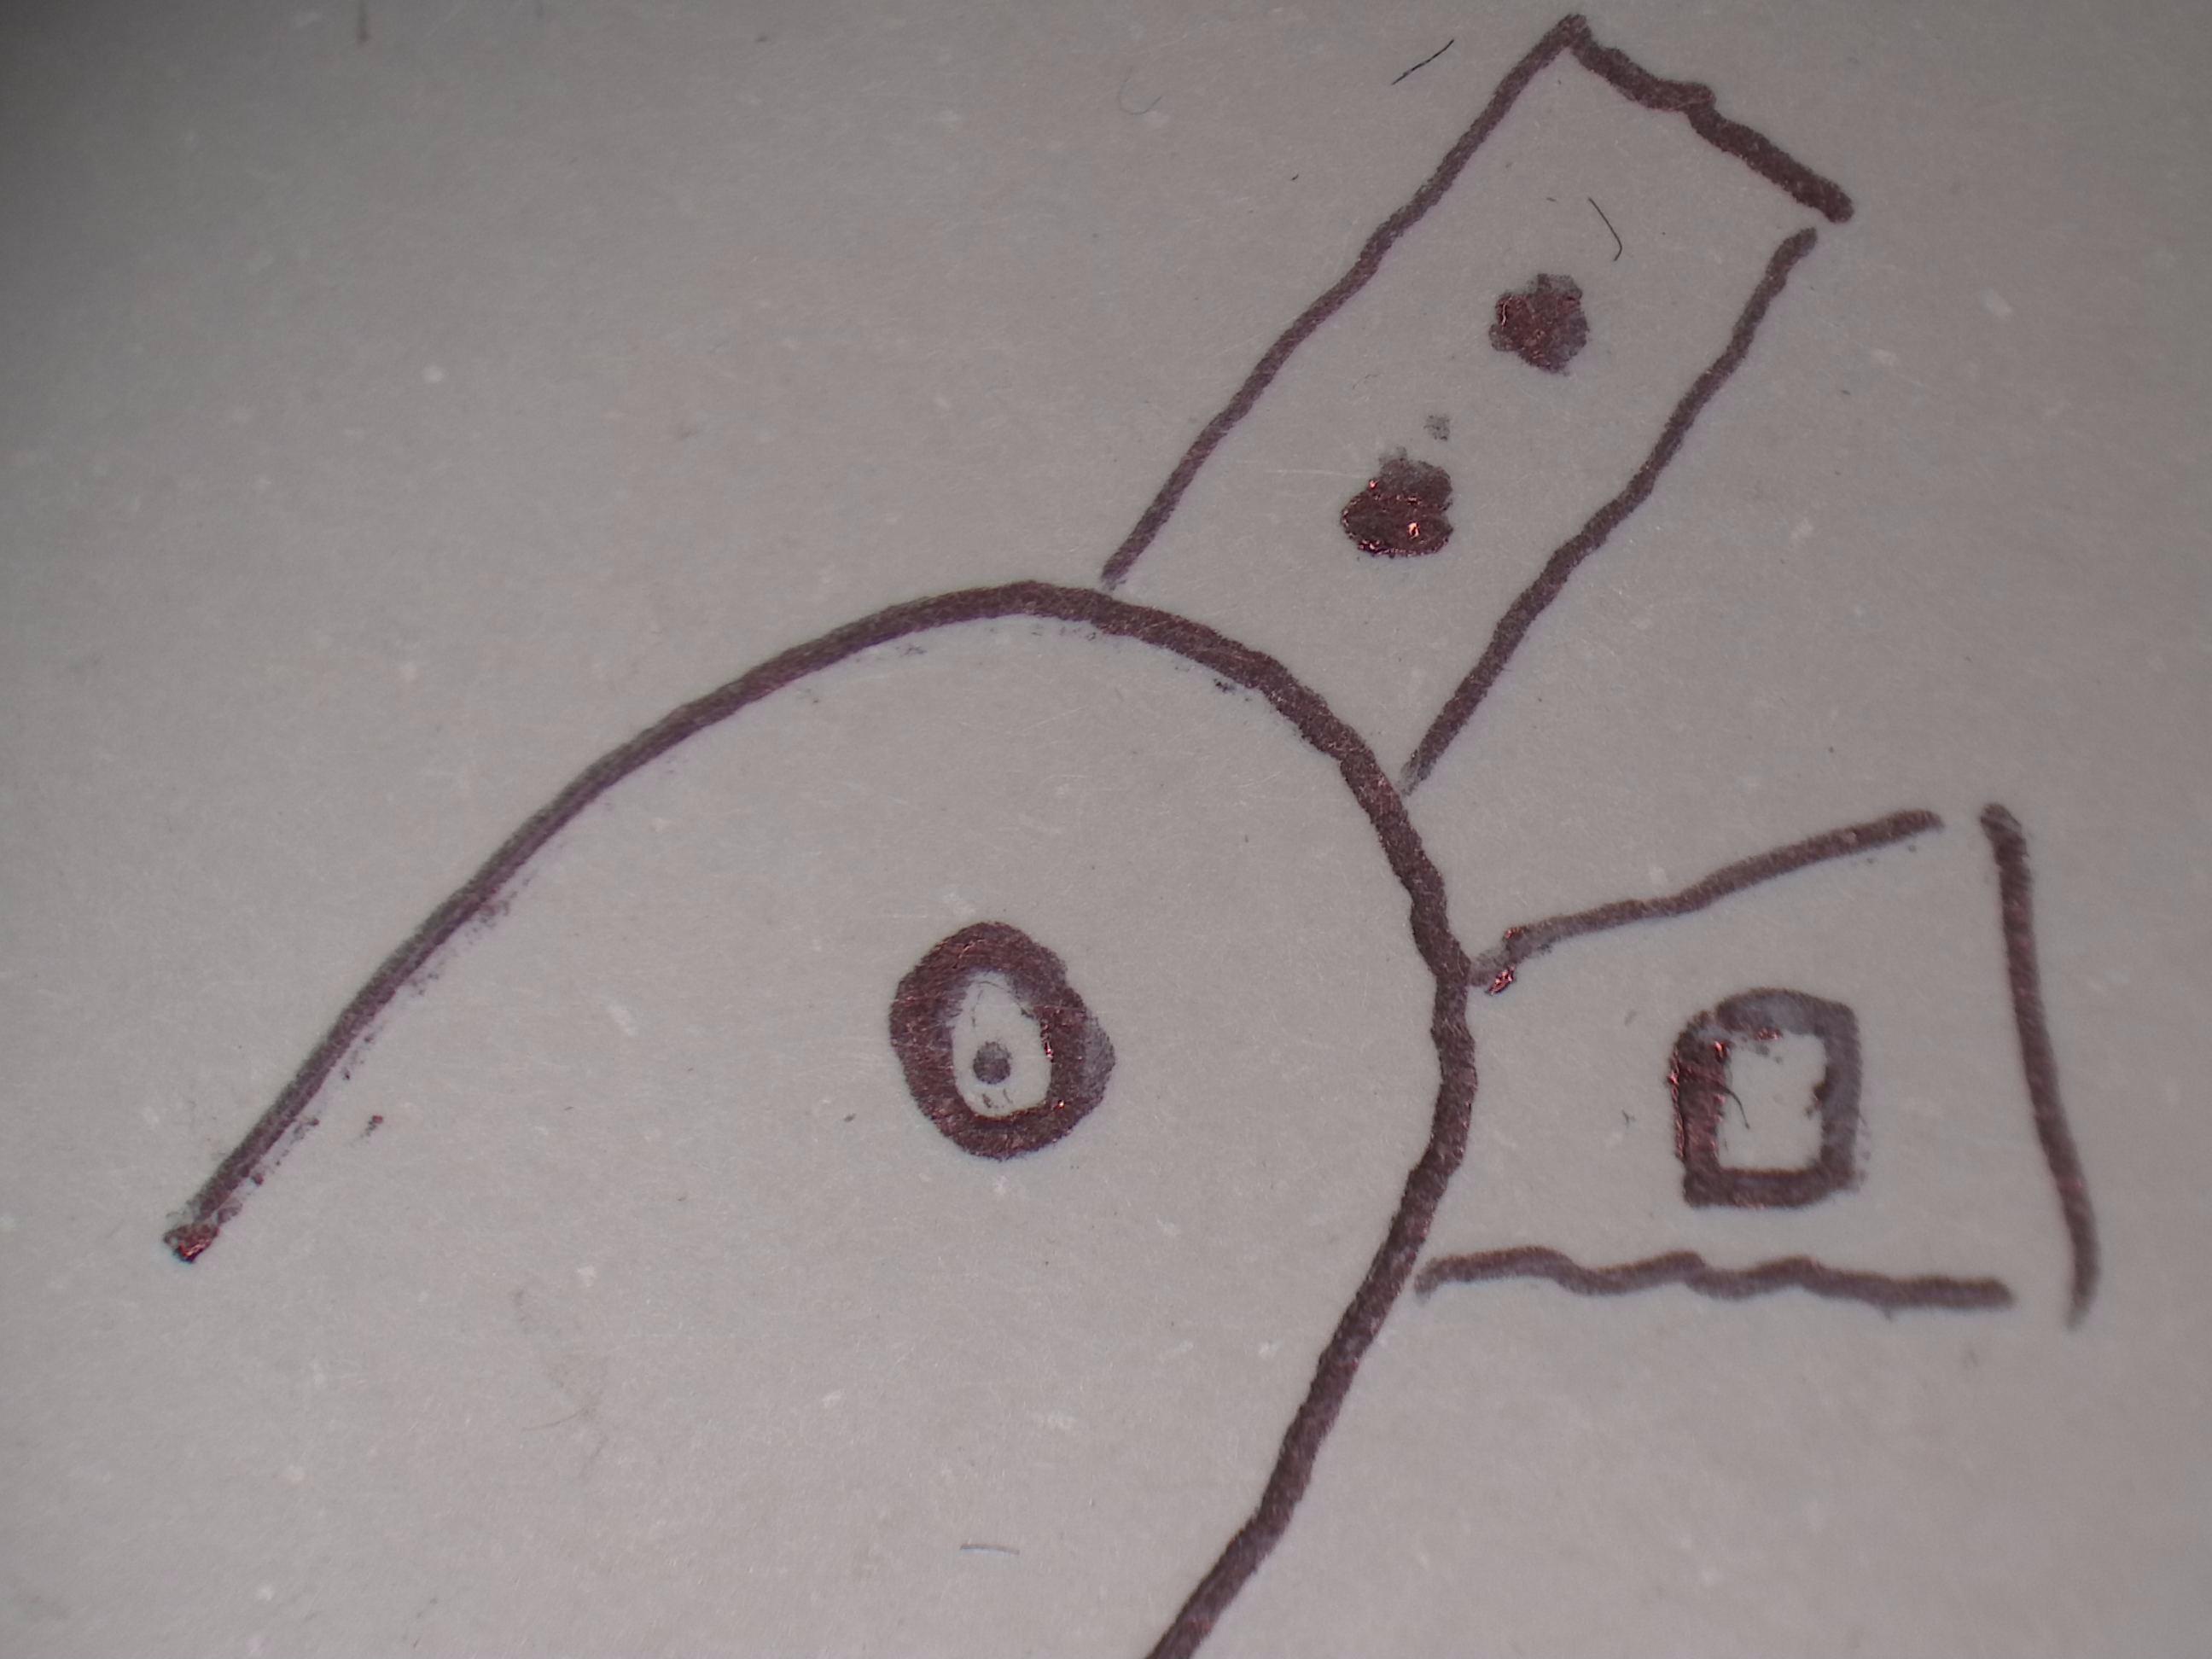
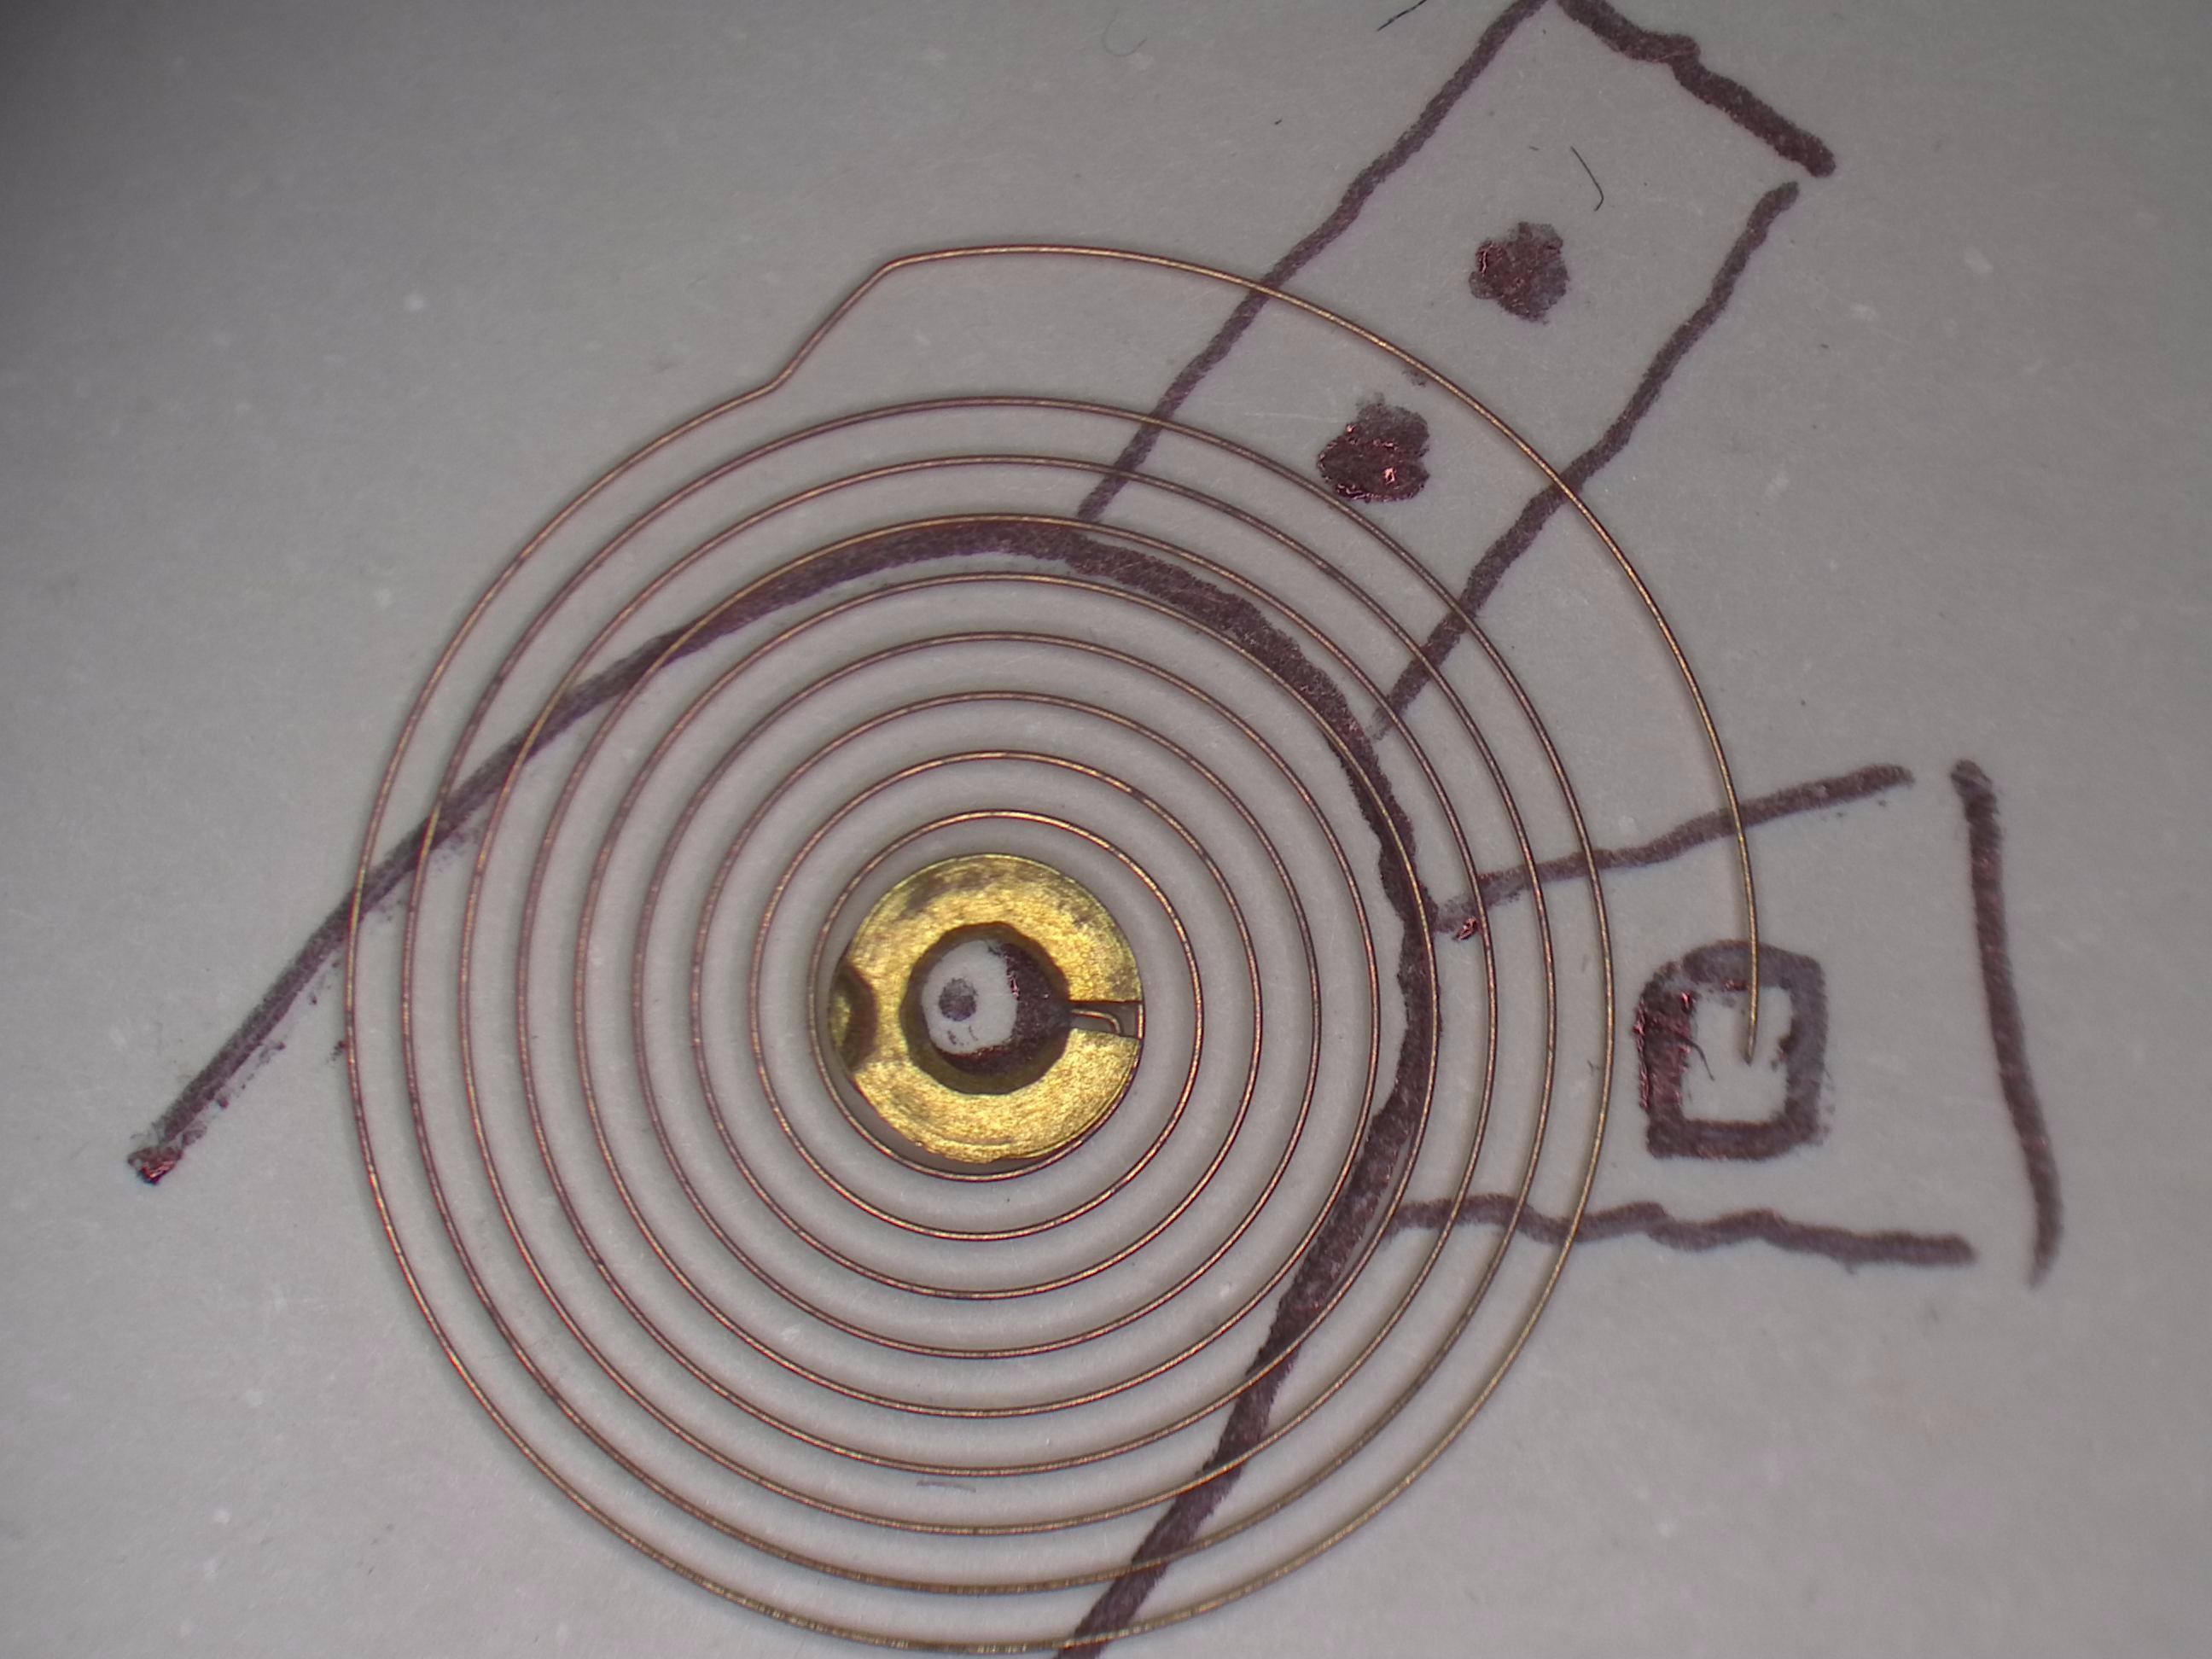
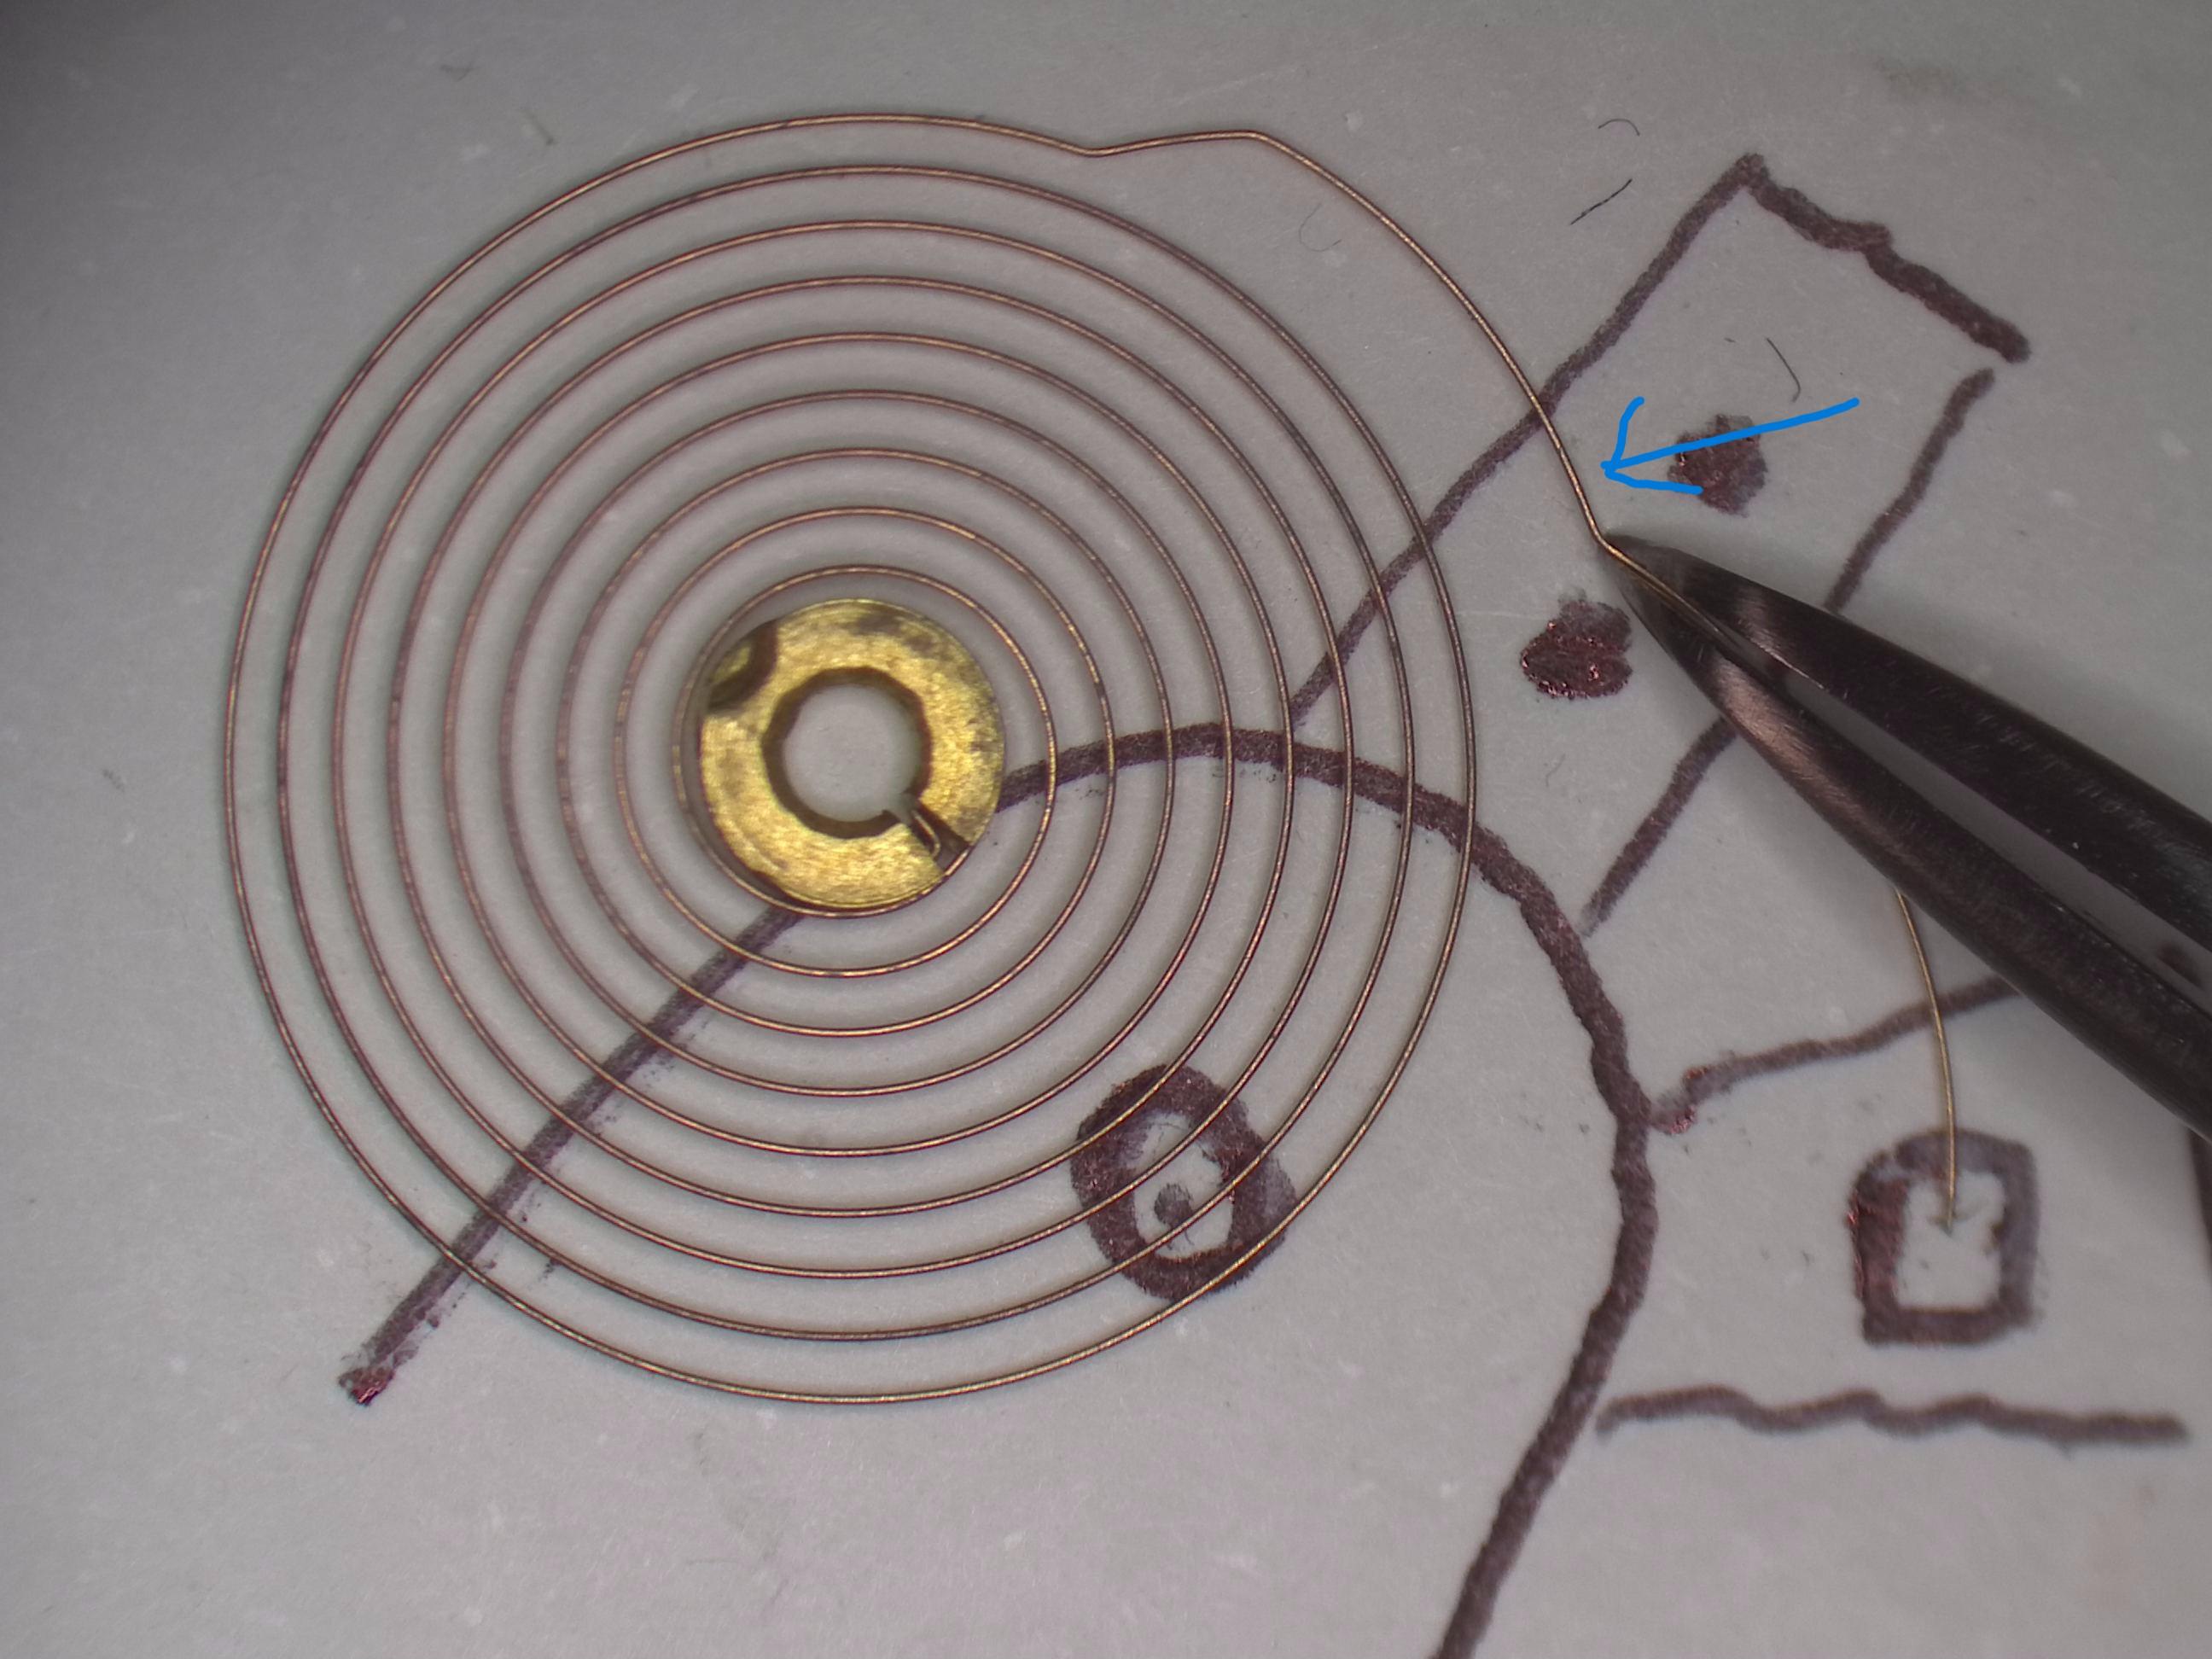
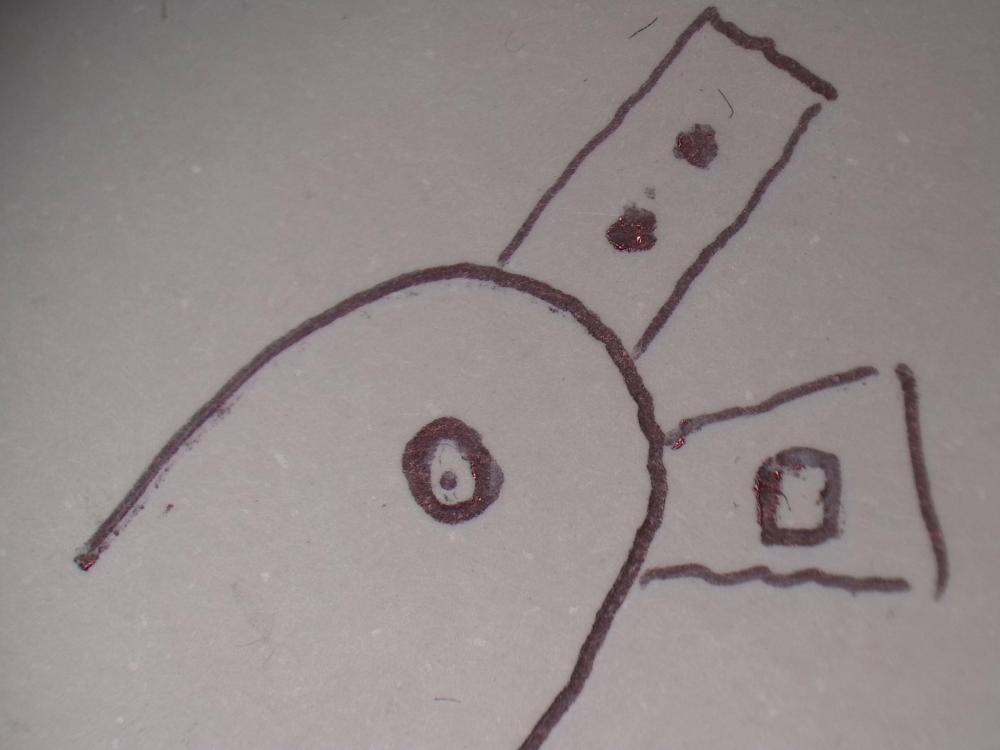
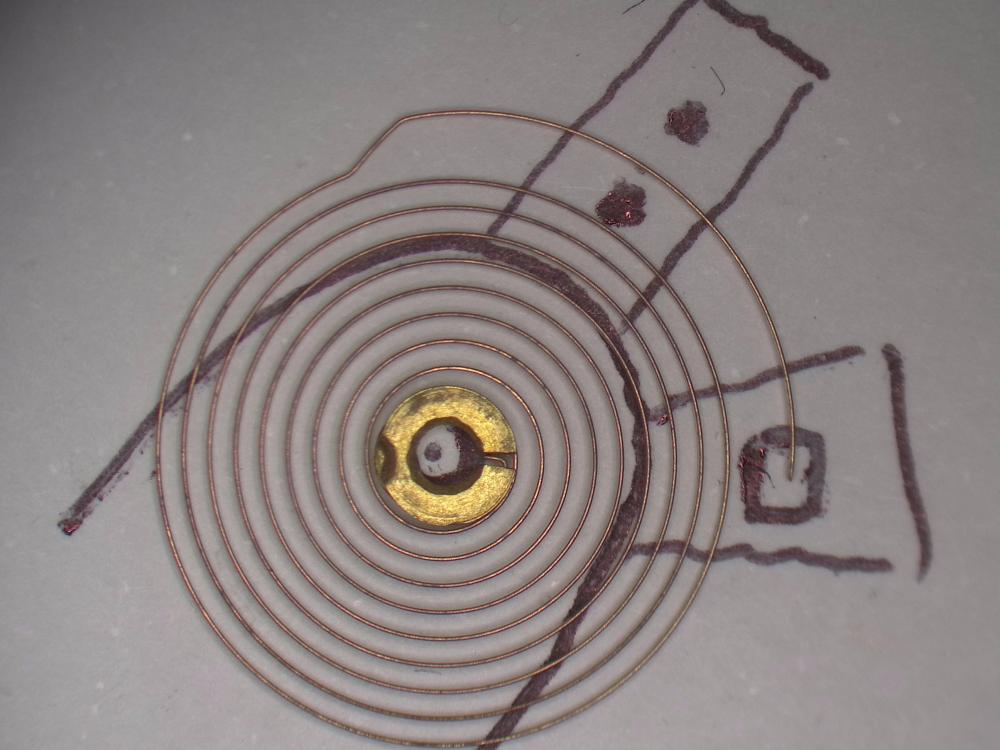
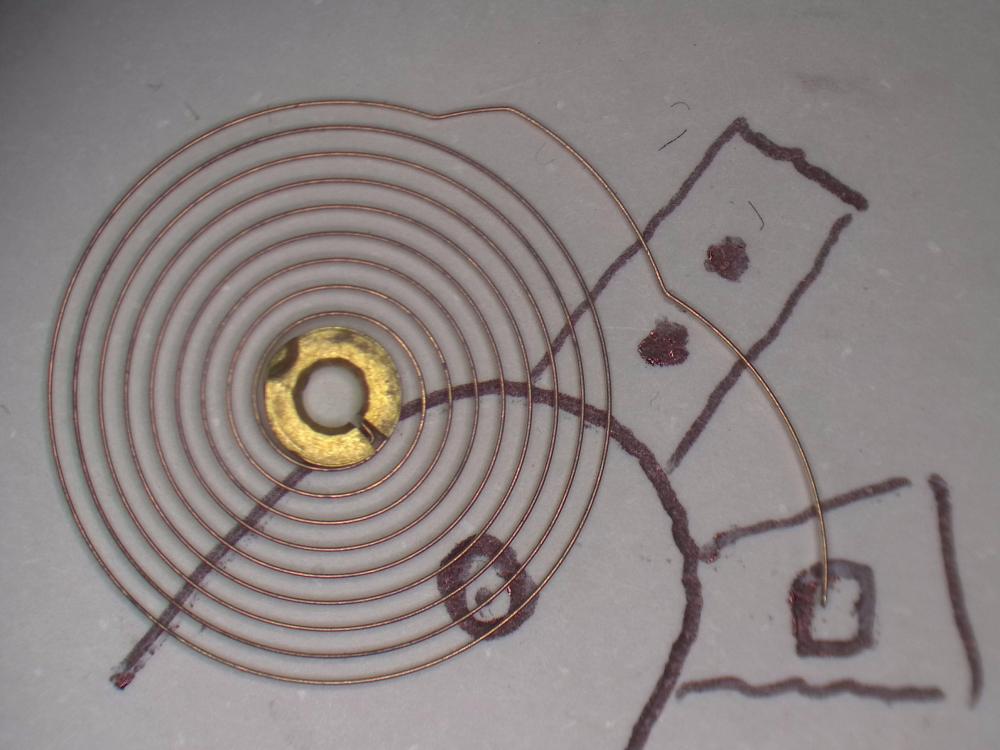
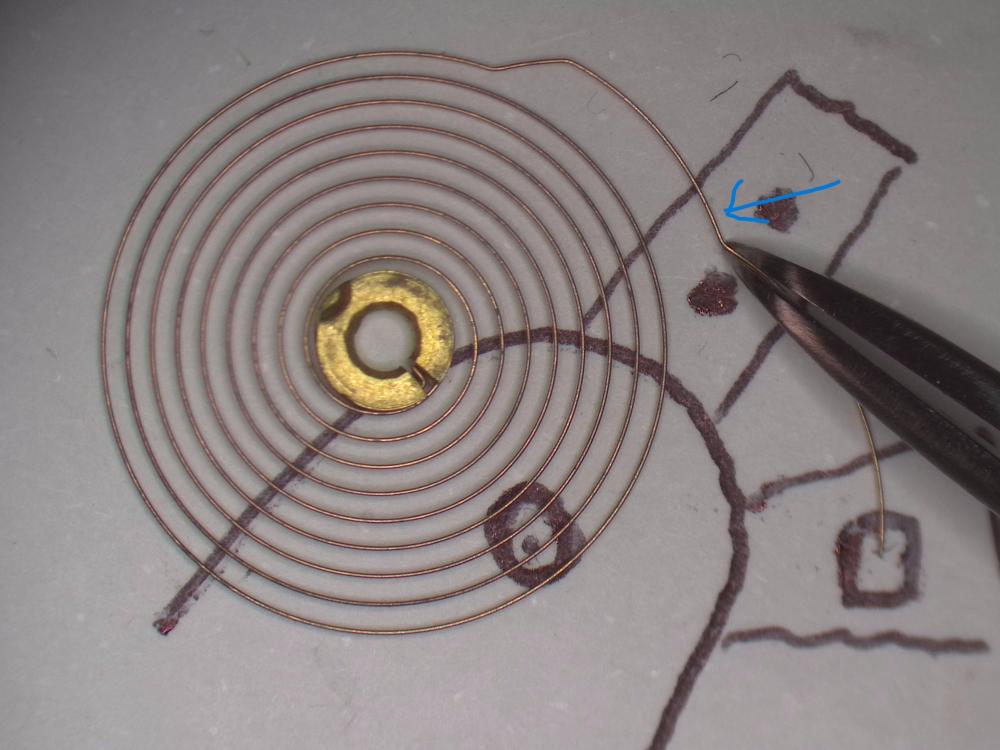
How did you clean the balance assembly, by hand? If you clean the balance and mainplate together, so the balance is mounted on the mainplate, this wouldn't happen, unless you're prodding with a brush if it is hand cleaned. Funnily enough, my students have just spent the last three weeks learning how to manipulate hairsprings and shaping end-curves, first by working on clock hairsprings, then scaling it down to ETA 6497 hairsprings. It isn't a bad bend, but I would remove the hairspring from the balance and then lay the hairspring on the underside of the cock then bring the end-curve back to where it should be. It's very important to place the stud in the stud support and tighten with the screw to get it to position properly to give you an idea where the collet will end up once assembled. There is a small groove in the stud that the screw will locate with. I've taken some photos of a clock mainspring and drawn the underside of the balance for it to position on. The first pic is the underside of the balance cock (I know the curb pin and boot is quite a gap, but I wanted the pic to be understood well). The second pic is how the hairspring and end-curve should ideally be with the collet bang on the jewel hole. When the index is moved the hairspring shouldn't be pushed or pulled by the curb pin and boot, or in modern watches the regulator pins. If that happens you'll see a difference in beat error when you move the index arm from fast to slow. You have to make sure there is a gap between the curb pin and boot before you move the index, otherwise it will bend the hairspring, which might have happened in this instance. The last pic is the hairspring being manipulated to form the end-curve again. This is done away from the cock and then try for shape on the cock remembering to ensure you tighten the stud screw to get the proper position of the spring. I have gripped the spring with No. 7 tweezers and where the arrow is, push the spring until the kink is out and the collet is on the jewel. If you've never done this type of work before, it's best to try with a scrapper first. It is a lot safer to remove the hairspring from the balance first. I use scalpels to lever the hairspring off, or very fine hand removing tools, but I still prefer scalpels
 1 point
 -
I got a big bottle of hexane to clean the balance hair spring, and it works a treat. Before treating with hexane I put the balance back on the main plate after I have disassembled the movement and run it through the watch cleaner with the rest of the parts, then take it off the movement and (once dry) put it into a my small jar (small hotel jam jar) of hexane whilst I build the watch up. It dries in air in seconds and is then ready to go onto the watch. If I can't run the balance safely through the watch cleaner, I will soak in naphtha first as per @oldhippy suggests (naphtha being the main constituent of lighter fluid) and then once dry soak in hexane as above... Probably 'belt and braces' but it seems to work and if it 'ain't broke, don't fix it'. Hexane evaporates very quickly, faster than acetone, so you can't hang around with the lid off, or have a leaky seal. I am also told it is safe on shellac, but haven't tested myself, but my results to date would support that it is safe. Like I said, to date I have had good results and will continue to use this method. Hope this helps.1 point
-
Sorry but I don't see photos of the bottom.0 points
-
My mother in law has asked me to replace the battery on her fashion watch. The back ridiculously tight, no chance with a case knife, can't knock f%^k out of it with a utility knife, so tried a blunt kitchen knife, can anyone guess where I'm going here? Hehe. The loop is superglue.
 0 points
 -
Without the rest of the bracelet and / or photos of the watch, it will be impossible to identify. Sorry but the link alone is useless and may as well go in the bin.0 points