Leaderboard

.thumb.jpg.cb17a66989f1e796fd4217db2e9ca9df.jpg)


Popular Content
Showing content with the highest reputation on 06/15/24 in all areas
-
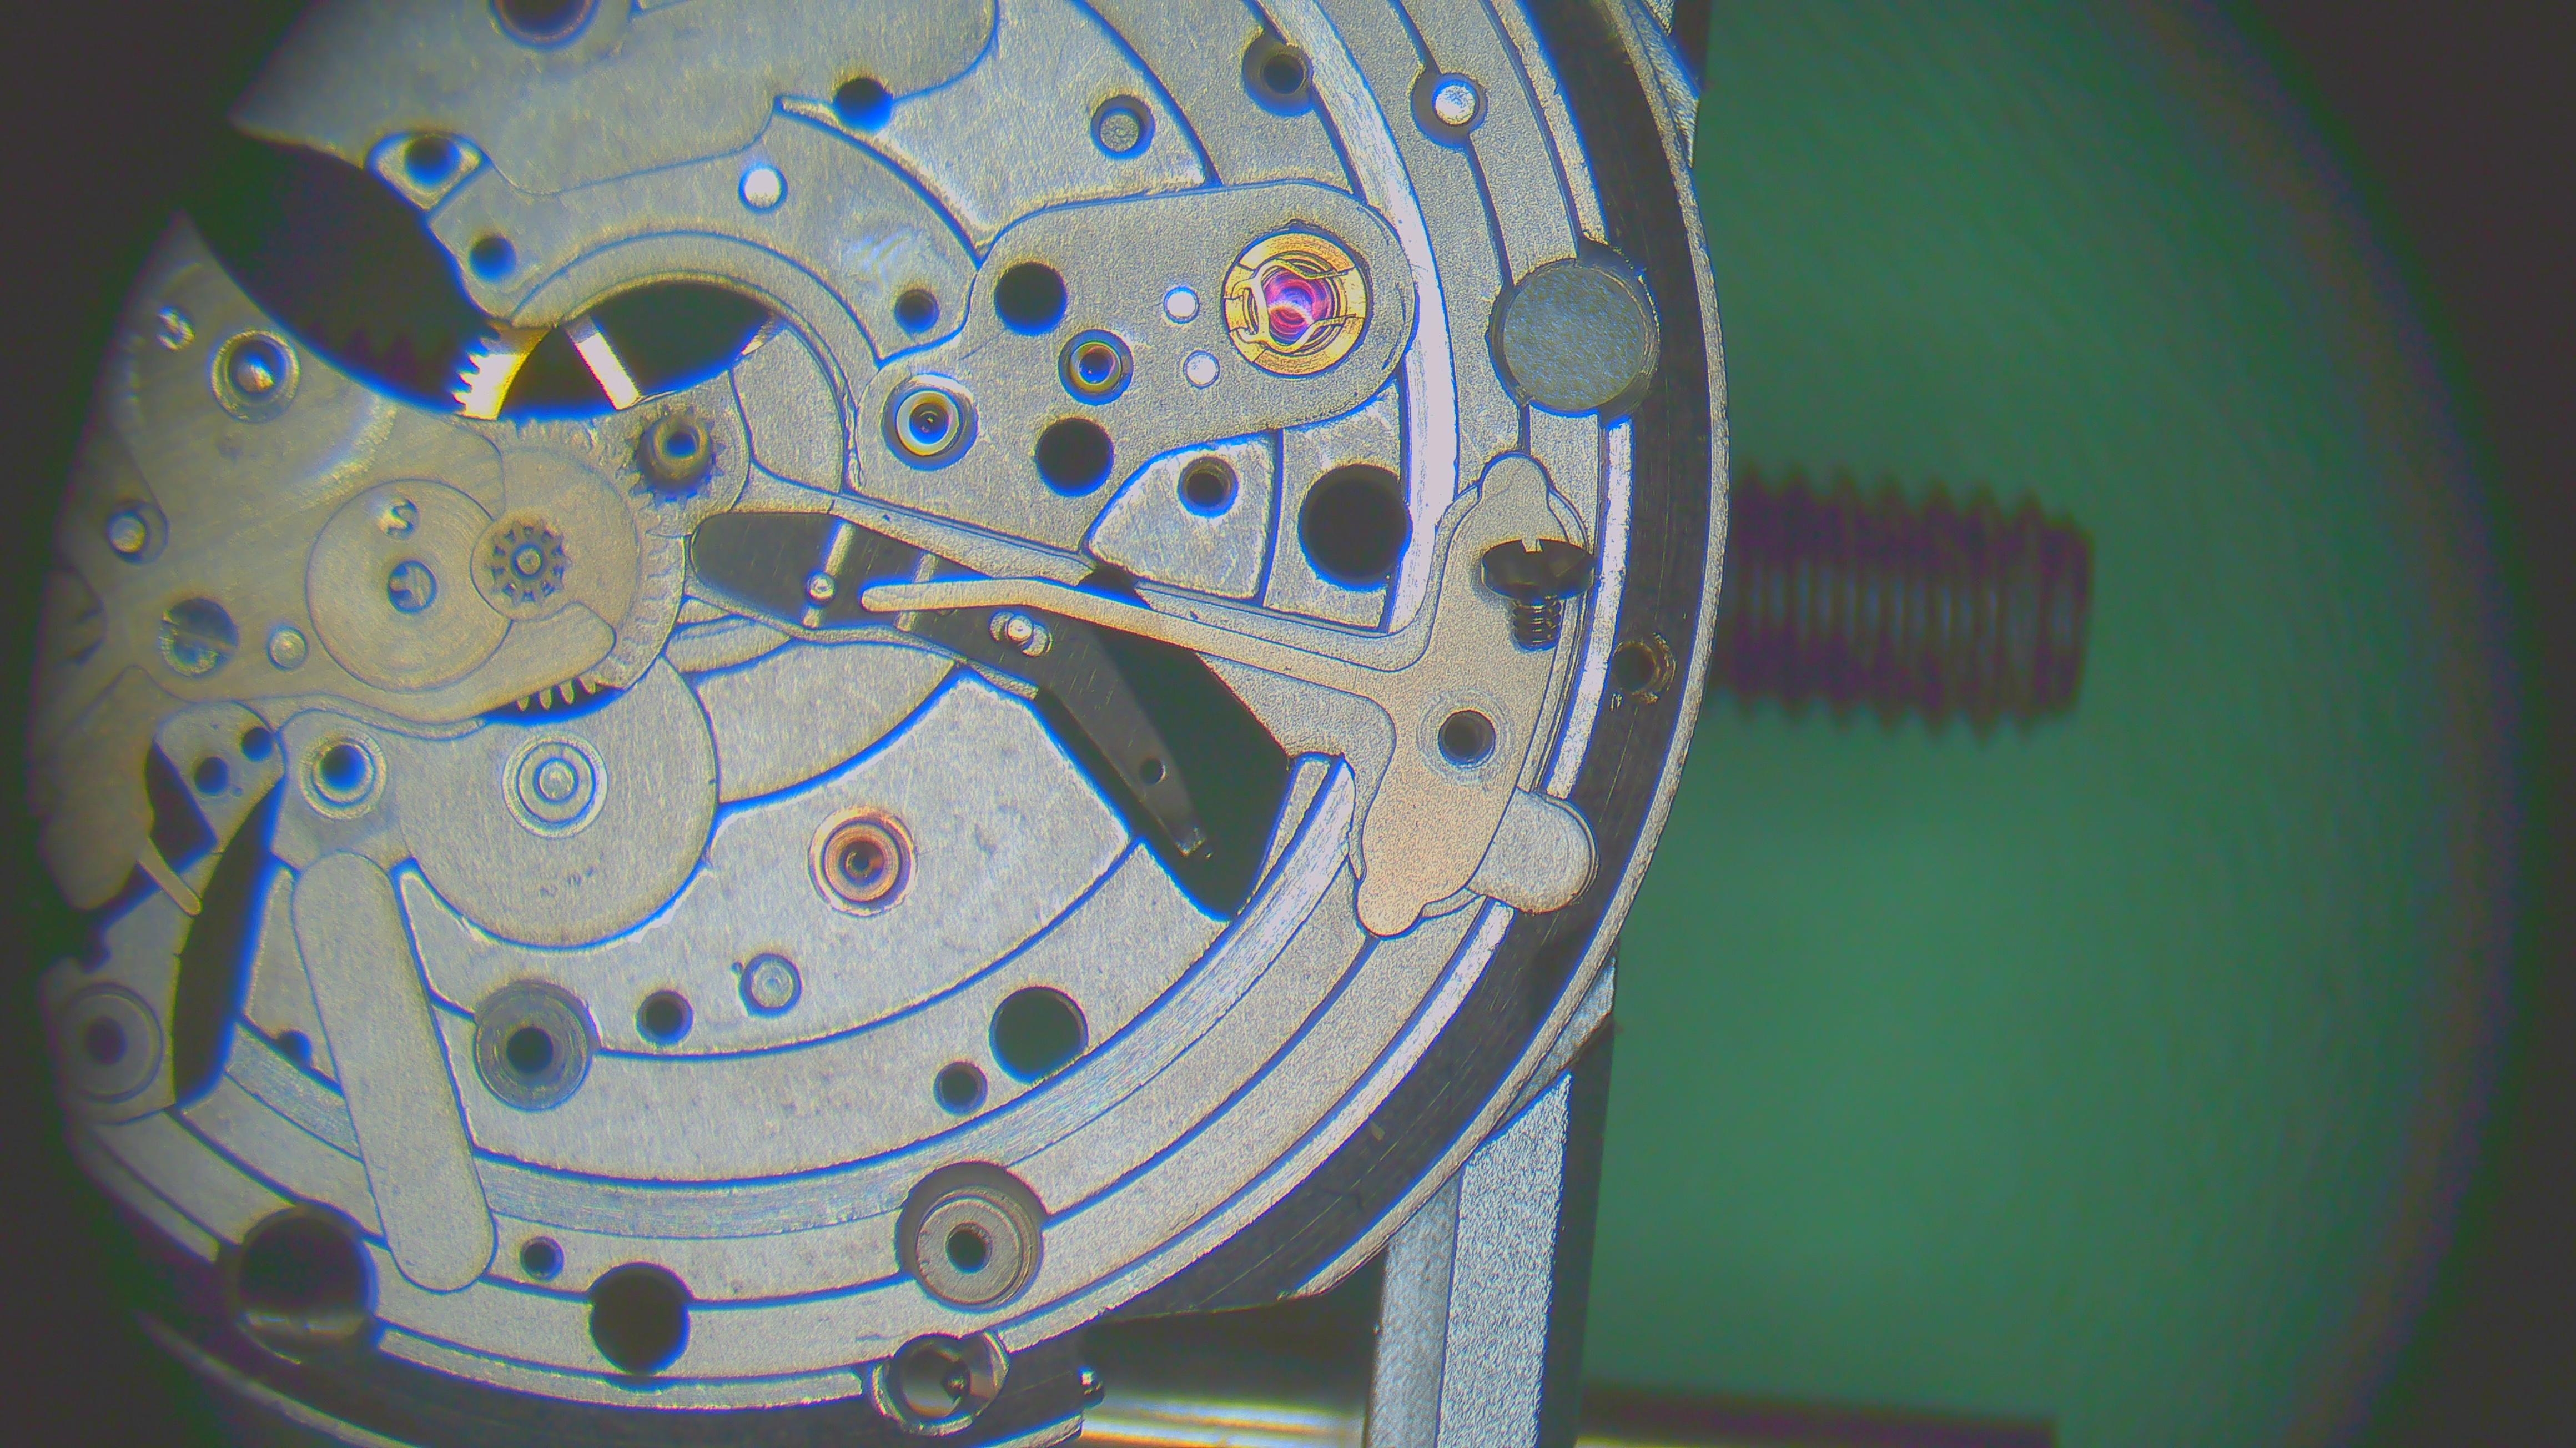
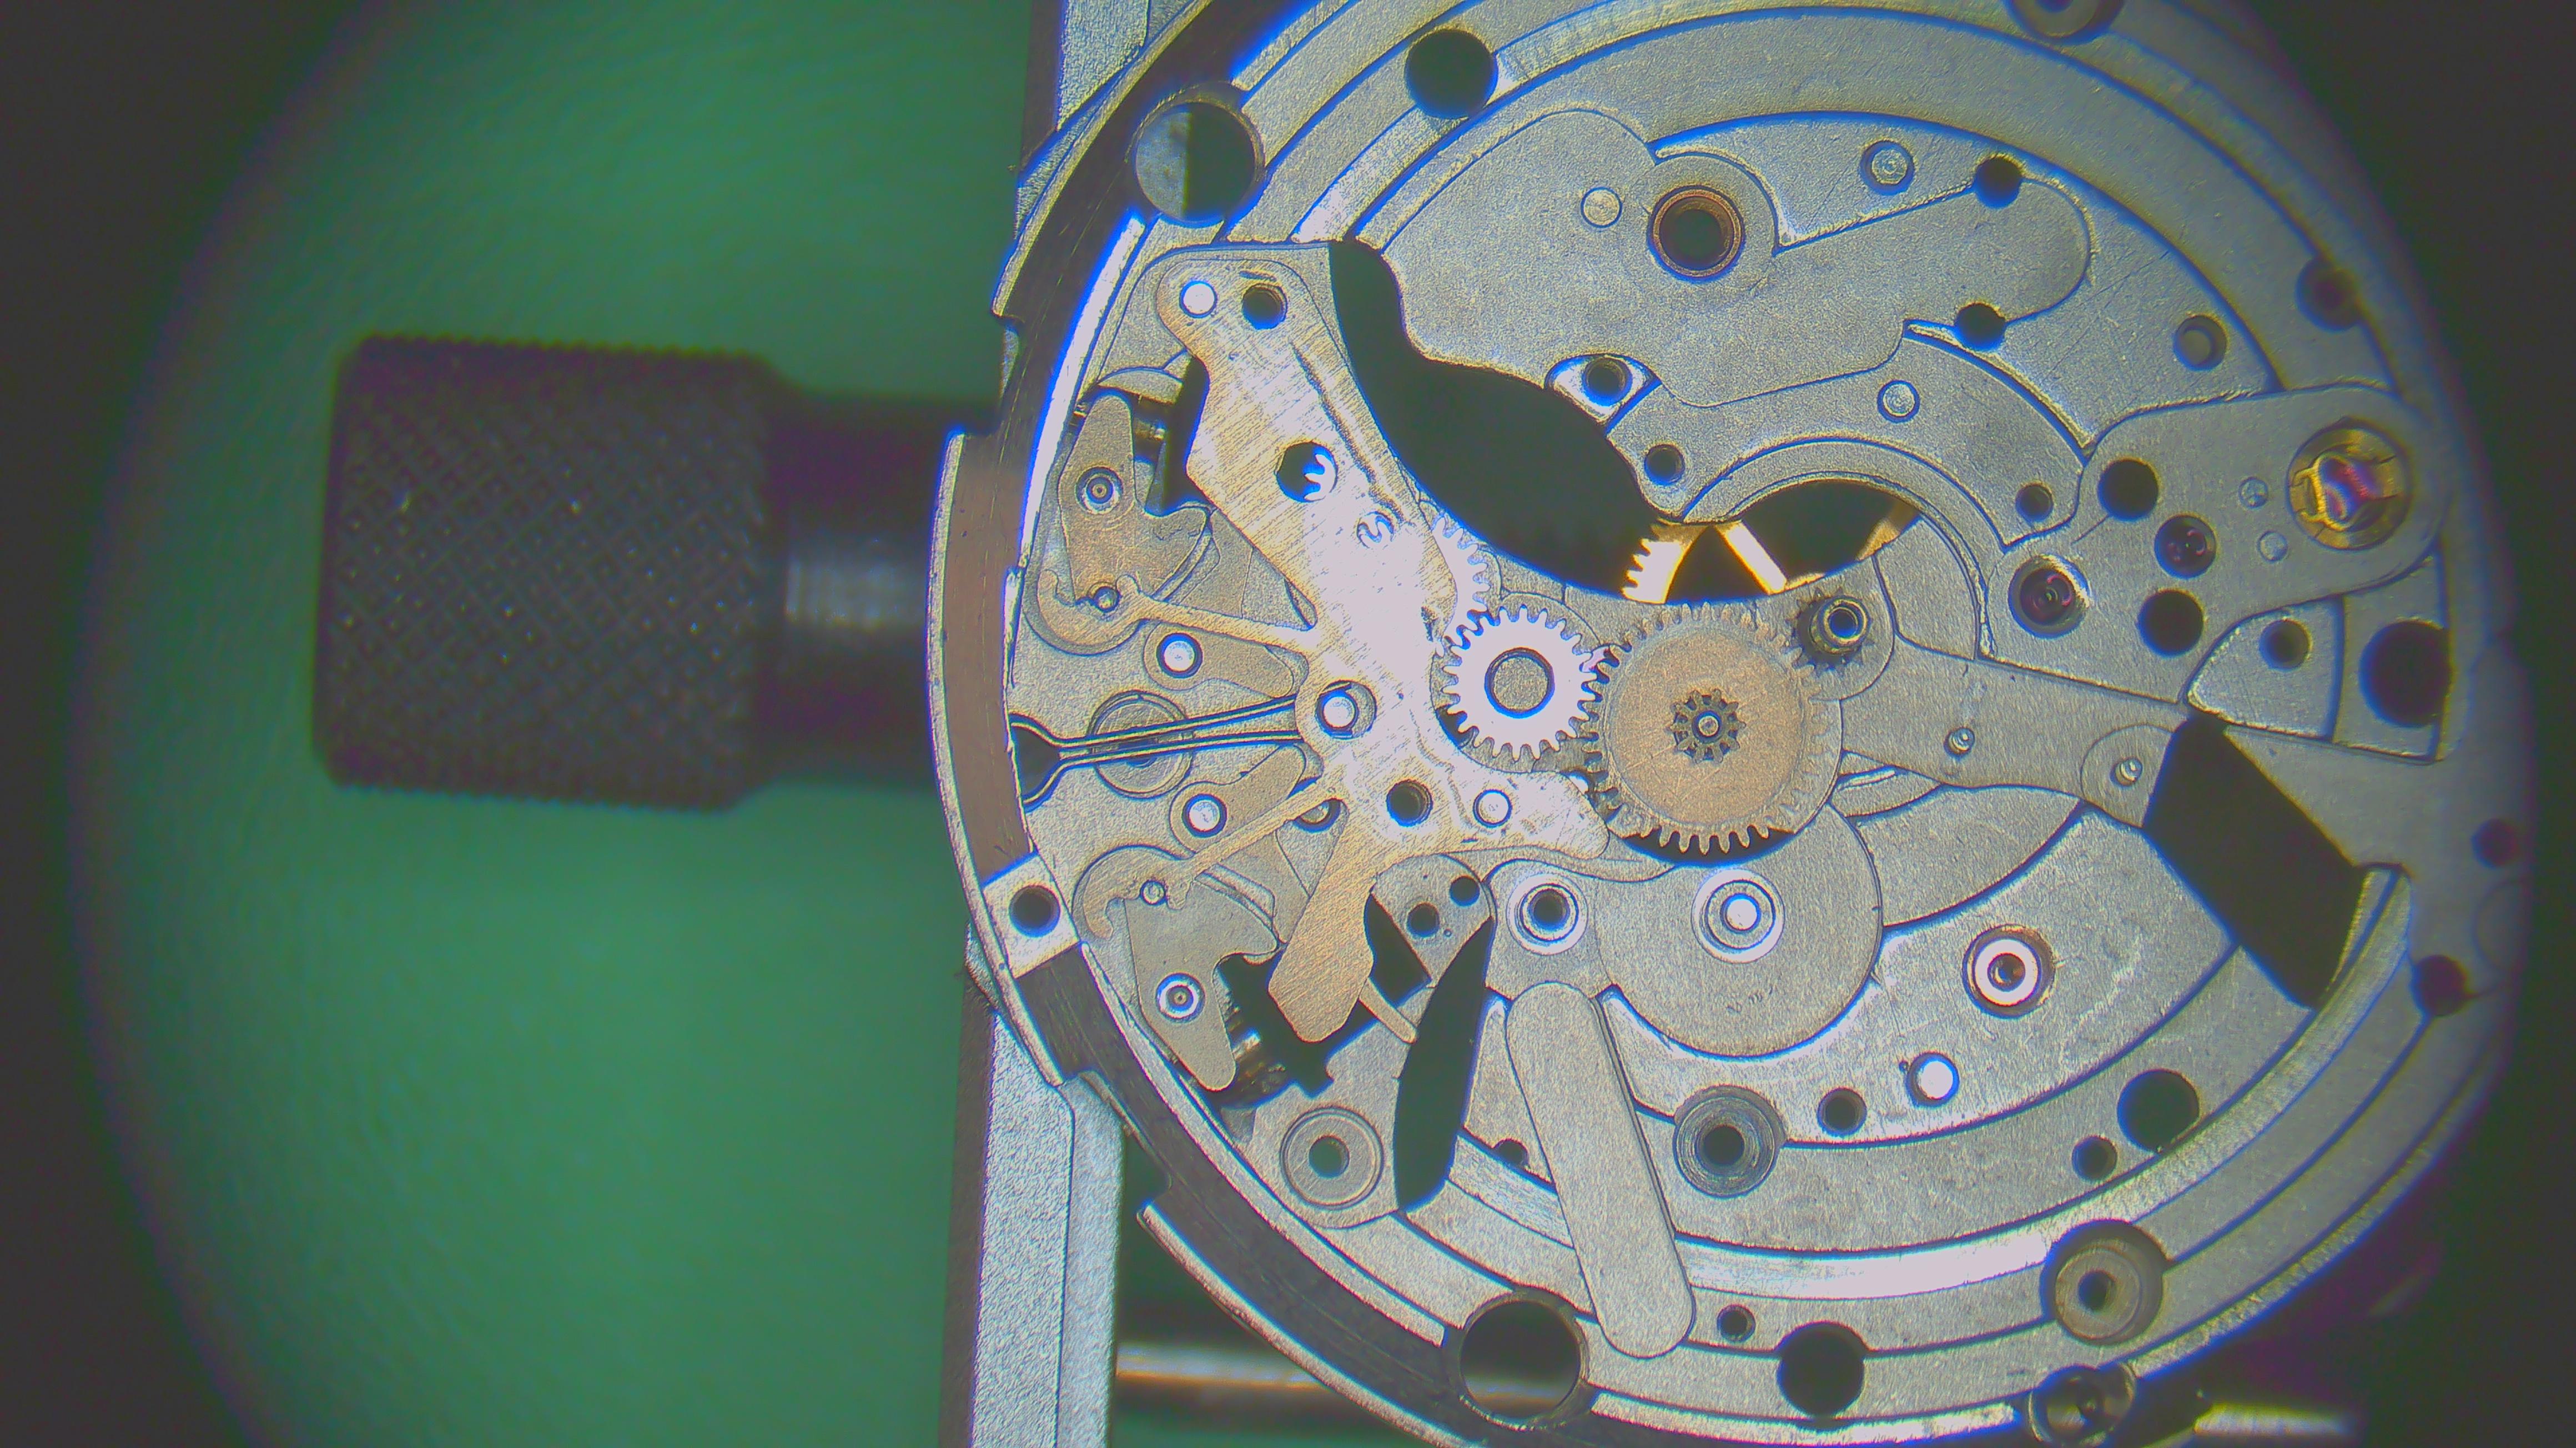
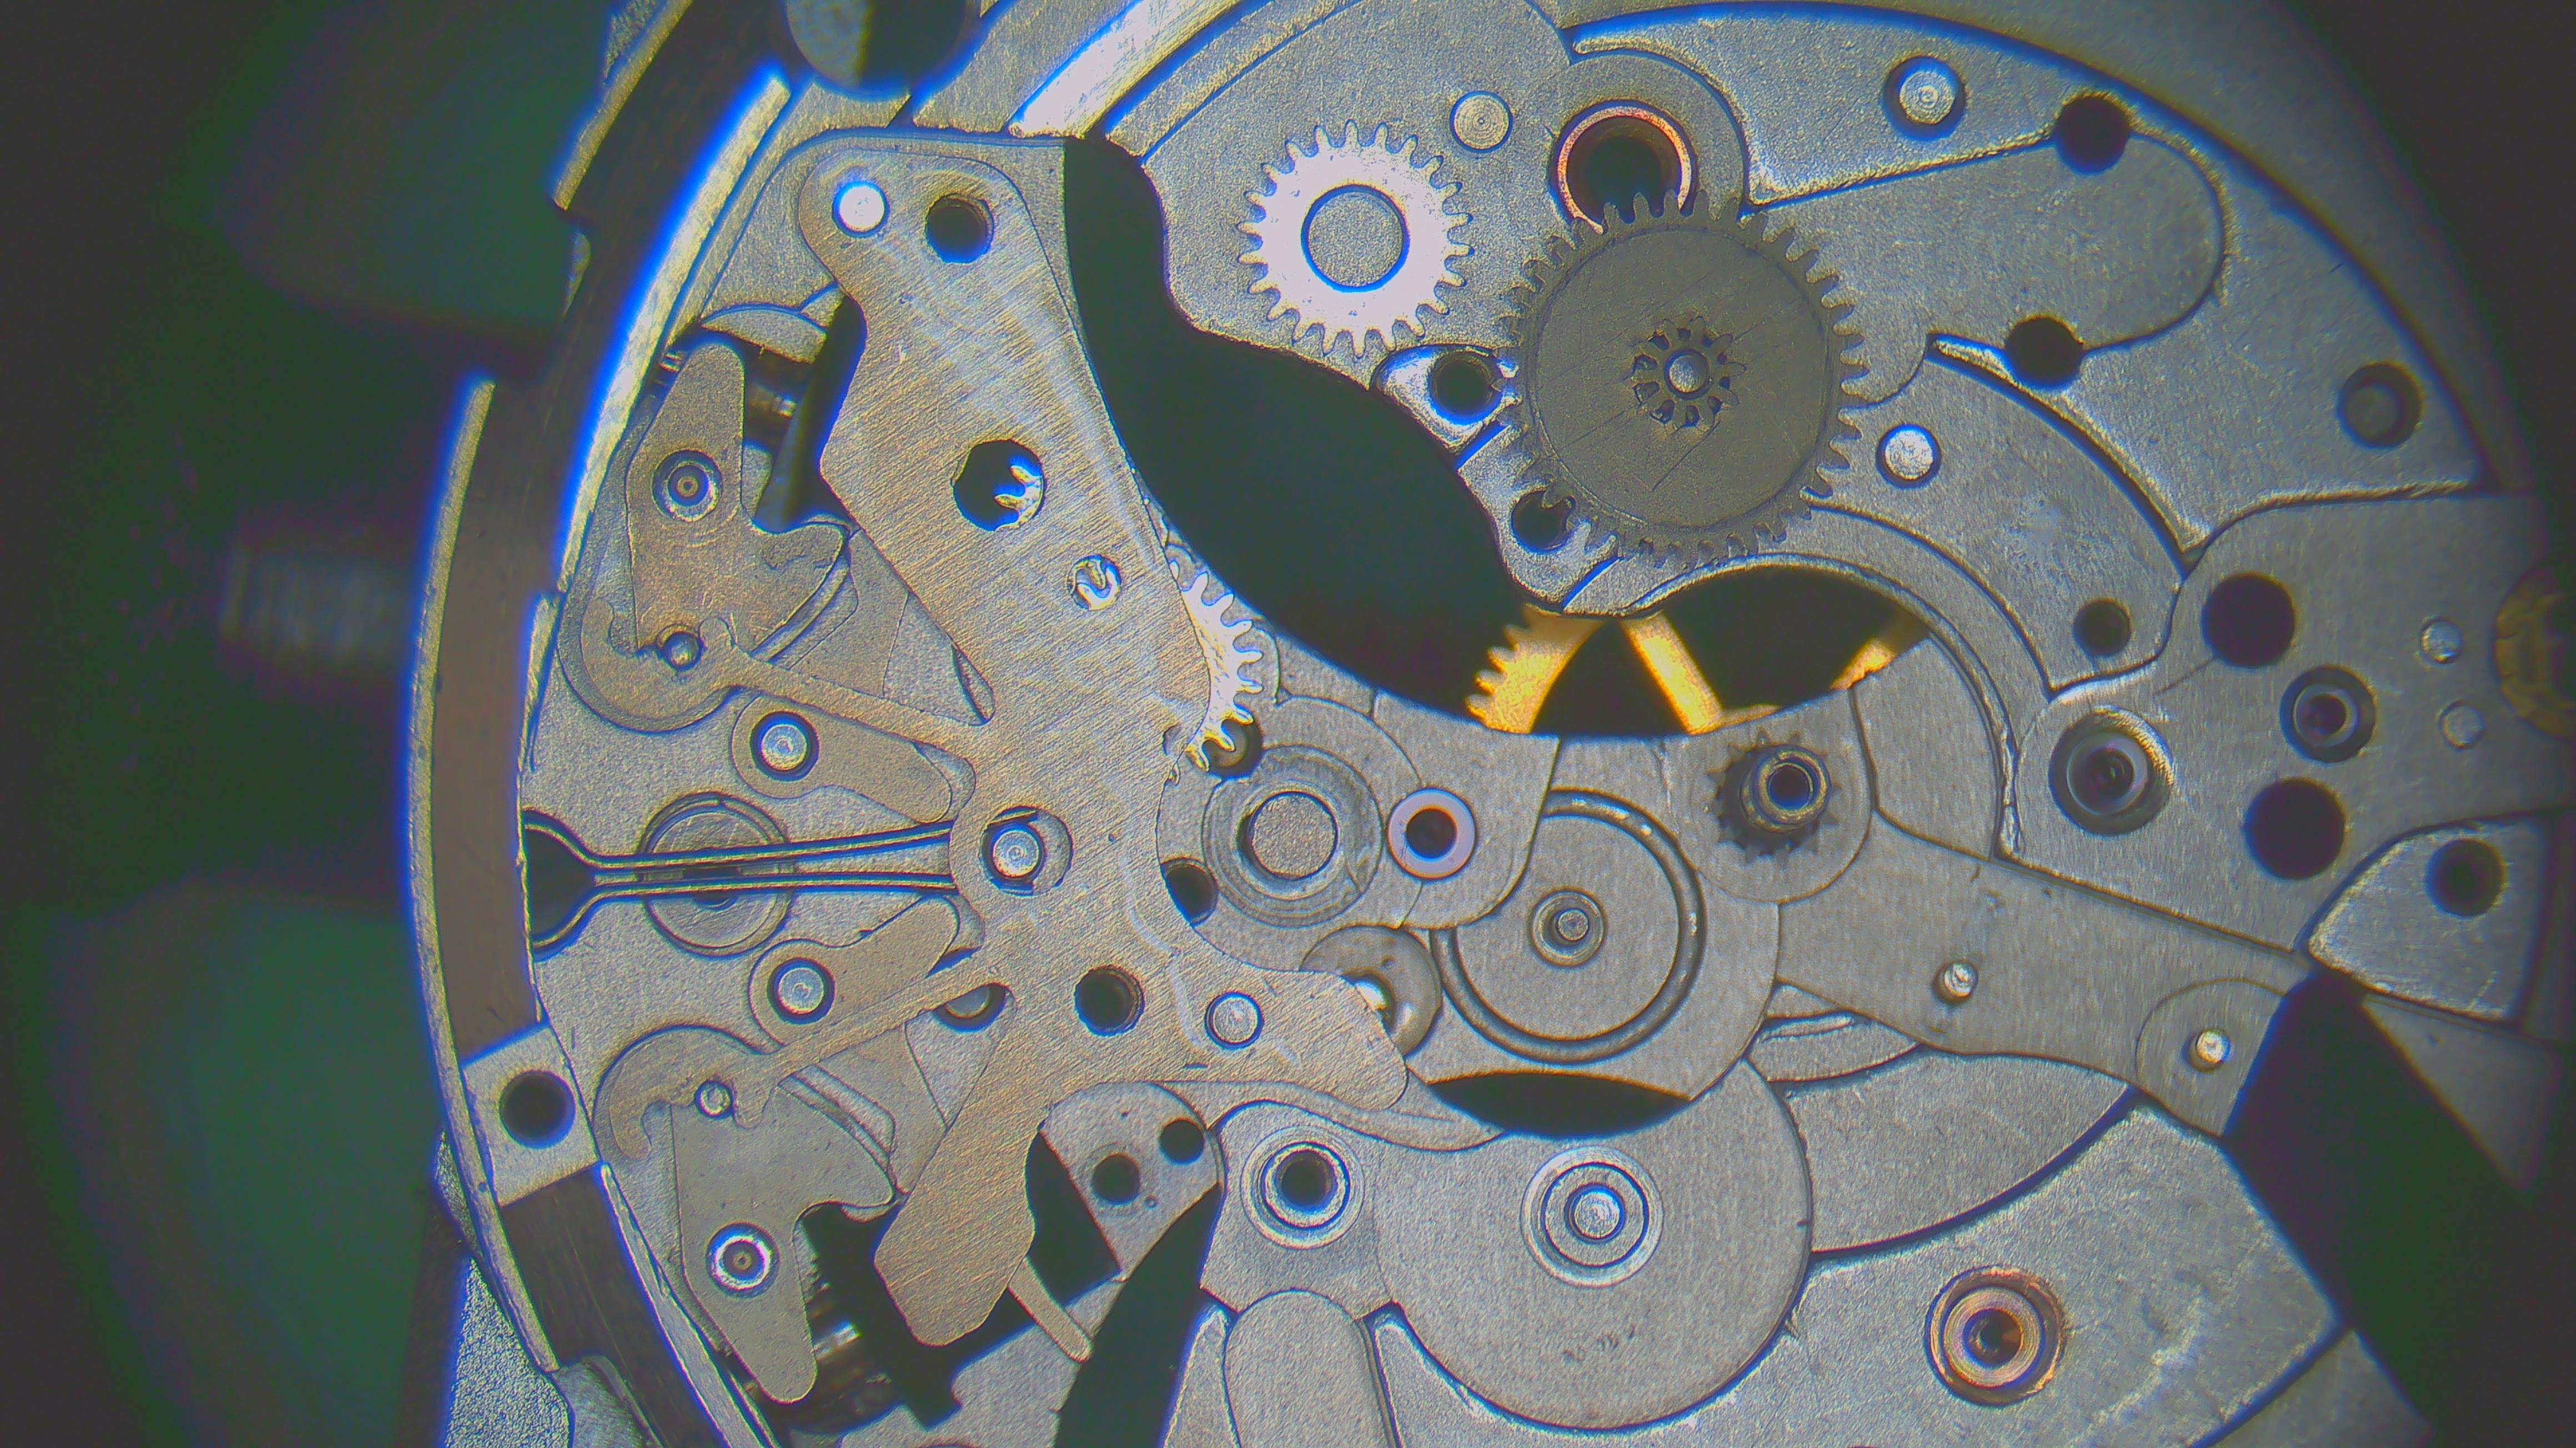
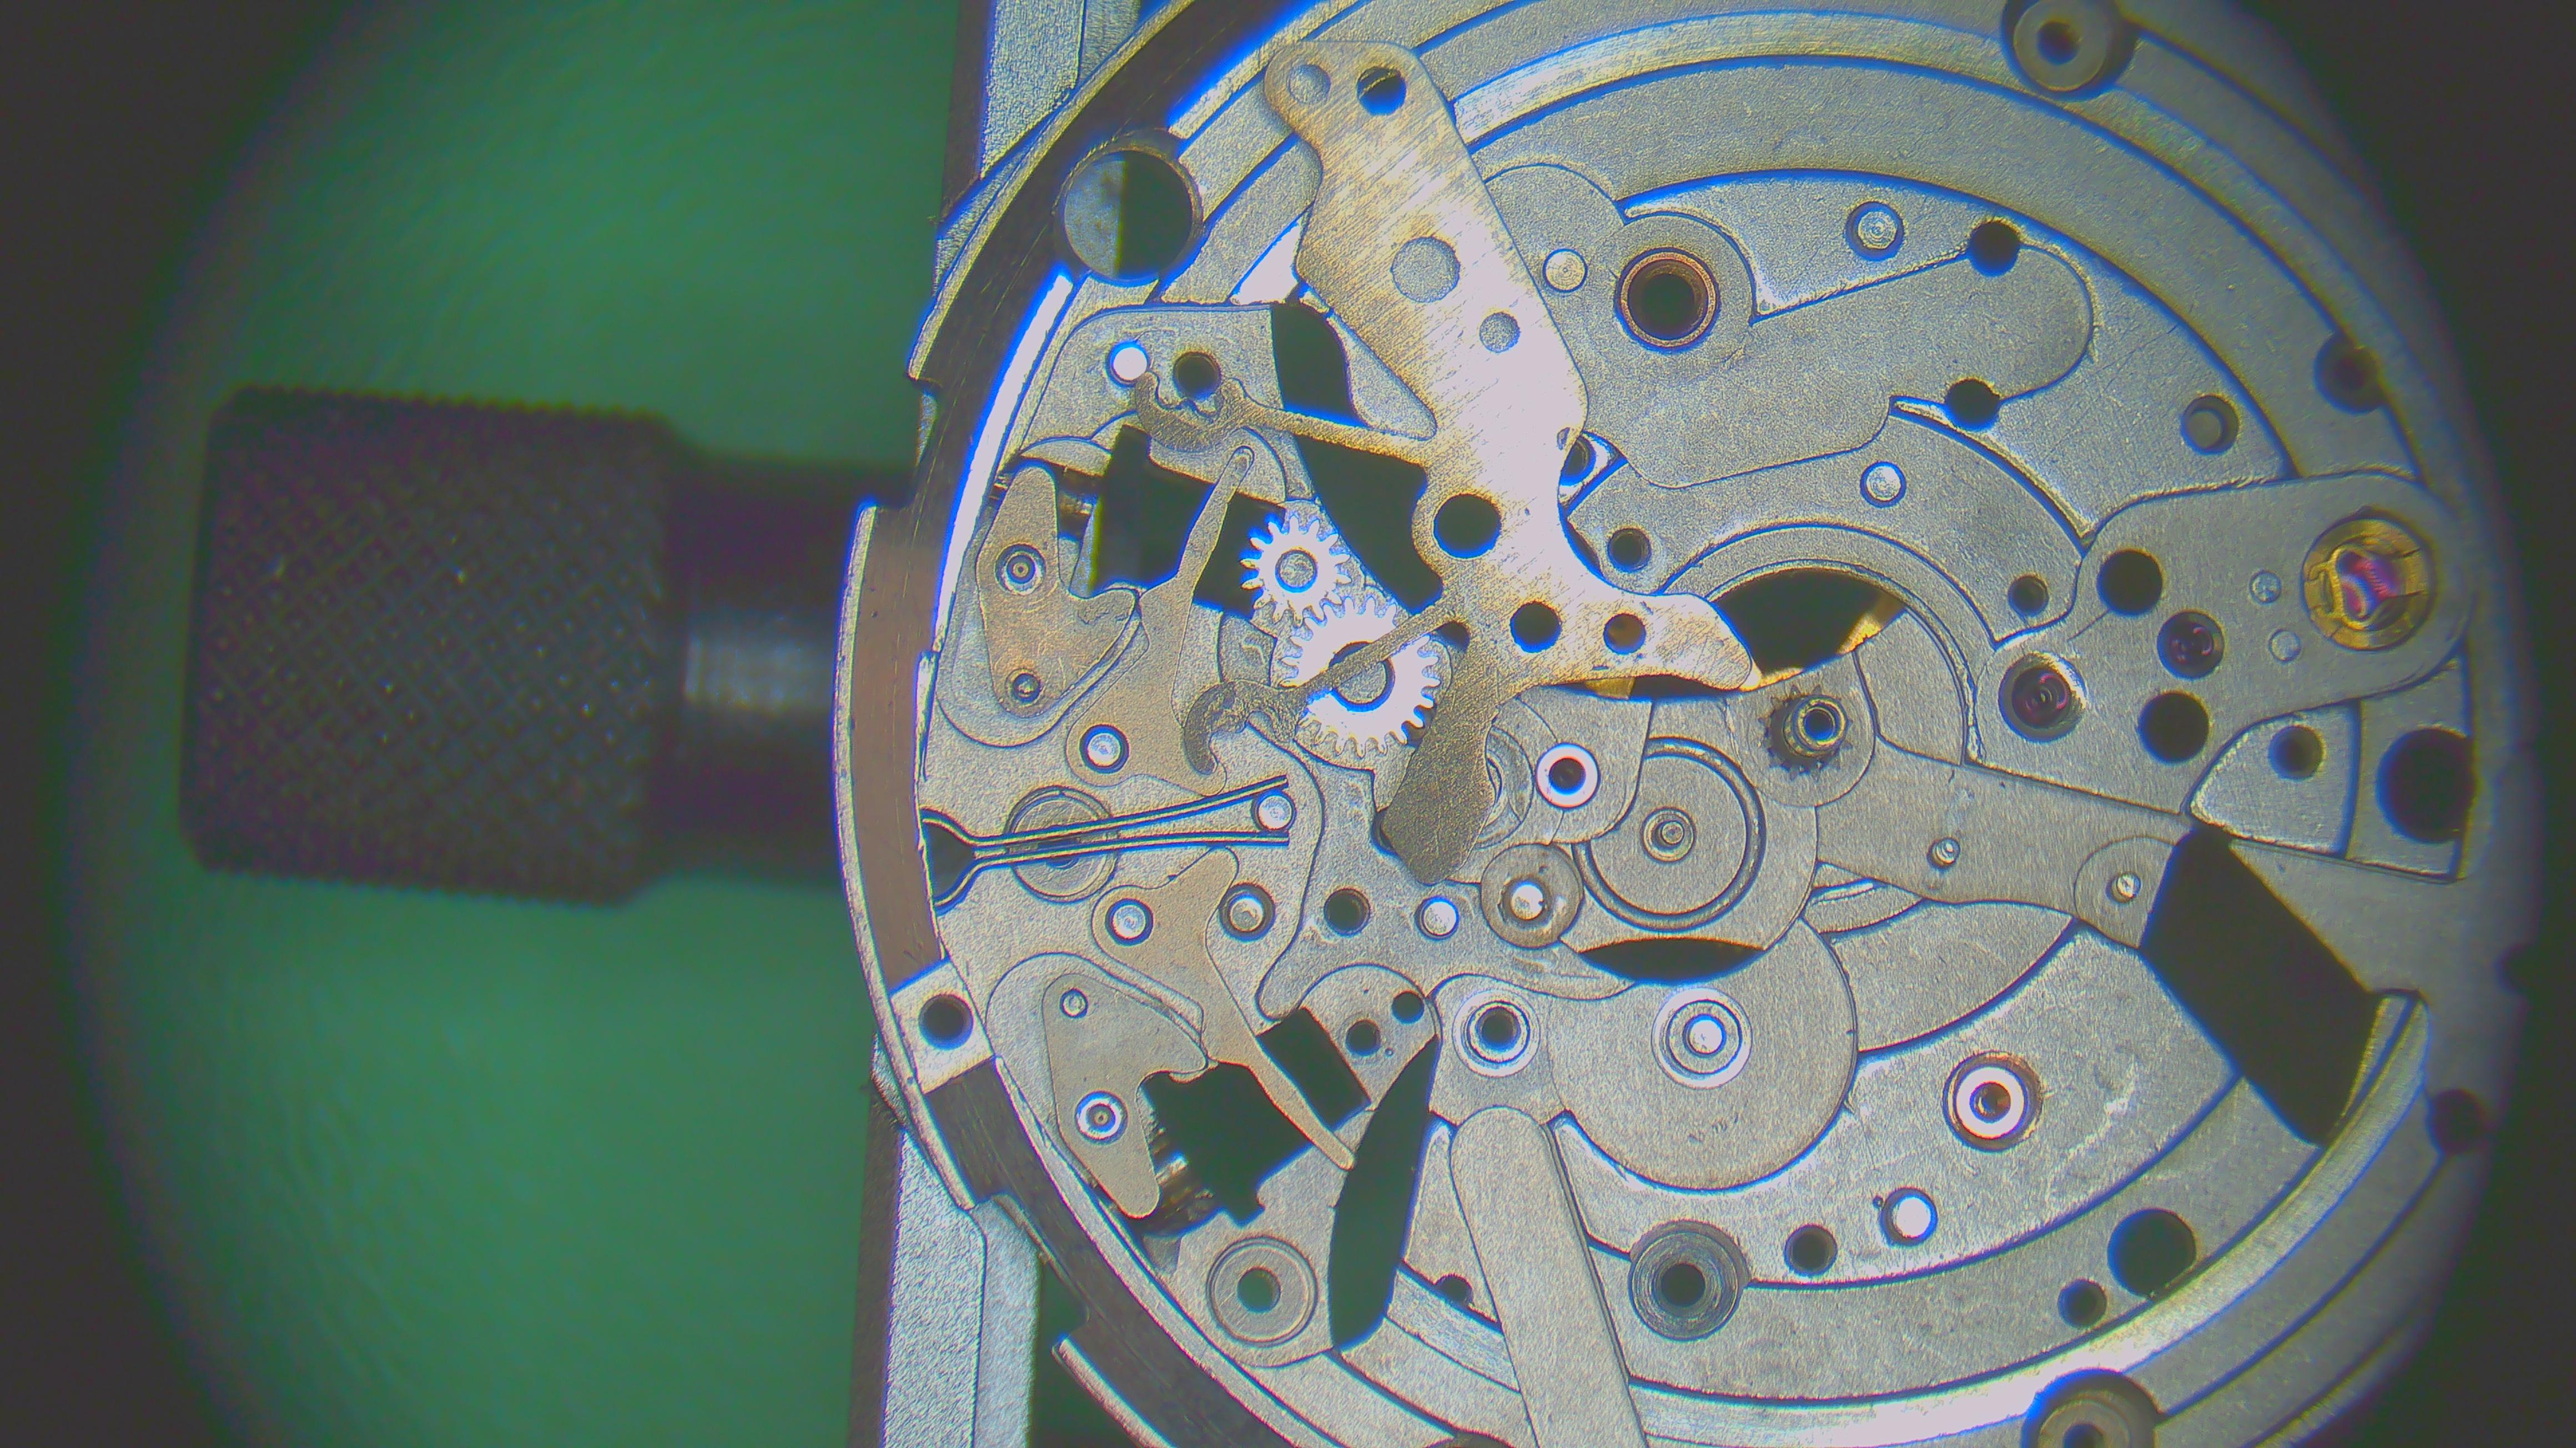
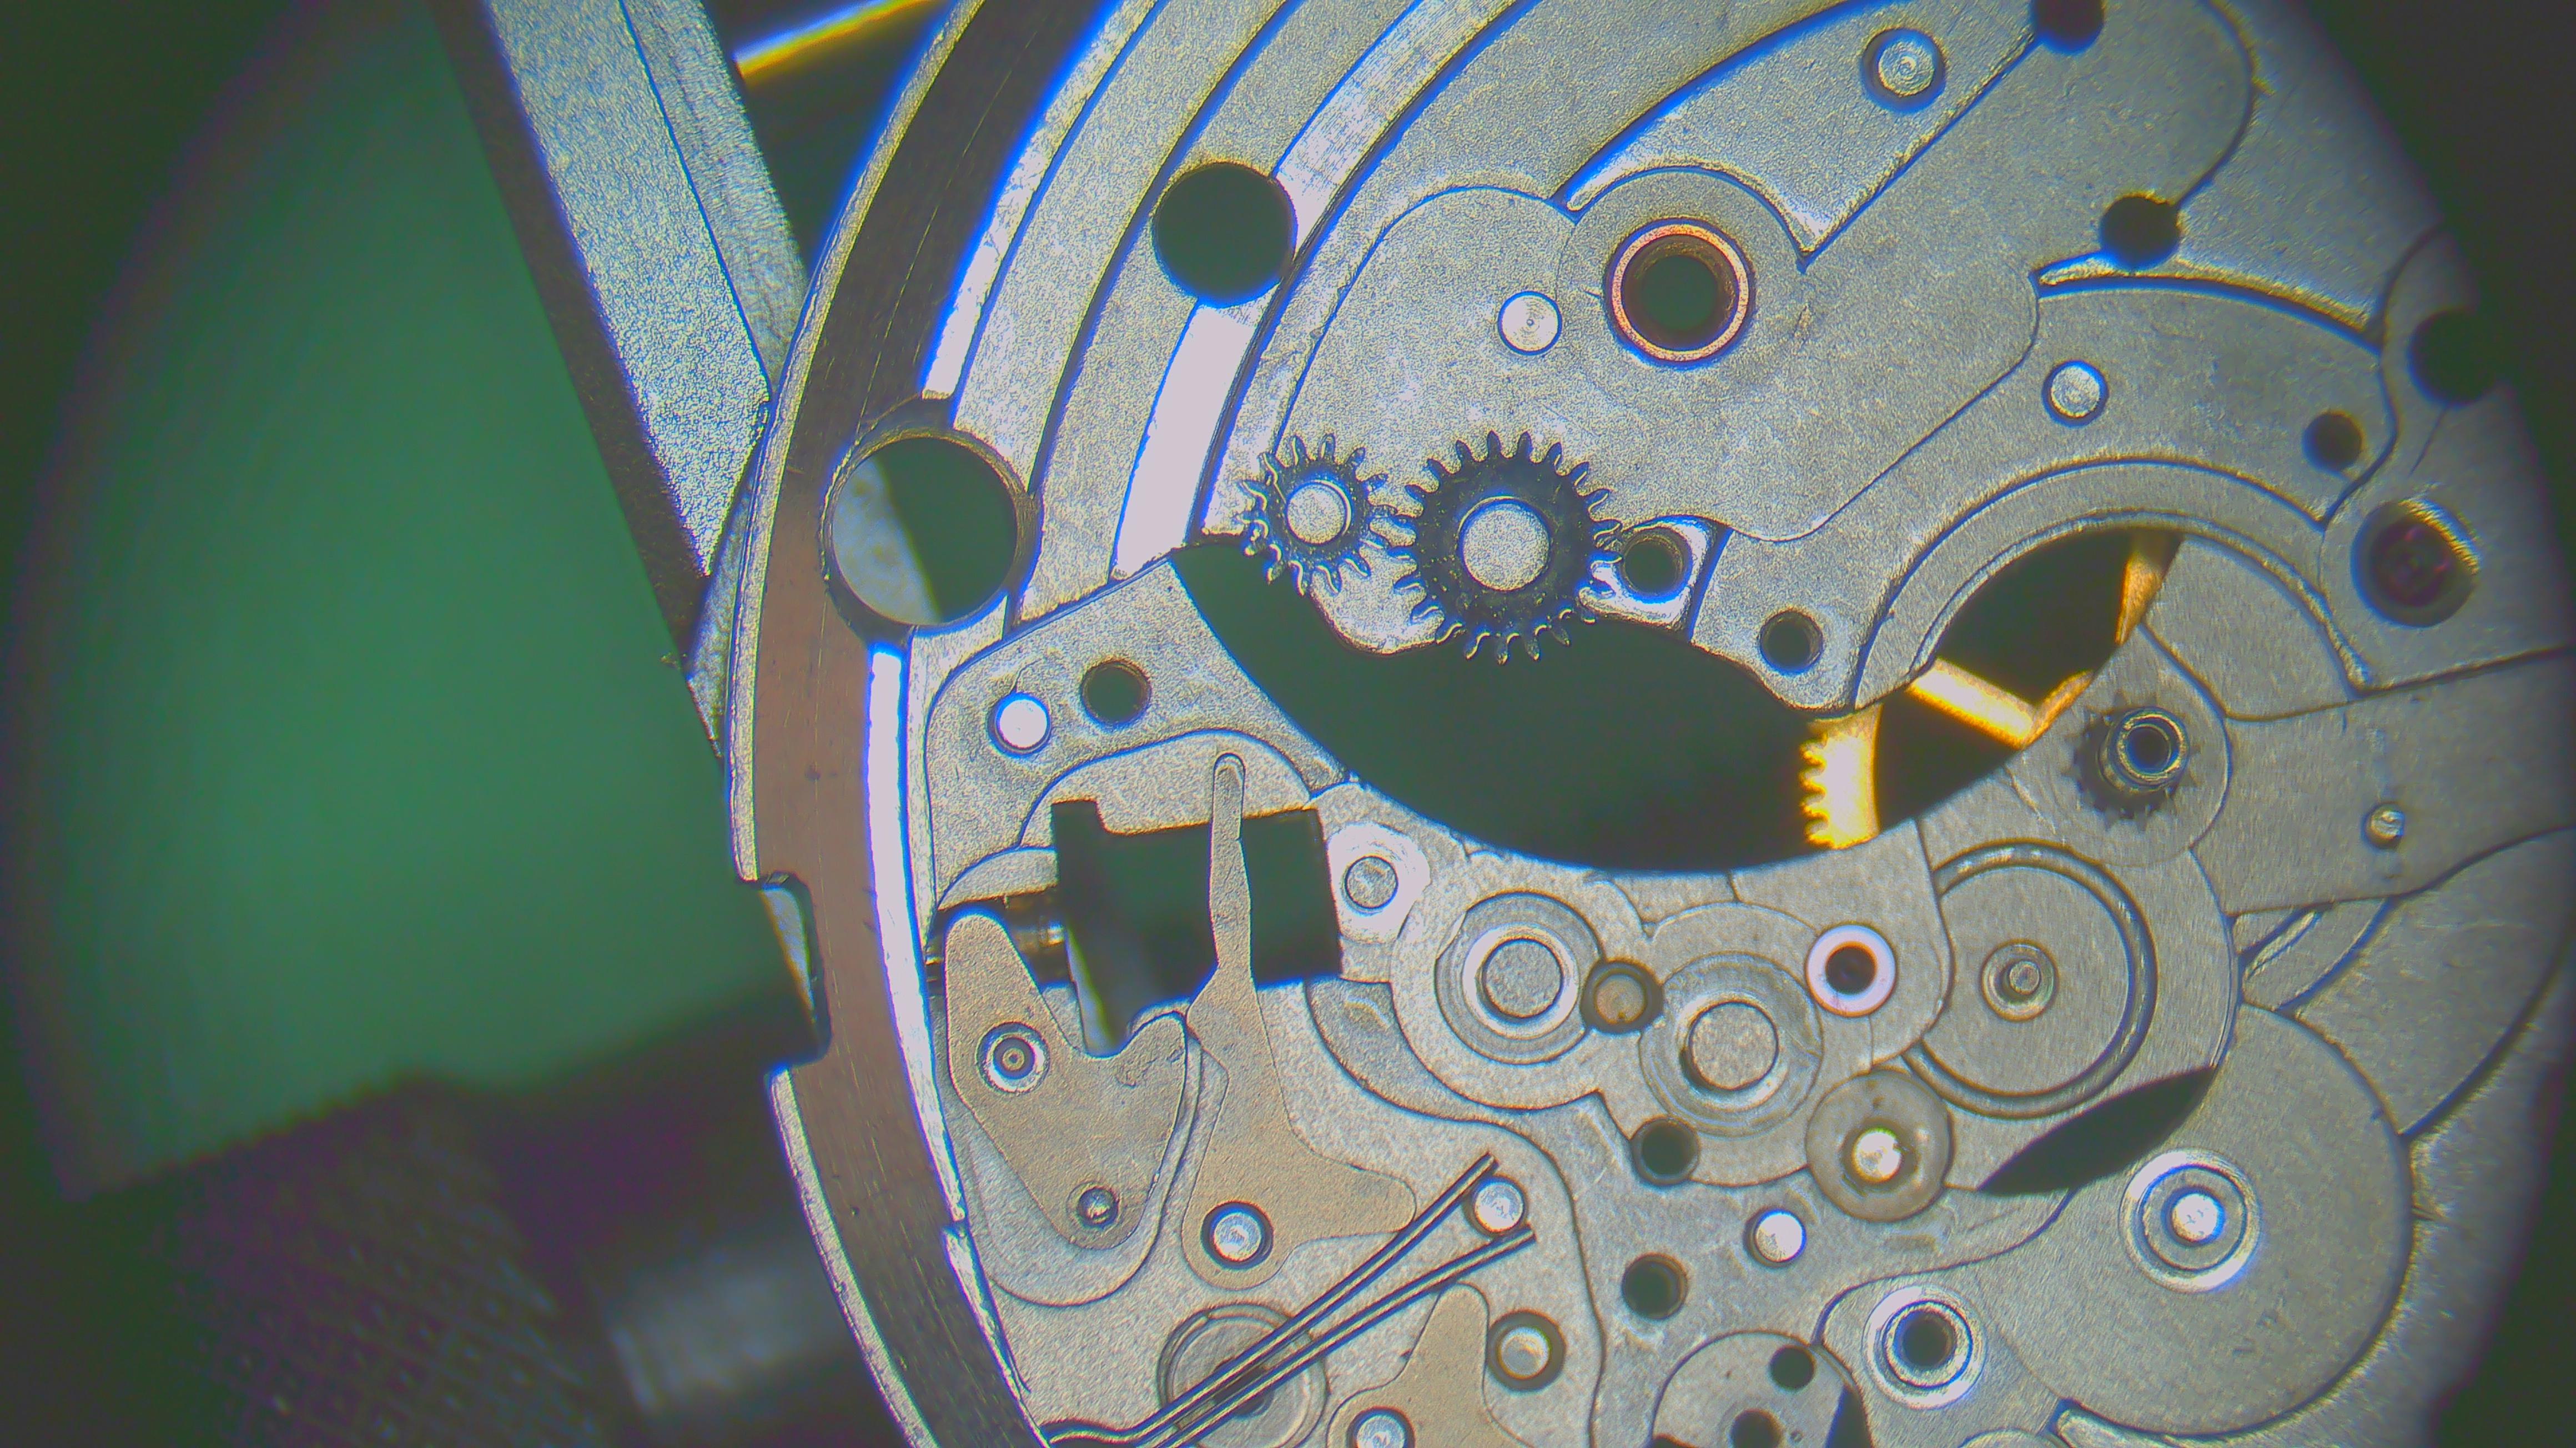
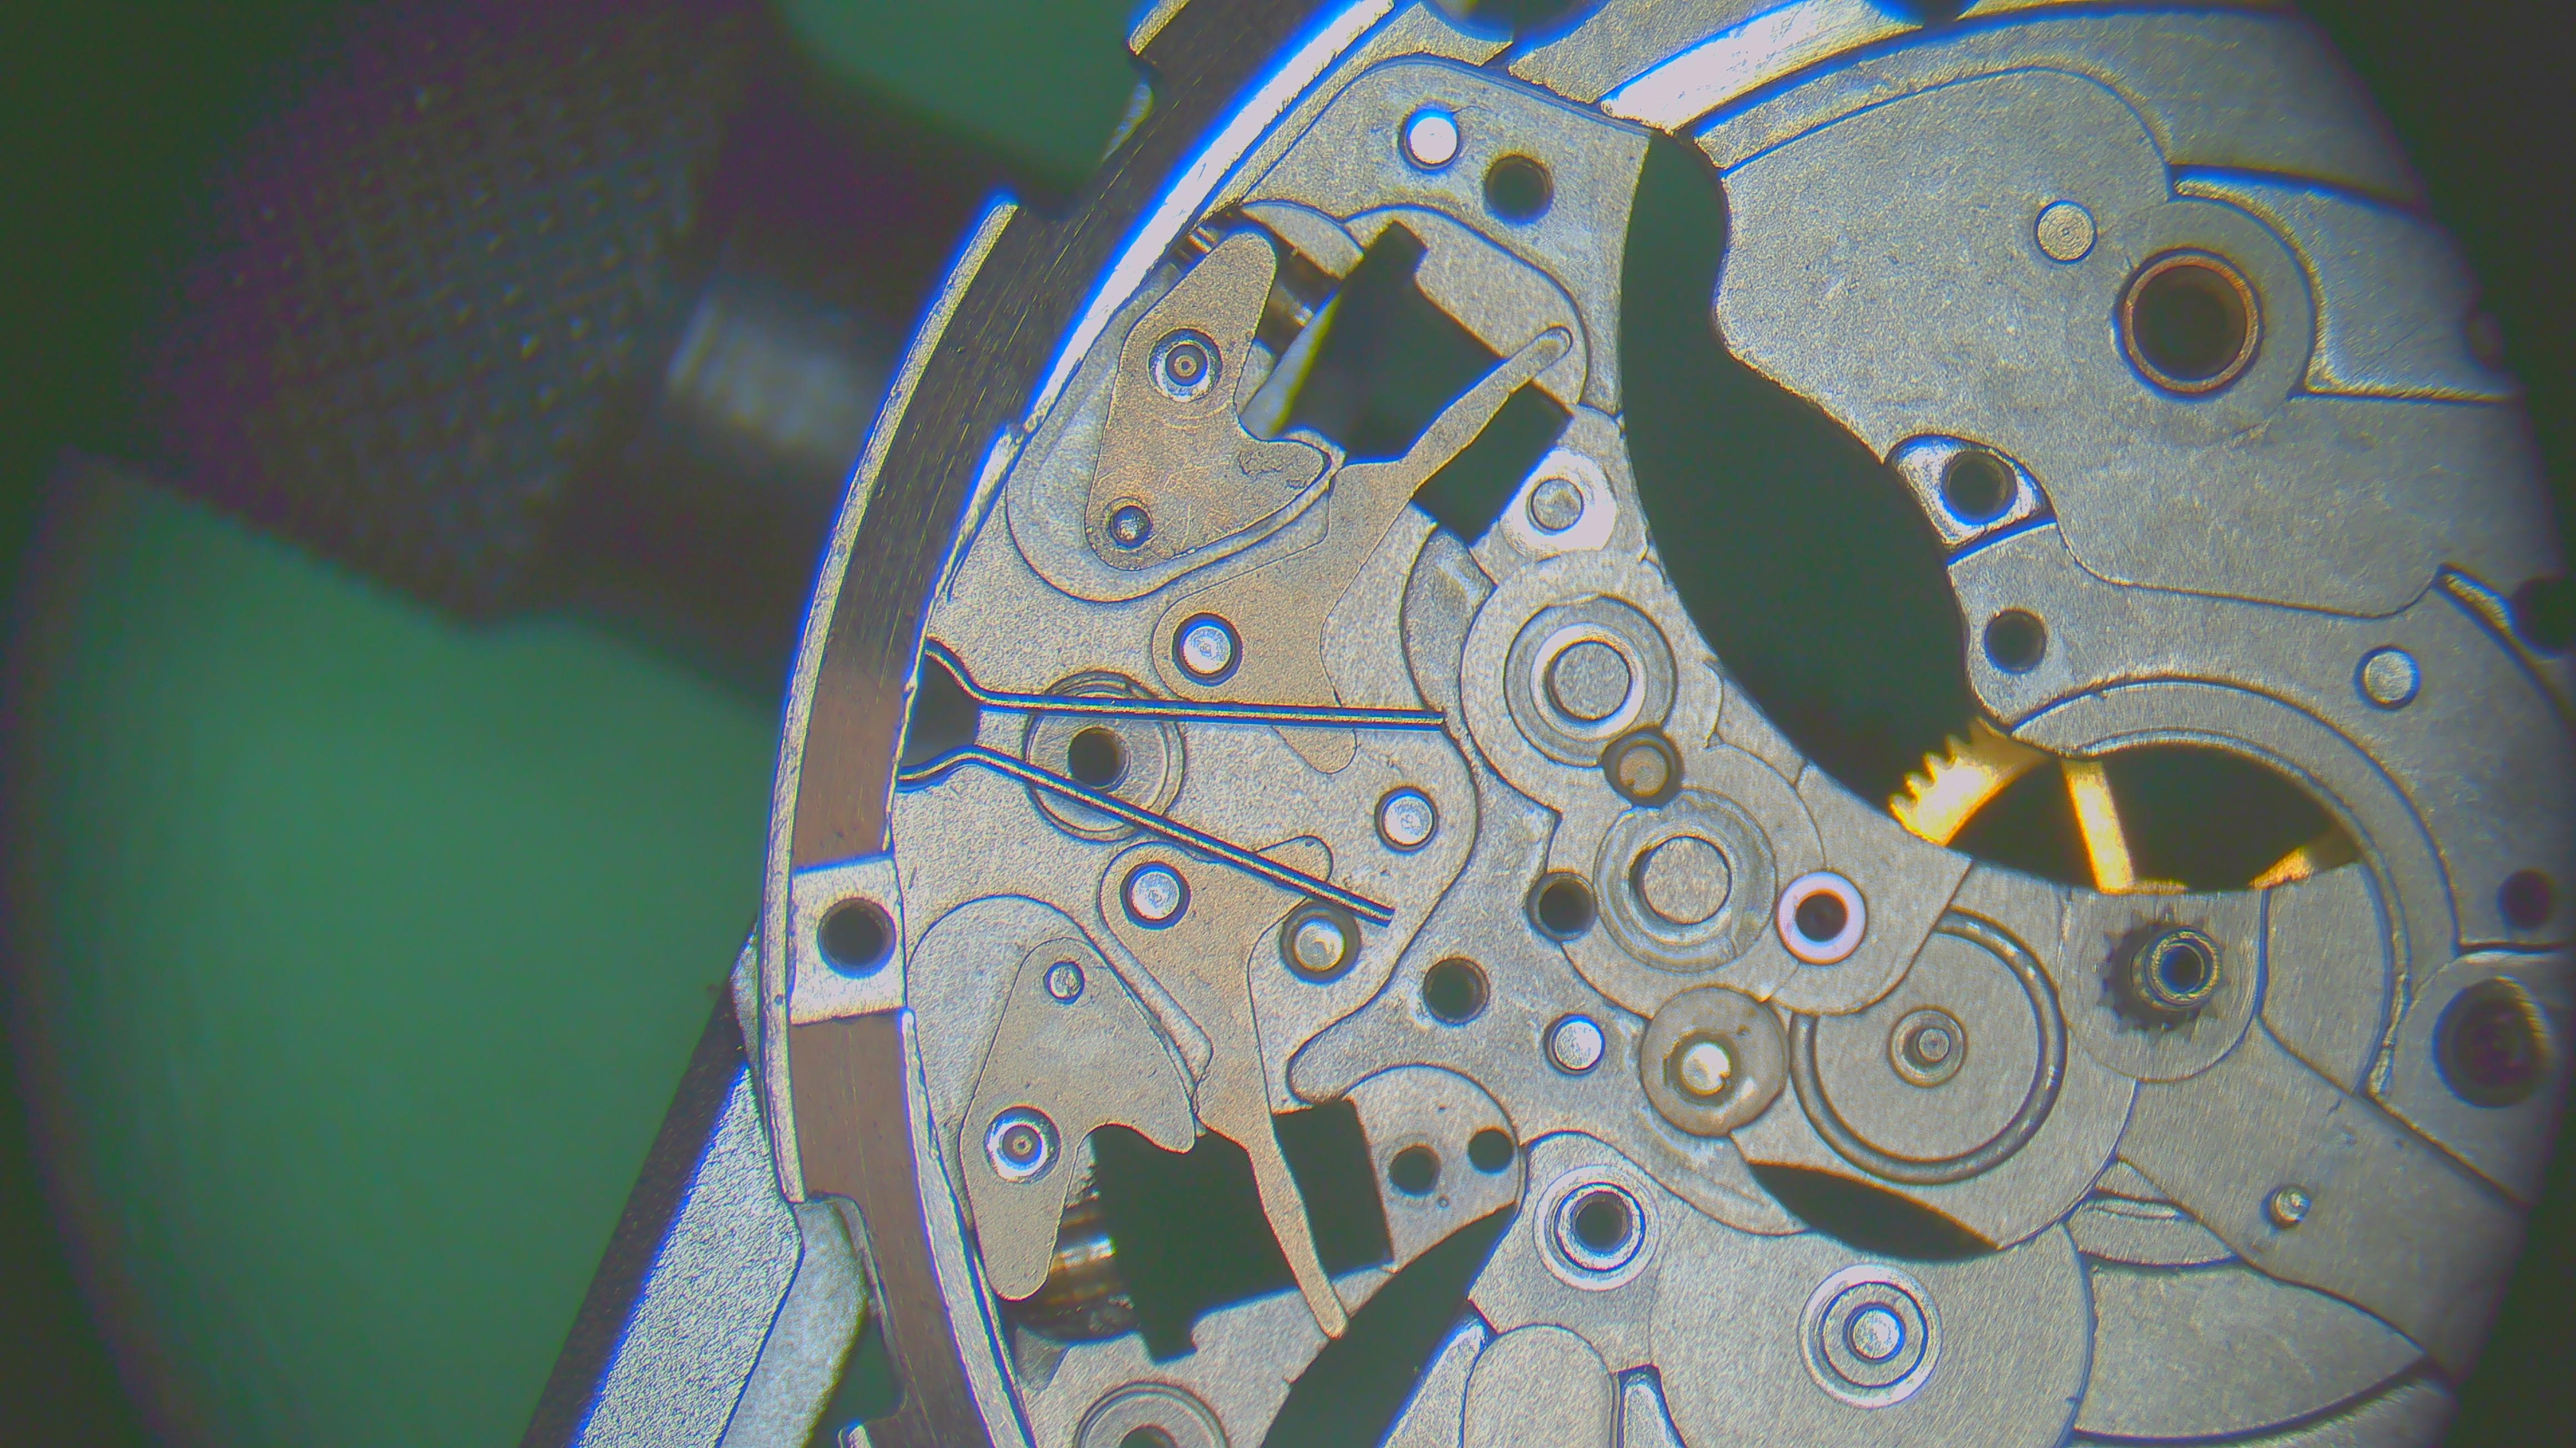
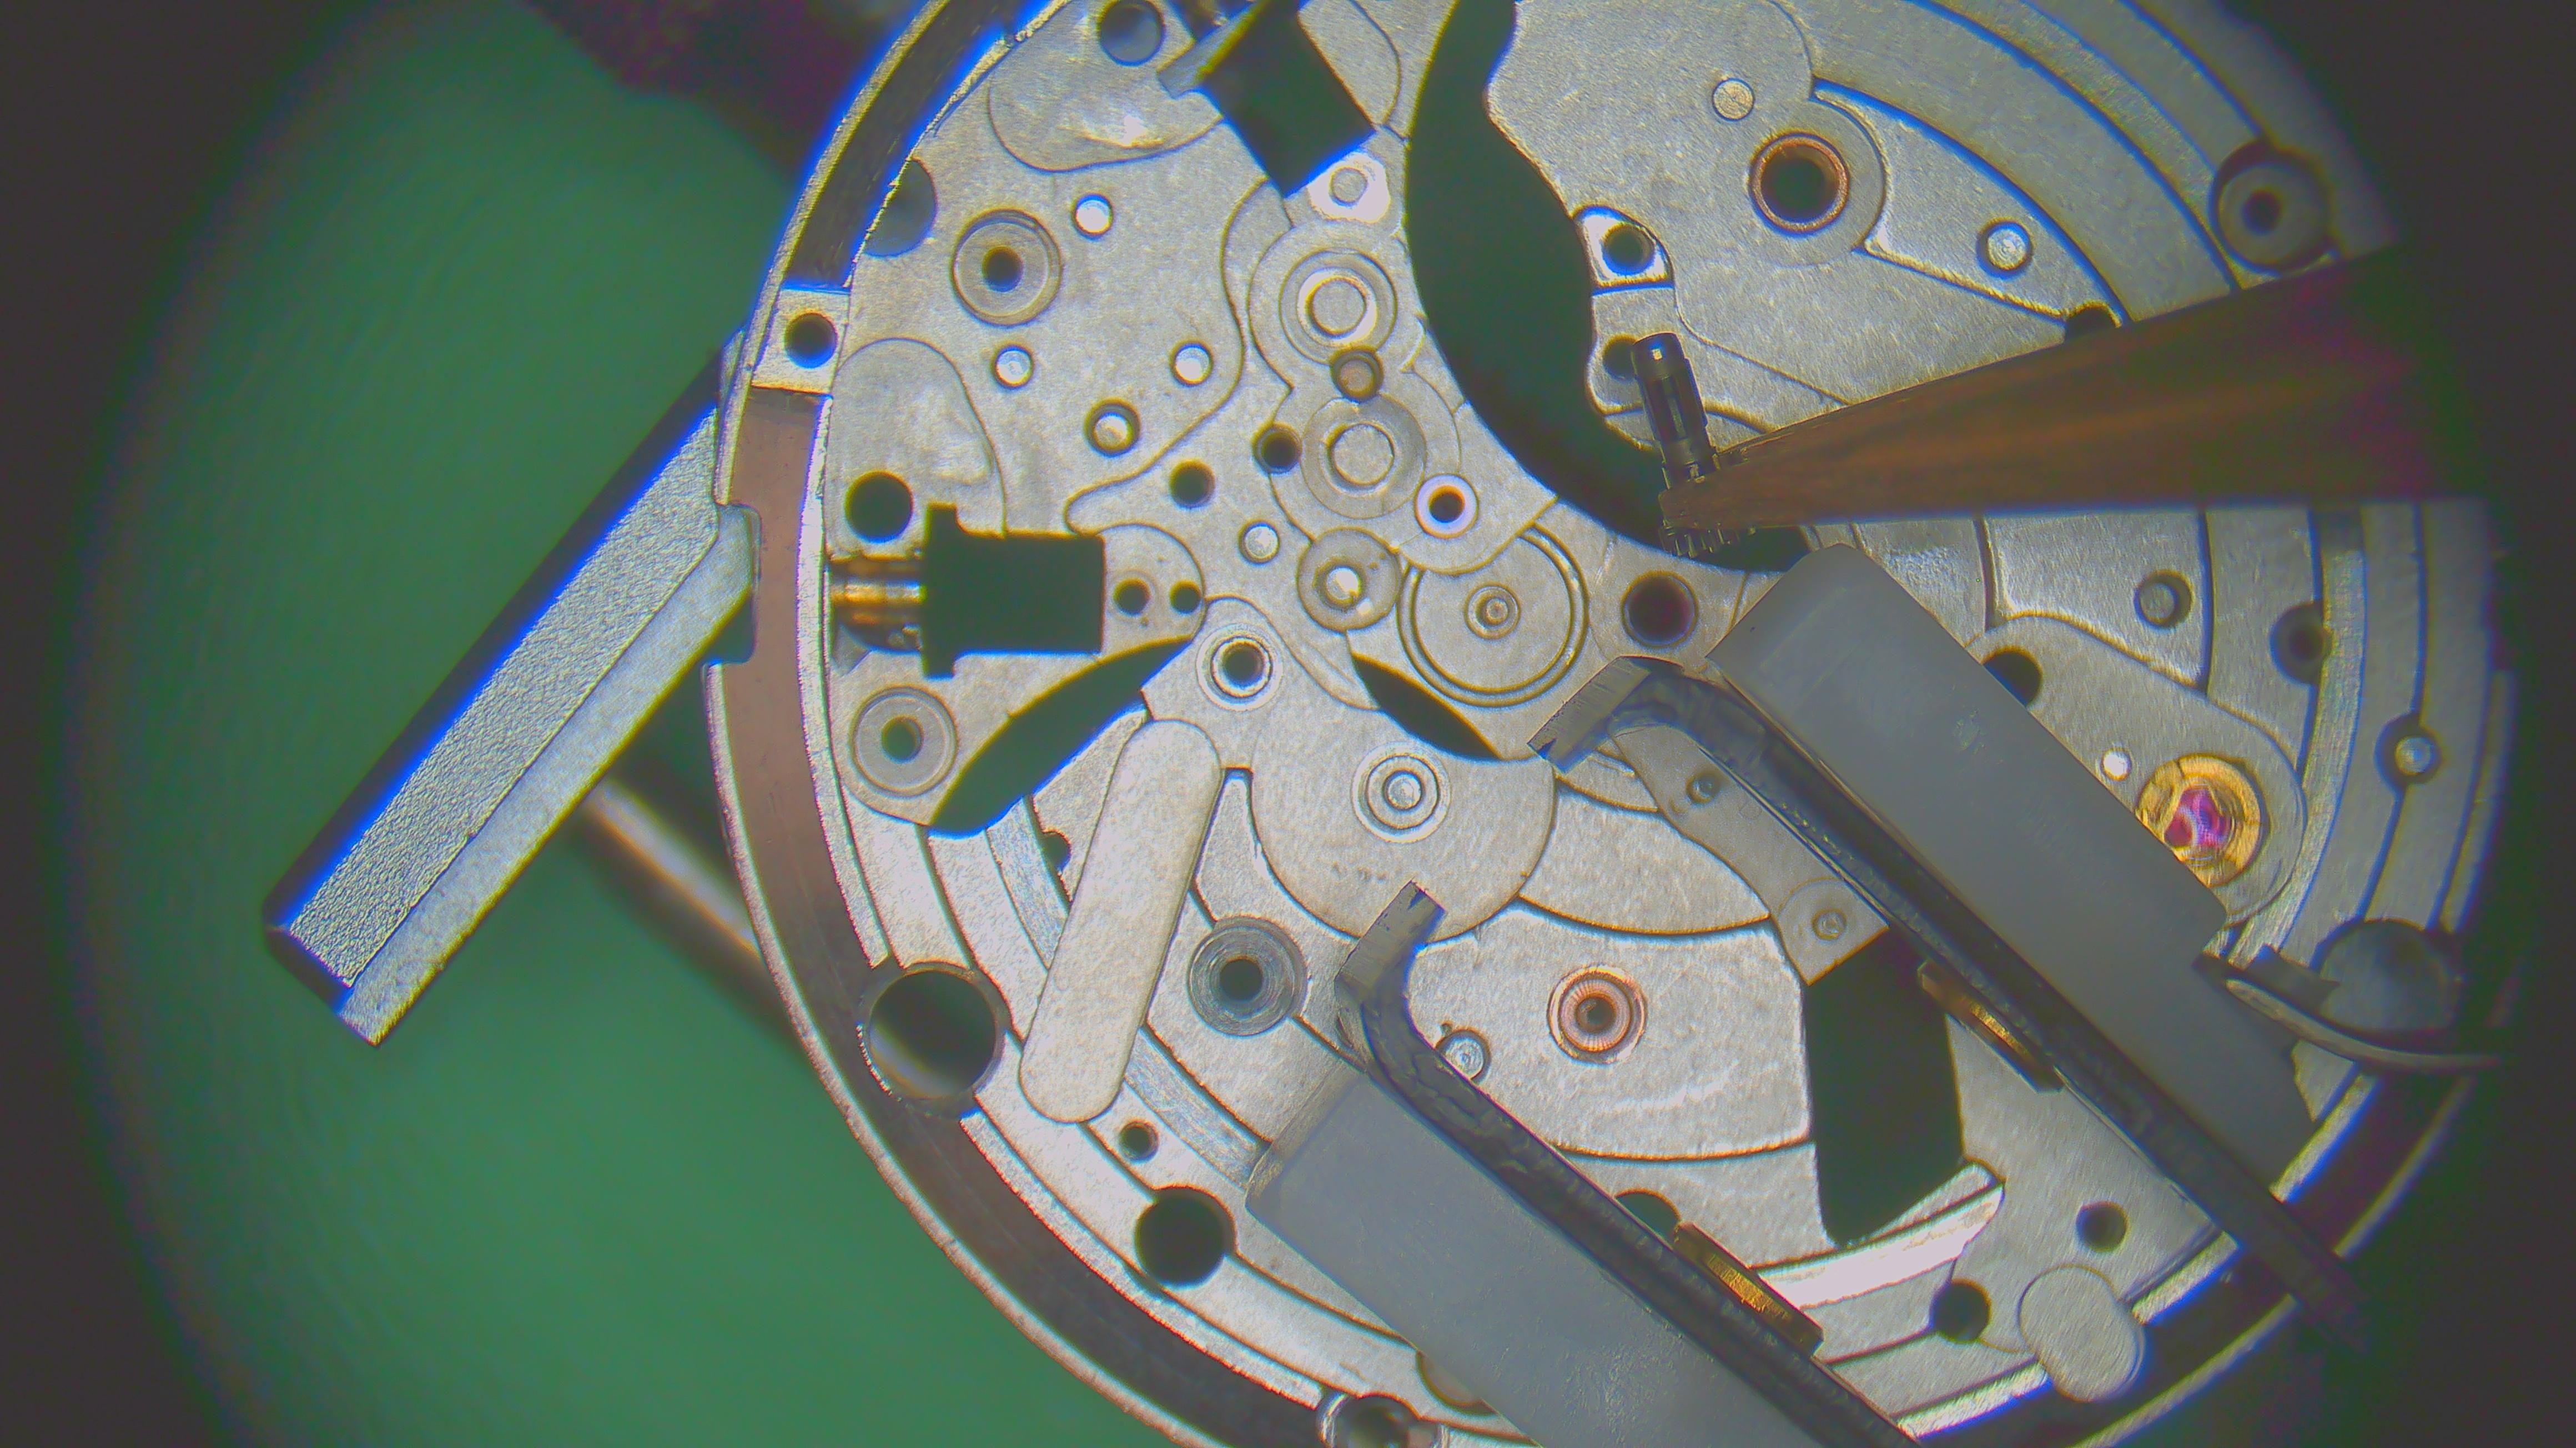
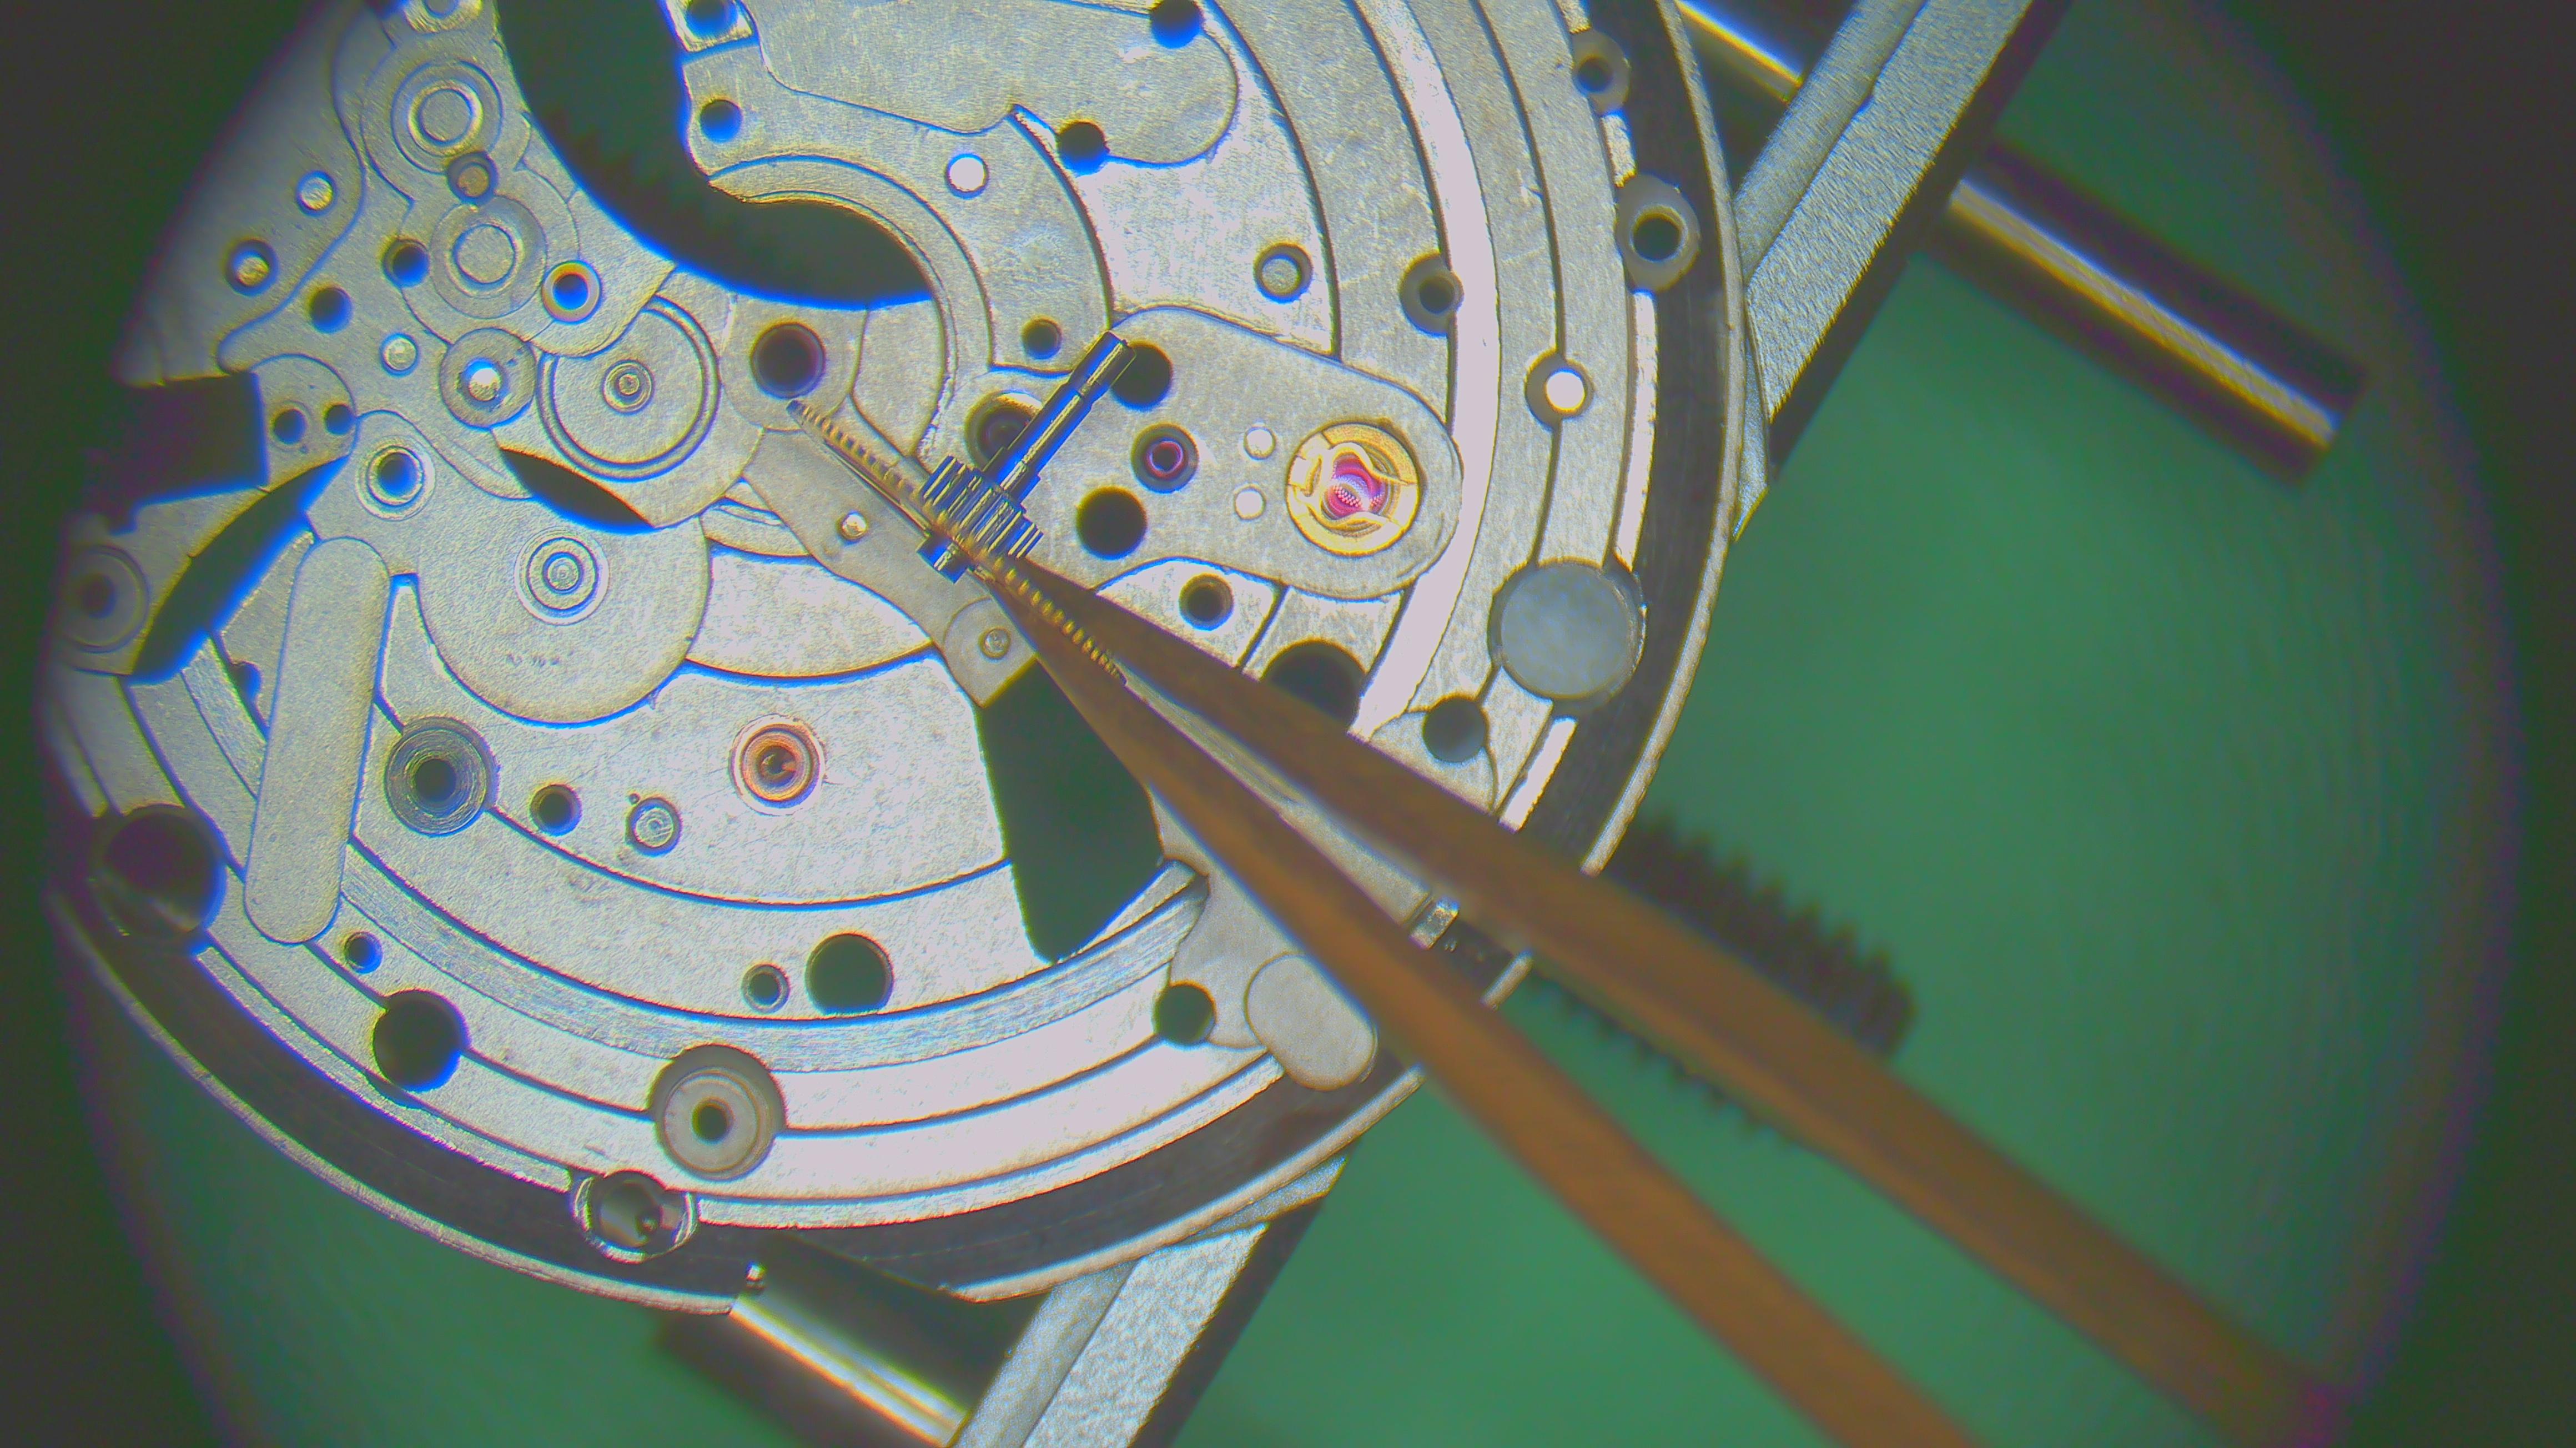
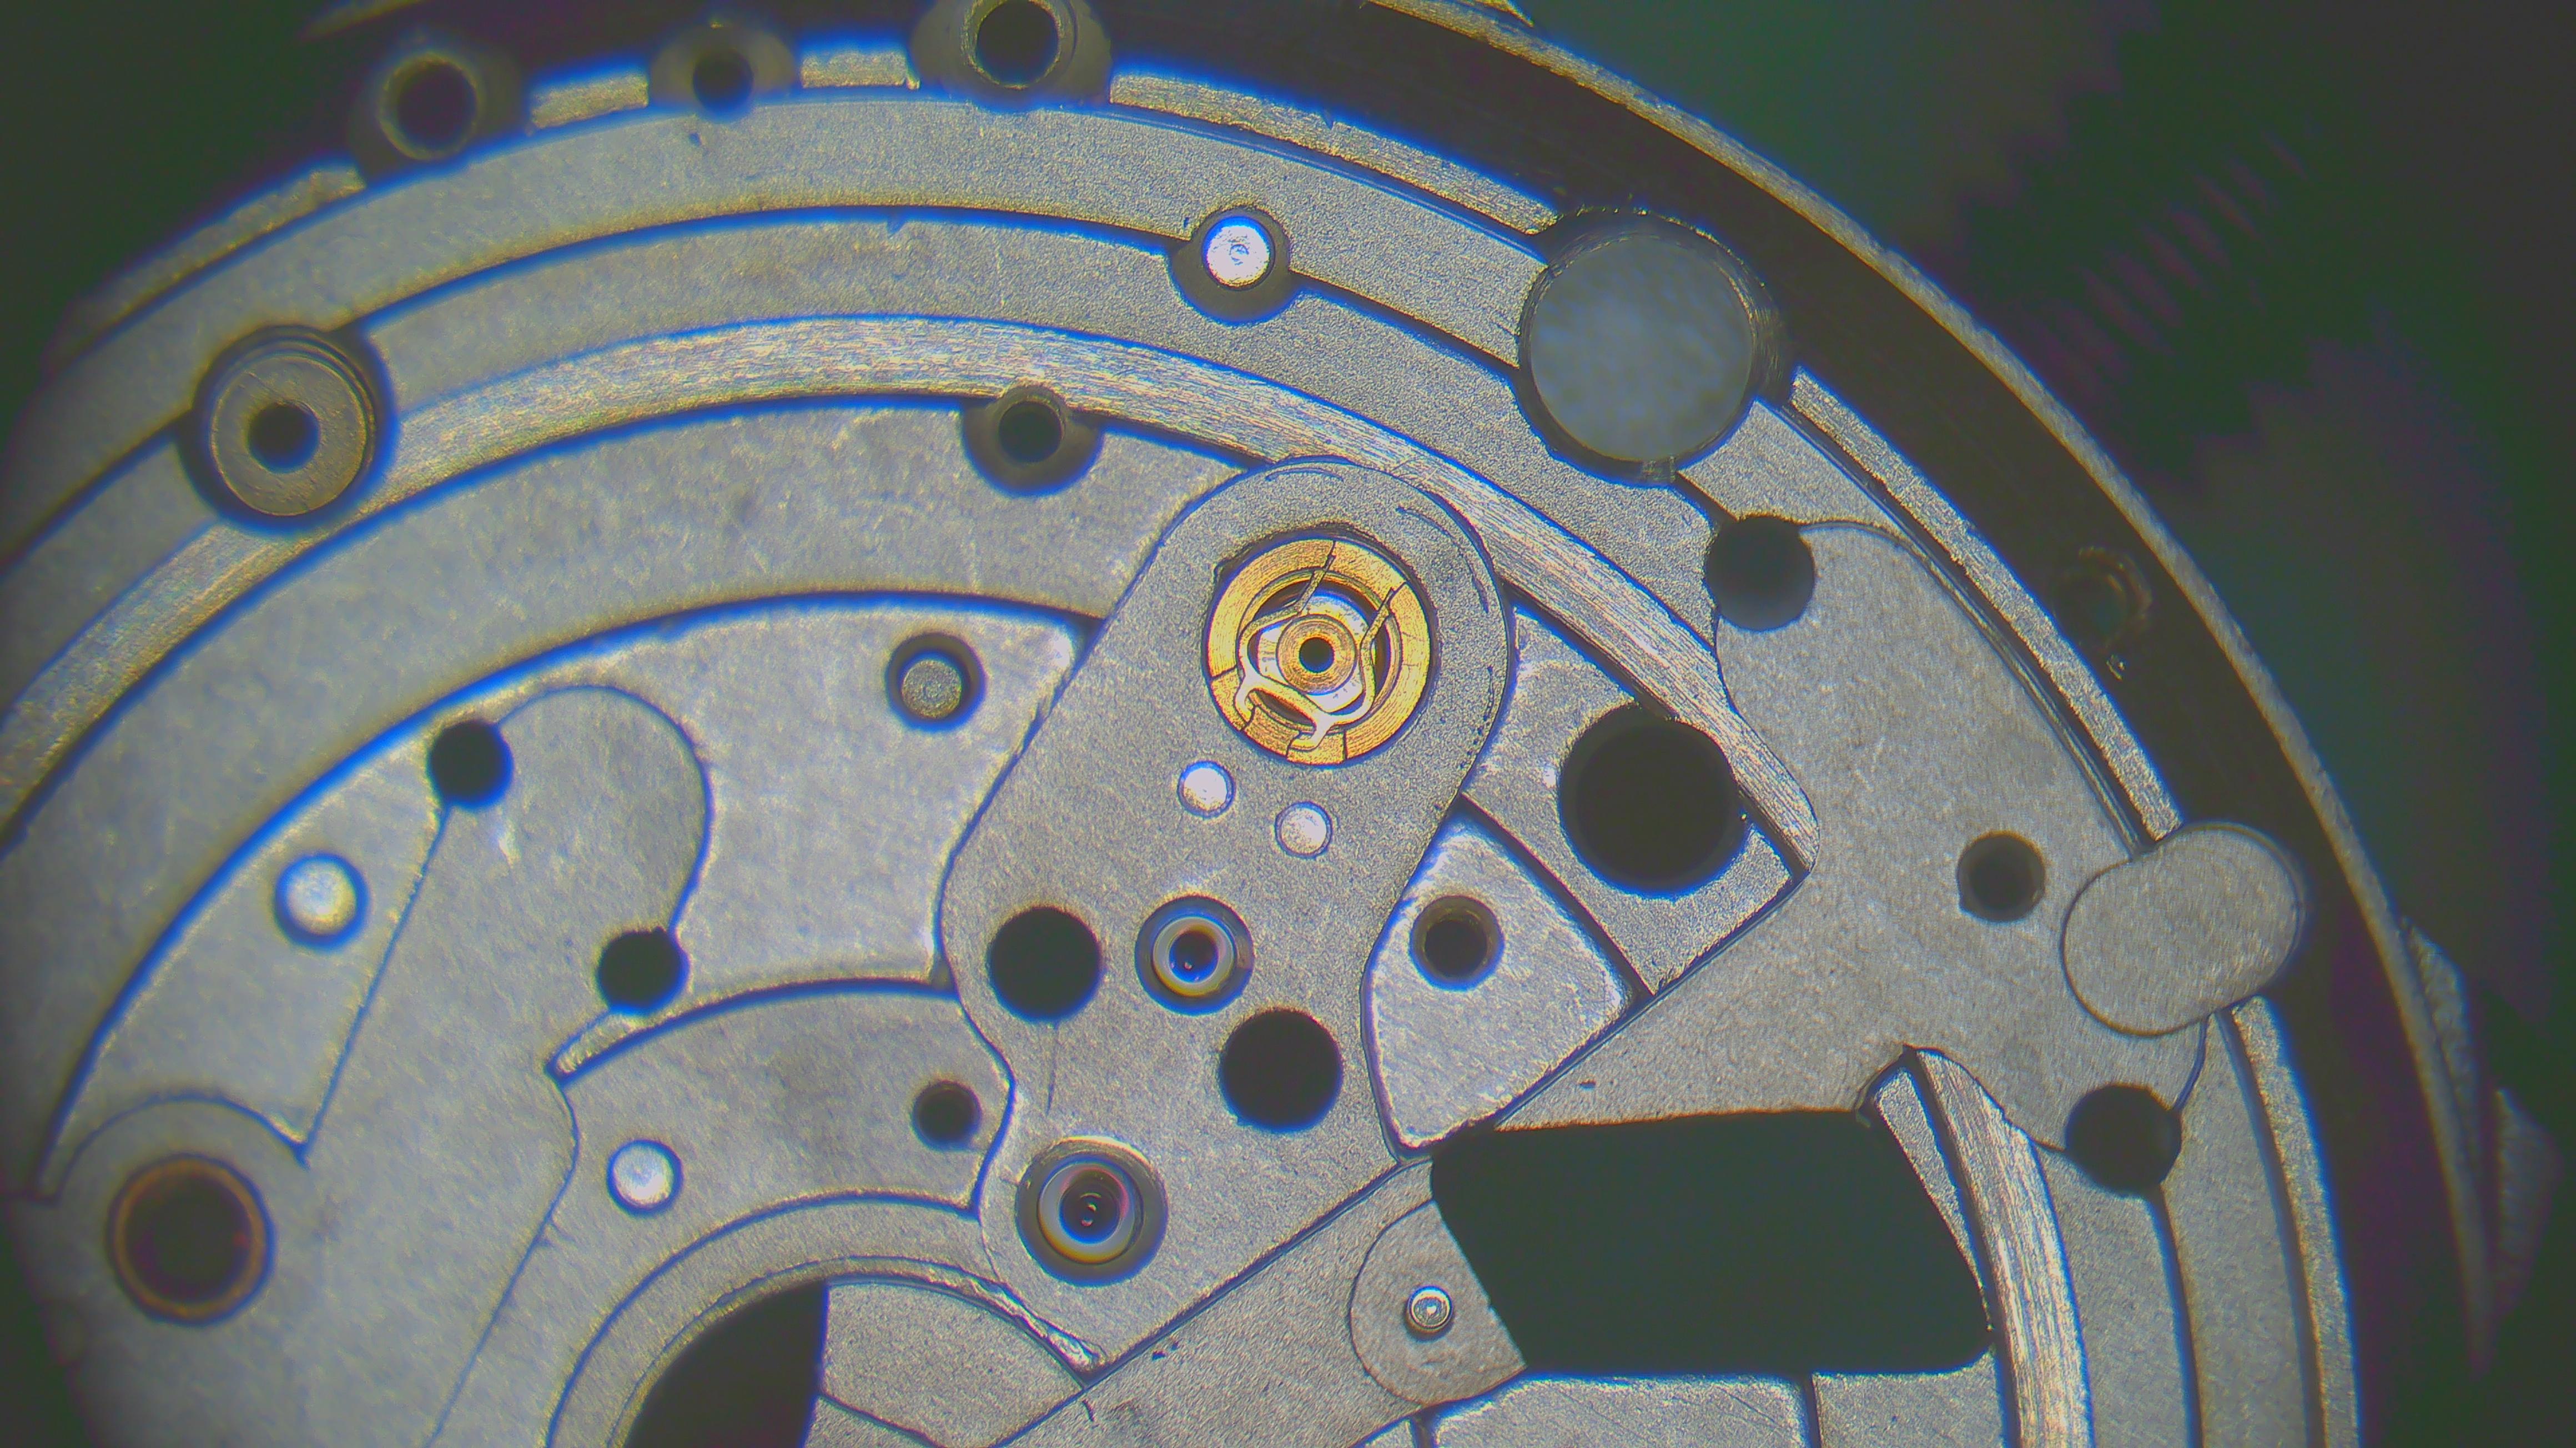
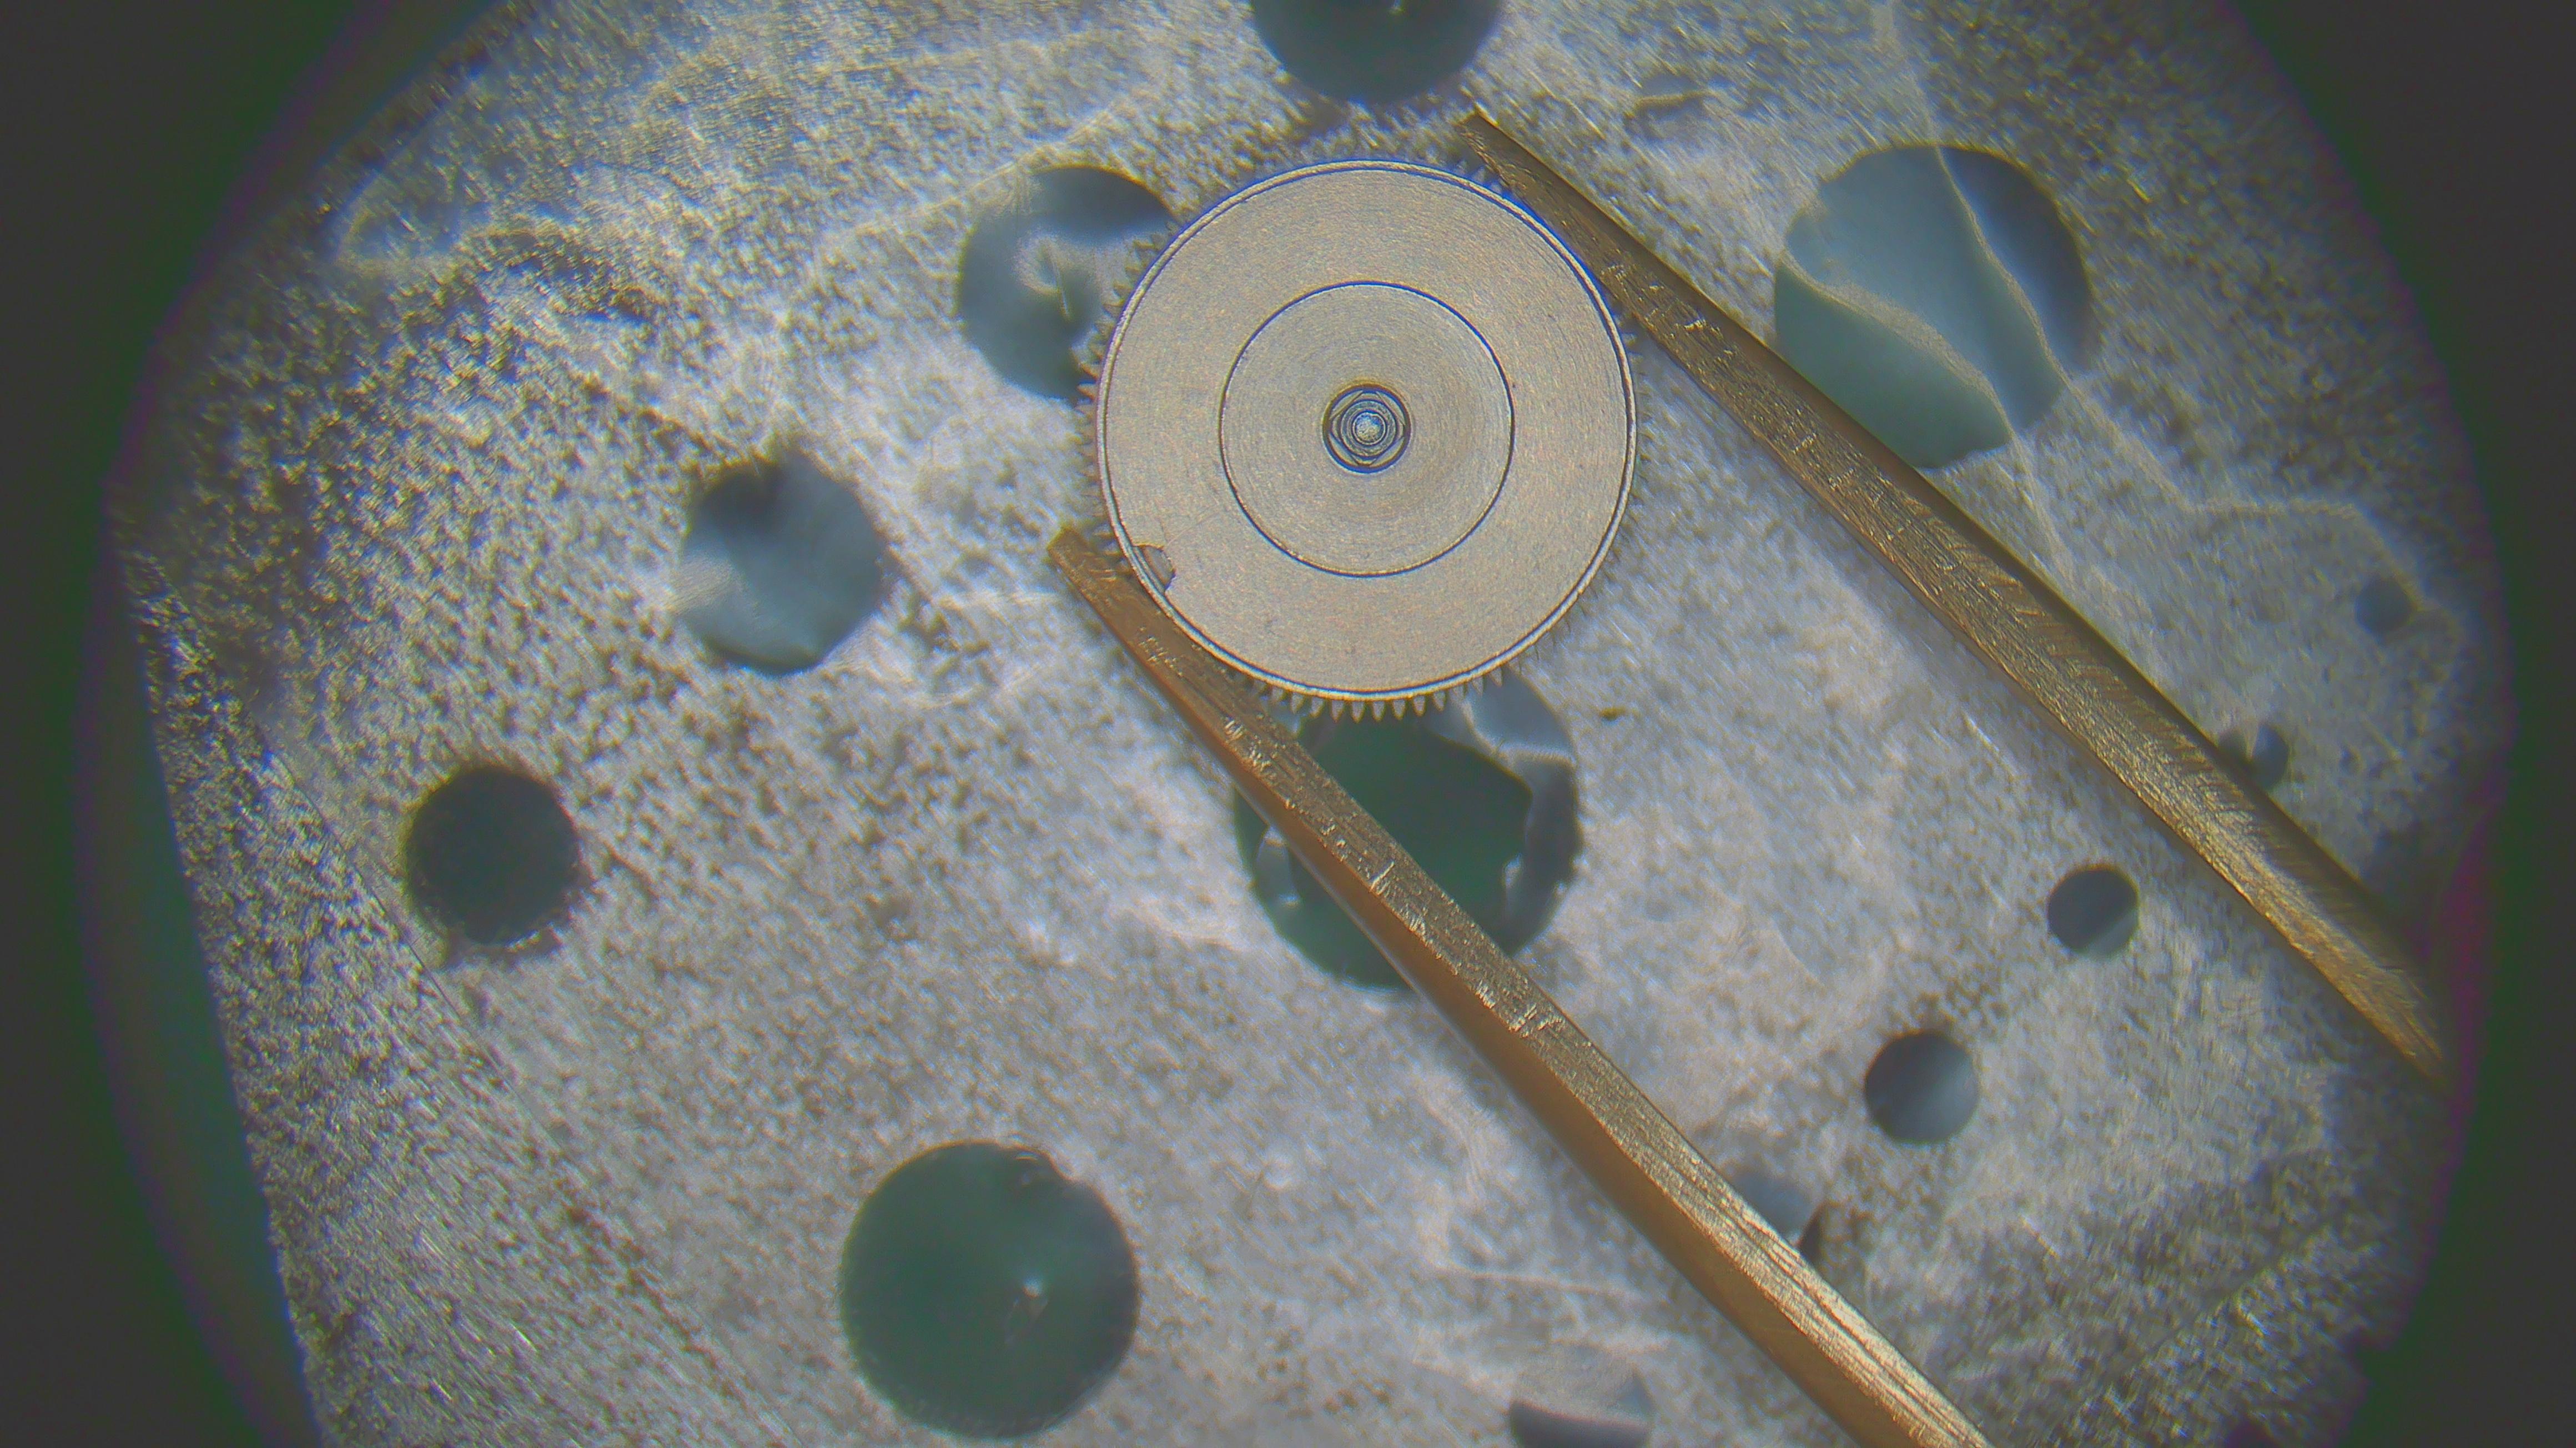
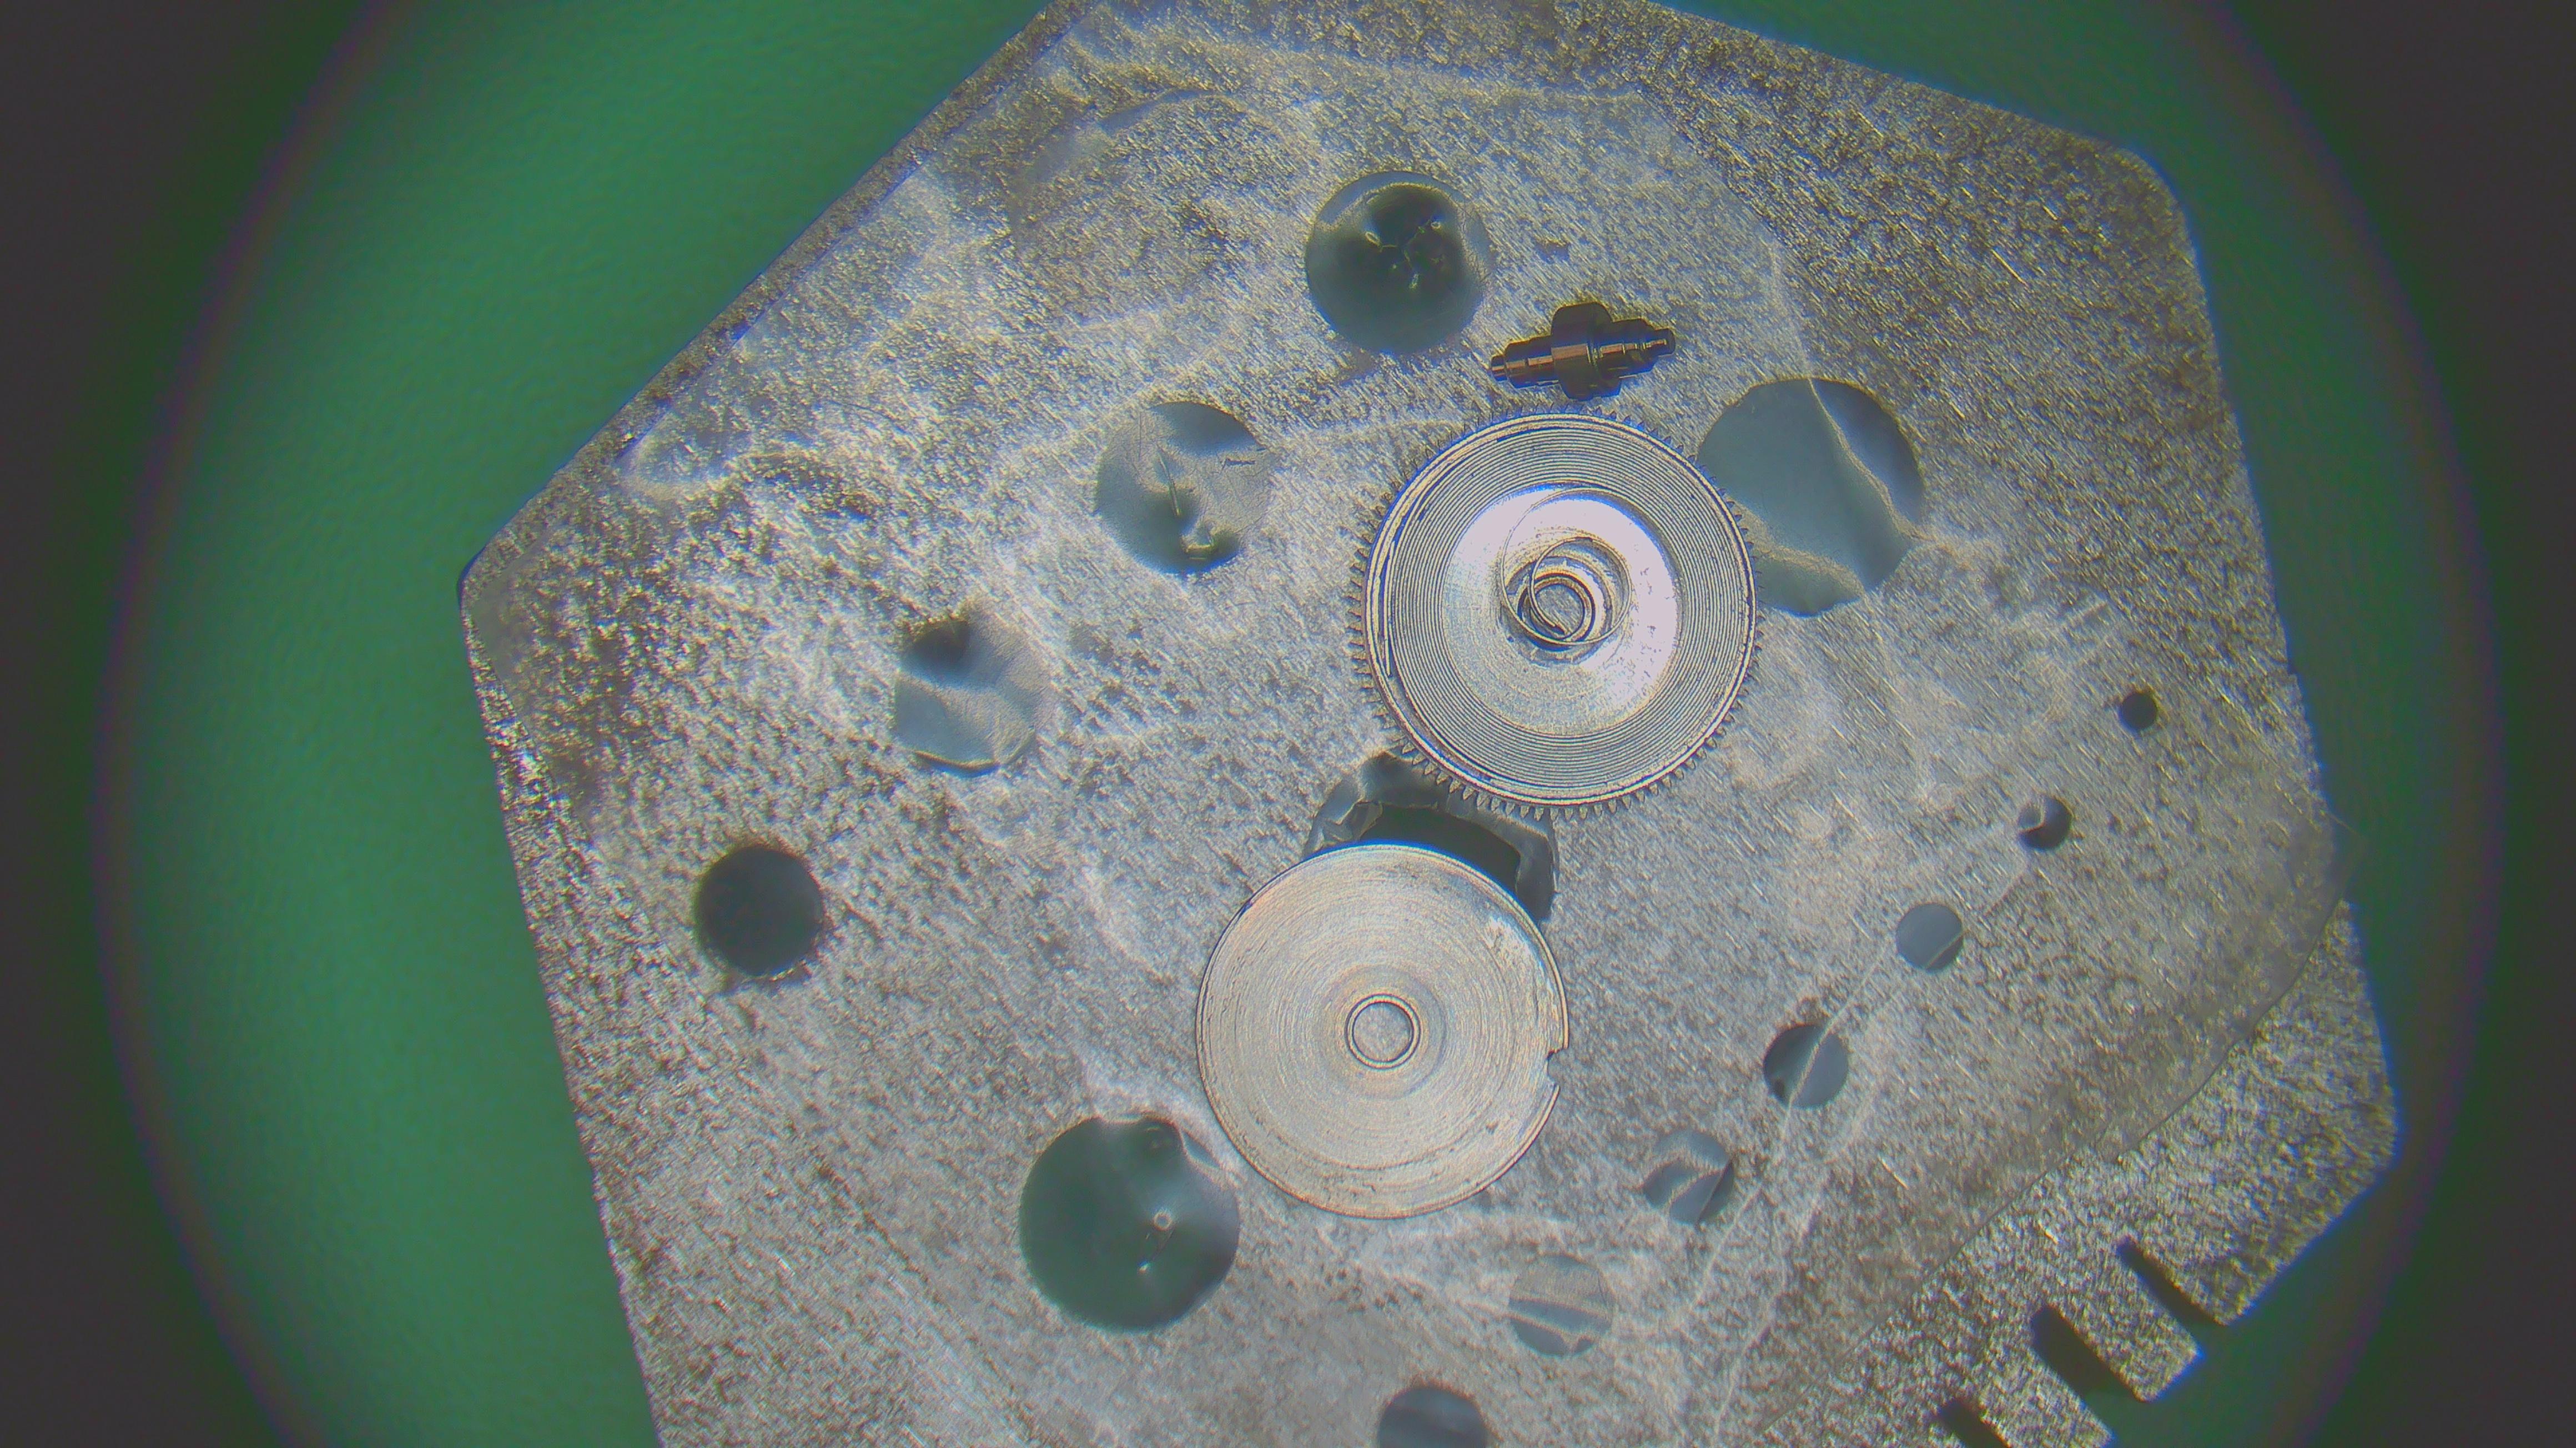
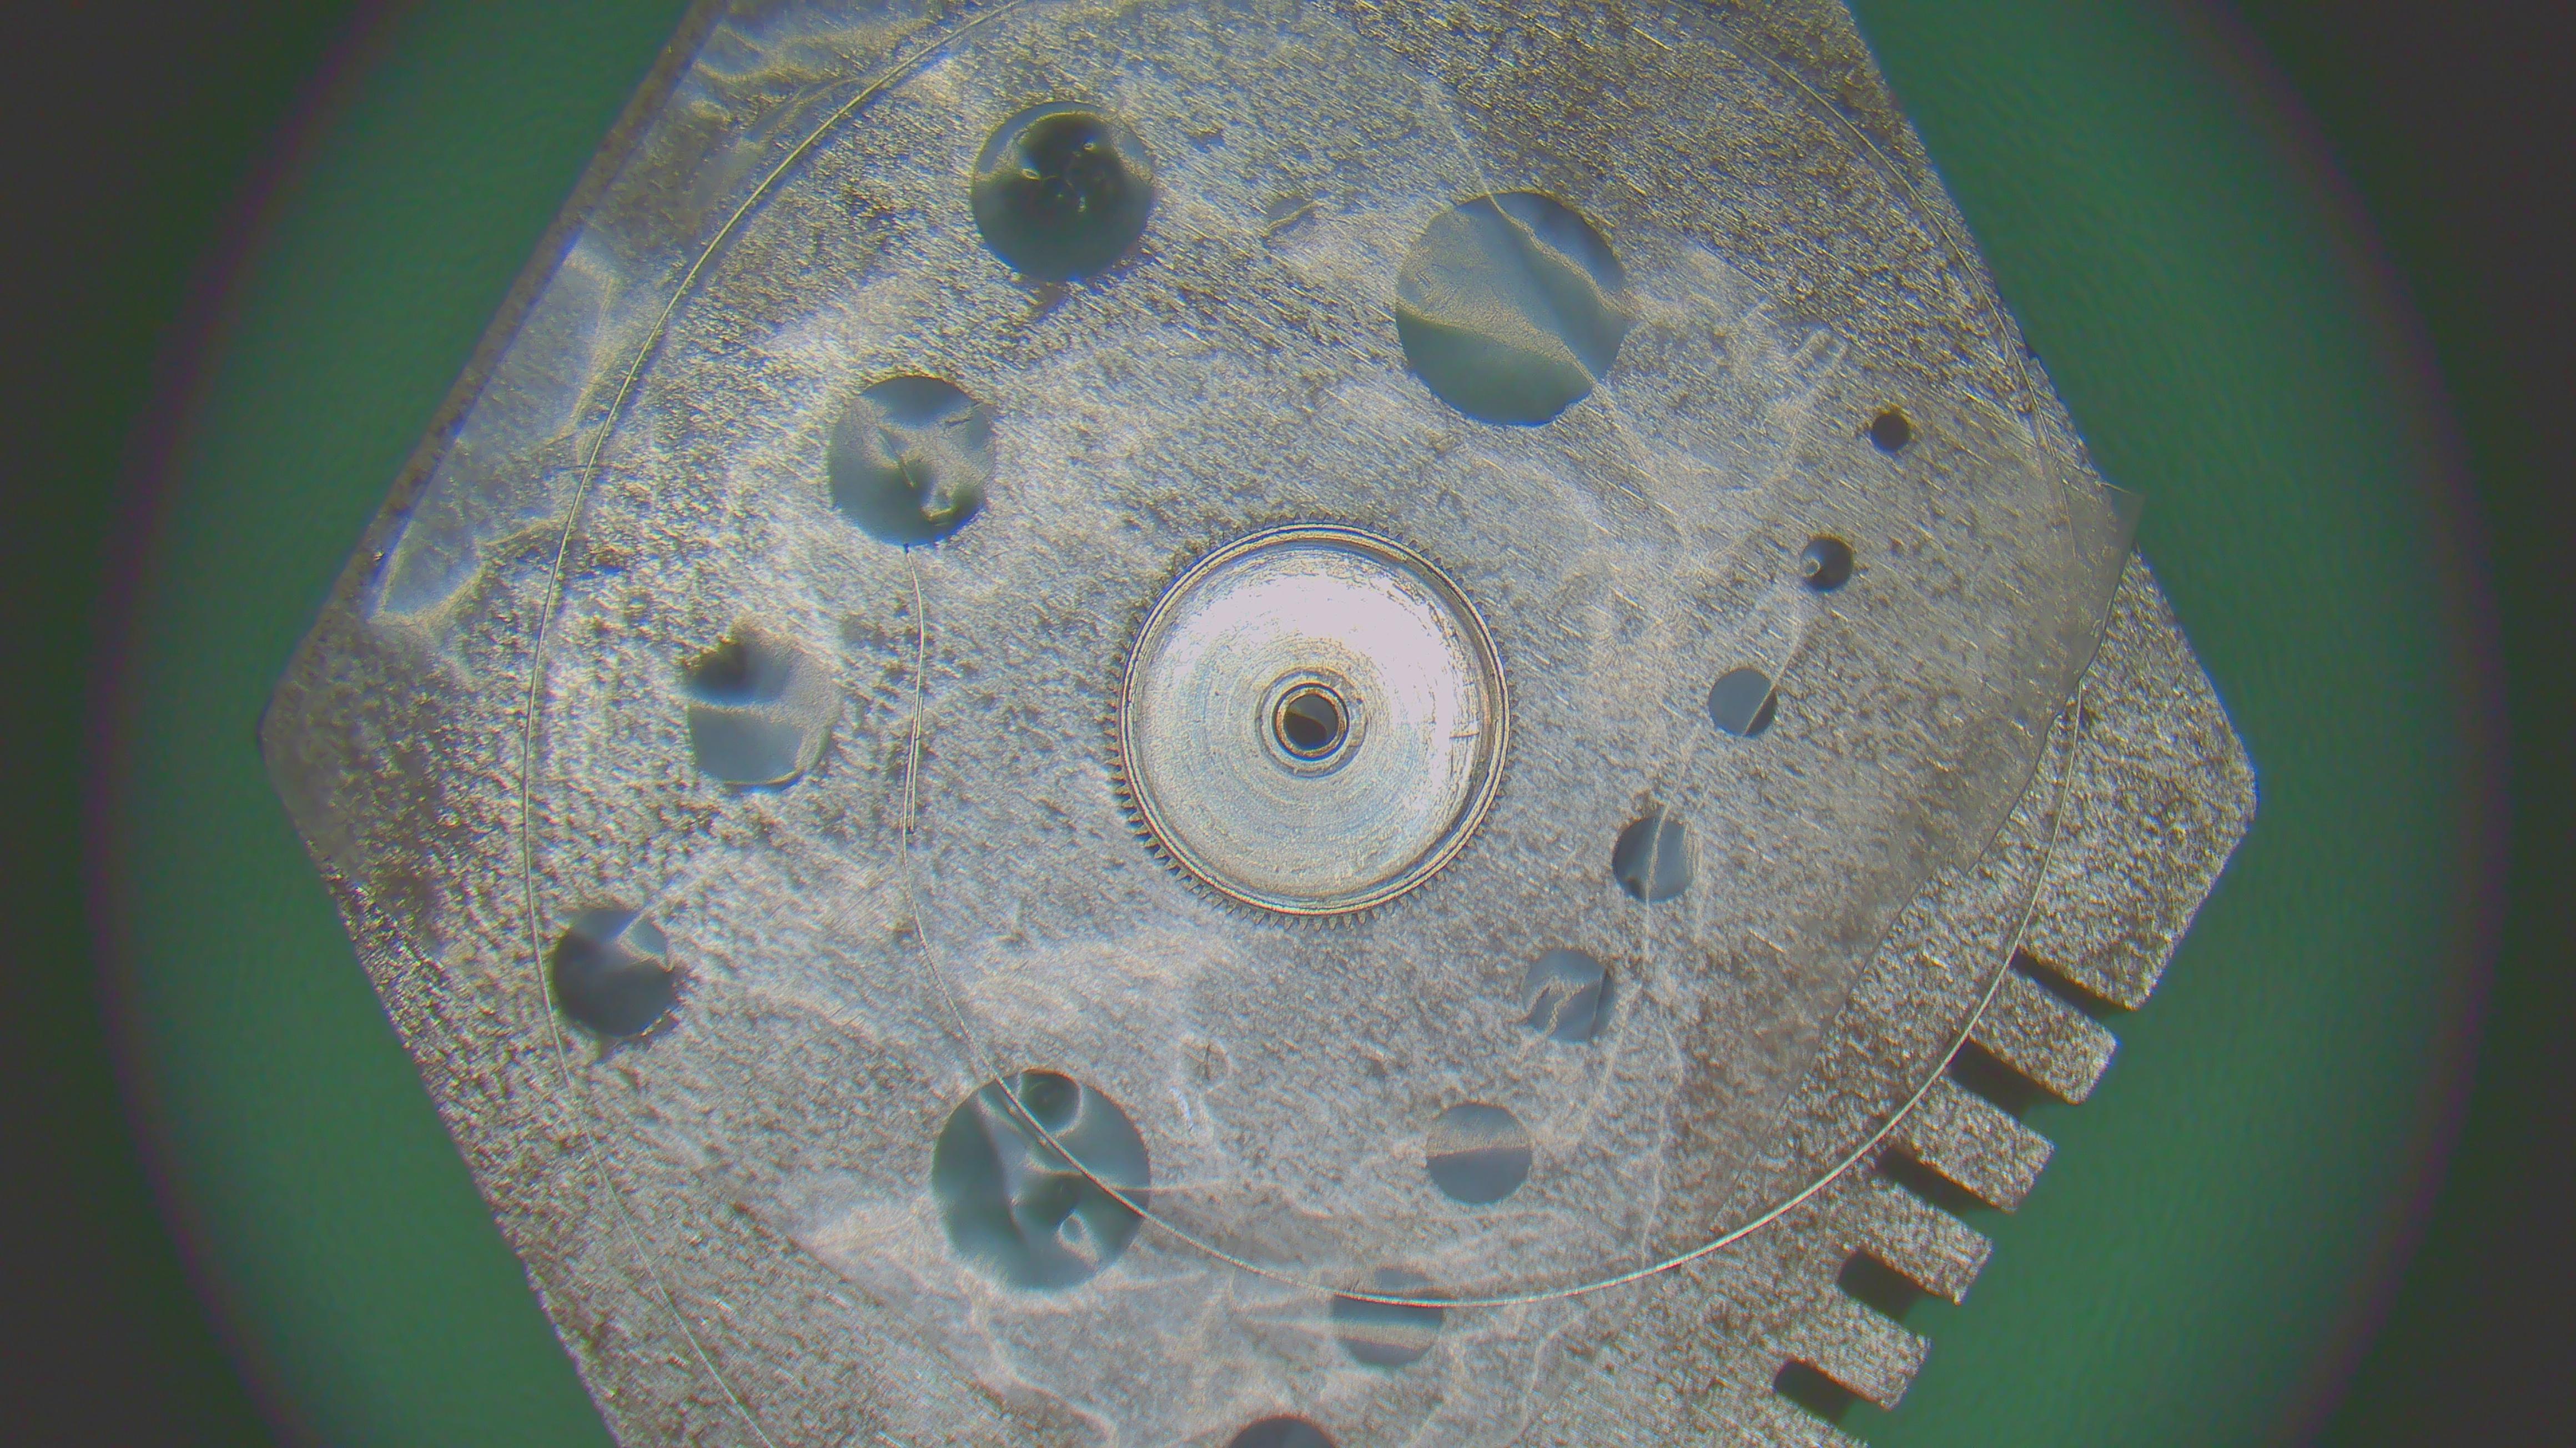
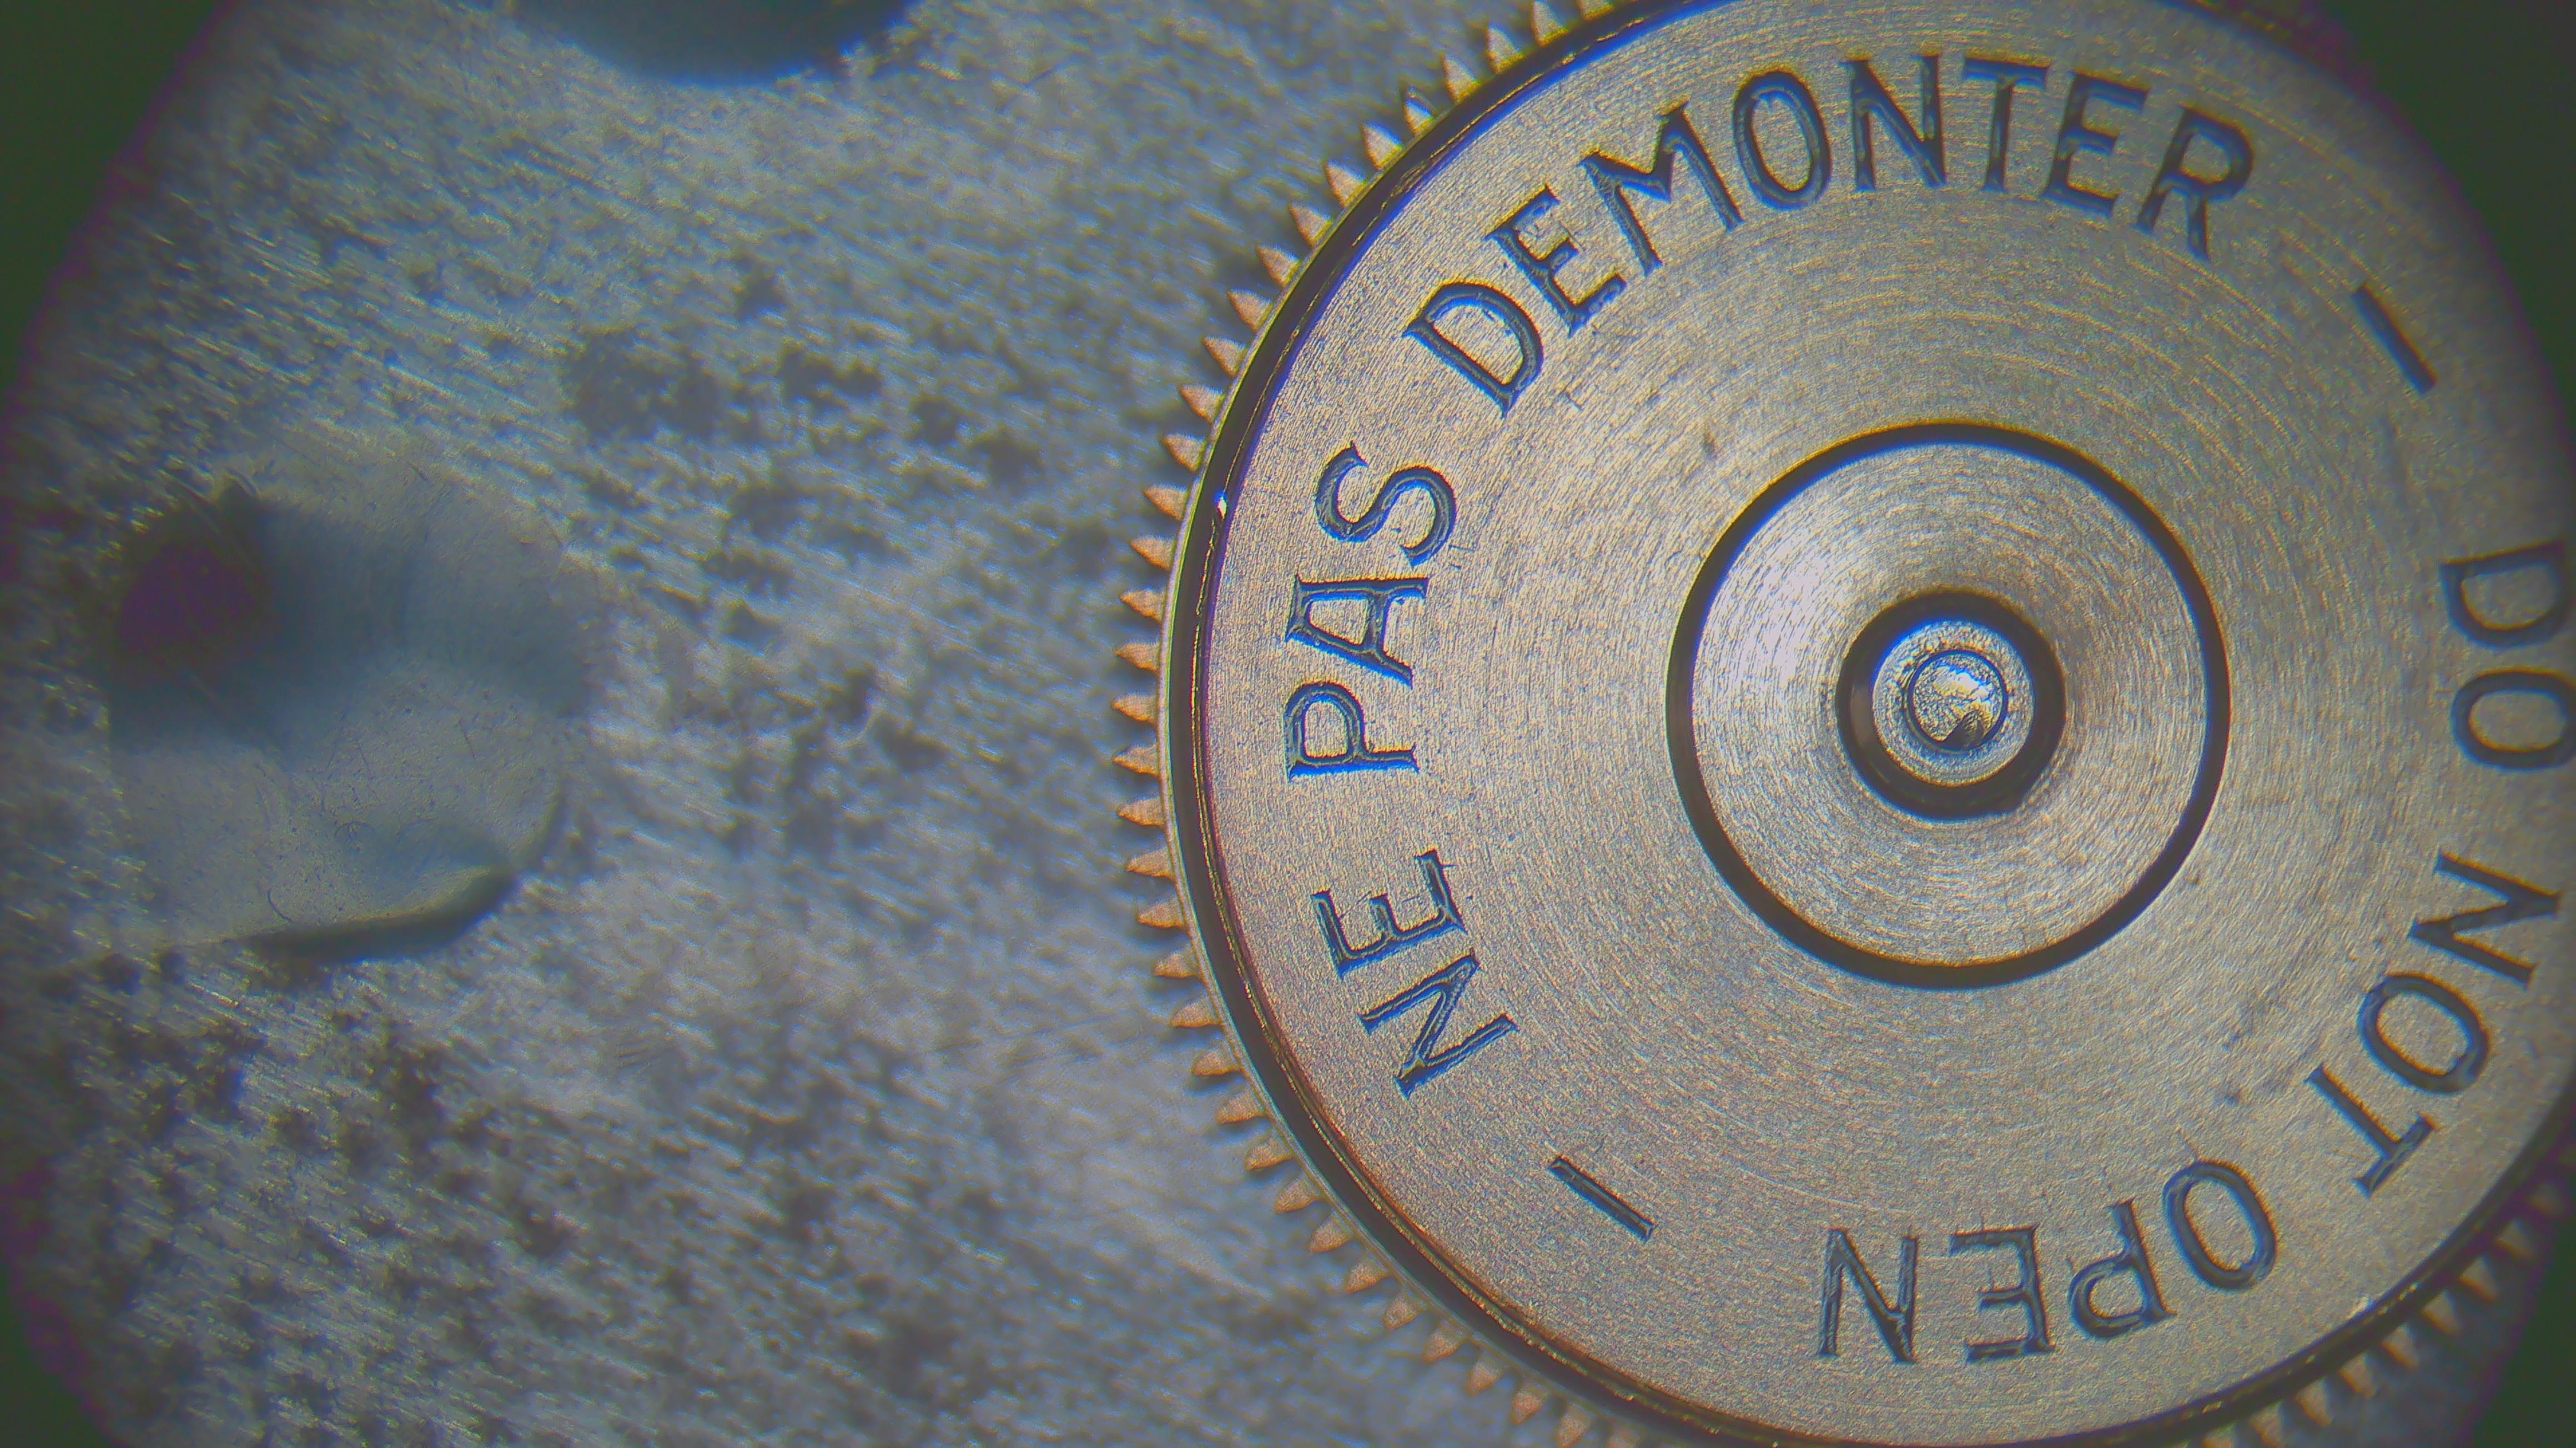
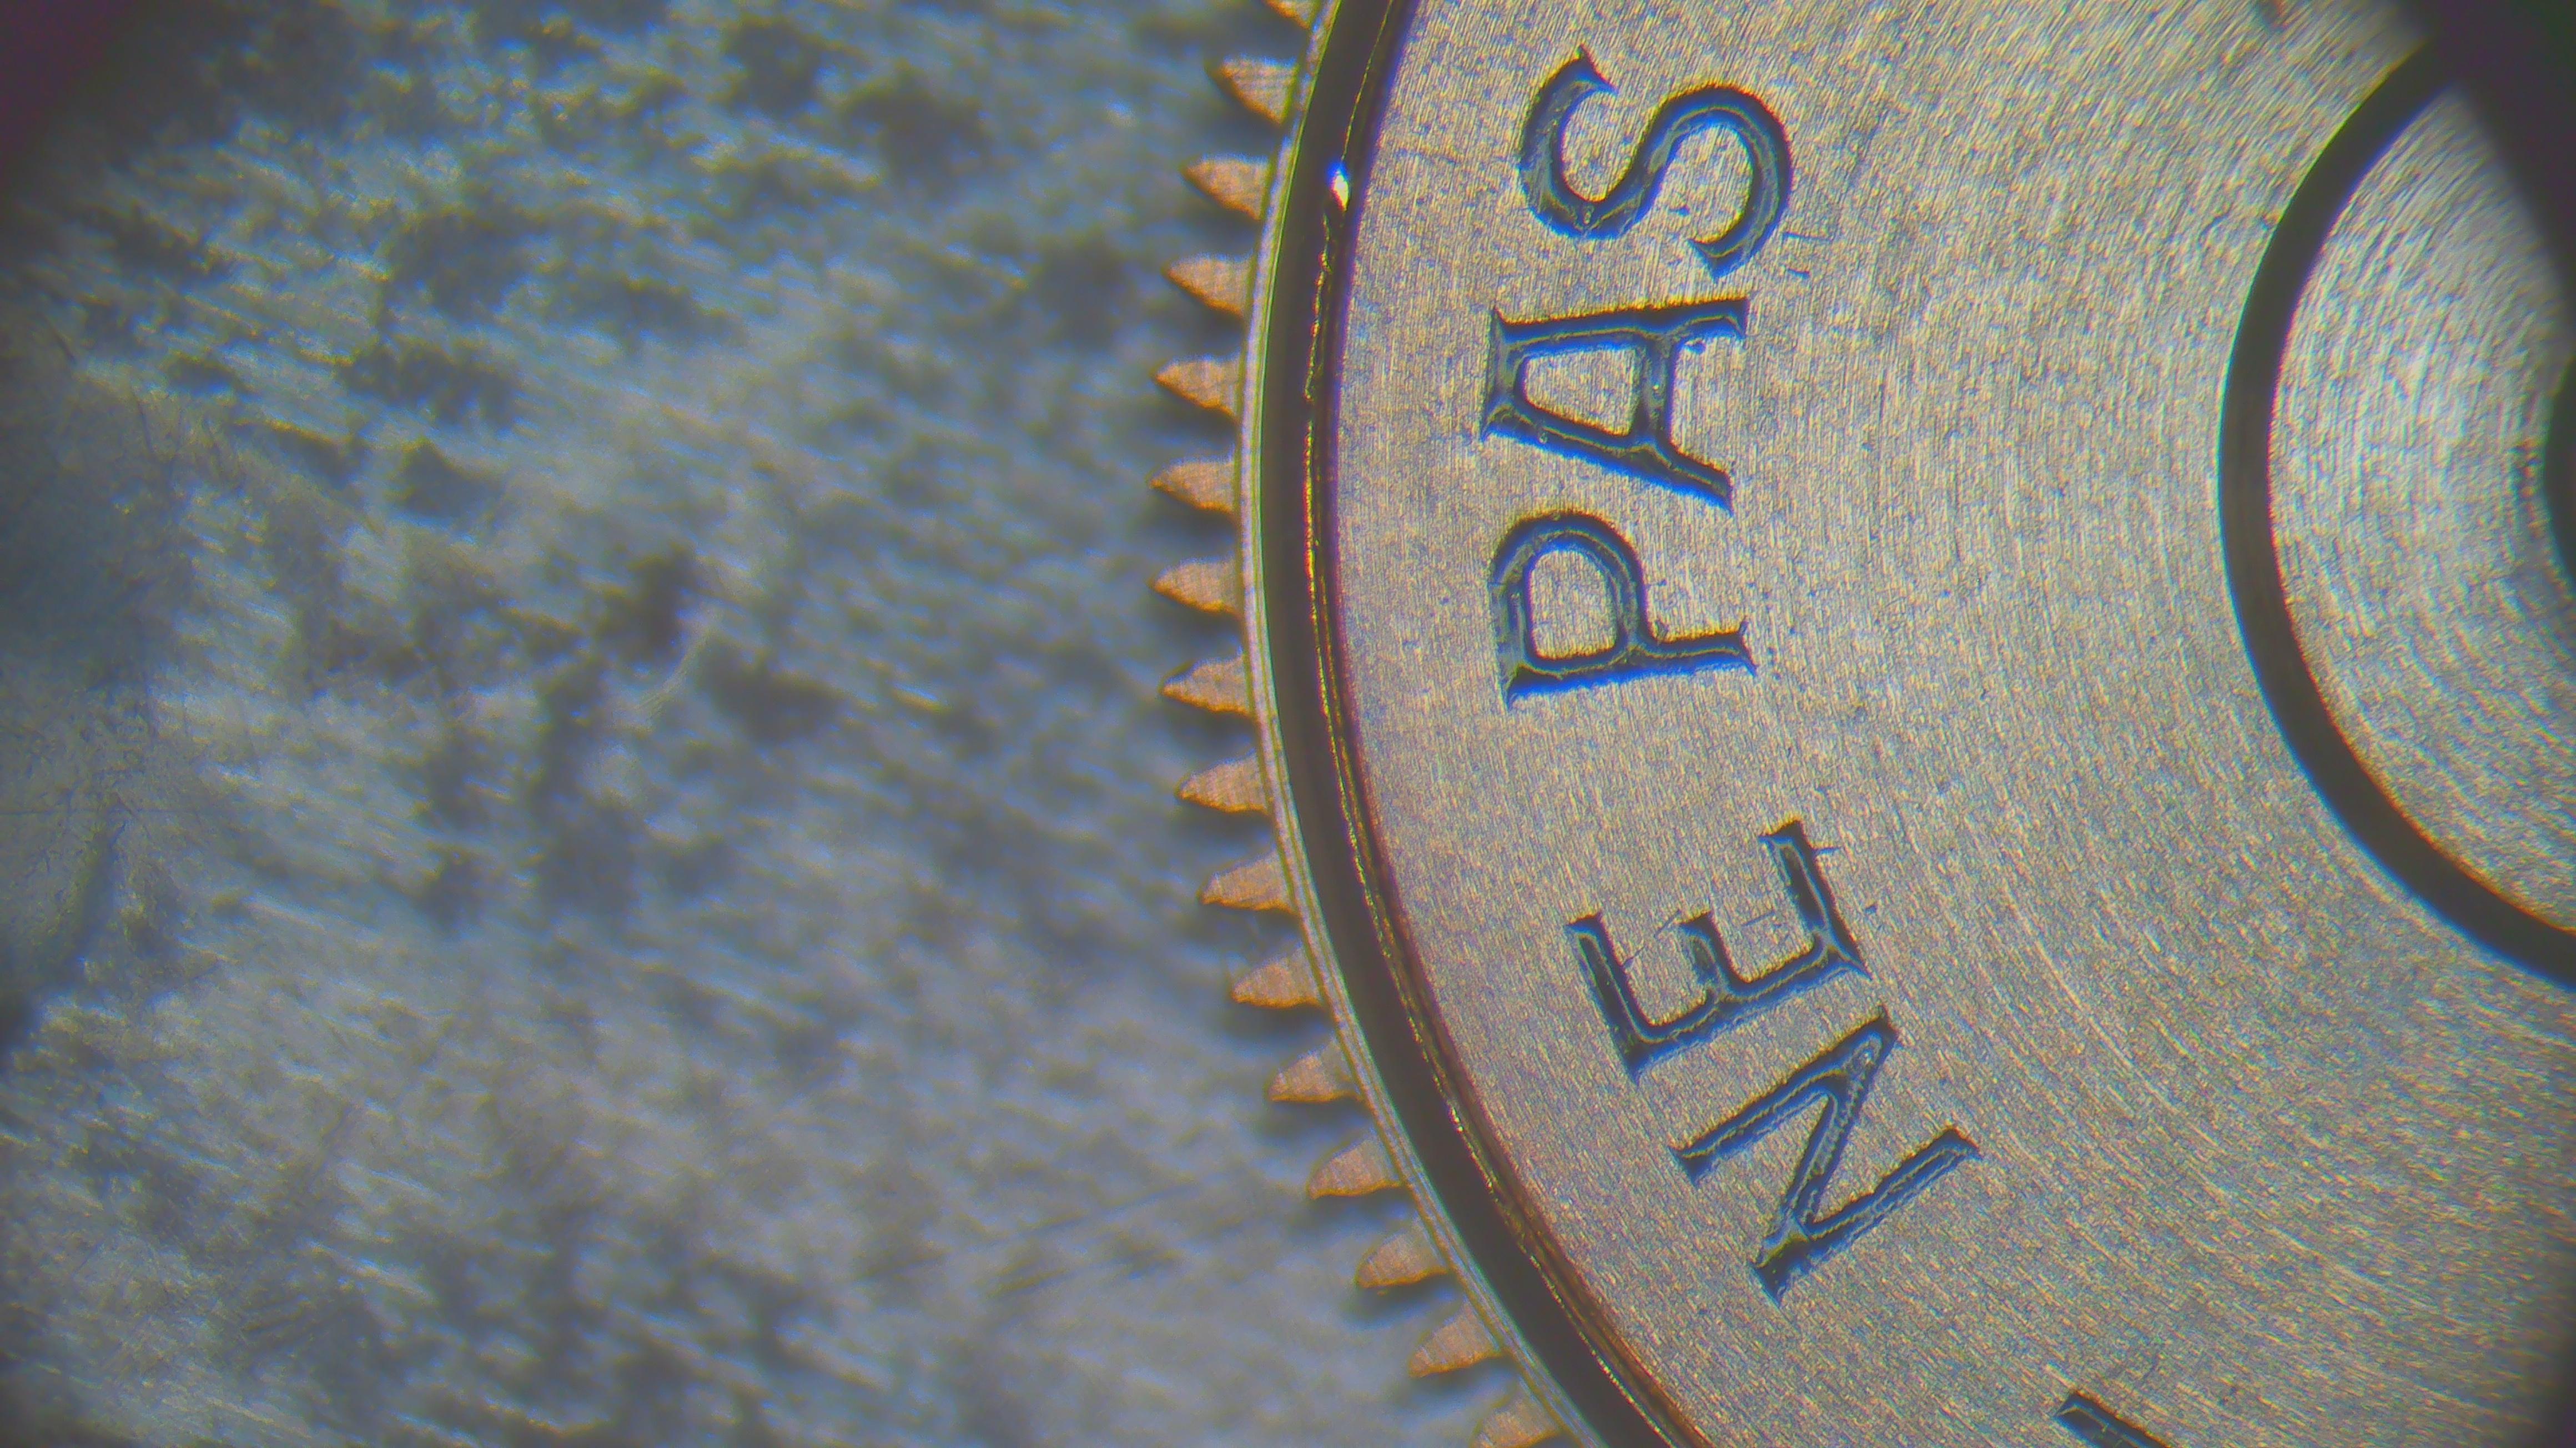
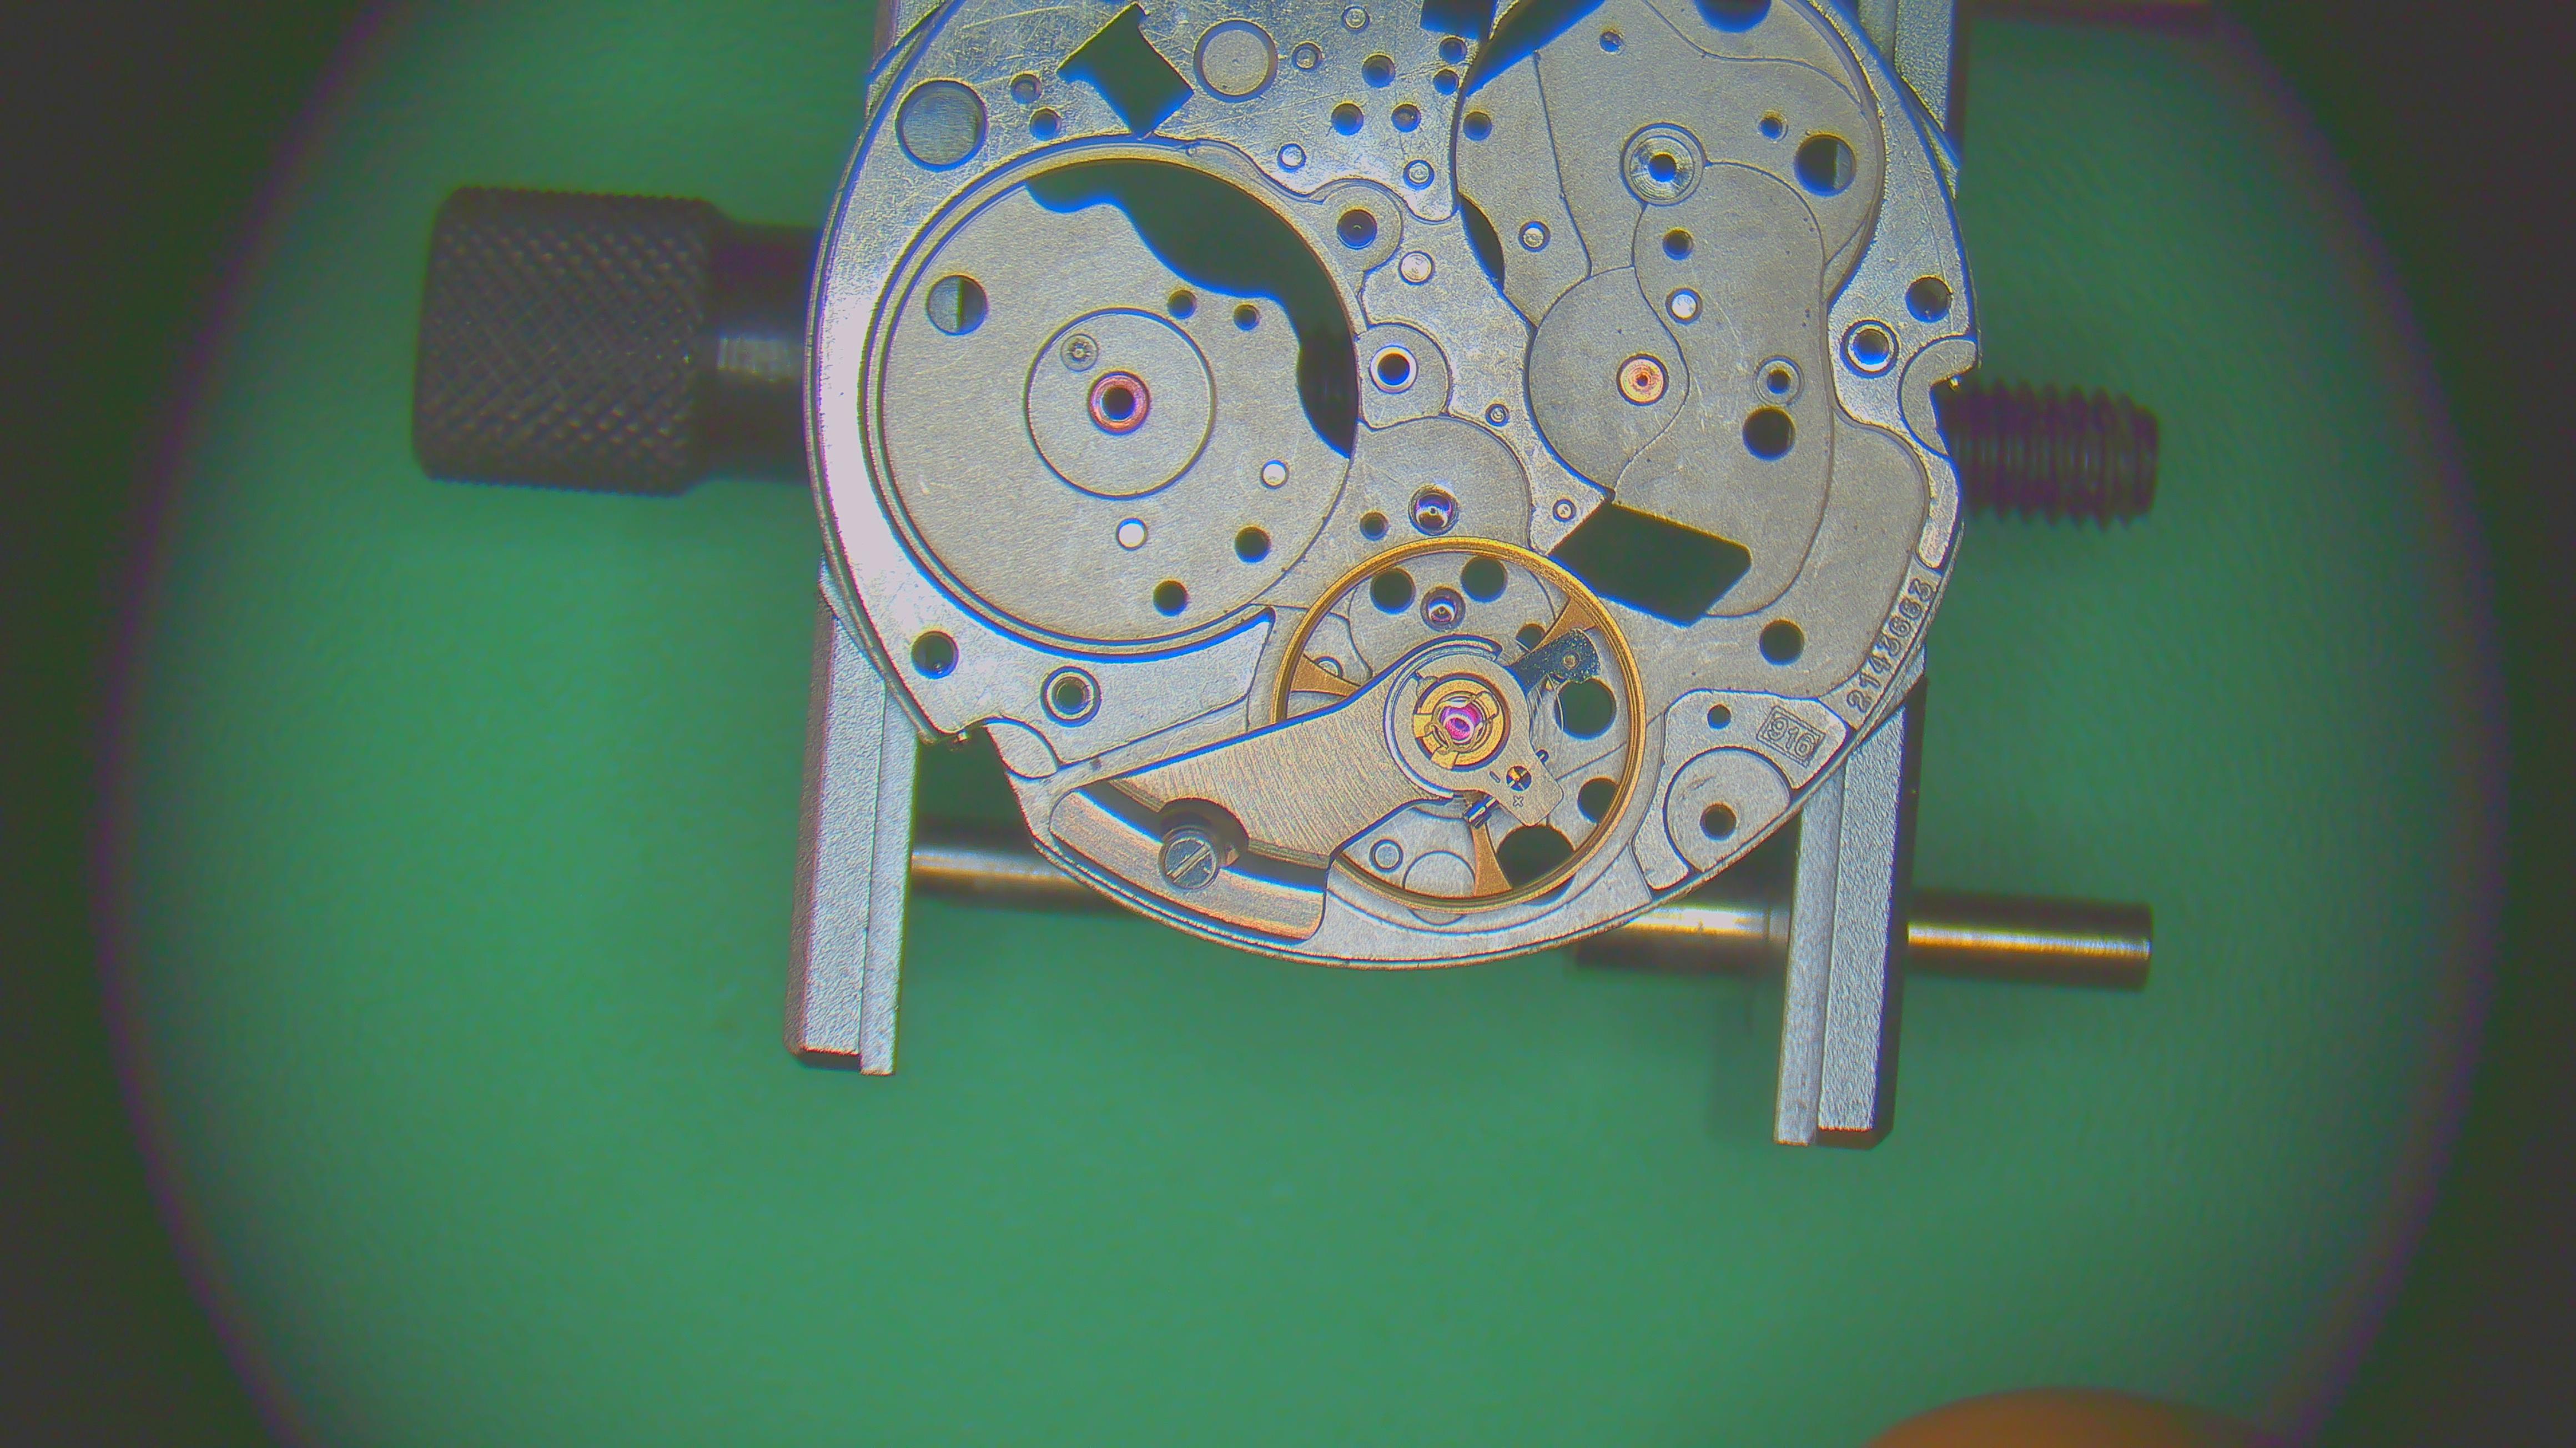
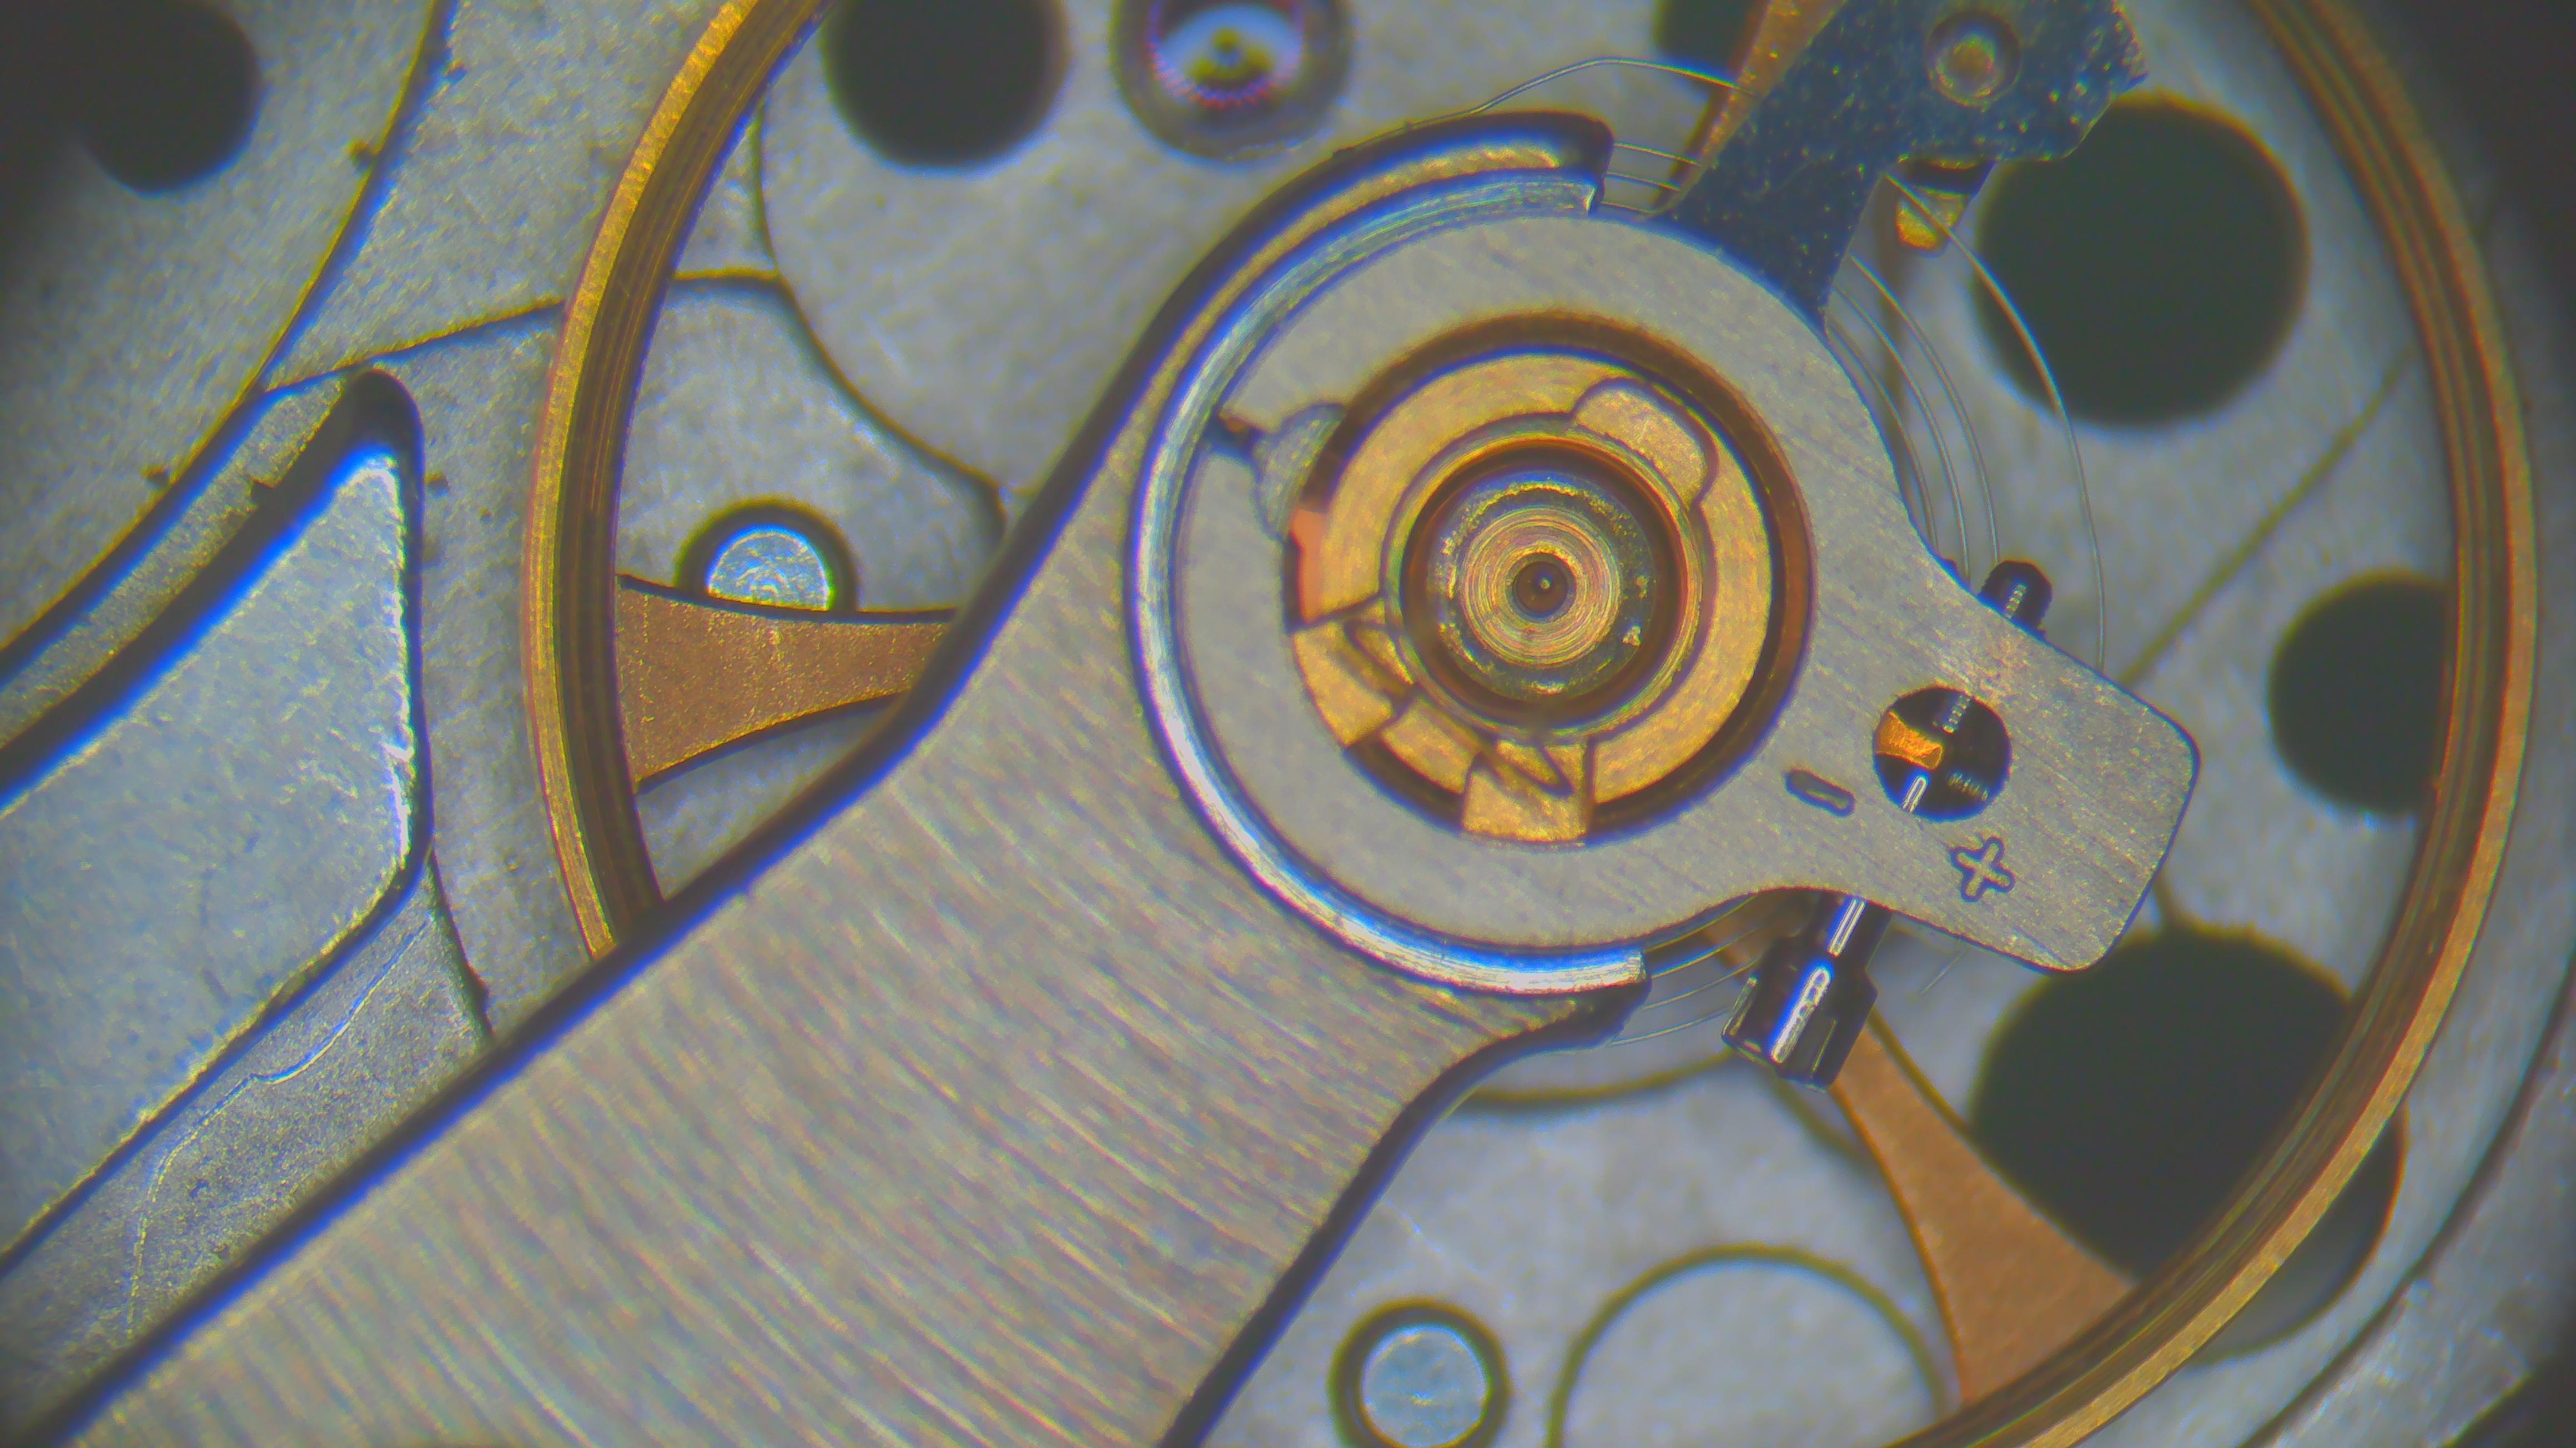
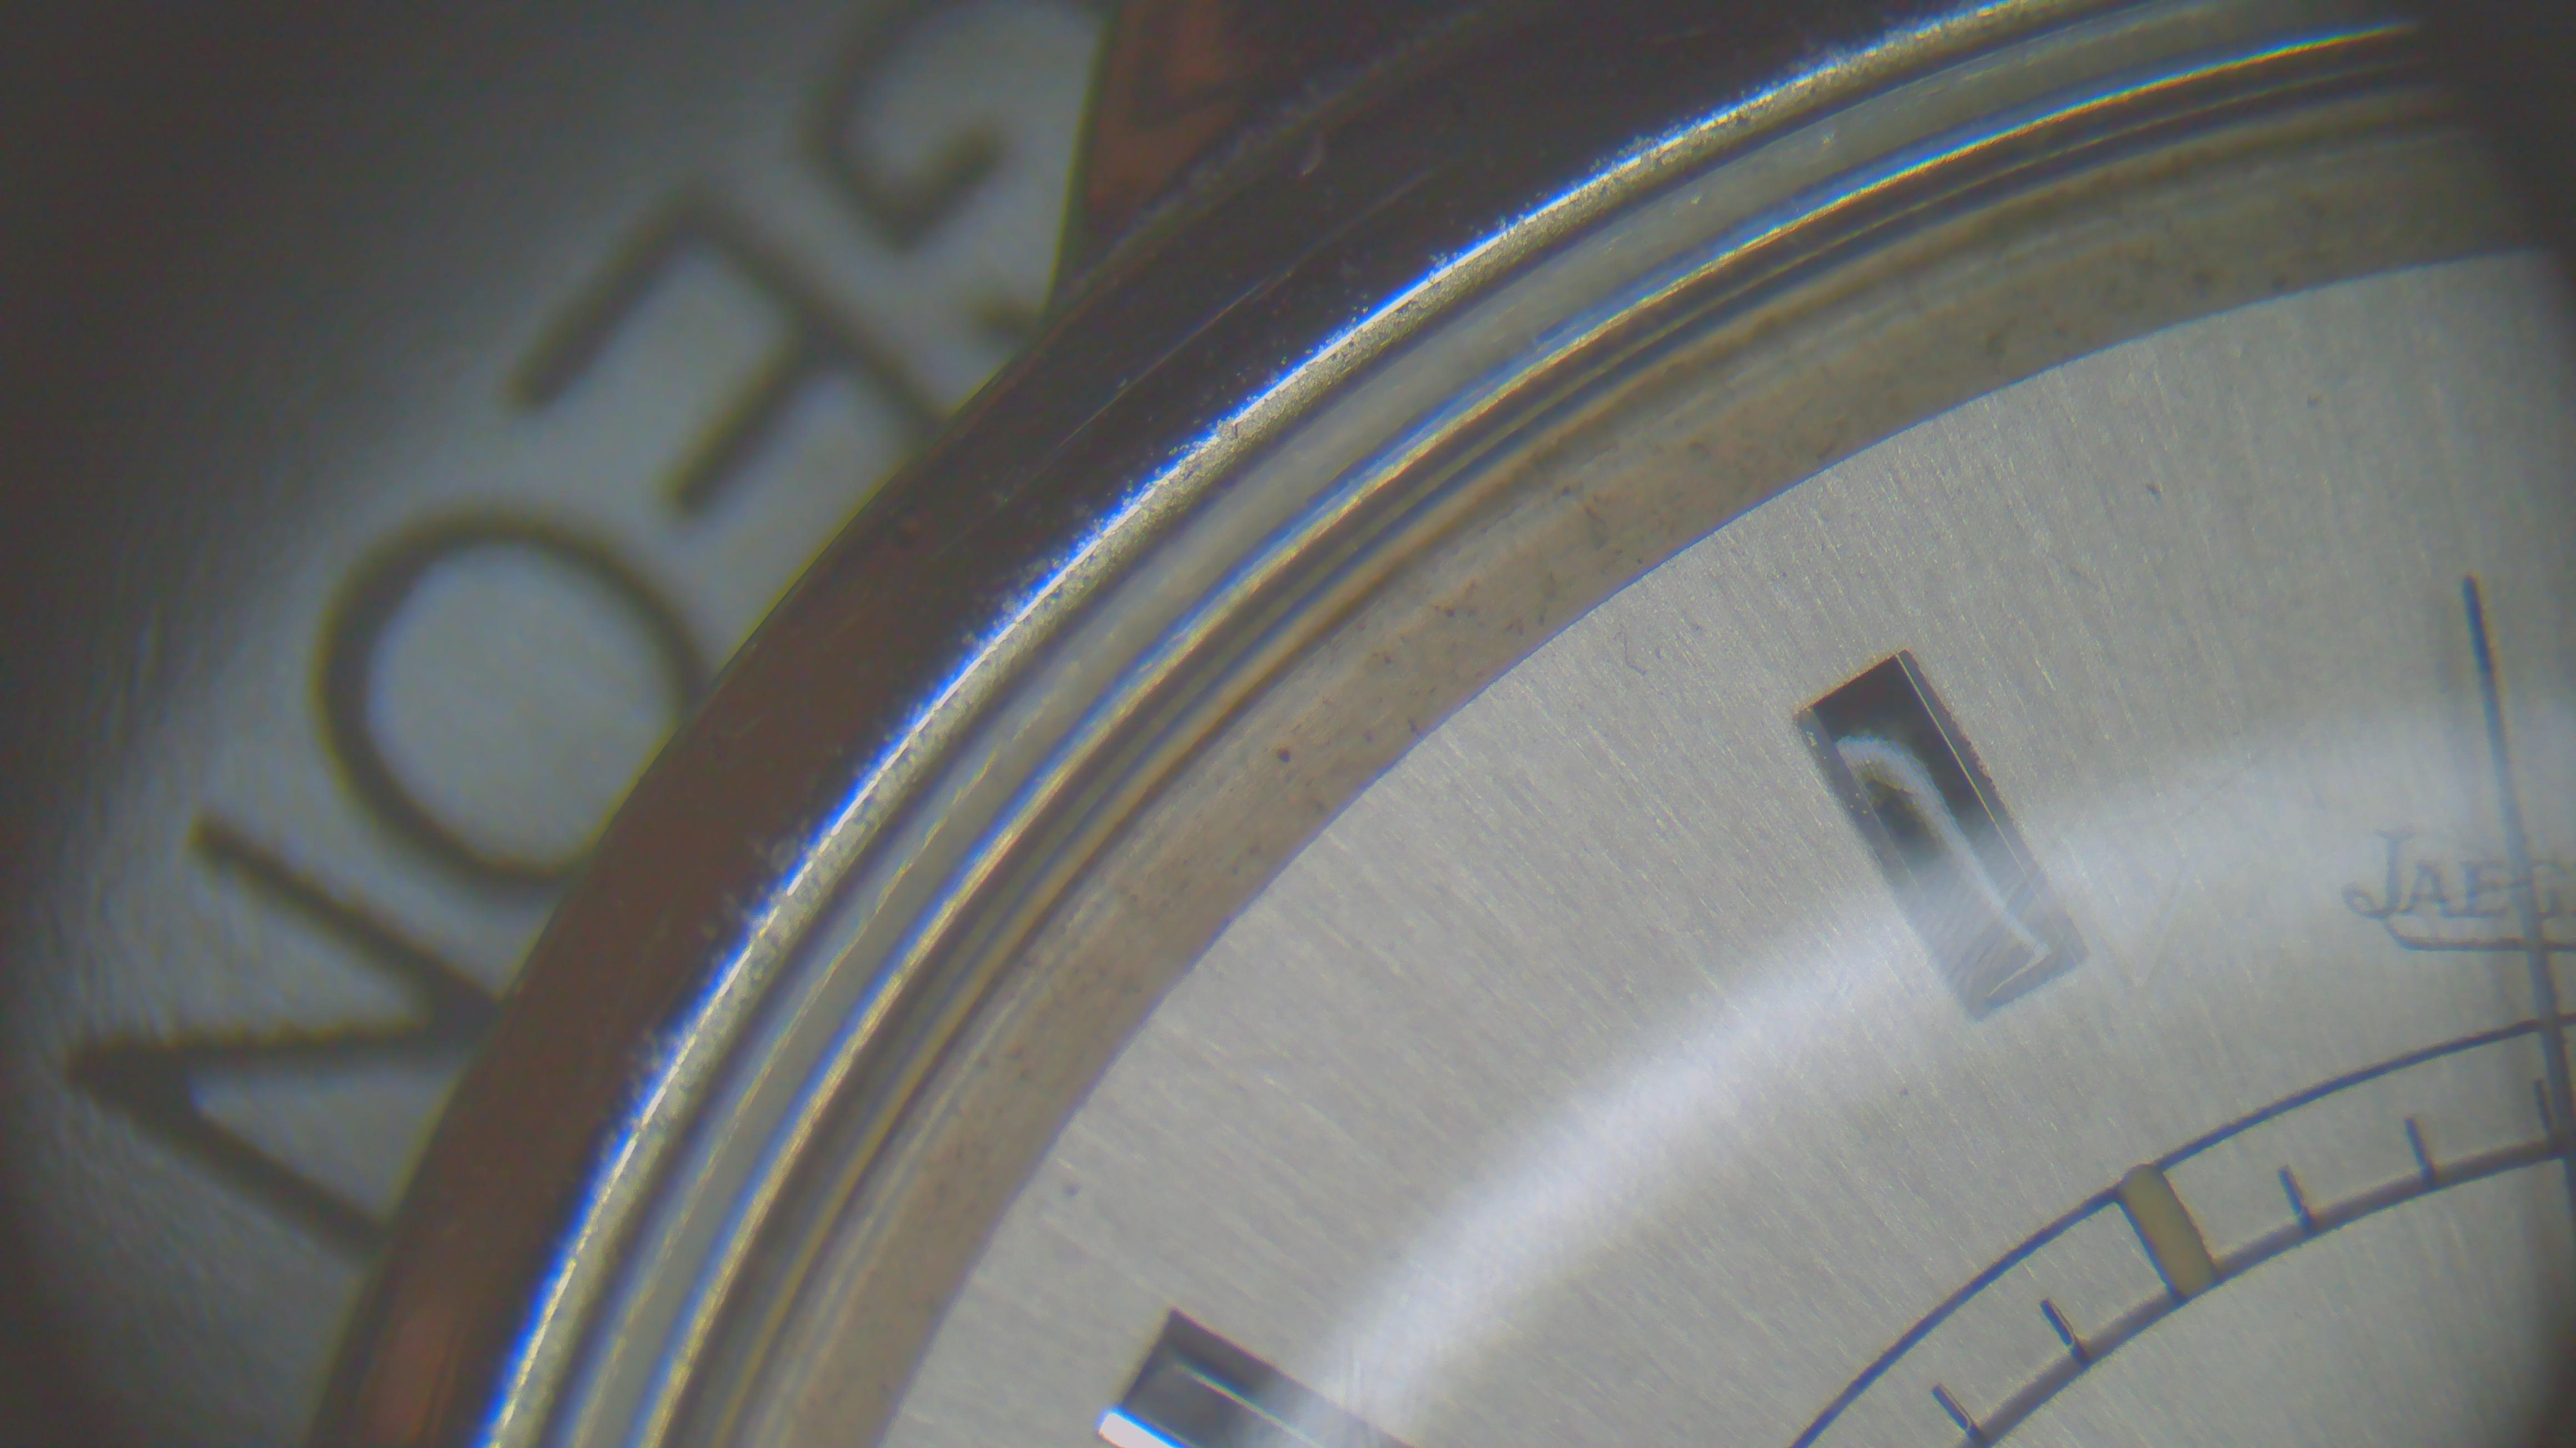
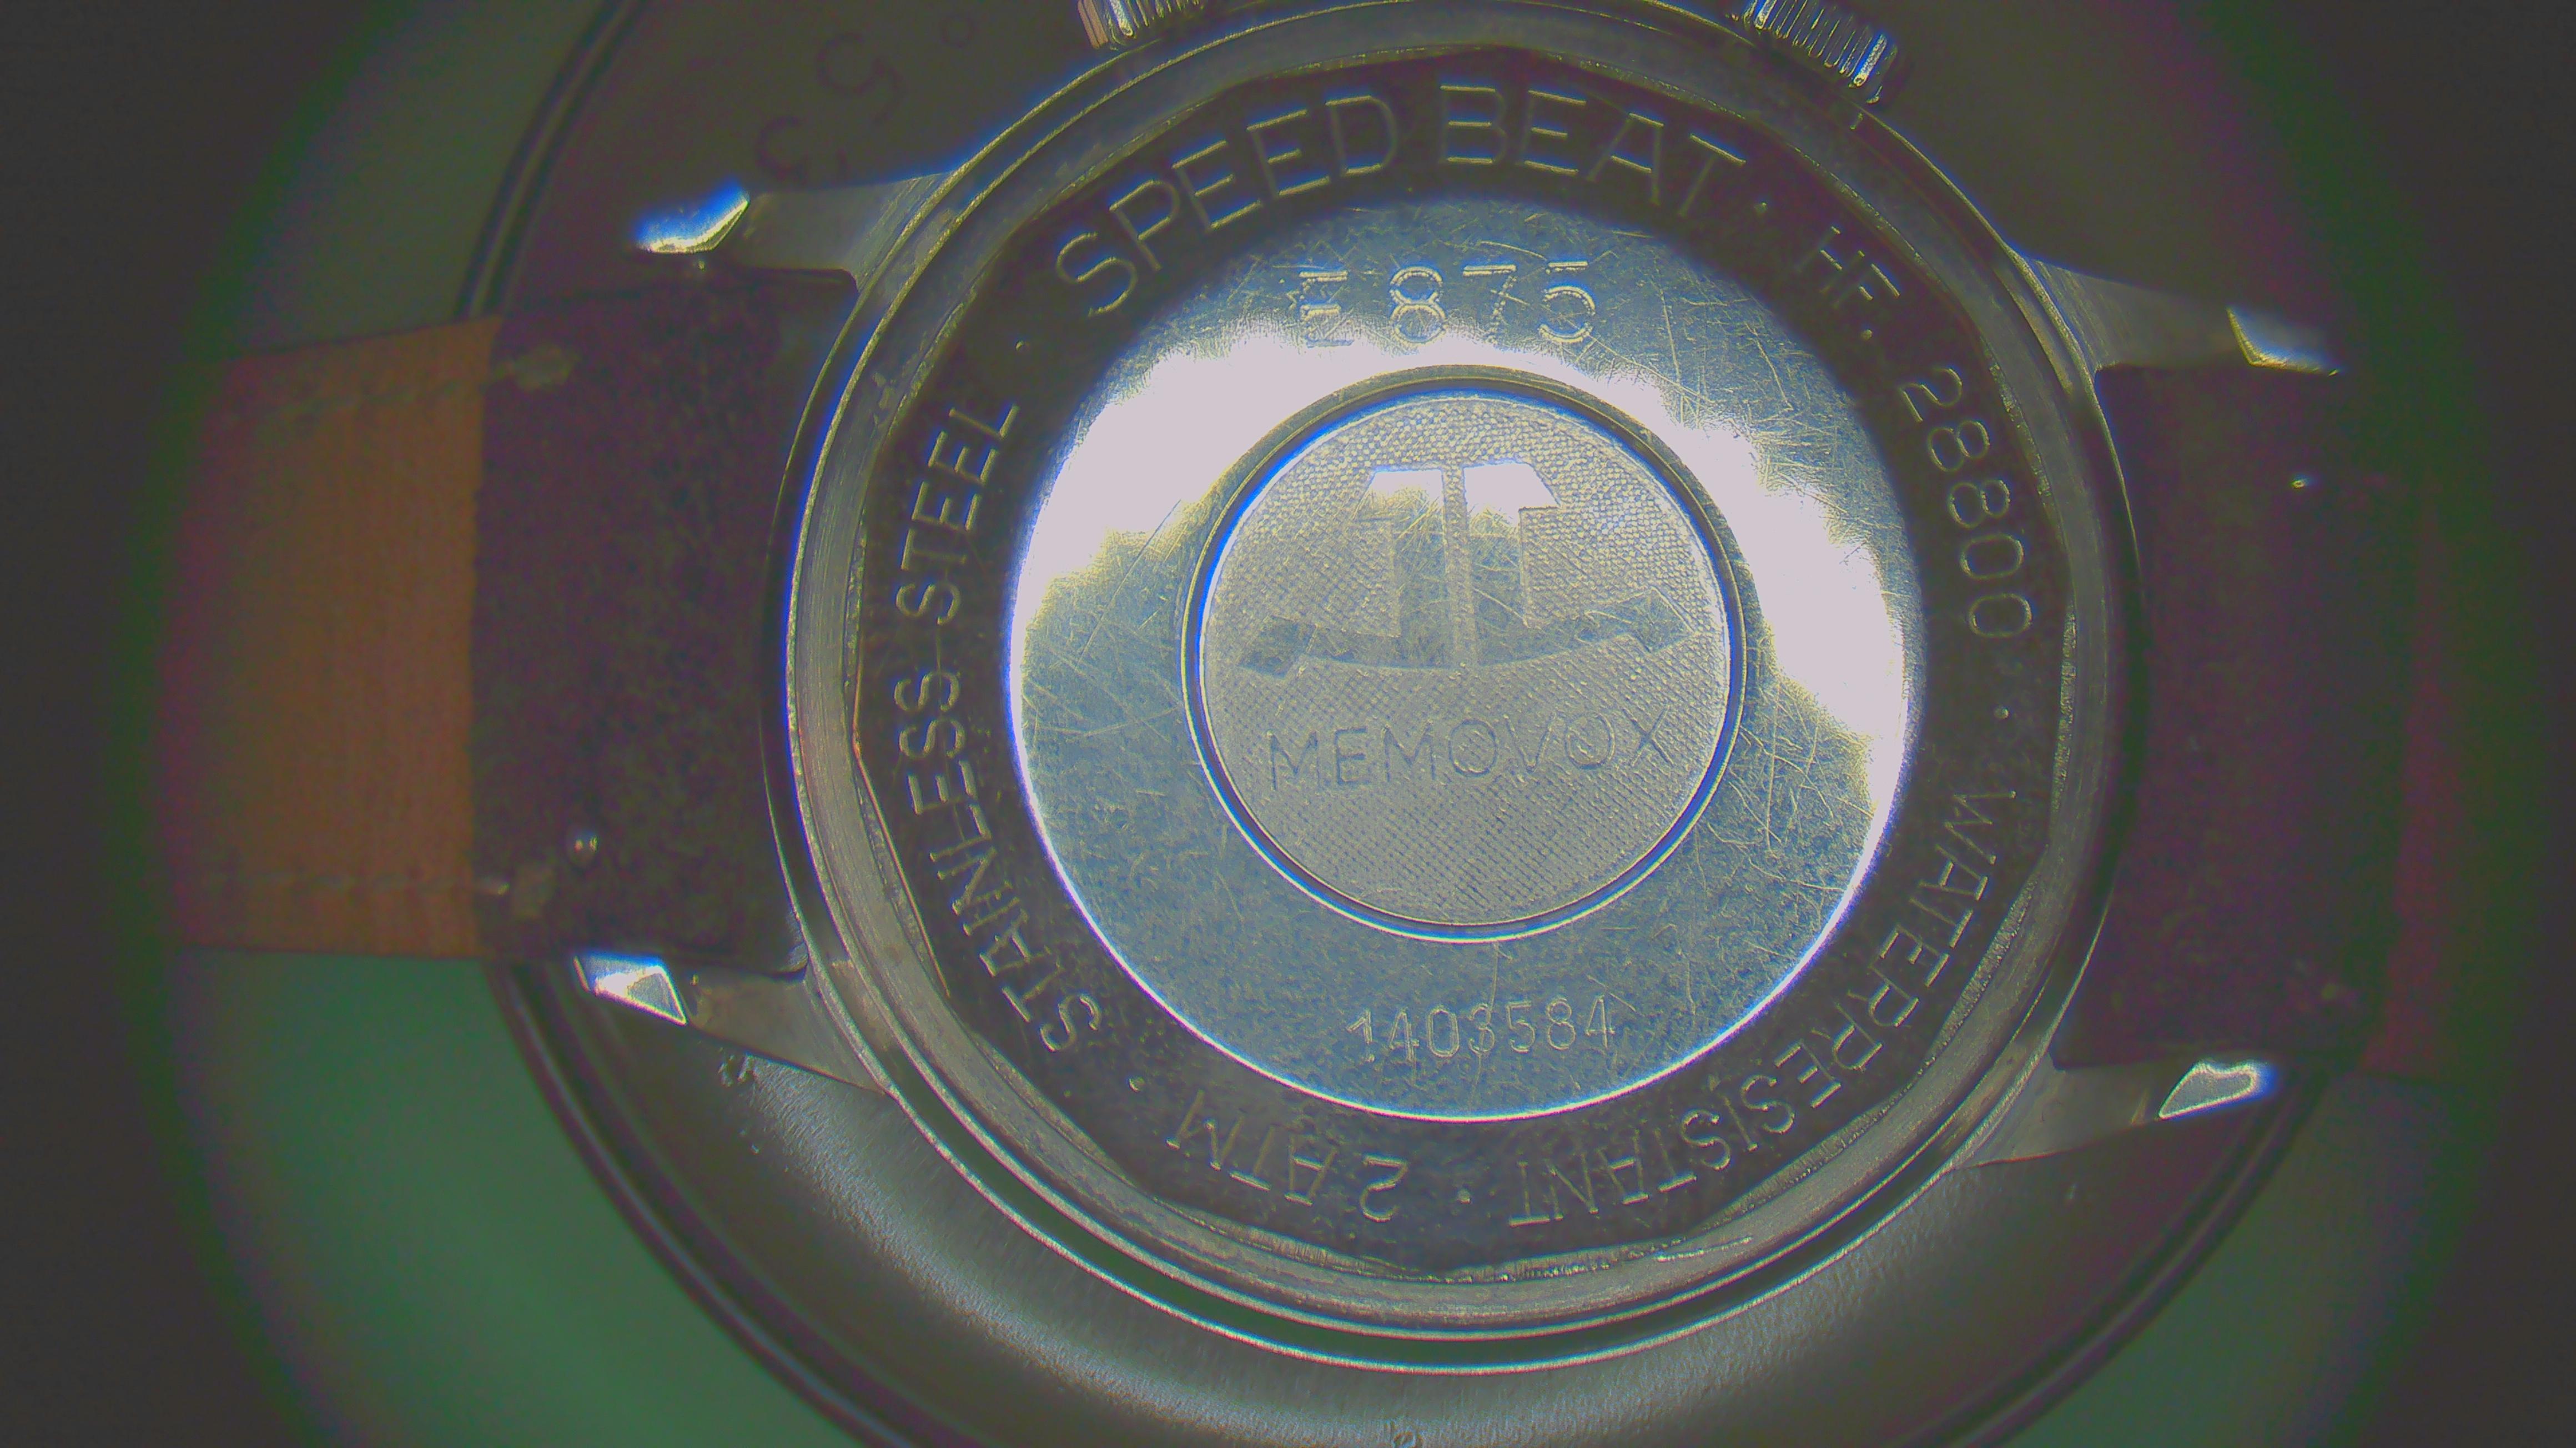
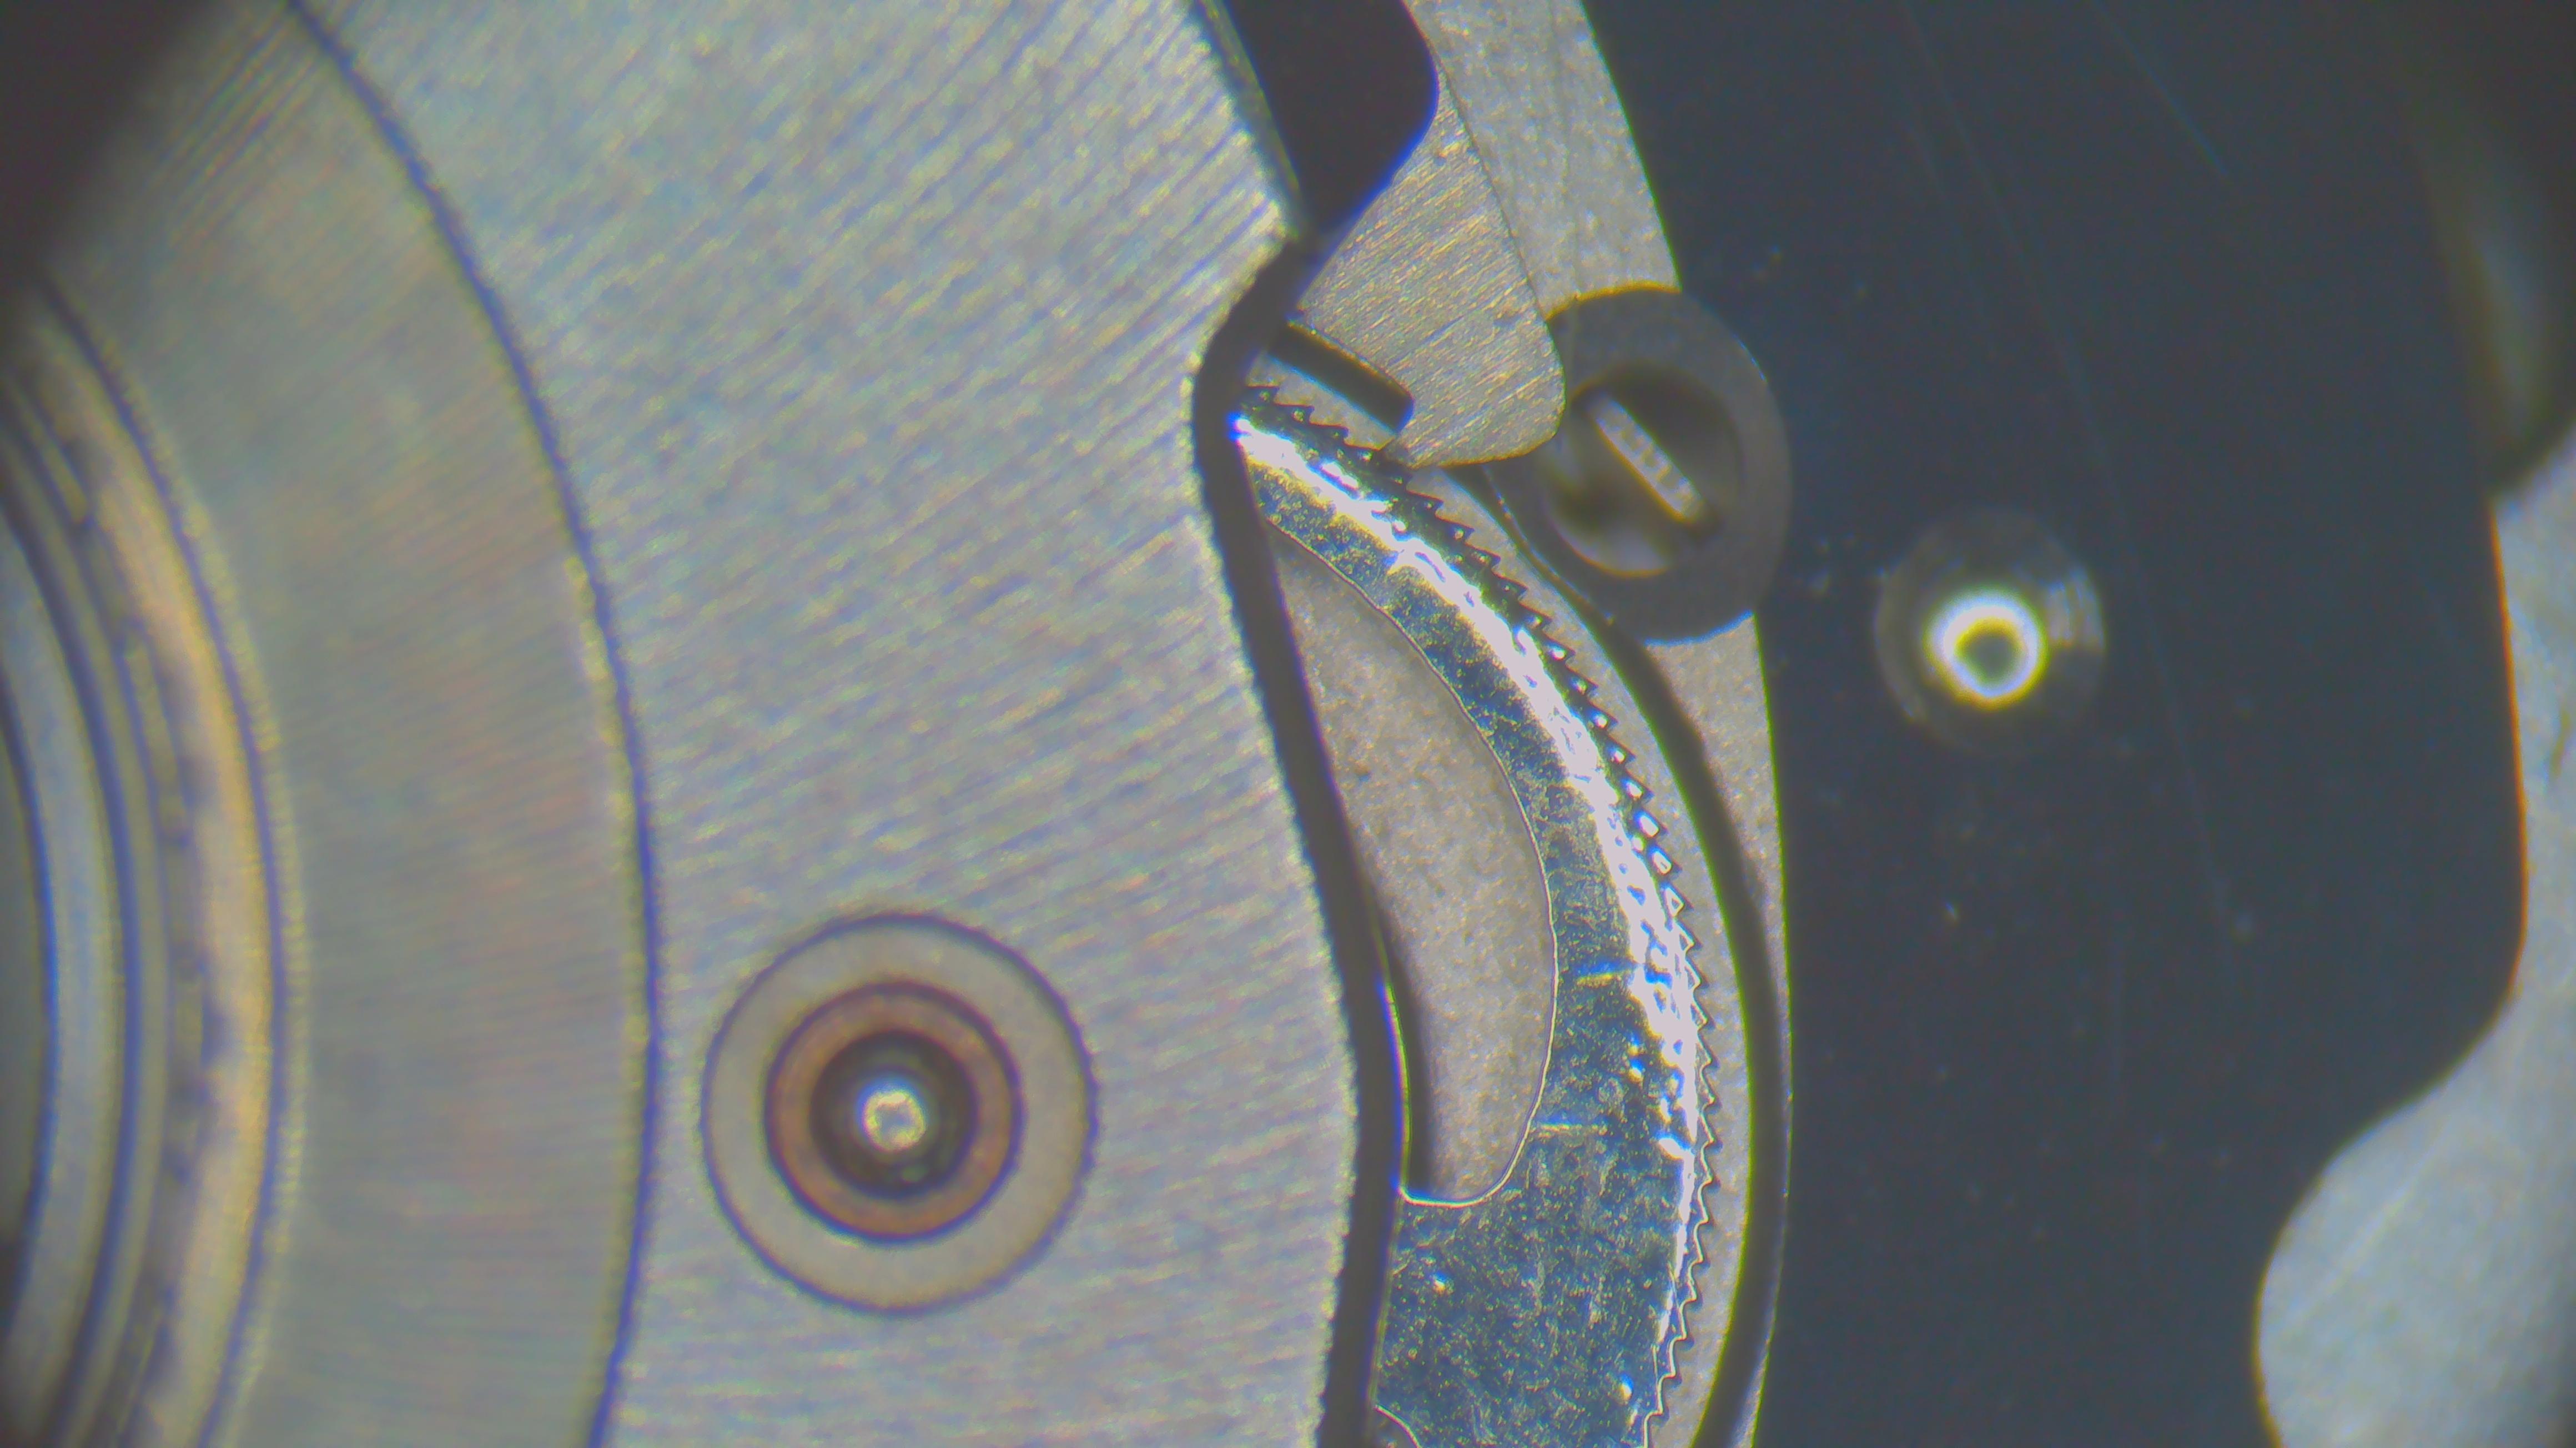
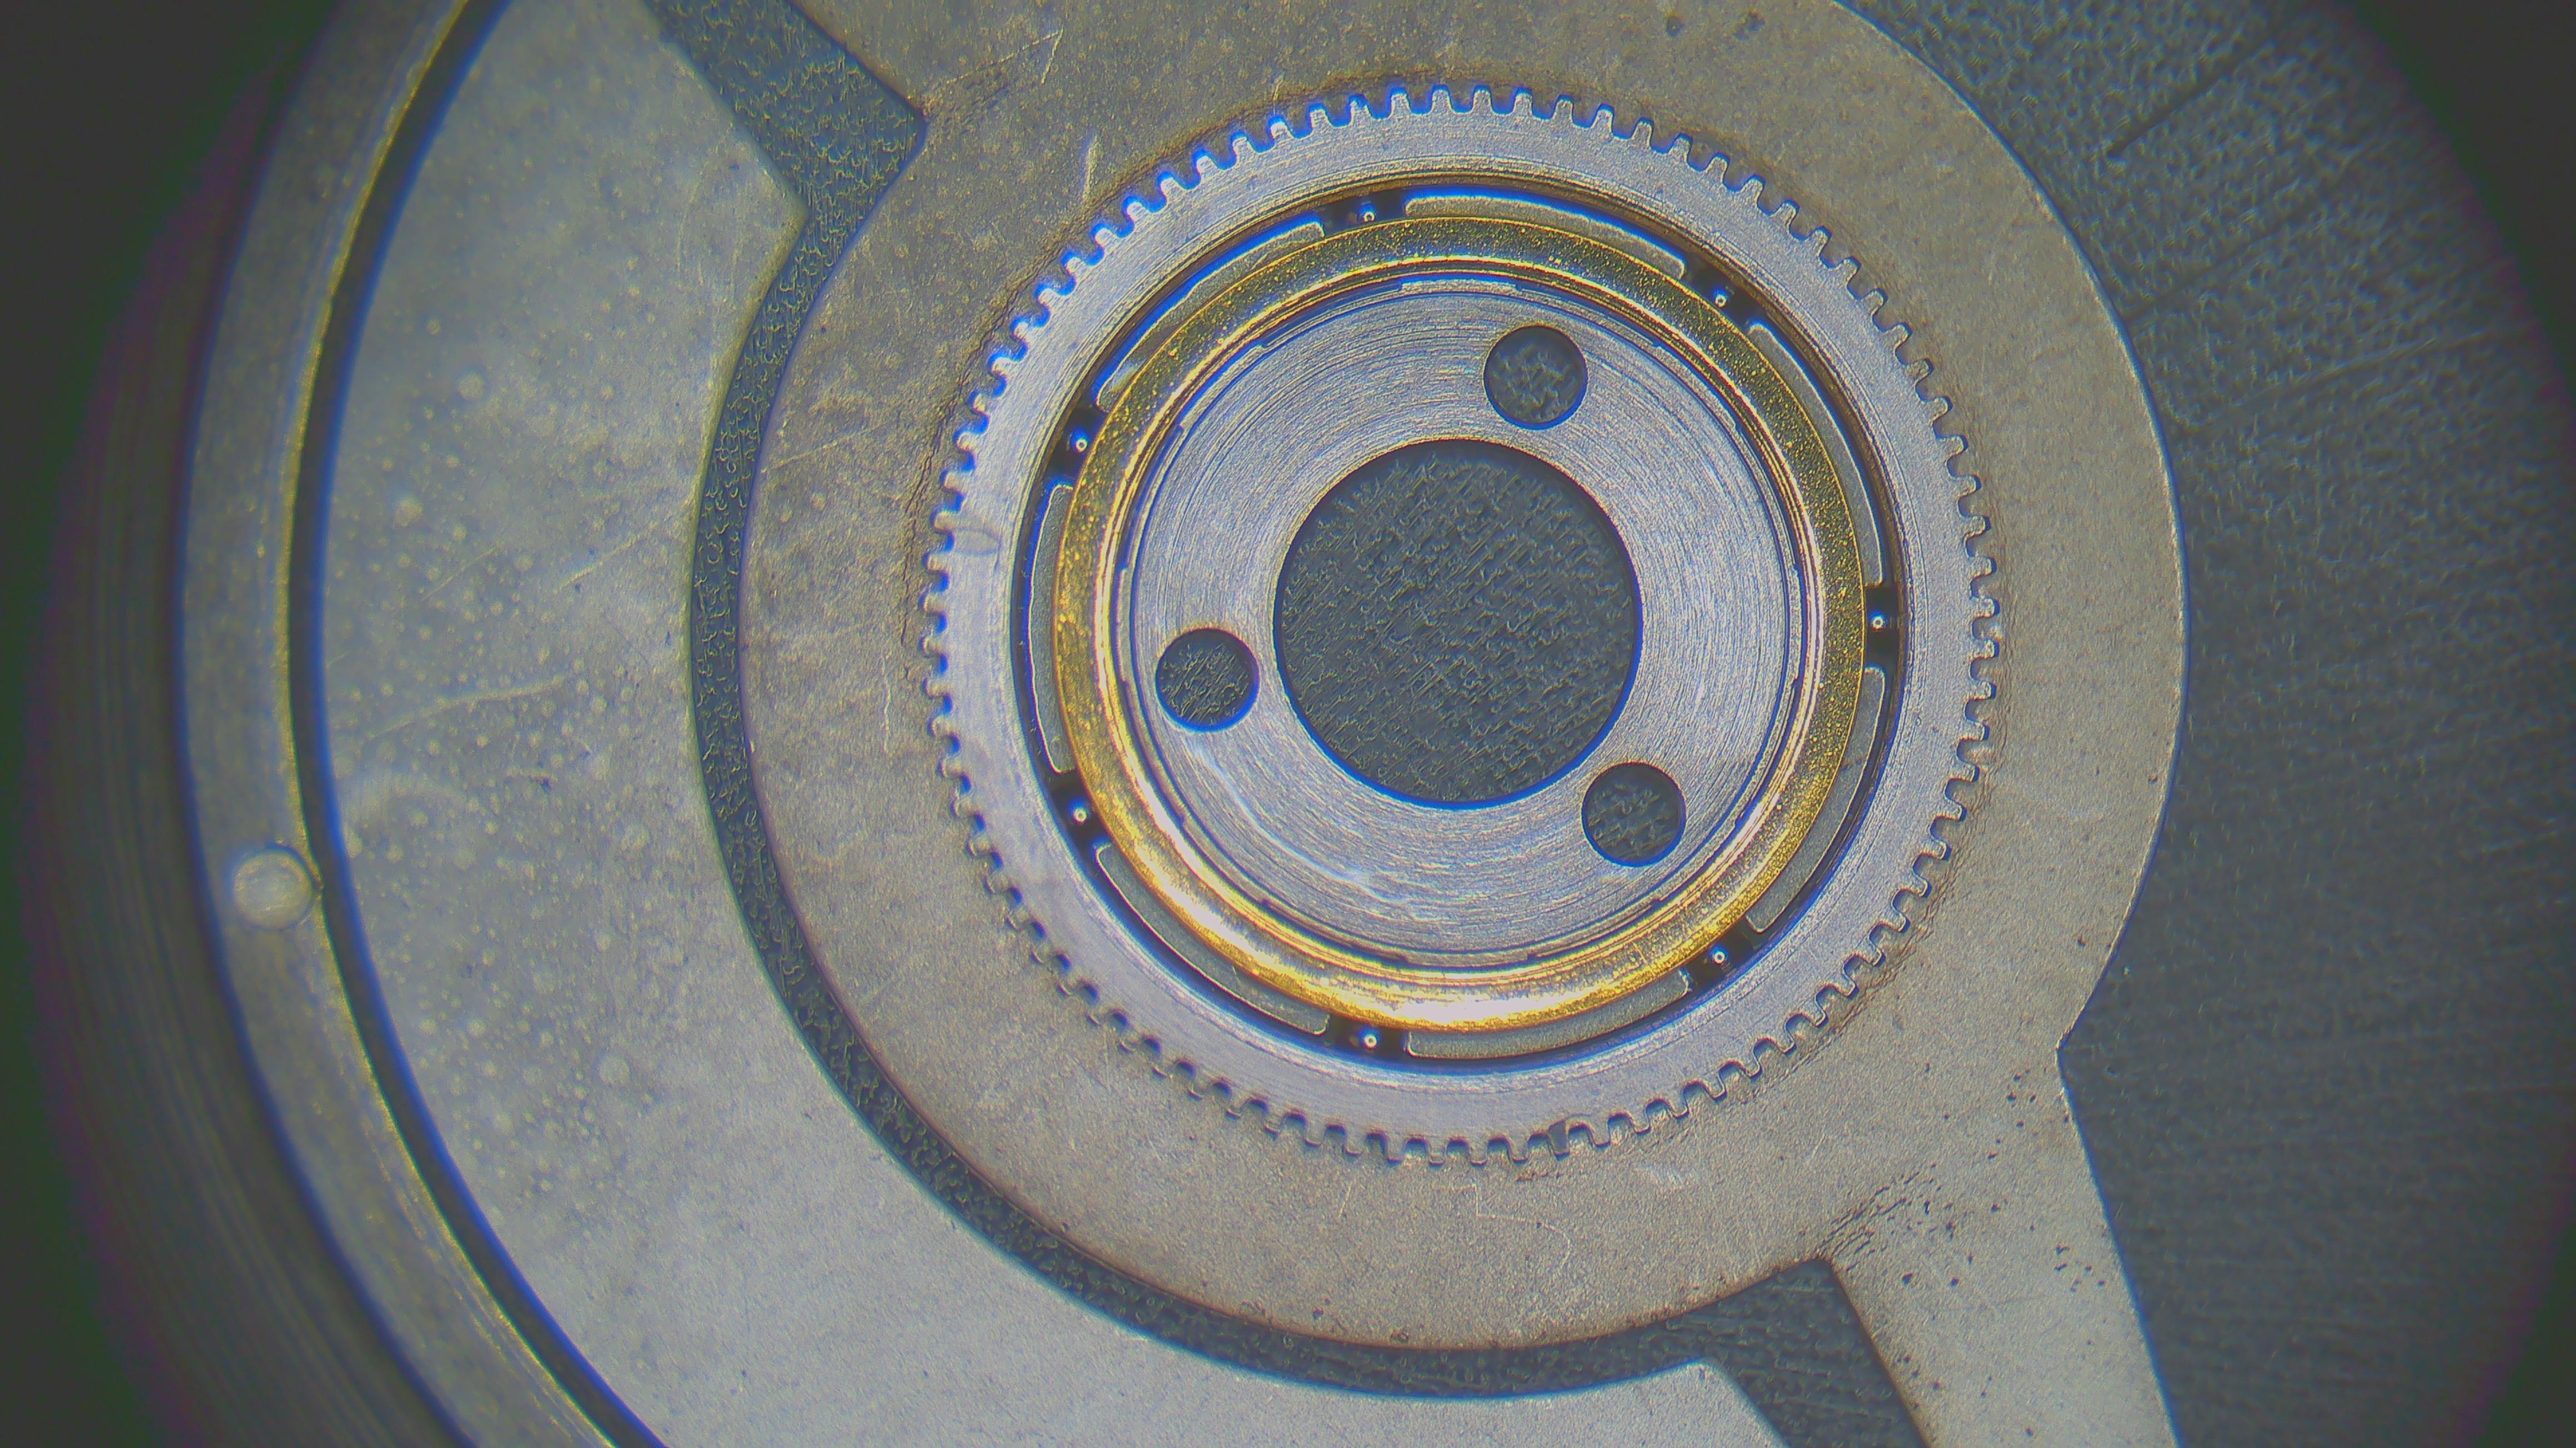
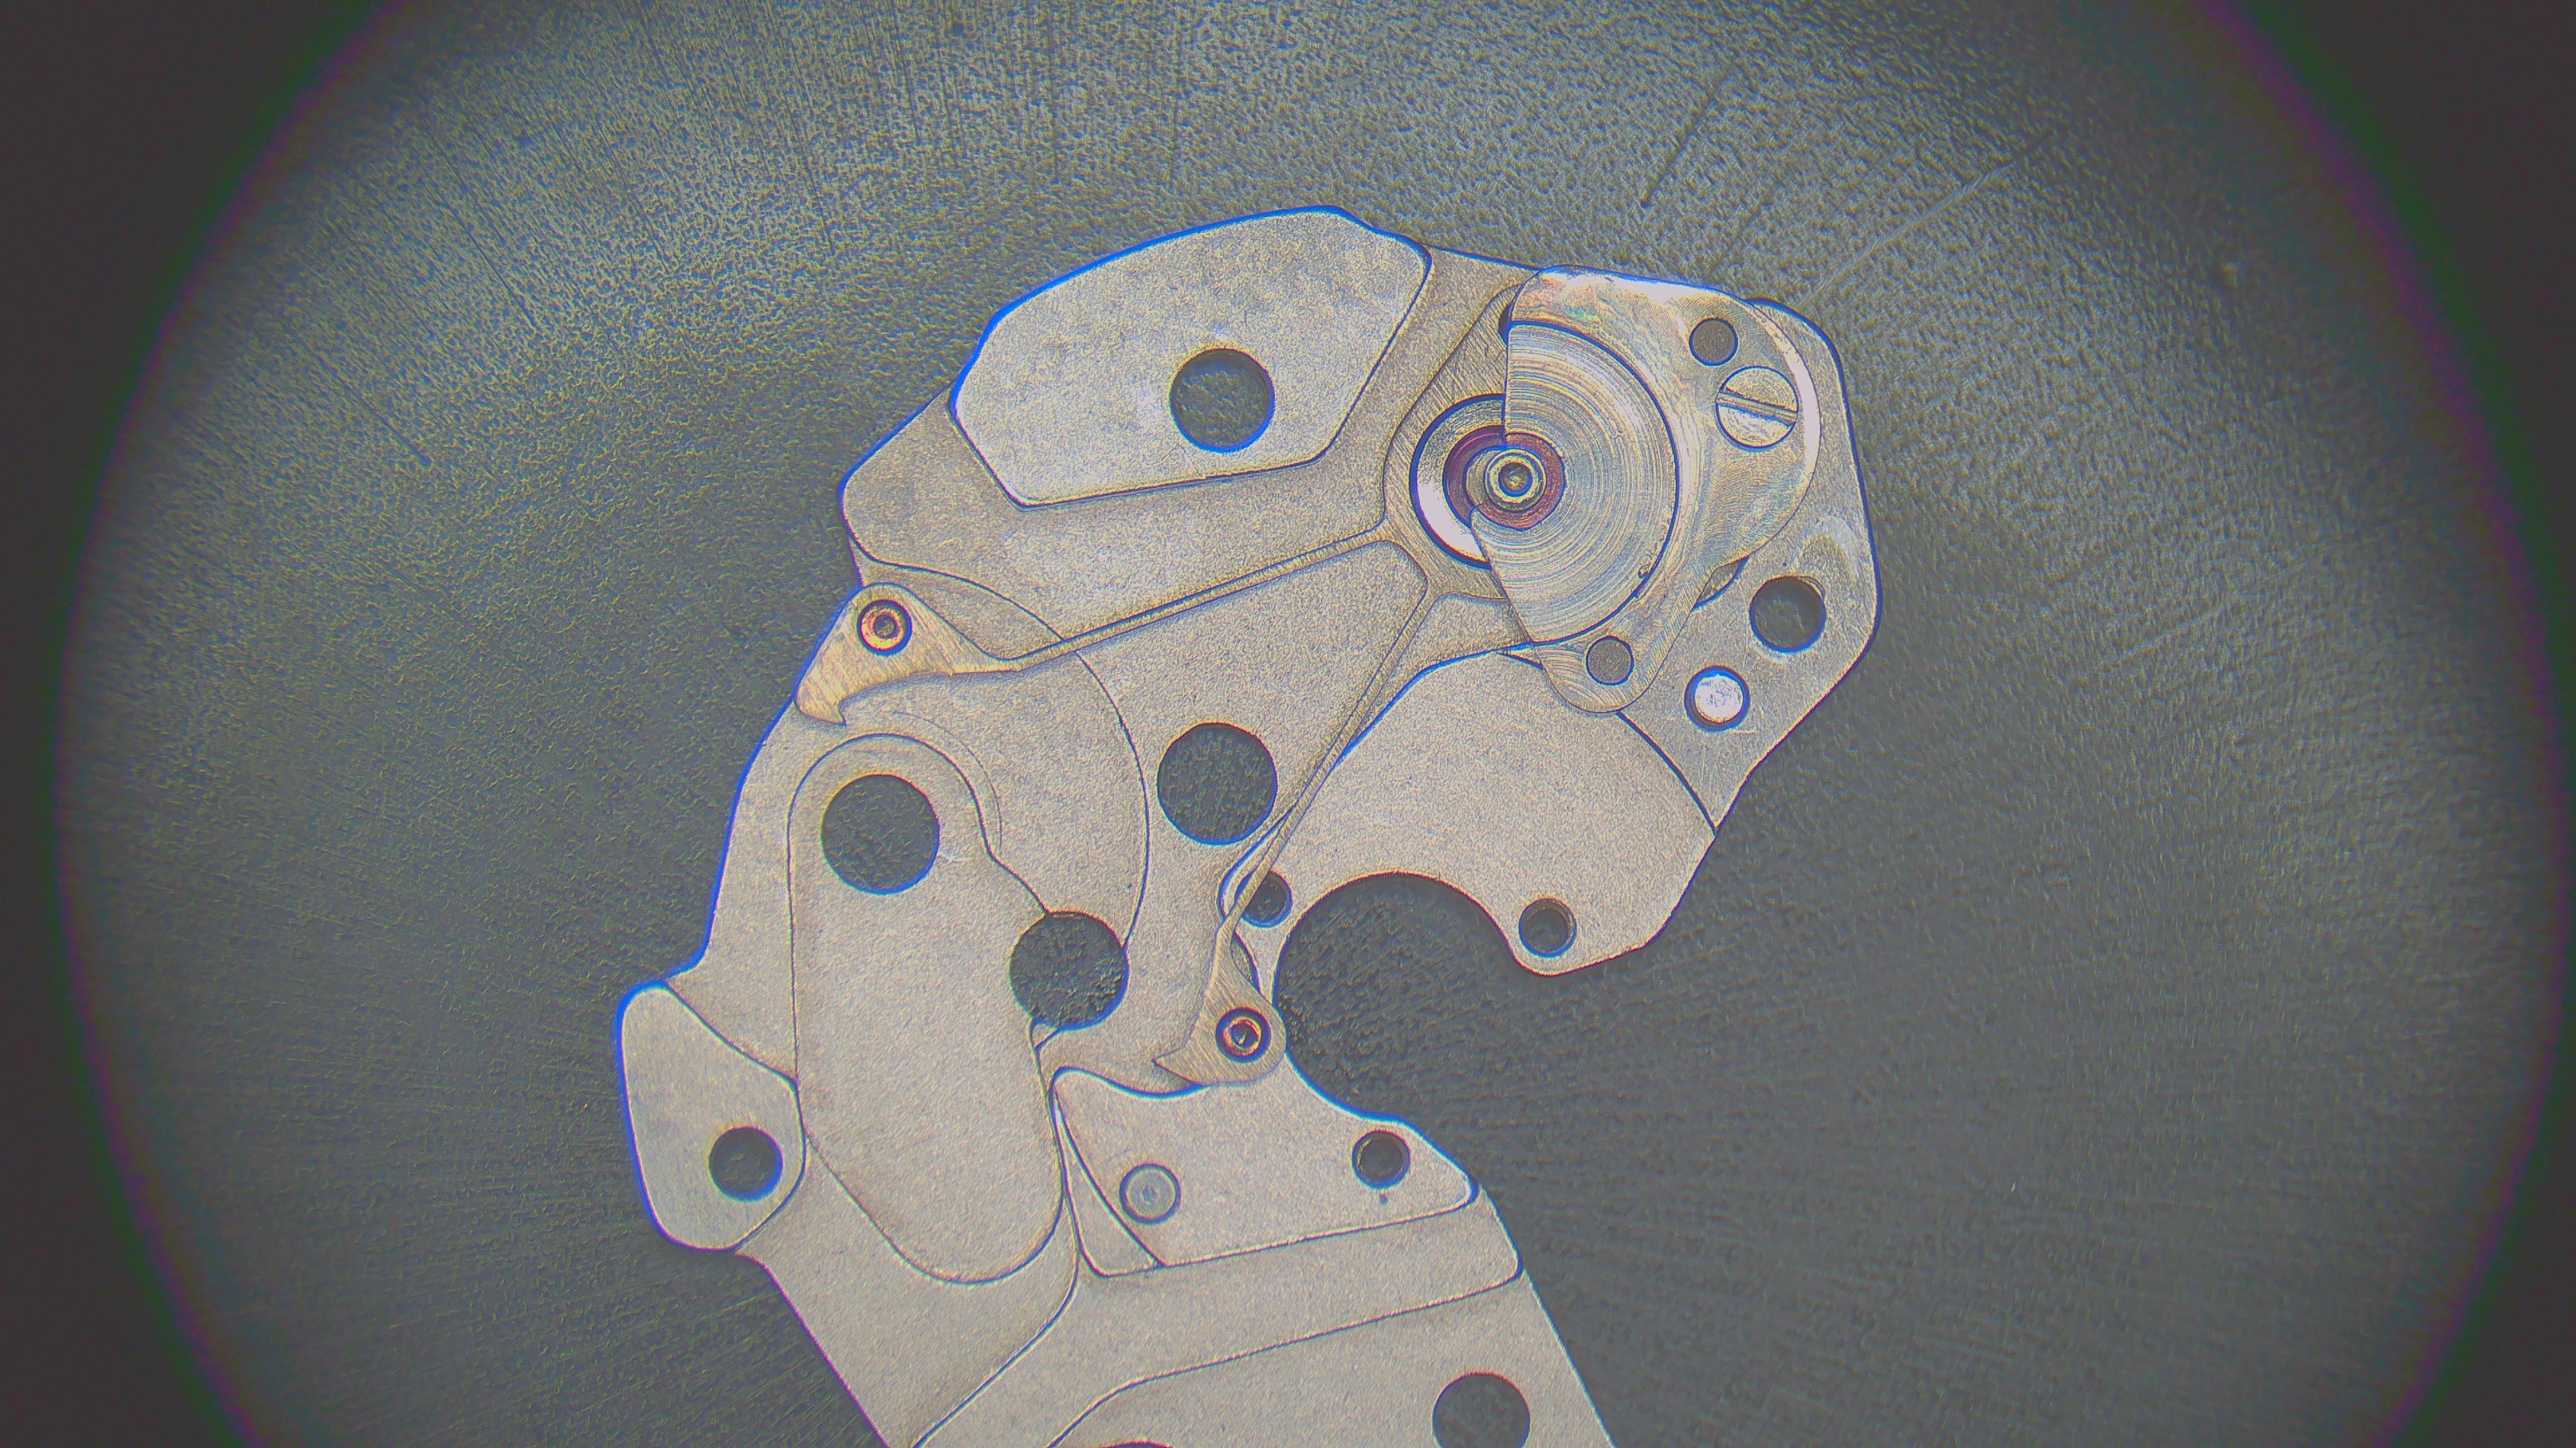
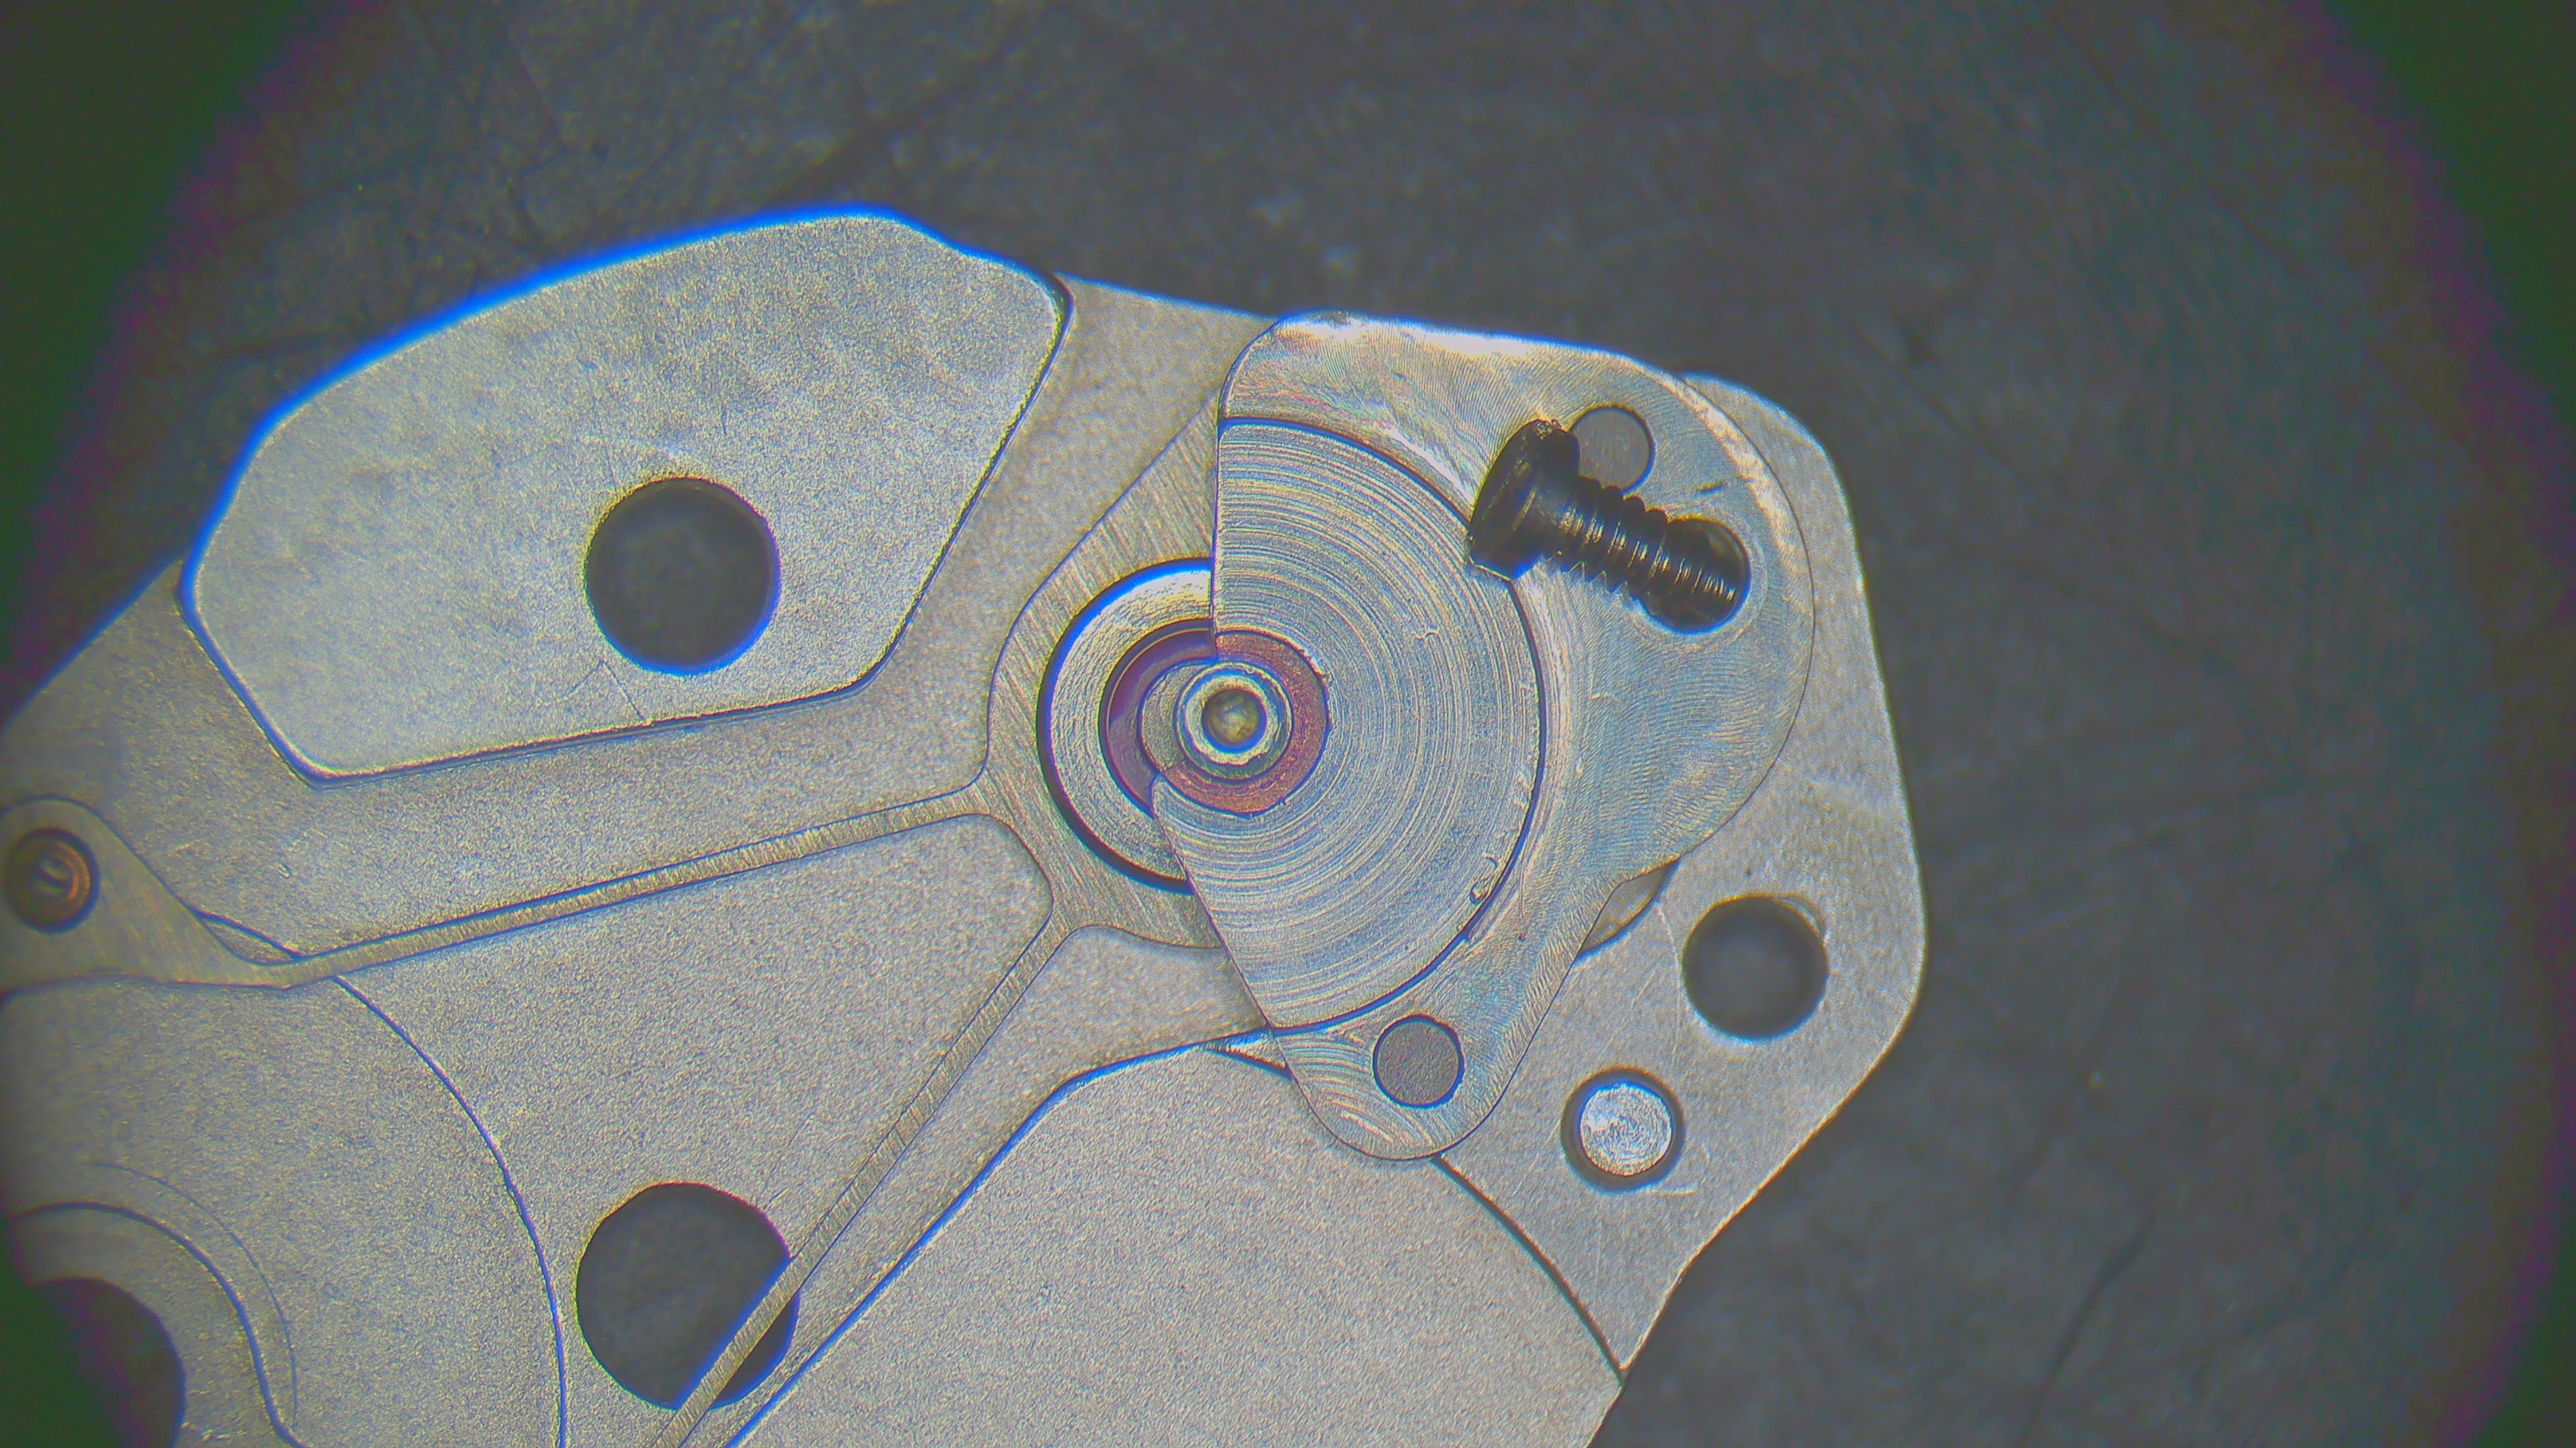
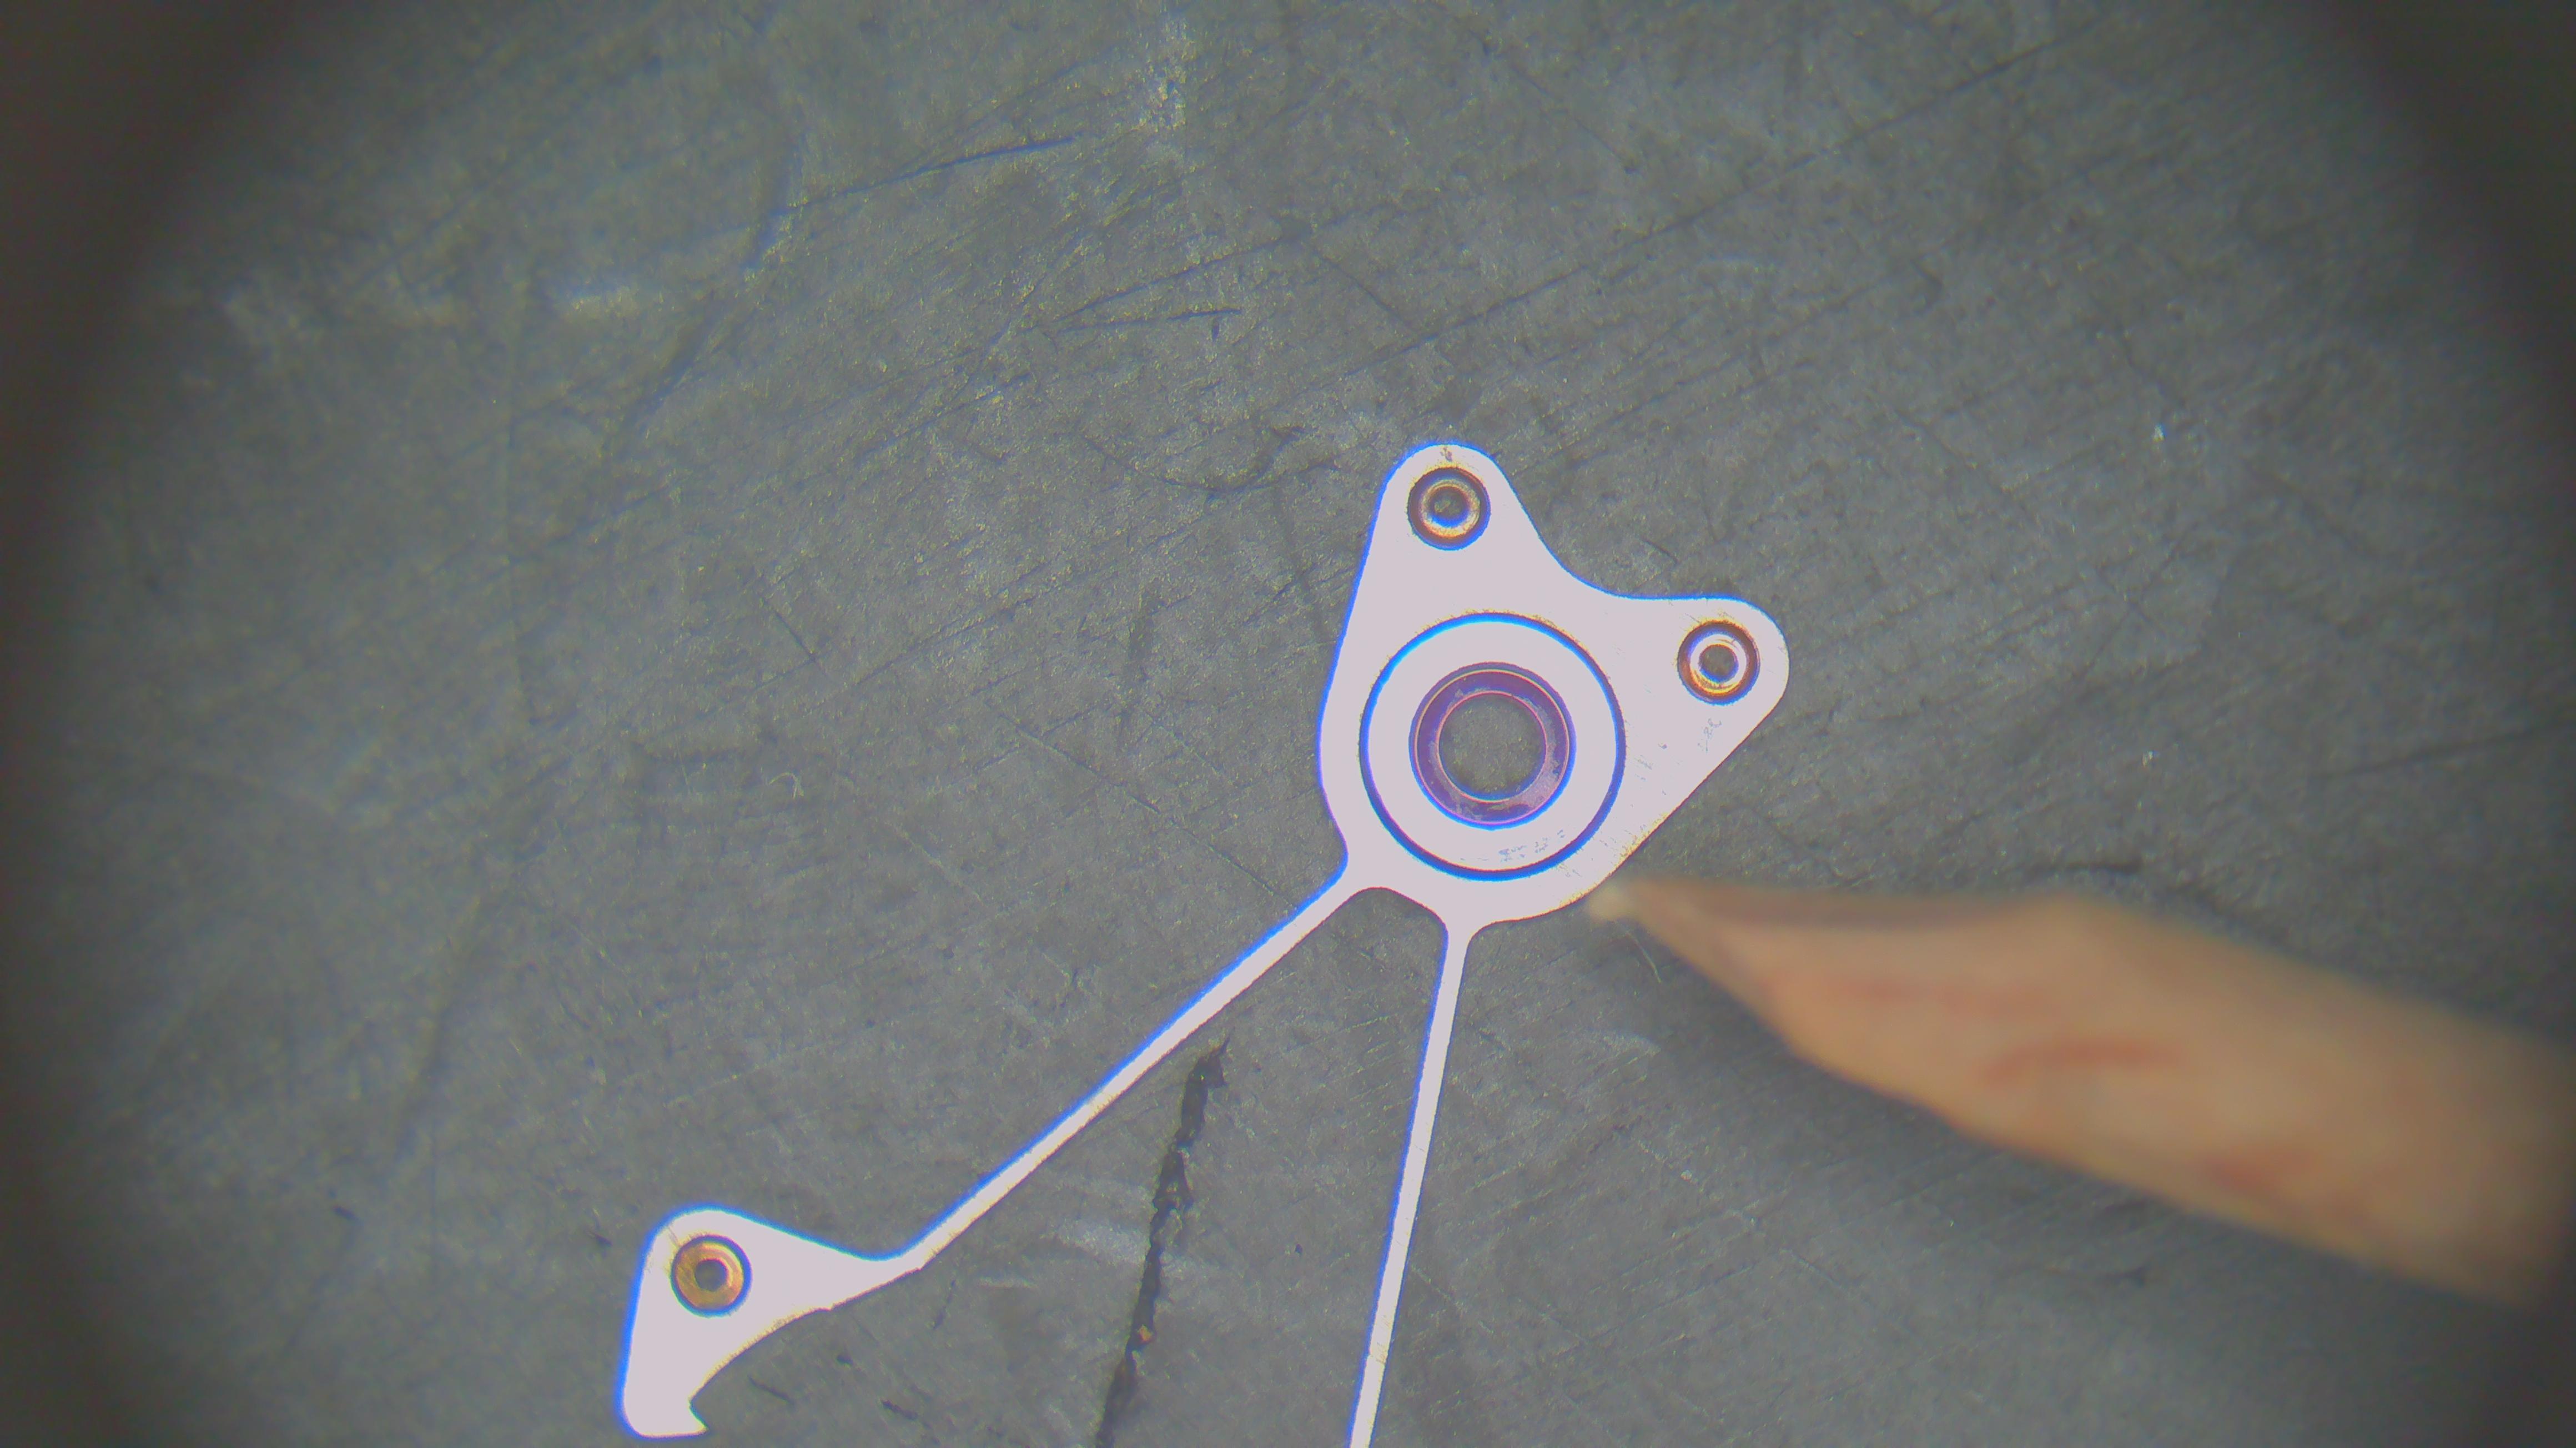
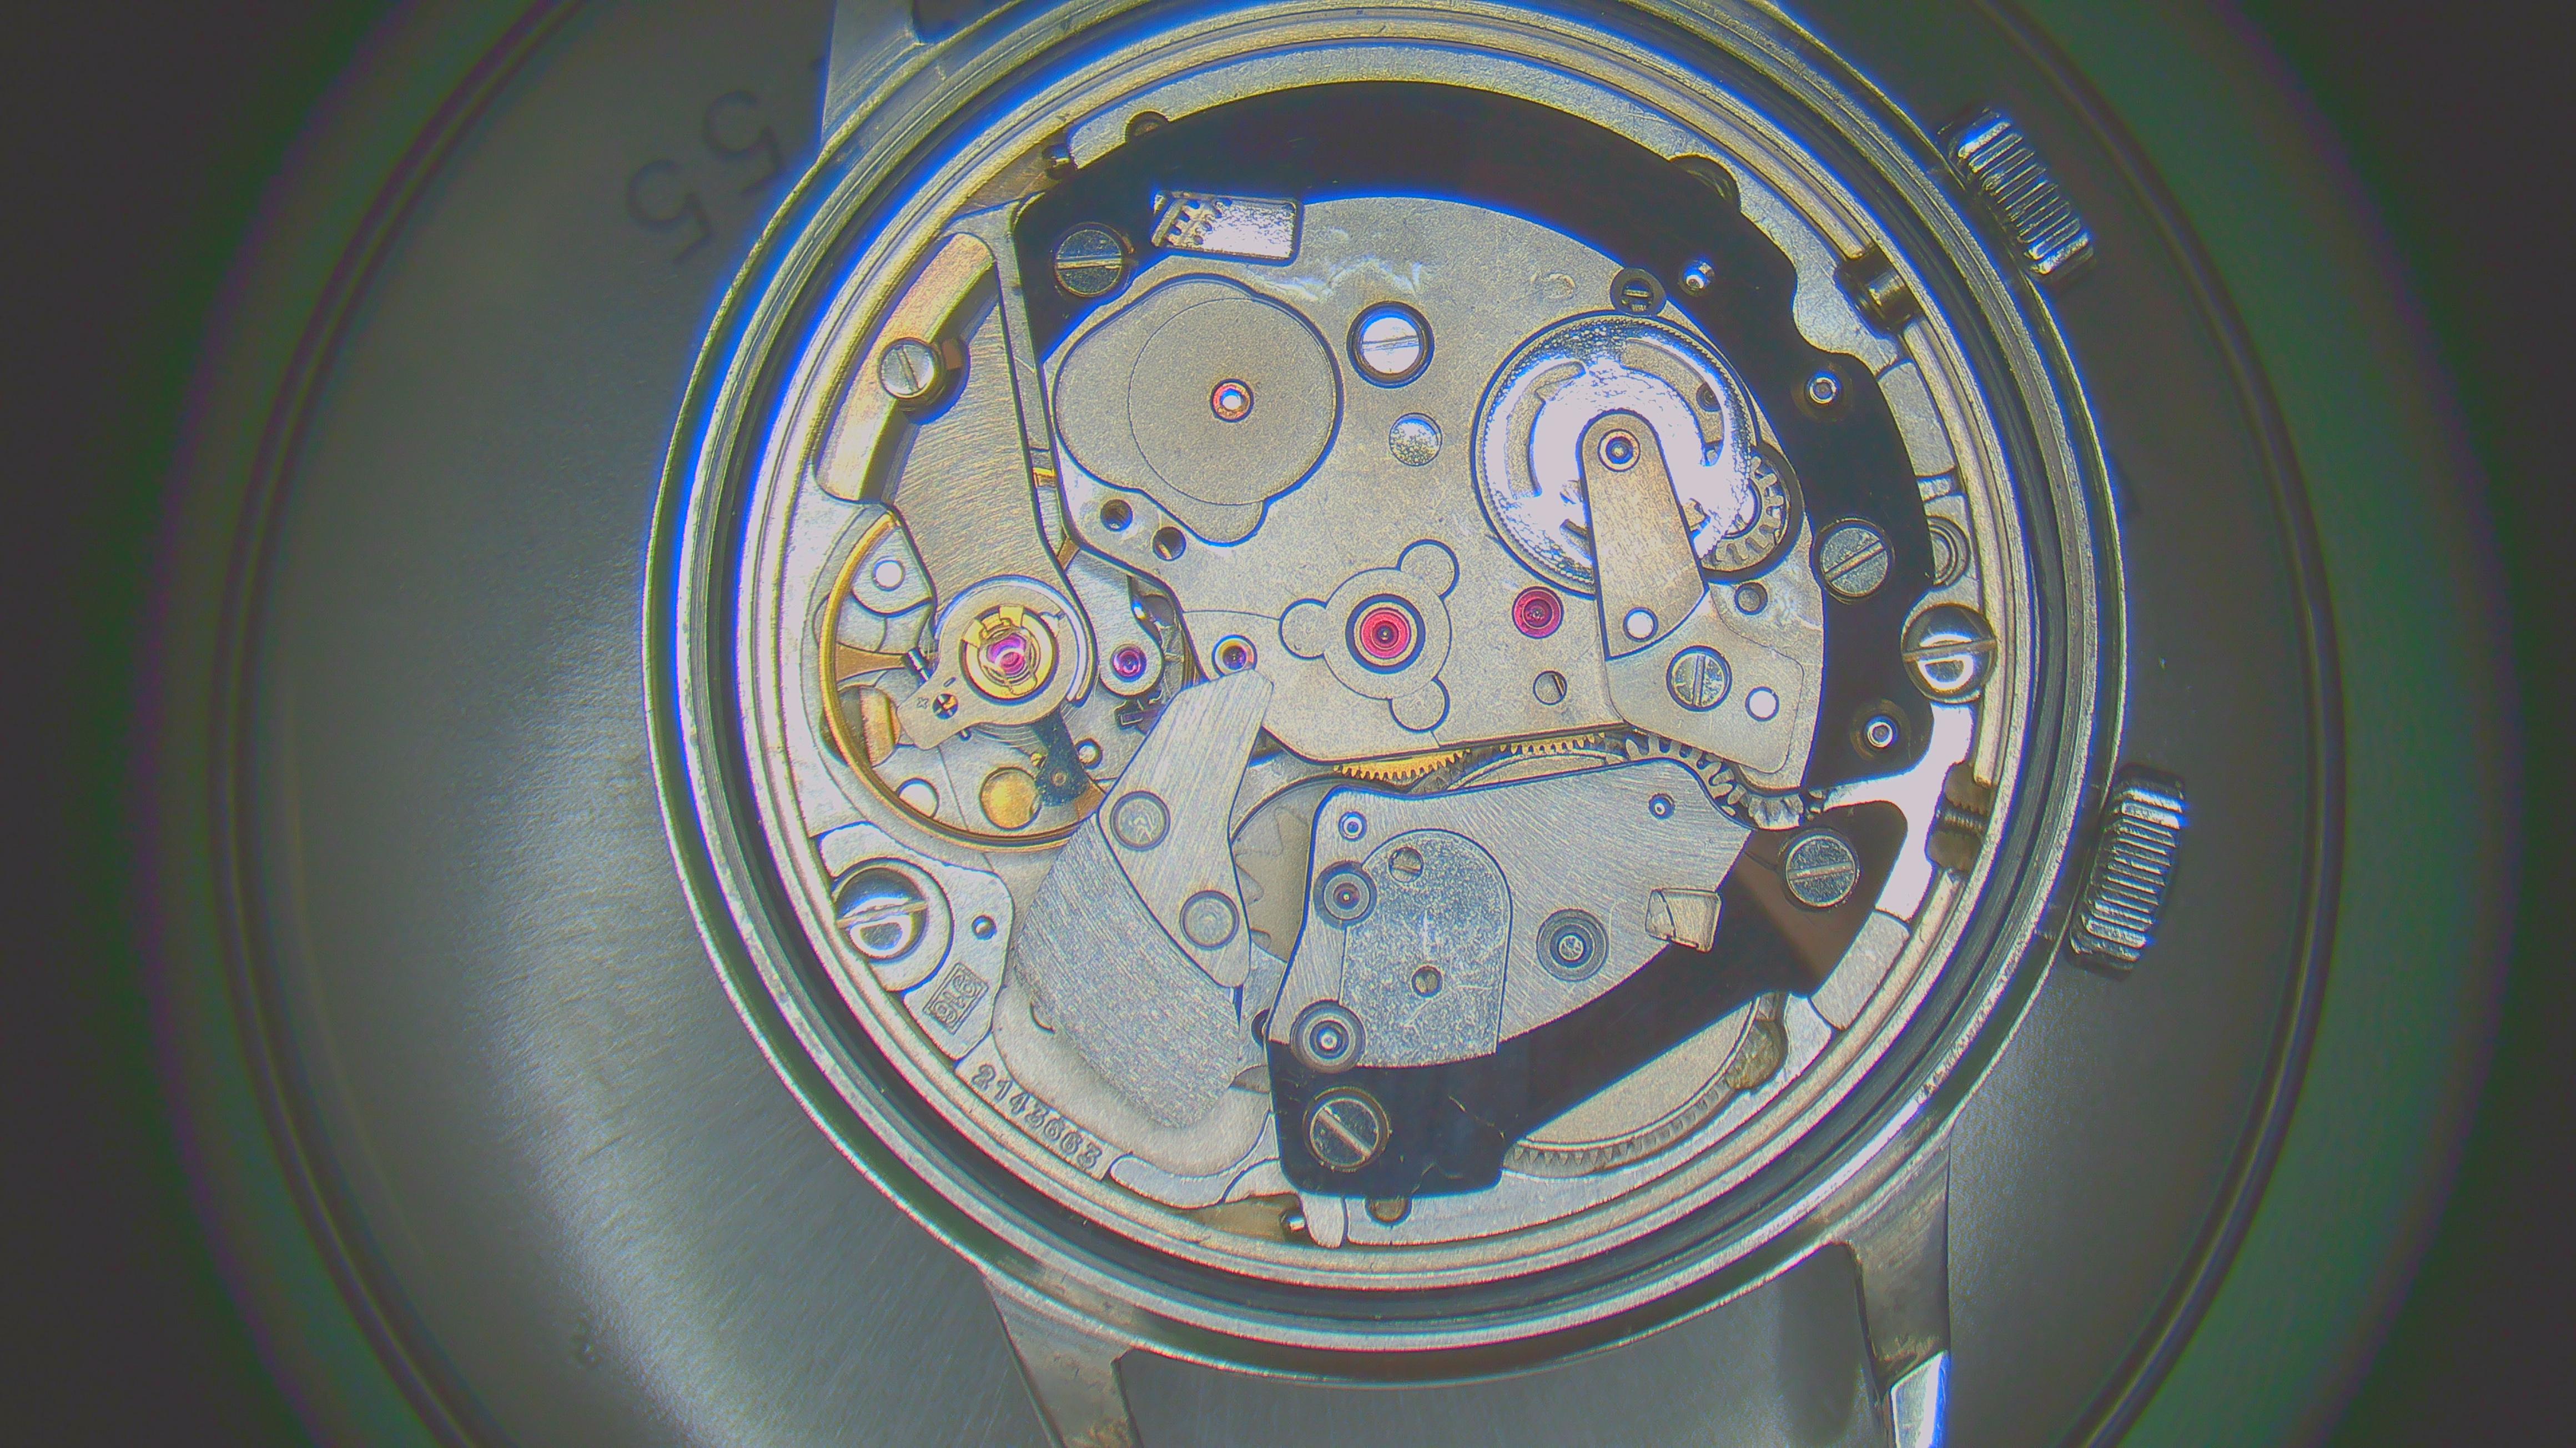
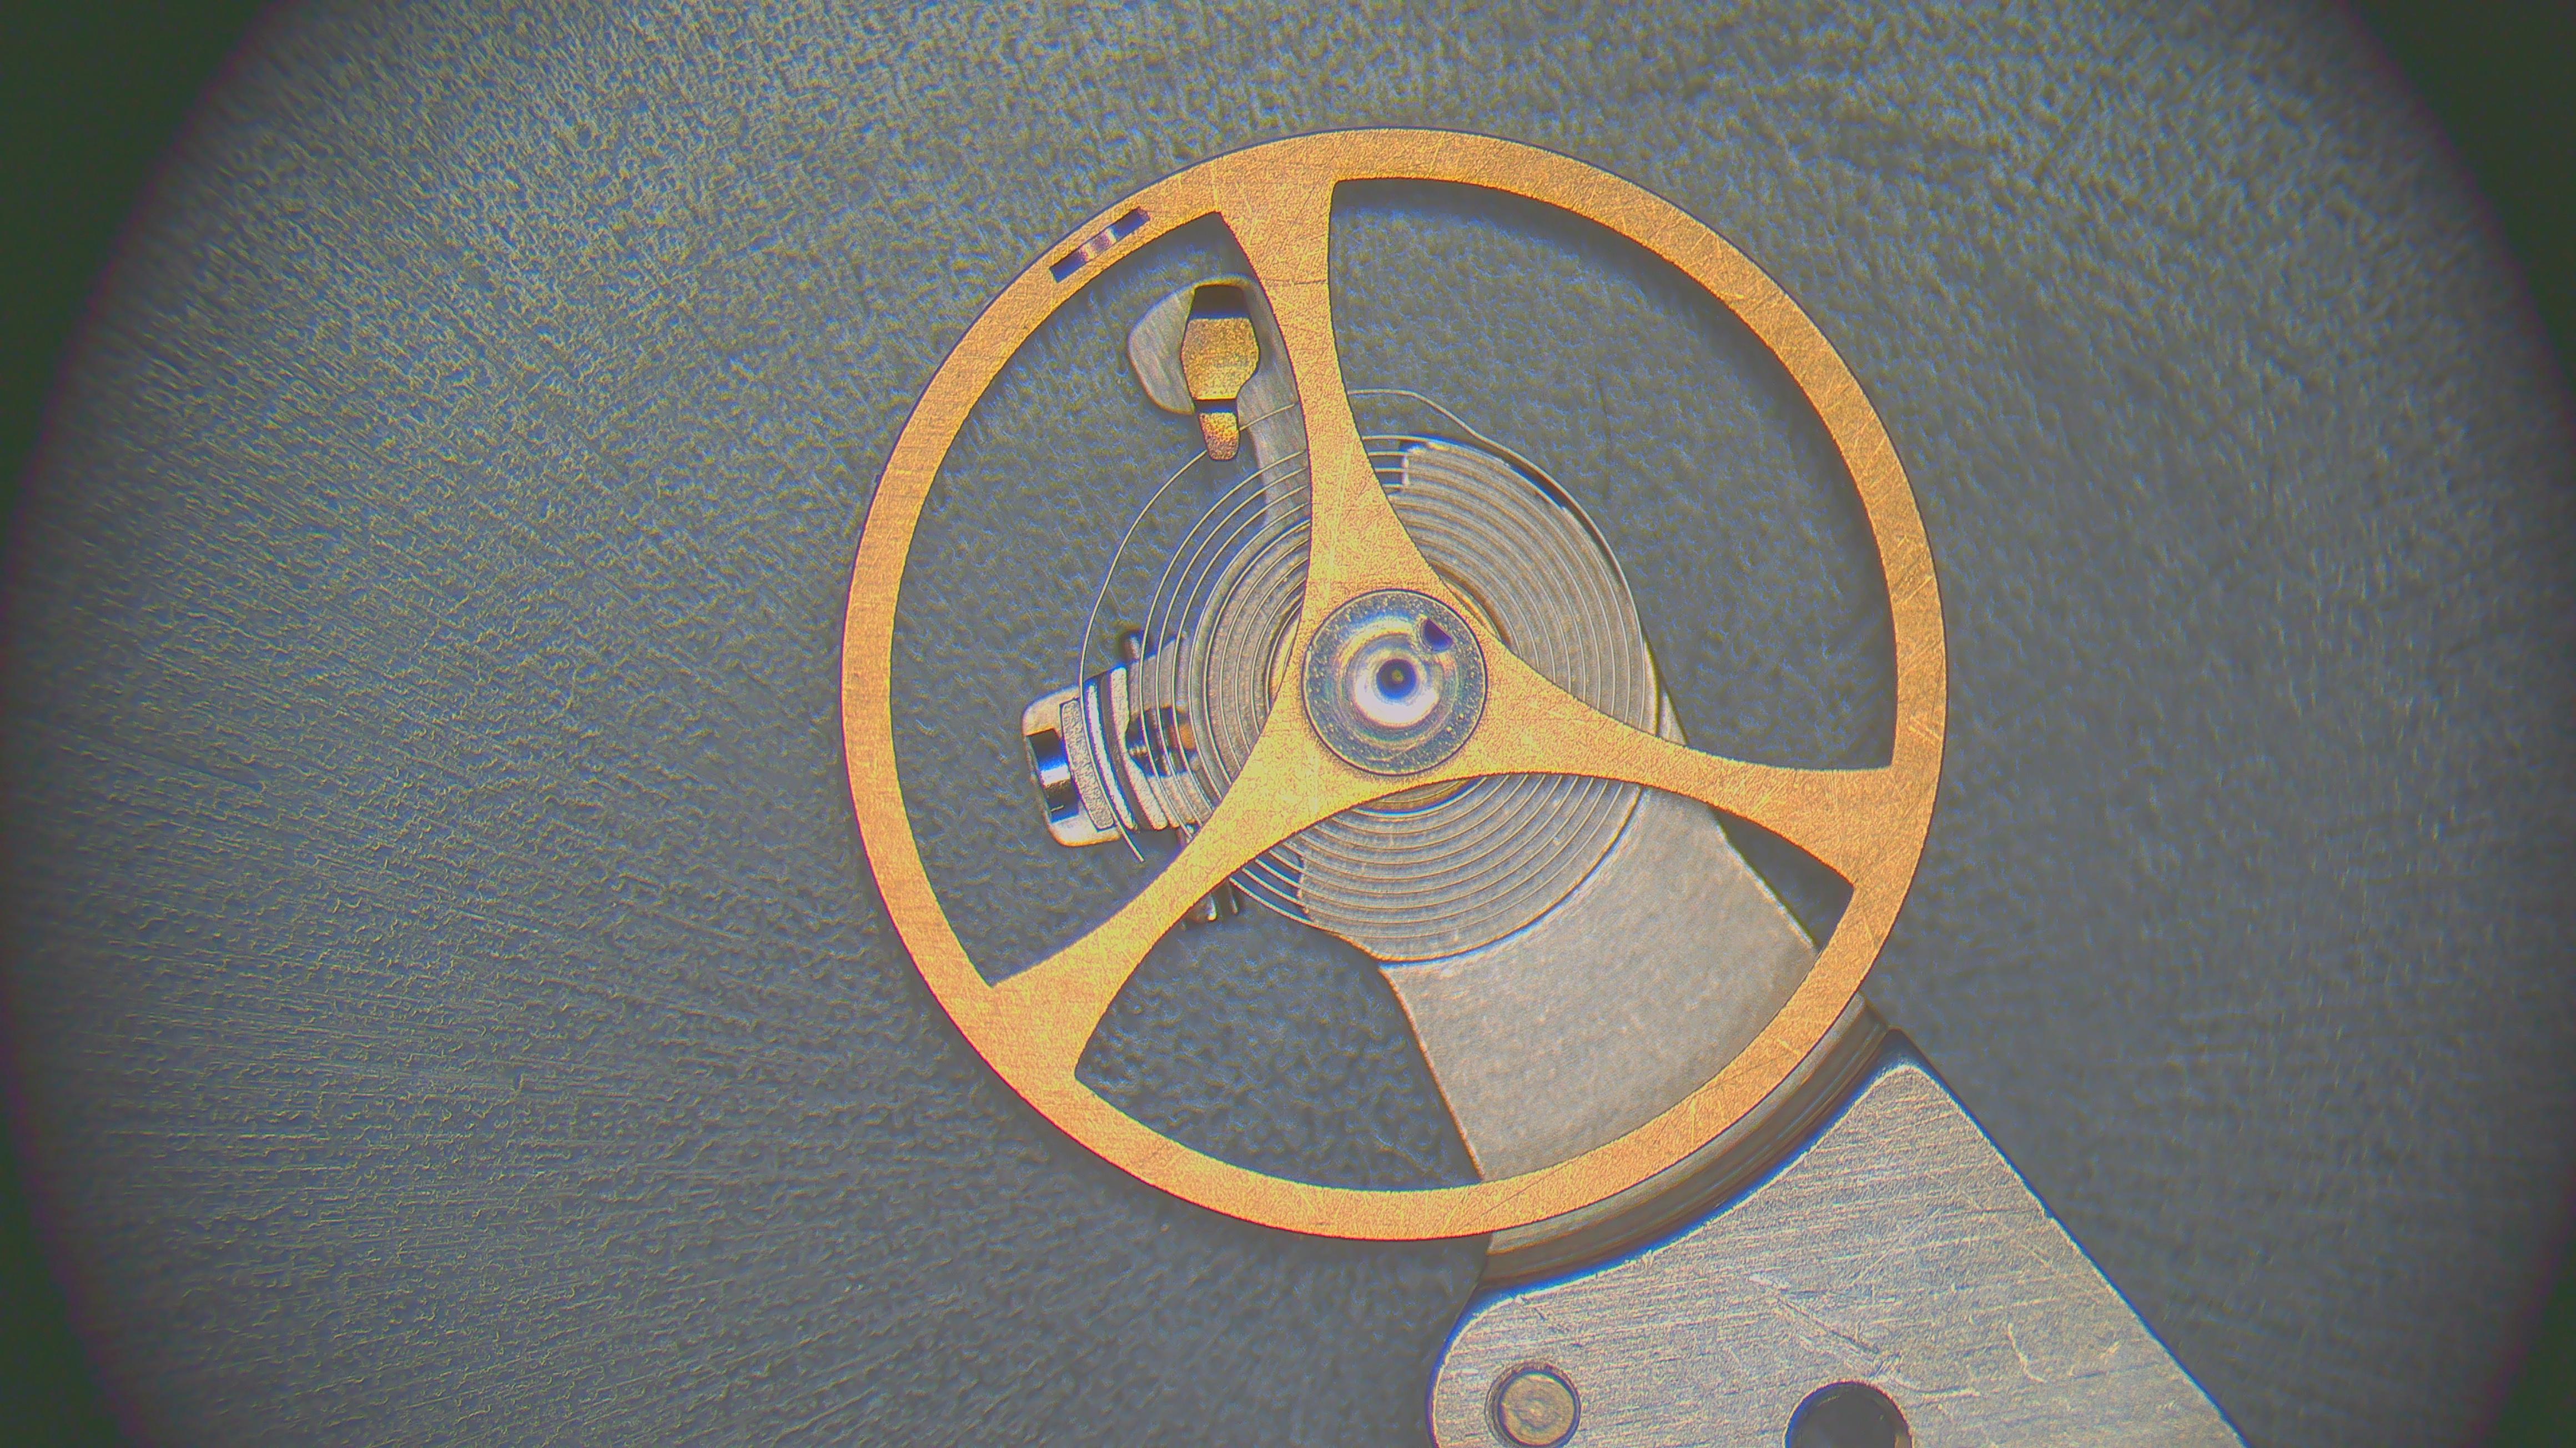
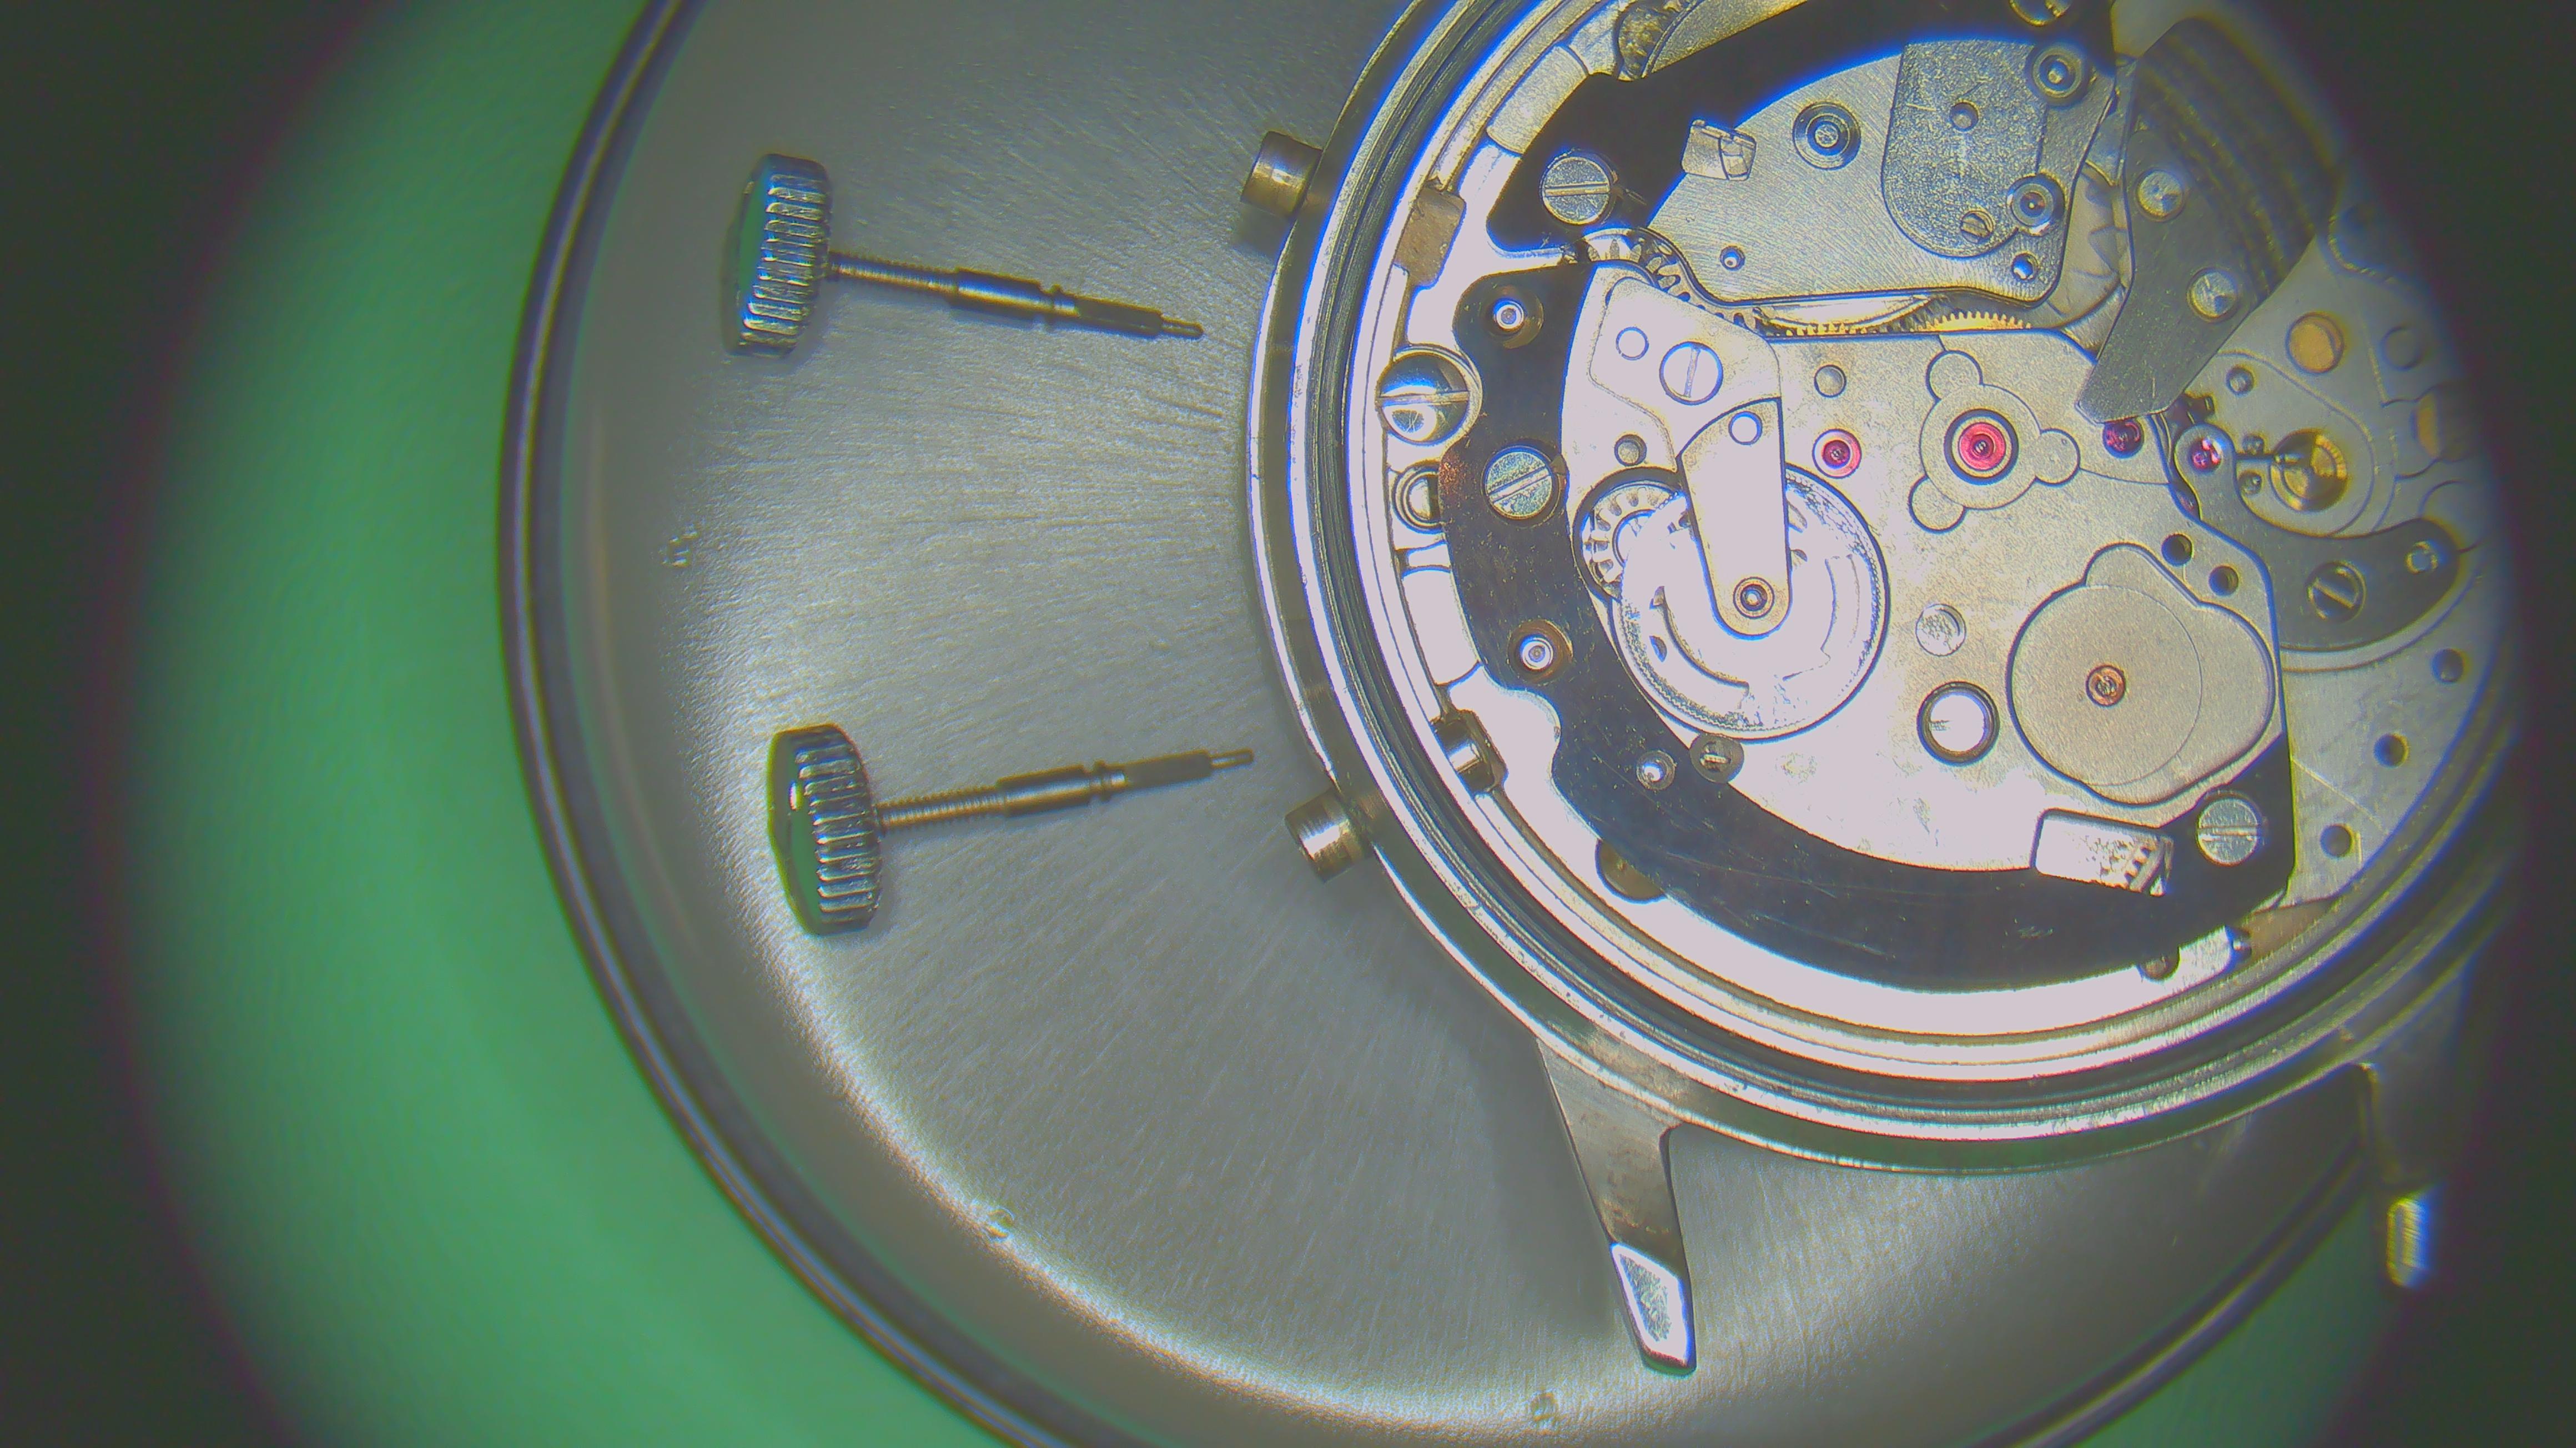
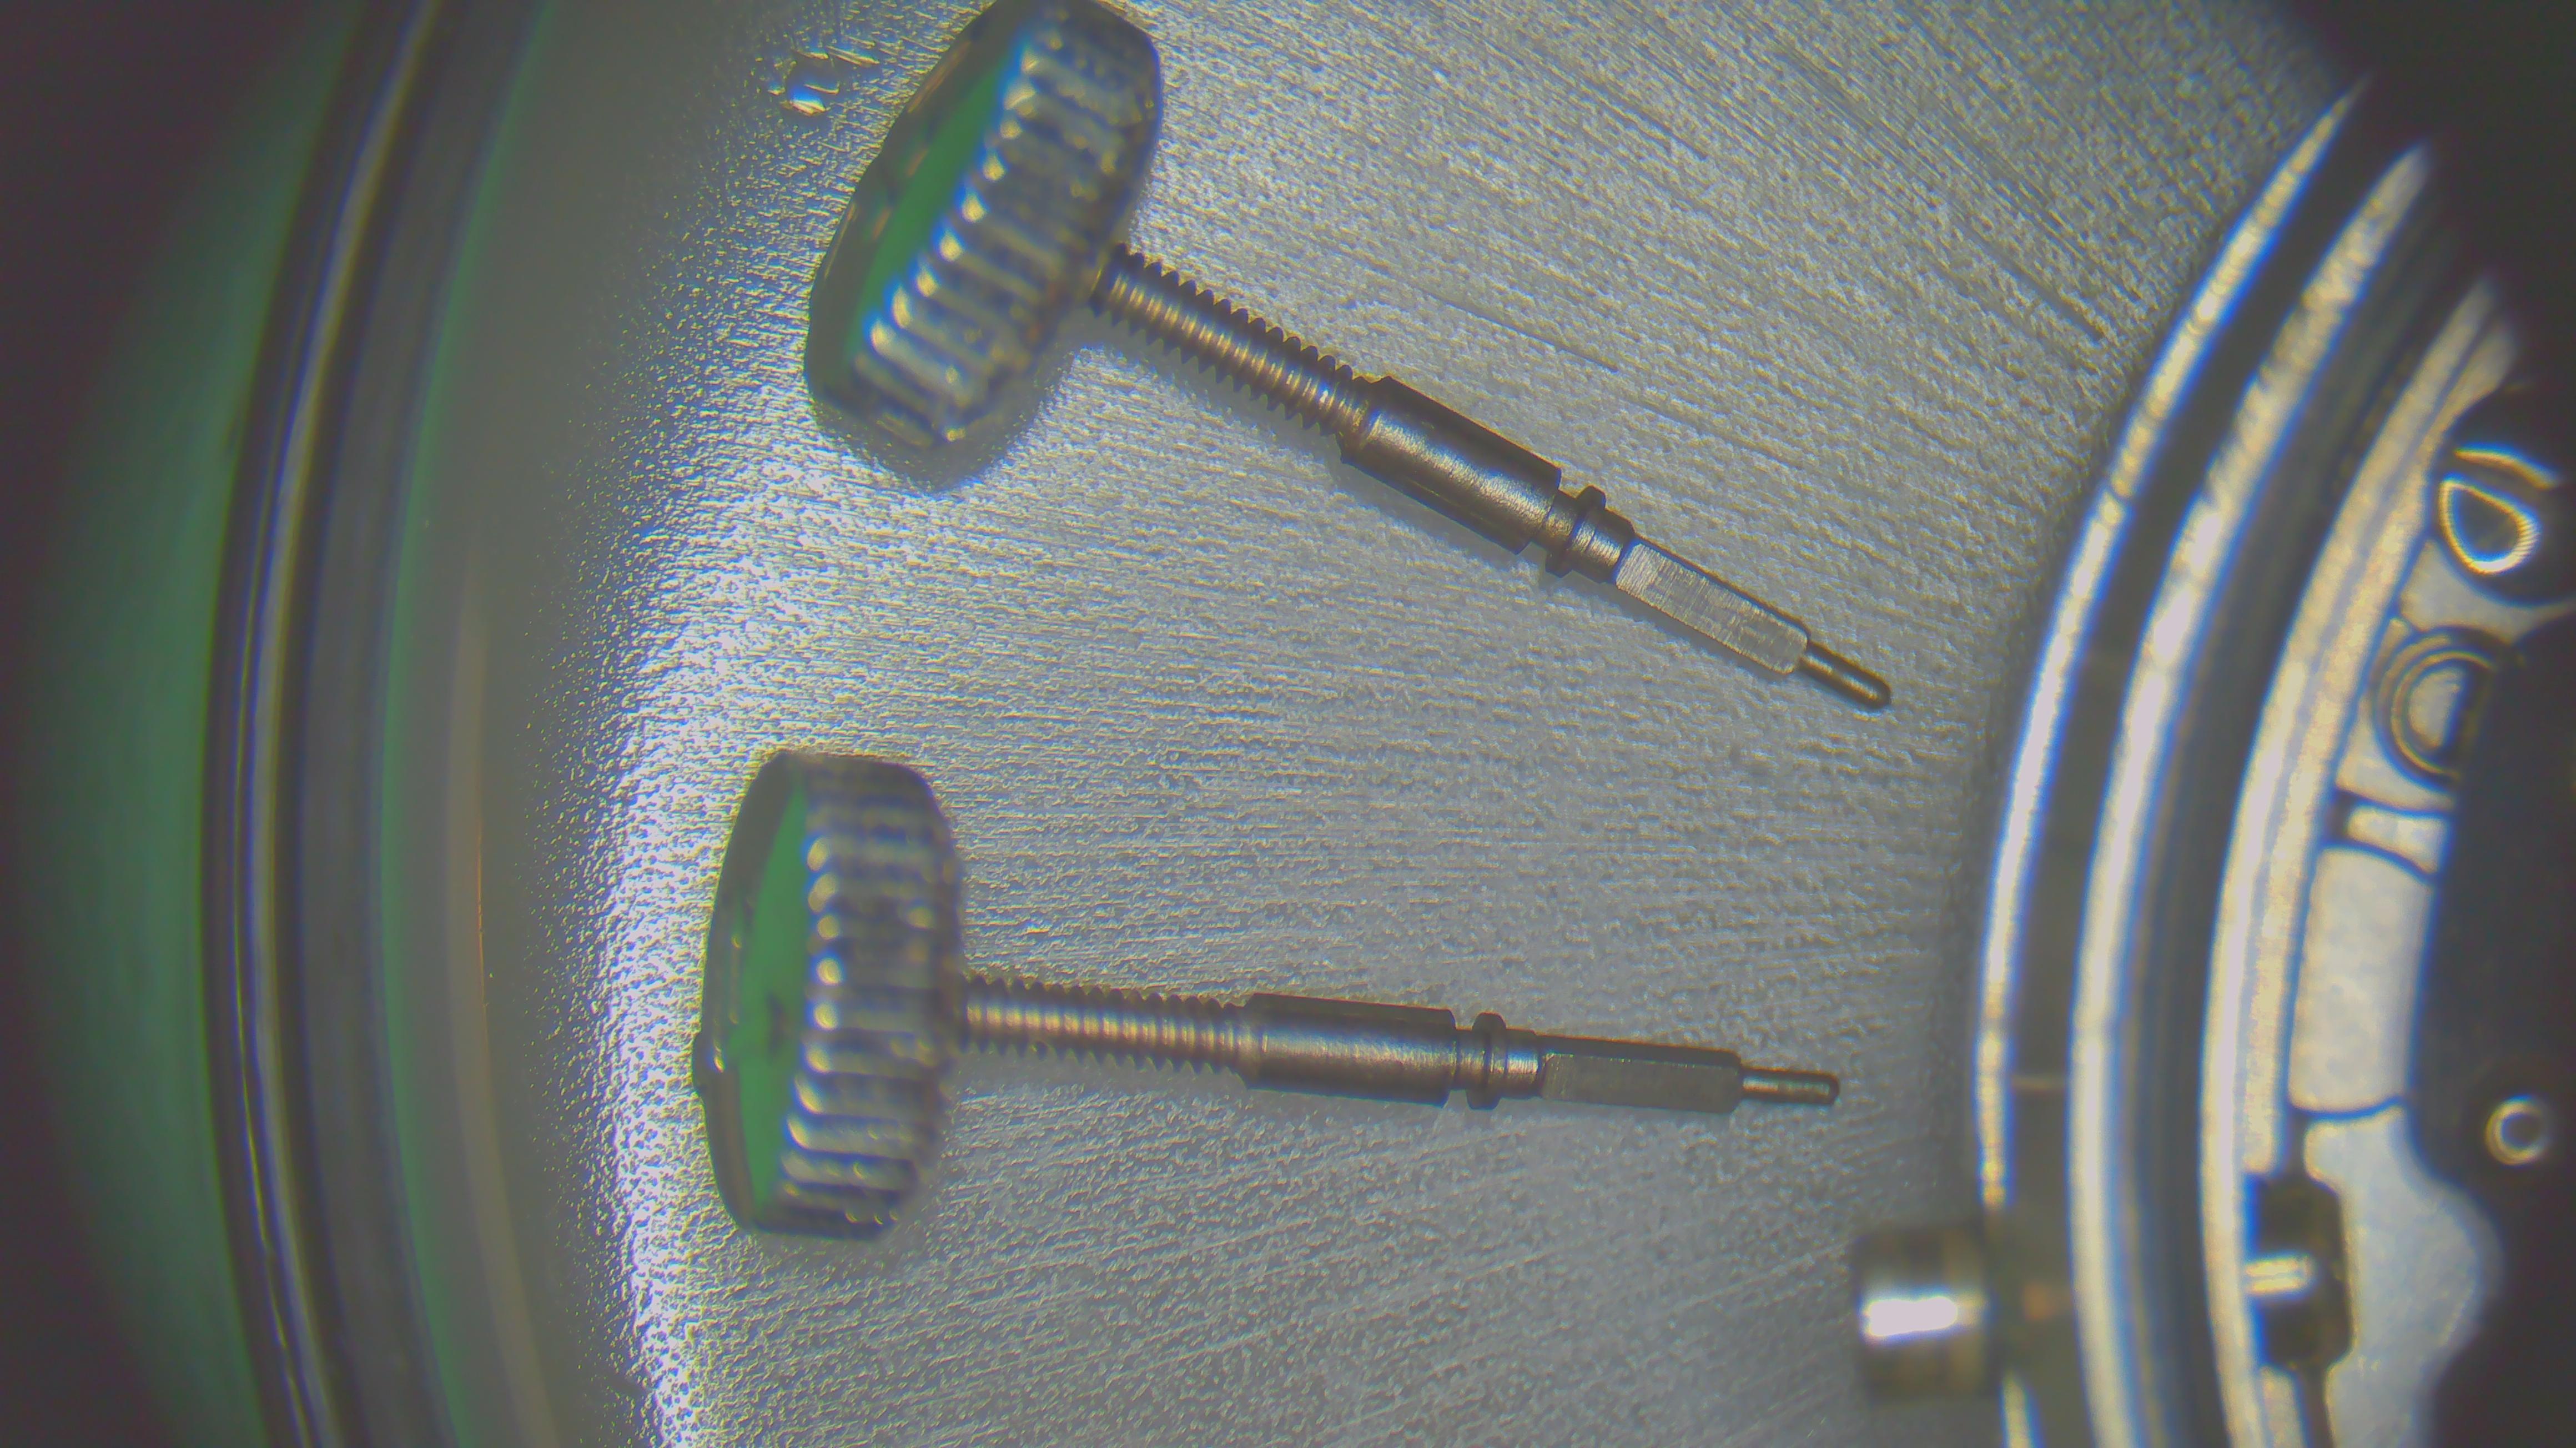
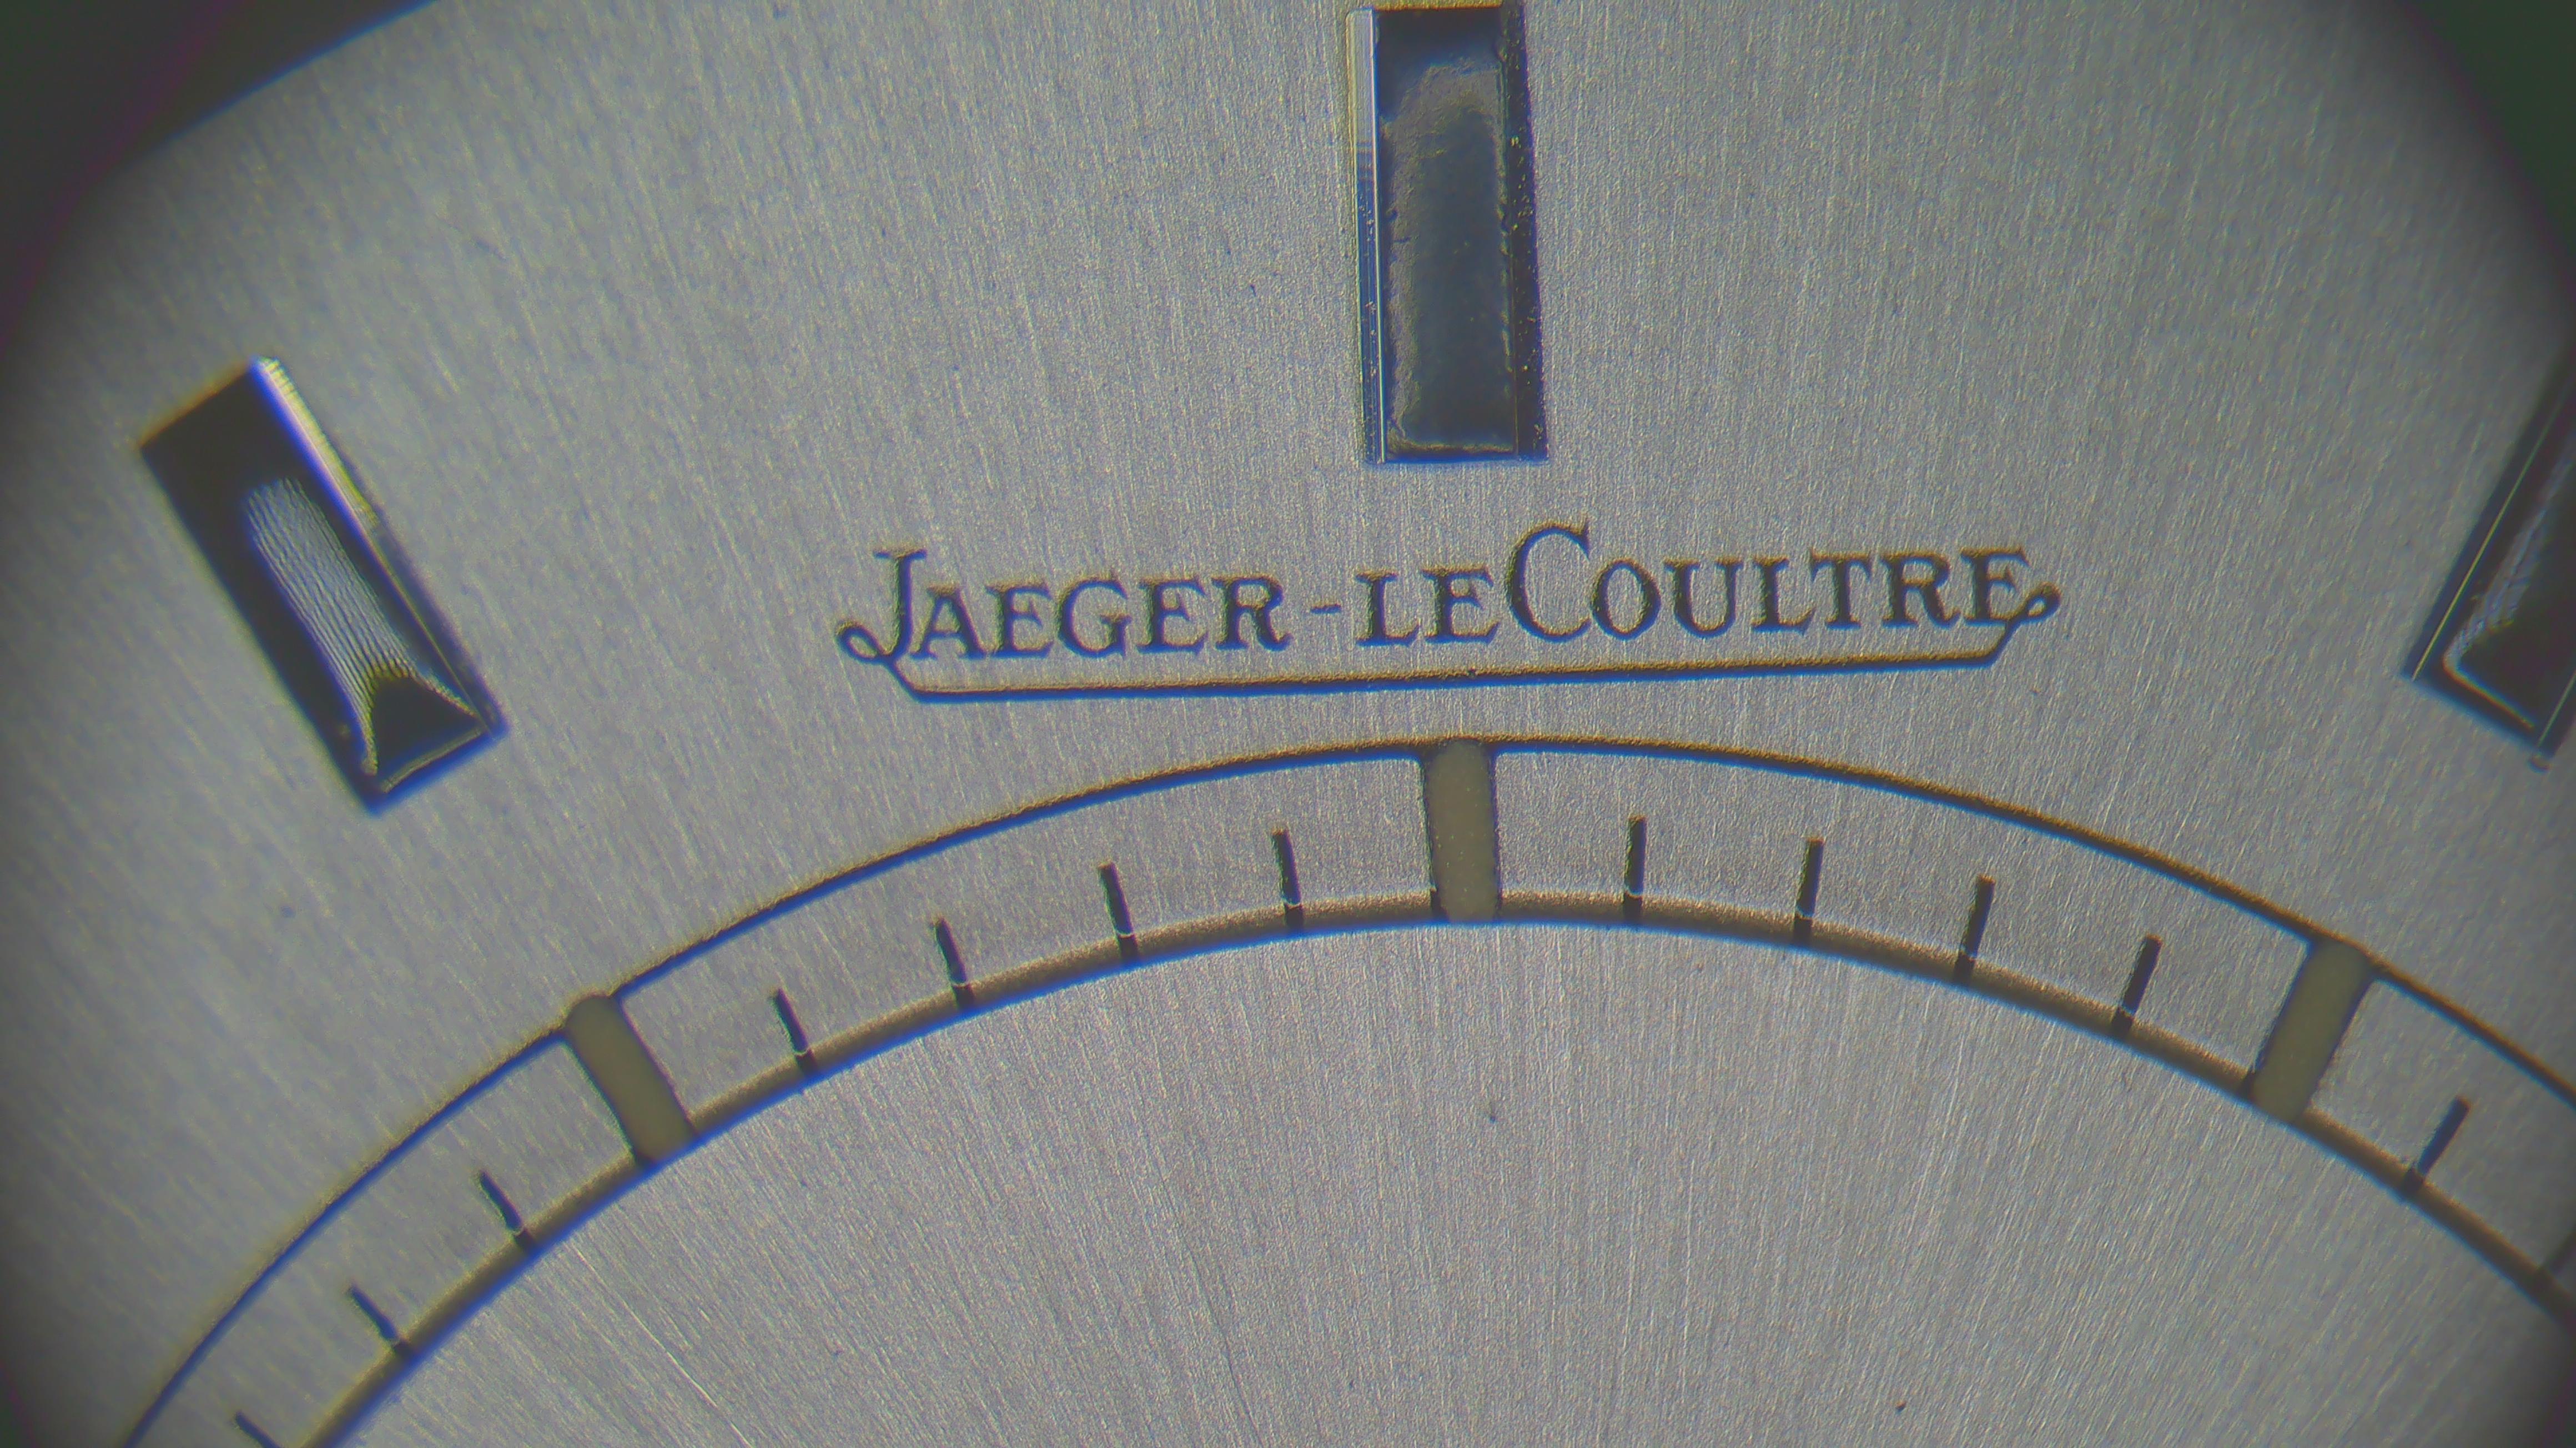
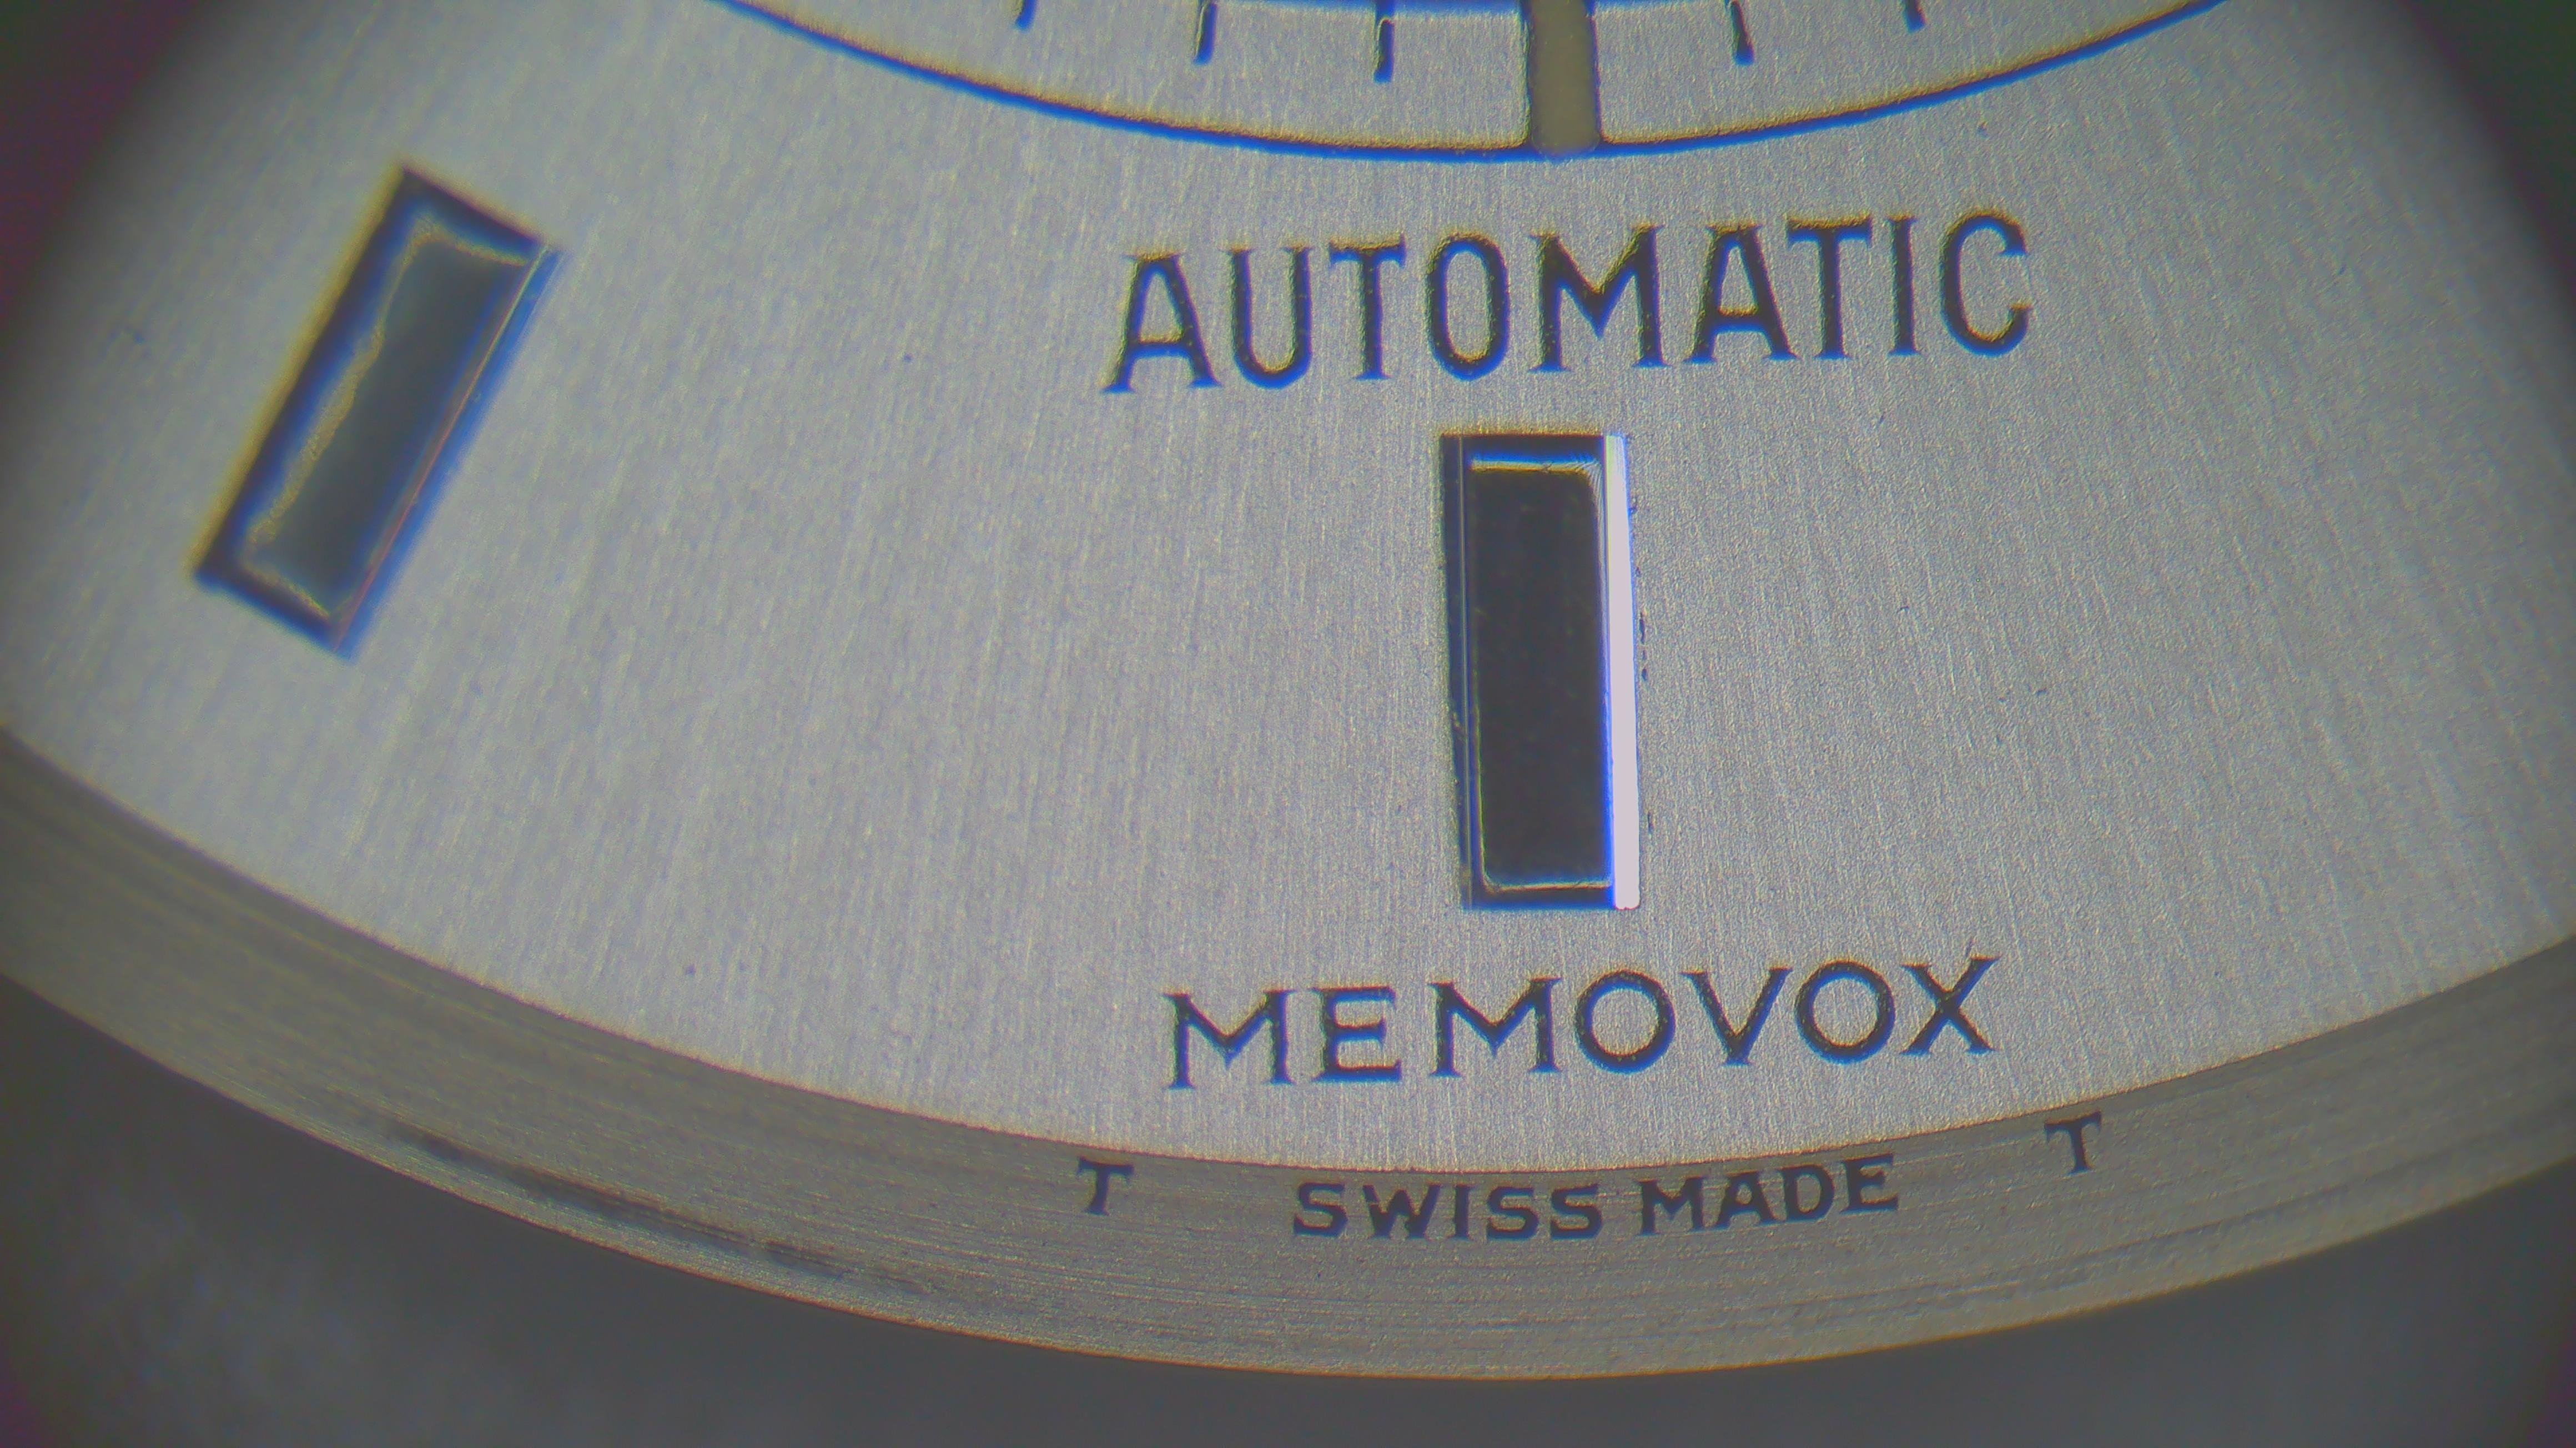
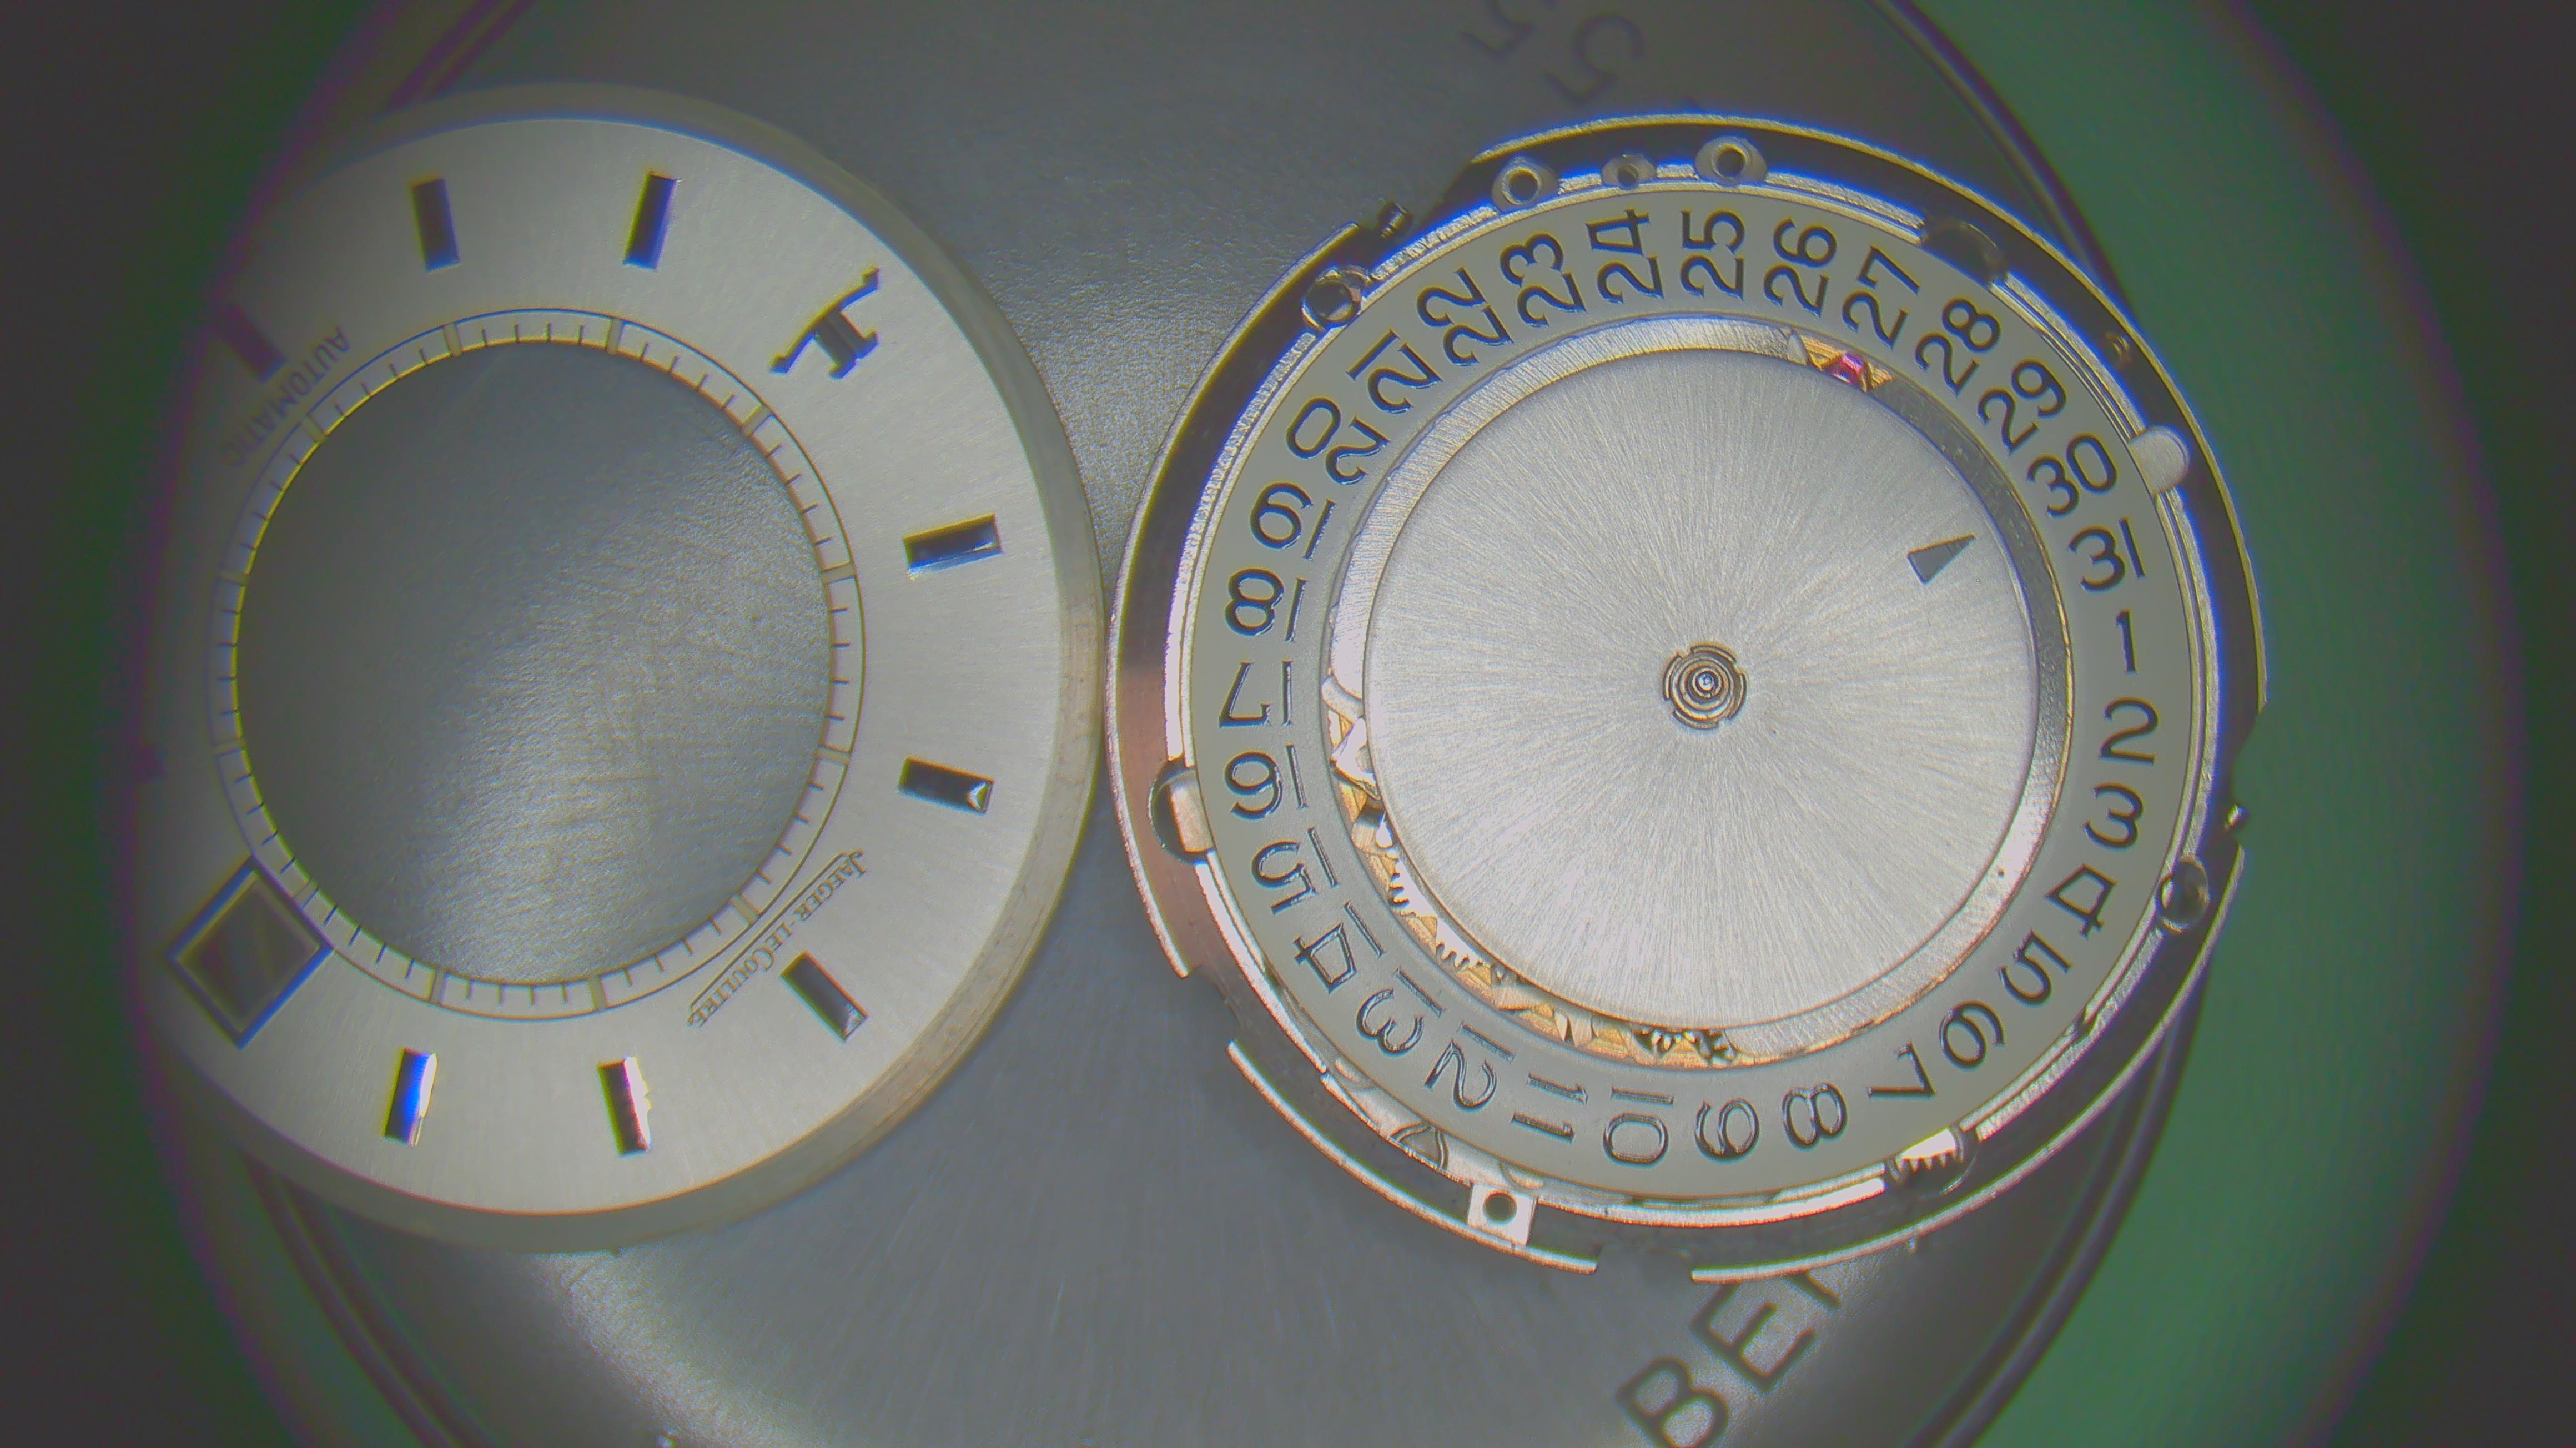
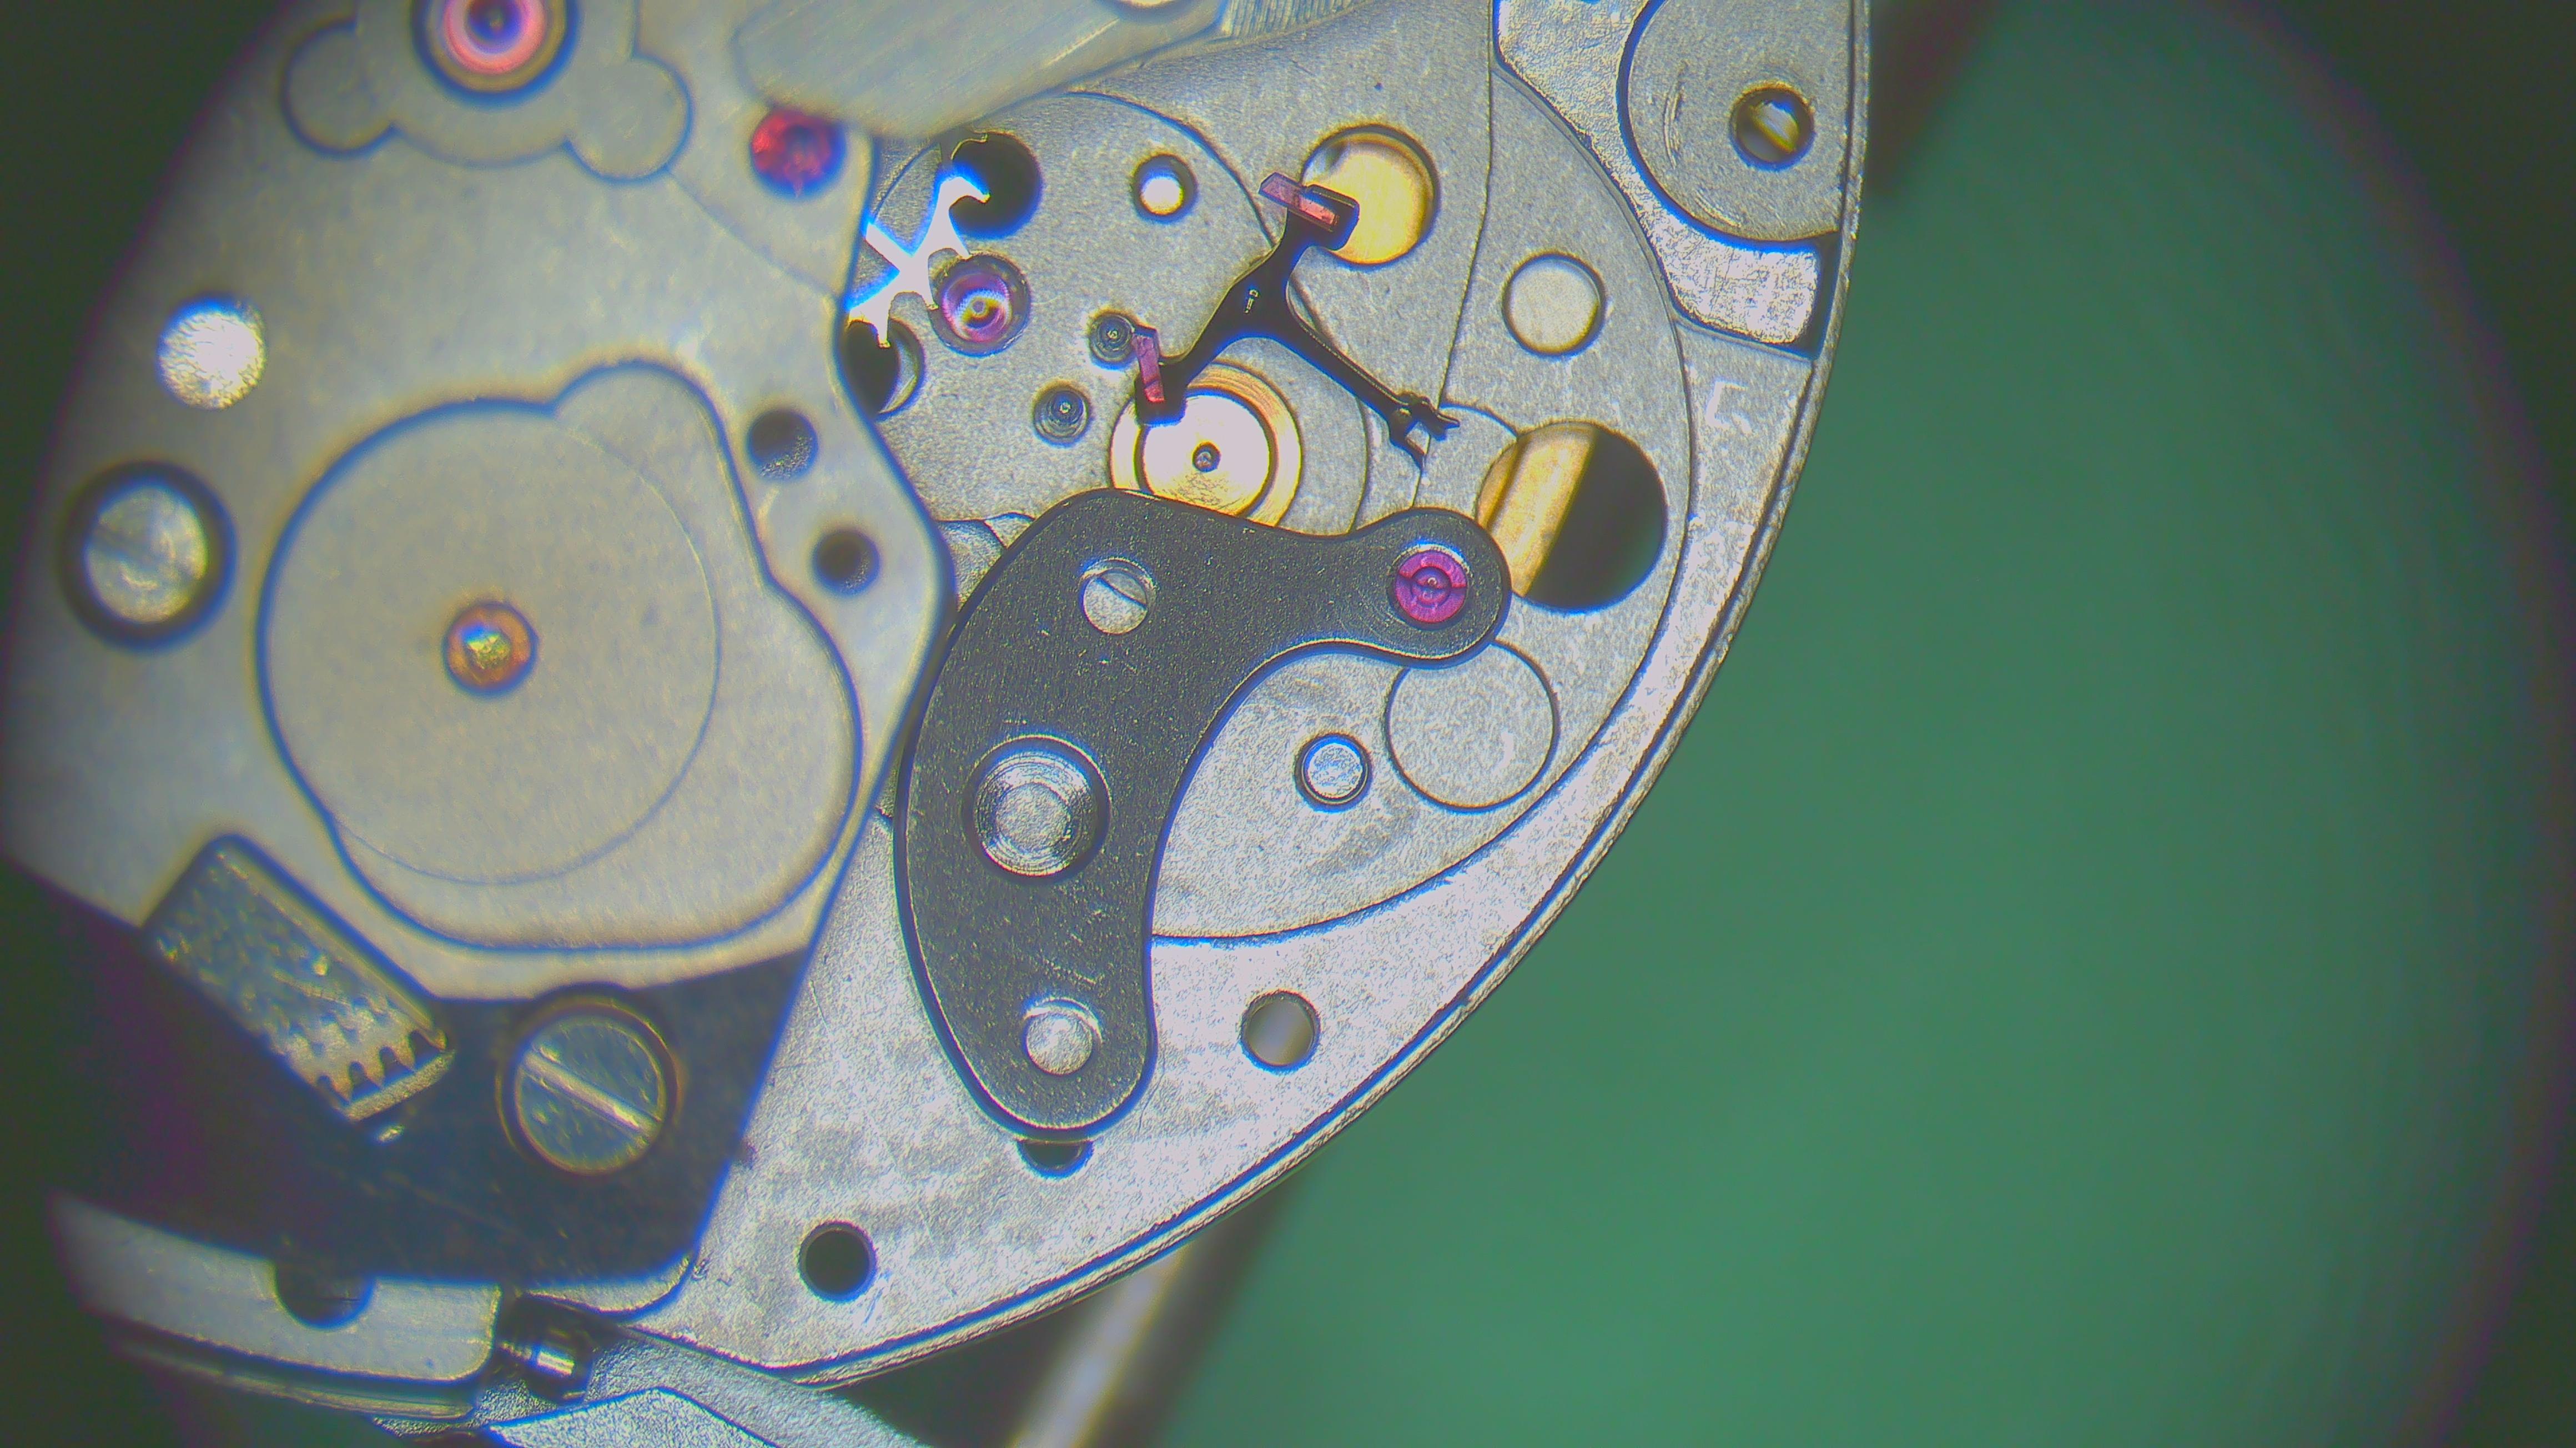
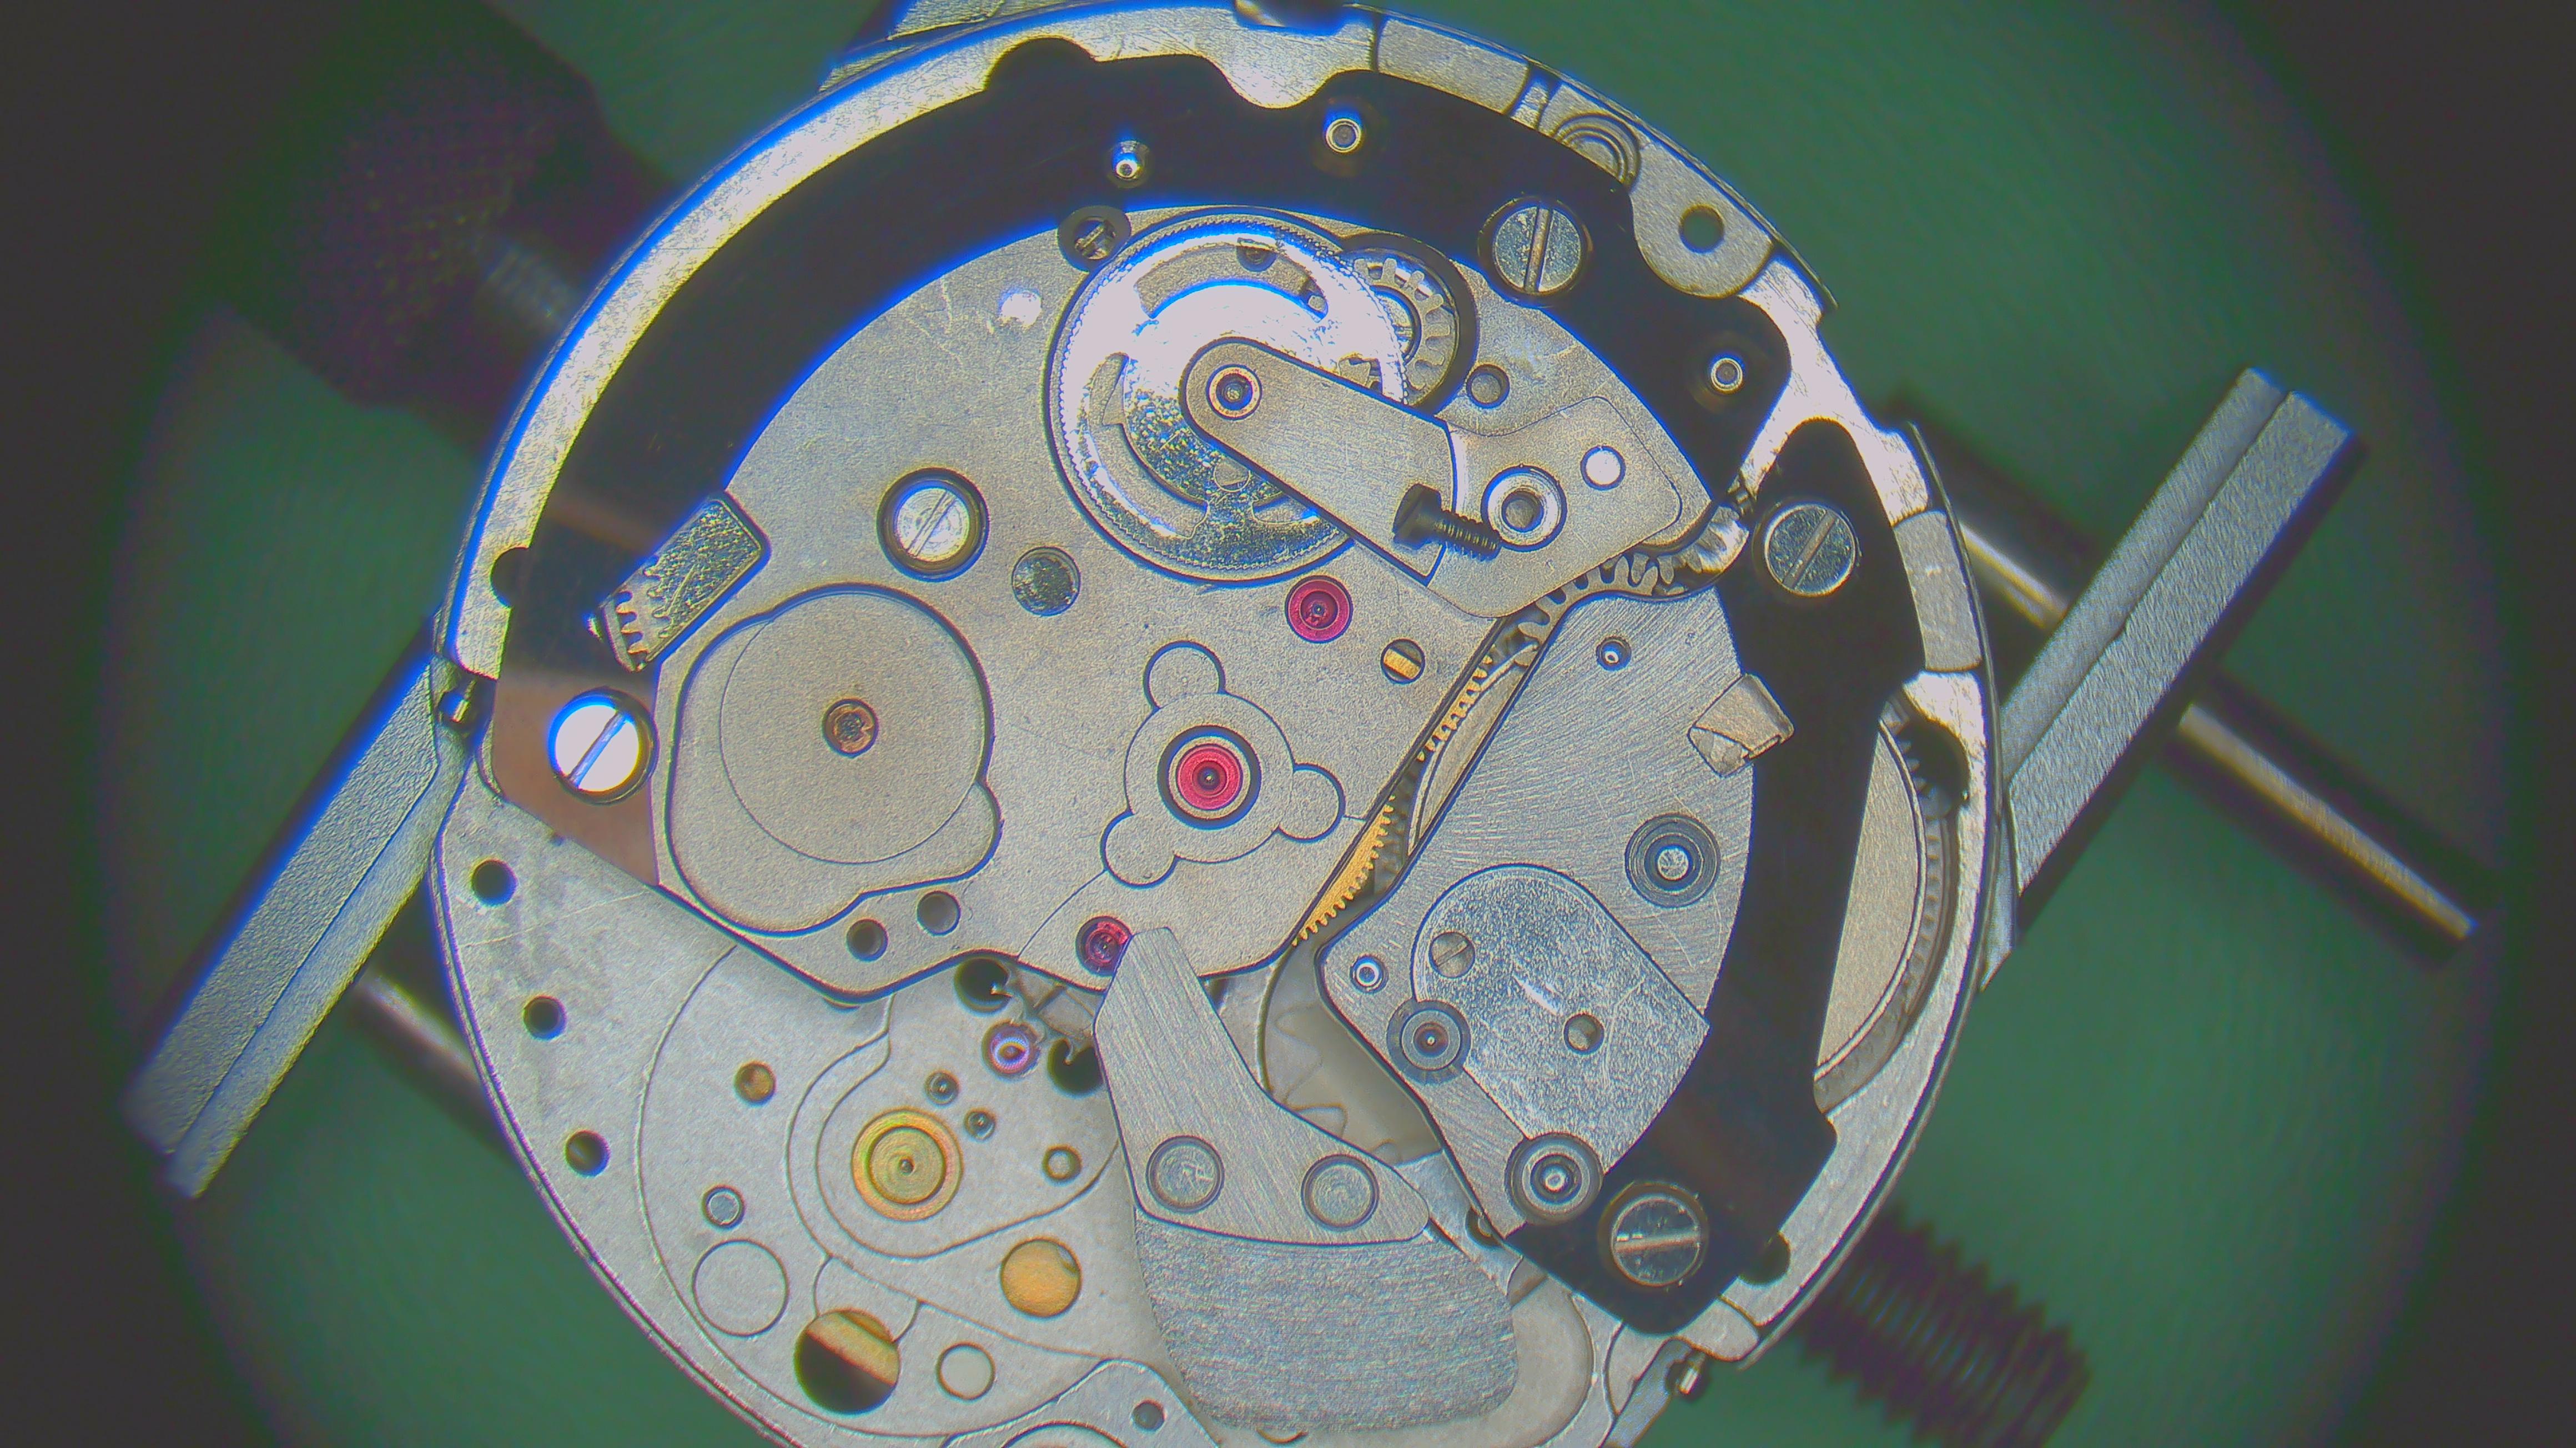
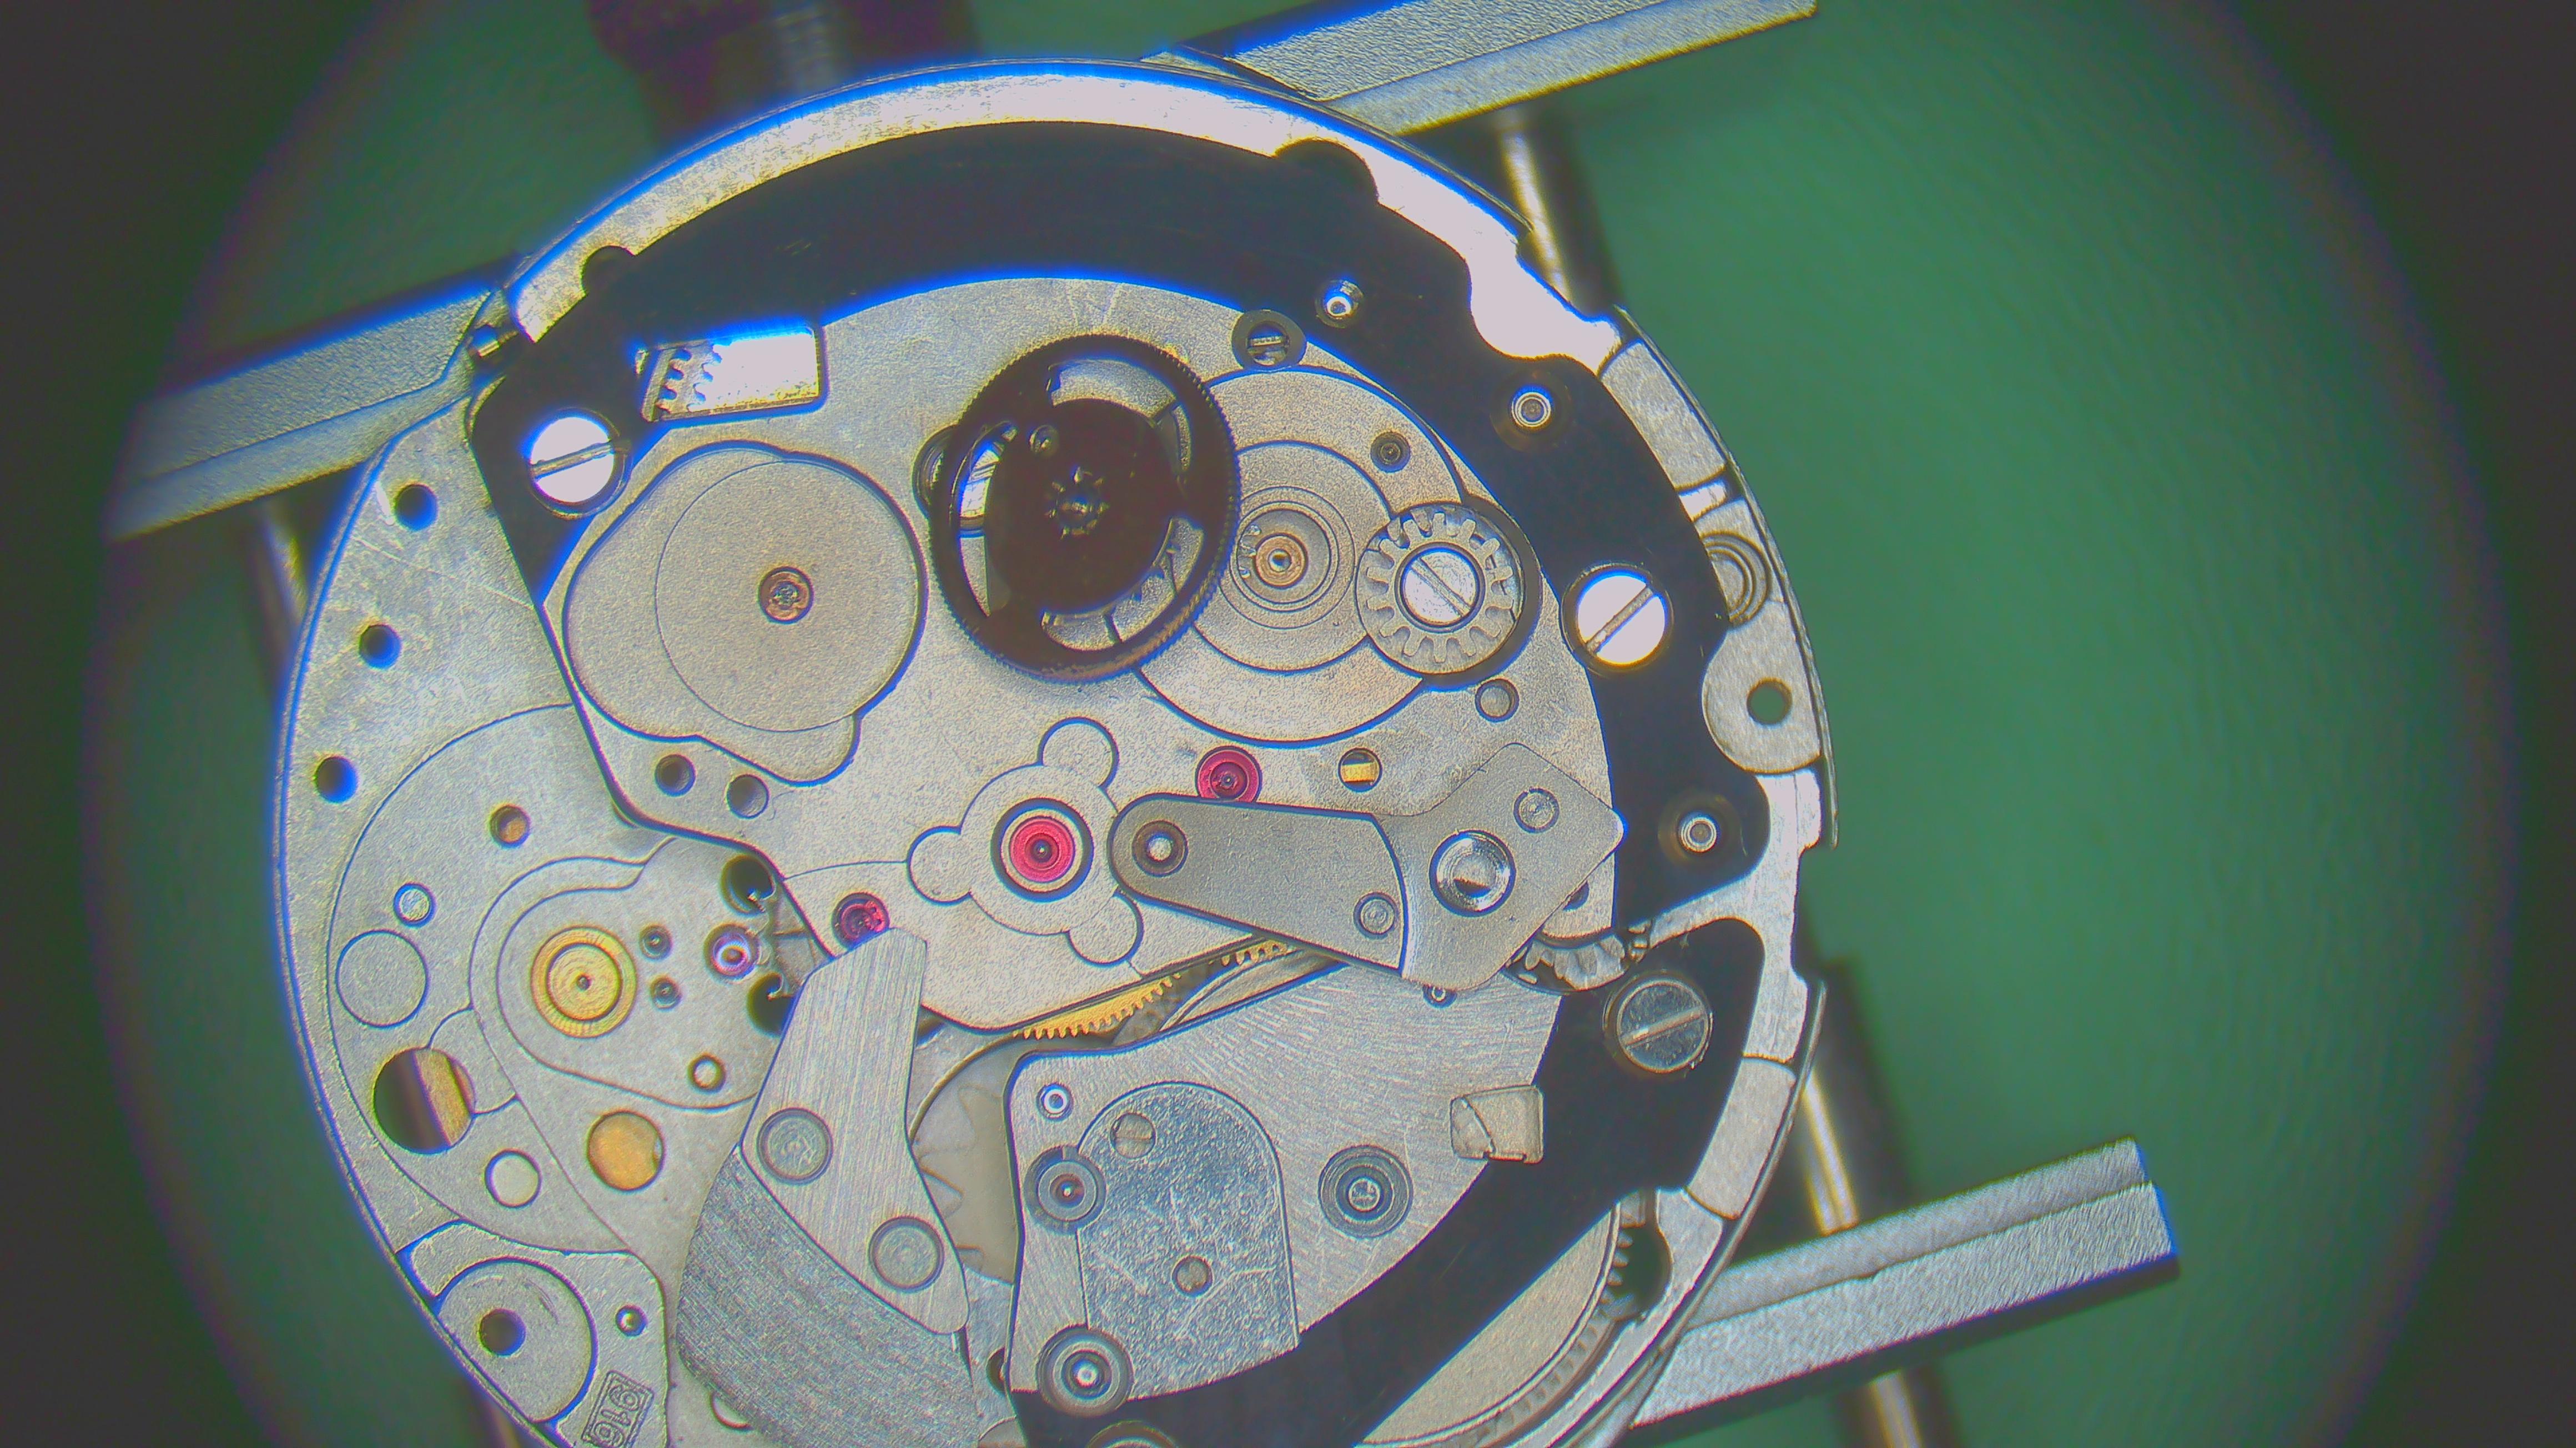
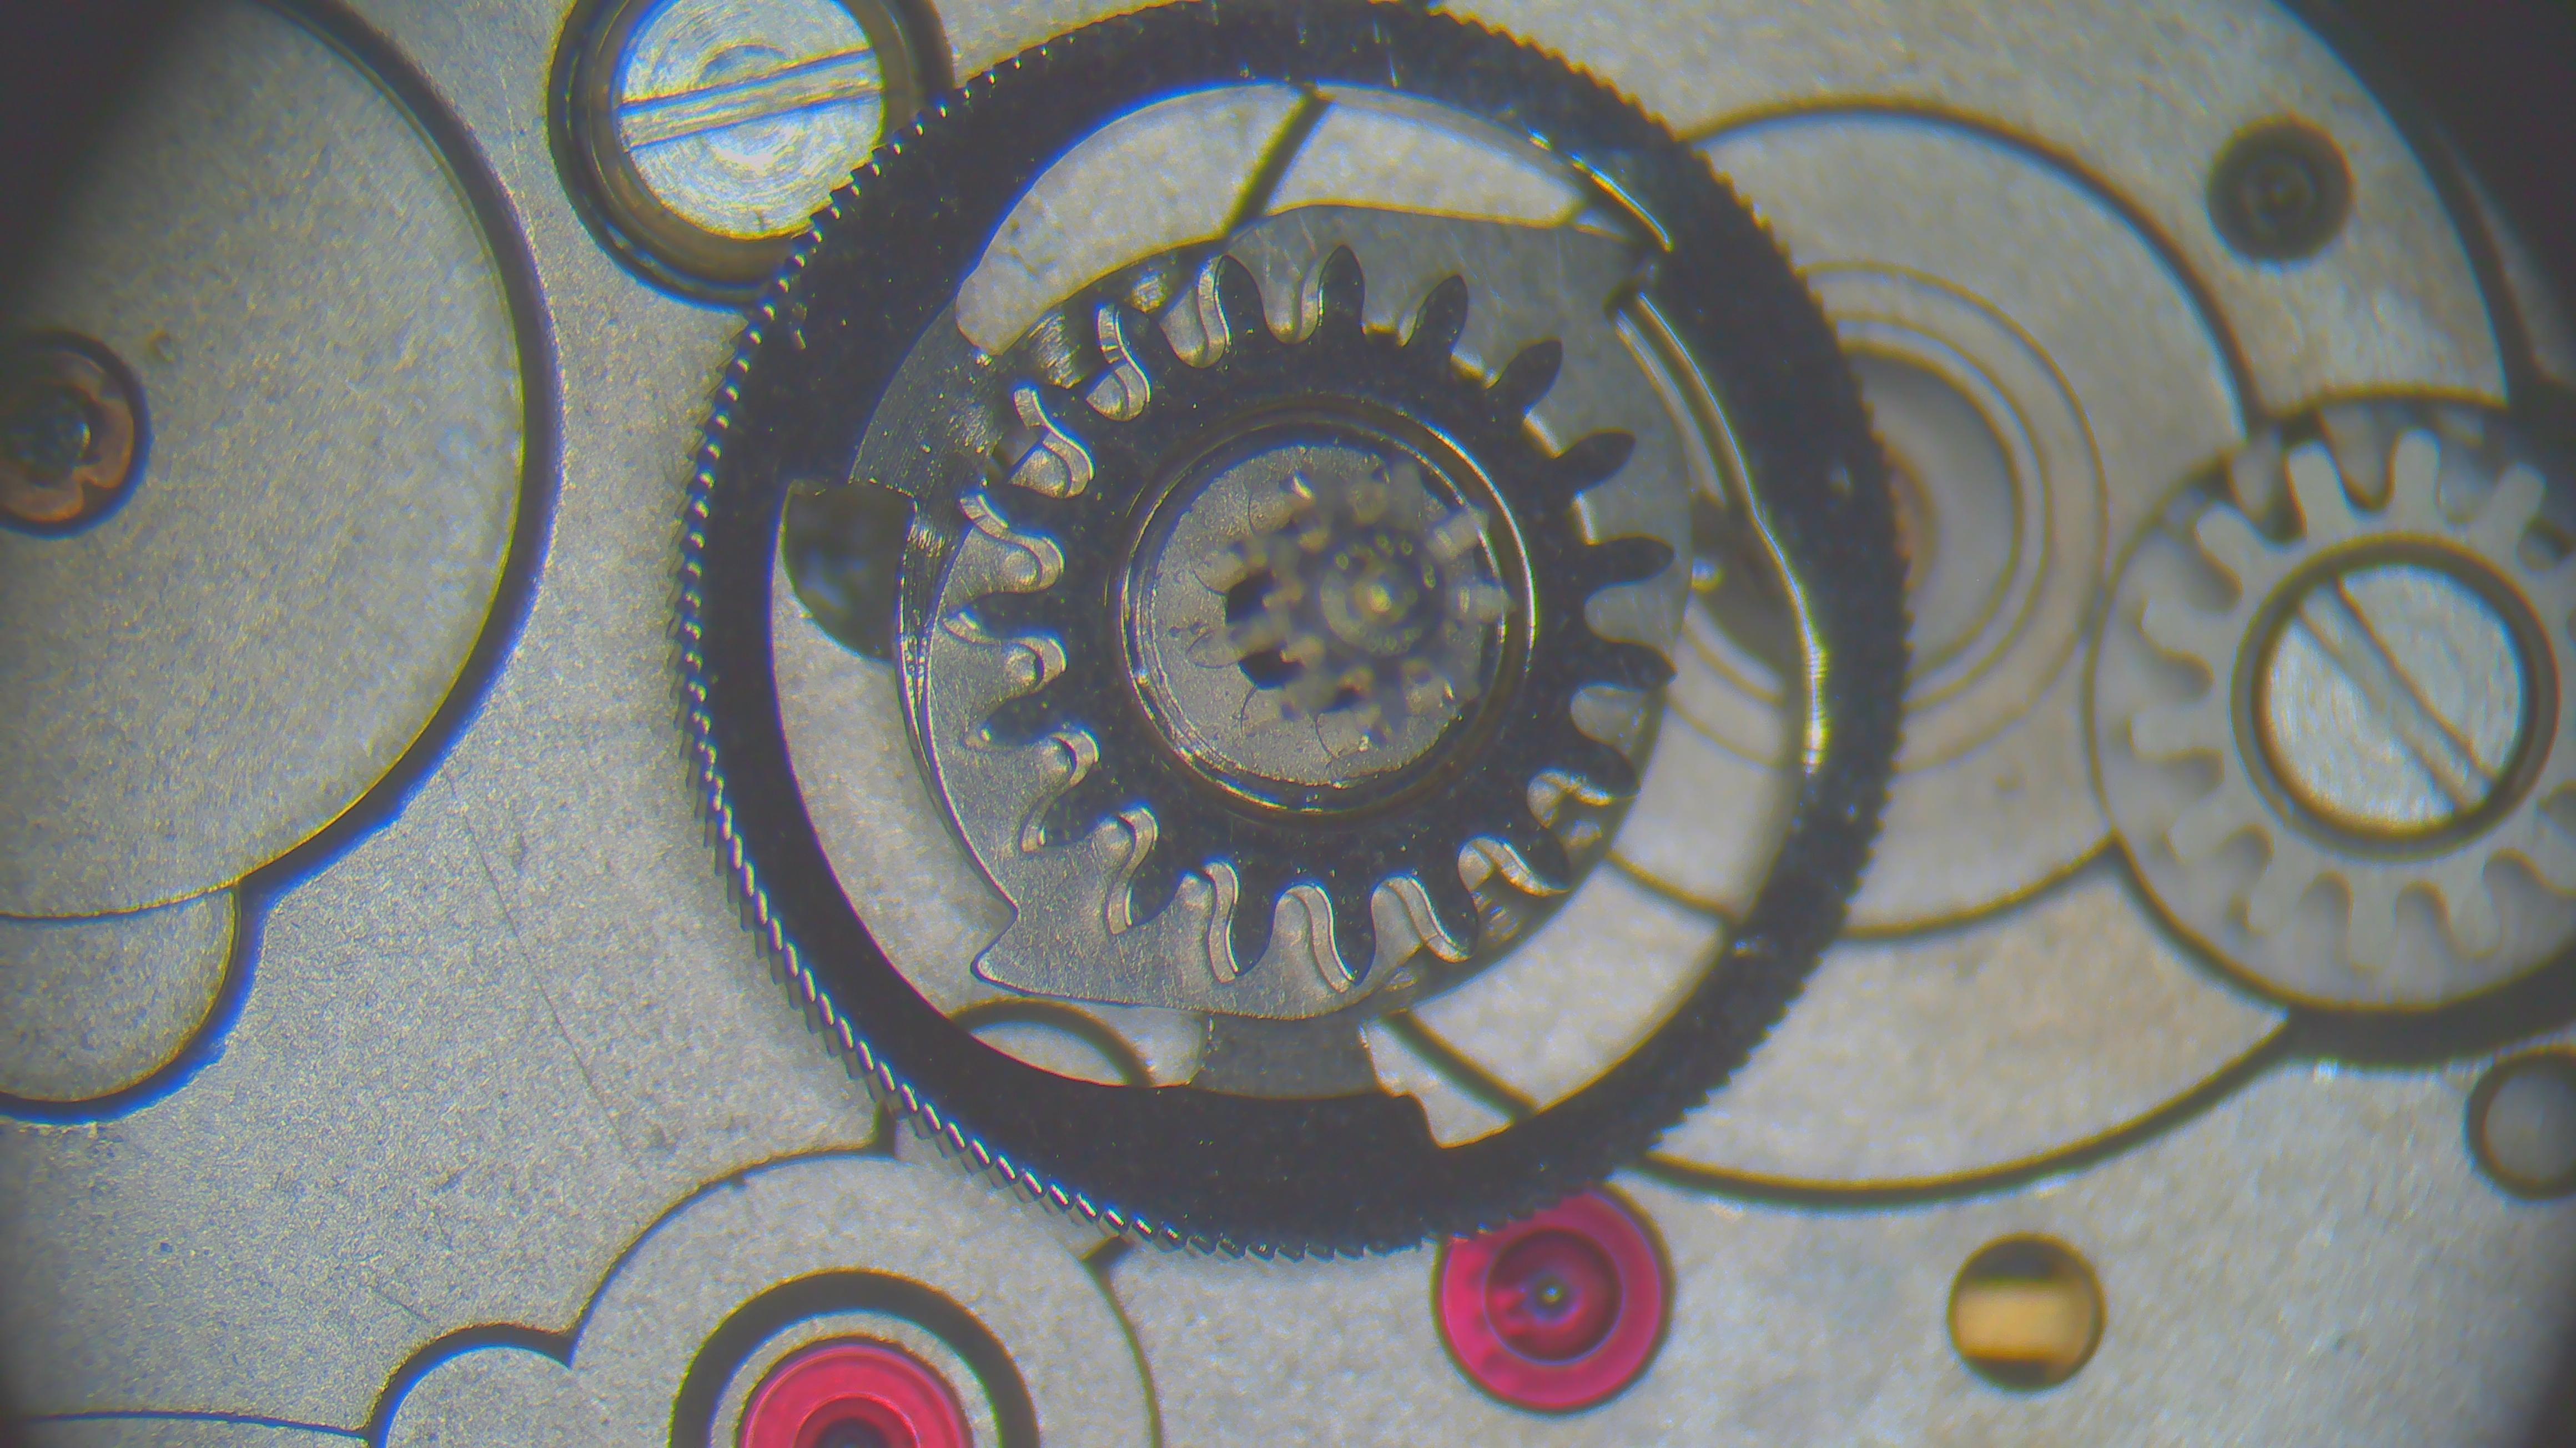
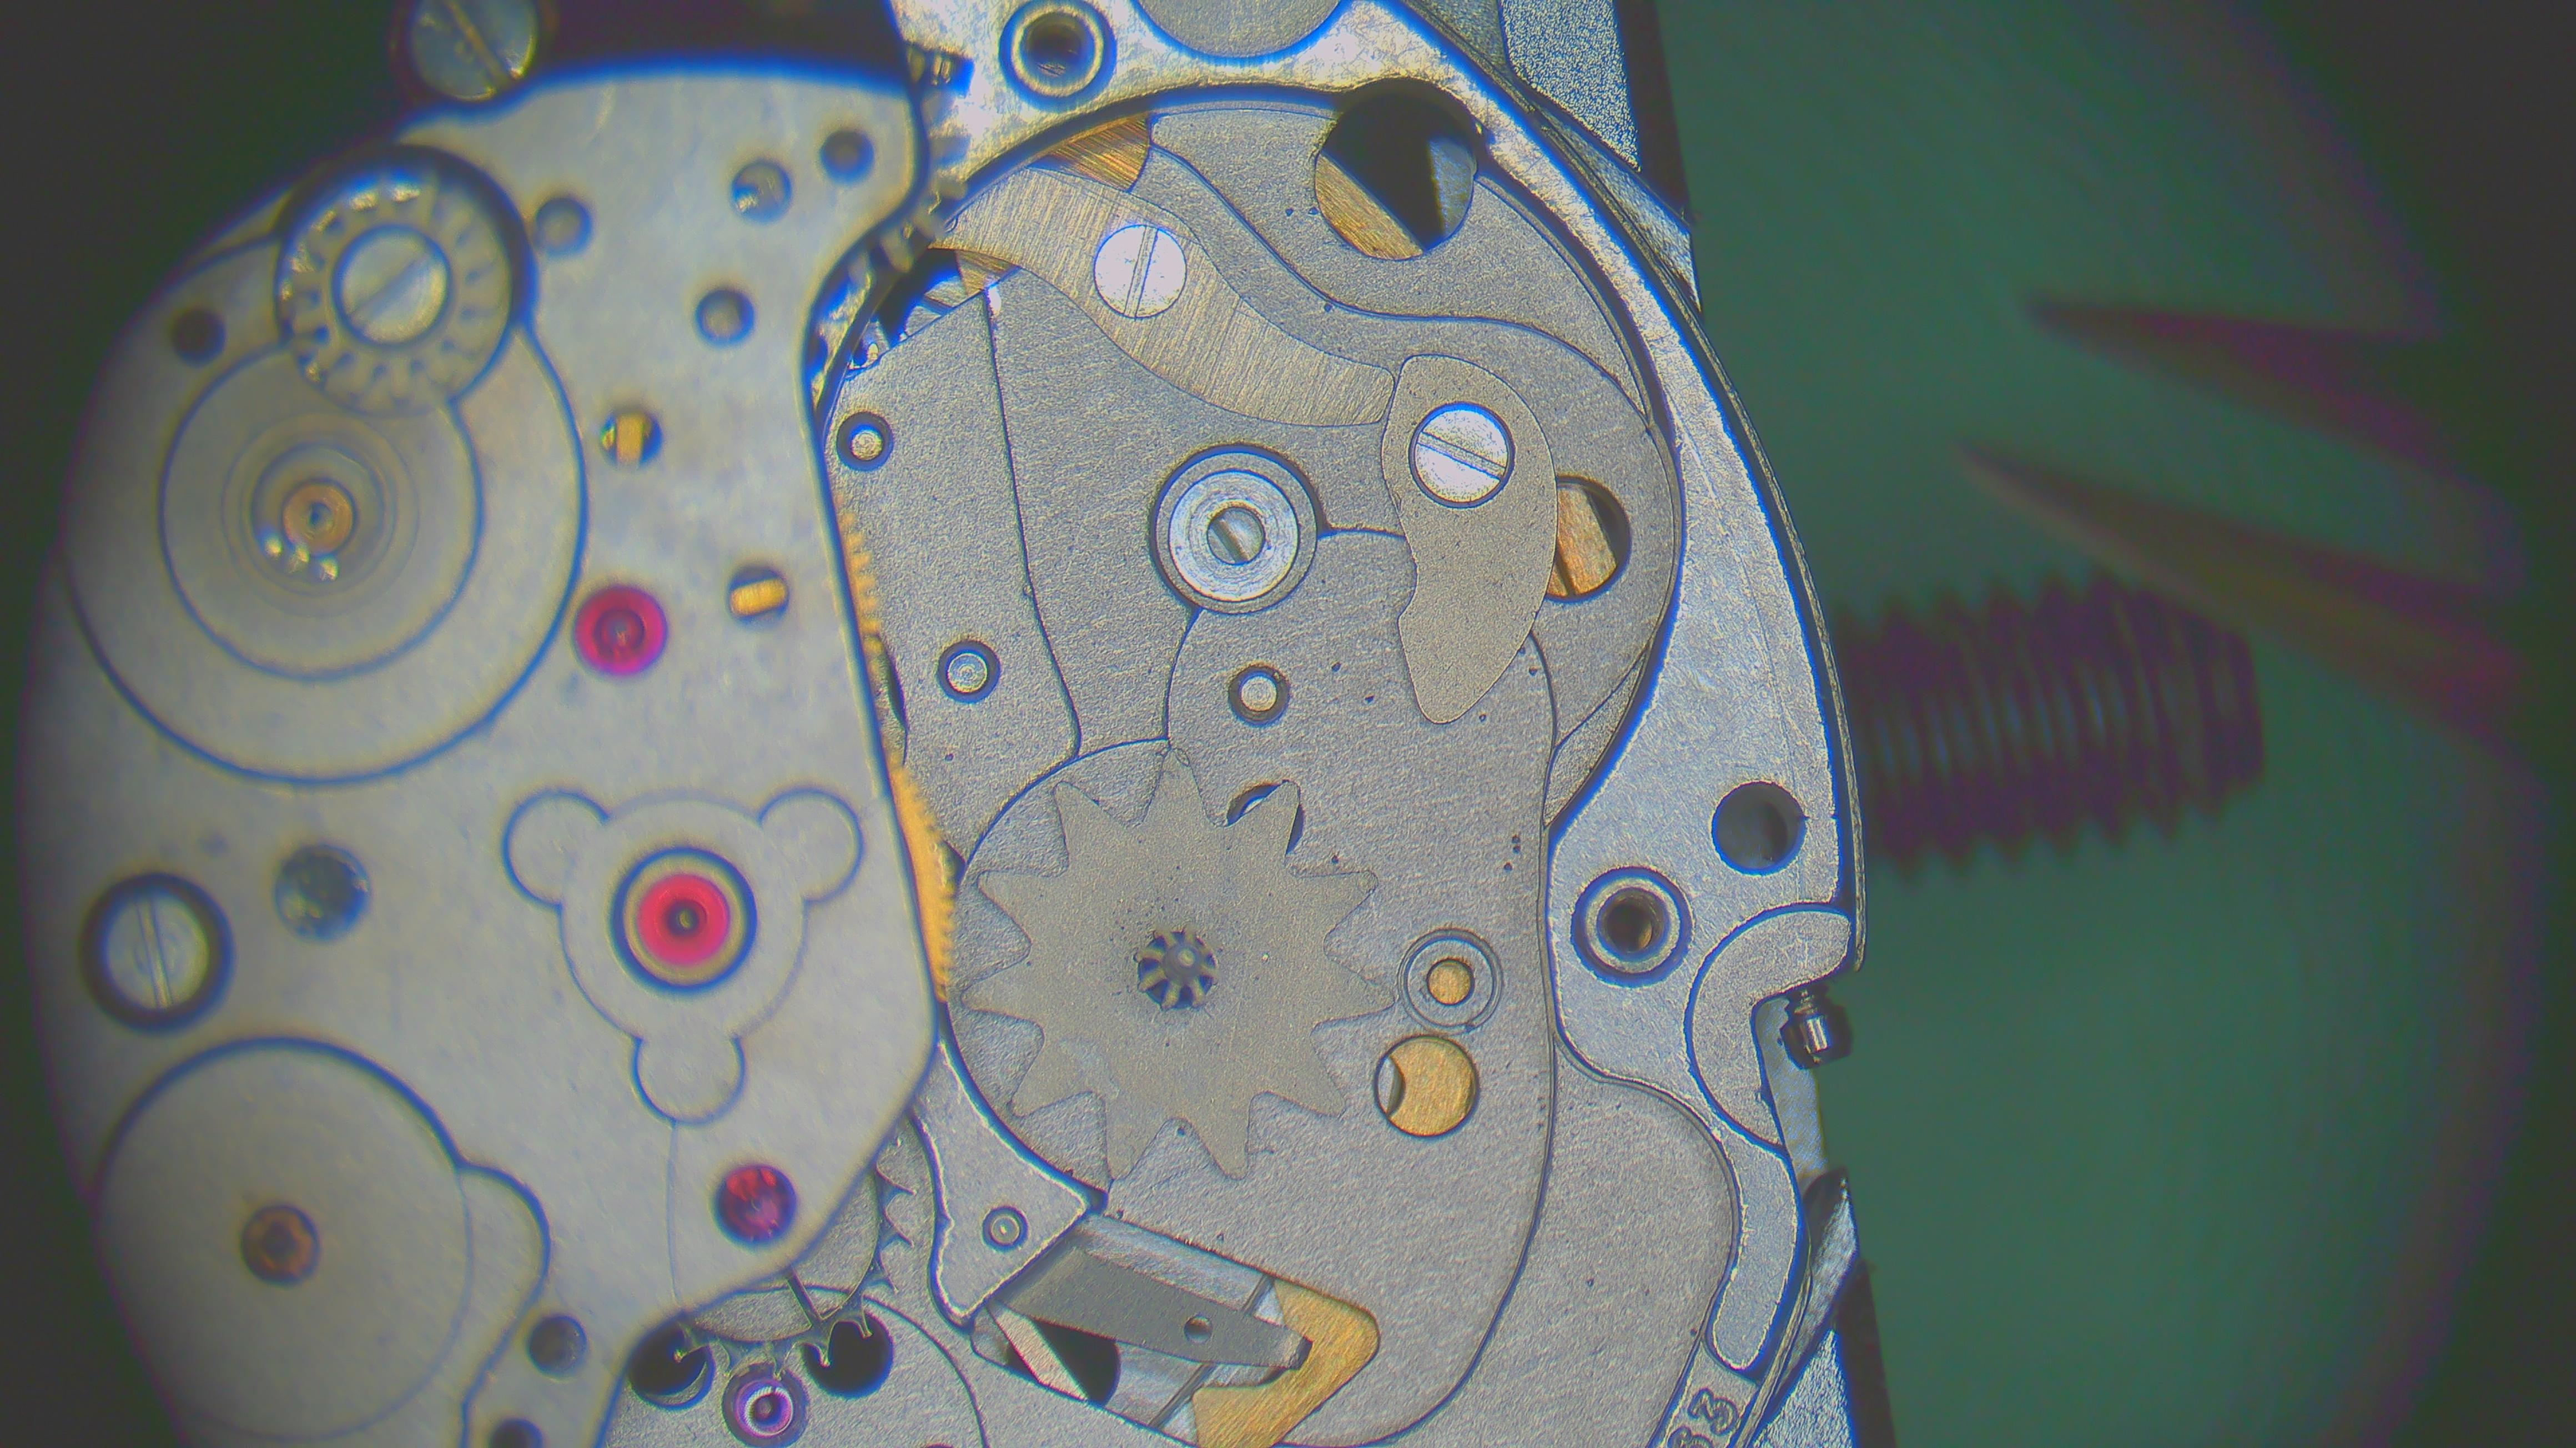
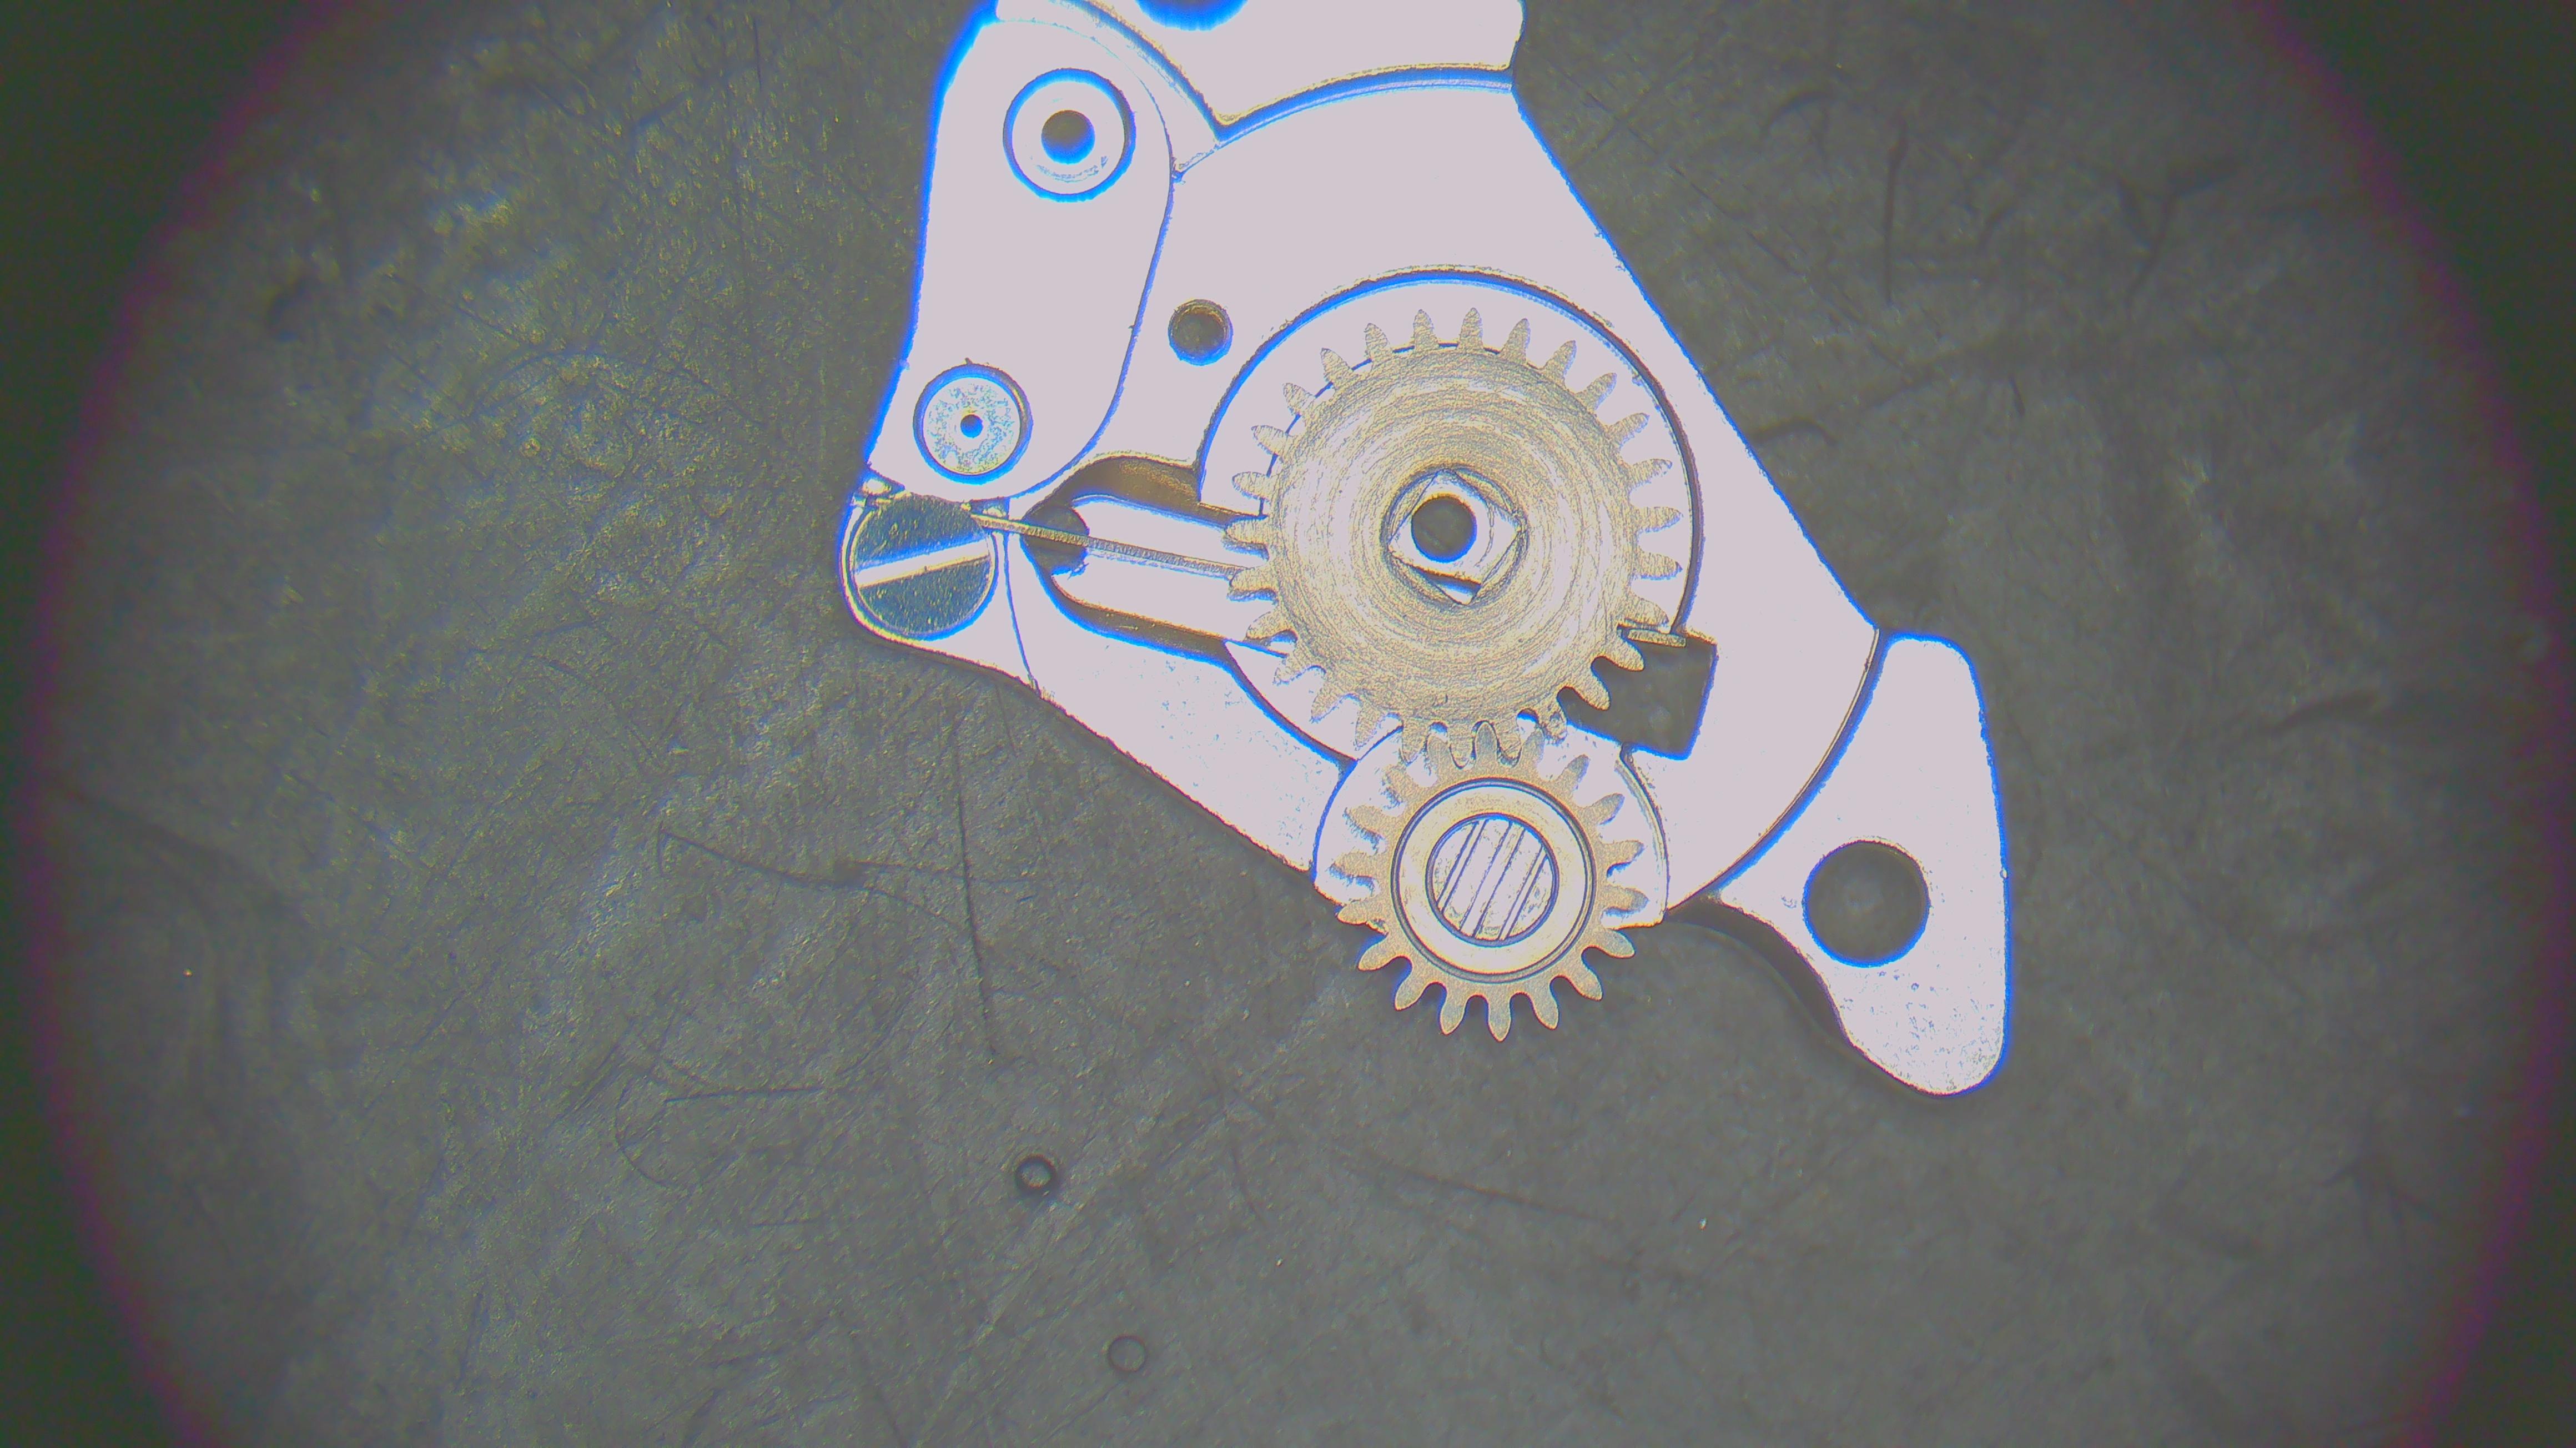
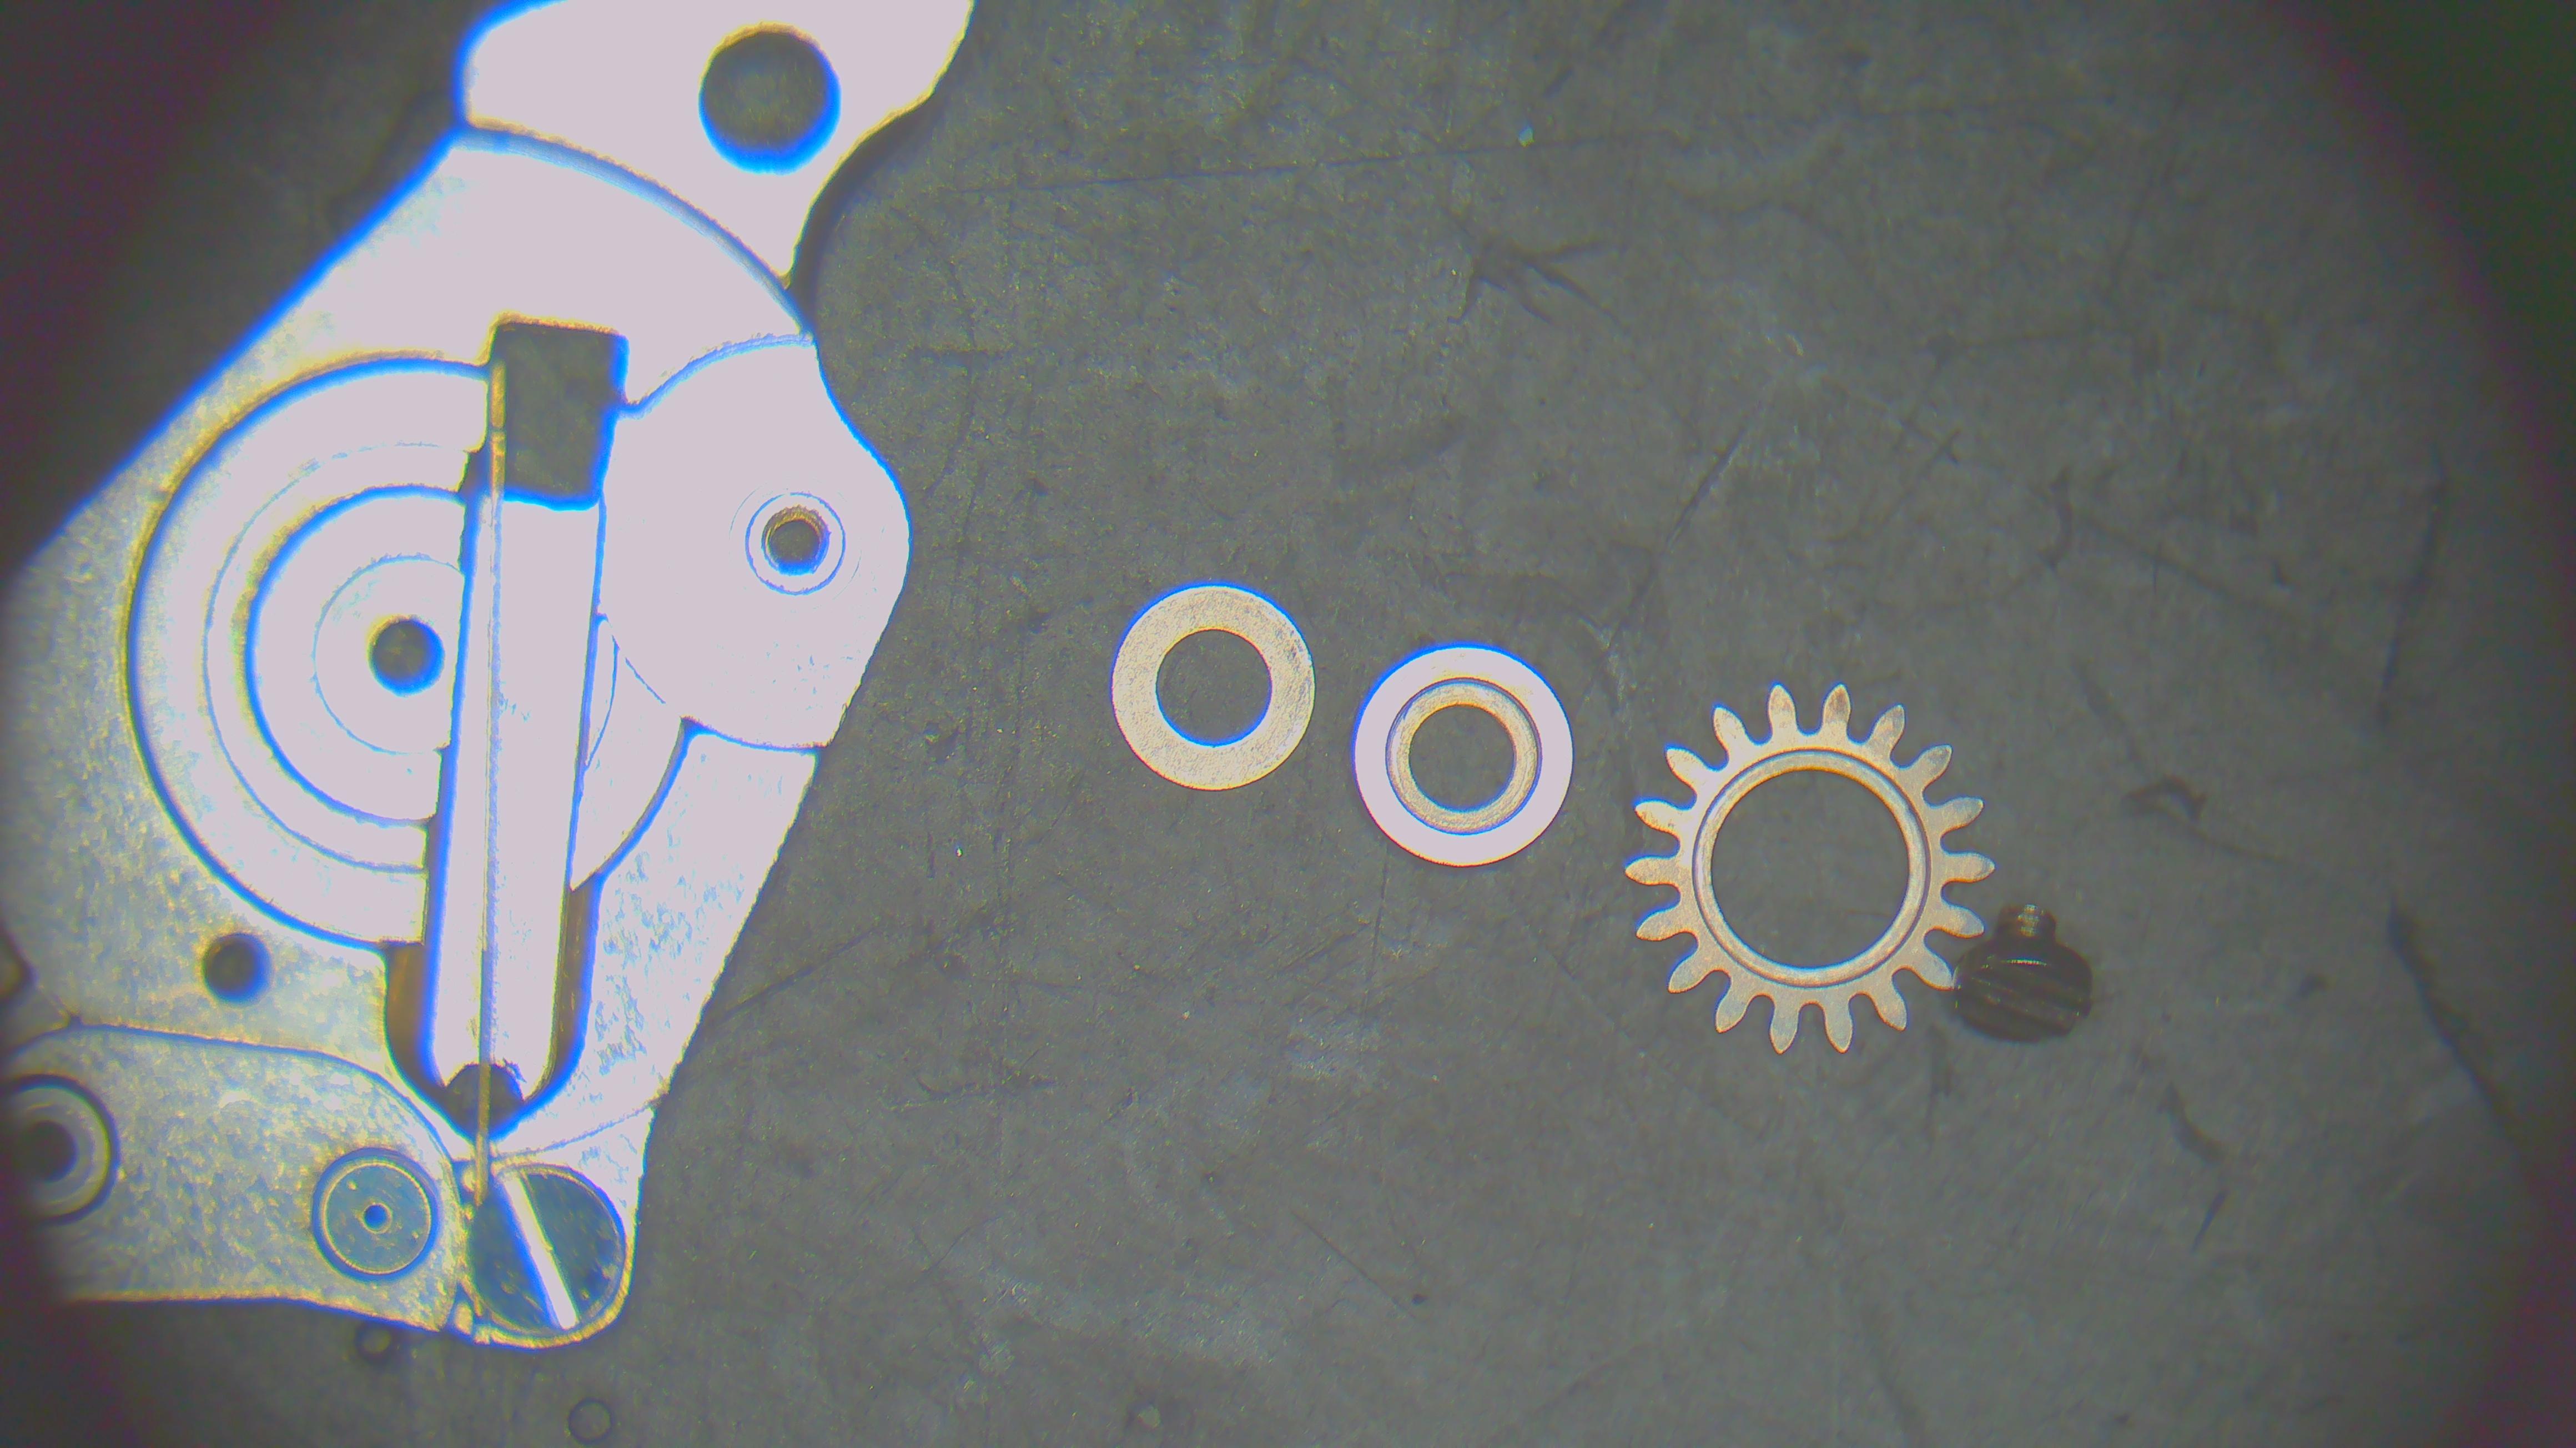
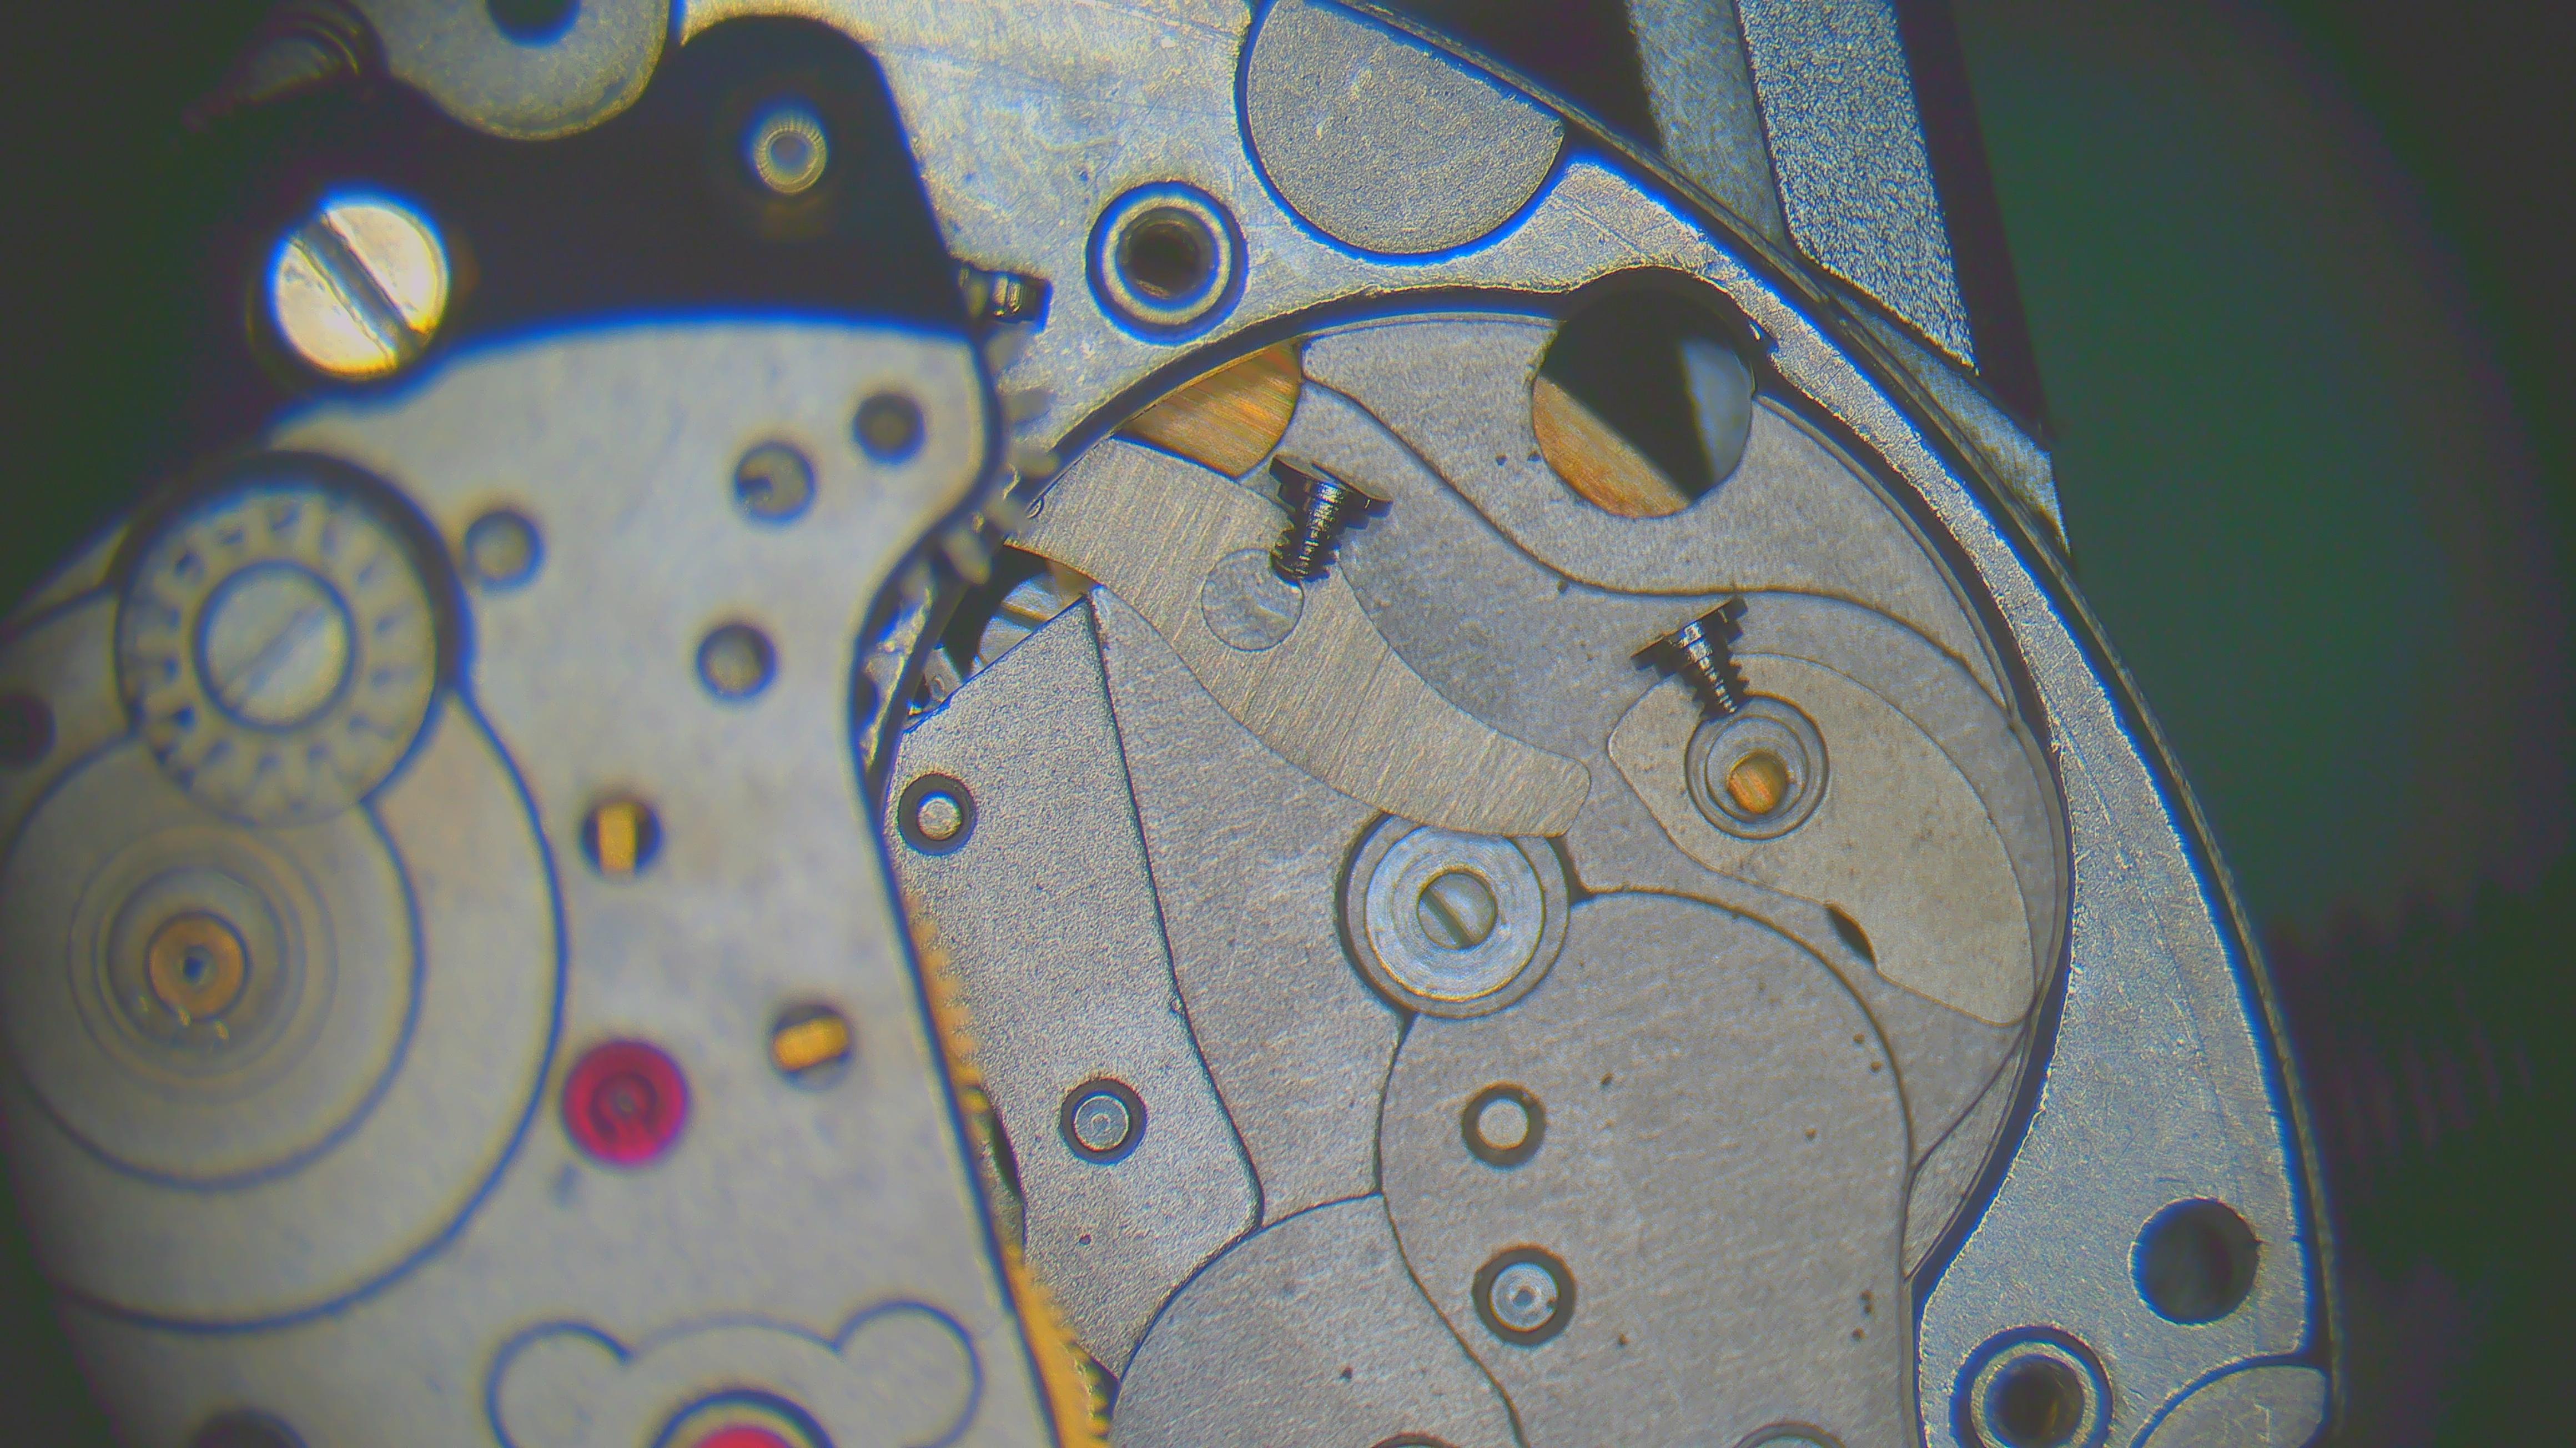
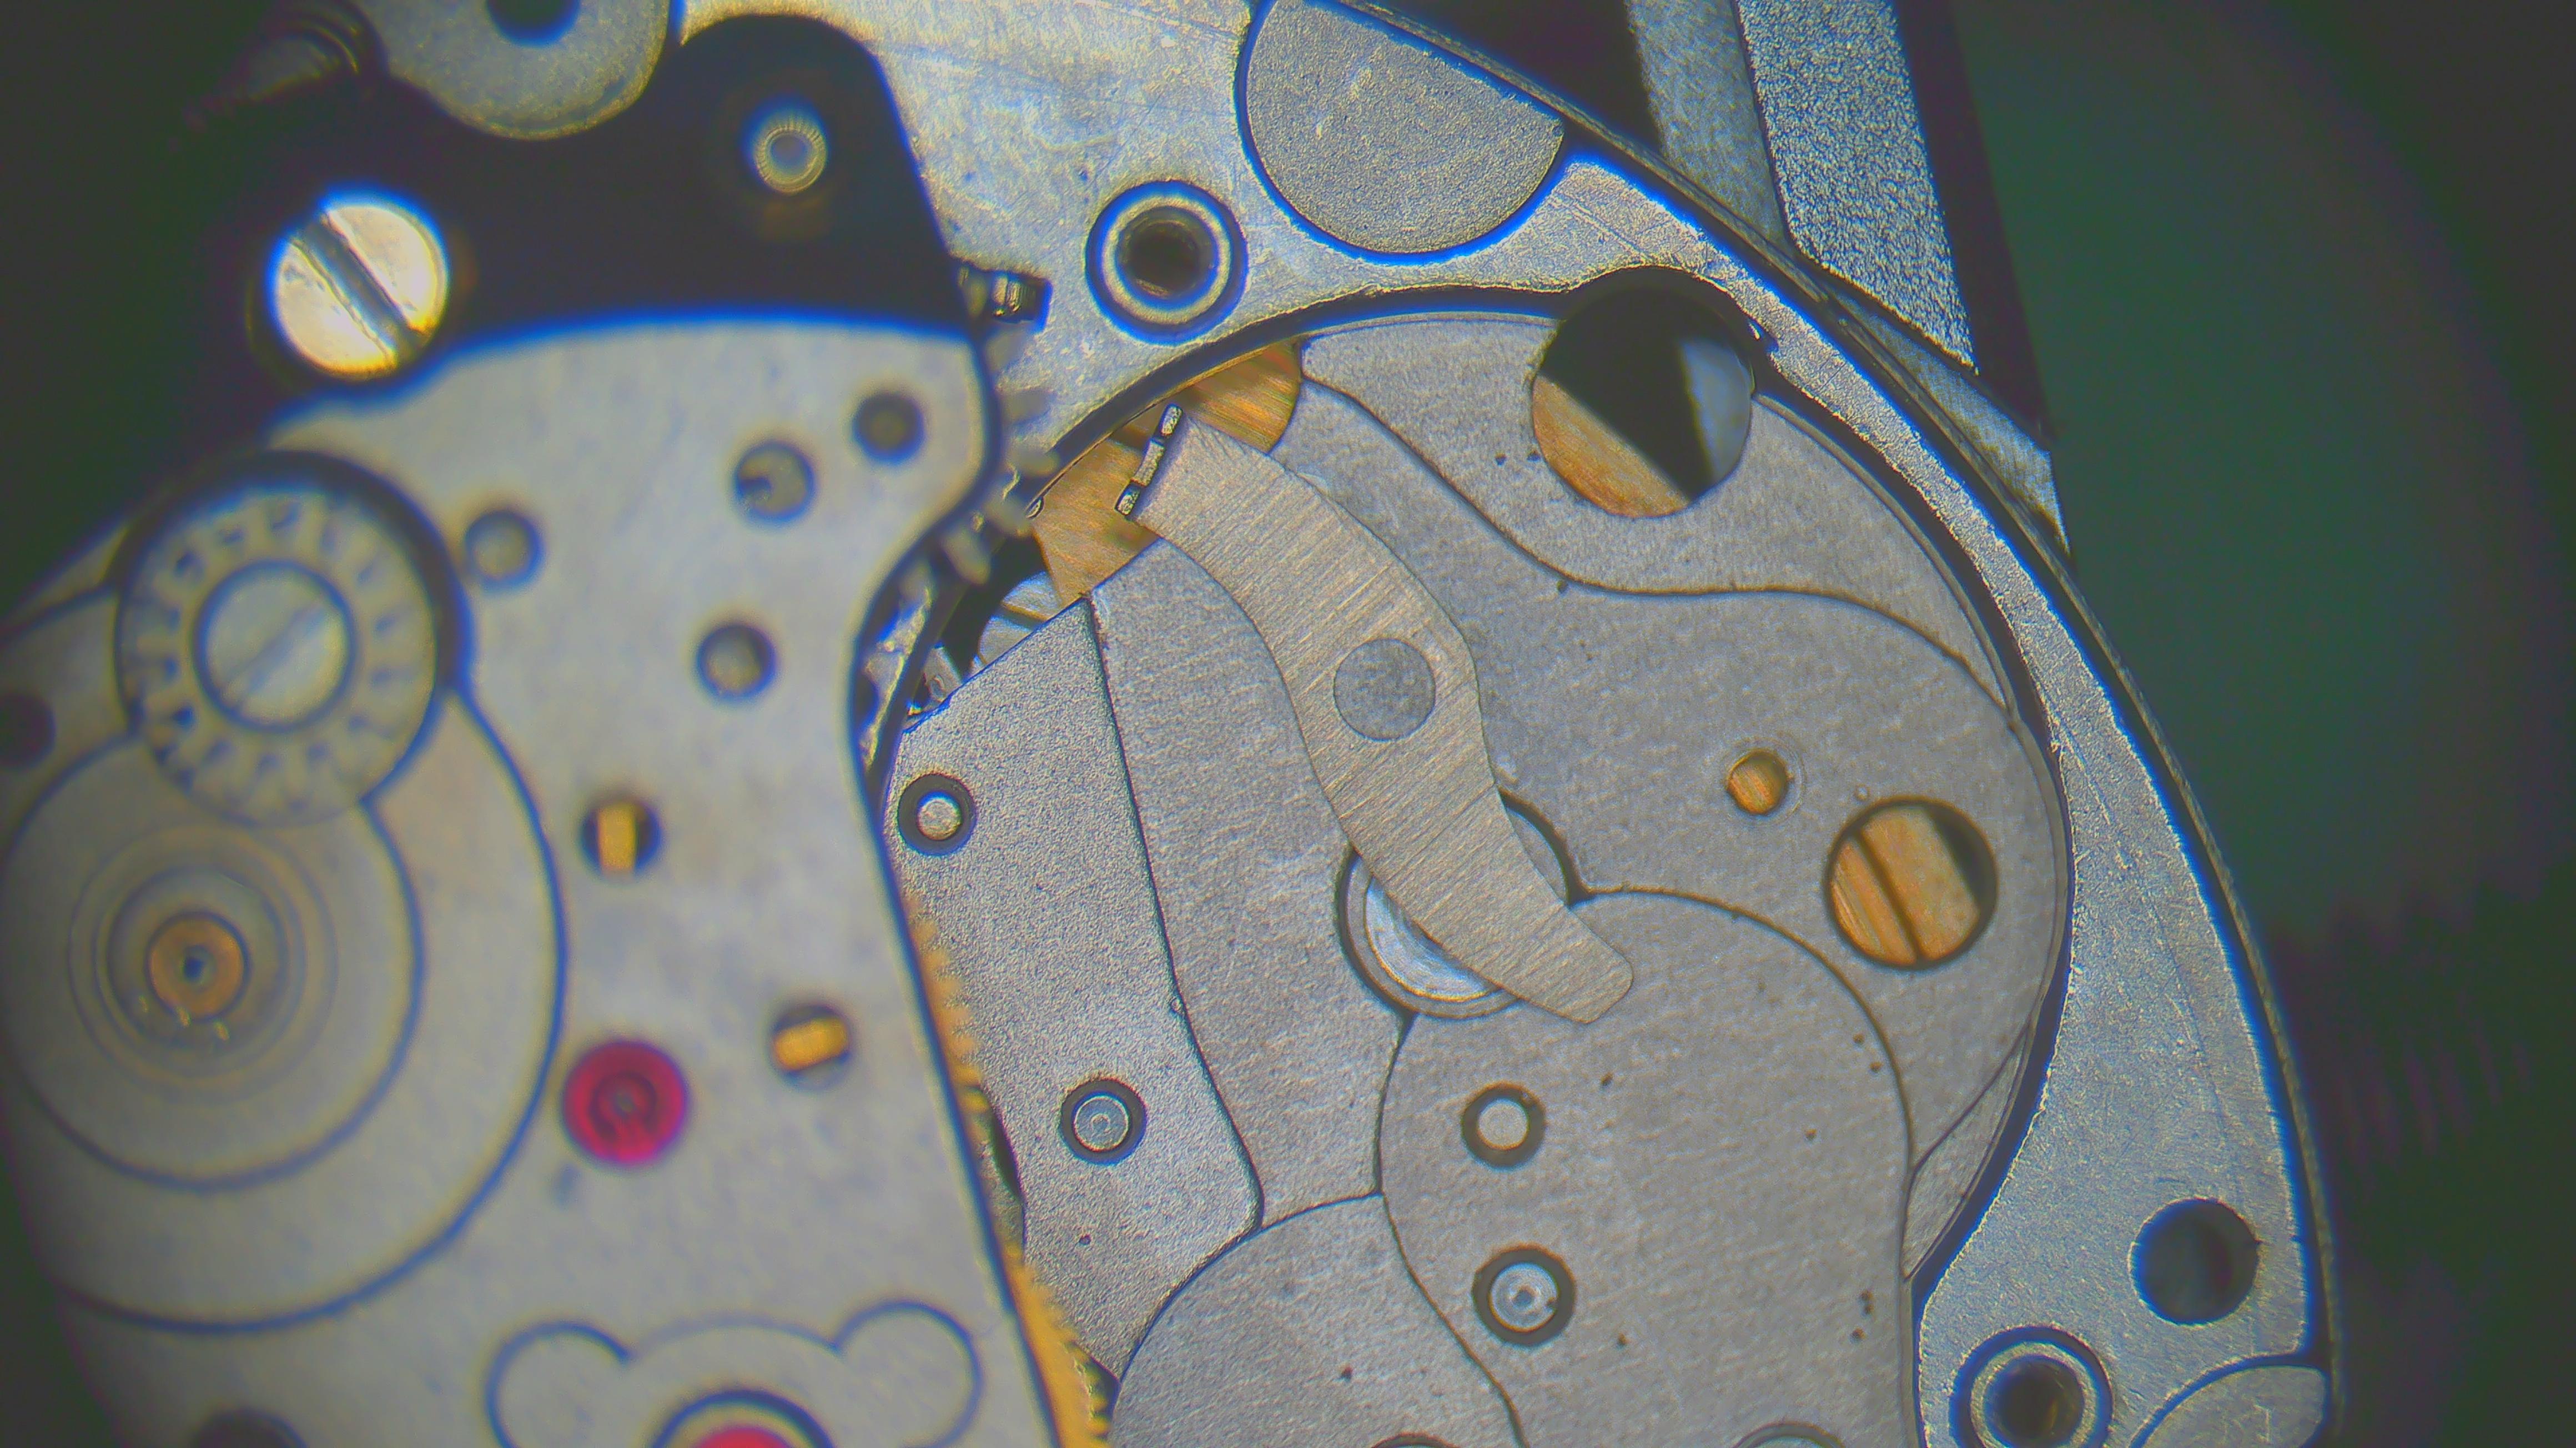
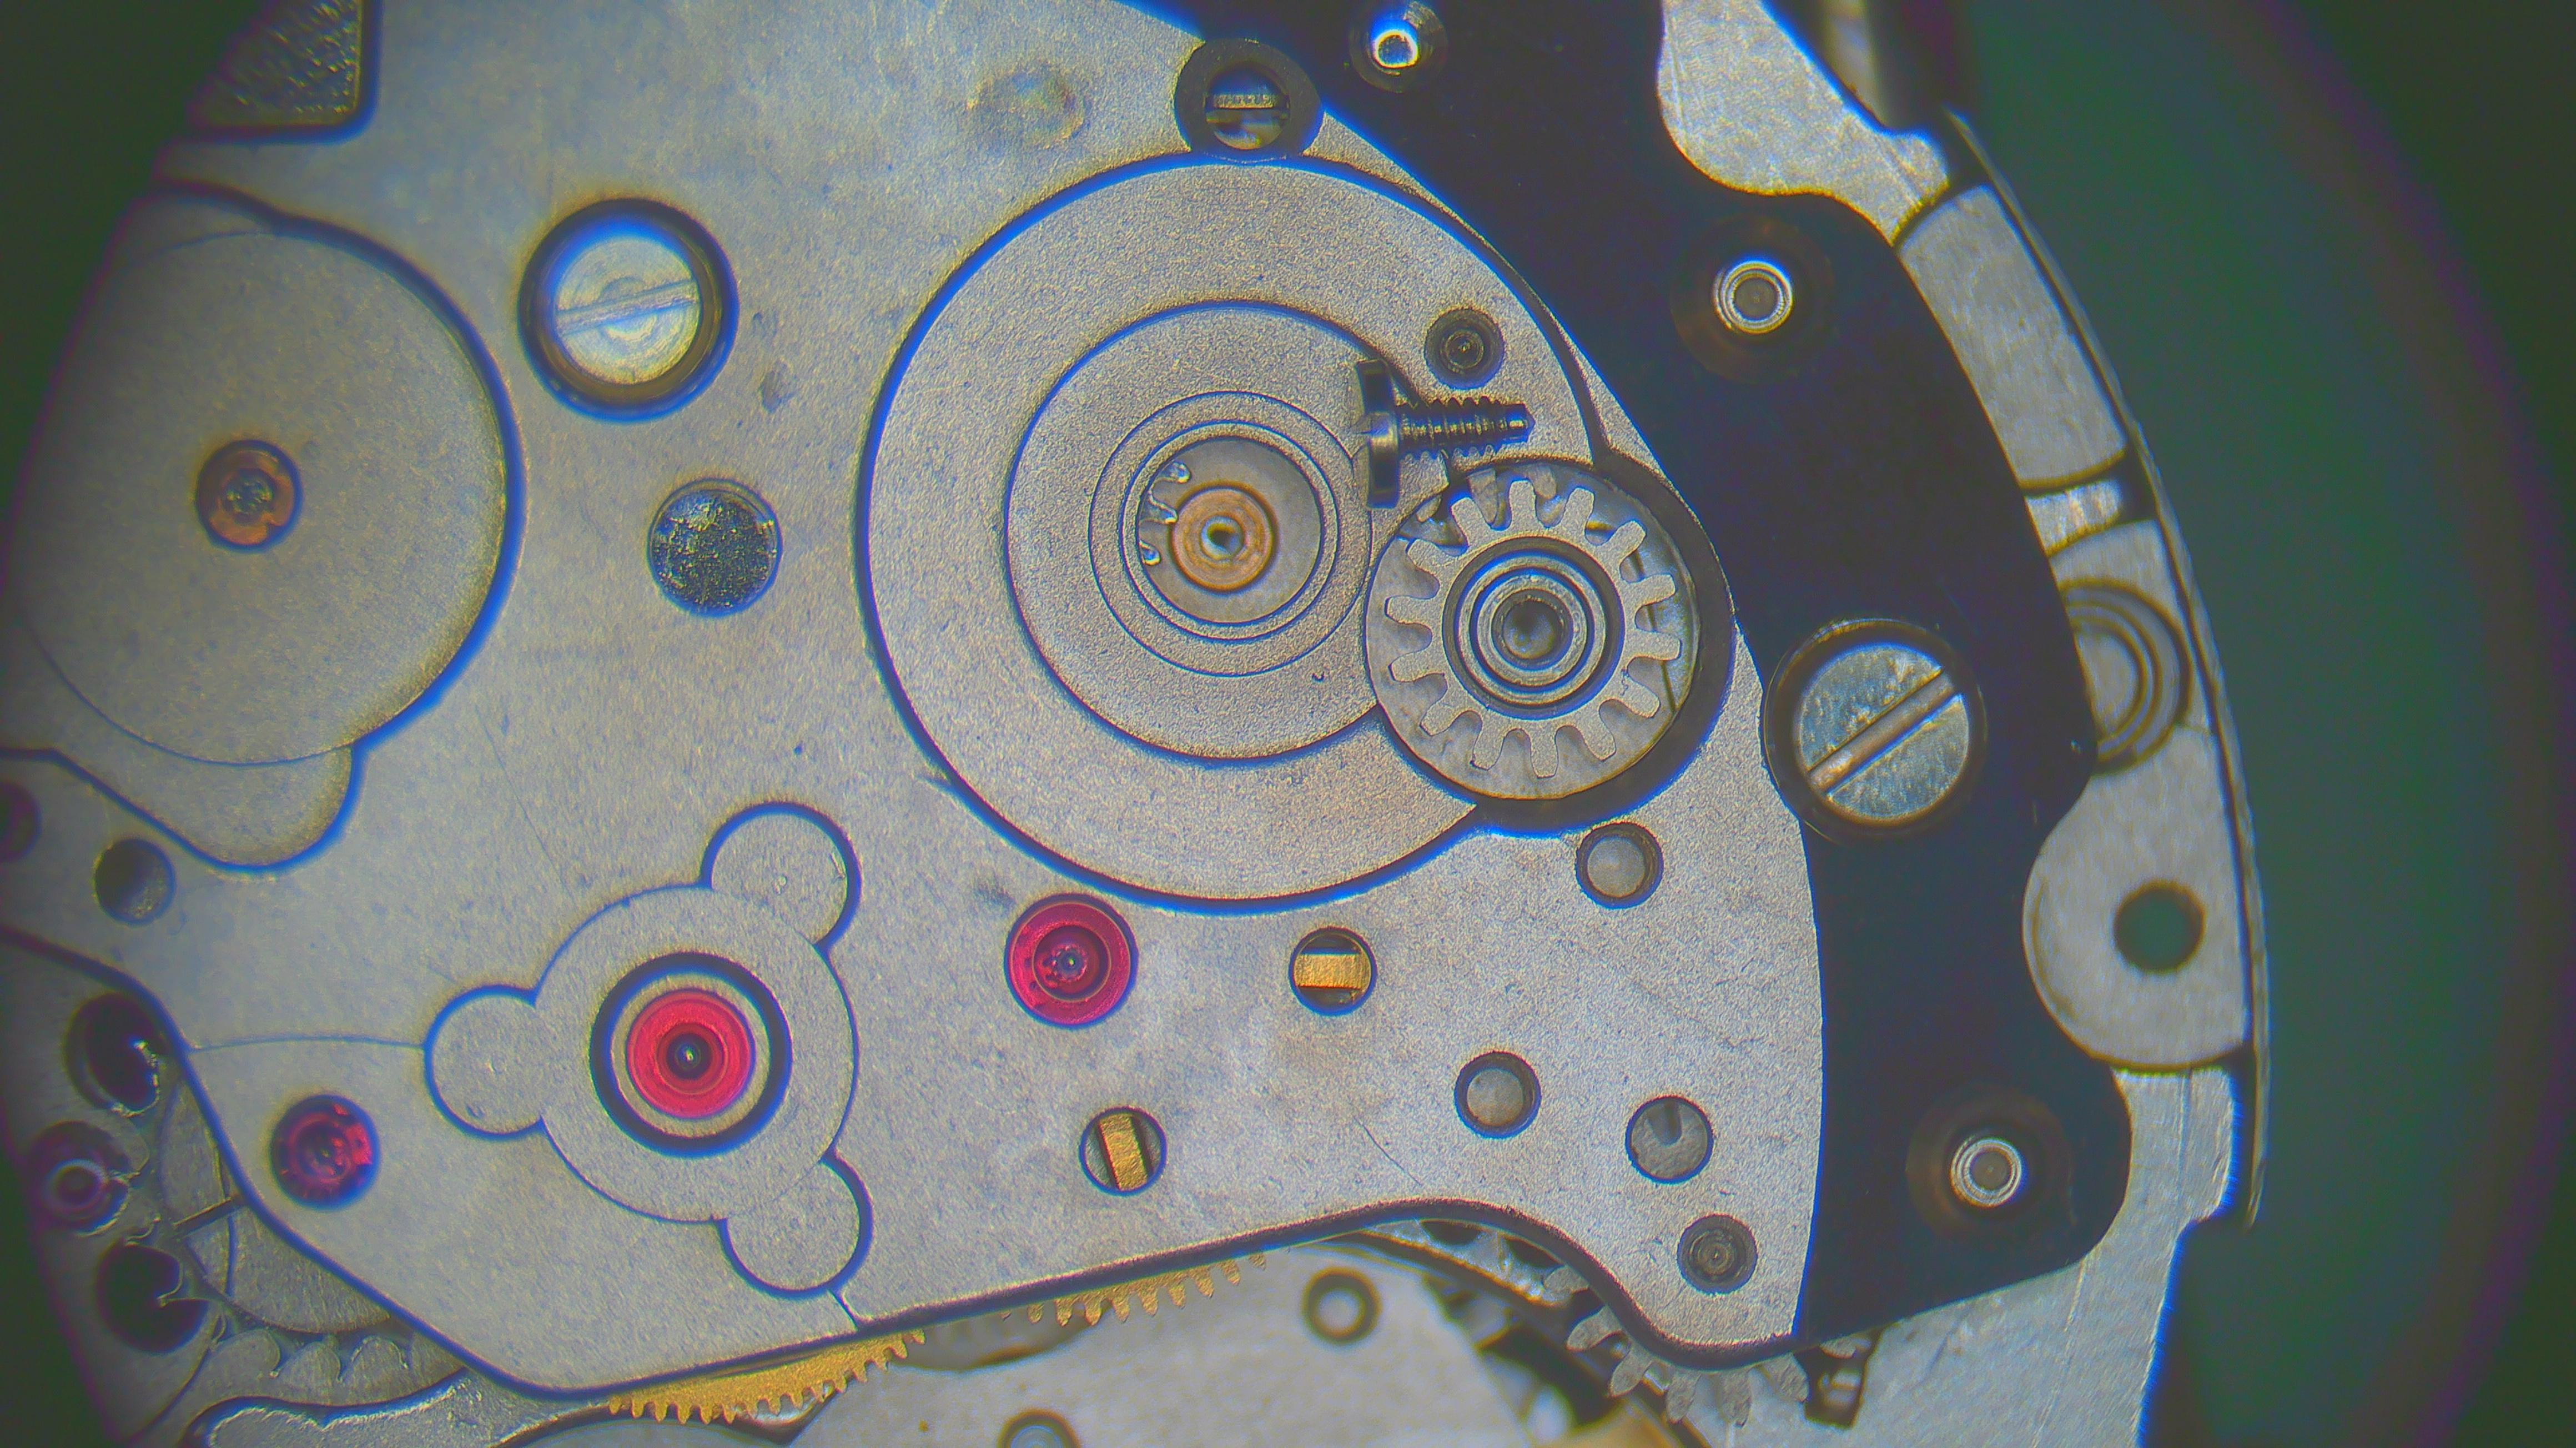
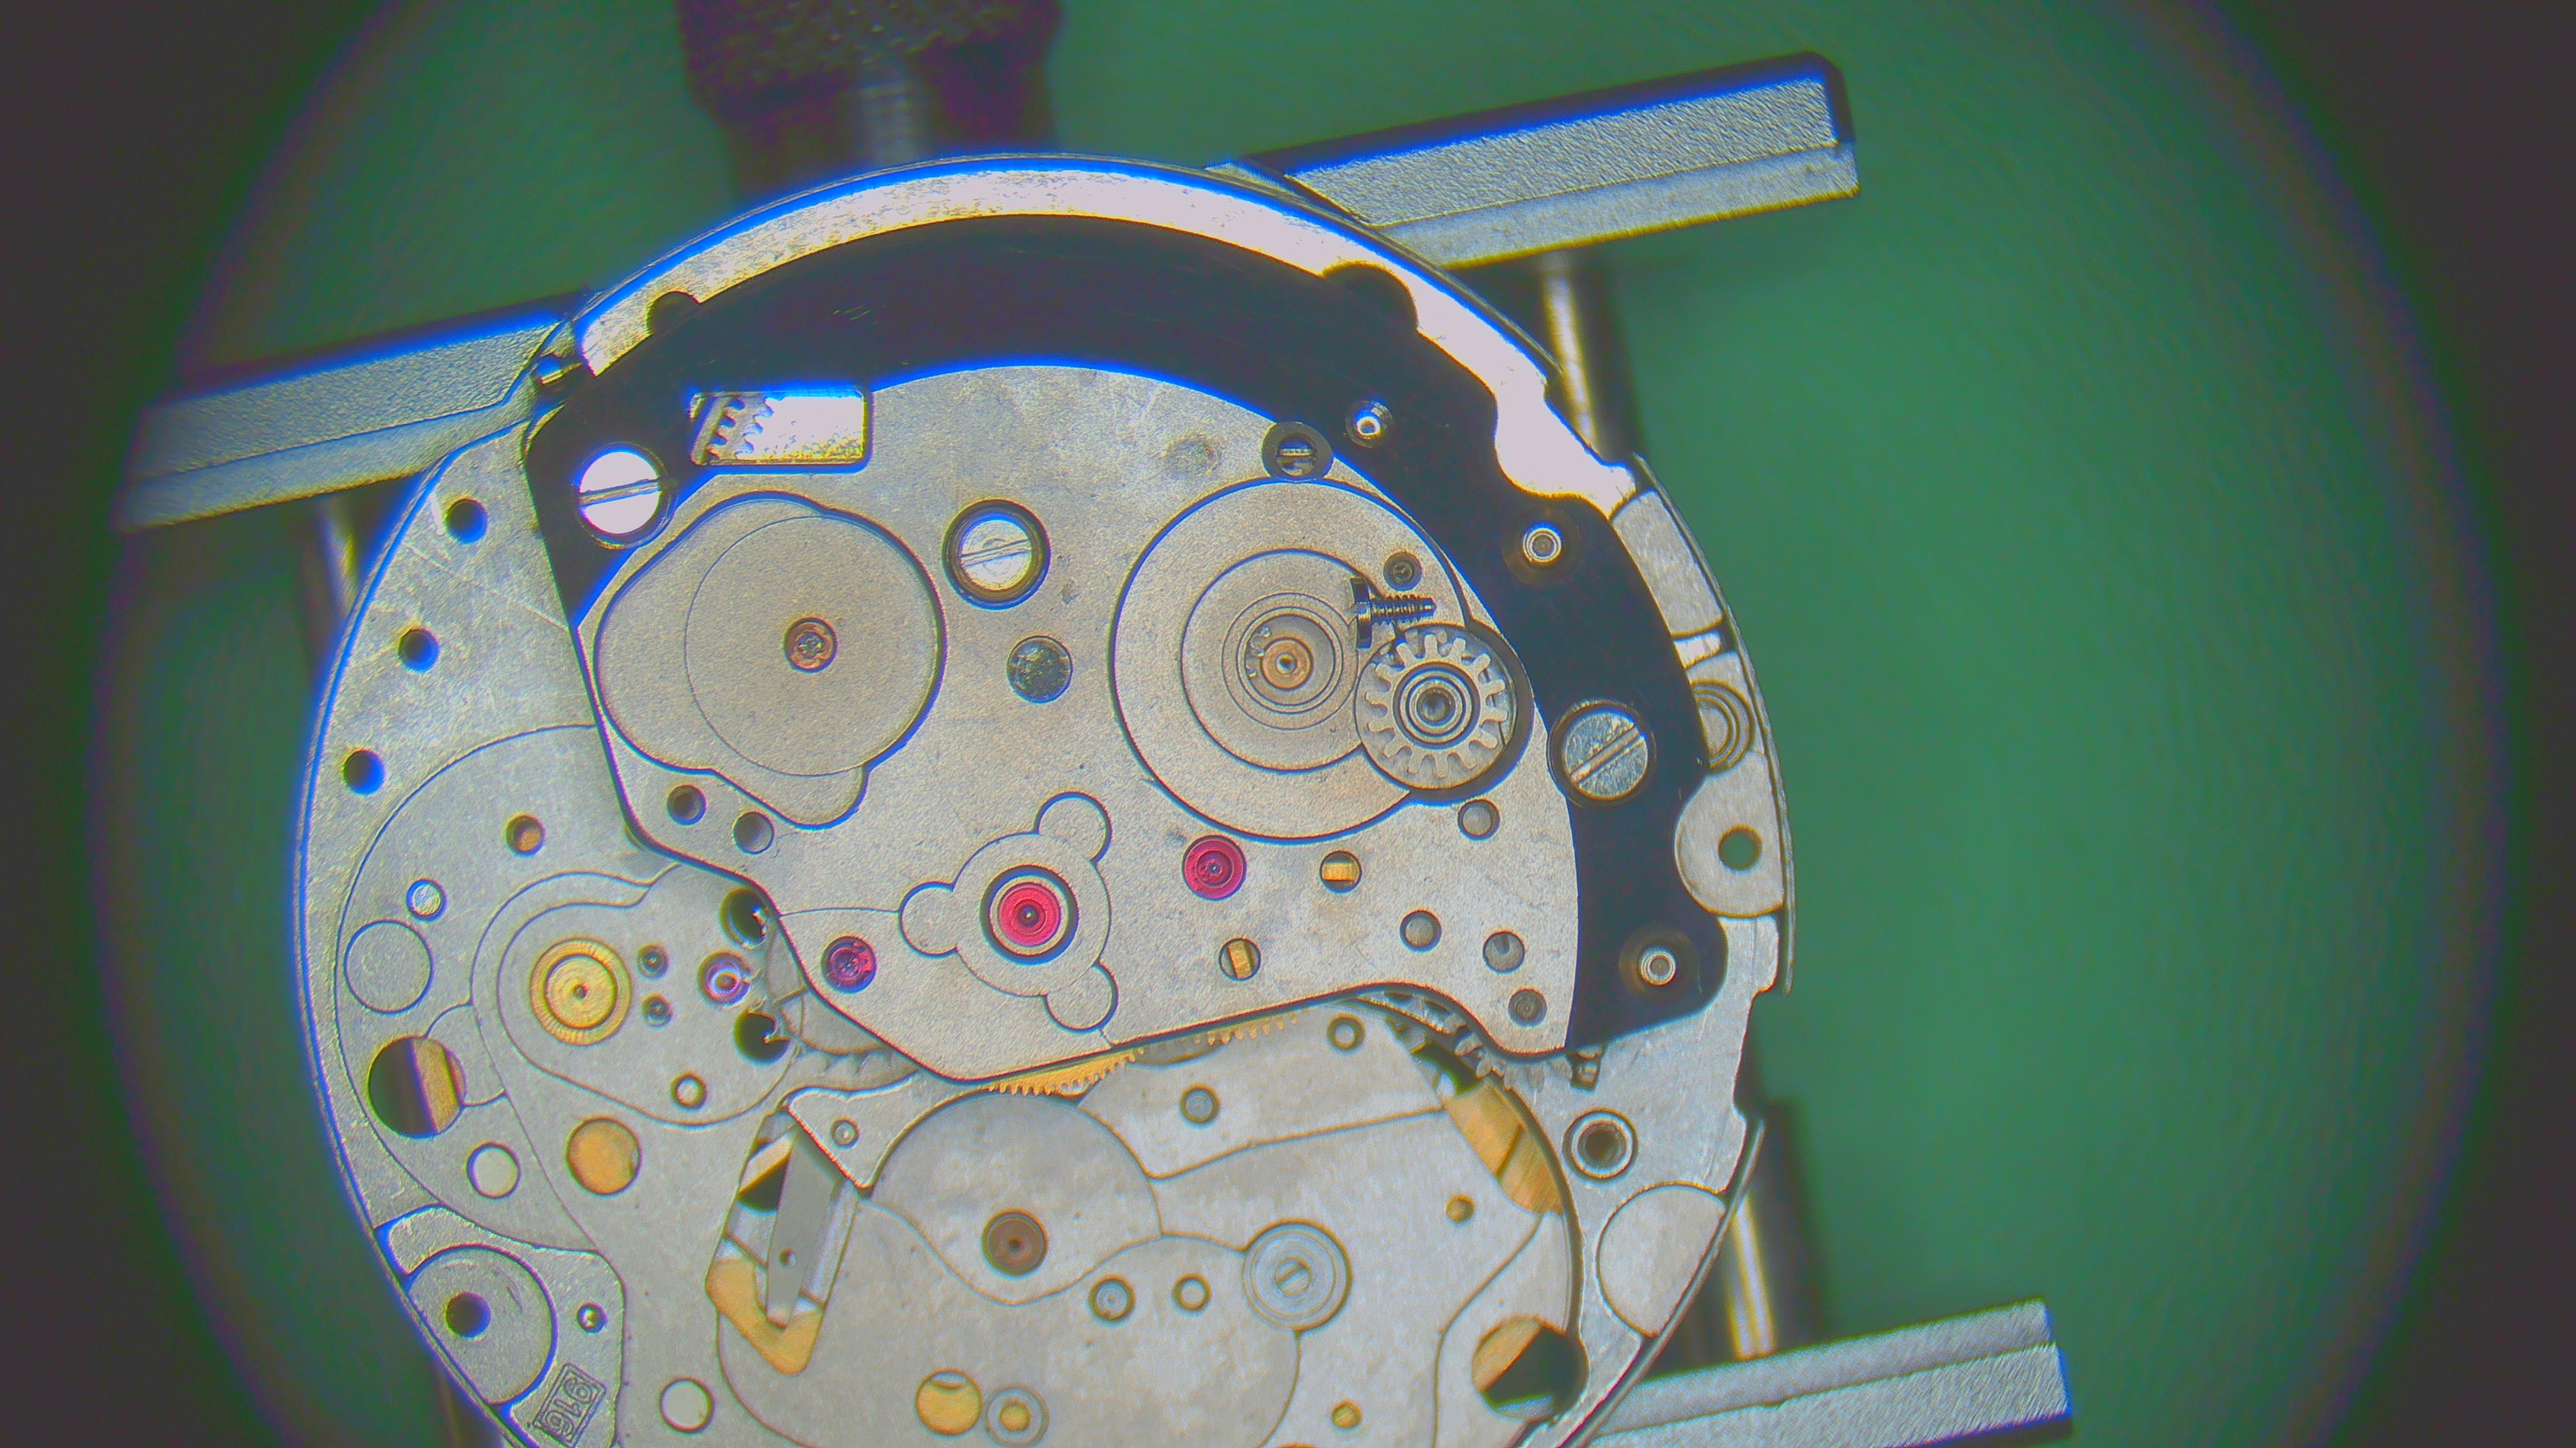
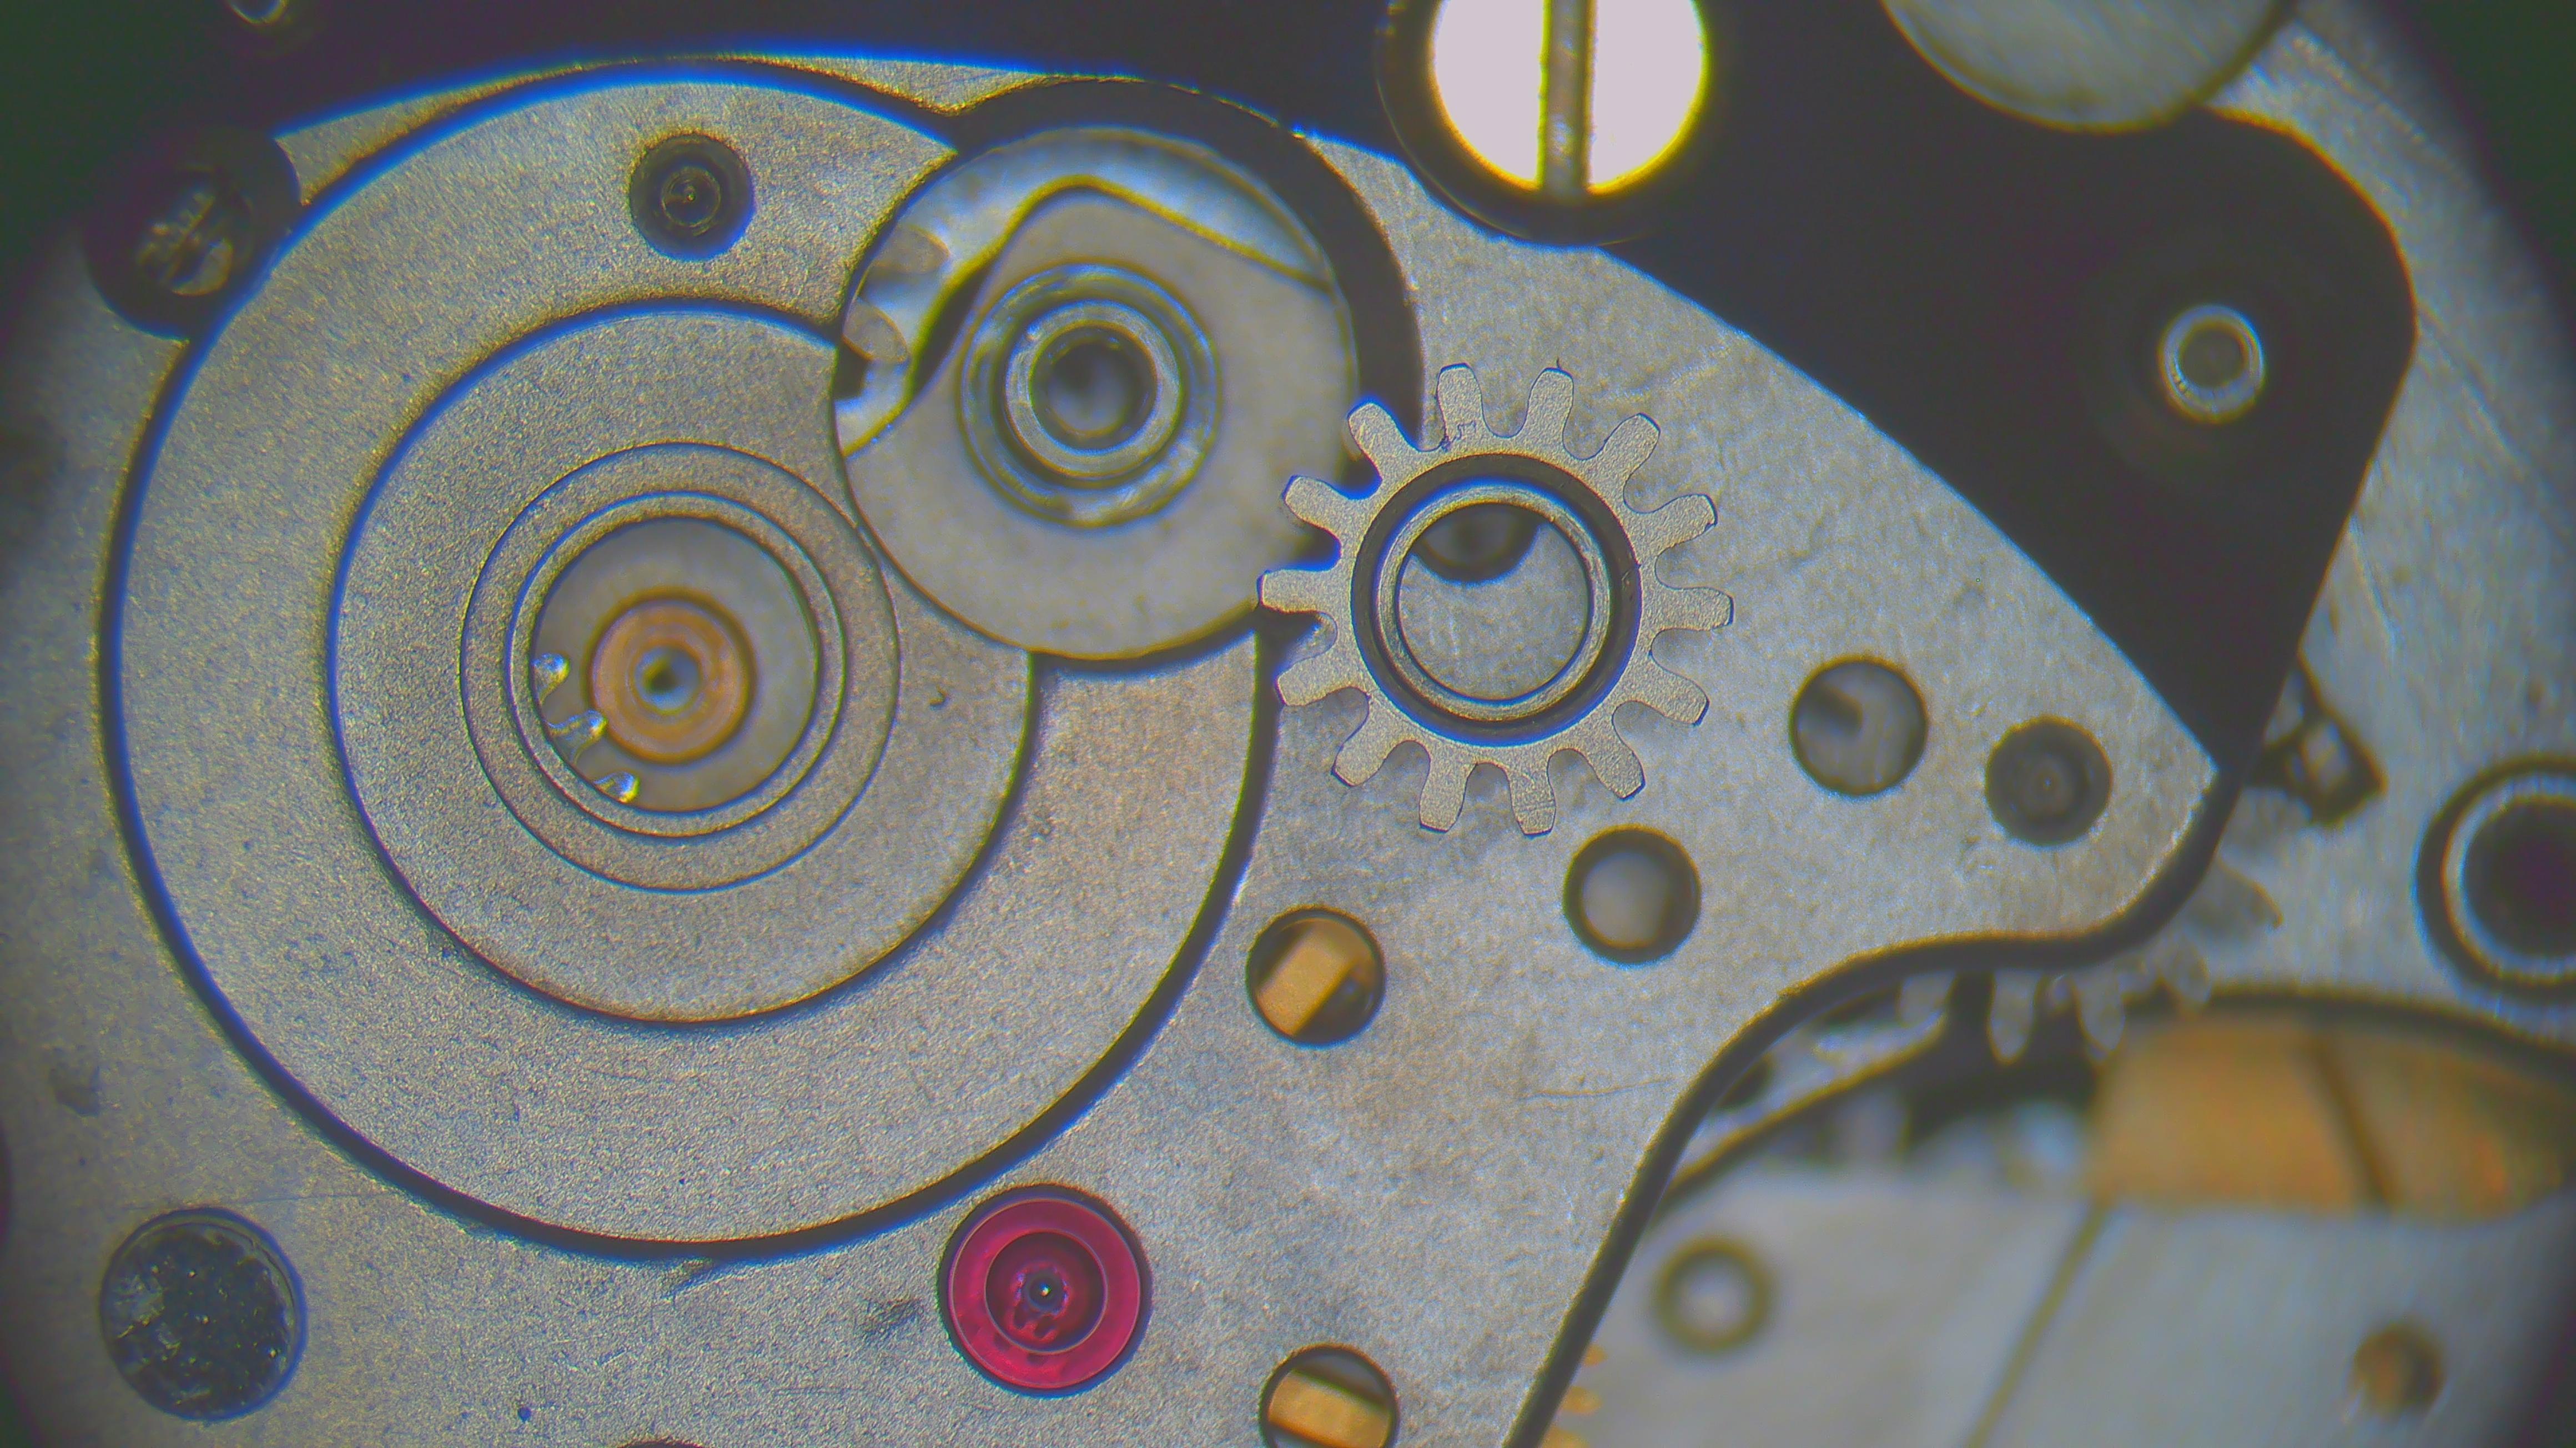
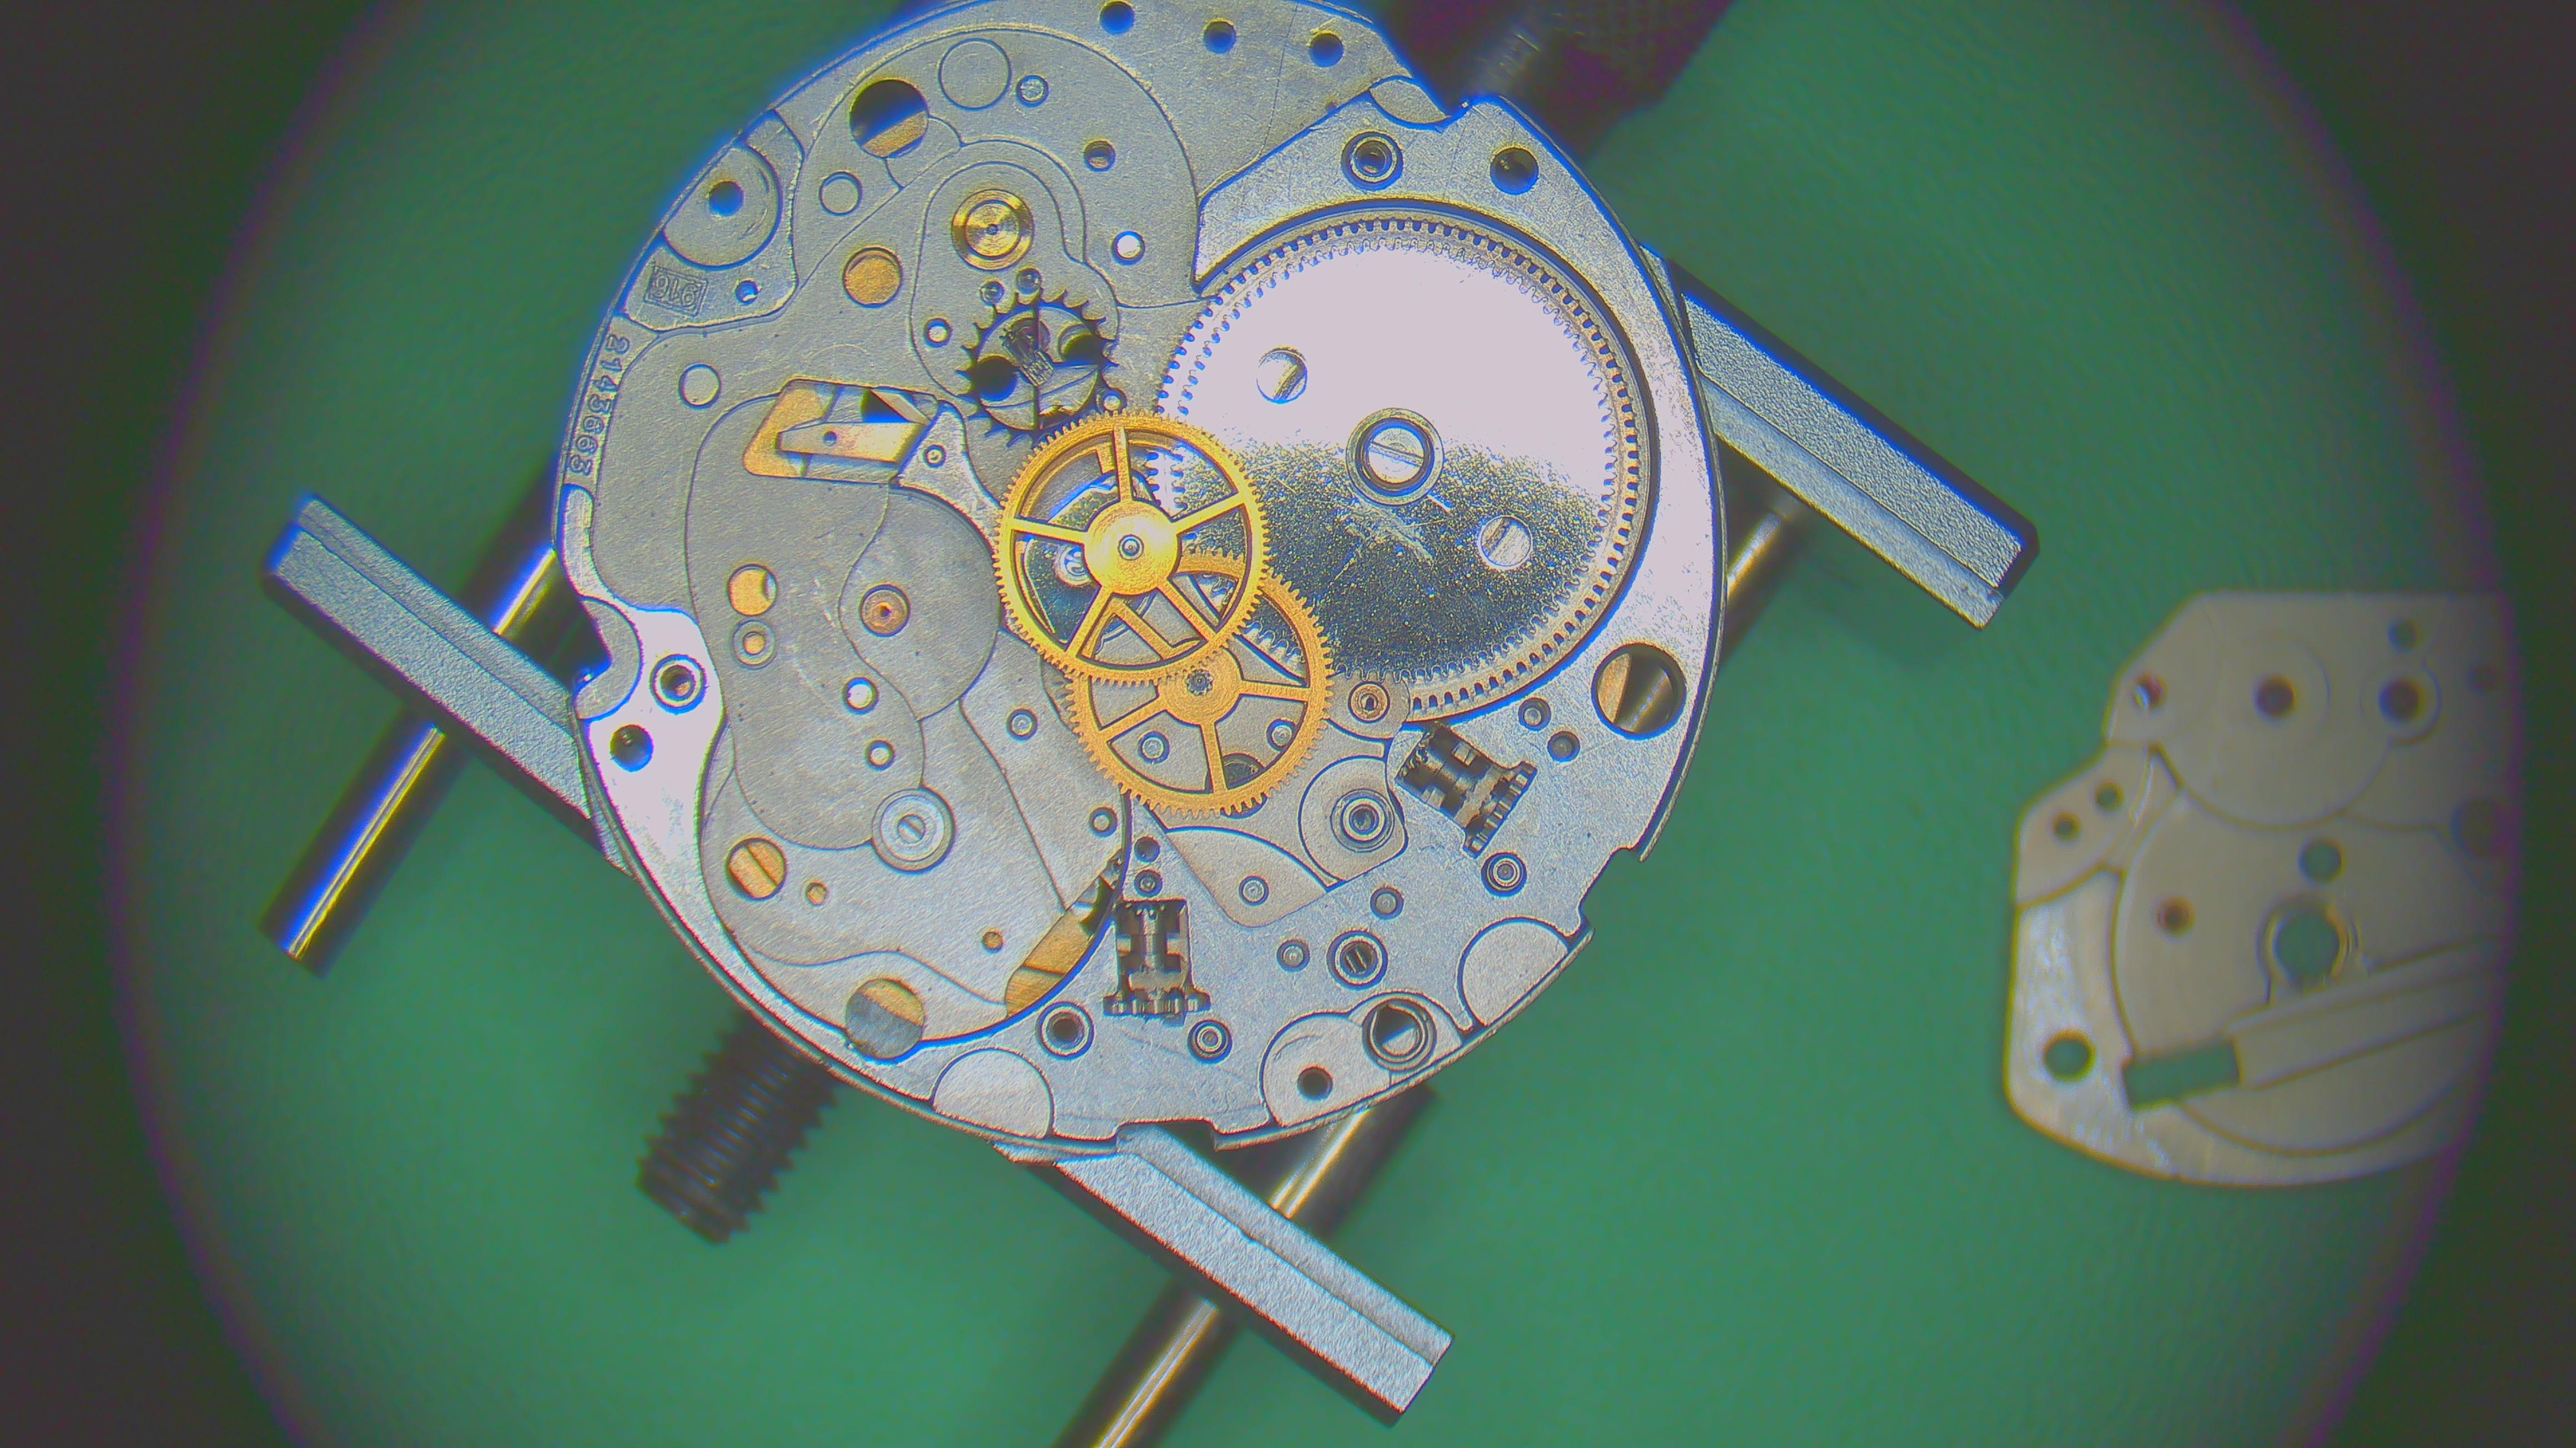
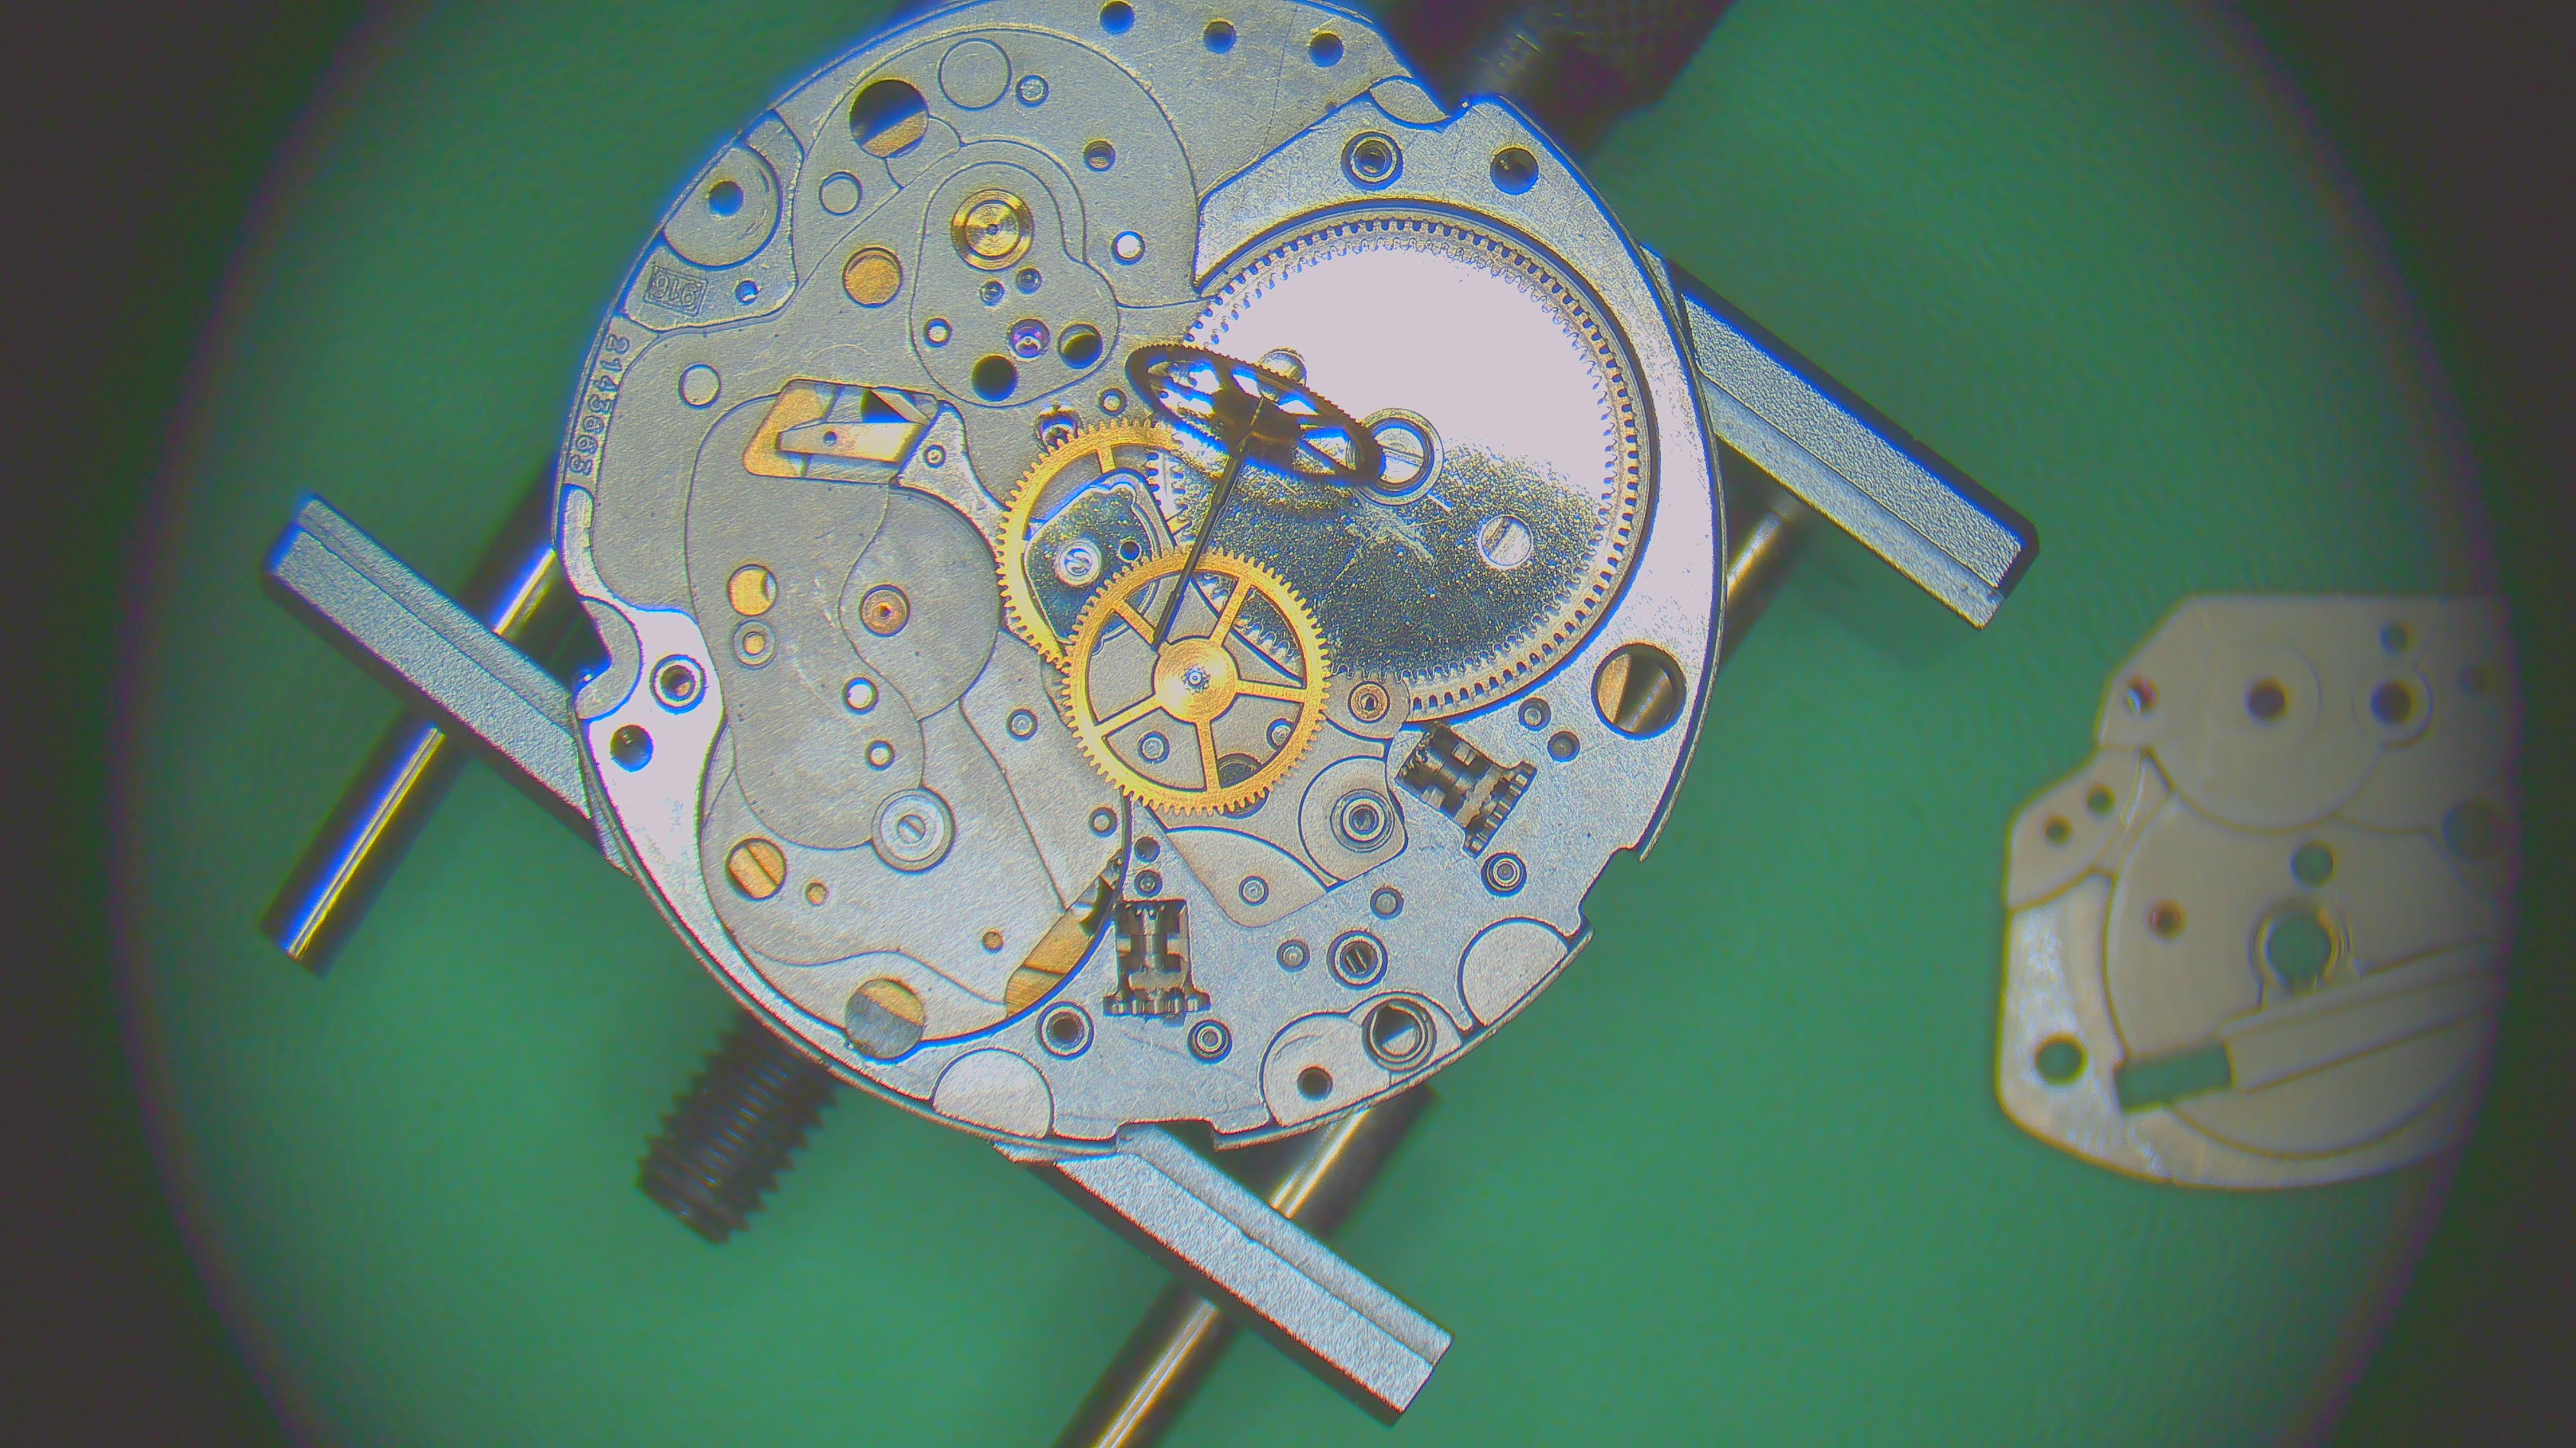
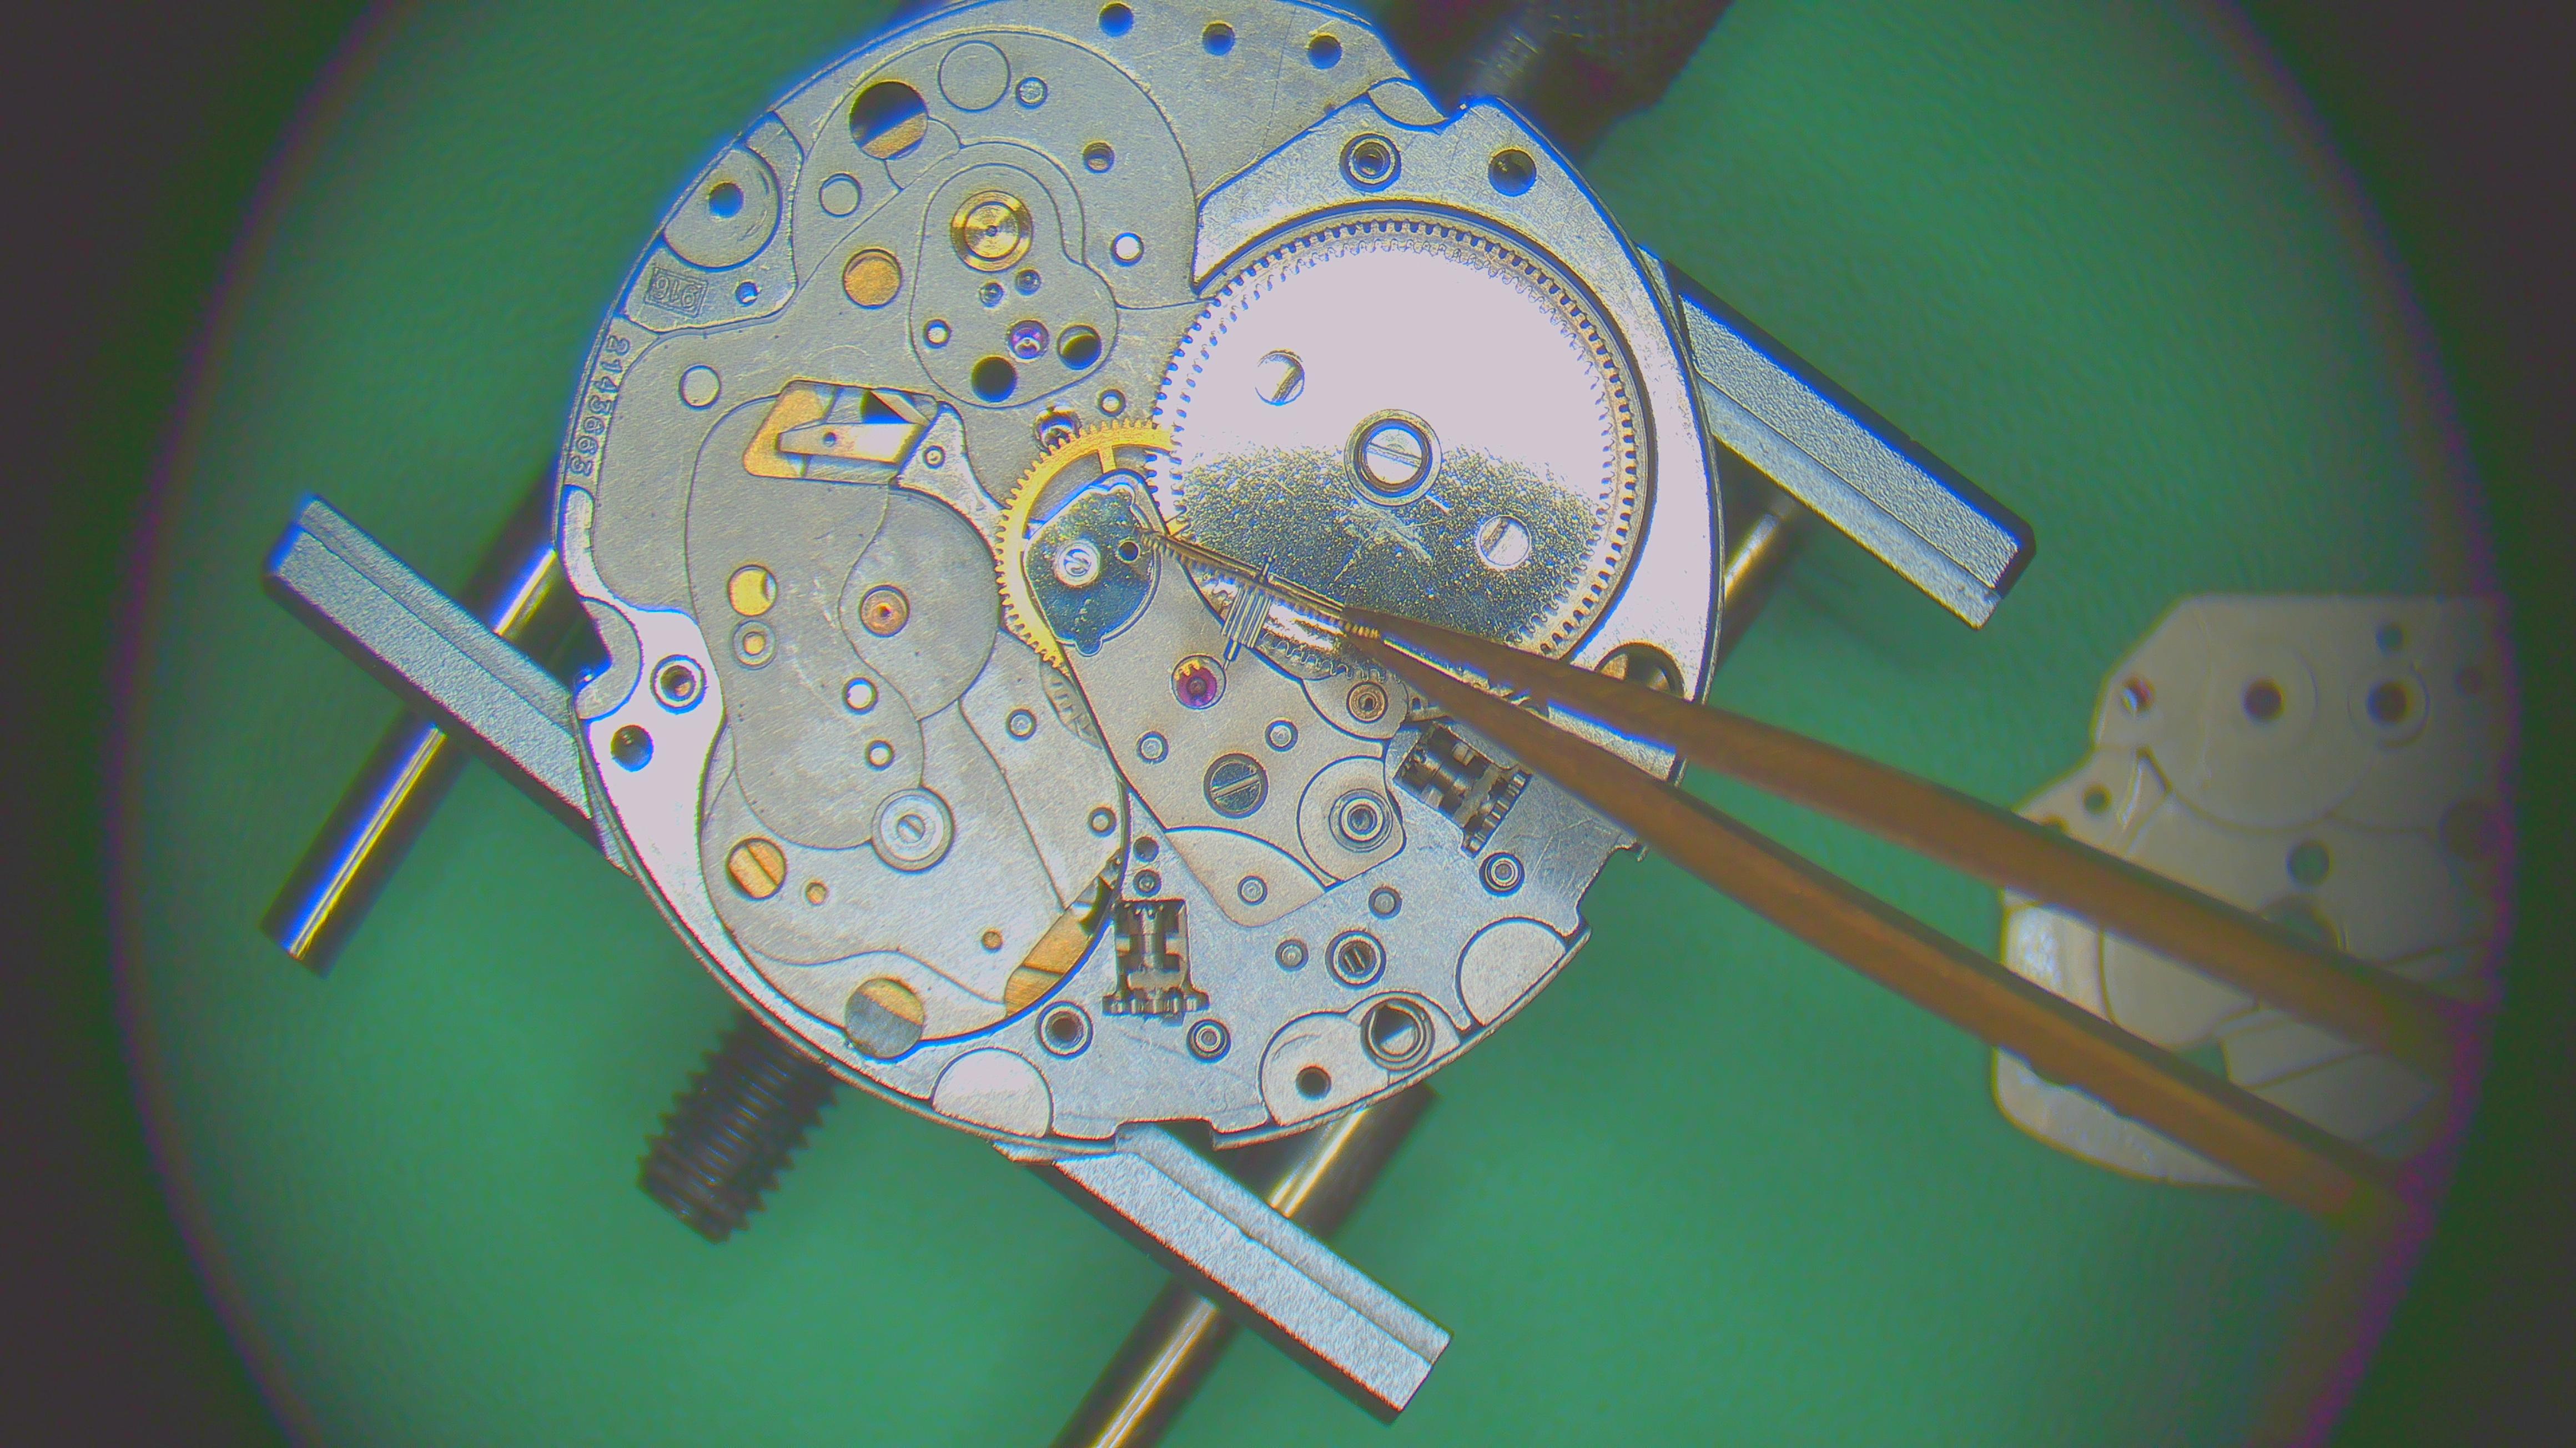
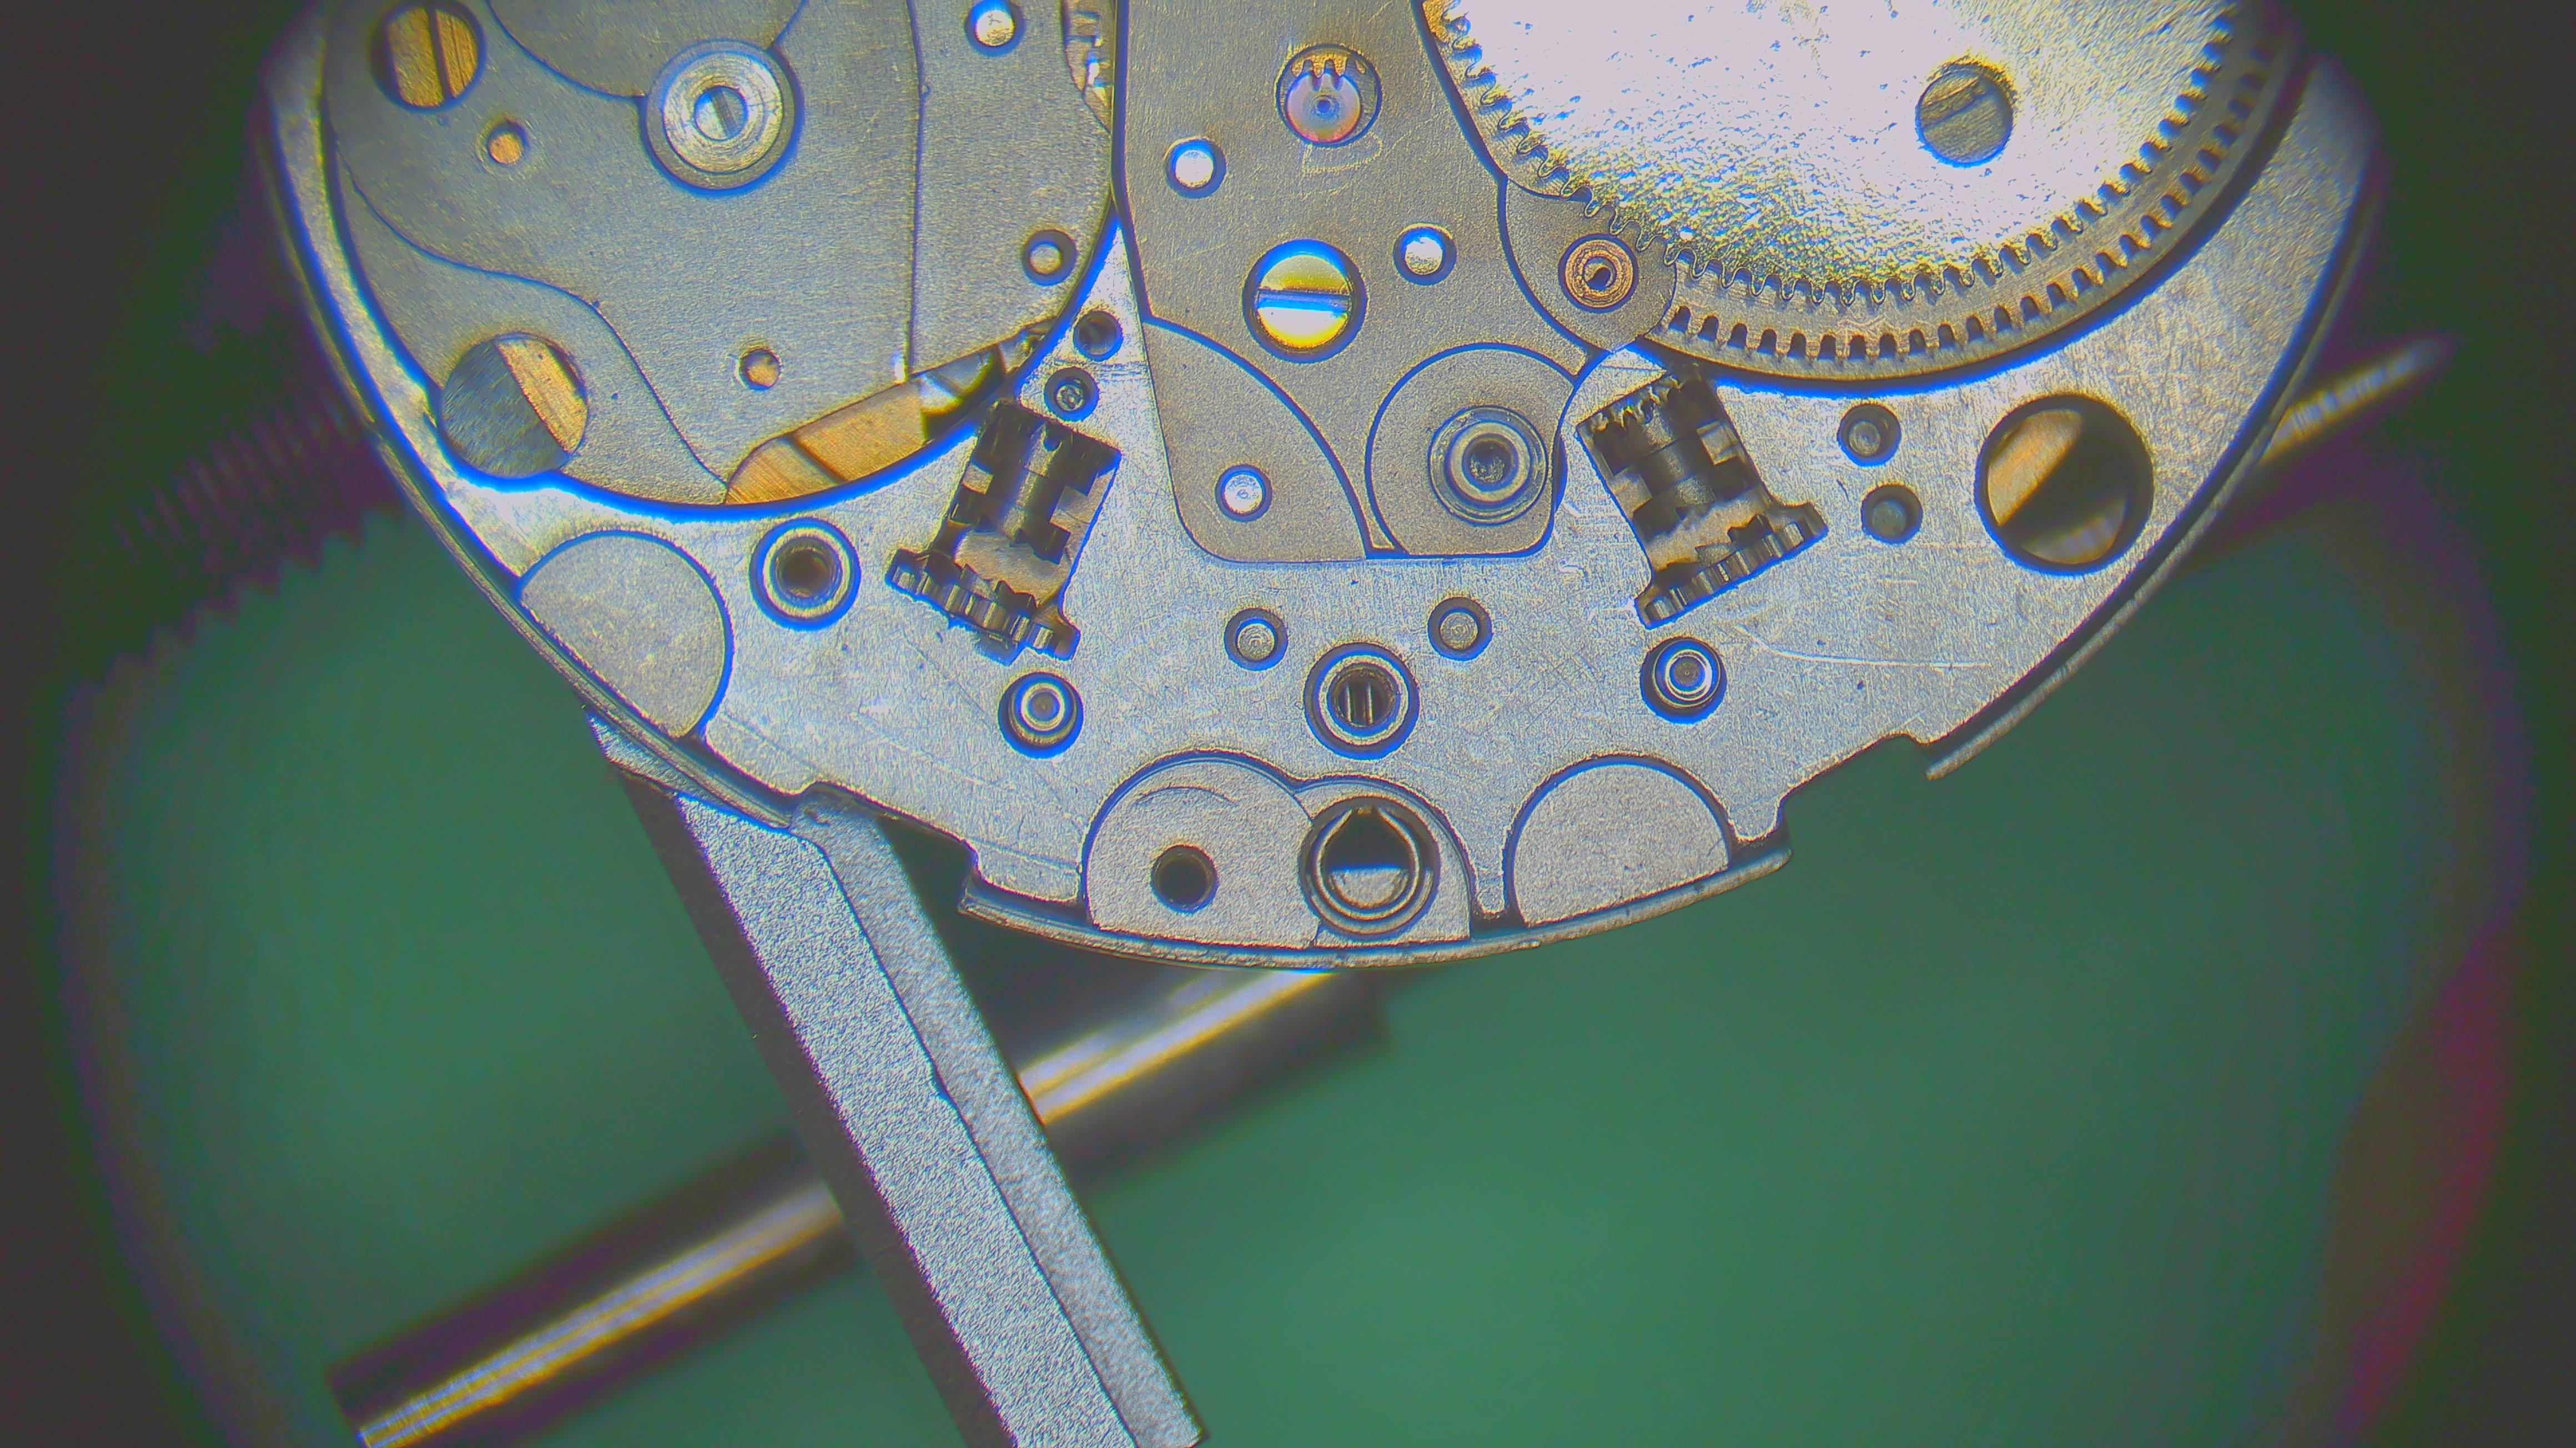
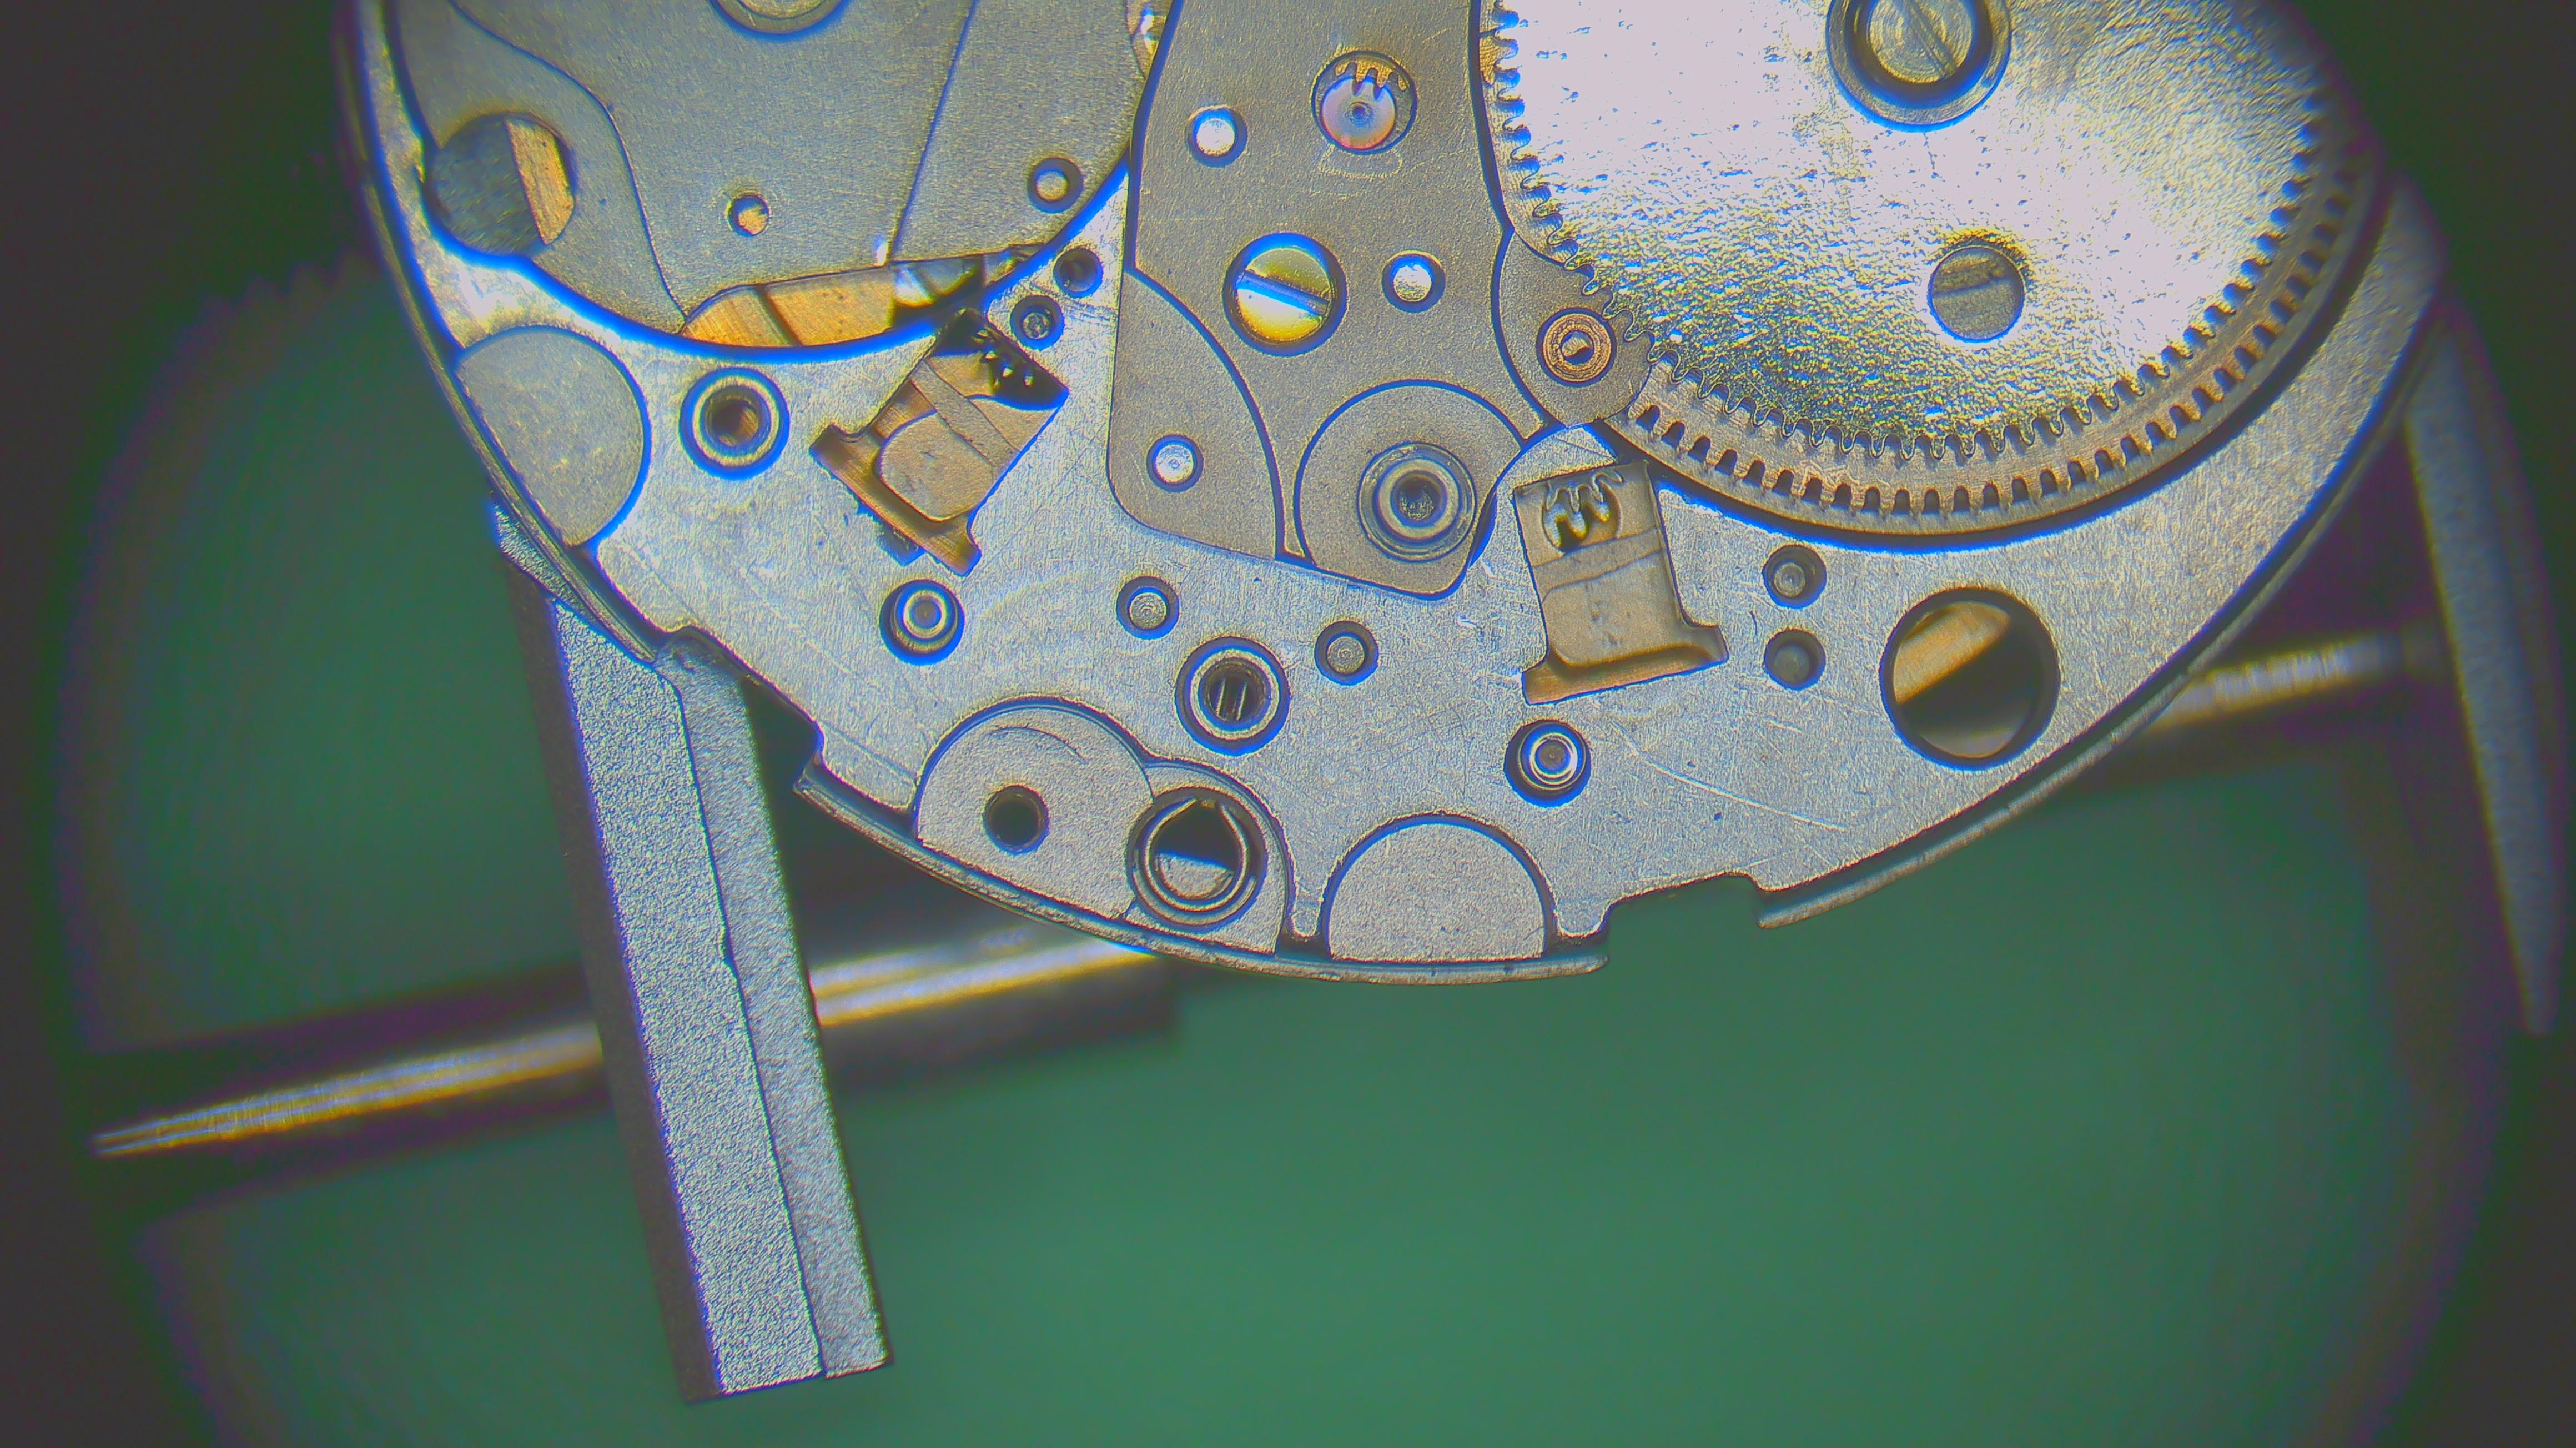
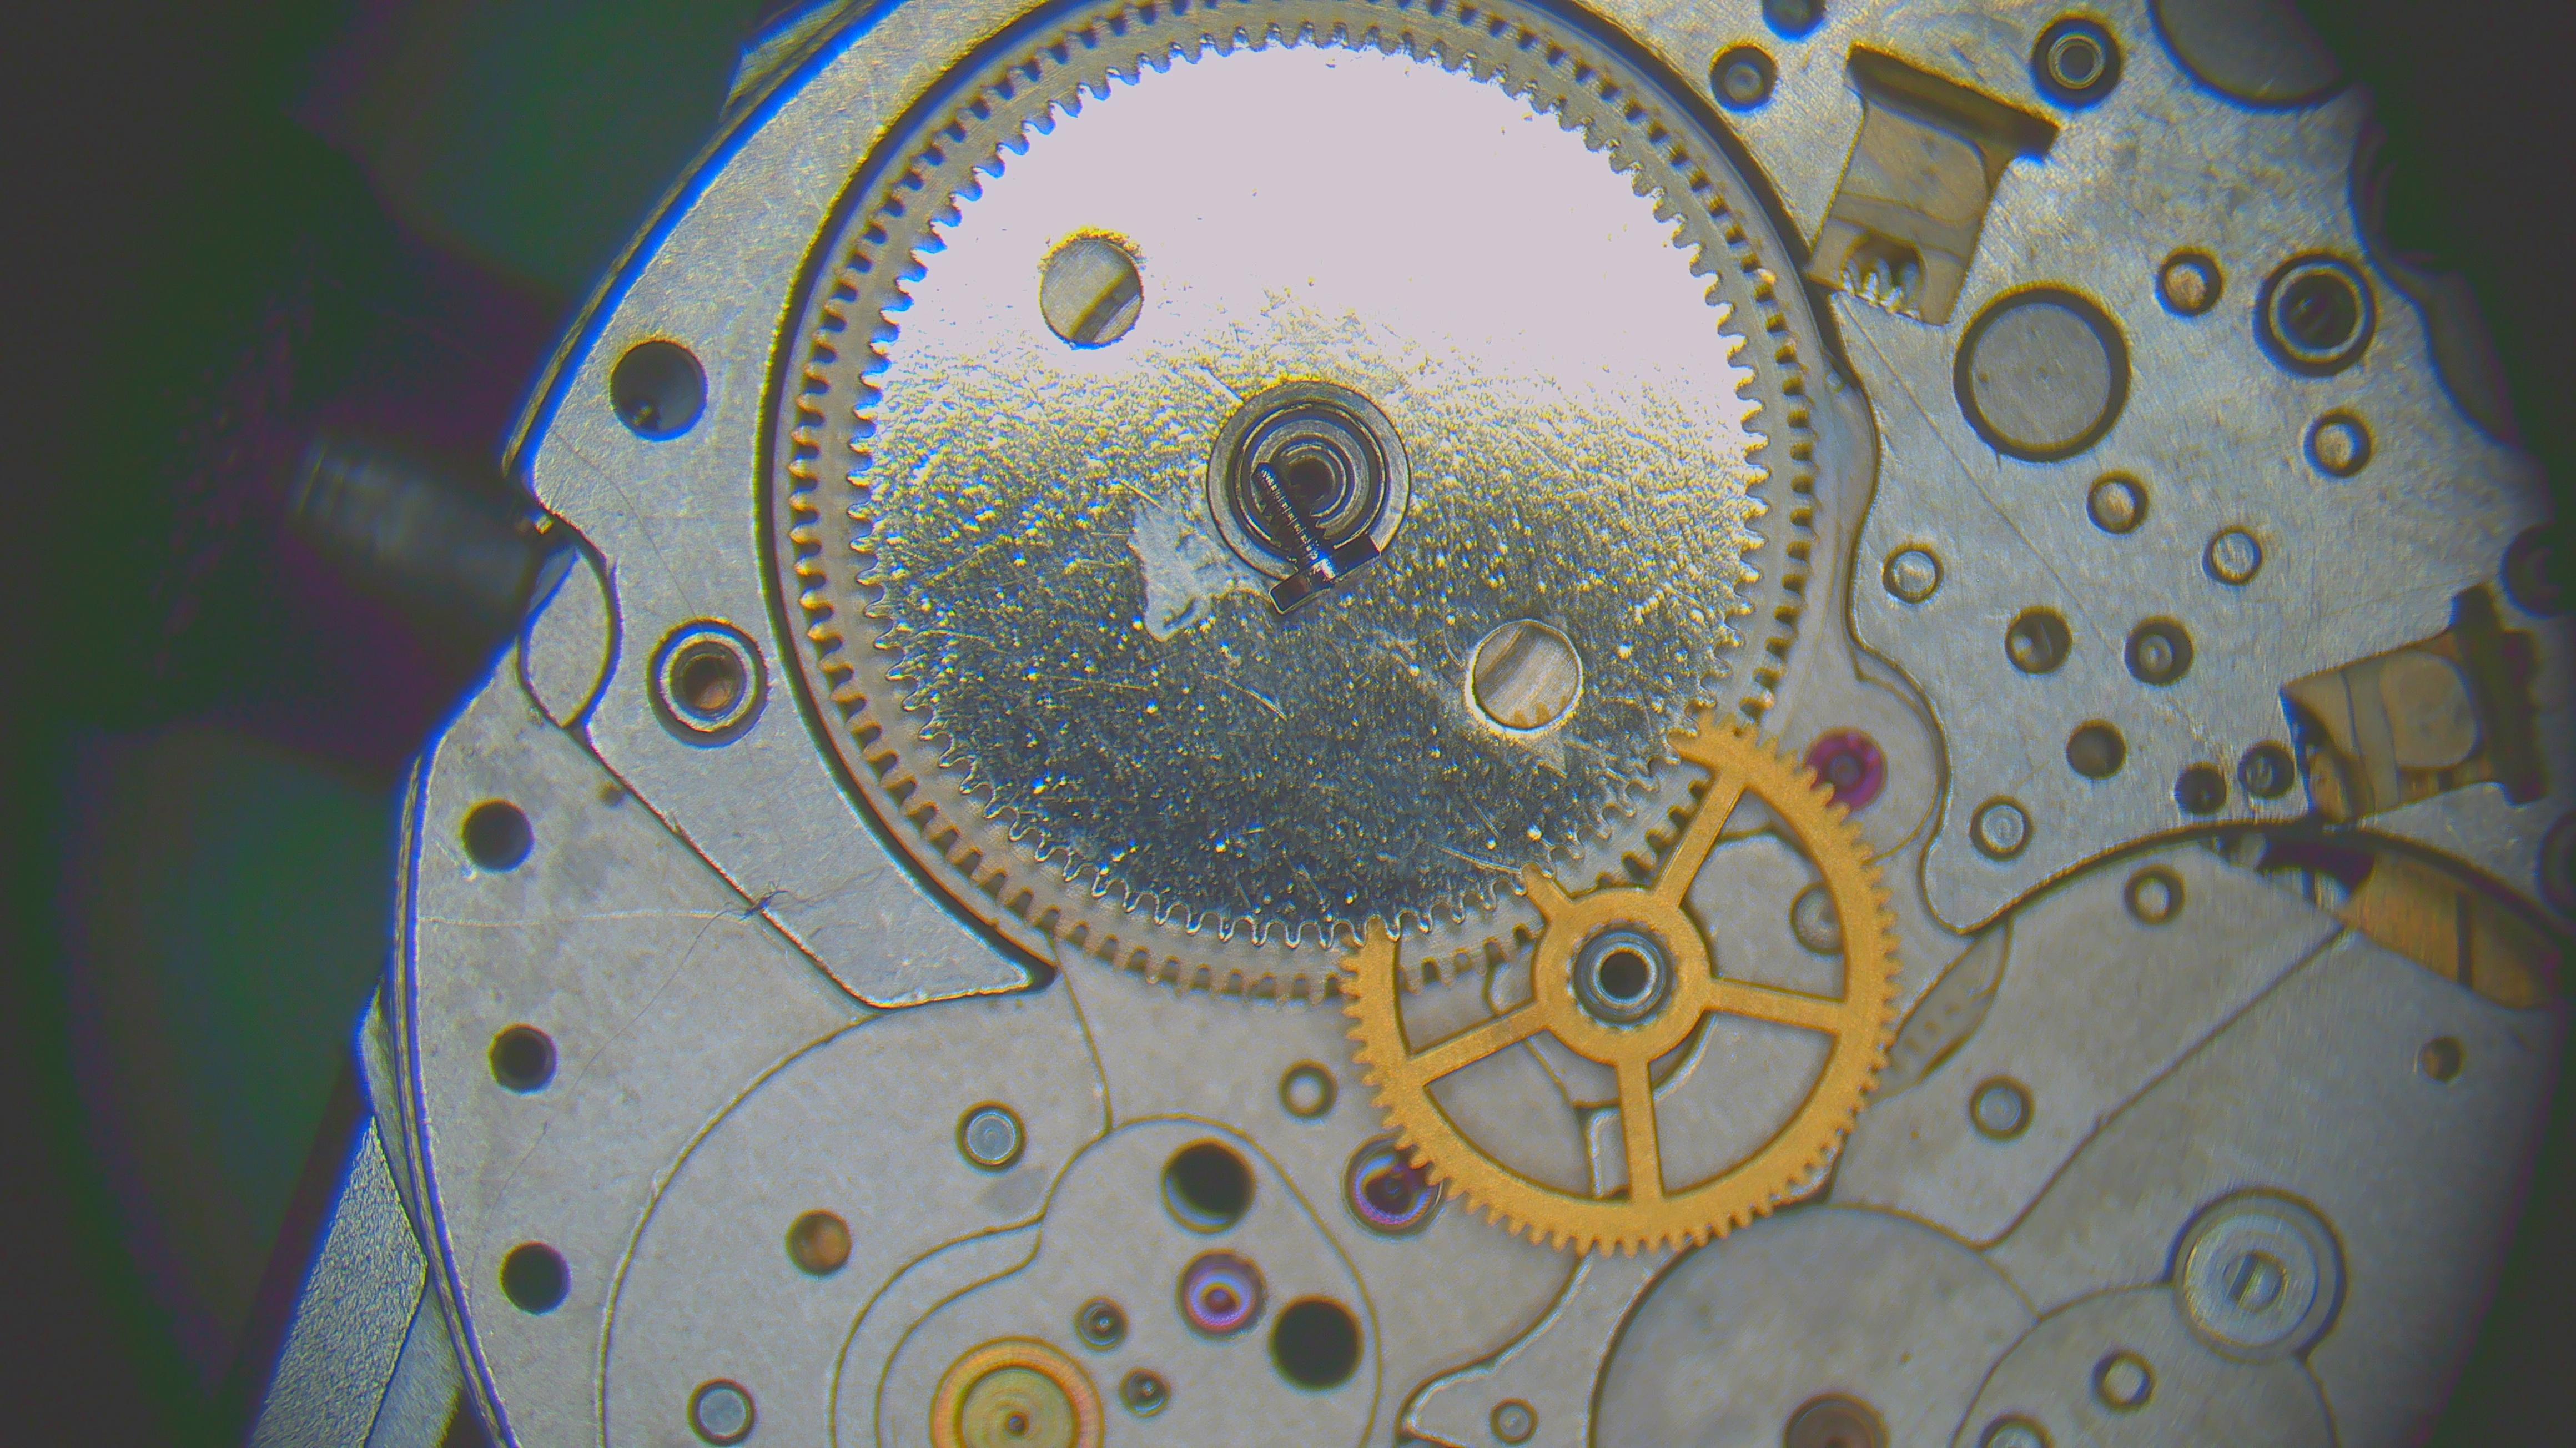
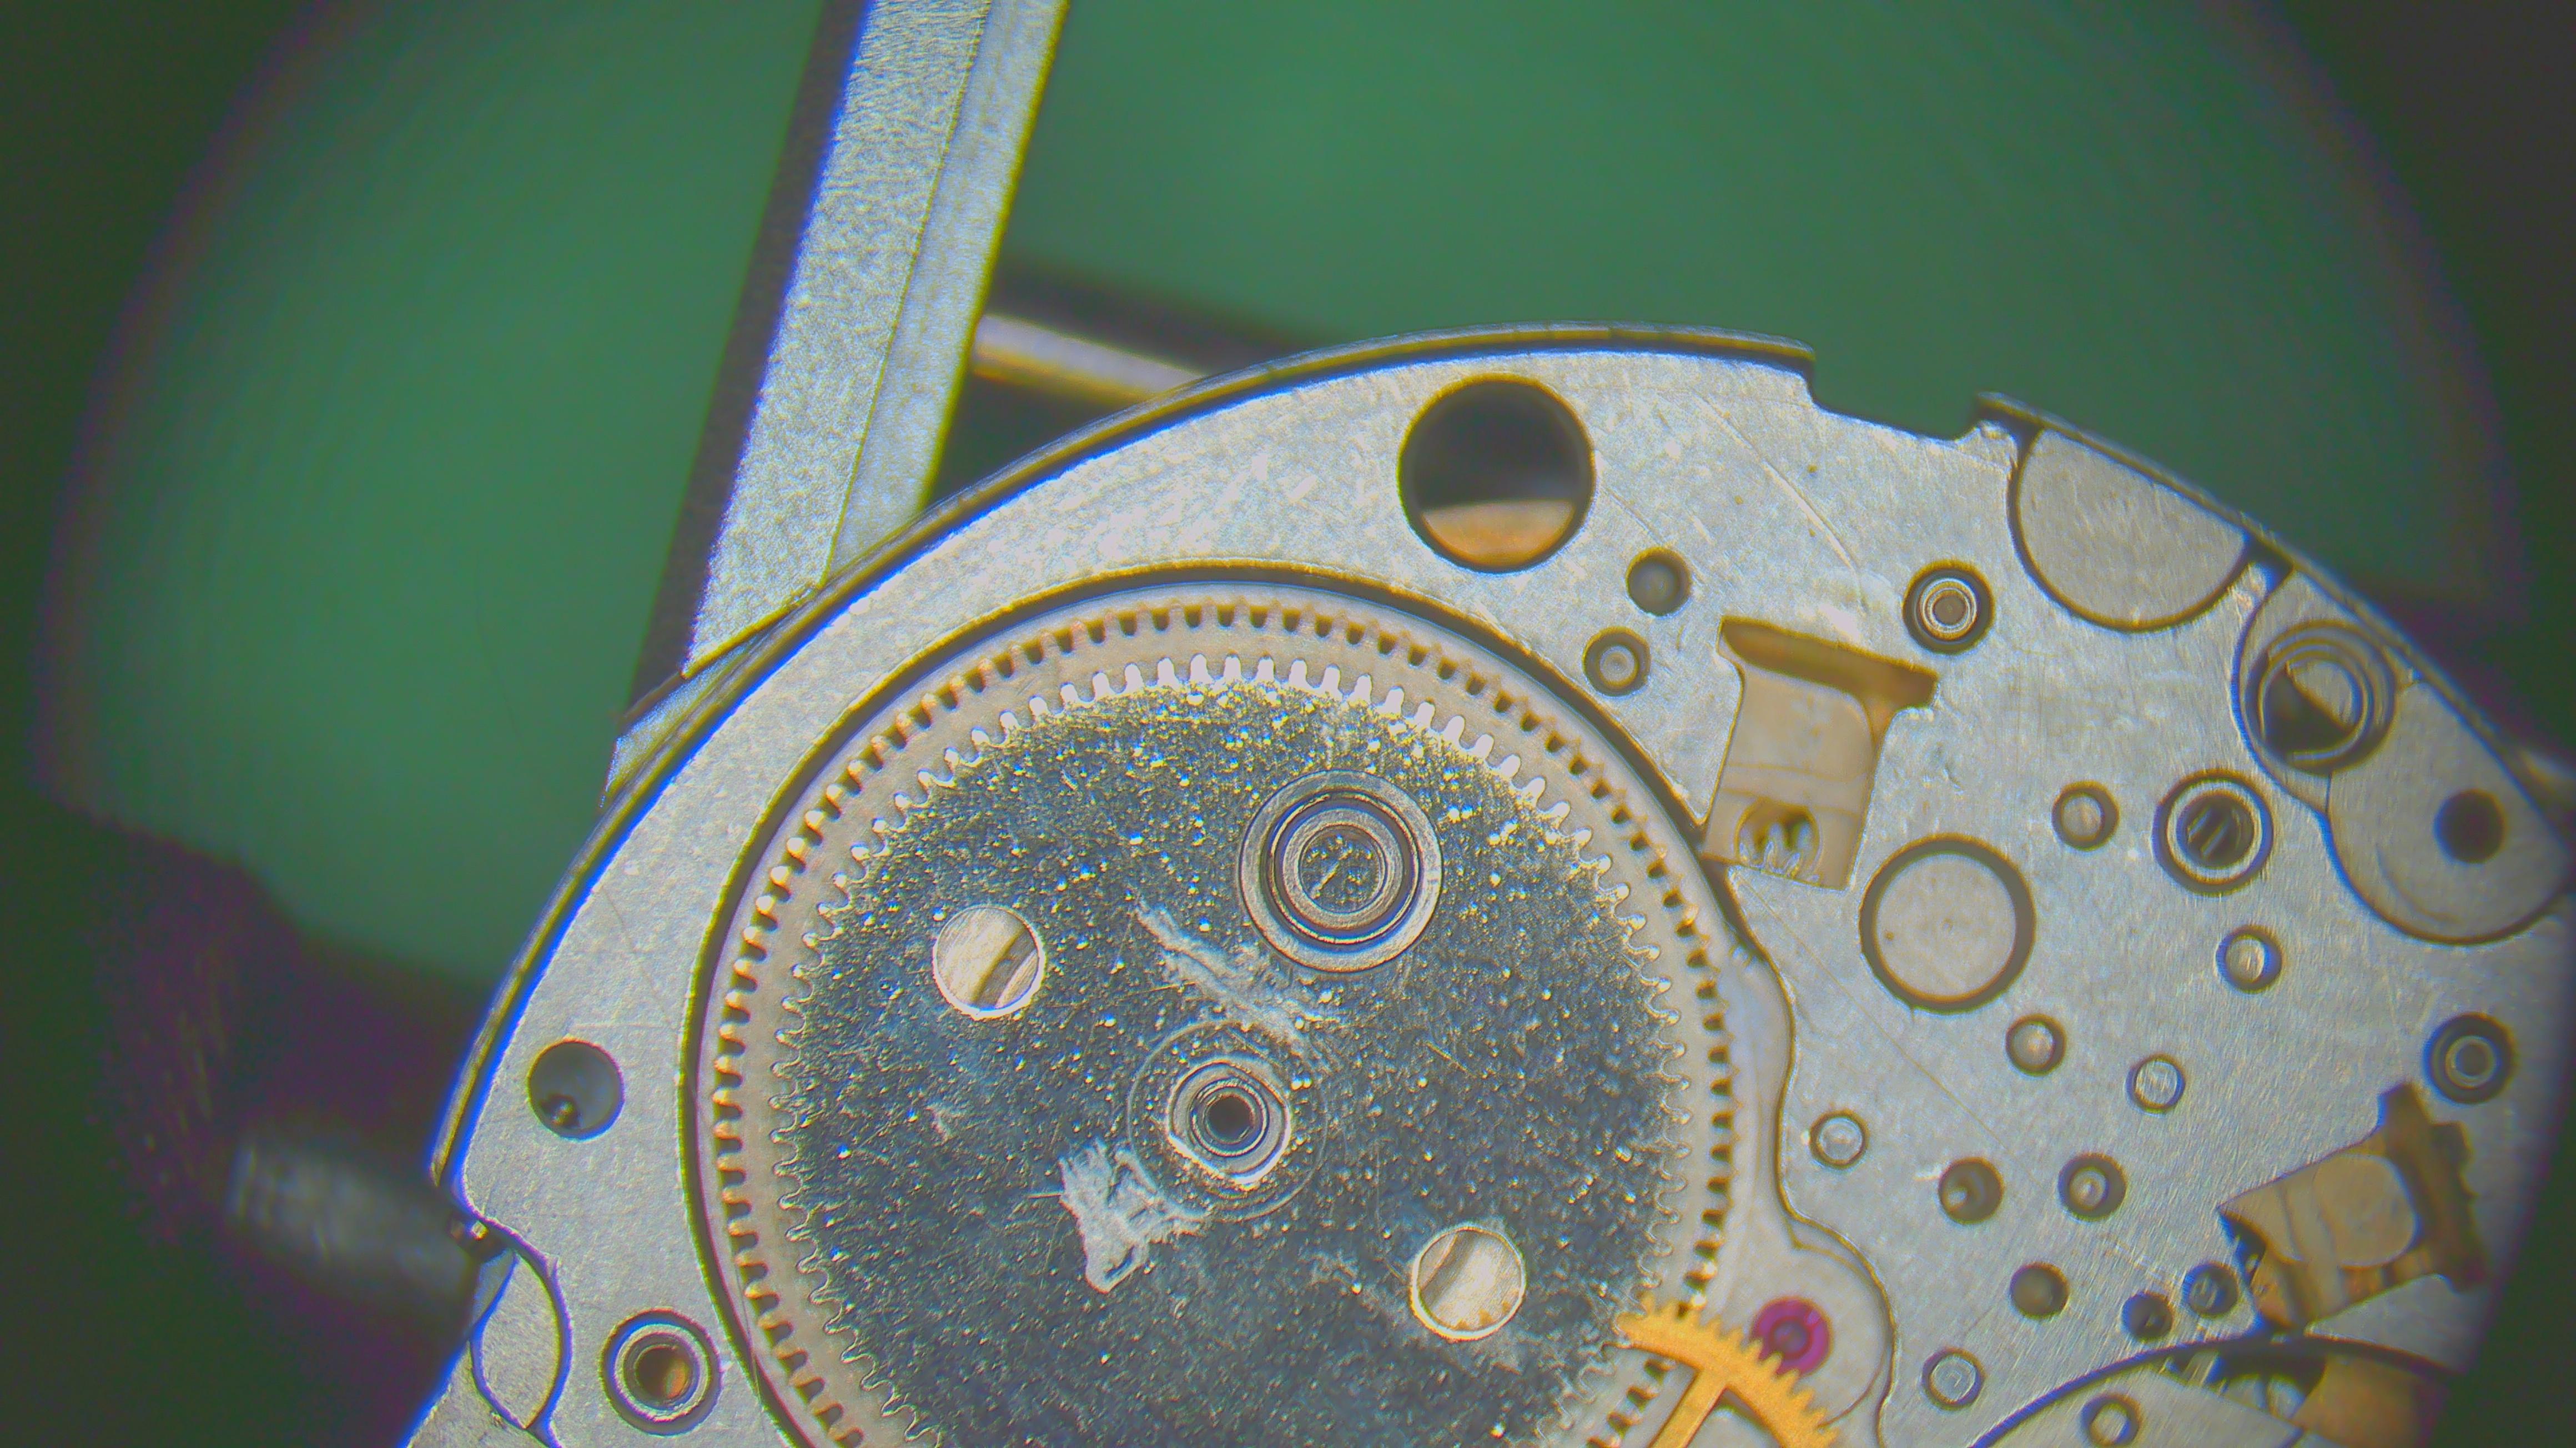
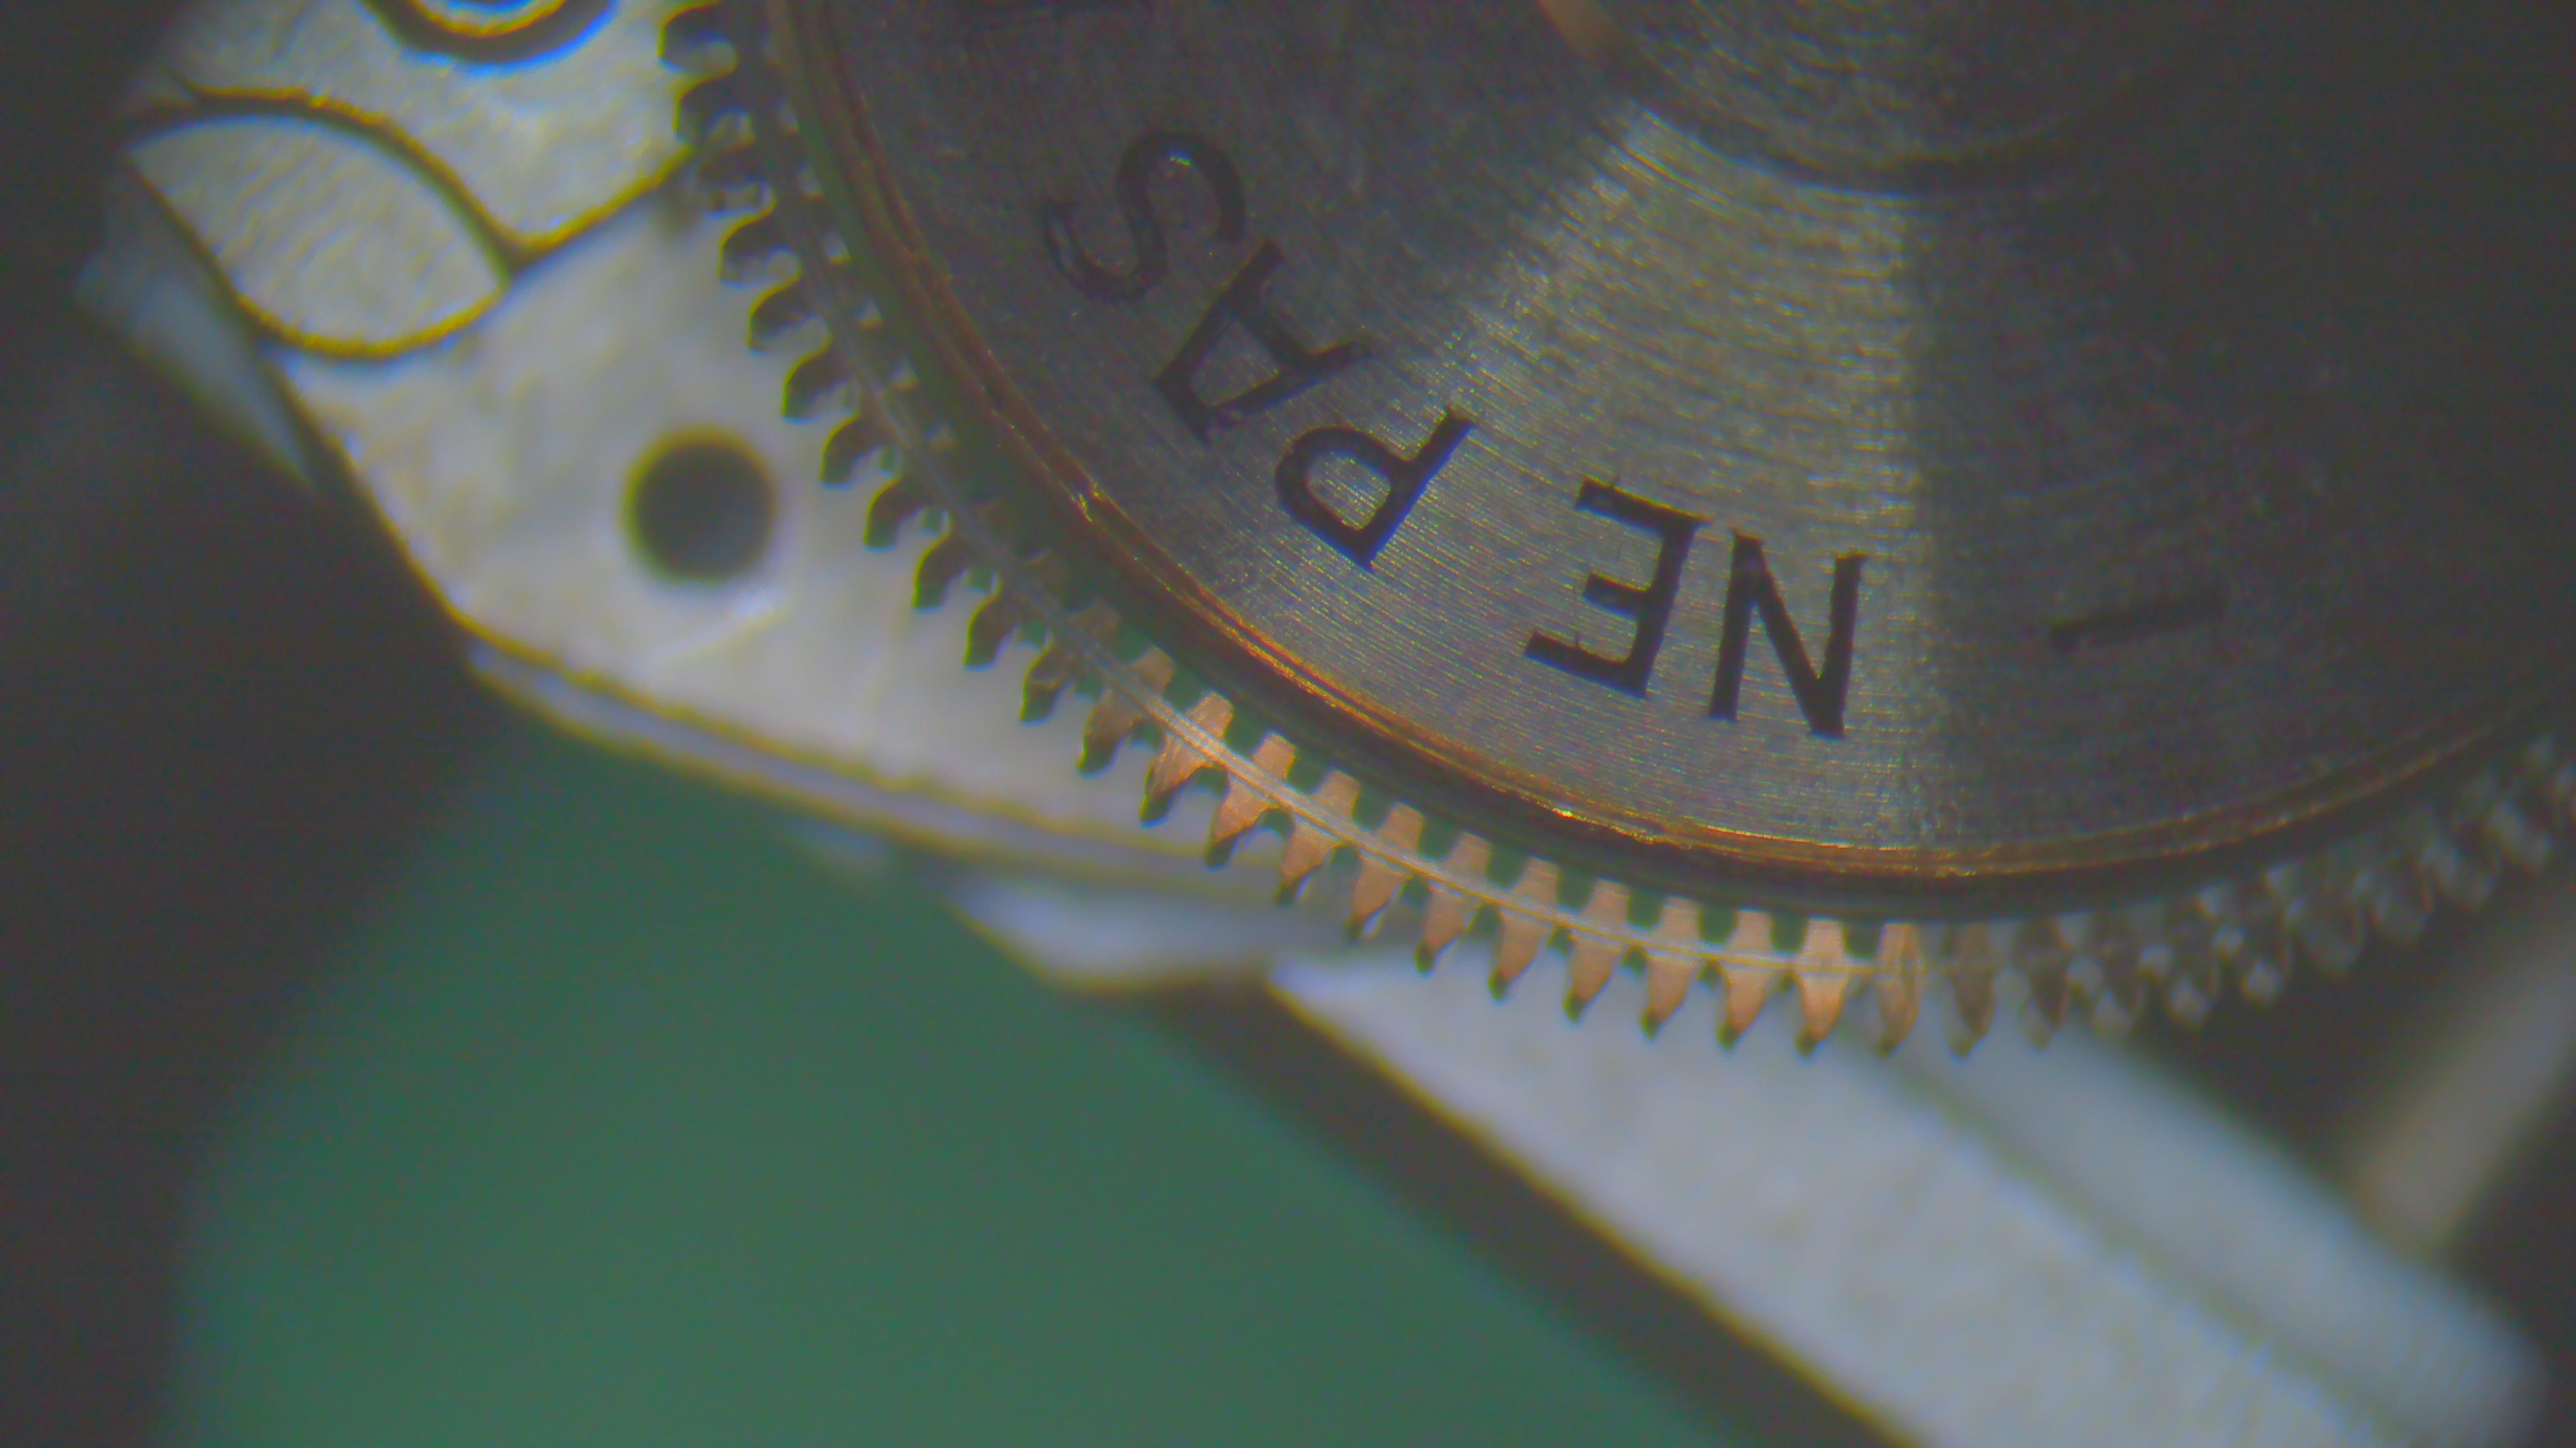
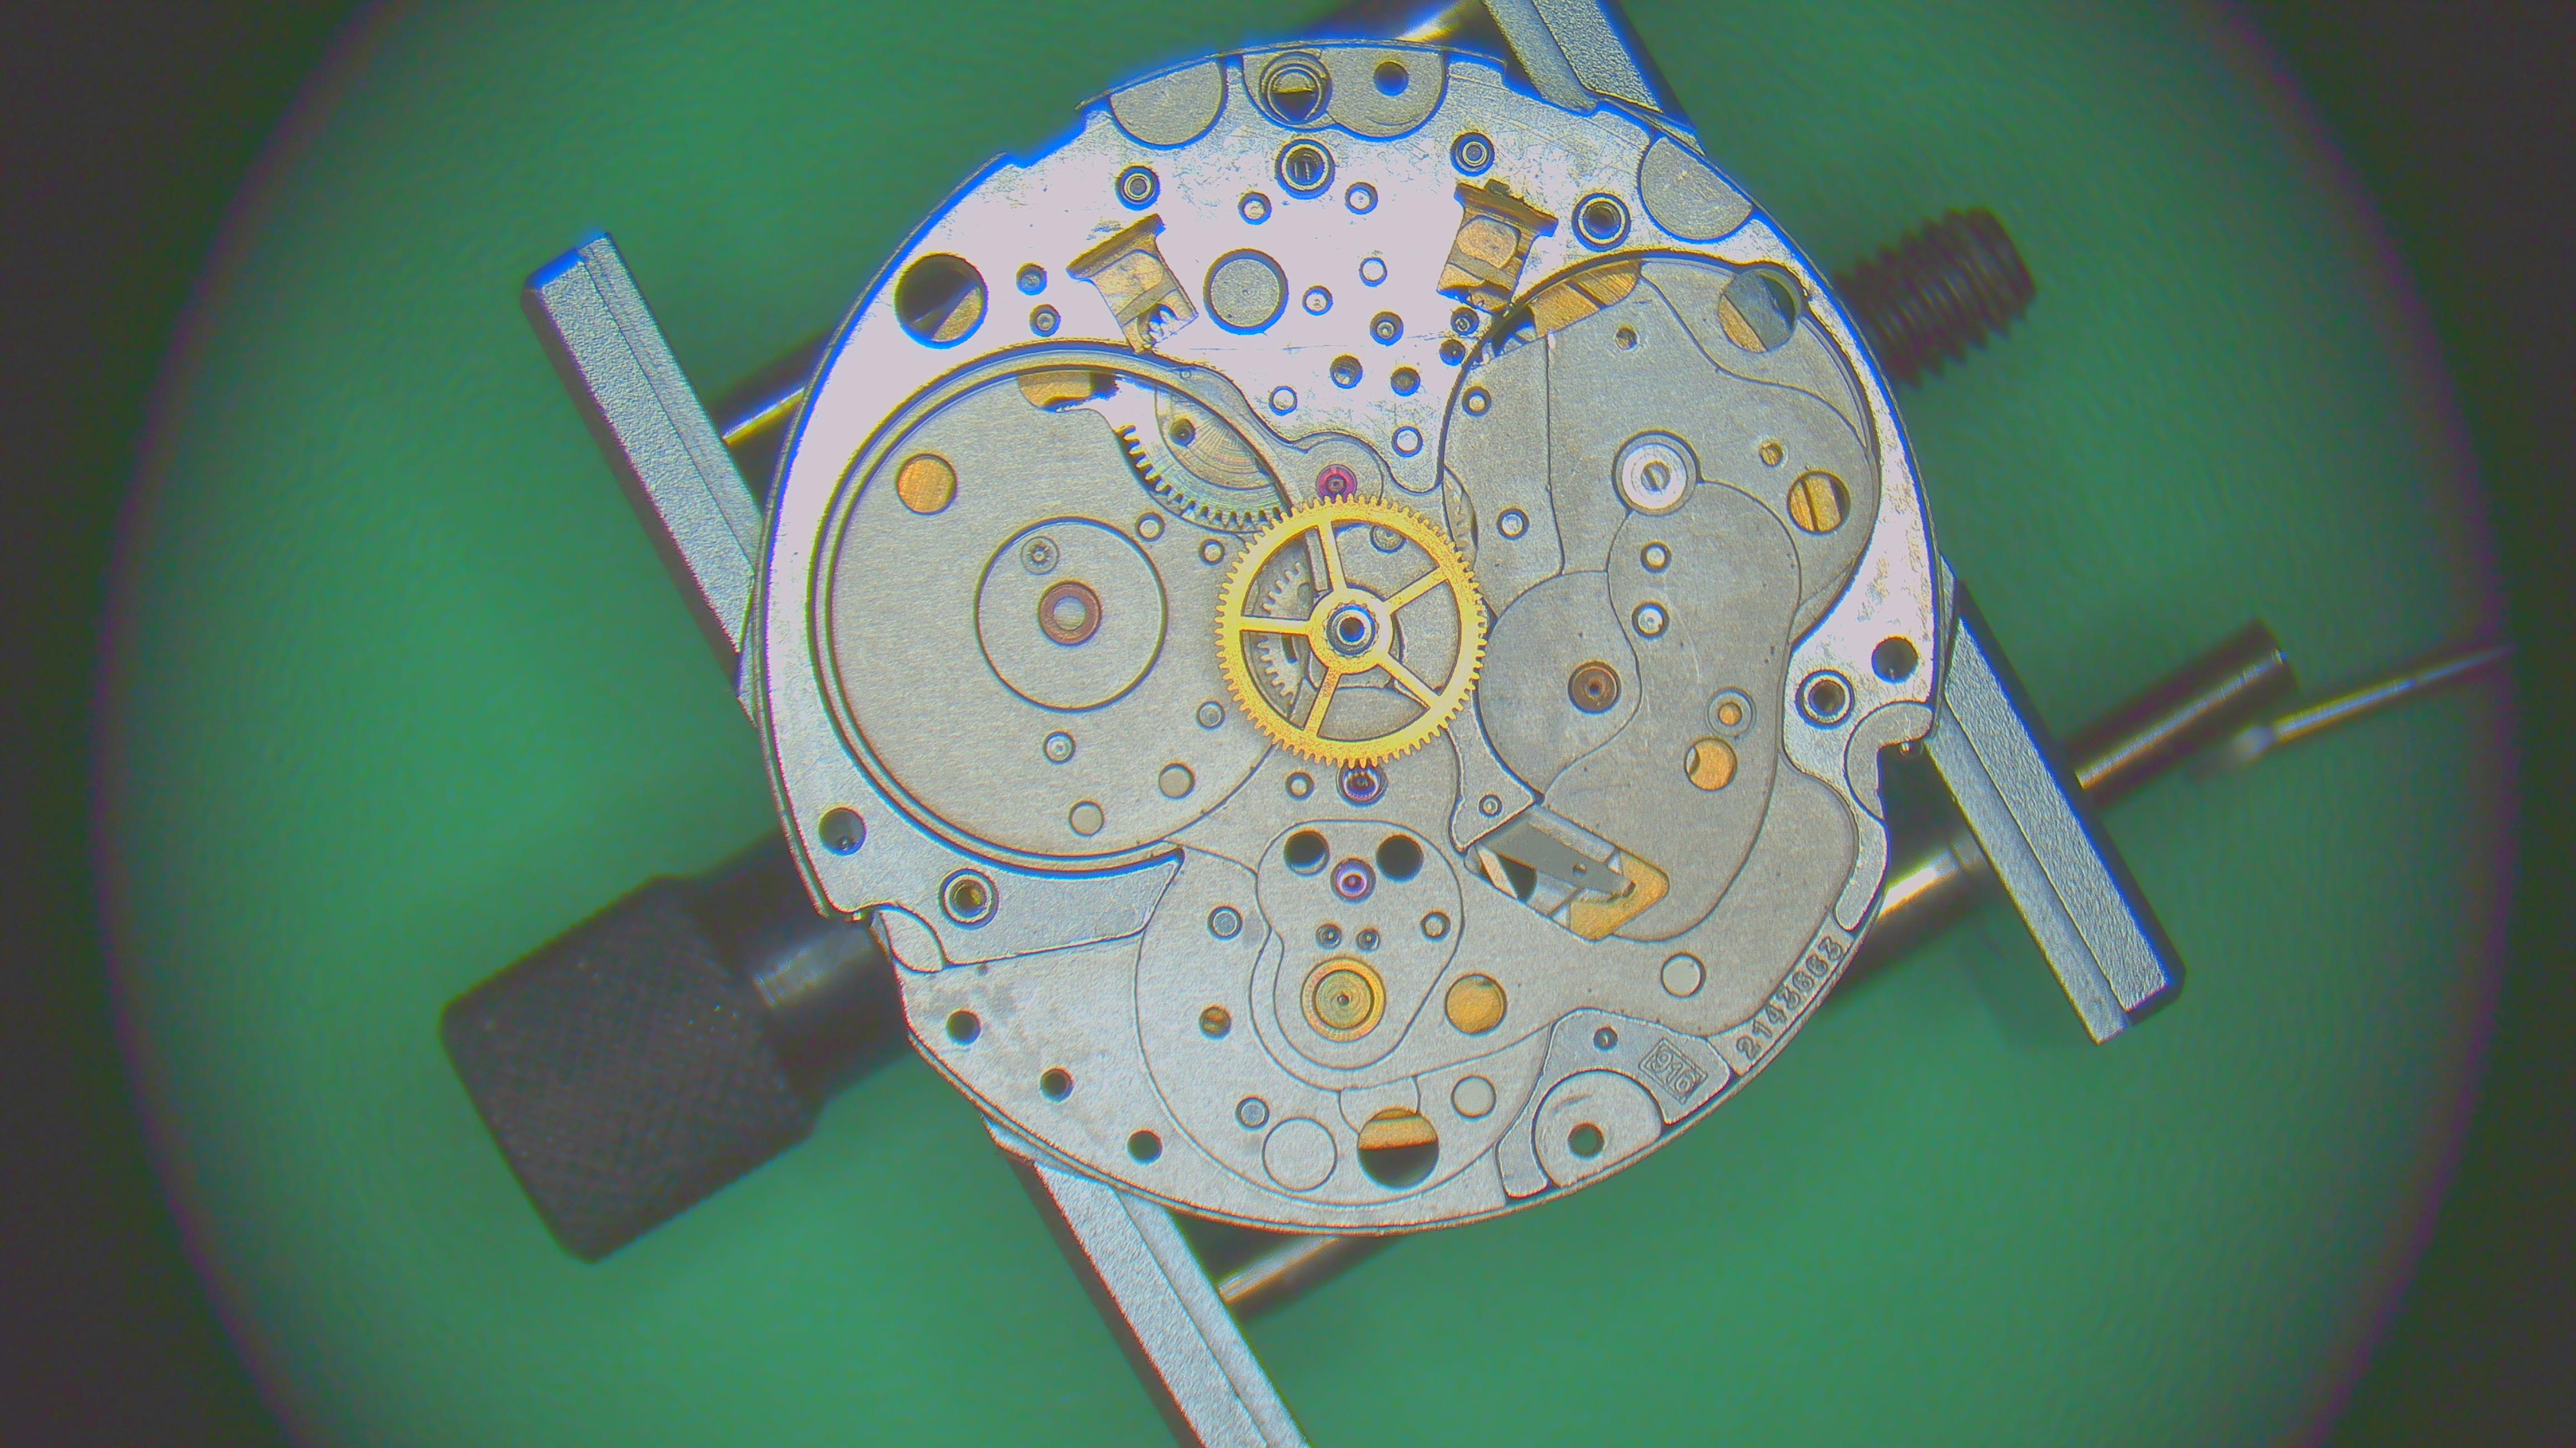
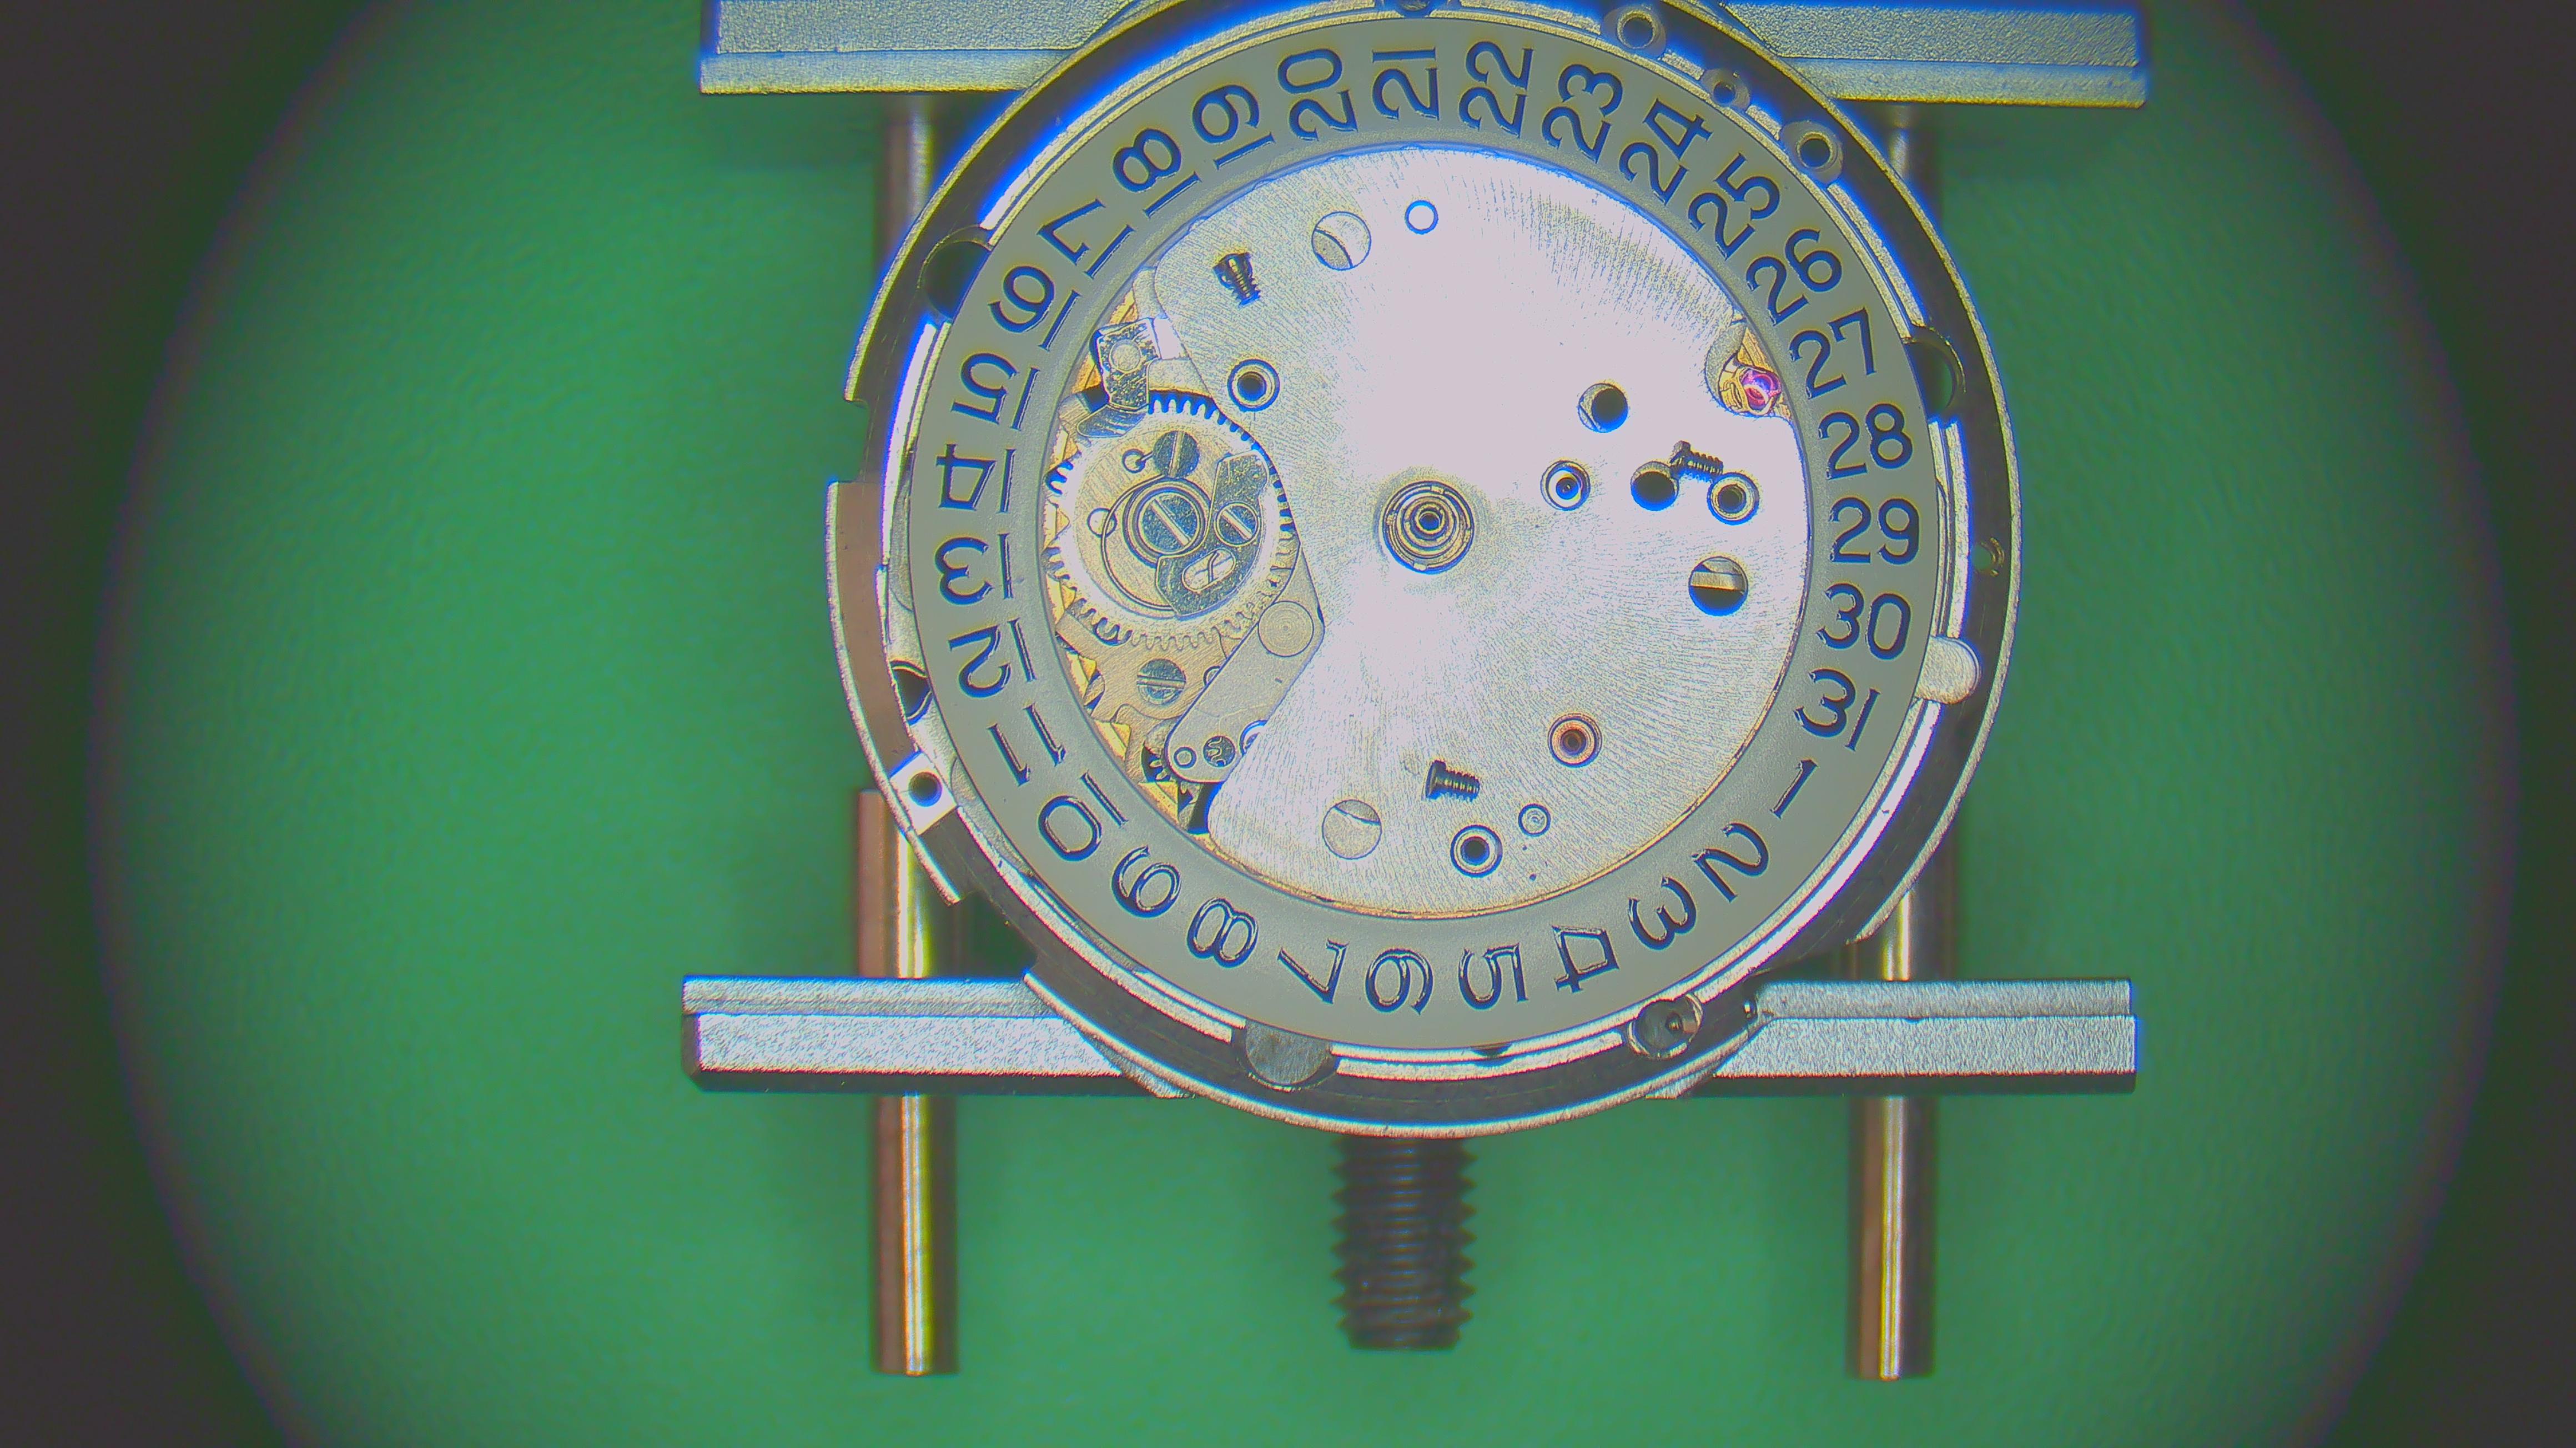
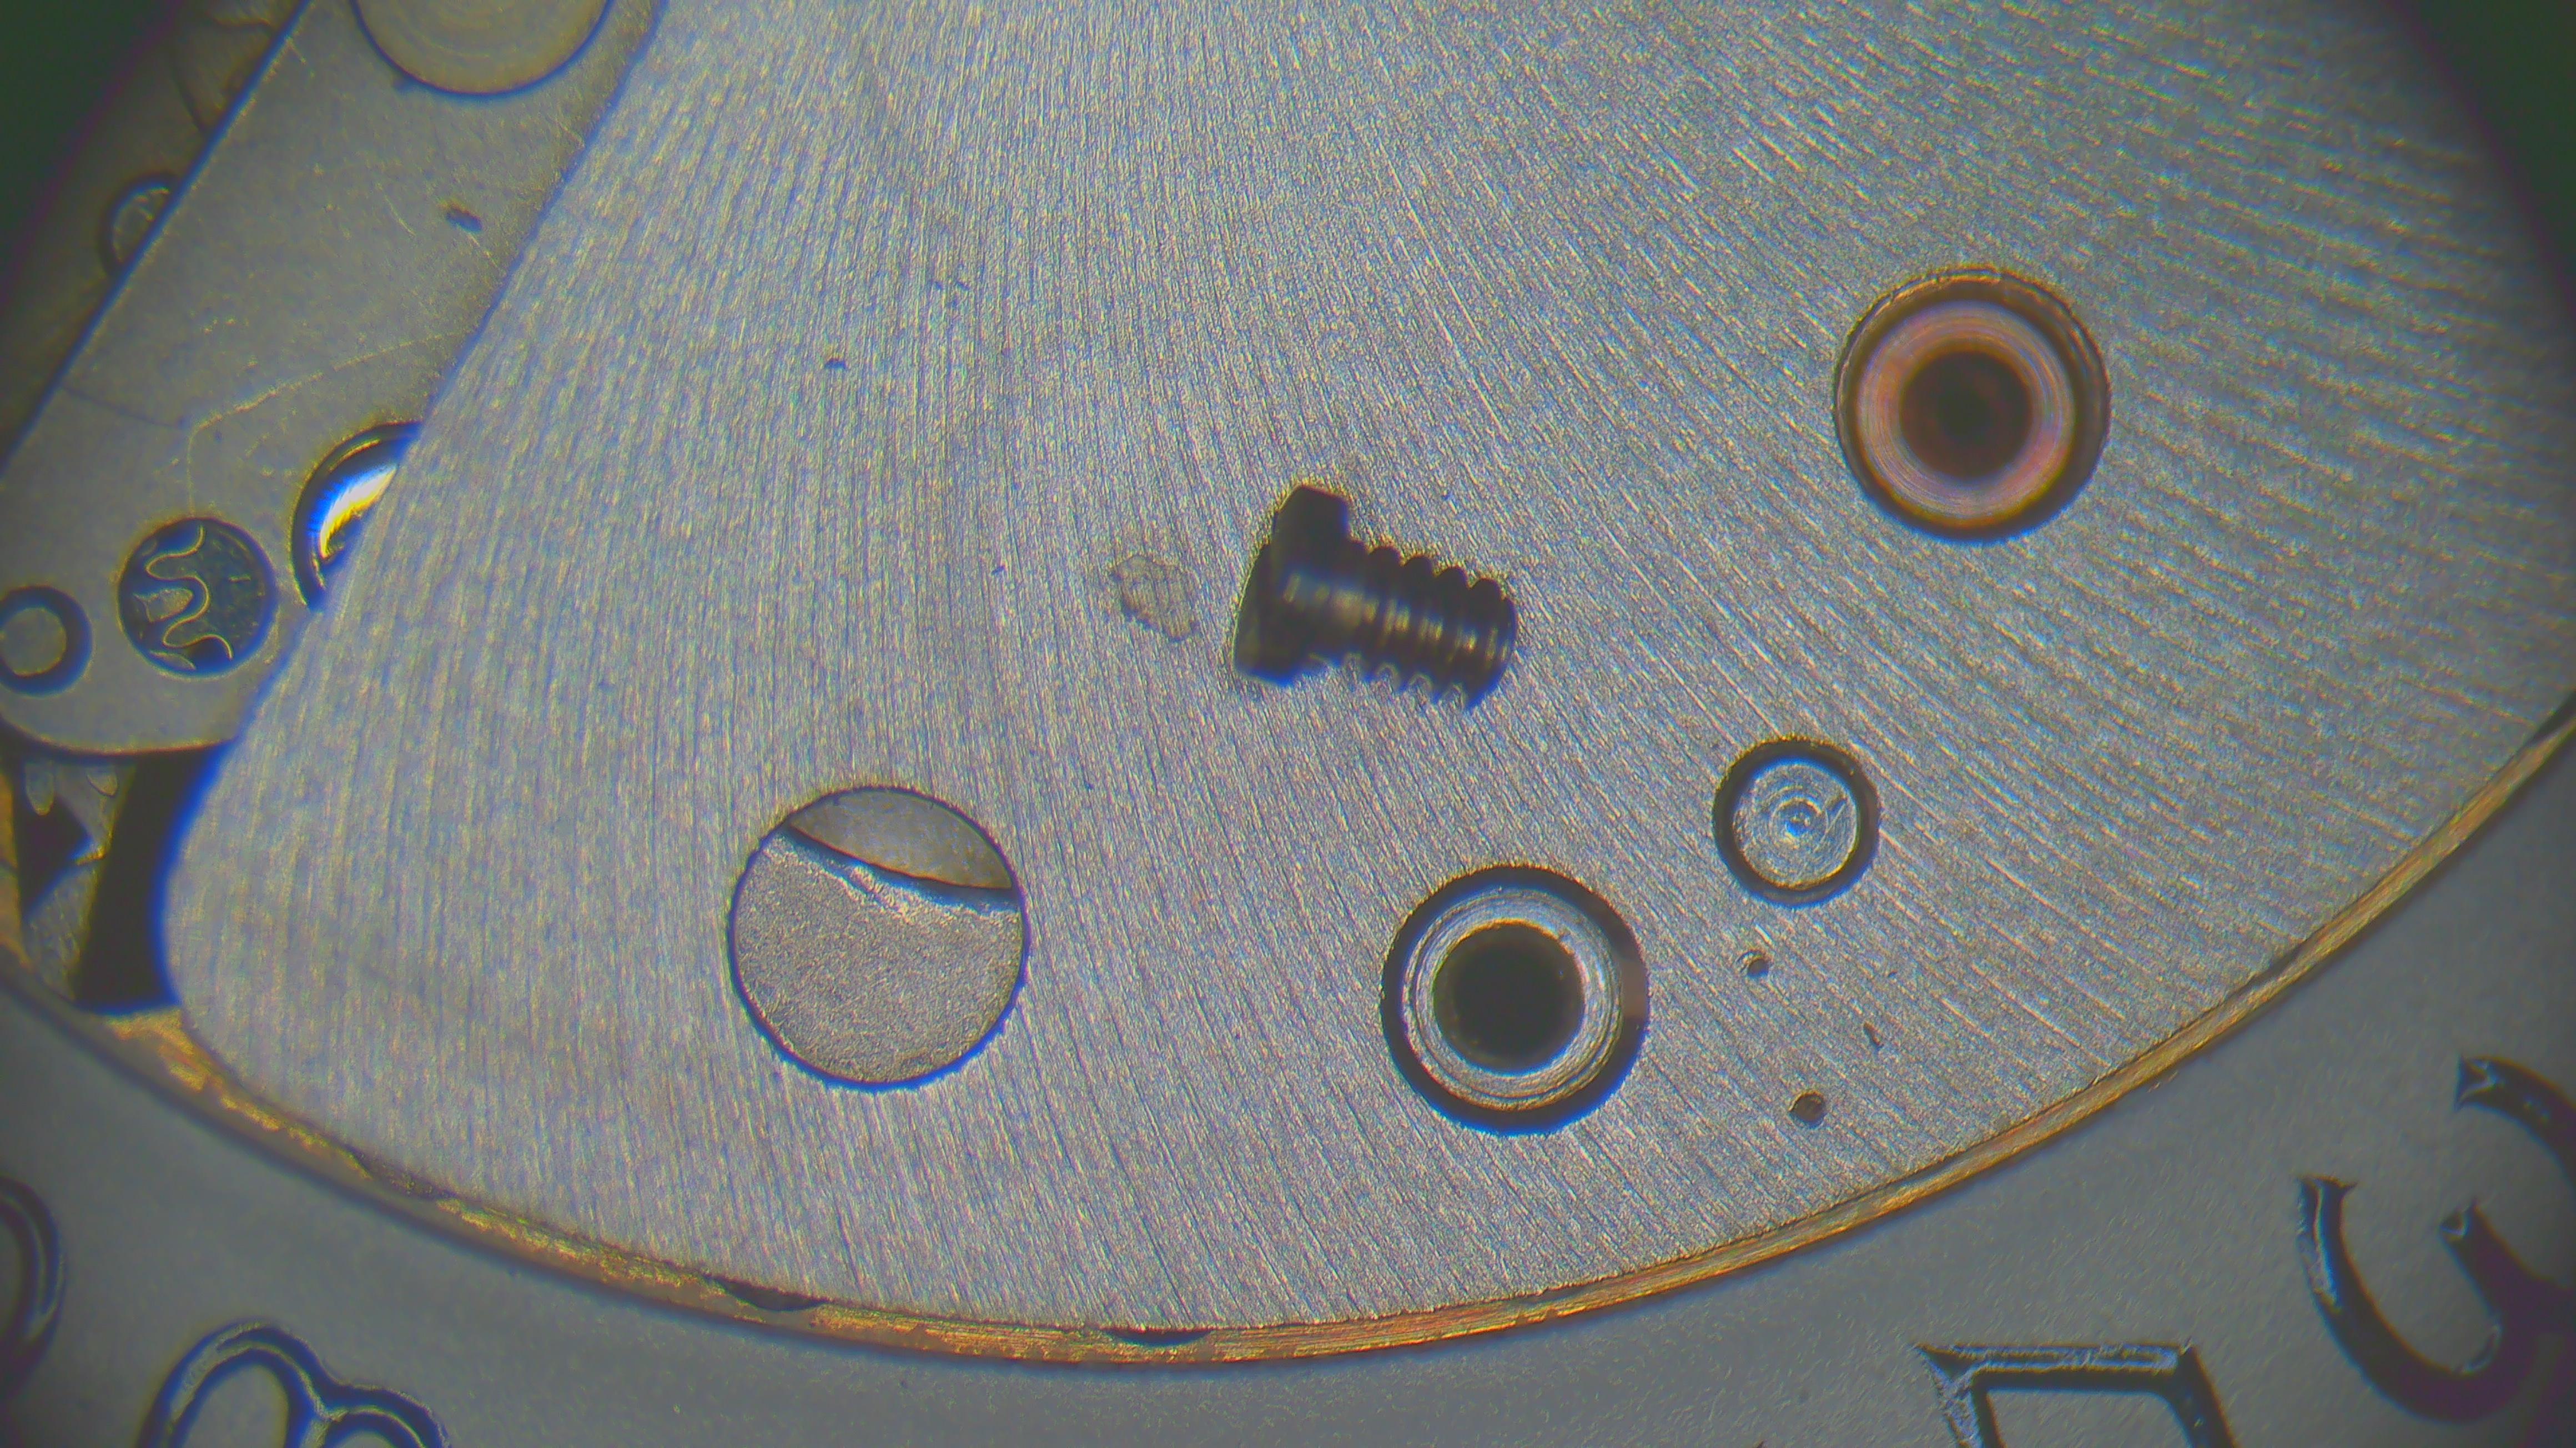
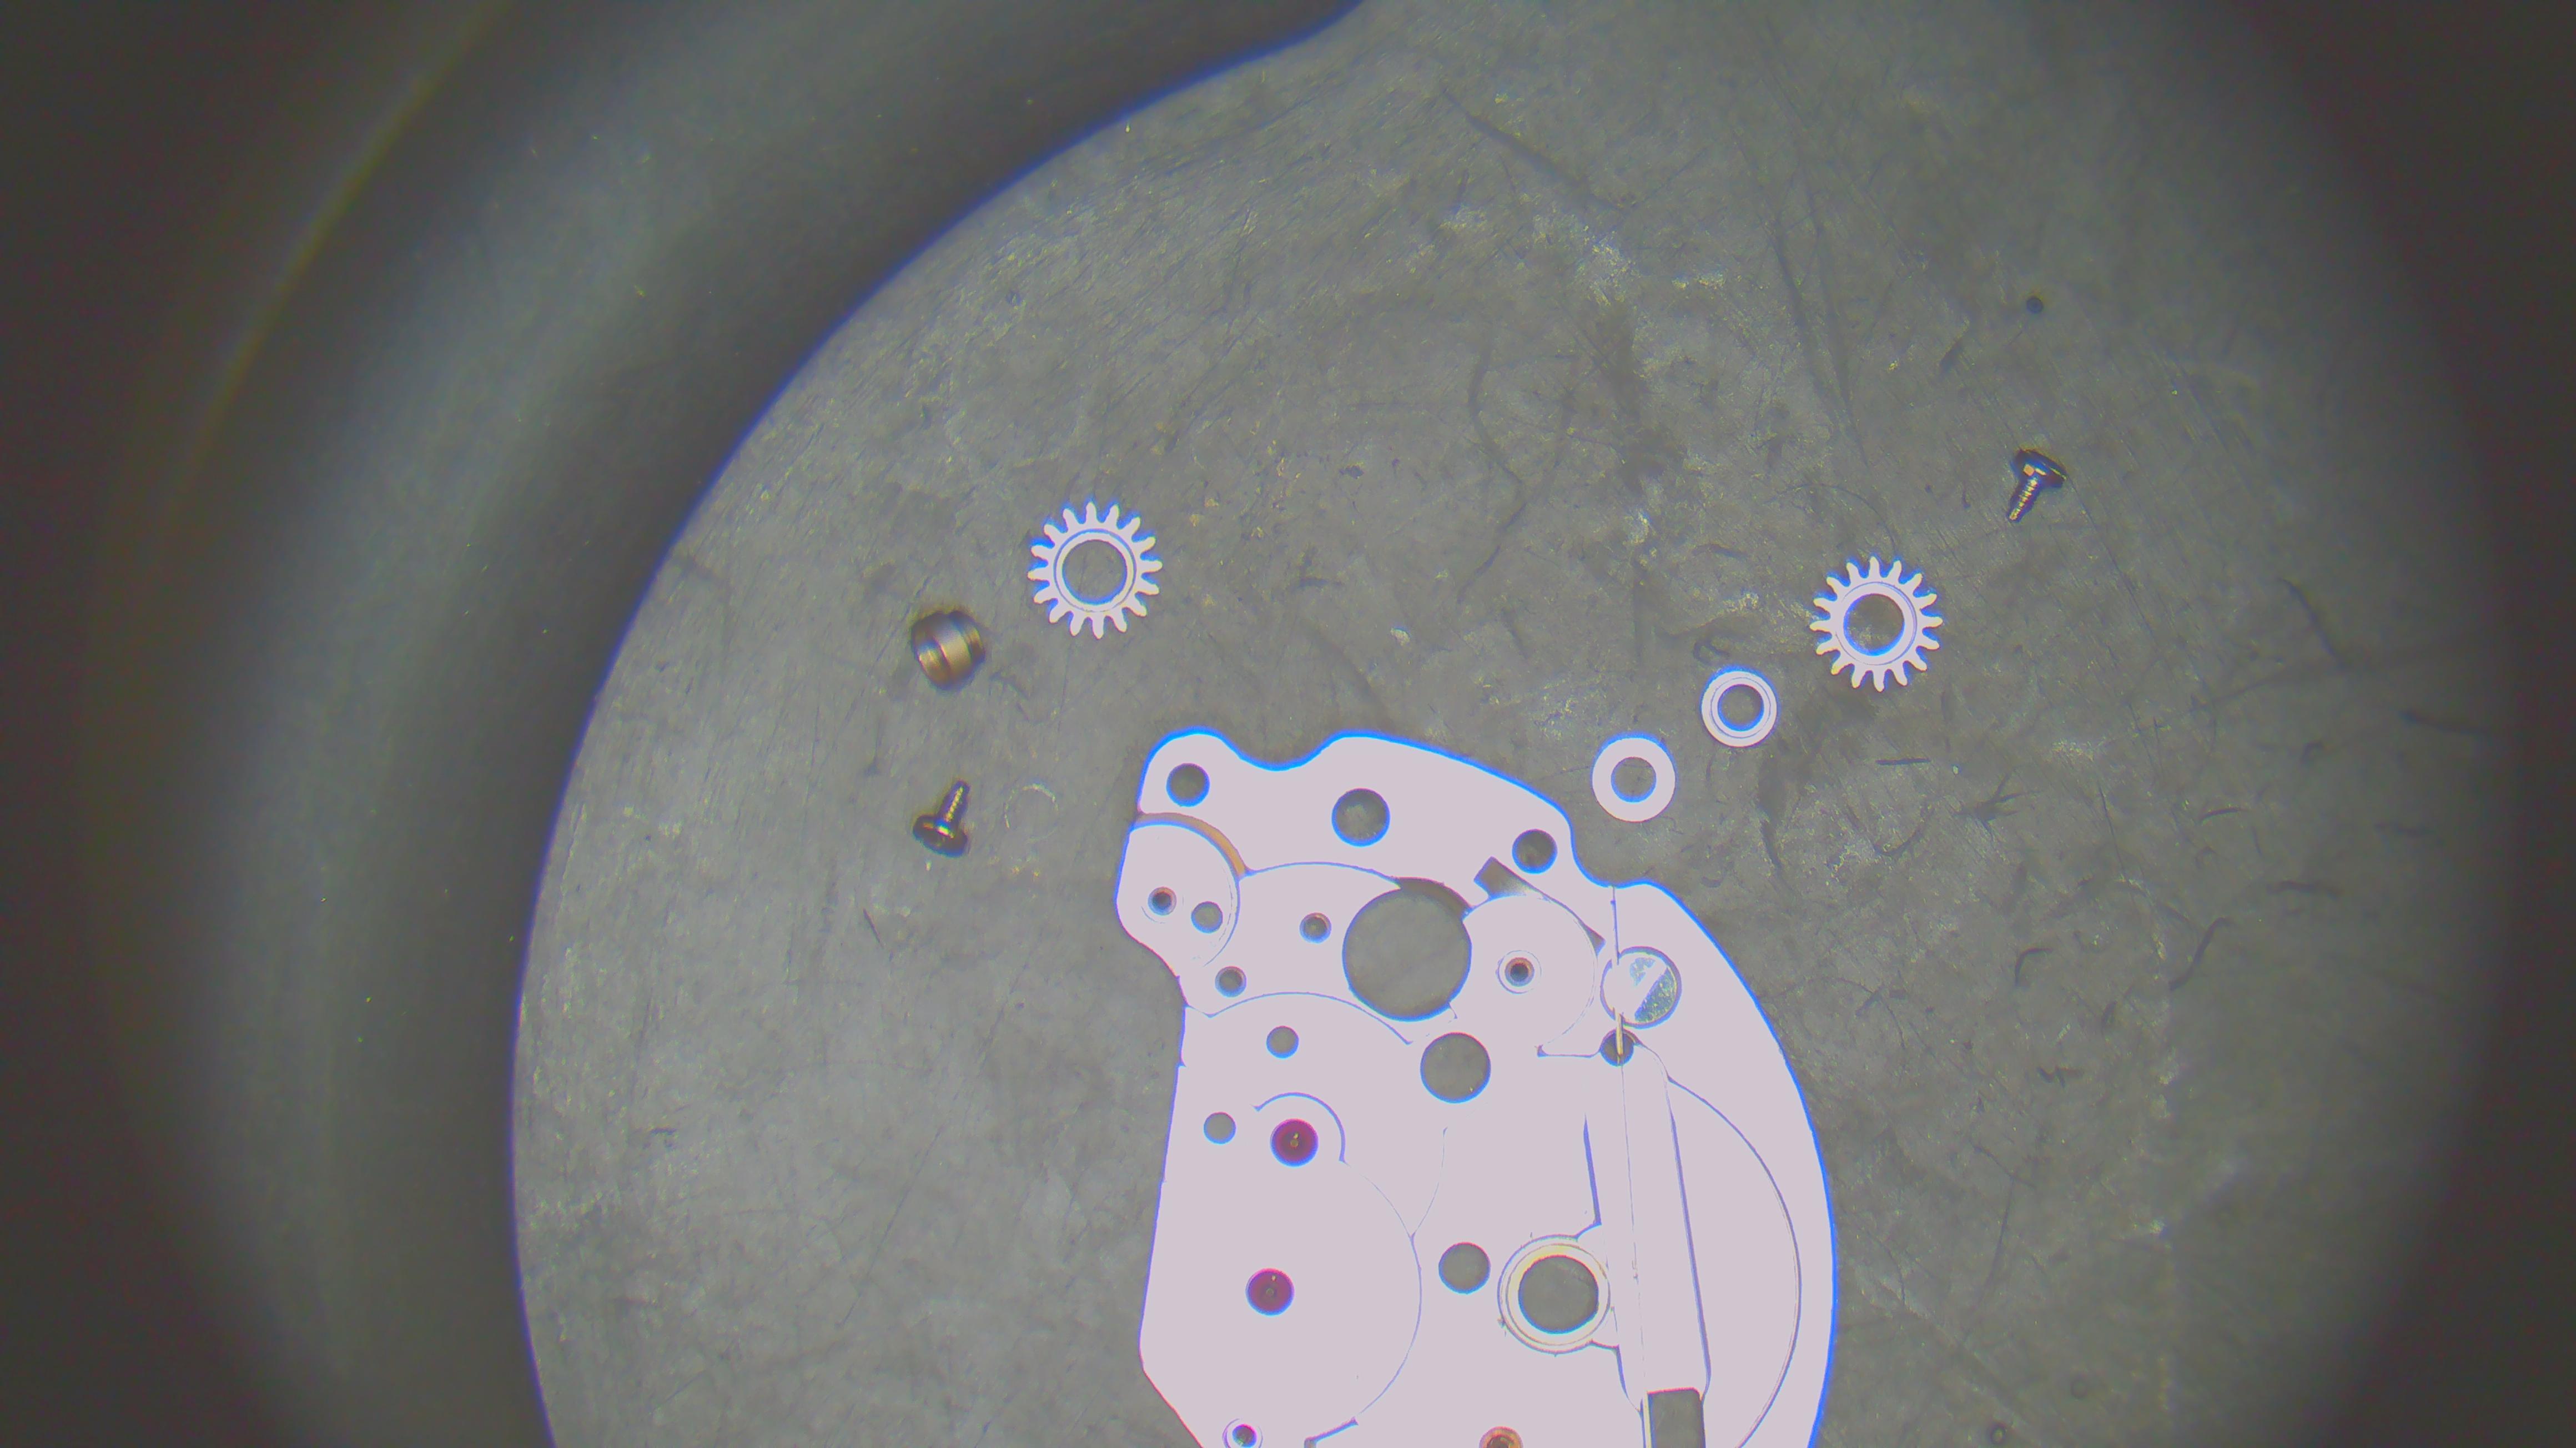
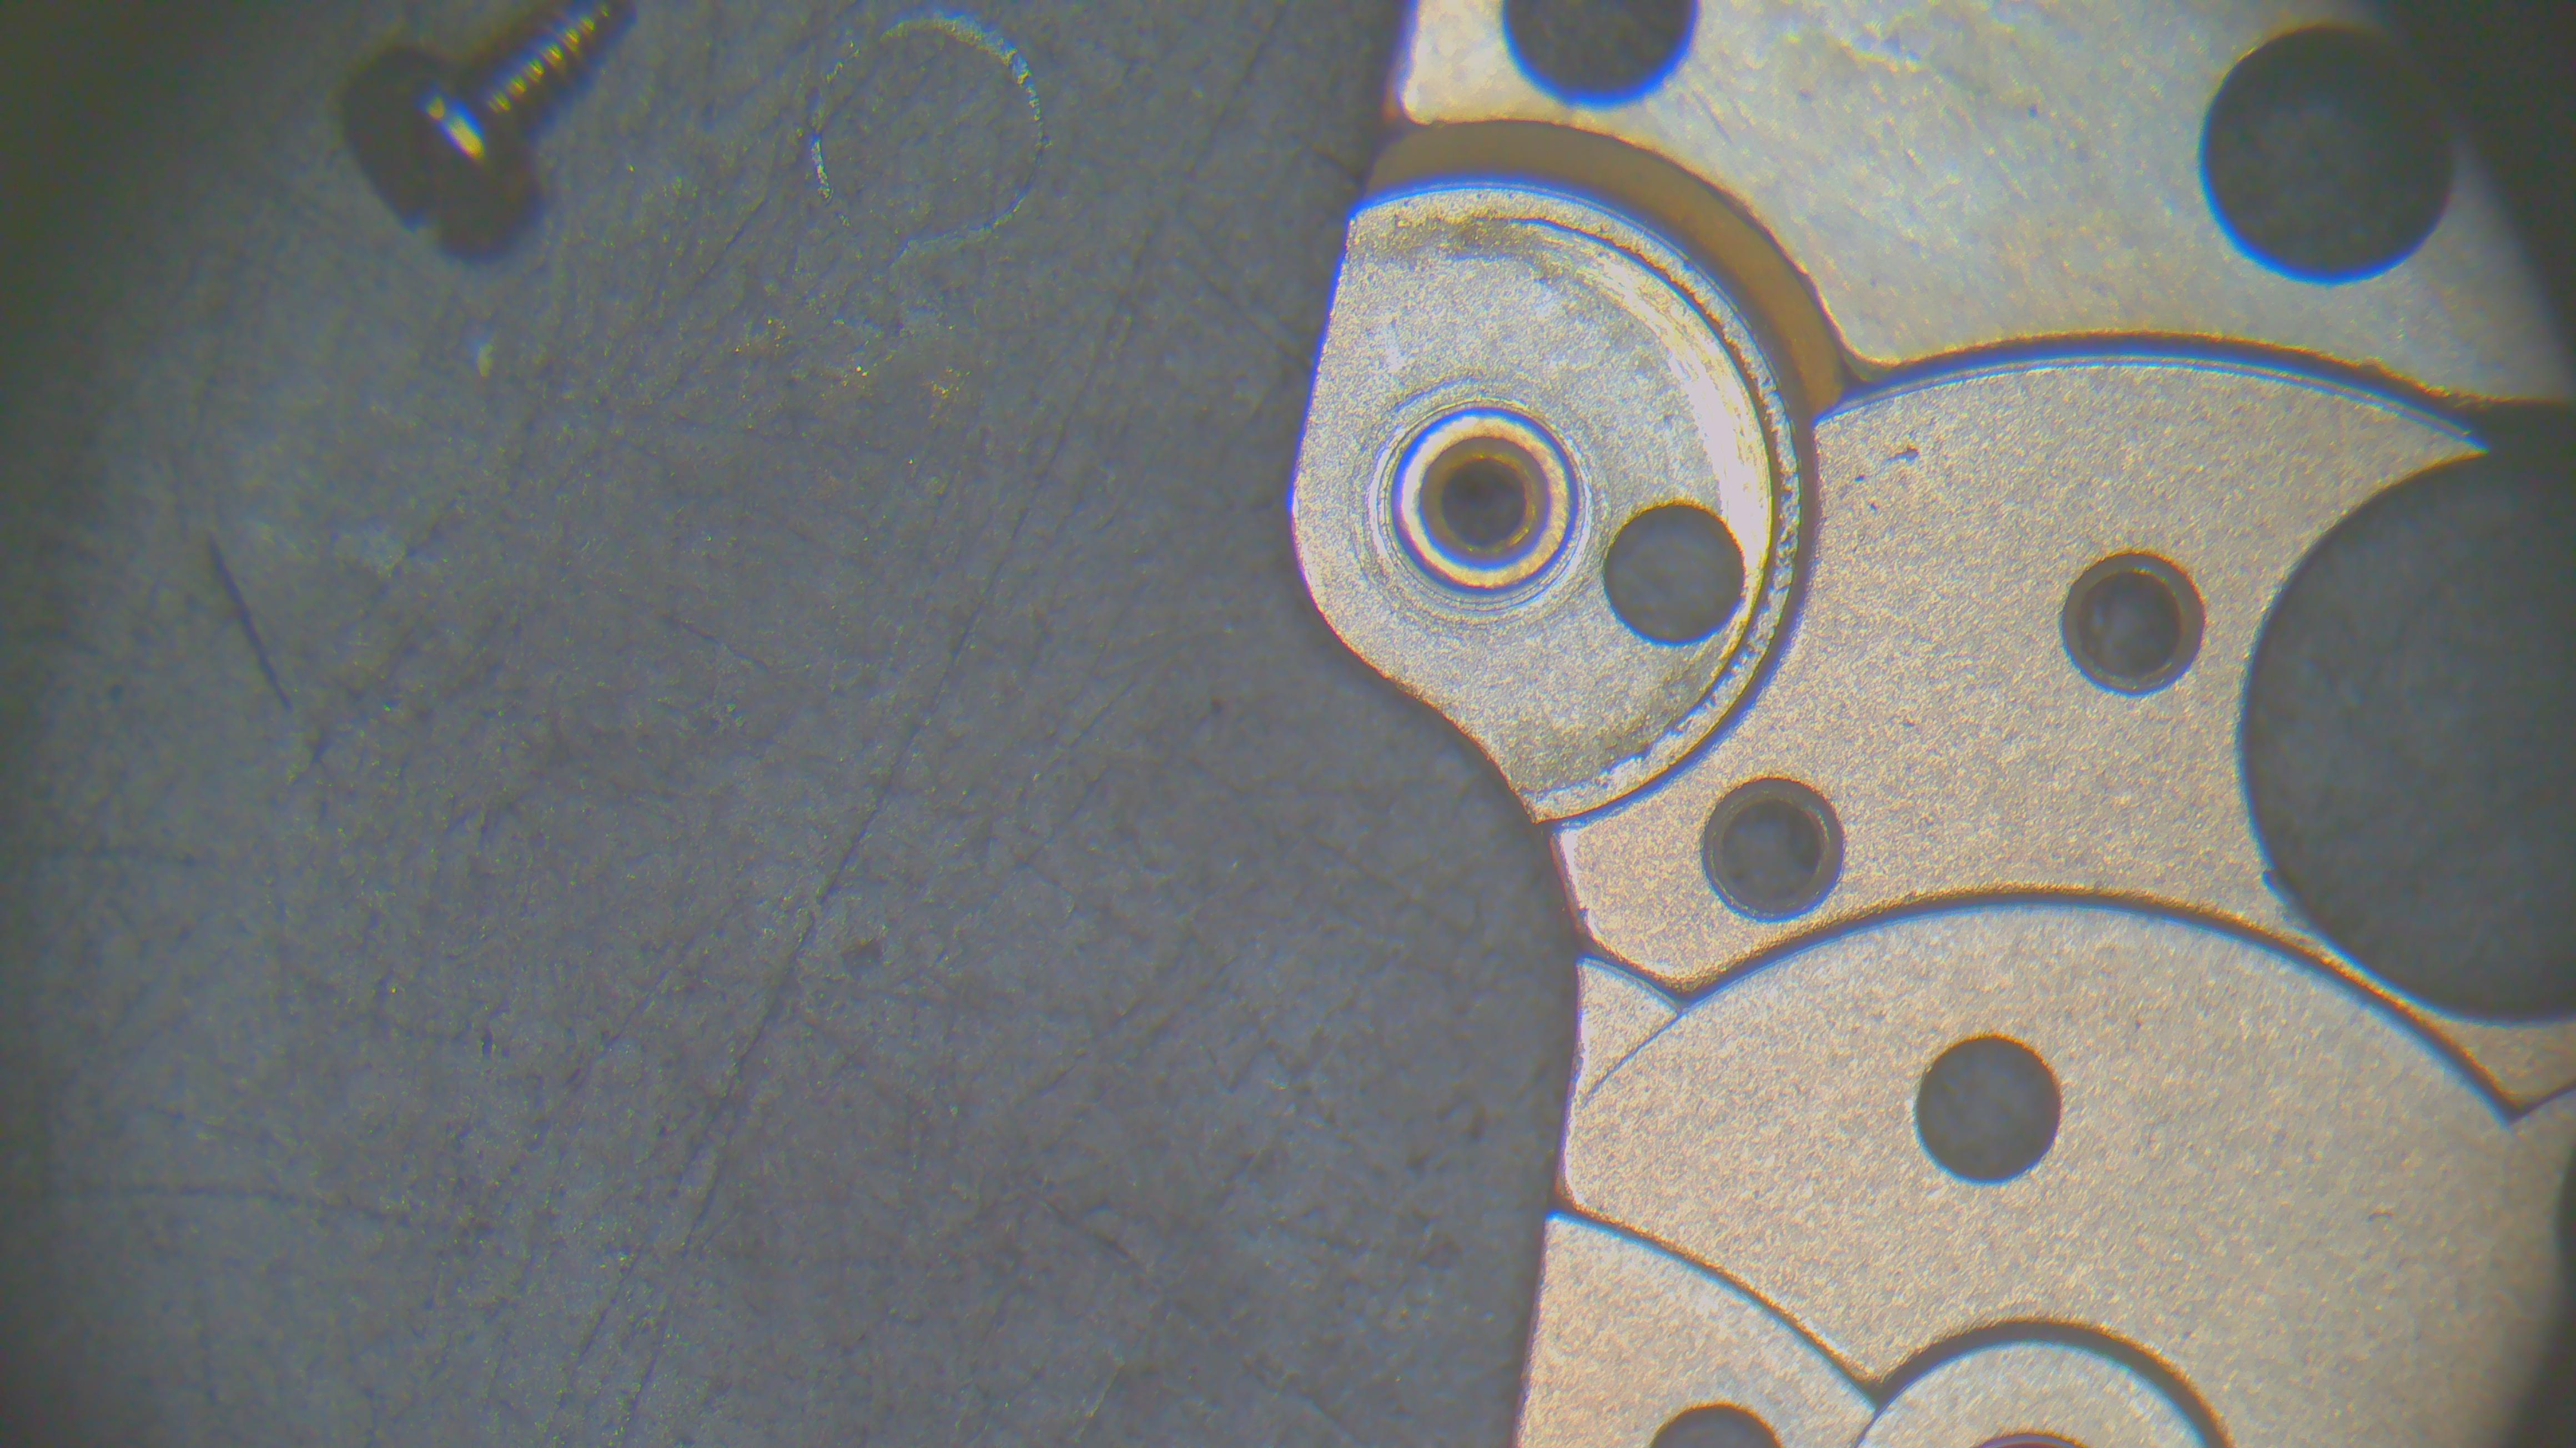
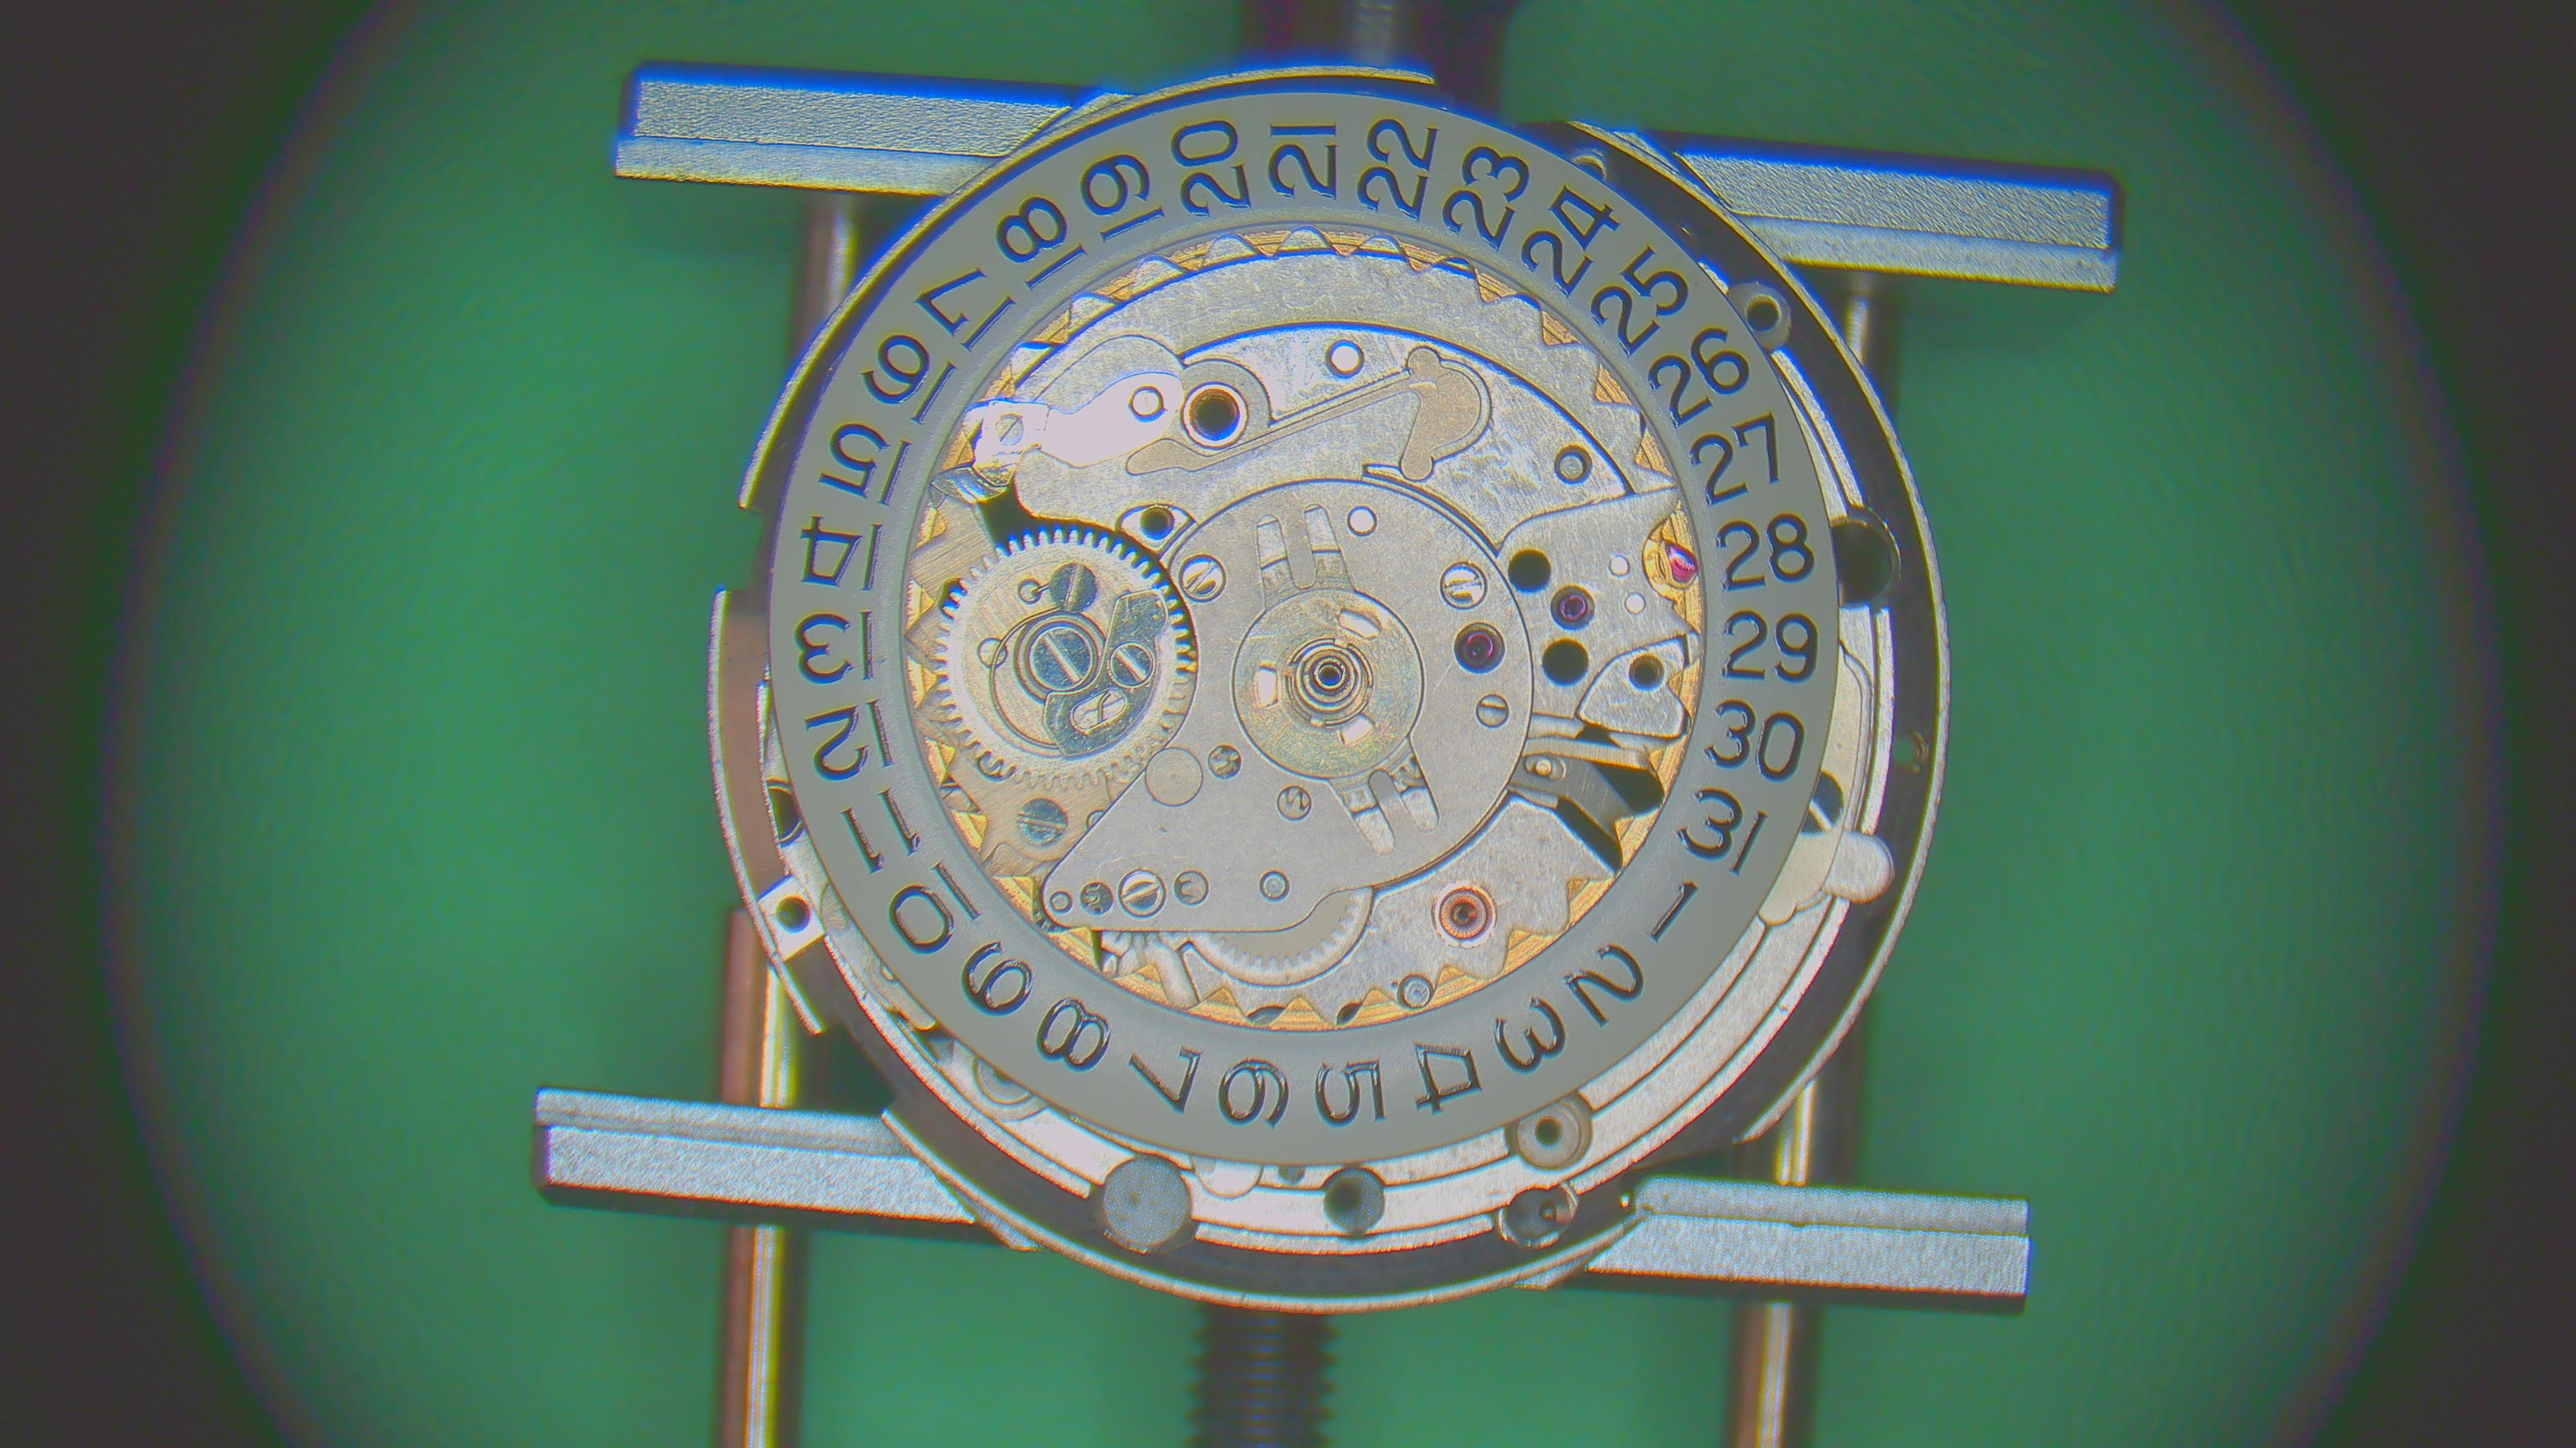
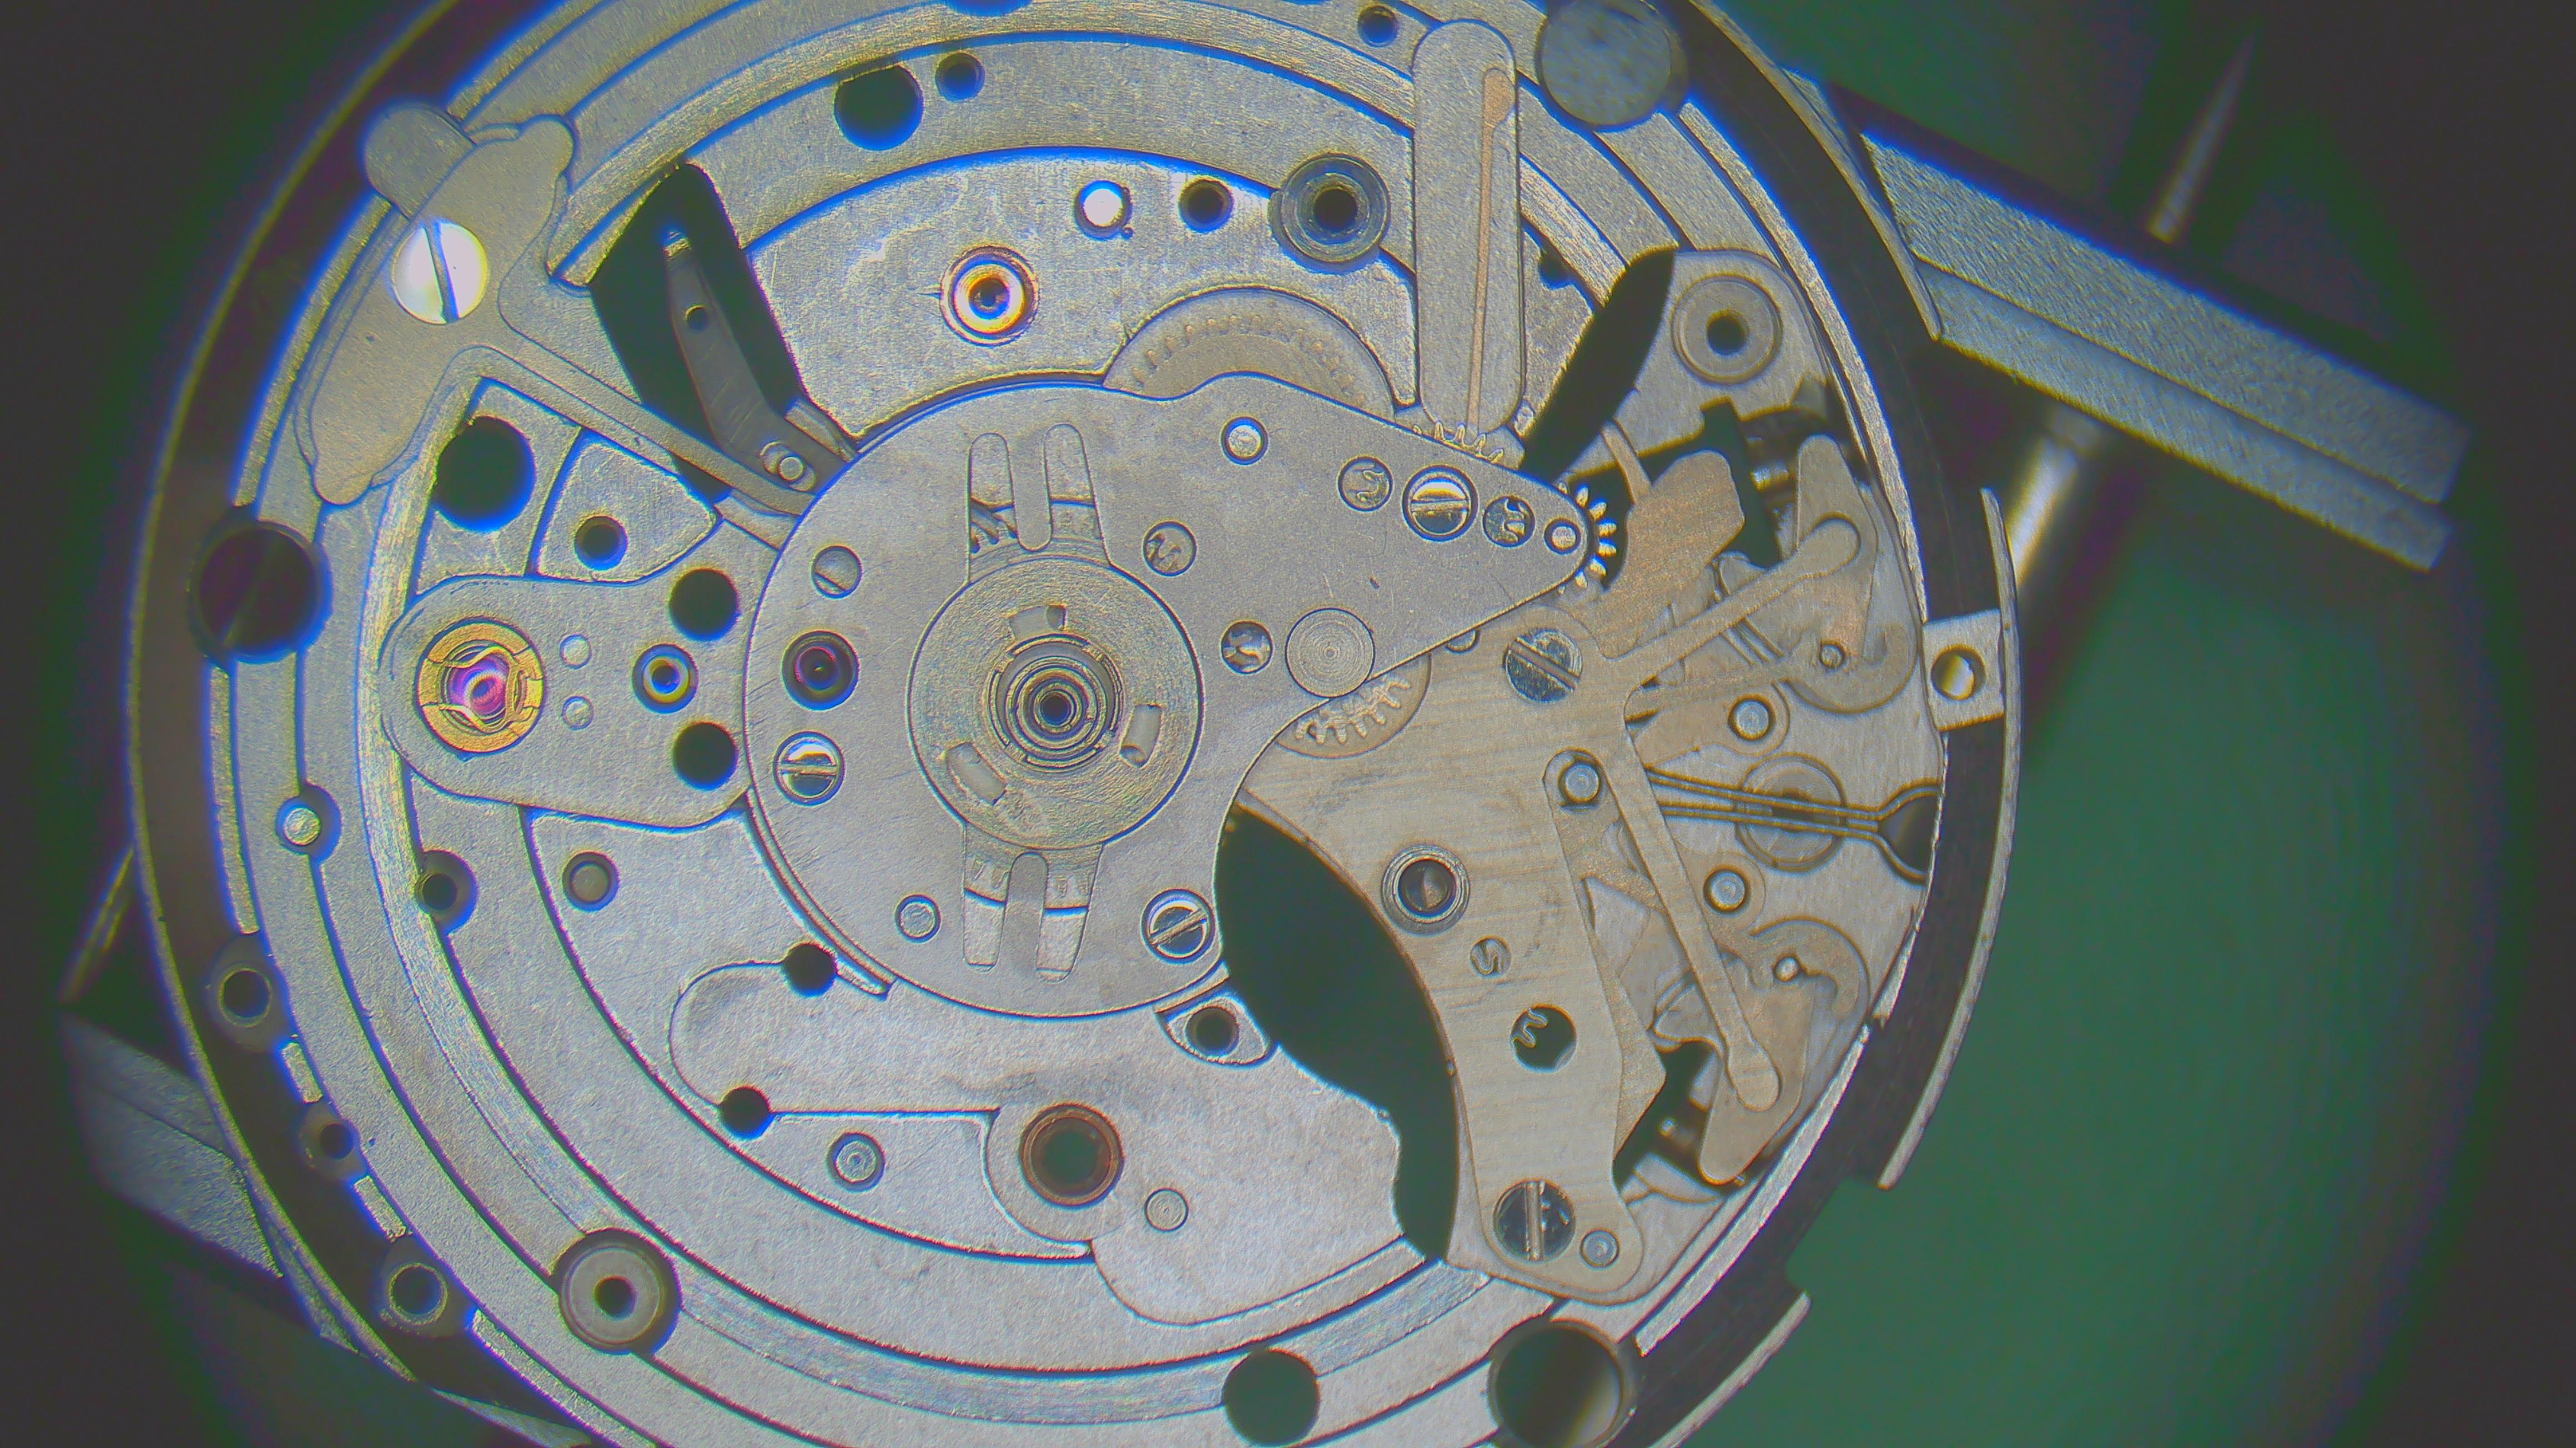
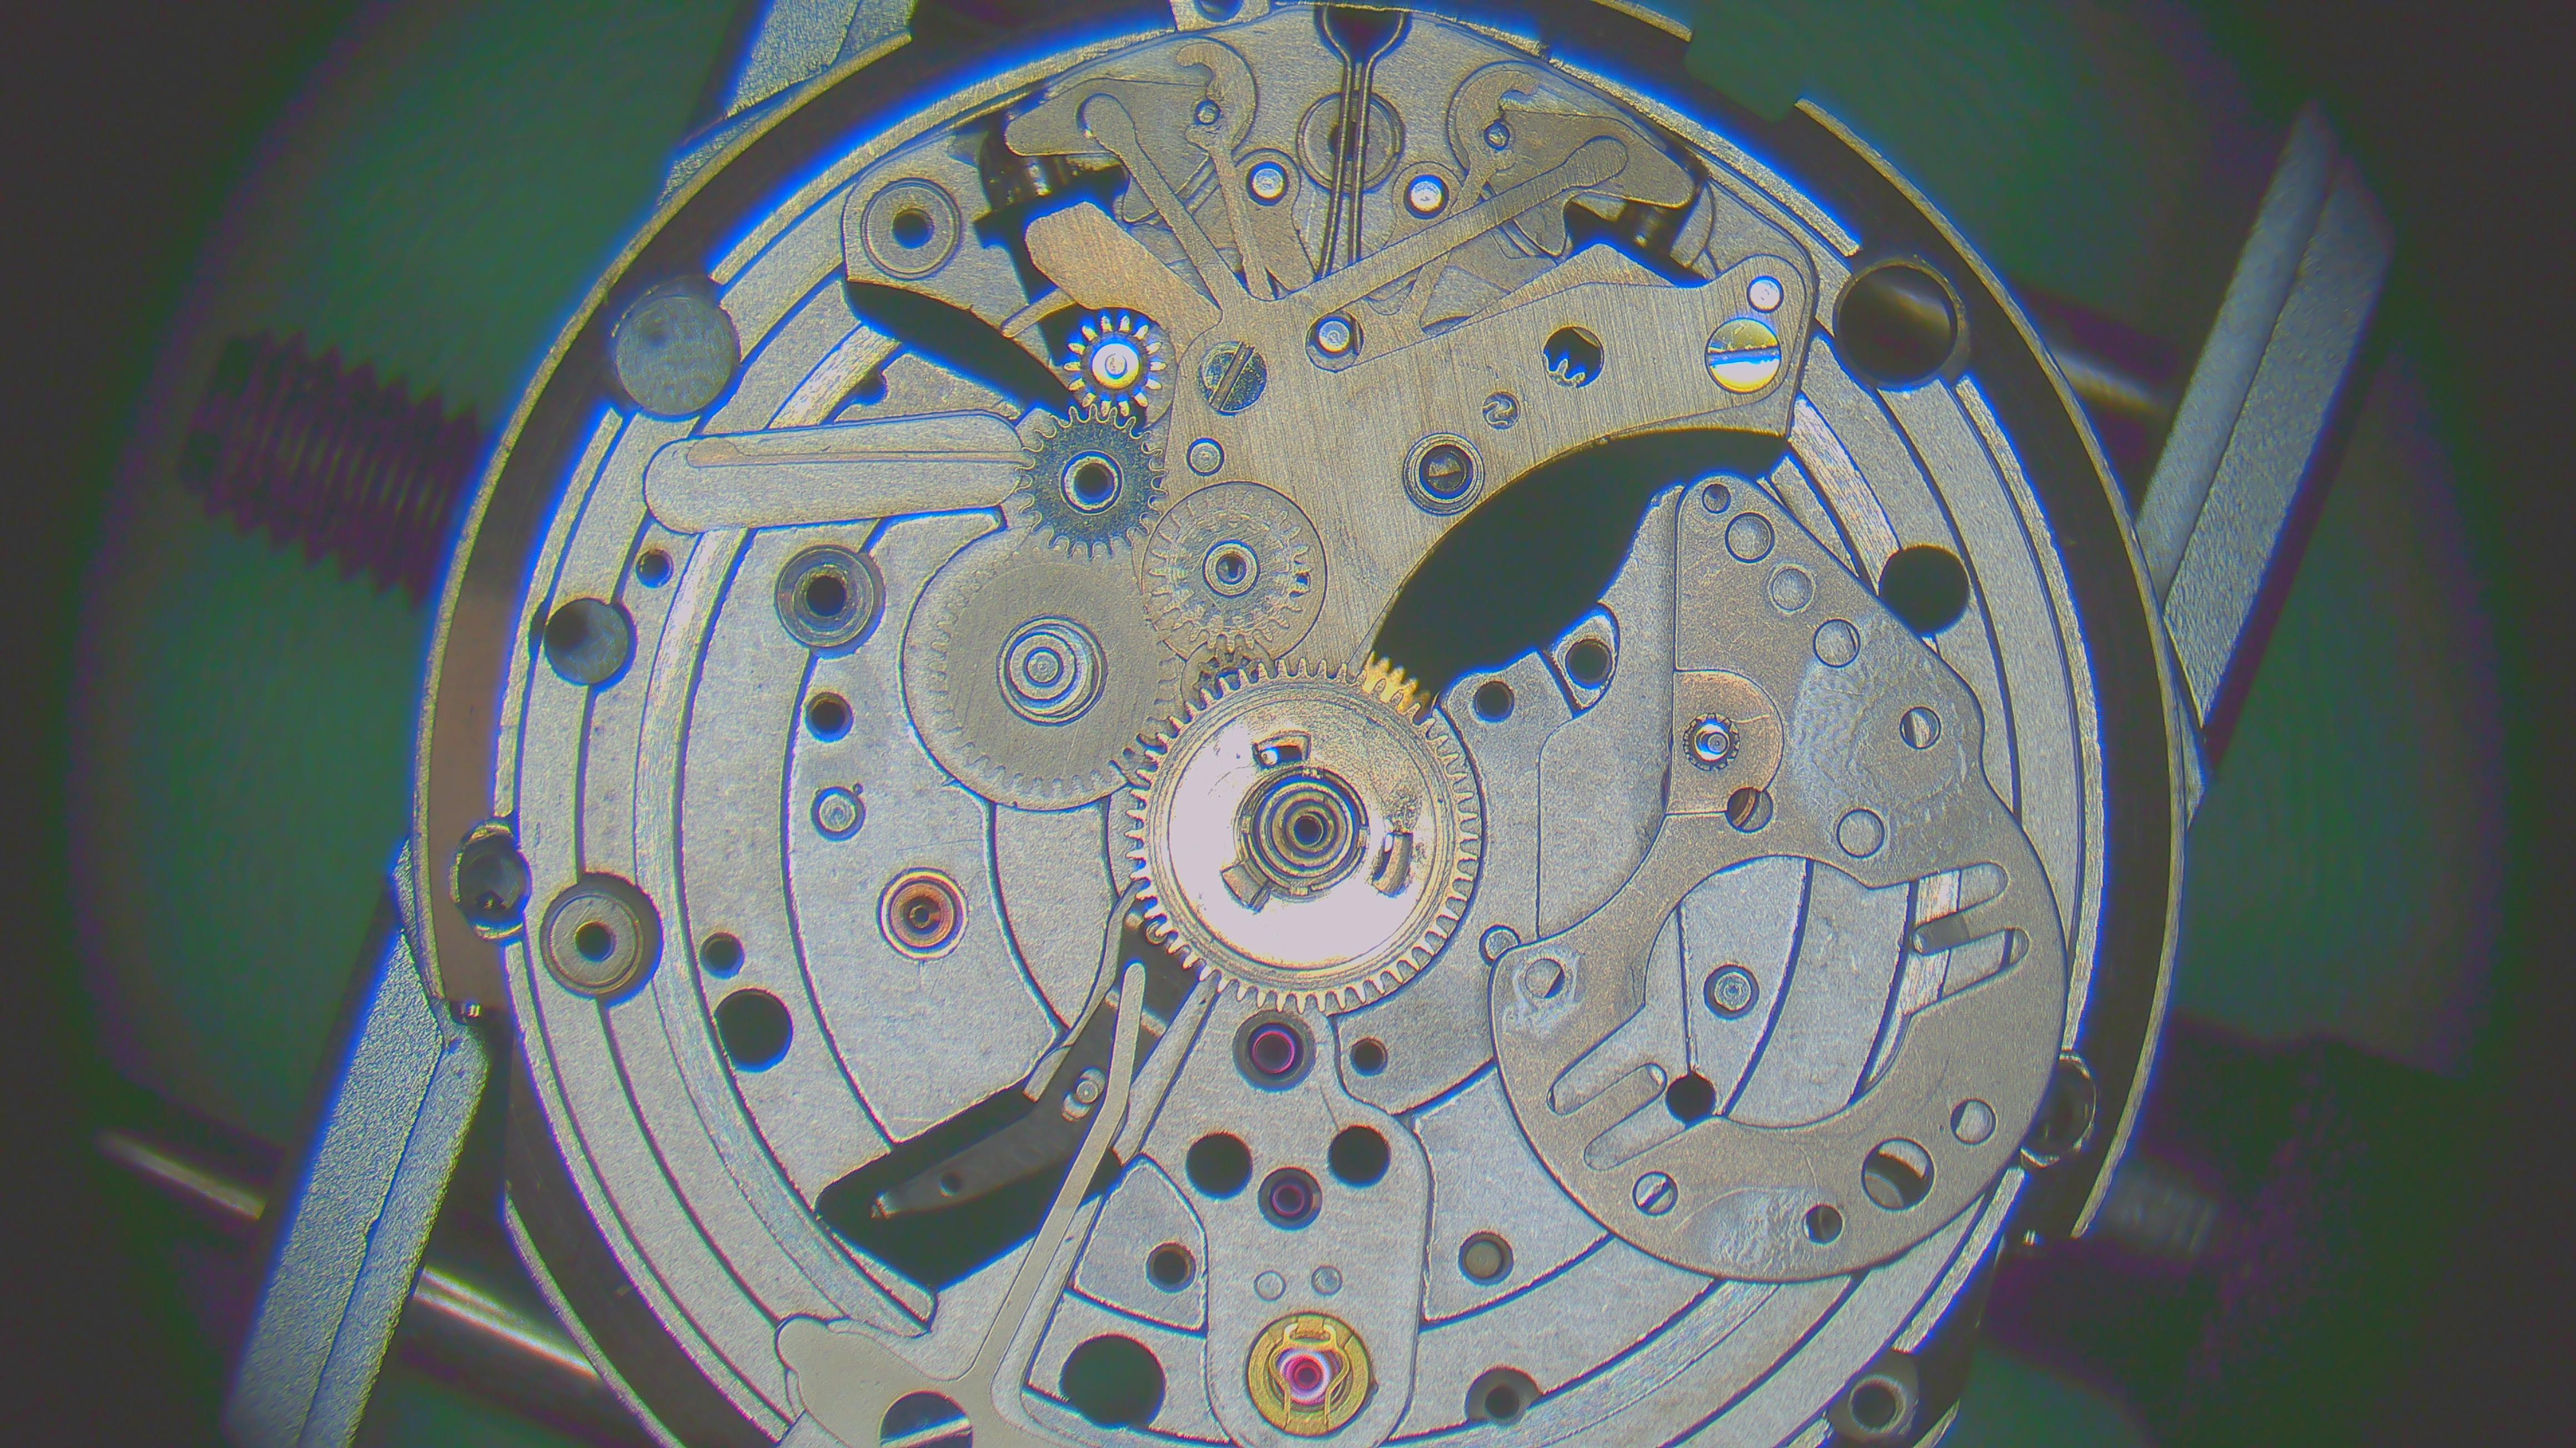
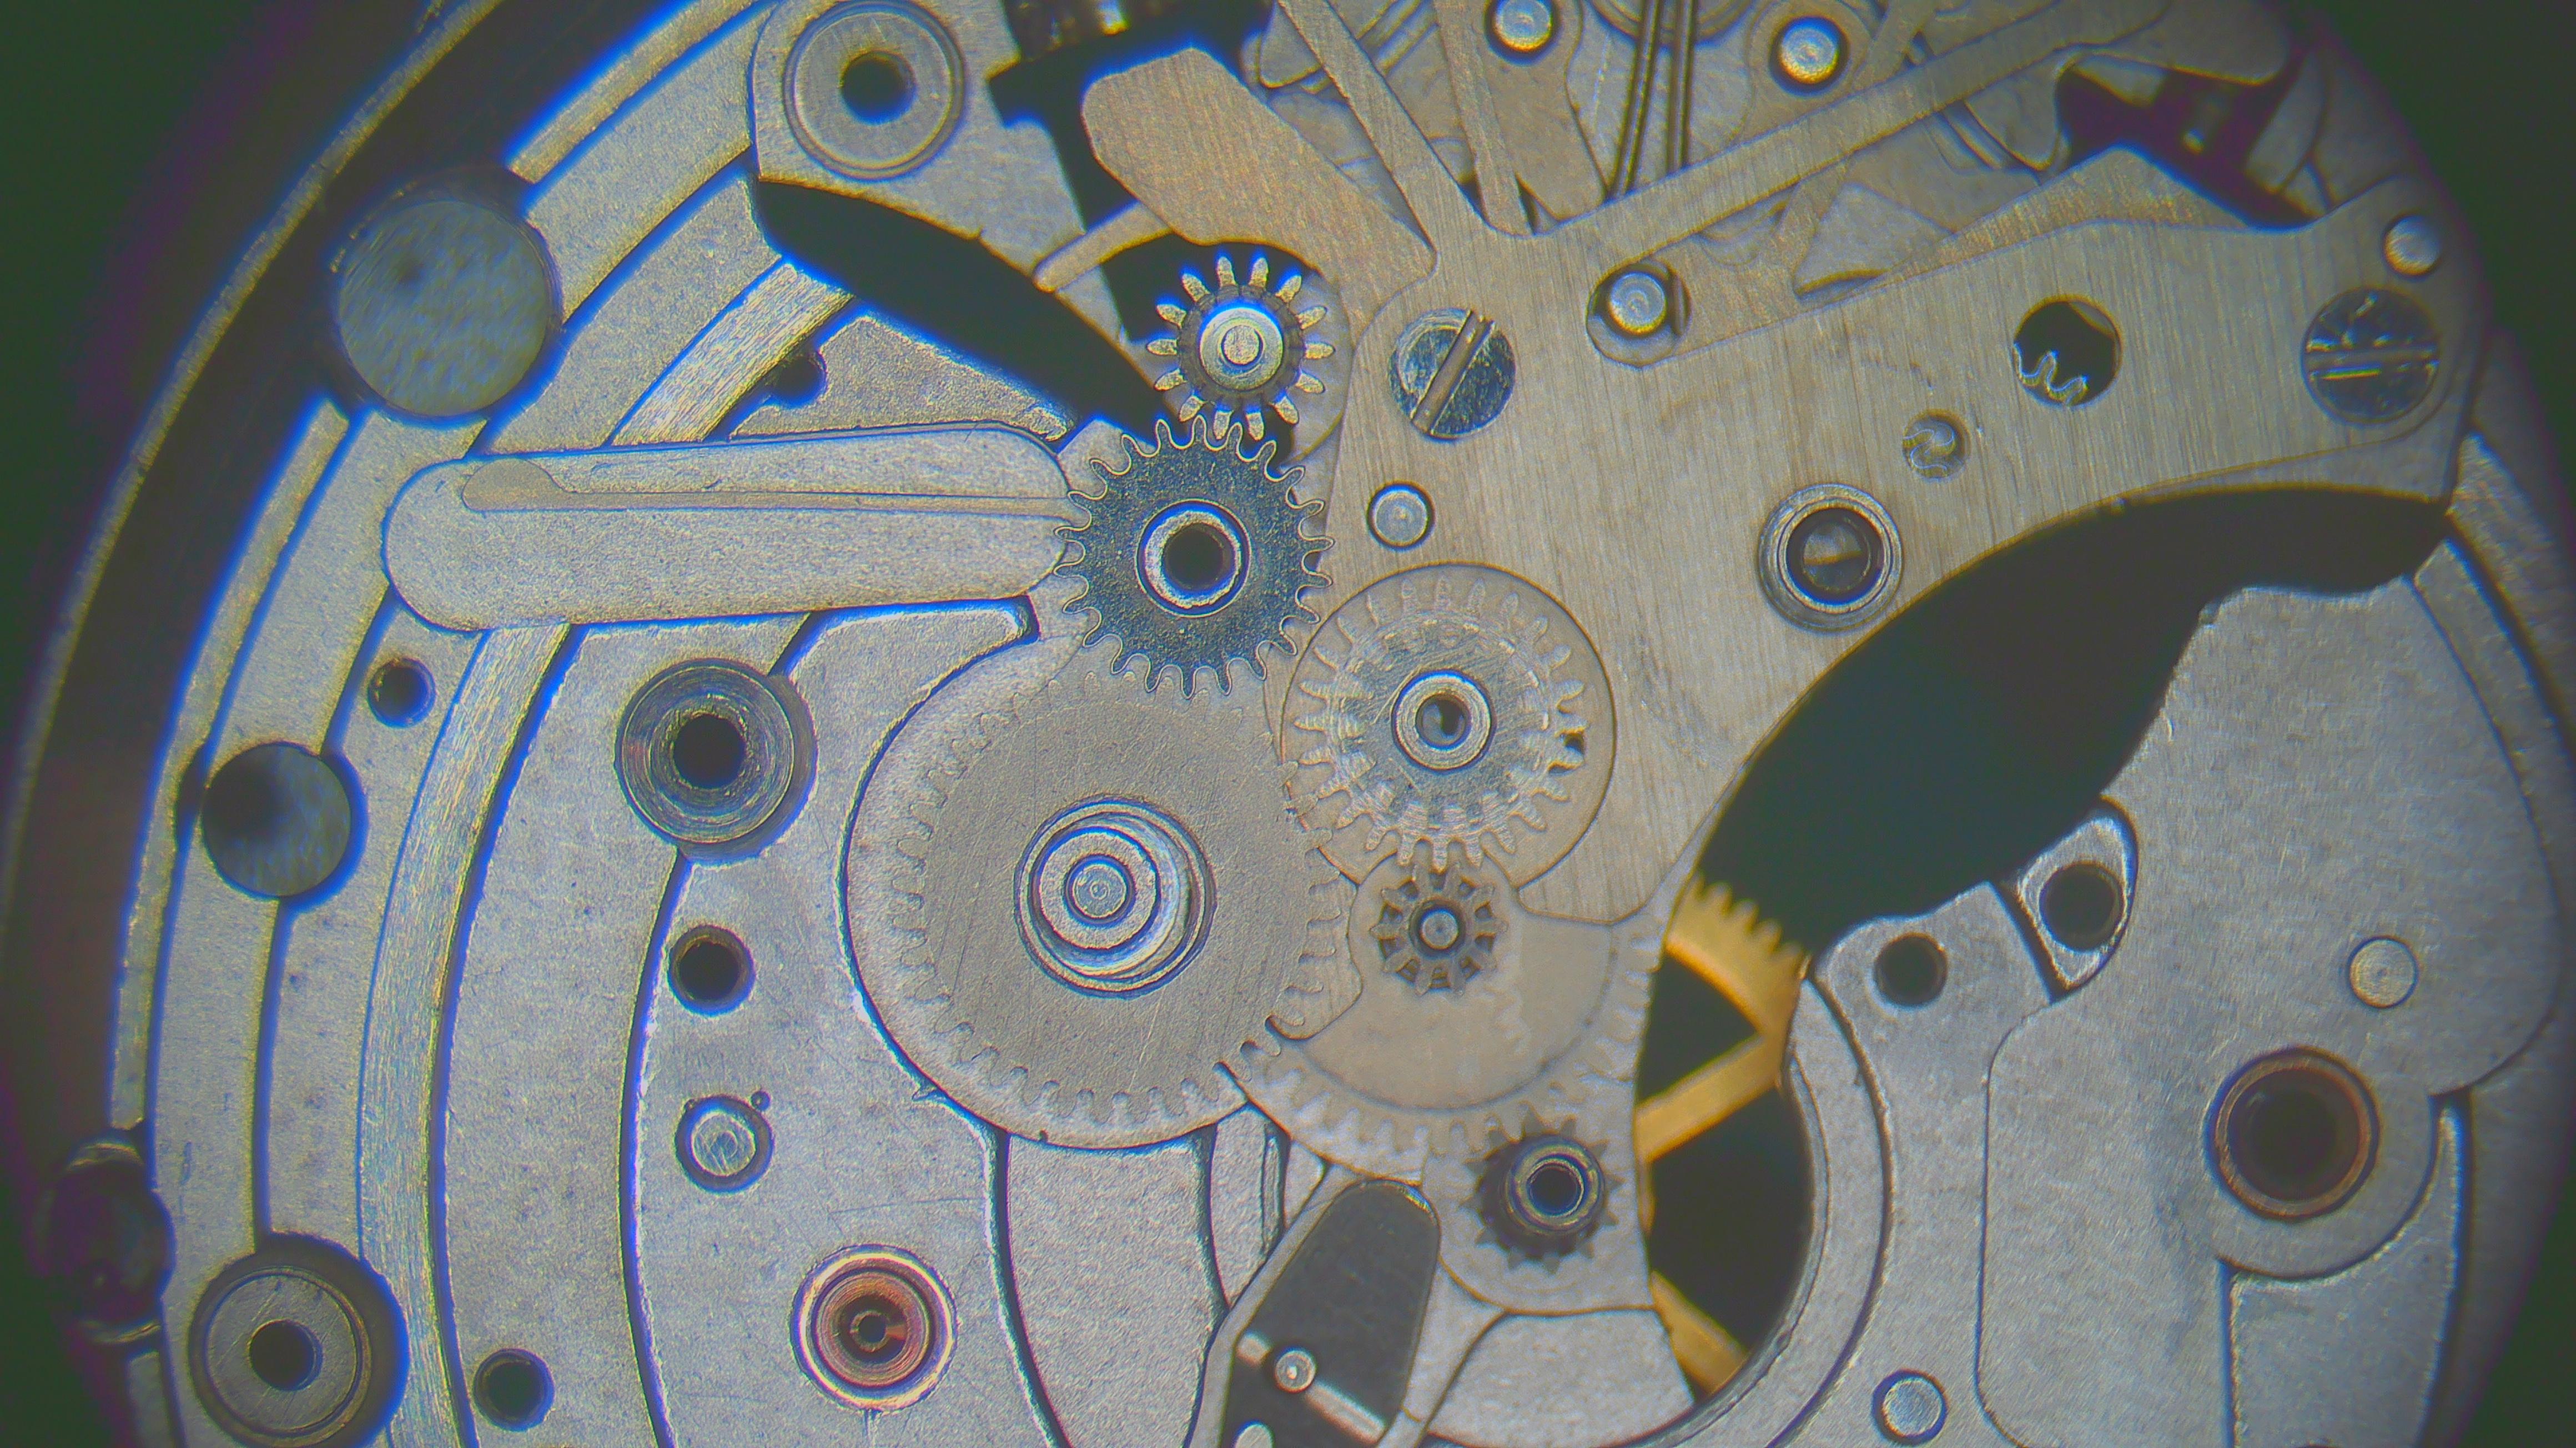
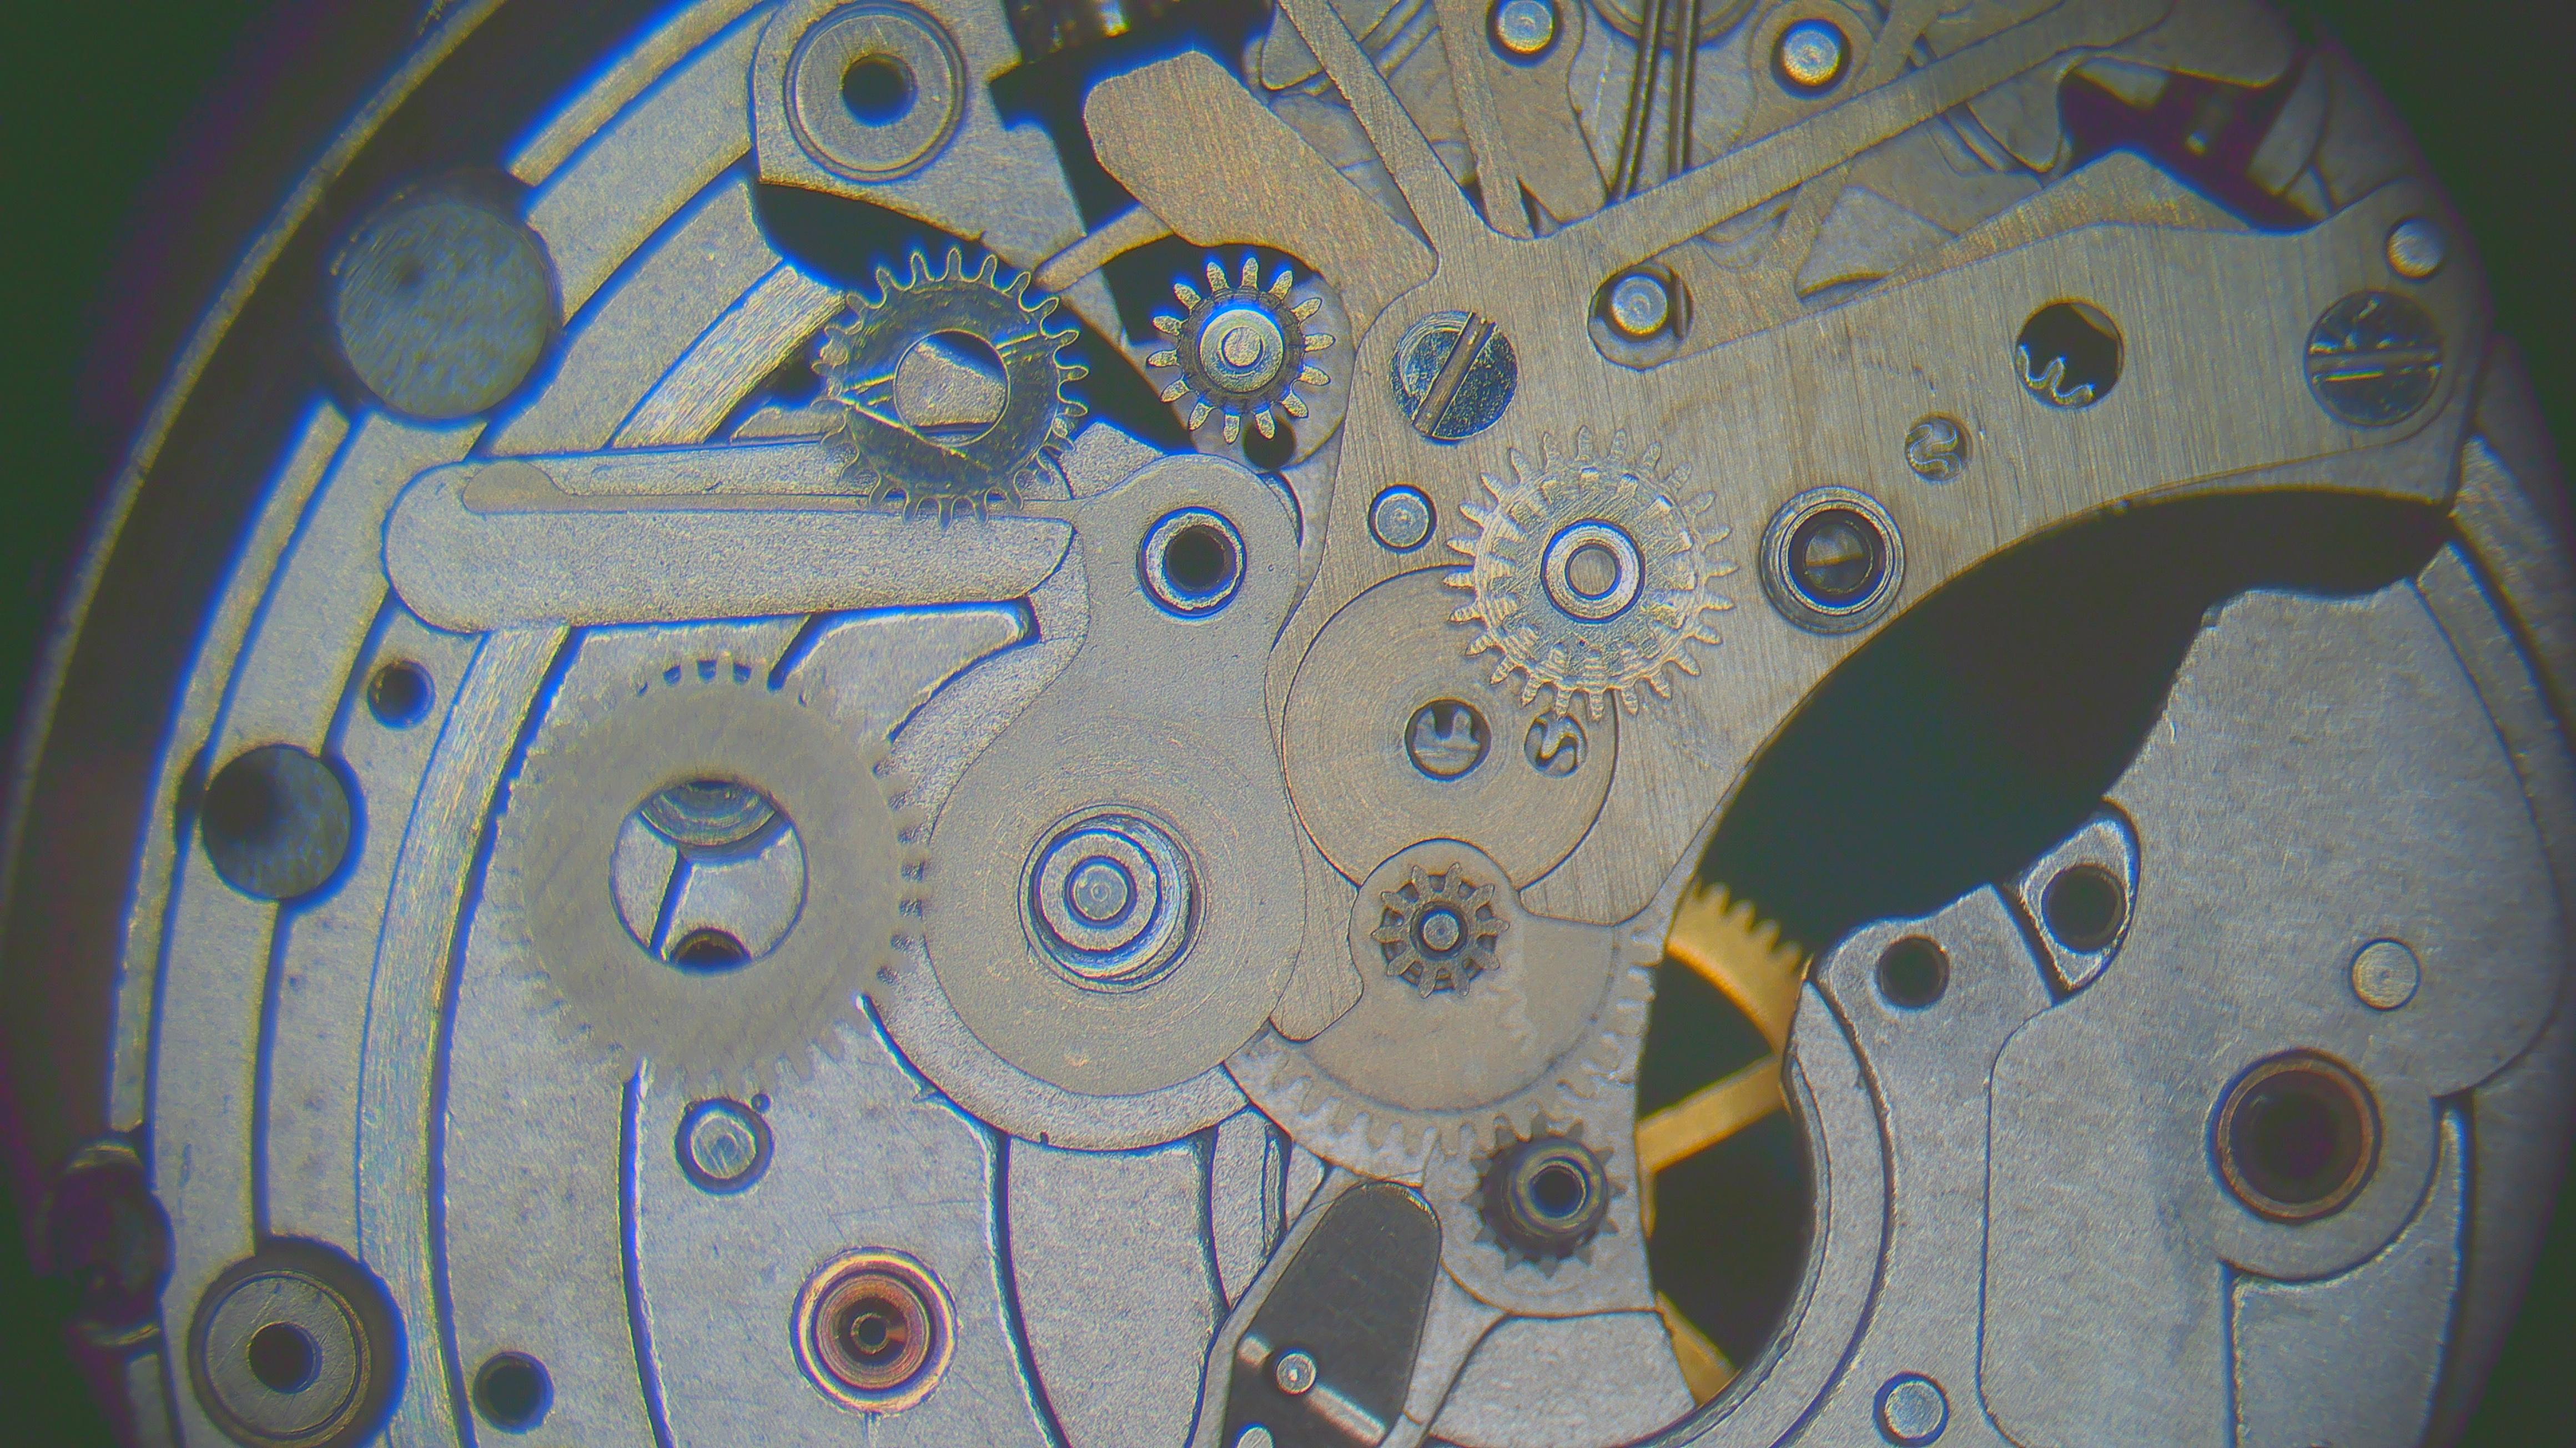
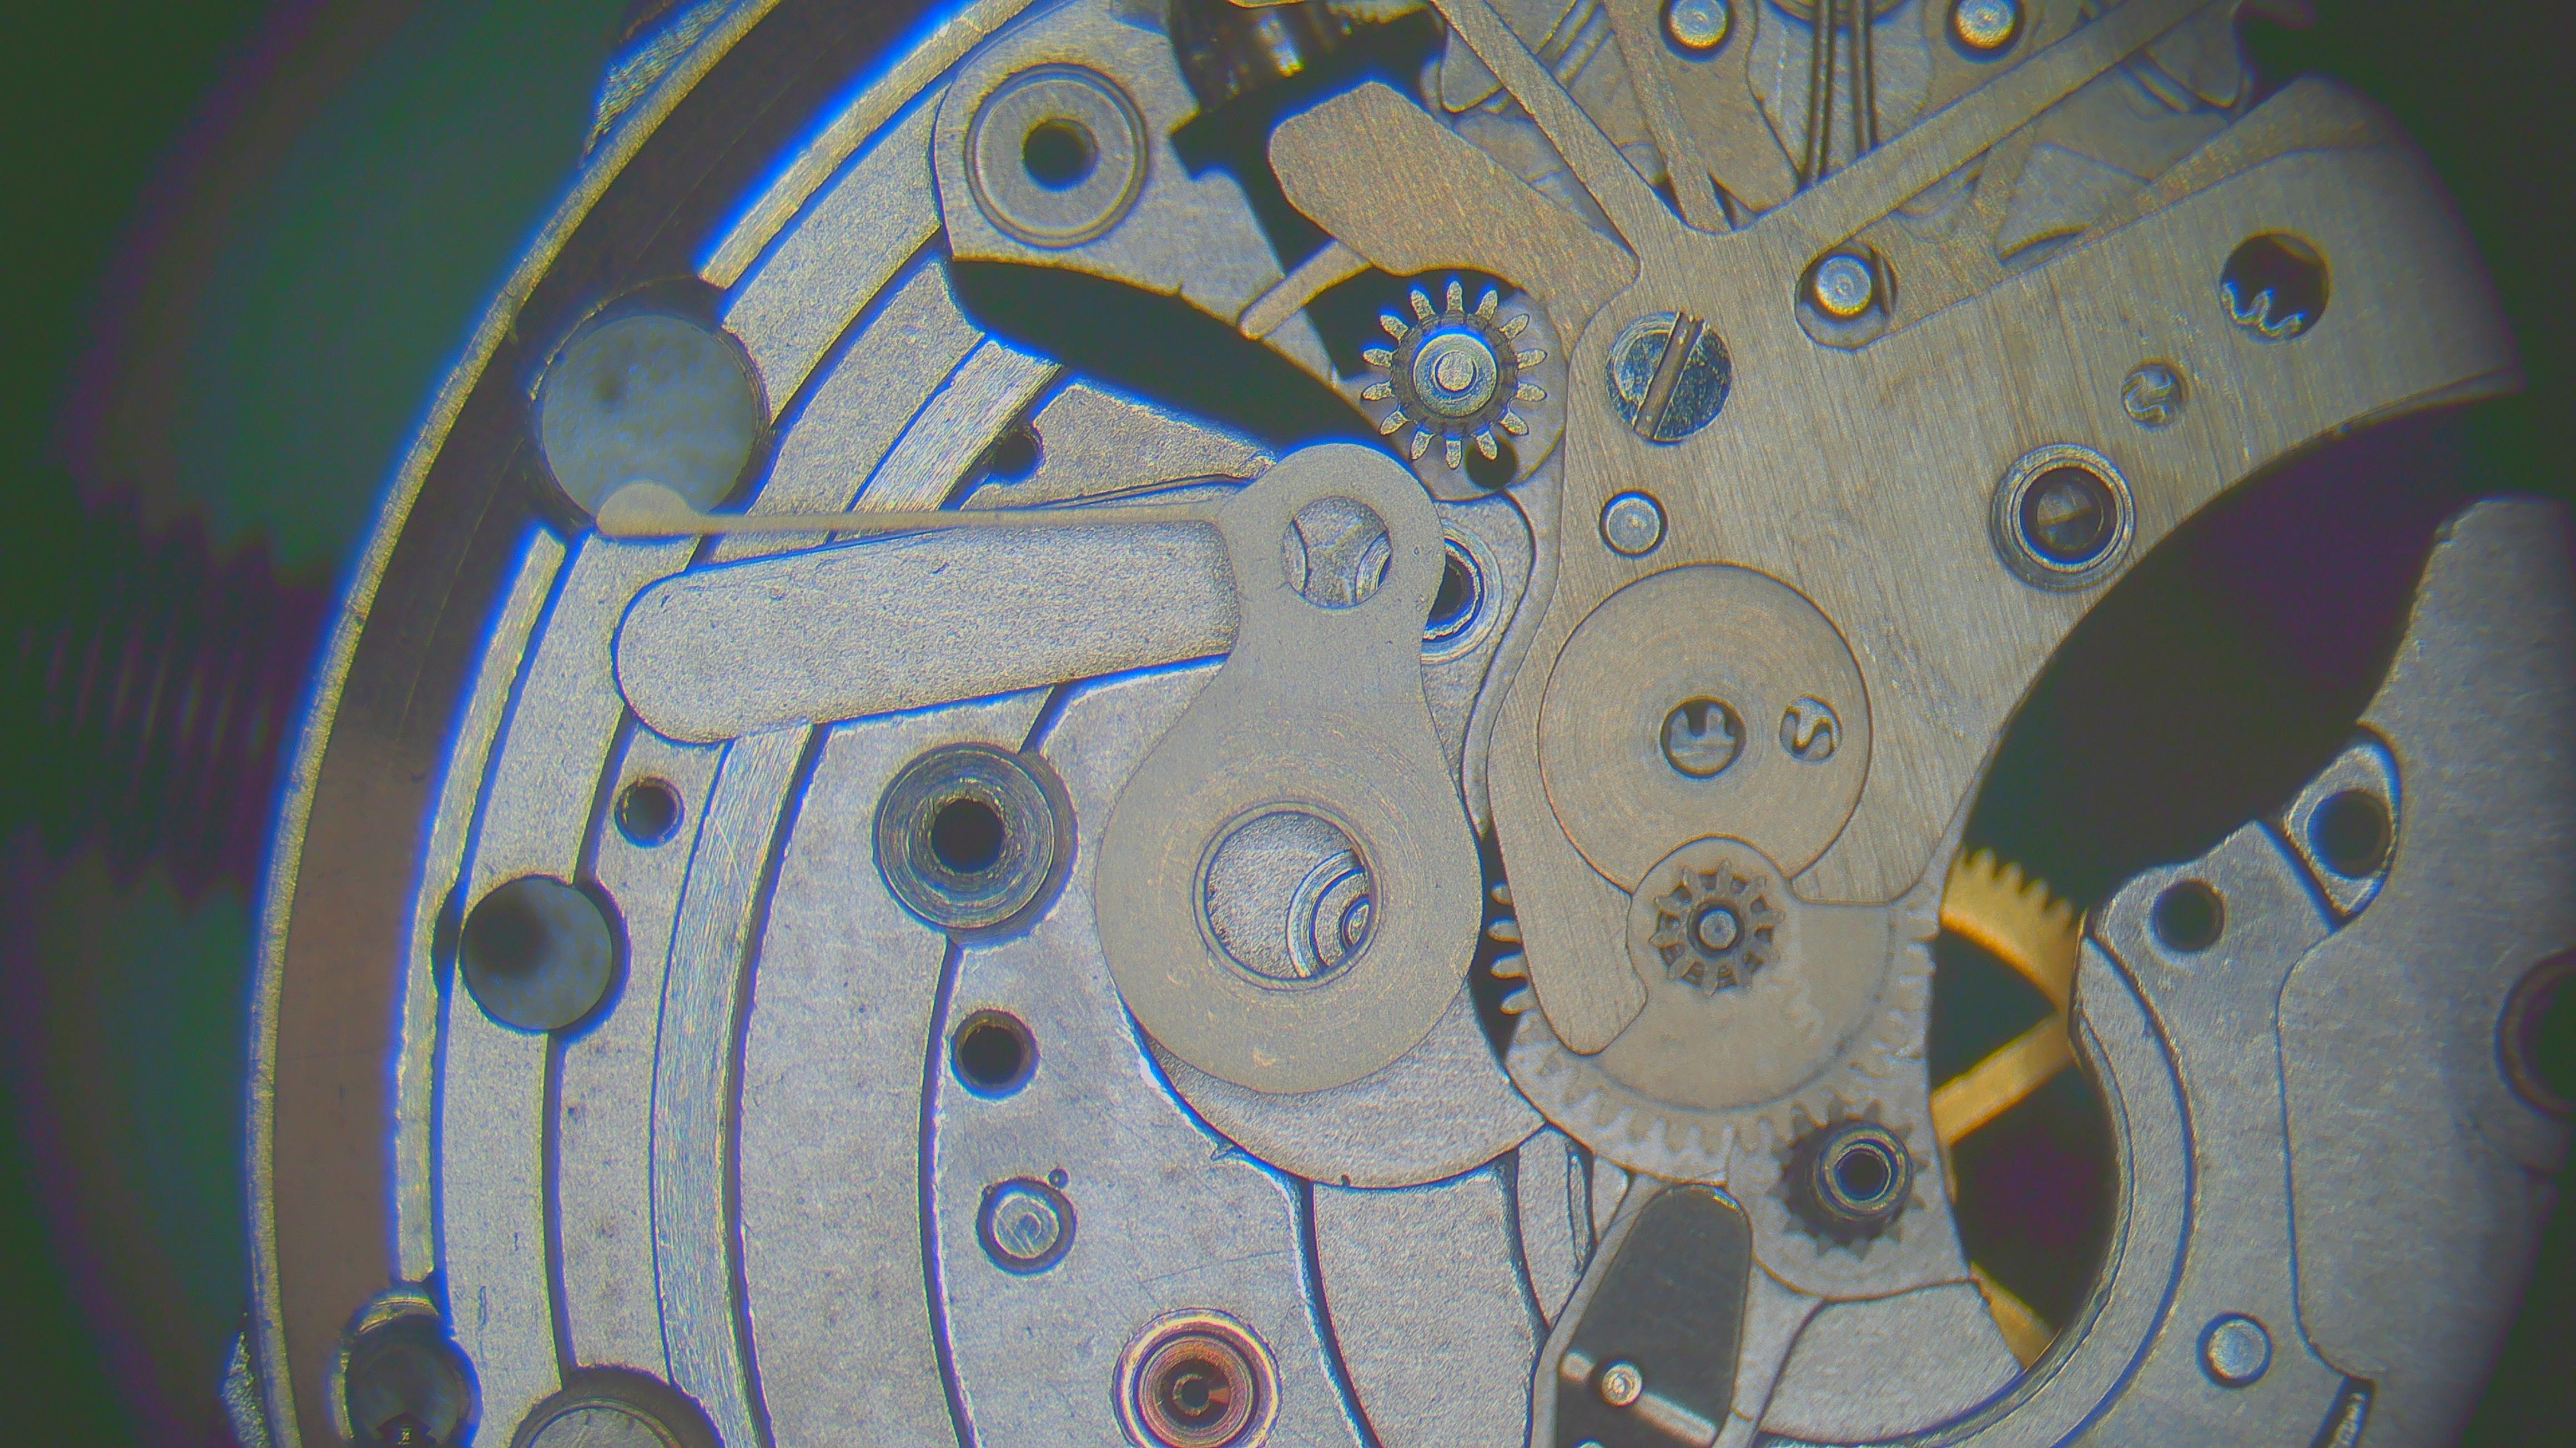
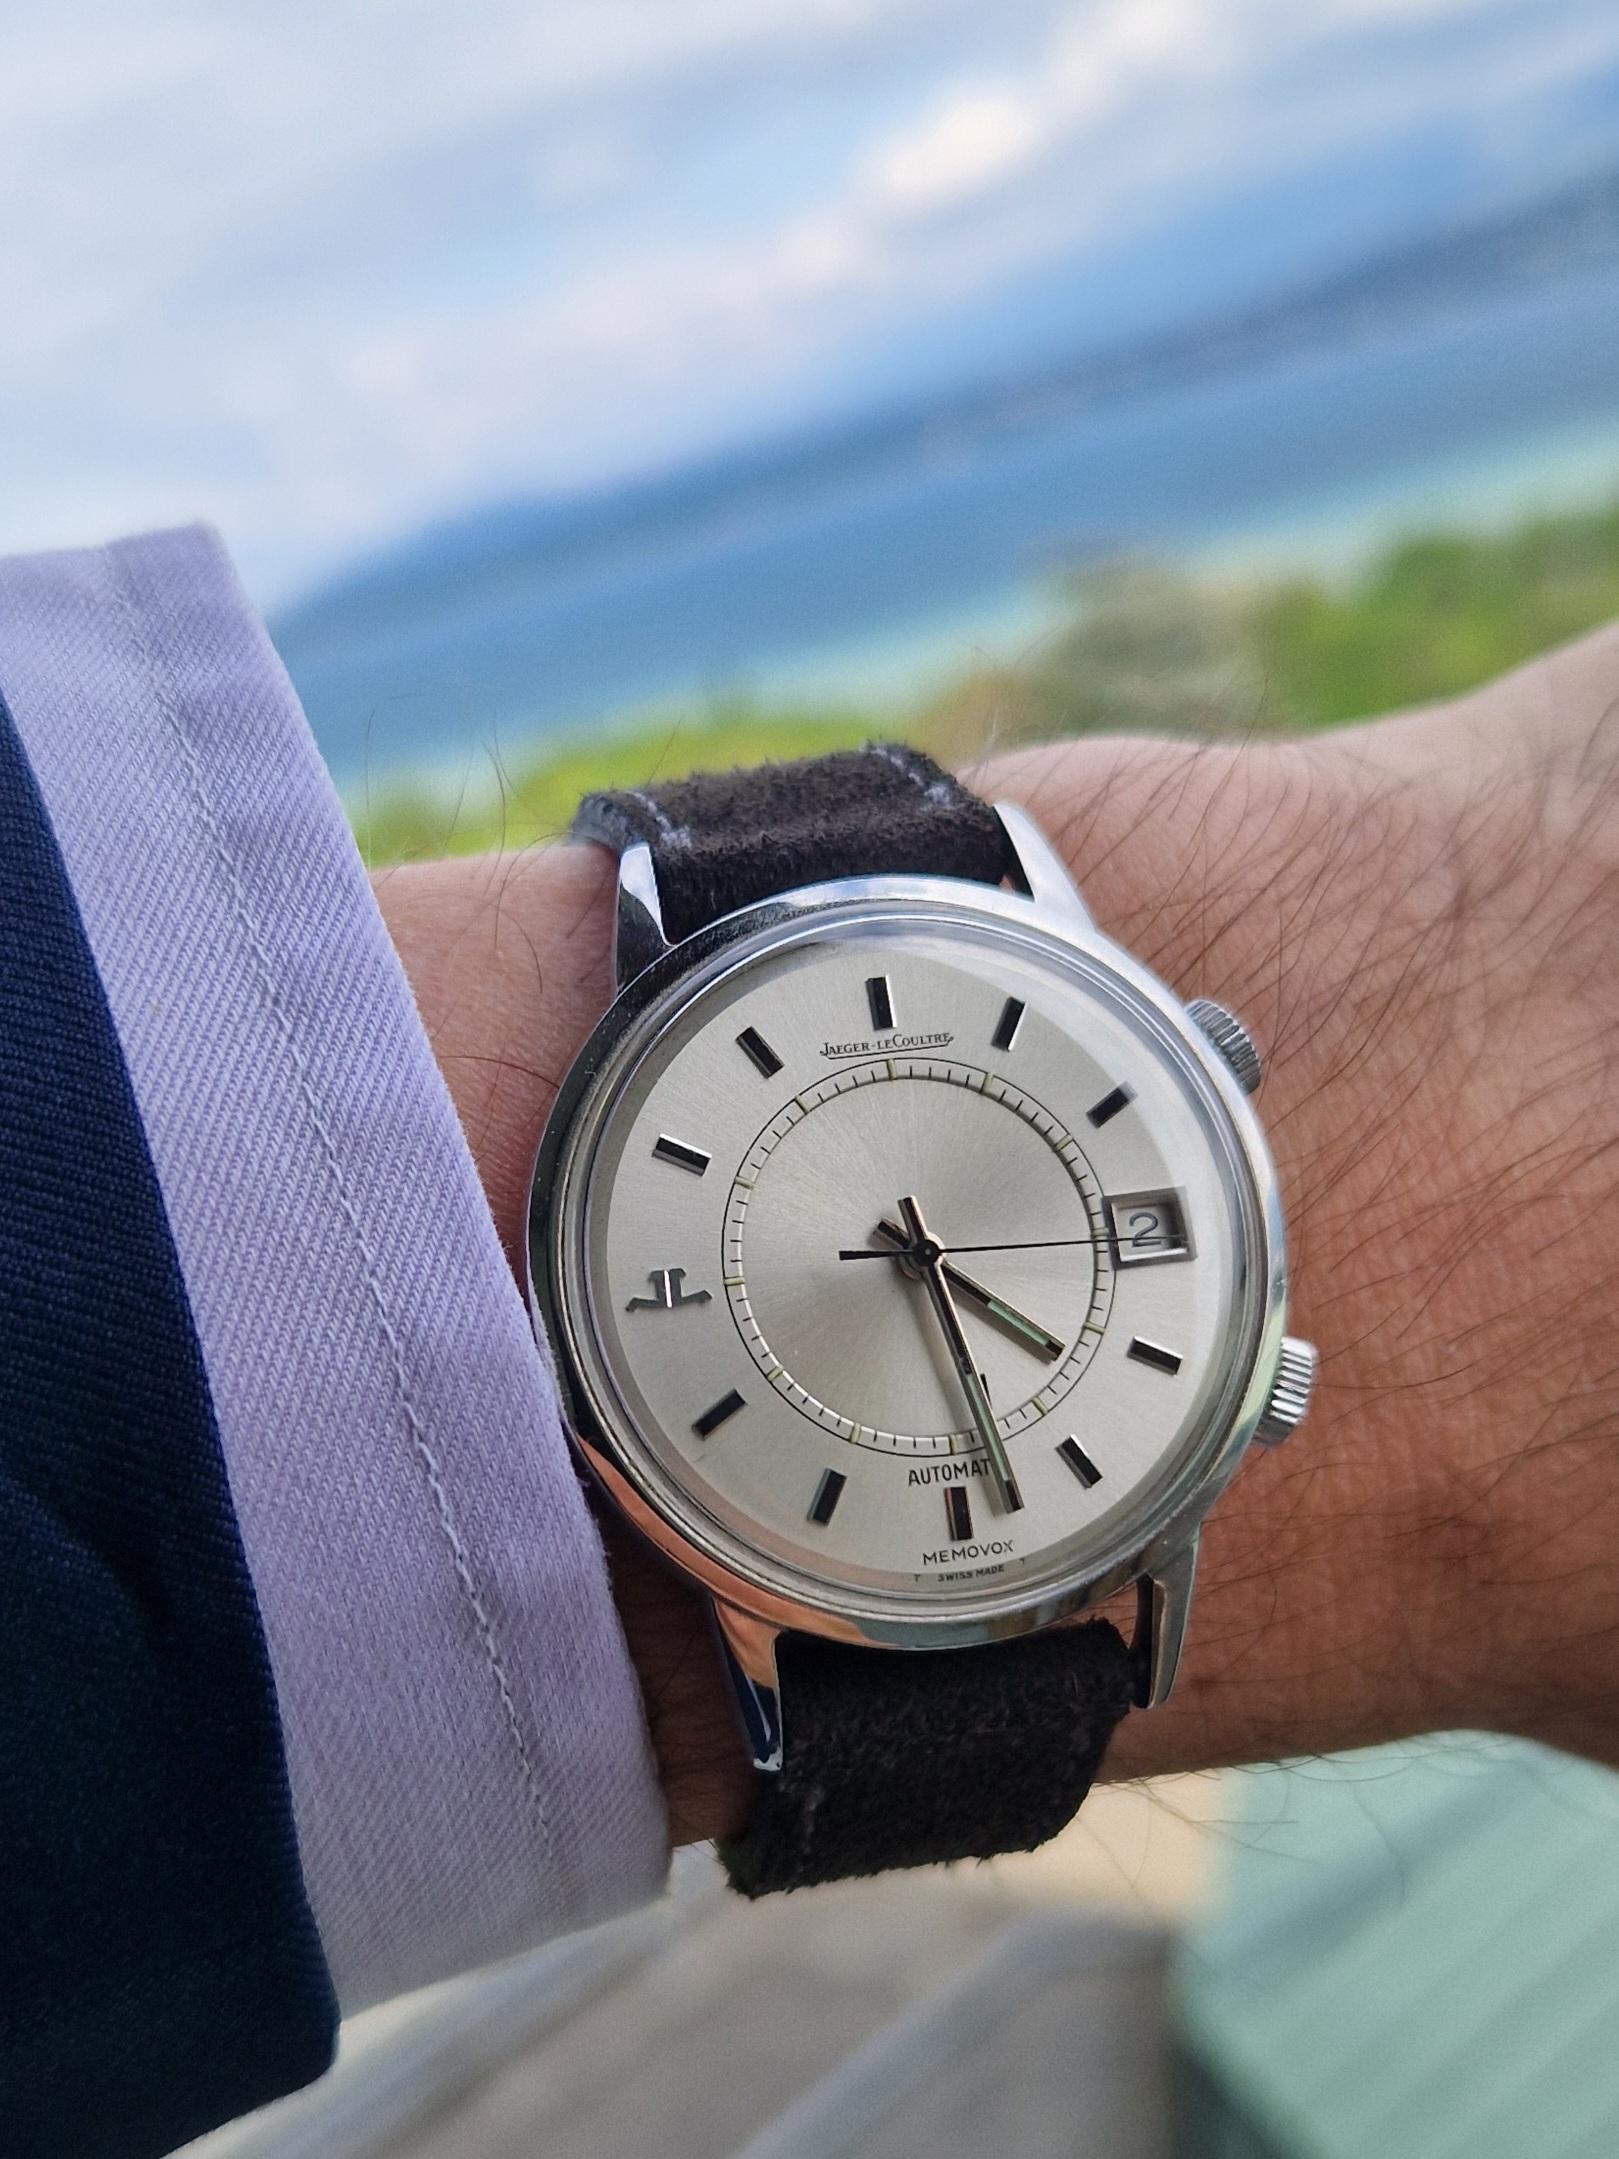
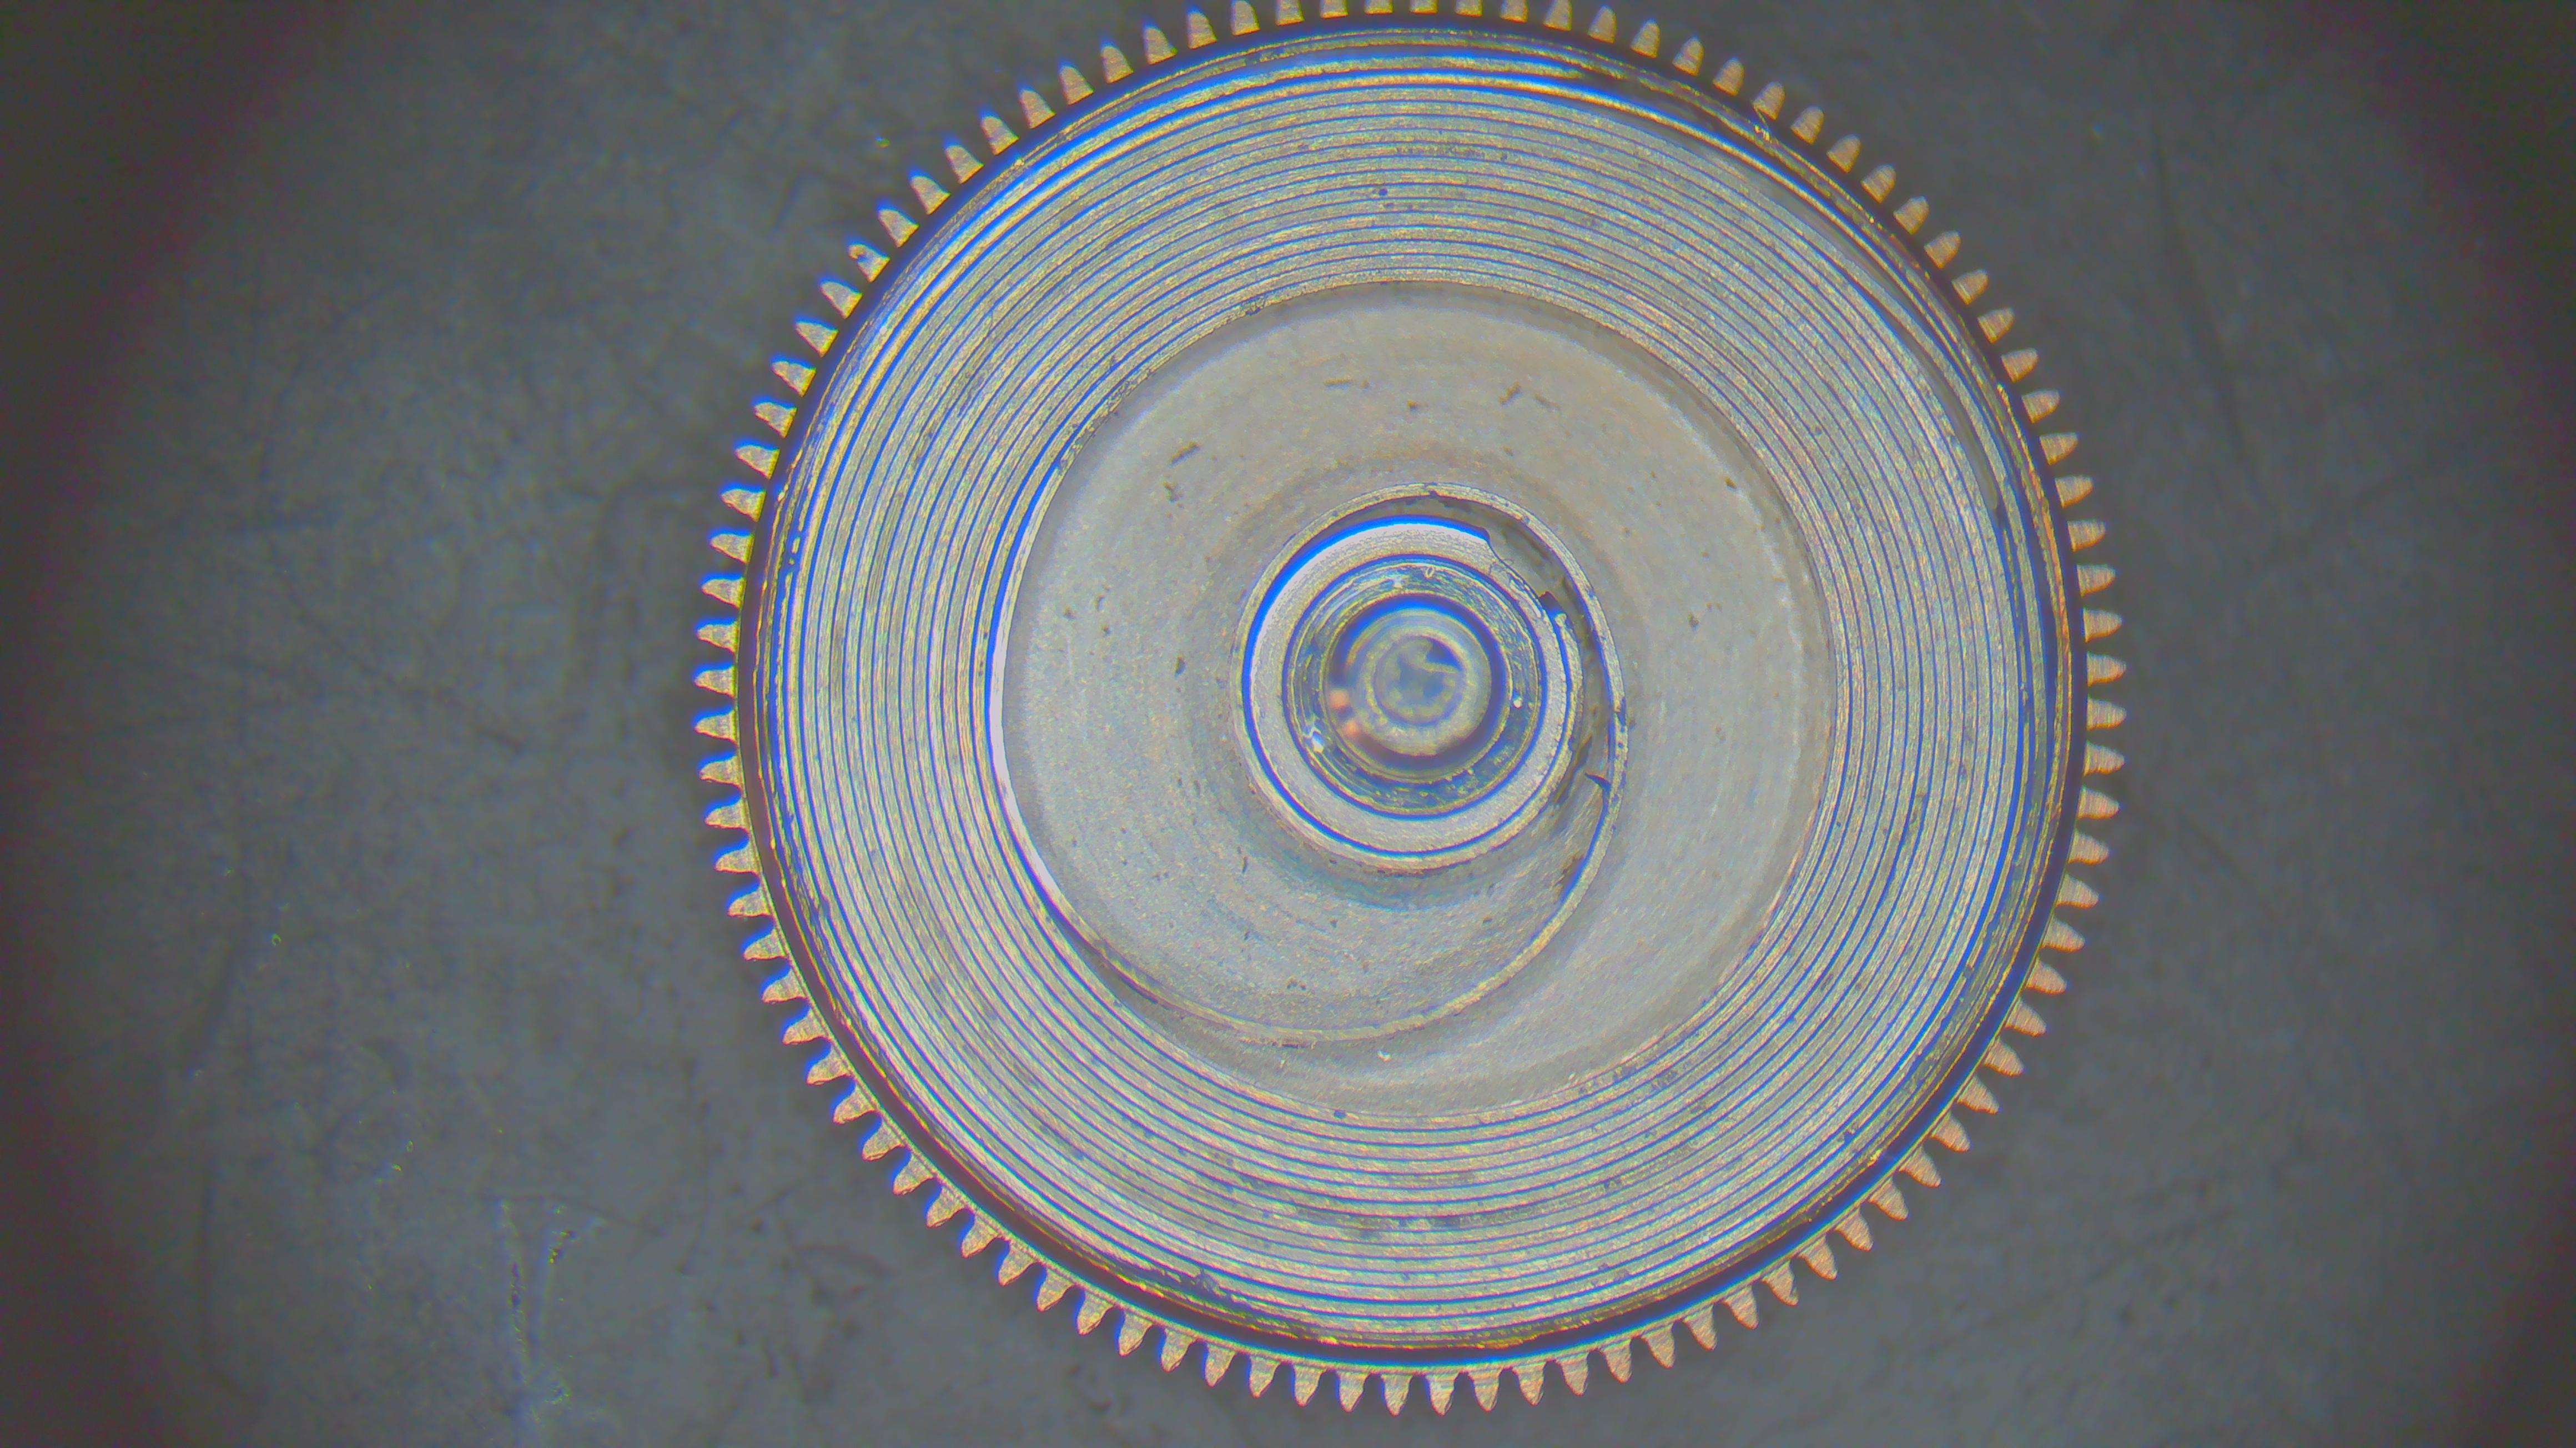
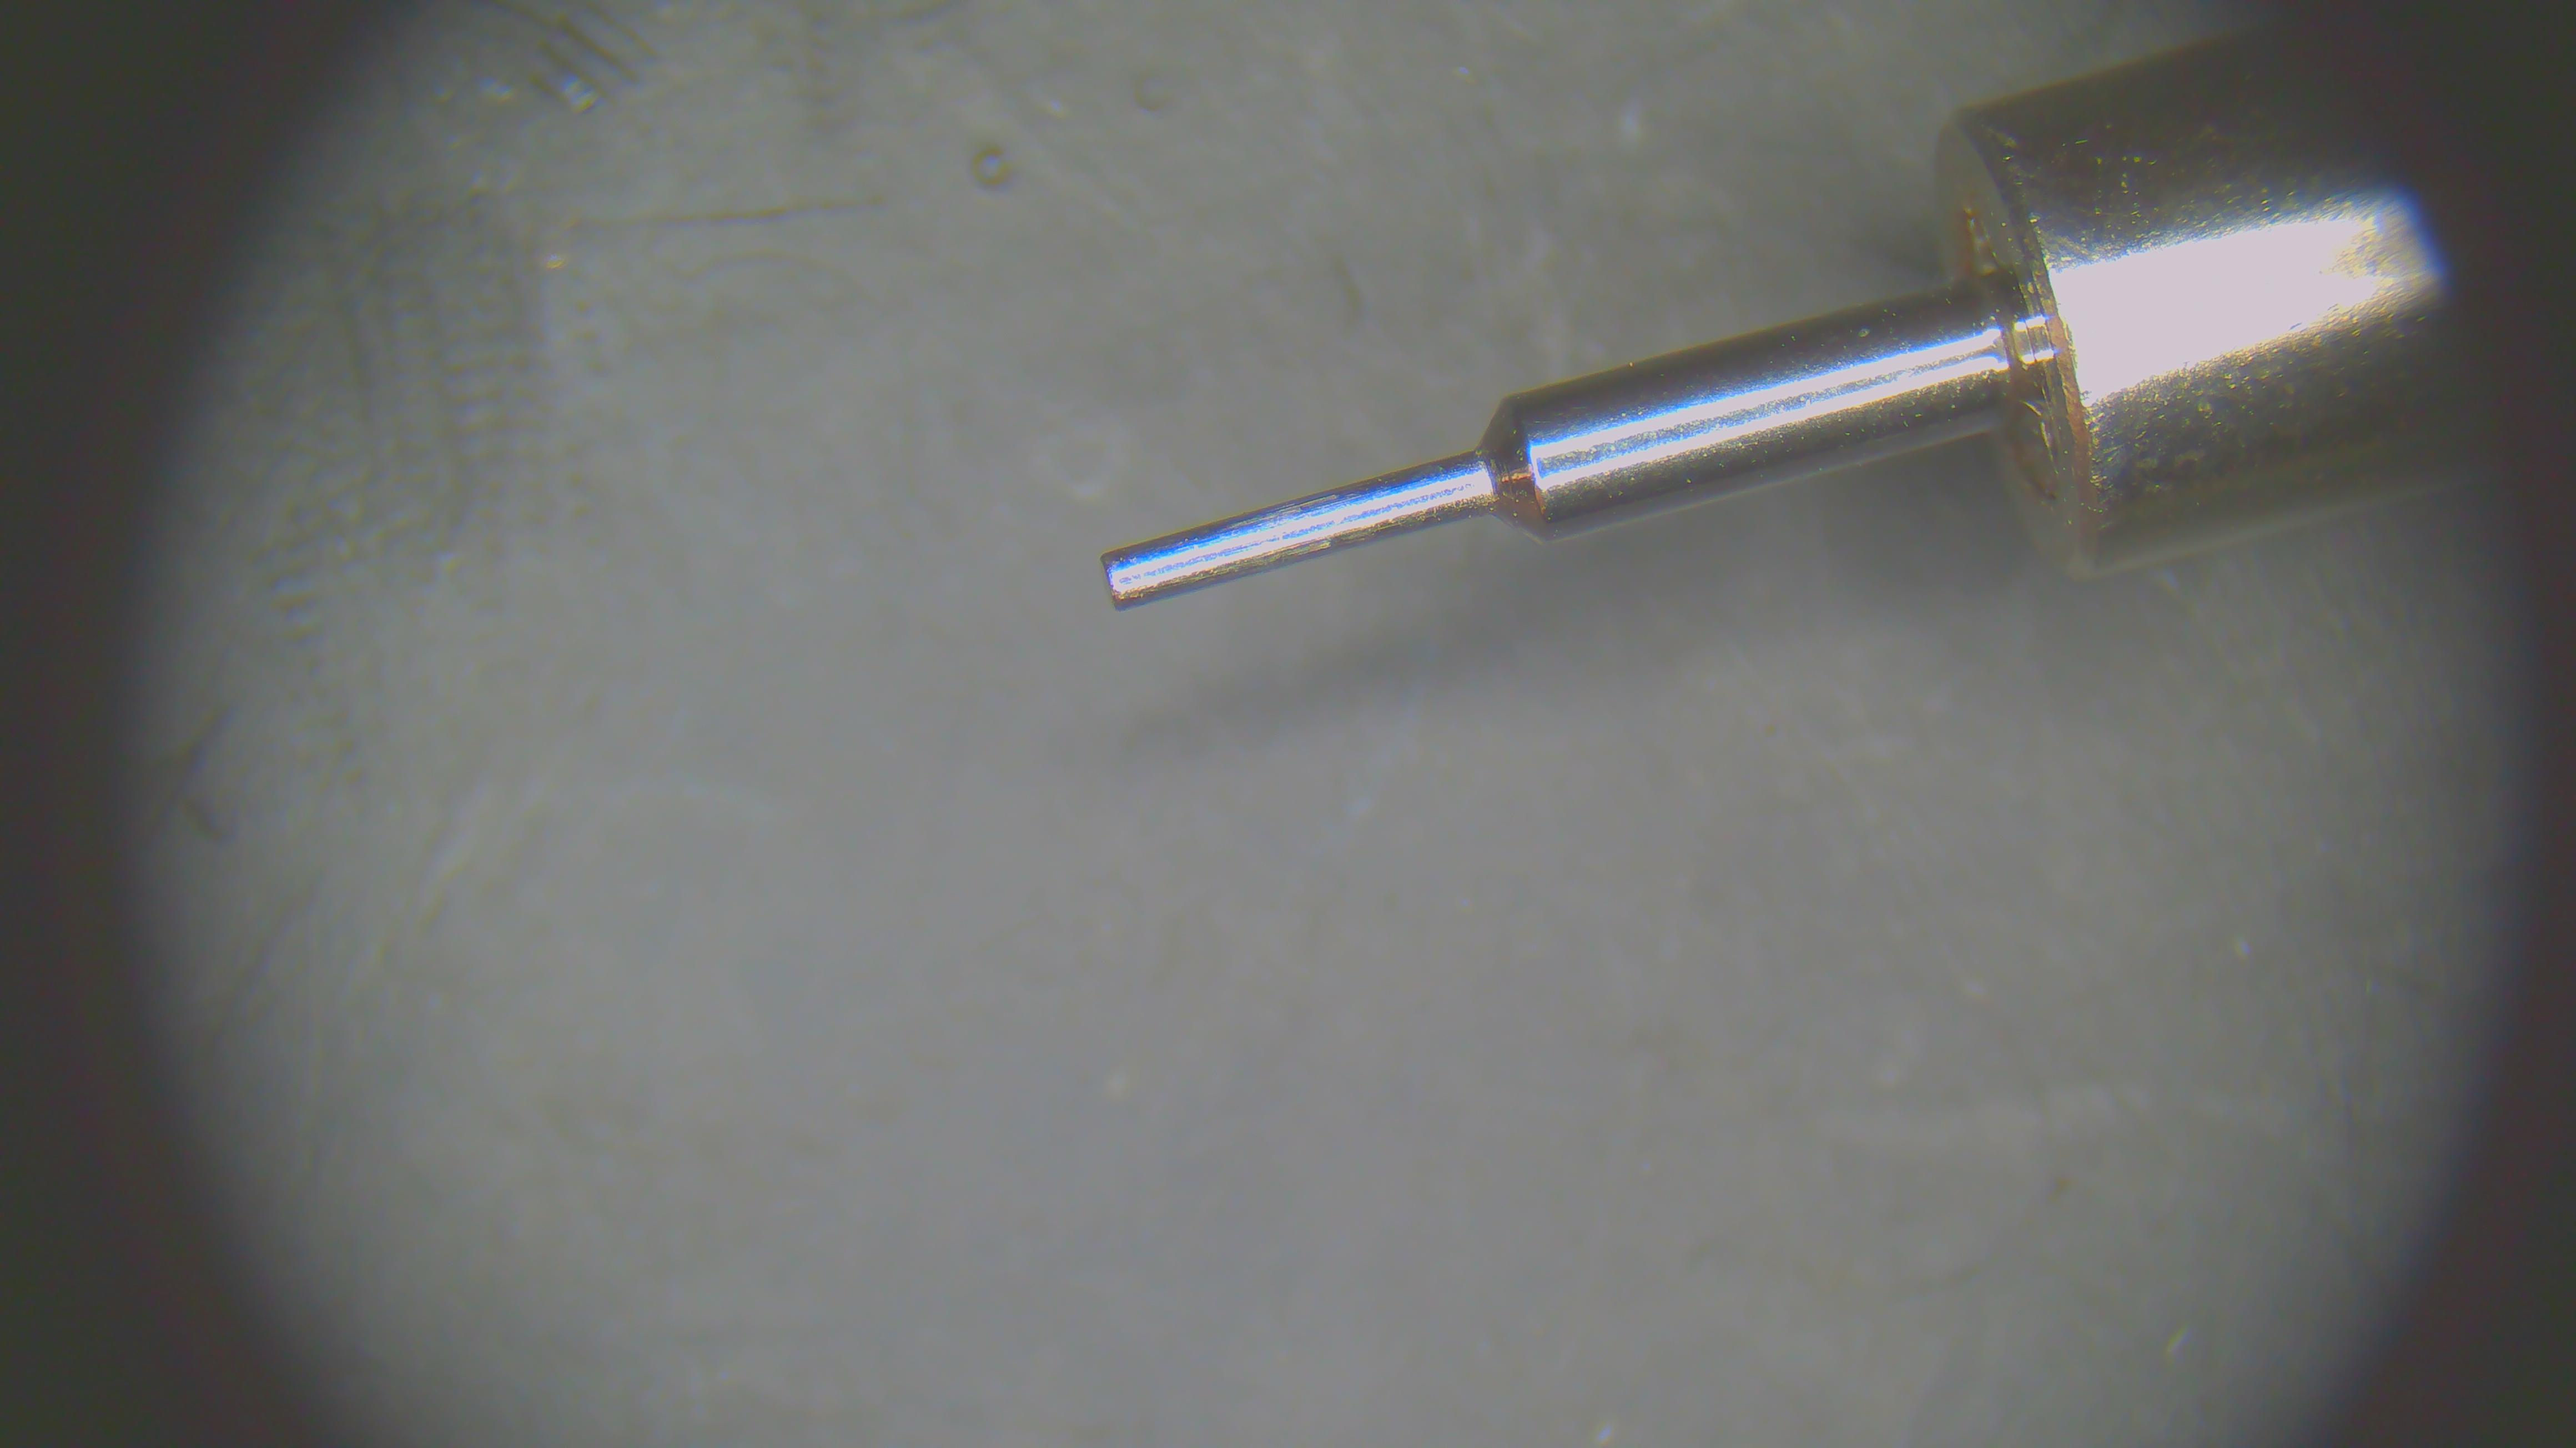
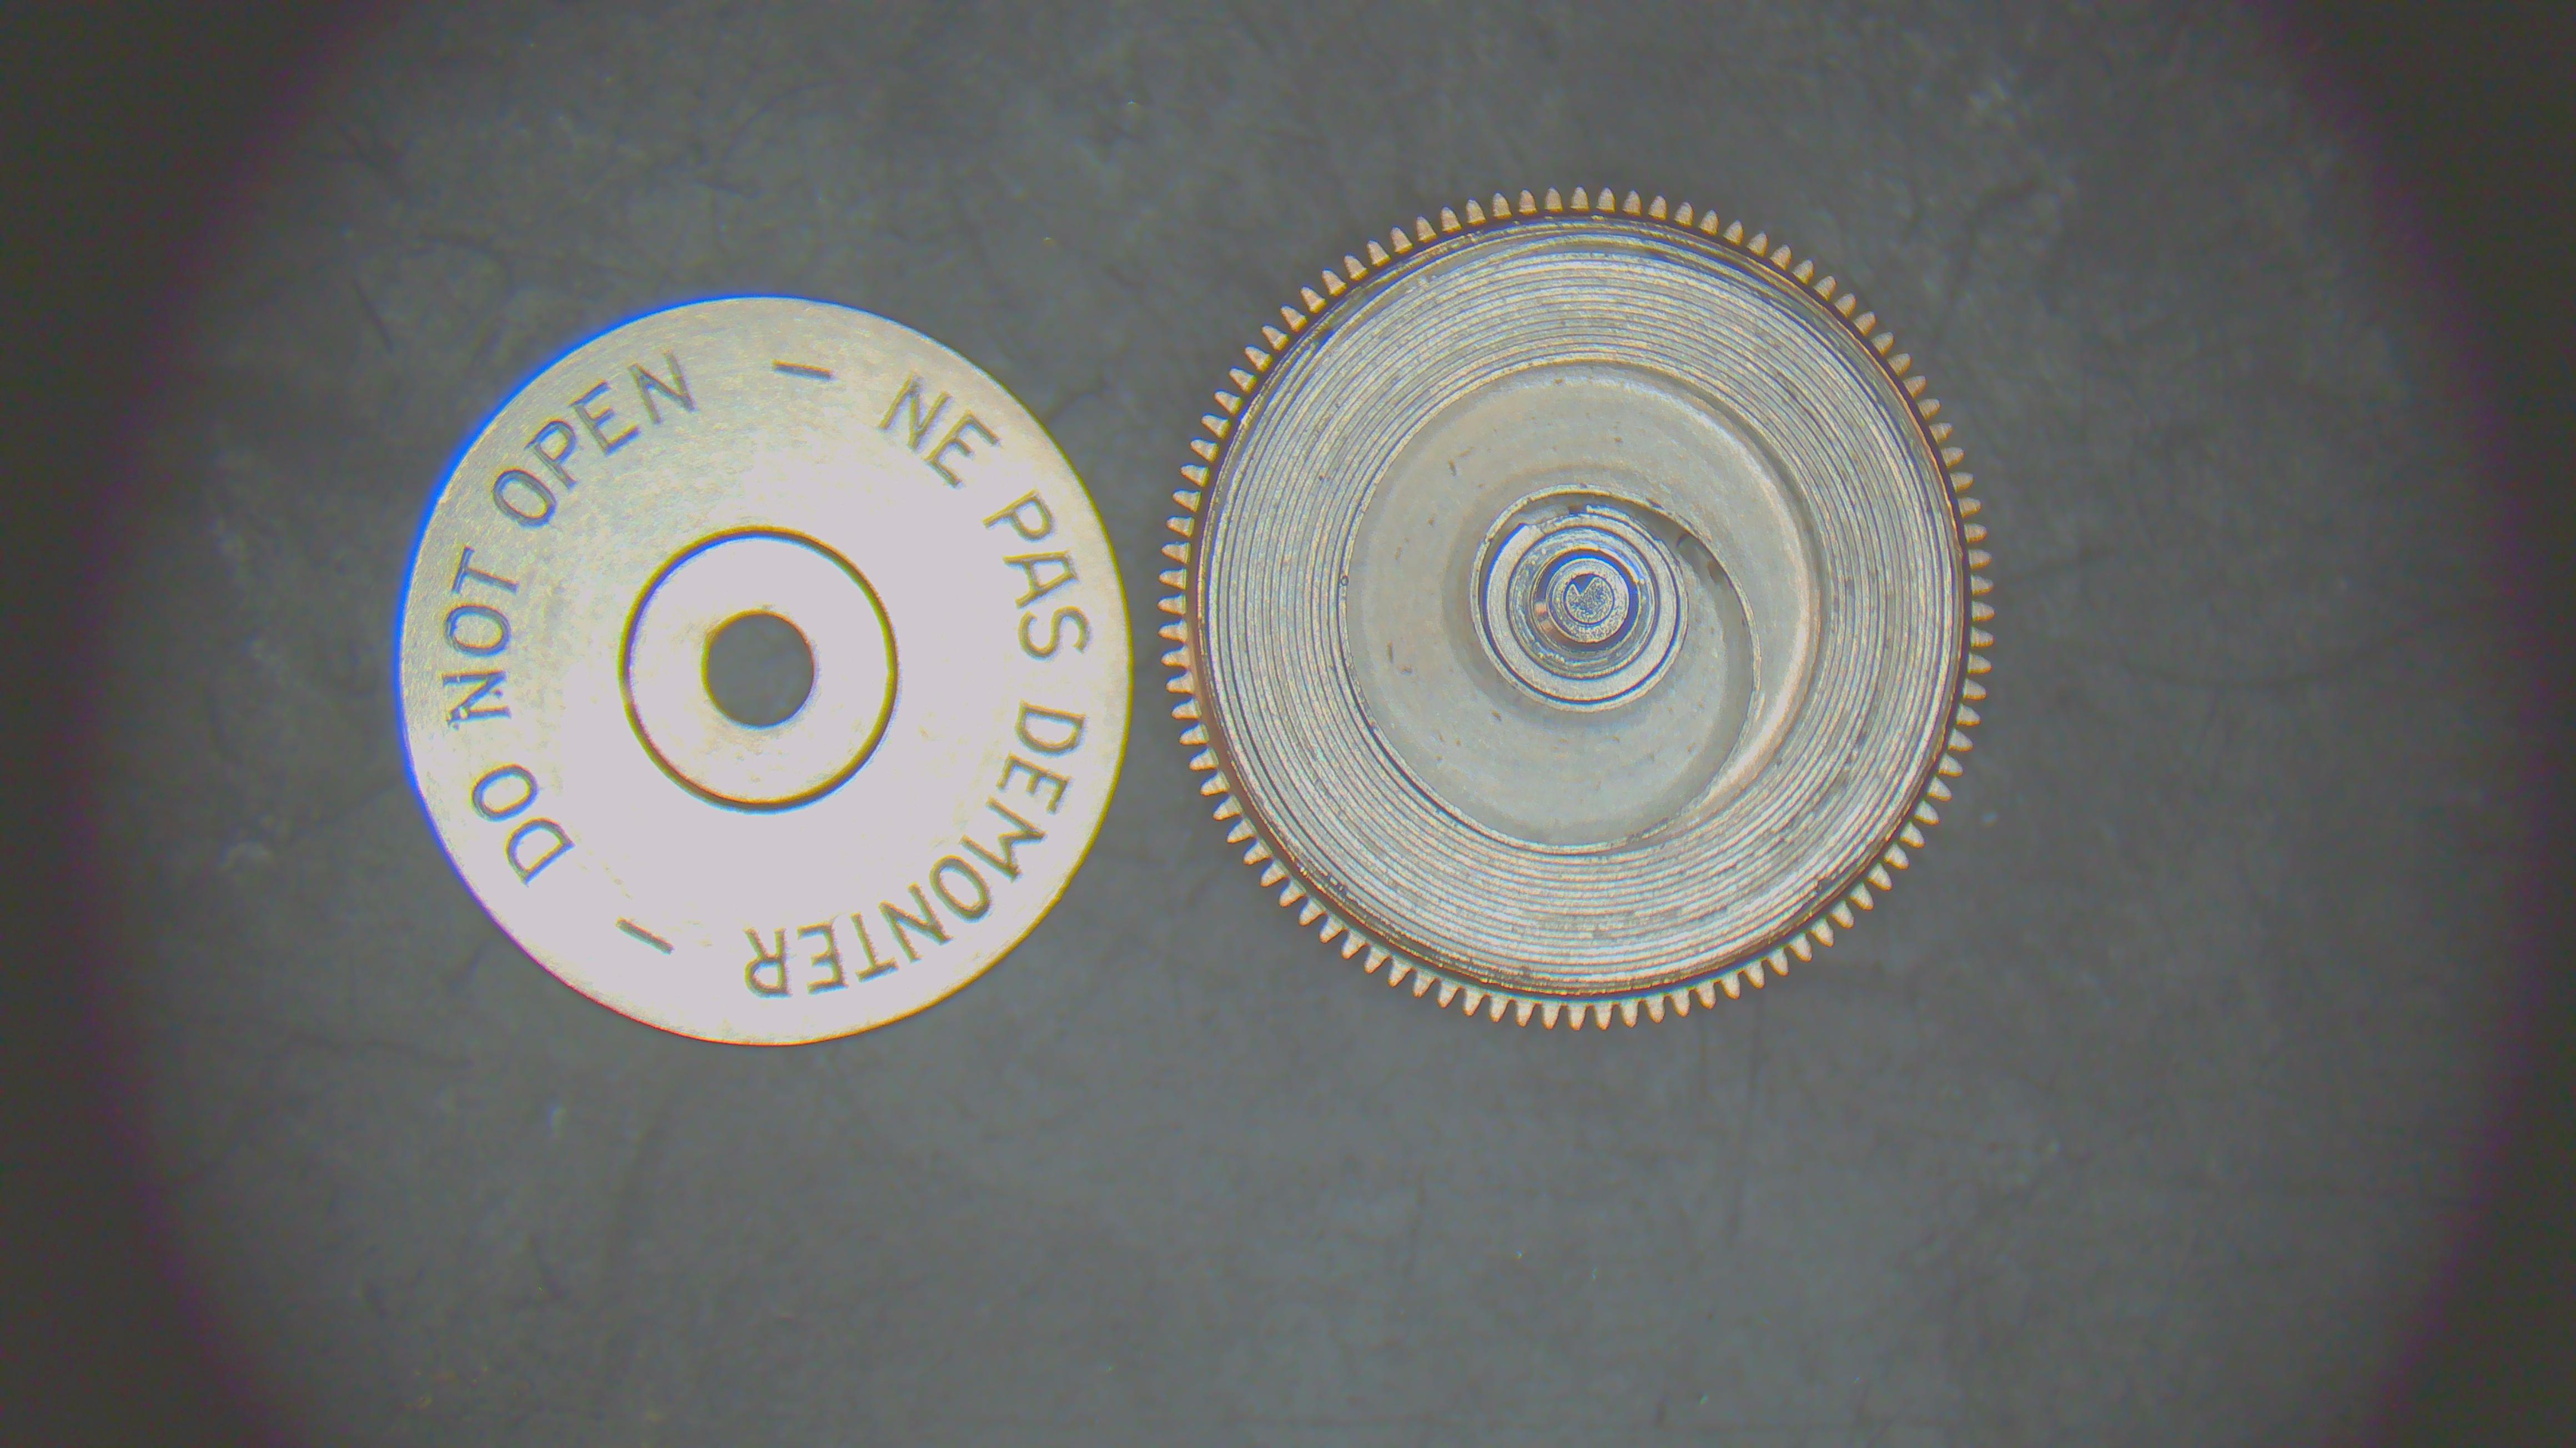
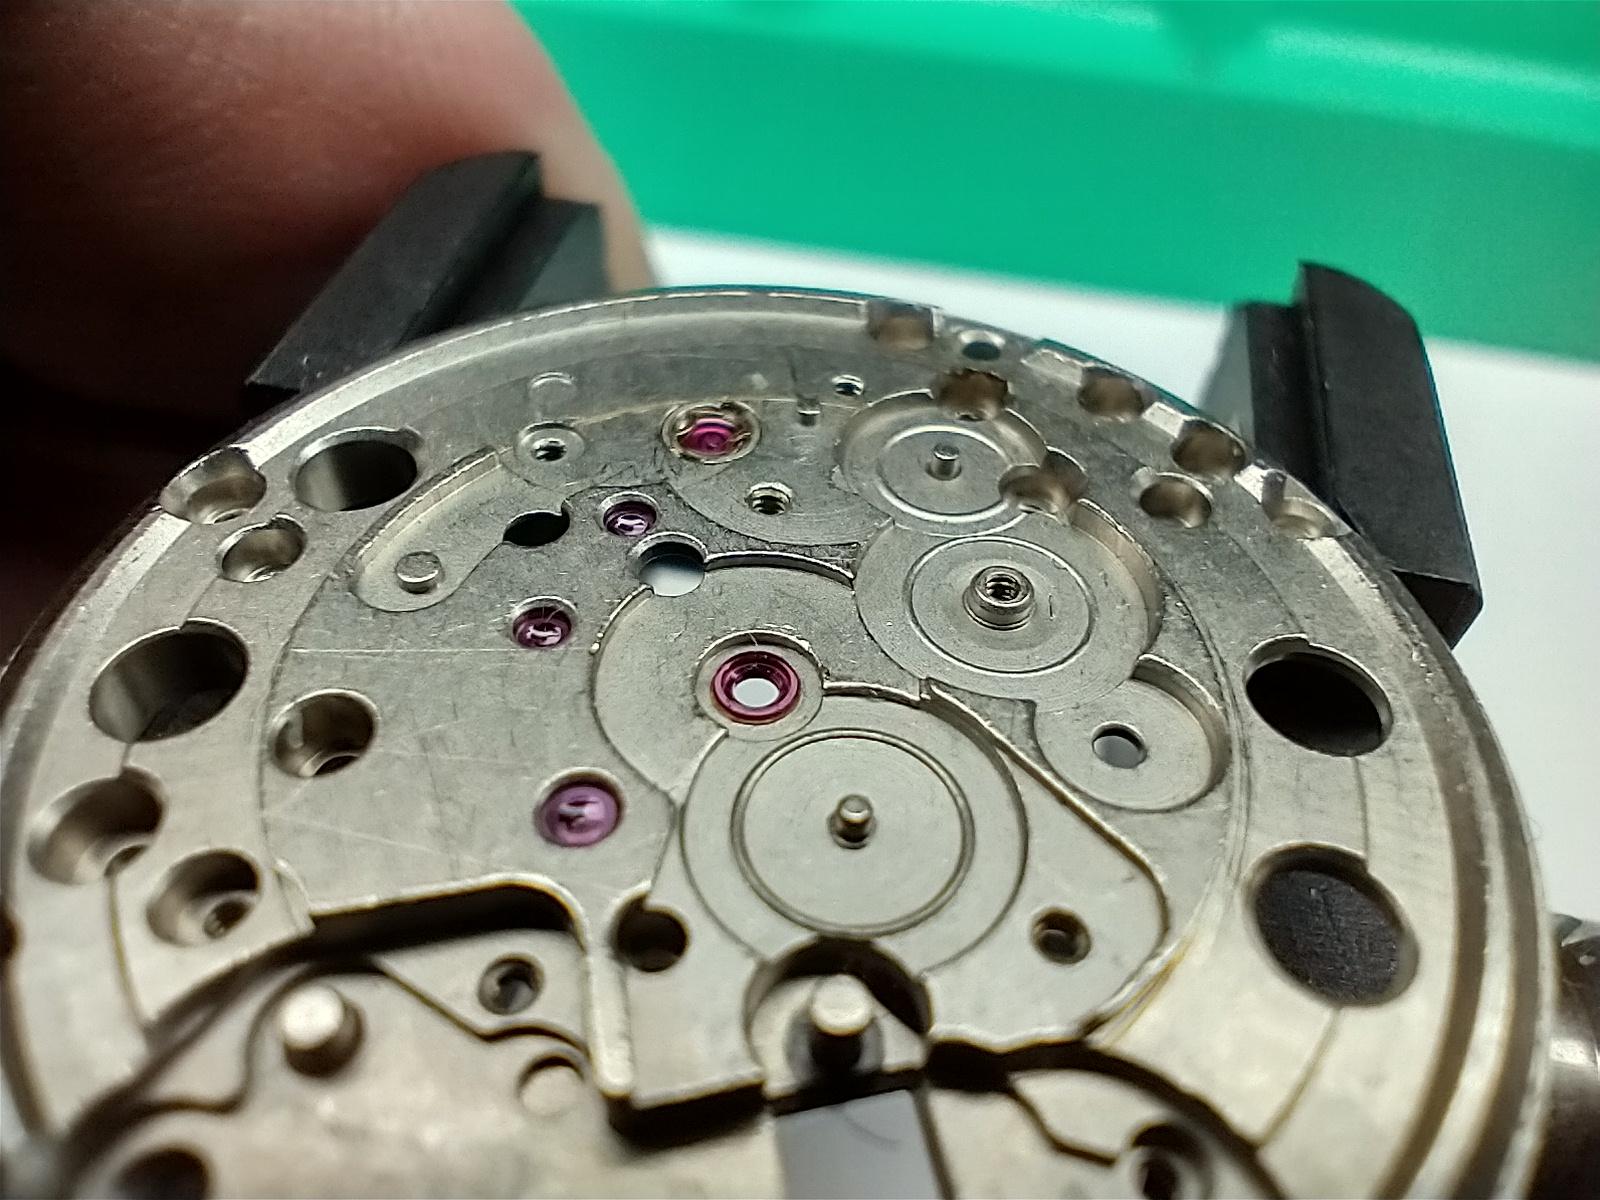
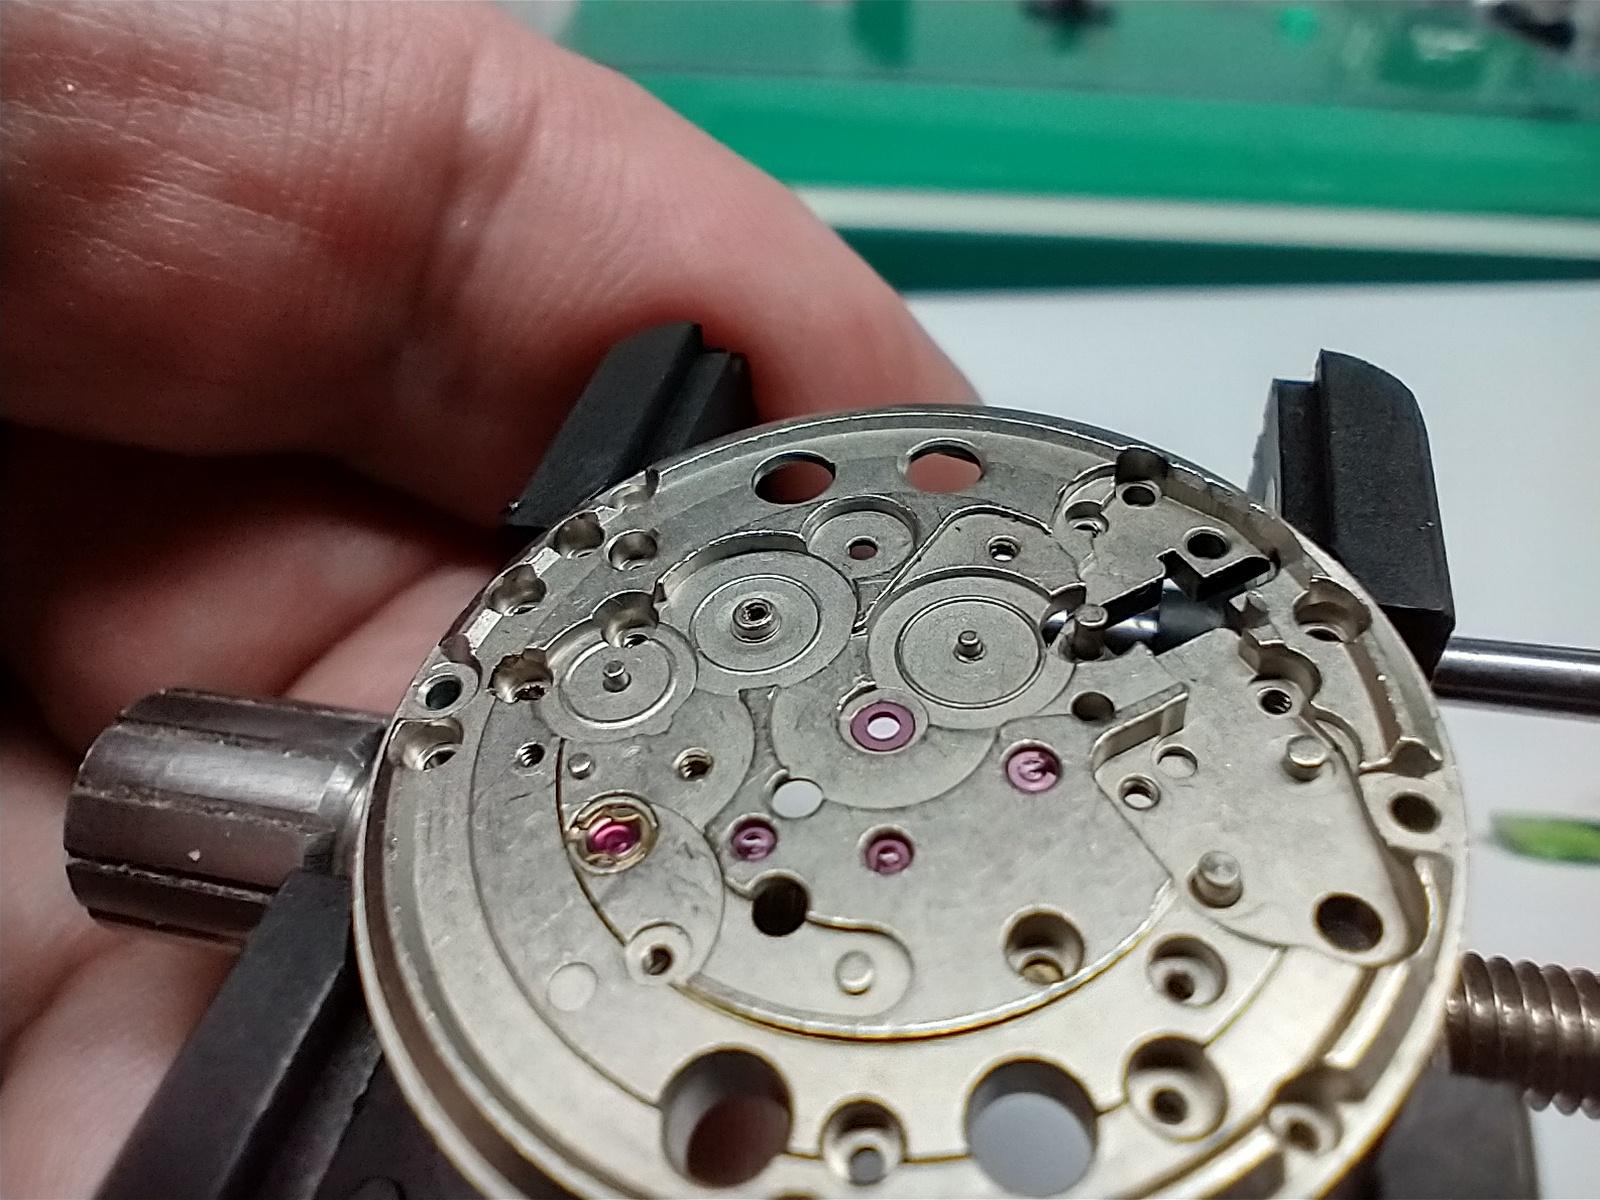
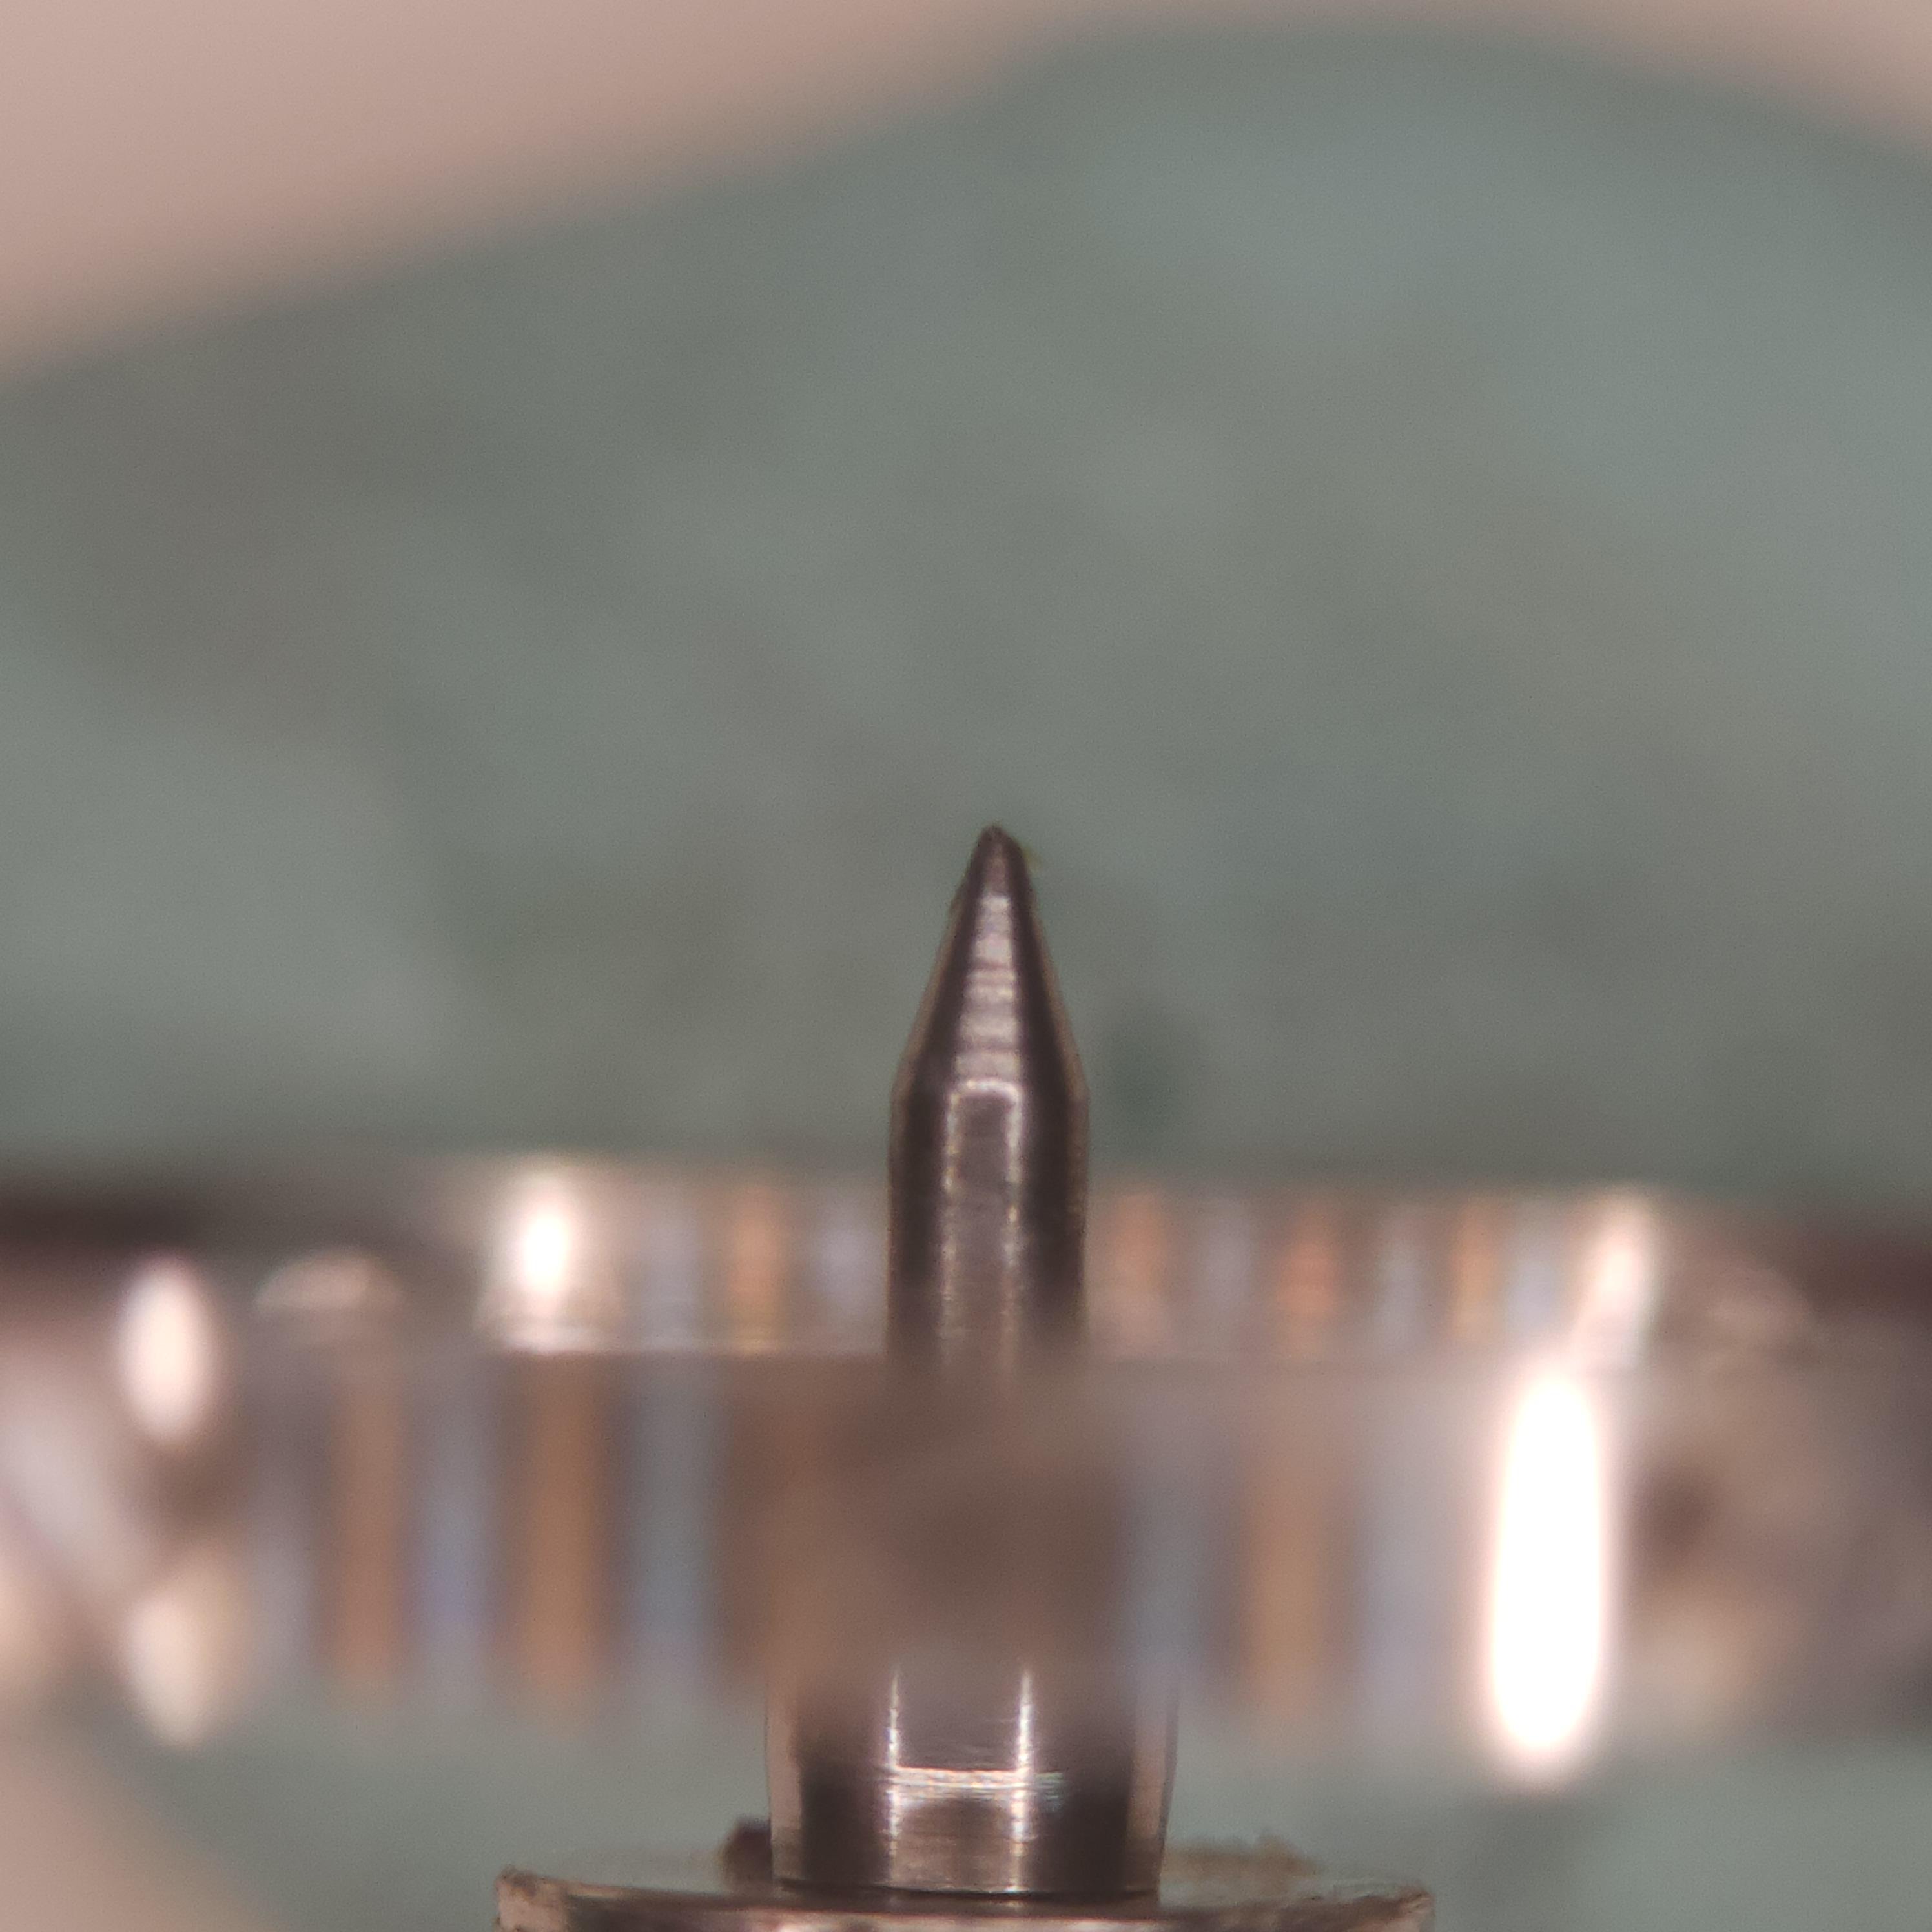
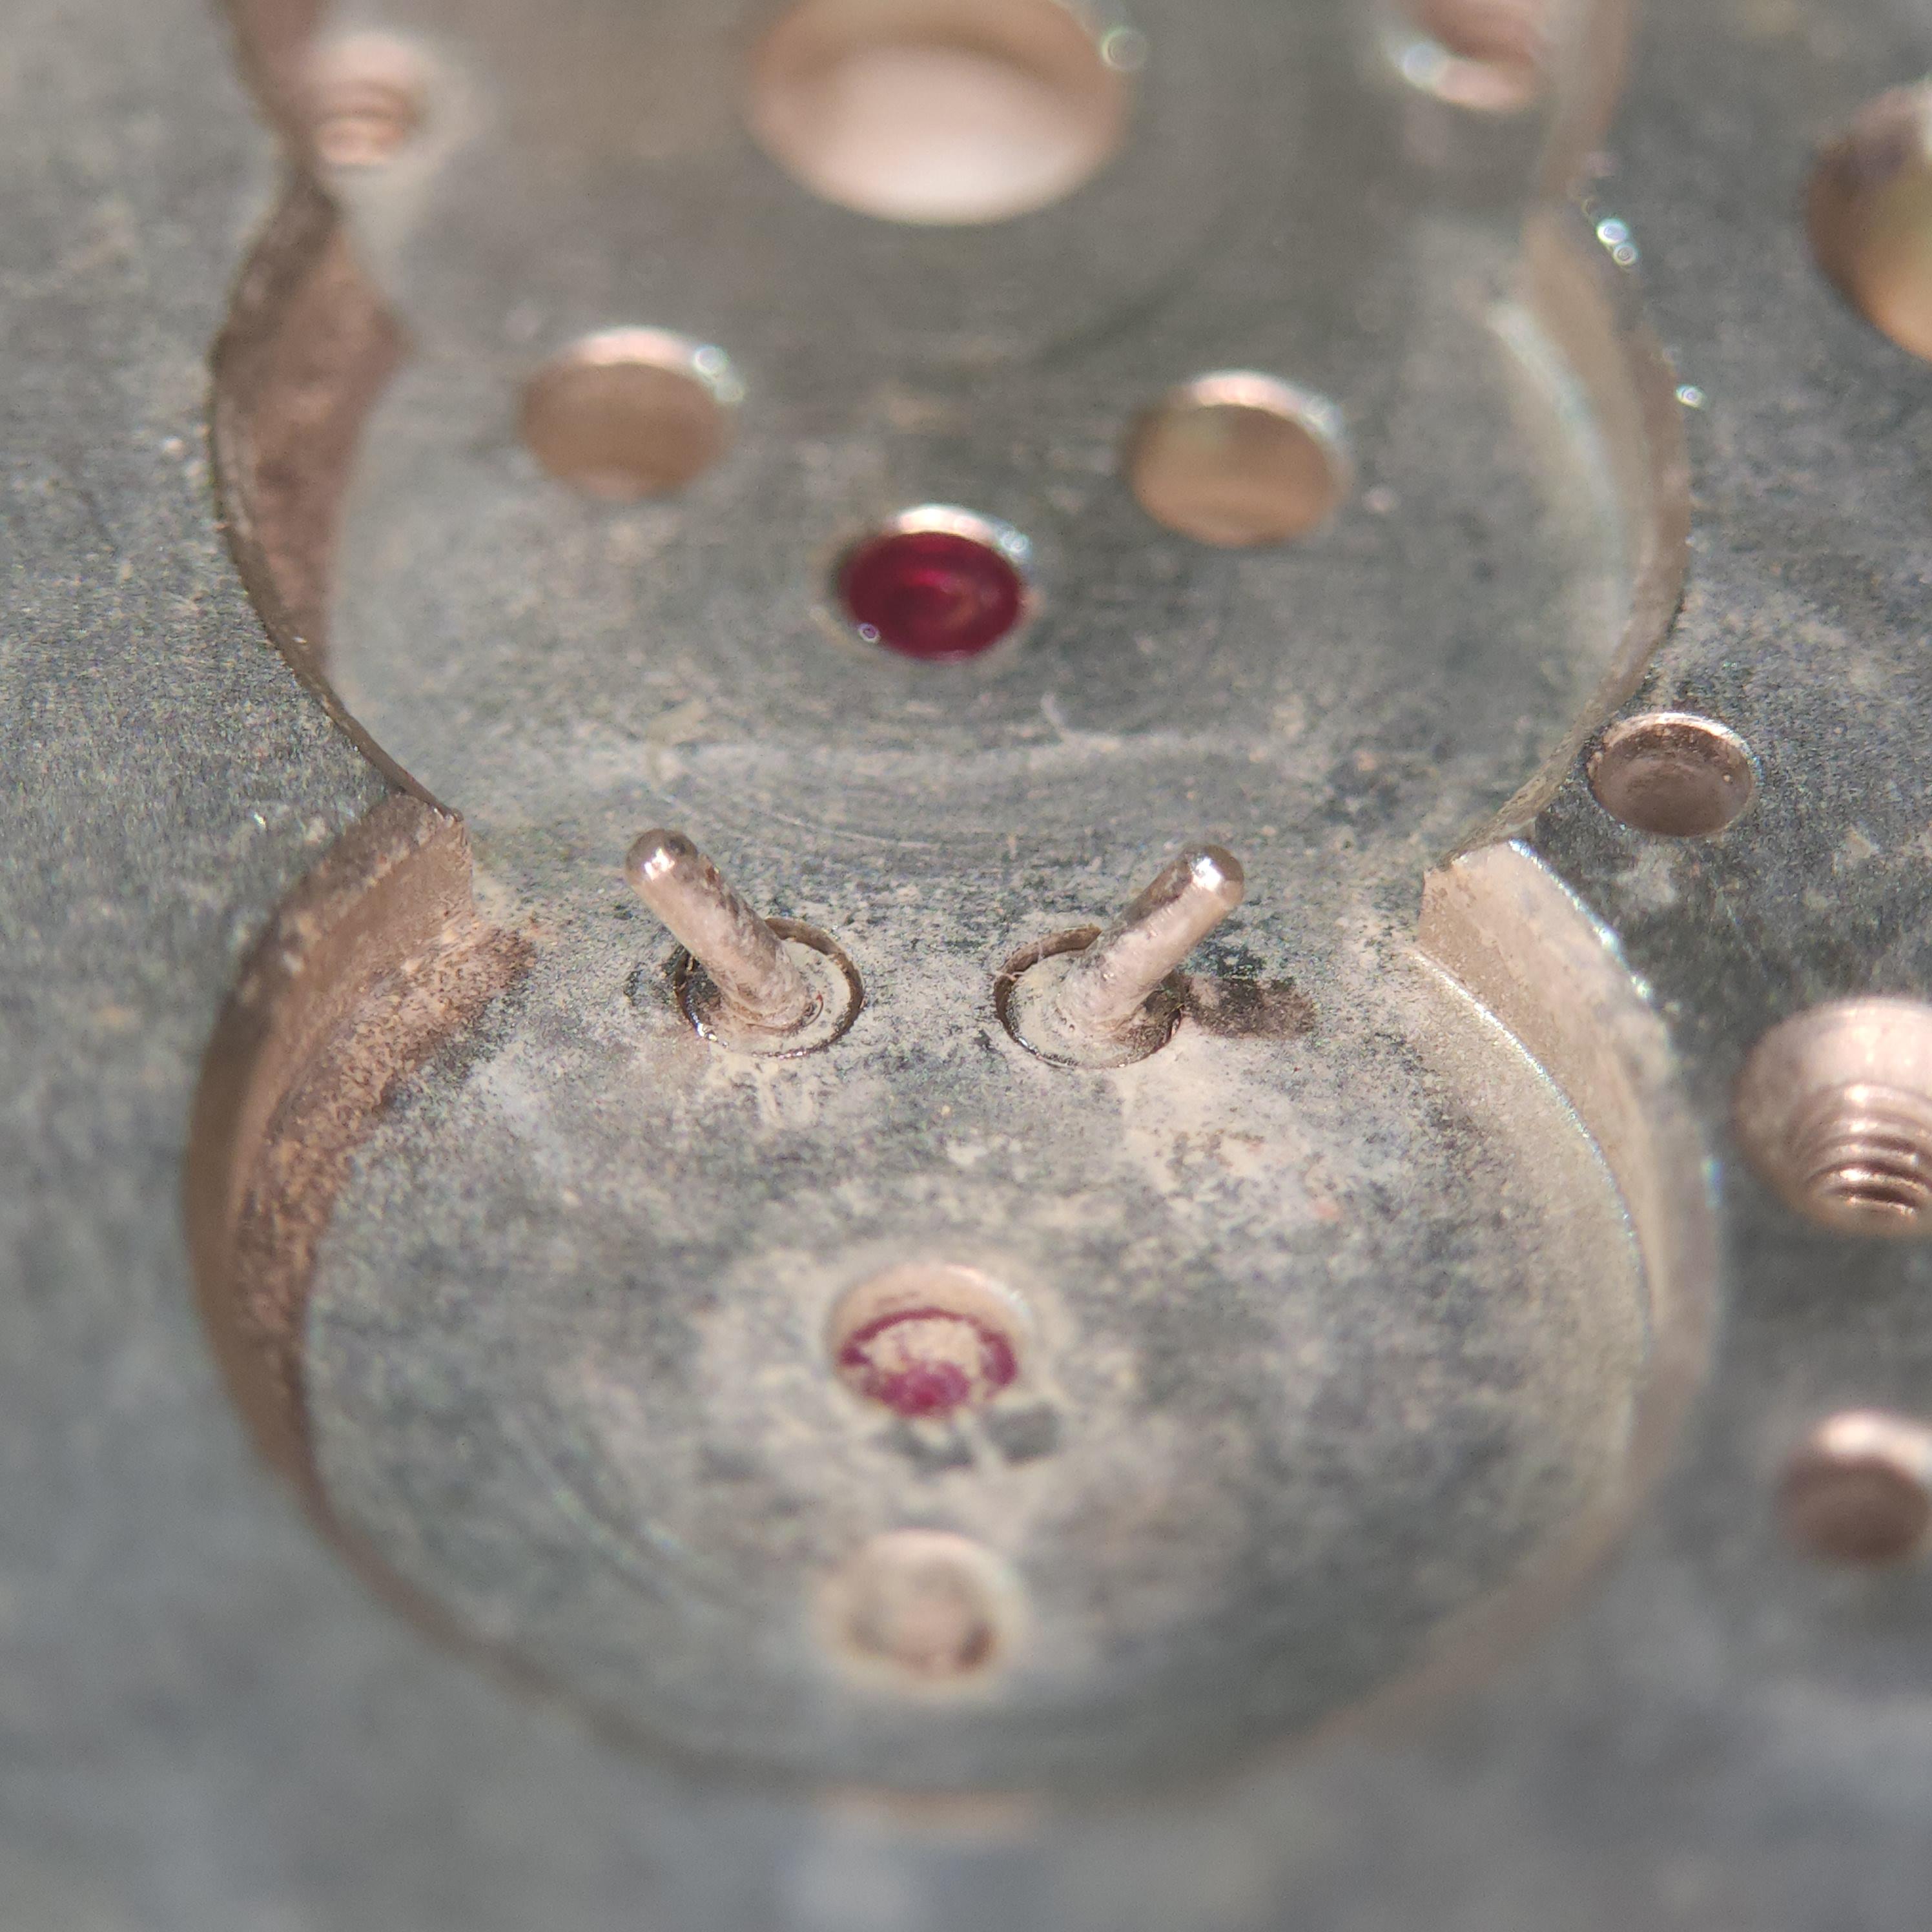
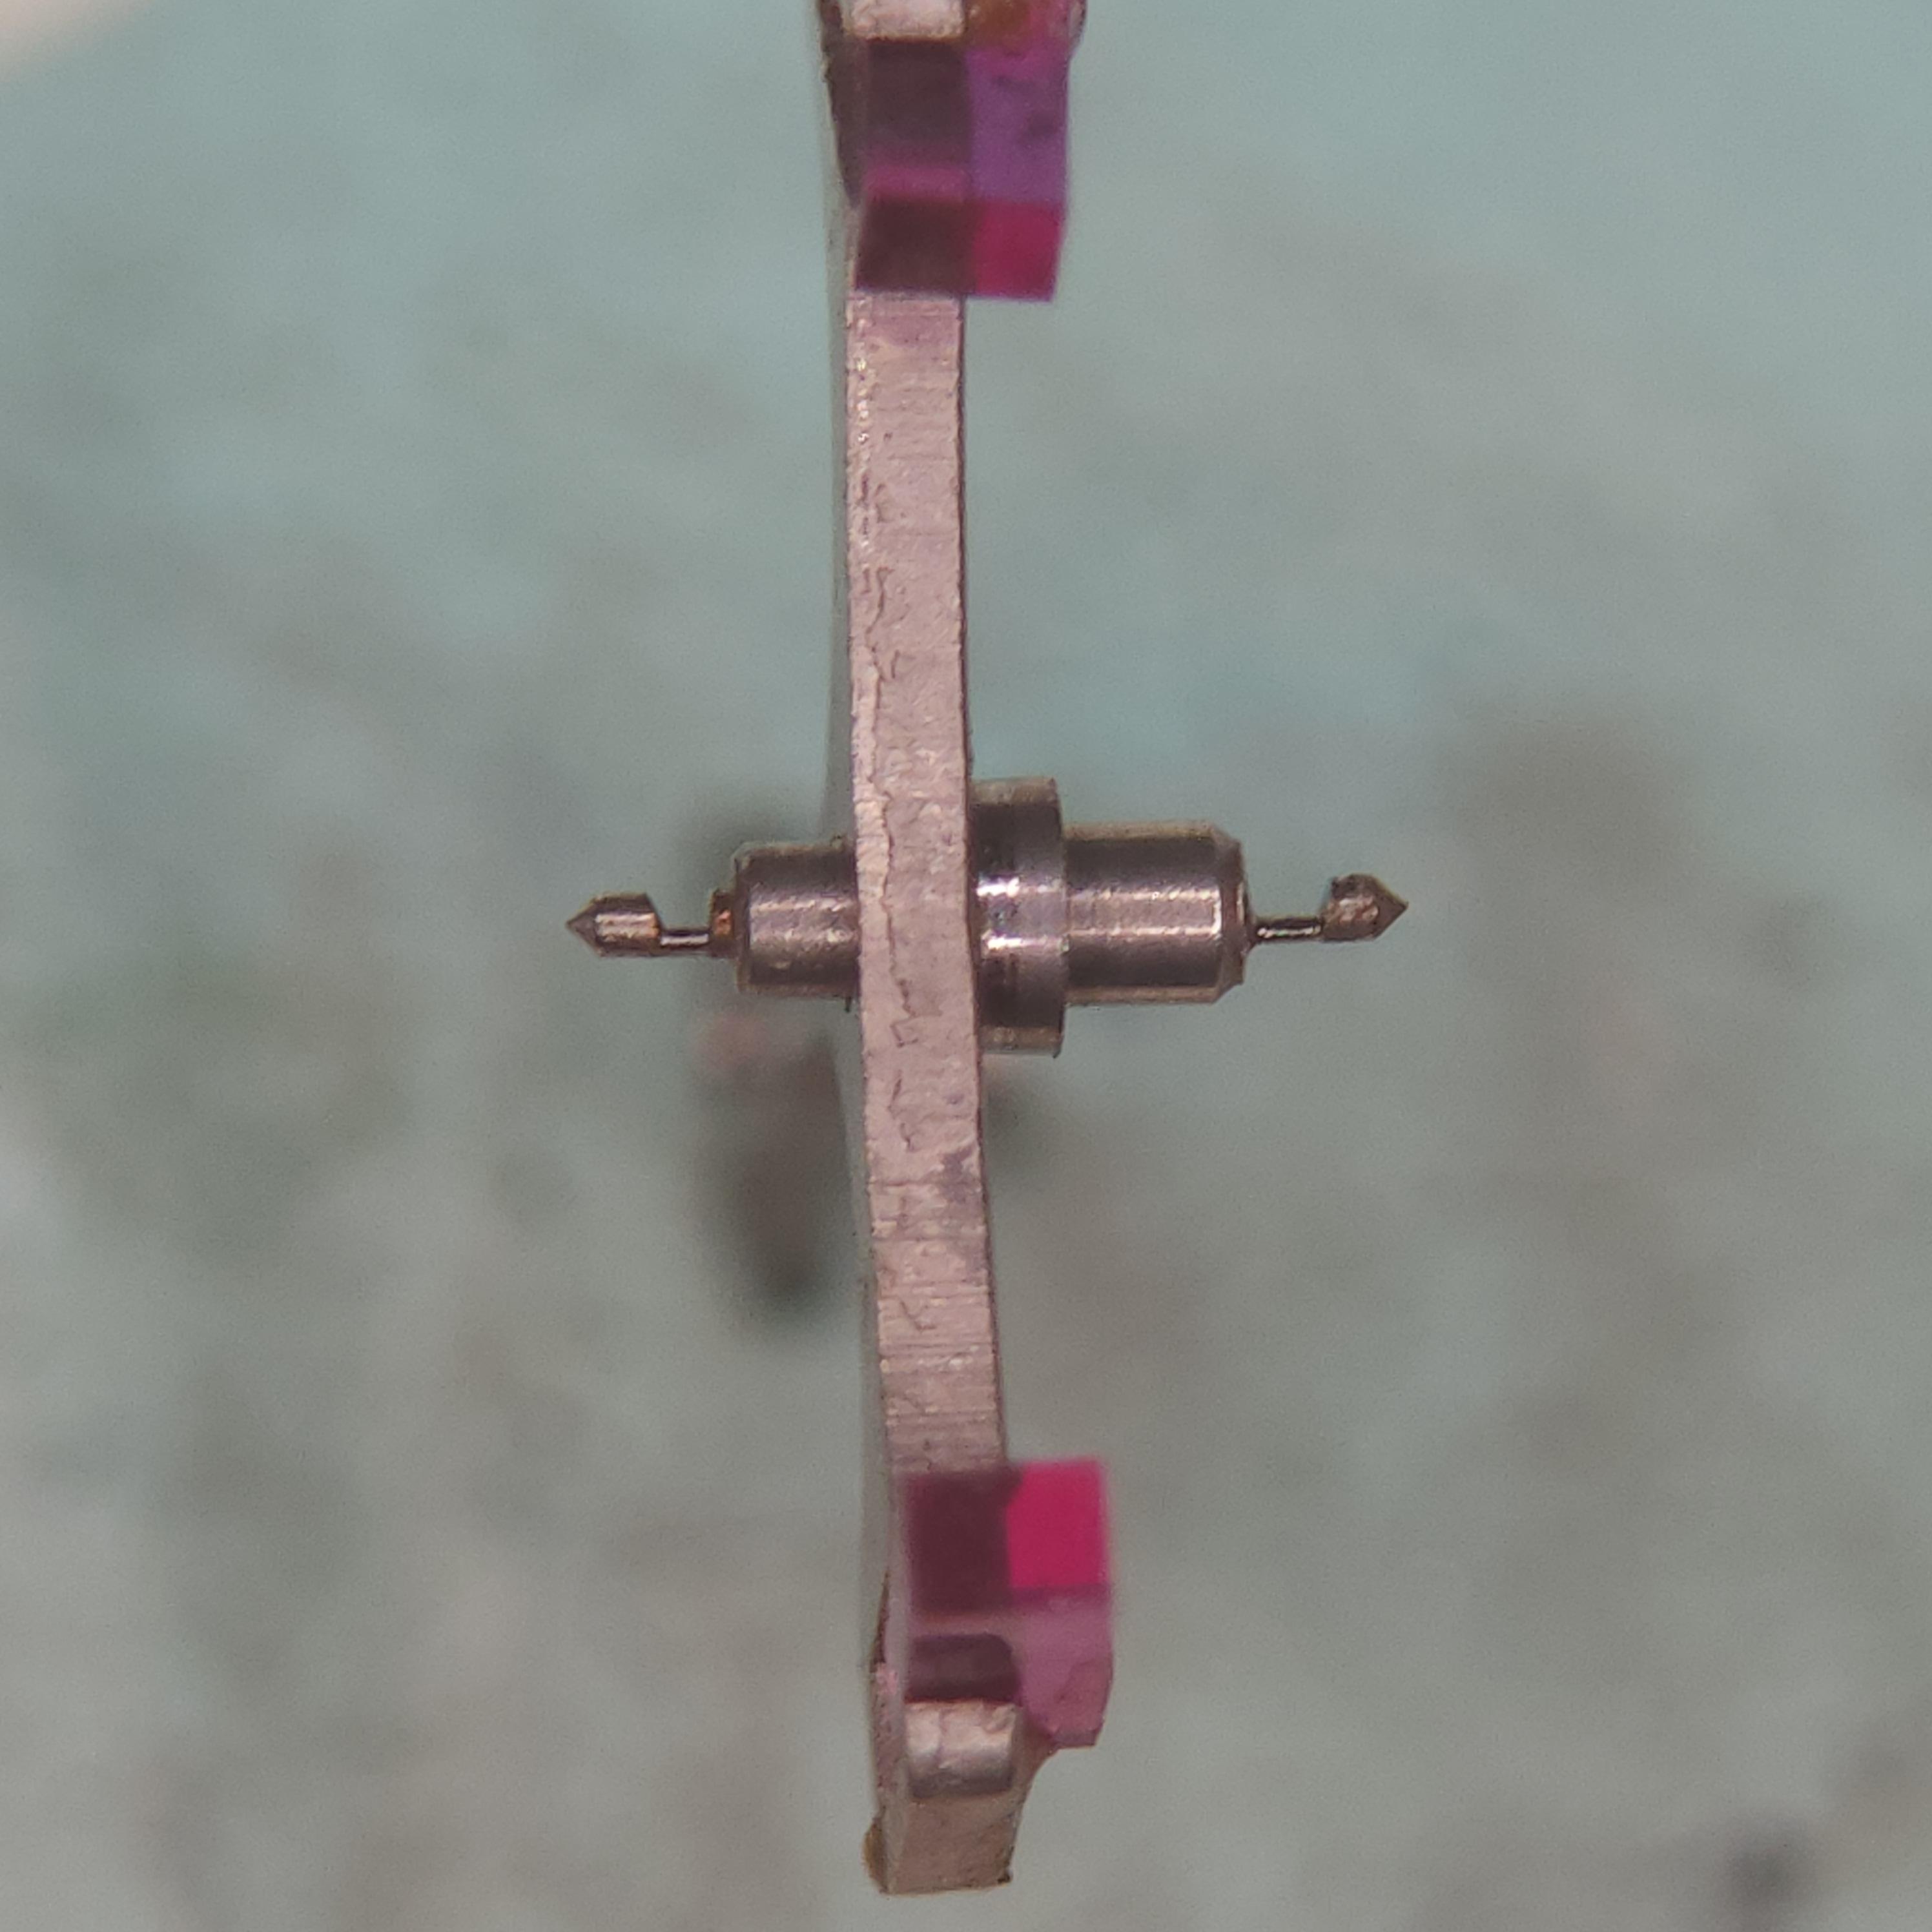
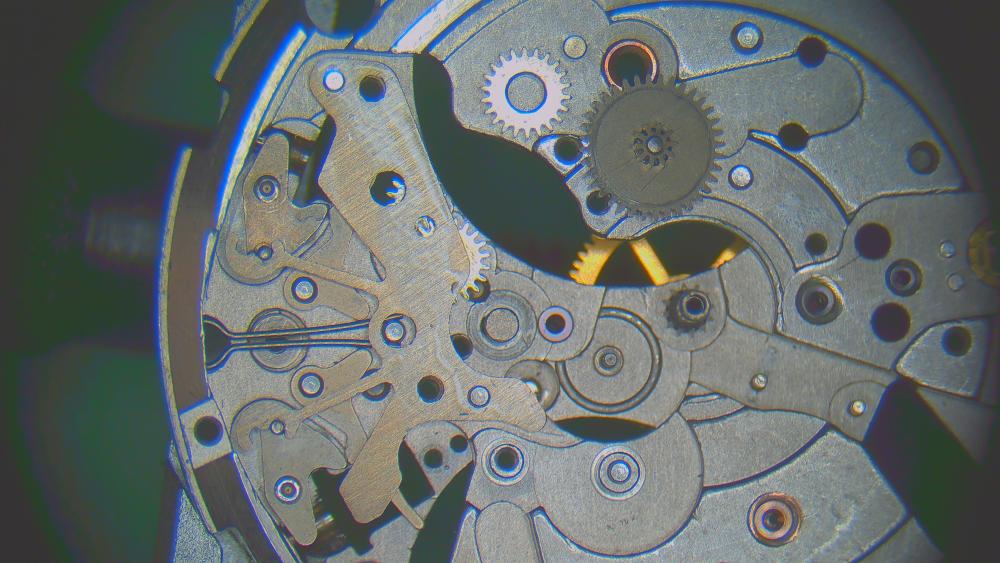
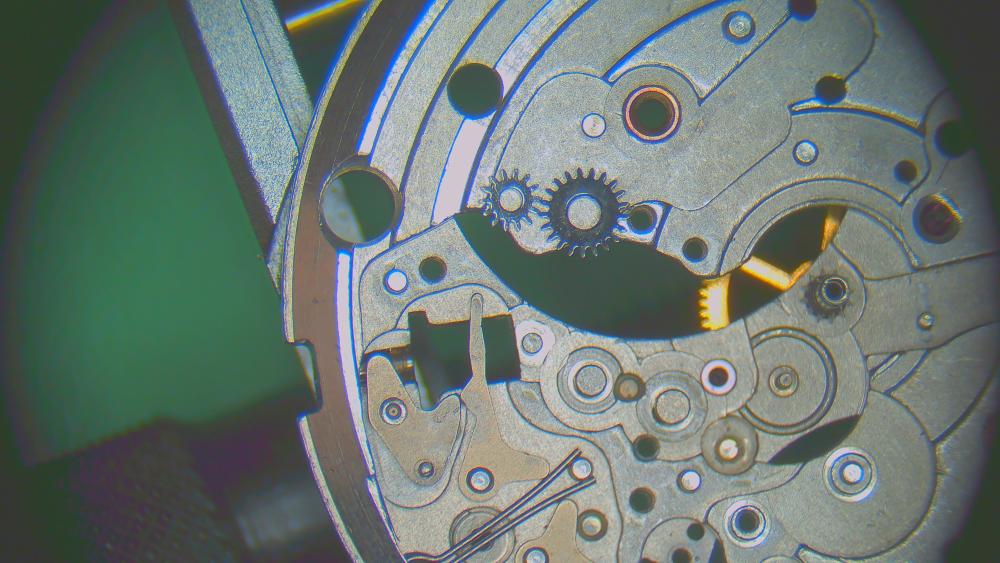
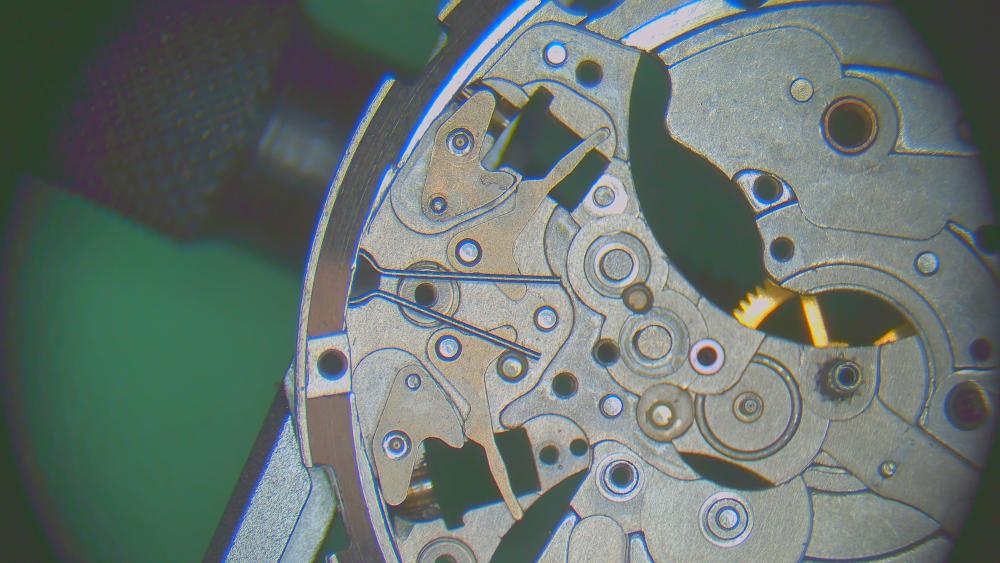
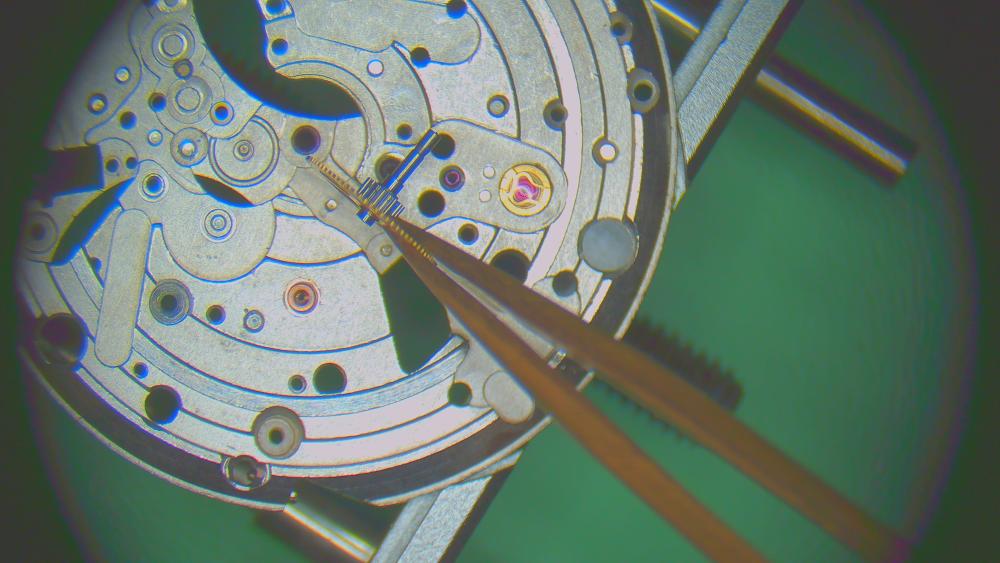
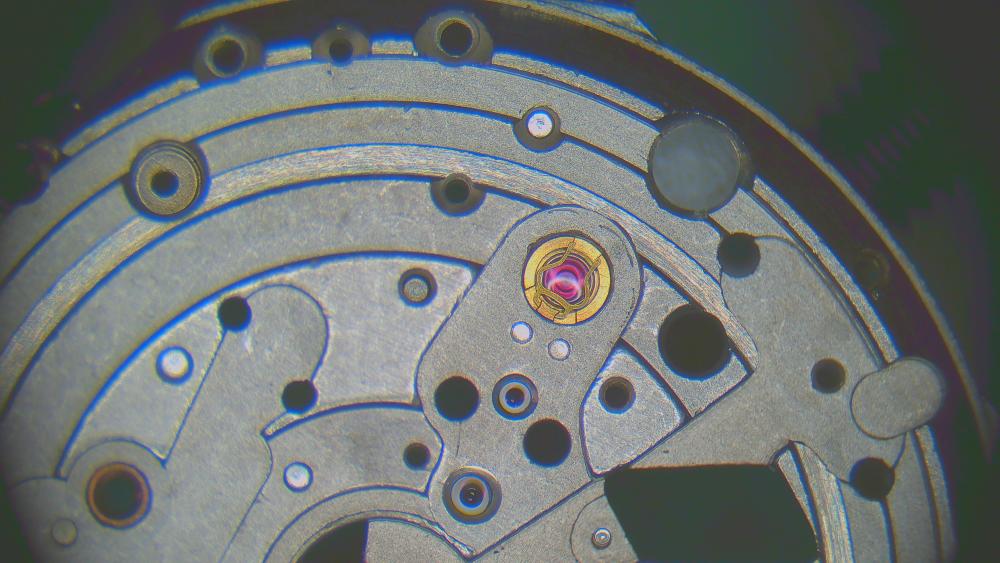
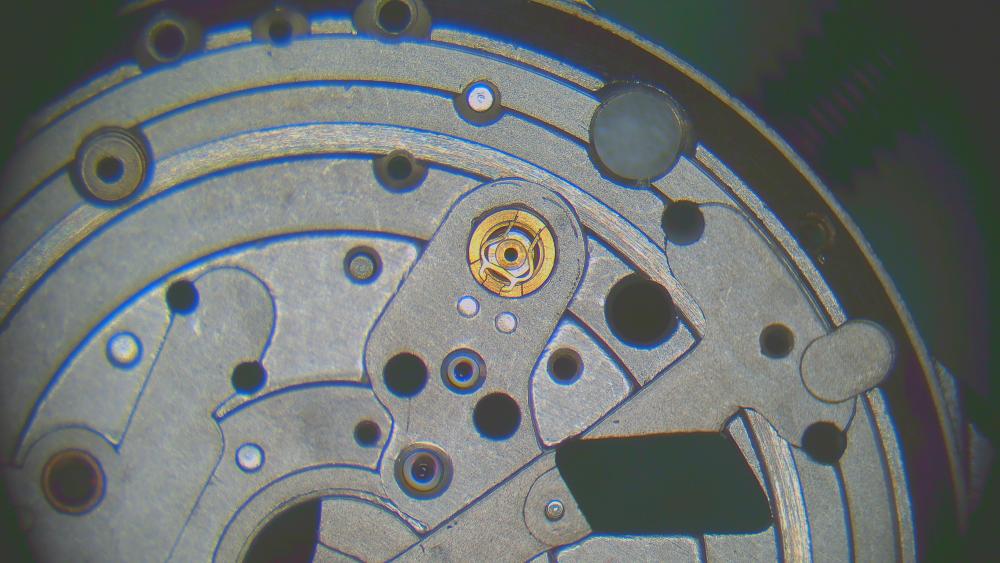
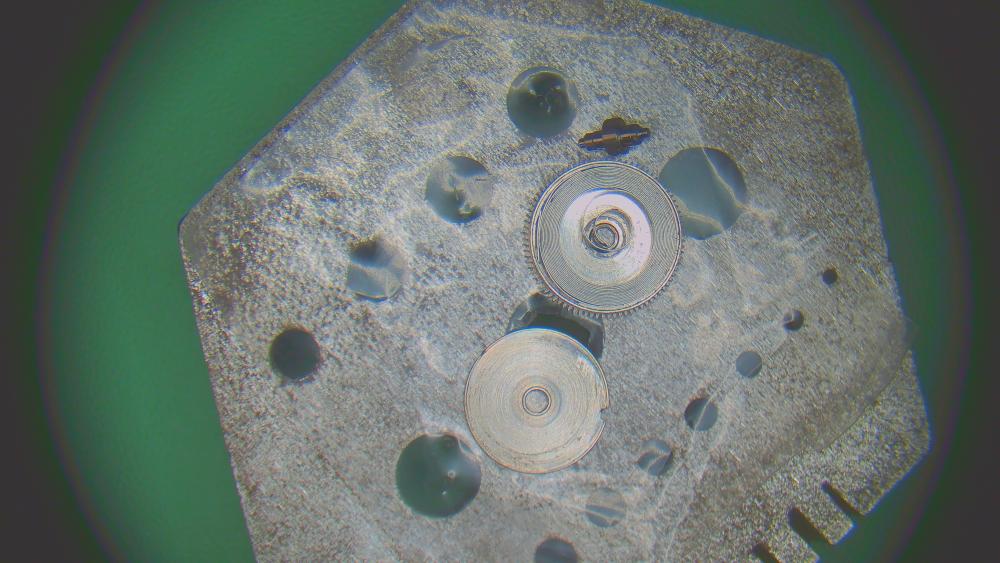
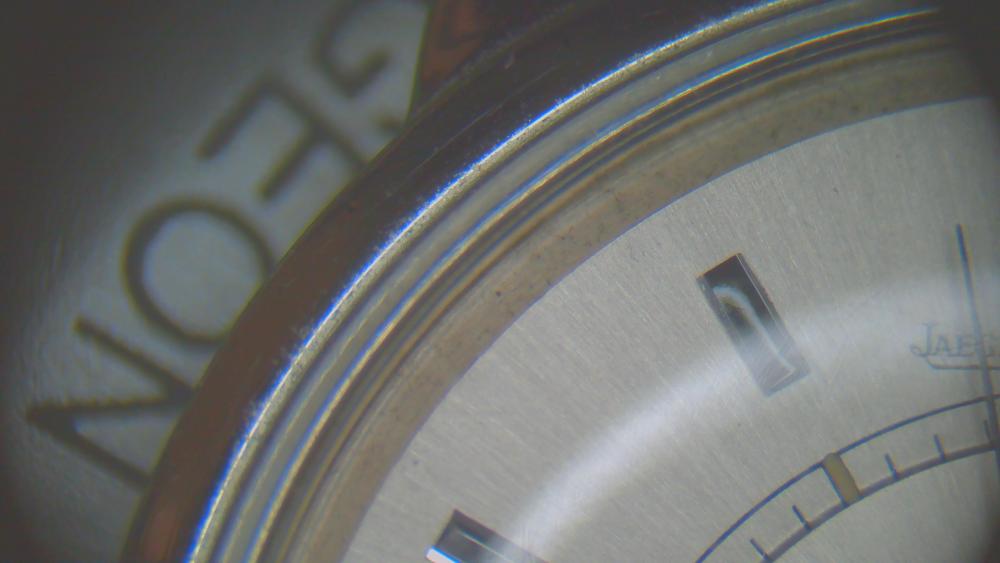
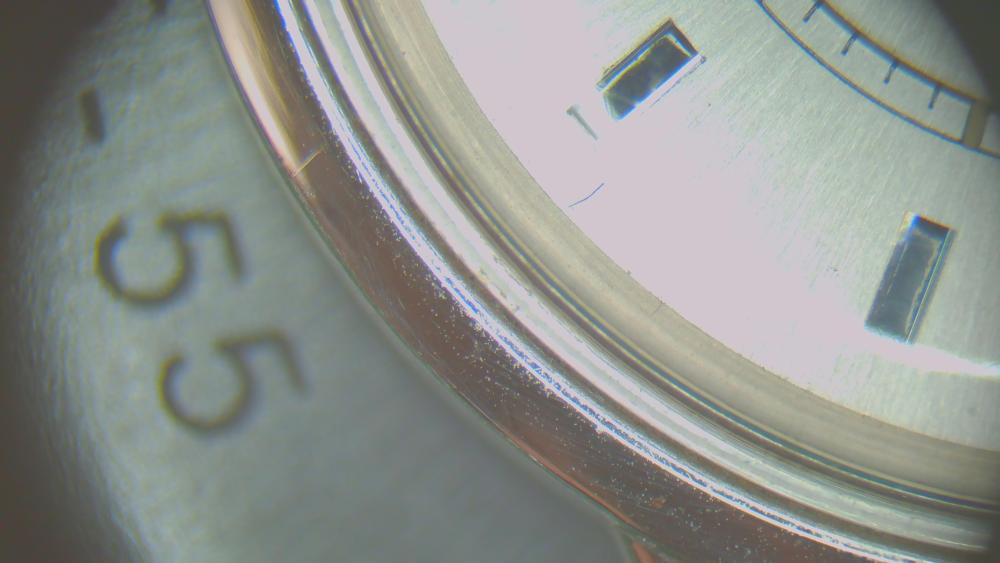
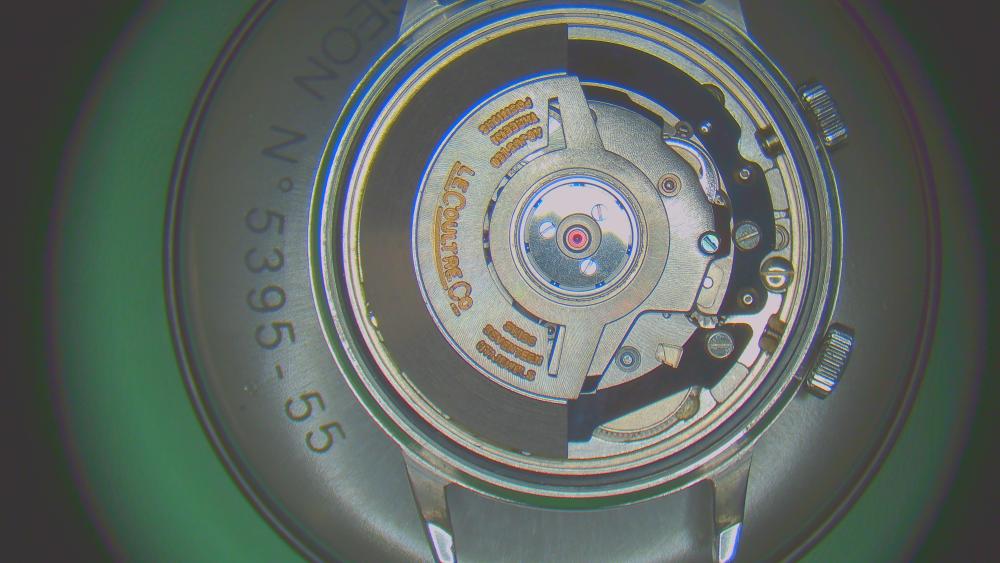
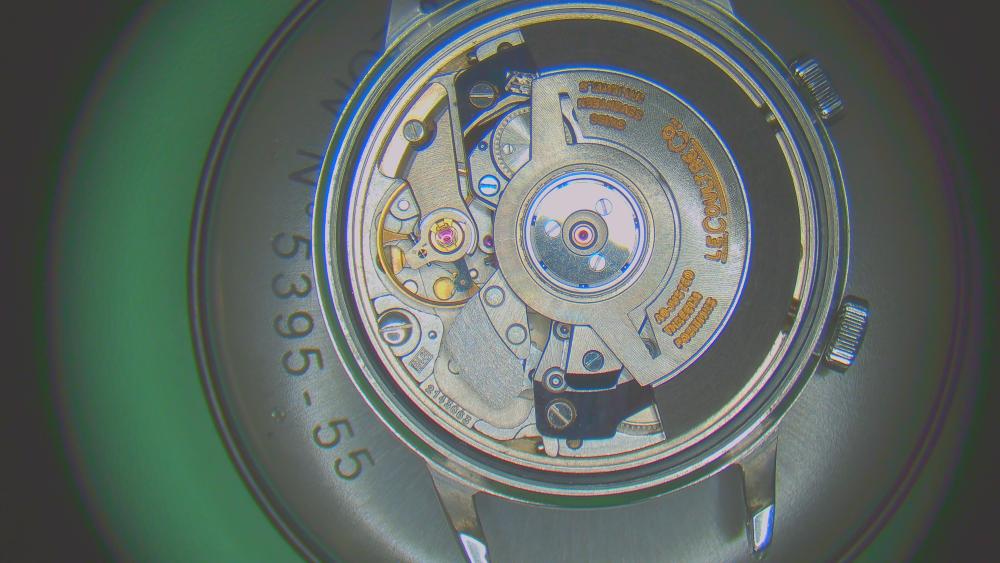
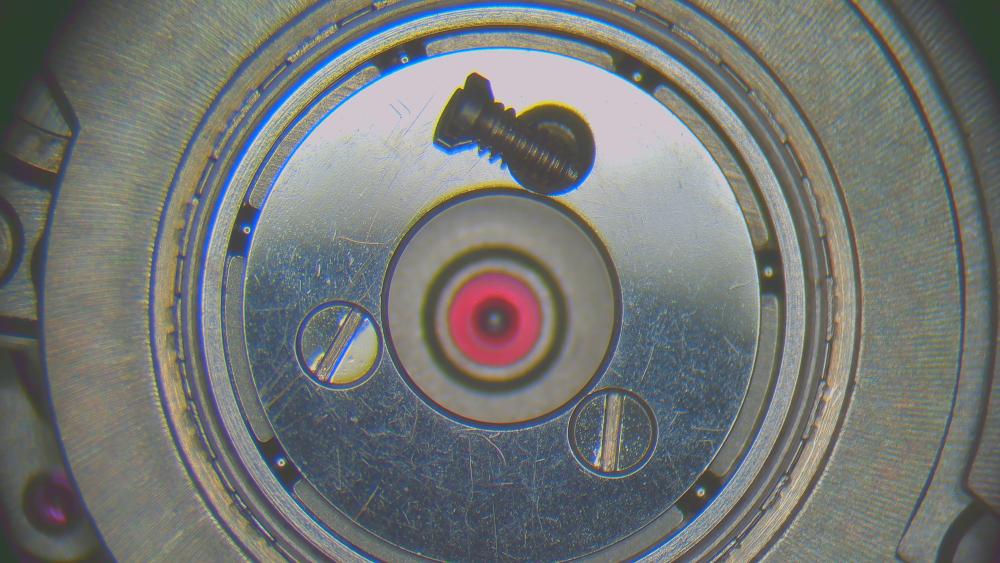
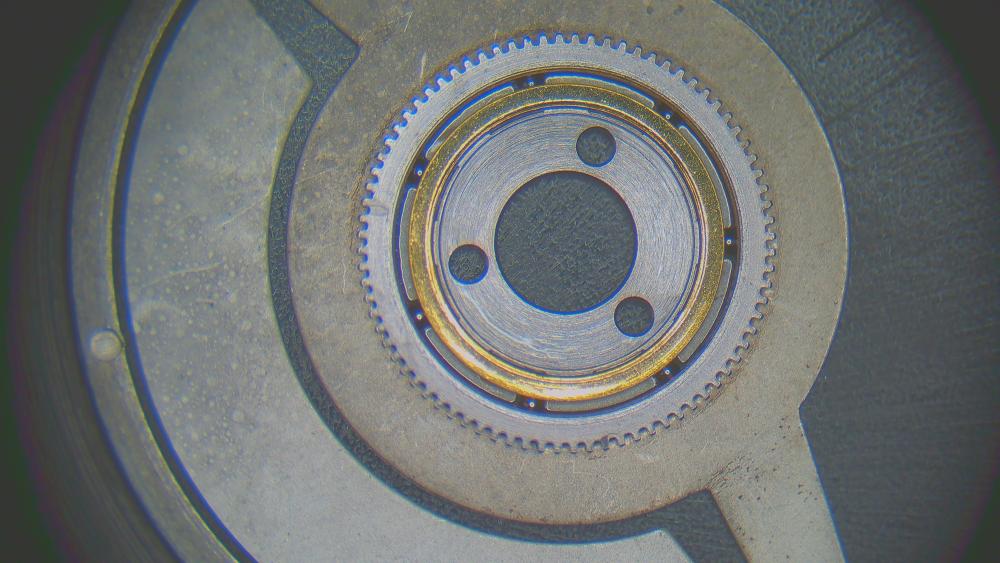
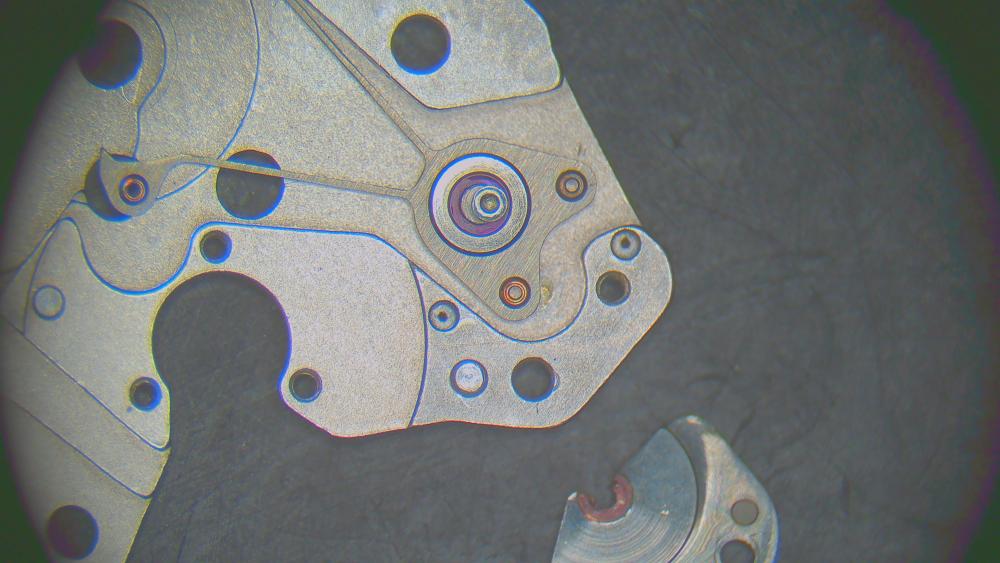
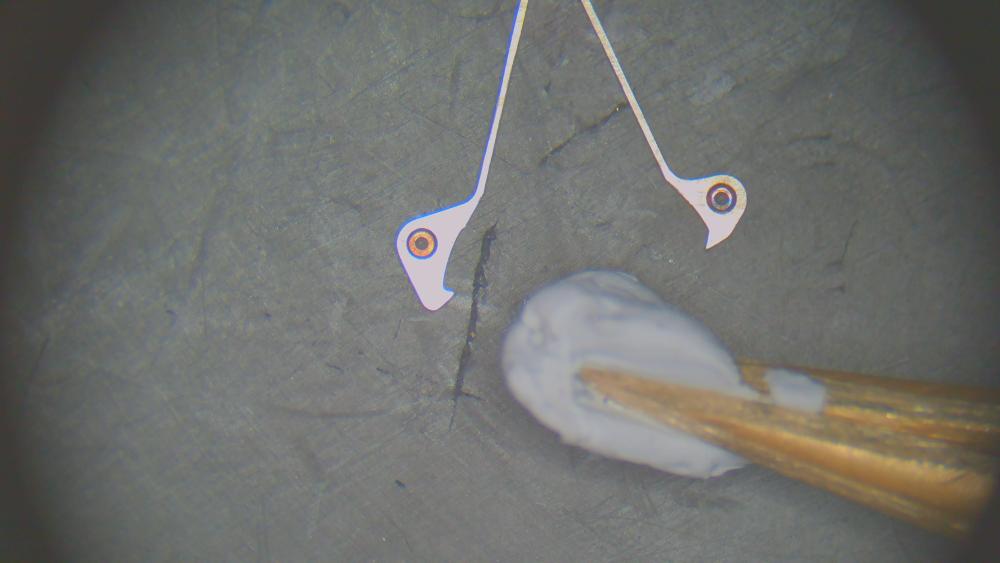
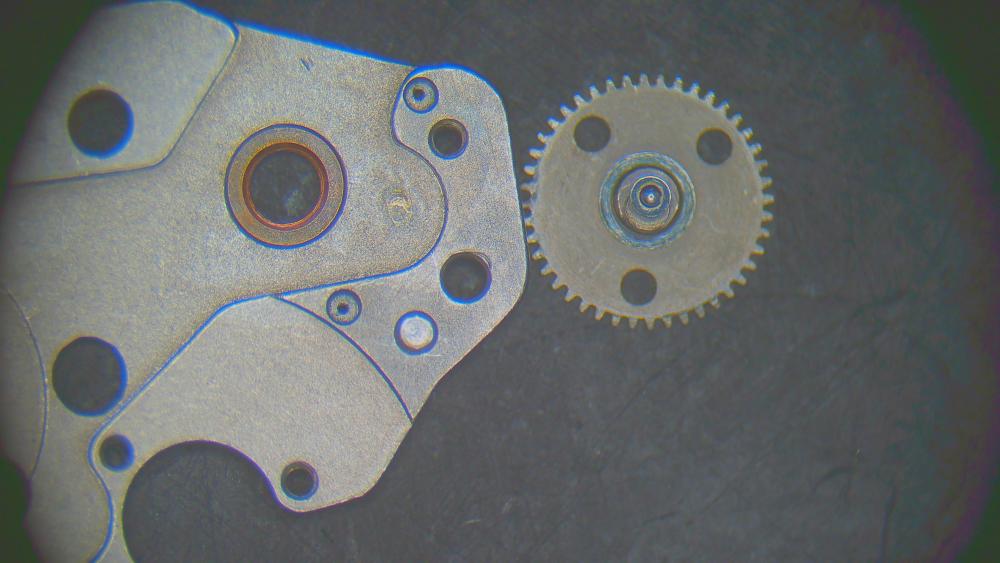
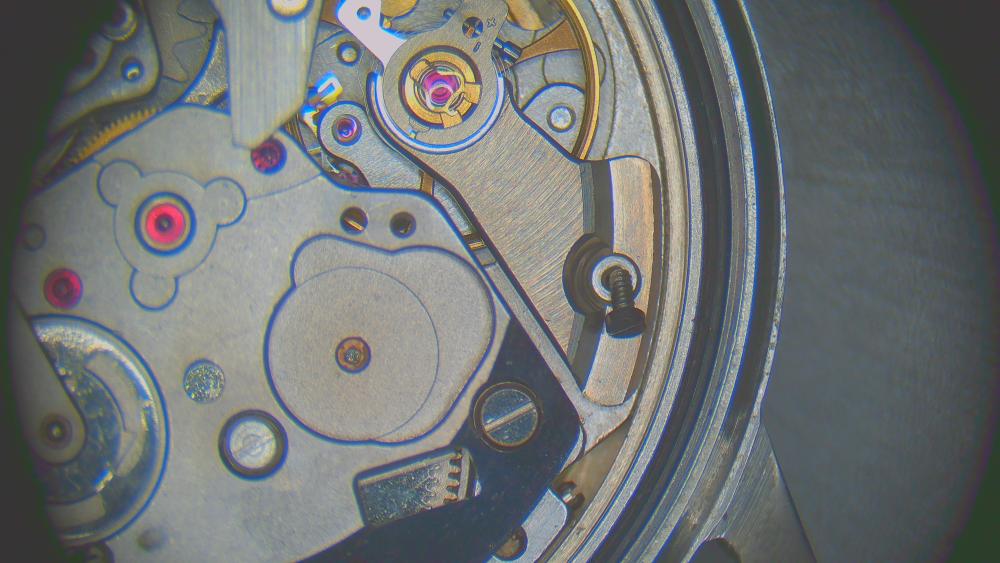
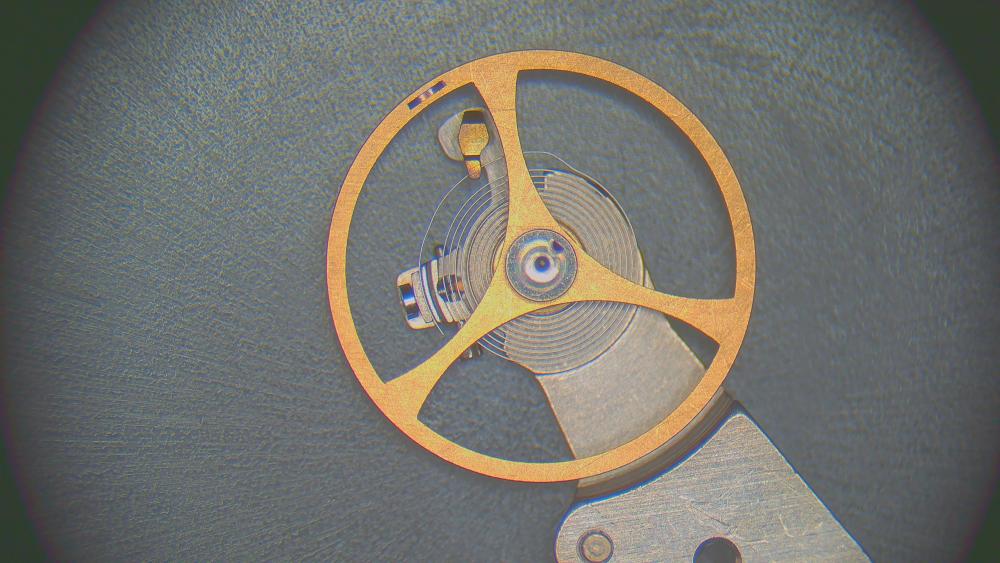
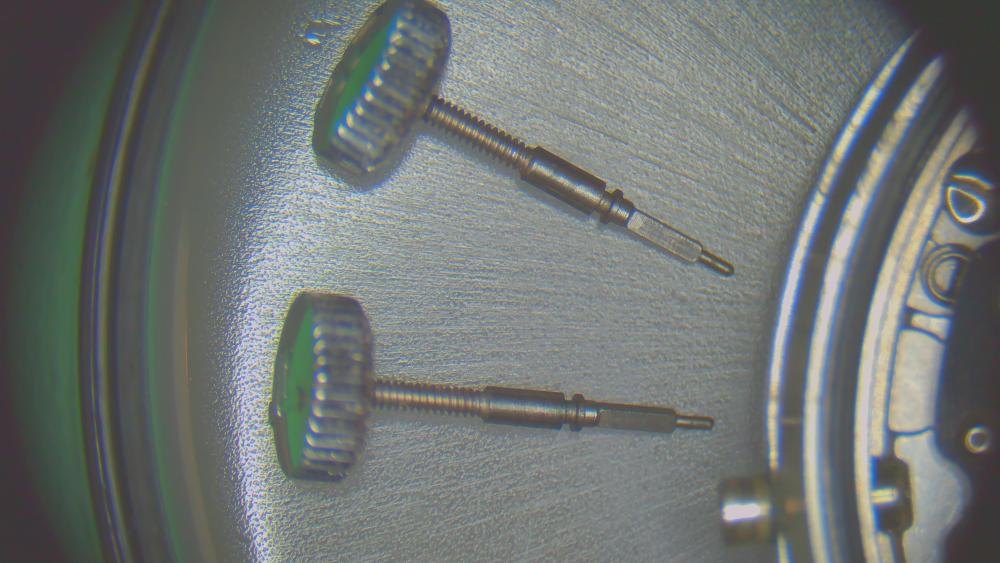
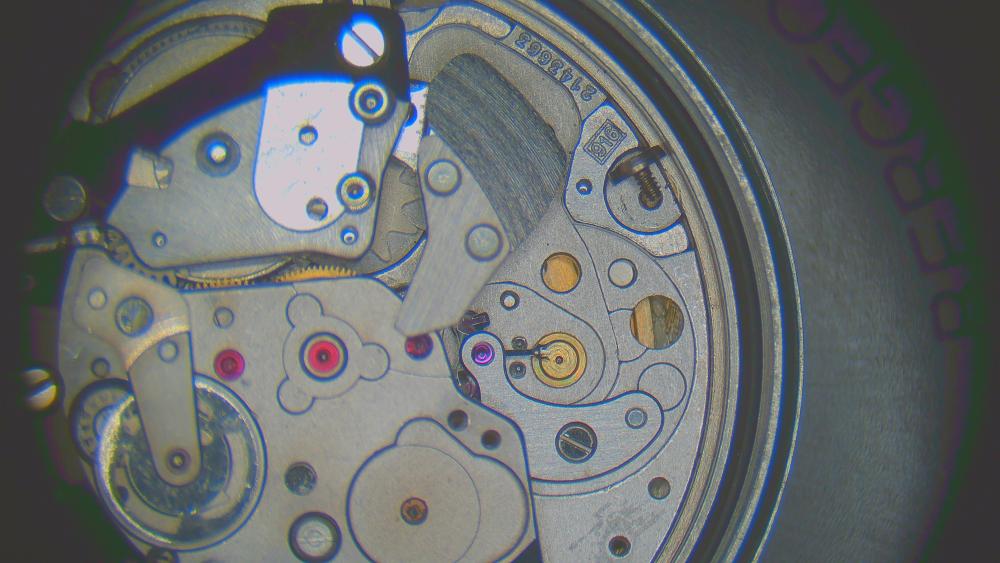
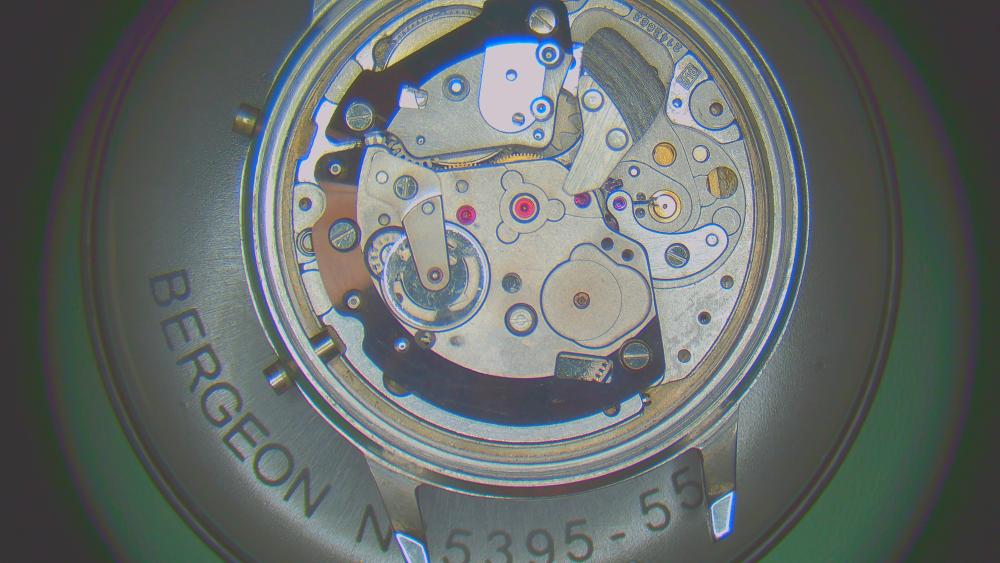
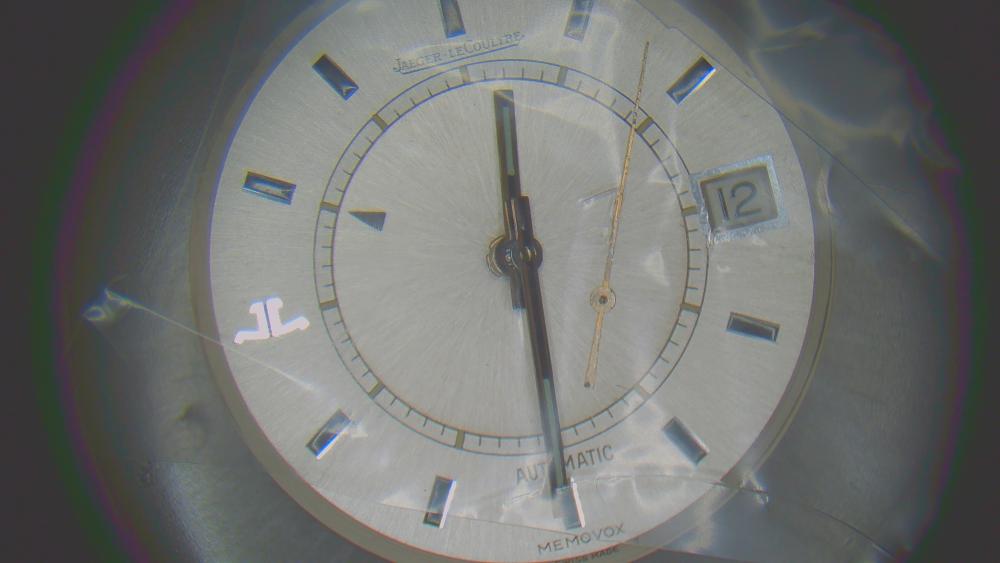
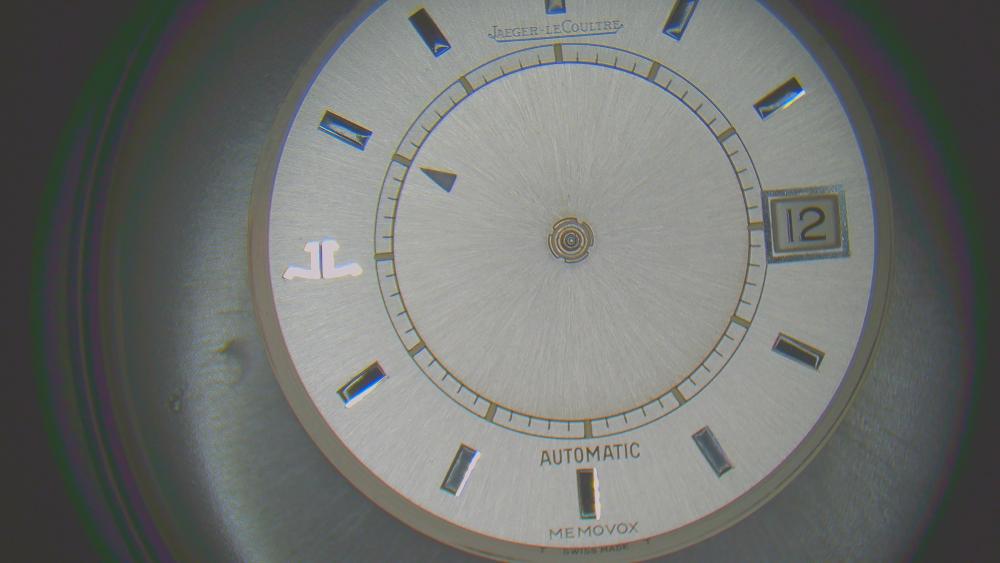
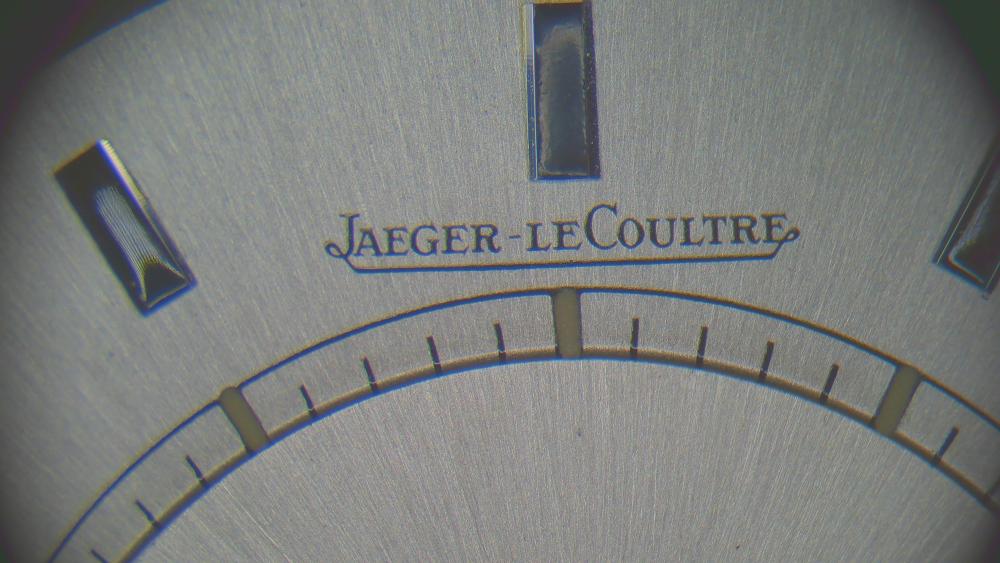
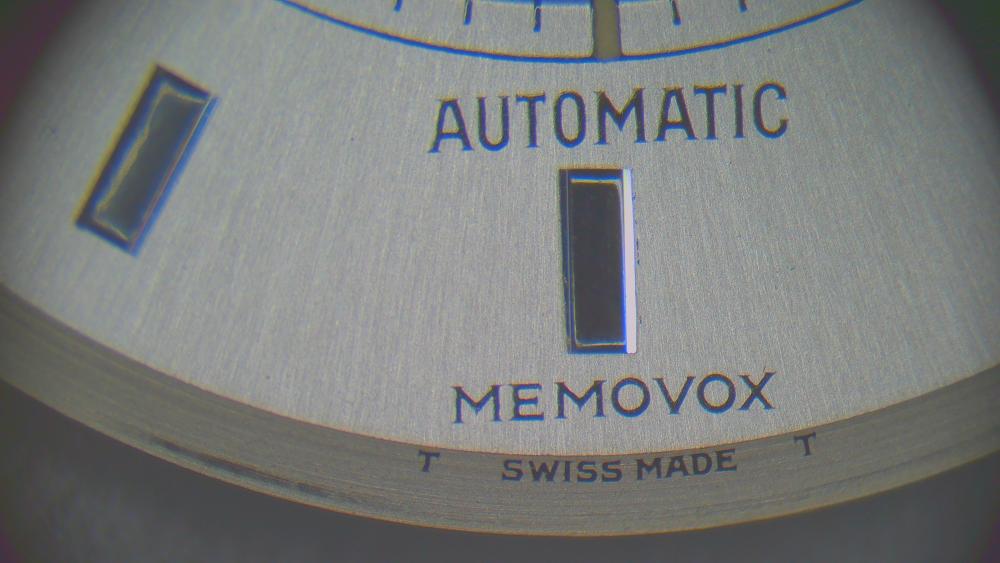
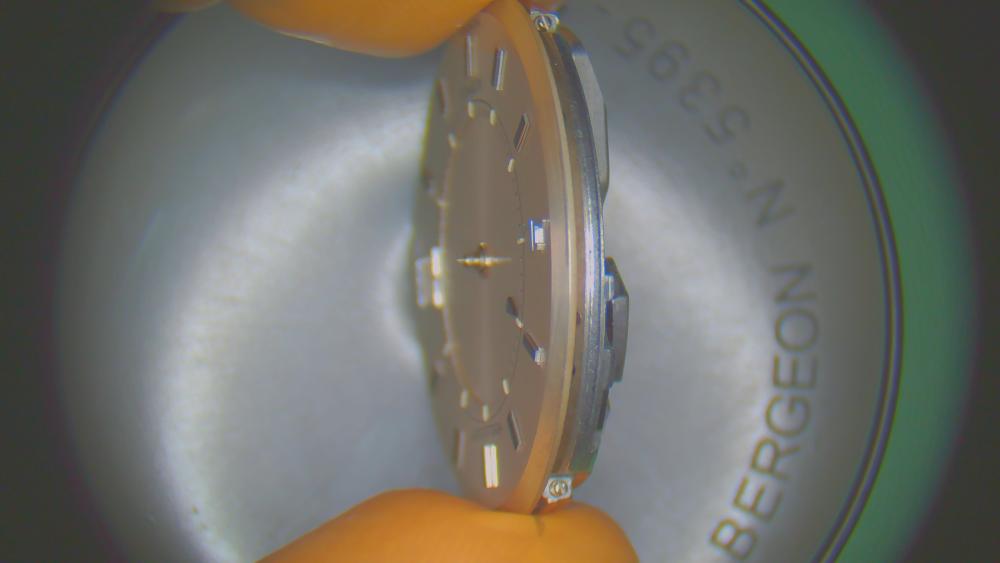
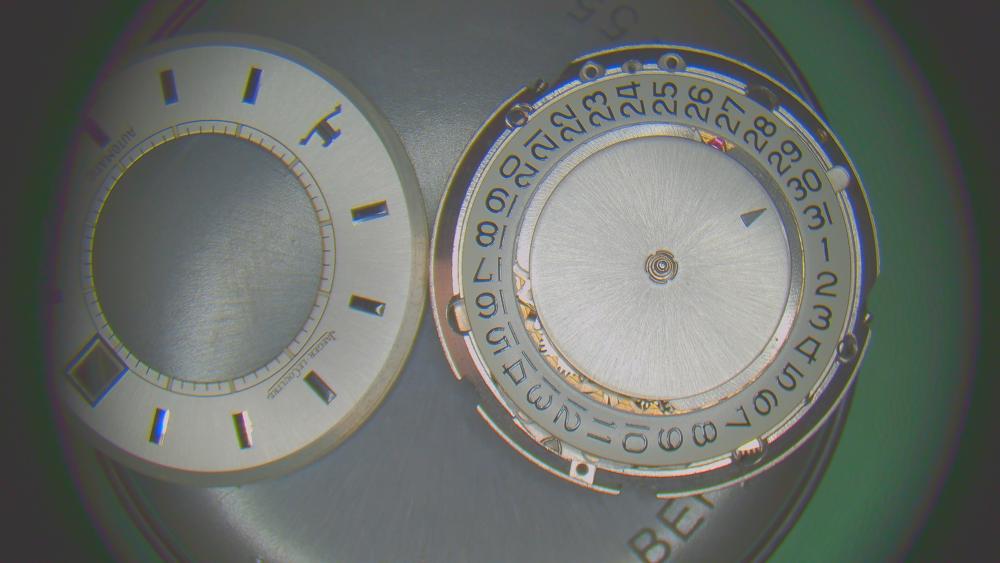
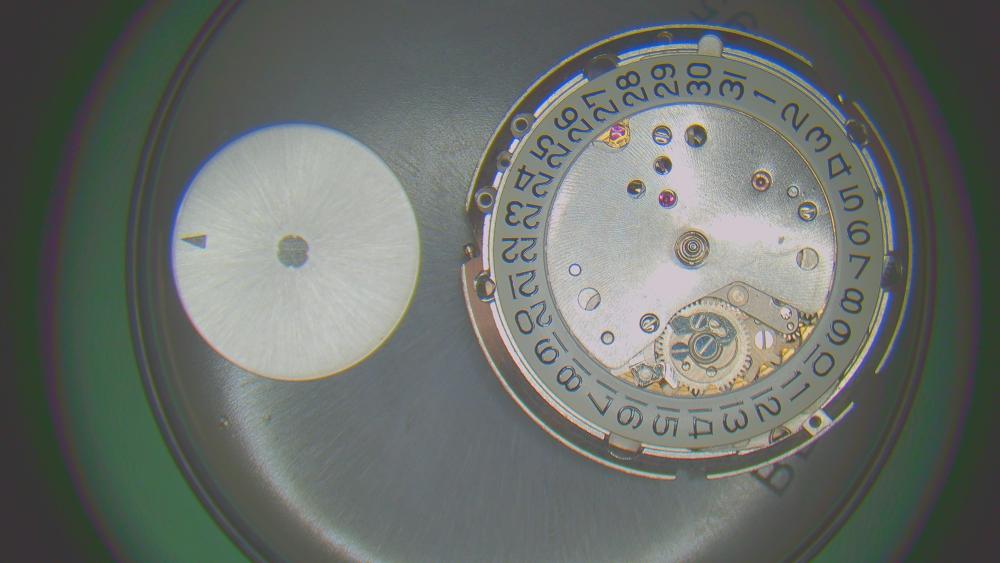
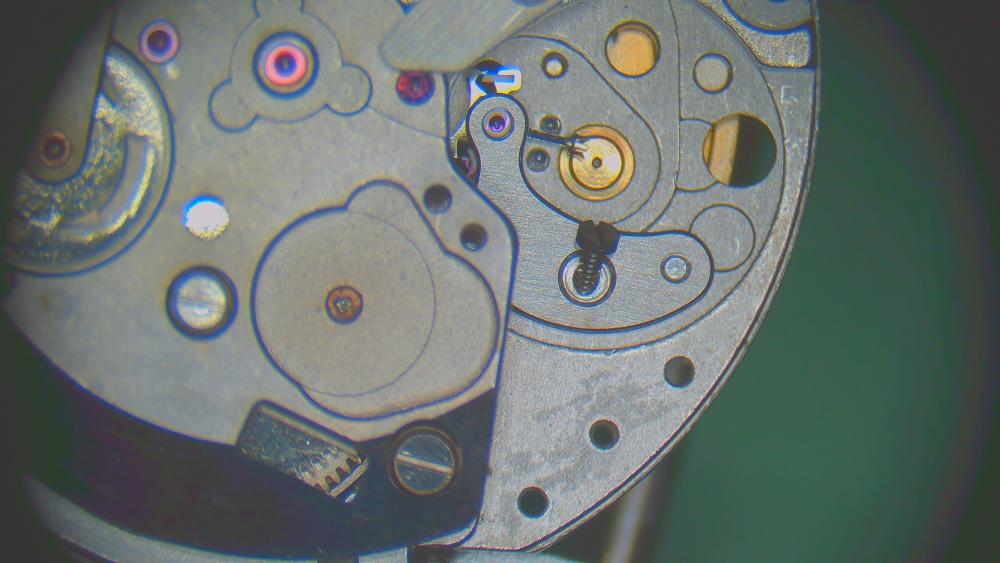
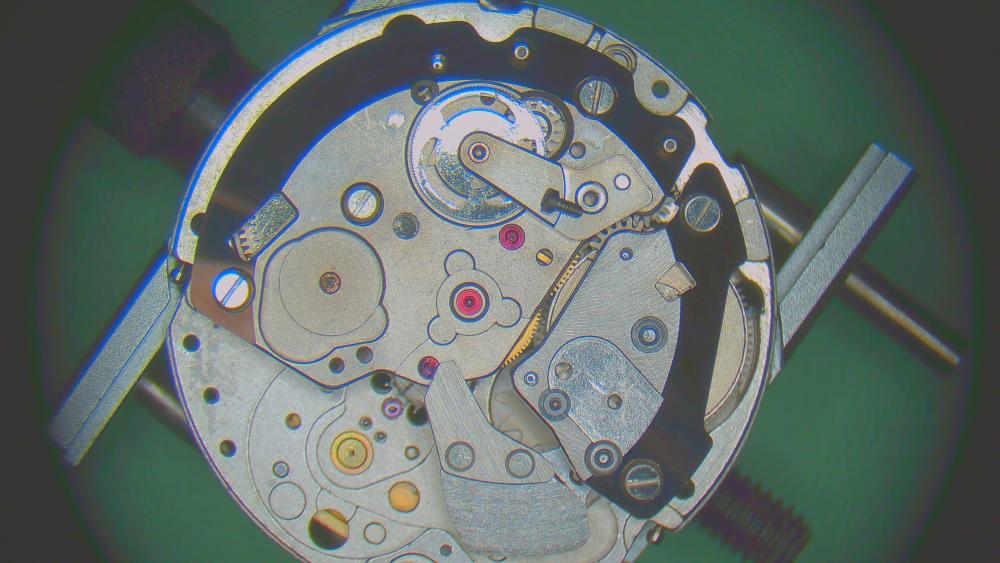
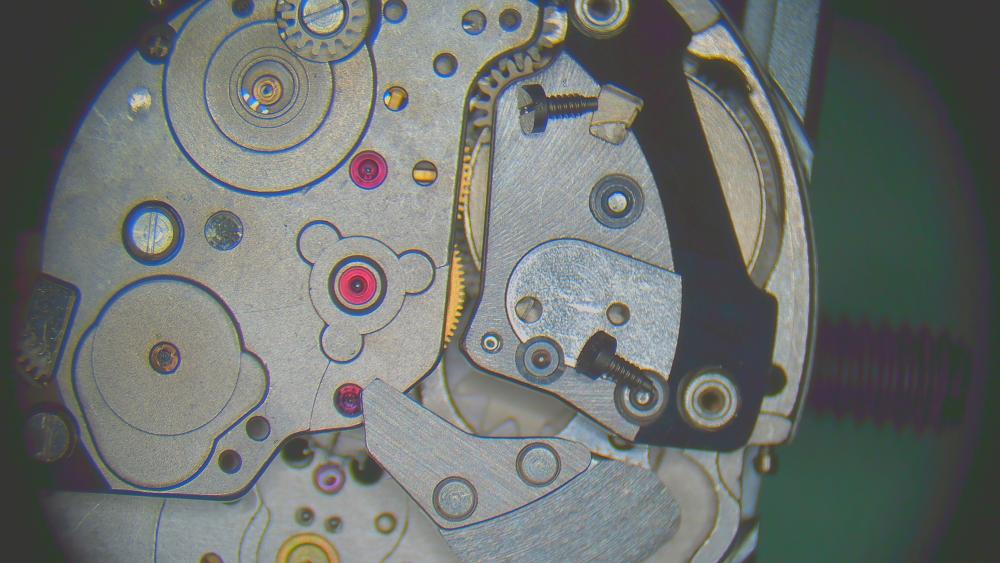
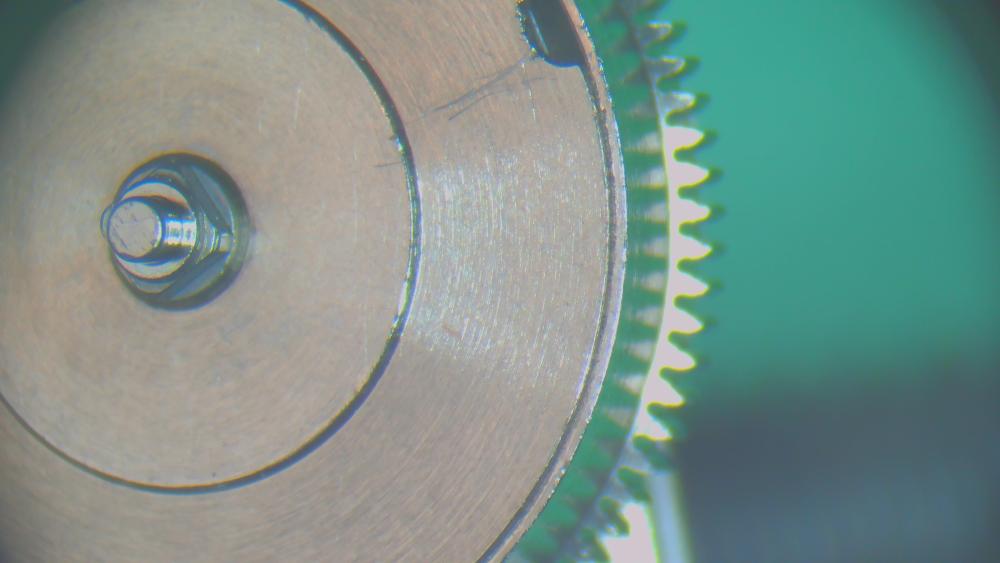
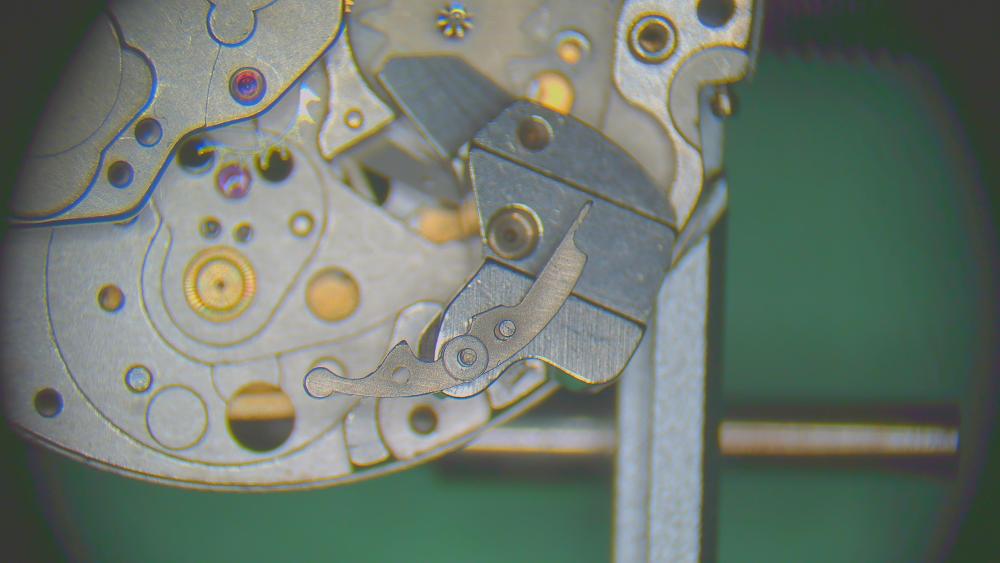
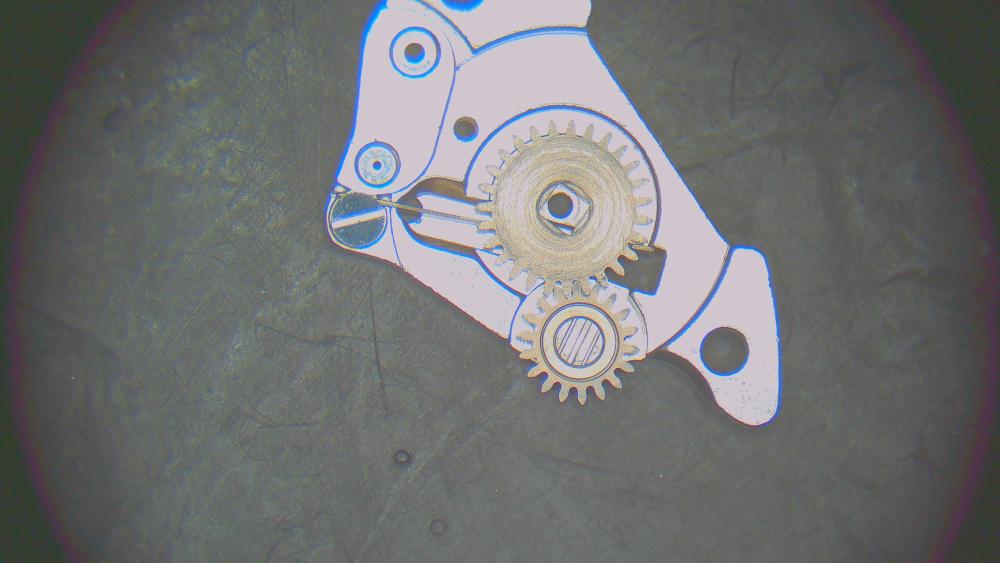
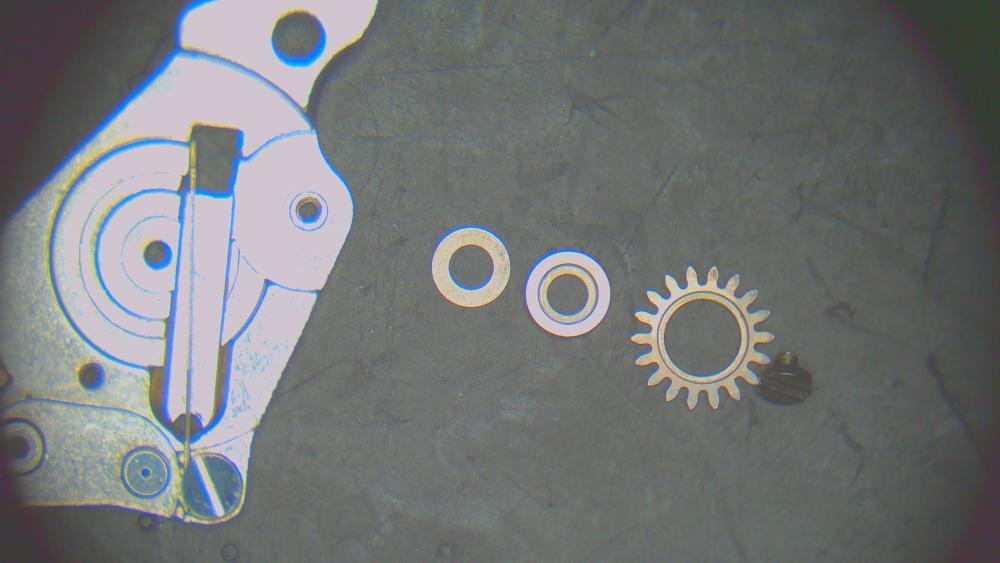
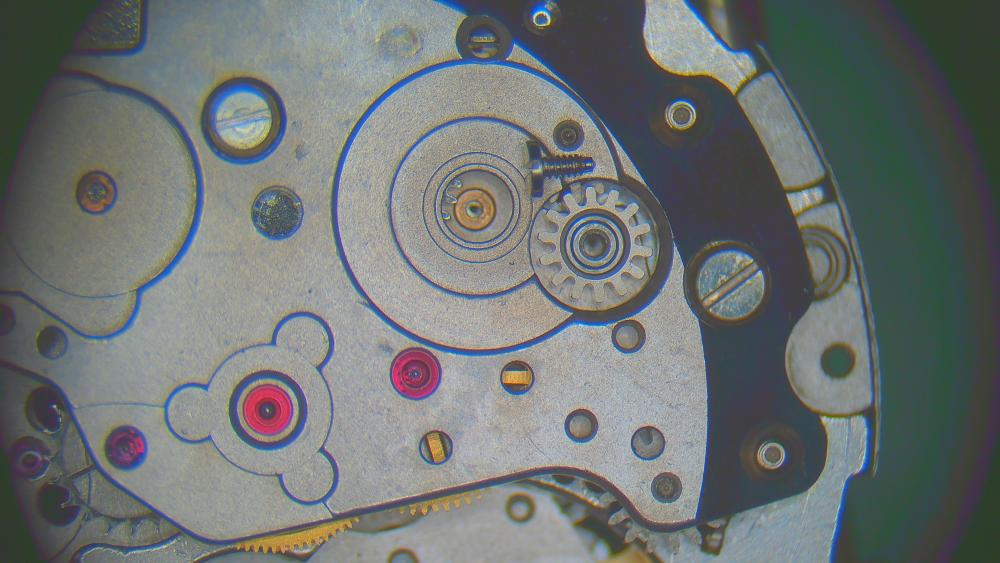
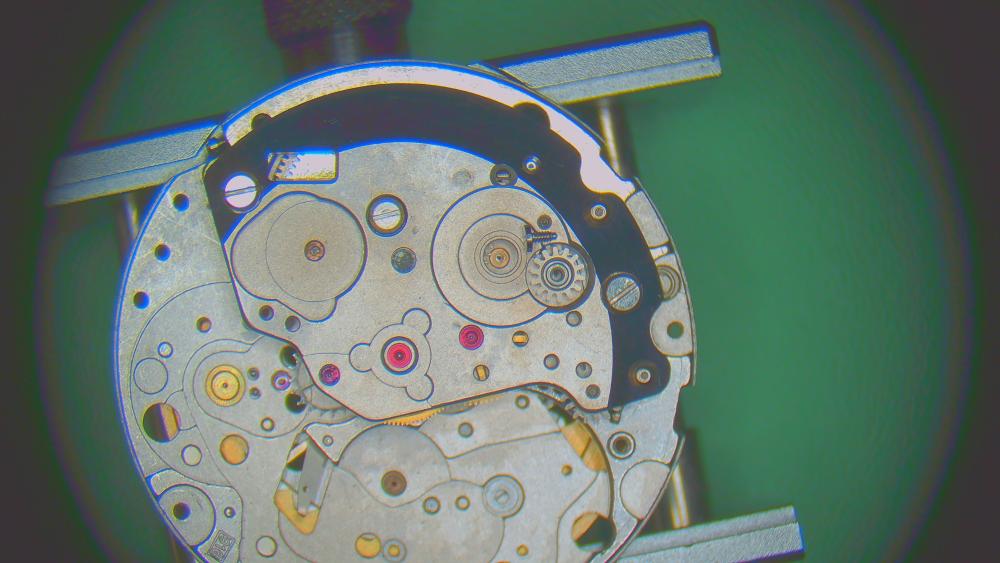
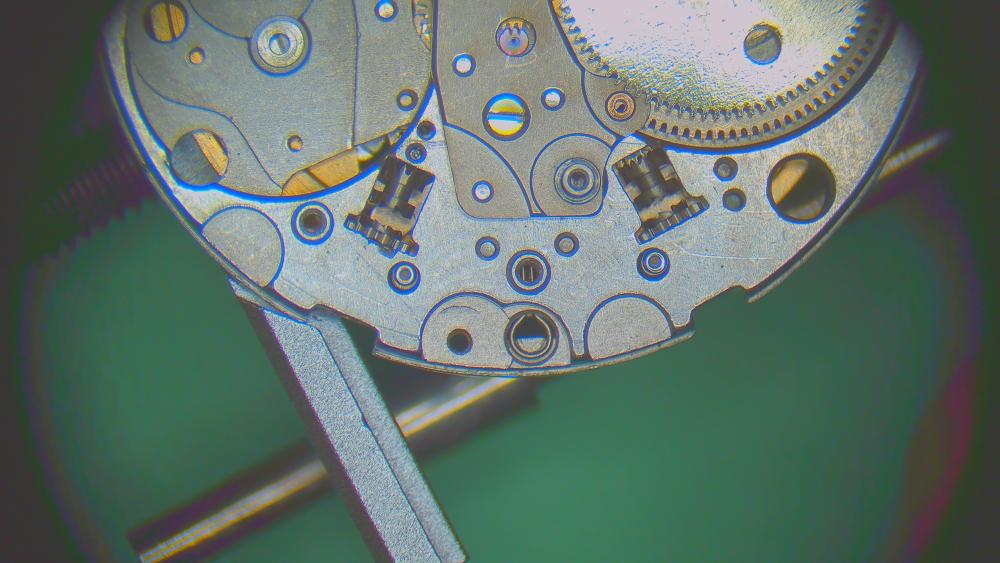
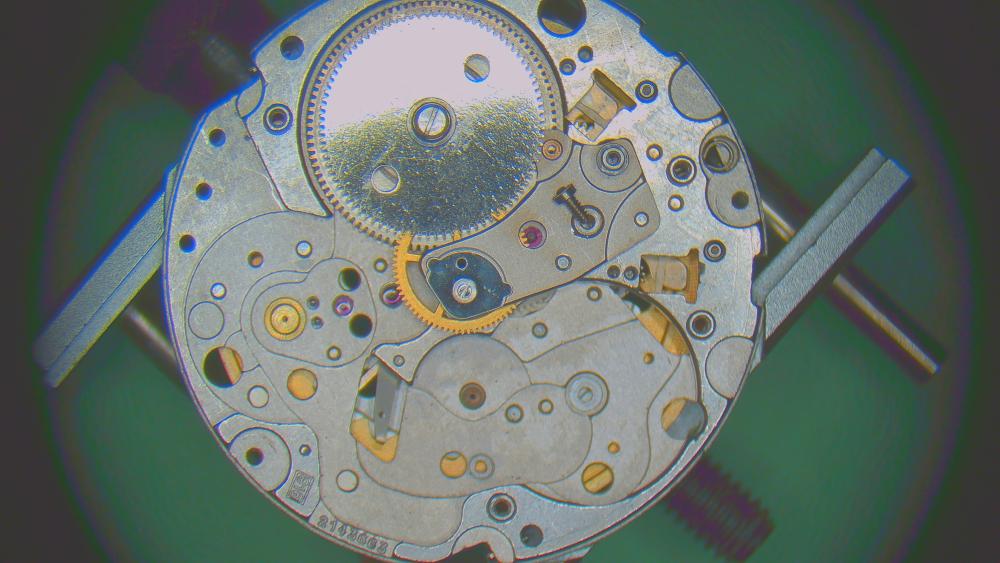
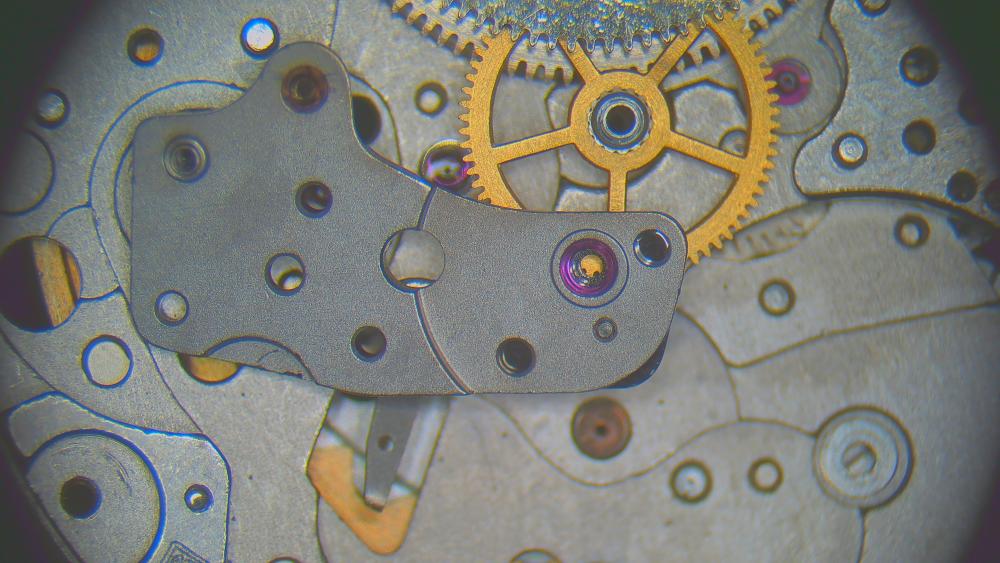
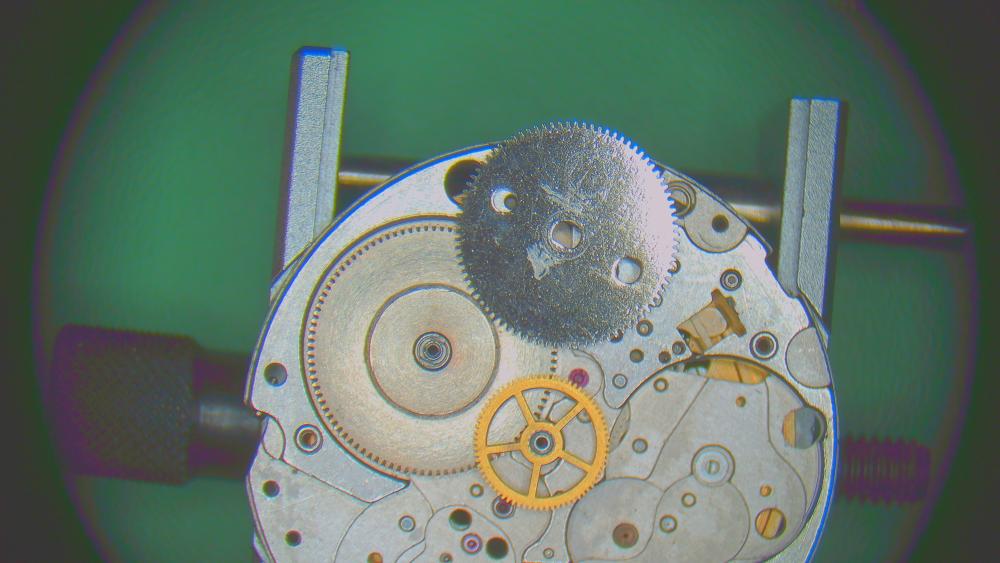
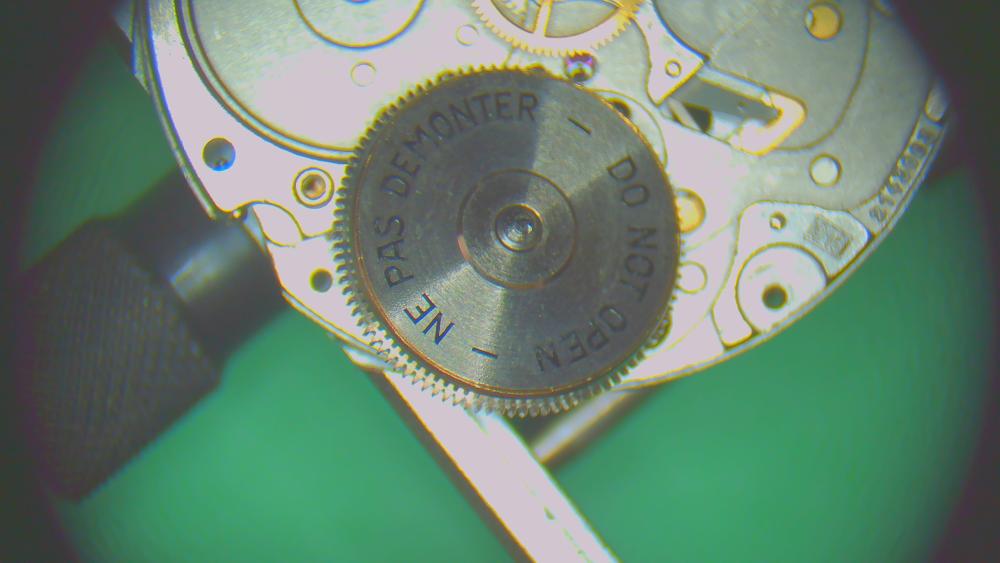
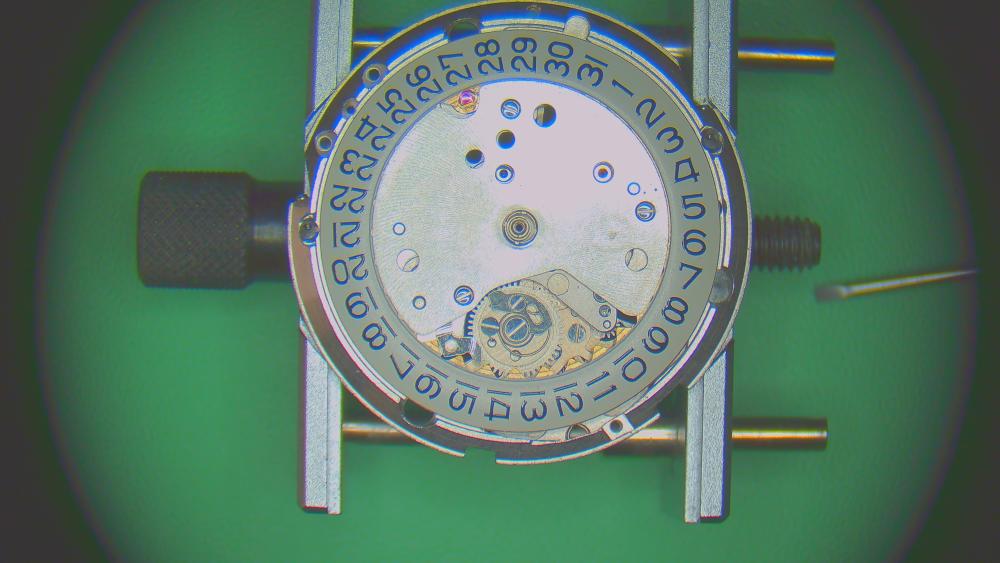
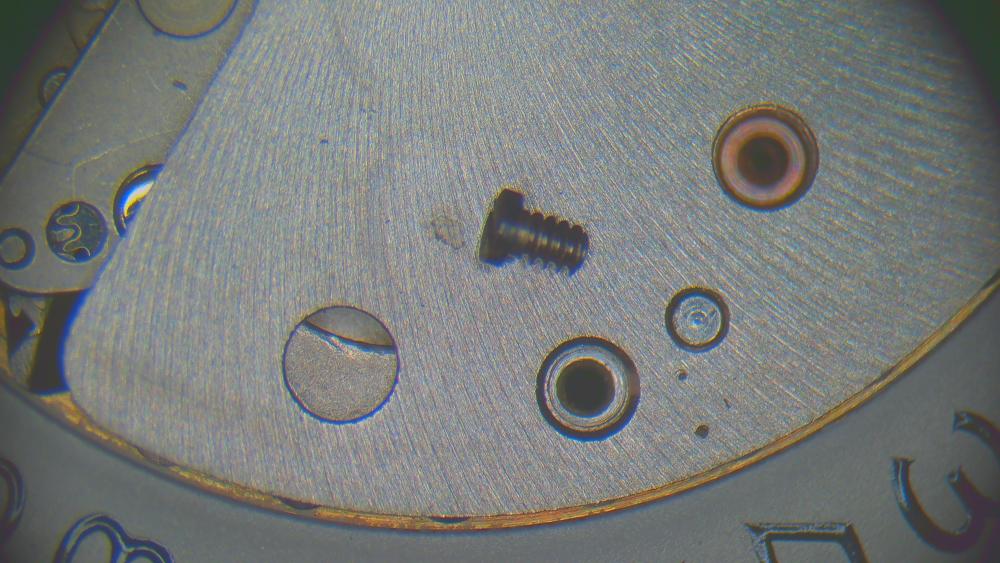
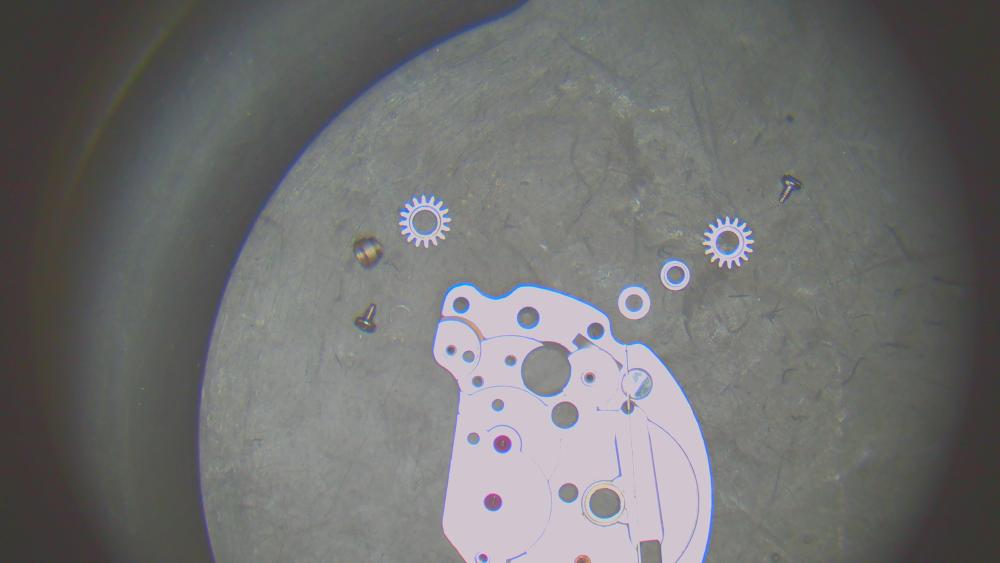
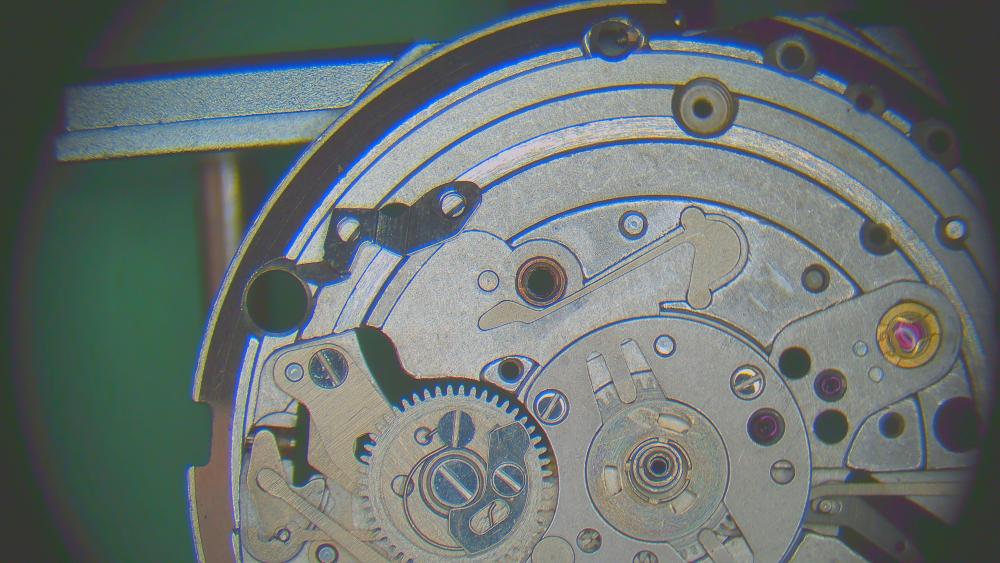
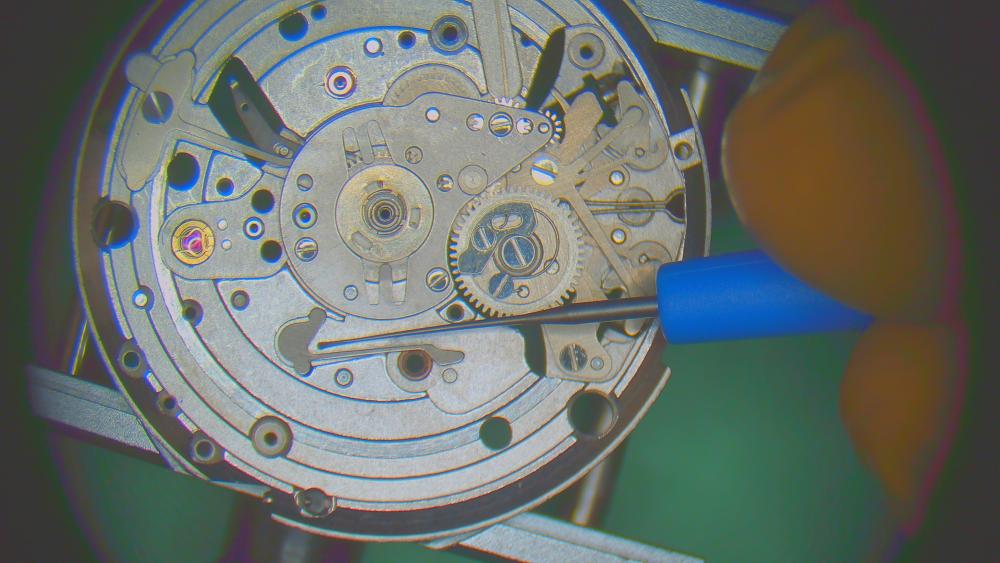
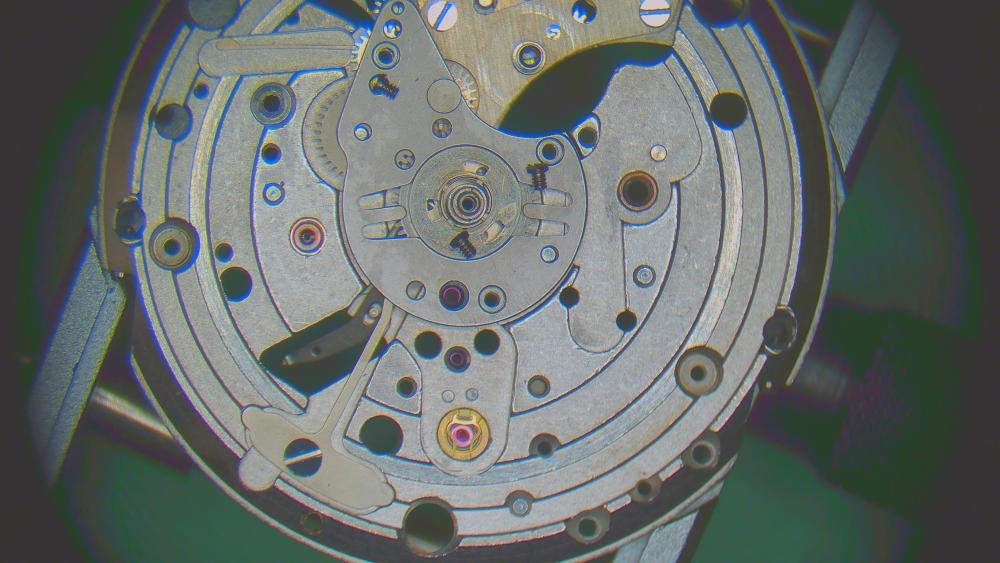
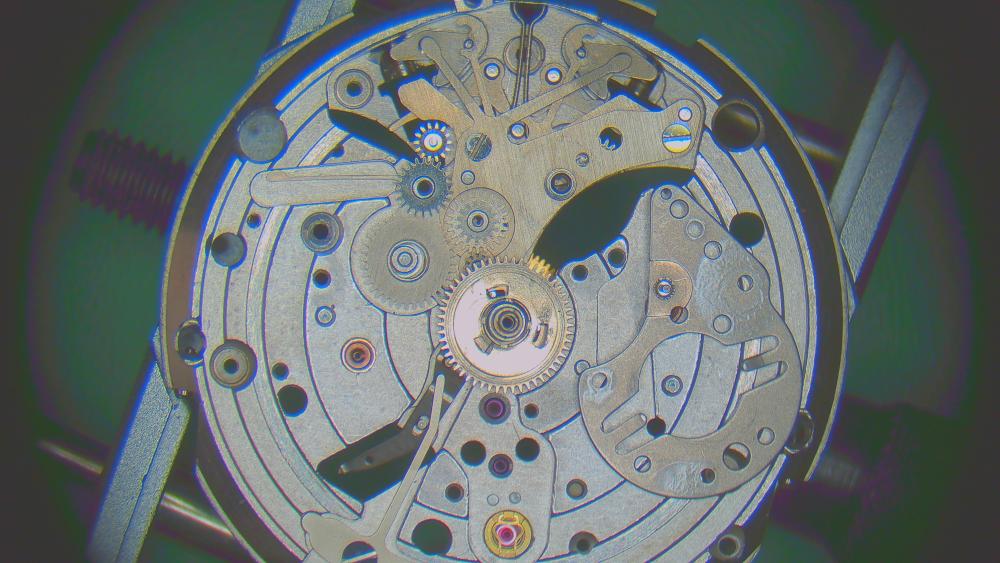
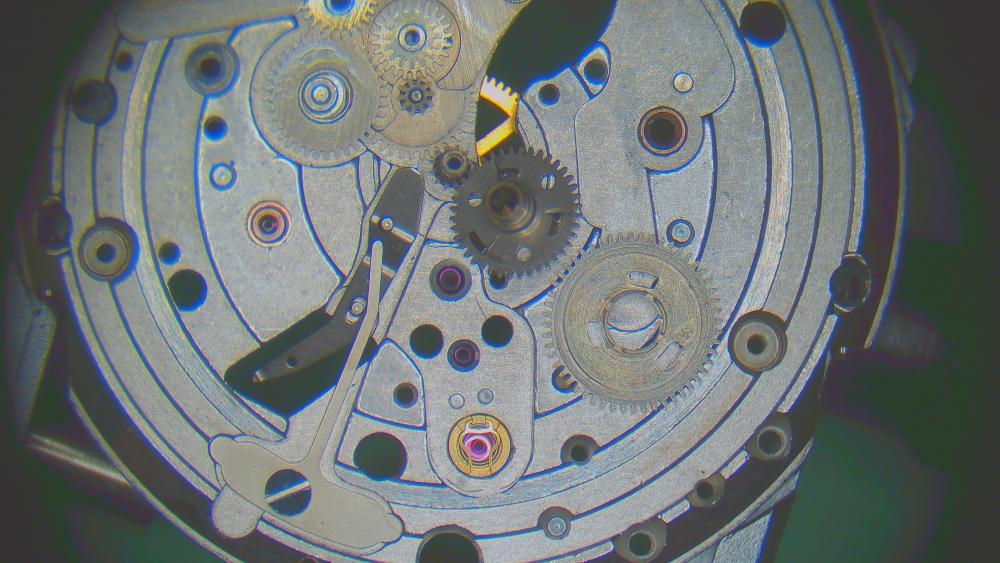
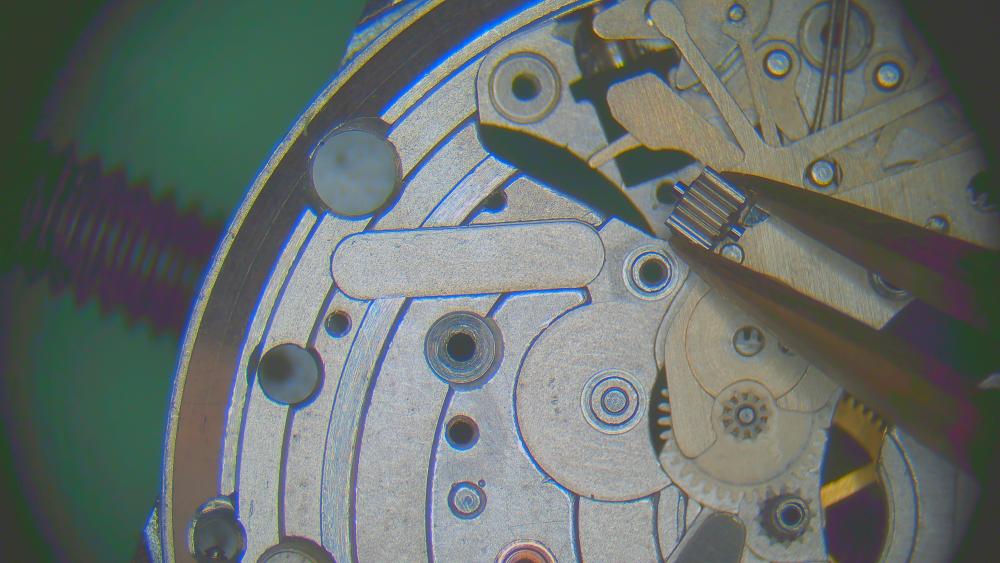
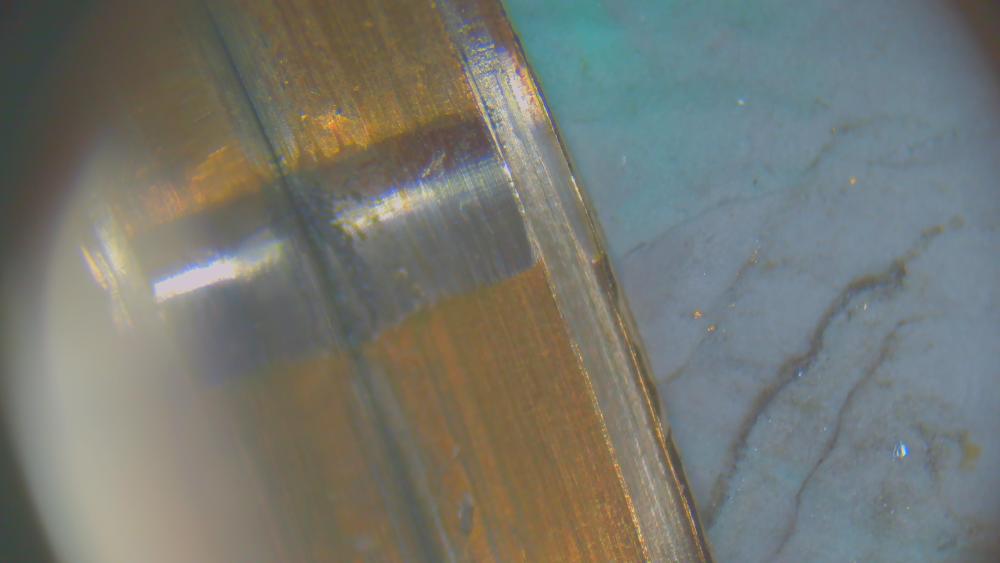
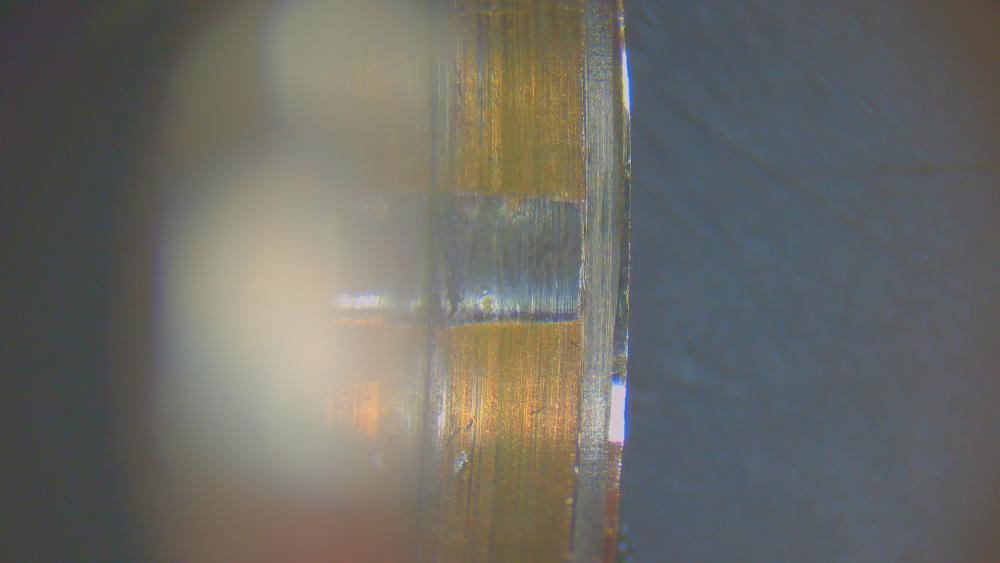
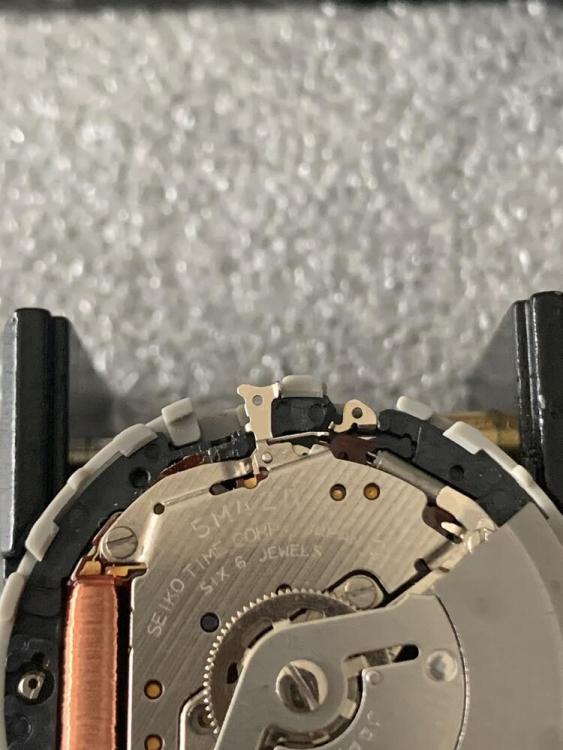
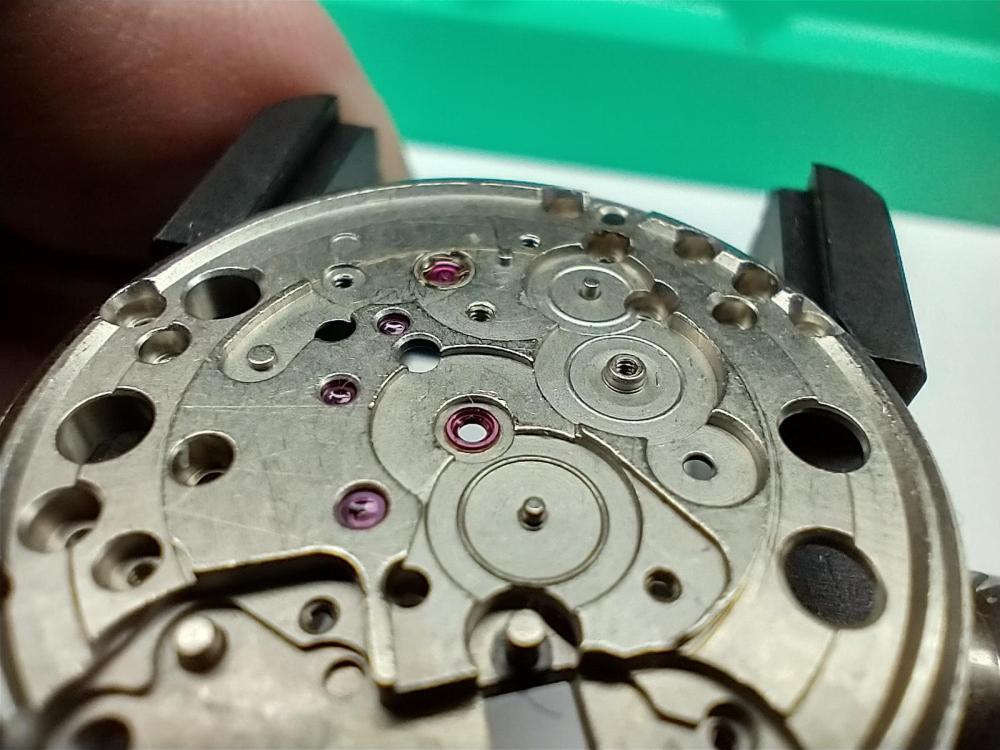
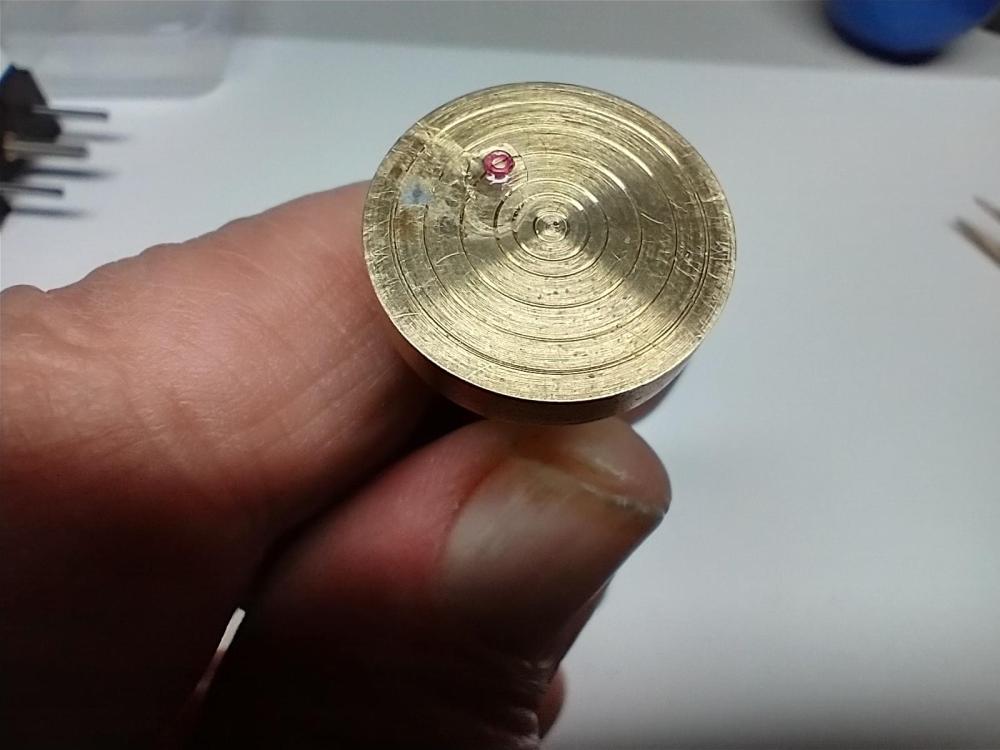
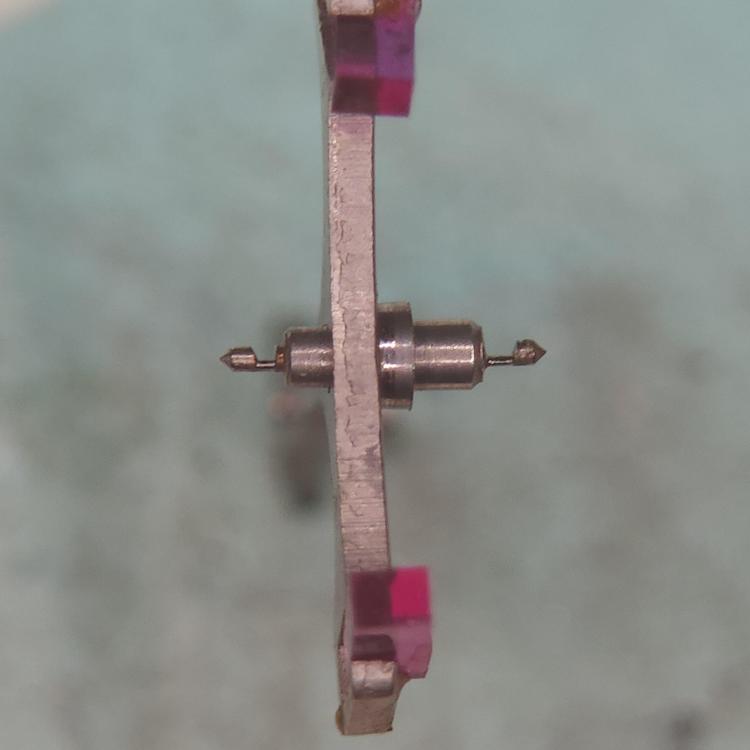
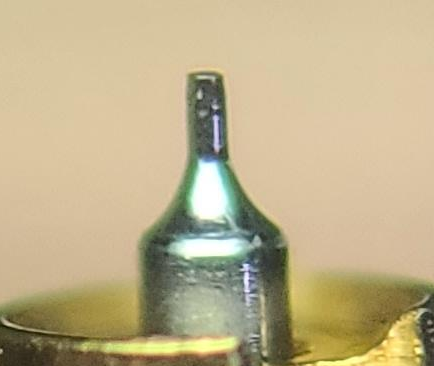
Hello everyone, this will be my first proper walkthrough and also my most complicated watch yet. A beautiful JLC Memovox E875 ("Speed beat") with calibre 916. This is the first of several posts: disassembly. You'll see my order of disassembly and close-ups of all the screws. Those are the main points. If there's anything particular, I'll write a comment. Otherwise the pictures are hopefully self-explanatory. Here's the beauty before disassembly: Ready to go with nicely dressed tweezers... also, screw slots are generally very thin so I also dressed all screwdrivers to very fine tips. inside of the caseback has a little knob that is hit by a hammer to create the alarm sound. Movement complete. before any disassembly, you can already see the magic level system of the automatic works I start by taking off the rotor. rotor underside rest of automatic works with three blued screws. magic lever system balance first.. identical stems. two case screws retention ring holds the gasket hands off and some dial-porn dial feet screws are nicely positioned so you can hold the movement in one position and access both at the same time. Thanks, JLC! both dials off let power down before this point! driving wheel for ratchet wheel / kinda-reversing wheel the alarm system train bridge I take the opportunity to remove the clutch wheelS and sliding pinionS. Again, both are identical. Nice. back to the train barrel can come out without damaging the center wheel. But careful. underside of the bridge with TWO crown wheels. NOTE: one "seat" is missing. Its absence has cause some damage to the bridge. I had indeed felt some resistance when winding the alarm barrel and it was one reason why I wanted to service it.. Part 414 is ordered from eBay. Barrel says "do not open". A whole other thread is devoted to this, see here: let's do the dial side: this spring was hard to get out. only an oiler would squeeze under it. the date wheel can stay assembled like this (no disassembly shown in the manual) previous watchmaker liked oil a lot. the alarm activation wheels lots of wheels.. also part of the alarm system pretty cool how the two keyless works are kind of the same and with some overarching parts damn, this spring was hard to get out. canon pinon and then the center wheel i remove balance jewels on both sides for thorough cleaning and reinstall the balance for cleaning. alarm barrel is normal (no "do not open"). the main barrel takes some nerves to open, but does so just fine. However, the edge of the barrel (where it holds the lid) is burnished a bit. I'm smoothing it out with the pointy end of a bracelet tool. This will allow the lid to go back in without problems. I'm planning on burnishing it over again when the new mainspring is installed. work in progres. done


 3 points
 -
That's true.2 points
-
Guys, I will suggest to do as watchmakers do when they make balance staff for unknown movement and no original staff in it to make measures at all. First thing to do is to determine the size A. This is done by putting the balance cock in place and measuring the distance between tops of the top and bottom cap jewels. Then measuring the thickness of the cap jewels and subtracting the sum from the distance between tops gives the size A. For measuring the size B it is needed to fix a 0.15 - 0.2mm plate on top of the pallet fork cock with some rodico, then measure the distance from the top of the plate to top of the bottom cap jewej and subtract the thickness of the cap jewel.2 points
-
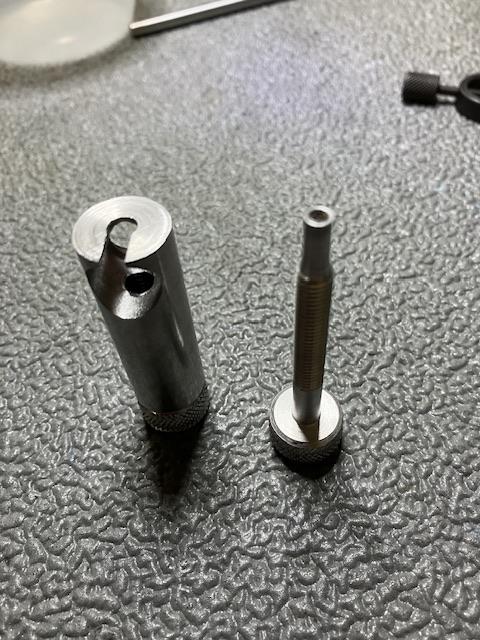
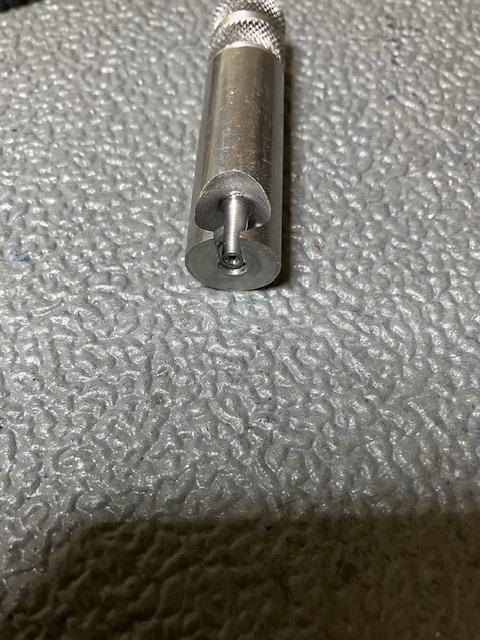
Will do , i have i think 3 or 4 of these stuffed in a drawer all of them have this side hole . I prefer a different tool to remove rollers. A lot of these vintage tools are for pocket watches which i don't work on. I will have a look though an old tool catalog to see what they are actually listed as , I've heard then called hand removers before. Found it matey , yes its a roller remover. I felt it is too big for dealing with wristwatches which is why its at the back of a draw.I Iike the simple one piece bradux tool.
 2 points
 -
Picture is too blurred, but this (lower) pivot does not look good. Frank2 points
-
Patience did the job!!
 2 points
 -
Girard Perregaux2 points
-
My Horia clone is 4/4mm, I have seen 3/4mm on Ali but the 4/4mm is the more useful imo Tom2 points
-
For some reason I like to collect these! They are not so friendly to repair and parts are like hens teeth. Getting one back to running order is very satisfying!
 2 points
 -
Yes, I think yours is recased. The bezel, the case and the crystal look wrong. Plus it has a bracelet on fixed lugs ? Sorry, I've not been on here much. I tried to unscrew the internal locking ring, but in the end decided to simply keep the original crystal in situ and polish it. Looks way better and has a nice bit of patina to it. I have finished the watch now. Just needs regulating, as it's running a bit fast.
 2 points
 -
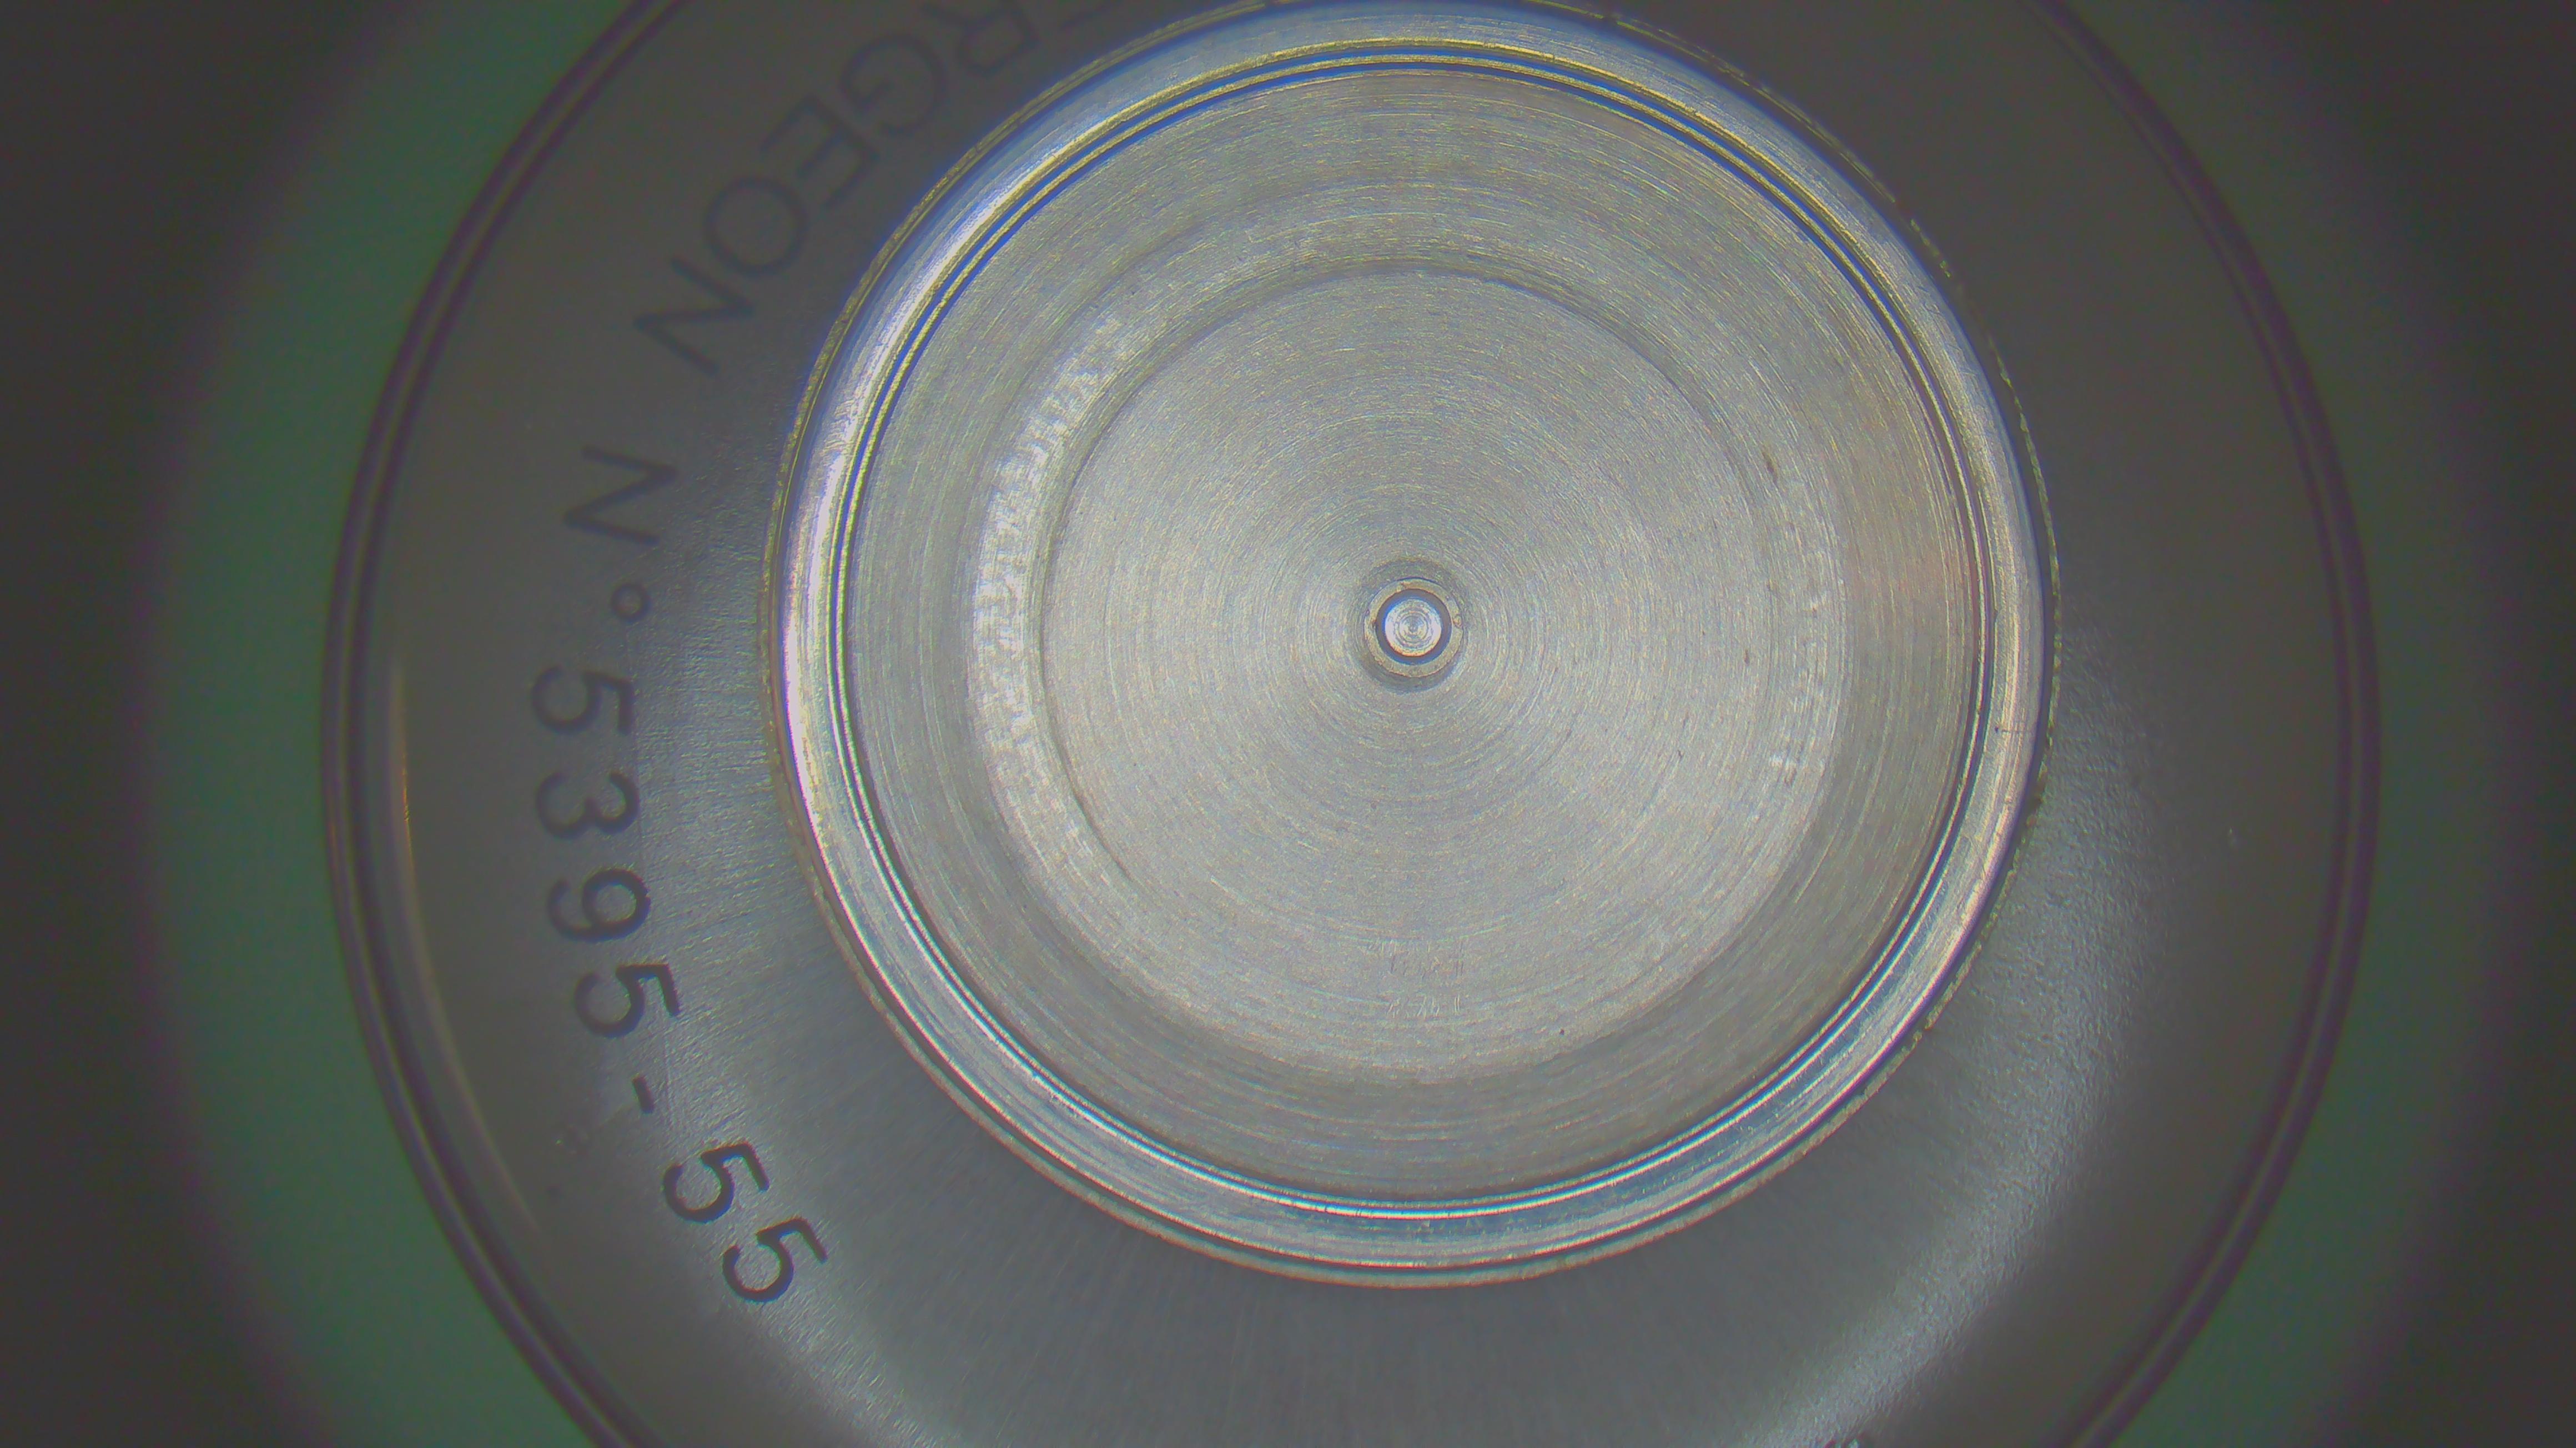
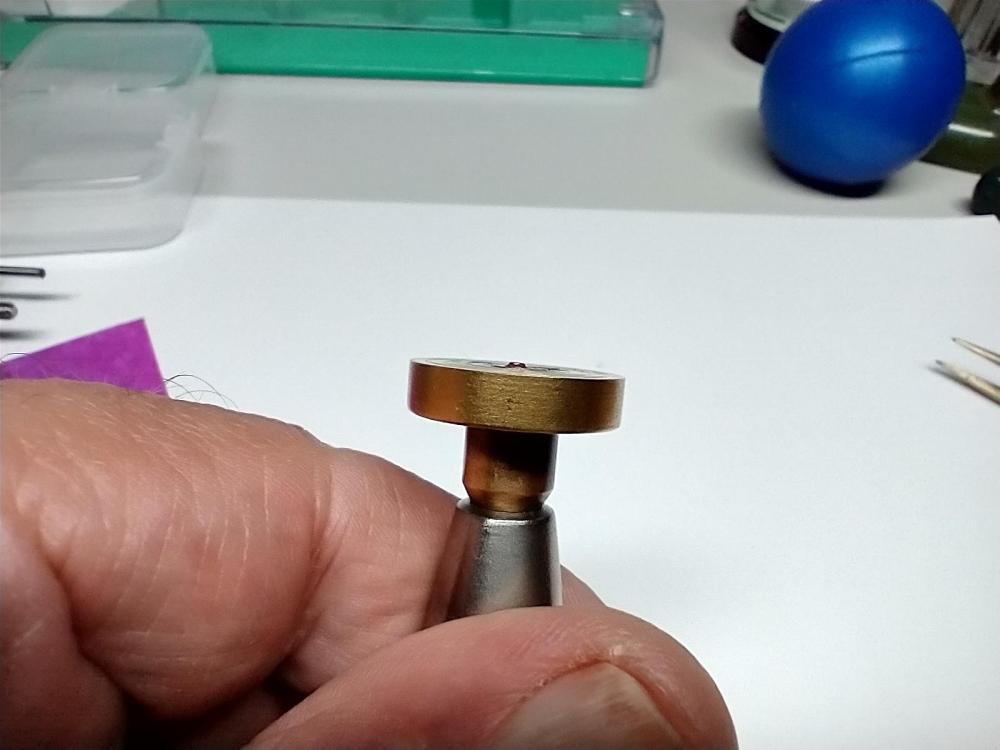
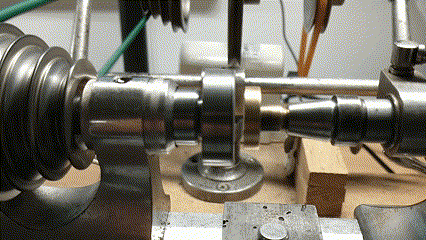
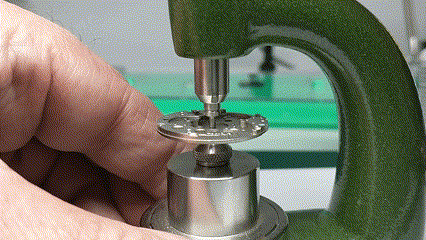
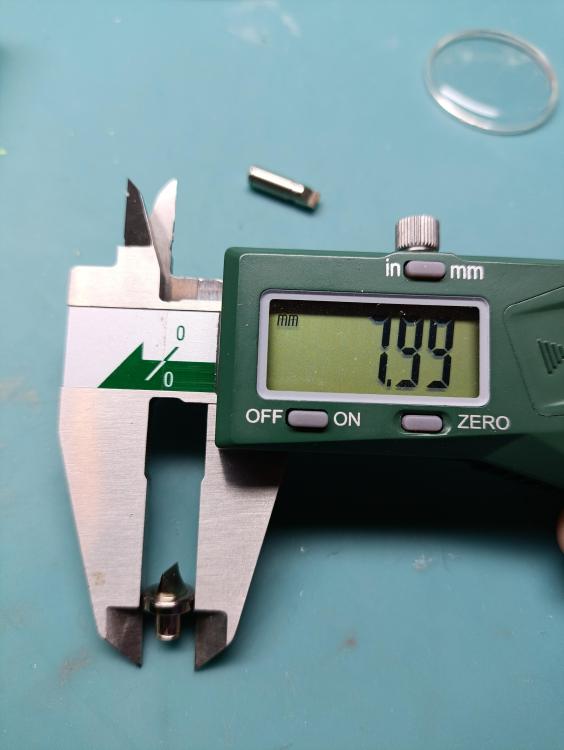
Hi guys, Some of you who have been stuck down the rabbit hole of watchmaking know that a fair part of it is finding a solution to a particular problem, especially when it come to vintage watches and all their idiosyncrasies. And, to find the solution, some unorthodox approaches and methods are employed. I find a good watchmaker will find a way to overcome. So, I'm servicing this Tissot 784.2 and find the centre wheel jewel is toast. The flat side of the jewel which the centre wheel sits on is intact, but the oil sink/dial side is crumbling and half of it is gone. It might last this way for some time, but maybe not and I'm guessing more on the latter. When I pressed it out, it fell apart. I teach my students there are two golden rules of watchmaking. Rule one: You are like the S.A.S. with servicing. You are in and out with no one knowing you were ever there. Not leaving gnarled screw heads and scratched bridges, etc. Rule two: Always think and consider the next watchmaker who is going to work on the watch. Don't leave obvious problems, or bodge something together, knowing it will create problems for the next watchmaker who works on the movement. If rule one is adhered to, rule two covers itself. The point I'm making here is, I could have left the centre wheel jewel and it might have lasted, but that's leaving the problem for the next guy and not very SAS. For some reason Seitz have discontinued the jewel size I needed (Sods law!), so I found one in a scrap movement that was the correct inside diameter. 0.8 mm to take a 0.79 centre wheel arbor. The outside diameter of the replacement jewel was 1.5 mm, so I had to ream the centre hole a little bigger from 1.19 mm to 1.49 mm. The problem was the jewel was 0.4 mm deep, so sat proud on the dial side and stopped the cannon pinion from seating properly, as you can see from this photo. I needed the jewel to be 0.27 mm deep like the cracked old one. Now, synthetic jewels are made from aluminium oxide with some colouring thrown in. Aluminium oxide is what is coated on wet and dry paper and as I don't have a diamond honing wheel, I decided to glue a piece of 400 grit onto a blank 8 mm collet and glue the jewel to a faced off wax chuck. Make sure the jewel is off-centre. Then I used my 8 mm lathe to hone the jewel from 0.4 to 0.27 mm. I can only use a GIF, so here it is... Then I lay another jewel that is 0.4 mm deep next to the one I'm honing and compare how much has been honed. I use a feeler gauge between the wax chuck and the wet and dry to gauge how deep the jewel is, so when I remove the jewel from the chuck using acetone, I know it is pretty close to what I want and found on my bench micrometre that I had honed it to 0.275 mm, so 0.005 mm bigger, which I'll force myself to live with. I was pretty impressed by the accuracy of doing this by eye with no CNC or even micrometre gauges whilst honing, just a rudimentary feeler gauge I made. Then I pressed in the jewel with a jewelling tool and set the correct end-shake for the centre wheel and ensured the cannon pinion sat correctly without touching the centre wheel jewel. There was no real need to polish the face of the jewel, as it isn't an acting surface, but could have done using the same method with different diamond micron pastes to get a mirror finish. The whole process probably took me close to an hour to figure out and work. Obviously the next time, it would be half as long. The diamond wheels would have made the job a lot quicker, as the wet and dry was wearing out making honing more difficult. I think with a diamond wheel, this could be done in a matter of minutes. A lot of the time was taken soaking the wax chuck in acetone and gently teasing the jewel away from the chuck. Because the jewel is so slim it is also very brittle and will easily break if this stage is rushed, so it's a matter of being patient and letting the acetone do its work and wipe away the melted superglue and gently prying it off with your fingers, not tweezers. You can't gauge how much pressure you are putting on the side of the jewel if you use tweezers. I could have saved myself time and effort by making a brass bush to fit, but I didn't like that idea I had robbed a jewel and broken one of my cardinal rules, which was more 'Dad's Army' rather than S.A.S.! It's a very similar way I hone down brass bushes, as parting them off on a lathe can't get total accuracy on the depth, so I finish them off like this. Now I've been successful using this method, I'm going to invest in some different grade diamond wheels for my lathe. These kind of skills and problem solving, I teach here in South London in evening first and second year courses. I hope this gives you ideas of overcoming obstacles and another reason to buy a lathe!


 1 point
 -
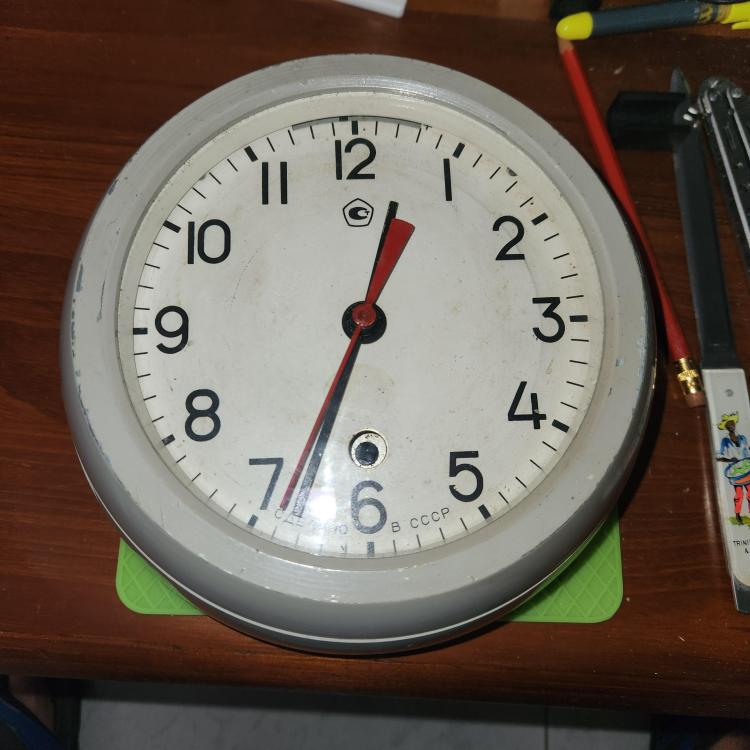
I had lunch in Chinatown today and took the opportunity to trawl a few antique shops in the vicinity. Then I came across this beautiful Russian clock in pretty good condition. And the asking price was only $88. I didn't even bother to bargain. I just paid up and went straight home. When I gave it a few winds and shook it, the second hand came to life, albeit a little sluggishly. I thought that all it needed was a good cleaning and oiling was all that was needed. Just the right project for this long weekend. When I opened it up, I was in for a shock. There was a puddle of thick brown oil inside, about the same colour and consistency of honey. When I took off the escapement platform, I was in for another disappointment. The upper balance pivot was broken. I proceeded to disassemble the rest of the escapement platform and did a preclean. It is evident that a butcher had worked on this clock. The banking pins were flared ppen to the max! Then I took a look at the pallet fork. The pivots were mushroomed almost to the point of breakage. I contacted my usual supplier in Ukraine for Russian parts to see if he had a new platform but he has yet to reply. I hope he's ok.


 1 point
 -
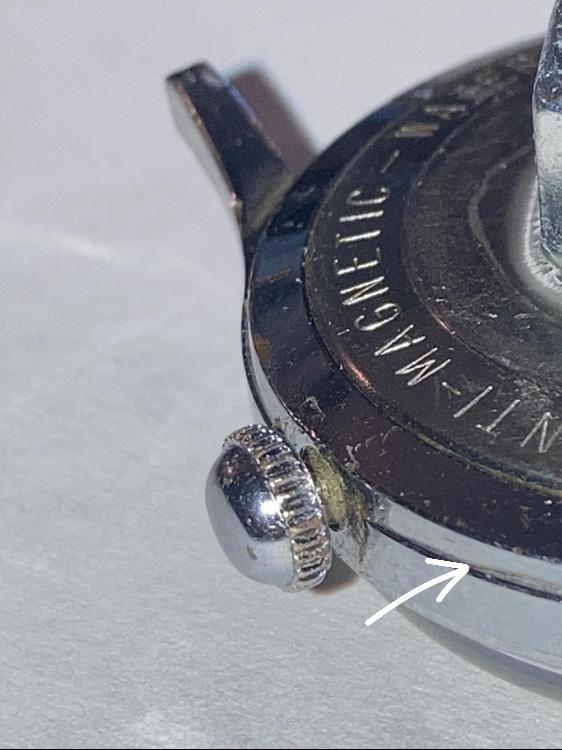
Hi @nevenbekriev, thanks for having such a close look. But it's actually all how it's supposed to be. It may be an optical illusion. These a 2/3 circle brass bushing on the lever itself and a full jewel on the plate below. The pic from the manual will clarify:
 1 point
 -
Thats not to say don't use this tool for removing hands, thats something you have to decide for yourself. What works for one person doesn't always work for another and tools are not always used exclusively for their intended purpose. You will know whats right if and when you make a mistake with them.1 point
-
Verry impressive picture, have never seen something similar. The white powder on the previous picture must be abrasive. Actually, the clock is not submarine one. It is regular ship cabin clock. The submarine ones have 24H dial. The parts are really big, isn't it time to attempt making new staffs for the fork and balance?1 point
-
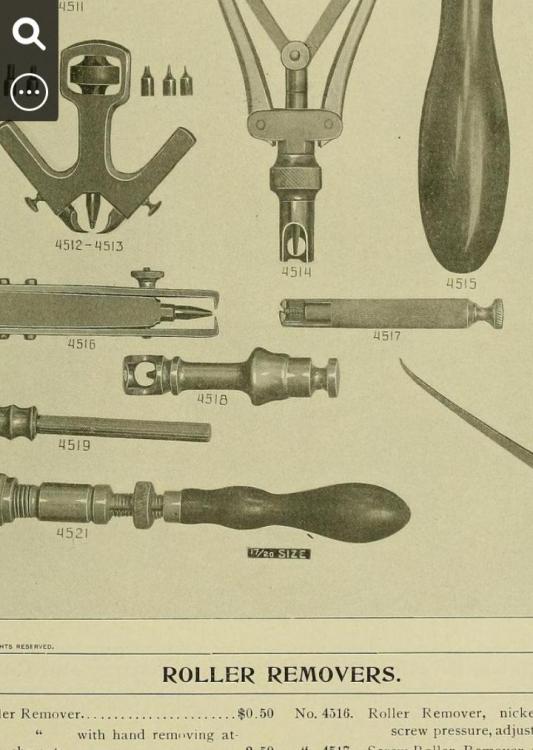
The tools shown are all roller removers that is the only description, there are also prices quoted from 1899 the date of the catalogue. The 4517 is the tool you and I have, i think i have 3 of them different sizes and also 2 of the 4516 tools. The roller sometimes needs to be removed so different tasks can be carried out to the balance ie. fitting a new staff. Always mark the position of the ruby pin so you can reposition the roller in the correct place. Its position can be worked out but its much easier to mark it before removing it. Most folks preference is to remove the hands with levers, some may like the correct presto tool.1 point
-
Wow, thank you so much. I have the other small adapter for my tool, which seems to work well for removing wristwatch hands. I'm fairly new to the watchmaking hobby, but I believe a roller remover can assist in fixing a balance wheel, correct?1 point
-
Haha thats what i thought, thats an extremely worn lever arbor , you wont be burnishing that damage out Hector lol1 point
-
Almost looks like a cylinder escapement staff.1 point
-
Howdy, I'm Pap3r from South Africa. I am a Mechatronics student that recently found interest in watchmaking, repair and tinkering. Started the hobby beginning of 2023. I have sadly found out that watchmaking in South Africa is a dying industry, with many supply shops moving onto jewelry supplies and no longer stocking any watch supplies. Once it's been sold, it will never be restocked again. The number of veteran and true watchmakers (not those ones that changes batteries or do simple watch crystal replacements at the mall or jewelry shop) are slowly dwindling due to age and other factors. I hope to learn and grow in this hobby, albeit a bit expensive on the student budget. So please do look after me, my fellow watch tinkers. Thanks a lot. Kind Regards, Pap3r1 point
-
Welcome to the WRT forum.1 point
-
Thank you for your introduction and welcome to this friendly forum. We all look forward to your contributions and continued involvement.1 point
-
Welcome to the forum, enjoy1 point
-
I see, thank you. Do you have a demo pic? I am having trouble visualising it.1 point
-
I have a few of these, i was under the impression they are roller removers, look at the tip of the center screw it has a pivot removal hole in it.1 point
-
My thoughts would be a tooth pick fitted tight into a staking block, paper pushed over the top, the hour hand fitted over and the toothpick cut down flush with tube then file both the hour hand and the toothpick stump.1 point
-
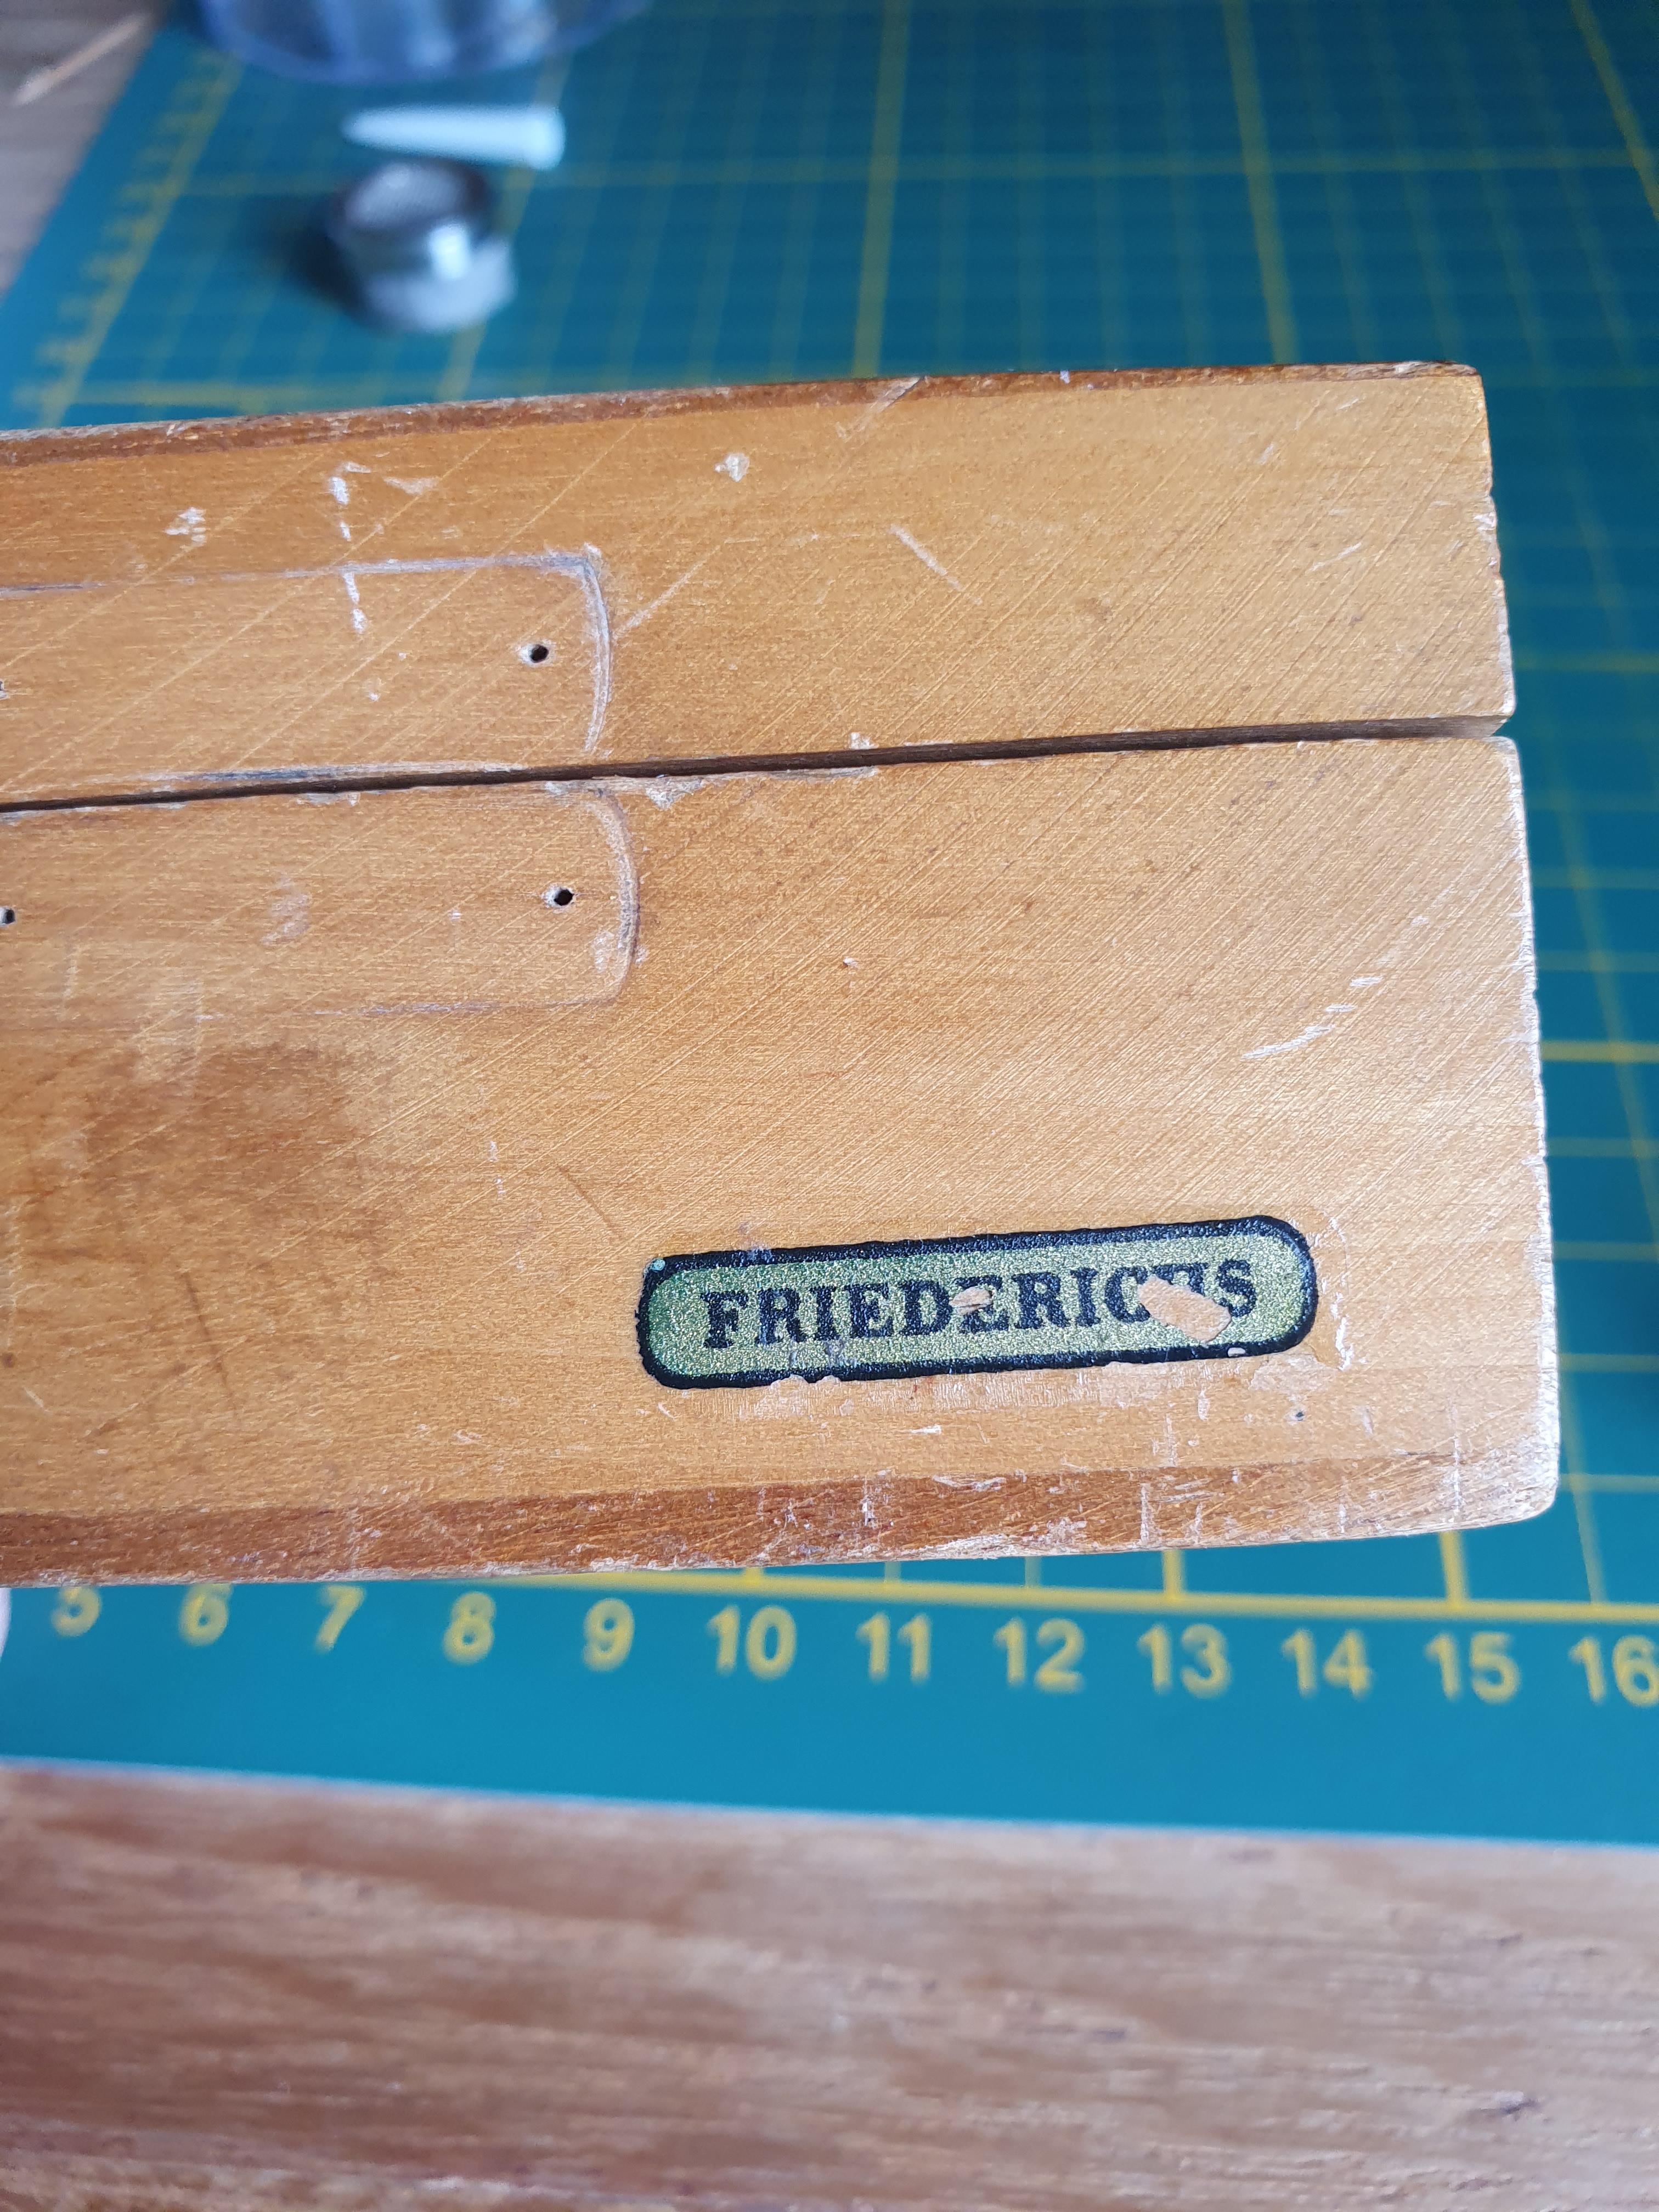
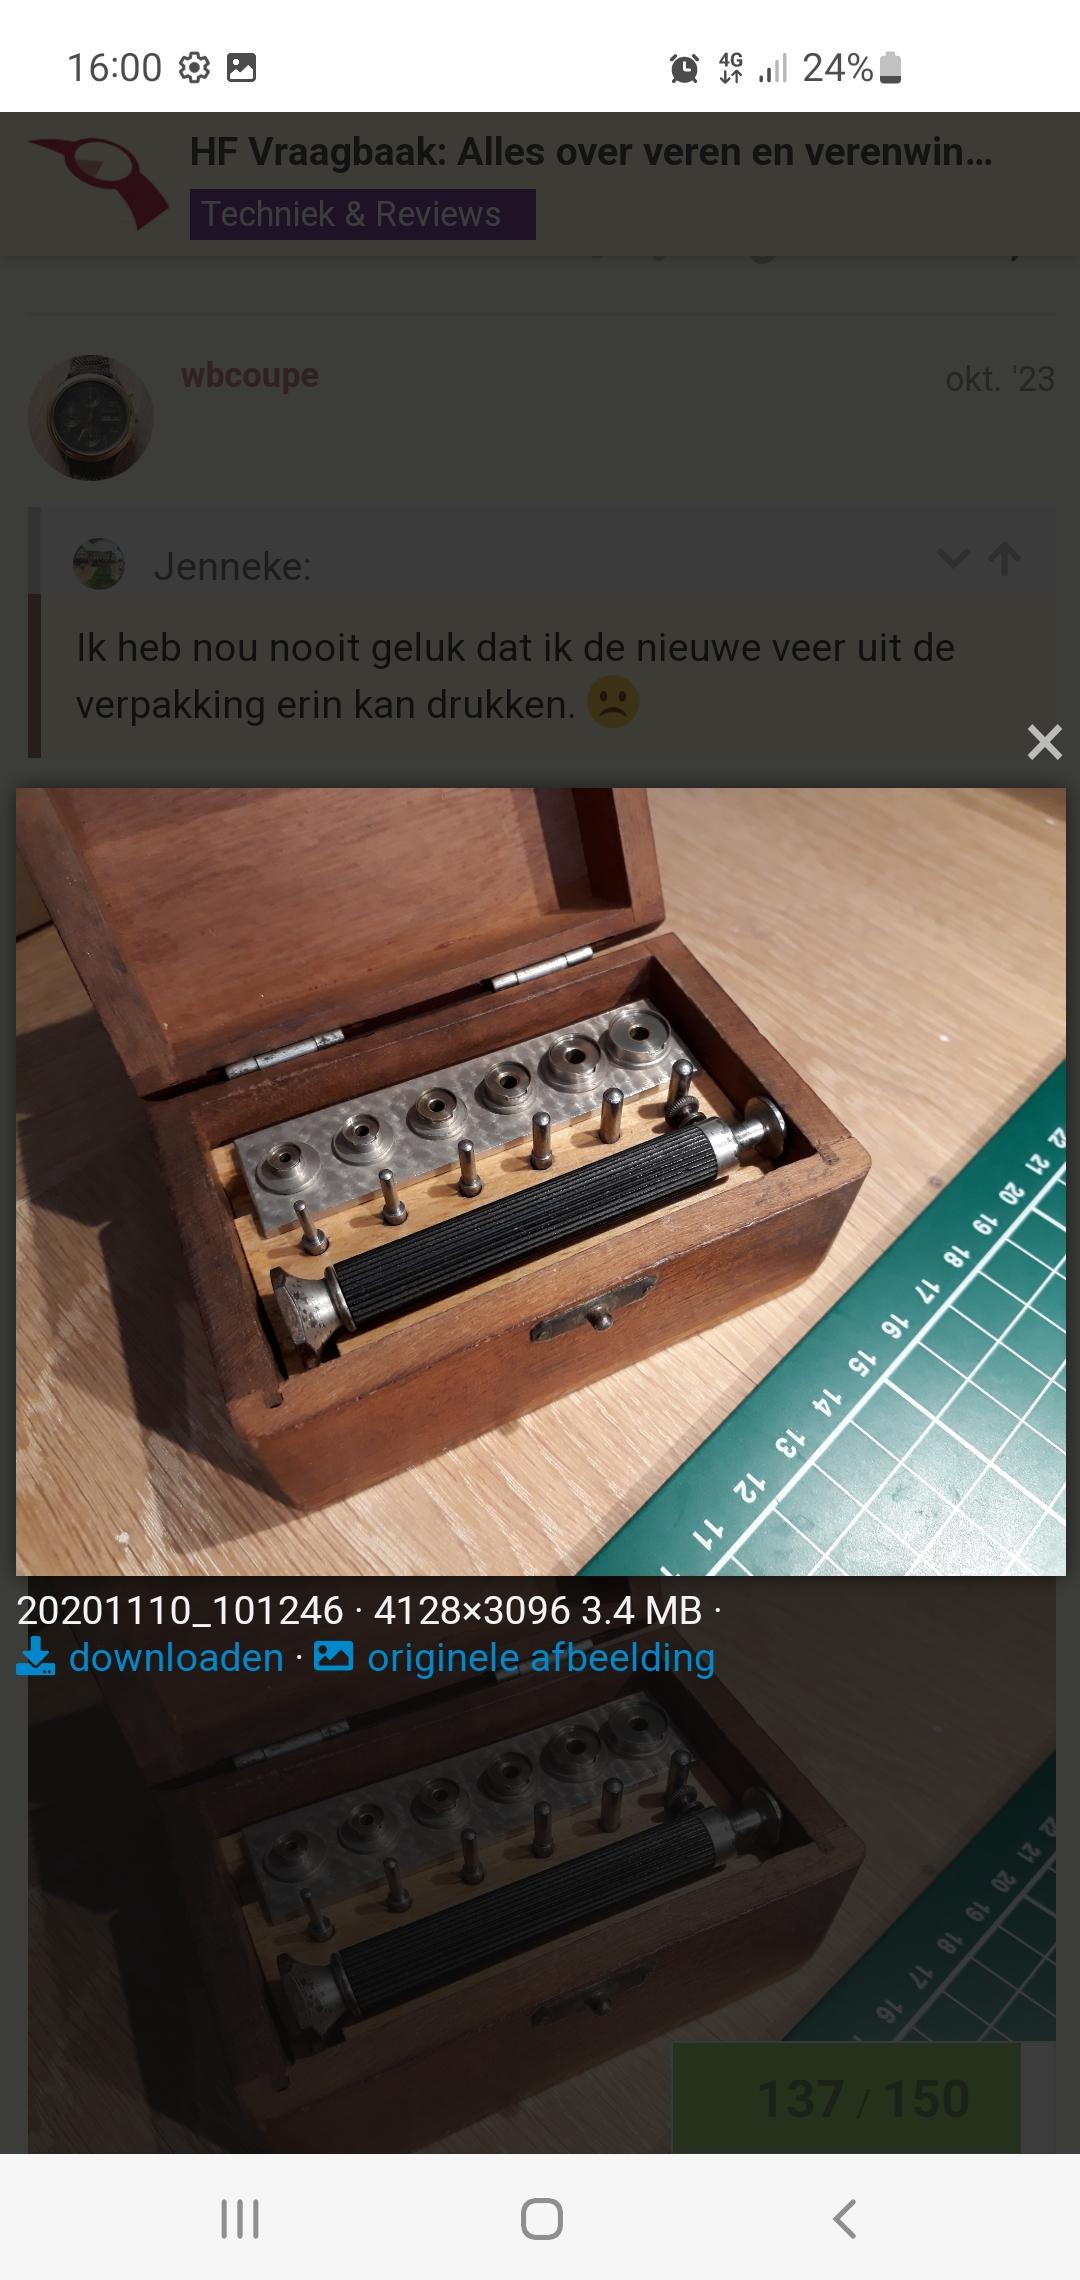
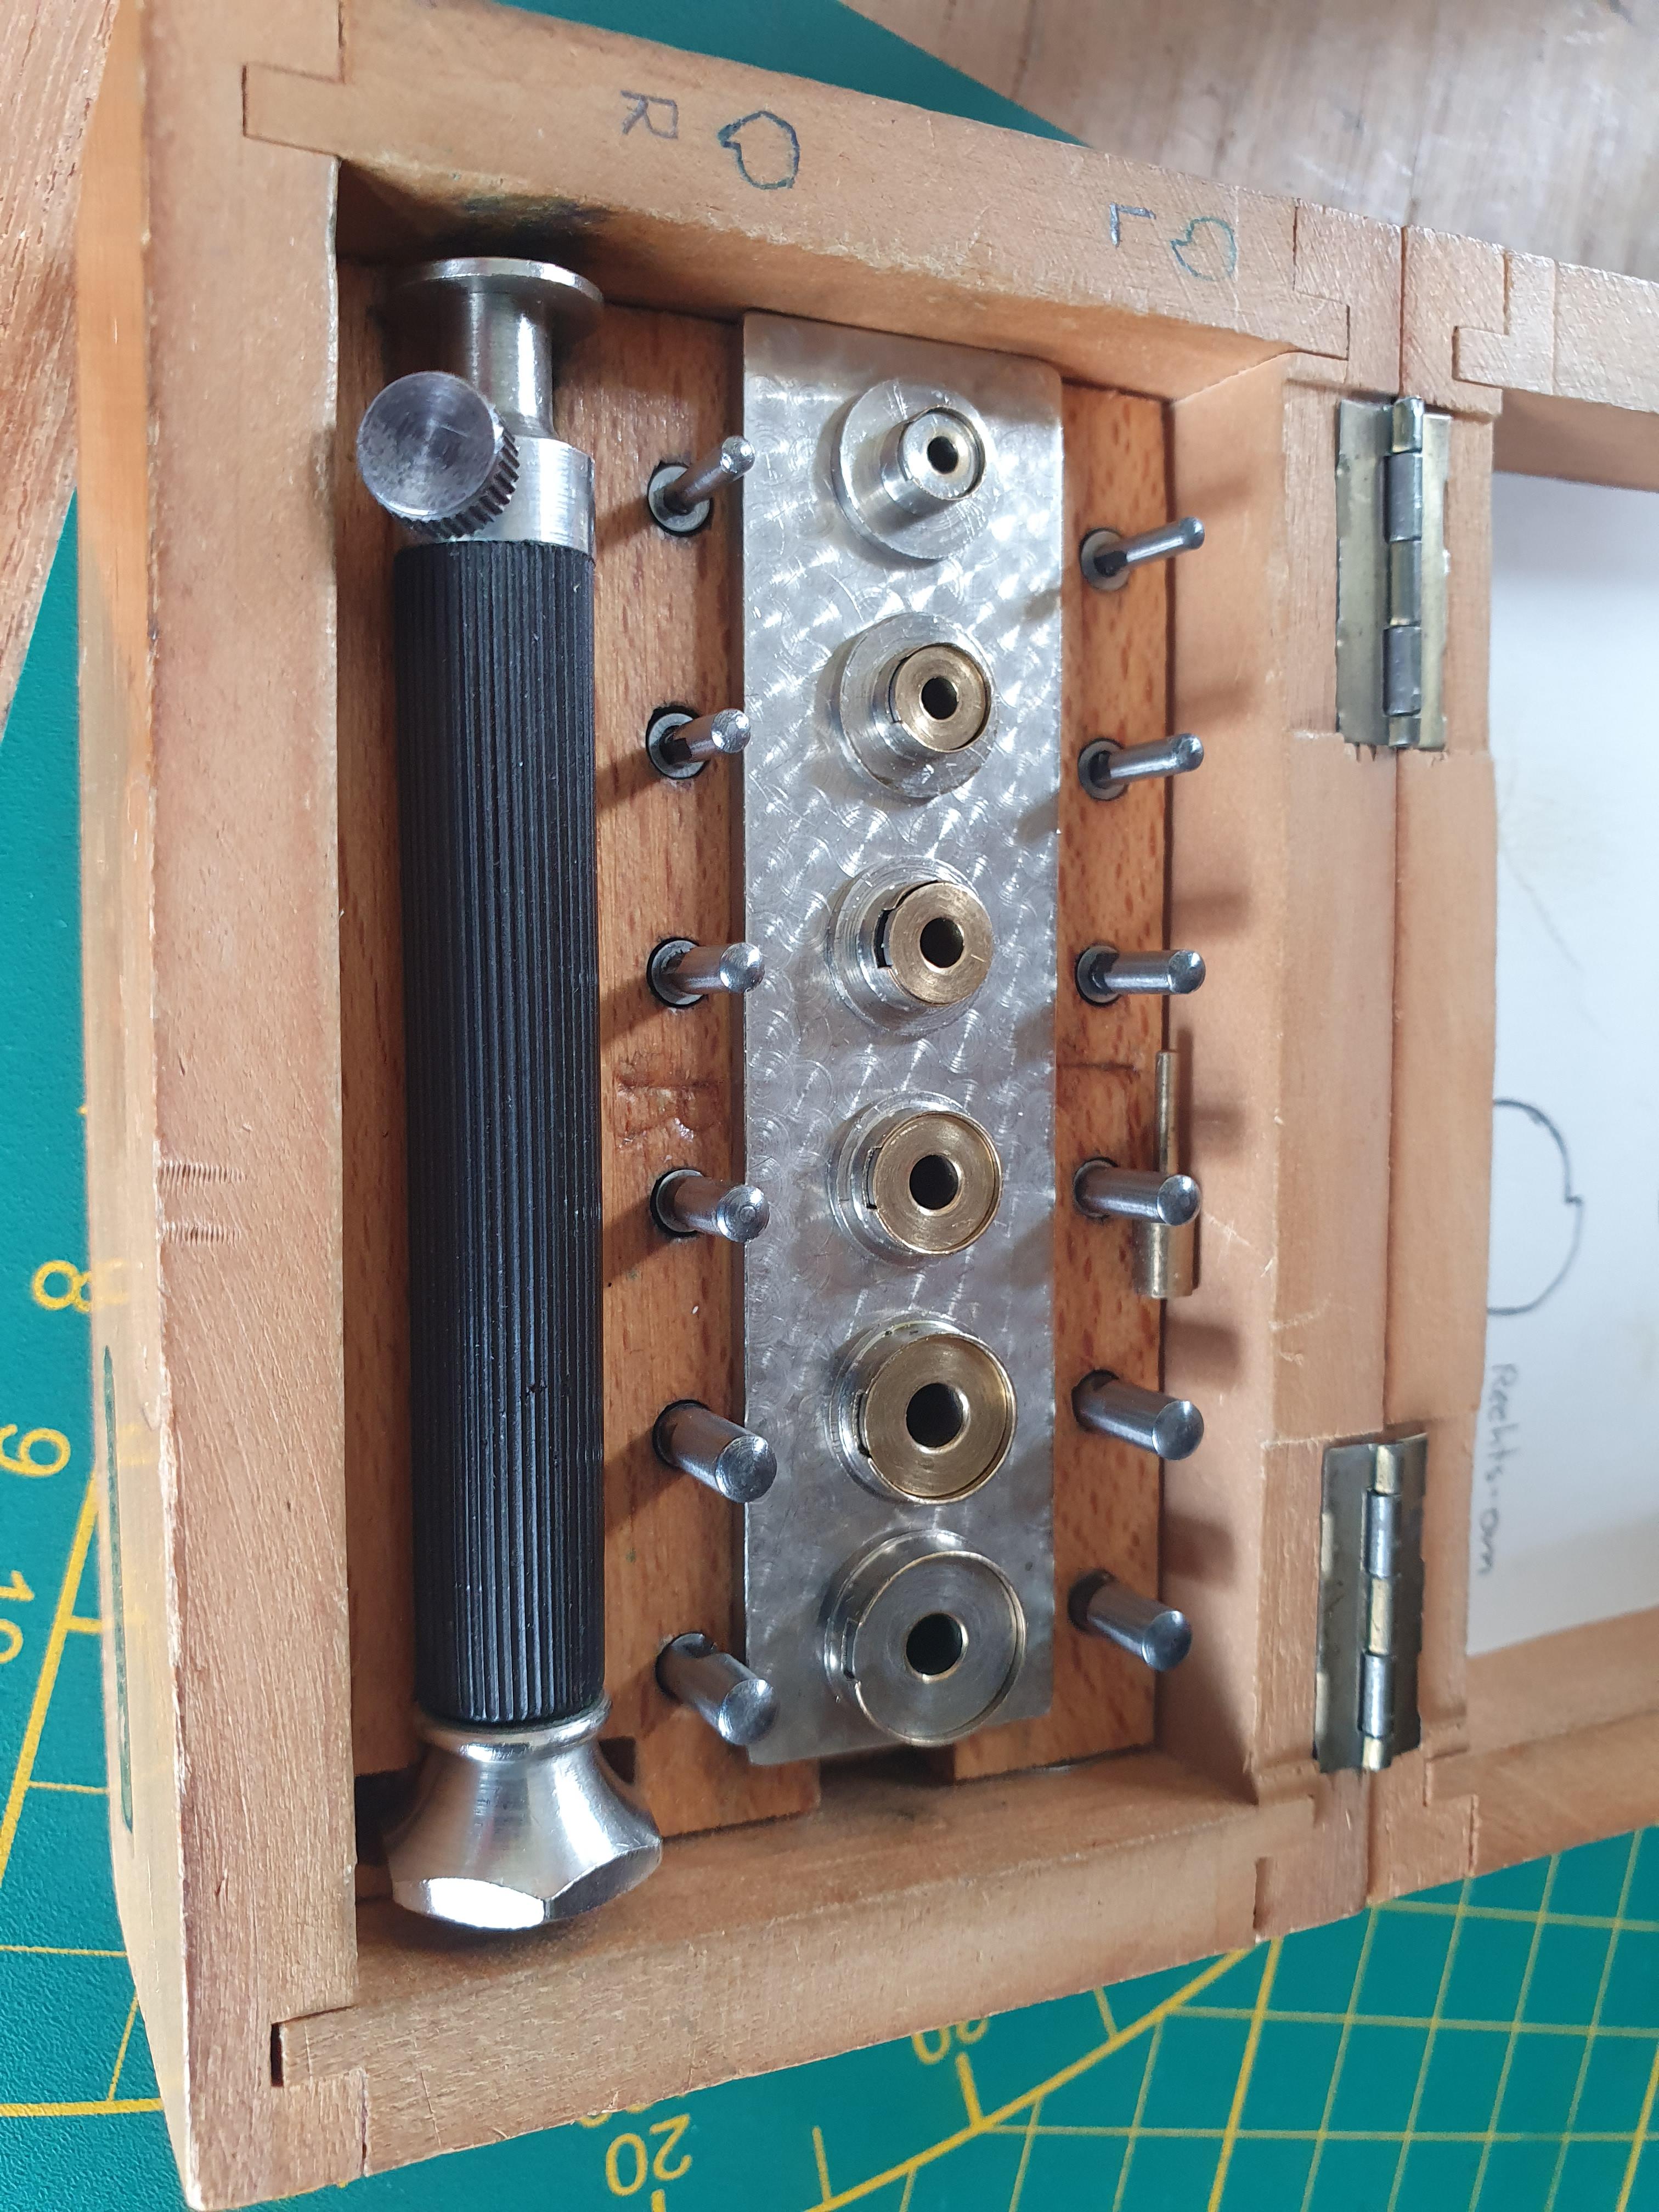
The label says "Friederich", suggesting perhaps a German or Swiss manufacturer but I have seen other brands as well. This set handles both left and right wounded springs, but I've seen sets that only wind one way as well. If you need the spring wound in the other direction, you need to transfer the wound-in spring to a seperate ring/holder before pushing it in the barrel.

 1 point
 -
I have one of those chinese sets and have drilled out some of the holders and that worked.... ok-ish. Then I found this set and have never used the chinese set again. One of the nice advantages of this set is that, once you have wound the spring in the holder, you can remove the handle from the arbor. Then you have more room and a much better view on the spring so you don't have to mess about with tweezers hoping the spring will stay in while retracting the handle with attached arbor.. And they're much cheaper than the Bergeon winders as well.

 1 point
 -
I agree on the pivot- and I would check very carefully the cap jewel (and hole jewel), it likely has wear as well.1 point
-
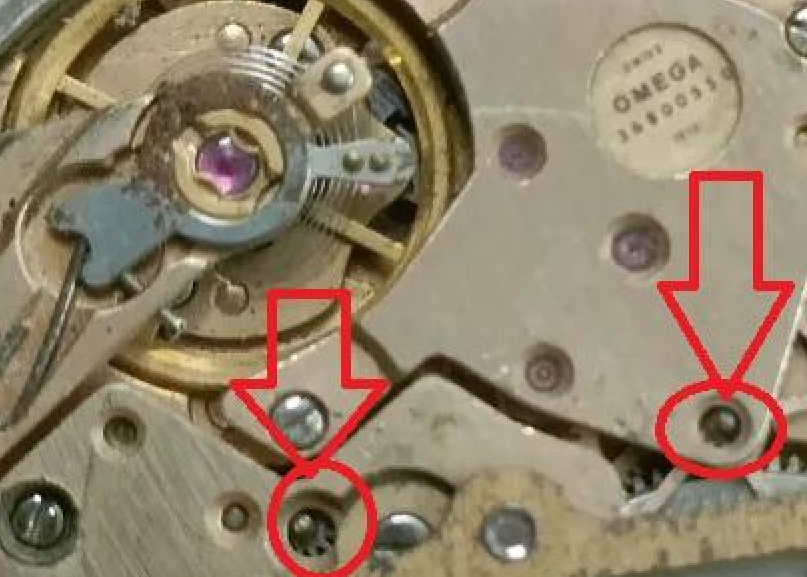
It's hard to tell from the pic (and I know it's very hard to get a good pic) but I agree with Frank. The pivot looks (possibly) worn at the end. Look at the line of light reflection
 1 point
 -
I recently had exactly the same problem on an ETA 2773. Cousins don't stock the reversers any more, but I found another cleaning cycle made things much better. I had been using my own mix of lubricant - 9010/naphtha, but now I've switched to Lubetta I'm getting more consistent results1 point
-
After a good soak in IPA and tickle with an artist’s brush and then another dip in Lubetta the reversing wheels are back in the watch and working a lot better!1 point
-
I am now..... ha ha Here are the dimensions of the Bergeon pin and stump I got from Cousins:


 1 point
 -
Apparently there are versions of the horia clone that are 3mm and 4mm, for some unknown reason i thought it was the stumps that varied and not the pushers but i may be wrong here. The clone i have both the pushers and stumps are 4mm and accept Seitz 4mm pushers and Star 4mm staking stumps and all the clone stumps fit the seitz and Star bases. I take it you are sliding a restriction pin in the cp Scott.1 point
-
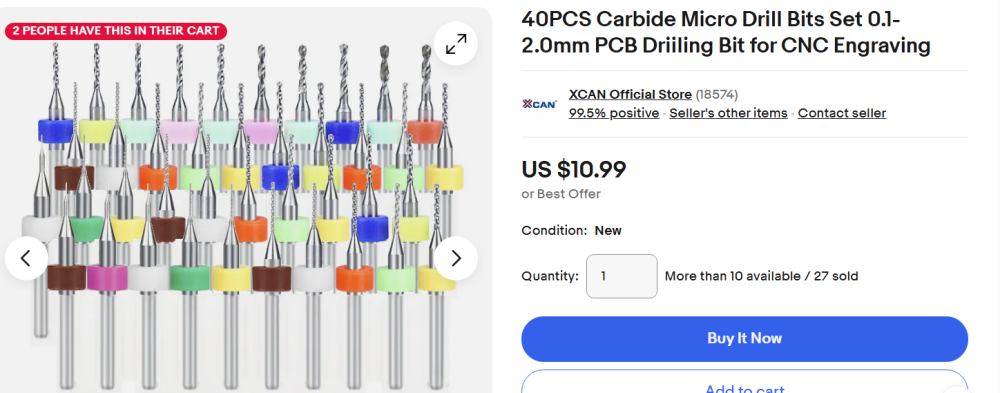
Thanks @LittleWatchShop - yes, I was thinking that getting the hole started with a small carbide drill would do the trick. Glad it worked for you and I’ll give it a go because I still think it would be fun to make this little tool. Cheers.1 point
-
@rjenkinsgb might be right. We were all distracted by the false cap on the back while the real opening gap was hiding in plain sight.
 1 point
 -
Re mixing oils. It would be ok to mix normal mineral oils (D5) with modern synthetic oils that are of the PAO type (HP1300 etc). PAO oils are basically synthesised from mineral oils and as such have all the undesirable properties of basic mineral oils removed or greatly reduced. 'Synthetic' lubricants can also be chemicals not related to mineral oils at all, hence my 'synthesised' usage for PAO oils. If you use a semi-synthetic motor engine oil in your car/truck, this is in fact a mixture of mineral and PAO. Greases are another matter though, as they are a mixture of an 'oil' and a 'soap', and it is more likely that the reactions of the soaps that can cause problems.1 point
-
A new mainspring £10, a new barrel complete £100. Any questions?1 point
-
Nice work Knebo, that looks great! Just a note (I'm sure I've mentioned it before but anyway)- of the barrels marked as sealed, the one I've encountered that's really really sealed is Zodiac. The burnishing is so tight the lid deforms to be point of being useless, requiring making a new one, at least in my experience. And I just got one in... haven't looked inside, hoping it not actually a Zodiac movement .1 point
-
It has been three years since I made mine. It was a challenge. I think I used a micro carbide drill bit to get the hole started. Then I followed up with a larger bit.
 1 point
 -
An interesting chemistry experiment, mix everything together, it might produce toxic fumes, go bang or you might win a Nobel prize. Hehe.1 point
-
Sorry i didnt get that Tom, can you repeat it please.1 point
-
There is a spring putting upward pressure on the seconds pinion but the click is going on top of the bridge so it is t installed yet. I’ll try the tapping method. The week end is coming so I’ll spend time on it1 point
-
I take it if you look at the bergeon complete set then ???? . Do we have a forum system error or is there an echo in here1 point
-
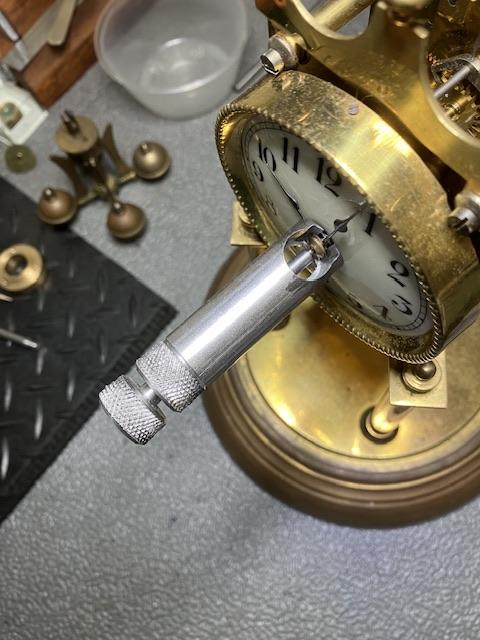
Yes, Nev, that’s exactly what’s happening. The bit is sliding all over the chrome surface and can’t get a bite into the underlying steel. I’m using a cobalt bit. I’ve used a punch. They’re quite the tough toenail clippers. I might have to dig a bigger pit through the chrome with something else and see if I get some tooth that way. I was hoping there’d be a bit to deal with this, but I’ll keep trying and might swap to a tungsten carbide bit and see if I have any luck. Thanks for your comments.1 point
-
Wasn’t sure where to put this but Because of the problem I have with my hands ( gout in both )I have trouble holding things especially torsion clock hands to remove them, I have tried the usual tools but not impressed with them but to be fair one was for watch hands anyway I see an antique one on eBay so put a bid on it needless to say I was out bid but decided I could make something similar and I must say it works a treat, I decided to thread my one but it looks like the one on eBay was a push operation . Dell

 1 point
 -
personally from my point of view I would say no. This is where more than just an evaluation on one side is needed somebody needs to take the watch apart and see what else is bad. Like it's possible the pivots for those wheels are missing which we really can't see in the picture right now. Then that does appear to be rather heavy rust on the balance bridge and I wonder where else were going to find that rust? just a little clarification here are you new to working on an Omega 1010 watches or are you new to working on watches altogether? The reason I need the clarification is that if you're new to watches and even if this watch came to you for free repairing it is going to be extremely expensive as Omega watches tend to be very expensive for spare parts. you never can tell about watch companies what part numbers we can find.of course the biggest problem of all is this is Omega watch part of Swatch group and Swatch group doesn't like us so they're not going to sell you the spare parts unless you have a swatch account. then if you have to find aftermarket Omega parts because they know that nobody can get those parts that tend to be really expensive is why repairing Omega watches is going to be very expensive. According to the parts list found at the link below there were some jewels available I'm not sure if they're the right one because I haven't quite figured out which jewels those are yet. I'm also attaching a PDF of the parts list to help you identify whatever it is you're going to need it looks like some of the plates were once available although getting a new plates will be problematic it might actually be better to find a scrap watch to steel parts from. http://cgi.julesborel.com/cgi-bin/matcgi2?ref=OME_1010 Omega 1010_complet_2236.pdf
 1 point
 -
I agree with a lot of this post. First of all, particularly with older movements, replacing the spring is a good idea, for a number of reasons, depending on the age of the movement and the material the original spring is made from. You can also buy a lot of new springs for the price of a Bergeon set of winders. I also agree with the point about buying a small selection of Bergeon winders. 5,6 and 7 RH are going to be the ones you use the most, so you could start with that. IMO the Chinese metal arbor winders are actually pretty good and, I find, they do get some use. You can also reuse the handle from the Chinese set on the Bergen winders which goes a way to paying for the Chinese set. I have both (including a size 0-6 generic Bergeon + an additional size 7 L and R) and a Chinese set, that I started with. One thing to note is that the Bergeon set is not a panacea. I expect a lot of people have been frustrated buying the full set only to find, after spending over £600, that the first barrel they come across doesn't fit any of the arbors or the arbor that fits has a barrel too small for the spring (I've been there!). Remember, it is generic, and isn't going to be a perfect fit, there's often a tradeoff. An option is to find the the arbor that fits and then find the next winder barrel up. They usually work ok, without too much slop.1 point
-
I am by no means knowledgable about clocks and watches. However, I have inherited a collection from my grandfather which I intend to restore/clean up as best I can. The first thing I wish to do is identify them one at a time. I hope it is OK to pursue that on this forum prior to no doubt asking questions about how to do particular tasks. I hope this is OK. Regards JHatton1 point
-
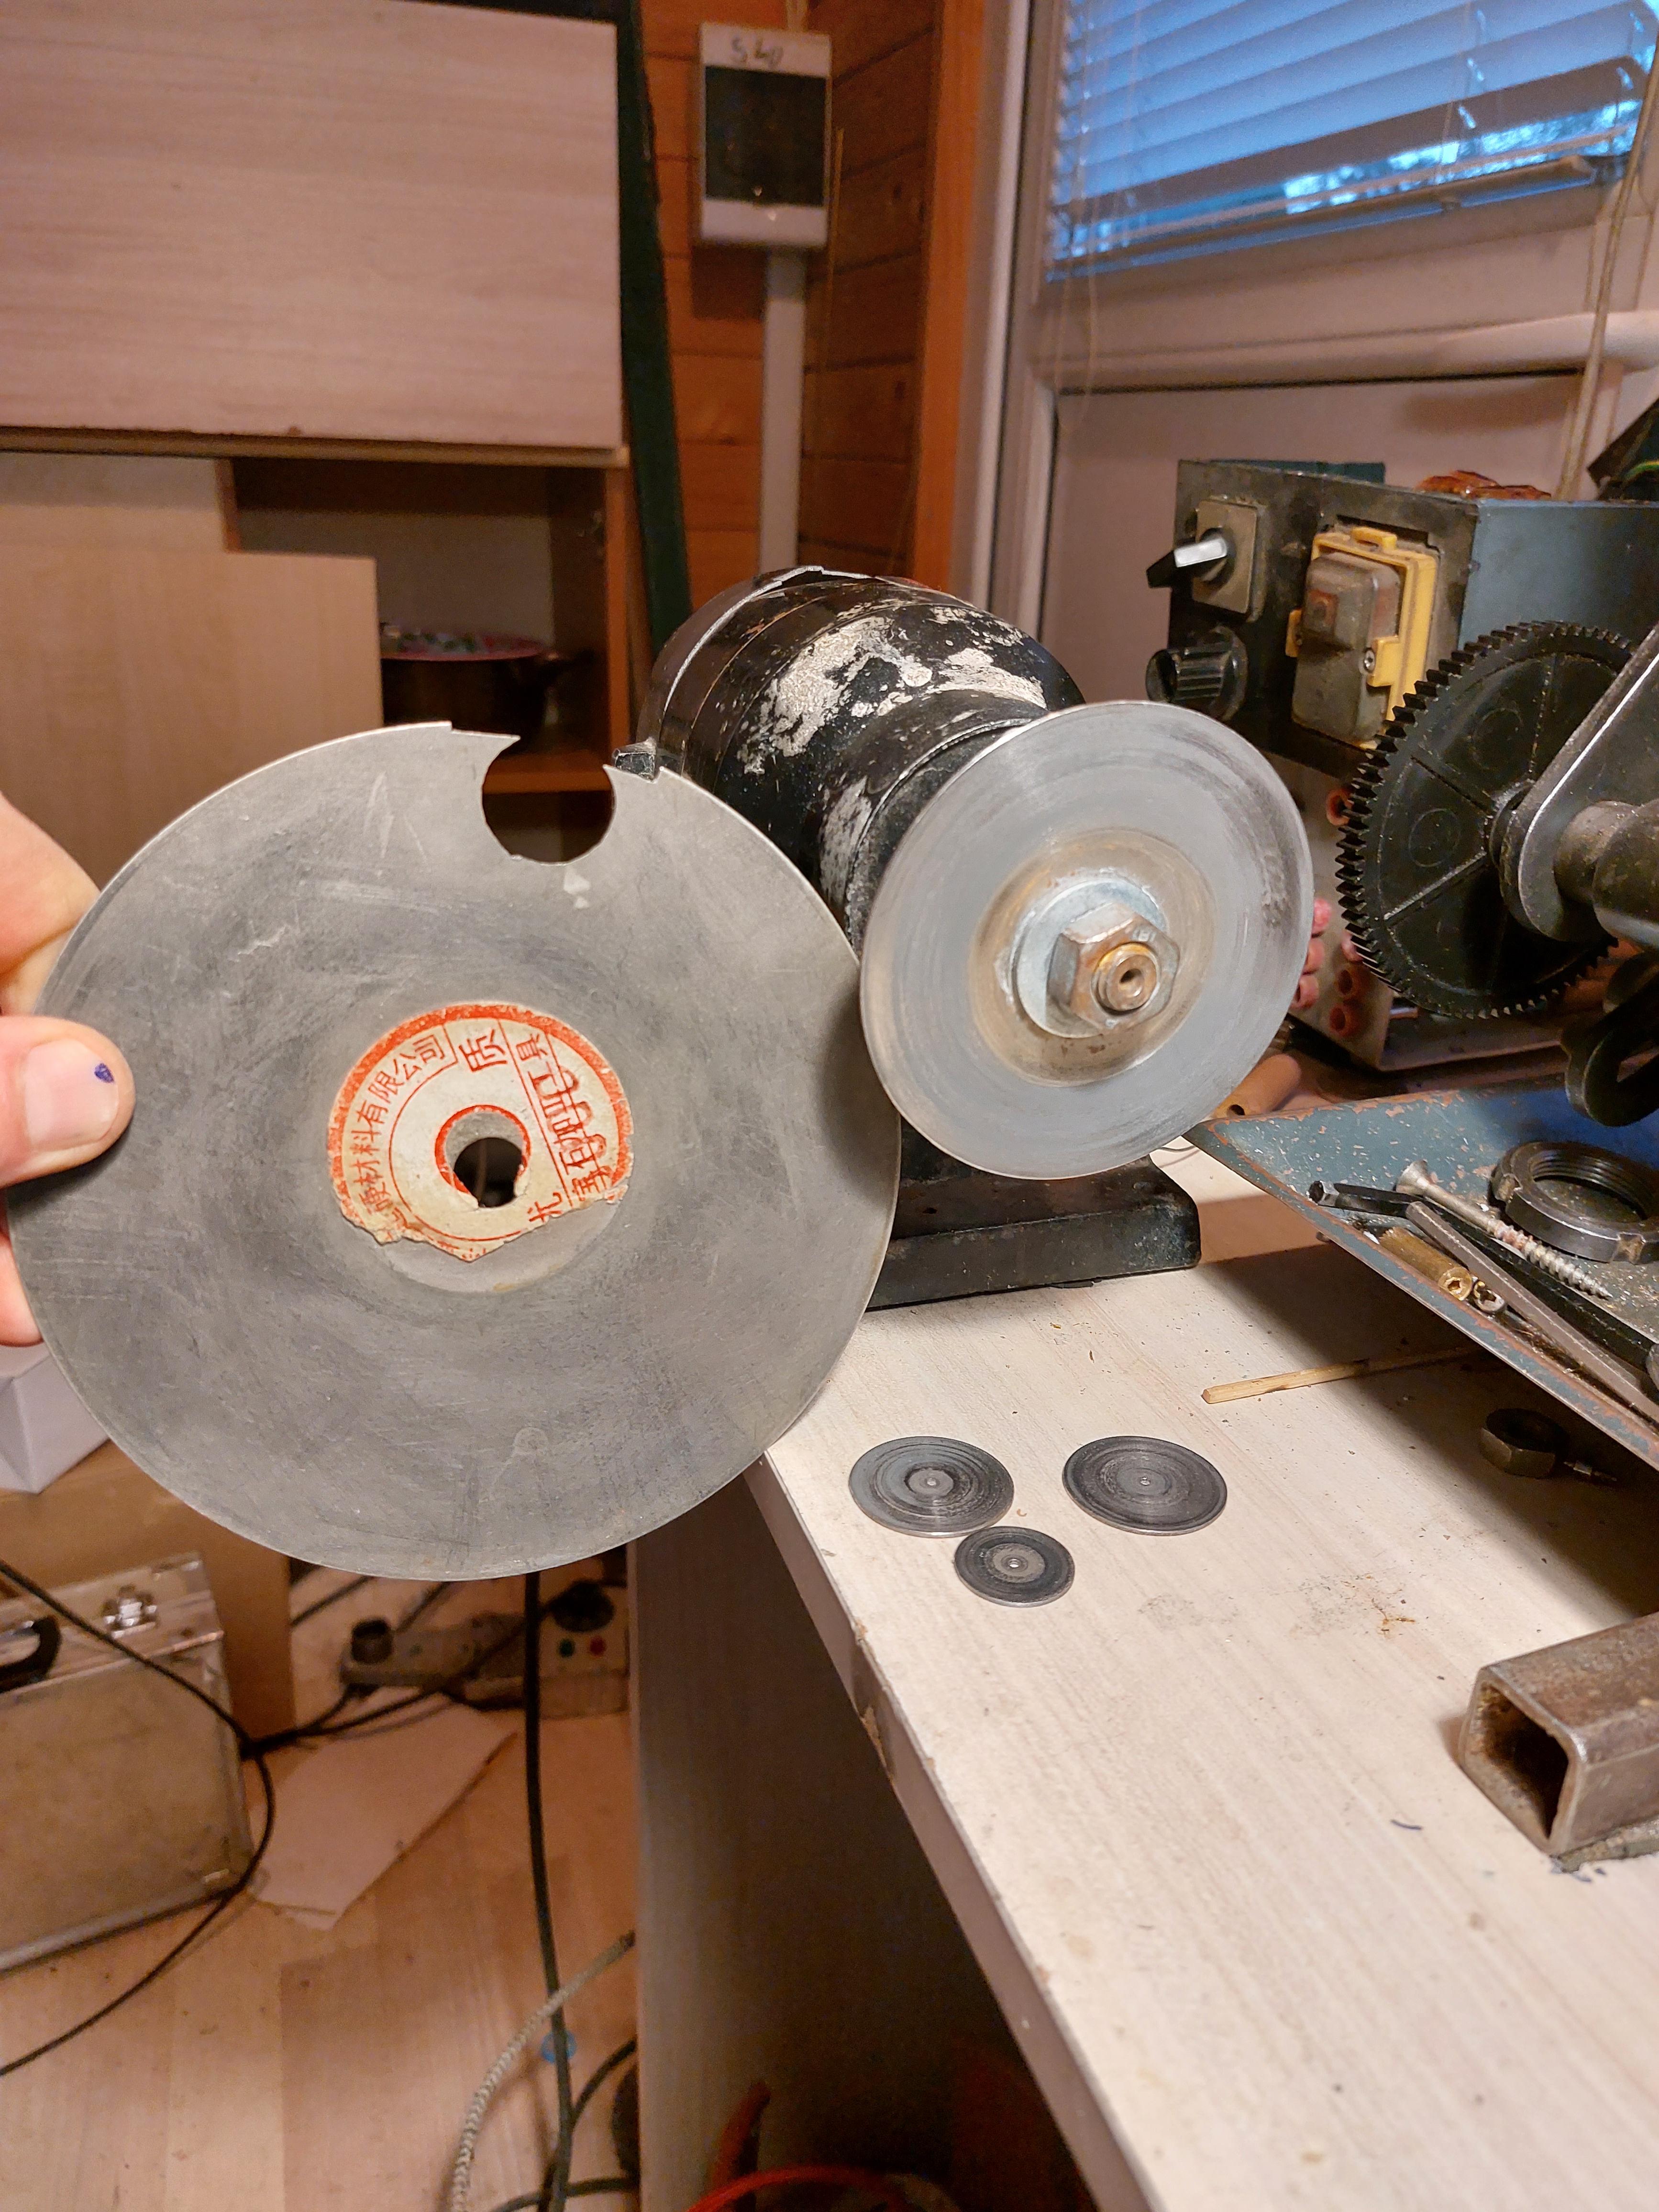
I have often to reshape stones, for example when I need to replace 'rolled over' or burnished type stone with a modern one. The other case is when a wider pallet stone has to be sized to tight fit the slot in the pallet fork. The tool that does this jobs is this kind of diamond disk. Grit 1000 or 800 is perfect for the honing. If the stone height is to be resized in the way Jon did, this will be enough to put the disk (the big one) on the table top diamond side up, put the stone on the disk, press it with finger and move it forward-reverse for a while on the disk surface, then try the height. If one is carefull and take measures not to grind the surface bent, this will take no more than minute to resize the jewel. The same way I use to resize the pallet stones. If a stone edge have to be rounded, then I turn on the top of a rod a 'nest' to receive the stone and glue there the stone with shellac, then while the whole thing is rotated, use the disk as a file to shape the stone.
 1 point