Leaderboard


Popular Content
Showing content with the highest reputation on 06/23/24 in all areas
-
It’s not perfect but it works, plus learned loads from turning it. So I’m a bit chuffed
 7 points
 -
Give me a shout if you do need parts for this movement. There are many generic parts out there, but I always give the client the choice between generic cheaper parts or genuine Rolex parts that cost more. Gleave and Co. do some good generic spares for Rolex' https://gleave.london/rolex-parts-by-caliber/ And, if you ring them for advice, they'll know what you are talking about, unlike Cousins. Unfortunately, the owner Graham Gleave, who is a wealth of knowledge when it comes to anything watch related is very ill with cancer at the moment. His sons are taking over the business. Please support these guys through the hard times ahead for their family and buy from them. Their rotor axles for all Rolex movements are as good as original axles and the other generic Rolex parts are really good quality and better than Cousins stock generic parts I wish we could go back in time to have mineral oils and greases that congealed and stopped the watch and save all that wear from the movement running with no lubrication, as the watch stopped to say it needs servicing So glad the owner decided to get their watch serviced and I'm sure it is good hands with you Hakan!3 points
-
One is staked to the pinion, one is free. They both engage the sweep pinion, but only the free one engages the 4th pinion. The result is the sweep pinion leaf engaged gets sandwiched; the staked wheel pushes, the free one must turn too, but it is stopped by the 4th pinion. It’s a great system that gives a perfectly stable sweep and doesn't suck amplitude like friction springs.3 points
-
Who ever gave you that info is bloody stupid. As already pointed out it's 18k. Longines watches are high grade. Go here this is the B H I site and download accredited watch repairers and look for Dorset. https://bhi.co.uk/repairer/3 points
-
I agree! Synthetic oils are both a blessing and a curse. I have just had a phone meeting with the owner of the watch and we have agreed to a full service. Unfortunately, it will take a while as I will soon be leaving the workbench for vacation, but fortunately, the owner has the patience to wait until the job is done. Hopefully, we won't have to buy any spare parts but I have warned the owner that in the worst case it may be necessary. I will post back to the thread if any questions need clarification. Thank you for all the input and documentation you have shared so far!3 points
-
Exactly that H, i have a few customers that do some work in their homes themselves, then i go in and do the finishing up intricate parts of the job. They often ask how i manage to do the work in a fraction of the time that they spend doing it ? Its just know-how, 40 years of handling and good tools applied in an efficient manner. Some of these customers make a fair job but the time spent doing it would make it non or low profit viable as a living for them. I always used to tell my apprentices, " learn to do it right first, speed comes later and naturally " . When learning something new we take our time and each step follows the previous step, we concentrate on every aspect of each step. Experience with something teaches us to multitask steps, switch and even skip steps that we previously thought necessary, we make our own natural order and certain way of doing things to become more efficient. Striving for perfection has a cut-off point and everyone's is different, it can alter during a situation and also change generally within us over time. As a young guy i was keen and eager to earn money fast, over time i became more conscious of the fact that i needed to do better work then as i matured futher i realised my expectations had grown way above what anyone else's were, i eventually found a balance that i was happy with that made me decent money and didnt cause me ocd stress.3 points
-
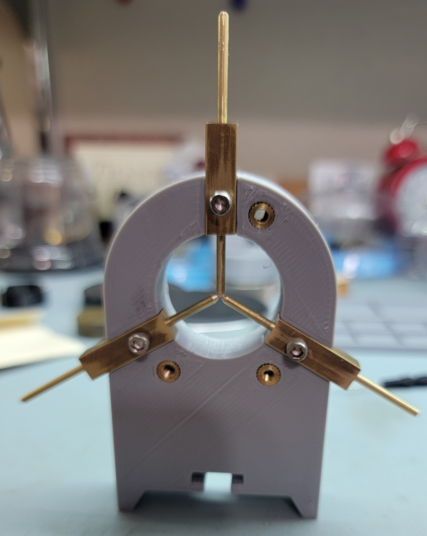
Got this idea from other stuff I had seen. Have not done a live test yet. The holes in the square stock drilled with my Levin using a four-jaw chuck to hold the piece. Square stock cut with a Dremel. Square stock fine tuned with my Sherline Mill. Holes for grub screws drilled with the Sherline Mill. Those extra screw locations were intended to hold a washer that locked in the square blocks, but I decided to just glue them in.
 2 points
 -
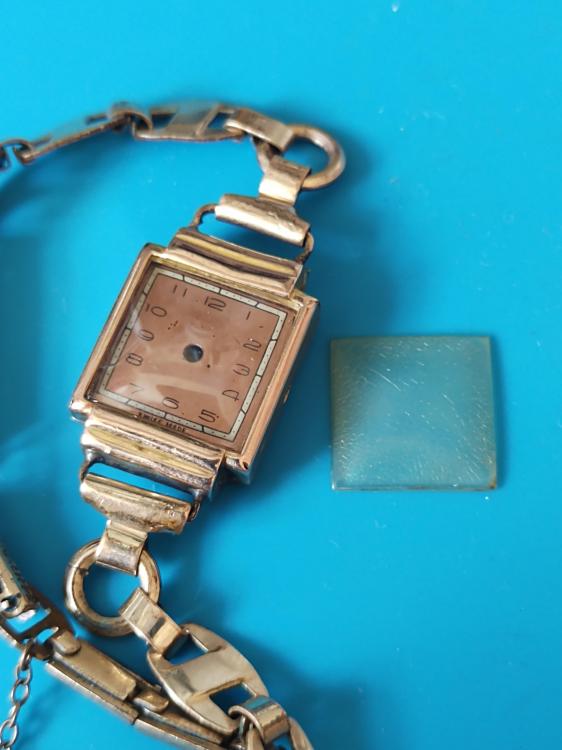
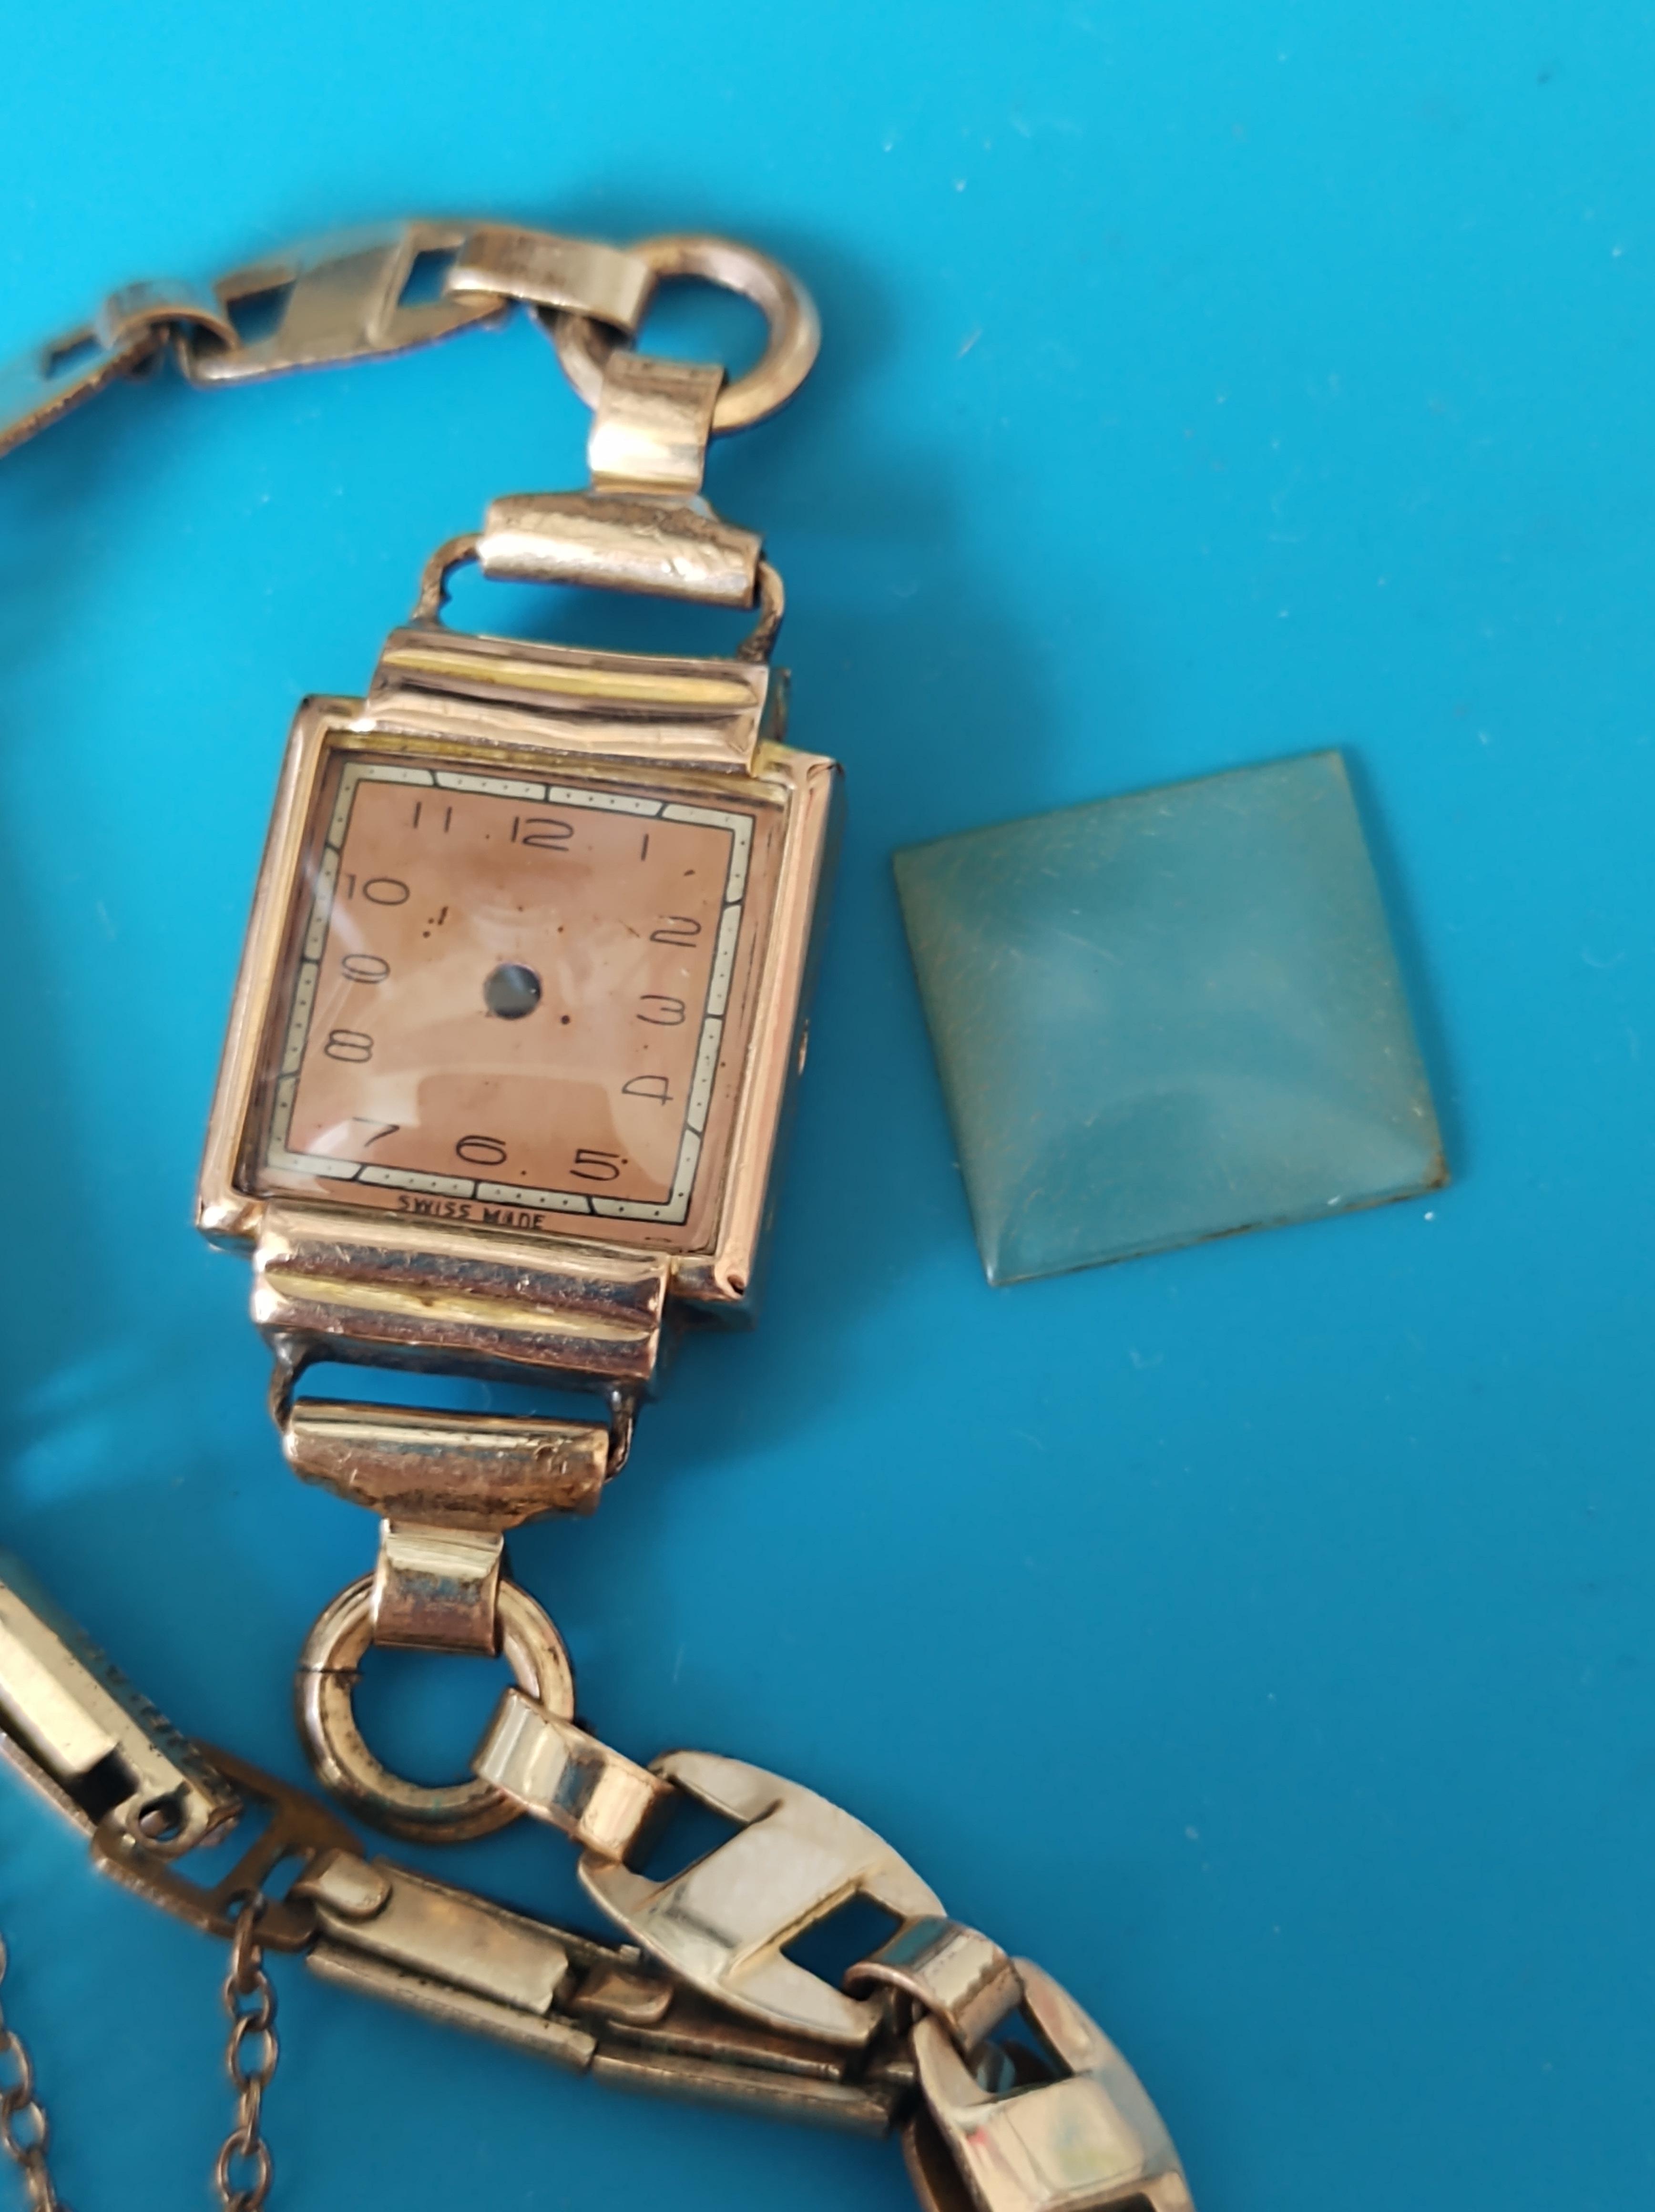
Hi, I wanted to share my replacement of an old yellowed crystal. Original crystal was yellowed and it was not possible to make it clear with abrasive and polywatch. In fact the polywatch seemed to dissolve the crystal making a sticky mess. I think the crystal was nitro cellulose and not acrylic. Crystal dimensions were 13.3 x 13.3mm and I found one on eBay described as 14 x 14 and model S7. Upon receipt it was found to measure 14.5 x 14.5. After careful rubbing on 600 grit abrasive sheet I got it to size so it would just snap into place. I had to be very careful to keep the edges square. I finished the edges with some finer paper and polywatch aiming to produce a nice 45 degree bevel on the edge. I finished off with some Minecol UV glue and had to illuminate with UV from the back side for nearly an hour to get it to set. Never had much luck with that glue as I have read that it should work in minutes. Result is a big improvement. The watch has an FEF270 movement by the way, just waiting on a donor movement for some parts (stem and balance).

 2 points
 -
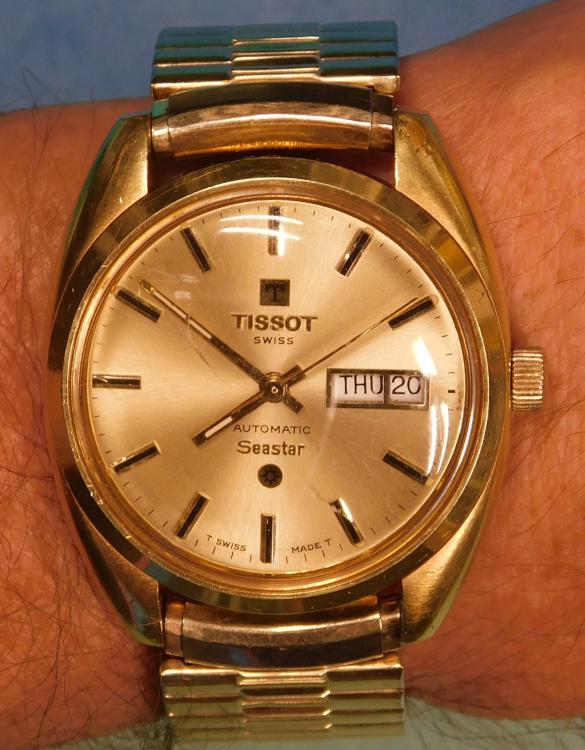
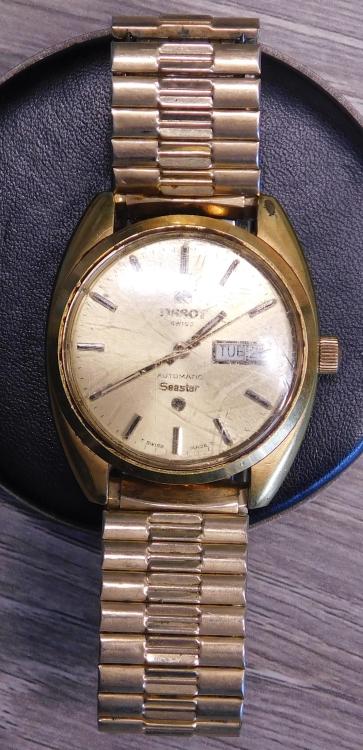
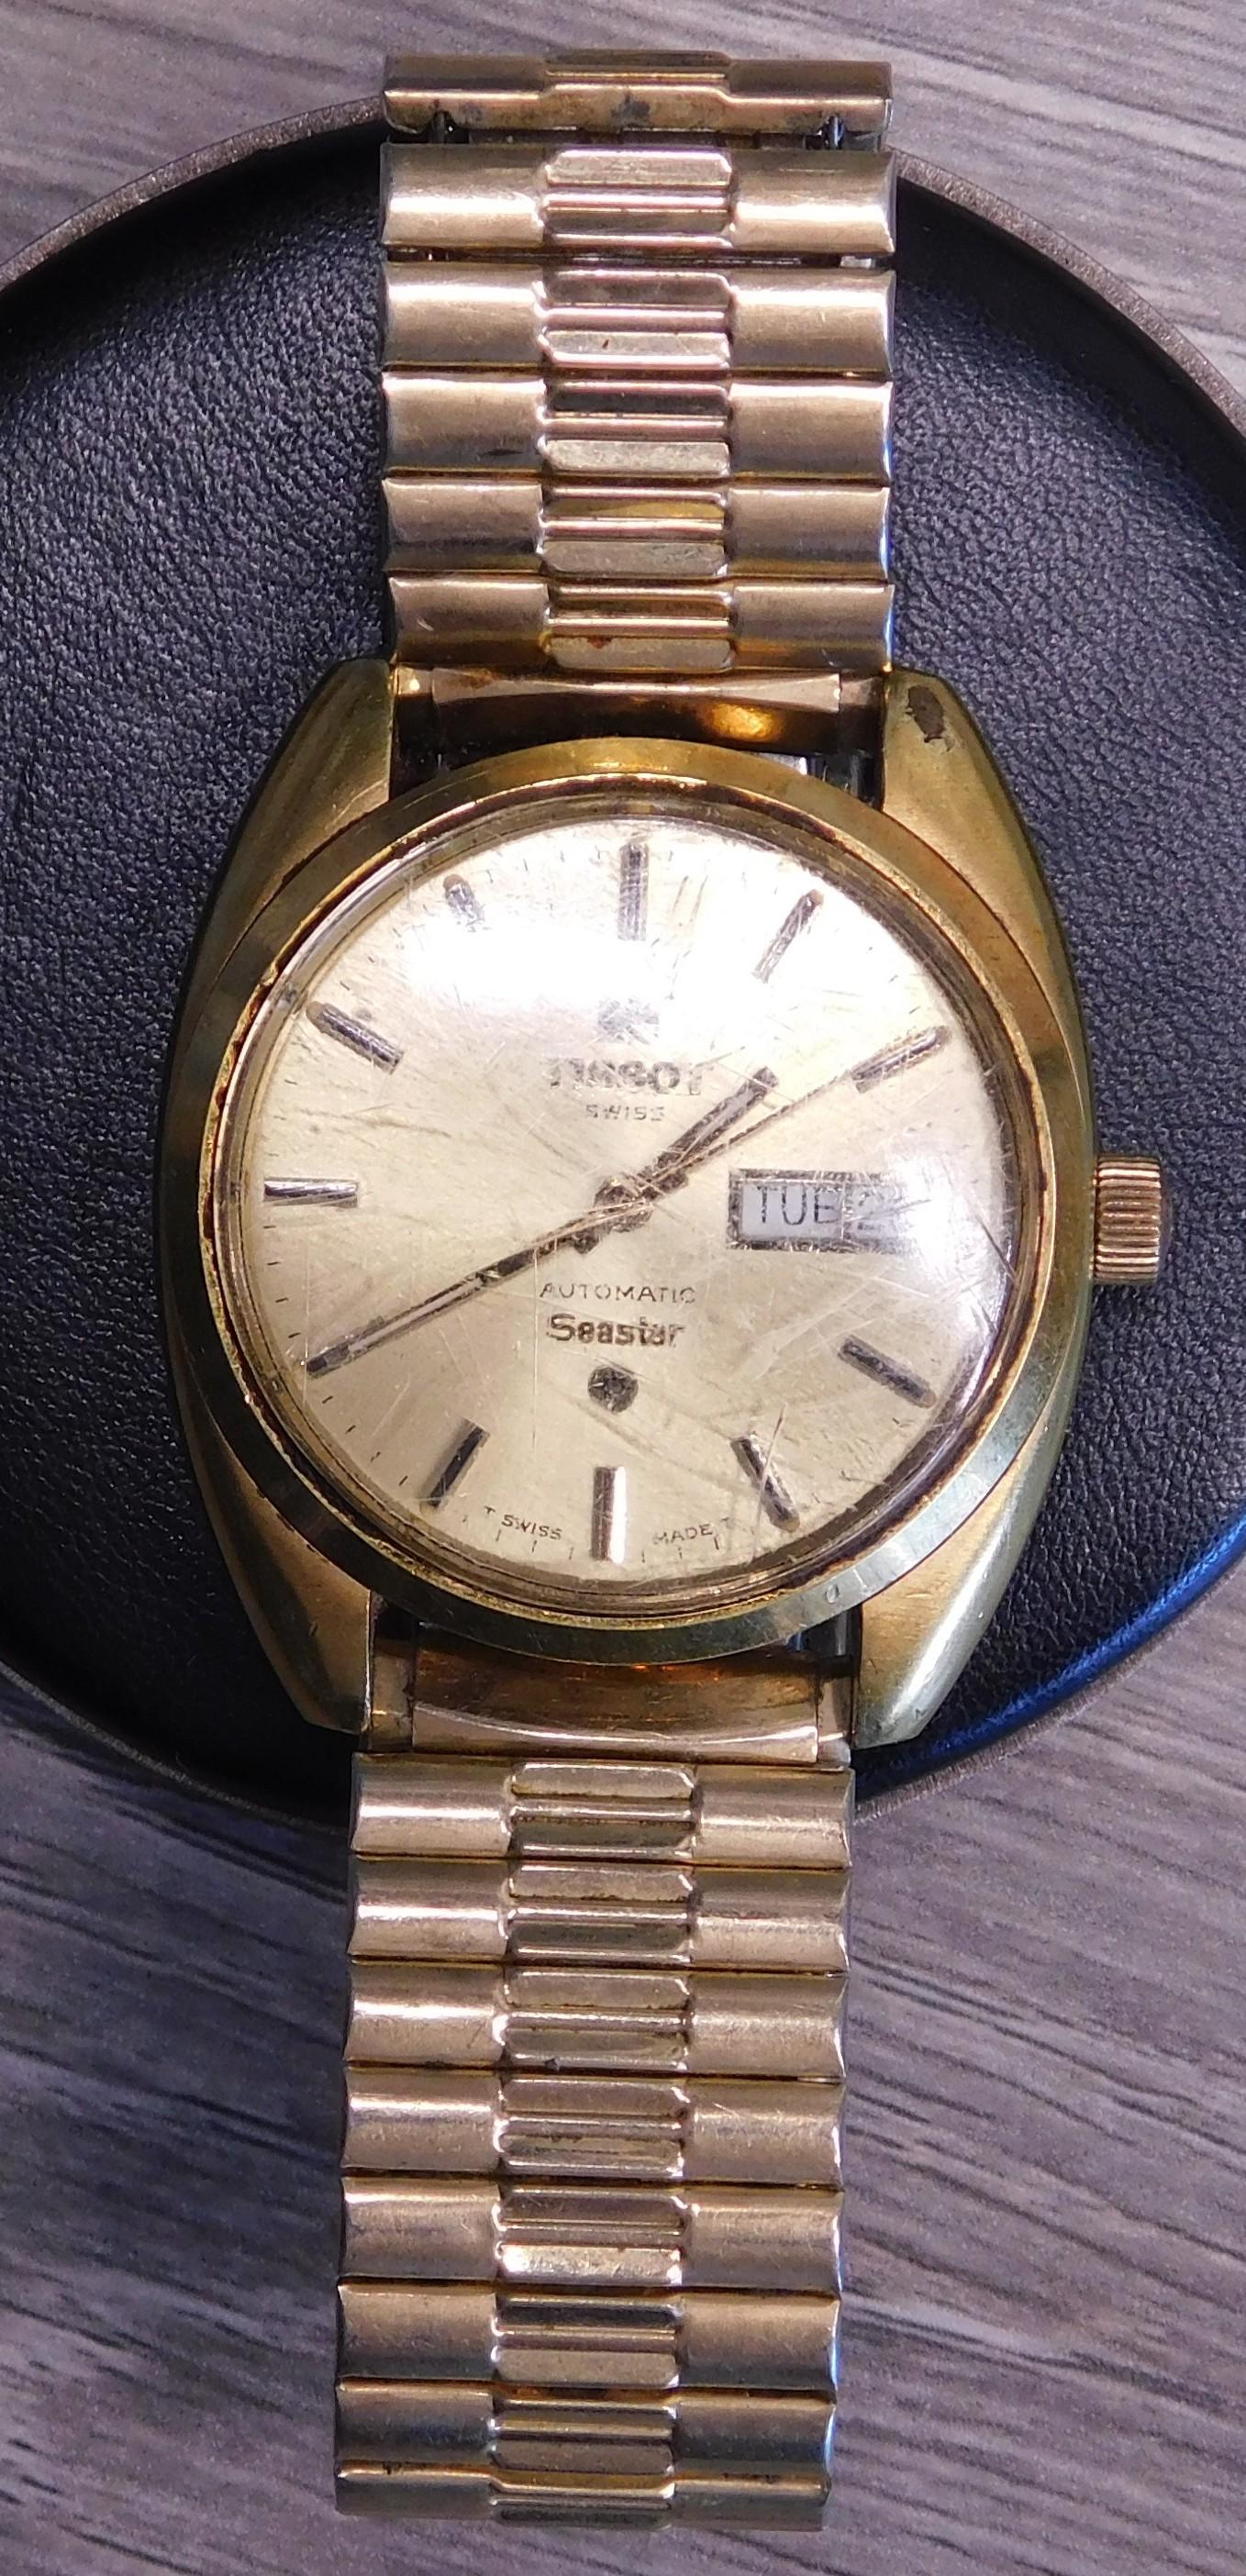
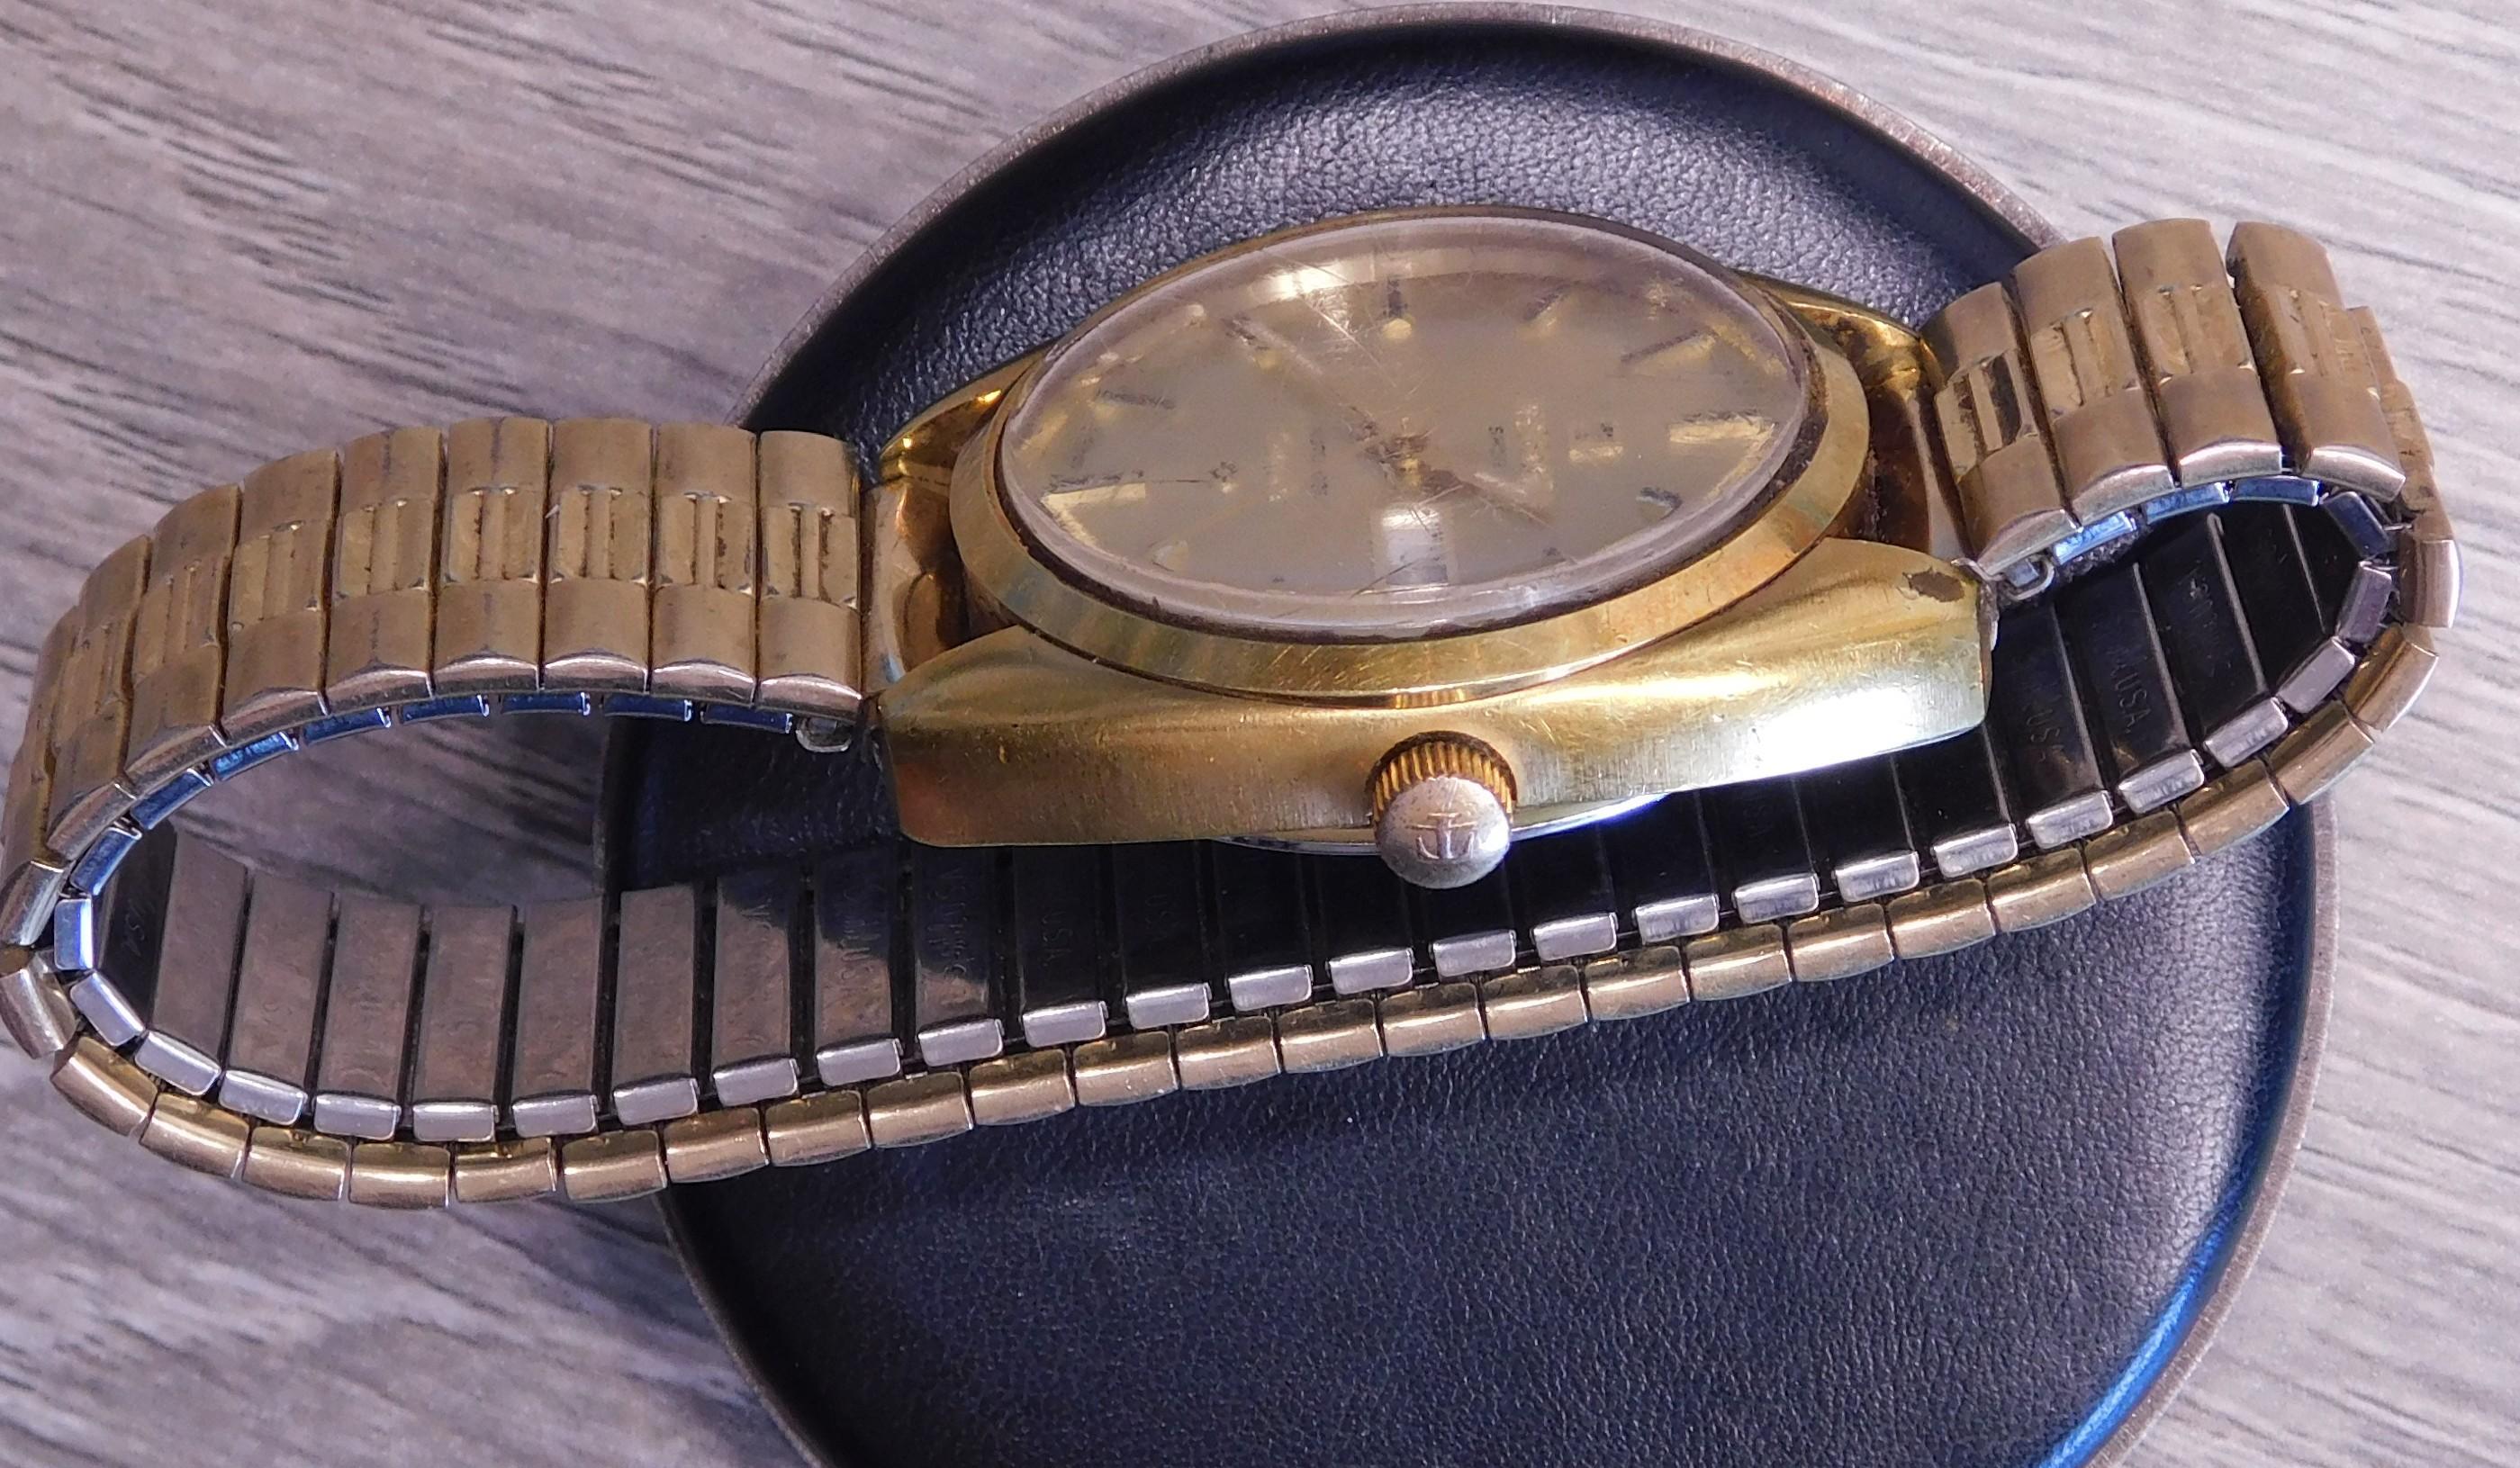
I bought a lot of 6 watches in August 2023 from the Bay. It was a typical 1 nice watch and 5 fashion type quartzs. $72.96US so £9.66 each with the exchange rate. Not 404 but is a 10.10! The crystal was badly scratched and scuffed but the listing did have Tissot as one of the brands. As the photos were not good I remember thinking it might be a seastar and I sniped it. It ran out of the parcel! The gasket had turned to tar and I had a bit of date wheel learning curve as well as dial. But I really like the 2591 in house movement and think these early 70s seastar are great. The dial on this has applied badges as well. All in all just the new gold ring armored crystal and I got to learn a bit about Tissot and this family of calibers that allowed me to pick up more expensive pieces and restore. Edit for spelling and Grammer and to add a side shot. There is wear of the GP on the lug in the one spot but rubbed out a bit and doesn't jump out at you on the wrist.

 2 points
 -
Definitely gold, with the key of Geneva stamp and a genuine movement. "Not worth cleaning " etc is code for they weren't interested or skilled enough. It is definitely worth a service but I can't recommend anyone.2 points
-
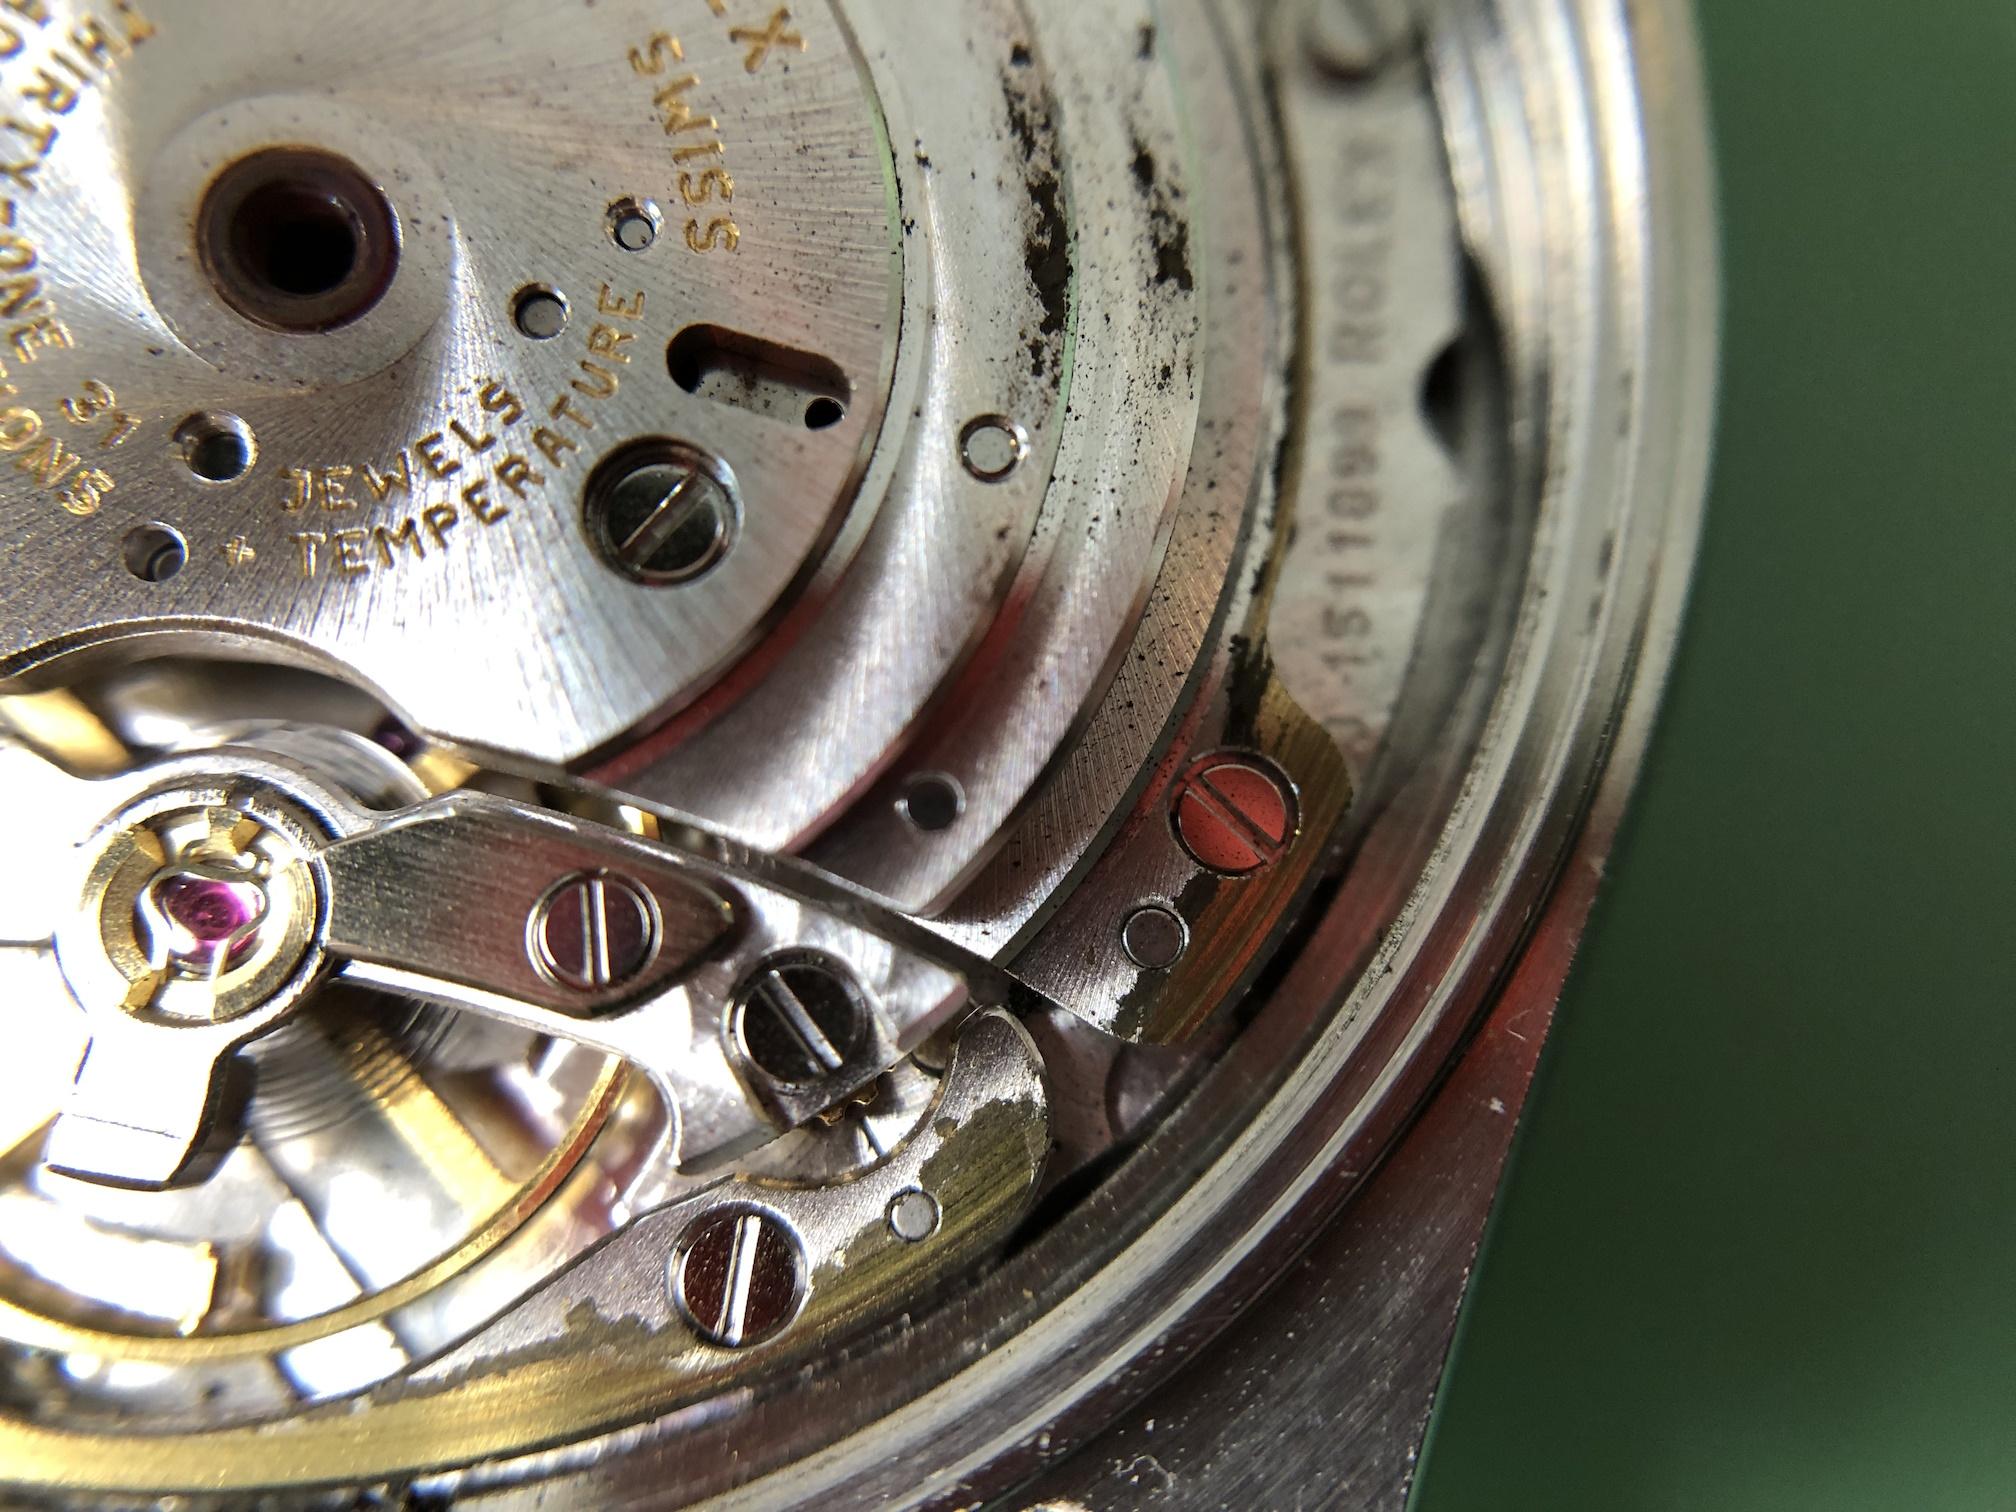
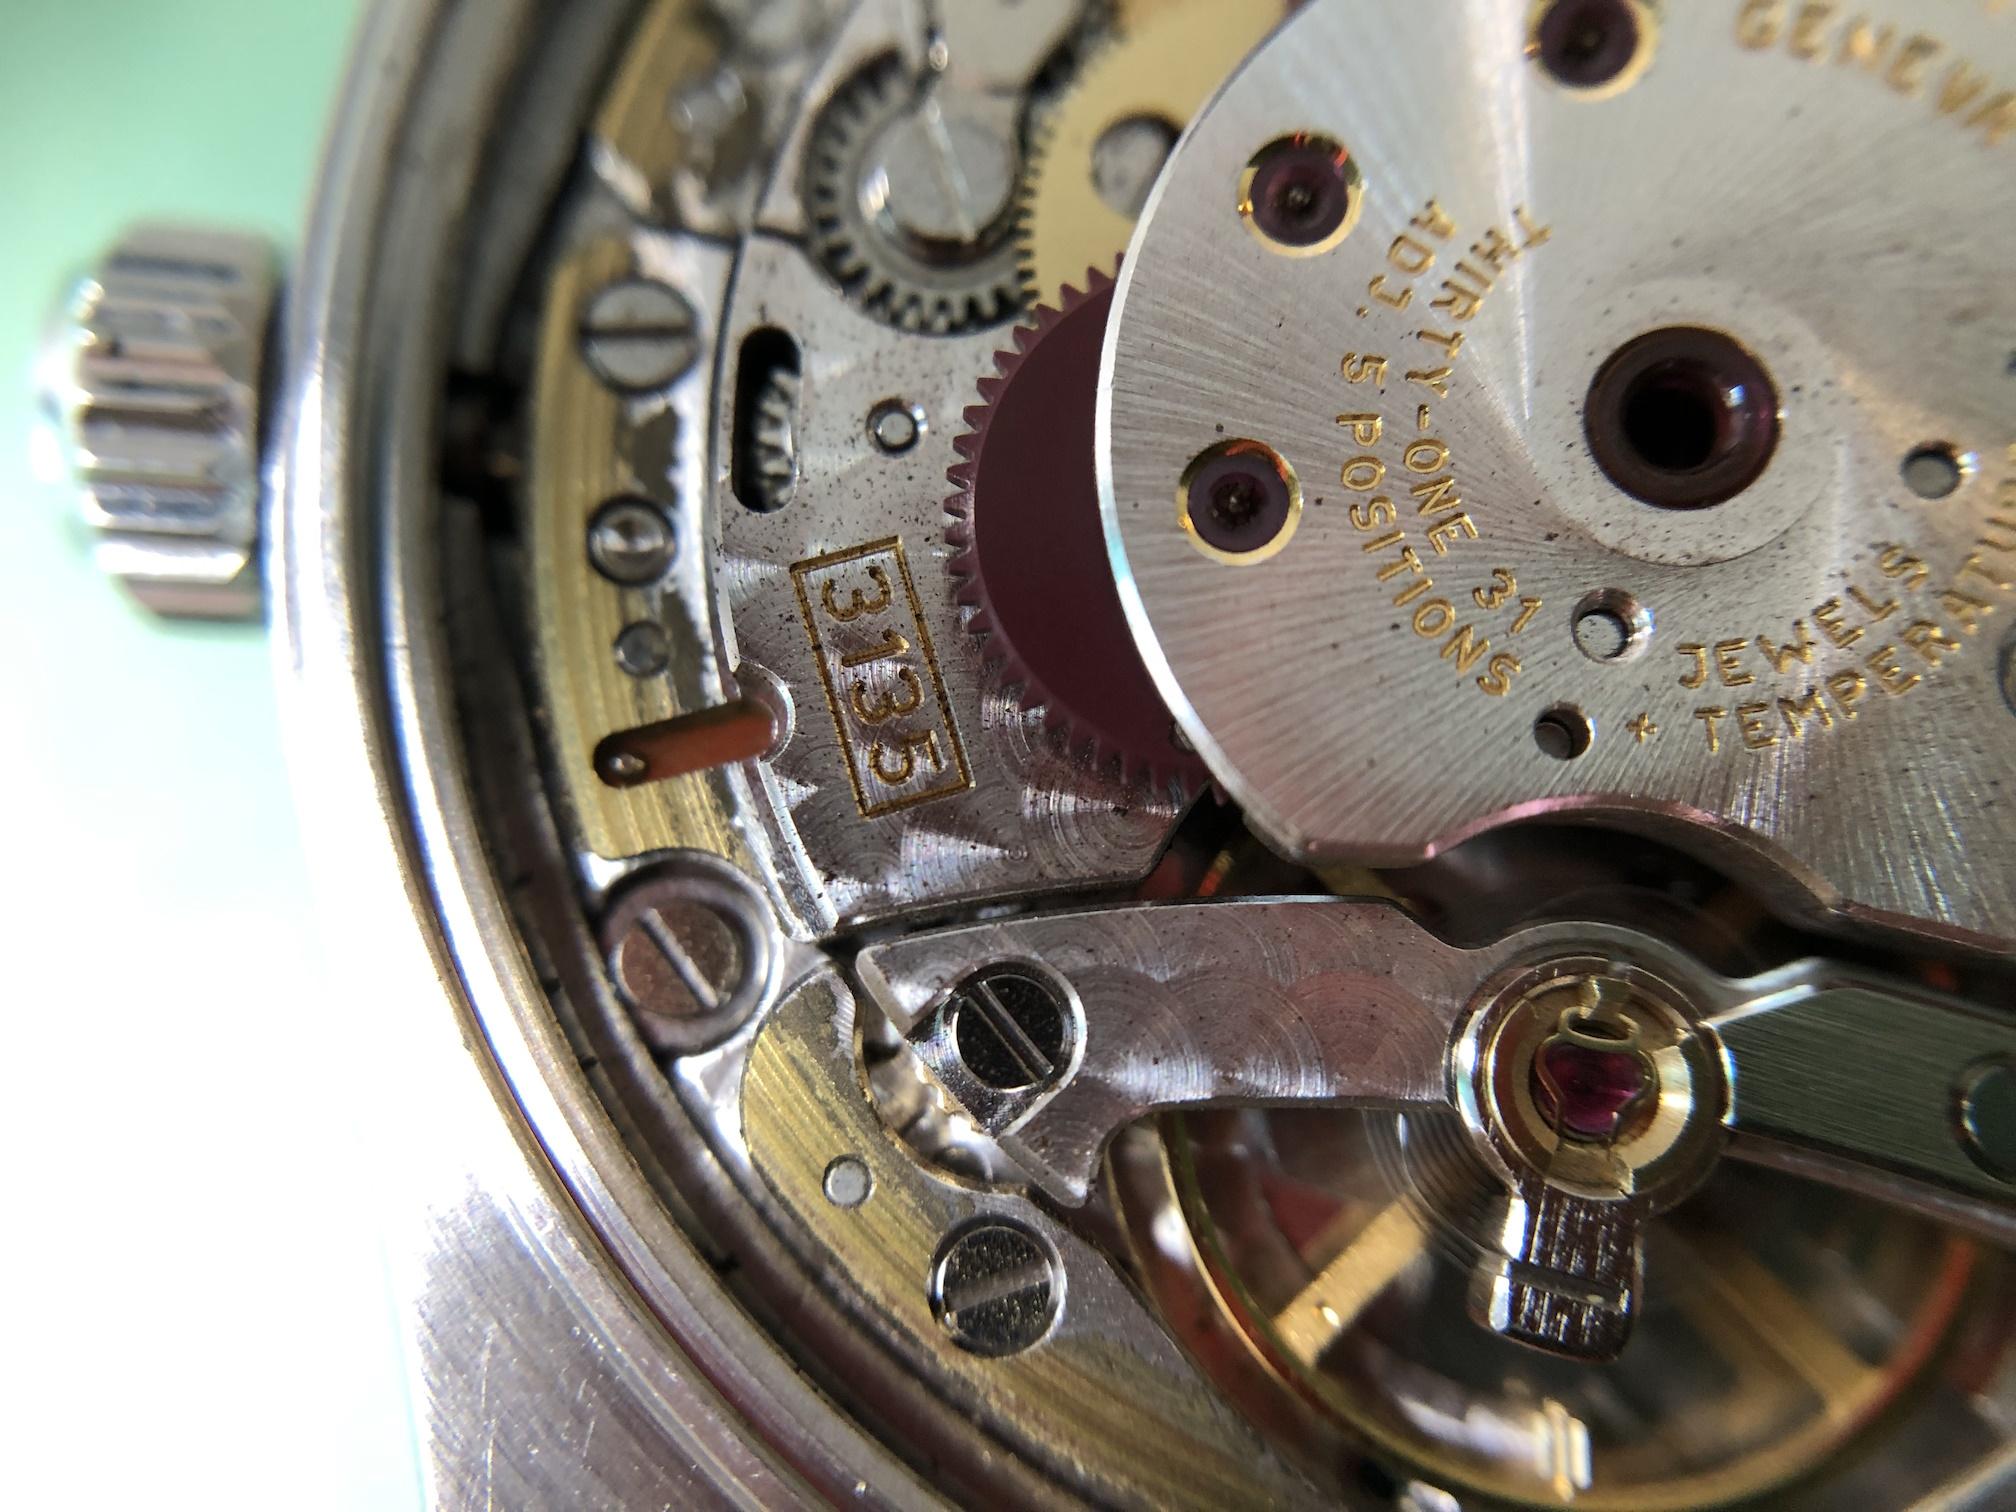
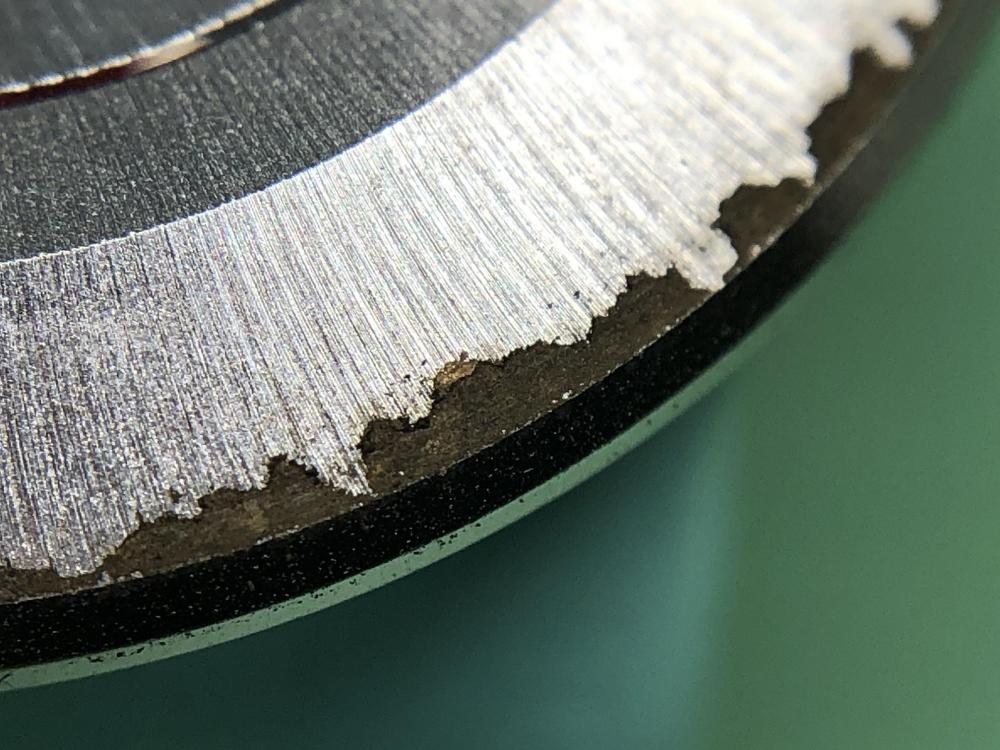
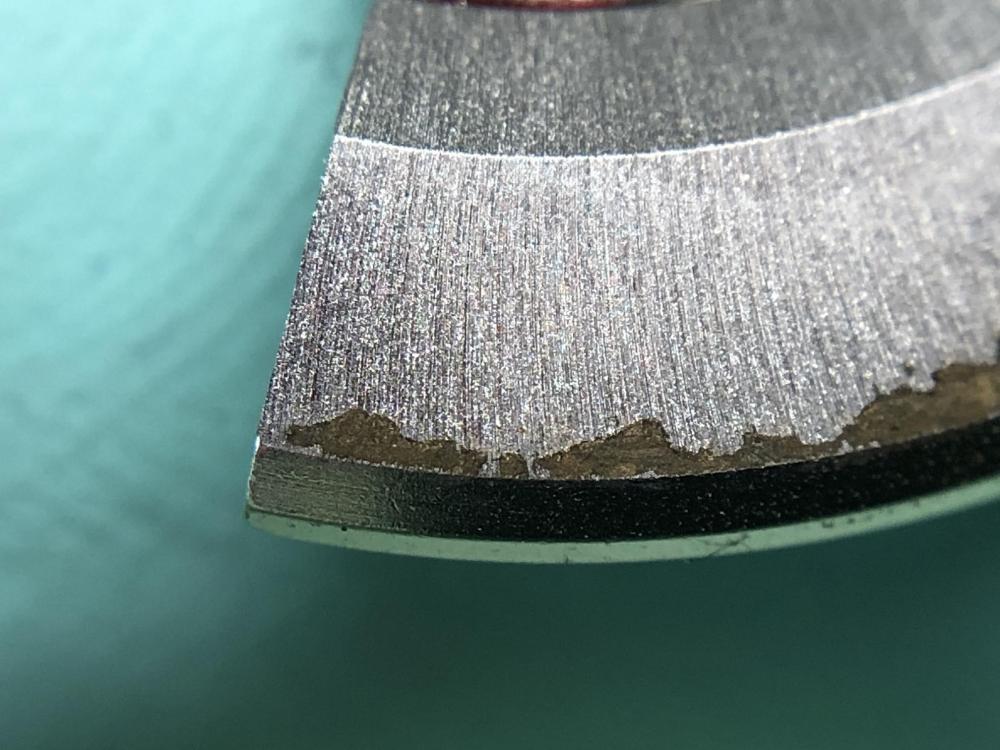
All that wear created a great abrasive dust throughout the whole movement which settles in where there was something to stick to, such as lubricant. Now that has dissipated it has left that abrasive dust to do its work. This is why i prefer some mineral lubrication in a movement, when it gums up, i think of it like an auto service due indicator.2 points
-
For me definitely worth having service done. Nice looking longines movement and a 18k solid gold case. Tom2 points
-
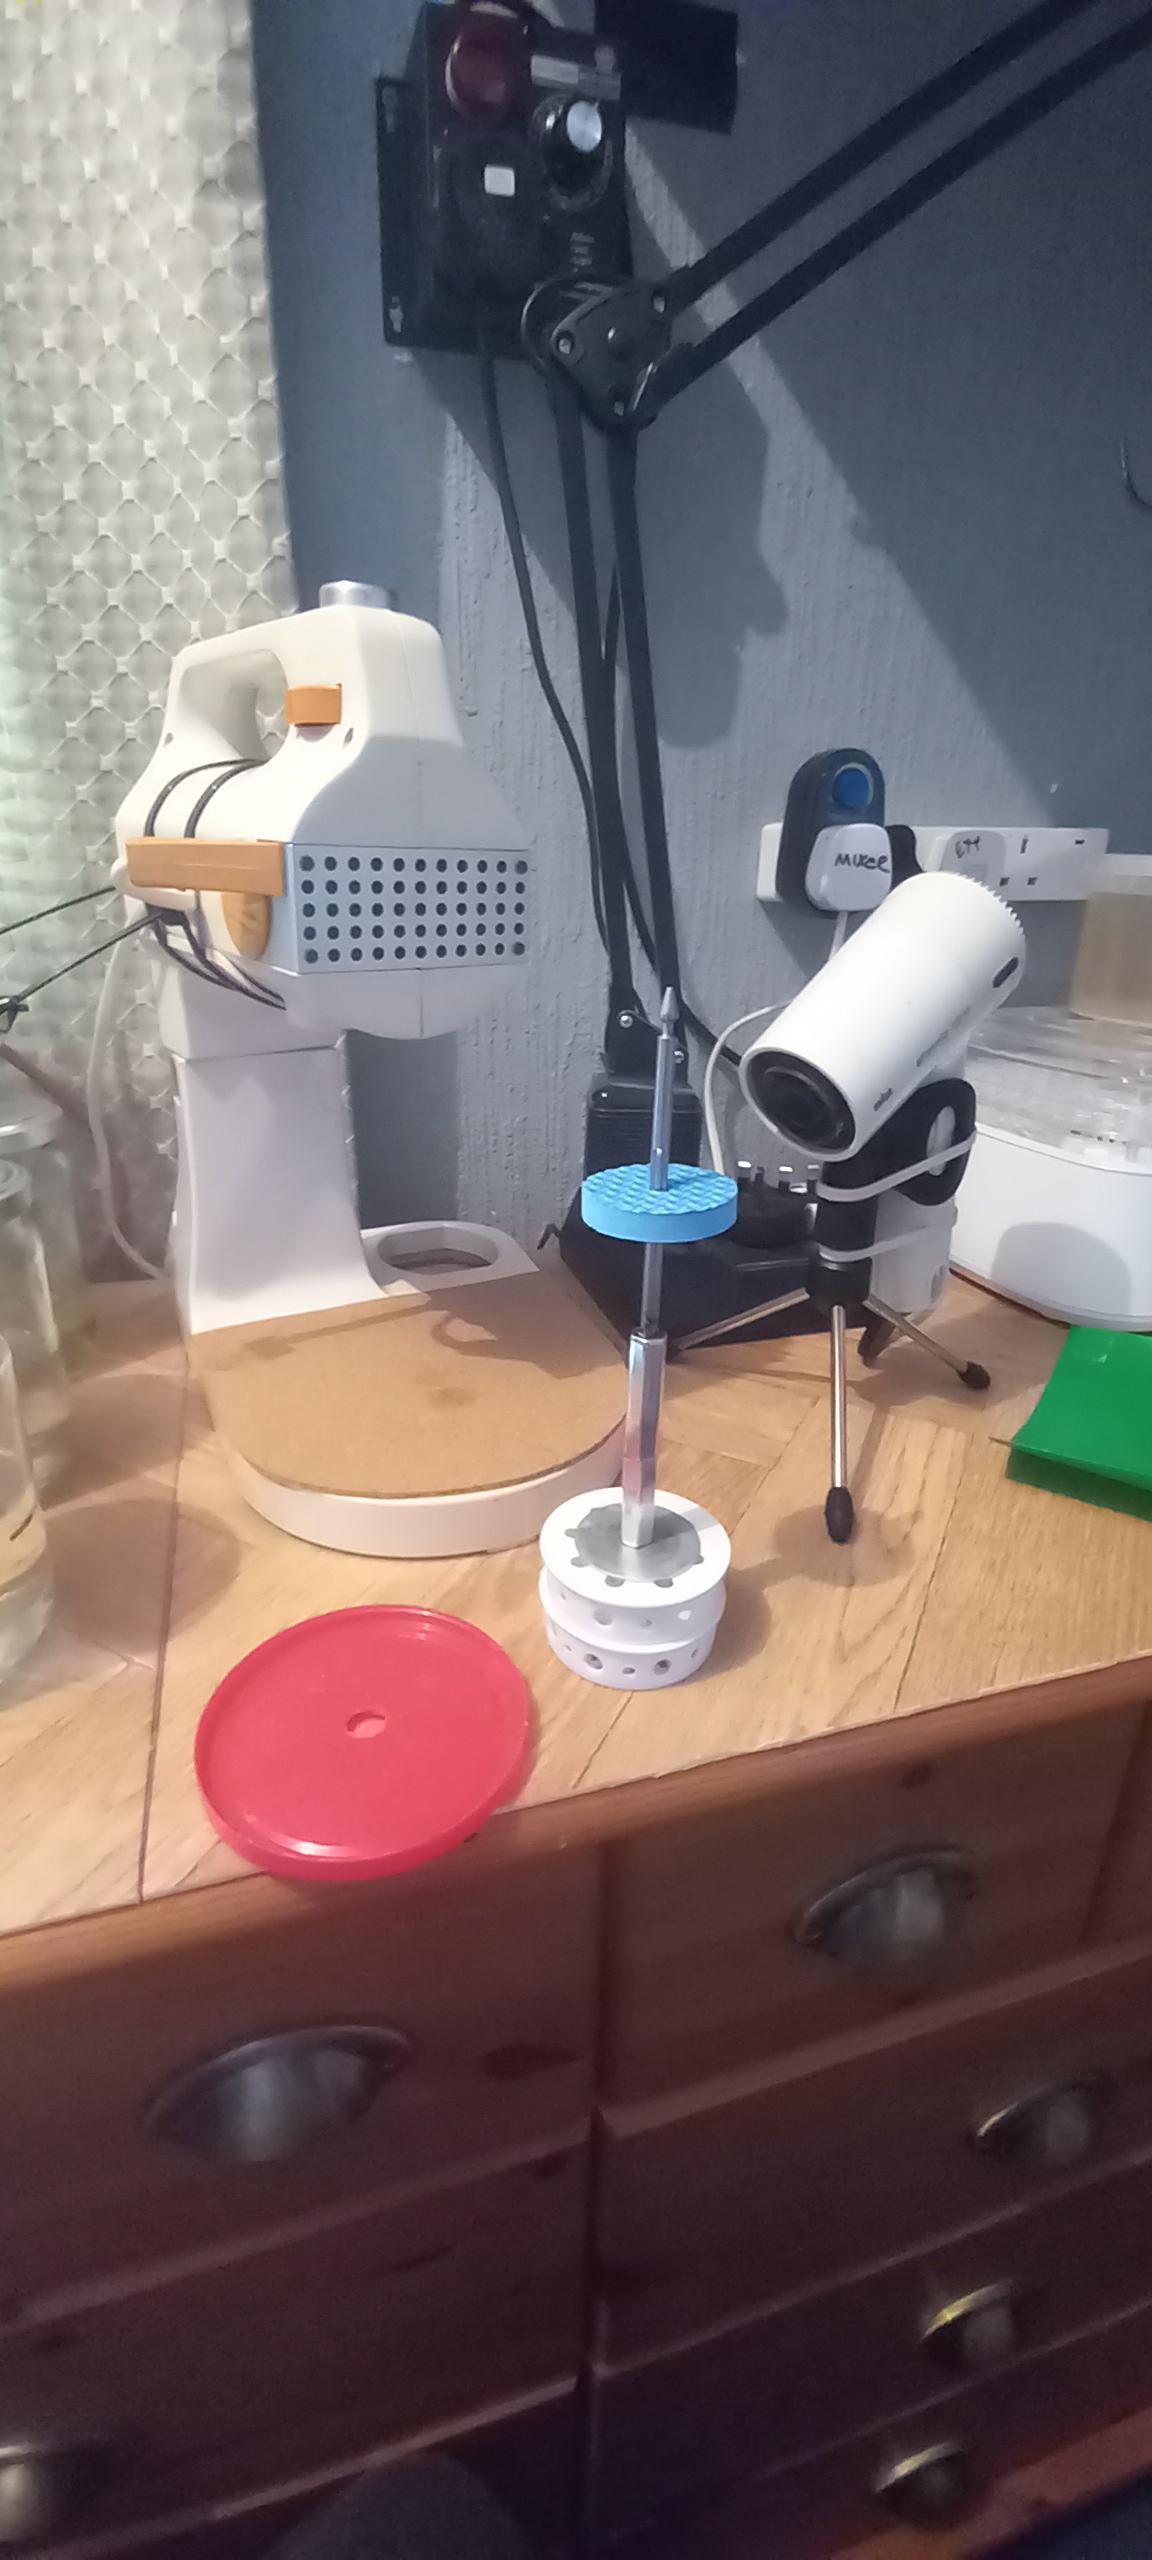
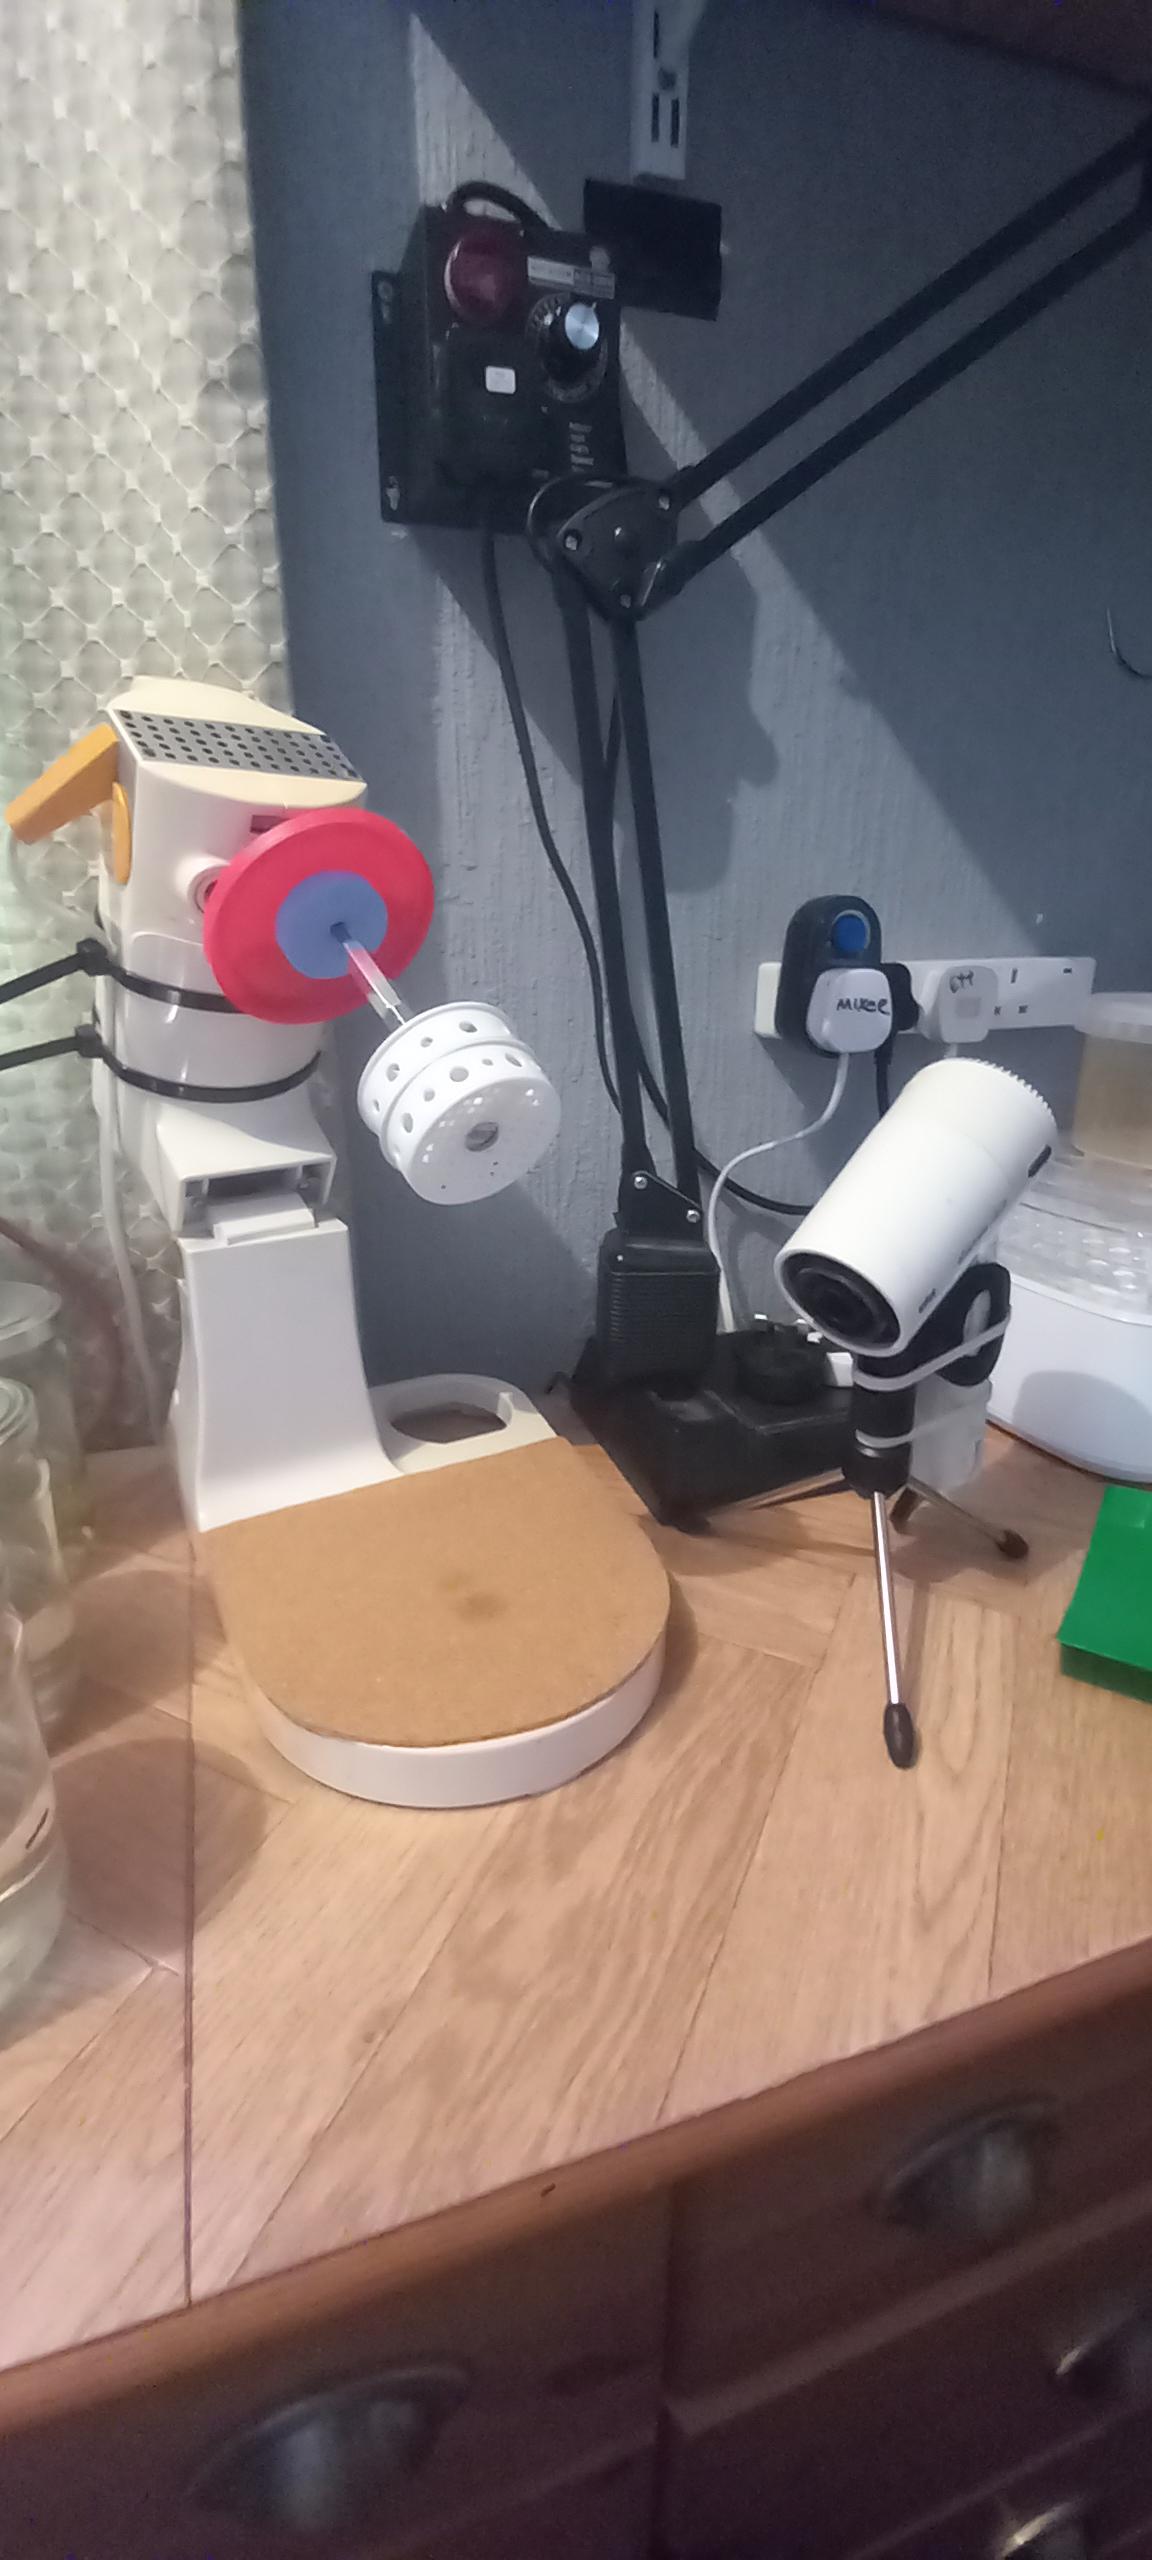
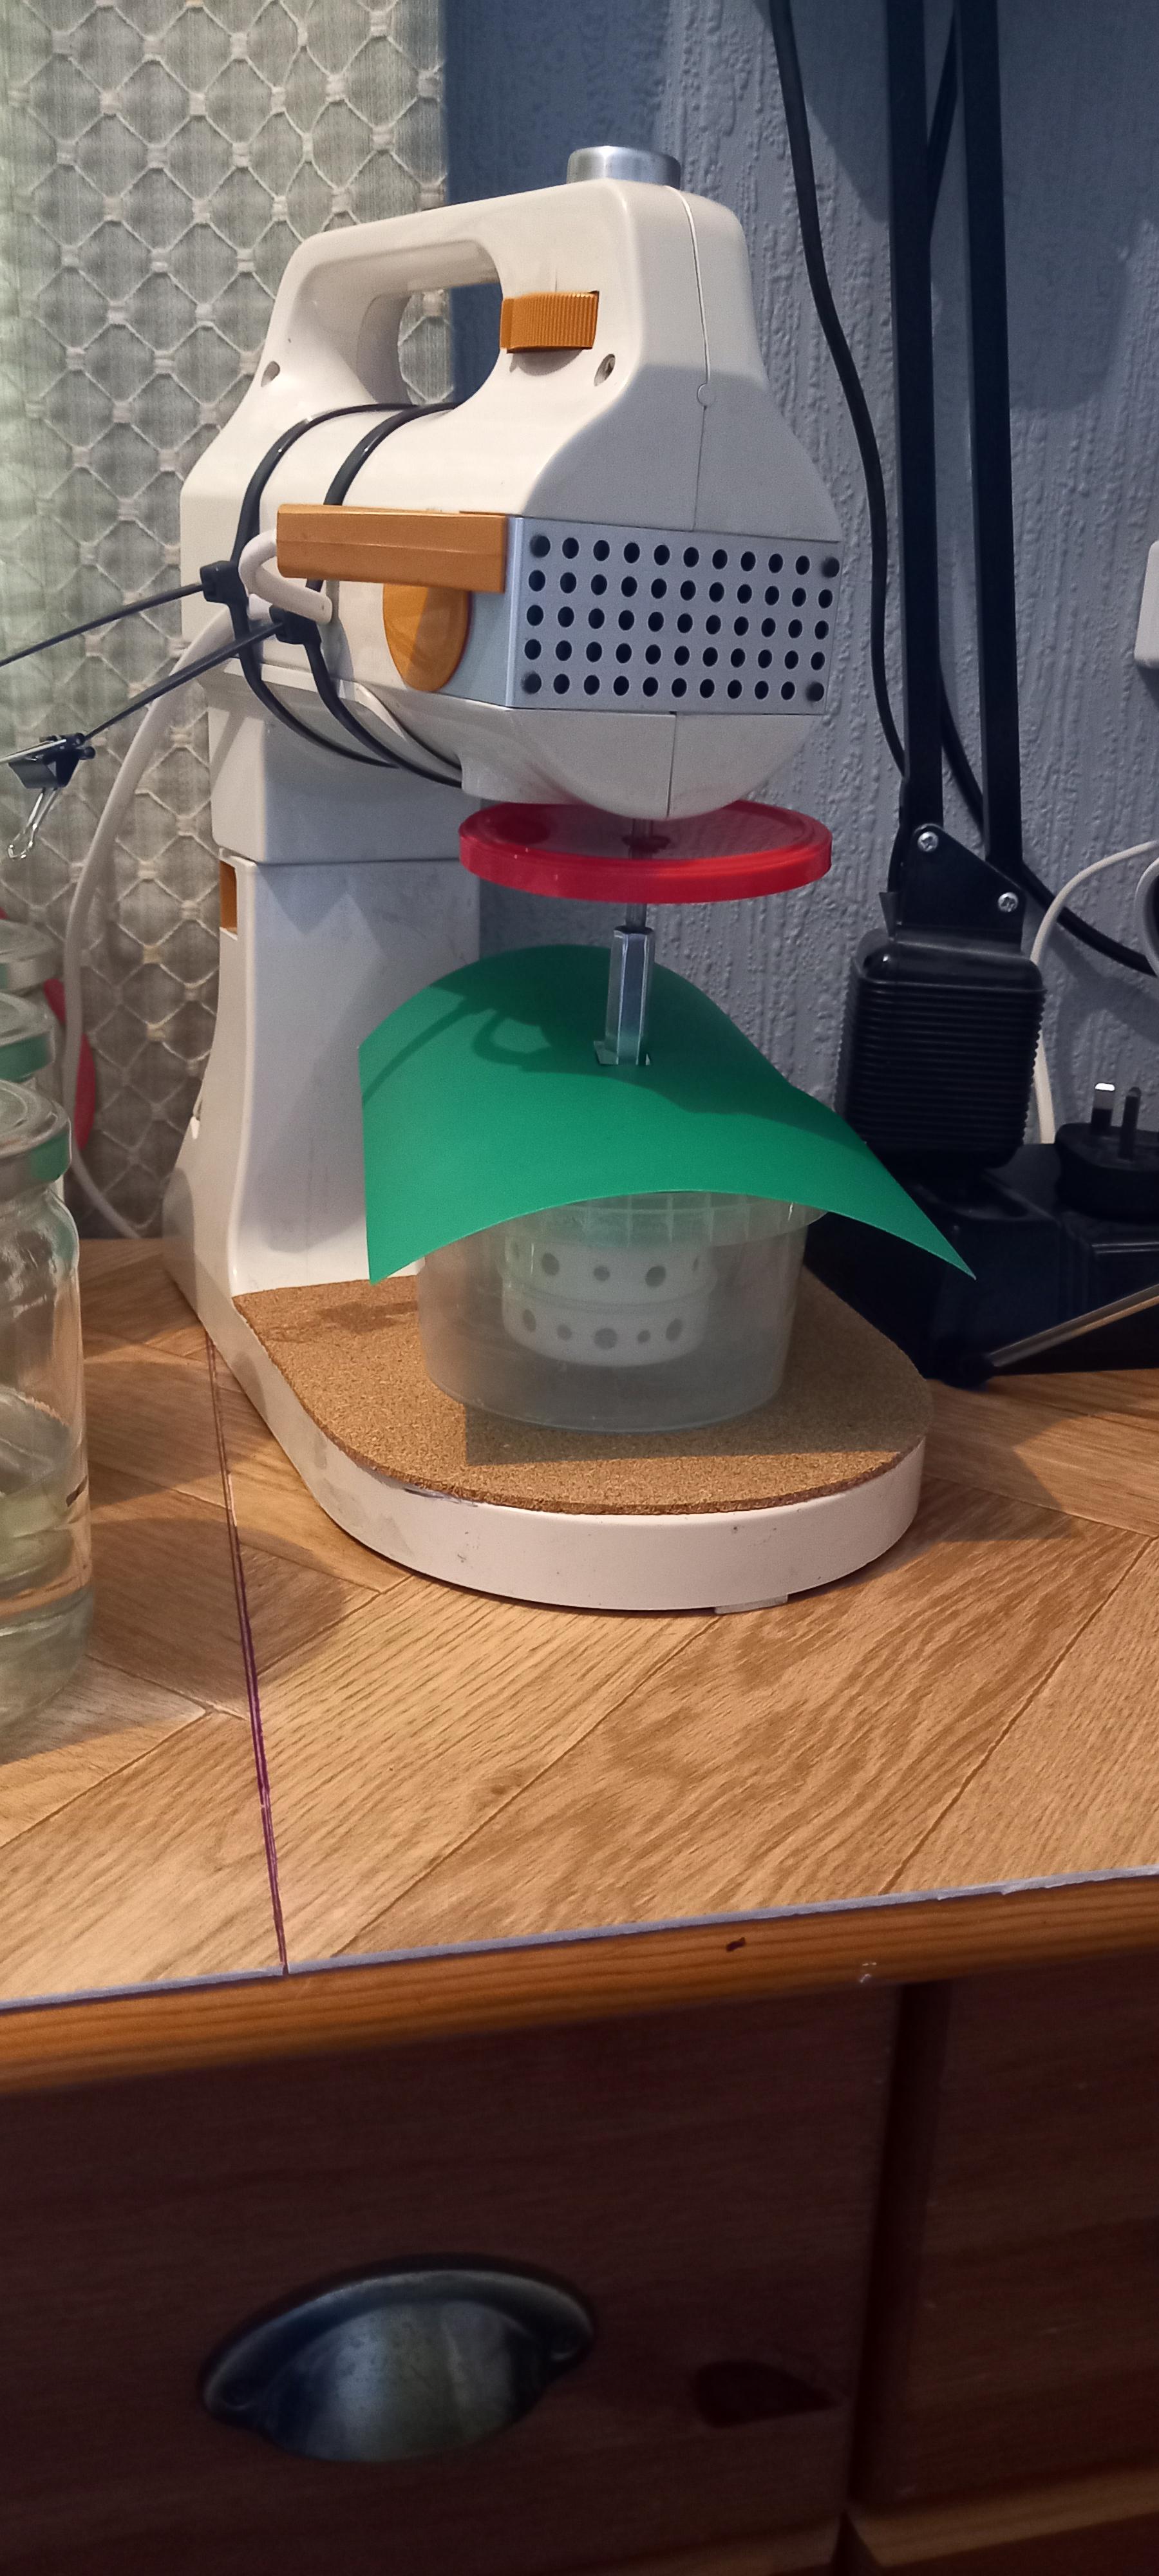
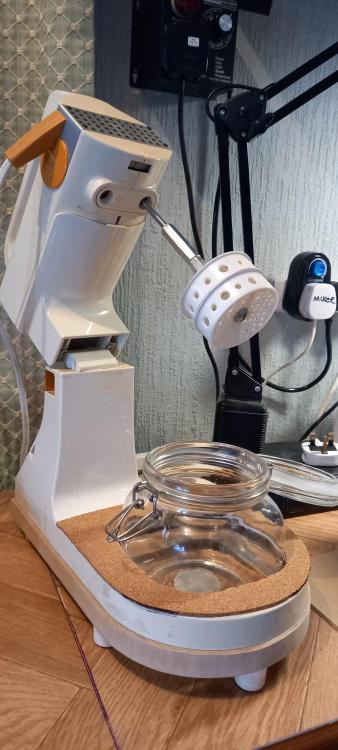
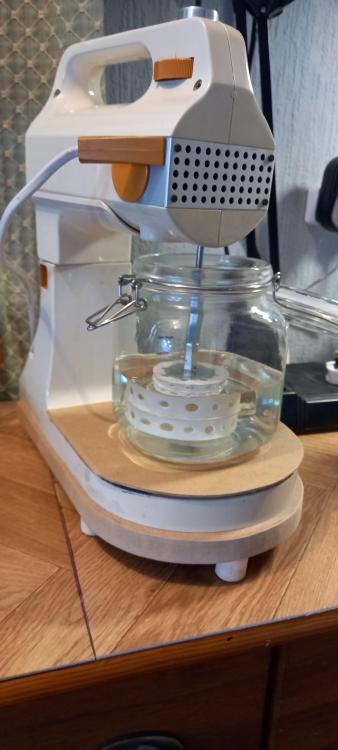
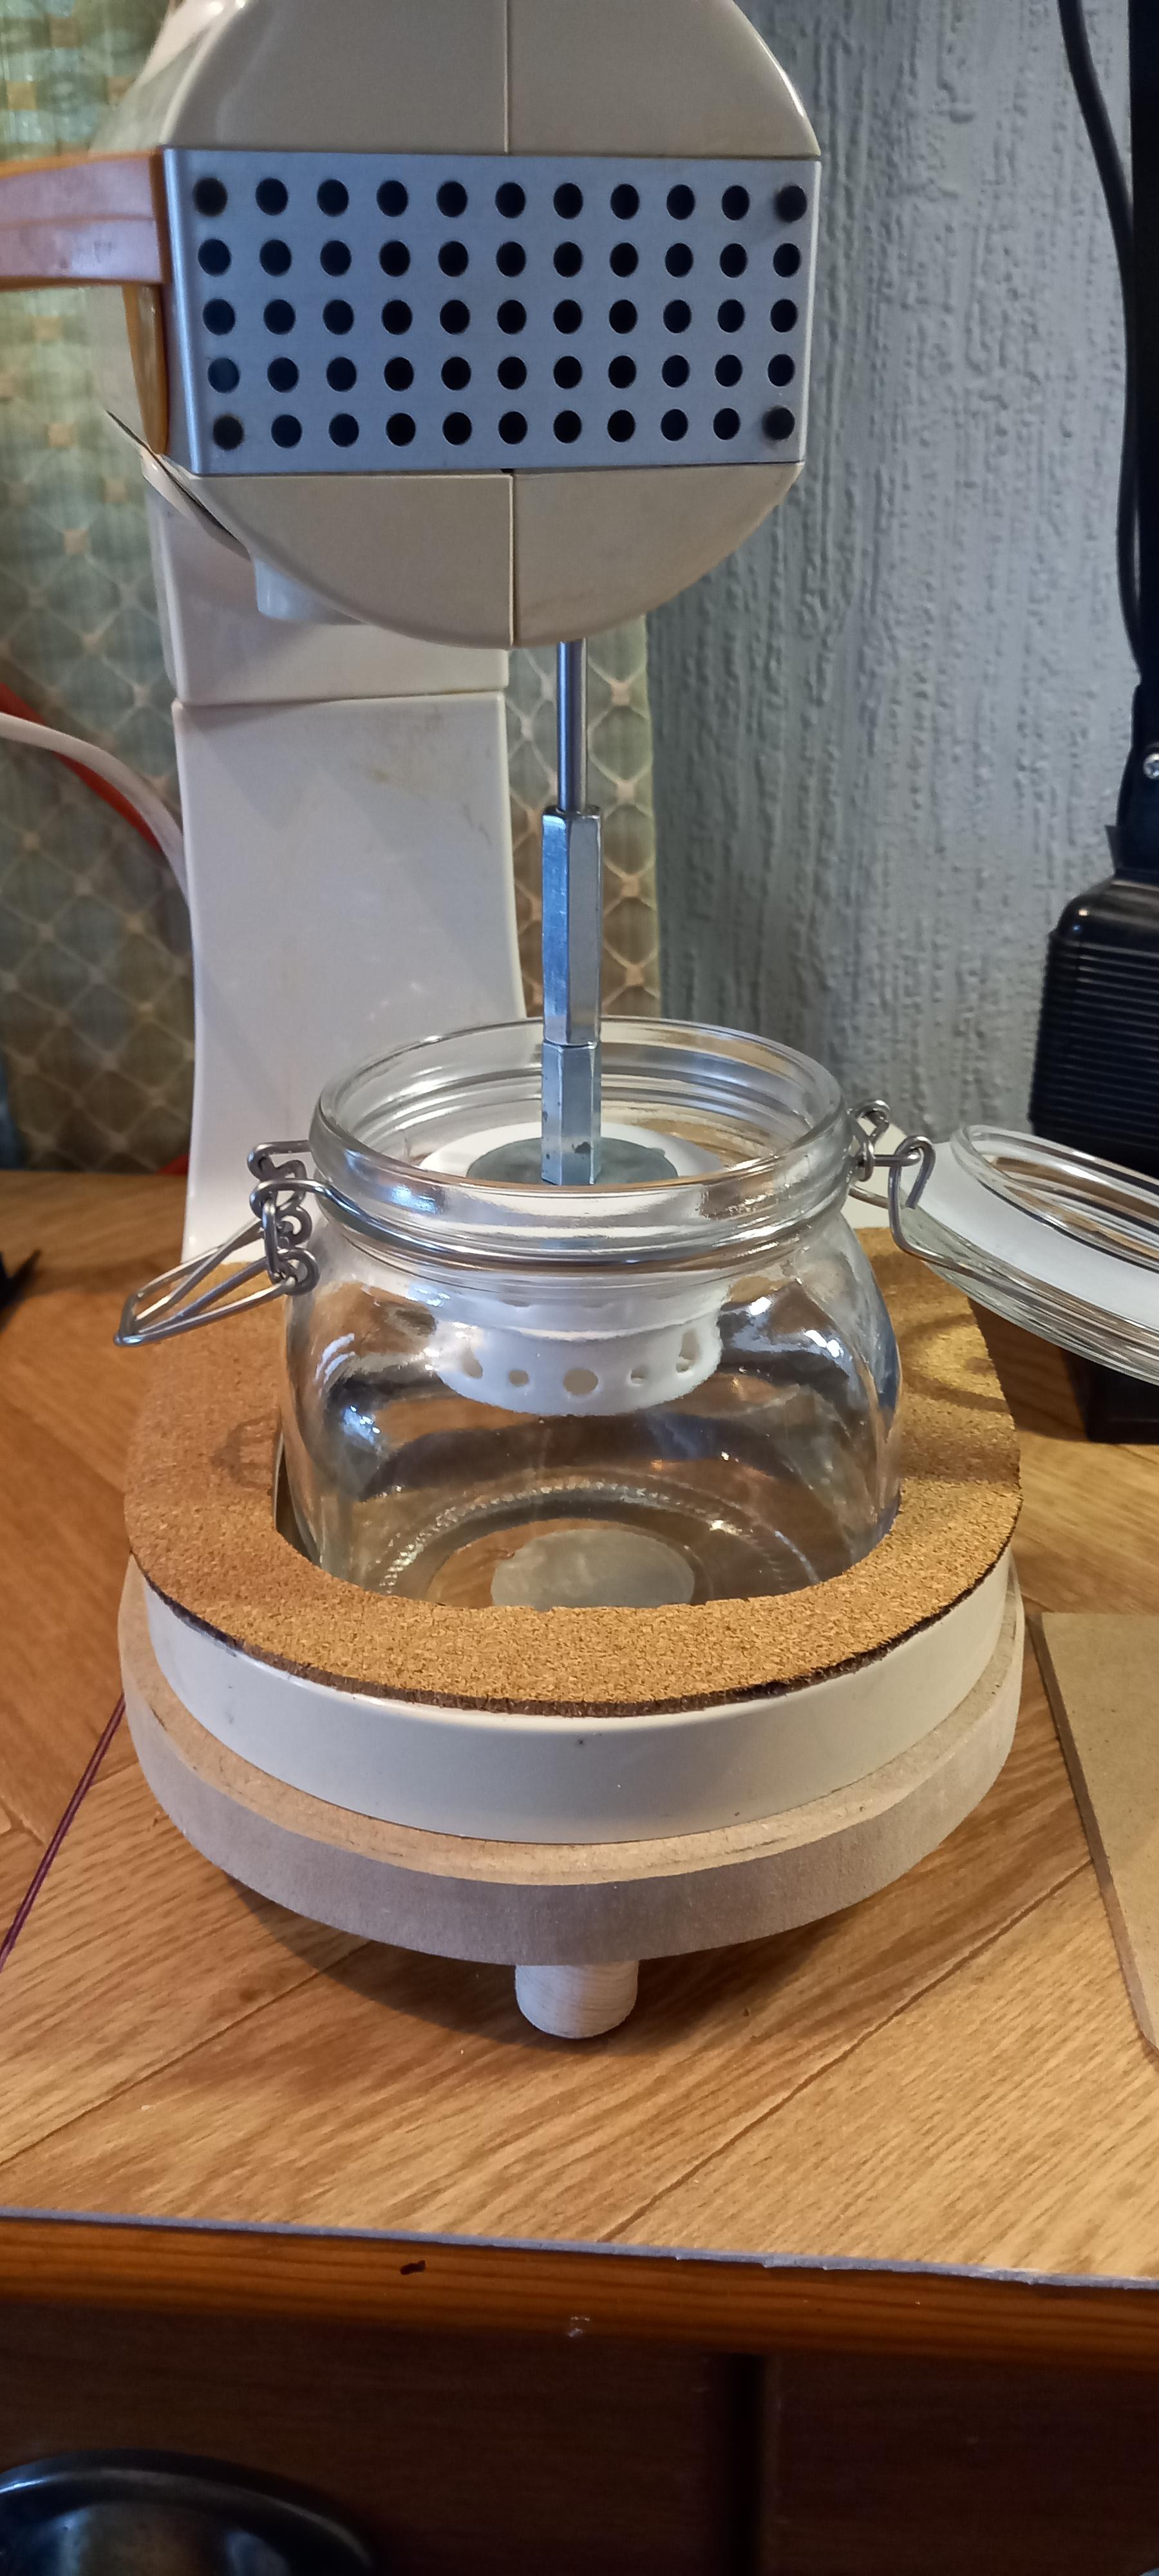
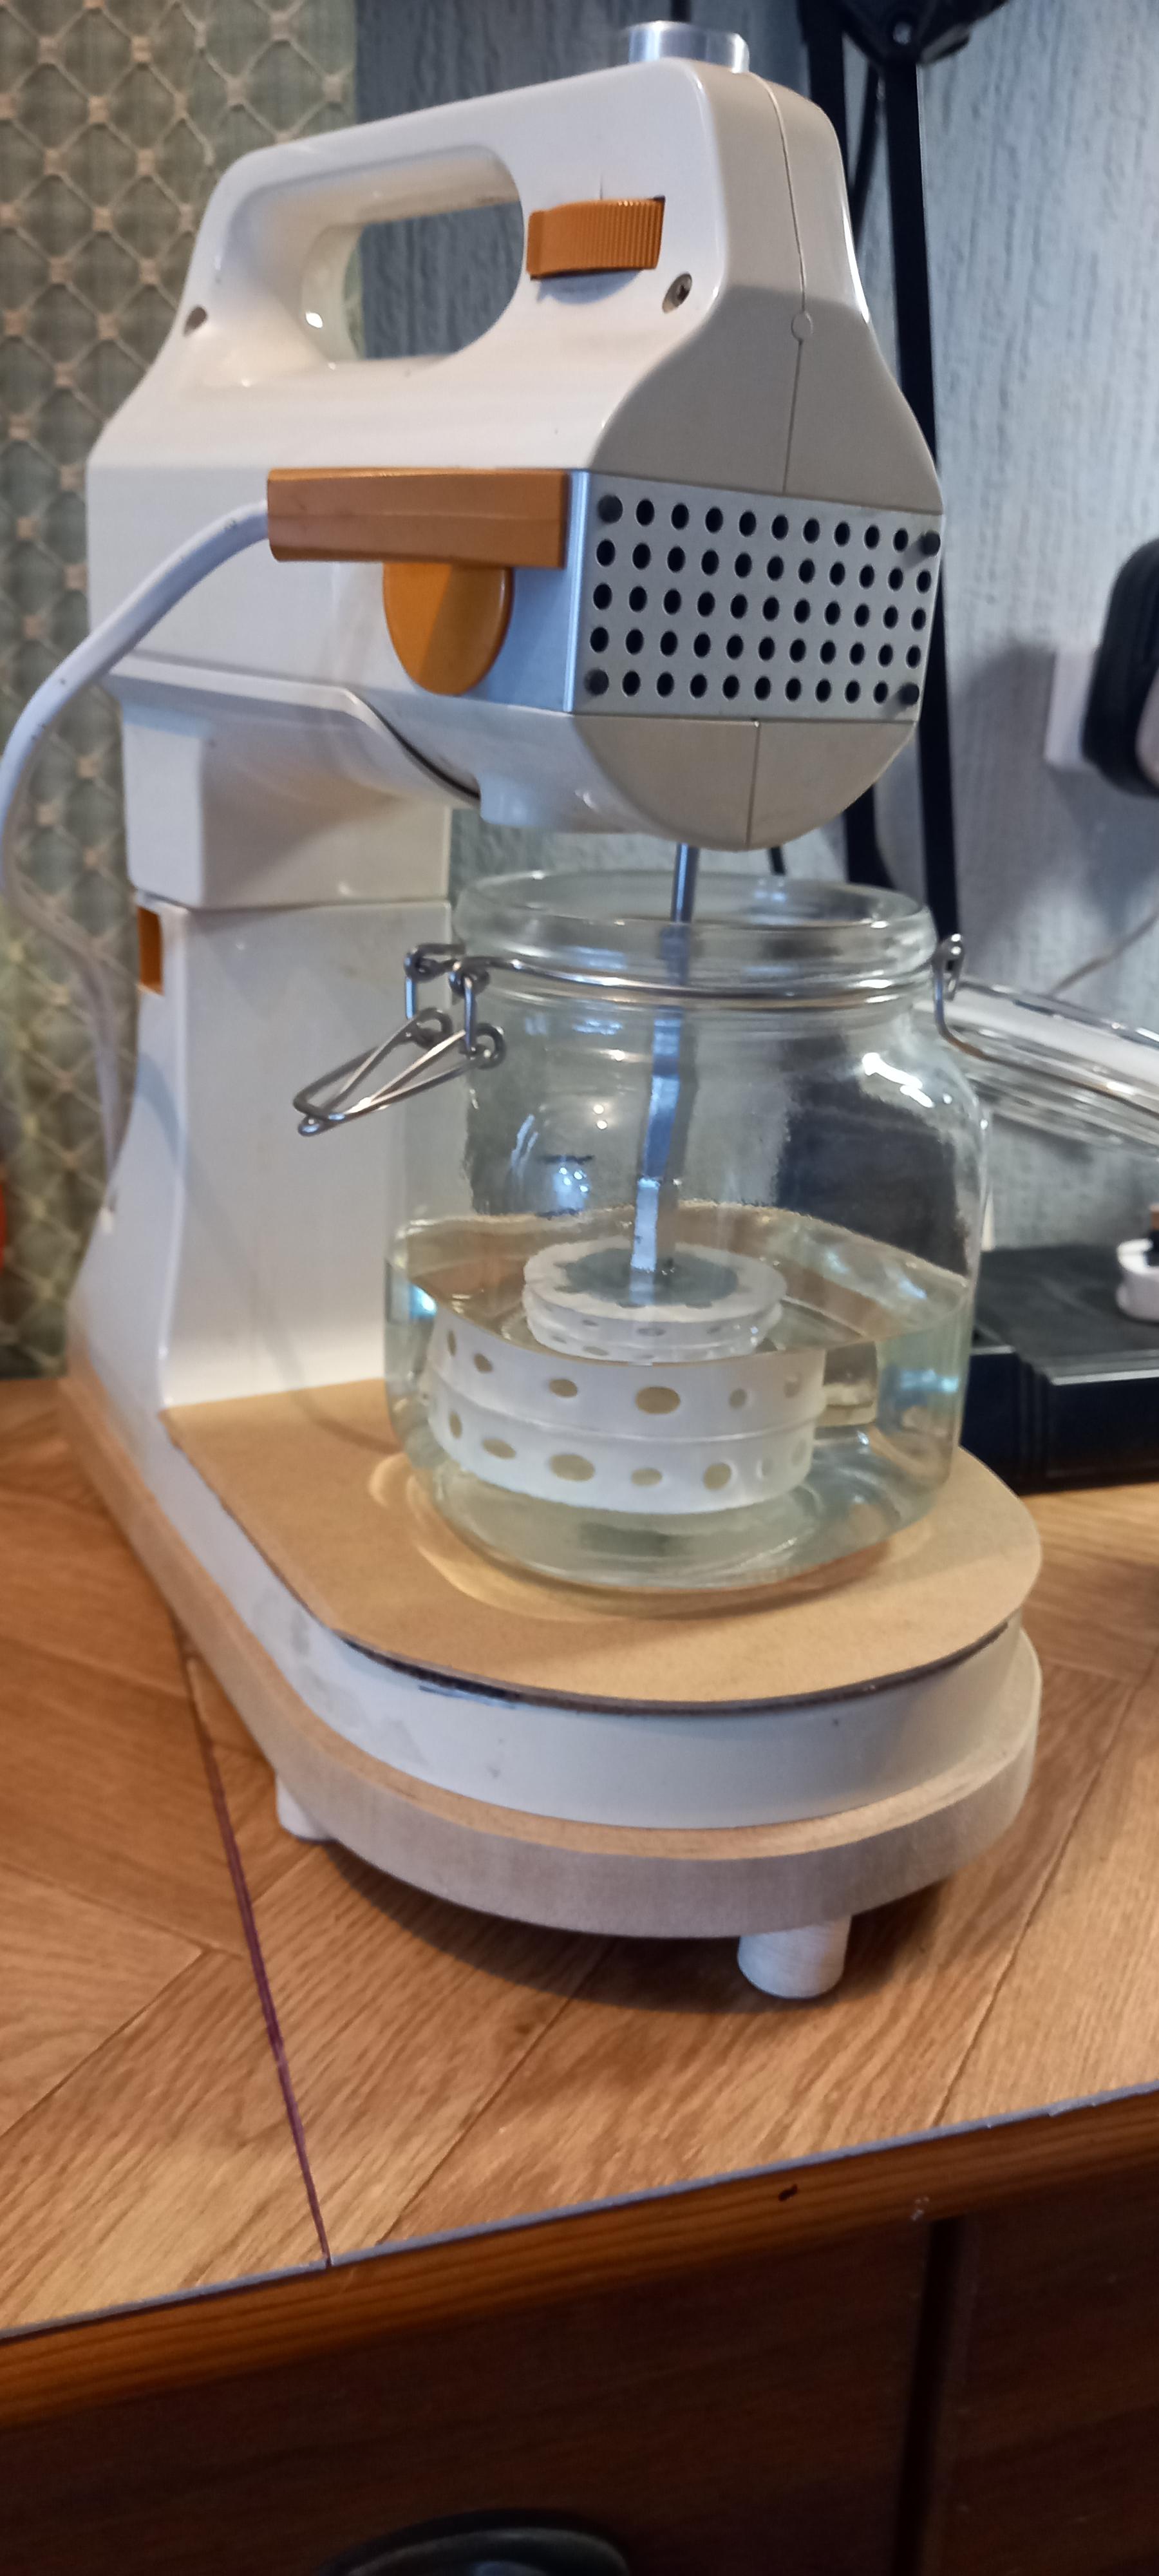
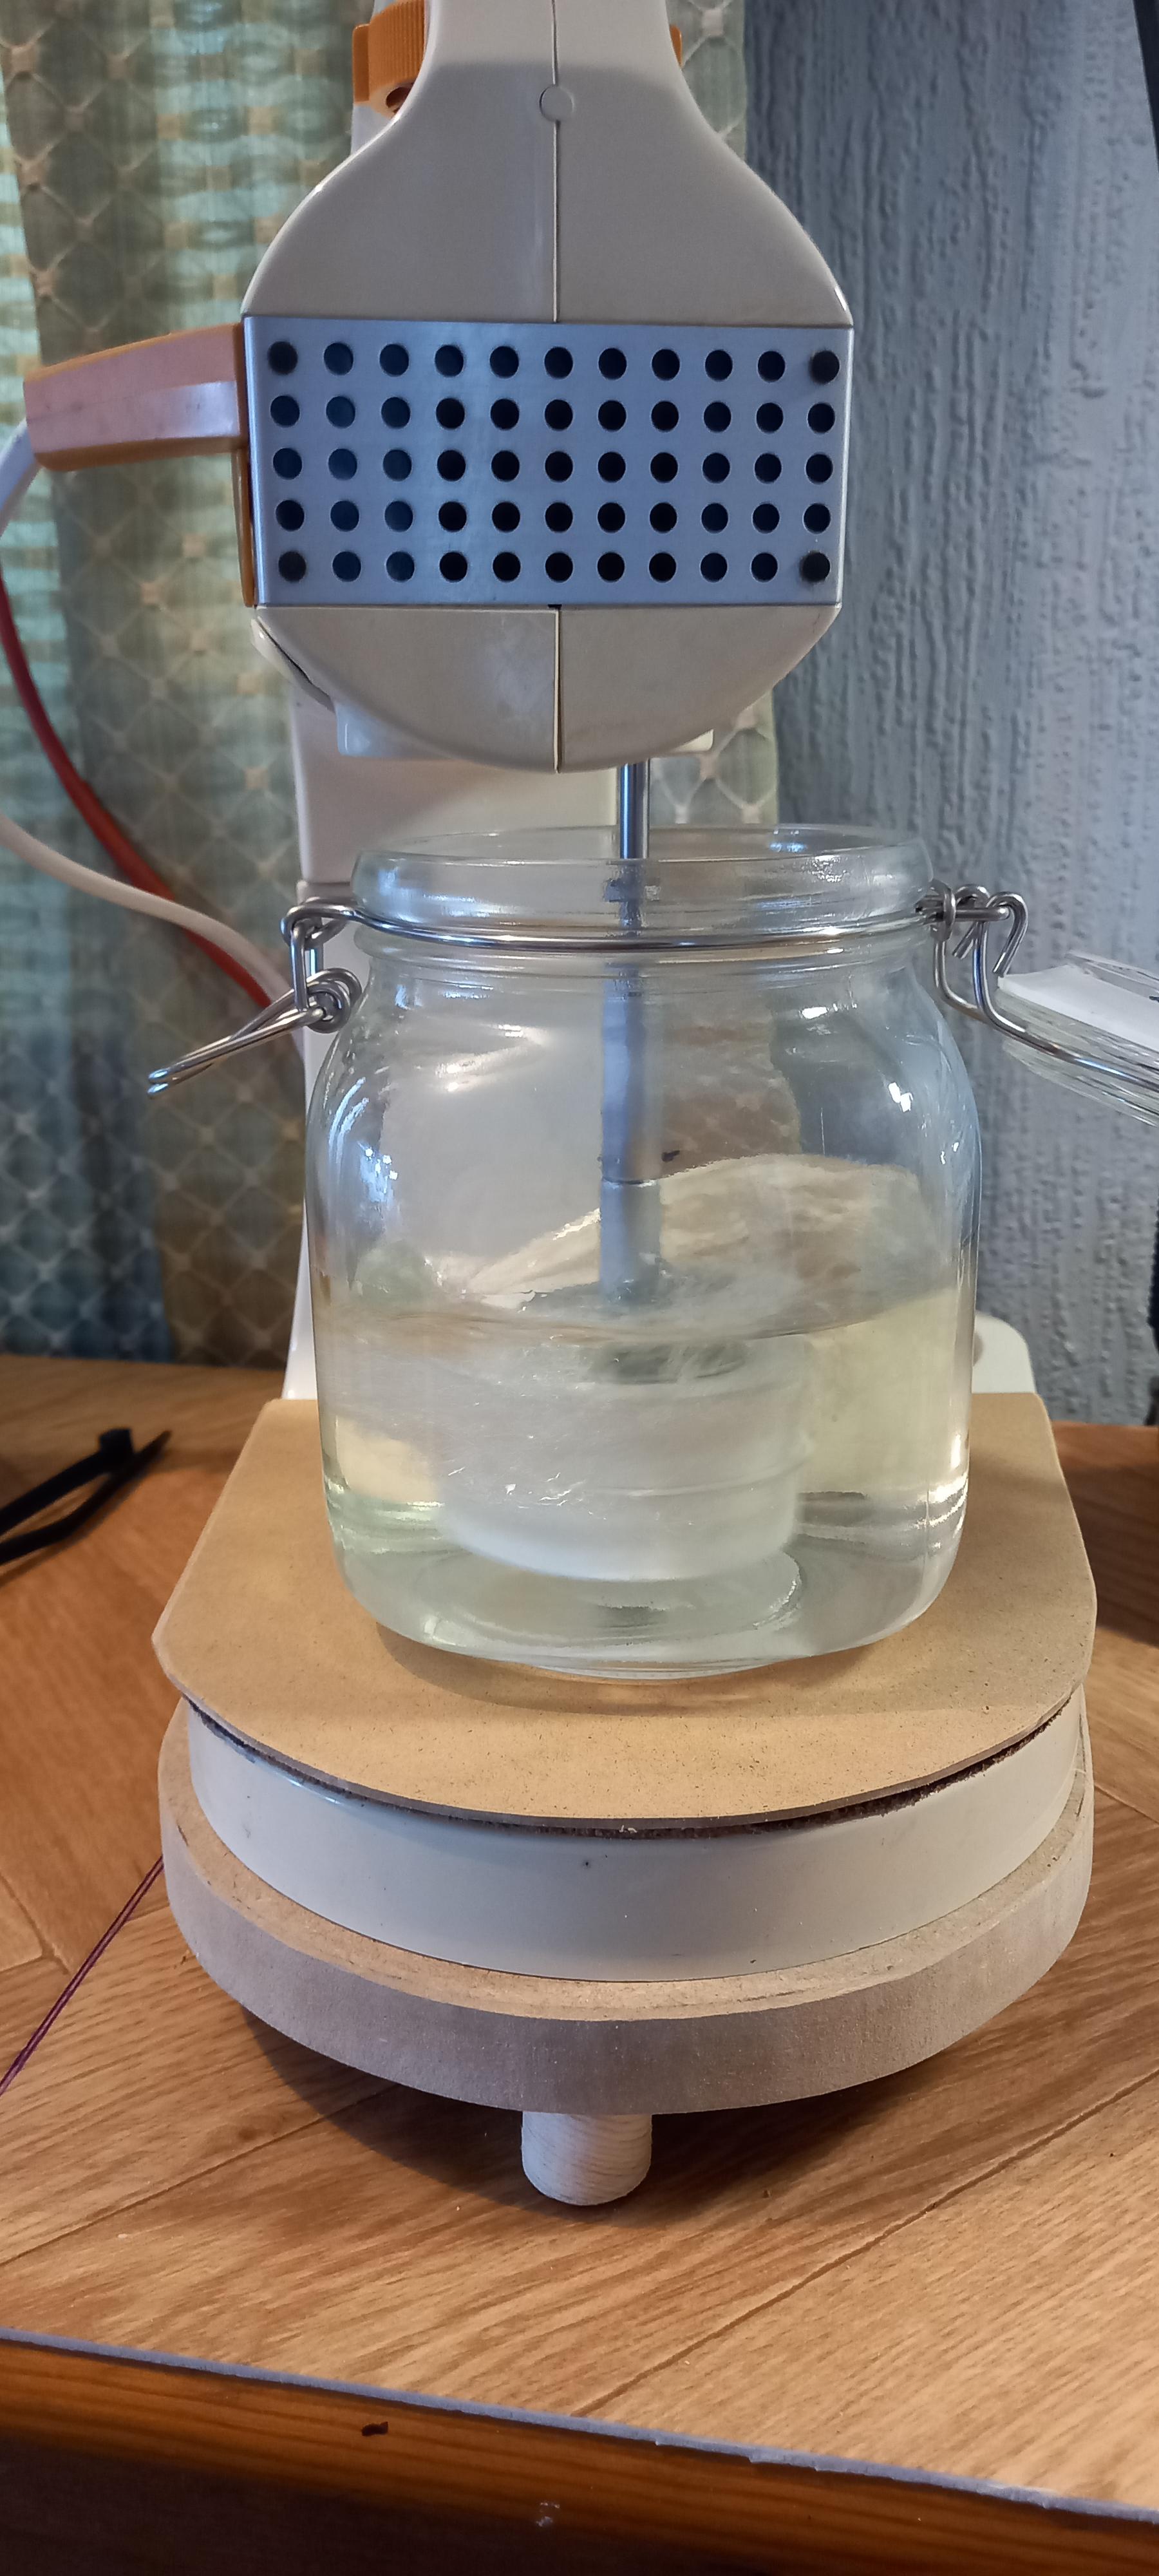
Final mod to the cleaner. The lack of room under the machine meant that i had to swap out the cleaning jars for an empty jar so i could spin off fluid inbetween cleaner and rinses. Simple solution to this was to drop a hole in the base, add another one and raise it up on some feet for the extra height needed. This way the mixer tilts back and forward and clears the edge of the jar as it exits and enters. An mdf plate slips under the jar so the fluid can cover the basket. Very simple and effective, no messing with knobs to raise and lower baskets. A very easy appliance adaptation that has provided me with a good controllable cleaner for under 20 quid. Lets get making something useful chaps .


 2 points
 -
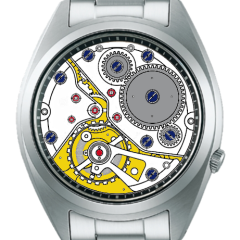
This is a companion of the 404 club where watchmakers are encouraged to squeeze every bit of value from those 'less loved' watches they find for less than £10.10..... why £10.10, this was the value and currency voted on by the members who already submit to the existing 404 club, but are finding it more and more difficult to find watches at this price point due to inflation and also wish to open this bit of tun up to more participants. The inspiration for the value of £10.10 comes from the hand position of most of the watches you see in pictures:, example below This is all meant to be a bit of fun and allow you to hone your skills and show off your talent on these watches to your peers here on this forum before attempting to use them on something that will cause tears! So Here are the rules: Watch purchase value to be less than or equal to £10.10 (or equivalent in your currency at the time of purchase) Reasonable shipping and spares are excluded from the £10.10 Before and after pictures are required (if possible) Lot purchases are allowed e.g. lot of 10 watches for £100 = £10 per watch Have fun and don't take it too seriously Over to you!
 1 point
 -
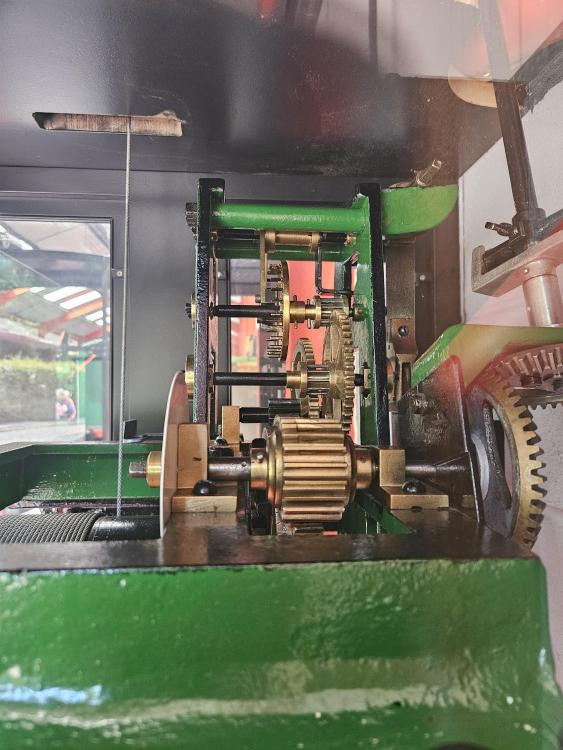
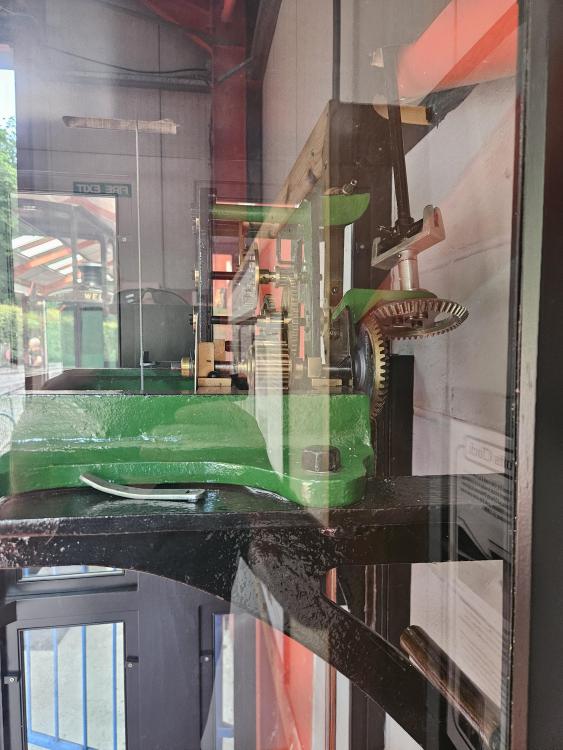
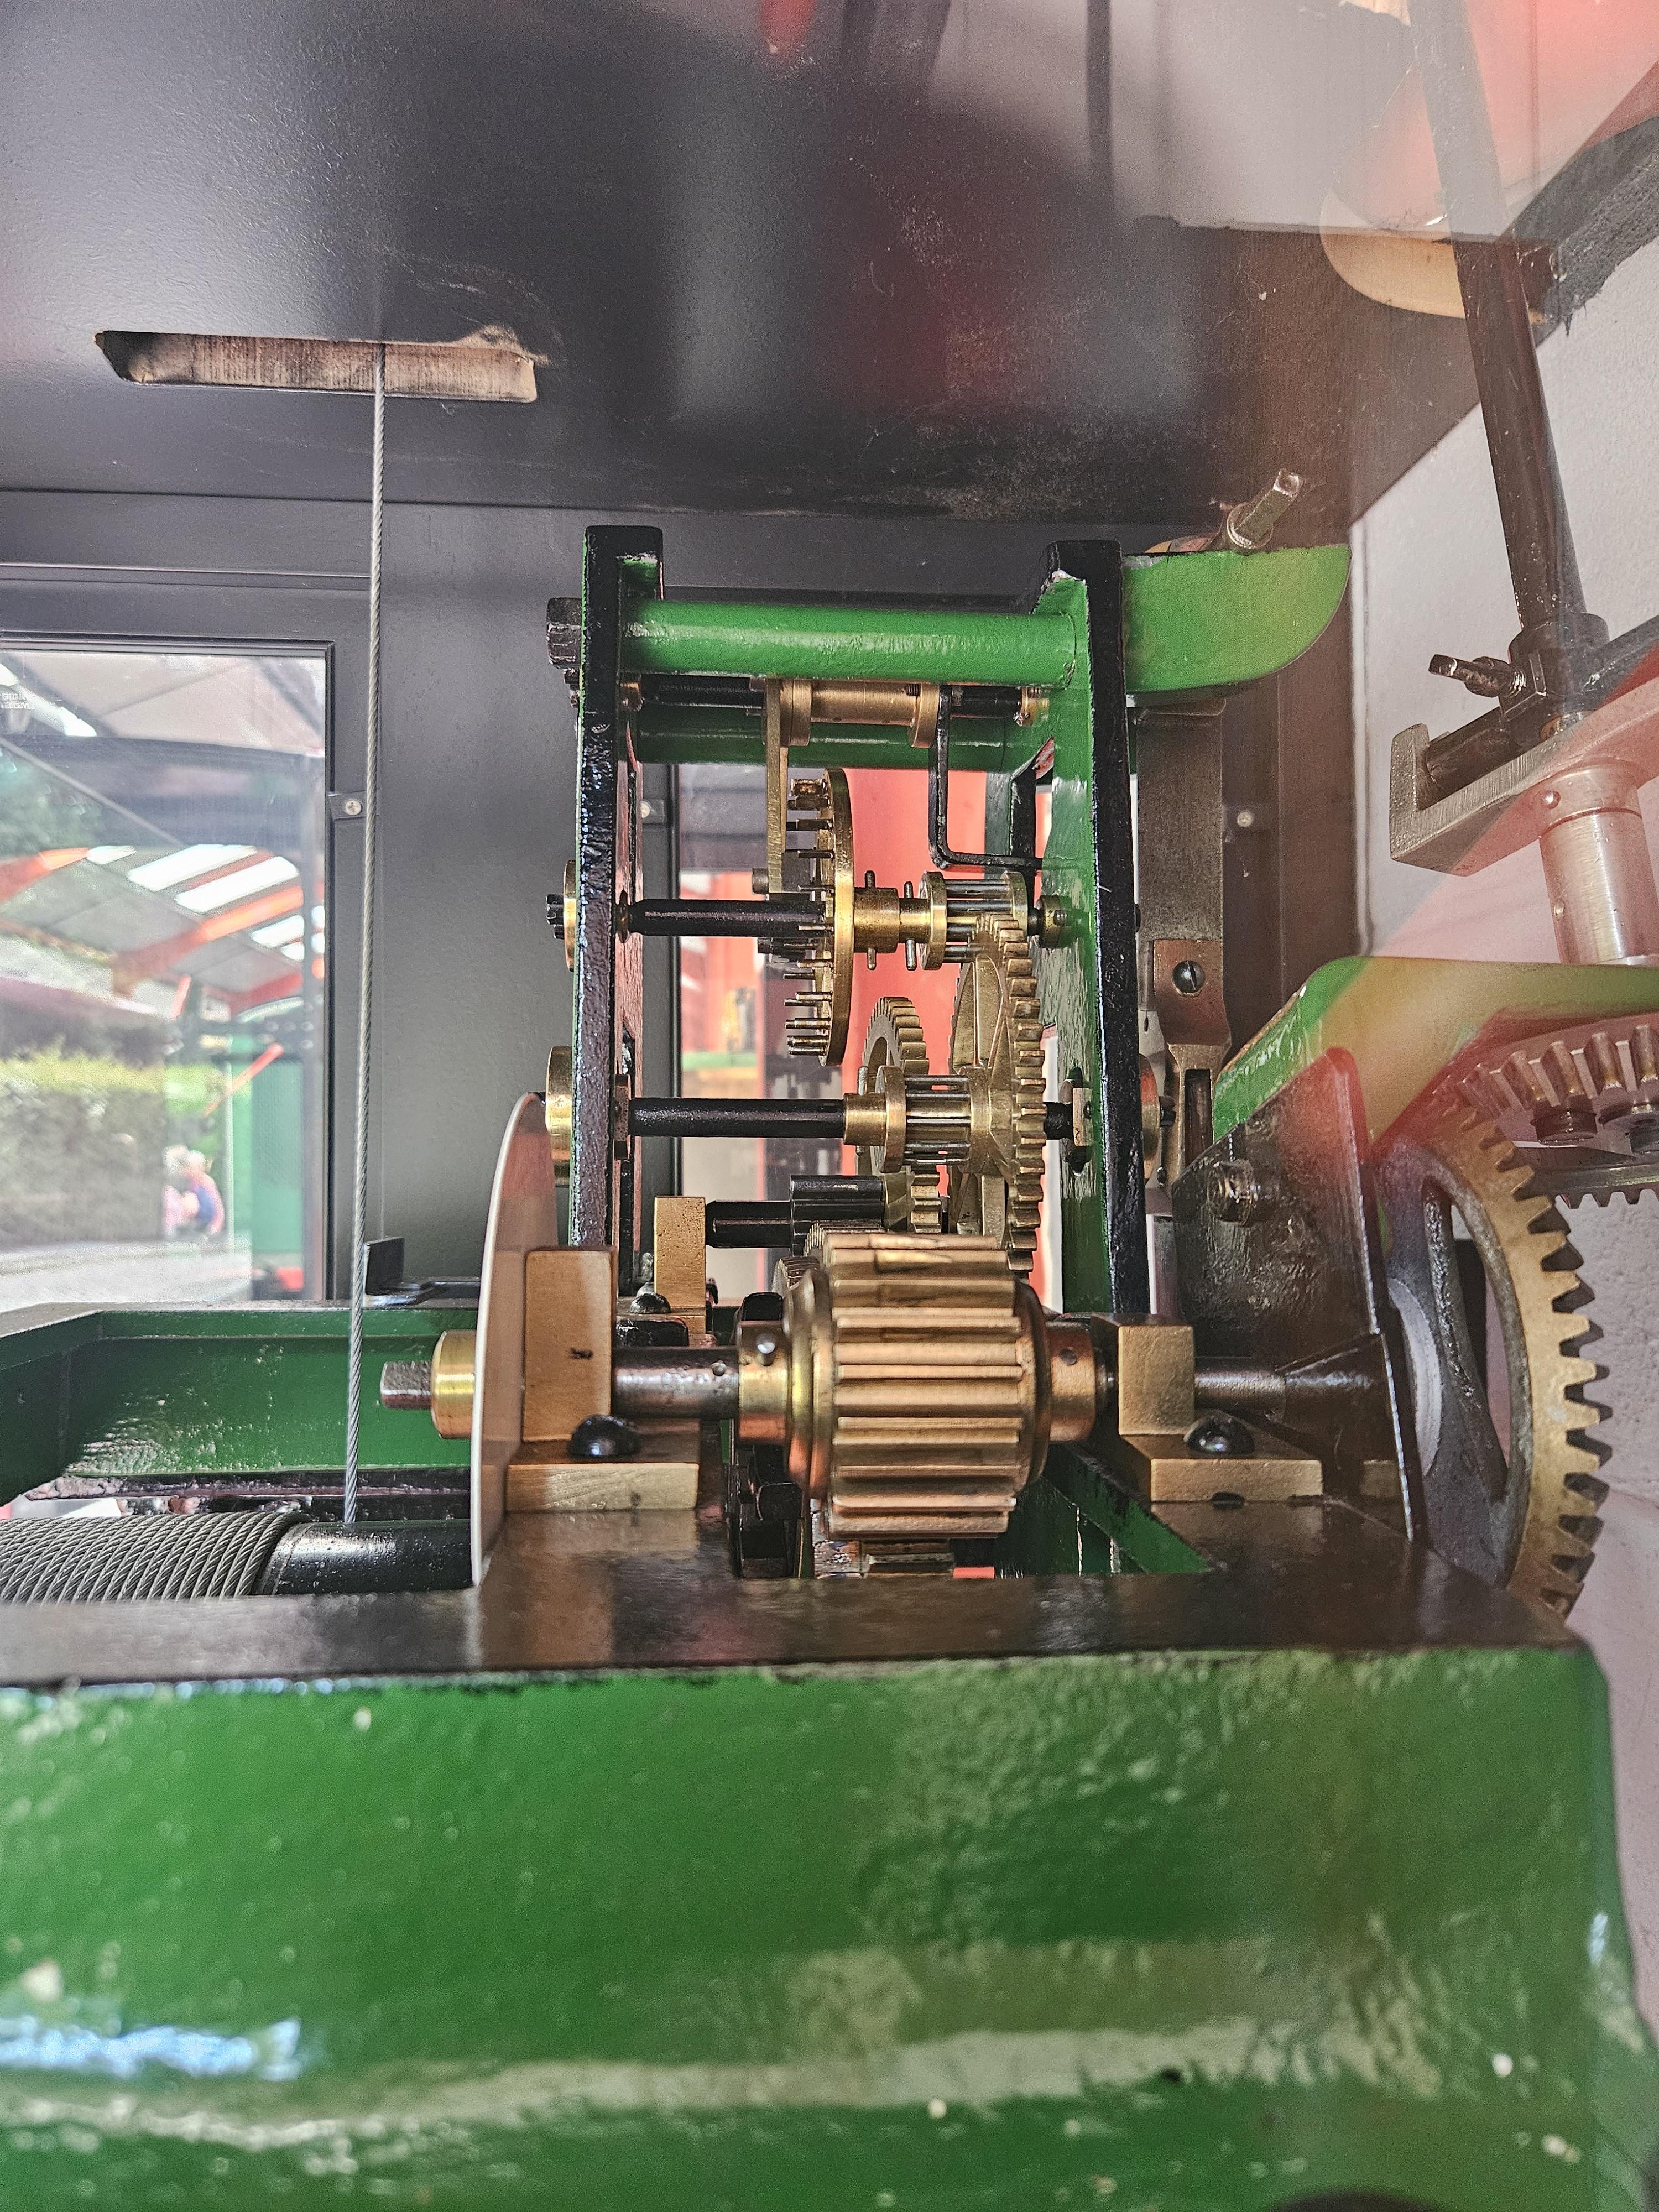
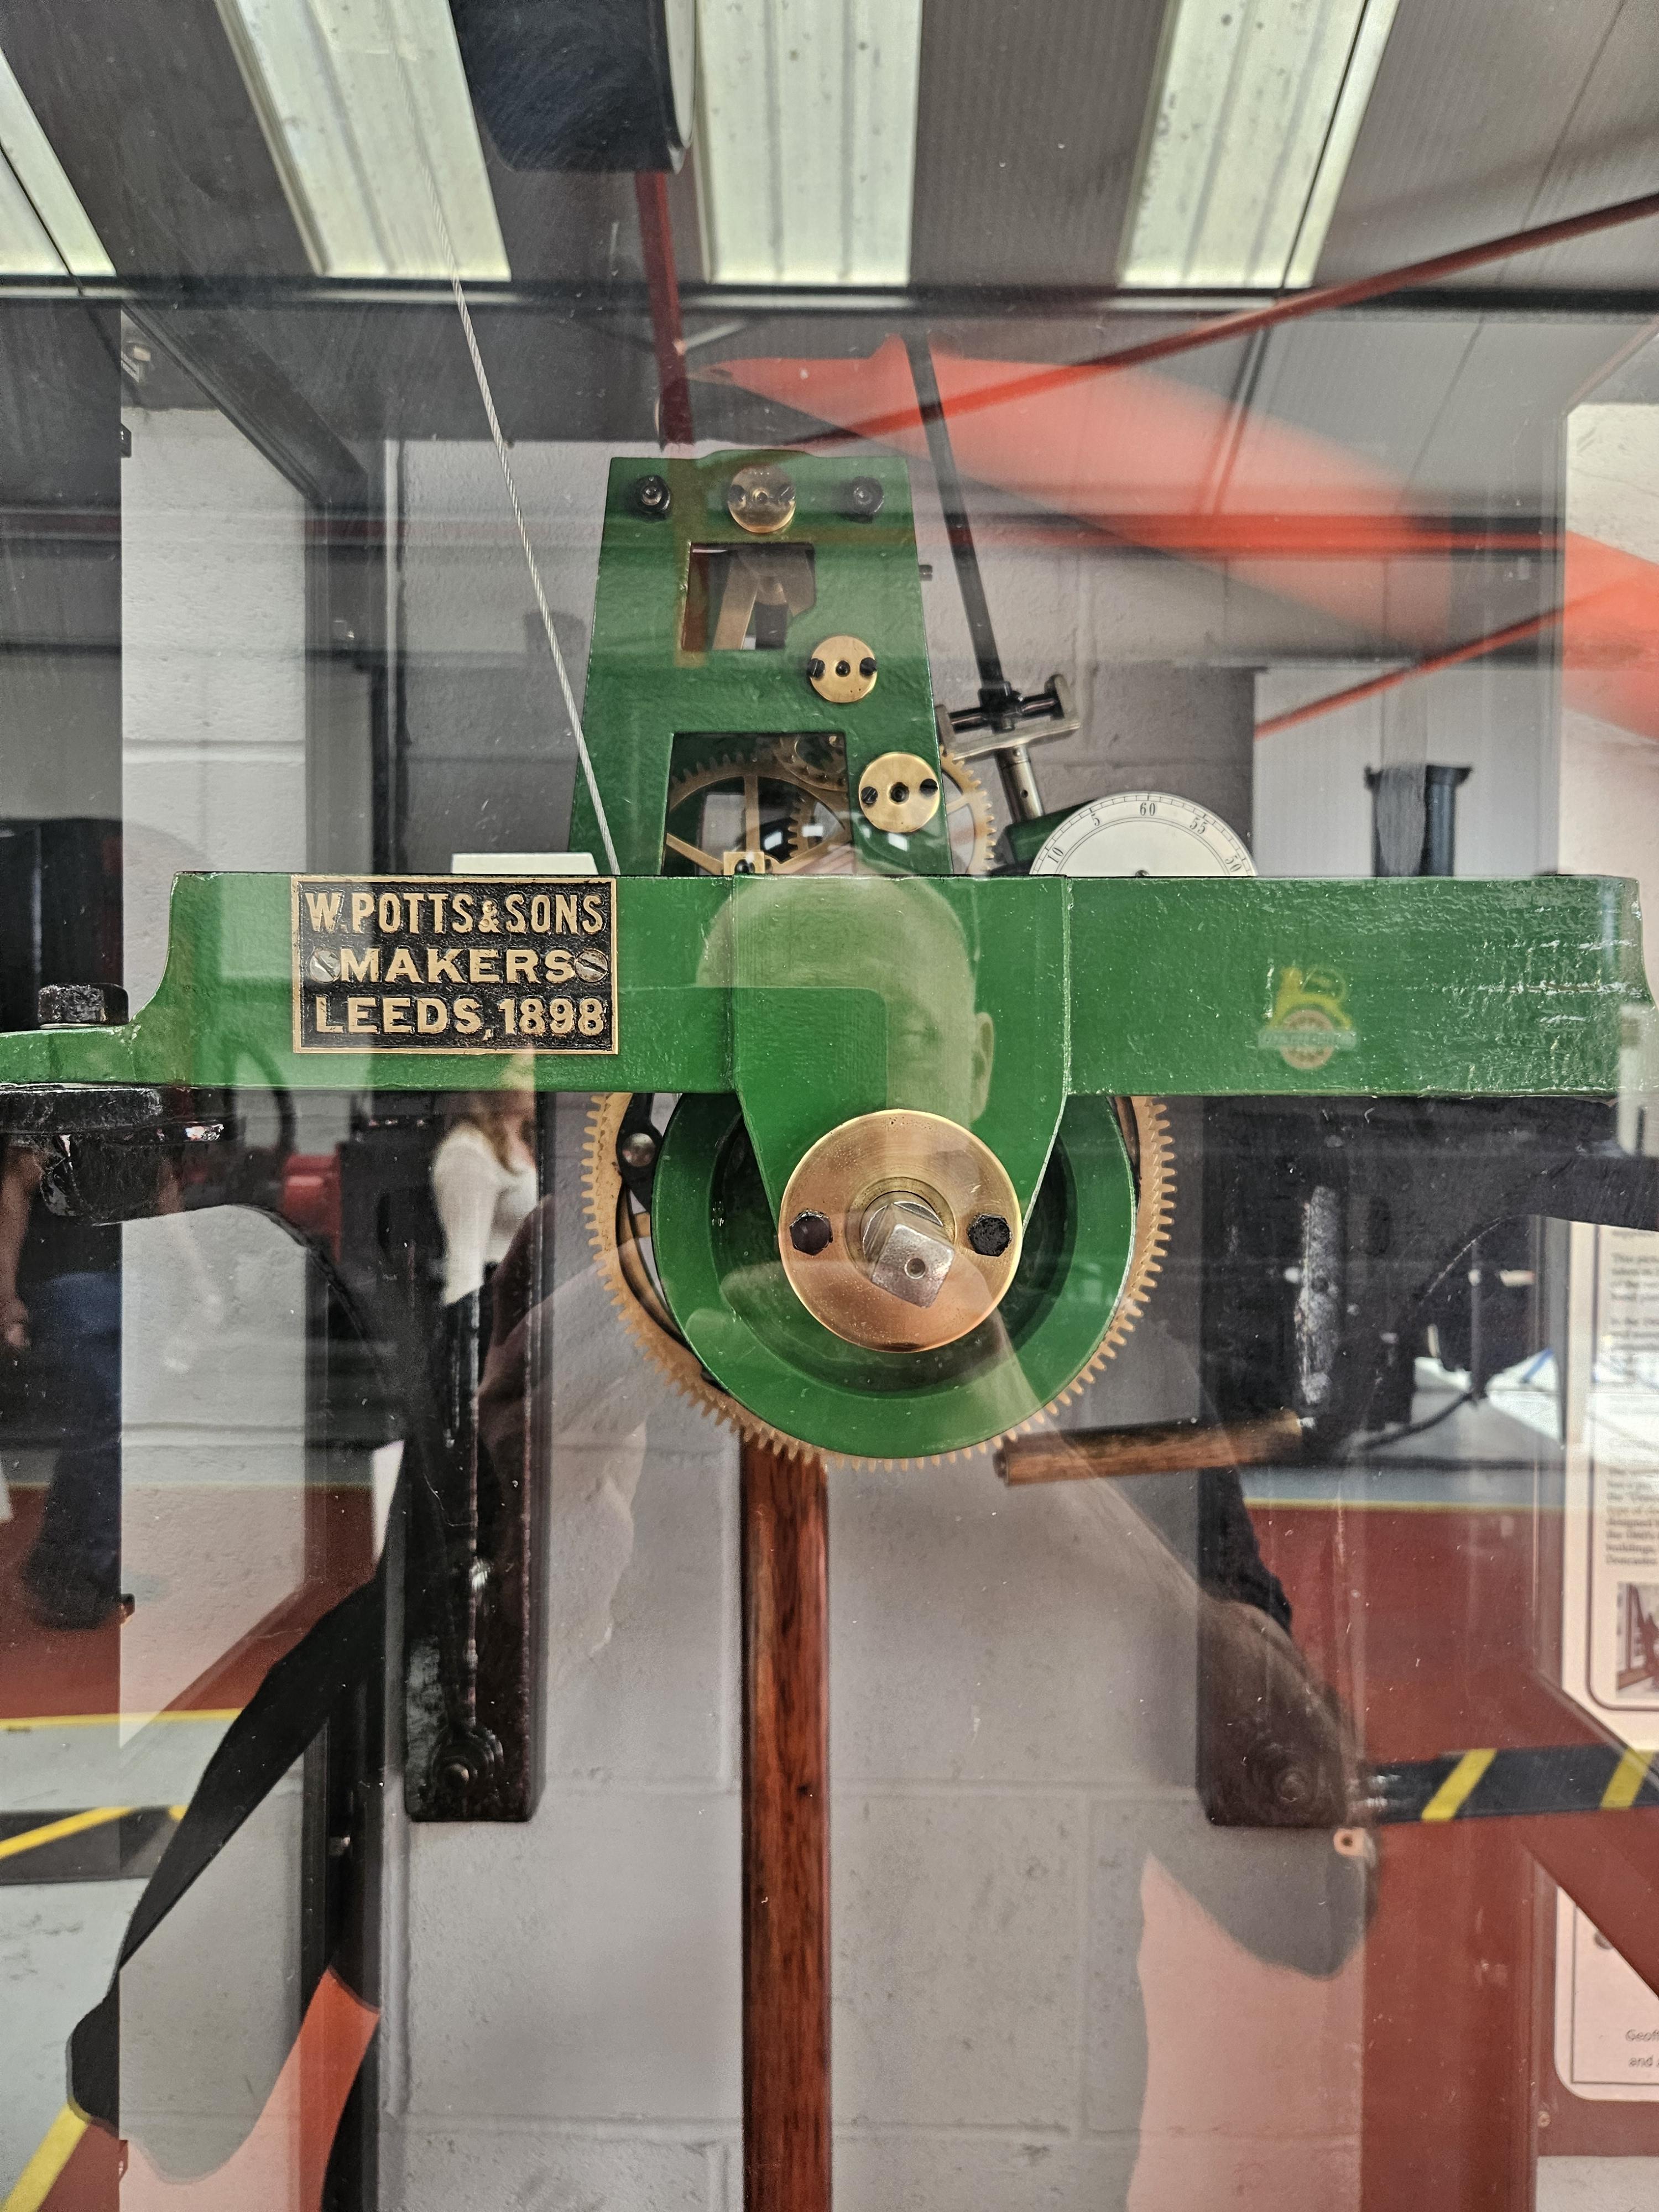
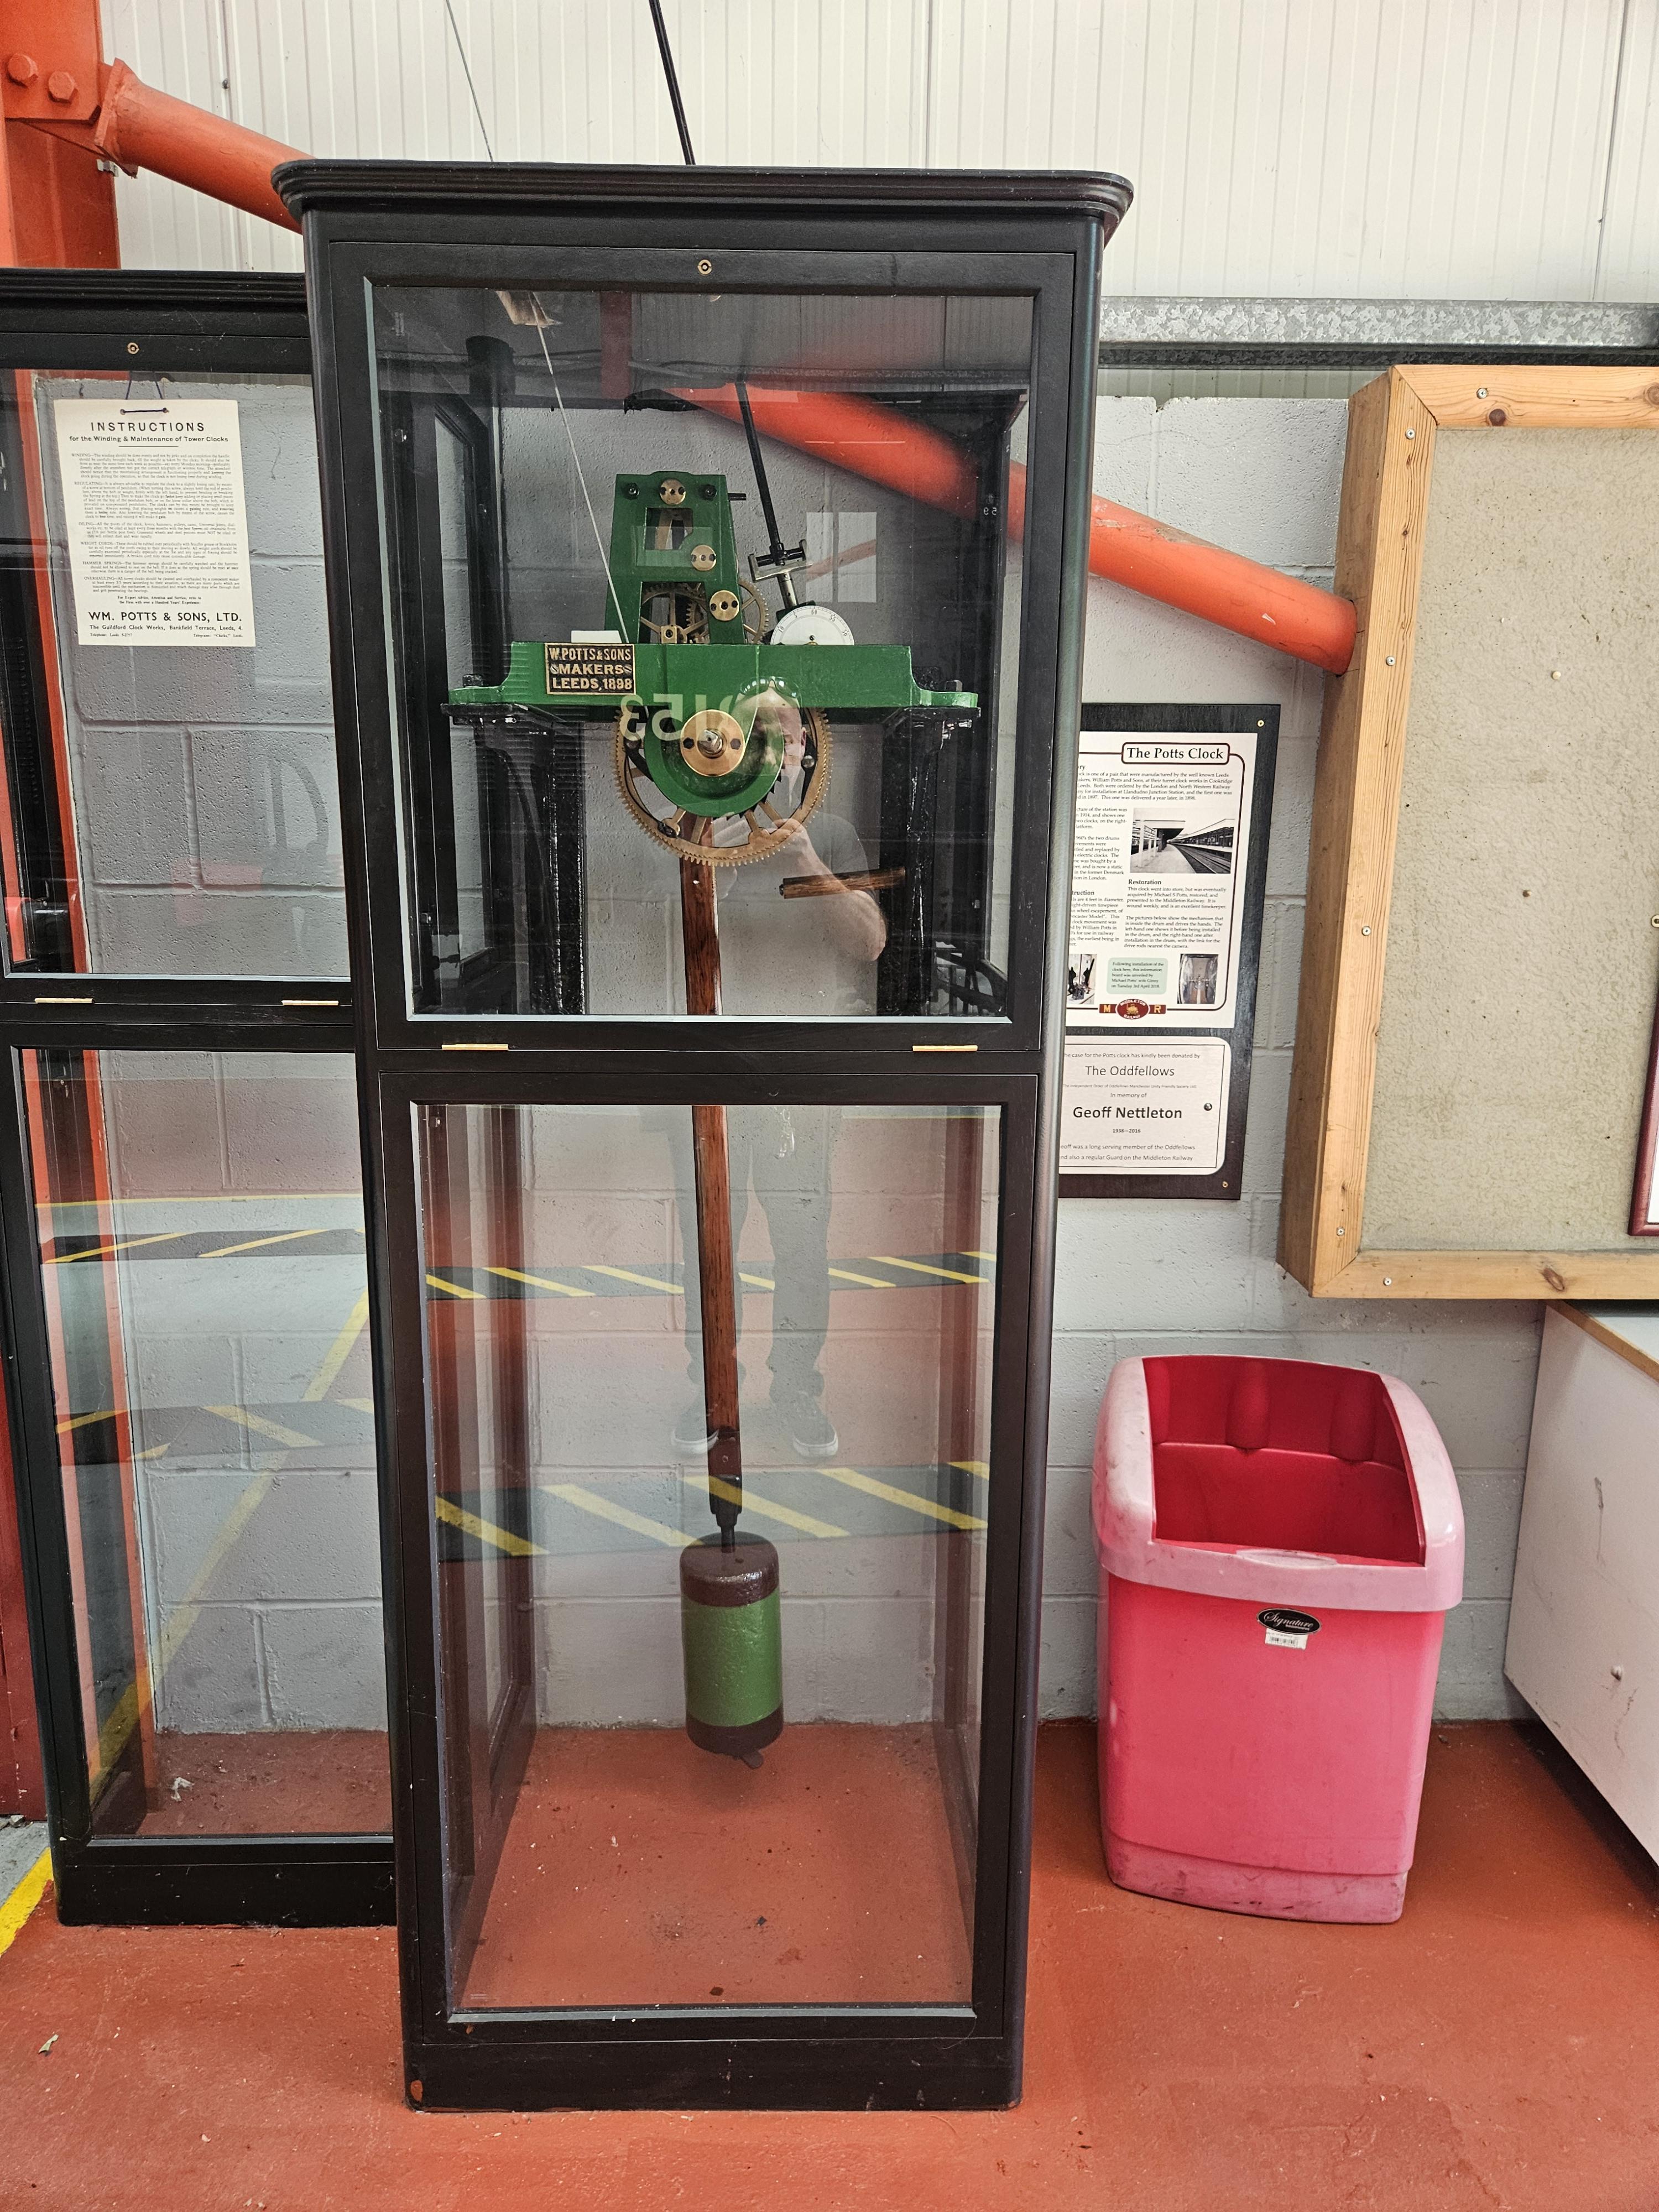
Hello all. I saw this today and thought you would like some photos.

 1 point
 -
Potts of Leeds. Lower Briggate always had a clock hung out side the shop. Iconic probably long gone The last time I spoke to one of their guys in Osset they had all but gone electric/electronic.1 point
-
They made turret clocks. This has a pin lever escapement. It's a show piece1 point
-
I have serviced a few Longines and they are top, quality. Certainly worth servicing.1 point
-
Lovely! Thanks for the pics.1 point
-
I really thank you all for your answers. My friend is very happy about that and he is determined to have it serviced. As for me, it was a great joy to handle such a nice time piece and to help my friend.1 point
-
I just used a punch, placed the s/s on a block of wood and made the hole, you might have to remove the bur around the hole with a small file a fine one is best.1 point
-
I'm with @Neverenoughwatches. Looks good.1 point
-
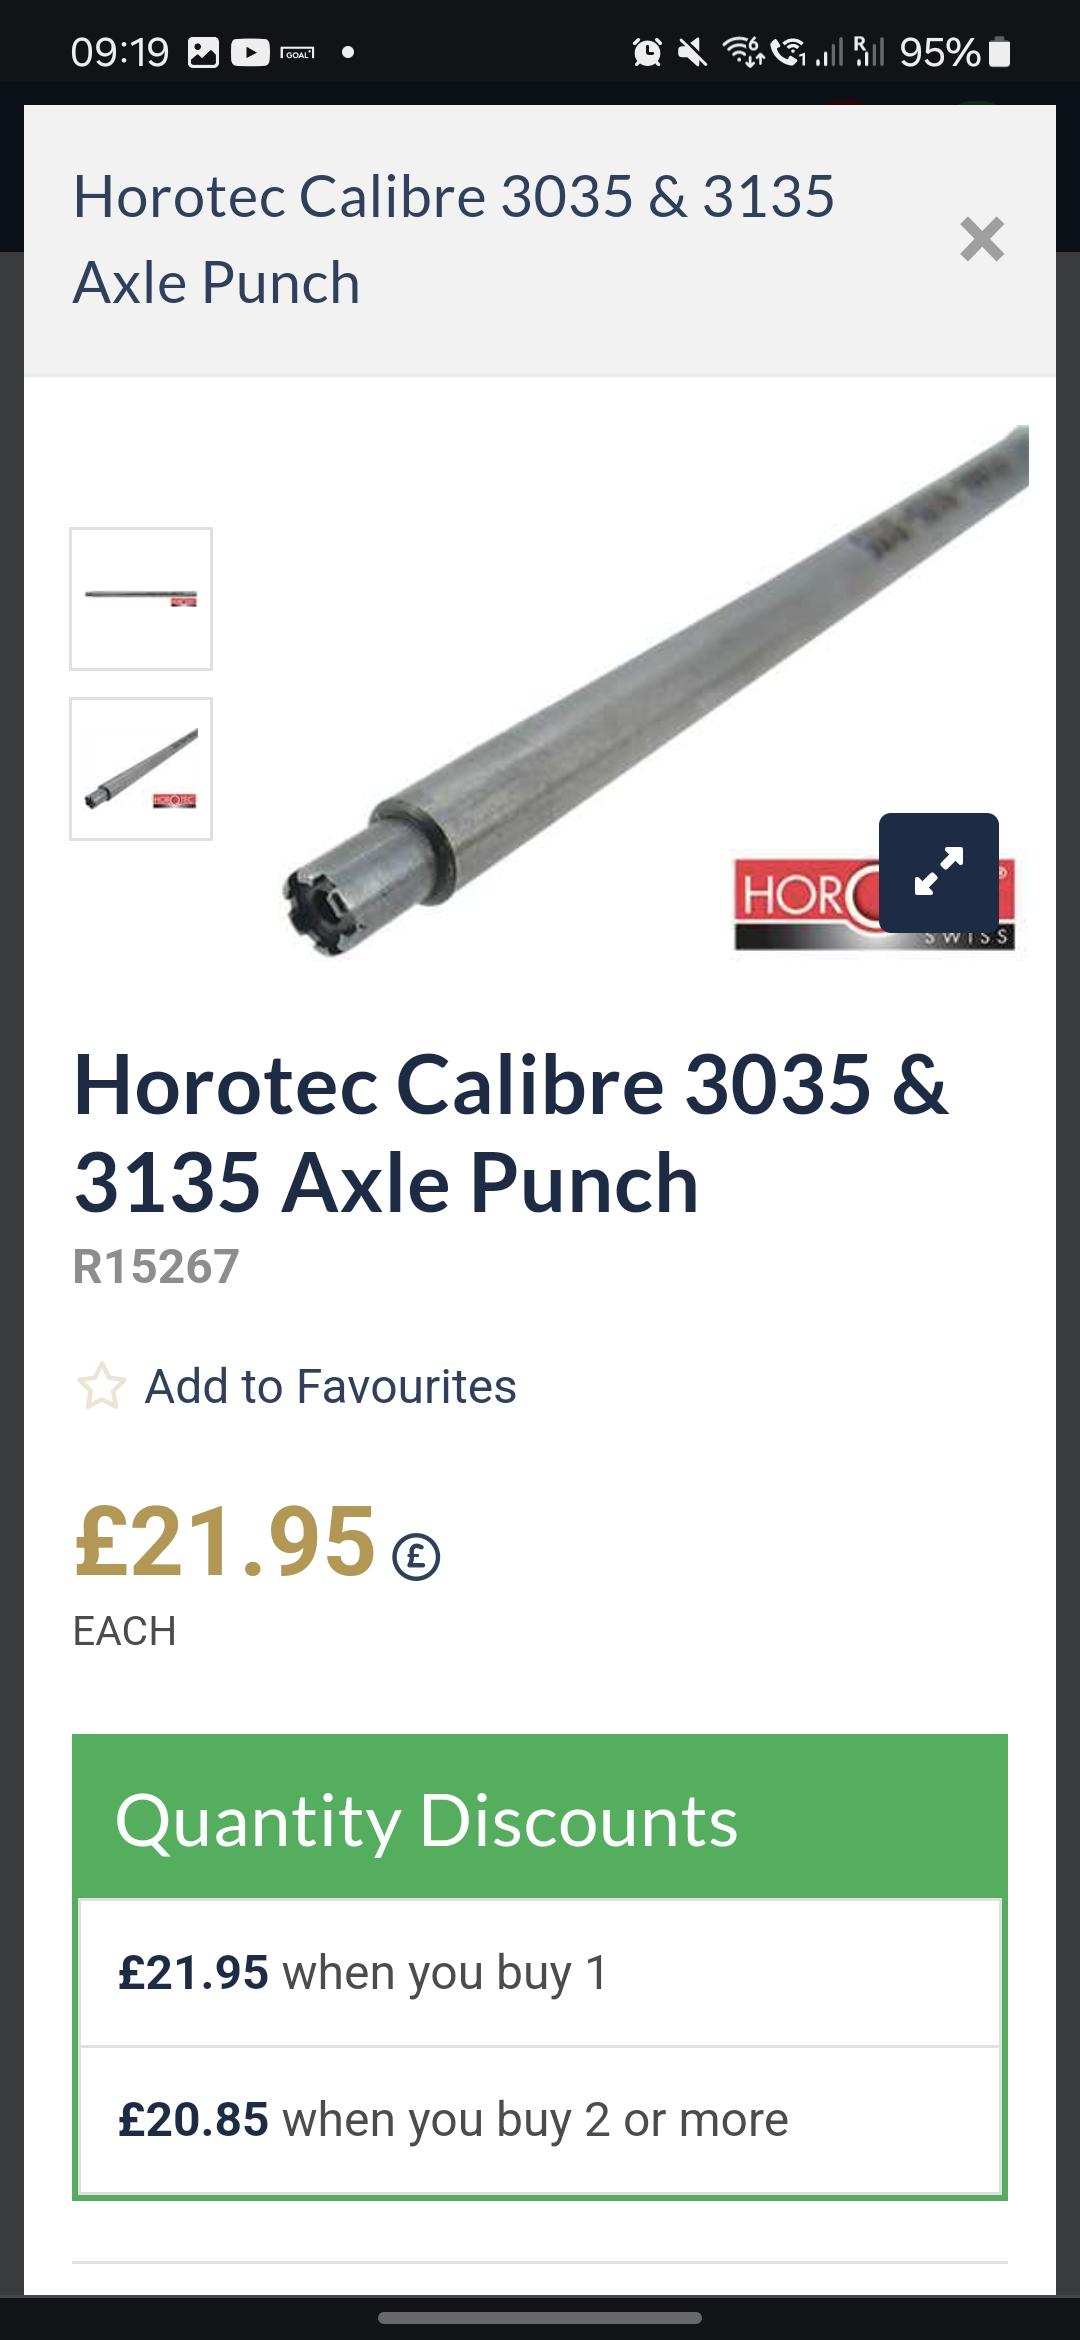
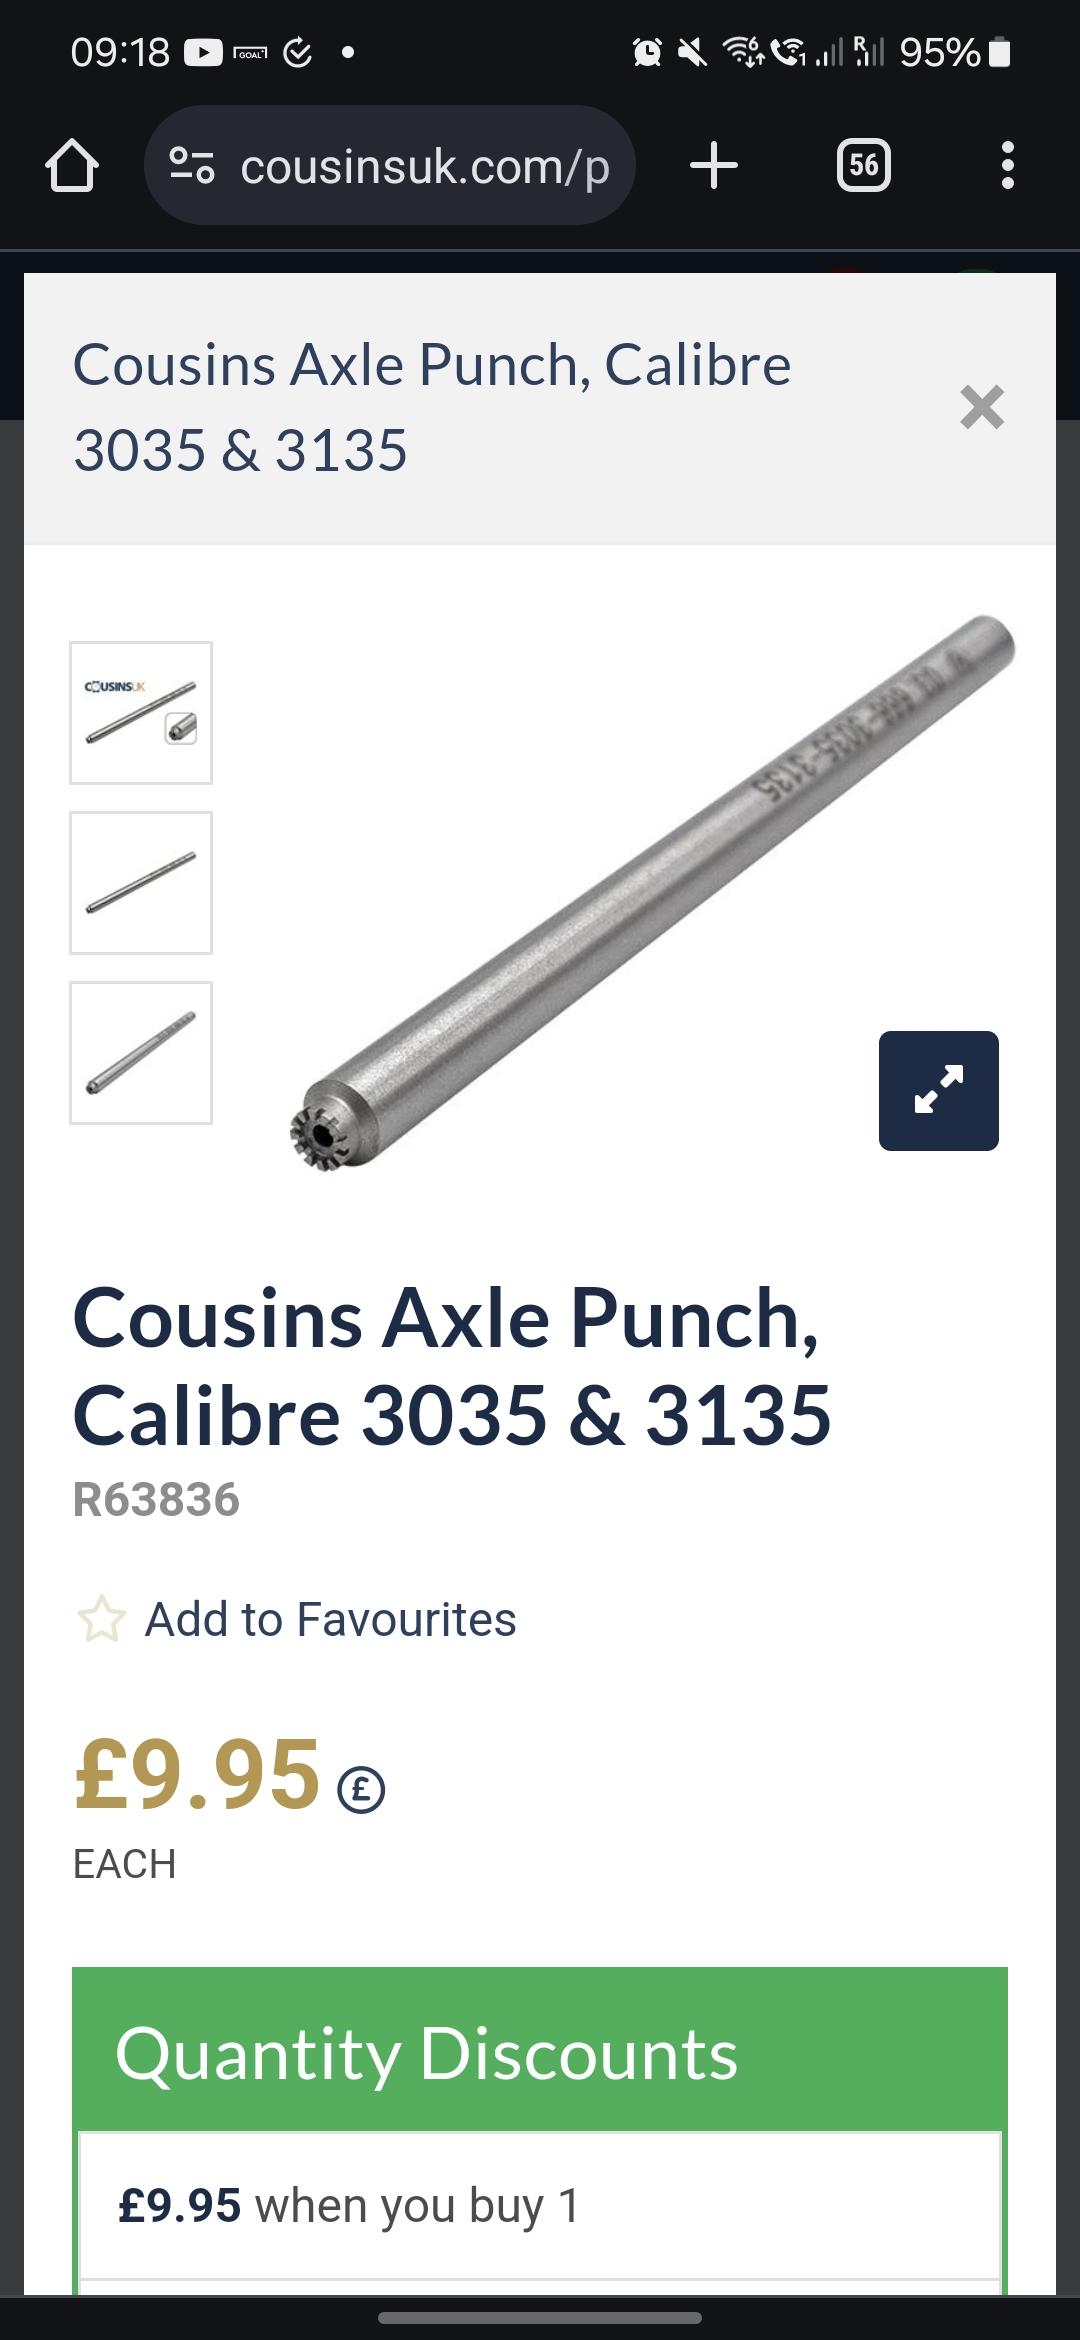
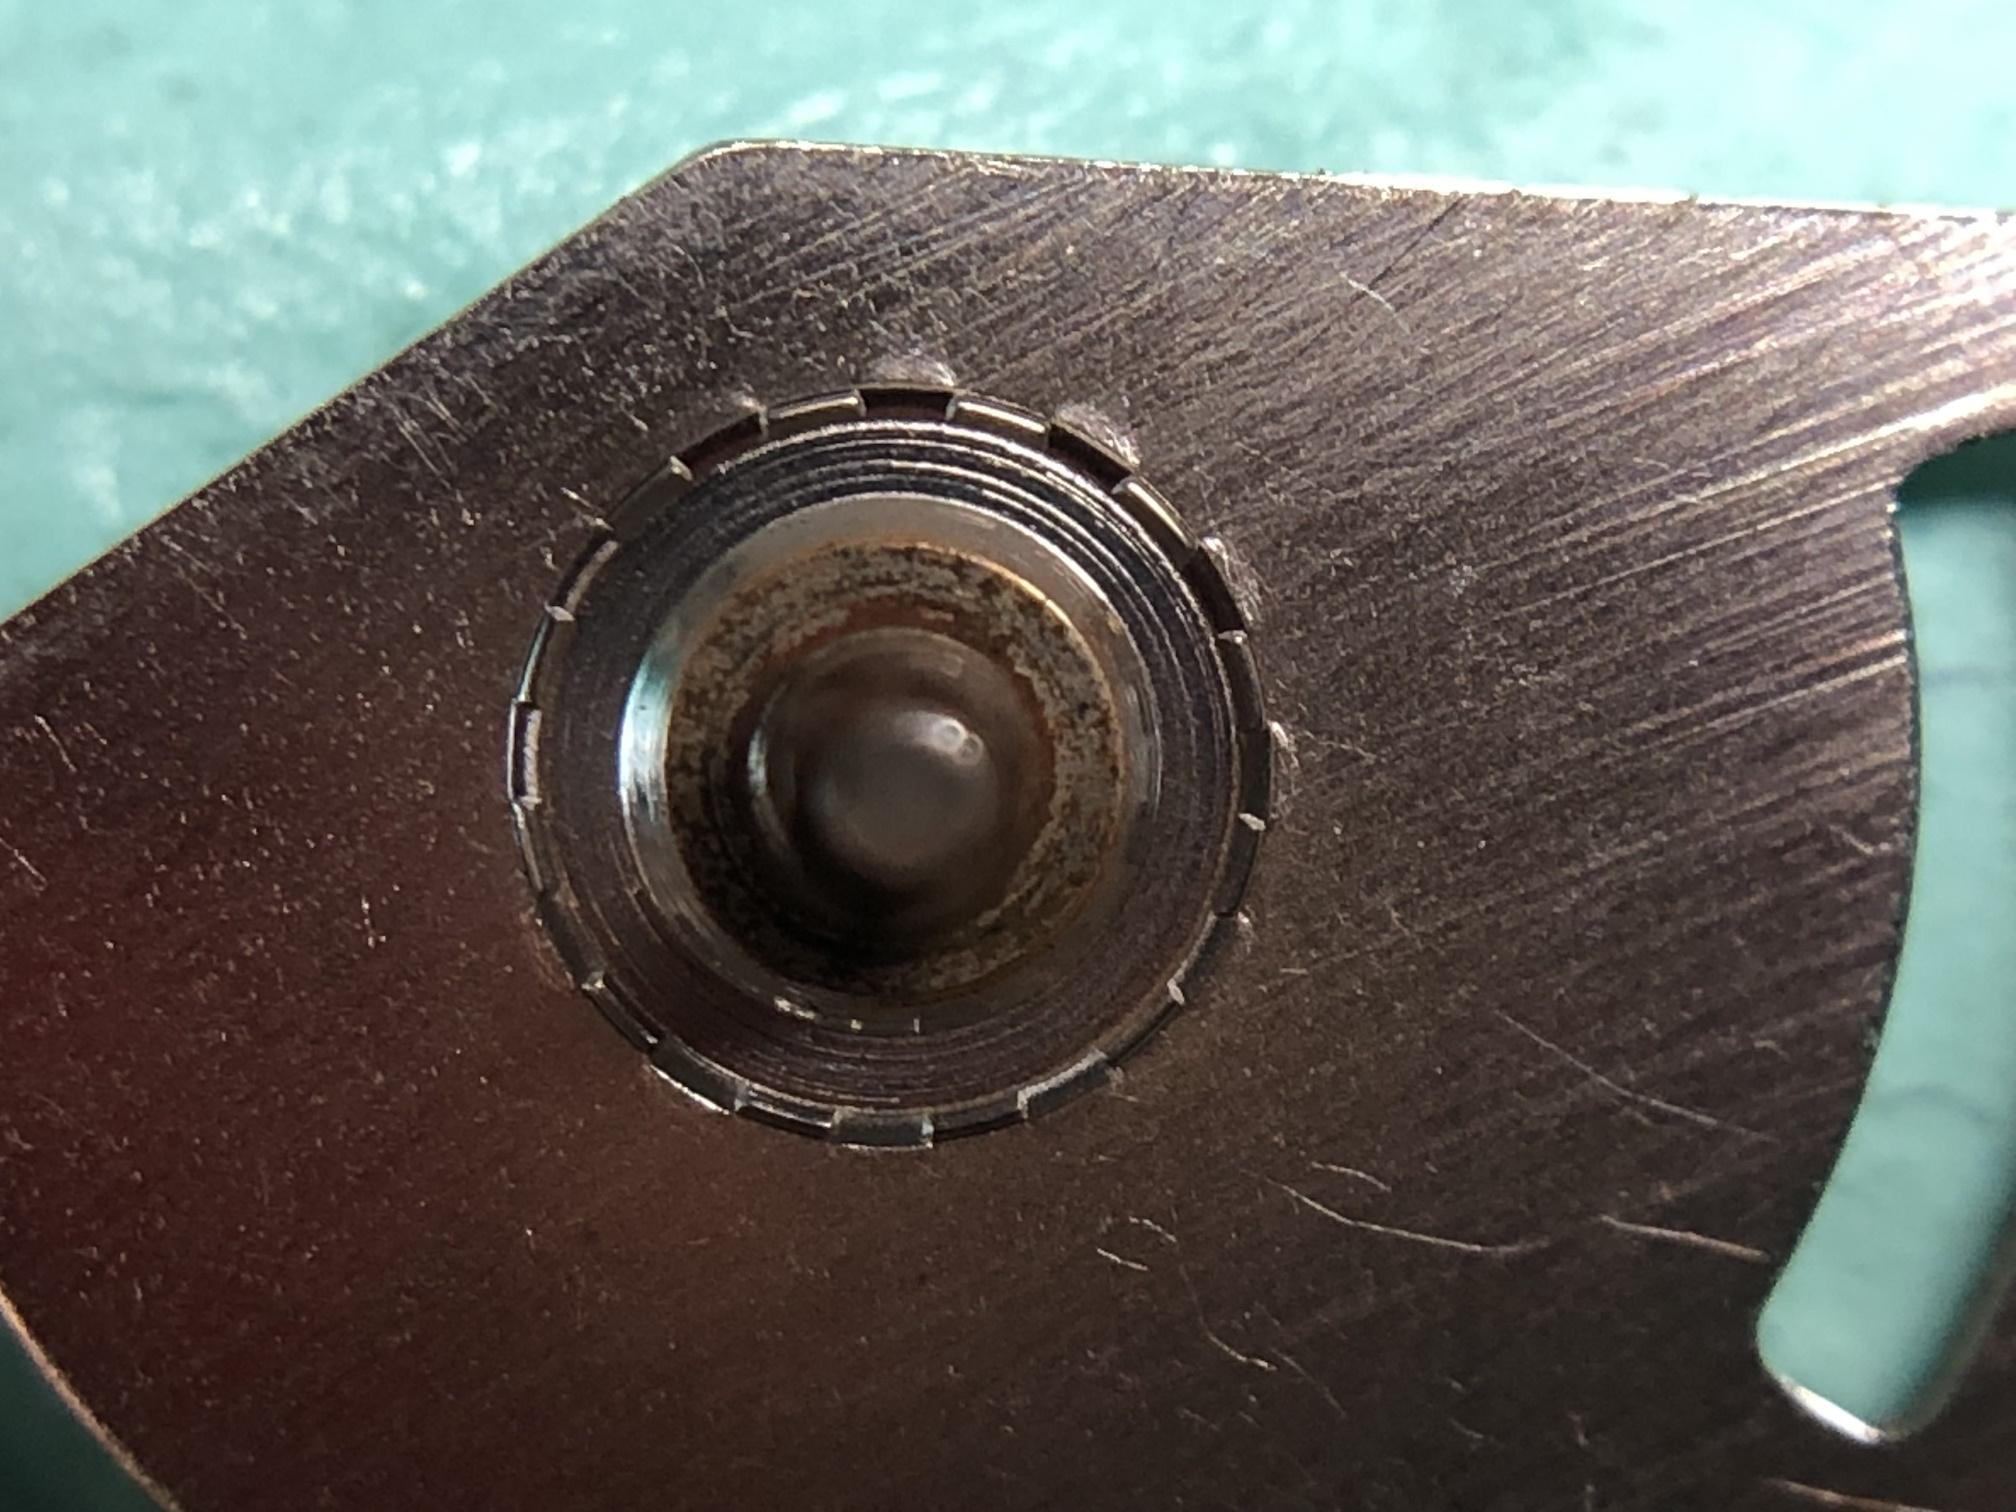
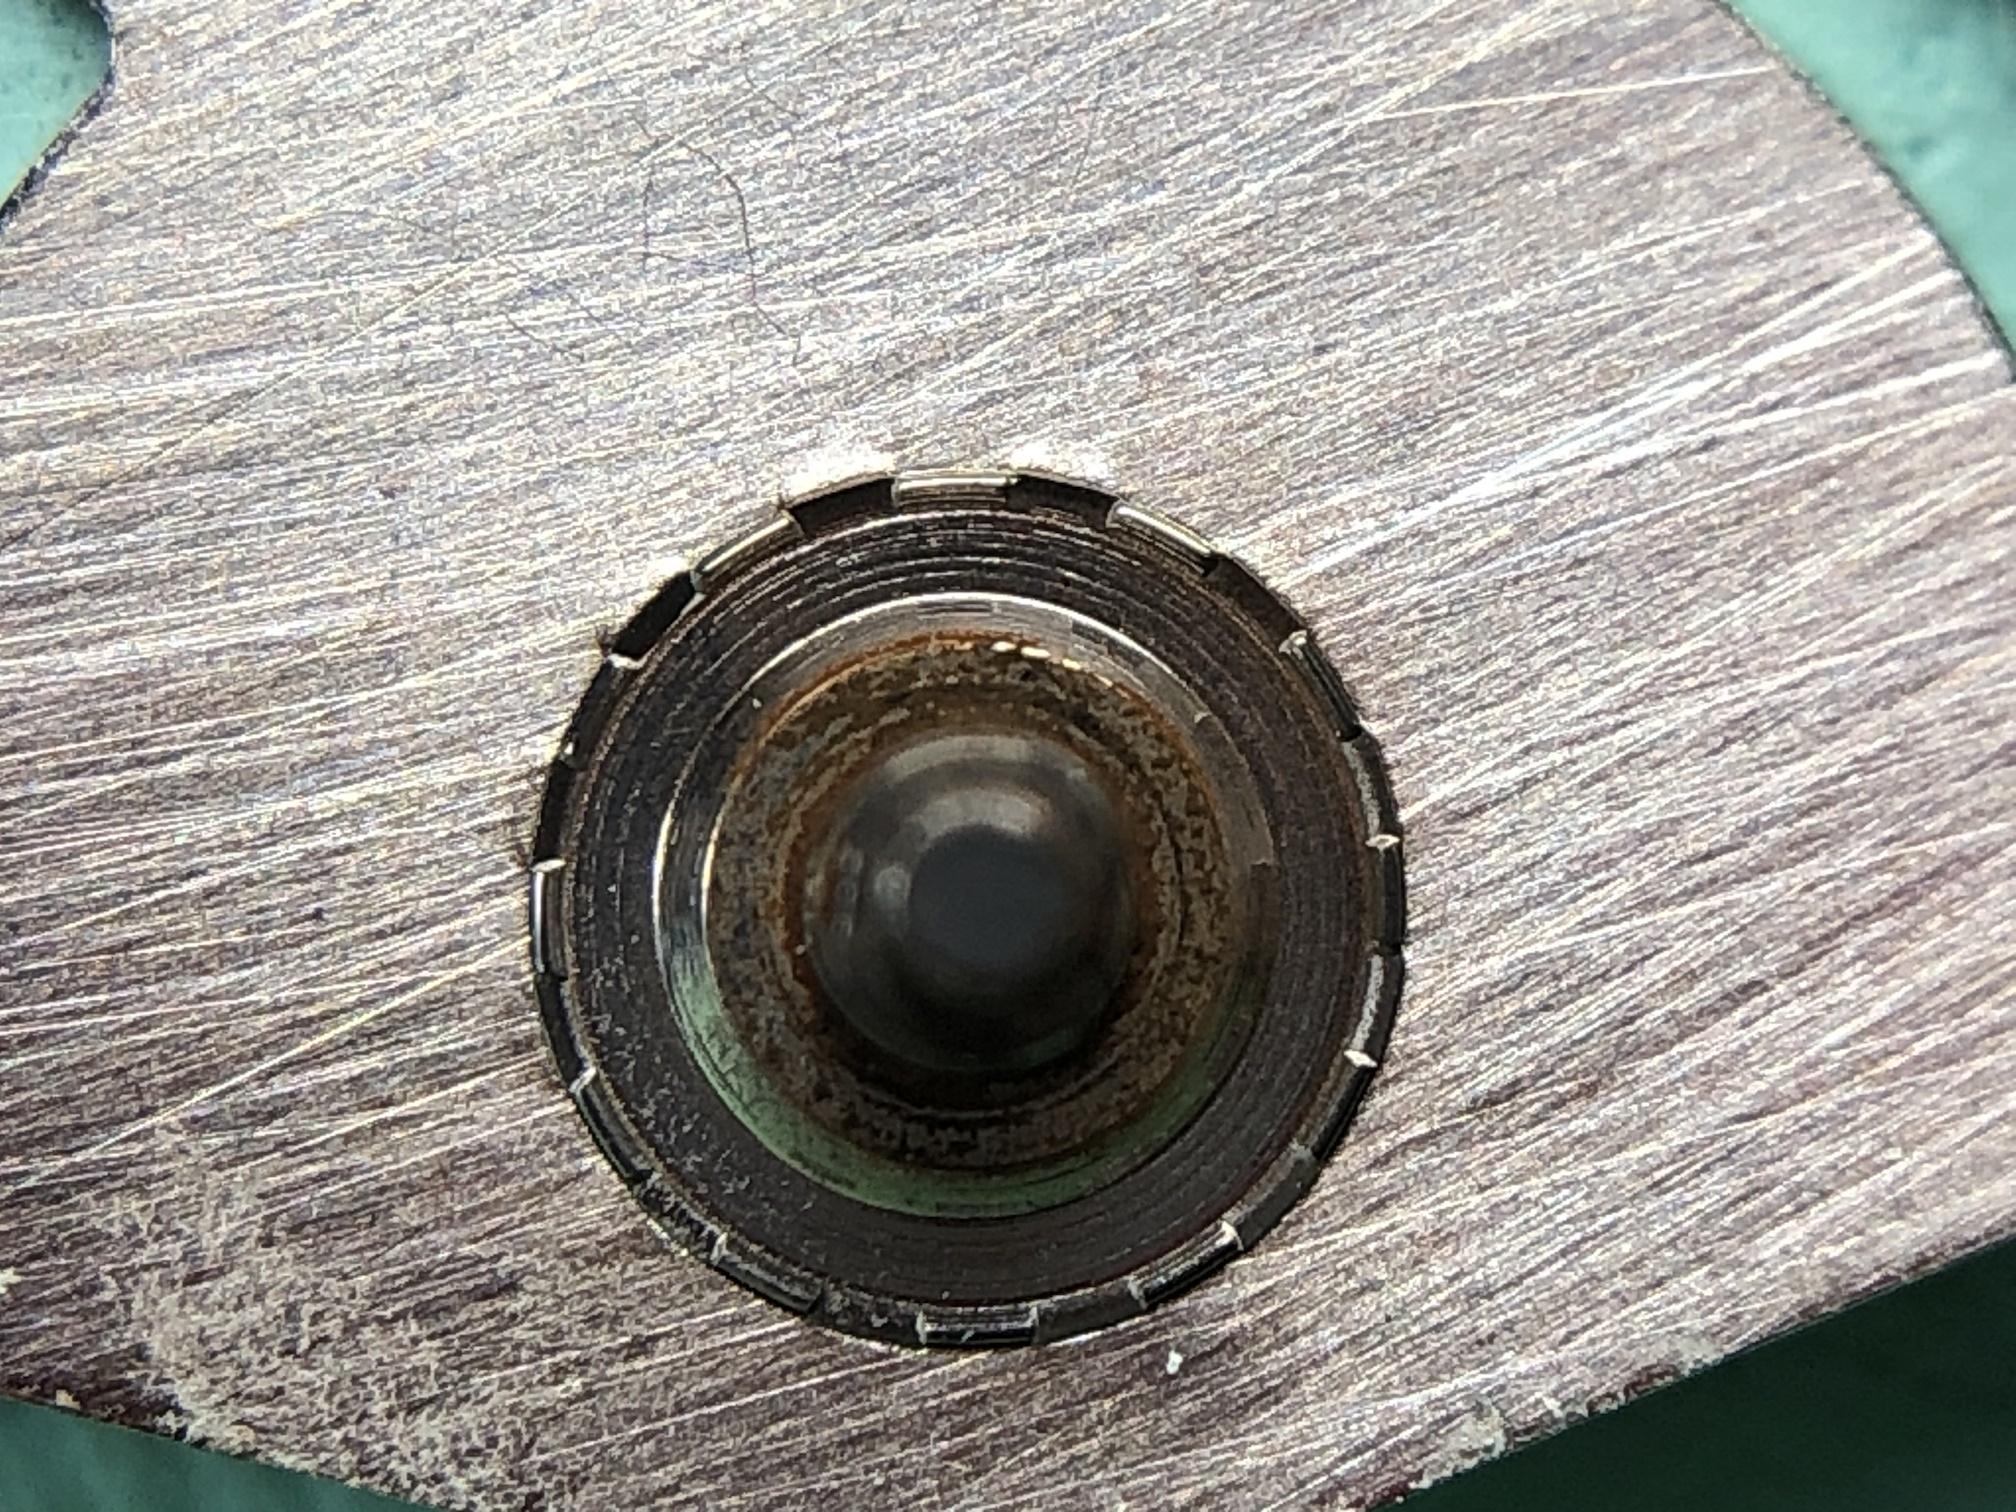
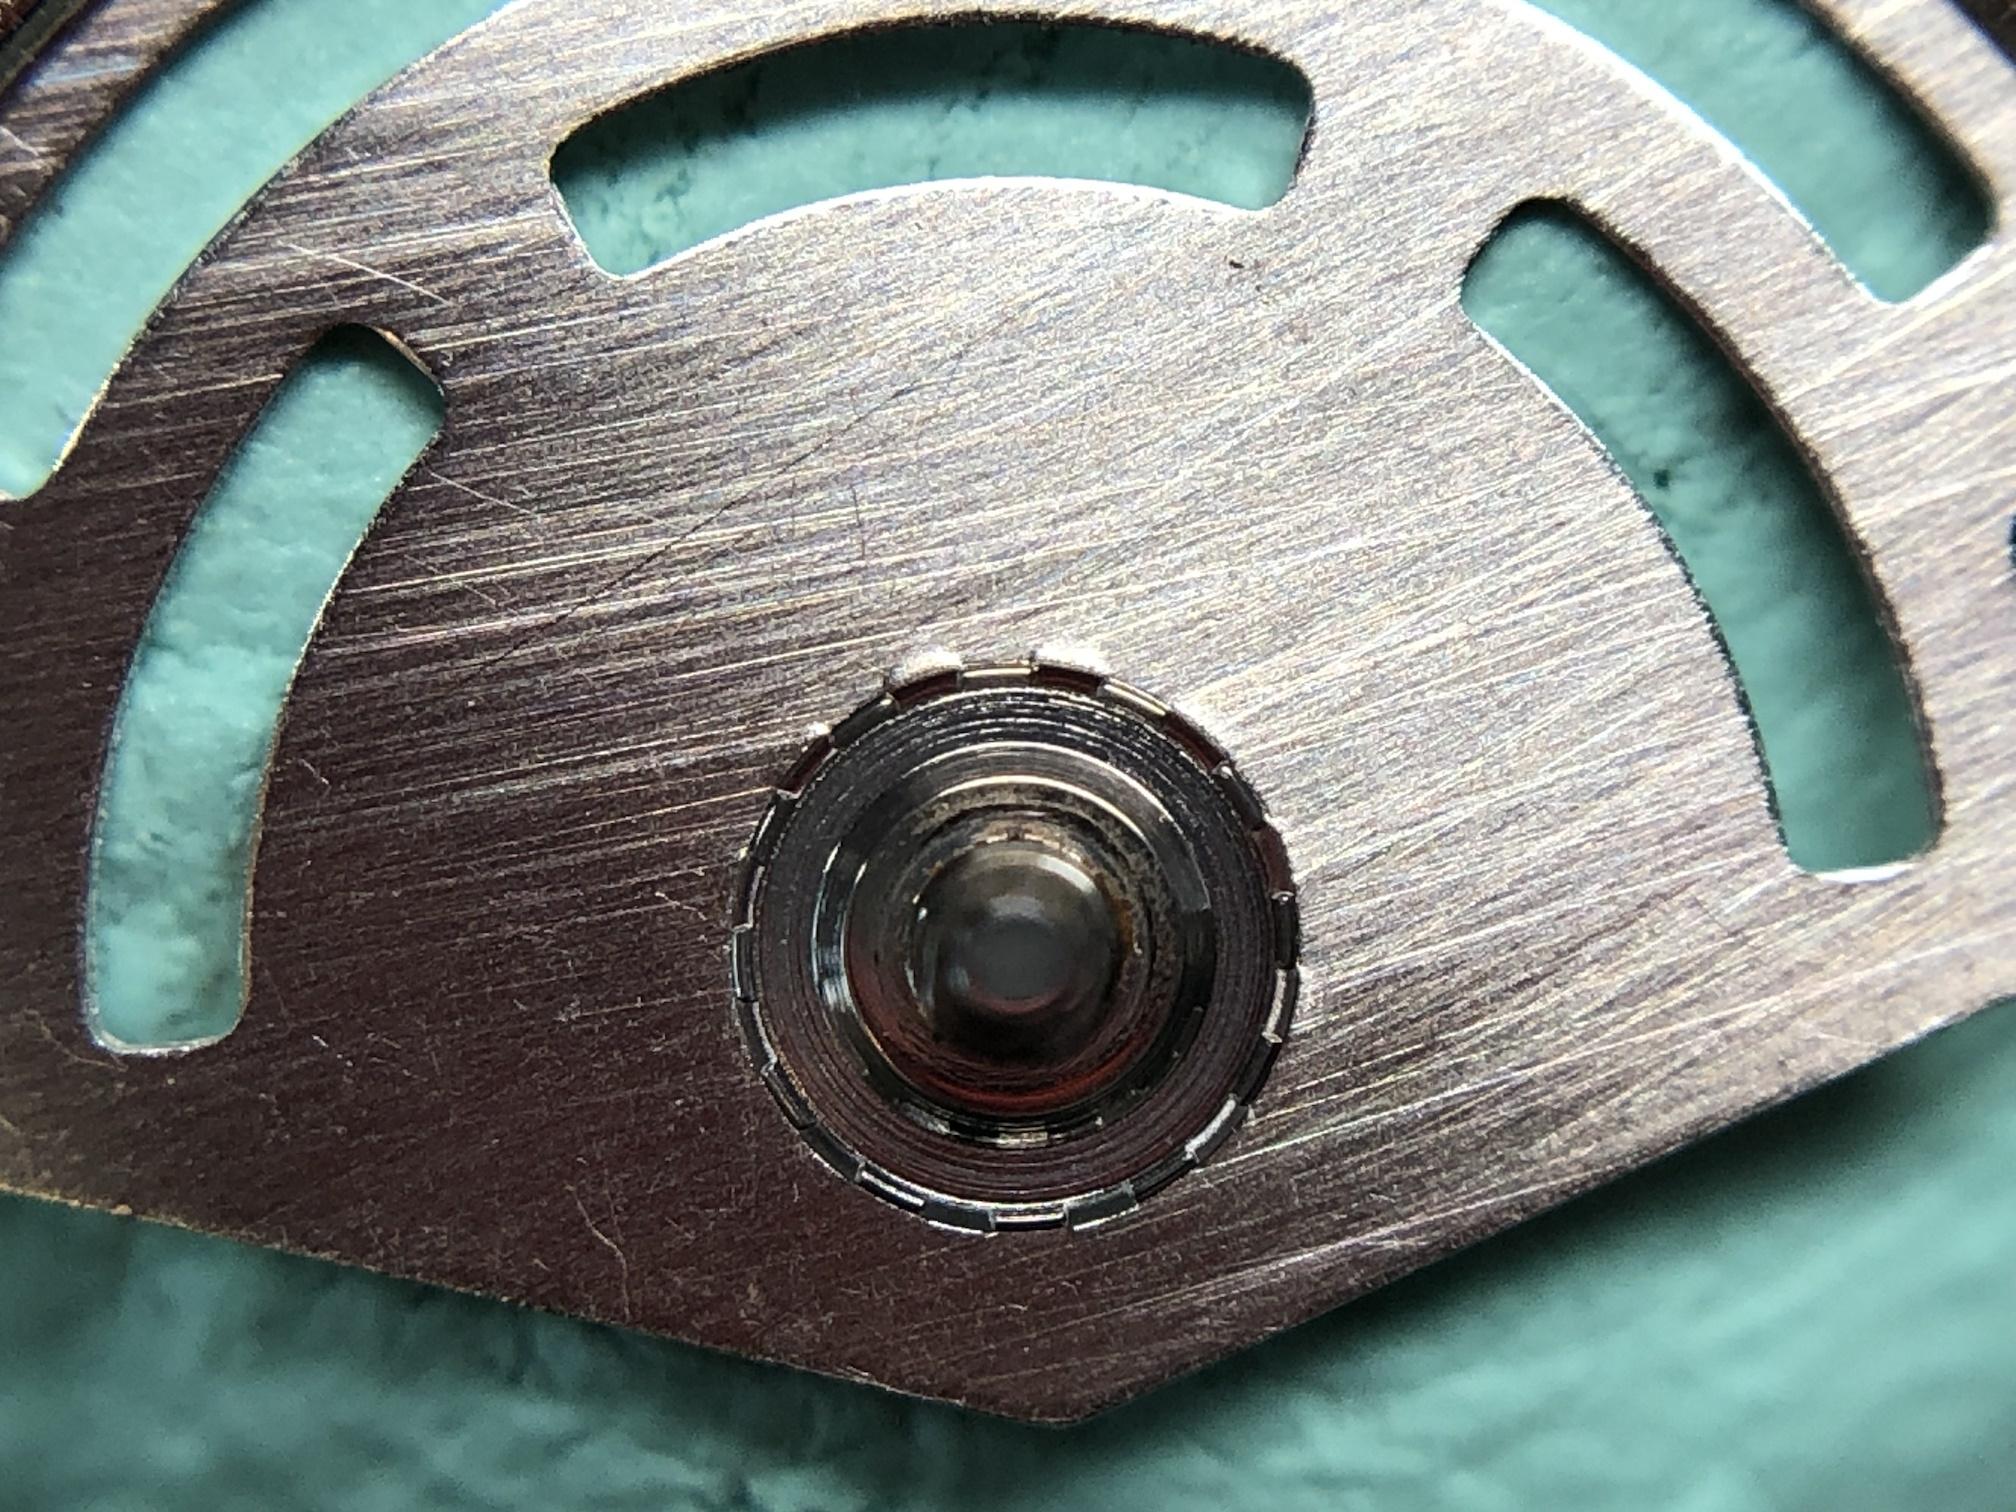
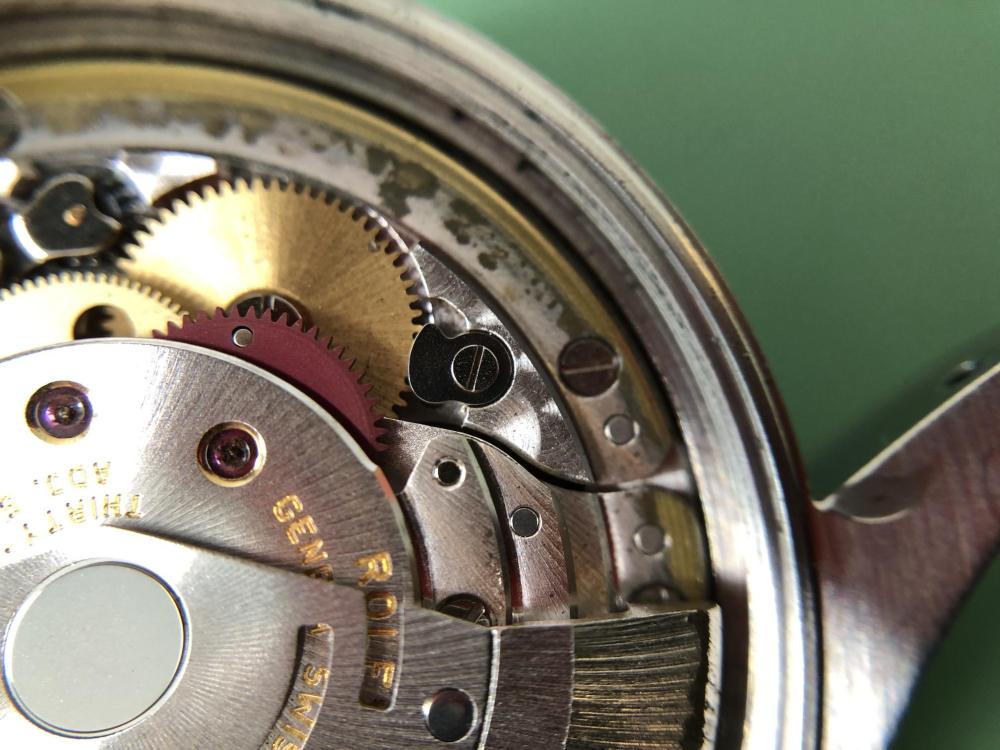
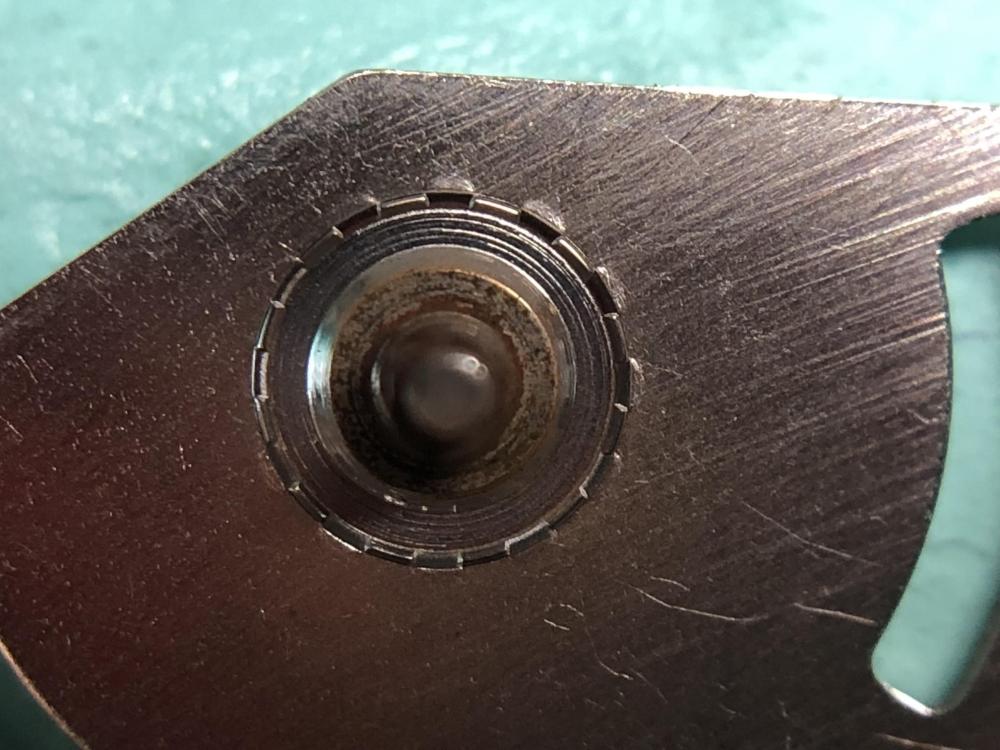
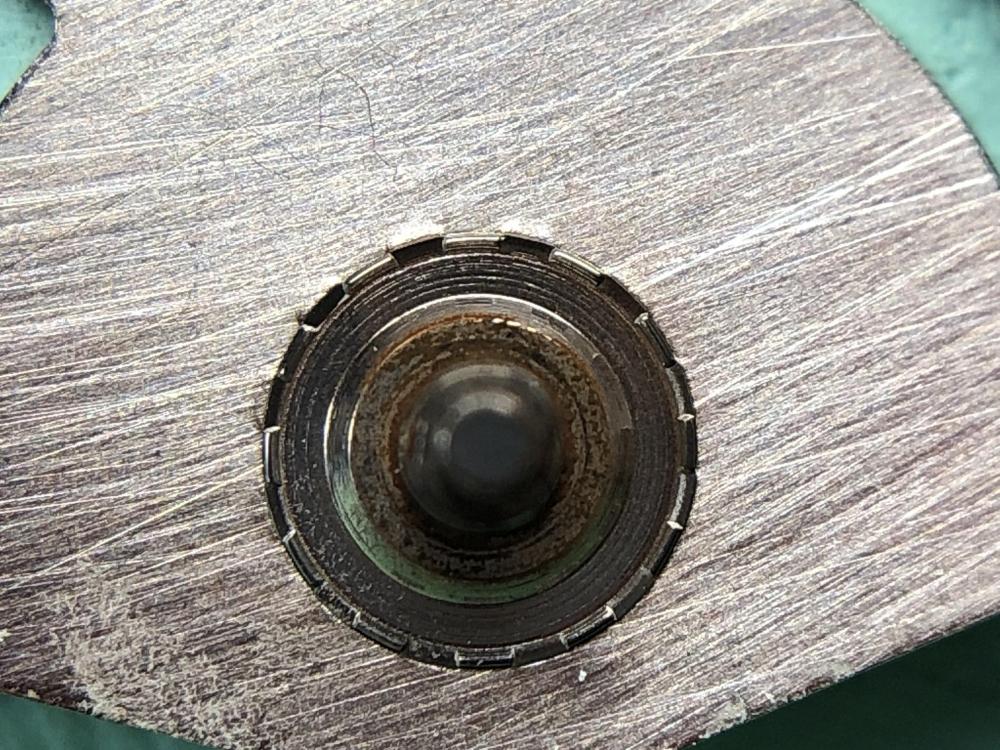
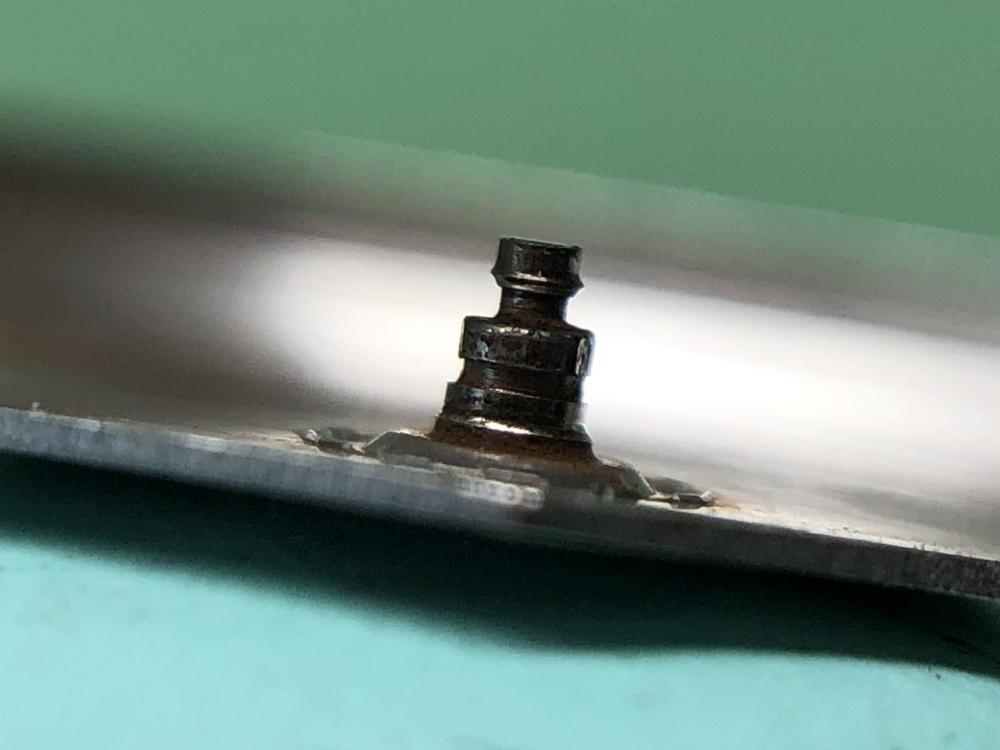
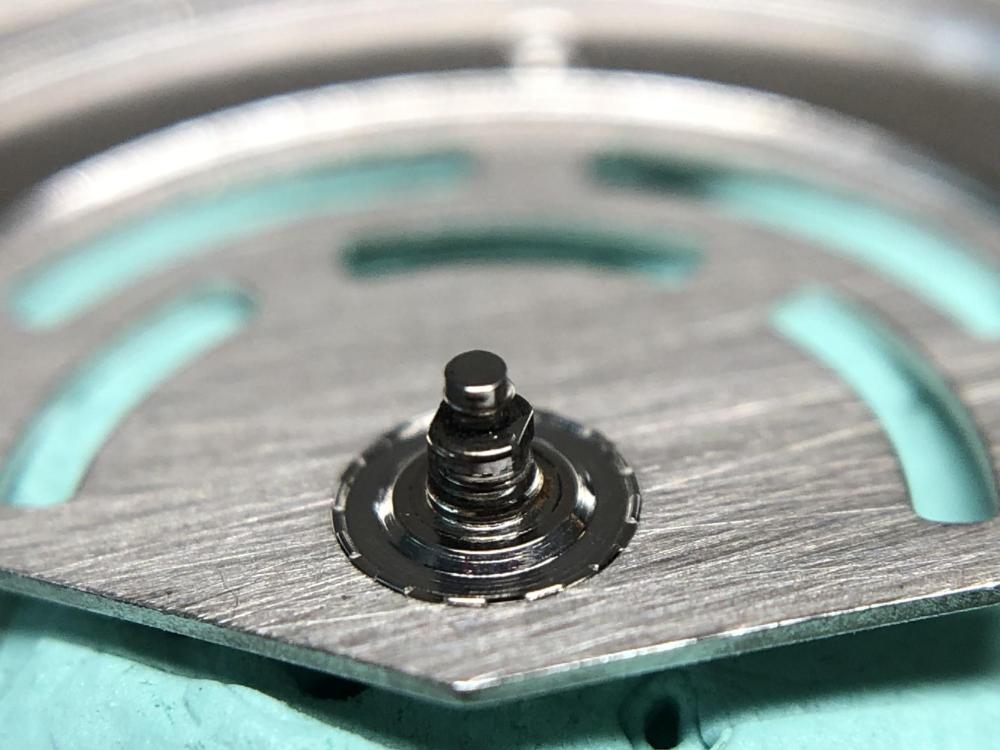
Oh dear @VWatchie, that doesn't look good Changing the rotor axle is obviously imperative. I hope not all pivots are affected by this metal dust and that you can seve some/most of those that are affected. I think I recall seeing a video of yours where you looked like an absolute master on your Jacot lathe. So if anyone can save those pivots, it'll be you. Otherwise prepare for ridiculous prices for NOS parts. I wonder if the jewels for the rotor axle are unaffected or need to be changed, too. I don't have enough experience to really judge the axle rivet. But it looks correct to me. Probably original Rolex. My Horotec punch for 3035 & 3135 also only has 6 segments. But I've just discovered that CousinsUK now also sells their own brand stakes for Rolex axles and that one has 12 segments. I think you'll be ok with either.

 1 point
 -
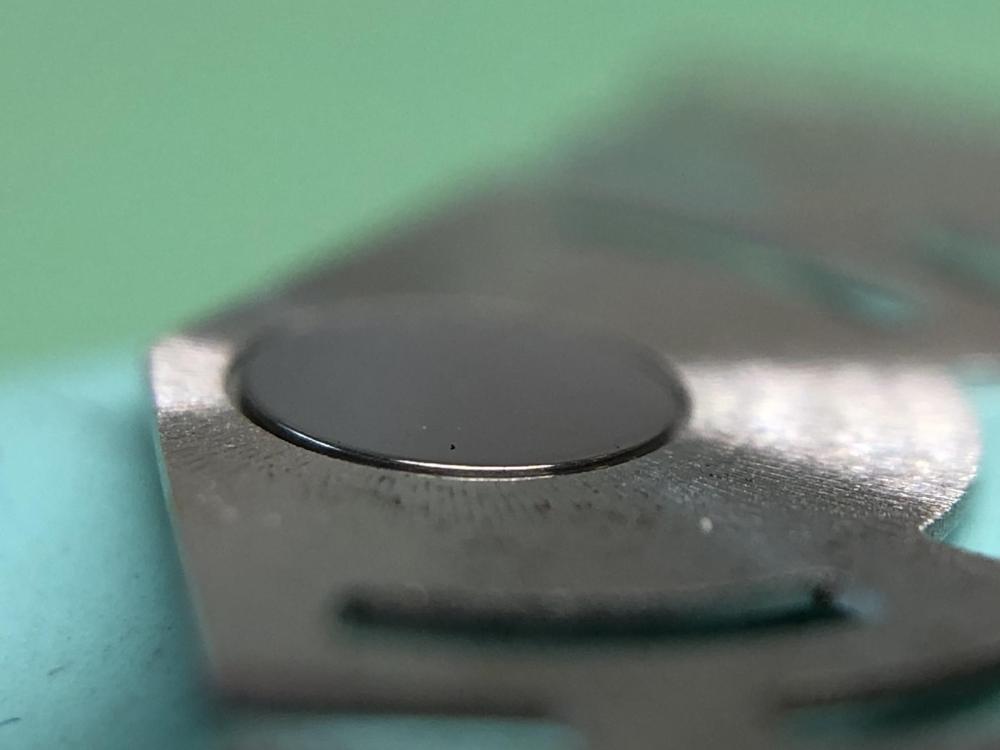
Hey, you just gently pry it off (maybe from two sides at the same time, like with hand removing levers). There's nothing holding it in place except a little friction in the middle. It can be a bit stuck, but it'll come off.1 point
-
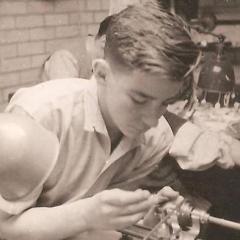
Back in the 70's and 80's we never had the internet or these videos you have now. We had to learn from scratch. You could write it down, learn from memory or find your own way of how to go about it. Service manuals were hard to get, you had to wait a long time to get some of them and not all were available. Customers wanted their watches repaired ASAP. Cameras were no good for this type of work you had to get the film developed and that cost money. It is so easier these days to service complicated watches.1 point
-
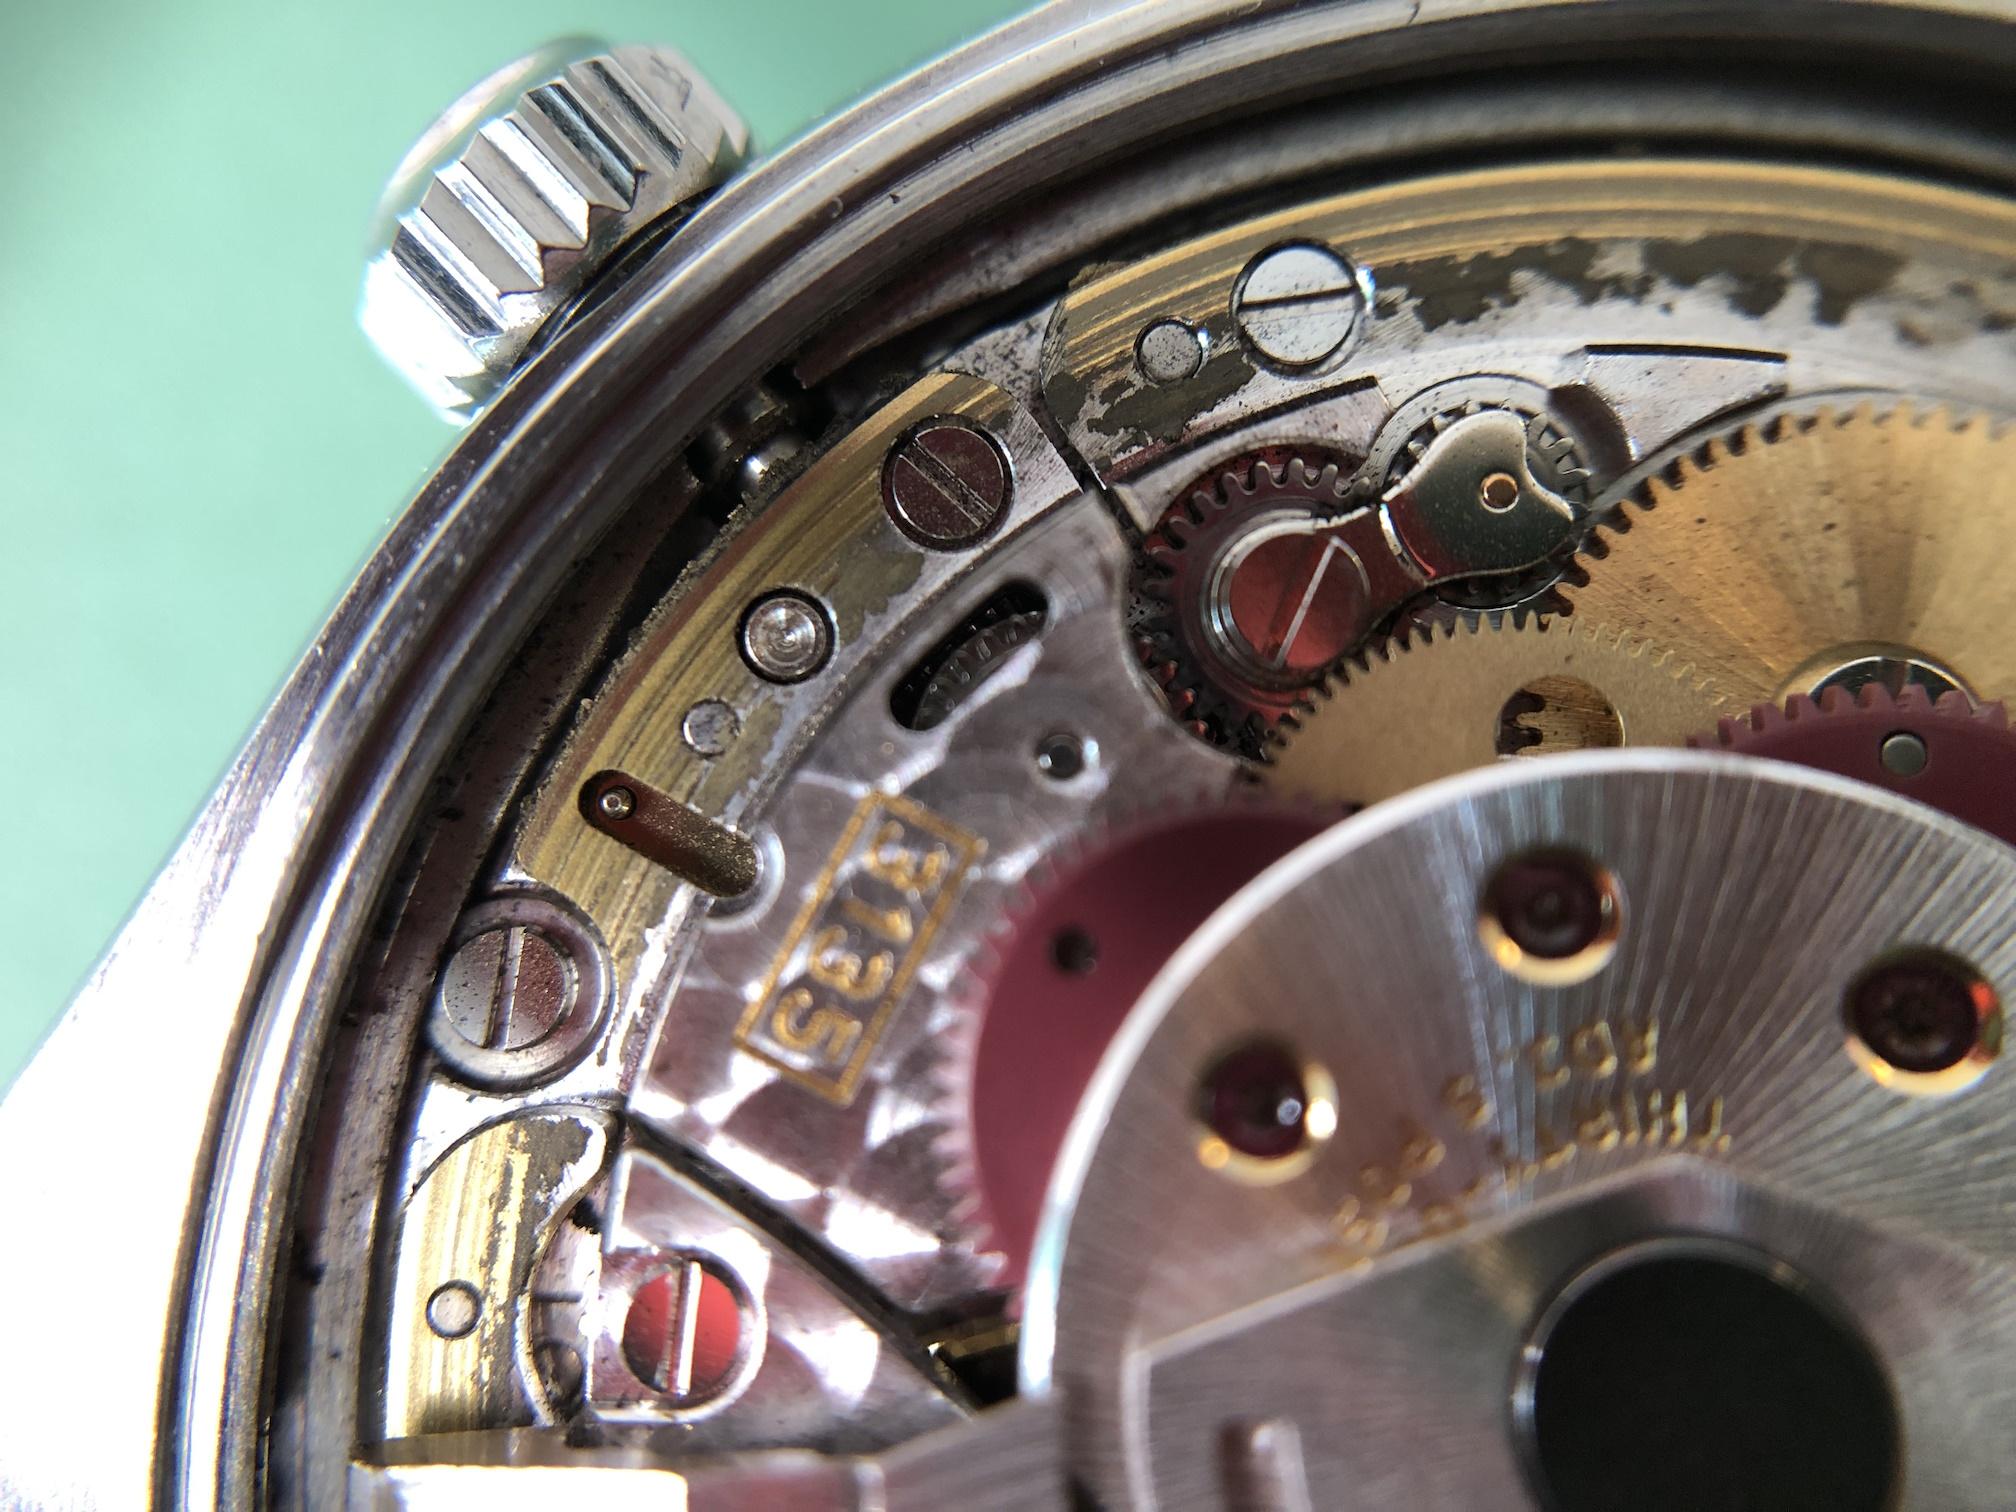
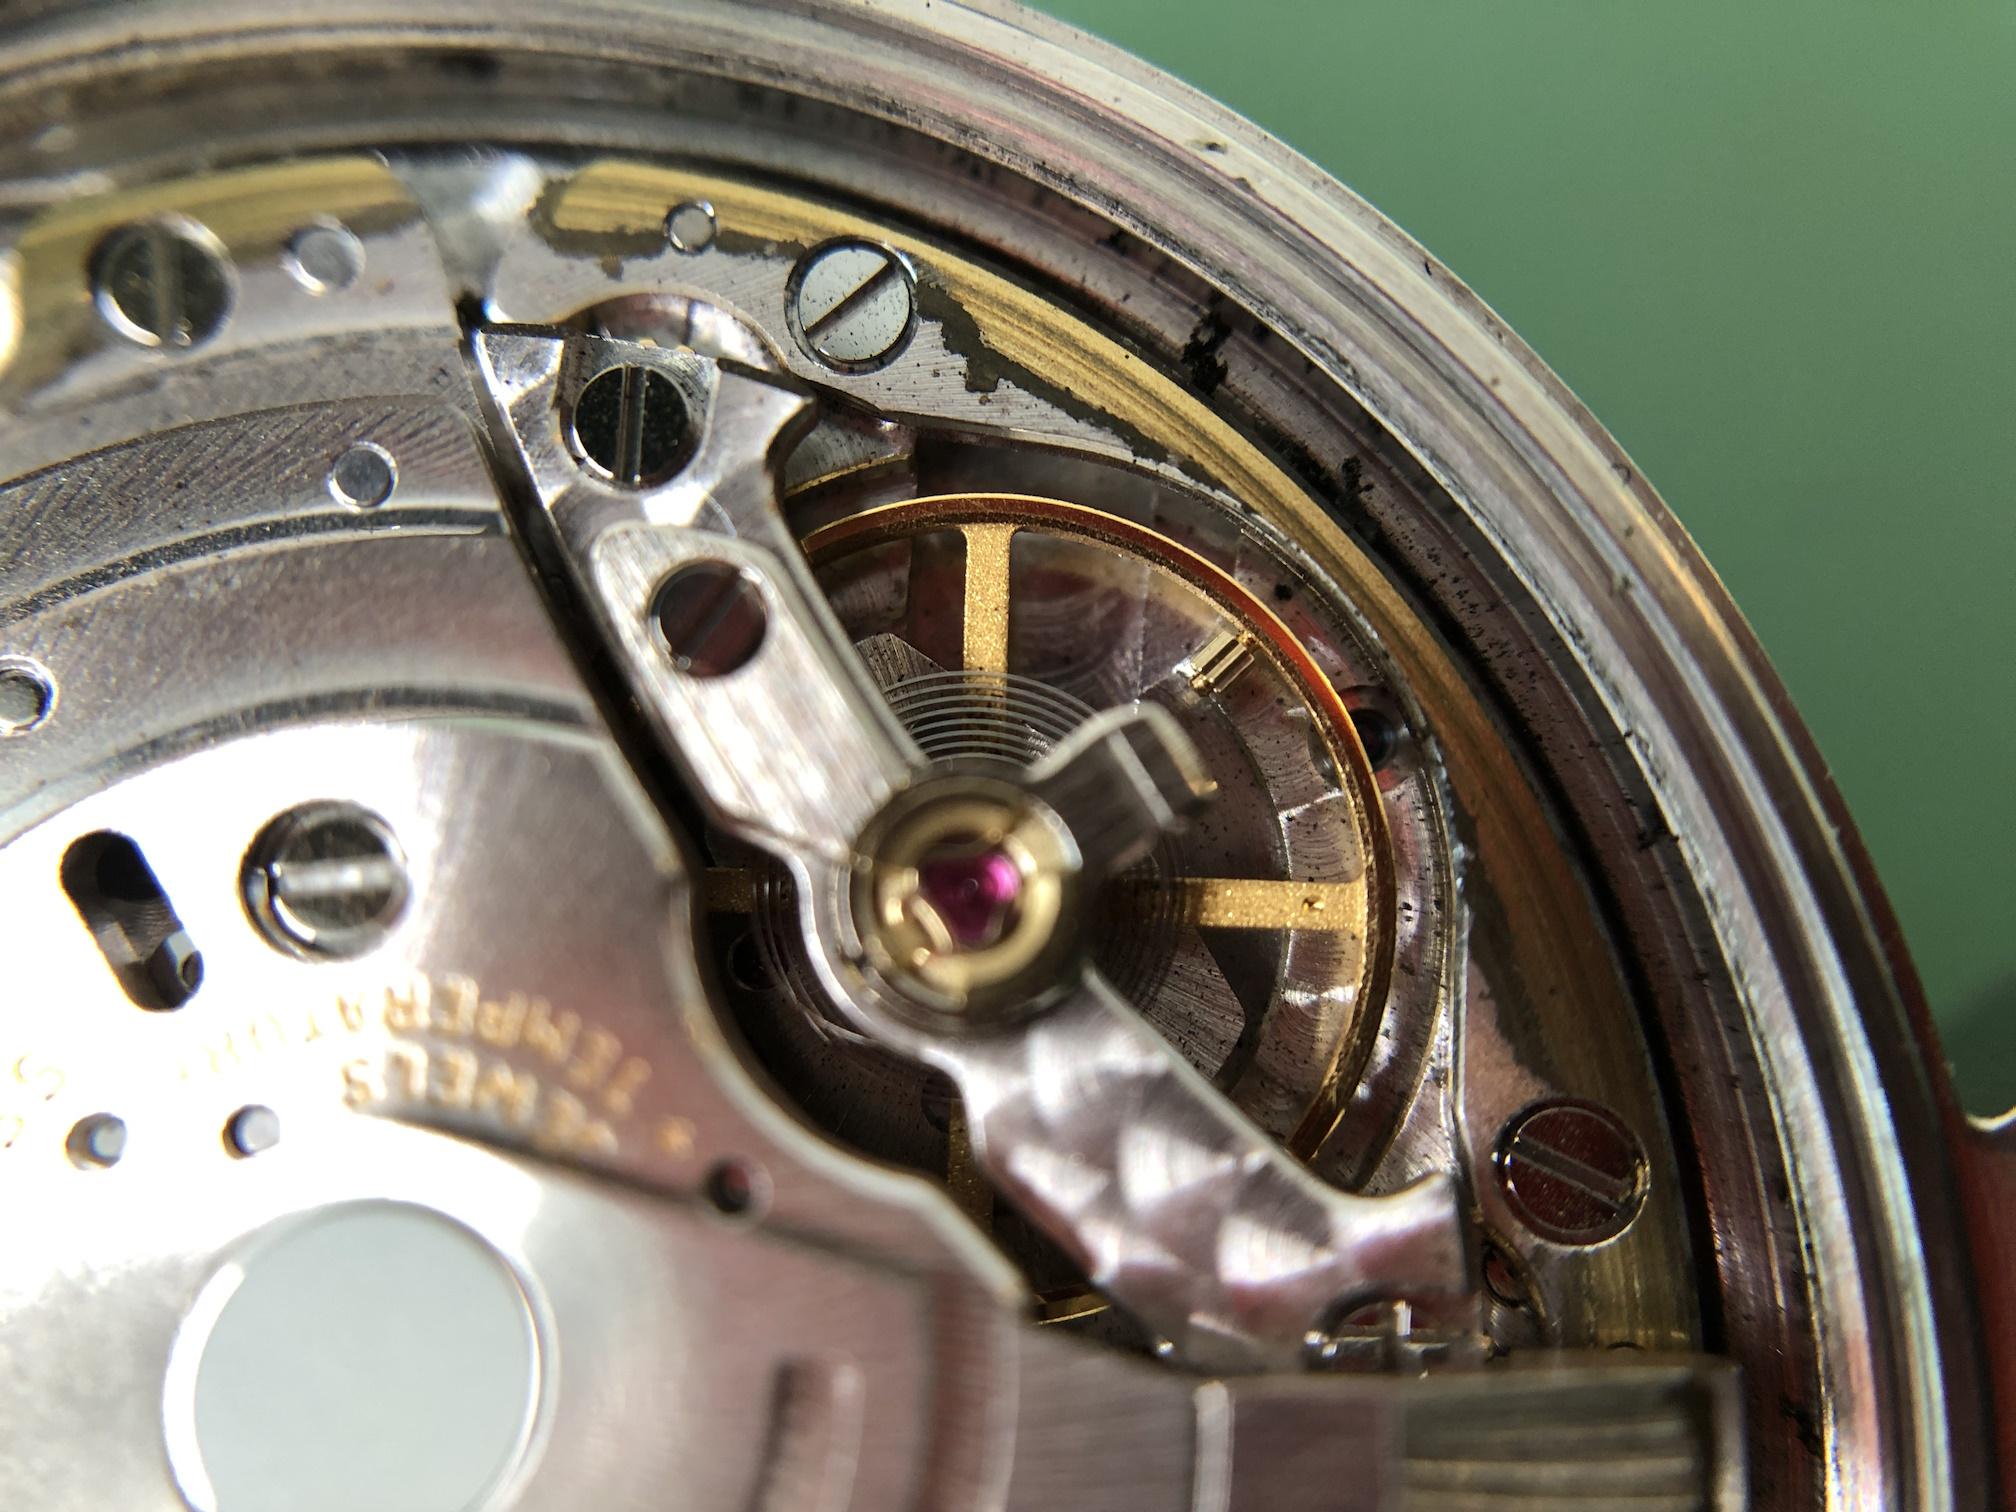
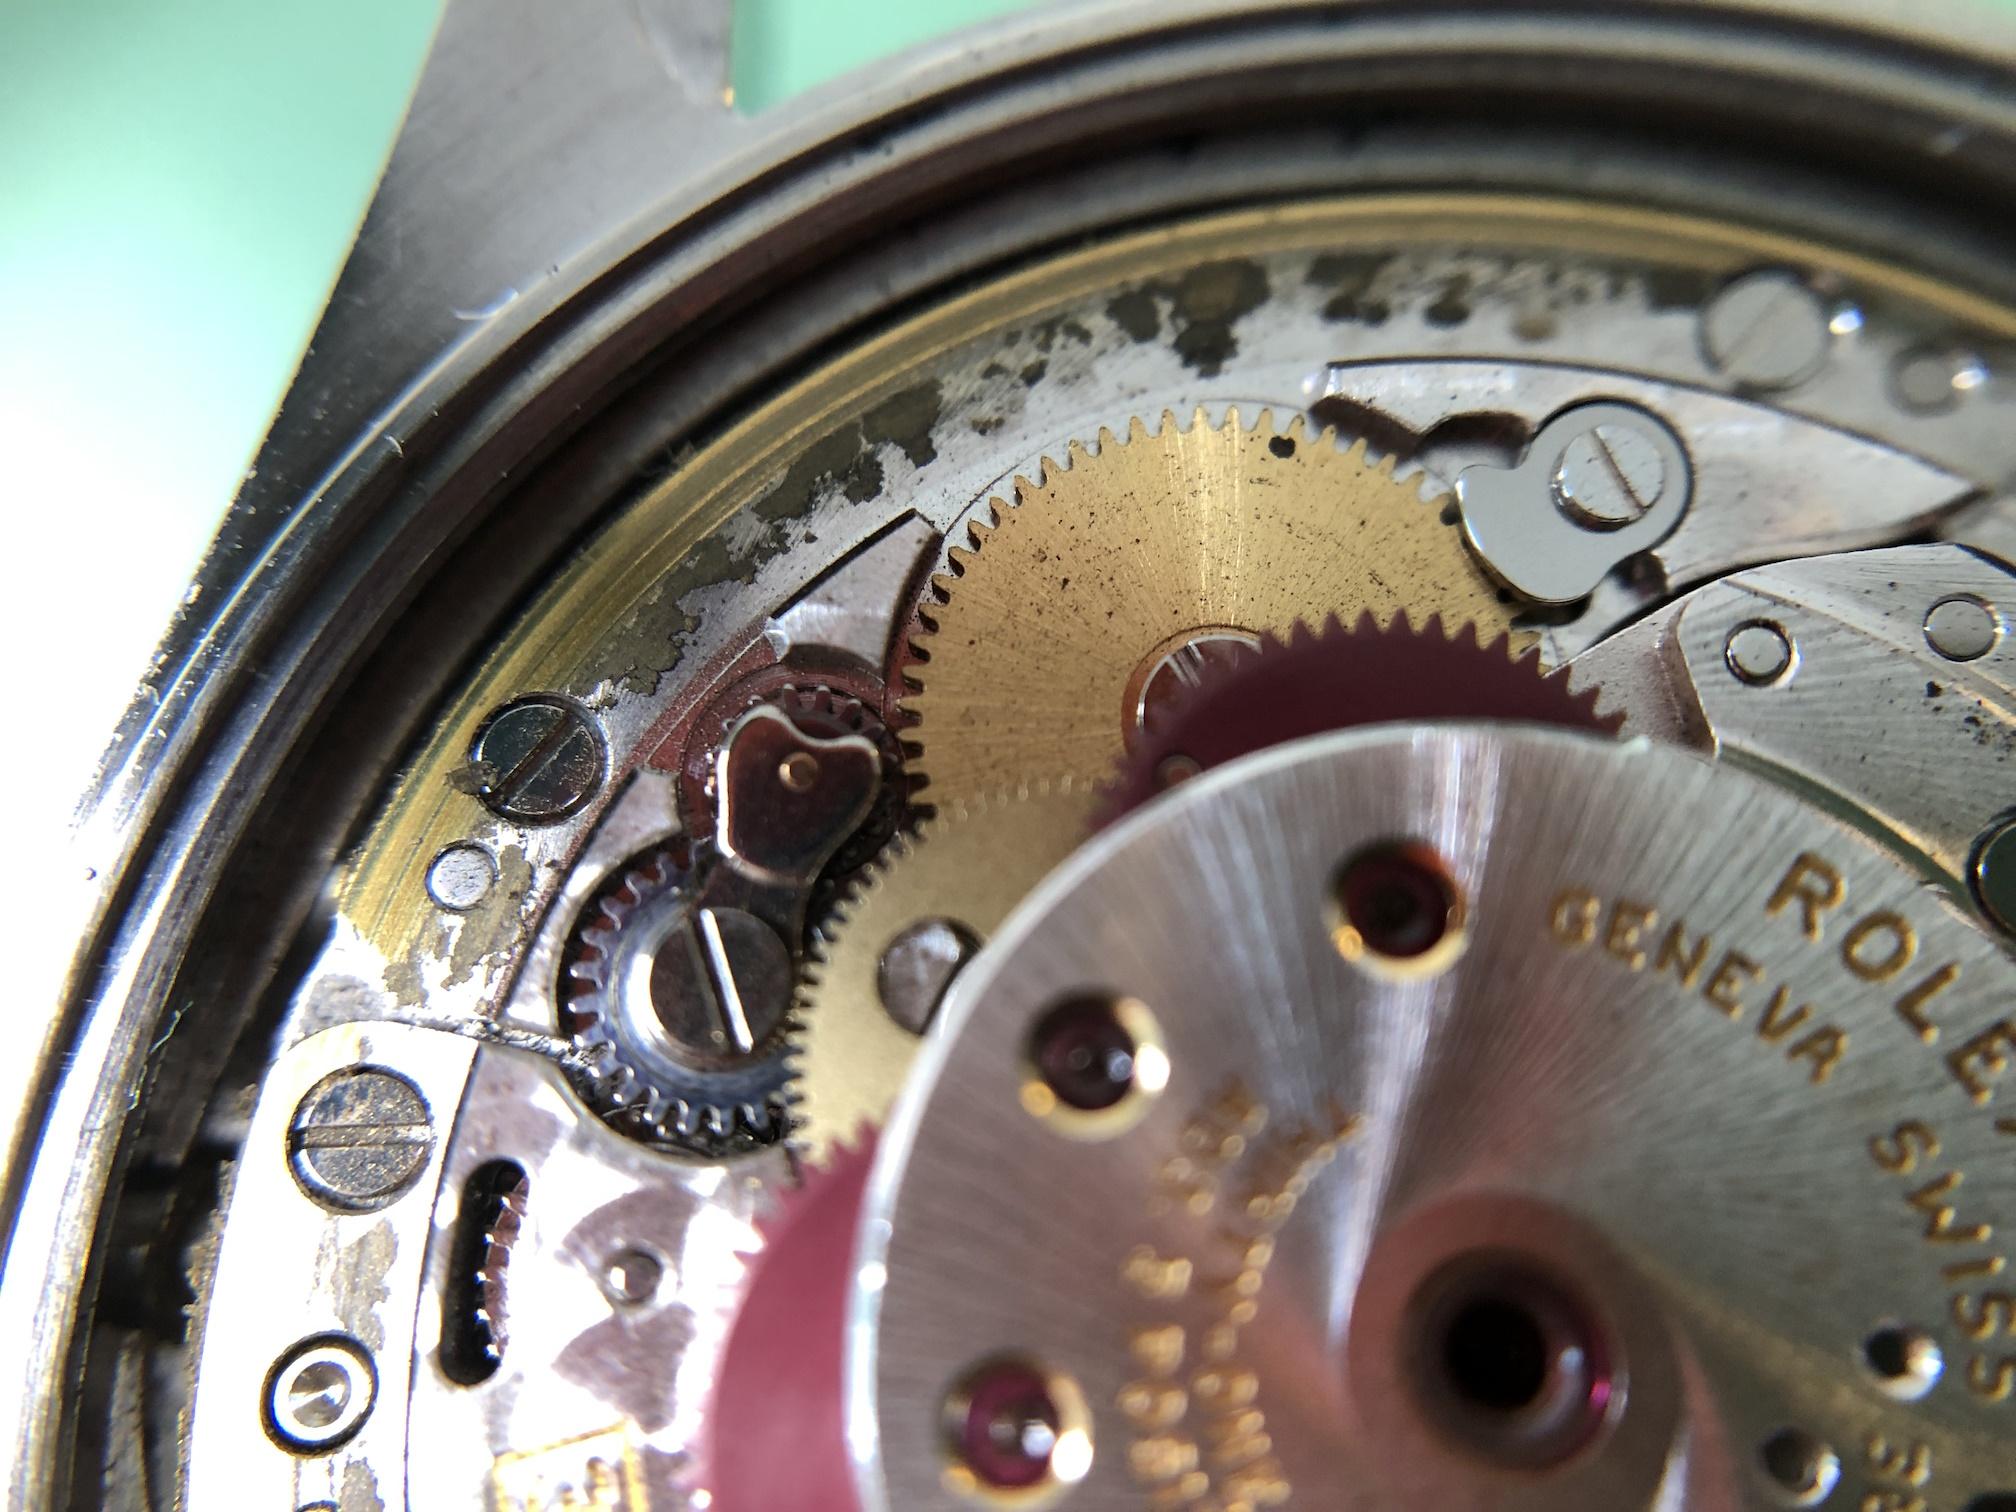
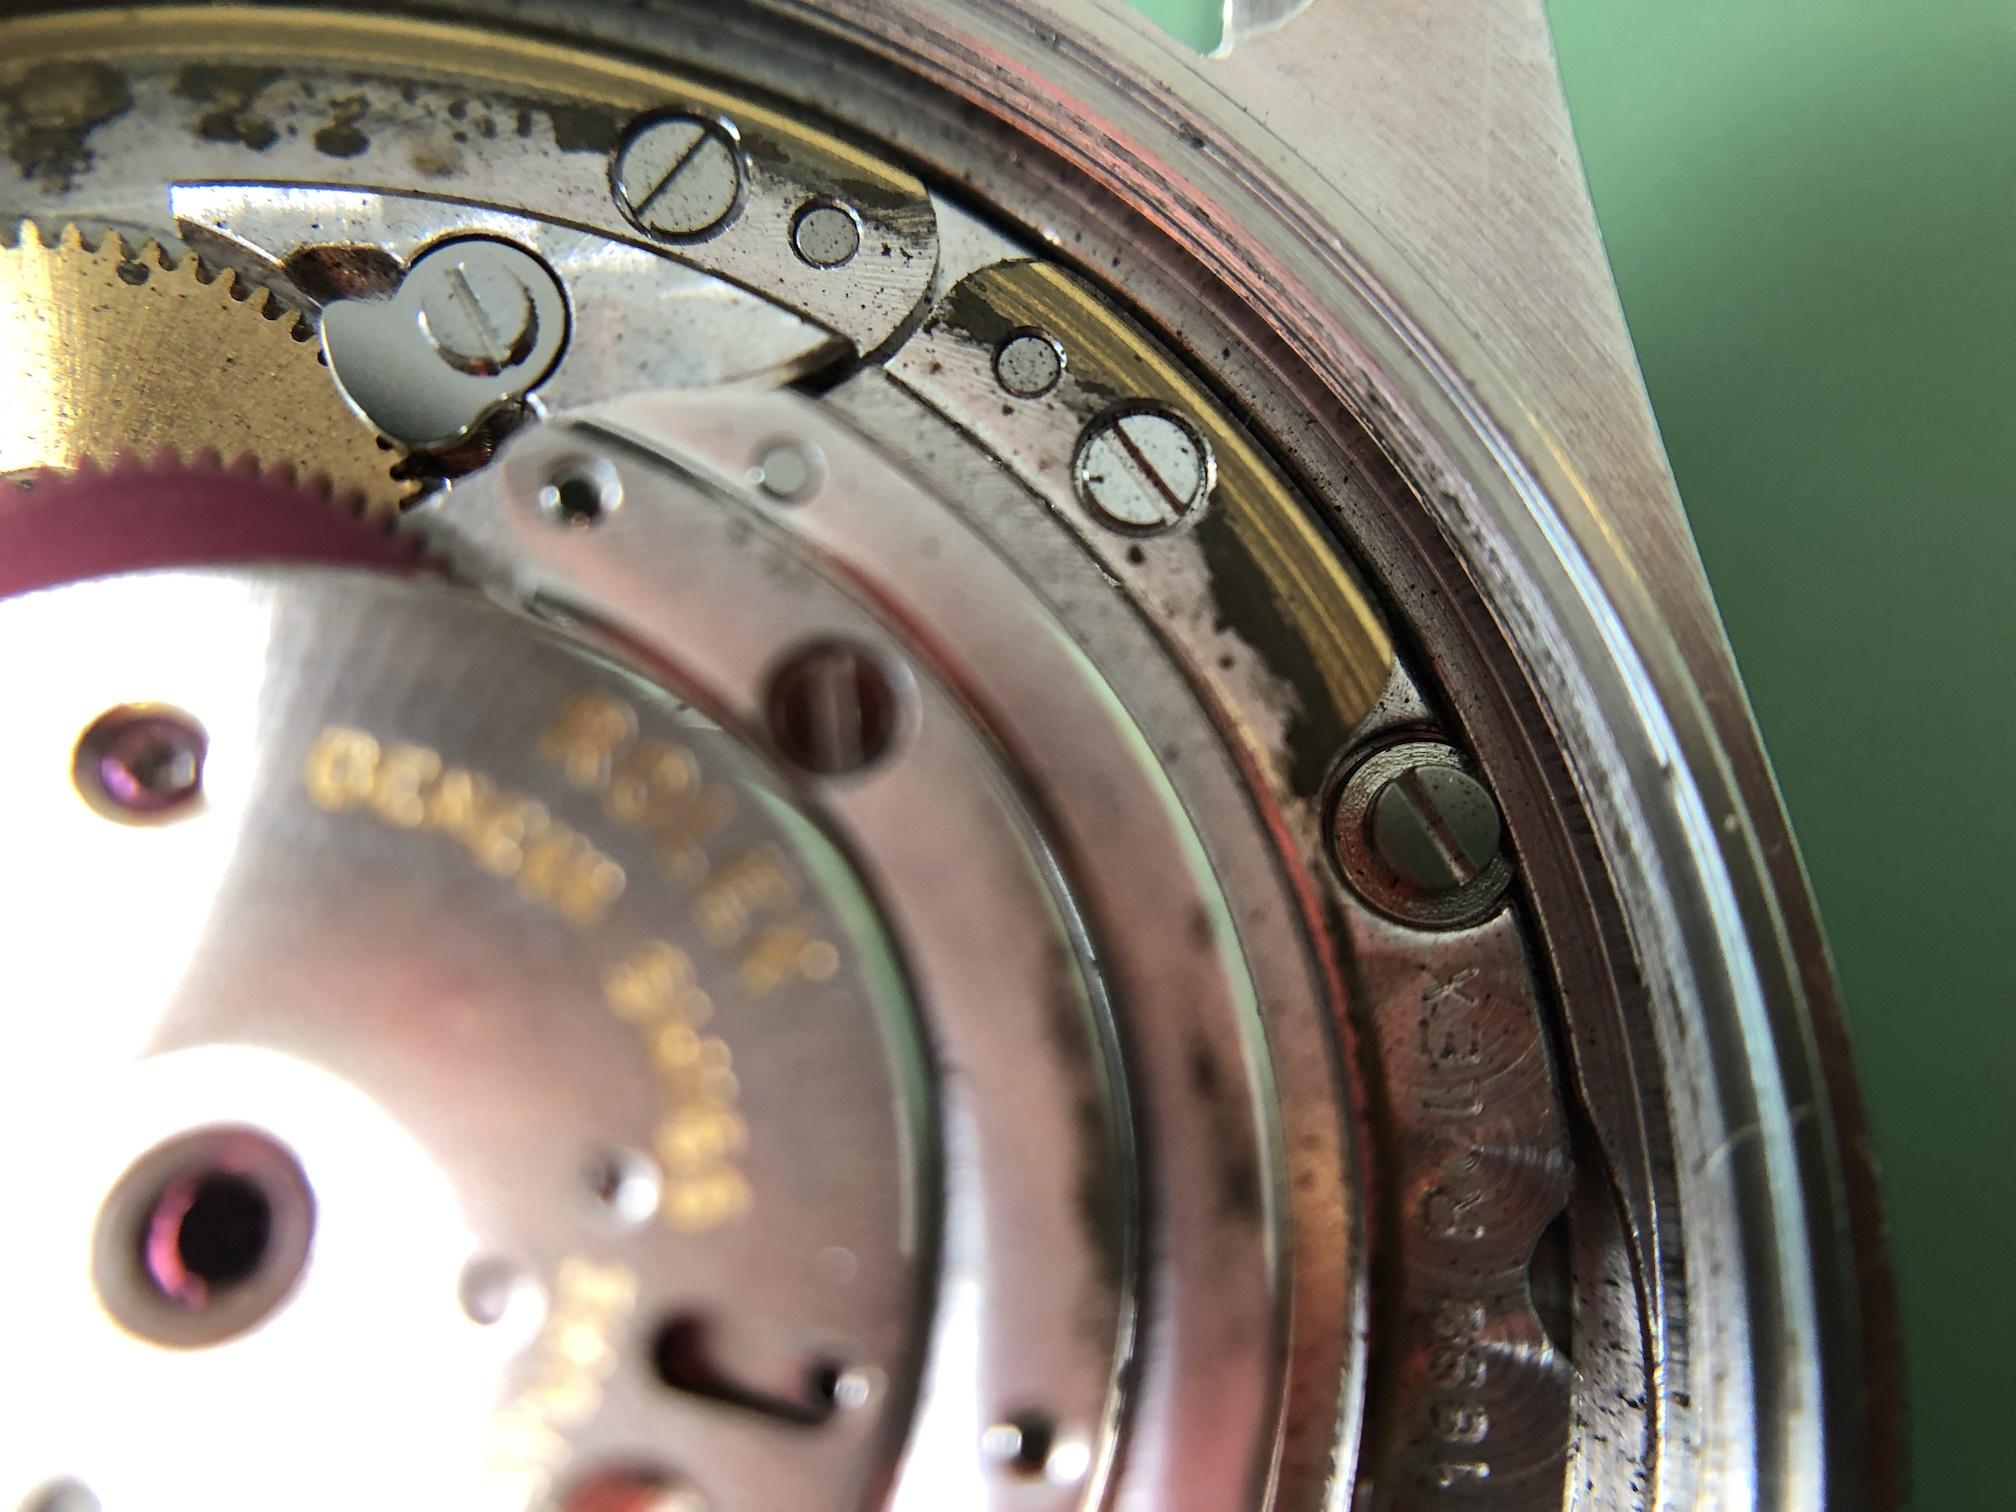
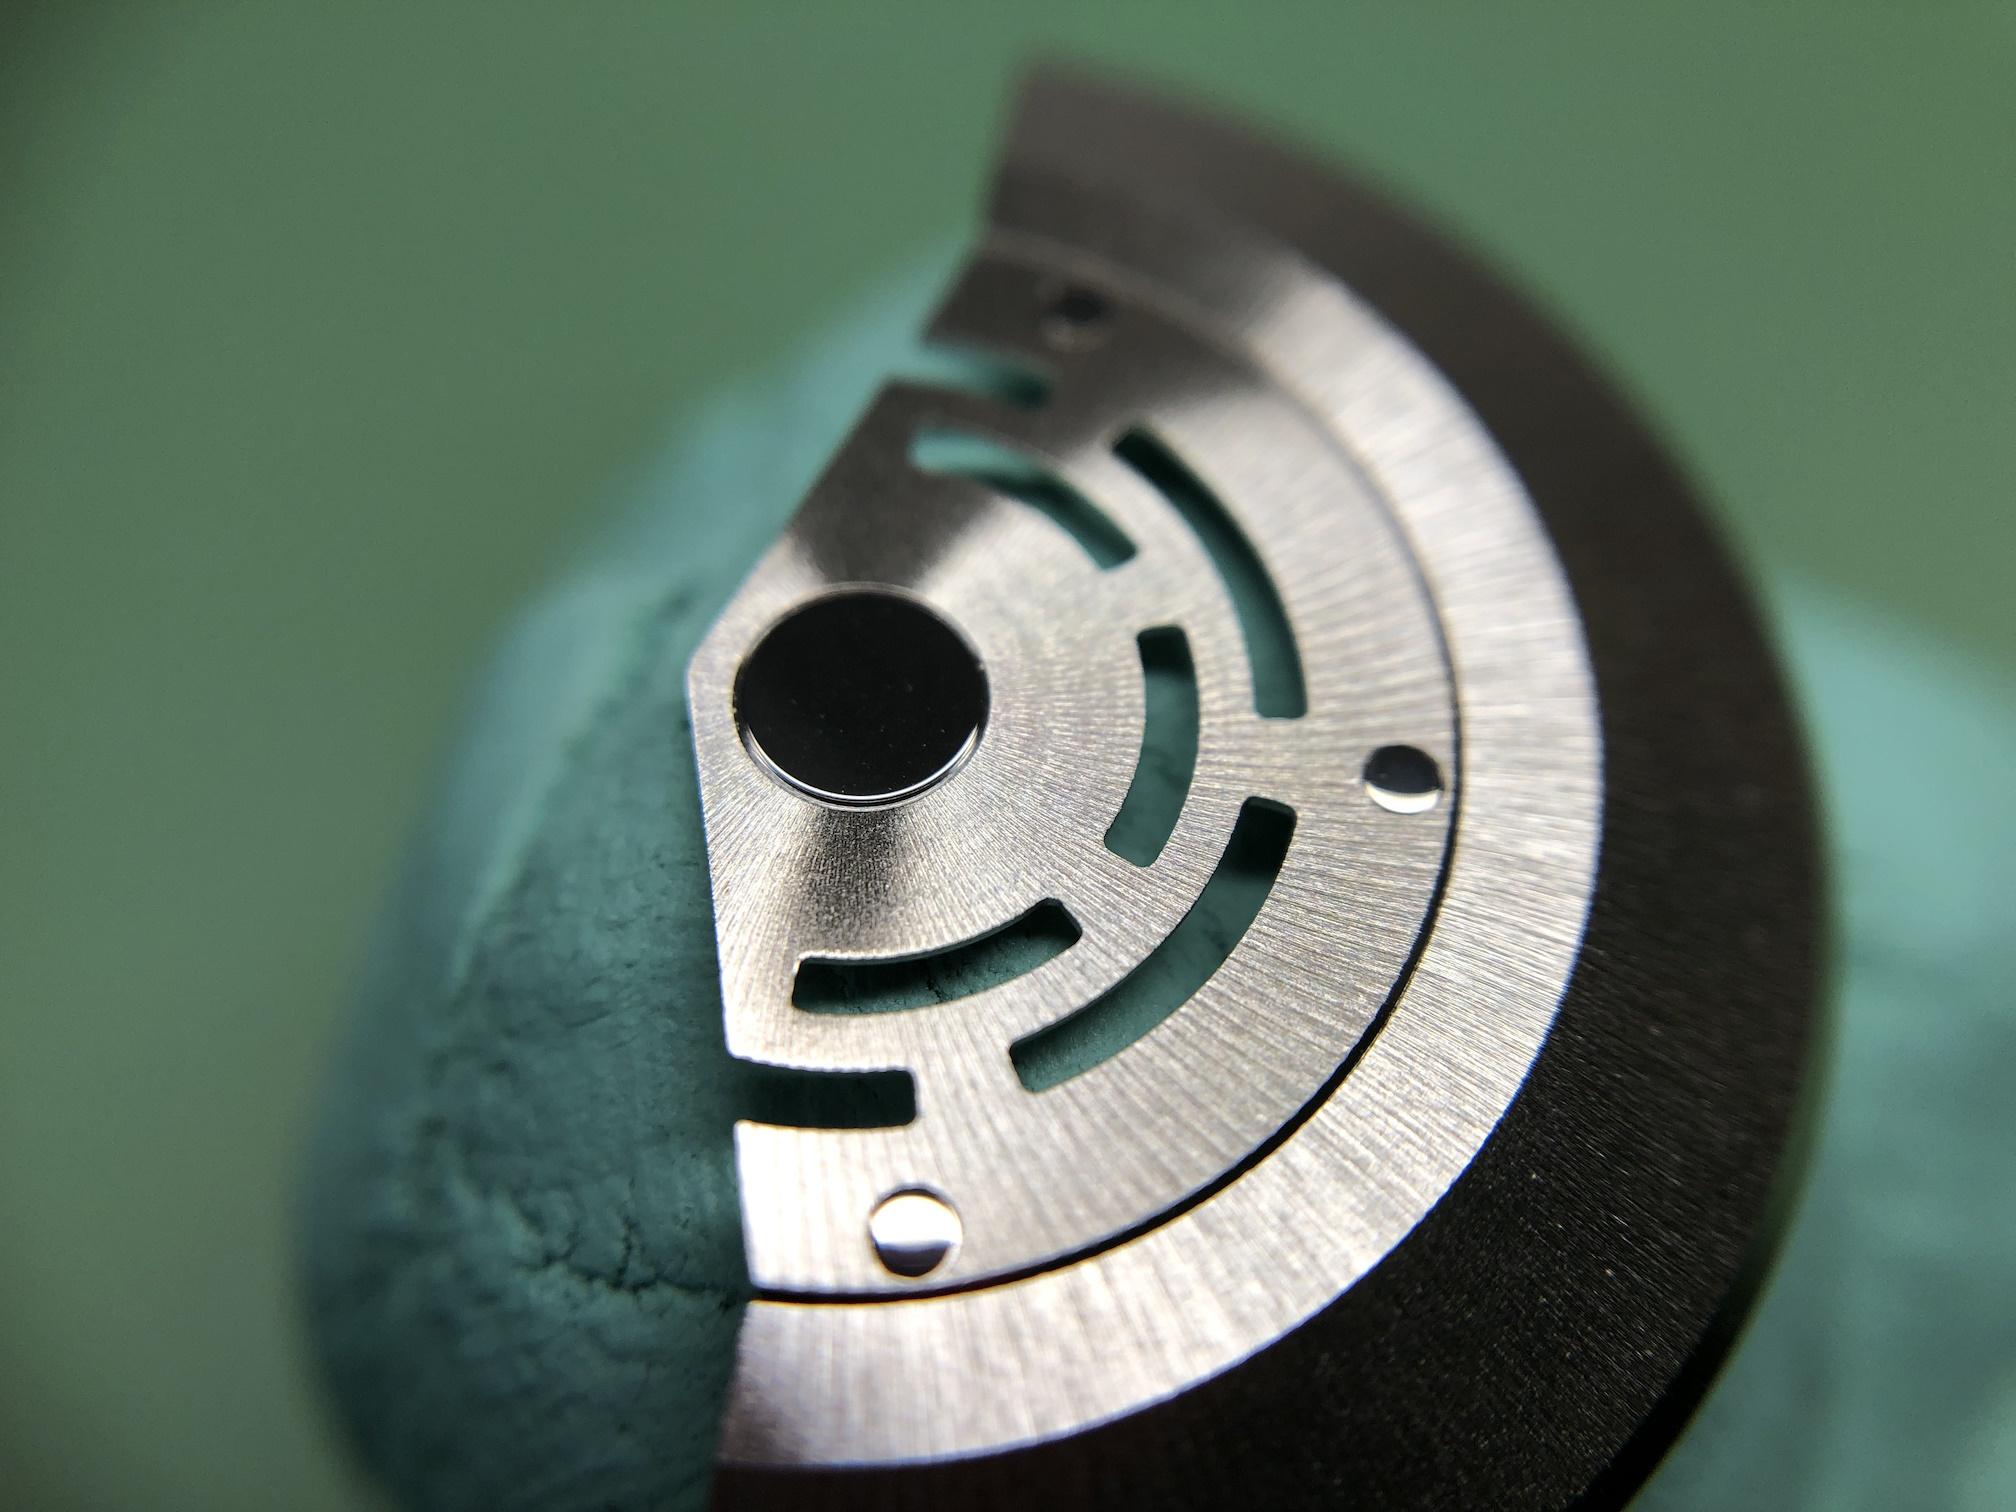
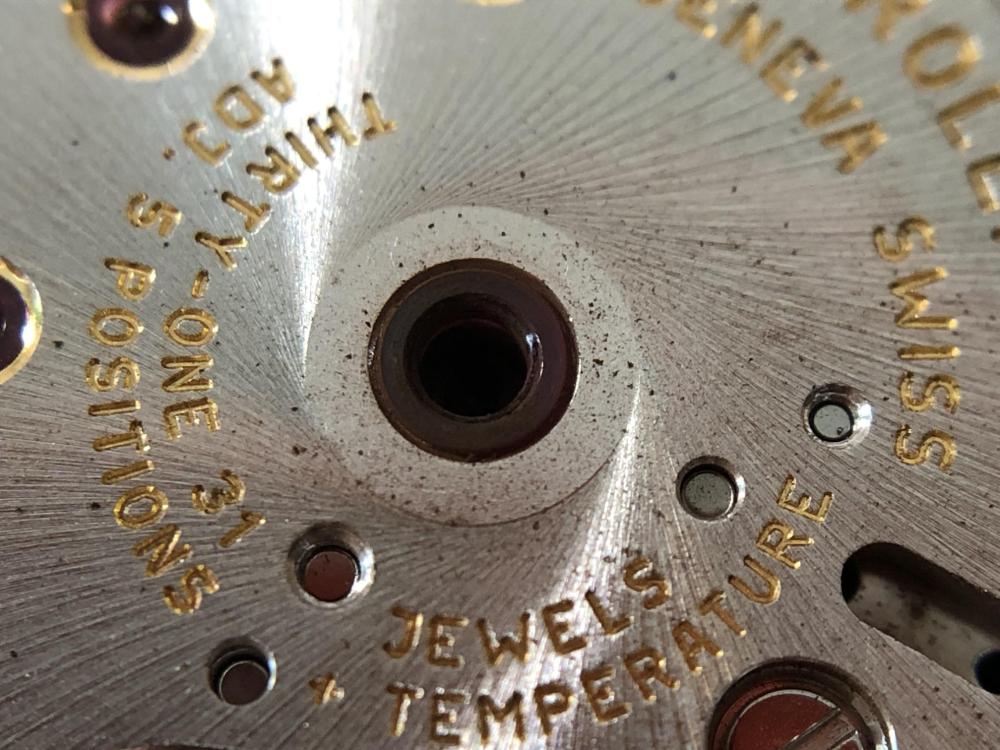
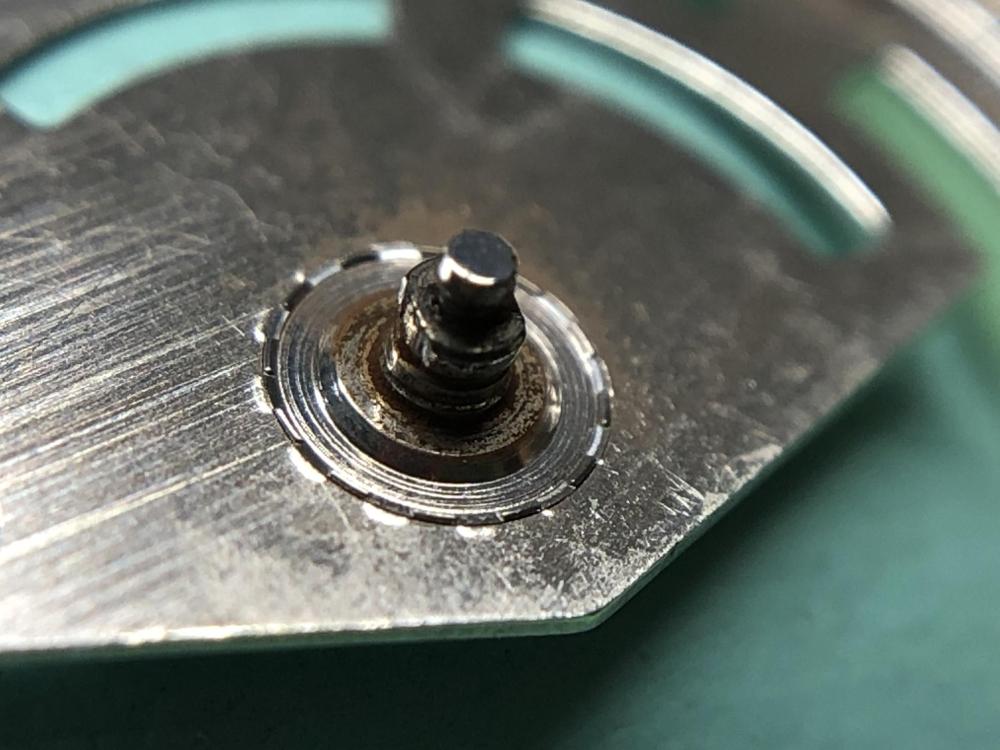
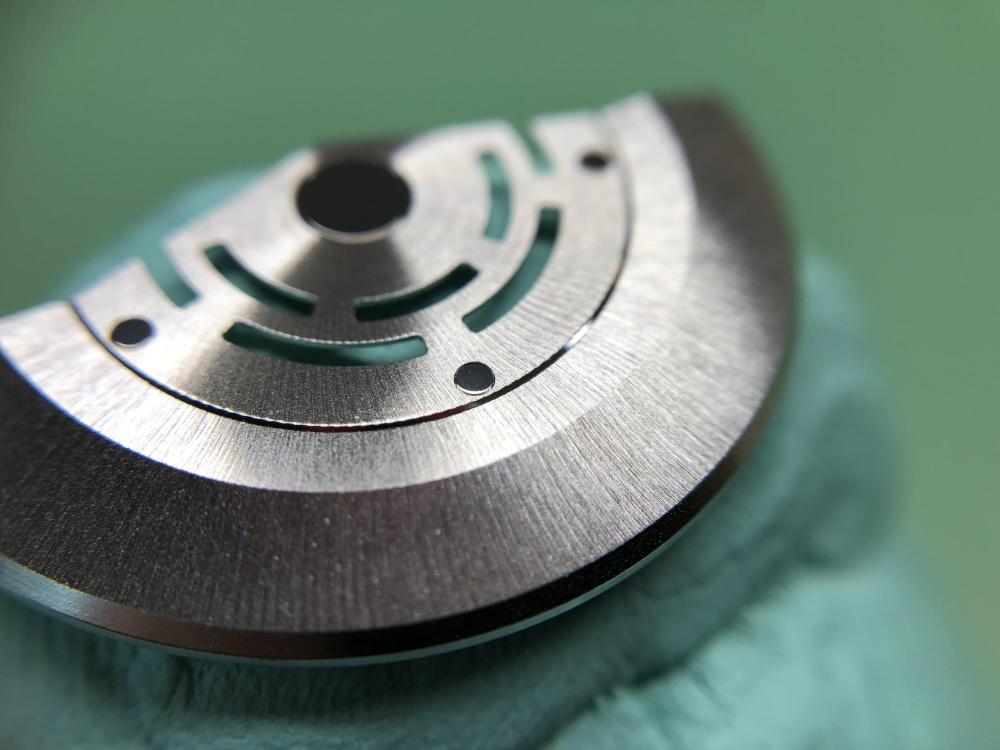
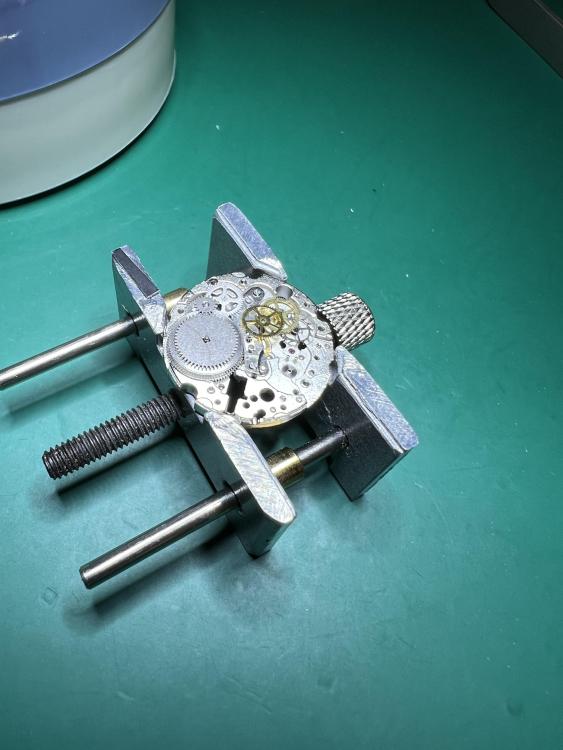
Now the watch is finally opened safely and correctly and I have made a first inspection. As expected, the rotor was so loose that it could not rotate. I have taken many pictures (more than needed I guess) and do not want to anticipate your reactions, comments, and observations but feel free to ask questions if you want something clarified or photographed. The last four pictures in the series show the rotor after cleaning. I am very curious about your reactions, comments, and possible recommendations, especially from those of you with experiences with Rolex such as @Jon and @Knebo. Of course, comments from all of you are more than welcome! This jewel is from the automatic device bridge. All the jewels on it look the same.


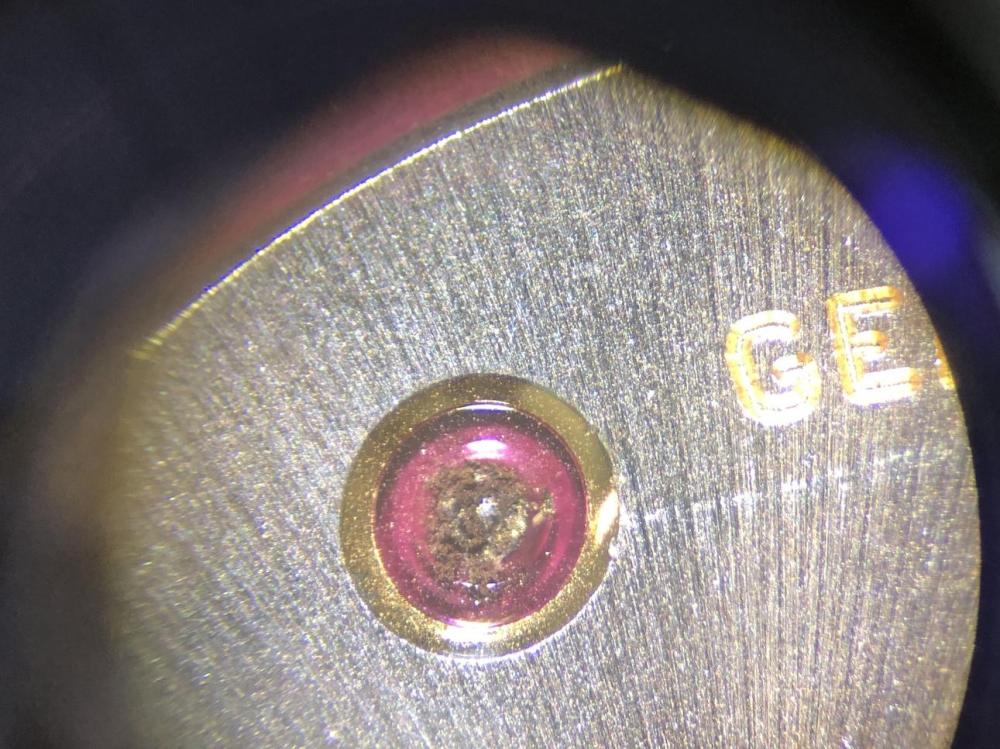 1 point
 -
Are you sure it's a 555 as it's very unusual to have 2 circuits for the same movement? Edit After a little digging is yours a Heuer 185 which should have the 555.232 which is a 2Hz movement? Further Edit After further digging the circuit with the M379 chip is from the 555.232 and Borels may have them. http://cgi.julesborel.com/cgi-bin/matcgi2?ref=|[[H[KZ
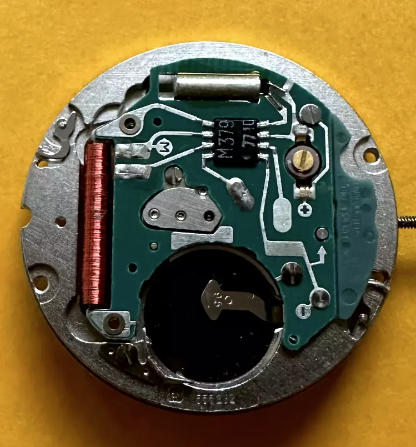 1 point
 -
Thanks Andy yes i can solder, mostly plumbing, i can just about silver solder,not always pretty though. Is it important for the machine ? my room is in the far corner of my house, miles away from any neighbours and i dont watch TV and only me in the house anyway. I got impatient and finshed off the mini mesh basket carrier and soldered a mixer whisk to a stud connector bolt. The machine as far as i could google is a 1/10 hp that equates to 75watts which means i can run it on a fan speed controller that can manage 300 watts. The machine works a treat and the controller keeps things quiet when working in the room. This is what diy appliance conversions are all about, one cleaning machine and one part dryer. Total cost a whopping 19 quid. Breakdown = carboot mixer £5, 2x cousins cleaning baskets £3 , 1x carboot hairdryer £1 , 1x carboot microphone stand £2 , 1 fan speed controller £7 , and about £1 for the bolts connectors etc. Lets round it up to 20 quid just for the hell of it. The plastic tub and green dust cover is just for storage. Come on guys if you haven't got the cash for a cleaning machine and dryer then knock something up, if i can do it anybody can do it.

 1 point
 -
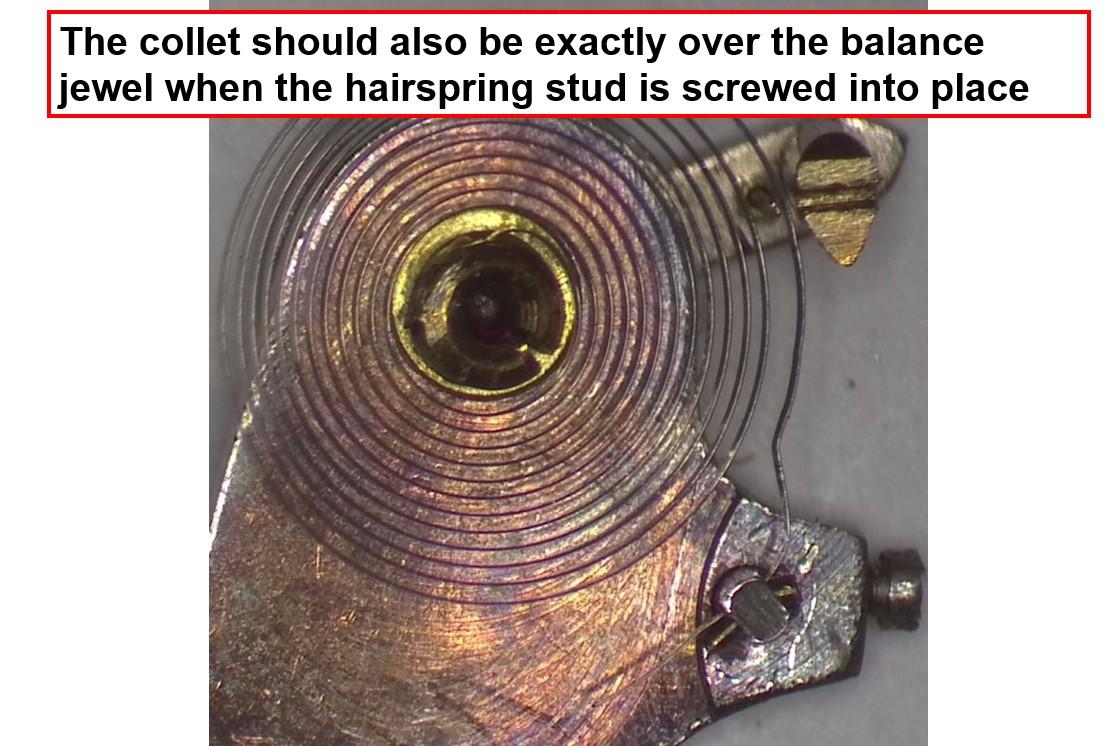
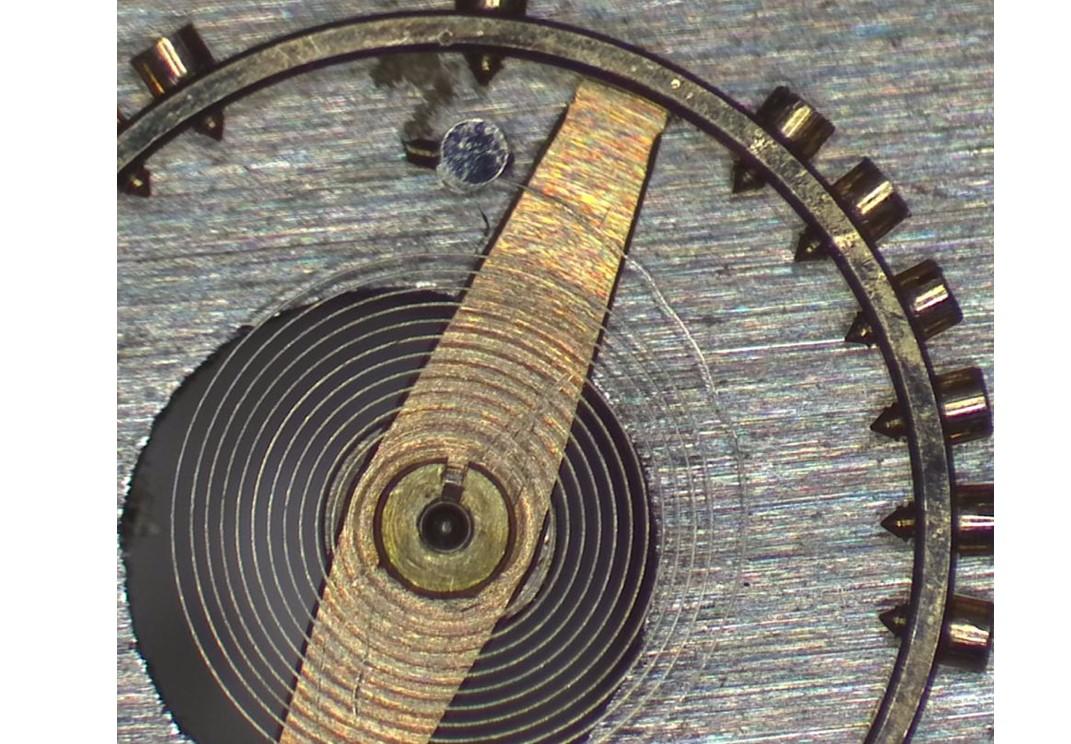
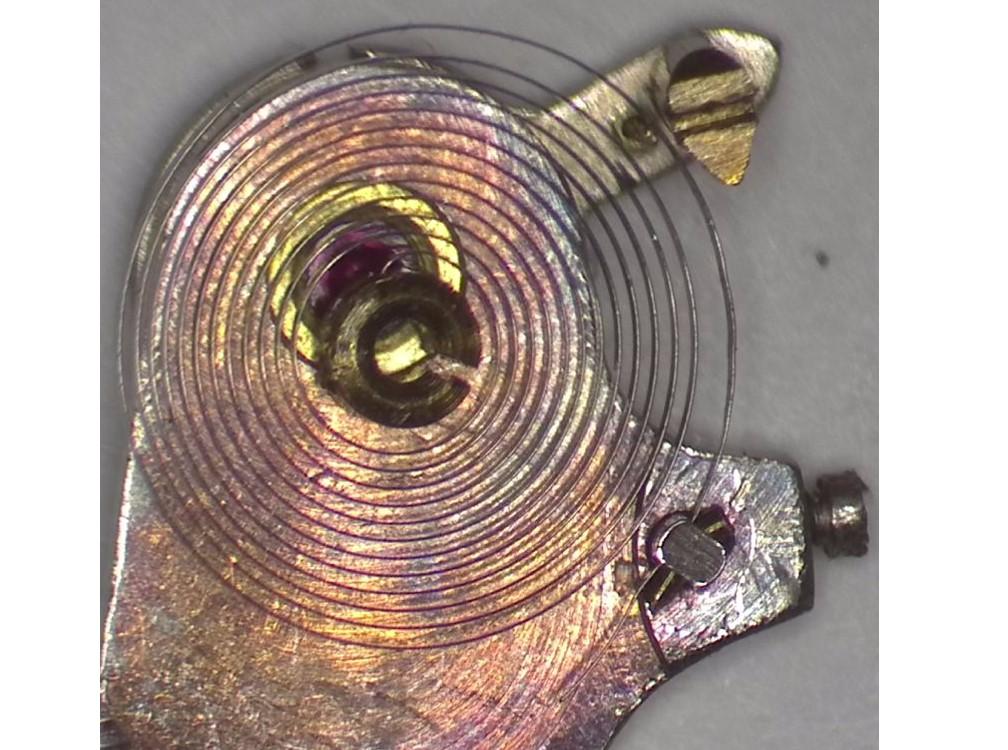
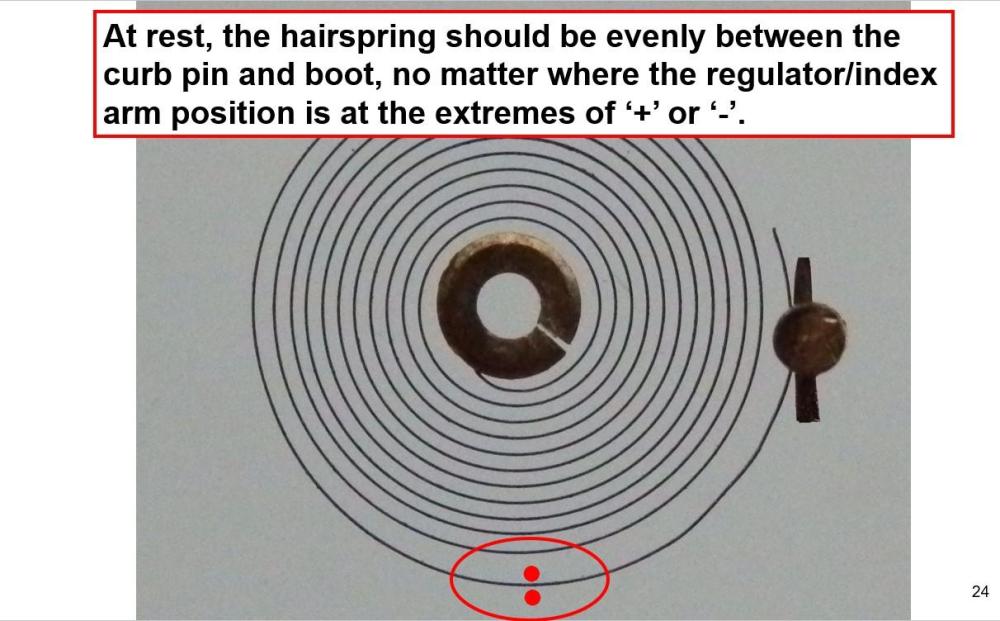
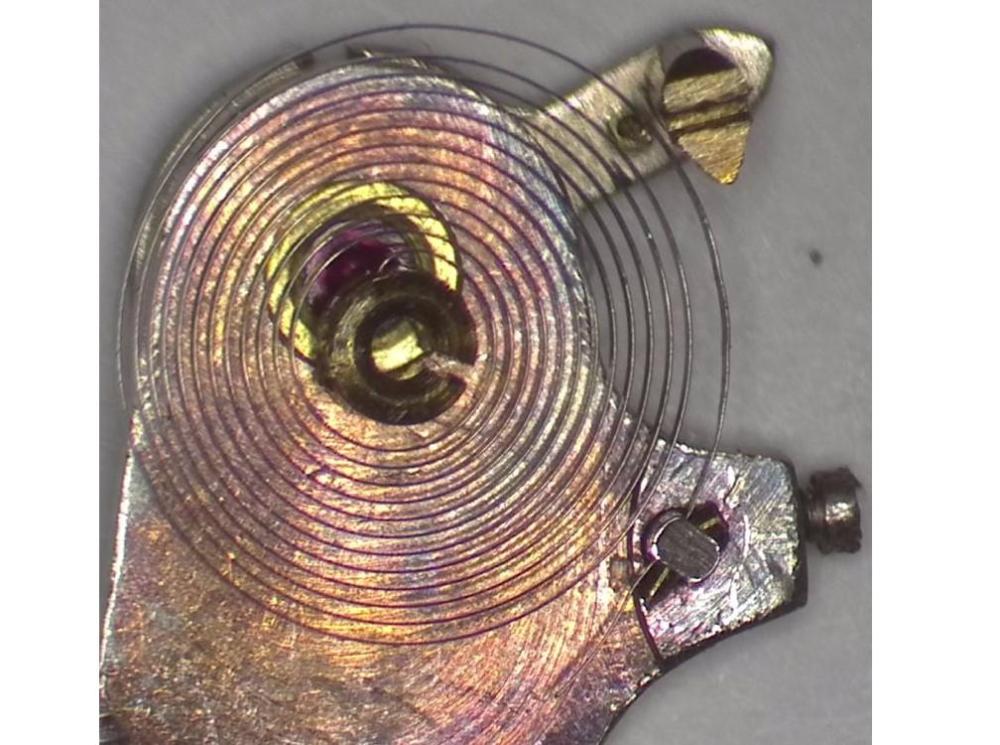
The only real way to know if the hairspring end-curve, collet position, etc are correct is to remove the hairspring from the balance and place it over the underside of the balance cock to see if everything lines up. The first pic is a hairspring with a gentle end-curve. Where the second coil is close to the regulator pin (curb pin) is of no worry, because a flat hairspring such as these don't breath much at that one side, only free-sprung and Breguet hairsprings have an even expansion and contraction on all sides. Don't get hung up on what you think you can and can't do to a hairspring to get it to sit correctly as in this slide. if it requires a kink just before the stud, then do it, but be very sure where the bends need to be to get the hairspring constantly between the regulator pins (pic 1) and the collet bang on over the balance jewel (pic 2) This is one I did recently, where the end-curve was way out with lots of little kinks in this part of the spring, which needed addressing first. So, once the kinks have been removed and the end-curve formed, then I can think about getting the collet over the jewel and keeping the hairspring between the regulator pins, because left like this a big changes in beat error will be the evidence the collet isn't central when the index is moved from extremes of 'advancing' or 'retarding' So, I worked out some bends close to the stud were required. I'm not getting side-tracked thinking the spring wasn't like this to begin with, so why am I putting such extreme bends into it to get it to work properly, as that is assuming anything was correct to begin with. And, I know doing what I'm doing is going to work, so I'm not interested in how it was, because how it was didn't work! The last pic with the acute bends near the stud worked a treat and the second coil closest to the curb pin hardly breathes on that side, so doesn't touch the curb pin, but it is always good to check if that is happening. I hope the pics help. As long as the hairspring is true on the flat when the stud is screwed to the stud holder on the balance (very important to screw up to gain the correct position as the stud positions itself) and the coils are evenly concentric and the end-curve is formed so the regulator pins don't ever push or pull them in the extremes of the index and the collet is exactly over the jewel and ensuring the second coil doesn't touch the curb pin, then your ready to attach it back to the balance and see the fruits of your labour! But before you do, move the index from left to right and make sure the hairspring remains central and doesn't move. Until you have ensured the hairspring is in this condition, as in the end slide, there is no need to touch the curb pin in my experience. It looks fine. Exactly!


 1 point
 -
Good progress made on the assembly. Next step the barrel (and gear train ) bridge time to breath a bit and go rock climbing. Interestingly lots of place where I thought one would put some oil (hp) Miyota recommends grease: center wheel pivots. Driving gear for ratchet wheel pivots reduction wheel pivots
 1 point
 -
Take a rod that is bigger in diameter than the nut but is smaller than internal diameter of the outer bearing ring. File a slot in it.1 point
-
Well put John! Yes, isn't it amazing what imaginative conclusions ignorant people draw? Having been involved with watches as my main hobby for eight years, I still cannot understand how one can earn enough money to make a living repairing and servicing watches. I have just spent more than a full working day refurbishing a quartz watch (Mondaine) that cost about $300 new. If I'm lucky, someone might be willing to pay half of that at best to own the watch. After my own expenses and taxes, I'd be left with pretty much nothing. Me and my family would starve to death! What it takes is of course to be experienced and quick, and have the most efficient tools. There are already several excellent videos on YouTube showing how to service the Rolex calibre 3135. As always, there are bad examples too. Fortunately, I am experienced enough to quickly identify clunkers. If I recall correctly, Mark has at least two excellent videos on his channel for servicing the Rolex calibre 3135. When I create a service walkthrough, it is primarily for my benefit. Partly because I find it very stimulating and partly because it makes it easier and saves time when I service the next movement of the same or similar calibre. I see it as a complement to the good videos that exist because these videos rarely name parts, describe which oils have been used, the exact assembly order, and so on. A good example I think is my service walkthrough of the ETA calibre 2892-A2 which even Mark to my delight appreciated. Wow, you are reading way too much into my use of the word "perfect". What I should have written is that I want to have enough time to do a first-class job without stress. That is, should any unexpected problems or issues arise, I want to be able to take the time needed to deal with them in a correct or at least professionally accepted manner. I have fought and am still fighting my ambition towards perfection and feel that I have come some way! This means that I now enjoy working with watches much more. Here are some quotes about perfection that I appreciate very much and that I remind myself of when the "perfection devil" comes to visit. "Don't let perfection be the enemy of the good." ~ @LittleWatchShop "Perfection is expensive to approach and impossible to achieve!" ~ @Waggy1 point
-
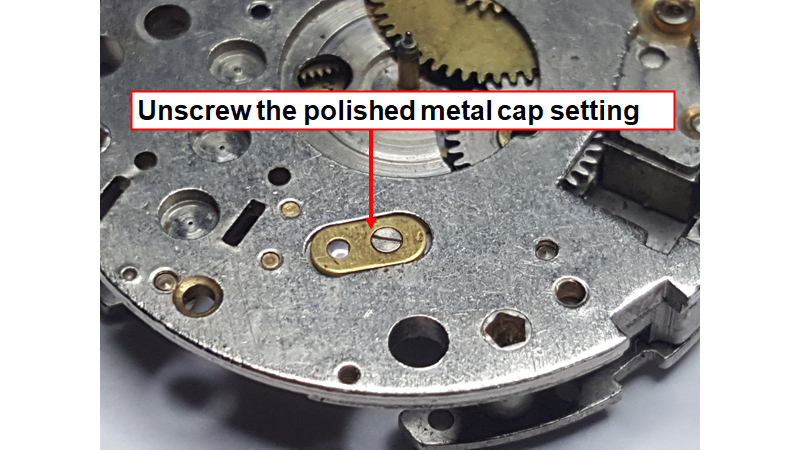
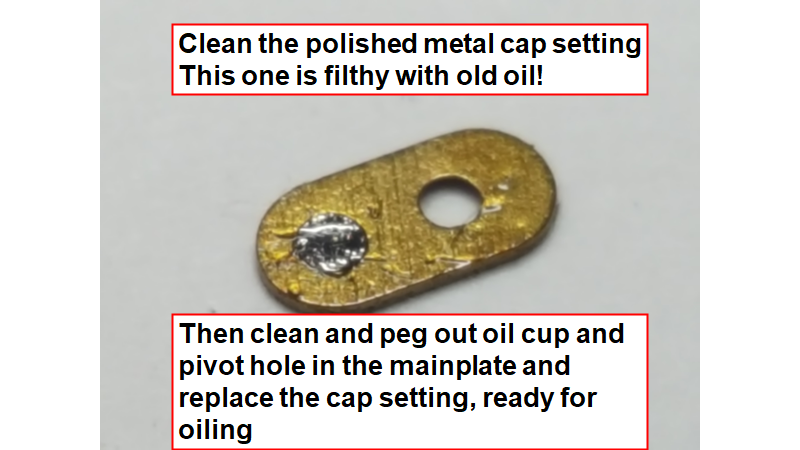
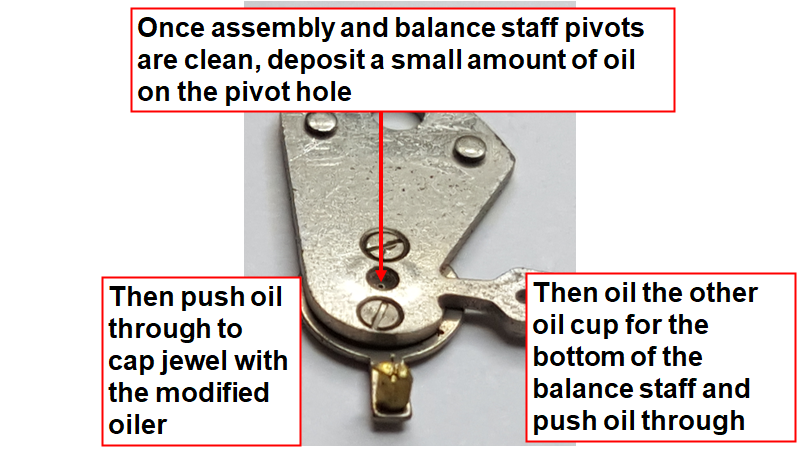
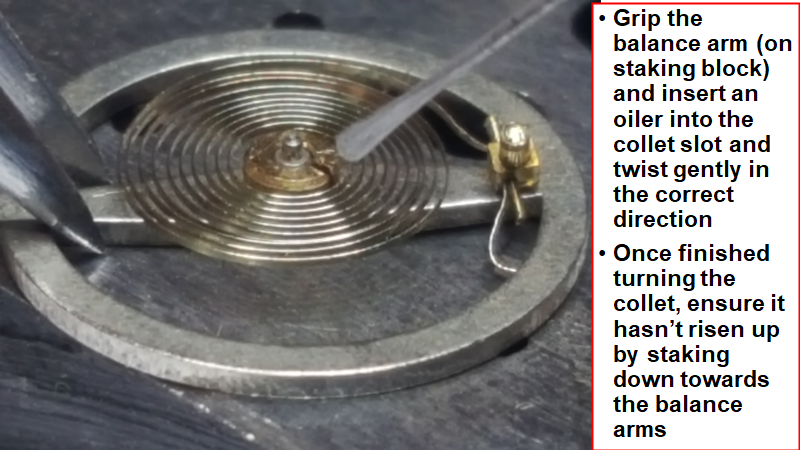
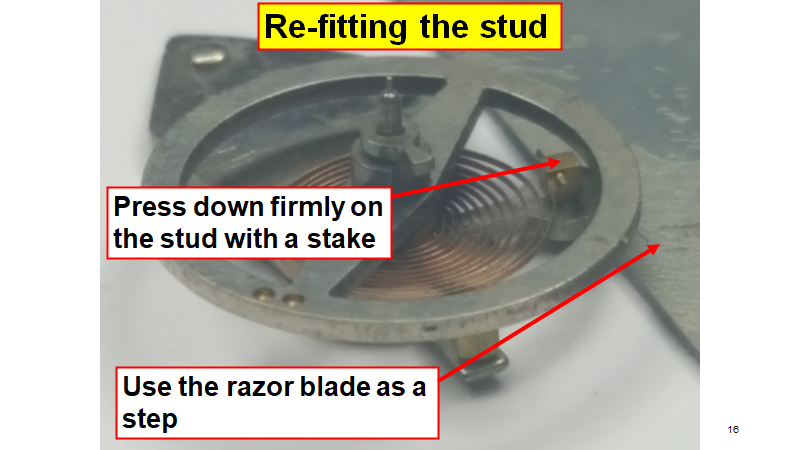
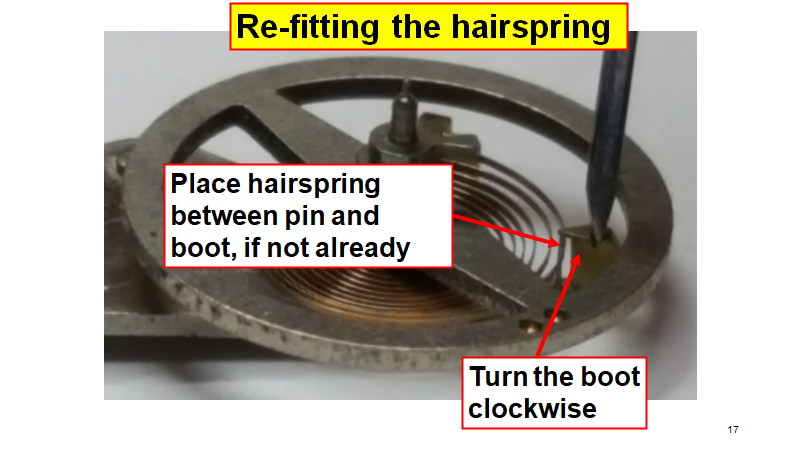
Hi, This is the third instalment on the Baumgartner BFG 866. I wanted to show how to bring the watch into beat On a previous walk-through of the BFG 866, I have described in detail how to remove the balance and hairspring to be able to oil the cap jewels As you look between the banking pins, the impulse pin is off to the left side slightly, putting the watch out of beat. The collet is turned in the opposite direction to the direction the impulse pin needs to move. So if in this case the impulse pin needs to move anti-clockwise to get it perfectly between the two banking pins, then the collet needs to be twisted in a clockwise direction You can attempt to turn the collet whilst fixed to the balance cock, but there is a much greater risk of damaging components, especially the hairspring. This is the way I teach my students, as it gives them the skills and confidence to remove the hairspring and balance from the balance cock and while removed they can oil the cap jewels as I've shown in this other walk-through on the BFG 866. I've got two more walk-through's on the BFG 866 that I'll post on the subject of adjusting the friction fitted minute wheel that is on the barrel and removing/re-fitting the centre seconds wheel and oiling the movement...

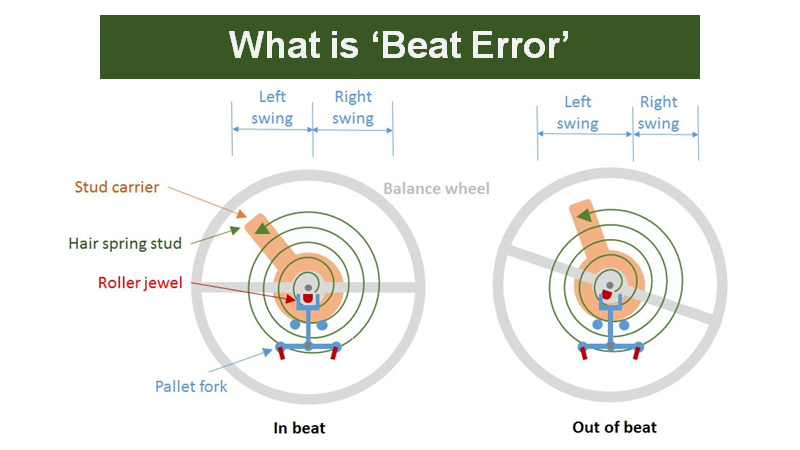
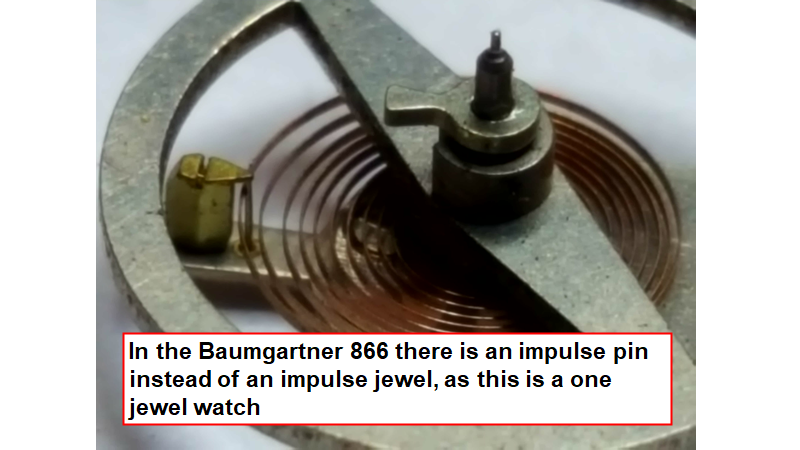
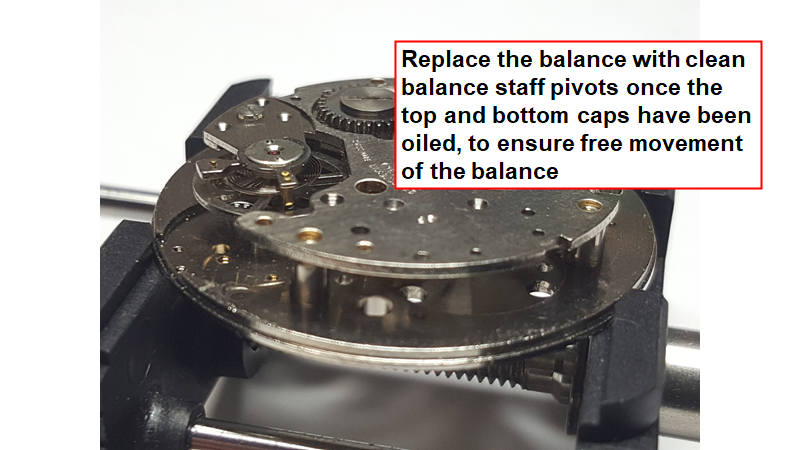
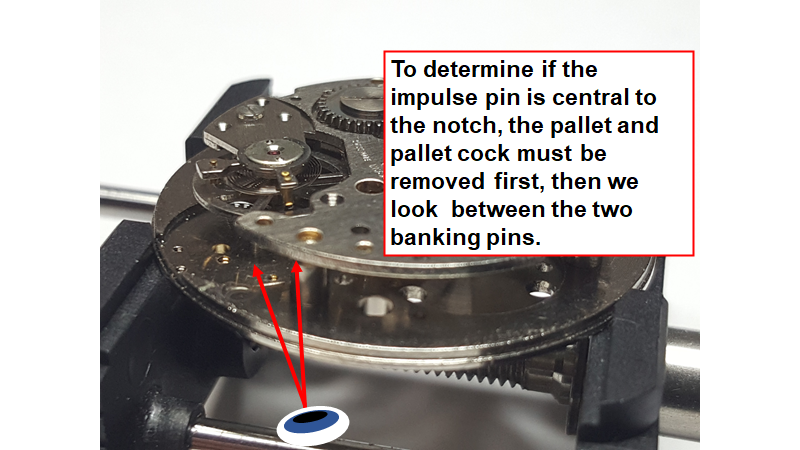
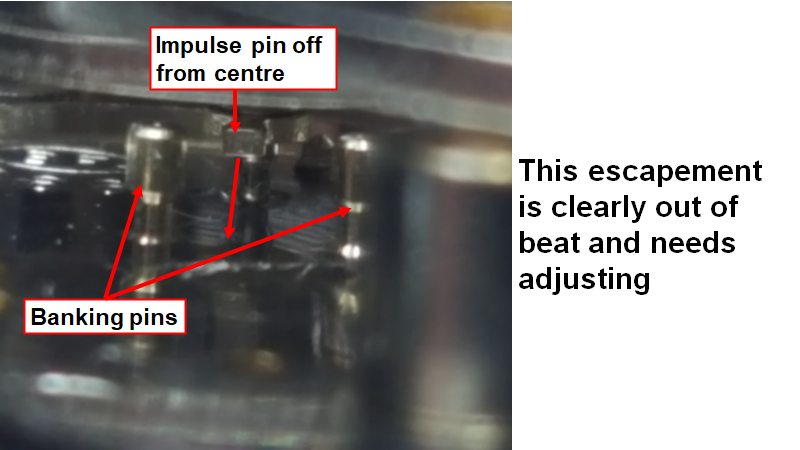

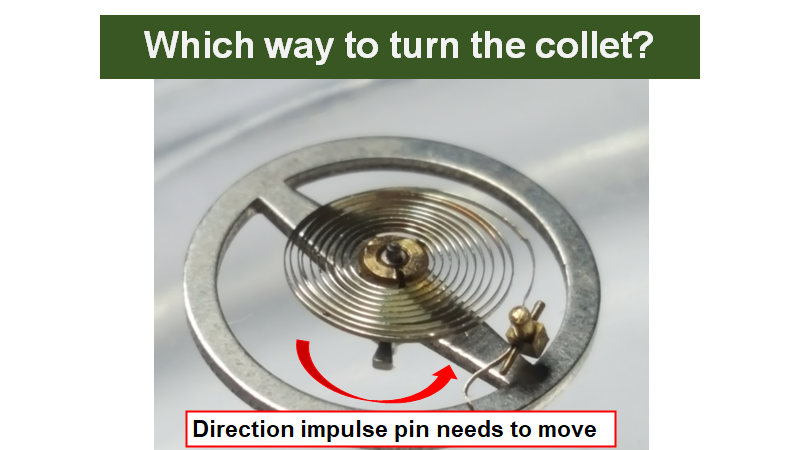
 1 point


.thumb.jpg.cb17a66989f1e796fd4217db2e9ca9df.jpg)