Leaderboard
The search index is currently processing. Leaderboard results may not be complete.


Popular Content
Showing content with the highest reputation on 08/10/24 in all areas
-
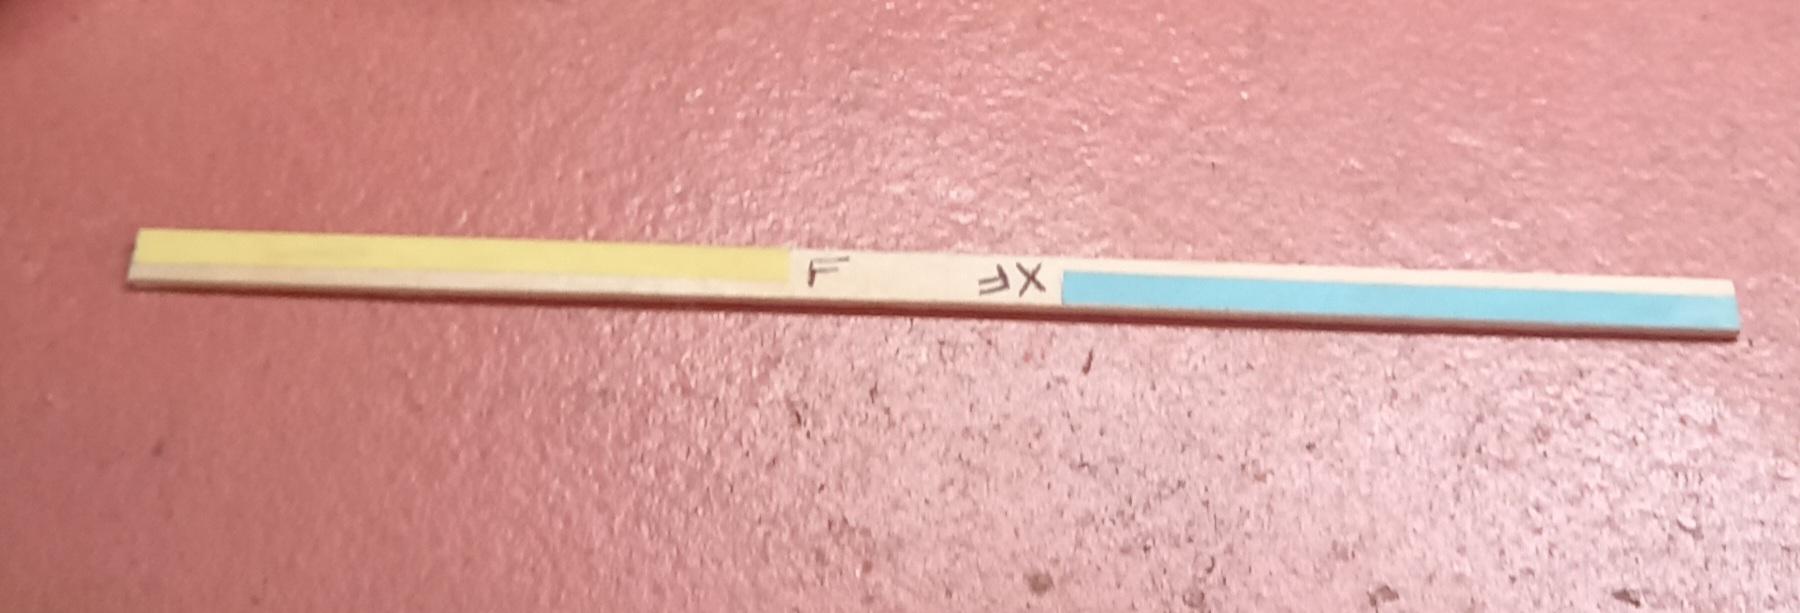
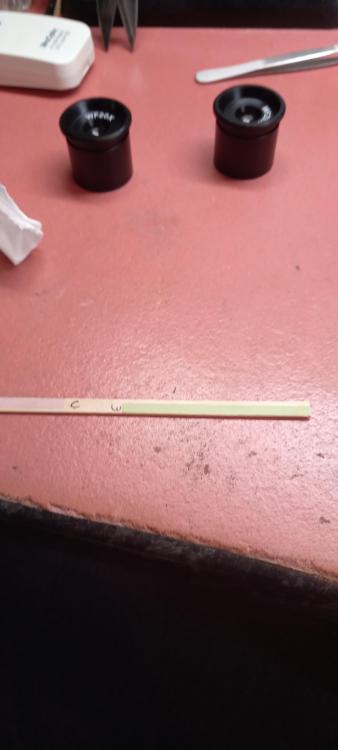
A little sanding item tip for a fiver. Great for fine shaping tweezers and part making, tougher and less messy than wet and dry. Dental plastic diamond lap strips. double side tape to a coffee stirrer, this is how us Yorkshiremen roll . And for those of you overseas this is how we speak in yorkshire , actually i dont I'm rather porrshh https://youtu.be/Xu5R1o2DgJw?si=ps3JBAS_u3sz6R7v

 5 points
 -
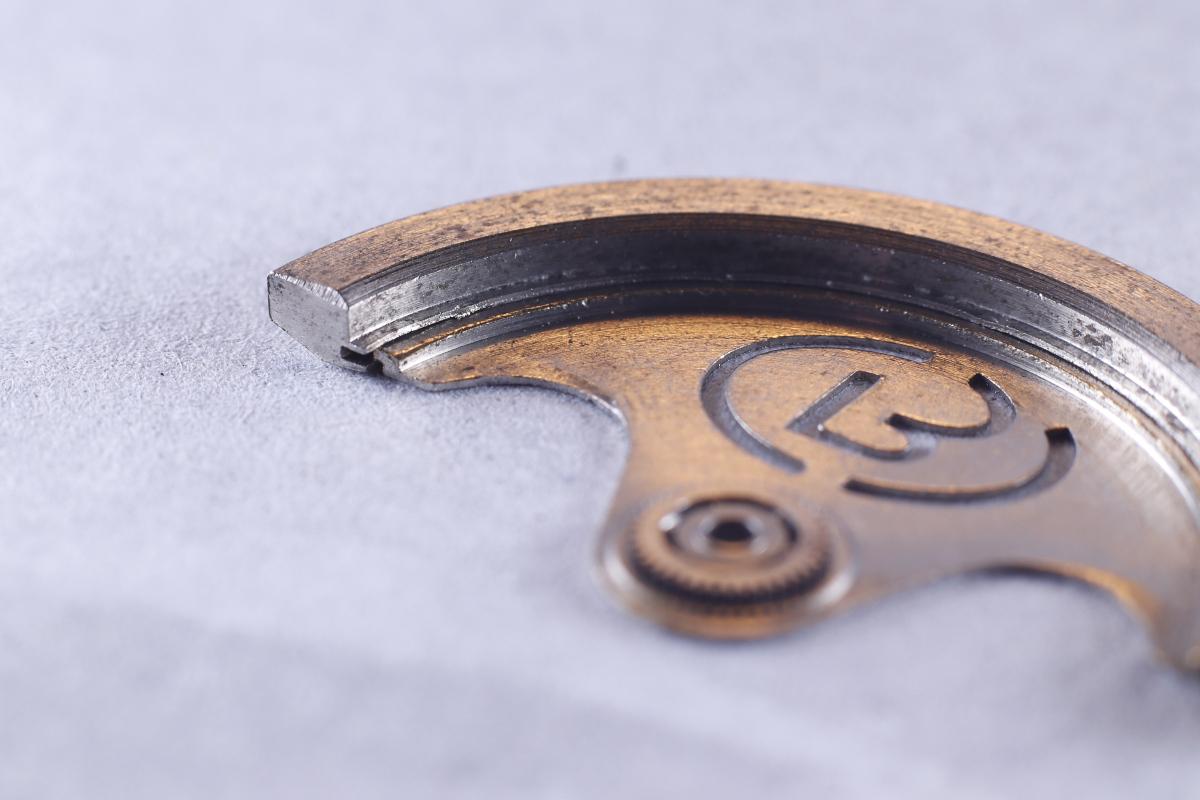
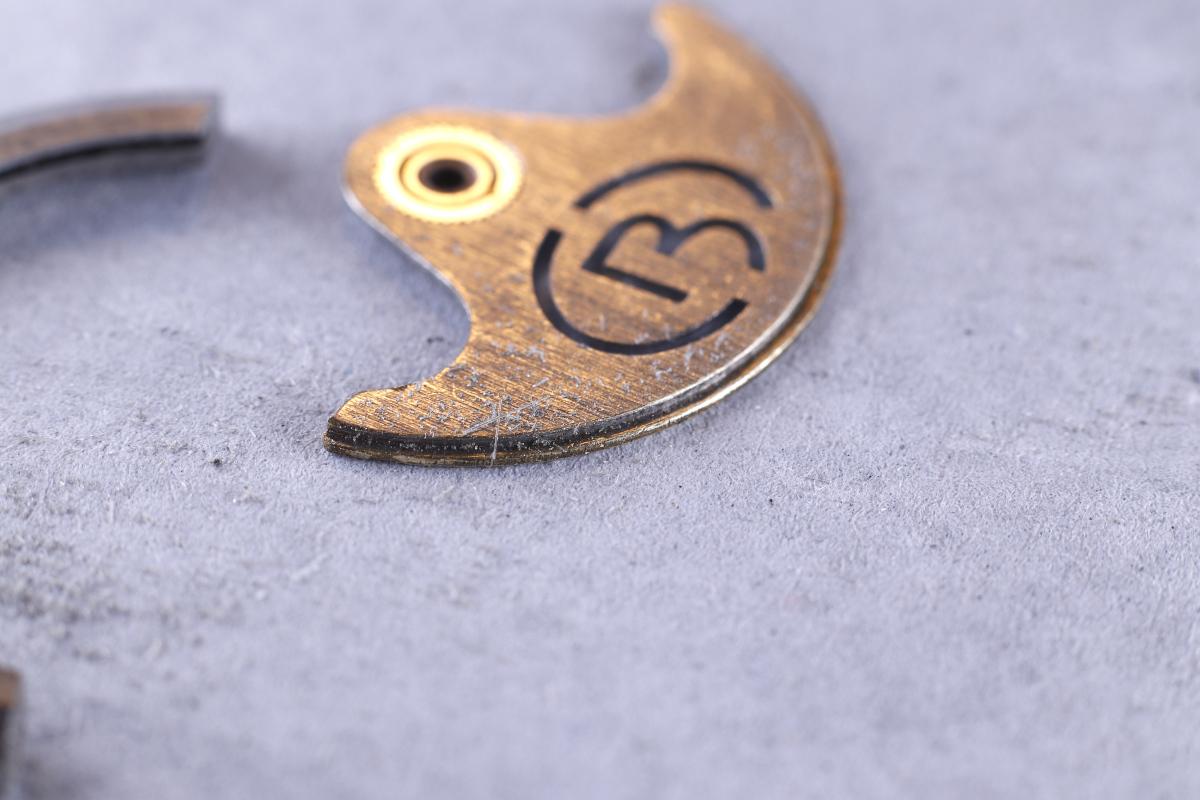
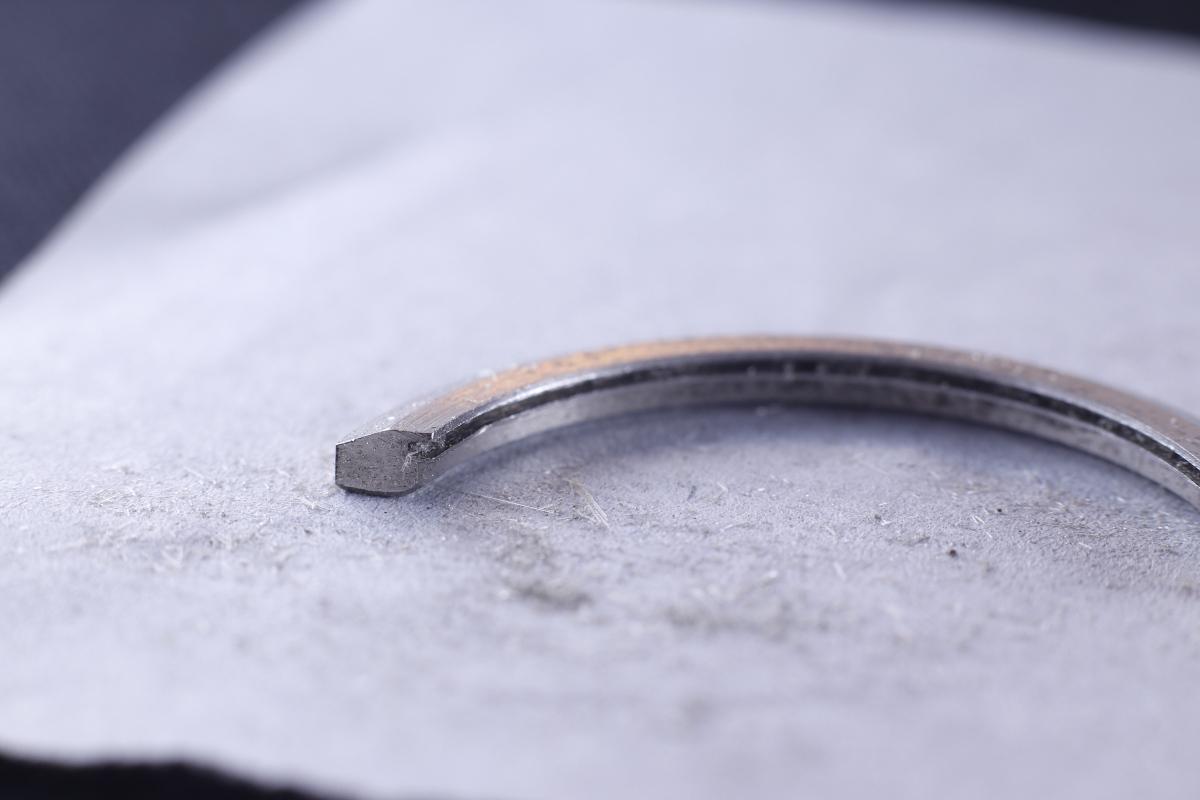
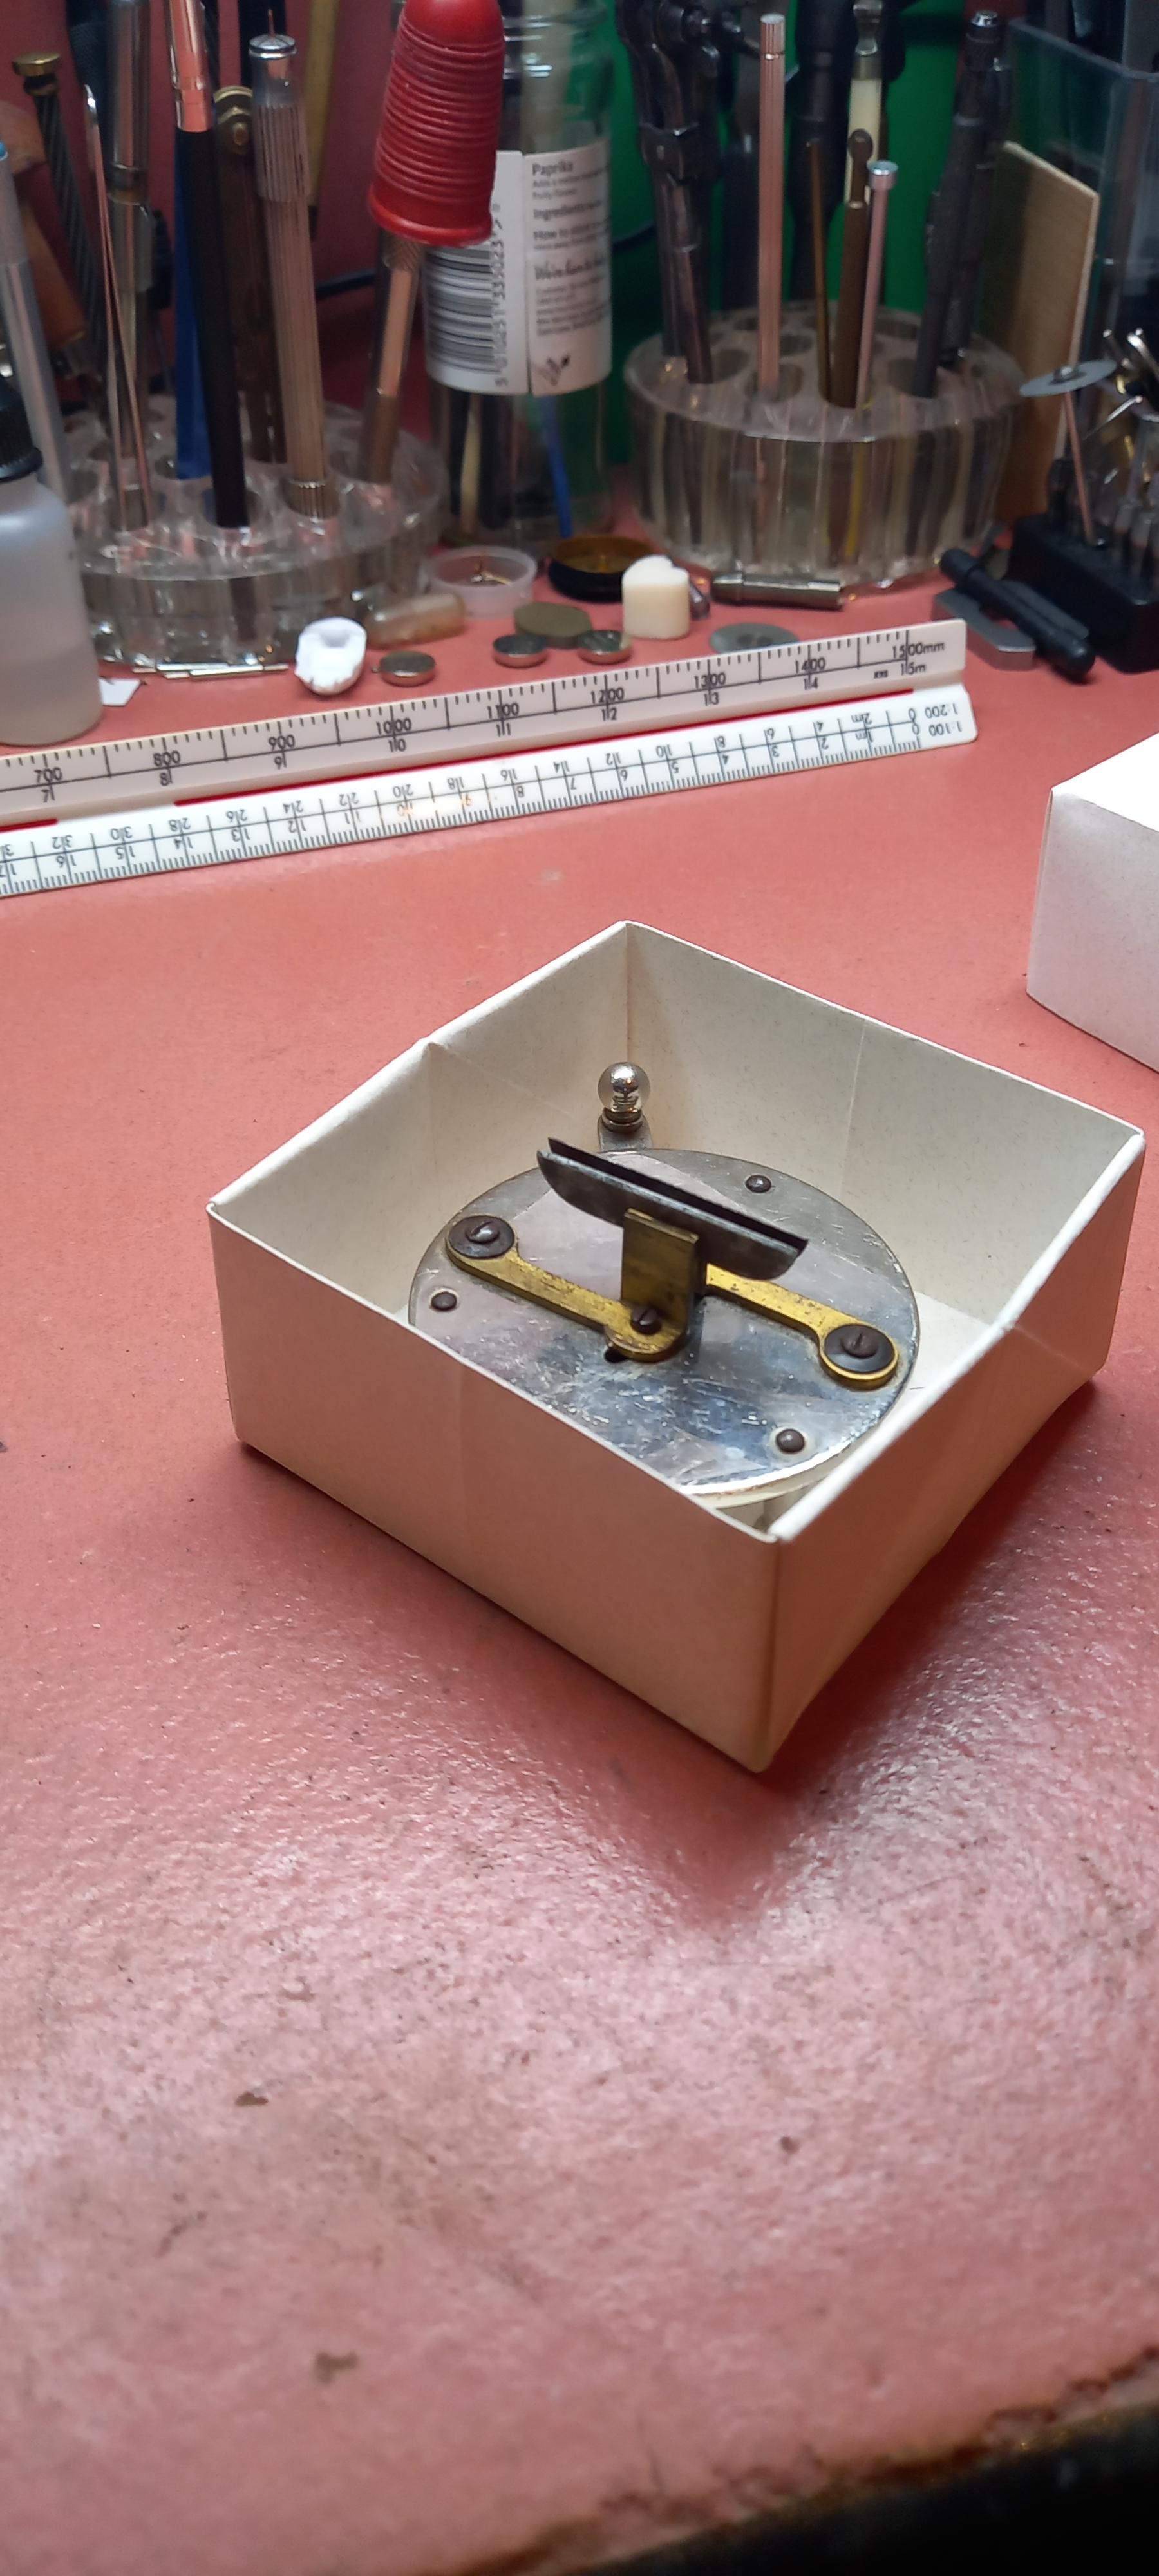
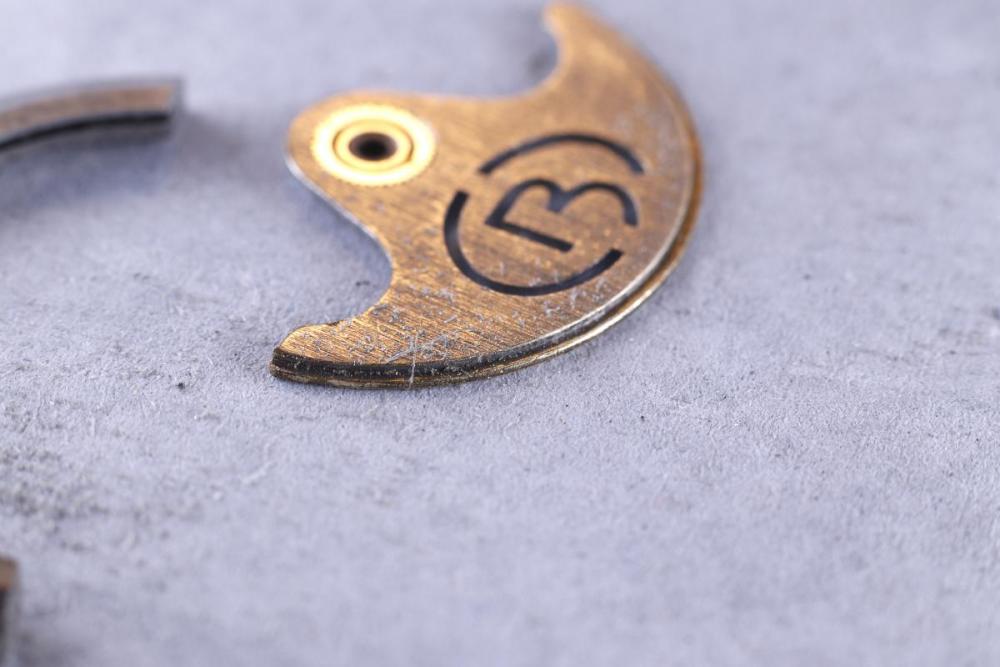
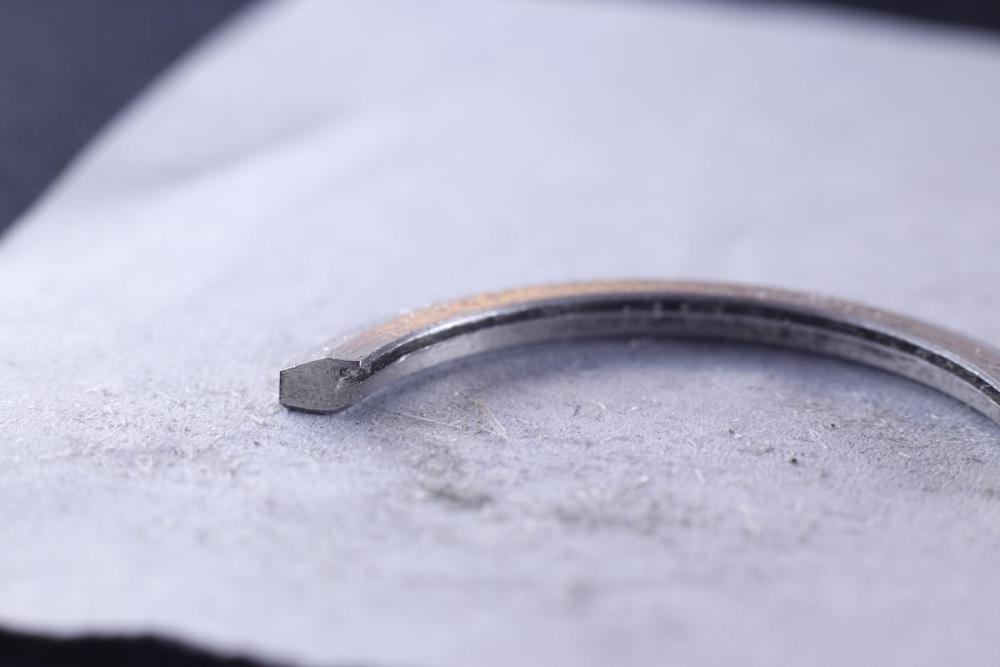
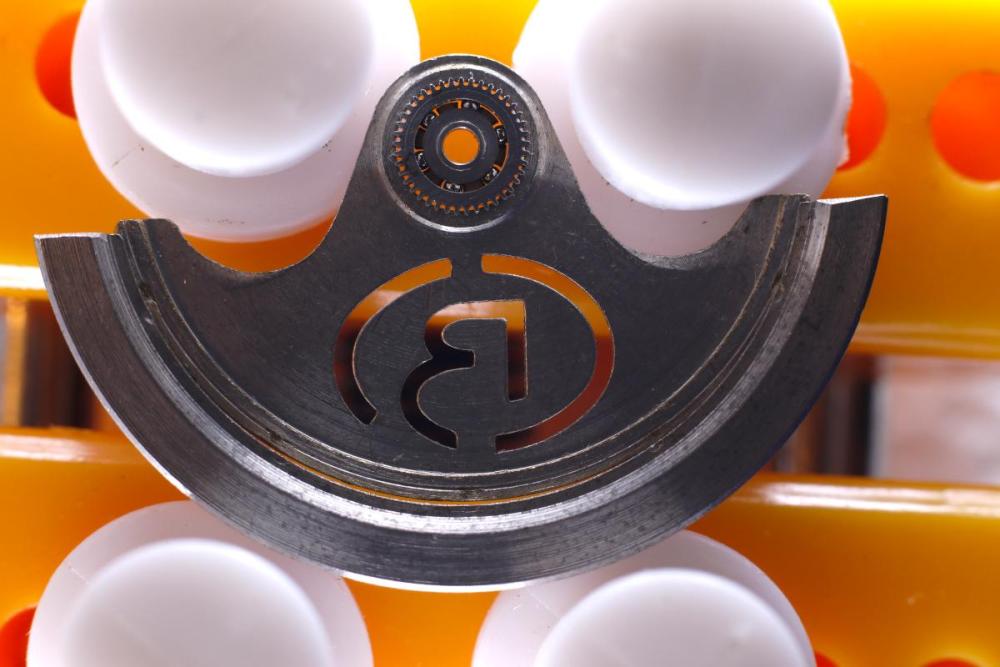
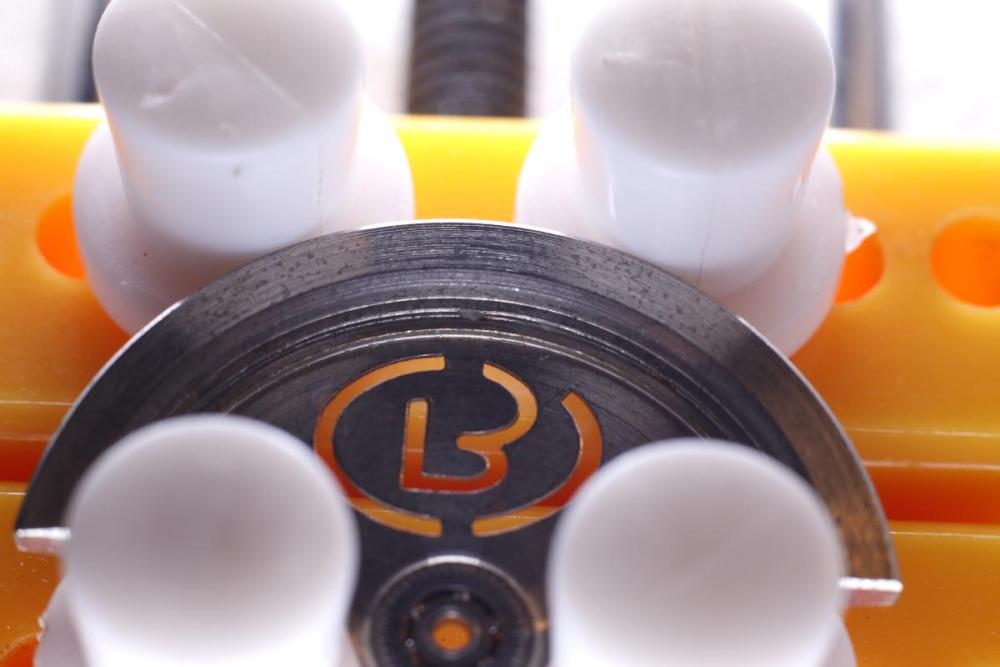
Separated the weight from the rotor. Opened up the upper flange on the groove where it folded in, or crimped. I did that by putting a screwdriver tip in the slot and gently easing from one side of the fold, then the other, trying to keep the pressure on the lower flange at the back of the groove; at the tip of the screwdriver. Dry fit I then cleaned both parts with a fibreglass pen, just to make sure there was no crud. I cleaned them with IPA. When doing the dry fit it wasn't easy to get the two ends to line up perfectly, the rotor arm would be slightly off to one side within the weight's groove. Even pressure was required so I lined it up in a case holder. CA glue (yes, I know, but I don't have a staking set, and I'm not buying one to fix a ten dollar part) was then applied using a cheap oiler (smallest of them) with acetone on hand to clean it afterwards. I put the CA glue on a small square of tinfoil to use in a similar fashion to an oil pot. I then closed the clamp keeping slight downward pressure on the middle of the weight to stop it lifting. There's a tiny bit of squeeze-out, which I only saw when taking the photo, but I don't think it's going to affect things much. Looking on the positive side it will show anyone else that glue is present. Should have remembered: The pressure points are slightly different being higher on the weight than on the rotor arm, slightly exacerbated by the slope on the clamp posts. It's a nice tight joint on what is the underside of the rotor, facing upwards in the clamp, but it's opened slightly at the apex on the top face of the rotor. It's not bad at all, just could have been avoided. Low temp solder was the way to go.

 4 points
 -
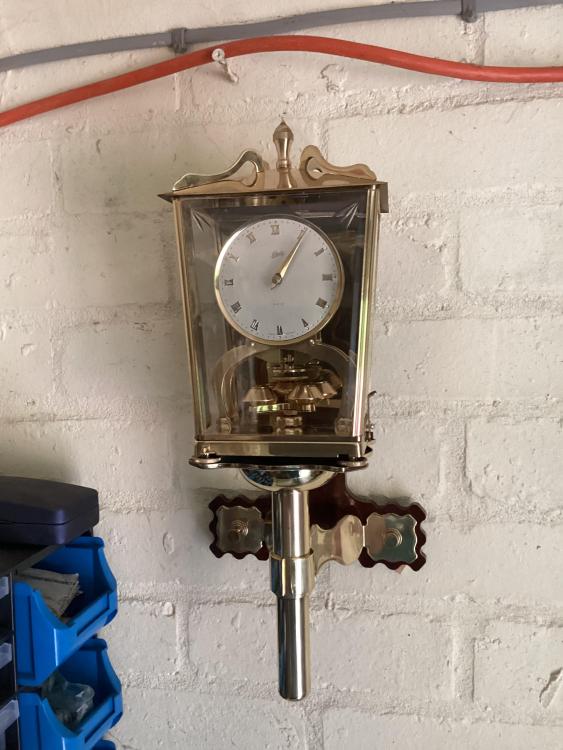
All finished up and running https://youtube.com/playlist?list=PLLJFeMdAdQ5p0cV9NygULjCsuzmFmBJi3&si=uxxd0DxaqwaNZY8z Dell
 4 points
 -
Hi Anders as this is your first excursion into the anatomy of a watch I have attached a little technical information/reading for you TM 9-1575.pdf TZIllustratedGlossary.pdf4 points
-
Cleaning and lubrication are the proverbial can of works. Some things are definitely black and white and some things are a grey area.3 points
-
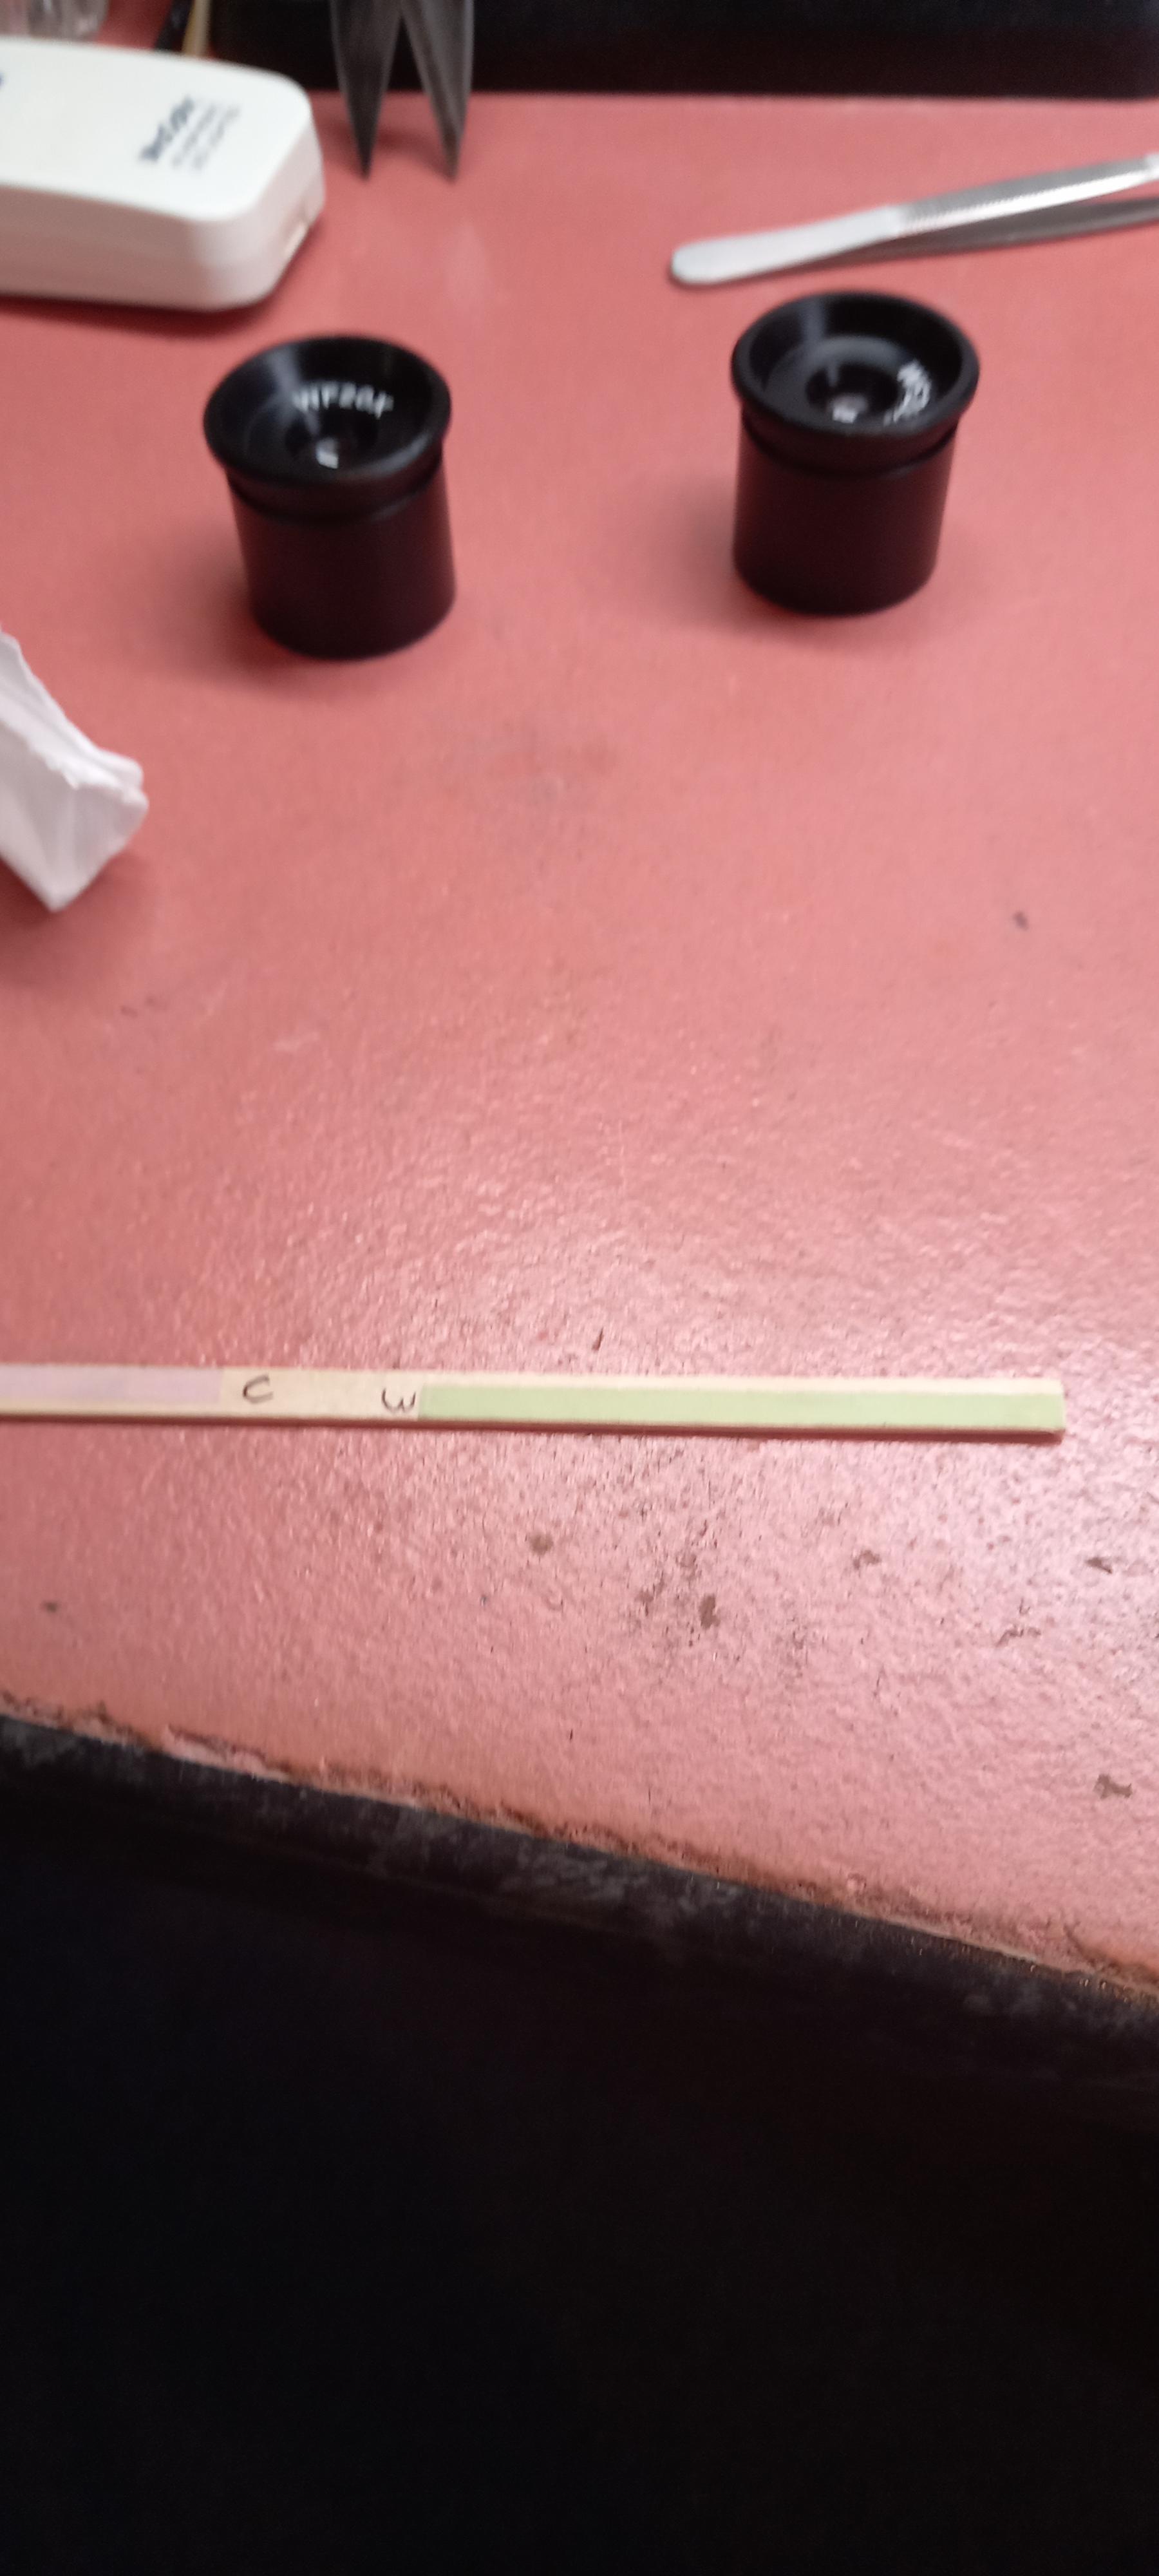
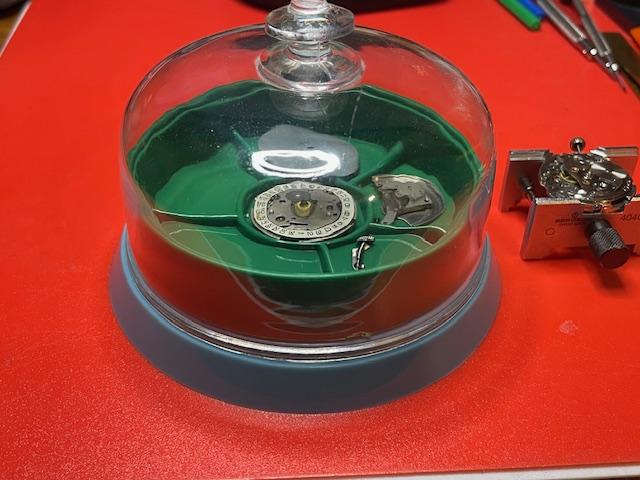
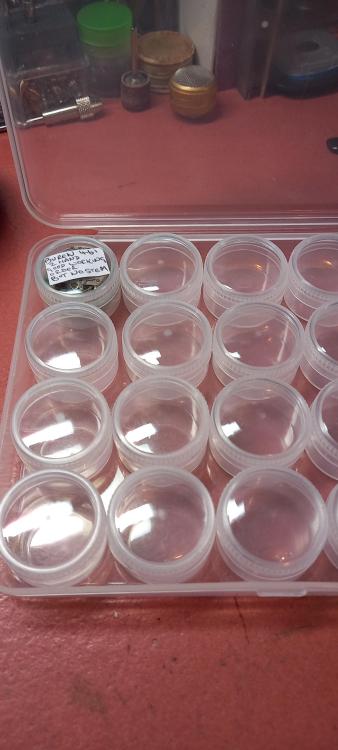
Something I discovered by chance a few days ago - the individual layers from the cheap plastic "stacking" parts trays will also work as an extra layer in a normal dust cover, which could be useful if working on a complex watch where there are more sections you want to categorise that divisions in the normal dust cover tray. The stacking ones I have are around 87mm diameter, or 89mm over the lip of the clear lid that comes with the stack; mine are from ebay but probably the same as these: https://www.hswalsh.com/product/round-stackable-trays-with-lid-economy-hb3134 (The stuff in the green tray is not related to the movement at the side - I just grabbed that one for the photo).
 2 points
 -
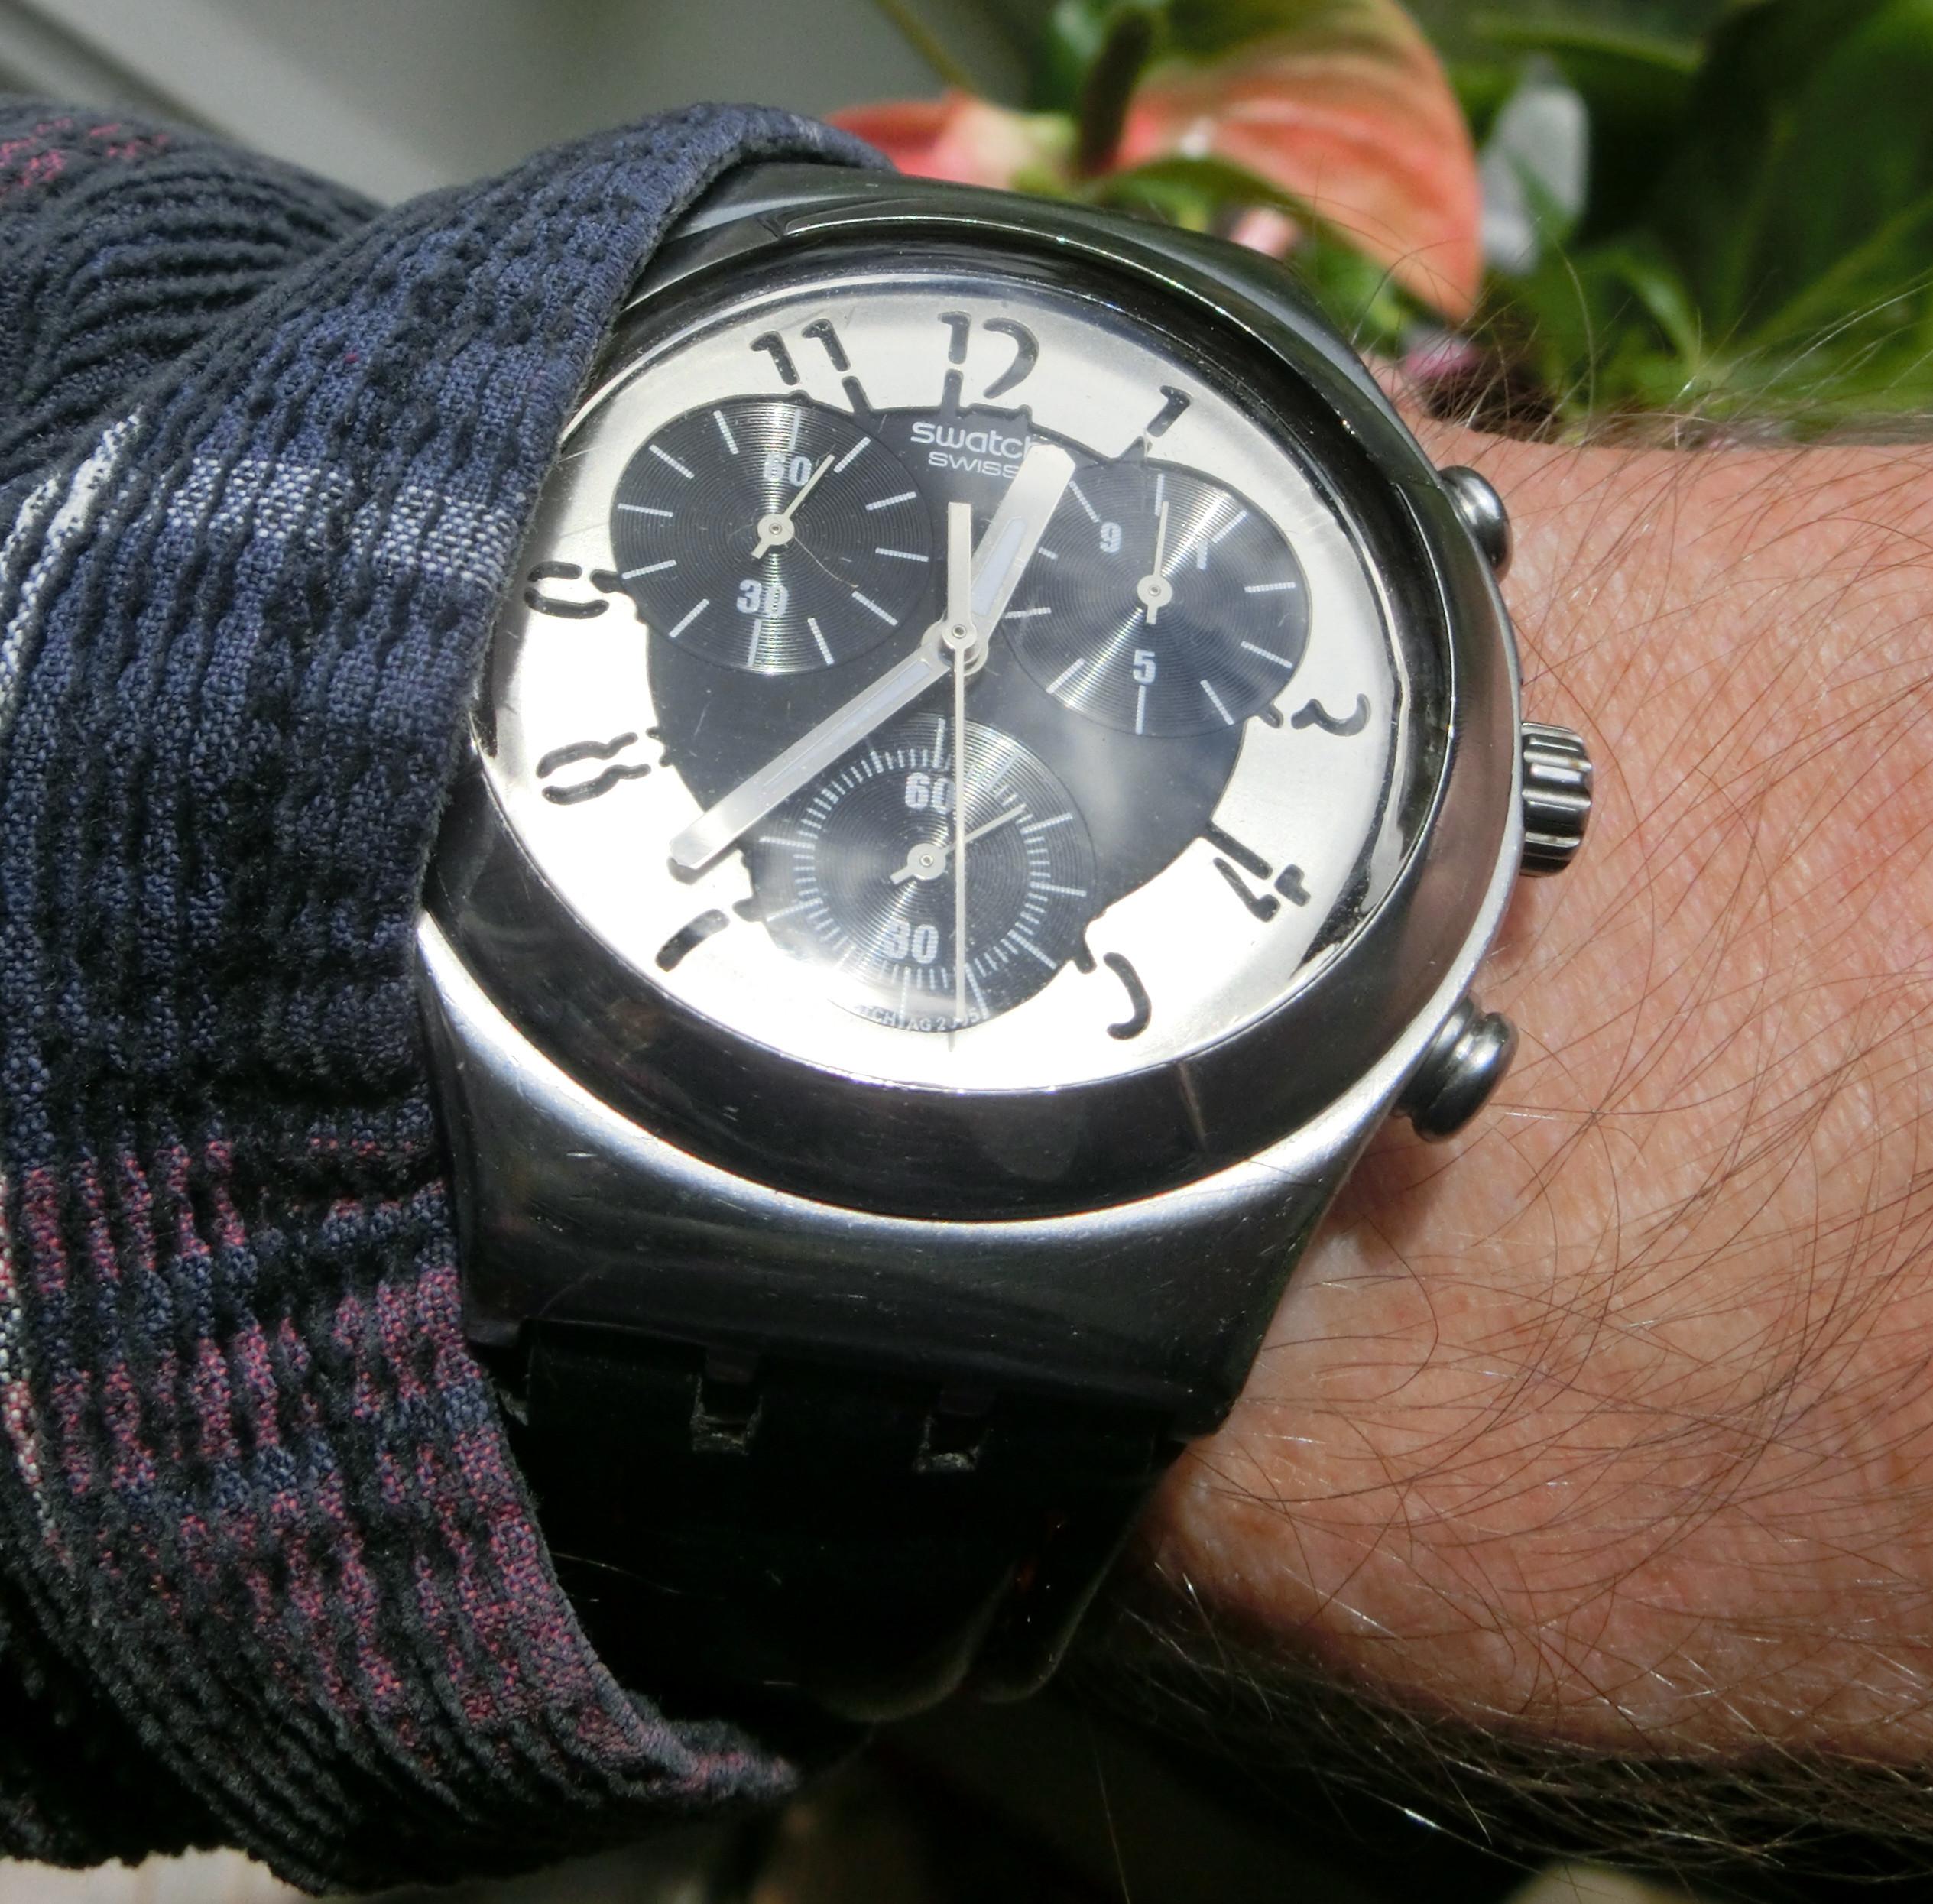
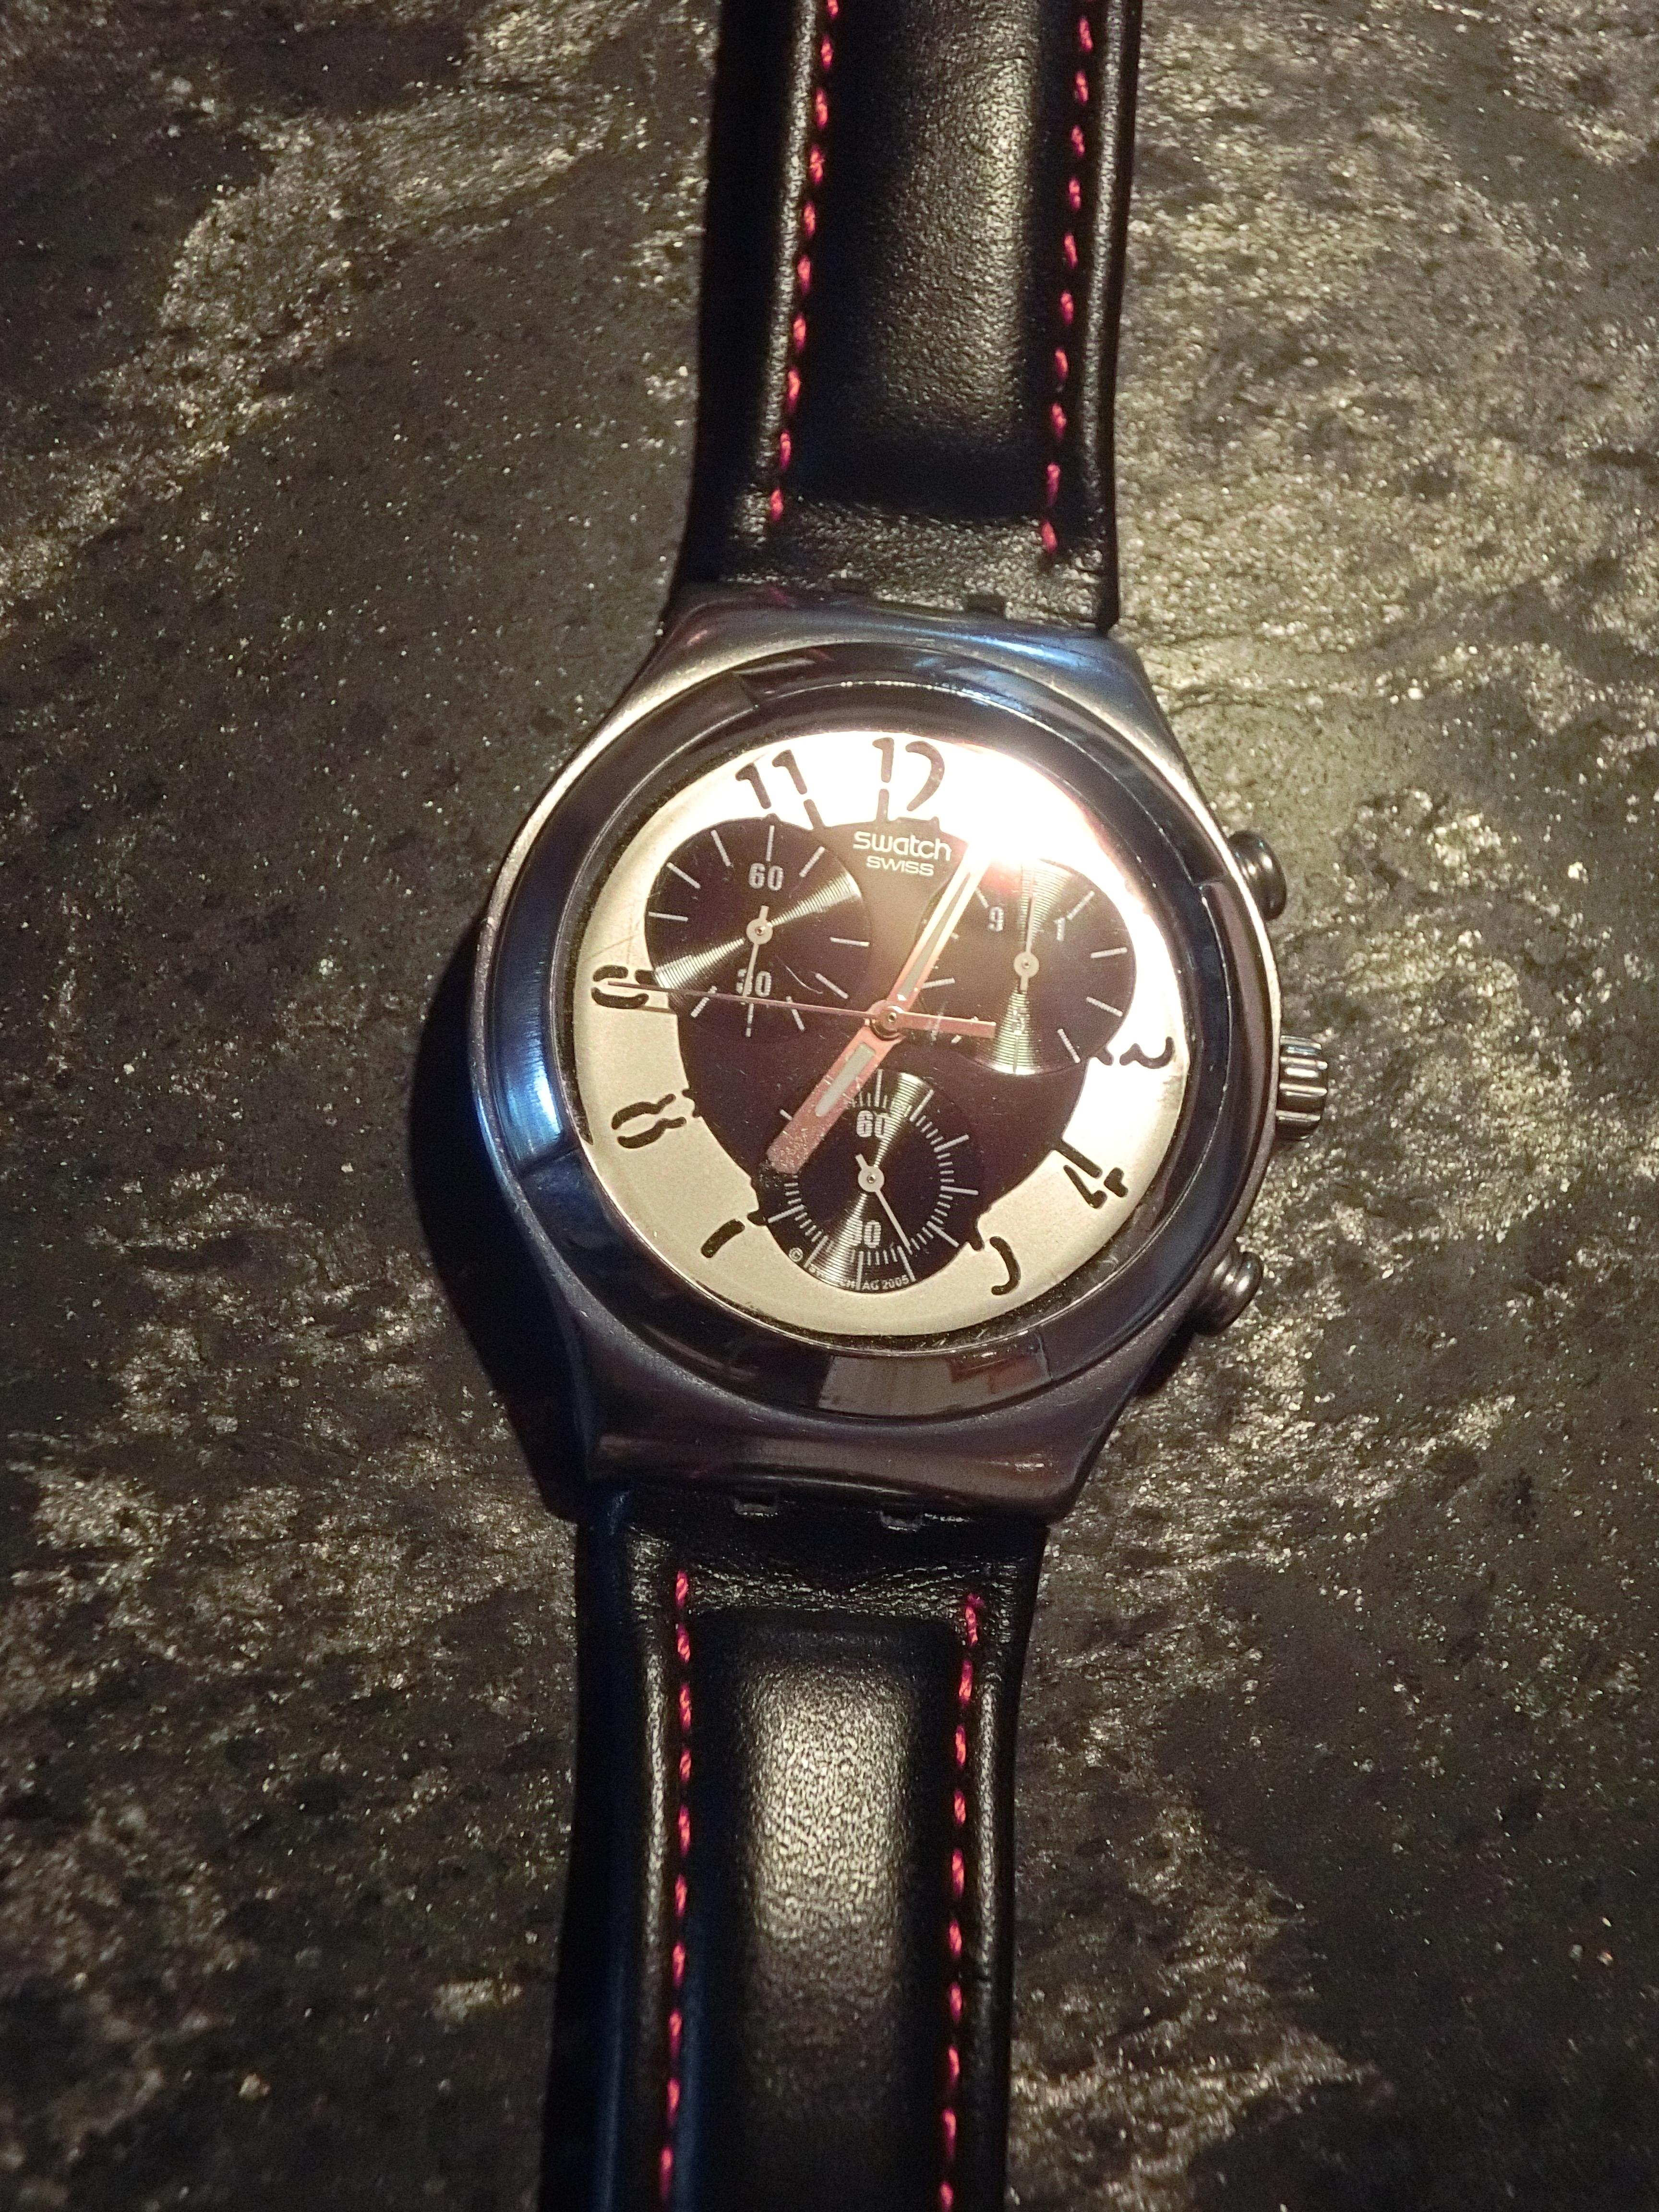
Today I was sporting the Swatch Irony Chronograph (a V8 Chronograph model YCS109 to be precise).

 2 points
 -
Thats all part of the learning Axel , we've all been there and still pay the occasional visit . You got it up and running after some tough repairs for a beginner and thats something to be proud of , certainly don't downplay your achievements matey.2 points
-
Plenty of discussions on watch cleaning solutions in relevent subforums, at the end it can depend on whats available where you live. Soap and water can often do good for pre-cleans. I use avgas thats an isometric petrolium product known as avaiation gas which comes in various grades and octane. Its cheap, readily available and commonly used for watch cleaning here, but obviously its not the right choice in Europe. A Try Paint thinners to find one that work for you. Our good moderator old hippy whom we call OH recommends lighter fluid which is shellac friendly unless in ultrasonic and perhaps in L& R cleaning machines. I don't recommend buying a timegrapher to starters, as you might come to realize that watch repair isn't your game. You can download apps off the net which will do the job for now. As you progress and are sure you want to continue working on watches buying a timegrapher is OK. The simplest app I have come accross on the net is "watch accuracy meter " your smart phone is all you need to use it, gives you daily rate and beat error. Wishi print outs is a bit advanced and not always conclusively interpertable. So a simple tg would suffice at first stages of learning. Seems Wishi tends to hear tics or toks that weren't meant to be regarded as tics , or I think so. An ultrasonic machine not neccessarily expensive one, generally makes life easier and well worth the price you pay. Buy tools as you feel you must have. Beware the never ending list of horolog tools kills your wallet.2 points
-
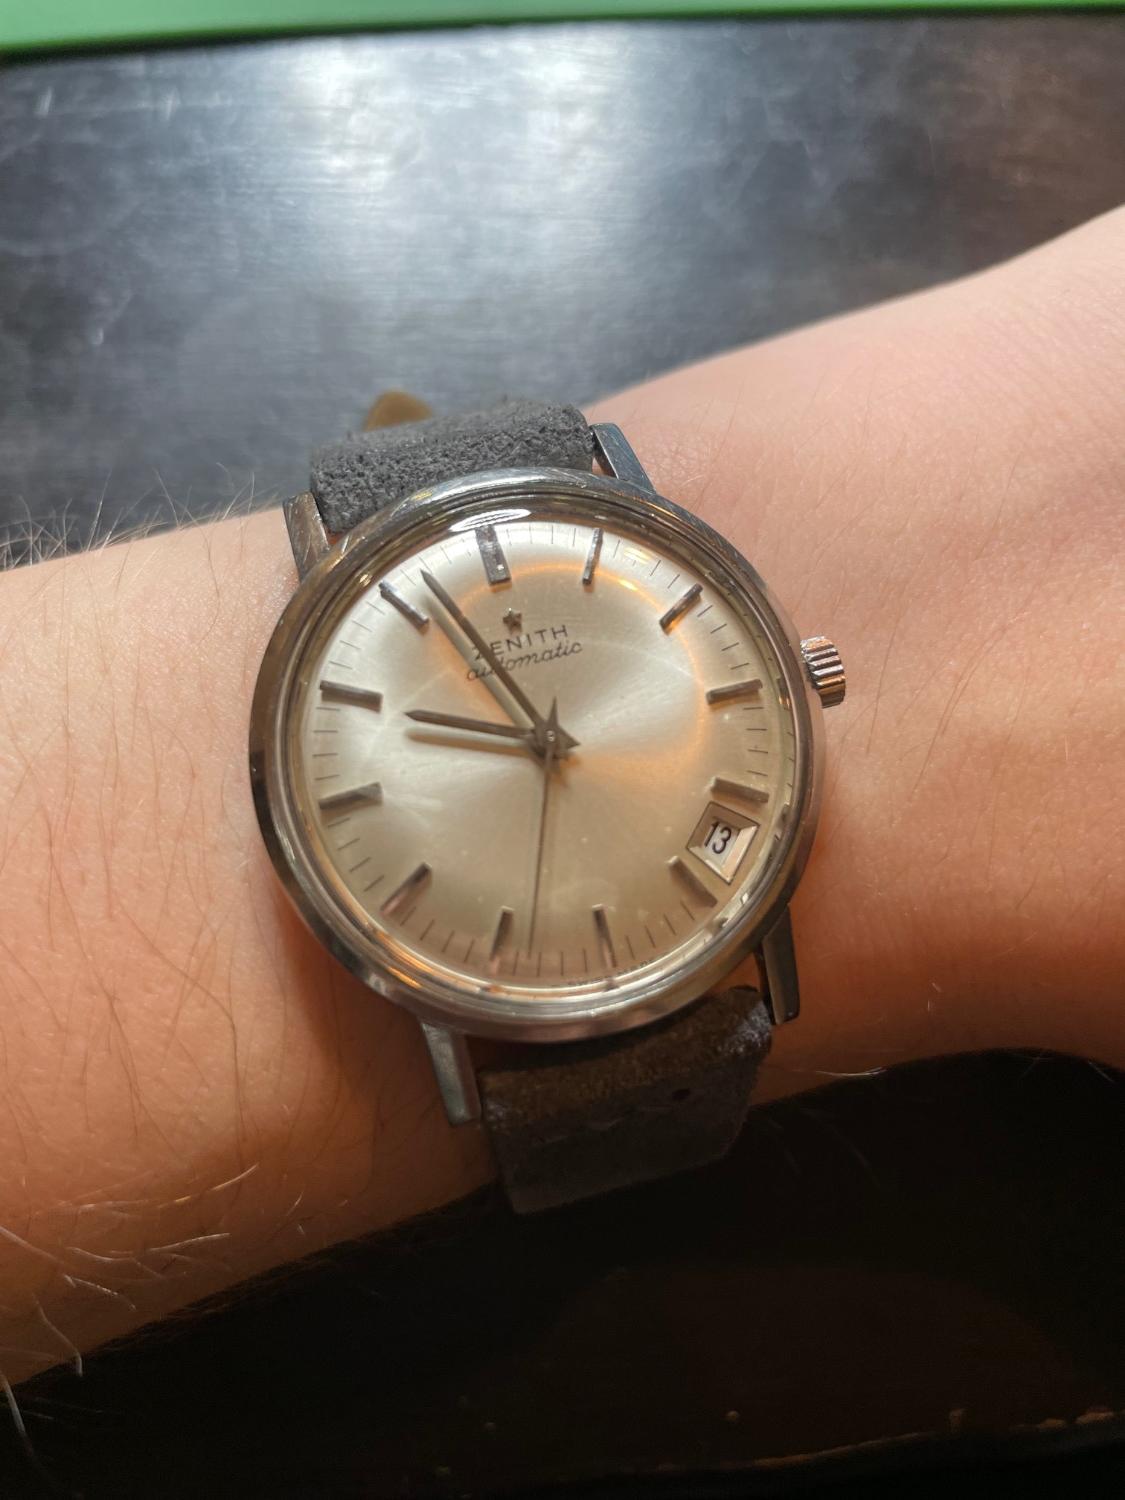
Haha no worries. I actually love the turns and shifts in subjects, also I might learn something new along the way It’s a Zenith with the 2542pc movement. What a roller coaster of emotions this restoration have been. One of the watches I got from my grandfather and when I opened it up it had 2 broken screws, one for the balance and one for the calendar works. Unfortunately the calendar screw was stuck in the mainspring and I couldn’t even get it out with the bergeon tool so I had to source a new one. After a long wait I finally got all the parts and started putting it back together and waddya know, balance is a bit too tight. After trying to get some aluminum foil shims taking the balance off and on the incabloc spring broke… I didn’t give up though and took apart my first balance (I have been sweating like a madman the past 2 hours) but I managed to get it back together and sourced the new spring from a donor movement I had laying around. seems like the watchgods smiled upon me because the hairspring seems to be fine after all my shenanigans and the problem with the balance being too tight just resolved itself, watch kicked right up with good amplitude and everything. I wonder what will go wrong next2 points
-
You only need one timegrapher. Before you buy one, you can time the watch against the clock on your phone, note the result, service and time again2 points
-
Vostok 2409 Service Walkthrough Disassembly Pictures (Please sort by name in ascending order) Vostok 2409 Service Walkthrough Assembly Pictures (Please sort by name in ascending order) Being able to service the ETA calibre 2824-2 was a long-term goal and a dream when I started servicing and repairing watches some years ago. However, my first “calibre love” was the Vostok 2409; a reliable Soviet/Russian 17 jewels manual workhorse without any complications which has been around since 1970. It is still in production and found in Vostok’s Komandirskie series of watches, by some called the AK-47s of the watch world, together with its bigger brother the Vostok Amphibian dive watch. Modern-day Vostok Amphibians use the automatic Vostok 2415 (w/o date complication) and 2416 (with date complication) calibres, but the Amphibian that I’m servicing in this walkthrough, an Albatross Radio Room, popular among collectors, is from the 1980s and in those days the manual 2409, as well as its predecessor 2209, was commonly used in the Amphibians as well as the Komandirskies. While I was servicing this watch, I noticed that the crystal didn’t fit perfectly in the watch case. Being a serious dive watch originally designed for the Soviet navy this was, of course, unacceptable, so I replaced the crystal and video recorded the event in my “Bergeon No 5500 Crystal Press Review”. For me, the 2409 was a great movement to get started with as it probably is the most affordable movement on the planet, and spare parts are readily available and cost next to nothing. A lost or damaged part never spells financial disaster. Also, eBay offers an abundance of used Vostok watches in decent condition housing this movement for as little as $20 and sometimes less. A brand new Vostok 2409 (www.meranom.com) can be had for as little as $27. Be aware that, almost without exception, the eBay listings always state that these Vostok watches have been serviced, but in my experience they never are. Well, maybe dipped in a can of naphtha, left to dry and then injected with a bit of oil here and there. I’ve seen horrible examples! A somewhat tricky bit about the 2409 is to remove and replace the anti-shock springs. For this, I use a self-made tool made from peg wood. It’s shown in one of the assembly pictures together with a description of how I made it. A very similar tool is demonstrated in this video. Later, as I was working myself through Mark Lovick’s watchrepairlessons.com courses, I trained with the Unitas 6498 pocket watch movement which is the selected movement for the courses. In all honesty, from a learning point, the Unitas 6498 would have been an easier movement to get started with (especially the anti-shock springs), but the tinkering with the Vostok 2409 was a low-cost and fun way to get started and made me better prepared for the courses which answered a bunch of questions and was amazingly instructive. Eventually, I plan to publish a “Vostok 2414 Service Walkthrough”. The 2414 is identical to the 2409 but adds a very uncomplicated date complication. So, if you want a whole lot of fun for next to nothing when it comes to money, there is no other movement I would recommend before the Vostok 24XX movements, and the 2409 is a great starting point if you have a desire to begin tinkering with watches. Be warned though; tinkering may take over a substantial chunk of your life!1 point
-
Hi Folks, A few years ago I was a mere customer of nice watches. I took to specific styles of watches owing to an interest in aviation. Fast forward a few years, I started my own independent watch brand. We make a few hundred watches yearly and ship them to a small set of customers. I am no watchmaker, but because we run a brand, I have come to learn a great deal about watchmaking - repair and assembly. I am here to learn and often ask questions about specific issues we're seeing, and perhaps contribute and bring a fresh perspective to problems and solutions from a brand owners point of view. I'd like to keep my identity anonymous - in the interest of our brand. I hope that is OK! Best wishes, An anonymous watch brand owner.1 point
-
Brass can be brazed or silver soldered but being spun and very thin there is a very high risk of distortion .1 point
-
Eloquently put John! I couldn't agree more.1 point
-
Hi Axel. You can read many books and watch many videos but to learn requires you to do the job, all the books etc will guide you through but it’s you in the end. So well done, and remember all of us on here have been where you are at and at times lost and broke a few things in the process. So get your hands dirty and enjoy the watch repair. Remember we are here to help not to judge or criticise, all questions answered where possible. If you are looking for any information just ask somebody may have it. I have attached a useful bit of information just in case you don’t already have it. Cheers TZIllustratedGlossary.pdf1 point
-
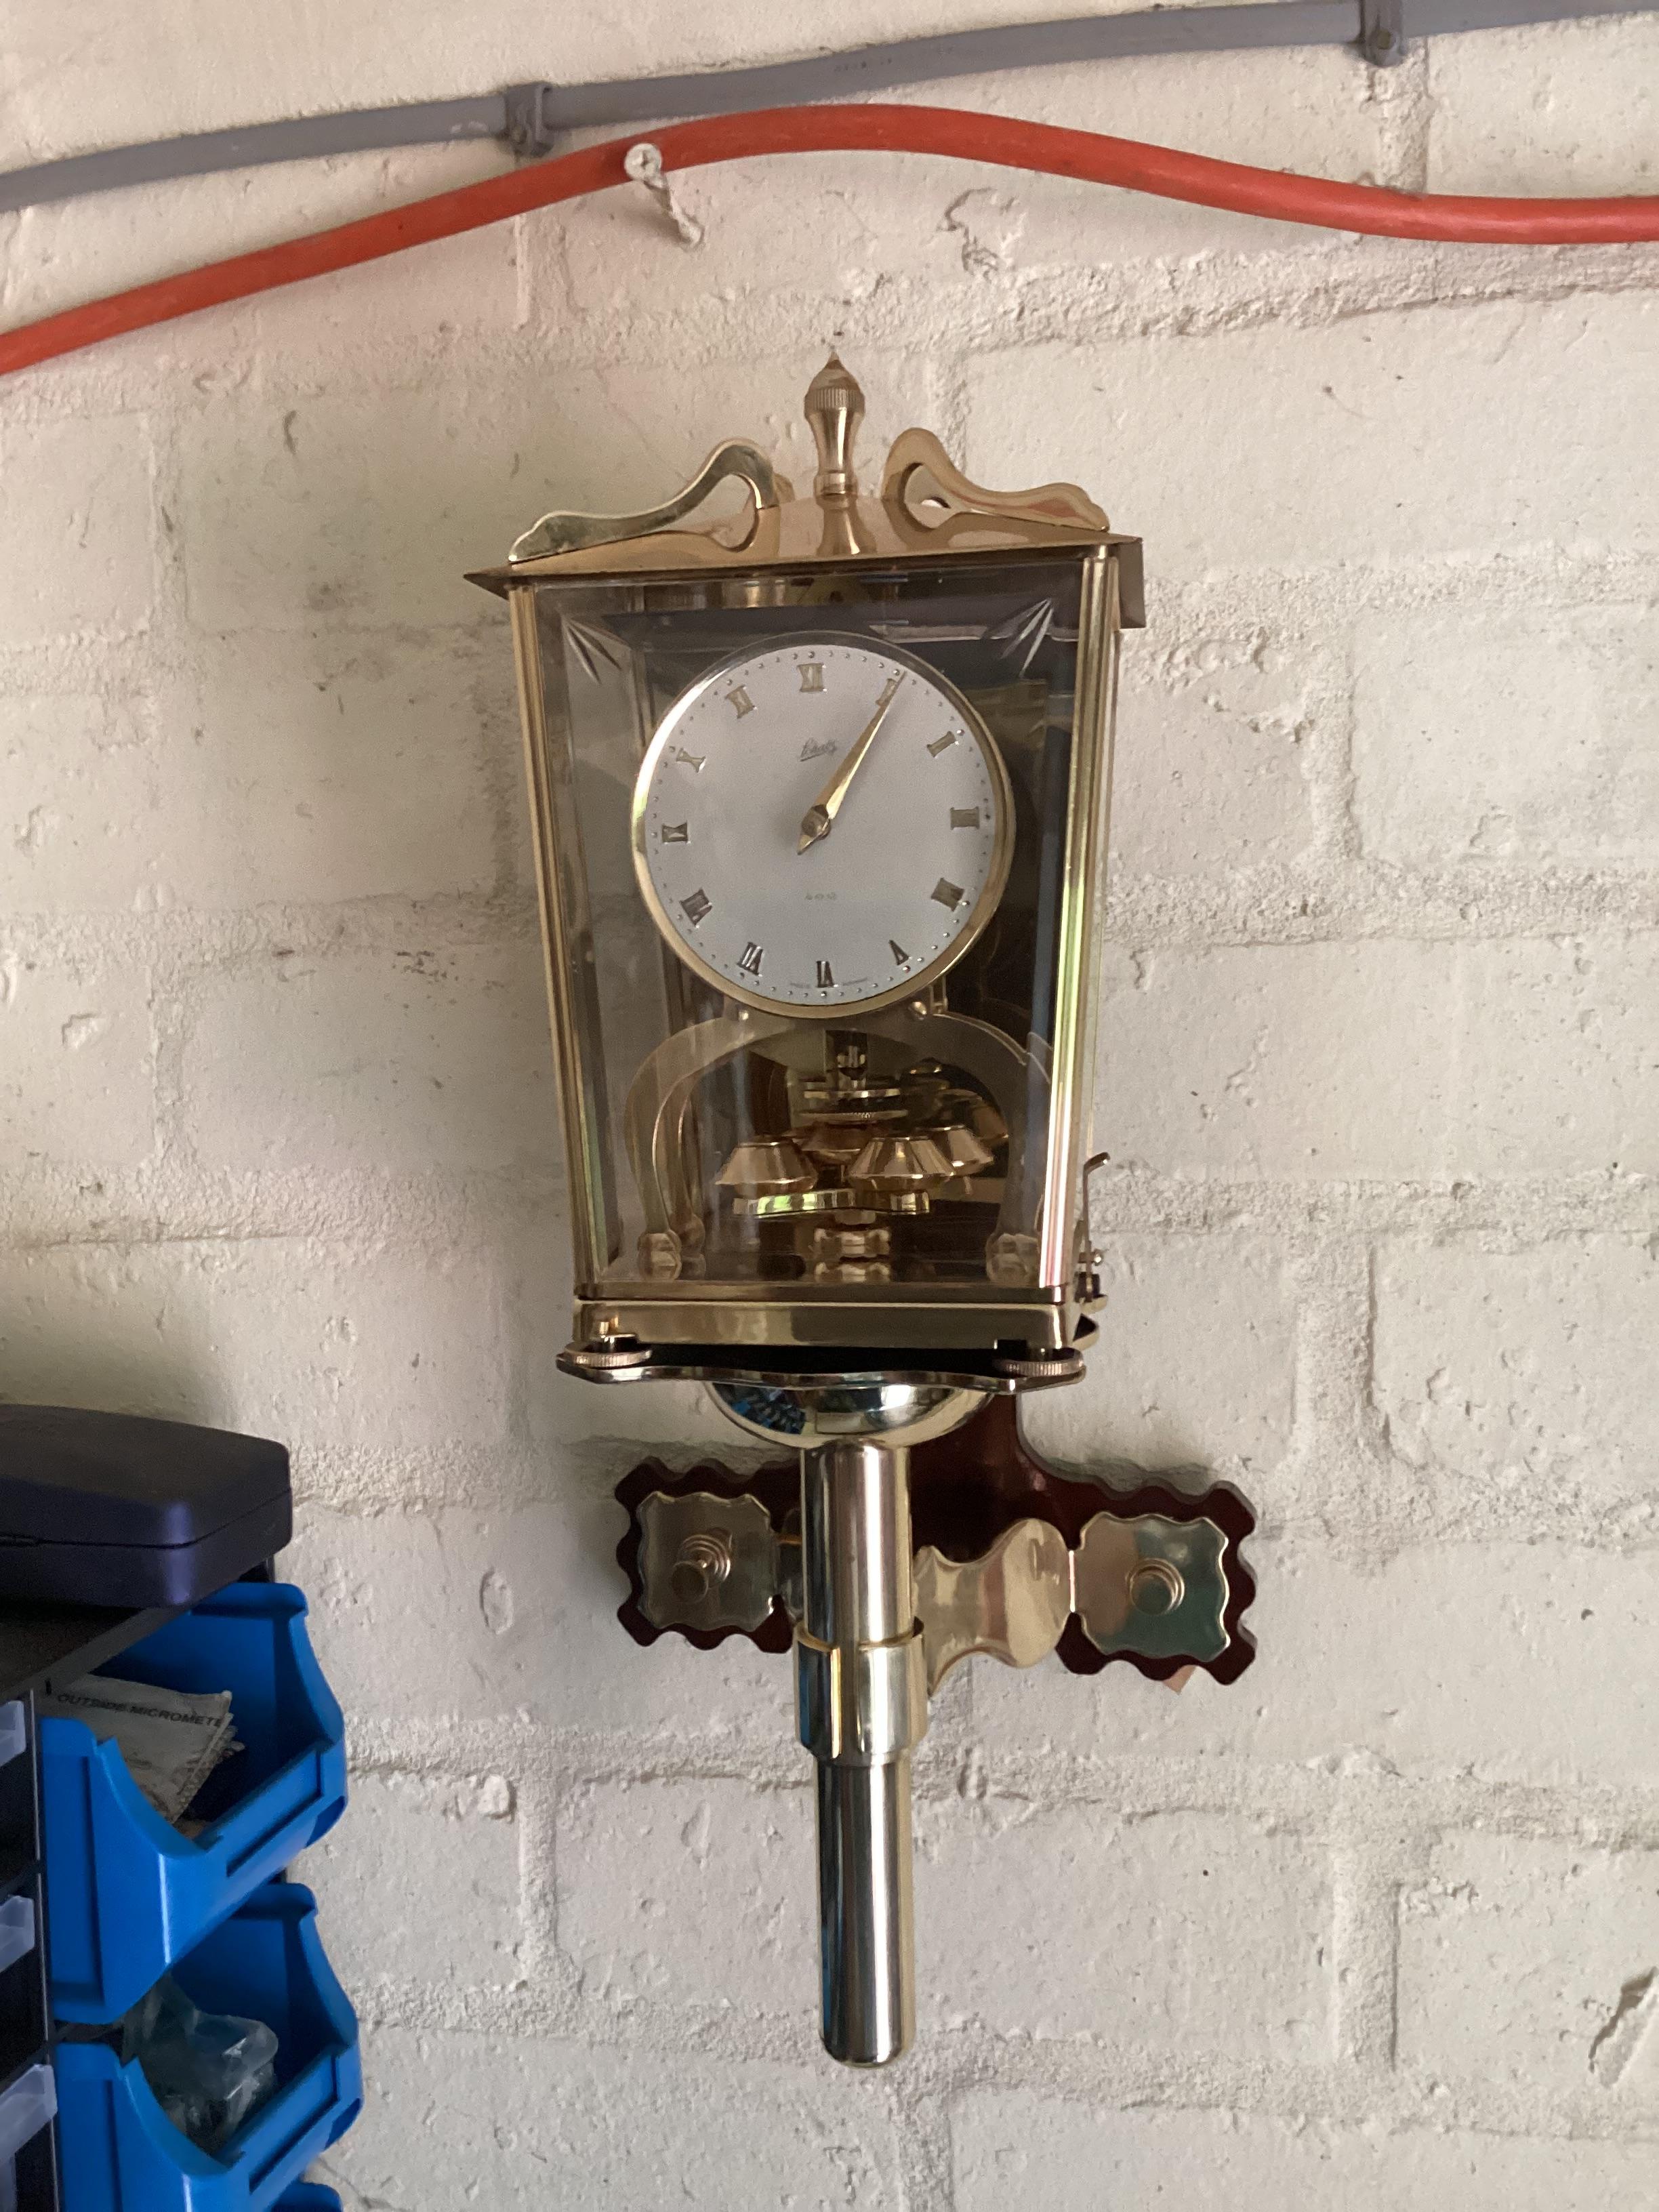
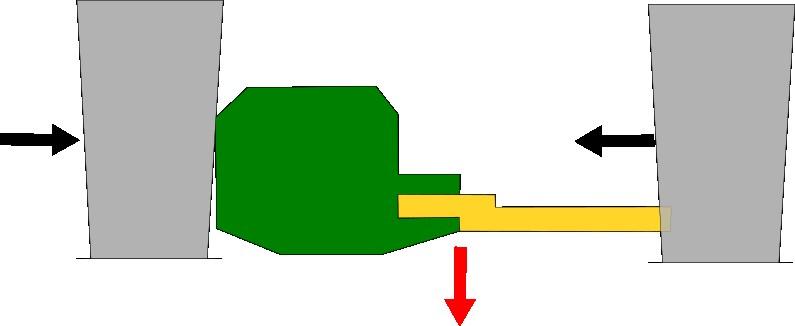
When I do a torsion clock without guide in book I fit top block and hang it on saddle sit pendulum on base on something 6mm thick then cut torsion spring in middle of hook , as for fork I usually start with fork 10mm below top block. Dell1 point
-
Well done Axel seems like you have the makings of a good repairman.1 point
-
I thought all compasses could be used for navigation? One of the problems was watching YouTube videos are they have opinions. The more people you watched more opinions you get and soon will become a big confusing mess. The compass method really isn't very good at all. The phone apps are definitely better although the best is to not worry about whether it's magnetized or not and just get a decent demagnetizer And your problem is solved.1 point
-
I will chime in again, but cleaning methods are just as divisive as oil conversations. I think there is a tendency to over complicate the cleaning methods, chemicals ect. in watchmaking. As someone who does this for a living, I will lay out my method below, and you can use it, or learn from it, or tell me I'm wrong, but its what I do everyday and I've had very little issues: Fill the ultrasonic cleaner with distilled water and I think 1-2% solution of Liquinox. Its a very small amount. Set the temp to 30C, and a time of 8 min. Be sure to do a degass cycle before hand. Then into a container of distilled water as a rinse. You can run it in the ultrasonic again. Then into IPA, then onto a cotton based card stock, with a small fan blowing across. Pallet forks and balance get a Naptha treatment by hand. Can be rinsed in distilled water, then into IPA, but this isn't always necessary. Liquinox is a very cheap water cleaning solution, and since switching from other cleaning methods that use different containers to contain cleaning solutions, this is much faster, easier, and cheaper. I can do 3 or 4 movements in a batch, and it will have used $0.18 of cleaning solution. I use a jar for distilled water rinse, as I change it after every movement. IPA gets changed often, as does Naptha, but these are in very small containers, maybe 30ml or so. People don't change solutions often enough, and if you see any buildup on the surface of your naptha, you're already too late. Its been contaminated.1 point
-
Thats what we do here Axel, help and support each other, banter and take the mick when we have developed a good repport with someone. We dont judge and have great moderators and regulars that dont stand any nonsense if anyone oversteps the mark. This is how all forums should be but sadly not. Not the rinse no caseback , only ever used IPA for rinsing, I would think it works in conjunction with Elma cleaners and better than IPA. The stubborn smudge might be an aspect of the ammonia in the cleaner and the rinse may neutralise that ? Still its something that is being added to the Elma rinse particularly if the baskets aren't spun off adequately, something a US user probably isn't doing.1 point
-
Yes, it's likely magnetized. A better and less expensive option is to download a metal detector app to your smartphone. There are many of those apps to select from so I can't recommend anyone in particular. Two popular timing machines are the Weishi 1000 and the Weishi 1900. I recommend the Weishi 1900 as it has a gain setting whereby you can adjust its sensitivity which sometimes needs to be increased and sometimes decreased. Also, when new, get yourself a watch that runs well. Then practice disassembling and reassembling several times until you've built some confidence. Then practice disassembling, cleaning, and oiling while assembling. This way you know if you've introduced some errors or not. I recommend a larger movement like an ETA/Unitas 6497 or an ETA/Unitas 6498, or a clone like the Chinese Seagull TY3600 which has Incabloc-like anti-shock springs which are a bit easier to handle when you're learning! Once finished practicing you can build your own watch using this movement. eBay is full of options for cases, dials, and hands. I've been an enthusiast for seven or eight years now and watches are by far one of the most intriguing and amazing machines I've come across after walking the planet Earth for 62 years. Good luck!1 point
-
As I feared the complete pallets are pushed/ hammered onto a tapered rod. You will have to take the complete unit off before you mark where the should go. You need to close the hole by using a stake punch around the hole so it is a tight friction fit. You could also use some locktight, blue is strong but easy to move red is stronger and more permanent. The movement is Gustav becker which is German.1 point
-
Short video of it running ( 2 hours at the moment) after re pivoting, milling long bush flush, adding a bush where the jewel should be in back cock ( it had a bush way to long and hole to big, replaced mainspring for an original I had in stock, I just wanted to make sure it would run before I did all the cleaning, polishing & lacquering although I will look out for a back cock with the jewel in it’s the same as the back cock on my 1000 day. Dell1 point
-
Broaching out a sweep seconds hole when you only have cutters and not smoothing broaches small enough to fit, run the cutter through some fine wet and dry to make it a less aggressive cut
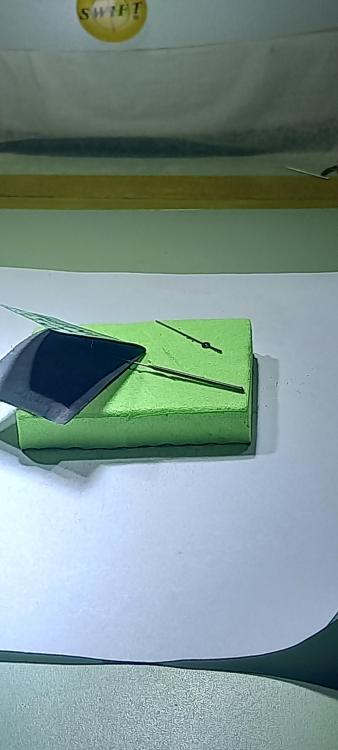 1 point
 -
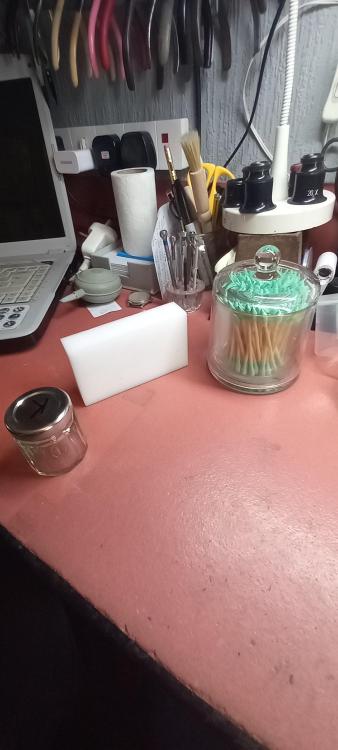
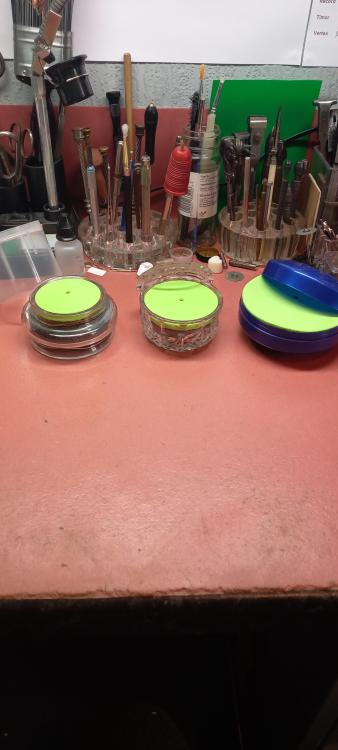
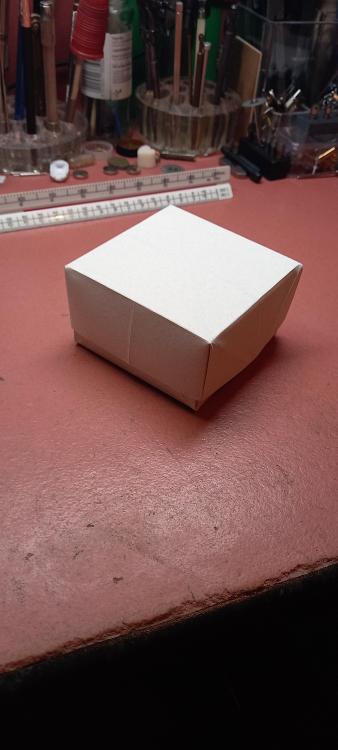
Some really good ideas Scott ,I'm ahead of the game on 3 of em, the magic erasers clean up hands and raised hour markers like nothing on the planet,and the glass matchstick/pointy cotton bud holder looks incredibly cool and swarve on my bench but i particularly like your light board one. So now I'm going cheapy cheap here ( I'm far too competitive for my own good ie. trying to outbench a guy bigger than me and half my age resulted in a one year repair partial rotator cuff tear ) . Origami boxes , i wont get into how to make them becauses there is more than one way and a youtube vid can show it quicker and better than i can explain it, so just planting a seed here if you have some nice vintage tools that came without a box ,thicker paper makes for a tougher box. And 3 movement cushions with lids, a coffee jar top, a trinket jar and shaving cream tub. Oh and a donor movement case from cousins.
 1 point
 -
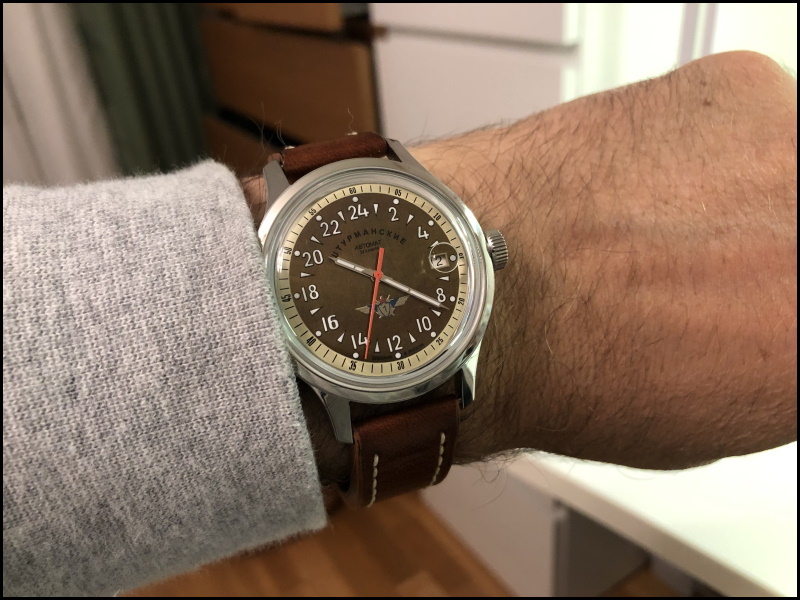
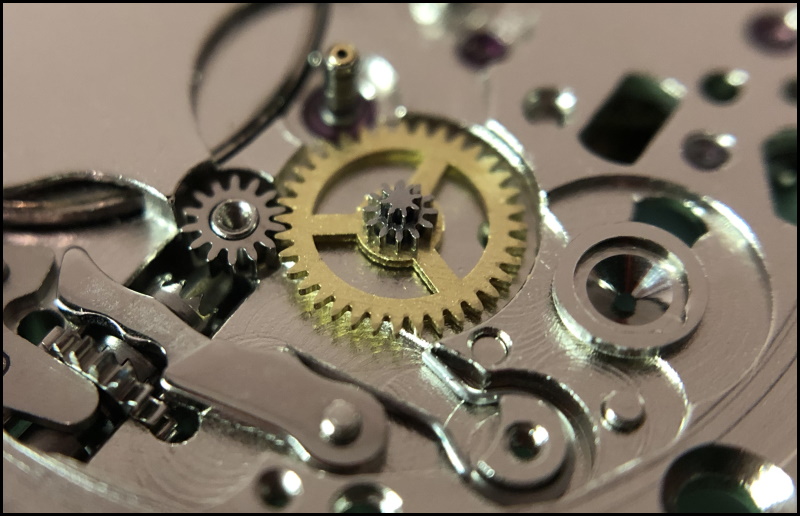
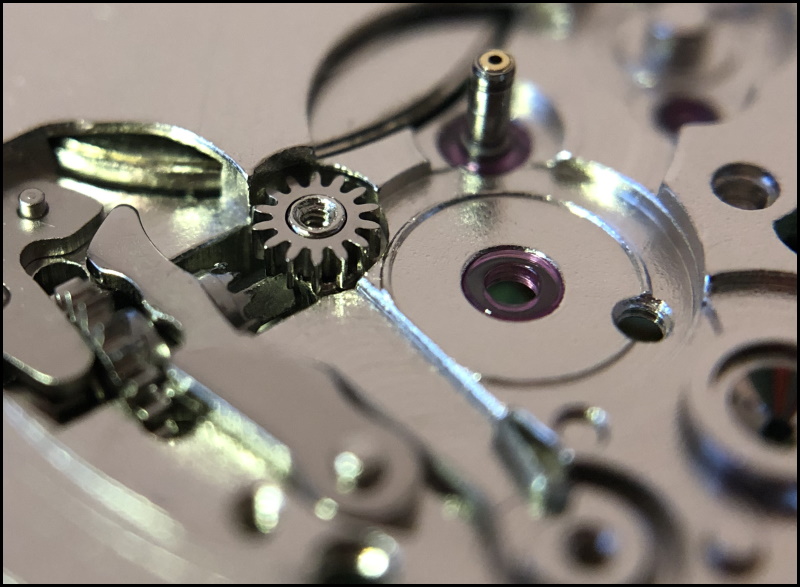
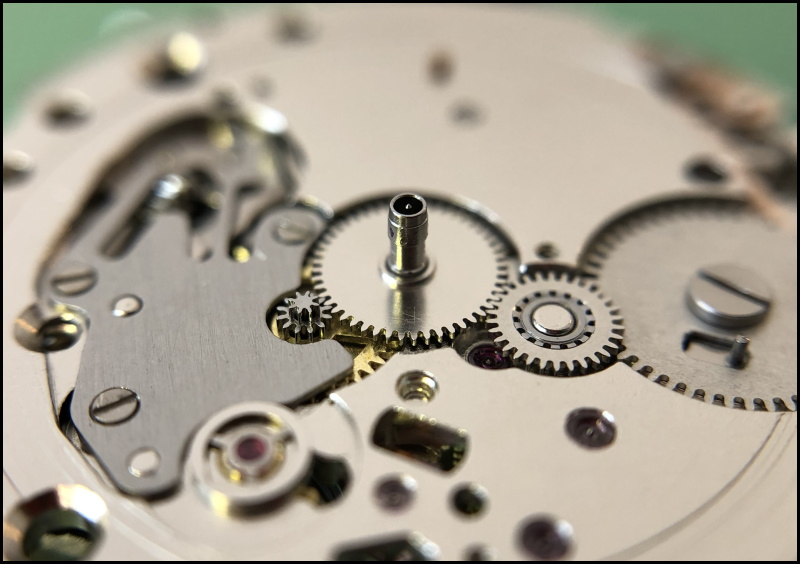
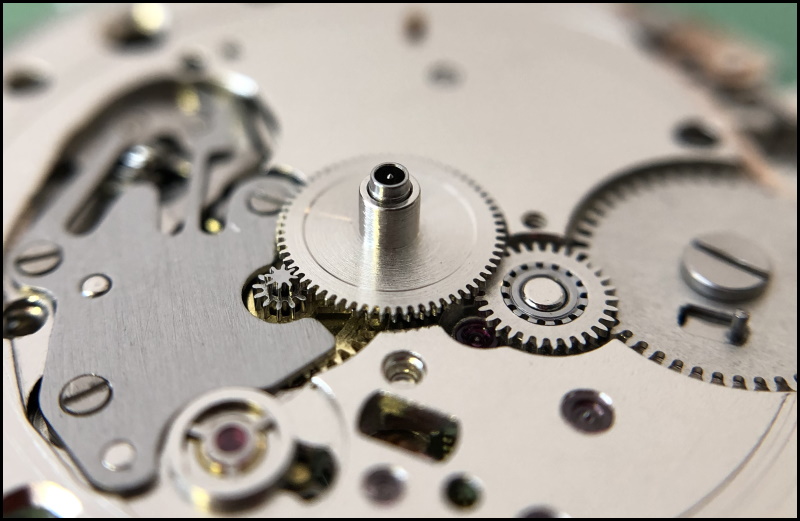
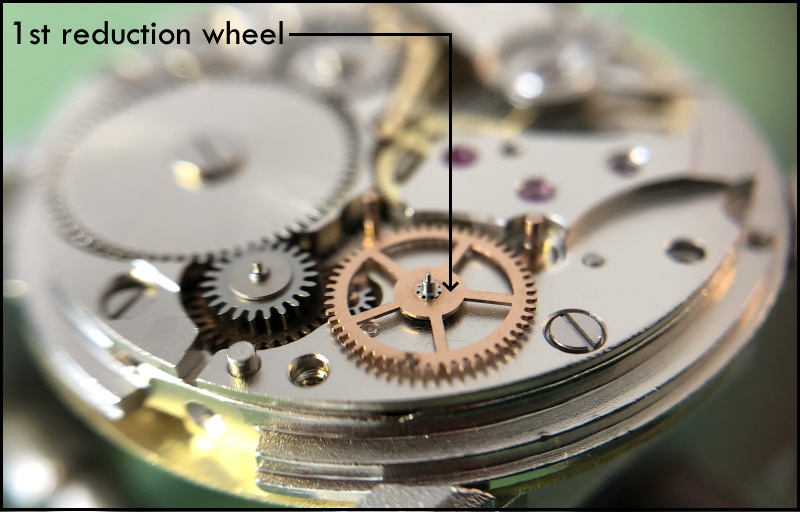
Introduction This service walkthrough is not a tutorial on how to service a watch movement. I made it for myself because I think it's fun and because it will make it easier the next time I service a Vostok 2431. I also think it feels nice to be able to share this walkthrough considering all the valuable information that many very talented members on WRT freely share. Many, many thanks! There is a lot to learn when servicing a watch movement that is not covered in this walkthrough. Therefore, I recommend, for example, watchfix.com, learnwatchmaking.com, or timezonewatchschool.com. I feel like I got the most bang for my buck at watchfix.com (I'm not sponsored in any way) but I've also had a lot of fun and benefited from the other online schools. Links to photos on my OneDrive Vostok calibre 2431 disassembly walkthrough. Please sort the images by name in ascending order. Vostok calibre 2431 assembly walkthrough. Please sort the images by name in ascending order. Curiosities I think it was in 2014 or possibly 2015 that I bought my Sturmanskie Open Space. I had just discovered that there were watches where the hour hand only rotates one revolution per day and at that time I knew absolutely nothing about watch movements, service and repair. The idea that the hour hand of a watch only rotates one revolution per day seemed not only completely logical but also different and fascinating. The earth rotates one revolution around its axis per day, so it should be obvious that the hour hands of our watches do so too. The fact that the letters on the watch were also Cyrillic did not make the whole thing any less exciting. I just couldn’t resist it and I’m happy I didn’t! Vostok claims that their movements only need a service every 10 years, and I think that's true because the tolerances are pretty rough and therefore large amounts of dirt are needed to stop a Russian movement or even cause it to run badly. It has been said that the amount of dirt required to stop a Vostok movement is enough to stop a hundred Patek Philippe movements However, the price for this endurance is a movement that doesn't come close to the precision offered by high-quality Swiss and Japanese movements, but it's still quite easy to get these Russian movements to run accurately as long as they're worn and used consistently. About the movement Russian watch brands such as Vostok, Raketa, and Poljot, to name a few, are known for using their in-house movements, but not this Sturmanskie which is instead powered by a Vostok calibre 2431, which is a 24-hour movement. However, it is not a true 24-hour movement. That is, the movement is not originally designed as a 24-hour movement. Instead, Vostok has modified the movement in its calibre 2416B so that the hour hand only rotates one revolution per day. Calibre 2431 is otherwise identical to Vostok automatic calibres 2416B and 2415. The motion work(/dial train) in Vostok 2431 The way that Vostok modified the movement so that the hour hand only rotates one revolution per day is by modifying a) the minute wheel, b) the bearing for the minute wheel in the main plate, and c), adding an intermediate date indicator wheel. The minute wheel has been modified so that it has two pinions that lie on top of each other. The lower pinion drives what I call the first intermediate date indicator wheel while the upper pinion drives the hour wheel and has been adjusted so that the hour wheel only rotates one revolution per day. The number of teeth on the hour wheel itself may have also been adapted, but this is not something that I have investigated. Normally the minute wheel is mounted on a regular metal post on the main plate, but in this case, Vostok has replaced the post with a beefy, jewelled bearing. I assume that this has been necessary to get the minute wheel, with its two pinions on top of each other, to rotate sufficiently smoothly and stably. The added first intermediate date indicator wheel drives the second intermediate date indicator wheel which is part of Vostok's regular (non-modified) calendar complication. And this is what it looks like with the hour wheel mounted. Cleaning I have found that it is all too easy to underestimate the importance of cleanliness when servicing a movement, perhaps because the parts are microscopic and therefore it takes time to get used to thinking microscopically, even though I have been doing this now for five years. Cleaning of pinions and pivots A type of watch movement part that is particularly important but also difficult to get completely clean is pinions, but @nickelsilver advised me quite recently that in its pre-cleaning you can dip and rub the pinions in pith wood that you have impregnated with an effective degreasing agent, for example, Horosolv. I've done it several times now and it works amazingly well. Speaking of pinions, independent American watchmaker Josh Shapiro mentioned in a podcast that he considered pinions to be the most difficult part of a watch movement to make perfectly. Whether it's true or not I don't know but I think it's likely. To get the pivots clinically clean, I have also started using EVEFLEX, but you have to be careful because the material has an abrasive effect. It is important to choose the right polisher and to be careful. I have summarized my experiences with EVEFLEX in this post and I mention it because EVEFLEX is easy and quick to work with and gives me very good results. End-shake If there's one thing I've learned this time around, it is that a Russian movement cannot be converted to a Swiss movement because the tolerances in Russian movements are generally much coarser. Experimentally, I adjusted the end-shake to 2/100mm on everything from the pallet fork to the centre wheel, with the result that the amplitude and rate became extremely erratic. I created a thread about this: "Can end-shake and or side-shake ever be too small?" As you will see if you follow the thread, once again @nickelsilver, @Shane, and @JohnR725came to my rescue. Many thanks! My recommendation is to let the end-shake be slightly wider on Russian movements. After I increased the end-shake to approx. 4/100 mm, the amplitude and rate returned to typical, i.e., still somewhat irregular but perfectly normal for a Russian movement. Side-shake In this video, Kalle Slaap from Chronoglide shows an amazingly simple and effective way to determine if the side shake is correct. Since there was a crack in the third wheel jewel in the train wheel bridge, I replaced it, and when I then used Kalle Slaap's method, I could clearly see the 3rd wheel pivot jumping back and forth in the jewel hole. So, I replaced the jewel with a hole that was 1/100mm smaller and the visual difference, just changing it by 1/100 mm, was nothing less than dramatic. I am incredibly happy that I got to learn this simple and exceptionally clear method. Many thanks to Kalle Slaap at Chronoglide! Vostok reverser wheels If you Google “Vostok reverser wheels”, there is a lot of whining going on. I don't think there are any major problems with Vostok's reverser wheels, but they are unfortunately easy to damage during service or modification of the movement, and I think that is the real reason for the whining. Next to Seiko watches, Vostok watches are immensely popular to modify in terms of dials and hands, and in addition, many people want to fix the seconds hand that sometimes stutters on these movements. The latter is done by bending the second-hand pinion spring illustrated in this thread. To make these modifications, the oscillating weight/rotor must be removed and when it is to be screwed back on, it is easy for the rotor pinion to end up on top of the teeth of the reverser wheels. If you tighten the rotor screw in that position, even just a little, the reverser wheels will inevitably be damaged. The result is that the automatic winding stops working or only works intermittently. An easy way to check if the reverser wheels are working as they should is to manually rotate the oscillating weight alternately about 20 degrees in both directions with a piece of peg wood while looking at the 1st reduction wheel which is large and easy to see. If the 1st reduction wheel continuously rotates in the same direction (counterclockwise, if I remember correctly), no matter which way you rotate the oscillating weight, you can be sure that the reverser wheels are working as they should. If, on the other hand, the 1st reduction wheel rotates alternately in both directions when you rotate the oscillating weight alternately, then you can be sure that the reverser wheels are damaged and need to be replaced. Servicing the automatic mainspring I find it difficult to service the mainspring on automatic movements. It is, in my opinion, a construction that leaves room for improvement and that is why I generally prefer manually wound movements. If the mainspring in an automatic movement slips too soon, it reduces the amplitude and the power reserve, and if the mainspring slips too late, there is the risk of re-banking and that the movement runs much too fast when you are physically active, especially when you take a brisk walk swinging your arms, and the oscillating weight rotates constantly. The effect is like continuously turning the crown of a manual movement with high pressure when the mainspring is already fully wound. Not good! What I learned this time anyway, long story short is that you can be quite generous with braking grease on the rim on the inside of the mainspring barrel. Even if some of the braking grease ends up where it really shouldn't be, I don't think it will destroy or affect anything negatively. Also, and again from Kalle Slaap at Chronoglide, I learned that you should press at the end of the spring at the bridle when it is mounted in a spacer, and you are about to push it into the mainspring barrel. In this way, the rest of the spring automatically follows down into the mainspring barrel. You can see it in this clip. Very smooth, especially in combination with my highly rated Master Craft mainspring winder which I wrote about in this post. Lubrication of cap jewels For a long time, I have had trouble getting the oil to stay in the centre of the cap jewels and not flow out after I oiled them and installed them, despite treating them with epilame (Fixodrop). I think it's because (and now I'm going by gut feeling) that I previously always installed the shock assembly in the main plate before installing the balance and that I didn't treat the jewel housing (chaton) with epilame. After several failures in servicing this movement, I decided to treat both the cap jewels and jewel housings with epilame and mount the shock assembly after having replaced the balance. It did the trick and also made fitting the three-legged anti-shock spring much easier. My theory is that the balance staff pivots stabilize the oil in the centre of the cap jewels when the jewel housing (chaton) is dropped into place, and better hold the jewel housing in place, which will otherwise slide around while installing the three-legged anti-shock springs. Have I just written the longest post in the history of WRT? Anyway, hope you enjoyed it!
 1 point
 -
Good jobe. You will get shinier results on chrome plated parts like bridge, mainplate so on, if you soak 24 to 48 hrs in just coke and use powdered detergent on tooth brush to scrub the rust away and keep brushing under tap water as a rinse.1 point