Leaderboard


Popular Content
Showing content with the highest reputation on 08/11/24 in Posts
-
Hi. It is quite possible that the shock system was temporarily displaced stopping the balance from operating and the subsequent letting down of the mainspring and incursion into the watch caused it to restart., I would check that both systems are seated correctly and not acting on the balance pivots. Might be prudent to check the balance staff for a bent pivot.4 points
-
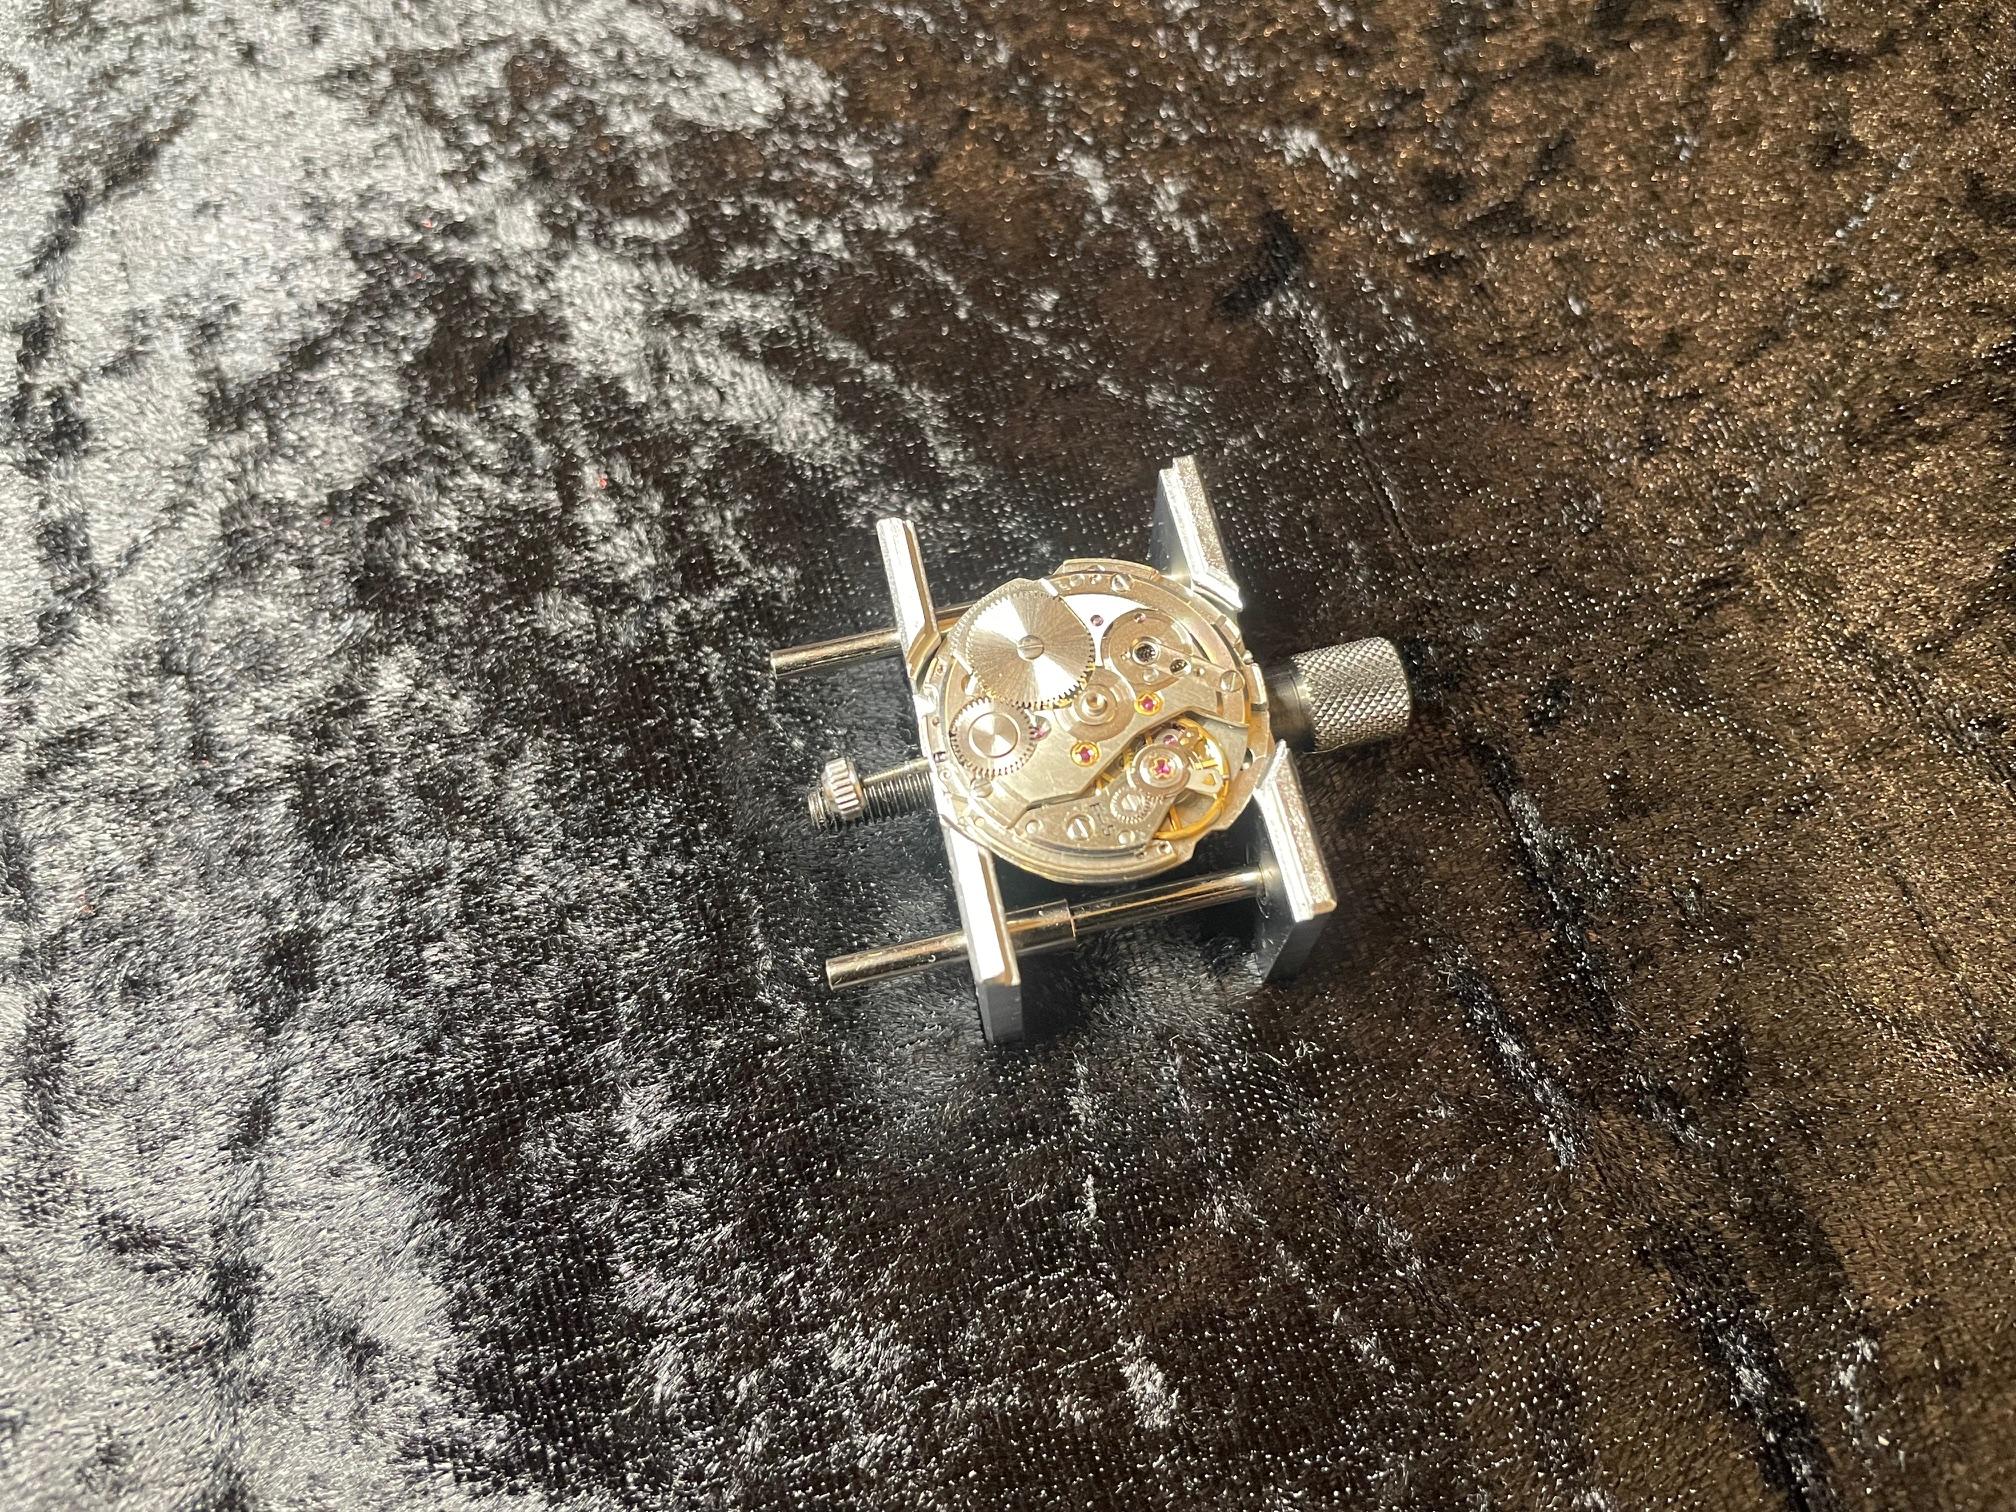
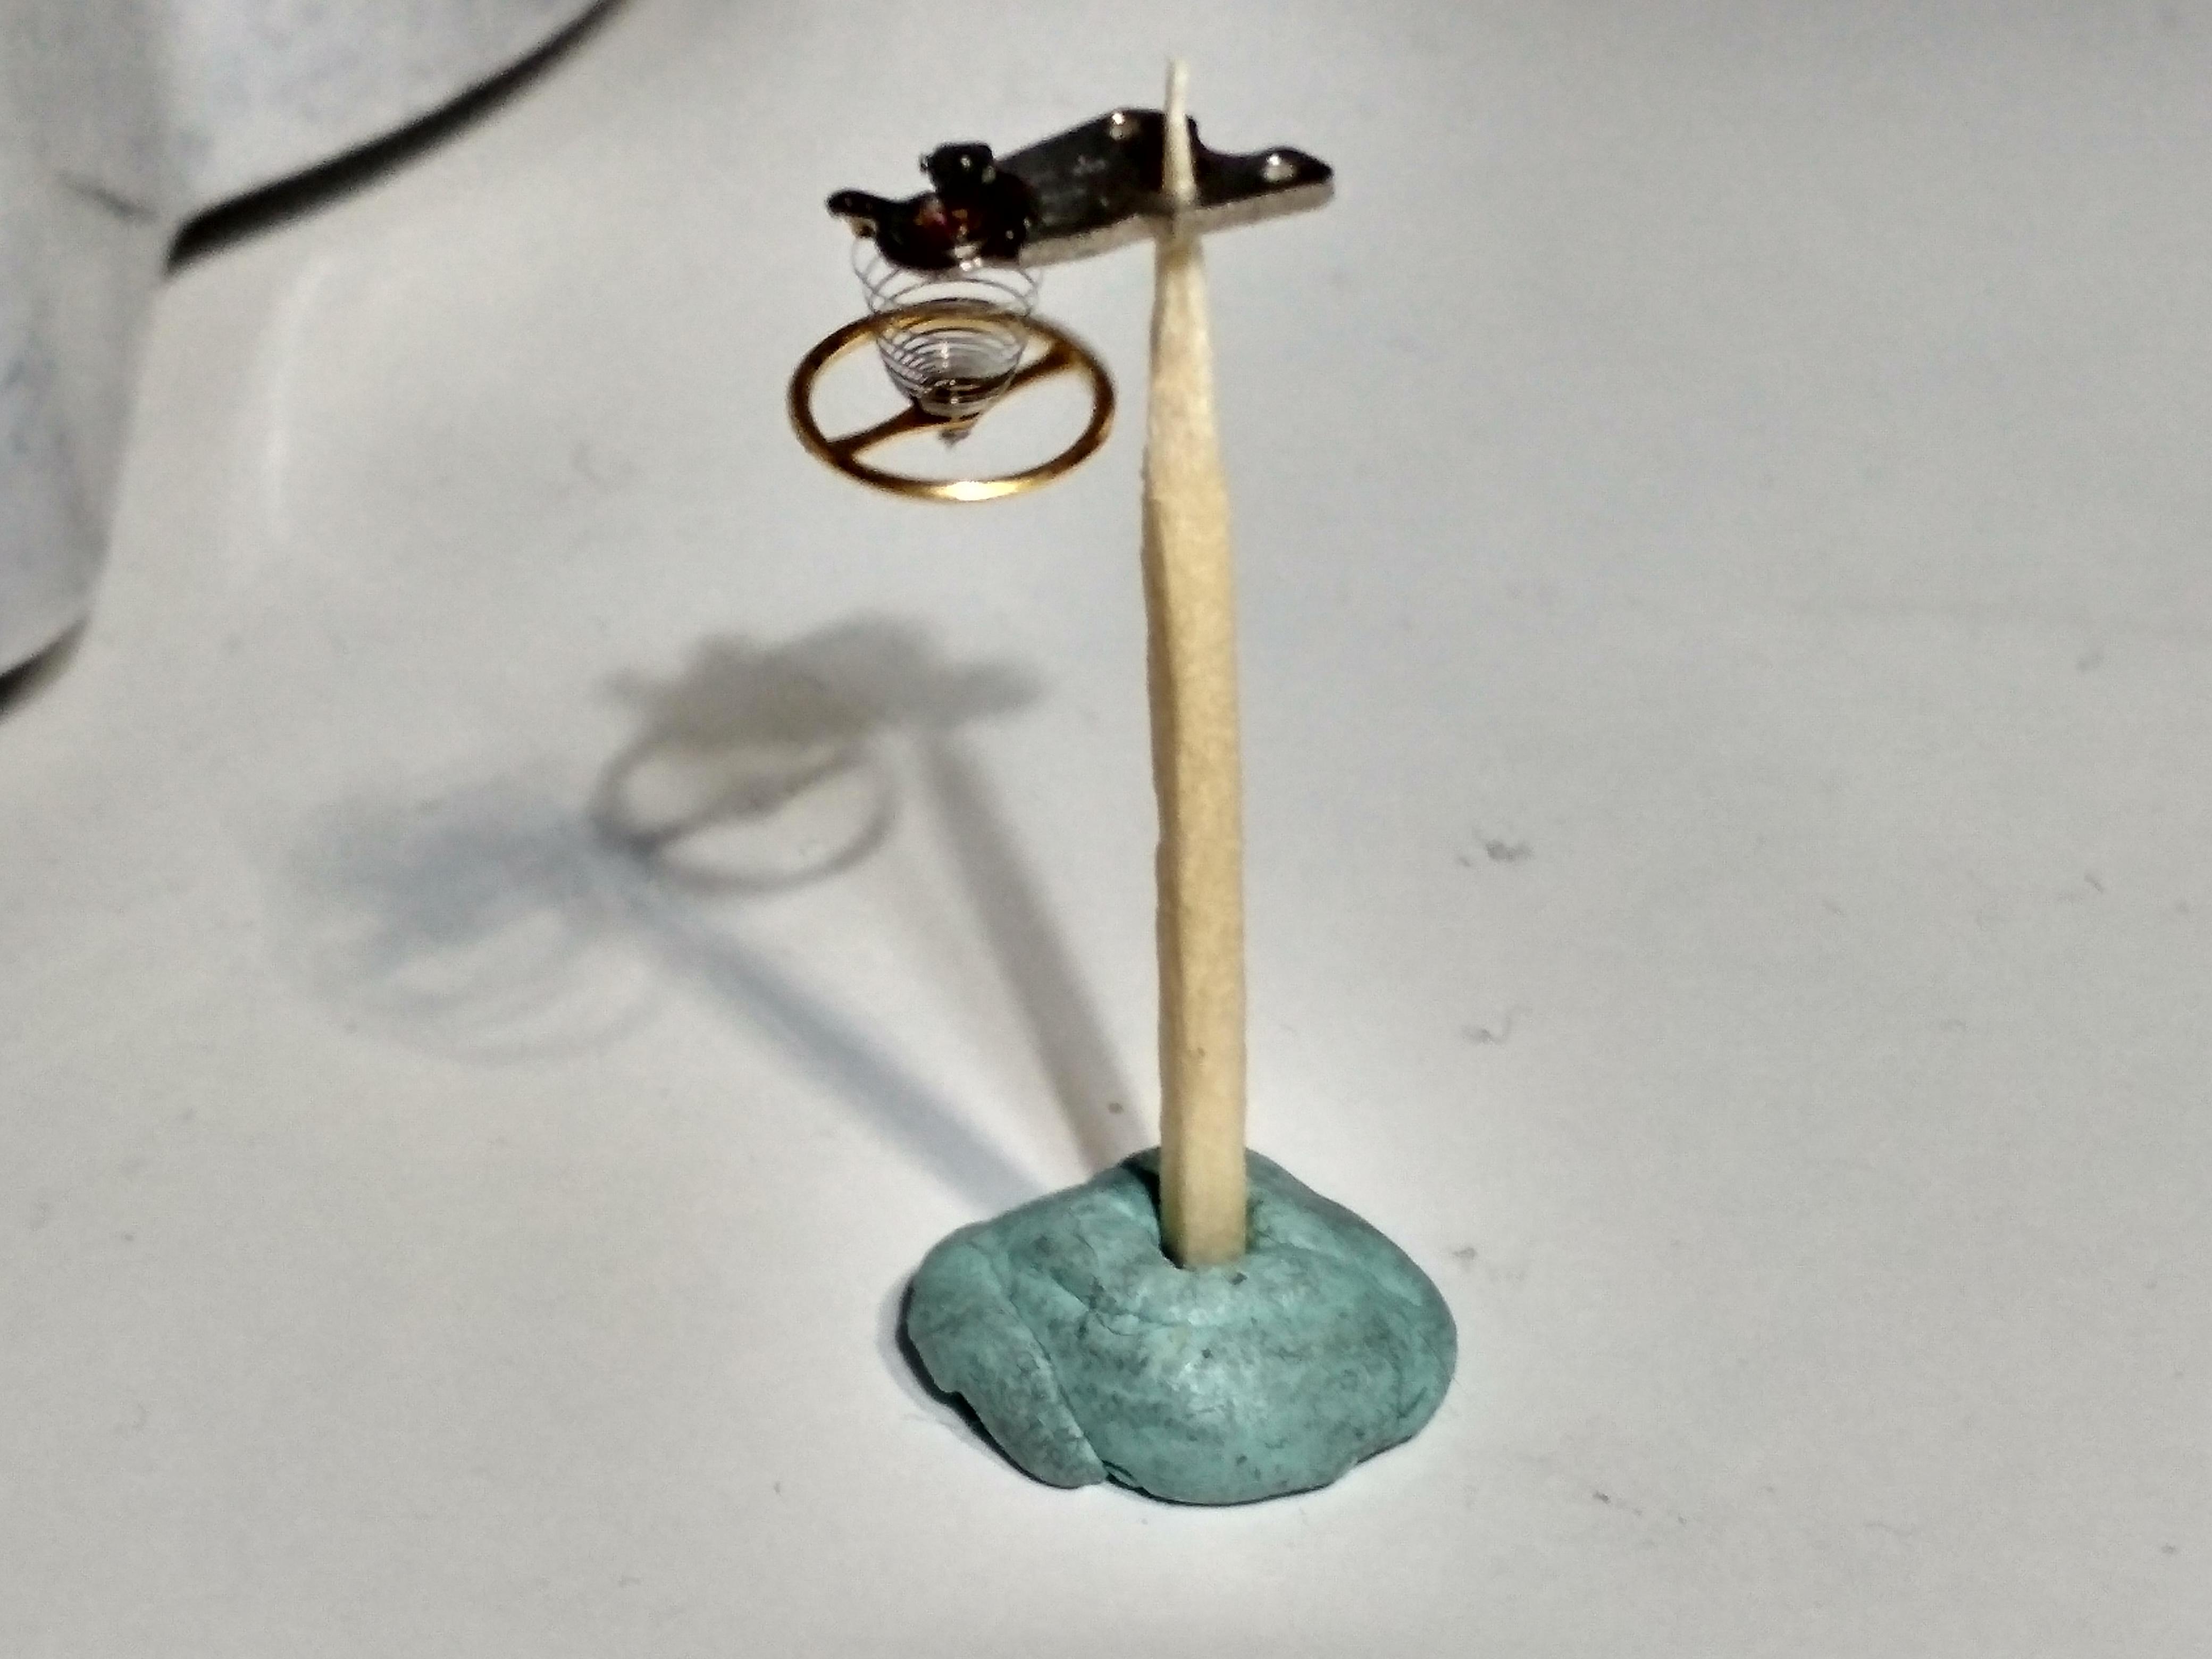
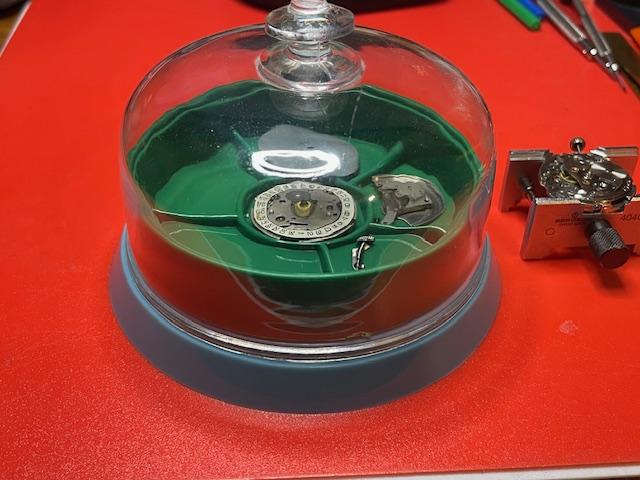
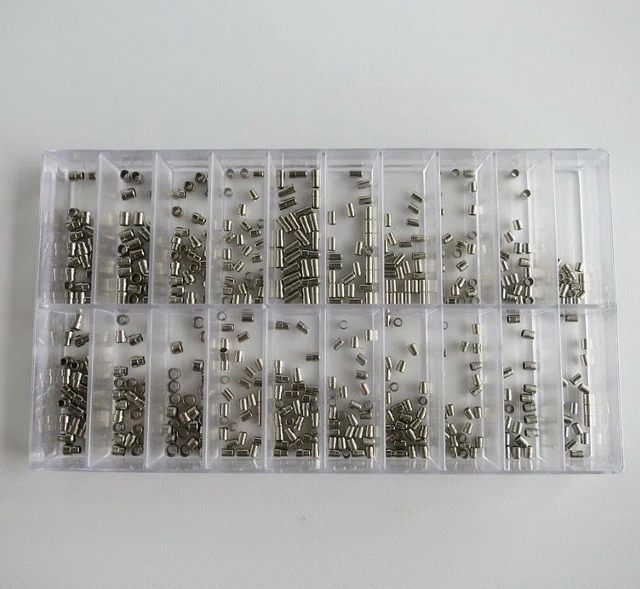
Something I discovered by chance a few days ago - the individual layers from the cheap plastic "stacking" parts trays will also work as an extra layer in a normal dust cover, which could be useful if working on a complex watch where there are more sections you want to categorise that divisions in the normal dust cover tray. The stacking ones I have are around 87mm diameter, or 89mm over the lip of the clear lid that comes with the stack; mine are from ebay but probably the same as these: https://www.hswalsh.com/product/round-stackable-trays-with-lid-economy-hb3134 (The stuff in the green tray is not related to the movement at the side - I just grabbed that one for the photo).
 4 points
 -
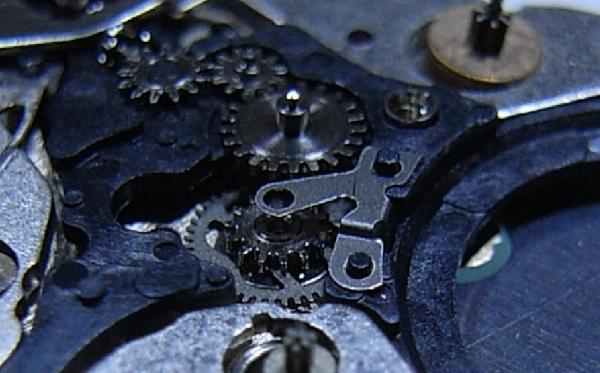
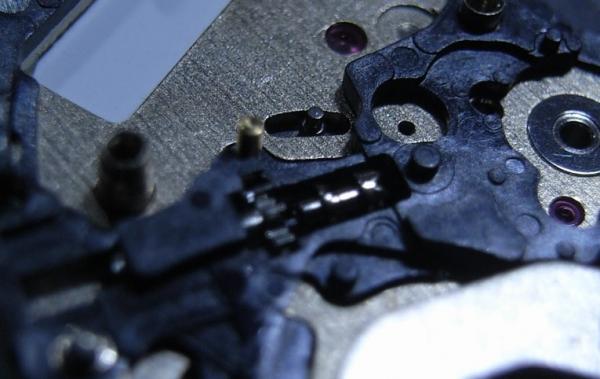
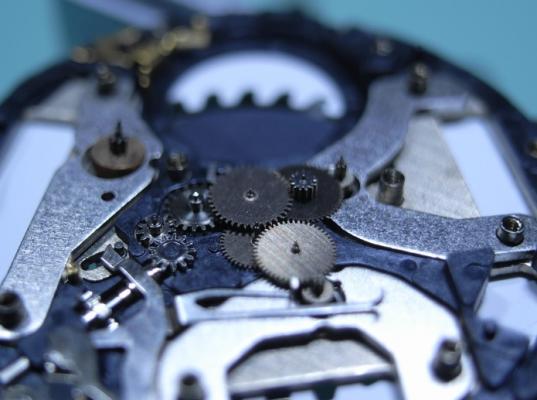
I think thats a hard question to answer, though the shock protection that we have been discussing is different to the one you mention here which resists shock to cause pivot damage. We were discussing escapement, possible that the safety clearances were slack allowing some kind of overbank. I'm far from an expert but i generally do think logically, i can almost guarantee if i shake the watch on my wrist hard enough i can cause enough damage to make it stop. An impact that you describe may have been enough but neither you or anyone here were witness to it. A hard sudden jolt to a dead stop , could it cause the watch to stop and cause damage ? It certainly looks that way Yep i can completely agree with you Tom , a decent quality watch that is set up correctly would need more than just a bump. This is a loose example Tom , different watch different quality . A non working Timex i bought about a year ago, it had over banked so i removed the balance put it back in , all hunky dorey for about a month of wristwear, it became my everyday wear for work. Then one day i had to break in through a front door for a customer, about 20 mins of hard drilling a 5 lever lock out. When I got home i noticed my Timex had stopped, on inspection the impulse had again made its way onto the wrong side of the fork. It hasn't done it since, i haven't drill any more locks out since either. Standard of watch plays a big part , factories can churn out friday movements that are not quite there. Can understand your concern, companies rely on reputation, thrive on a good one , sink with on a poor one. This issue is something you would want to get to the bottom of. One suggestion i can make , initial inspection of a non working watch, without making any changes to the movements situation, look , look and look again very closely. I'm not suggesting your guy didn't do that , but an overbank can be easily ruled out, i did mention at the start that in this case it was an unlikely cause as it would be easily found, even if just caught up slightly. Be good to find out what damage or change has happened to make the tg freak out , that will at least point you in some direction instead of no direction .3 points
-
I’d end up swallowing the am cannon pinion…3 points
-
It could be as simple as a speck of dirt had lodged in the train and by letting the power off it released it from its place and moved out of the way. You won't find the true problem until you take it apart and inspect all the parts.3 points
-
Haha i had a crap night's sleep after an evening of junk food, the missus exiled me to the sofa, my stomach was making the strangest of noises. Alls forgiven now , treating me to a breakfast out Possibly a partial catch Rich, pin resting on top of a horn. A fully overbanked escapement would need the balance removing and replacing. Possible that the impulse pin was just caught half way, sat on a fork horn, I'd expect your repair guy would have picked that up easily. But an unwinding and rewind of the mainspring might have been enough to drop the pin back inside the fork slot. This might account for the tg snowstorm, damage to the pivots of the balance or the pallet fork, movement of the fork's guard pin, damage/displacement to pallet stones/impulse pin. Check all these areas, the safety clearances may have changed. Does this look like an attempt to redeem myself .3 points
-
One that springs to mind Richard is the solid ones either milled into the plate or bridge are more difficult for someone to bugger up. Tom3 points
-
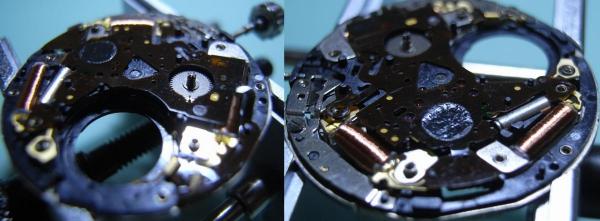
Thank you for this suggestion Tom. It appears to be a logical explanation to the issue. Certainly we won't try to reproduce this with the G100. We have used Miyota 9015 for several years, and have never encountered this in the 9015. We have also been using Sellita SW200-1 recently and have seen this issue once or twice. Thank you! I learnt a new term today. However, I looked up rebank and learnt that when a movement "rebanks", the watch is still running (albeit not perfectly). It means that the pallet fork knocks on the balance and it can be audible as "double-ticks". OTOH, an "overbank" causes the impulse pin to be stuck outside the horns of the pallet fork, thereby putting the escapement "out of action". So this could be an "overbank" of the escapement - because the watch had stopped upon impact and wasn't running at all(?) The question is then, how does an overbanked escapement start working as soon as the power is released from the main spring. I would assume that an overbanked escapement will need the watchmaker's intervention to fix the impulse pin in position for the escapement to start working again? My gut feeling is that there is something wrong with the balance - additional information: after monitoring the movement for two days, we tested again after casing up - the watch is suddenly off the charts - amplitude is all over the place, accuracy is not within bounds, and beat errors show up. Of course we decided to switch to a new movement on the customers watch, but I'd prefer to get to the bottom of this so we can handle this if it comes up again.3 points
-
I think your best option would be a strap type car oil filter remover.2 points
-
The correct way to insert anything with a thread be it a nut, bolt, screw or watch crown is to rotate in the opposite direction till the threads align and then tighten.2 points
-
Hey Bill, the second one matches closest, the barrel diameter is more about what this spring will easily pop into, not about any other parameter. You could have a 12mm barrel that uses that same spring and this one will fit just fine. Tom2 points
-
Mine likes to say "happy wife, happy life " and she means it.2 points
-
Another experiment - something to hopefully stop cap jewels & retainers escaping like micro tiddledywinks! I actually got this stuff around the end of last year, but it took weeks to arrive and I pretty much forgot I had it until yesterday.. It's black "crushed velvet" or Velour, according to the original advert - very short, flattened pile fabric. My idea was that it should be easier to see any escaped small parts, and they are less likely to slide any distance. It turns out things land on it almost without any bounce at all - and depending on the angle you look at it, it appears either dark or light, so things are visible regardless of colour or reflectivity. I'm still working on a movement holder or cushion, not directly on it; it's purely as a stray item catcher.
 2 points
 -
Hi @Neverenoughwatches The term I learnt was overbanked meaning that the fork and the impulse pin were displaced, the impulse pin being on the wrong side of the horn. This is due to a shock/knock causing the fork to jump to the wrong side during the oscillation of the balance and the balance returns to rest outside the horn2 points
-
Haha actually i got 2 terms mixed up its not rebank its overbank lol2 points
-
Another good one rob, is 2 the max that will fit inside the cover ? Haha i use these for putting hands in. I used to also strip parts and save them like this, probablyan ocd organising thing that we all possess, now i just put the whole movement in a small zip lock bag, the parts are safer stored within the movement and their identity is never lost that way. You can claw back some ocd habit by aphabetically labeled Chinese takeaway containers full of those baggies.2 points
-
A hard knock can cause a rebank, i had this a few months ago with a Timex, different quality obviously and more likely with a cheap escapement but its something that springs to mind. Maybe a partial catch up of the impulse pin in the fork that just needed an energy release and re- wind of the barrel. Thinking about it your watchmaker would have spotted this on close inspection , the impulse pin resting on top of a fork horn so the fault more possibly something non-visible2 points
-
Welcome to,the forum ,enjoy.1 point
-
Thank you for your introduction and welcome to this friendly forum. We all look forward to your contributions and continued involvement. If there is anything we can help you with don’t be afraid to ask. Nice clear photos can help a lot.1 point
-
Hi, if you can not find links there are buckle extenders made, you will need to find and measure to assure a good fit....1 point
-
Happy husband ...........estranged ? Nymphomaniac wife ? Ahhhhhh thats why I'm always so full of joy1 point
-
Holy crow batman , well there was absolutely no way i was going to guess that Rob Just to add to that, cool project and kind of relieved you didn't post a shirt Or a dress Cos i might have wanted you to make me one as well1 point
-
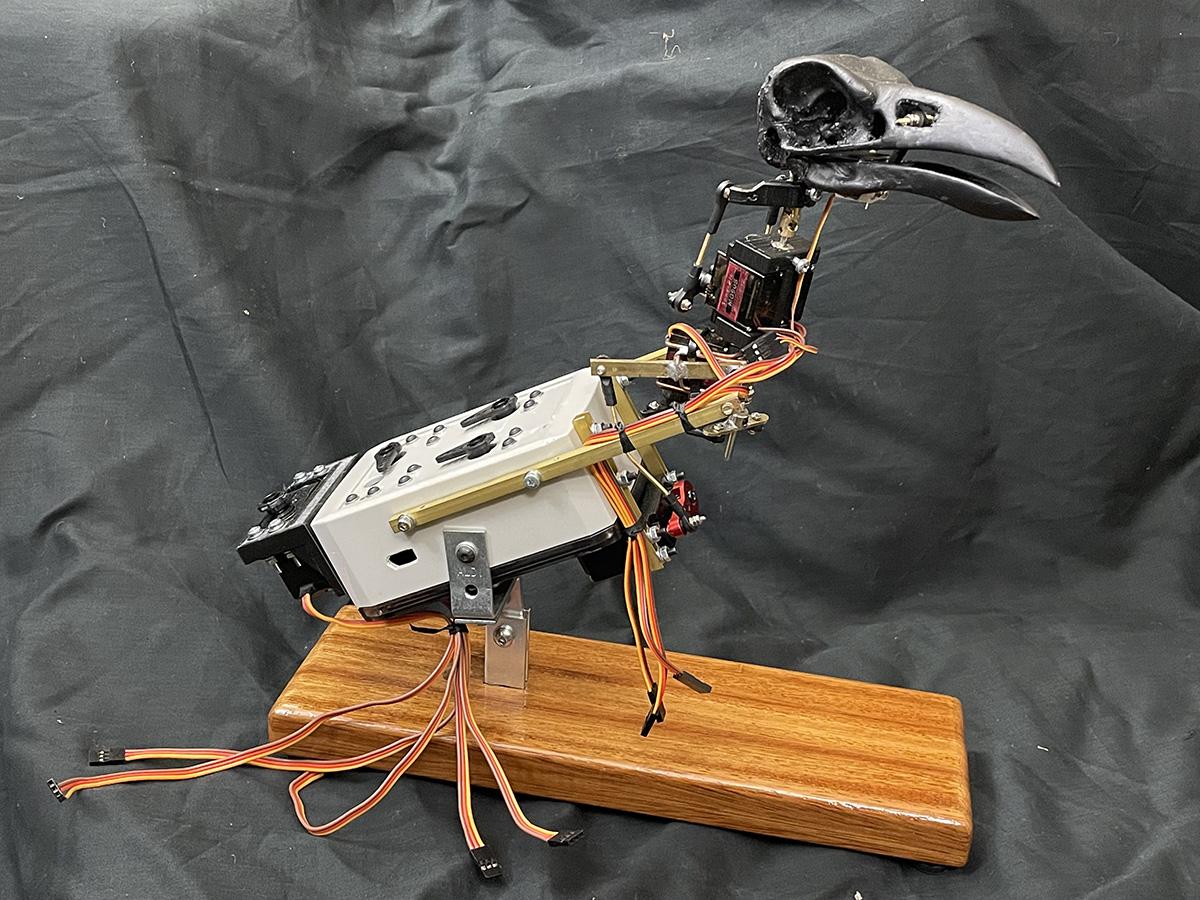
As you ask - a possible base "skin" for an animatronic Raven project; the stuff was listed as all-way stretch - but its not. I'm getting some proper animatronics grade material from a specialist instead. (I have green baize & red felt for the instrument boxes).
 1 point
 -
Great if you are lacking iron in your system lol.1 point
-
We don't know if it's a problem unless we know which watch it is. For Rolex your definitely having a problem but for a pin lever watch your doing outstanding. Oh and then there is the other problem will understand better if we get a caliber number but most watch companies unless it's a chronometer grade watch only originally adjusted/time these watches typically in the three positions. Pro watch repair point of view you always want to look at the watch and six positions but just remember it was originally regulated in three positions typically1 point
-
Hi @Neverenoughwatches you will feel better after your coffee and toast, by the way the Sun is shining in Scotland.1 point
-
Hi, welcome to WRT. Has Swatch Group's policy of not selling to independent watchmakers impacted you in anyway?1 point
-
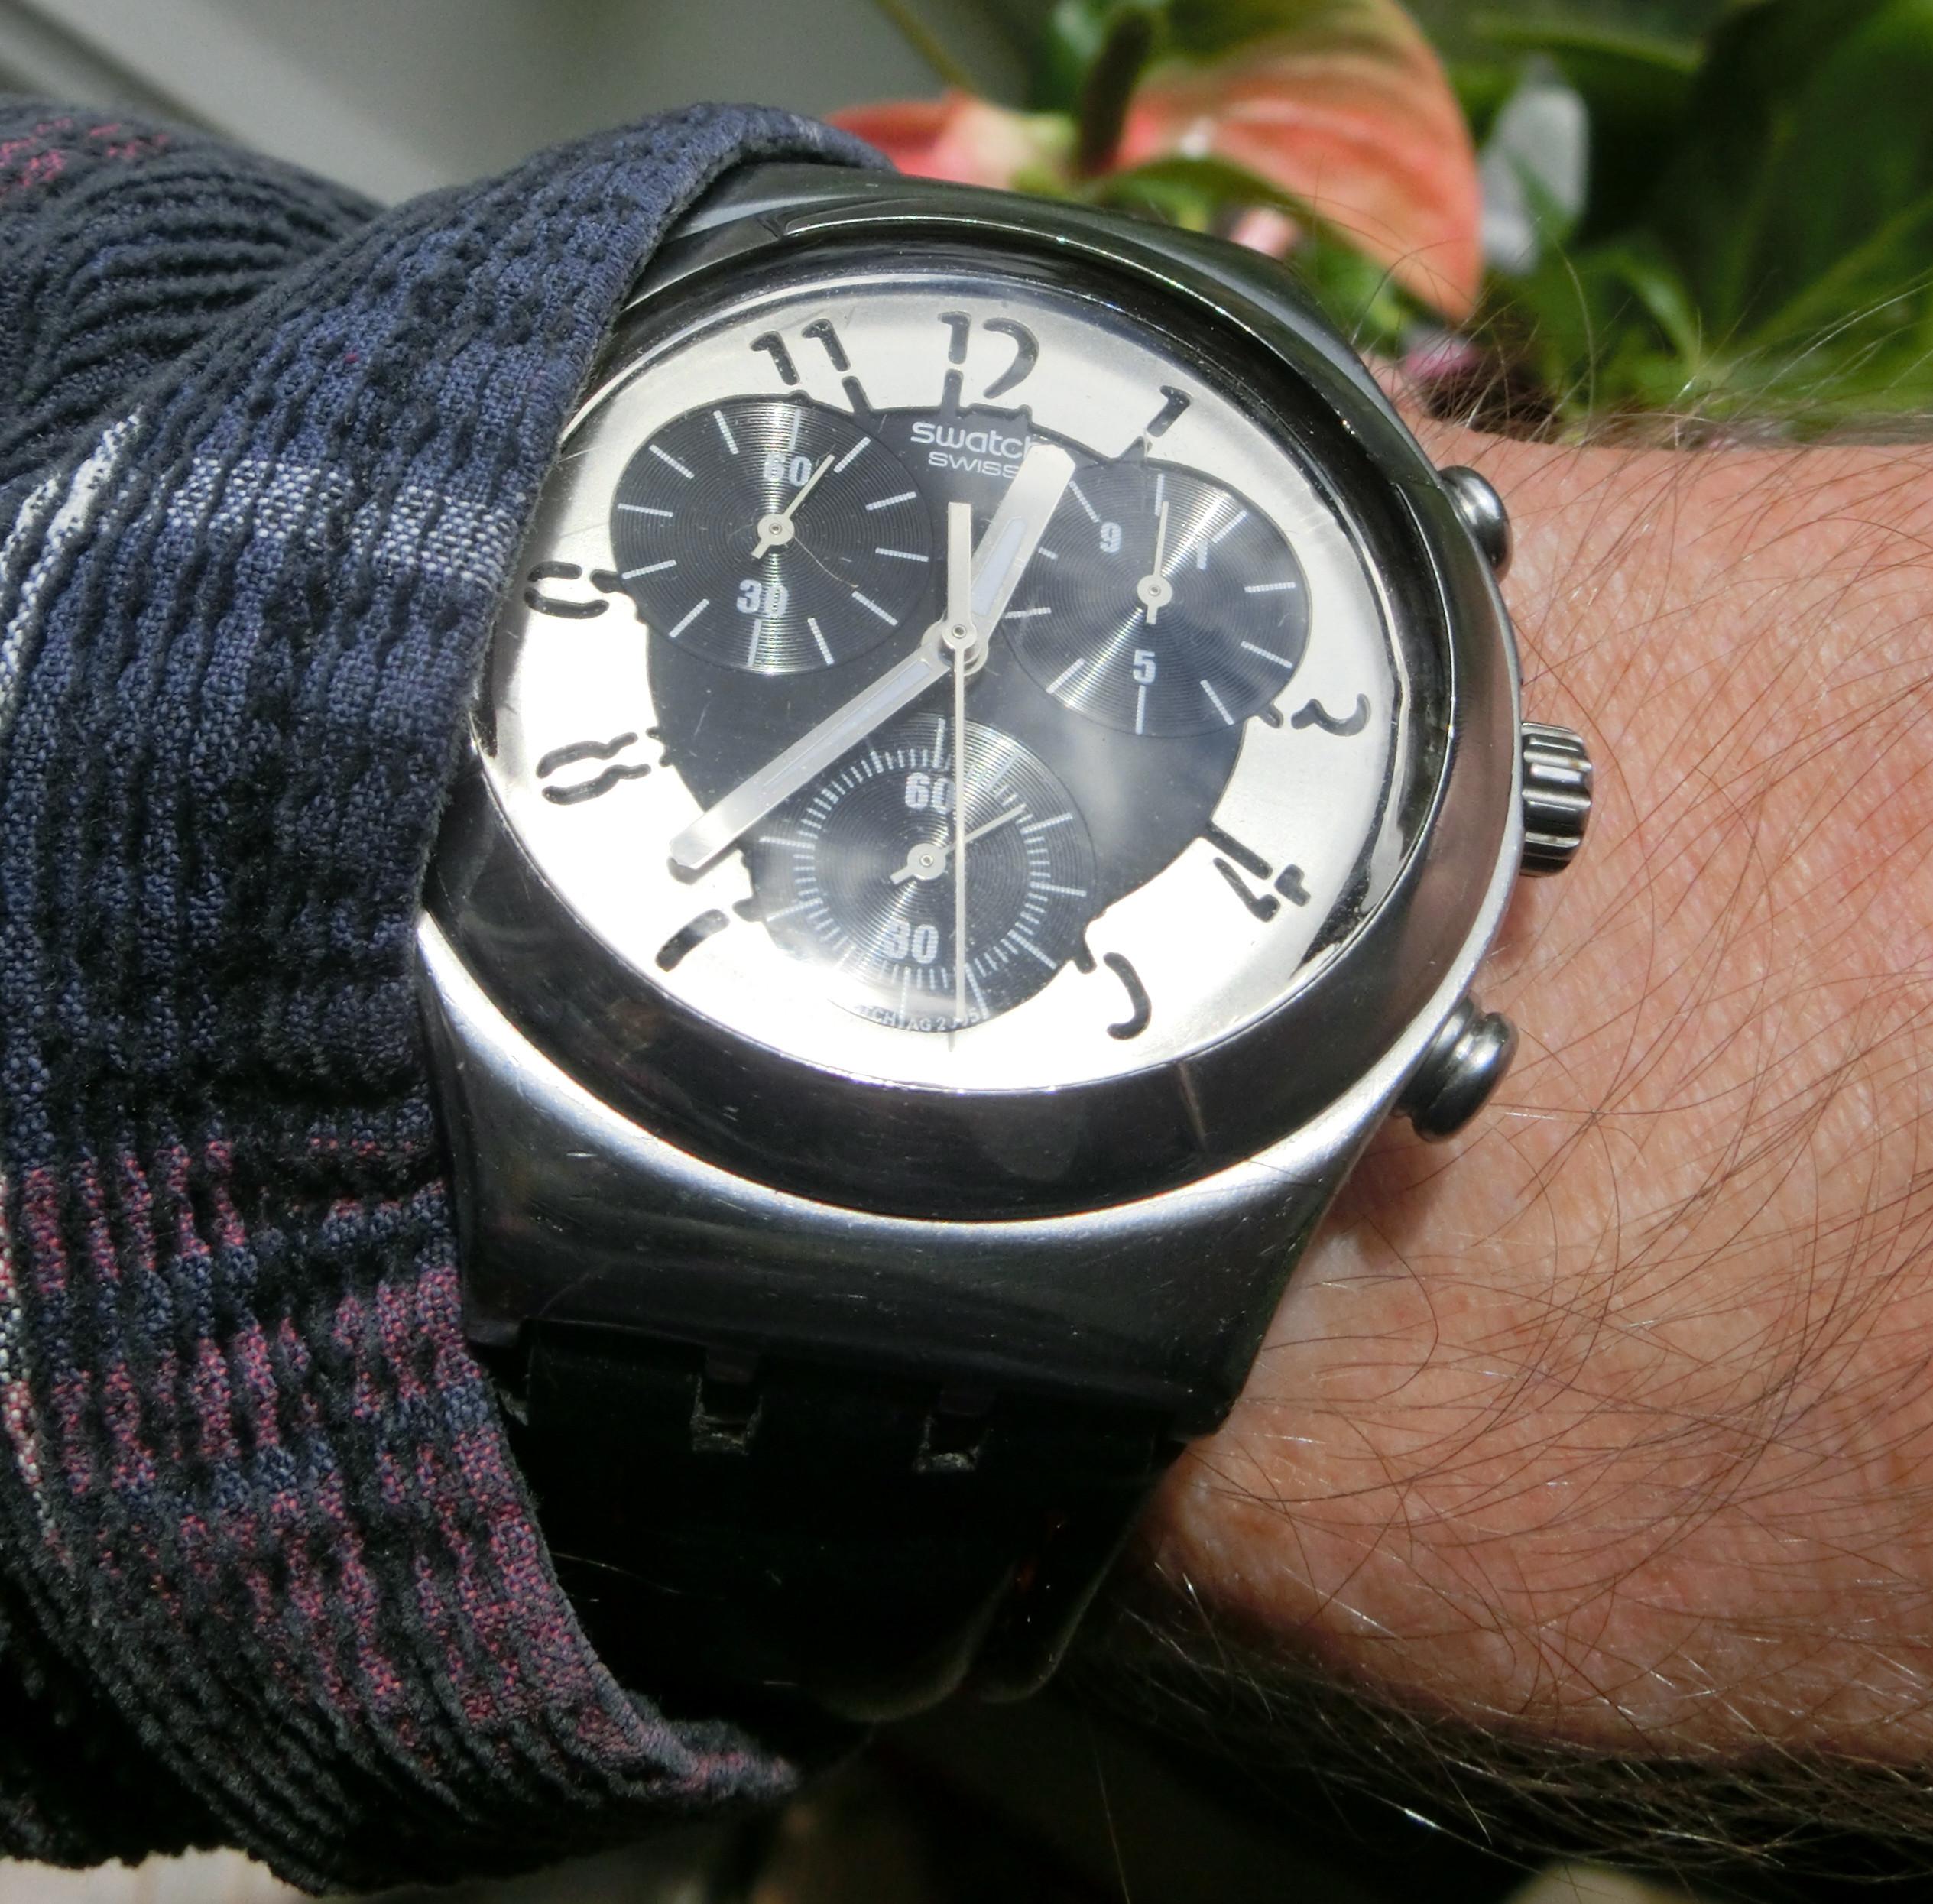
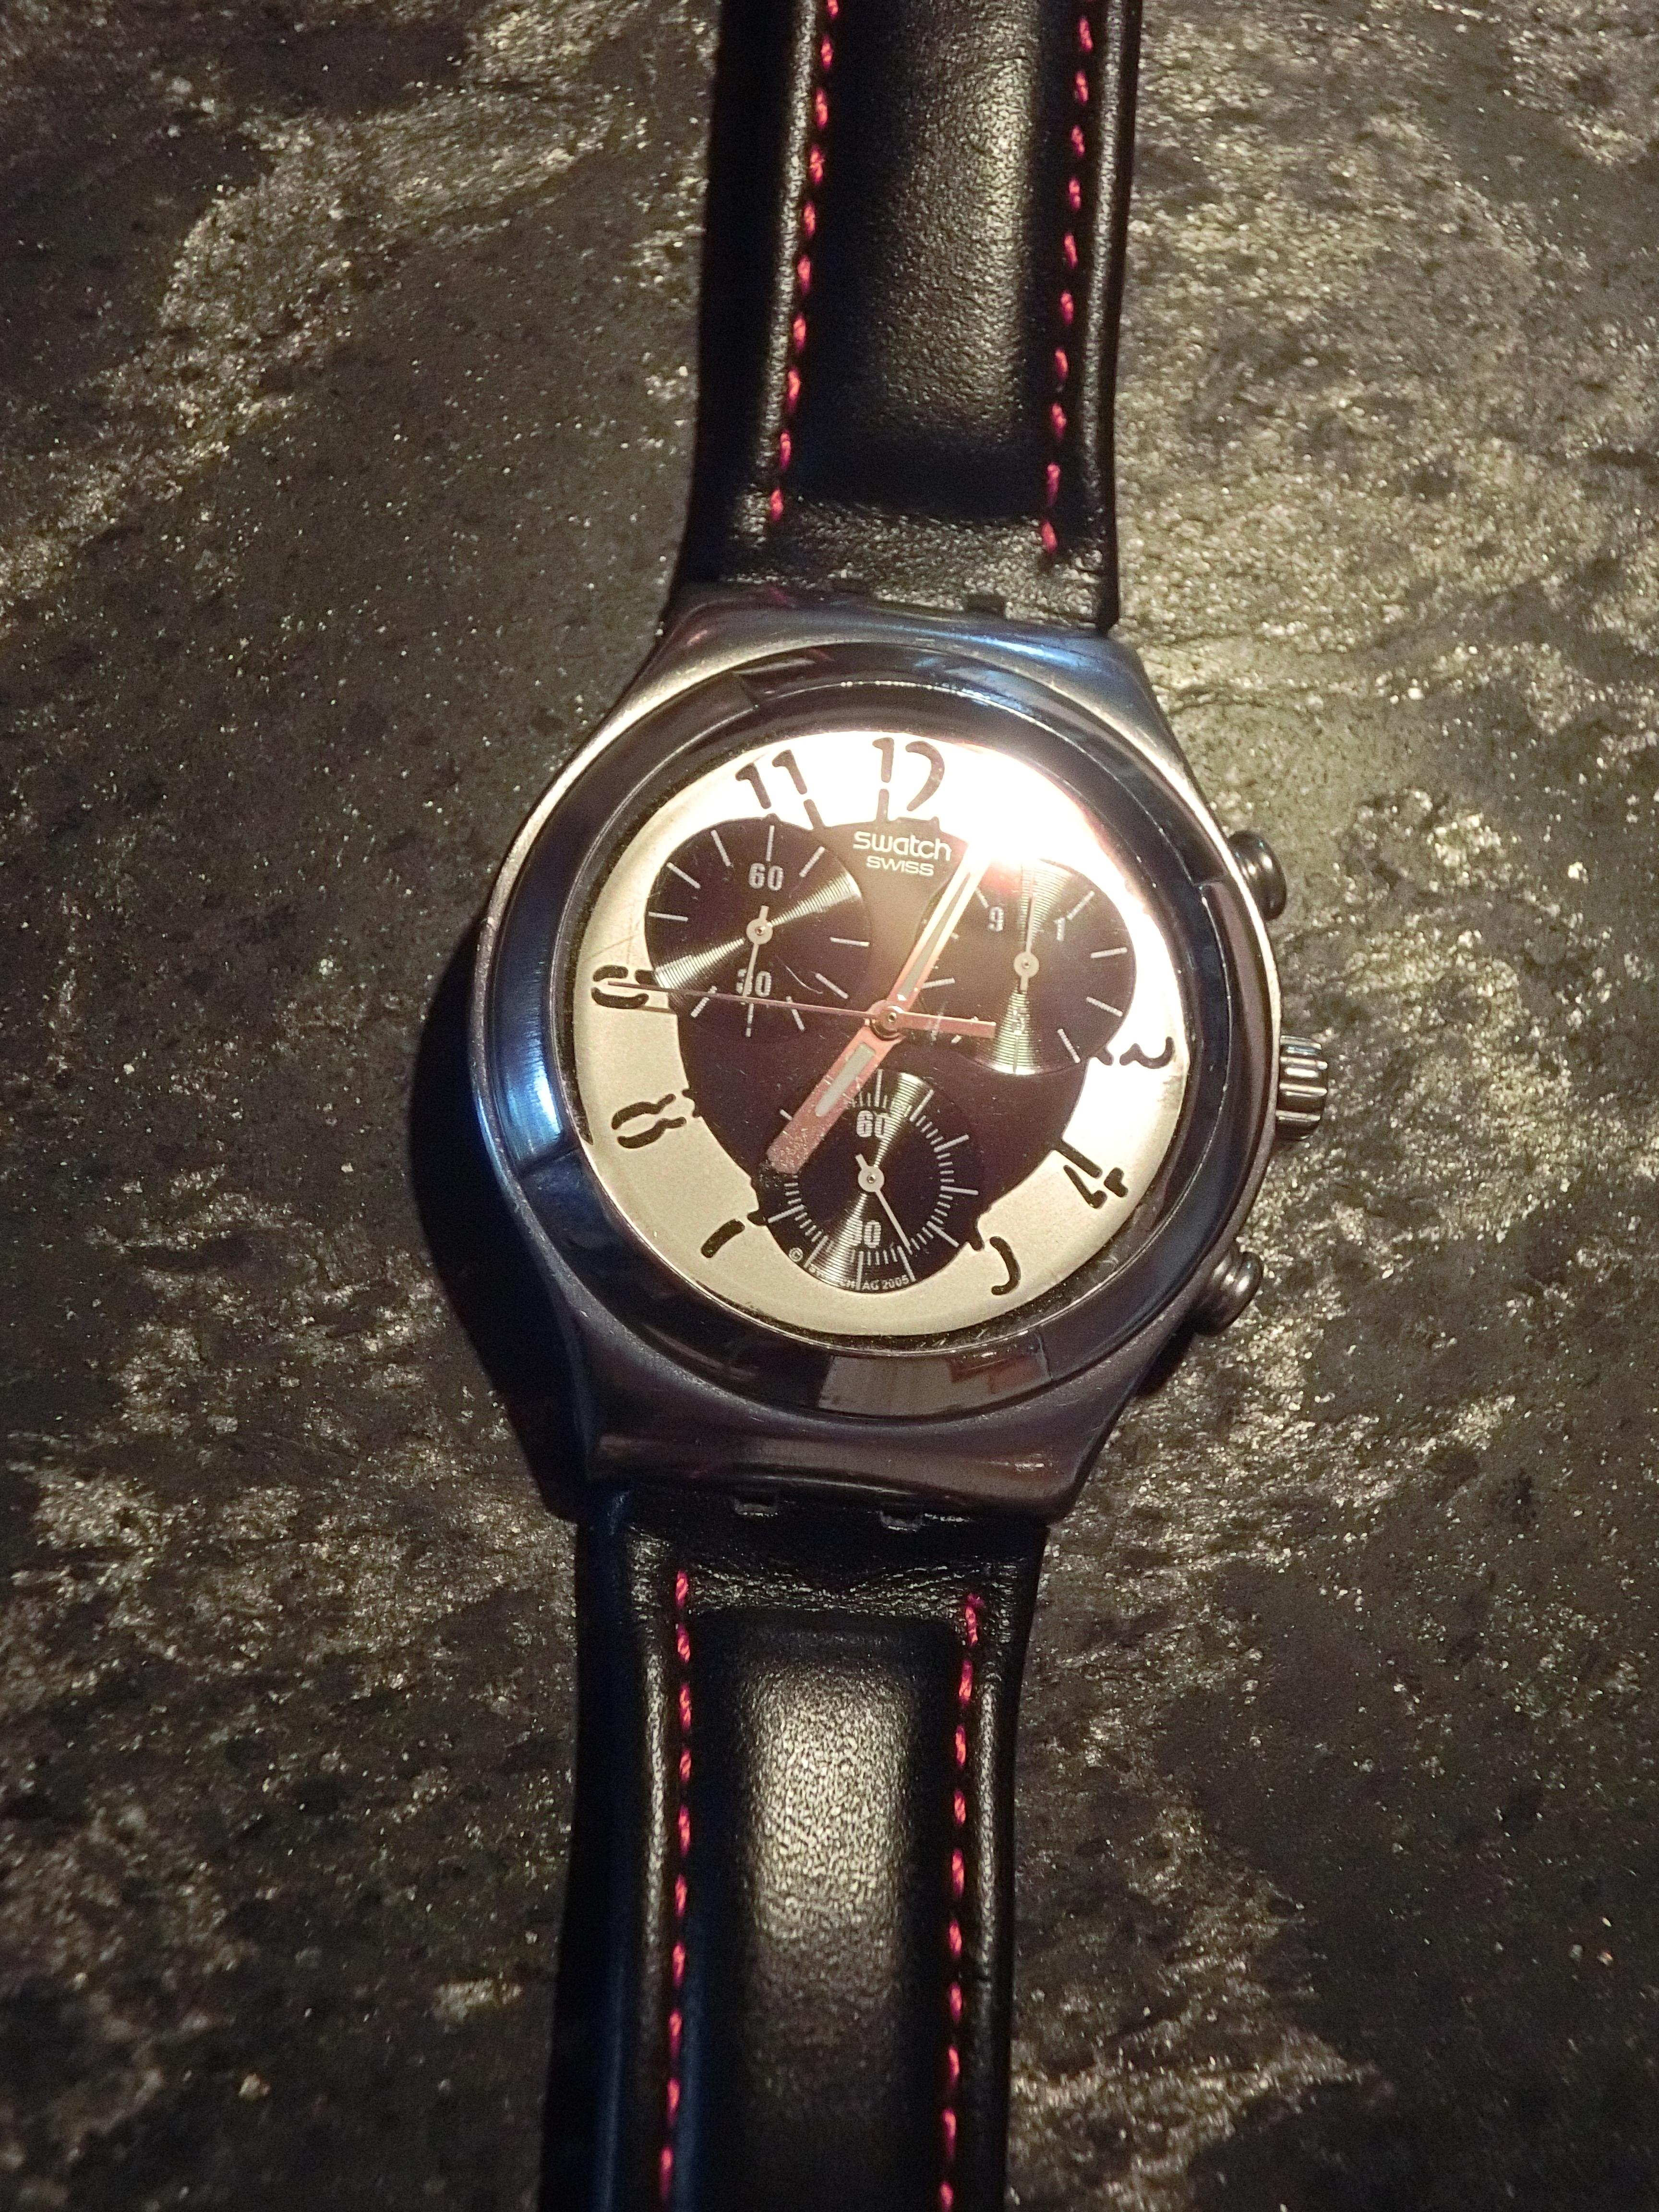
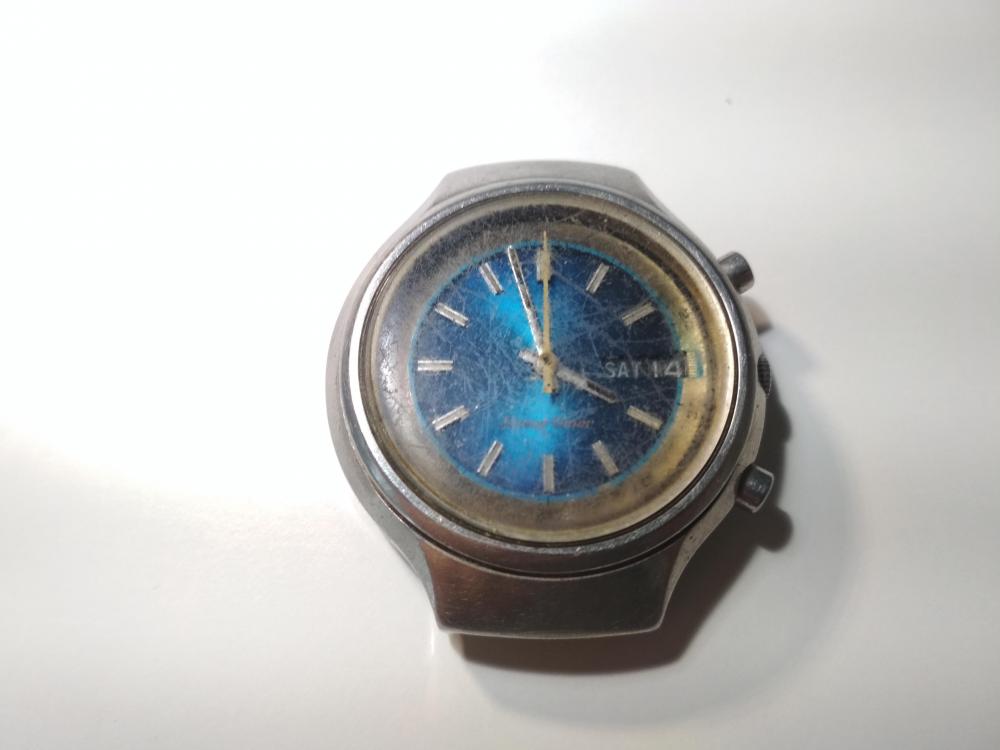
Today I was sporting the Swatch Irony Chronograph (a V8 Chronograph model YCS109 to be precise).

 1 point
 -
New version with N designation came with shock protection, kif system I beleive.1 point
-
Eloquently put John! I couldn't agree more.1 point
-
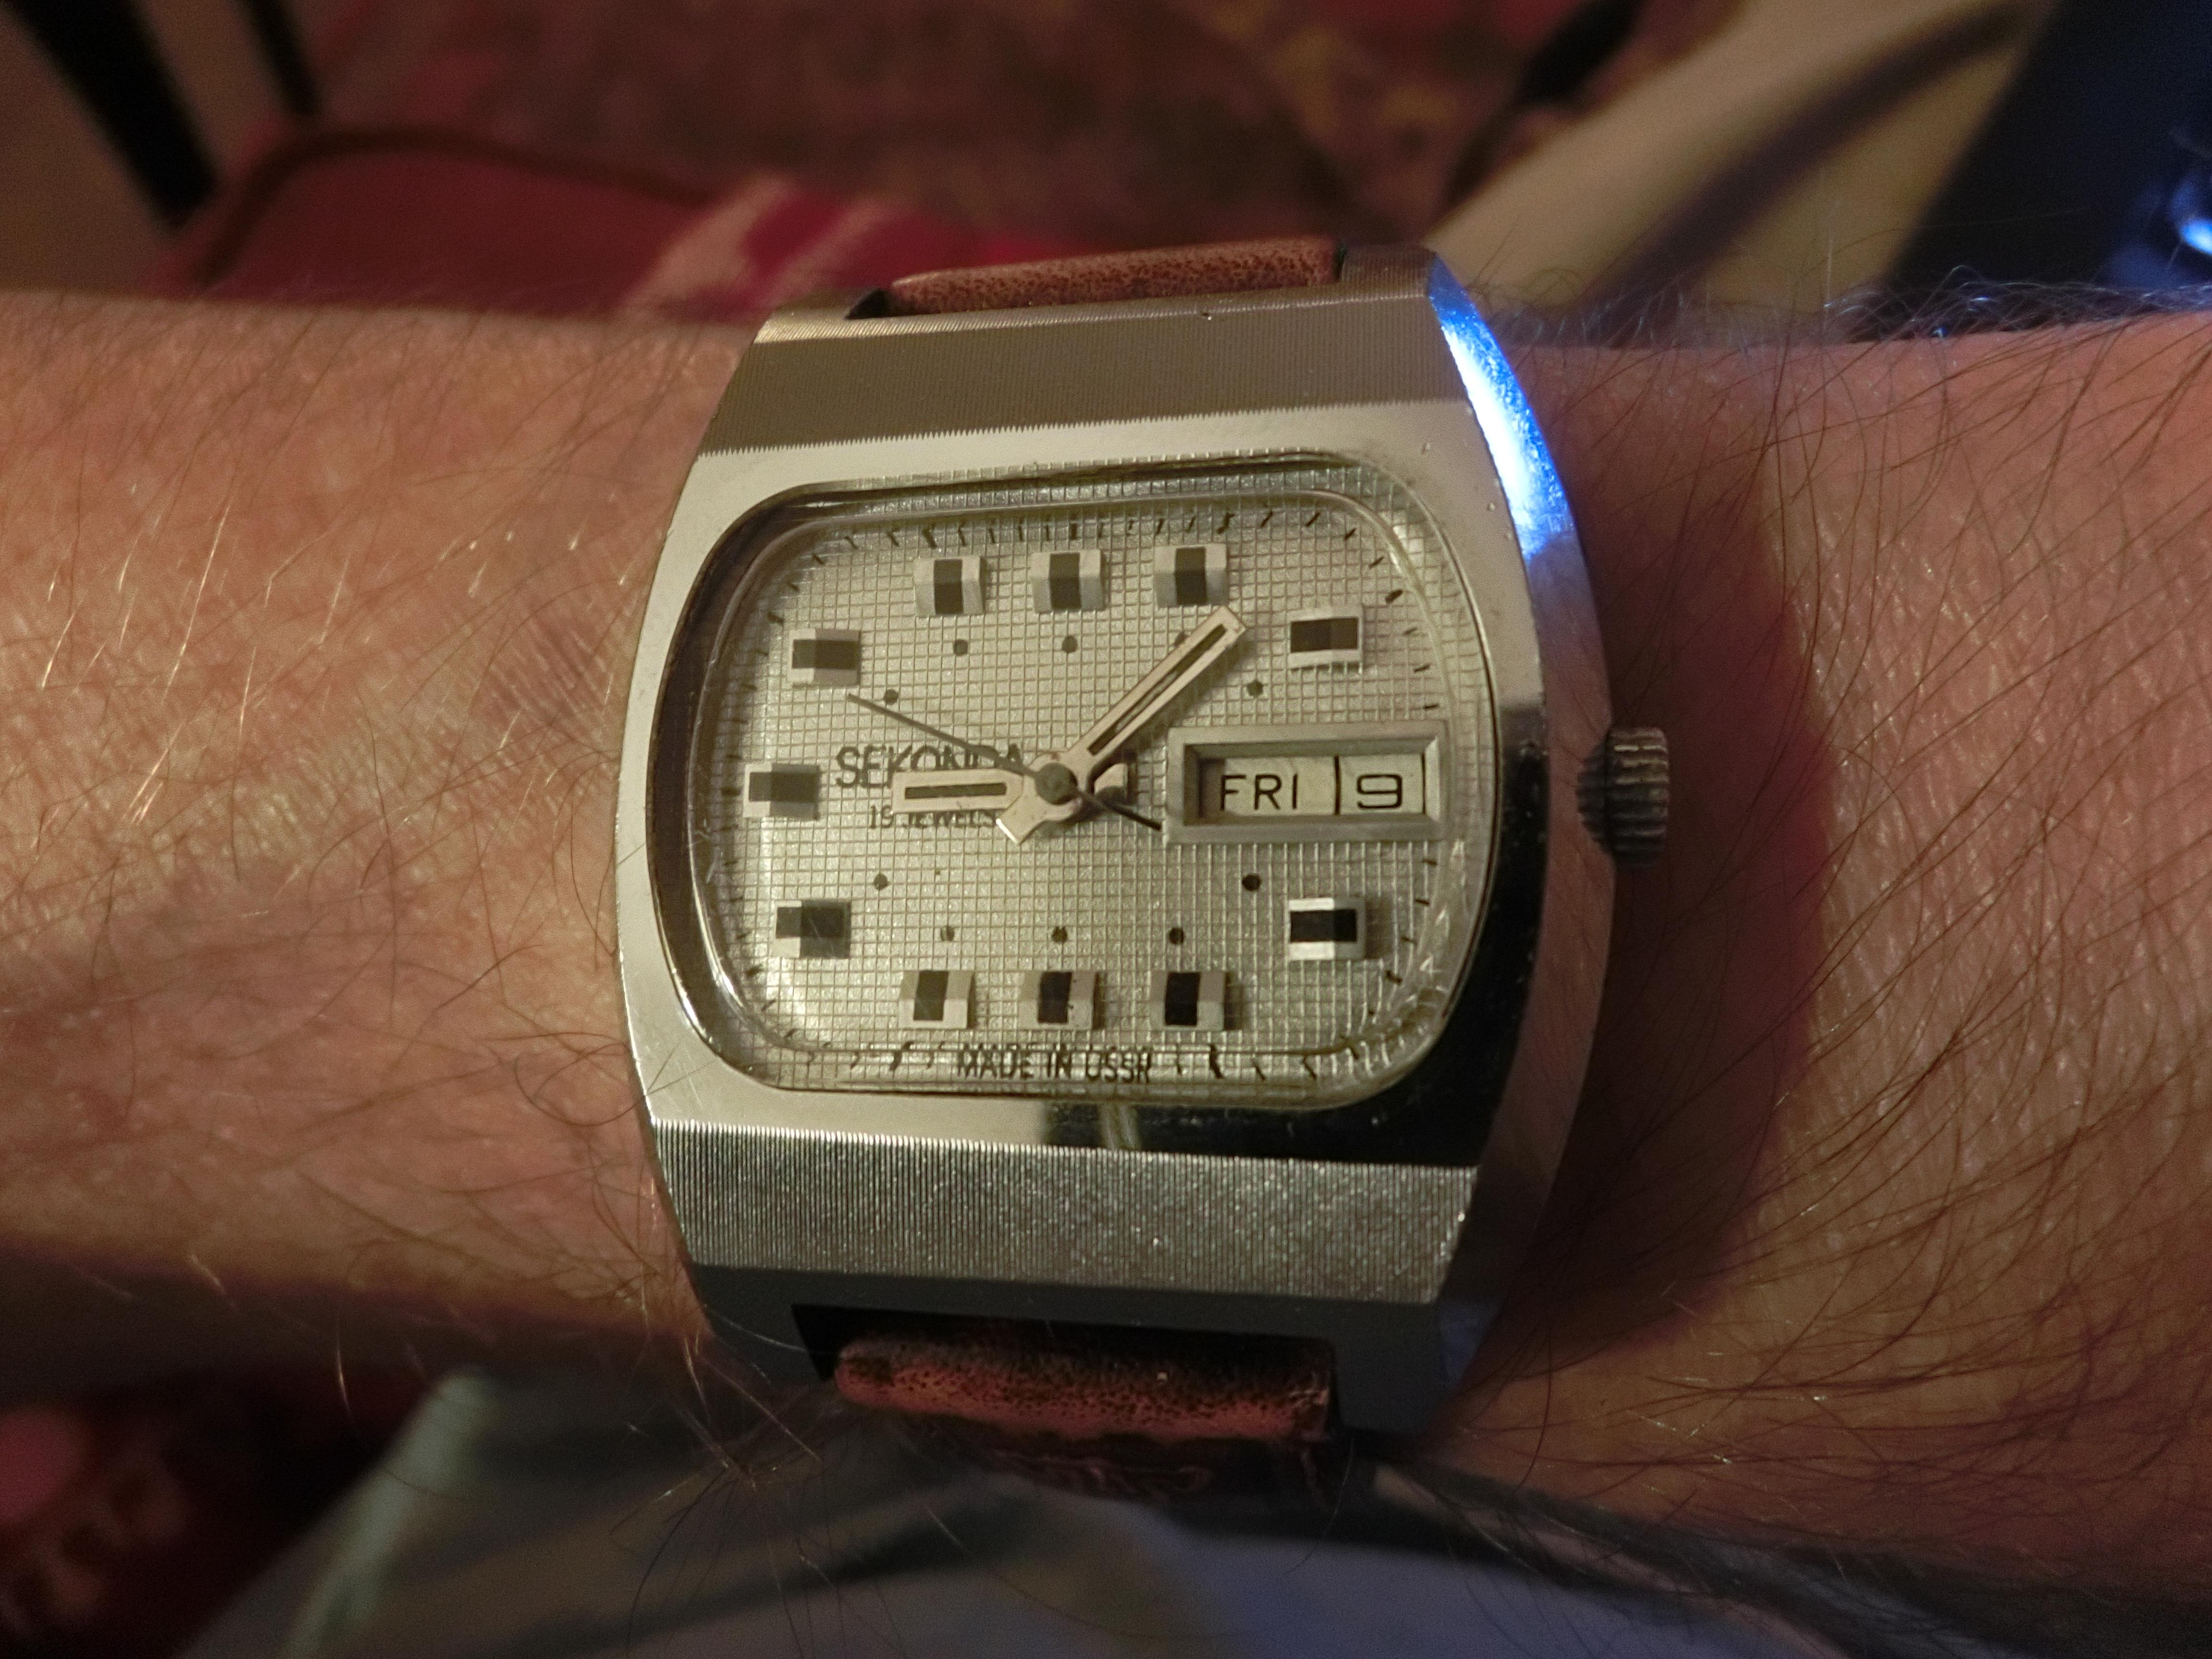
Its been a while since I wore this 2628.h USSR era TV cased Sekonda, so I decided today was the day to give it an airing.
 1 point
 -
Without a Geiger Counter no way to know for sure, I picked one up second hand for quite cheap just to be able to tell. It looks to me like the numbers have been re-lumed at some point, the colour of those doesn't scream radium to me actually. That browning of the lume on the hands does look radium based though. Balance of probabilities says there is probably some radium somewhere in that watch. I wouldn't worry about gas being released when you opened the back, almost no way that watch is water/gas tight given its age. If you change the crystal take sensible precautions. I lay paper towels over my work surface and dispose of them afterwards then wipe everything down with a damp paper towel. I had my working area scanned by a professional a while ago (I think I posted the story before) and he couldn't detect anything so I assume my precautions are ok.1 point
-
I wonder if life is the ultimate product of the universe. Oh well , let fix Khan's watch first.1 point
-
Mickey has a heart beat. Got oil applied to two escape teeth and it just took off. That was last night. Still running this morning.1 point
-
The caseback seems to be set into a channel, so there's no edge to get under. My photo doesn't really show that well. EDIT: I gave a razor blade a try and was able to find an edge to get under and was finally able to get the caseback off. Just a one jewel movement, as I expected. Balance spins freely, which is good. Just won't run for more than a few seconds.
 1 point
 -
Nothing more that a small needle file needed. Preferably with one non toothed edge so no risk of the depth being reduced at the same time. To remove the teeth marks, use a square degussit stone will smooth it off nicely or fine ally oxide paper/low grit lapping film glued to a matchstick.1 point
-
Depending how hard it is I'd be looking to take most of the material away with a standard square file and then finish with a diamond file.1 point
-
It does look too tight , can see it overly pulling your wrist in. Silly question but all the clasp micro adjustments are at max ?1 point
-
For me this is nothing unusual with good tolerance threads. The crown has a spring in it which you have to depress, the anti clockwise rotation with a slight click lets you know that the threads are ready to be properly engaged and tightened normally. This is usual behaviour for fine close tolerance screws, bolts etc. looser tolerance ones are just turning on the end of the threads until they catch. What you describe with the binding if you don’t follow the procedure is to be expected with good tolerance threads as they were not lined up correctly to allow the threads to engage properly. Tom1 point
-
Sorry it's not a cheap or easy strap to get hold of and the only one I know available is also mangled. https://www.ebay.com/itm/293734767699 The problem you may also have is the pin on that end link could be bent or worn which would involve even more tools and work.1 point
-
It needs to be reshaped correctly once removed from the watch. You need the correct size round bar and ideally soft nosed pliers, hammer, vice etc. Edit What's the strap reference as it may just be easier for you to get a new strap.1 point
-
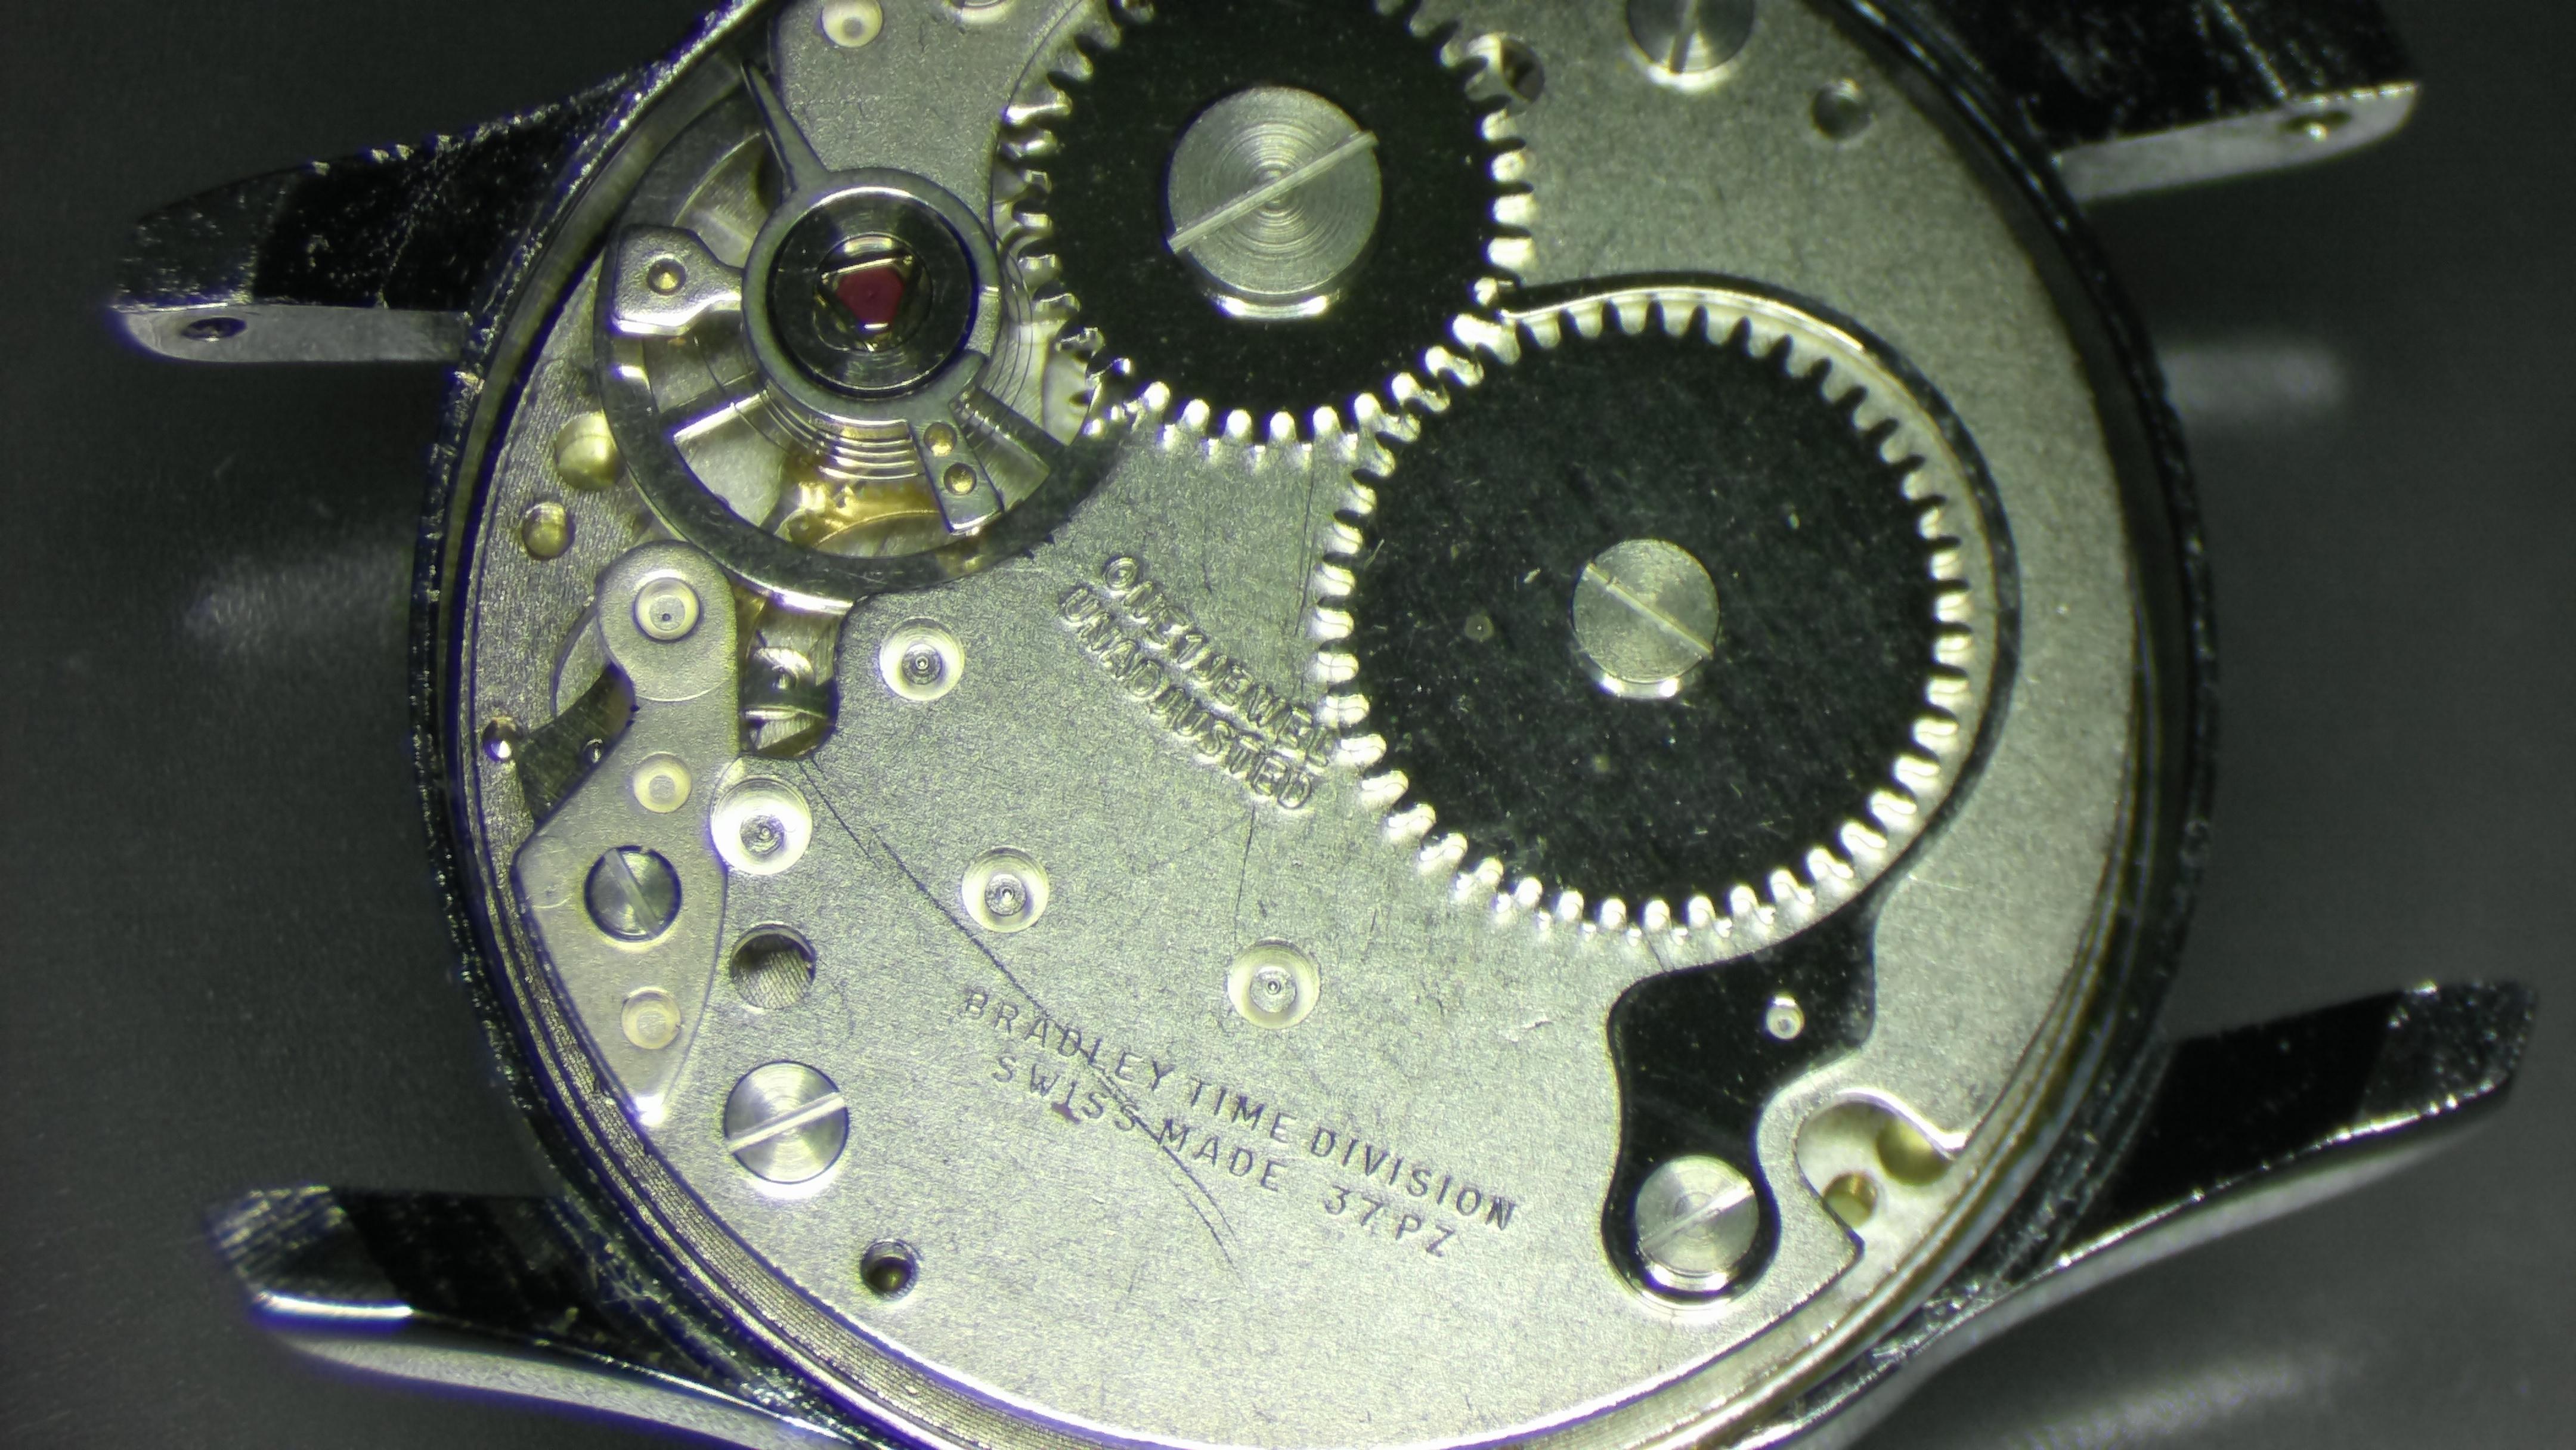
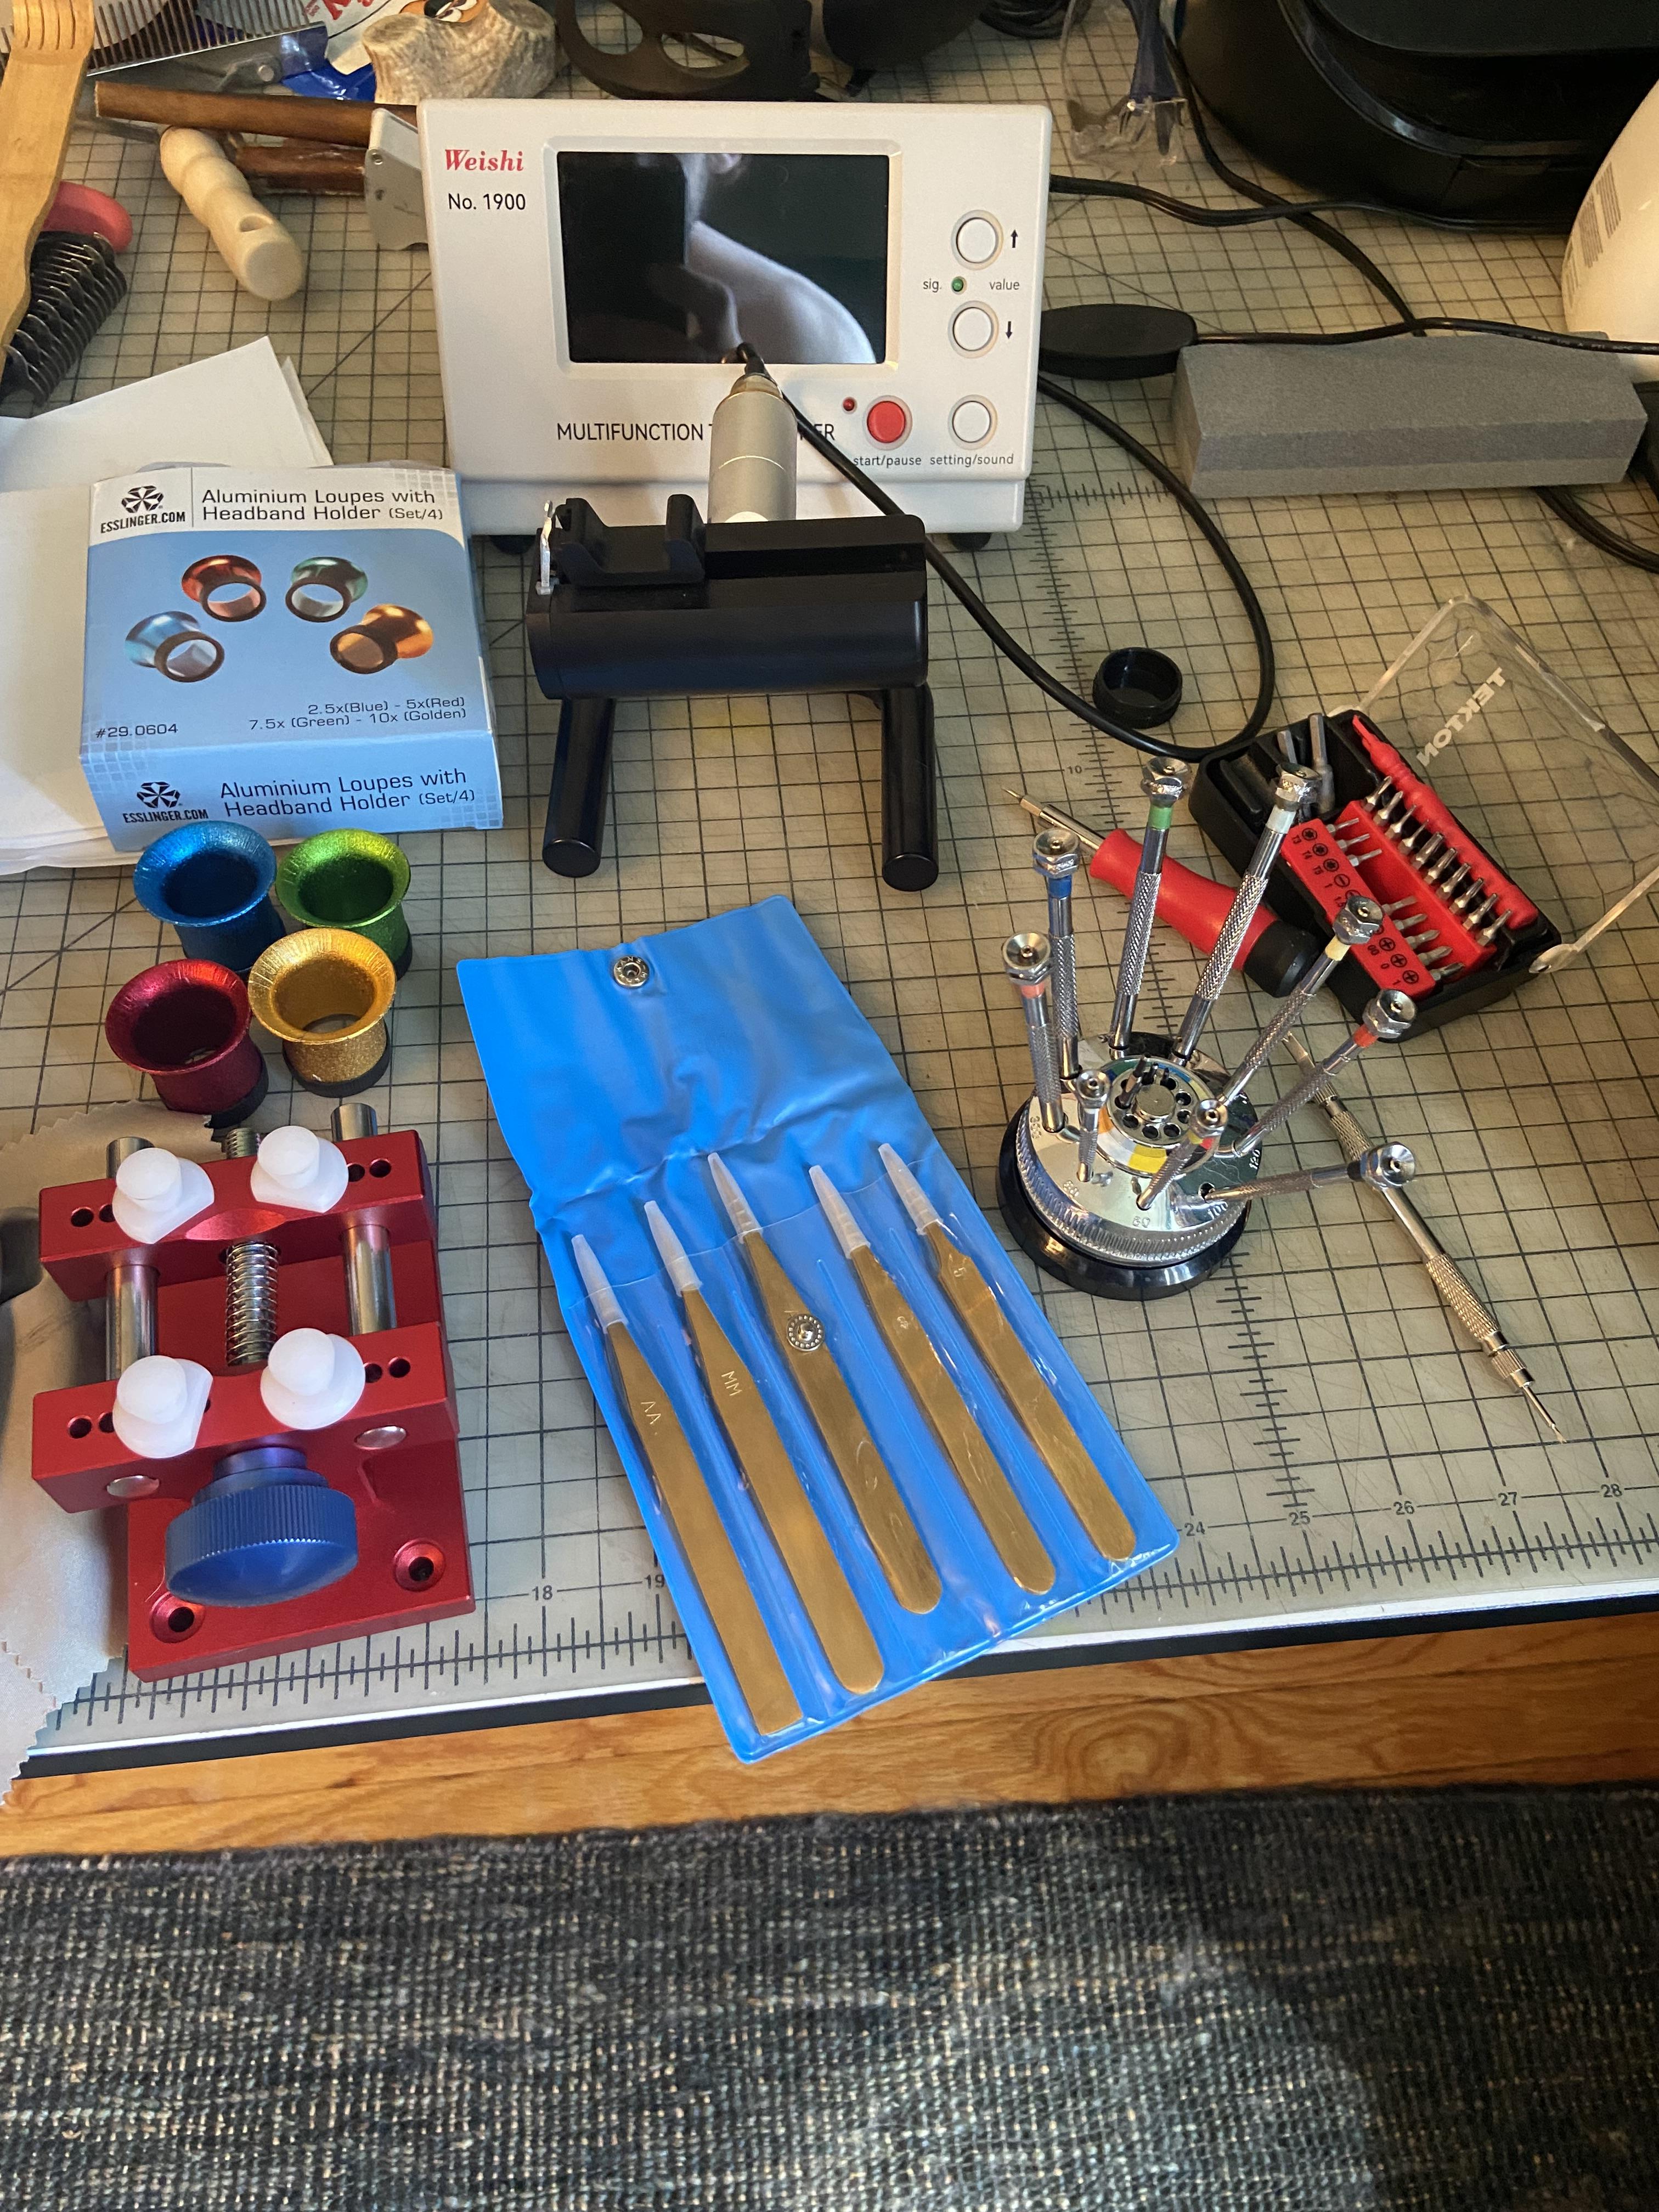
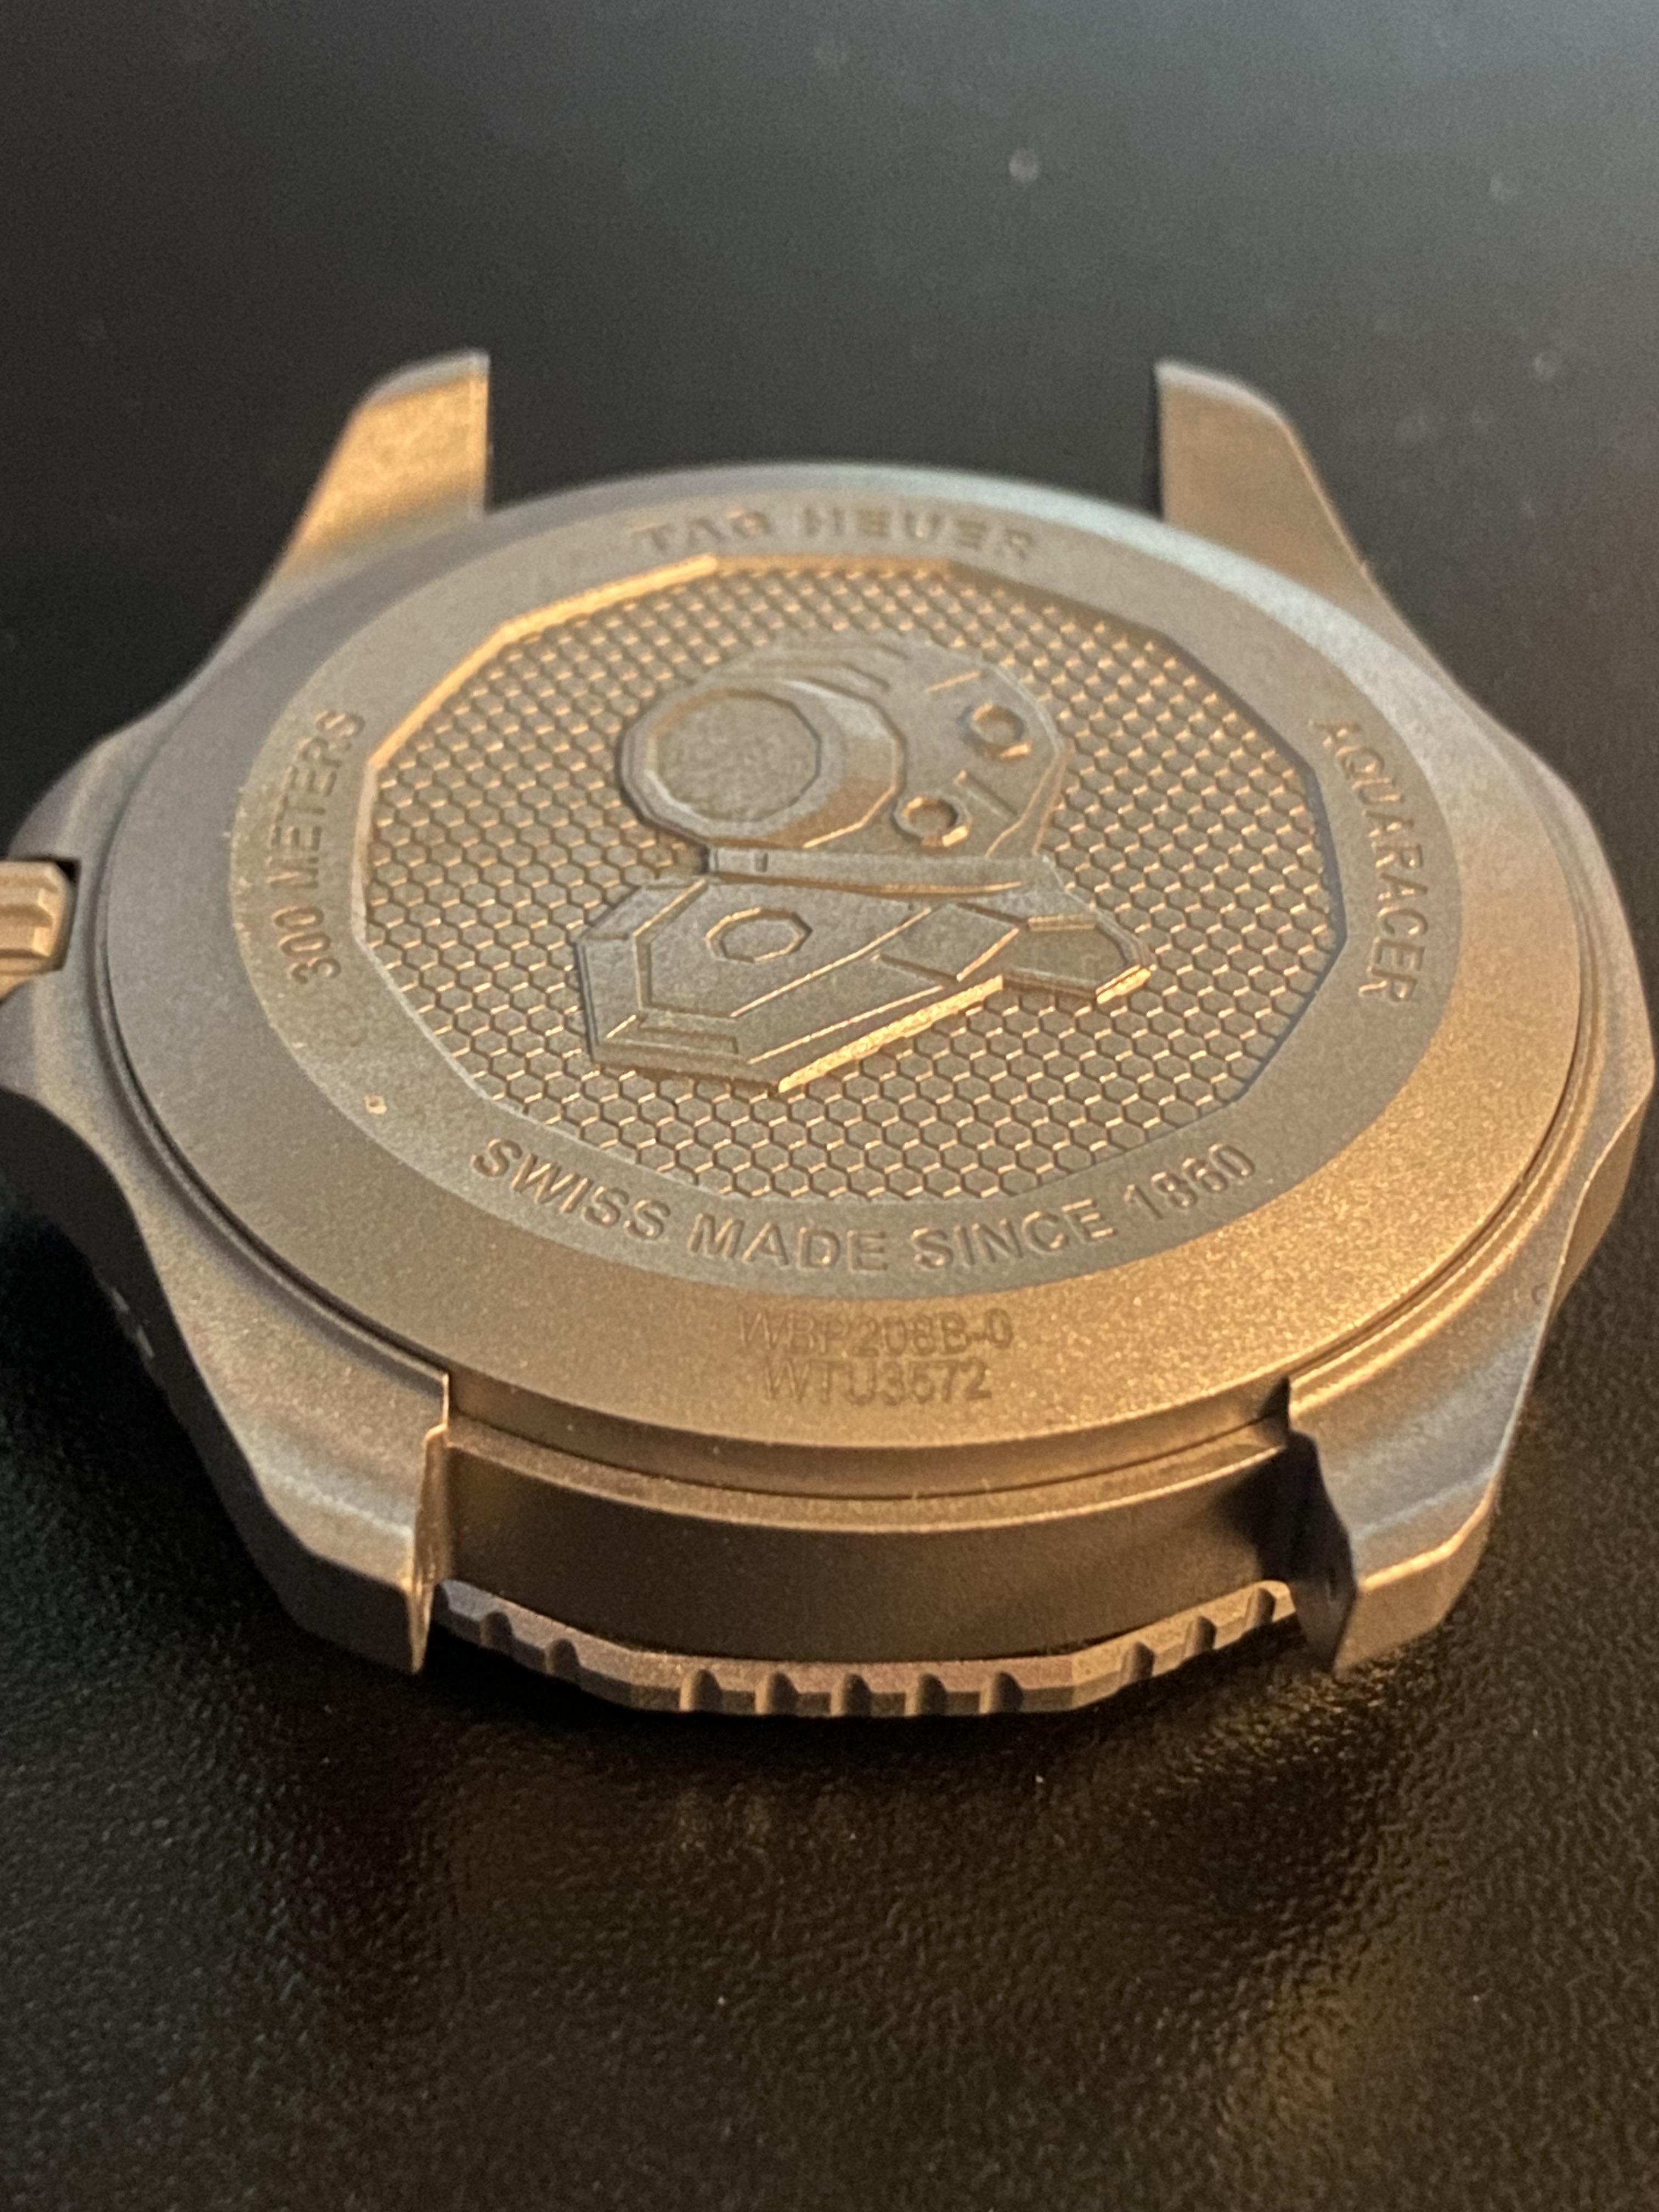
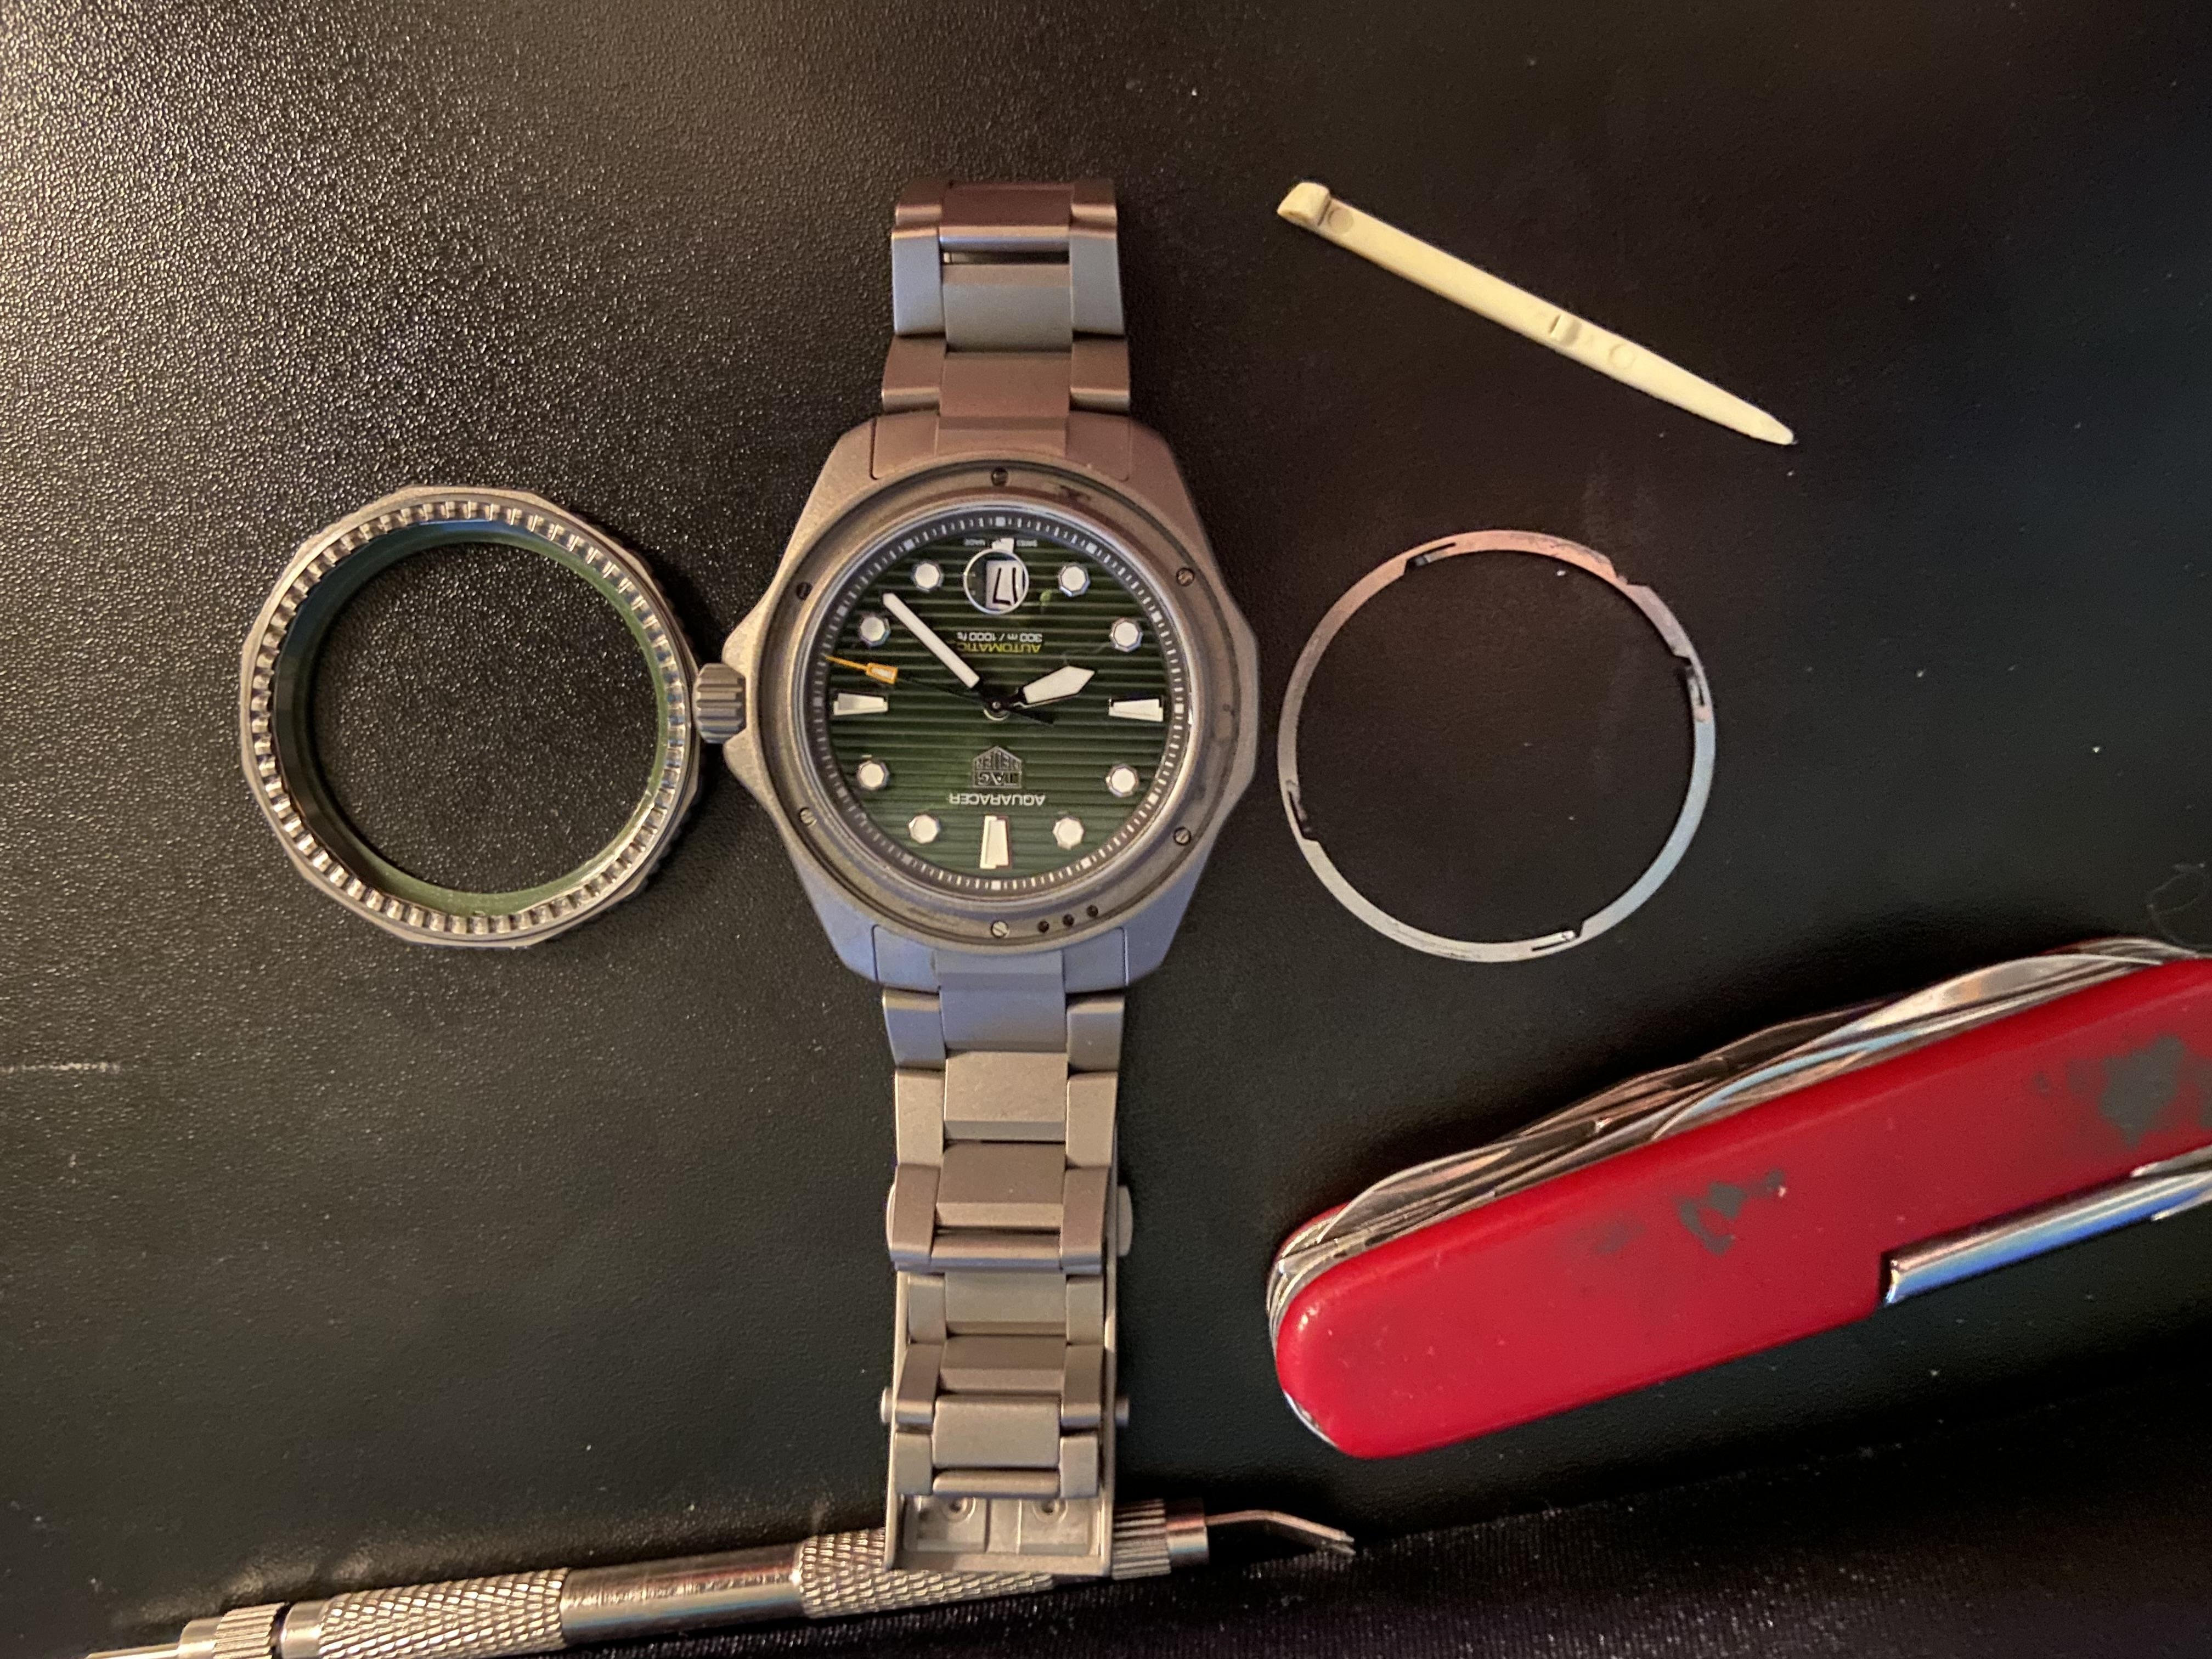
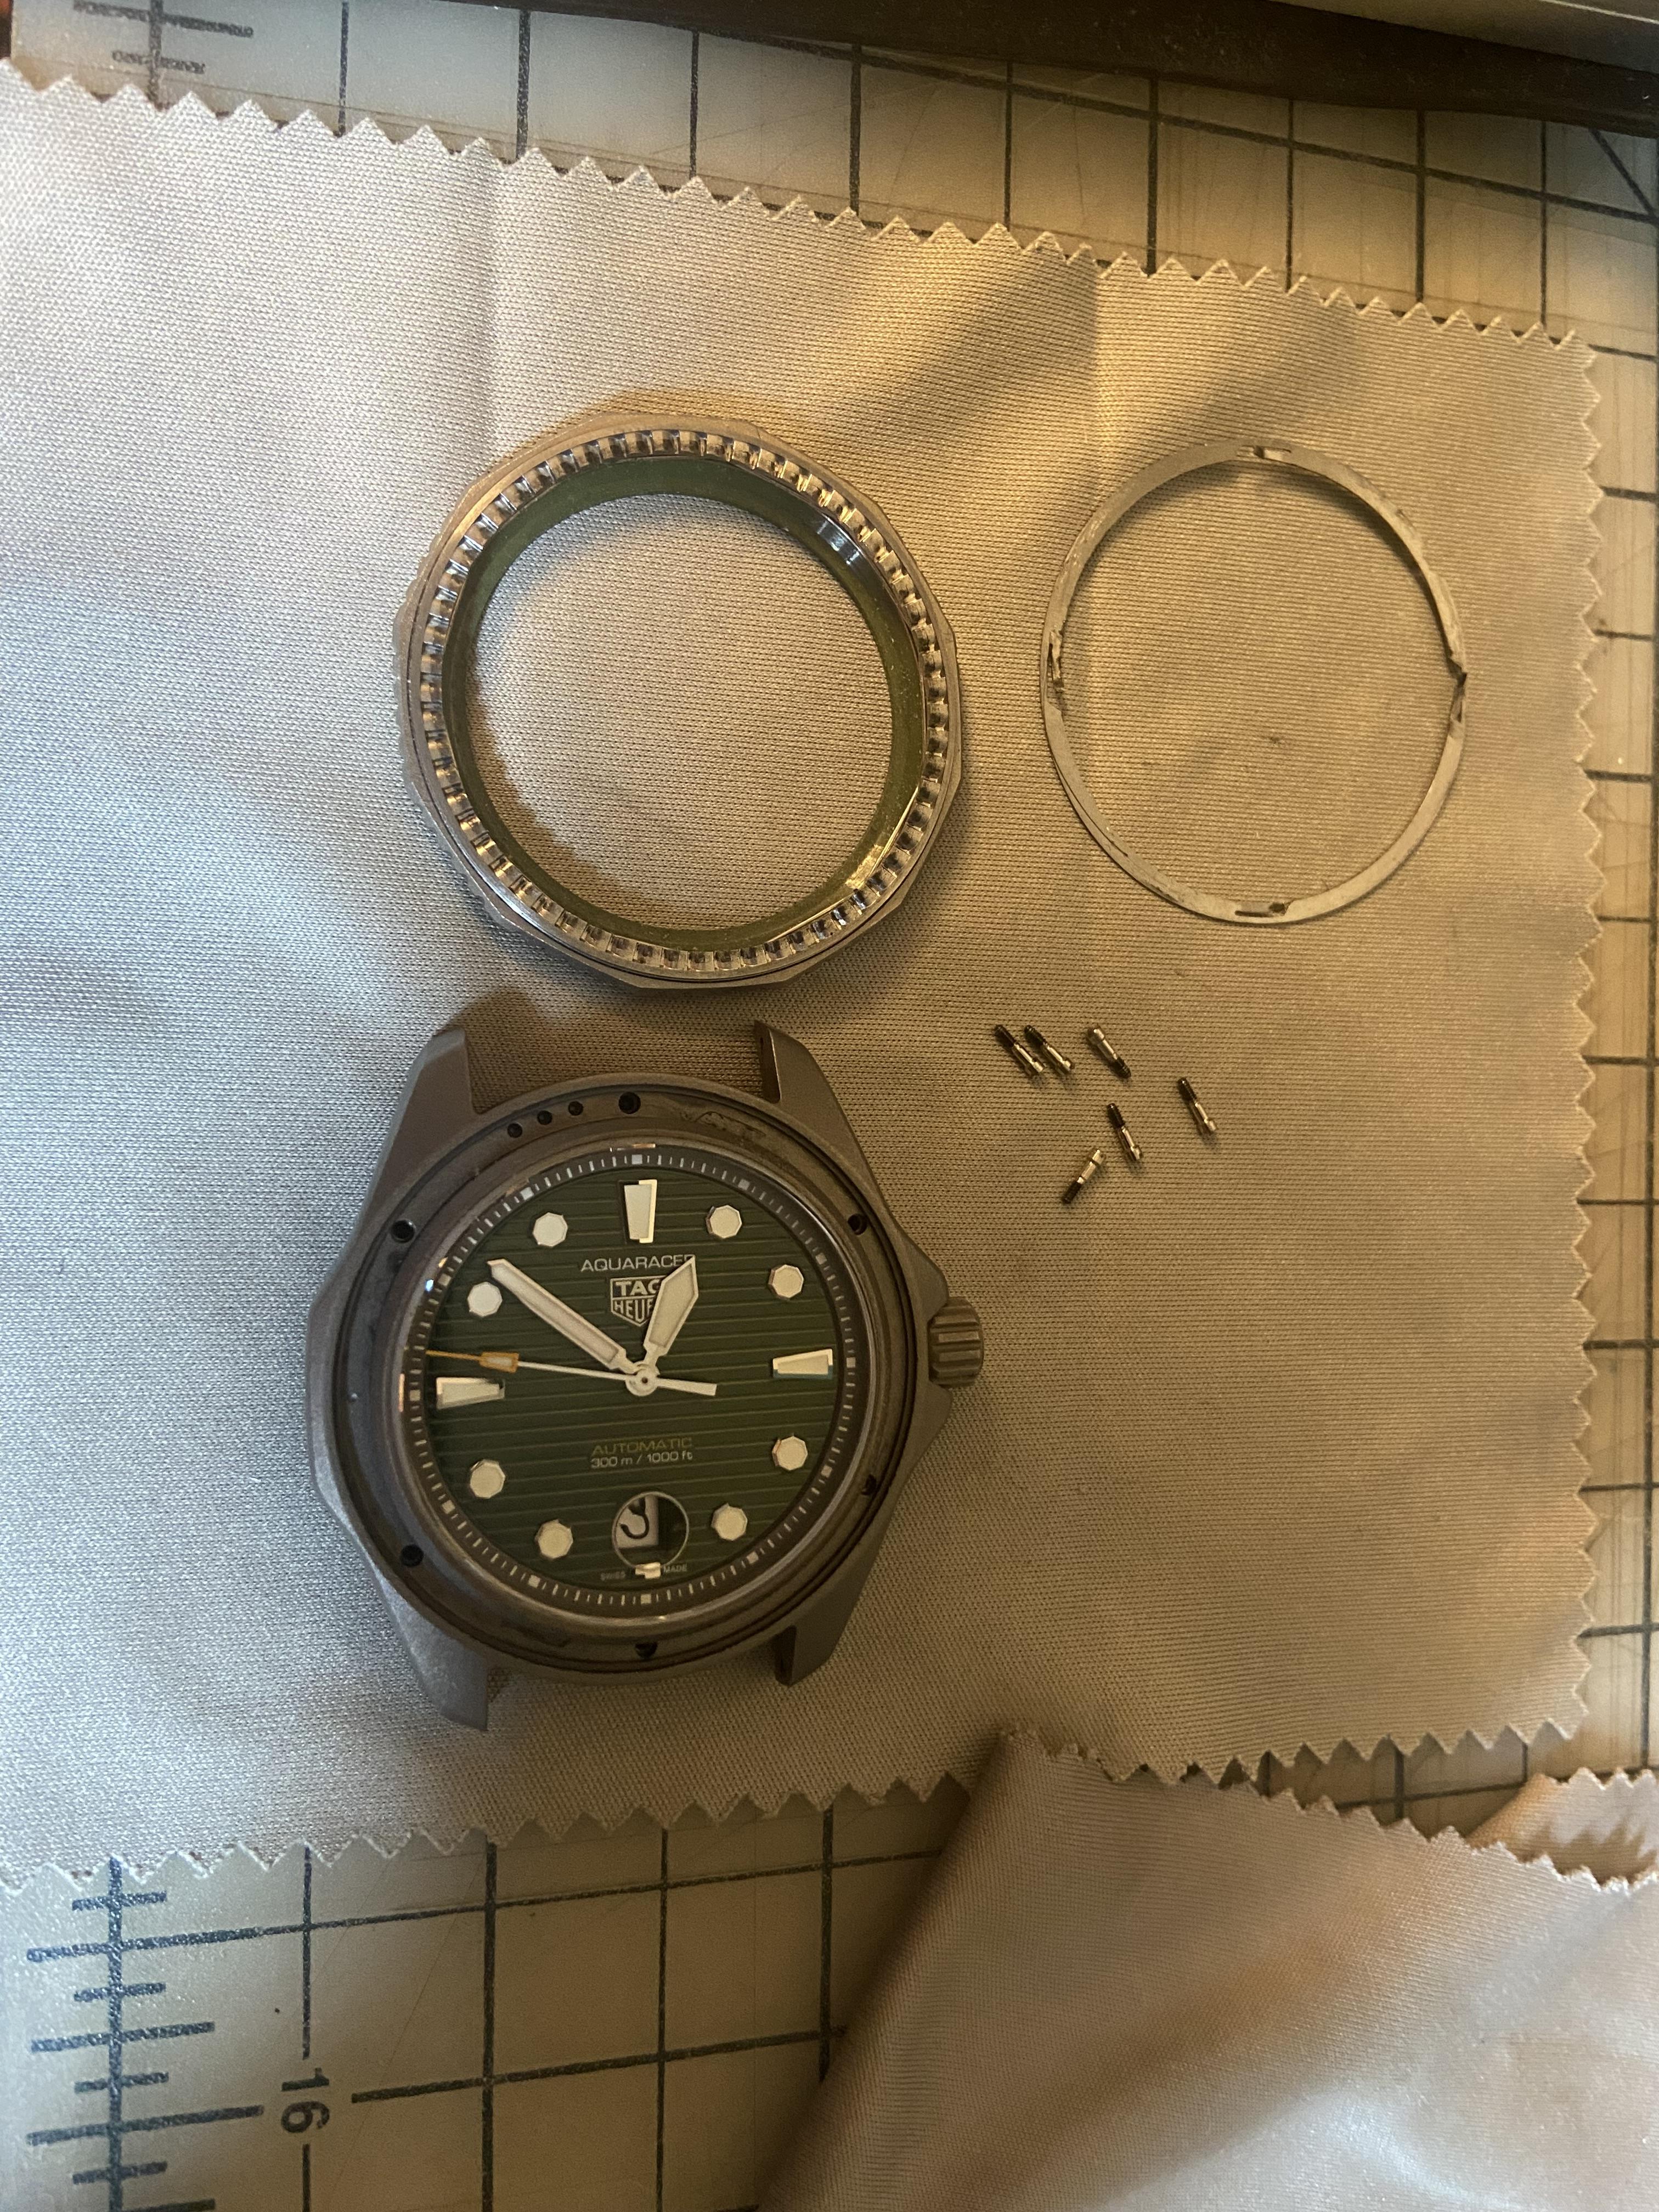
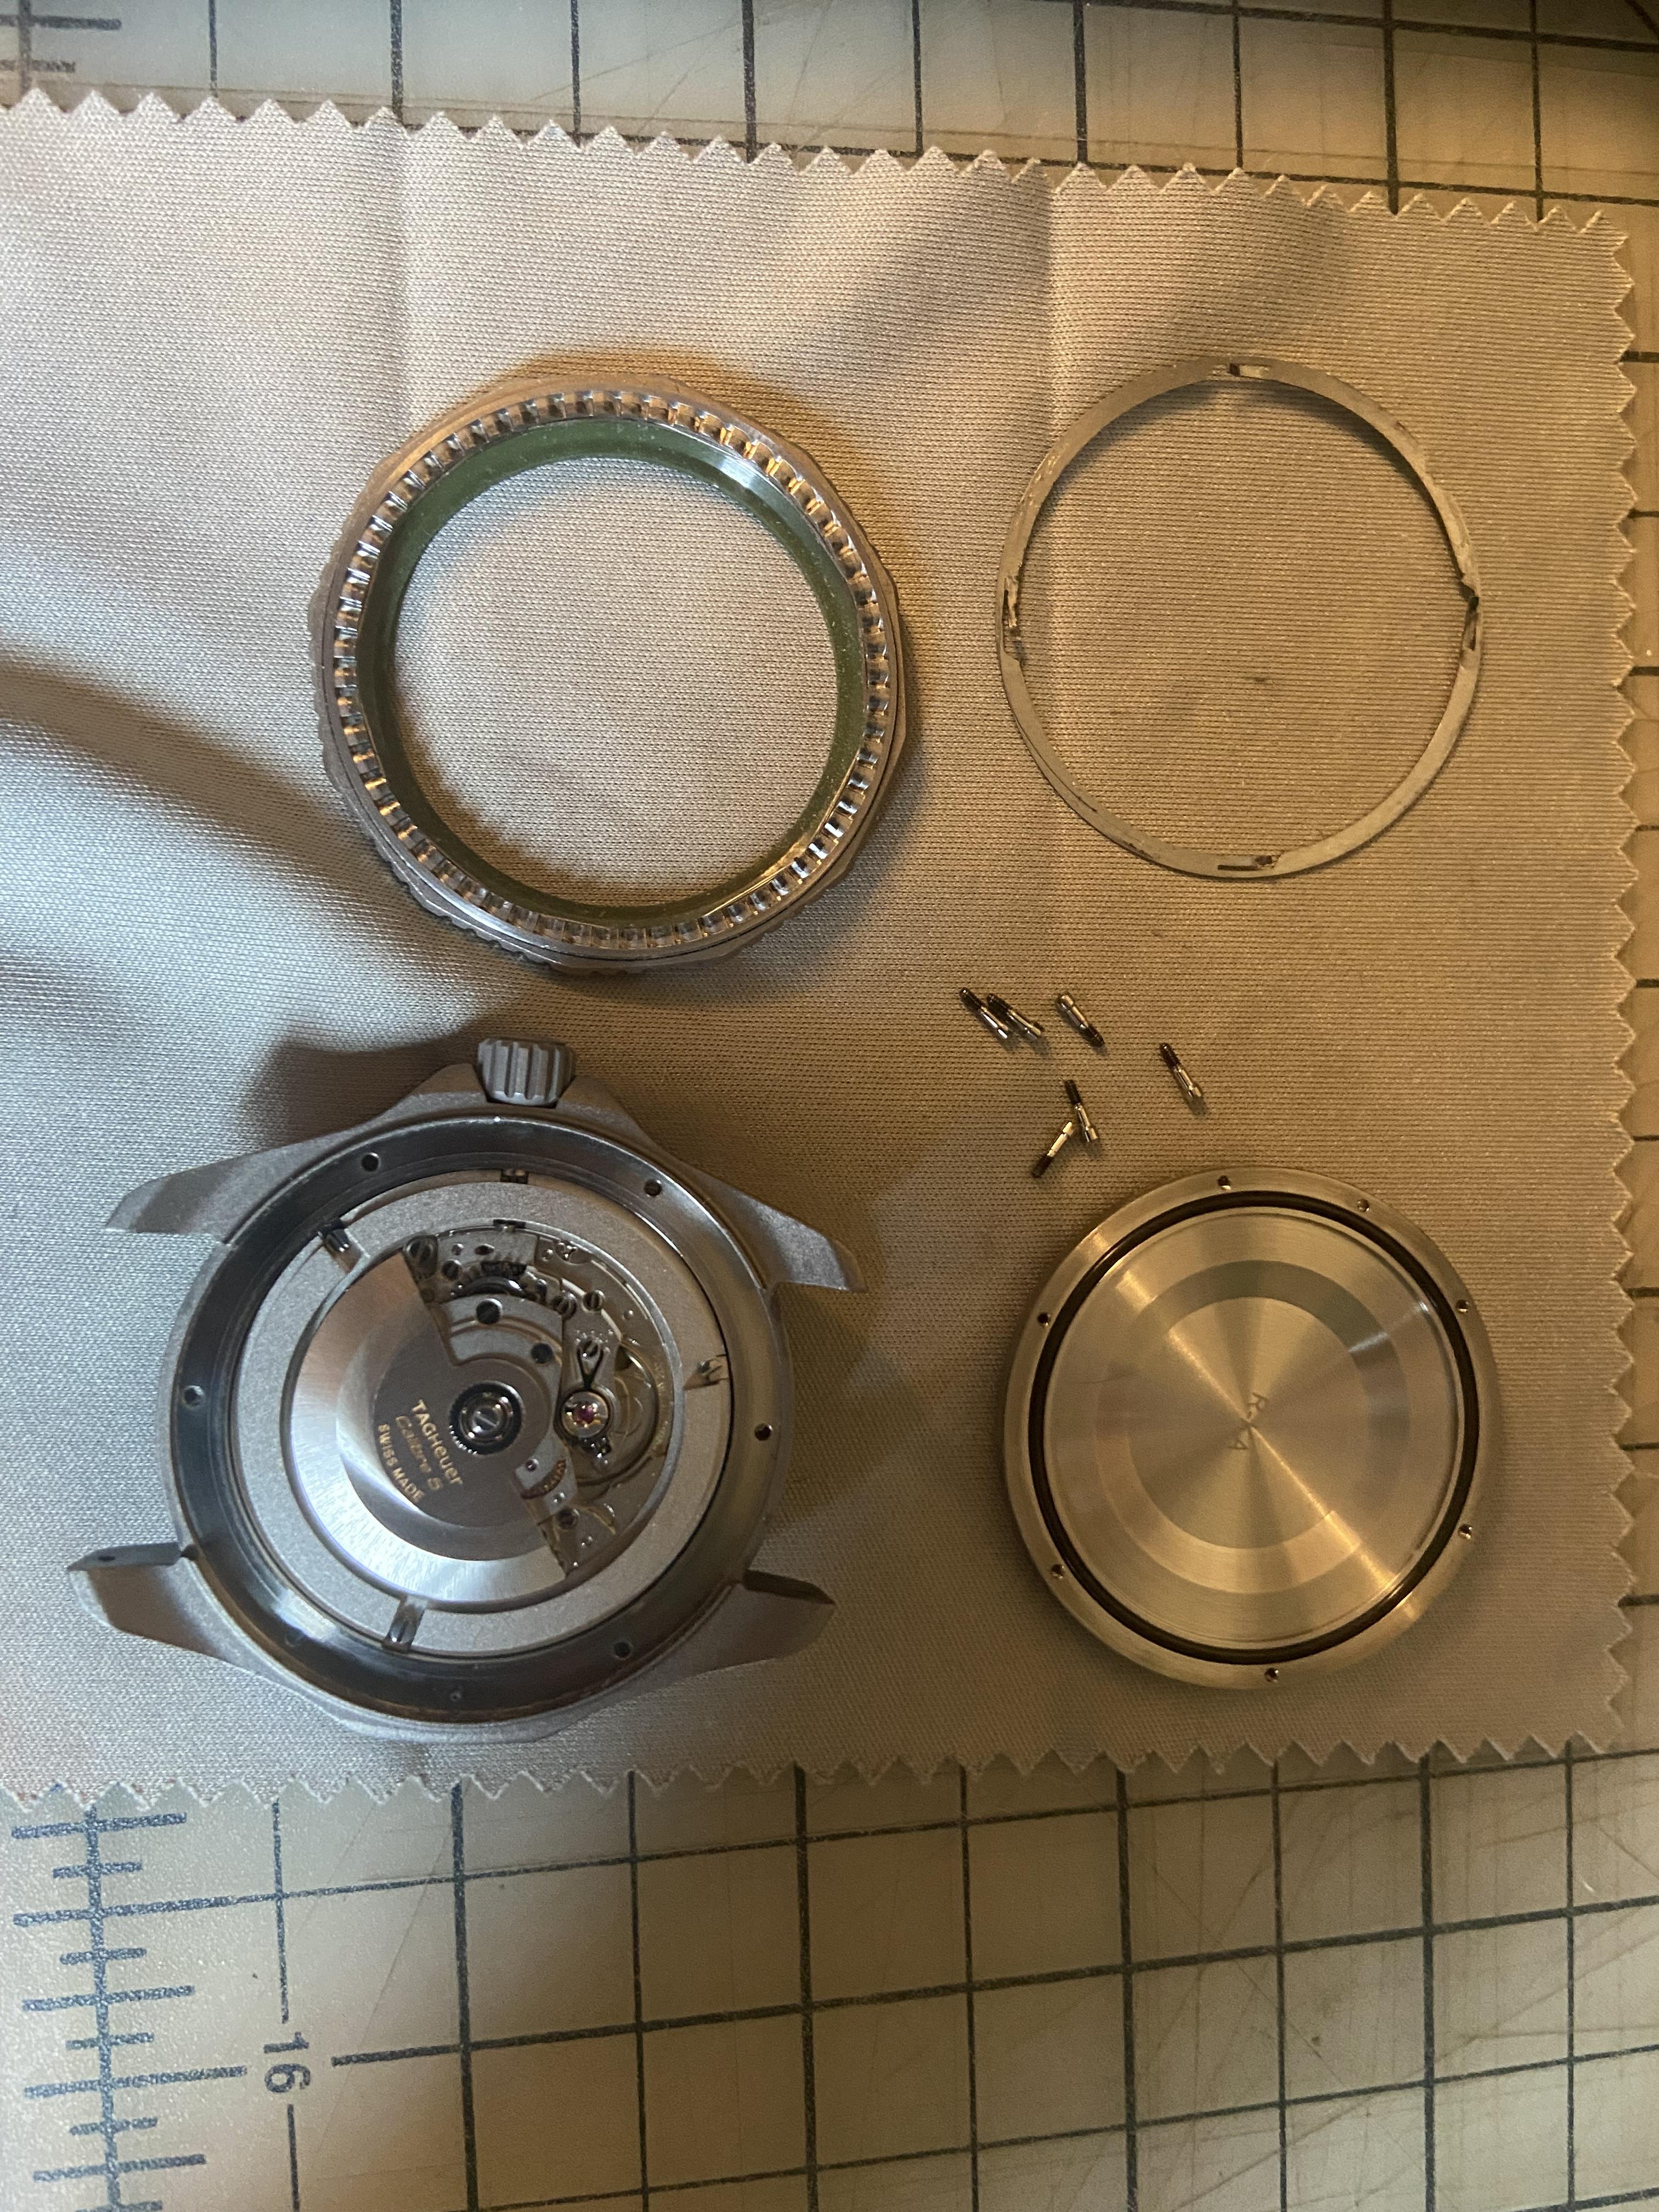
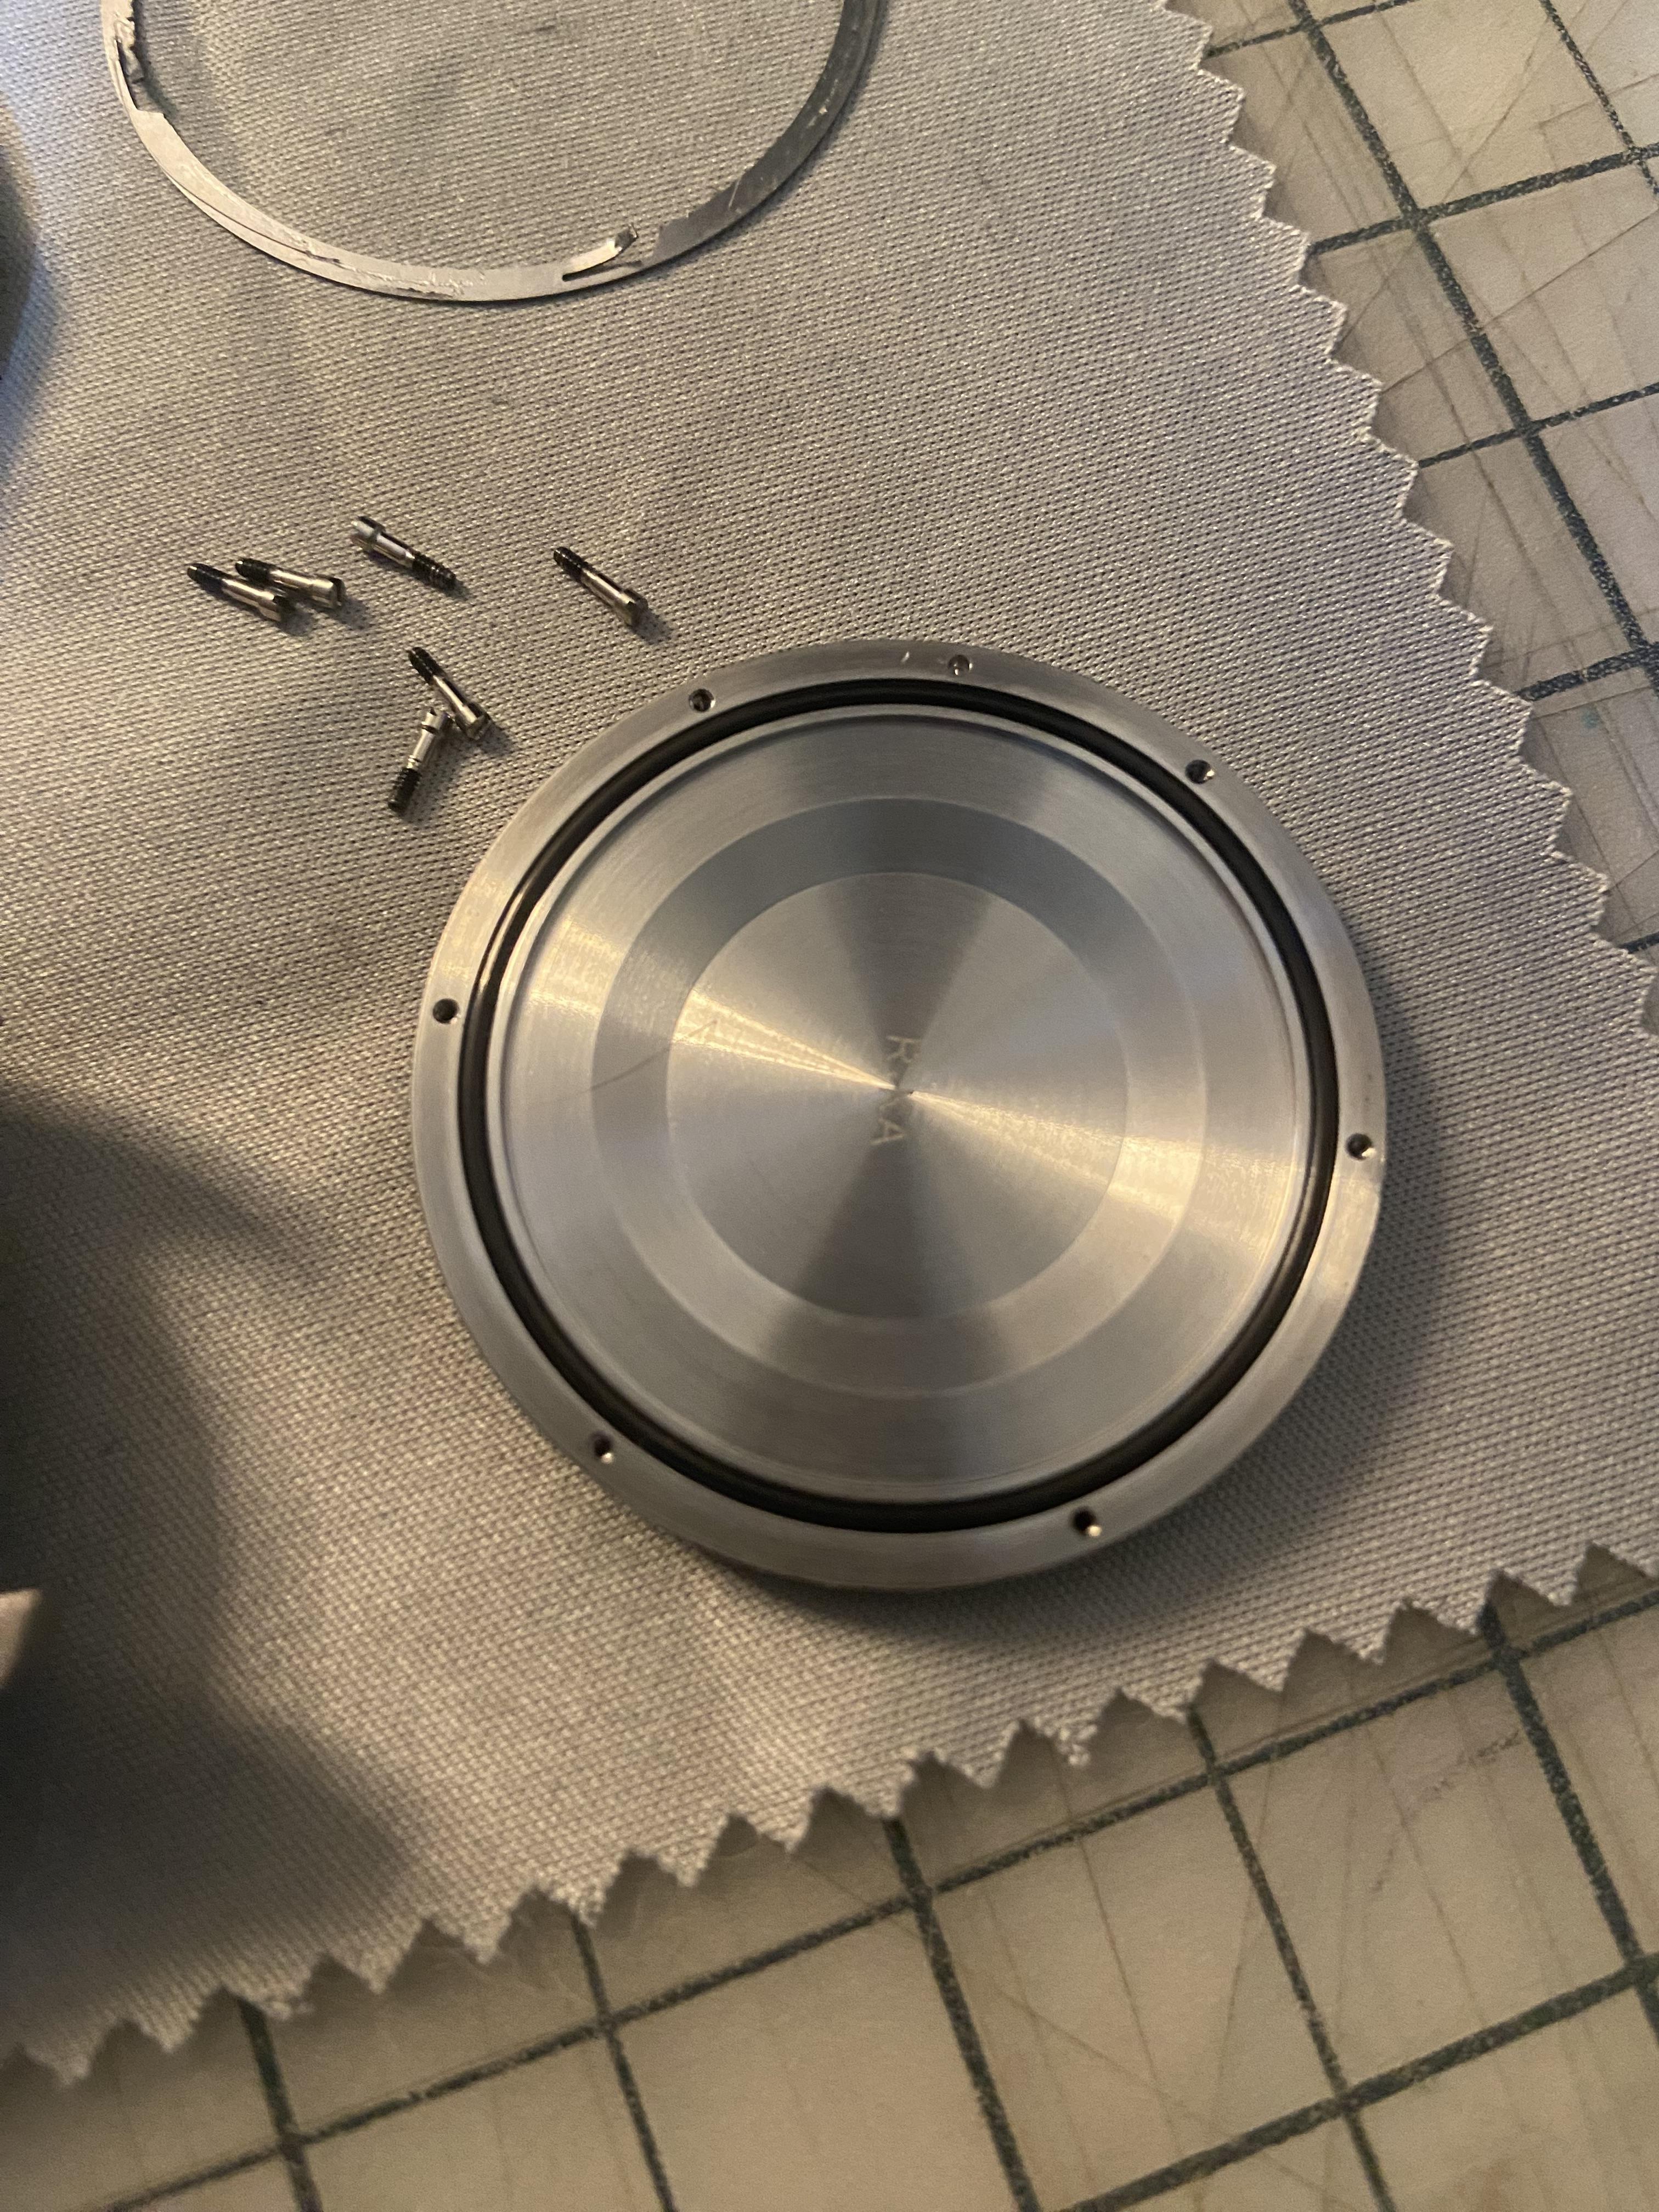
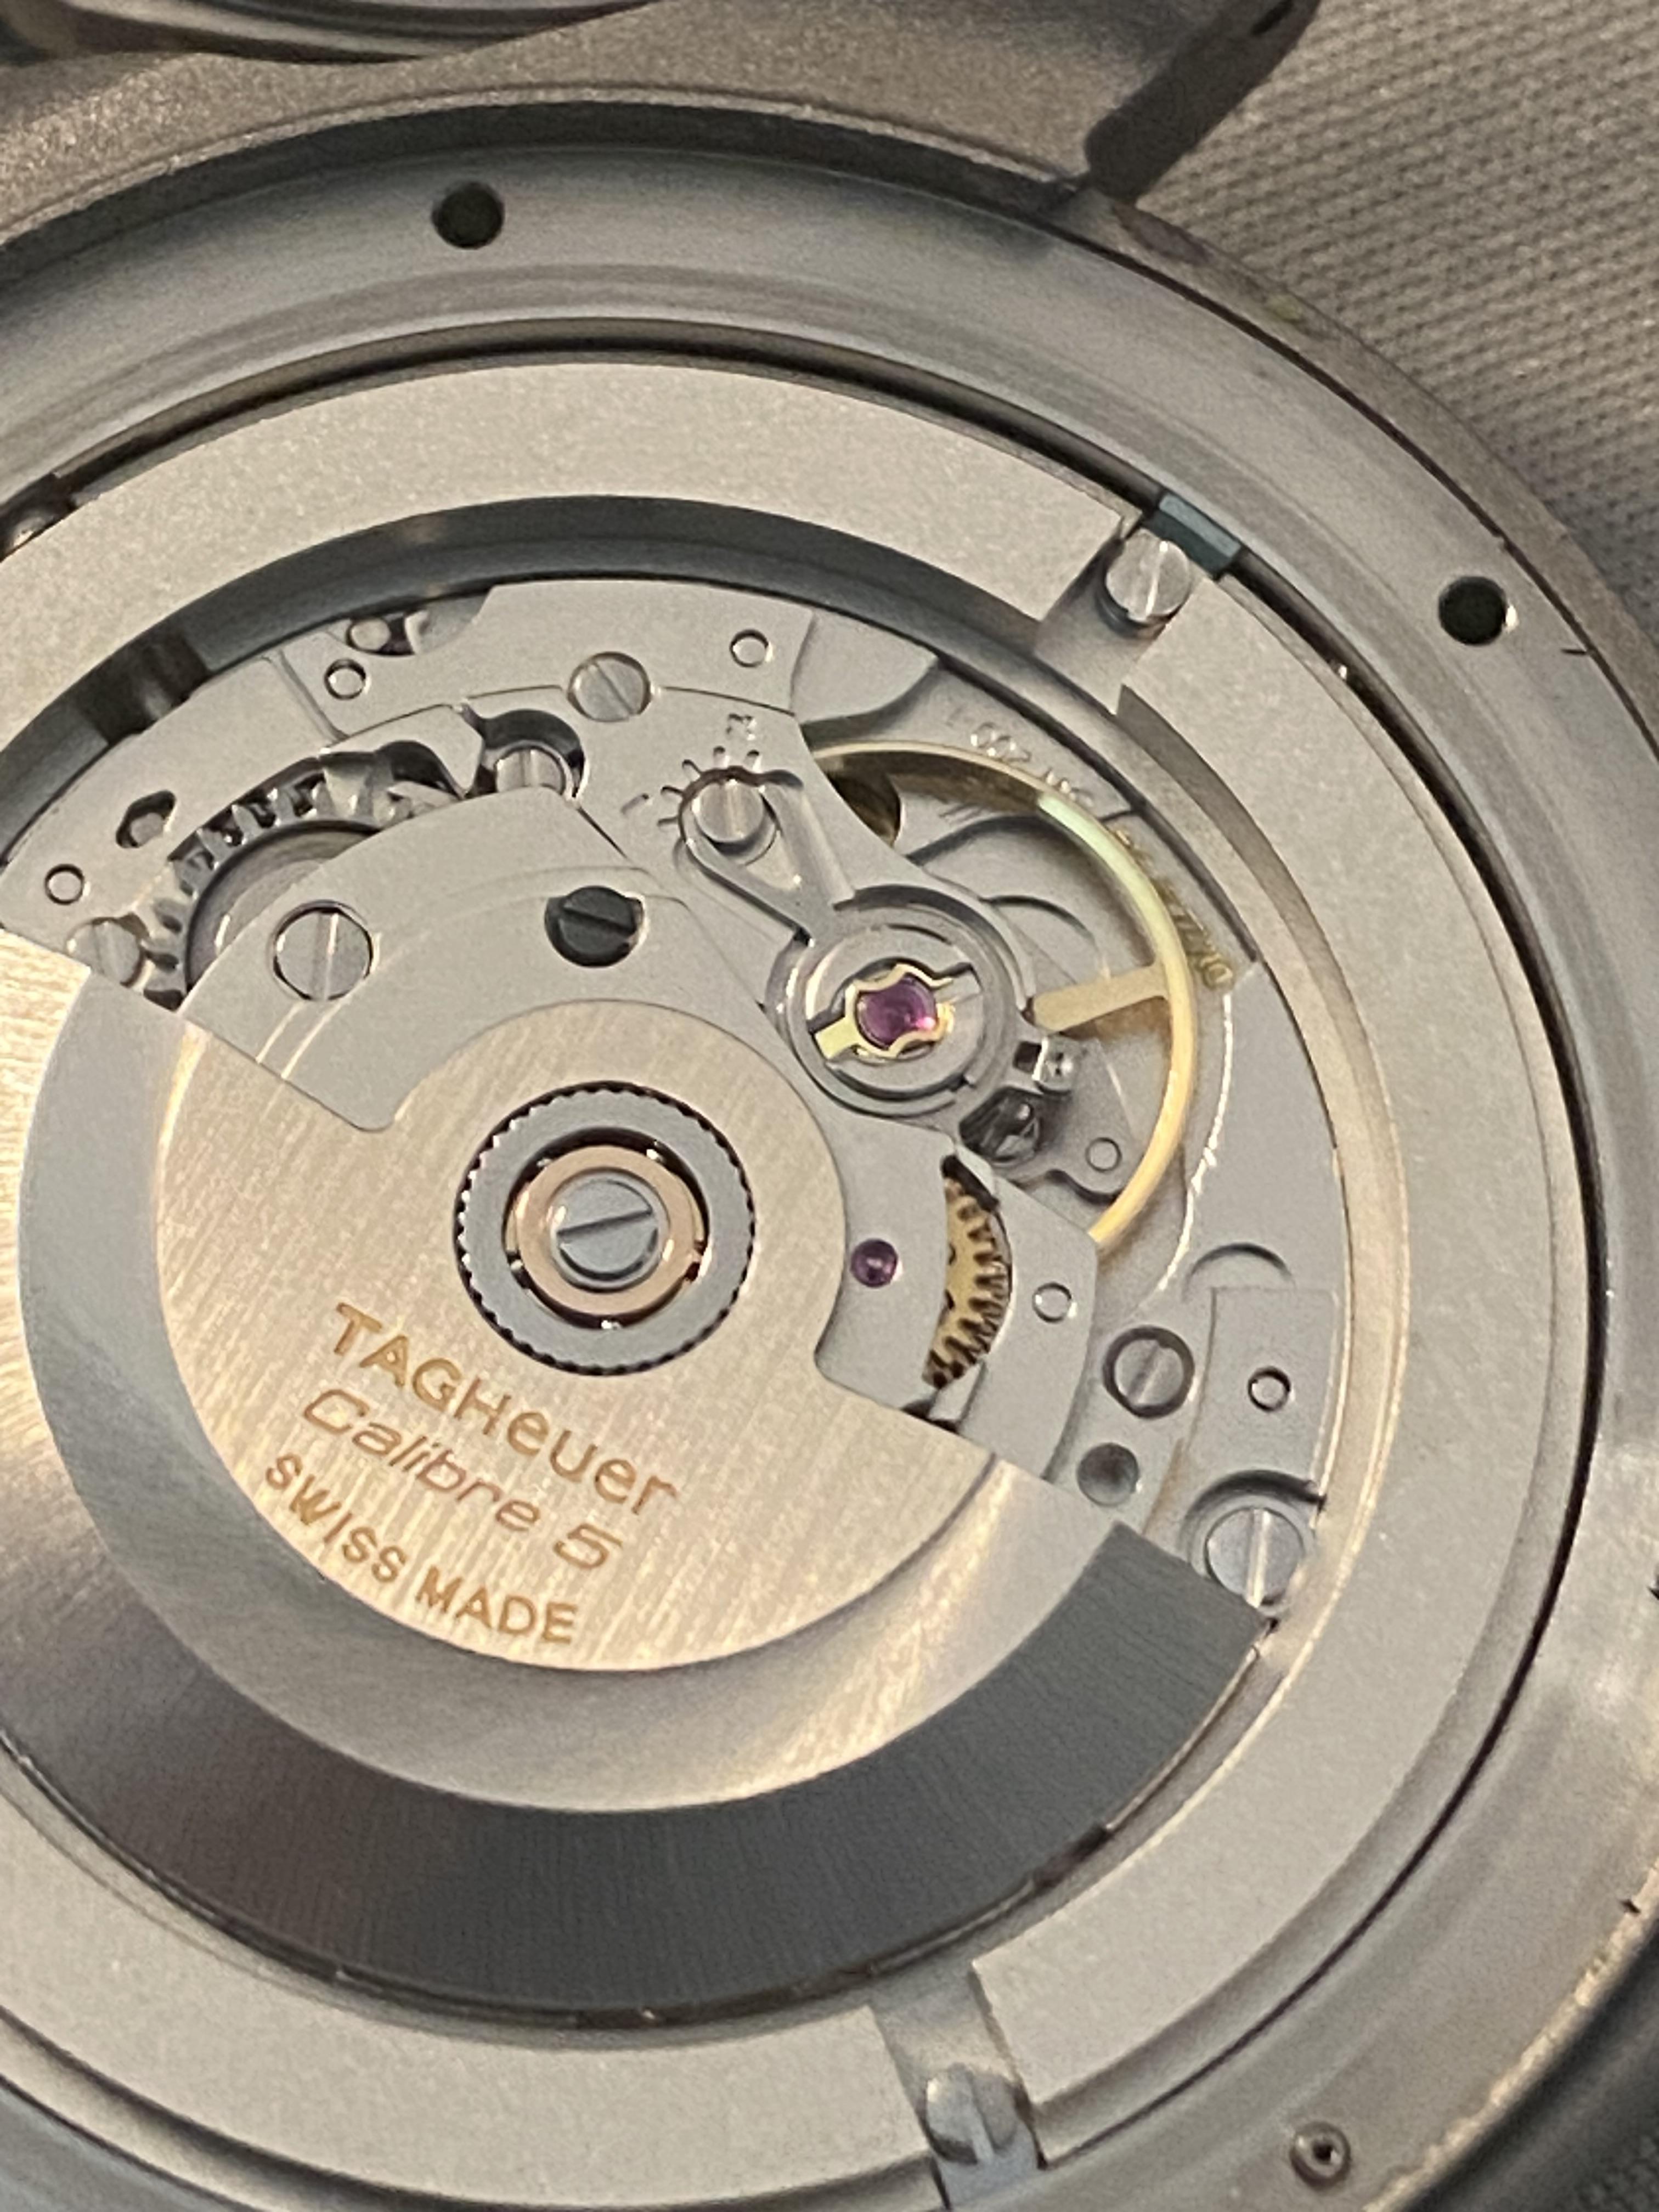
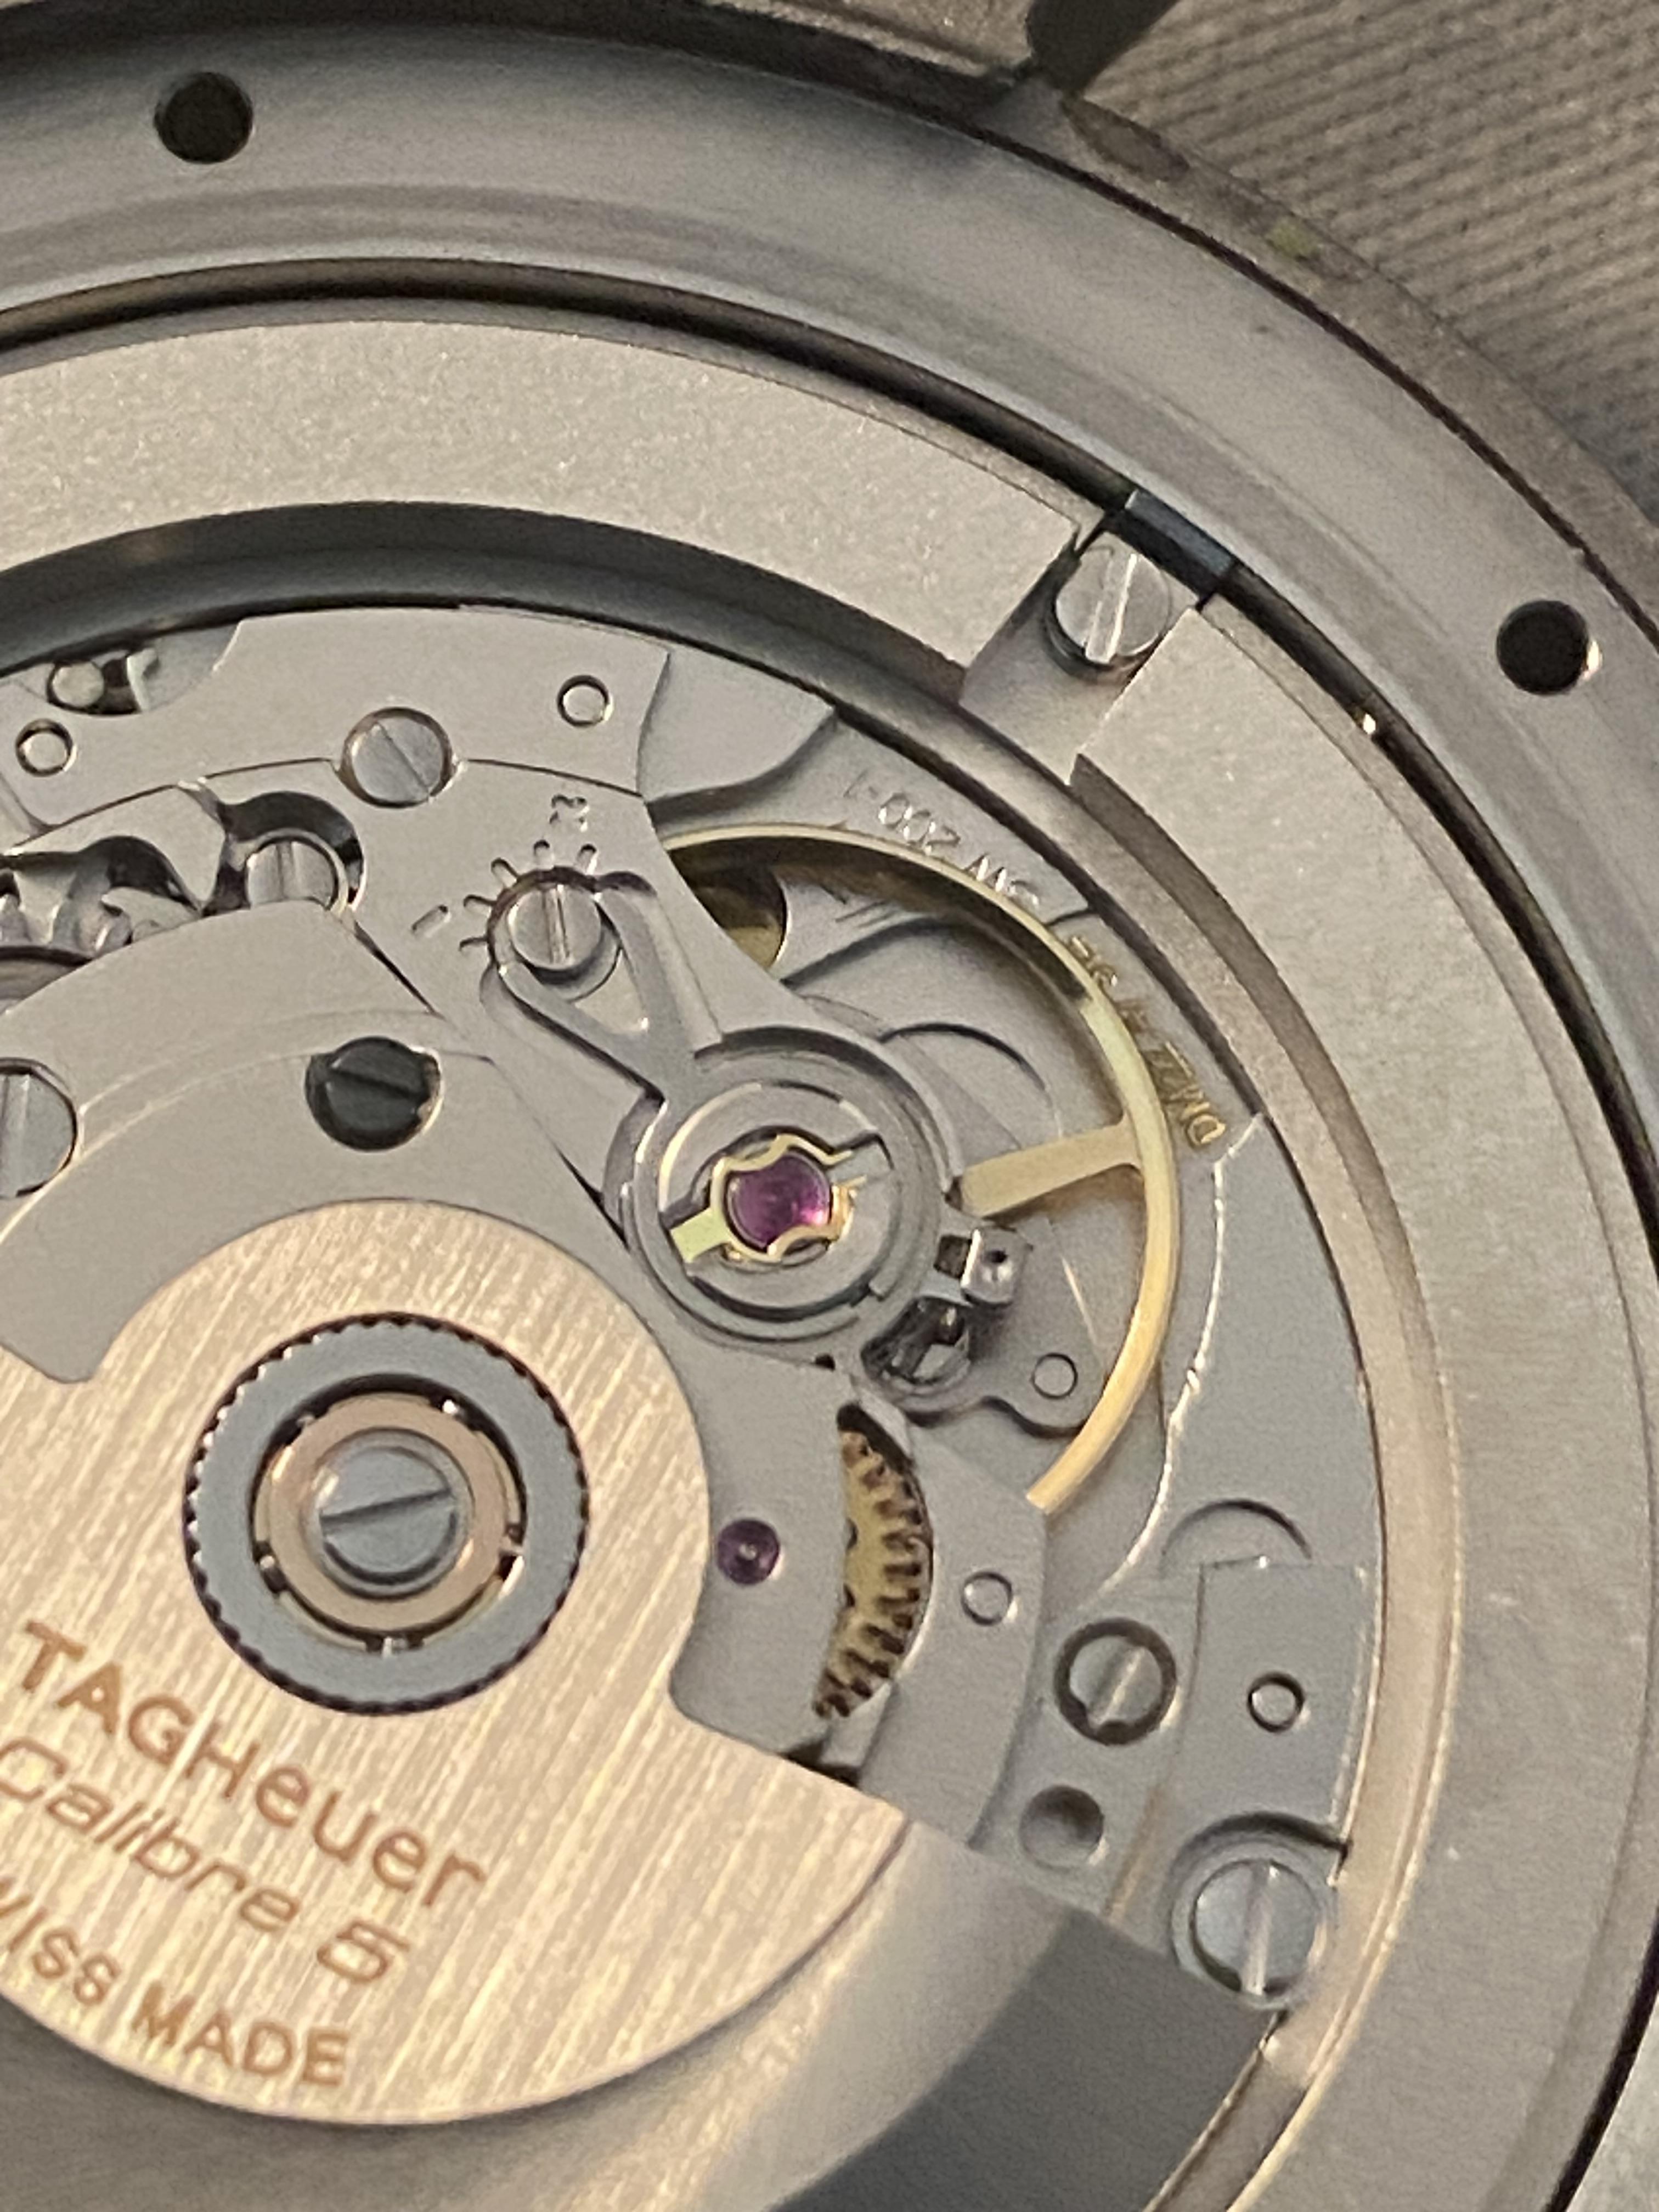
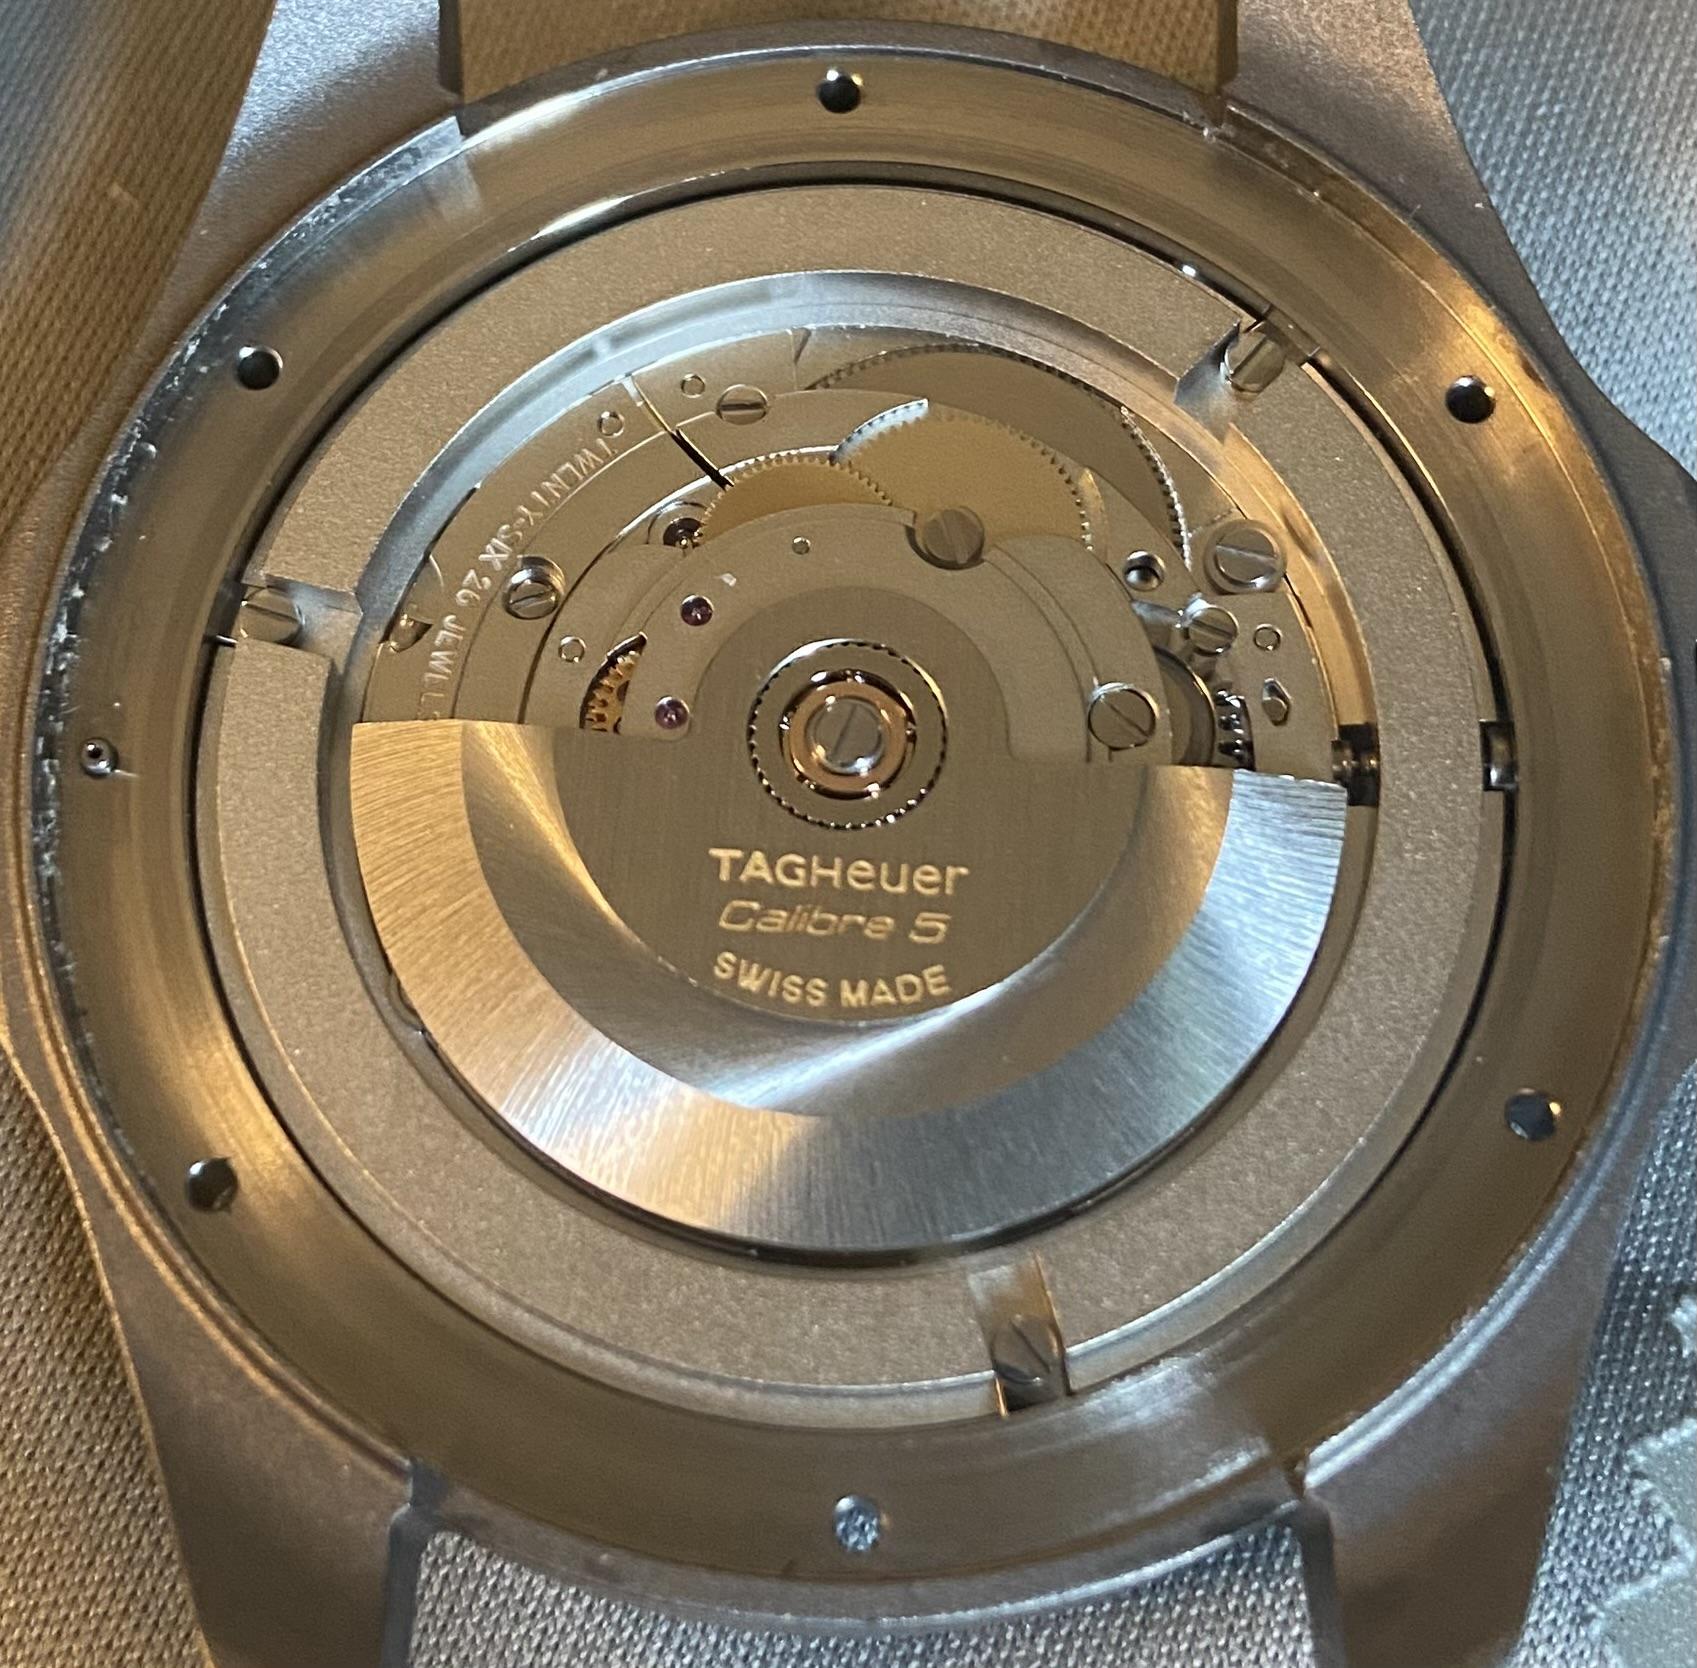
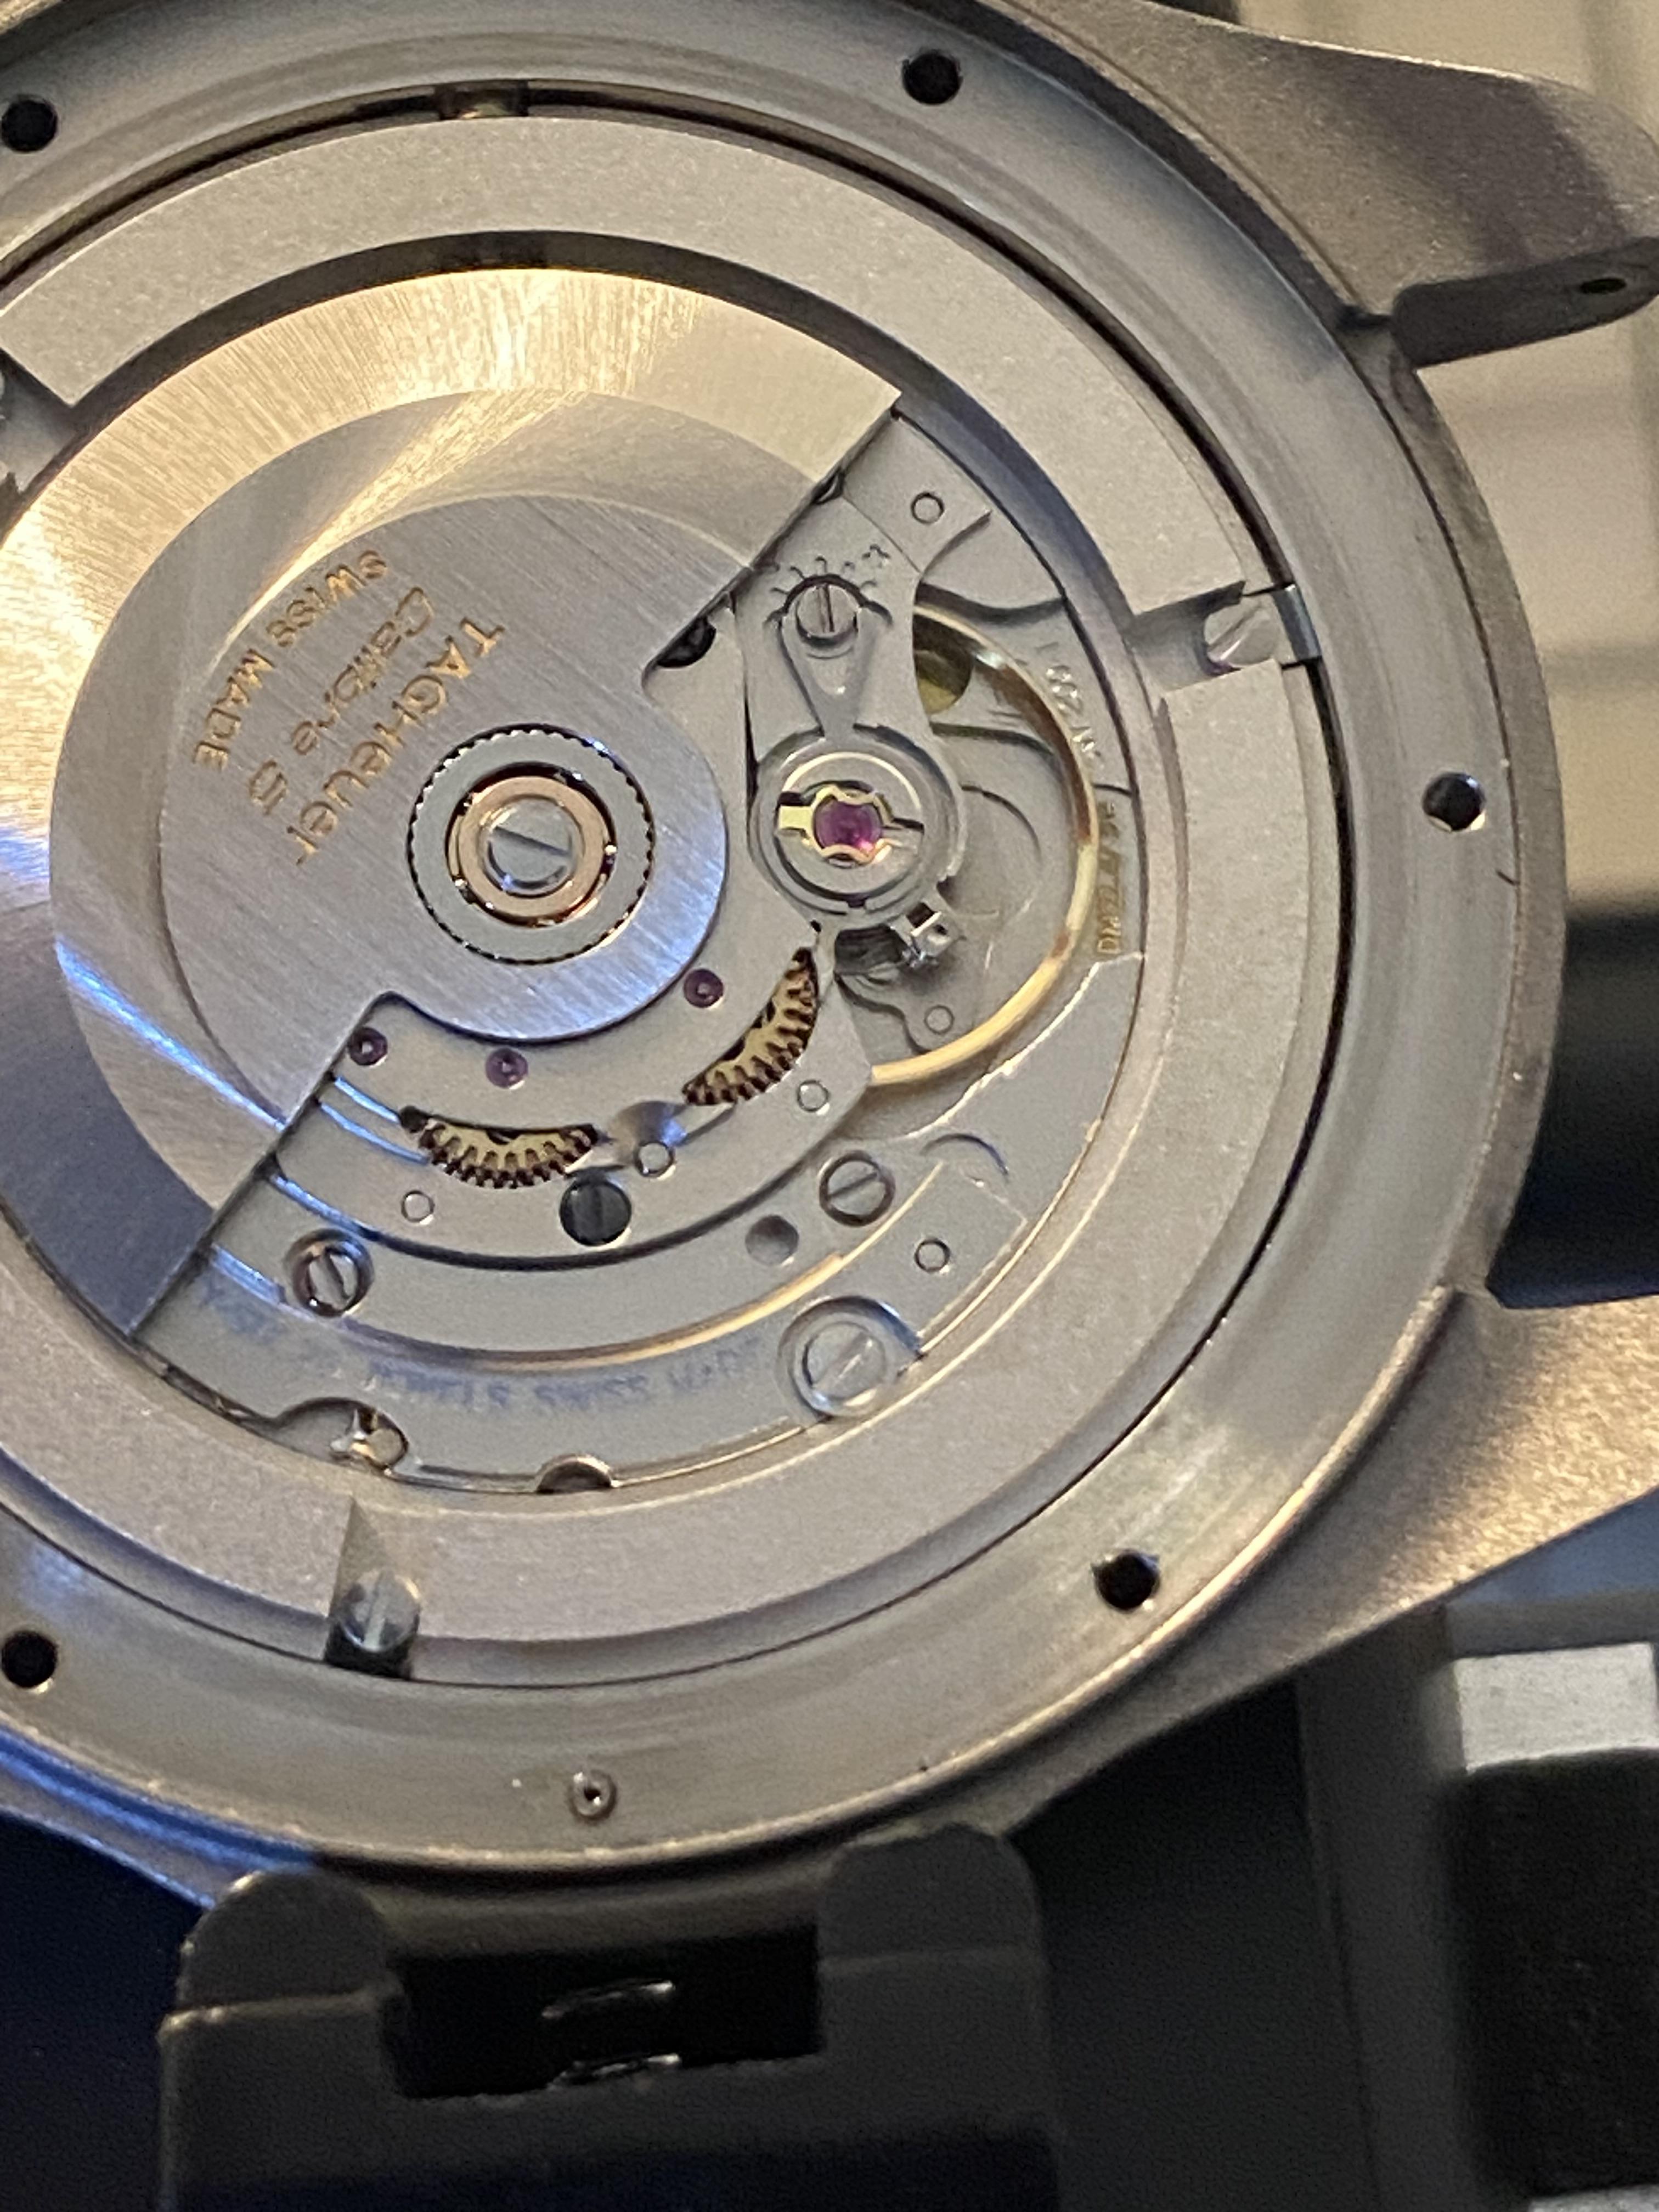
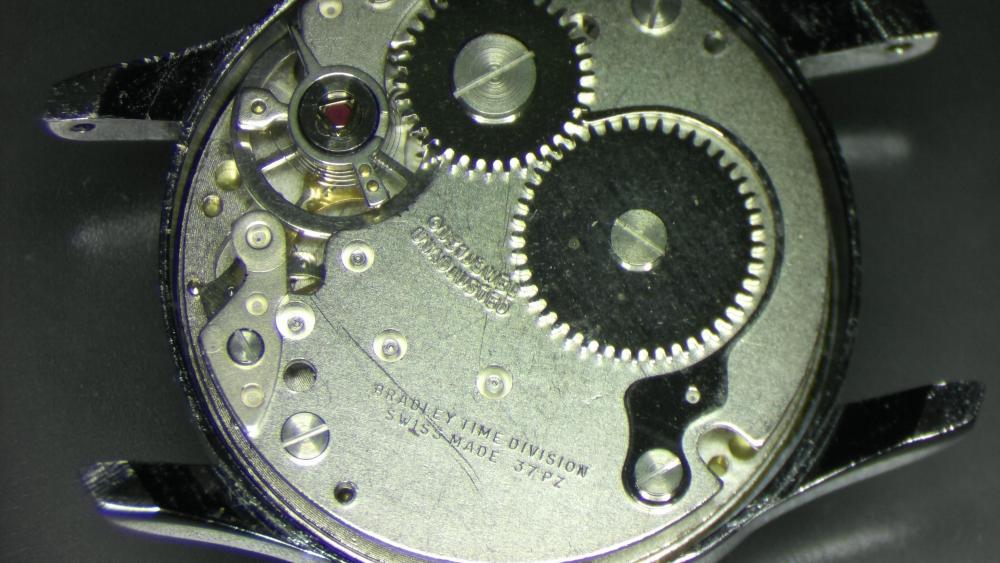
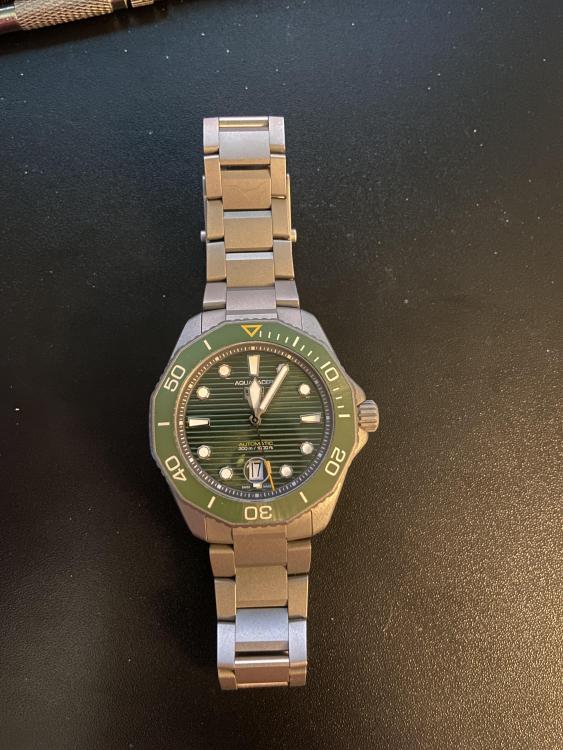
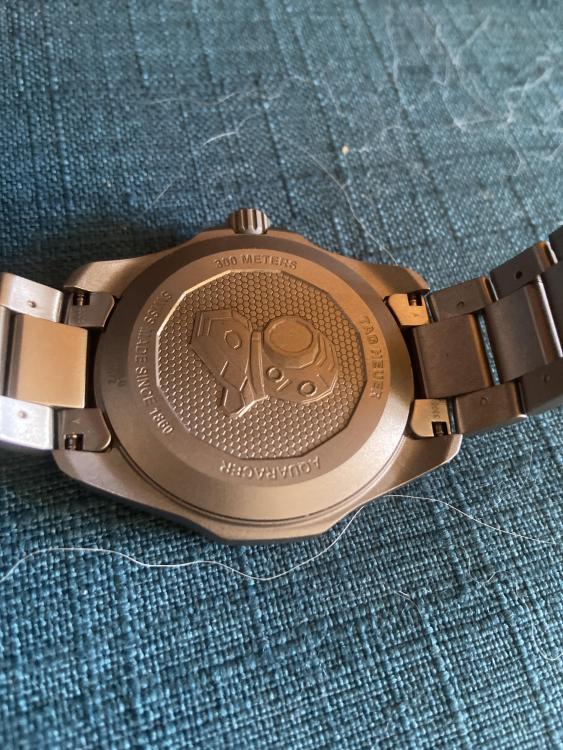
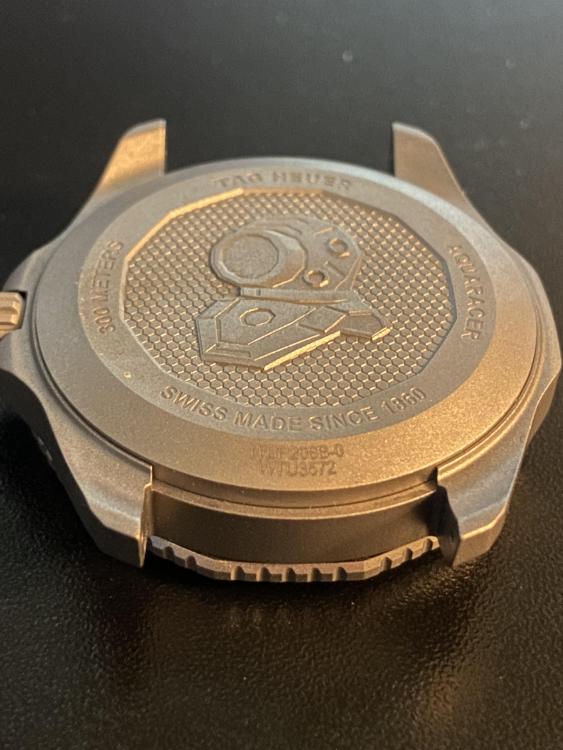
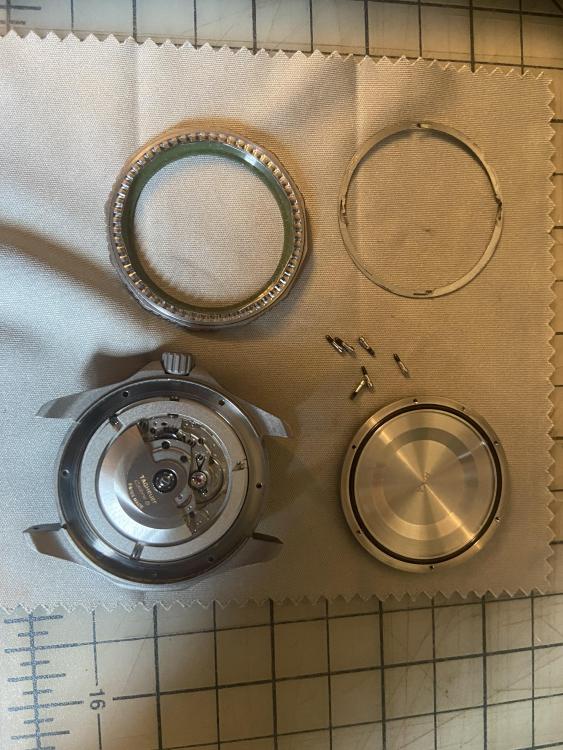
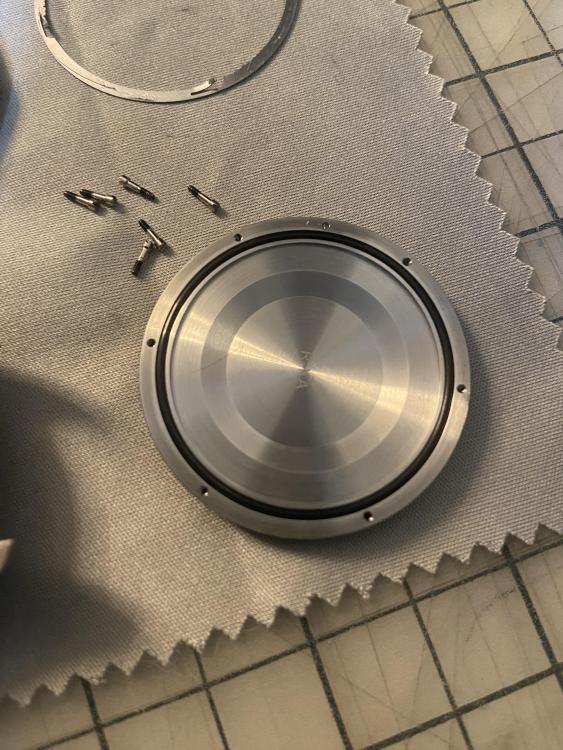
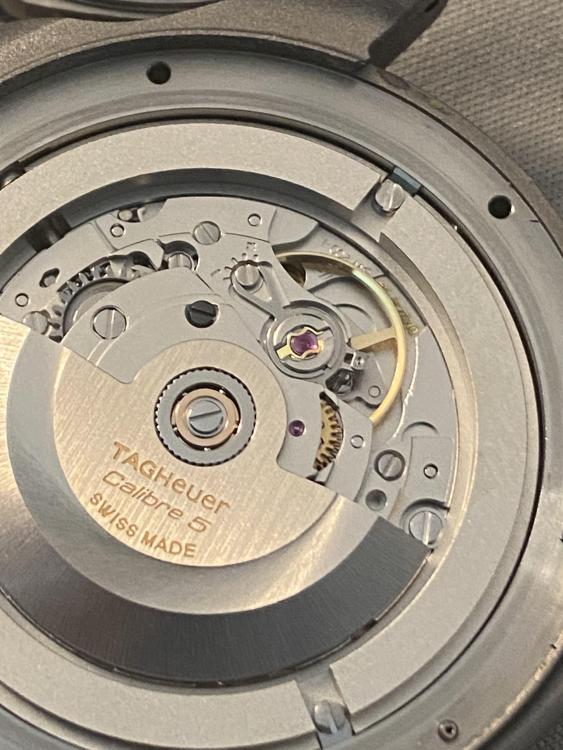
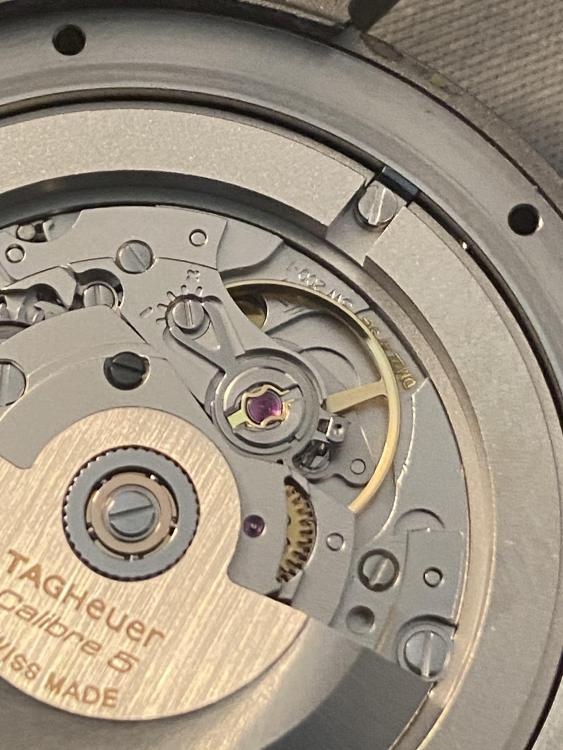
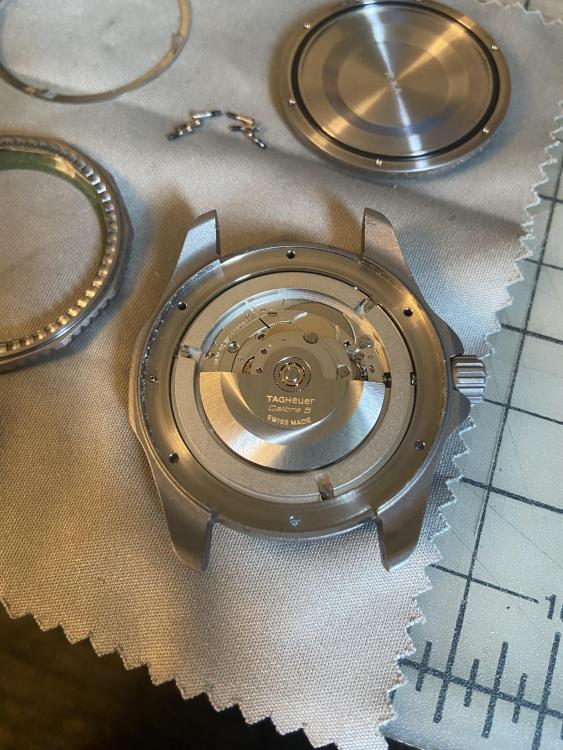
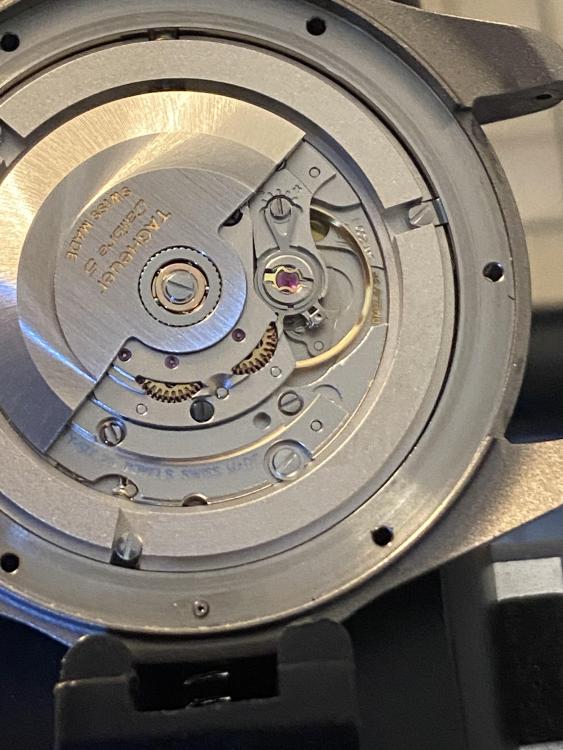
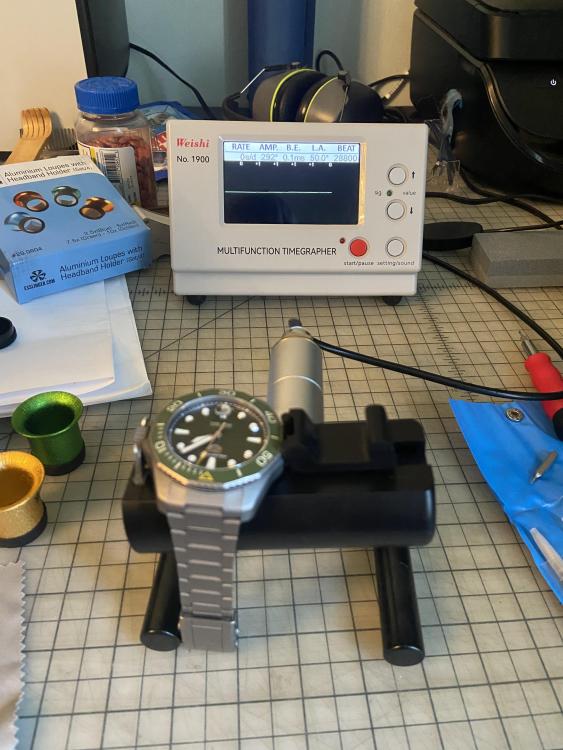
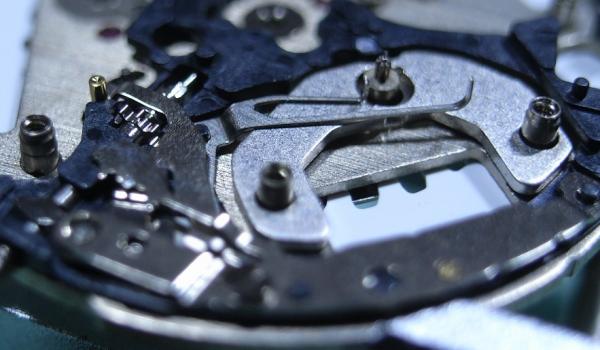
As I mentioned in some of my prior posts, I would probably work up the nerve to open the watch eventually. Well, this morning I woke up and decided to give it a go. In the intervening time, I bought a set of 10 watch screwdrivers, 5 brass pliers, a watch case vise/holder, and 4 loupes. They were all quite affordable around $10-20 for each set of tools. My wife had already bought me a time grapher some time ago, so I watched some YouTube videos on how to regulate an SW-200-1 and decided to try my luck opening the watch and turning the fine regulation screw a bit. The following posts will break down the steps of what I did. The image below shows the set of tools I used for the job. Here’s the watch in question. The images show the watch exterior front and back. The last one shows the dive bezel and the bezel spring removed, which reveals the six screws under the bezel holding the case back on. This is as far as I got during my last aborted attempt to open the watch. The next step was to remove the six screws under the dive bezel and spring that hold the case back on. At this point I thought I needed to unscrew the case back, so I put the watch in the vise and used the rubber ball method to try to unscrew the case back. I applied as much force as I could by hand, but it wouldn’t move the slightest bit. This left me quite confused, so I took the watch out of the vice and inspected it. As I was rotating the watch around and looking at it, the case back came loose and nearly fell off. Apparently those six screws are the only thing holding the case back on, so once they are removed, it comes off very easily. Then I inspected the movement. Tag Heuer calls this movement the Caliber 5 and gives very little information about it beyond that. However, through research on the internet, I surmised it was almost certainly a Sellita SW200-1. My suspicions were confirmed upon review of the movement. In the second picture below, you can see SW200-1 stamped into the baseplate near the top of the balance spring. In the third picture you can see the stamp saying 26 jewels. Another image zoomed in shows the 26 jewels a bit better At this point I wanted to regulate the watch. My previous post listed the performance in various positions. I’m reposting that information here for reference. regarding the daily rate, it is very consistently +10spd measured on my wrist. Every 24hours I wear it, it gains about 10 seconds, and it gains about 70 seconds in 7 days. So the +10spd is the average daily rate when I wear it 24hrs/day. on the time grapher the rates are all over the place. Amplitude is around 290-300 in all positions. On a full wind the rates are: Dial up it’s +10spd 3 down it’s +18spd 12 down it’s +5spd 6 down it’s +20spd dial down its +13spd 9 down it’s +4spd Those rate numbers correspond to the fine regulation screw being at the position shown above. This is how the watch was when I opened it. I spent about an hour tweaking the position of that screw back and forth while watching the rate change on the time grapher. My sense is that when wearing the watch it runs +10spd and that is the roughly the rate for the dial up position. That indicated to me that I should regulate the watch mainly focused on that single position as that seems to be the effective rate of the watch given my wearing habits. After several adjustments and trail and error while watching the rate on the time grapher I ended up in the position shown below. It seems odd to me that the fine screw was not centered for yhe watch coming out of the box from the factory. In the end I just moved the screw back to its centered position which brought the daily rate onI the dial up position to 0 and the crown down to +10. I was happy with the new rates, so I reassembled the watch and checked it on the time grapher. The image below shows the rate for dial up. I’m not sure how the time grapher rates will translate to real world performance so I’ll wear the watch for a few weeks and see how it does. In any case, I’m happy I didn’t break the movement or case during this adventure. I’ll report back on how it performs in a week or two when I have enough data to assess it. Thanks for everyone’s help and advice here. I don’t think I would’ve know how to proceed through this process carefully enough to avoid destroying the watch without your suggestions.


 1 point
 -
You need to be careful before completely removing the old tube that you can get a replacement of the correct OD as I'm only aware of push fit ones up to 2.2mm. I presume it is just a standard crown and not screw down?1 point
-
I agree with @HectorLooi it looks like the remains of the old tube is still in the case (see image below), the smallest OD is still lodged in the case and the targe OD has been sheared off - but difficult to tell for sure. If the small OD is still there then you need to push it out, ideally with a pusher tool as @HectorLooi states. Alternatively if you do not have this tool, maybe you have (or could make) a punch of the correct dimensions to push it out. Once removed you can replace it with a new one, there are many sites offering assortments, for example AliExpress have them for cheap, but also eBay/Amazon or whichever watch tool supplier you prefer eg CousinsUK and you are sure to find the right size and have spare ones for next time.
 1 point
 -
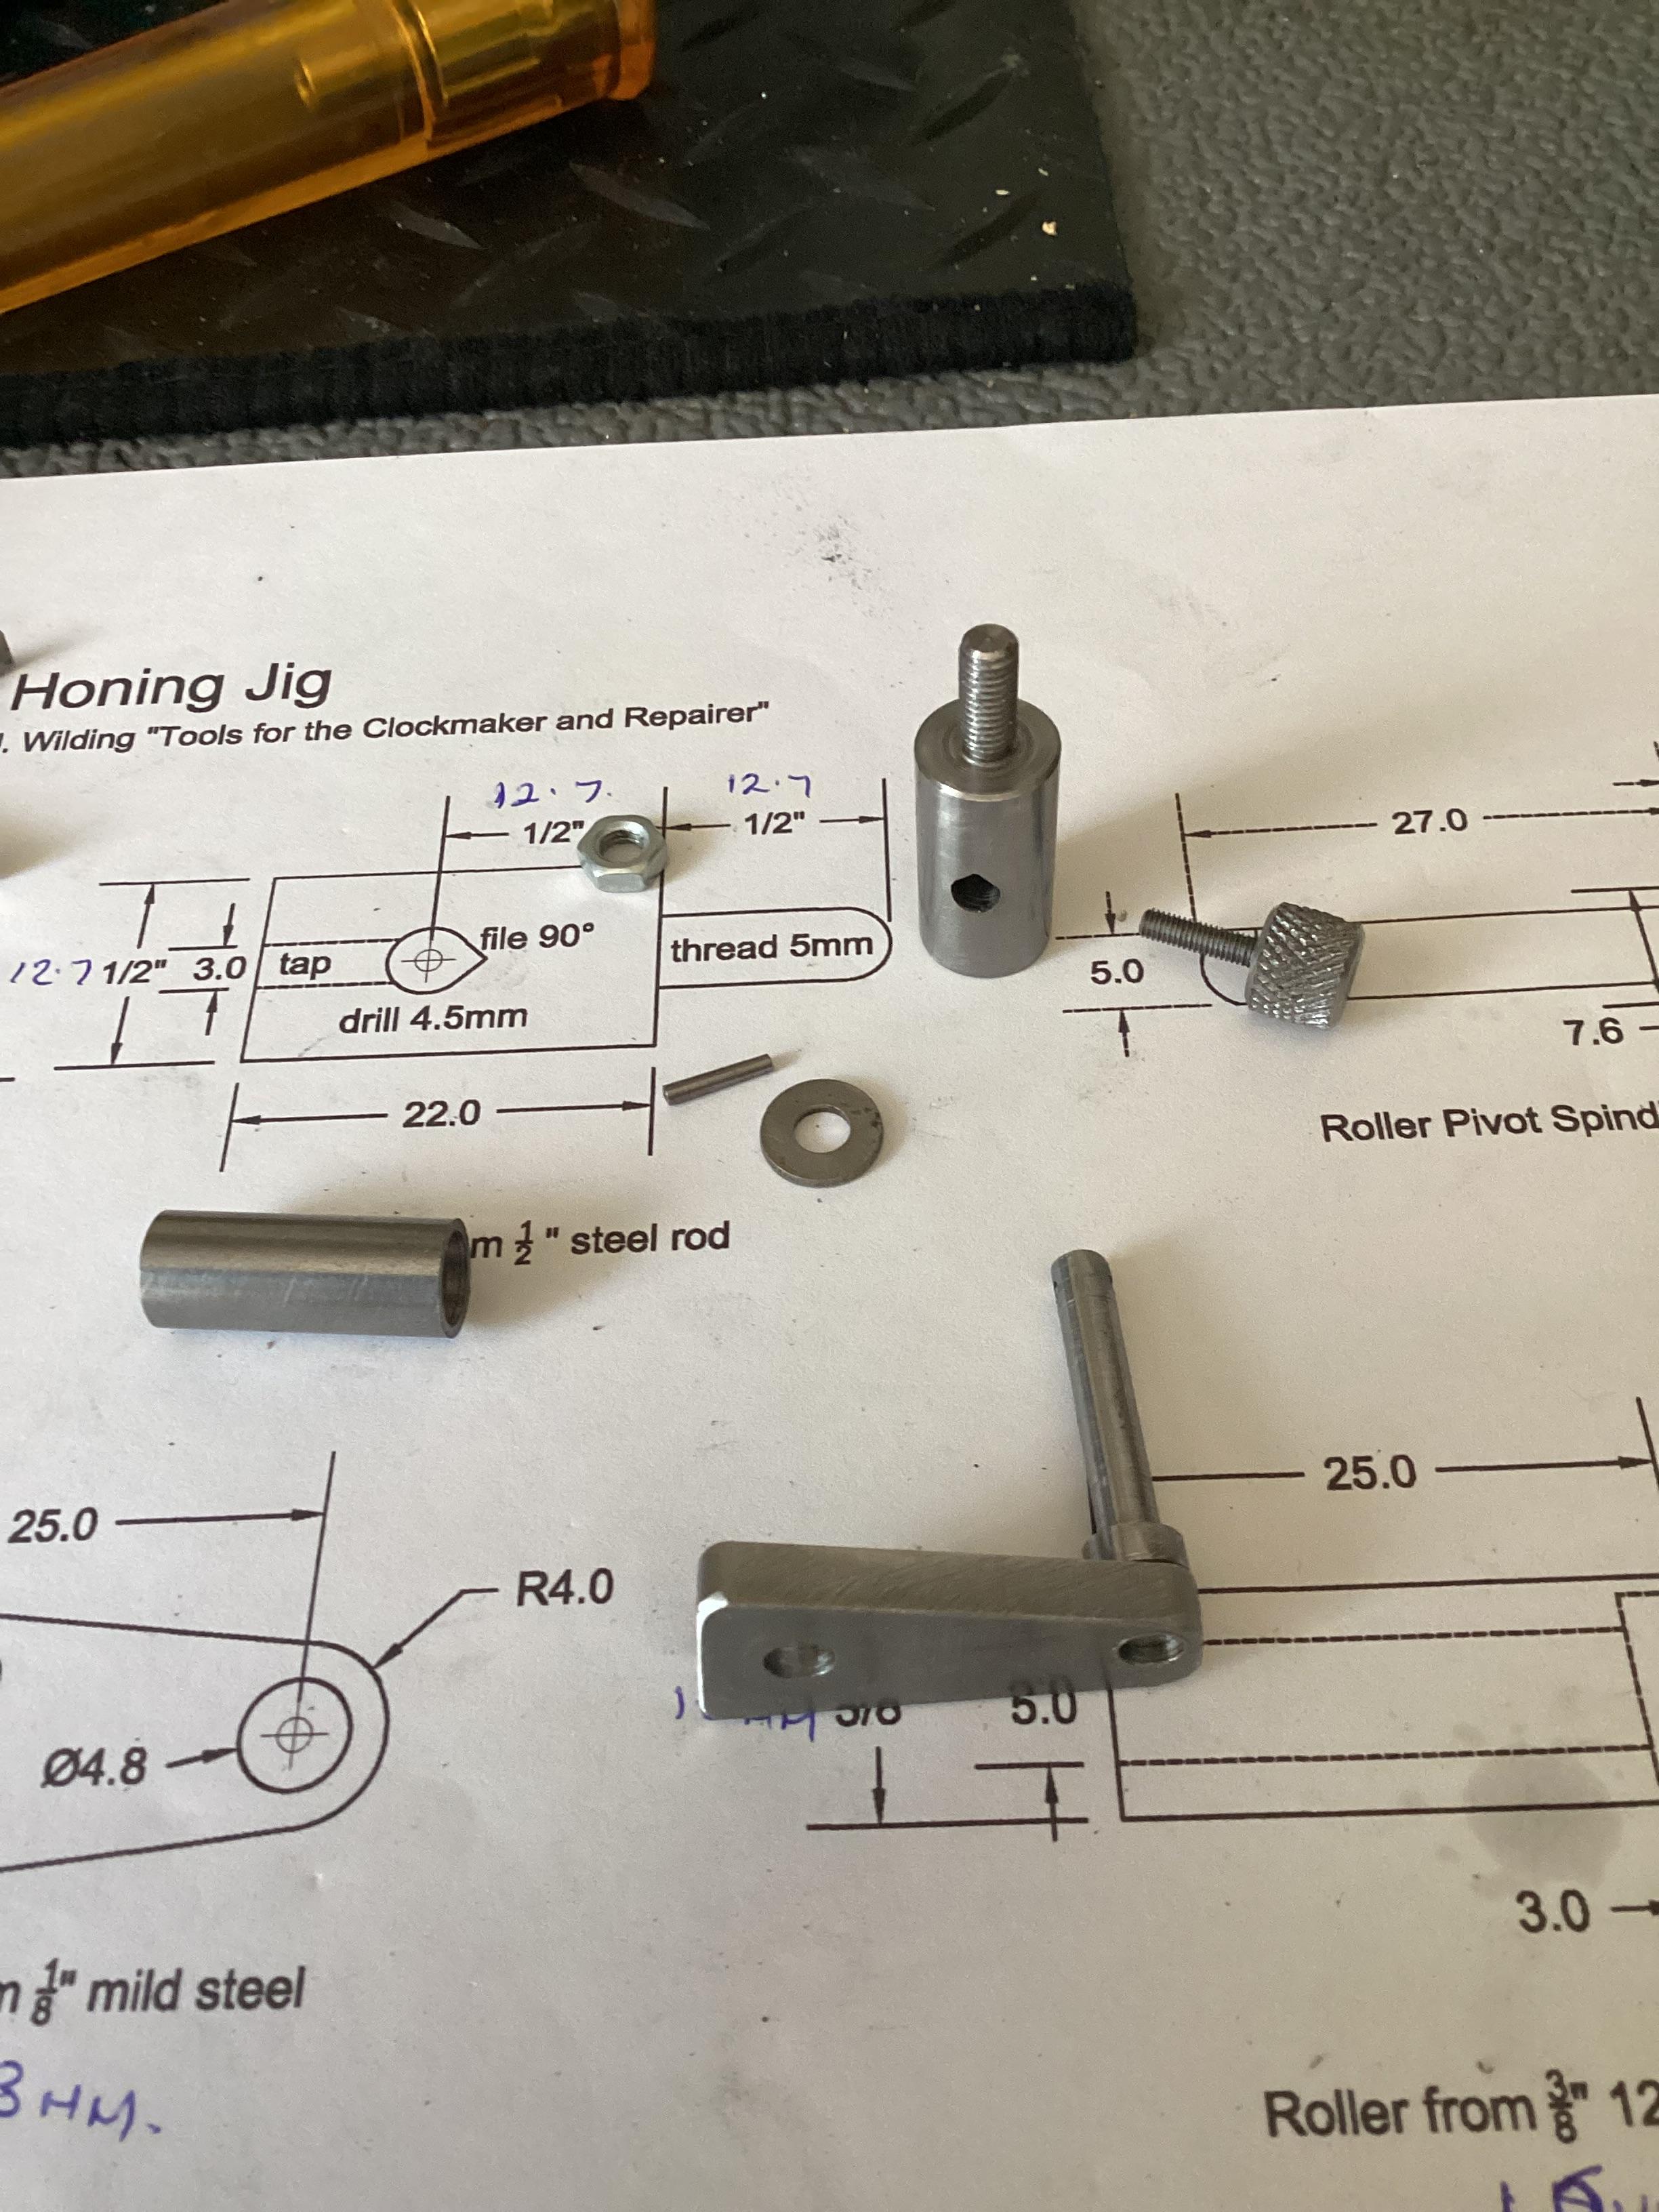
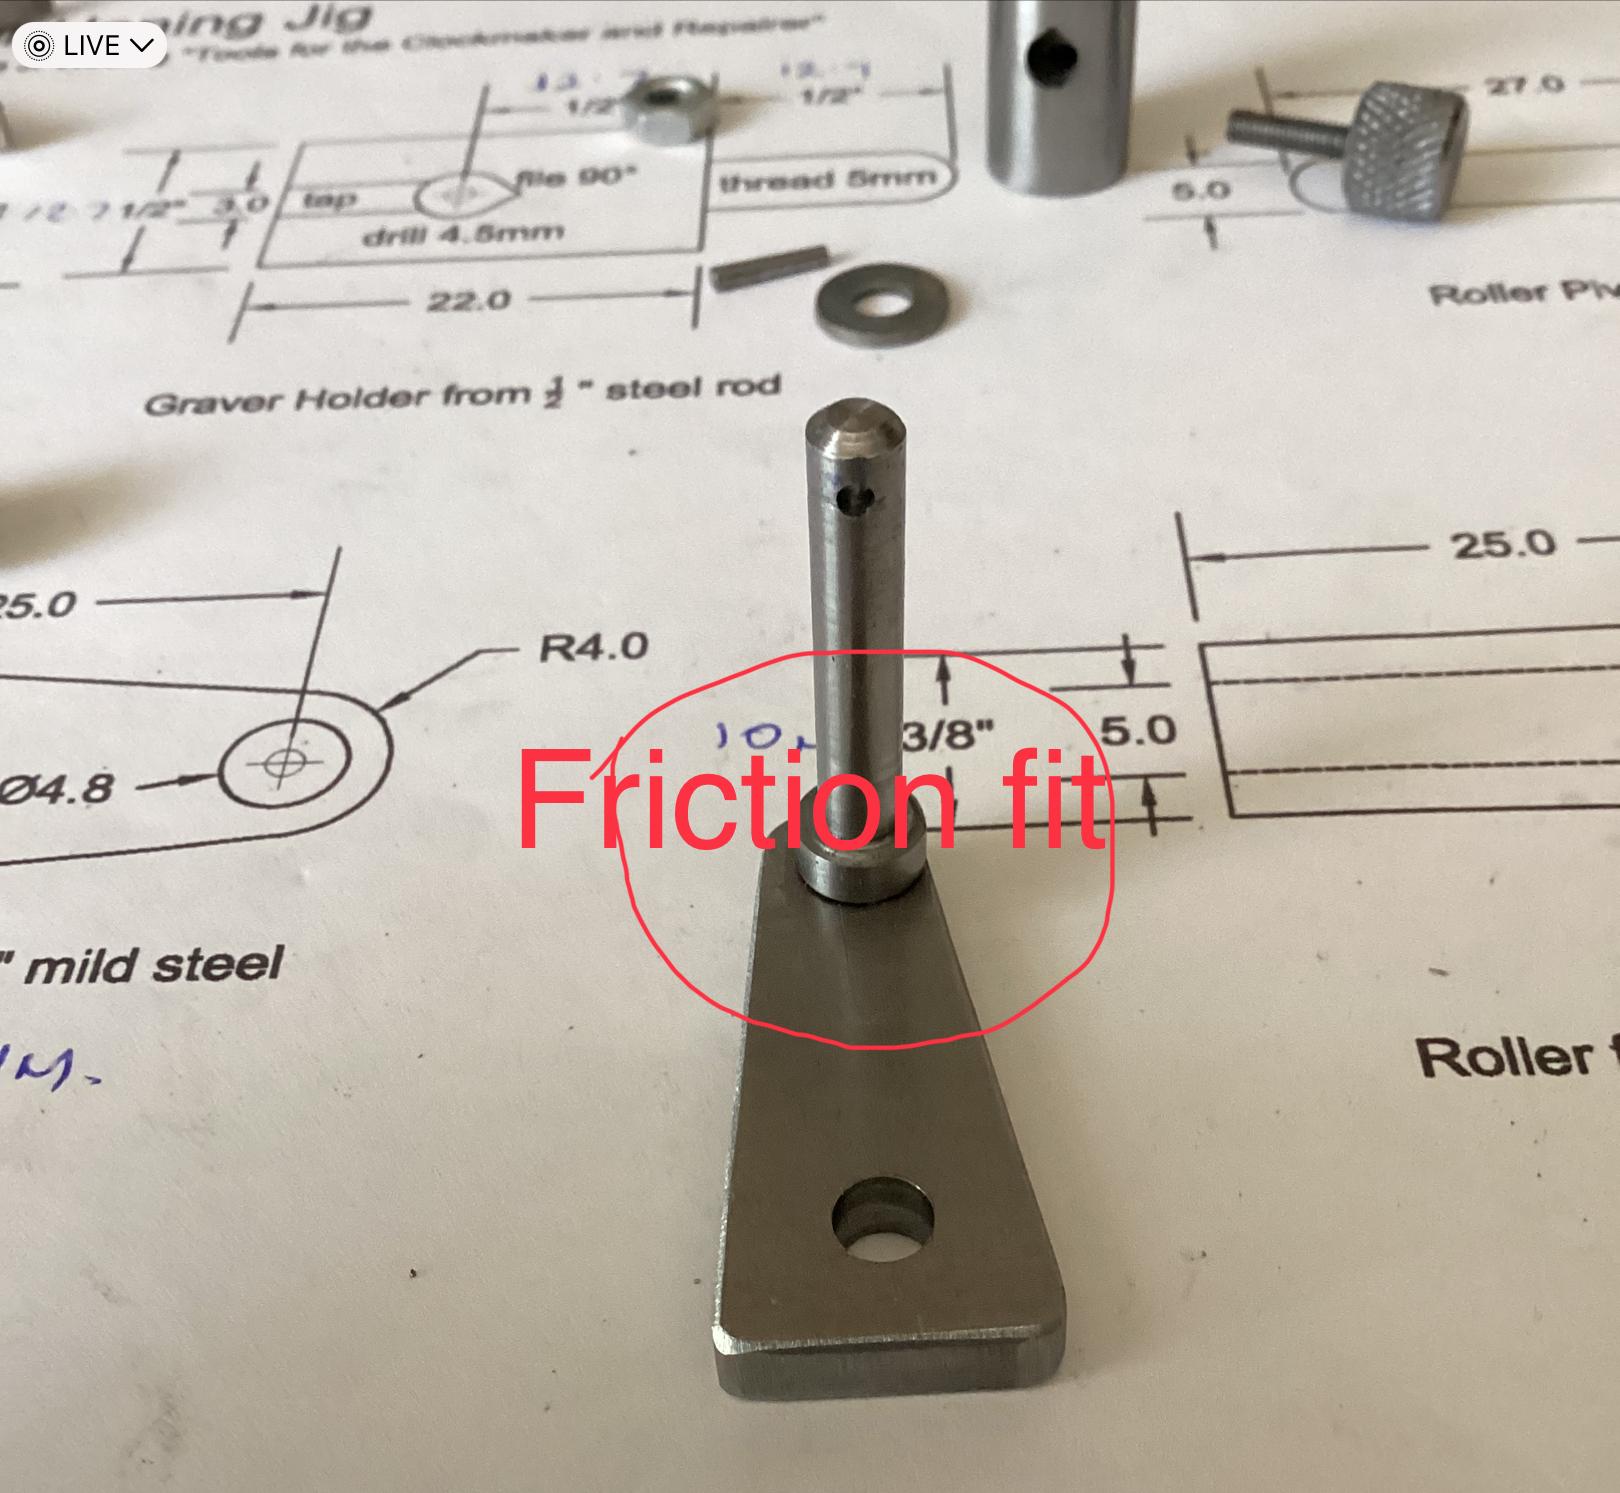
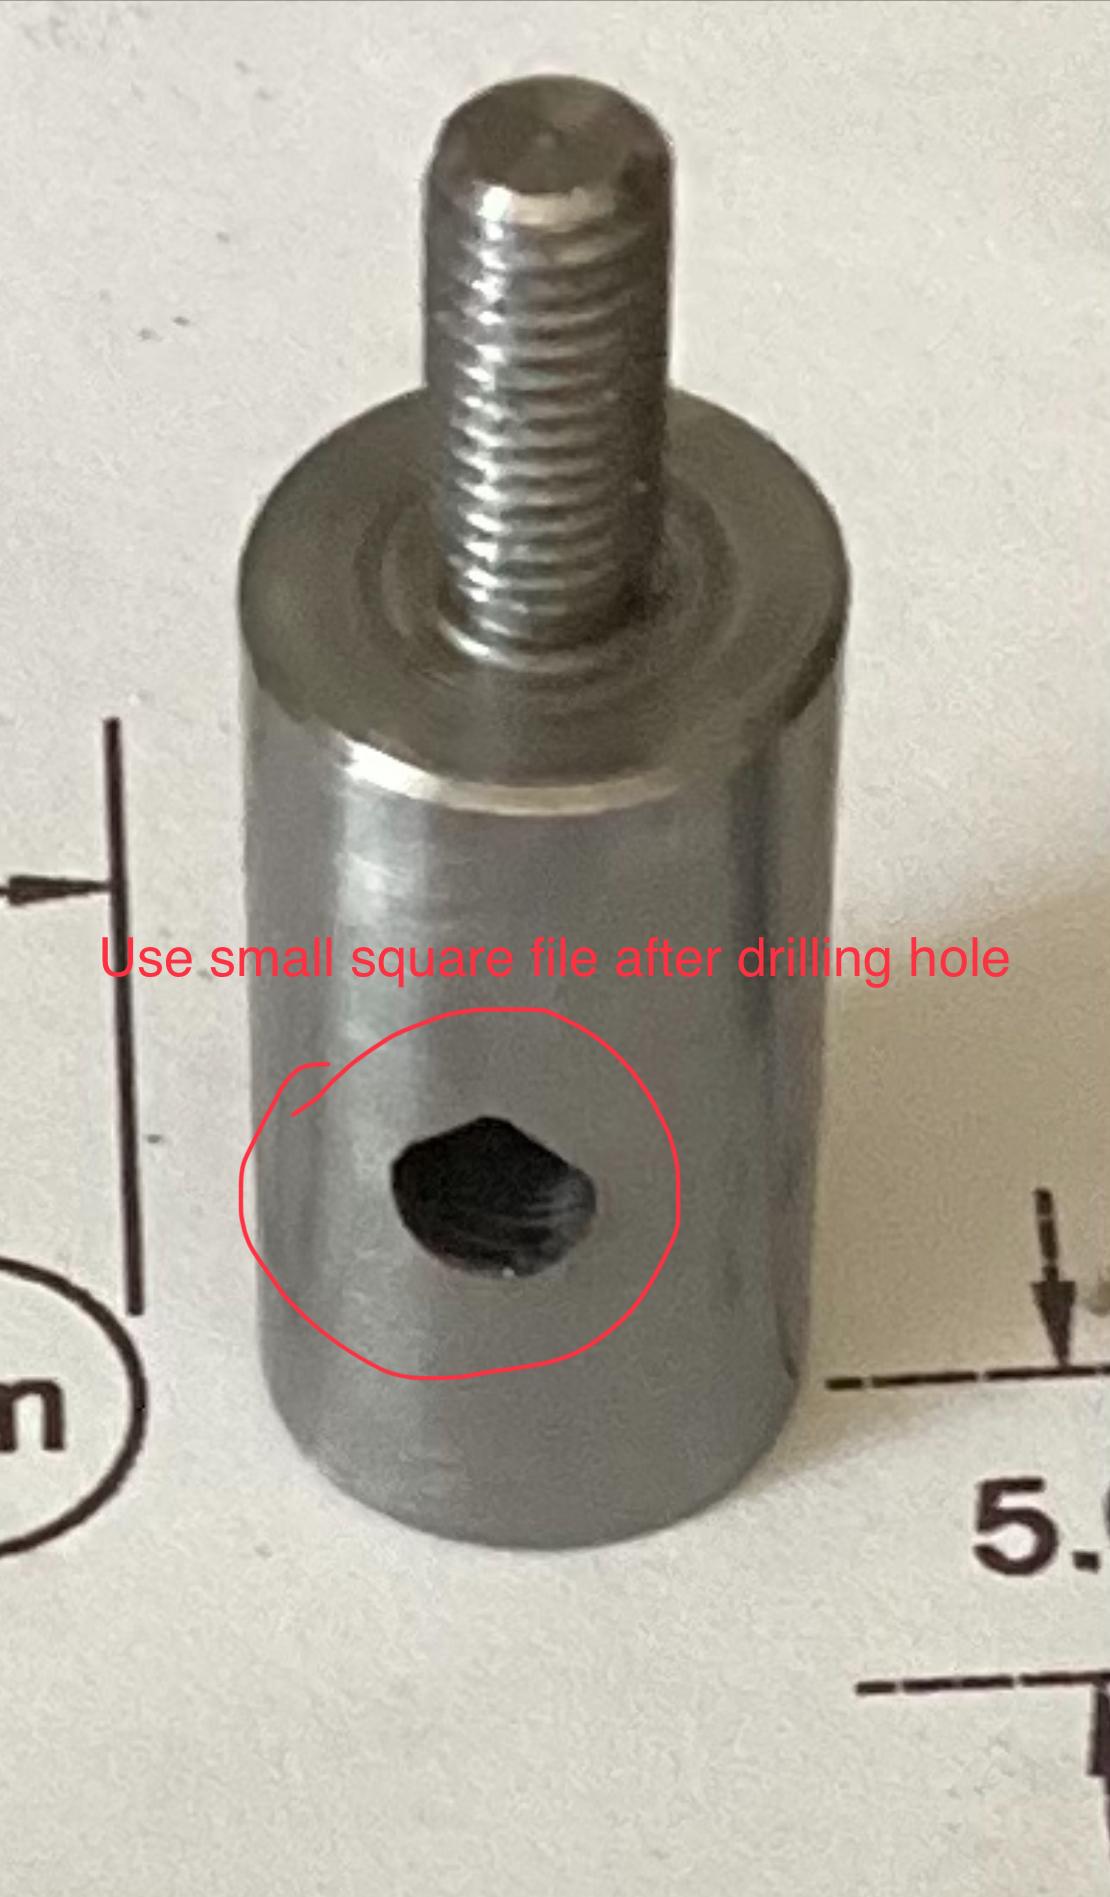
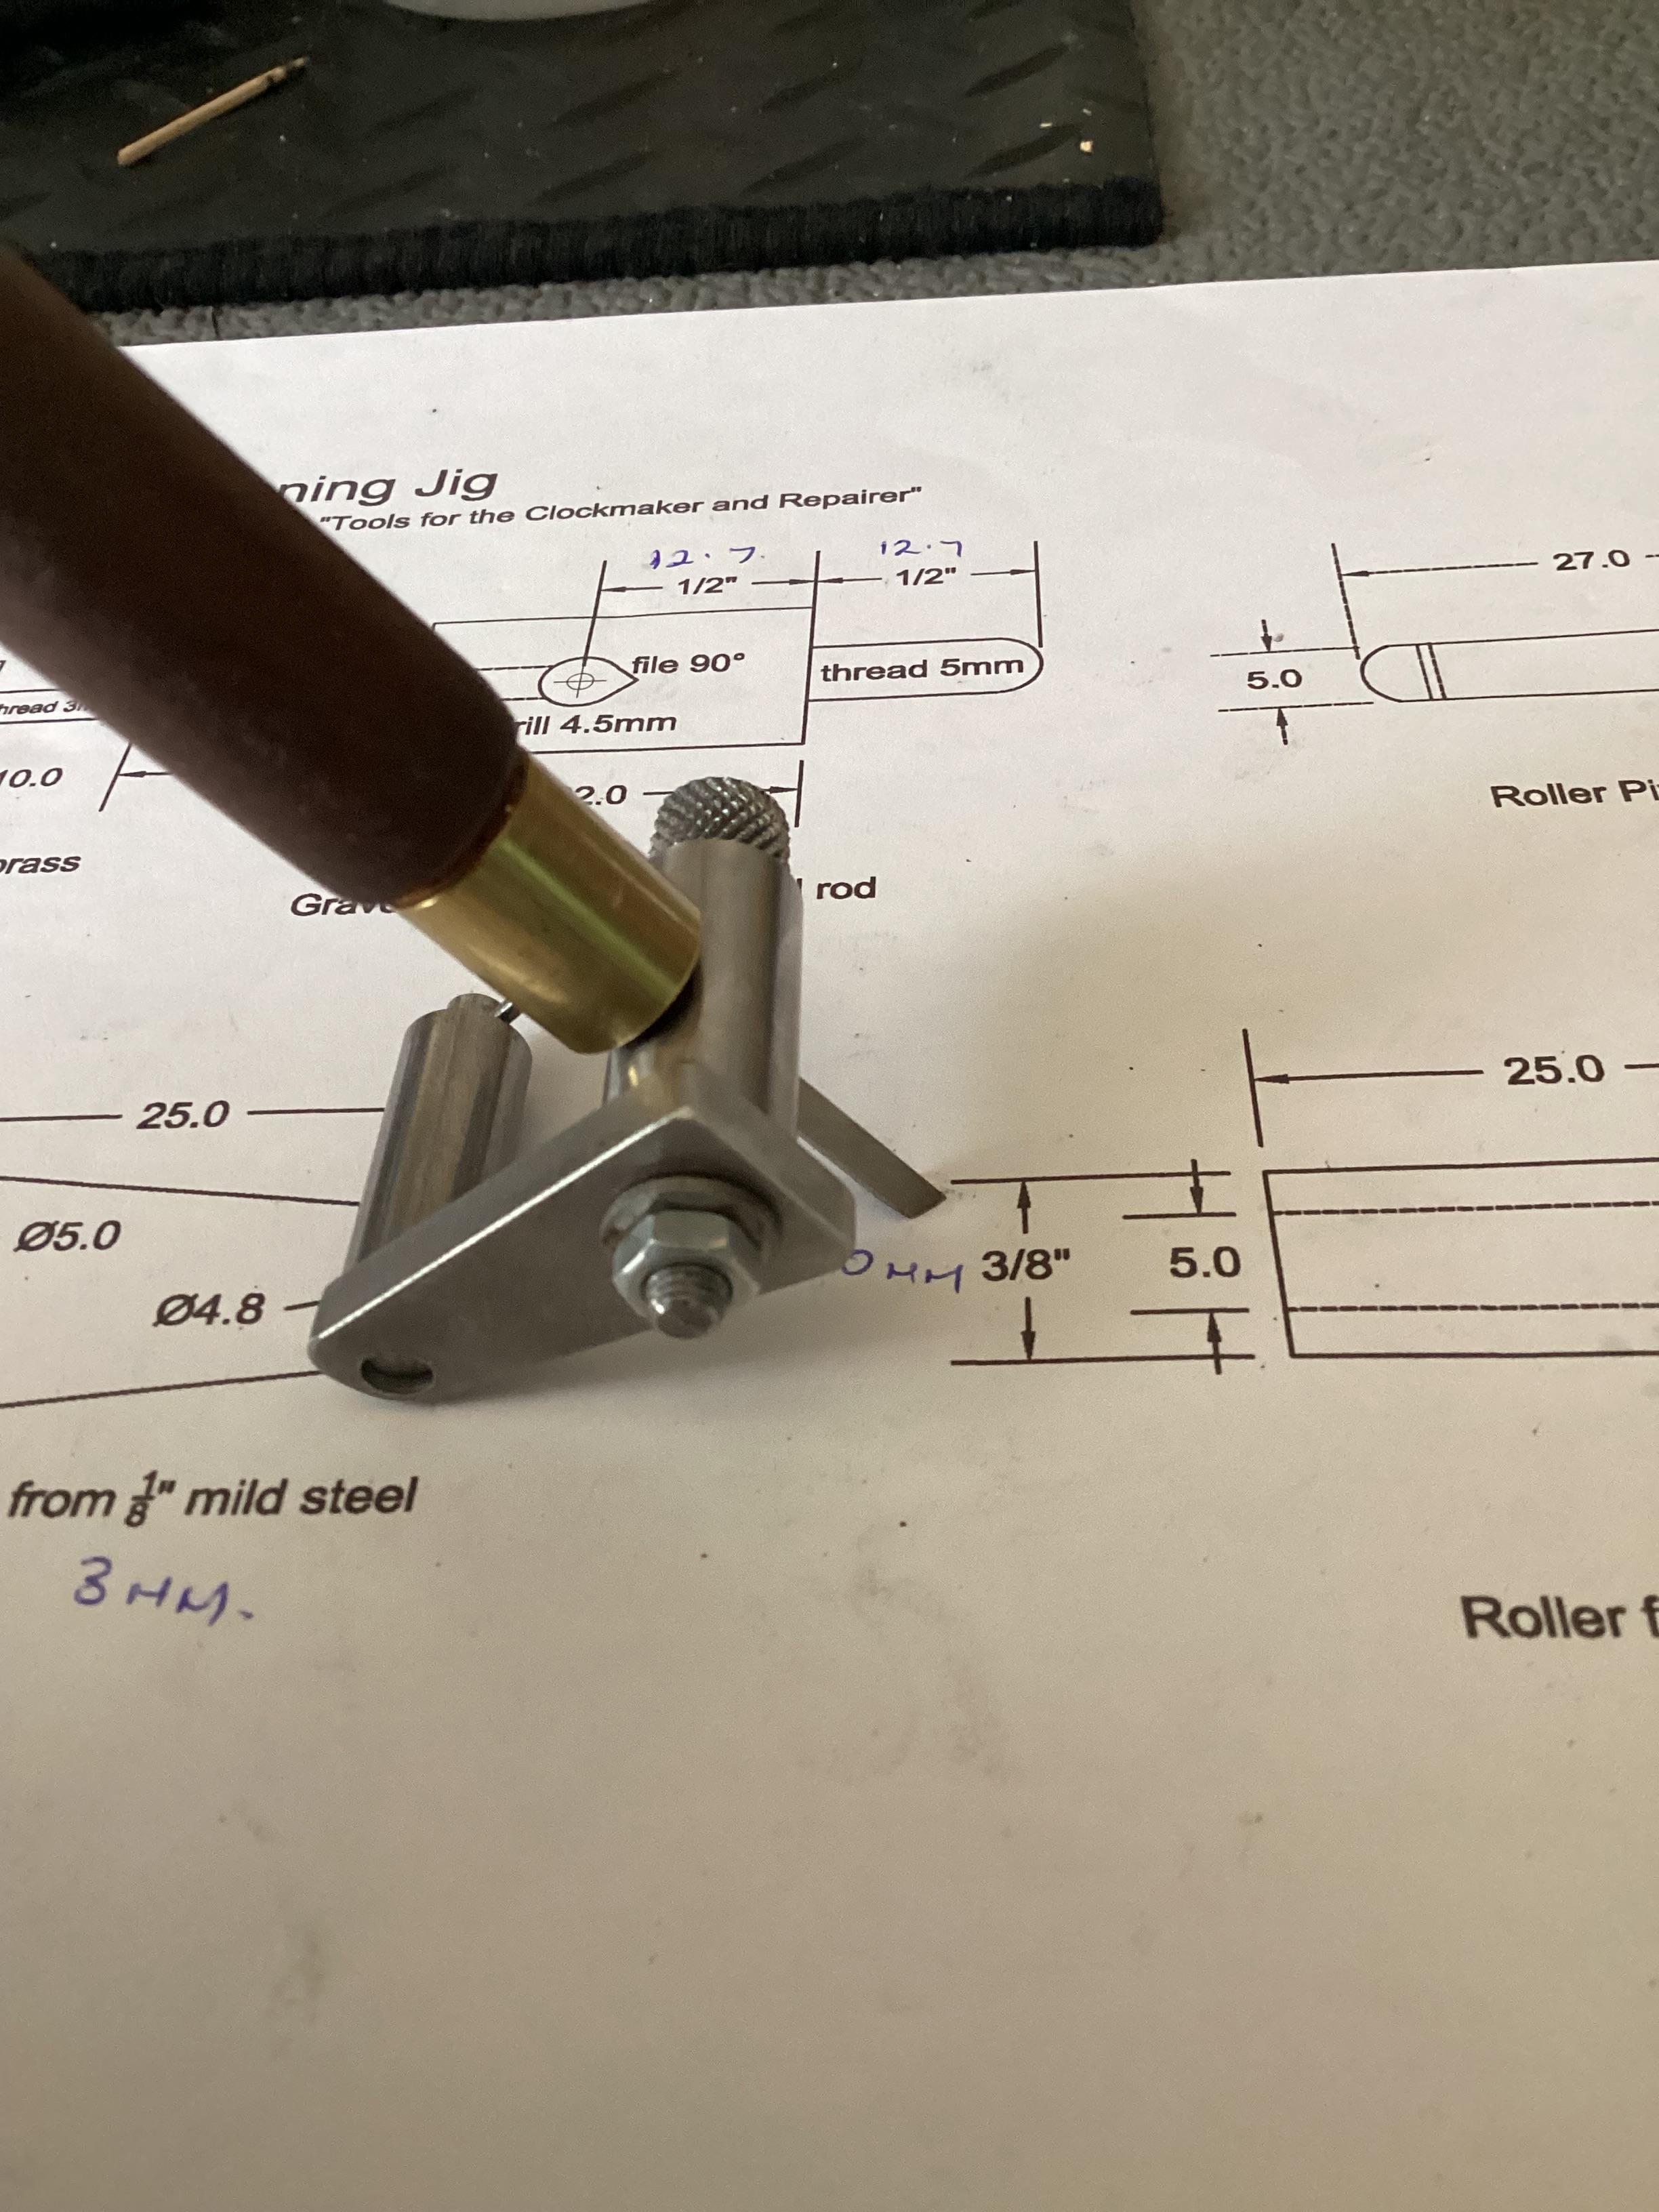
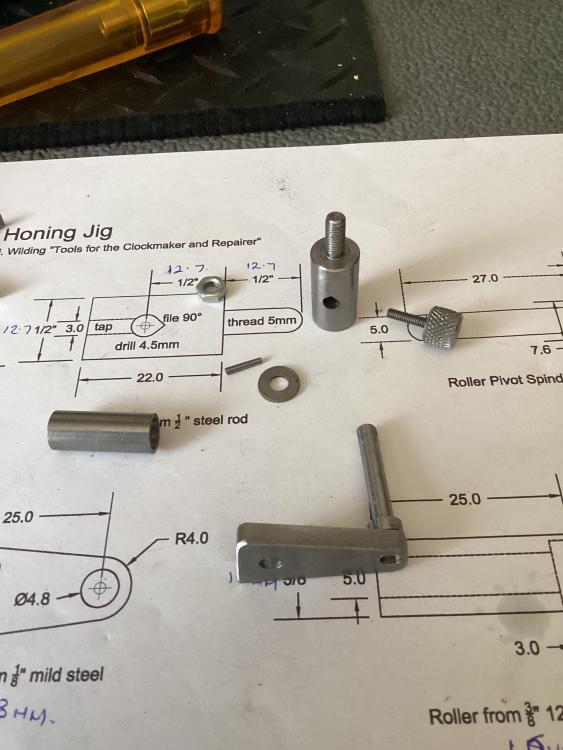
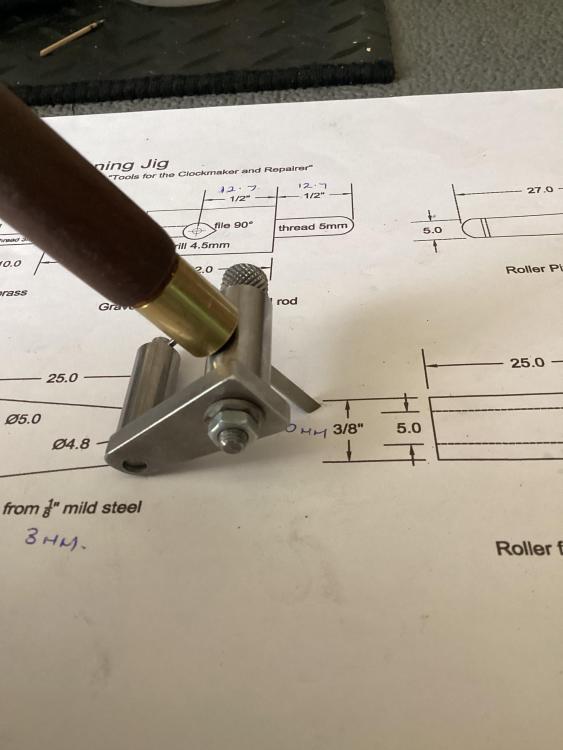
It may be my age but I can’t get on with the Crocker style jig for honing my gravers , I would have liked the Bergeon one but there is no way I am paying £120 just to sharpen gravers , I used to do it free hand but having gout in both hand has made it difficult, I chanced upon a set of drawings from John Wildings book tools for the clockmaker & repairer so today I made it and I must say it does a good job, not sure if legal to post drawing so if anyone interested then PM me . Dell


 1 point
 -
Hi guys, I had a videographer in my workshop last week whilst I was teaching the ladies from Mr Jones Watches, here in London https://www.instagram.com/p/C8mWgjnohG8/?img_index=1 He made a short film of what I do and thought I would share it with you1 point
-
Try taking the strap off and see if there is a notch for a tool or knife in one of the strap recesses? I've never seen one before but suspect it is a pry-off type, as it seems unlikely the text and logo would always be in perfect vertical alignment if it was a screw-on type?1 point
-
Opinions are worth considering when they are offered with reason. Yours were not; All Chinese made tools are crap. End of story. You are telling us that all of the tools that I and others here have bought and used are garbage. Why? Because you say so. Well, you are wrong and you have shown that you are totally unwilling to listen to other viewpoints that contradict your own, viewpoints that are based in actual hands on experience with the tools mentioned in this thread. If you have actual experience with any of the products mentioned in this thread then please quote the original post and give your feedback. That is what this thread is for. But please don't come in hear and take a huge non-reasoned dump in the middle of the topic and then expect everyone to, for some reason, respect that. That's not how discourse works.1 point
-
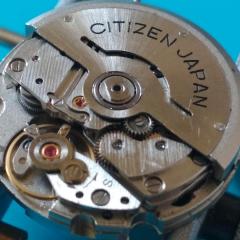
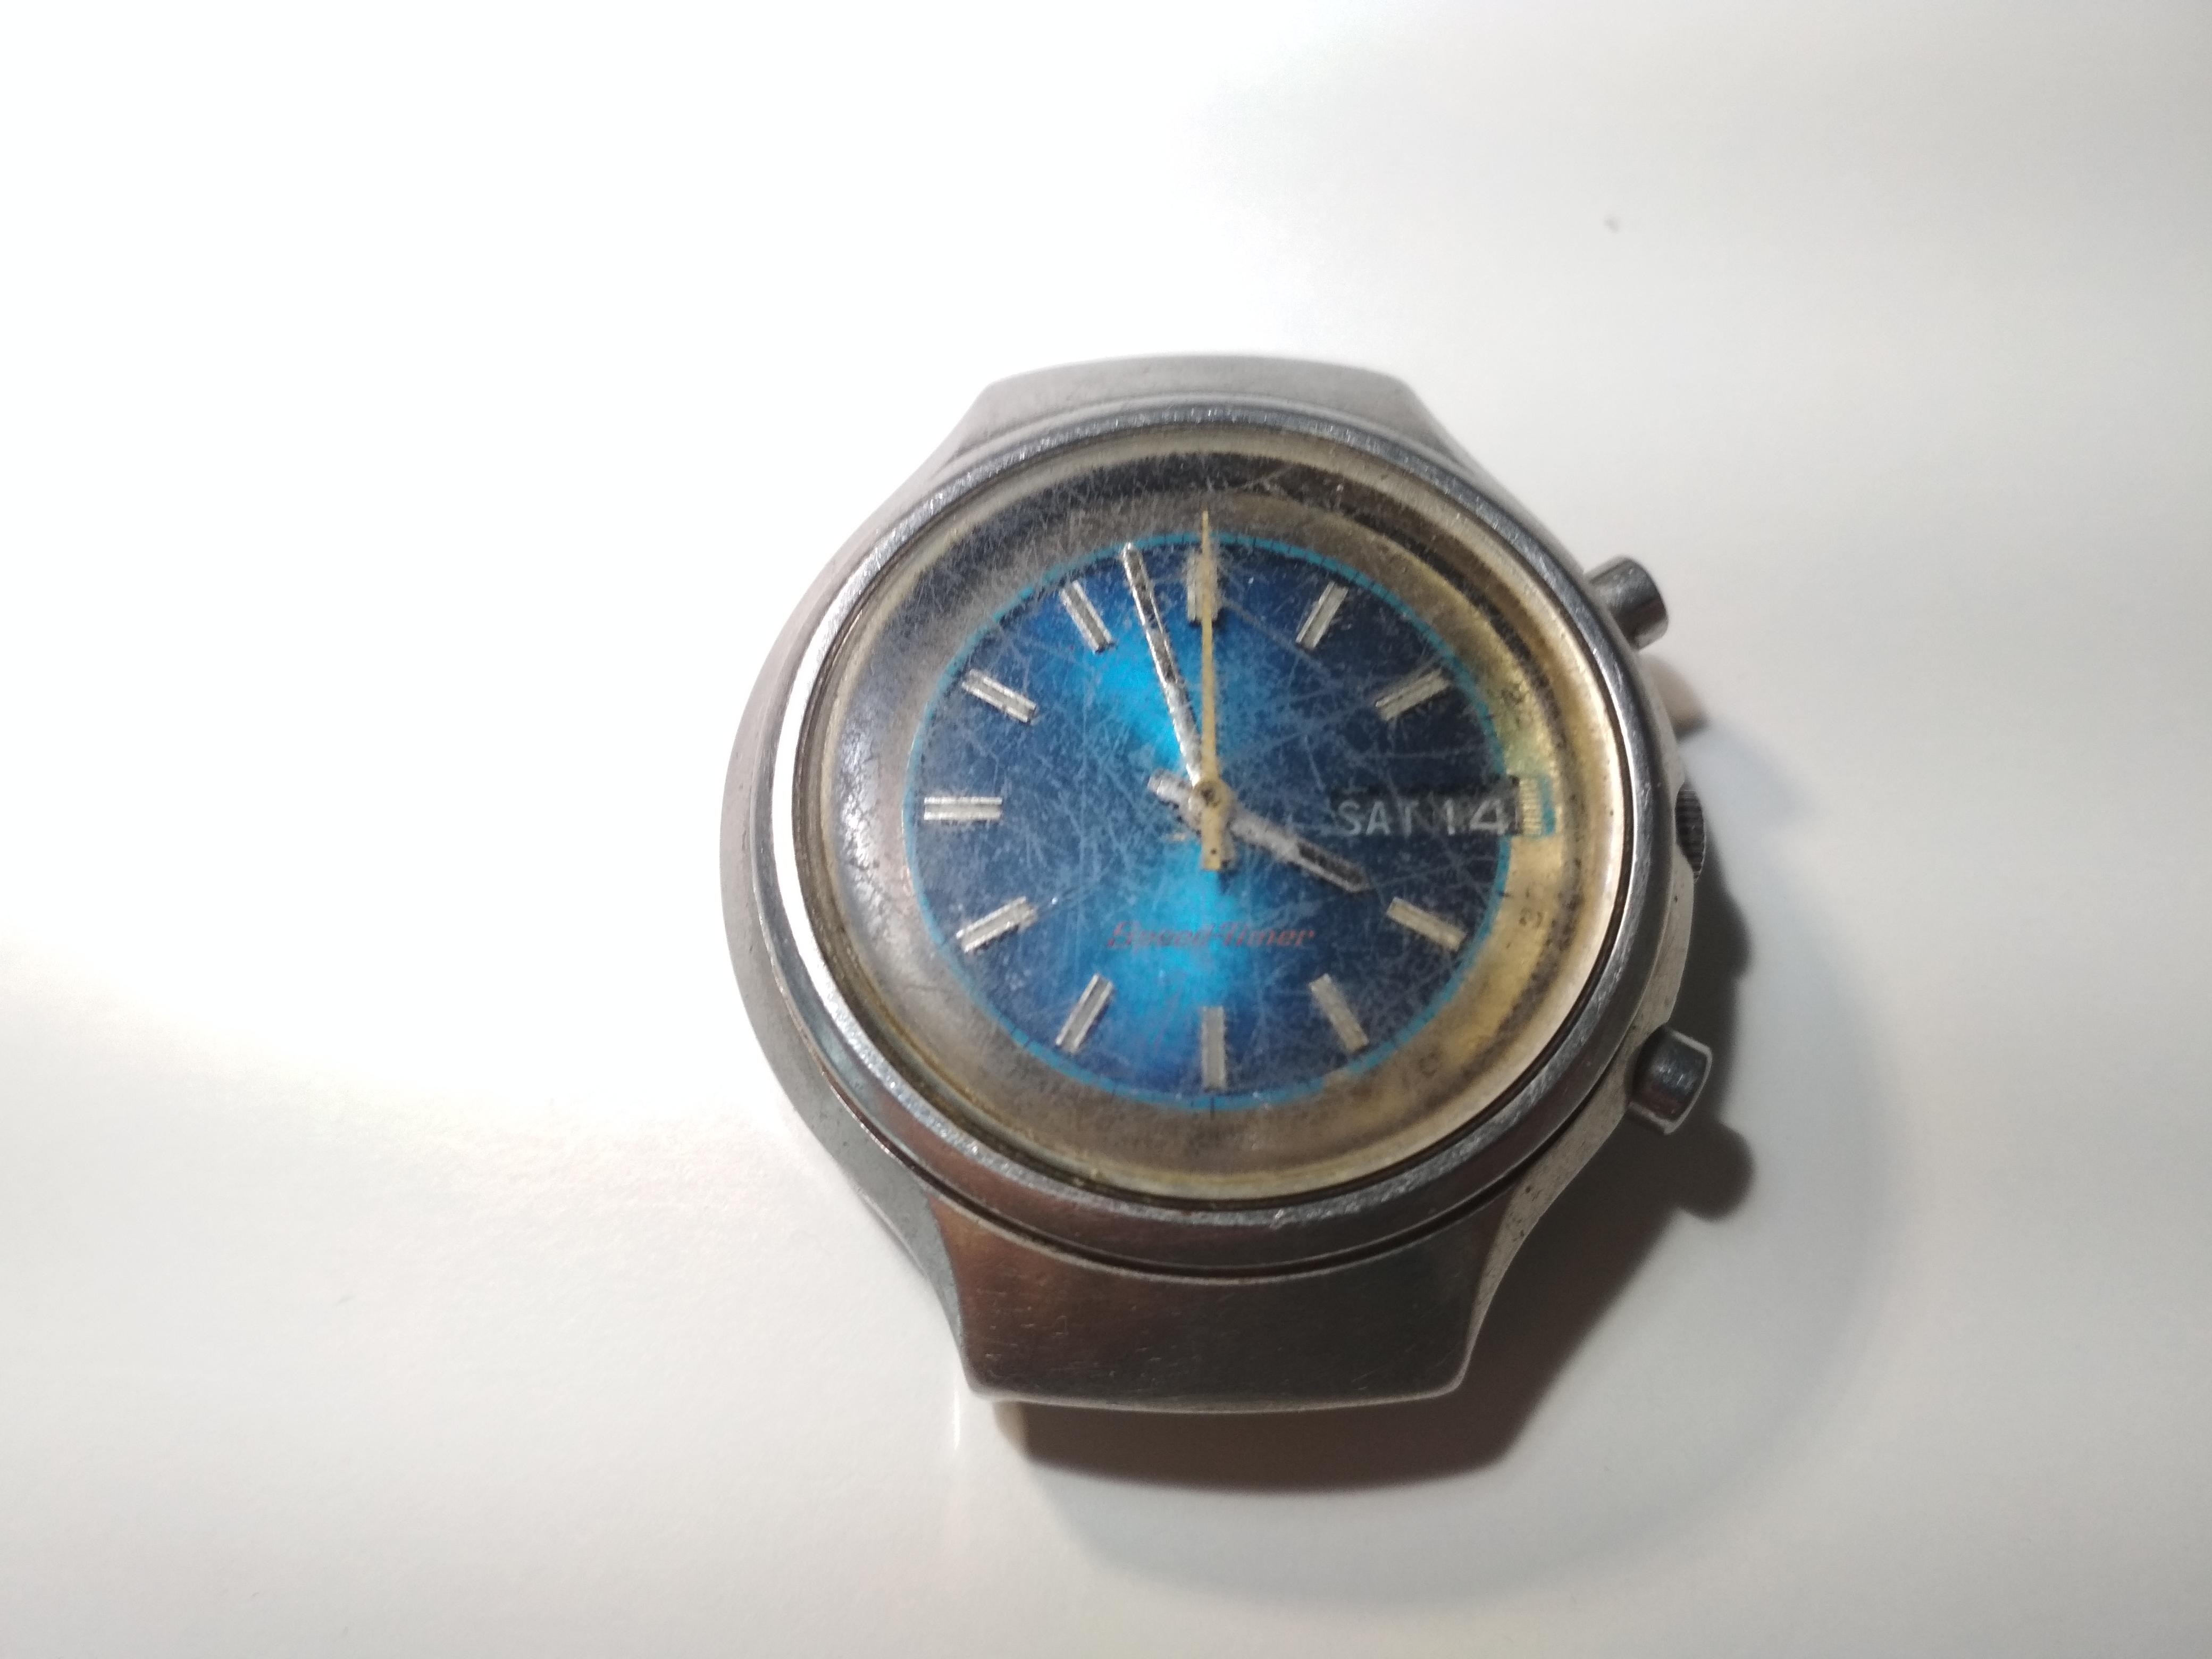
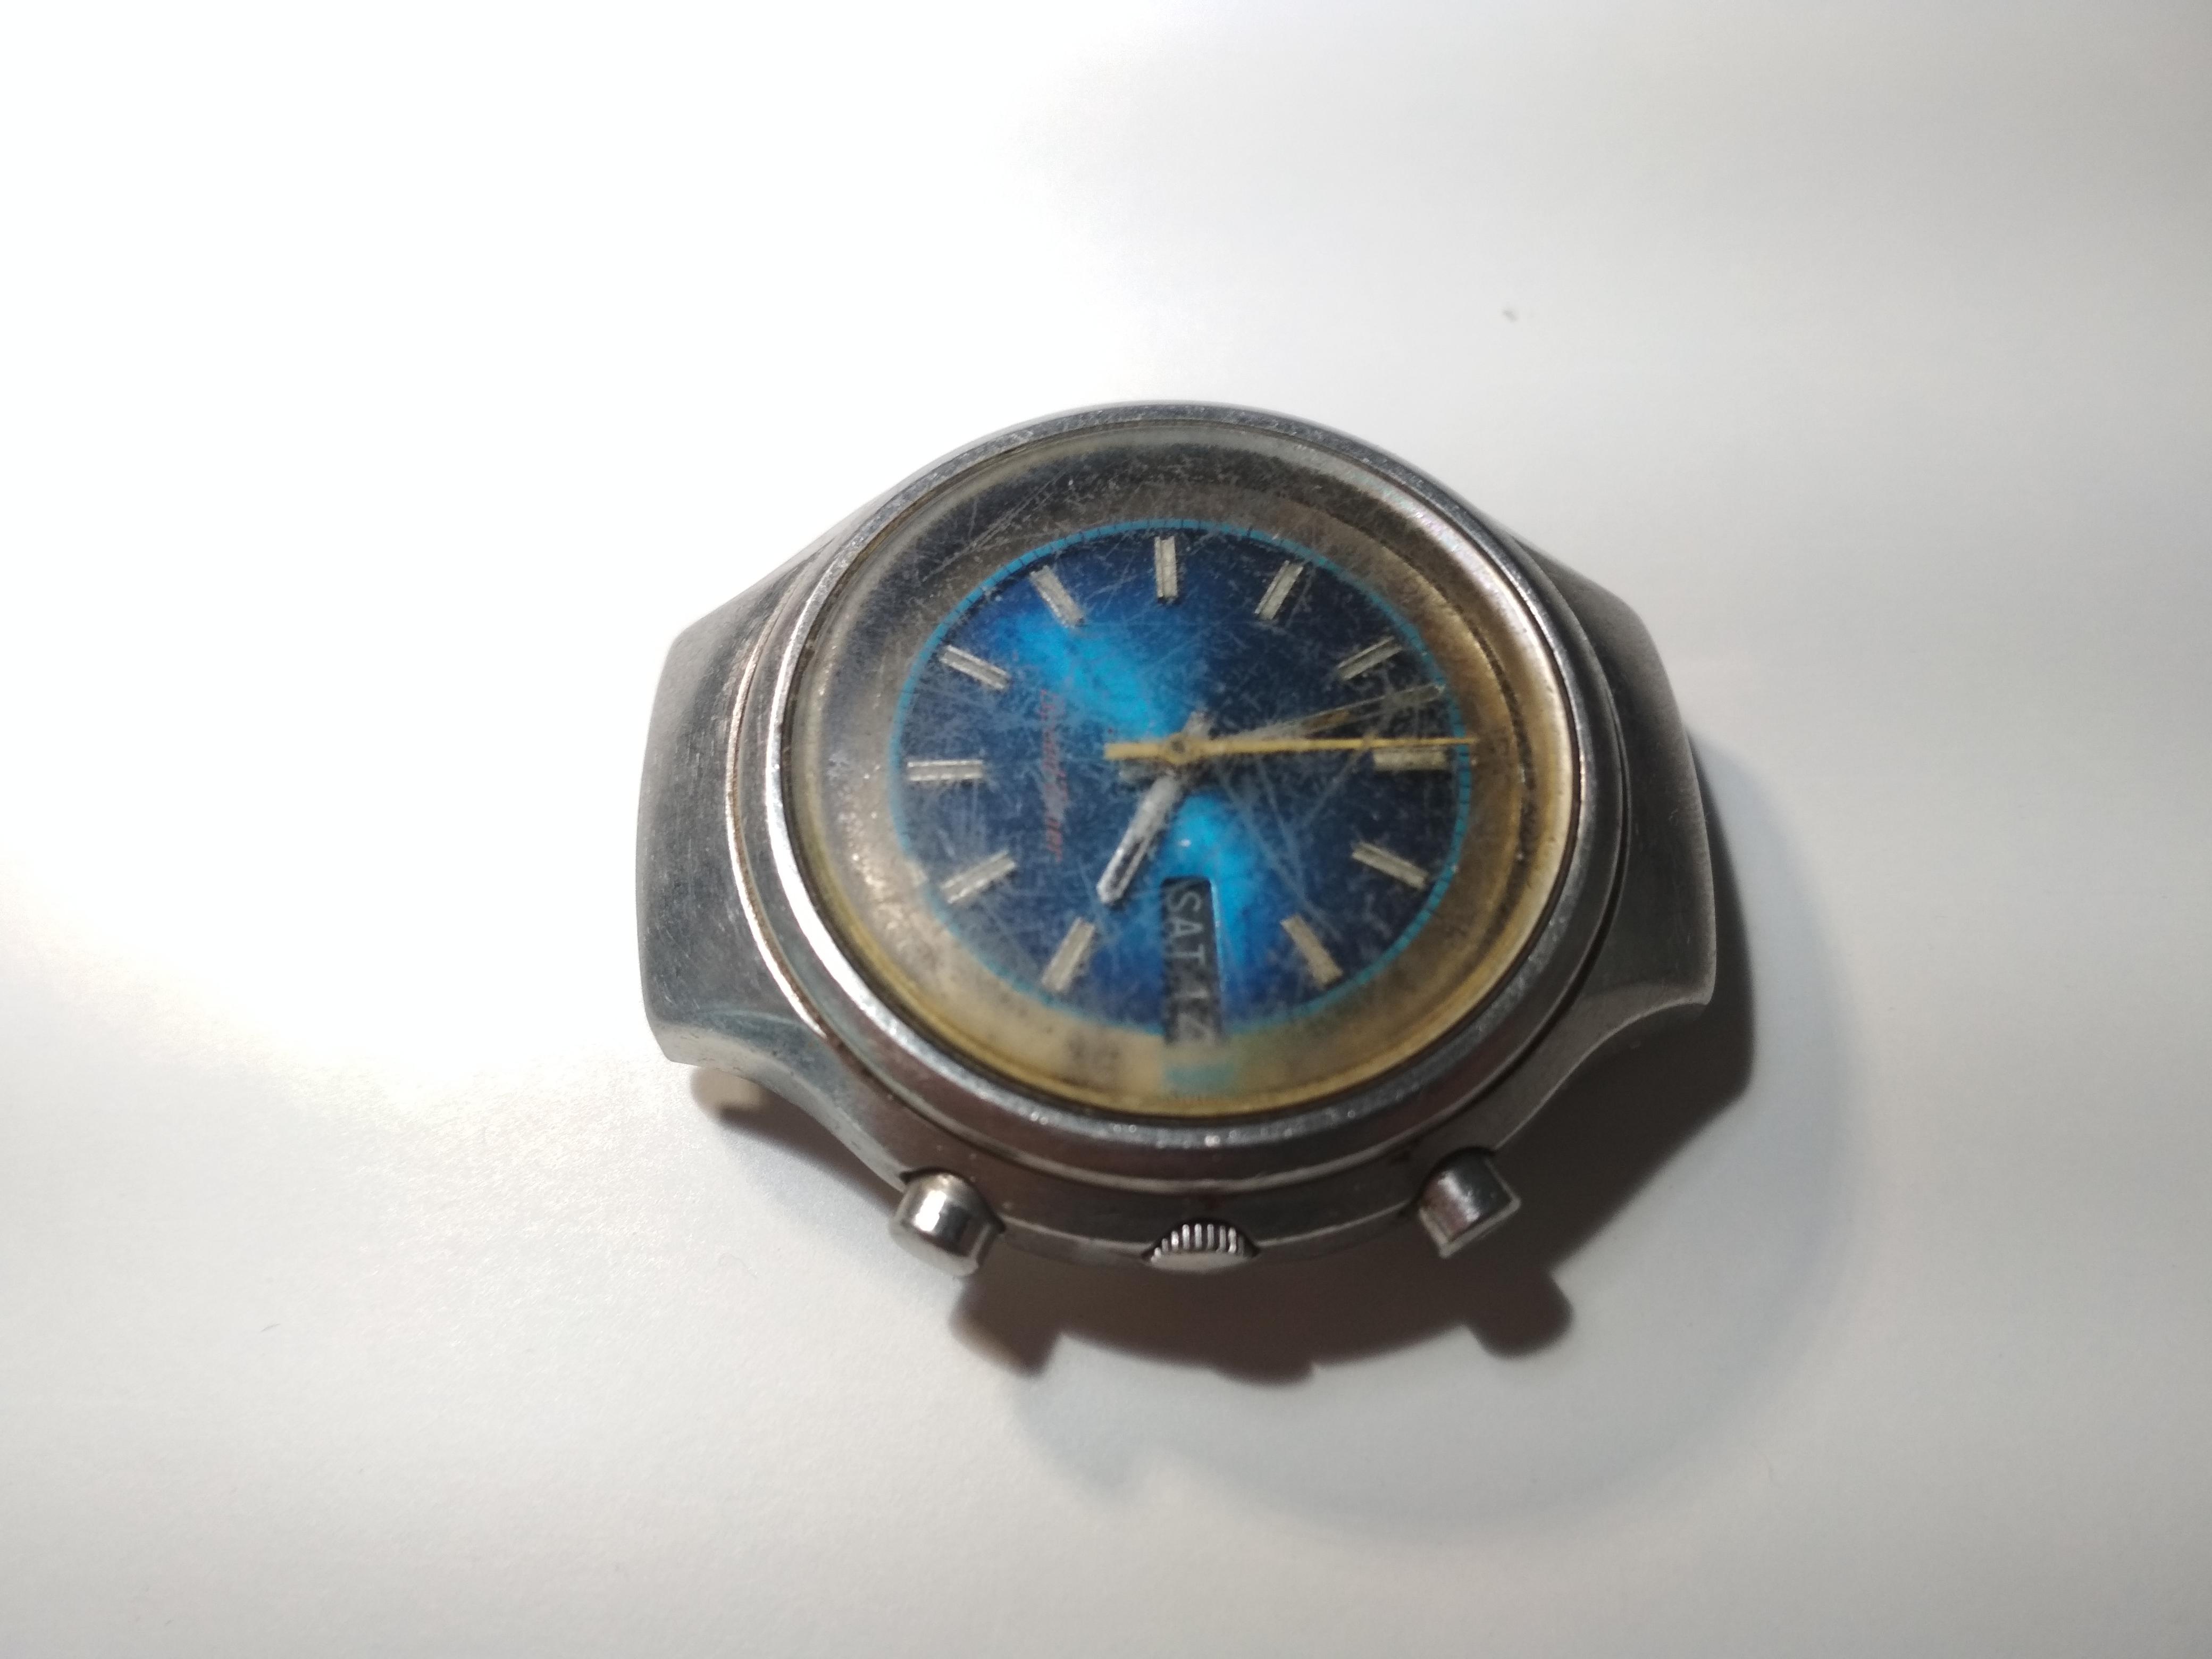
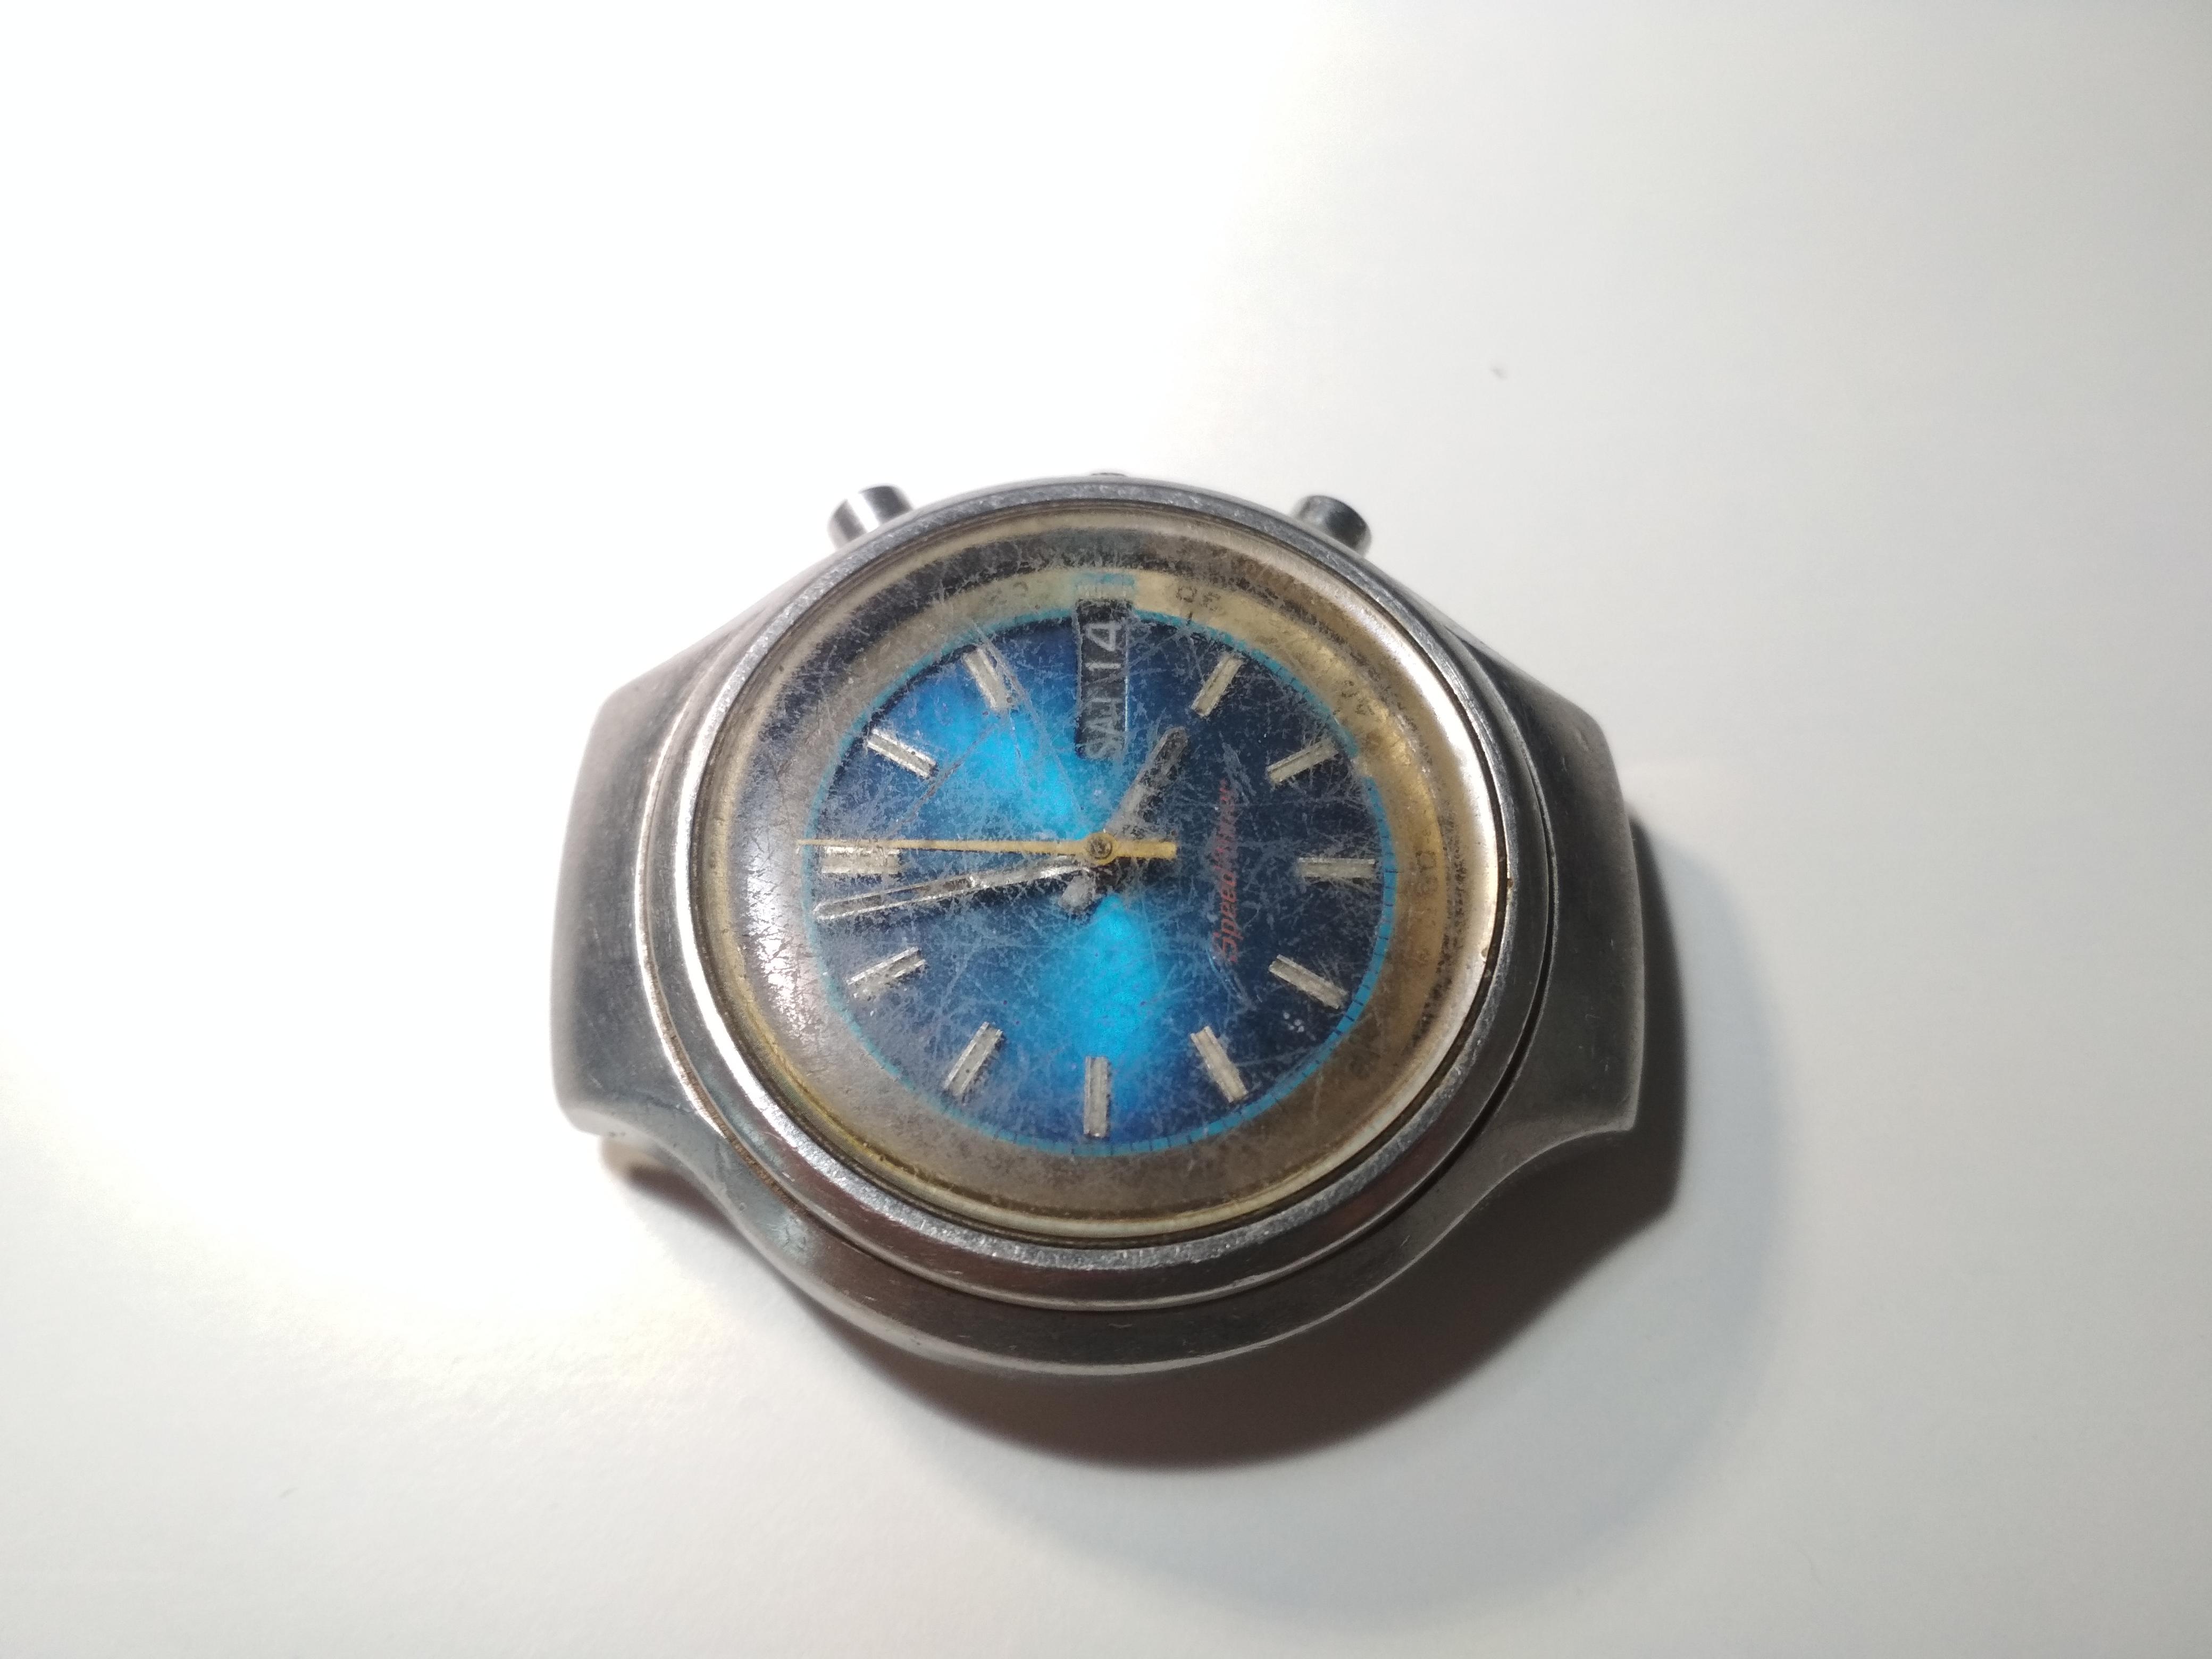
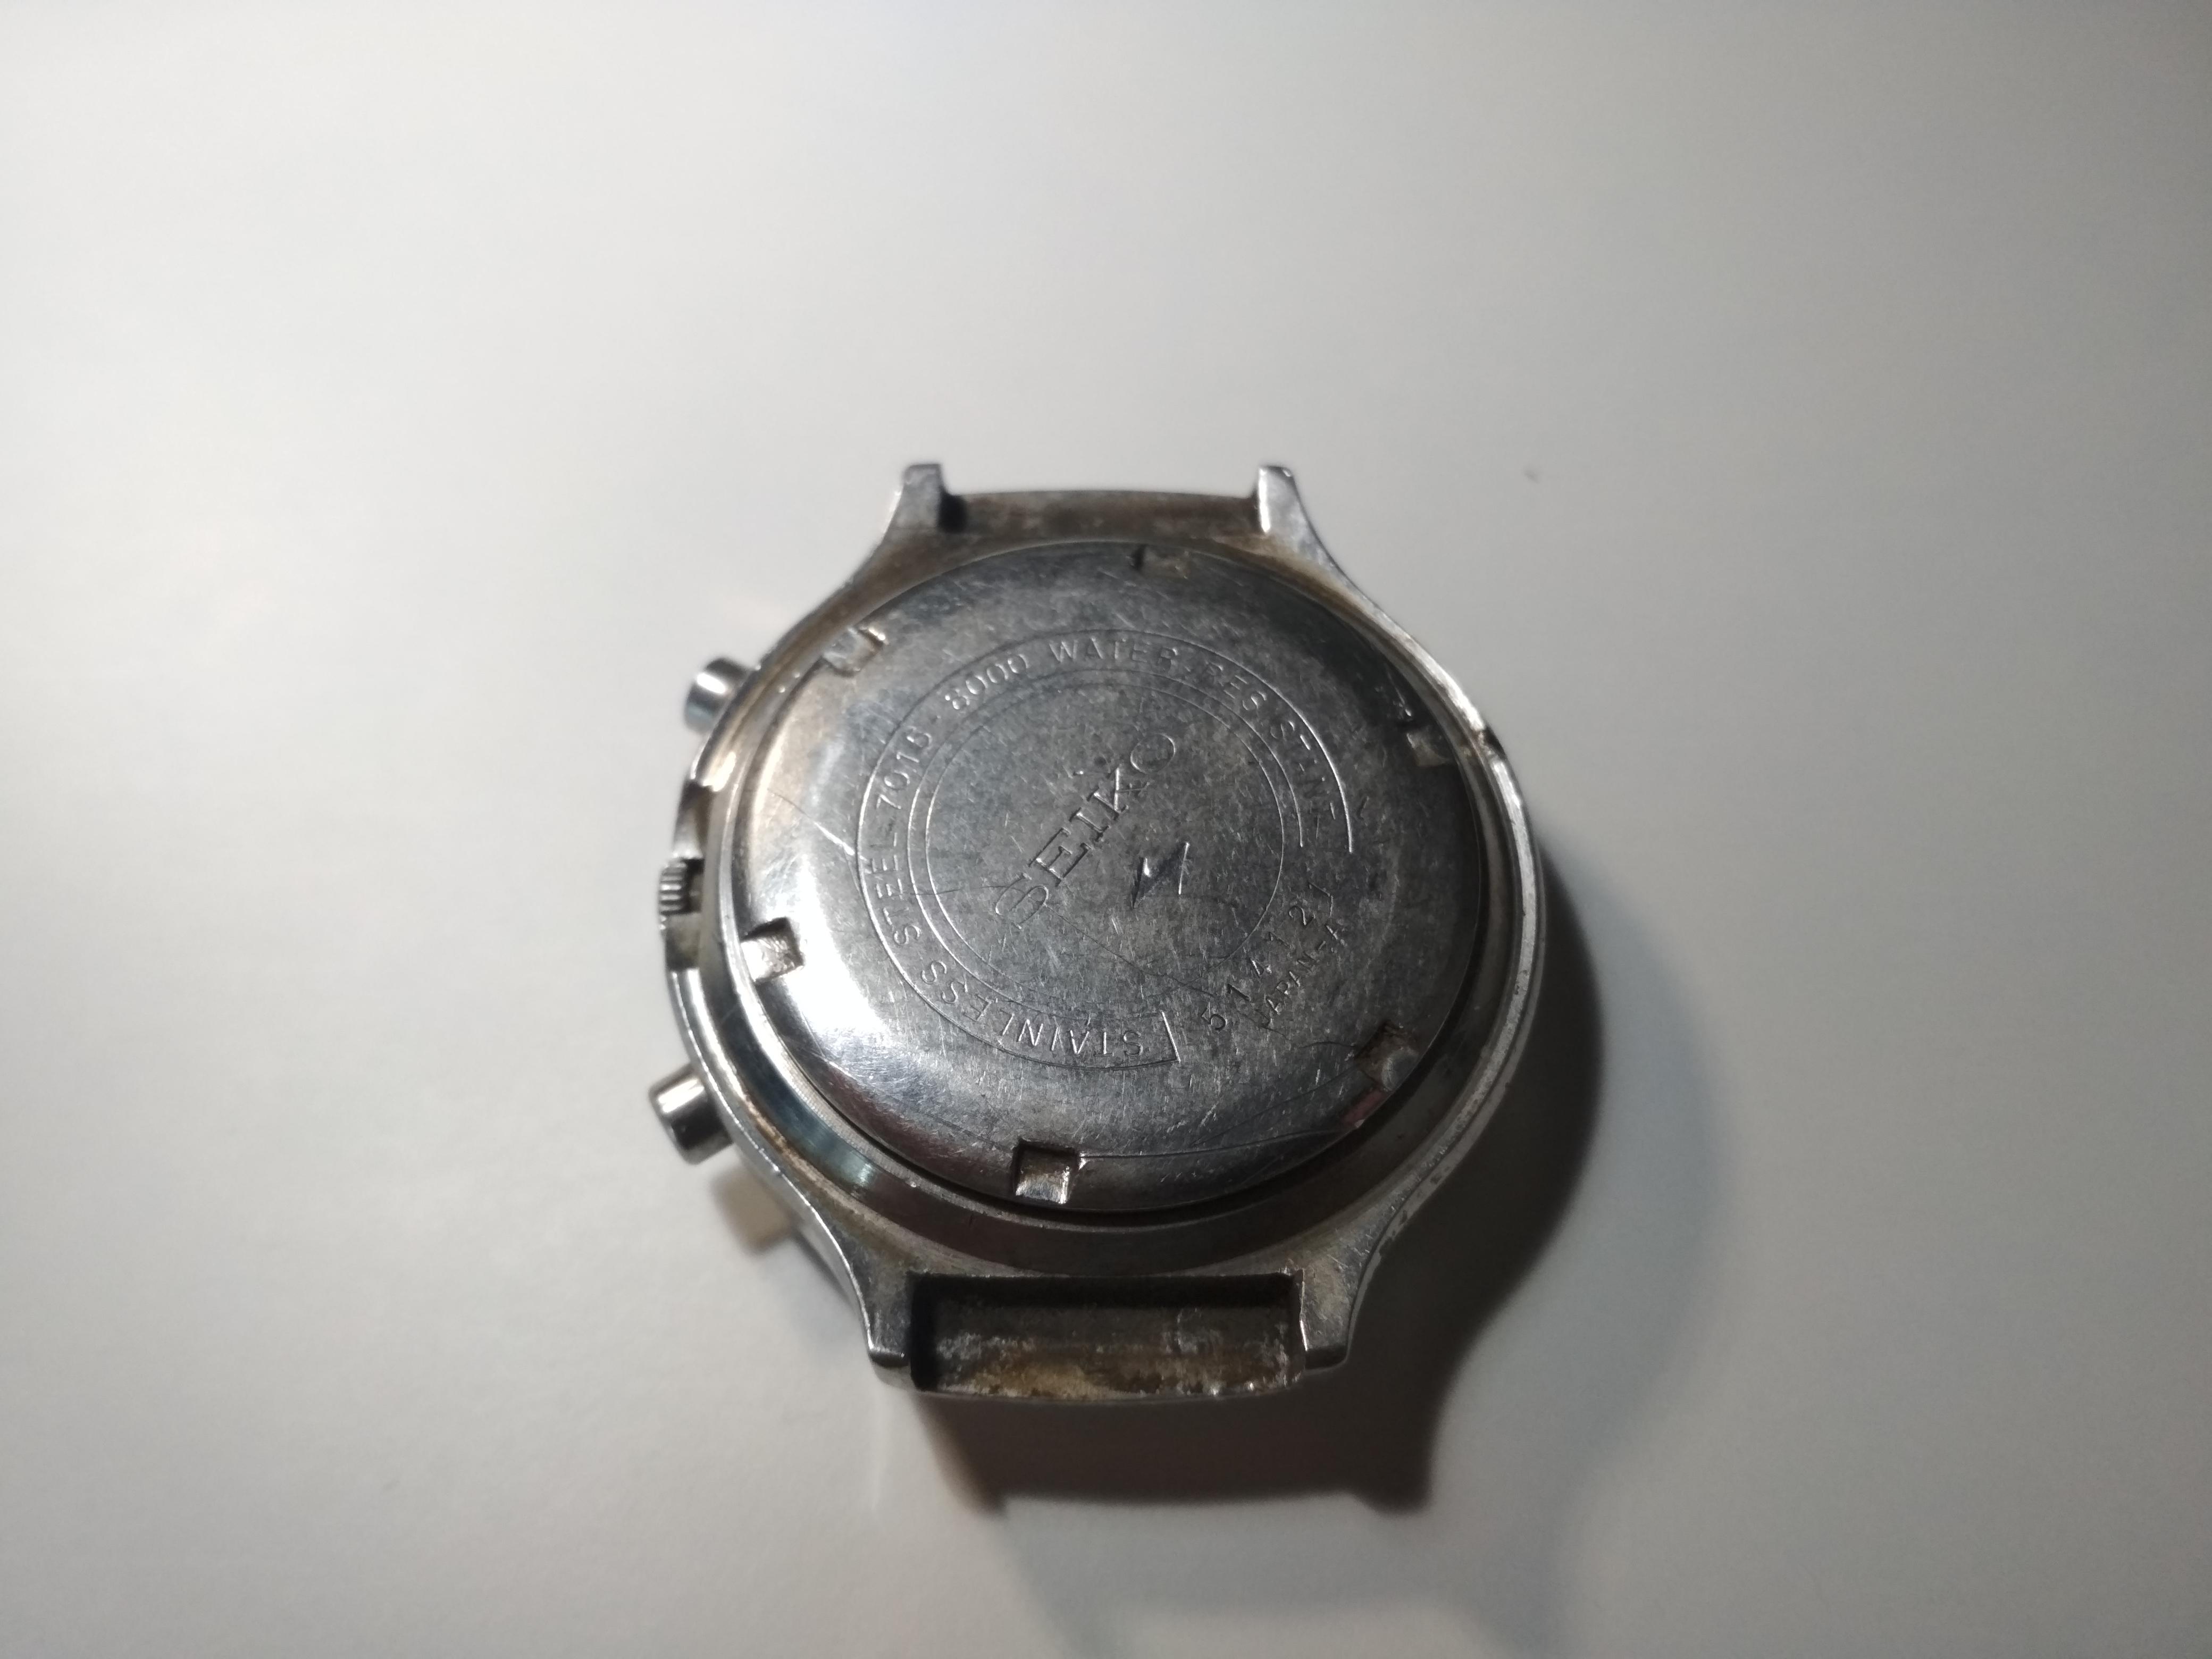
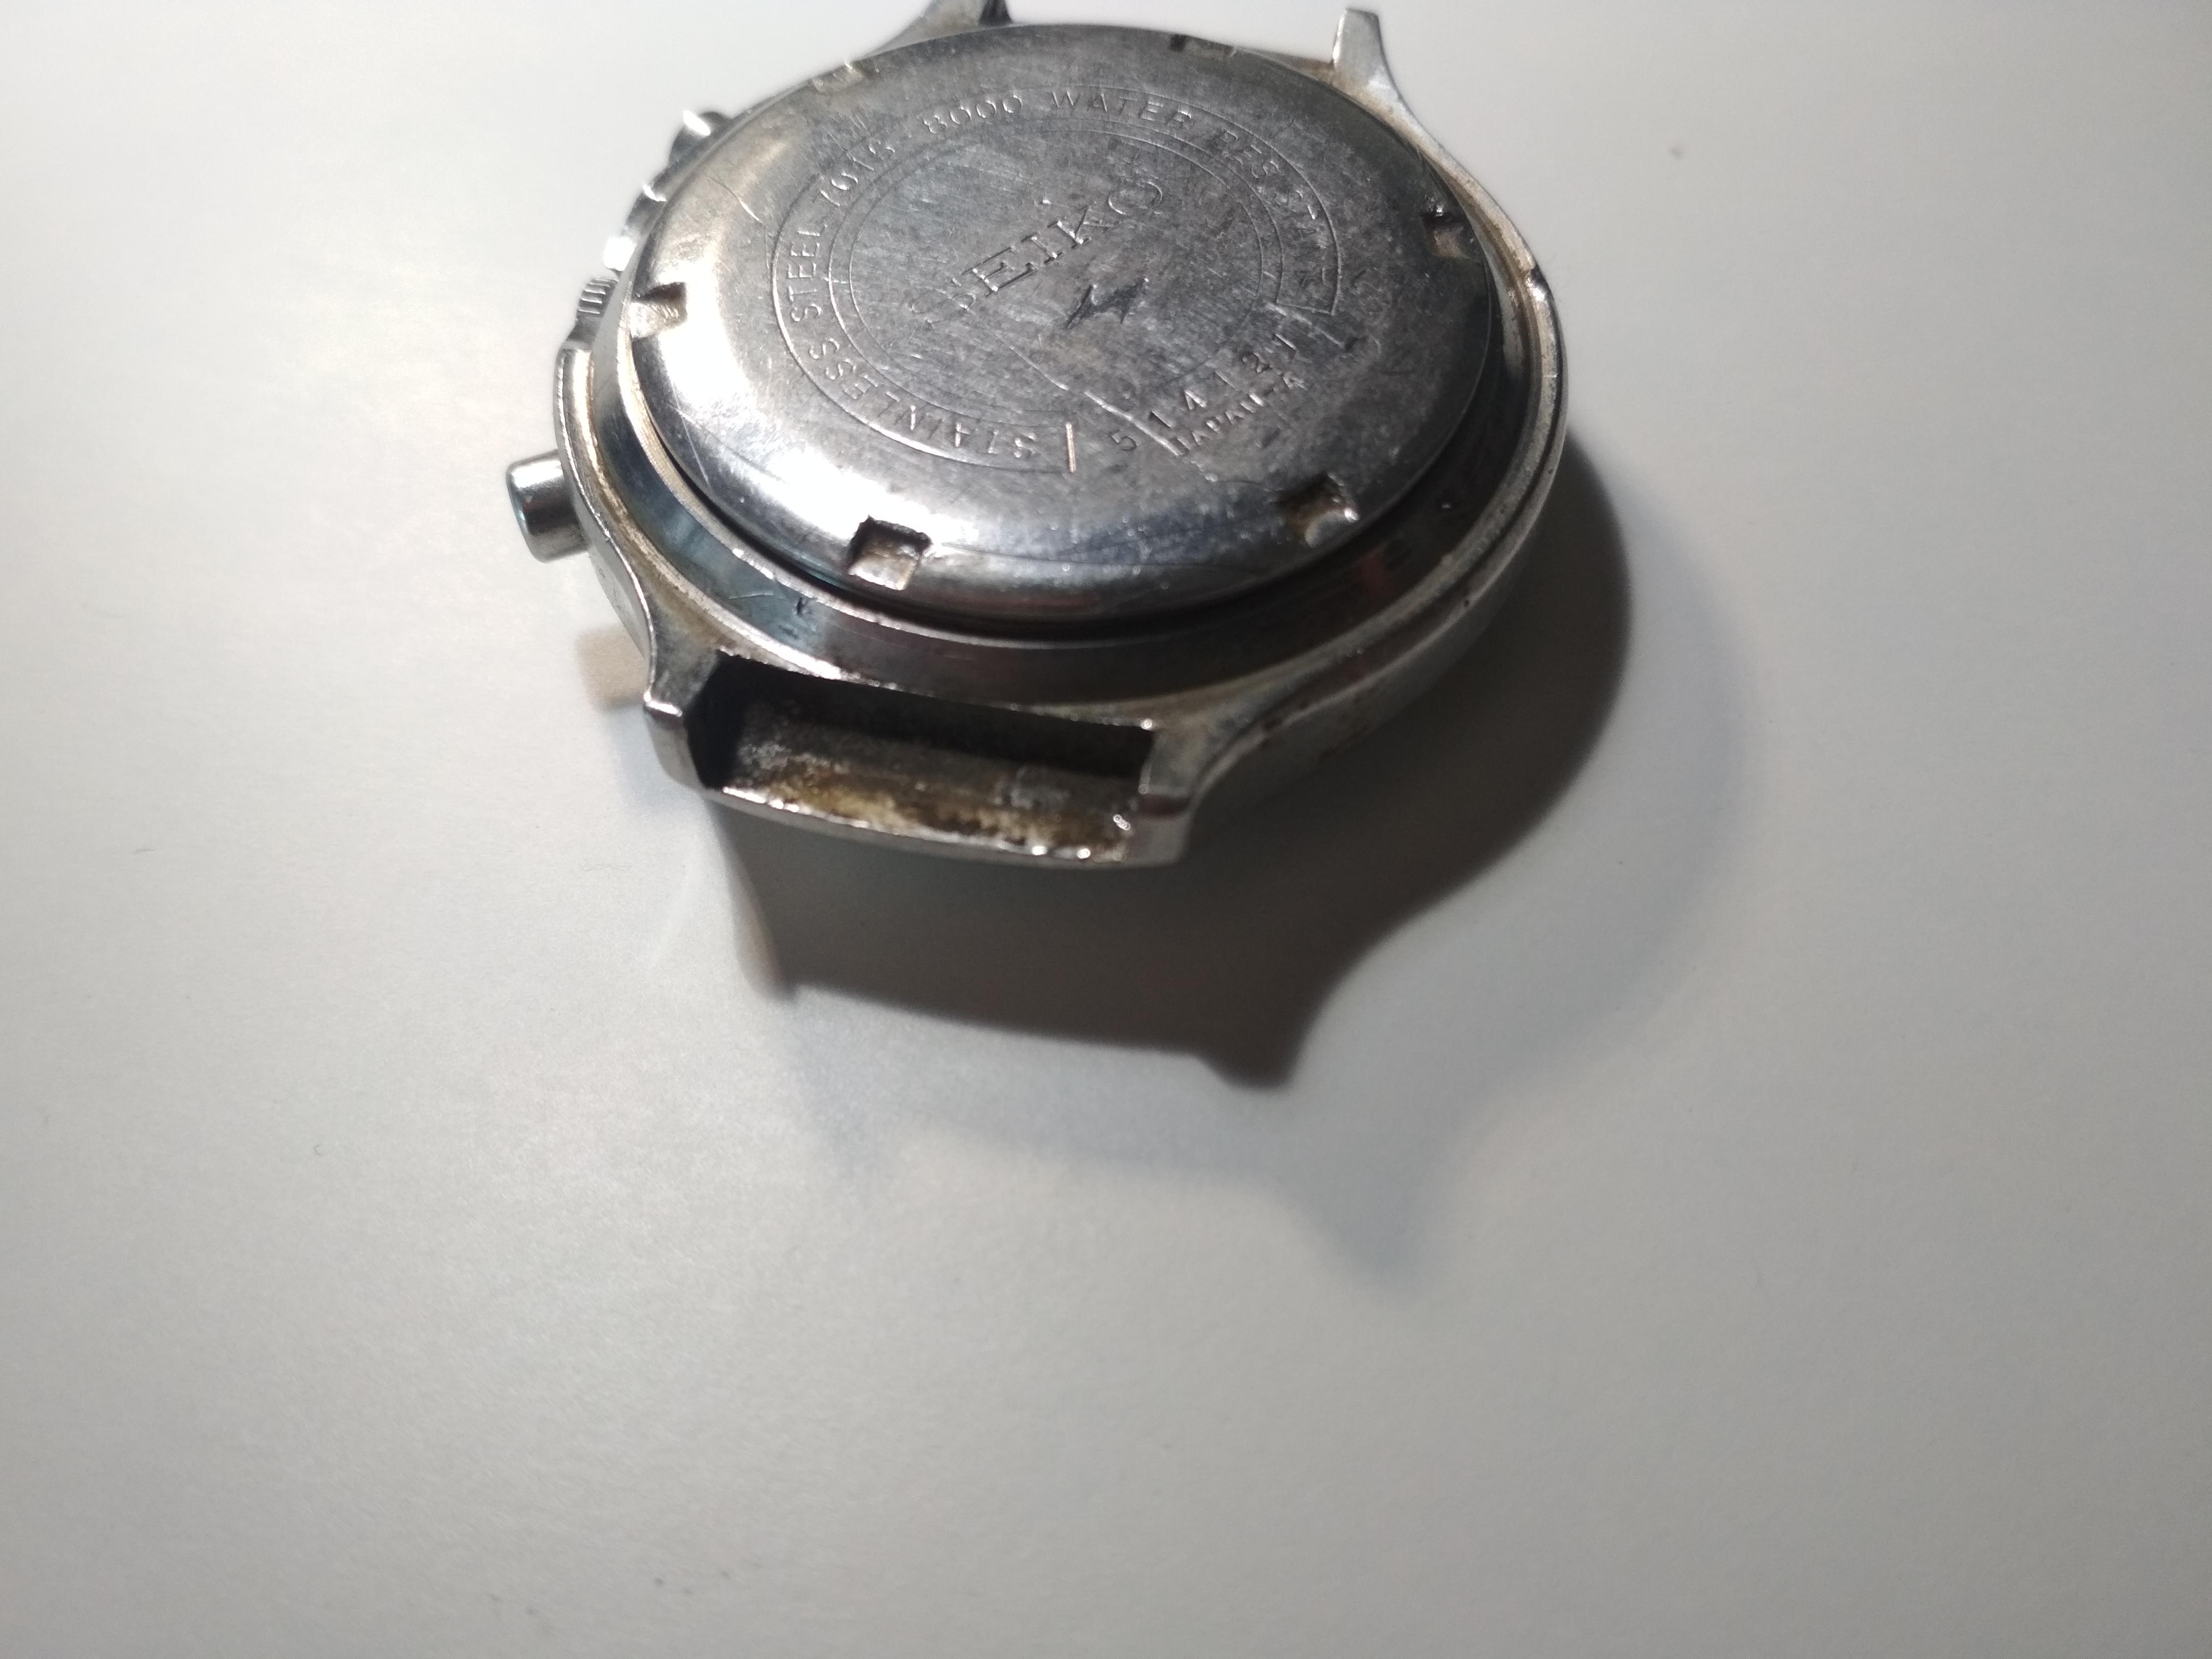
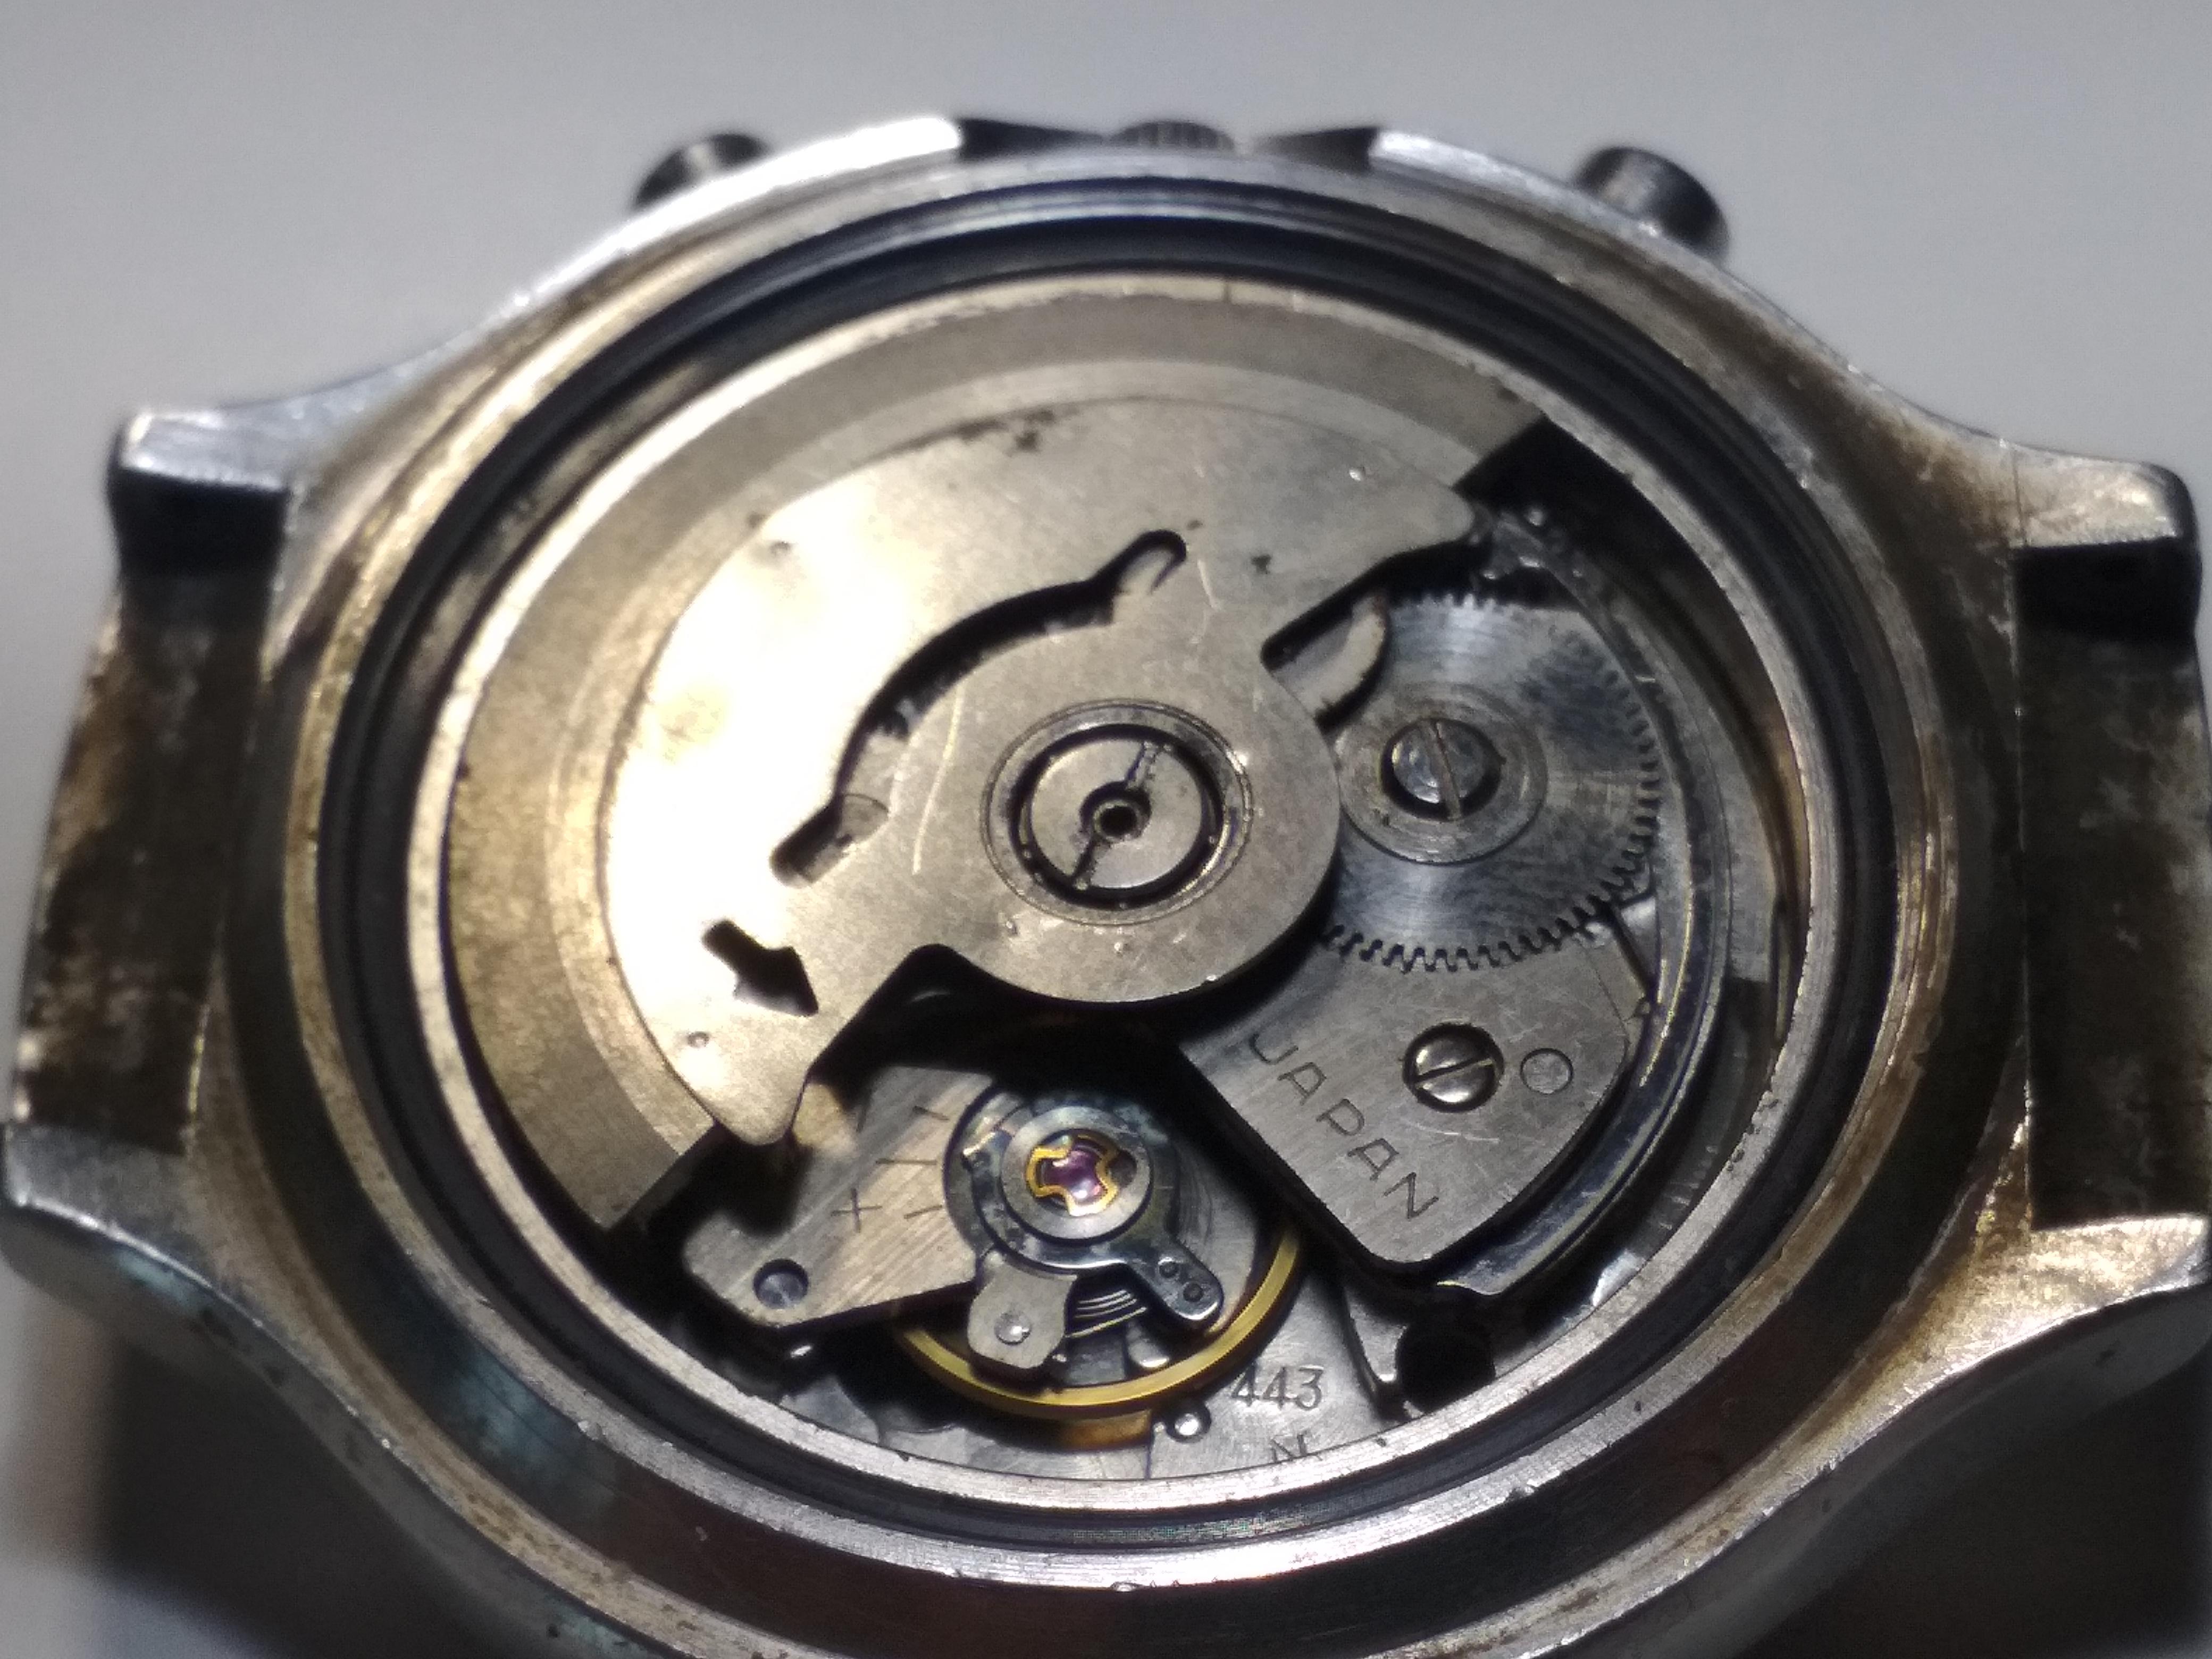
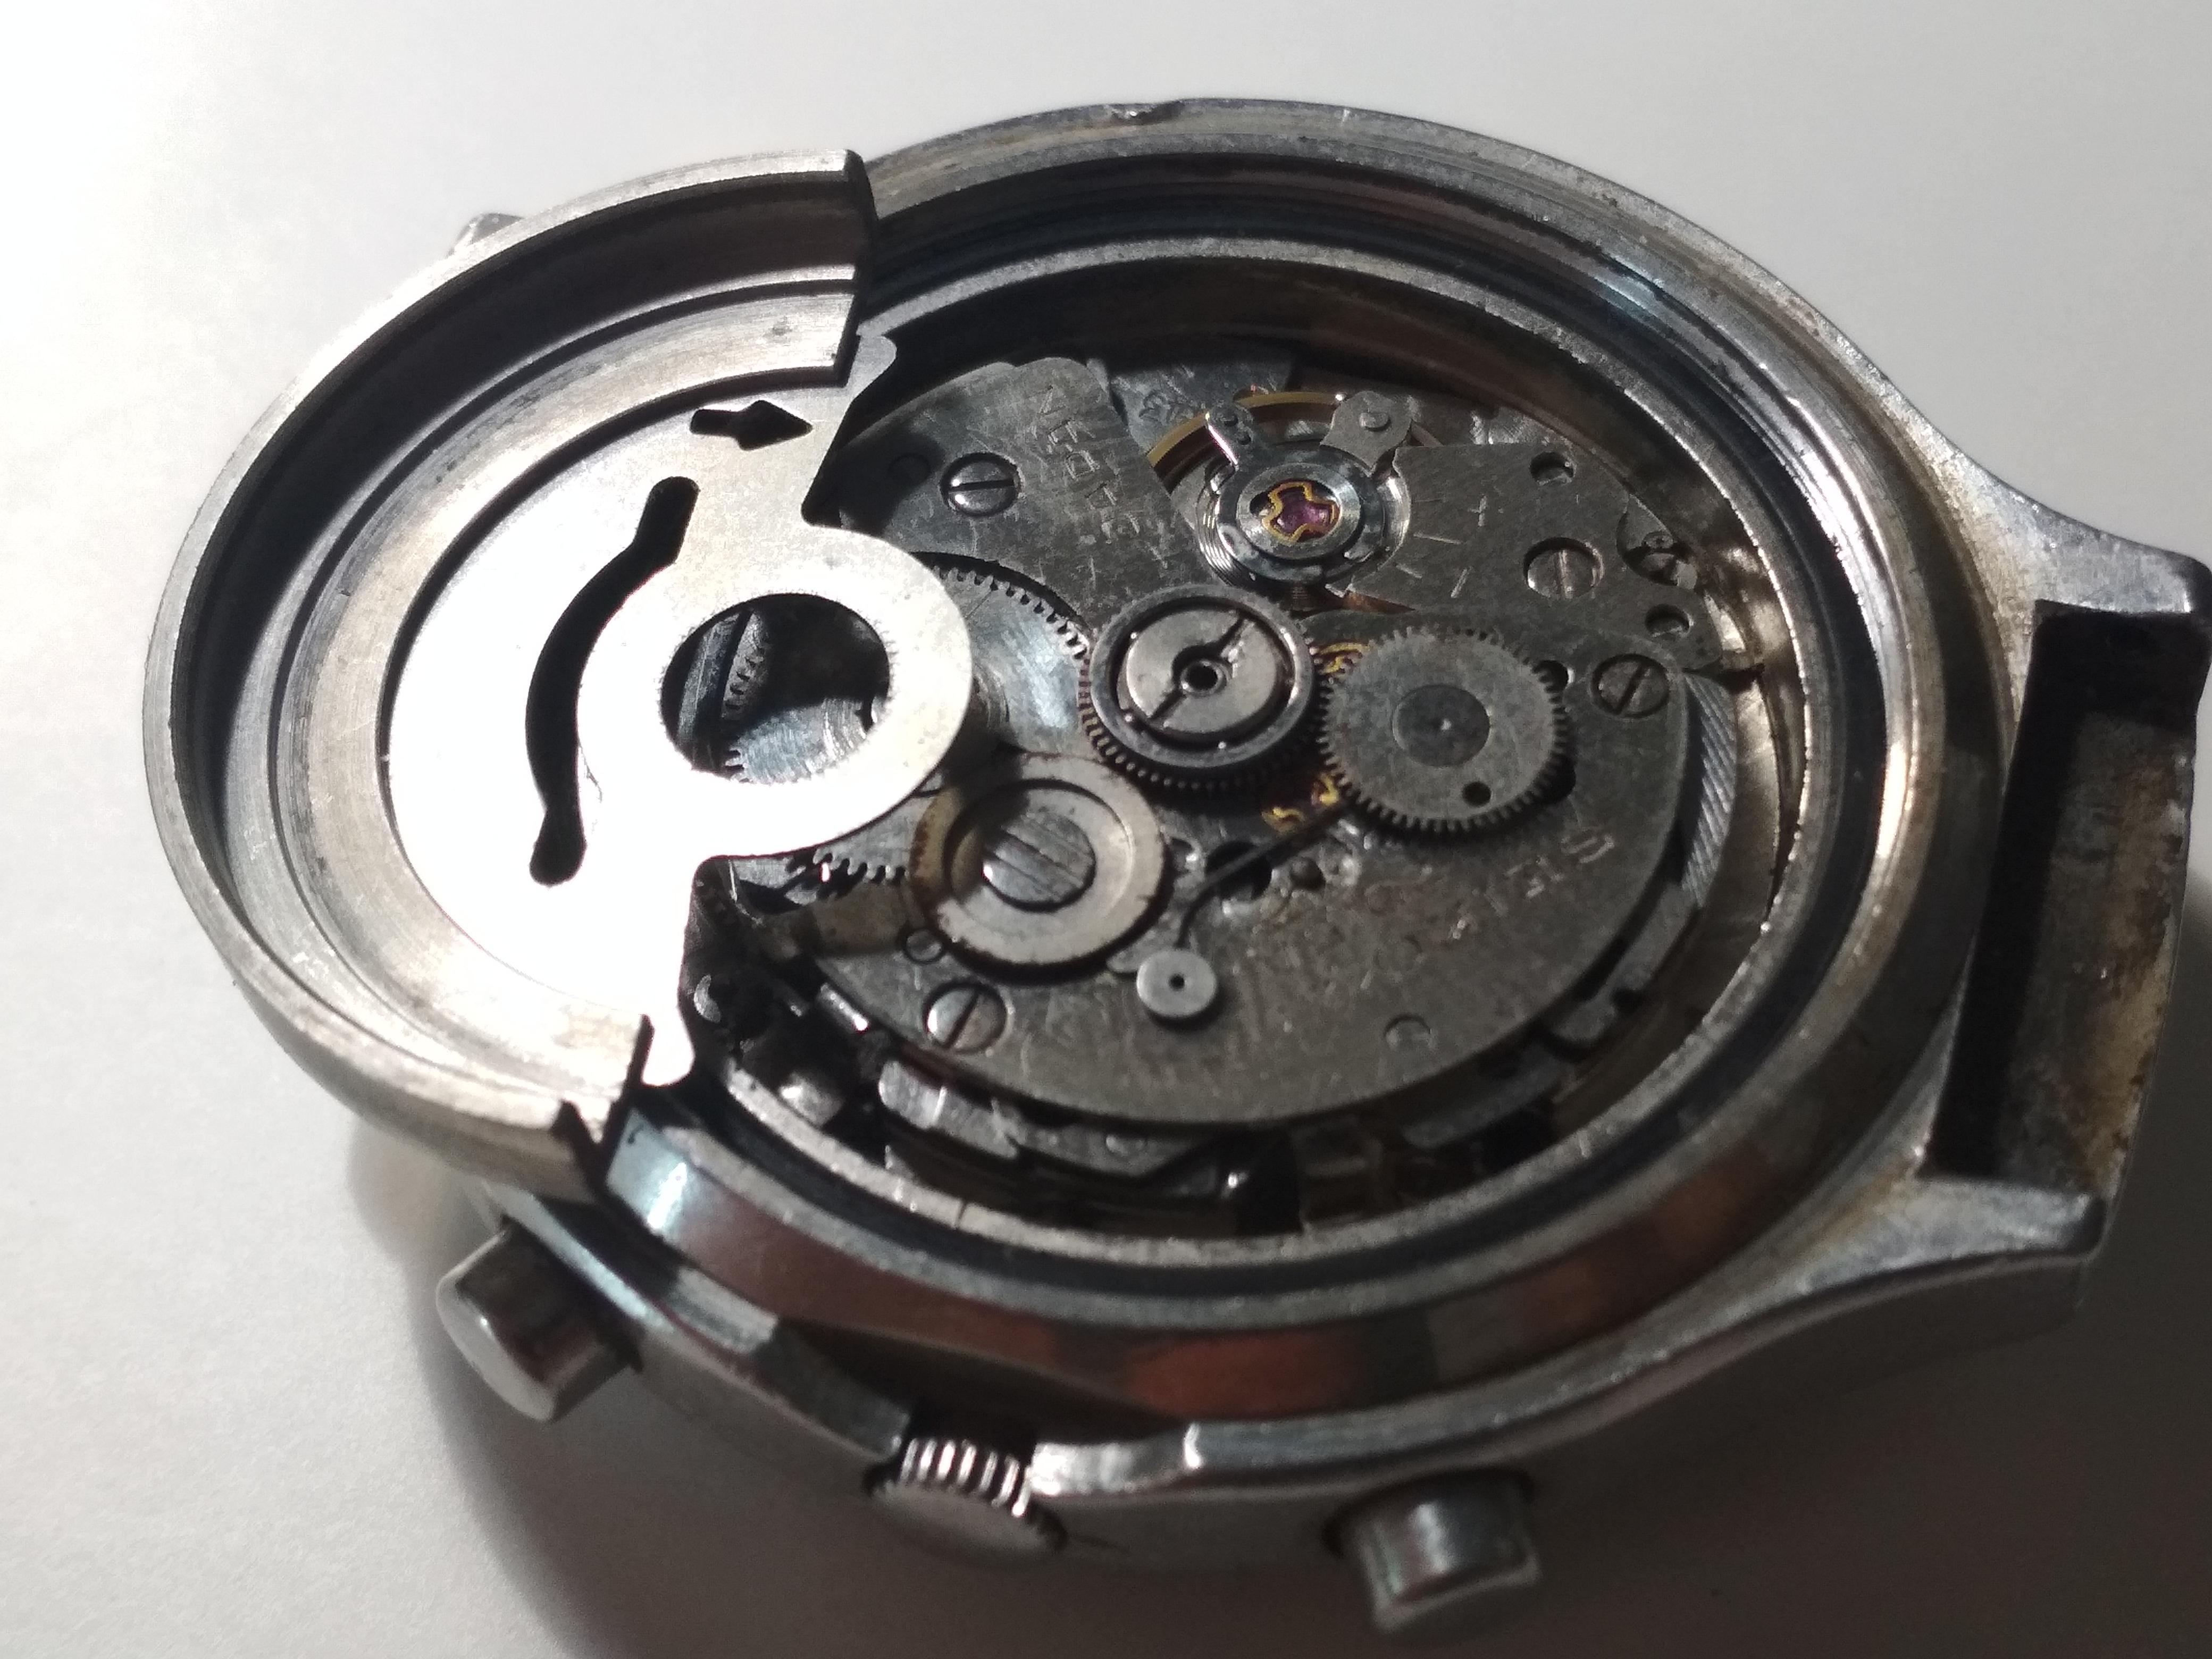
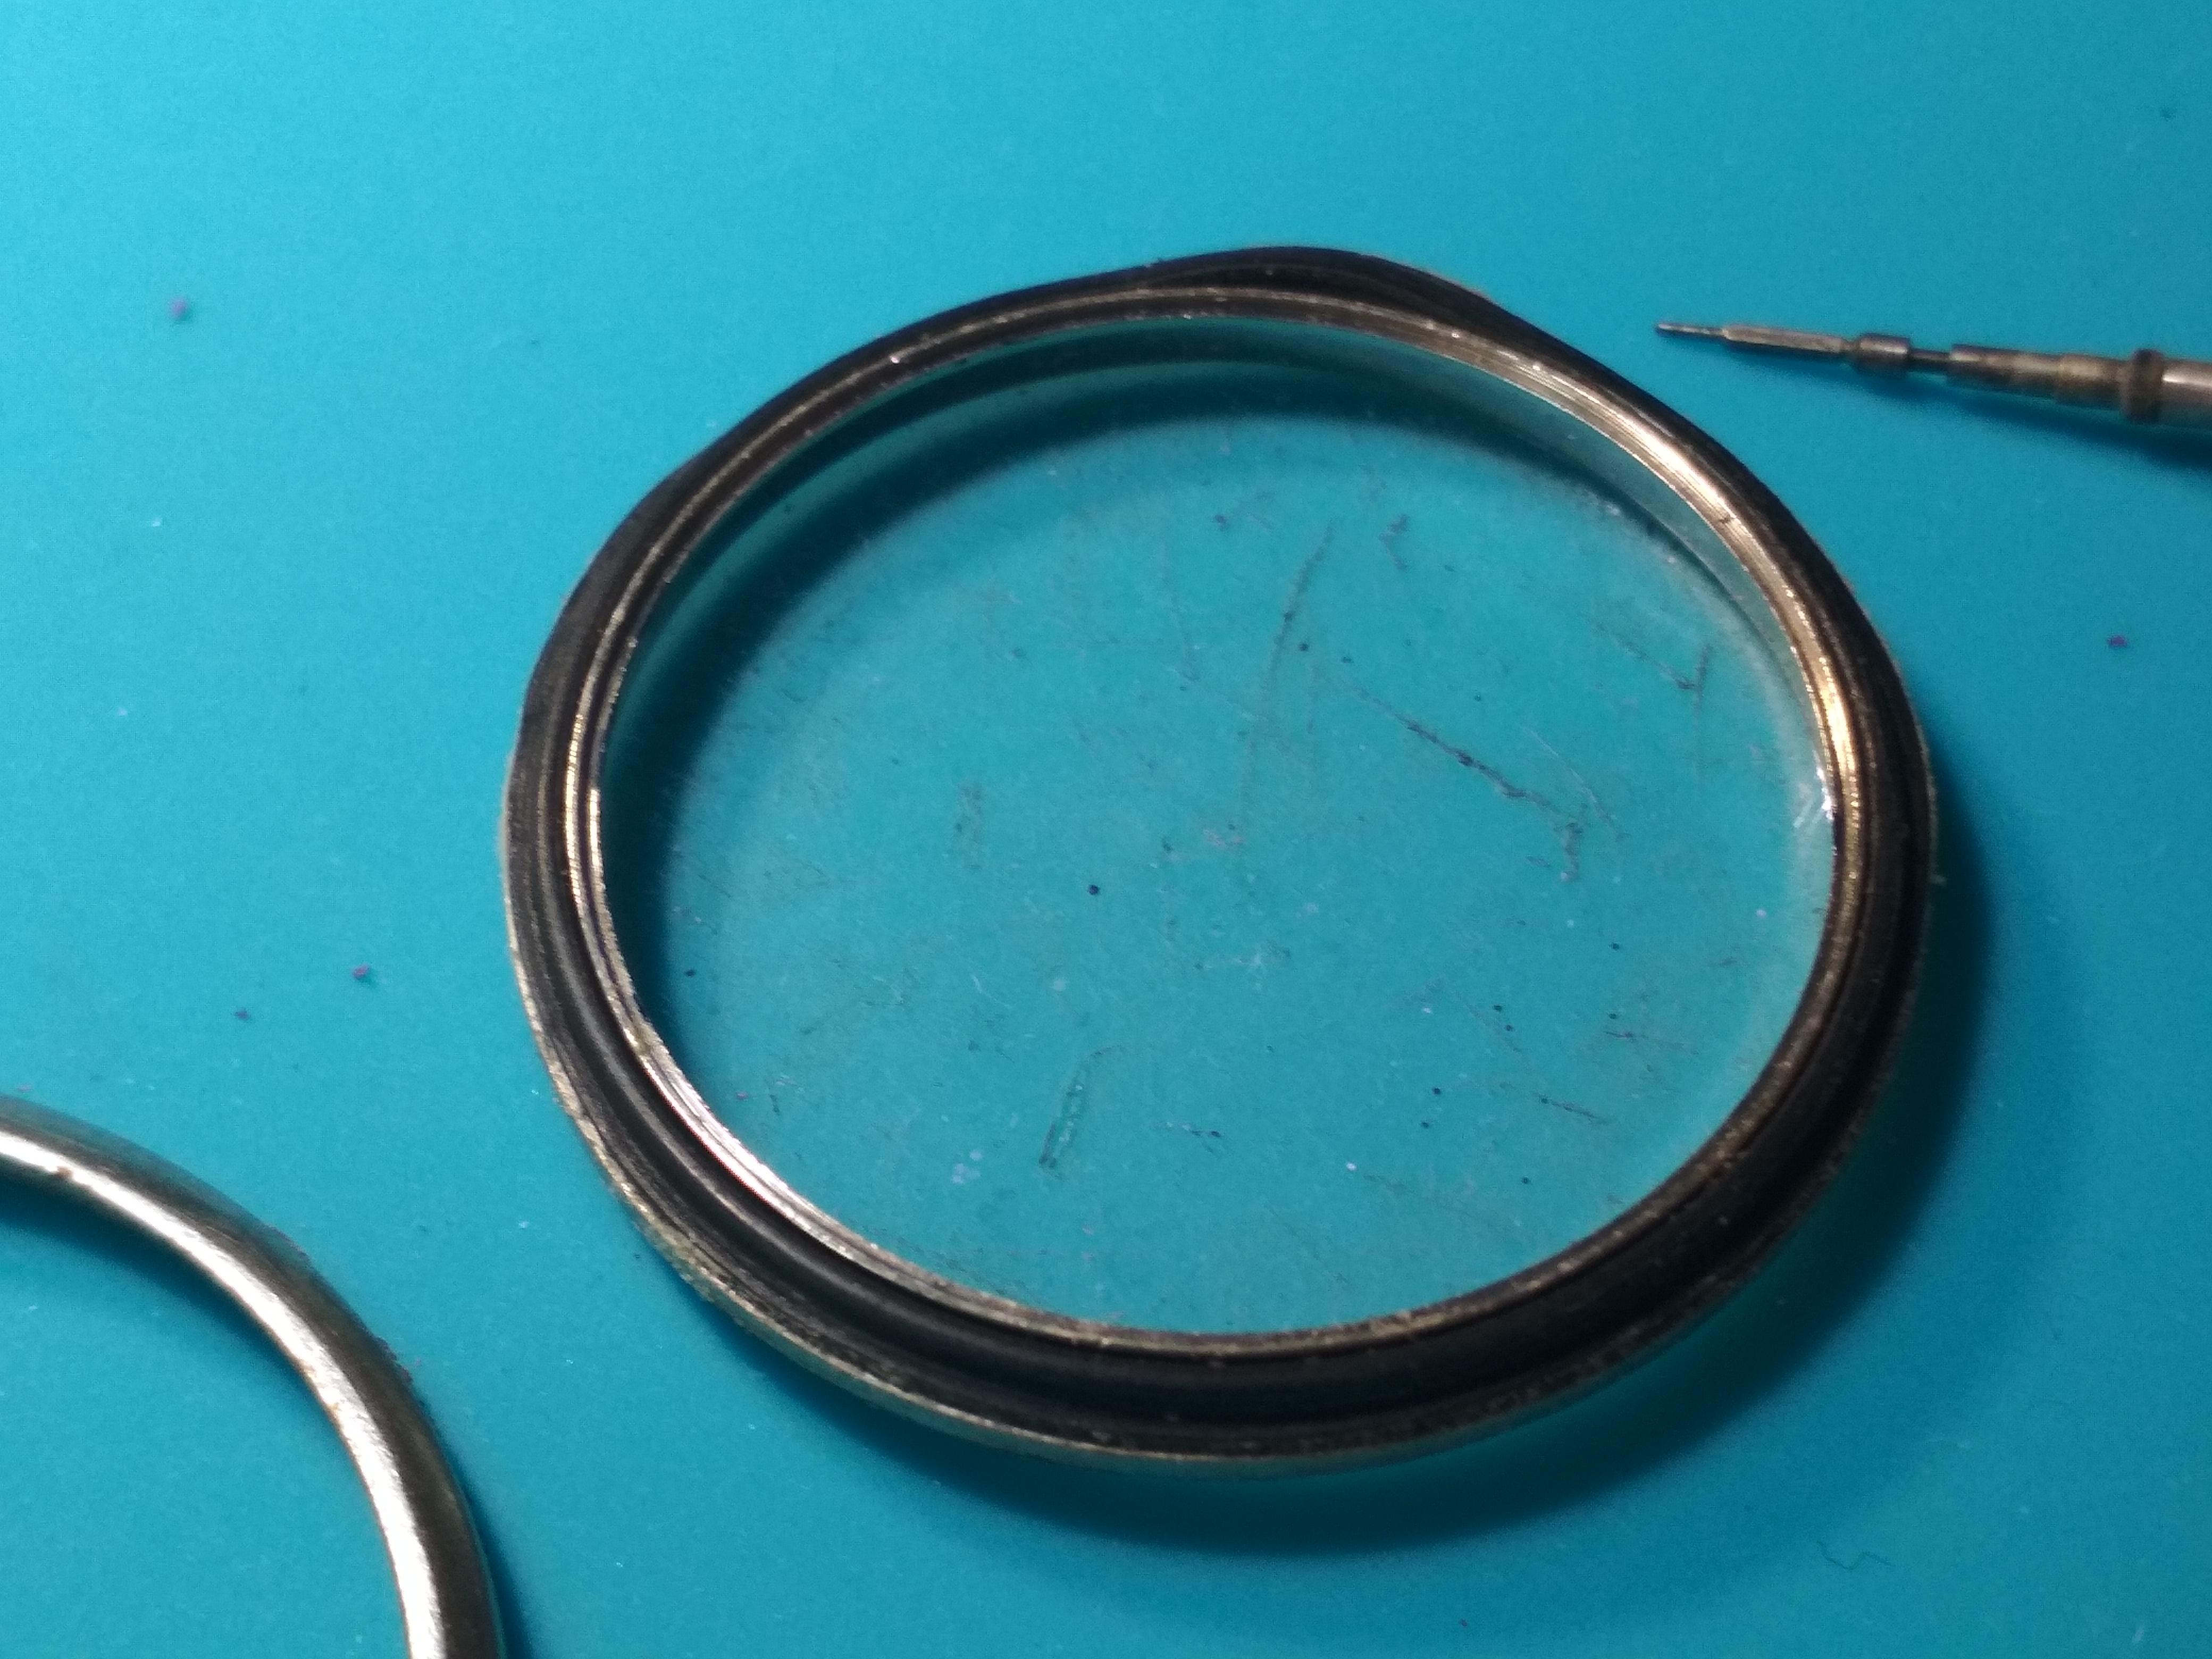
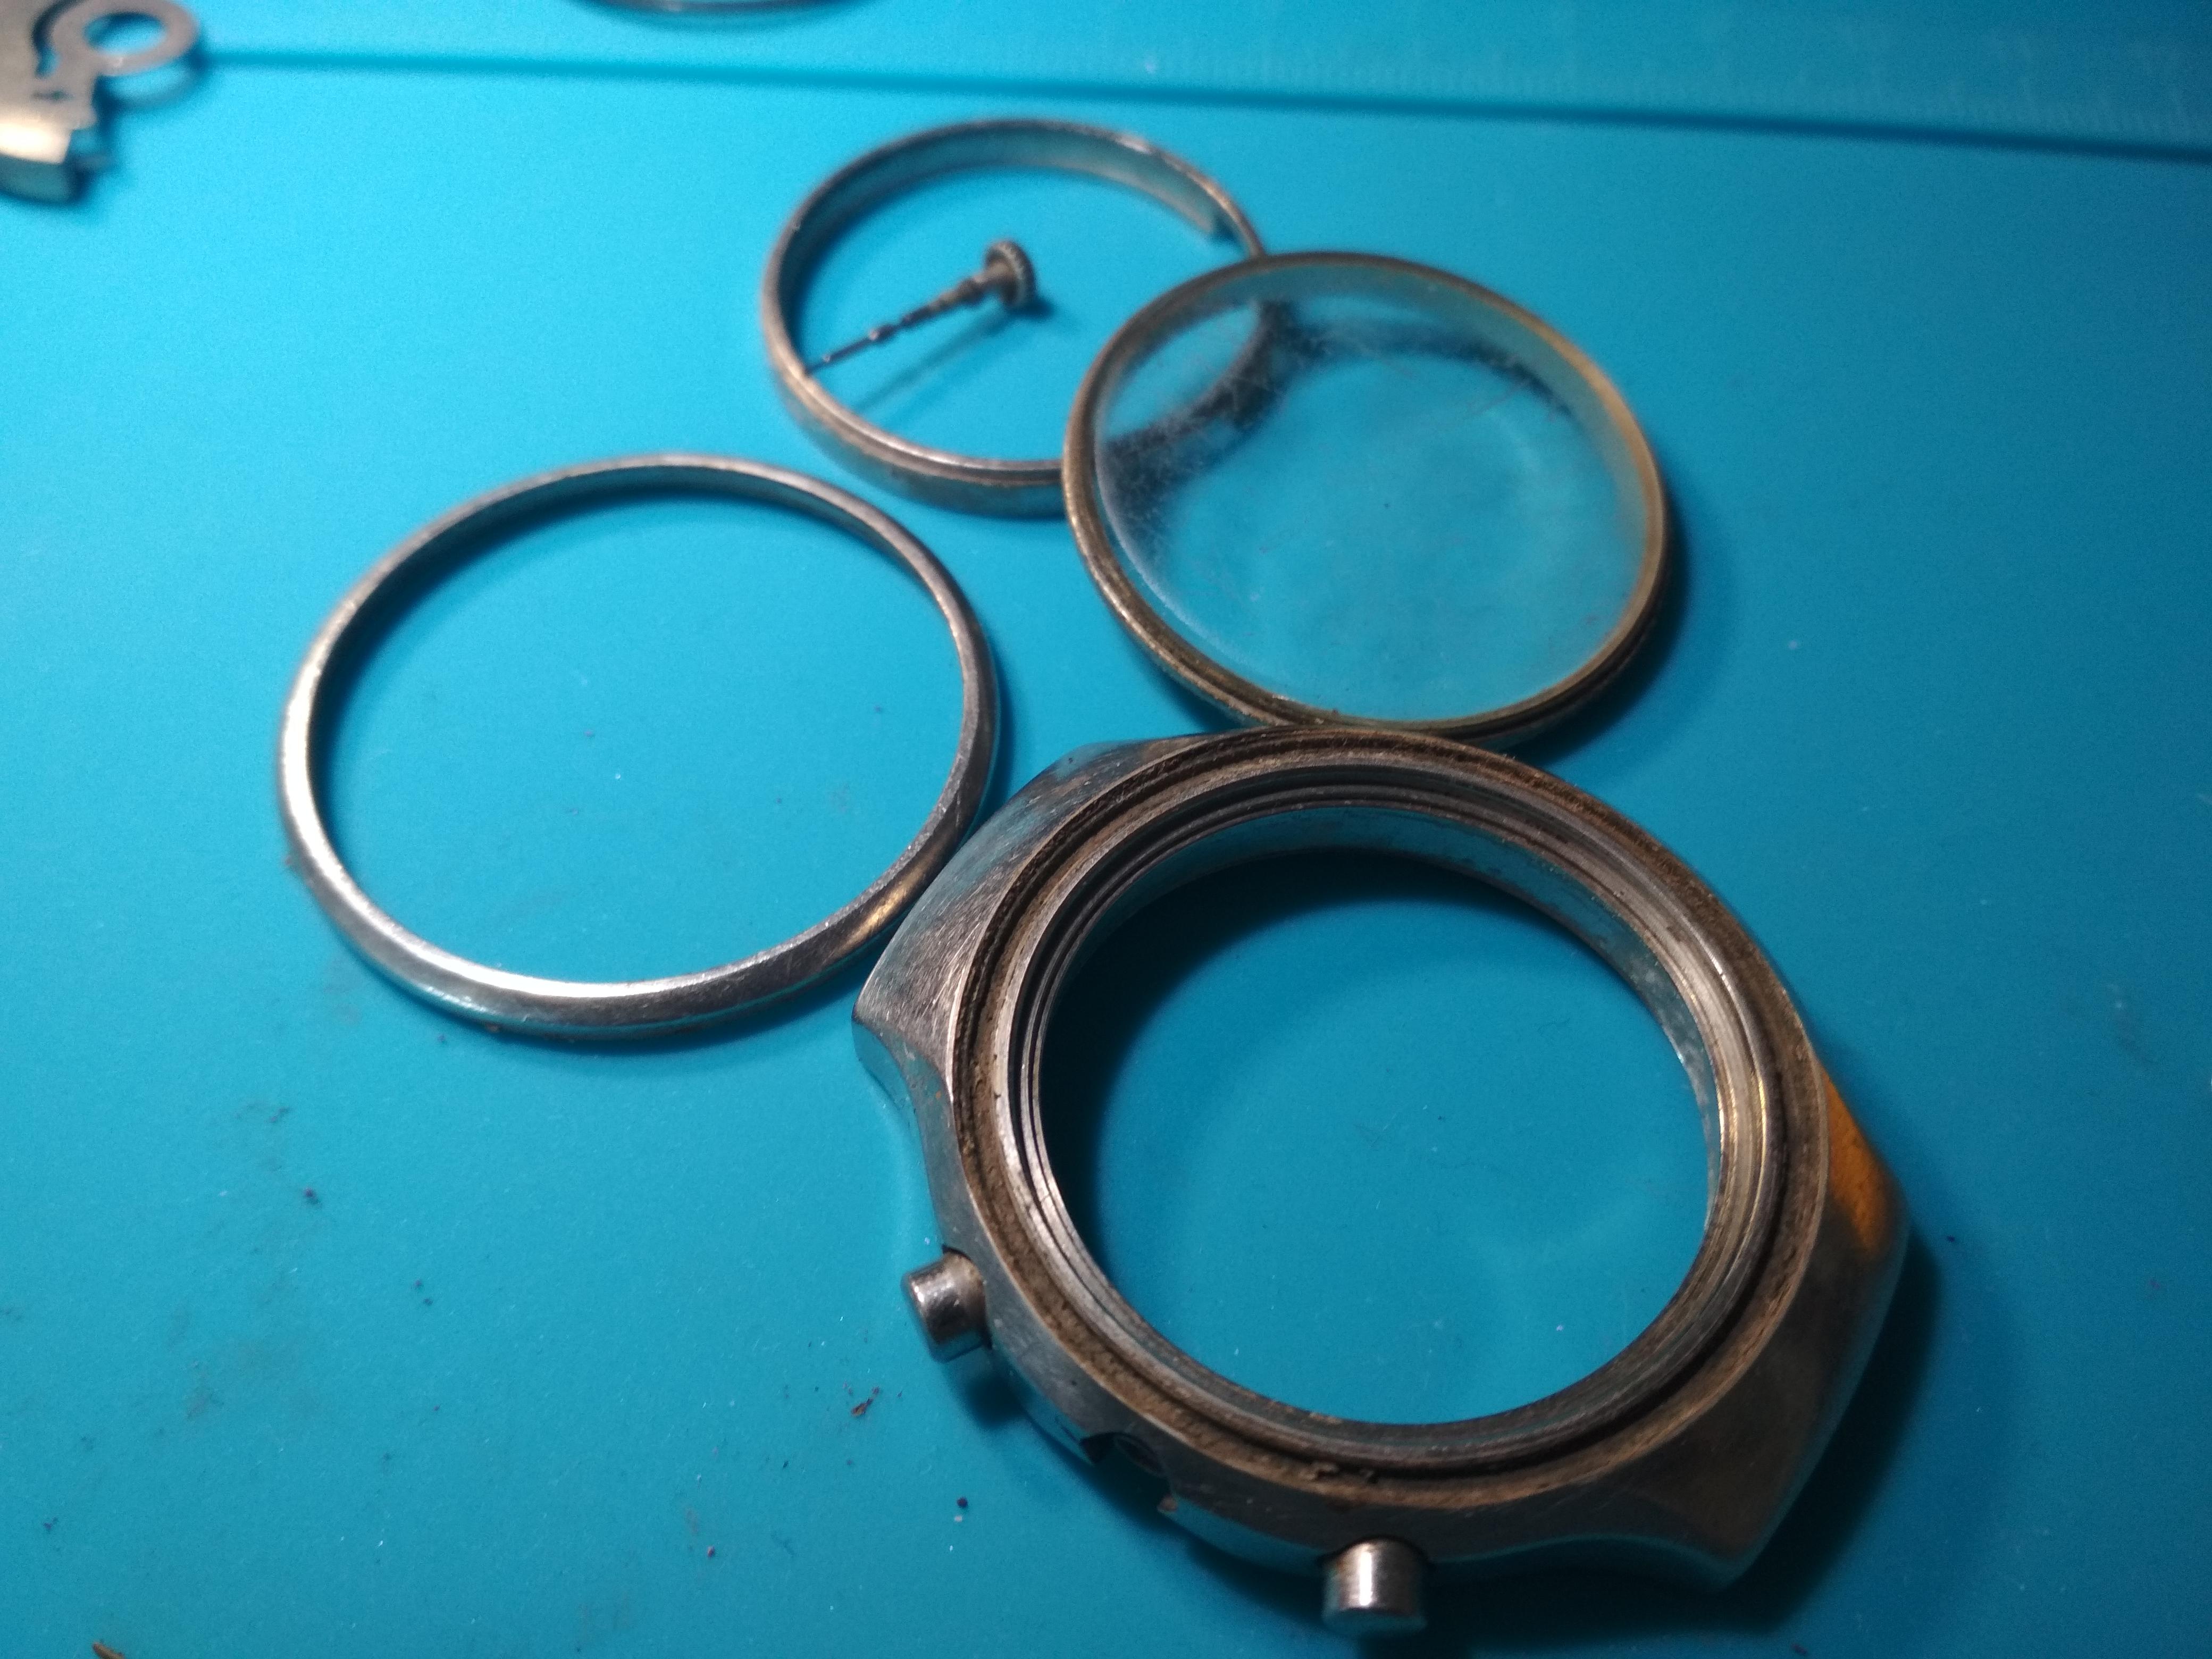
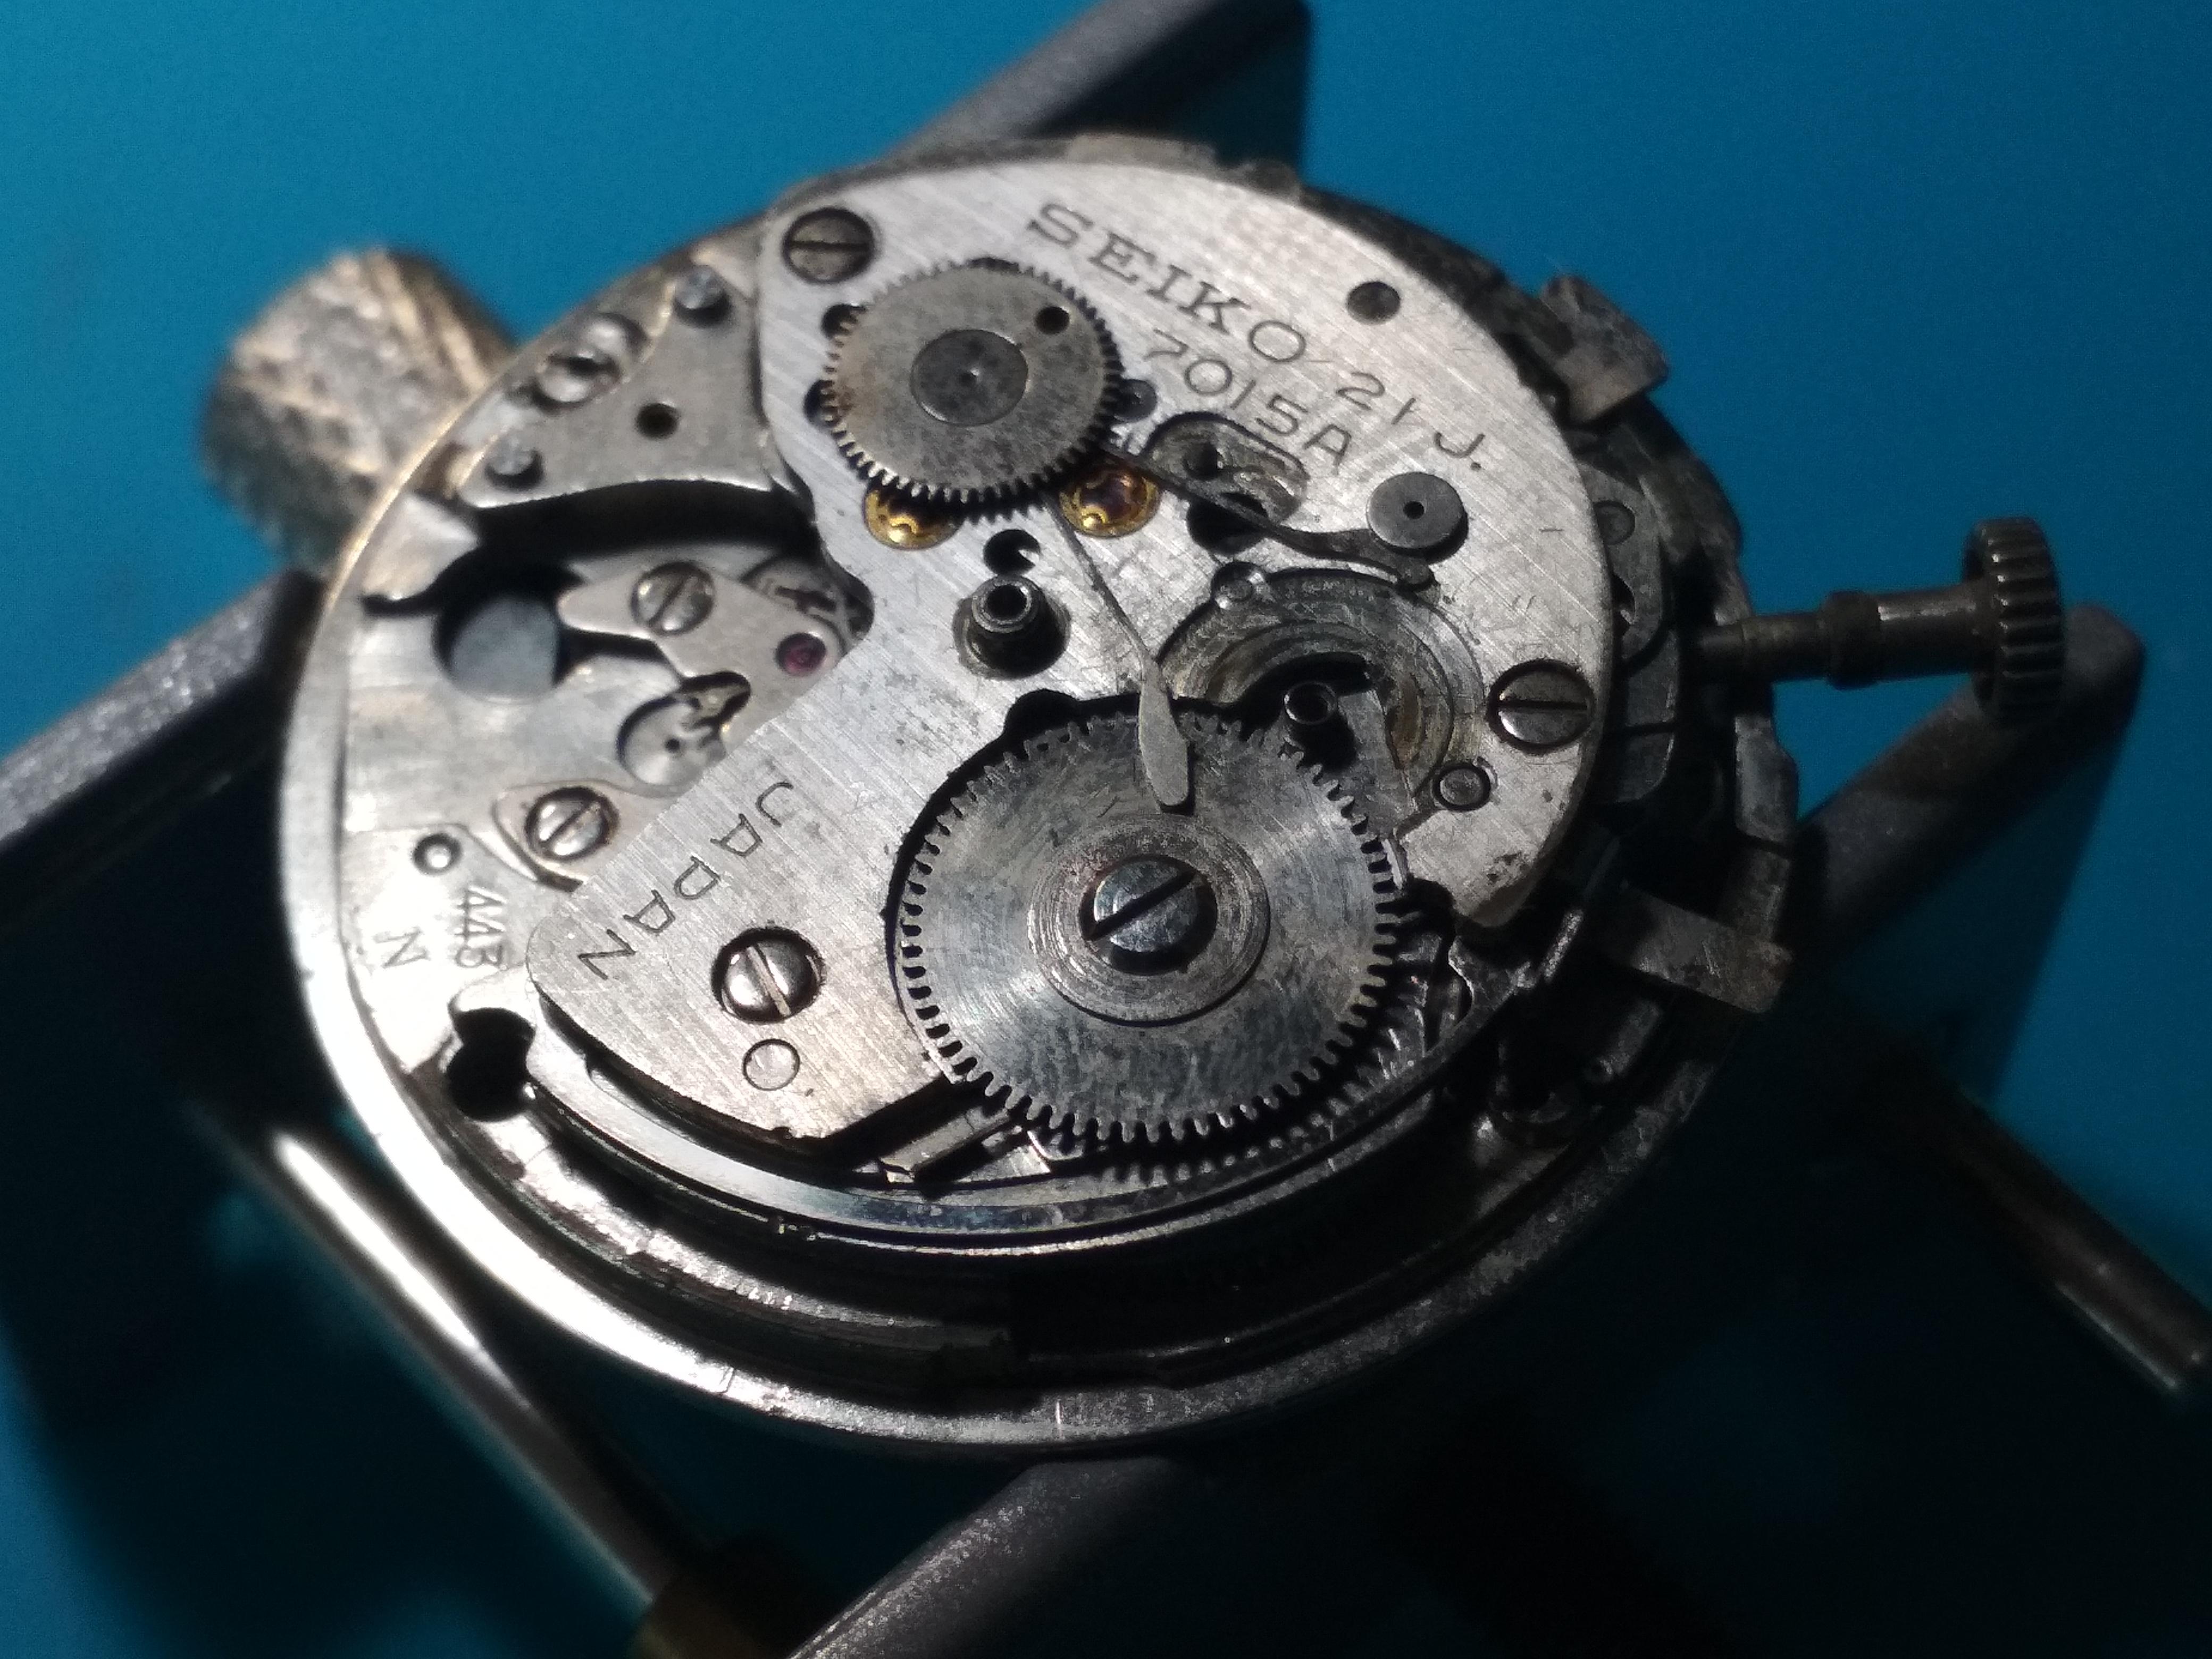
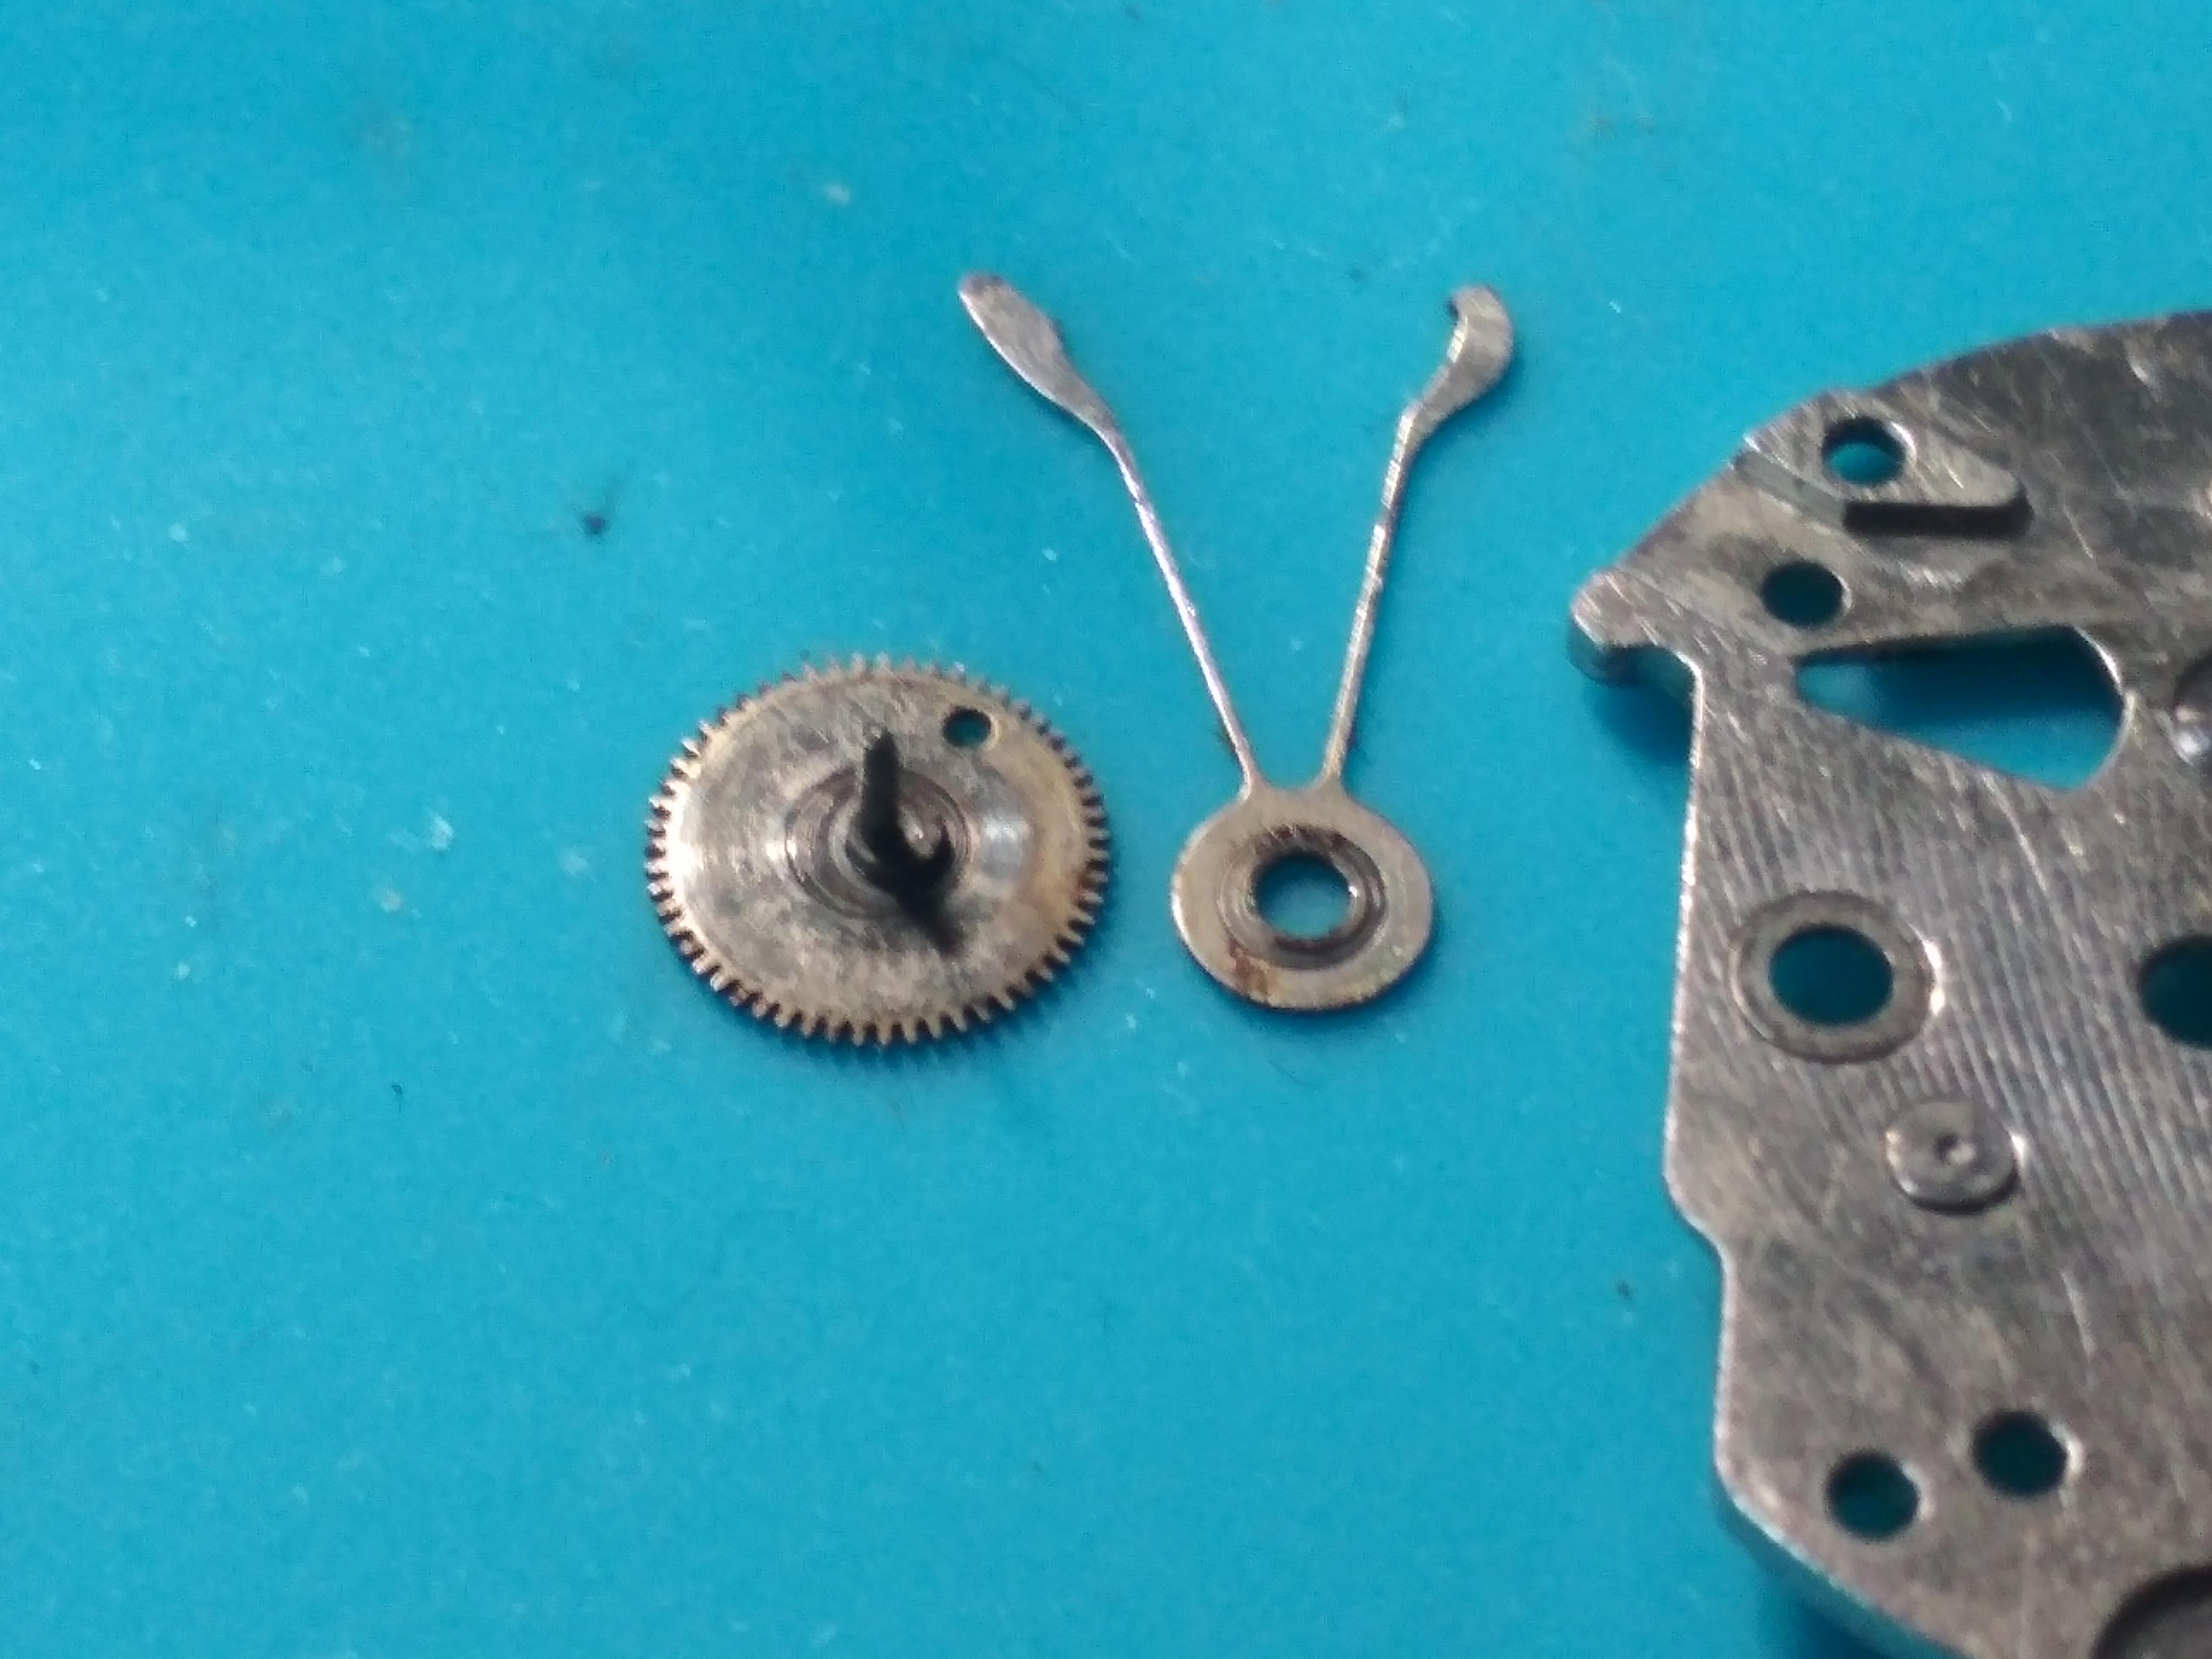
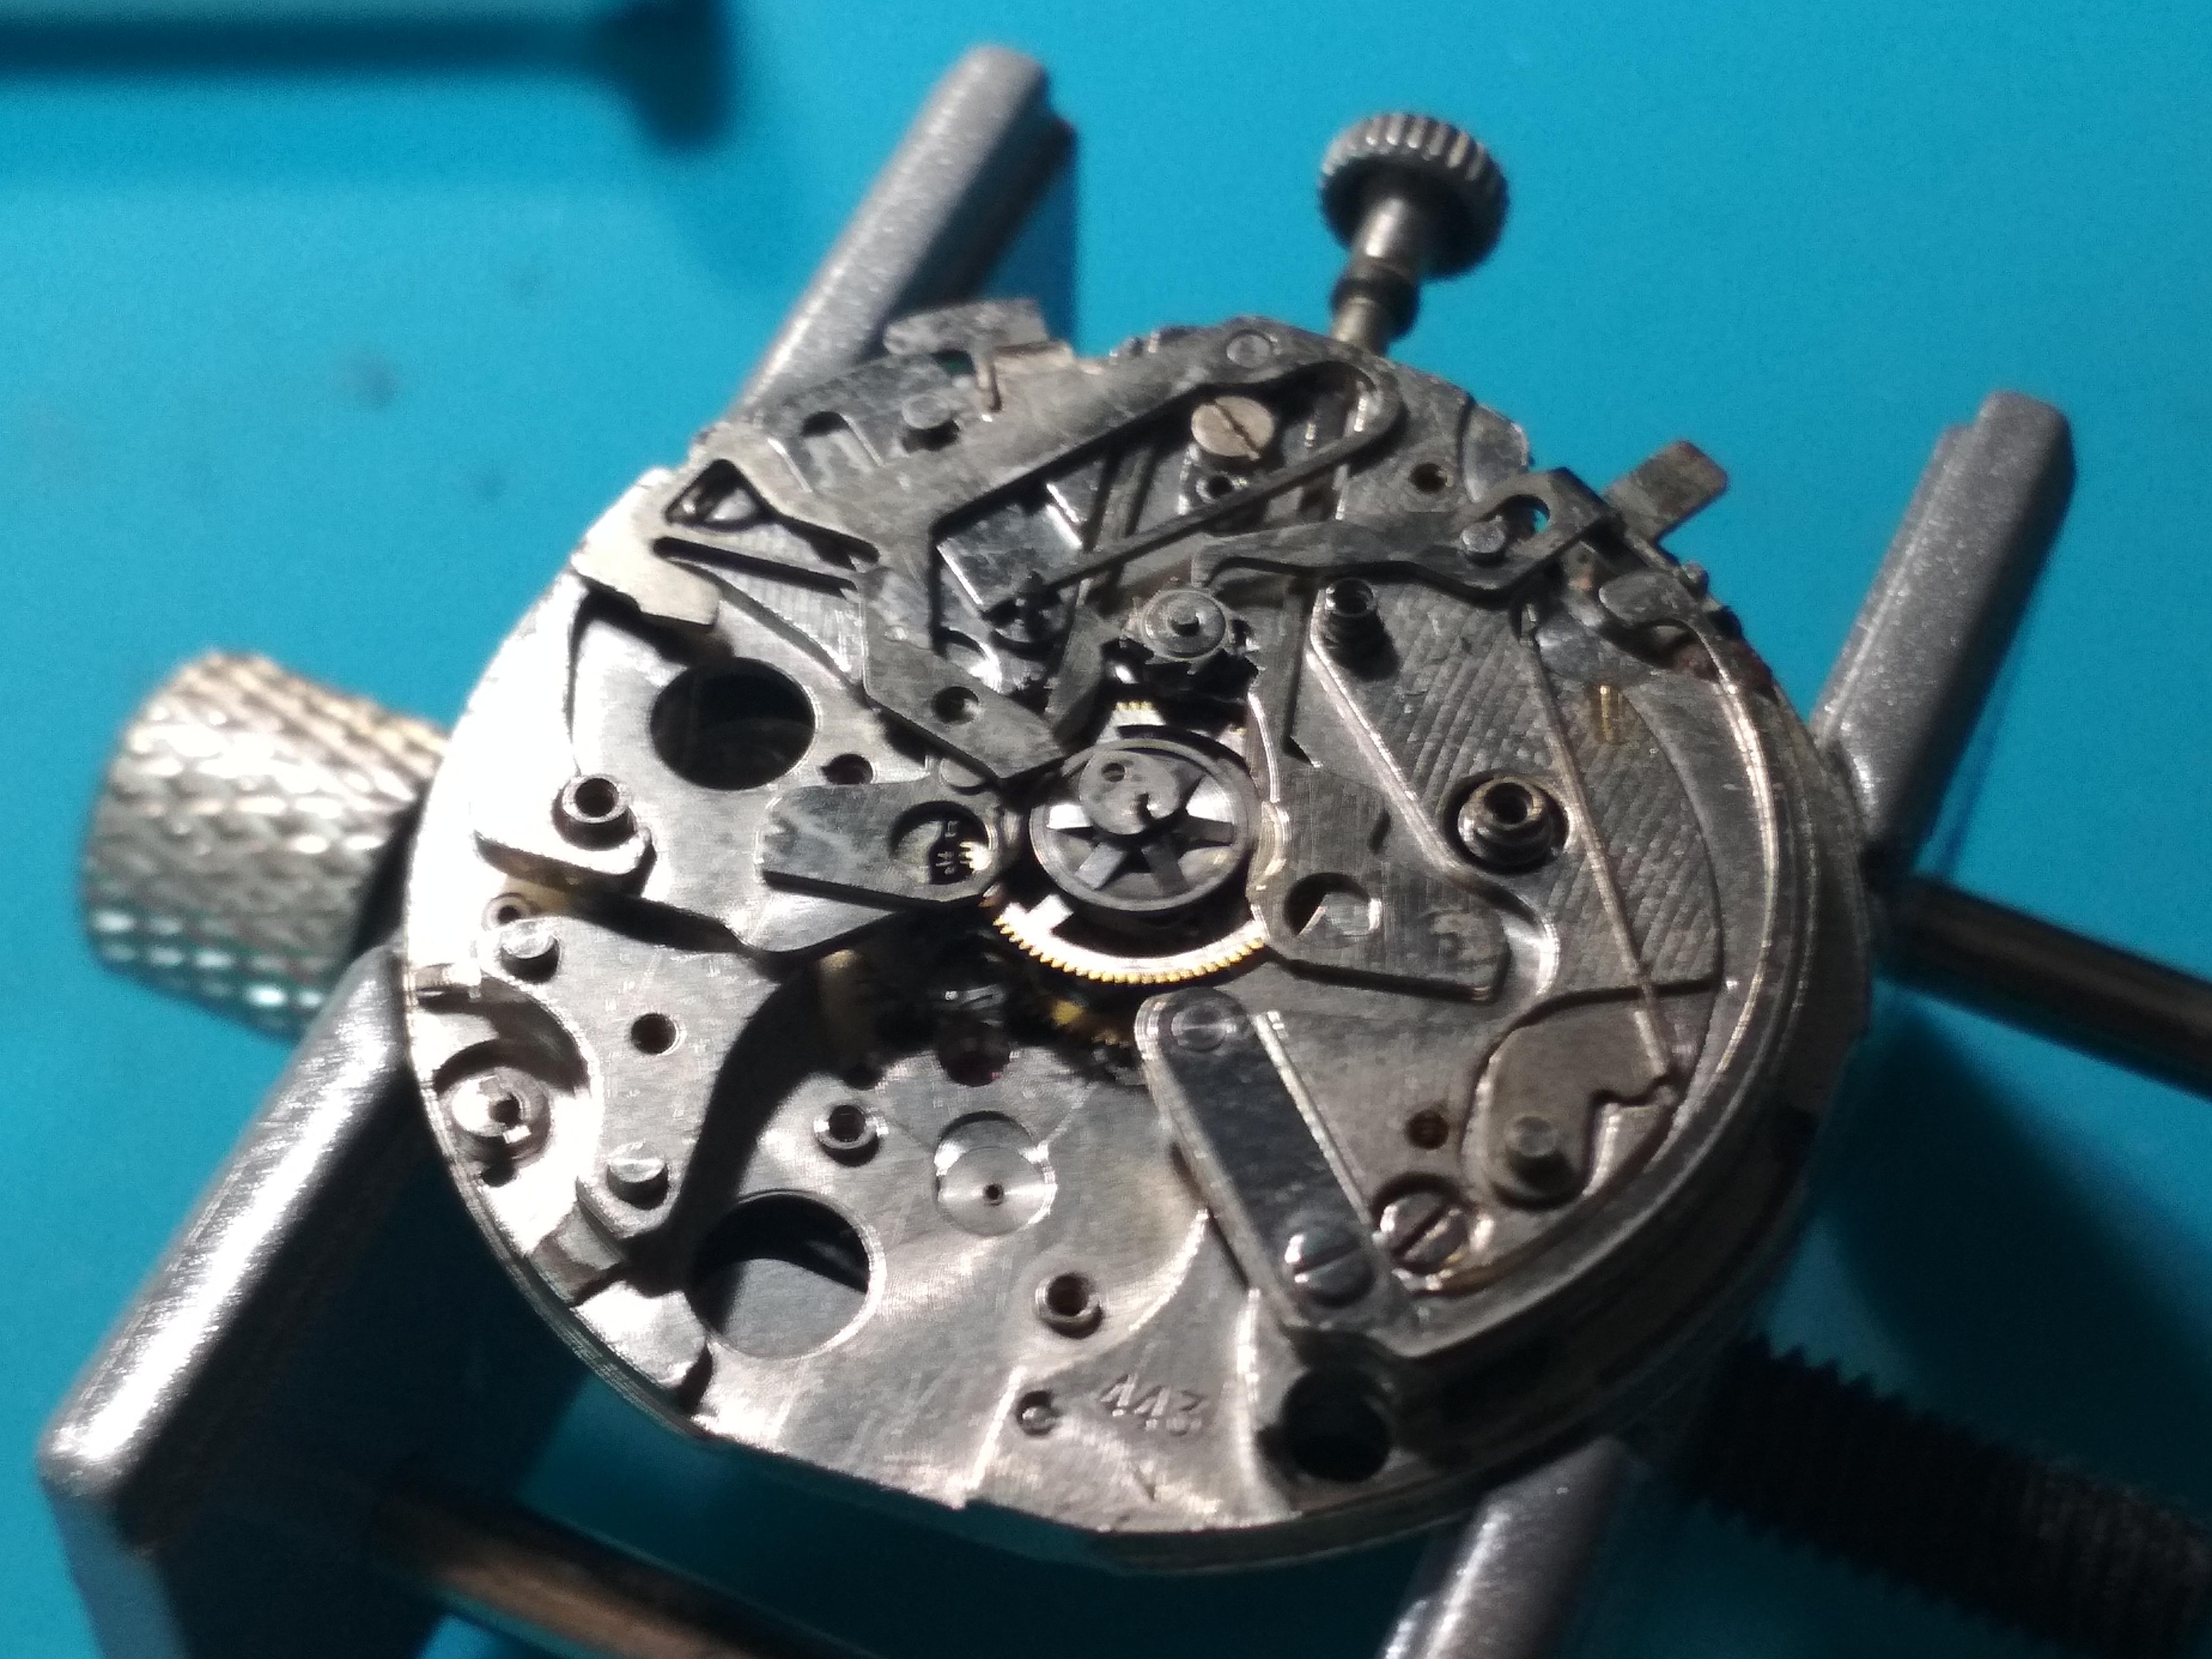
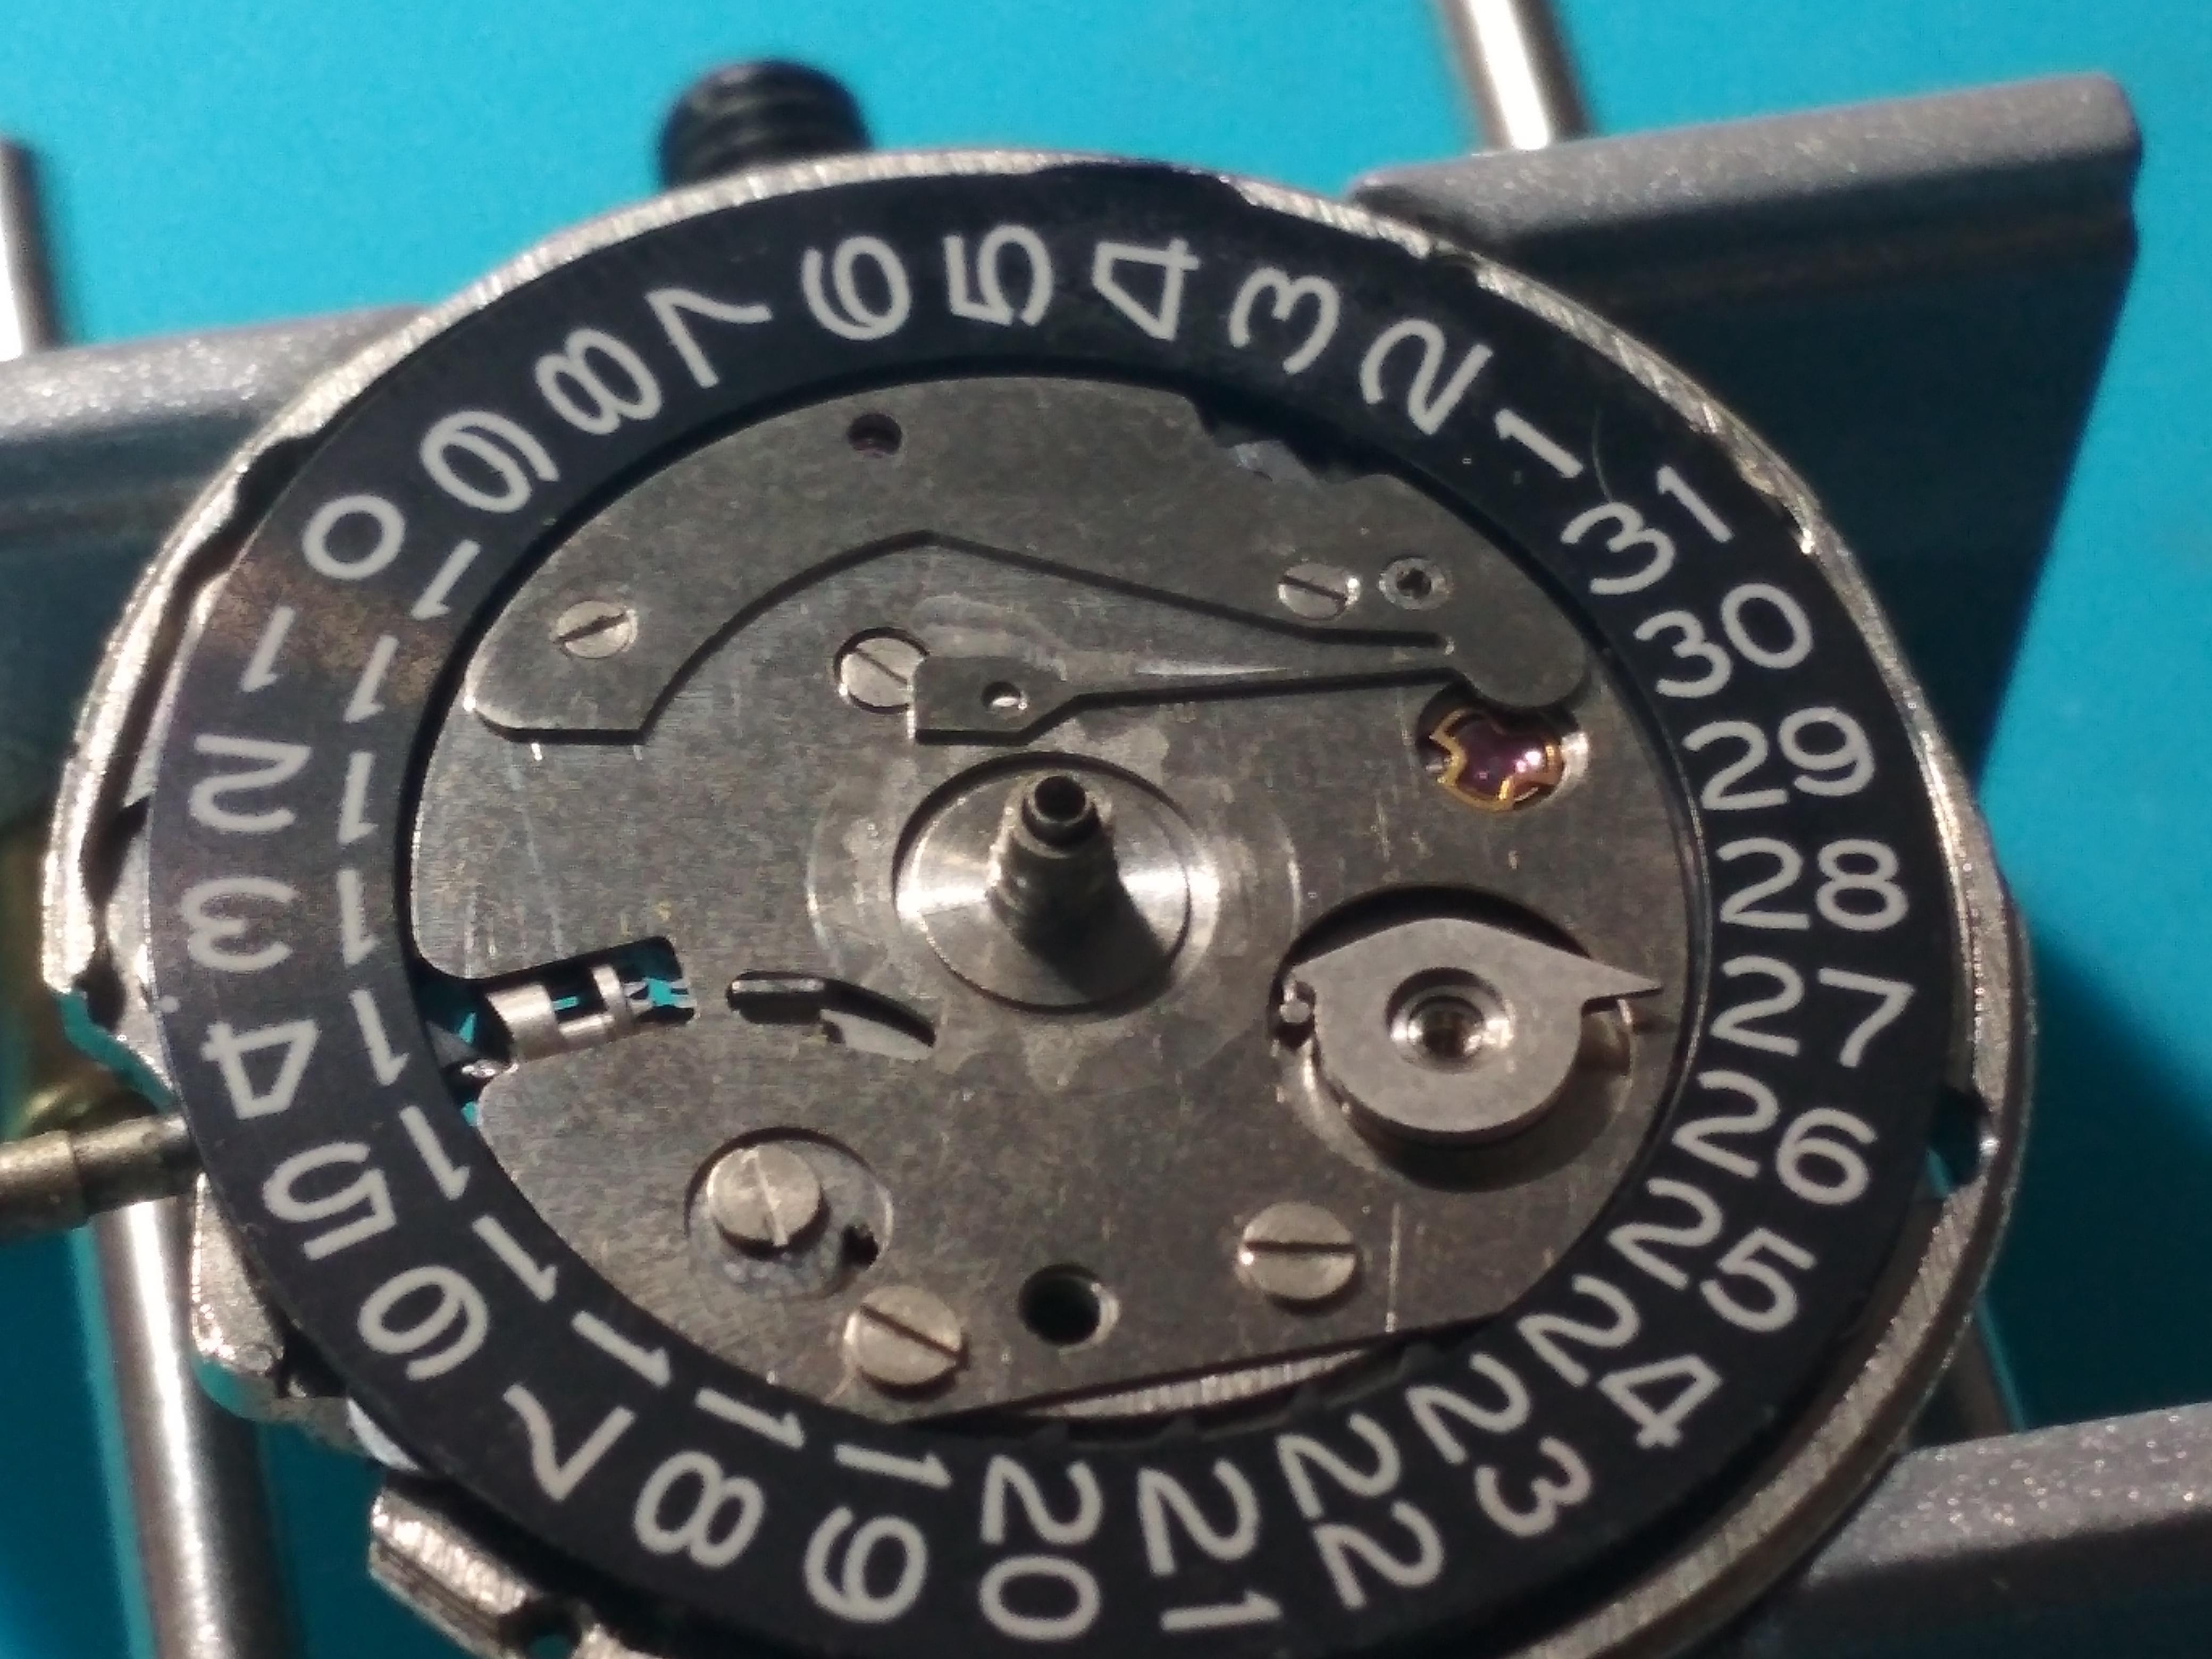
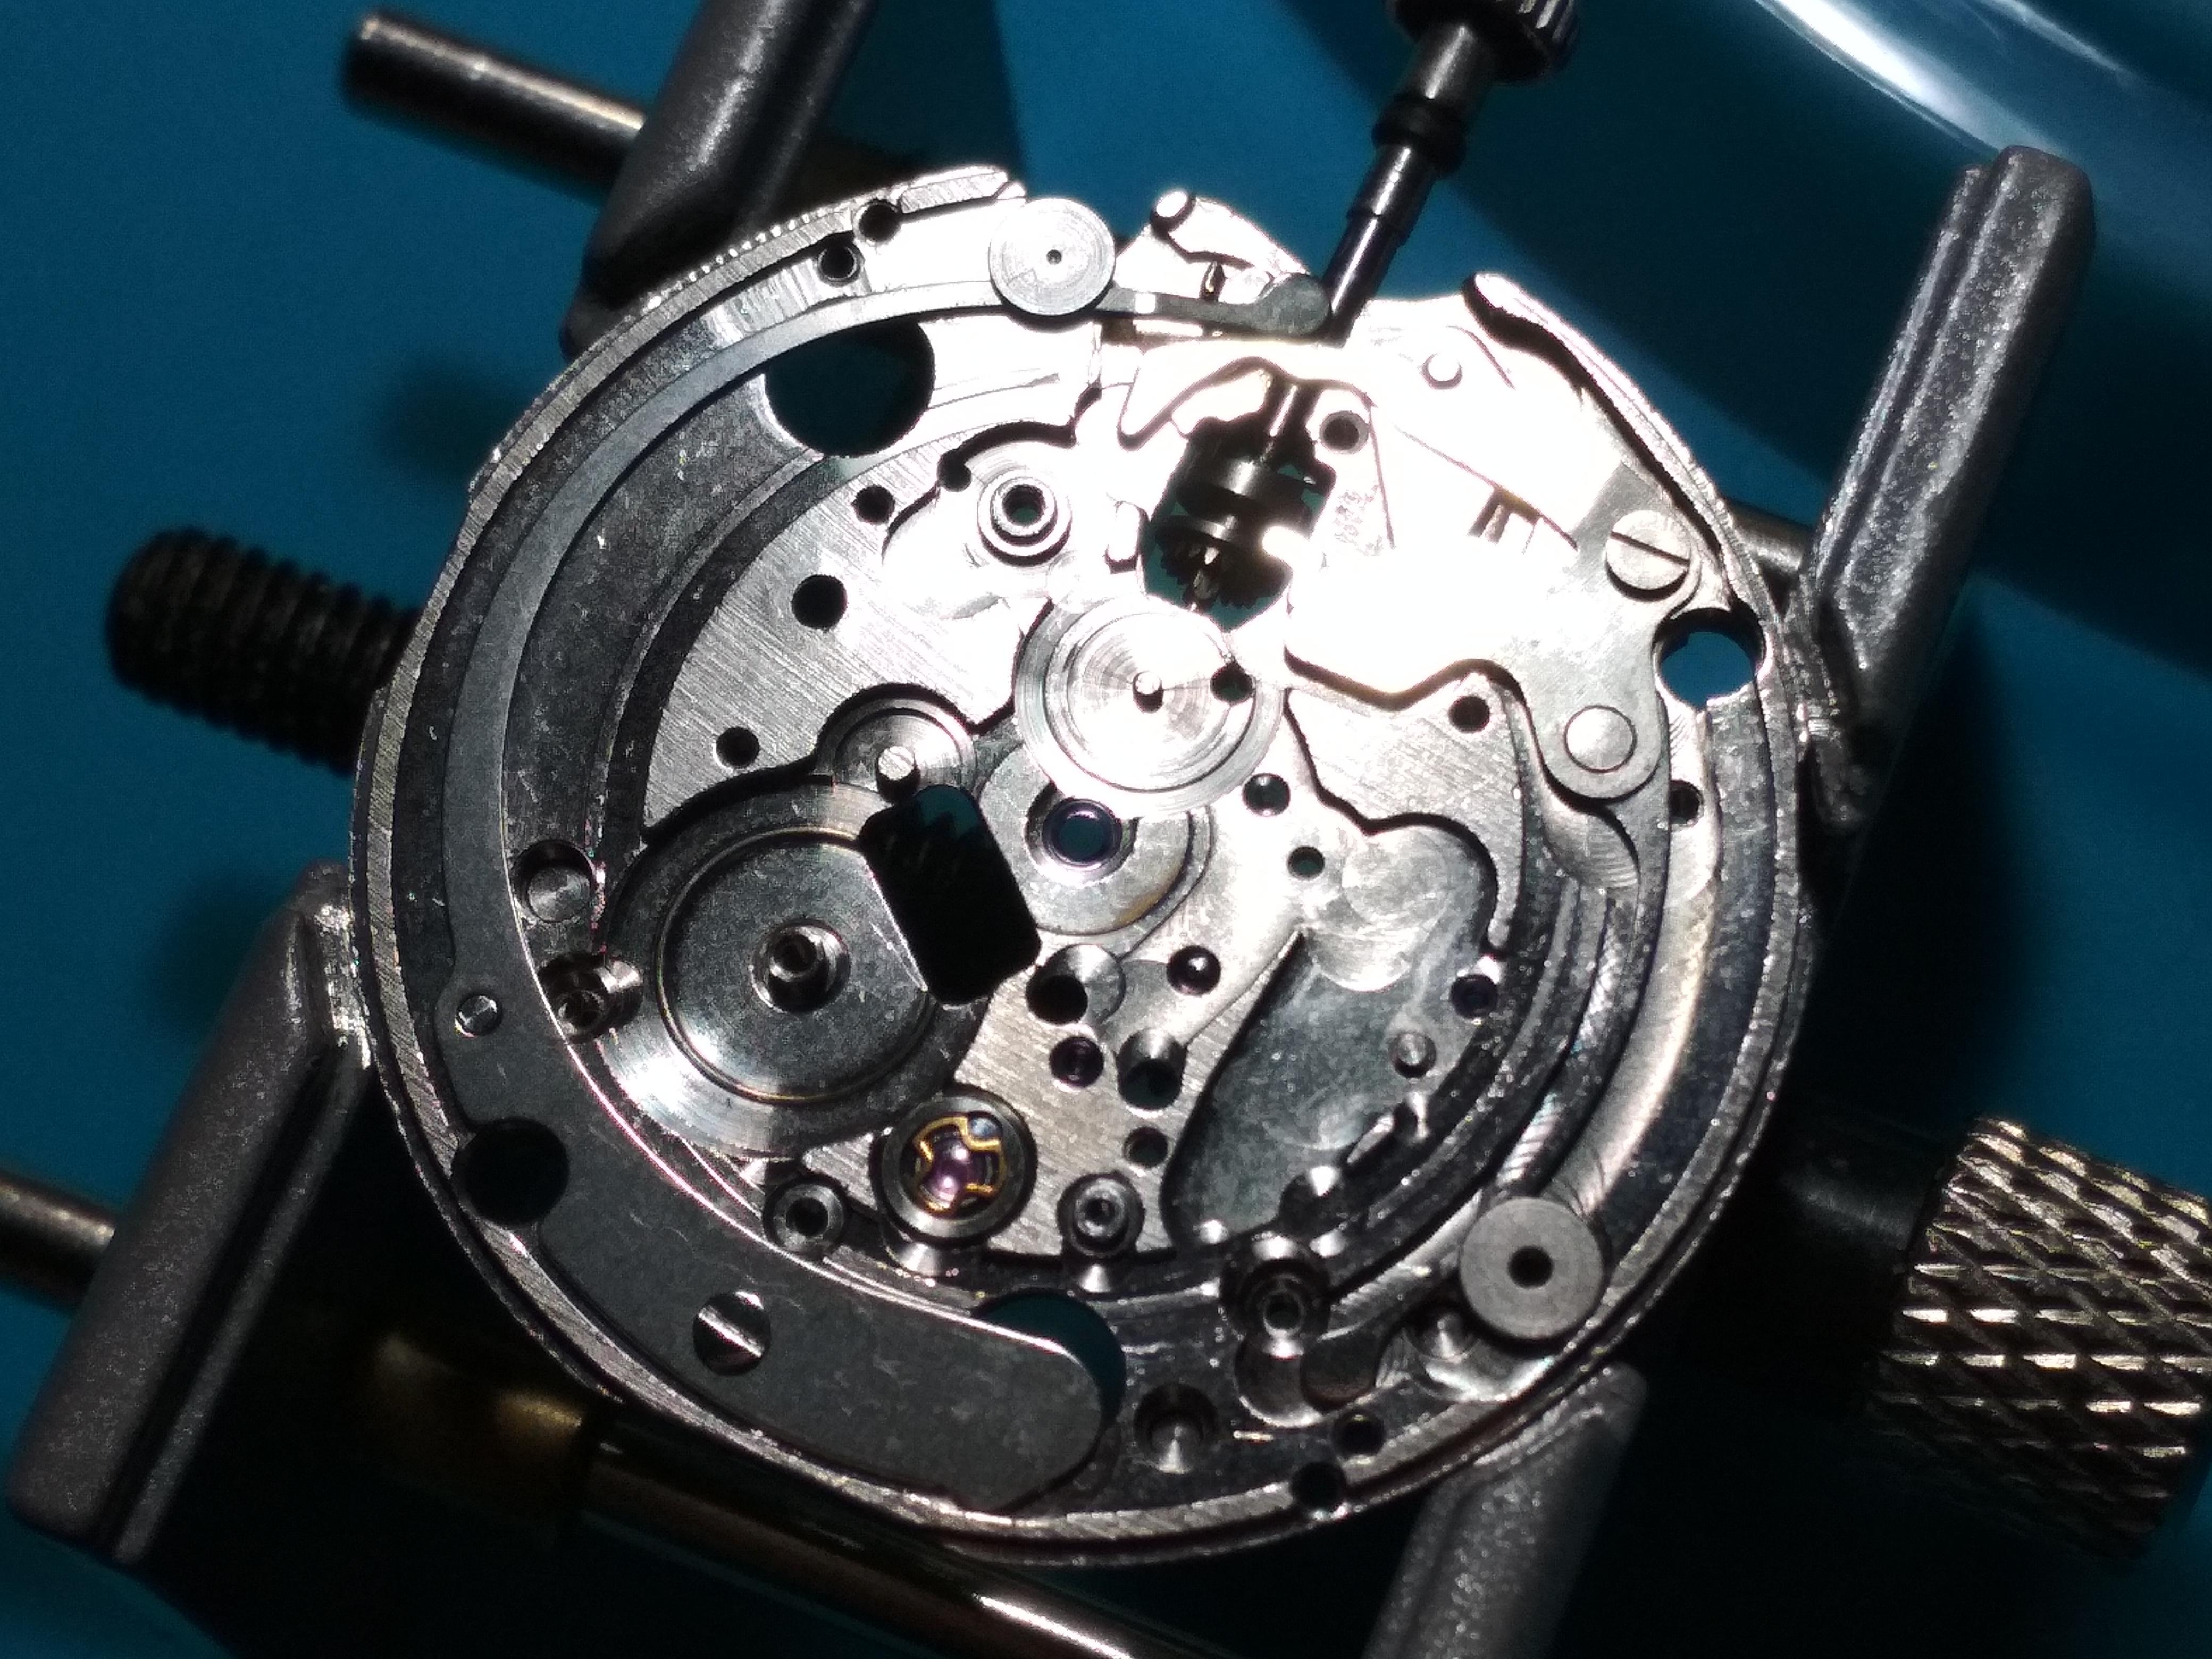
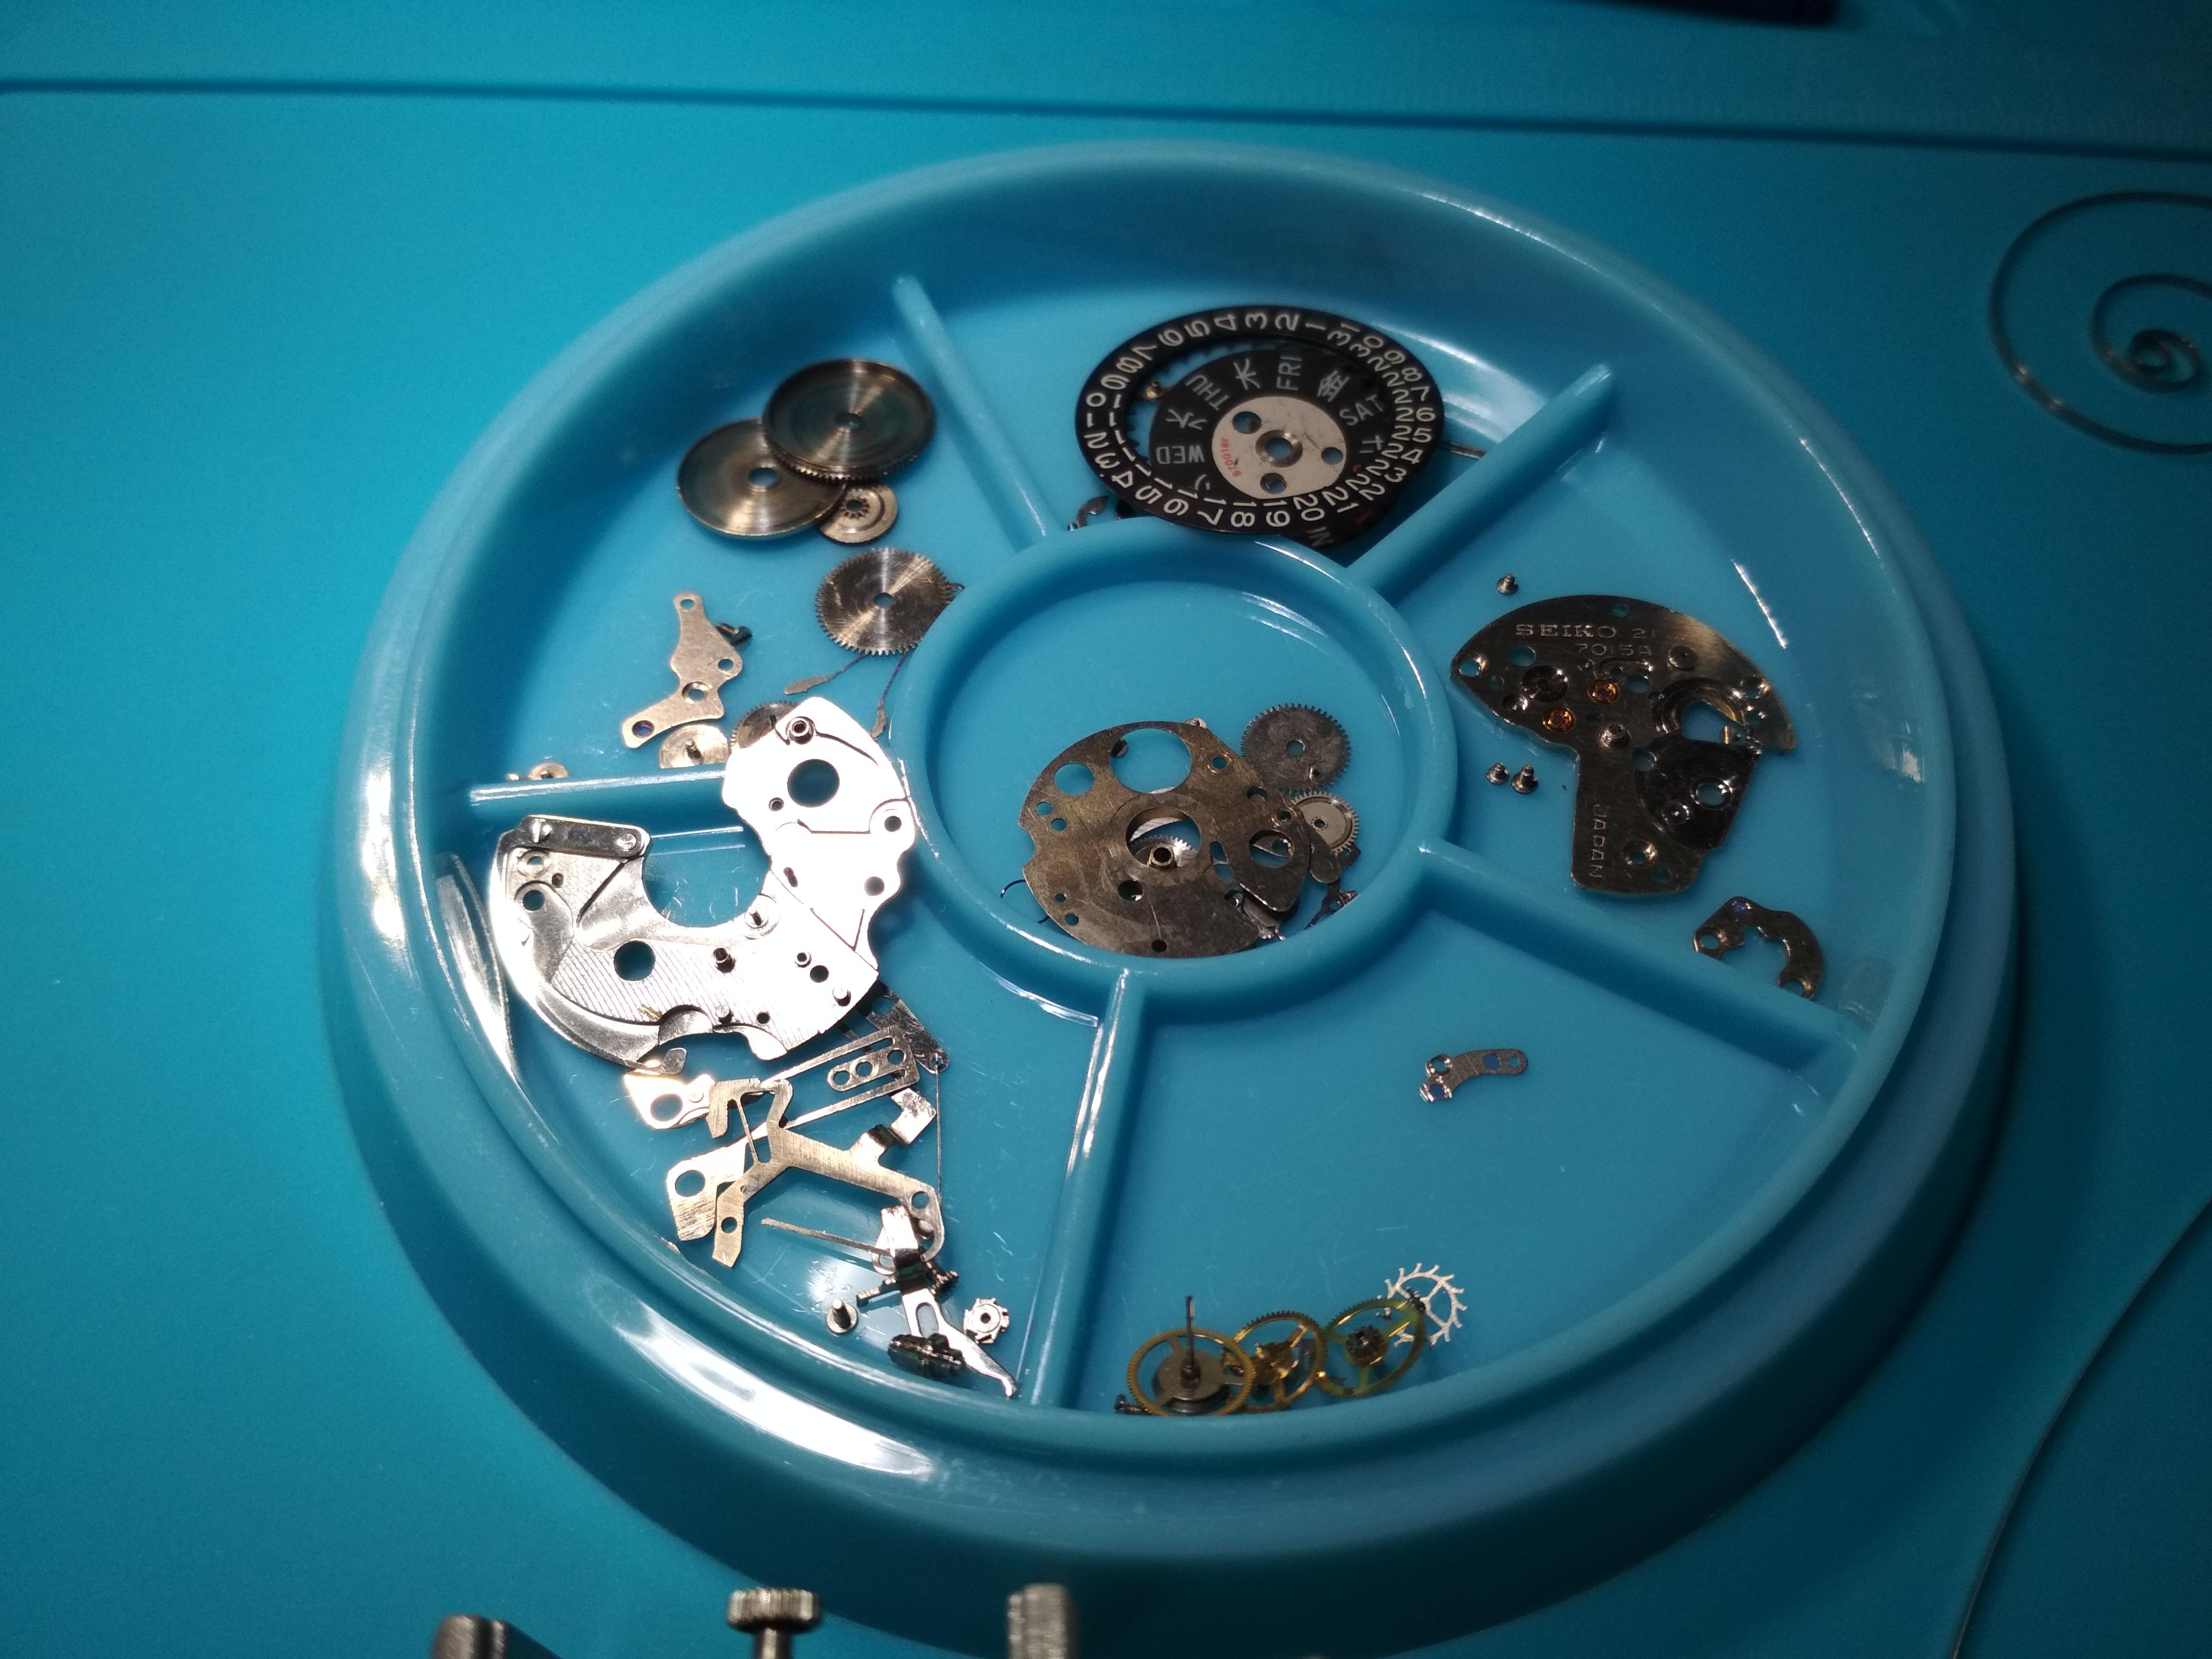
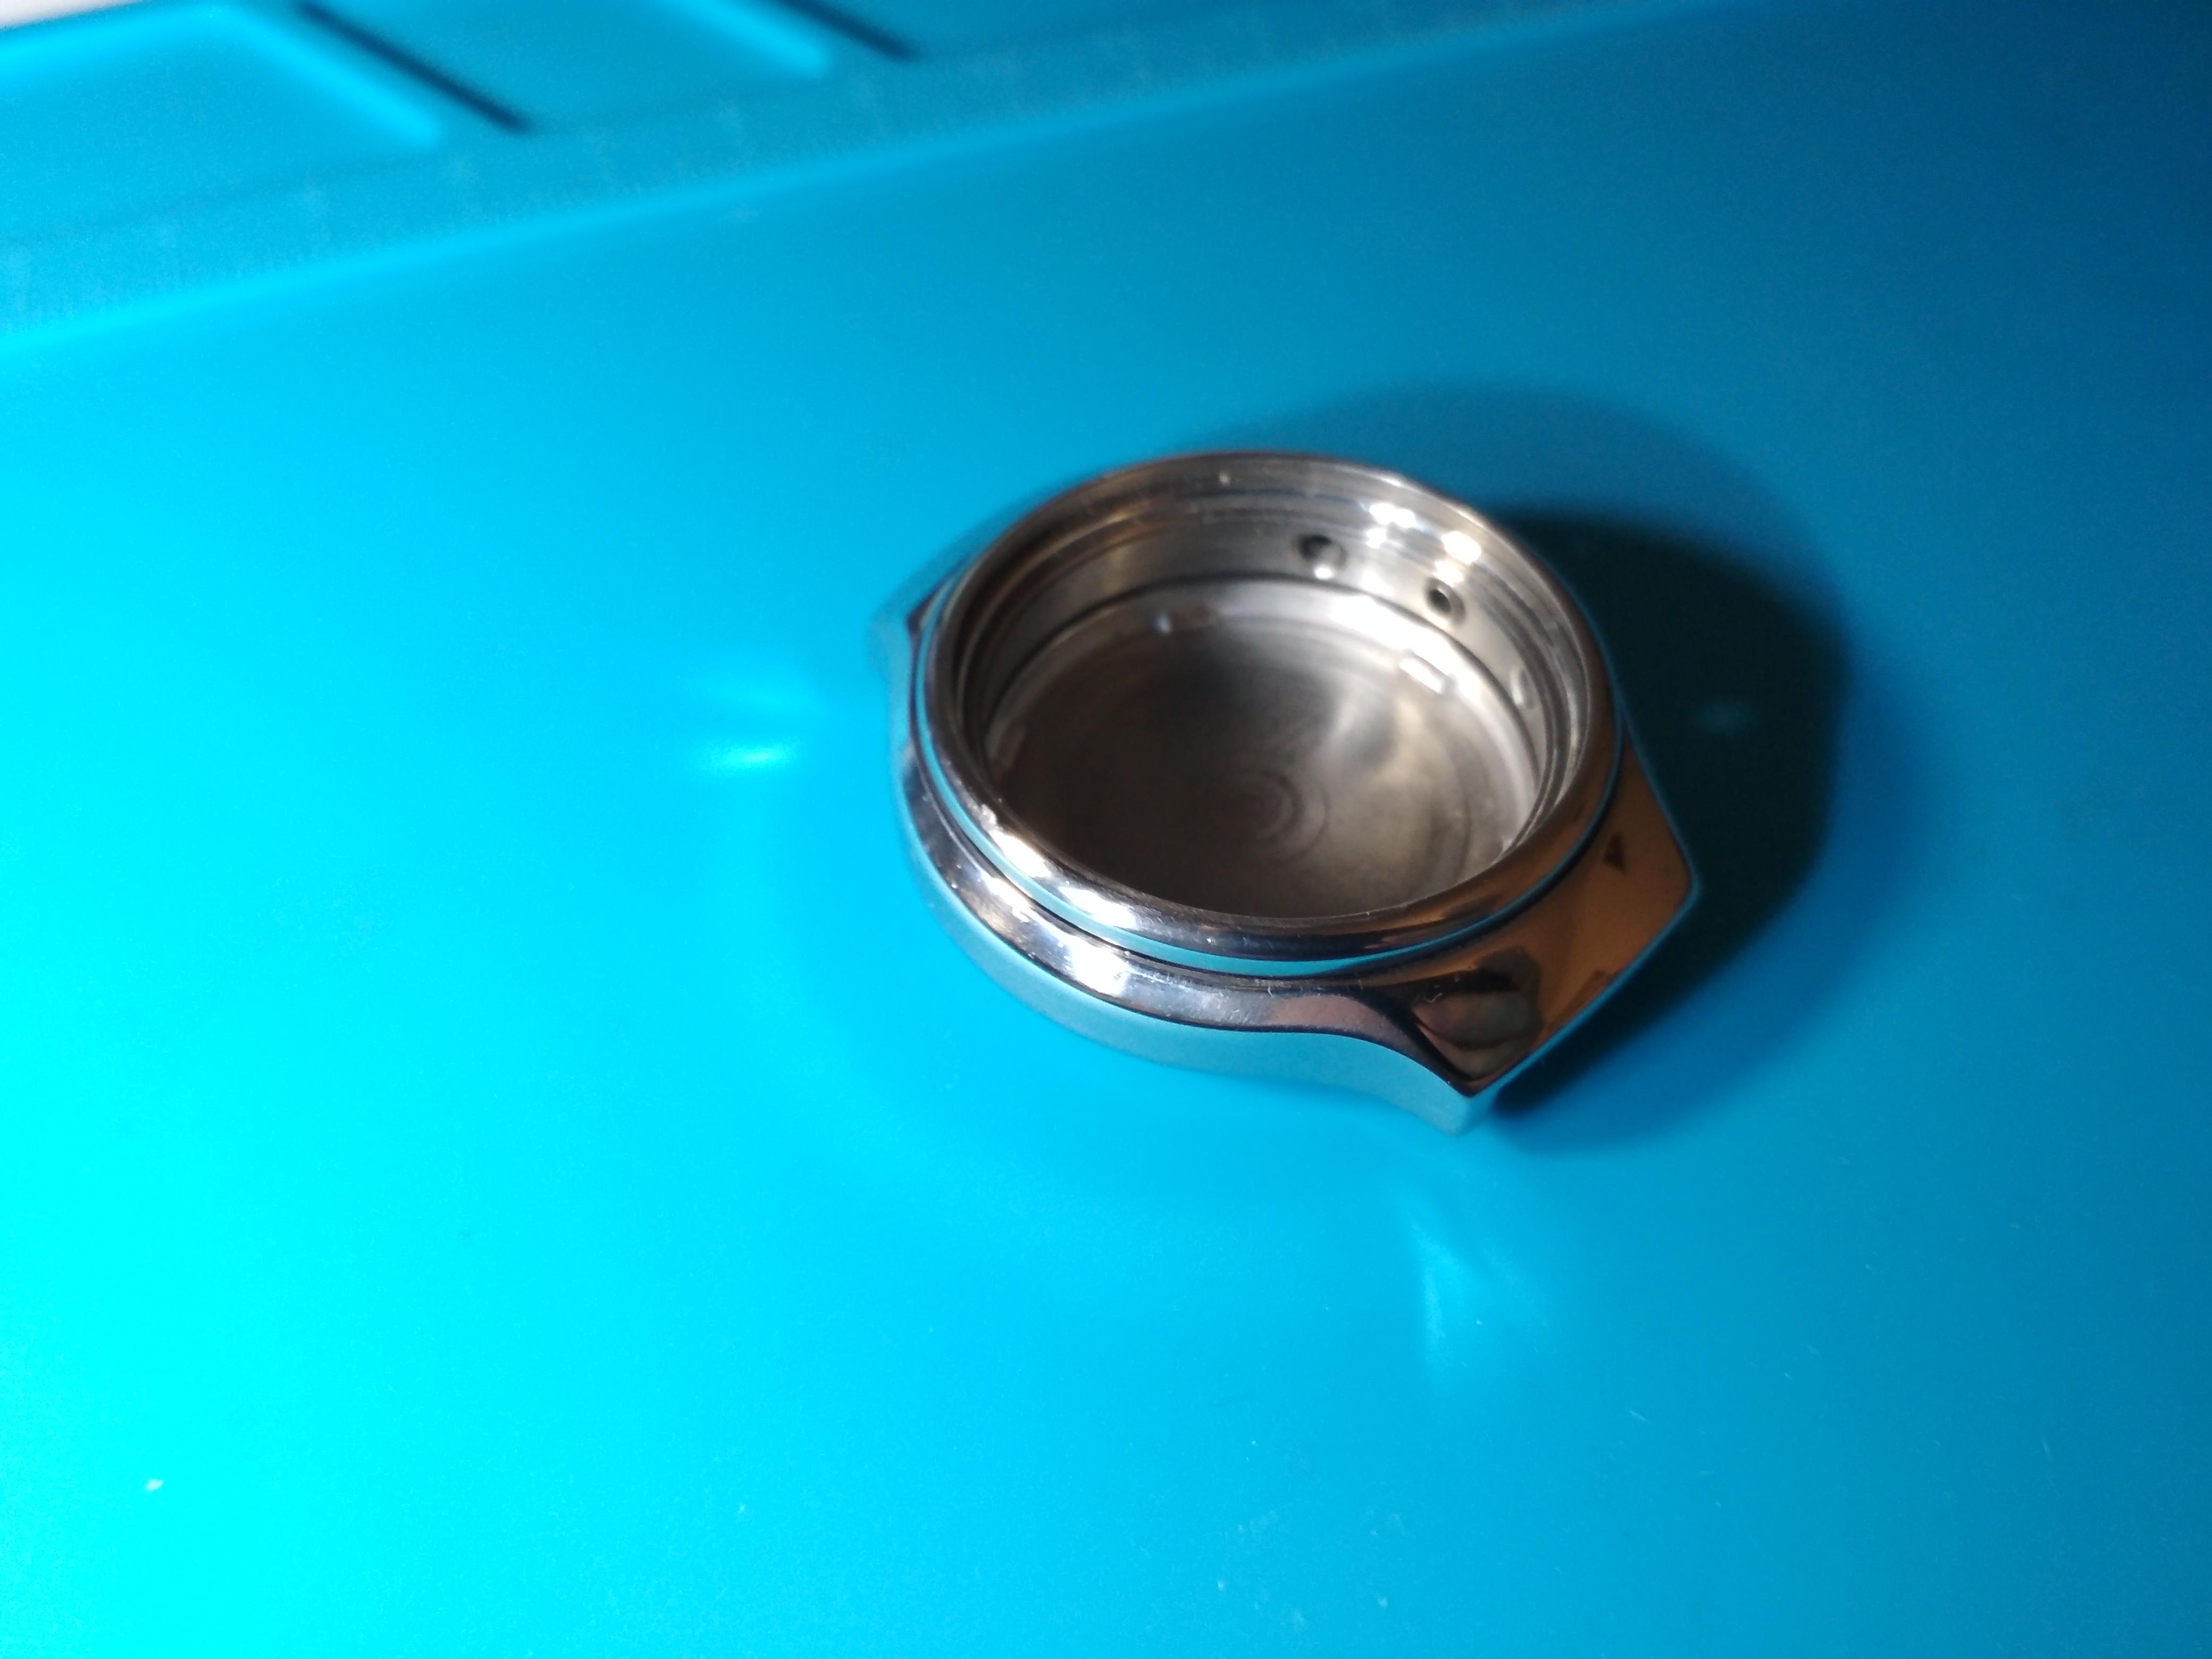
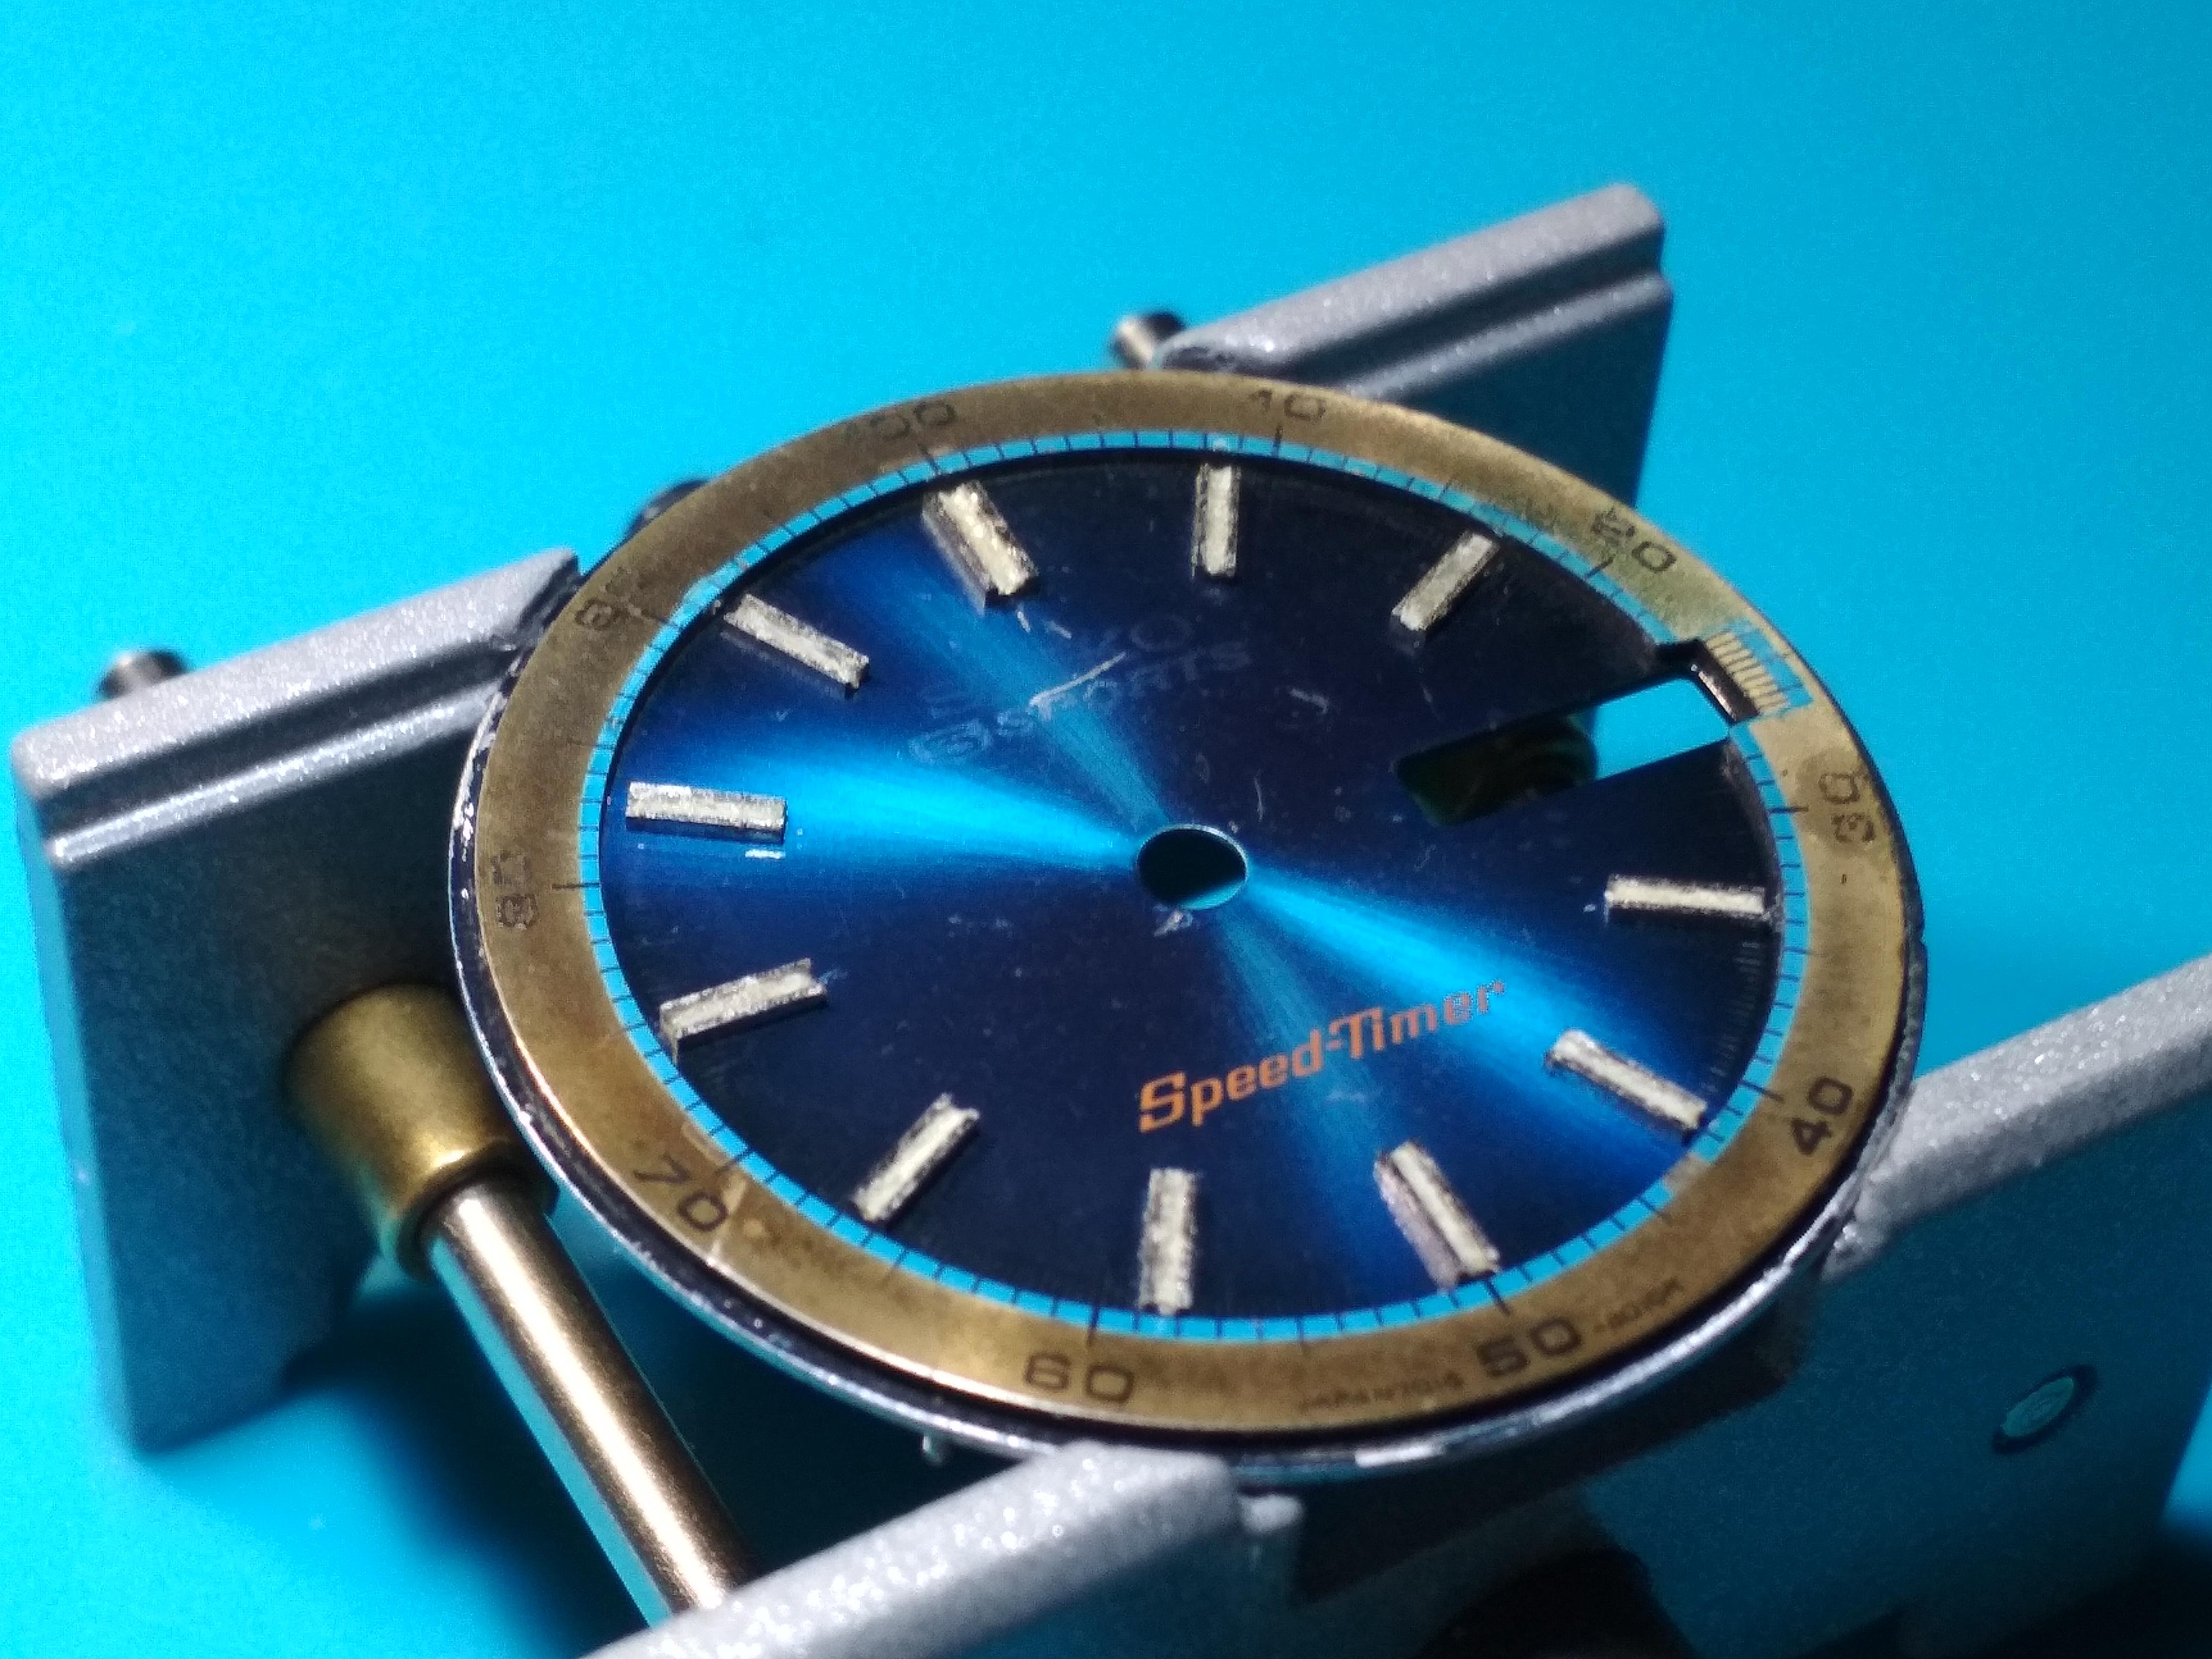
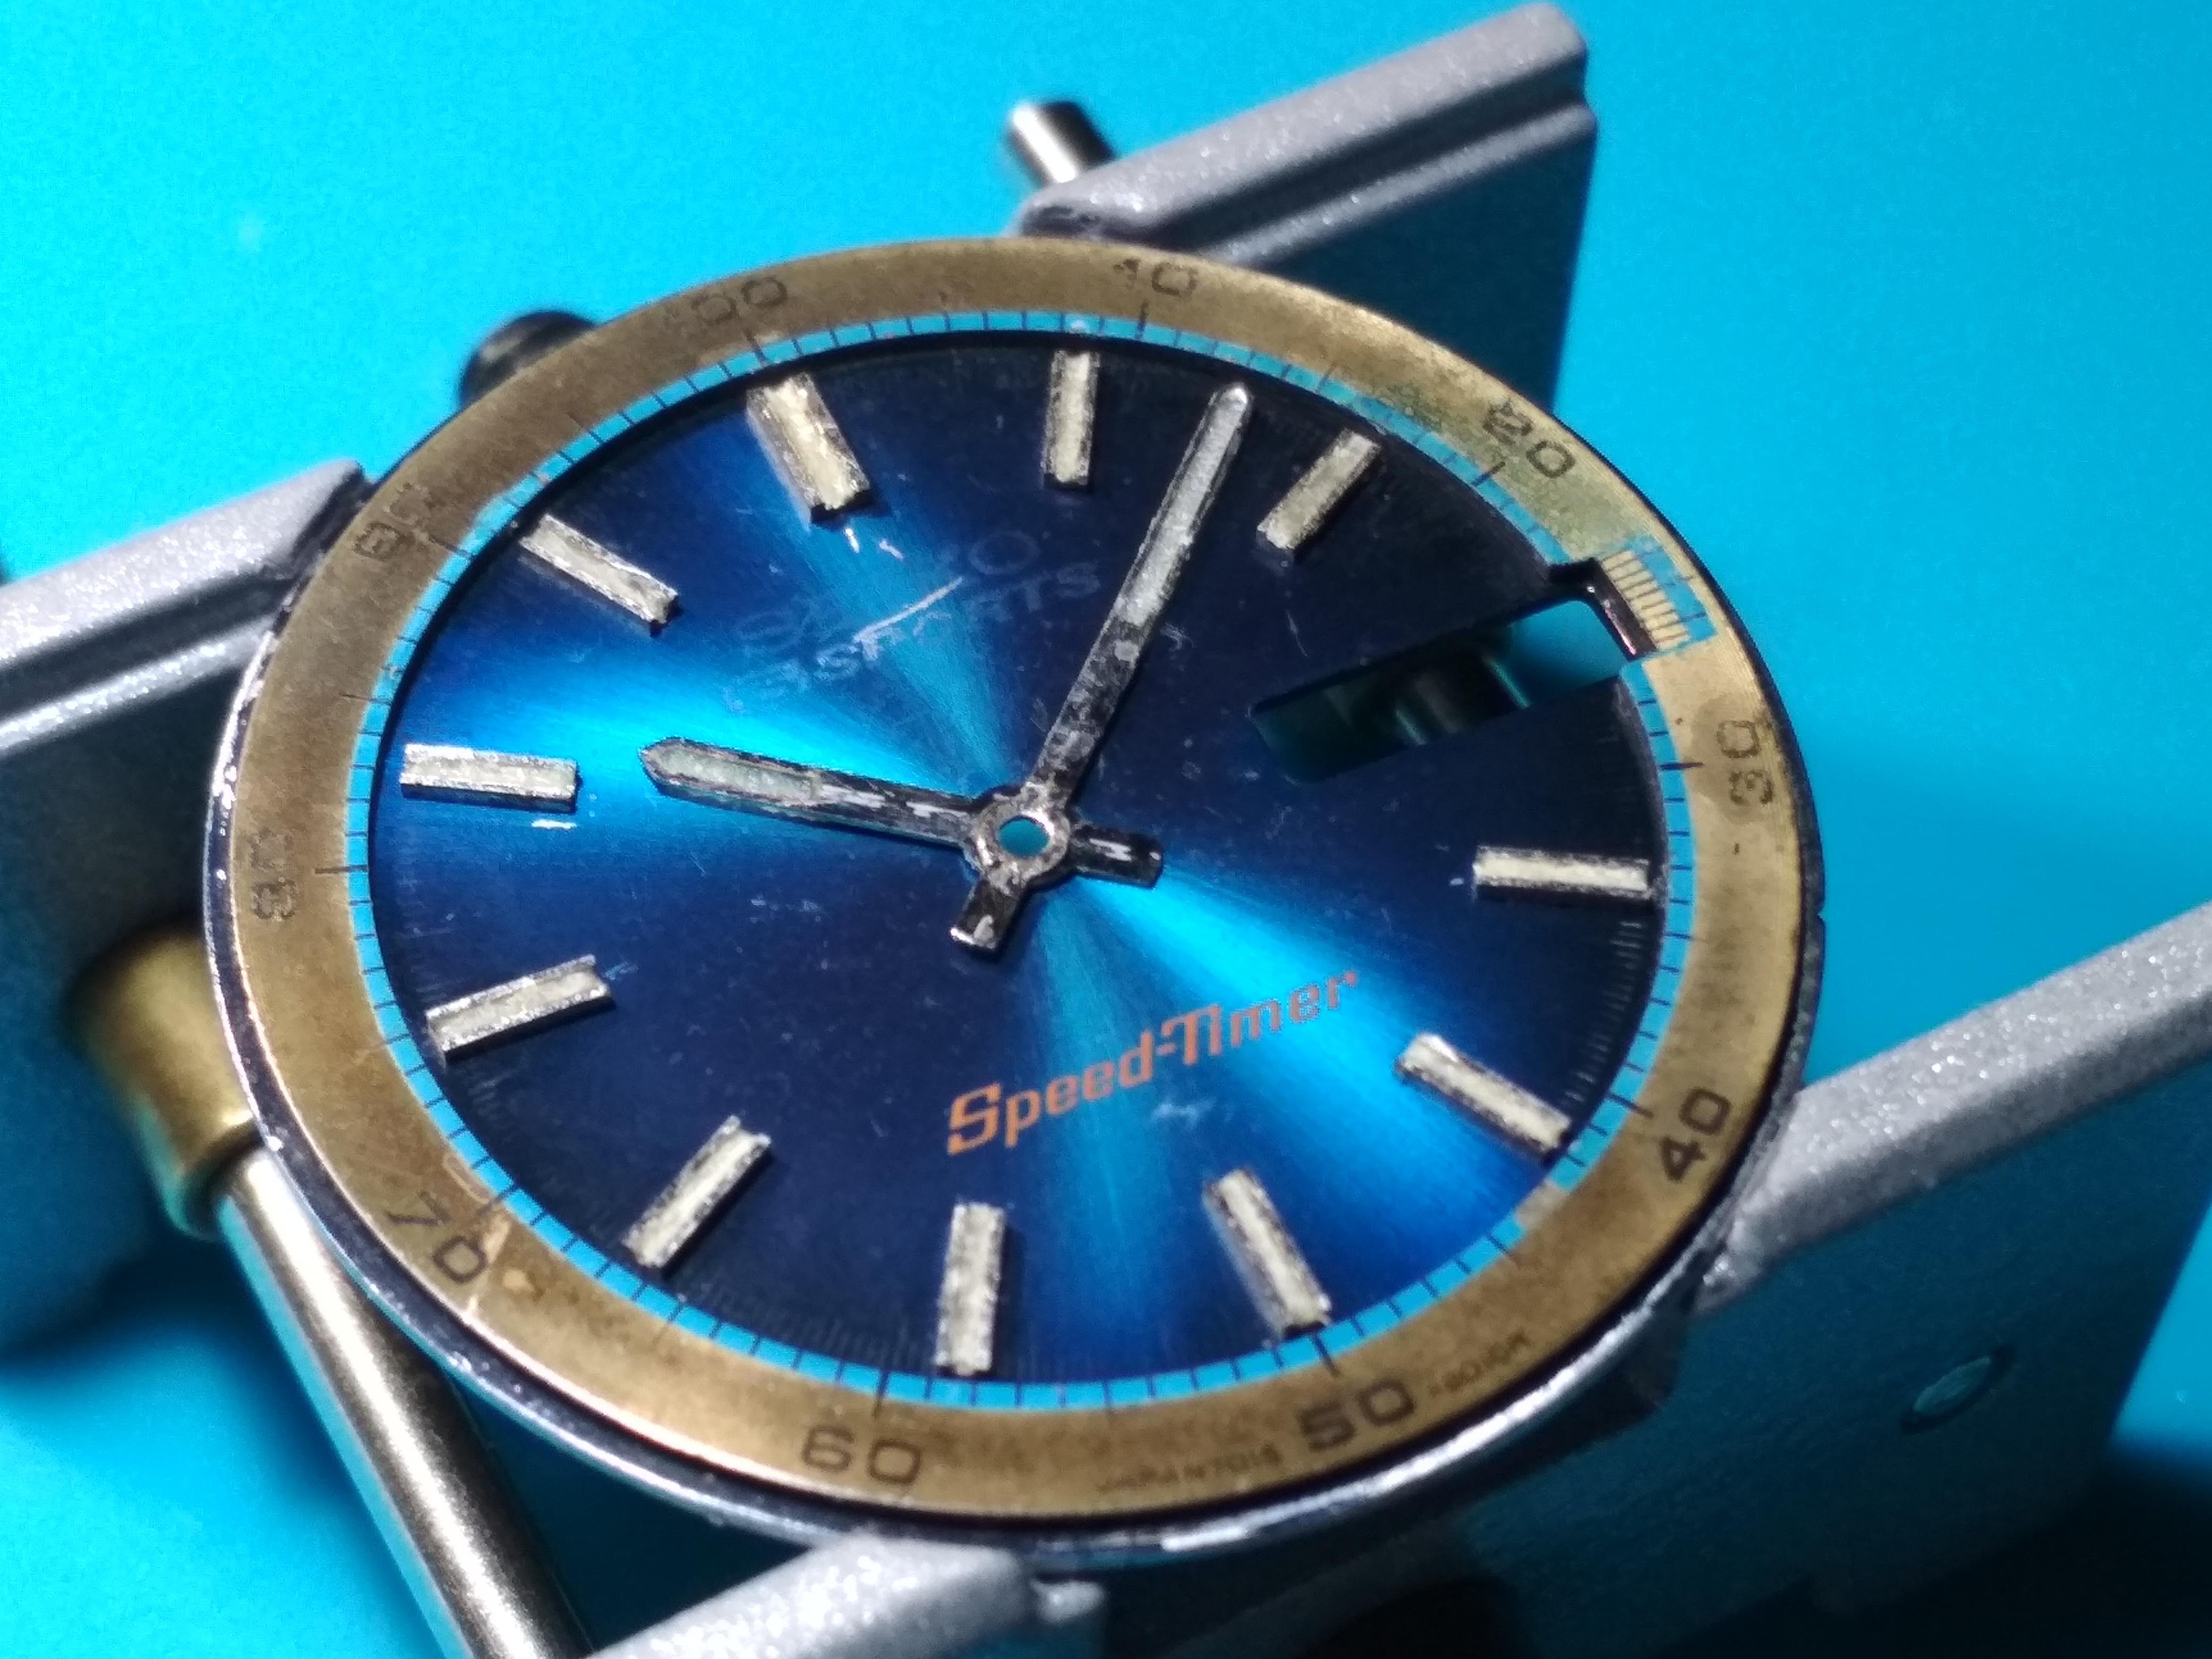
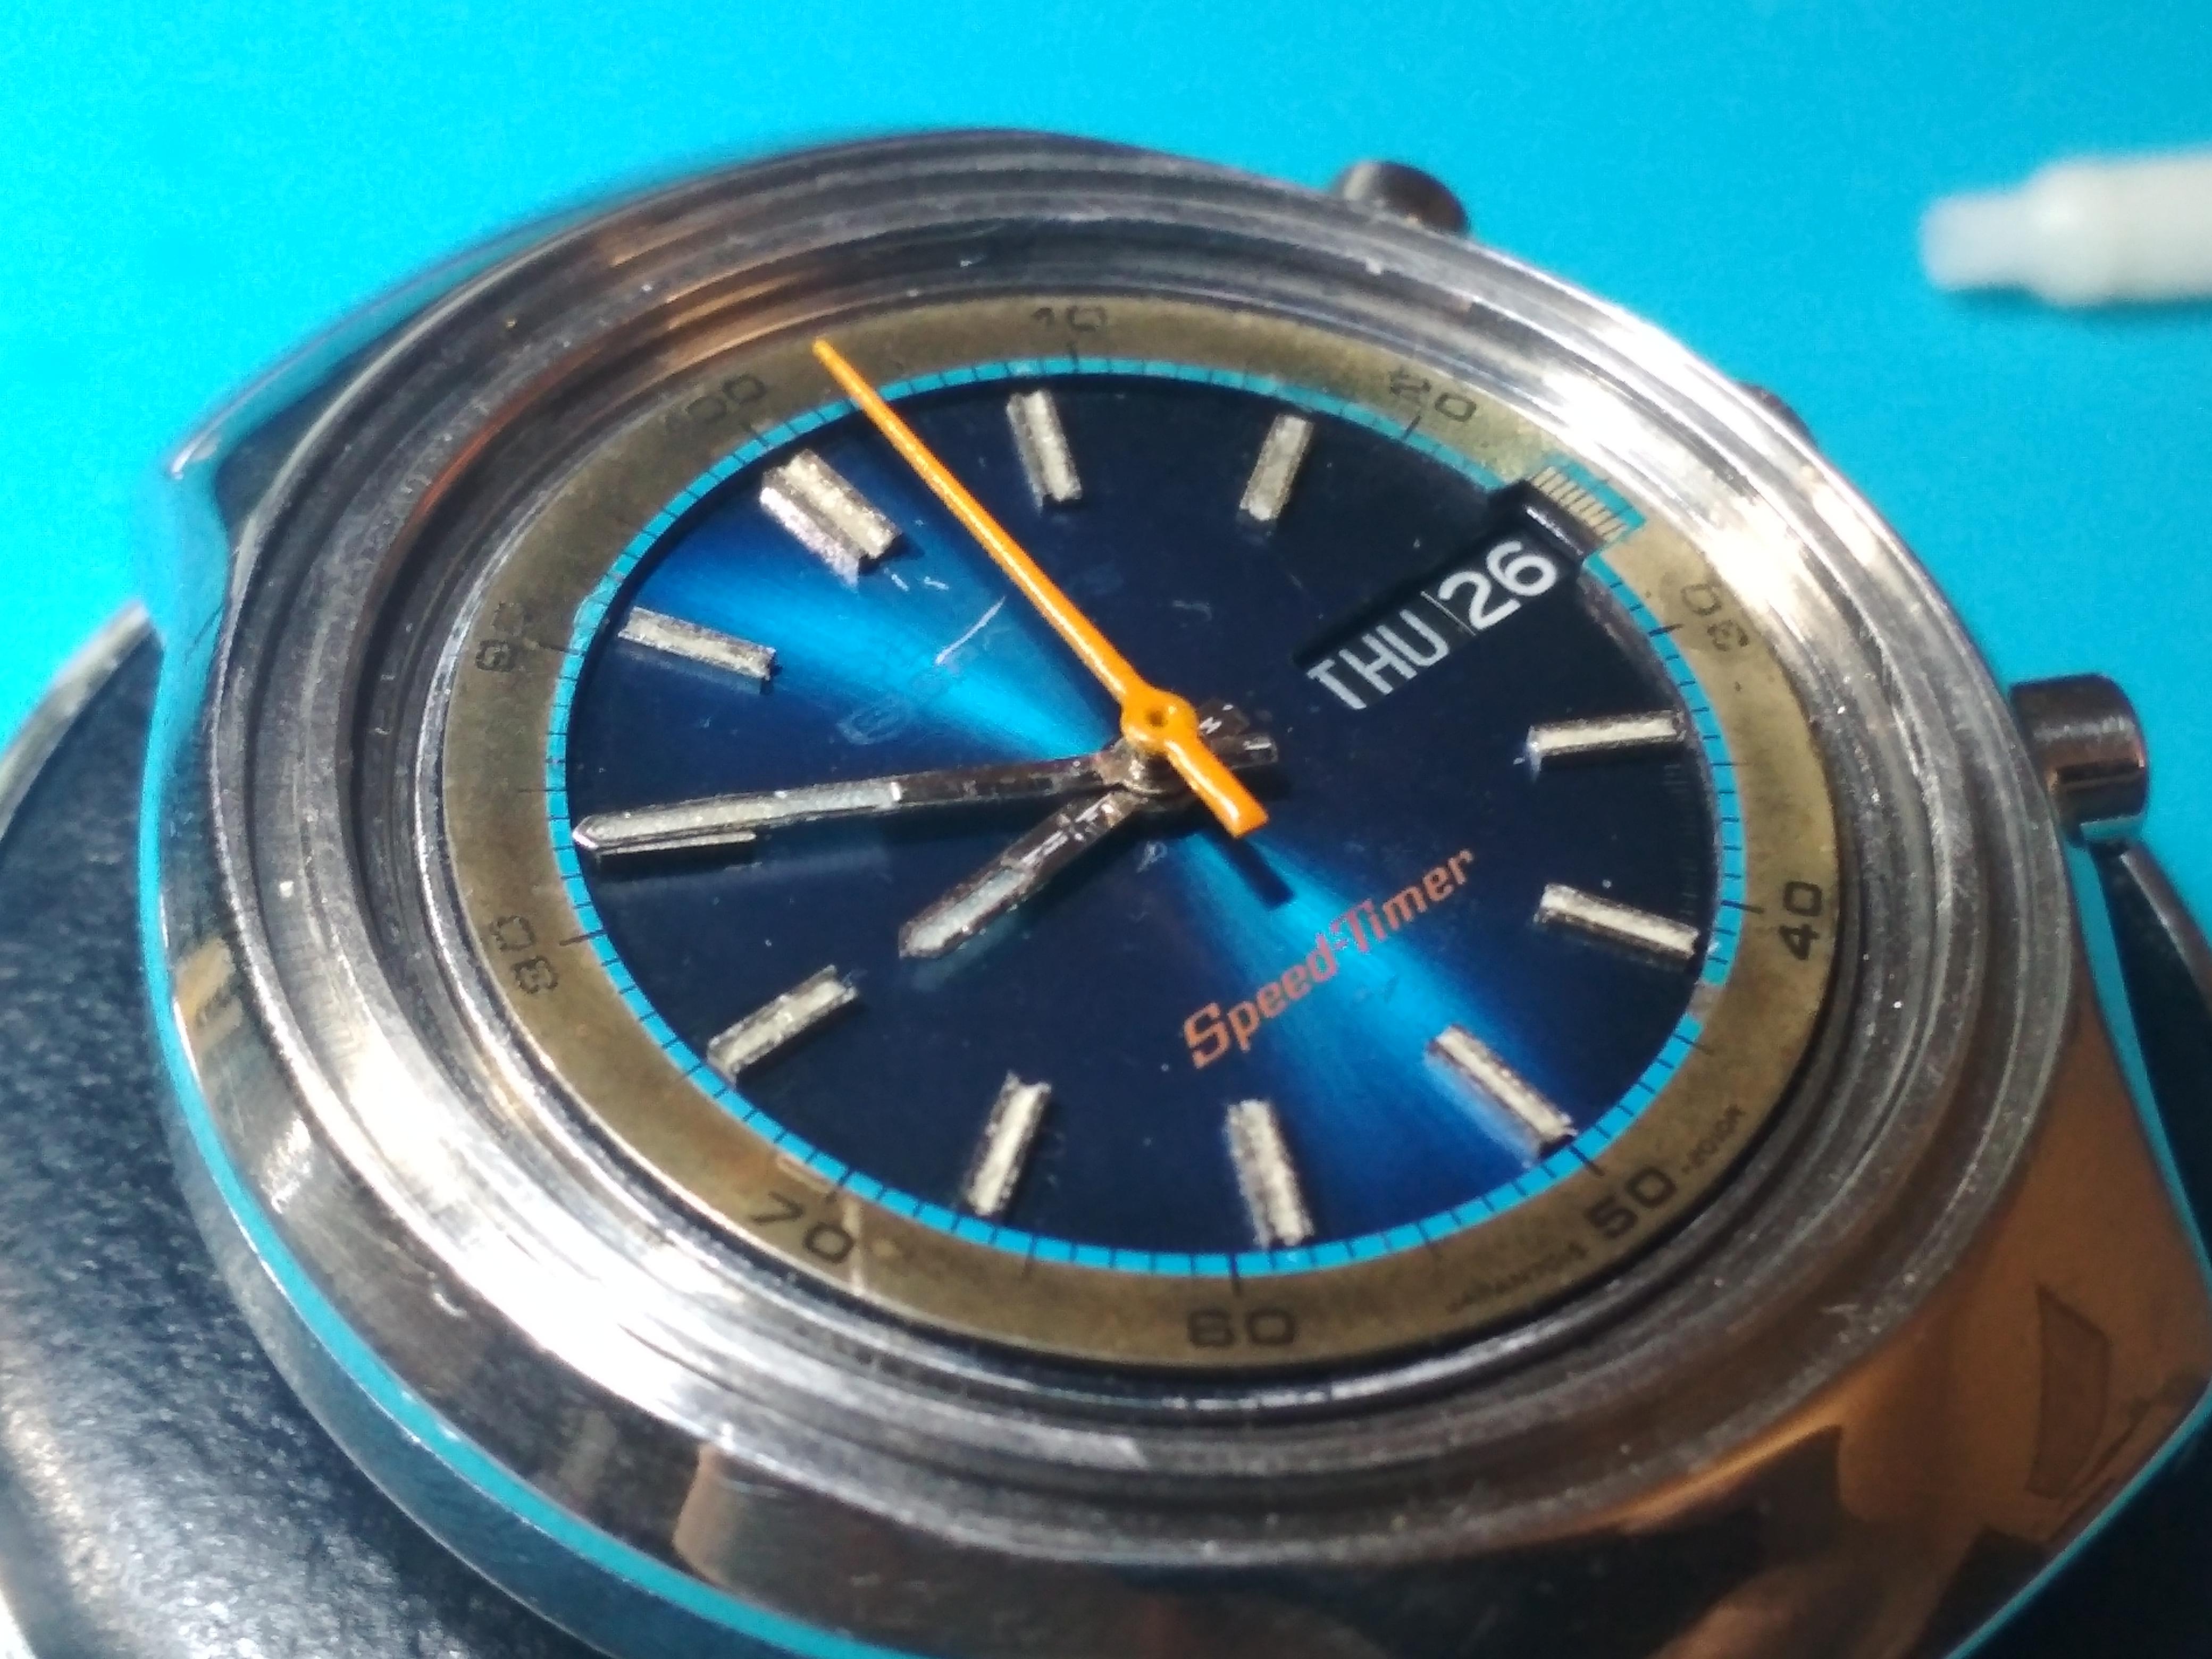
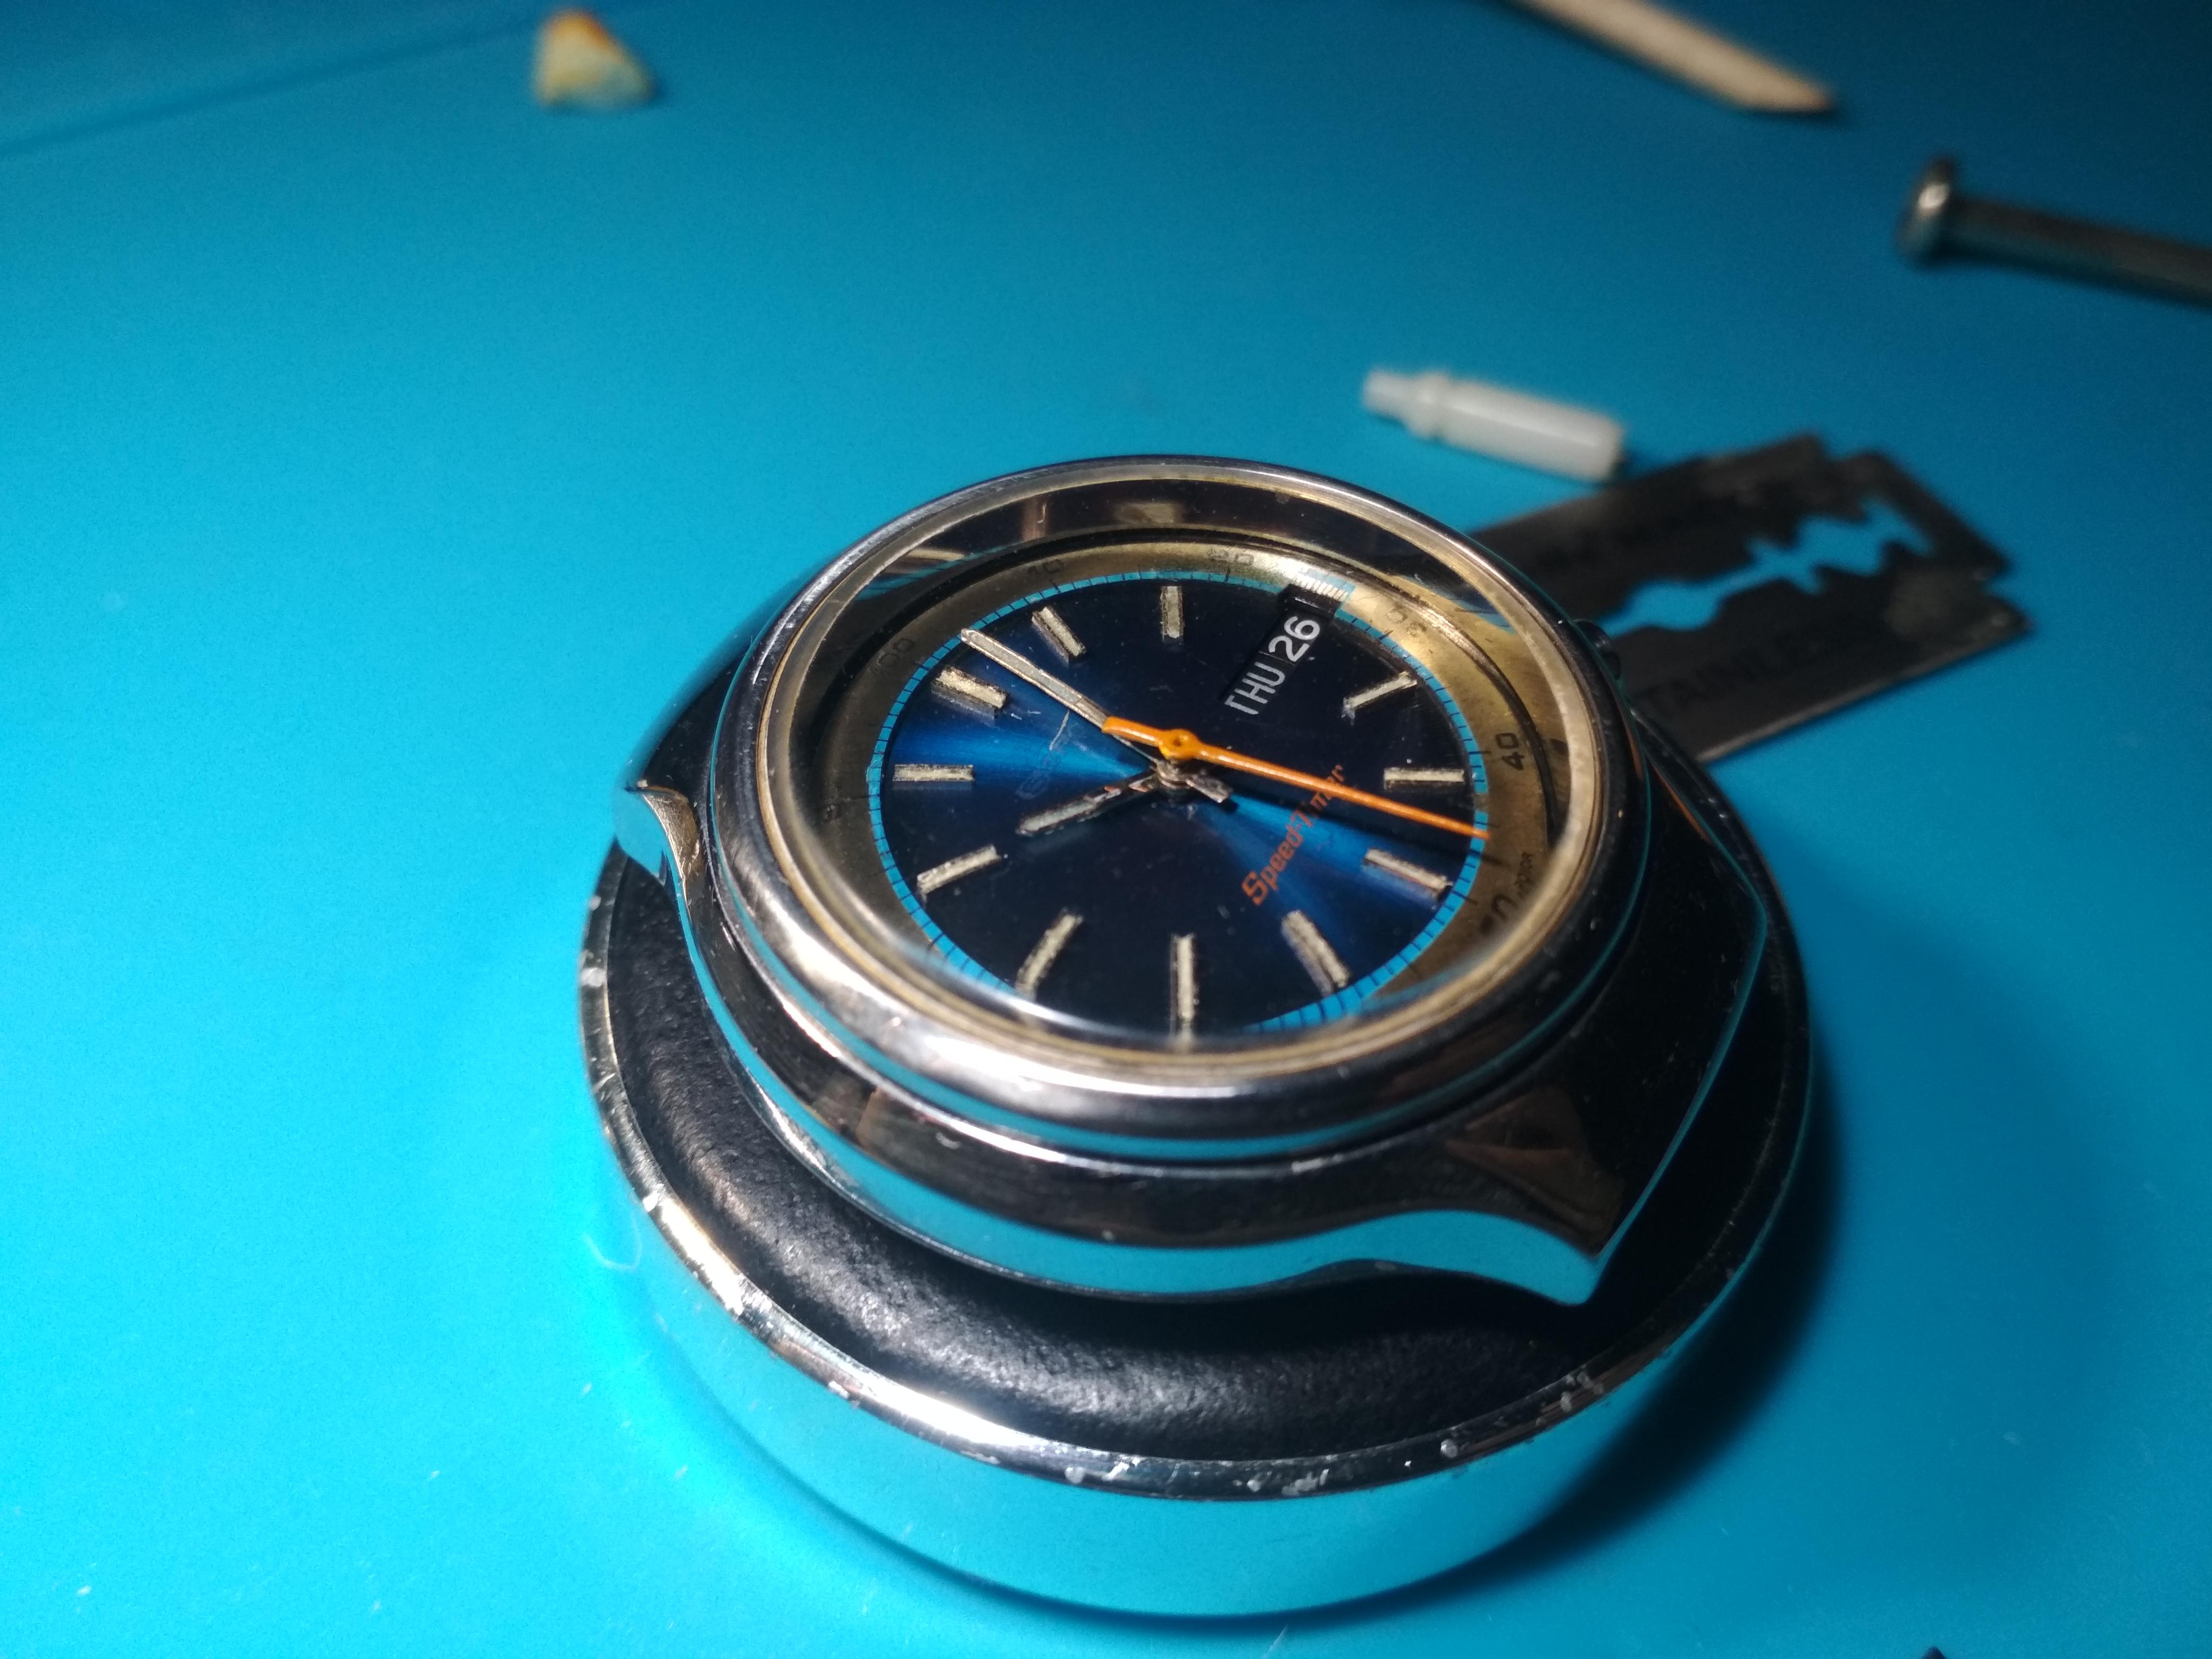
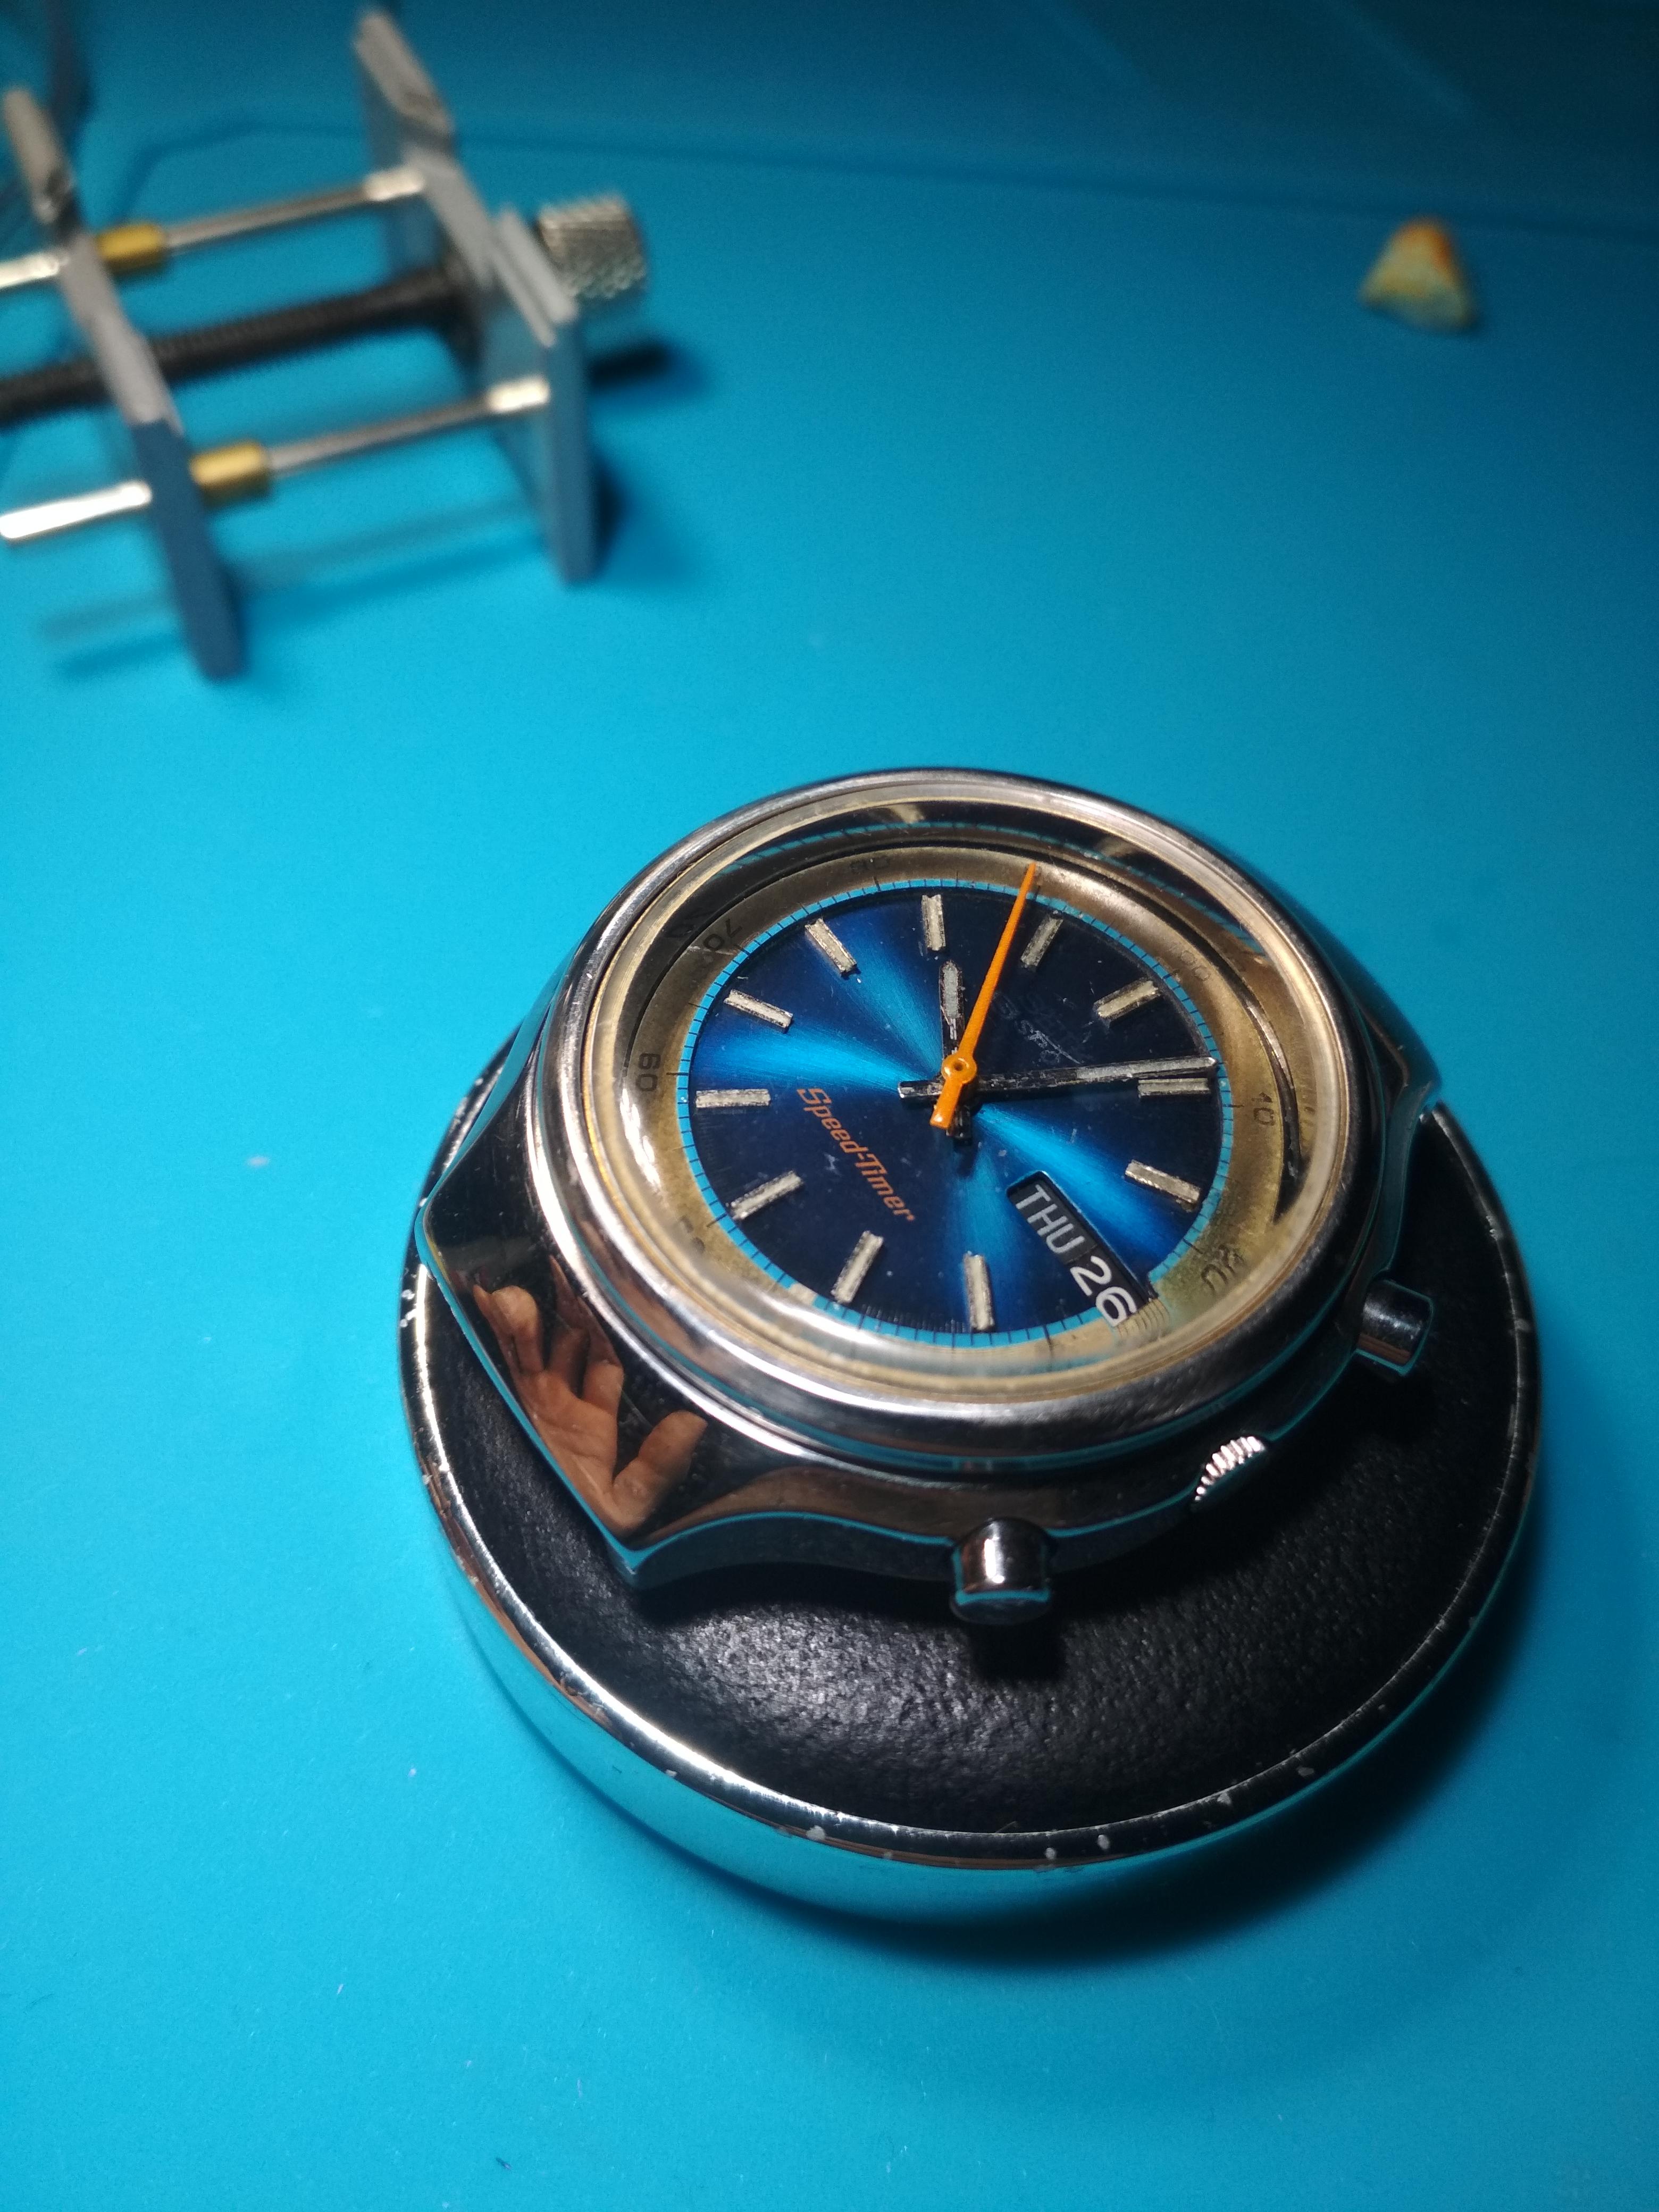
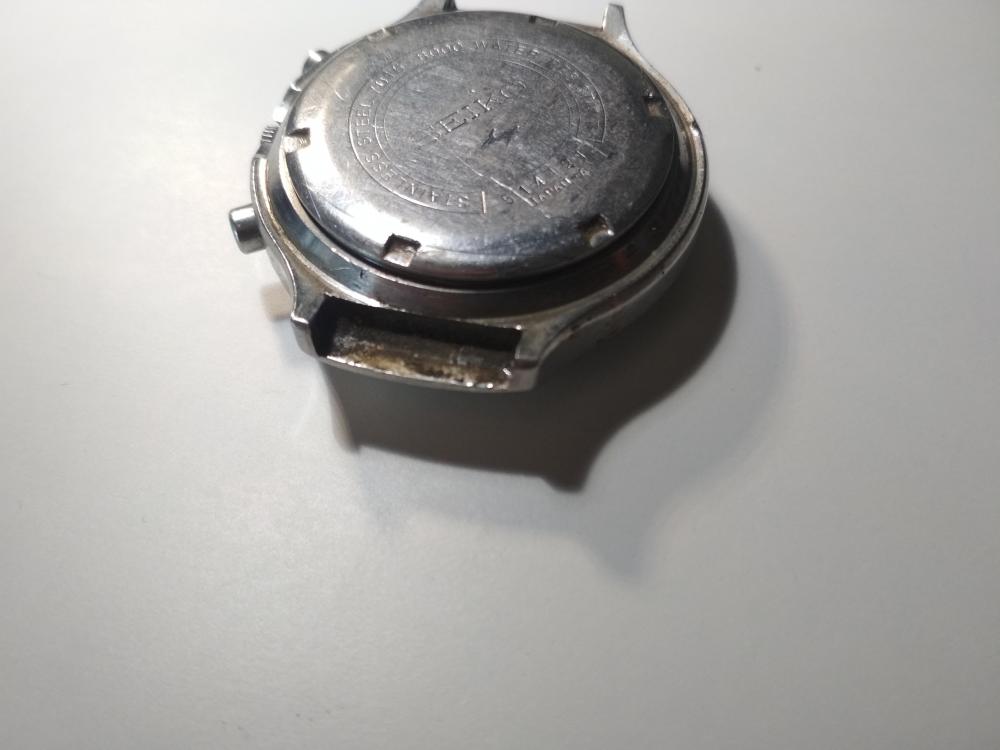
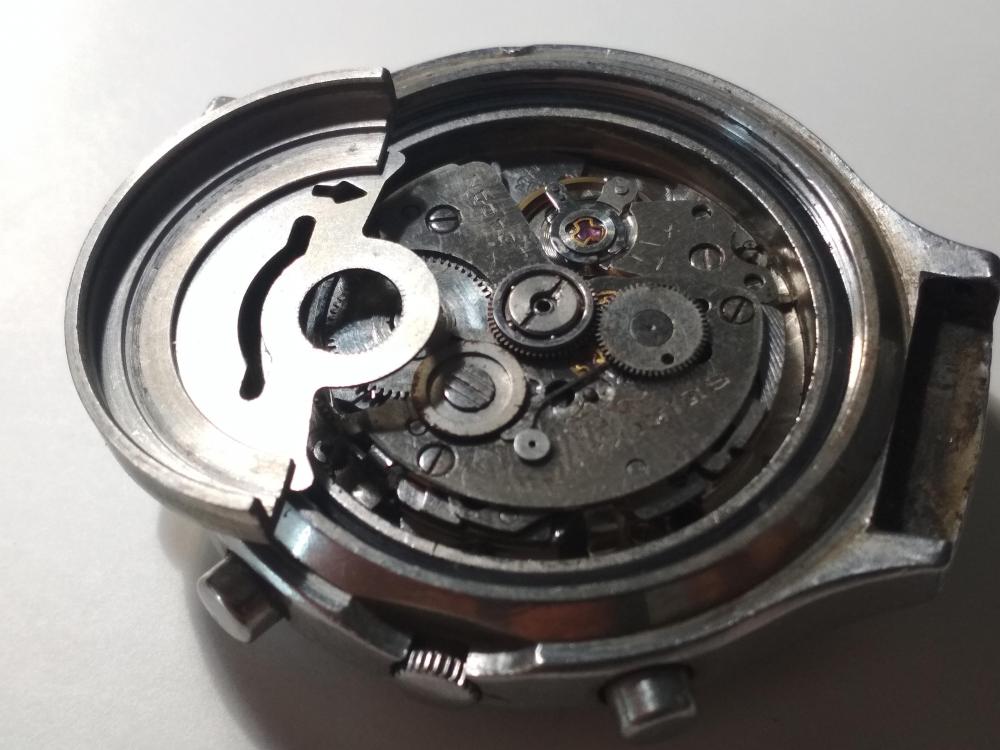
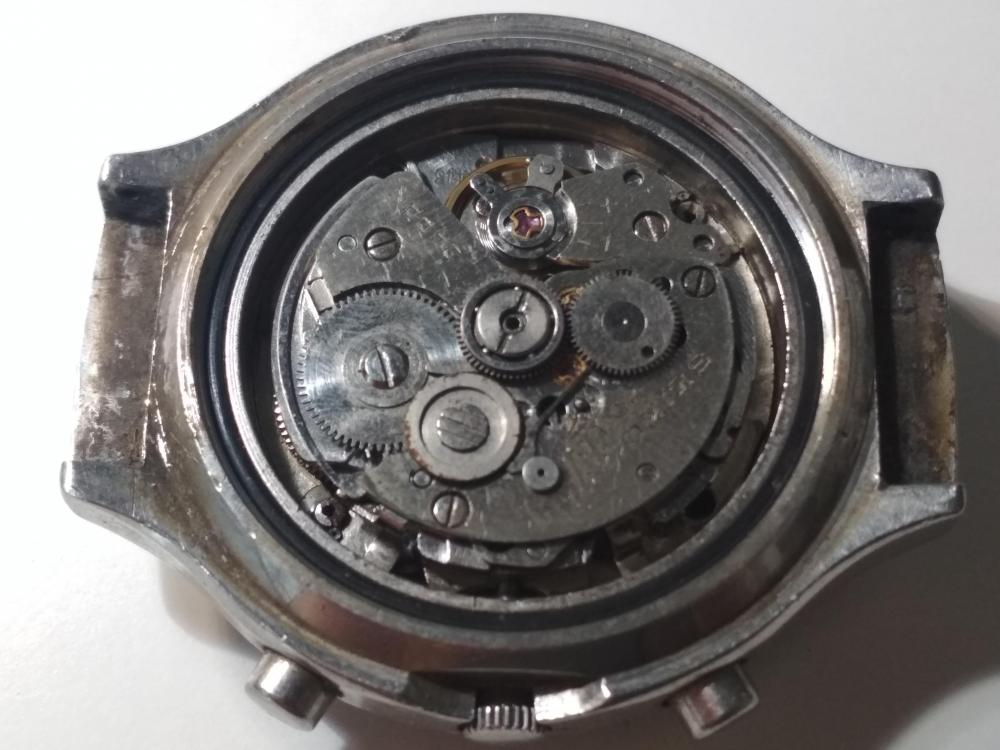
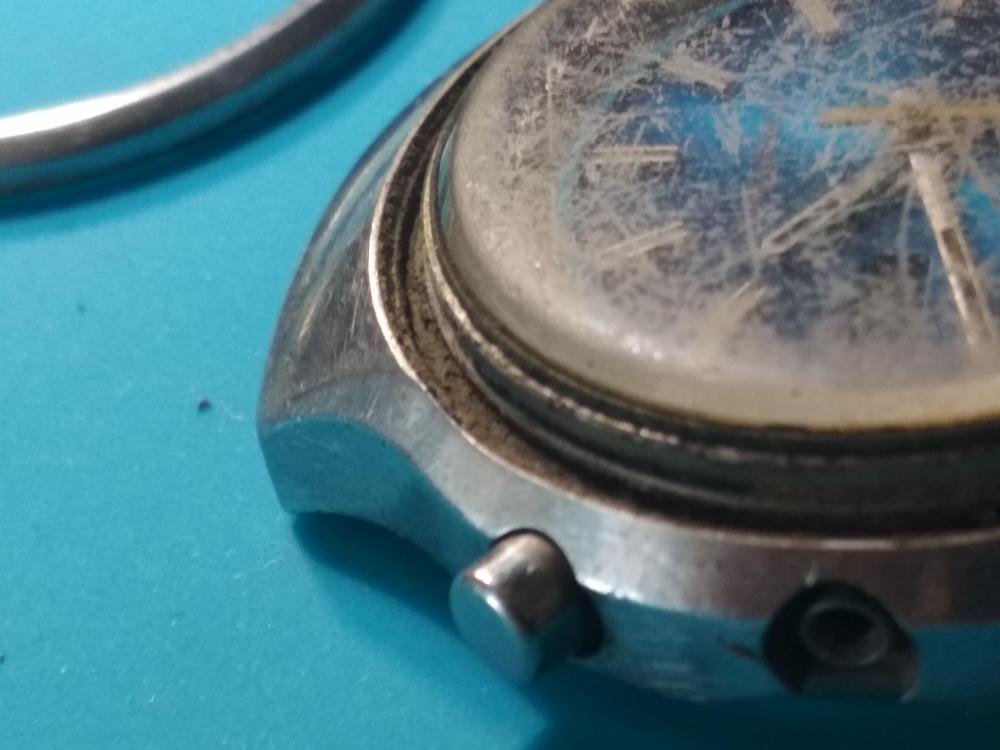
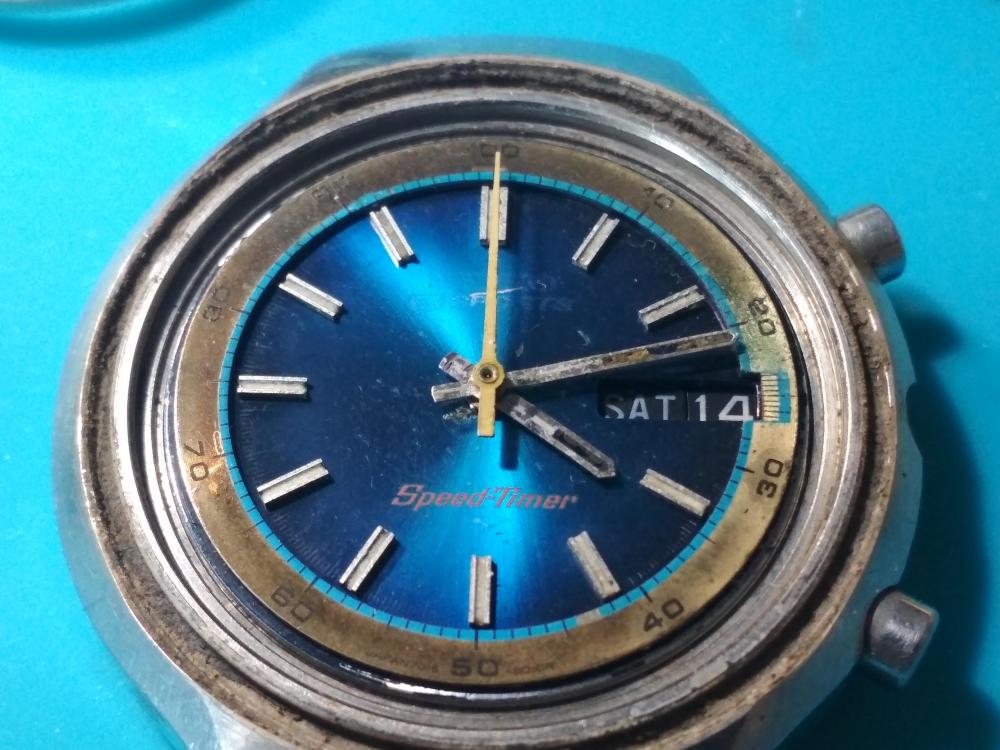
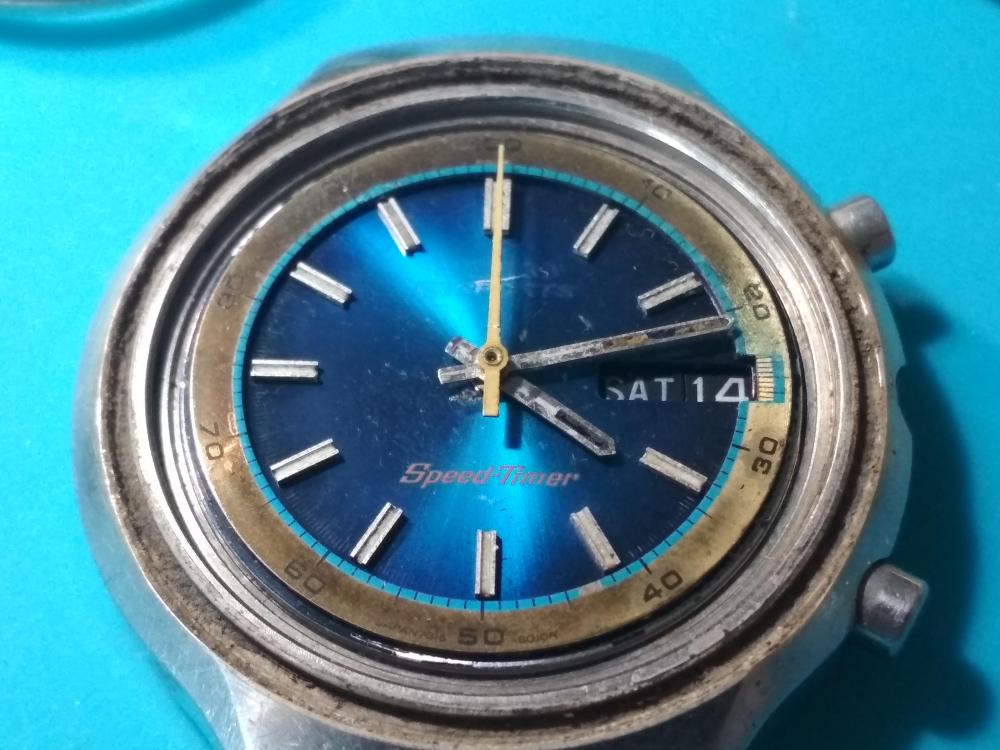
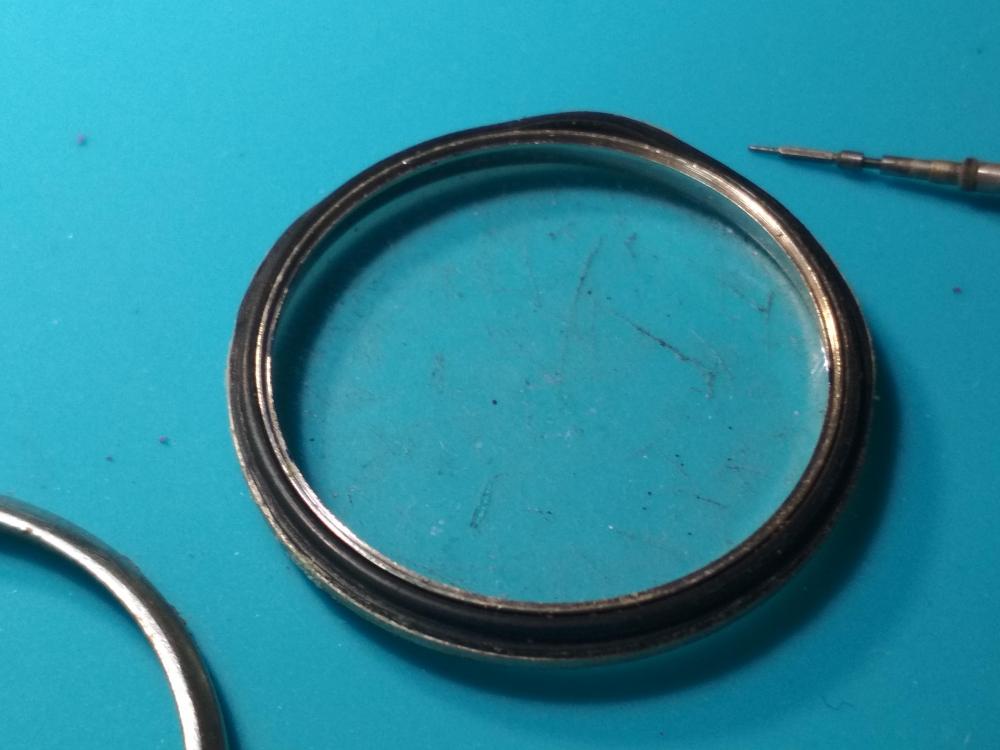
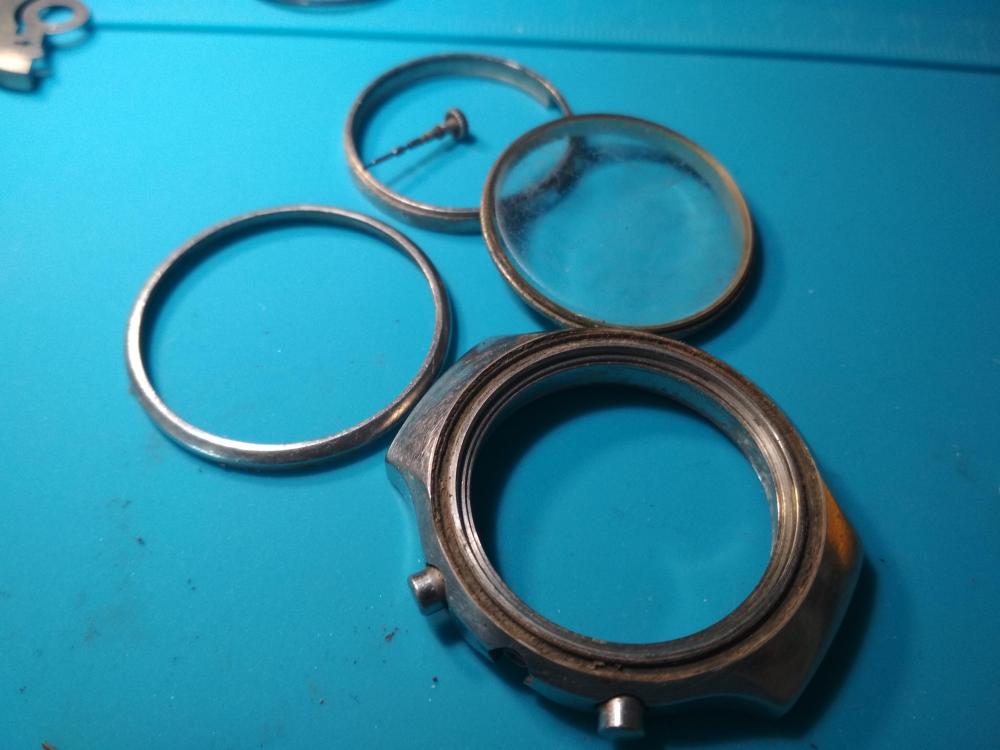
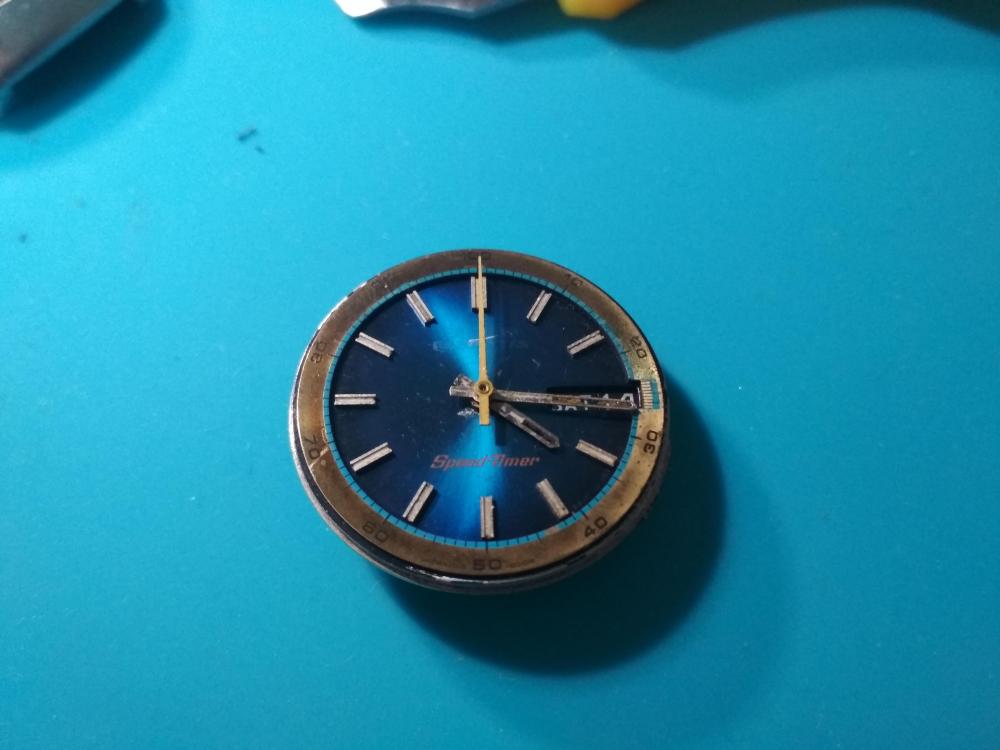
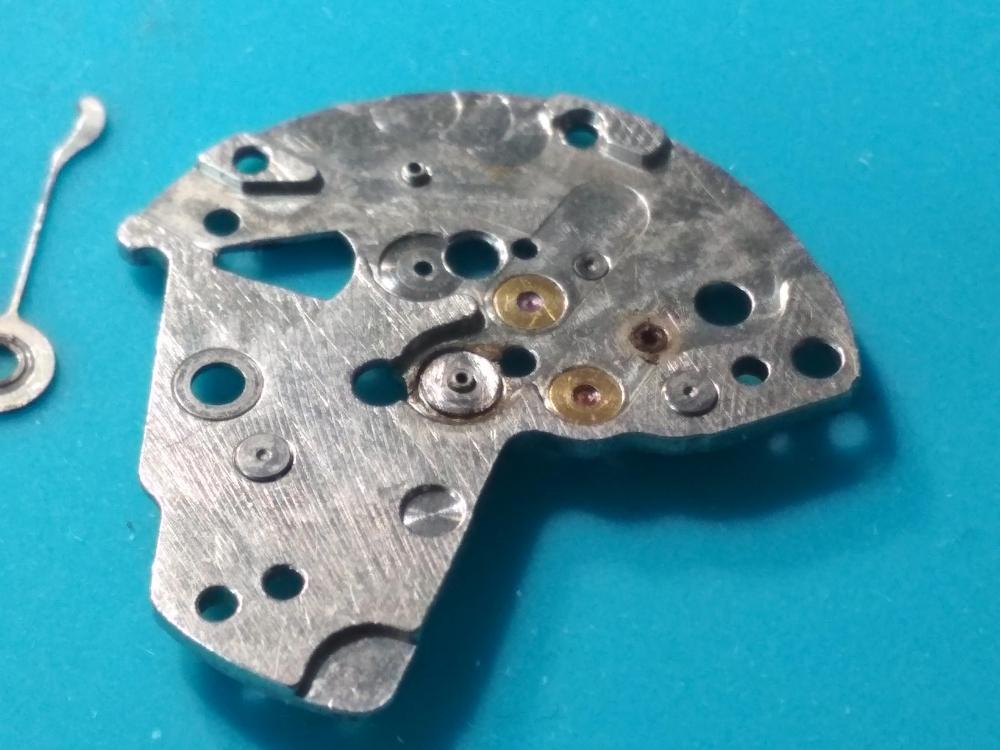
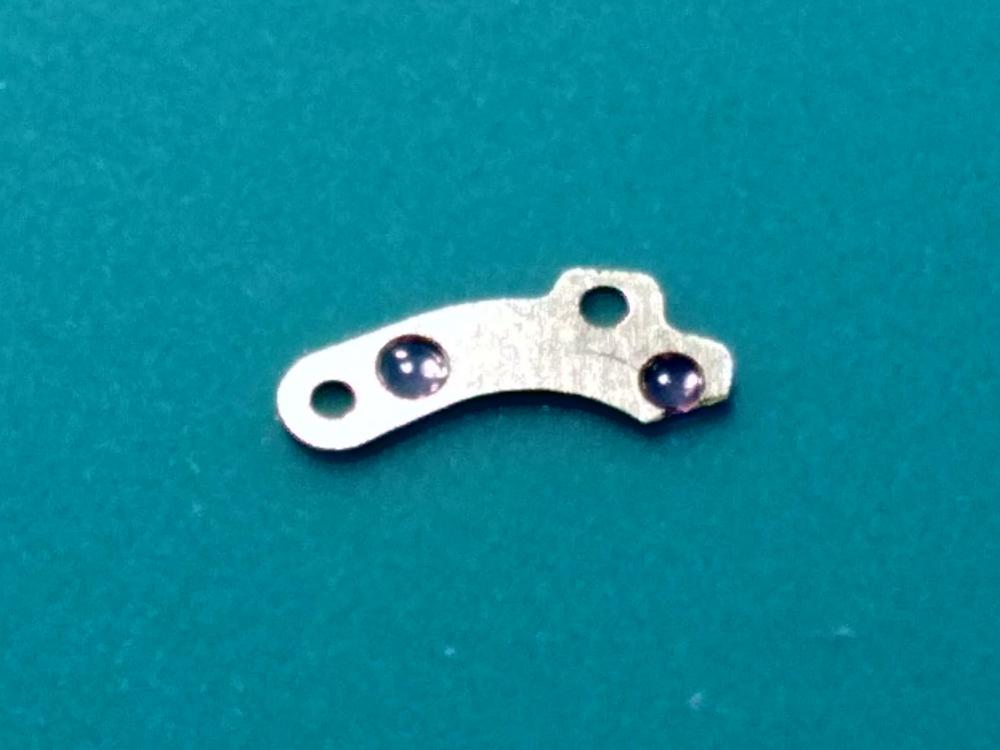
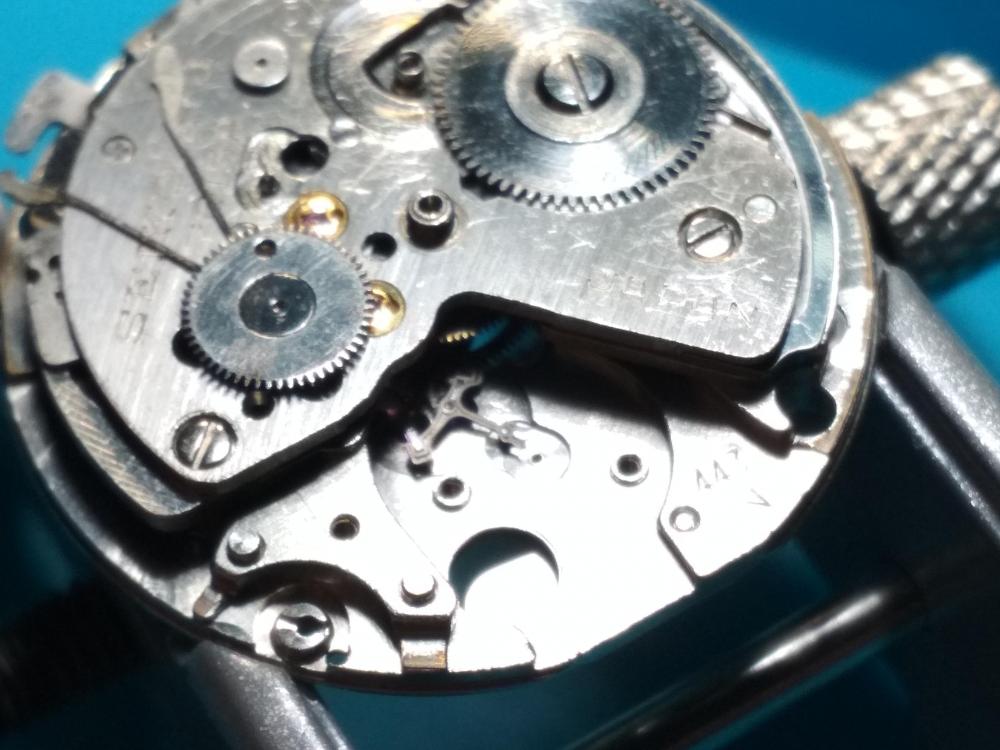
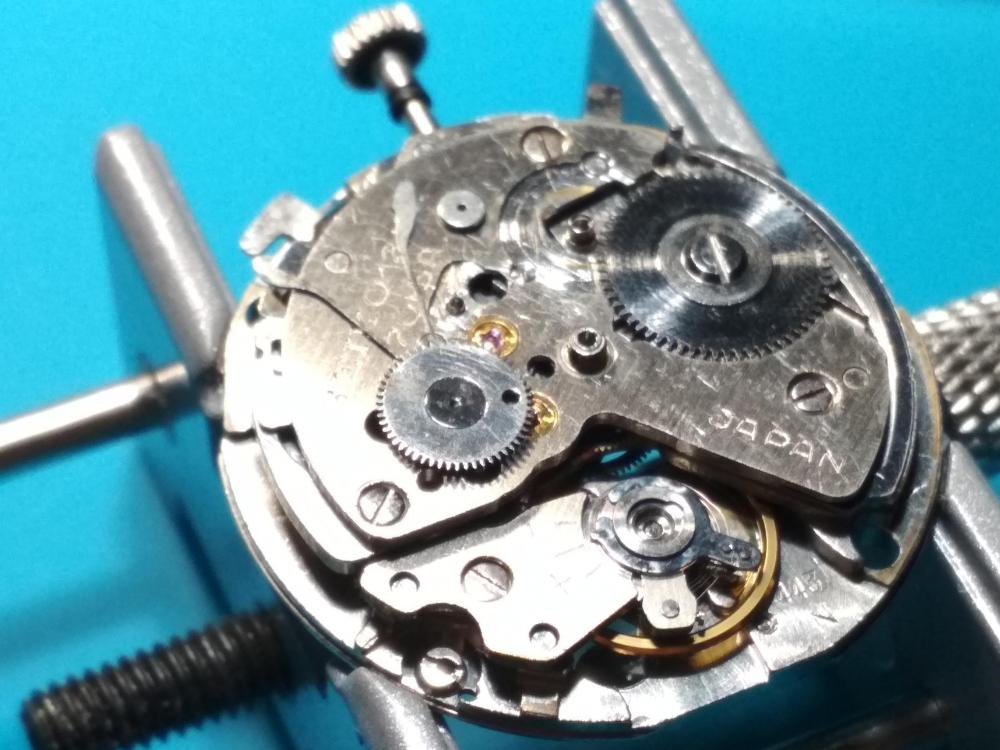
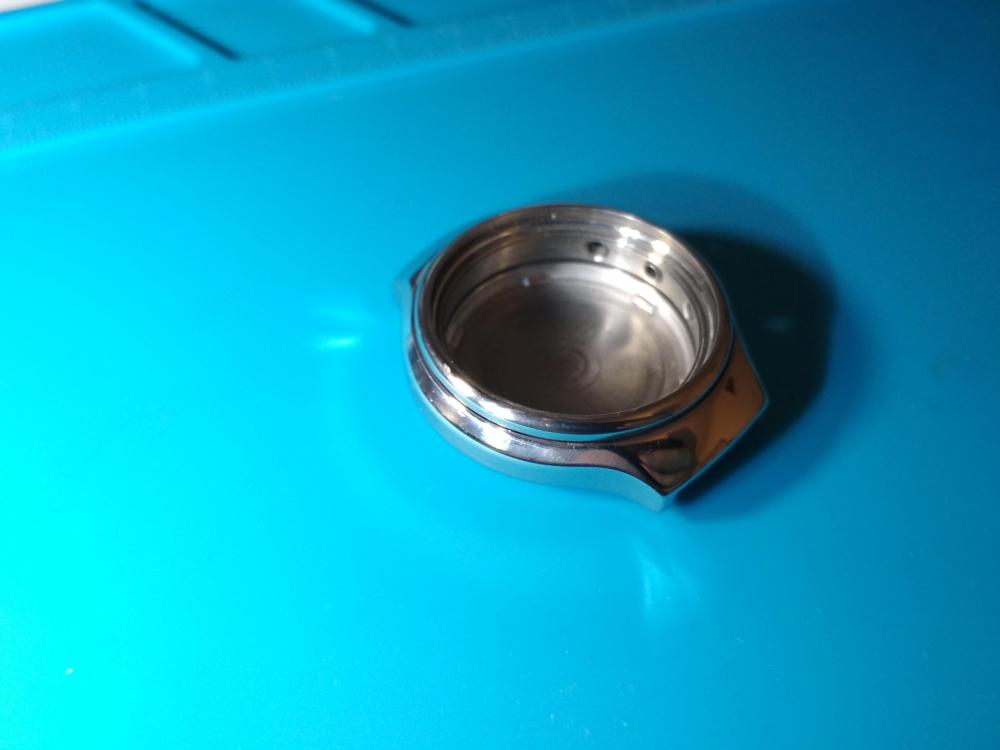
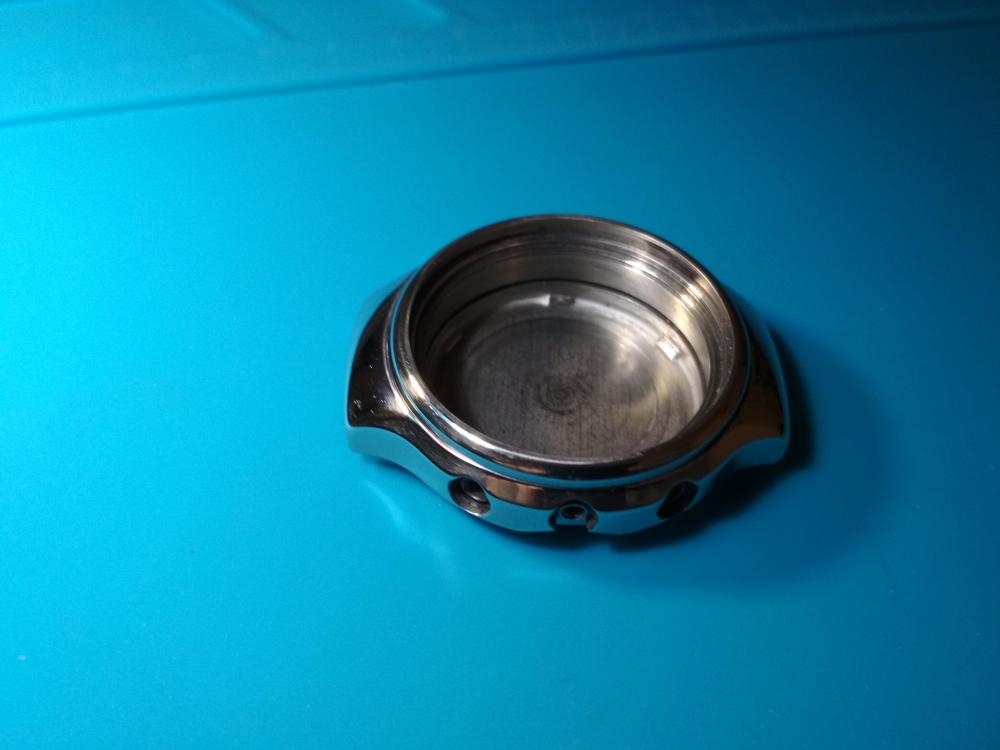
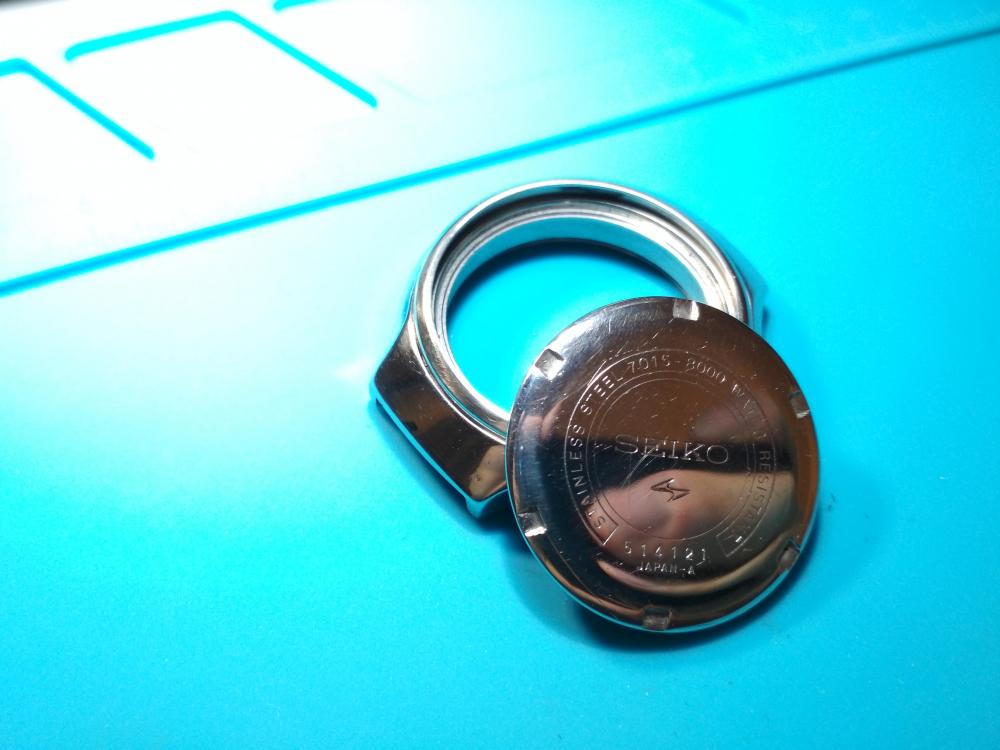
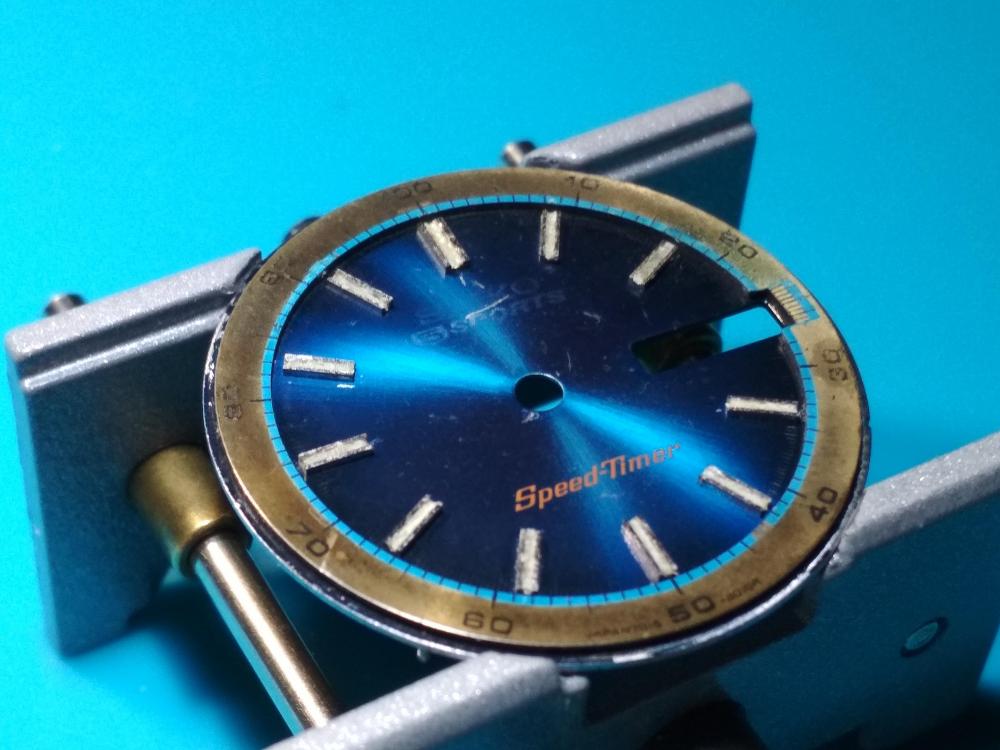
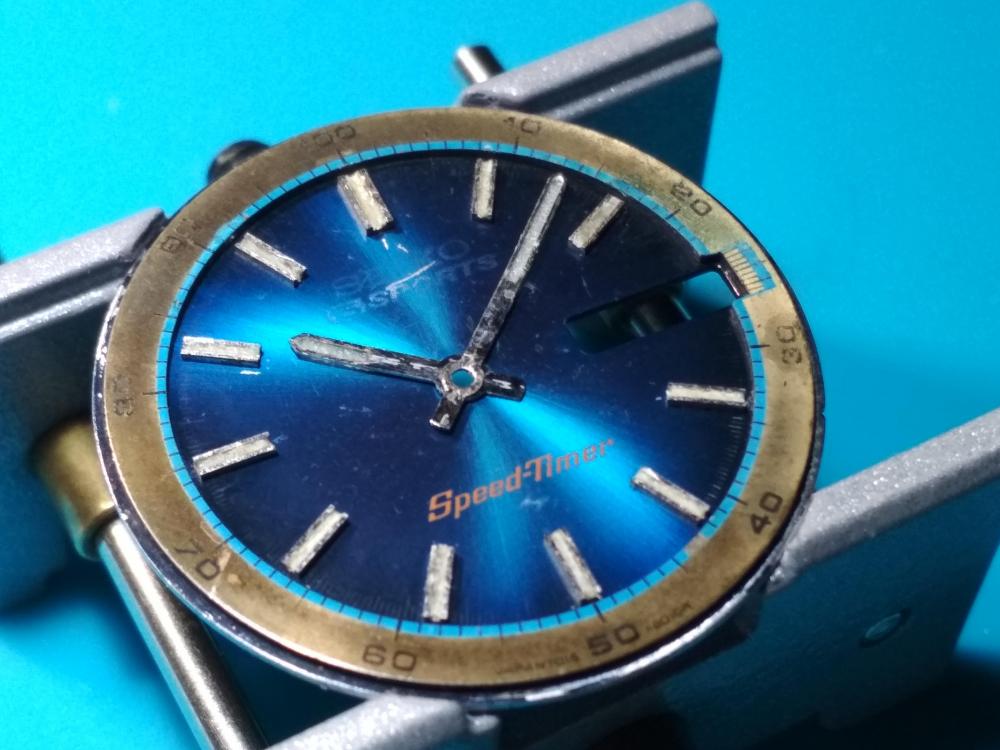
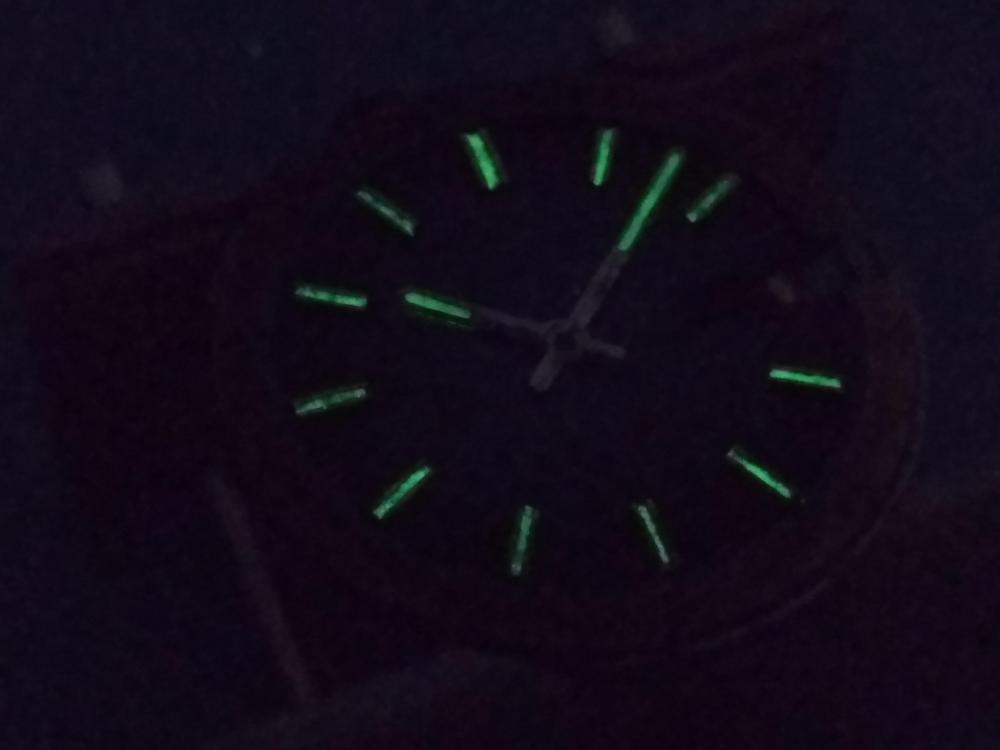
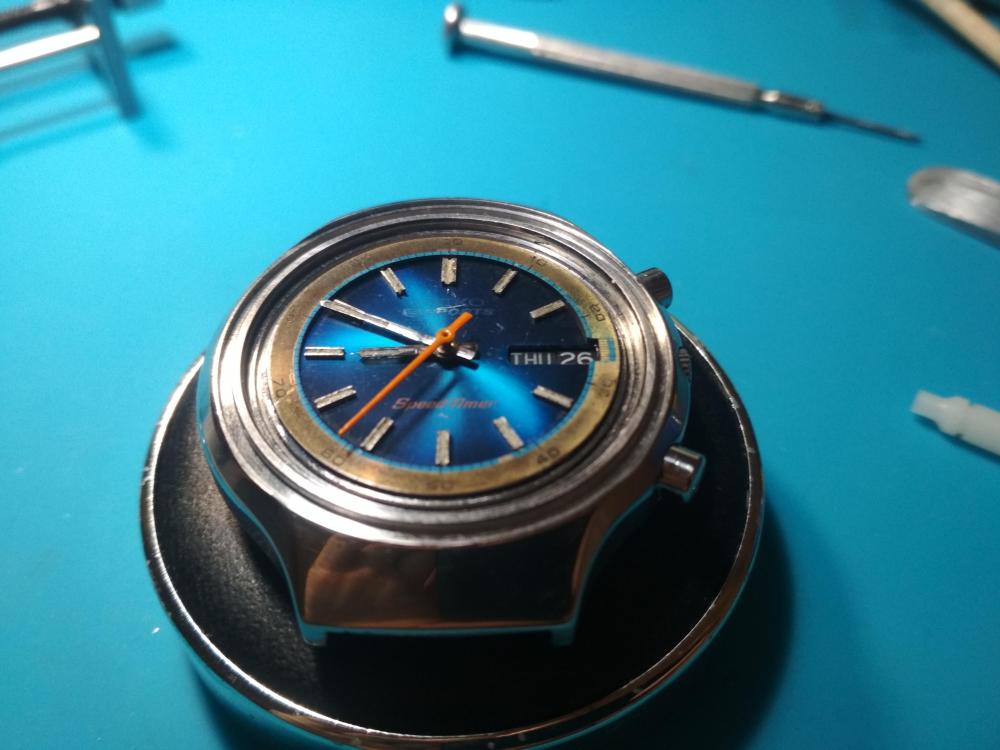
Hello guys, I want to show you my lately restoration project. This time it was a Seiko 7015-8000 with blue dial. Watch came to me in very poor condition. As you can see on photos the case was scratchty, crystal was totaly tarnished with deep scratches. Everywhere was dirt, gunk and mud...yuck. Movement was running and stopping with very low amplitude. After opened the caseback I wasn't suprised - it looked like as case - dirt and signs of wear. Rotor was loose and fall out the case. When I take off the crystall I saw dial which had faded Seiko logo, some scratches and hands which lost their lume. Next step was strip down the movement - everywhere dirt and dry old oil. Time to cleaning bath Look at this - it's my temporary balance wheel stand - I suspect that from temporary it will be permanent. It does job well. After cleaning it's time to assembly movement. Now it looks better - maybe not pristine but clean and shiny. New oil here and there and movement starts to run. Now it's time for bench testing before install it to the case. Meanwhile I took care of the case, dial and hands. Case got some polishing work - not to much cause I didn't want to loose the sharpness of edges. That is effect: Dial and hands got new lume - I am not perfect in this work but I still learn to do this. Additional the seconds hand was repainted to orange color. I didn't change the crystall but i just polished it with waterpaper and on the end polish paste. Effect suprissed me. Time for the pleasant work - putting this all pieces together into the watch. VID_20190927_195610.mp4


 1 point
 -
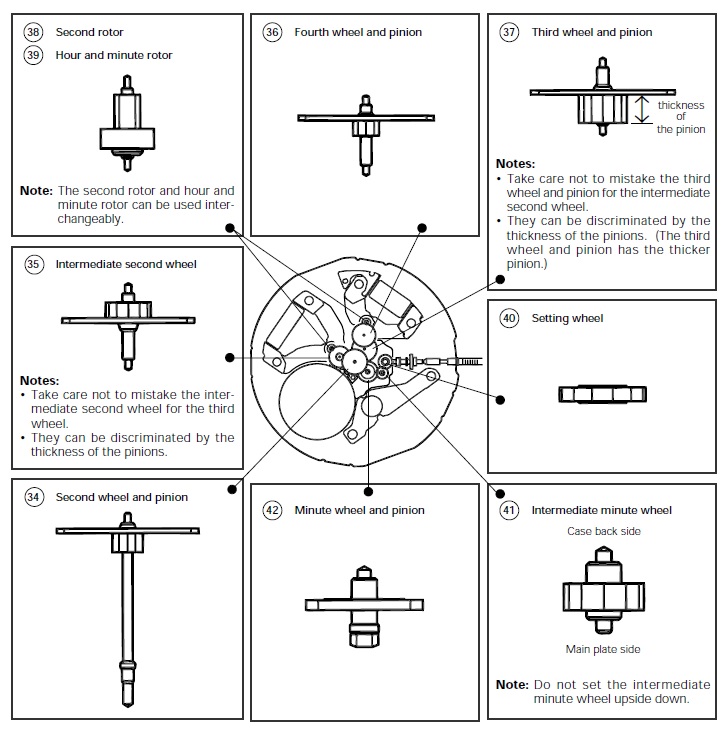
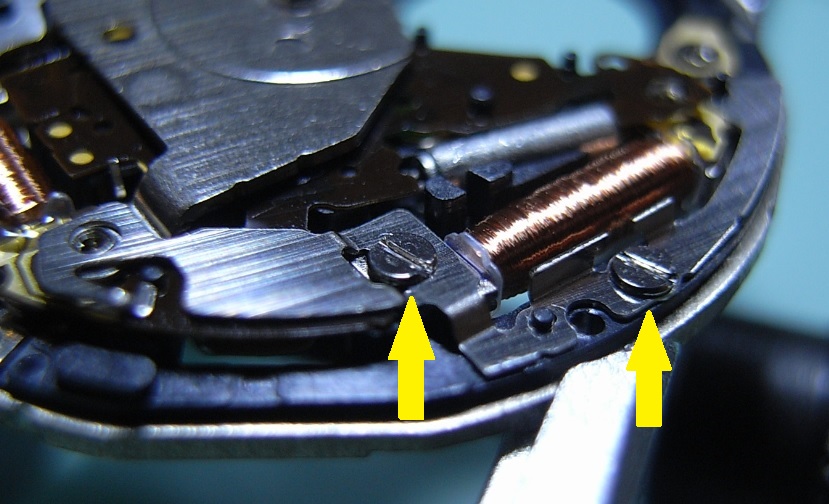
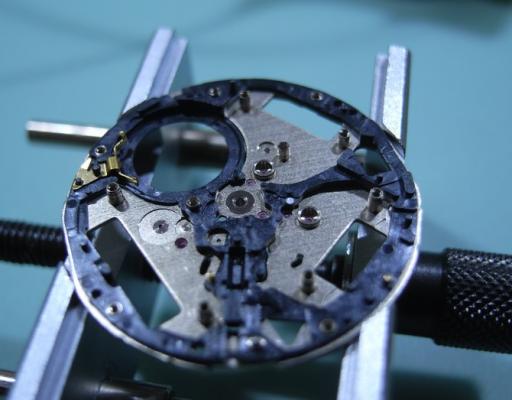
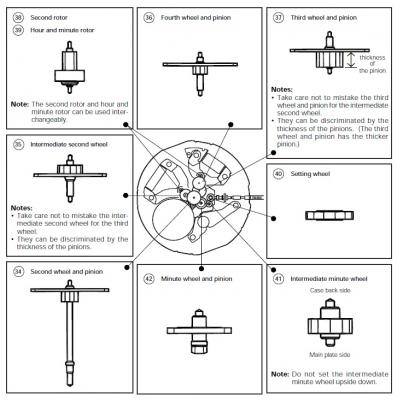
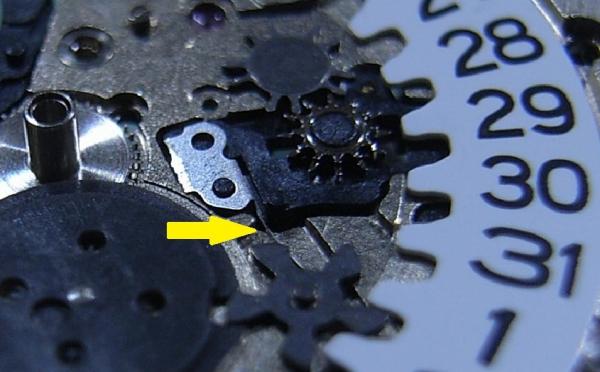
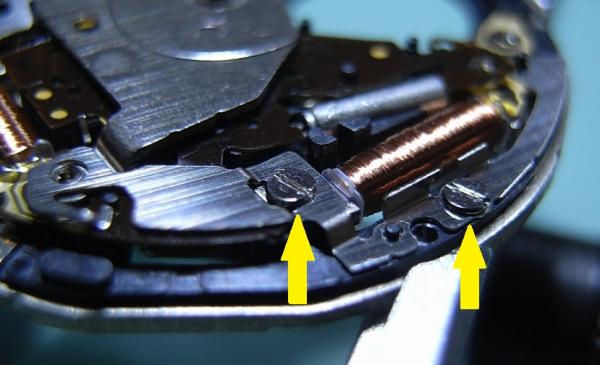
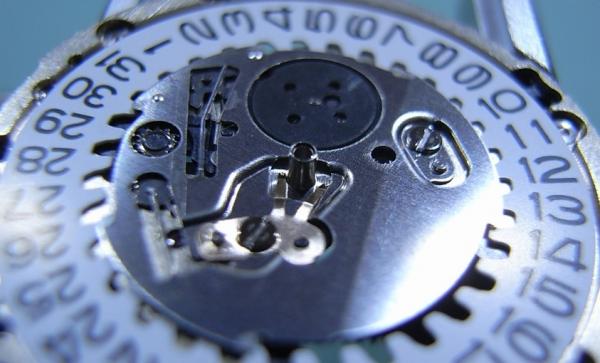
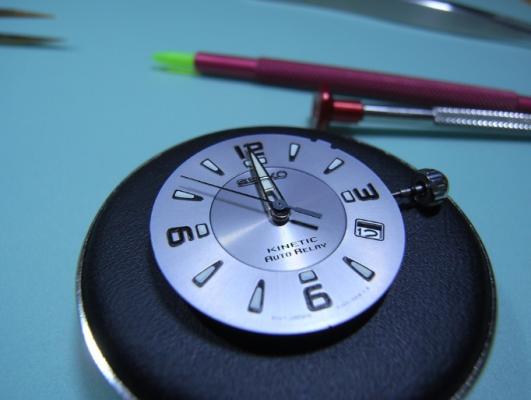
Assembly Place the Circuit Block Spacer onto the Main Plate Clean all the Stators and Rotors before you re-assembly them ... yes they are that small!! Fit the Hour and Minute Stator, and Hour and Minute Rotor Fit the Clutch Wheel and the First Intermediate Wheel for Calendar Corrector Fit the Stem Replace the Train Wheel Setting Lever, Yoke, Setting Lever, and Setting Lever Spring Fit the Generating Stator and Generating Rotor, and also the Second Stator and Second Rotor Next is the Train and Motion Work, it is by far the hardest part of the assembly. It is all housed under one plastic bridge, so to make it easier here is a location chart. First the Motion Work - Setting Wheel, Intermediate Minute Wheel, Minute Wheel and Pinion Slide the Center Wheel and Pinion in the affix the Spacer Then add the Train - Third Wheel and Pinion, Intermediate Second Wheel, Fourth Wheel and Pinion, Second Wheel and Pinion Place the Train Bridge on and locate all the gears into their jewel holes. Next steps are easy, but be careful and gentle Fit the Coil Blocks - Generating Coil Block, Second Coil Block, Hour and Minute Coil Block Then CAREFULLY fit the Circuit Block Place the Oscillating Weight Bridge; but do not screw down. Then fit the Circuit Block Cover B, and only fasten screws indicated by yellow arrows. Place Circuit Block Cover D but do not fasten Continue and fit Circuit Block Cover C, this one you can screw down ... sorry forgot to take a photo, but it's the only cover left Now place the Circuit Block Cover A Cover on and fasten down all the screws Remember to leave the Battery Screw out ... as shown in the picture below Flip the movement over and fit the Hour Wheel, then the Intermediate Hour Wheel NOTE: I pictured the Intermediate Hour Wheel upside down ... sorry about that. Fit the Intermediate date Driving Wheel Replace the Date Driving Wheel, and the Date Driving Wheel Spring (Note spring location) Replace the Day-Date Corrector Wheel (See fitting instructions on Page 9 of Tech Specs) Replace the Second Intermediate Wheel for Calendar Corrector Place the Date Dial Guard on, fit the Hour Wheel Guard Spring, and fasten Install the Battery, and then fit the Oscillating Weight Fit the Dial and Hands Case the movement back up ... and you're done!


 1 point