Leaderboard


Popular Content
Showing content with the highest reputation on 08/26/24 in Posts
-
That's where the big leap happens from following photos taken to reassemble a movement, to spotting something out of place, because you know how the movement should work and you are not making assumptions about what you have found when disassembling. I always tell my students 'Don't assume what you find is how it is meant to be.' Like the brake spring. You'll be surprised what you find when you look at a movement with scepticism.3 points
-
Print a pallet fork & escape wheel and you've got a Tissot!3 points
-
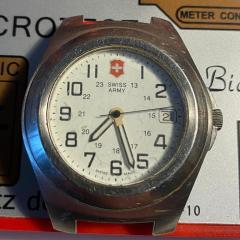
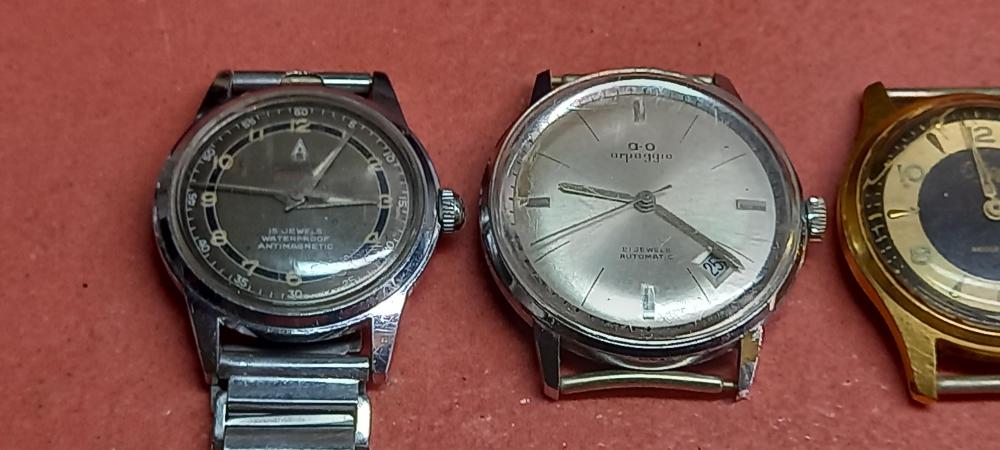
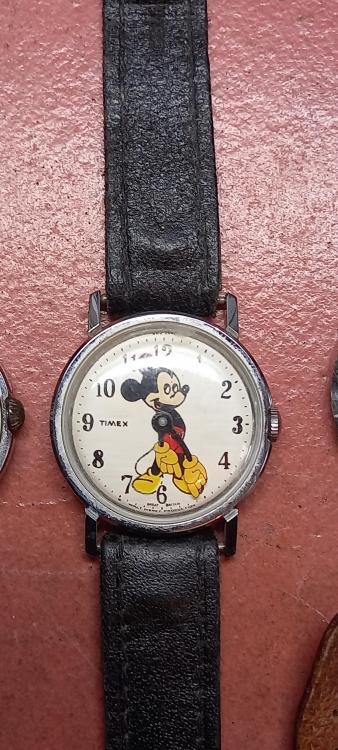
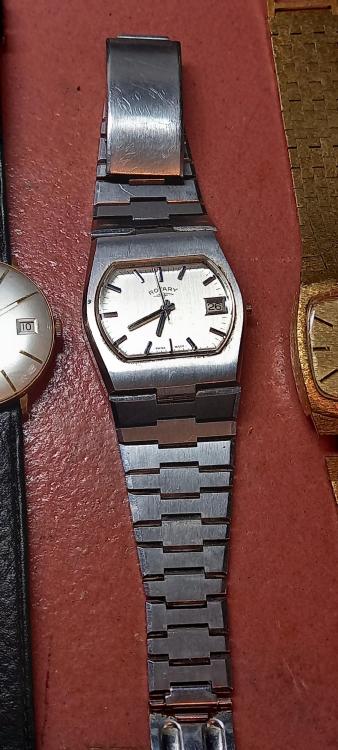
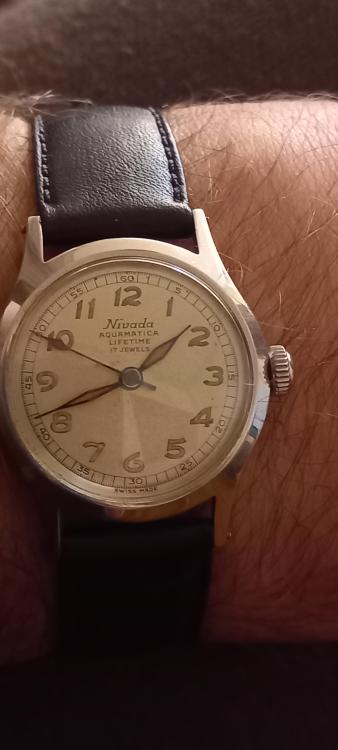
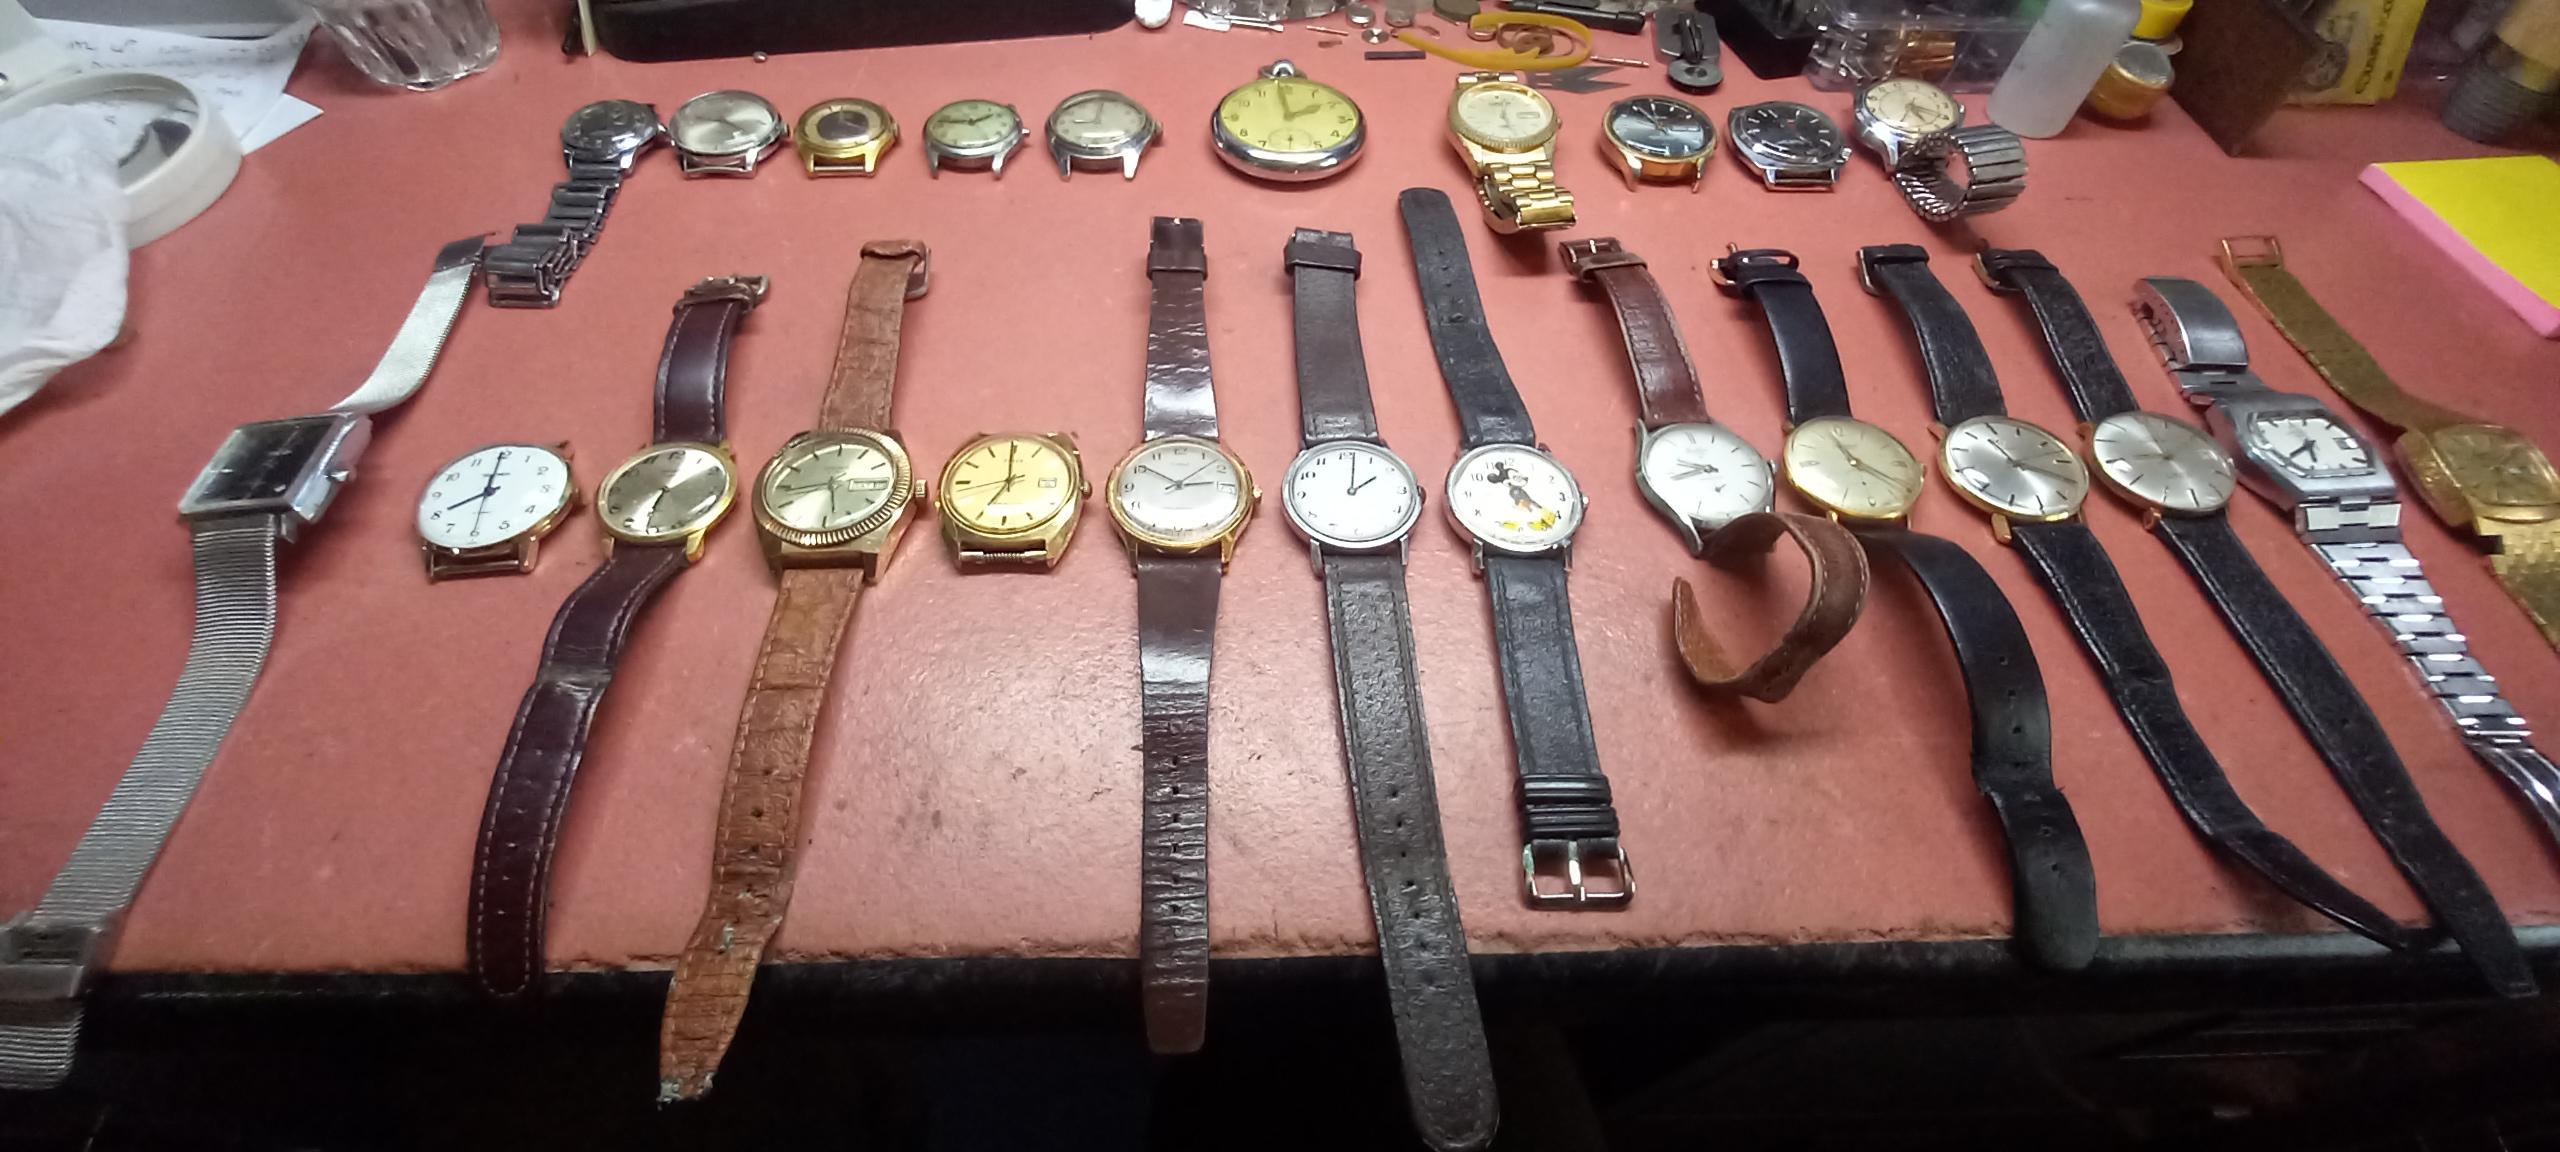
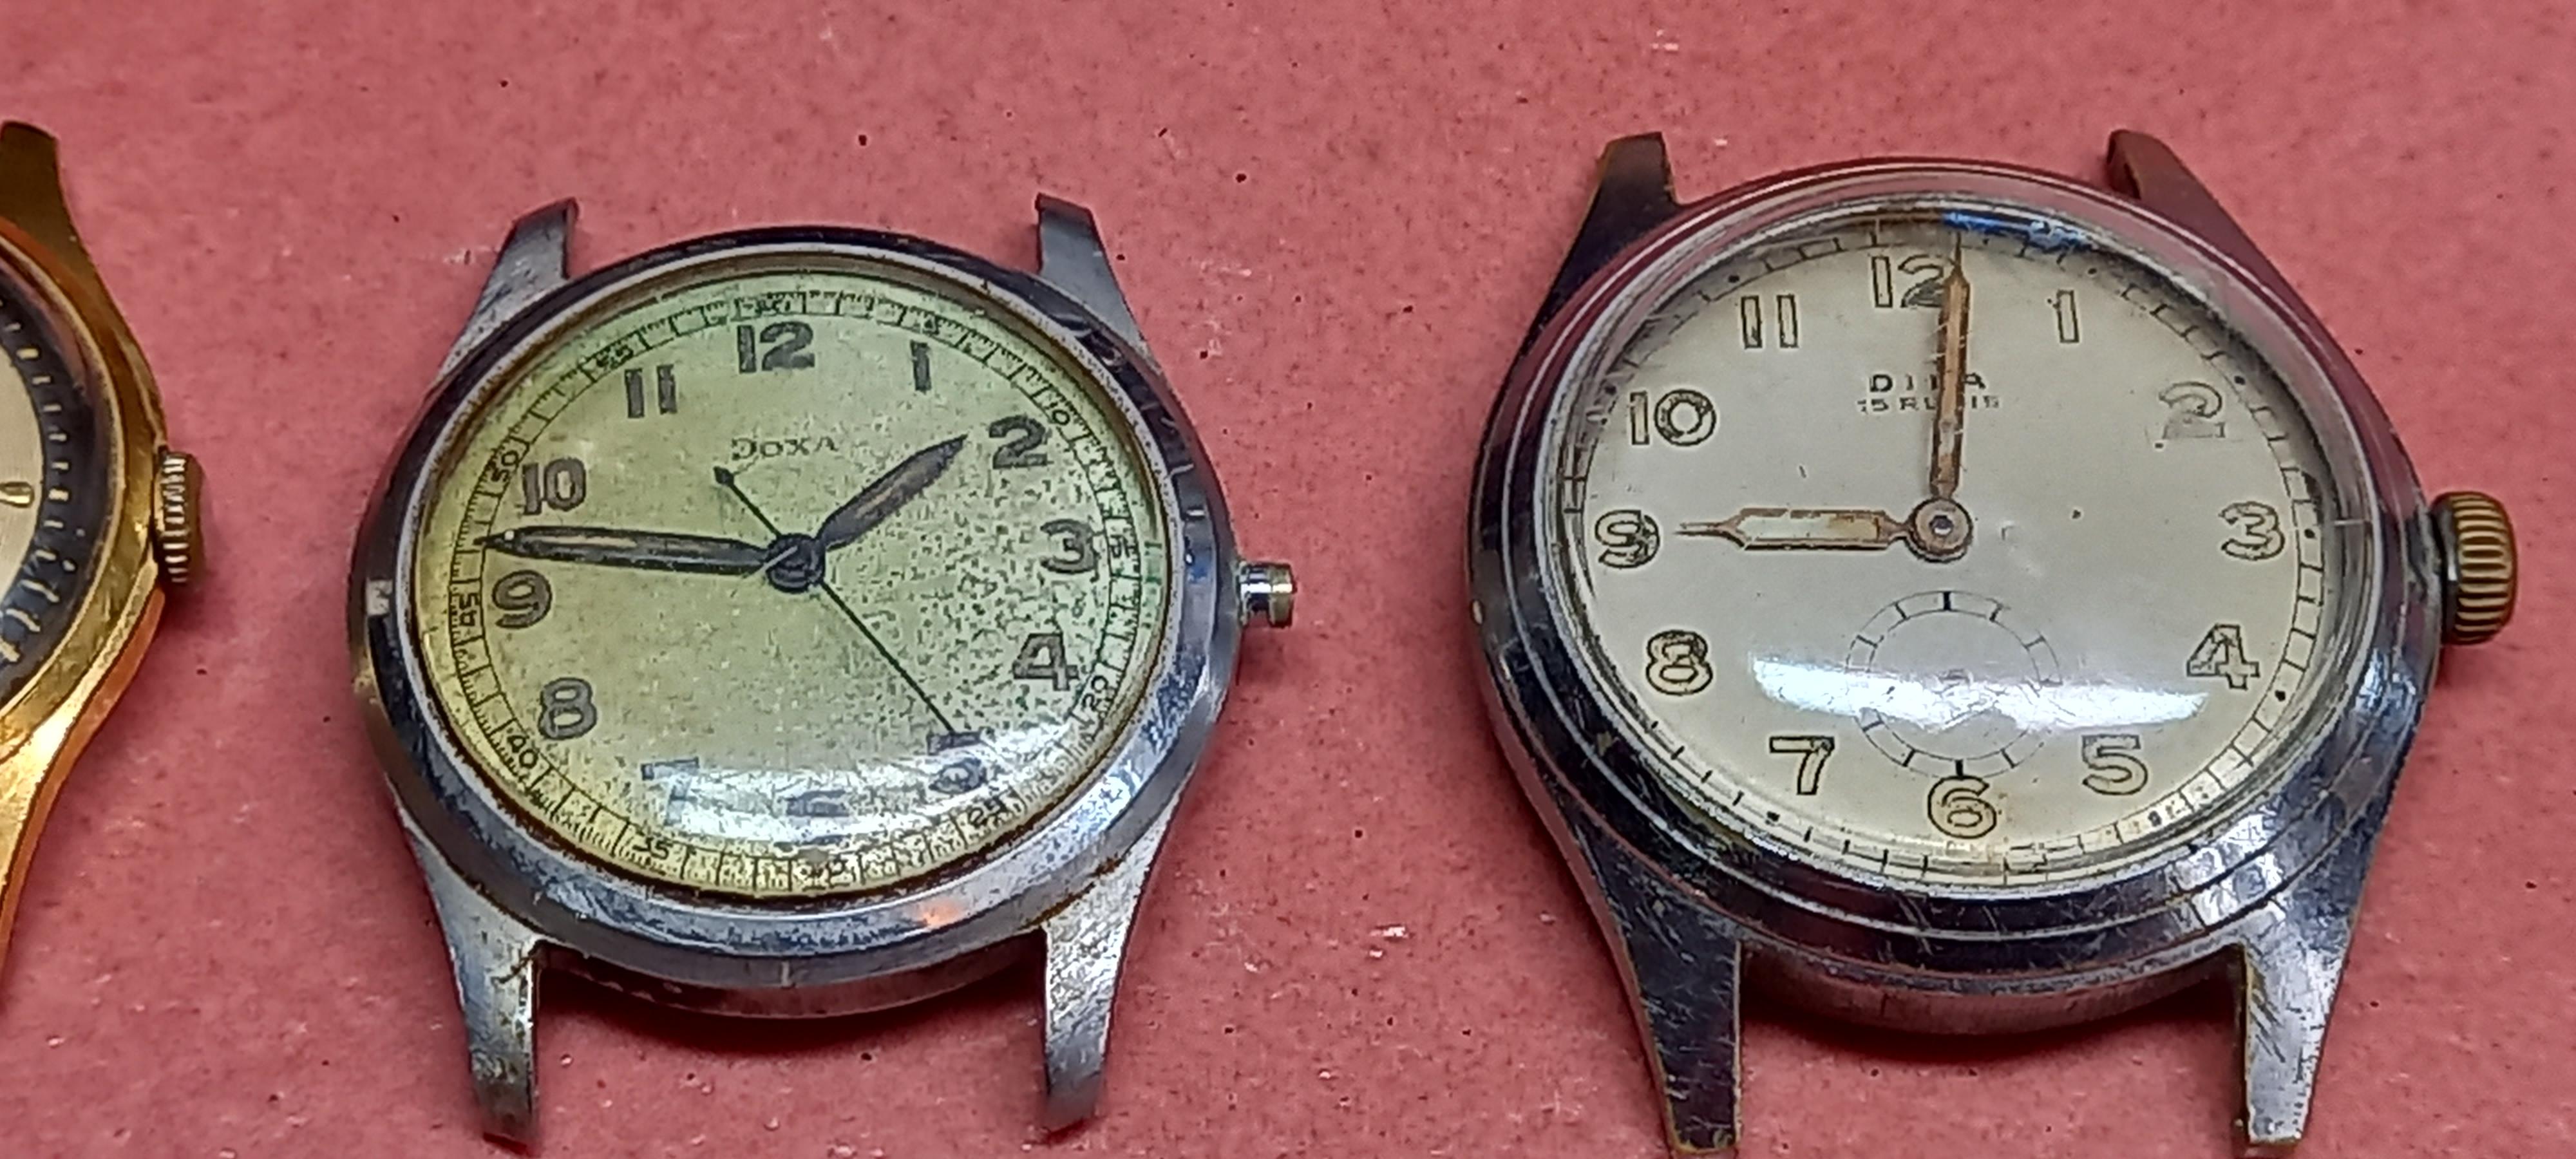
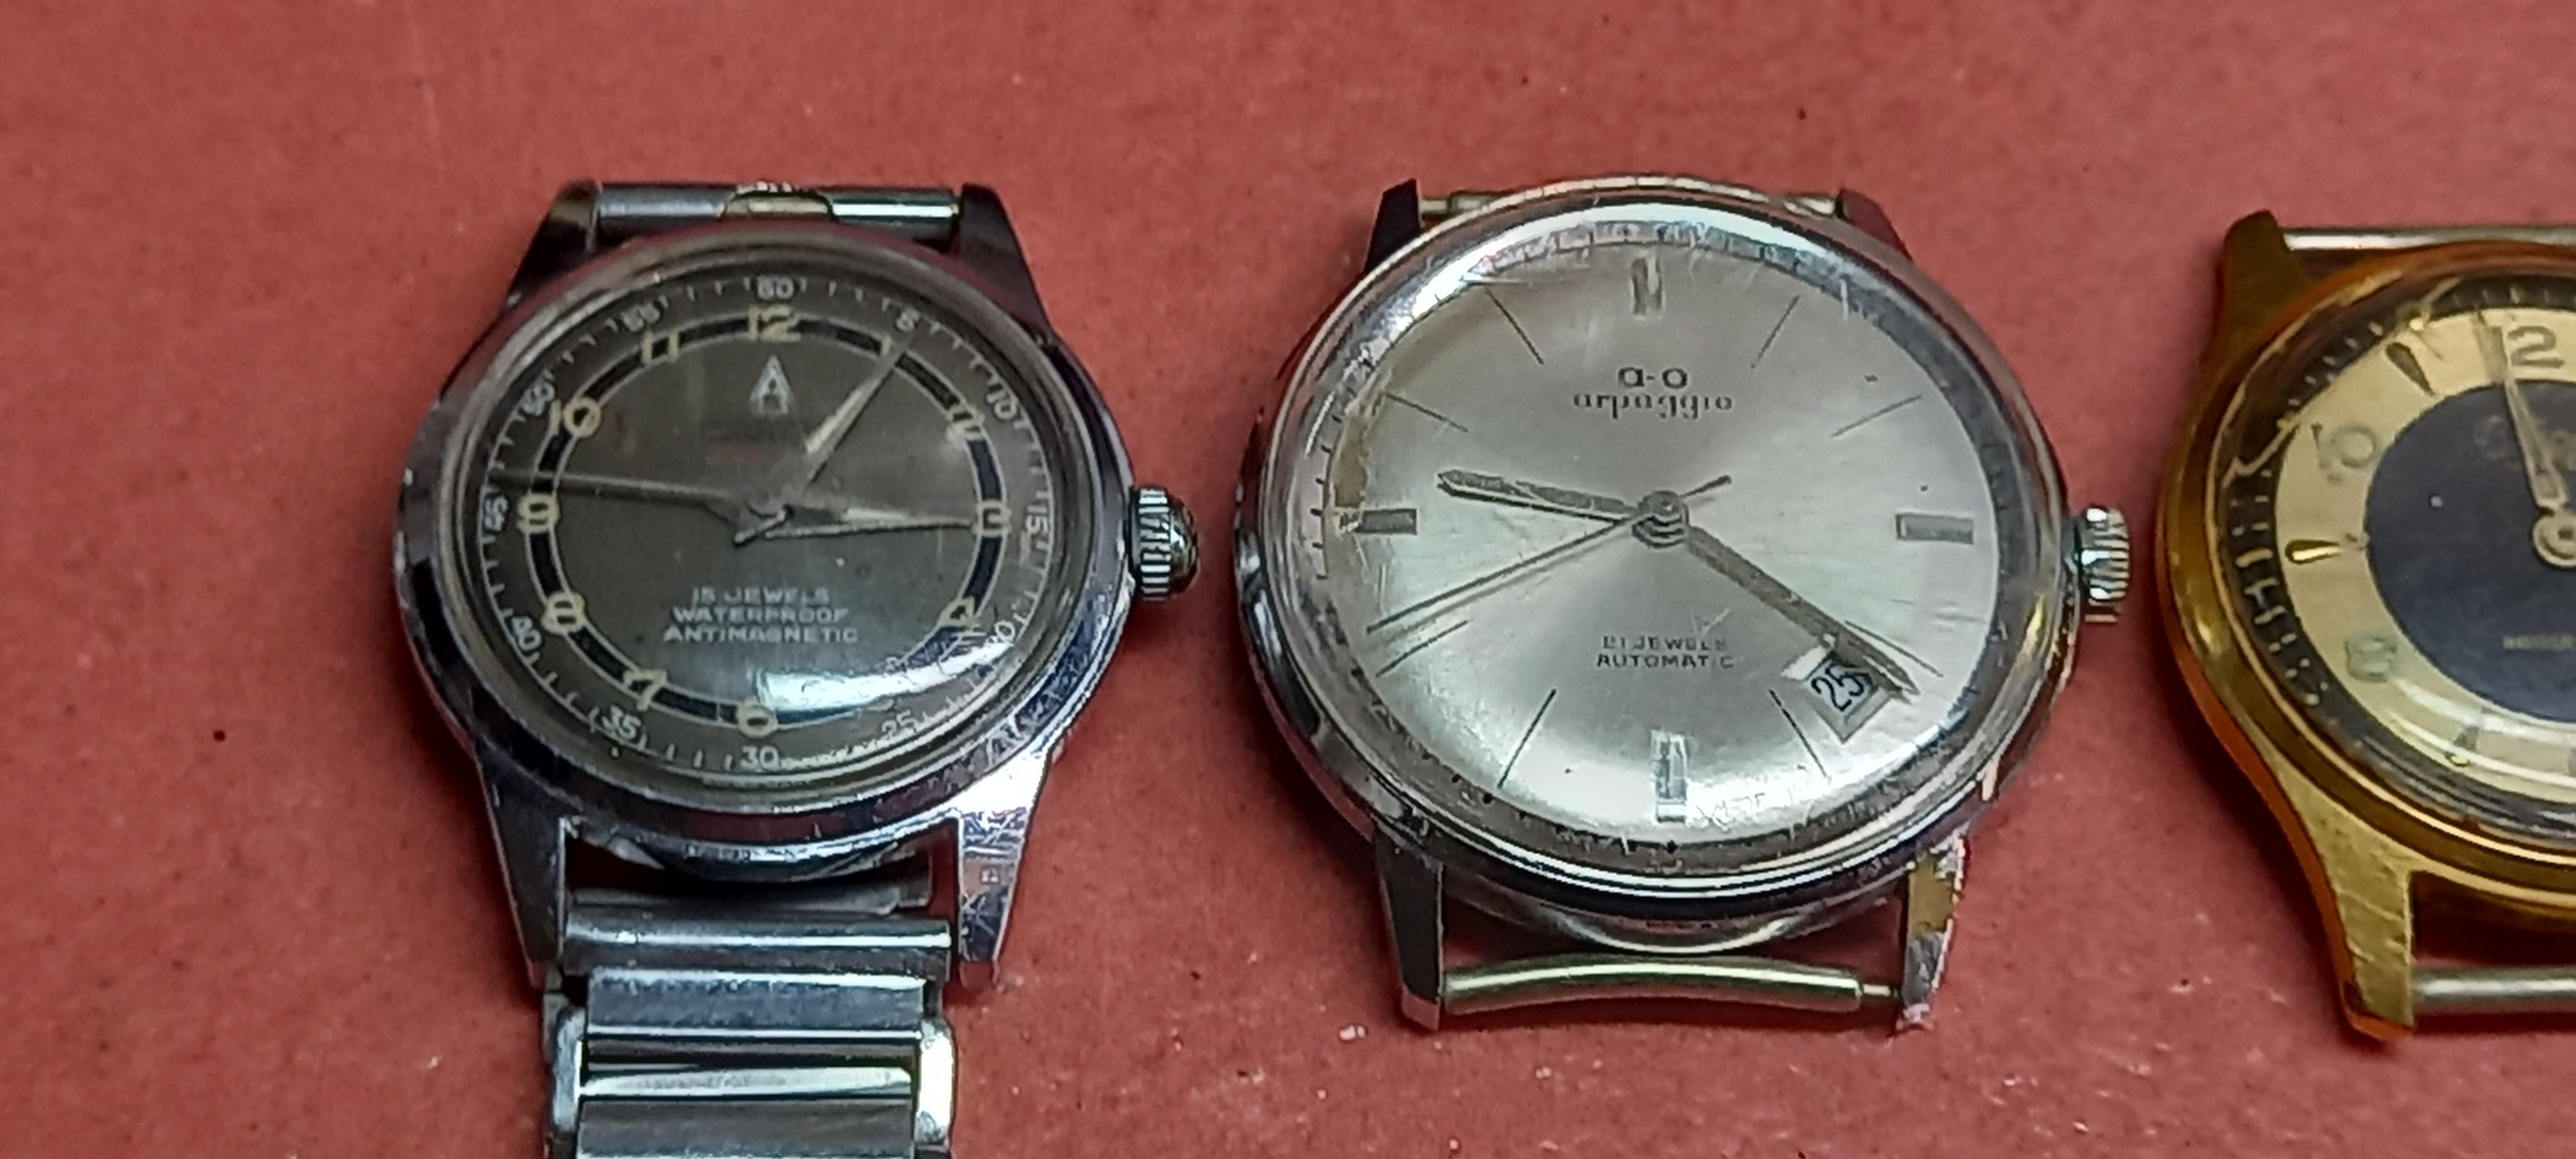
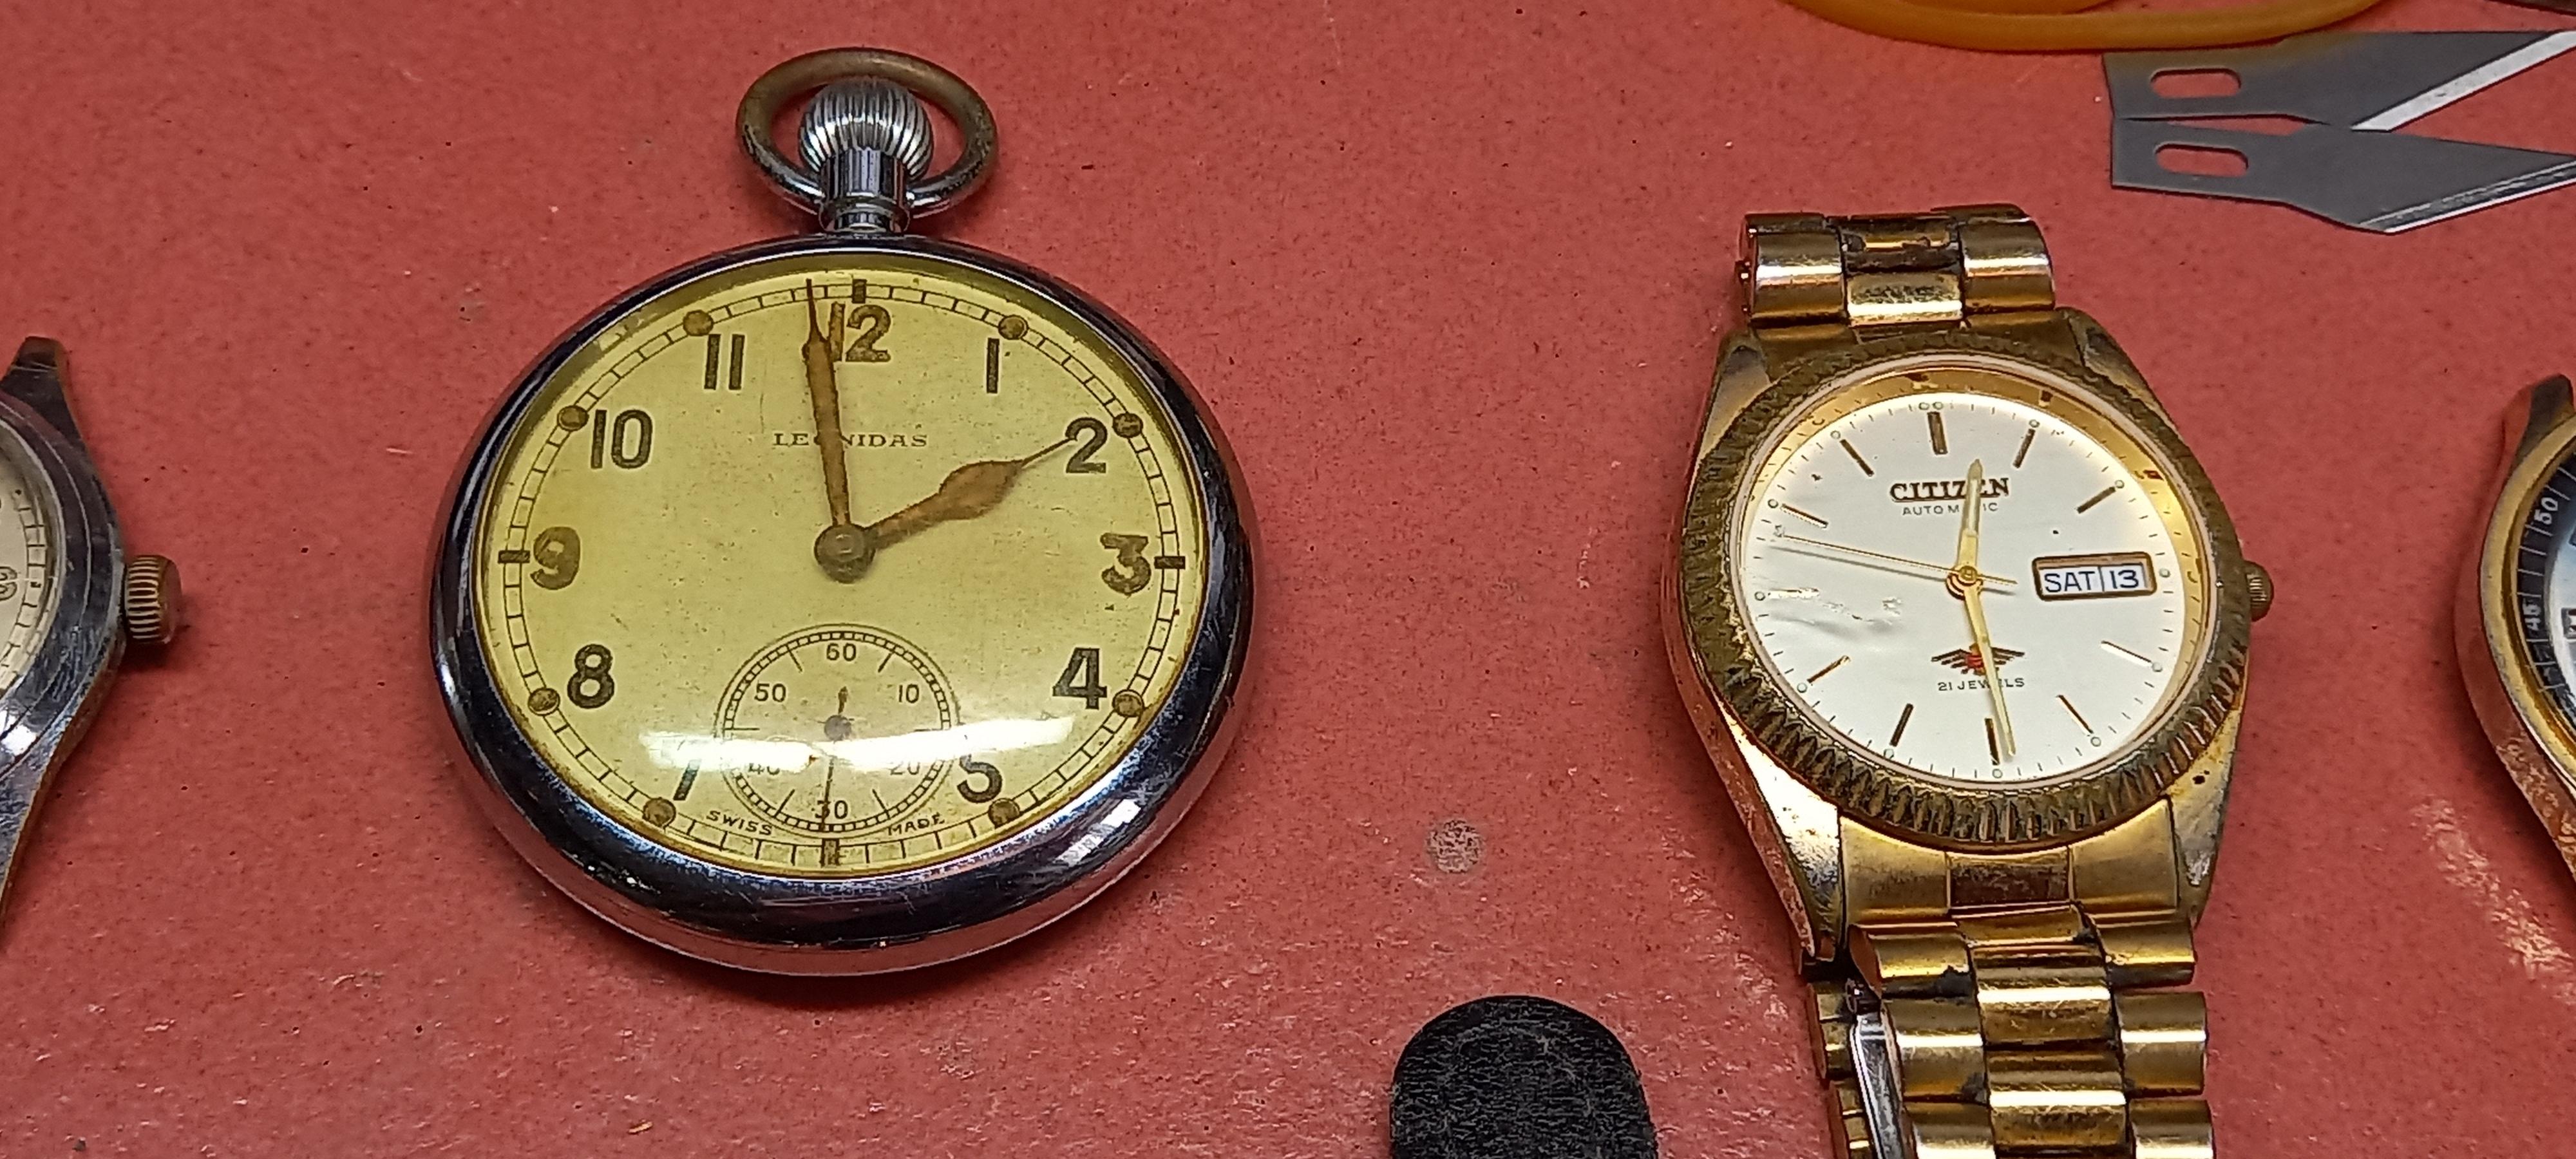
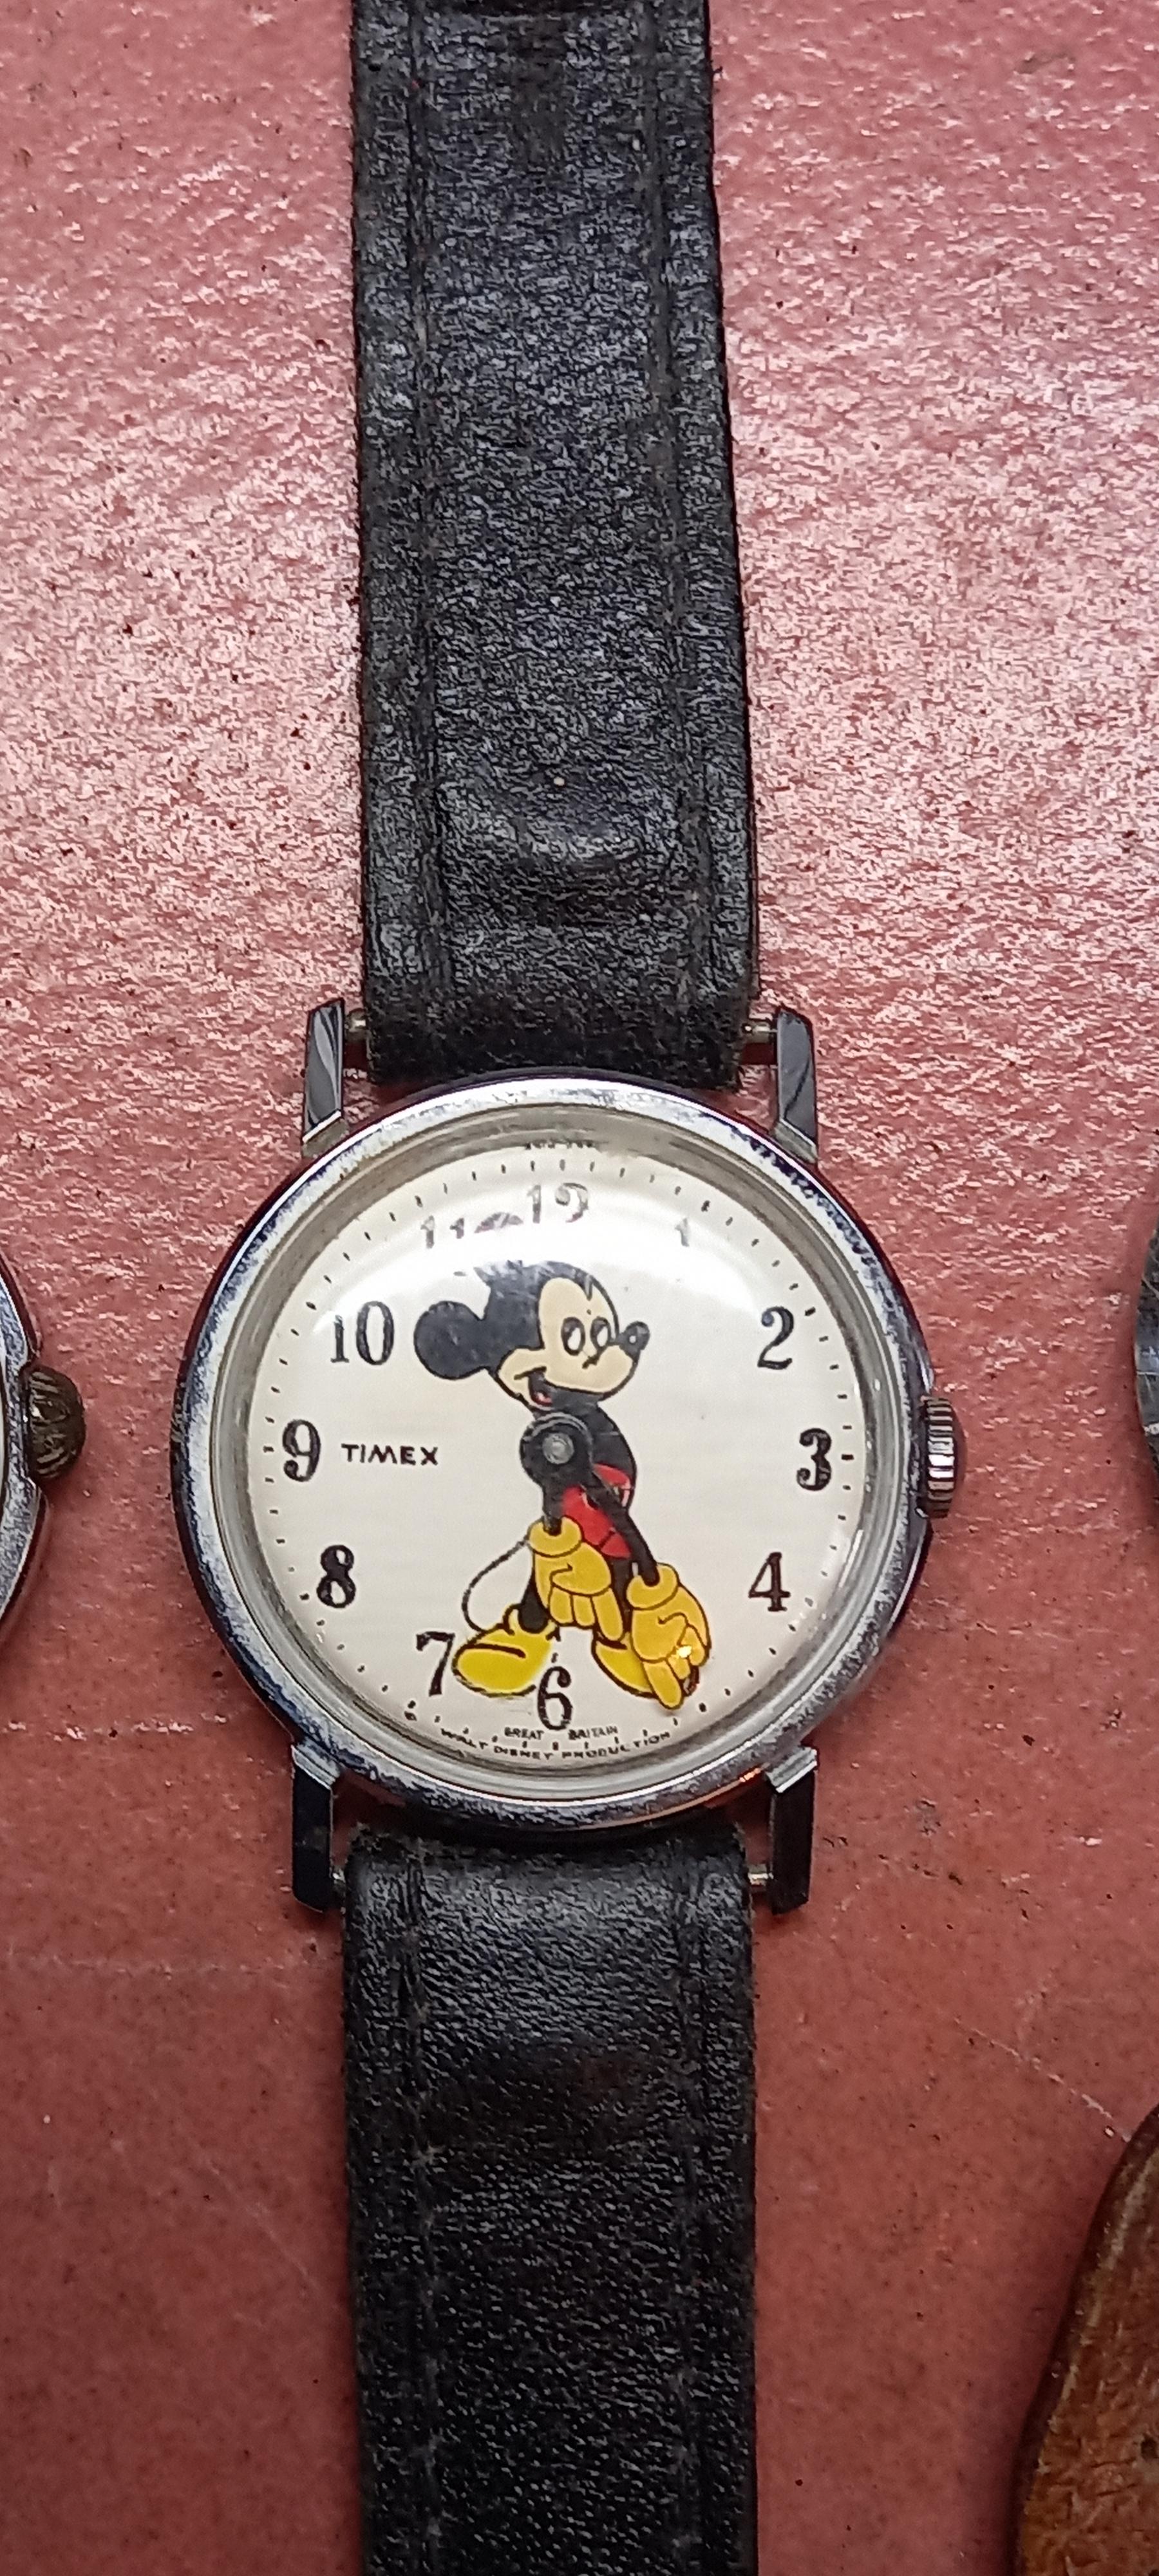
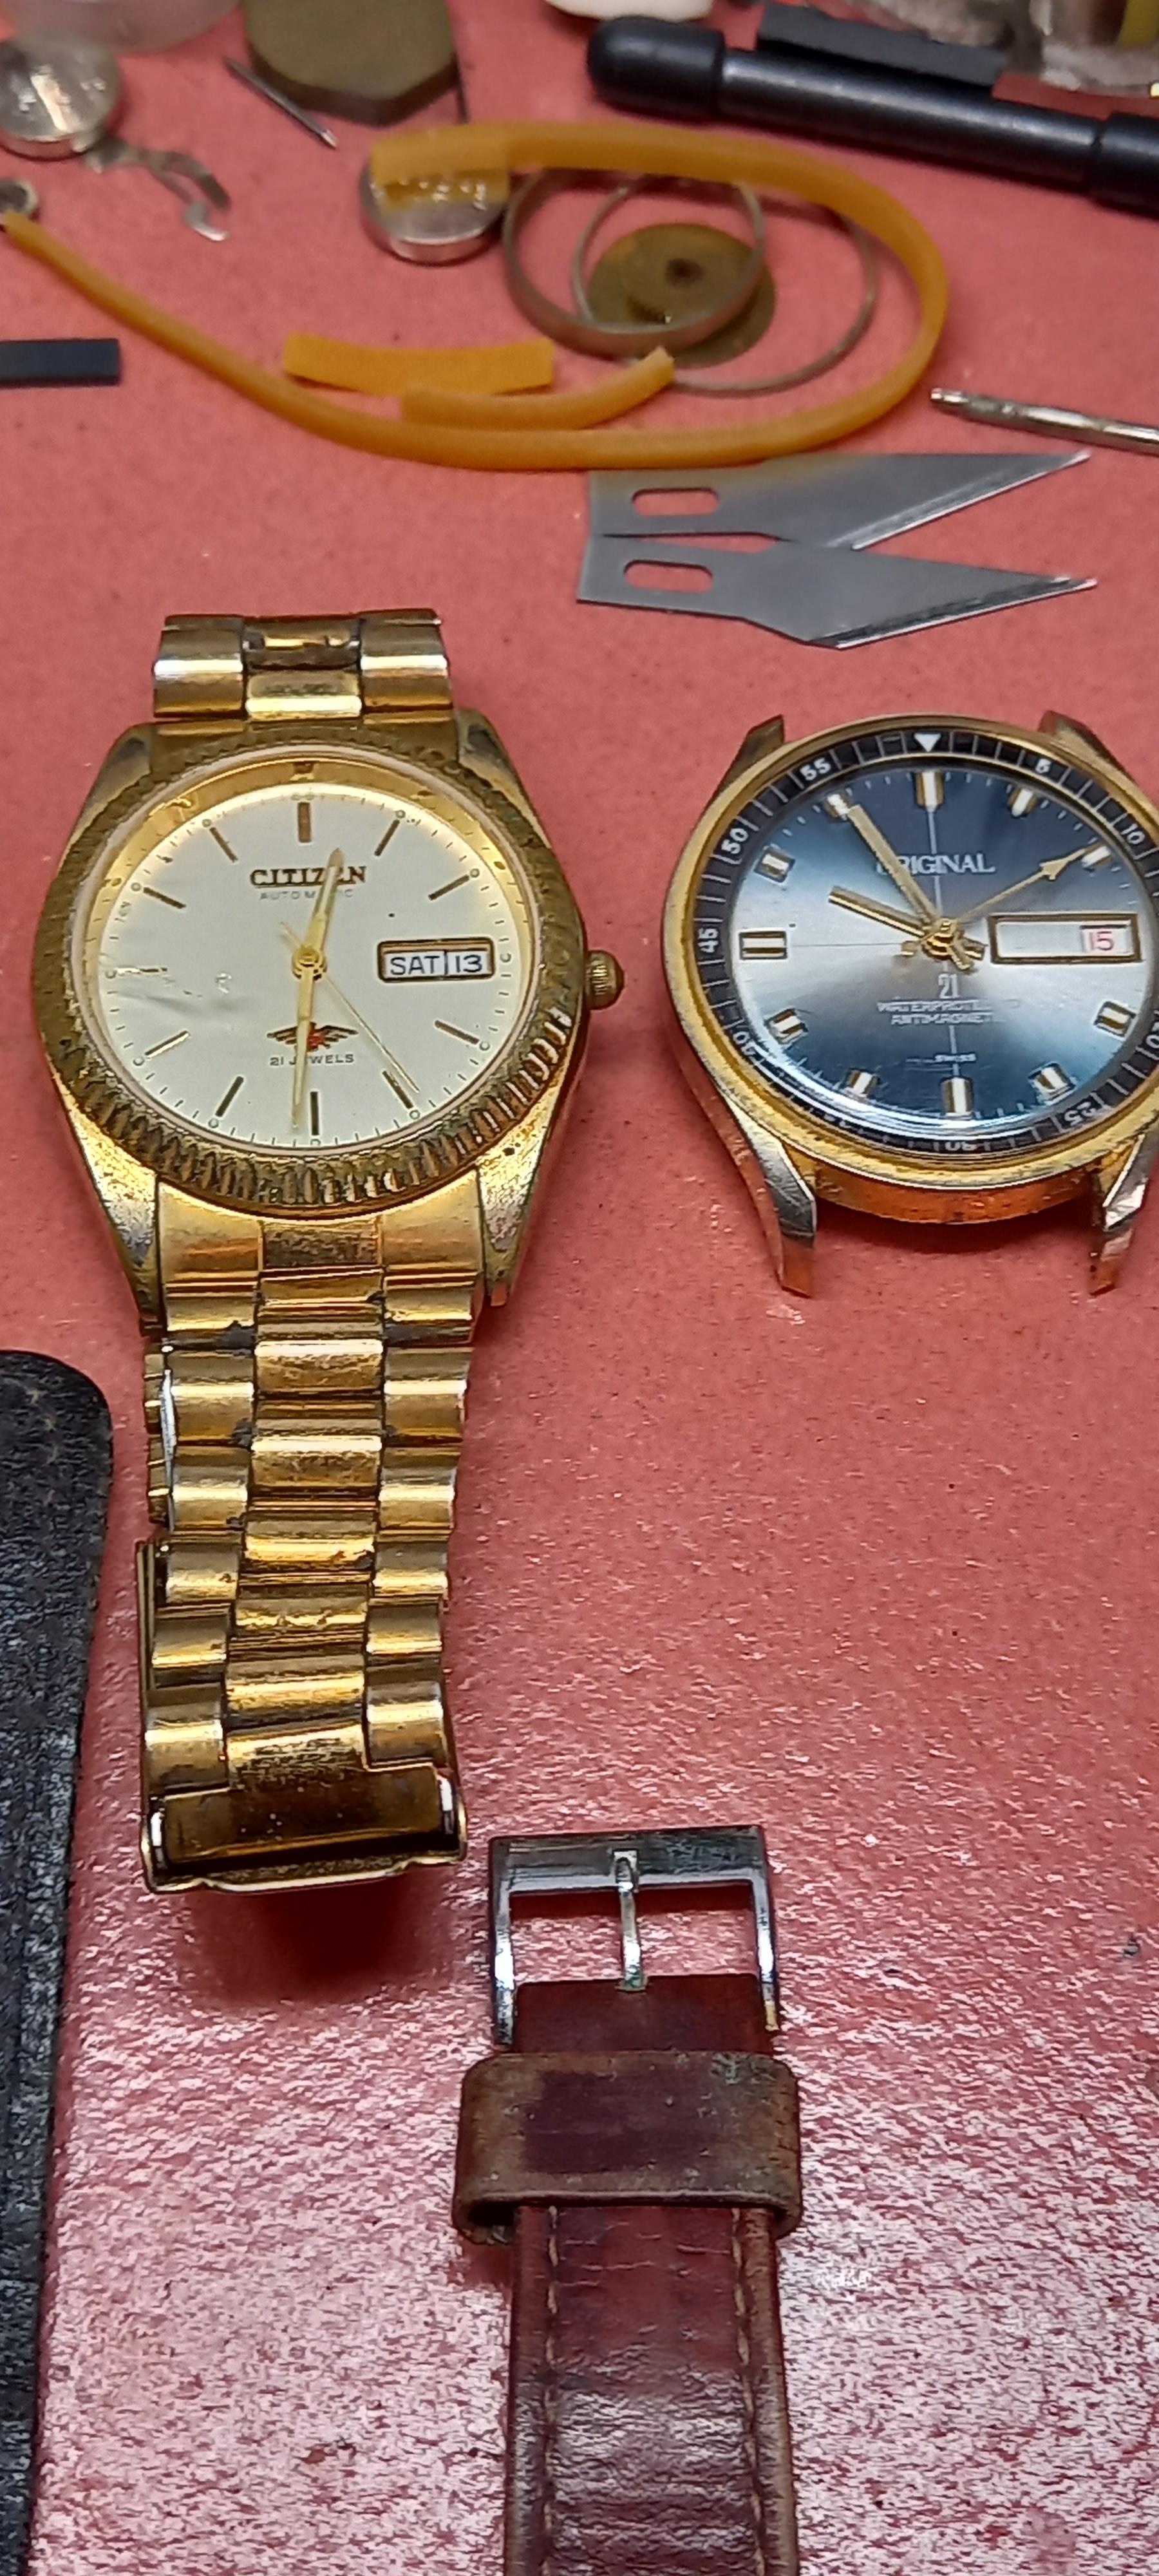
Been a few weeks since anyone posted. Heres 25 candidates for the 10:10 club. 25 watches £203.00. I have a few favourites. The Nivada on my wrist, bit small at 30mm but its a lovely little bumper automatic. The Doxa, cant wait to get to this, the Cyma is a nice size, Citizen Eagle 7, Leonidas GSTP. Mickey Mouse Timex.


 3 points
 -
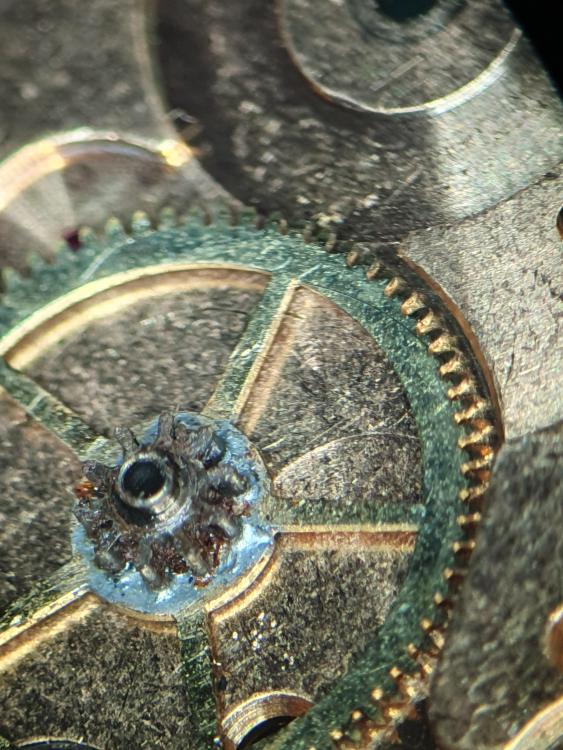
I'm servicing a nice but very dirty (gasket dust) Enicar Sherpa with a 1141 movement. It has a minute wheel on a ruby post. I've never seen this before. Is it just an Enicar thing, or more common? Well, I'll have to re-think the "nice" comment on this Enicar. I got it from the first owner, who bought it when he was young. He told me he only got it serviced once in the 70's by an east German watchmaker, but it wouldn't run very well afterwards, so he put it in a drawer. What do you think, would a broken, warped and soldered centre wheel influence timekeeping??
 2 points
 -
If you have found a dial already that fits what you want and are prepared to buy it then there isn't anything actually stopping you attempting the mod on the original.2 points
-
Experience teaches us that sometimes the benefits of letting things be and living with what you have, can outweigh the risks involved if things wrong.2 points
-
Not to impugn your amazing work, but a few more plastic parts and you’ll have yourself a nice Seiko!2 points
-
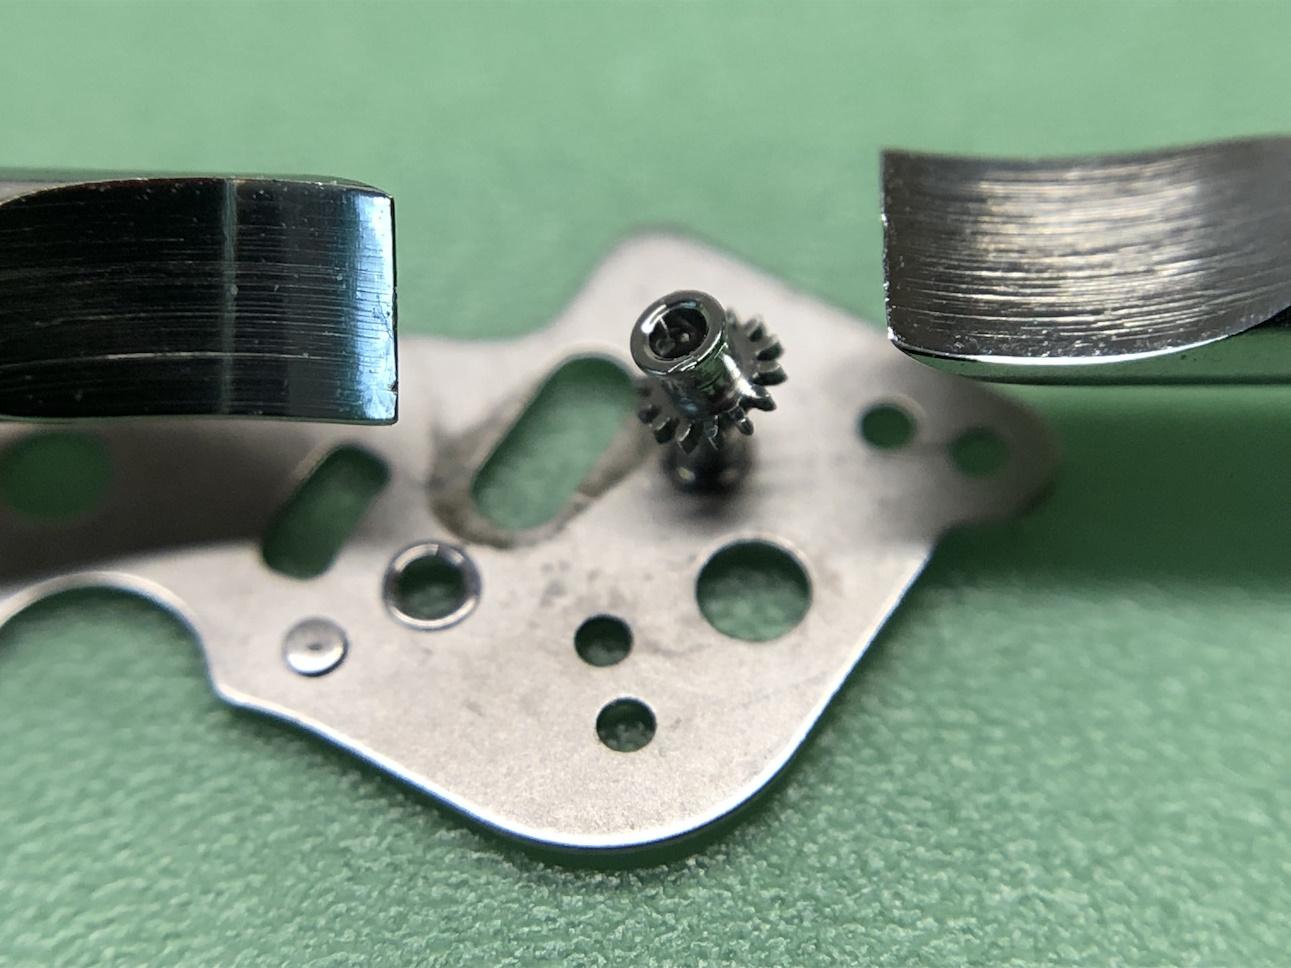
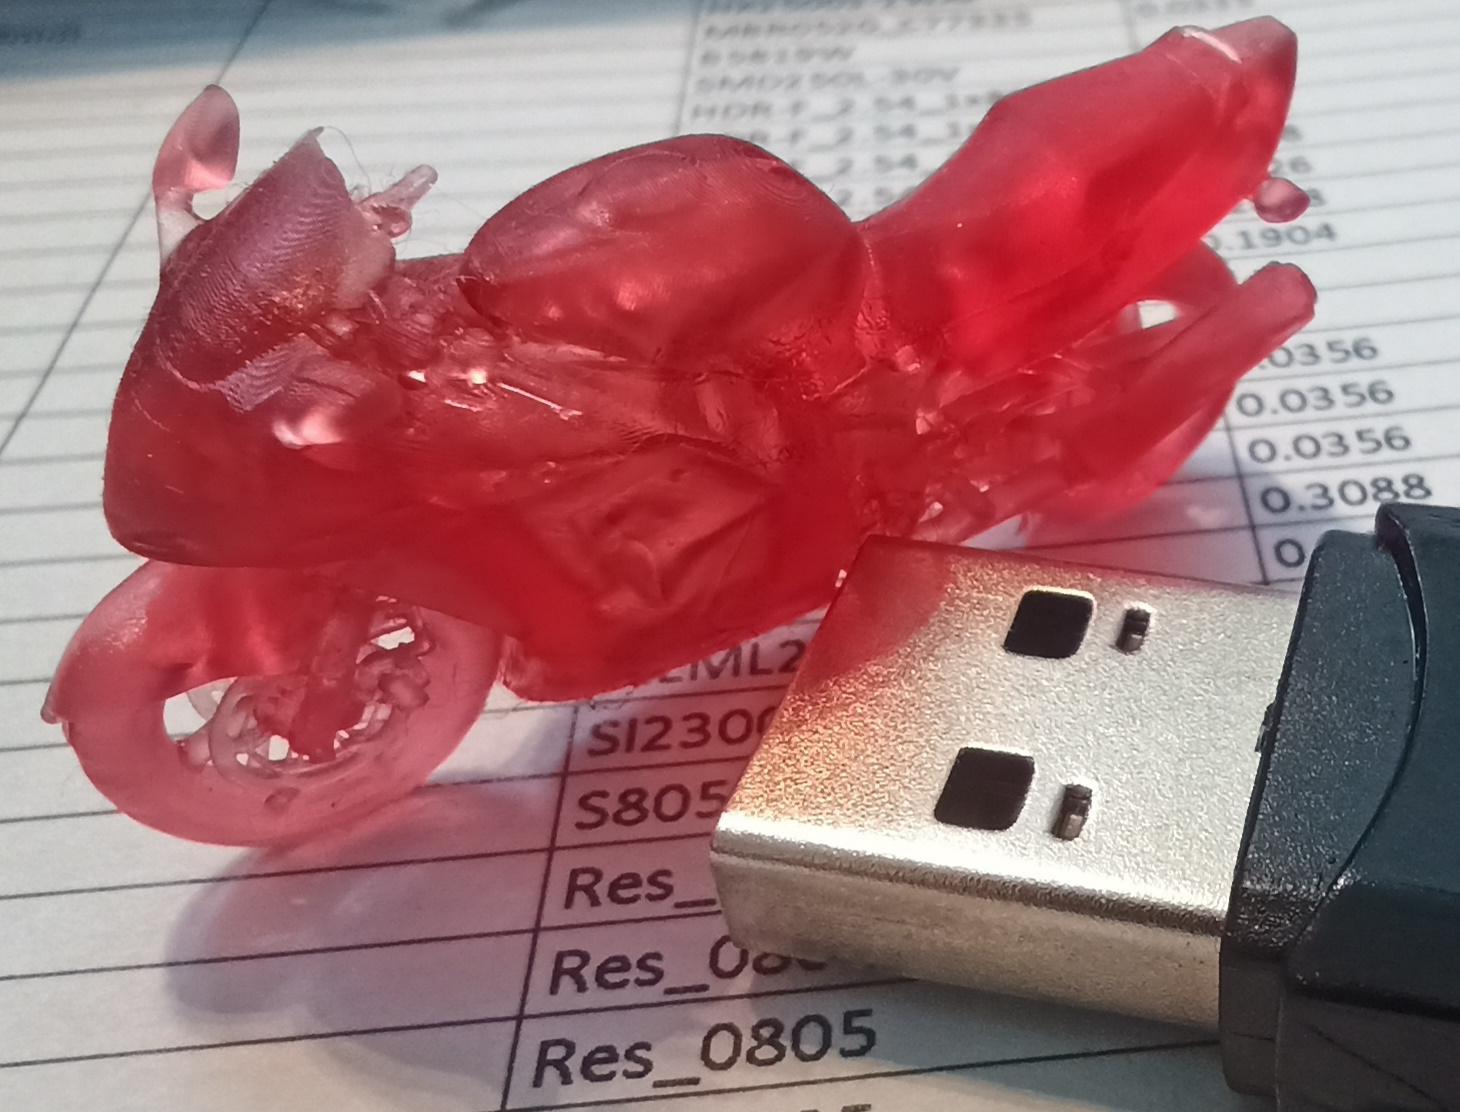
3D-printing has saved my behind on so many occasions. As long at whatever doodad I need won't require loadbearing capabilities, it's often quicker to make one up than locate it on Aliexpress and wait for the mailman to deliver. Try have a look on www.thingiverse.com... Detail level on resin-printing is insane. A cheap chinese 299USD printer will deliver stuff like this 43mm long Honda Blackbird motorbike model, complete with ittybitty brake rotors, handles and grabrail. I'm now looking for an assortment of watch-sized screws, washers and other tiny bits needed for this hobby. Where do you all source stuff like that?
 2 points
 -
Appreciate the input folks - I think all things considered, while I might have a closer look at things, it's probably more likely that rather than switching things around I'll look to buy a dial which has exactly what I want already present... there is one, it's just more expensive than messing around would have been (free!).1 point
-
Post some photos, including the movement and someone will know.1 point
-
I would like to share a check list made up by a master watchmaker. I take no credit for it, only think it would be helpful for us hobbyists. Here it is! CHECK LIST I decided to write up what is called a 16 point check that is meant to be a guide to steps required to service a watch this is slightly bias towards a wrist watch but very relevant to pocket watches also: This is a guide and not the definitive answer after going through it a few times add you own additional tests and observations. This is of course for a basic time only non-automatic or any with additional features, I also leave out things like demagnetizing, actual cleaning procedures, a good chunk of common sense needs to be applied also as I say its meant as a good starting point to a correct disciplined procedure, This is version 1 may add or edit/delete later. Check number 1 a Check the winding to see if the mainspring is broken. b Check to see if the setting bridge or sleeve is broken by pulling the stem out and testing the proper snap of stem. A broken setting bridge/sleeve is easily detected c. The balance wheel should be oscillated to see that it is true and the balance pivots should be checked by looking through the upper jewel to see that there is not a flash on the pivot. d. The hairspring should be checked to see that it is not damaged. e Check setting of hands f. The watch should be looked over in every respect, paying particular attention to any rust spots that may appear on any part of the movement. When rust is evident around the stem or setting mechanism, it is most important to remove the dial and hands in order to check this mechanism to see if the rust is very extensive. Check Number 2 a. Examine each part as it is being removed from the movement. b. Check for rust on every part. c. Check every pivot to see that it is not damaged or bent. d. Check the jewels in the watch, to see that there are no cracked jewels. e. Check pallet stones to see that they are not chipped or damaged. f. When removing barrel cap, make sure that it snaps off only after sufficient pressure has been applied to it. g. In the examination of each part, a close check is not made at this time as many of the parts will not be clean enough for that purpose. a much closer check will be made on the parts as each part is handled in the assembly of the watch Check Number 3 a. Upon completion of cleaning and parts removed from the basket into the assembly tray, each part should be checked over with the use of a watchmaker’s loupe special attention should be paid to the jewels, because if there is gum oil still remaining on the jewels, the cleaning job was not done satisfactory . It is also worthwhile at this time to examine the pivots. If the jewels are clean, and the pinion leaves are clean, it is almost certain that the cleaning operation was performed effectively. Check Number 4 a. Examine the condition of the mainspring. b. Check the width, strength and length of the mainspring. c.. If correct, replace mainspring using correct mainspring winding tool, not by hand d. Check the lubrication of the mainspring if required e. Check the fit of the mainspring around barrel arbor. f. check the mainspring end for proper shape to catch in barrel. g. Check the snap of the cap on barrel and replace in correct position h. Check the end shake and side shake of barrel arbor is it also sometime recommended to do this without mainspring fitted to test for free run and end shake i. Check the cleanliness of the barrel and barrel teeth. j. Check the oiling of the barrel arbor after the cap is on. k. Check the condition of the barrel teeth to see if they are bent or worn. Check Number 5 a. Jewel holes must be cleaned with peg wood if necessary. b. Jewels must be checked for chips or cracks. c. Check the train wheel pivots for rust, polish, cuts and straightness. d. Check the pinions for rust’, pits and polish. e. Check the pivots for pitting check that clean pith wood is being used. f. Check plates for tarnish, fingerprints, and polish jewel settings. g. Assemble time train and check end shake and side shake. h. Check wheels for trueness arid upright. i. Lift each wheel with tweezers to check for end shake and to see if each wheel is free enough to fall back to its original position. j. Spin train to see that is spins freely, in dial up, dial down and a vertical position. Check Number 6 a. Replace barrel and barrel bridge and check the oiling of the barrel arbor upper and lower bearing. b. Check oiling of crown wheel. c. Replace ratchet wheel. d. Note: do not oil remainder of movement until after kick-back is checked or cap jewels are present oil those now e. Wind watch slightly to check kick-back and recoil. This check should be made in dial up and dial down positions. If the watch does not have kick¬back, this indicates that the train is not as free as it should be. First, however, before checking into the train itself to determine if there is some frictional error, it would be worthwhile to examine the mainspring around the barrel arbor. Many times the loose fit of the mainspring around the arbor will prevent kick-back from occurring within the train. In such instances, the arbor is simply slipped in the mainspring instead of the train receiving the reversal torque, that normally occurs. If the barrel is found to be satisfactory, then the train. should be checked to see if the trouble can be located. first, the train should be examined carefully to see if each wheel is free, and if no trouble can be found, then it is advisable to remove the train wheels from the watch and replace each wheel in the watch individually and to check the spin of each wheel. If each wheel spins freely, this indicates that the pivots and the jewels are in good condition and that one need not look further for defects or faults in those areas. Next, place two wheels at a time in the watch and check the spin of the wheels. Thus, any error of improper depthing or a badly formed tooth on a wheel or pinion will be detected. It is simply a process of elimination in order to locate the particular trouble, and of course, proper corrective measures must be taken to correct an error when one is found. Check Number 7 a. Oil all the train jewels in the watch, and at this point it is advisable to oil also the balance jewels. b. Check to see that there is a ring of oil around each train pivot and that the jewels are not over-oiled or under-oiled. c. Check the jewels that have caps to see that the globule of oil has been formed properly between the flat cap and curved hole jewel and no keyhole shape if so remove re clean jewels and check seating the re oil and repeat check for perfect ring. Check Number 8 a. Oil stem properly. b. Oil friction parts of setting. c. Oil wolf teeth of clutch wheel and winding pinion. d. Oil clutch wheel groove. e. Oil points on setting lever that contact the setting bridge or the clutch lever. f. Never oil dial train. Note: ‘dial train means all wheels following center wheel staff. g. Seek expert advice on some types of intermediate wheels connecting clutch at setting positions that require oil. Check Number 9 a. Check condition of pallet arbor pivots. b. Check for chipped or loose stones, shellac or gummed oil on pallet stones. c. Check guard pin for straightness and proper shape. d. Check polish of pallet arbor, pivots and fork slot. e. Check end shake of pallet fork. f. Check height of pallet stones in conjunction with escape wheel teeth. g. Check matching stones. h Check drop lock i. Inside and outside drop. j. Draw. k. Hang-up of stones on escape wheel teeth. Check Number 10 a. Check tightness of roller jewel in roller table - uprightness of roller jewel. b. Check the height of the balance wheel in conjunction with the fork bridge and the center wheel. c. Check the clearances. d. Check the height of the guard pin in relation to safety roller. e. Check the proper length of roller jewel and fit of roller jewel to fork slot. f. Check the guard clearance. g. Check the corner clearance. h. Check the jewel pin shake. i. Check the guard test, j. Check the corner test. Check Number 11. a. Check the hairspring in-the-flat. b. Check the hairspring in-the-round. c. Check the quadrant of the hairspring to see that it is formed properly between the regulator pins and stud d. Check for beat of the watch by equalizing the force to receiving and discharge pallets. e. Check for the collet wobble. f. Check for trueness of the balance wheel, and for the flash of the balance pivots g. Check for trueness of roller table. Check Number 12 a. Place the watch on the timing machine and take a rate in the dial down position, then turn the movement over to dial up position and take a rate. There are three things that should be observed from the rate that was taken: 1. Dial up should indicate the same time as dial down. 2. Observe the closeness of the lines to determine if the watch is in perfect beat. 3. Observe how the watch is running in reference to the time error over a 24-hour period. b. Adjust the mean time rate of the watch so that the dial up and dial down positions will record on time. Do not move the regulator more than one degree in adjusting the mean time rate. Any other alteration must be made by adjusting mean time screws or by adding or removing weight from the balance wheel in such a manner as not to affect poise, static or dynamic,. c. If the rates in dial up arid dial down are found to be different from one another, then this indicates a mechanical error in the watch which must be traced out before proceeding. d. If the watch is found to be out-of-beat, then of course, it should be put r in proper beat at this time. We might emphasize that if the watch was put in proper beat in accordance with the proper procedure at the bench, then an out-of-beat condition or minimal amount would not be indicated on the timing machine. e. When the above conditions have been satisfied, the next step would be to take a rate in positions and errors corrected. If everything has proved to be satisfactory, the watch should be tested for isochronal test be made on the timing machine, which consists of re-testing at different winding levels and rate in the dial up position. Check Number 13 a. Check for proper lubrication of cannon pinion on center post. b. When replacing the cannon pinion, be sure that the leaves of the cannon pinion do not come down on top of the minute wheel teeth so as to bend the teeth of the minute wheel. c. Check tightness of. cannon pinion d. Check to see that cannon pinion does not ride up when watch is being set. and smooth consistent operation. Check Number 14 a Make sure that the hands are fitted securely to the parts to which they are attached b. Make sure that the hands are adjusted so that there is equal space between the hands and the hands are set as close to the dial as possible. c. Check to be sure that the hands are shaped to the contour of the dial. d. Check to see that\ the hands are positioned so that they are synchronized with one another. Check Number 15 a. If there is no case for the movement, simply disregard this check and proceed with the next check, number 16. b. Check for proper snap/screw back of the case. c. Check for the clearance of the hands under the crystal. d. Check the crystal to see that it is securely fitted into the case. e. Check to see that the crown is next to the stem and reasonably close to the case. f. Check for tightness of movement in case. g. Check the spring bars to see that proper spring bars are used for the particular type of case so that the band is held securely to the case. h. Check the lug holes to see that they have not been worn badly by the spring bars to a point where the hole may break through and allow the spring bar to come out of place. Check Number 16 a. Set the watch on time with a master clock. b. Let the watch run for a period of 24 hours and check the error in the time repeat in several positions. c. Allow the watch to run until it completely runs down and check the length of run. The watch should run a minimum of 30 hours, preferably 40 hours, if it is in “A. I have no answers to any of the steps since I didn't make this up. Maybe Mark might.1 point
-
tlb you can do this but like said until removed one does not know if it is the same size window/hole in the dial, I know too that once the windows come out they keep falling out getting tangled in the hands so seal/secure it well when finished swapping, make sure the height is the same or lower too....1 point
-
Hi! I'm currently working for a low-budget feature film. We're looking for old home videos of watchmaking, watch repairs, and watch fairs. Any tips would be greatly appreciated! Sincerely, Joel
 1 point
 -
The wobbly crowns of the Boctok divers is to facilitate the setting of the watch while being worn, most are autos. In the video i think the water resistance would have given in well before that, certainly at a sustained pressure.1 point
-
Gorgeous watch! And that's a helpful confirmation thank you.1 point
-
Really, are you sure? Look at that quality of that cheap Chinese movement1 point
-
I still haven't got used to setting/winding mine - there's a certain wiggle required. Weird but apparently very good function for water resistance - you should look up the guys video on YouTube who takes it down to a thousand metres of pressure (or whatever ridiculous depth it was before the acrylic shatters.)1 point
-
I hadn't seen that post but yes my point was that if someone asks a question that you think is a bad idea then my natural response would be to answer that question and not just ignore it for fear of upsetting them.1 point
-
A small update for those who are interested. Last Friday I finished the disassembly and for those of you who are interested, I have added new pictures to the link I published in a previous post (please sort by name in ascending order). It was over 300 pictures. In the long run, I plan to create a service walkthrough and then I will have plenty of pictures to choose from. I was a bit unsure whether I should dismantle this cannon pinion-like part on the "Cover mechanism" because Rolex explicitly writes "Do not dismantle". But, since the whole movement is covered with metal debris, I chose to do it anyway. However, I had some headaches because it did not work with my trusted cannon pinion remover nor with some of my presto tools which were all too big. I tried to pull the tube off by clamping it in my staking set and pushing the tube up with brass tweezers, but that only resulted in the tip of the brass tweezers breaking off (easily dressed) but better than damaging the tube. After looking through a bunch of videos I finally found a video where @Markshows how to do it. Many thanks! The parts are now soaking in a degreaser (Horsolov) and I will brush them all off before it is time for the cleaning machine. Getting everything perfectly clean will be a challenge considering the service neglect and damage made by the loose rotor.
 1 point
 -
A lot can go wrong with a dial, a lot can go wrong with anything in watch repair, but dial finishes dont like heat or solvents or tool slips and they can be expensive mistakes. Scuse the pun but your technique needs to be dialled in before you start so it would be good to practice on something similar and not important to you beforehand. The times we think to ourselves "why did i start this,why didn't i just leave it alone"1 point
-
Thanks for the encouragement Jon! I'm mostly concerned about hitting so hard that the rotor cracks as illustrated earlier in the thread. I don't mind breaking the axle. I can handle that but the rotor would feel heavy. Come to think of it, I've had worse challenges and succeeded well with them in the end despite having strong initial doubts. There is a lot in what you say! Thanks again for the encouragement, my friends!1 point
-
I looked up the title Vostok Amphibia. I found it very interesting because apparently the crown disconnects itself the watch when it gets whatever happens to it. I should have been paying attention because apparently they even have a store in the US where they can be purchased relatively inexpensively.1 point
-
I'm so glad you found it useful1 point
-
Something to be aware of for those of us wanting to learn about these movements as part of our watchmaking journey. I expect there will be enough around for a short time on Aliexpress etc. but probably worth grabbing one or two sooner than later as one of the restrictions is the bulk buyer cannot resell but must use them themselves. Tom1 point
-
Just as a reminder this discussion is occurring in a very interesting section of the message board. This is where were supposed to be cheerful and helpful and not negative and well be quite honest a lot of times I just walk away and don't even bother because too many rules and I'm going to hurt somebody's feelings etc. etc. Always important to share your thoughts with a photograph so we grasped what you're trying to do. I'm not sure you actually going to know that until you take it out. Typically although I watch repair the word typical isn't exactly correct because it was way way way way too many variations. But as somebody else said you have a square hole in the dial the frame typically will push in so is going a little bit of a flange and probably just Glue. The markers often times will be almost riveted in place depending upon a variety of factors As usually things like that would be the last thing on the dial as long as it's not stuck to the finish you should build to probably push it out being very very careful not to get your fingerprints all over the dial or damage anything's if you're lucky. Then you should bill a push it in and glue it would just a very tiny bit of some sort of glue Then the best thing of all would be more photographs like to dials both of them and the backsides the dial so we can see for the future. Then if anyone else ever asked the questions we can refer them to this discussion and others can learn from whatever we learn here
 1 point
 -
It's literally removing one date window from a dial and fitting another the same size but ever so slightly different shape, because apparently that's important to me!1 point
-
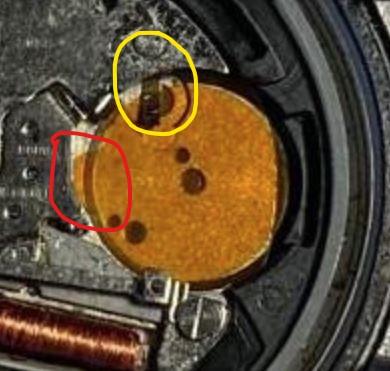
Thank you I've now corrected that - but no change Would I have done damage putting the battery in with the disc in that location ? My next step is to dig a multimeter out and check battery voltage...1 point
-
The insulating disc isn't positioned correctly. The tab circled in red should go under the contact circled in yellow.
 1 point
 -
I think by the time you've sorted an alternative movement along with new hands & spacer and crown swap you'd be better just waiting to repair the original.1 point
-
It's really a shame we don't get a picture of the watch just a description. Then yes it sounds like a classic American pocket watch which means put it back in the case that would be the easiest way to solve the problem unless we get a picture and we can see if it has the mechanism to run out of the case. As it be much easier to find with picture if we only knew which watch the Swiss Then what does this watch have in common with the original title of this discussion that occurred two years ago?1 point
-
The speed control on my unit is pretty good, I can adjust it from 0 to 2000rpm. I been using it at 200 rpm and works fine. Unfortunately I have to pit a timer since my stirrer doesn't have an alarm when it stops. But I am happy with my unit. You can find it on amazon for less than 100$
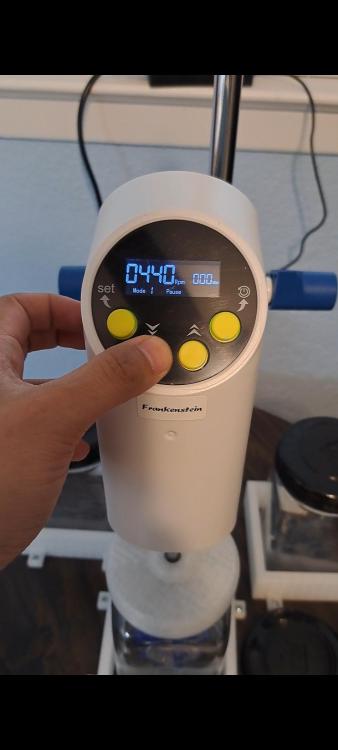 1 point
 -
Got this wonderful 1971 $8 eBay find running. Other than a broken mainspring and a crack in the crystal, it just needed a good clean up. It did have a beat error problem, but I got it adjusted to a 0.6ms BE, a 260° and positional error of +/-30s. Not bad for essentially a novelty watch probably not expected to make it much past the '70s. I think the hardest part was fitting the pallet fork without jewels. Those holes are TINY! That brass plating was 10 kinds of awful so I just polished it off for now. I might nickel plate it. Or 24k rose gold, for such an elegant timepiece.
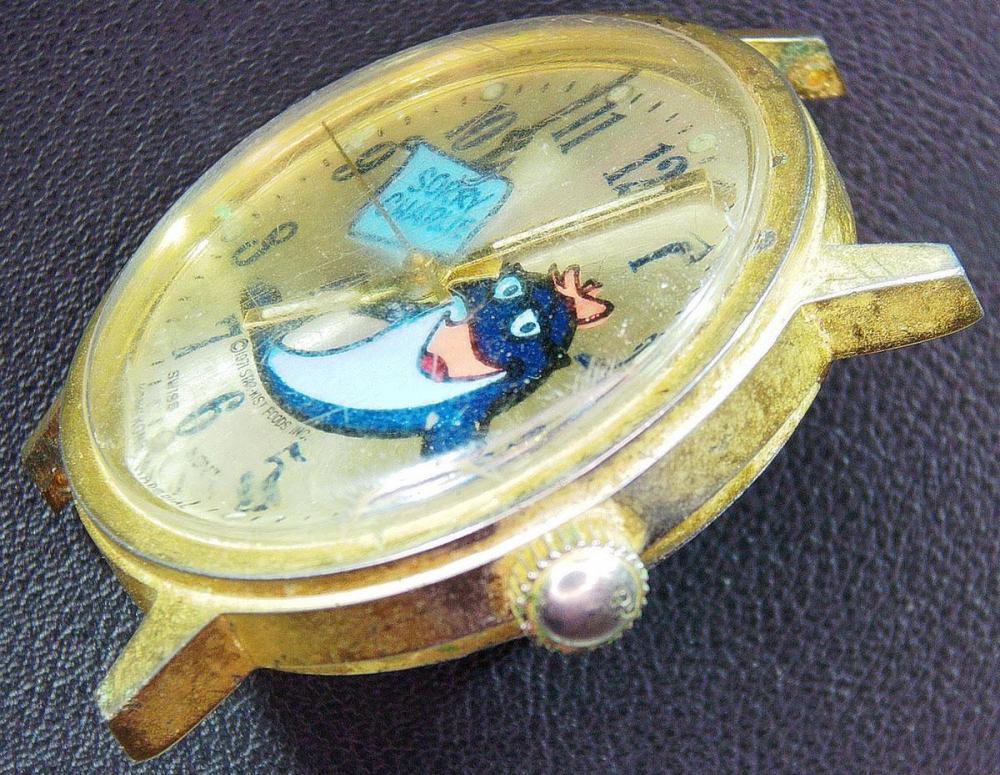
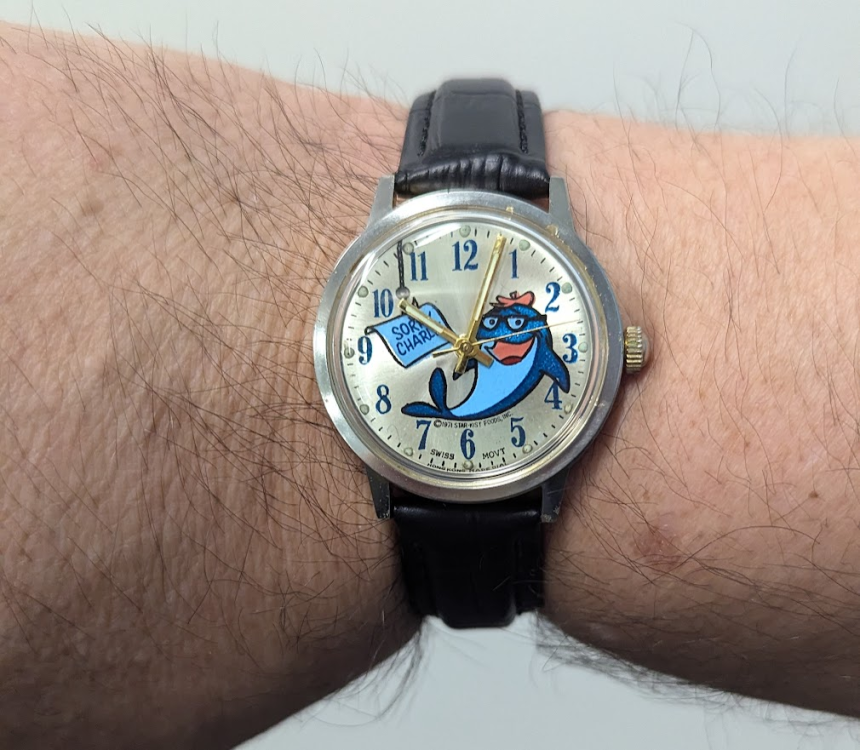 1 point
 -
PhilB You have a wonderful journey ahead. Come on in, the waters fine.1 point


.thumb.jpg.19a9c4ff164d78d516aa9f05a063752b.jpg)