Leaderboard


Popular Content
Showing content with the highest reputation on 09/22/24 in all areas
-
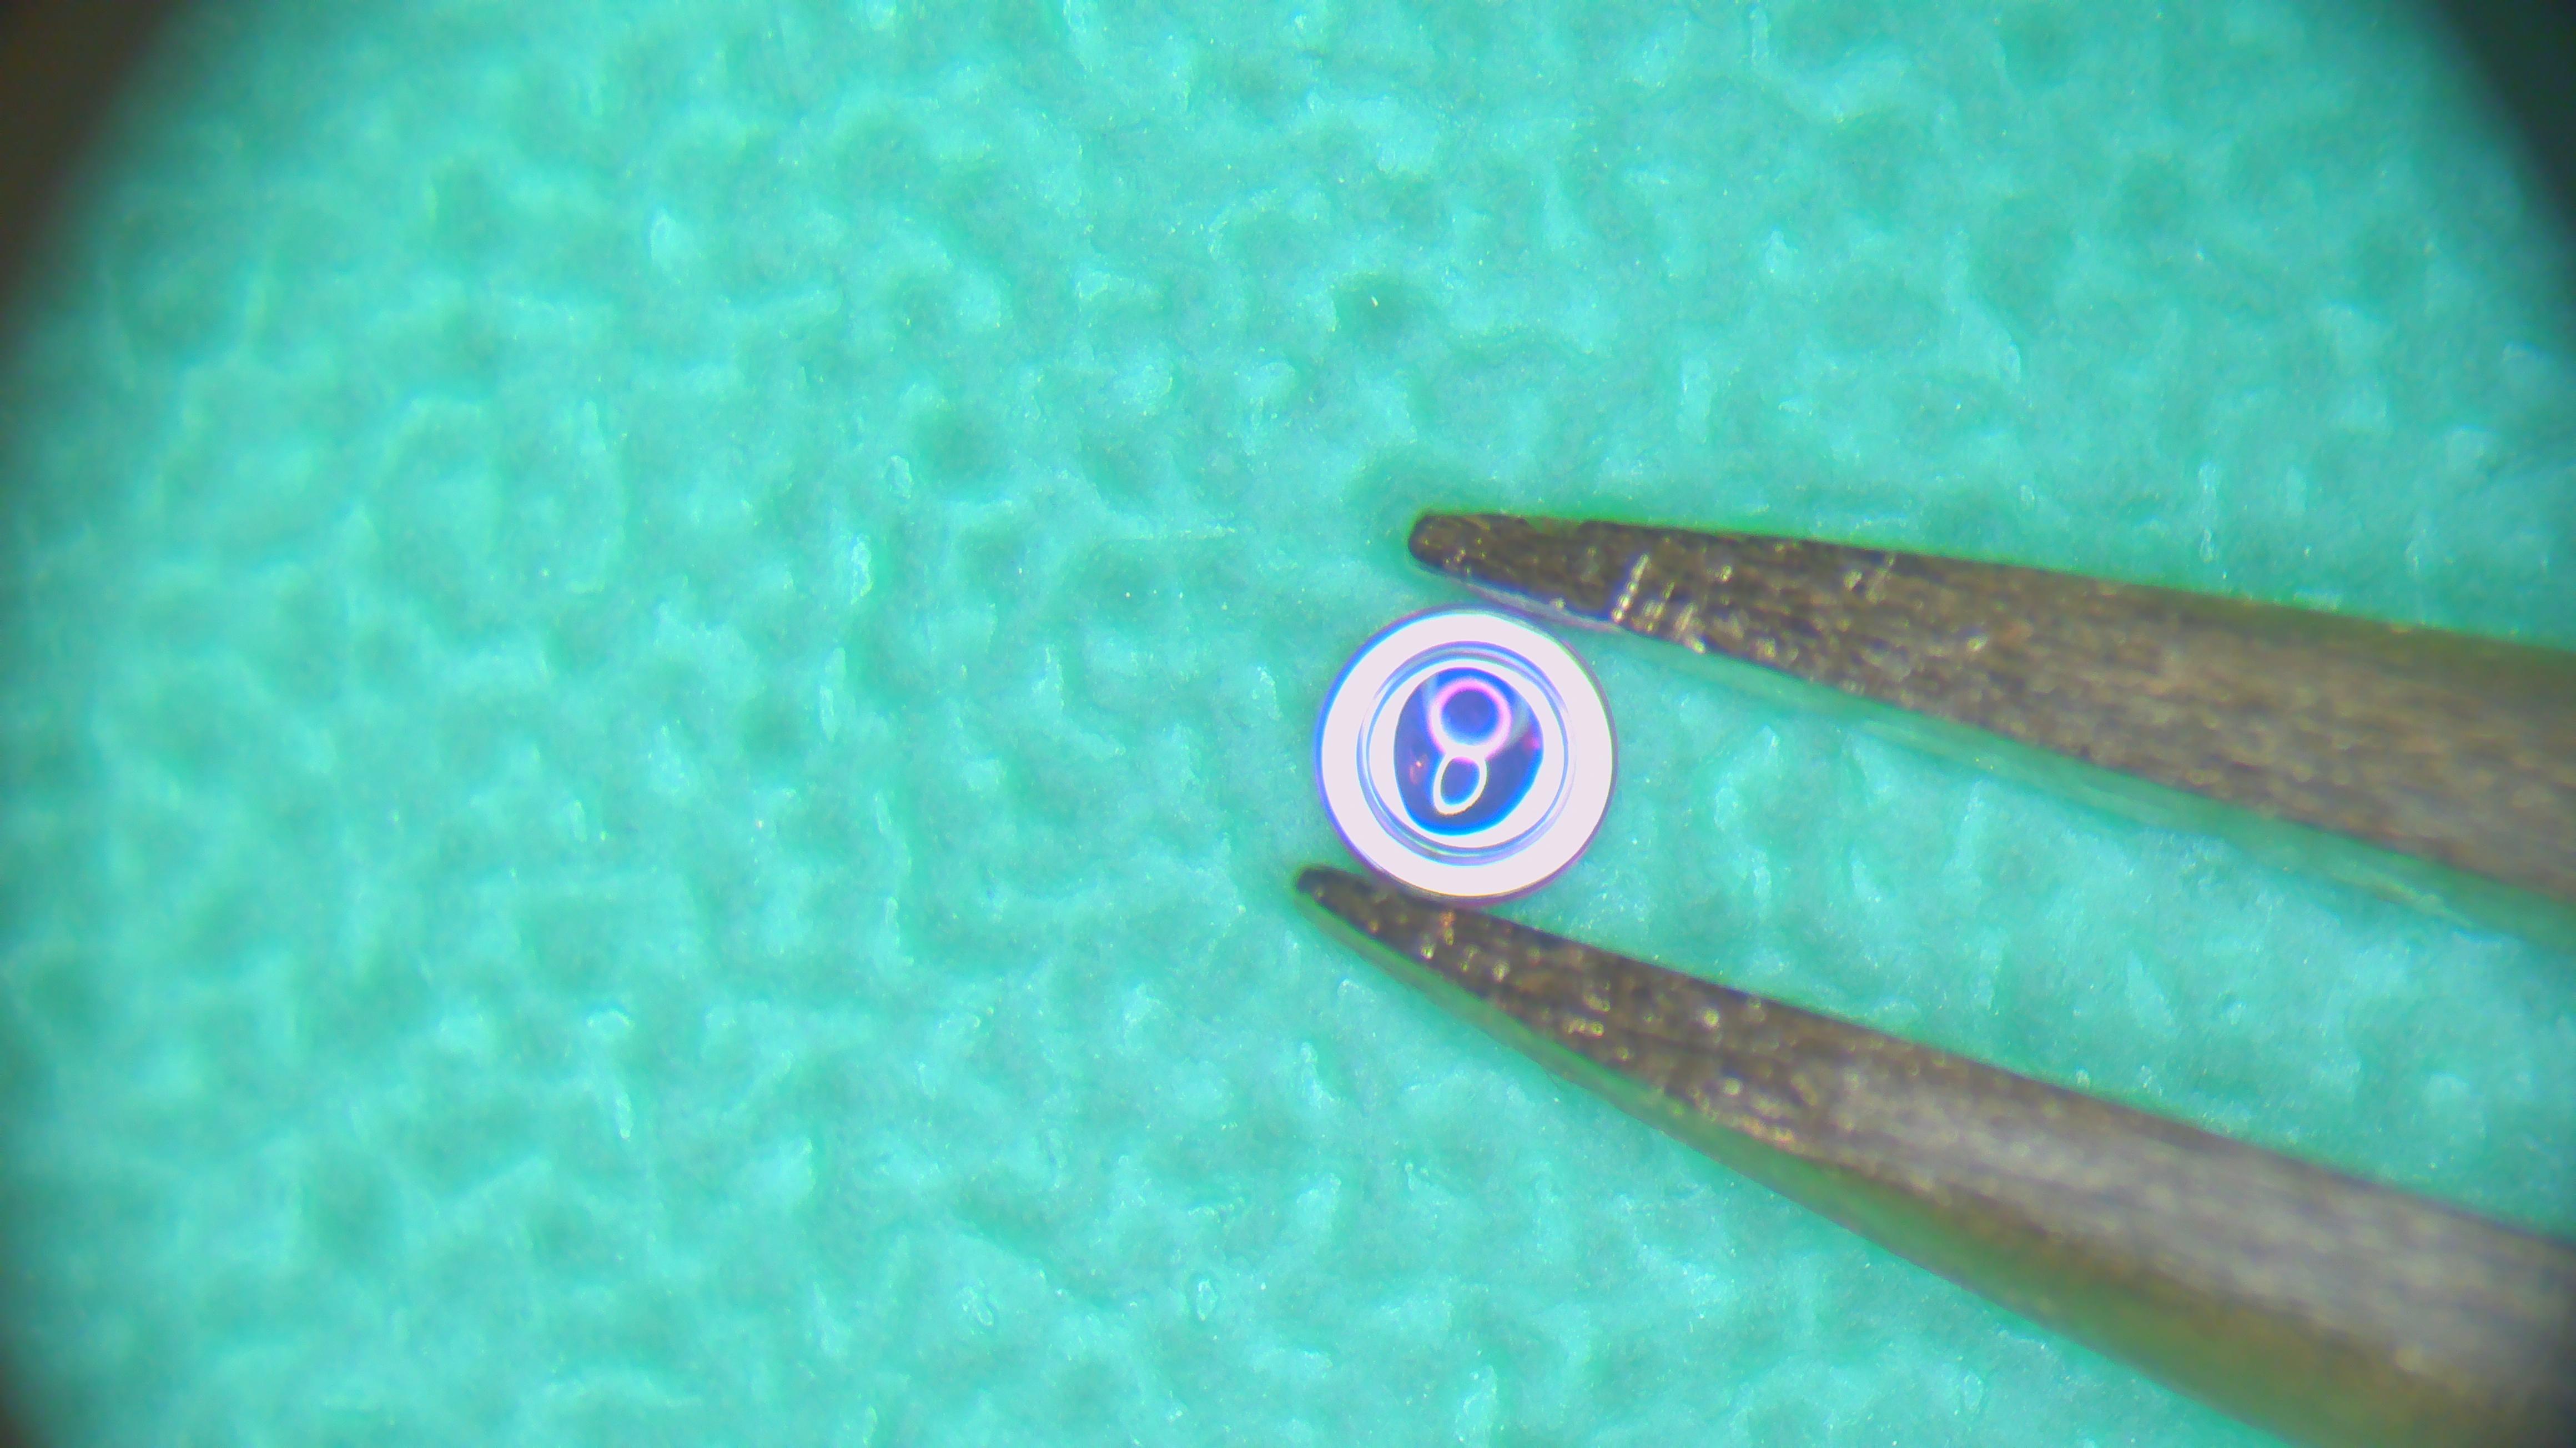
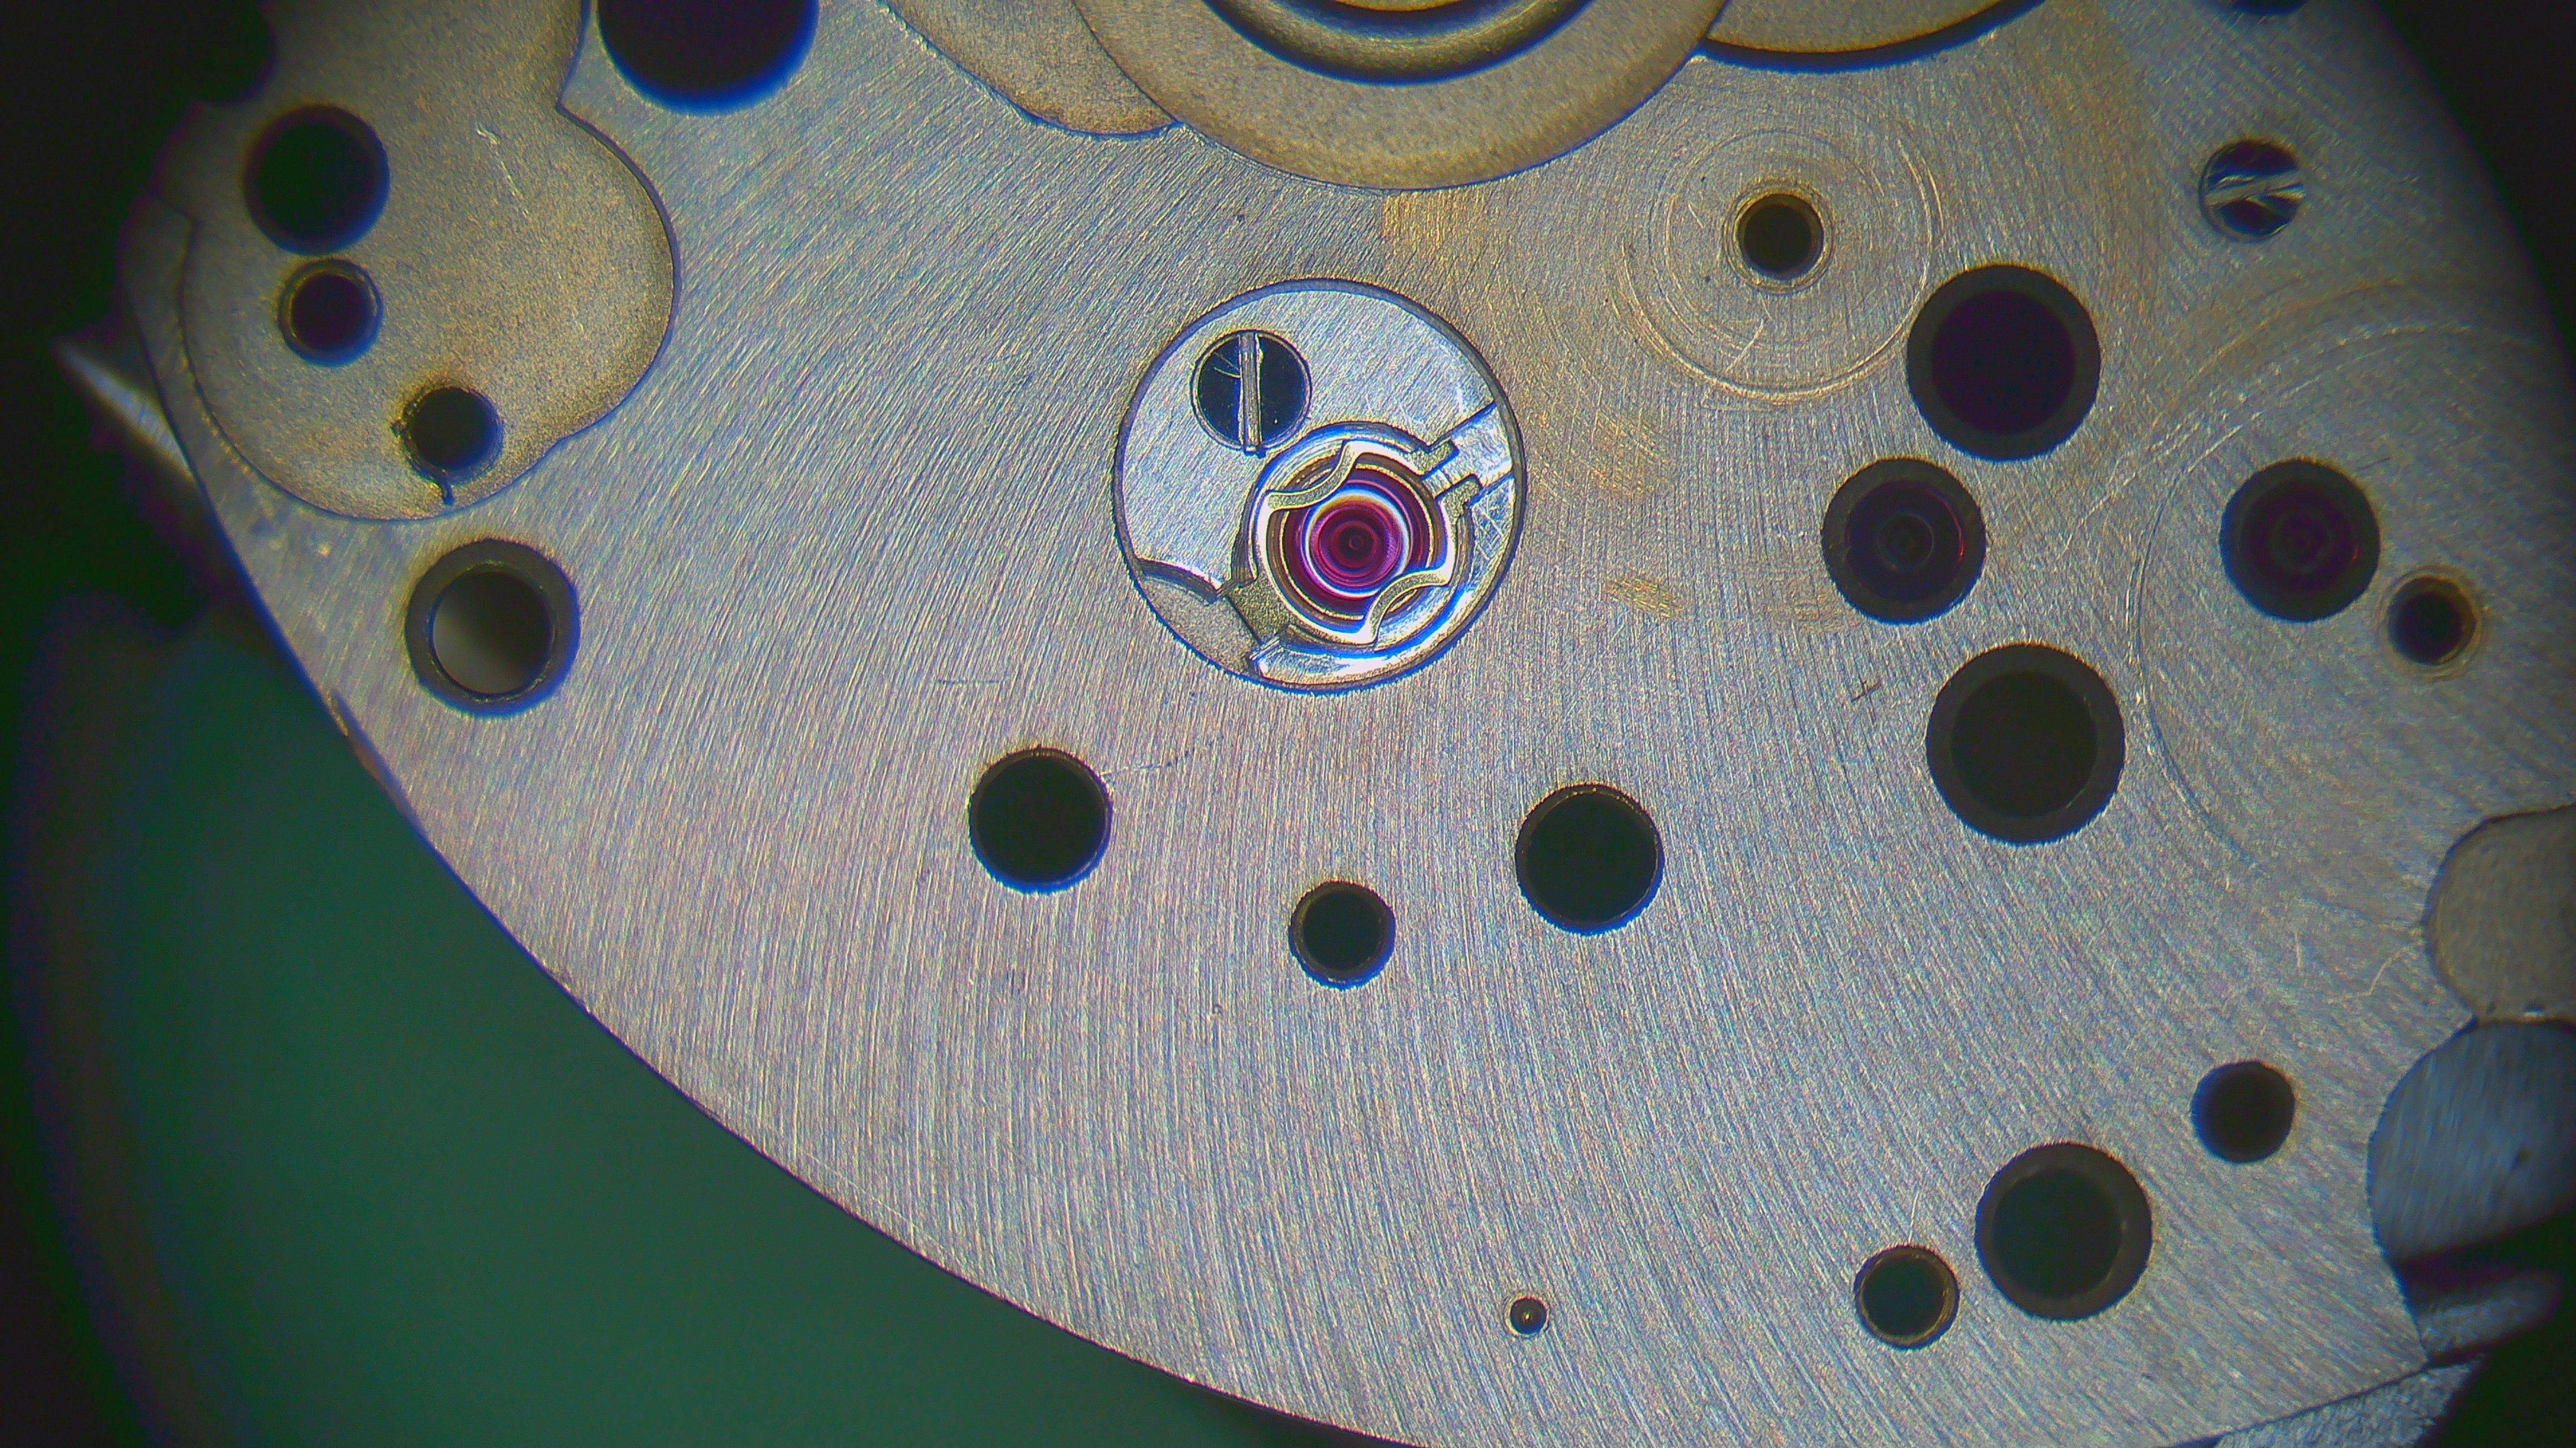
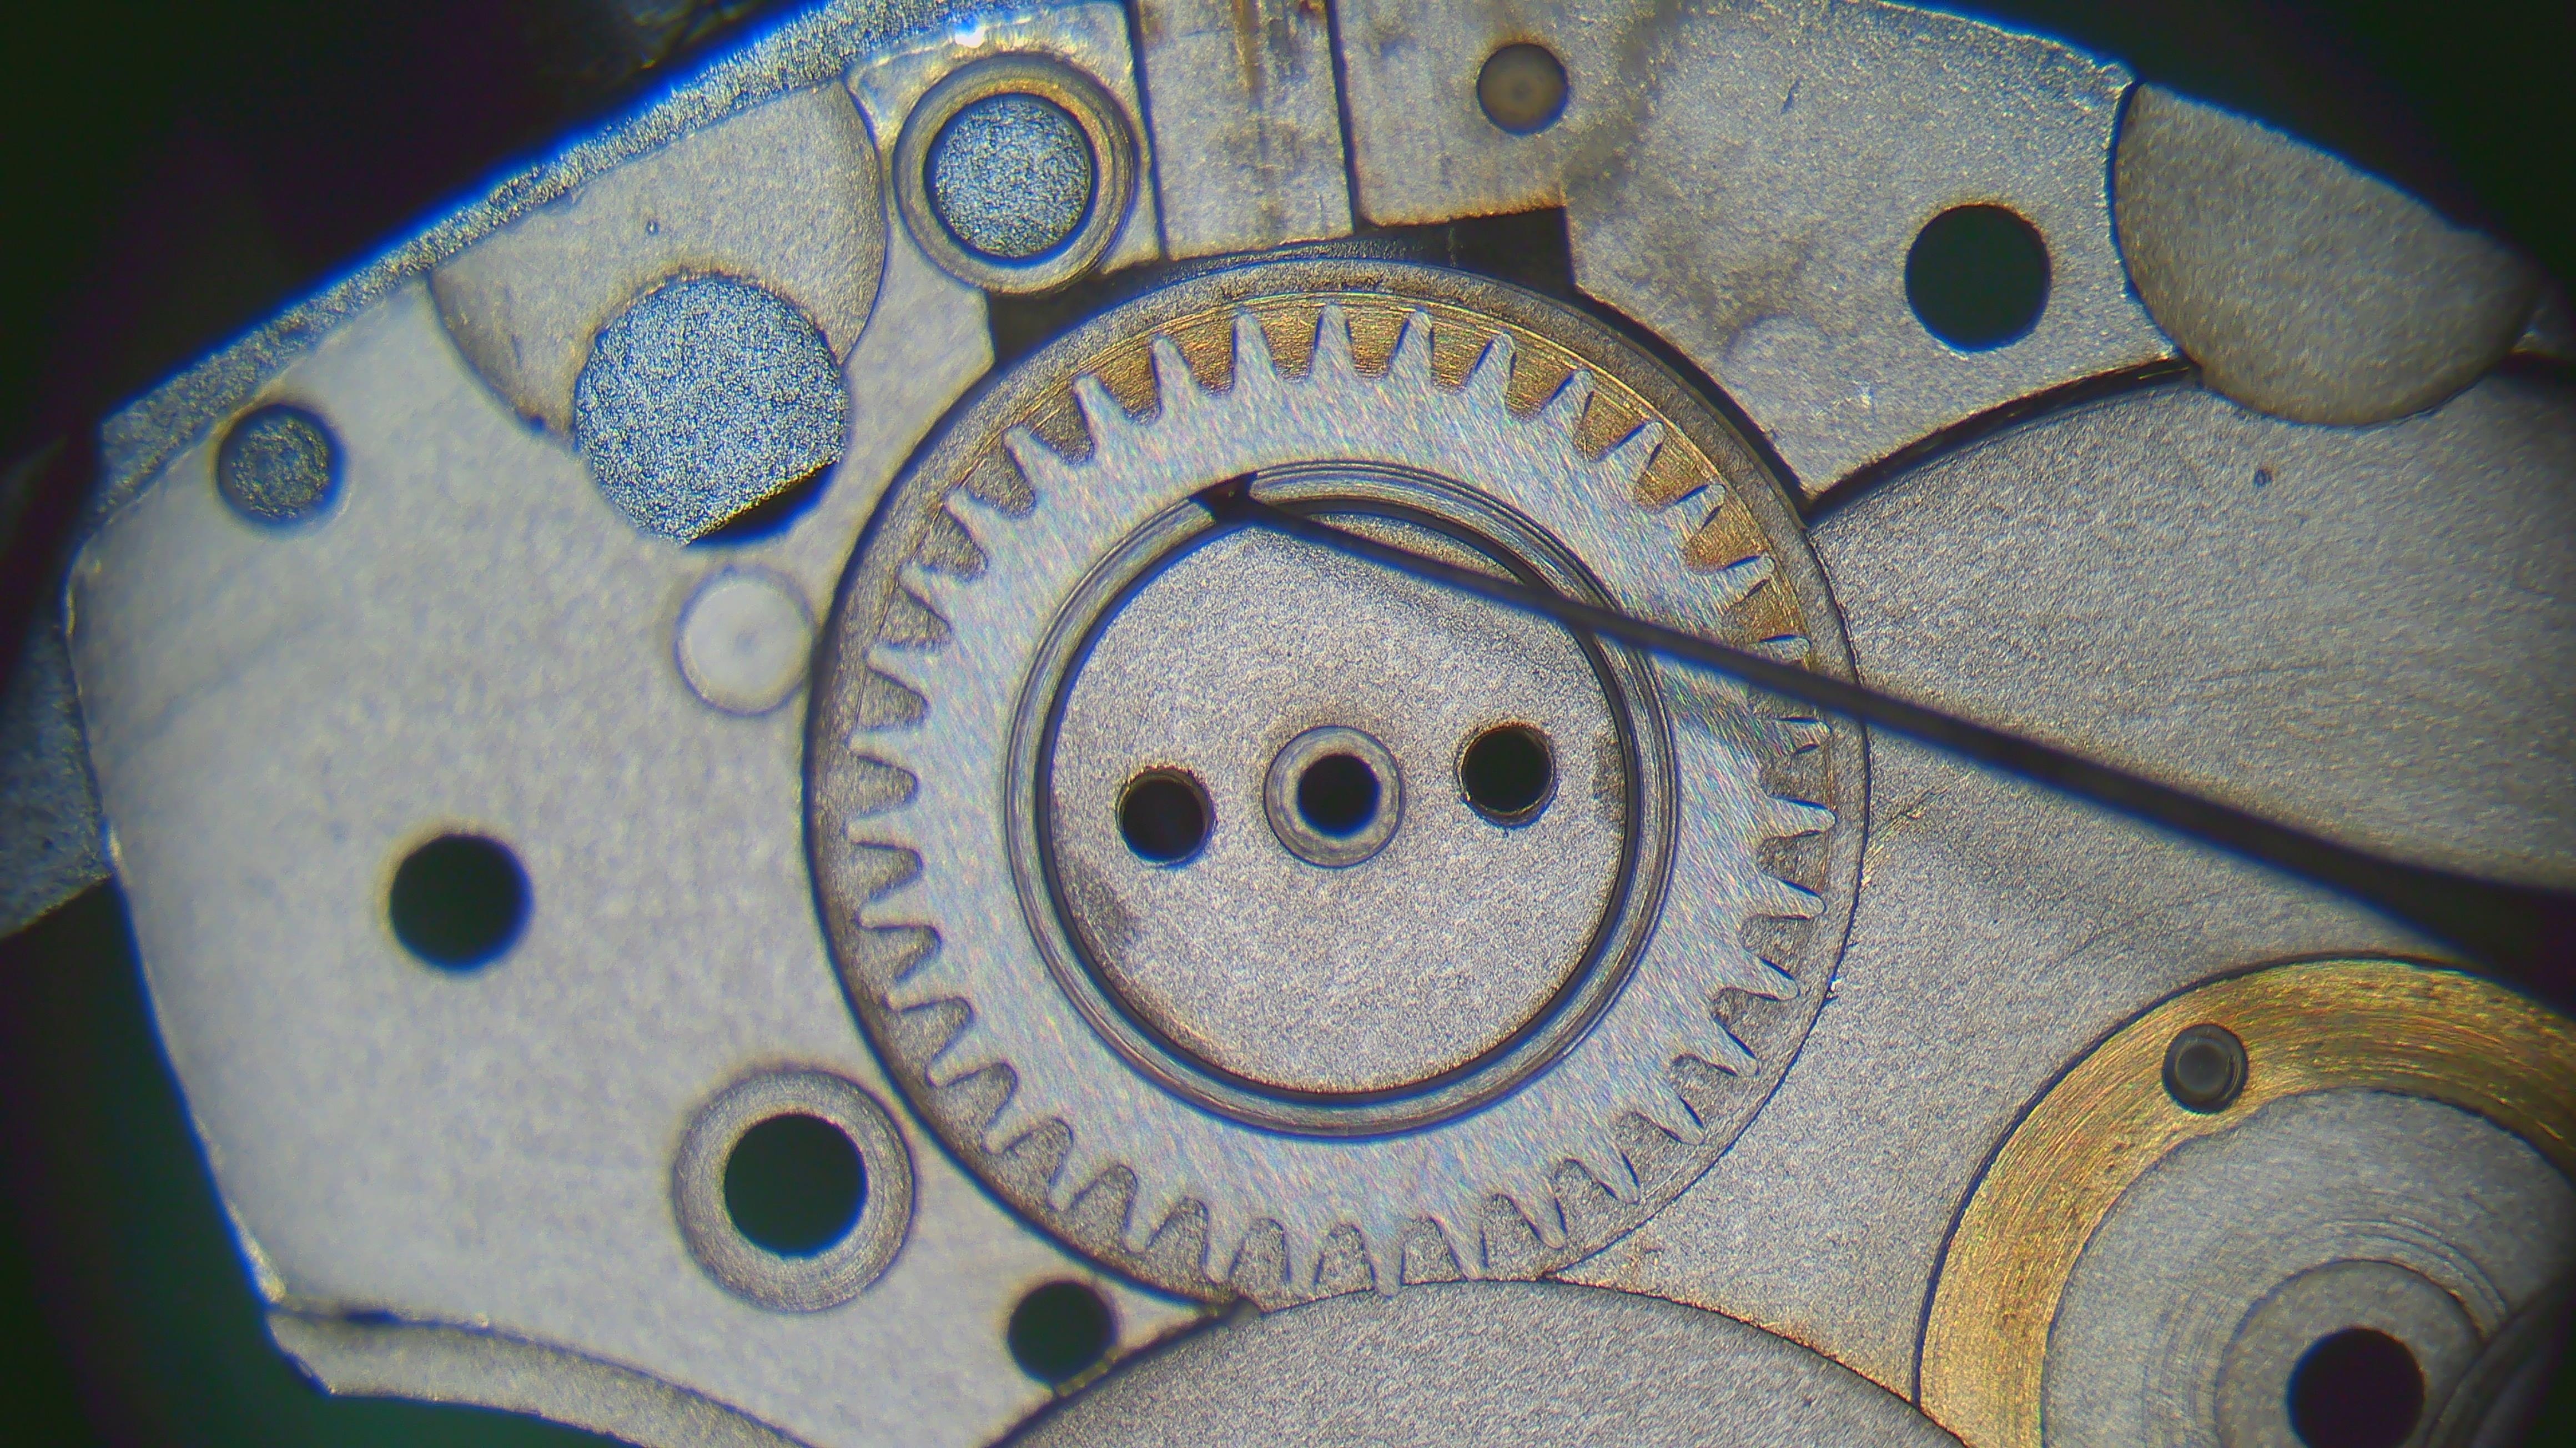
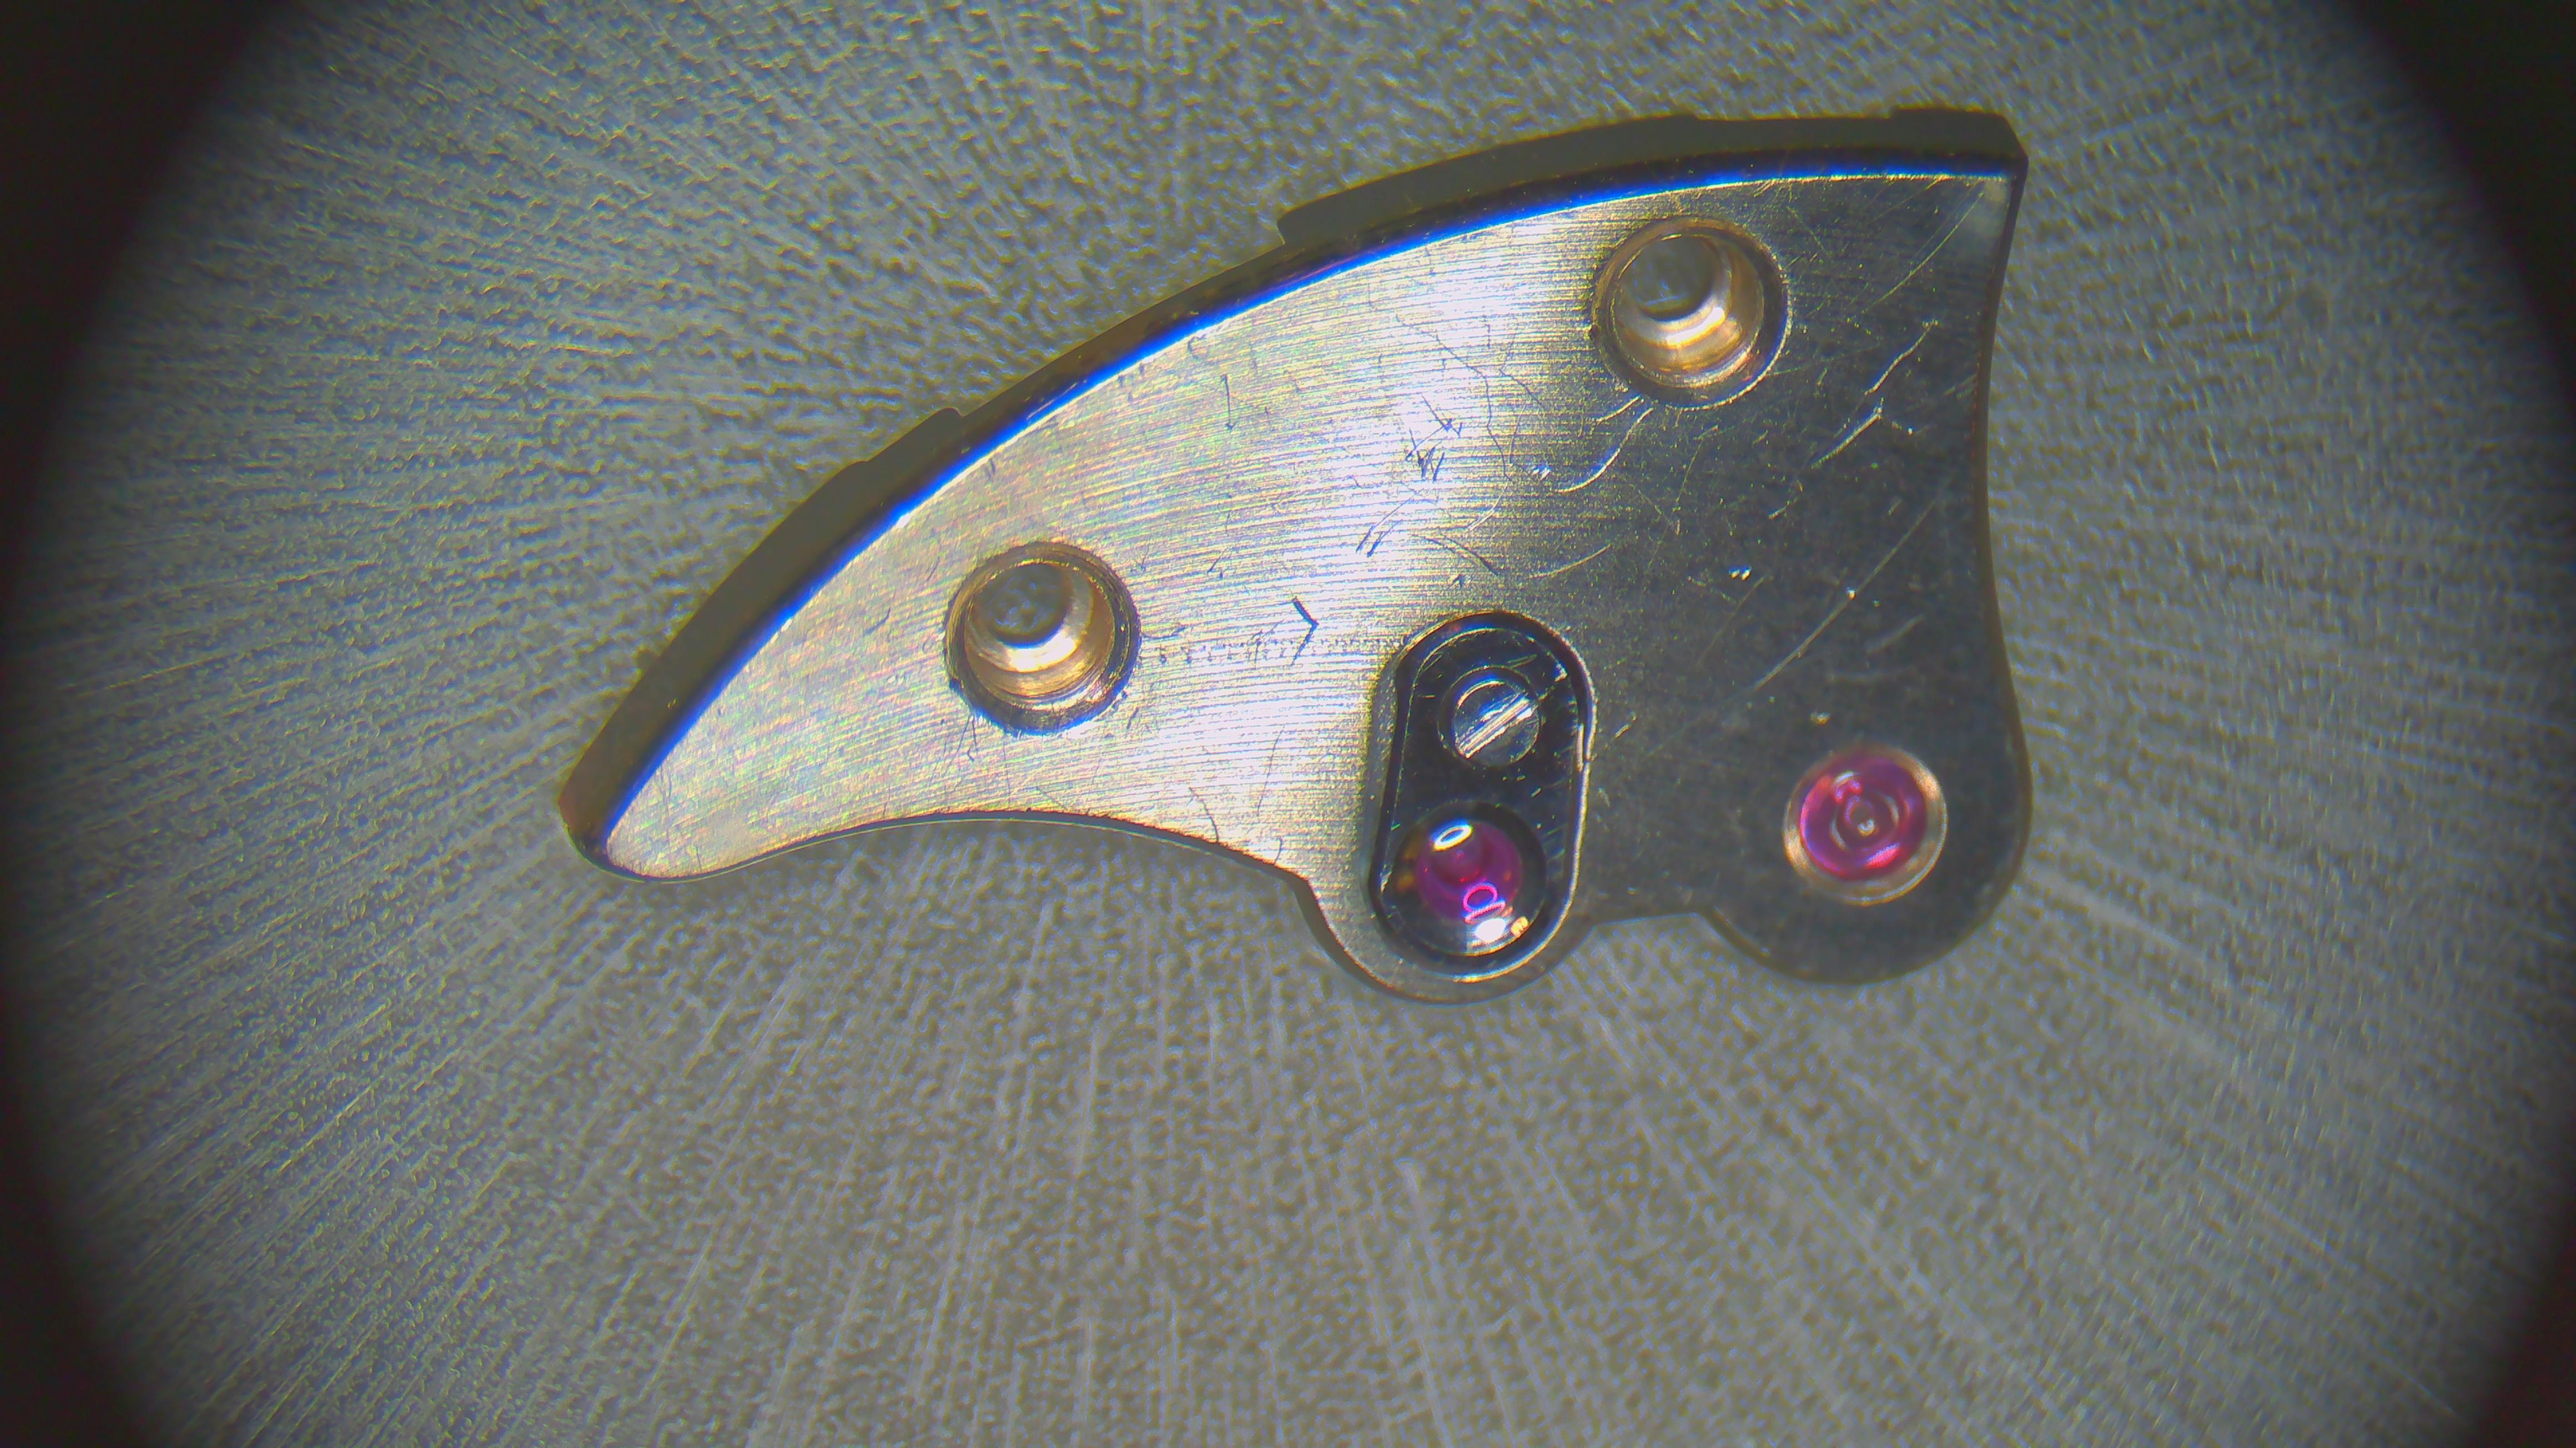
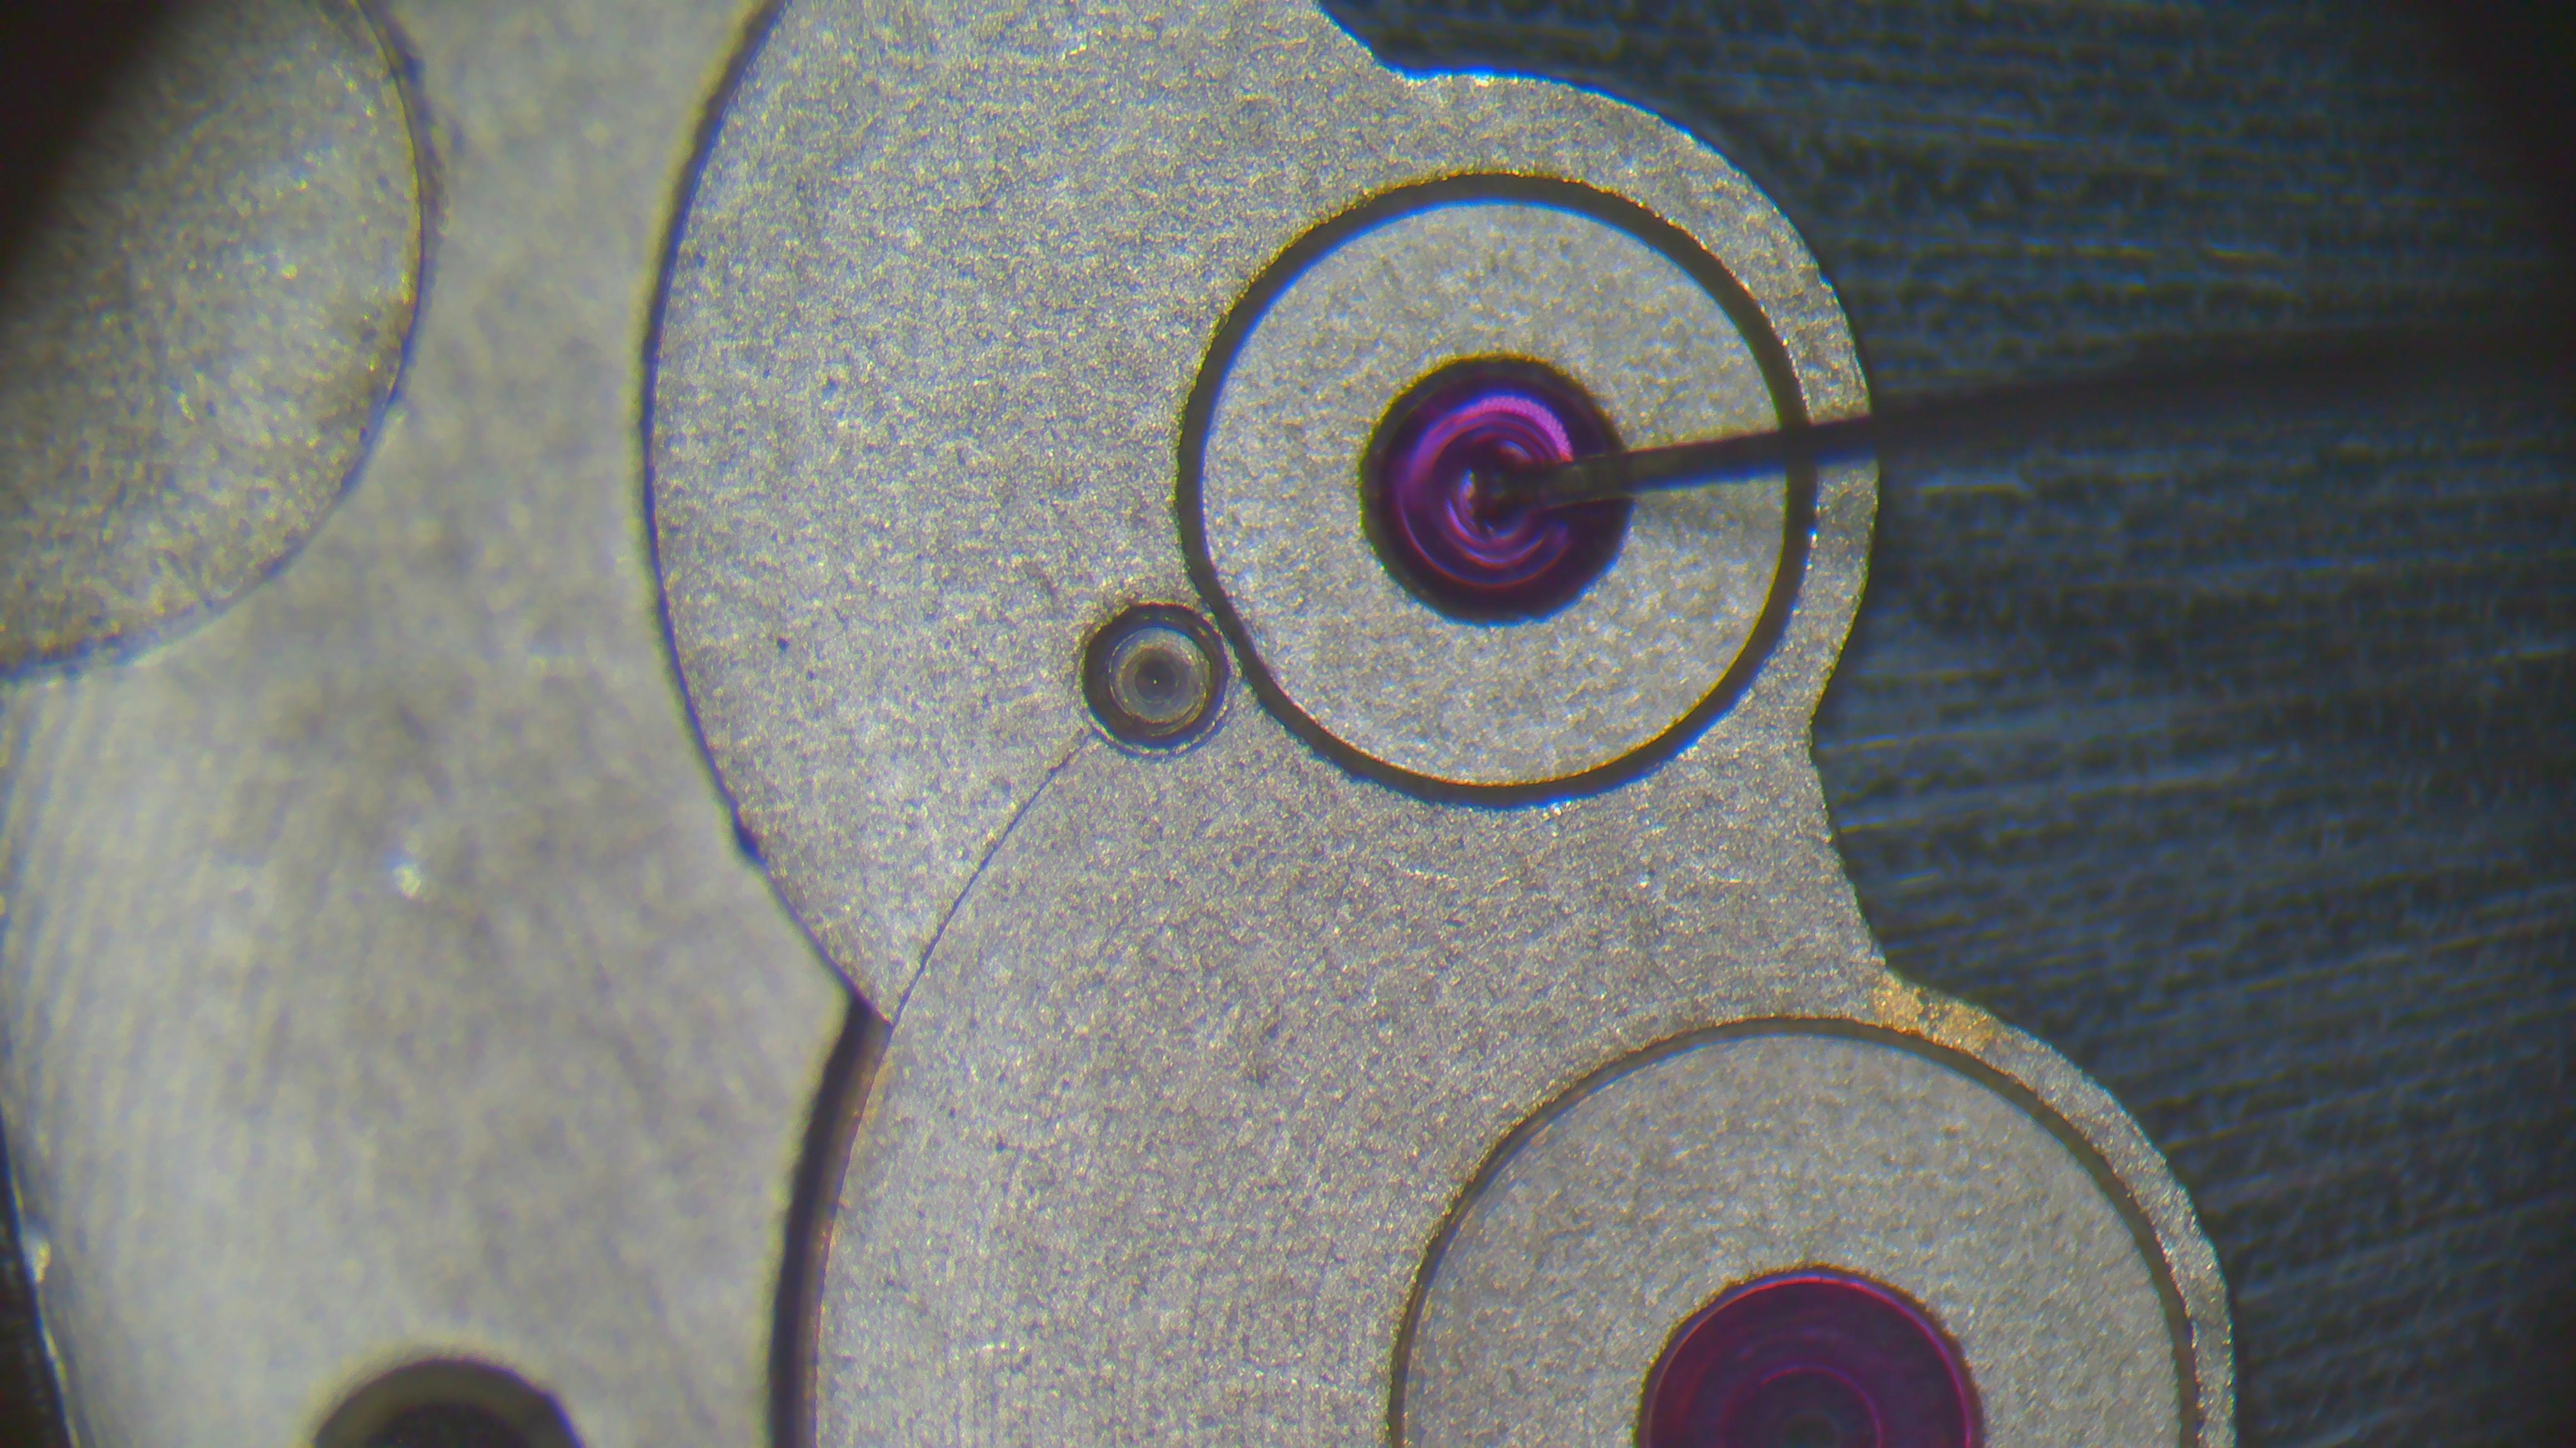
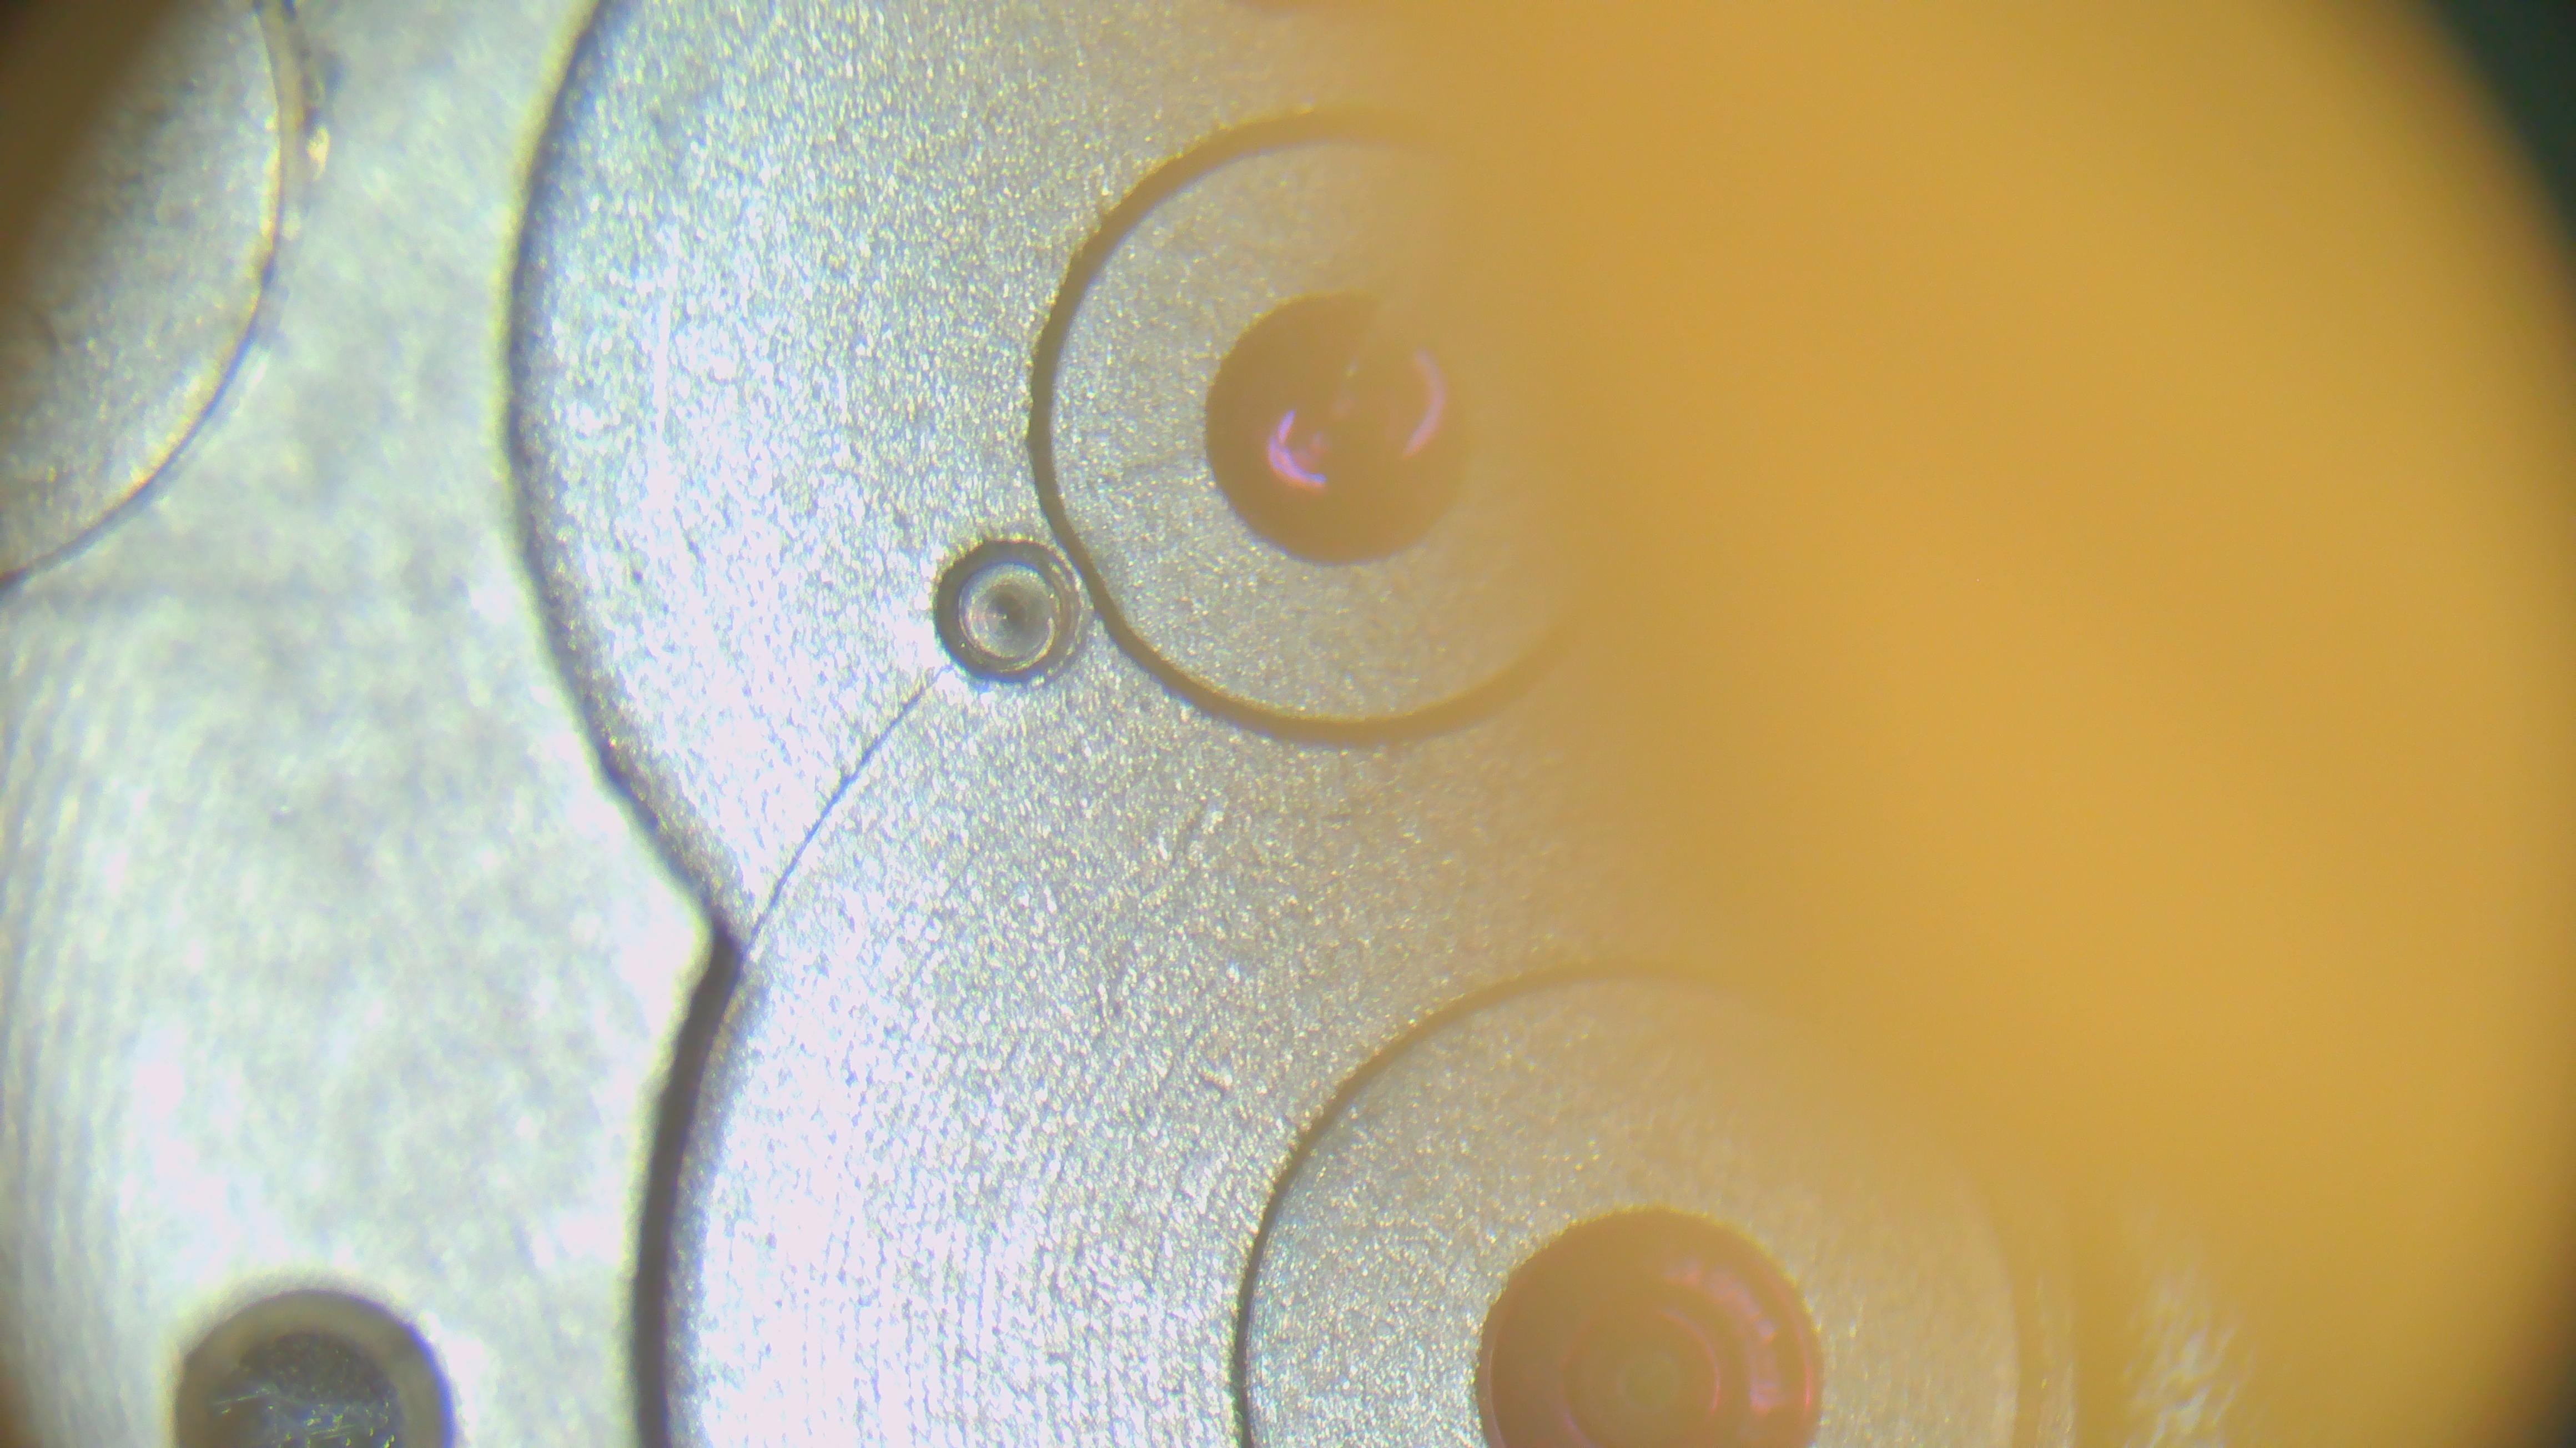
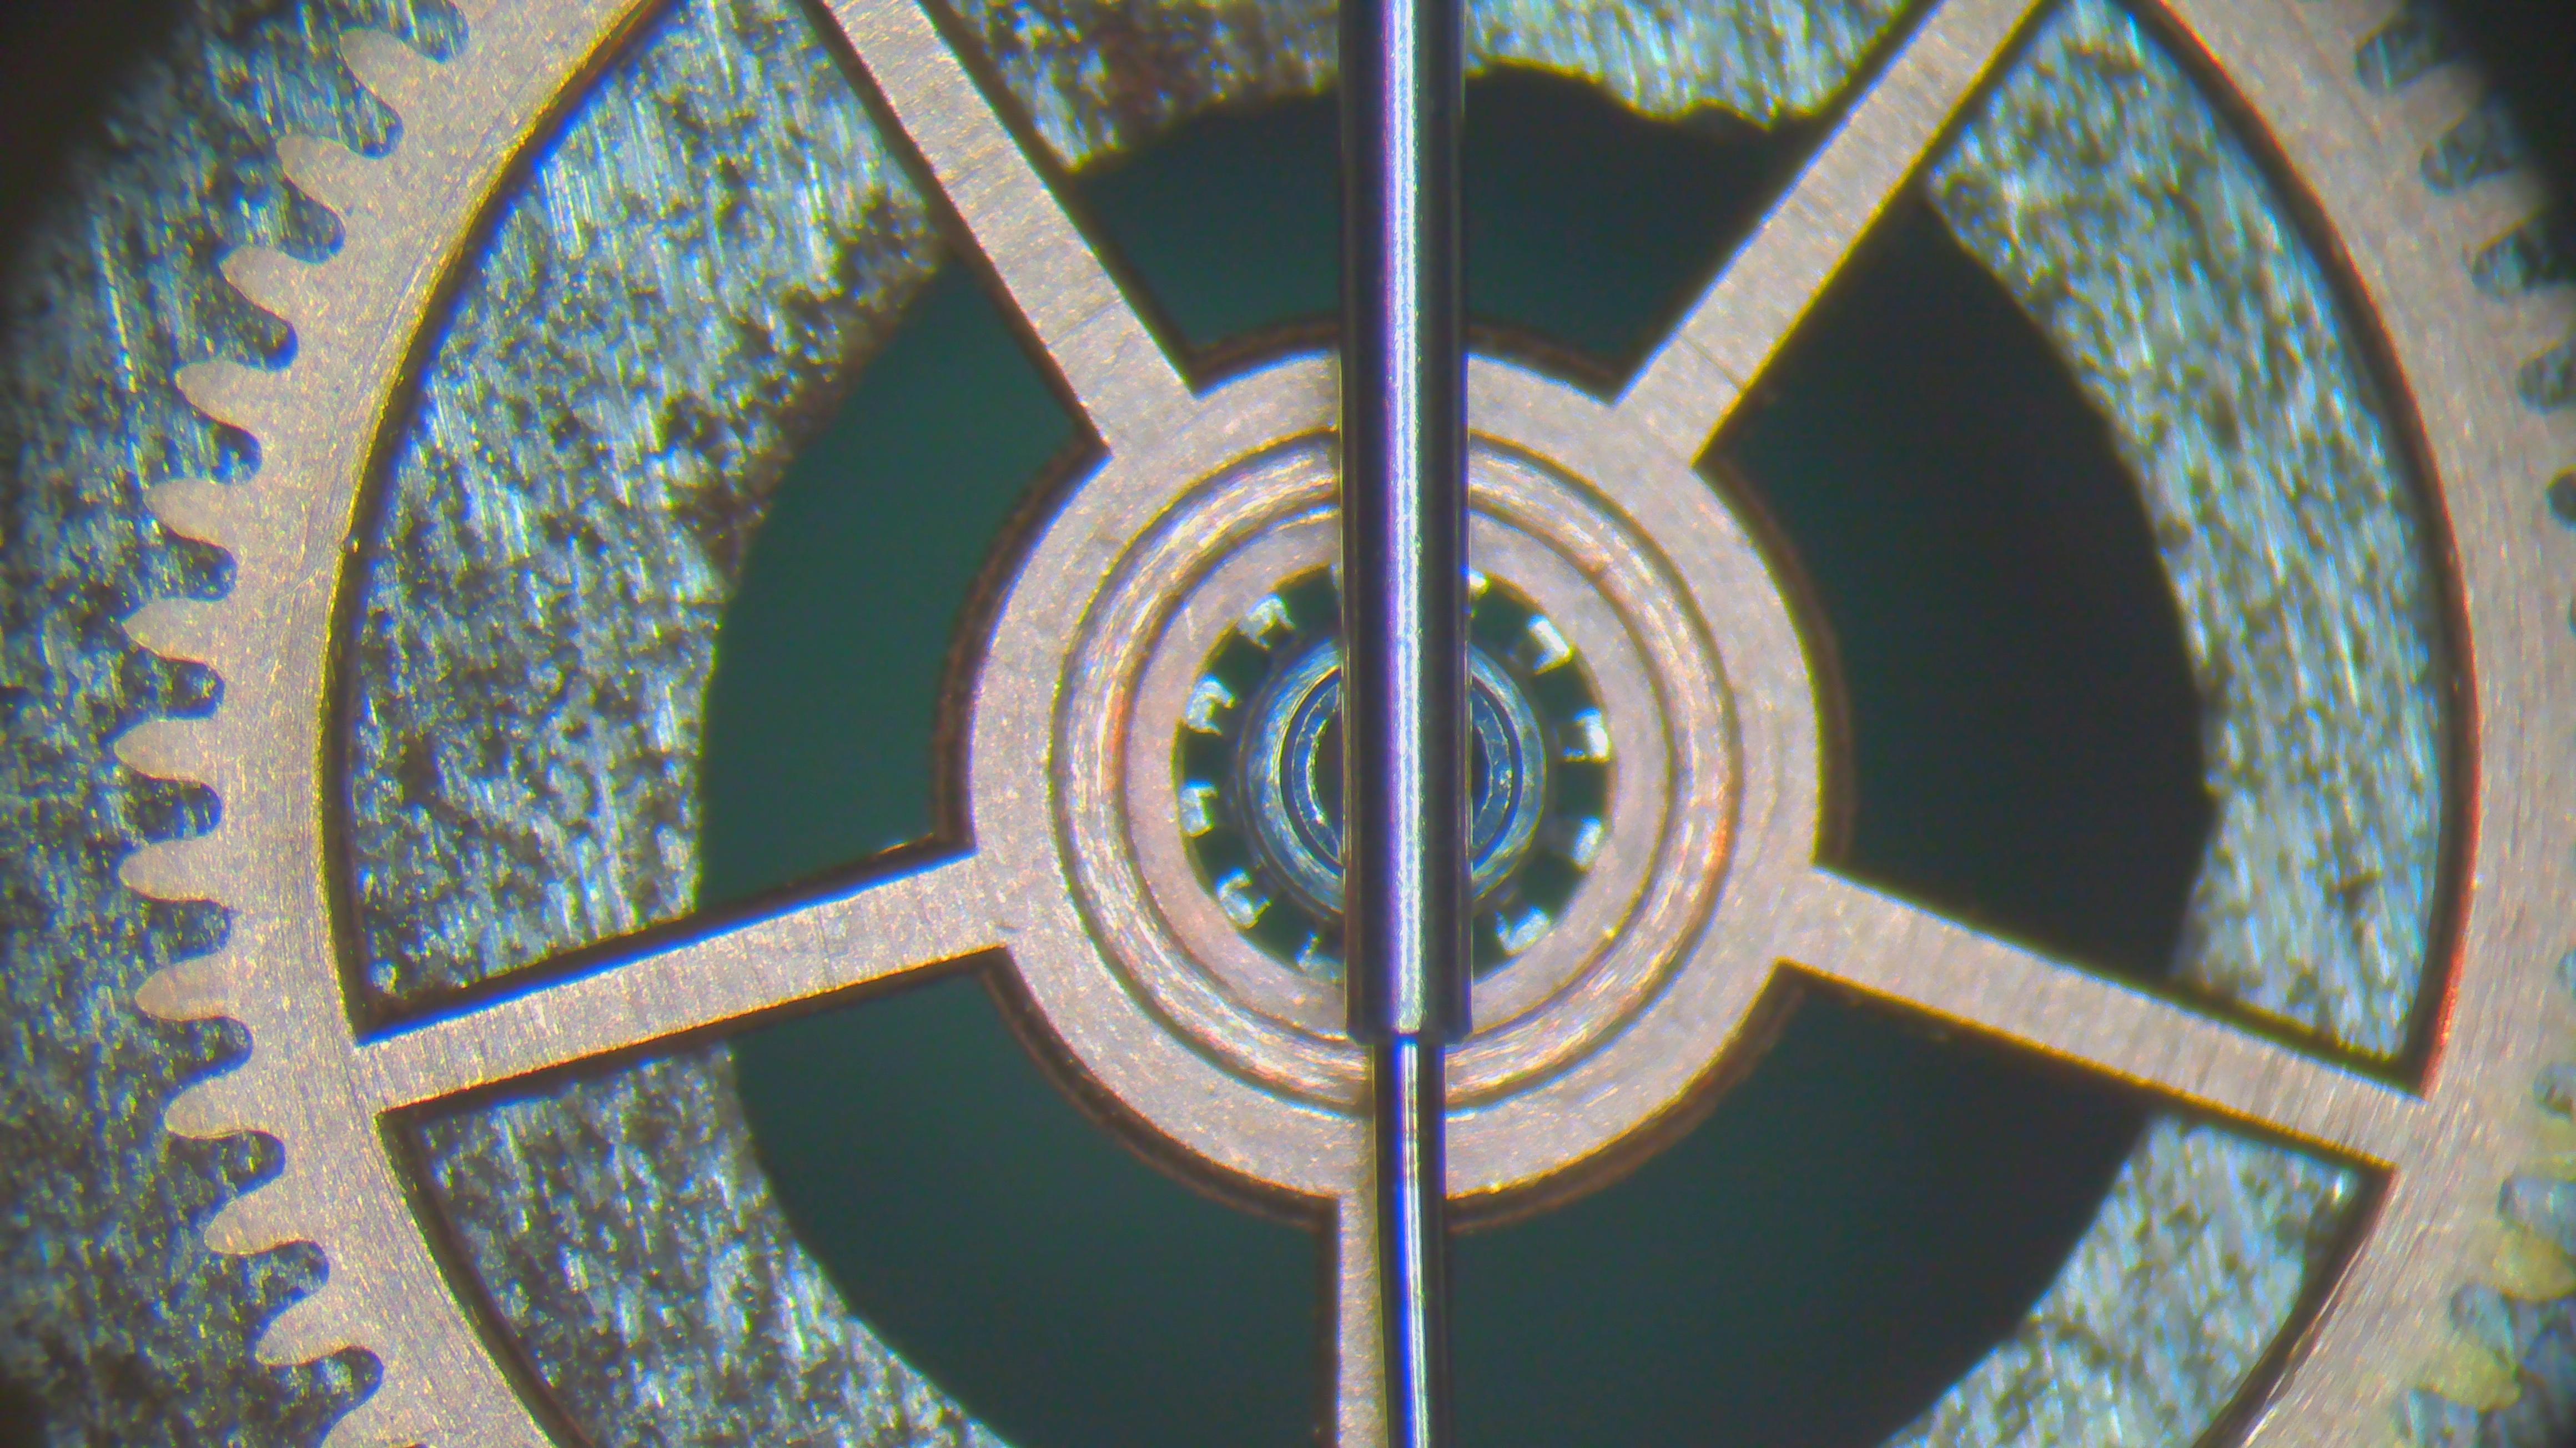
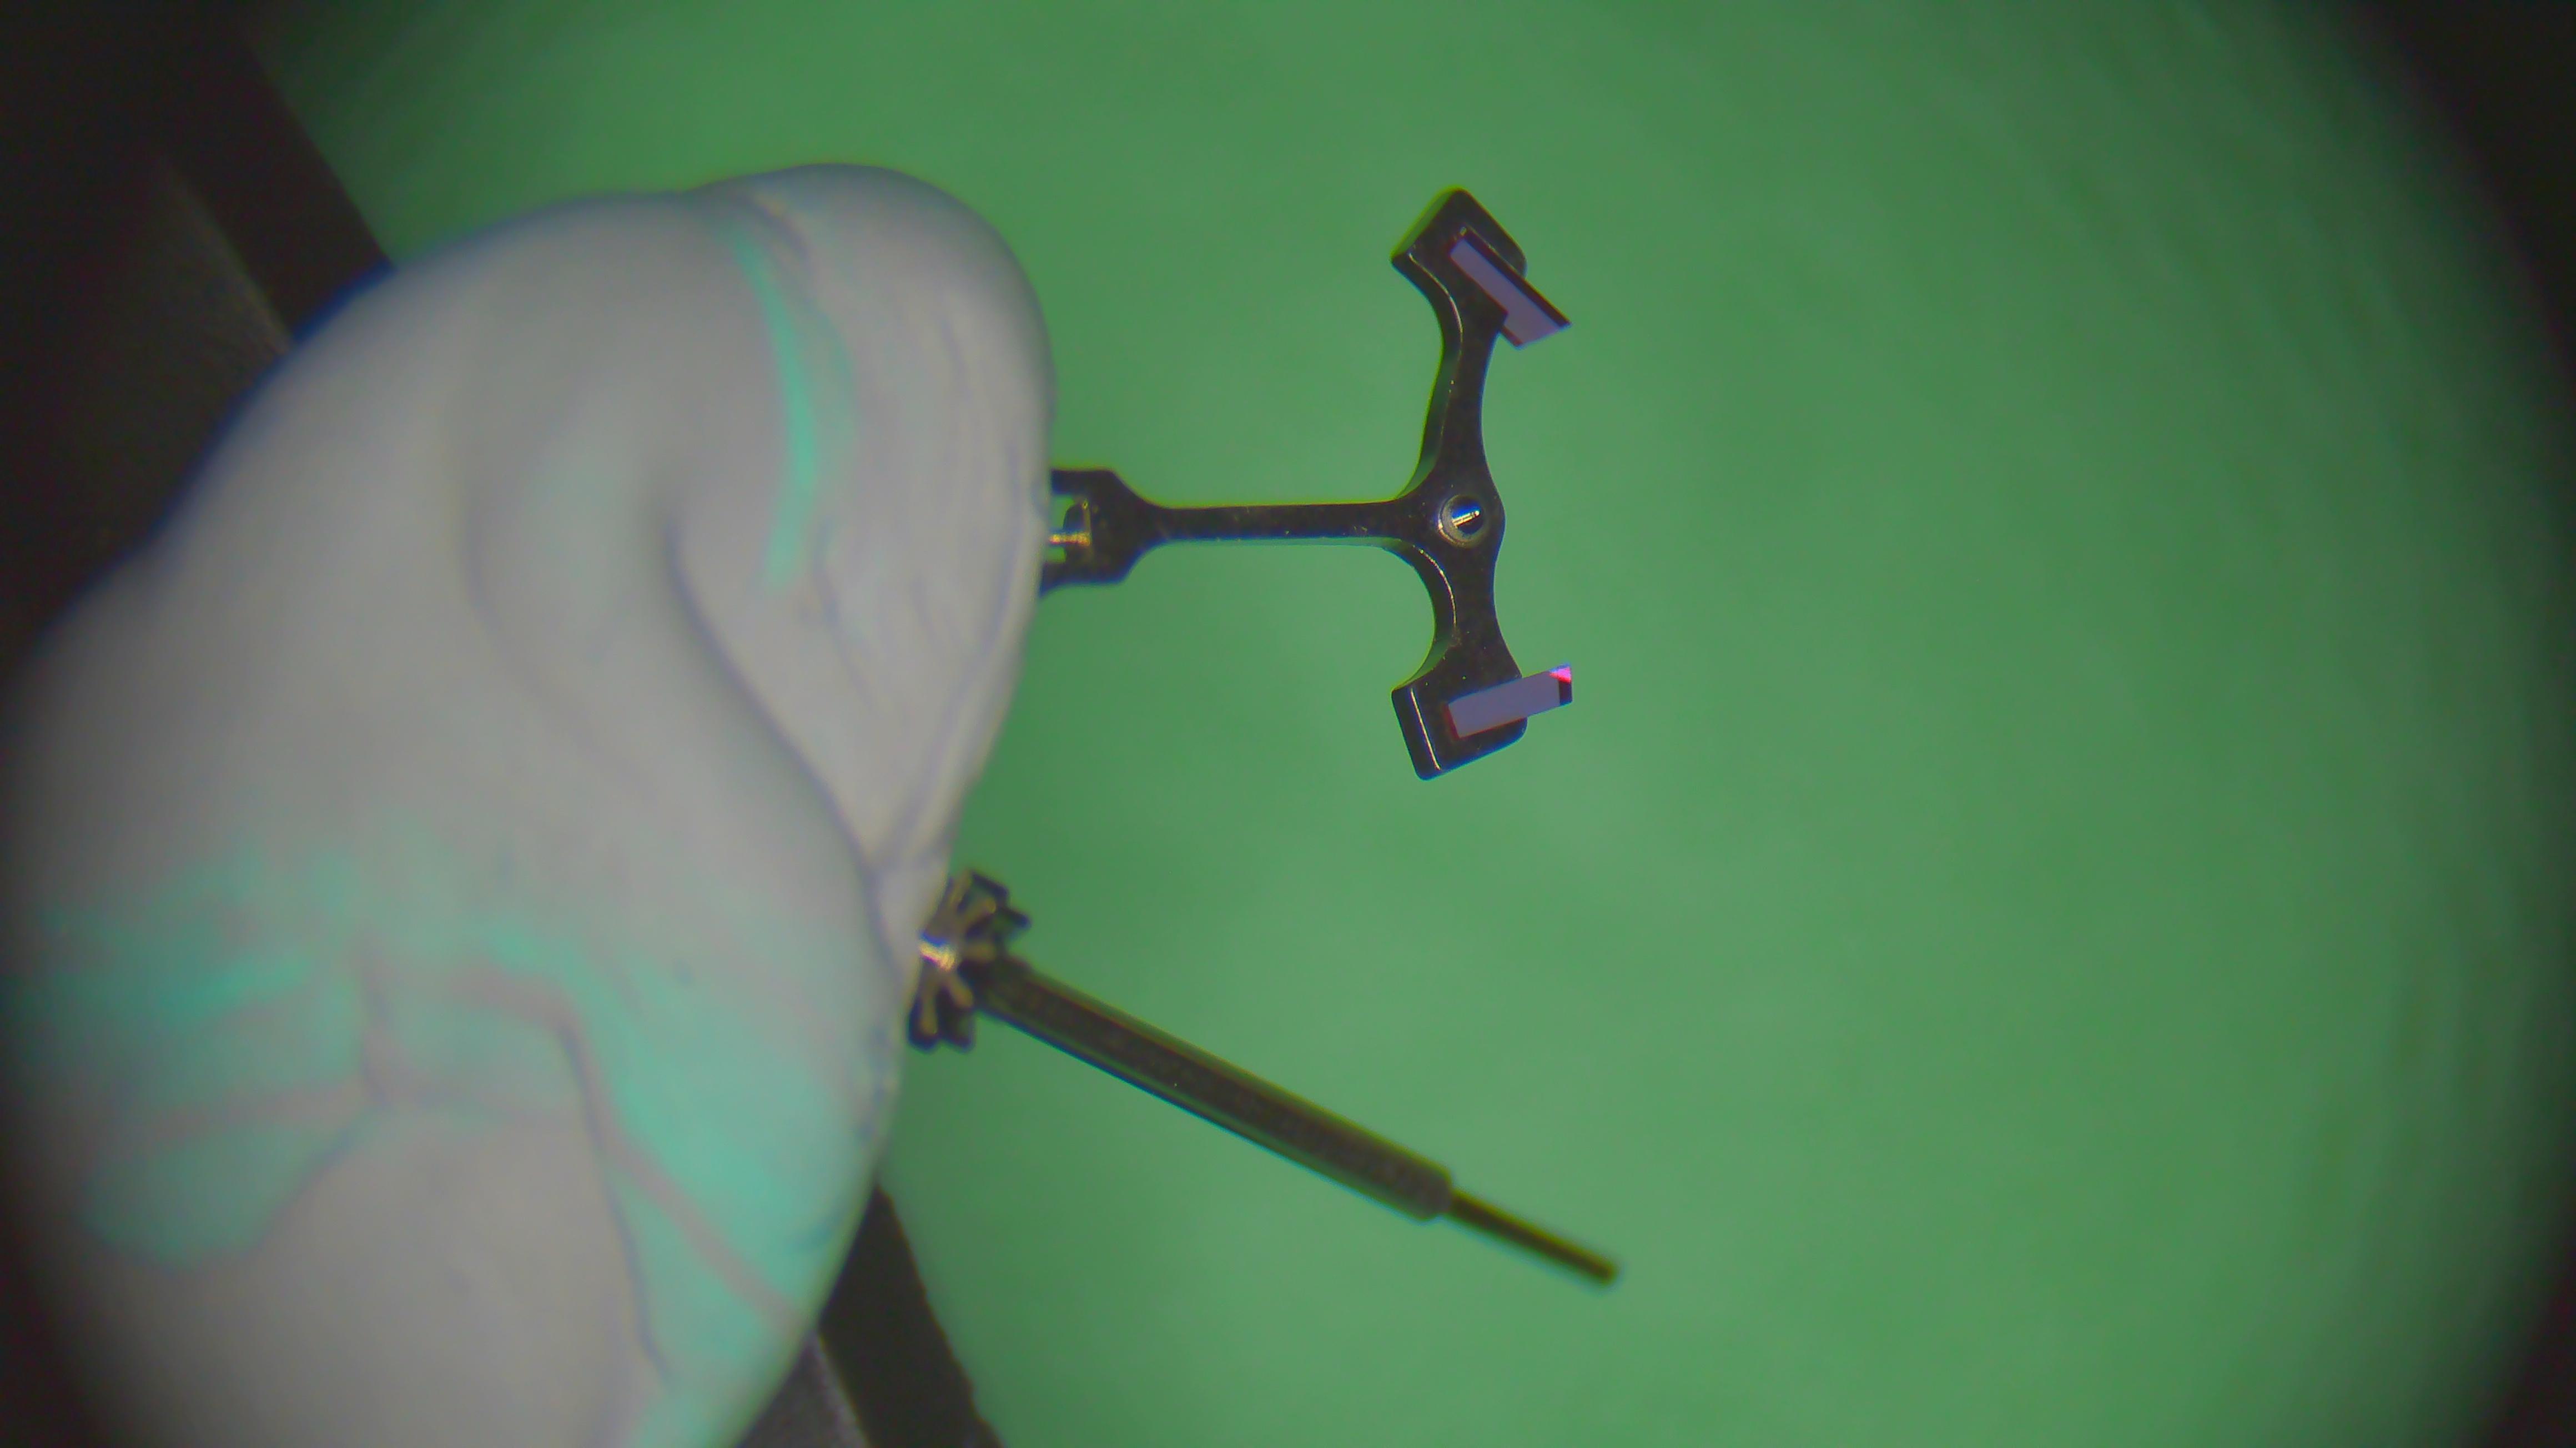
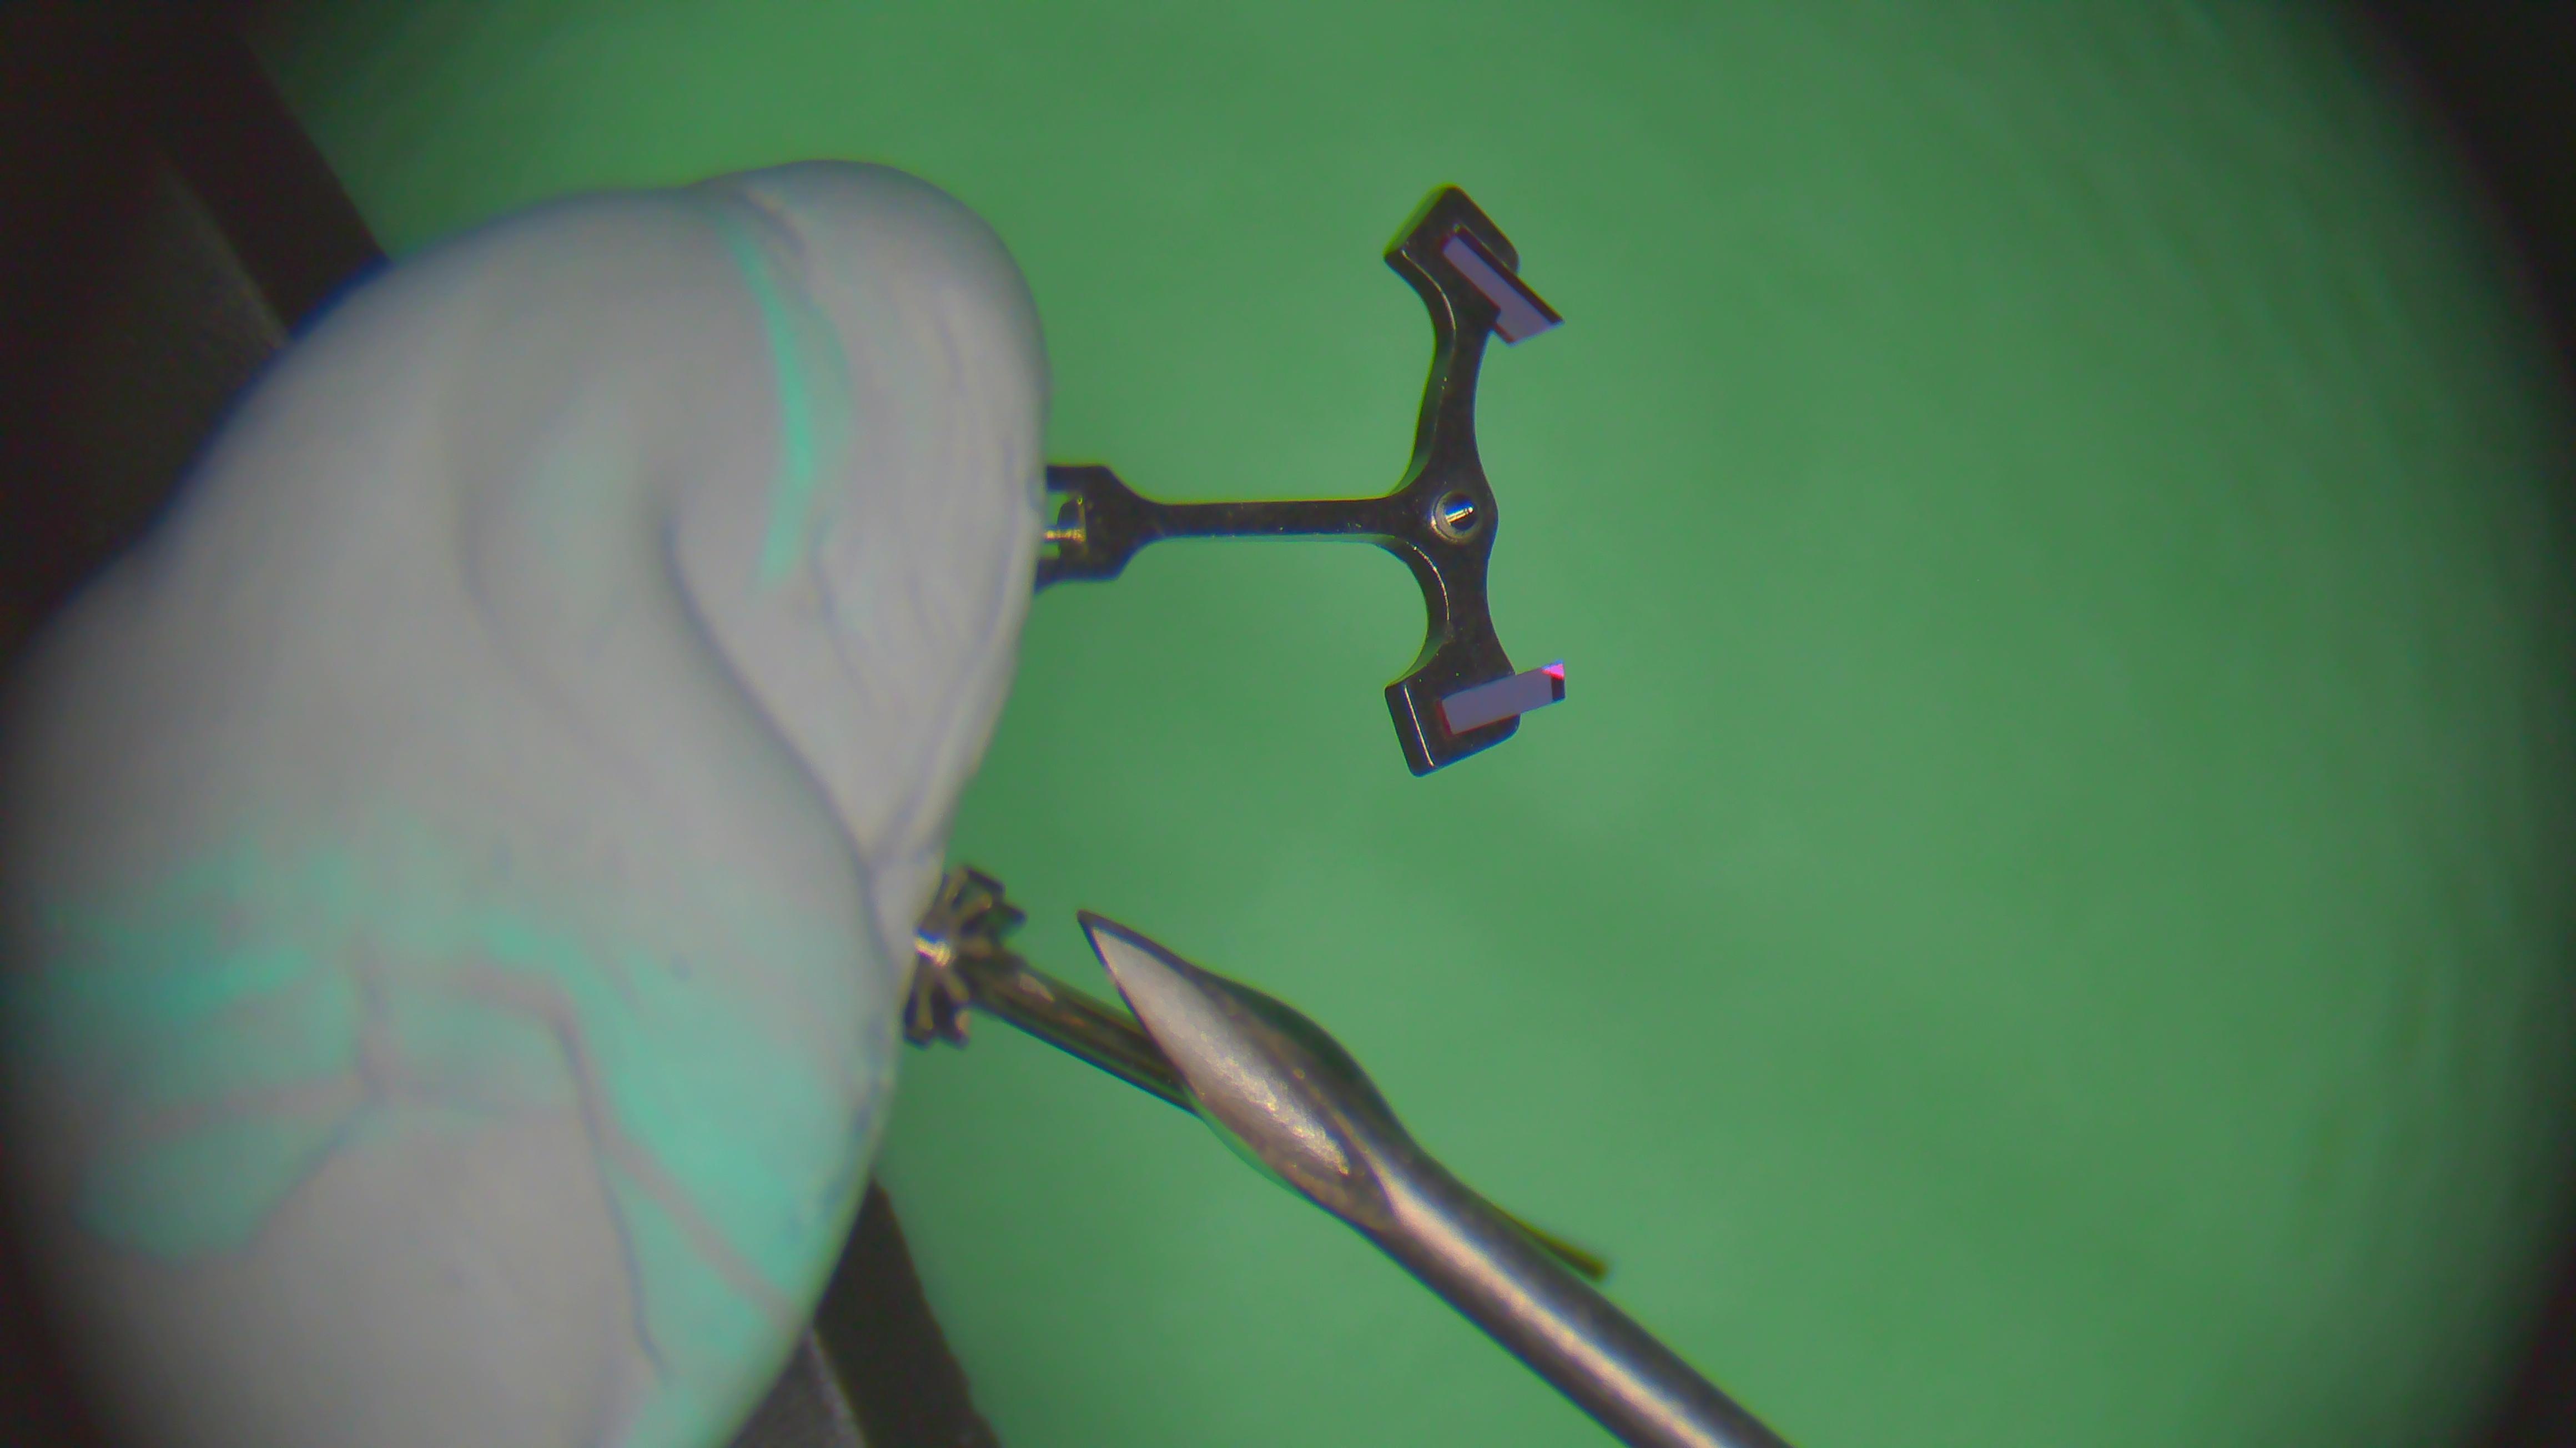
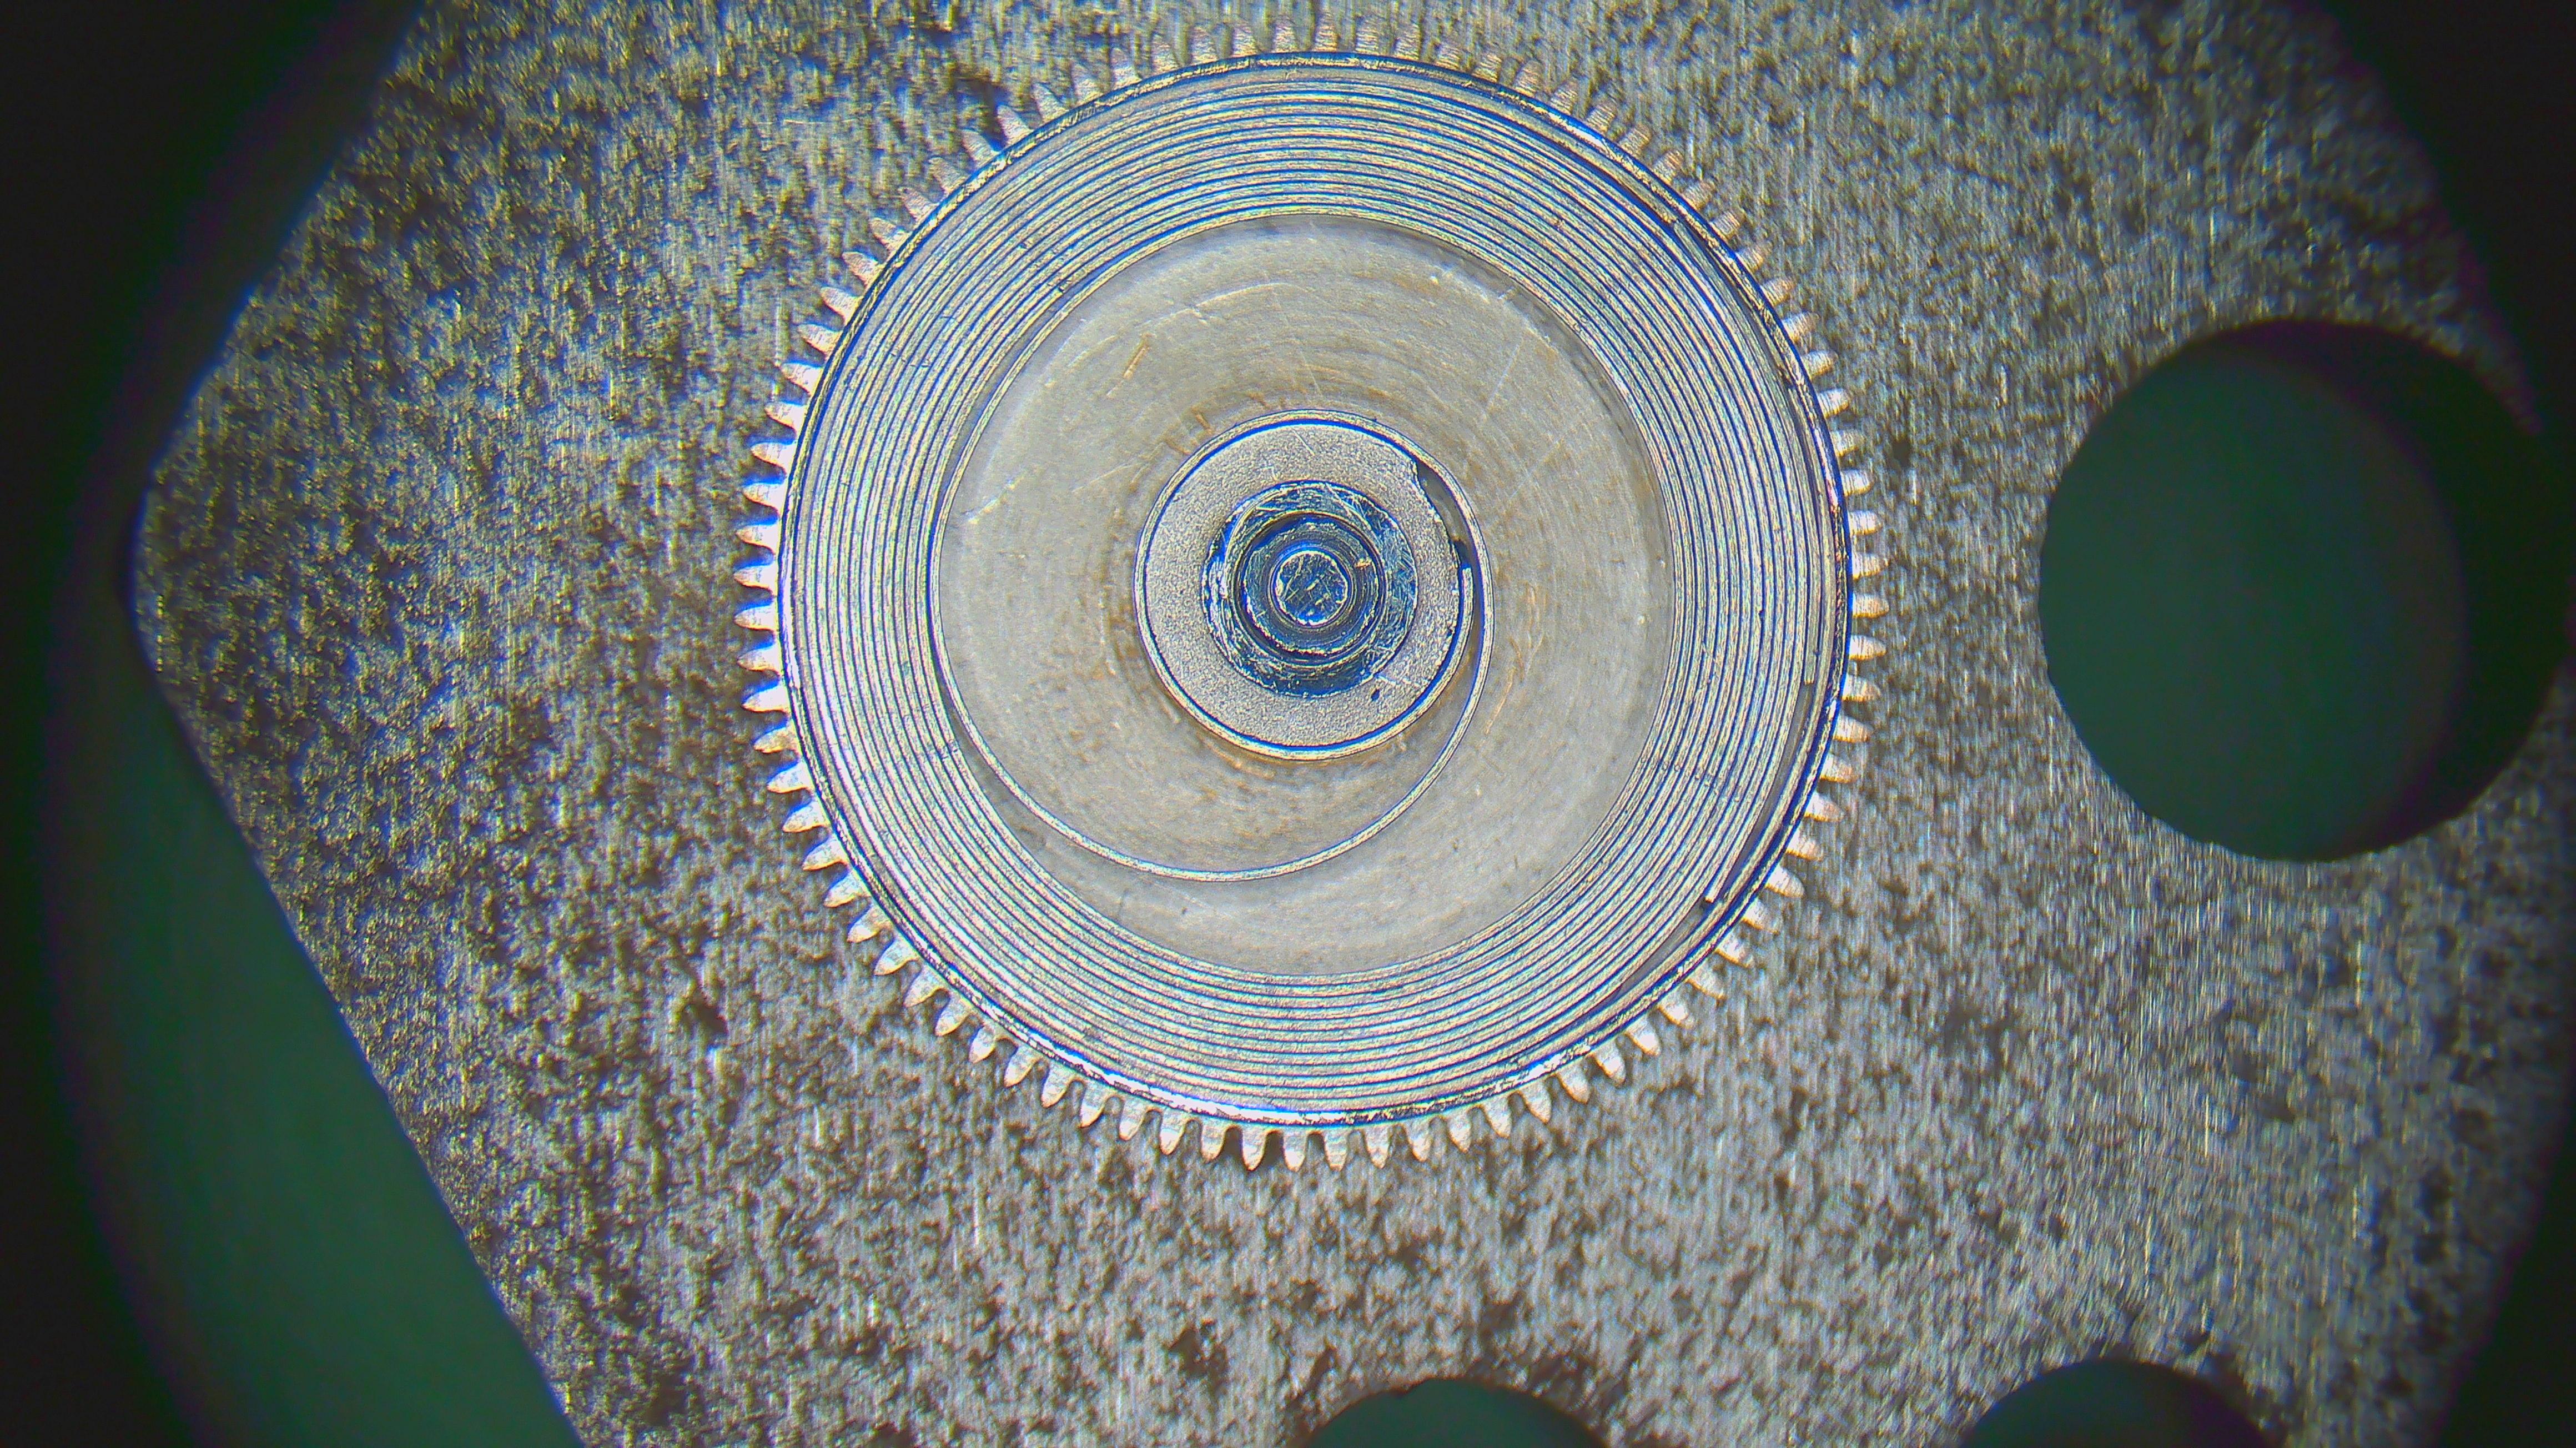
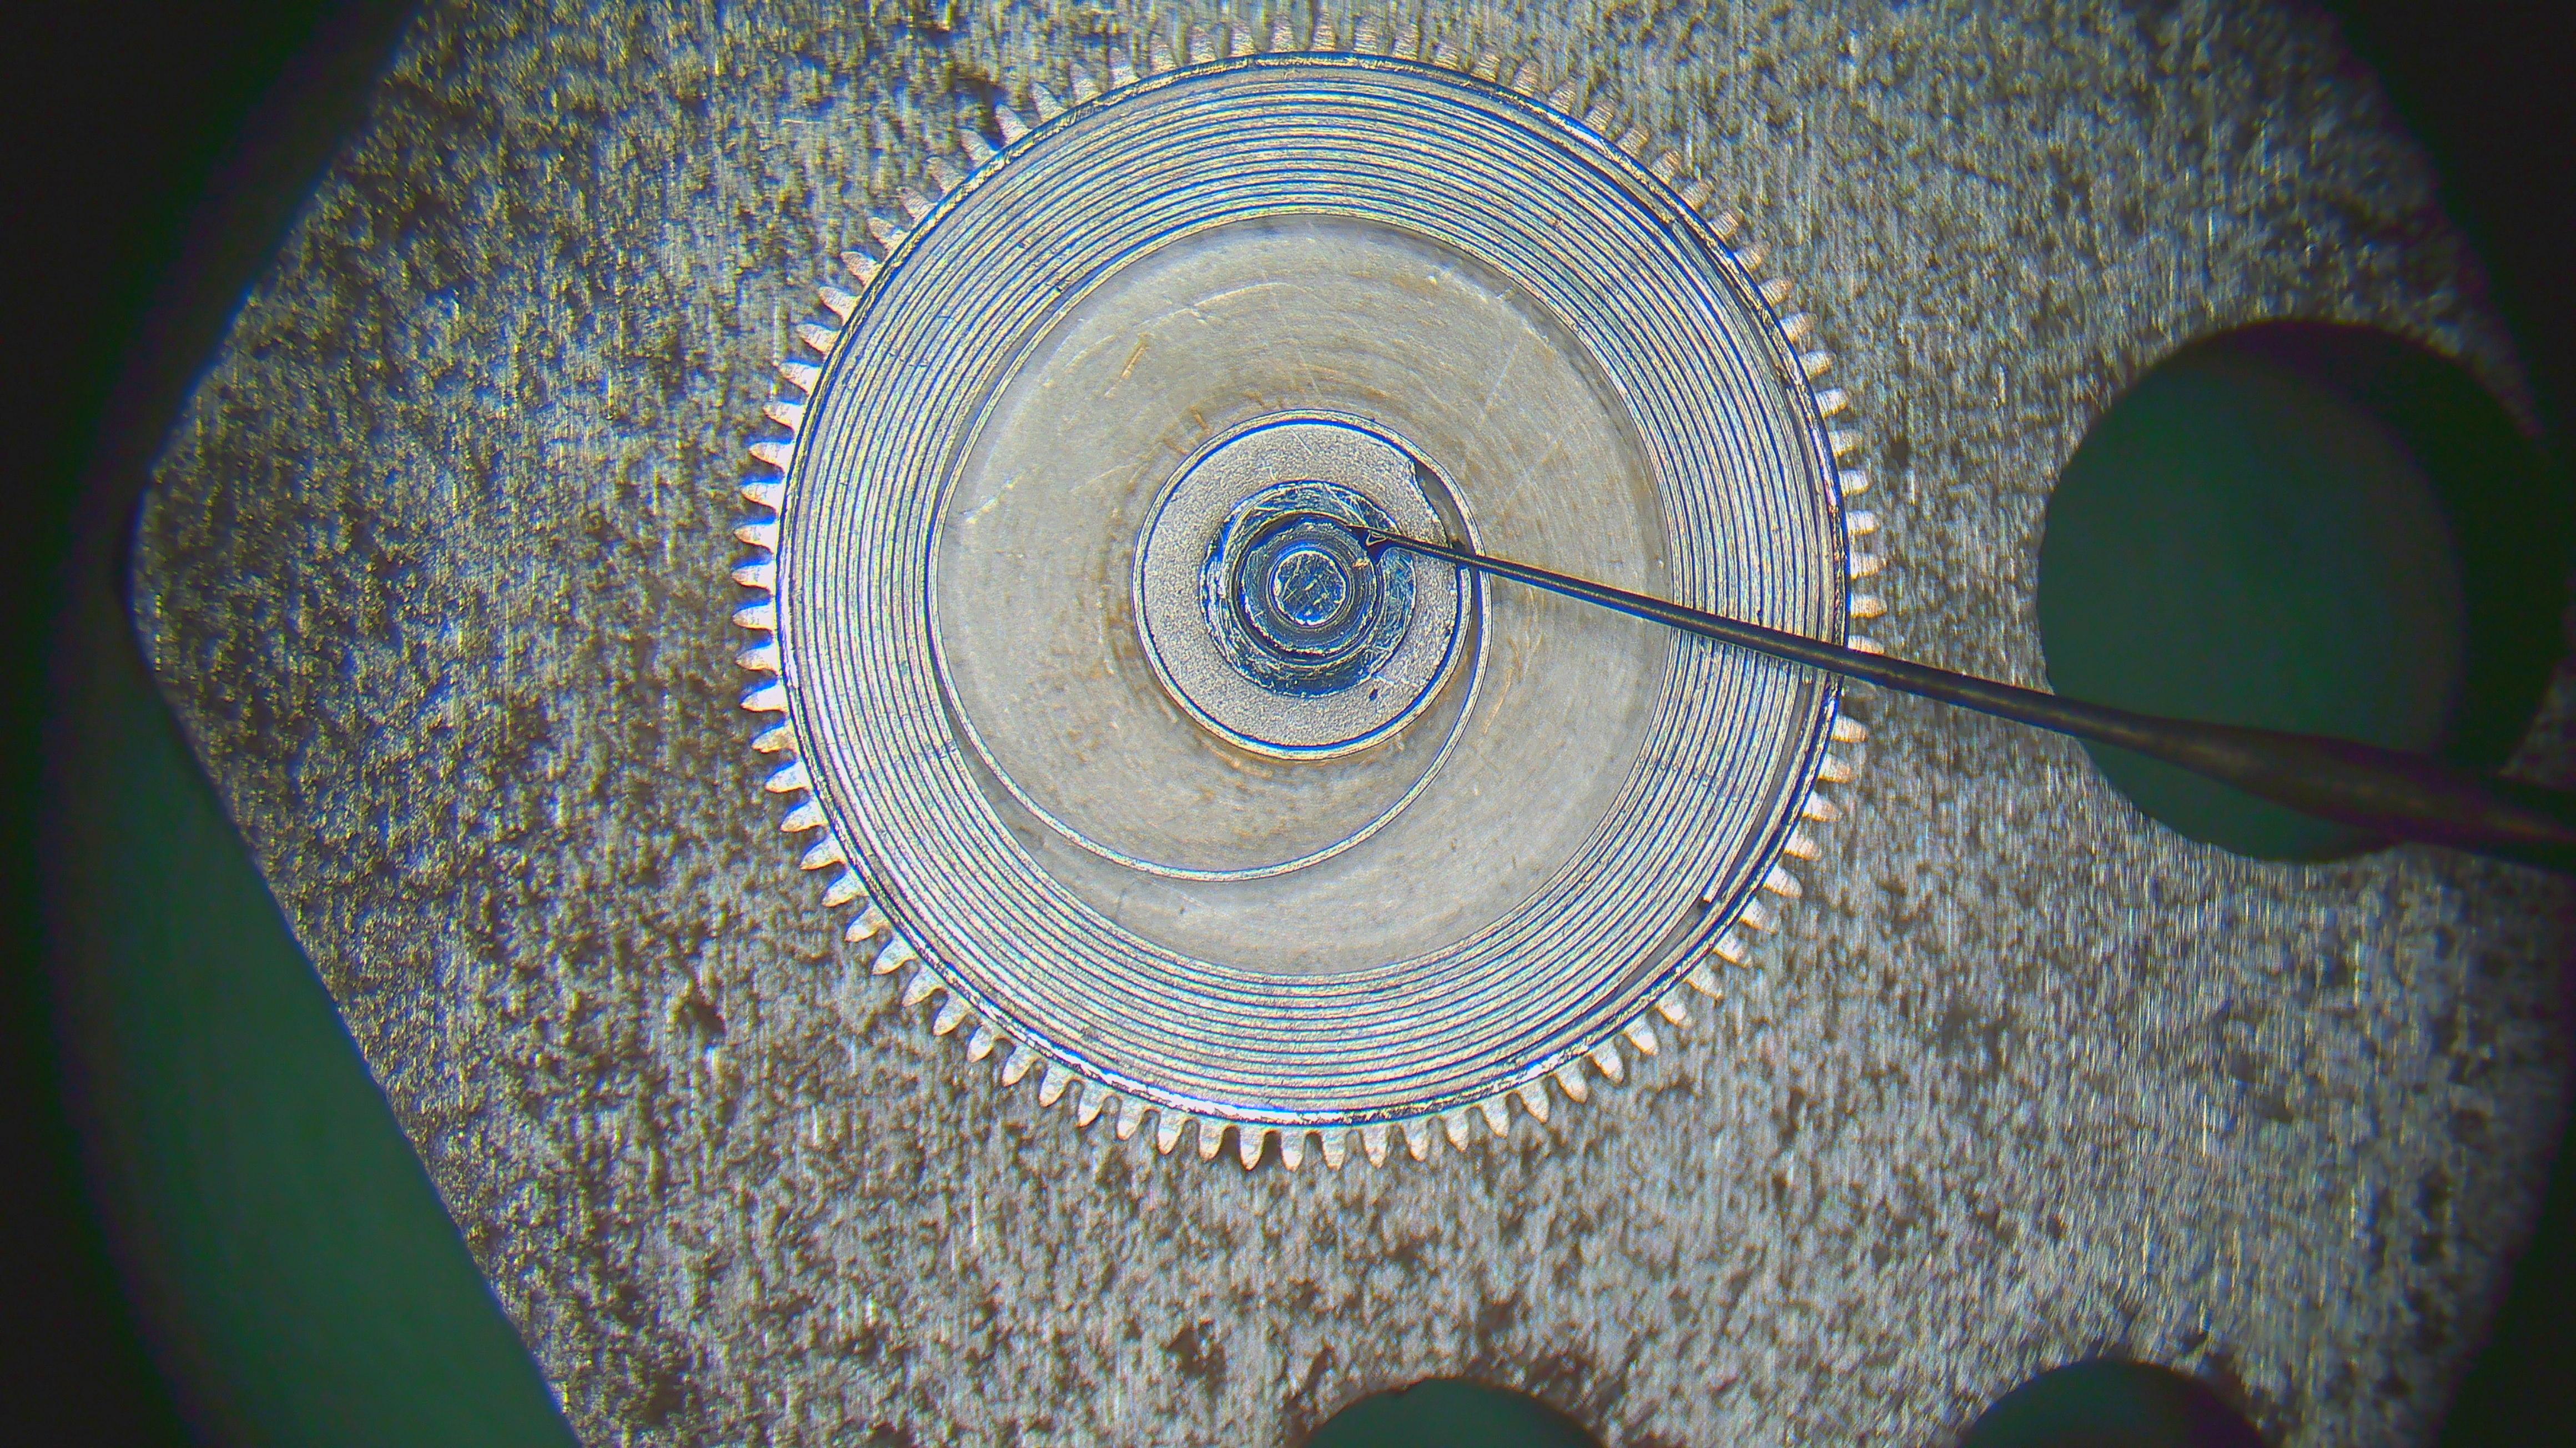
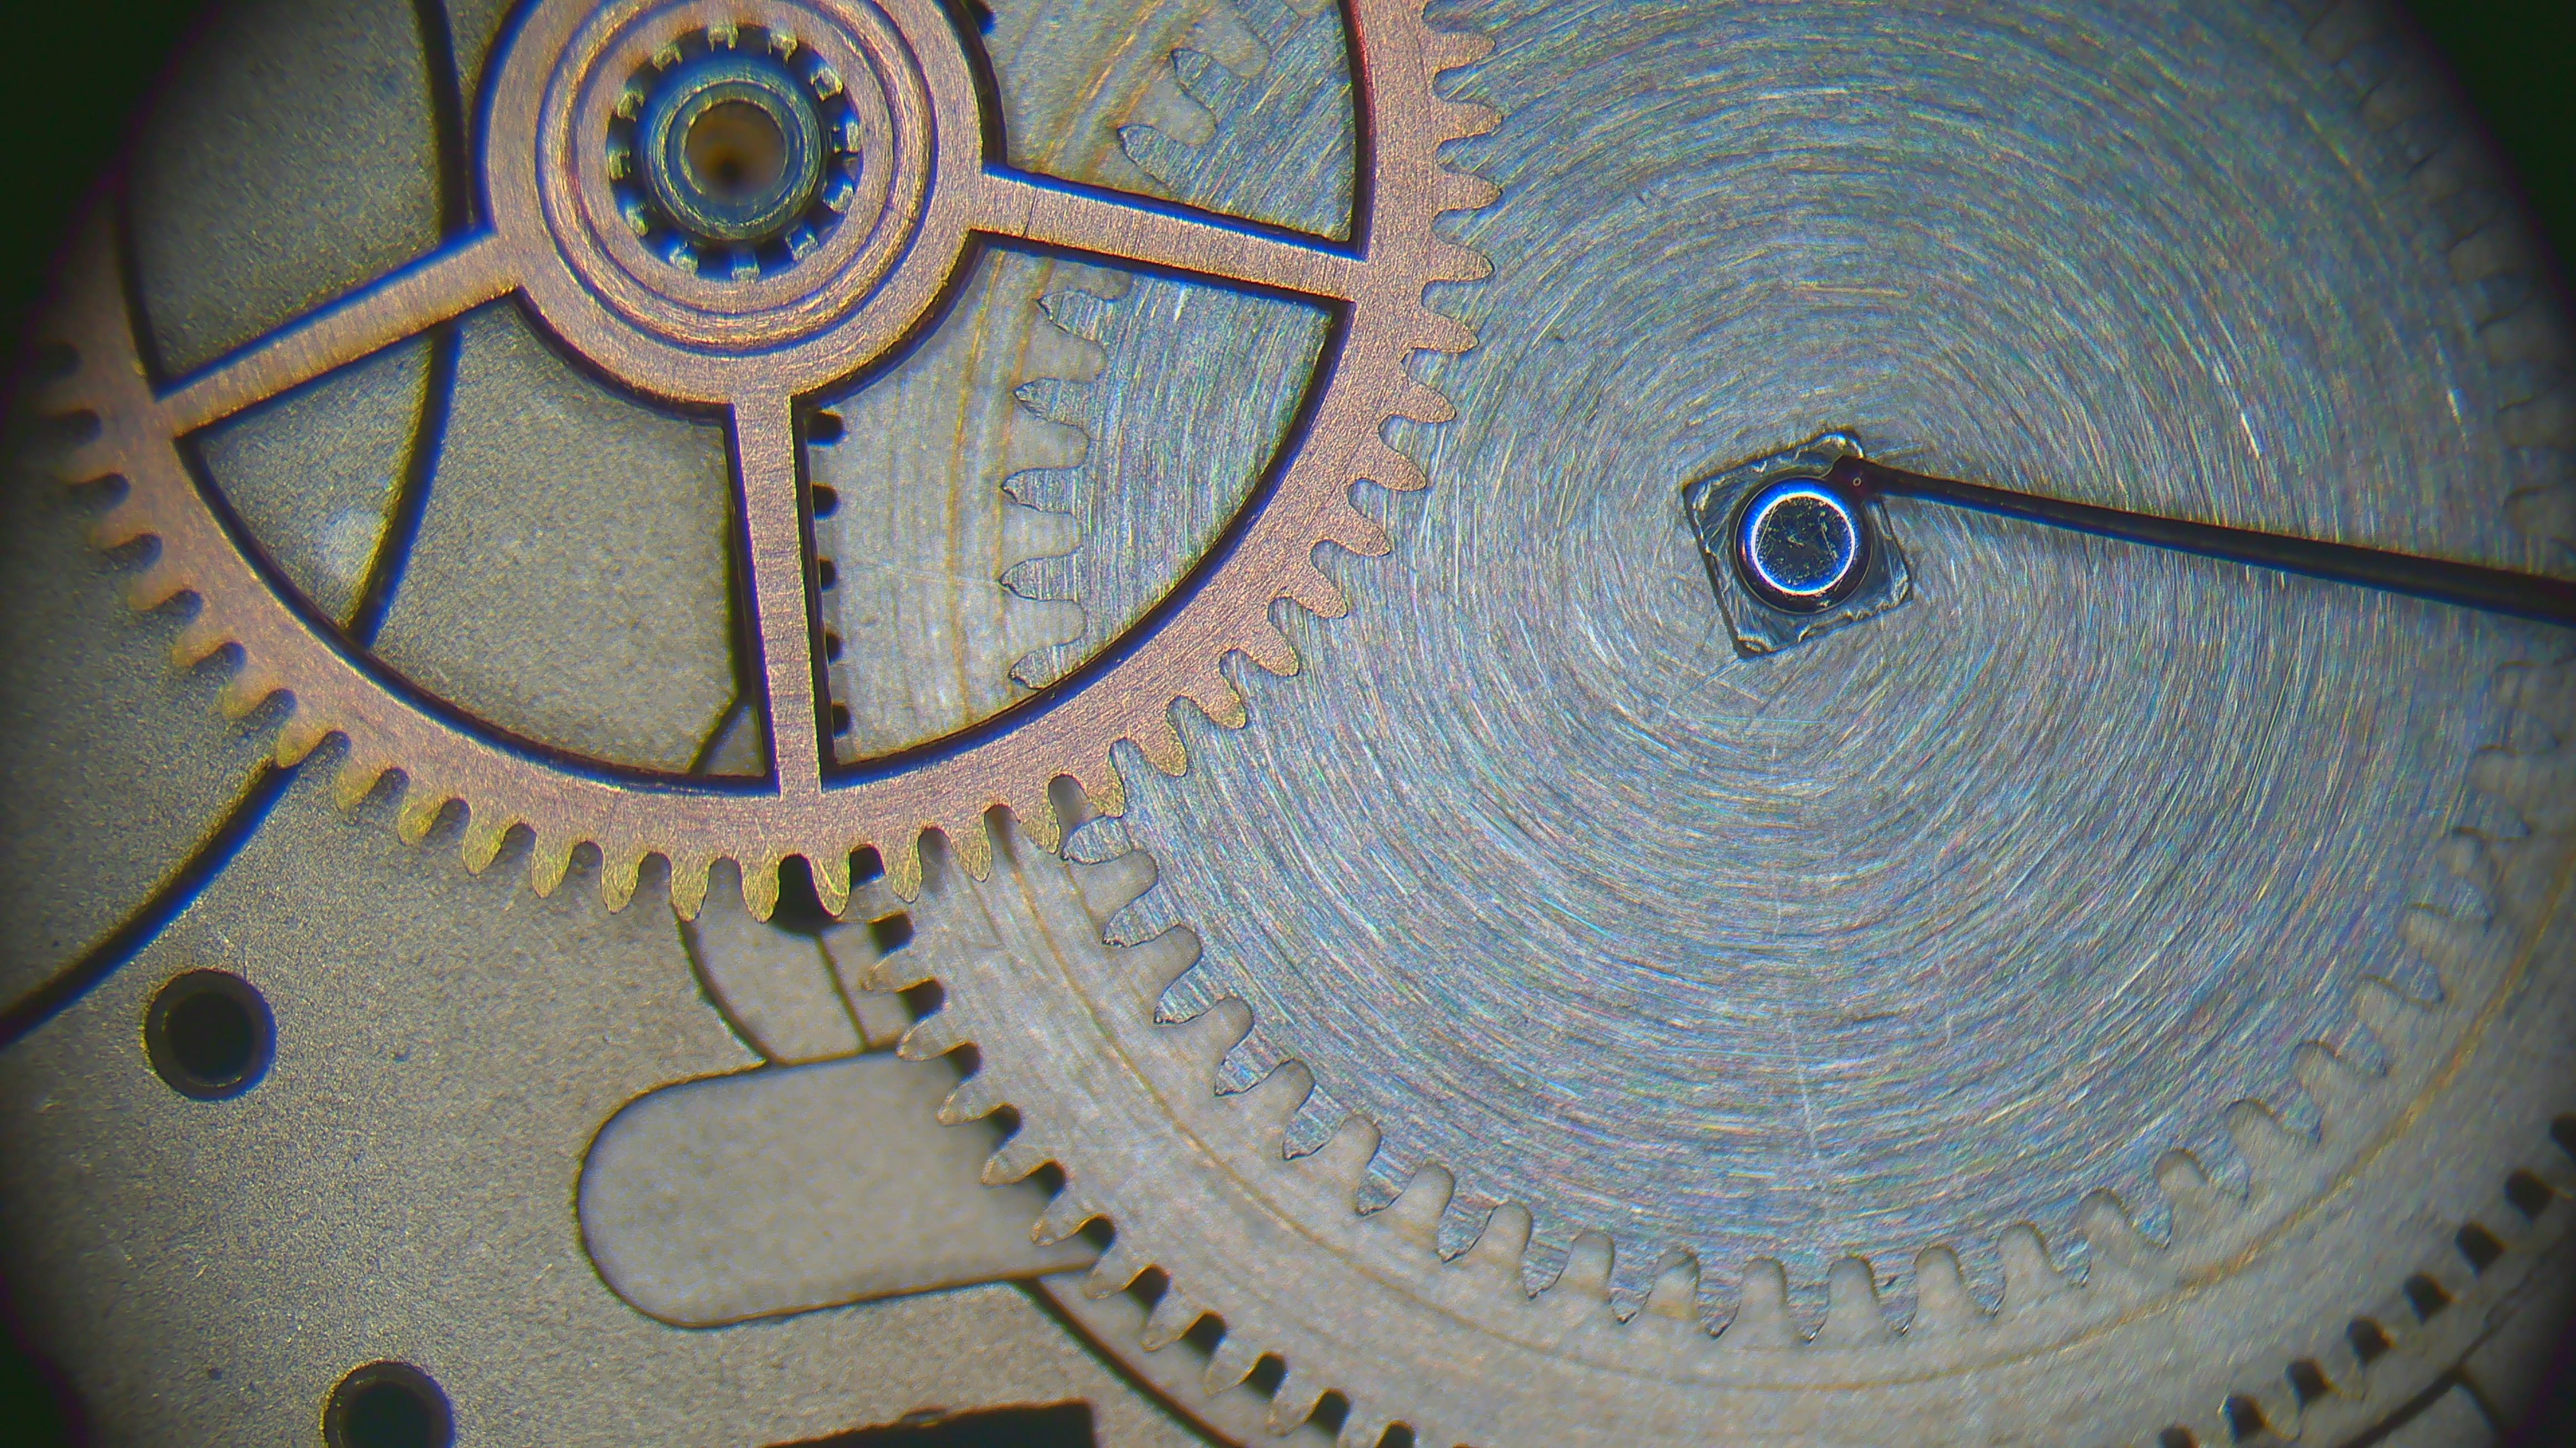
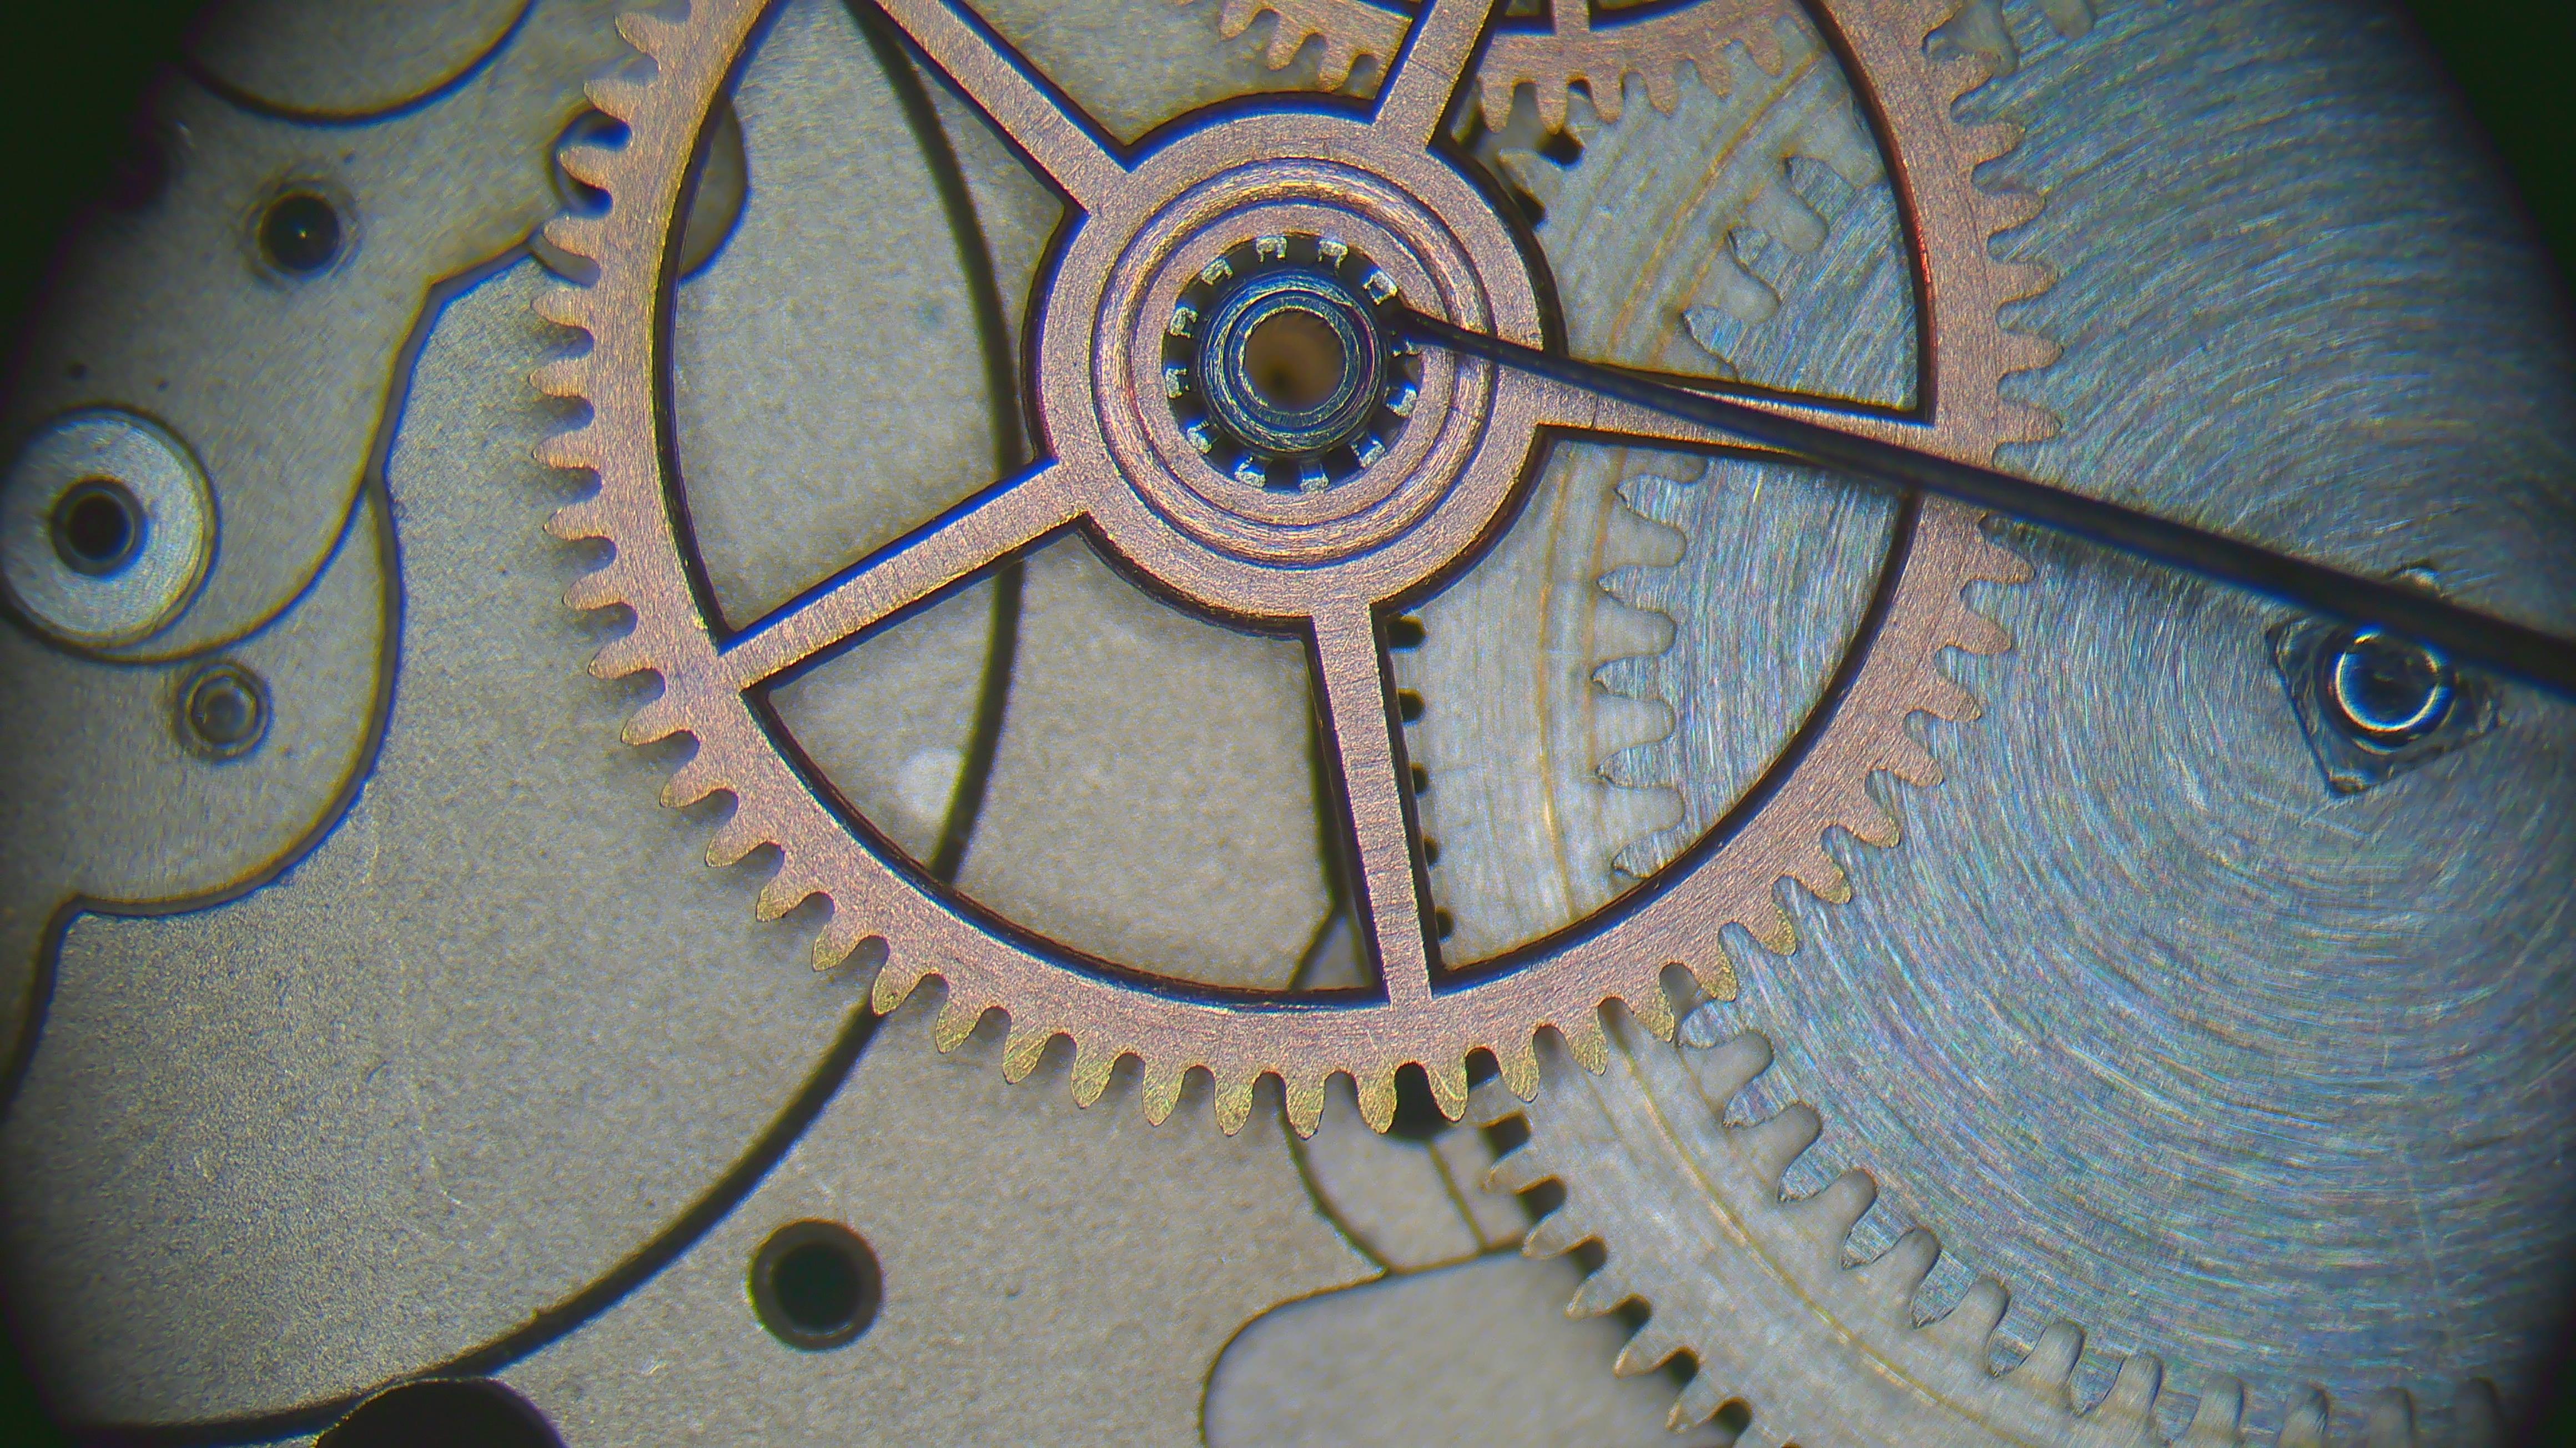
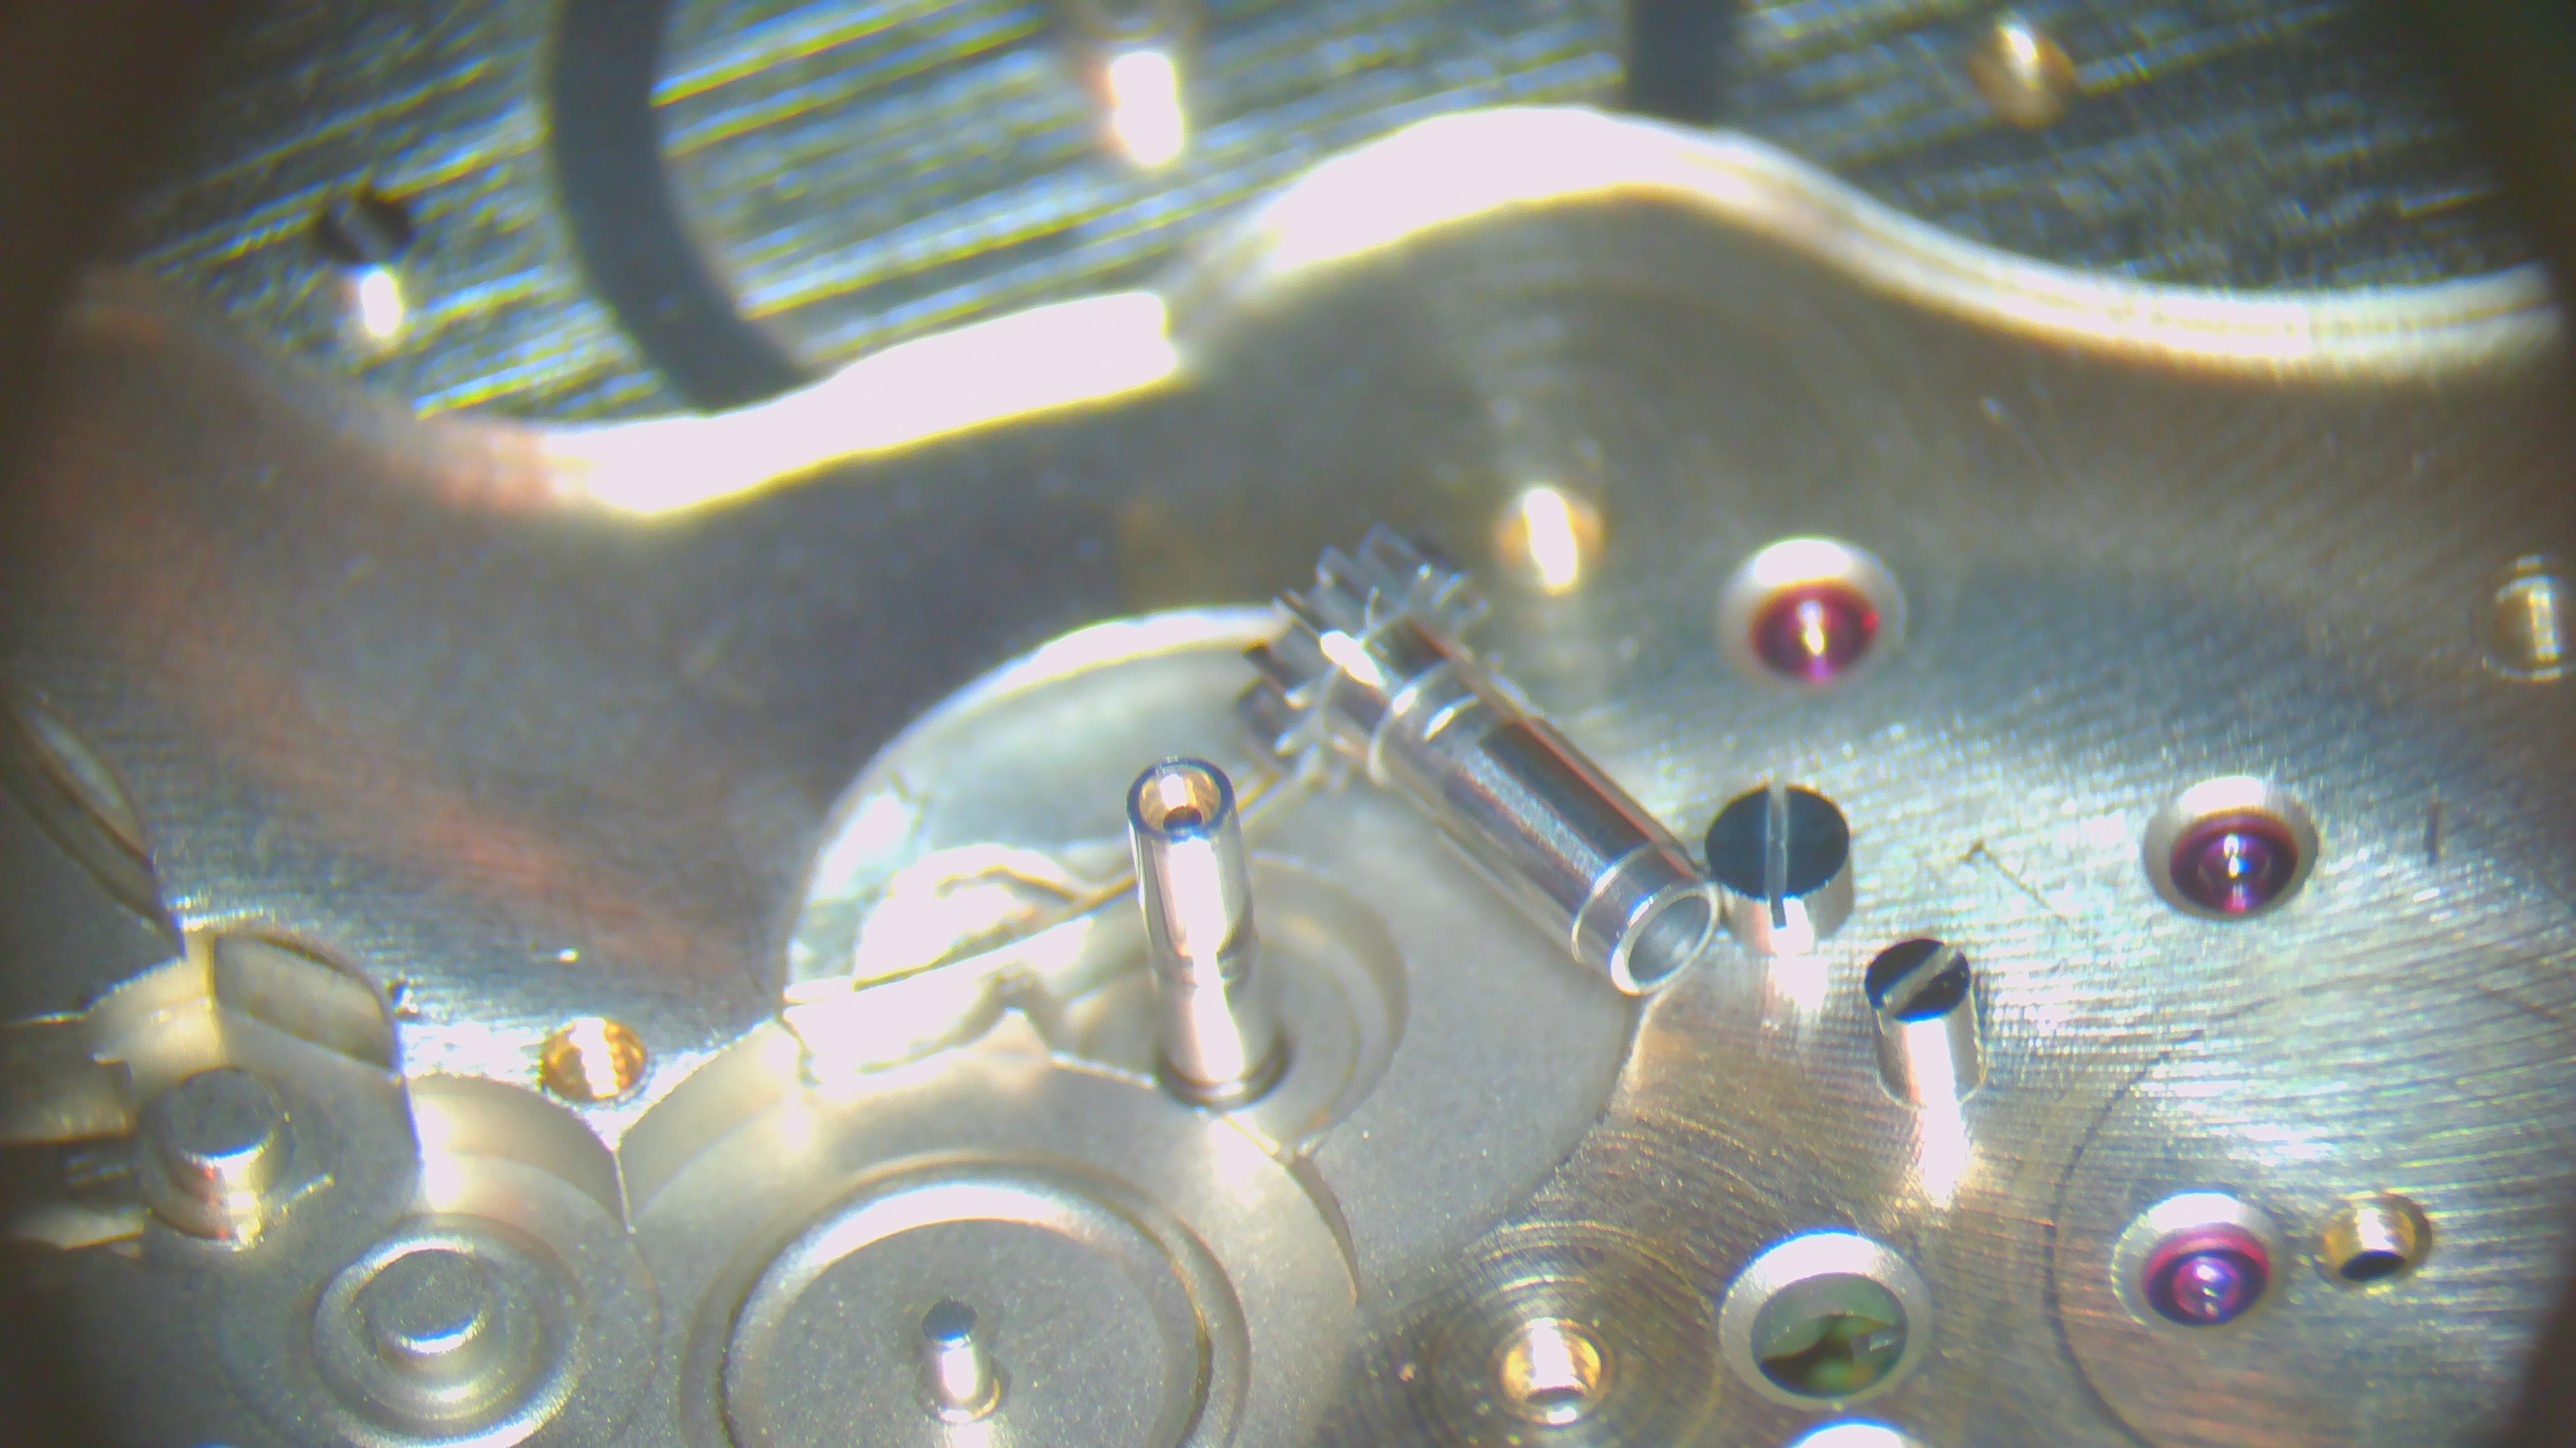
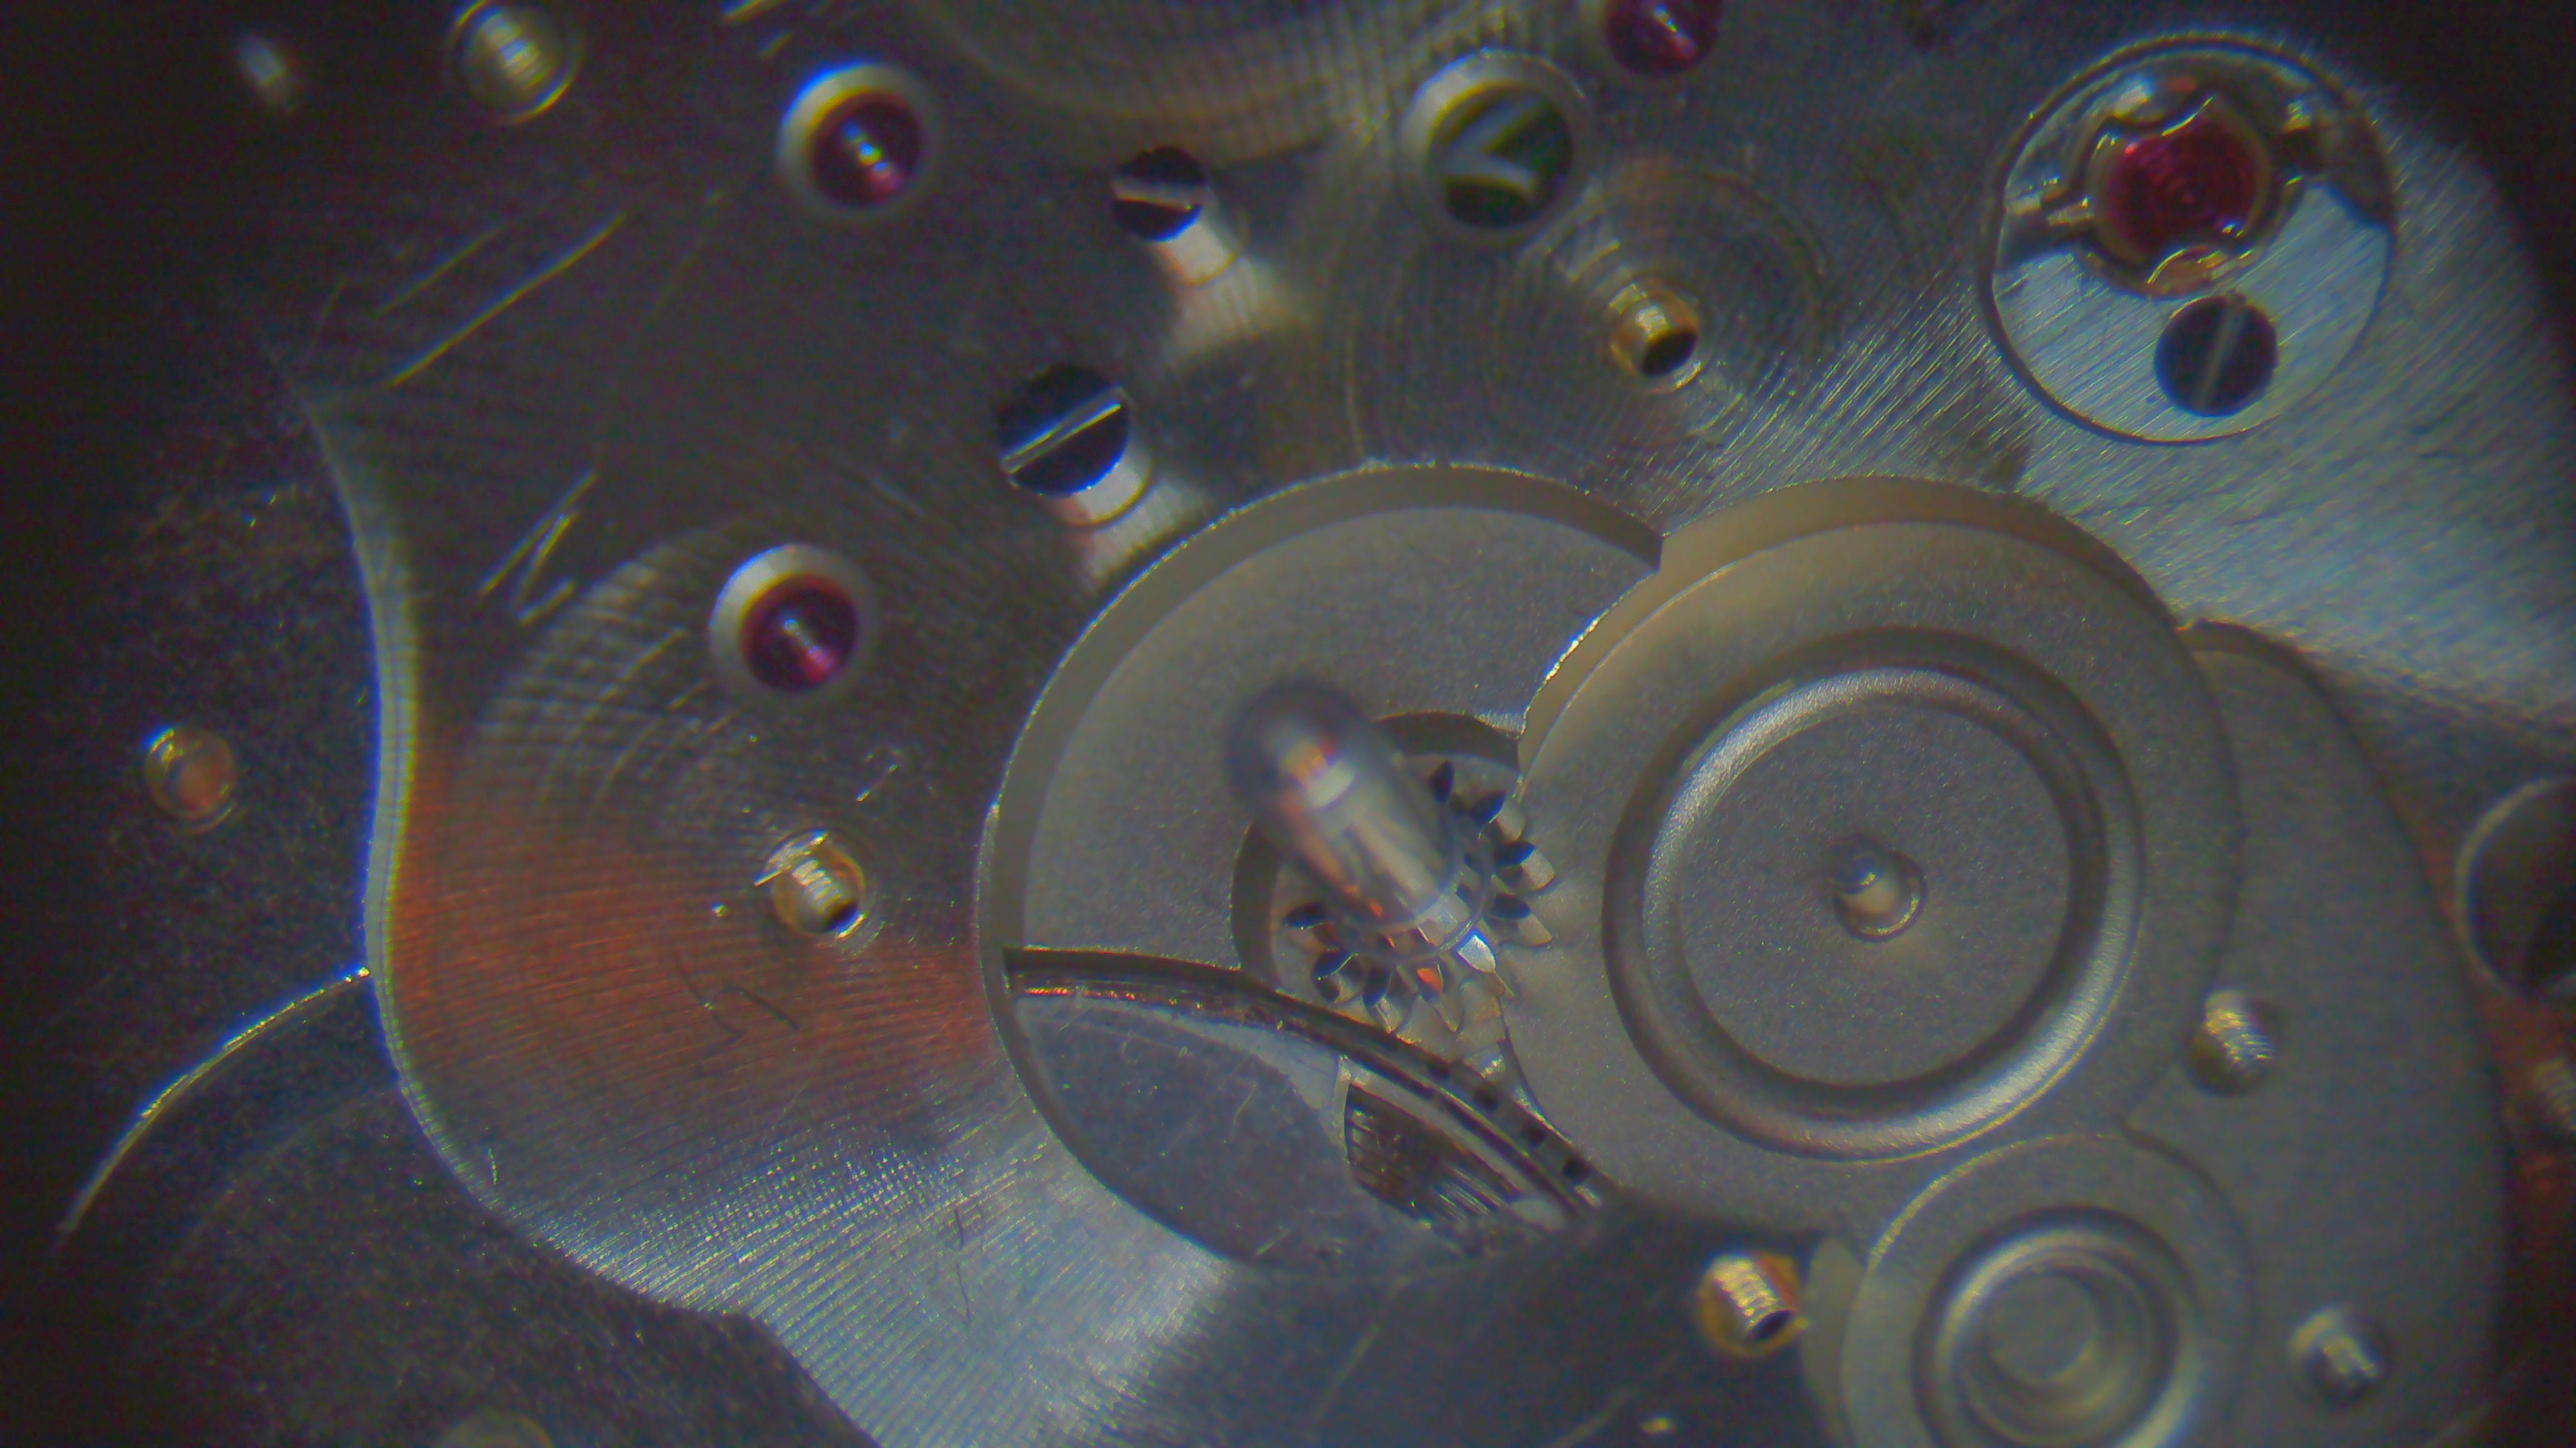
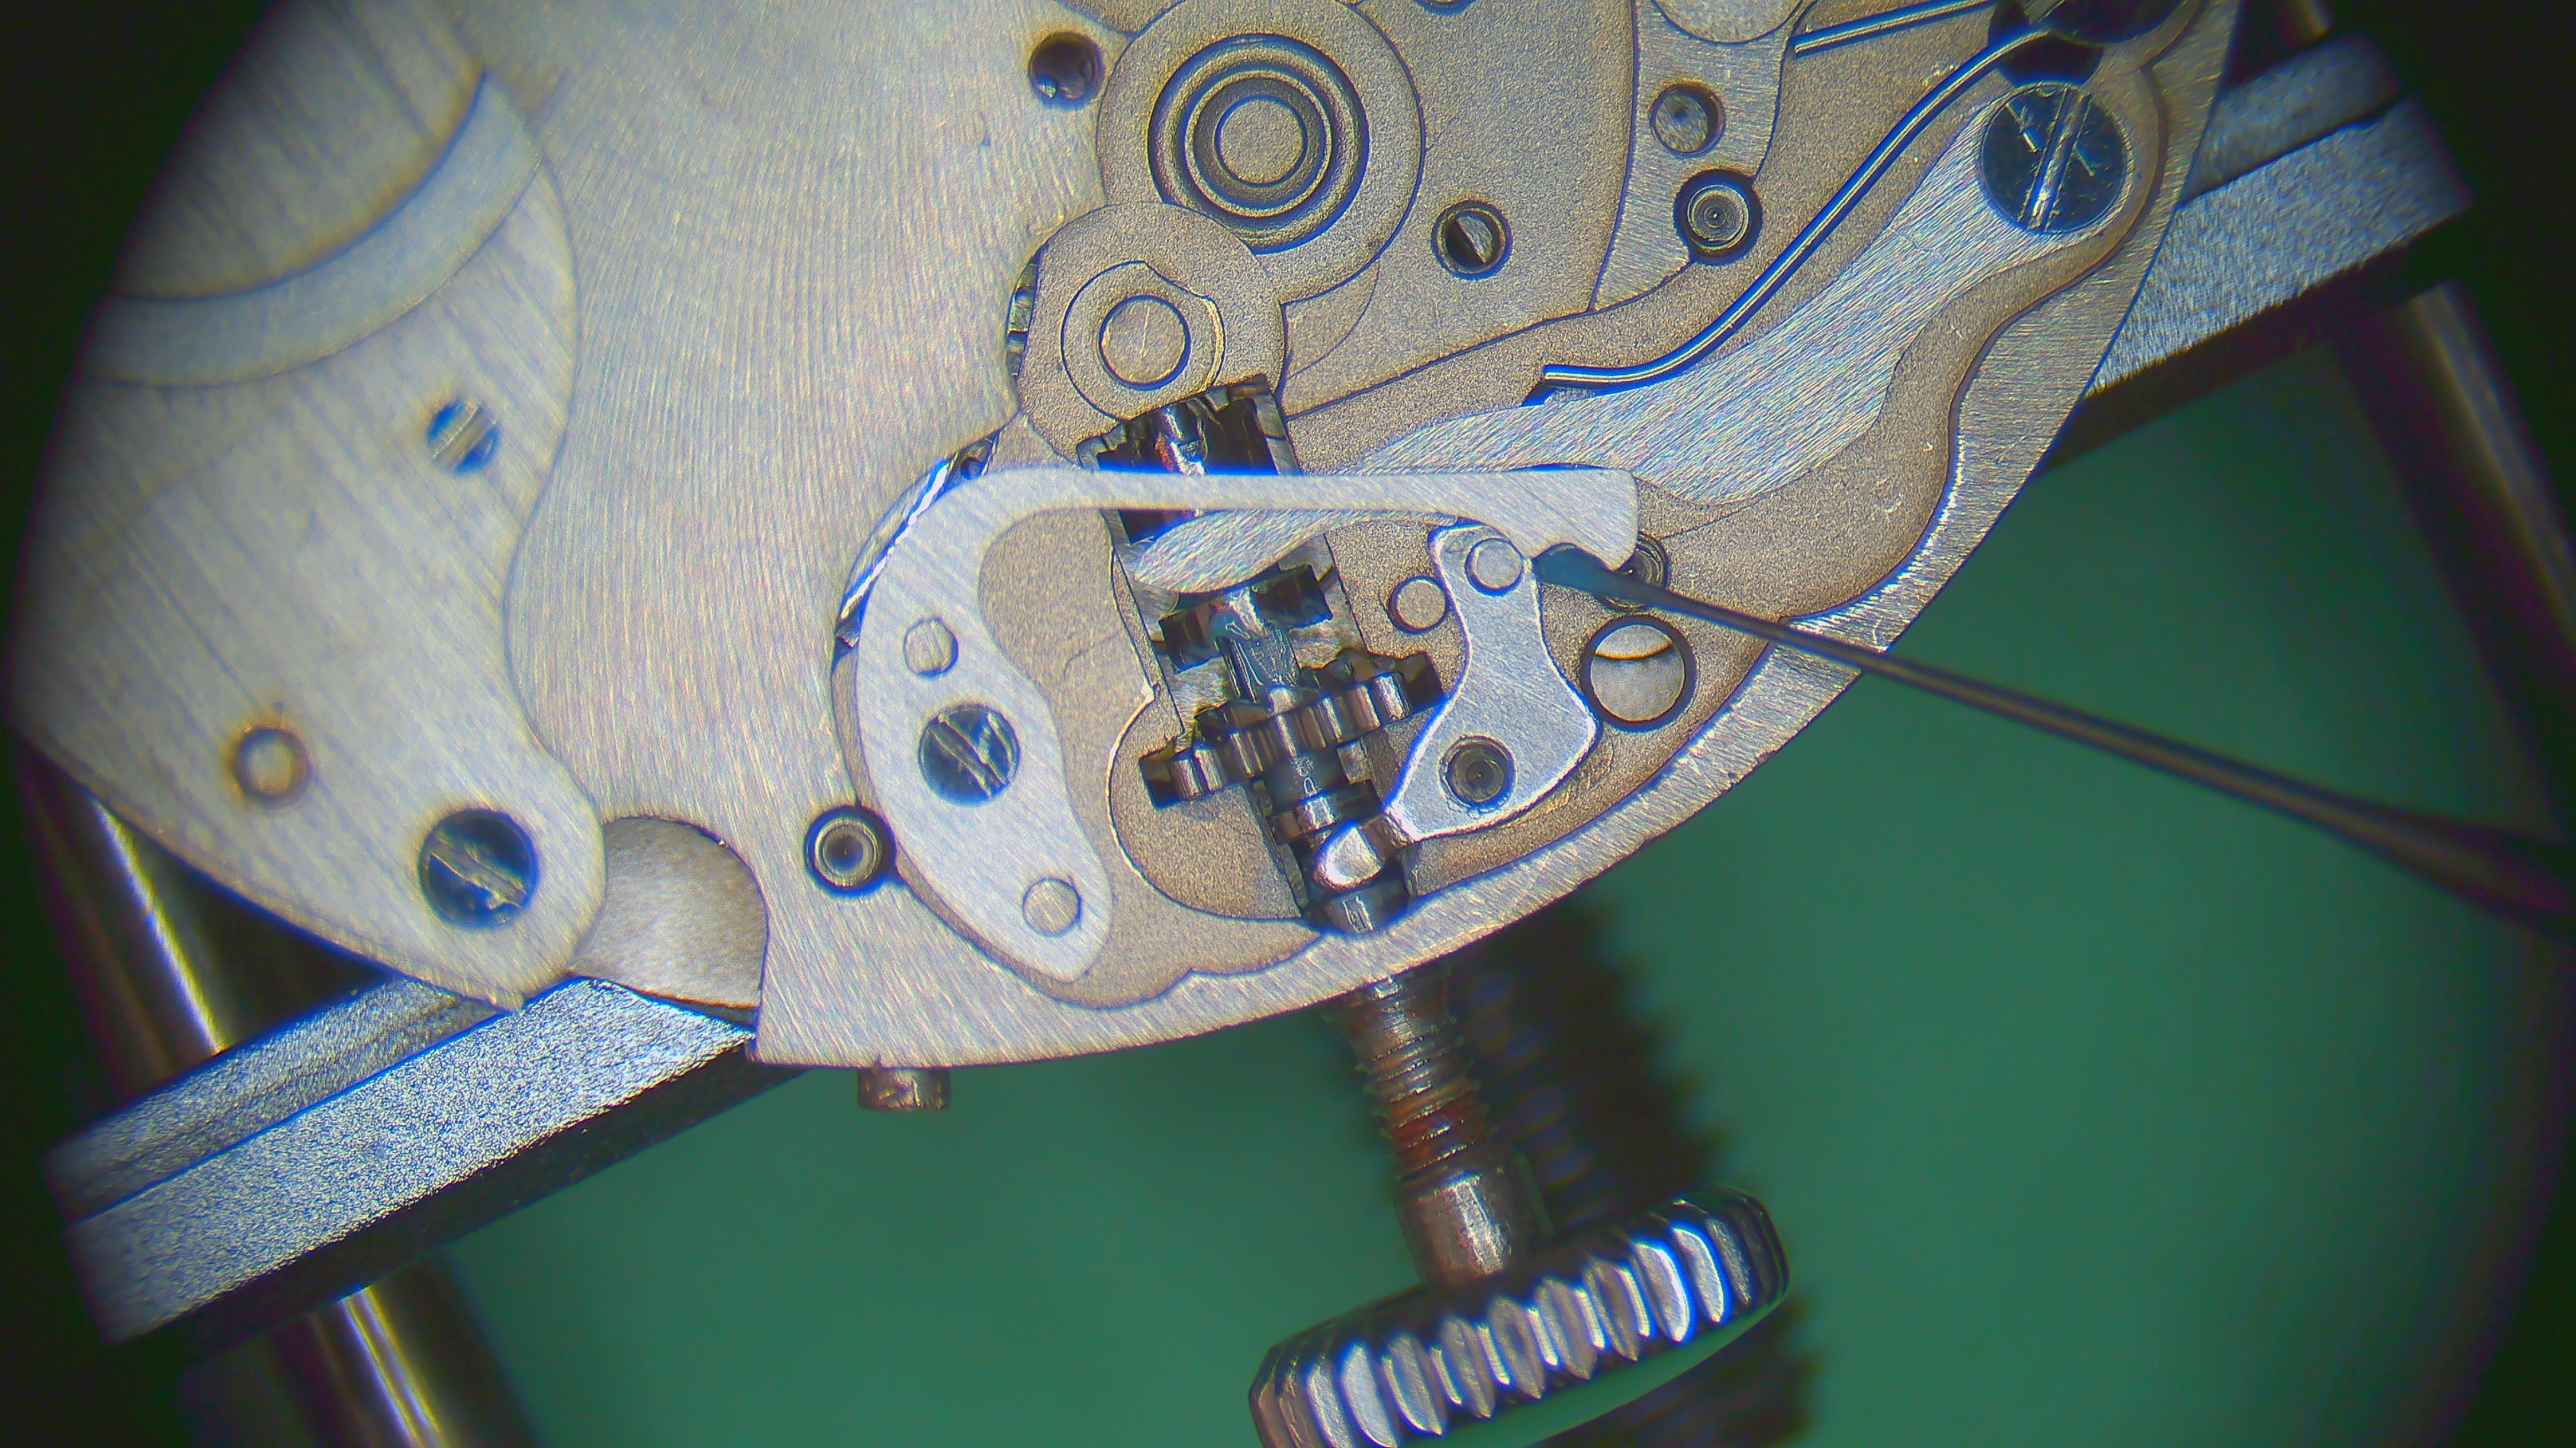
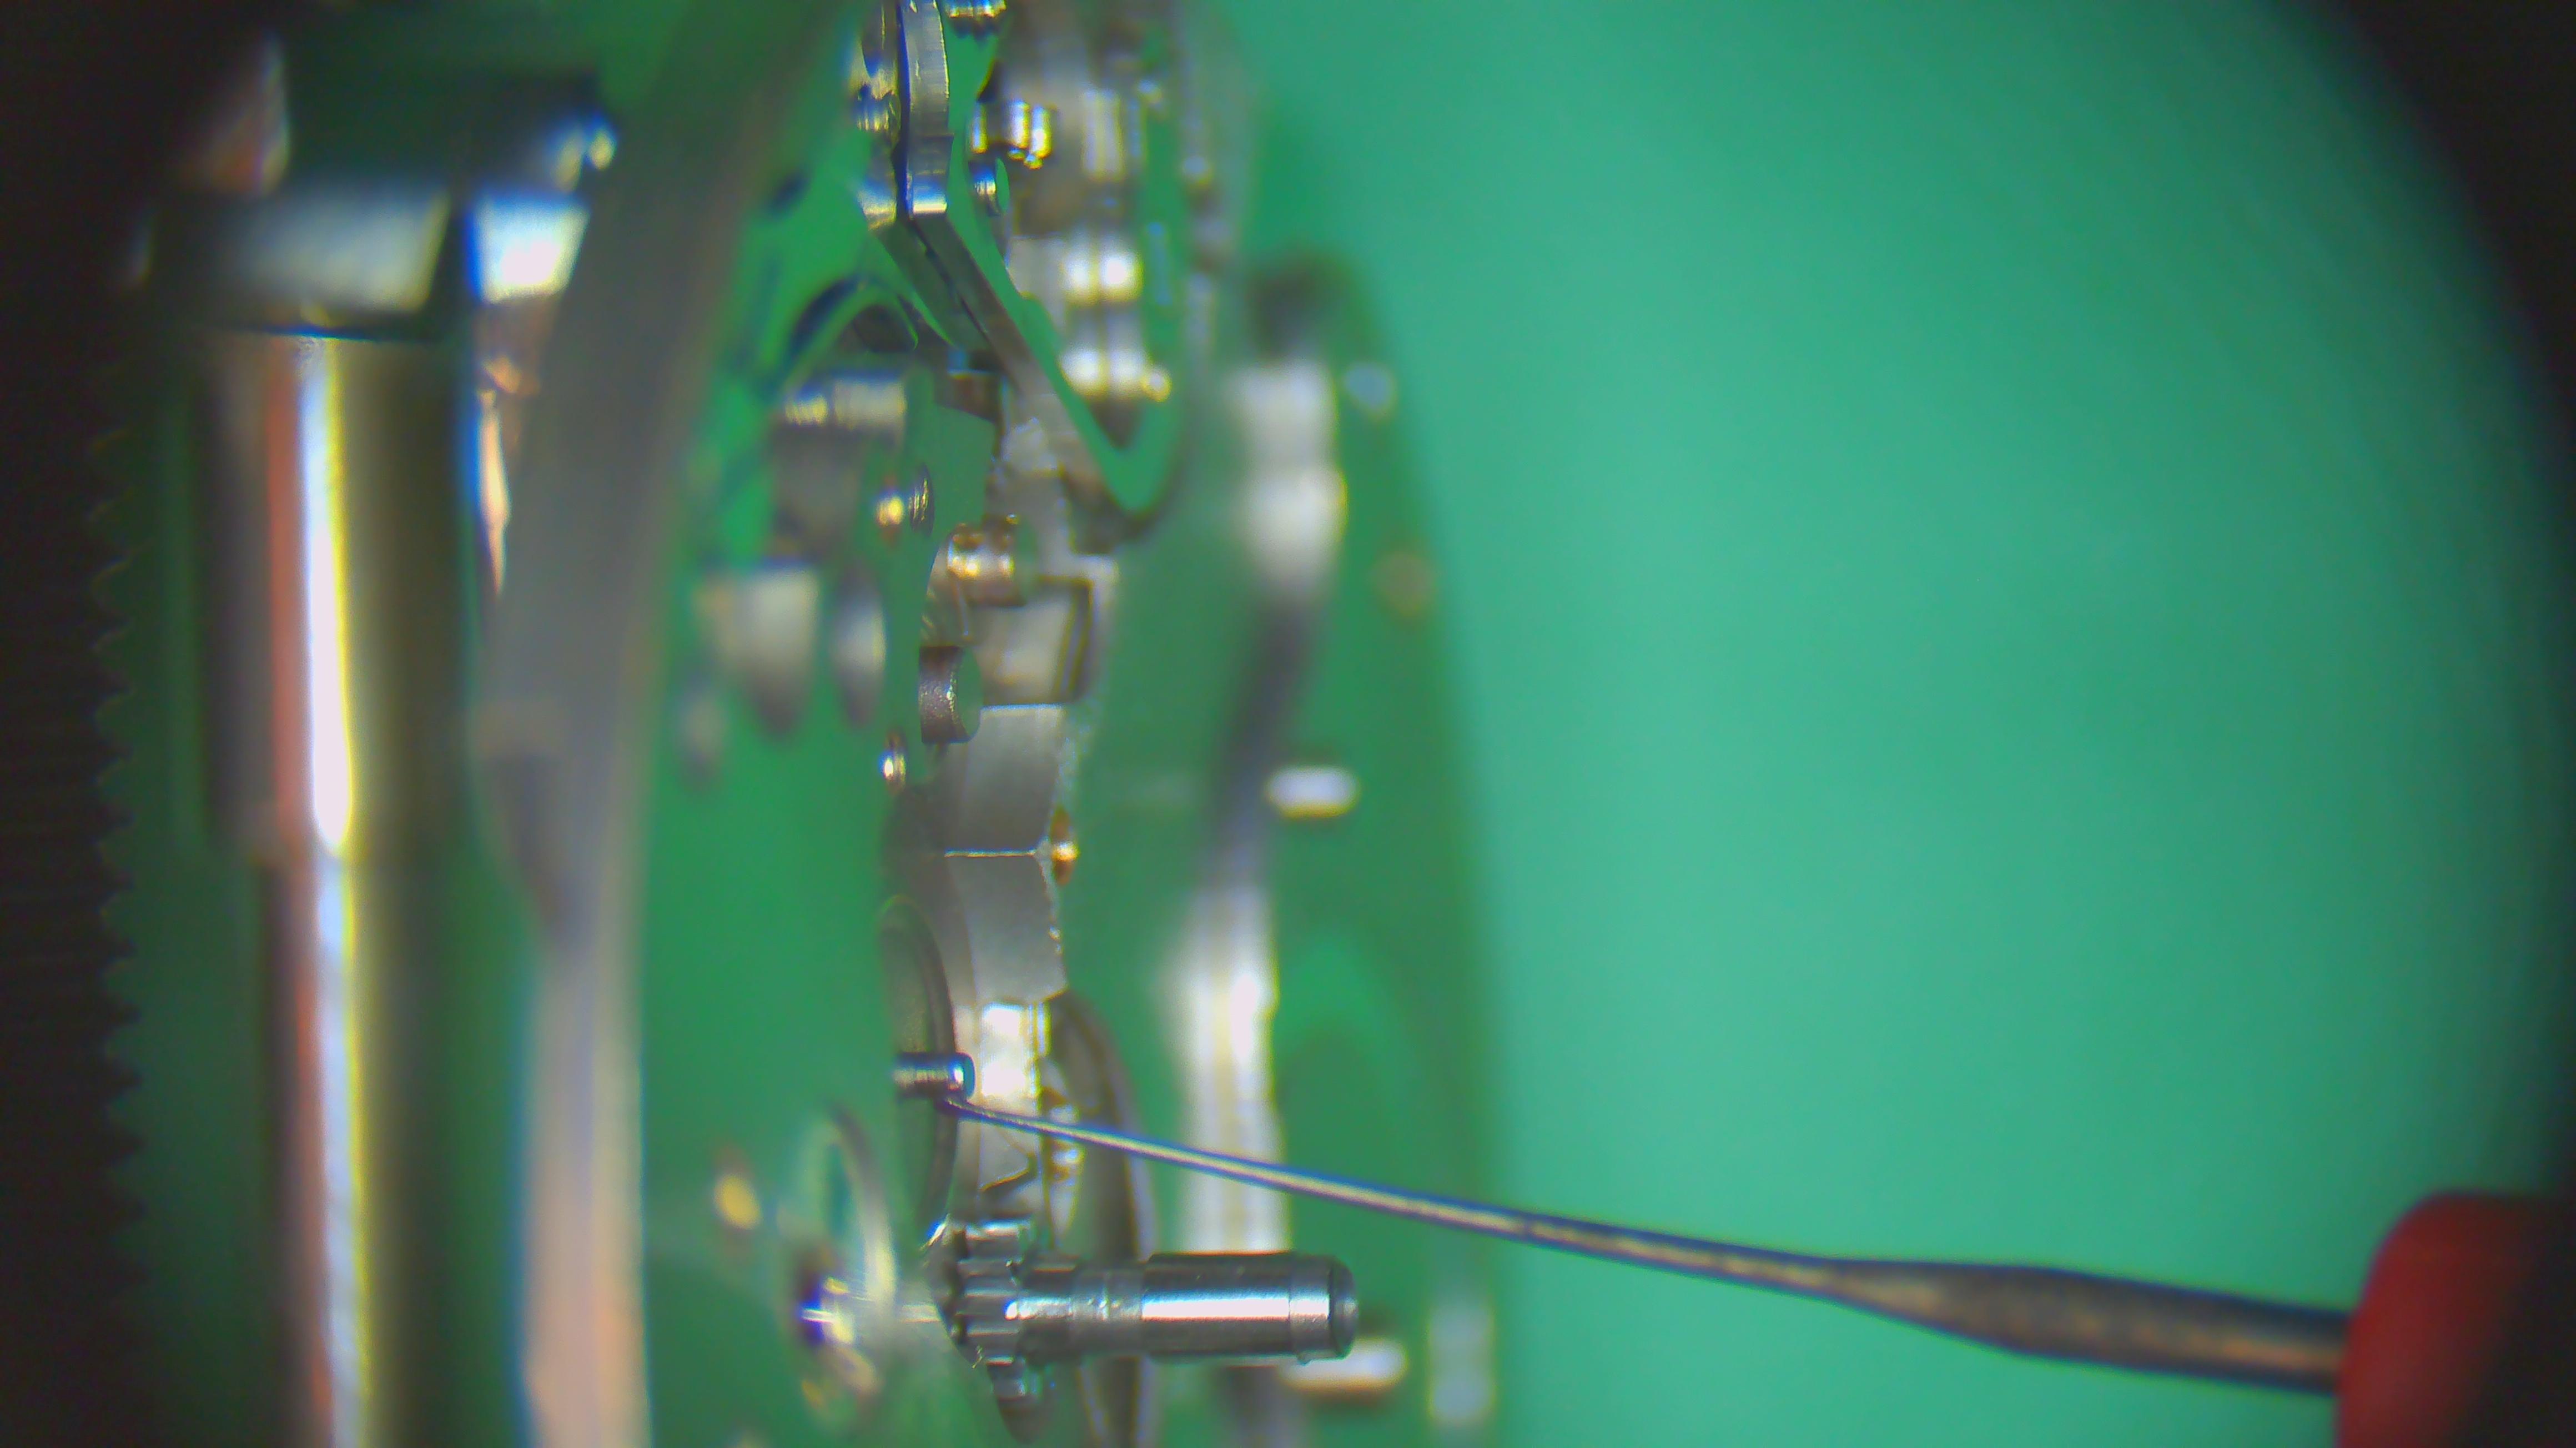
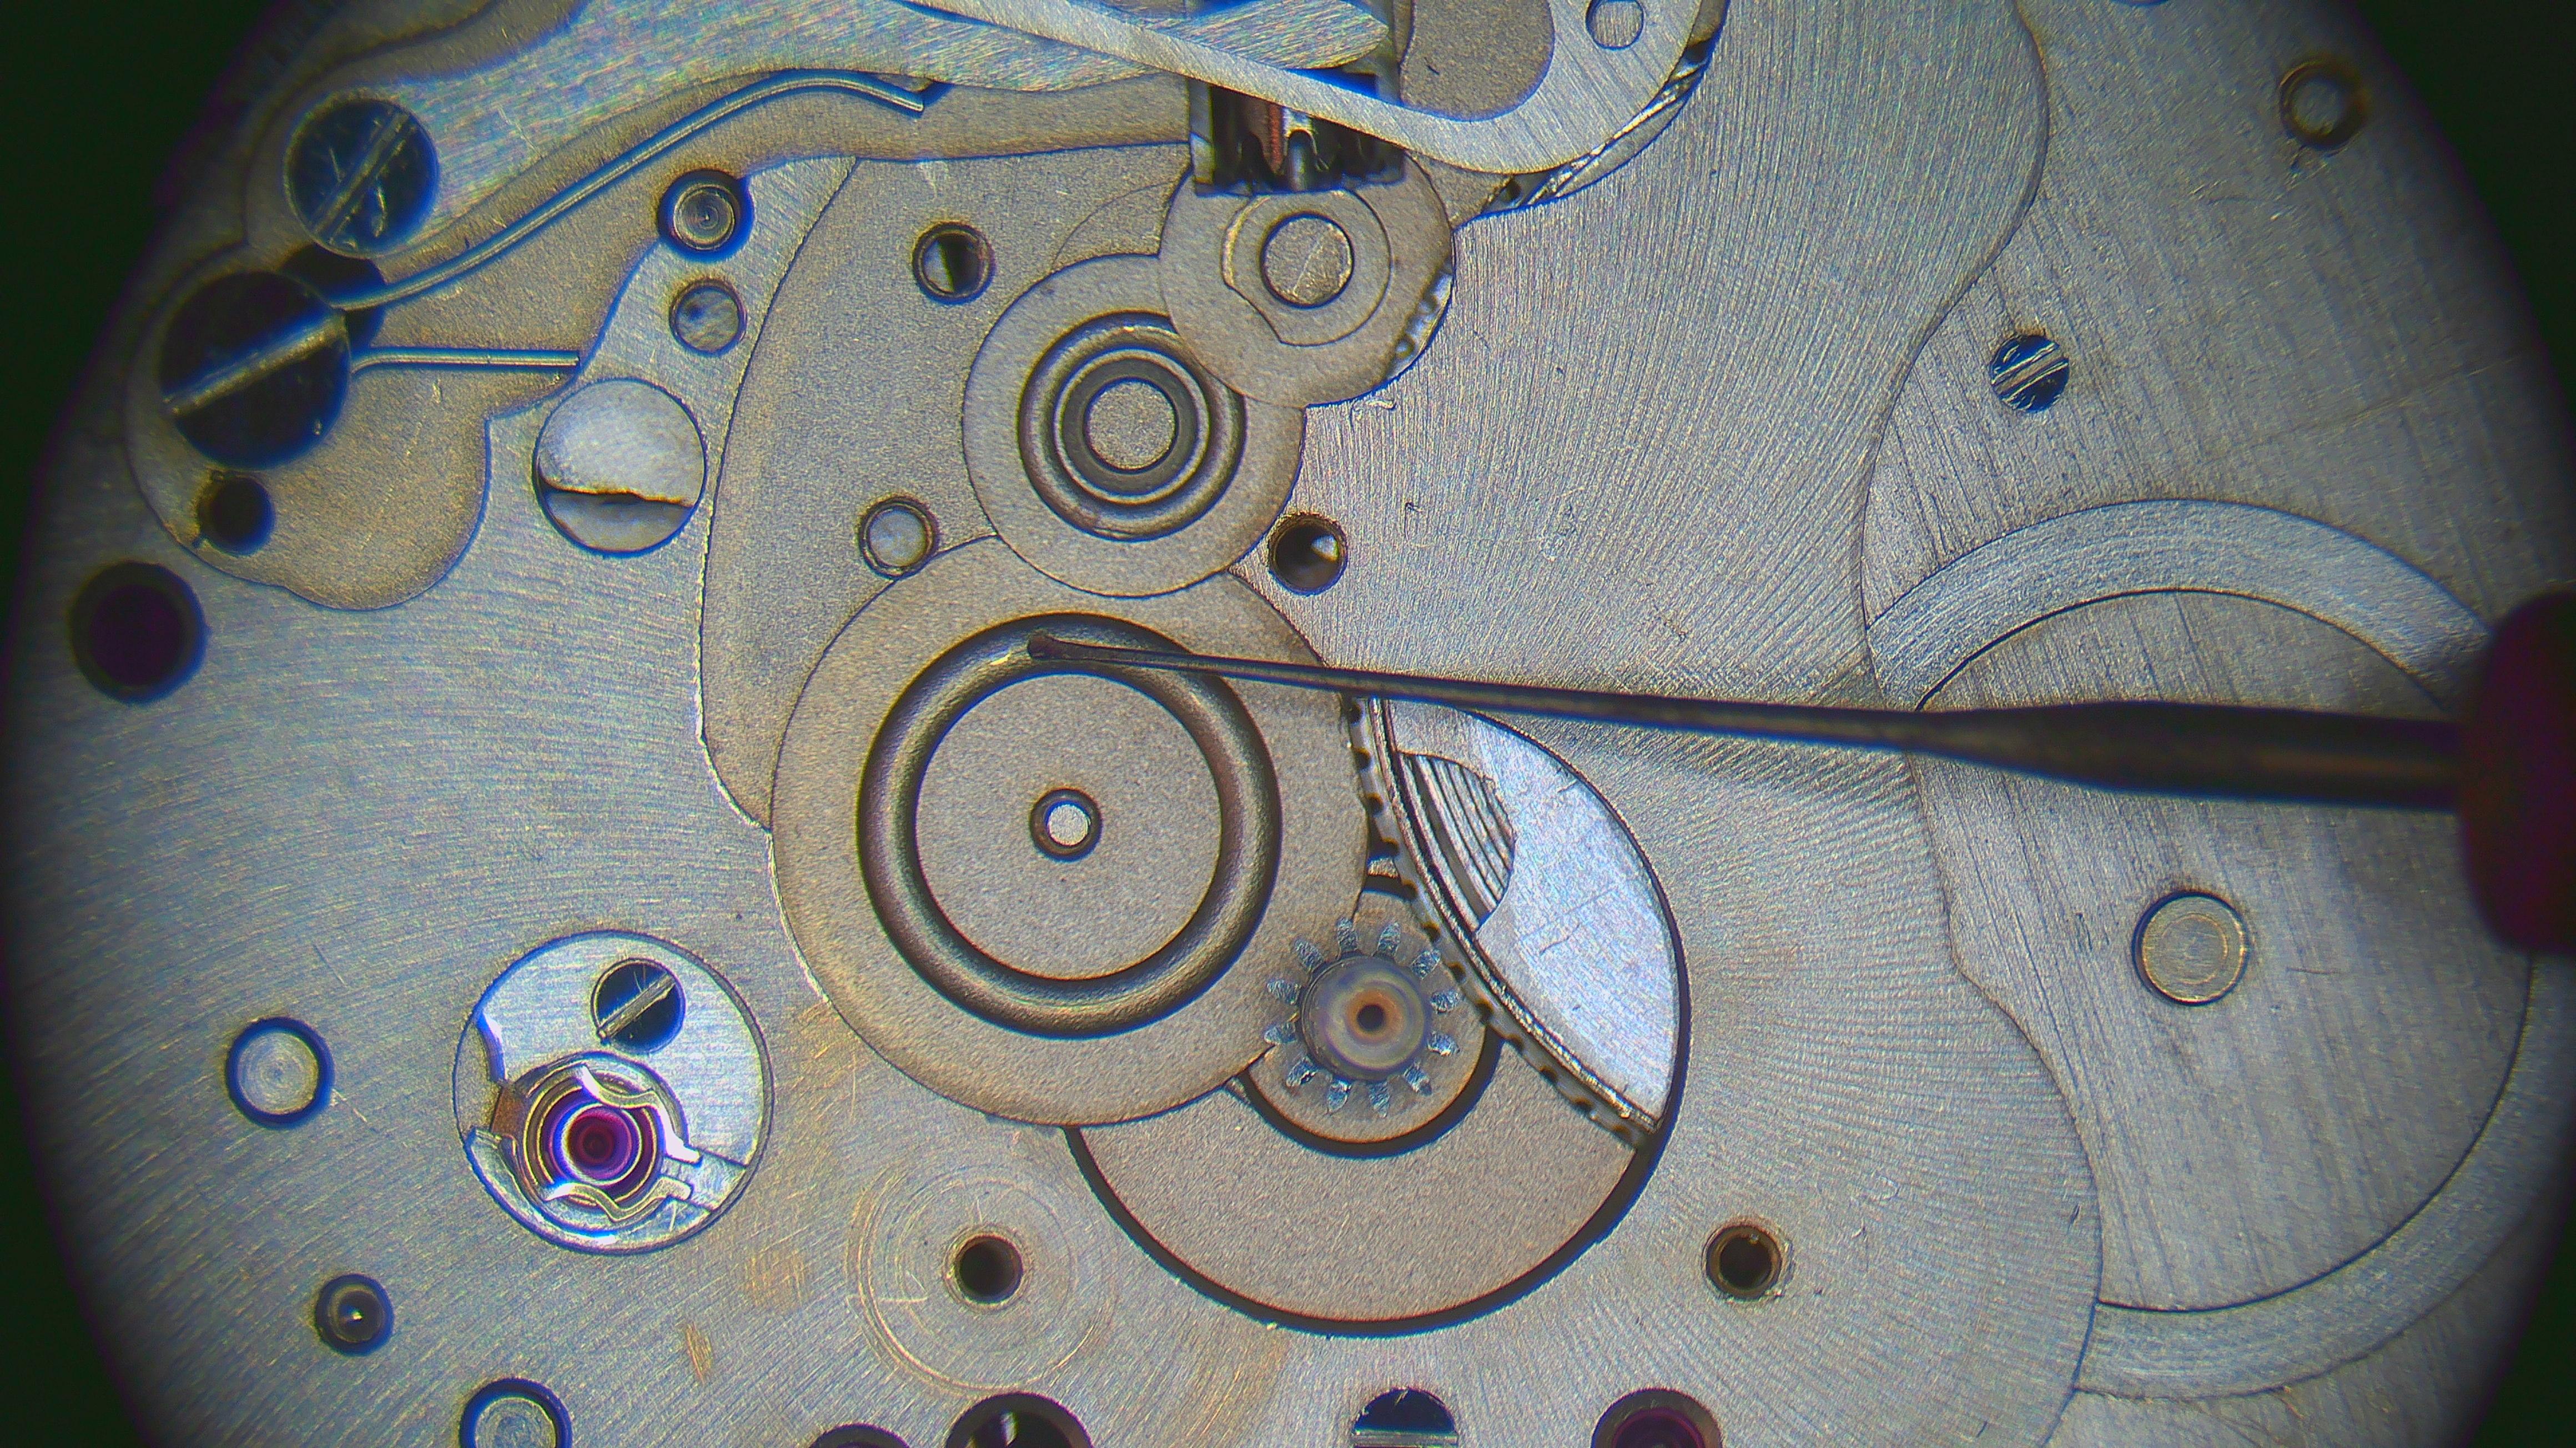
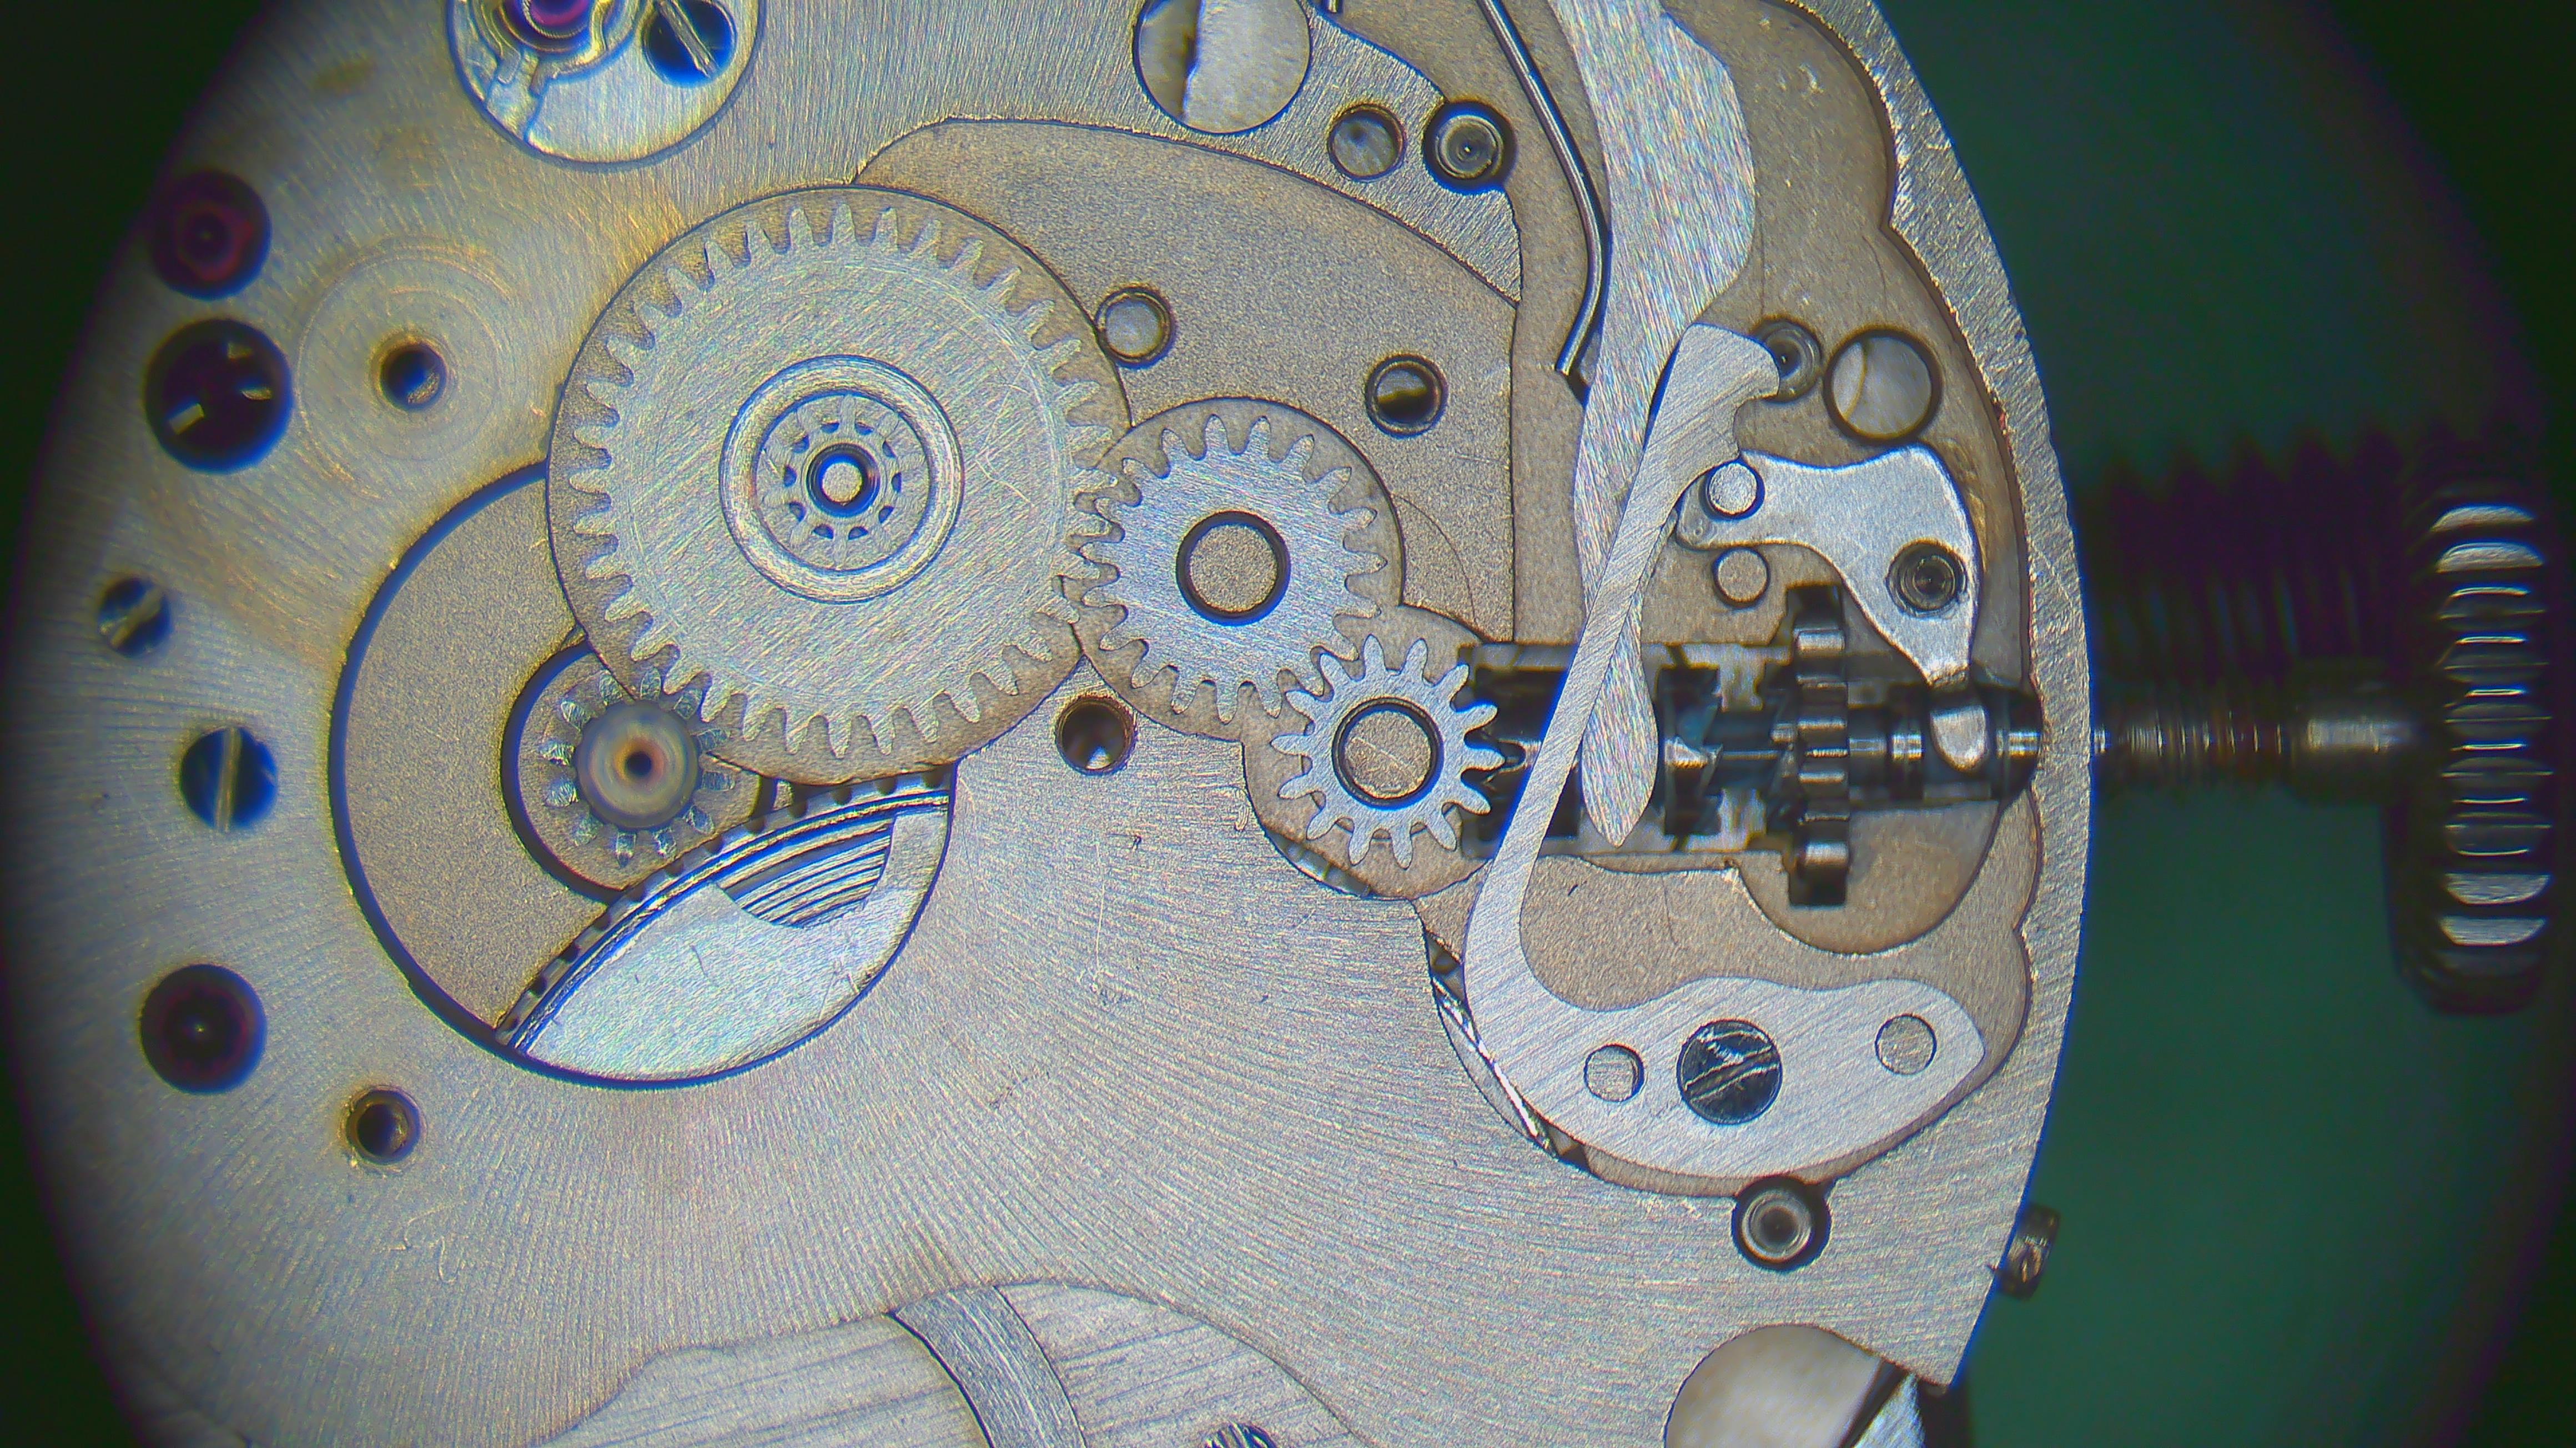
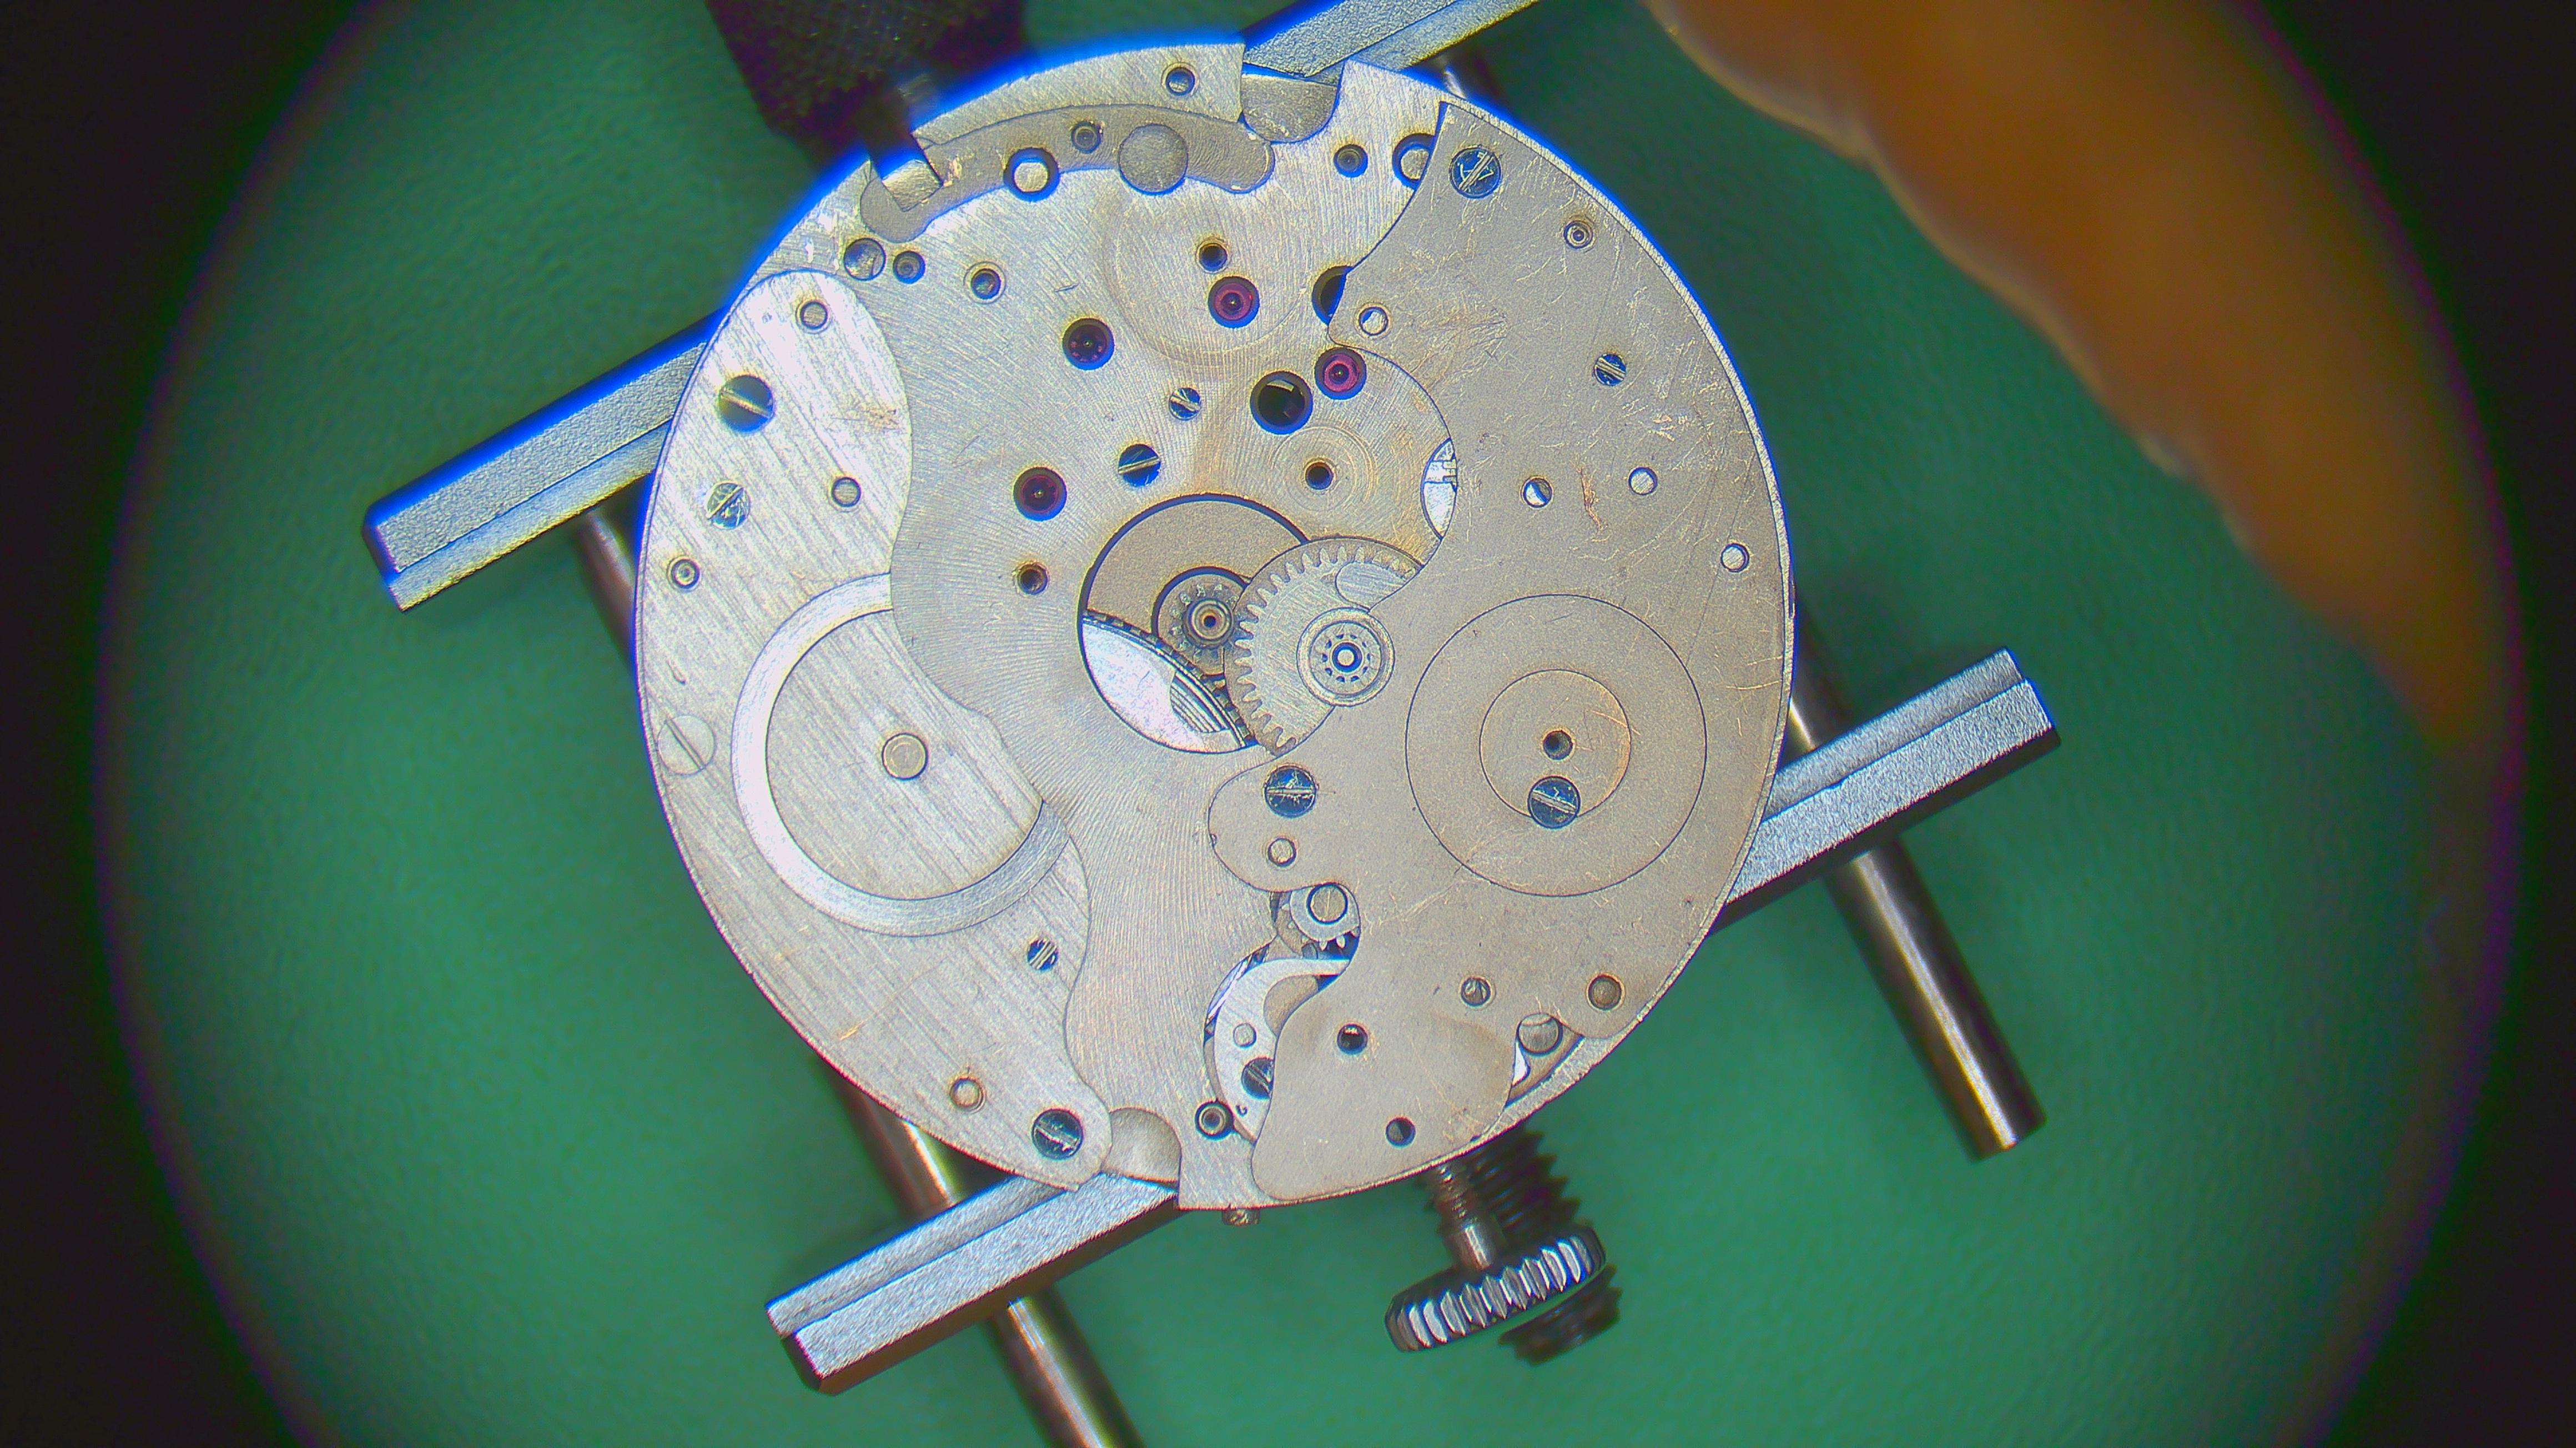
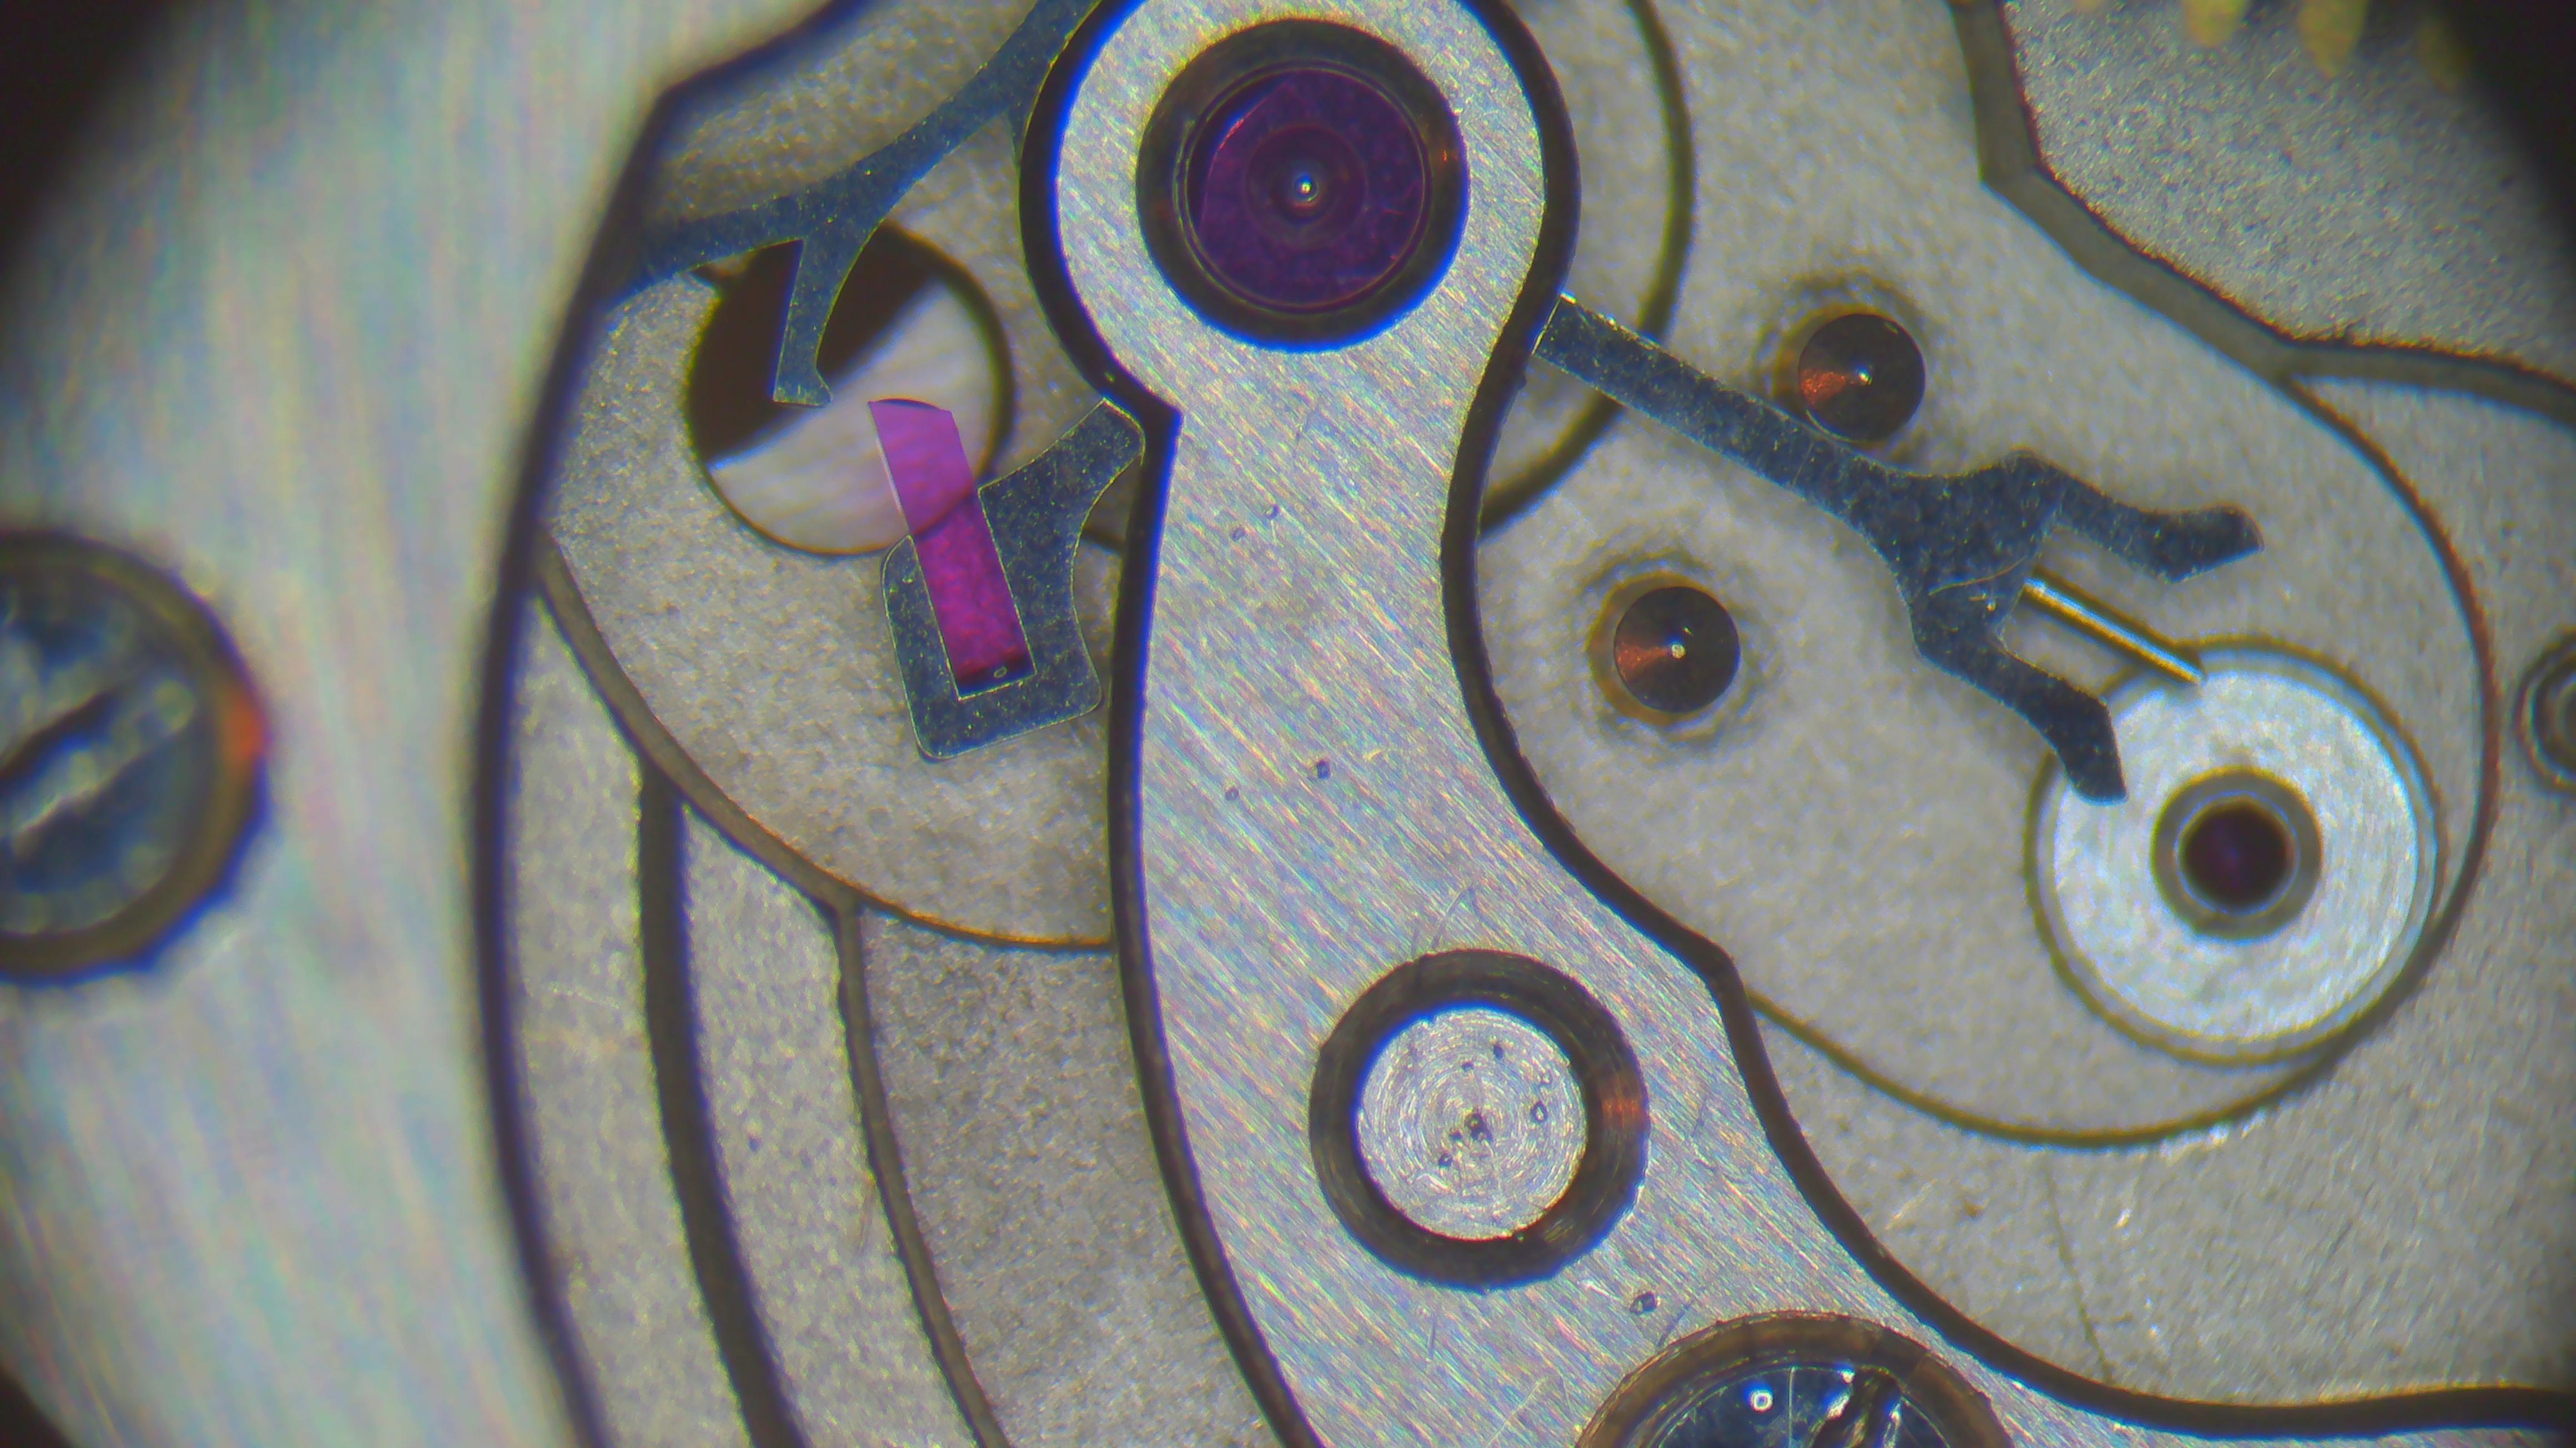
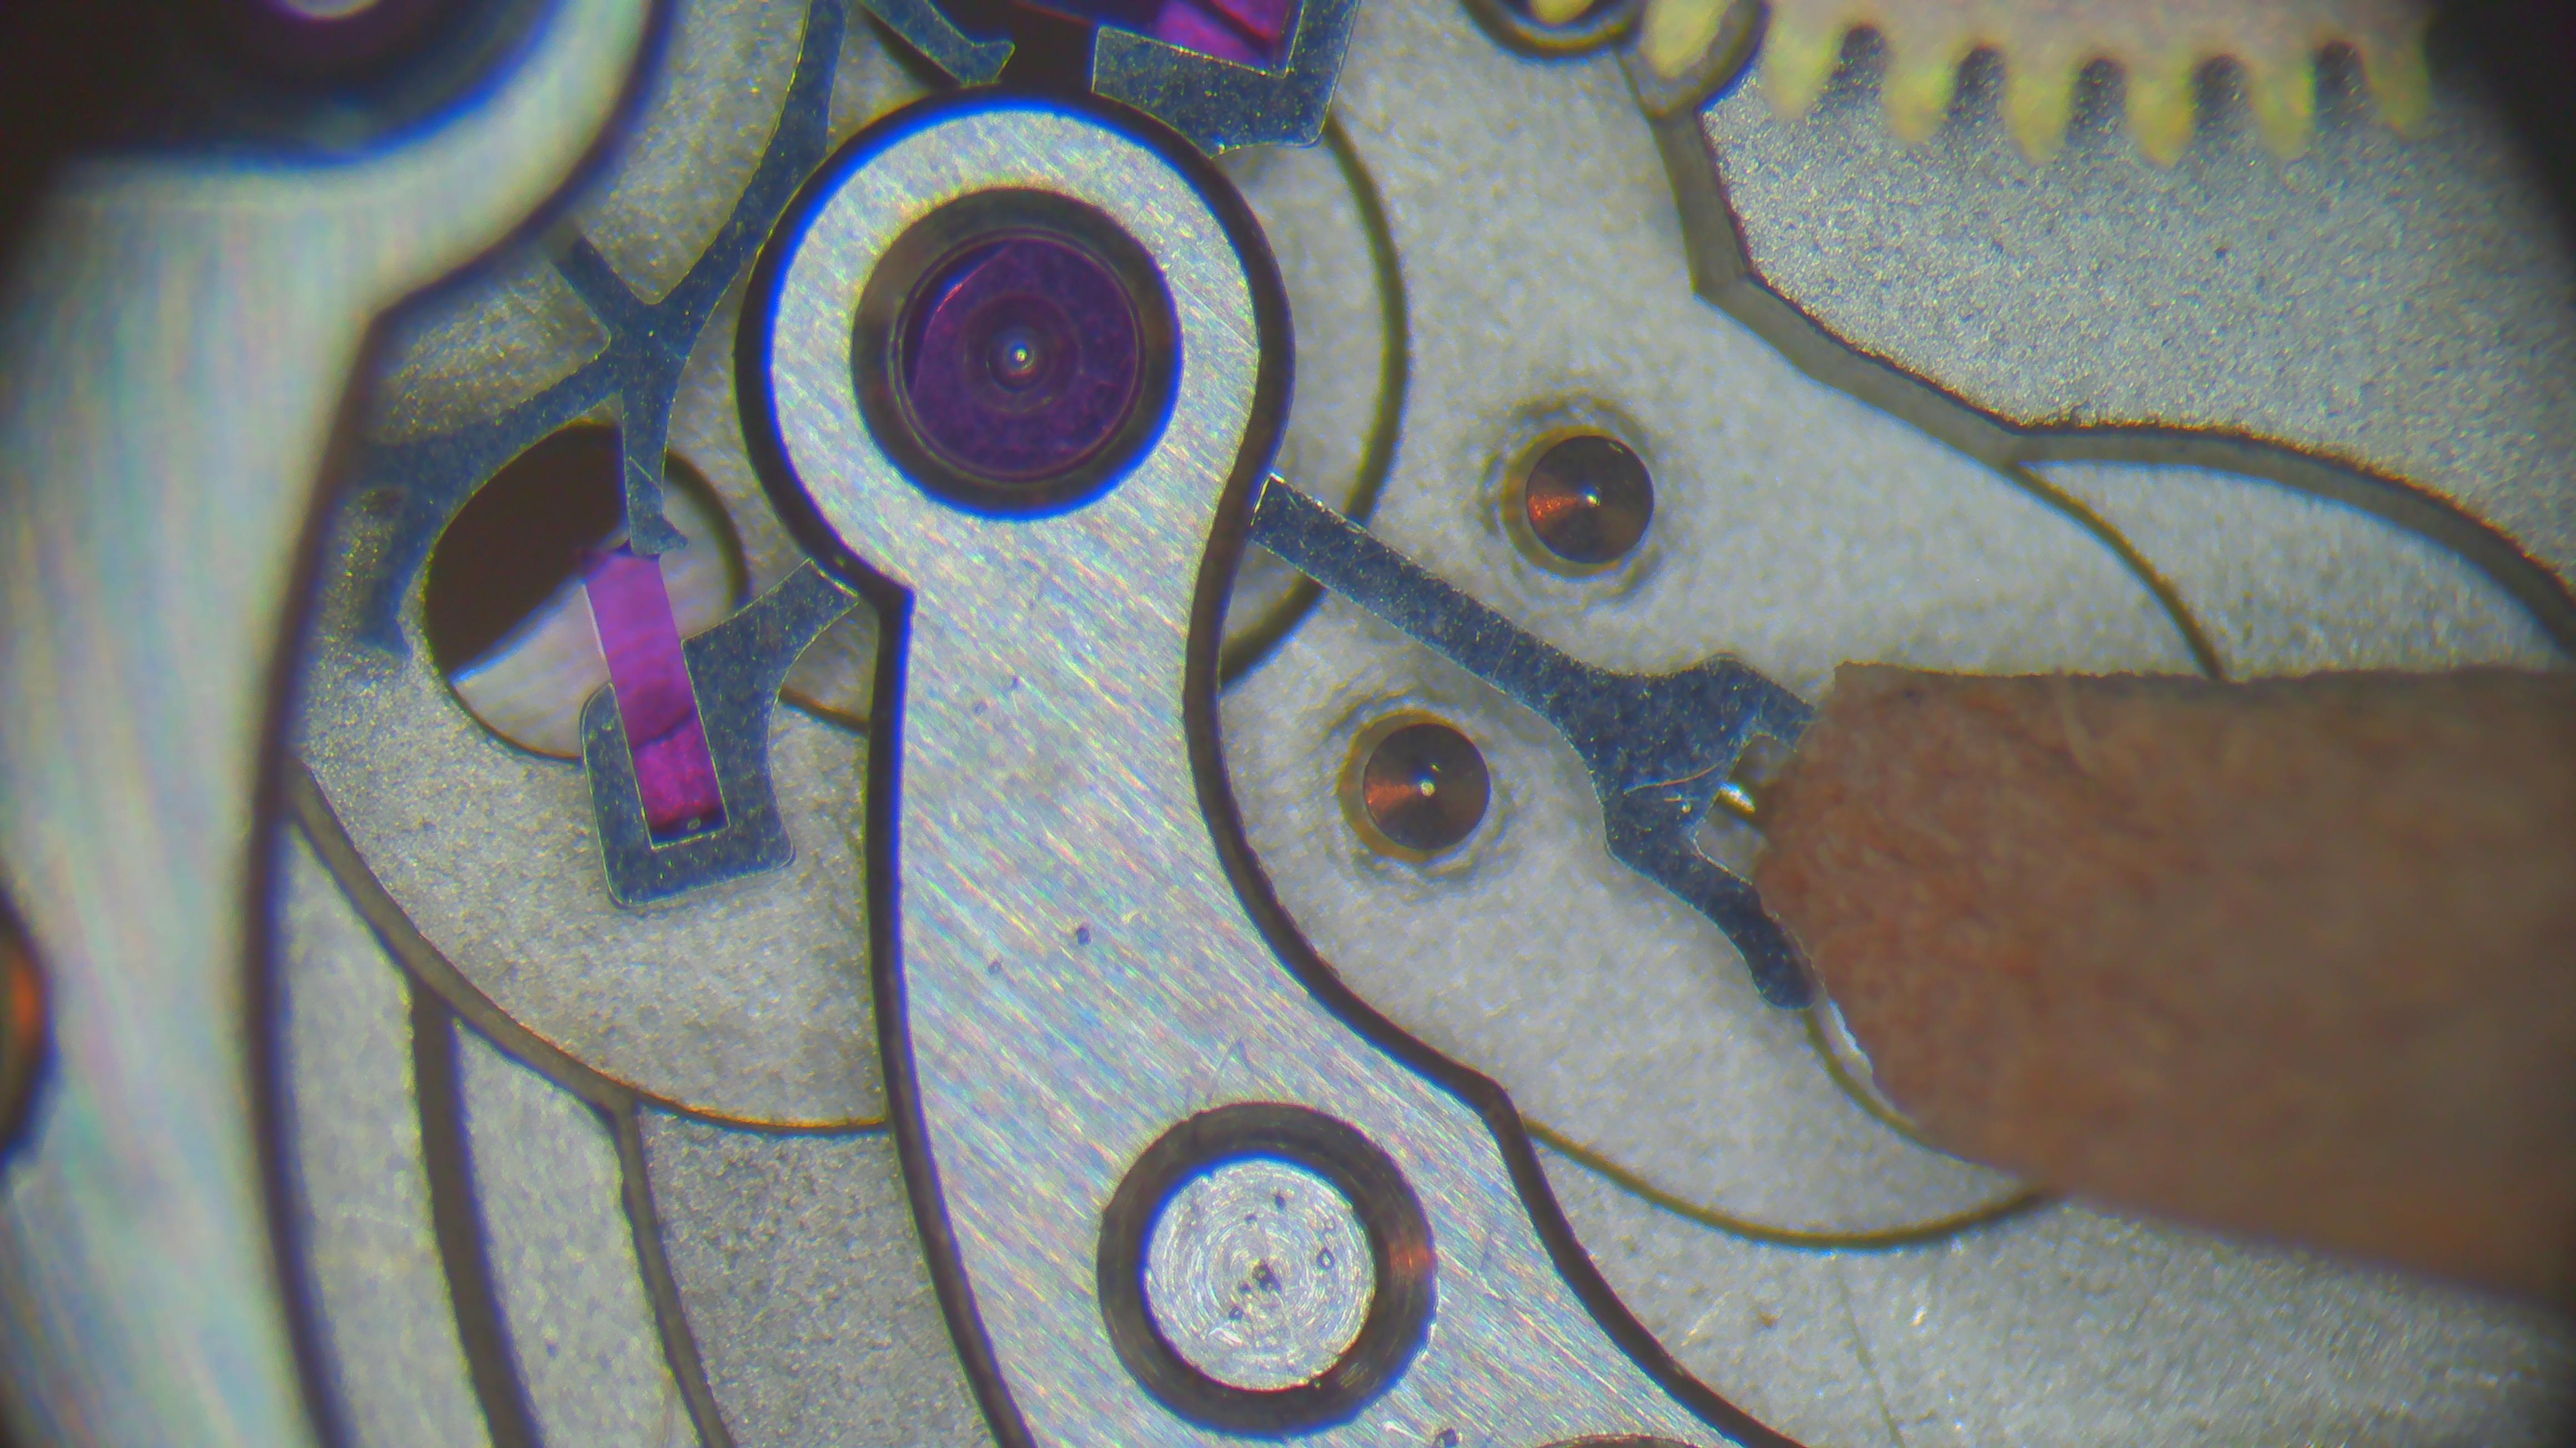
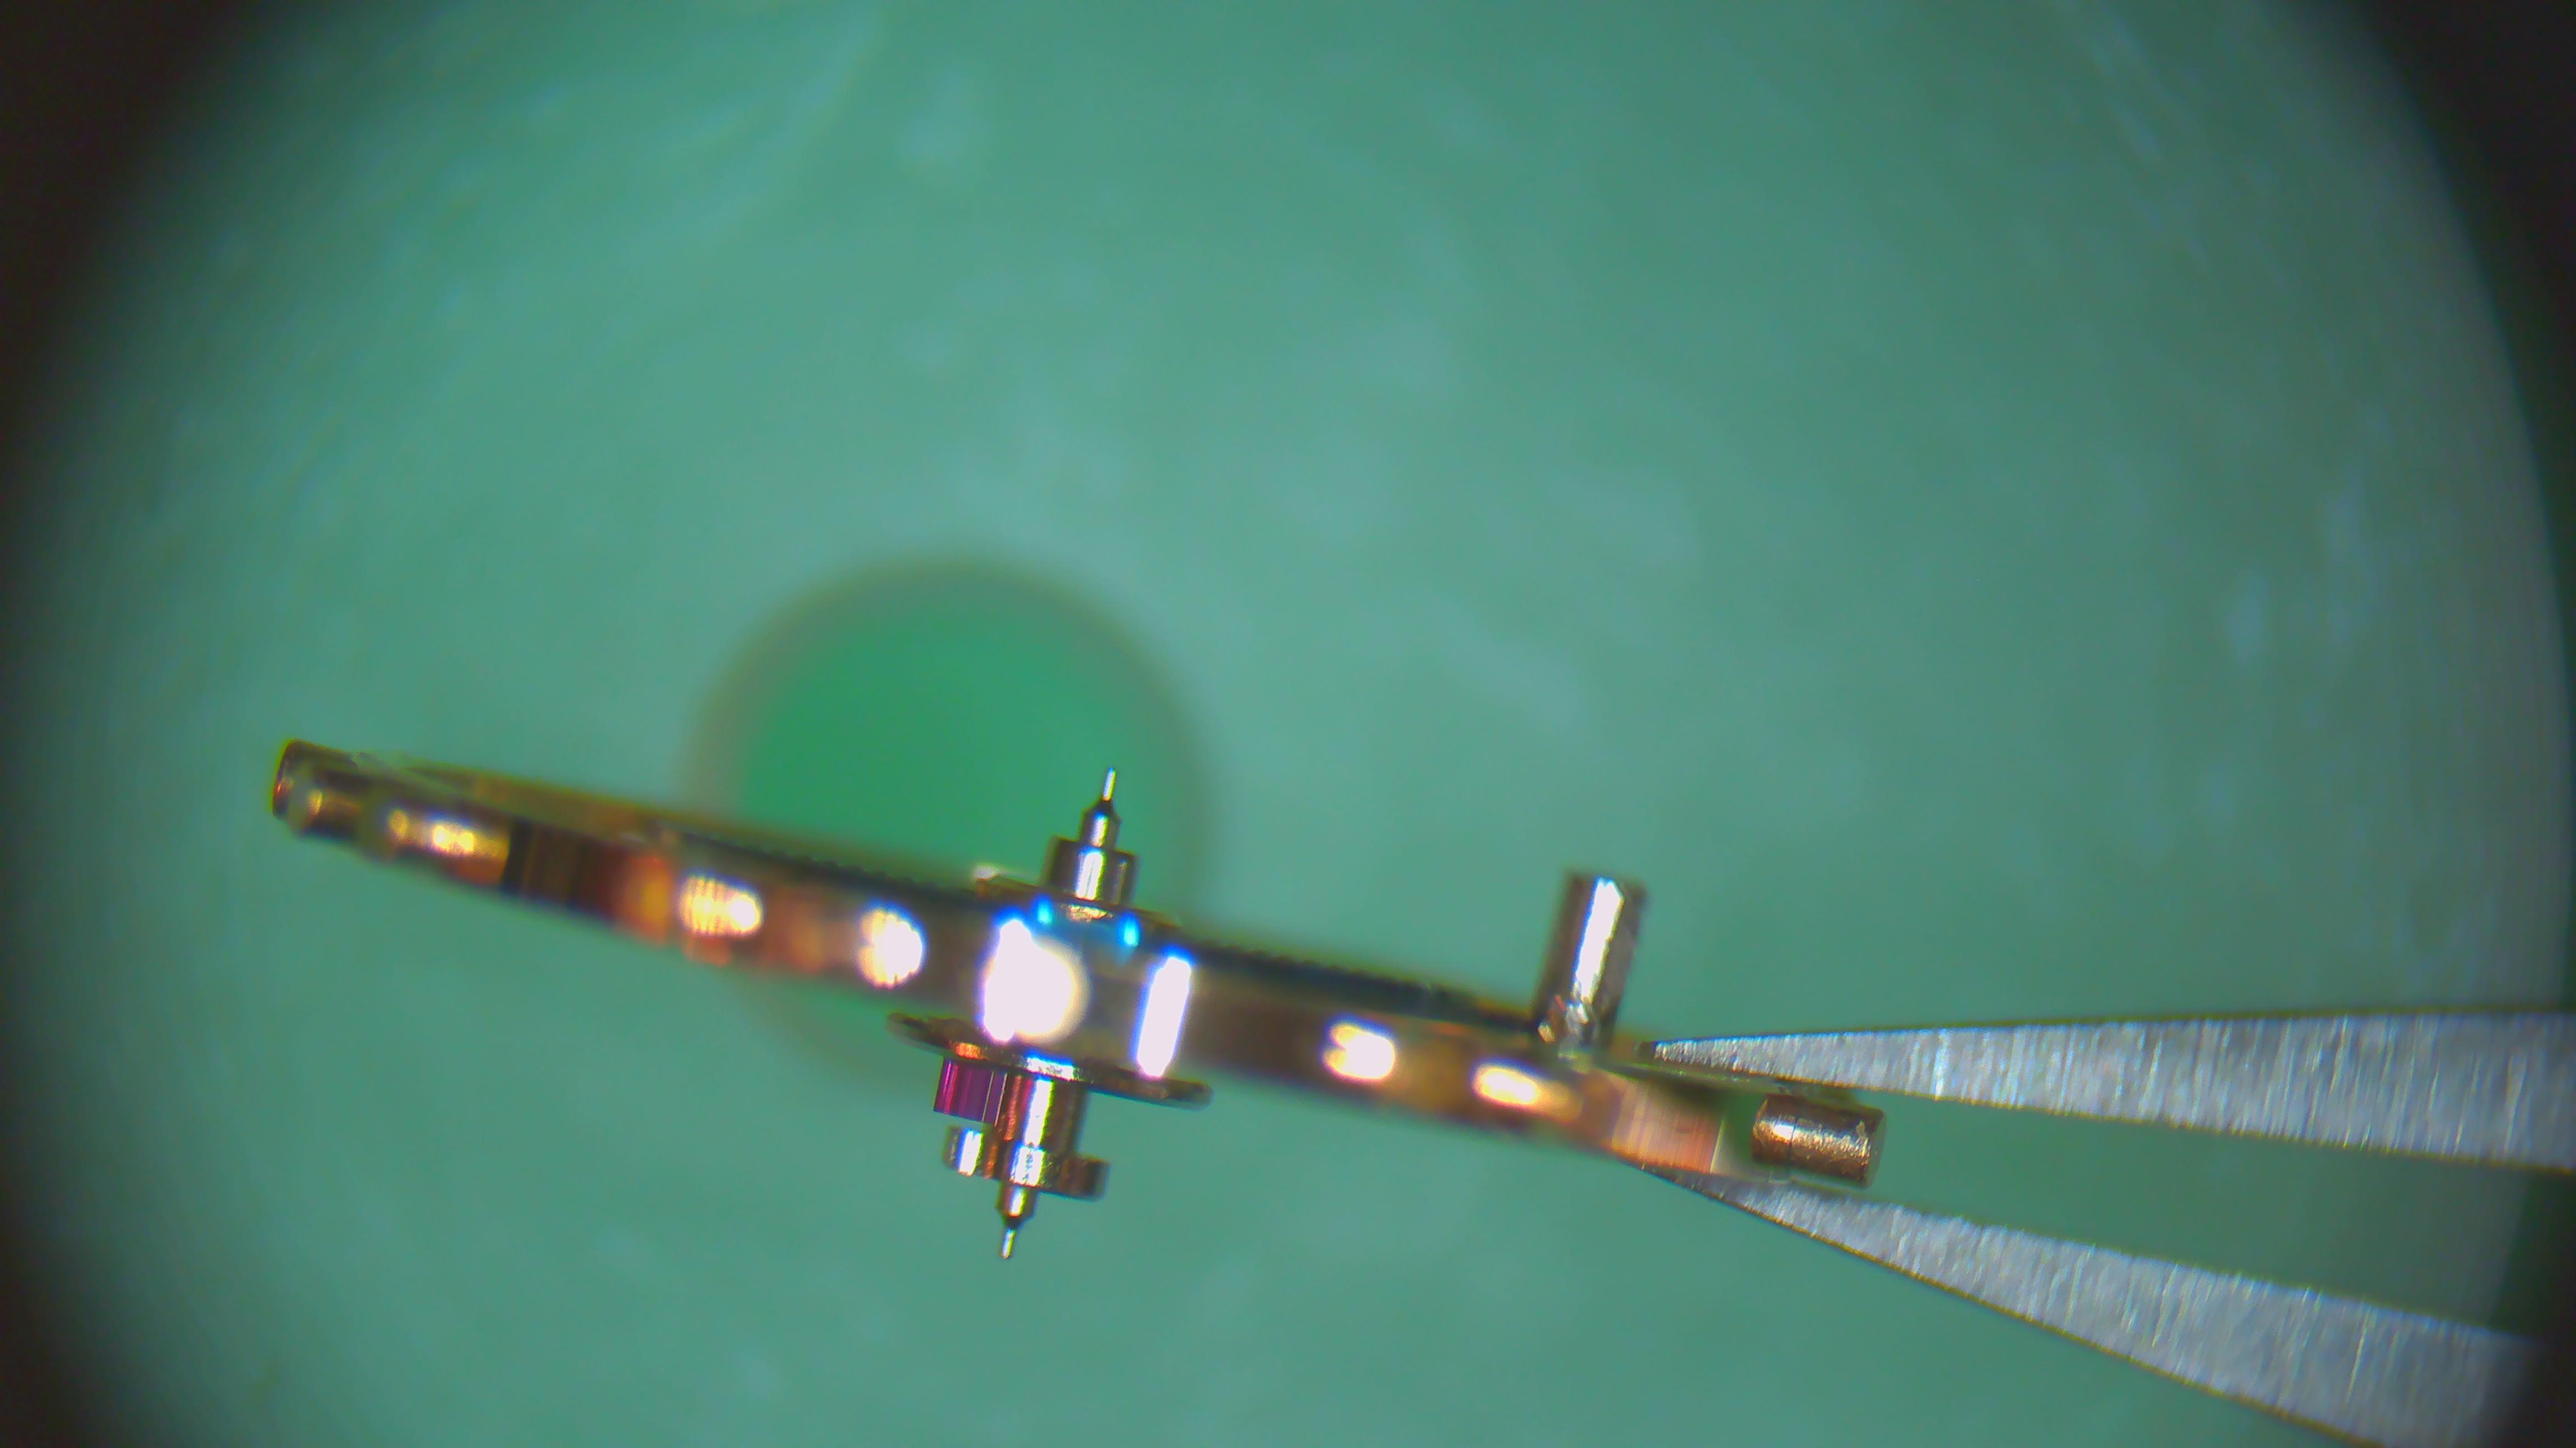
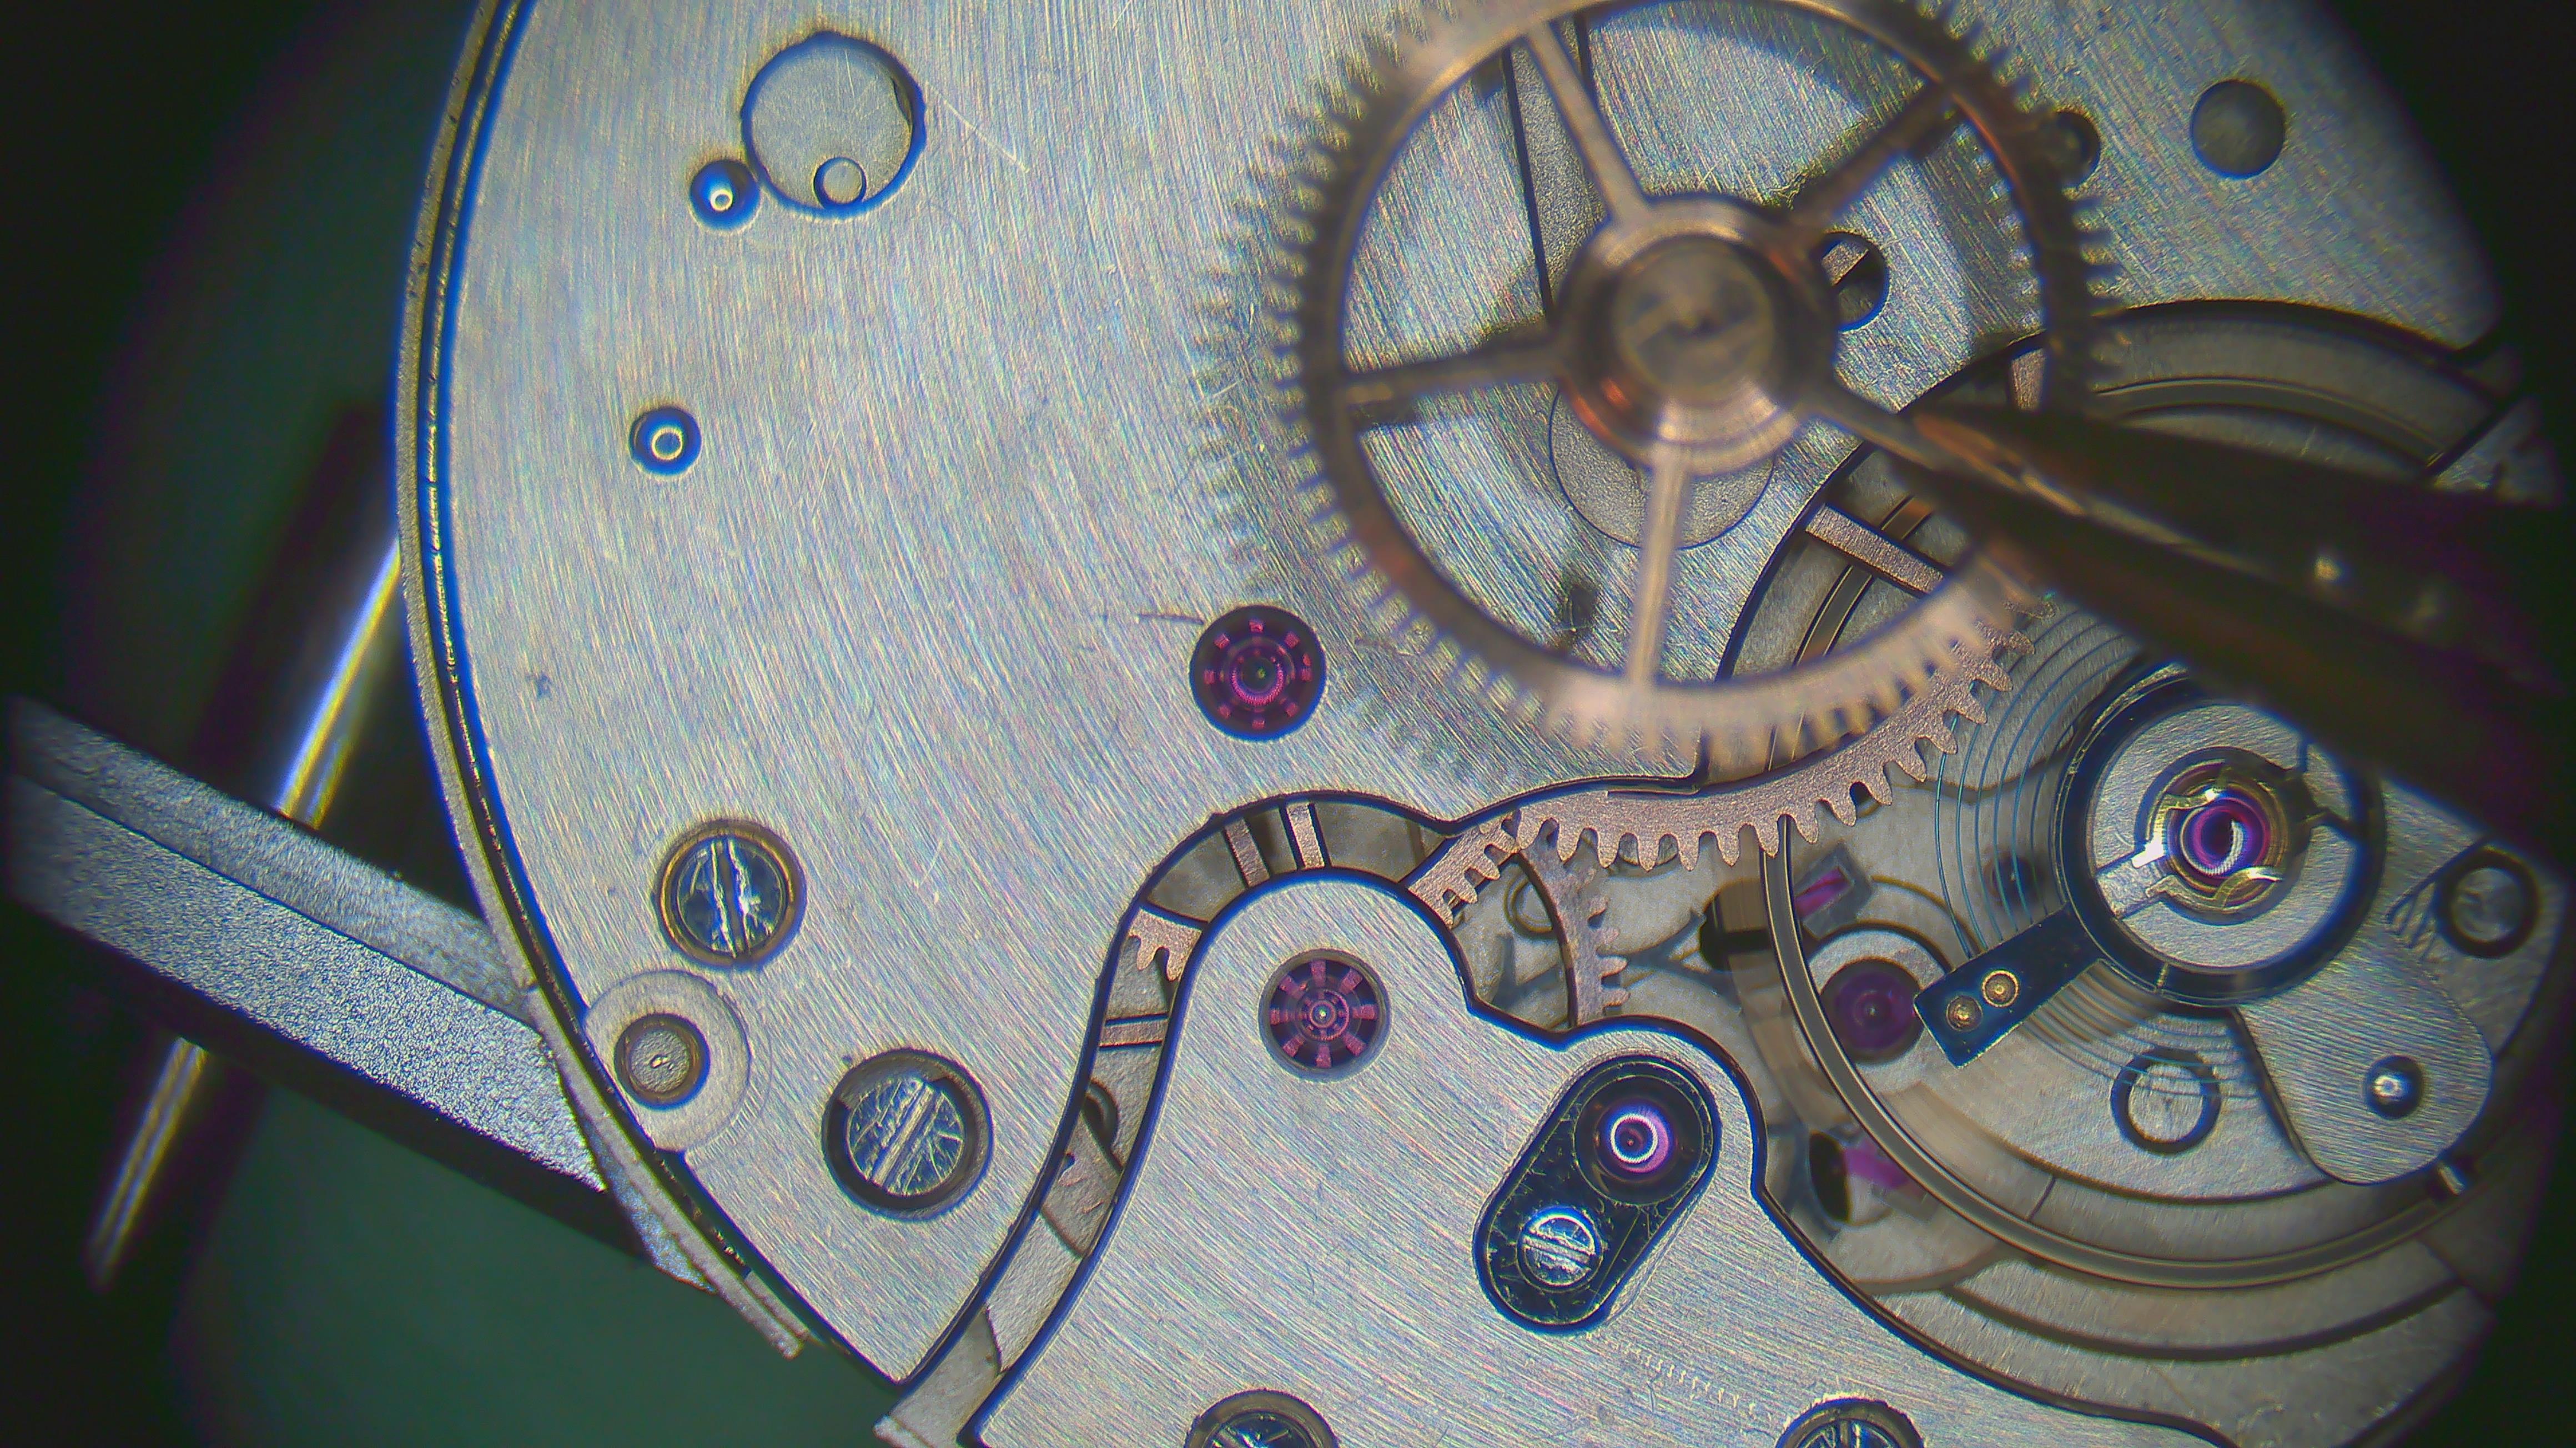
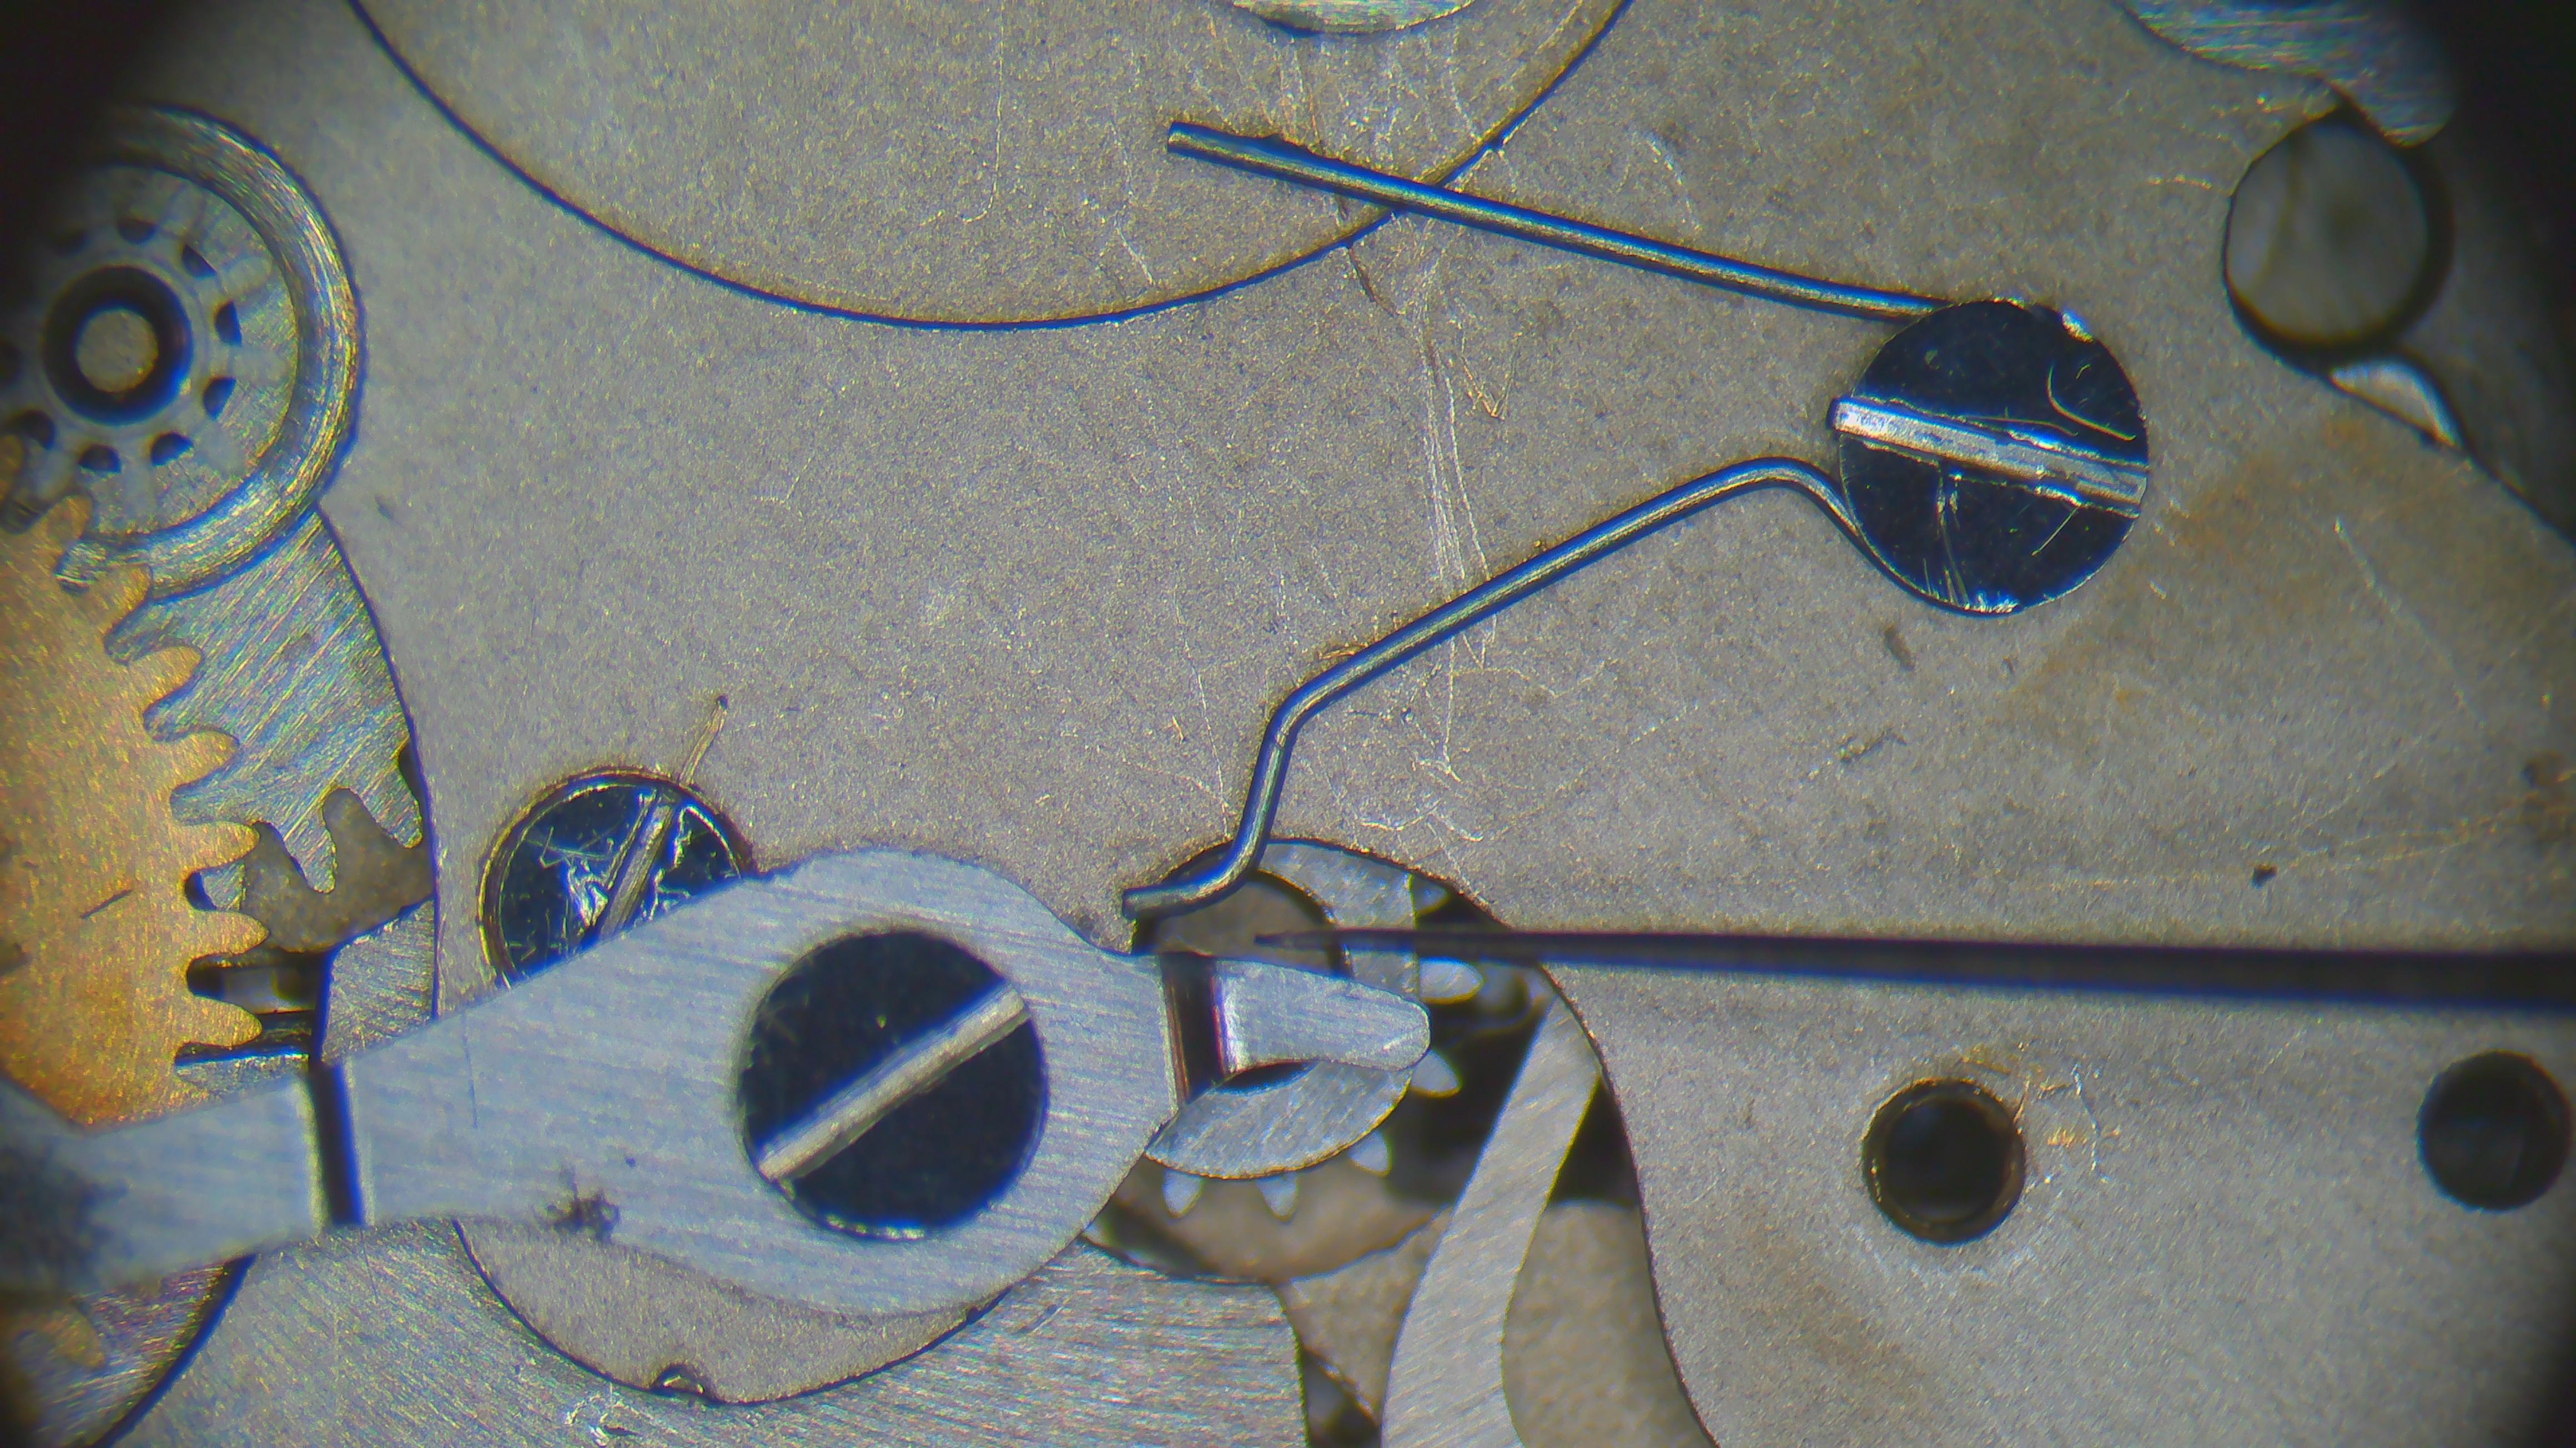
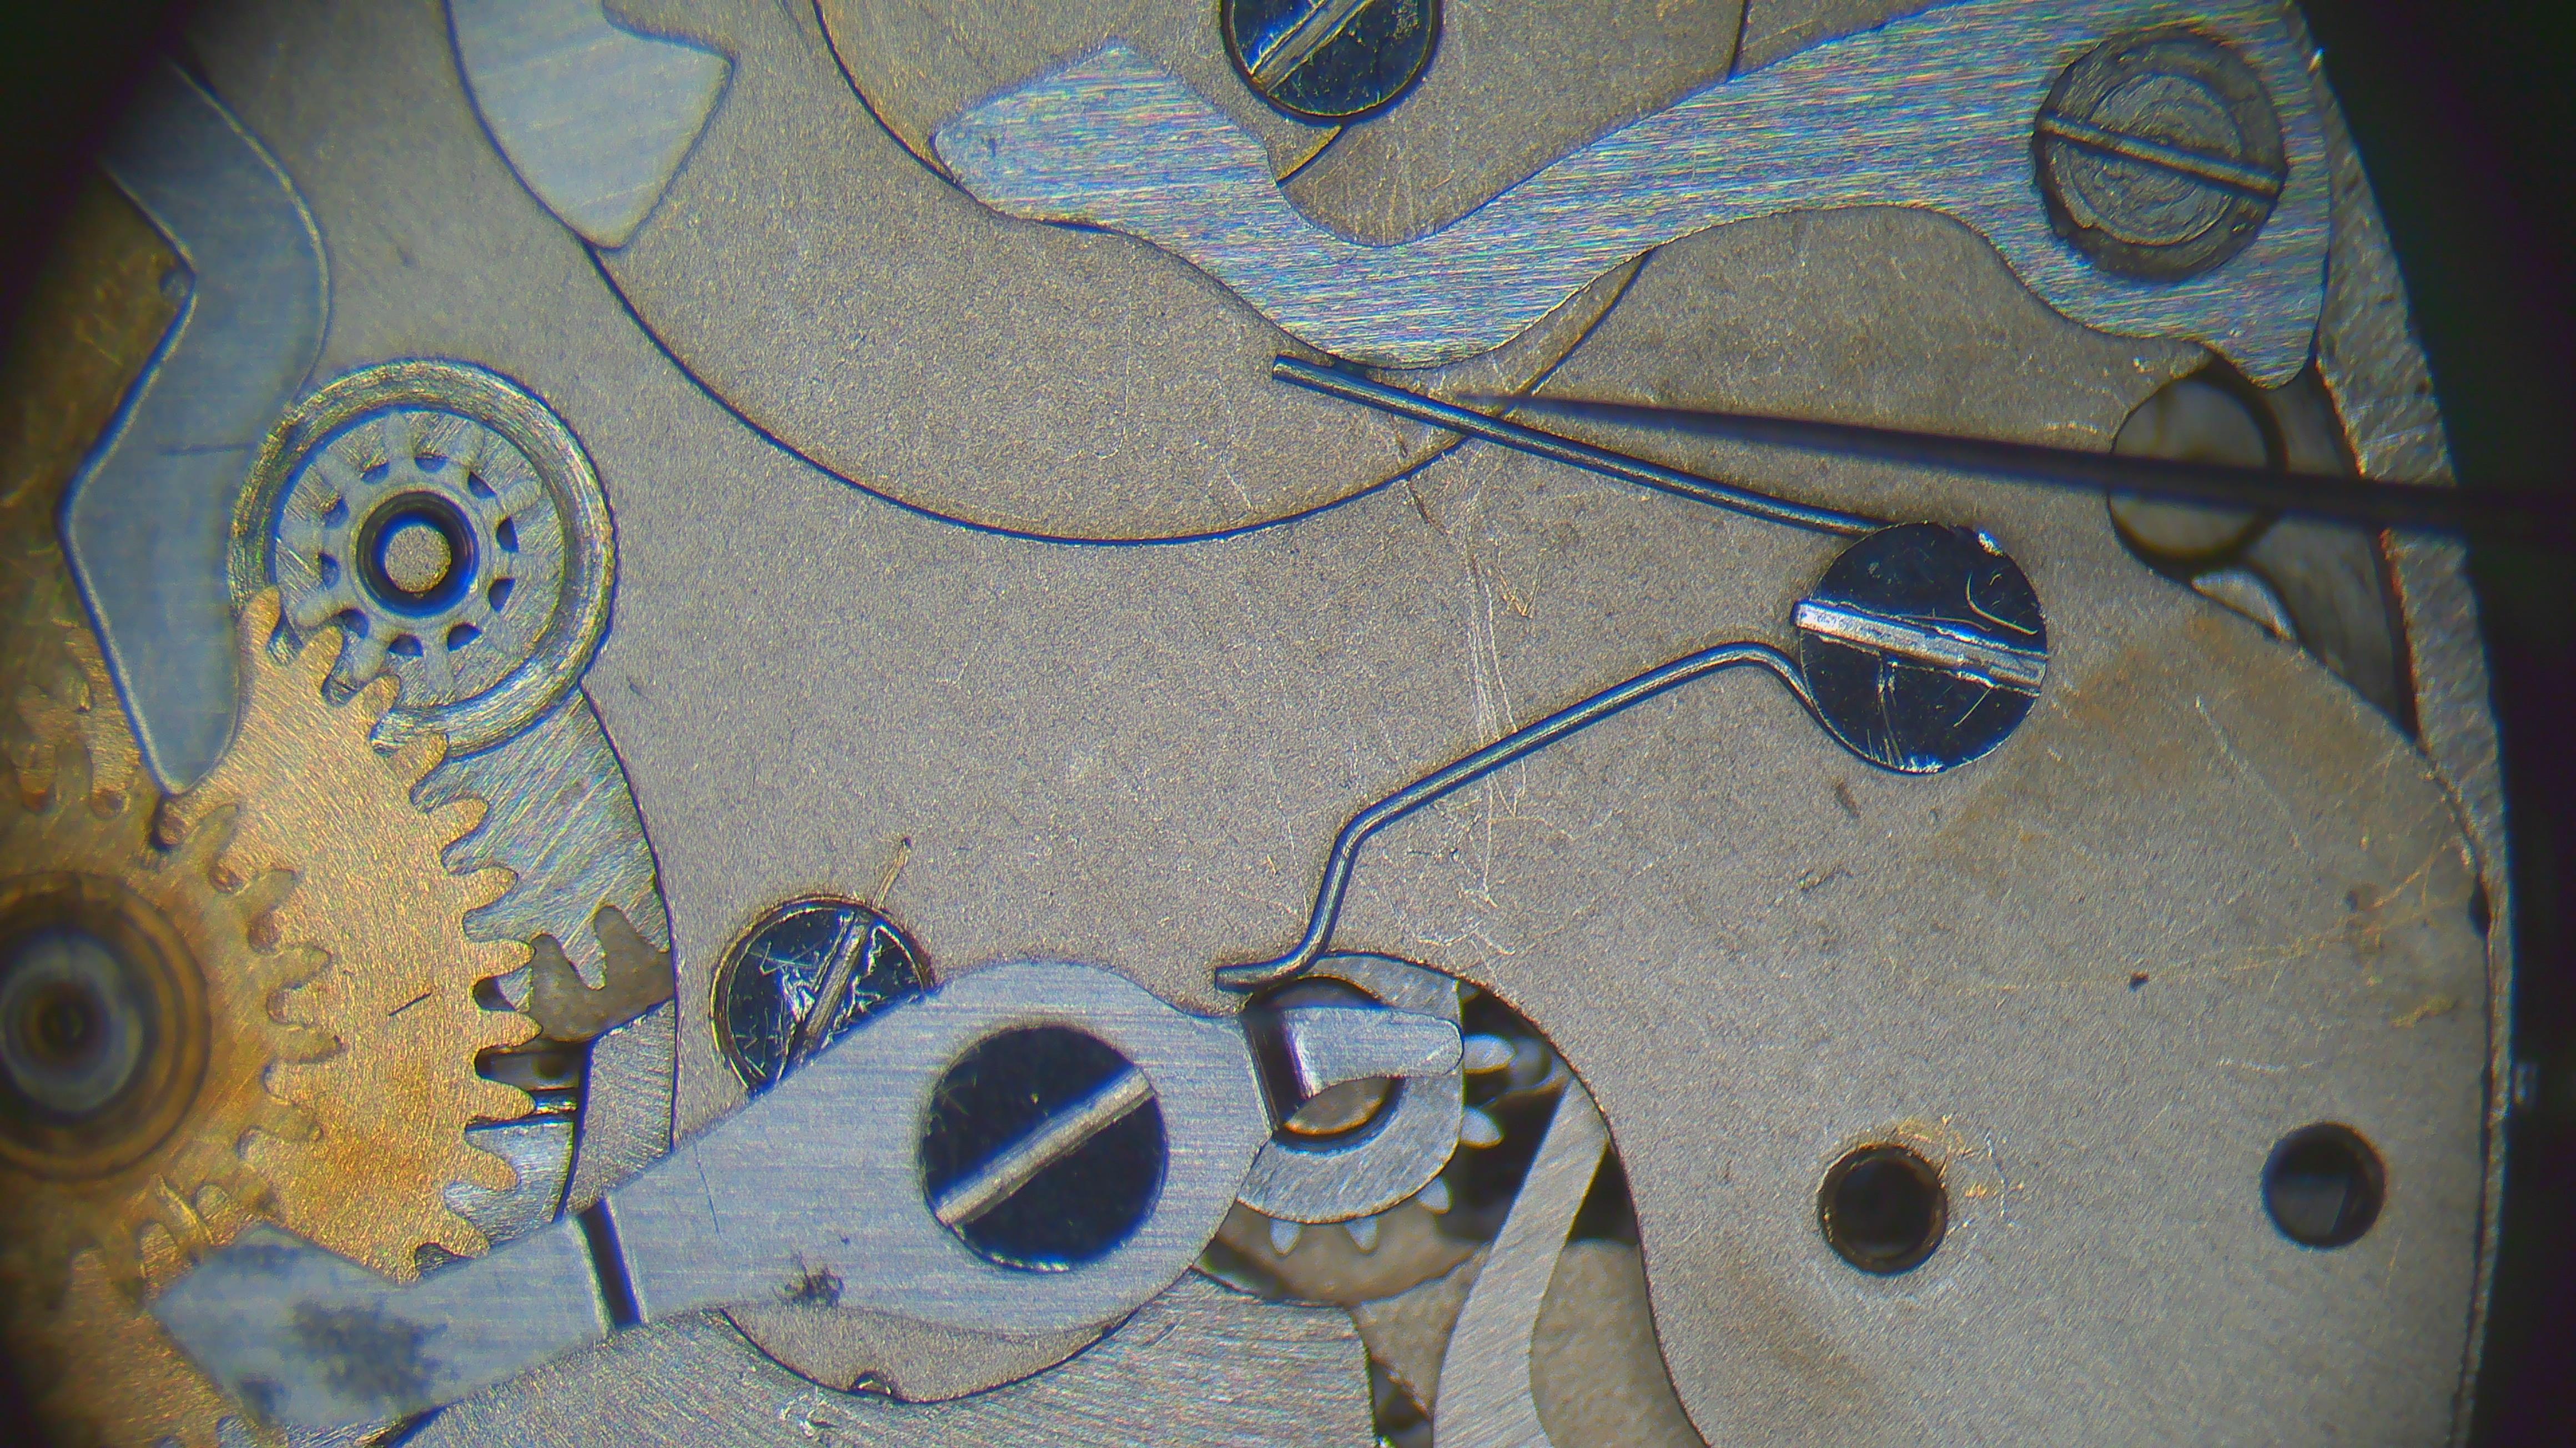
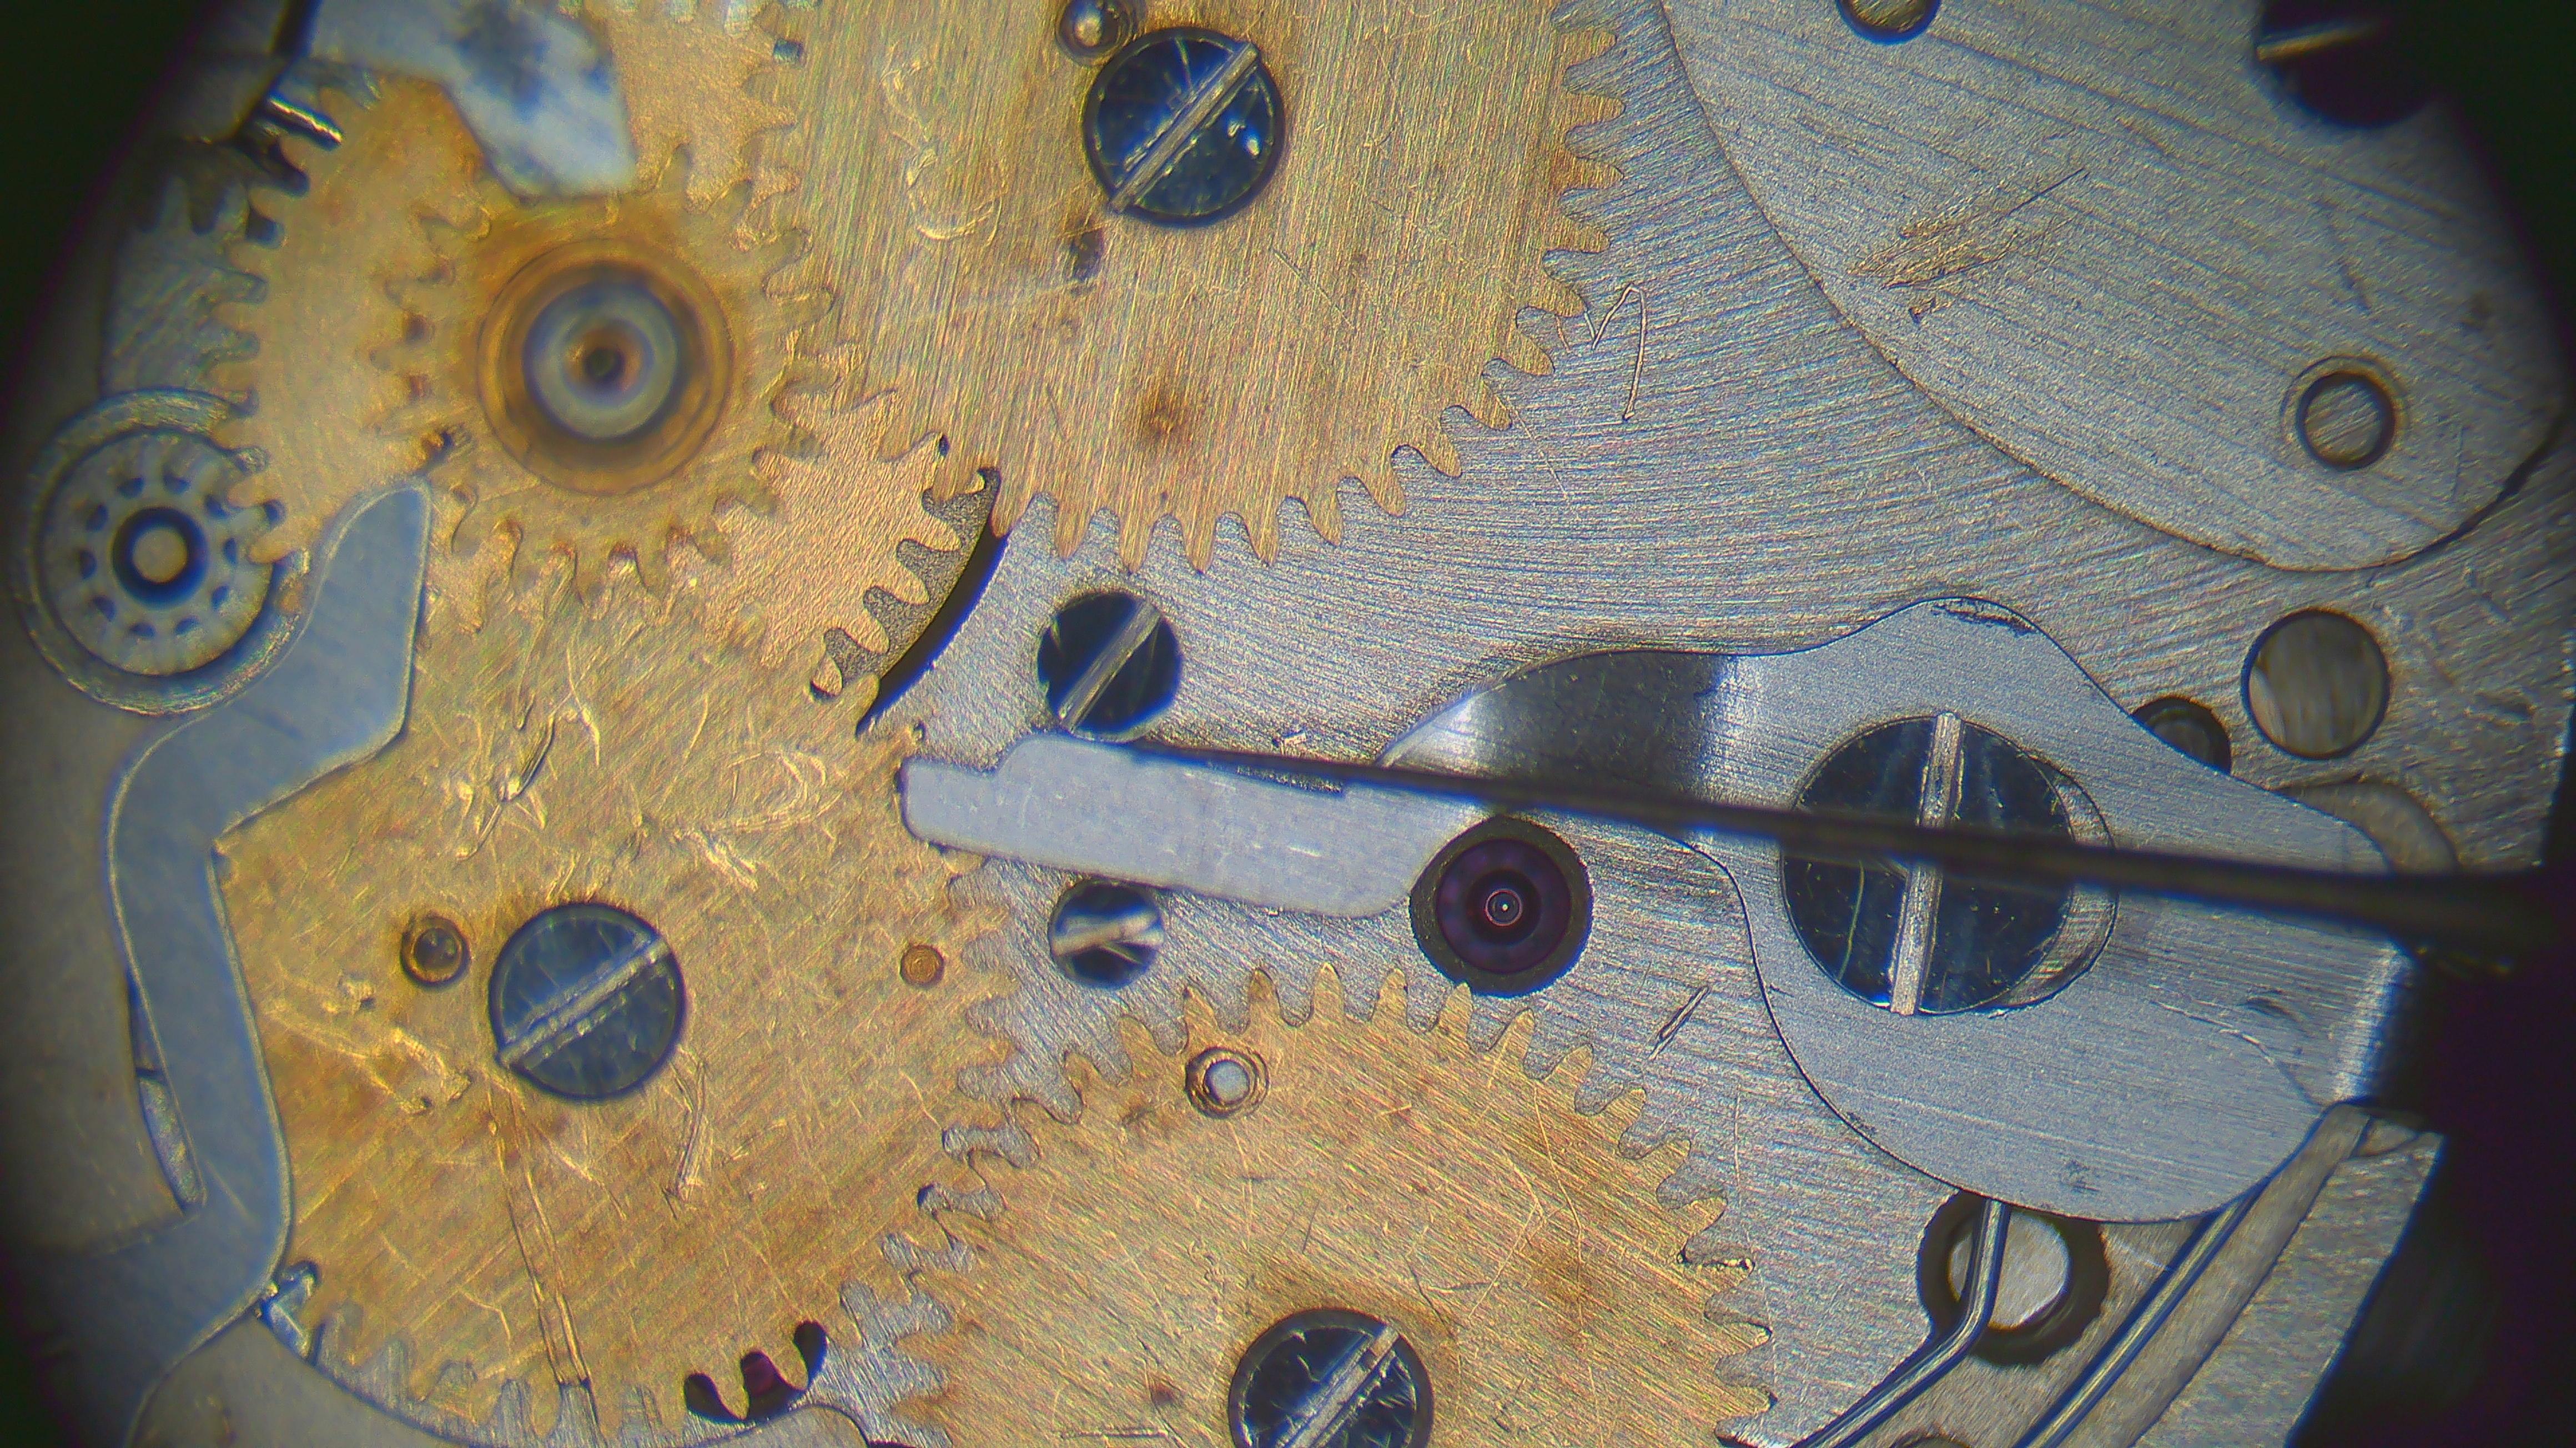
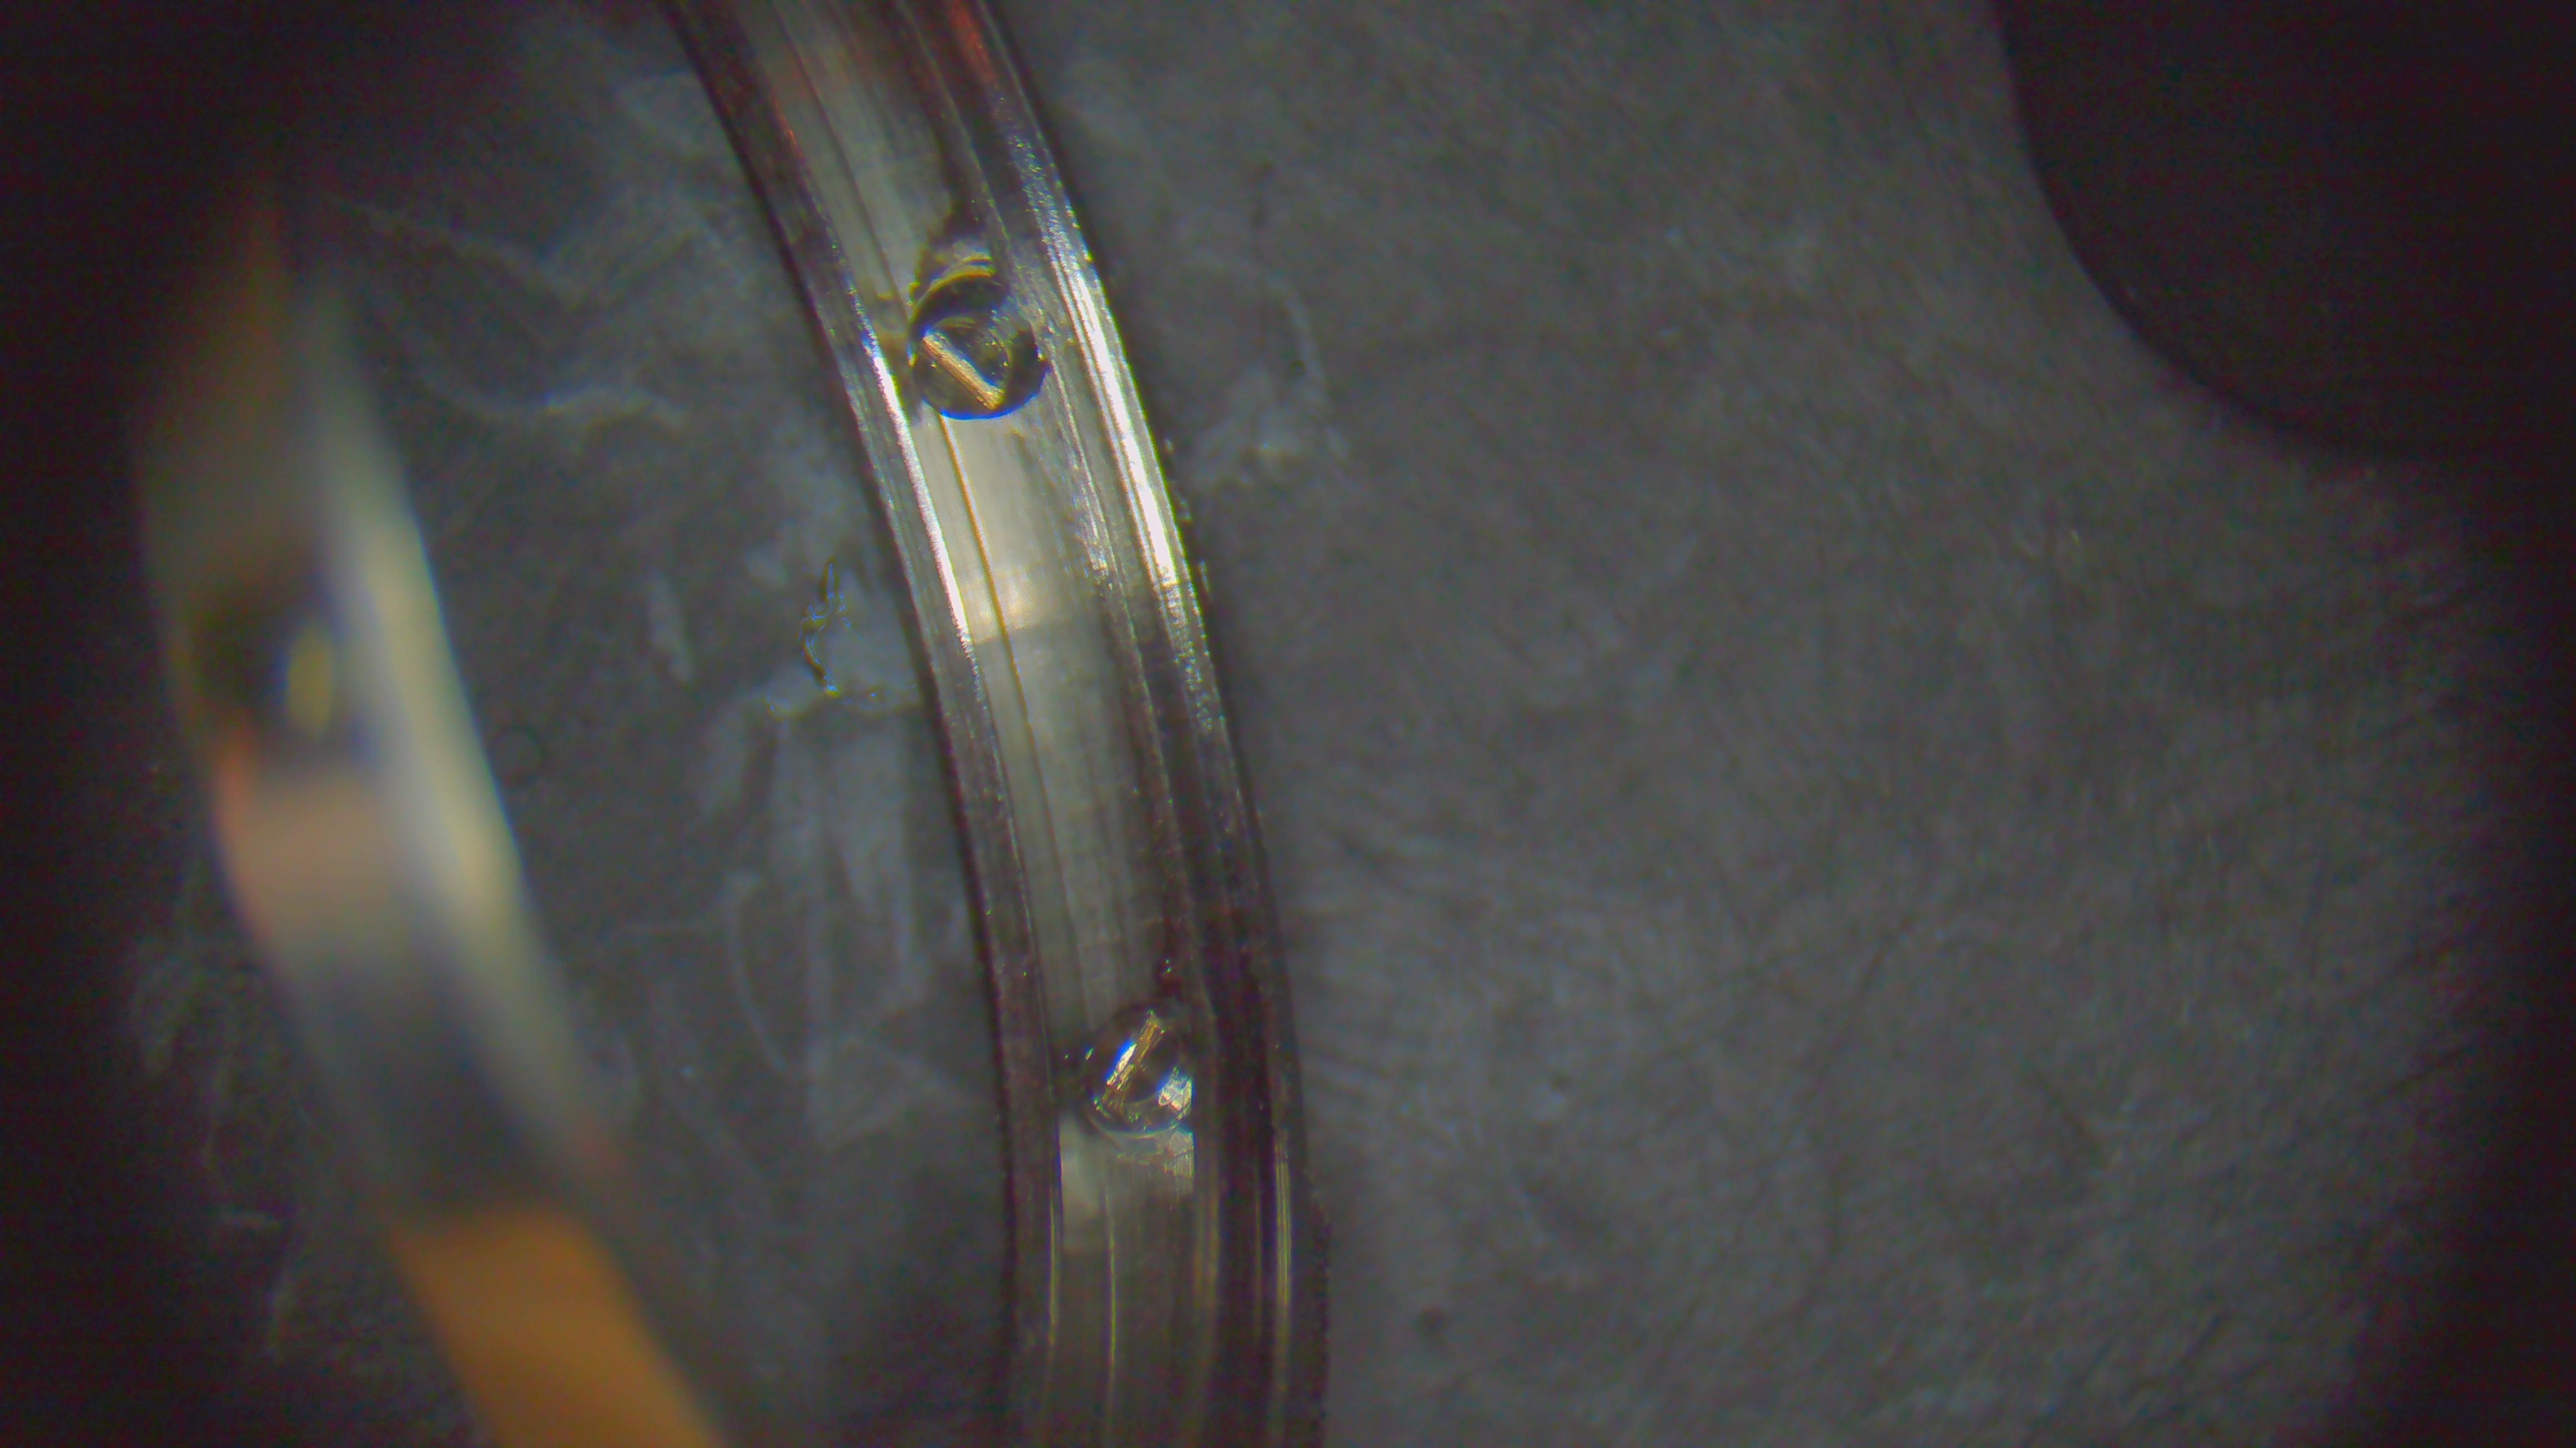
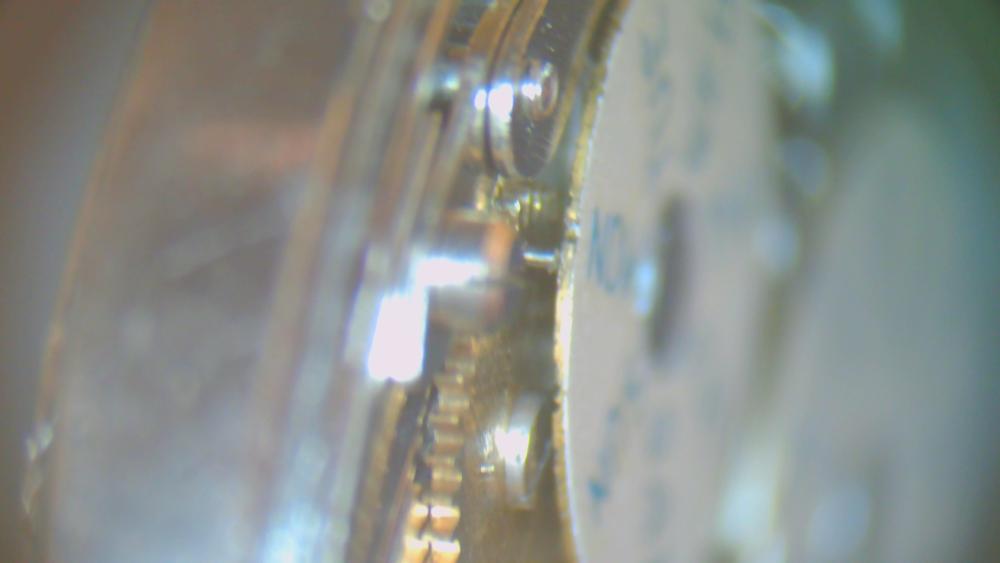
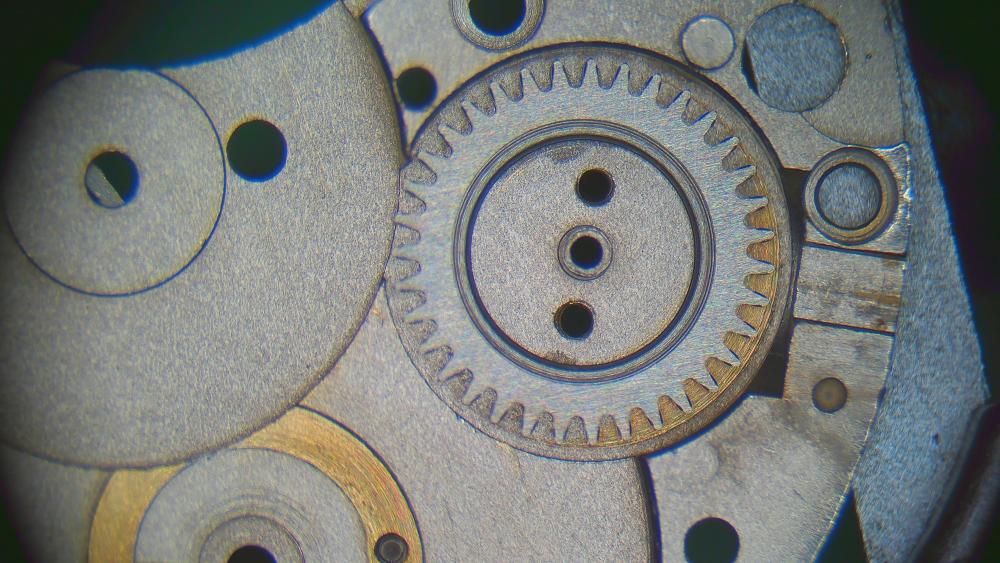
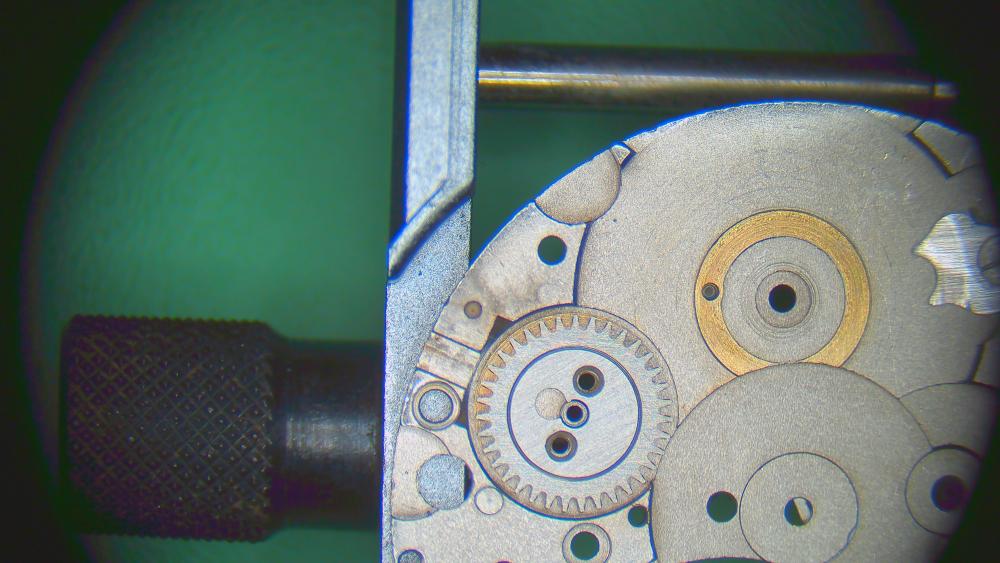
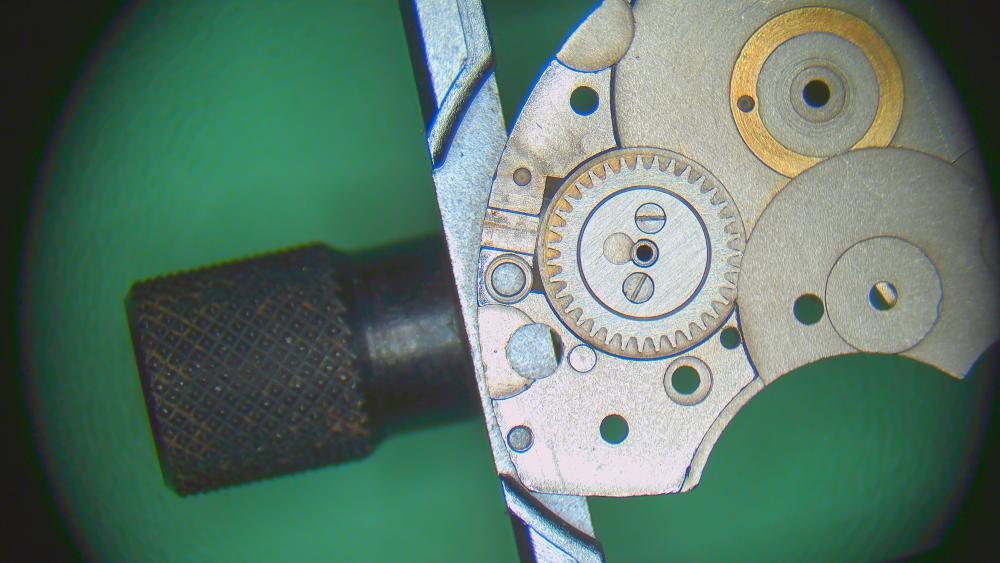
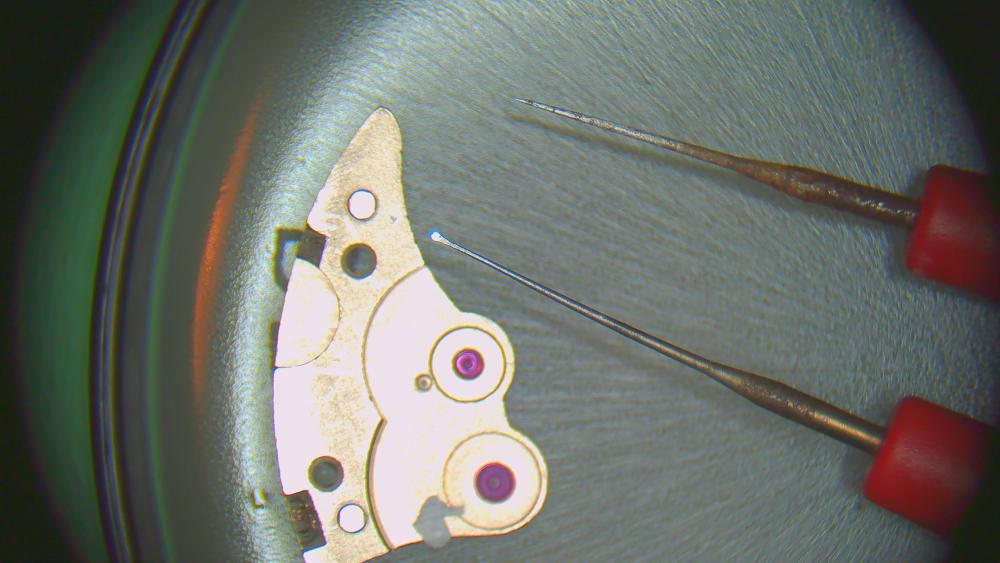
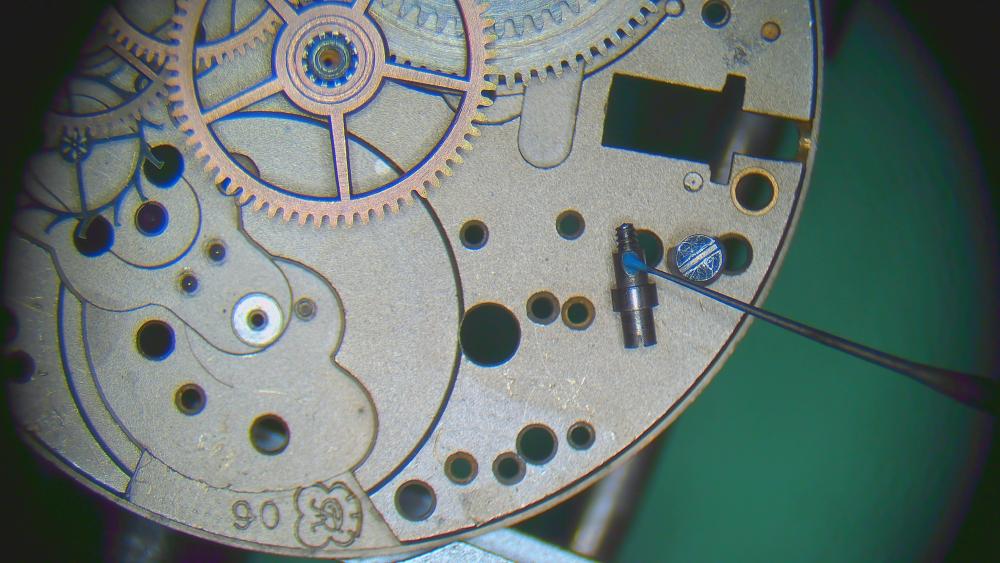
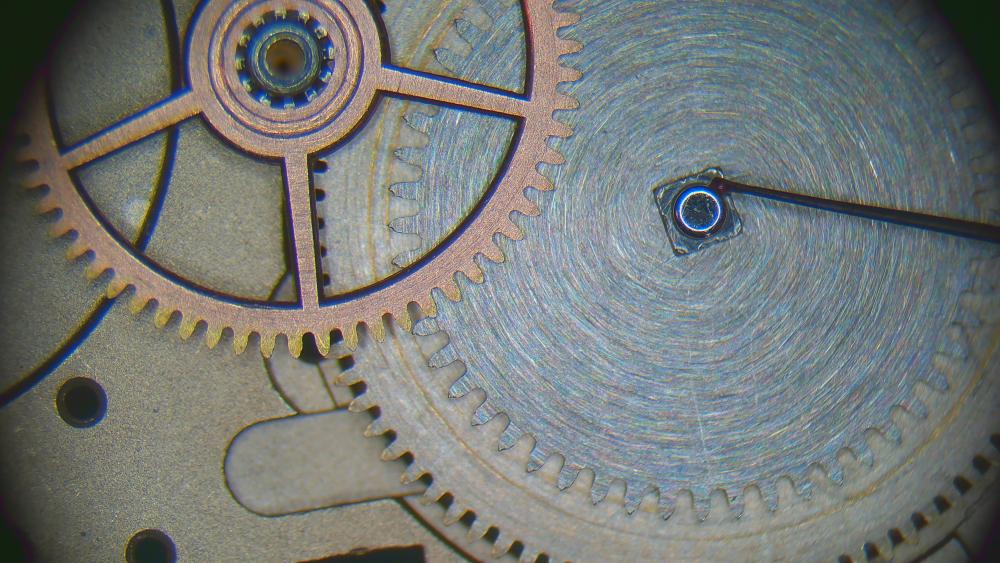
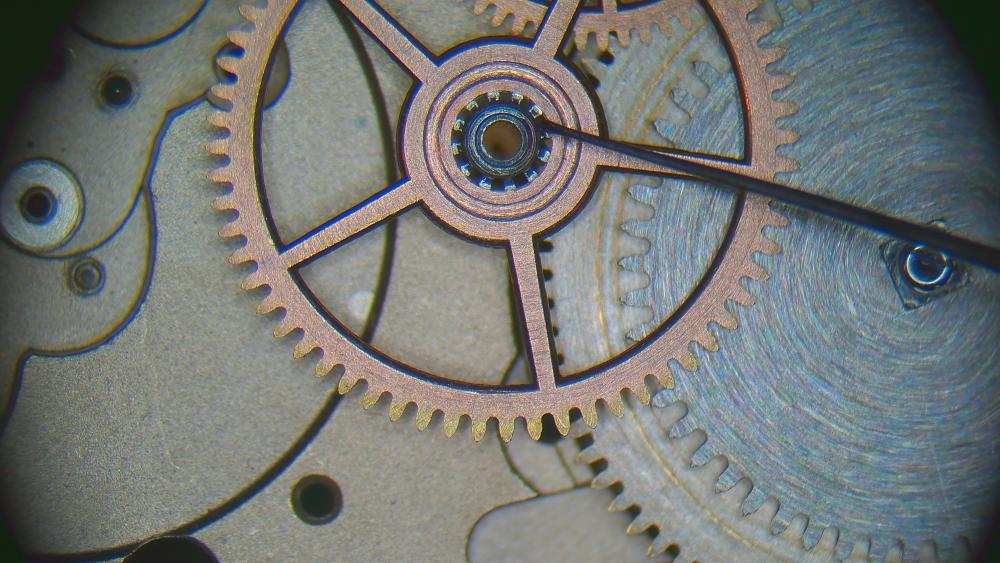
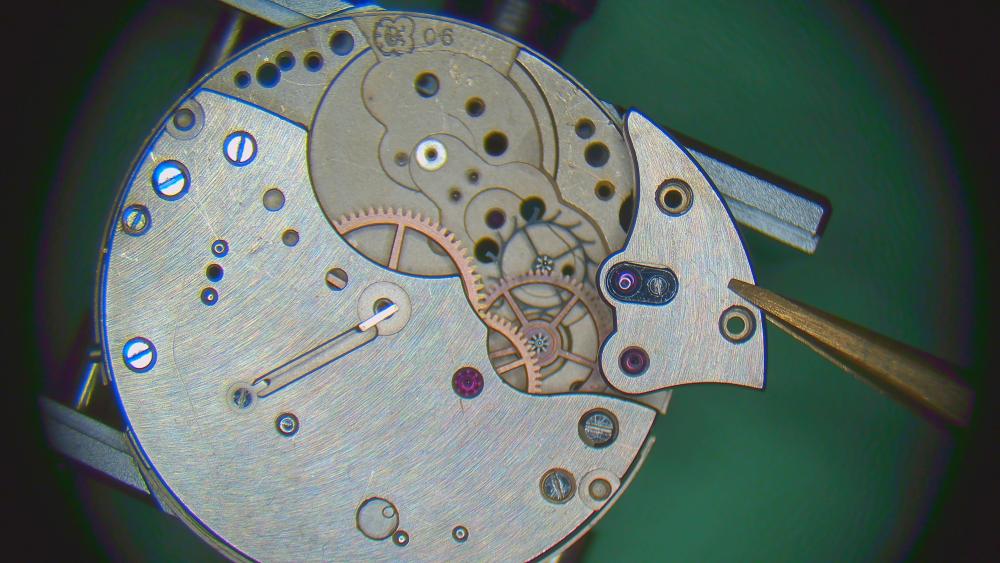
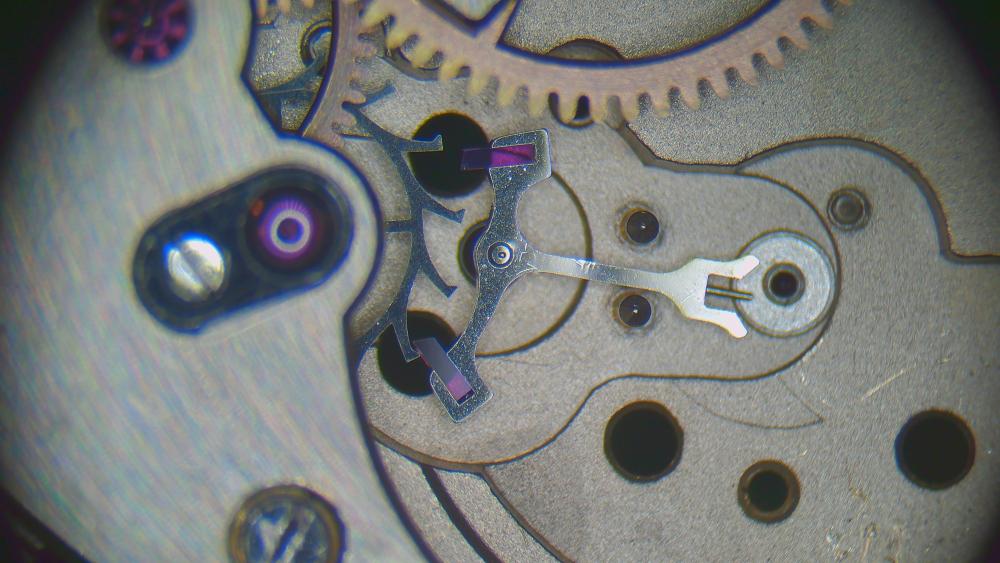
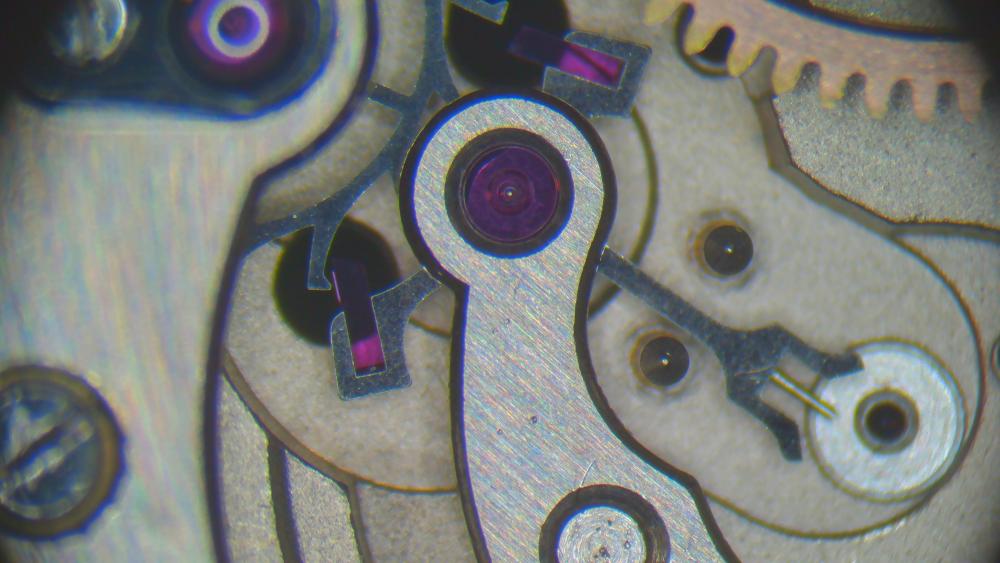
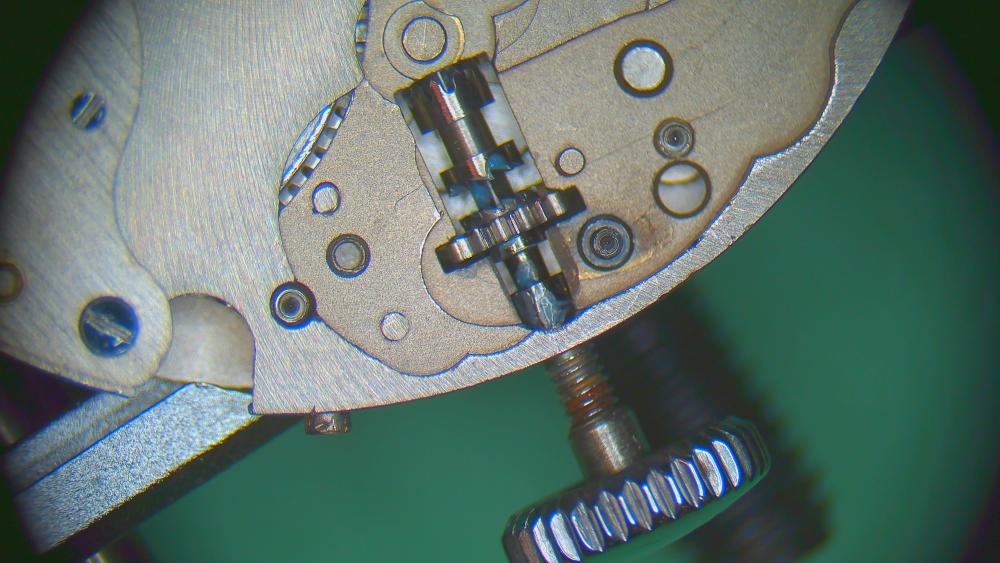
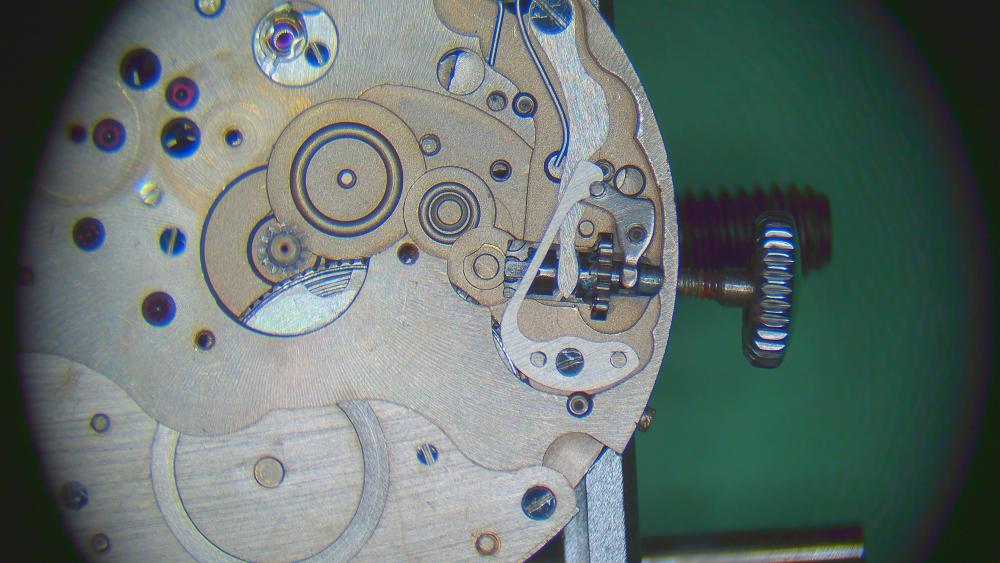
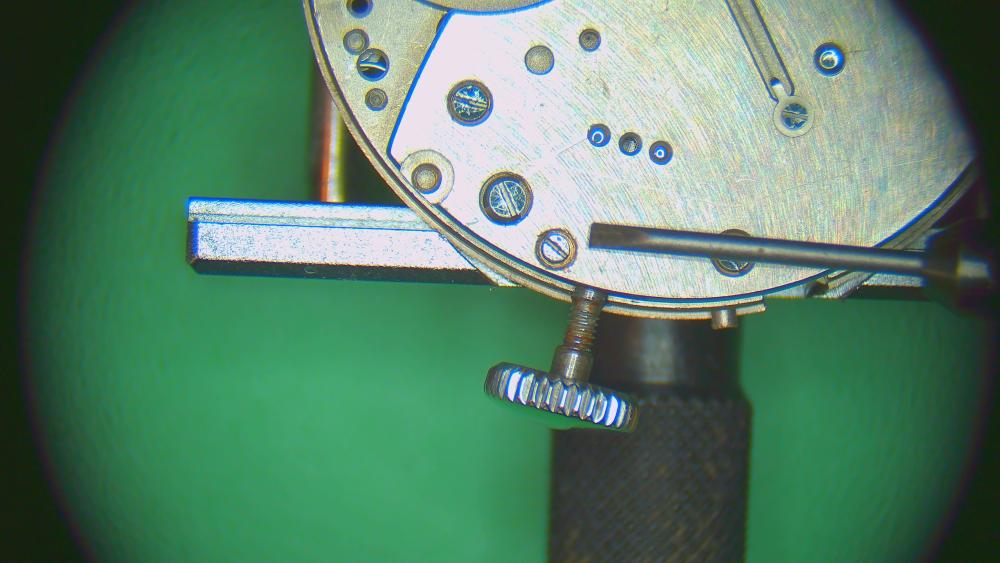
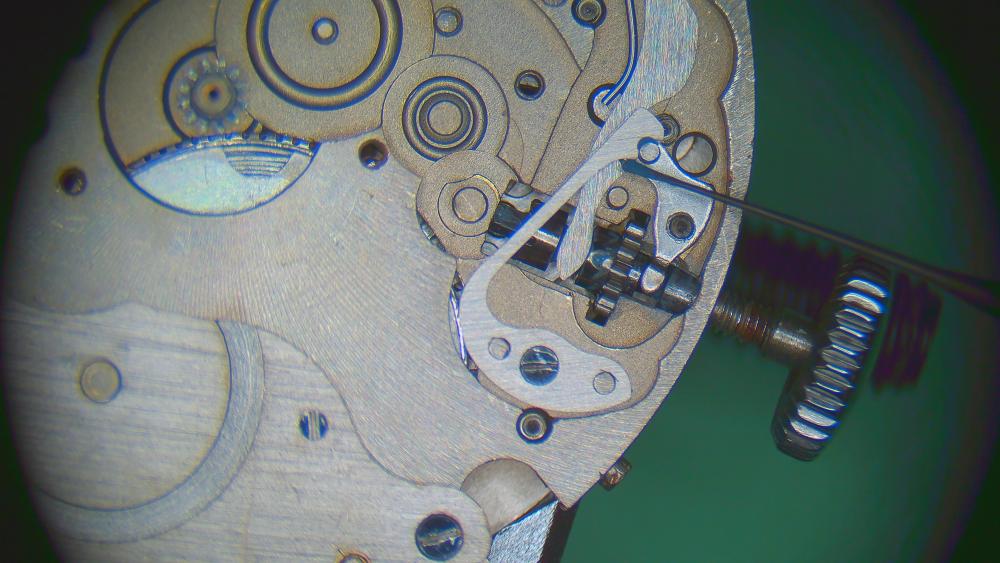
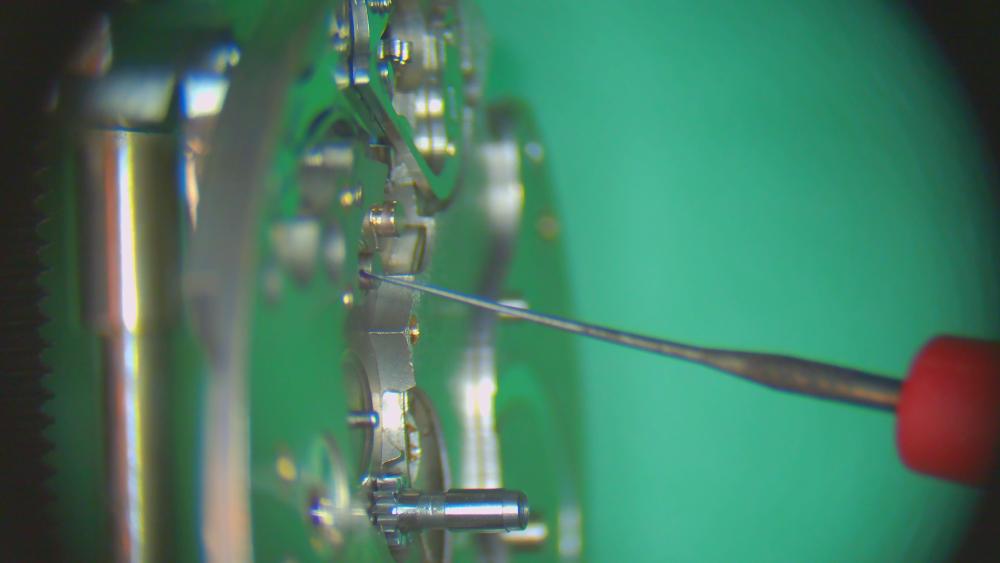
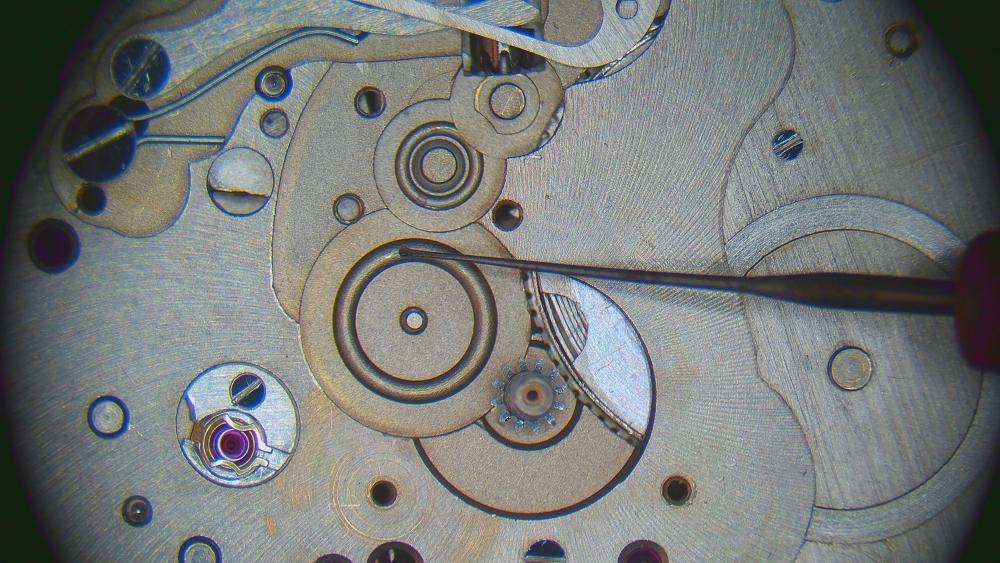
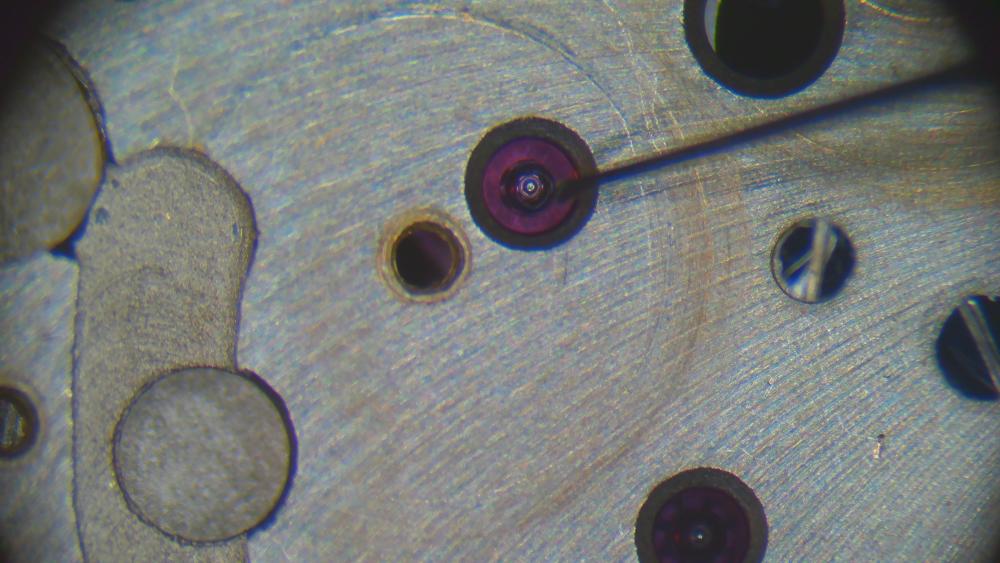
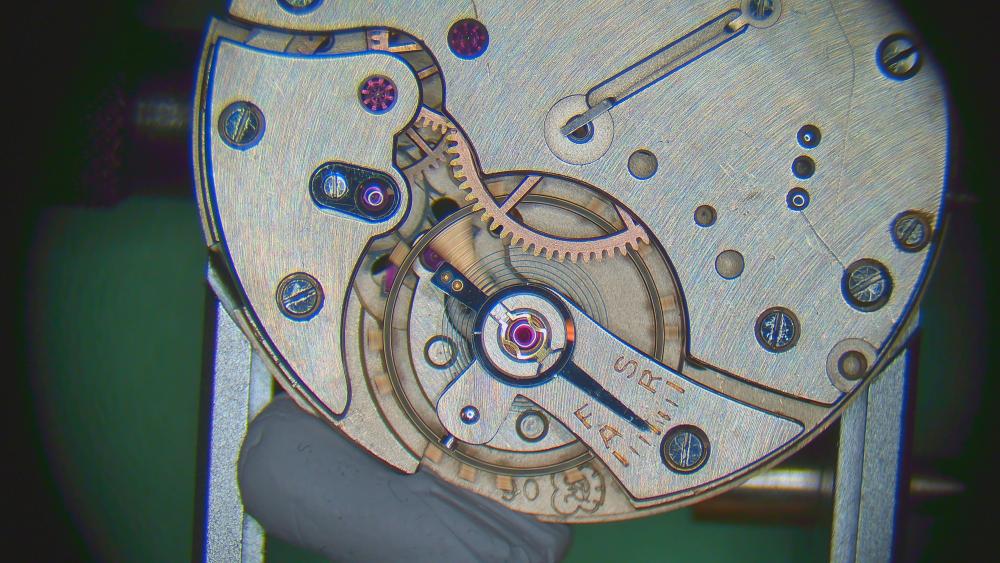
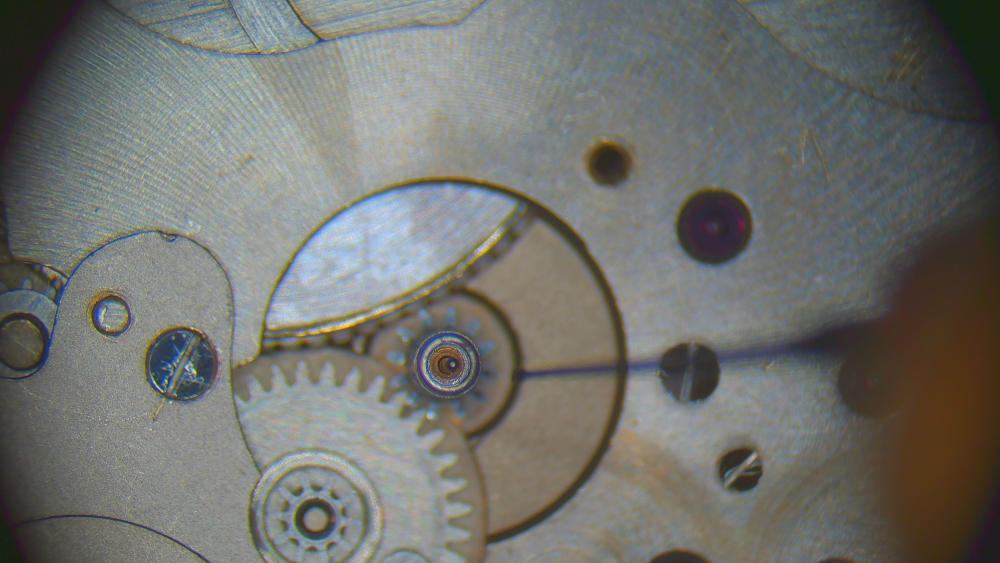
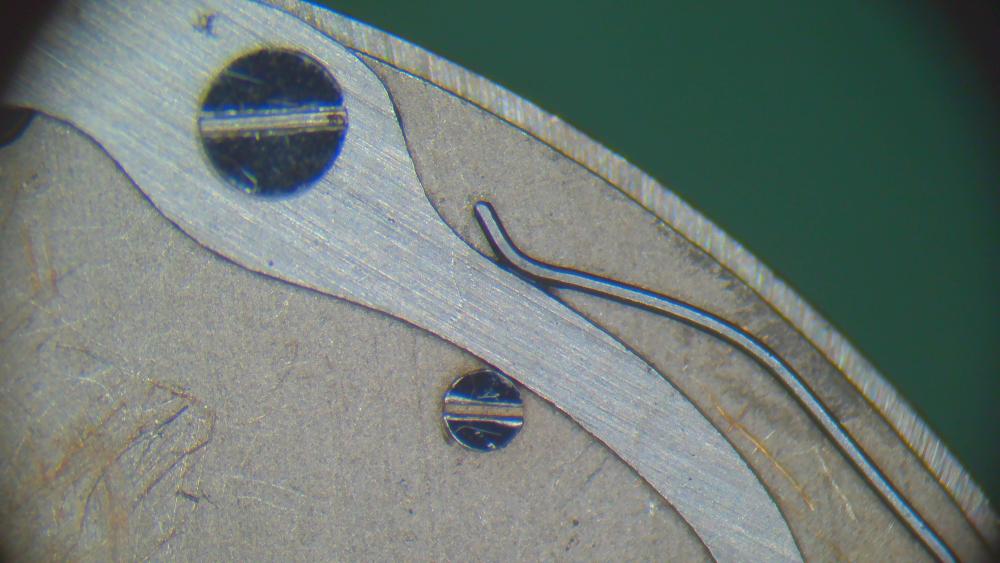
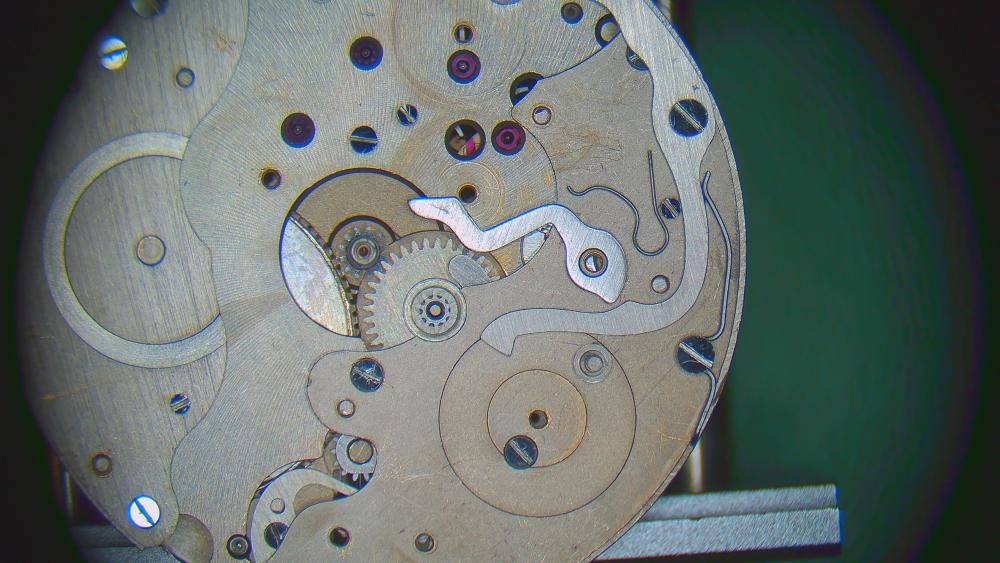
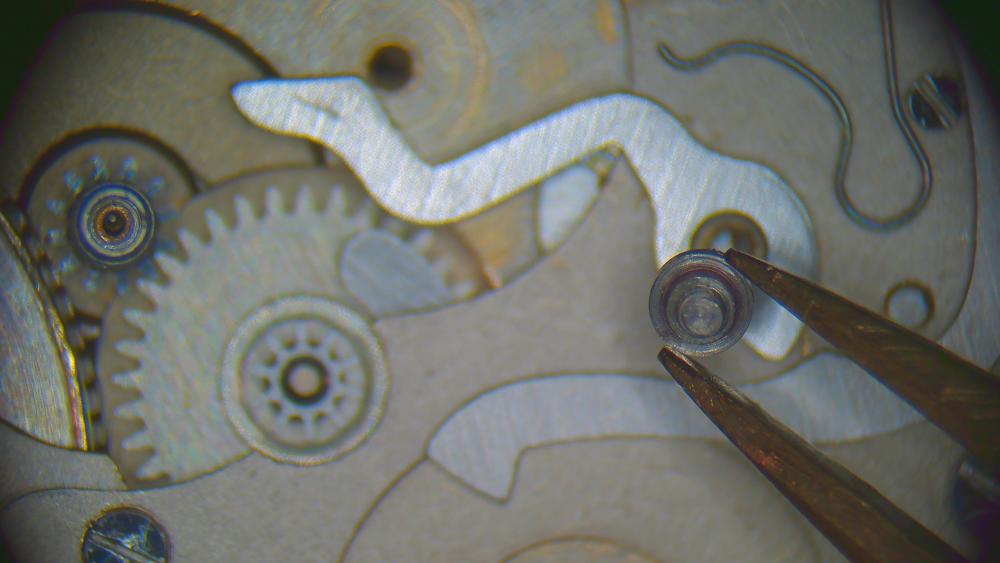
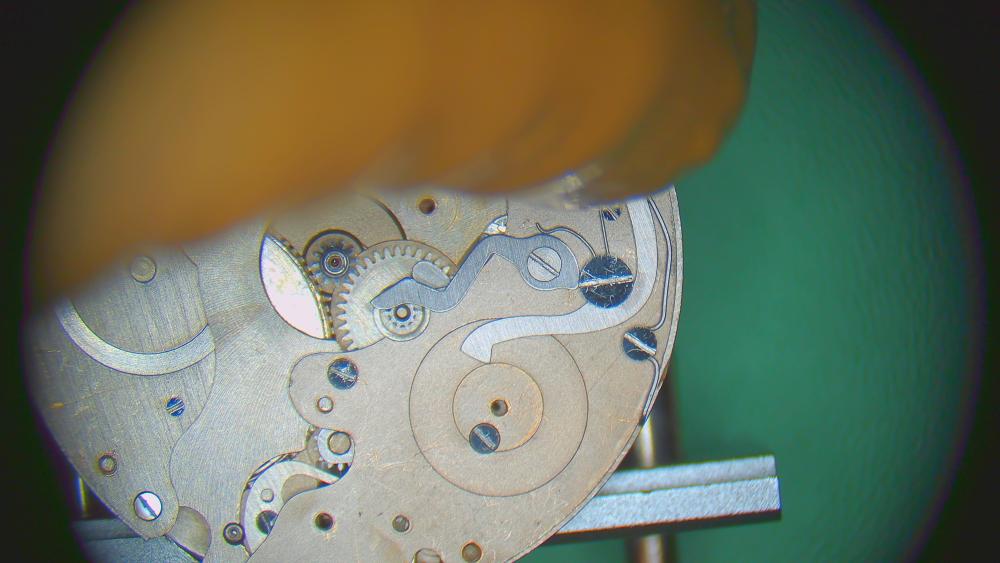
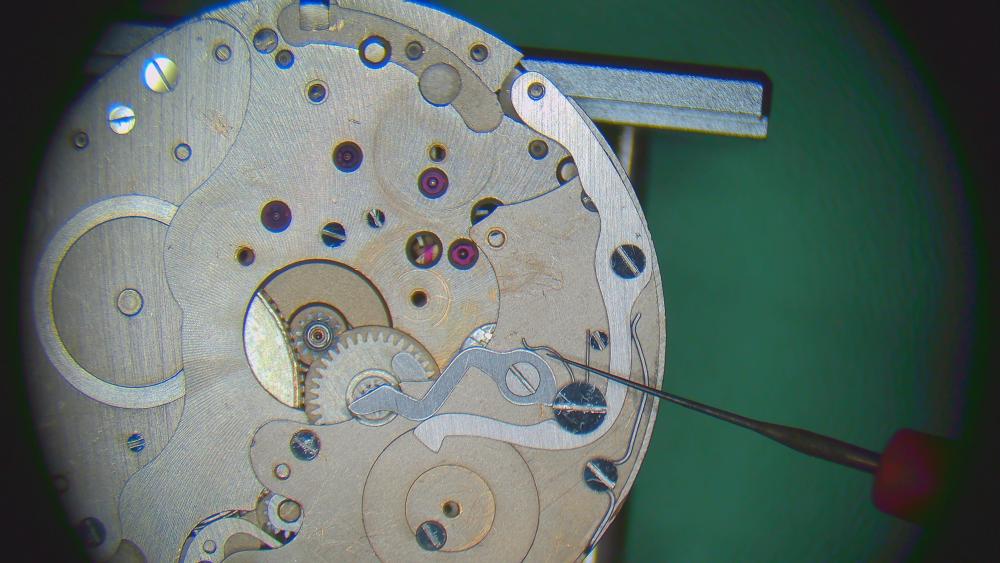
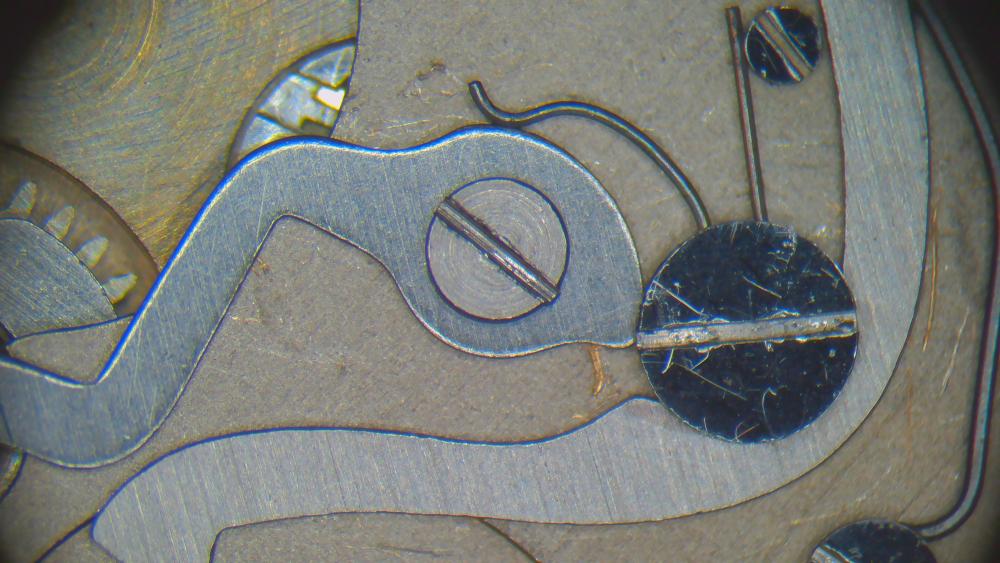
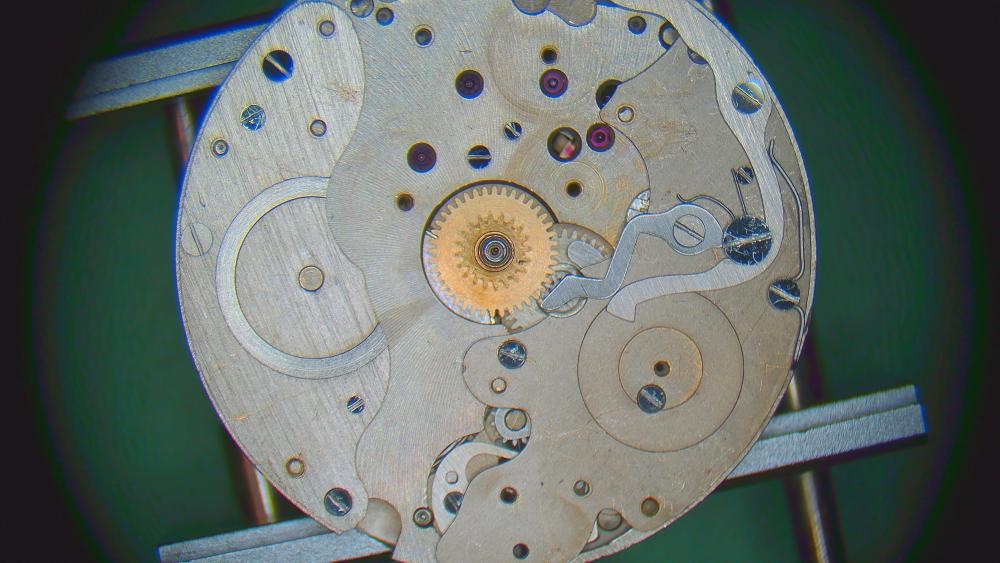
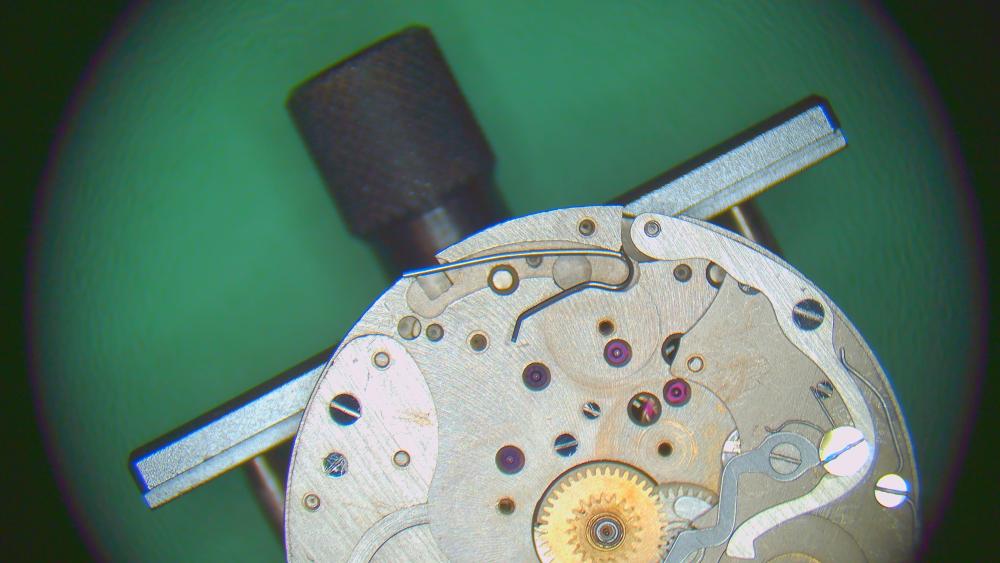
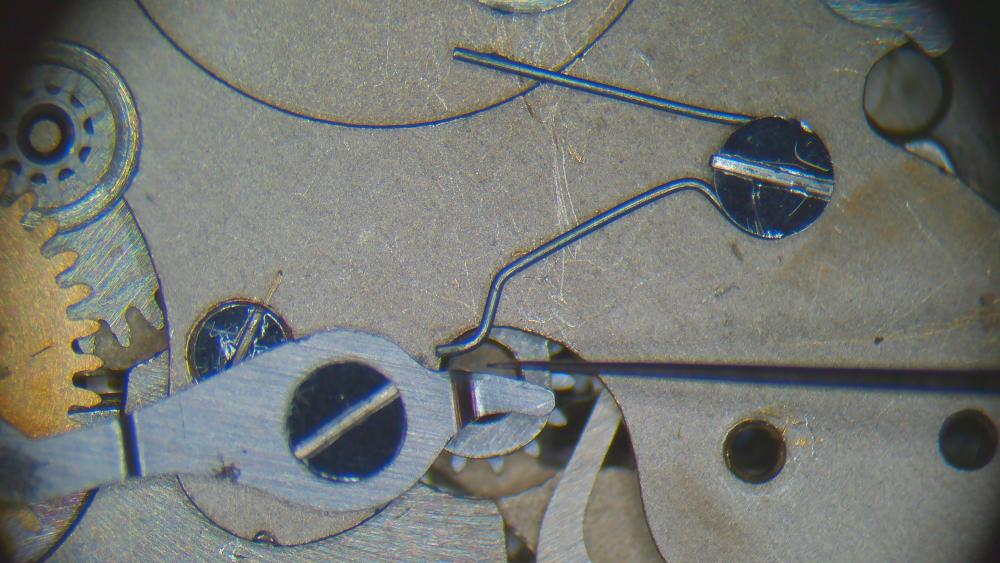
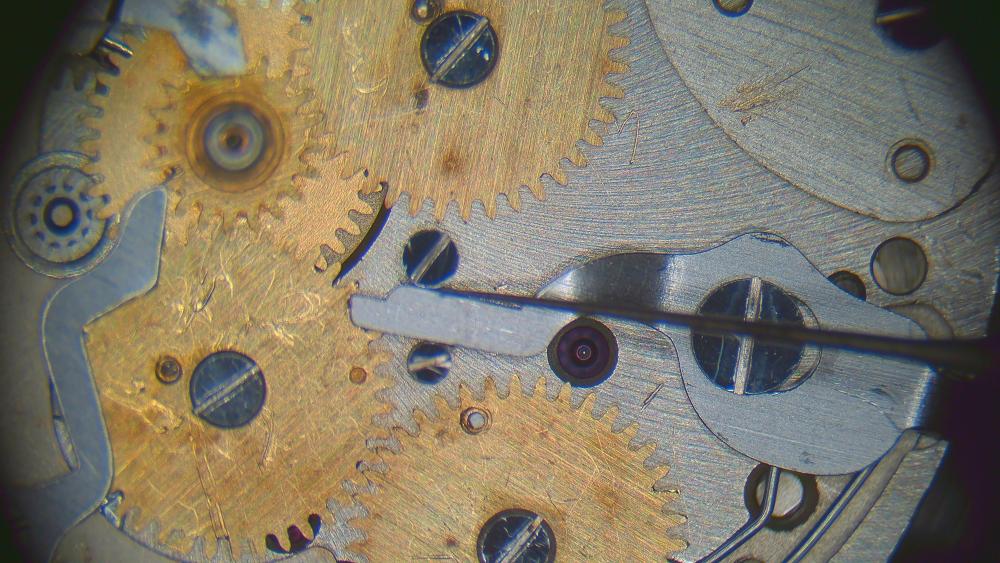
The roller jewel should be aimed right at the pallet fork center (at its hole jewel) with no power on the watch. Eyeballing your photos that does seem to be the case. Does the balance oscillate freely with the fork out? If you rotate it 90 degrees and release it, does it oscillate for a good while (like 20+ seconds)? If not, check your endshake, which is easily adjustable on this caliber. With the balance and fork out, everything else in, if you put a few clicks (like 2 or 3) of wind, does the train spin freely? If not, figure out why, and correct it. With the balance out, everything else in, fork in, just a few clicks of power, does the the fork snap cleanly from banking to banking with a slight nudge? If not, figure out why. With everything in, no power (fully unwound), does the balance swing freely? If not, you may have a height issue with the fork. Generally it's good to practice on a number of less expensive movements before moving on to something high-grade like this. When learning, you will break and lose things, and the cost of parts is far less. In your pics, you have the train bridge off and fork in, when you put the train bridge on you want the fork out to help check for freedom as you fit it in place. The escape wheel can also get caught under or over a pallet jewel leading to damage.3 points
-
Hi Nigel, Several things to say here... First one: in situations like this (where You were worried that the internal coil is loose and no pressure to the arbor), You need just to try to wind and see if the hook of the arbor will catch the spring end. It is obvious from the picture (to me) that it will catch. If so, then You need just to close the barrel and be happy. Then, I will open a secret for You: It is not possible to heat treat the spring with electric soldering iron. No mater what You see in the videos, this is not possible. I assure You that if one can do something with the help of the soldering iron, then He will be able to do the same thing with the soldering iron not plugged in the wall socket. The difference will be only that there will be no danger to burn His fingers on the hot iron... Winding the spring in the barrel with hands can be done without damage to the spring, but one must feel the spring and not to bend it more than needed. Practice helps much. One thing is for sure: using mainspring winder is not less dangerous for the spring if one has no practice too. The winder must be correct for both the spring and the barrel and one must know the habits of the winder in order to prevent the spring from damage. And one more secret: if the spring is not completely flat when put on the table, this not always mean that it will not perform well and there will be loss in amplitude. Now You have opportunity to try the first new spring that You consider as damaged, and to compare the amplitudes with the old spring and with the new one, that is still in the box when the time for it to get in the barrel comes.2 points
-
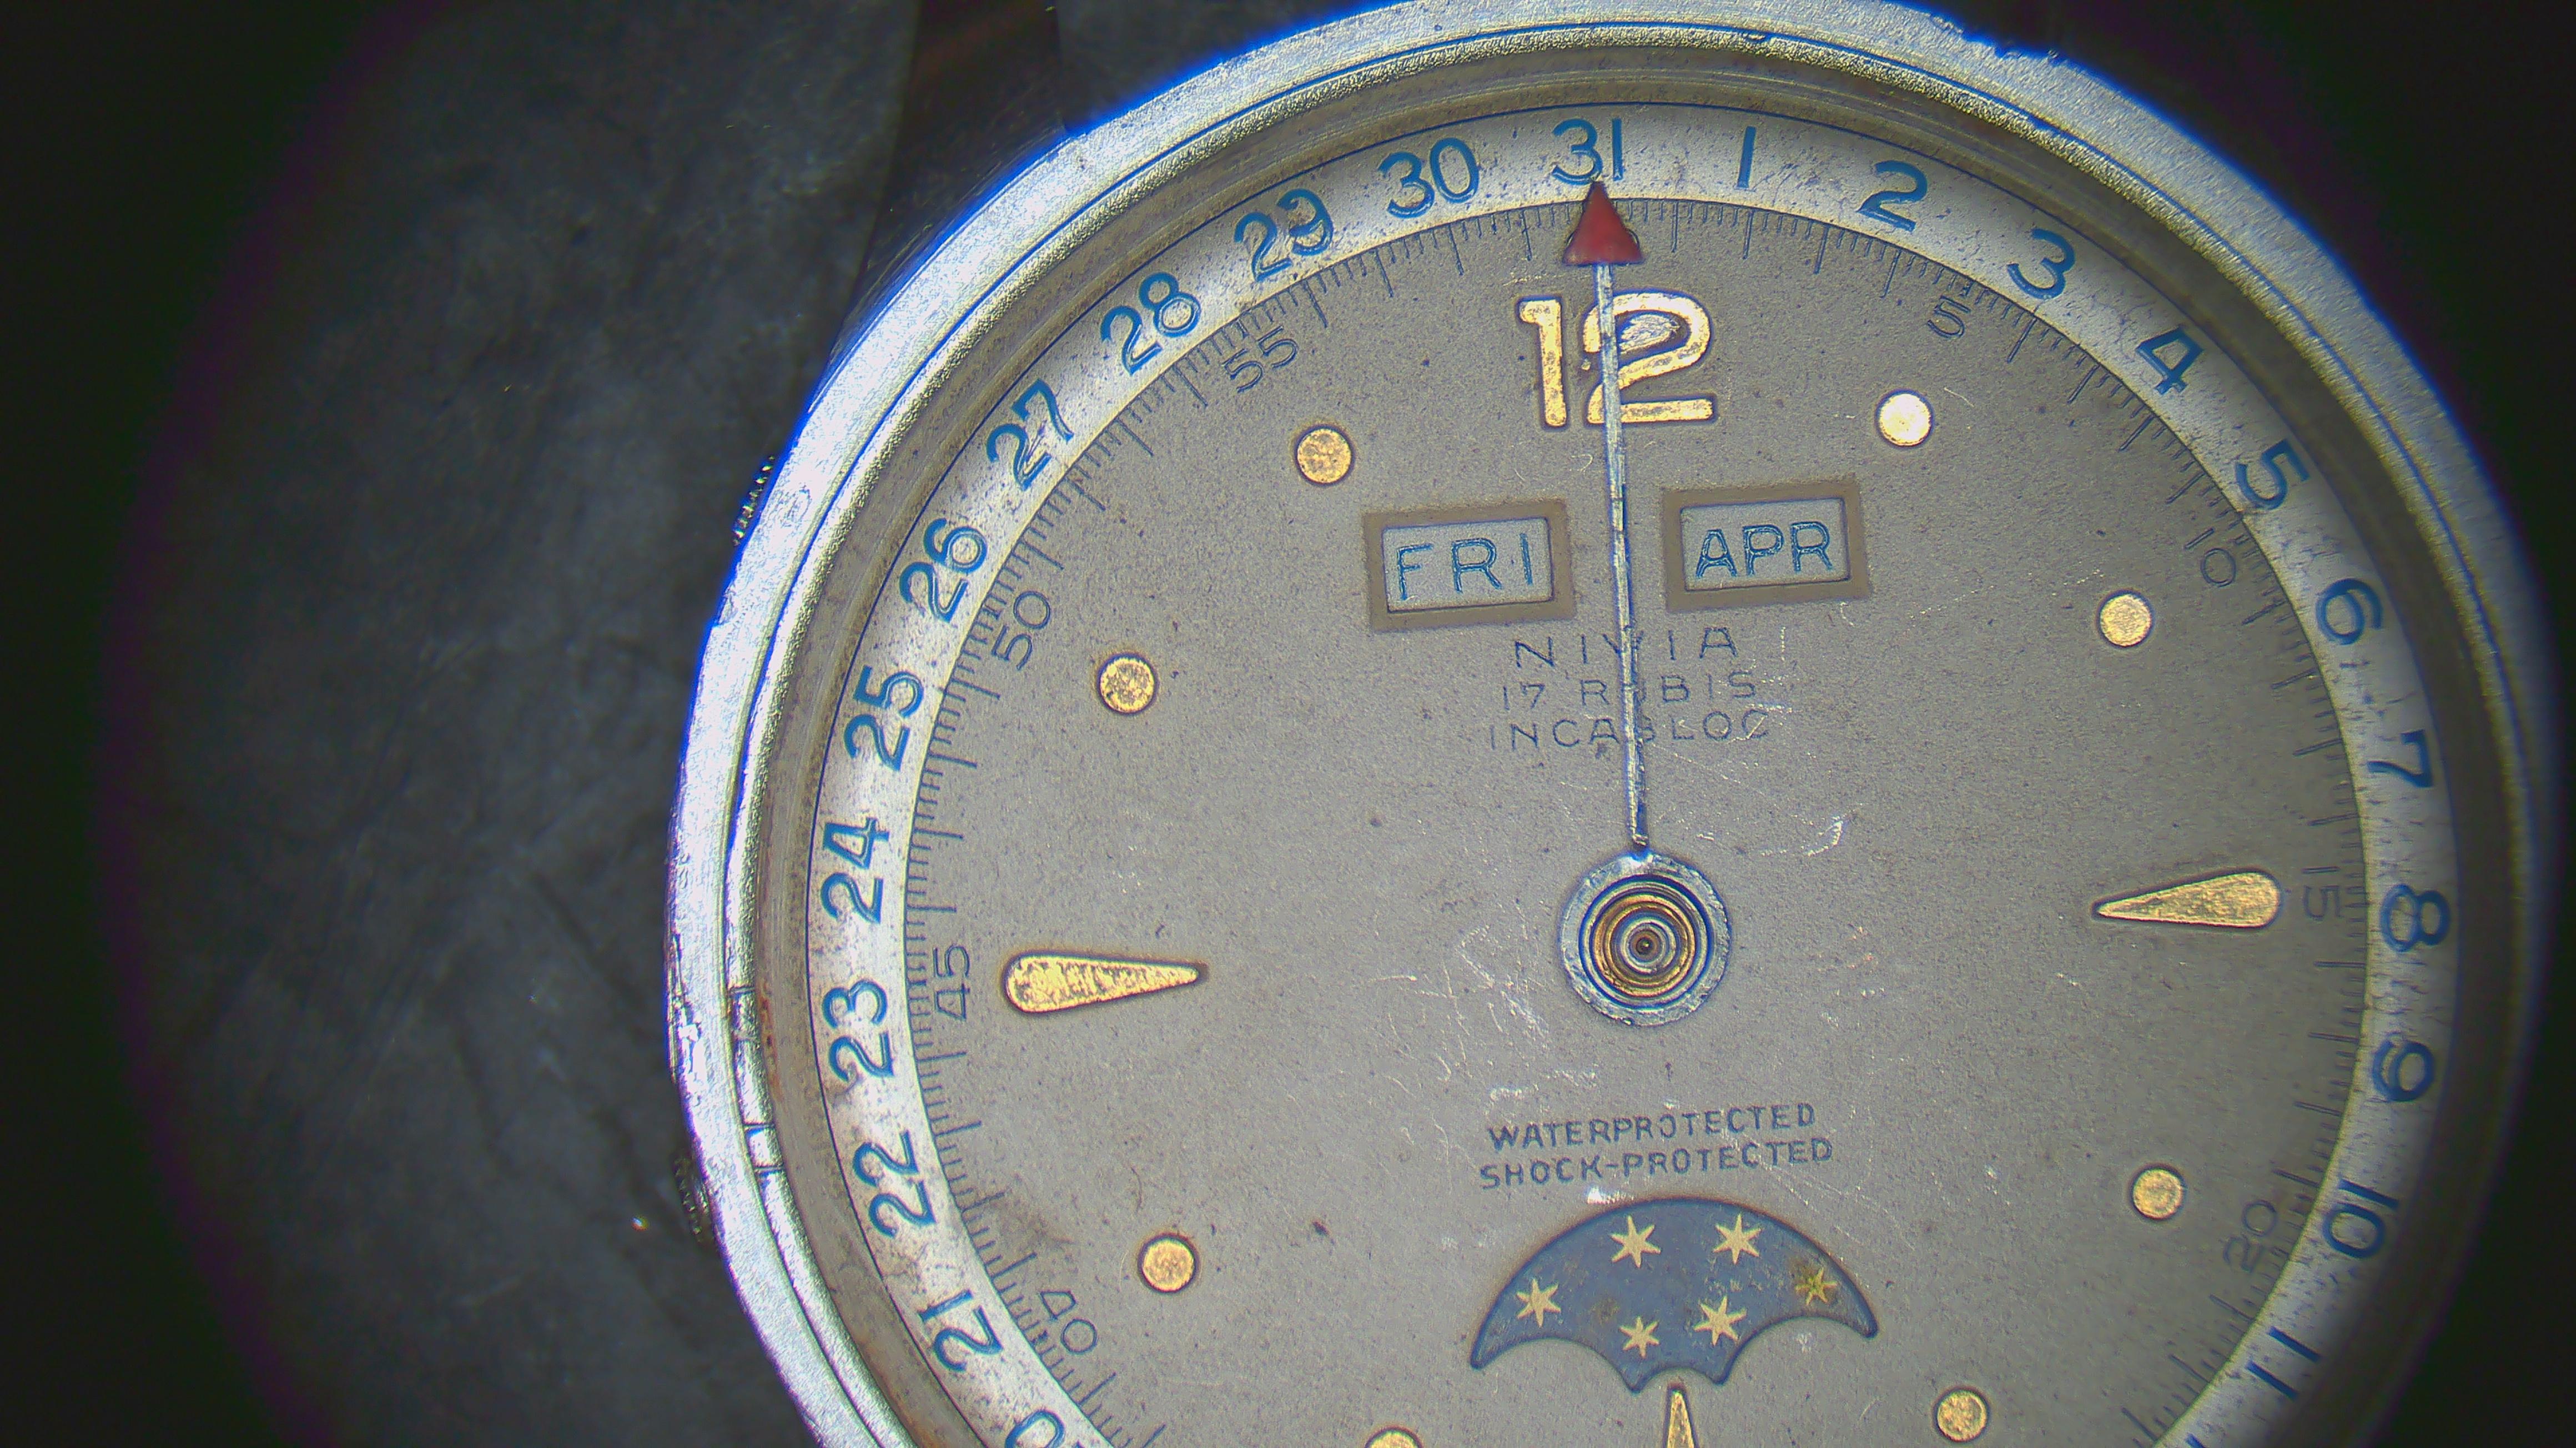
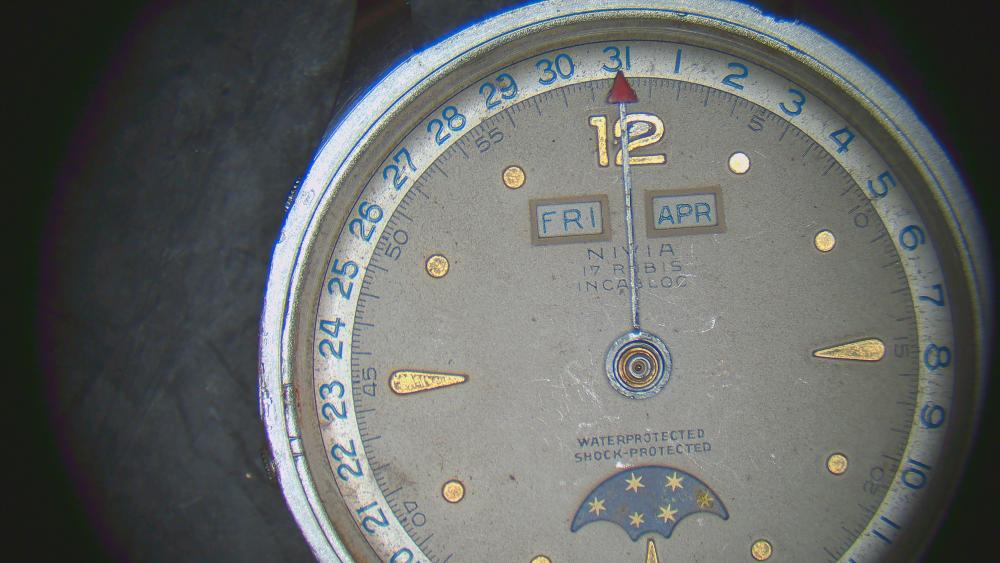
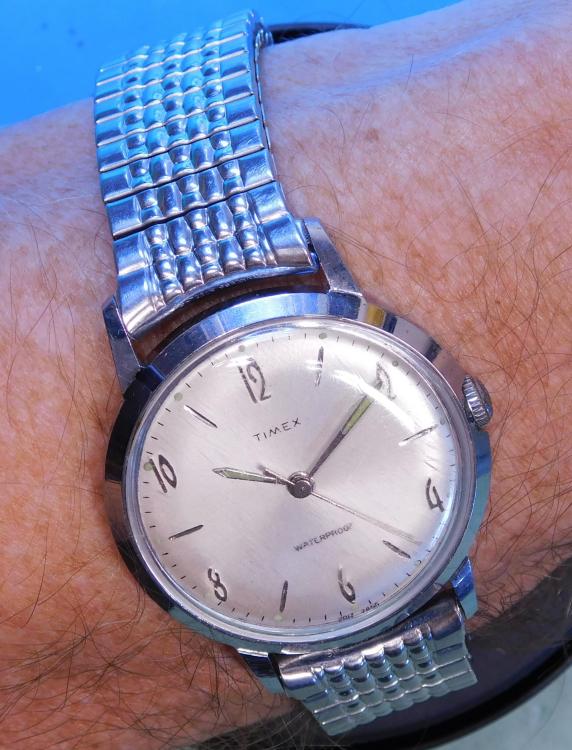
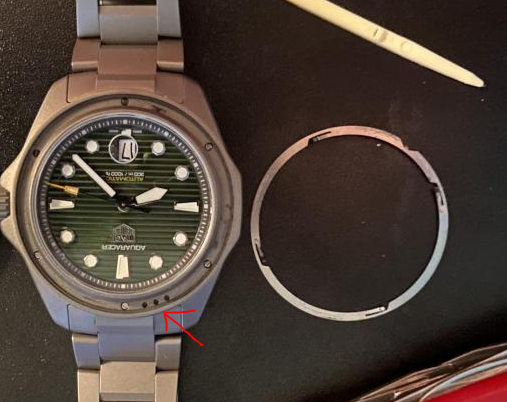
Picked up this morning in a lot of 10 for $25. Was $5 if I bought sperate. Pics as is then after 30 minutes or so. Numbers on the bottom of the dial are 2017 2466. Not sure this was ever serviced. The movement ring almost has a bakealite look to it. Wasn't running but did a little picking with an oiler and now running, albeit a bit slow. Love the hands and applied markers. Looks like no ingress of water as no rust. The bottom of the case and crown have what is probably sweat damage to the Chrome plating. The crystal need additional work or replacement. The bracelet is a period piece, but sized and flared out so not a one size fits most and damaging the lugs finish. It's in the ultra sonic for the first of several 10 minute treatments.


 2 points
 -
@nickelsilver Has given you really good instructions for checking for End shake problems. If we had the service guide you would find that Rolex is obsessed with end shake. If you start swapping out components especially anything resembling aftermarket you'll have to fit every single one and make sure that they actually do fit. Yes I know it's a Rolex is supposed to perfect but still things need to be adjusted in Rolex watches.2 points
-
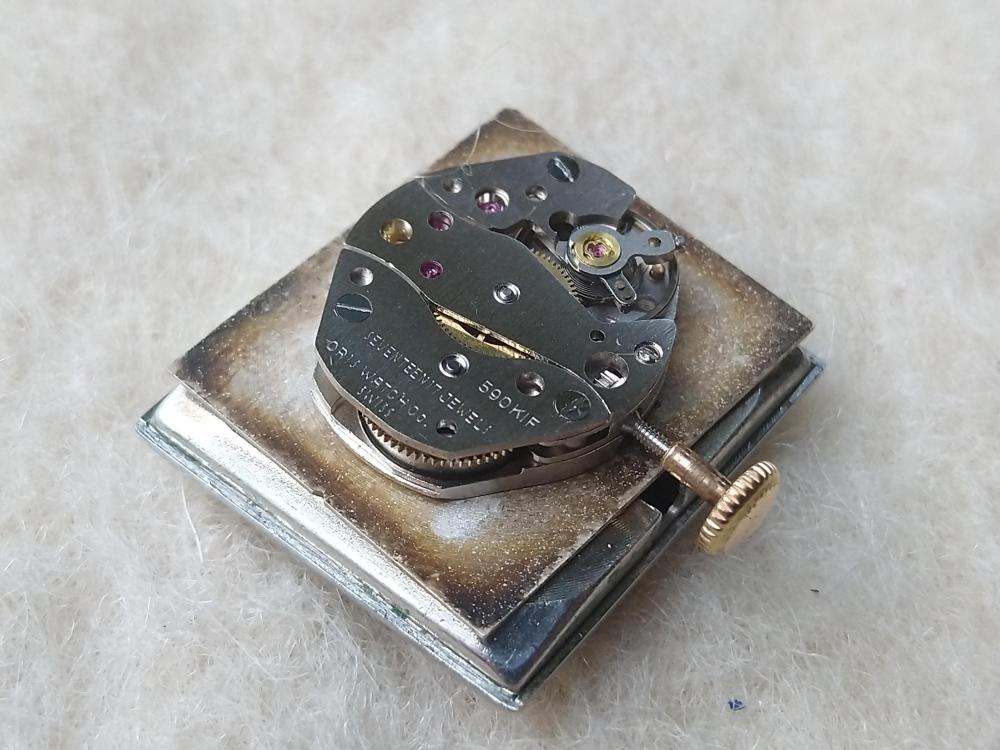
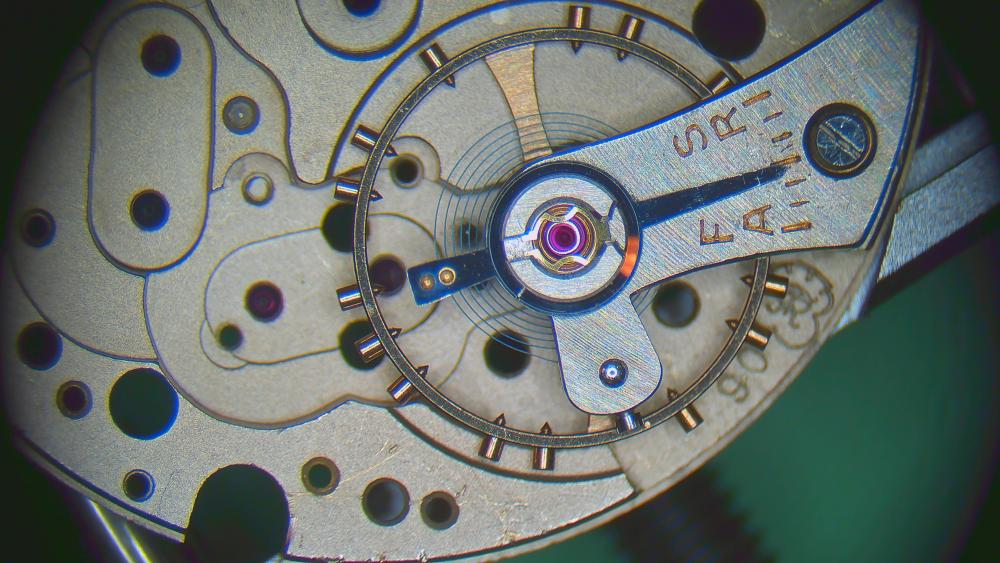
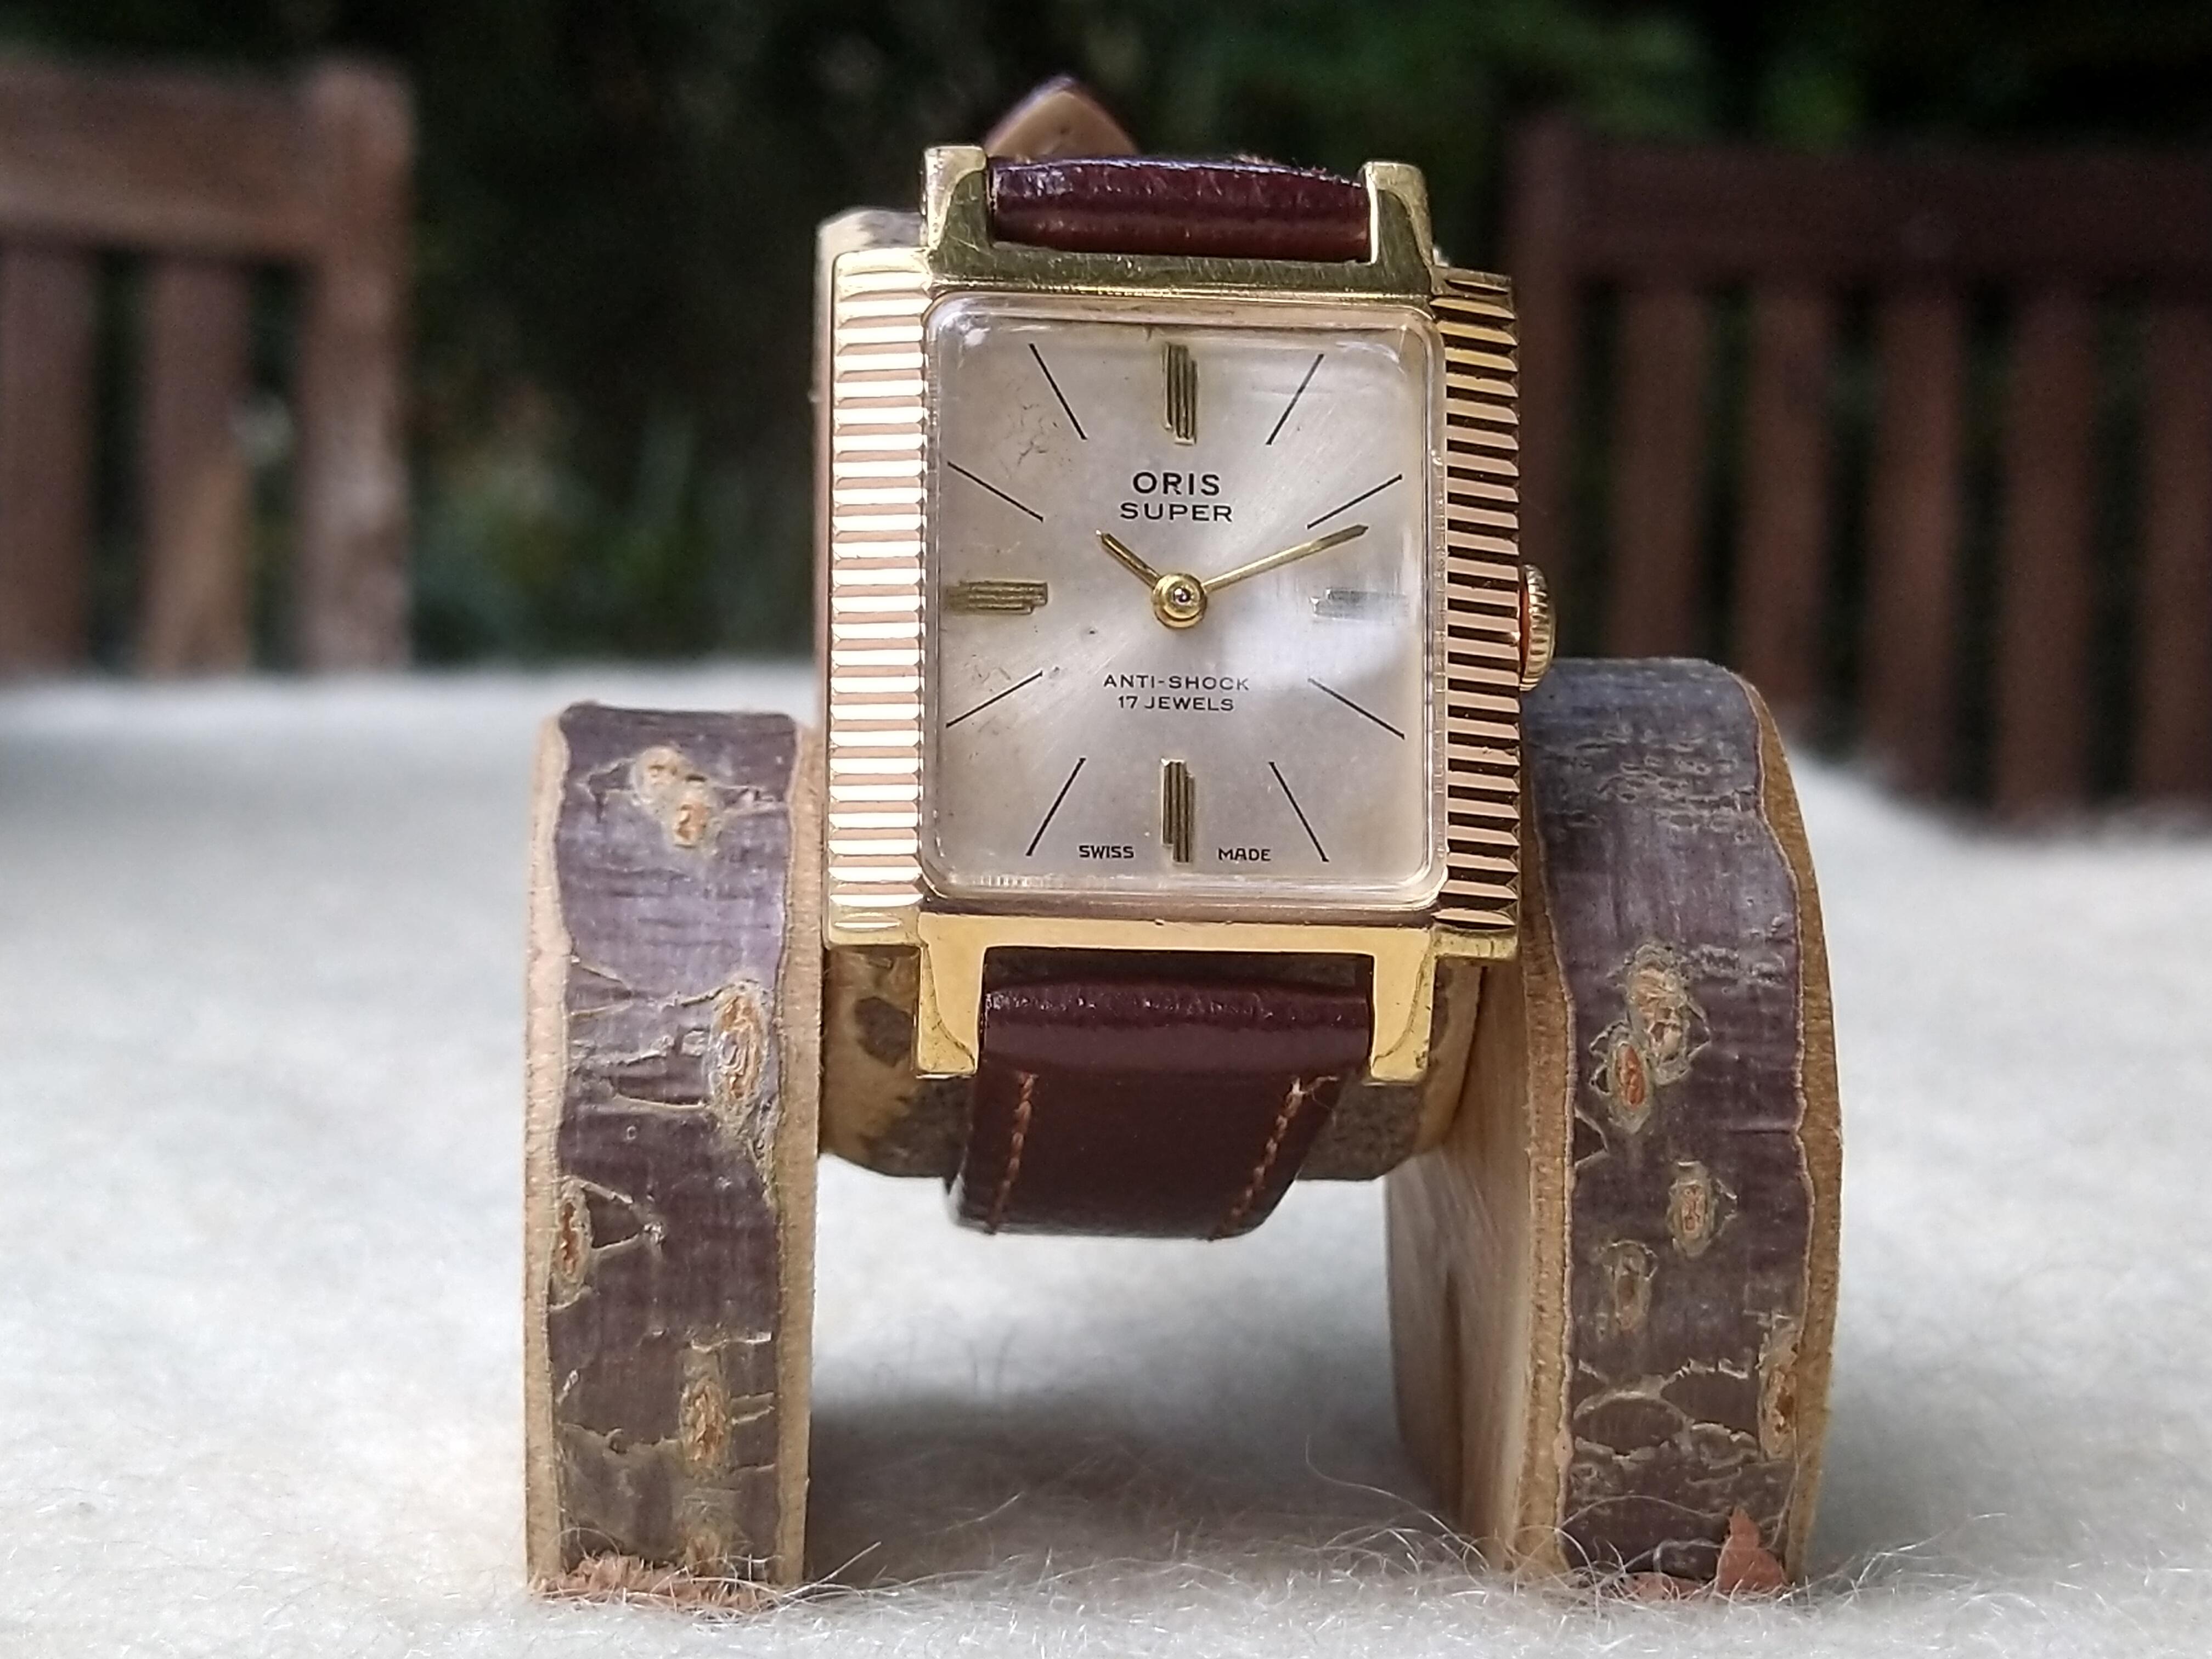
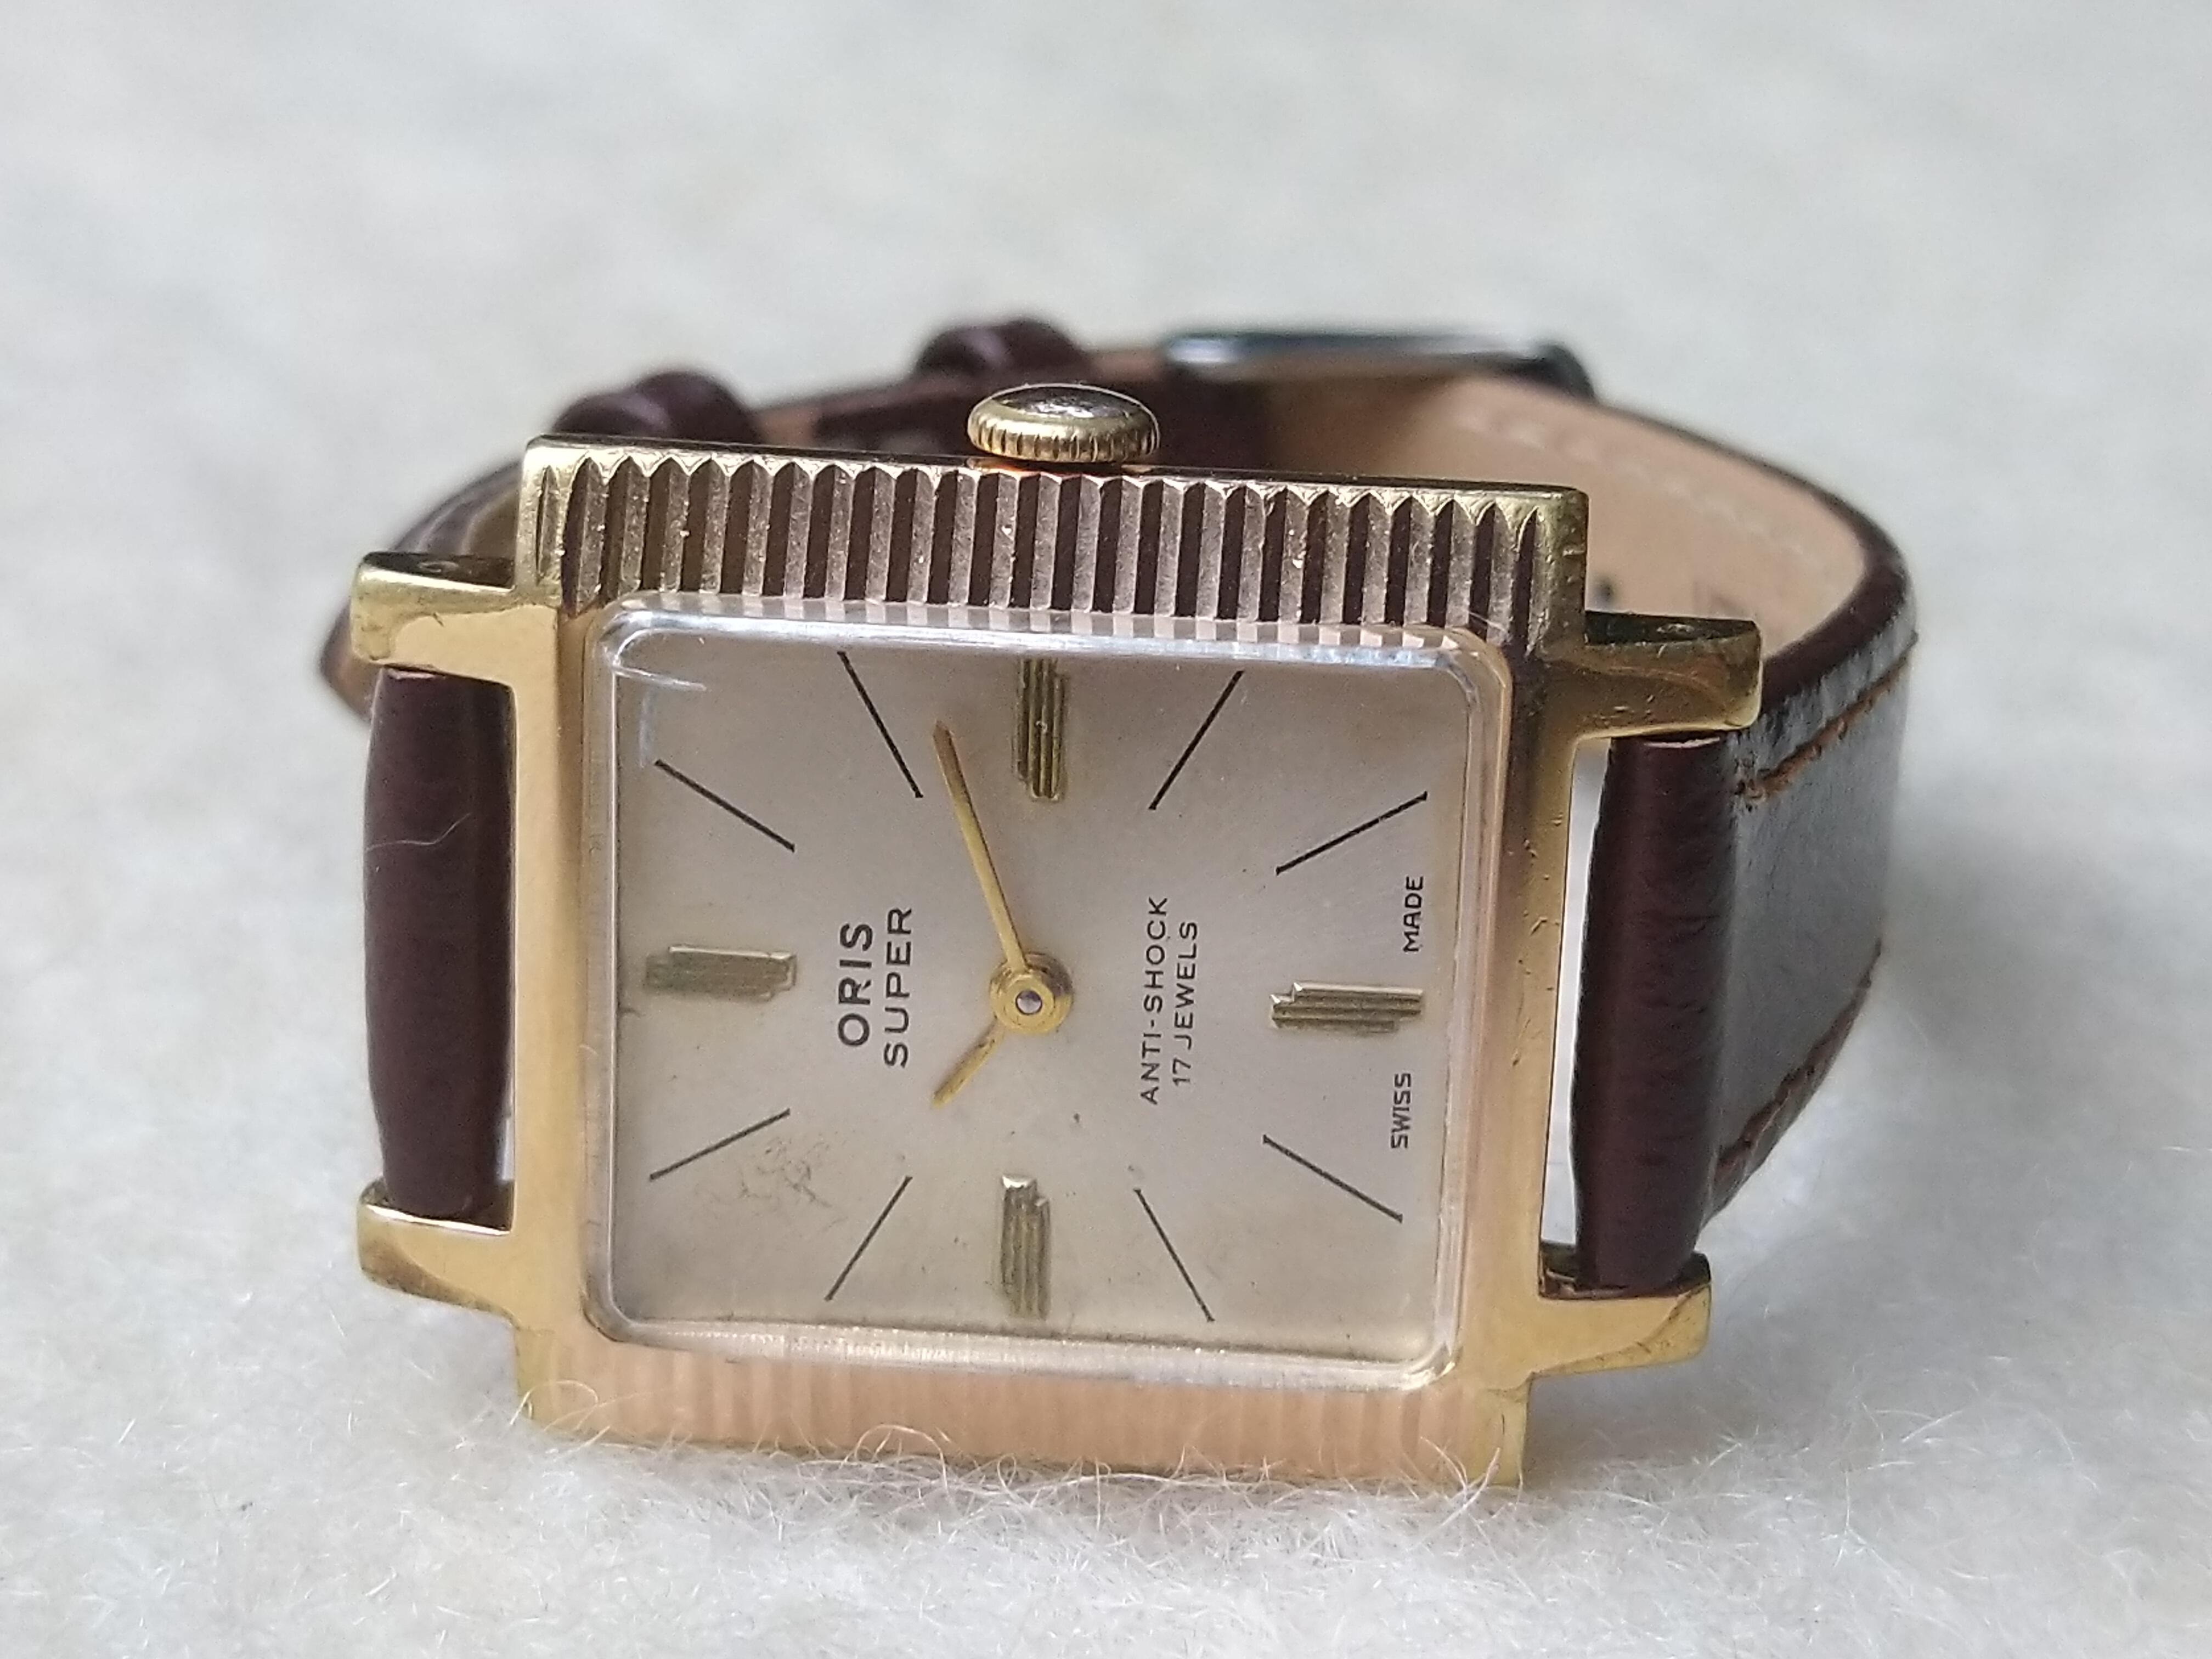
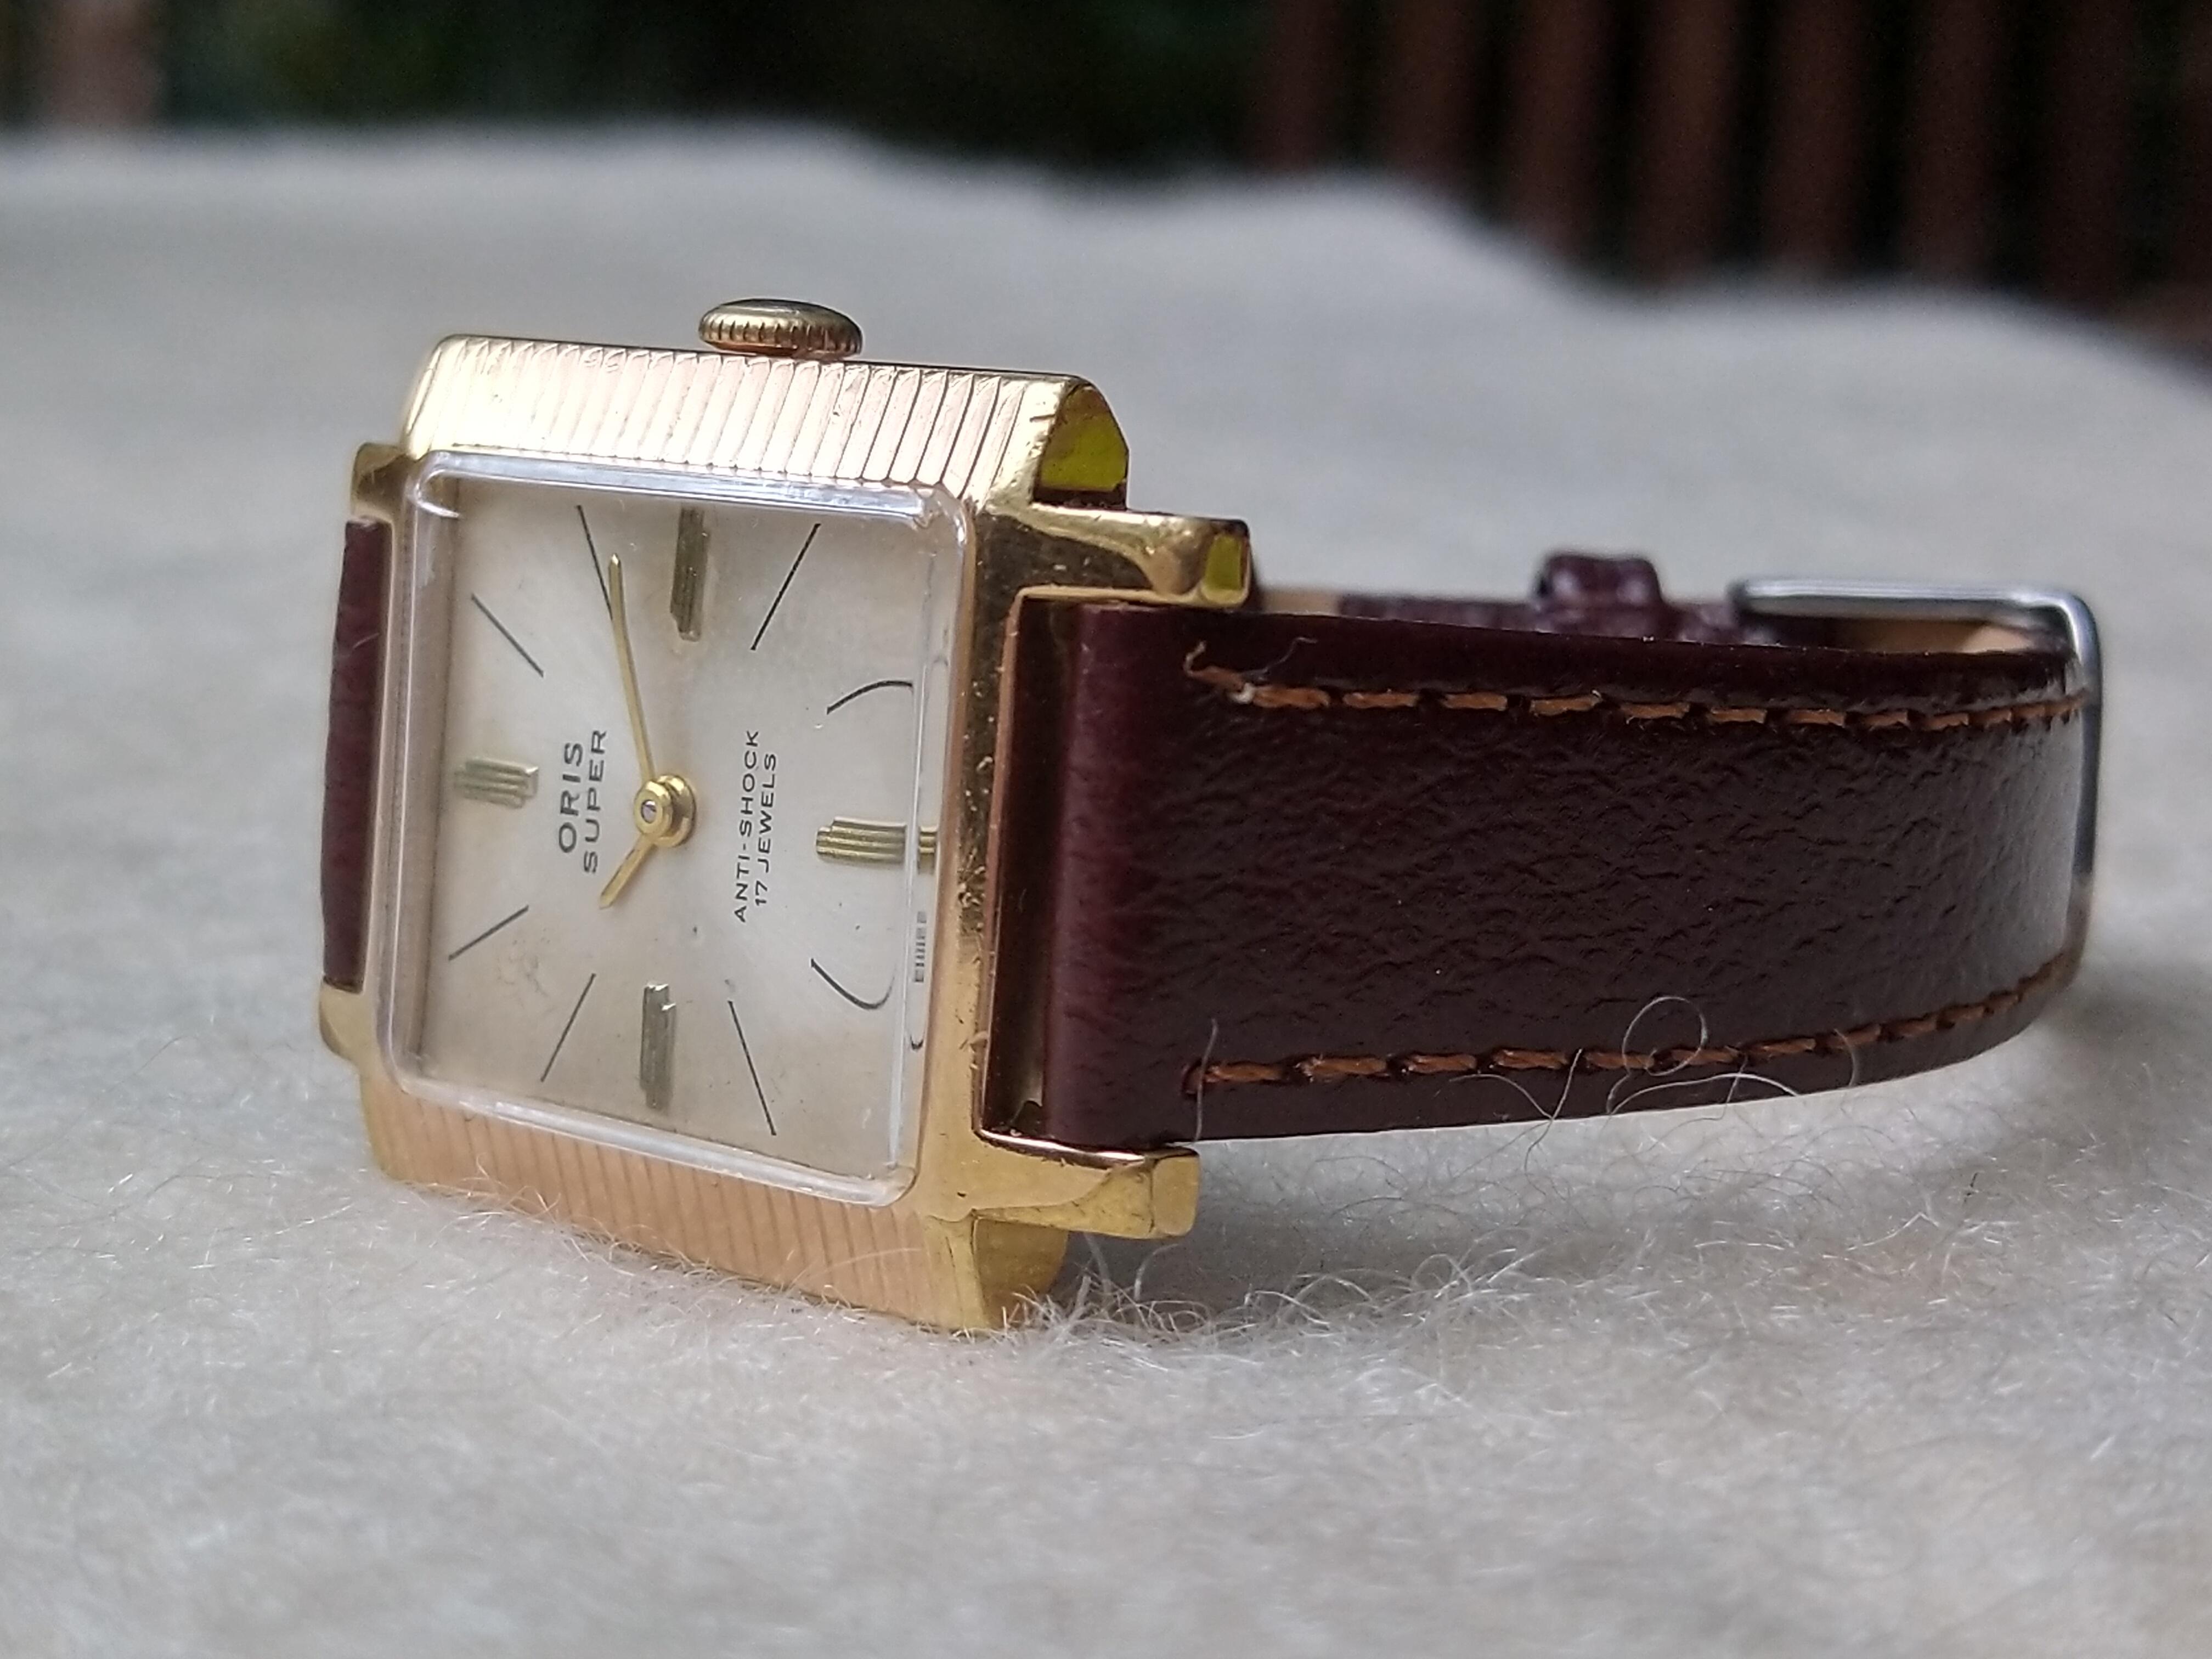
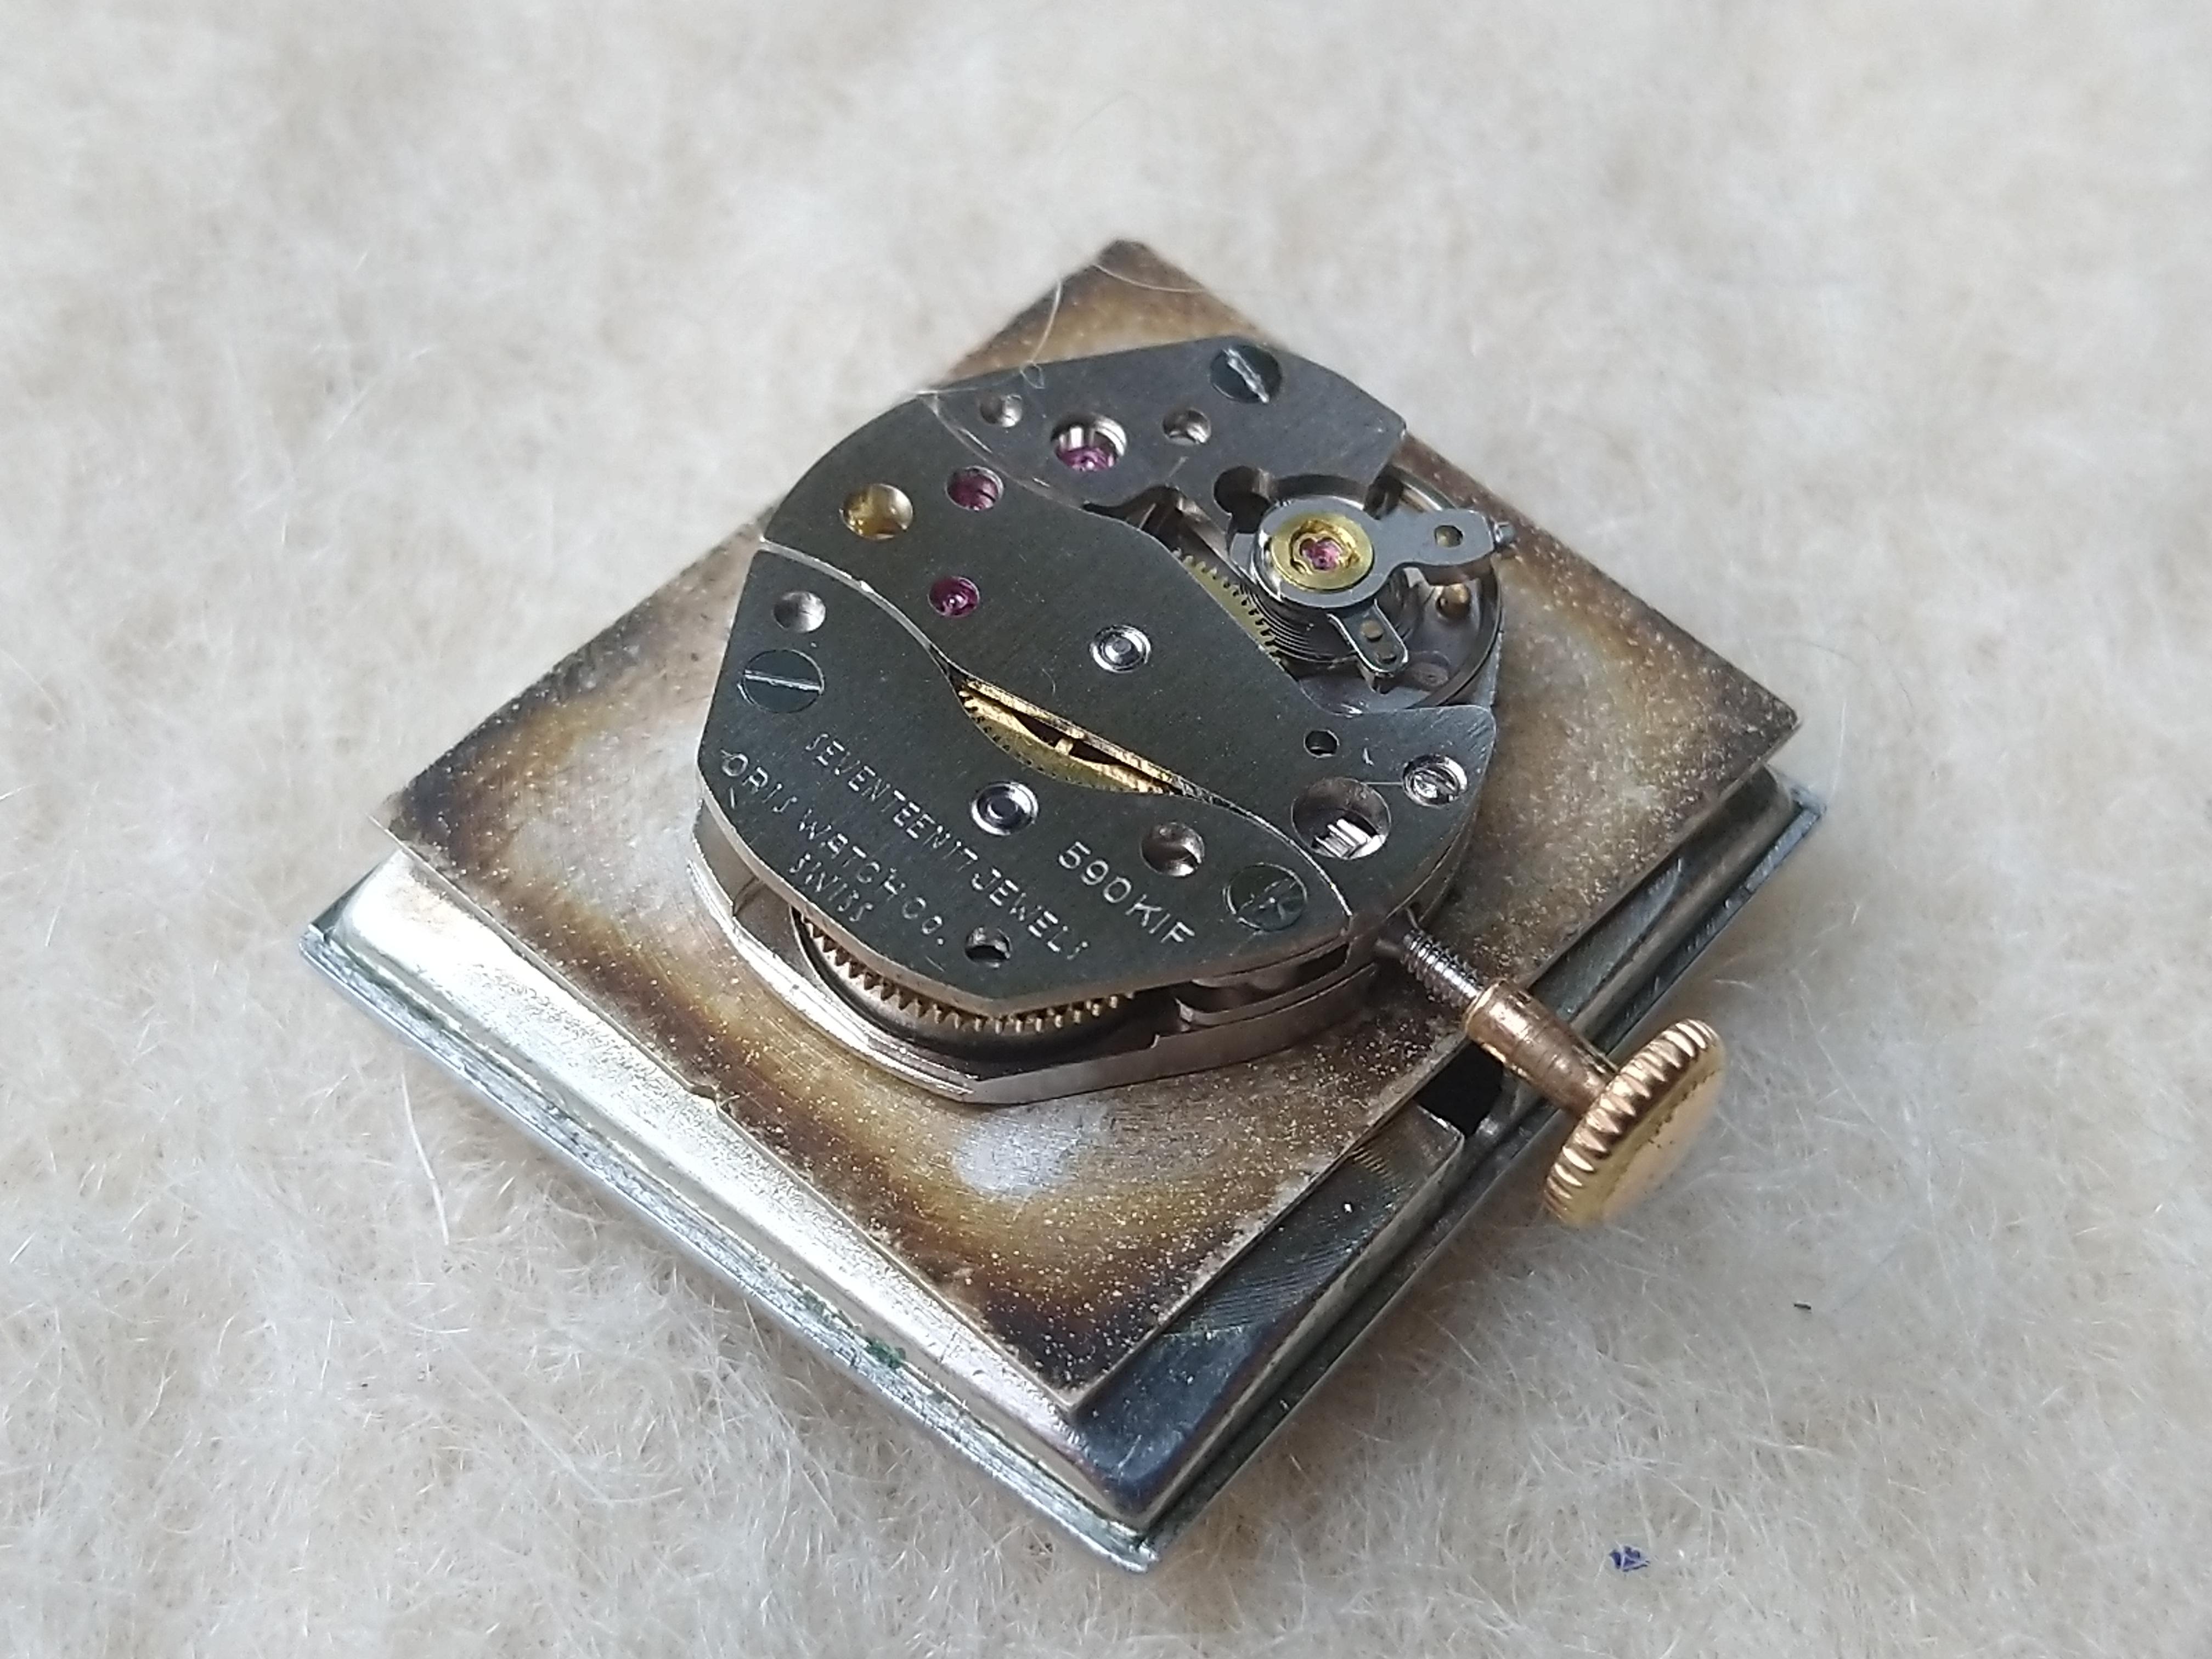
HWGIKE#18 Oris 590 KIF After a full service it has an excellent performance, zero beat error and the amplitude is above 300 almost fully wound though. Pin pallet. No mistakes were made. I only took the pictures, my apprentice did everything.


 2 points
 -
If it only ran for 8 hours or so then stopped there is definitely something wrong that has nothing to do with your winding of it. It should run for about 38 hours on a full wind. If you're lucky it may just need a service. The likely reason you can only give it 8 or 10 winds is that the mainspring is still about 3/4 wound and the real question is why is it stopping with so much power still in the mainspring.2 points
-
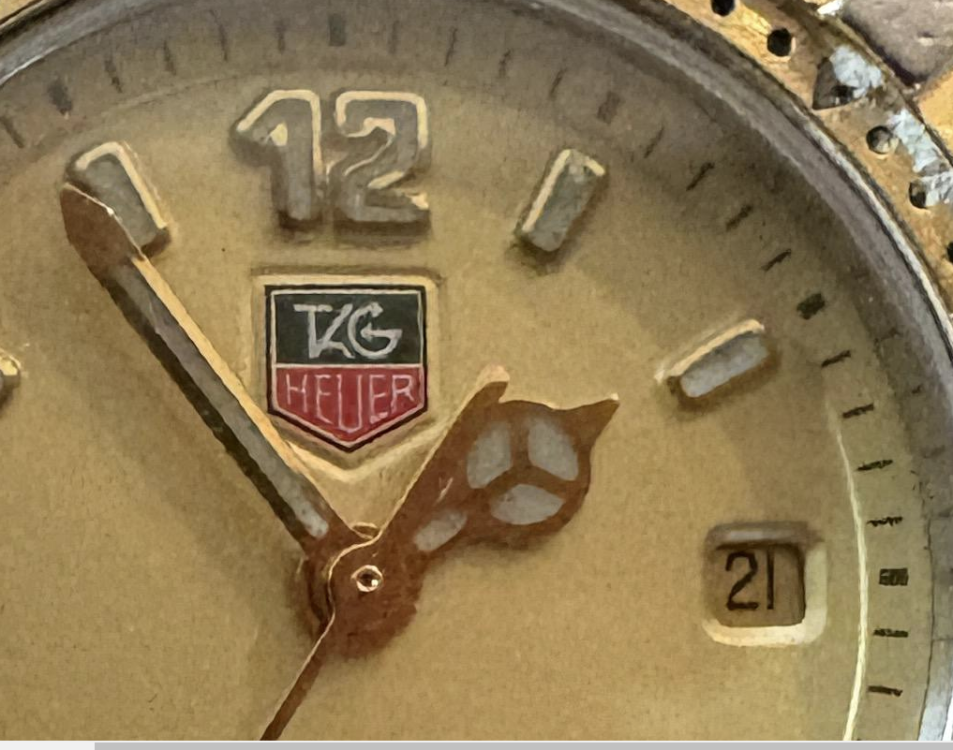
The quality on the dial, hands and bezel isn't their for a genuine. I'd be interested to see the back, clasp and crown. As @Neverenoughwatches said the movement would also confirm this. Edit The Date Window is also incorrect.
 2 points
 -
Update: cannot beleive that cousins had this exact acrylic! Now working on the correct crown 1.2mm or tap 7, I thought..seems Japanese style crown sizes are more straight forward and tap 12 is 1.2mm...

 2 points
 -
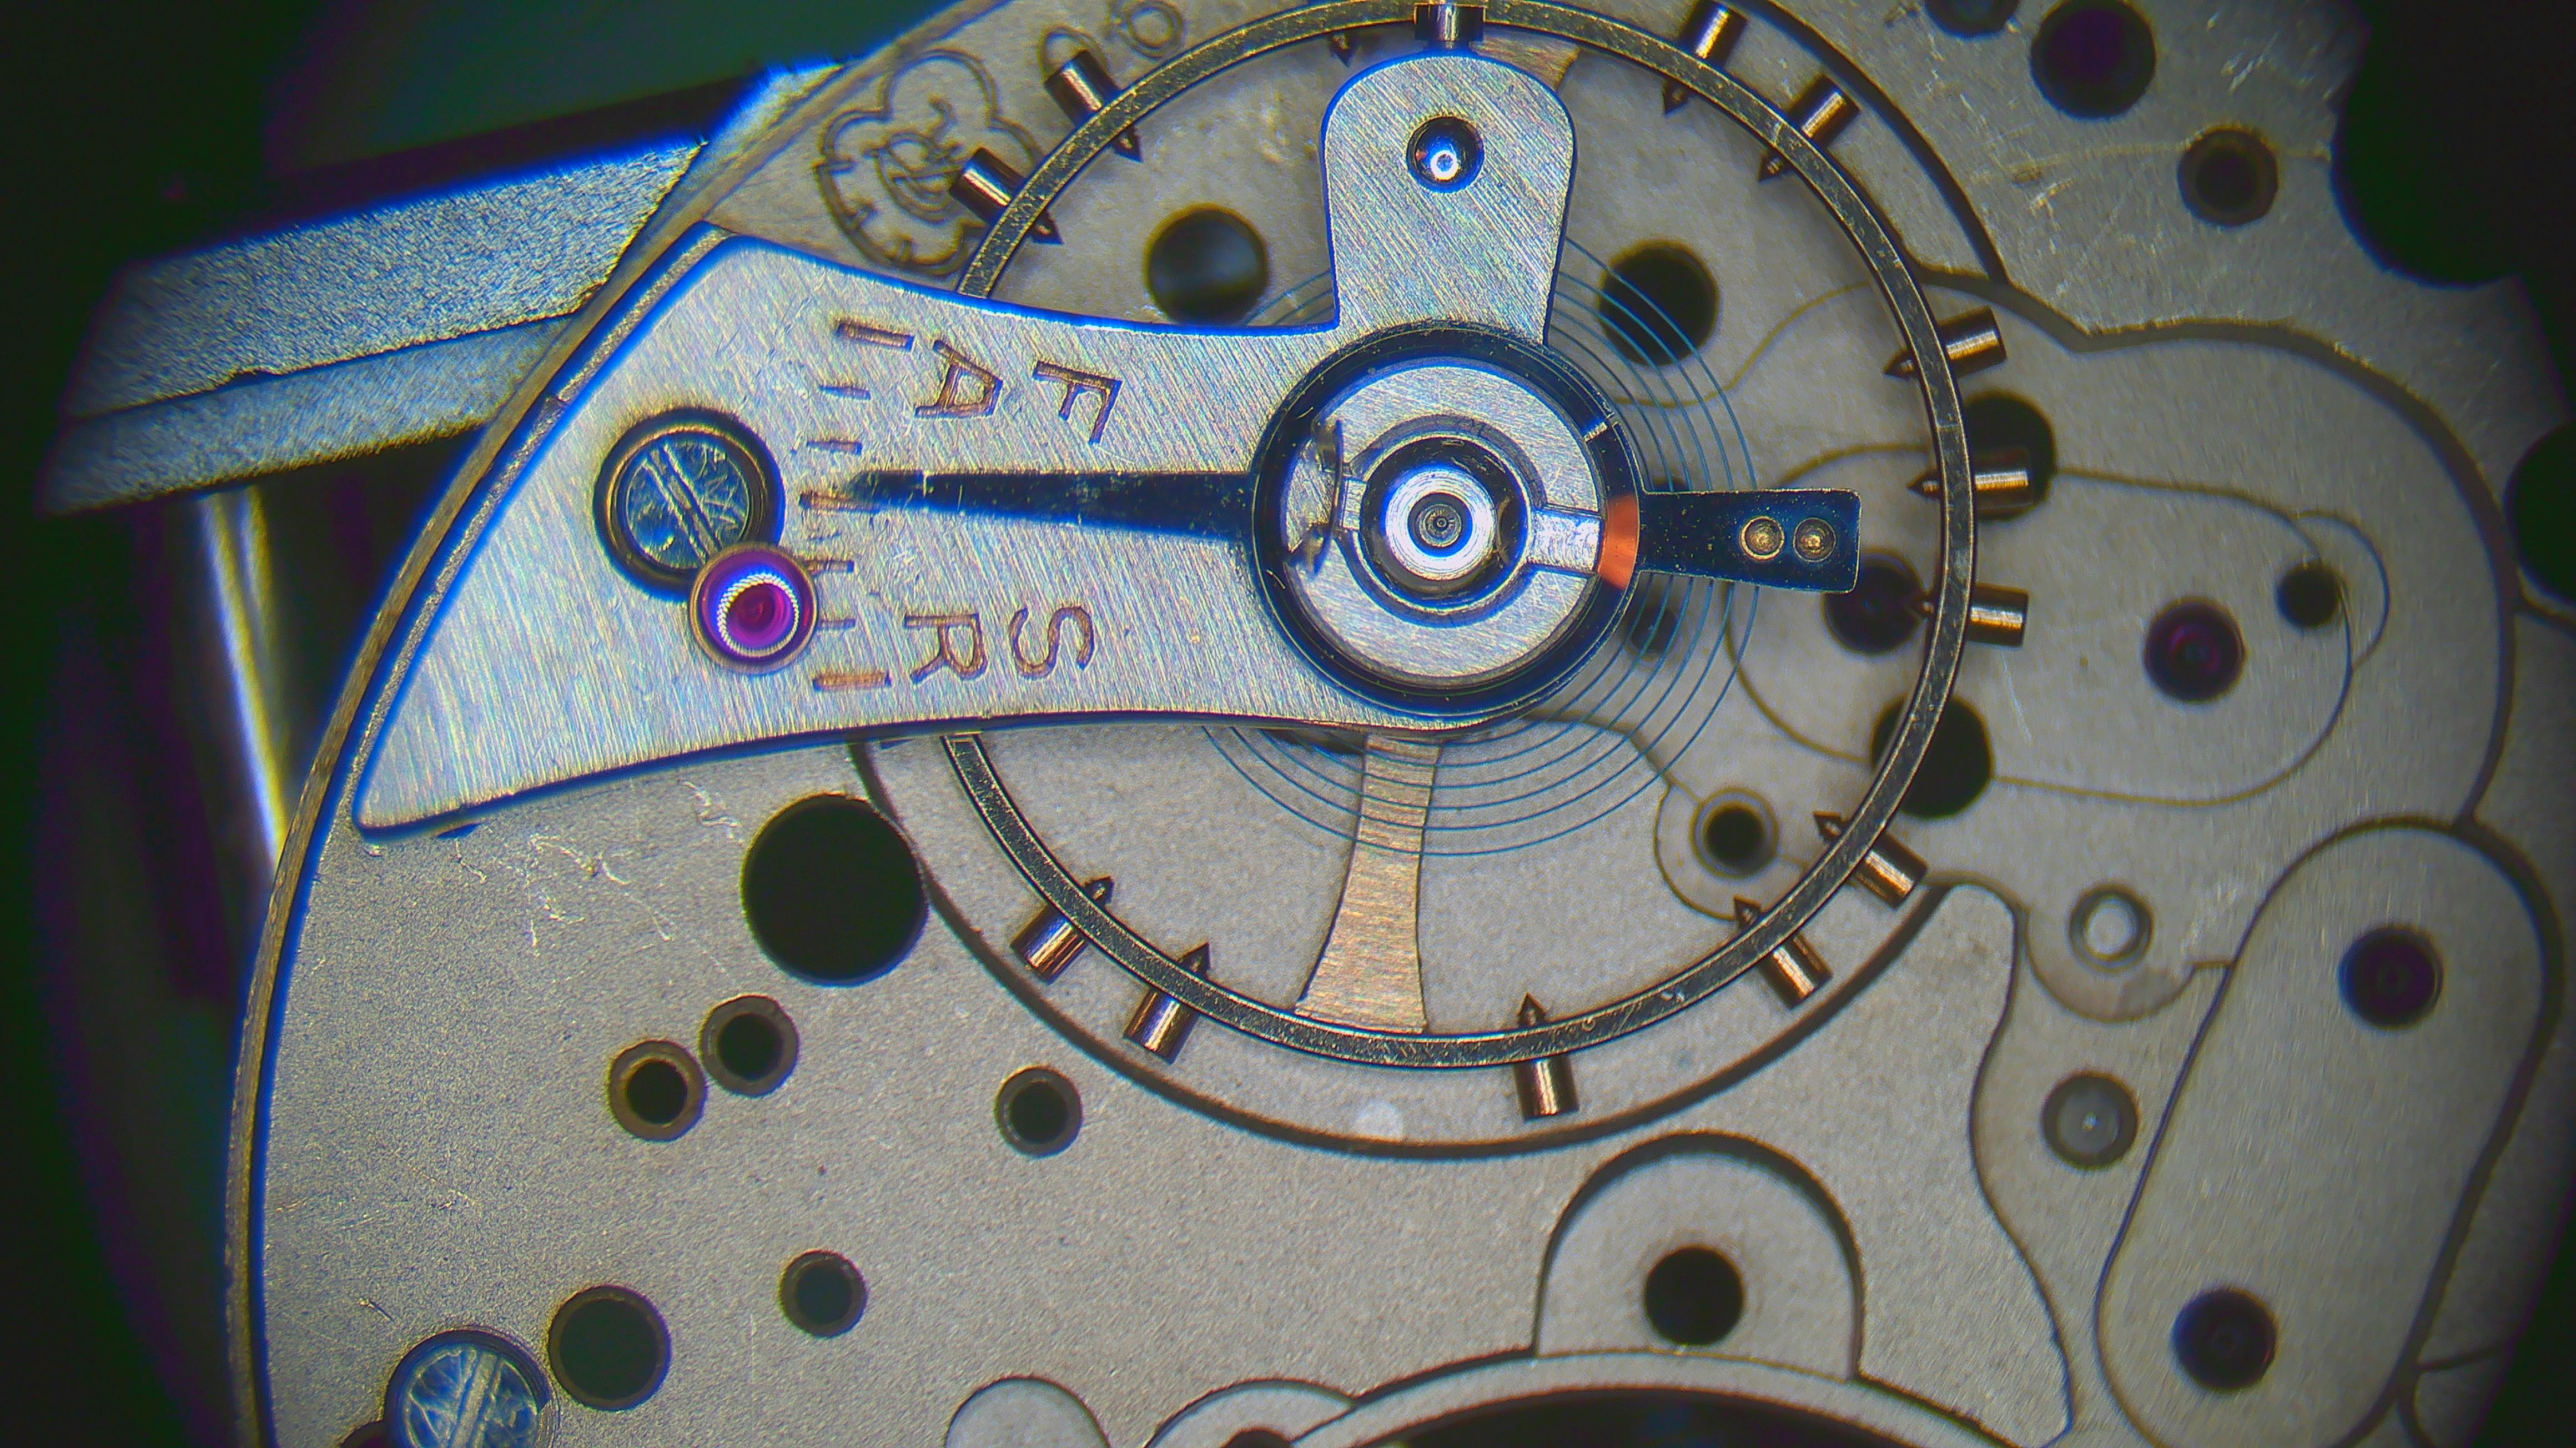
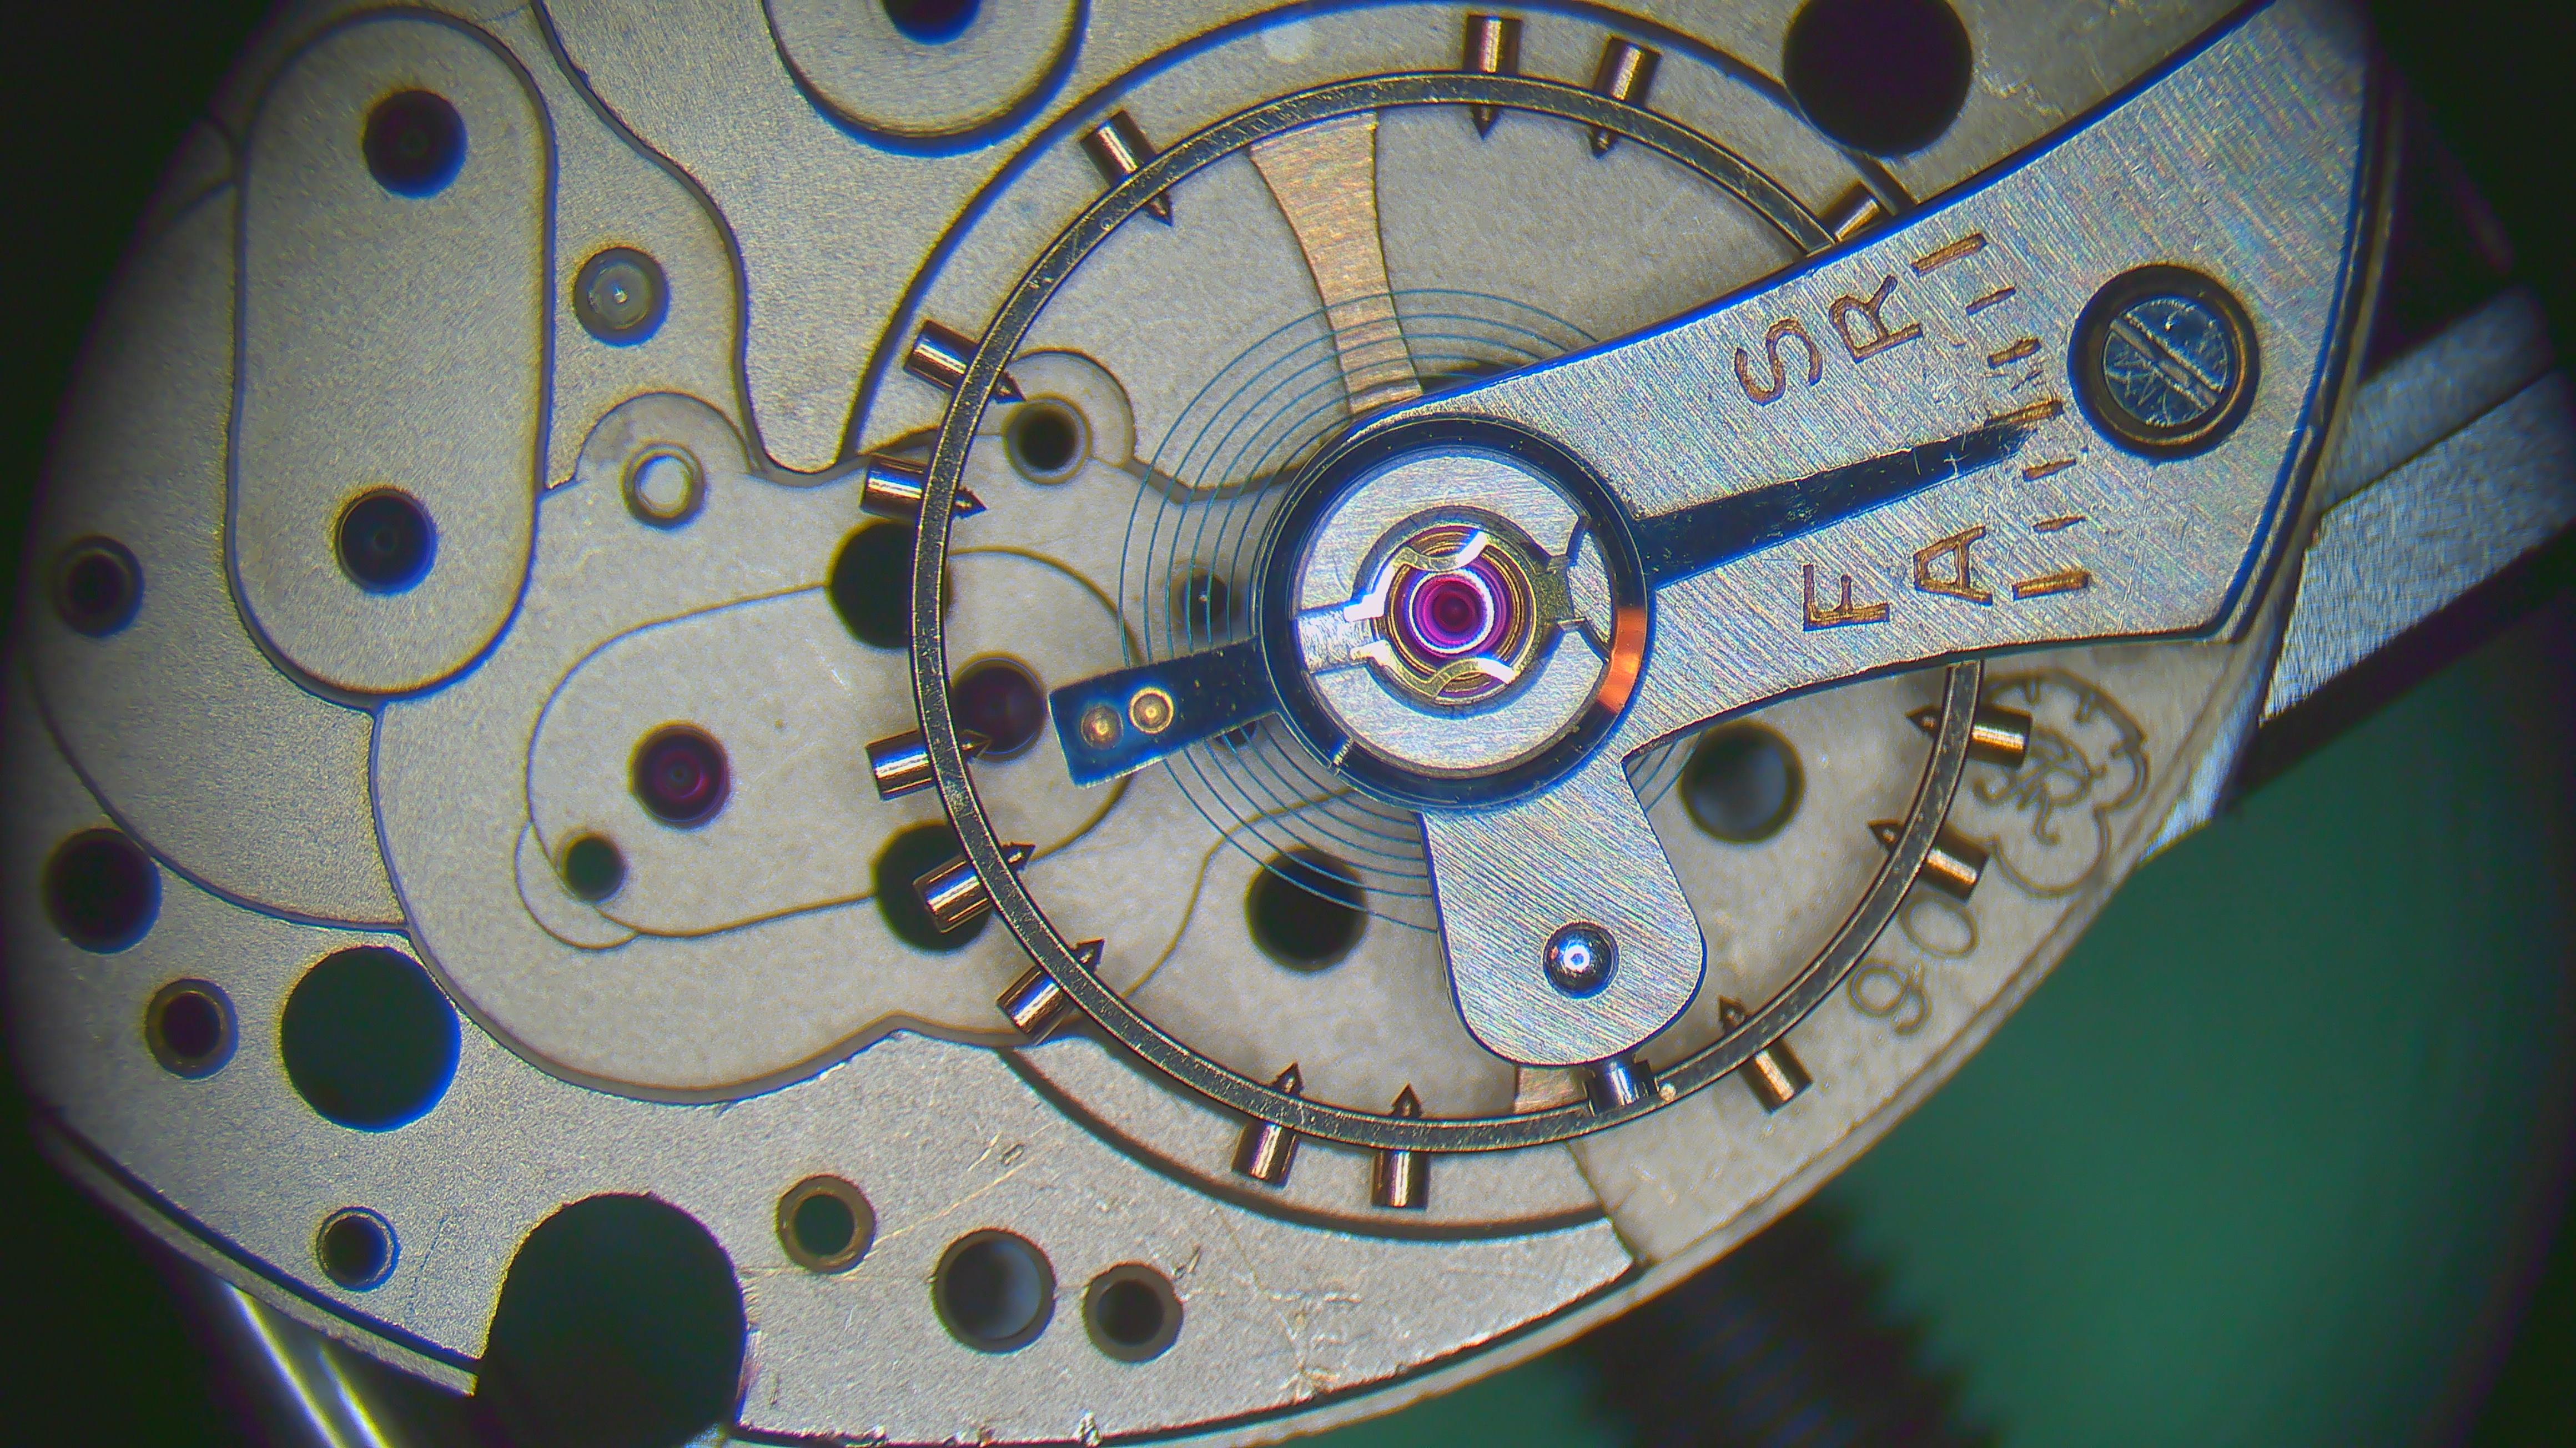
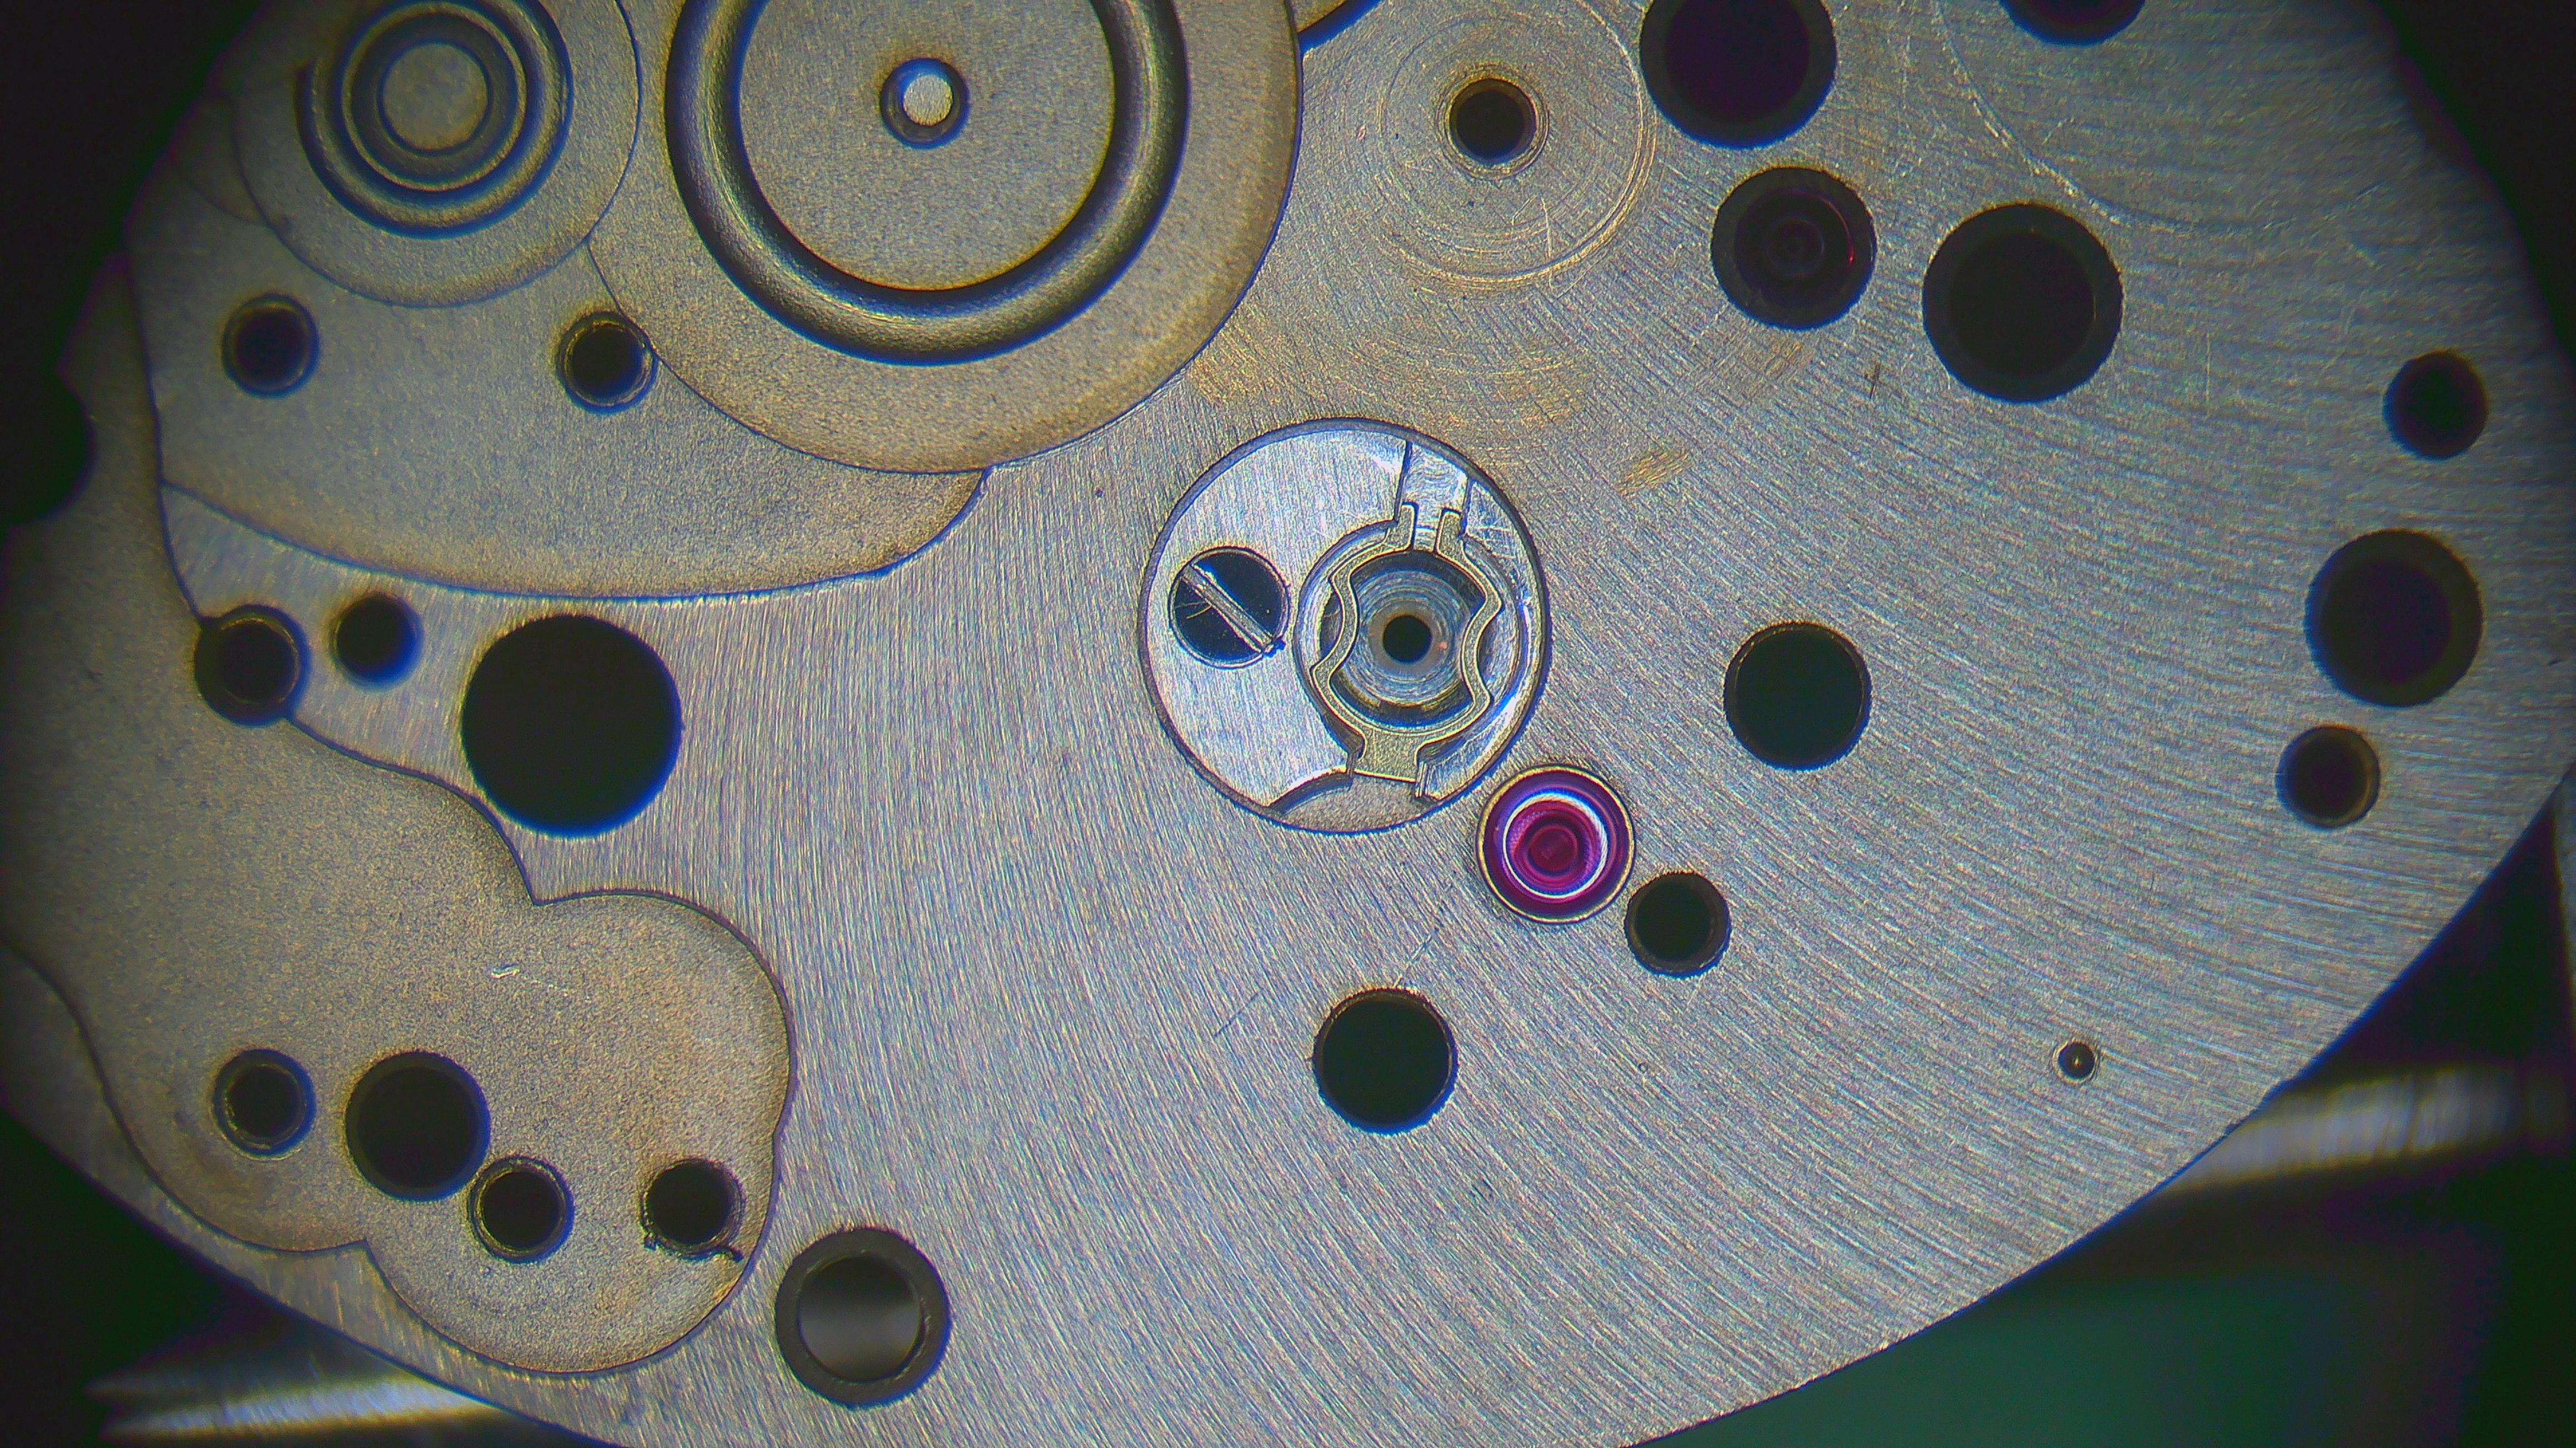
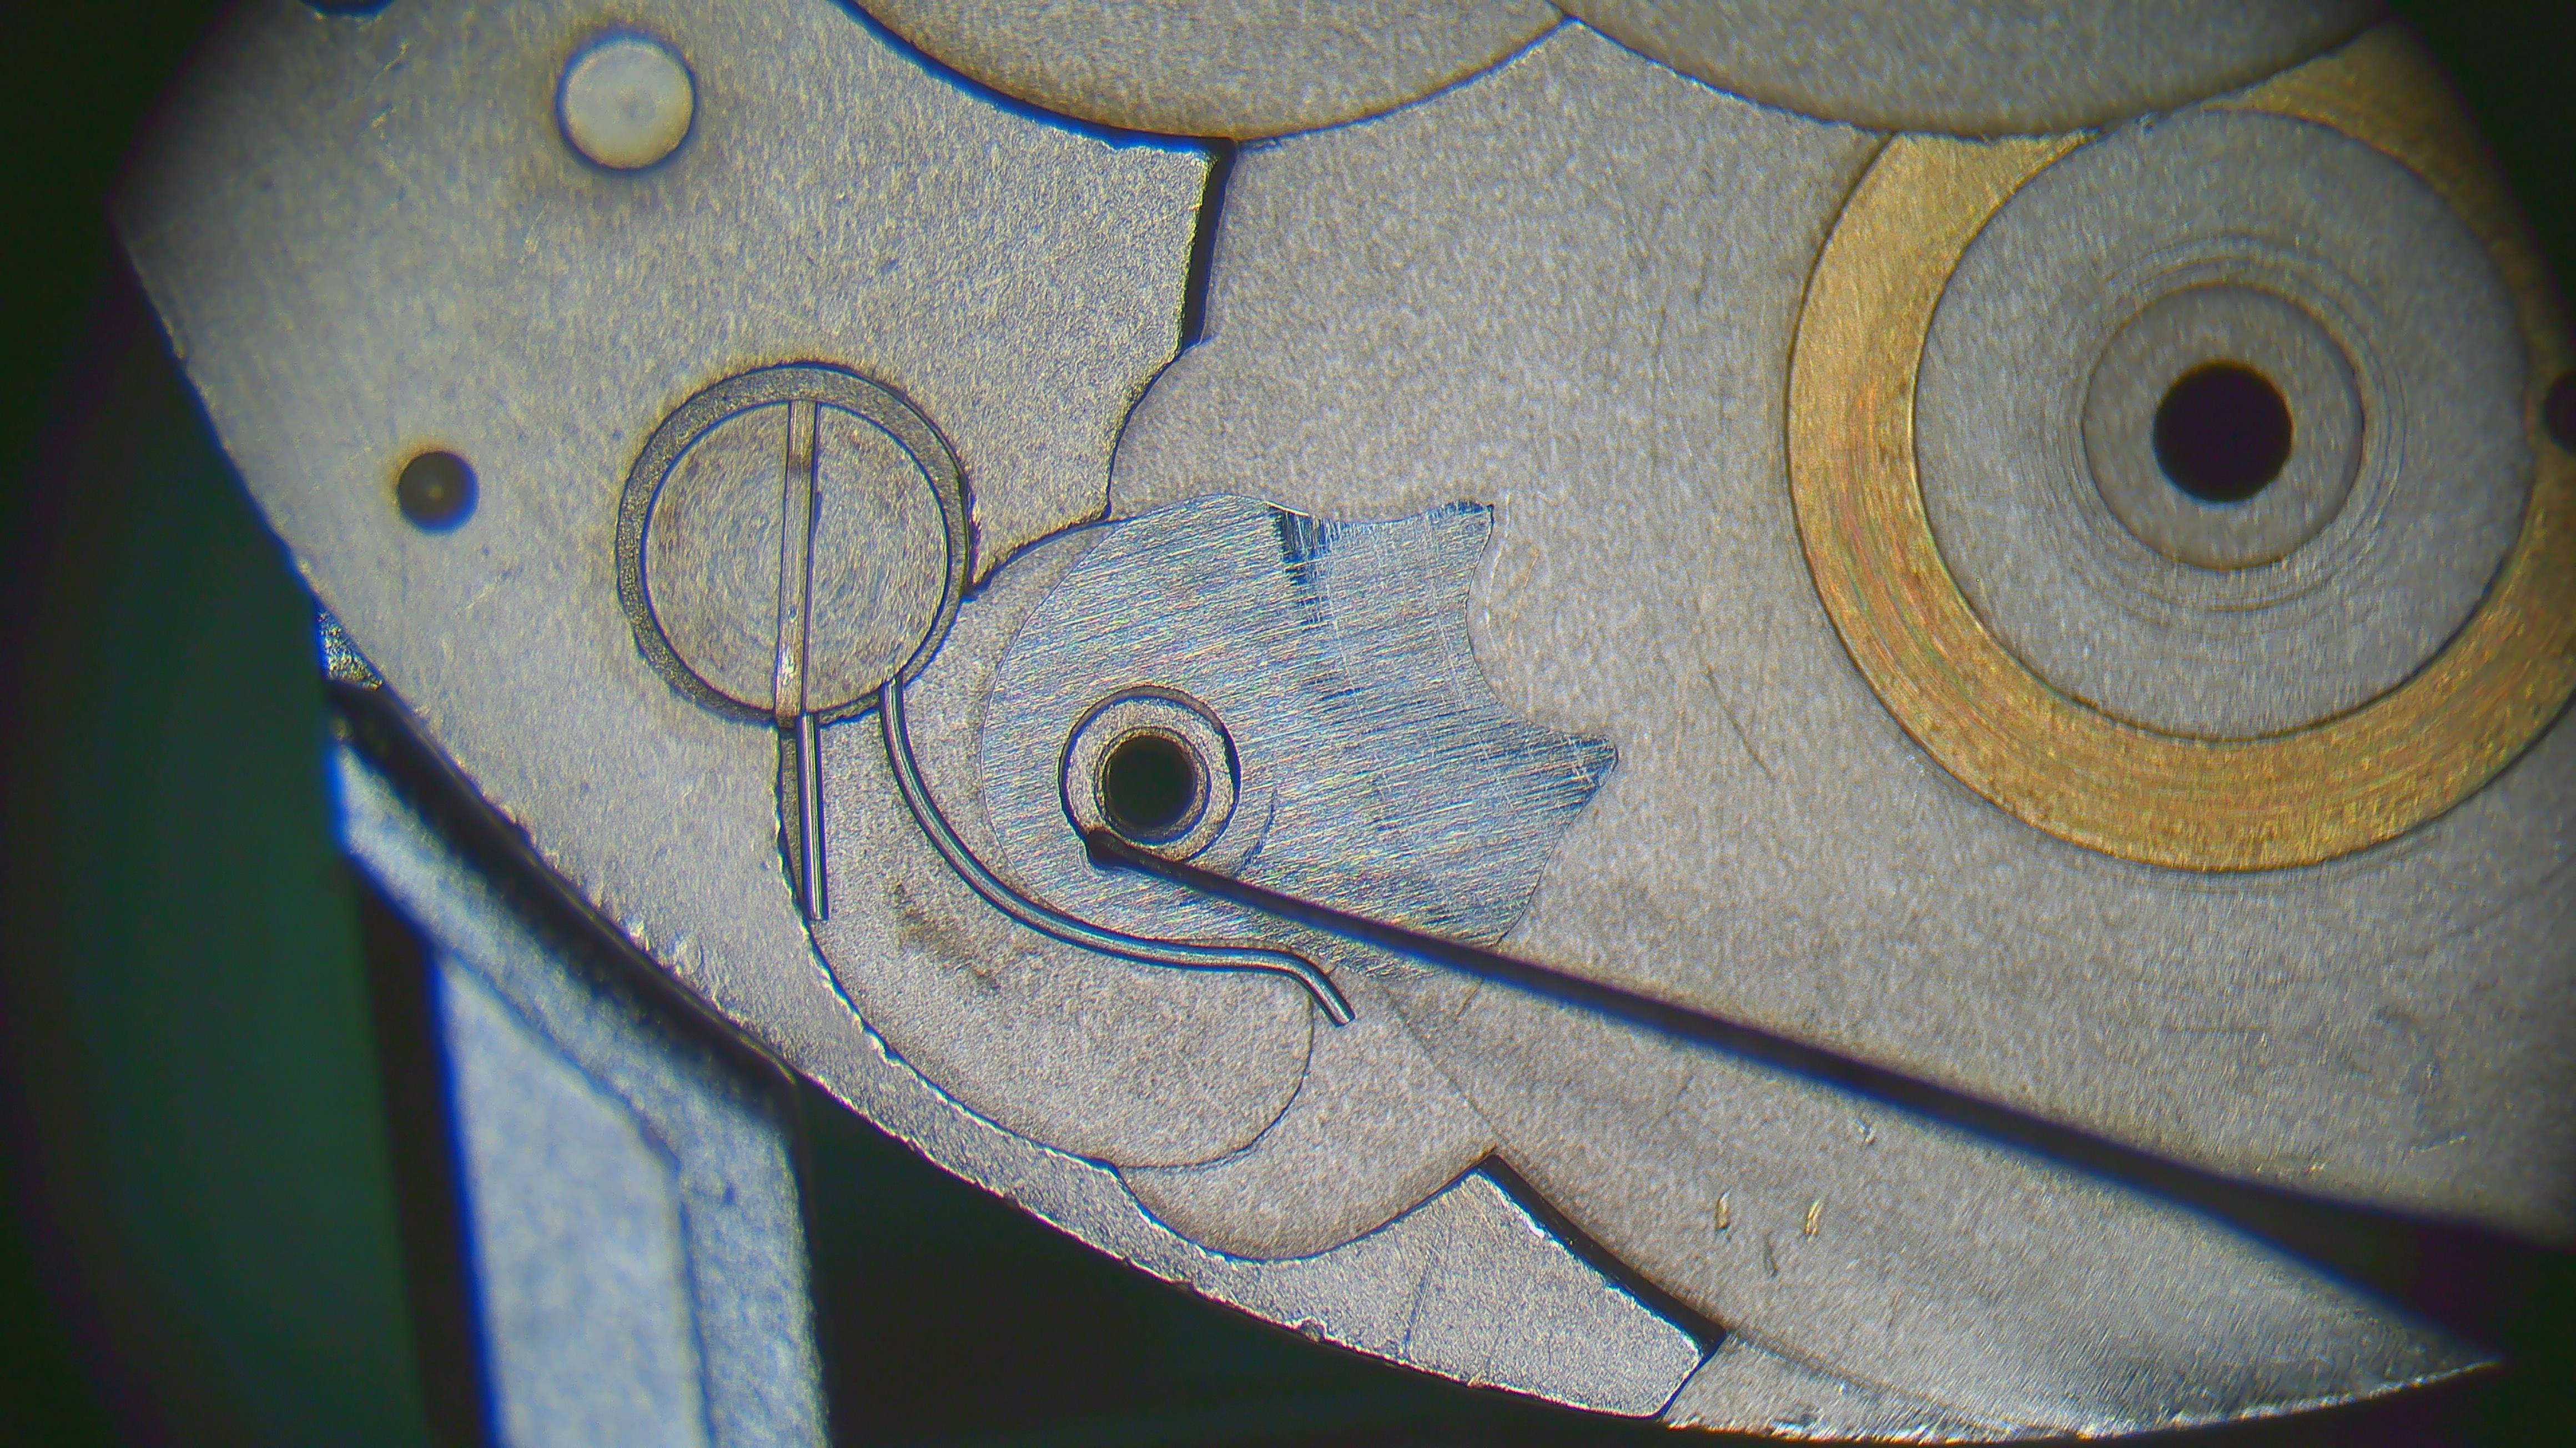
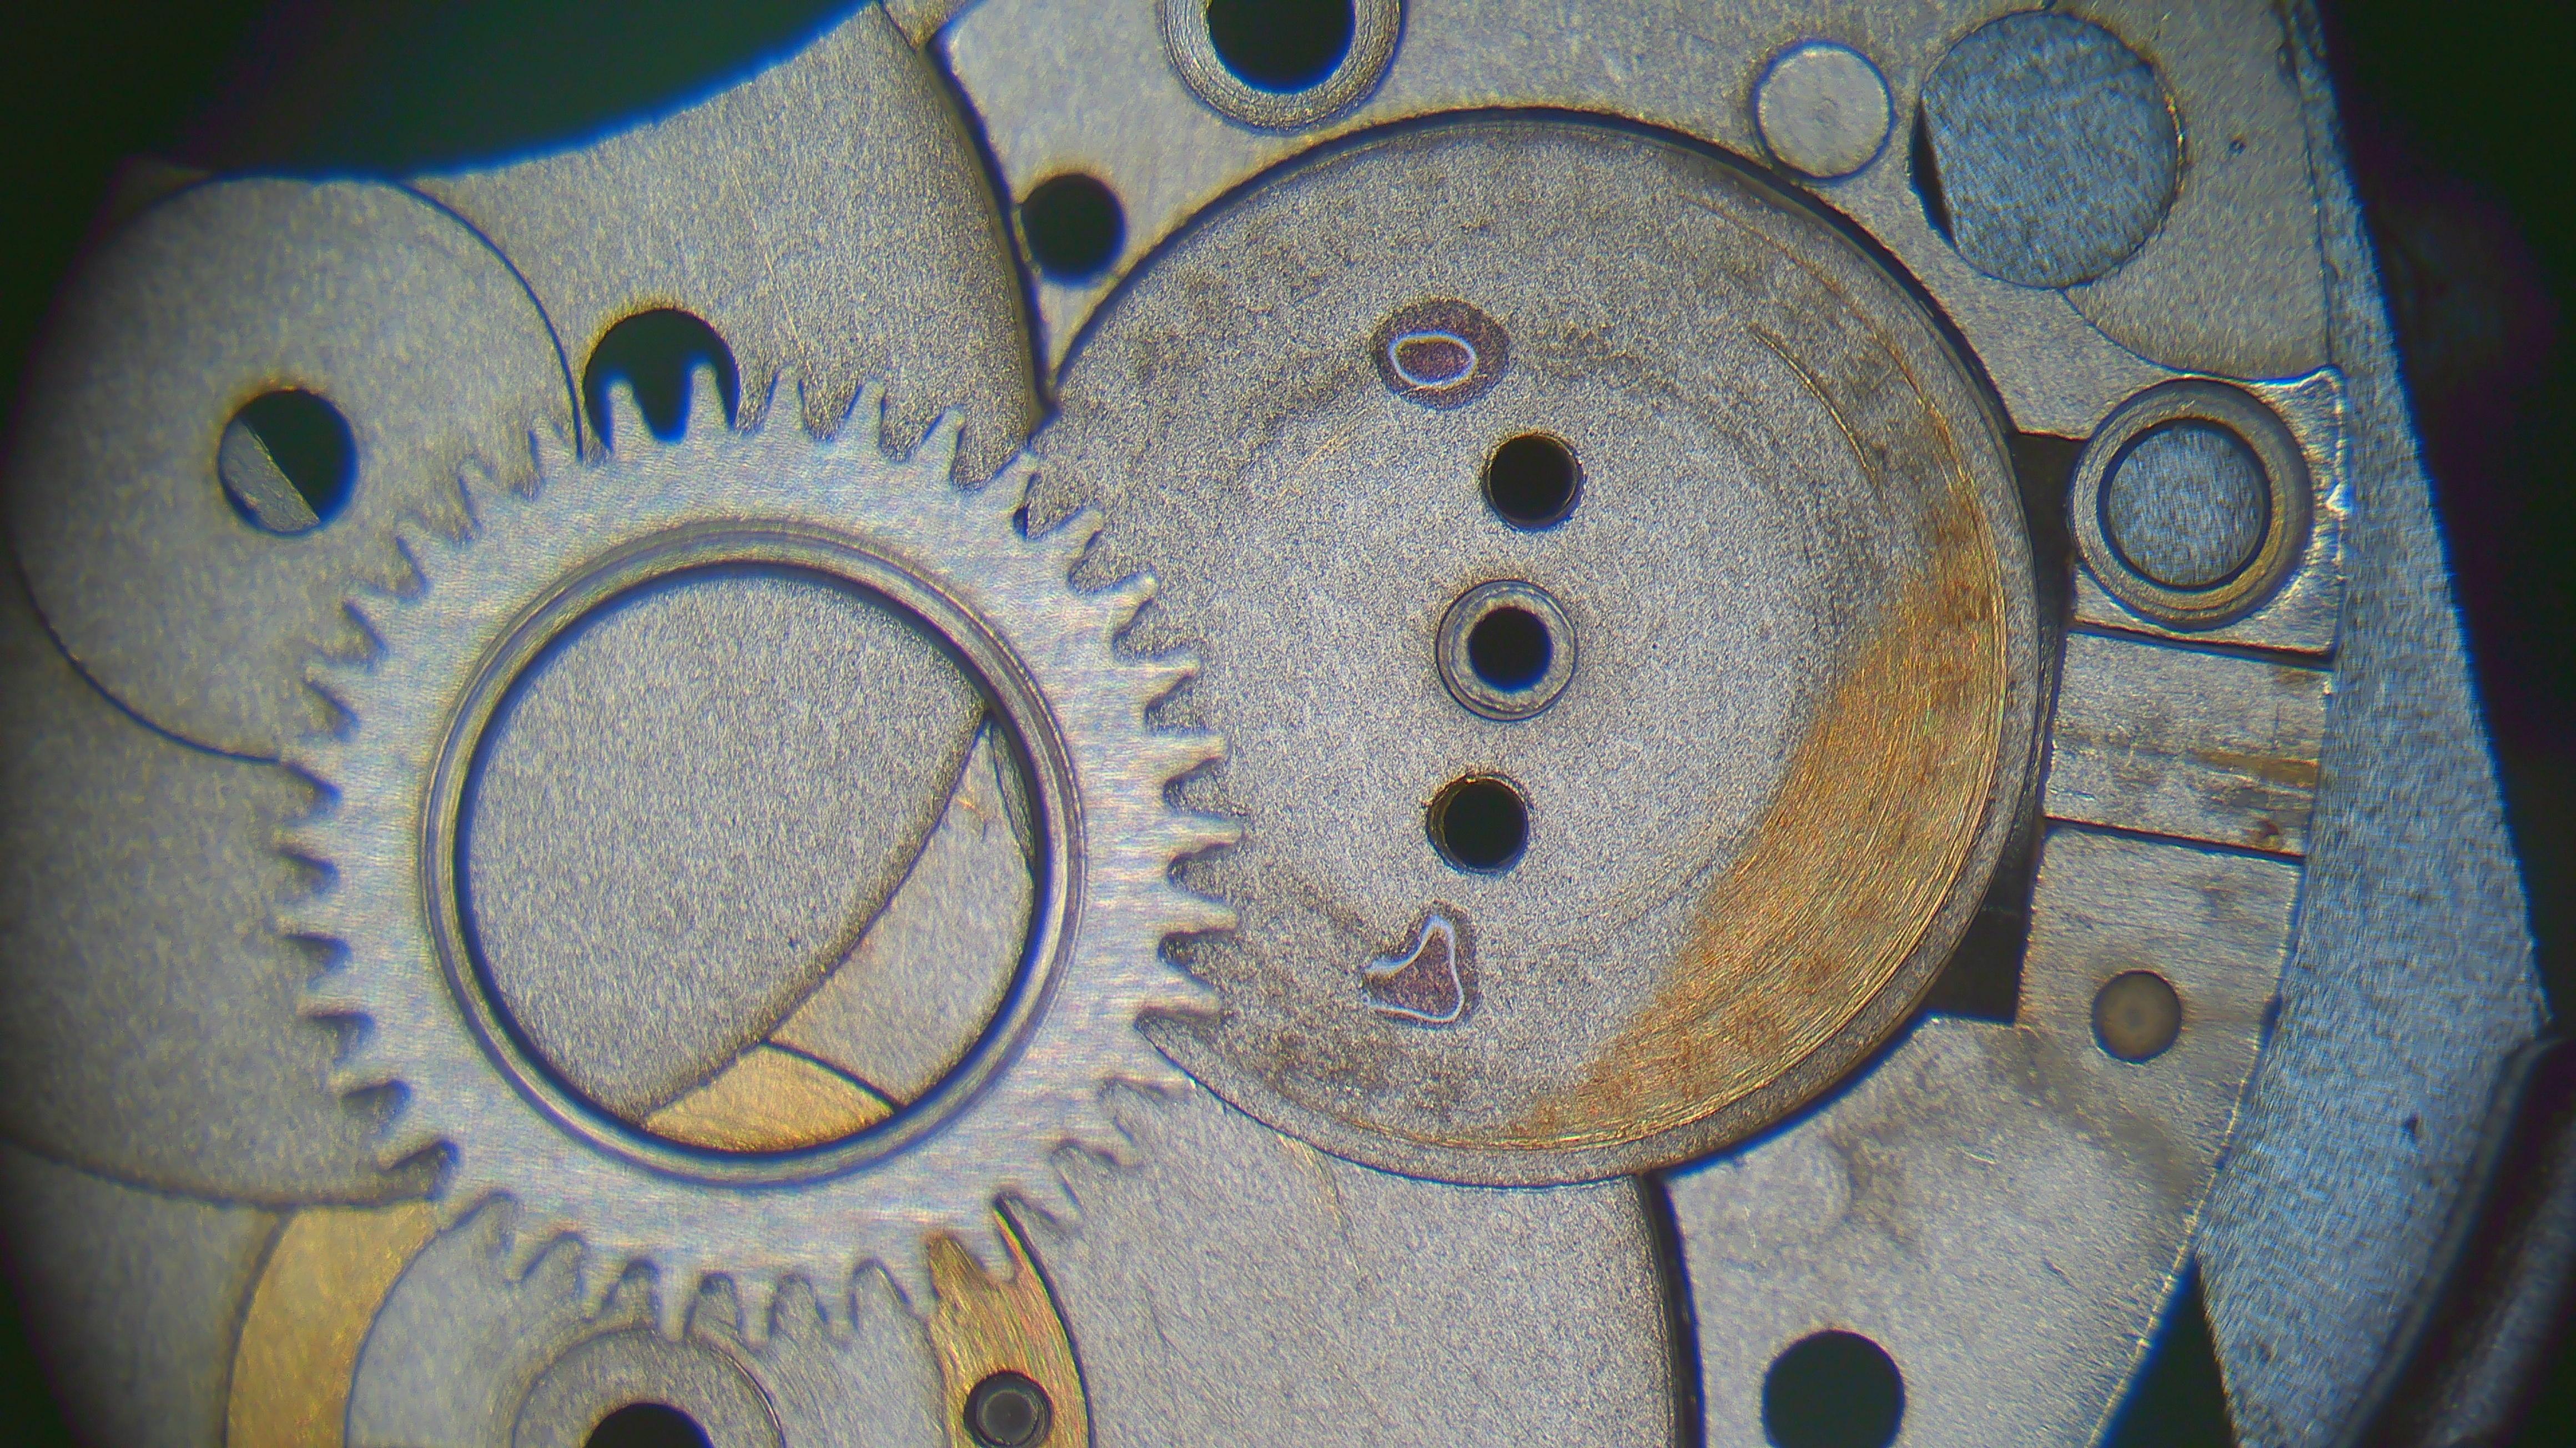
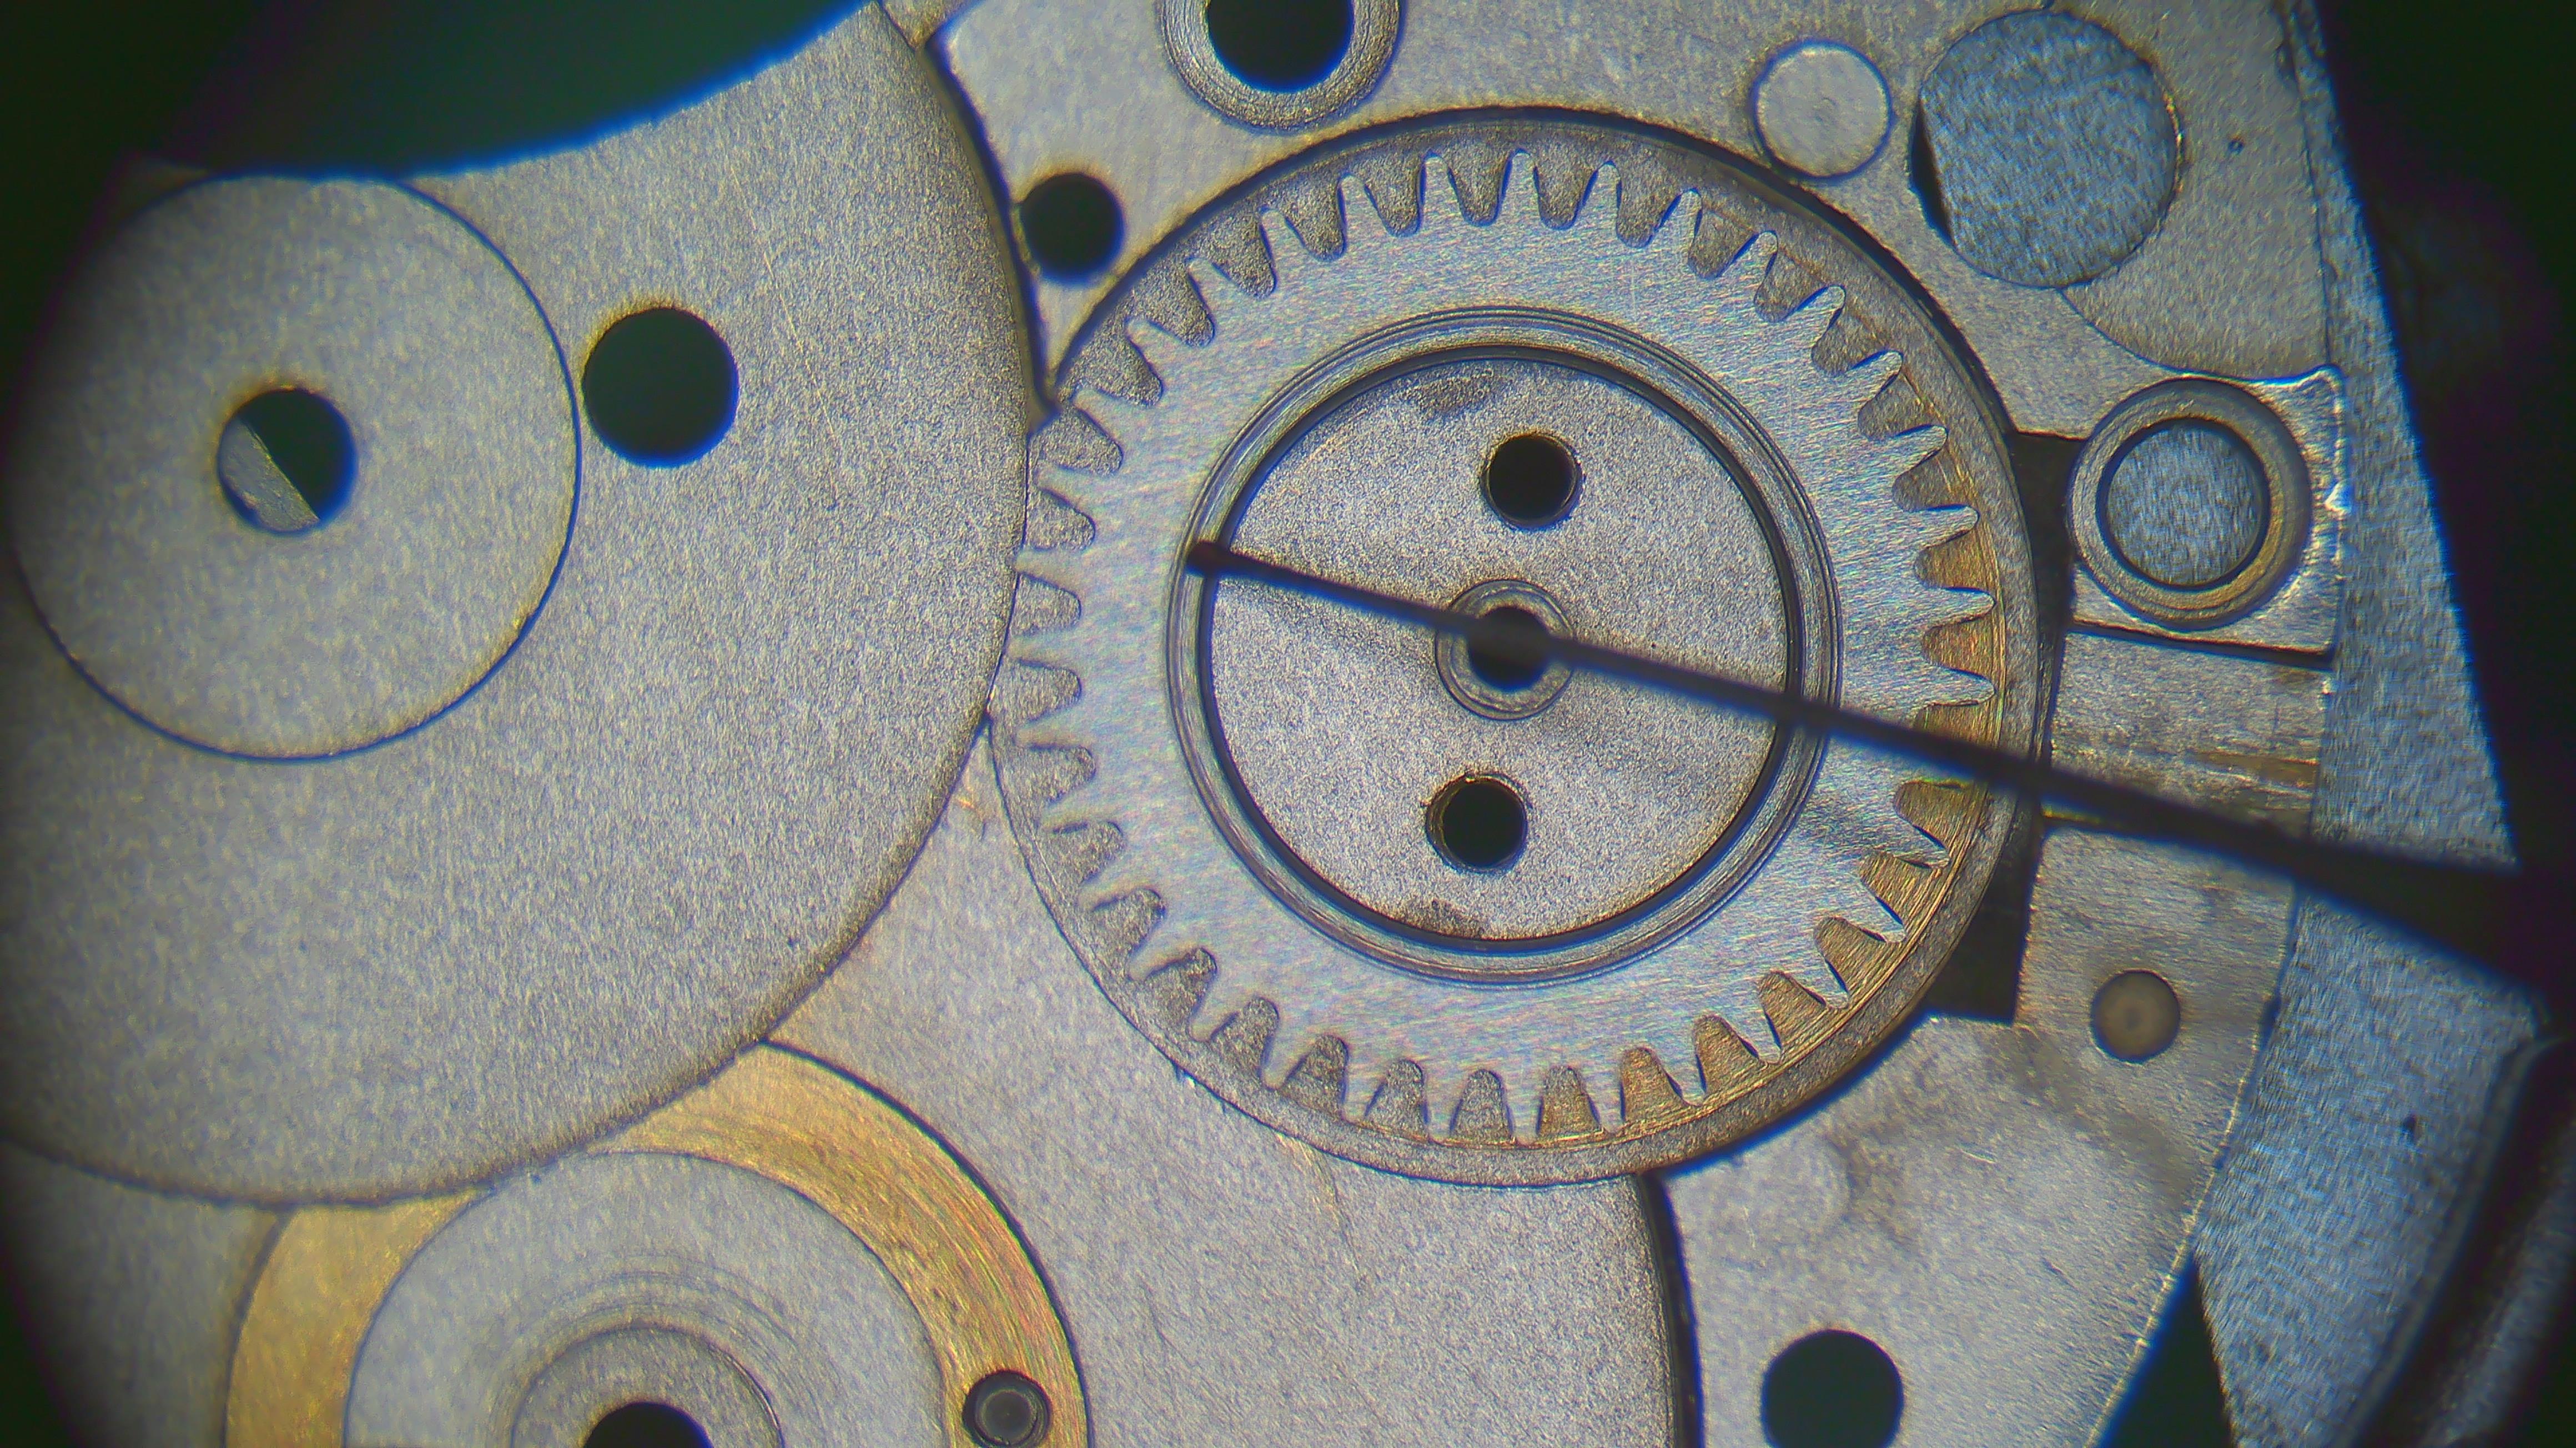
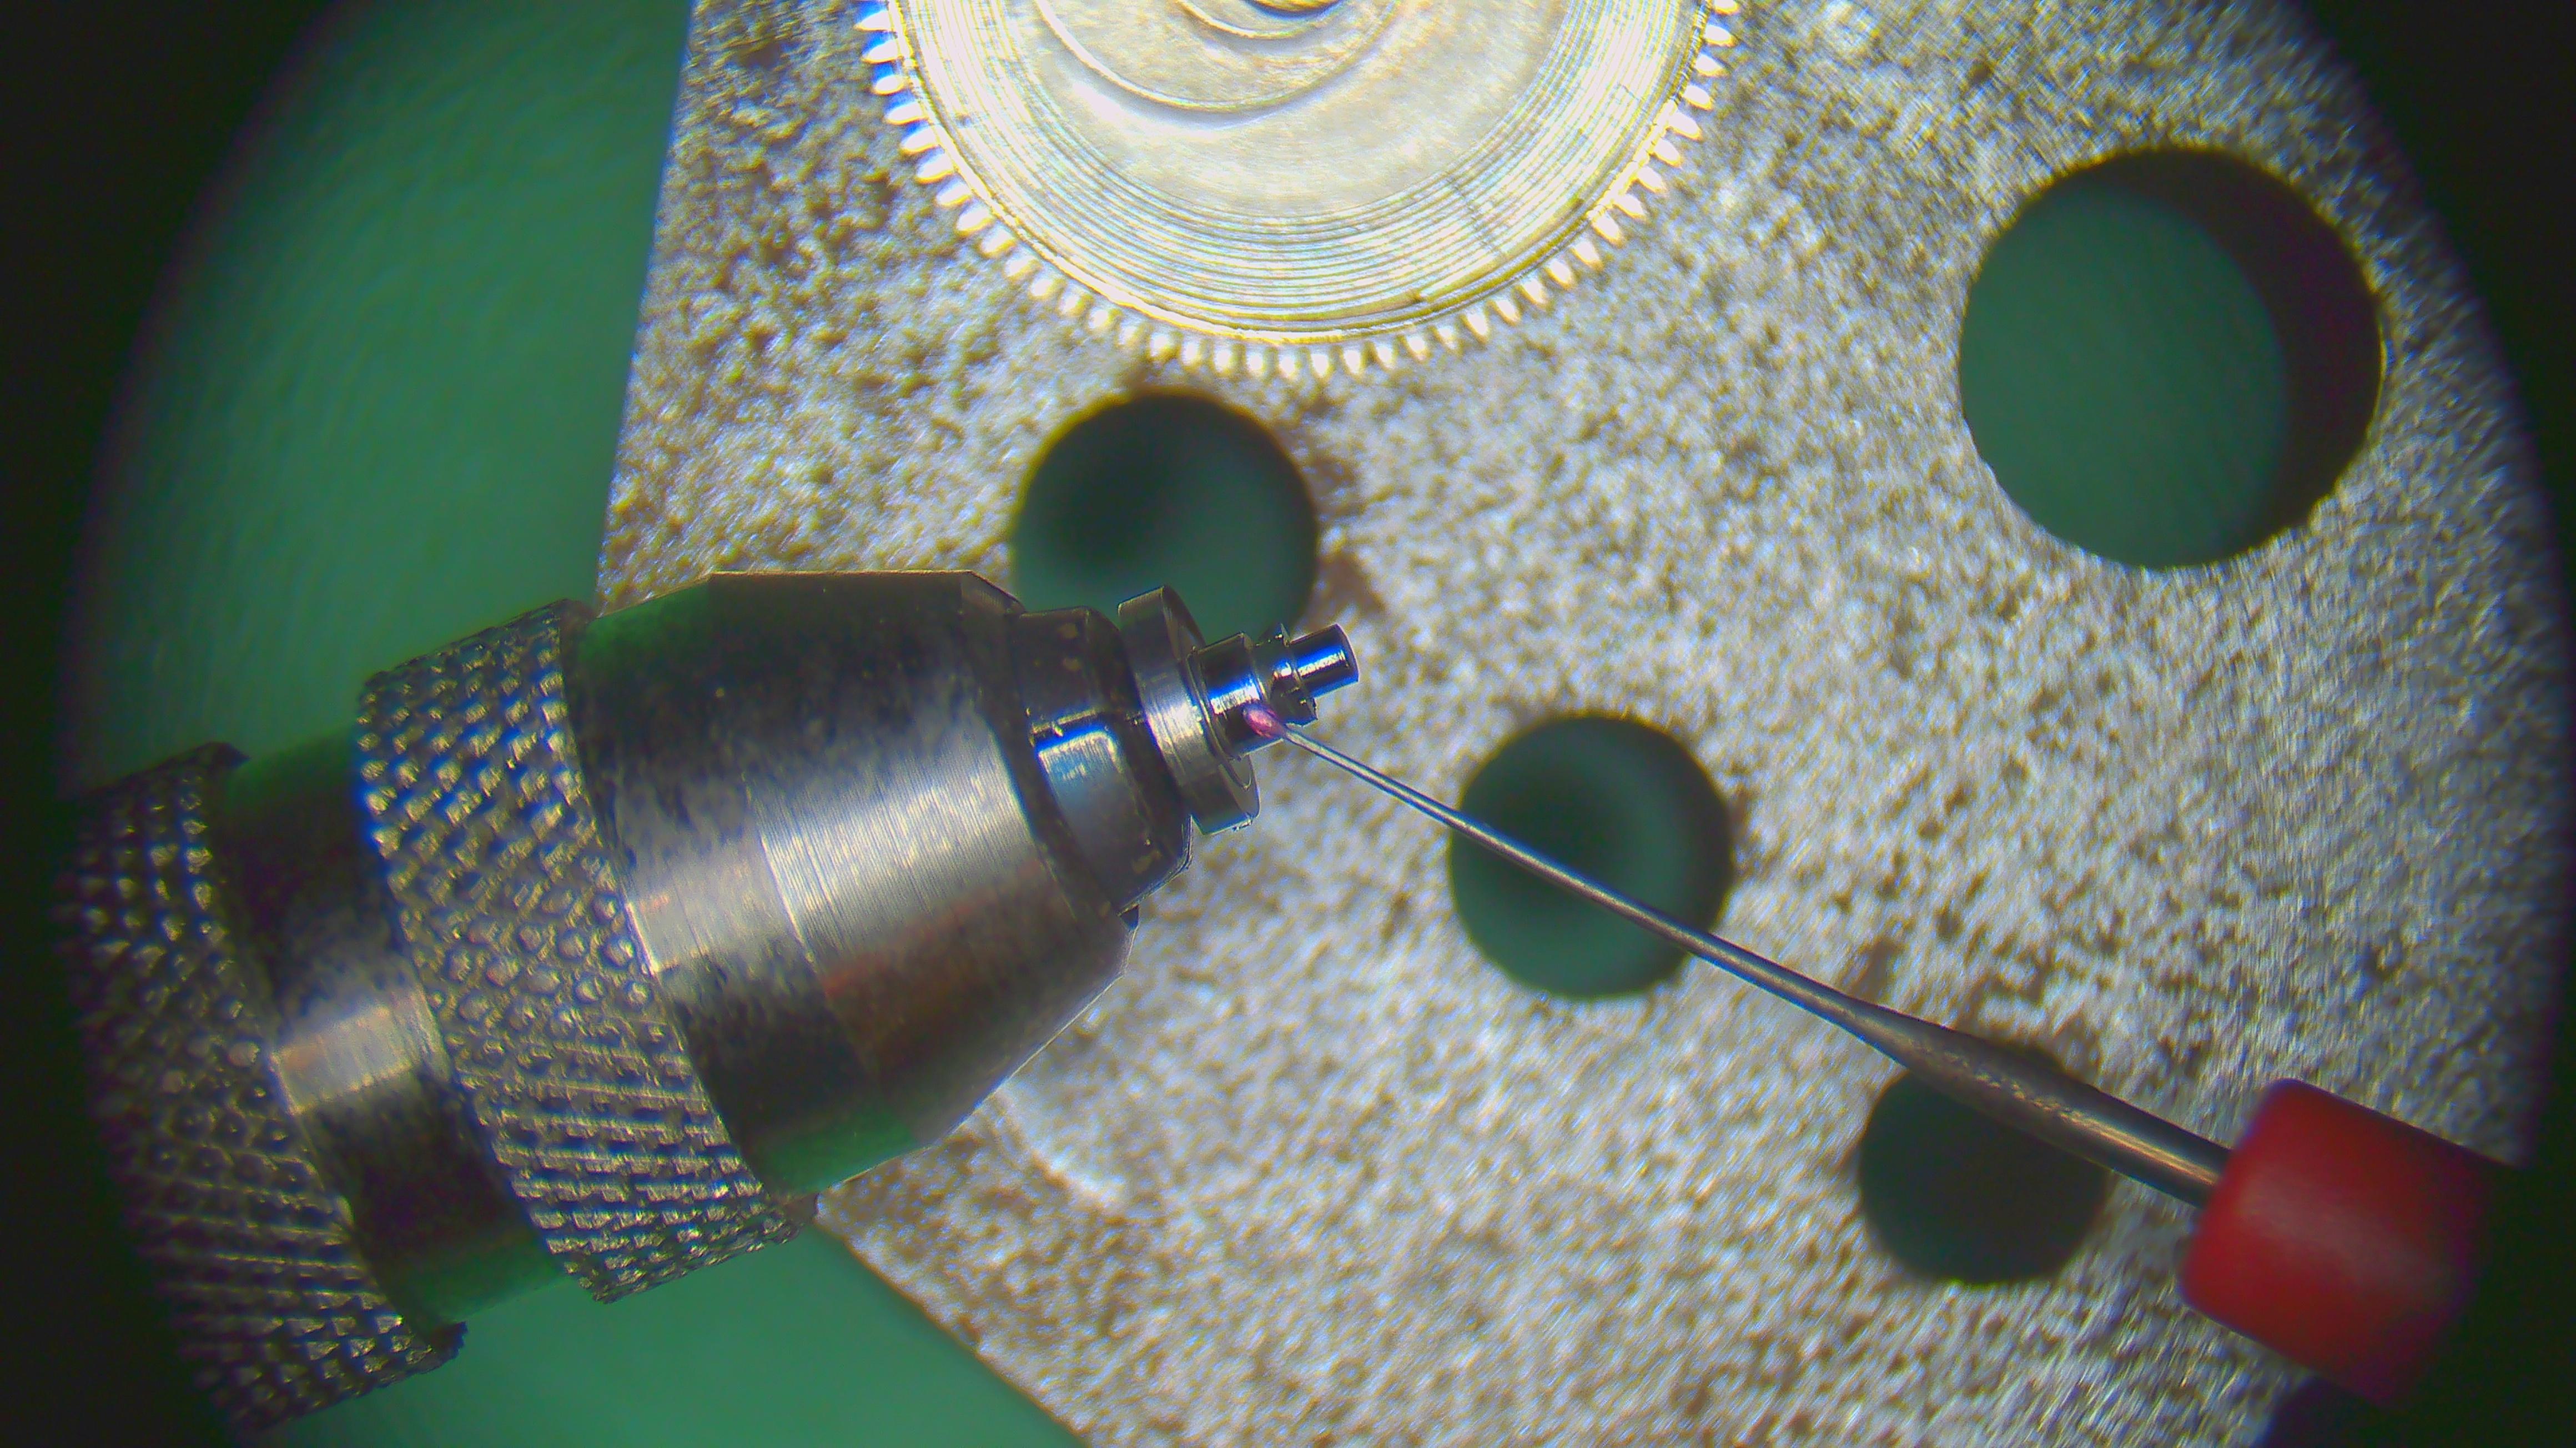
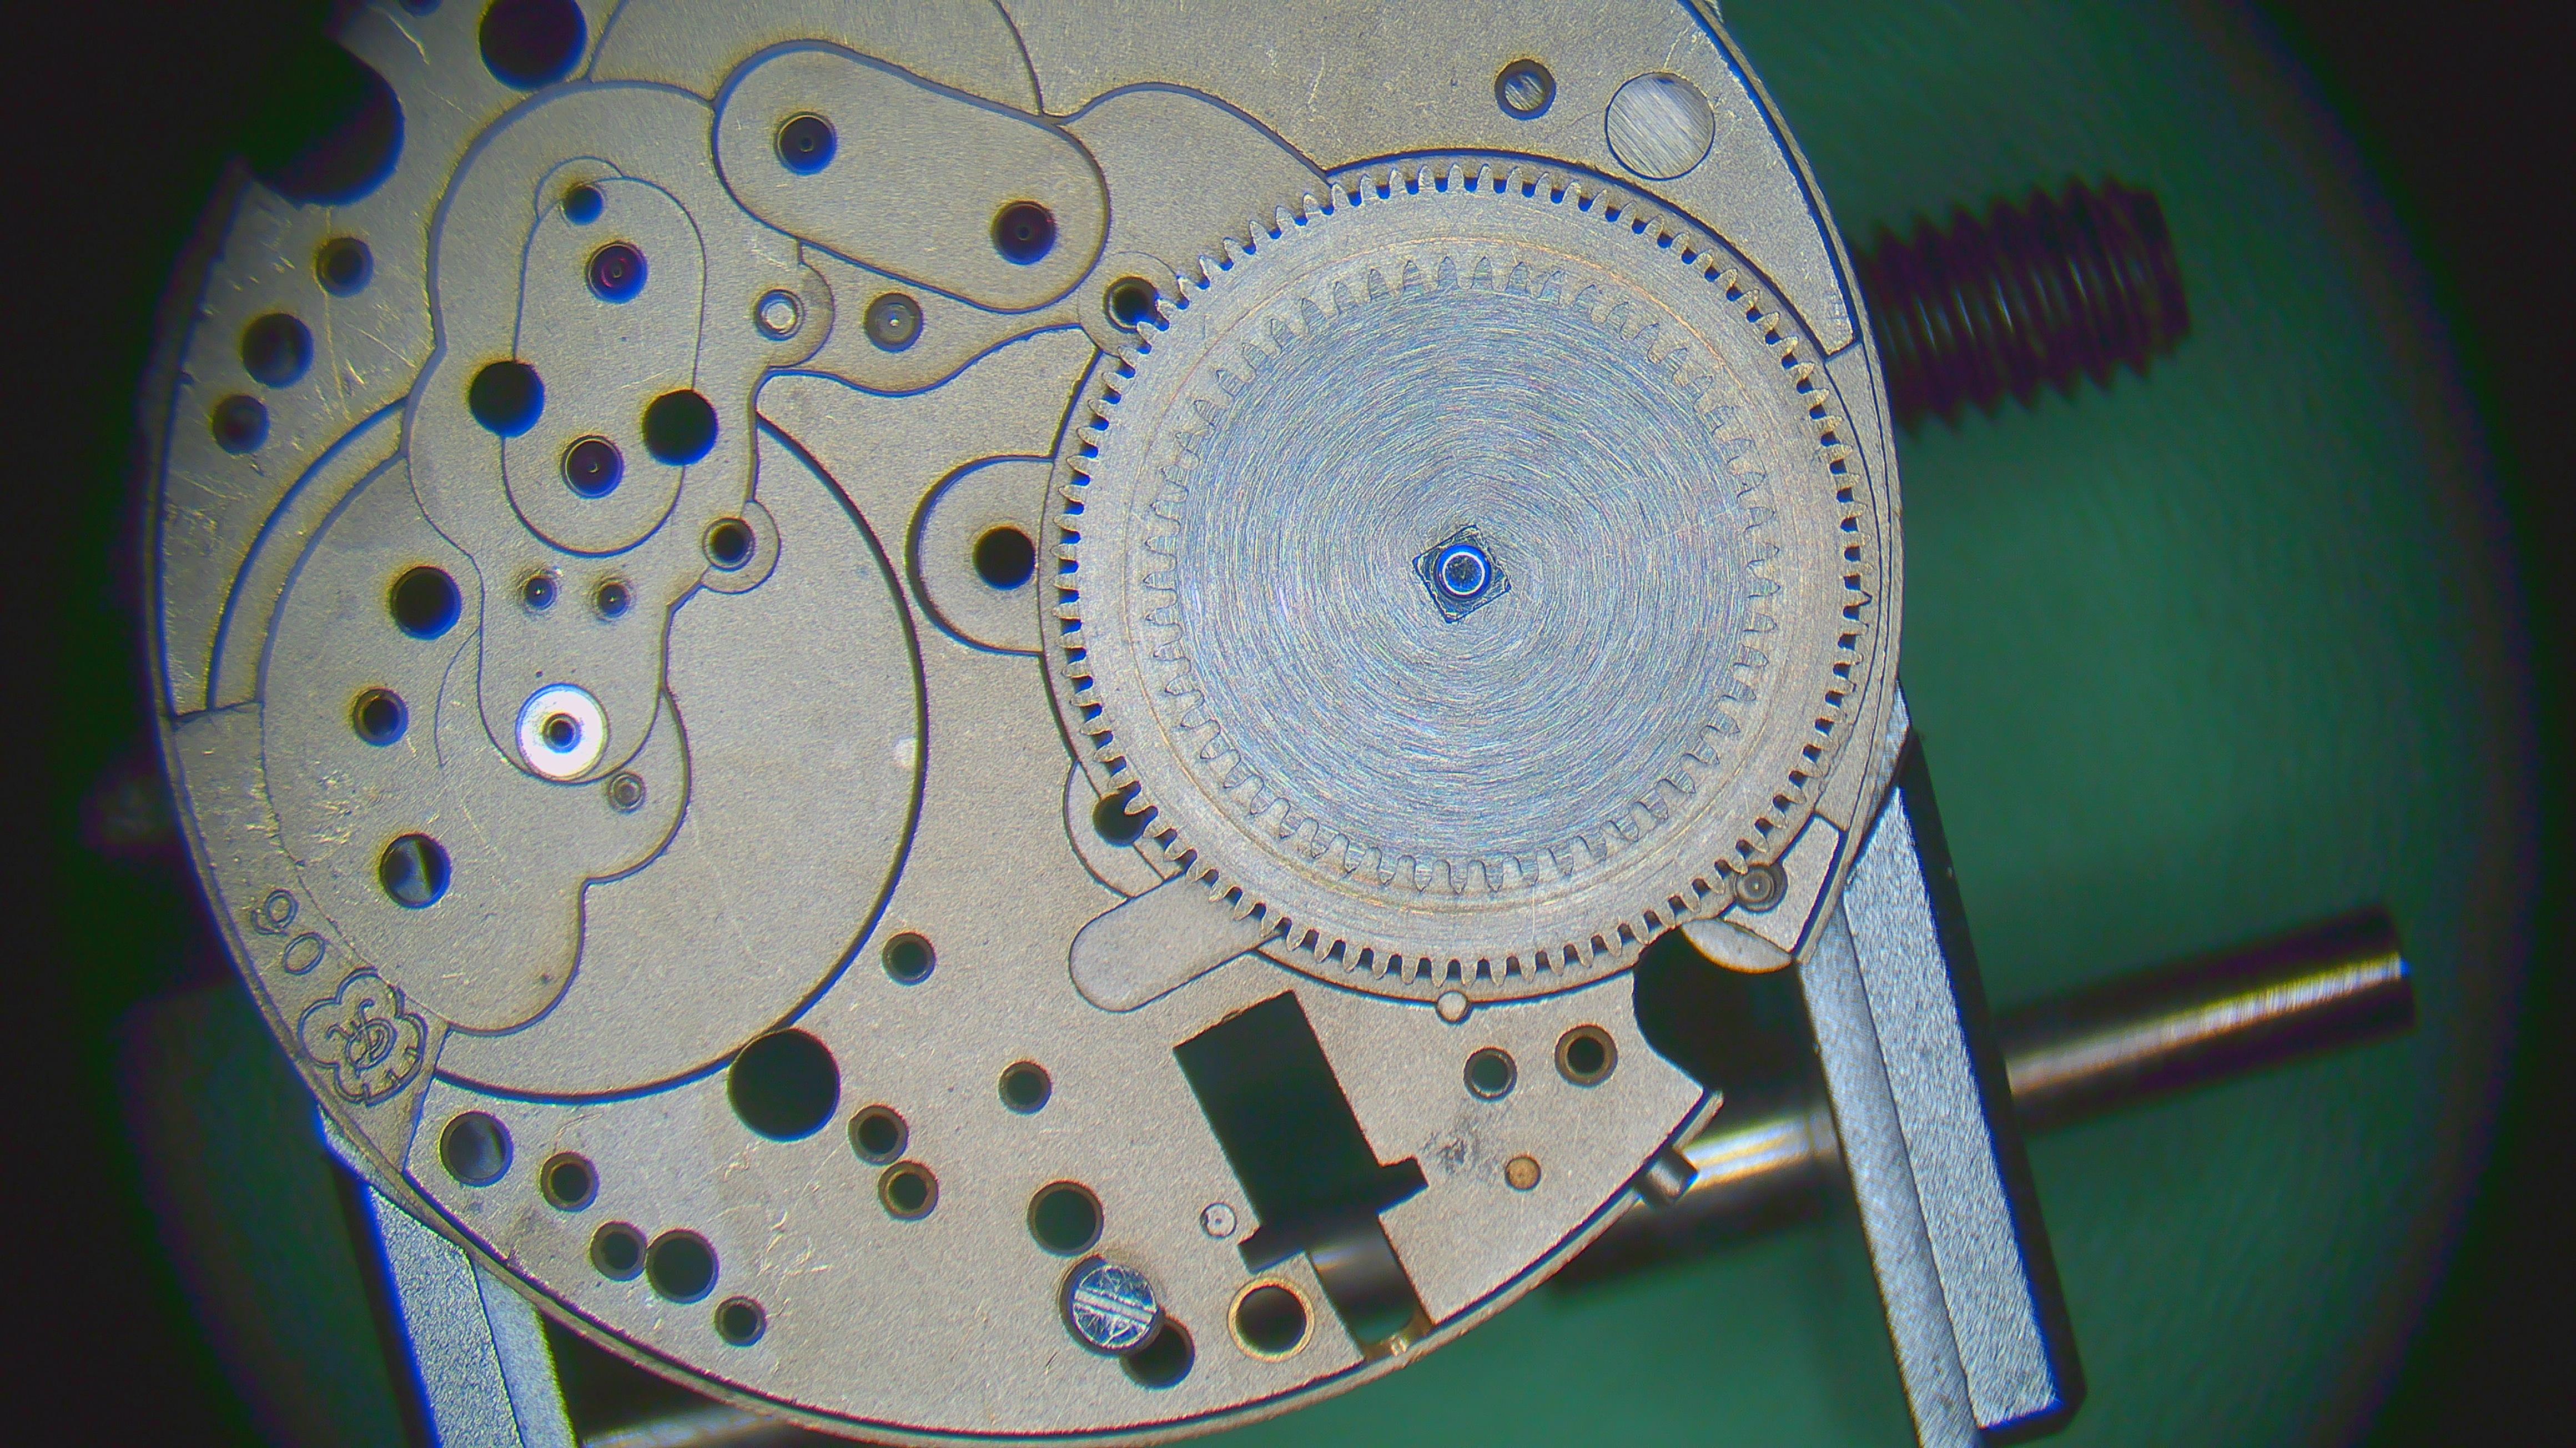
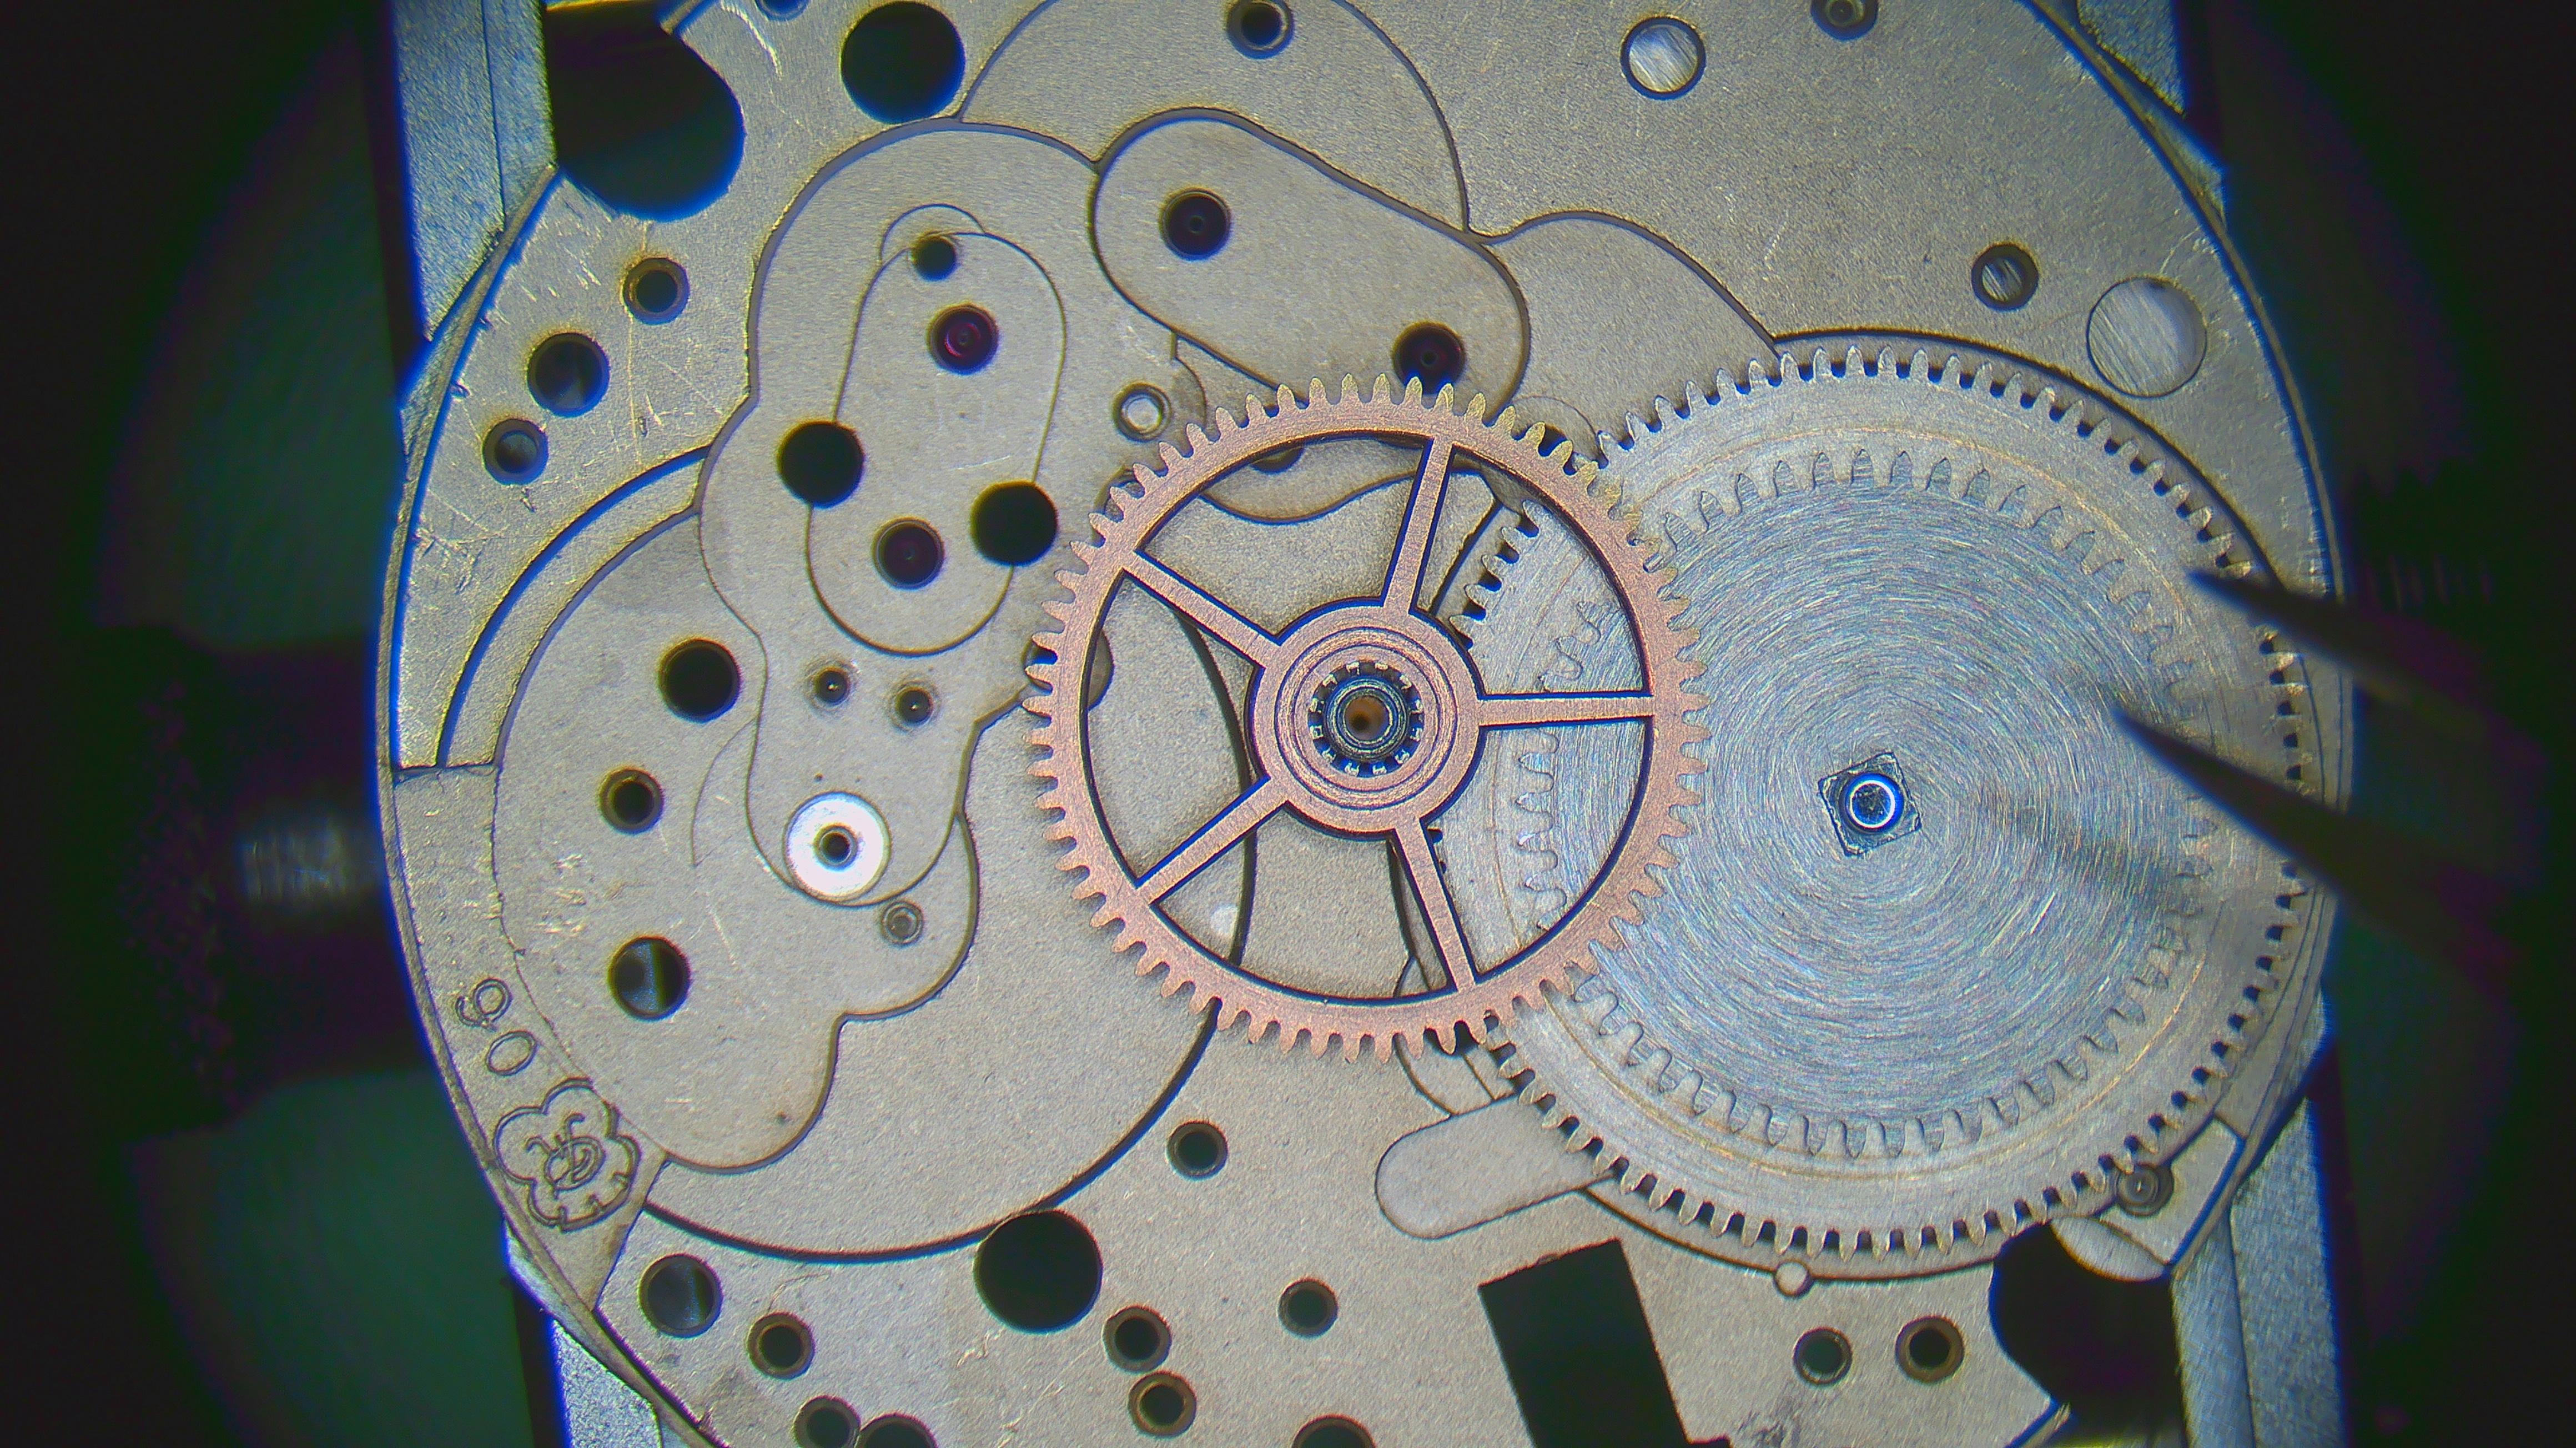
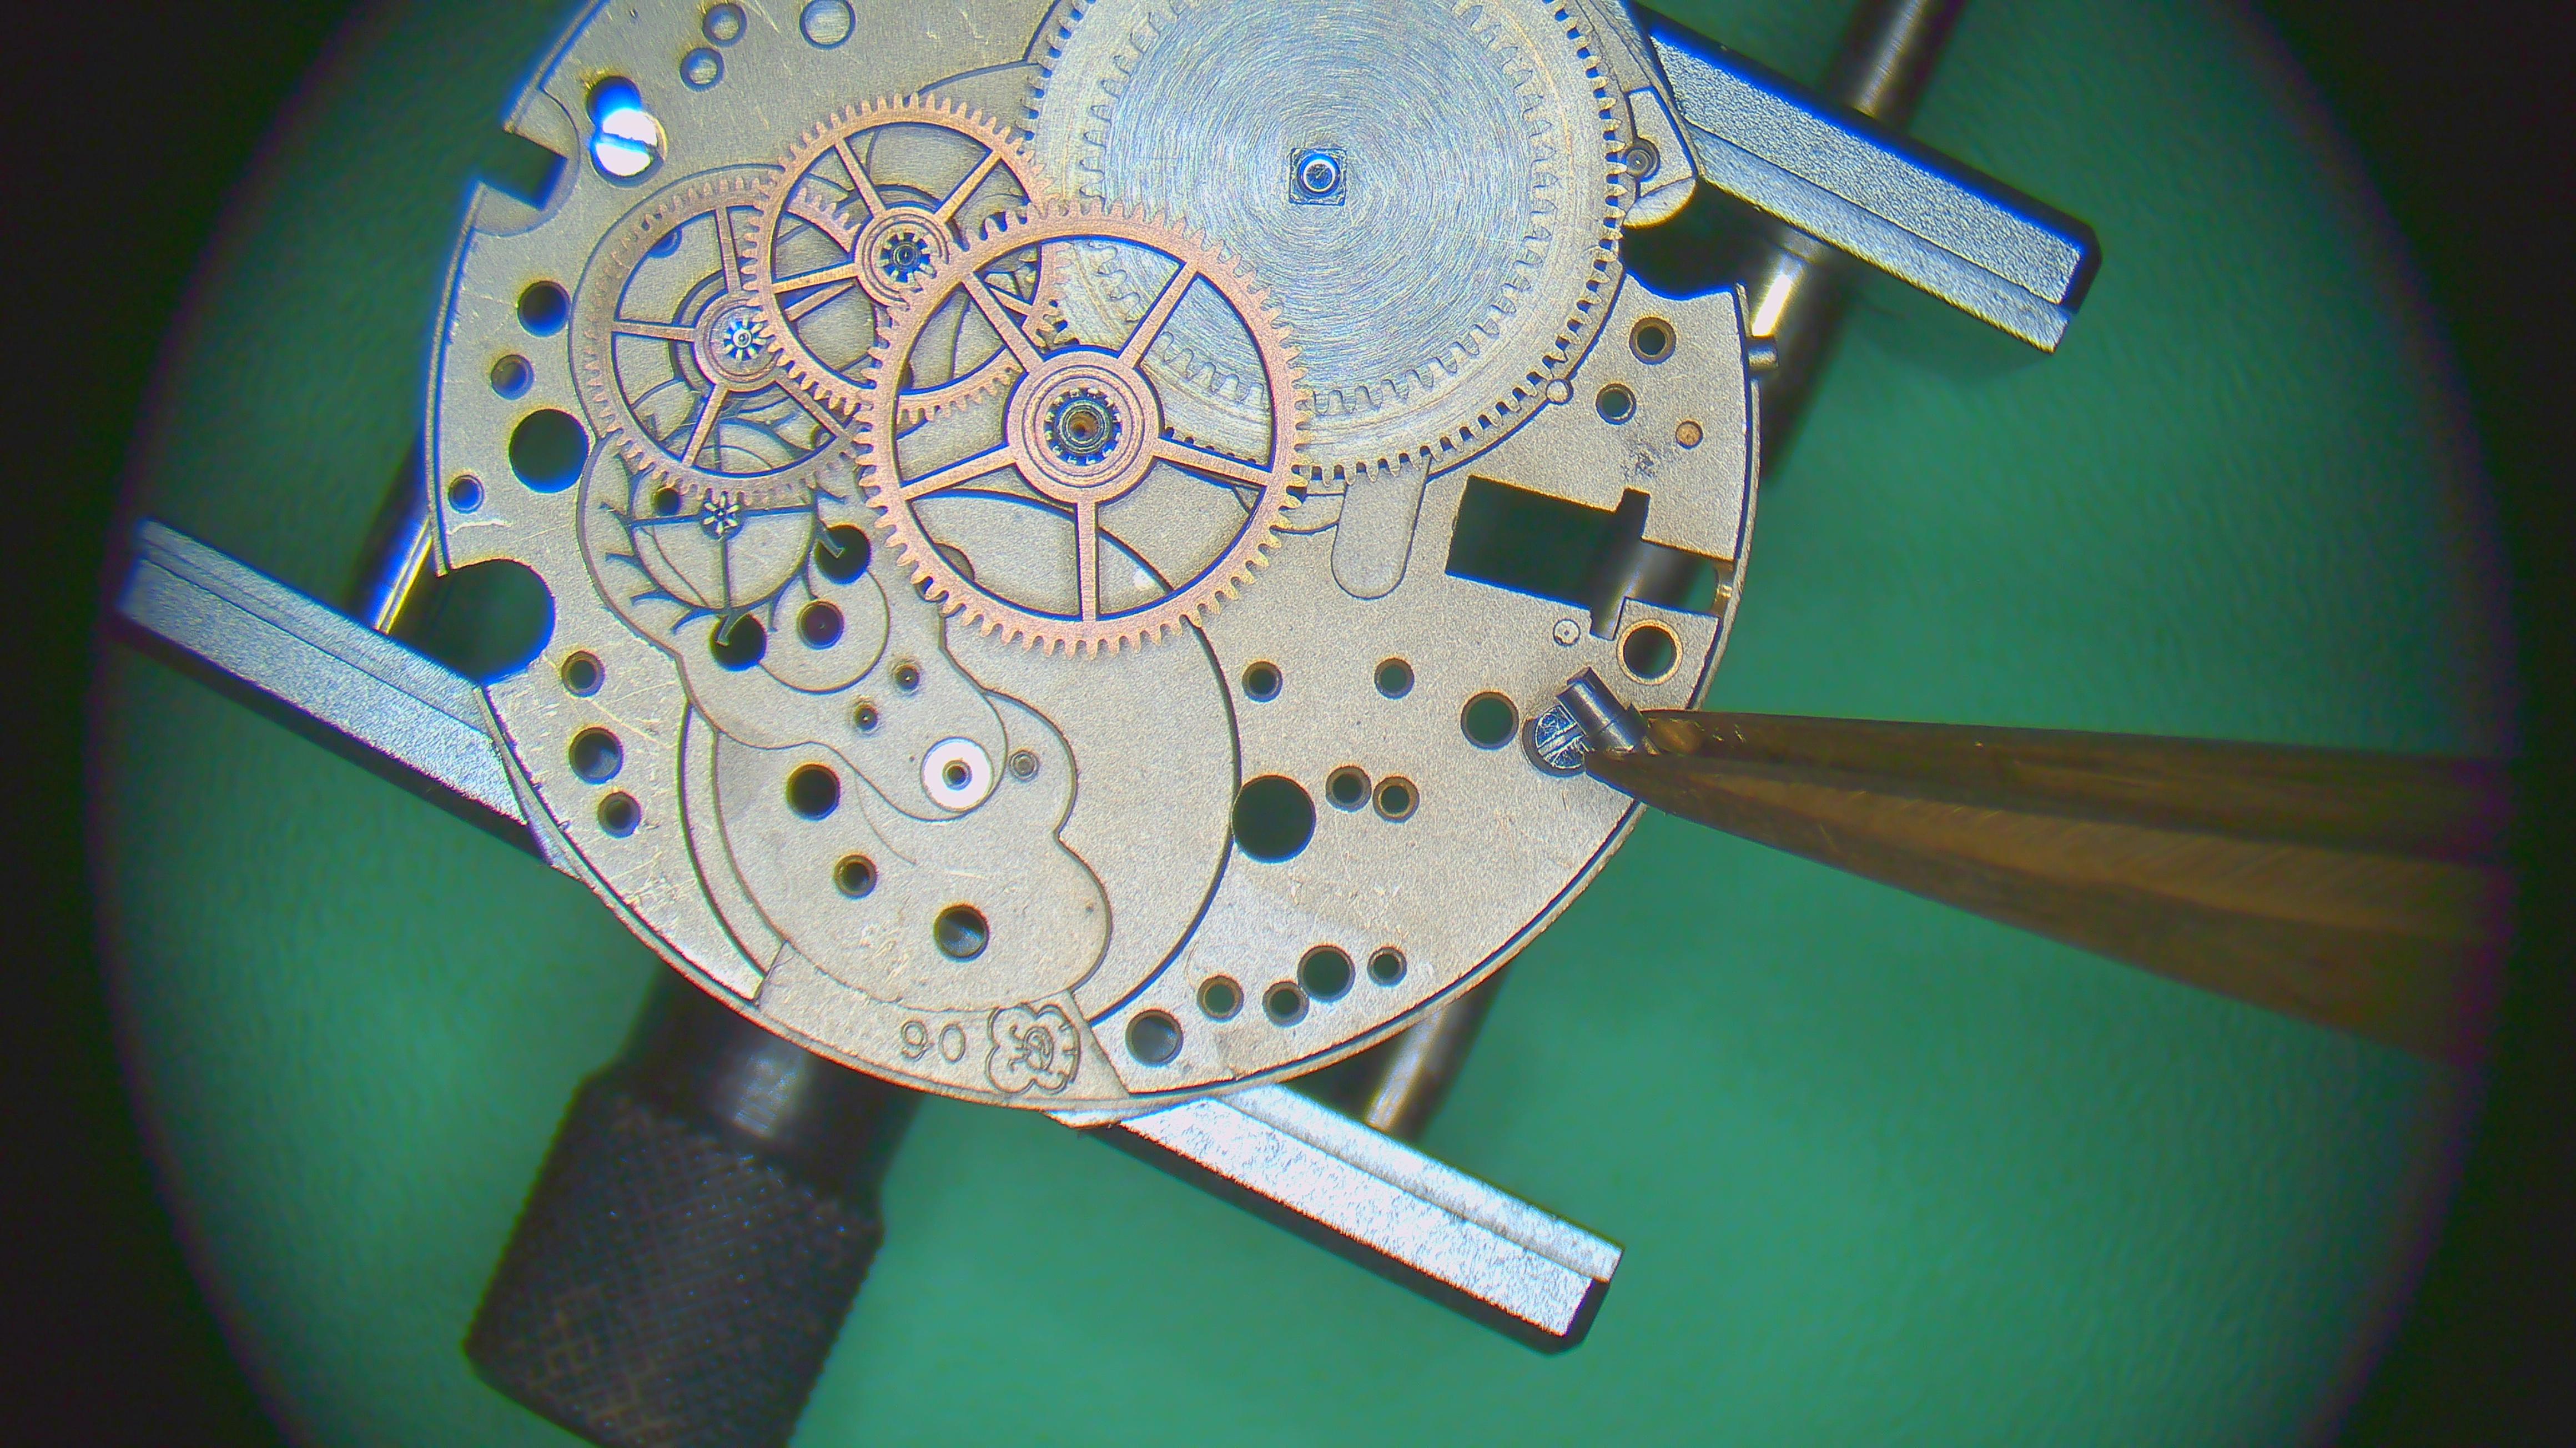
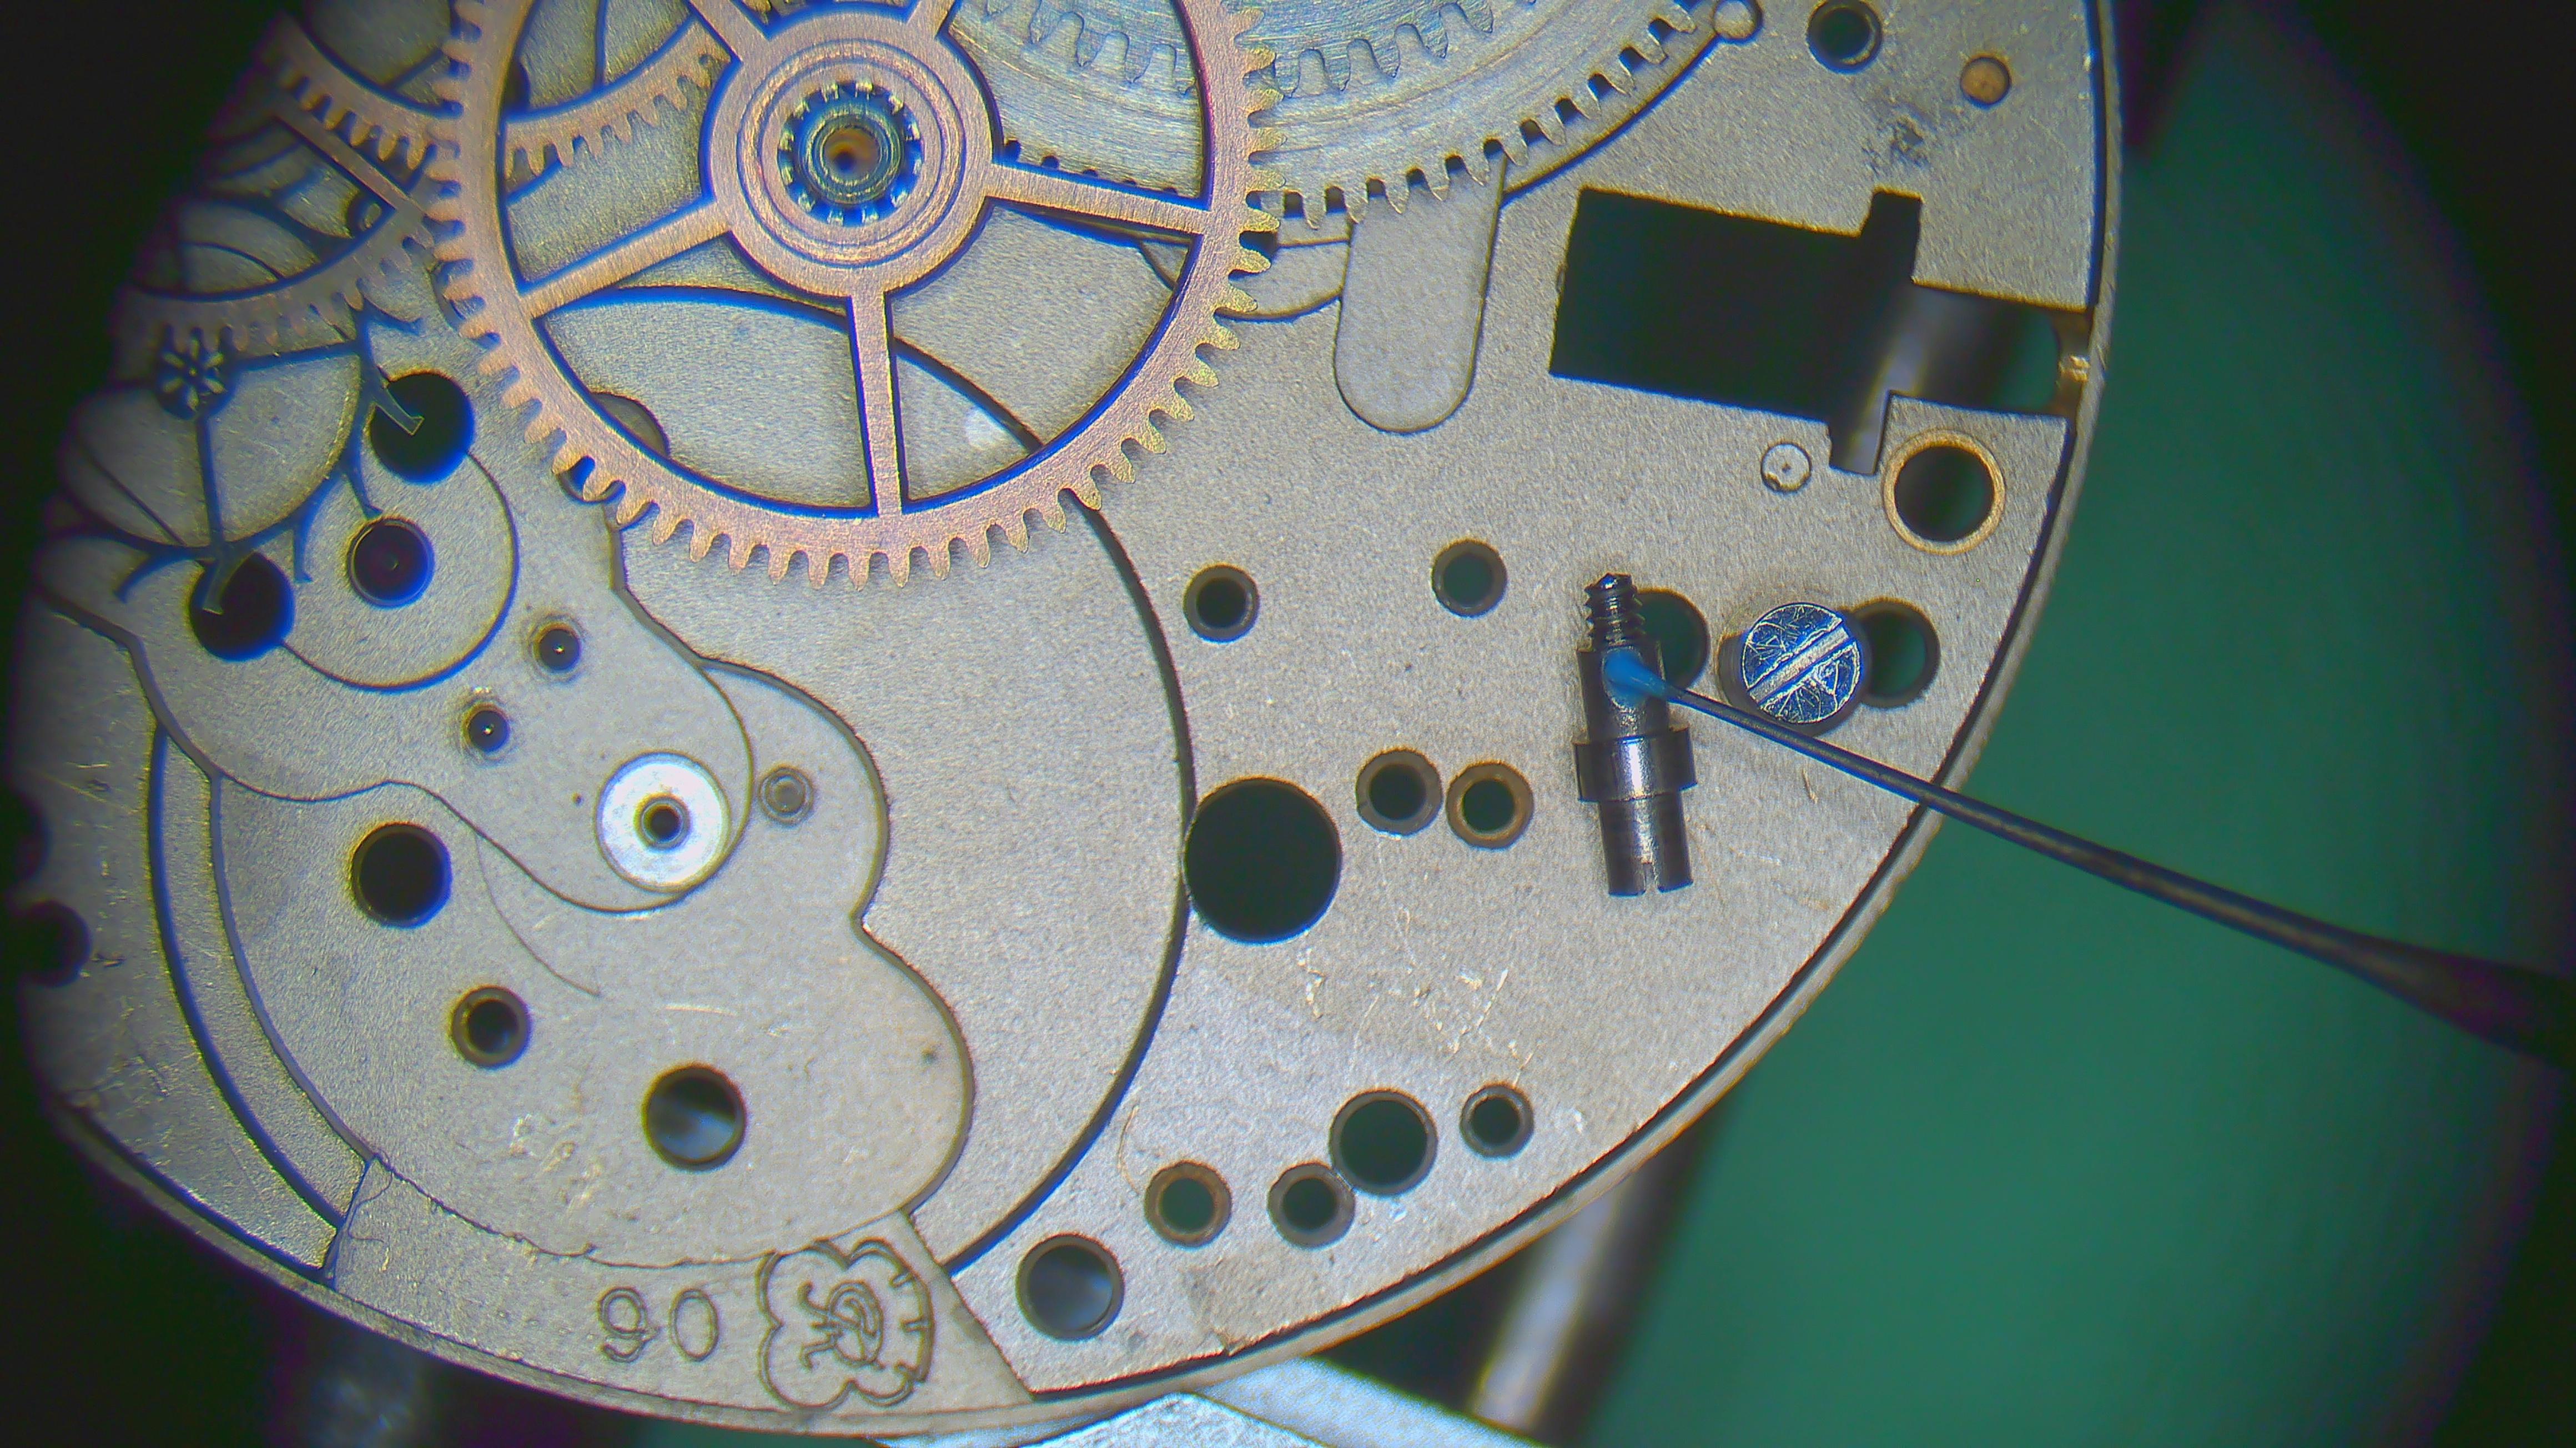
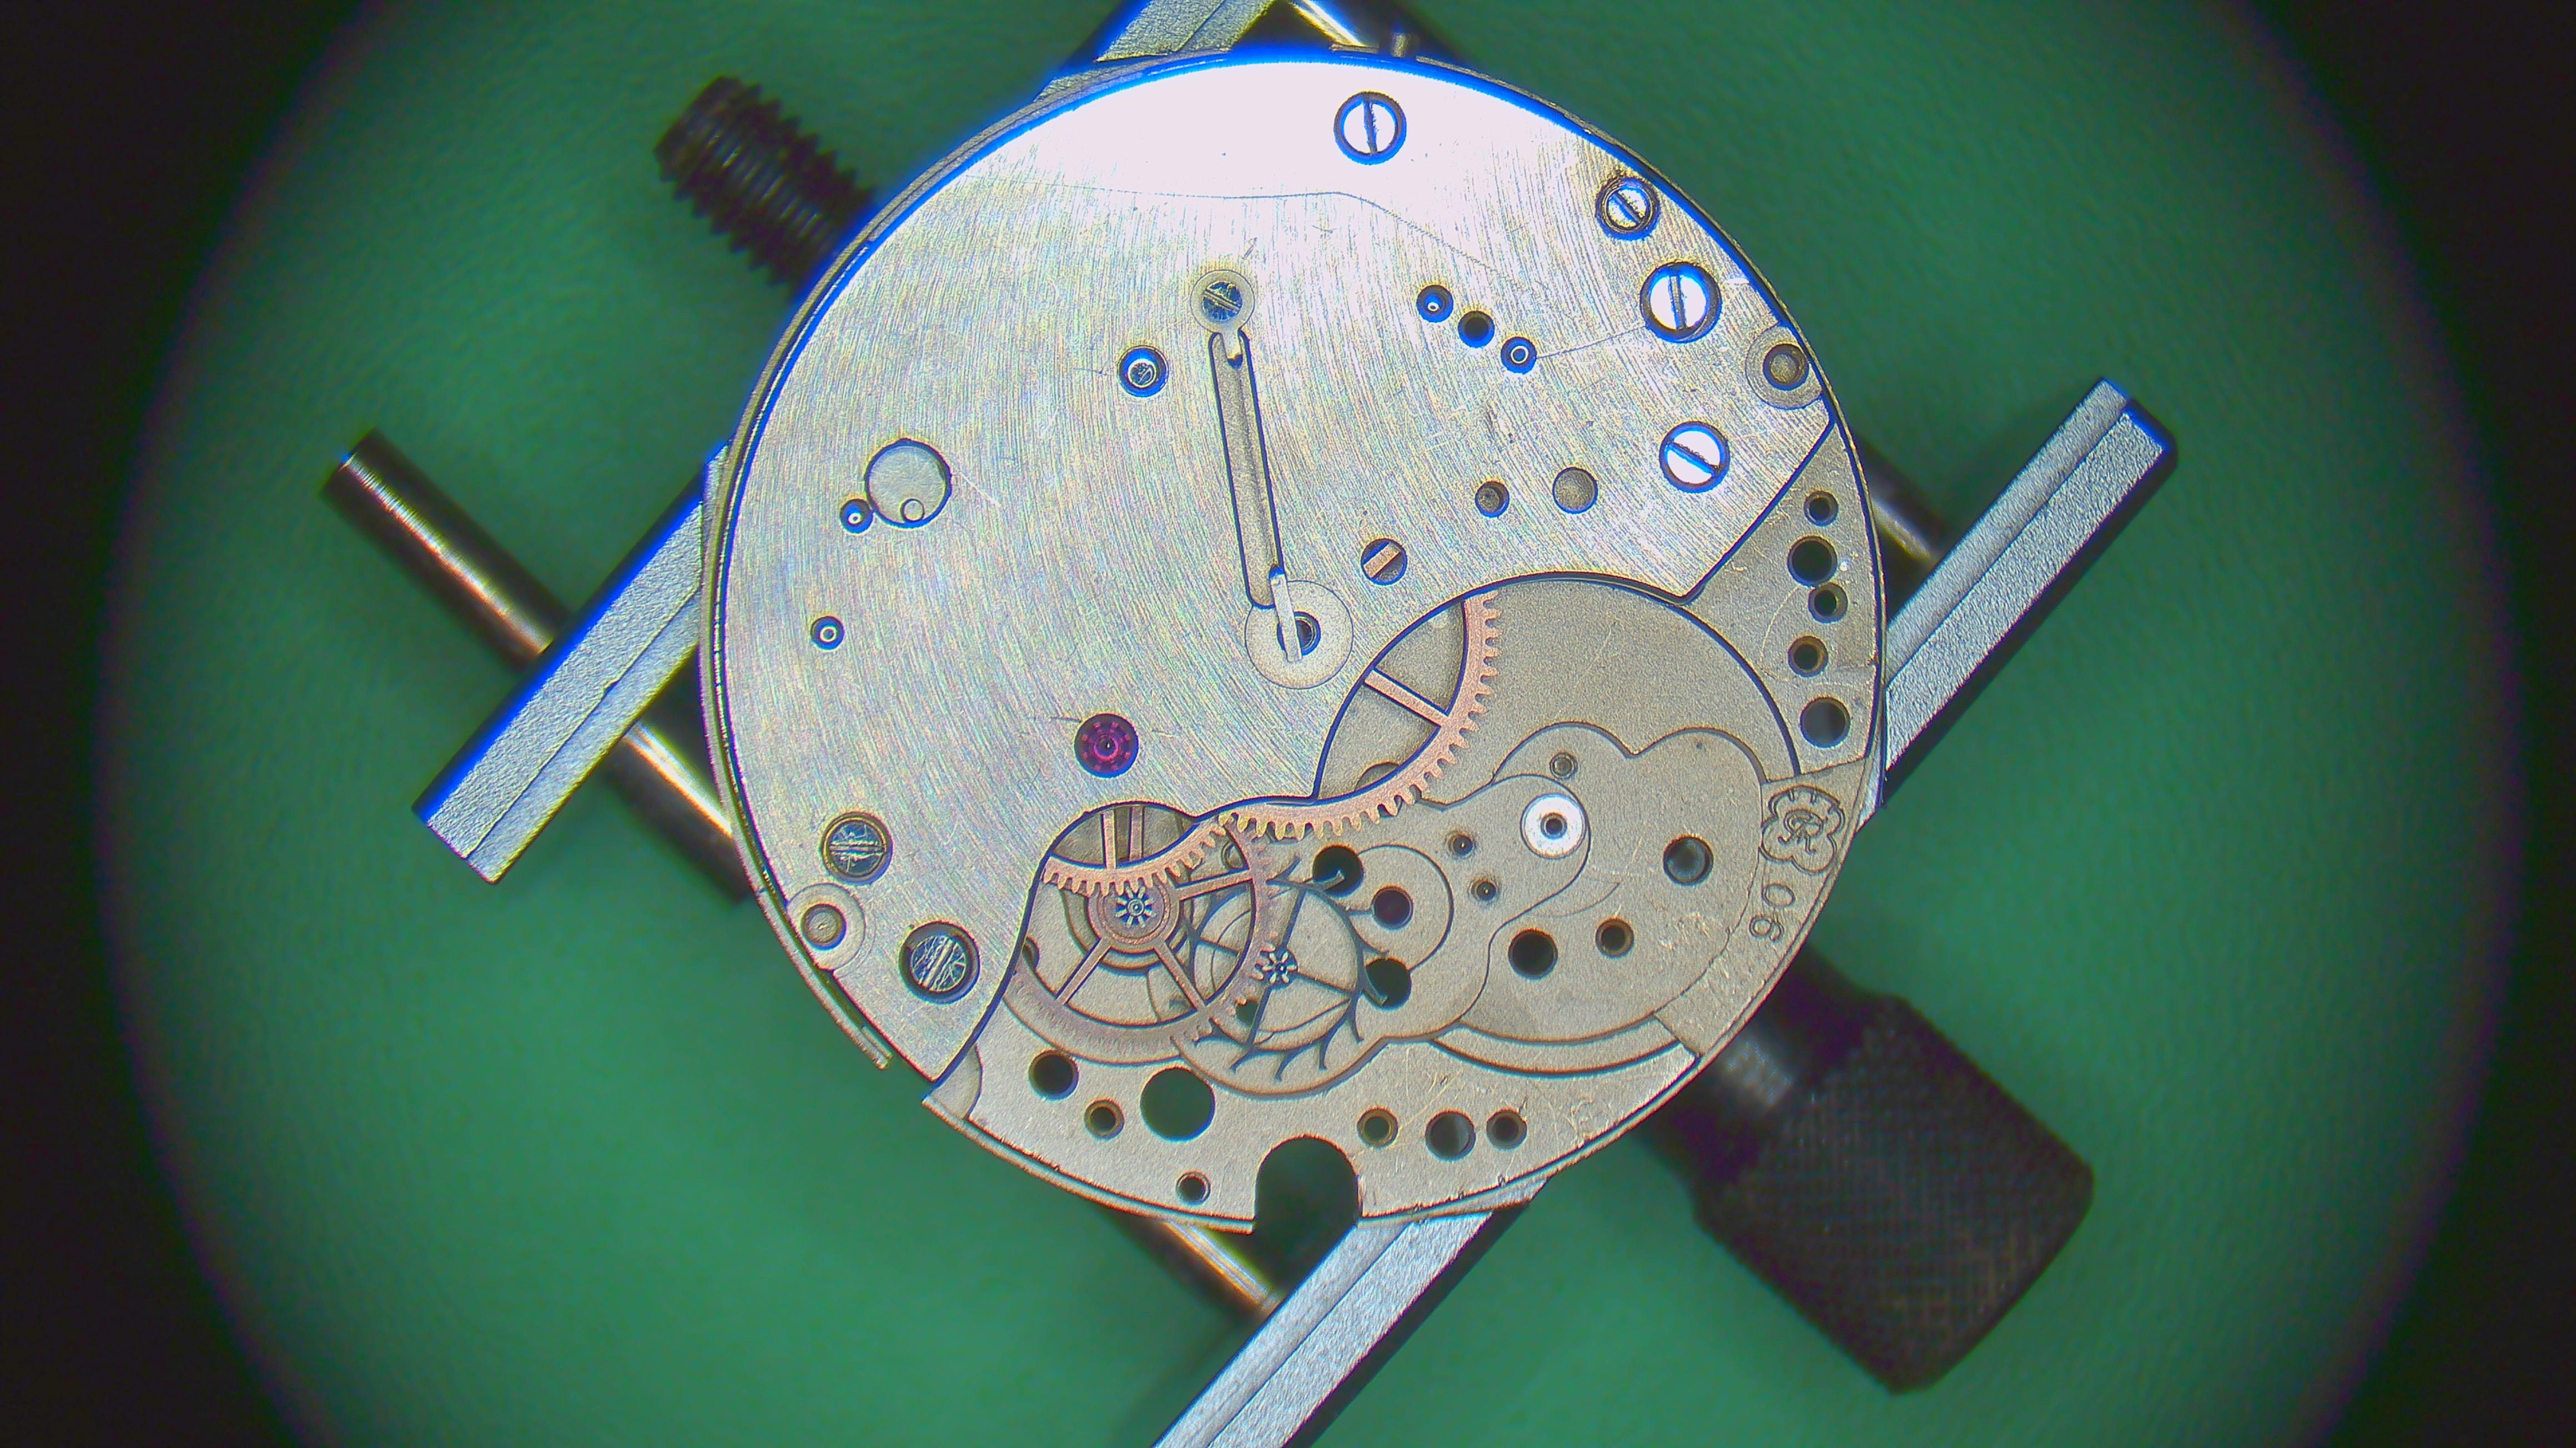
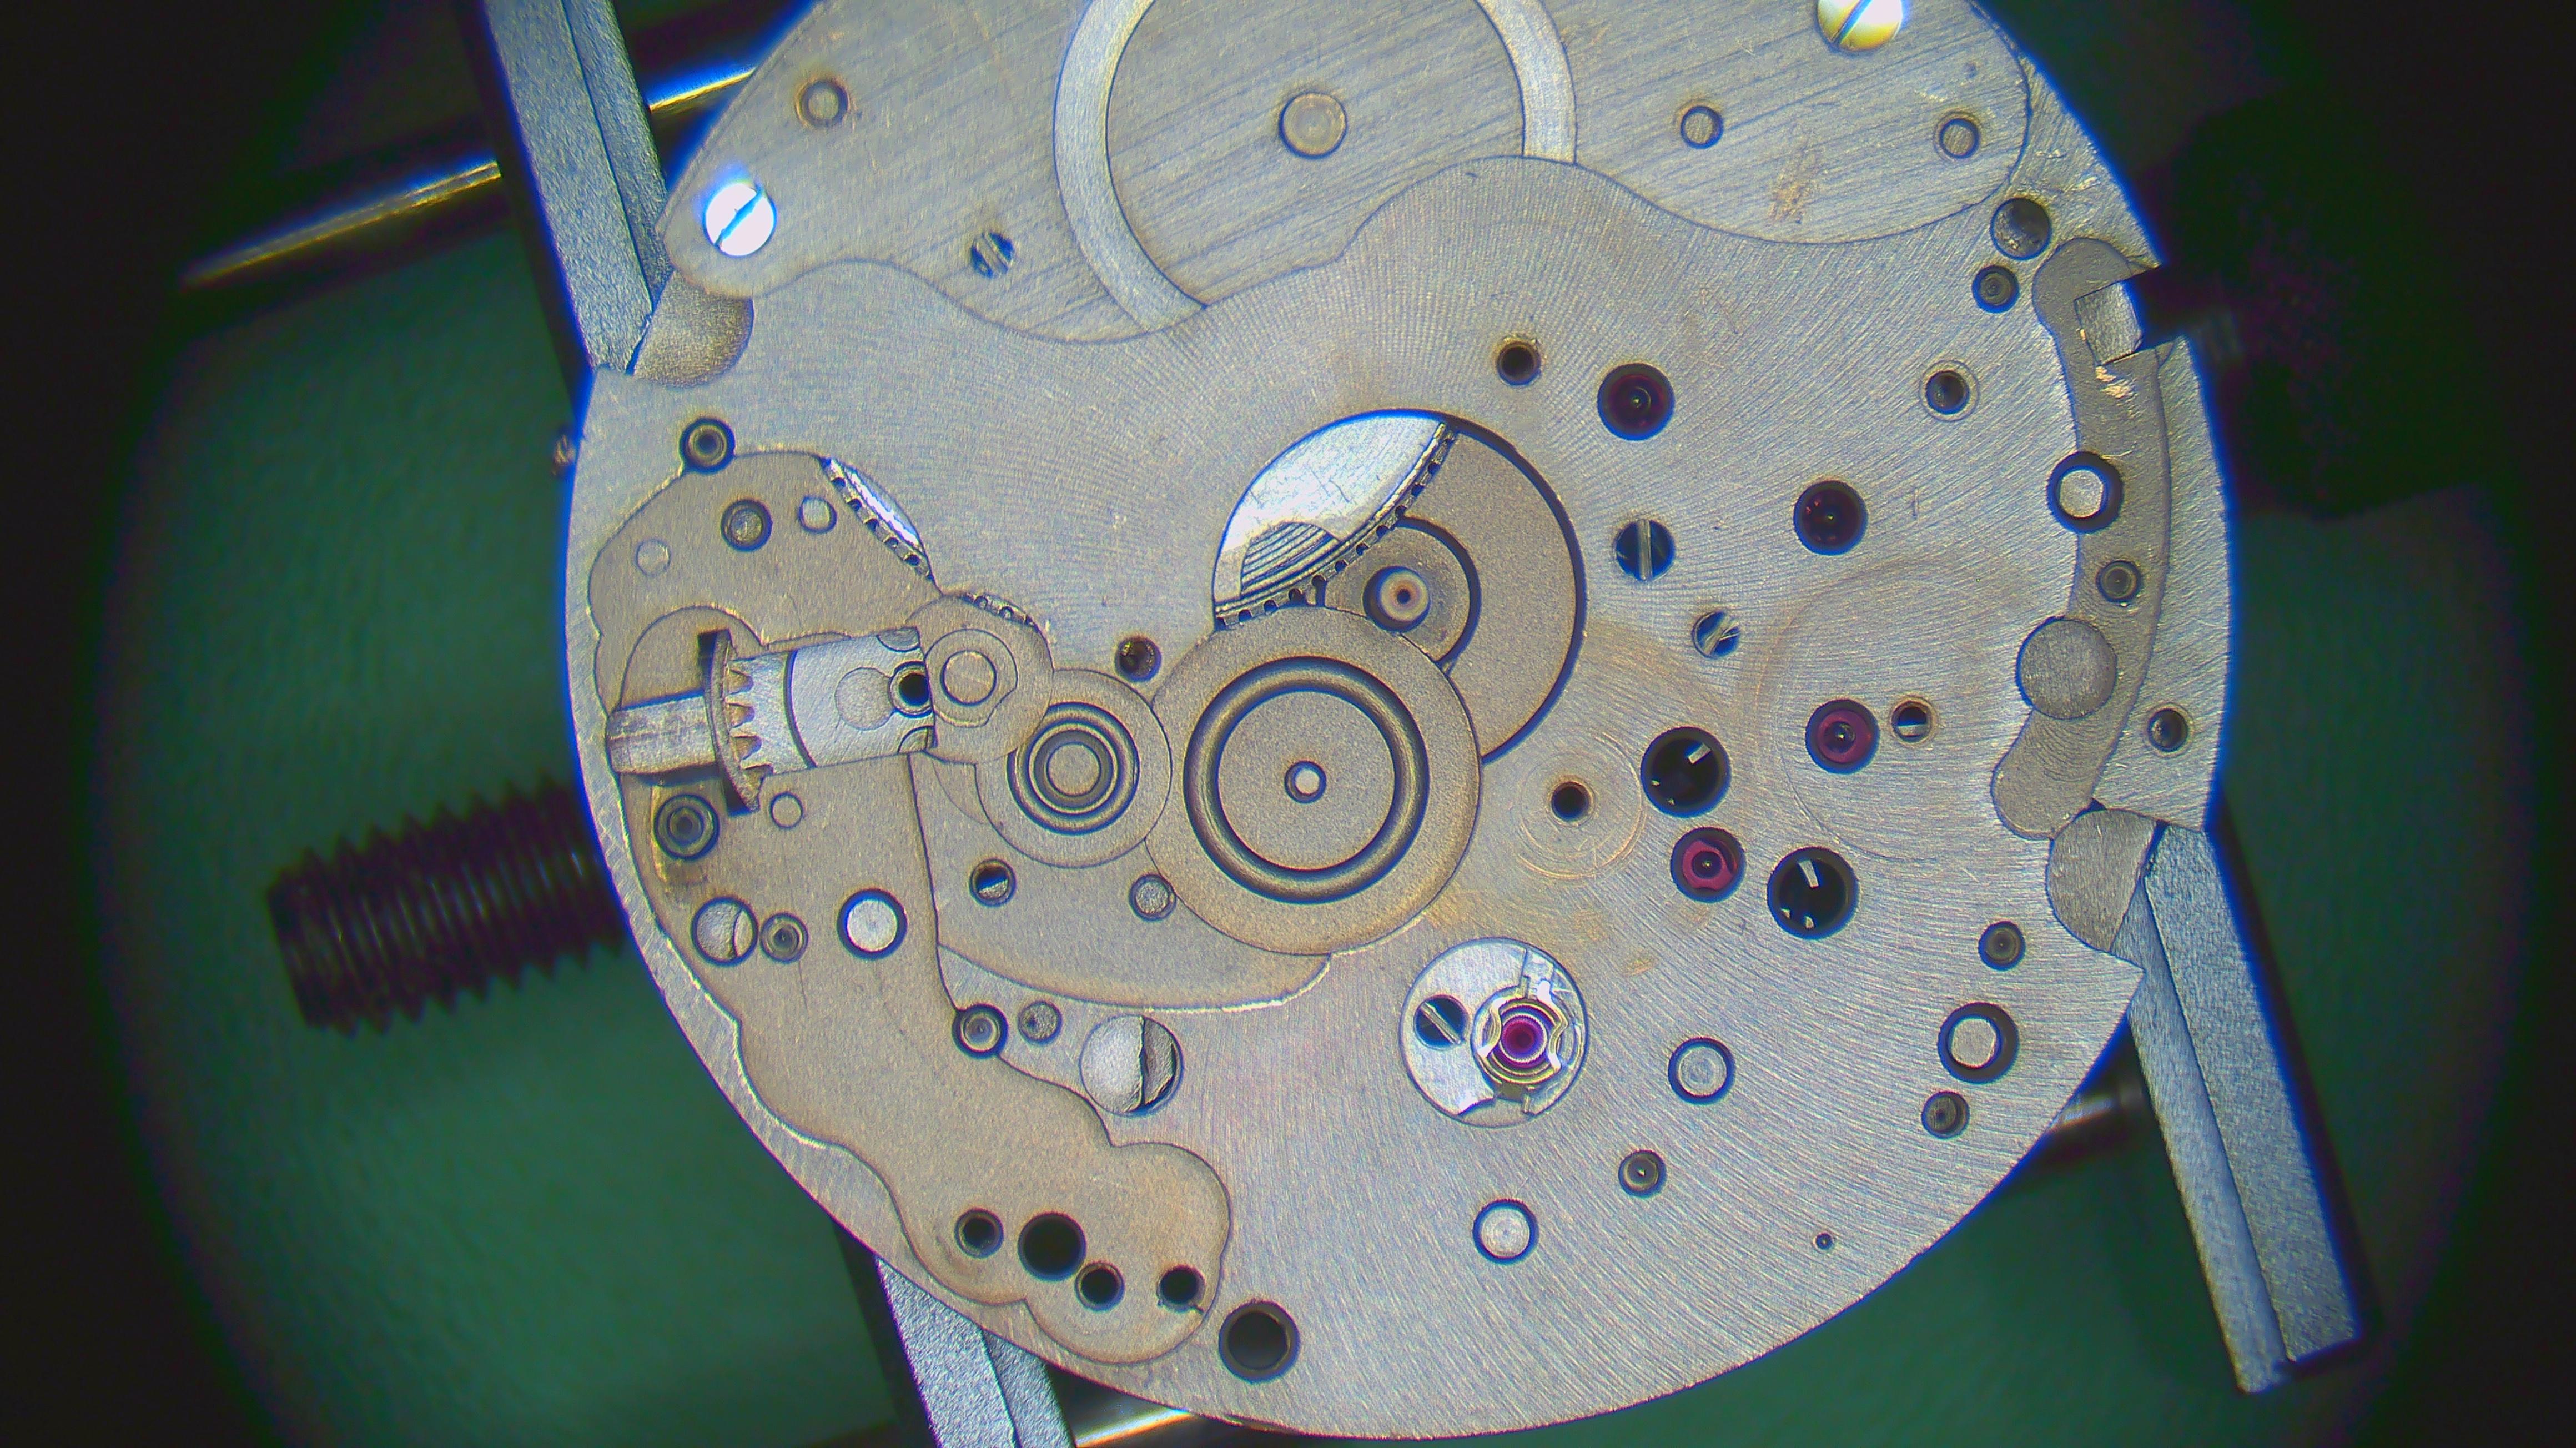
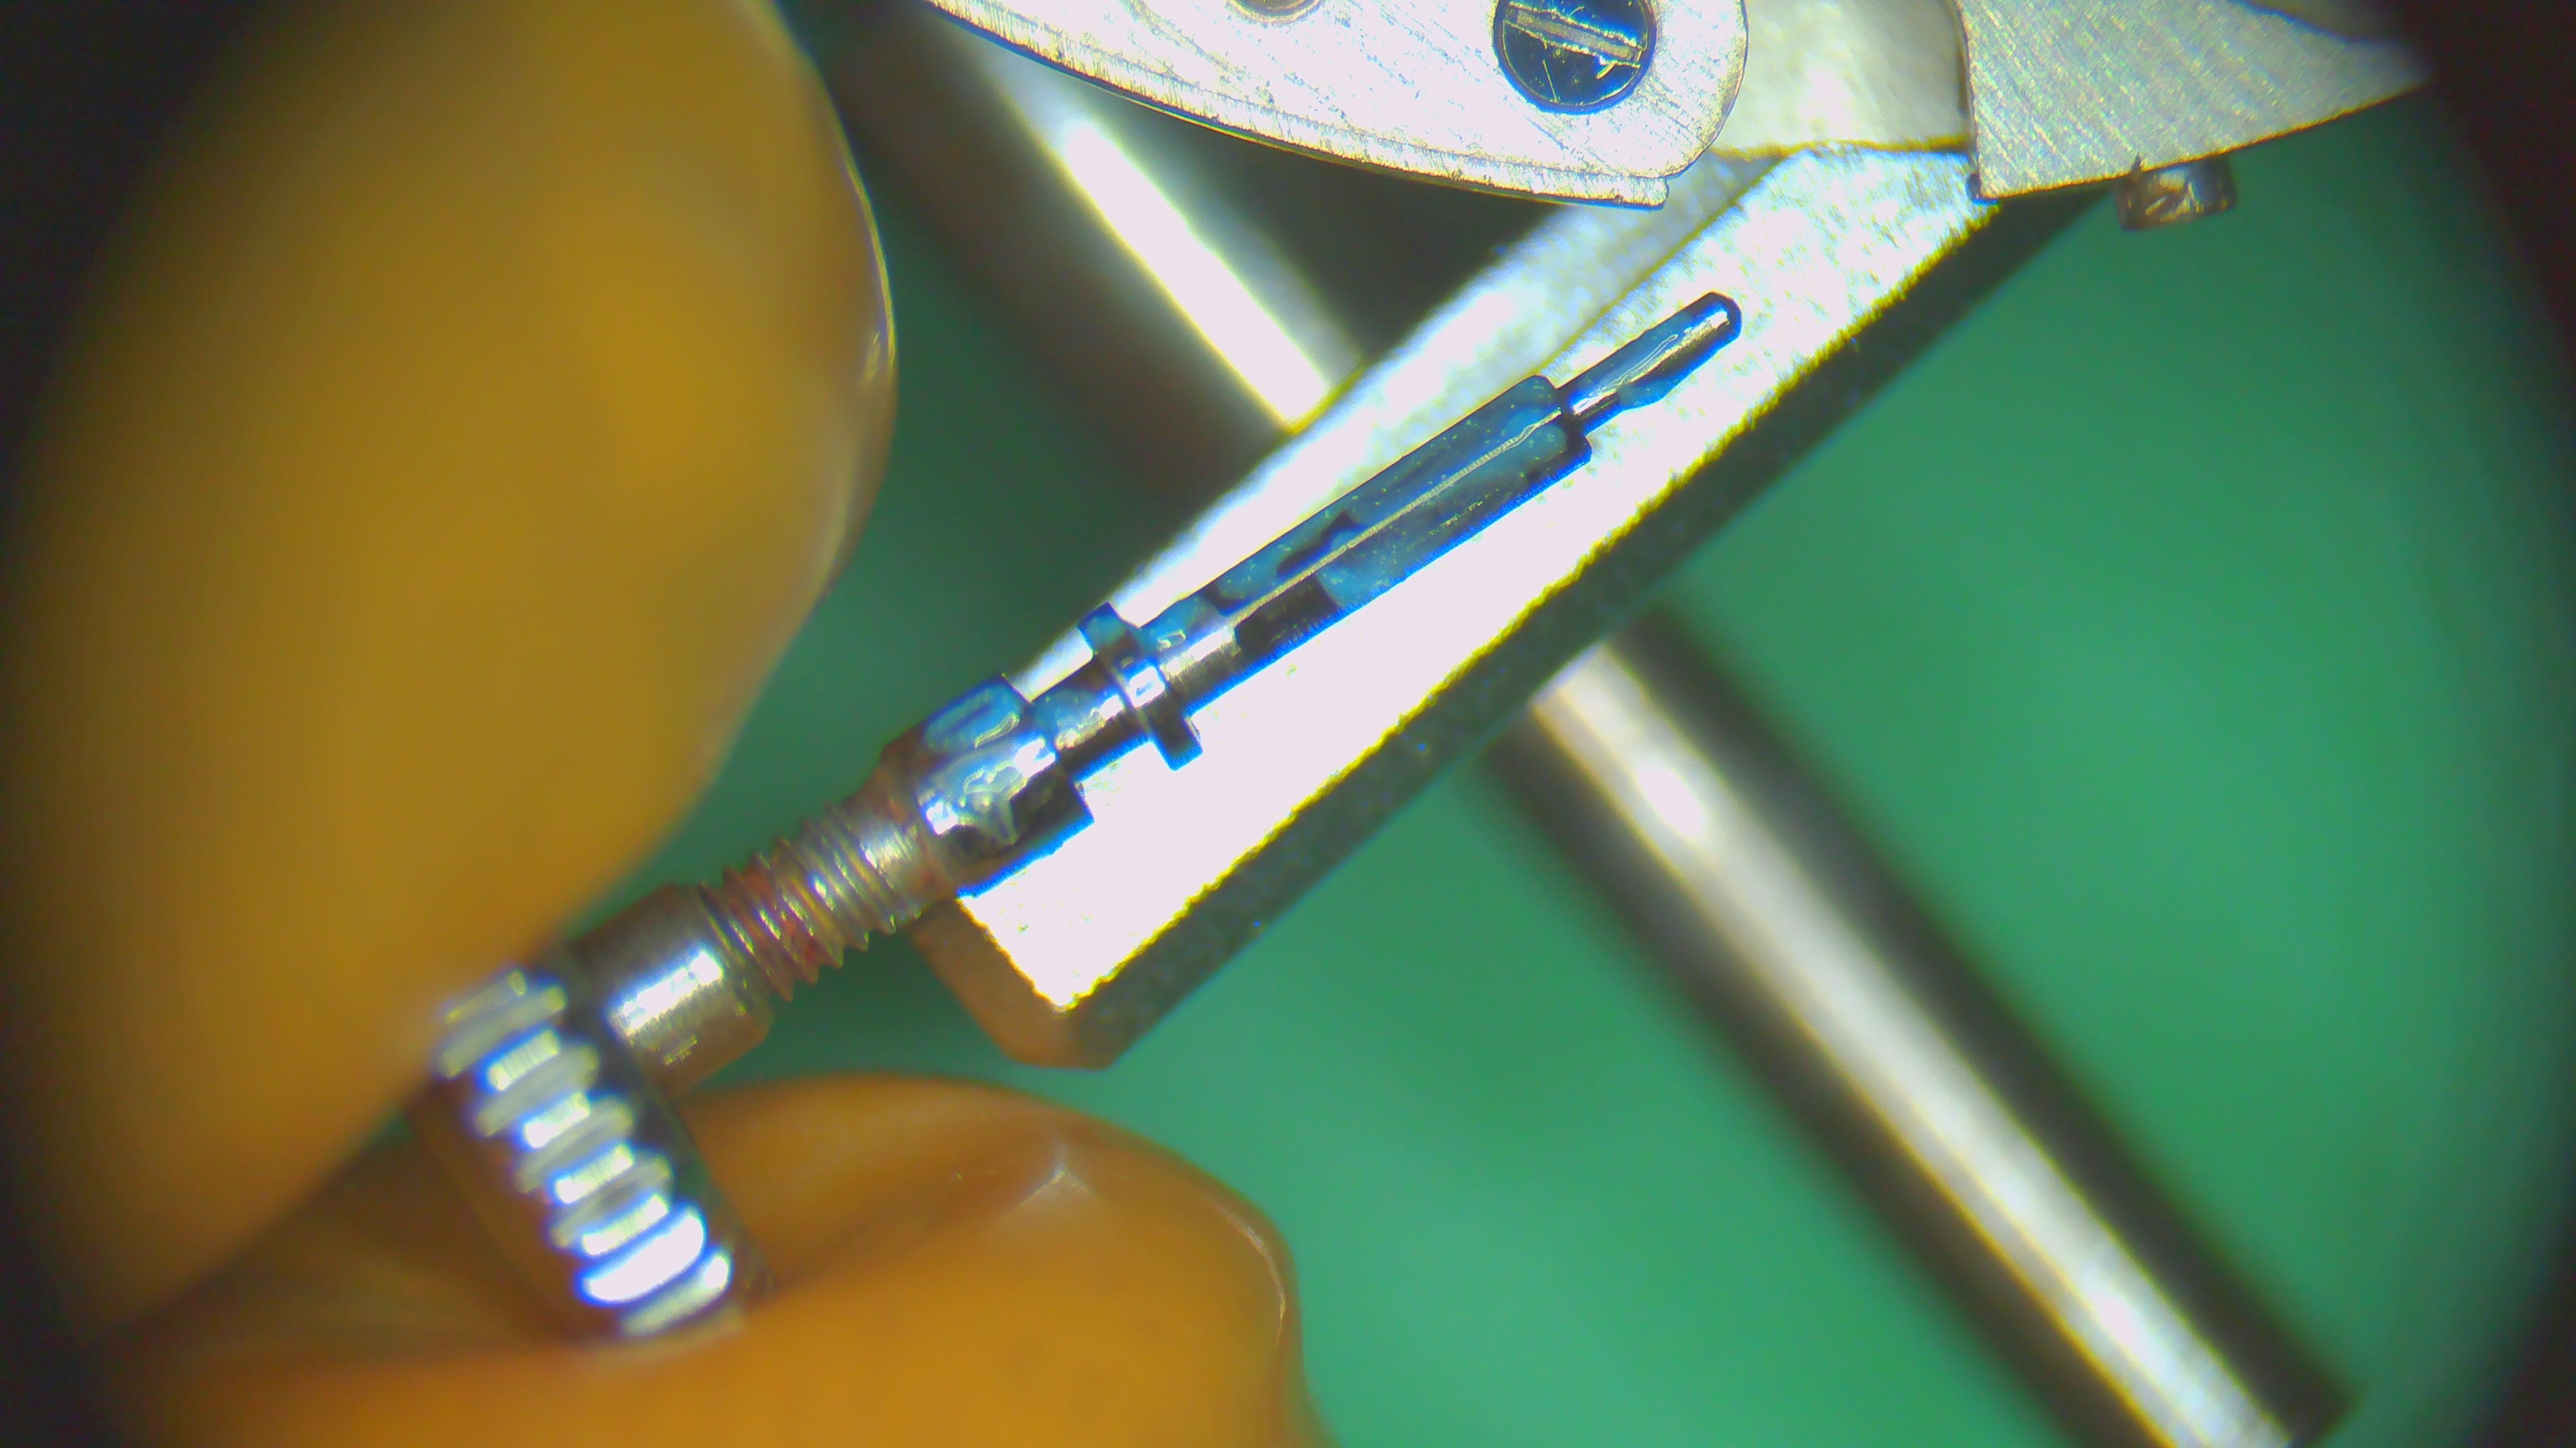
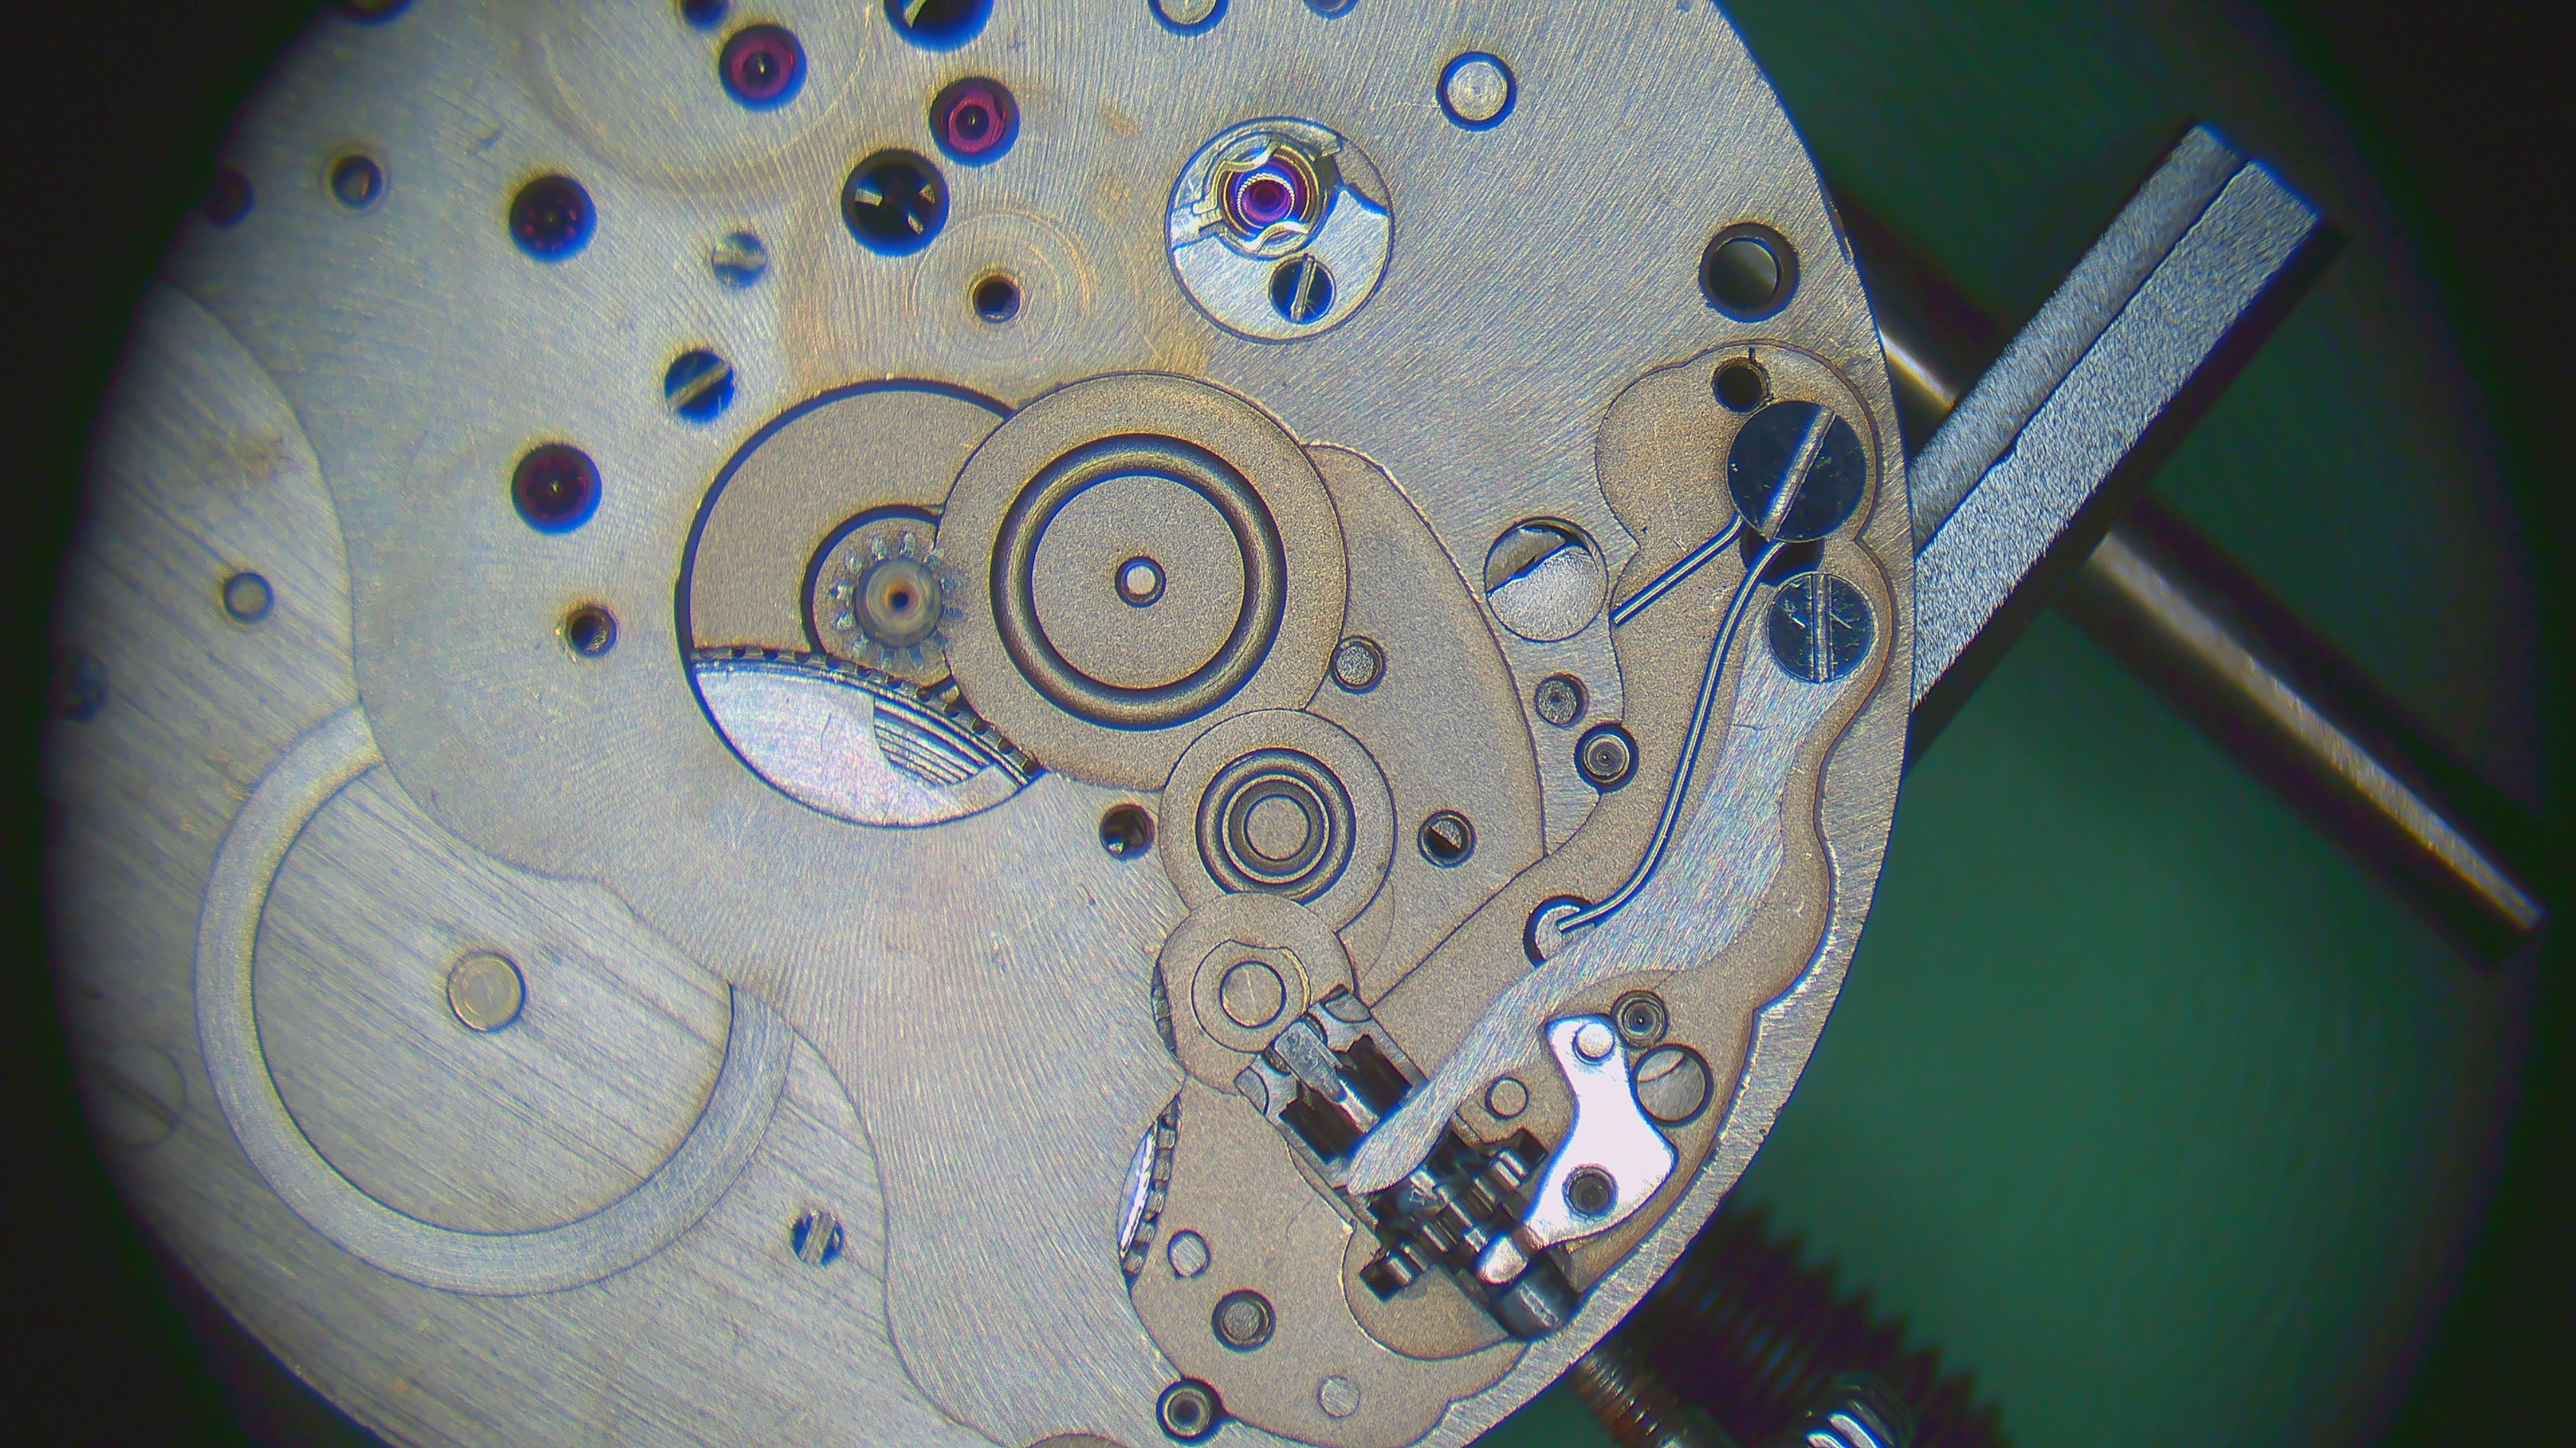
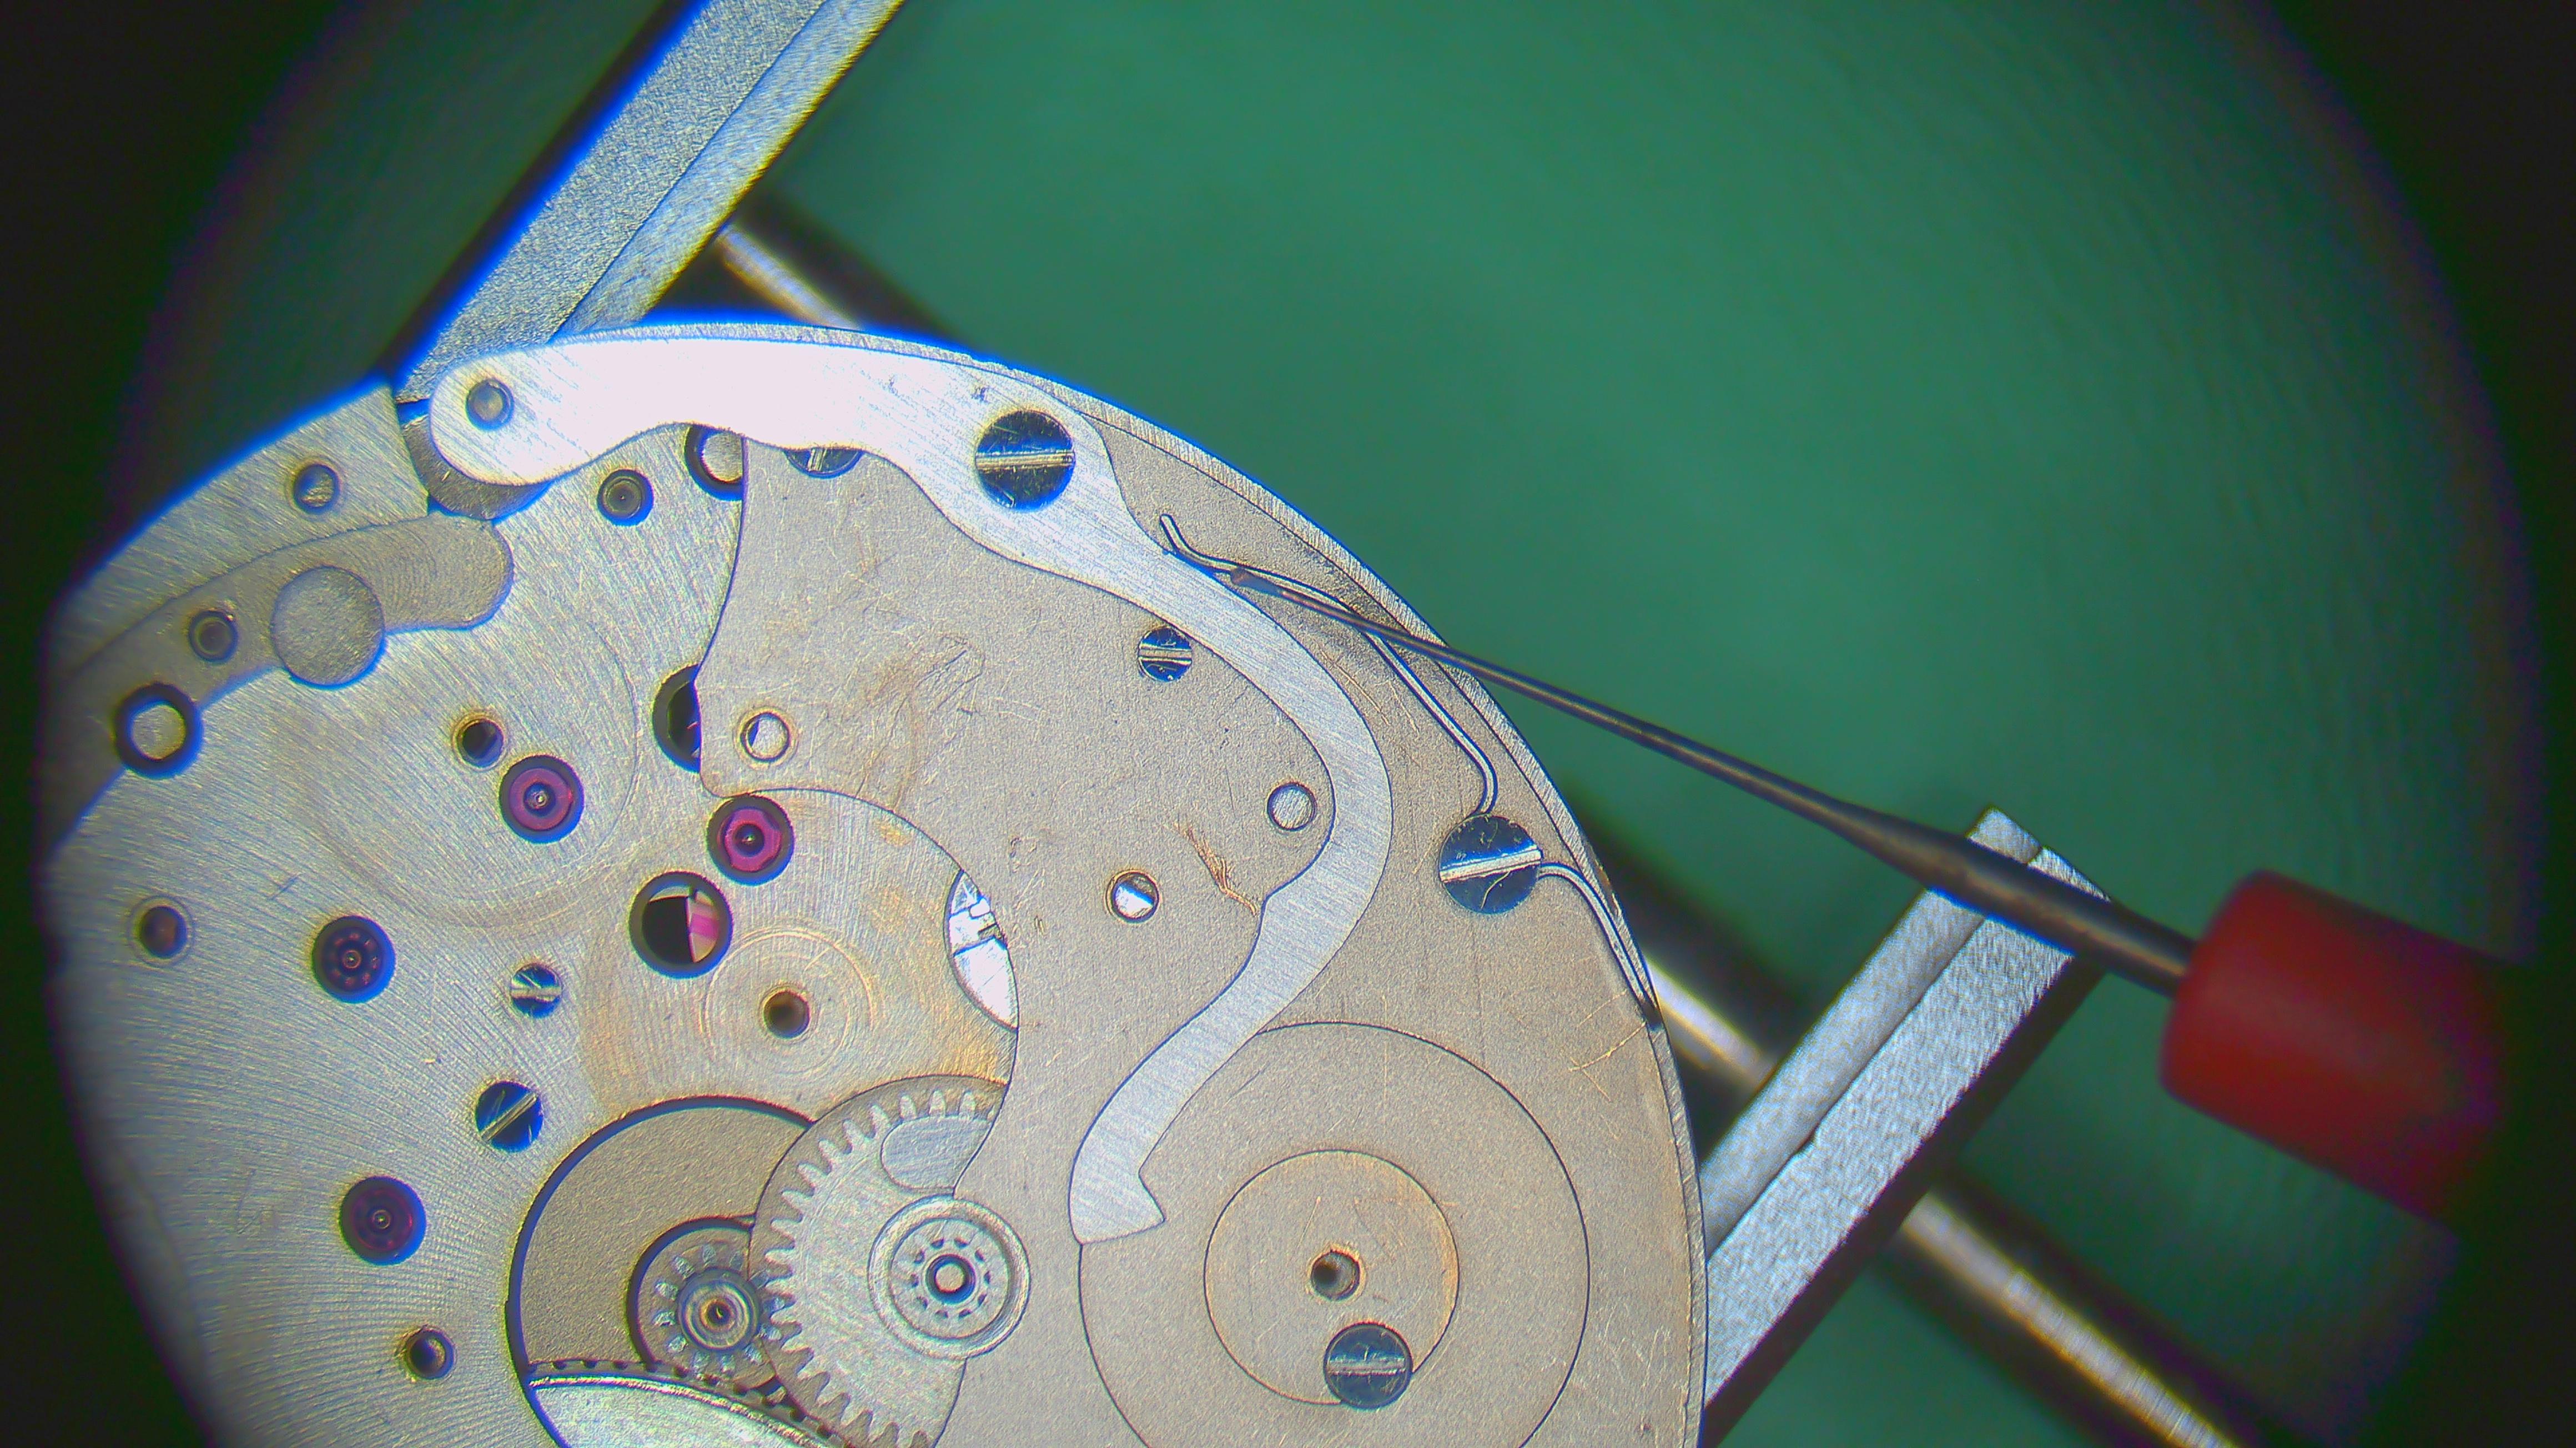
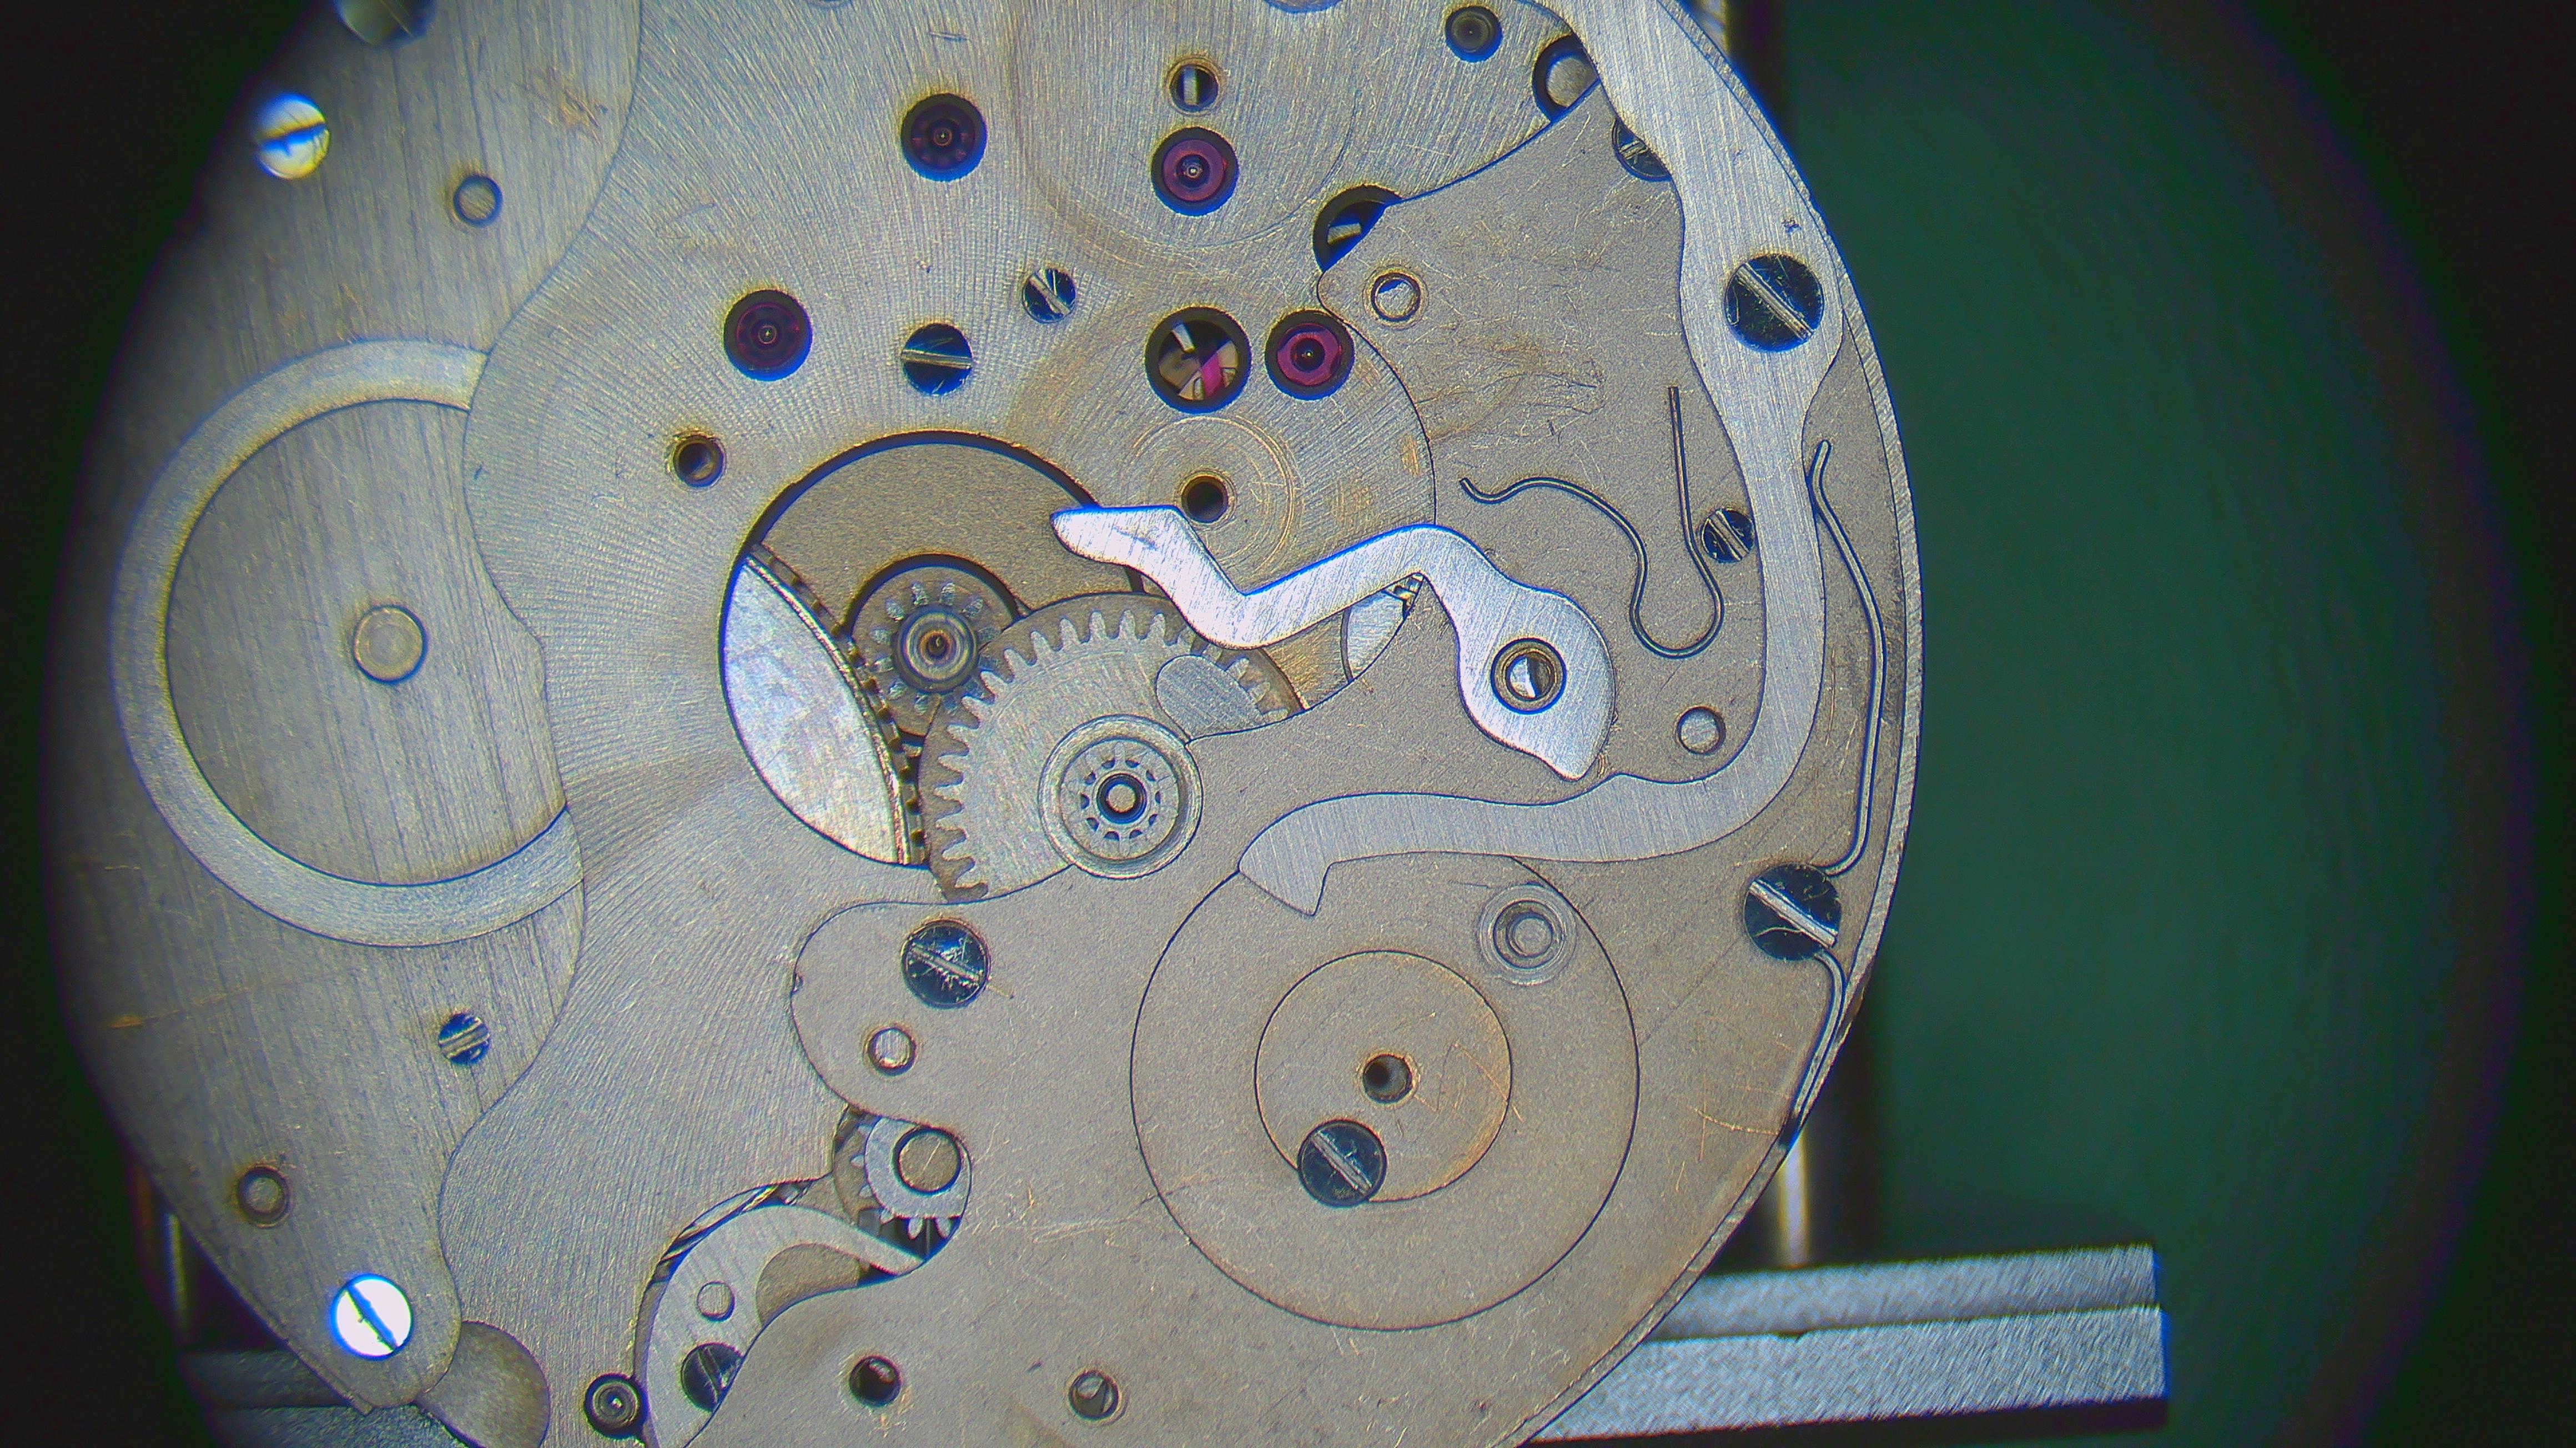
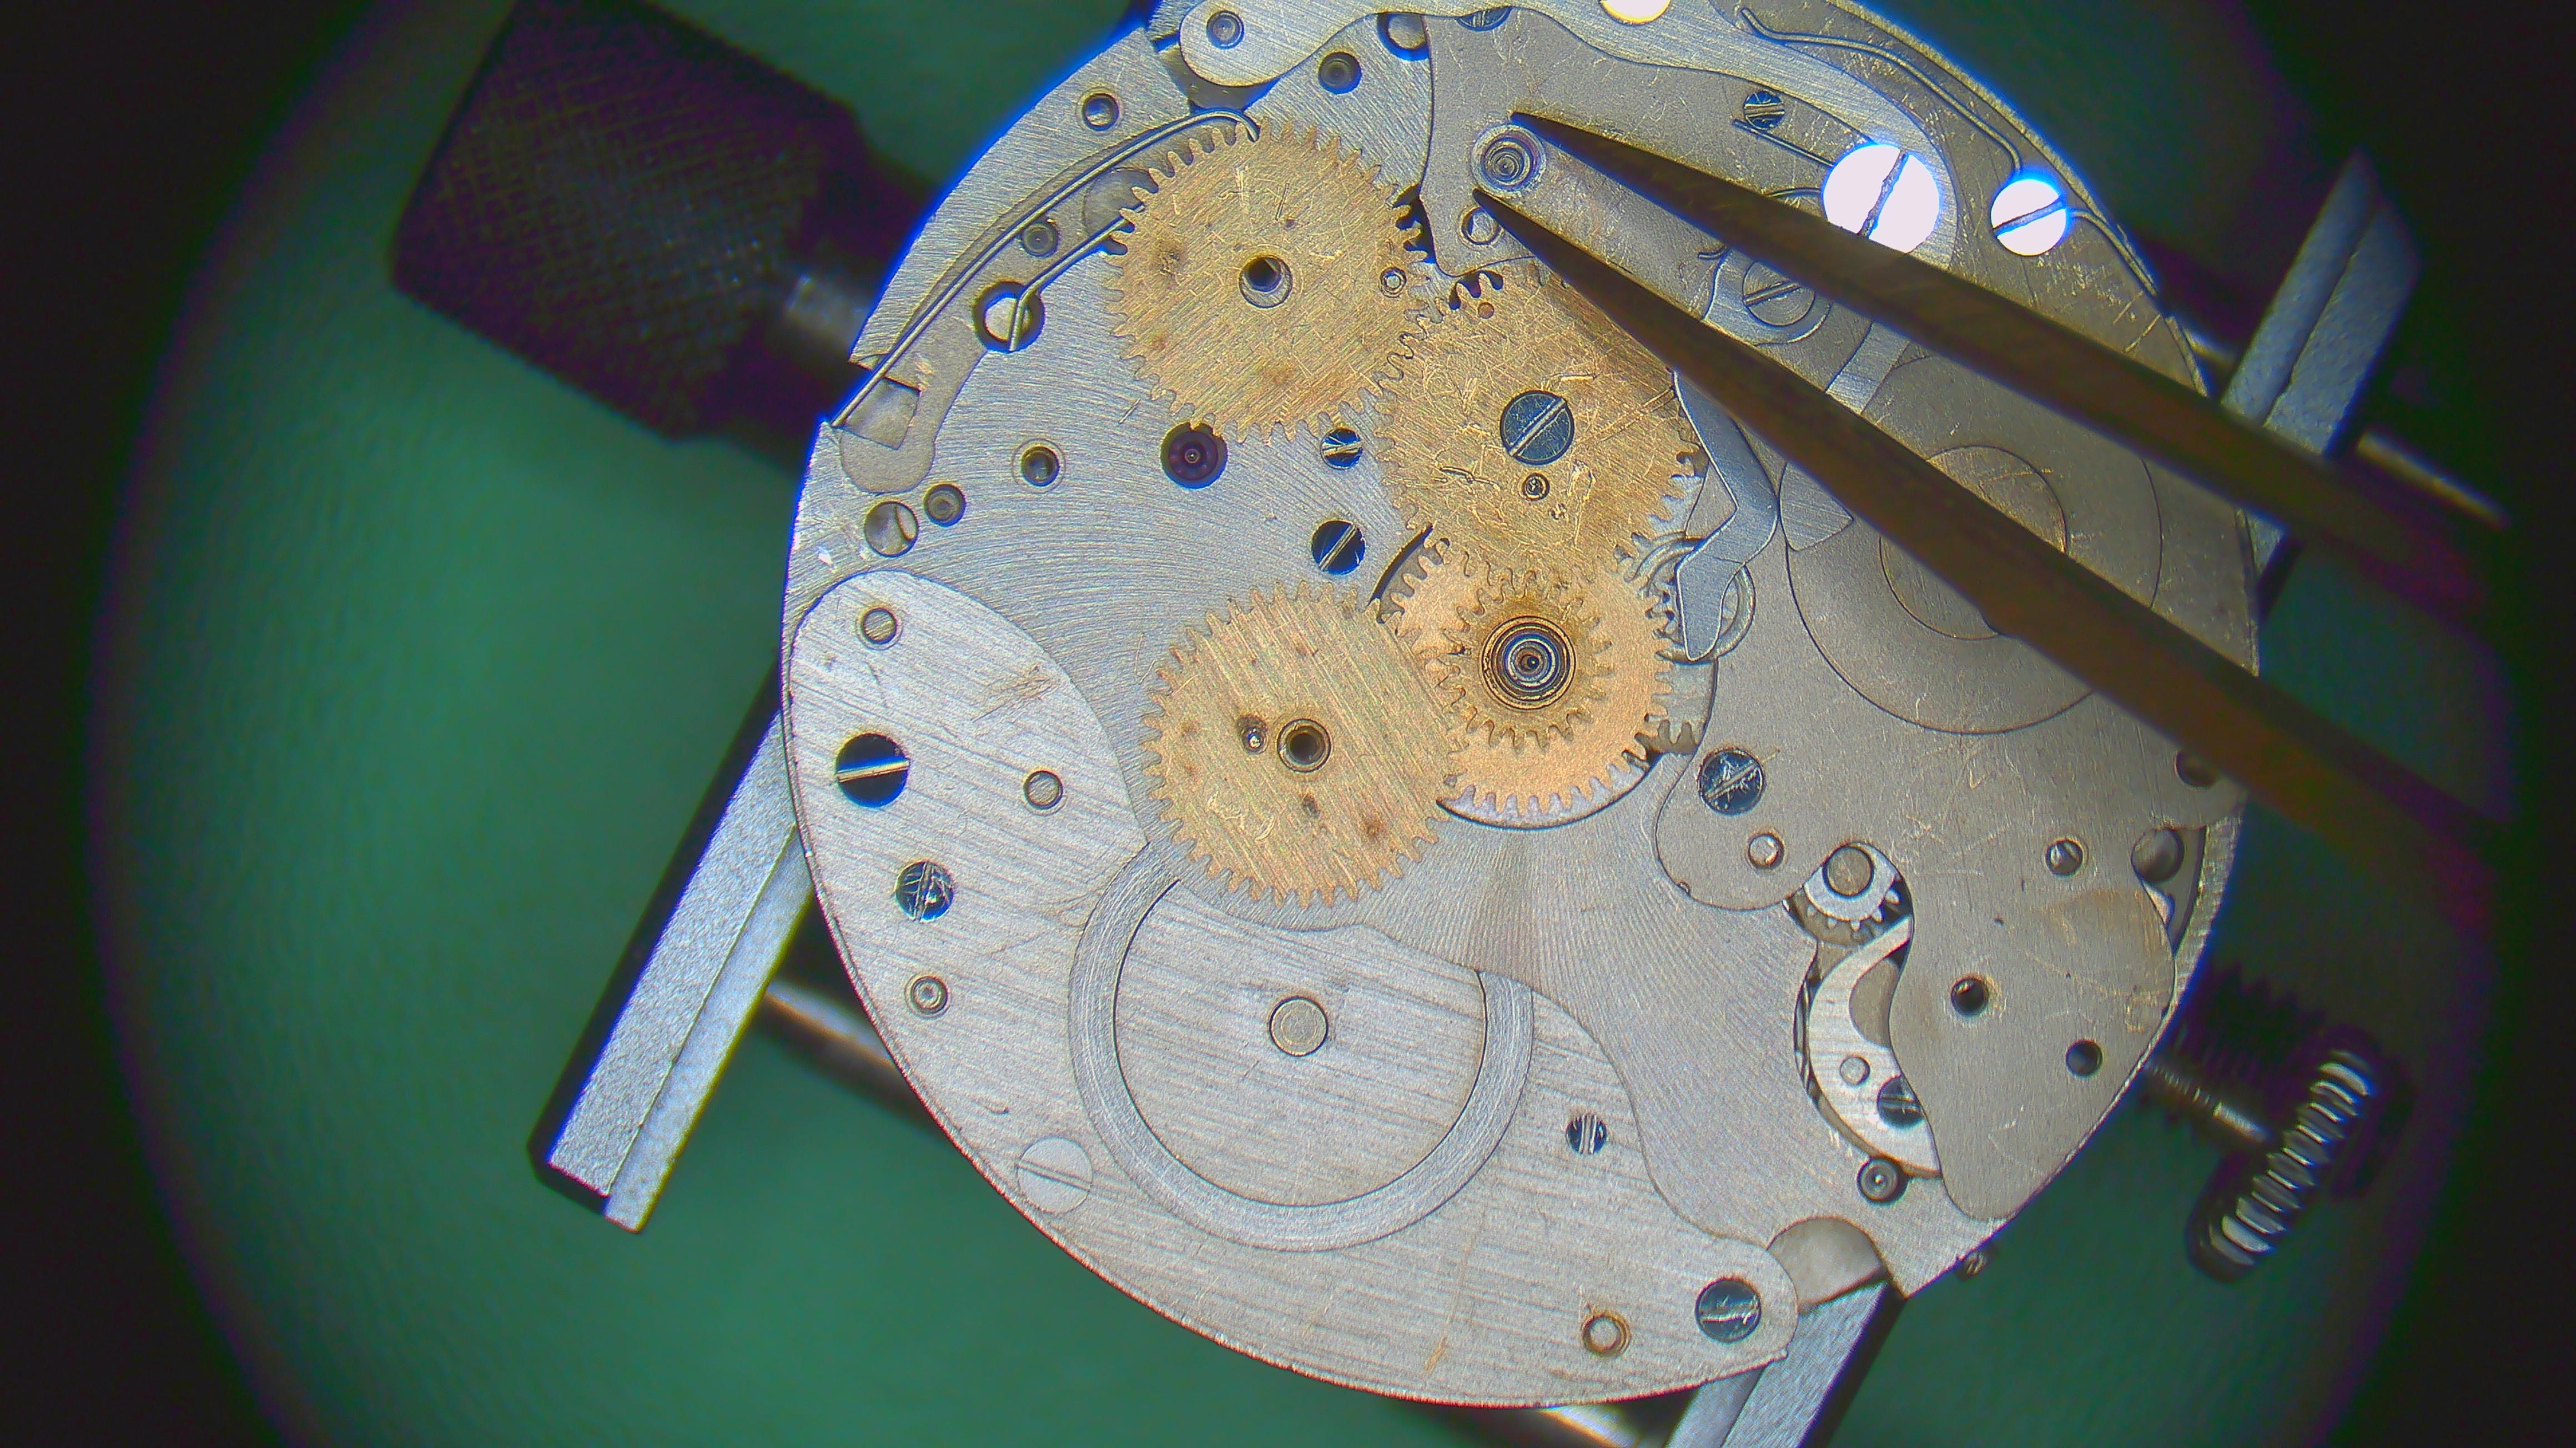
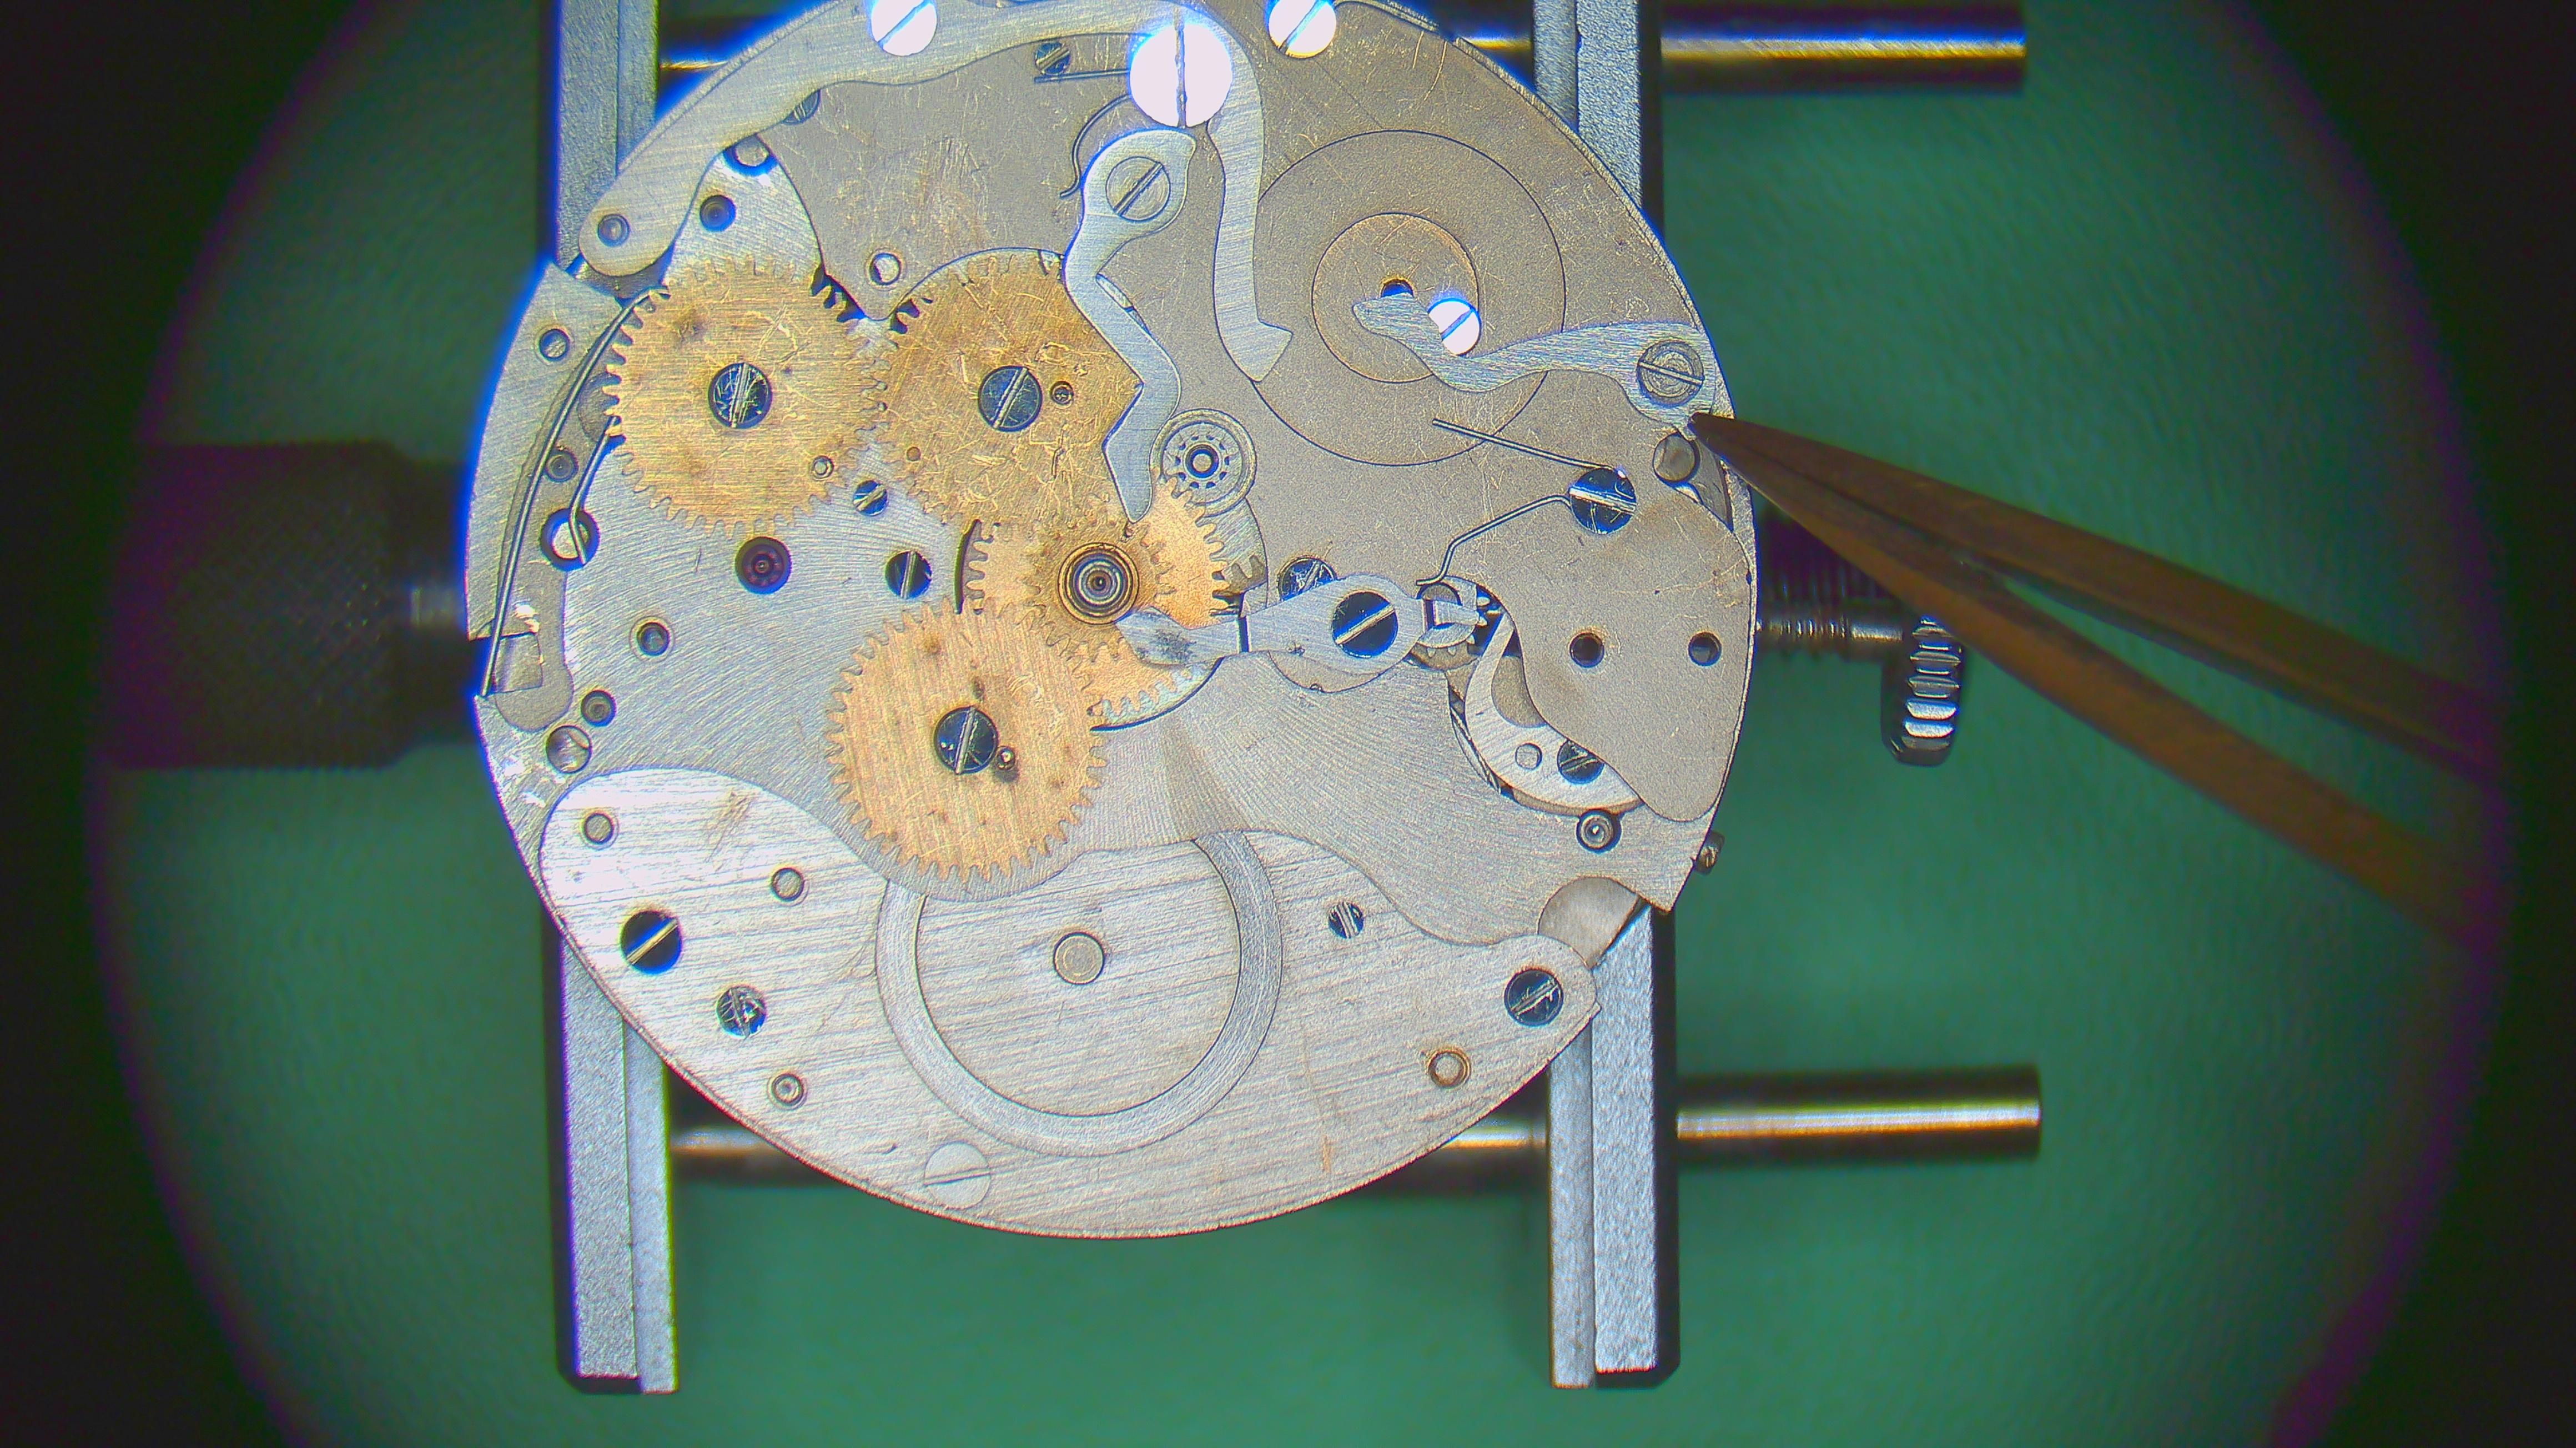
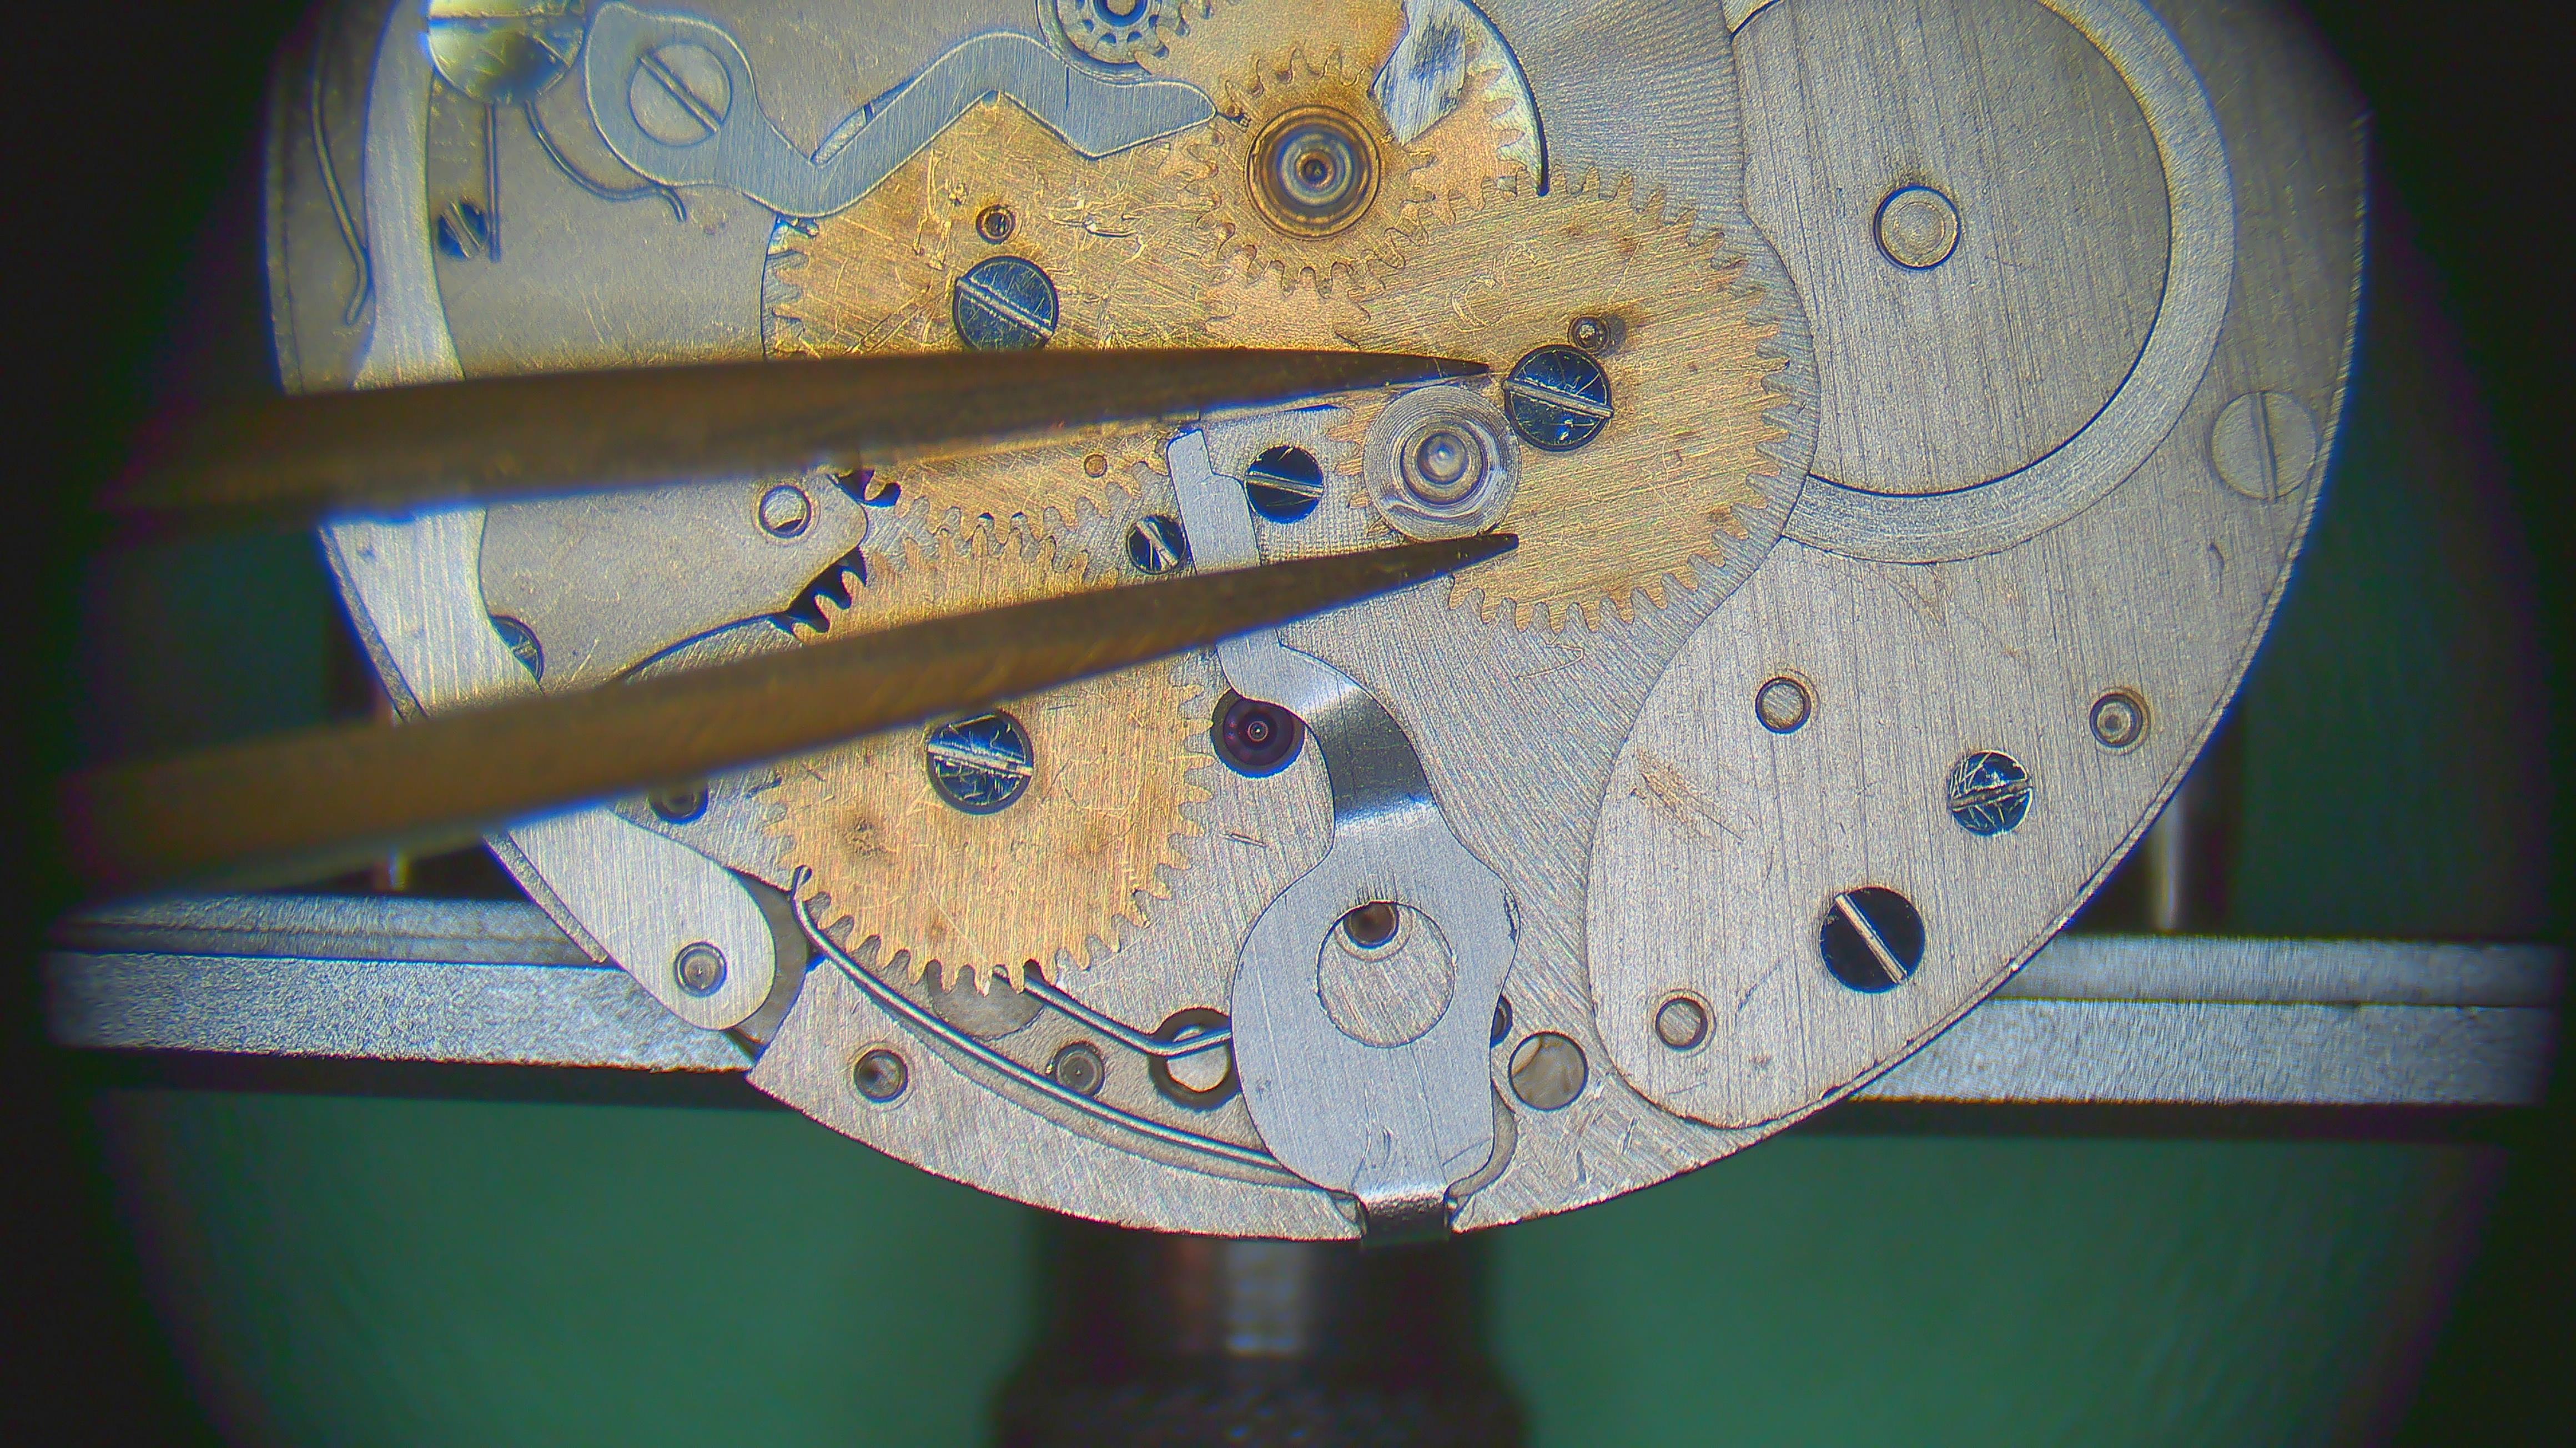
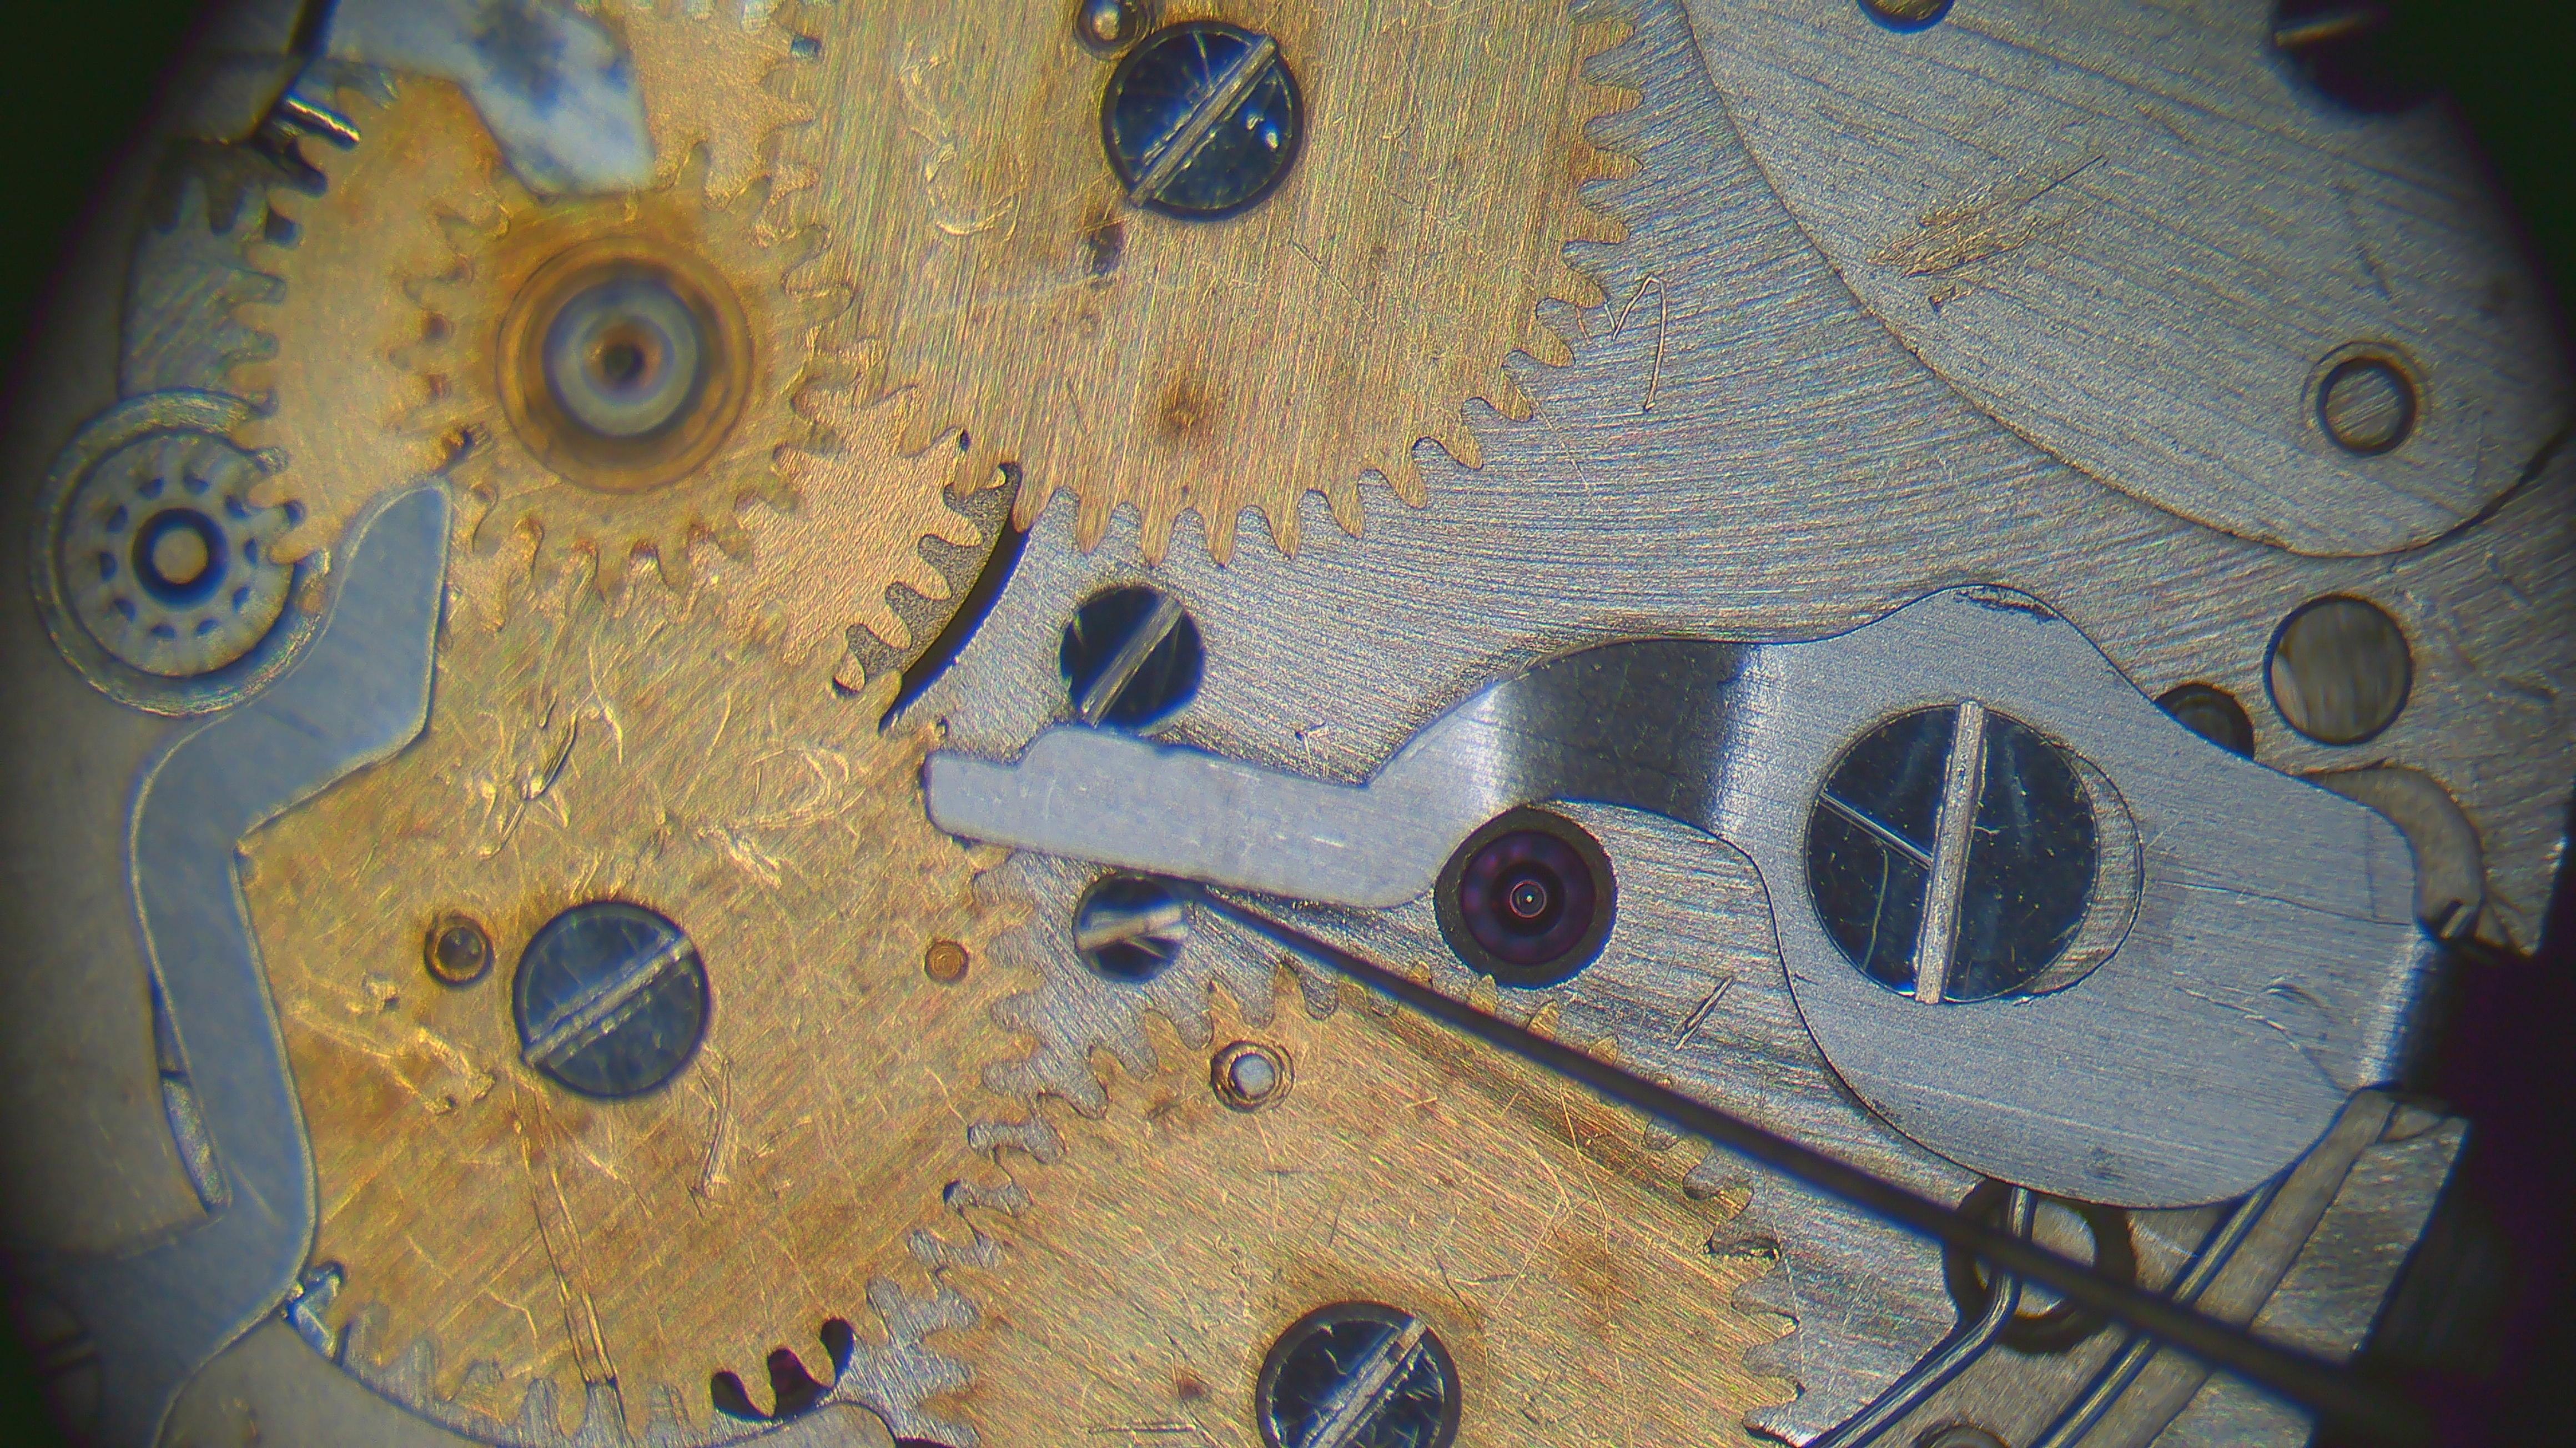
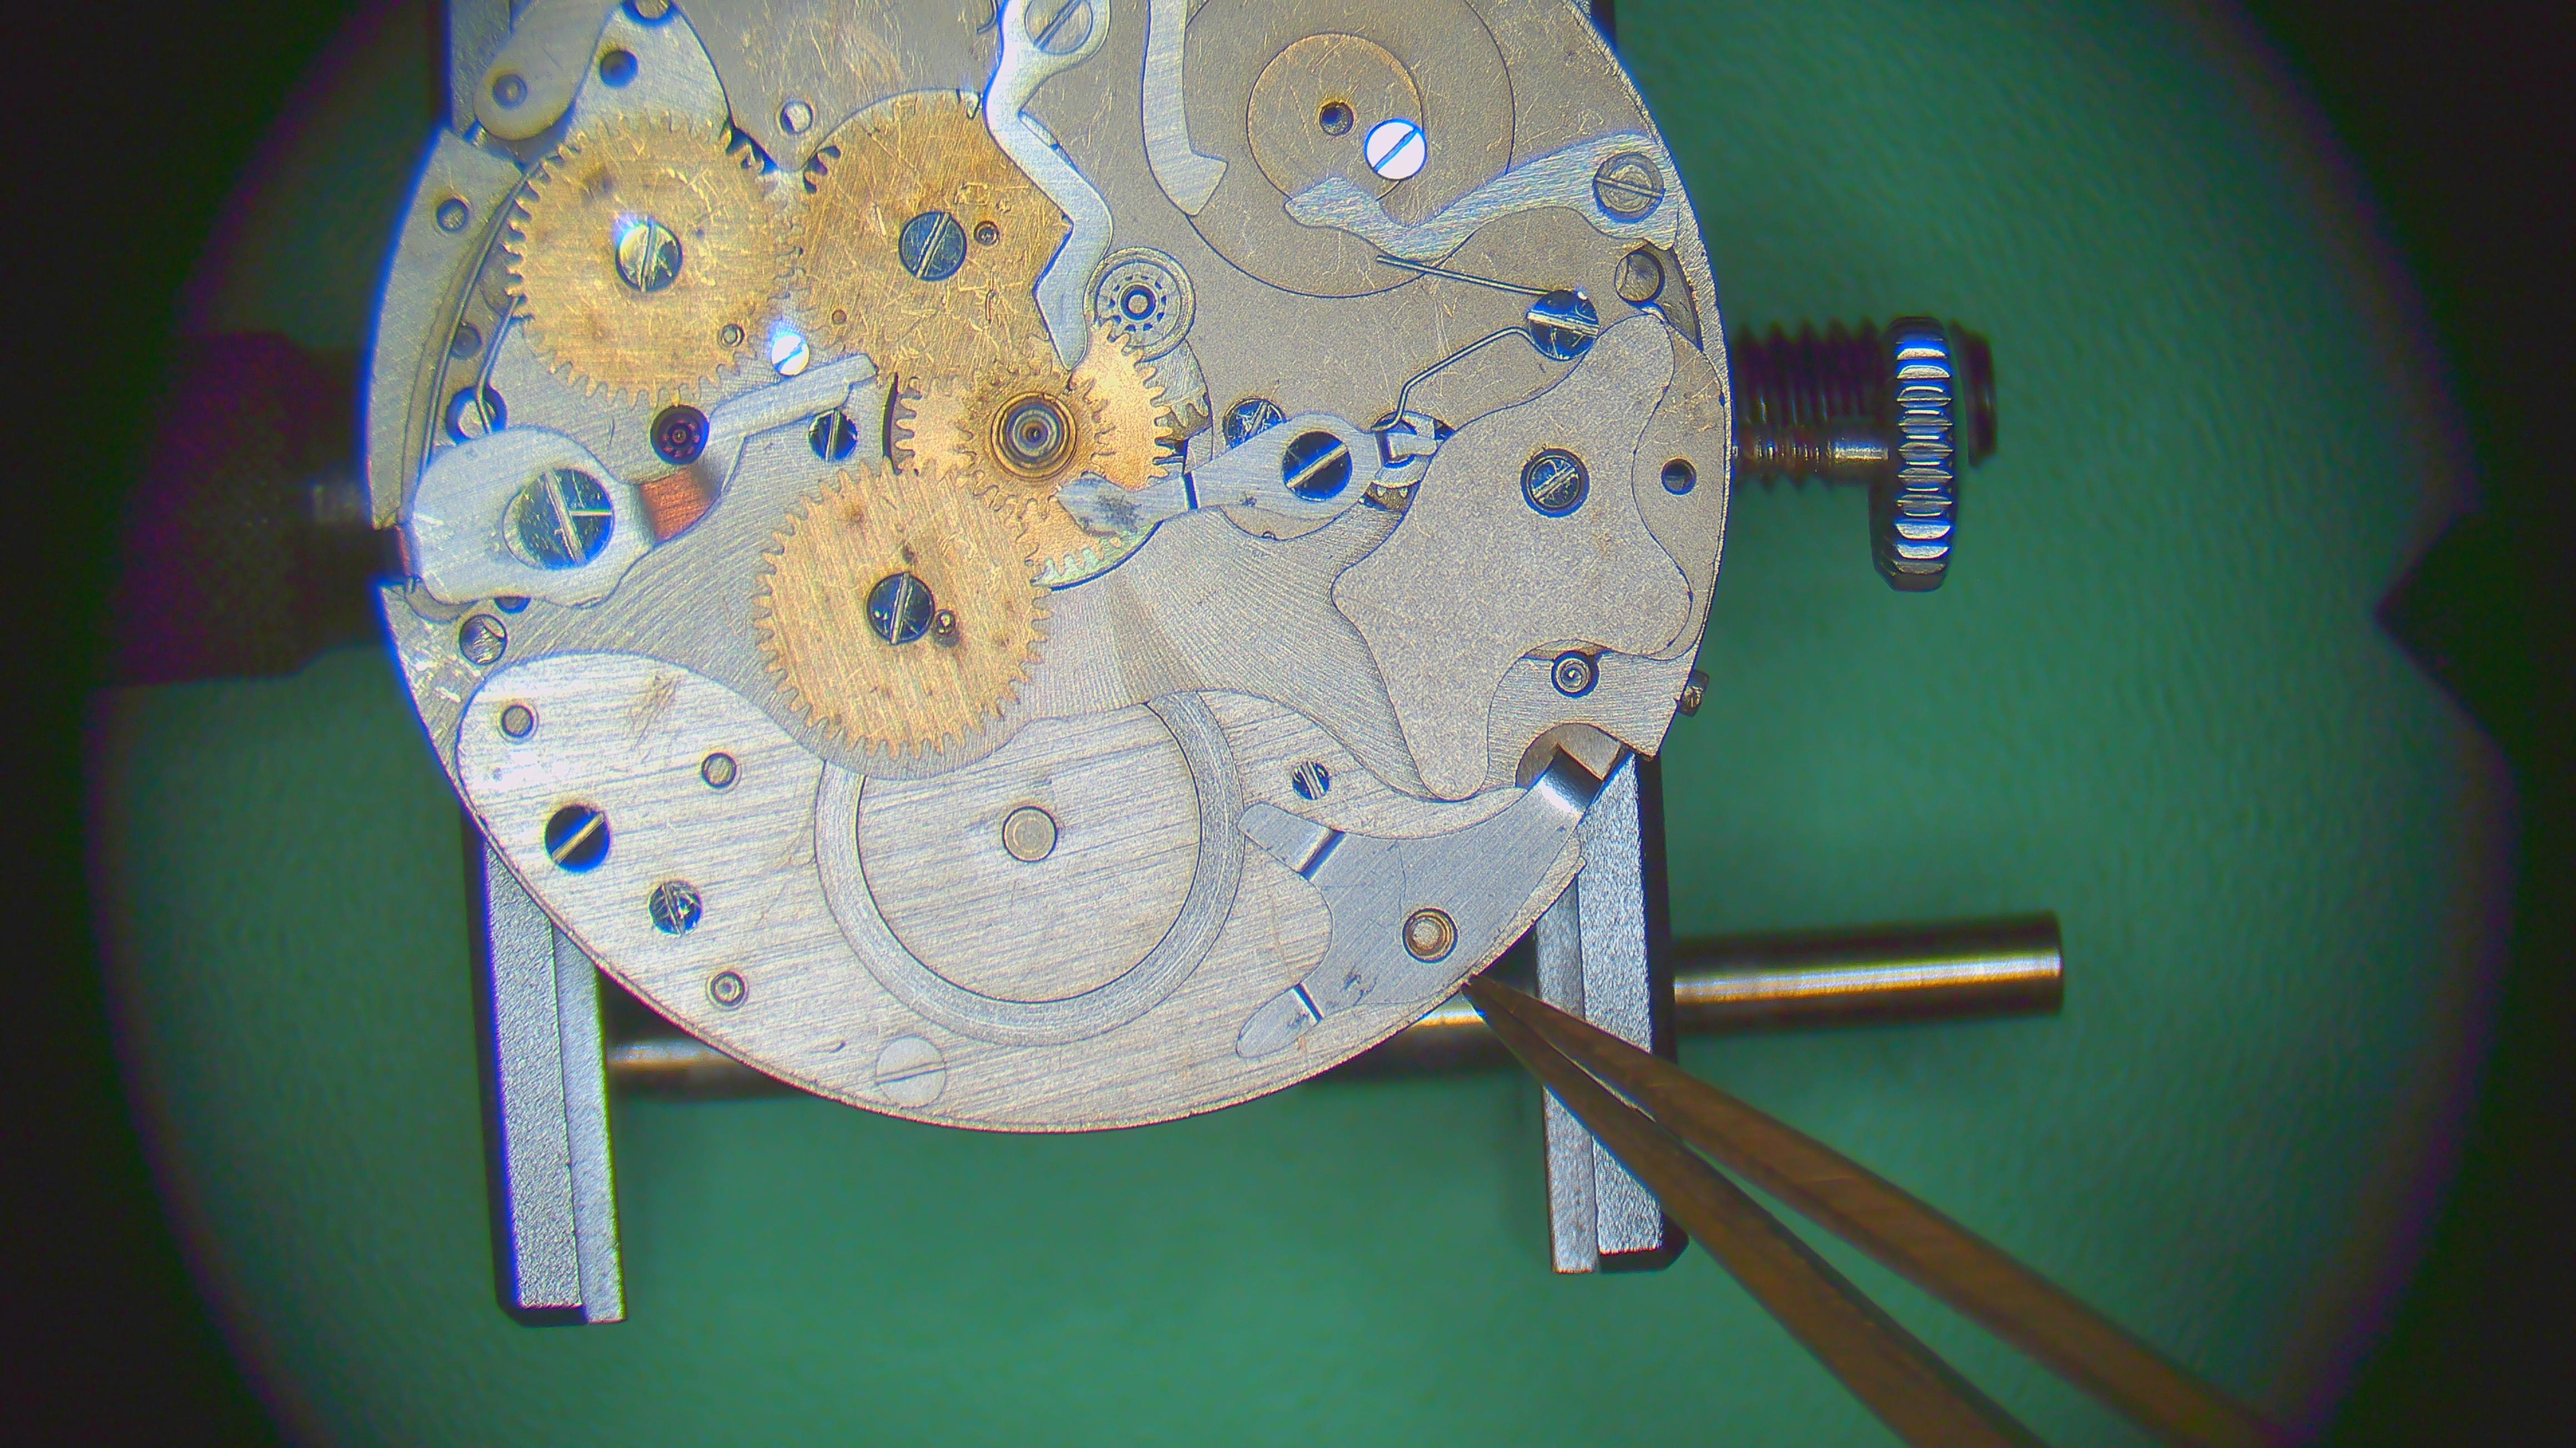
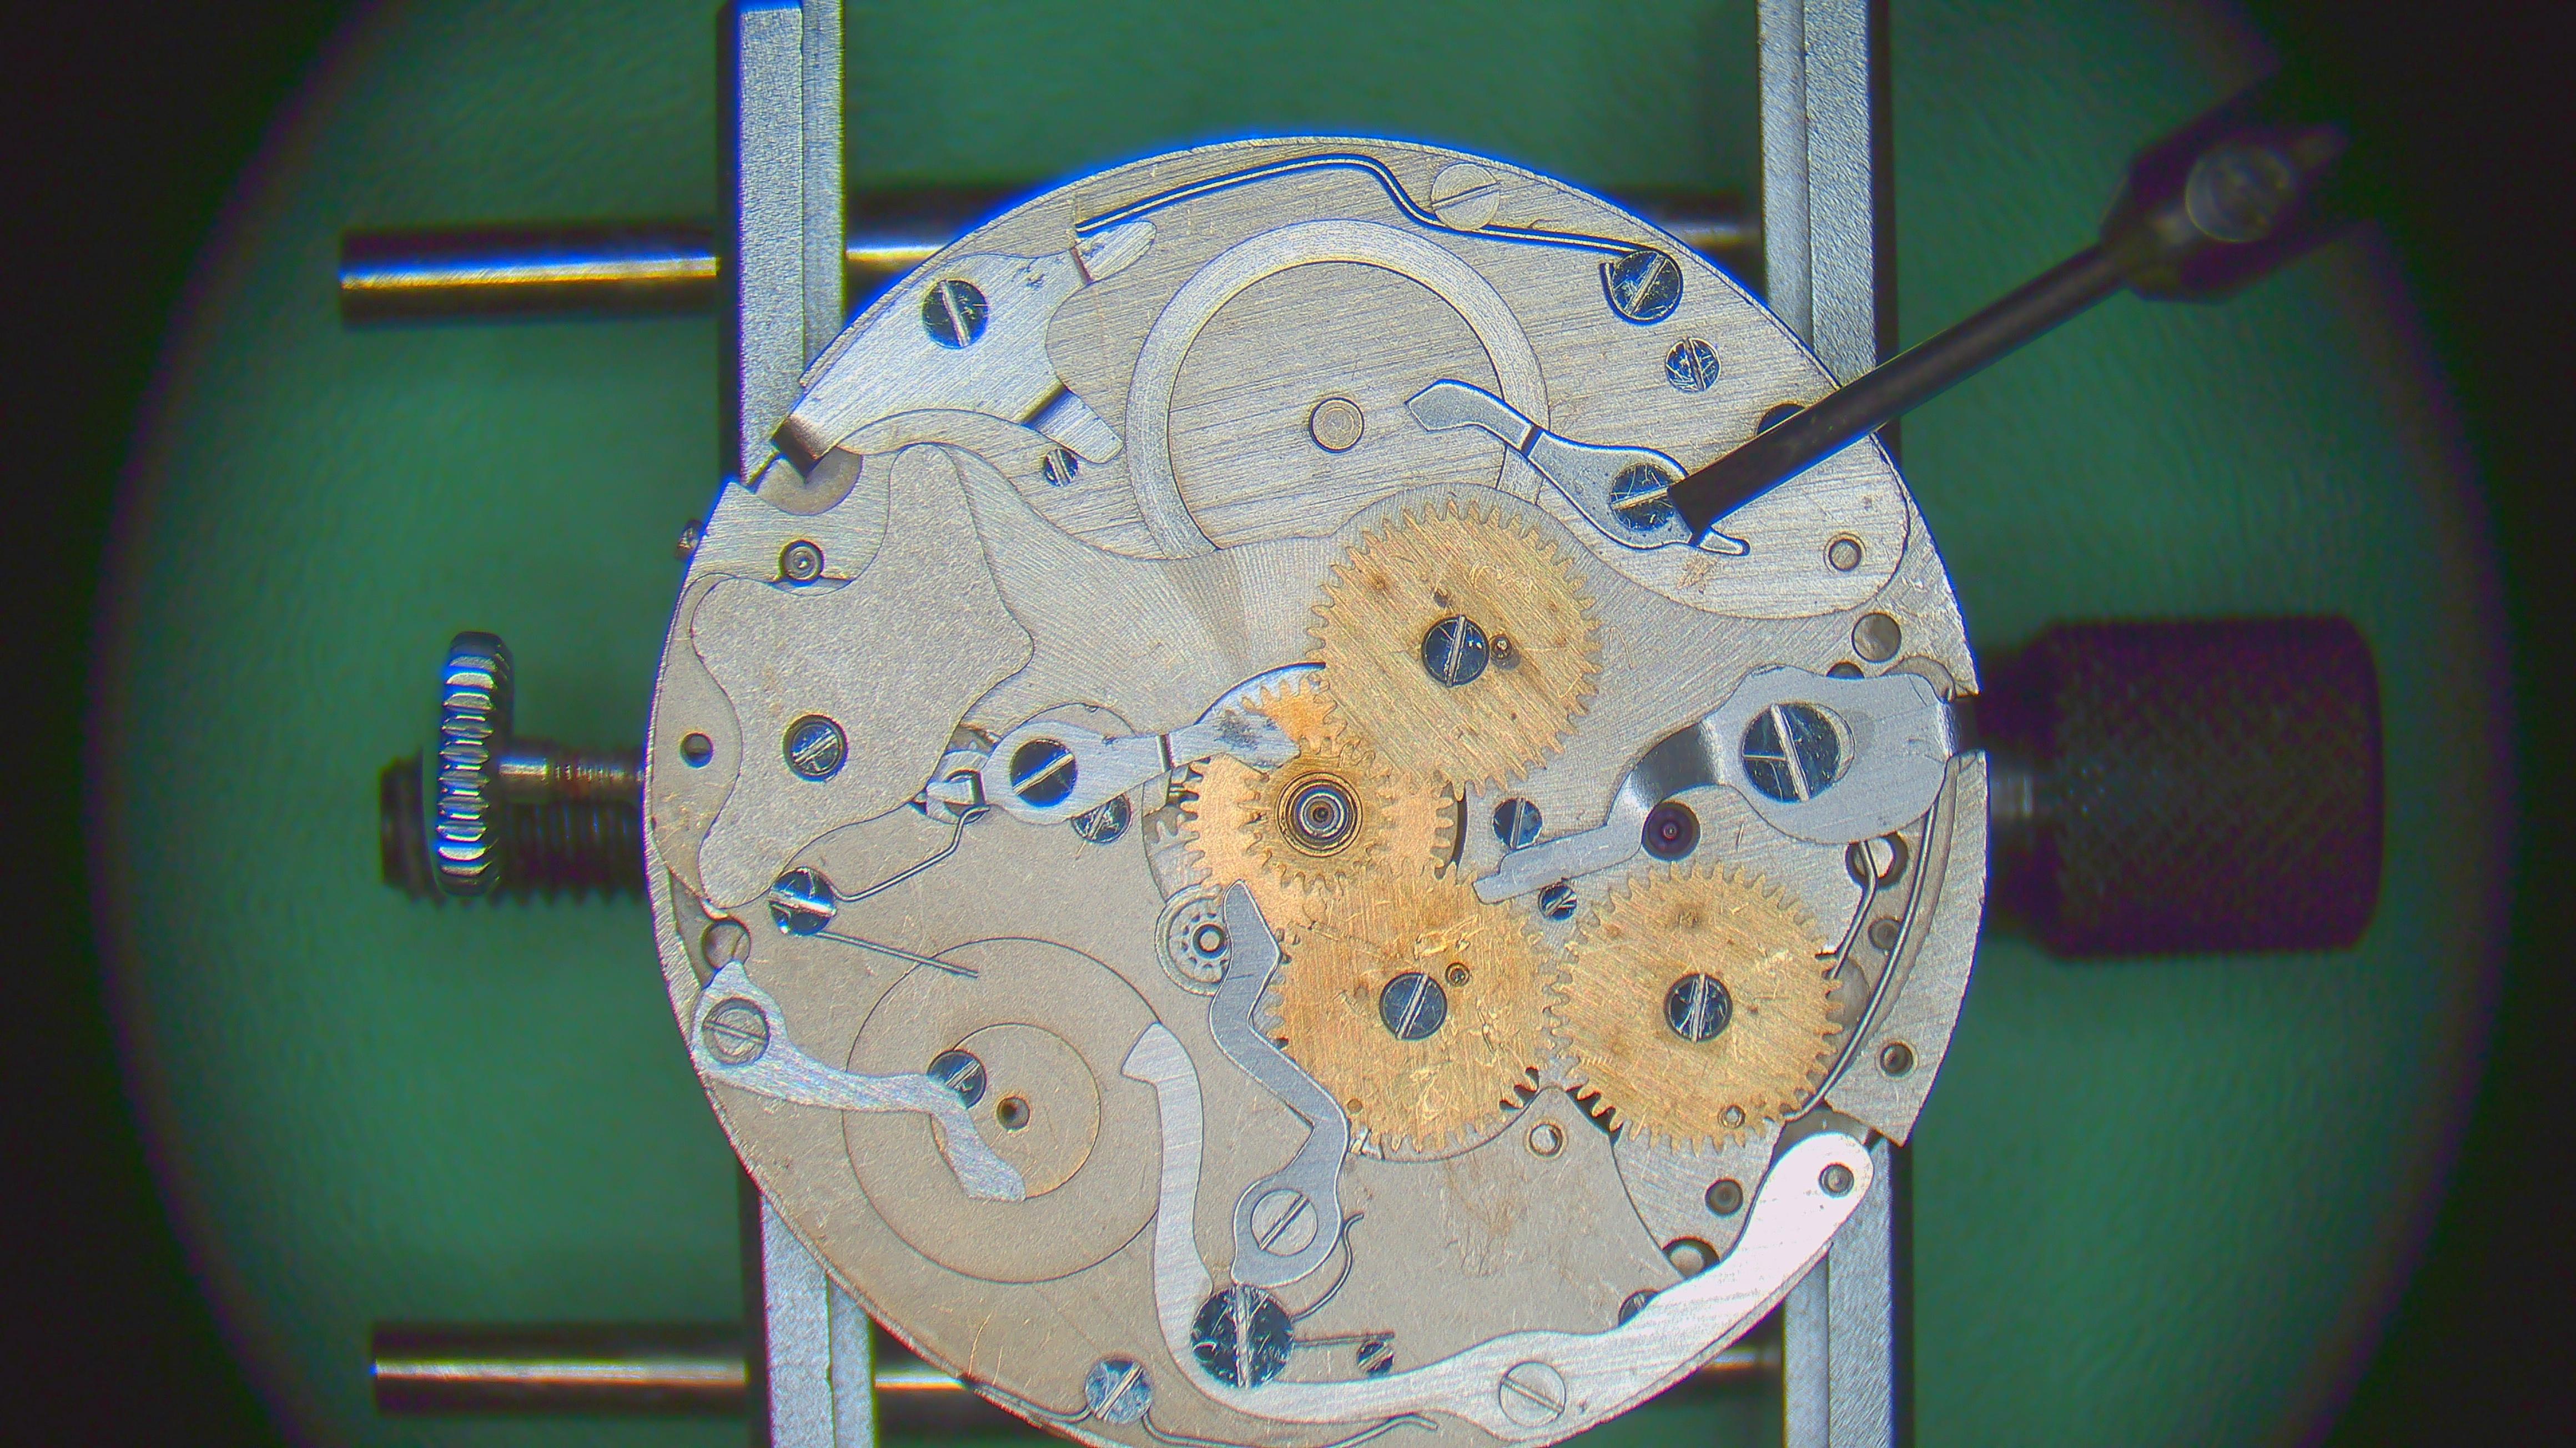
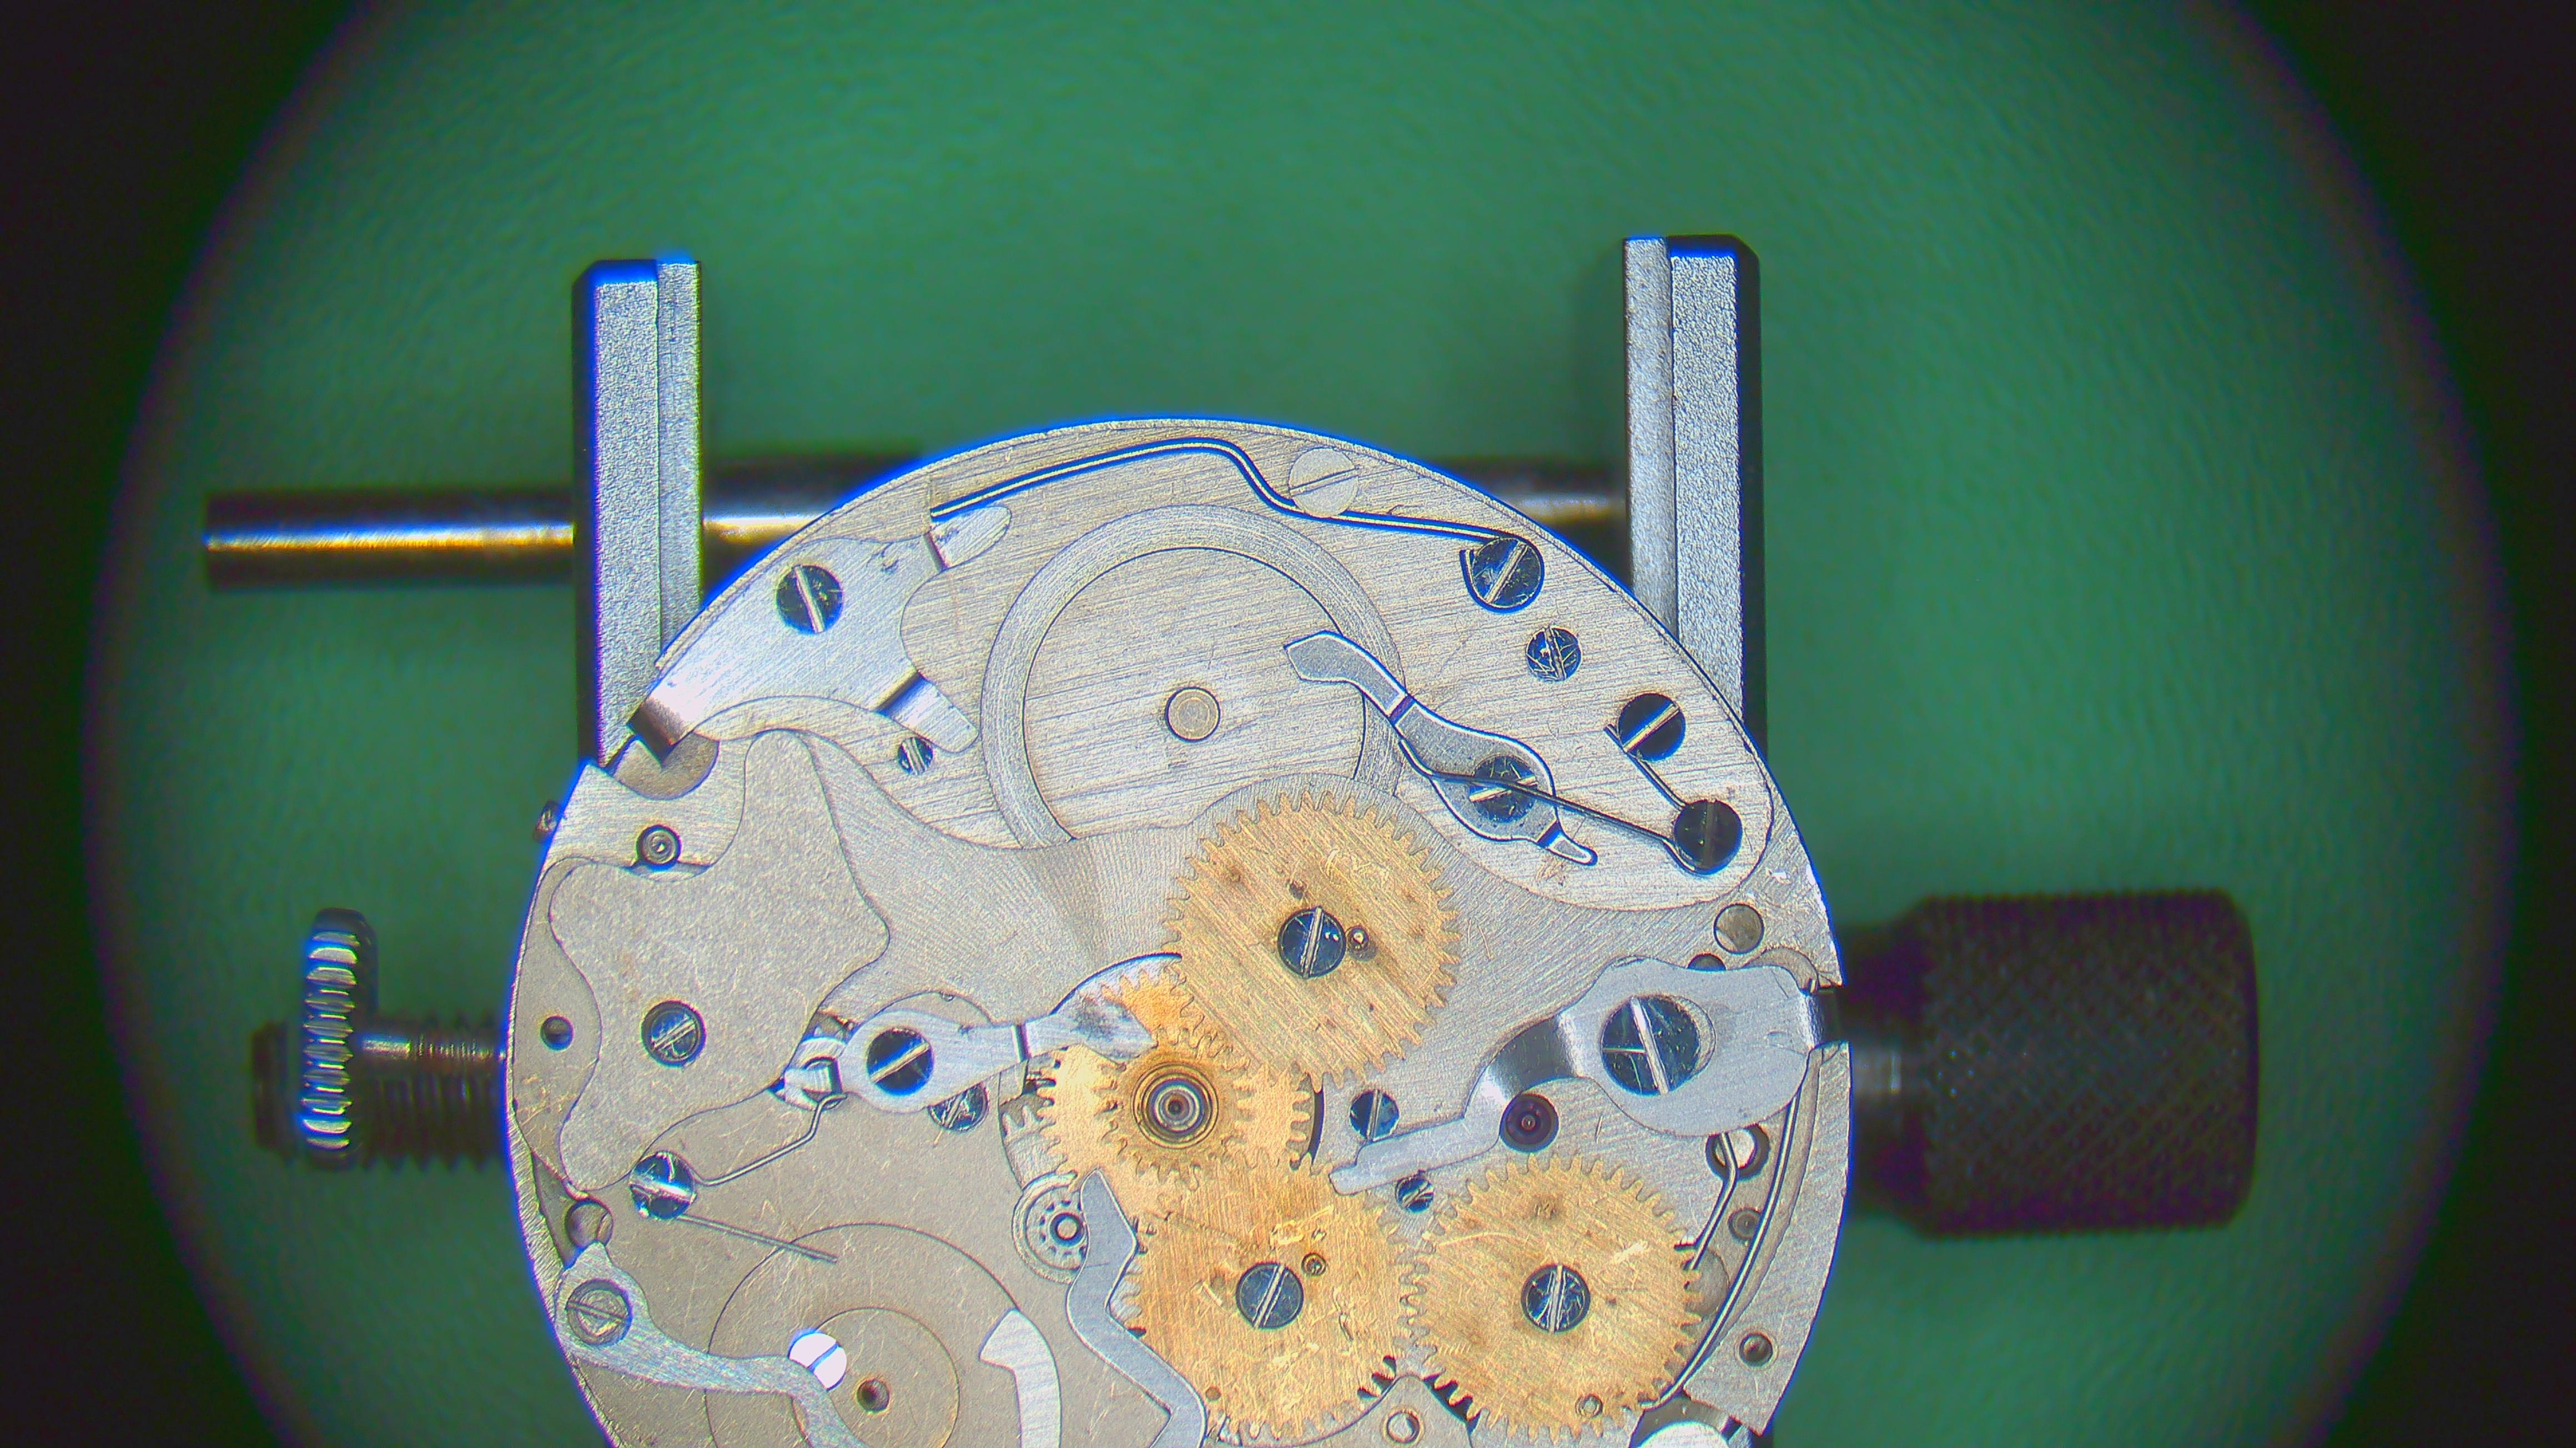
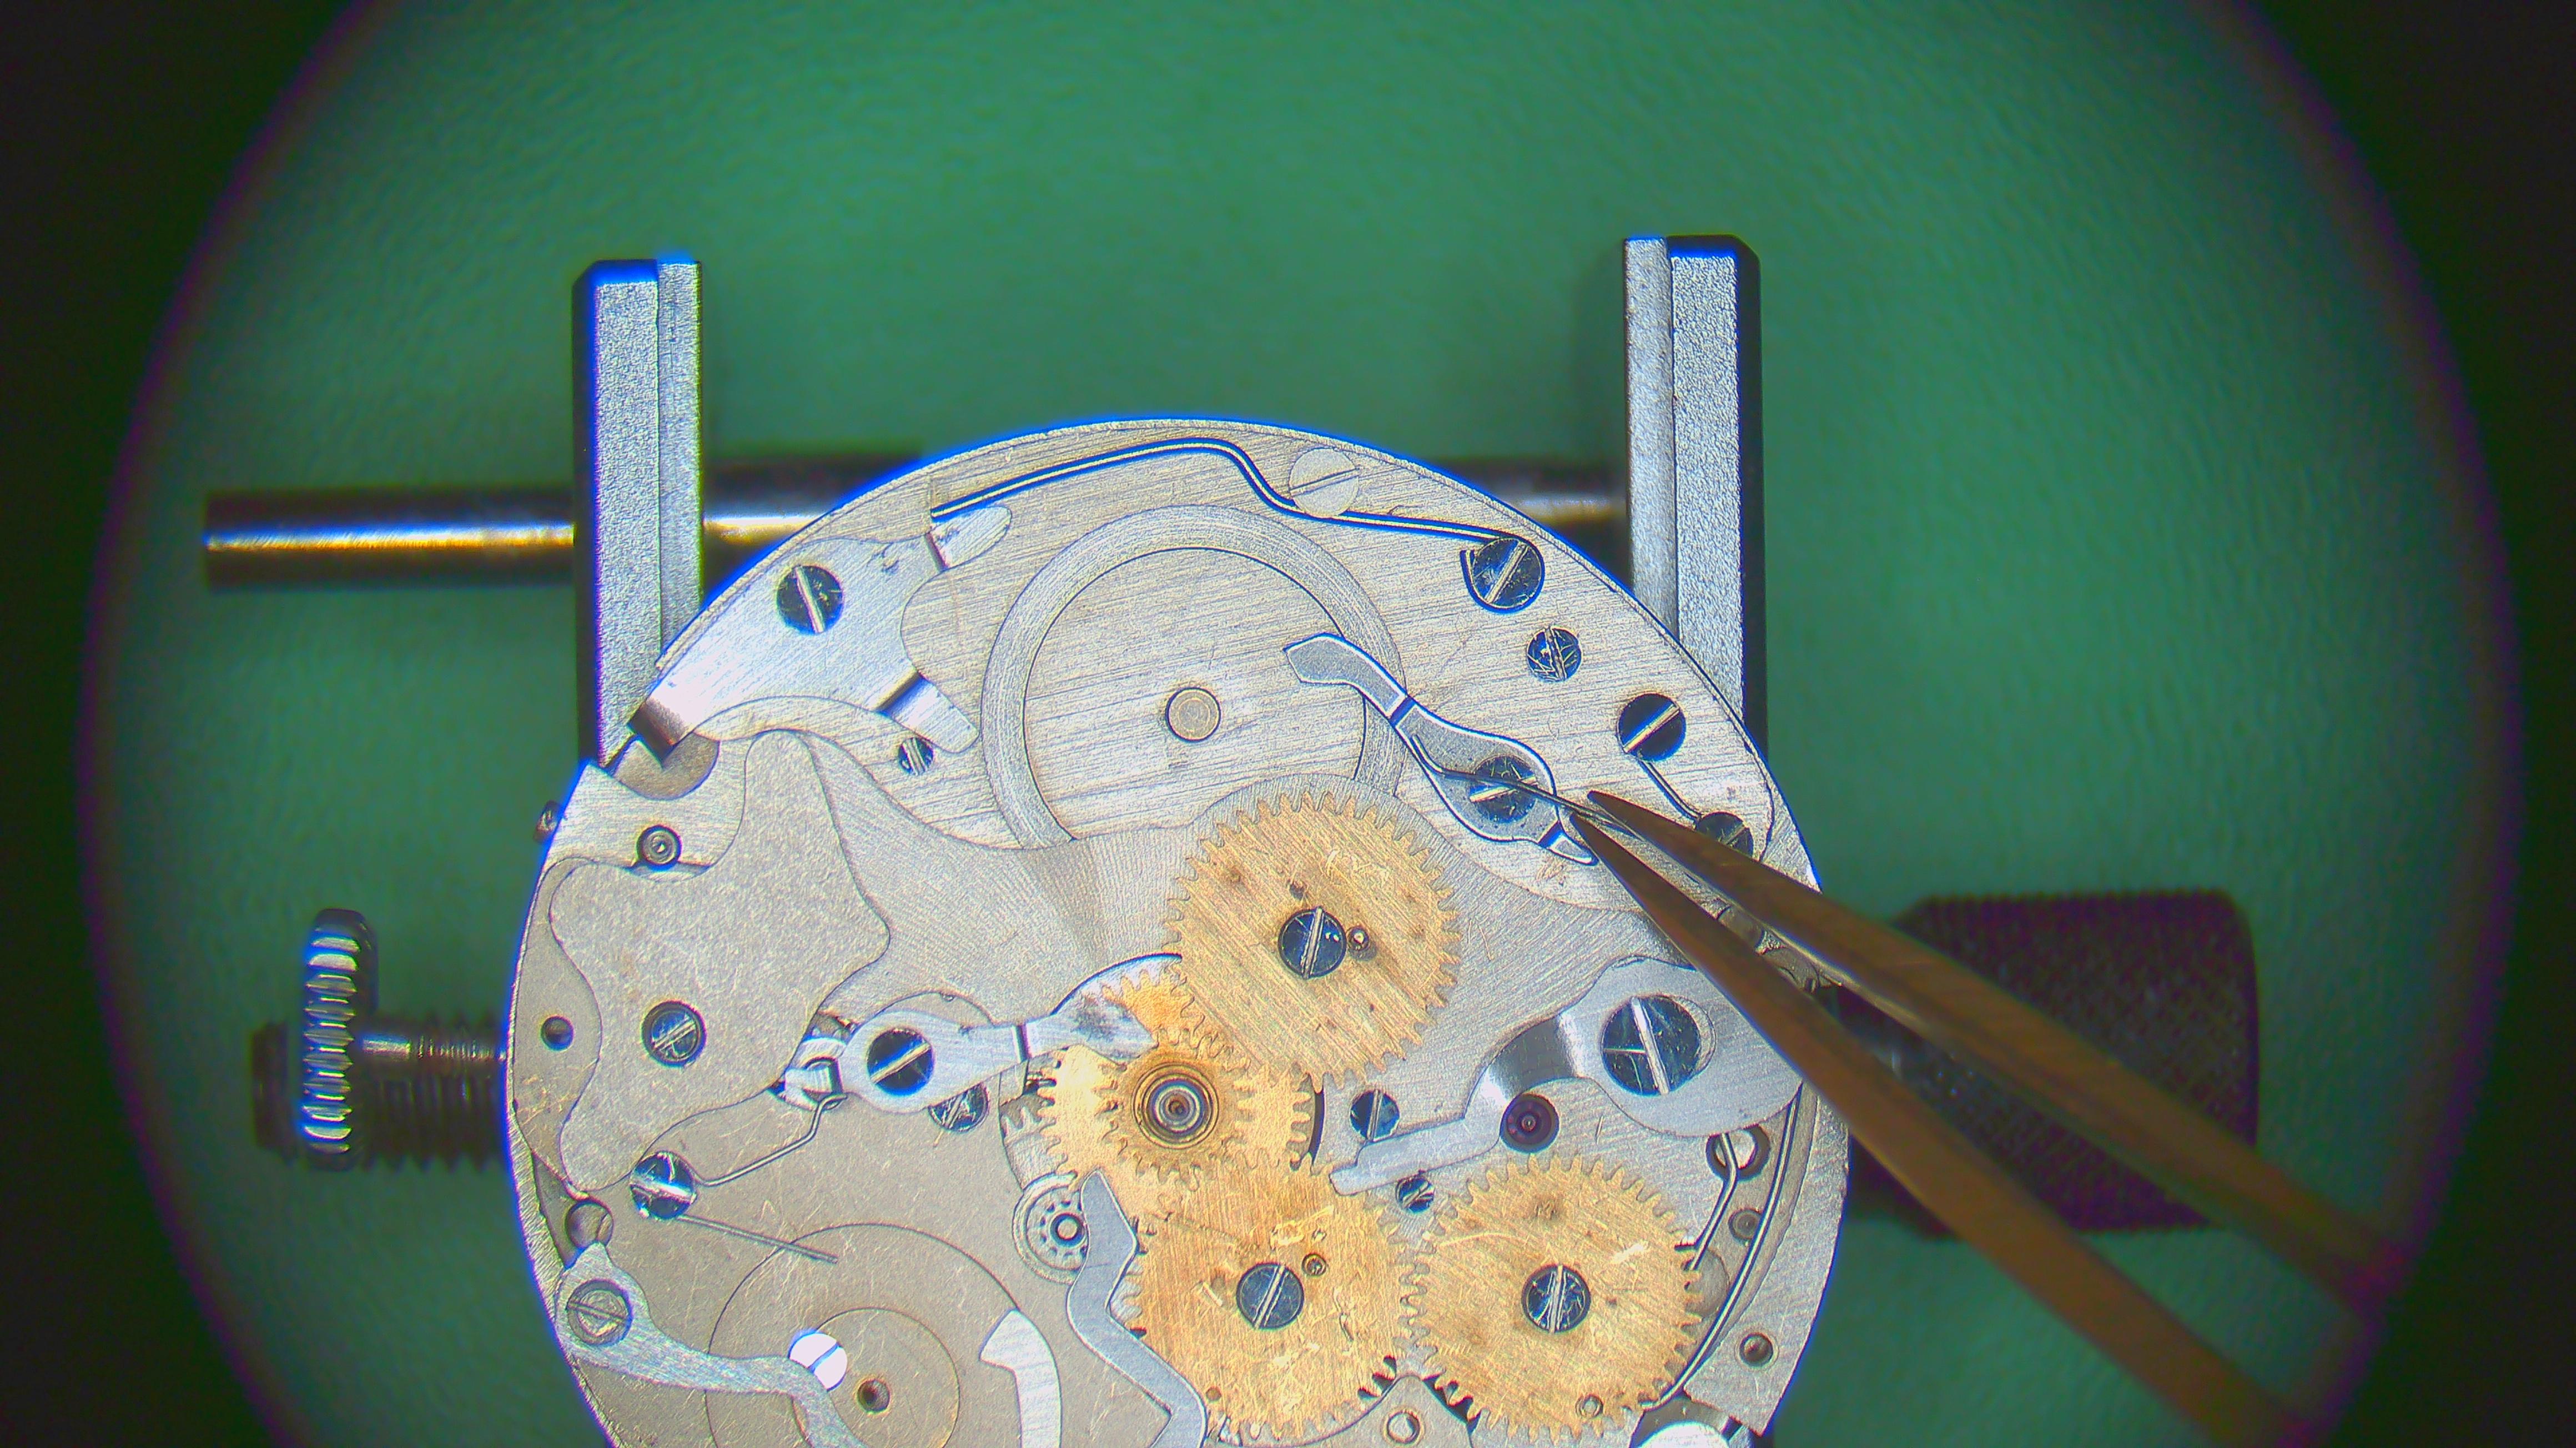
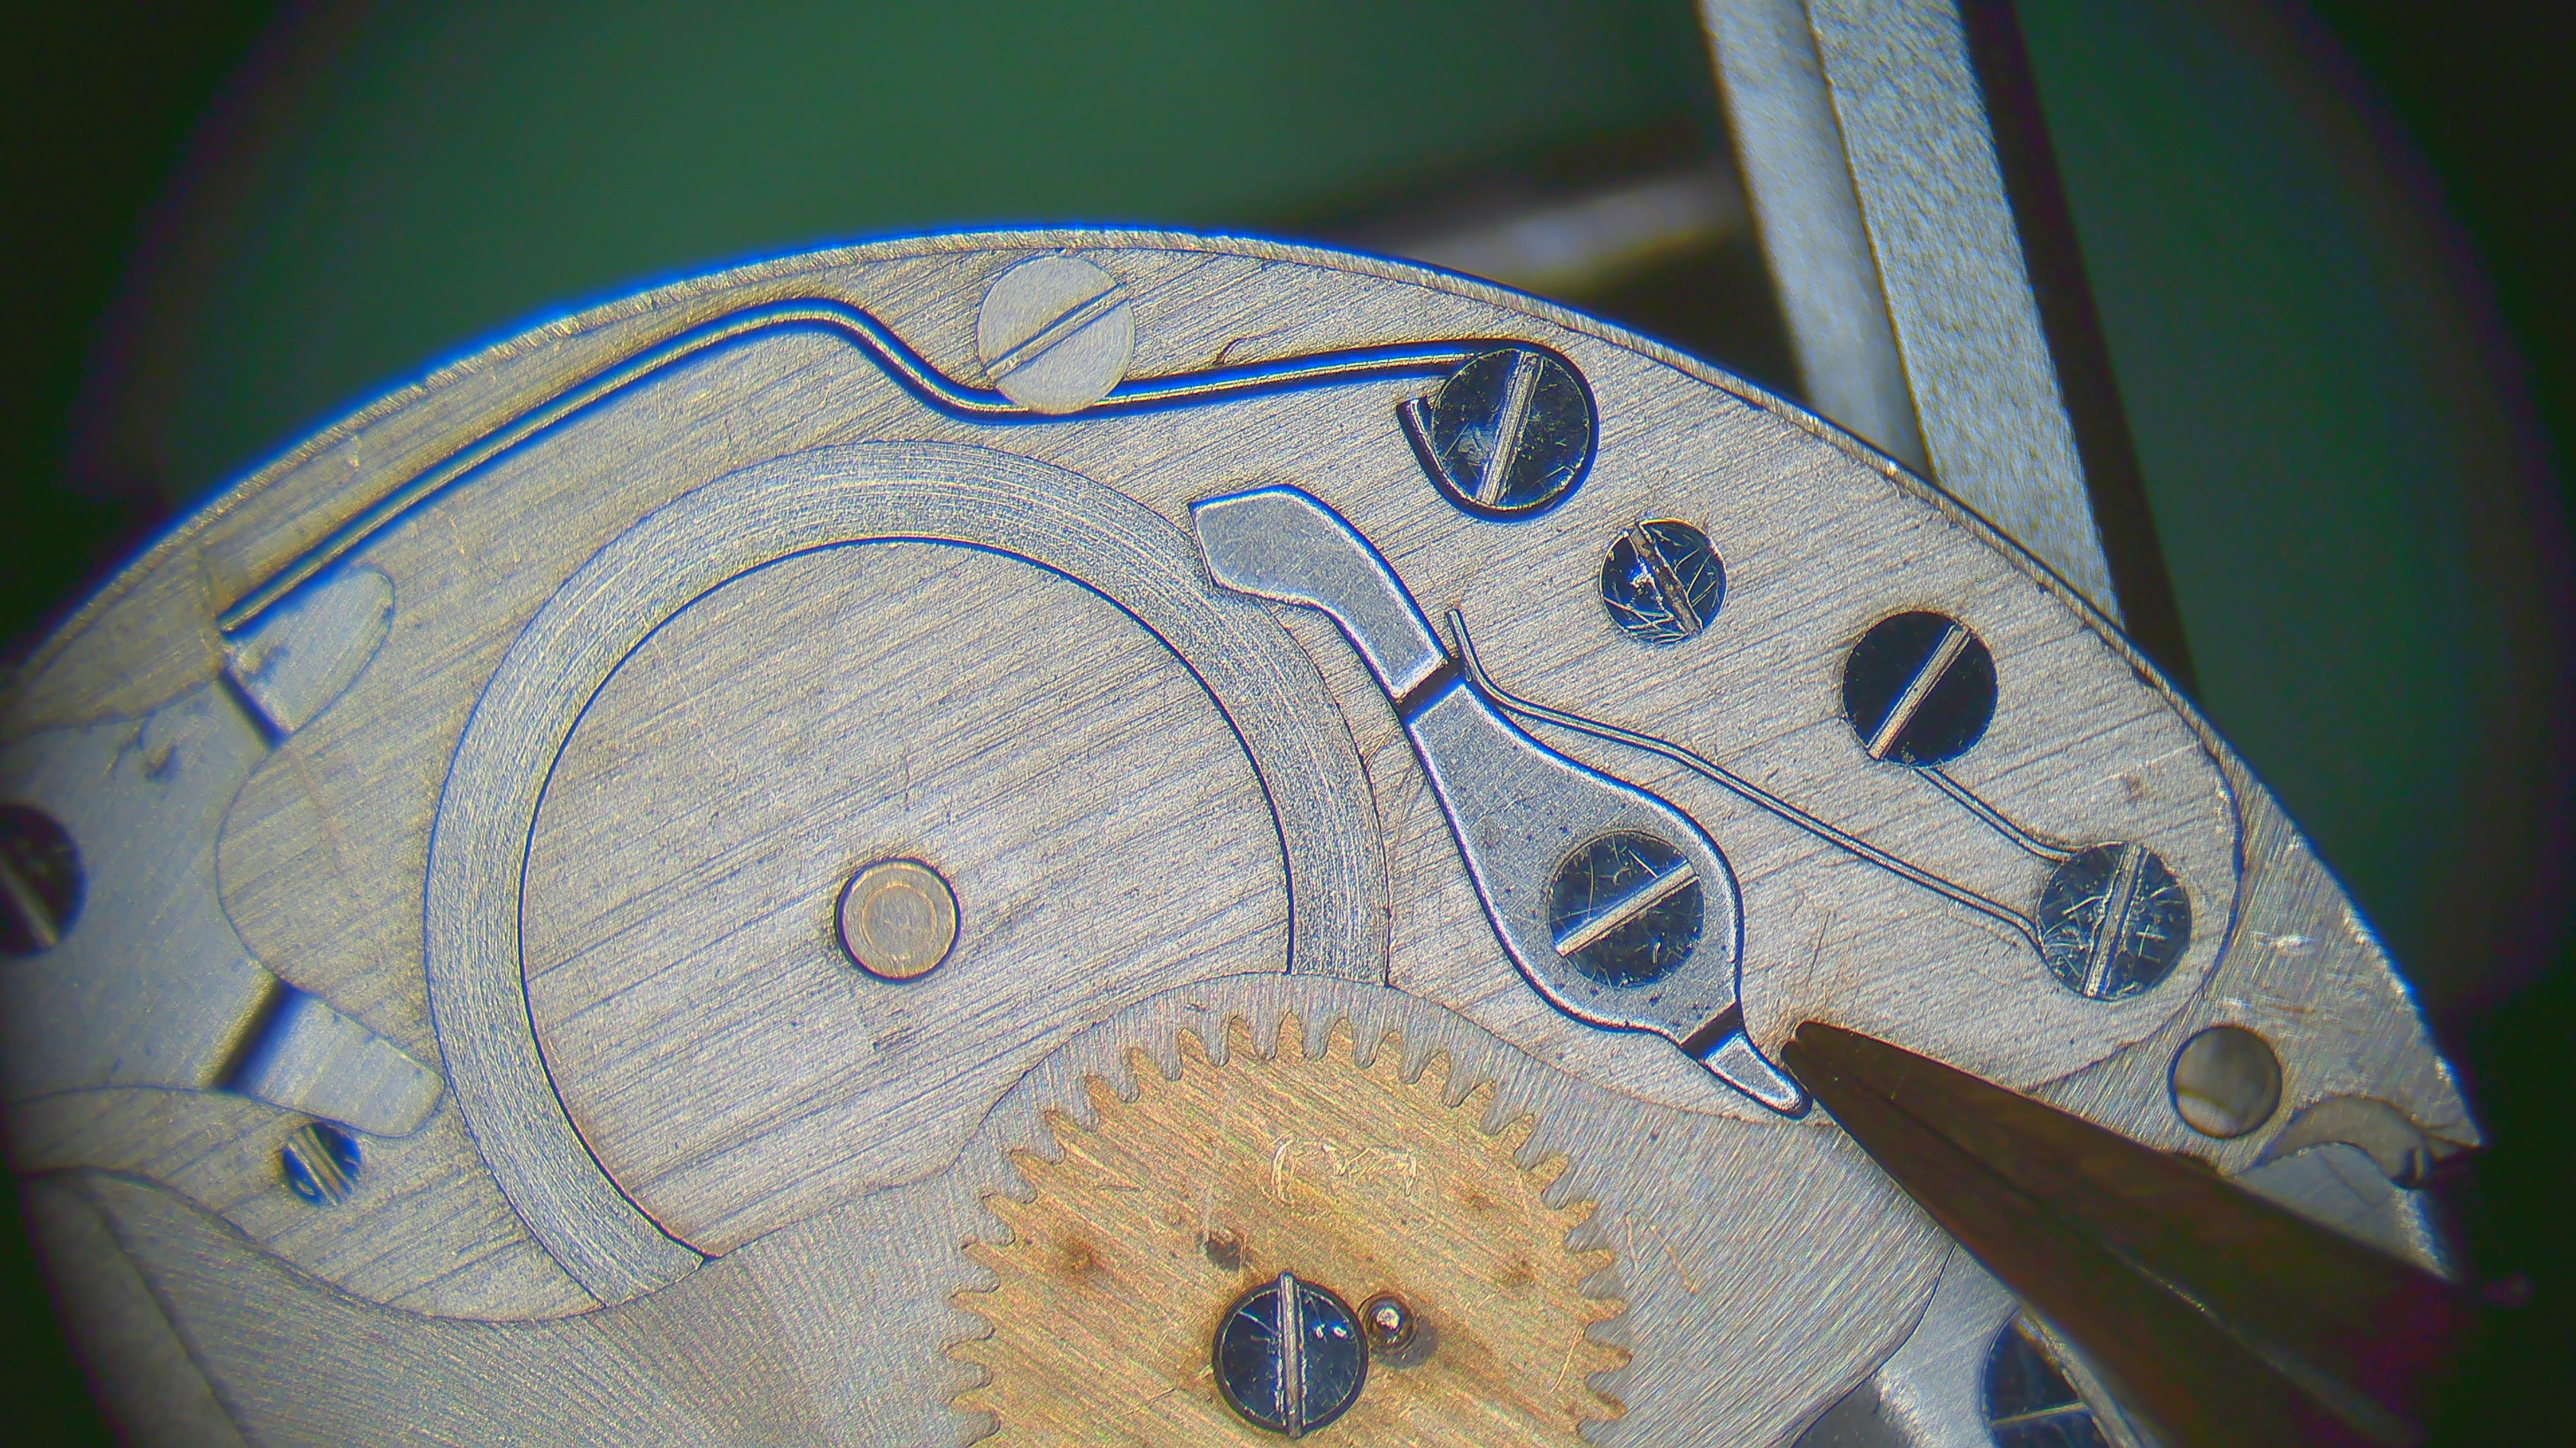
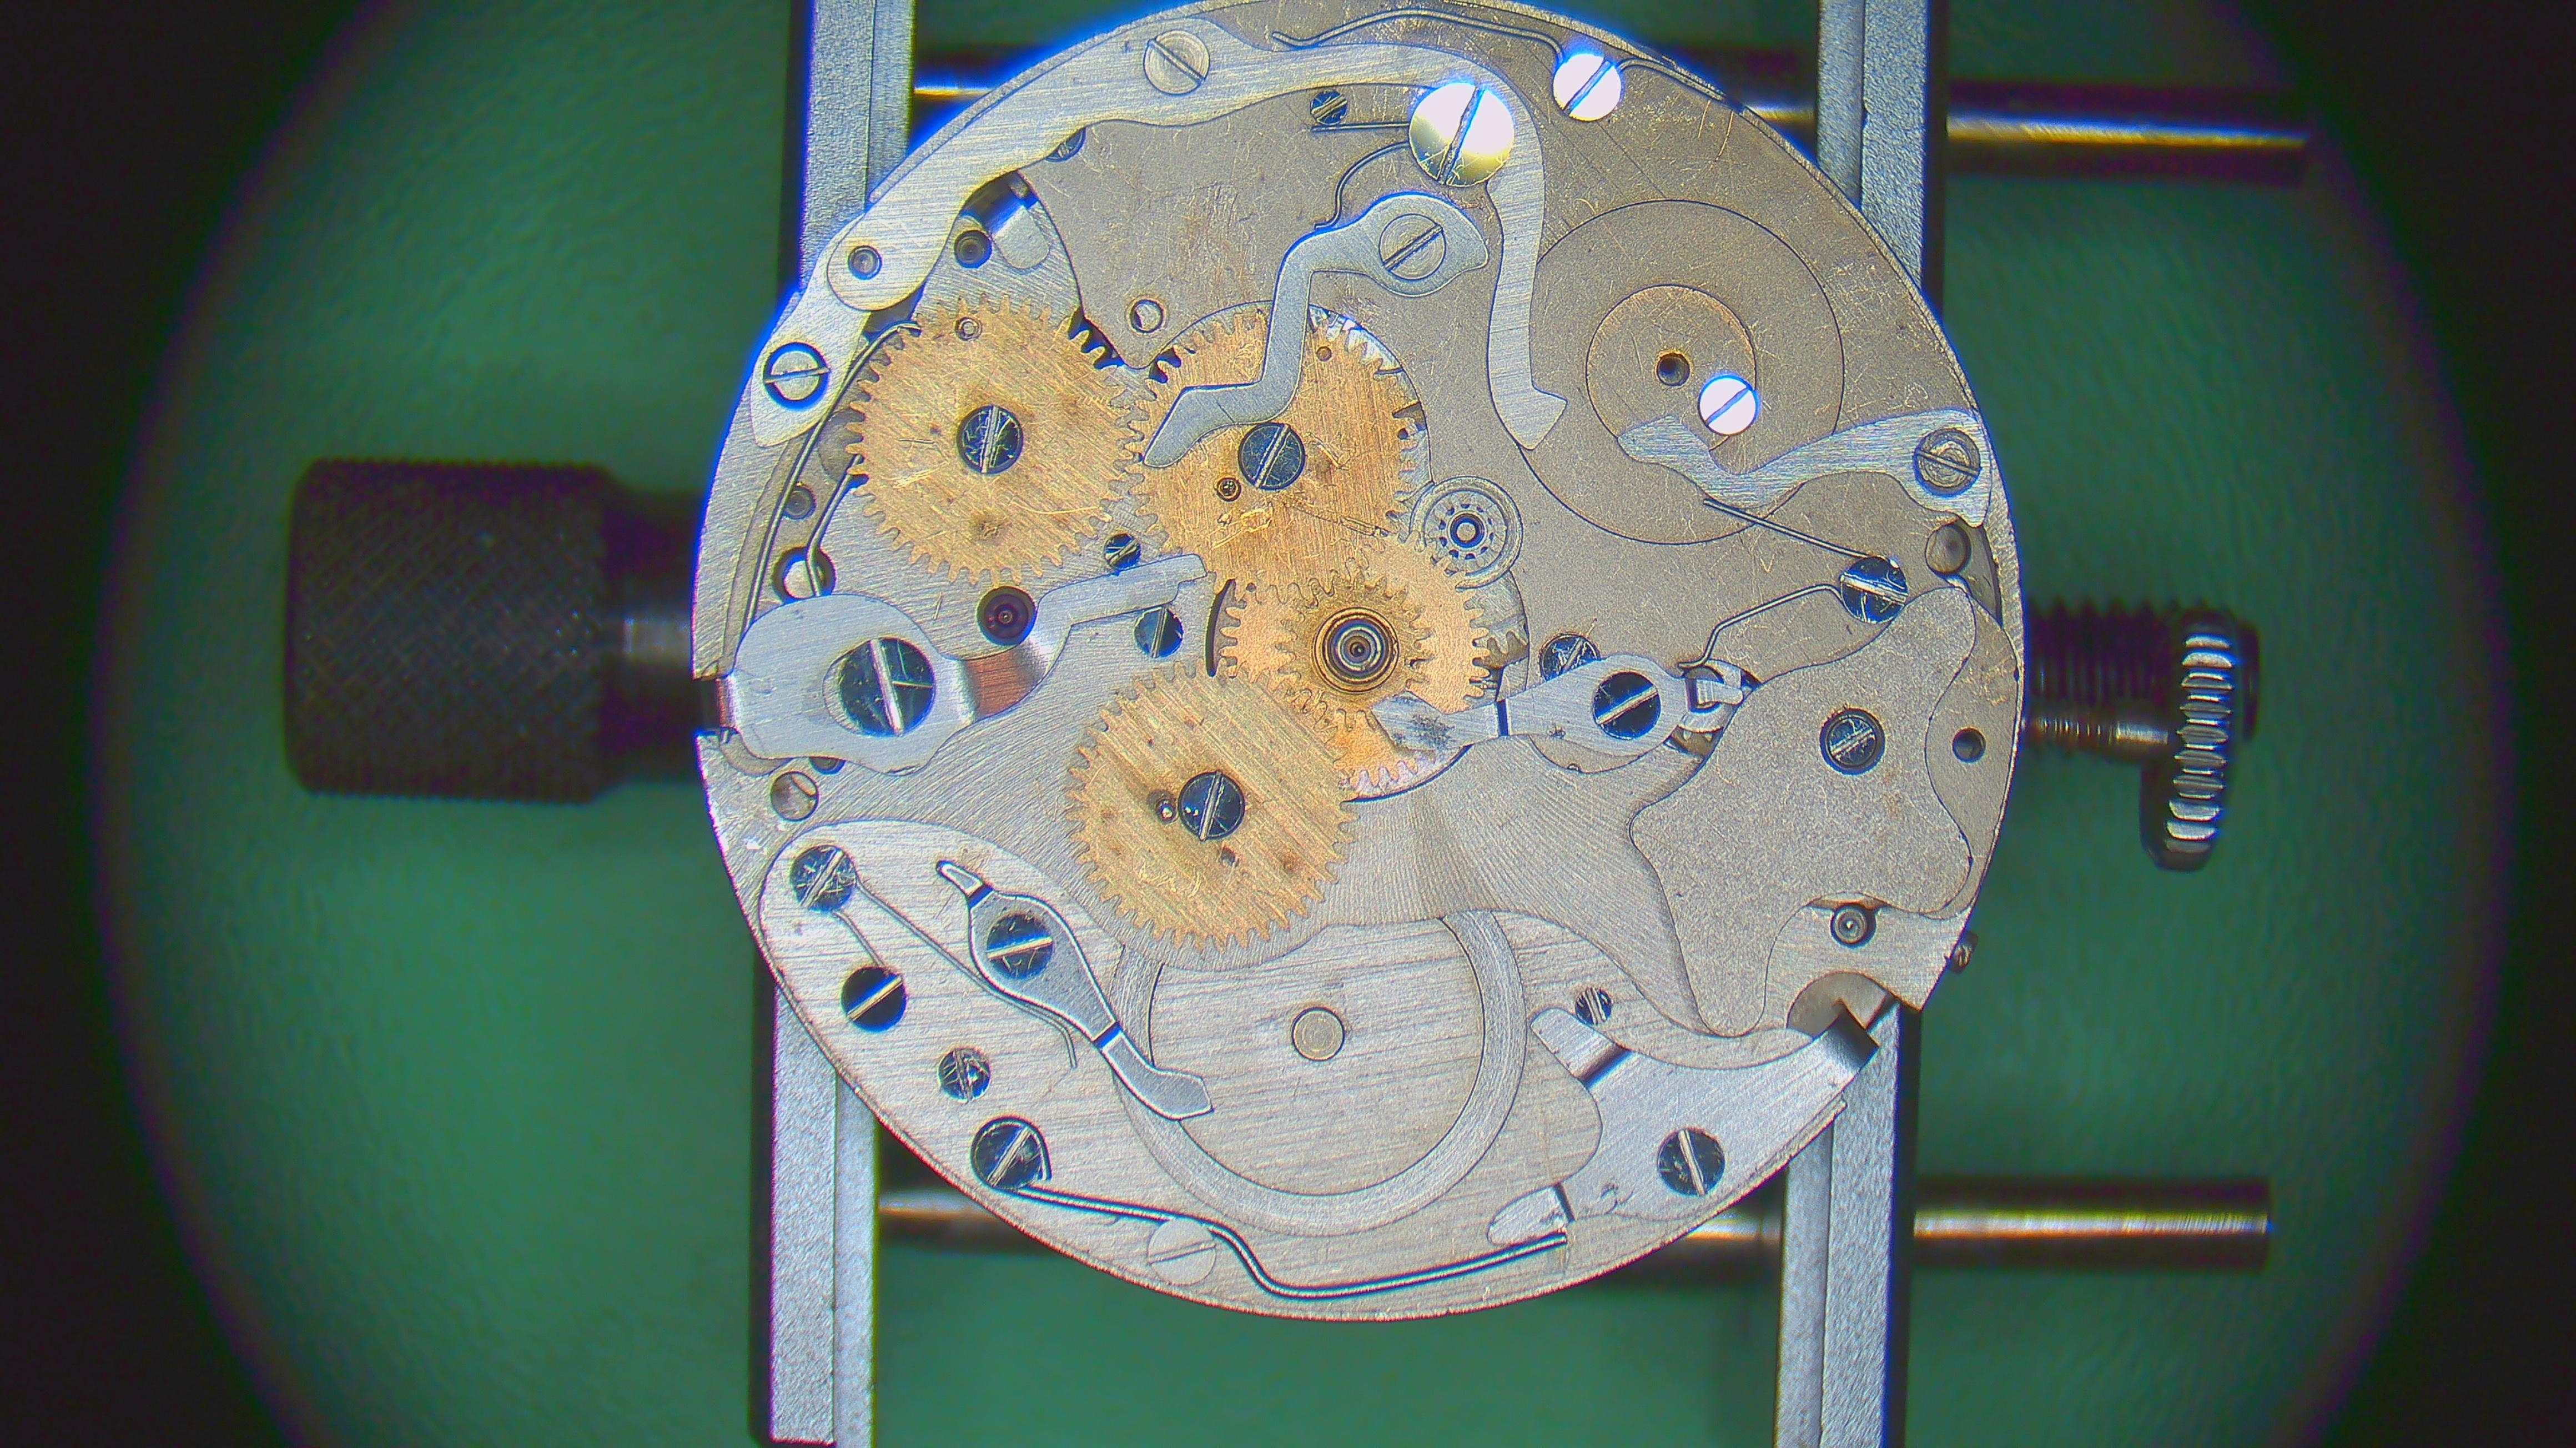
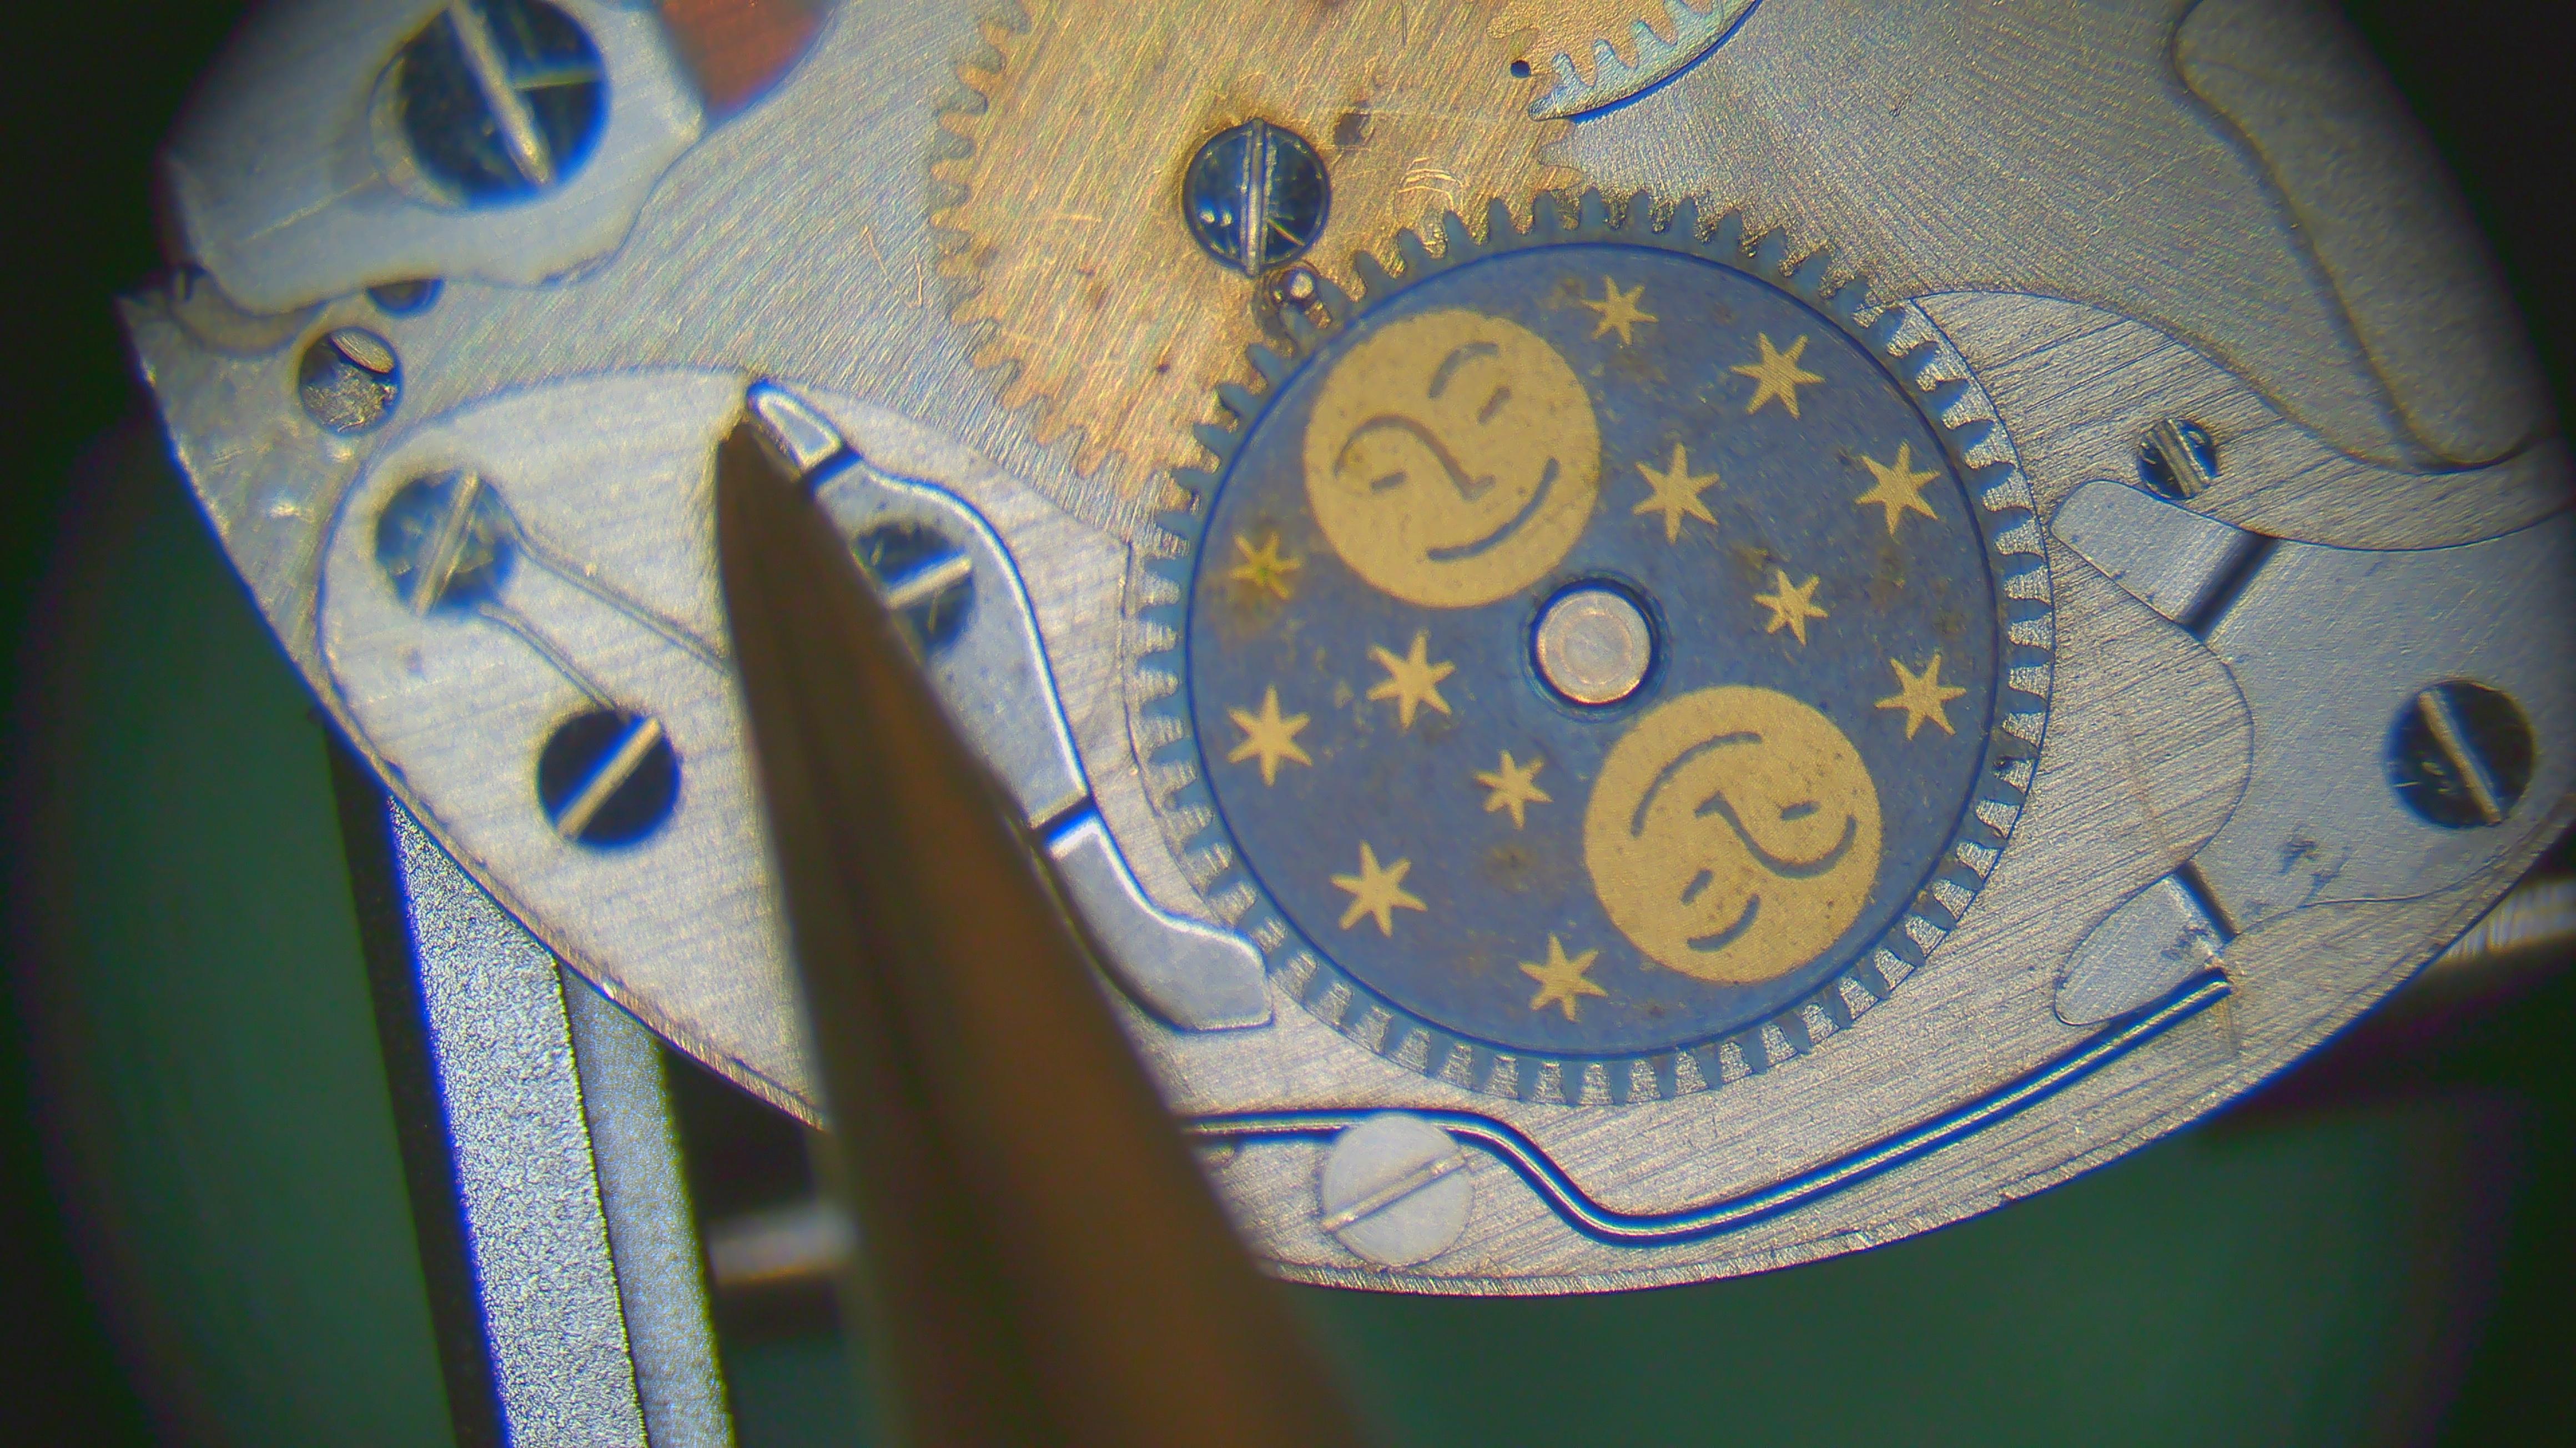
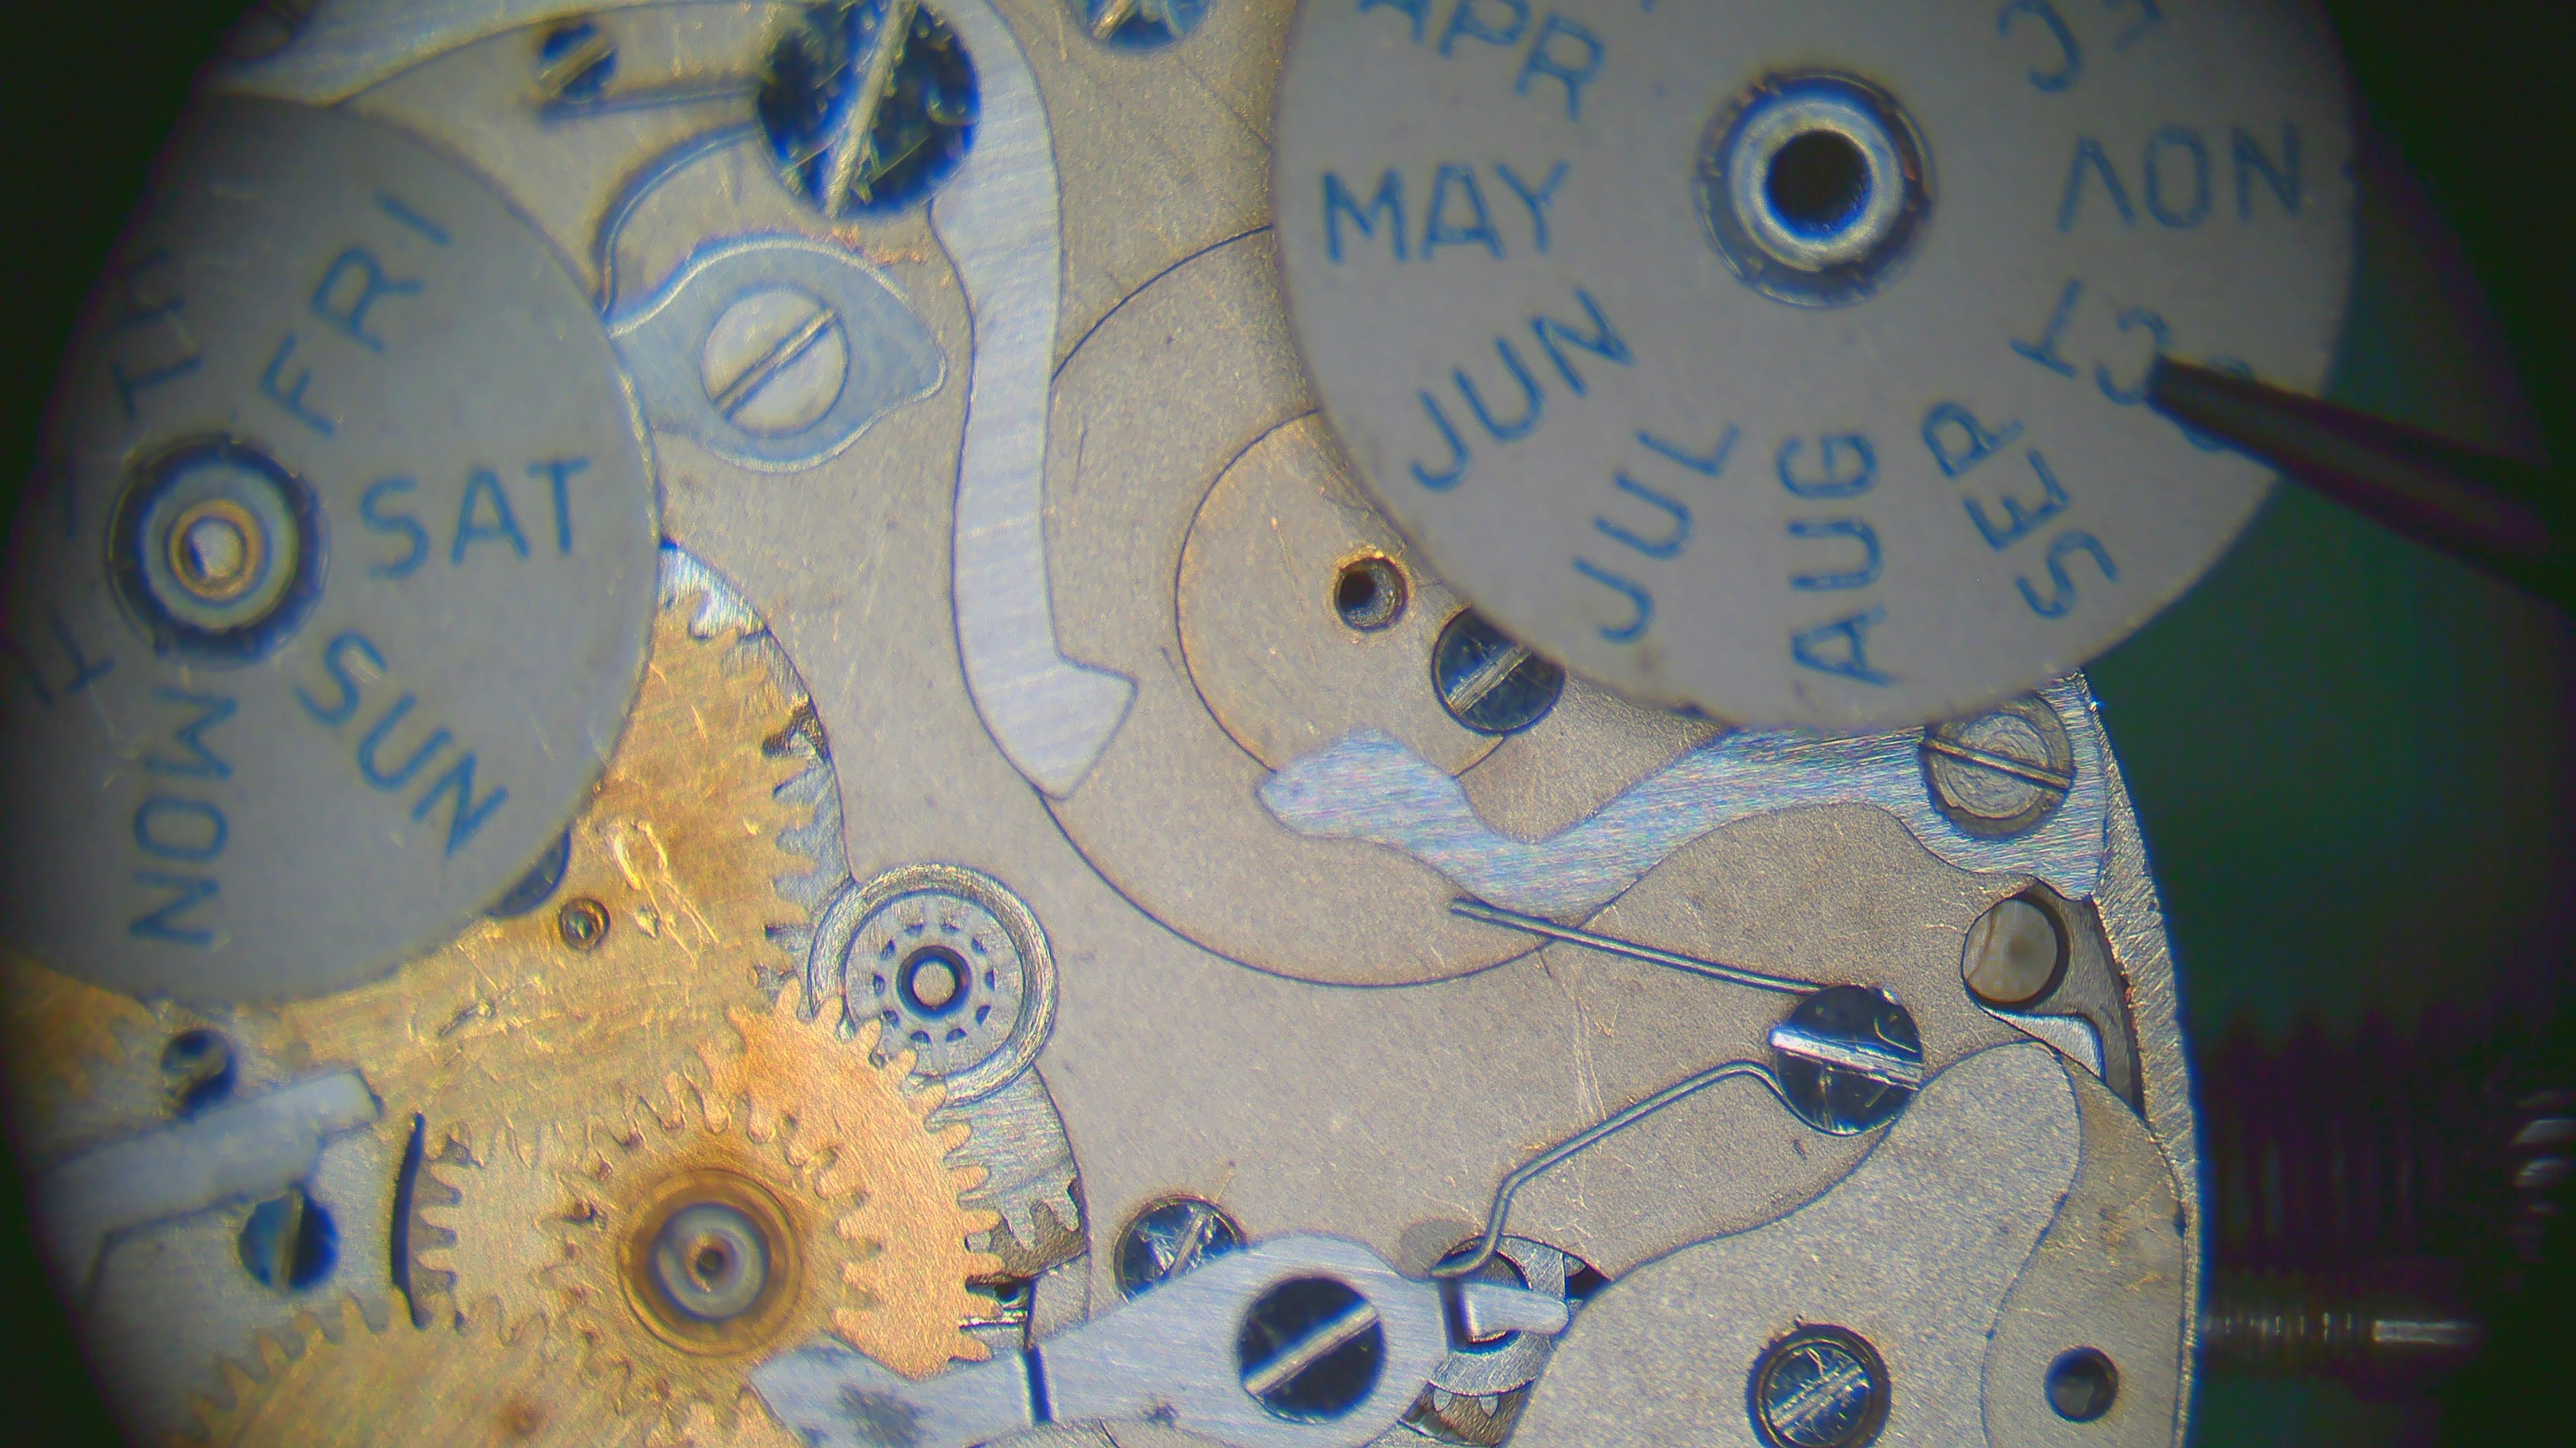
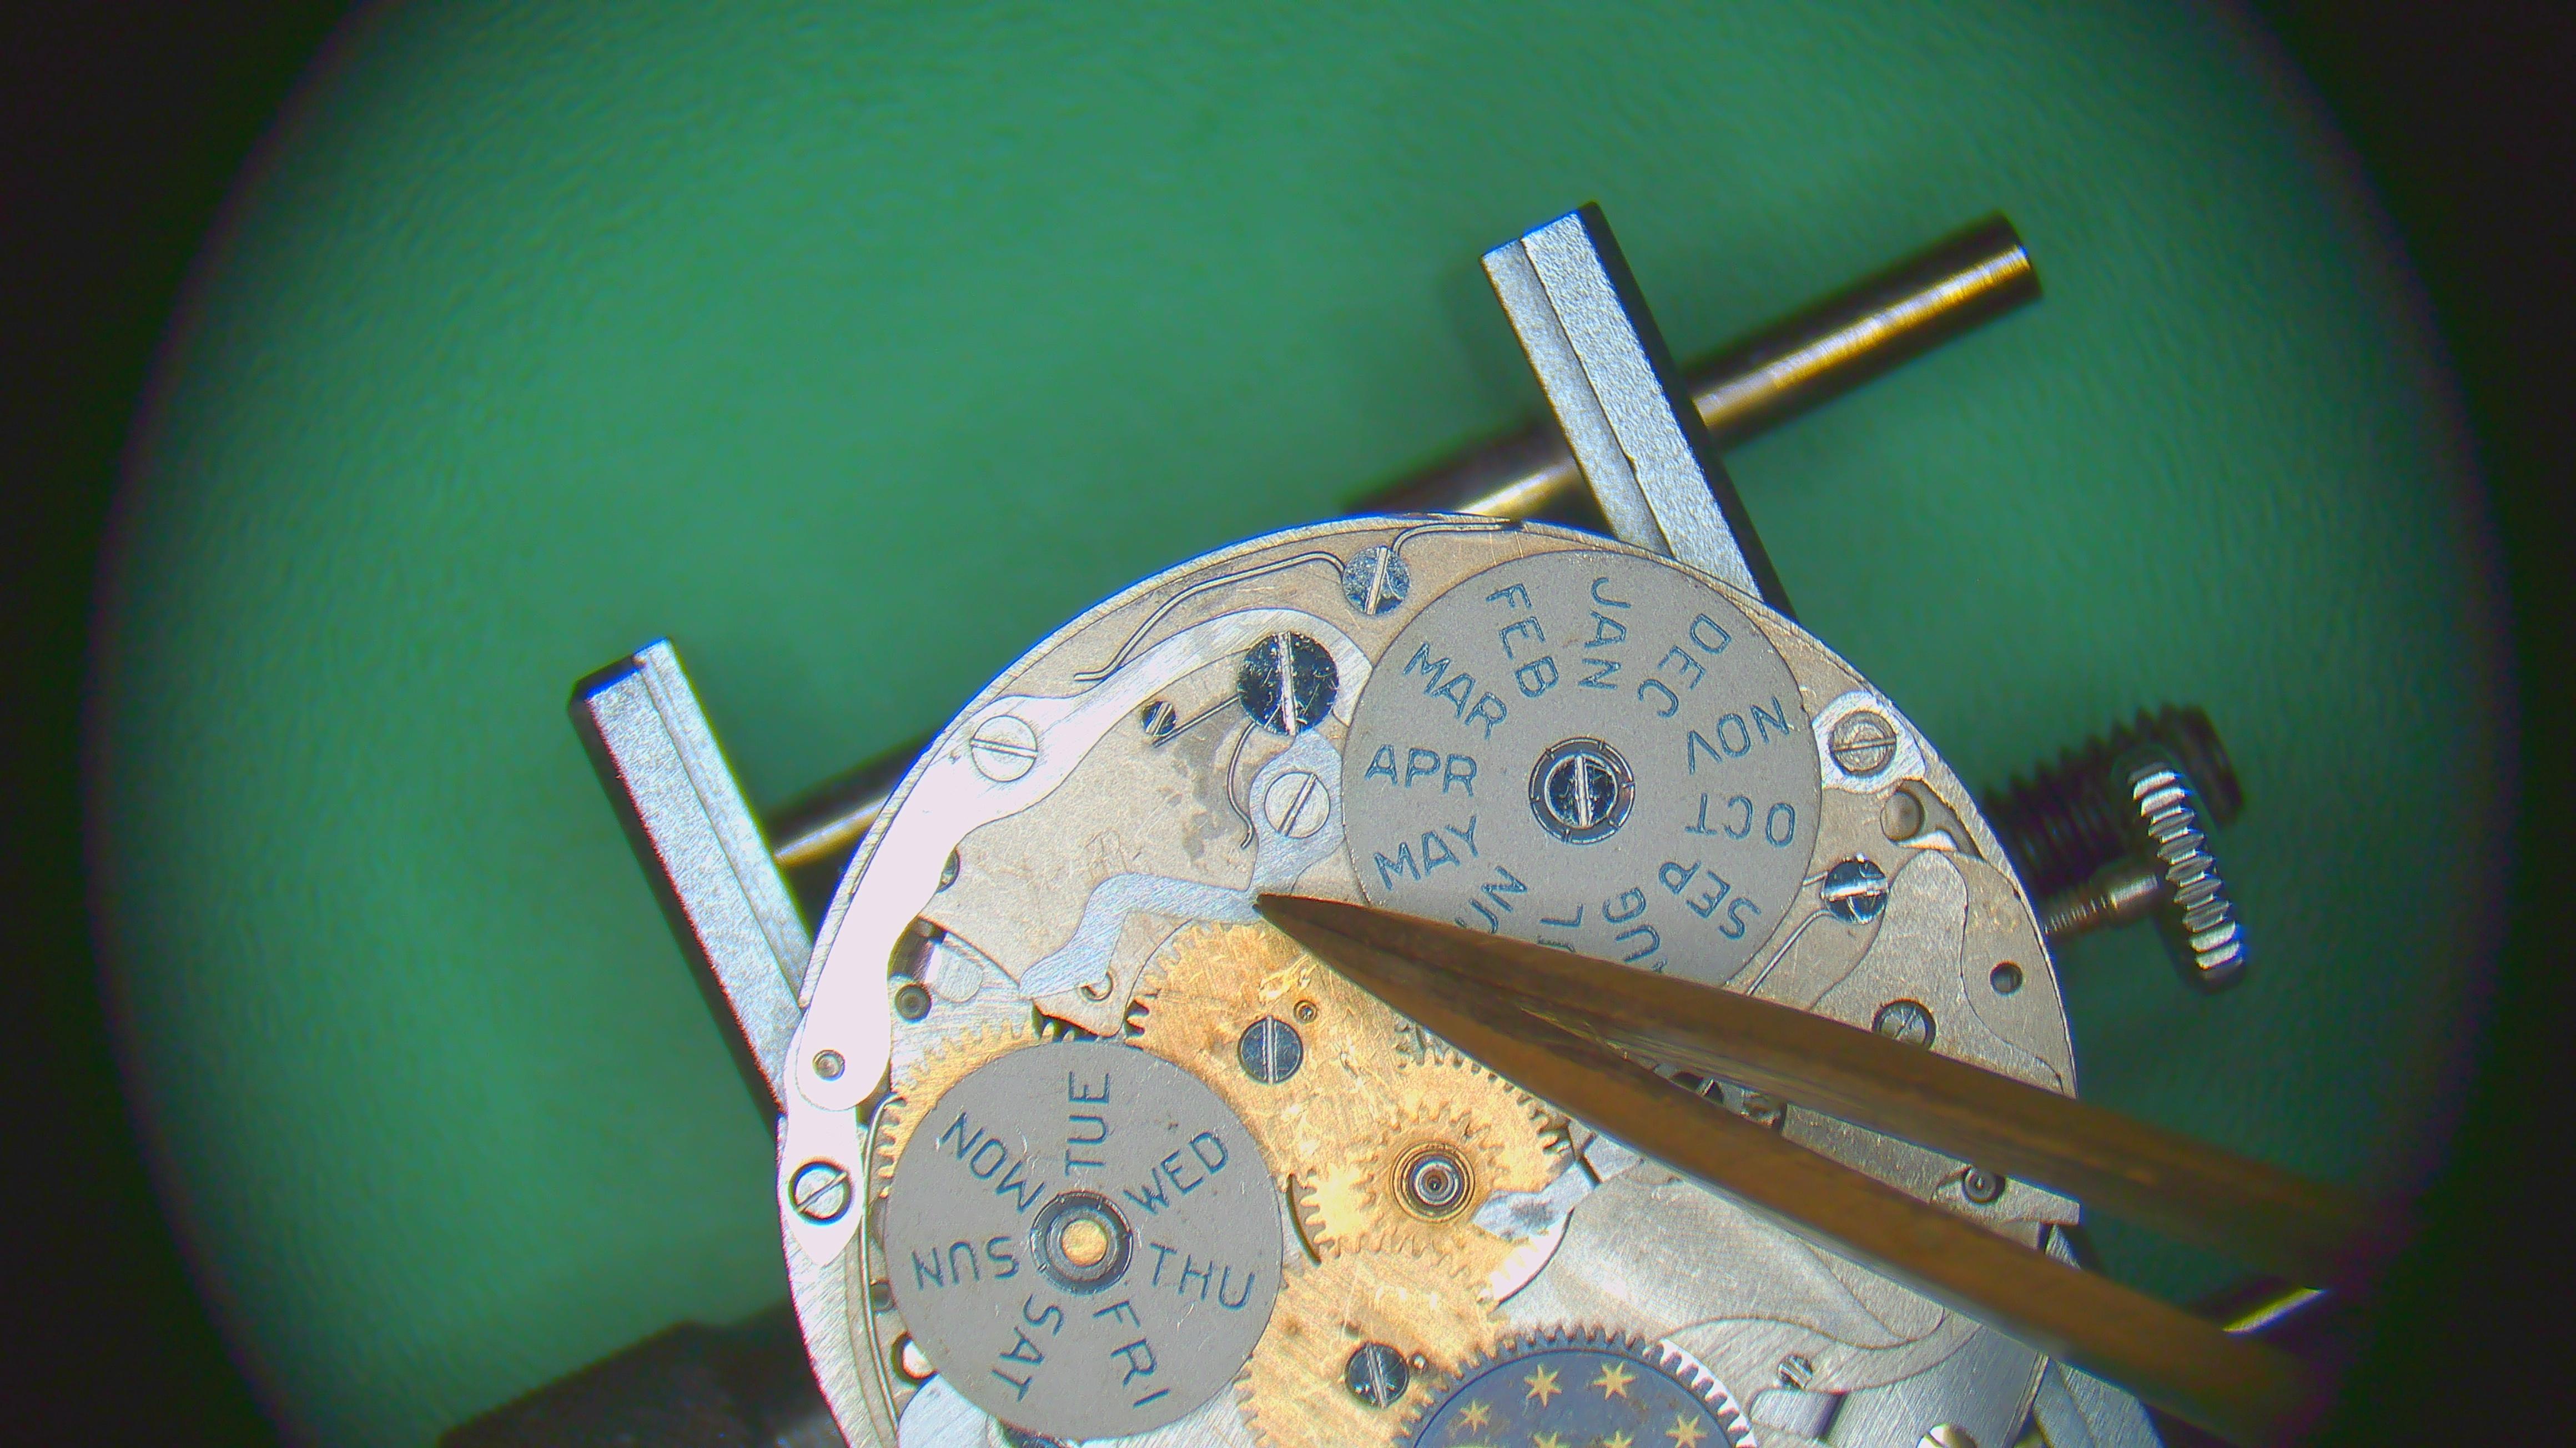
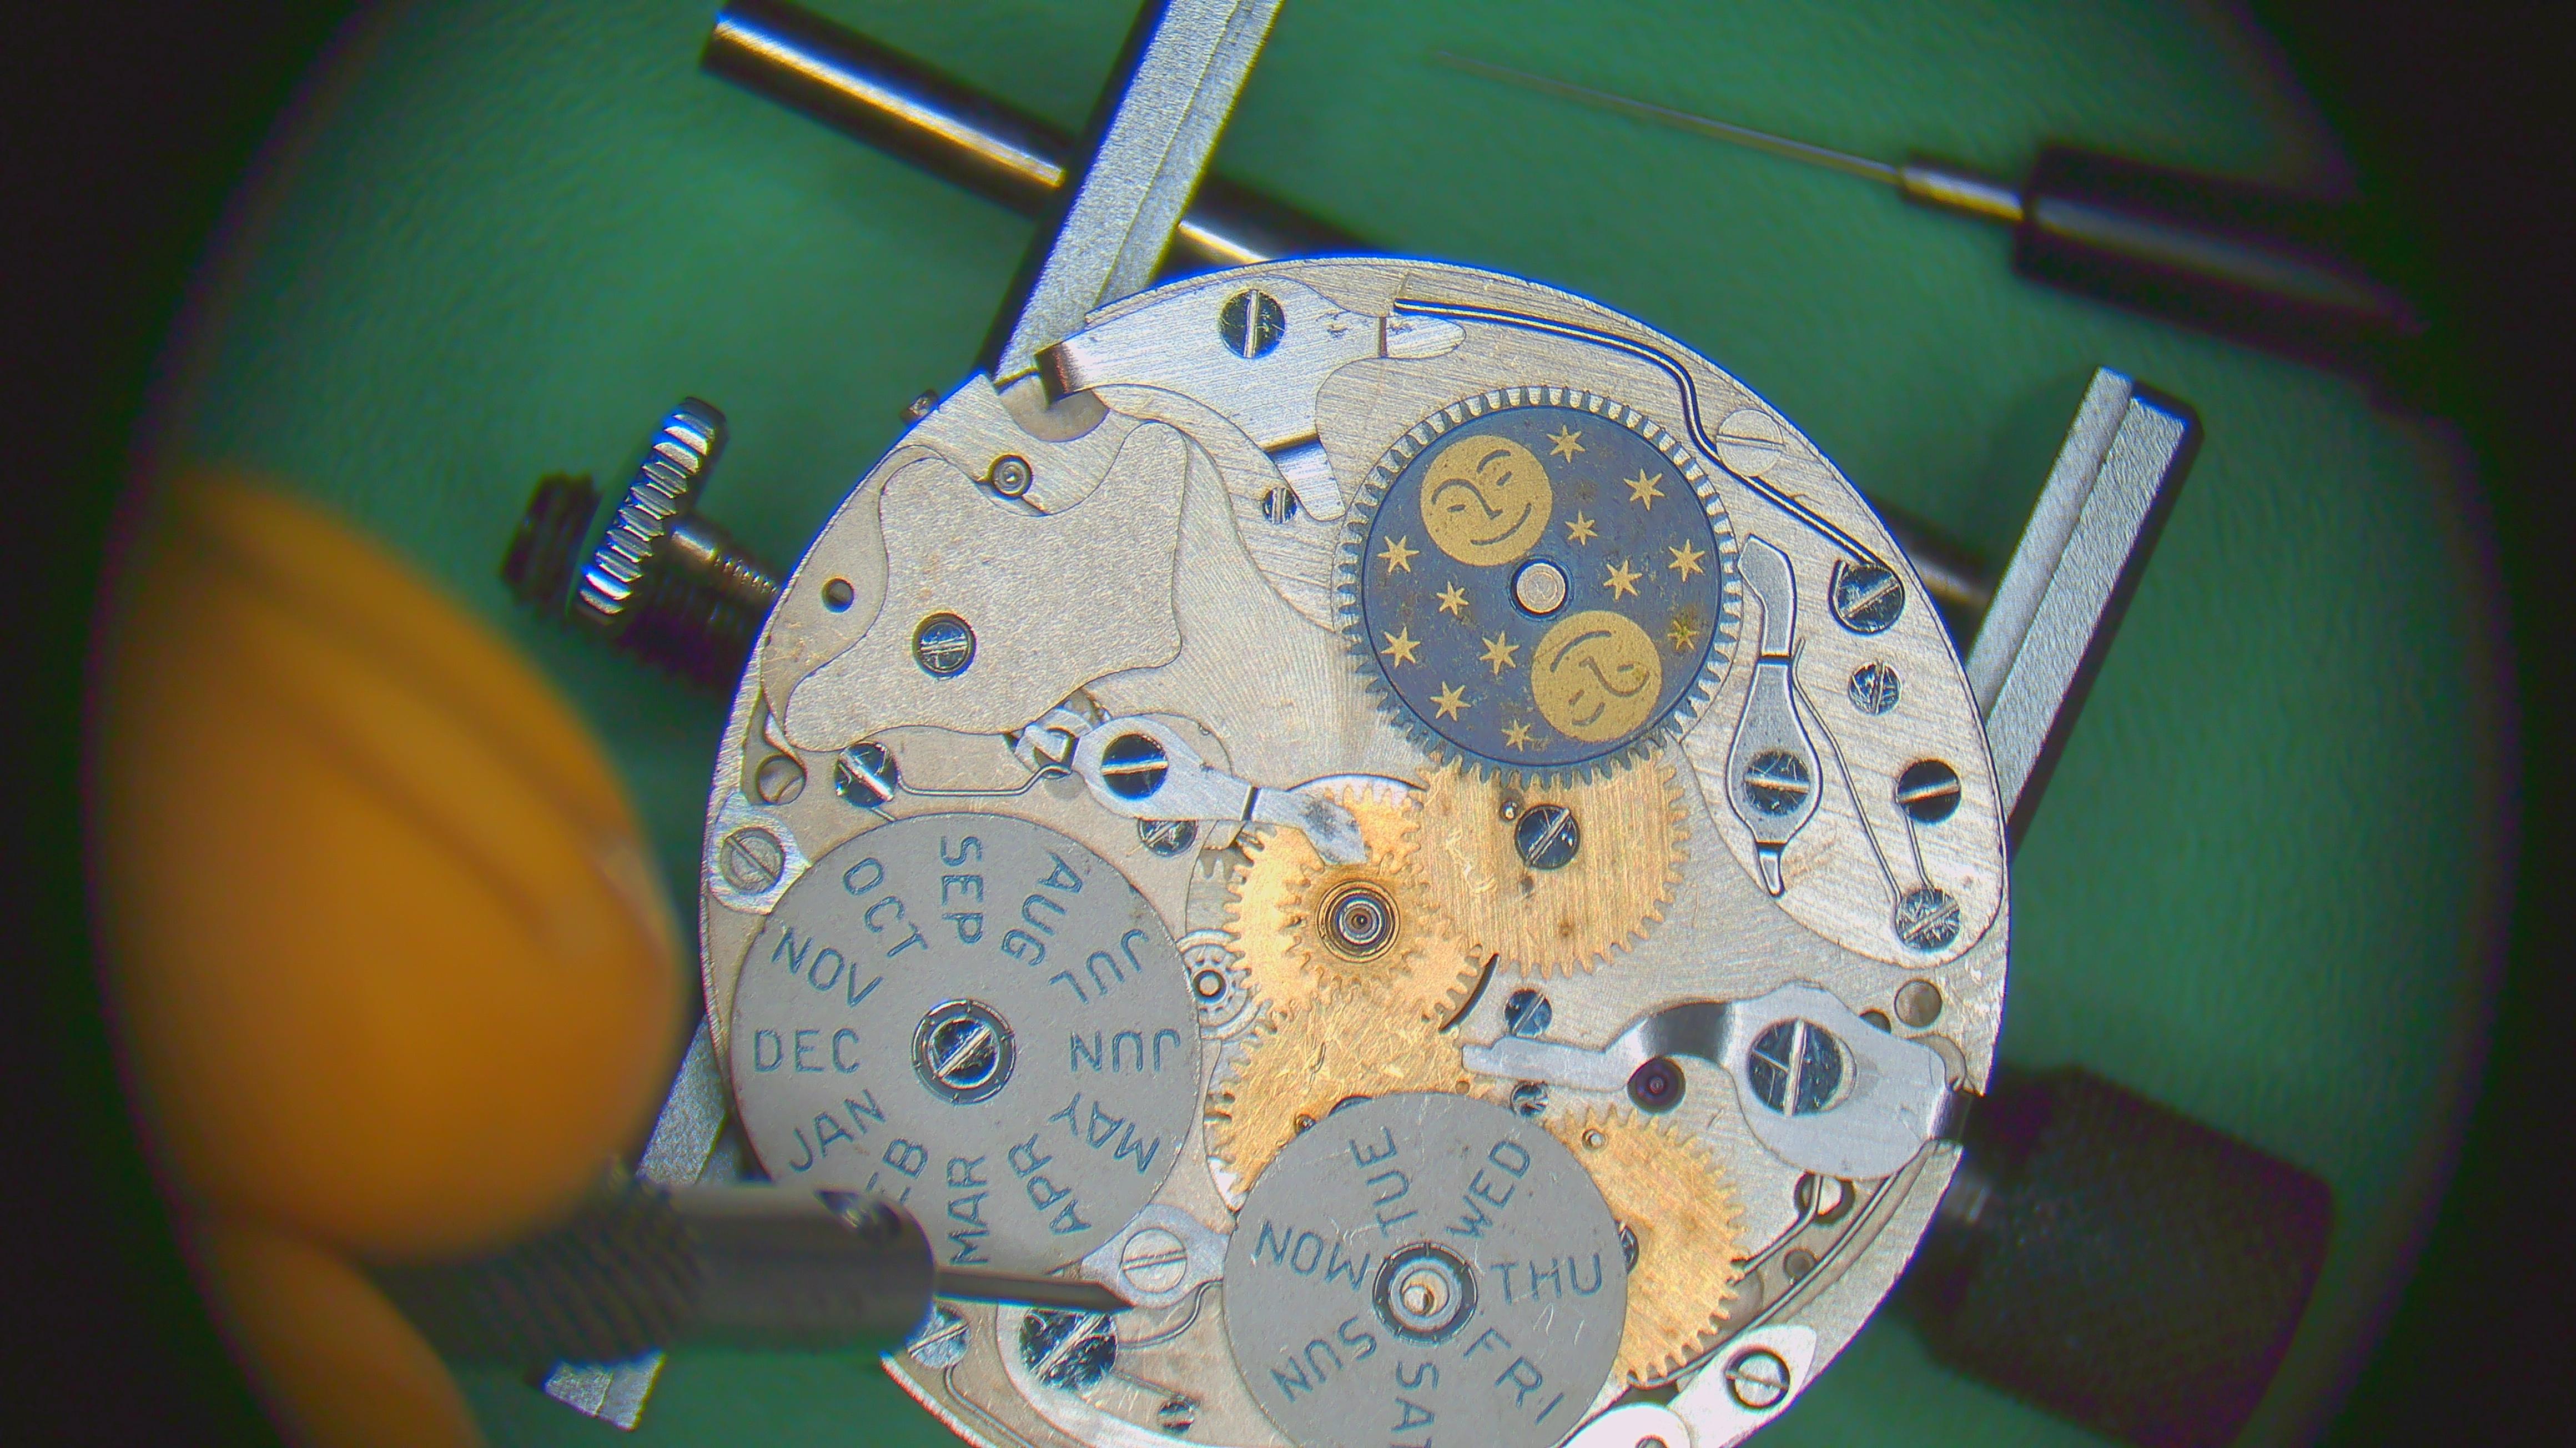
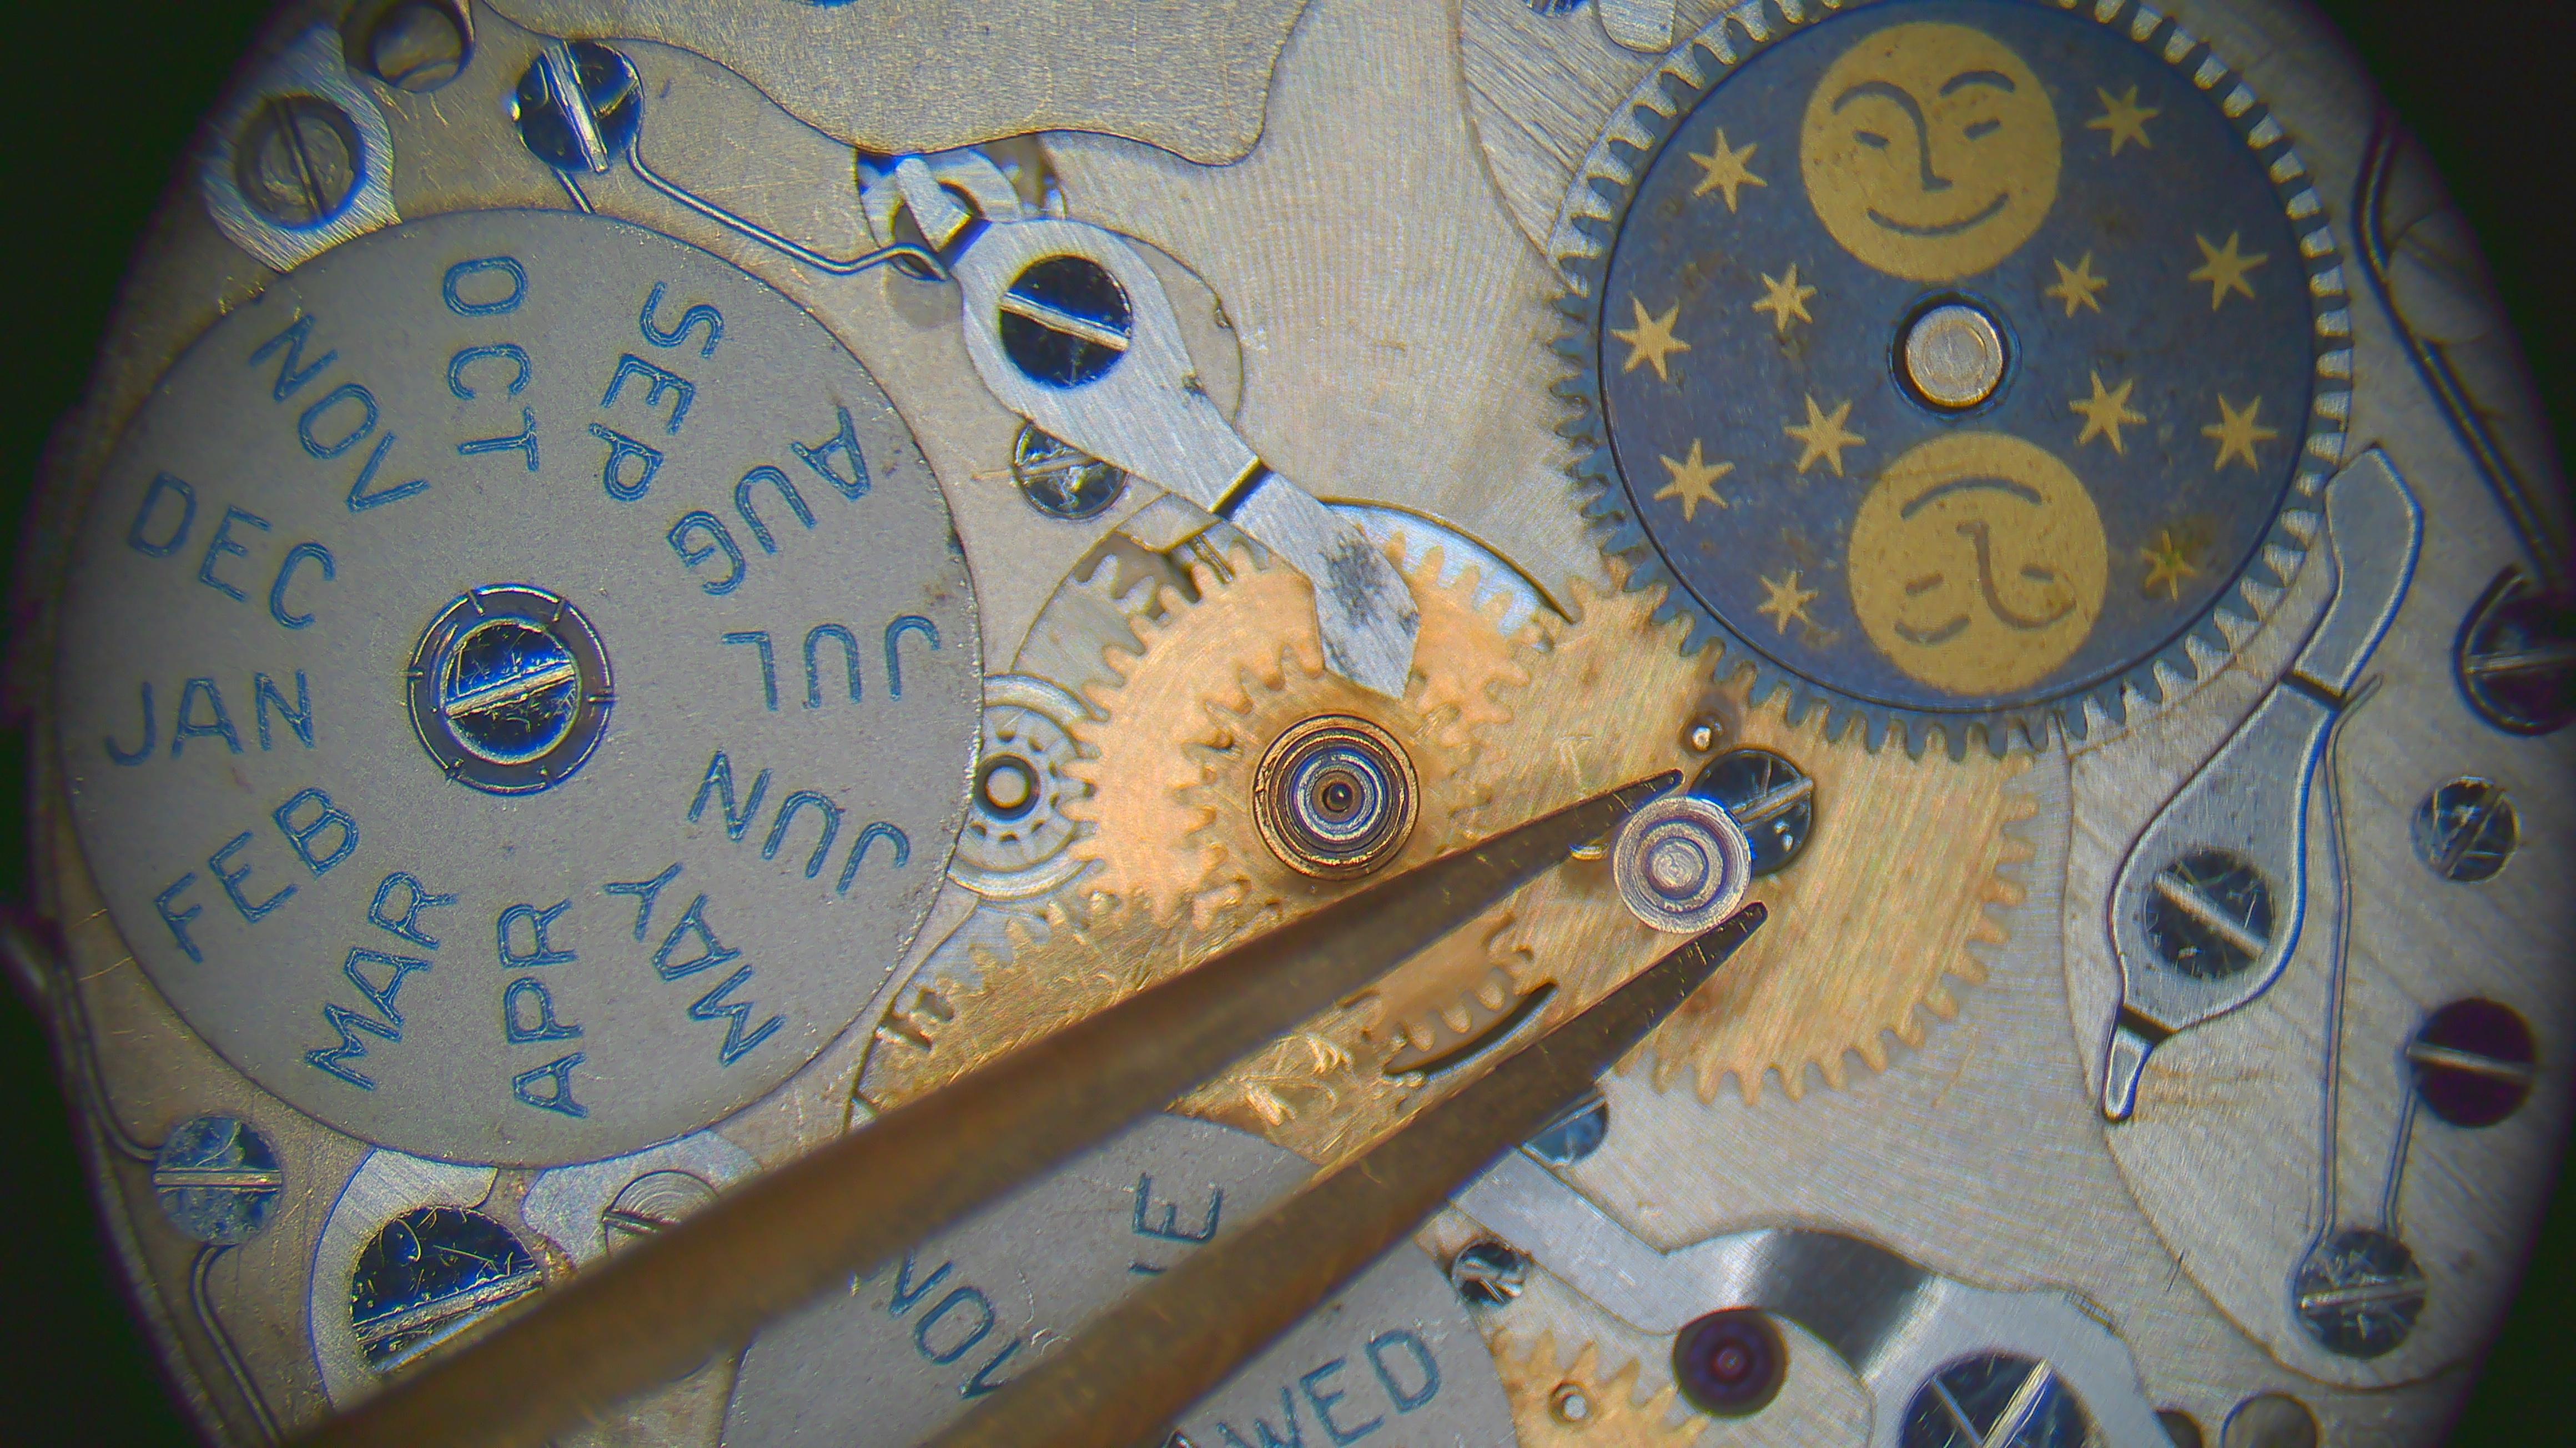
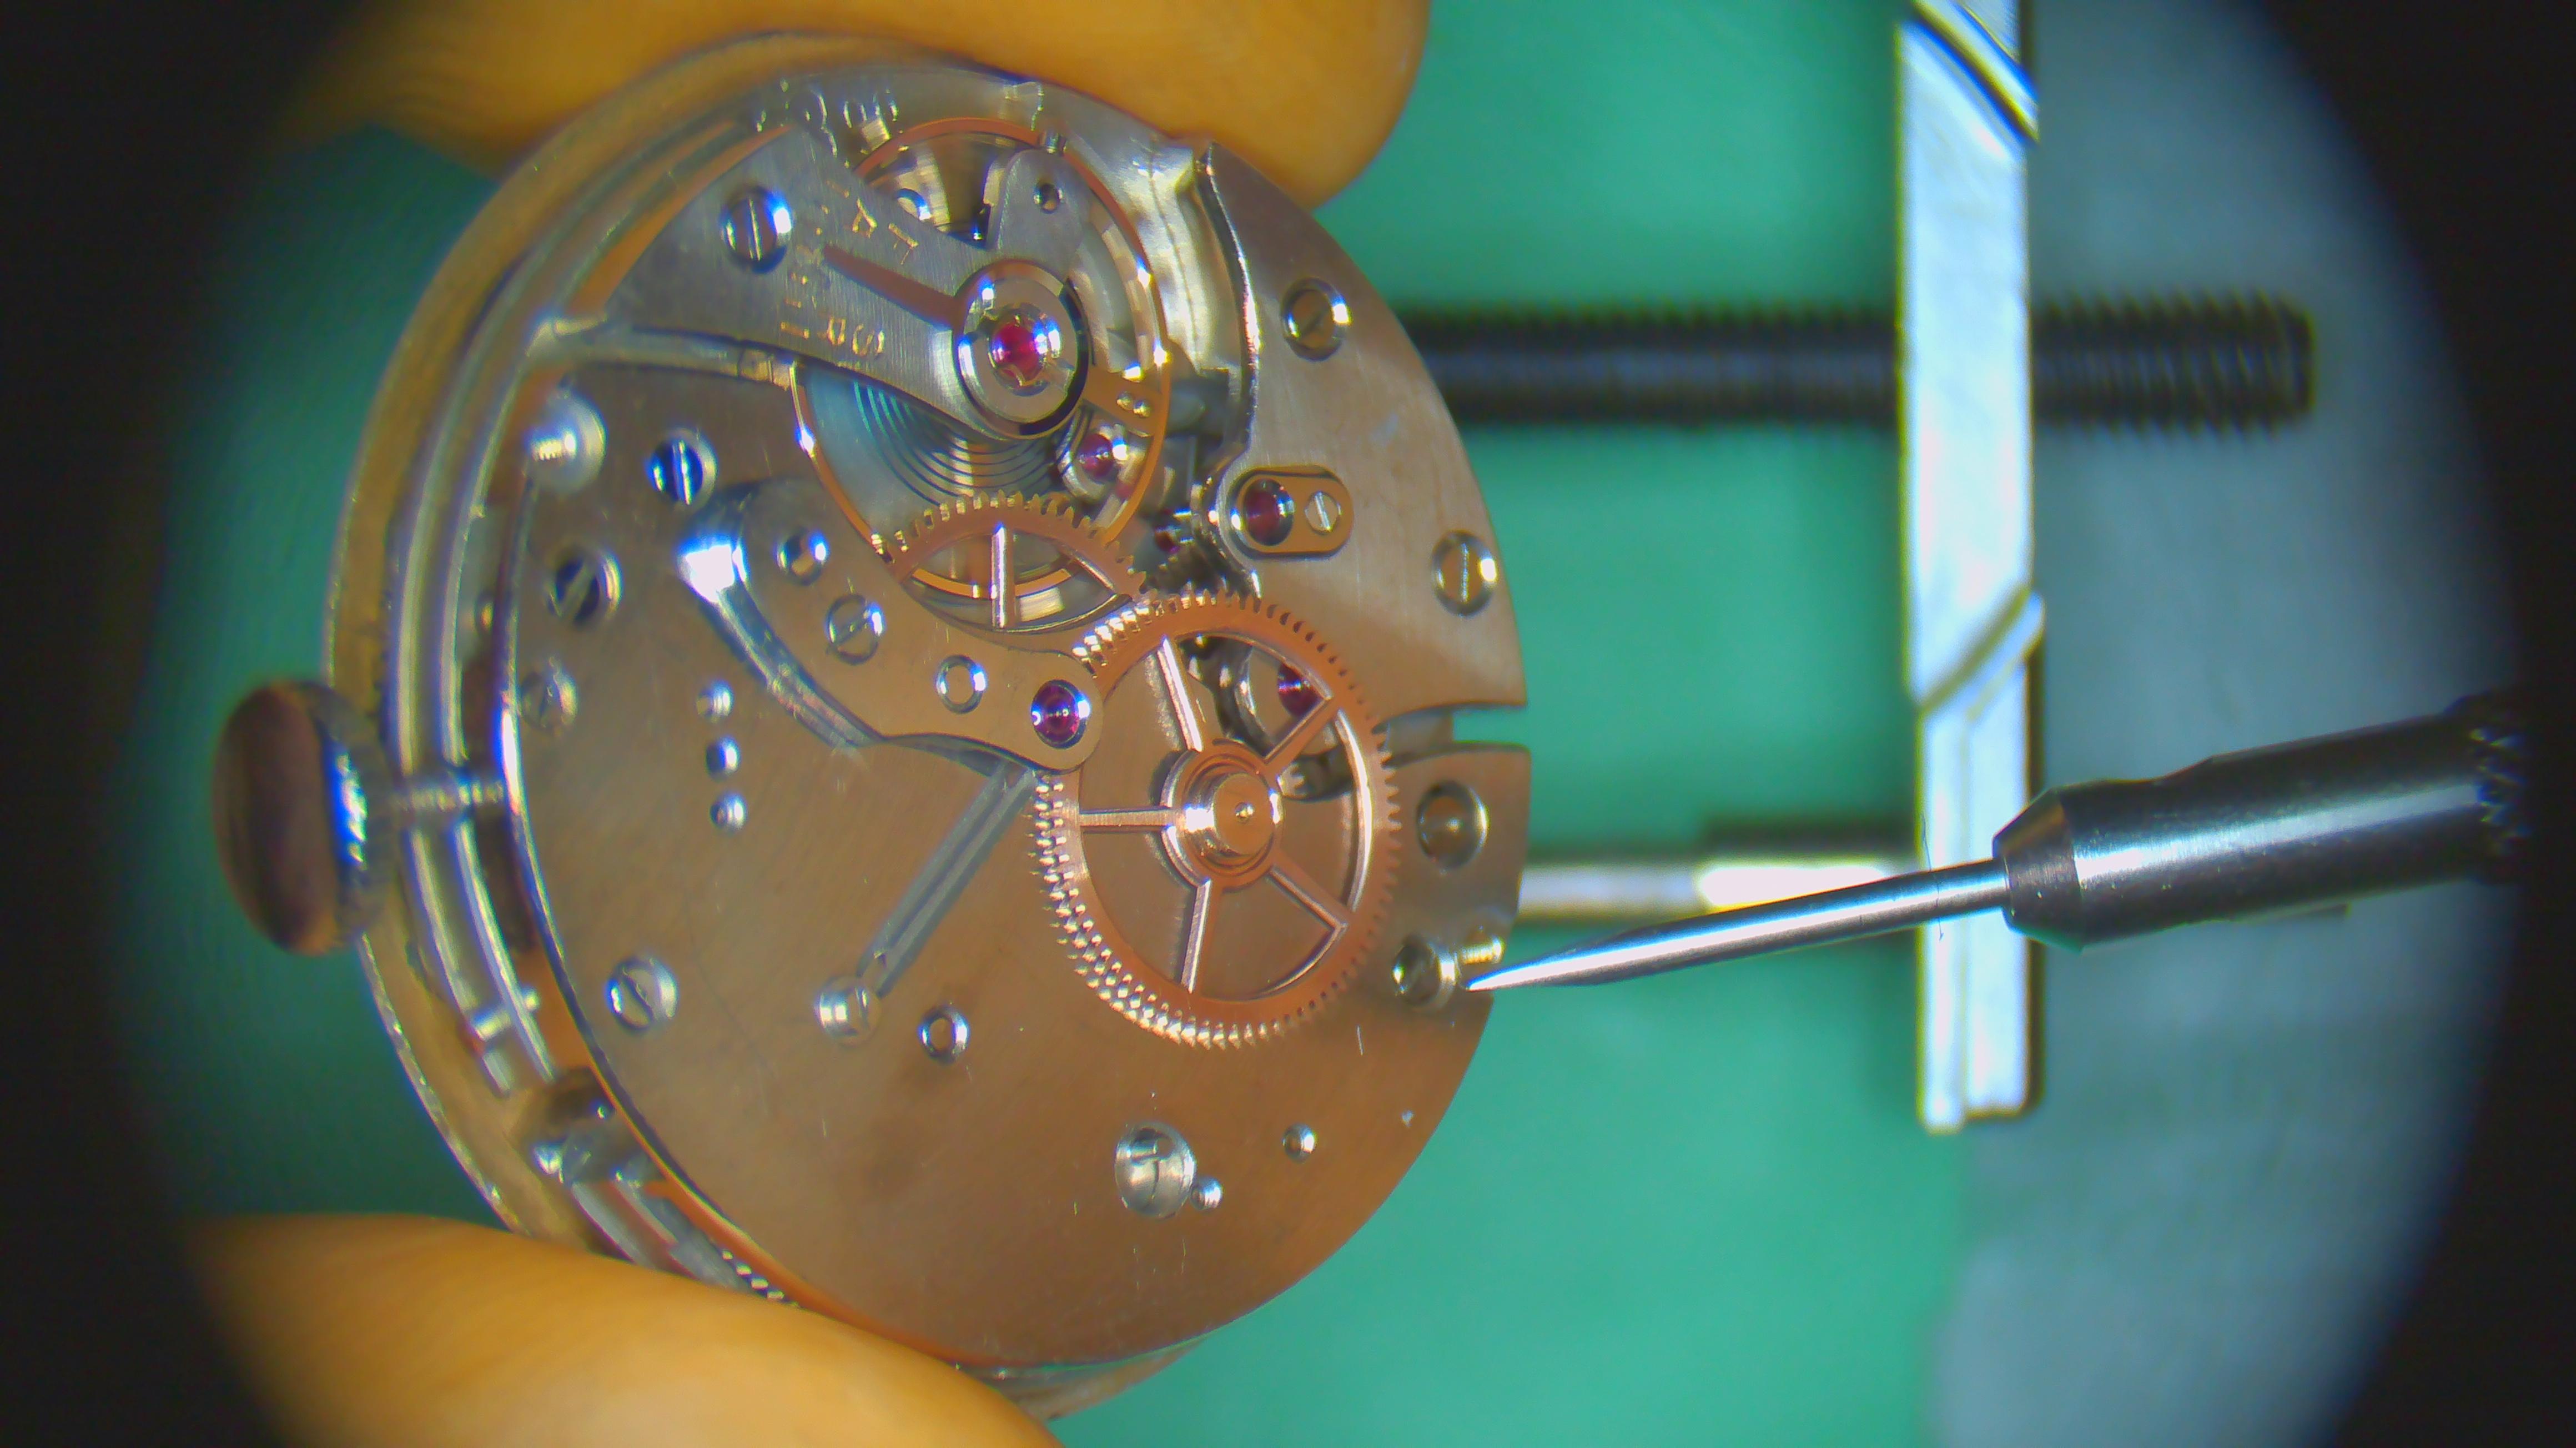
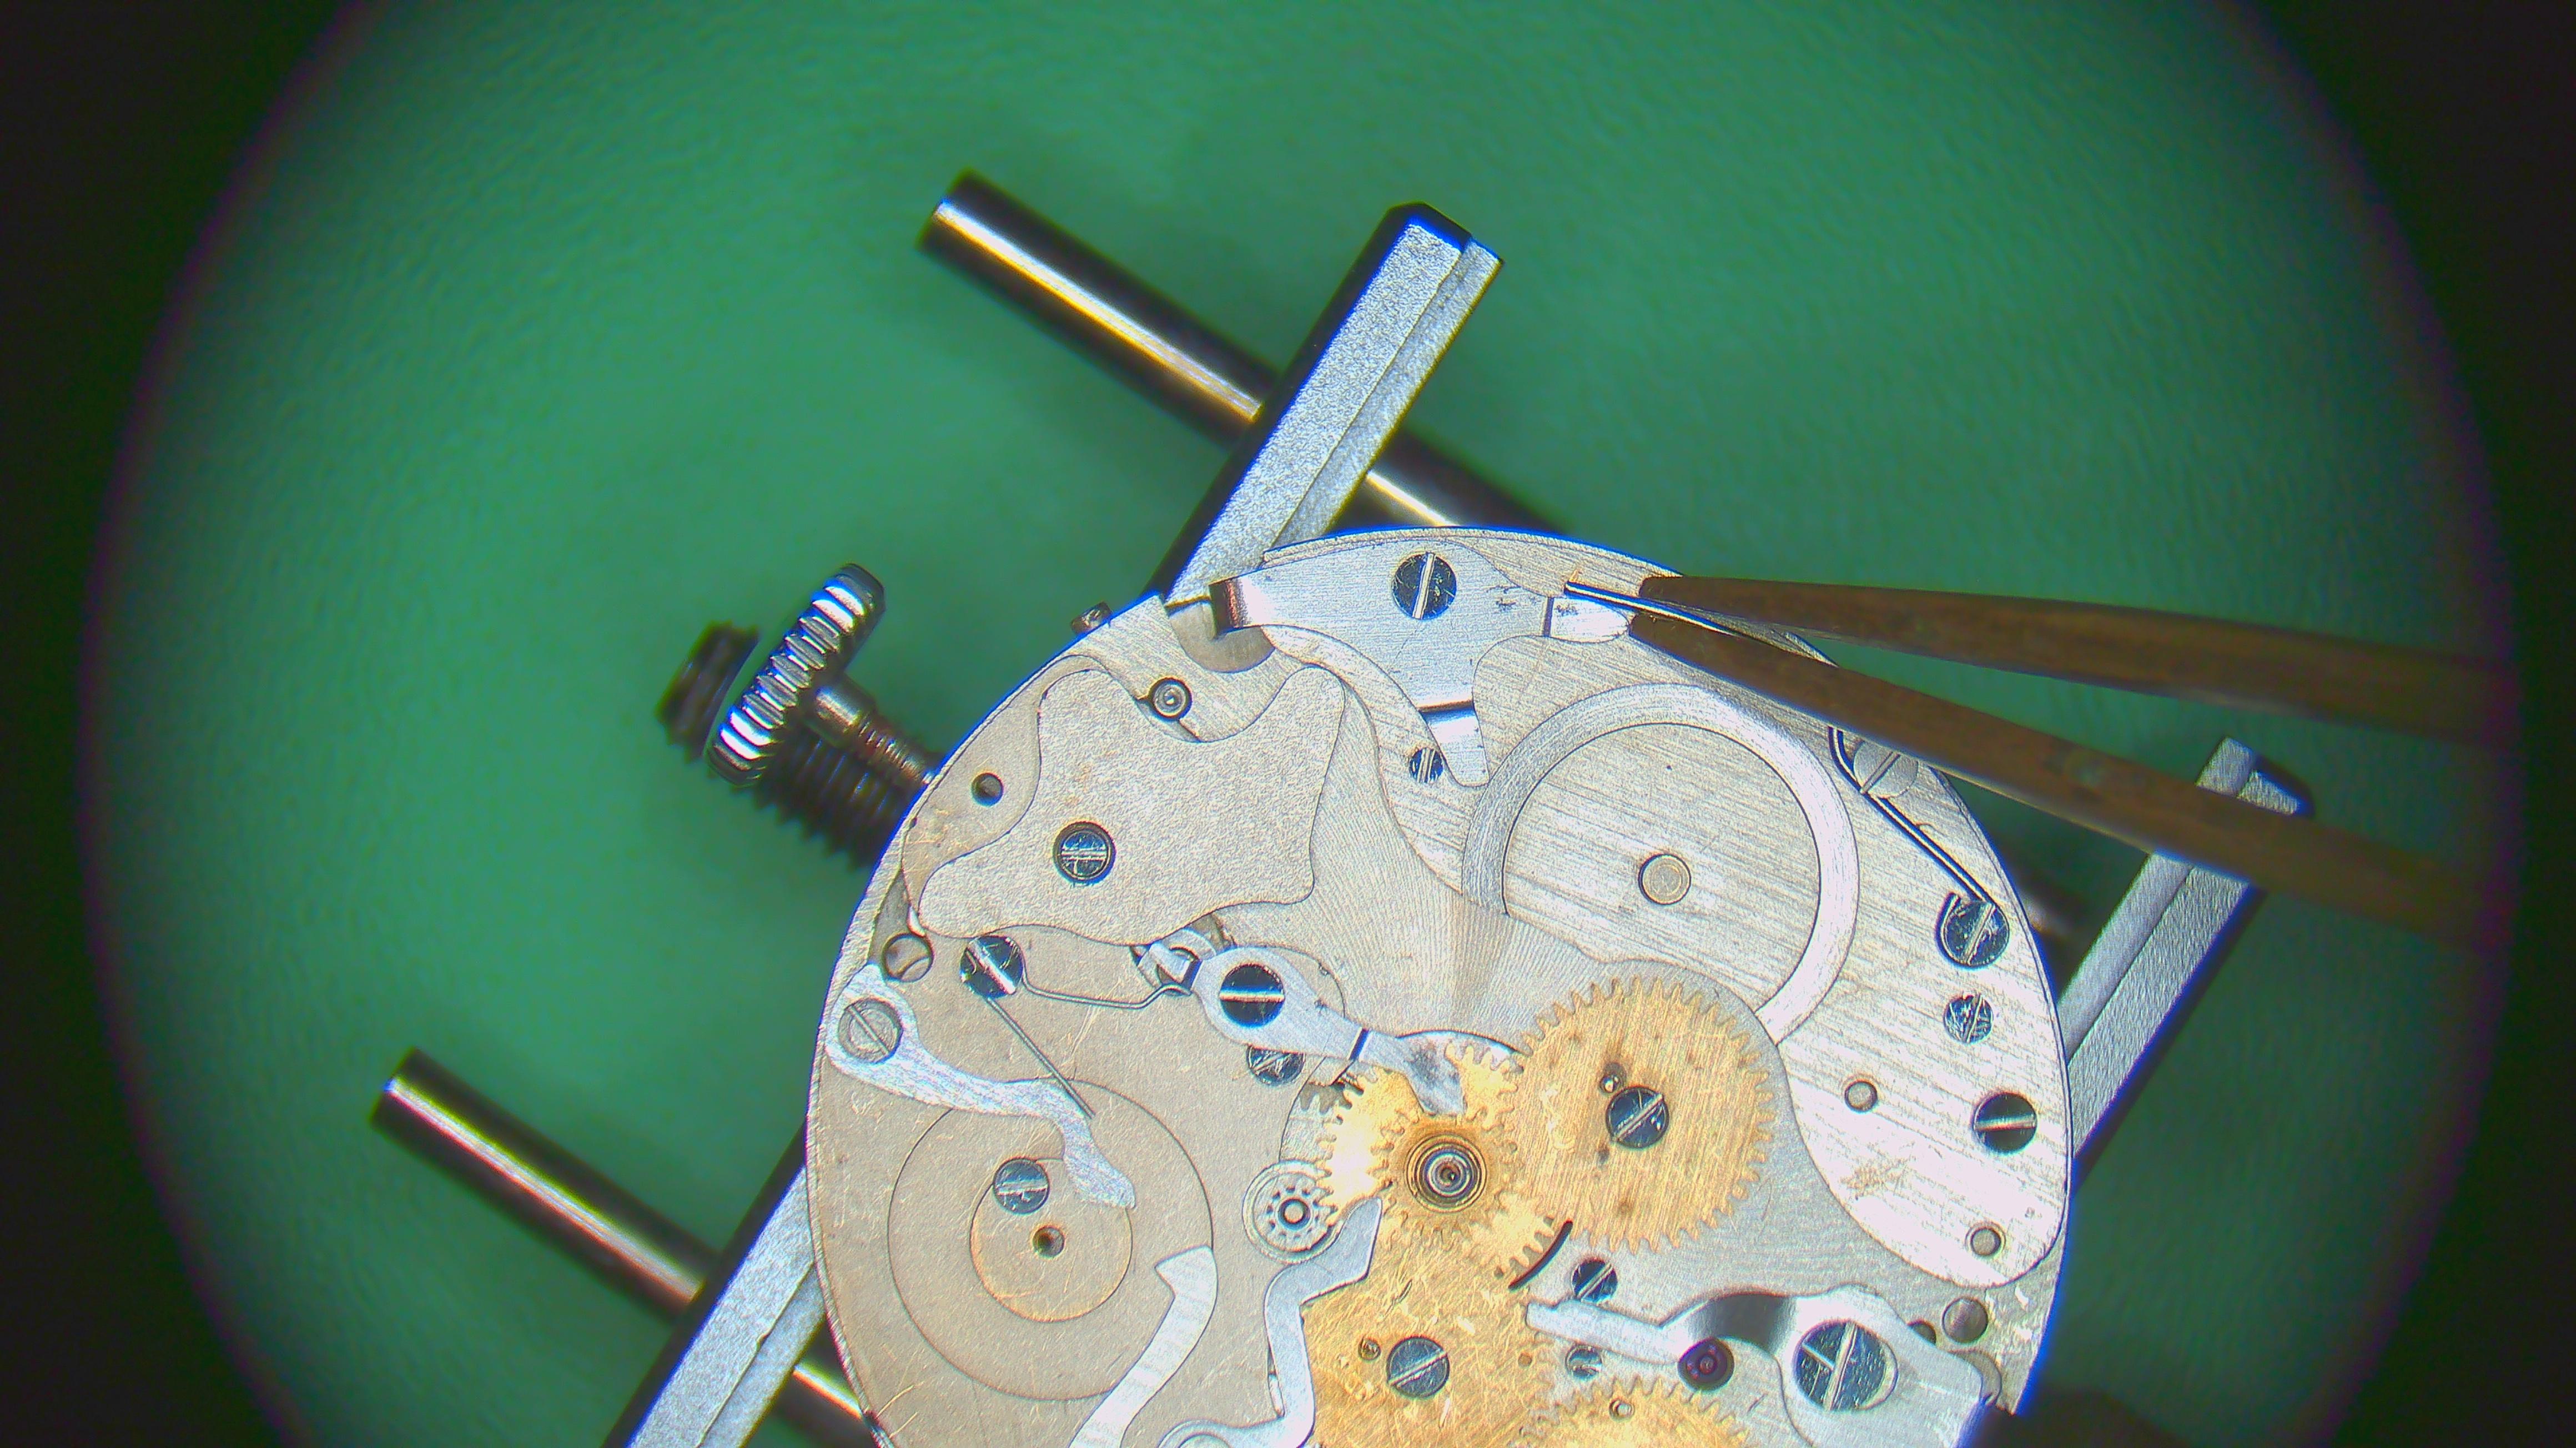
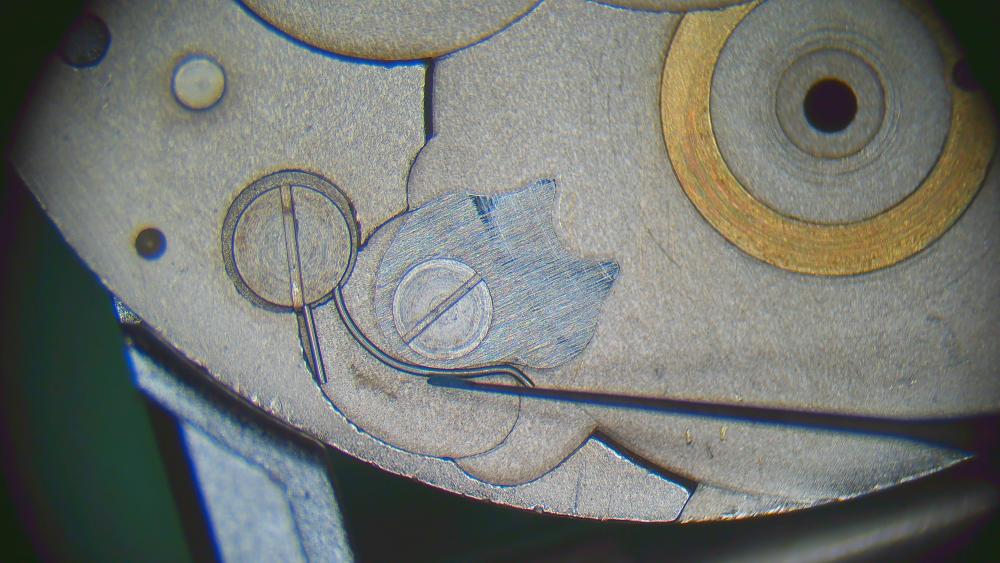
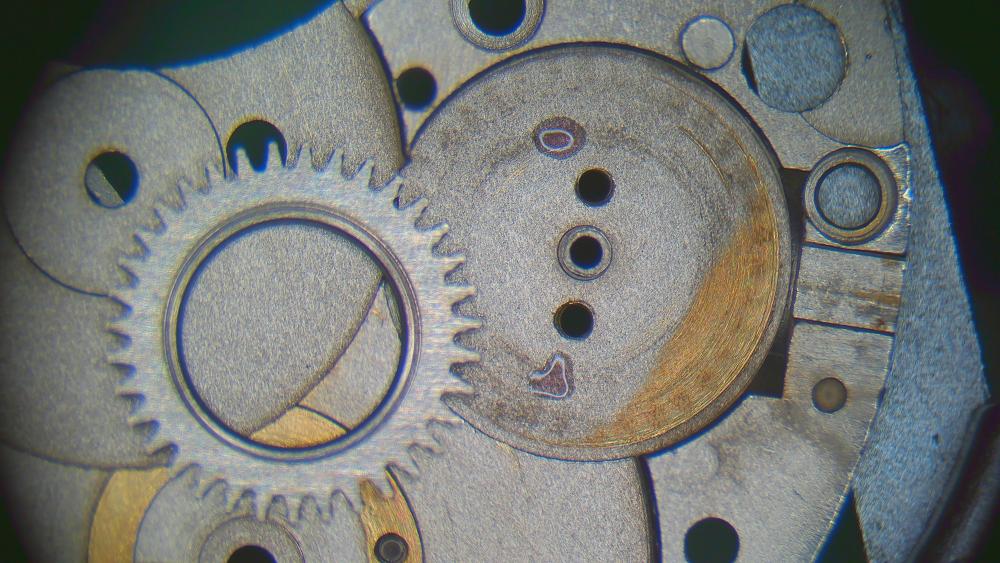
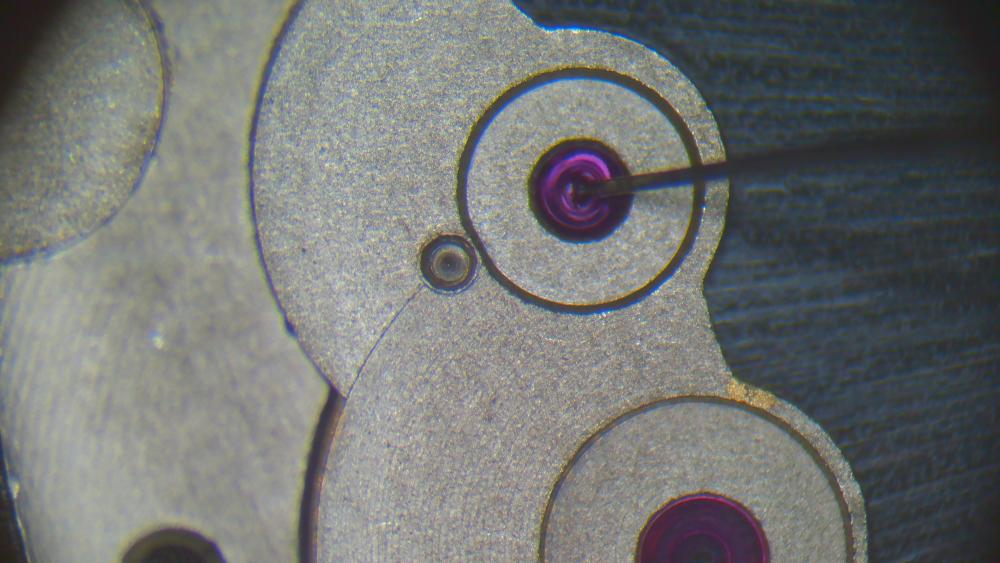
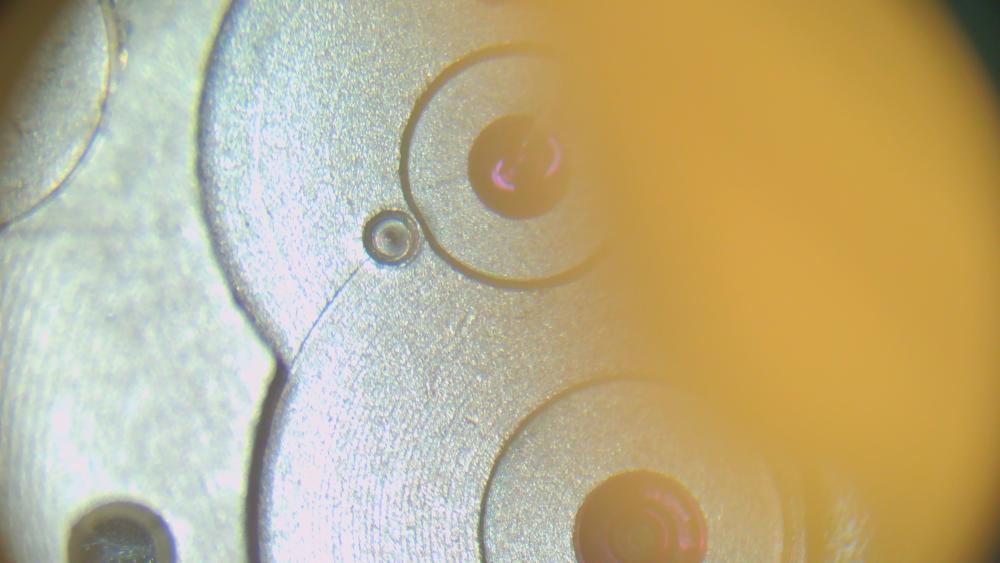
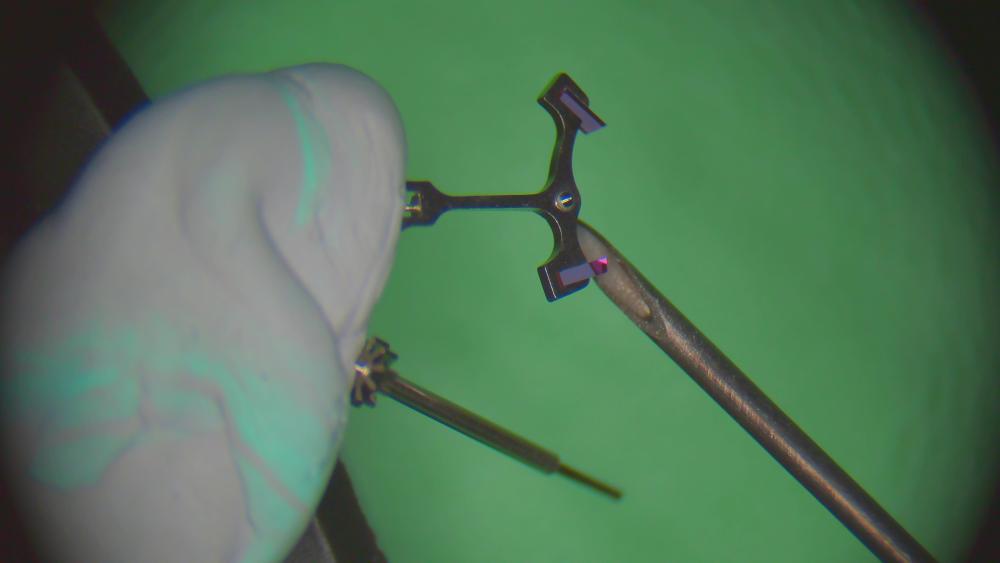
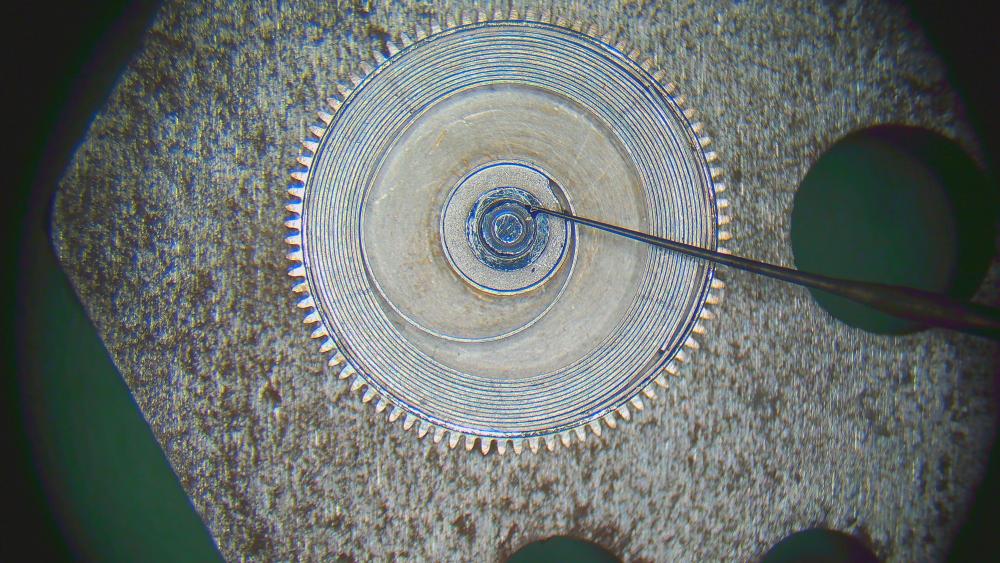
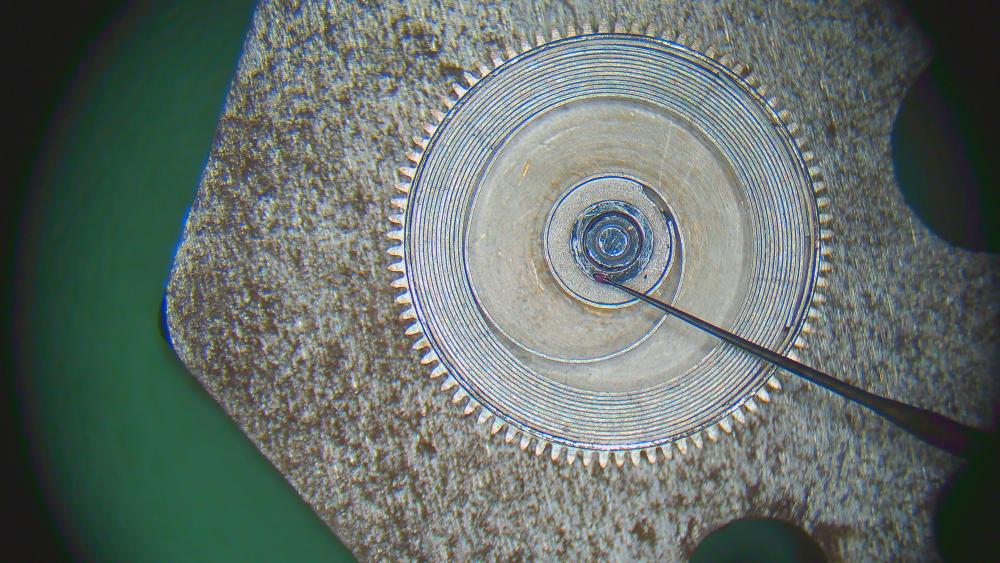
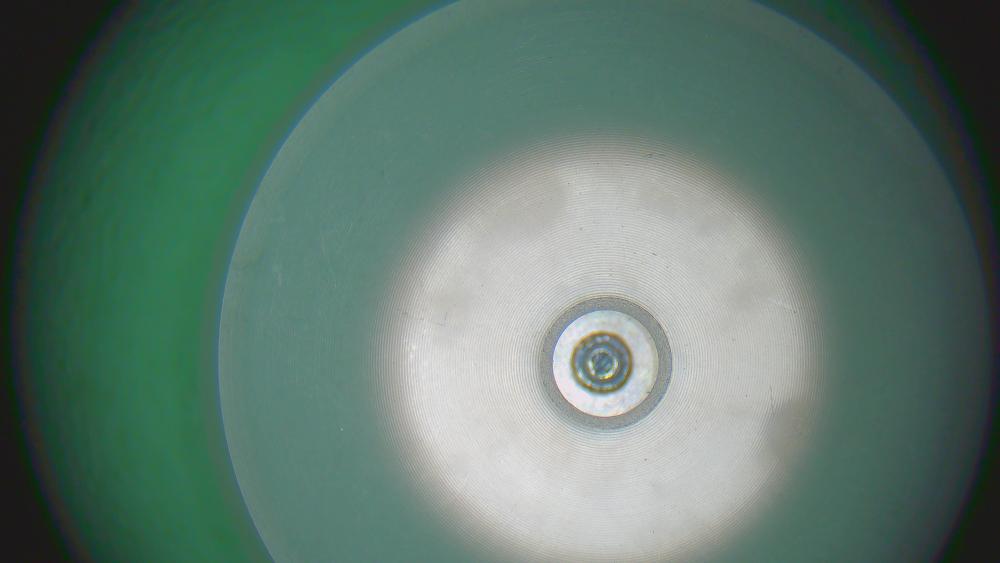
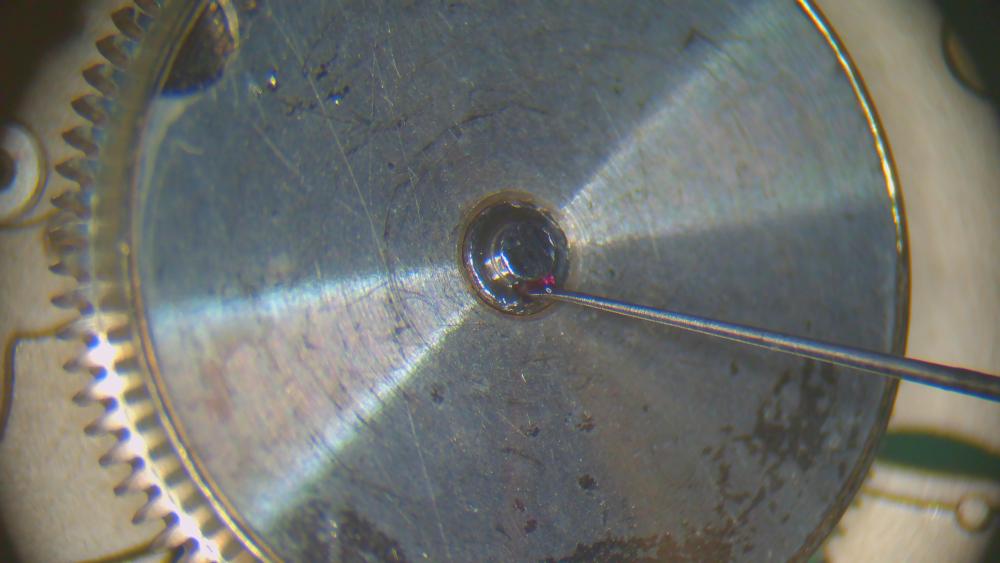
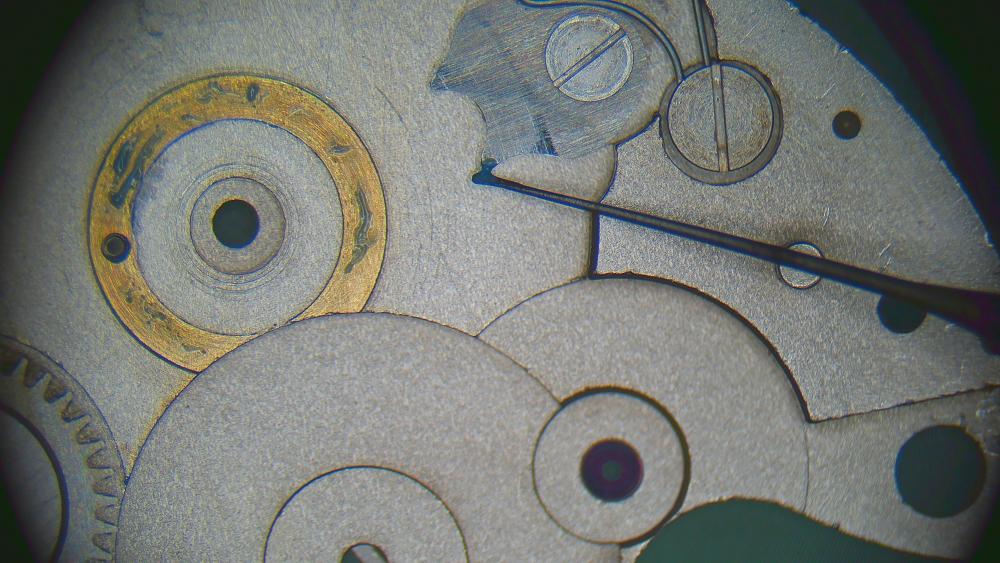
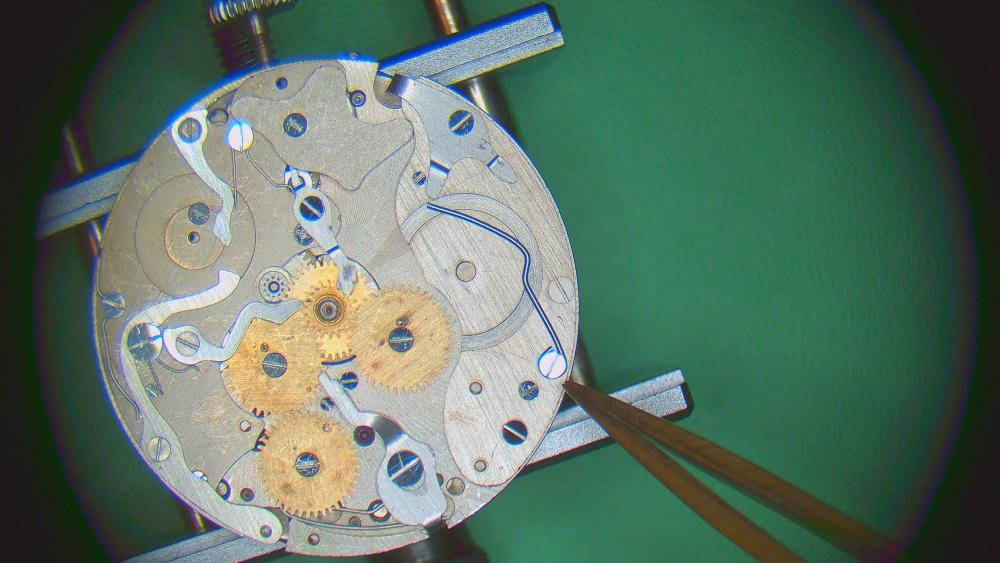
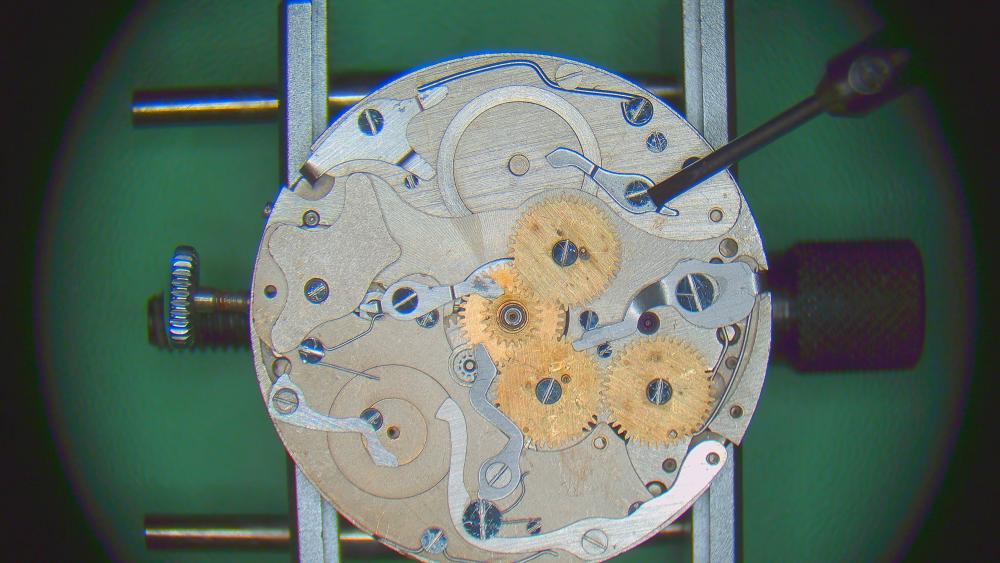
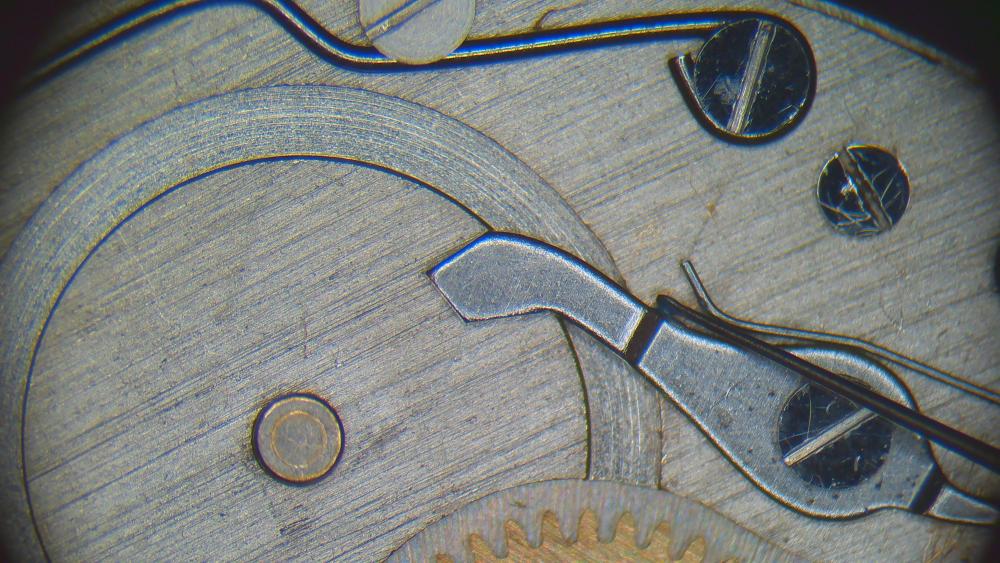
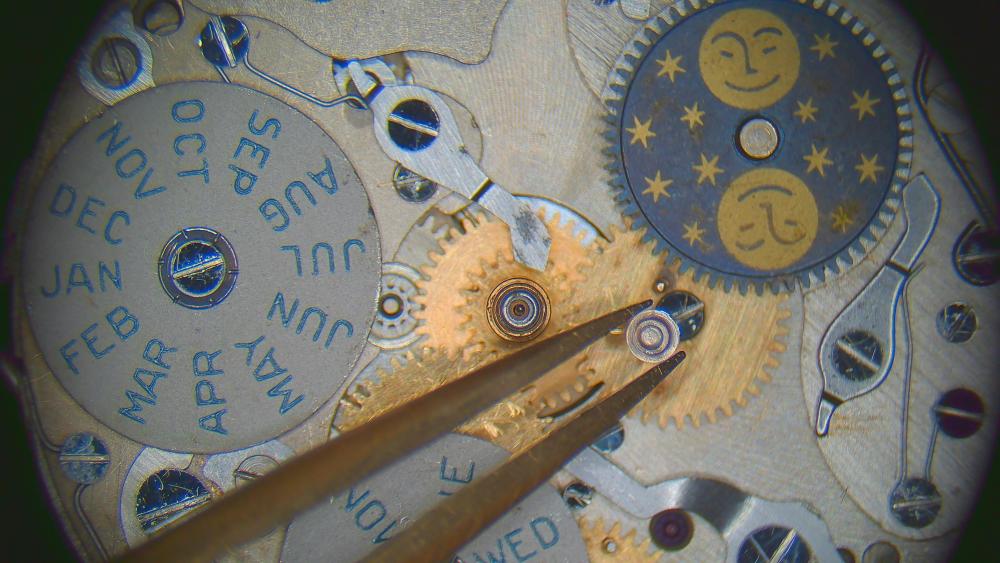
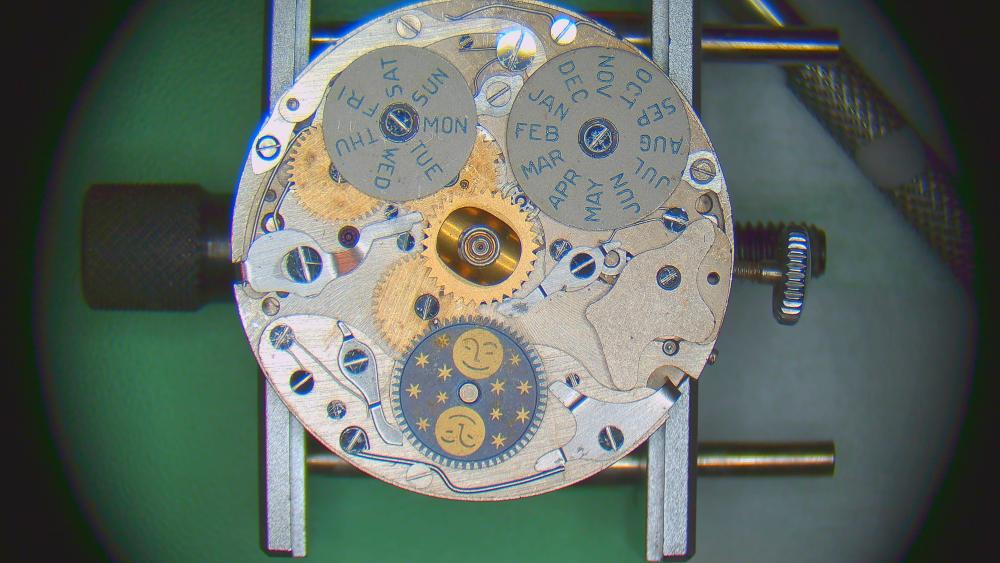
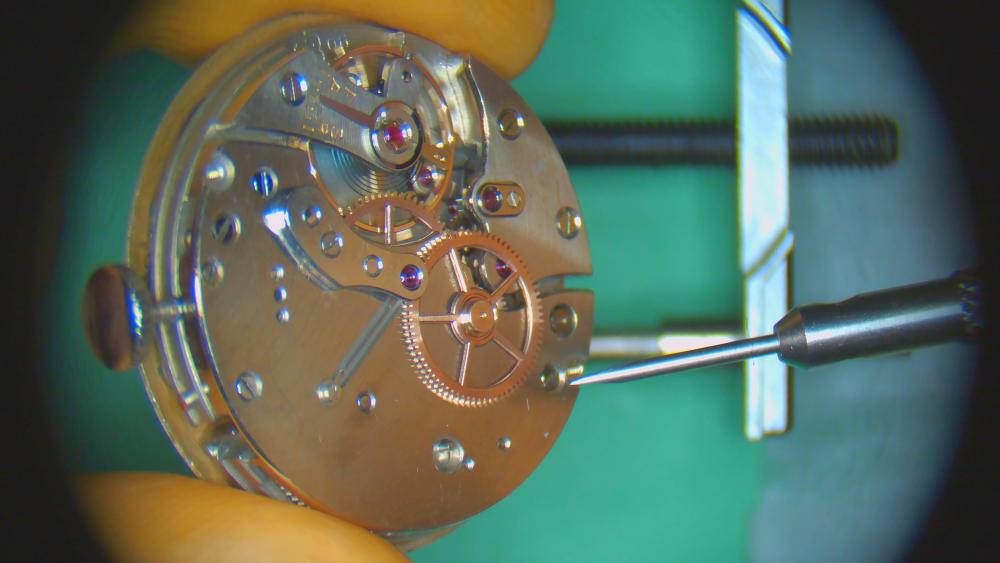
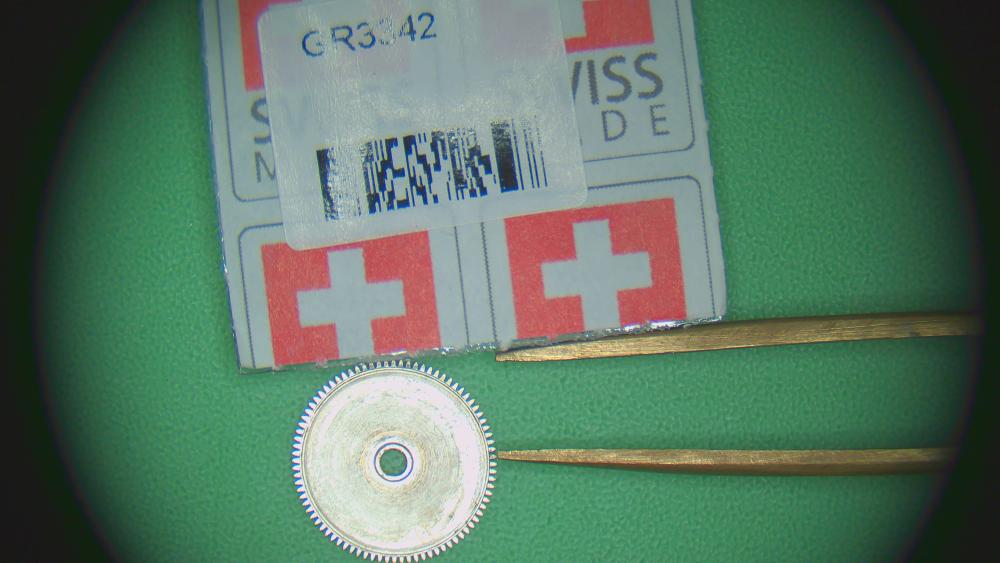
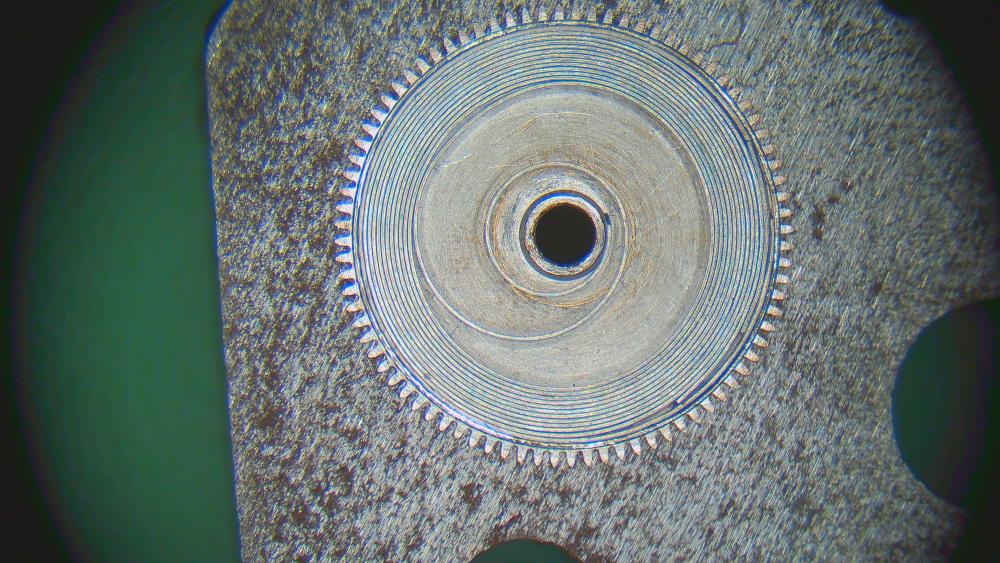
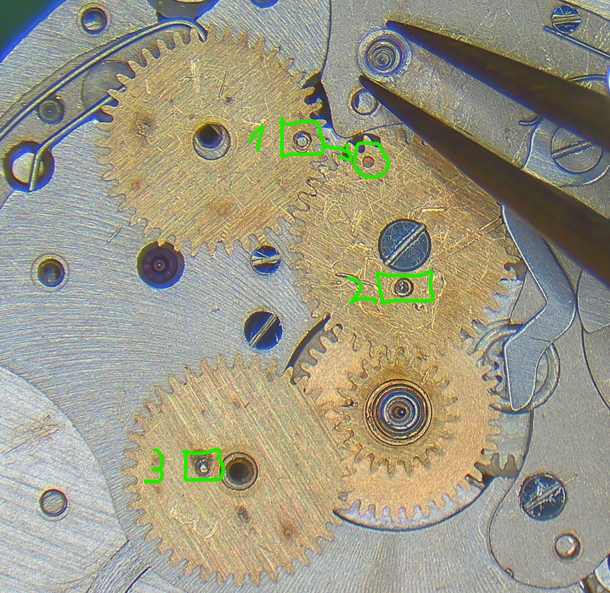
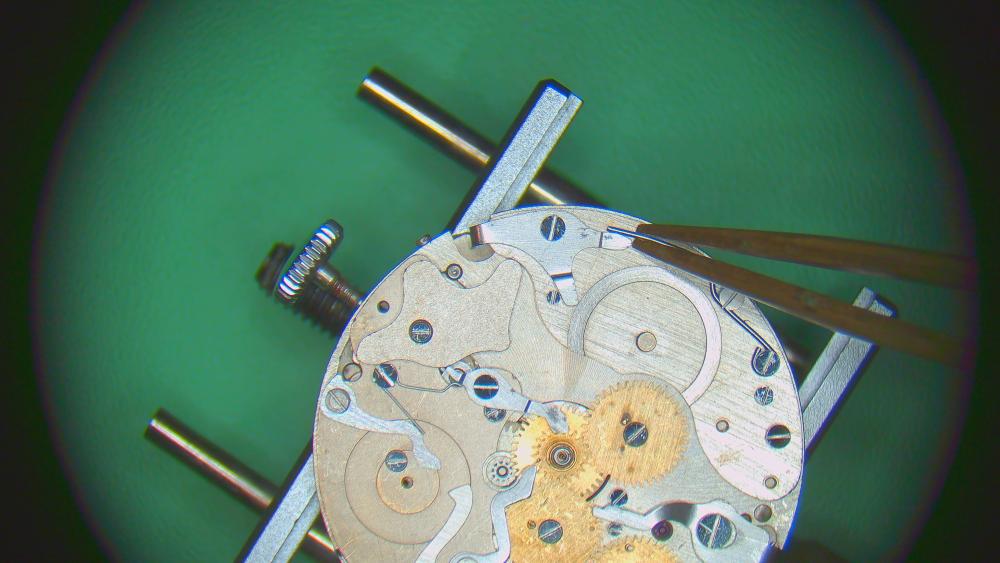
Hello everyone!! I finally managed to finish the assembly and to upload all the photos! It took longer than expected and I had a few issues that took a fair bit of fault-finding and troubleshooting. Great learning opportunitiy. Well, but now step-by-step. Cleaning in ultrasonic cleaner: 1 cycle of 7min in L&R 111 cleaning solution 2 cycles of 7min (each) in L&R watch rinsing solution Since the balance was still mounted on the main plate, I start by oiling the shock-protected balance jewel settings with 9010. Prepping the barrel bridge which has the click and crown wheel on the underside. - a bit of HP1300 around the click post - a bit of 9504 between click and click spring (the photo looks like I'm putting it on the wrong side of the spring, but obviously I put it in-between) two small drops of HP1300 where the outer crown wheel rests (removing the excess HP1300 where it didn't fit under the crown wheel) two small drops (always red oiler, by the way) where the outer crown wheel rests/slides on the inner crown wheel. Prepping the train bridge. The fixed cap jewel for the escape wheel is installed and oiled from the underside. One drop of 9010 into the sink, then using a filed-down oiler (to a very fine tip) to push the oil through. Checking the size of the oil ring from the other side with the microscope and repeating the process with another very small drop of 9010. Now the oil ring looks perfect. Prepping with epilame. Escape wheel (in jar), pallet jewels and centre seconds pinion with a syringe. Removing epilame again from the pivots of the escape wheel. I don't epilame balance jewels anymore since I read in some Rolex service manuals that they don't recommend doing it. Prepping the mainspring barrel. As mentioned before, the watch was originally re-banking (knocking). The mainspring used by the previous watch-destroyer was too thick (0.15mm instead of 0.14mm; and power reserve was rather low). Considering that I'll be using modern synthetic lubricants, I even decided to go down further to 0.13mm (GR3342). HP1300 on the arbor (note, there's no screw hole in the arbor, so make sure that the square bit goes in first) now two small drops of HP1300 on the other side closing Ready for assembly. Another drop of HP1300 on the arbor where it goes on the main plate. and on it goes and the ratchet wheel on top some HP1300 on the centre wheel ..and in I already position the other wheels (not necessary) Don't forget the screw for the setting lever before installing the barrel bridge! I also add a drop of 9504 on the click where it interacts with the ratchet wheel. NOTE: you may see that I put some grease on the discolored ring that slides over the ratchet wheel. I later removed this because it seemed to rather bind the ratchet wheel and cause low amplitude in the dial up position. So I suggest not oiling it at all. drops of HP1300 on upper side of barrel arbor and centre wheel and here goes the barrel bridge. It's a bit fiddly with the click (there's a round cut-out in the bridge on the left side of the photo with a small pin that can be manipulated to pull the click to the side to facilitate process of installing the bridge). the pre-prepped train bridge goes in pallet fork now the keyless works. First, canon pinion after some 9504 on the centre wheel. winding and sliding pinion with 9504 stem with 9504 setting lever and more 9504 yoke and yoke spring don't have posts, but shouldered screws. This makes it a bit tricky: the latter that you install will be under tension and it's therefore not so easy to insert the shouldered screw. I suggest starting with the yoke (a tiny bit of HP1300 on the shoulder of the screw). jumper spring quick turn-around to secure the setting lever screw back to dial side: some 9504 on the two positions of the jumper close up after removing some excess grease small drops of HP1300 on the posts for the time setting wheels (oil covers approx the top 1/3 of the height of the posts) I use the residual HP1300 (almost nothing) on the slightly raised rings on which the wheels sit) big bridge covers the time setting and keyless works. Oiling the train jewels on the dial side. (just one photo). I opt for 9010 for the escape wheel (like on the train side, of course). Then HP1300 for the rest. I know, maybe too viscous and I'm sure I'll loose a bit of amplitude. But I tell myself that HP1300 will last the longest and stay in place the best. Once could certainly use 9020, HP500 and or HP1000. balance in and it ticks. I let it run while I oil the remaining pivots of the train side with HP1300. Then I remove the balance again. I follow this belief that the "dry" running will now have scraped off the epilame in a channel, permitting a more effective oiling at this point. So I oil the exit pallet stone with 3 drops of 9415 (advancing the escape wheel a few teeth each time). Checking the amounts by slowly sliding the exit stone along the escape wheel teeth. Approx 70-80% coverage of the tooth is my aim. AND BIG MISTAKE. I dropped the balance cock when trying to reinstall it The cock dropped on the mainplate and the balance fell down. The hairspring was a bit bent... fortunately only on the end-curve, close to the stud. A bit of bending and it was good again. Here is the result after correcting: Back in and it runs fine. Now pressing on the centre seconds driving wheel thining about the oiling of the centre seconds pinion (this picture was taken earlier before installing the centre wheel). As you can see, even the thicker part of the pinion is thinner than the whole in the centre wheel. Hence, the pinion touches only the jewel at the top pivot (train side) and the tight bushing within the centre wheel on the dial side. Still, I'm applying a tiny amount of 9010 where the pinion rubs against the tension spring the special bridge for the seconds pinion is installed. And oiled with 9010 (9020 may also be good/better). I oil the pinion within the bushing of the centre wheel from the dial side. For this, I carefully apply a drop of oil only on one side of the oiler and slide it down the canon pinion). Some risk of oil spills here, but I think I did it well. This concludes the base movement! At this point, I did some testing. As mentioned before, amplitude was down significantly in the dial up position (minus 40 degrees). I concluded that it was caused by the grease under the barrel bridge. Having removed it, I still have about 15 degrees less amplitude dial up (vs dial down). Might still be the ratchet wheel binding against the barrel bridge, but less than before. I'll call it good. Now to the triple calendar and moonphase!! I guess that's what you've been waiting for. Each disc (day, month, moonphase) has the following: - a wheel with a vertical pin that drives the star under each disc (teeth on outside of moonphase disc) - a jumper (lever + spring) - a corrector (lever + spring) - the disc itself All of the above are held by shouldered screws. I oil the shoulders of the screws for the levers with a small drop of HP1300. The screws for the springs don't need it, I think. The touching points between springs and levers are greased with 9504. Funnily... the very first thing I did was wrong. I installed the month corrector before the day corrector. But the day corrector needs to go in first. So to keep things as a guide, I'm posting a later picture first to keep it as a "correct" chronological guide. So please ignore everything on the picture, except the circled day corrector. The screw is unique and has a tall head (functions also as a distancer for the dial later on). Some HP1300 under it. But back to the mostly empty plate... Now the corrector of the month disc spring for month corrector installed (you now see that I forgot the day corrector, but imagine it's there). 9504 between spring and corrector. this lever and spring will be jumper for the day disc Take note of the oversized screw for the spring, which also holds secures the month corrector. I add a bit of HP1300 where the corrector slides under the screw. 9504 where spring and day jumper/lever touch time for the combined hour+24h wheel after some HP1300 on the canon pinion this spring will later work with the corrector for the date. It's a very strong spring. Time for all the driving wheels with the vertical pins. Their position needs to be exactly coordinated so that date and day would jump at the same time (and the moonphase just a bit later, around 2-3am). Two aspects here: 1. which wheel where? Wheel 1 has the pin furthest out. Wheel 2 is in the middle. Wheel 3 has the pin closed to the centre. 2. how to position the pins? - Pin 1 needs to be opposite the circled dent in Wheel 2. - the position of Pin 3 needs to be in a specific angle to the other ones... If you position everything like in my picture, the moonphase will jump at around 2am. NOTE: the shouldered screws for these wheels have a longer thread than all the other ones (for springs and levers). HP1300 on their shoulders. this spring (close to the crown) will interact with the jumper for date (just below, towards the center) and month Installing the jumper for the month disc (HP1300 on the shoulder) some 9504 between the spring and the two jumpers a funny little plate comes here. For proper positioning, push against it where you see my flat probe. corrector for the date with the other large screw. Some HP1300 under it. the tip of the corrector goes between two screws and I put a bit of 9504 where they touch the corrector next corrector. This one is for the moonphase. big and strong spring for the corrector. To install, I first half-way unscrew the two screws guiding it. I can then lift it up enough to move it over the corrector. tightening the two screws again. (only one of them shown here, but need to do it for both). 9504 at the rubbing point. there are some scratches on the plate here from the spring. So I'm adding some 9504. moonphase jumper (shouldered screw with HP1300) spring for moonphase jumper (screw in half-way; place the spring; screw in fully) the greasing point is where the jumper goes up (where my oiler is, exactly) here you see where the jumper will be when the moonphase disc is in place. The finished setup before installing the discs moonphase first: pull the jumper with one hand, set the moonphase on the post. No screw here. Some HP1300 on the post. Placing the day and month discs are a bit fiddly. So after trying a few time, here is my preferred method in six steps: 1. lubricate the shouldered screw with HP 1300 and set it aside (close by). 2. Pull up the jumper... 3. and insert a 1.6mm screwdriver between the end of the lever and the screw to hold it back. (sorry for change of perspective, now the jumper is on the bottom). 4. position the disc over the screw hole 5. place and screw in the shouldered screw. 6. release the screwdriver. similar for the month disc DONE (or am I....???) Well, what's interesting is that you can only properly test the functioning of the date and moophase corrector like this. The combined day and month corrector needs to be depressed by a very exact amount. So it's not really possible to test like this. So to the case and the pushers. First, I put the dial (which I'll end up taking off many more times...). Two eccentric screws hold it in place. You can see their position from the train side through holes in the barrel bridge. I put crazy amounts of silicone grease onside the pusher hole and around the springs inside then I insert the actual pusher view from the other side. The grease isn't oozing out (good). Push the pusher against your workmat to be able to screw in the screw without pushing out the pusher. Well, the day/month and date correctors didn't work properly. I spent hours fault-finding. There were two issues, actually. 1. The screws for the pushers for day/month and date are not the same. I should have taken pictures of each pusher screw upon disassembly. I had to swap them around. At this point, the date corrector started working. Good. But the day/month still didn't. The day always got stuck in-between days. 2. I found the vertical pins on the wheels to be a tiny bit too high! They were actually scratching the underside of the day and month discs. This made the disc not jump smoothly and get stuck. It also explains the metal shavings I had found in the movement when I first opened it. I used a file and gently filed them down a bit until they'd go under the day and month discs. After this was solved, dial back on. Set the time (clockwise!!) until the day disc jumps. Then install all the hands for midnight (date can be any..). DO NOT test the pushers/correctors until you have advanced sufficiently past the jump of the moonphase. I'd say 6am, at least. DONE!!!! I'll post some timegrapher results soon.


 2 points
 -
This is cheap Chinese Tongji movement in ball case. Nothing to do with Kundo, they didn't do such watches. This is actually a clock, the rear half must have flat part to put it on flat surface. How to disassemble - the bezels are pressed in the middle part and sharp knife is needed and some force. But, only disappointment will be found inside...1 point
-
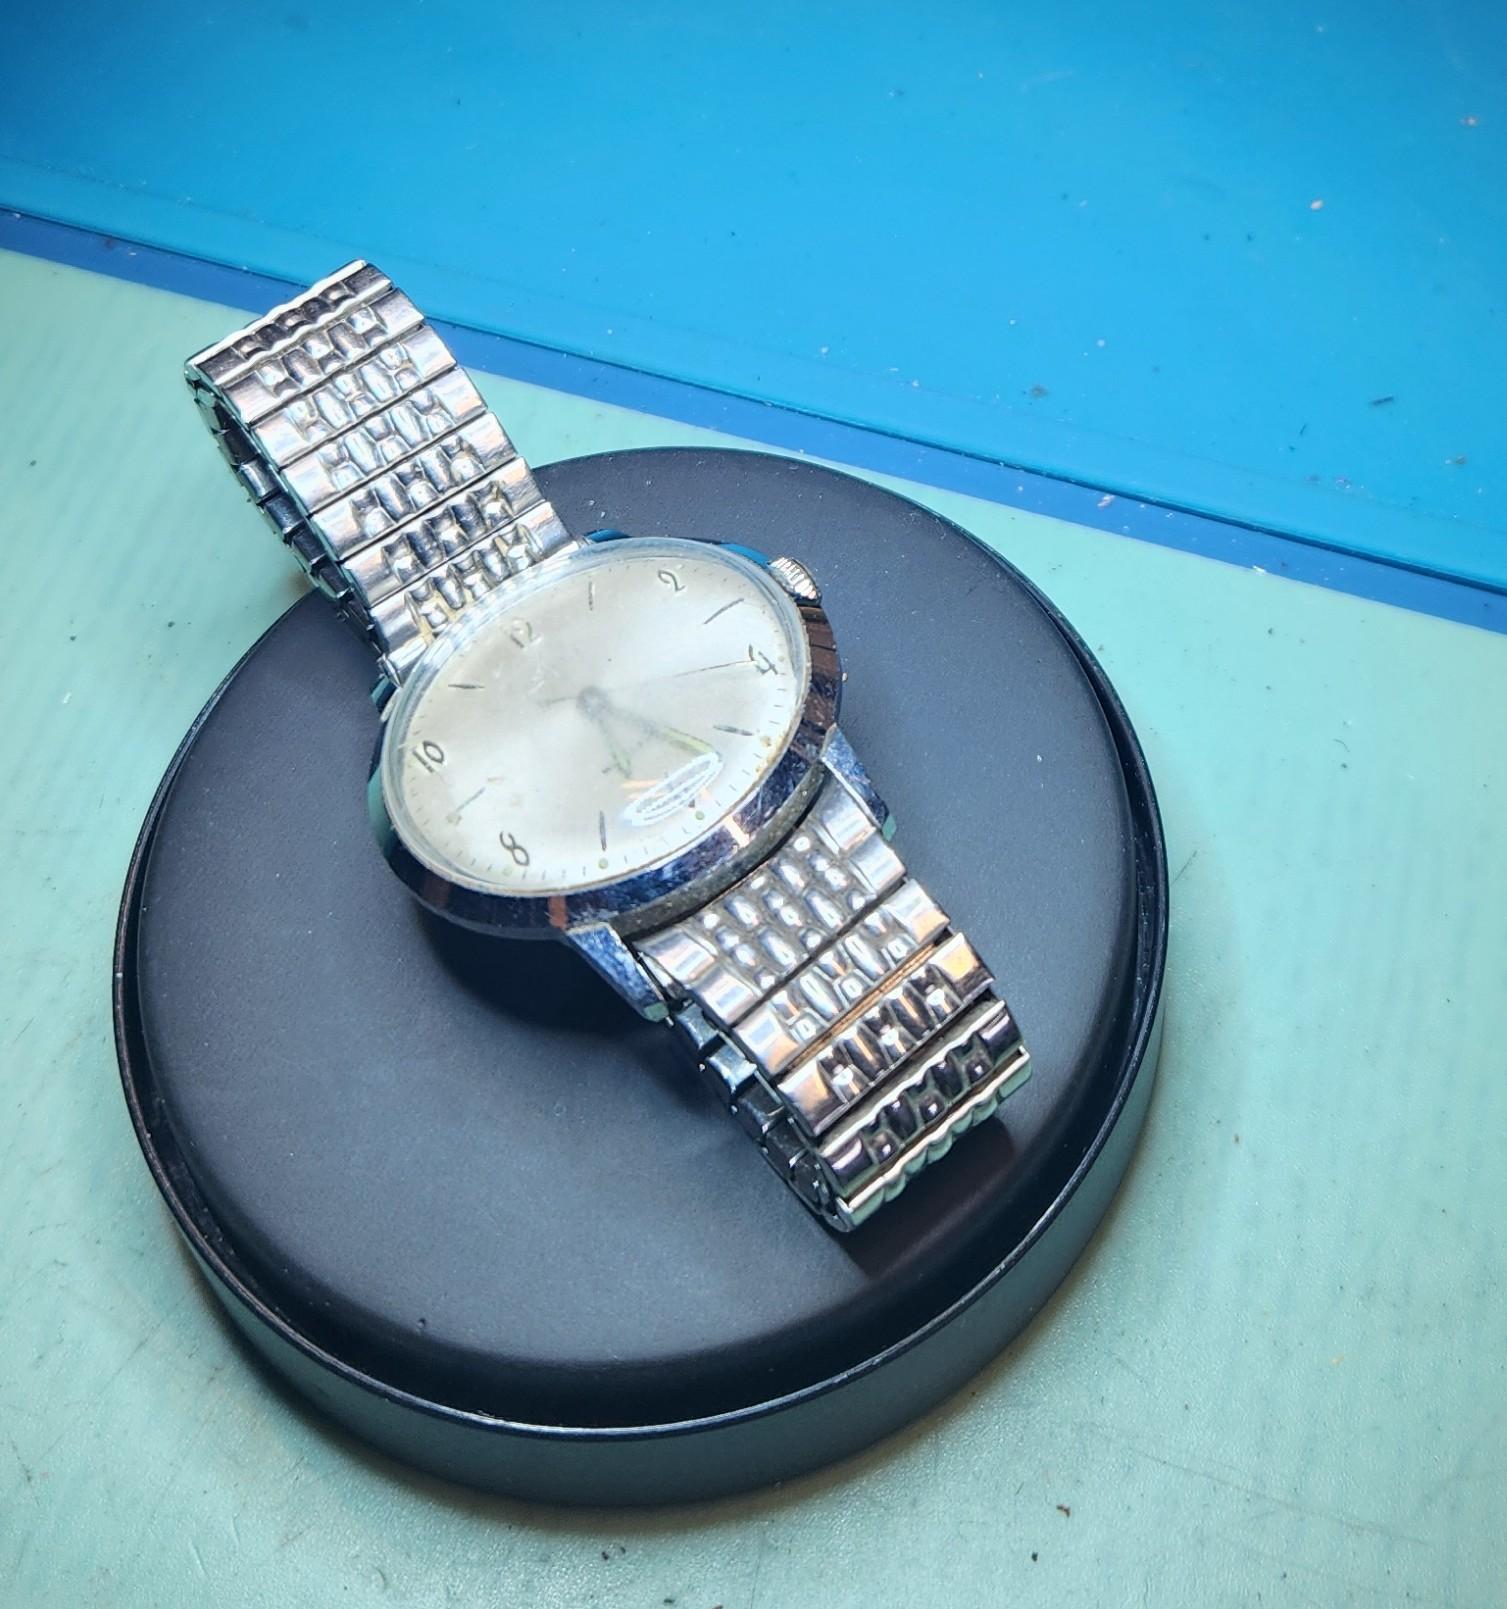
The lume is not at all active. Seconds after this shot a portion of the minute hand lume fell out. Oh well. I do like this one...of course I am biased. The original is 34.2mm and 41mm lug to lug with a lug width of 11/16" or 17.7mm.
 1 point
 -
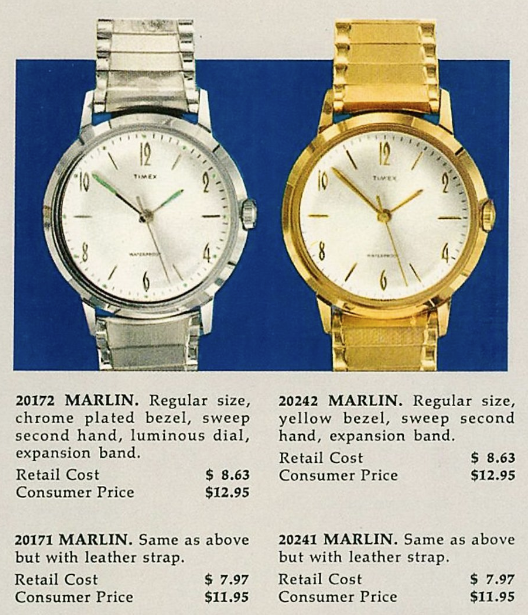
A nice example. According to the internet.. $12.95 in 1966 is worth $125.82 today, make of that what you like. Having said that, a 2024 Timex marlin is around twice that price, but you do get a jewelled movement for that money. https://timex.com/collections/marlin-watches?country=US This is the 2024 version, very nice, but for nostalgic reasons, I still think I prefer the original, which is probably just as well, since the new one is currently out of stock.
 1 point
 -
Great success guys, I only winded like 9 times the crown and for about now 4 and half hours is going beautifully I love my Rolex hehe so happy that managed to complete my build and rebuild my watch now proudly own 2022 submariner 126610LN! Tomorrow when I get my hands fitting tool I will get the dial and hands fit on movement and then last but not least is get all gaskets fitted and get all in the case and put straps in and take to the AD for them to regulate the accuracy as it supposed to get somewhere 1/2 sec per day so looking forward guys at Rolex to calibrate as it needs special tool for balance wheel wights to get them properly adjusted1 point
-
So it's a Marlin from 1966 with an M24 Movement. Edit Here's the 1966 catalogue clip.
 1 point
 -
All that tell you is what's common knowledge for month and possible years or manufacture.1 point
-
I'm not sure if a new spring can even be pushed in from a correct size ring. The T end has a tendency to jump out of the slot at the bottom of the barrel. I used to hand wind T springs but that usually ends up scratching up the floor of the barrel. I learnt how to use a mainspring winder to fit T end springs from @JohnR725. His method is to leave a short "tail" sticking out of the winder, fitting the T into the slot and holding it in the slot by pressing down on it with the back end of a brass tweezer while pushing the spring out of the winder. Takes a bit of practice but it works like a charm.1 point
-
Even with the difference in photo quality, the op's doesn't have that crisp finish, Walkers cheese and onion would appeal to me. Date window is now very obviously incorrect.1 point
-
Did you specifically ask for a waterproofing pressure test when you left it. Maybe it's the shop's standard proceedure to change the gaskets when doing this. If so then i would have to assume thaf your bill when you picked it up would be in accordance with gasket changes at the 3 points of possible water entry, crystal ,caseback and crown along with the battery change. Your invoice should have that work detailed on it if thats the case, so if the crystal gasket was changed then the bezel would need to come off to do that. As regards to fake as Andy has suggested, I'm kind of on the fence, its easier to determine in the in the hands. Certainly a fake would not house the correct movement for the watch, perhaps you could ask your guy to varify that, if it is fake personally I'd be very embarrassed to acmit i hadn't told you it was. Just had another look, i think Andy is right , my gut is telling me it's a fake. some particulars on the dial dont appear to line up, the overall finish looks poor.1 point
-
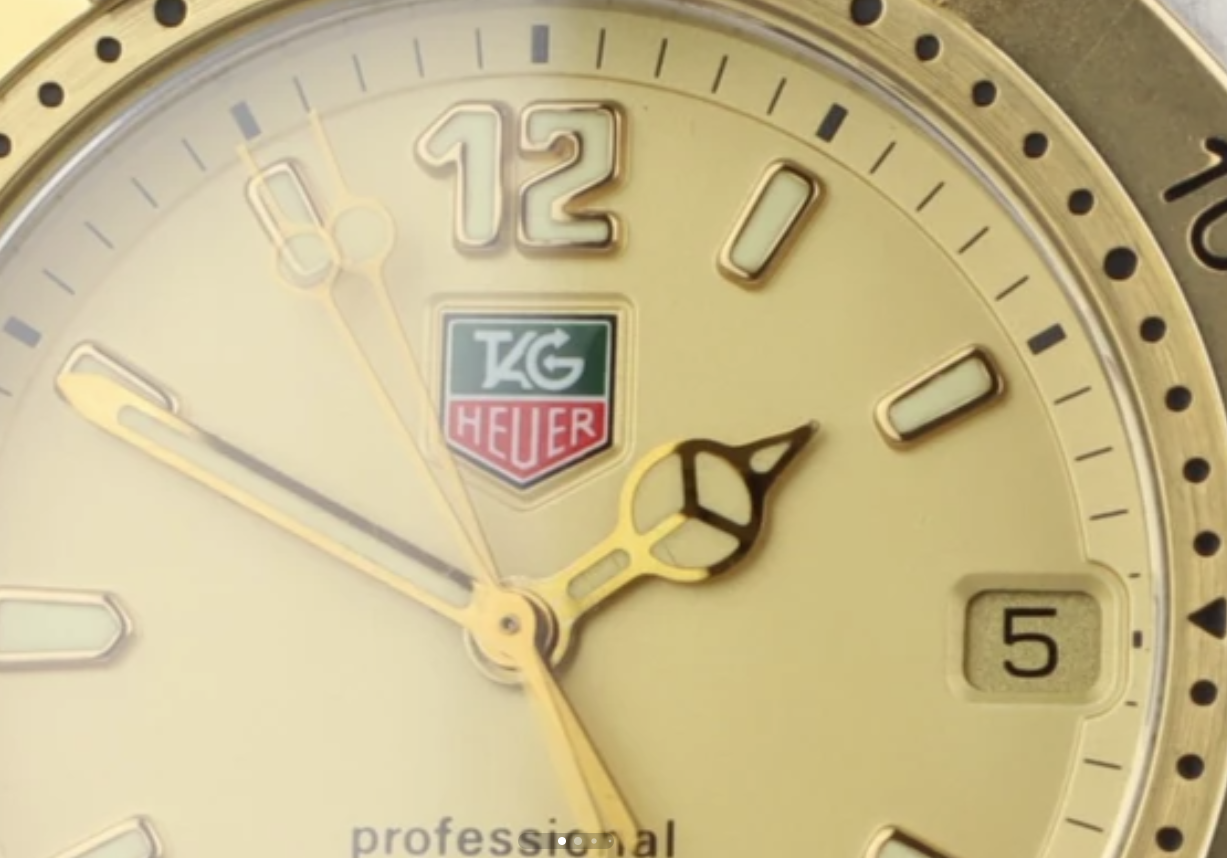
I have not worked on a TAG watch but most bezels have a click style spring under the bezel which creates the click and some calibres it stops movement in an anti clockwise turn. I don’t see any reason to remove the bezel to change a battery. If the bezel was stiff to turn then yes they have to be removed to clean.1 point
-
Thanks! I hadn't heard of "iFixit", but I see they have an interesting website. A recommendation (even from a stranger ) is better than none, so I've ordered an iFixit set and will report back in case anyone else is interested.1 point
-
Welcome to the forum If the crystal wasn't being replaced then there's no reason to replace the gasket unless it failed when testing. What kind of shop did you take it too? Edit Just had a closer look and it's a fake anyway.1 point
-
Another weekend and another chance to work on this beautiful movement which came back to life again today. For anyone interested, I've uploaded more assembly pictures. The calendar and automatic works remain to be assembled. It's getting close https://1drv.ms/f/s!AnVrKJ9agkNWkokVhogLYtvc6xAqdQ?e=qjlJ4w (sort by name in ascending order)1 point
-
Well the bezel came off easily. I moved the bezel spring round to the third hole of the three holes, it was on the first hole originally, and the bezel is now aligned perfectly. I'm over the moon. Thank you everyone for your help and advice, much appreciated.
 1 point
 -
Would changing which hole the bezel spring tab sits in maybe make a difference? I know the holes look farther apart than what the bezel is misaligned, but I bet there are 2 bezel clicks worth of distance in there.
 1 point
 -
When attempting one, plan to fix all the design and manufacturing defects.1 point
-
His live streams are instructional and if you prefer straight lessons search his channel. He has dozens of videos on practice and technique.1 point
-
That is how mine are installed1 point
-
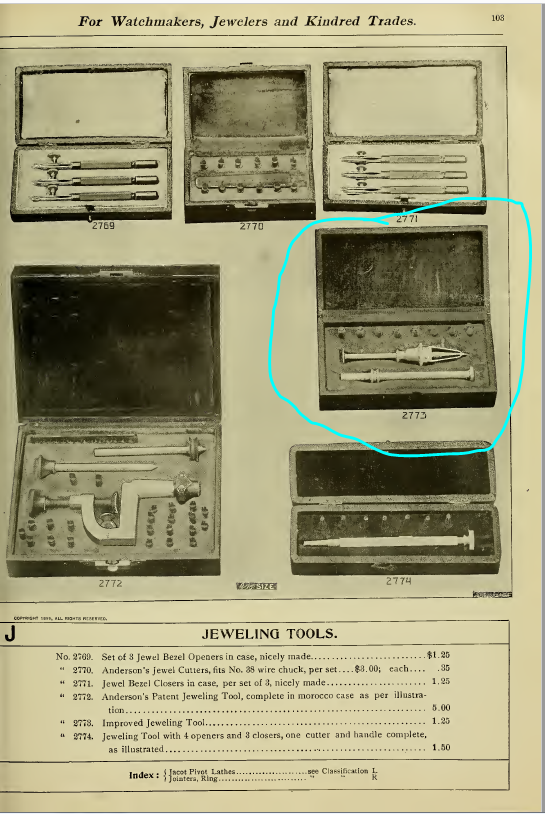
it actually works better if you just download the catalog in your favorite format. Then there's index in the back which sometimes helps. unfortunately the tool catalog does not explain how to use the tool
 1 point
 -
should get it in the mail tomorrow1 point


.thumb.jpg.cb17a66989f1e796fd4217db2e9ca9df.jpg)