Leaderboard
.thumb.jpg.cb17a66989f1e796fd4217db2e9ca9df.jpg)


Popular Content
Showing content with the highest reputation on 09/23/24 in all areas
-
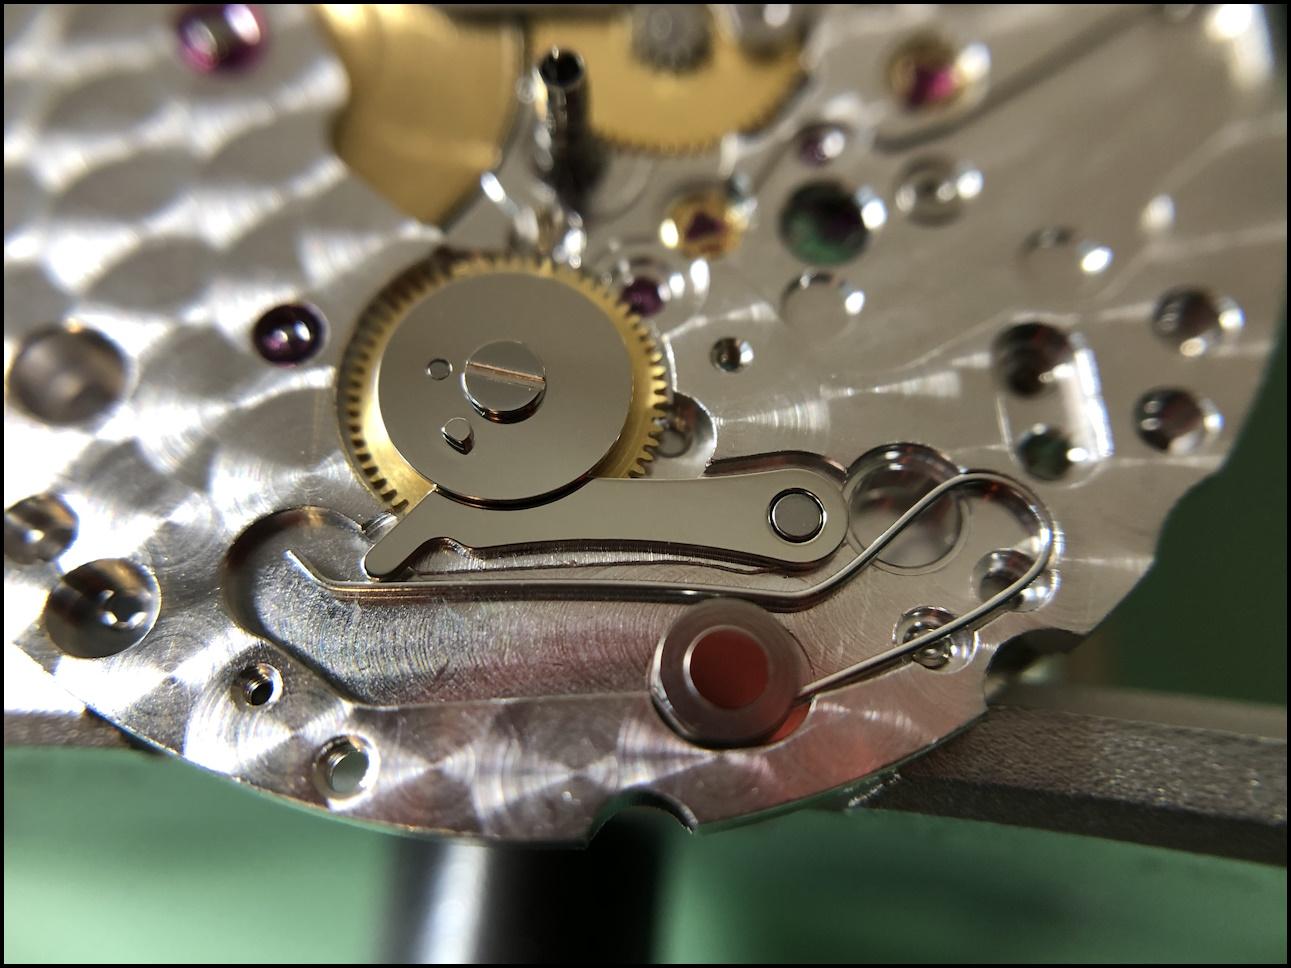
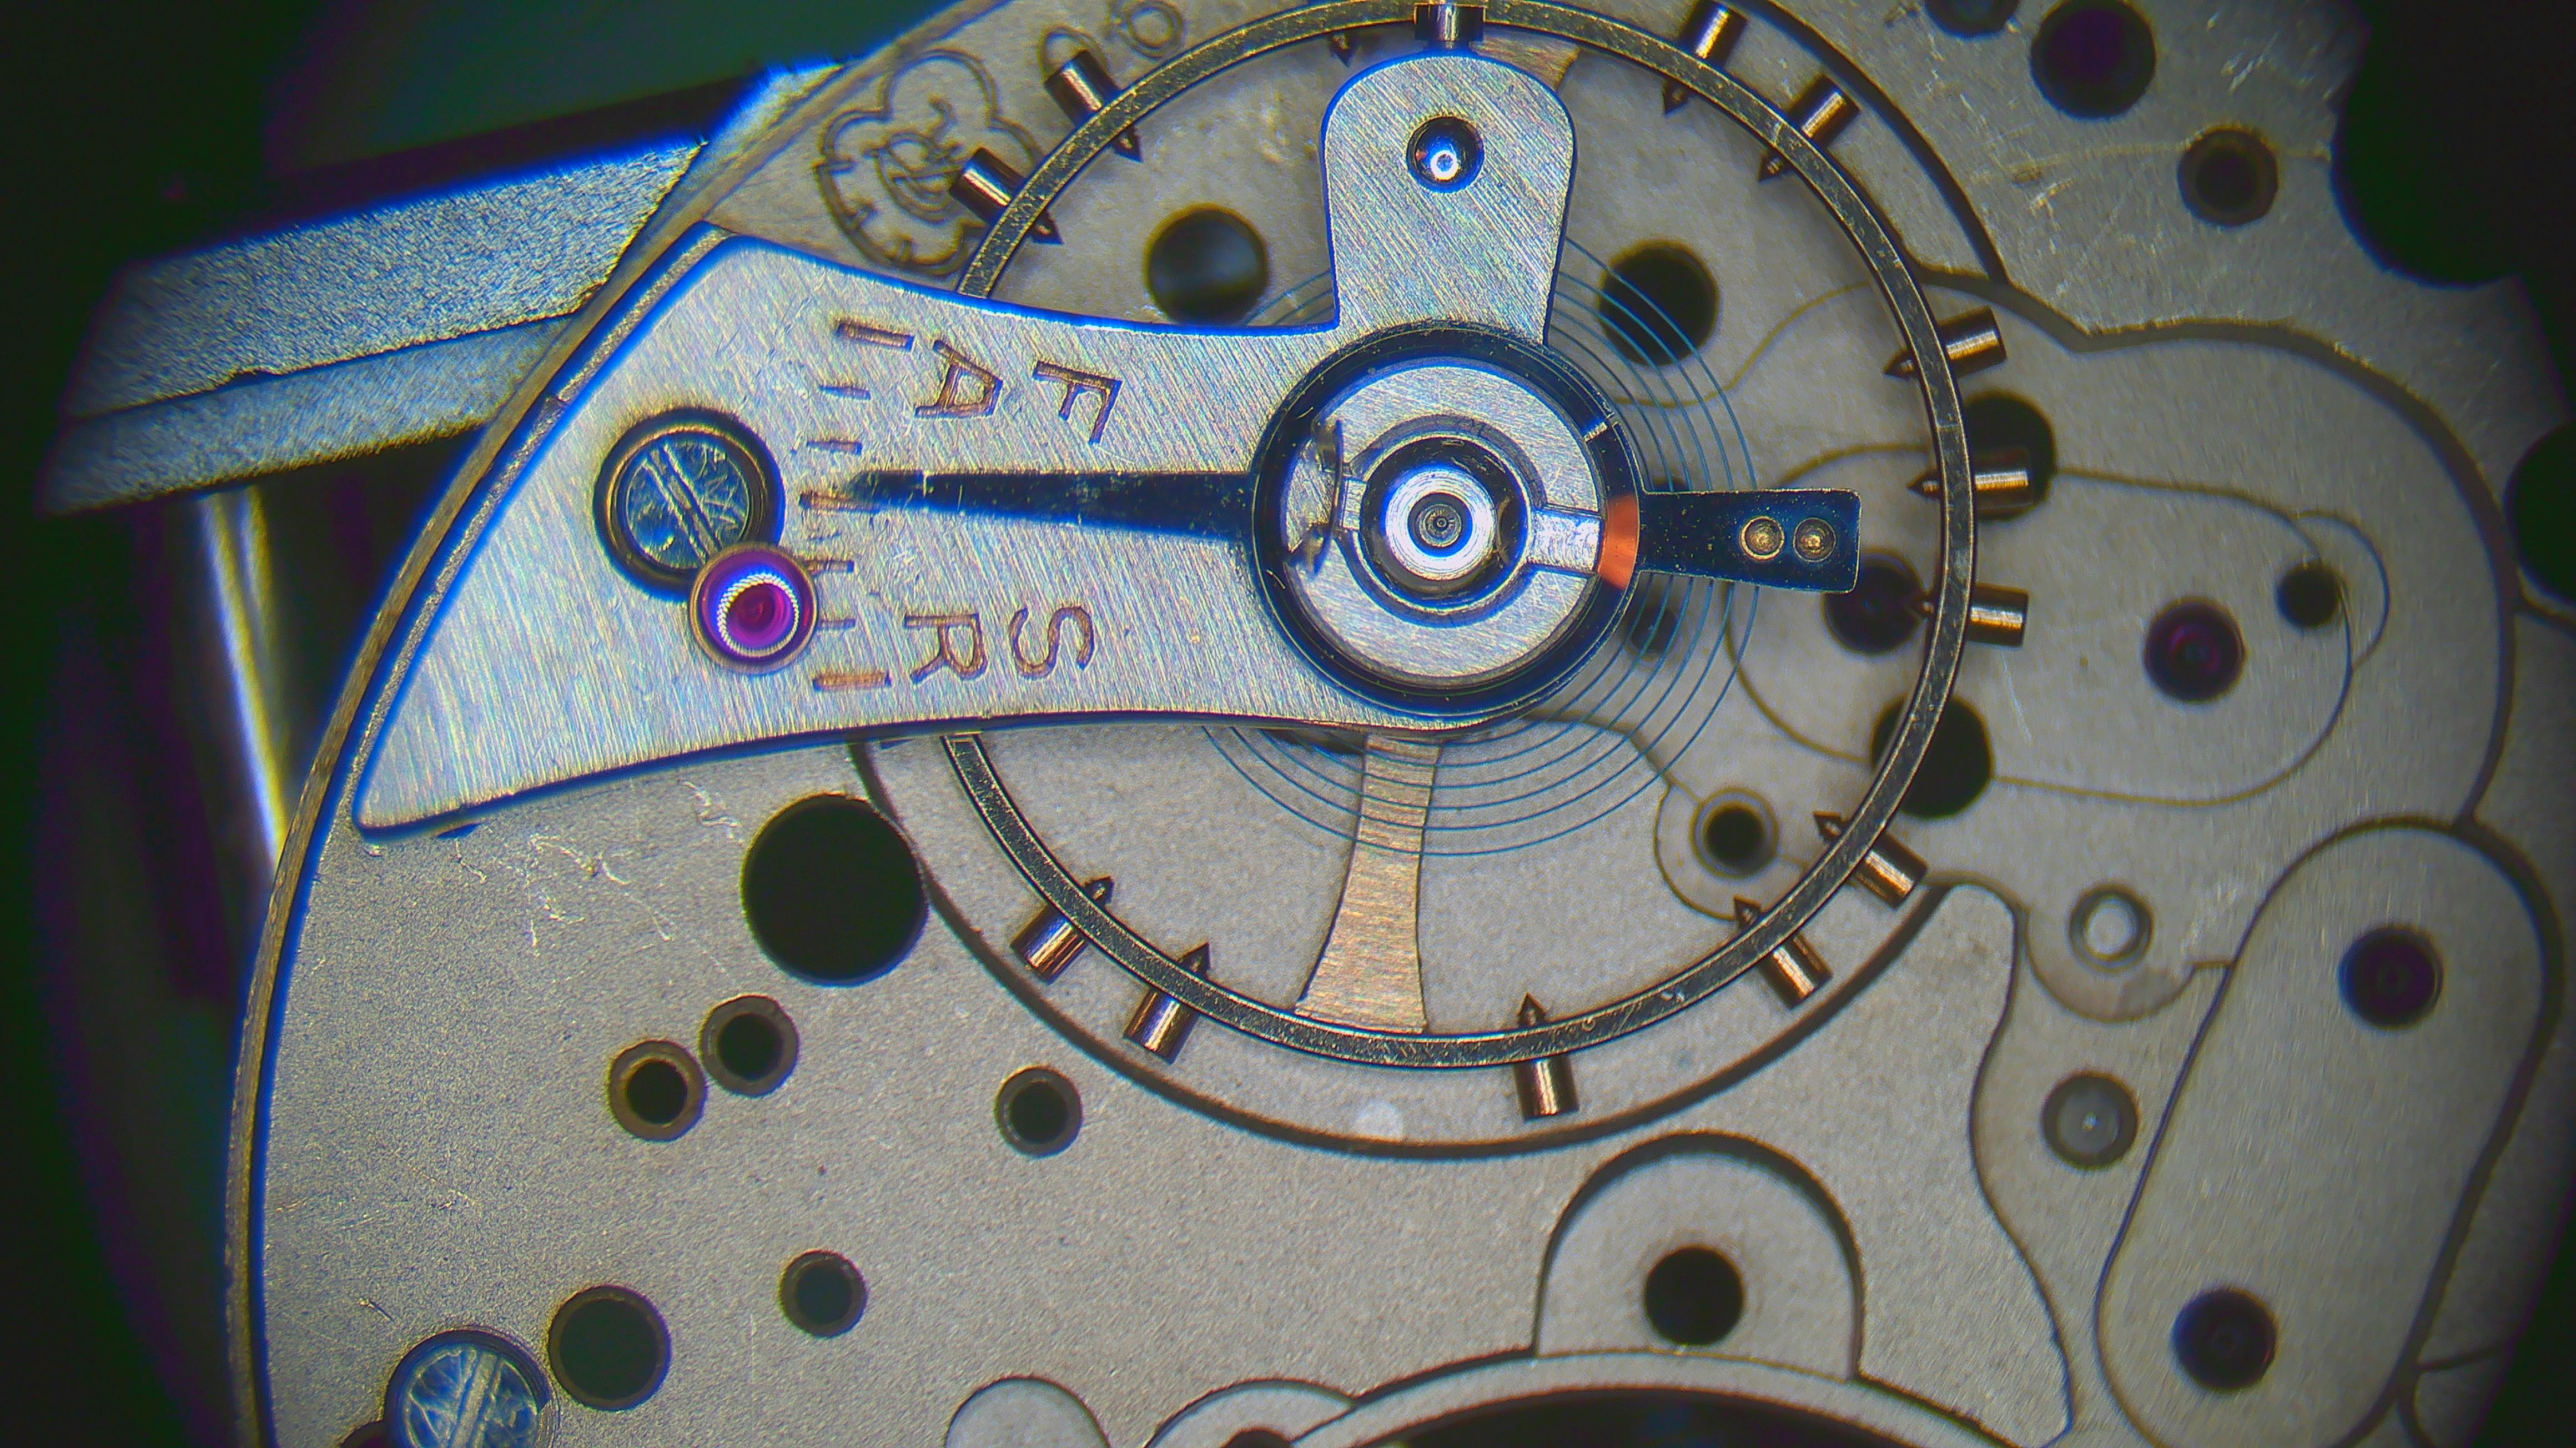
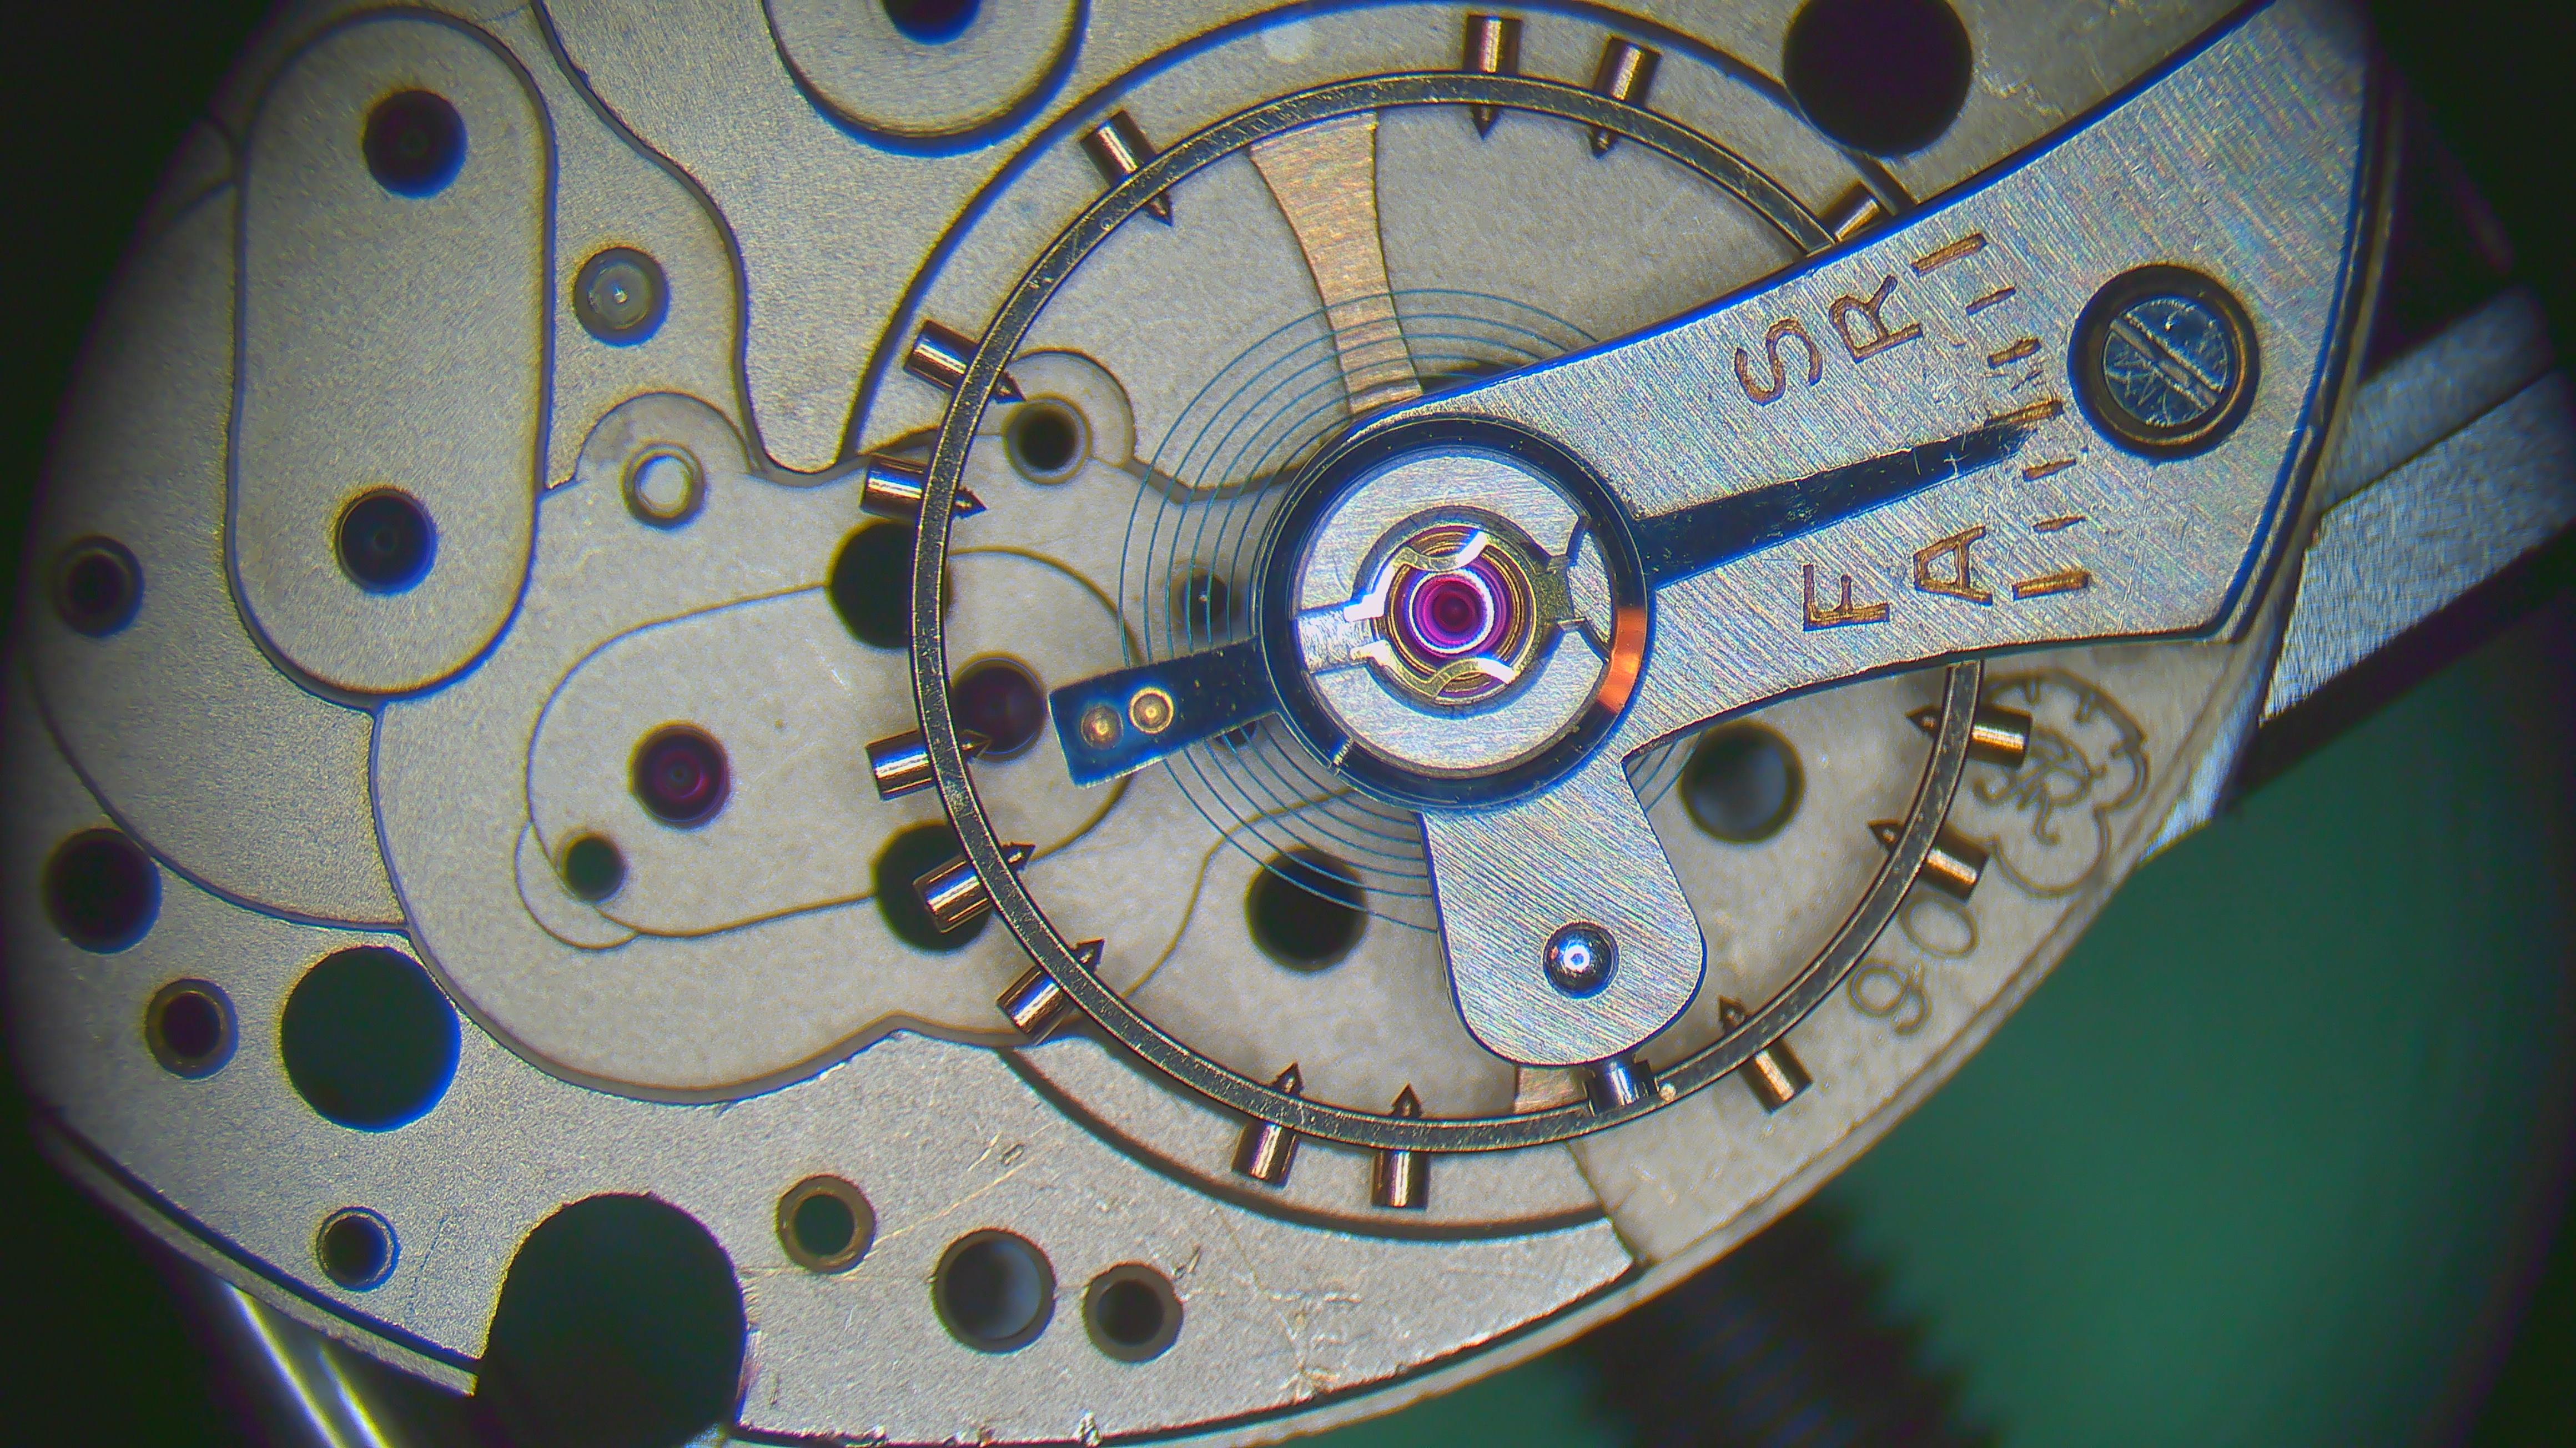
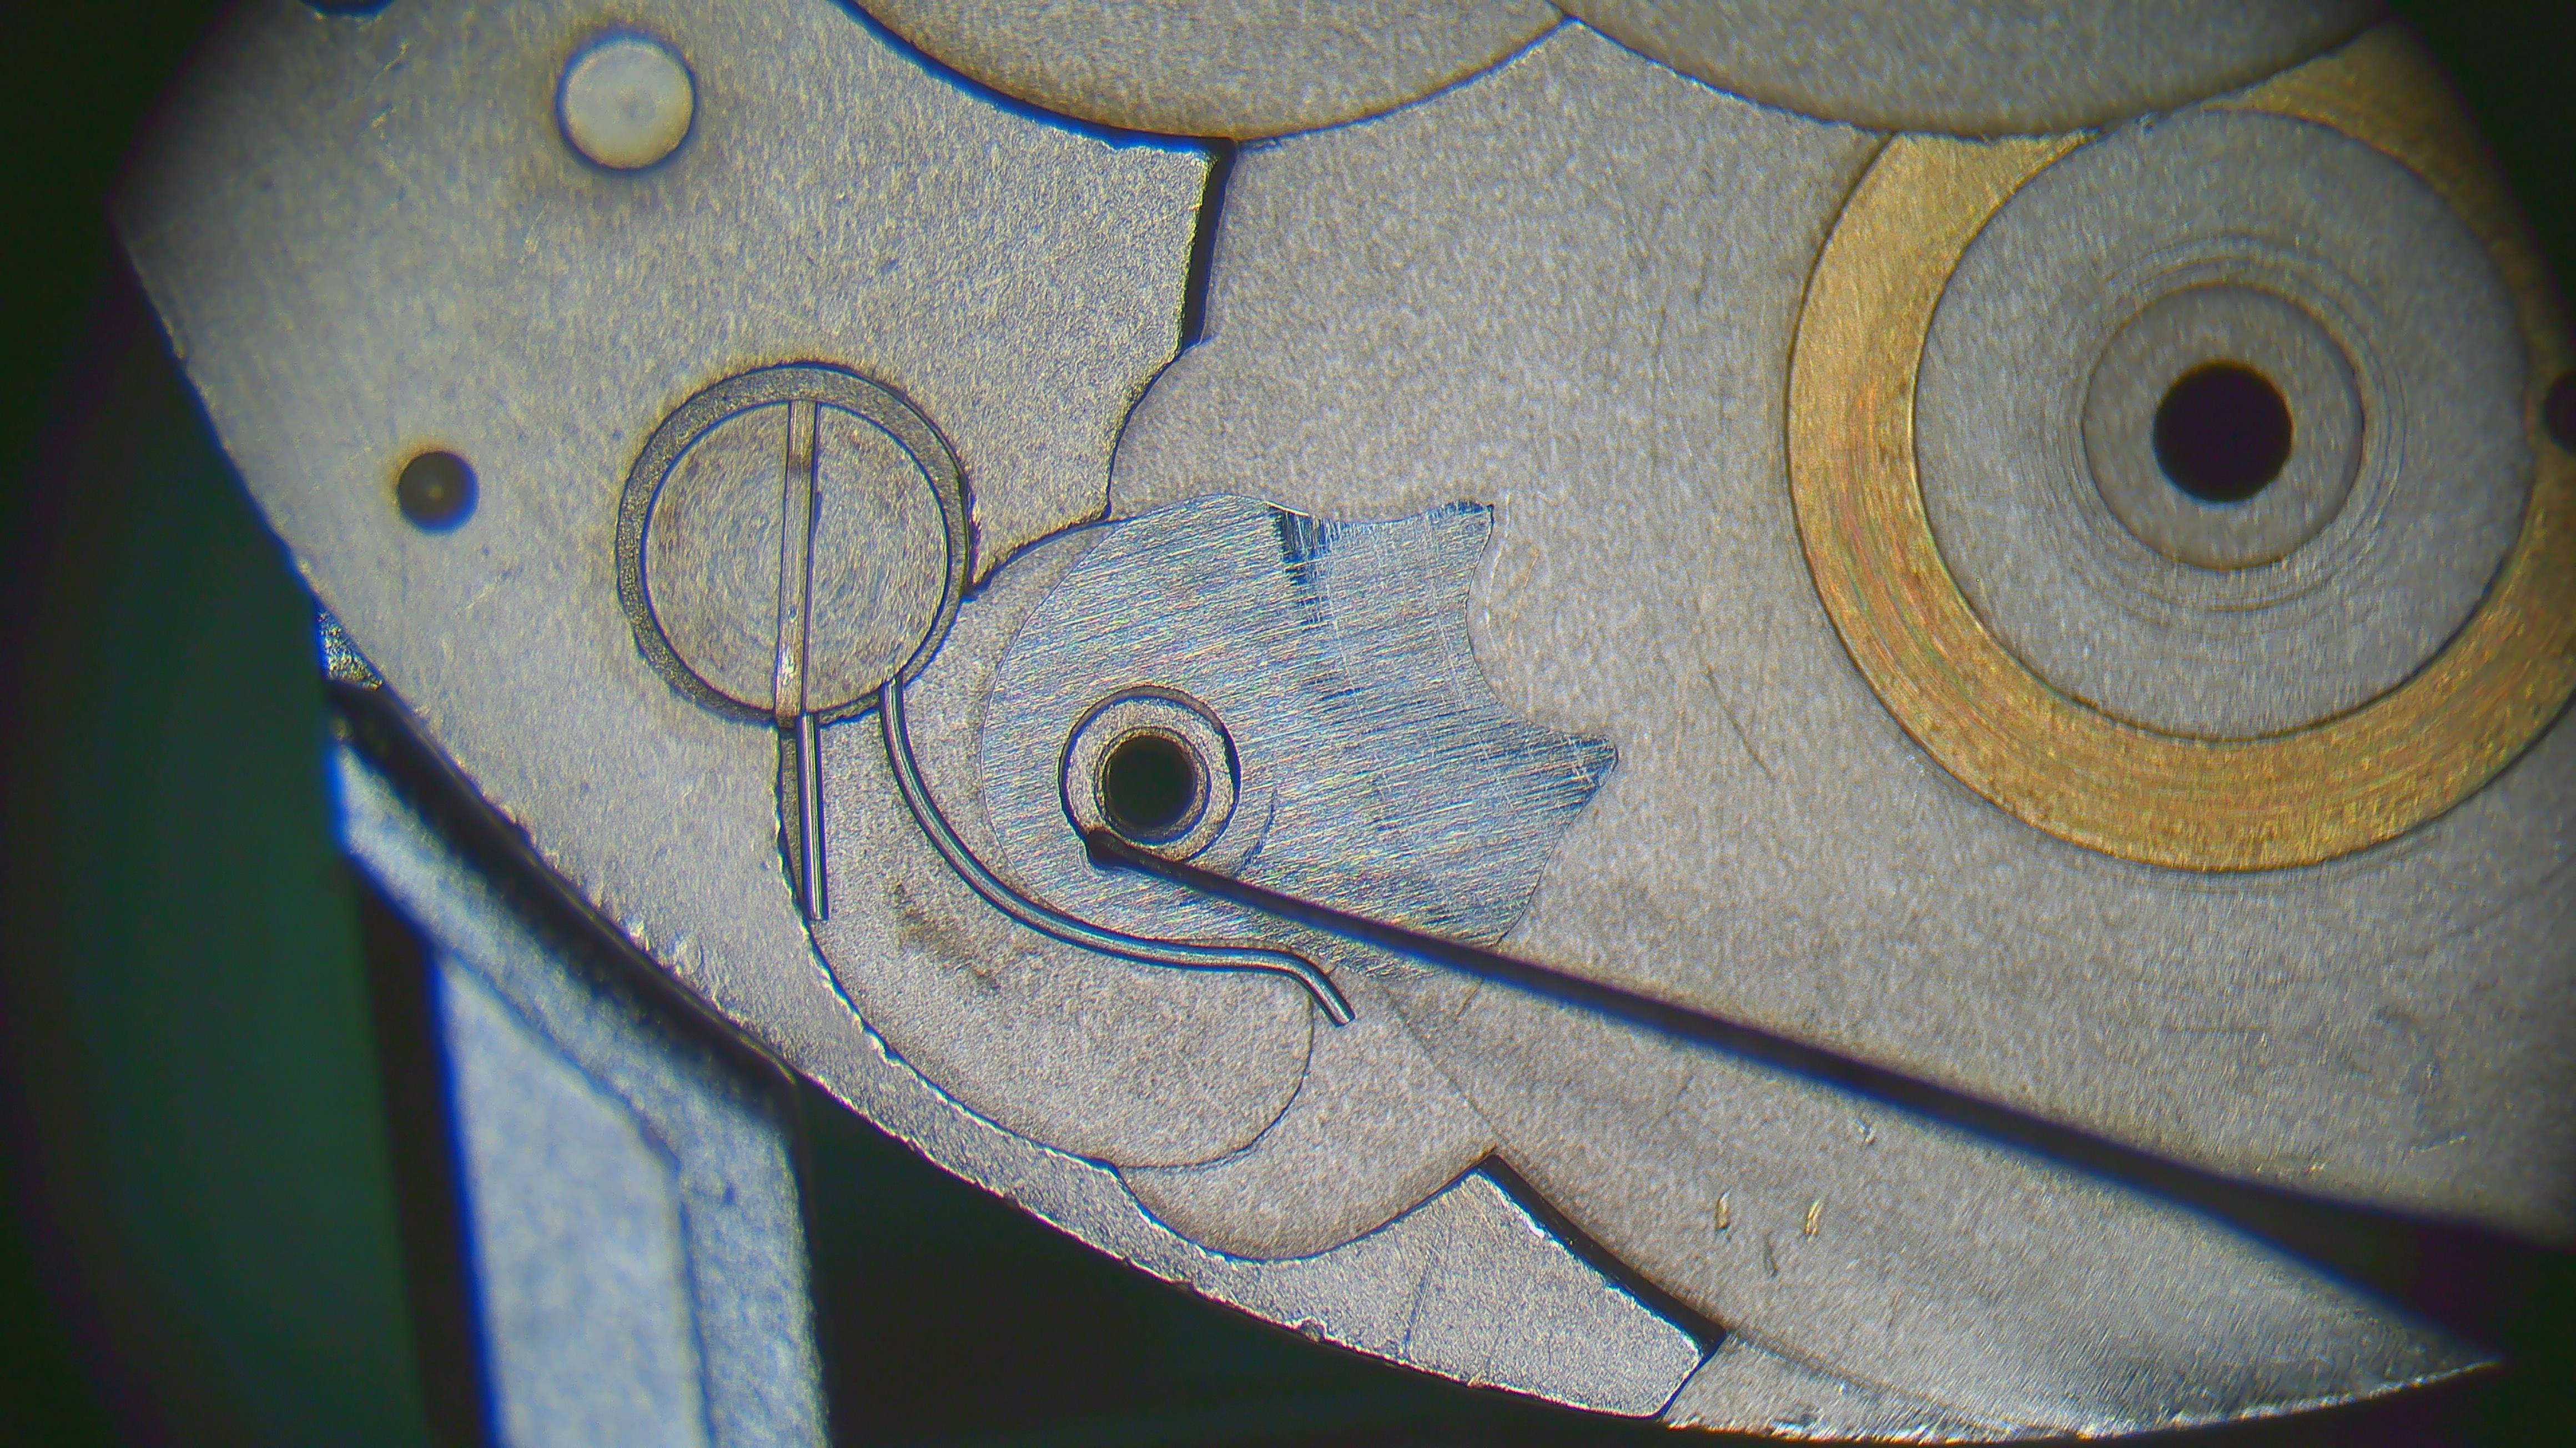
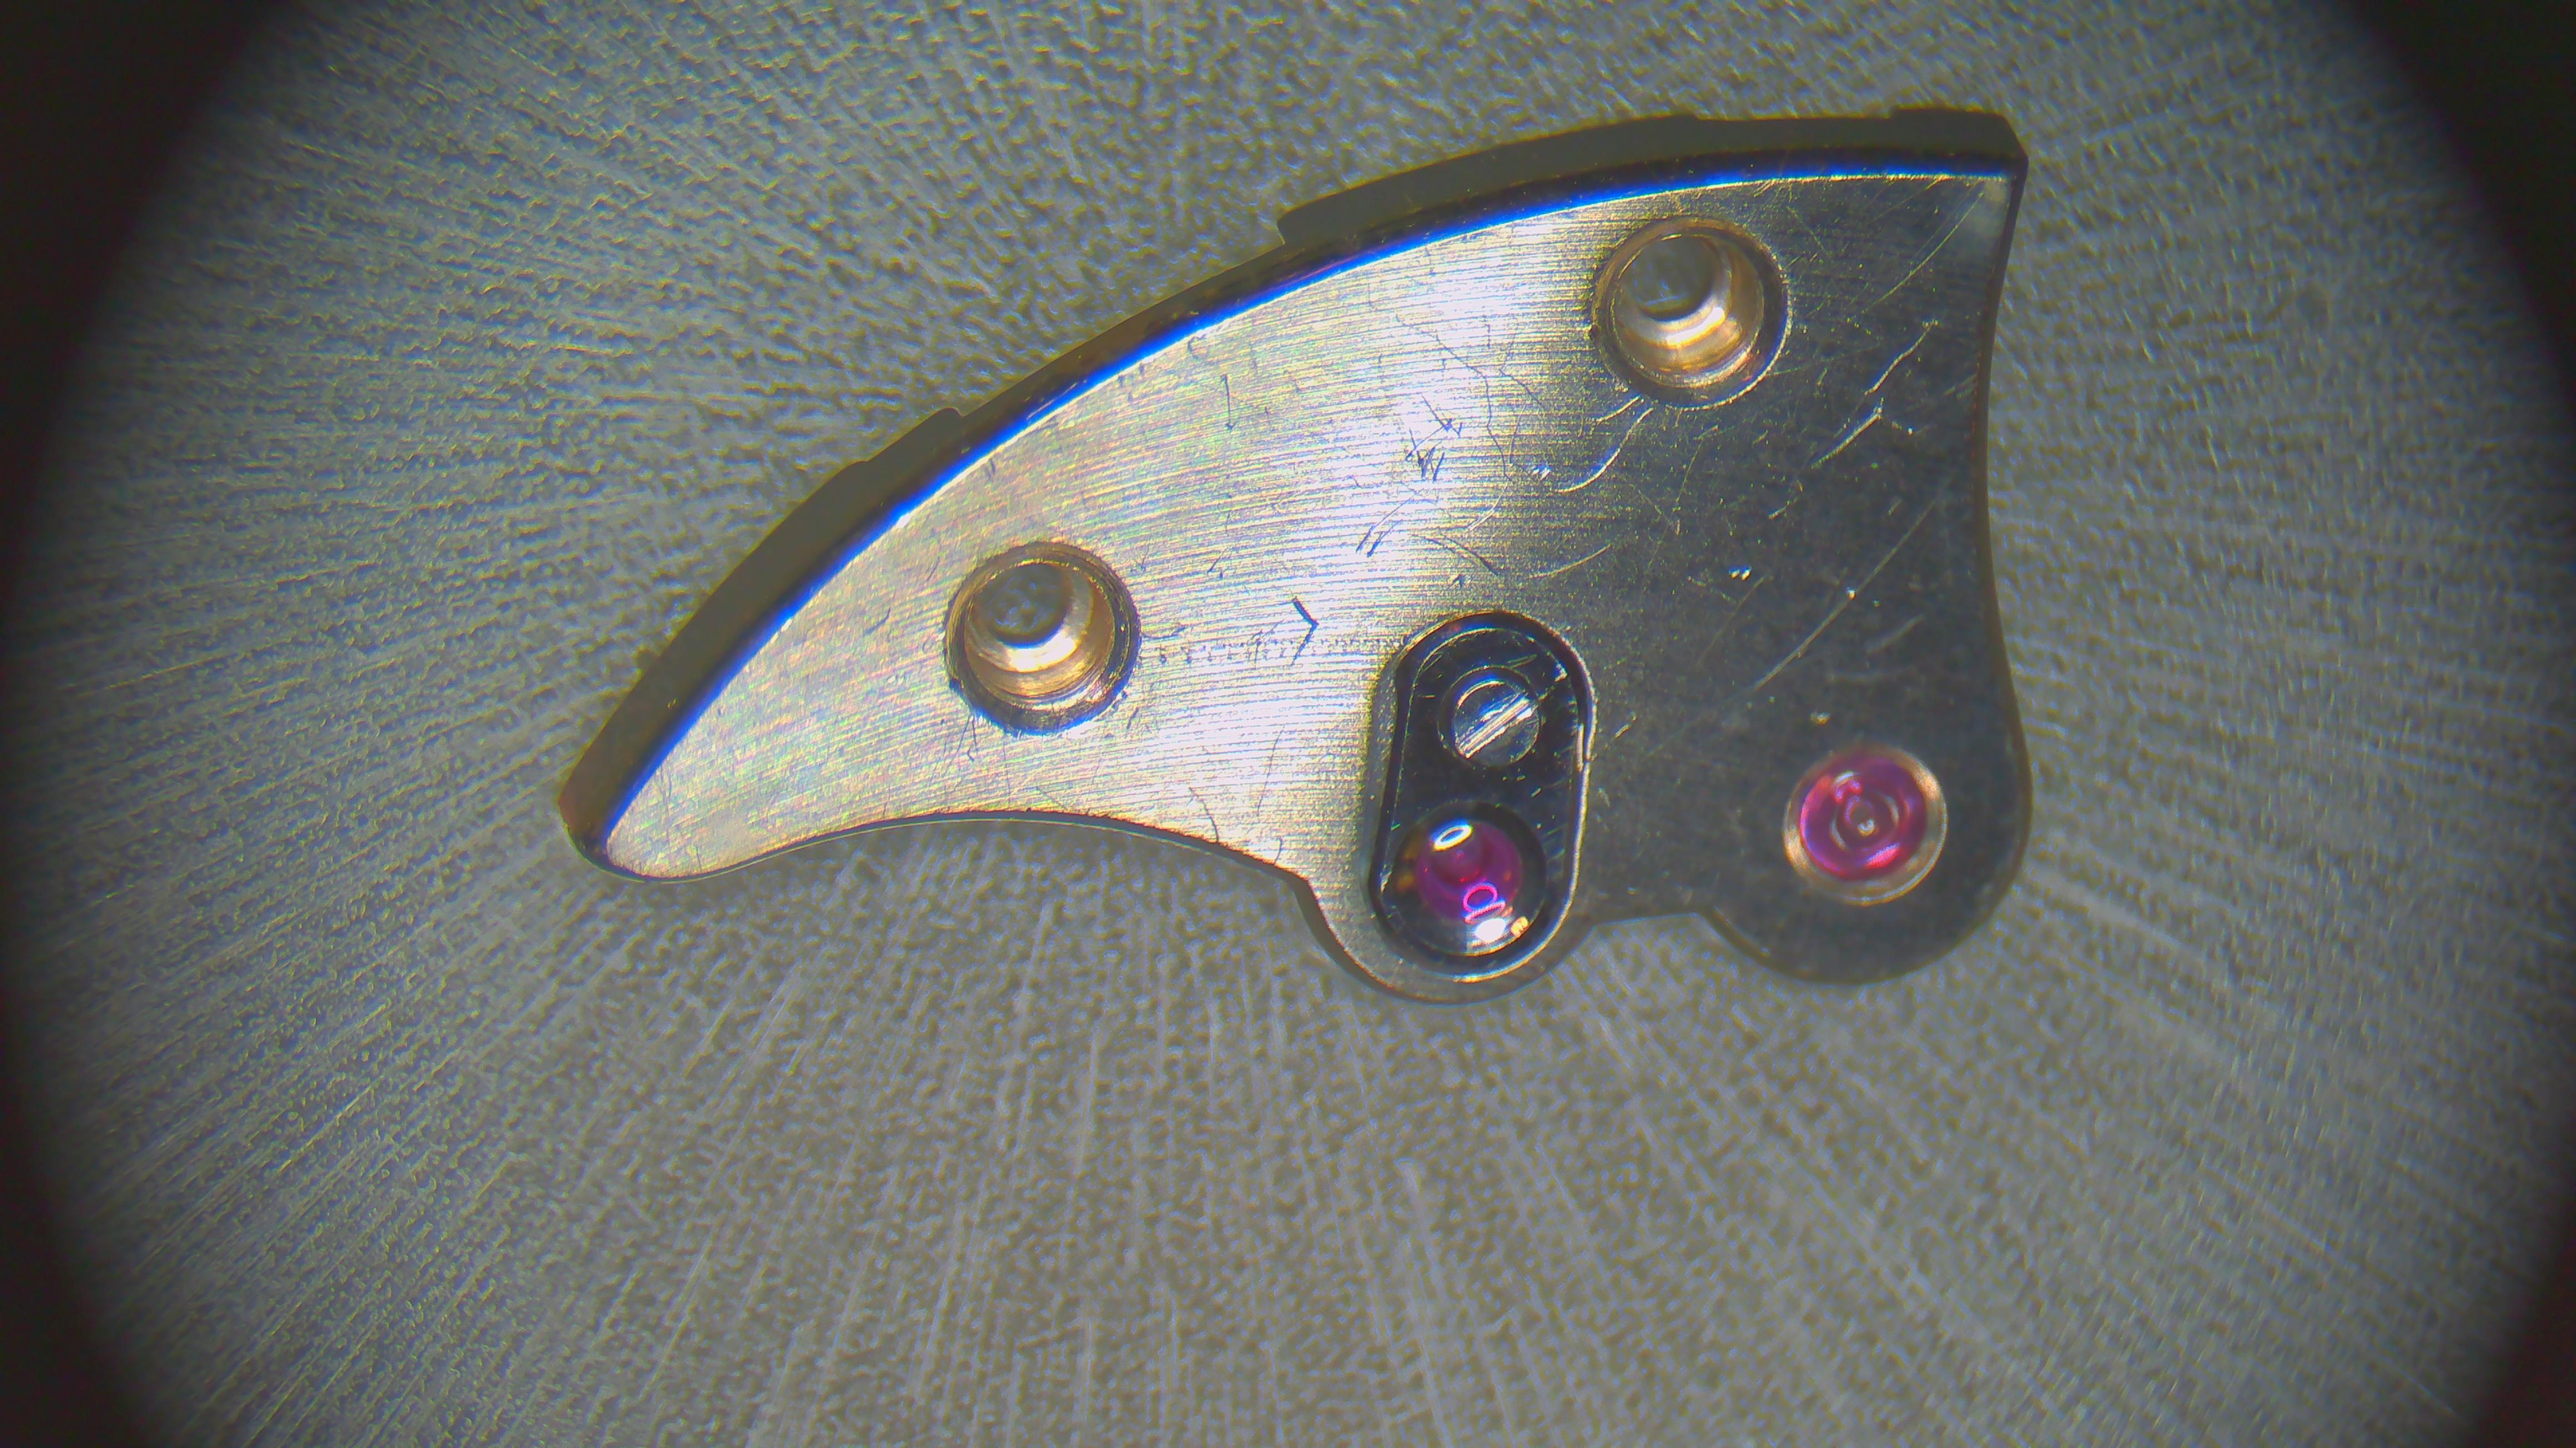
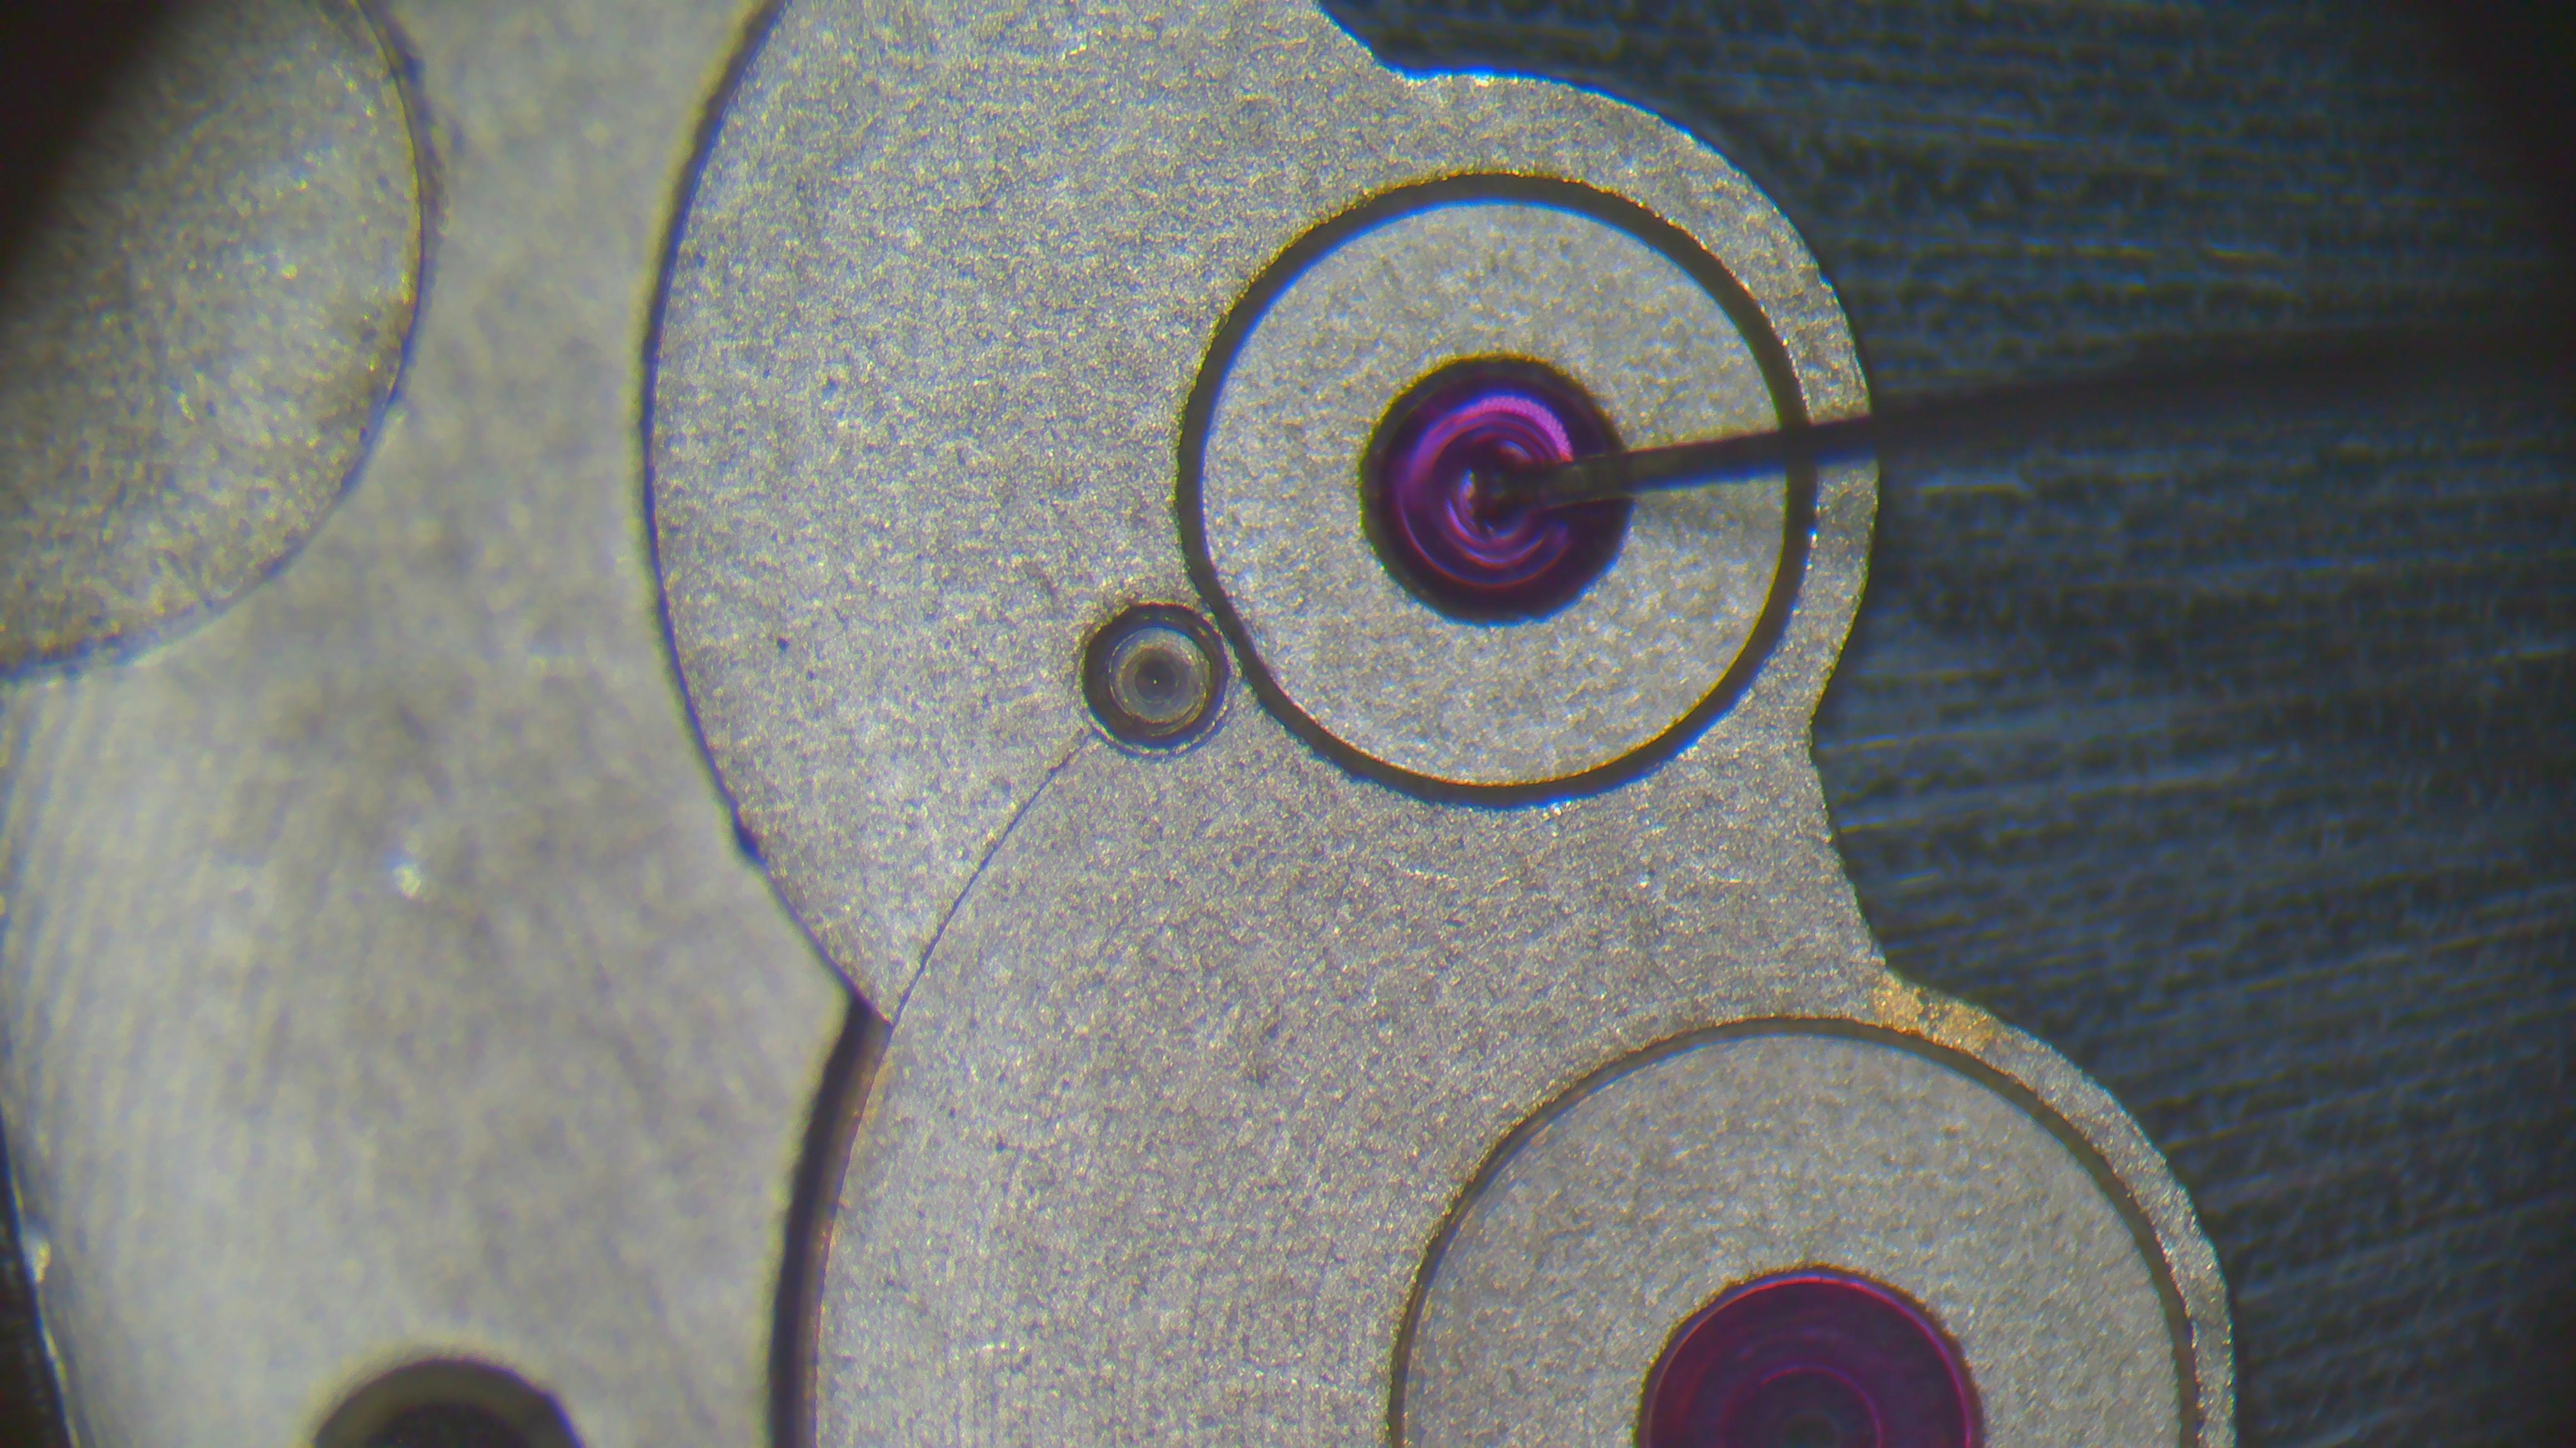
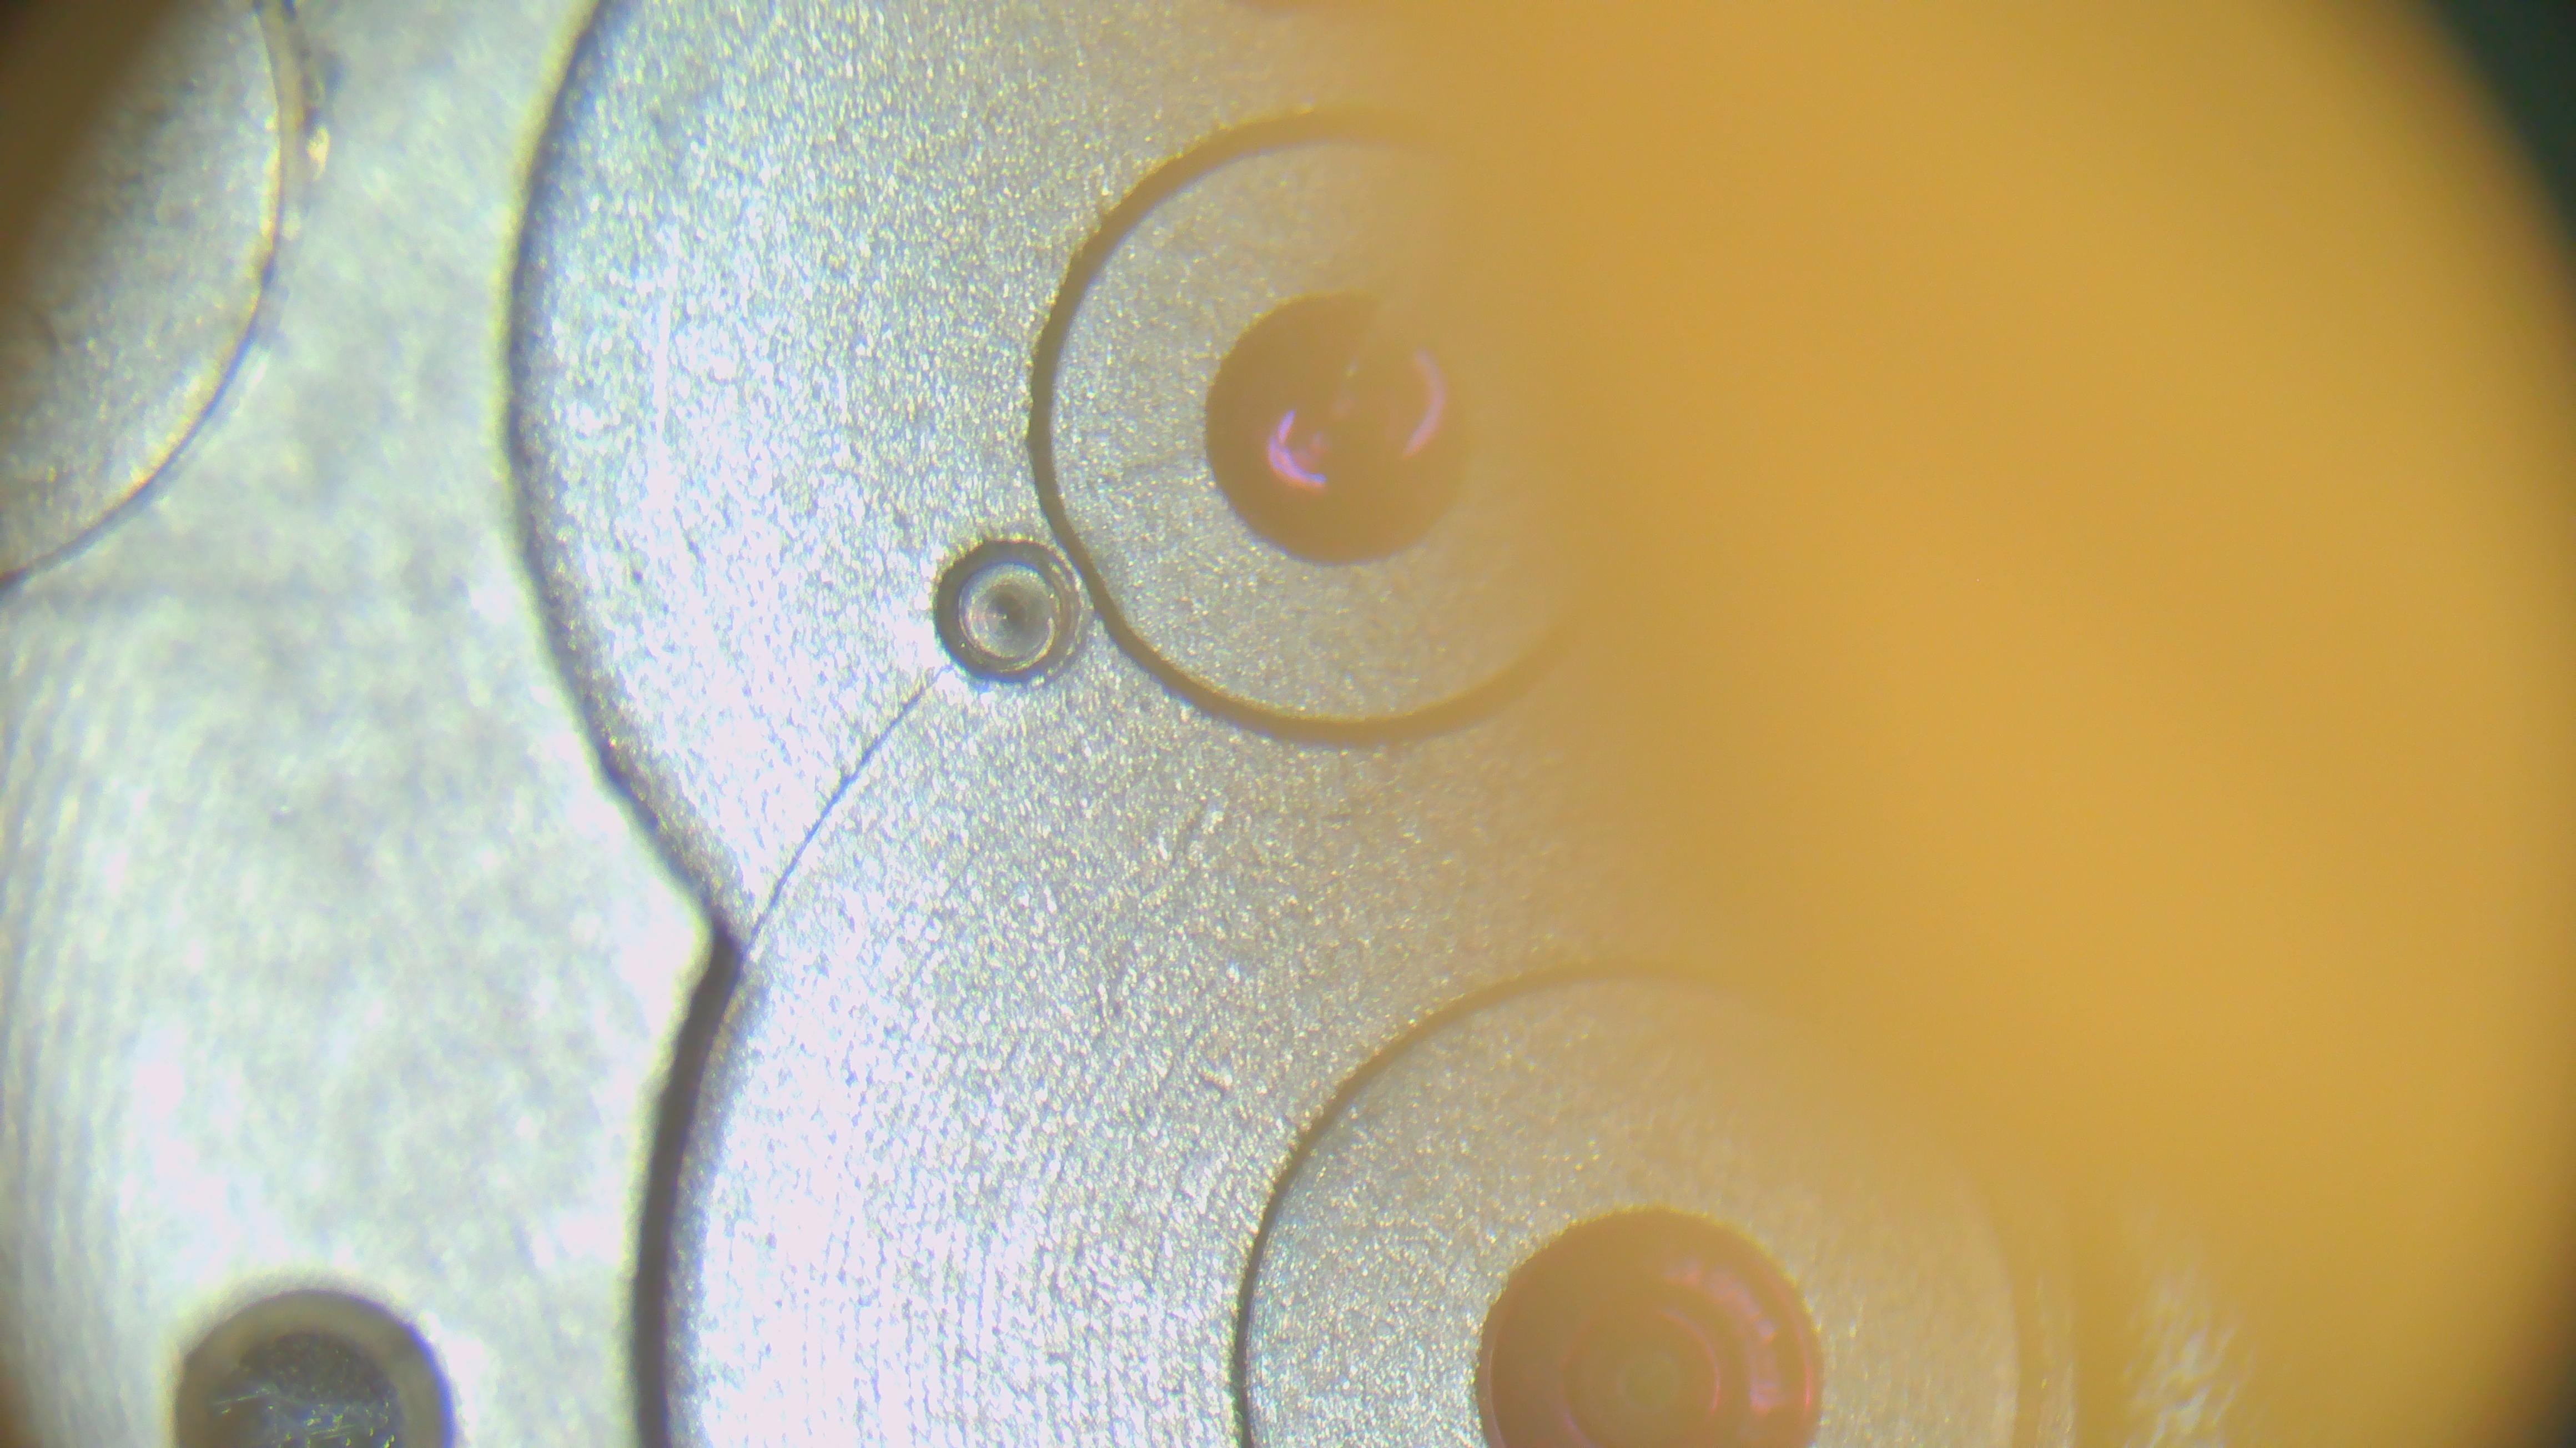
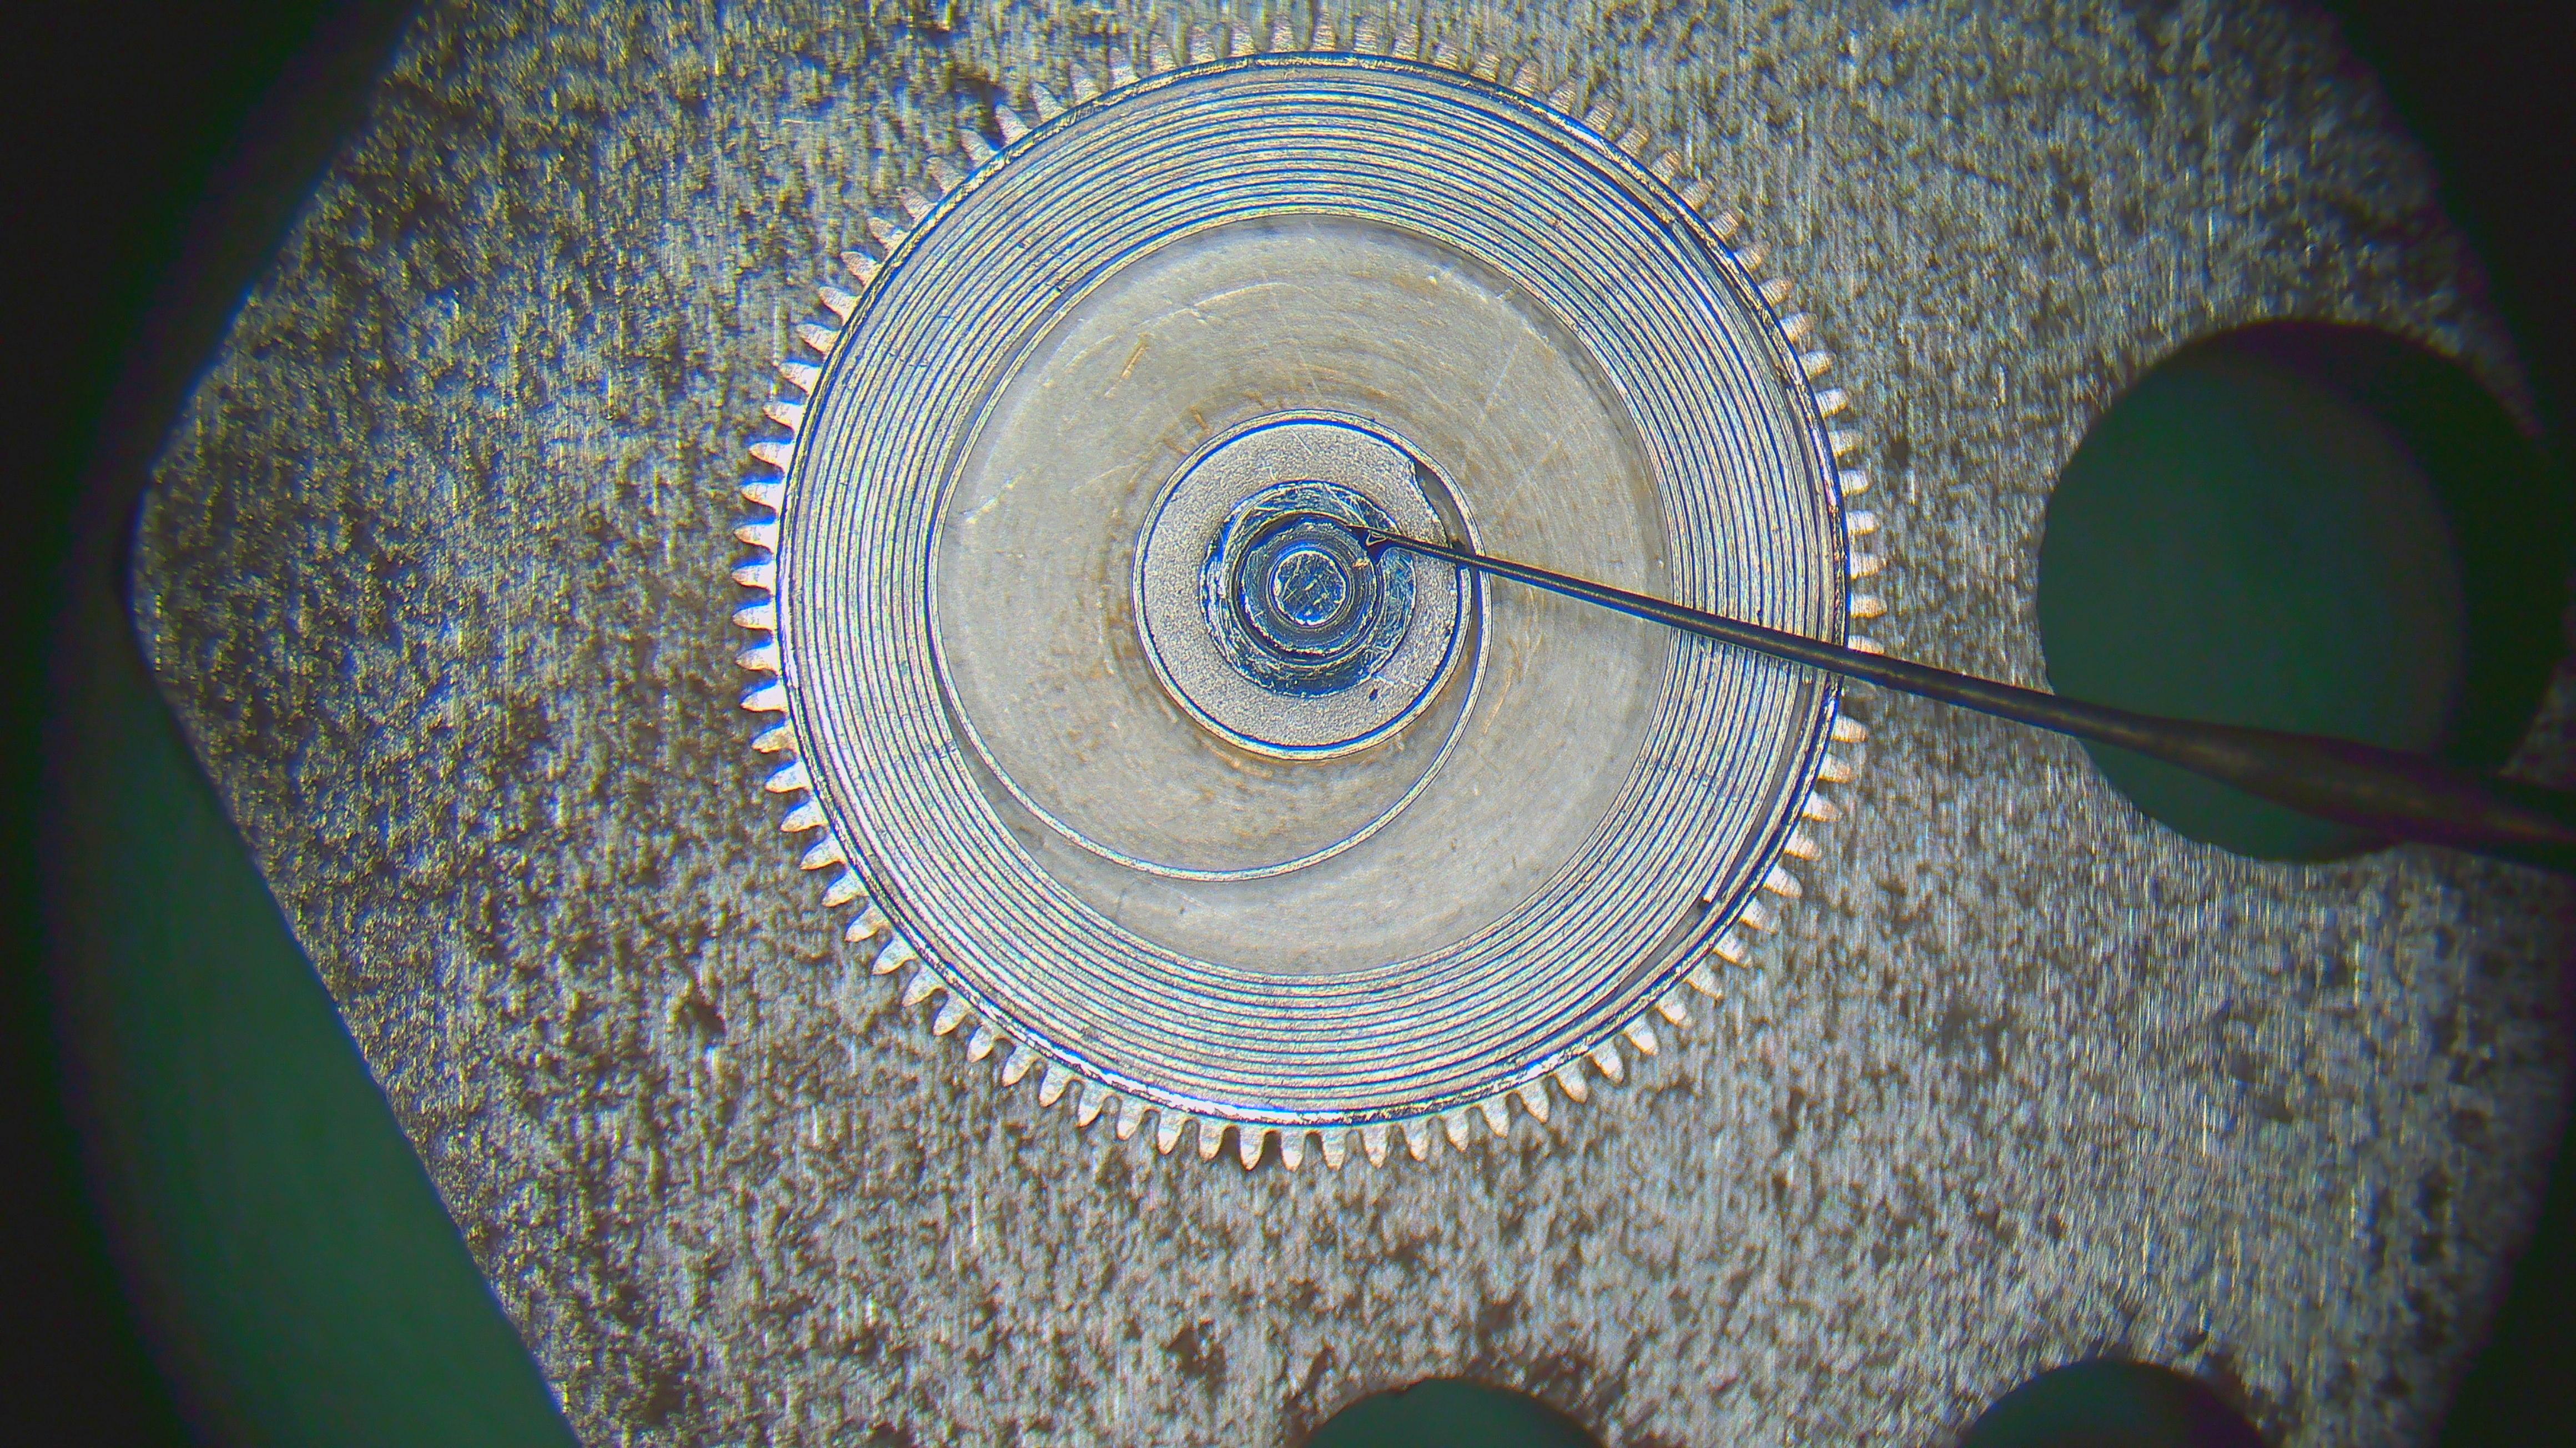
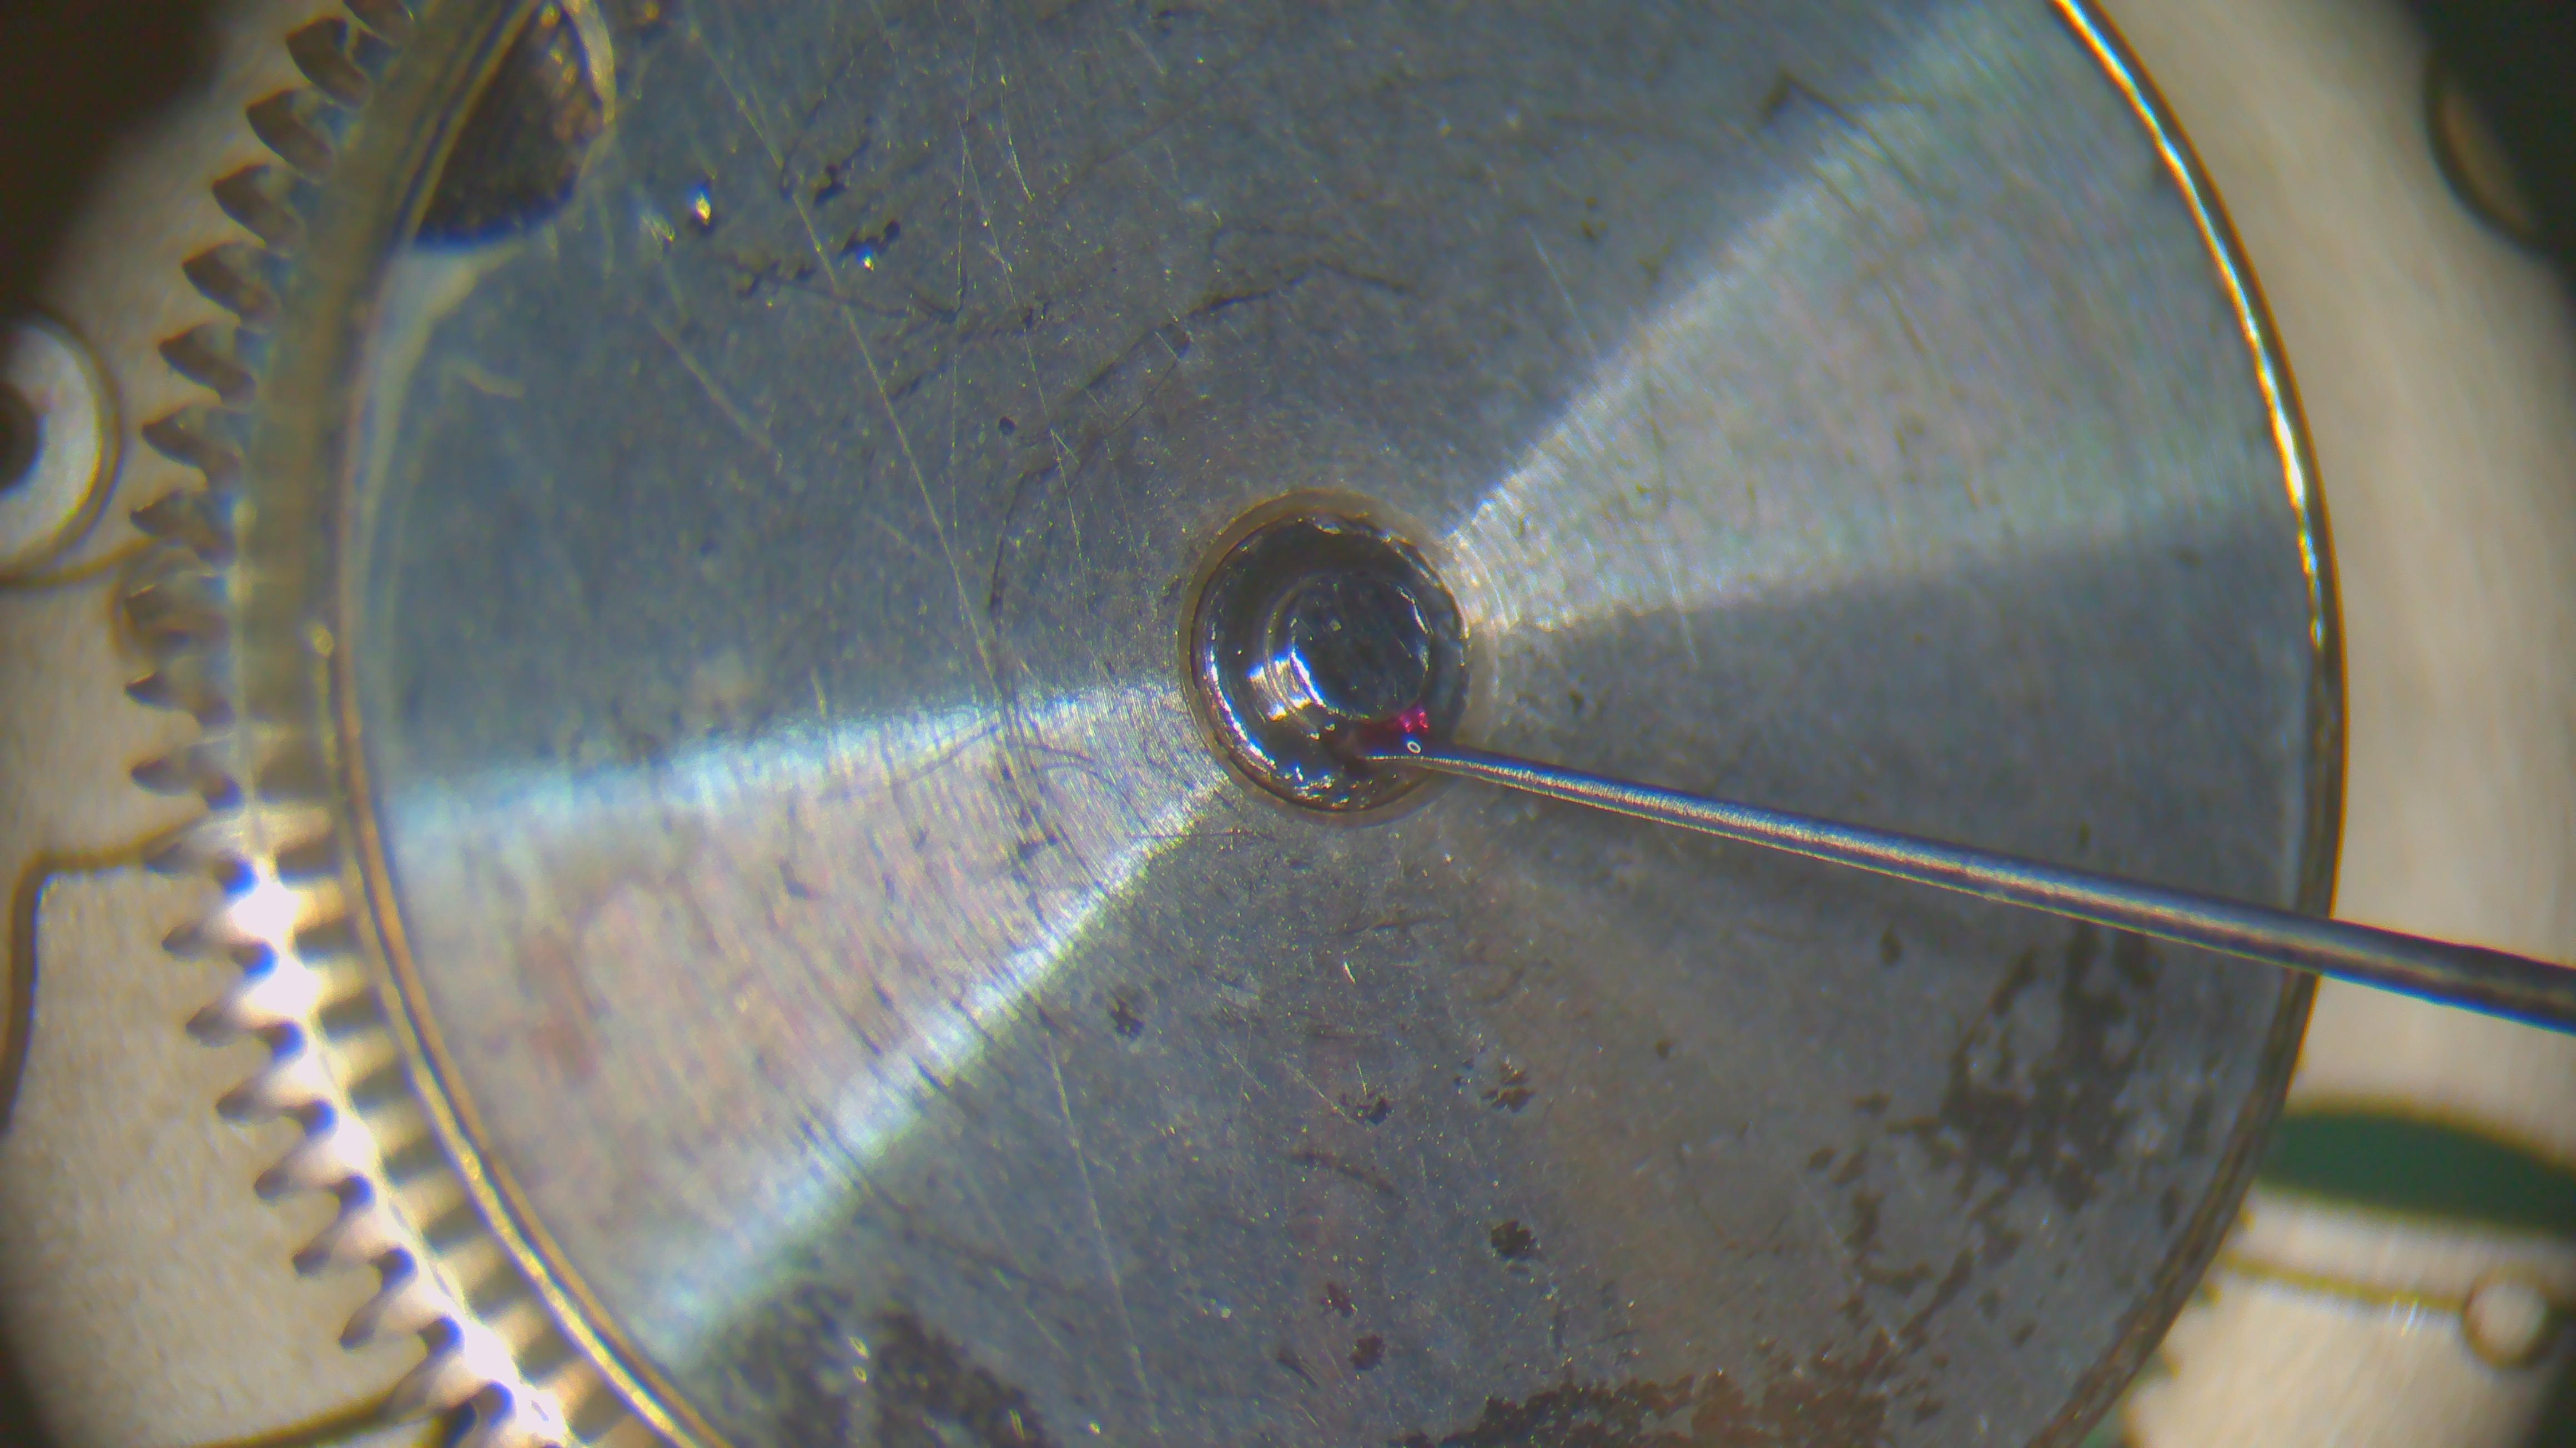
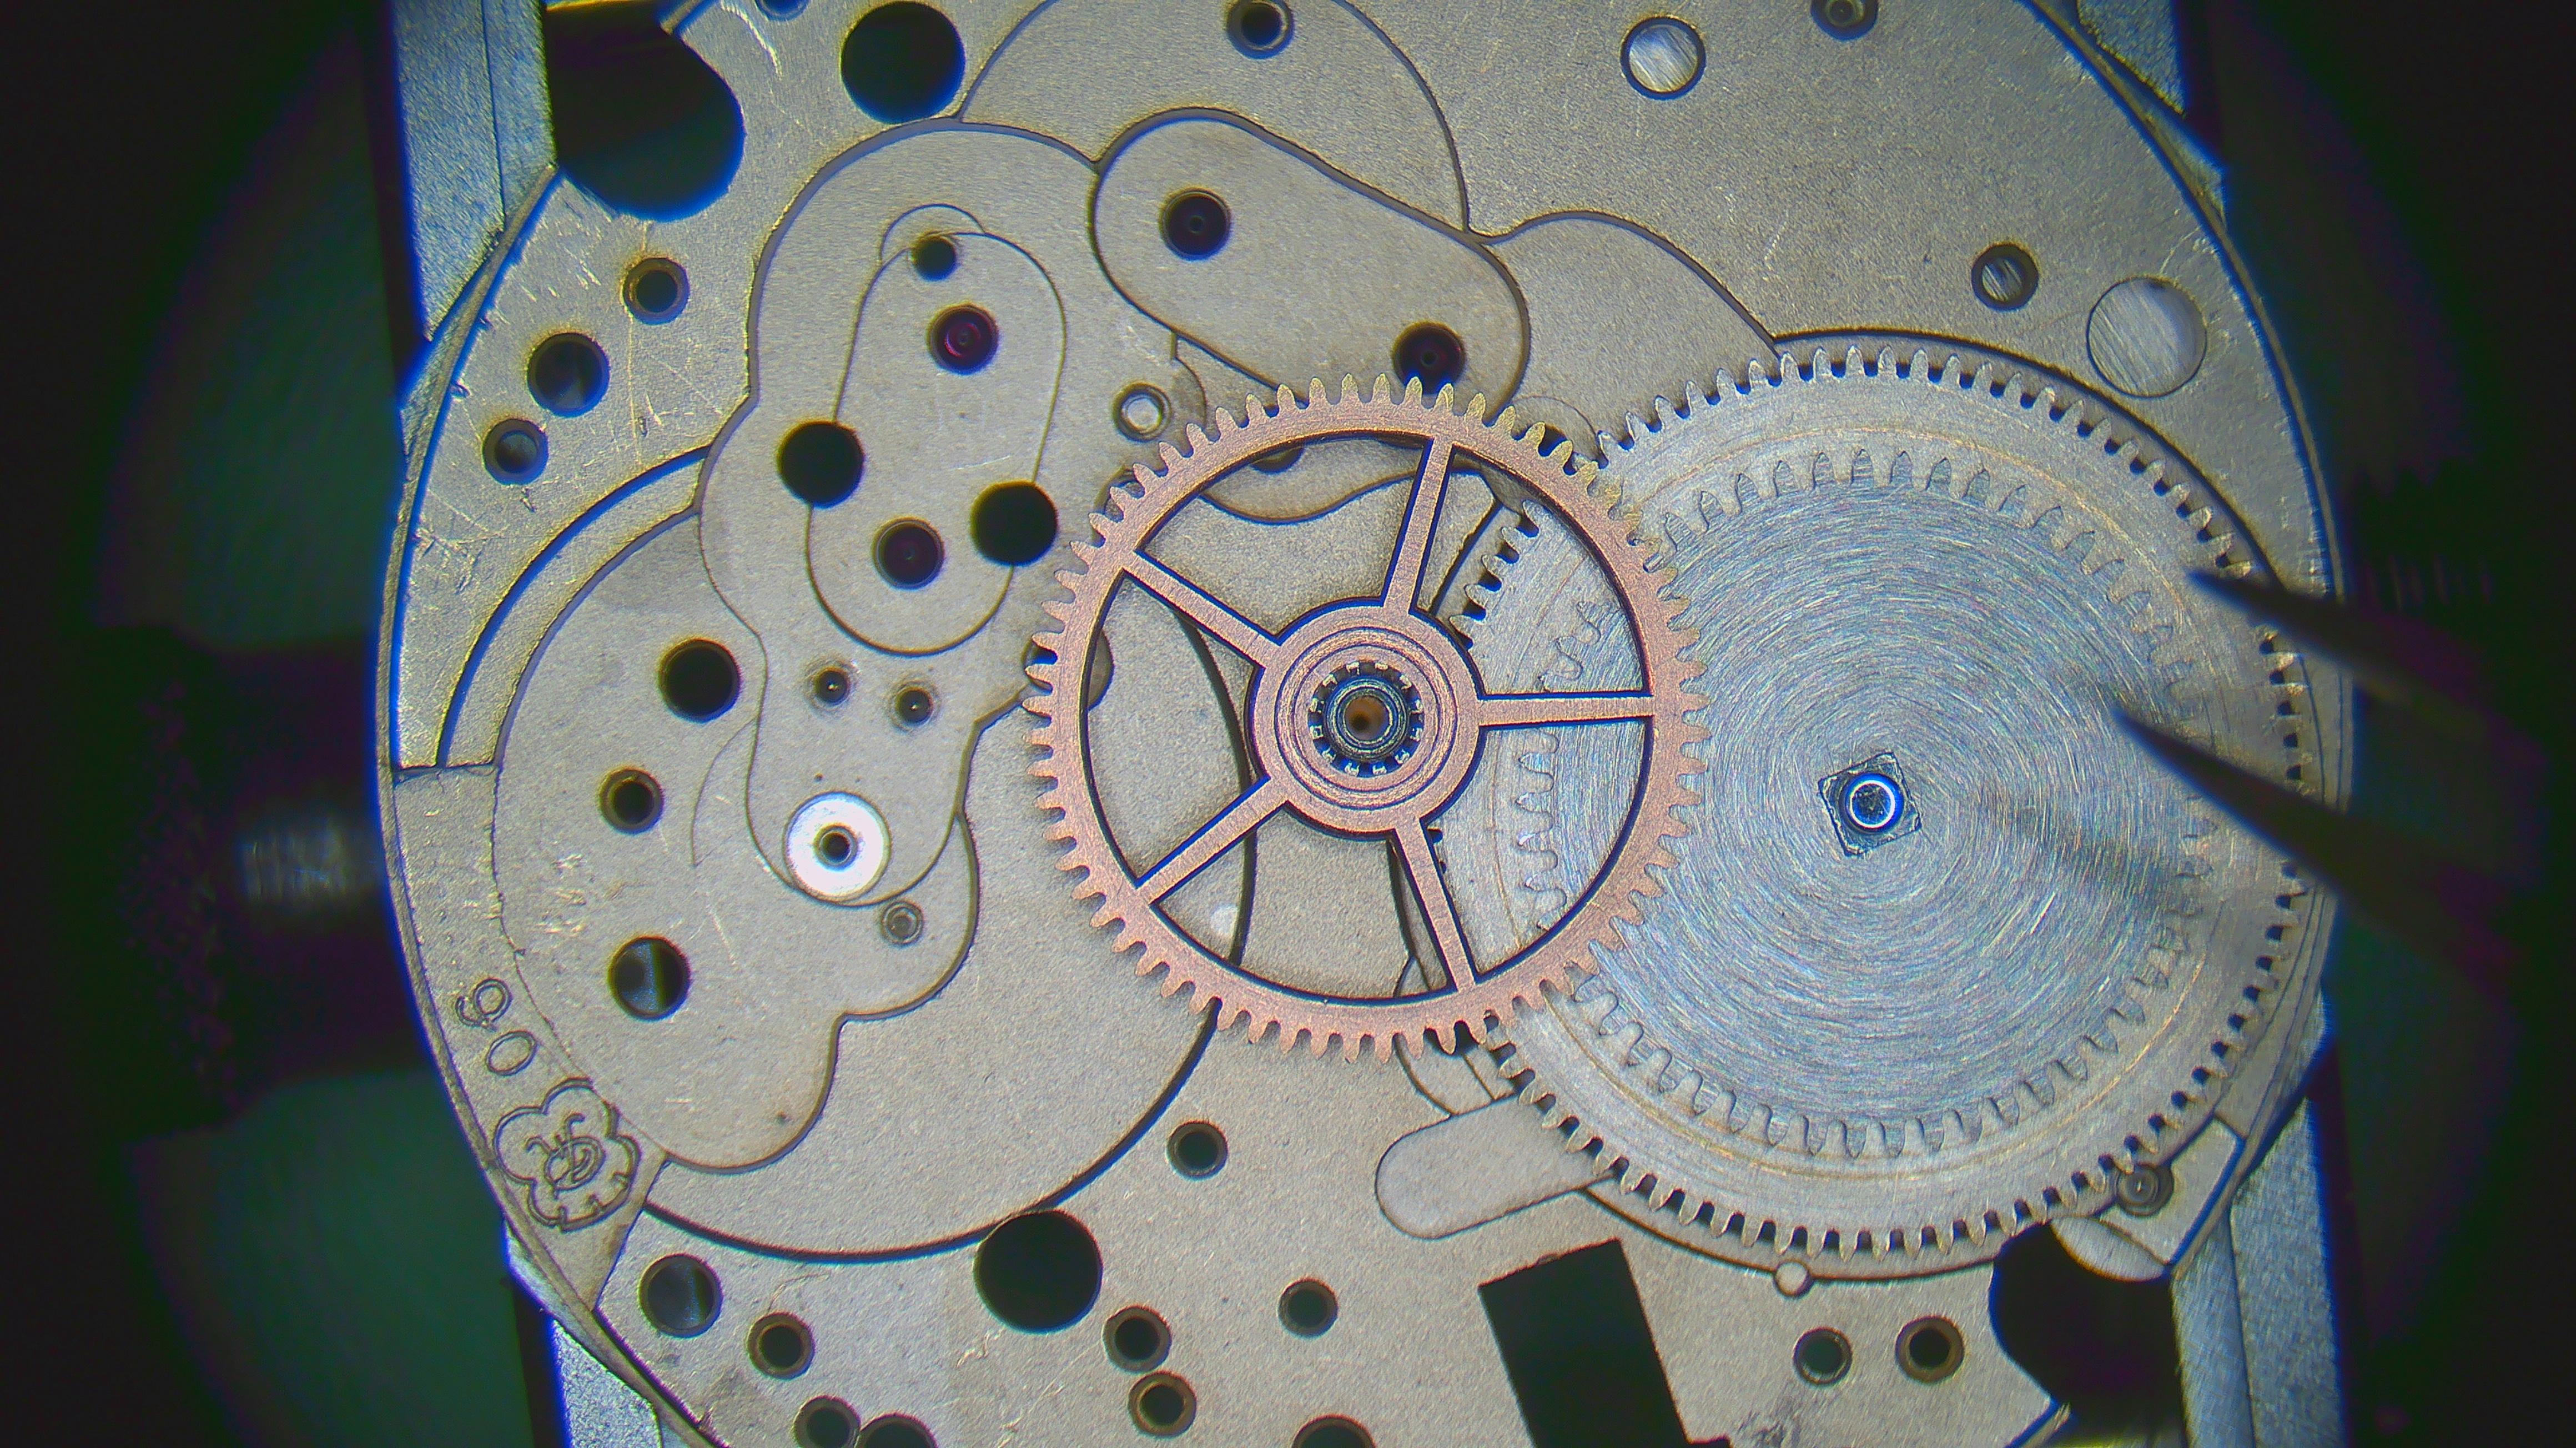
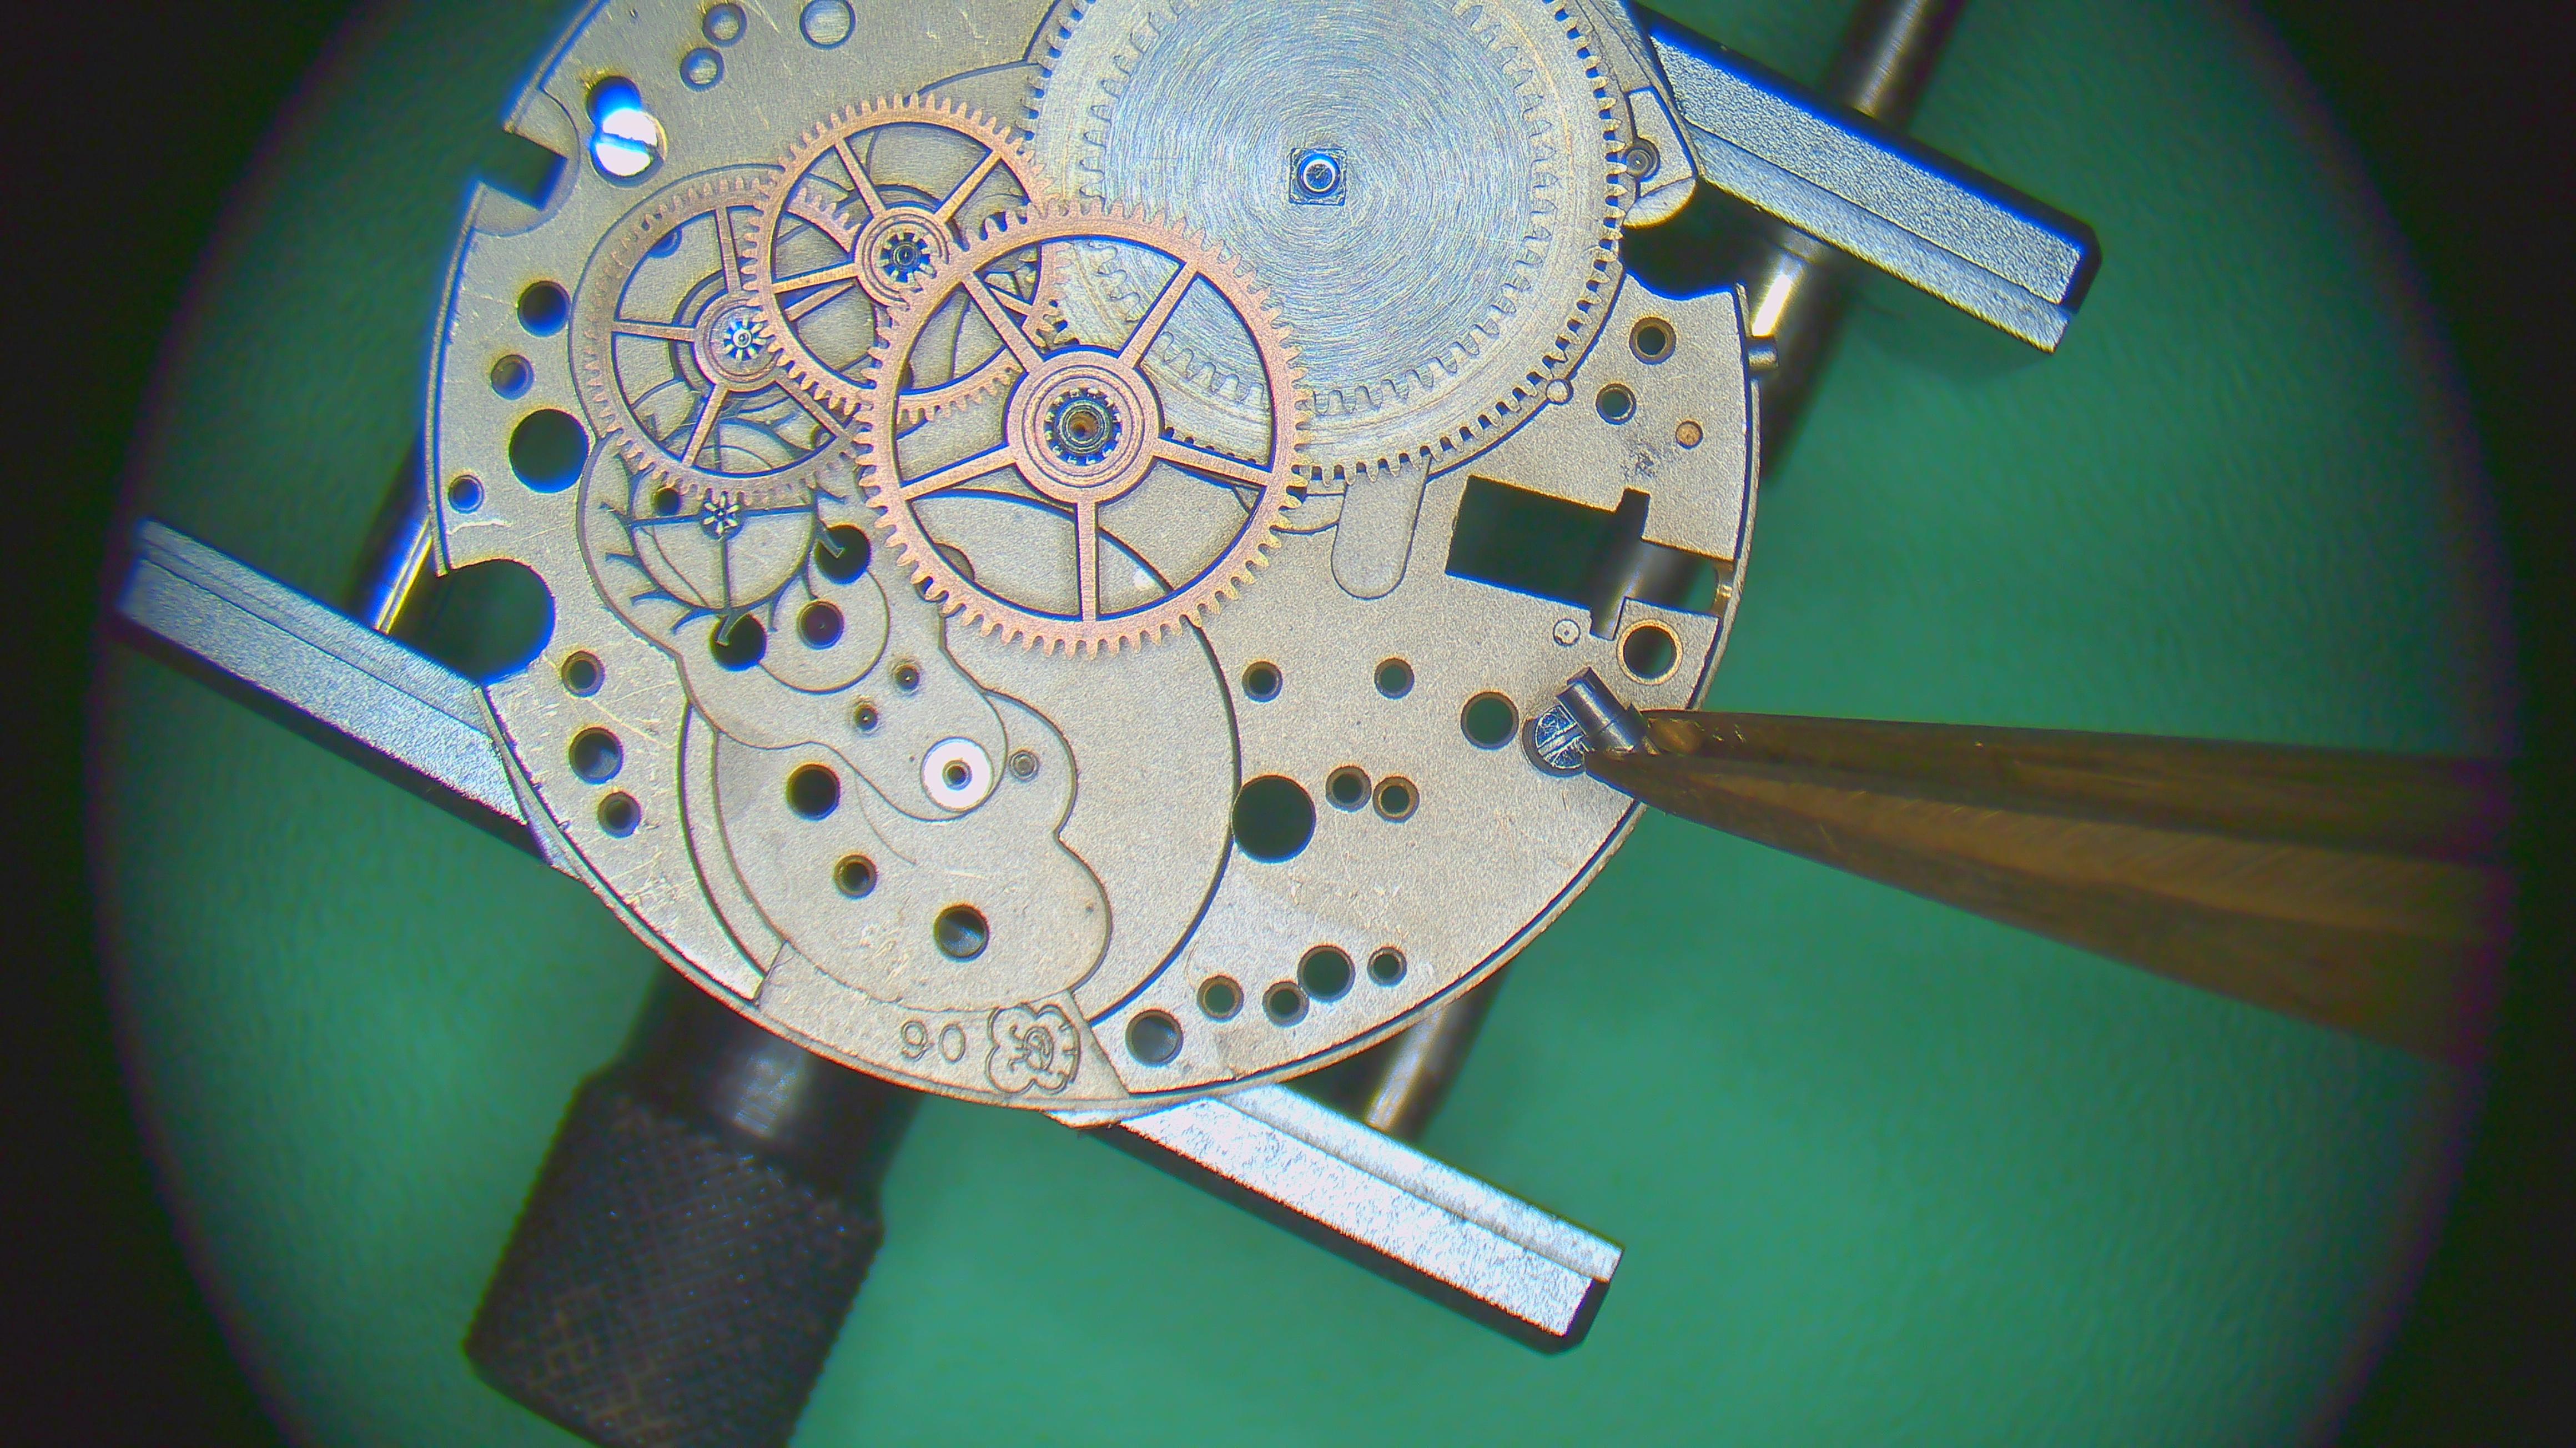
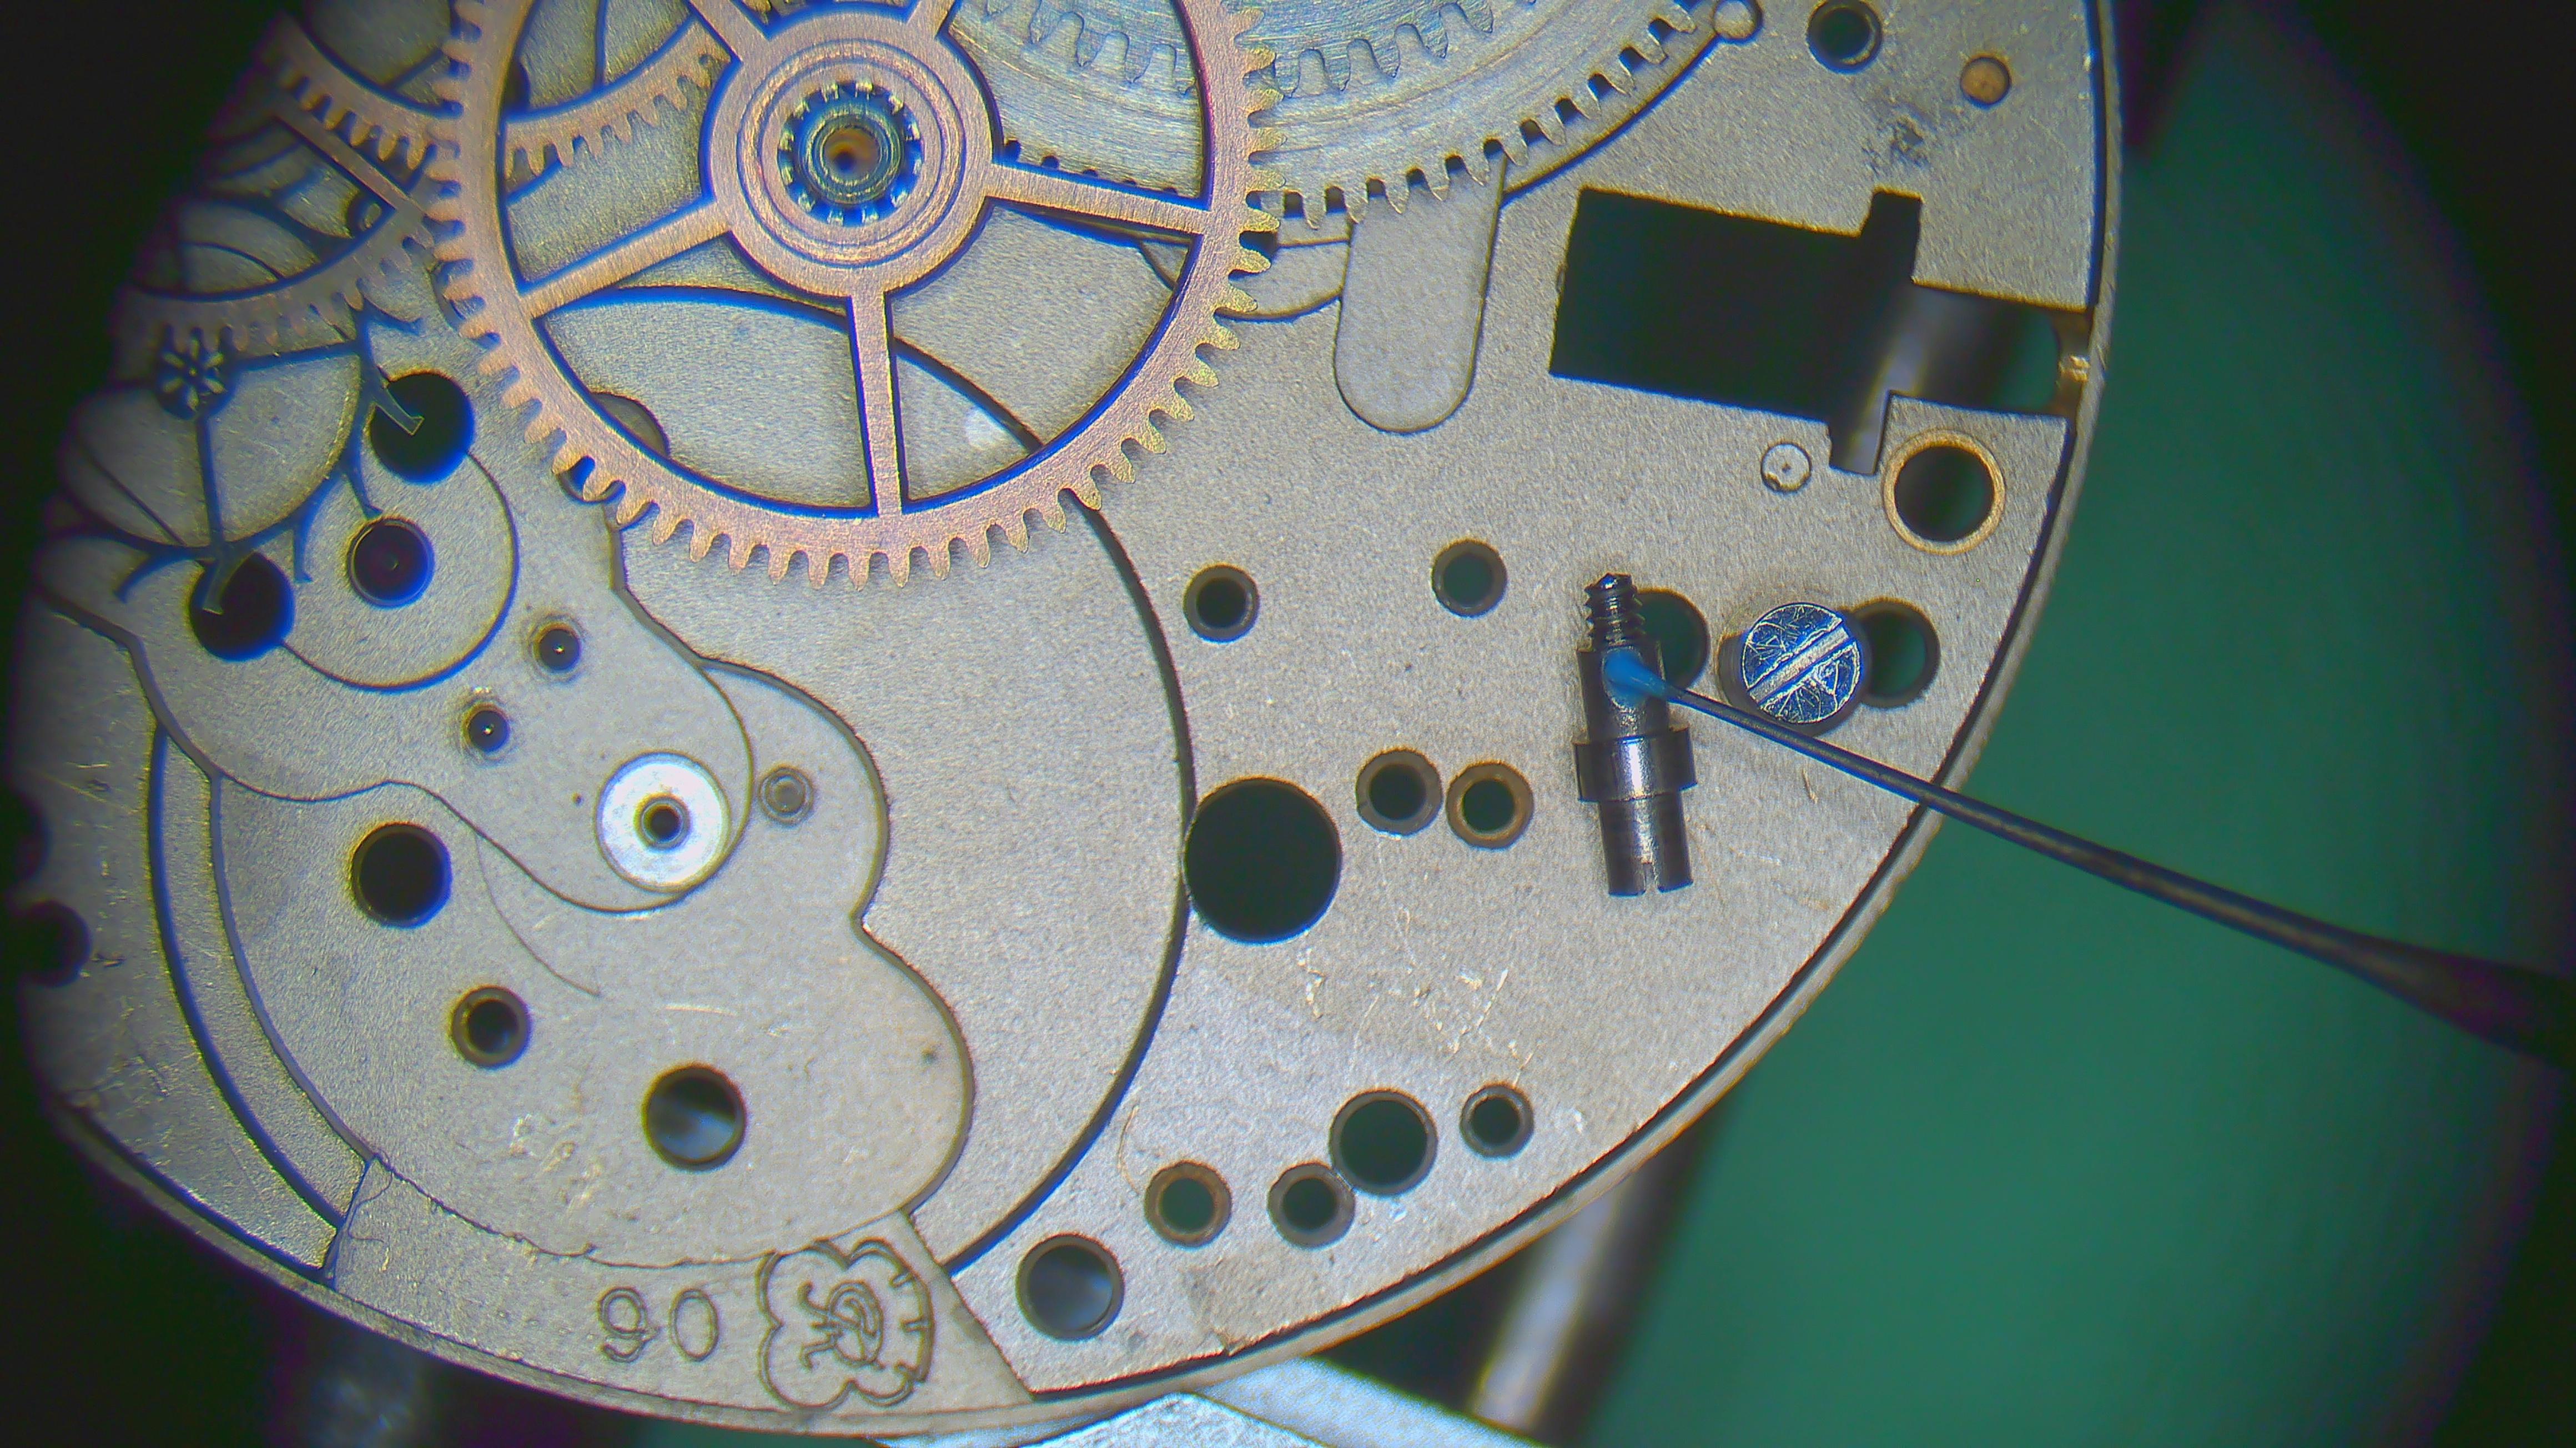
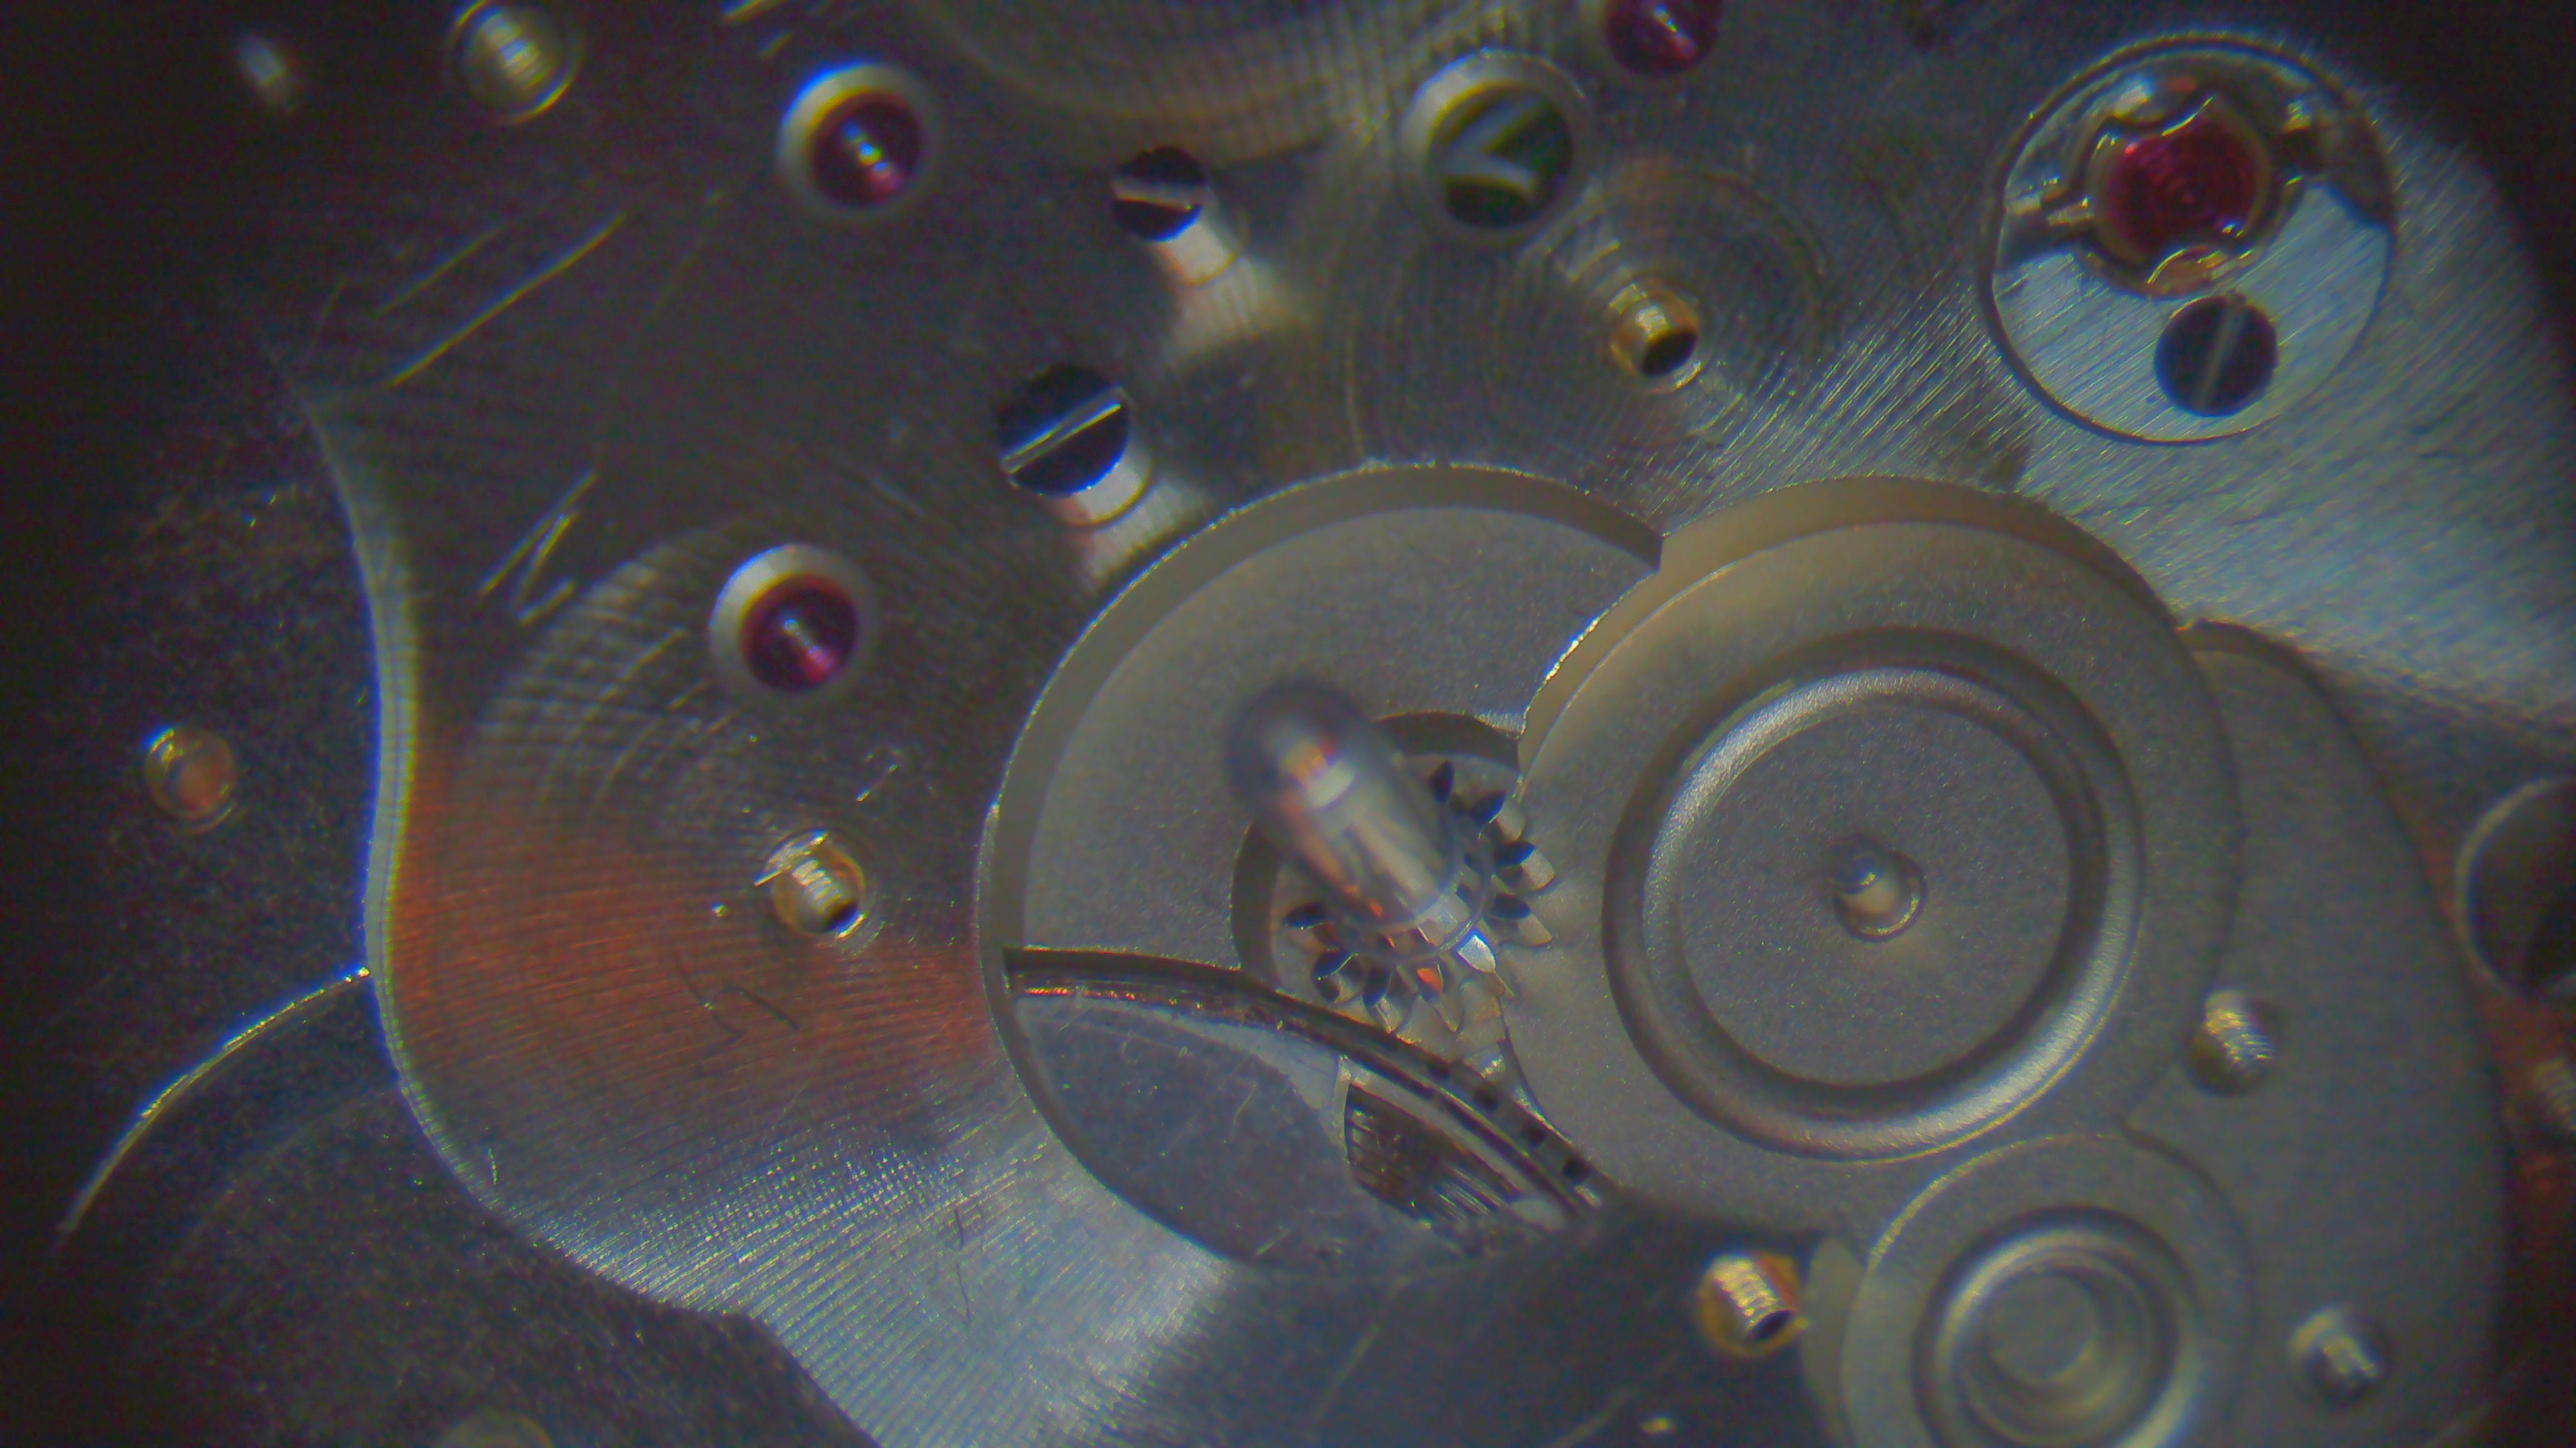
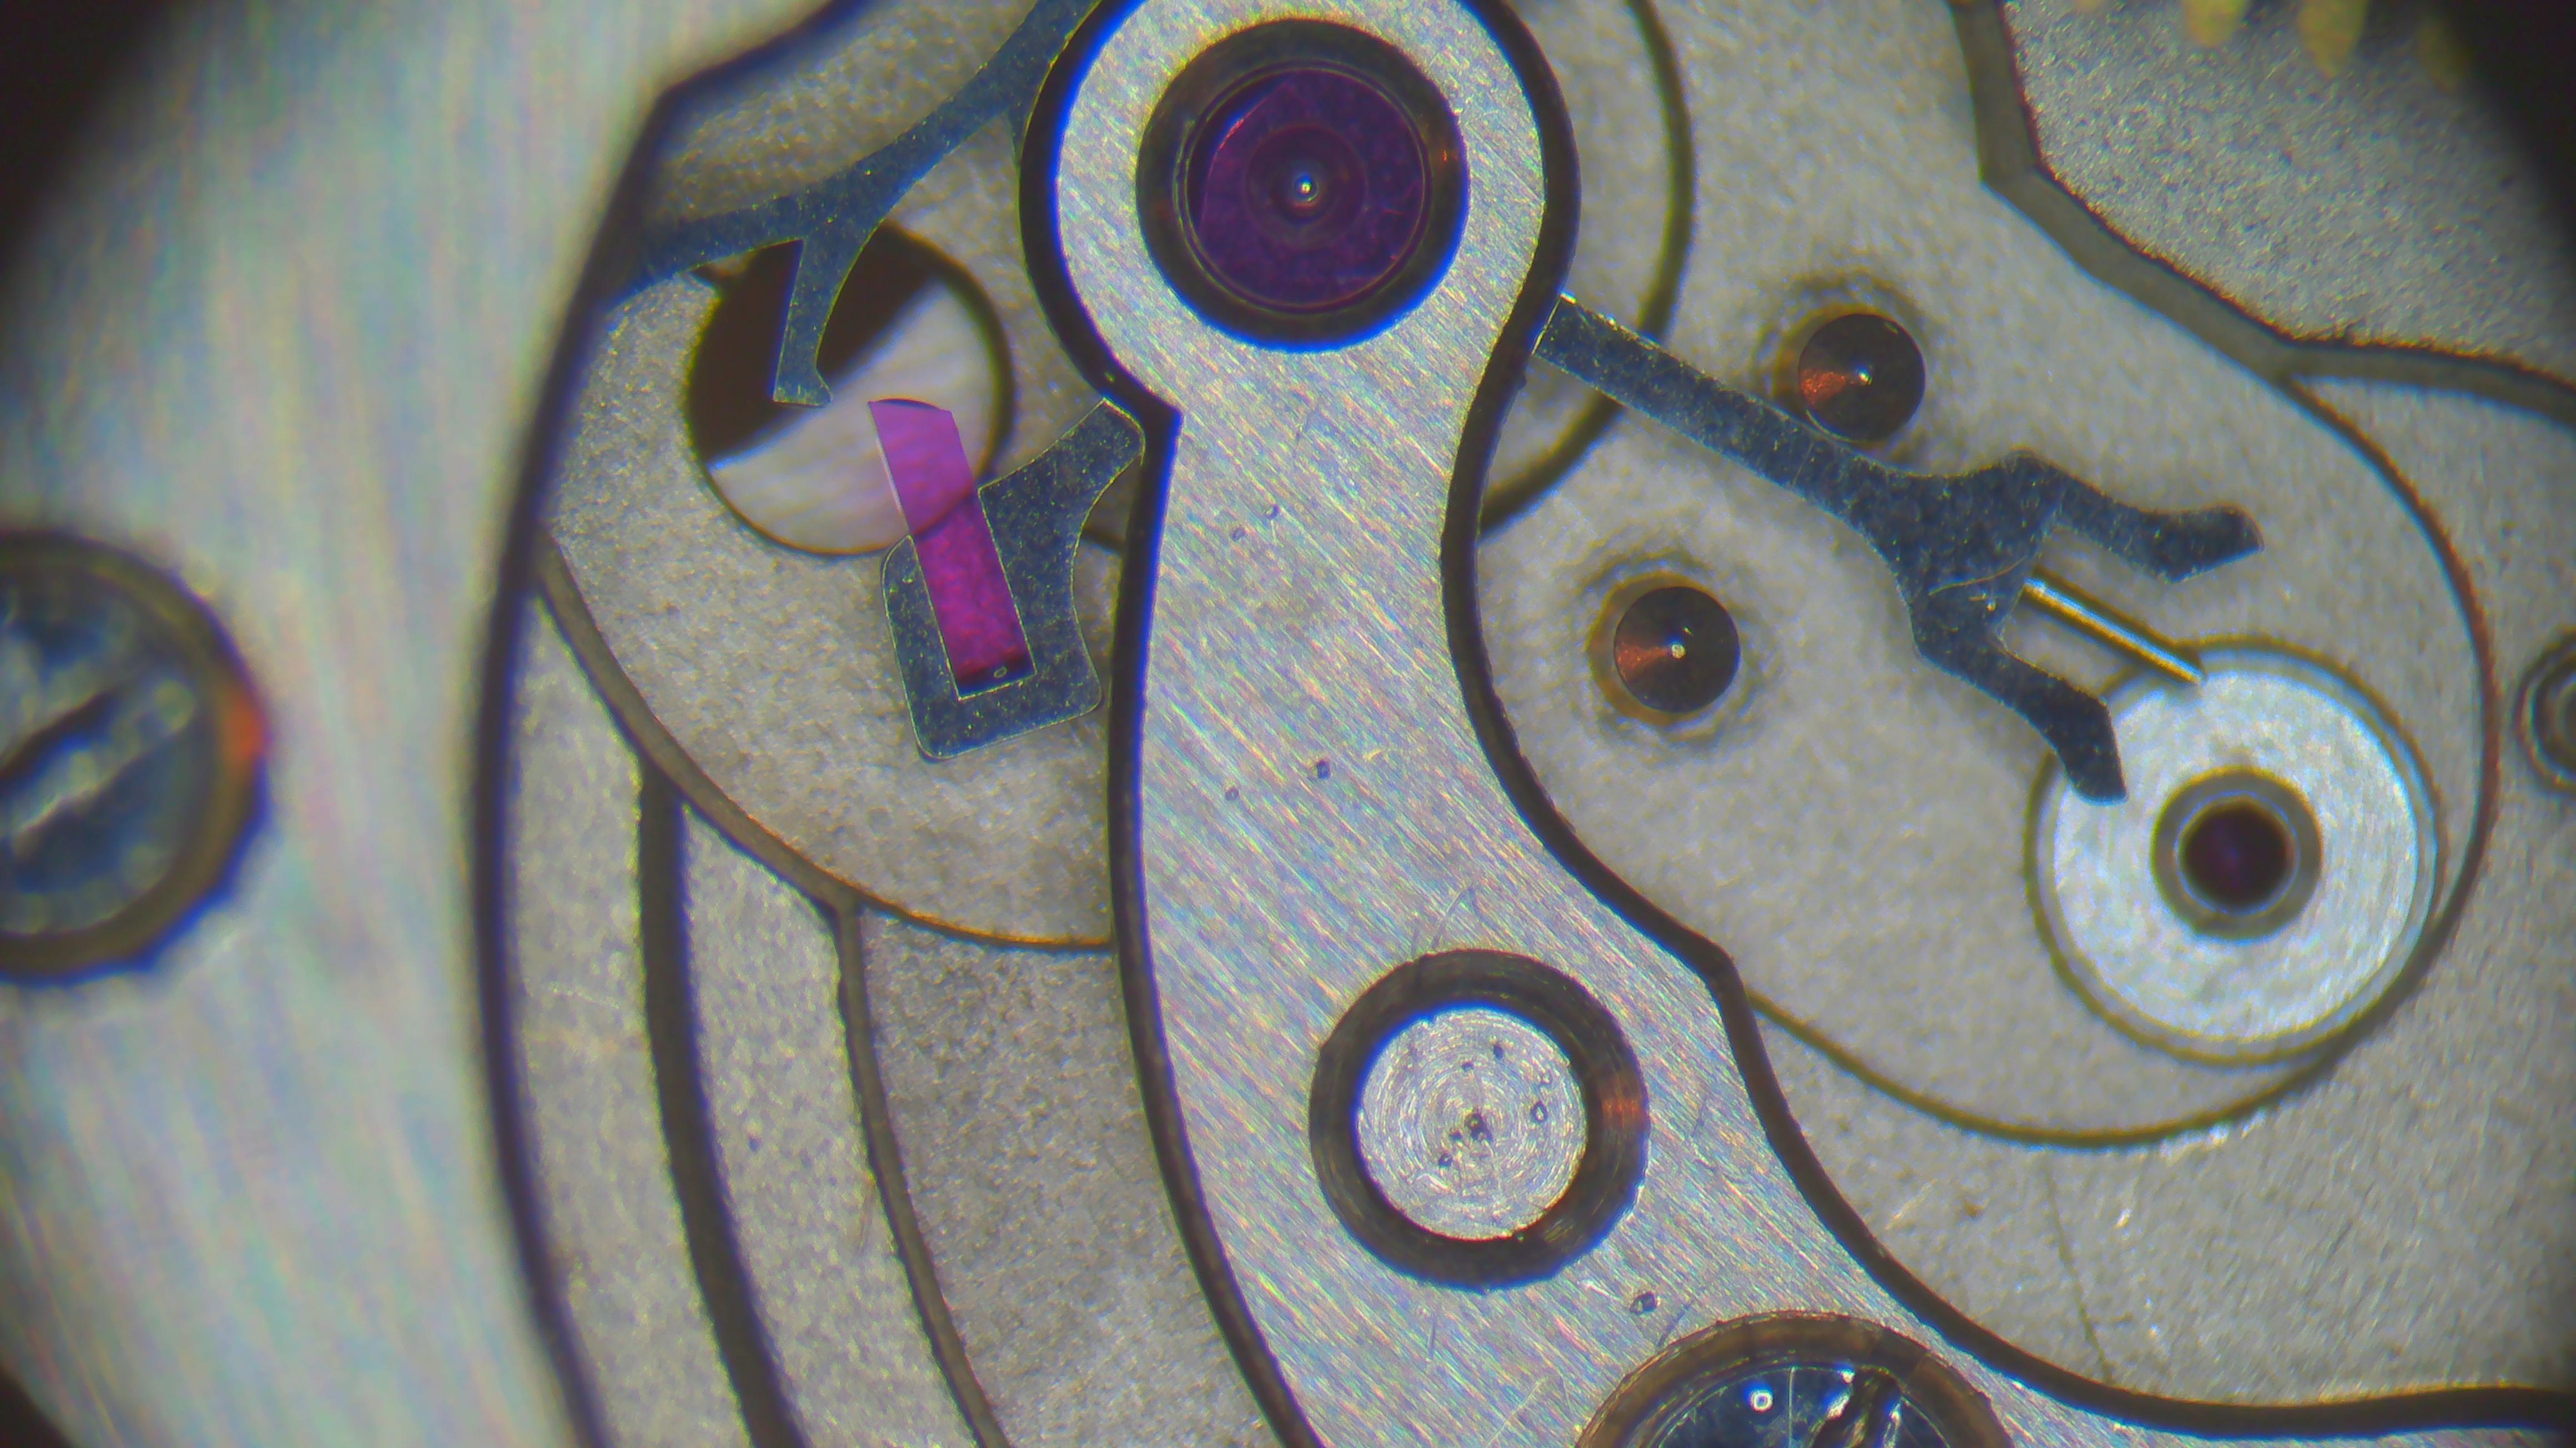
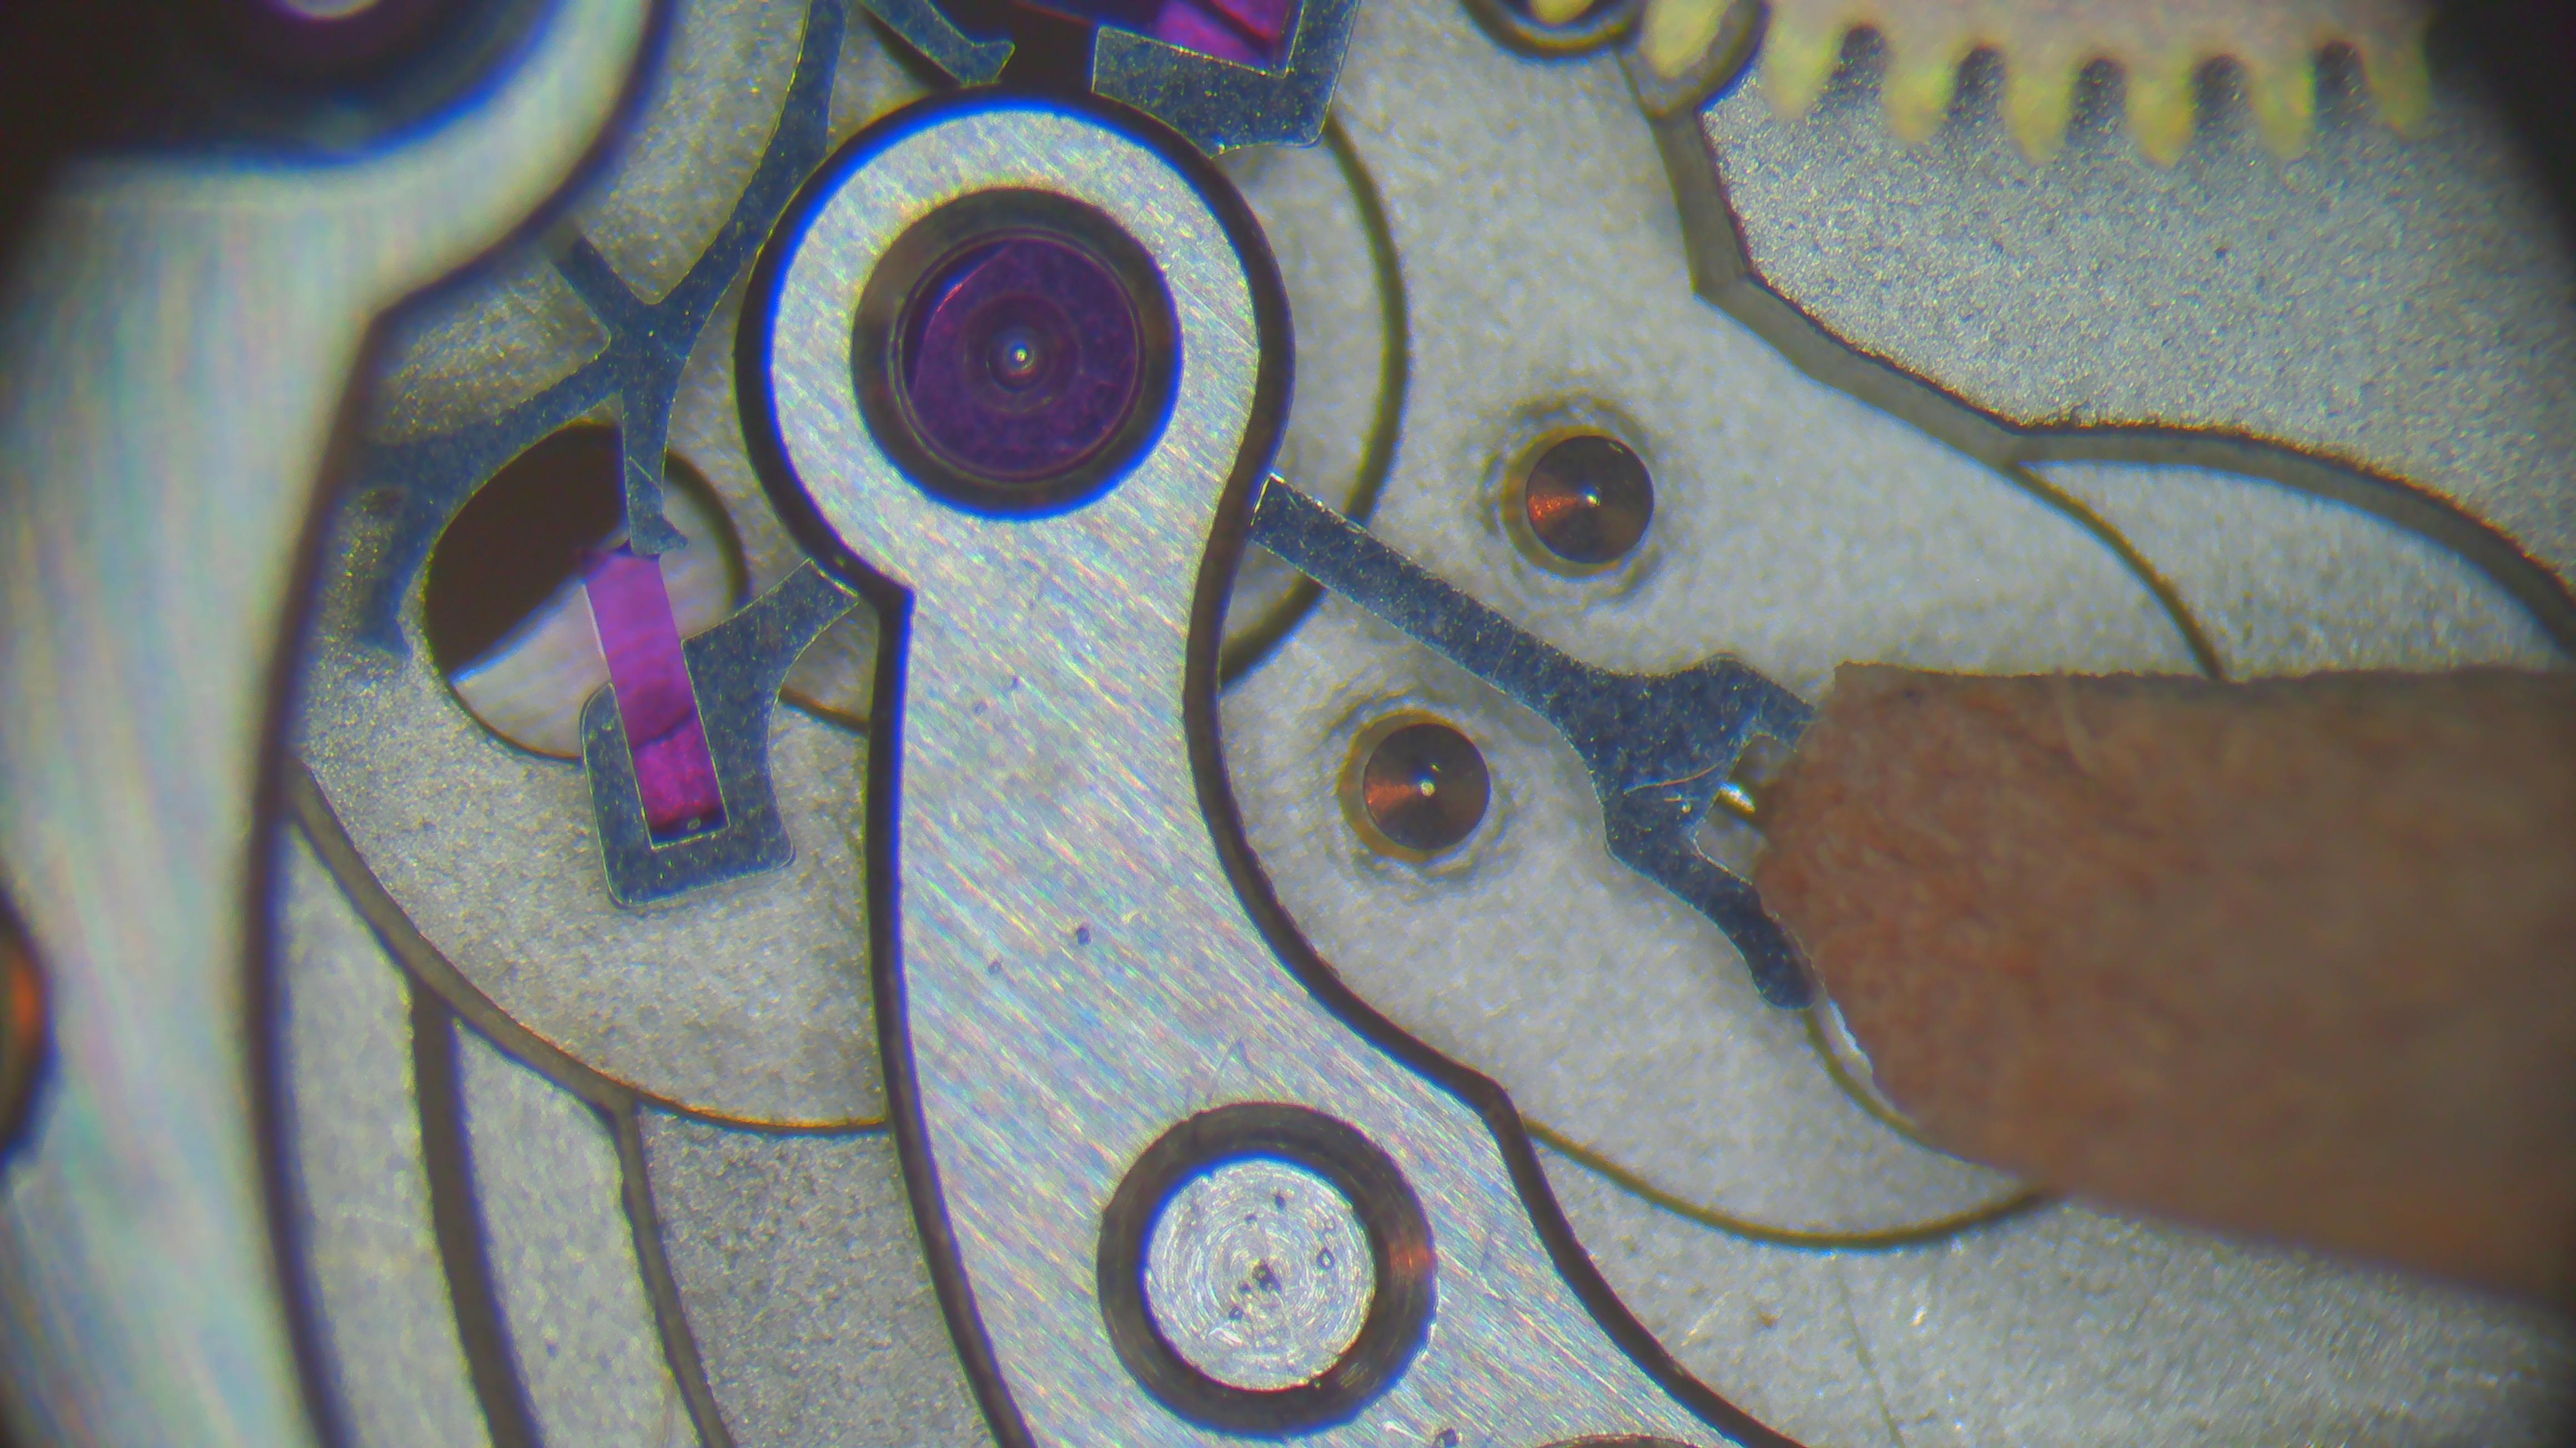
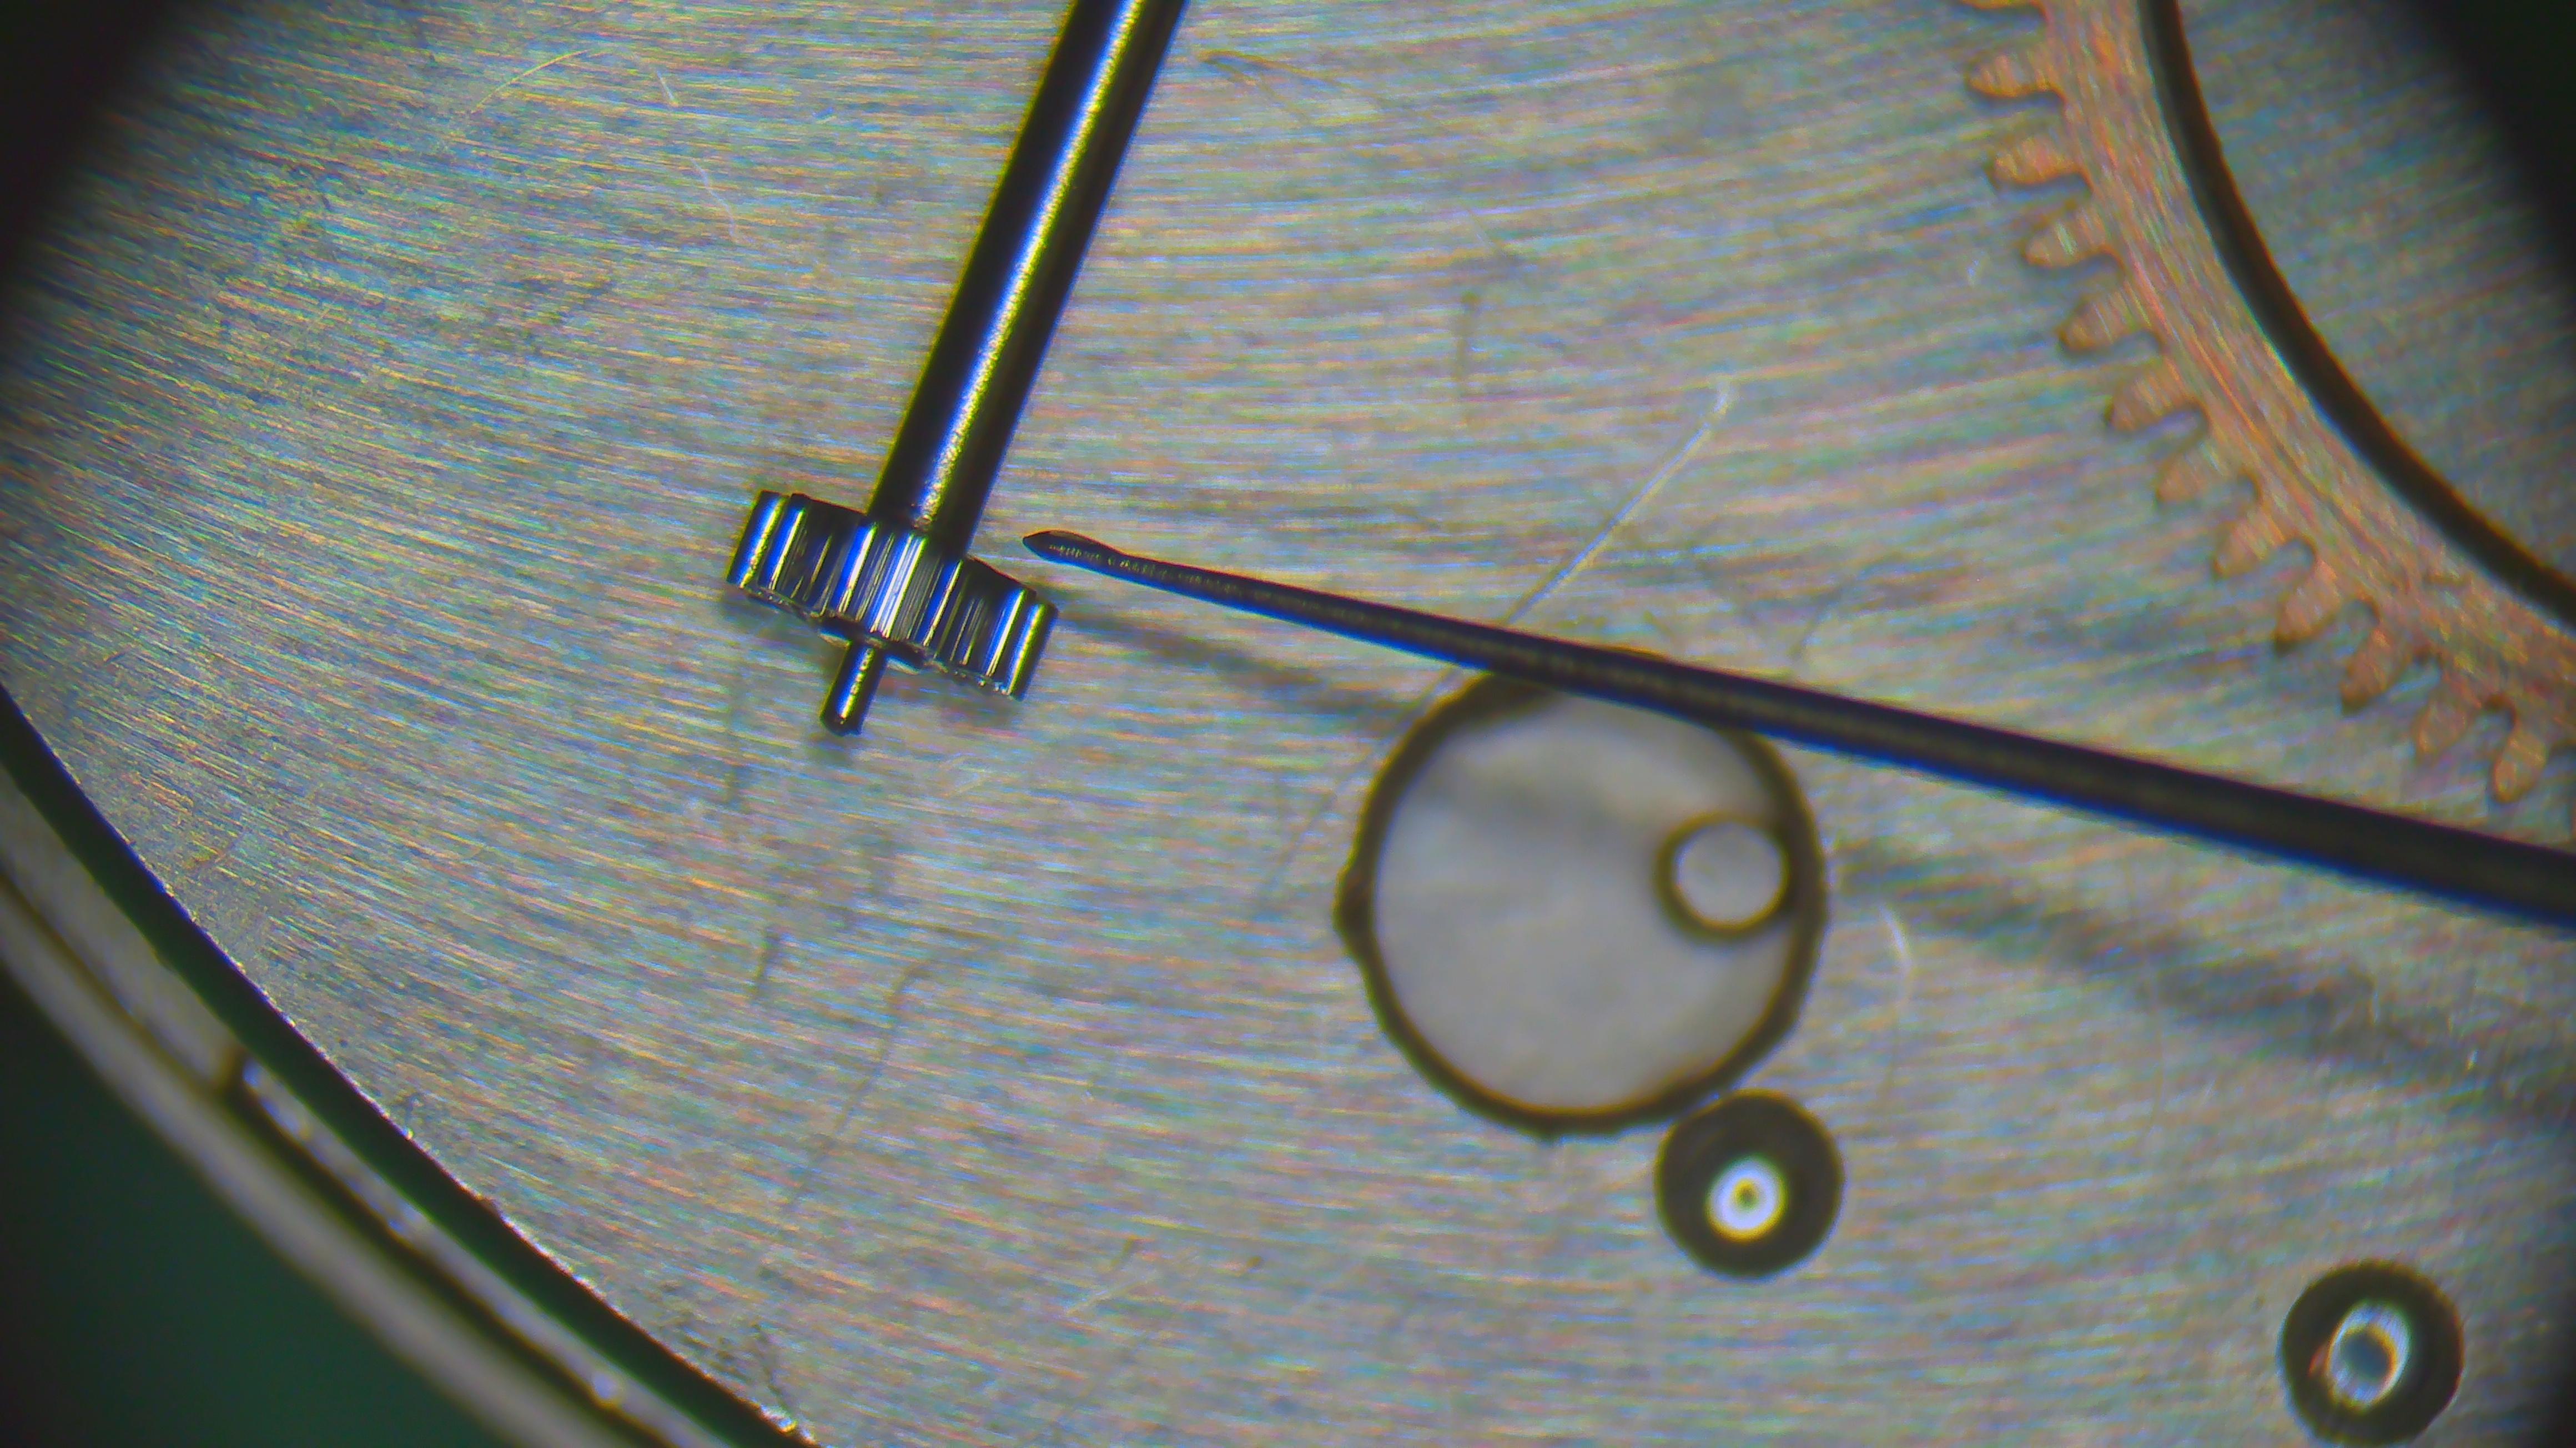
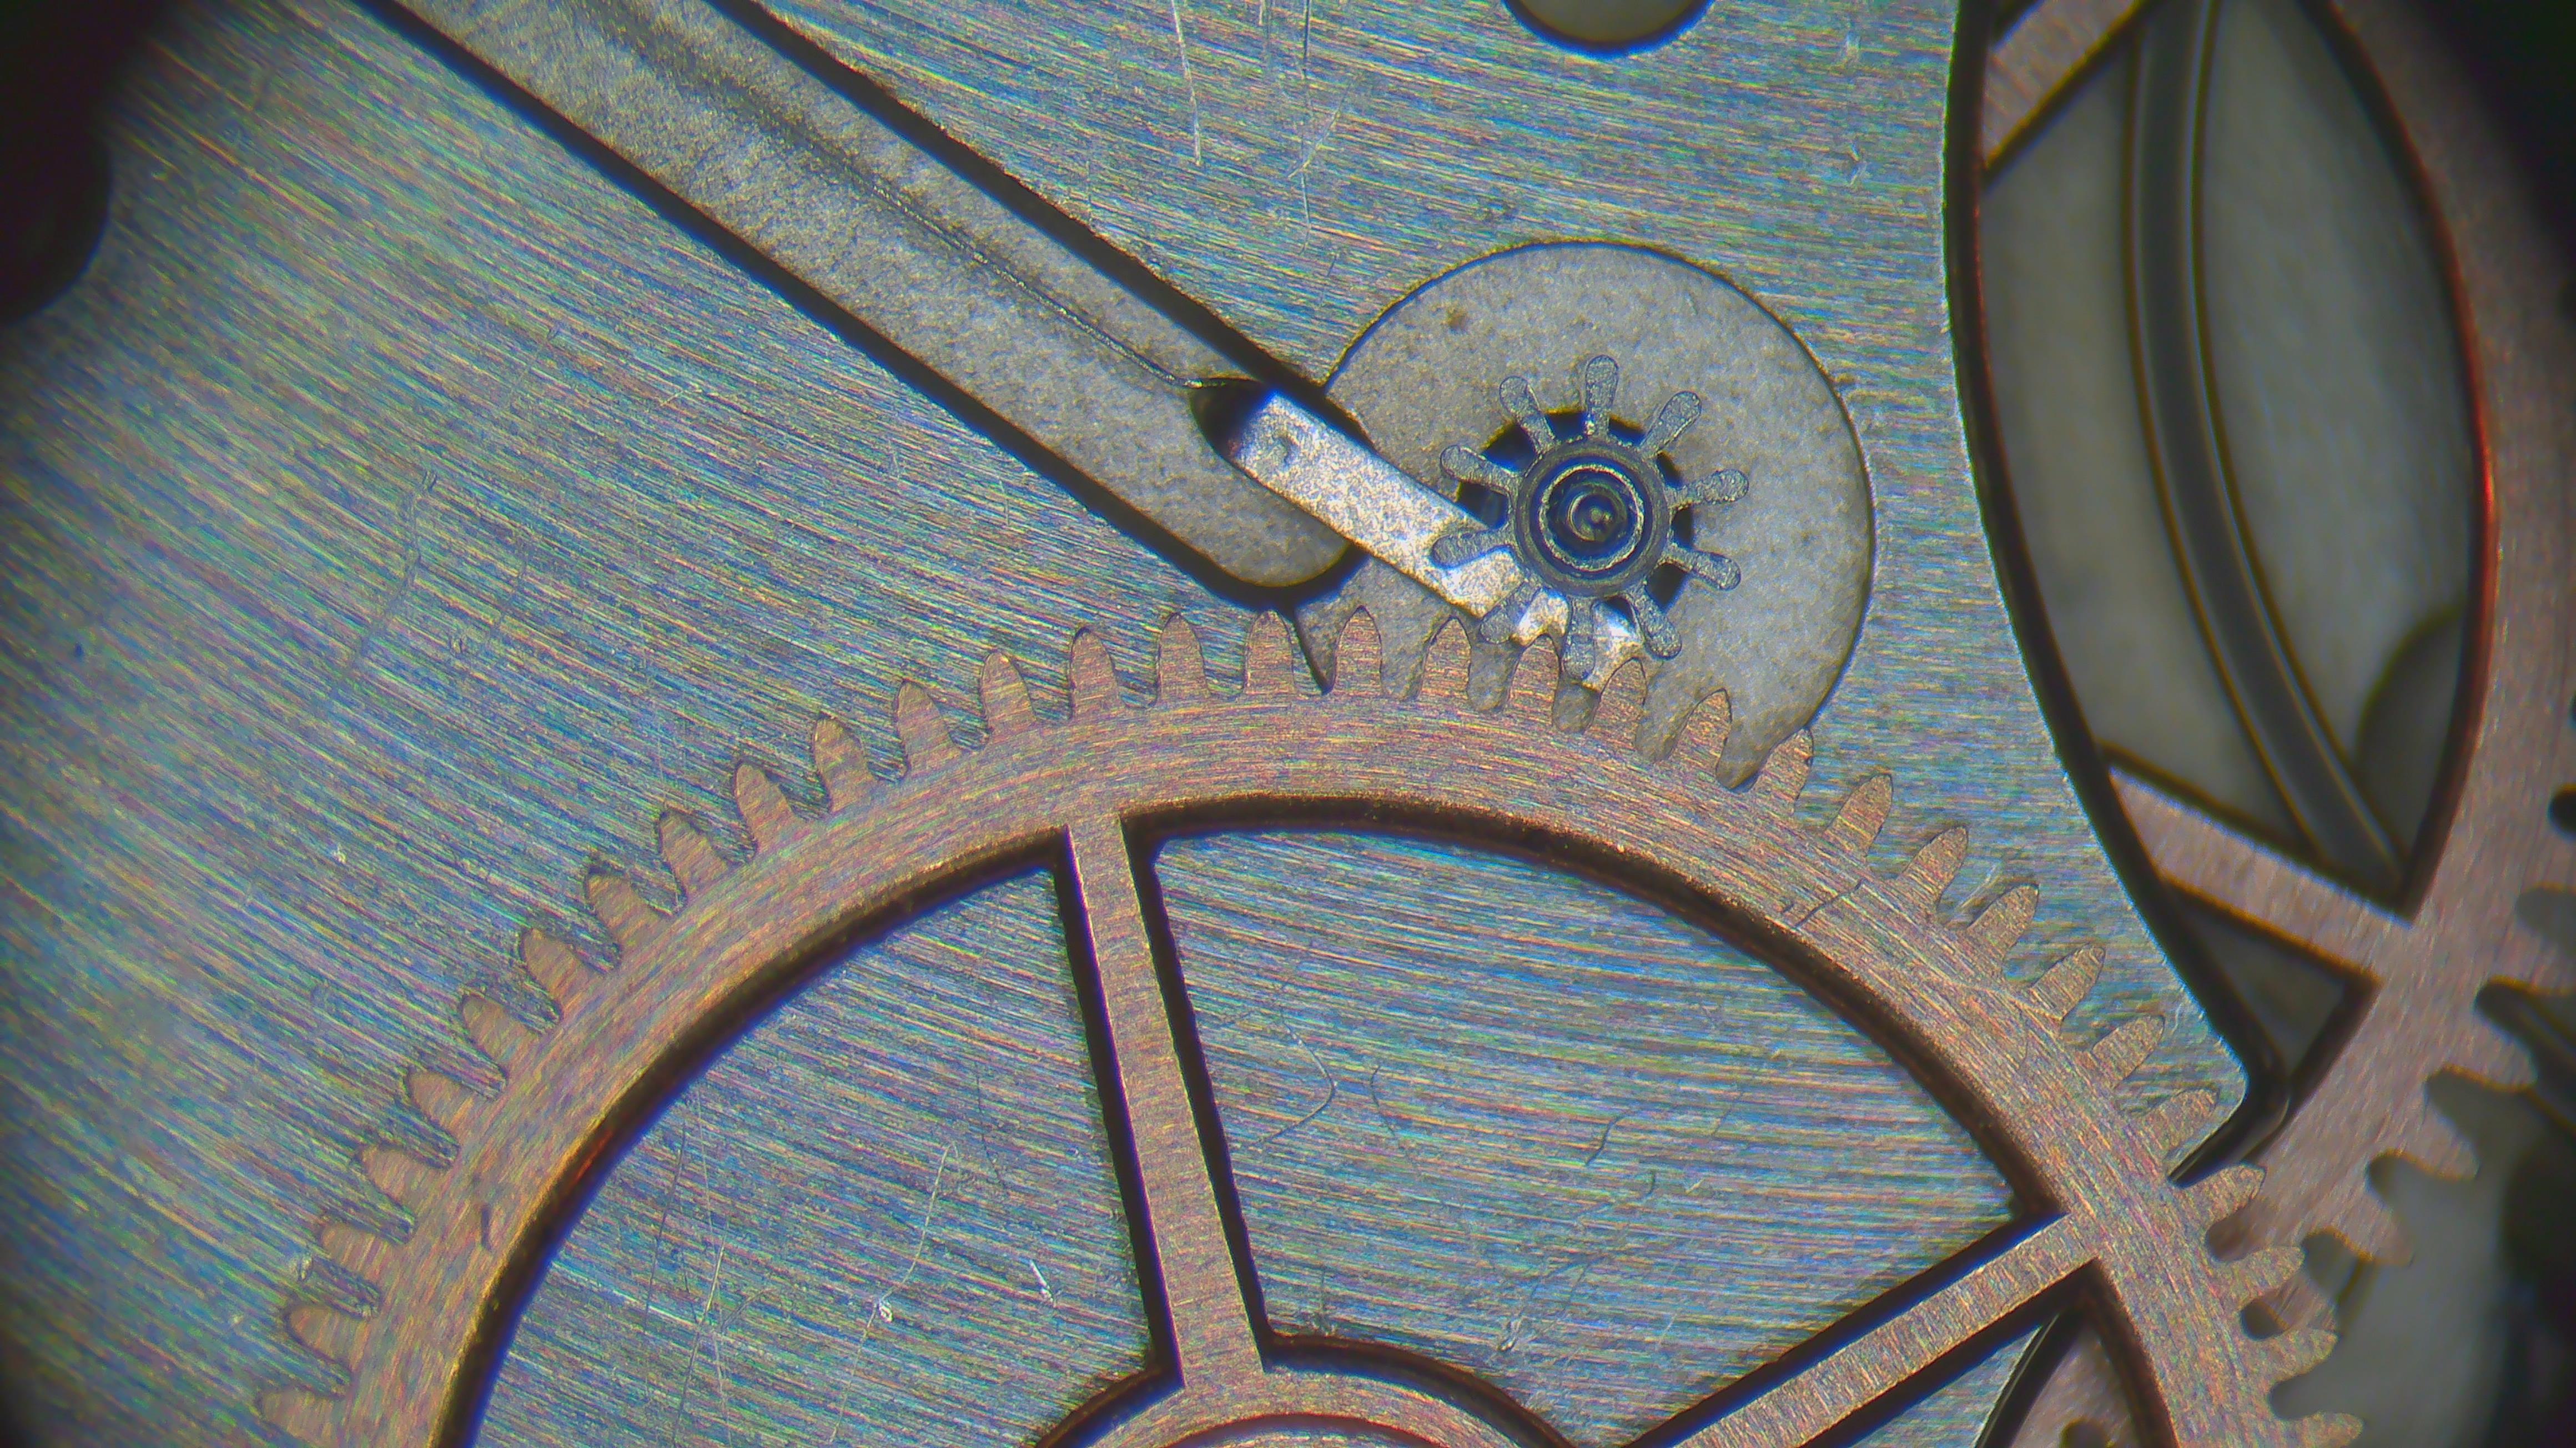
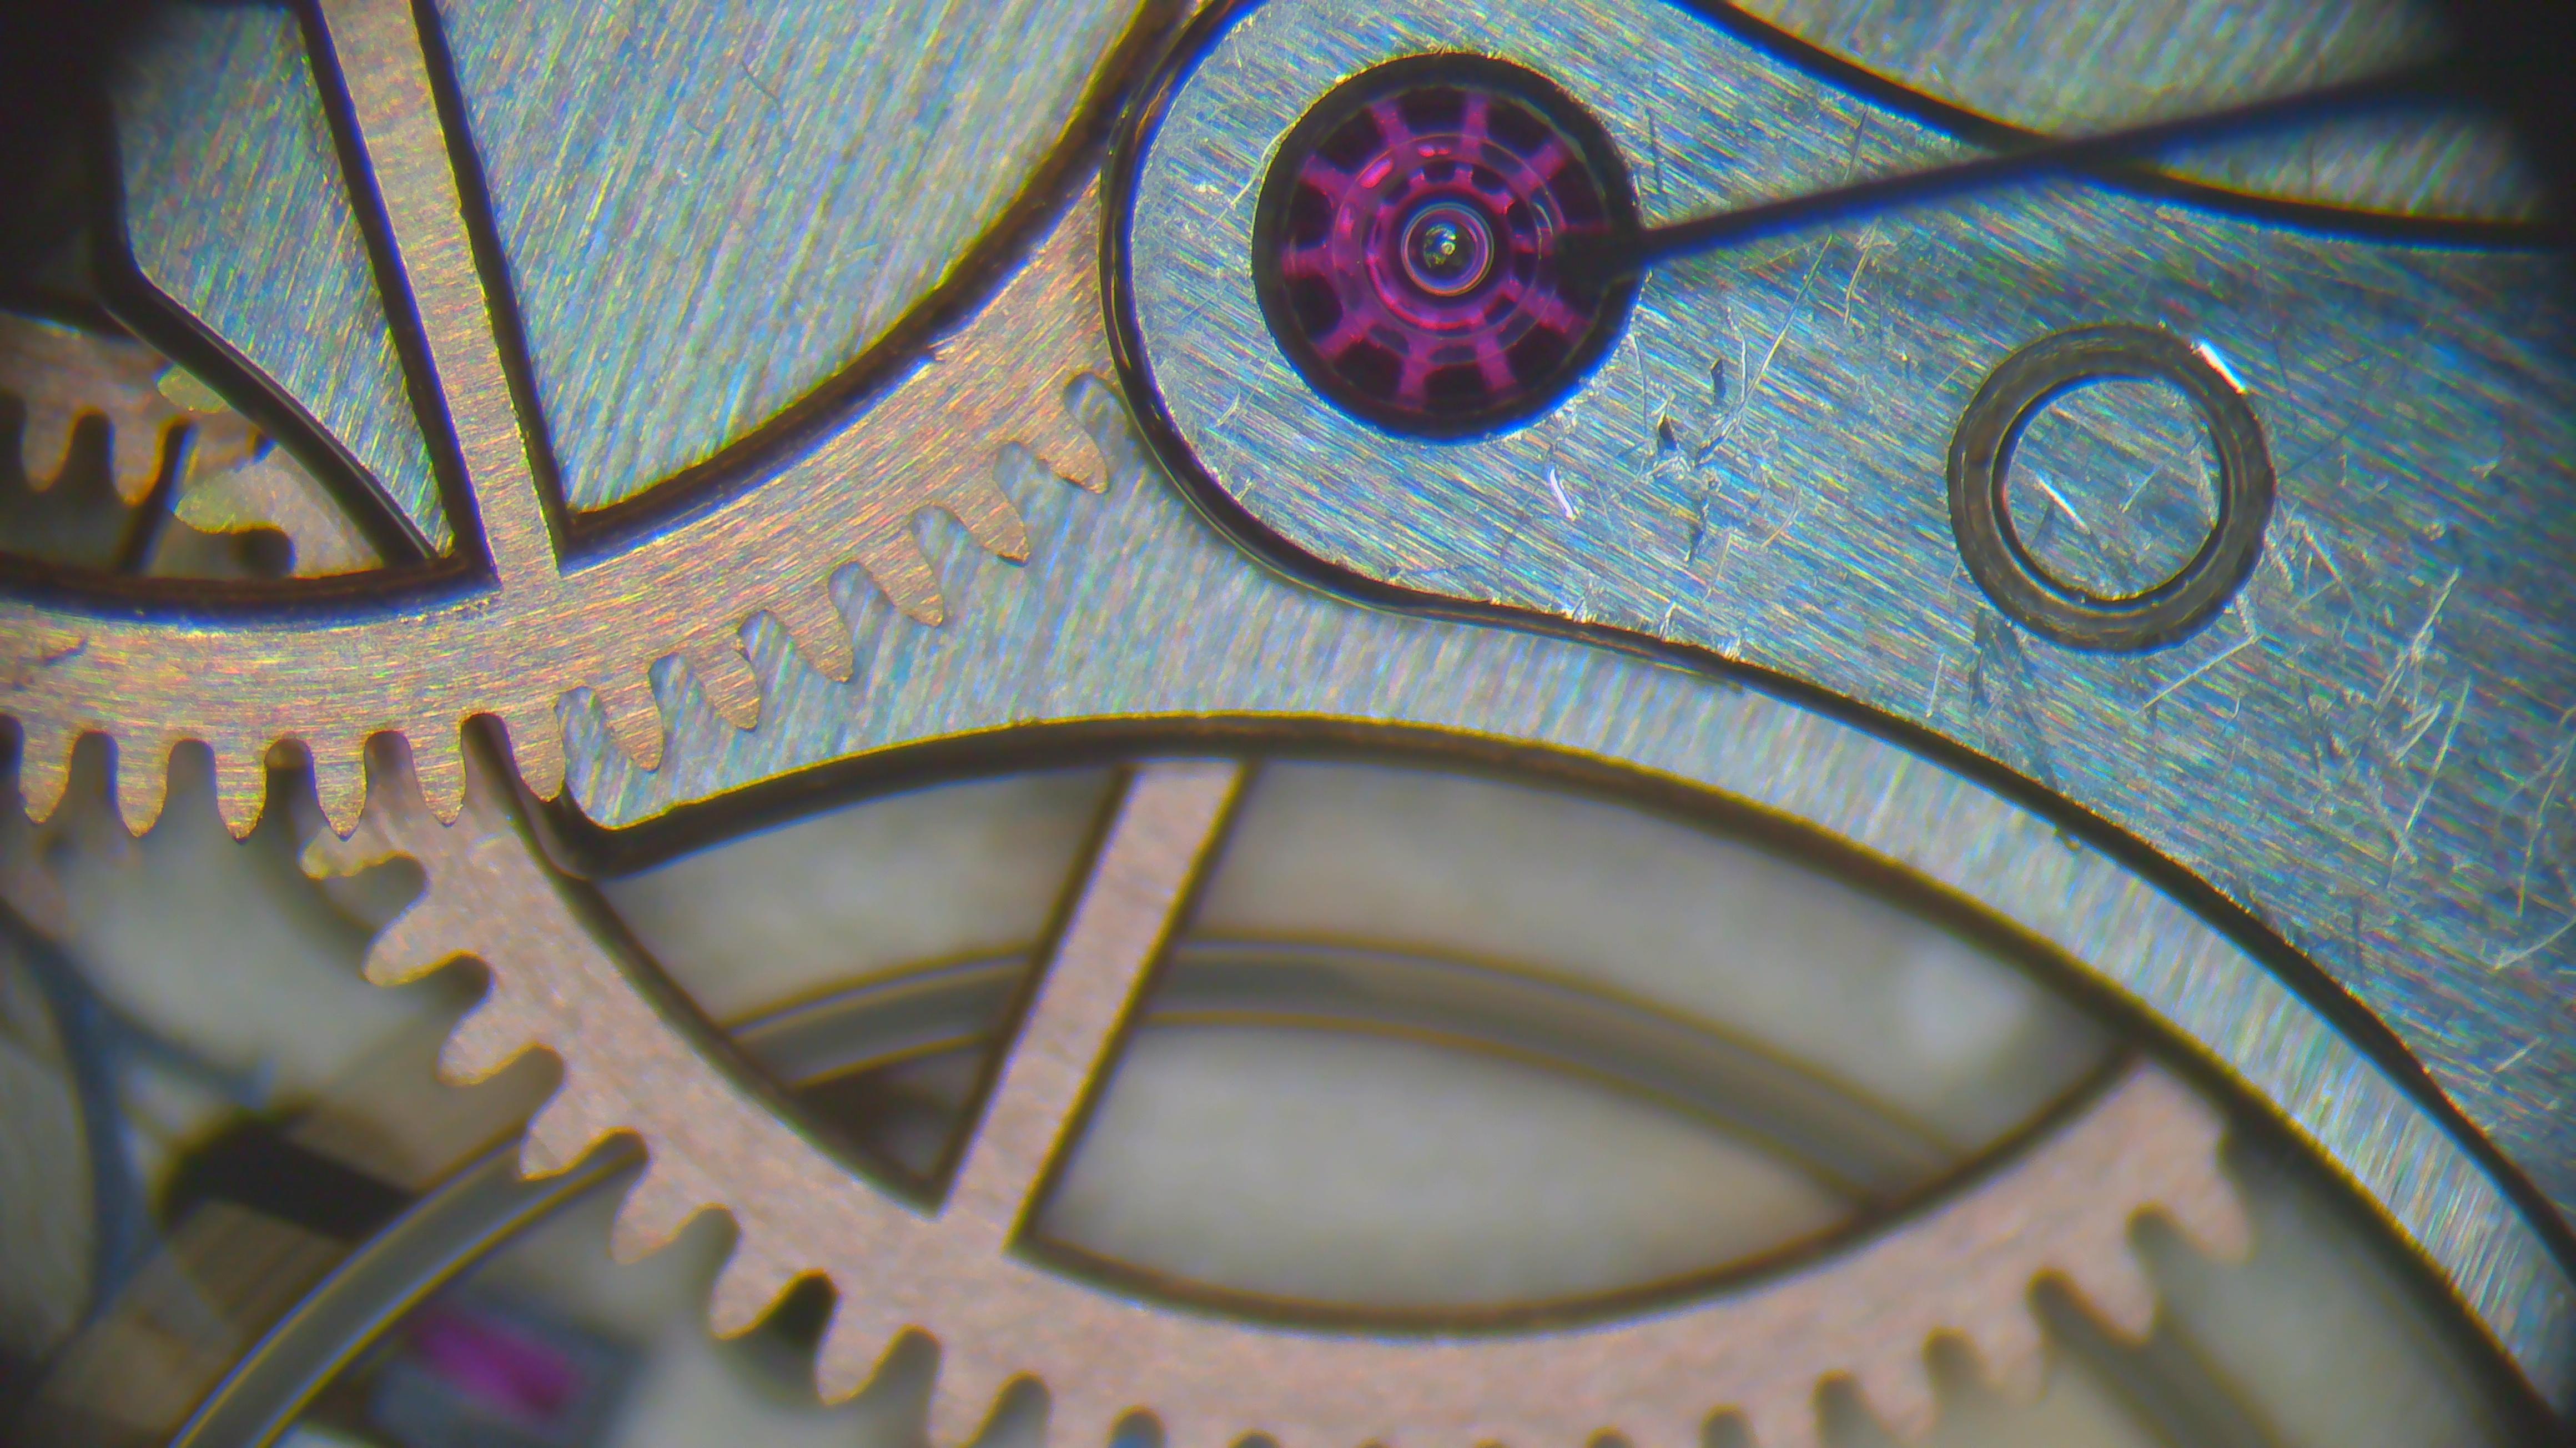
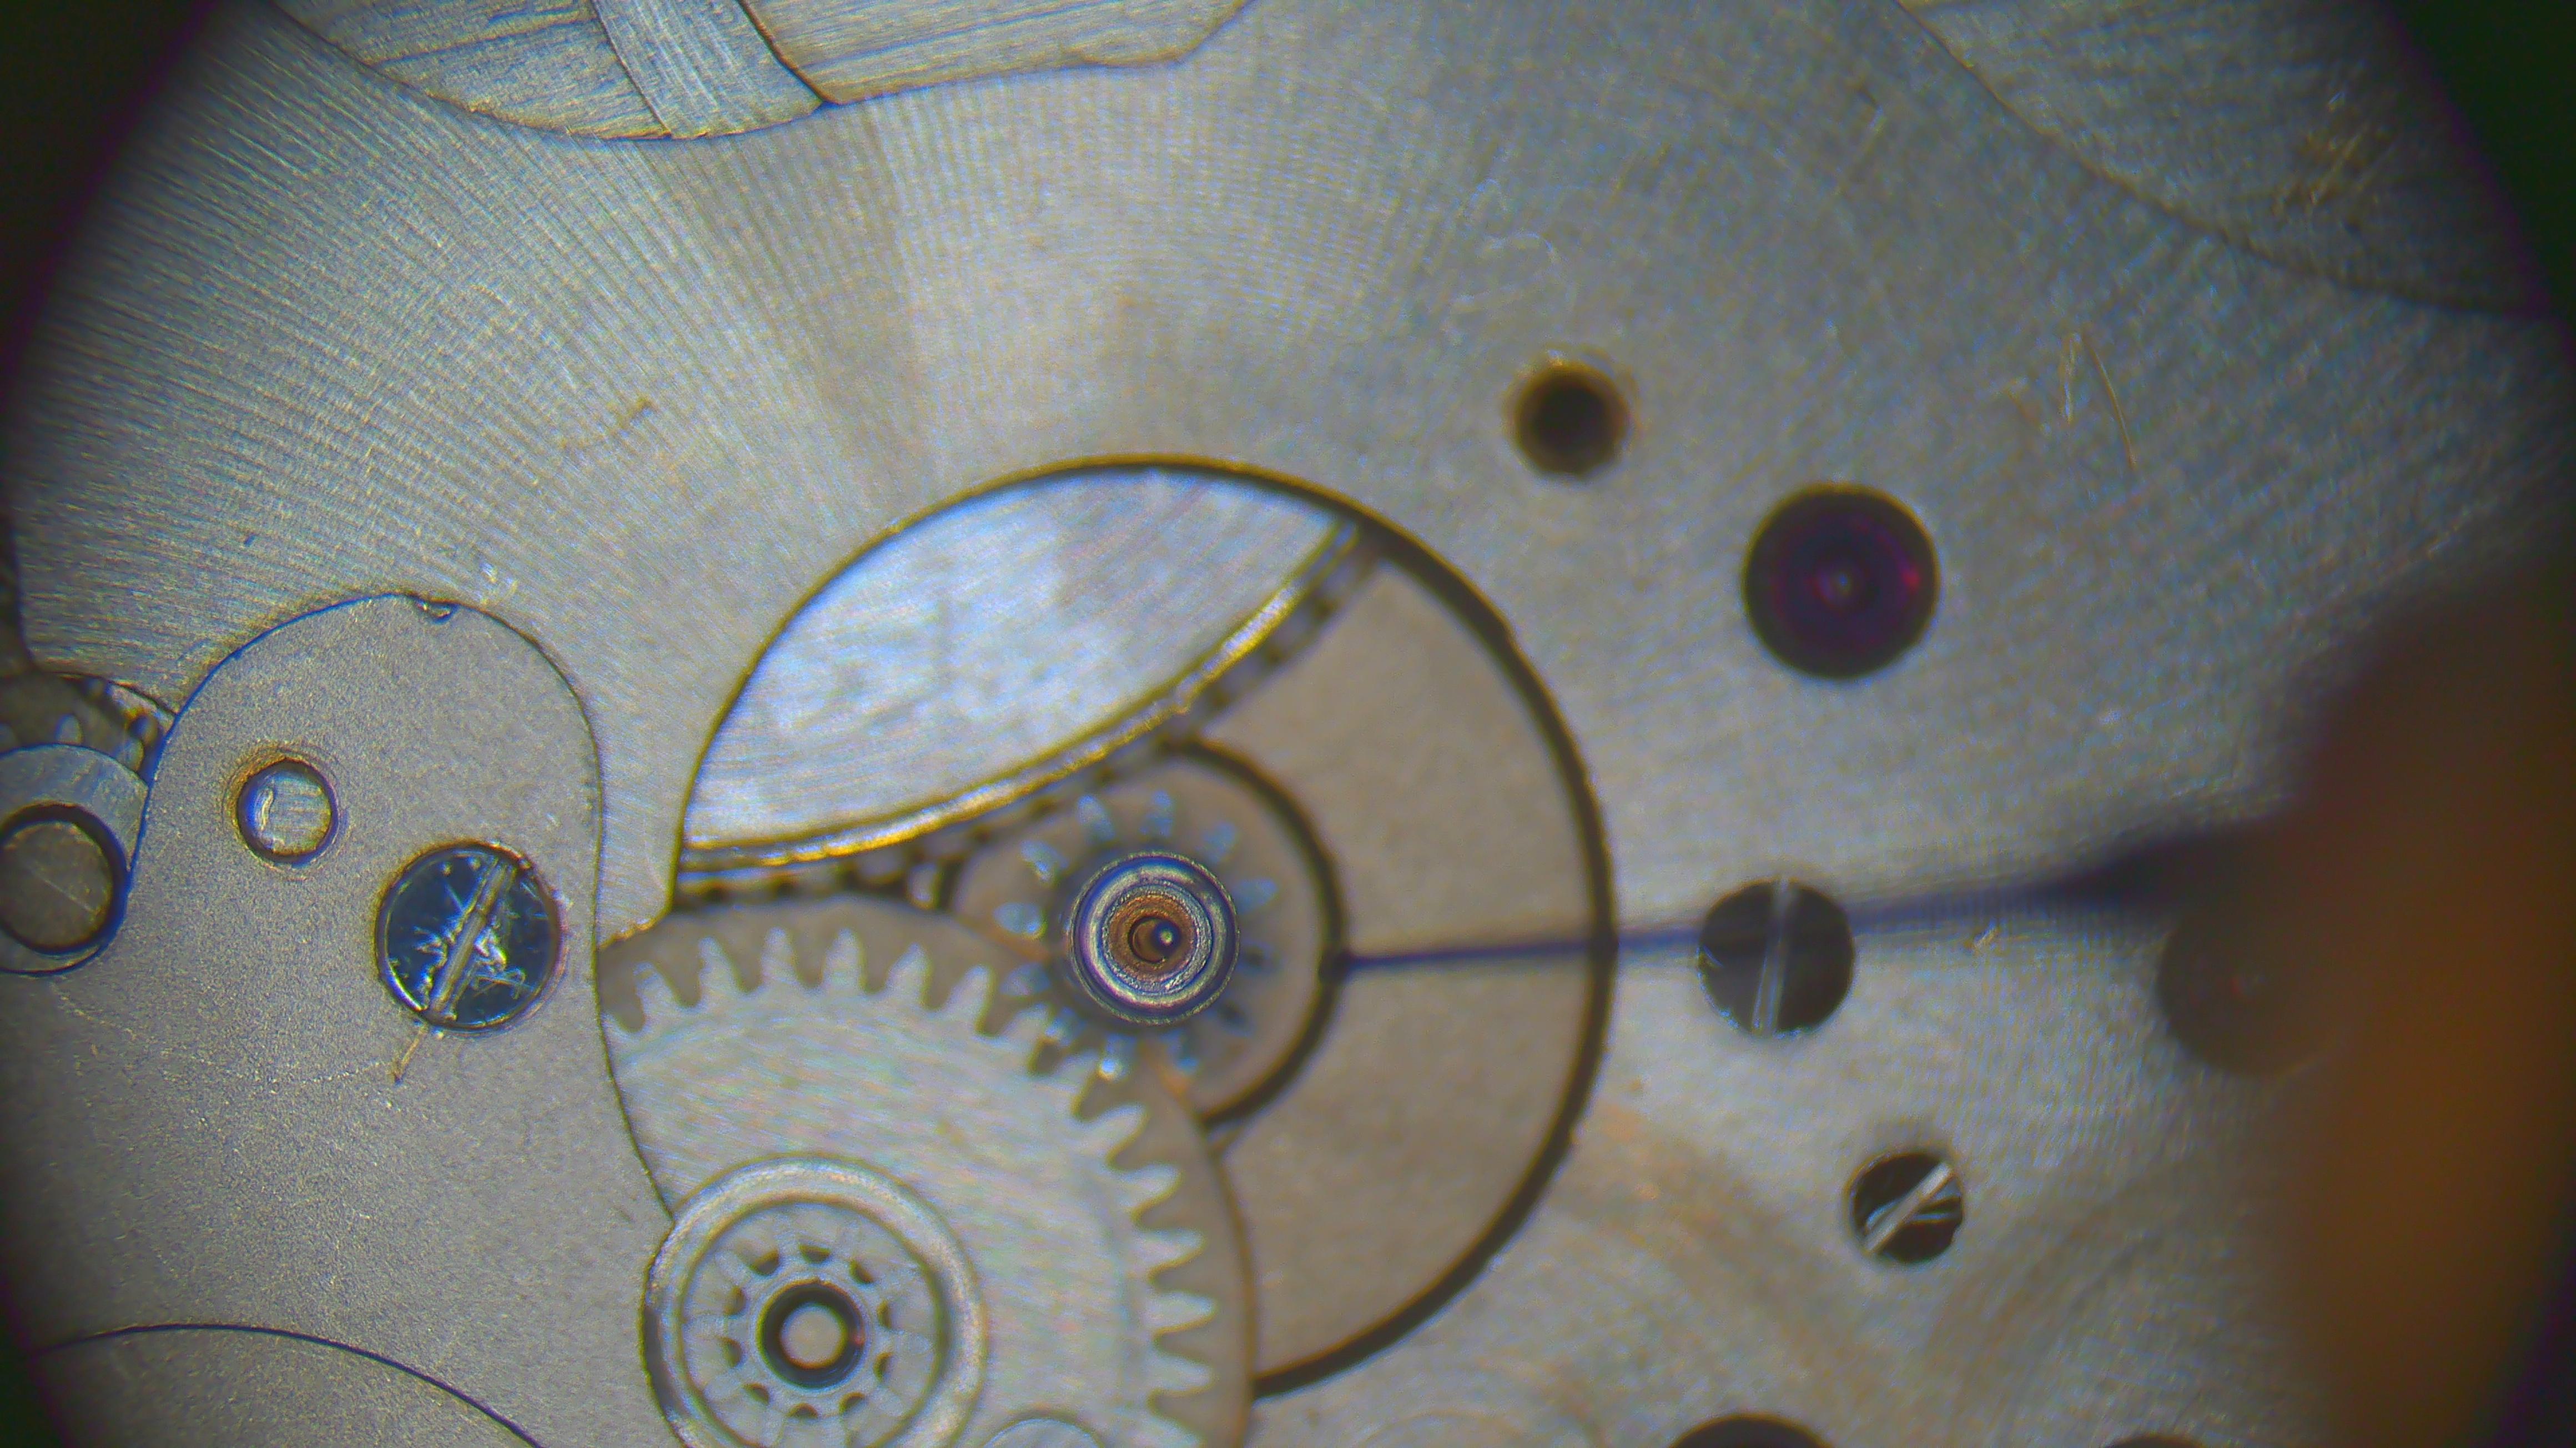
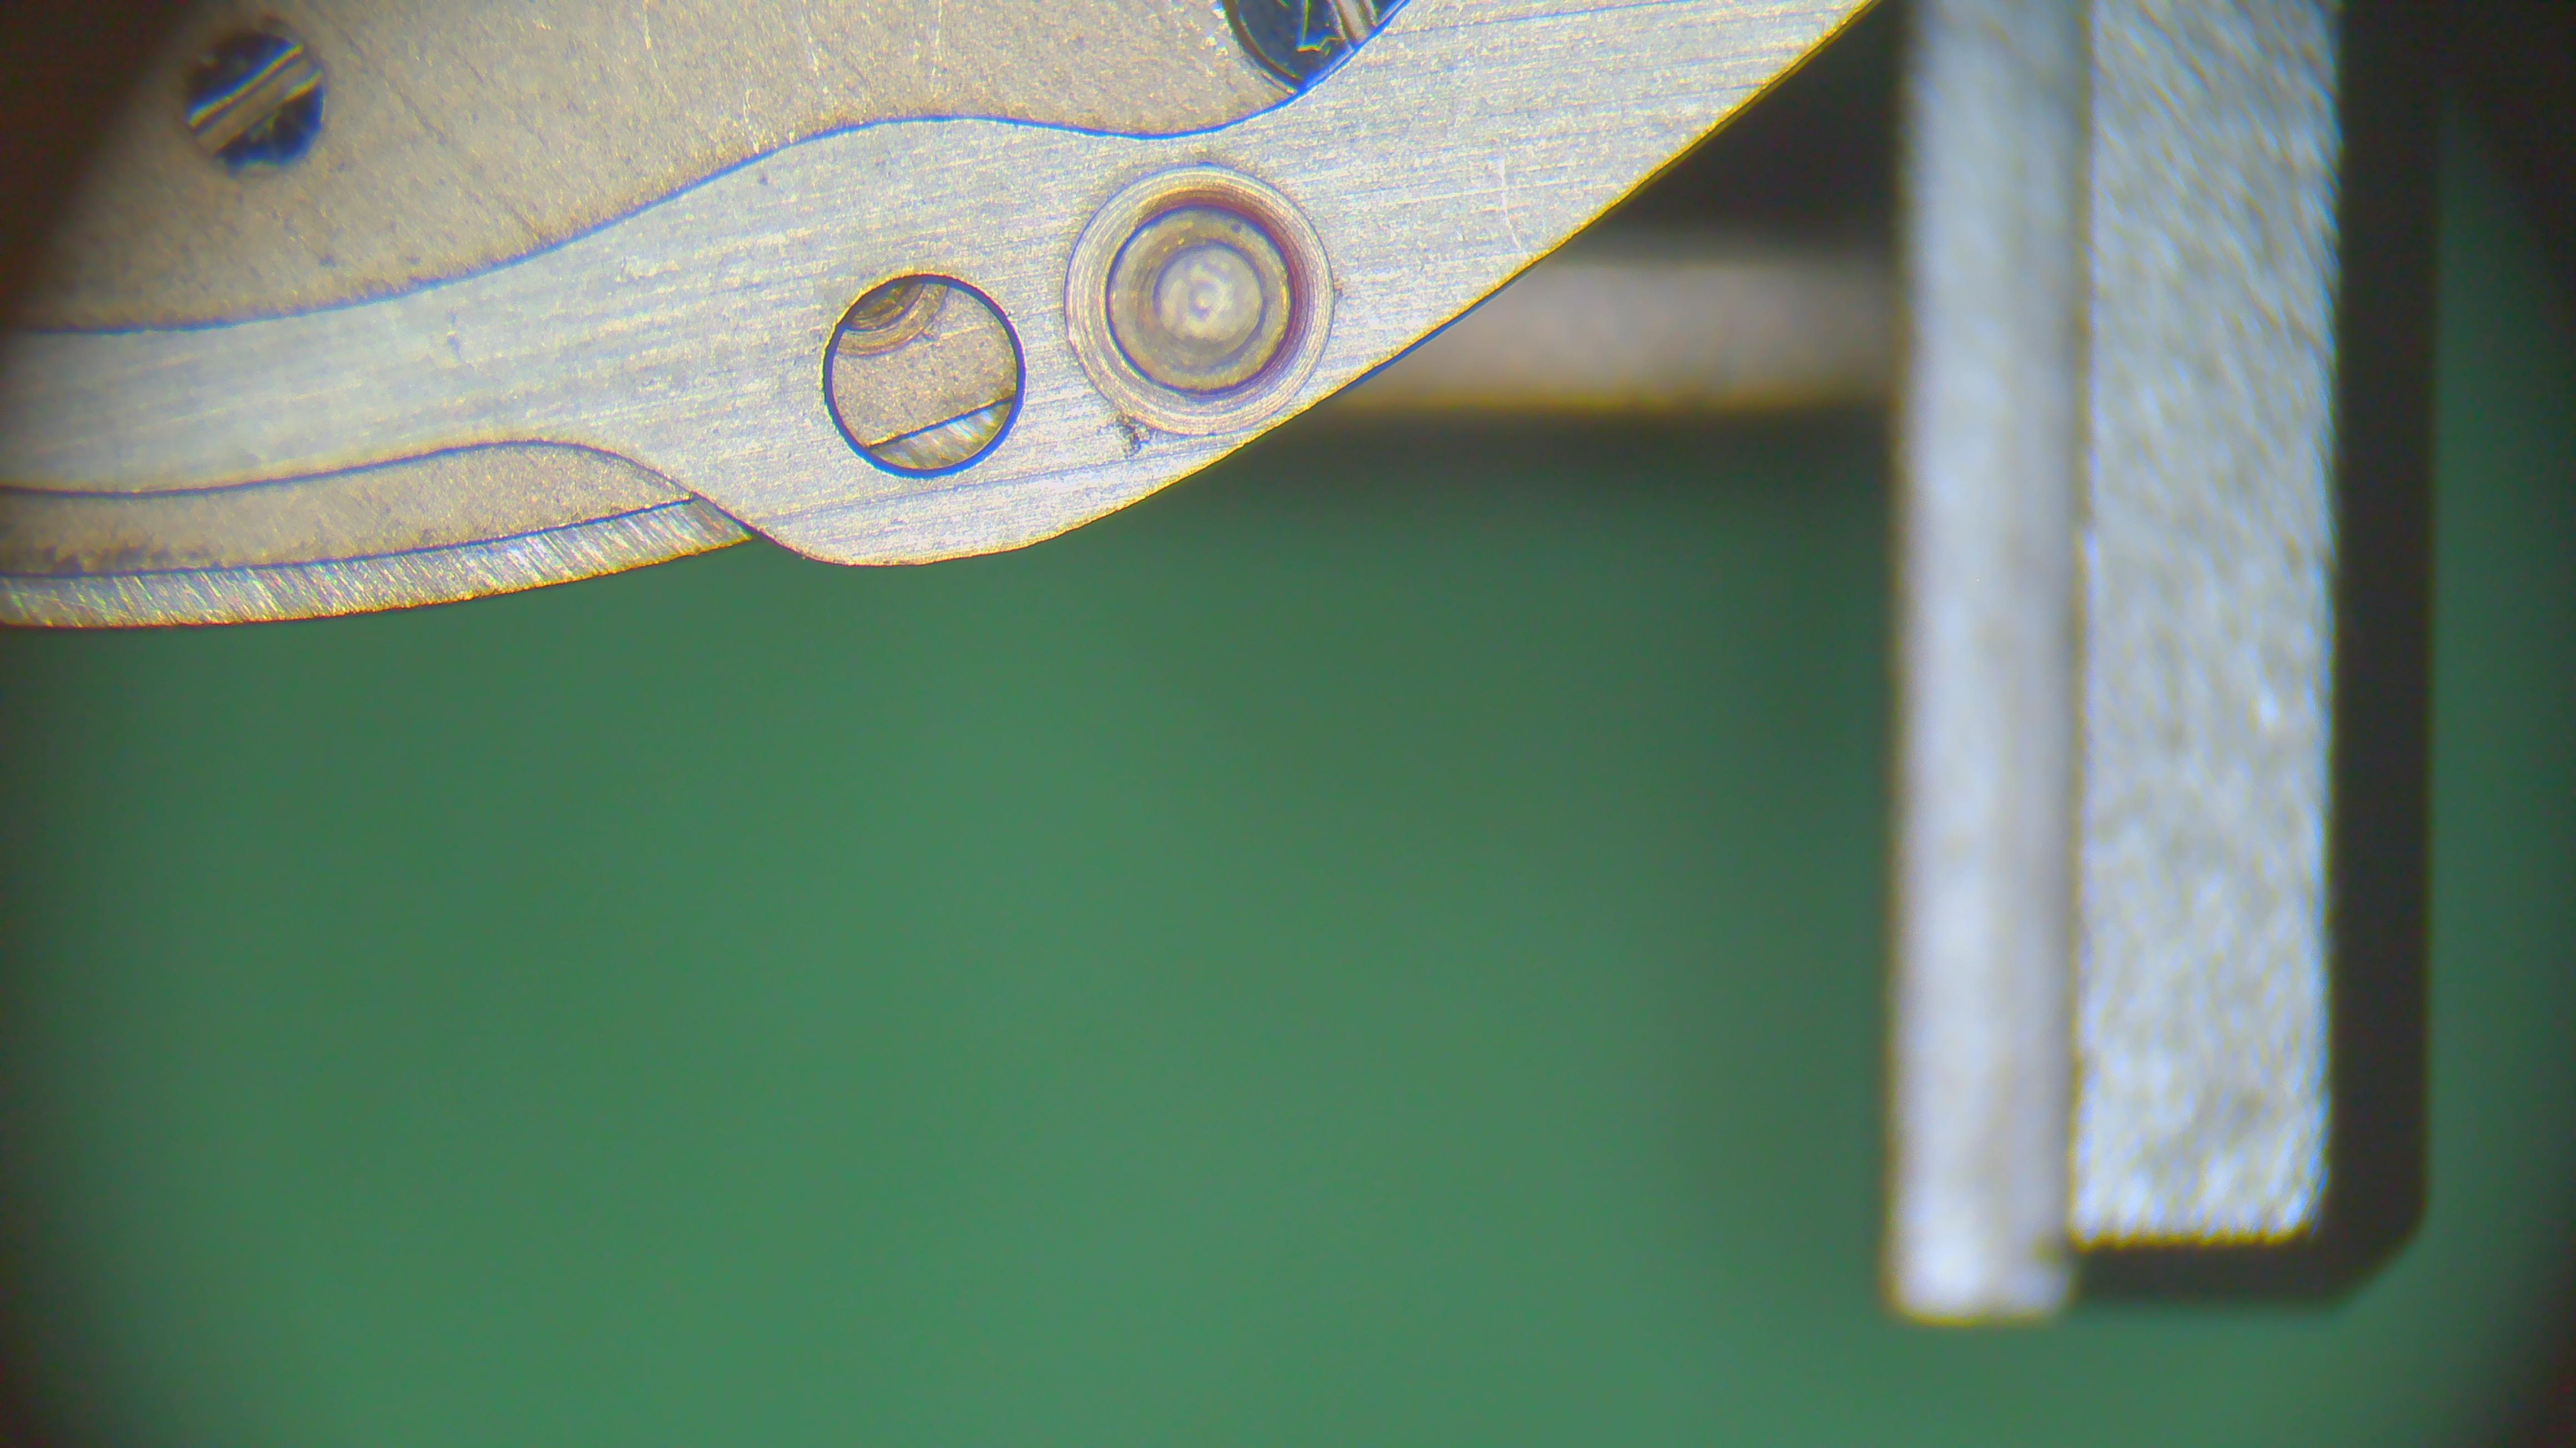
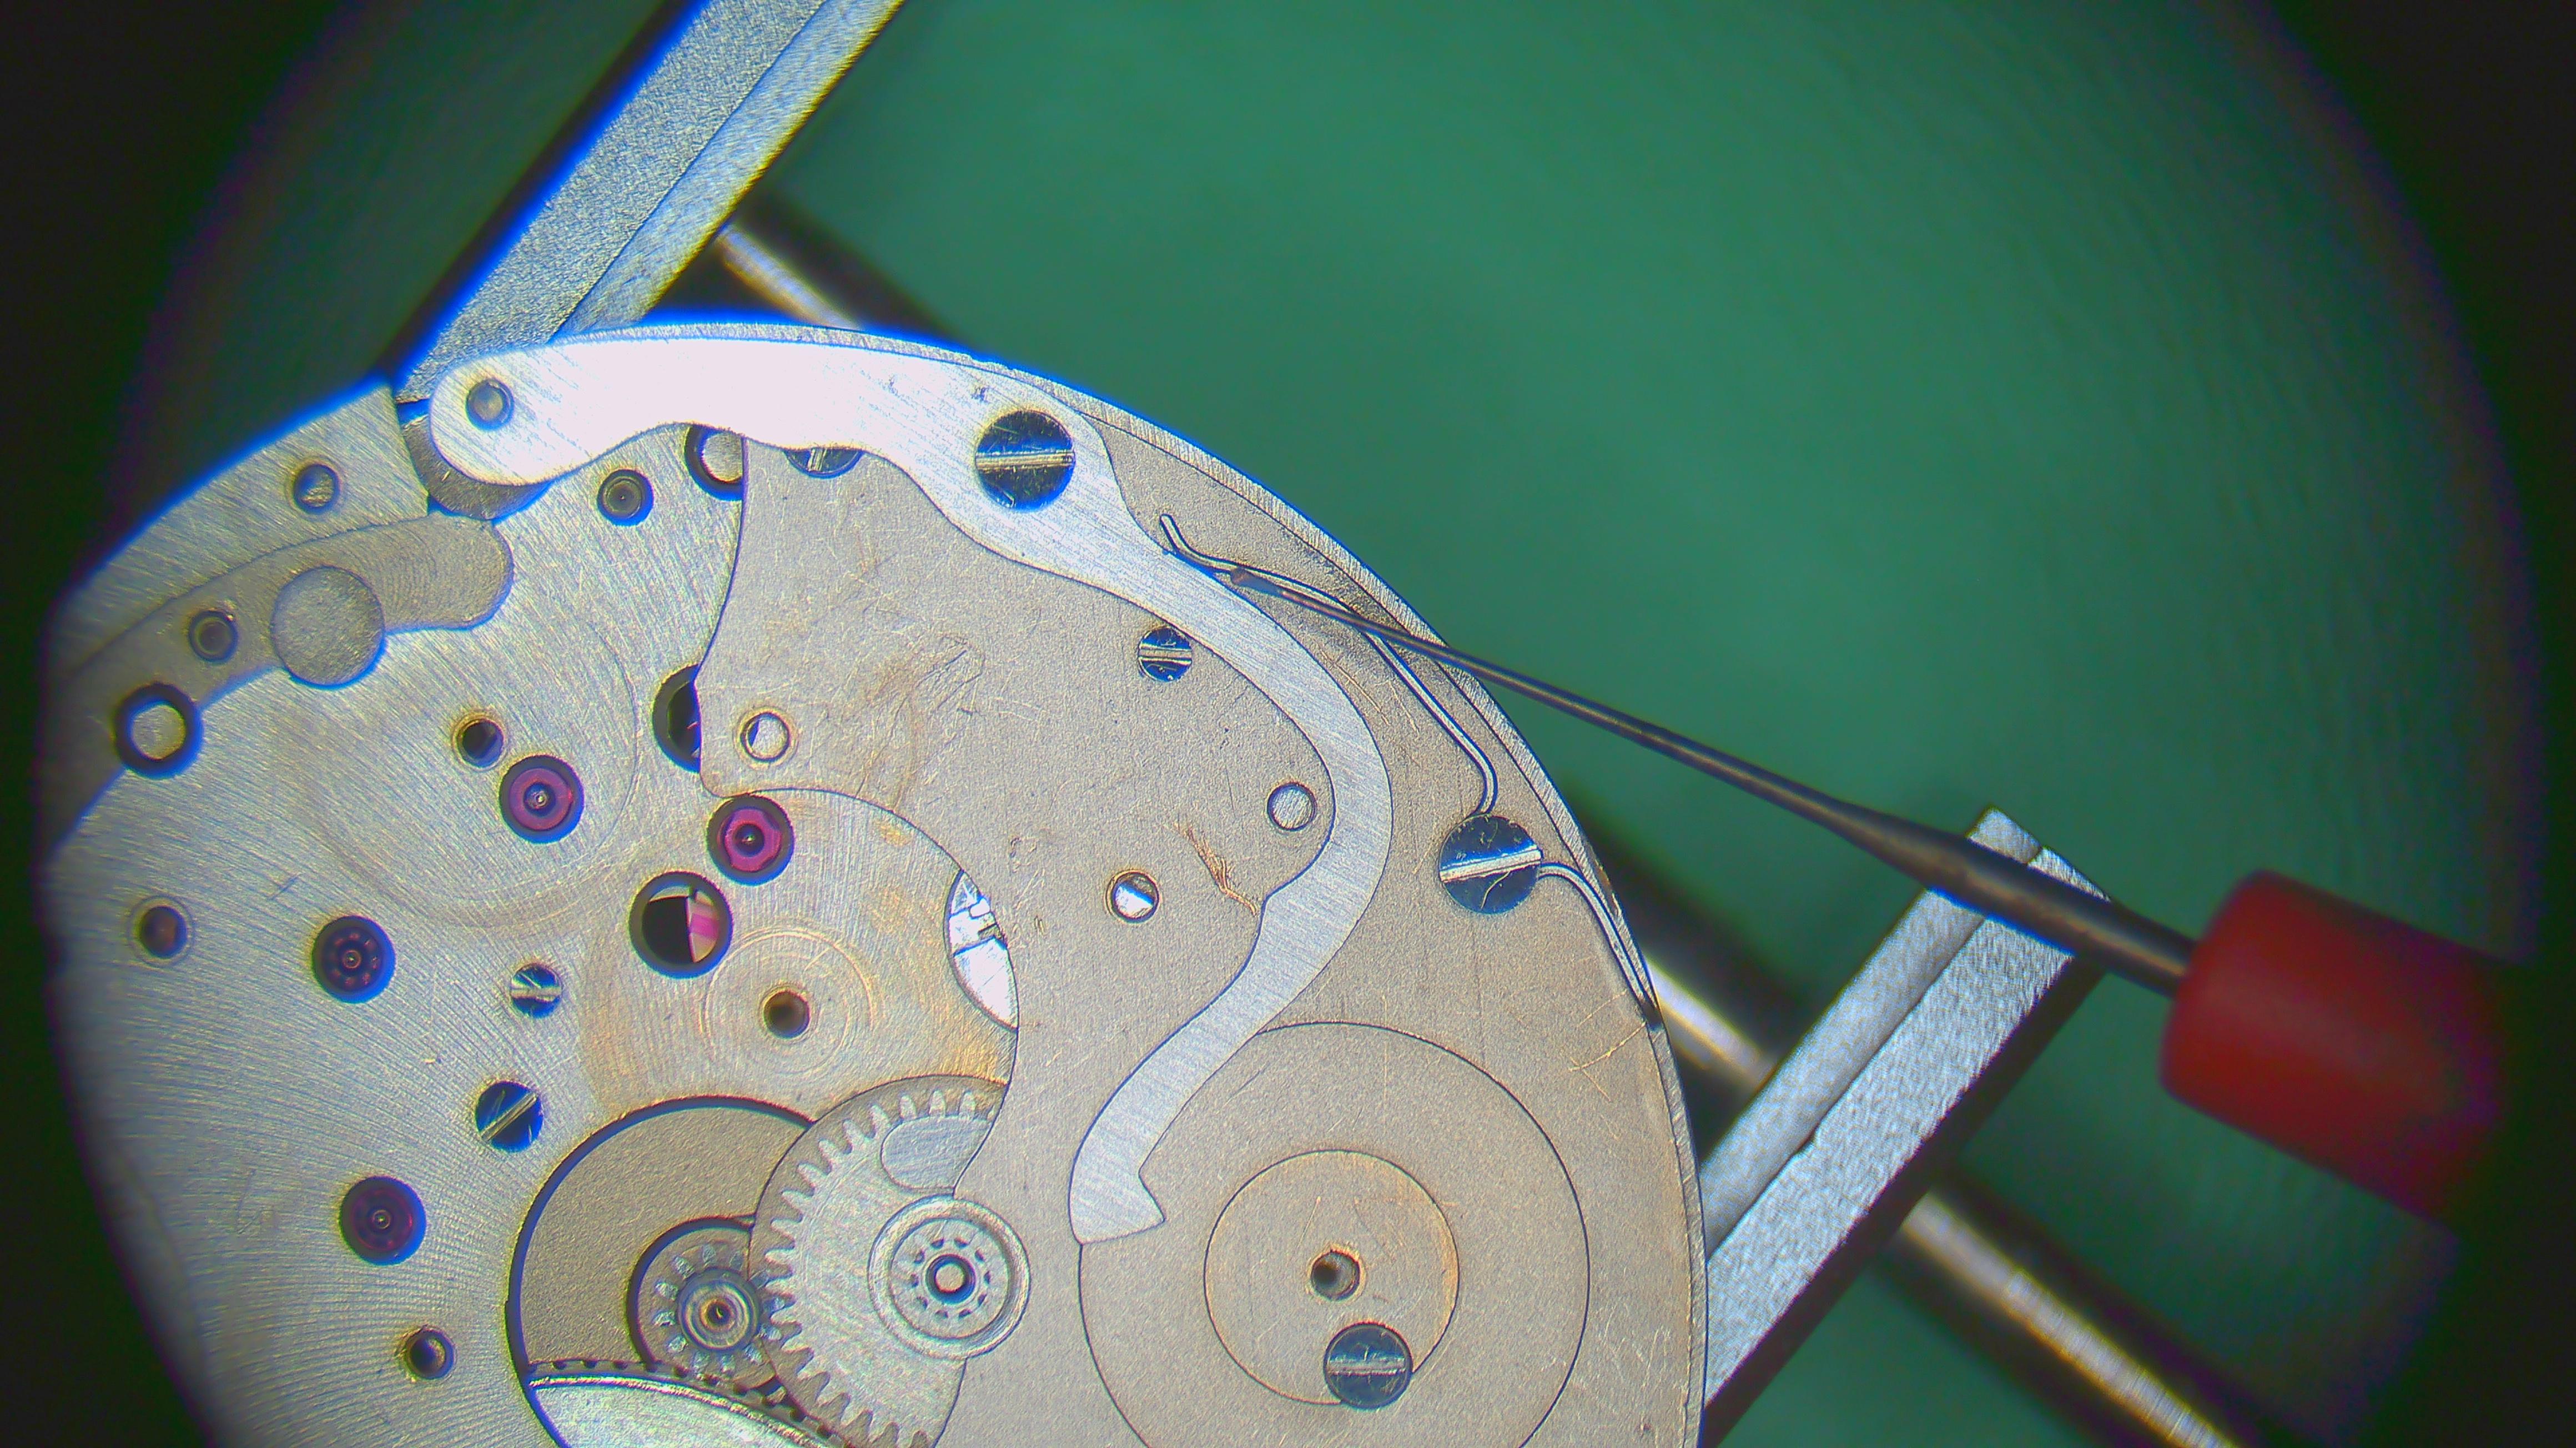
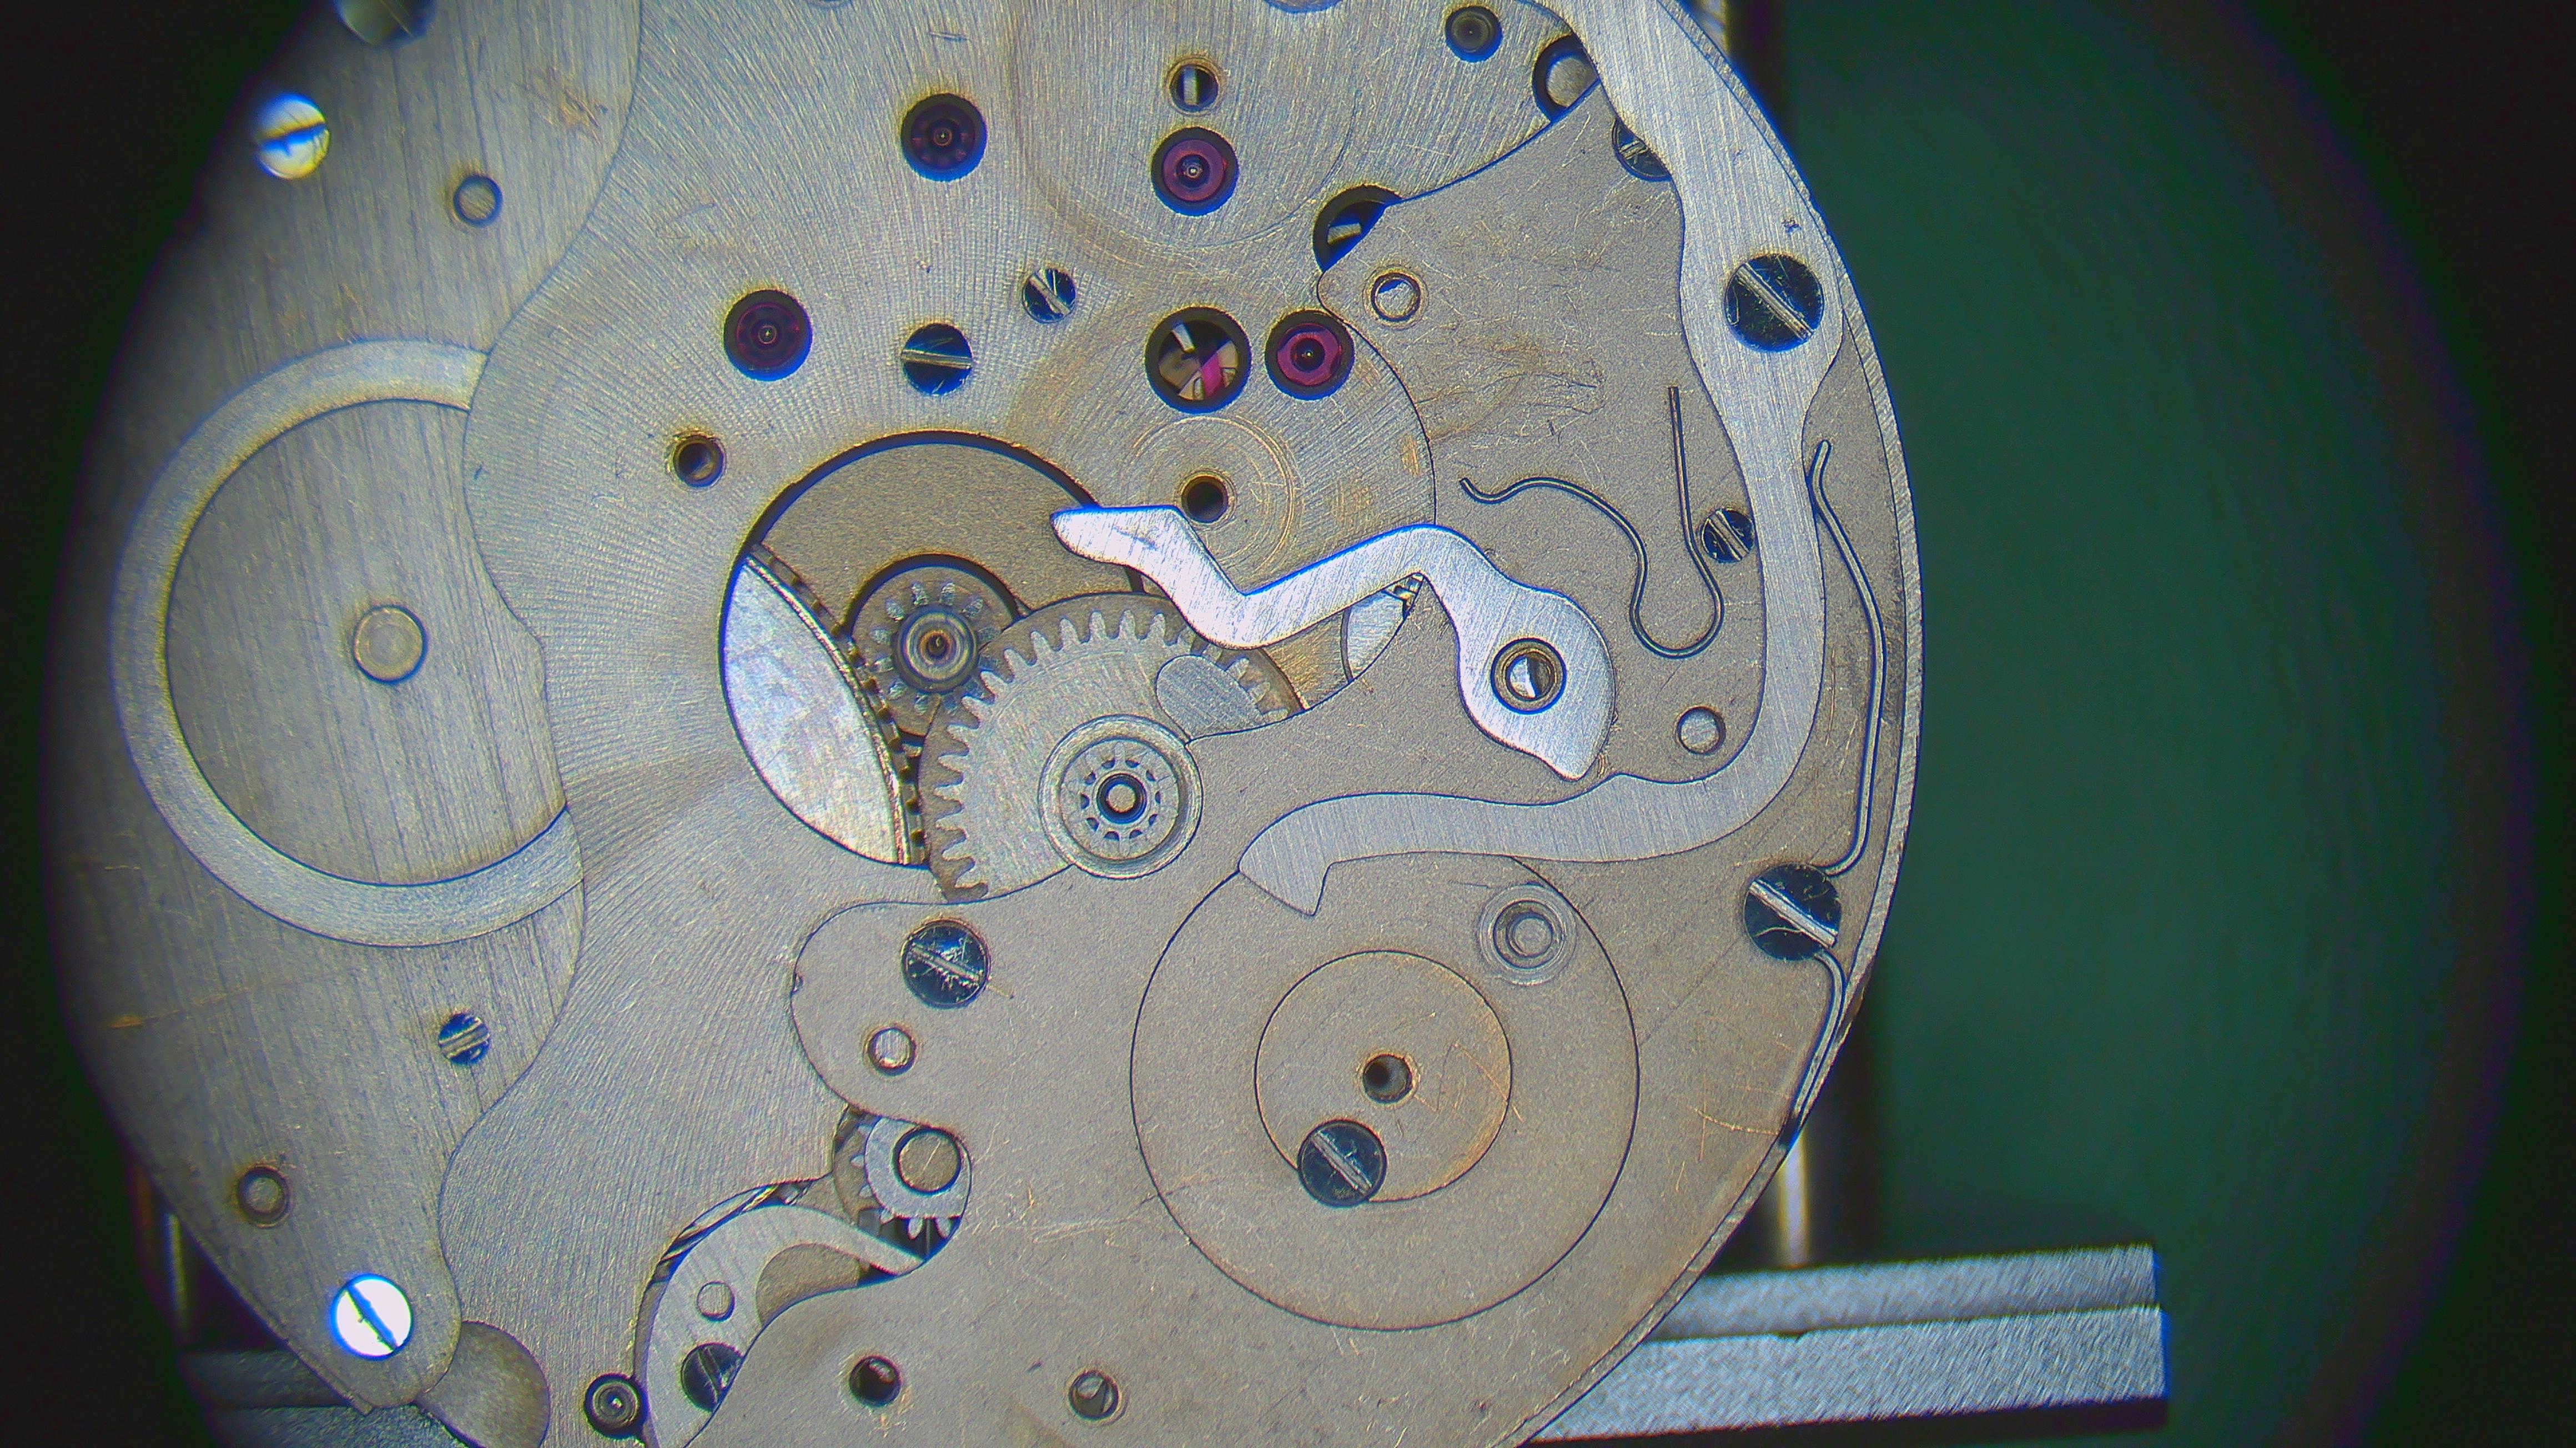
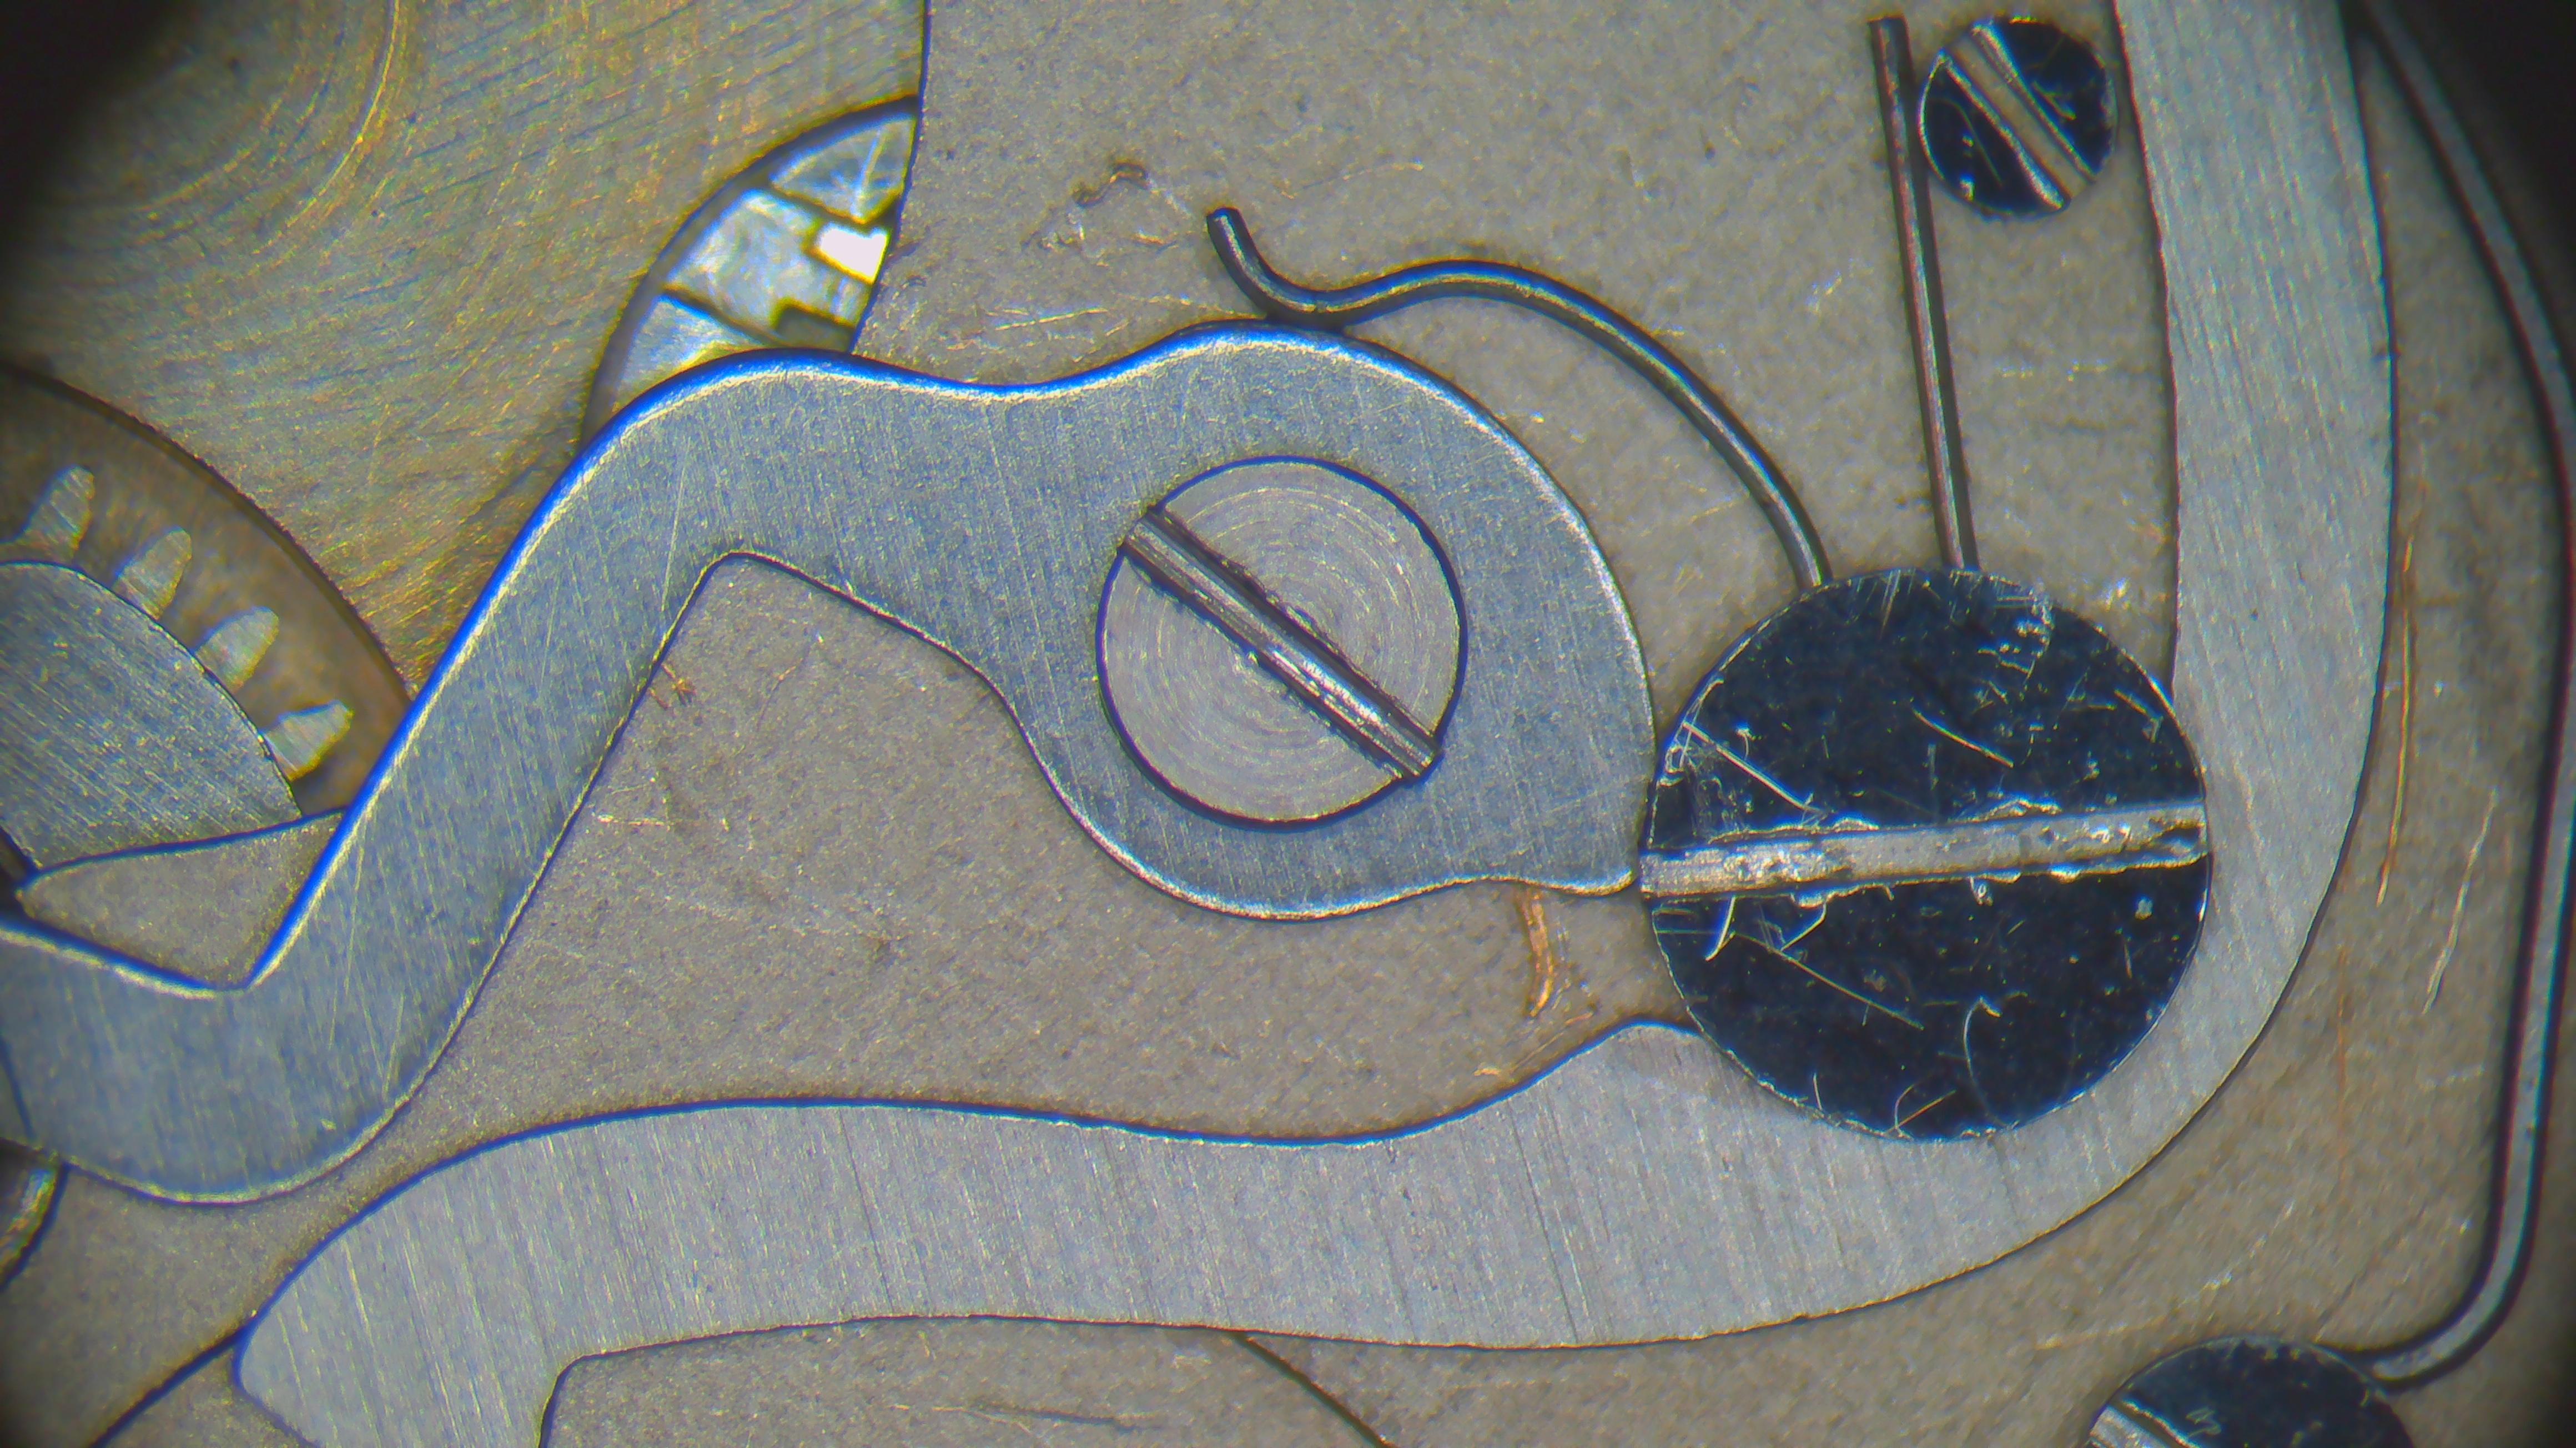
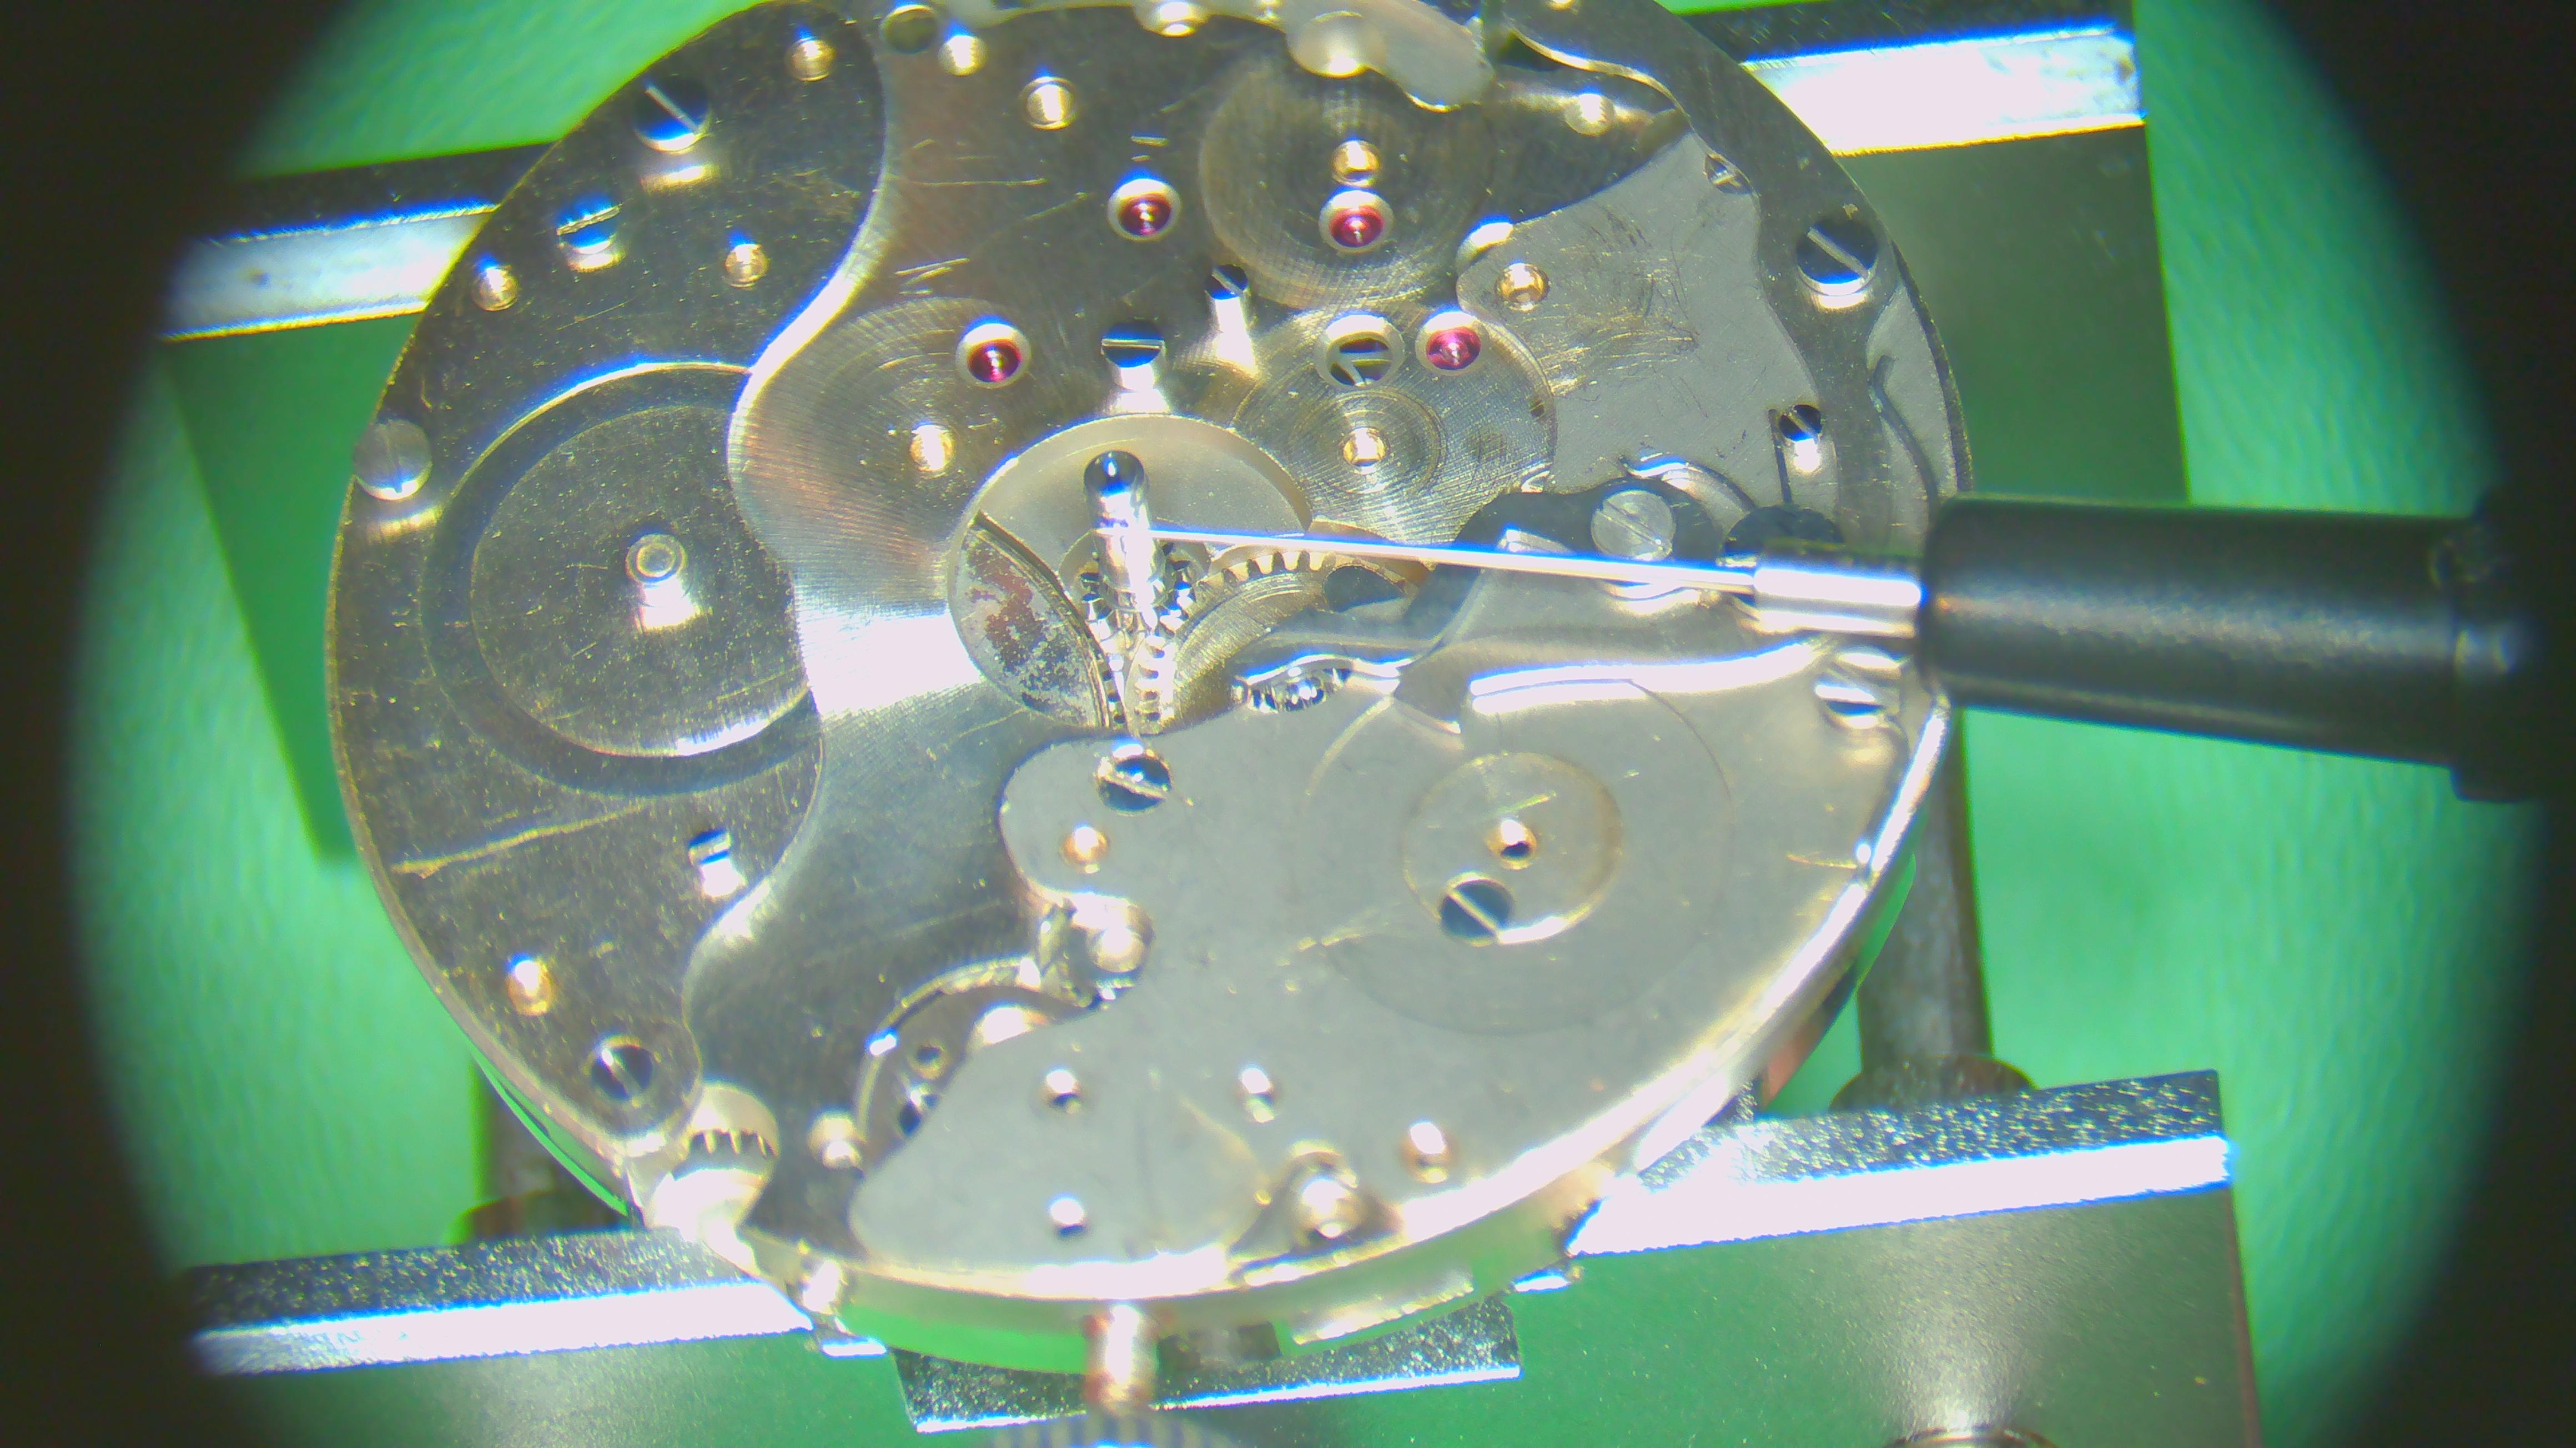
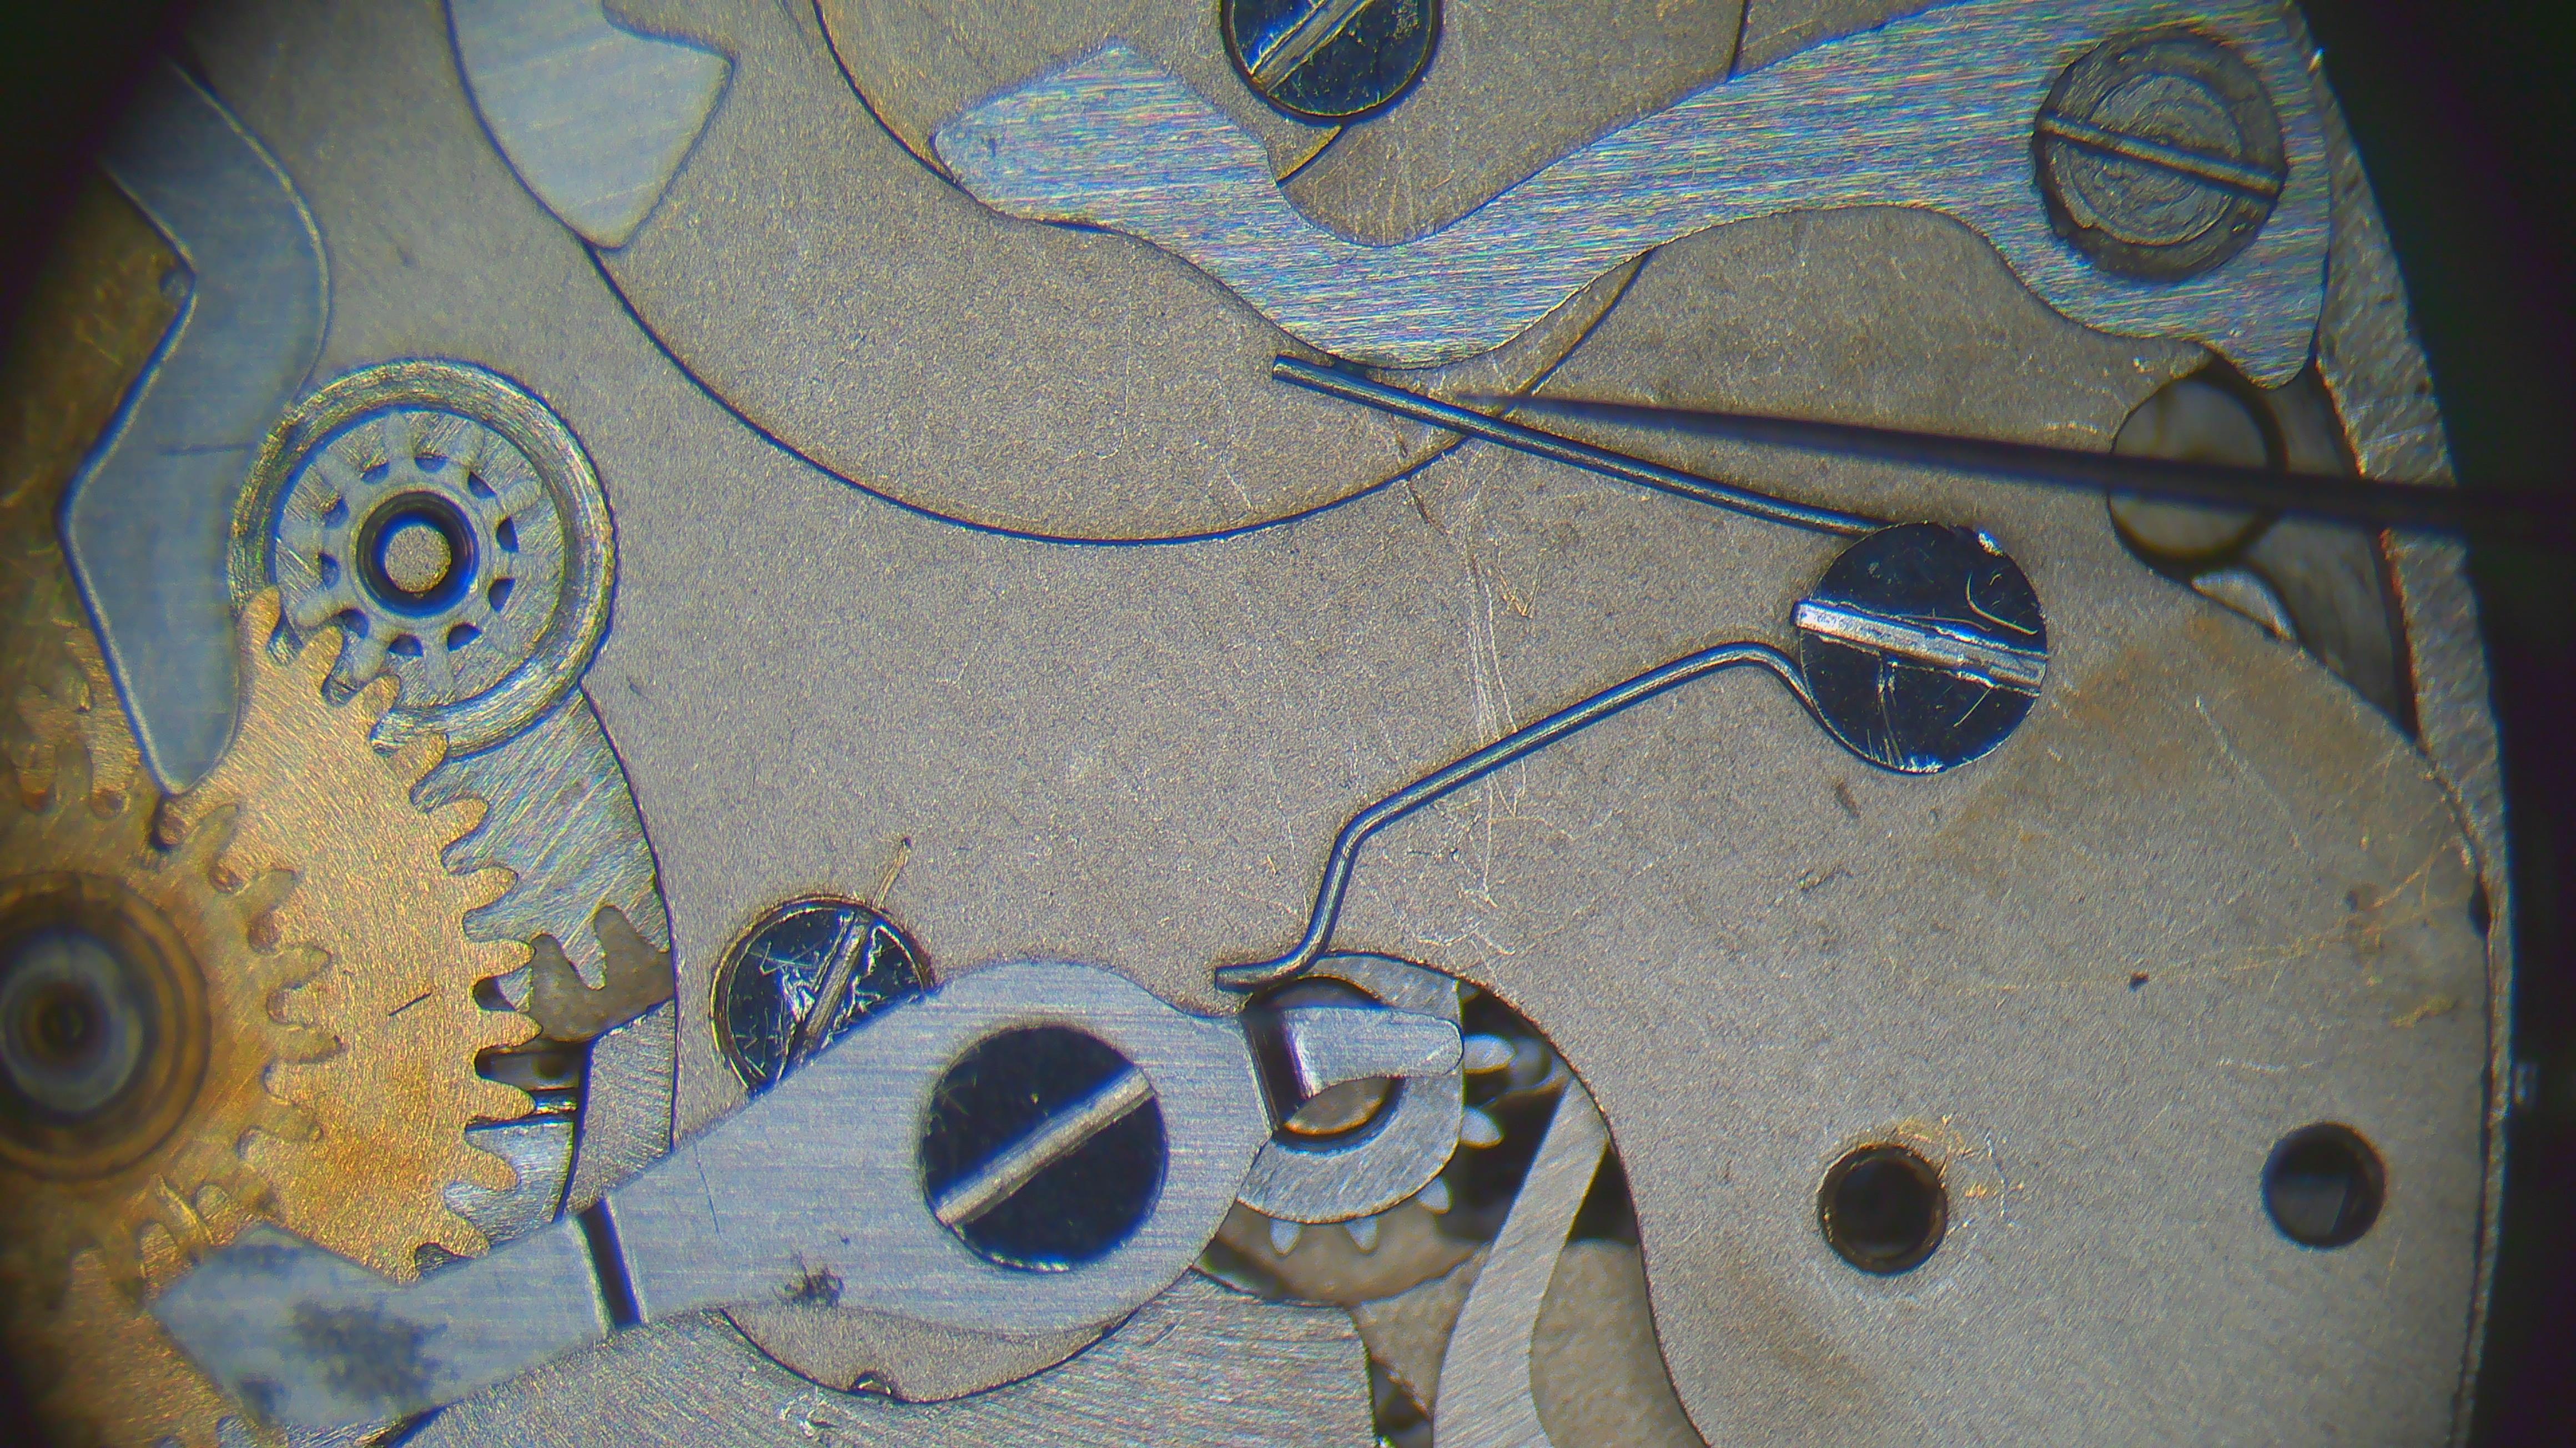
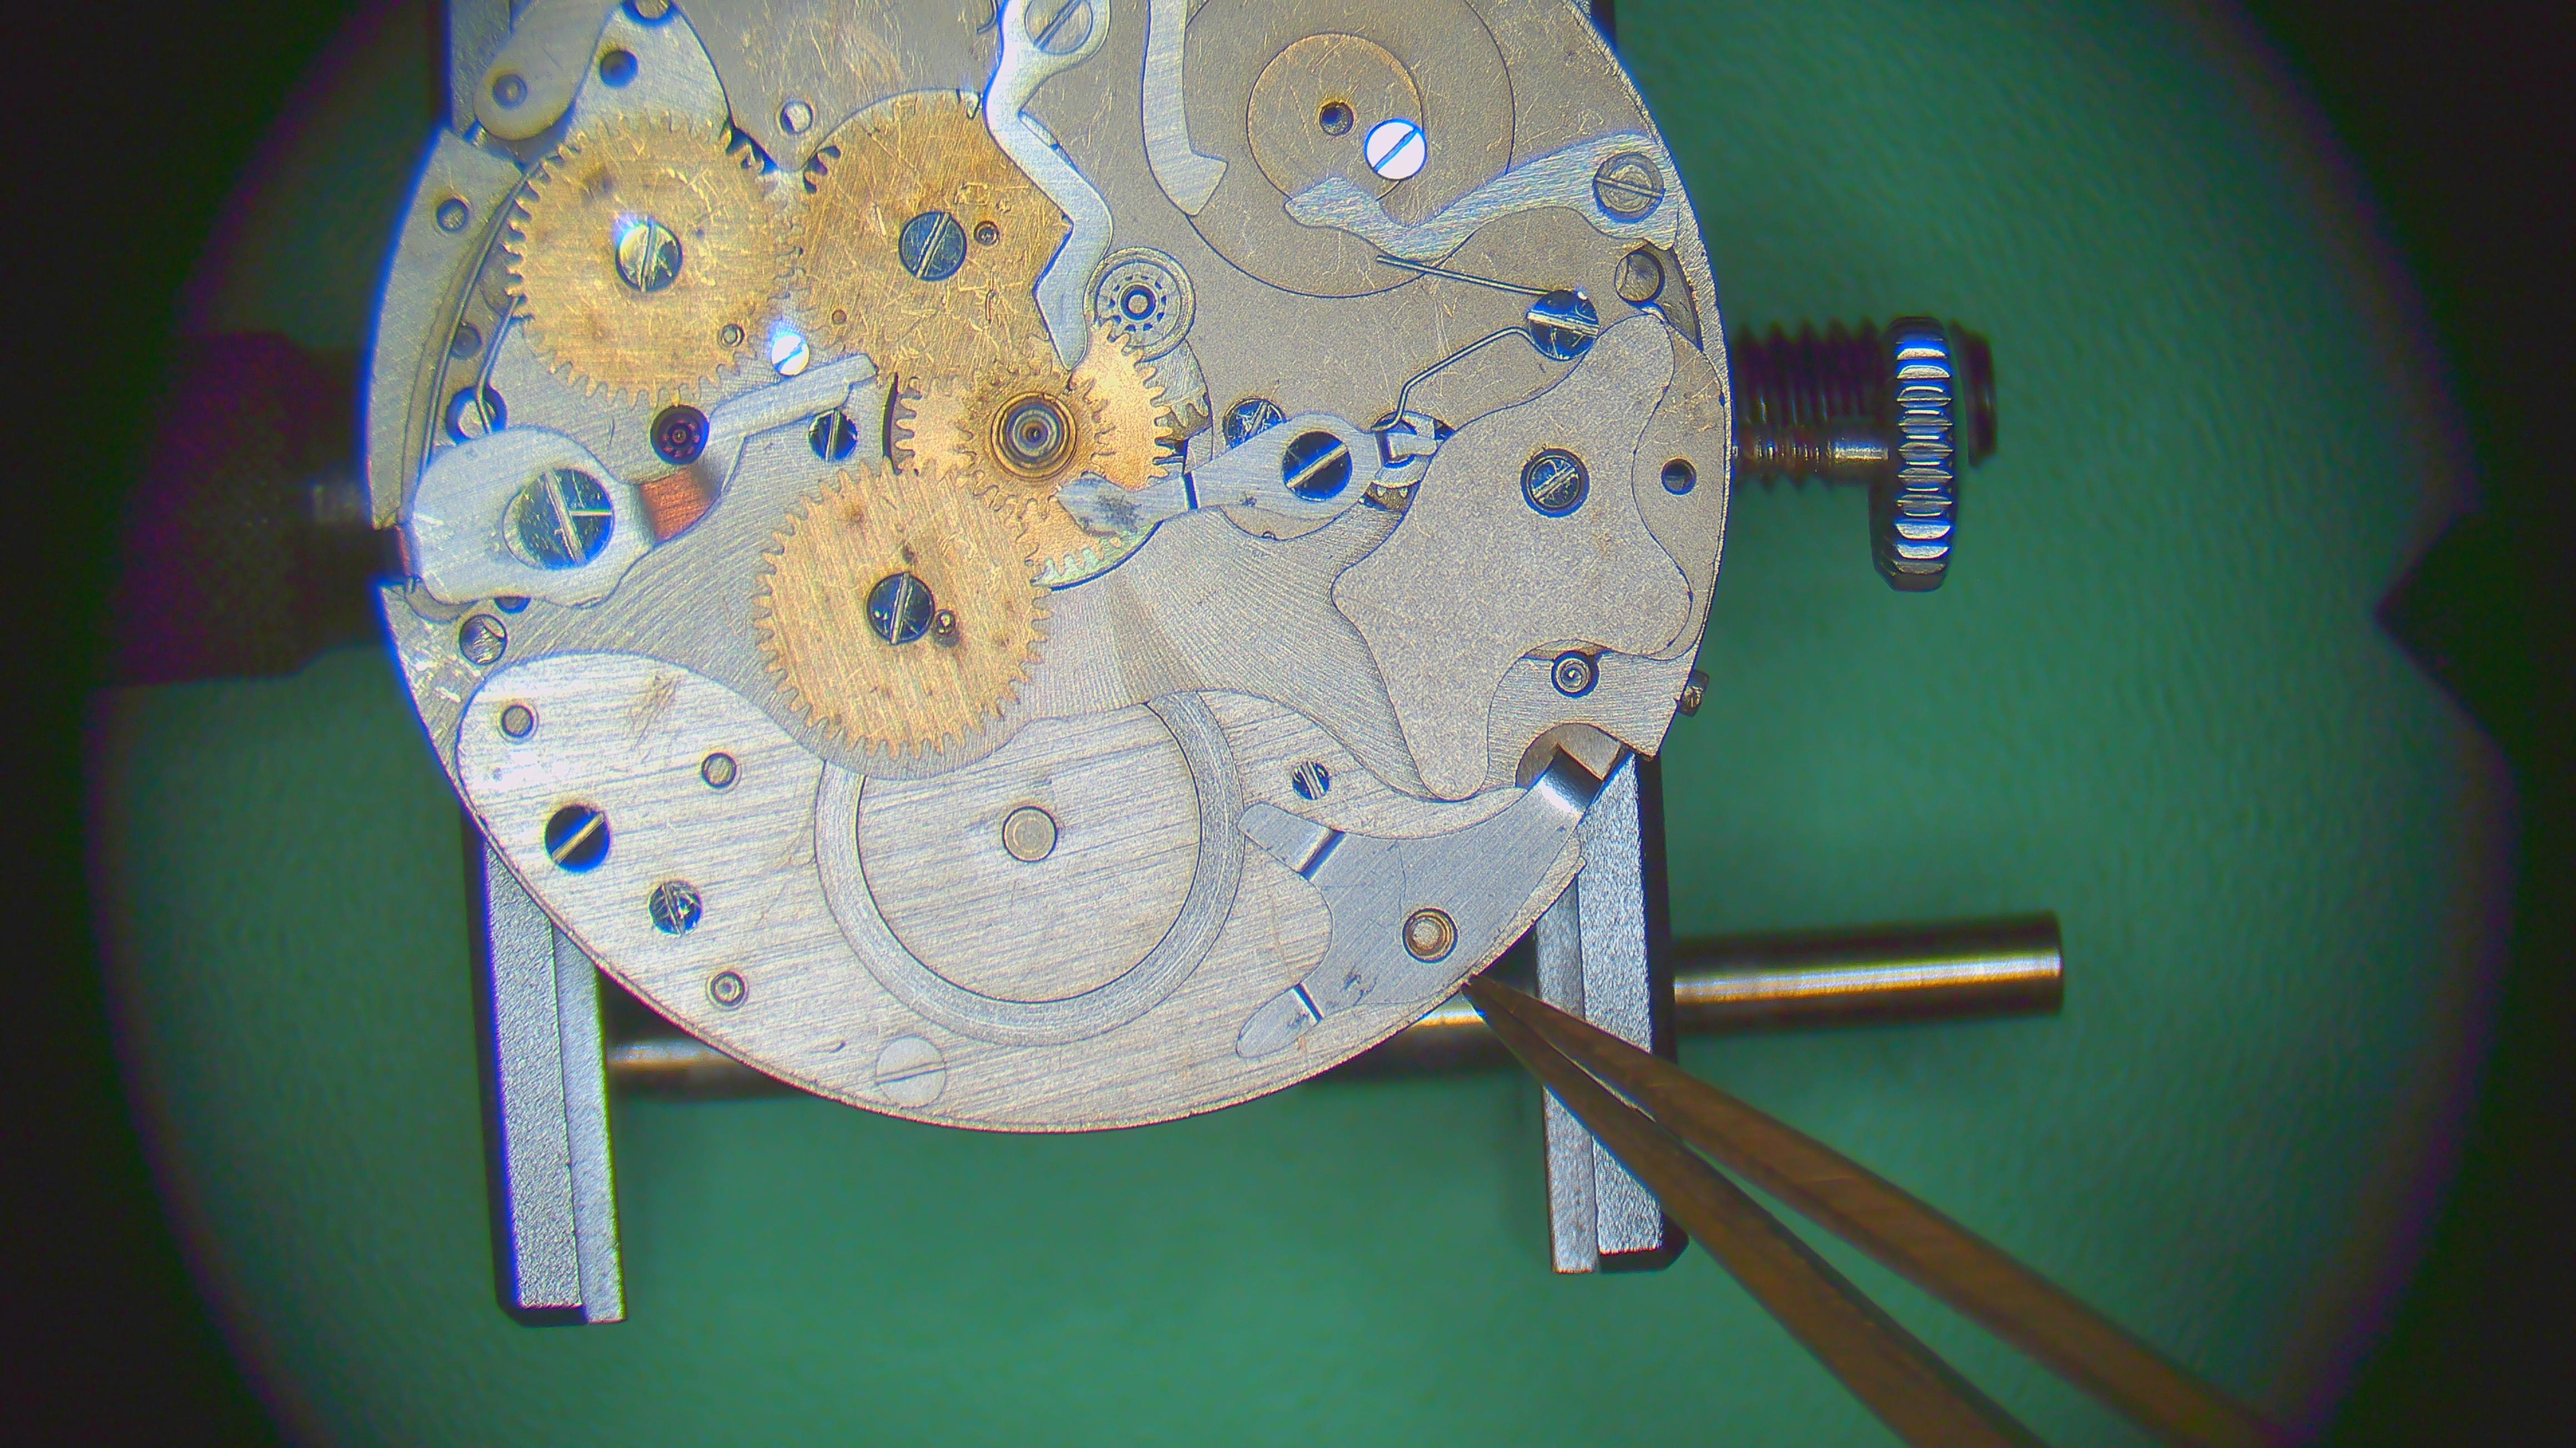
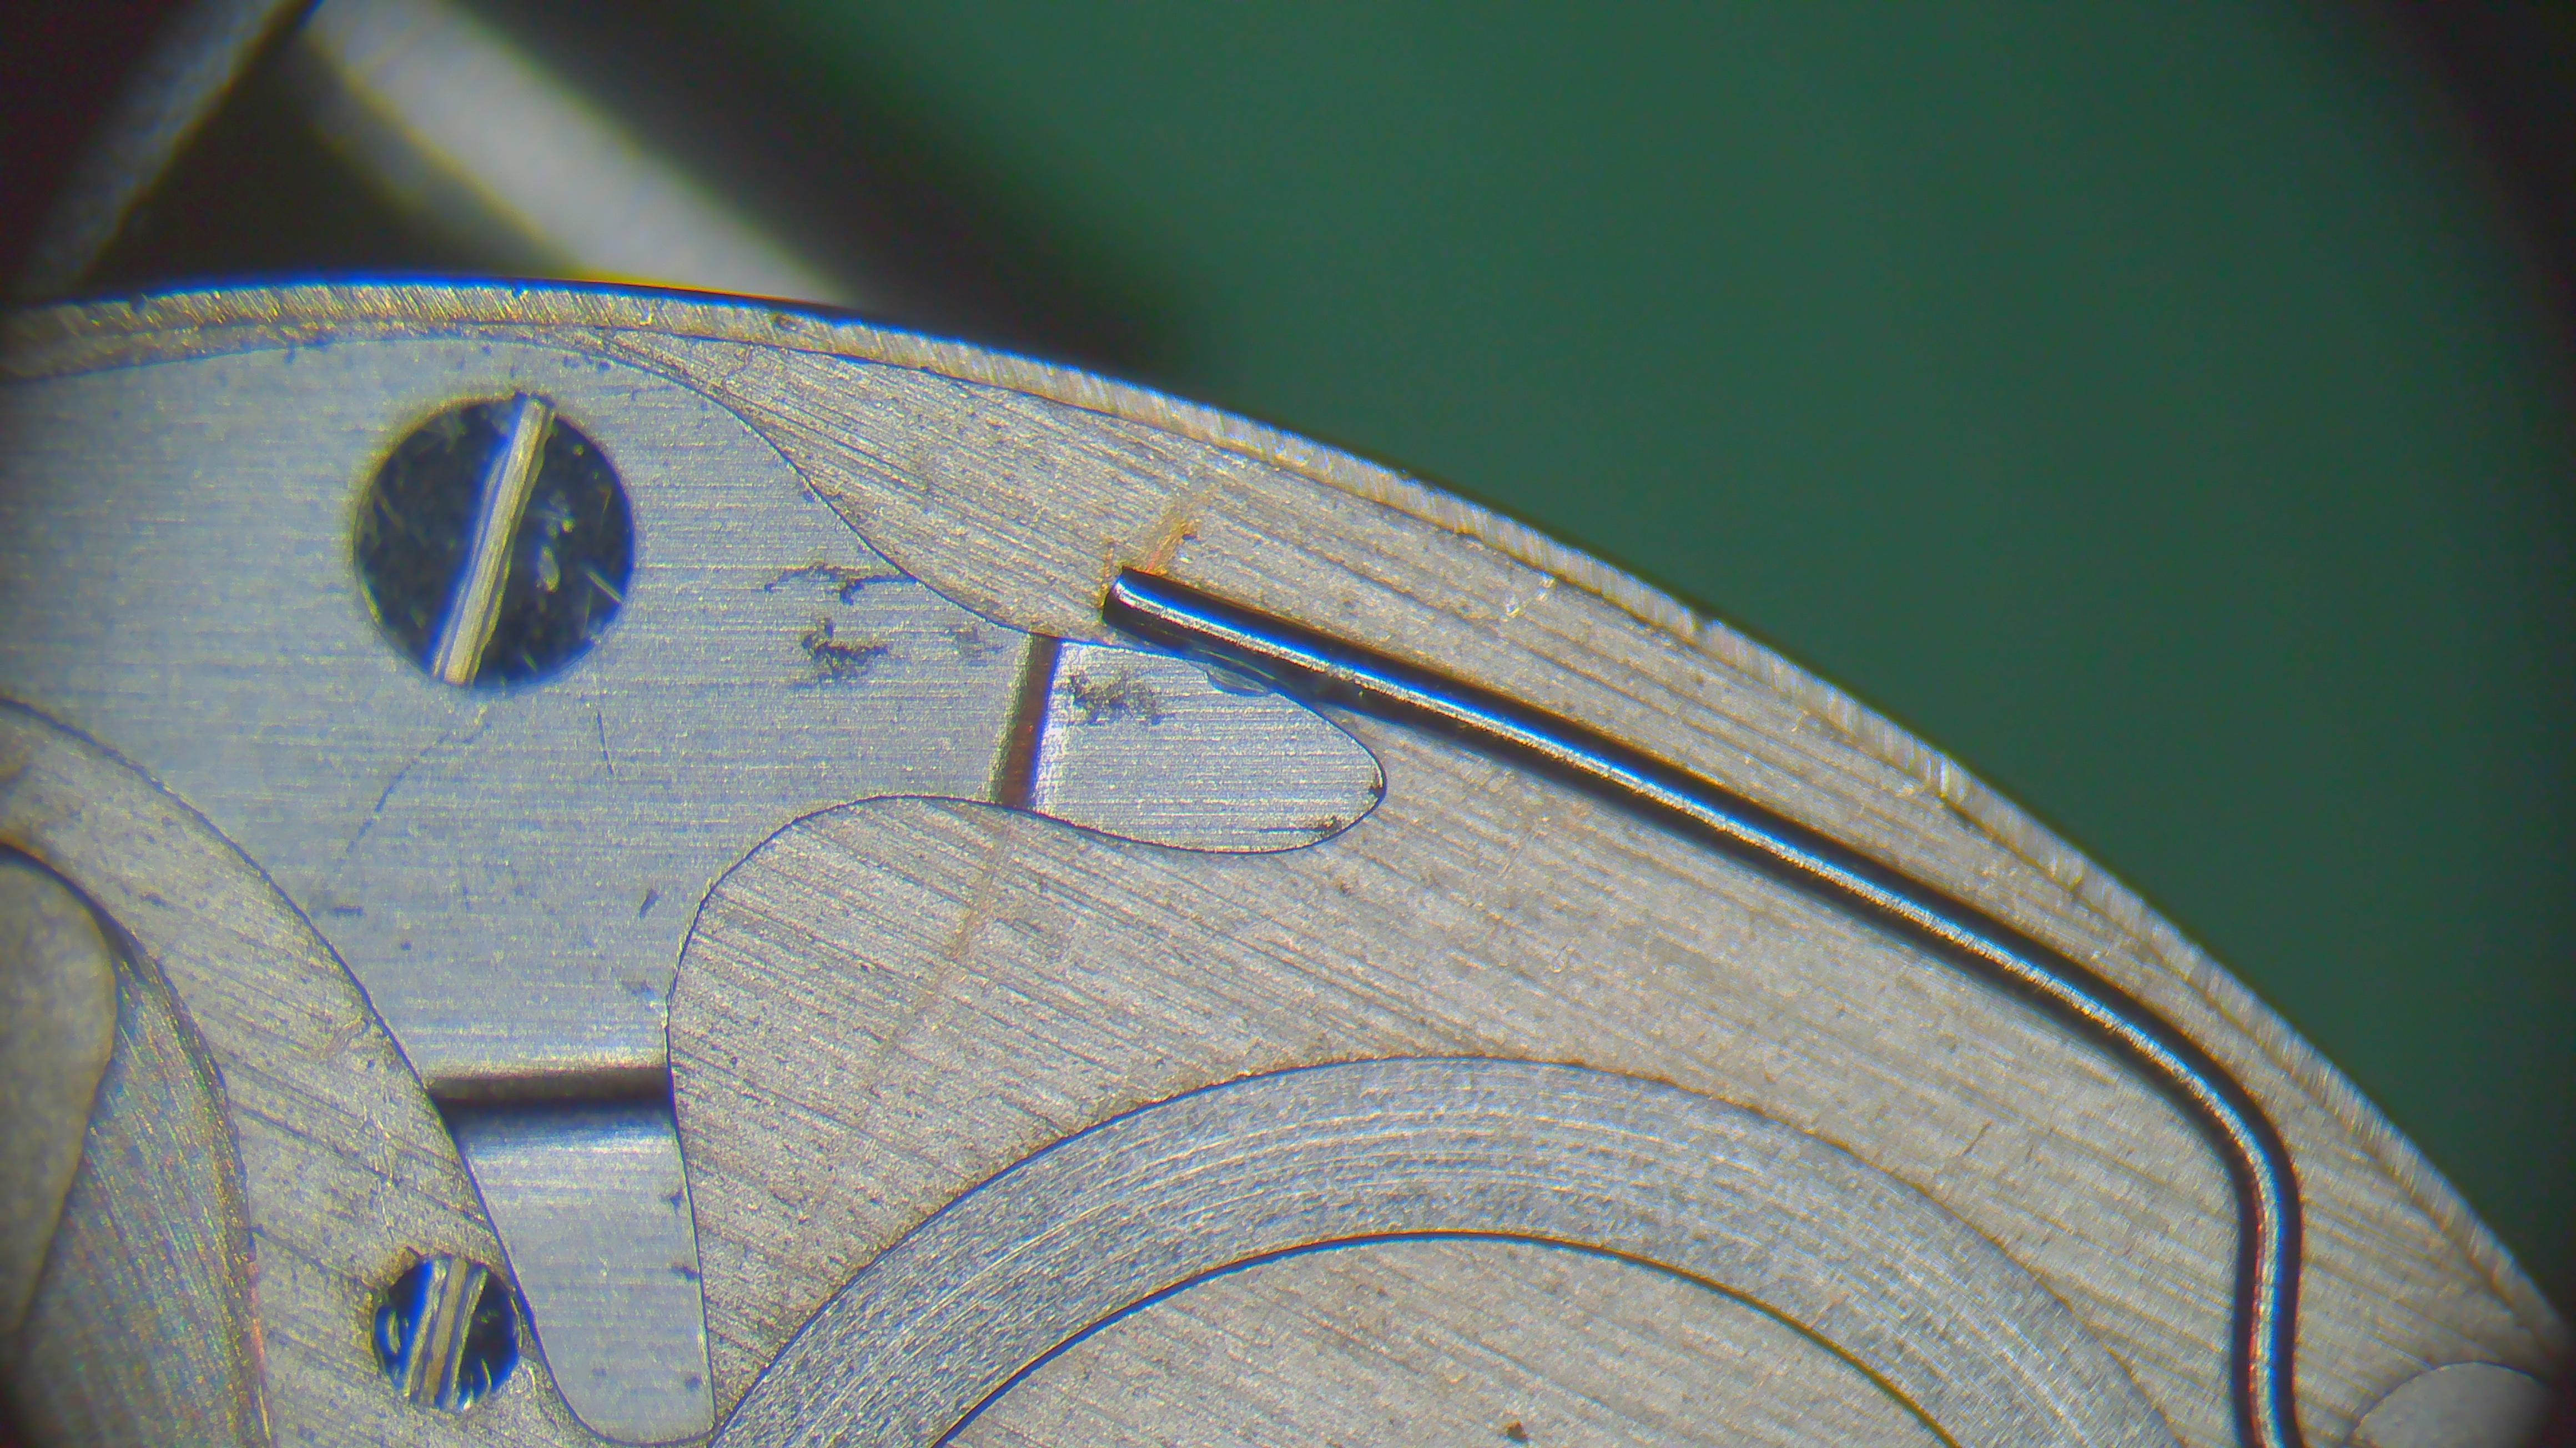
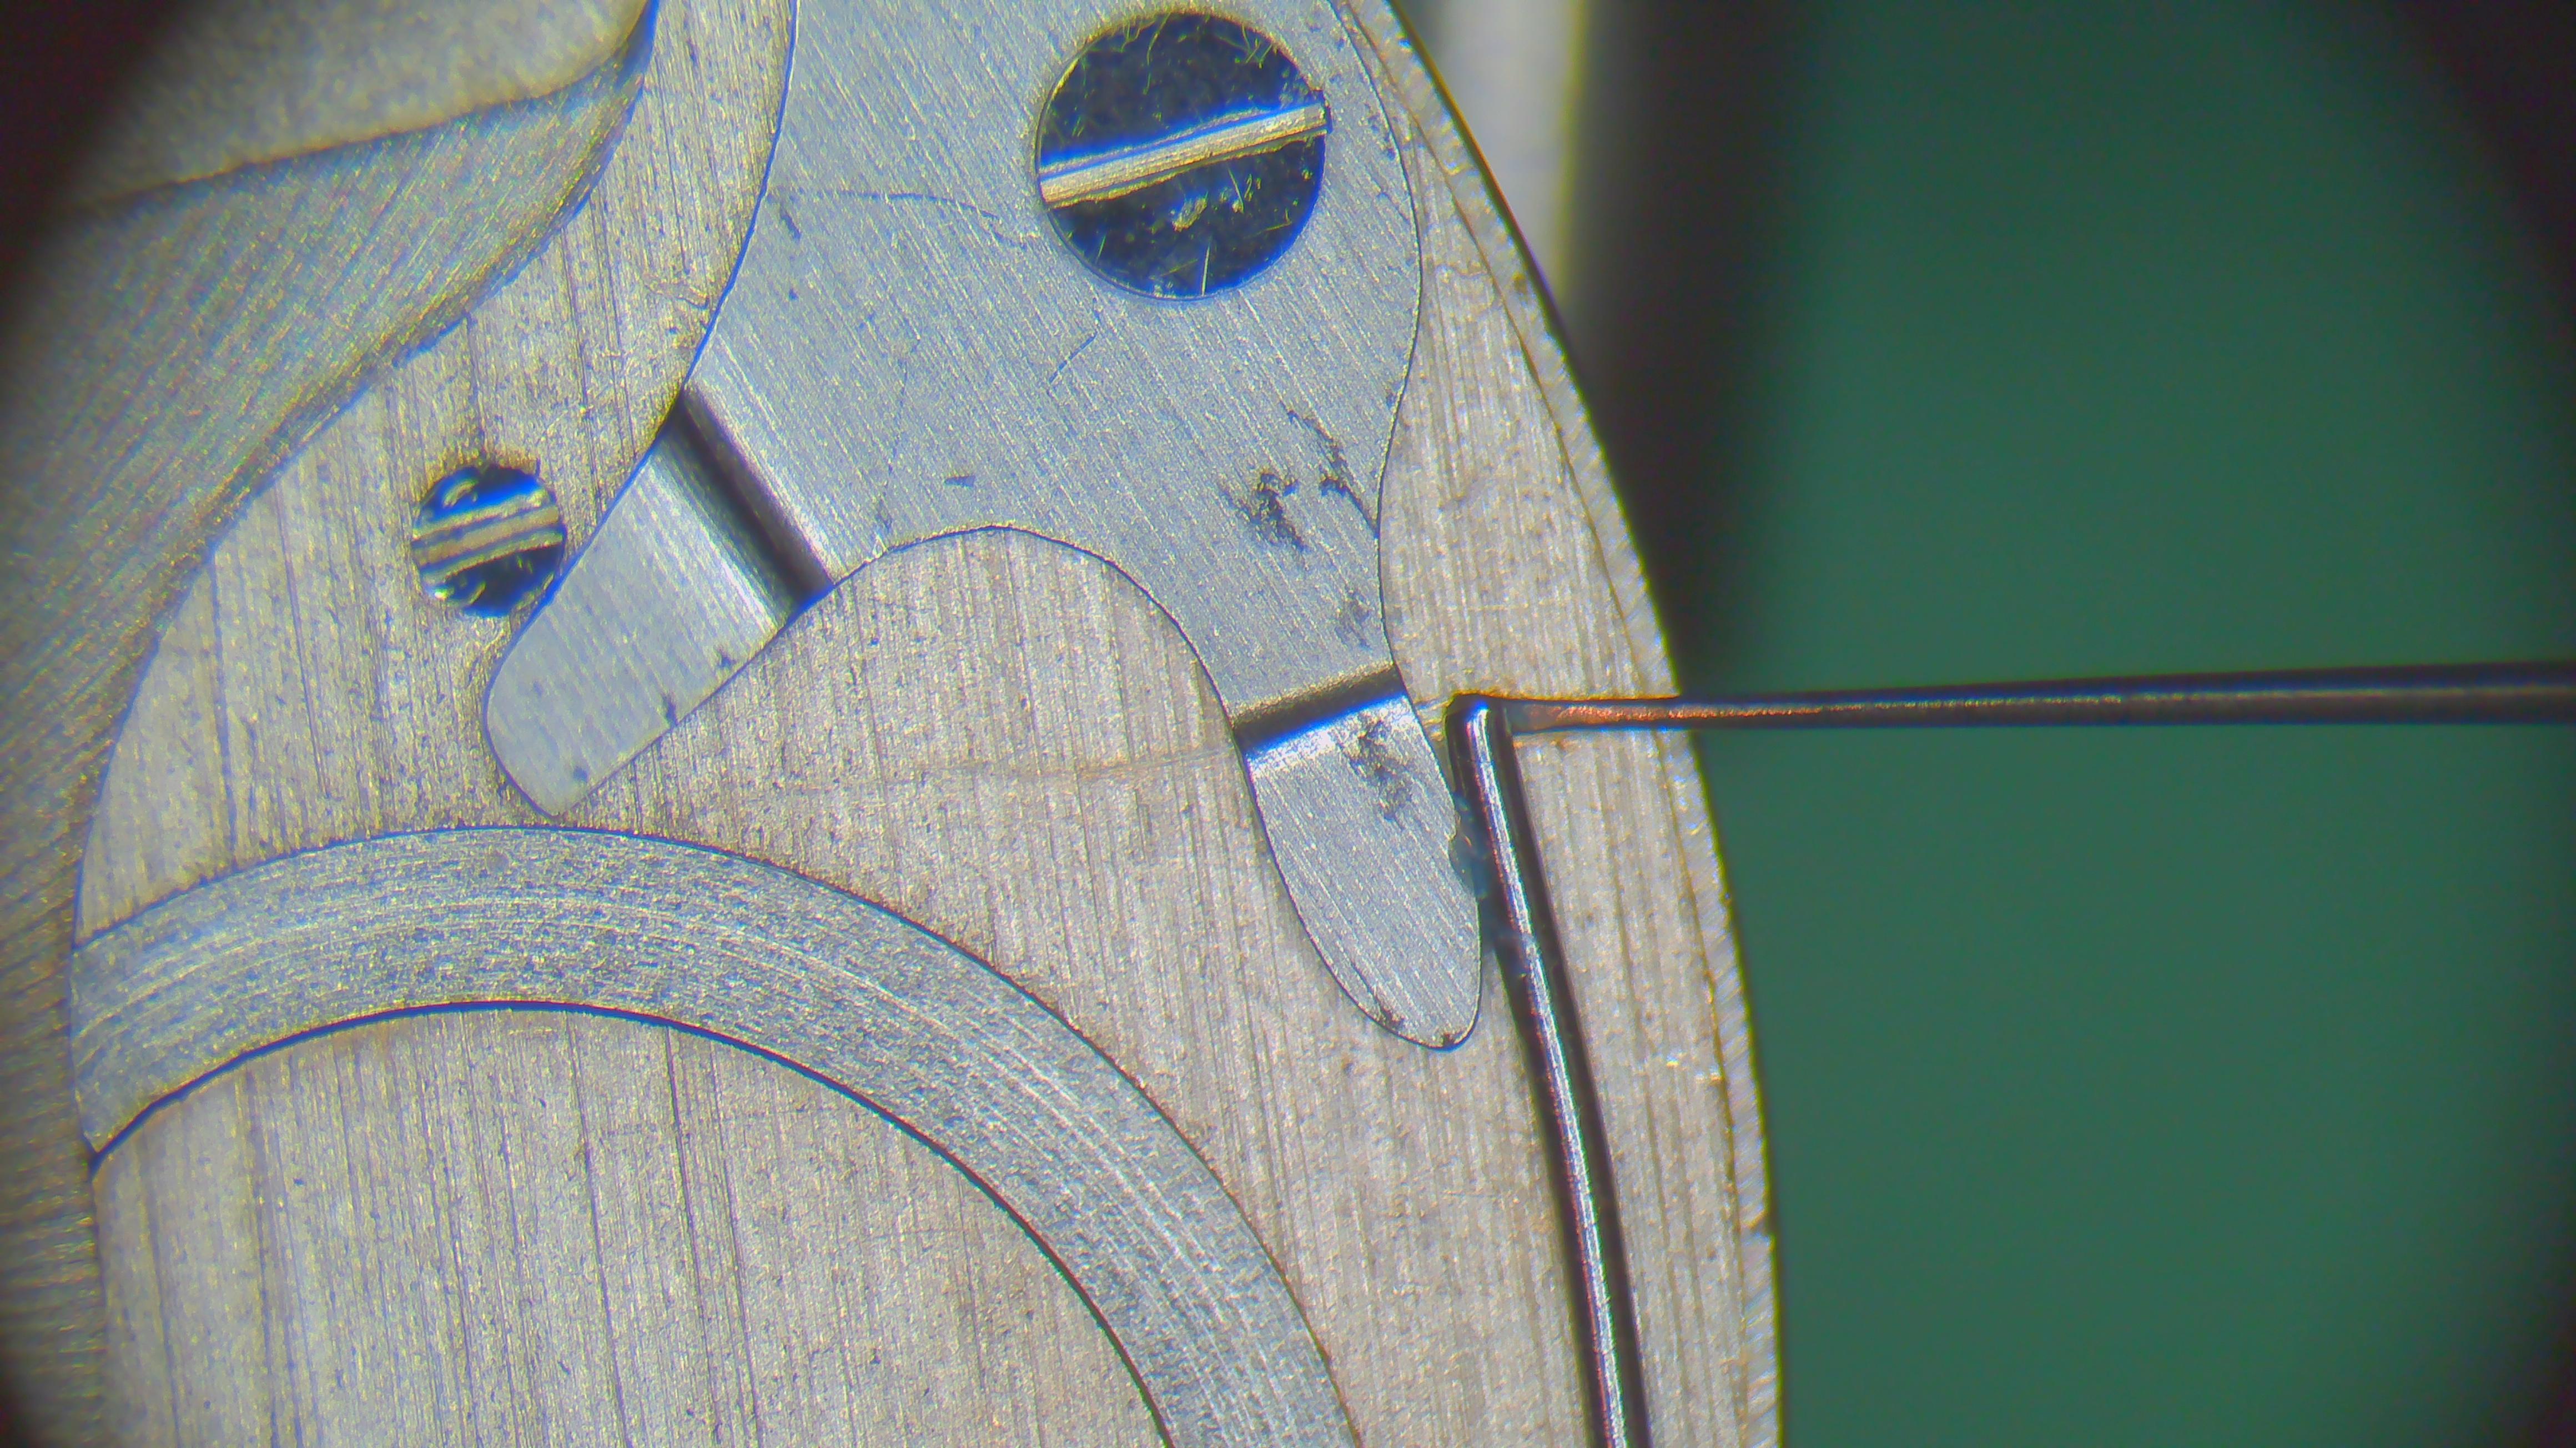
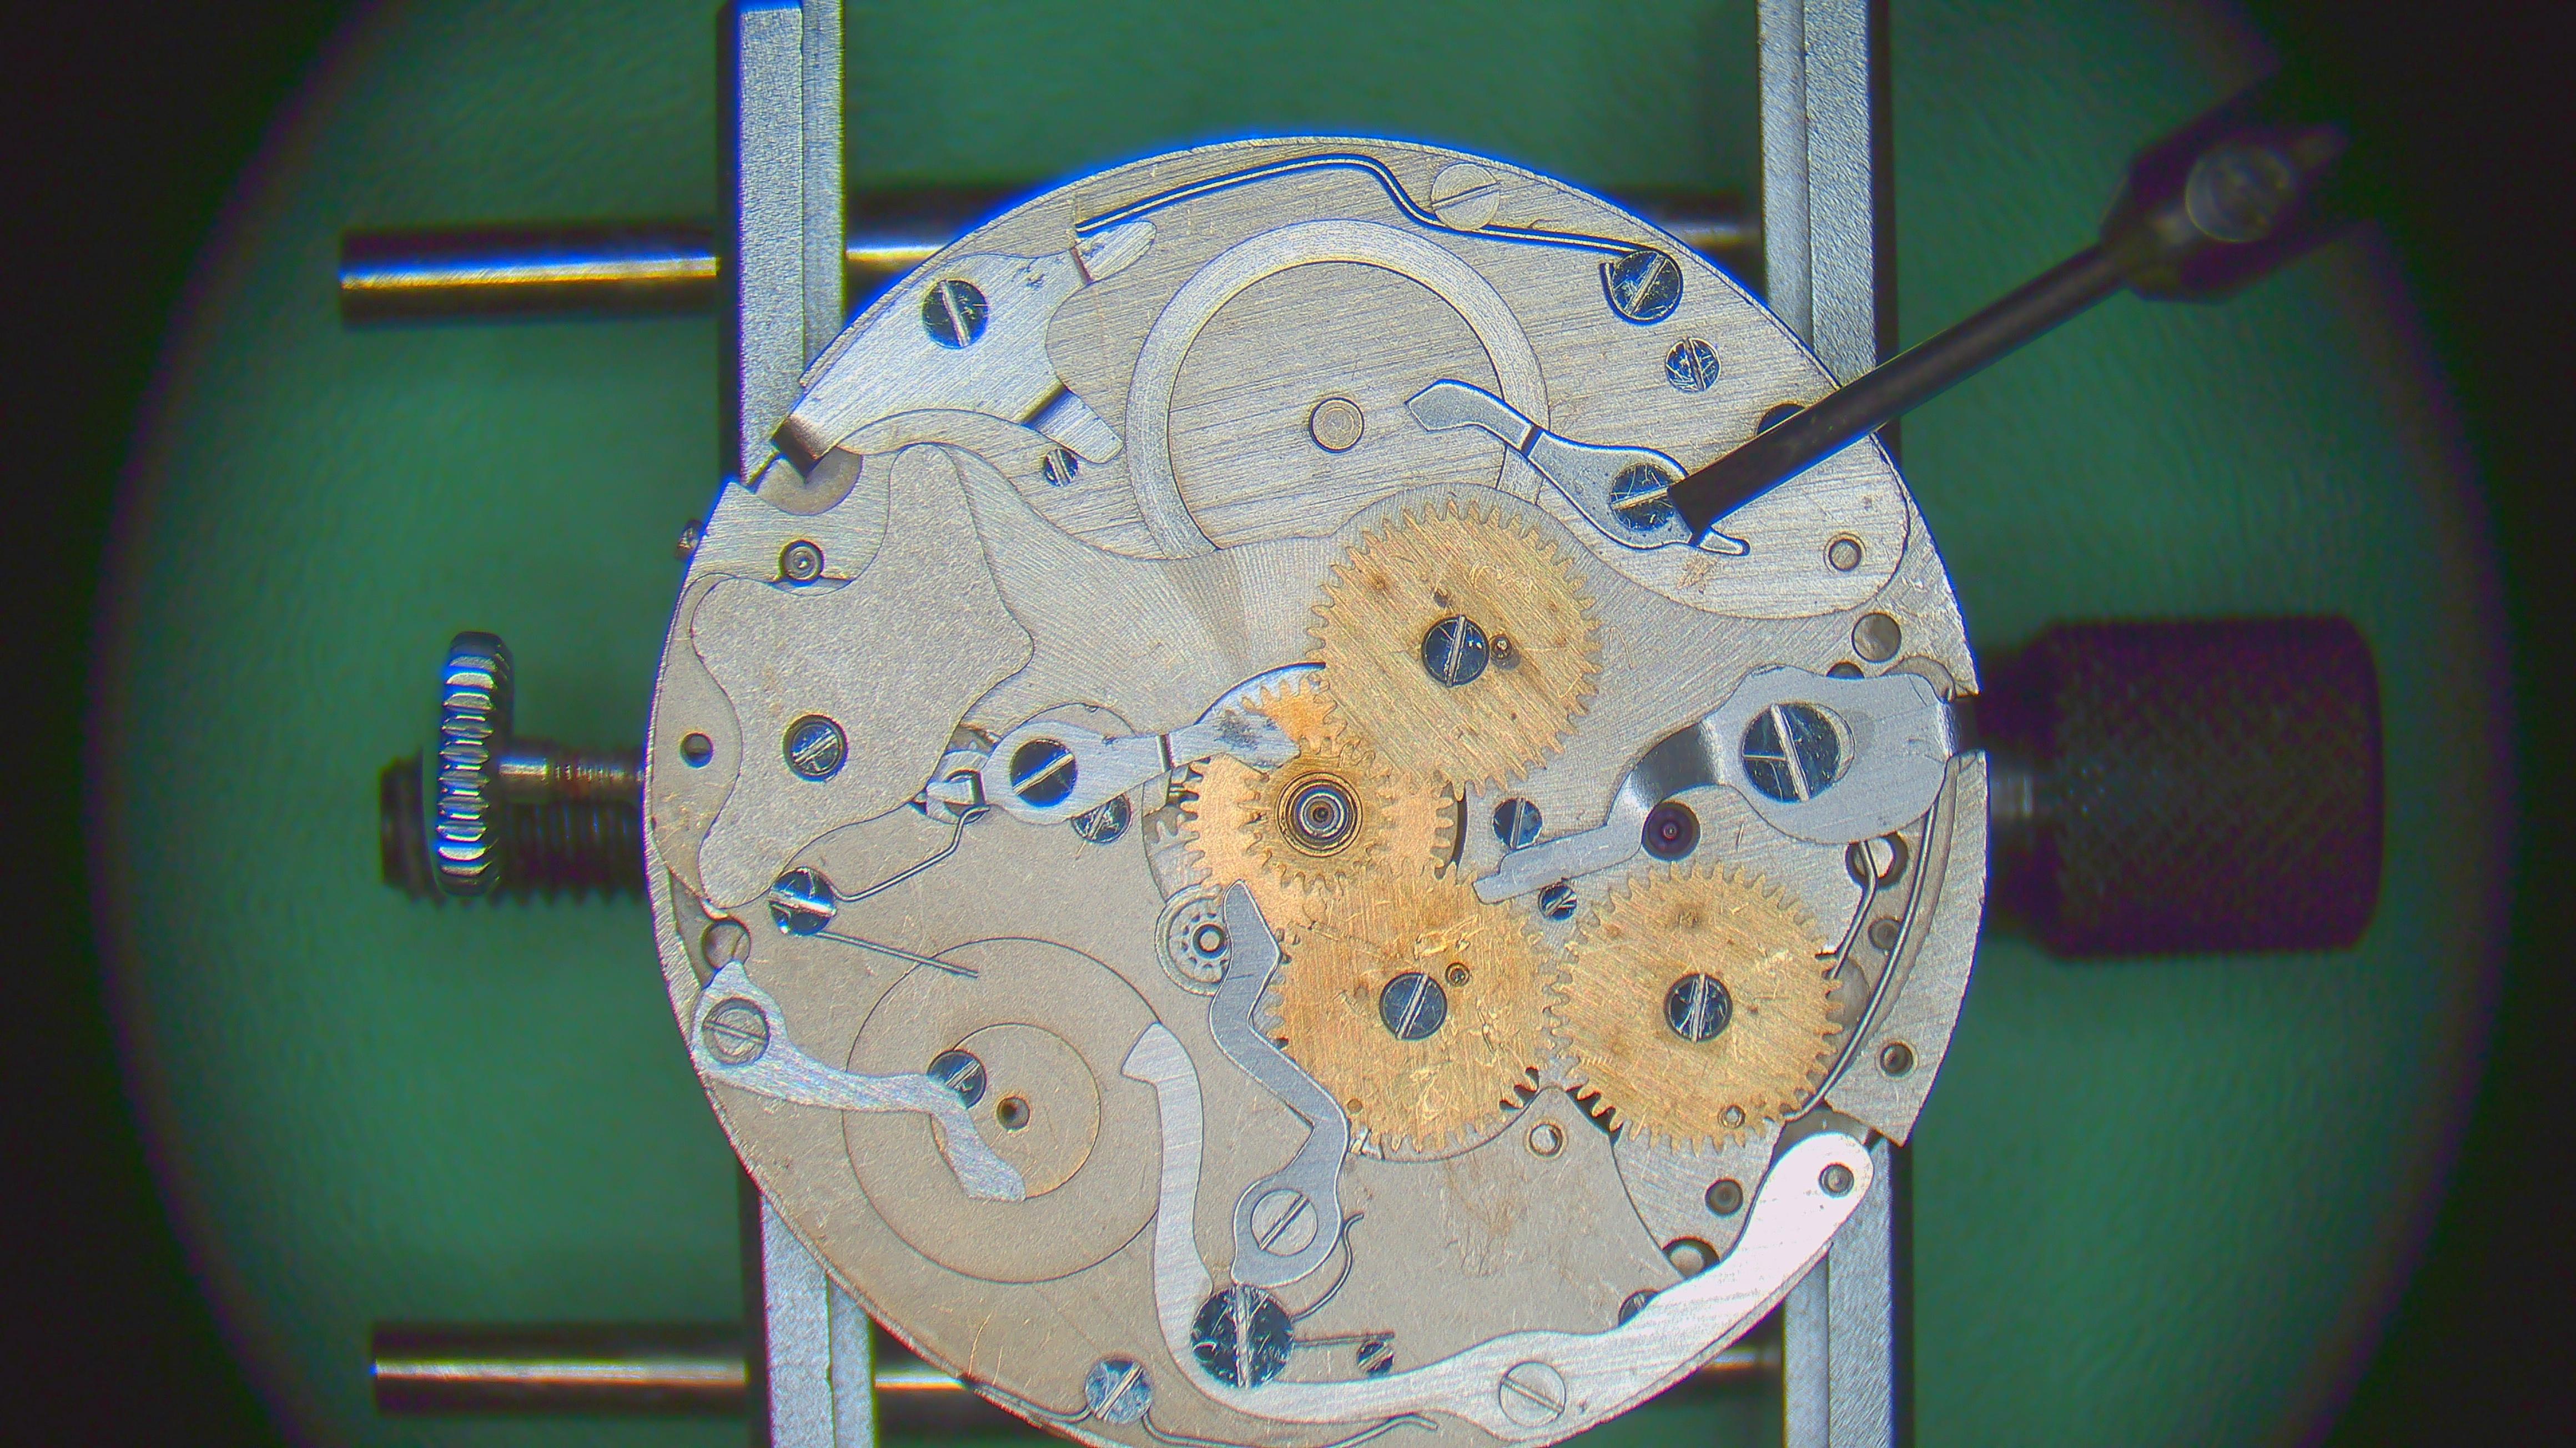
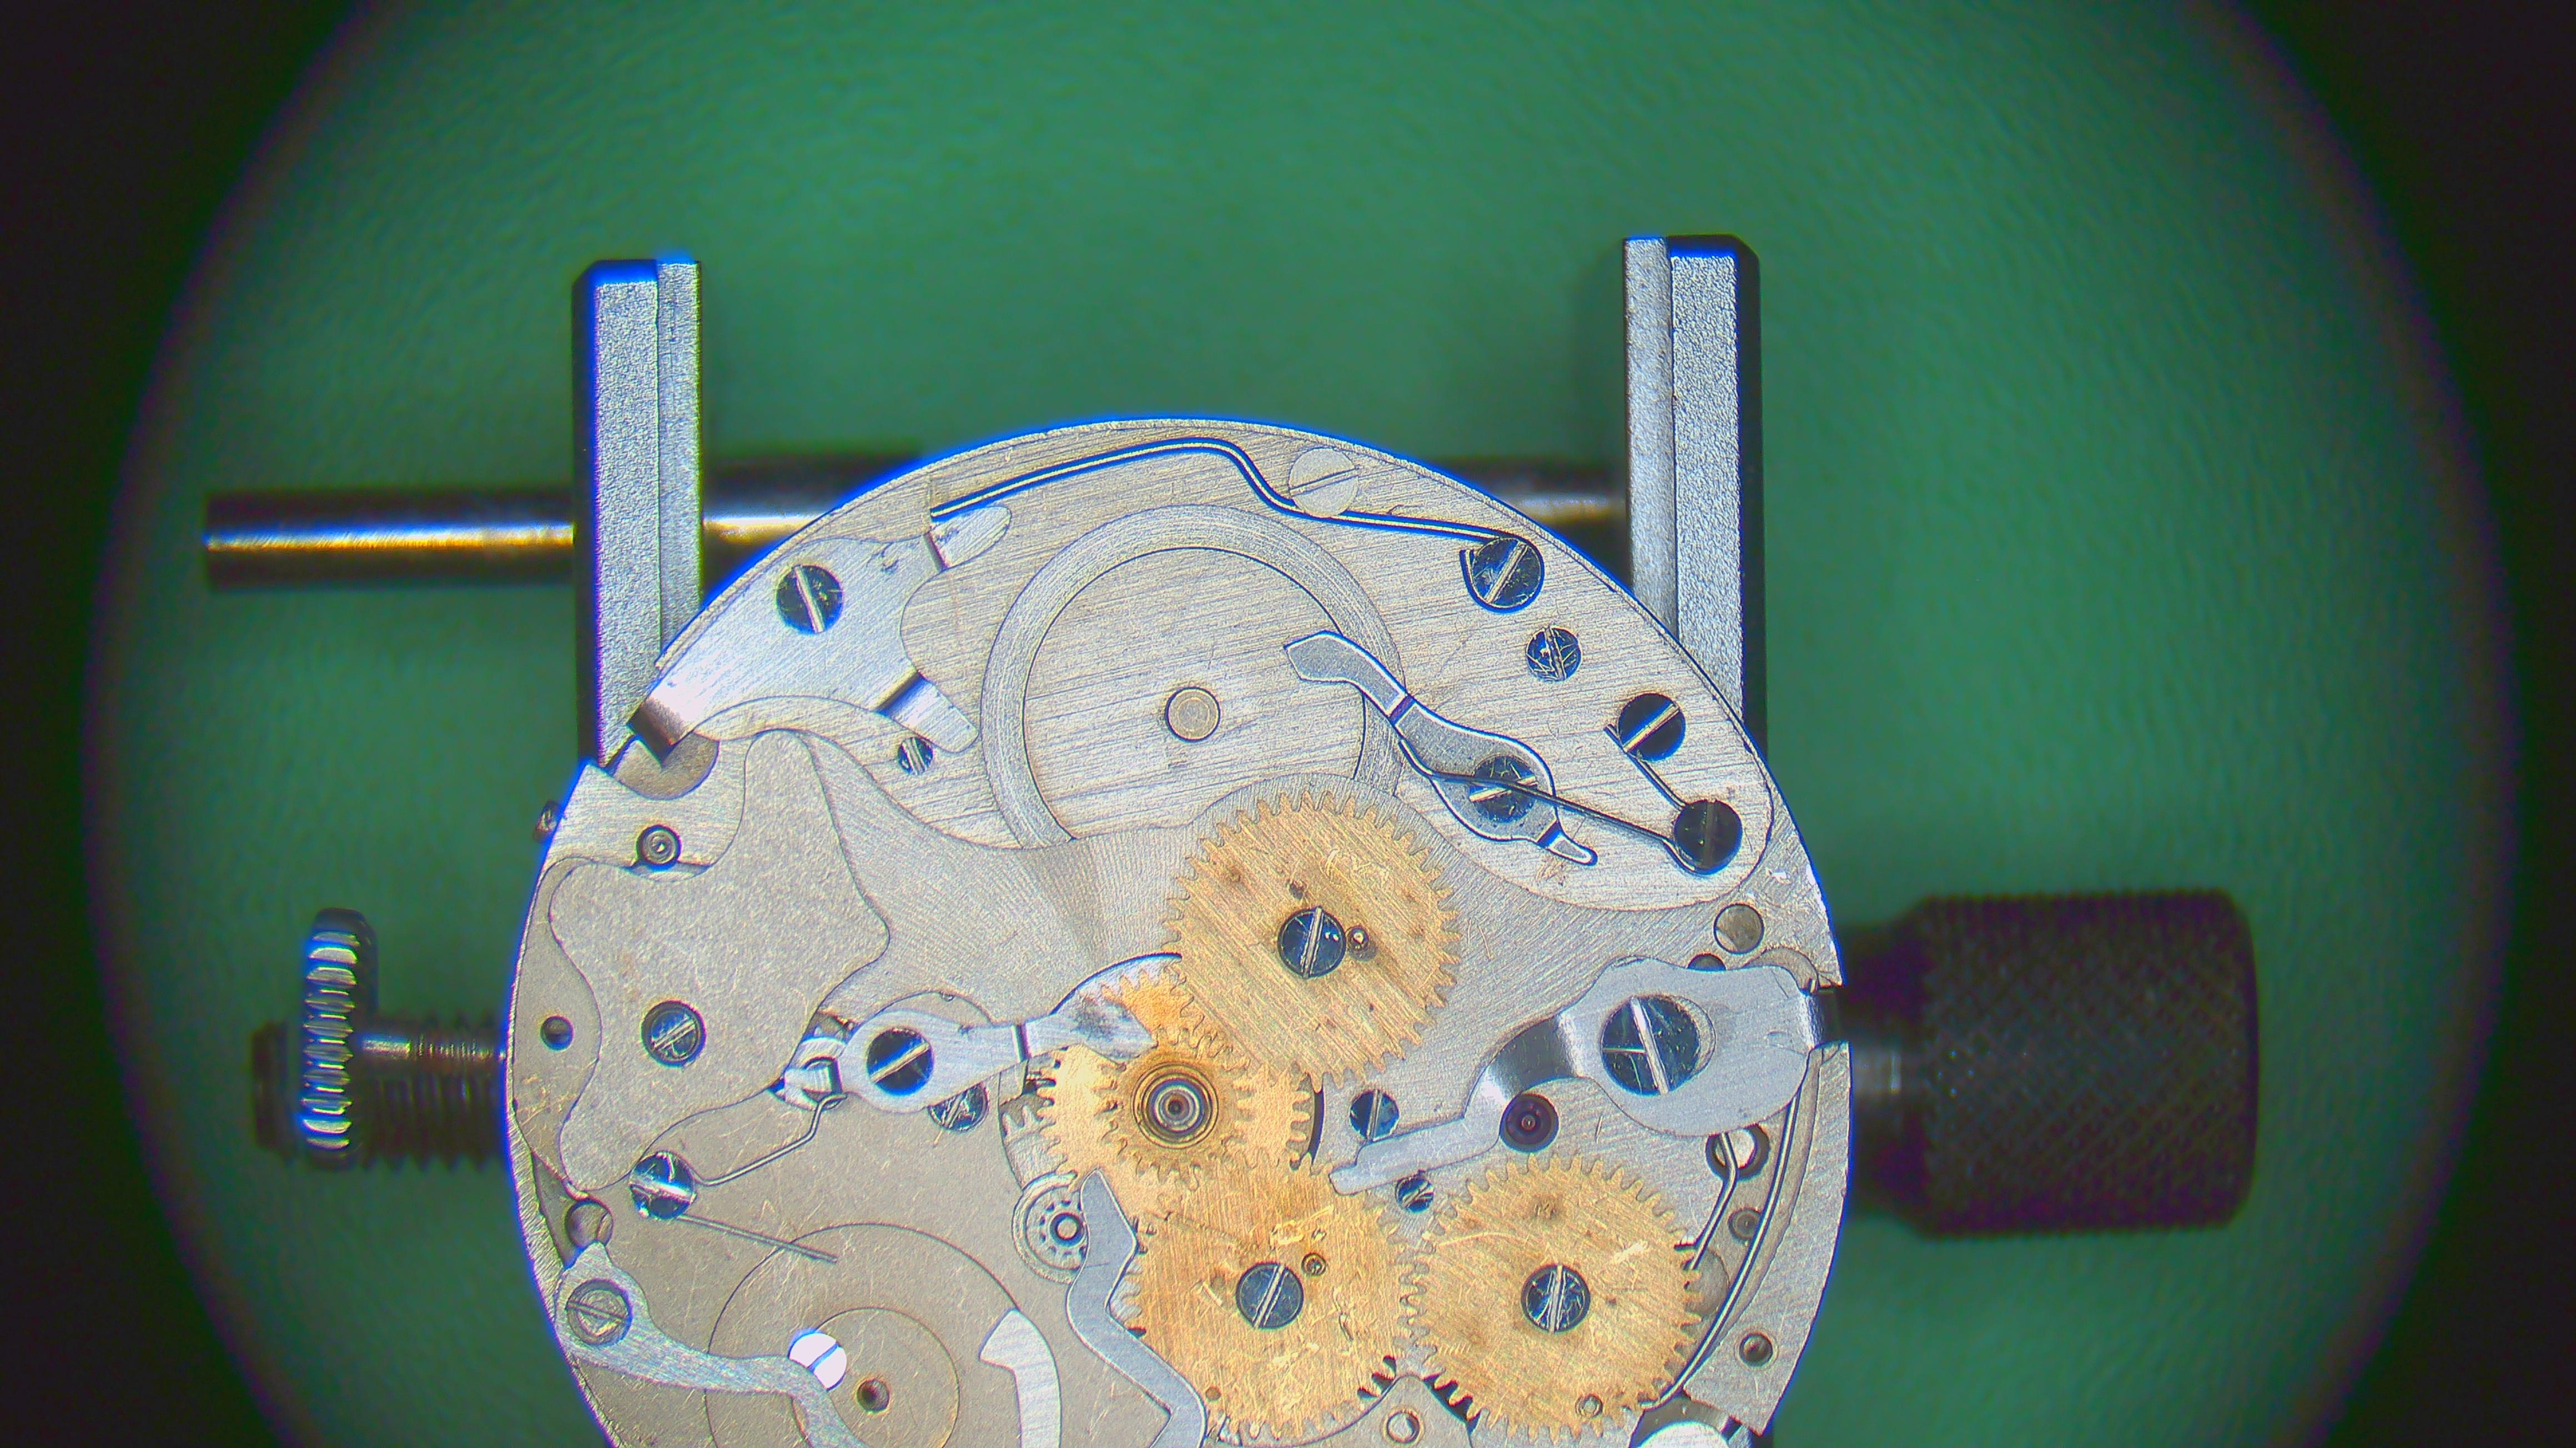
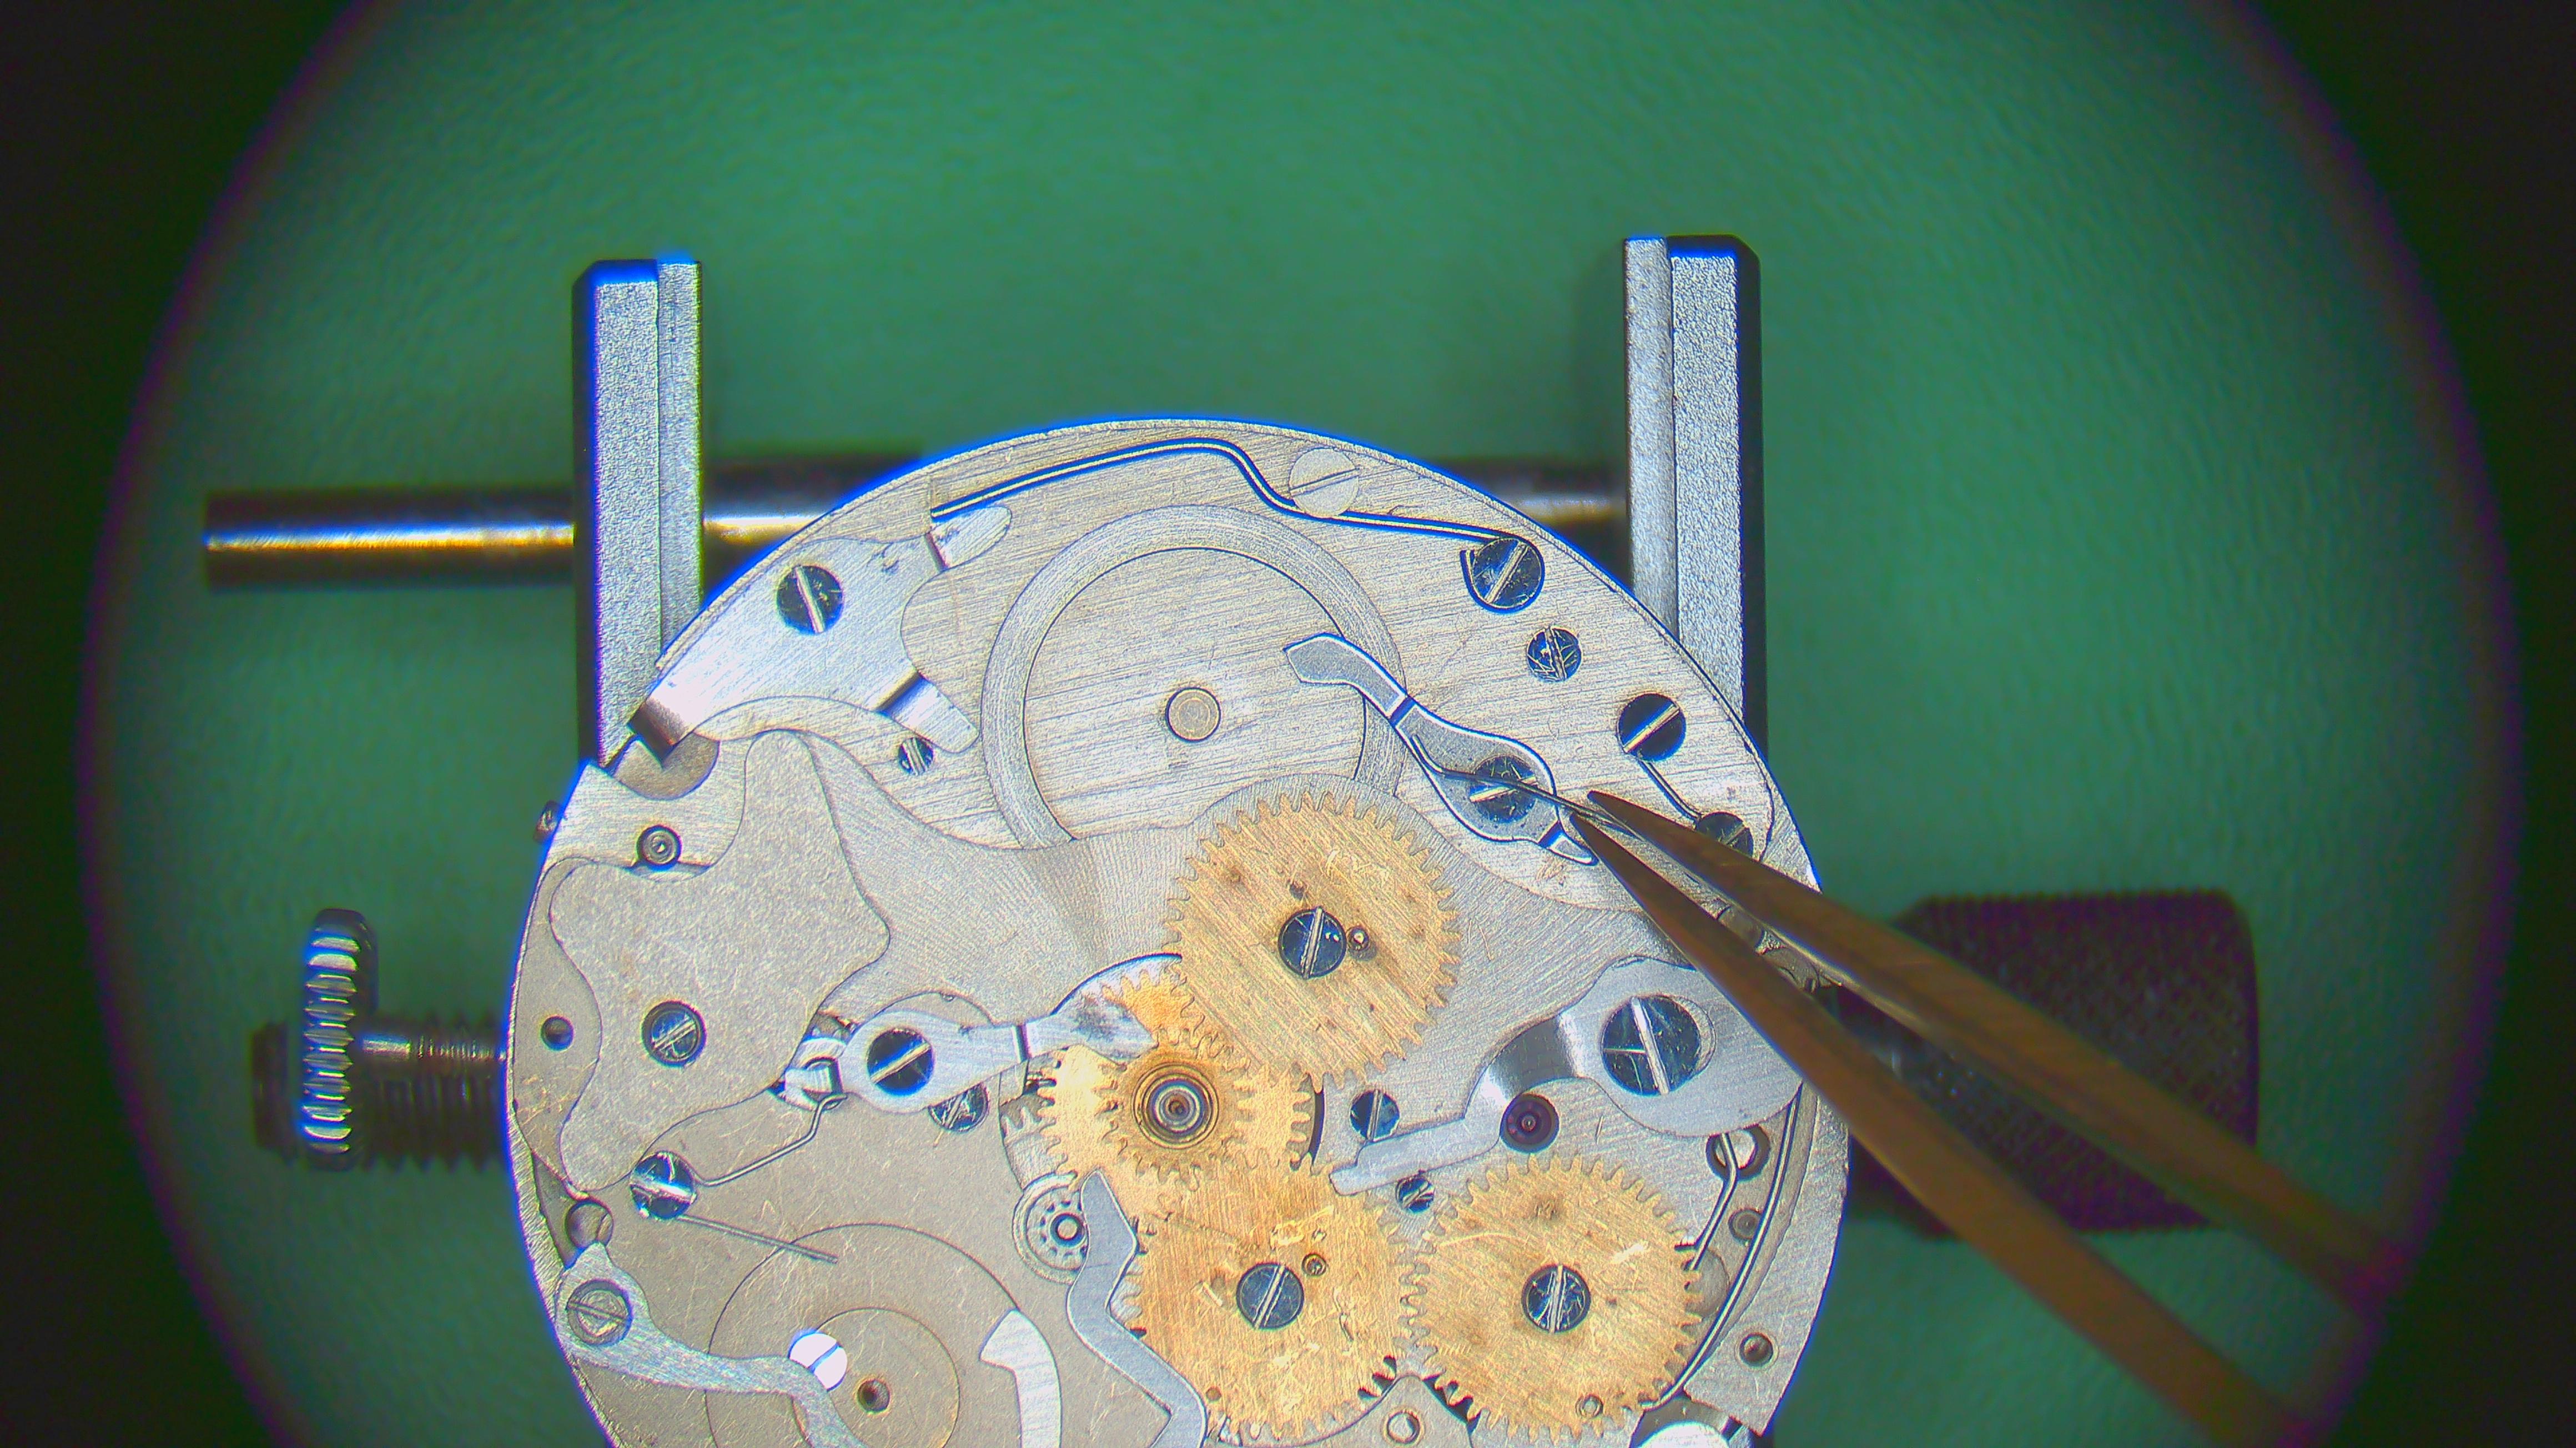
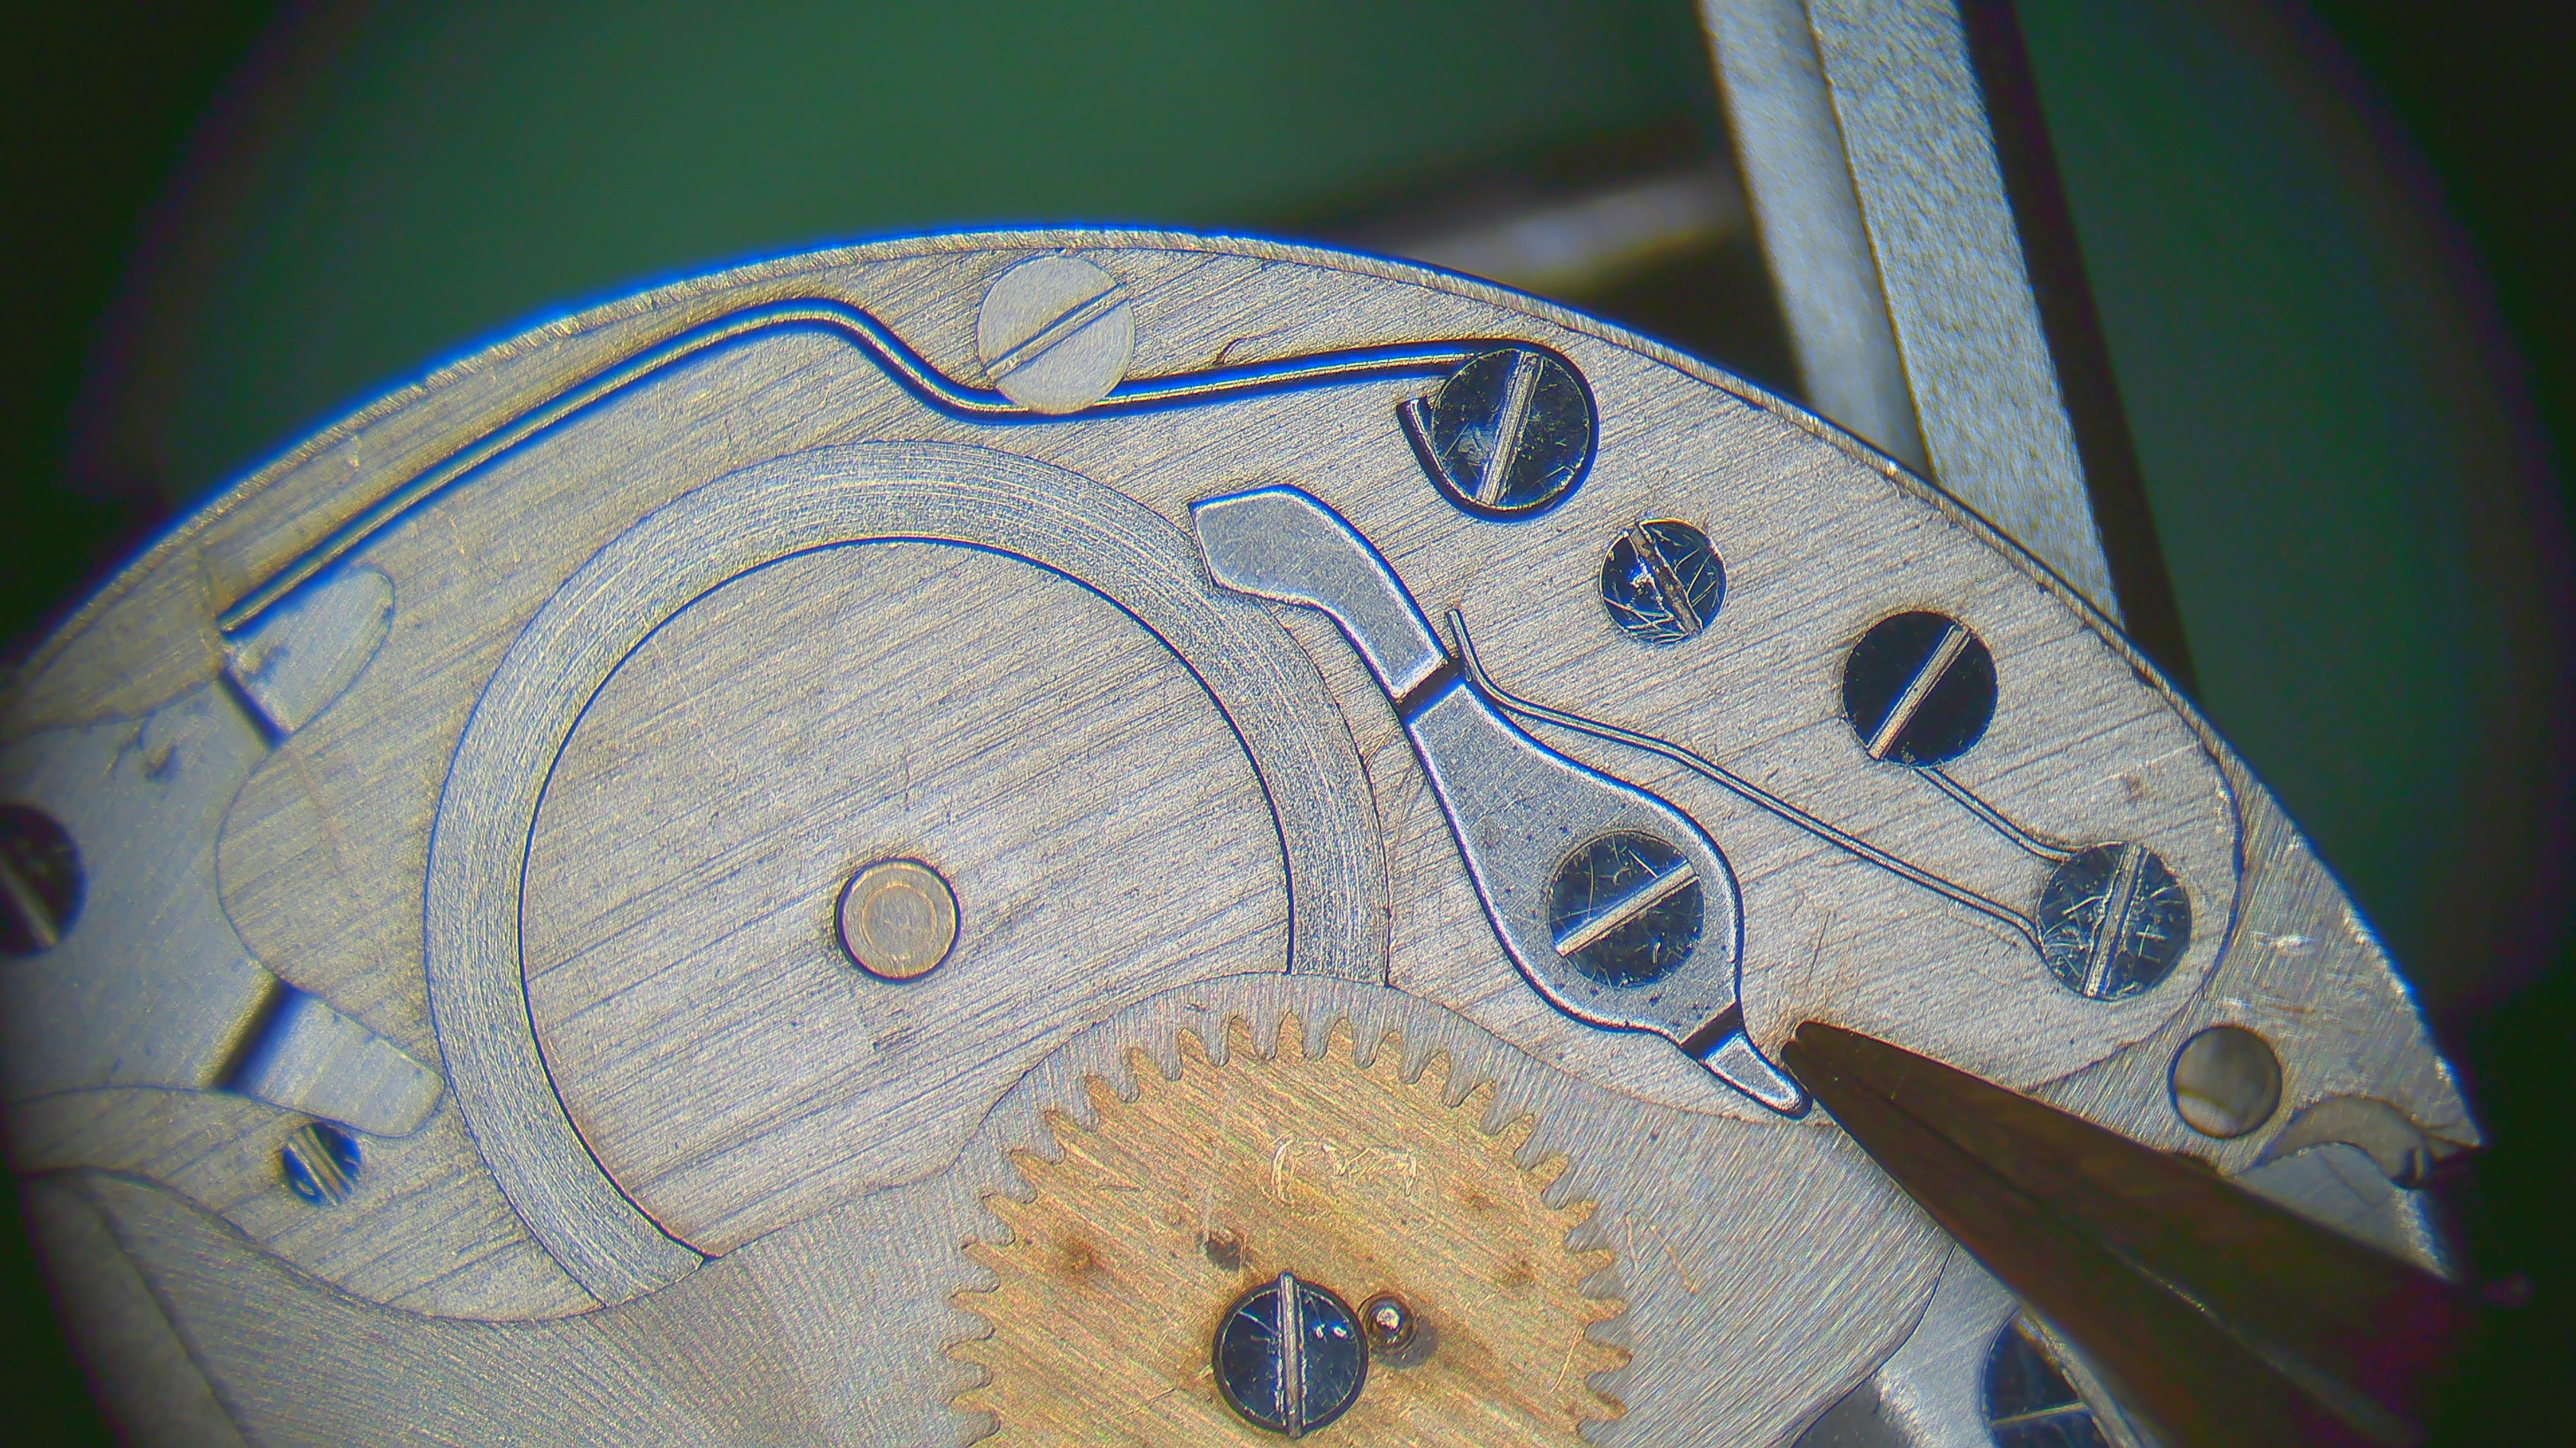
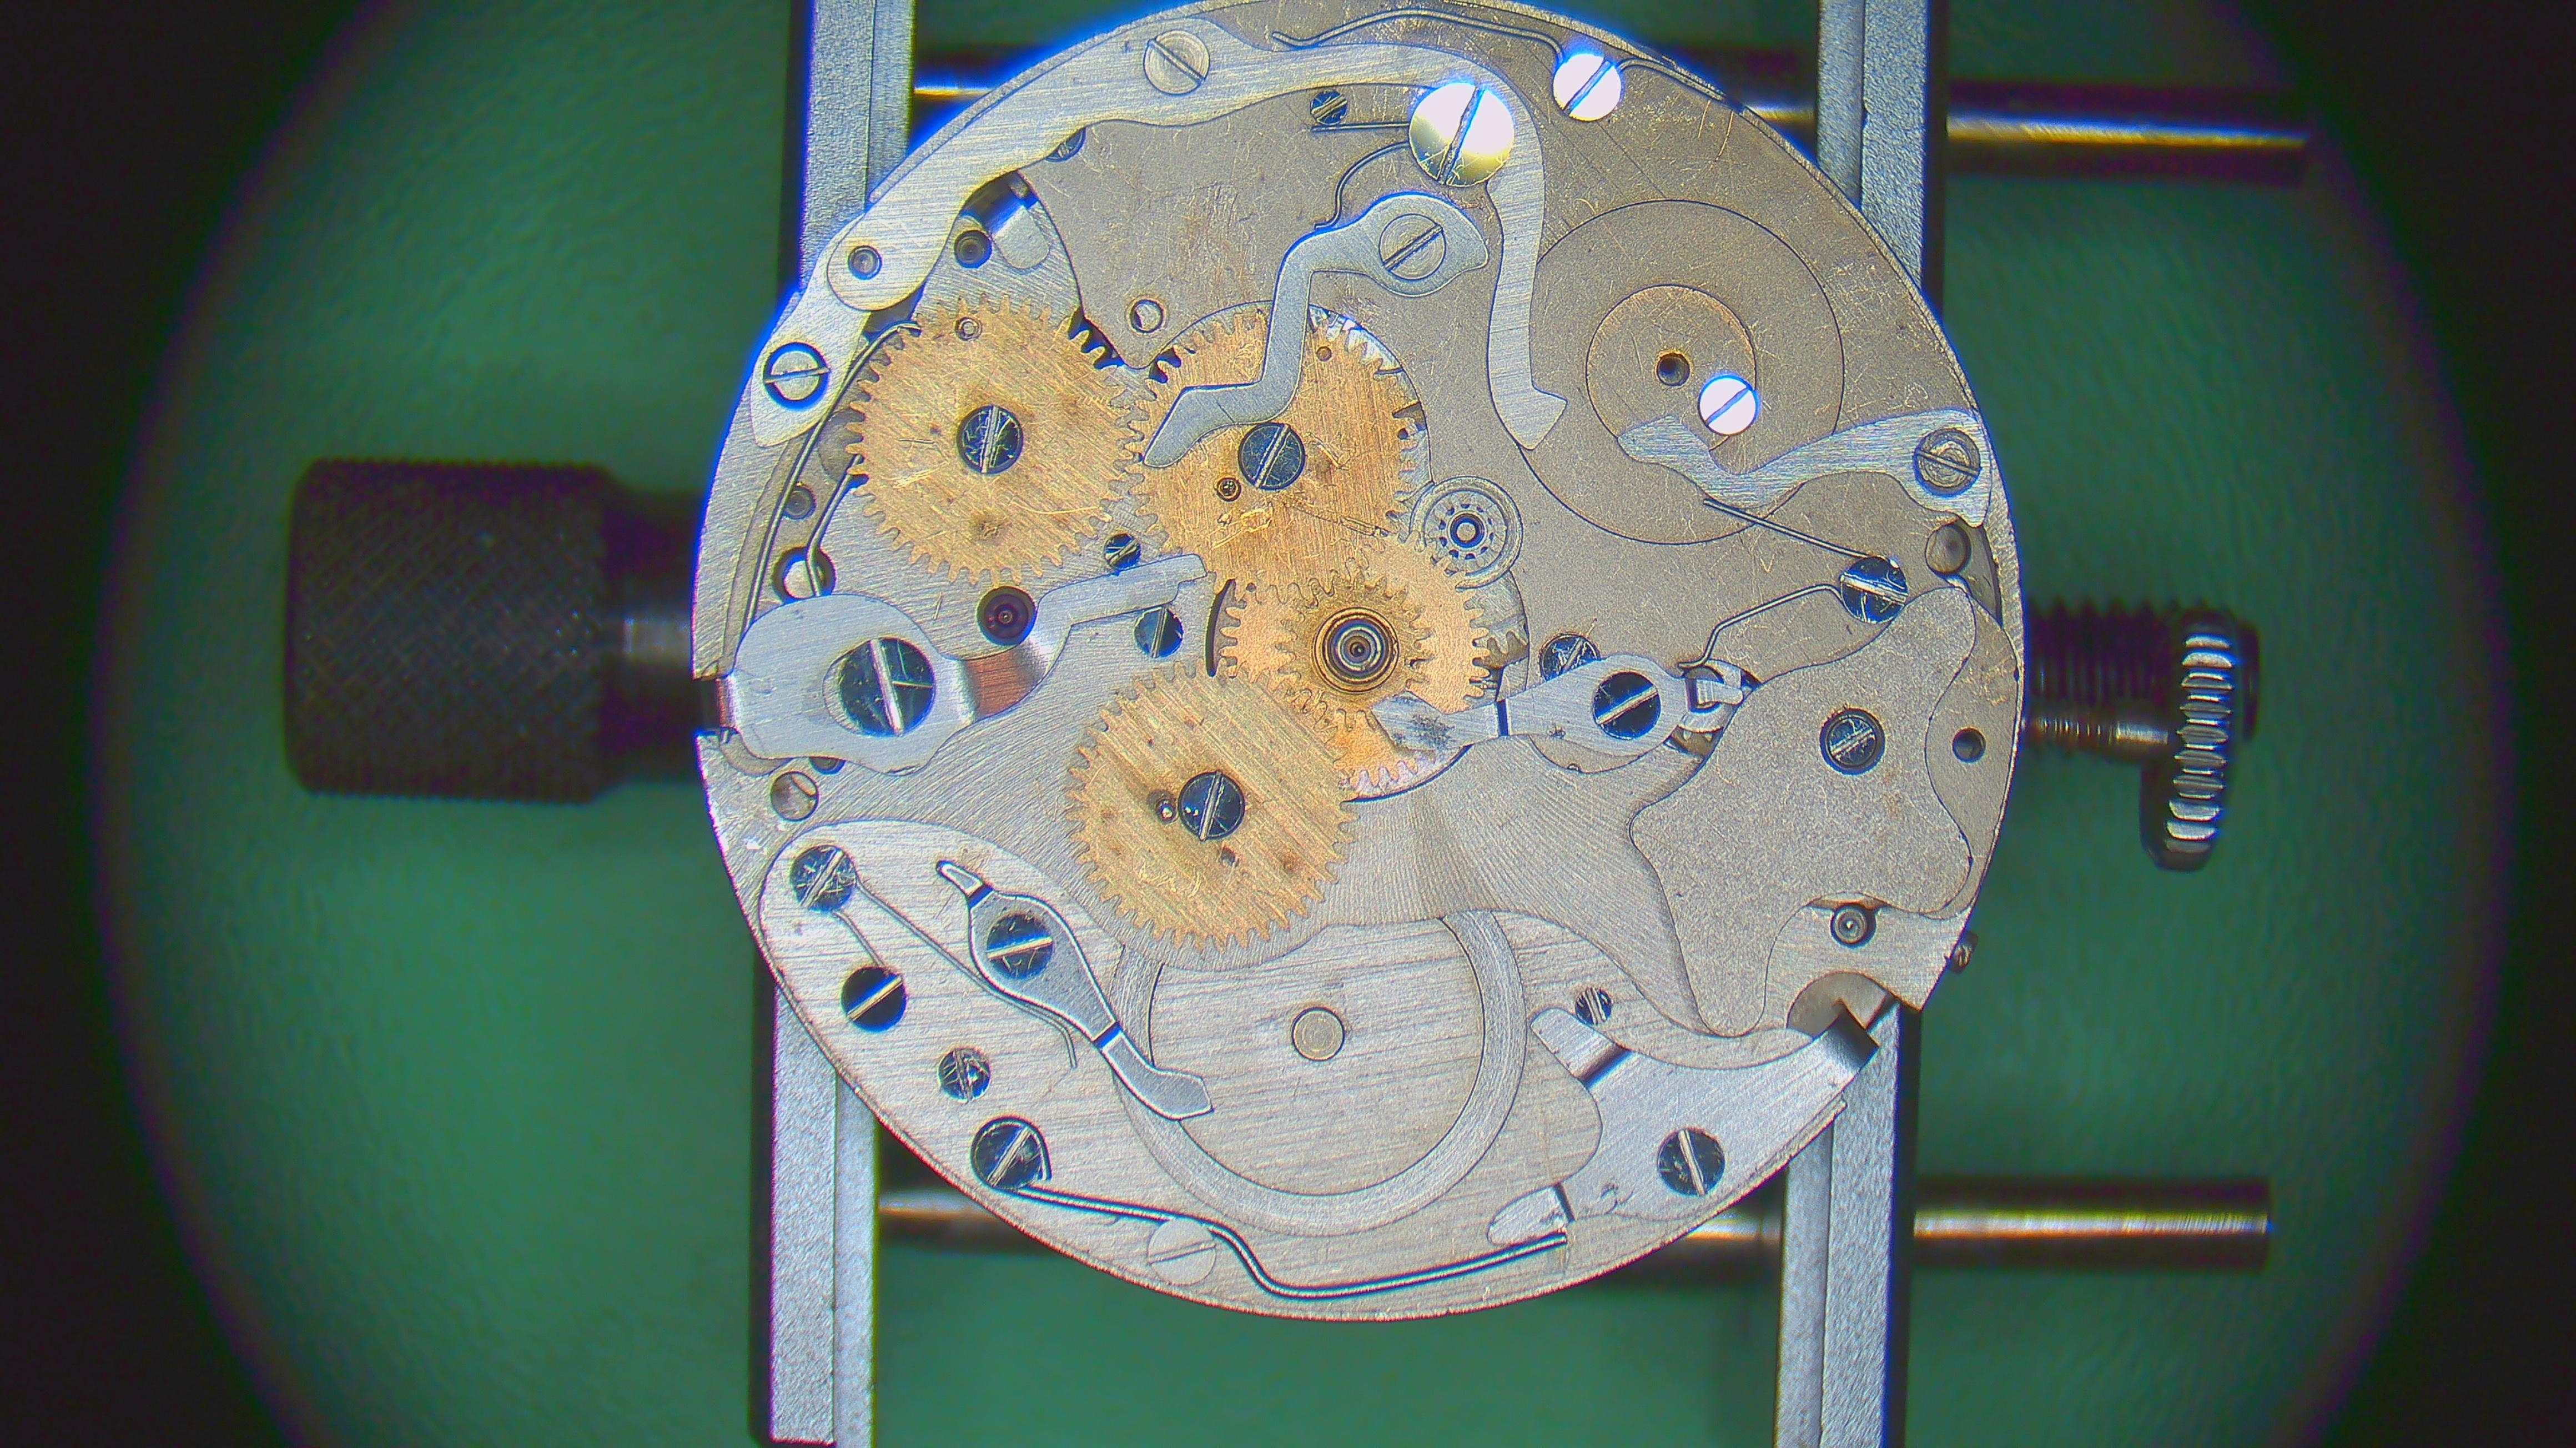
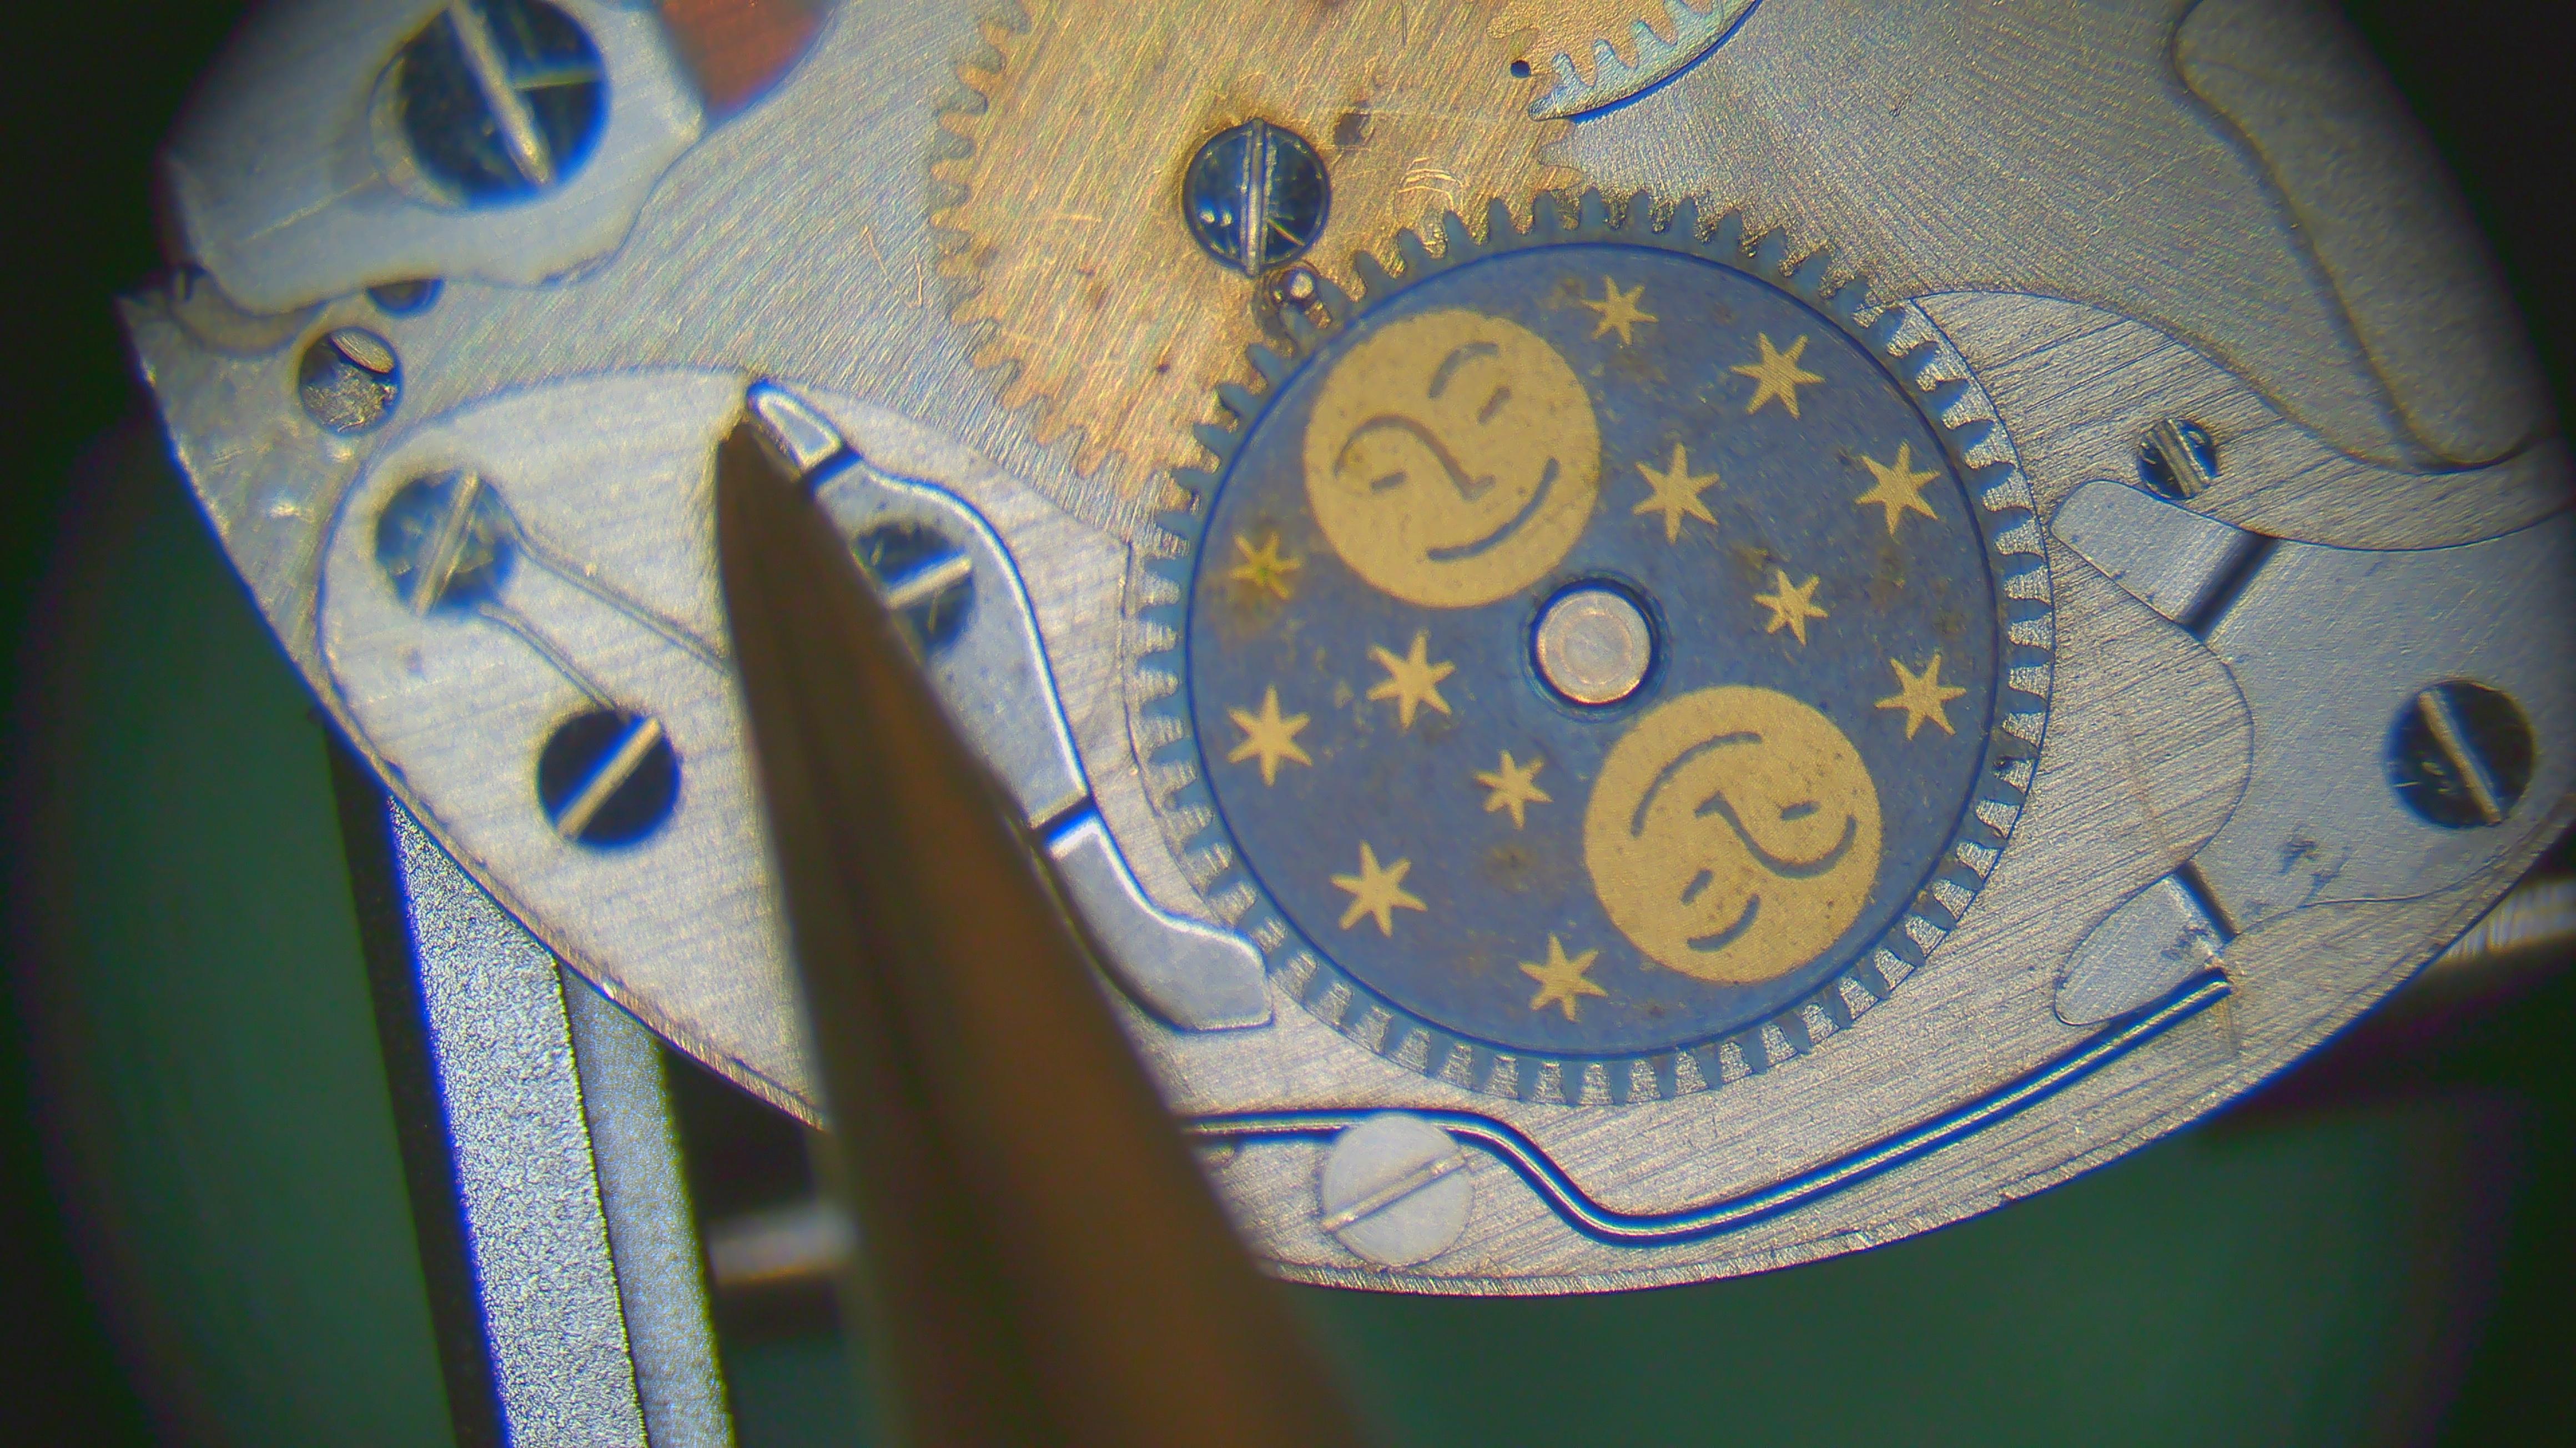
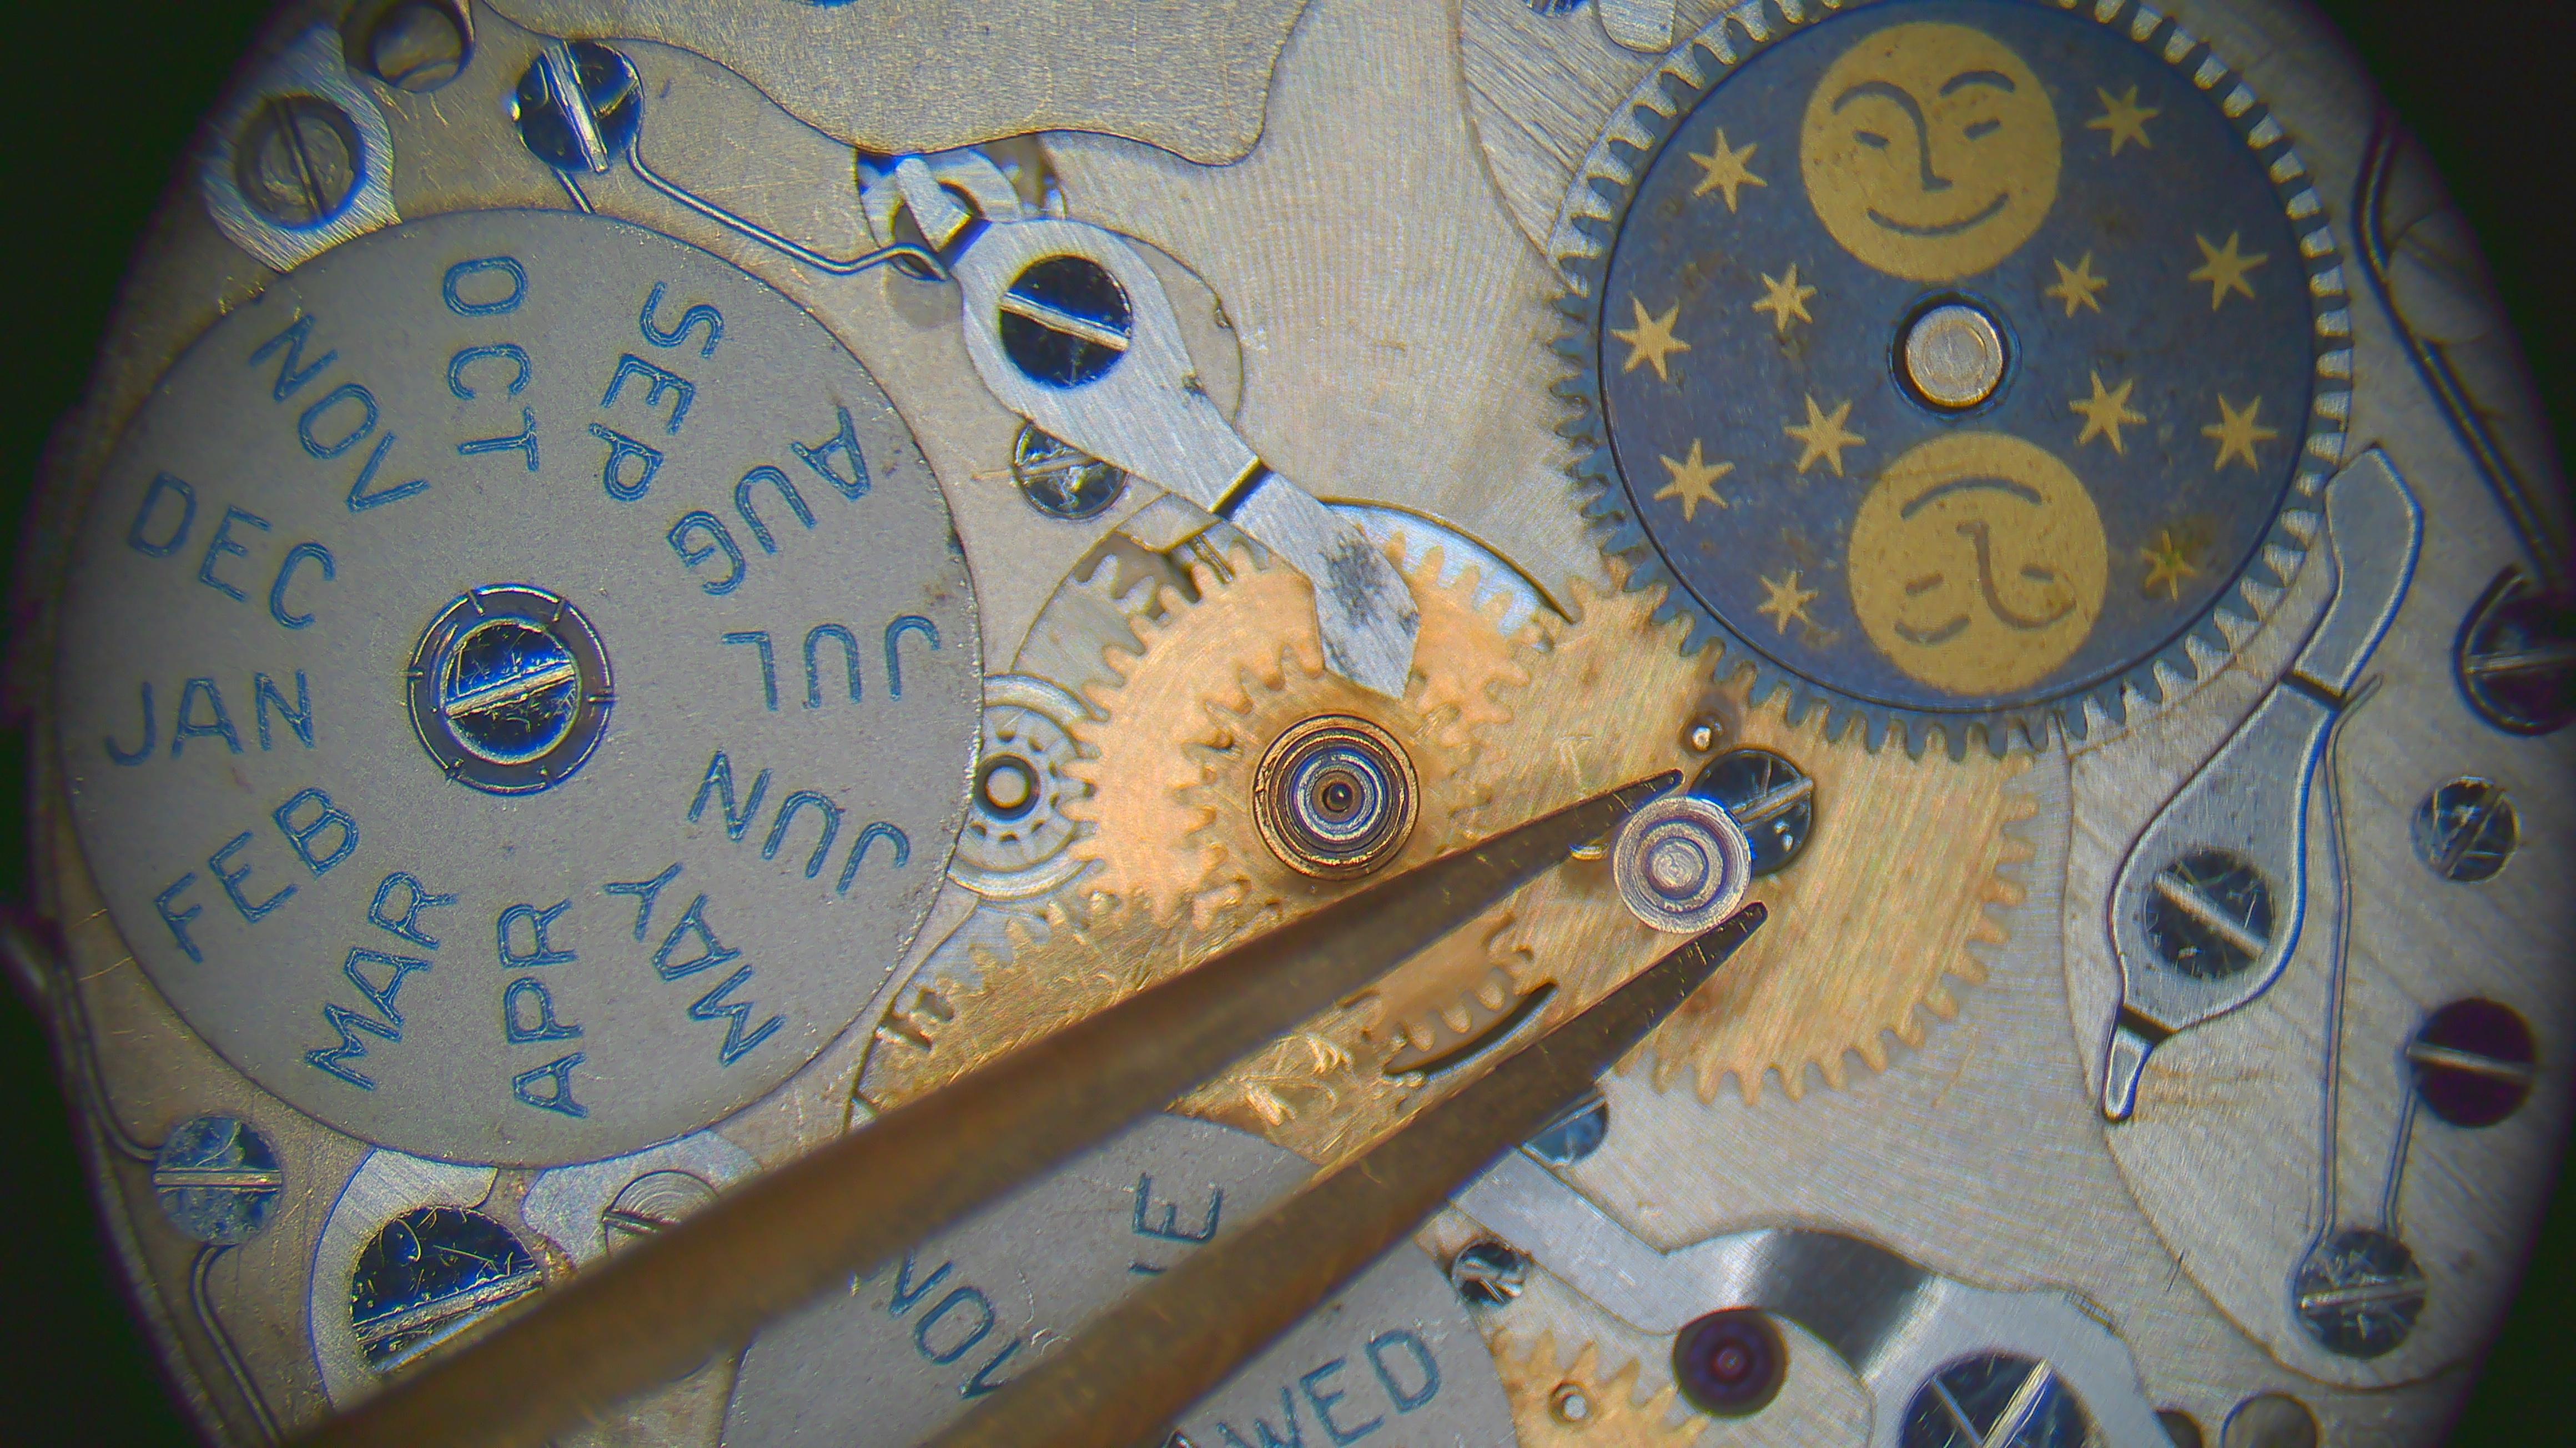
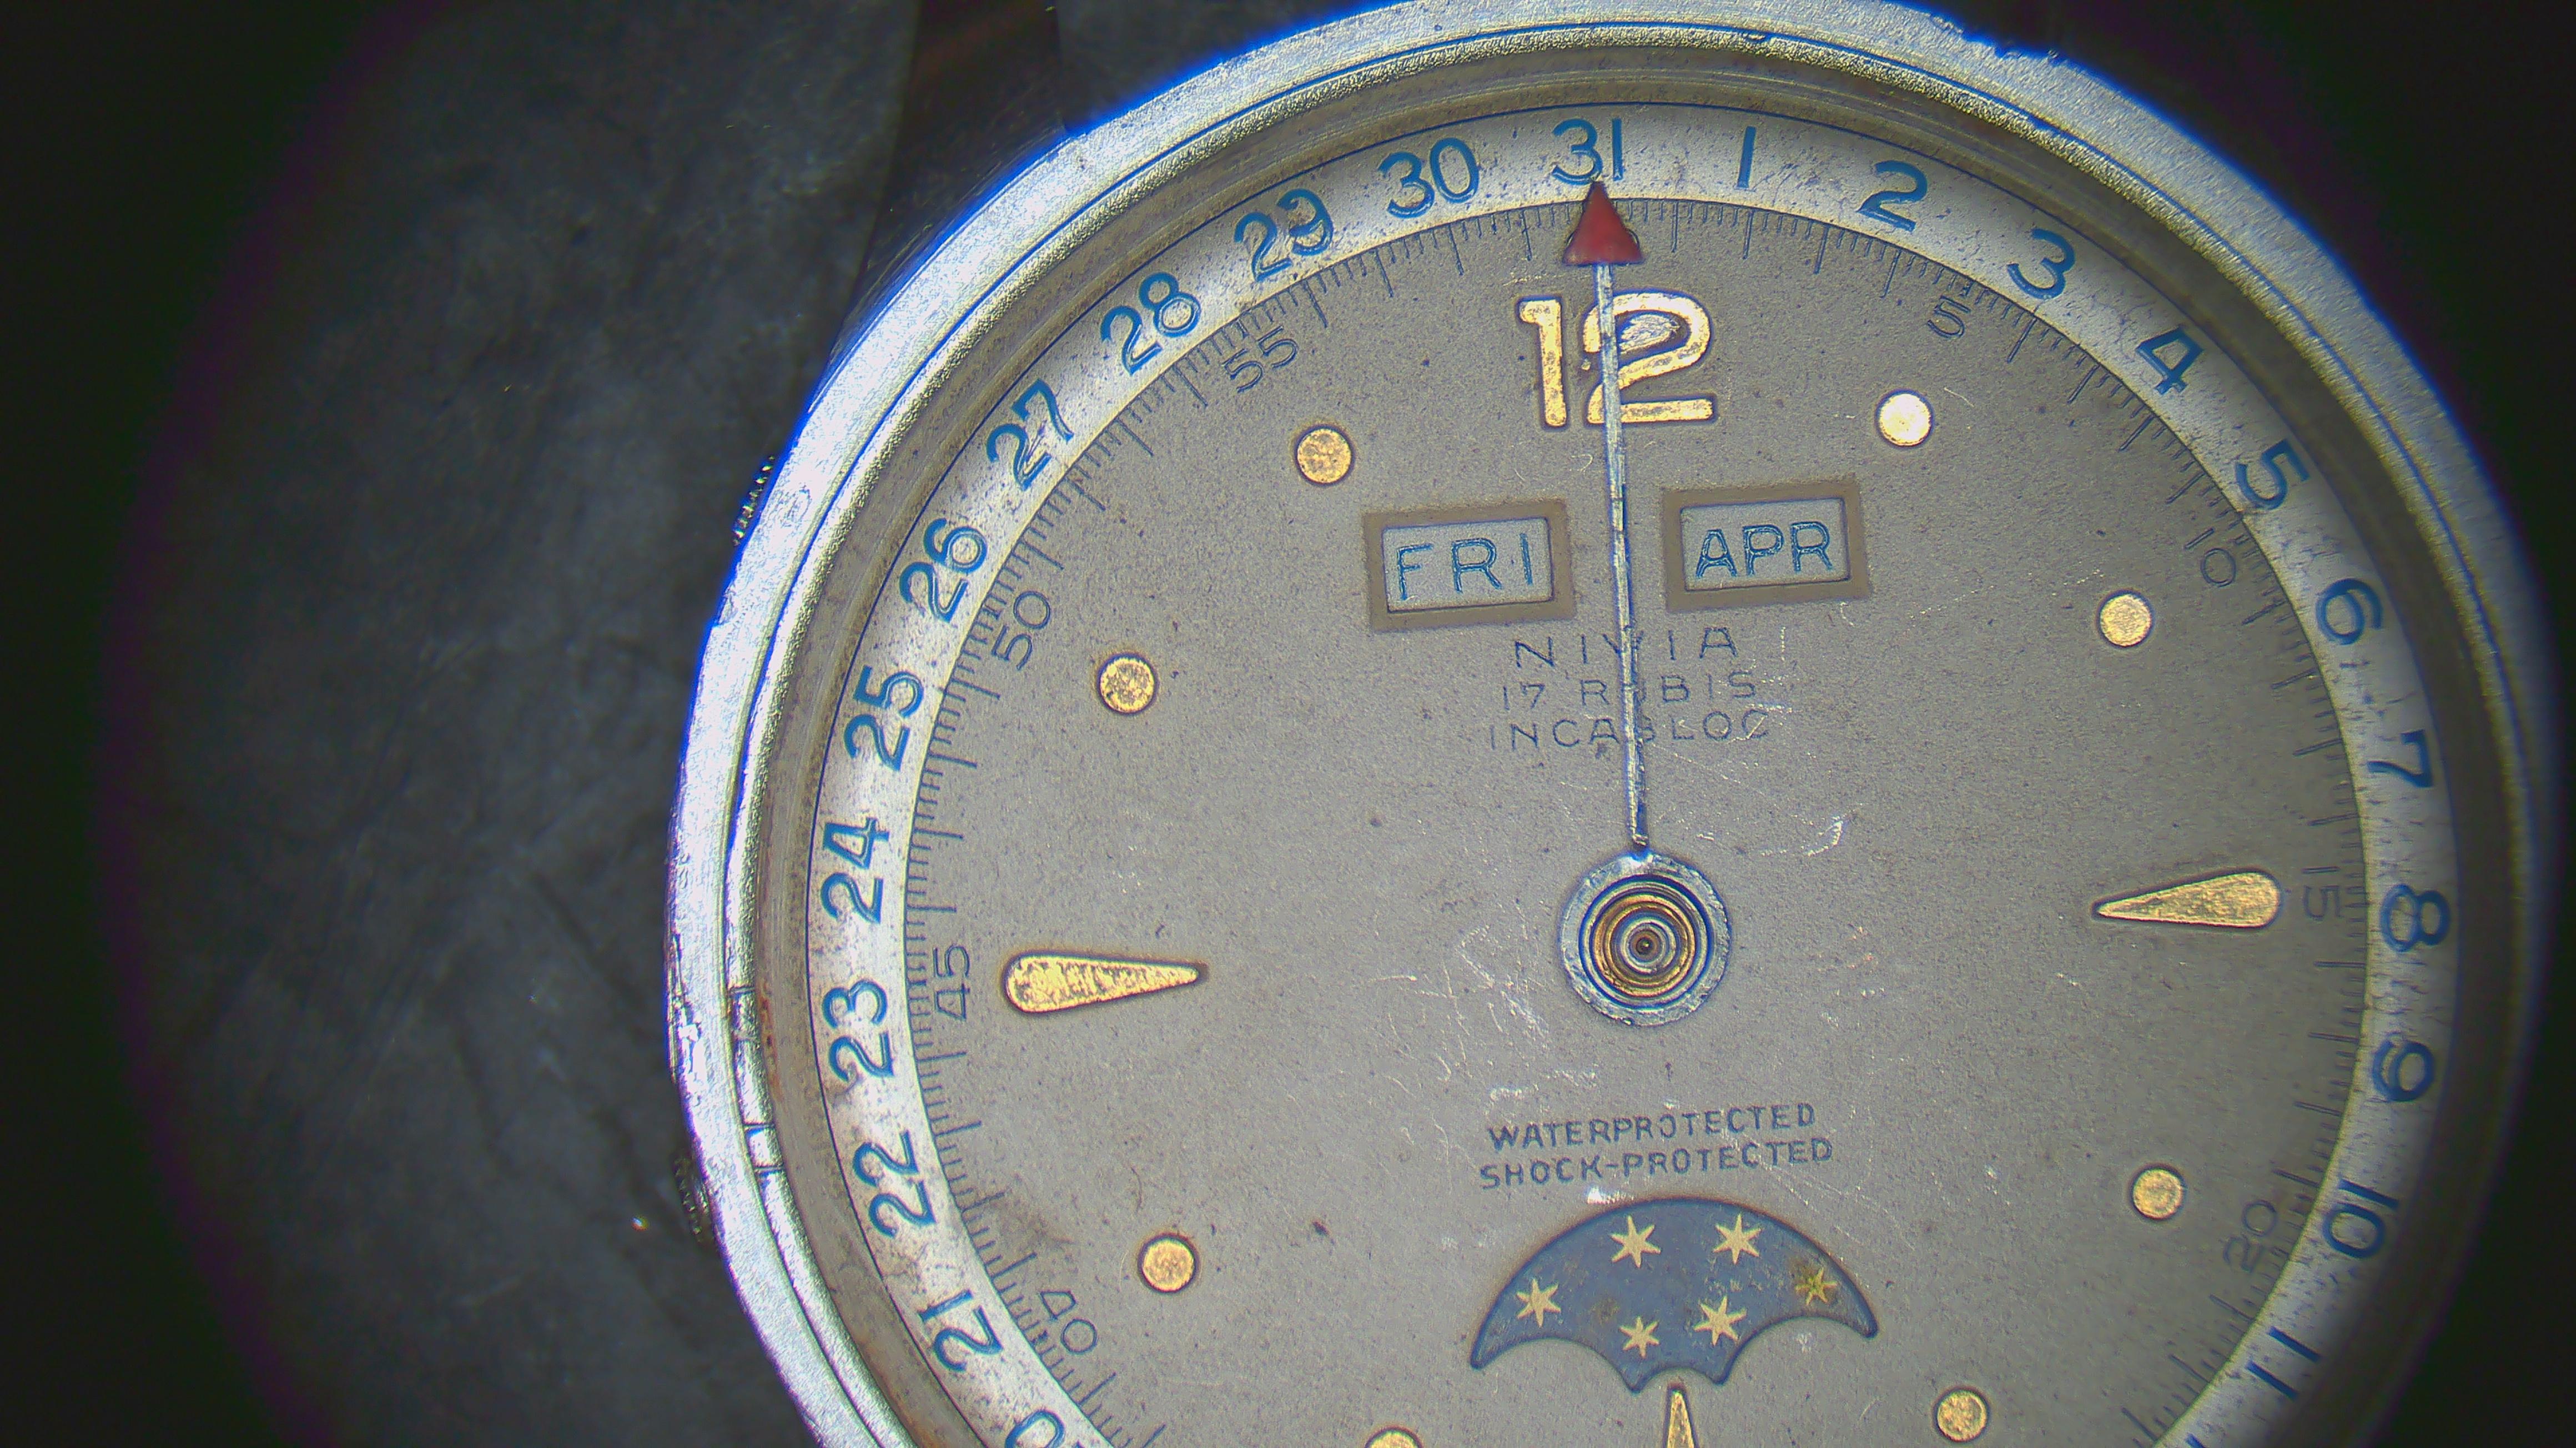
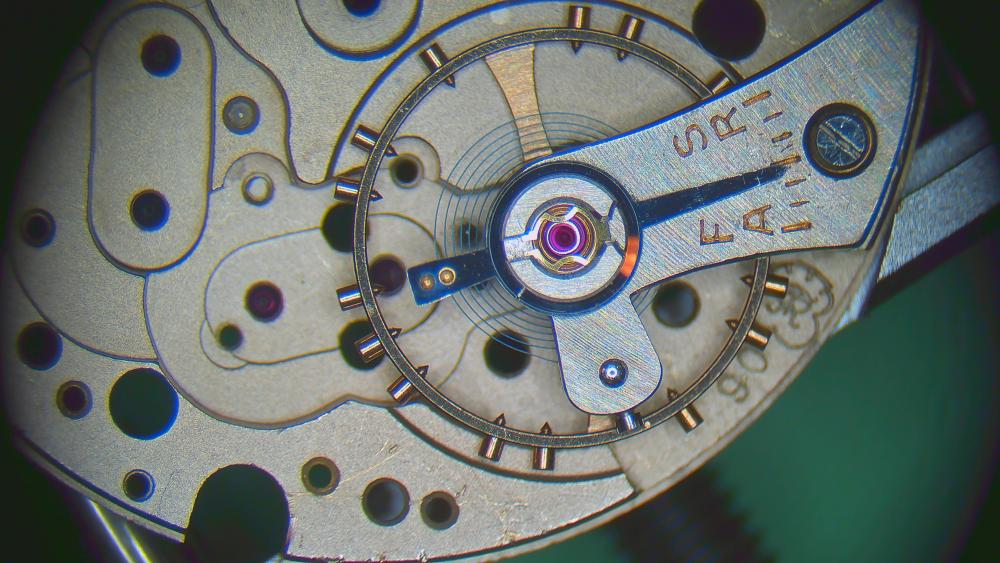
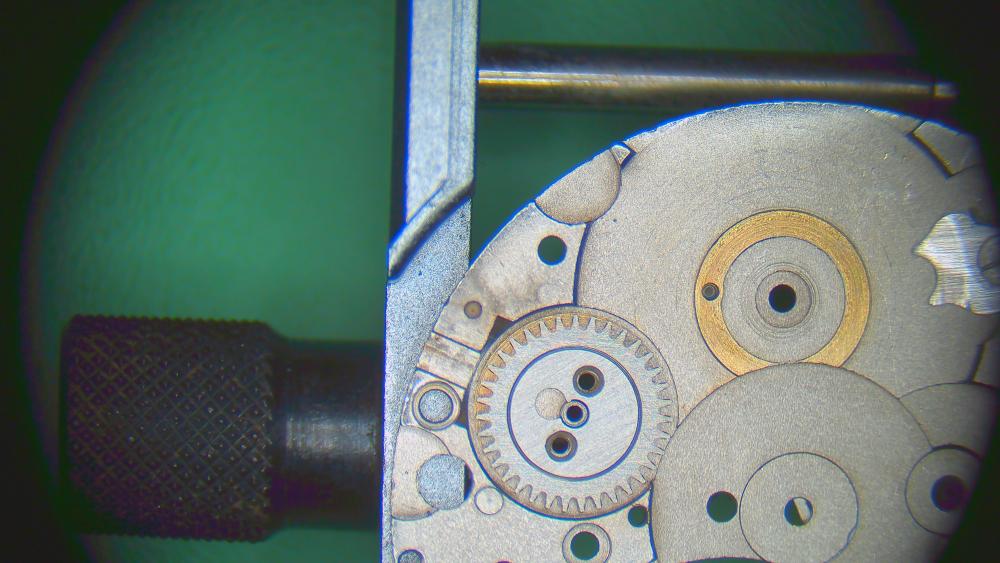
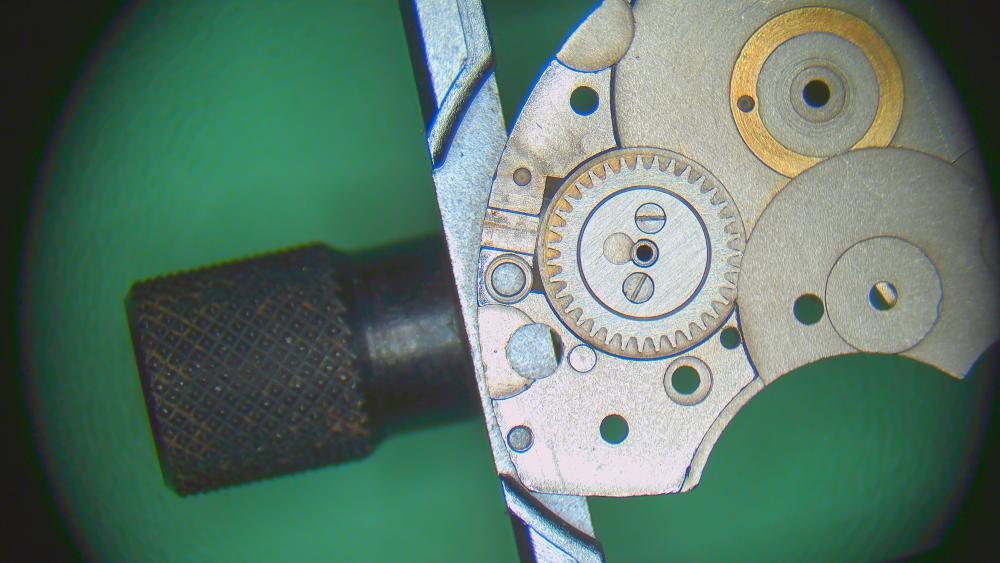
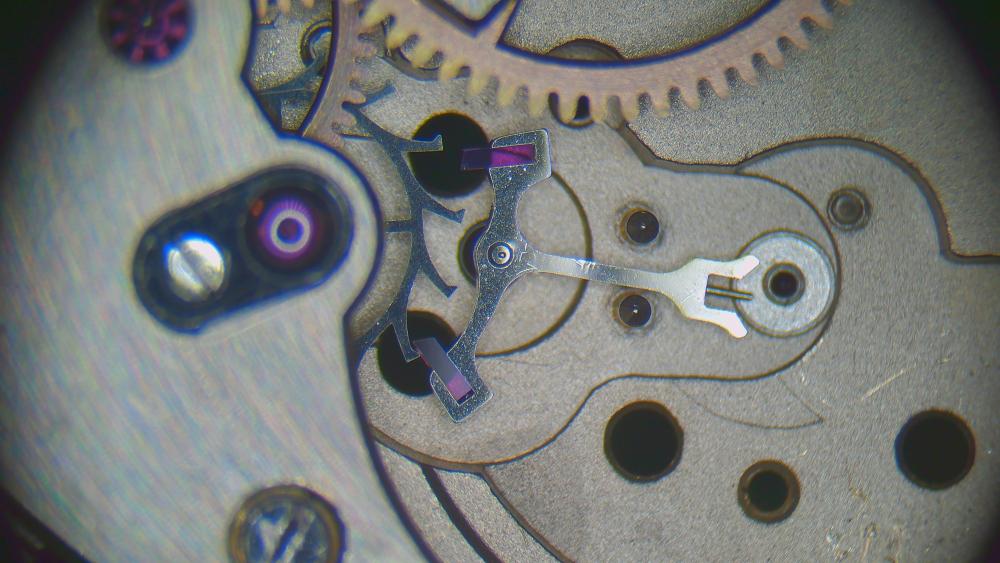
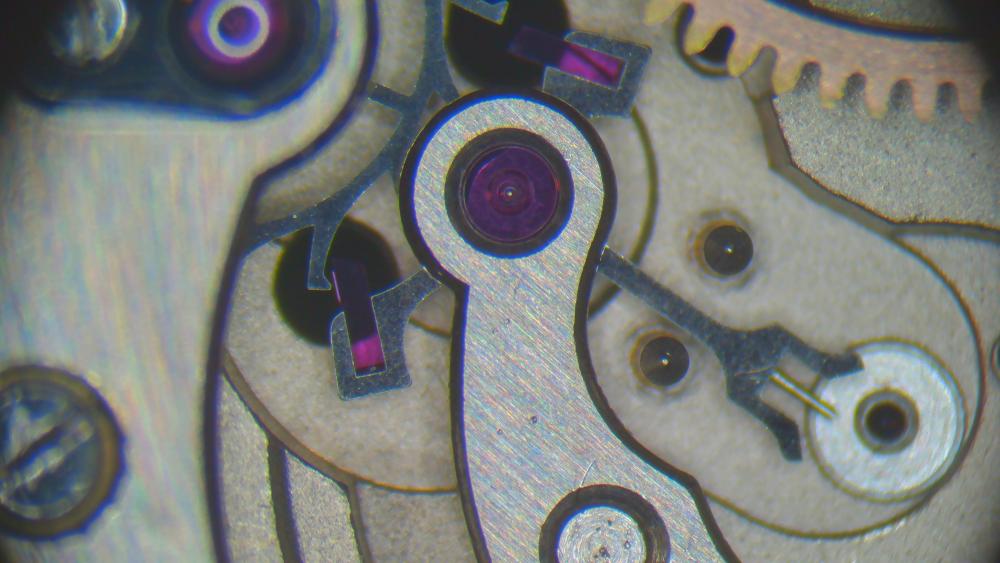
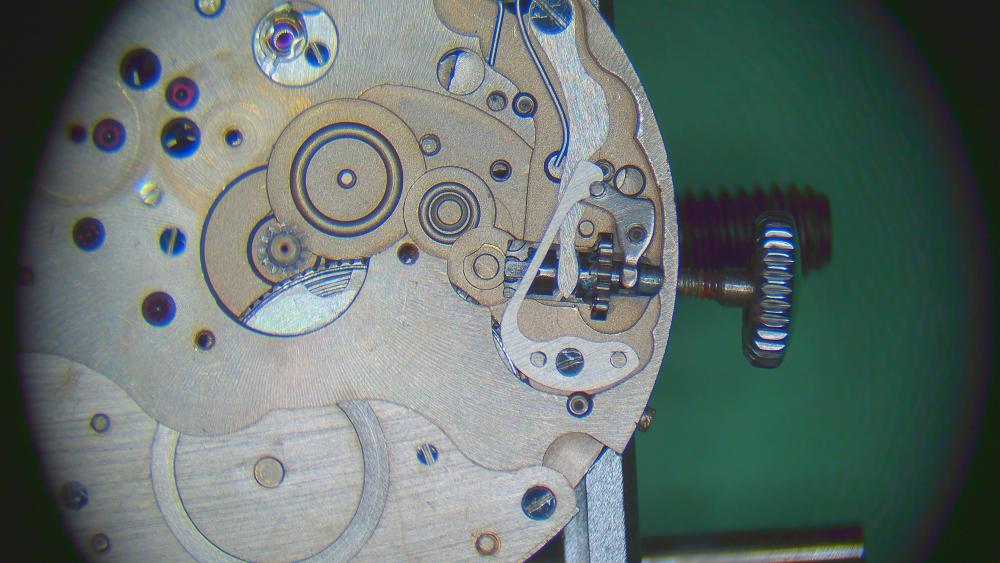
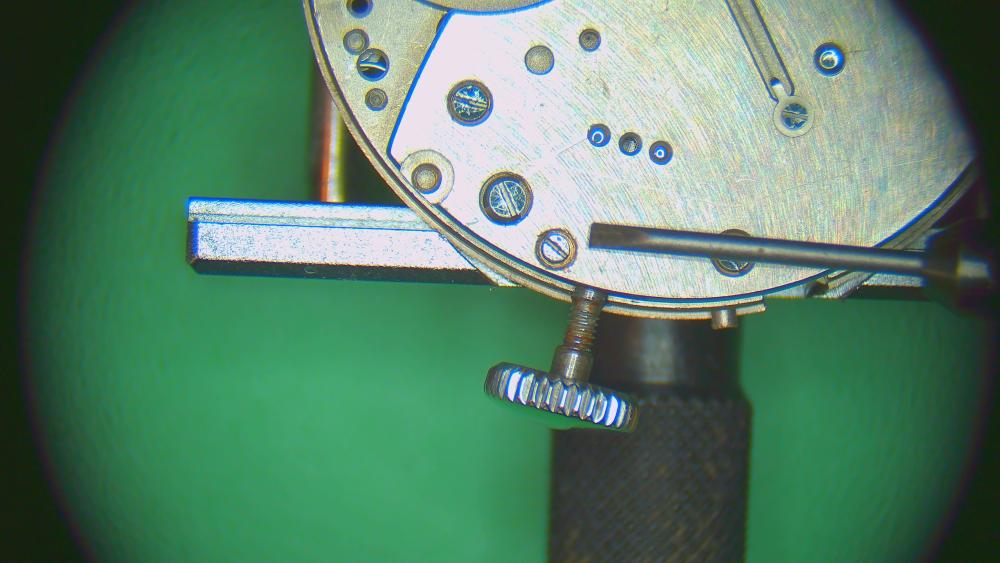
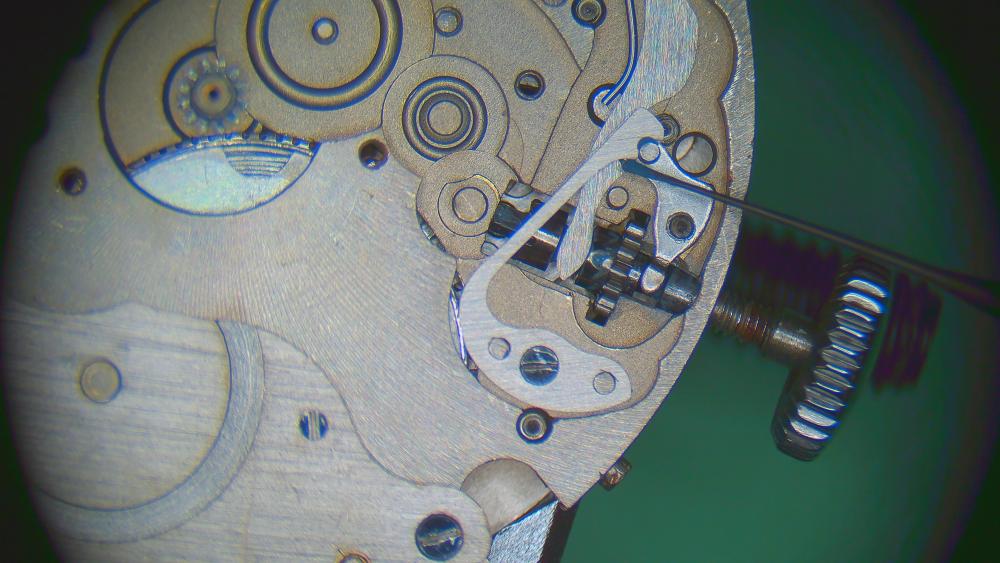
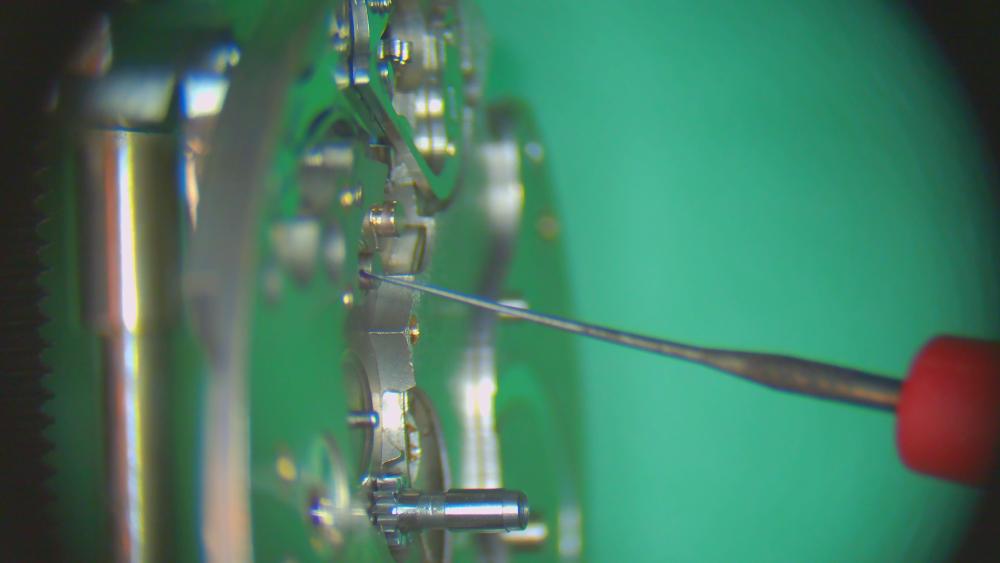
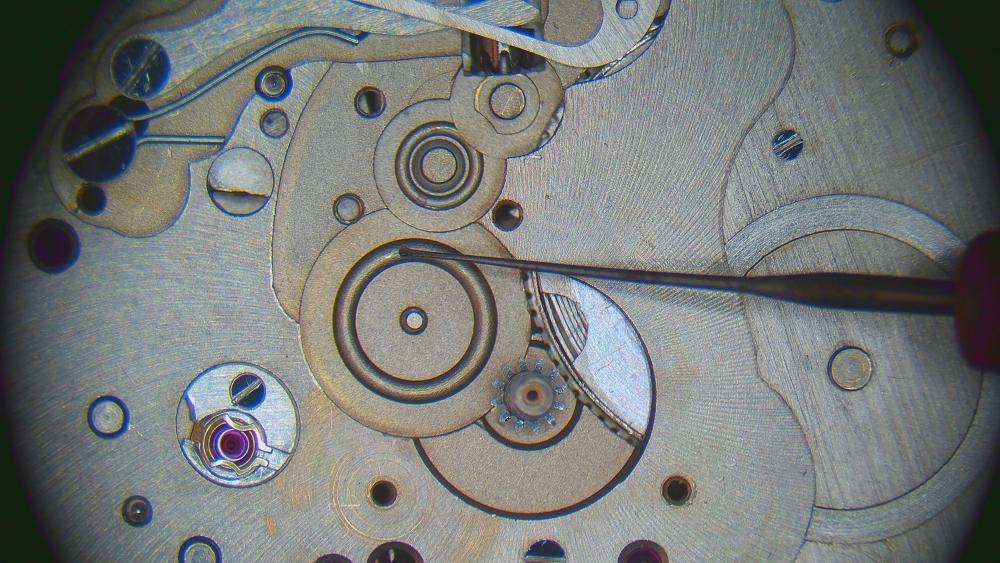
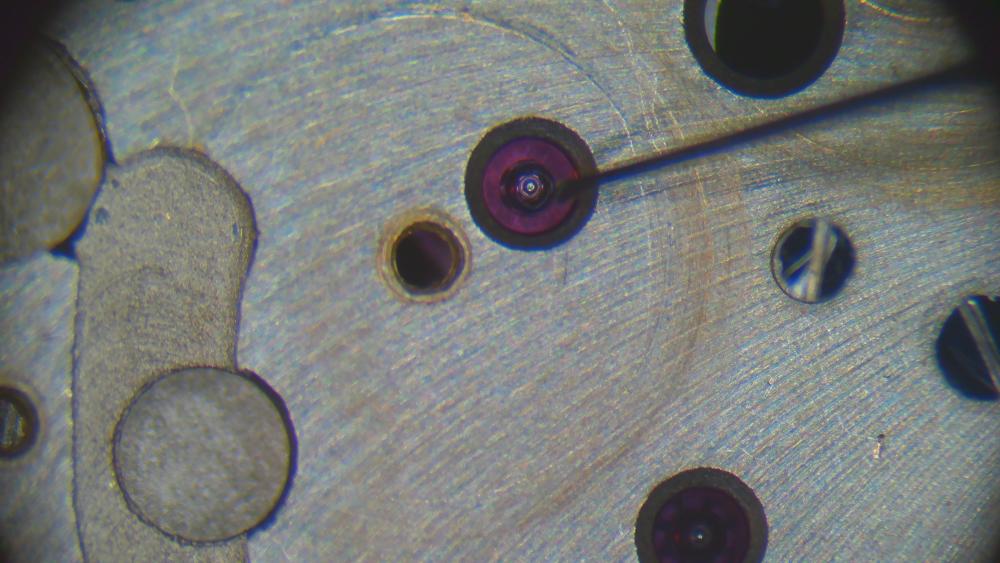
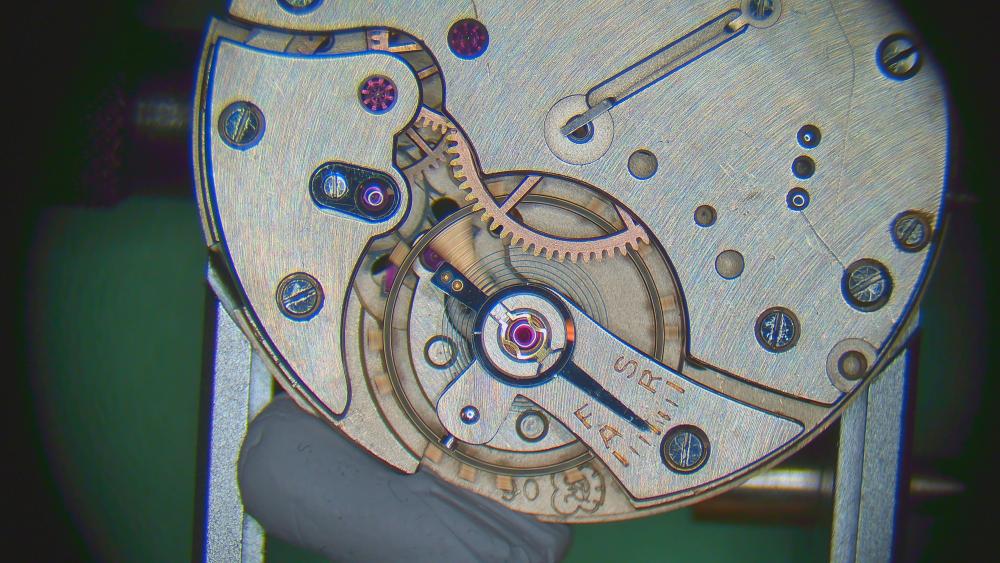
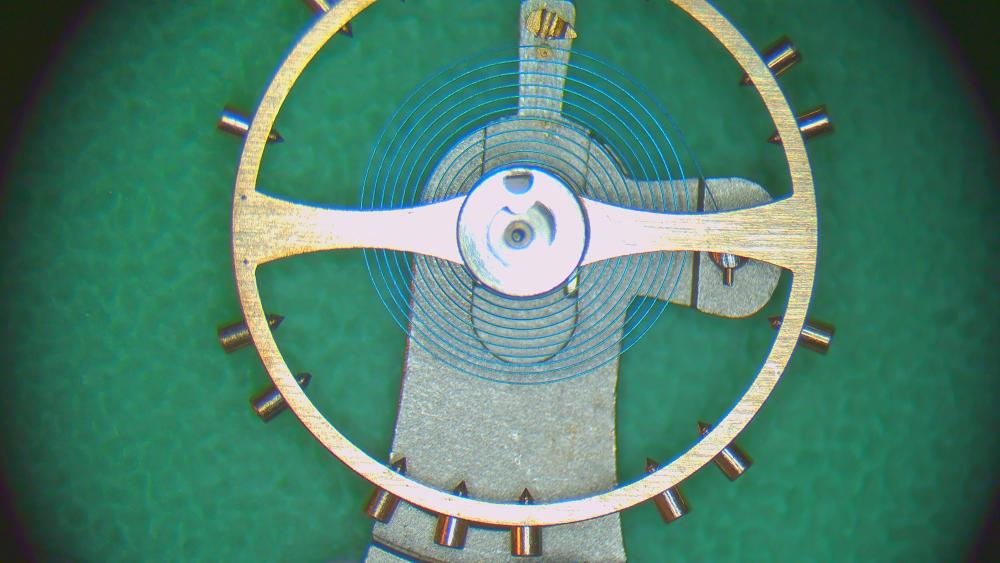
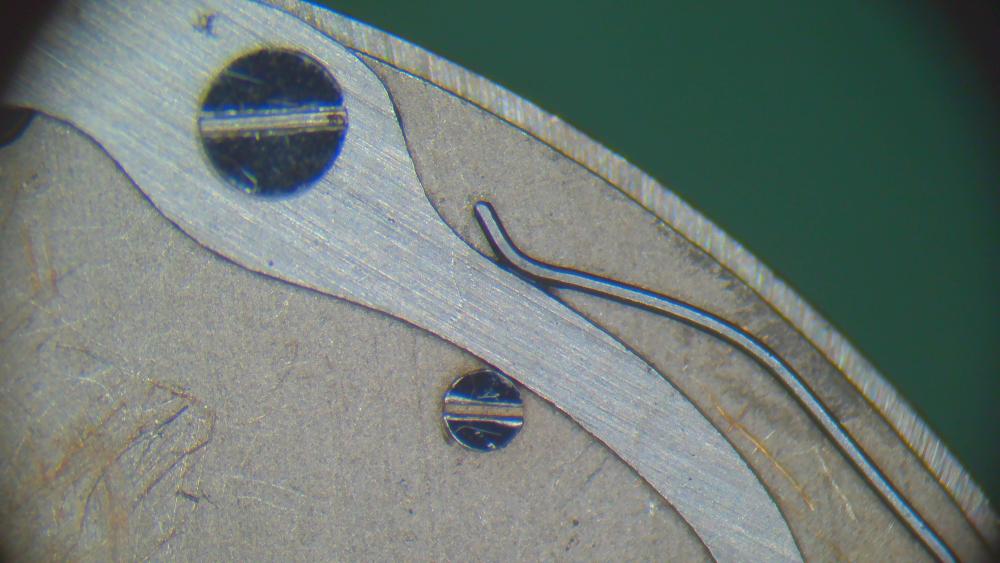
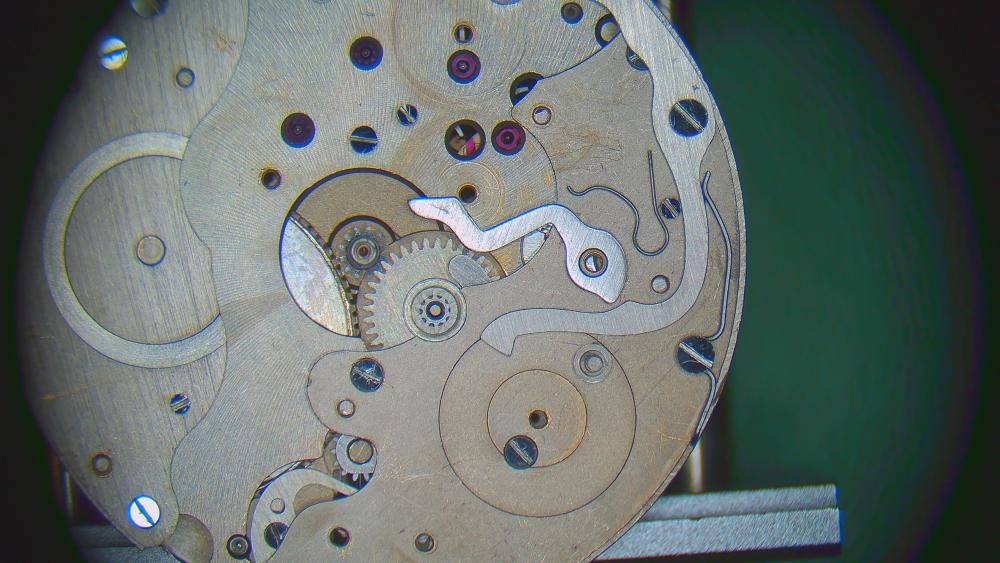
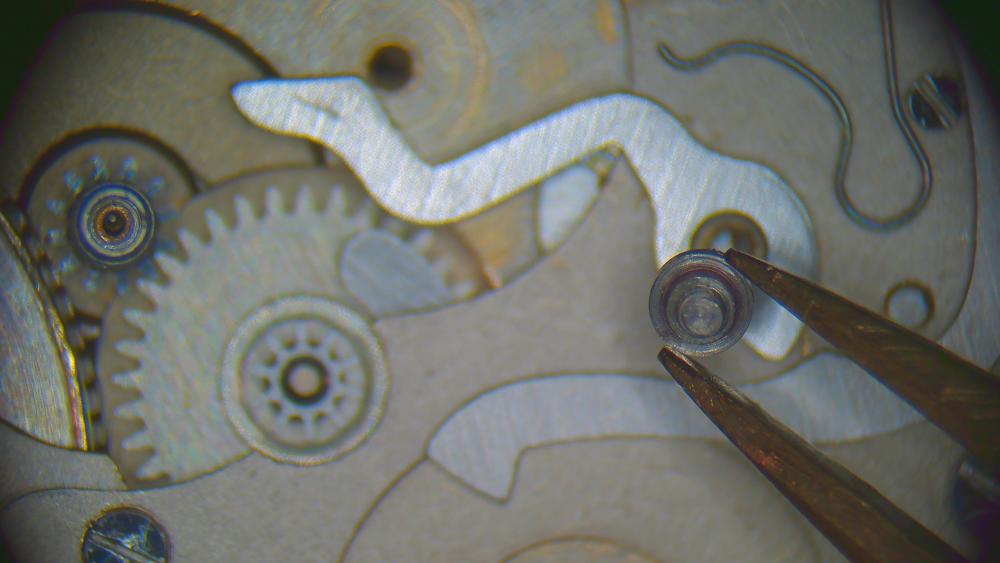
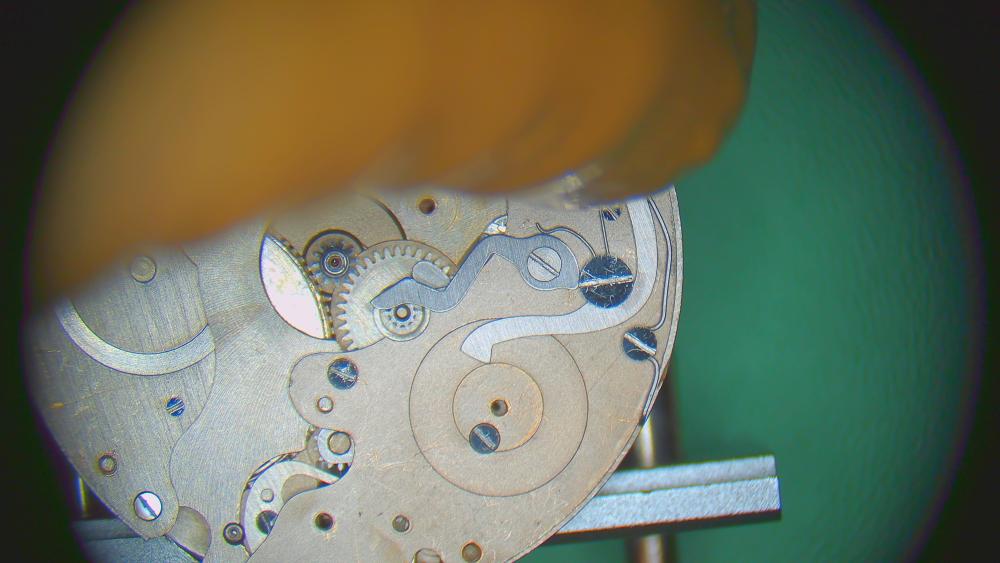
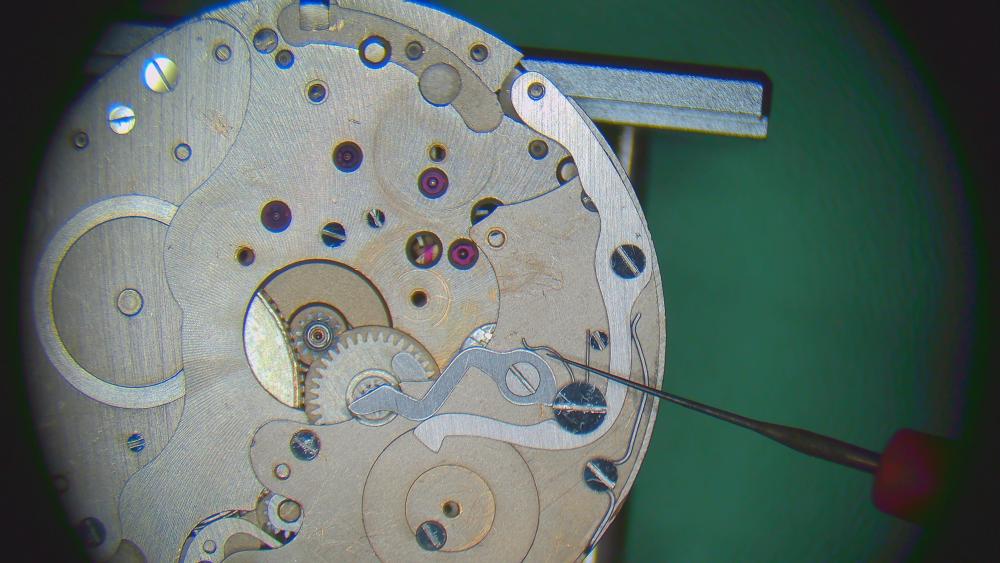
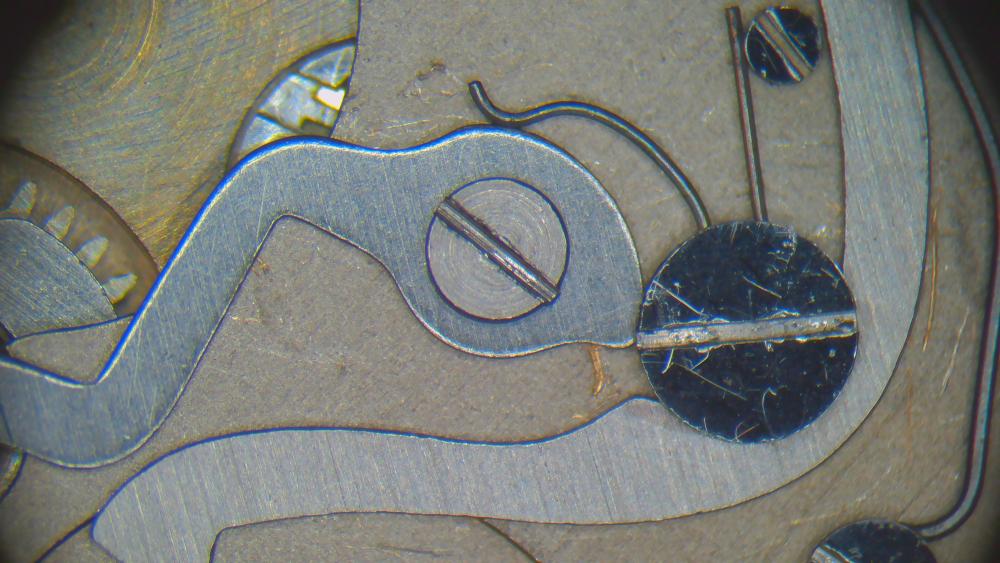
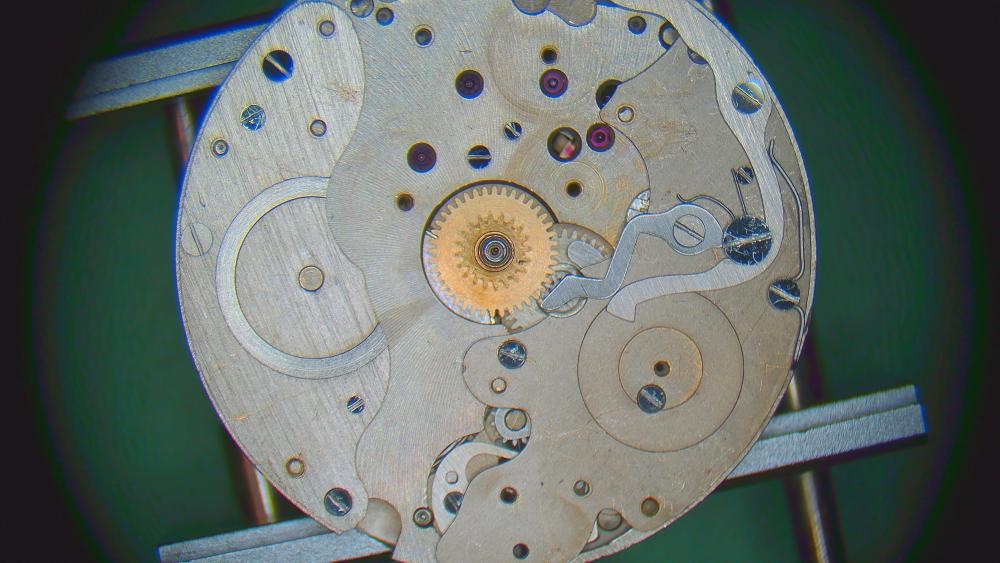
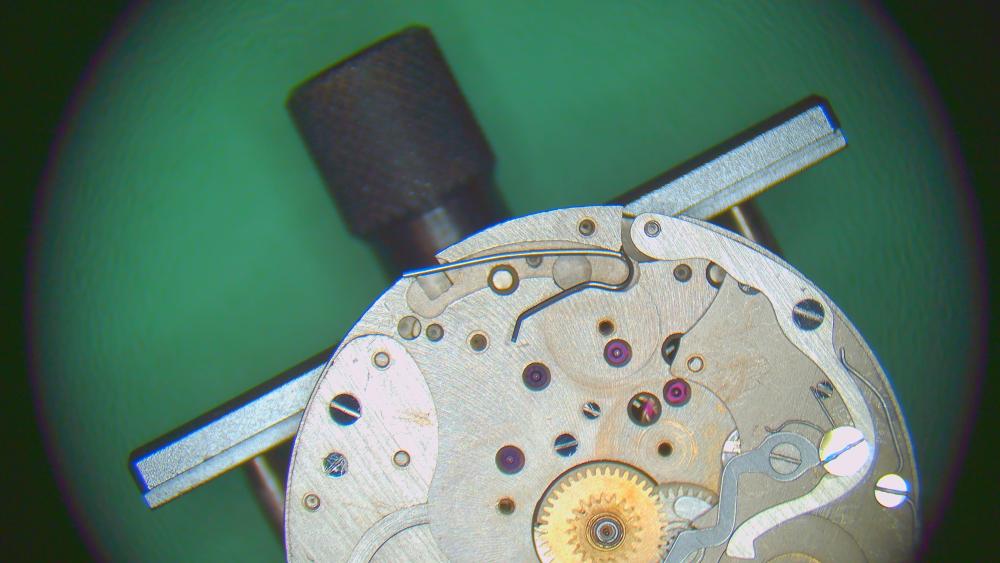
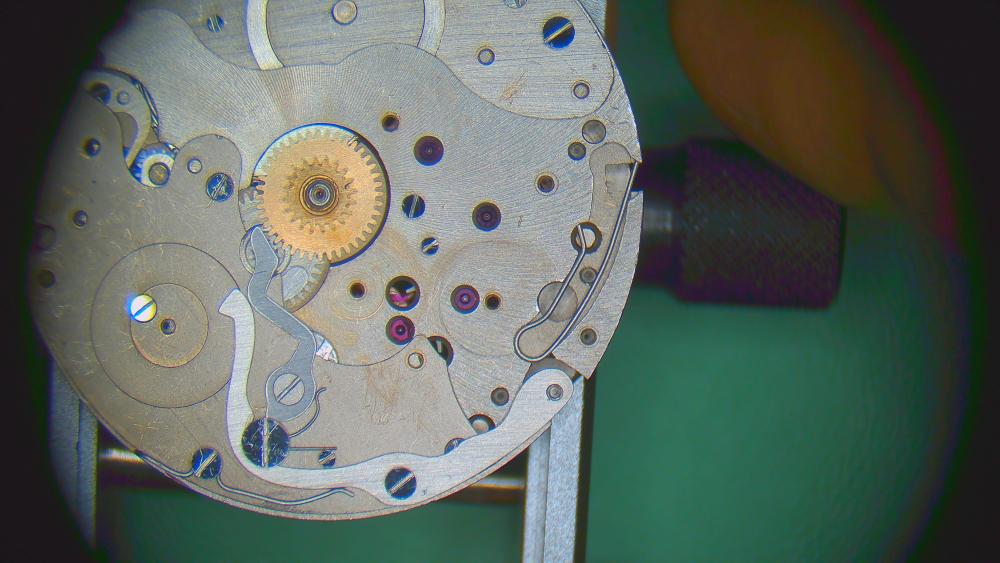
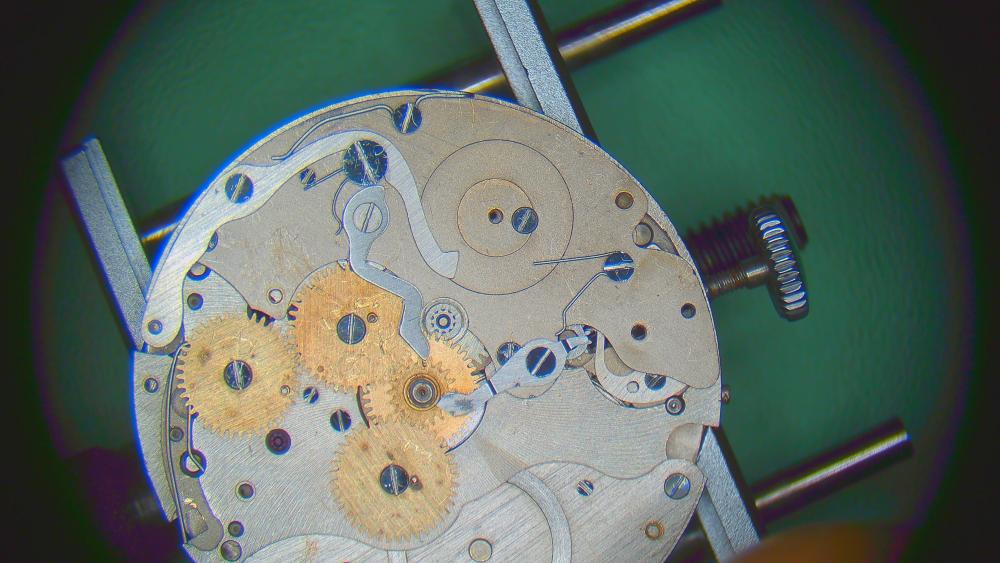
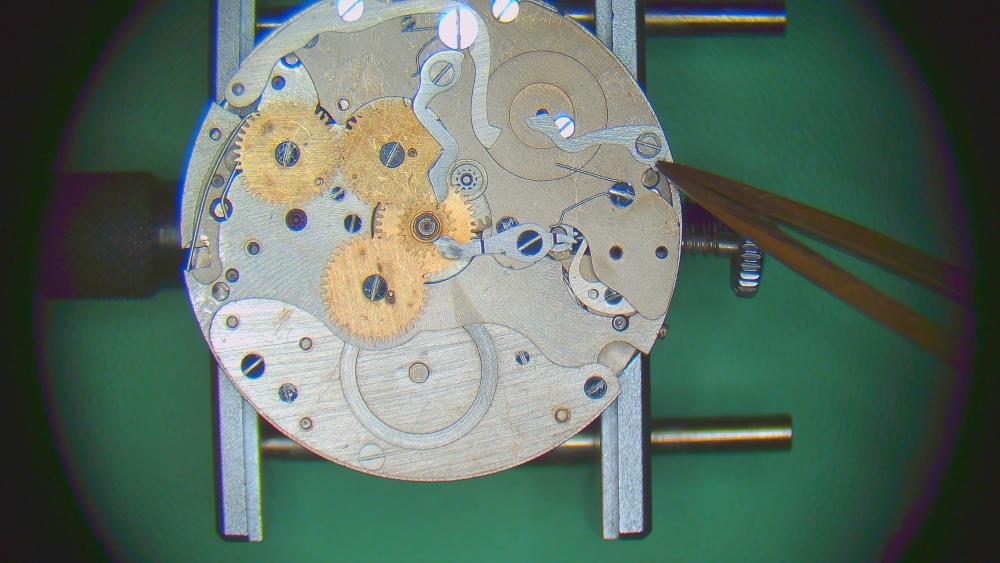
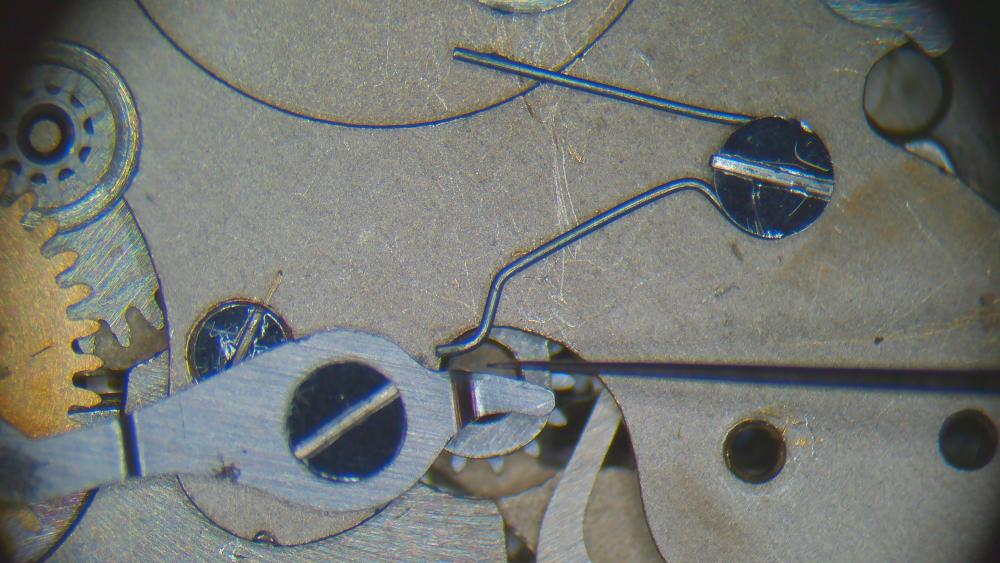
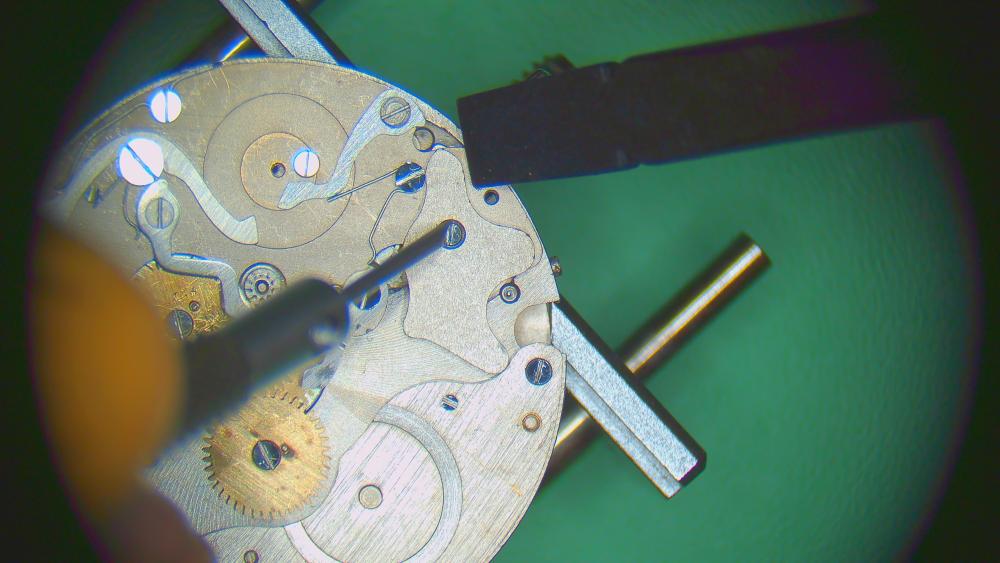
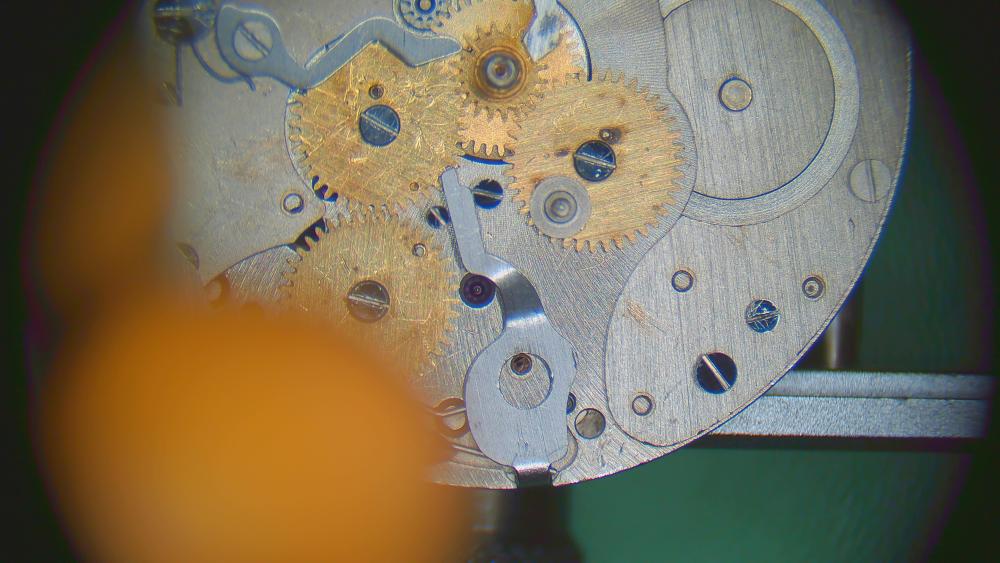
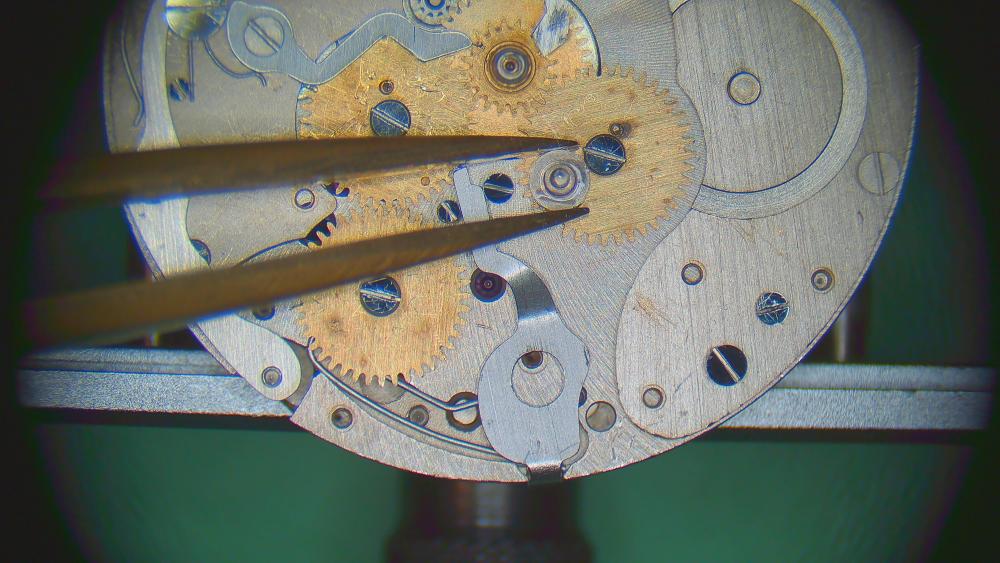
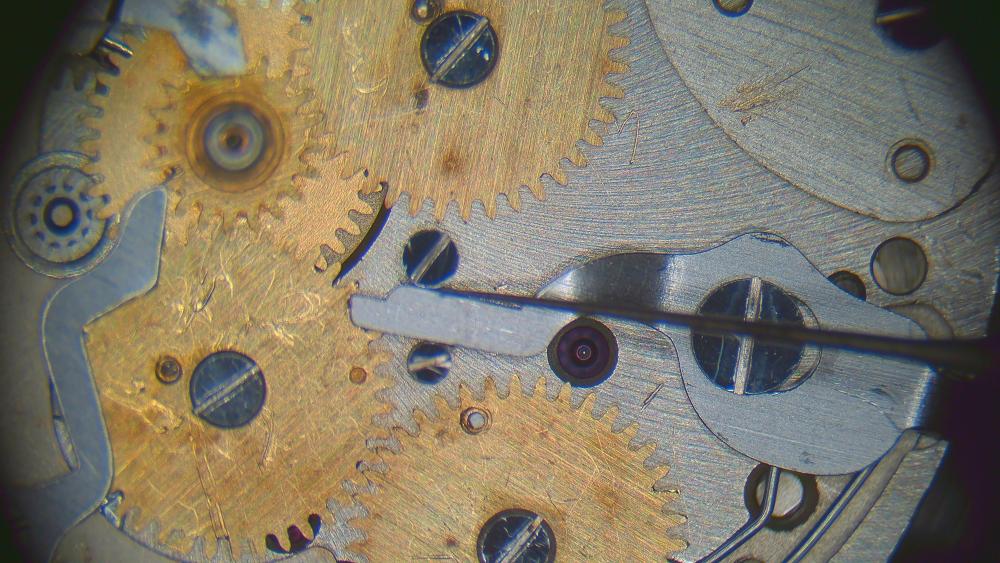
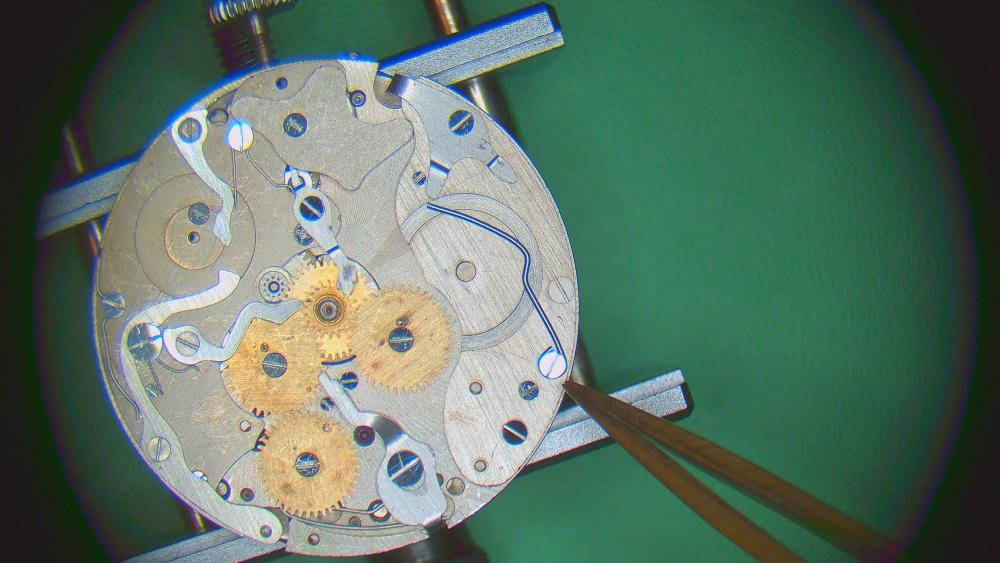
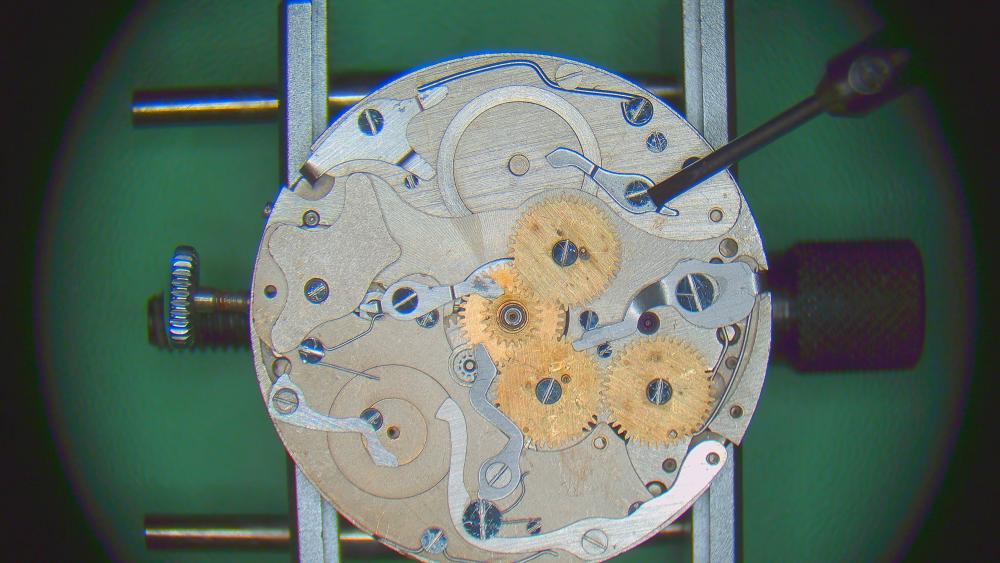
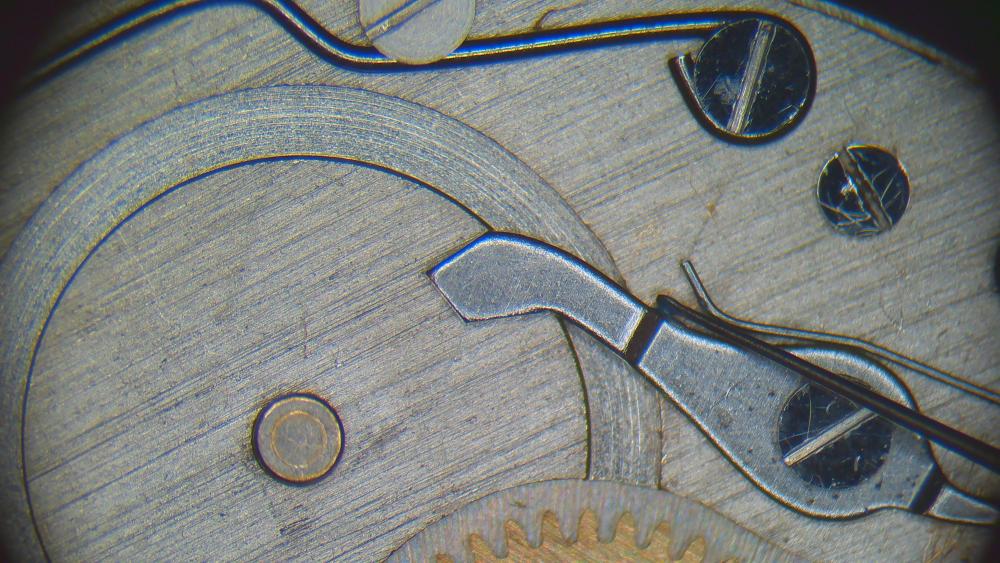
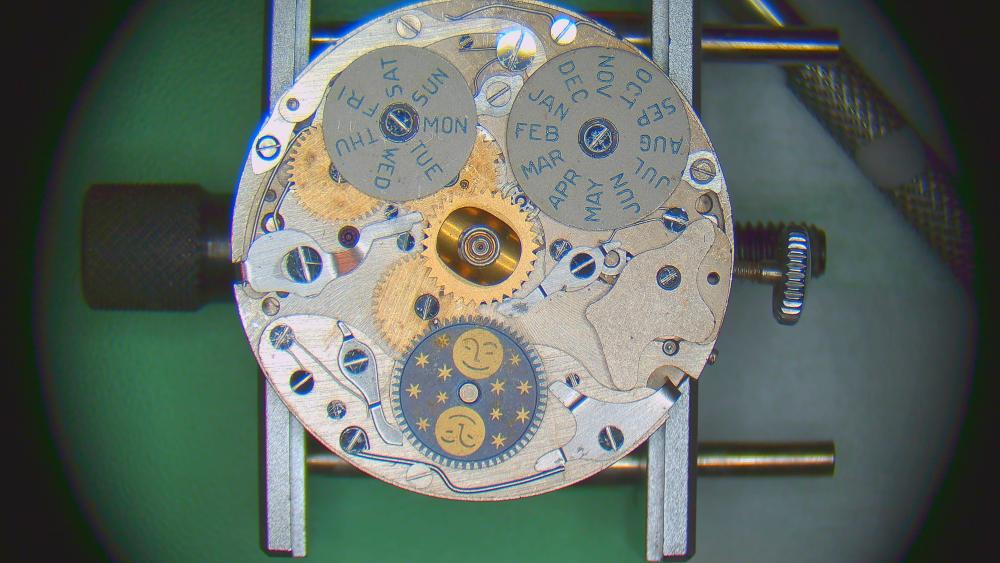
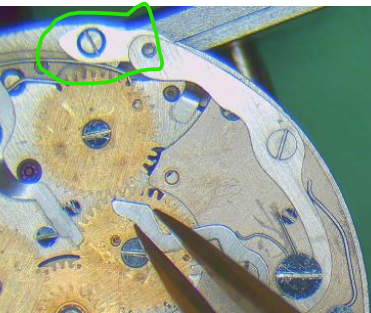
Yesterday I got the calendar works in place. It was one of the moments I feared because of the mighty spring (part 3135-635) that presses on the cam yoke (part 3135-633). If you lose the spring for the cam yoke while assembling the parts, the consequences will probably be disastrous. For an experienced Rolex repairer, it is probably no more challenging than fitting an arbor to a mainspring, but as always when you do something for the first time, it is a bit of a thrill. The challenge with the spring is that it is so powerful that it is impossible to hold it back without the movement holder - in my case the Bergeon 4040 - slipping or tipping. In other words, to hold the spring back you must resist or push on the movement holder. Perhaps the dedicated Rolex movement holder is better in this respect!? My method was to first push the spring away with brass tweezers with my right hand (which is my dominant hand) and then hold the spring with a chisel-like piece of peg wood held between the thumb and forefinger of my left hand while allowing the ring and middle fingers to stabilise the movement holder. Then I could put on the cam yoke with the jewel pre-mounted, the date finger (part 3135-623), put the screw in place and finally gently release the spring back to the cam yoke. The key to success is to prepare all the parts, lay them out in the right direction, and have the right screwdriver tested beforehand. You don't want to have to stop in the middle of the operation because, for example, you can't get the hole in the date finger to fit the post on the date wheel (part 3135-625), or you need to look for the screw. By the way, this screw is very similar to the screw for the sliding gear yoke (part 3135-217) which, unlike the screw holding the date wheel and date finger parts, is coned on the underside. Strong magnification is required to tell them apart. It is nice when the date changes in an instant but the construction does not feel very sophisticated even though it is very beautiful to look at. The construction reminds me of how the corresponding complication is implemented in Vostok's calibres 2414 and 2416B which also change the date in an instant. The big difference is Rolex's implementation with a jewel on the cam yoke and that Rolex's powerful spring probably has at least a hundred times longer life than the equivalent of Vostok's movement where one often finds that the spring is severely exhausted or even broken. As much as I like the Vostok movements, I have to admit that the implementation is substandard even if the principle is the same. A solution for instantaneous date change that I find more sophisticated is the one that can be seen in ETA's calibre 2472. Anyway, I felt very relieved when everything was in place and it felt like a new and important experience. To be honest, I felt really proud and celebrated with a slice of my wife's delicious apple pie and a cup of coffee!
 3 points
 -
A follow-up, in case it's of interest to anyone. The back of the Canford is held on by the 6 hex-headed screws. They need a 1.5mm key, but the sockets are very shallow so the key end must be absolutely flat and that's what caught me out. I had forgotten that my watch was still under warranty, which would be invalidated if I were to change the battery, so I'll be sending it back to EB this time The iFixit "Mako" set arrived quickly from Amazon and has a useful collection of pieces that appear to be well made - only time will tell.2 points
-
As a diver I know that almost without exception everyone uses a dive computer. However, in the past you used to use dive tables to calculate your maximum bottom depth duration. For example if you knew the dive was 30m then you would use the table to have it tell you that you could safely remain at this depth for 15 mins. So I assume you could use this bezel once you get to 30m to let you count down from 15 to 0 mins before you have to make your way to surface with the standard type of stops. However, if you over-stay your time at depth then you run the risk of accumulating too much nitrogen in your blood and returning to surface would require additional and prolonged stops to allow the nitrogen to exit your blood and other soft tissues. Failure to make these additional stops could result in a nasty case of DCI, also known as the bends and in extreme cases death. You would have a pressure gauge on your tank so you dive on pressure, not time. However, if you overstay your bottom time, then you may have to make more and longer periodic stops on your way to the surface (known as decompression stops). Normally you dive and plan not to have these decompression stops and only regular 3 minute stops at set intervals. Decompression stops could be as long as 10-20 minutes each and several of them (depending how deep you wend and for how long) and you better hope you have enough air left to make these longer stops, or you have to come to surface and hope for the best.2 points
-
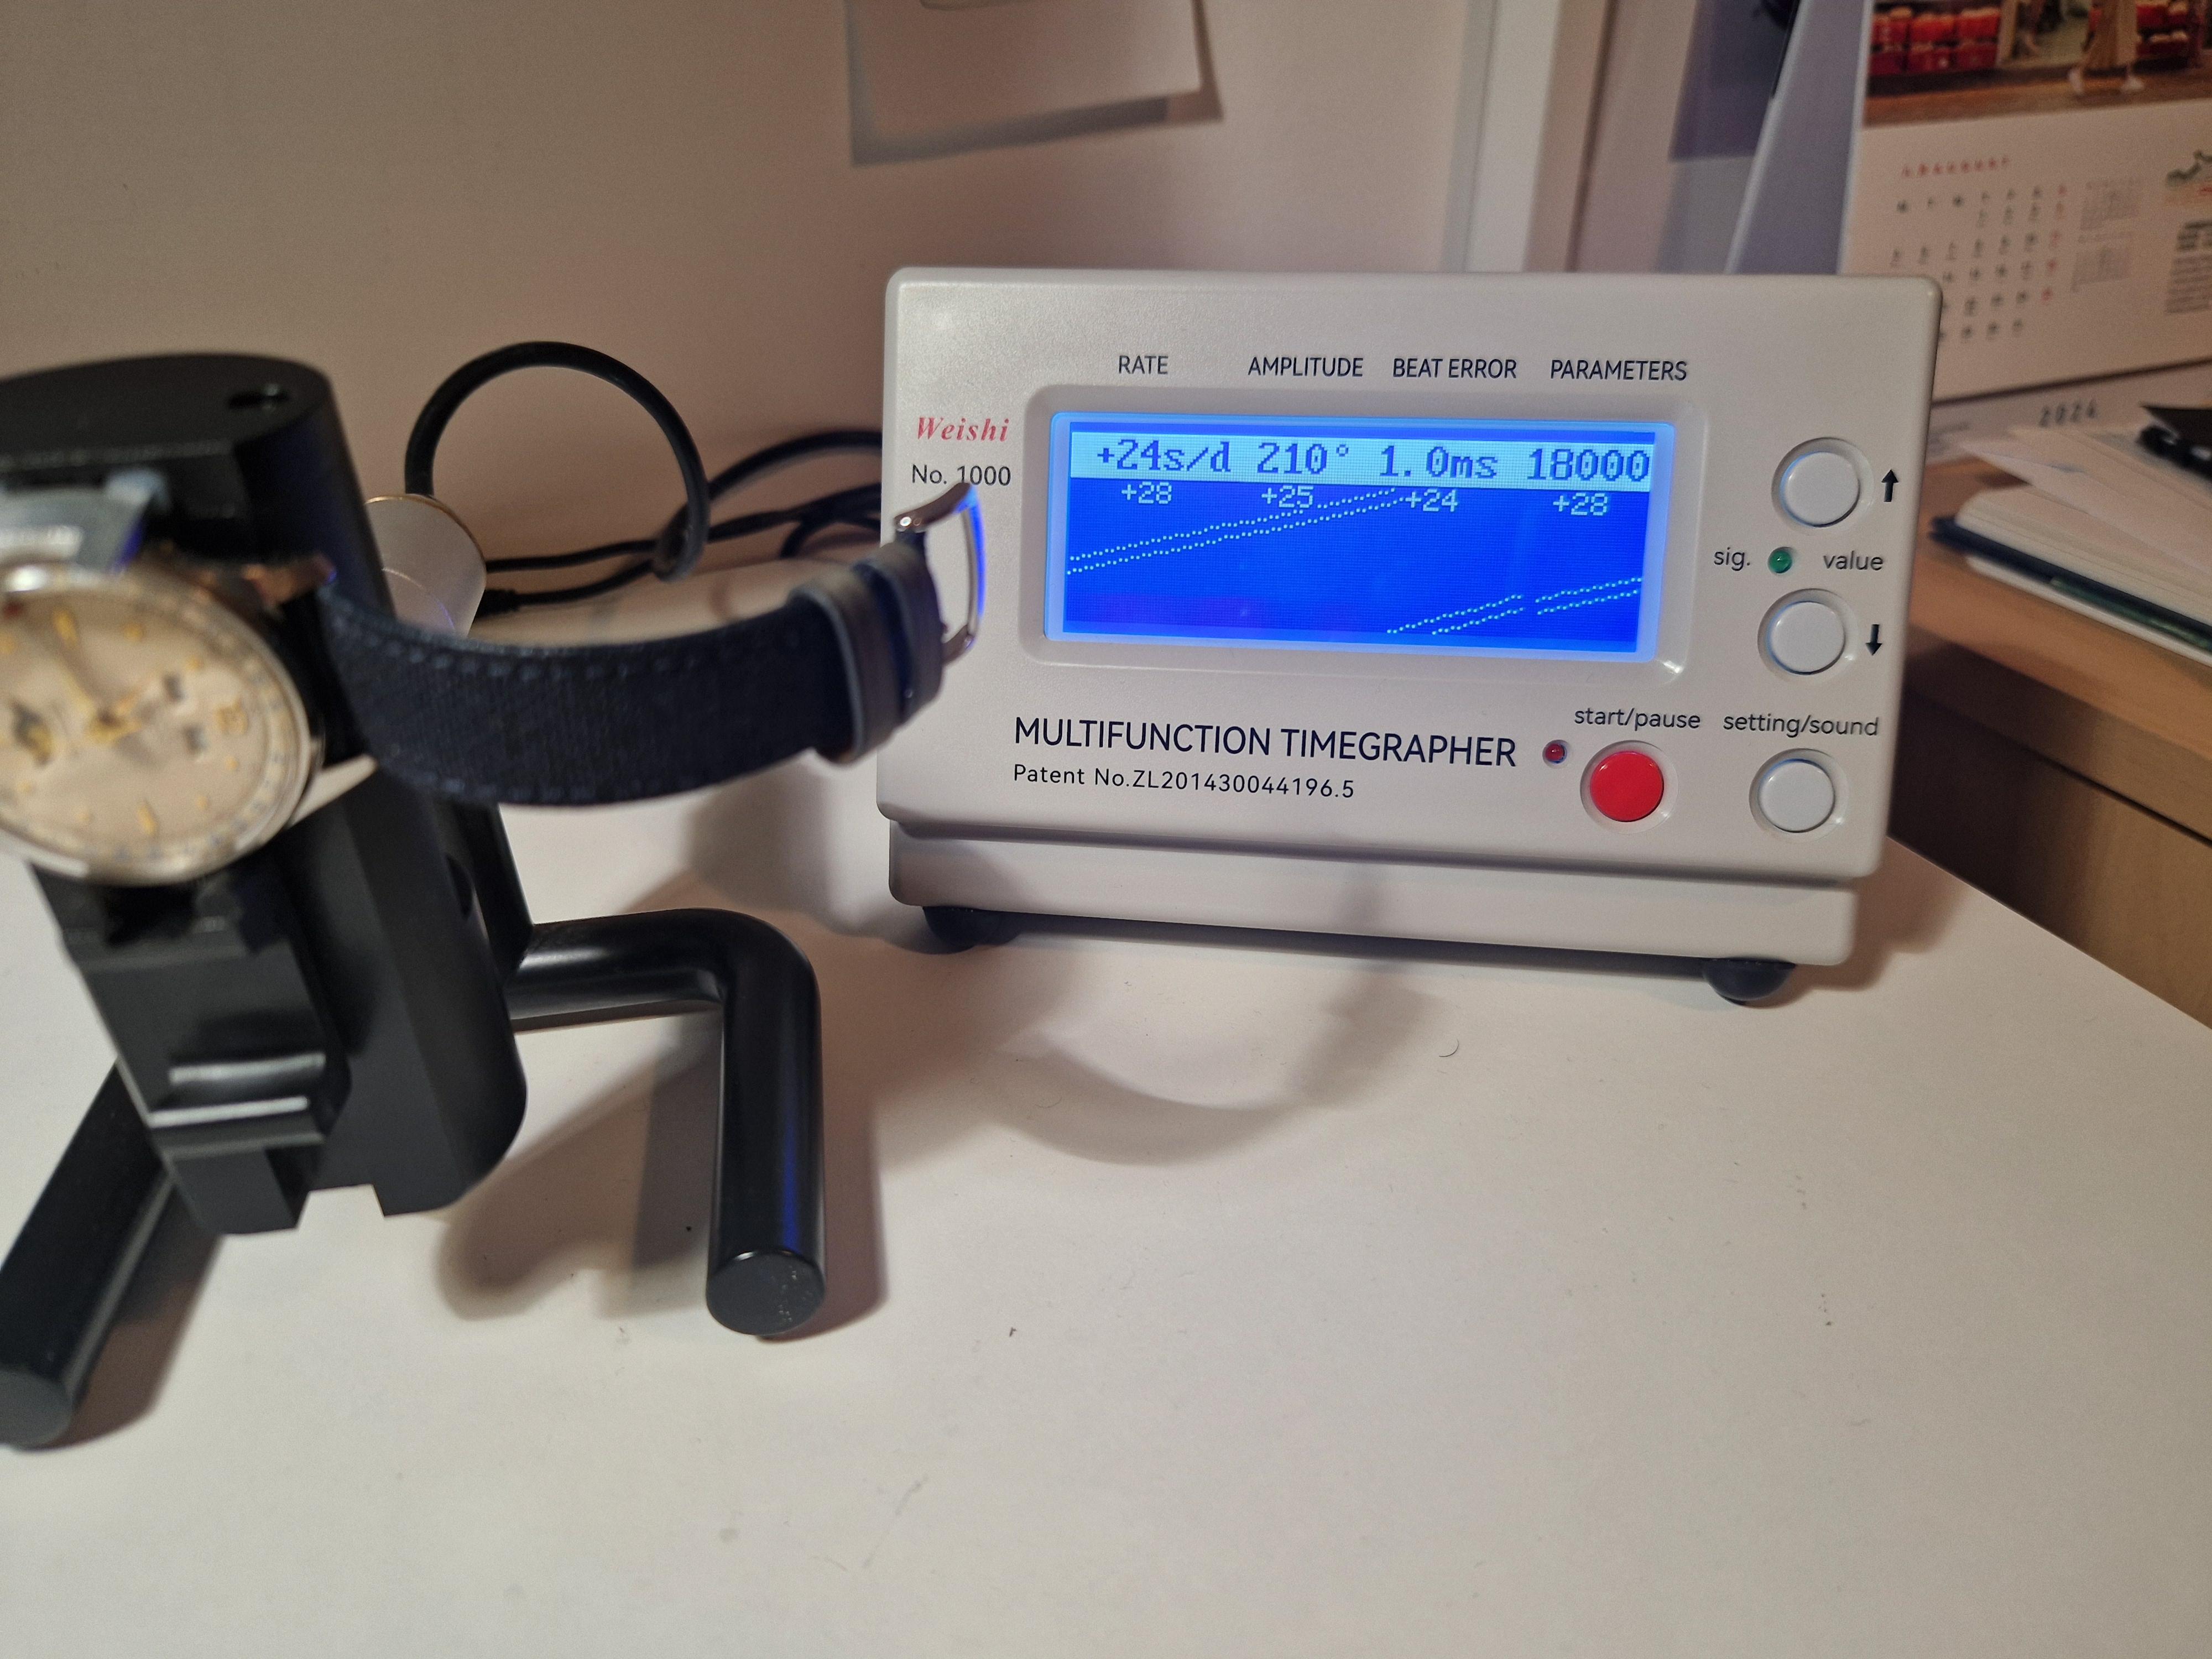
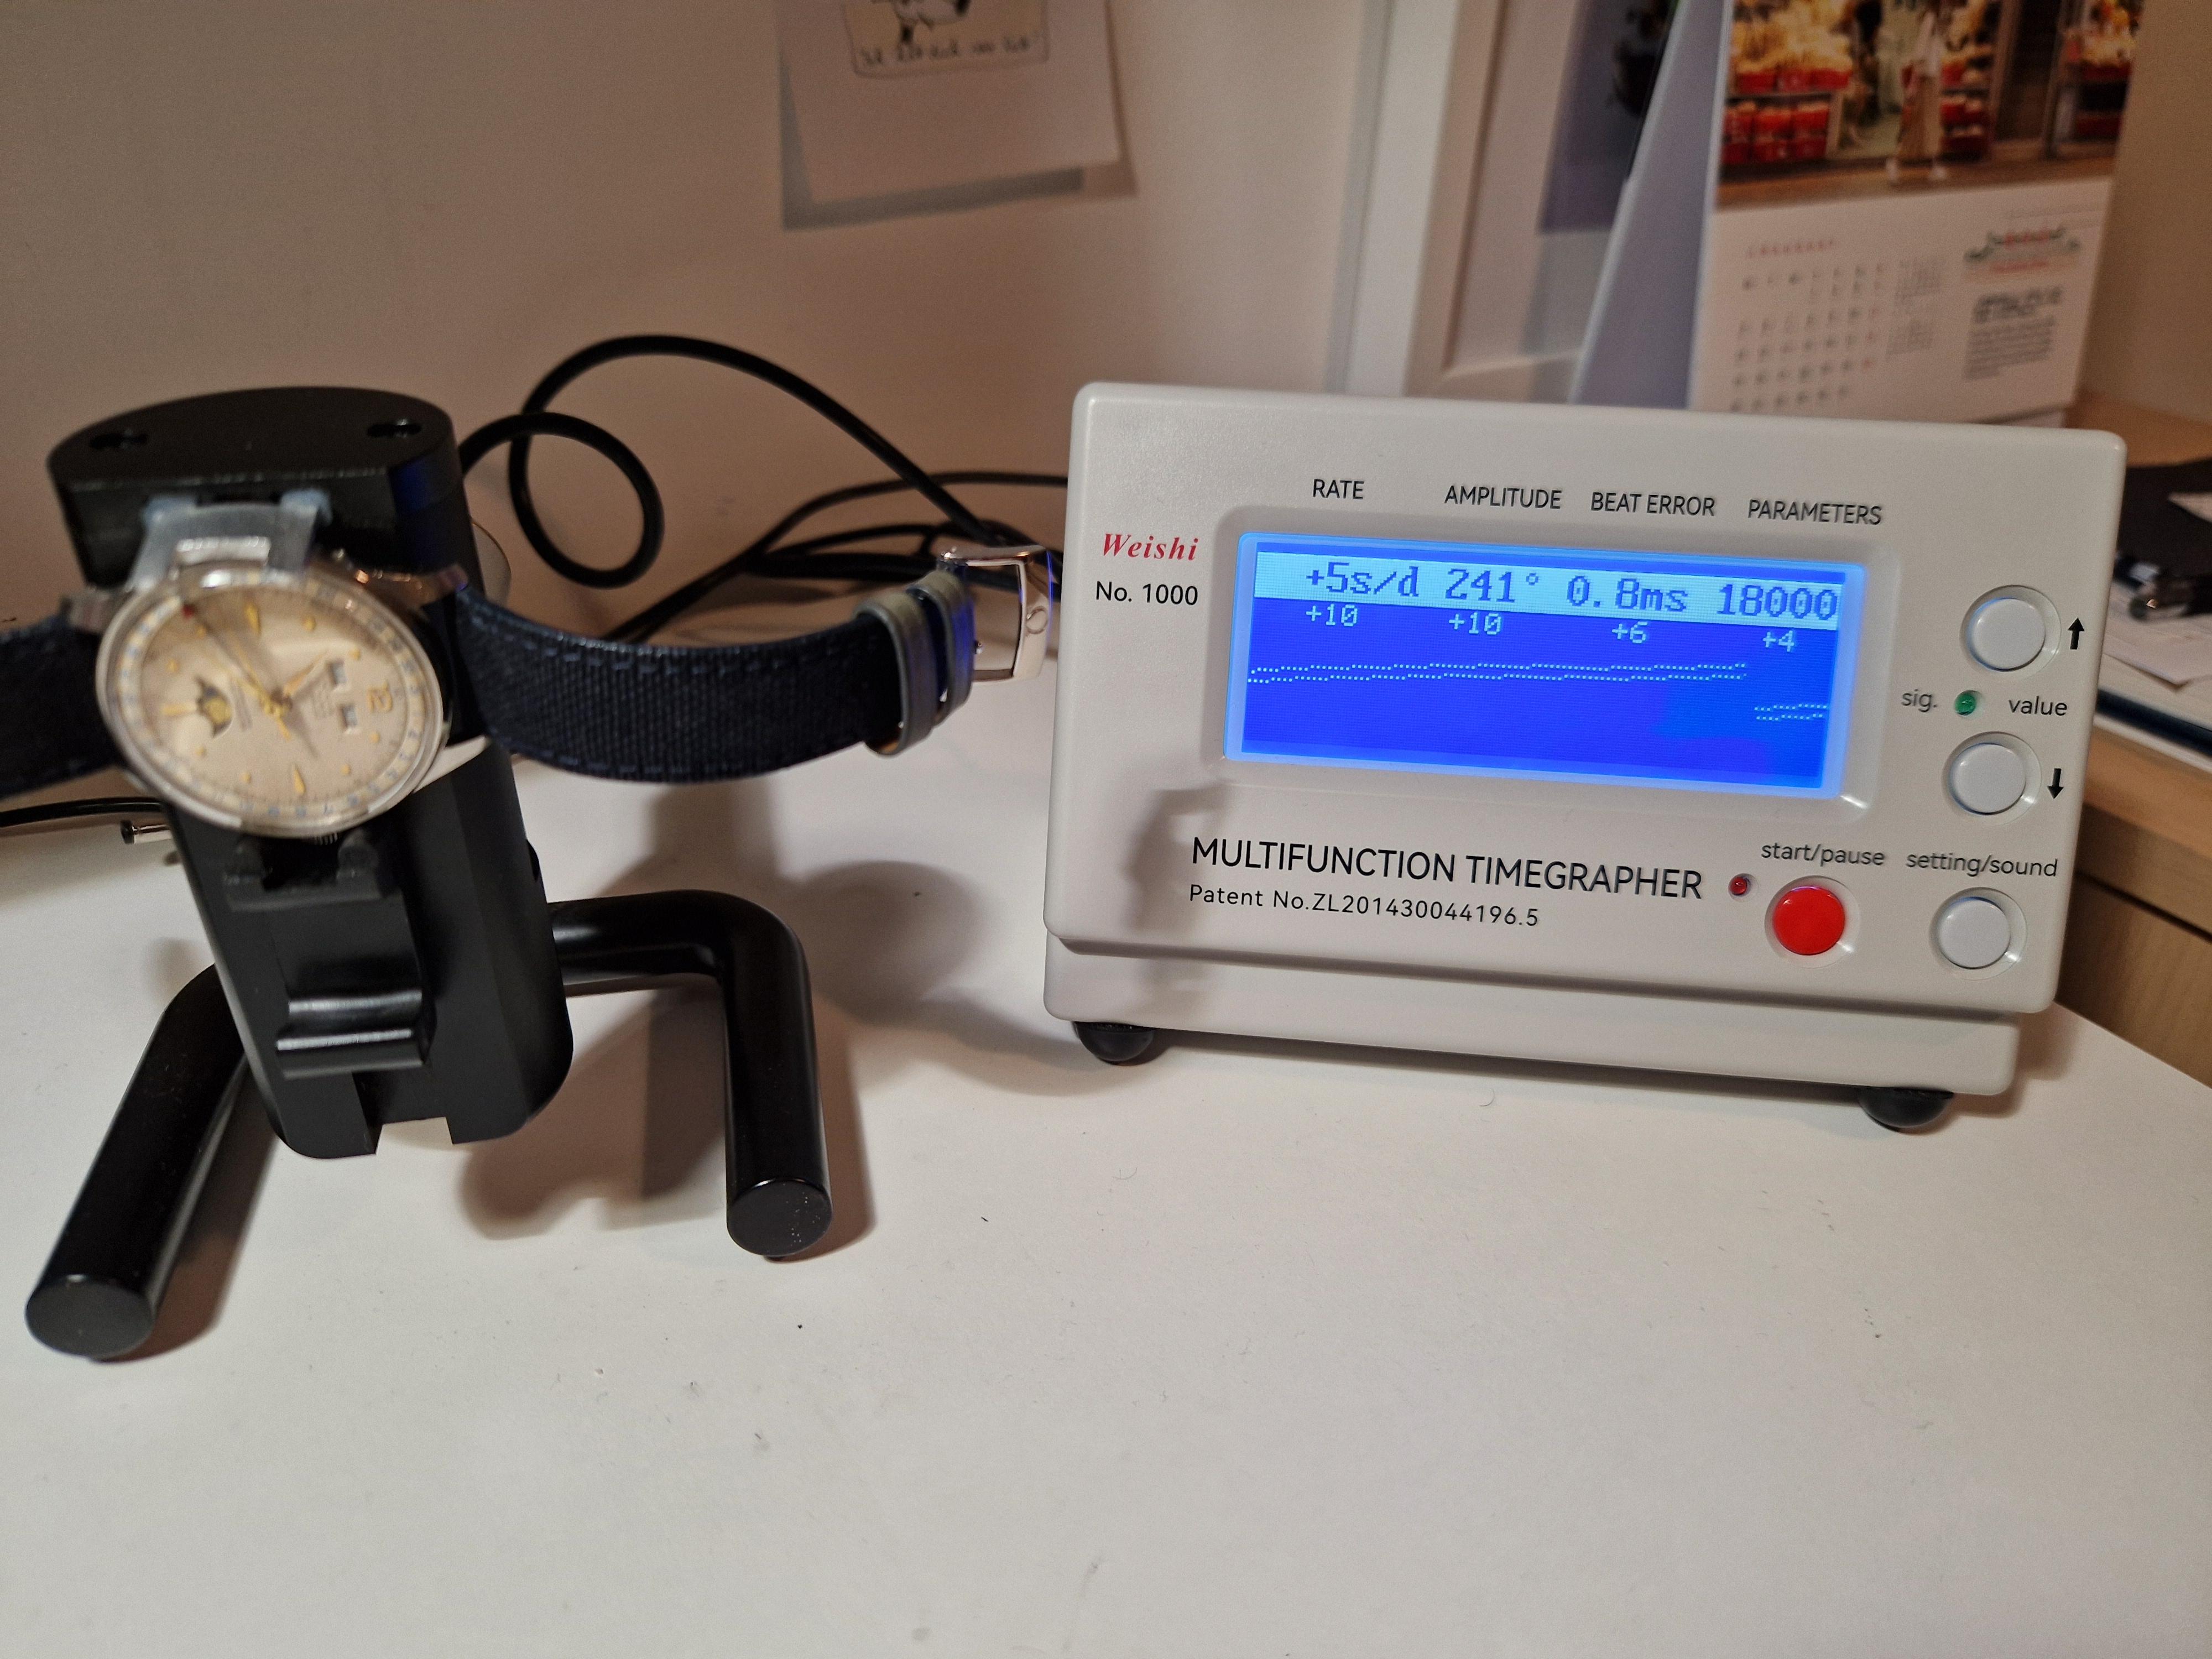
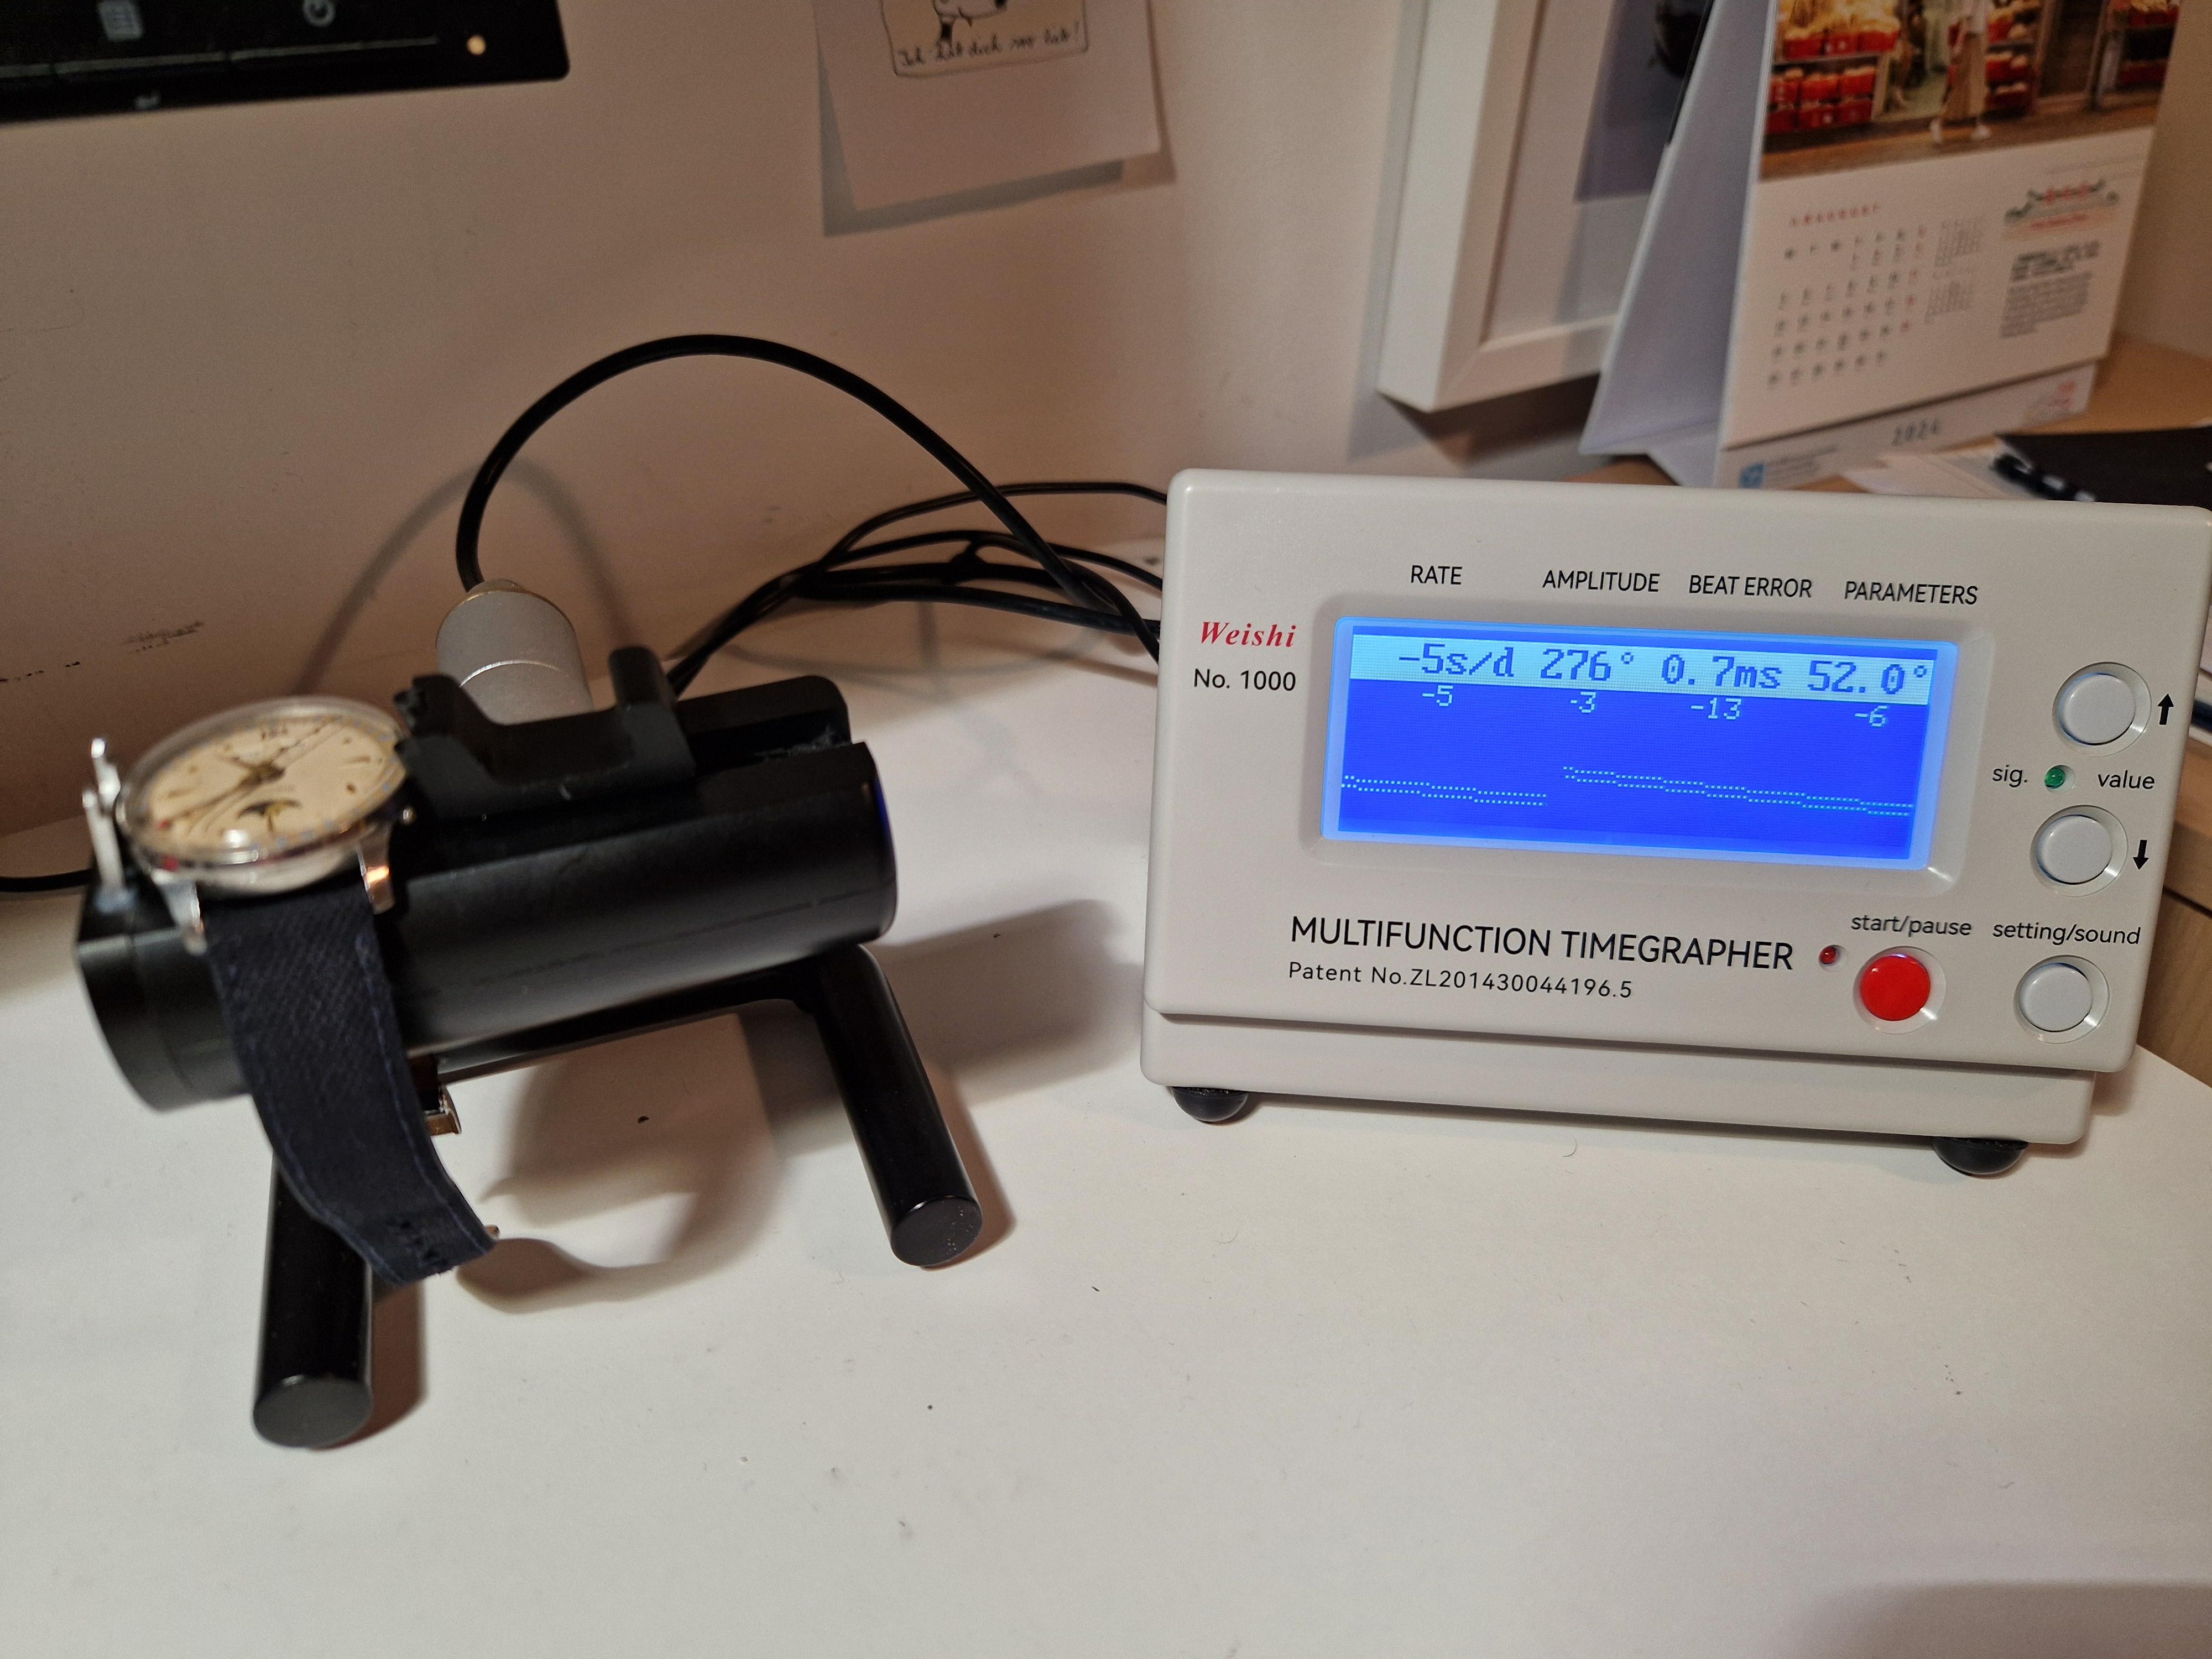
and now how it runs AFTER 24h:

 2 points
 -
Hi Nigel, Several things to say here... First one: in situations like this (where You were worried that the internal coil is loose and no pressure to the arbor), You need just to try to wind and see if the hook of the arbor will catch the spring end. It is obvious from the picture (to me) that it will catch. If so, then You need just to close the barrel and be happy. Then, I will open a secret for You: It is not possible to heat treat the spring with electric soldering iron. No mater what You see in the videos, this is not possible. I assure You that if one can do something with the help of the soldering iron, then He will be able to do the same thing with the soldering iron not plugged in the wall socket. The difference will be only that there will be no danger to burn His fingers on the hot iron... Winding the spring in the barrel with hands can be done without damage to the spring, but one must feel the spring and not to bend it more than needed. Practice helps much. One thing is for sure: using mainspring winder is not less dangerous for the spring if one has no practice too. The winder must be correct for both the spring and the barrel and one must know the habits of the winder in order to prevent the spring from damage. And one more secret: if the spring is not completely flat when put on the table, this not always mean that it will not perform well and there will be loss in amplitude. Now You have opportunity to try the first new spring that You consider as damaged, and to compare the amplitudes with the old spring and with the new one, that is still in the box when the time for it to get in the barrel comes.2 points
-
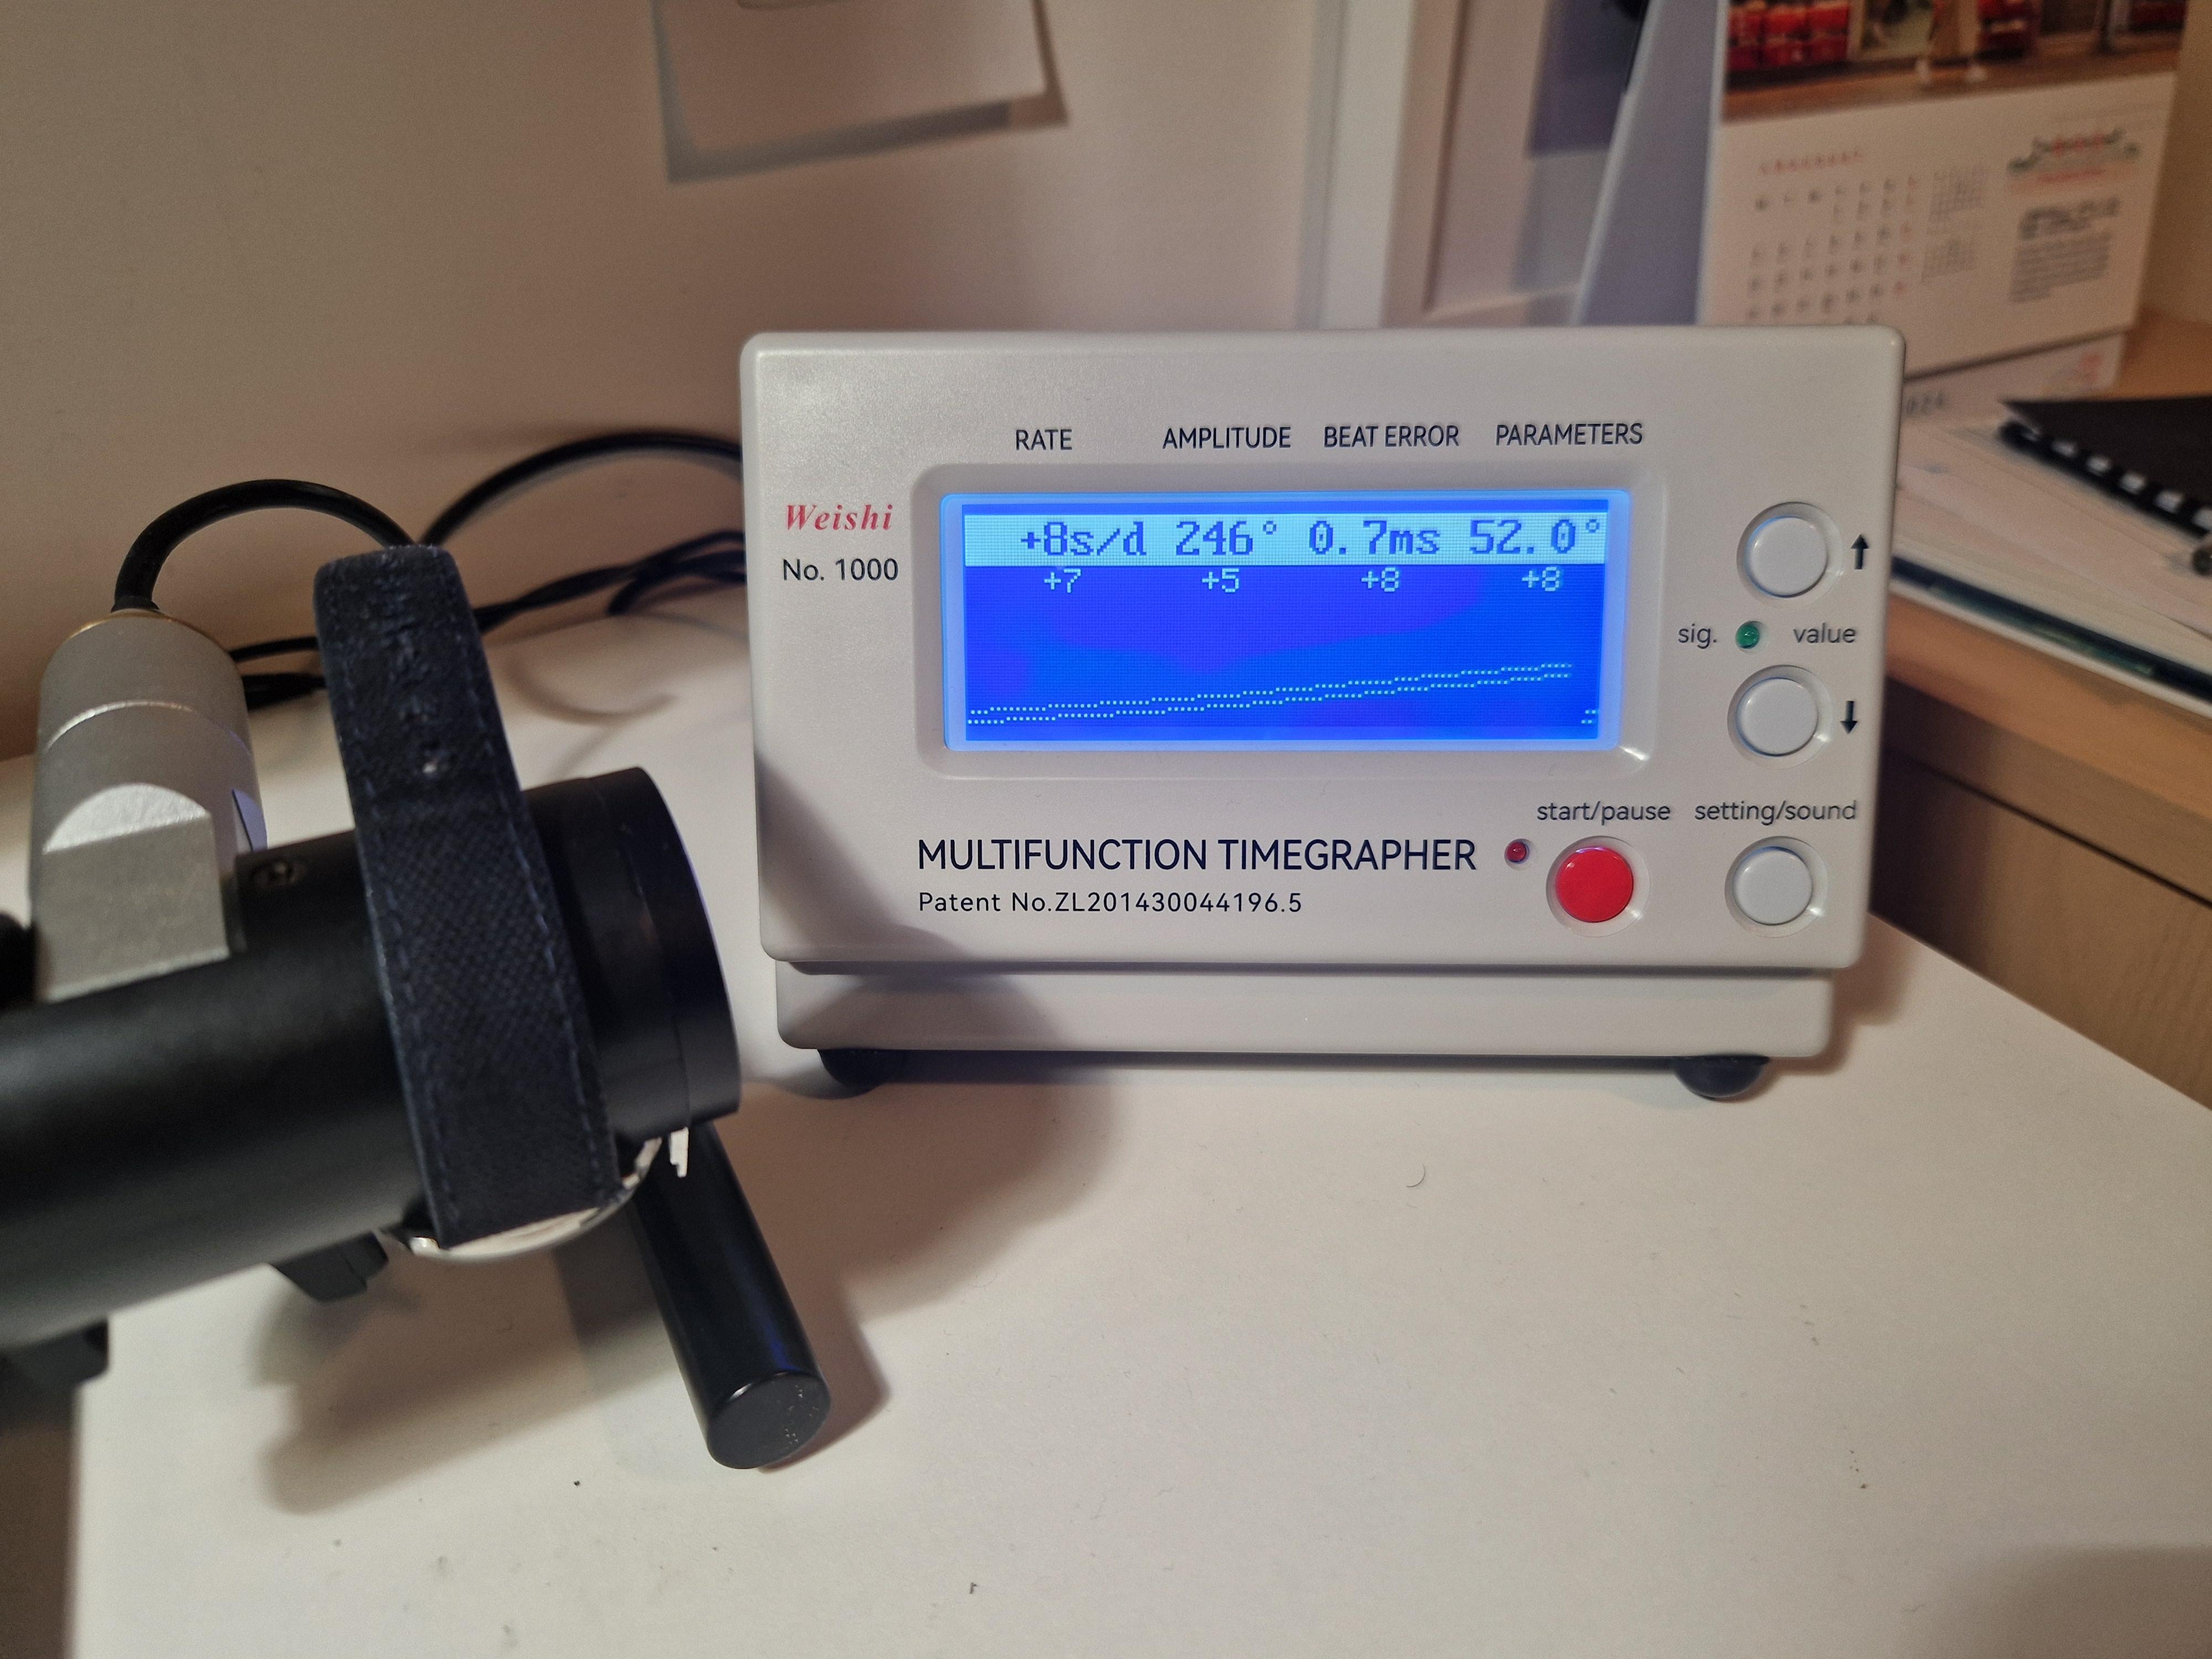
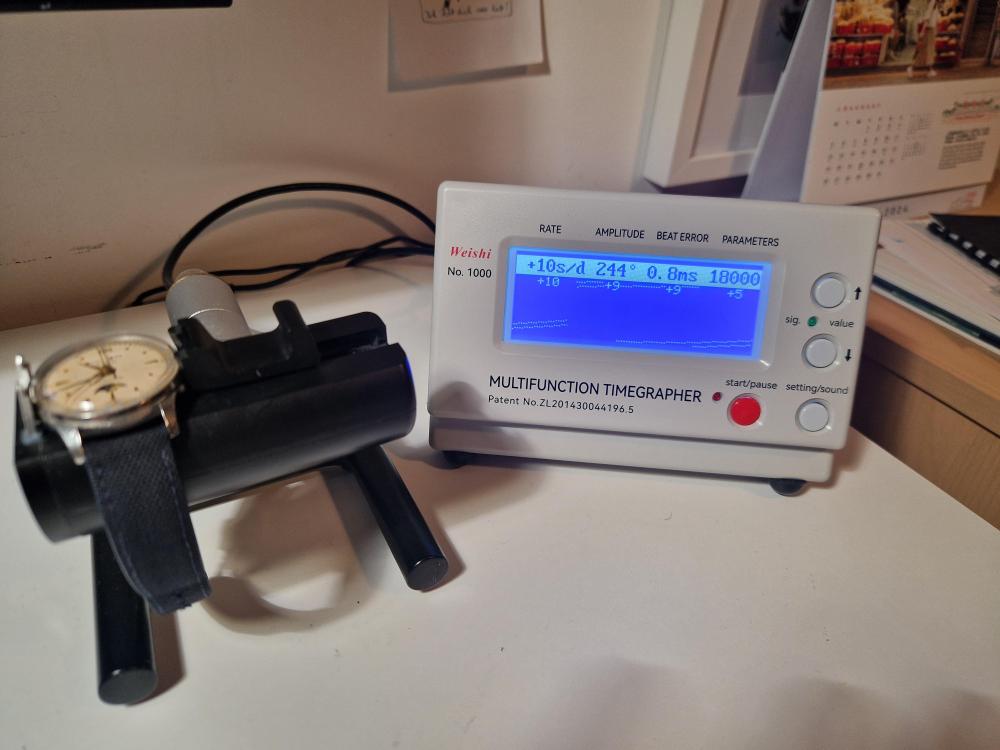
Here are the timegrapher readings at full wind (after 24h to be posted later):


 2 points
 -
Glad I was able to help. I spent quite a long time trying to figure out how to open the watch and regulate it, so I figured I could save others some trouble. I spent probably two or three months trying to figure it out before getting help from this forum and finally figuring it out. Just opening these aquaracers is pretty unintuitive. It’s a pretty unique design. It was really worth it to me though because I got it from +10 seconds fast per day down to +2, which means it’s within a minute of the right time for a month, which is longer than I usually wear it anyway.1 point
-
I was a Volvo mechanic before going to watchmaking school. Not a factory mechanic- I worked for (initially and then closely with) a Volvo junkyard. We built some pretty good rally as well as demo Derby cars. The rallys were usually English two seaters with tricked out Volvo motors. The demos were _always_ Chrysler Imperials!1 point
-
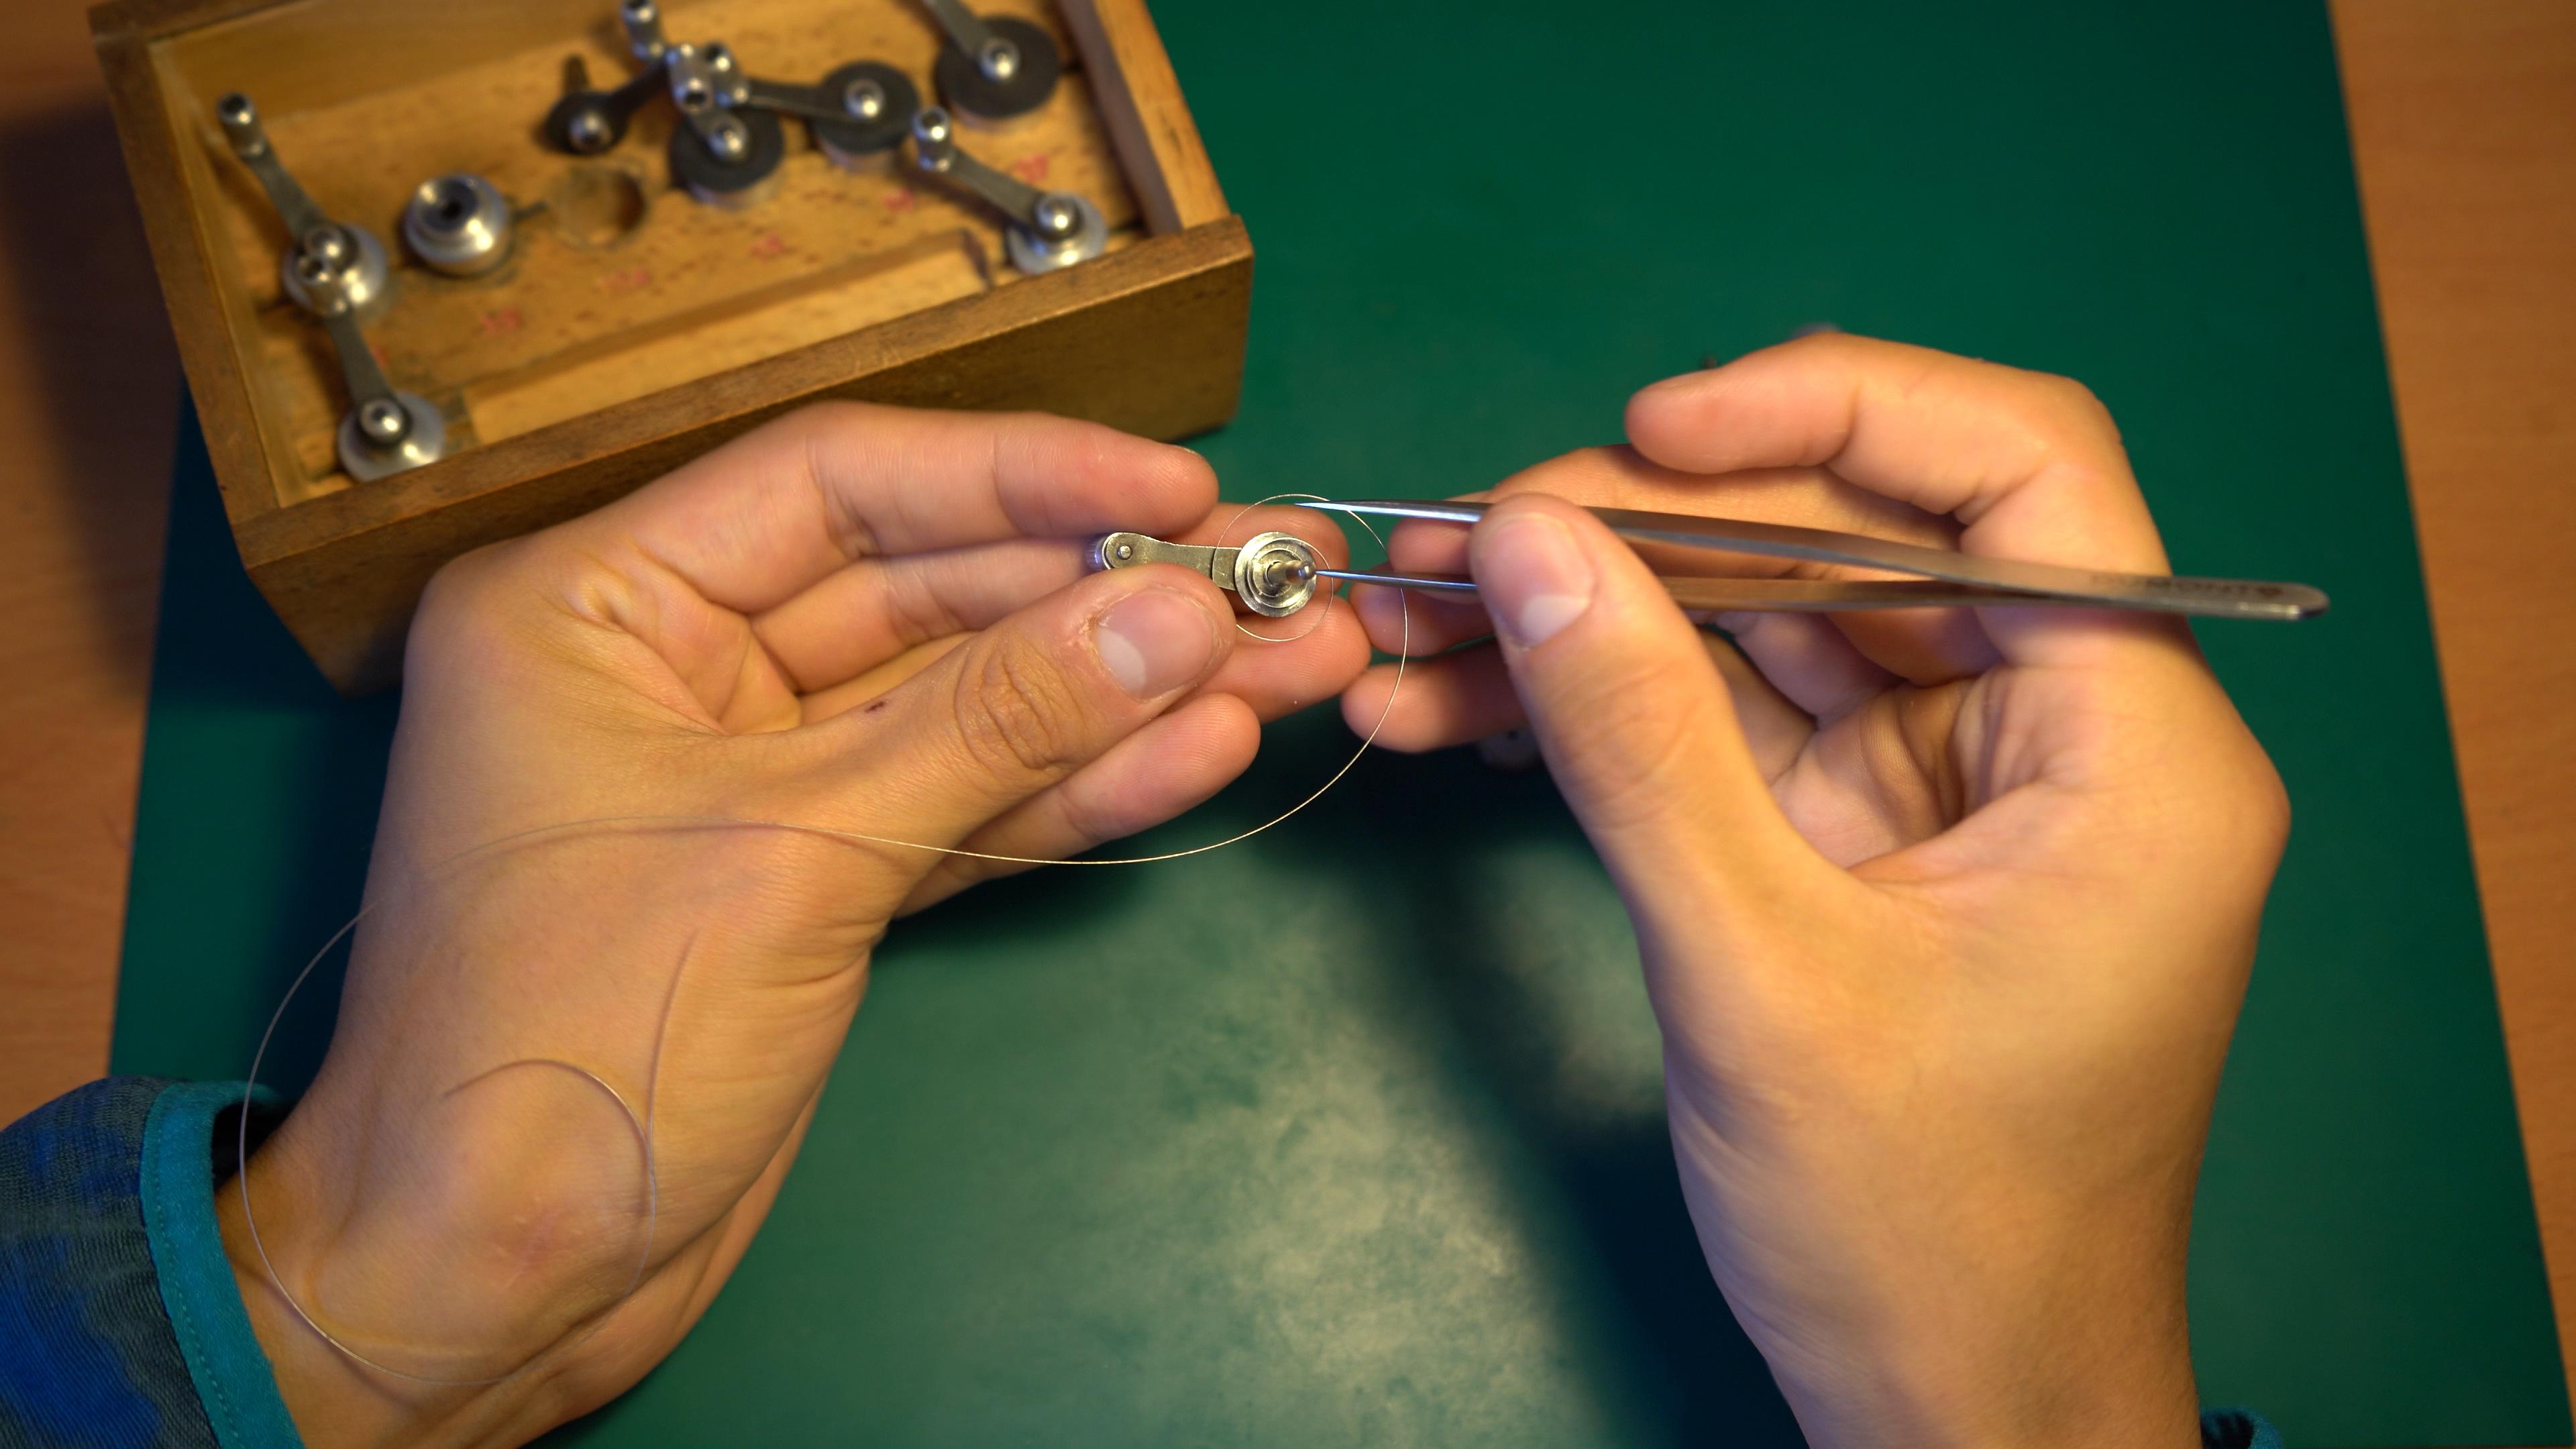
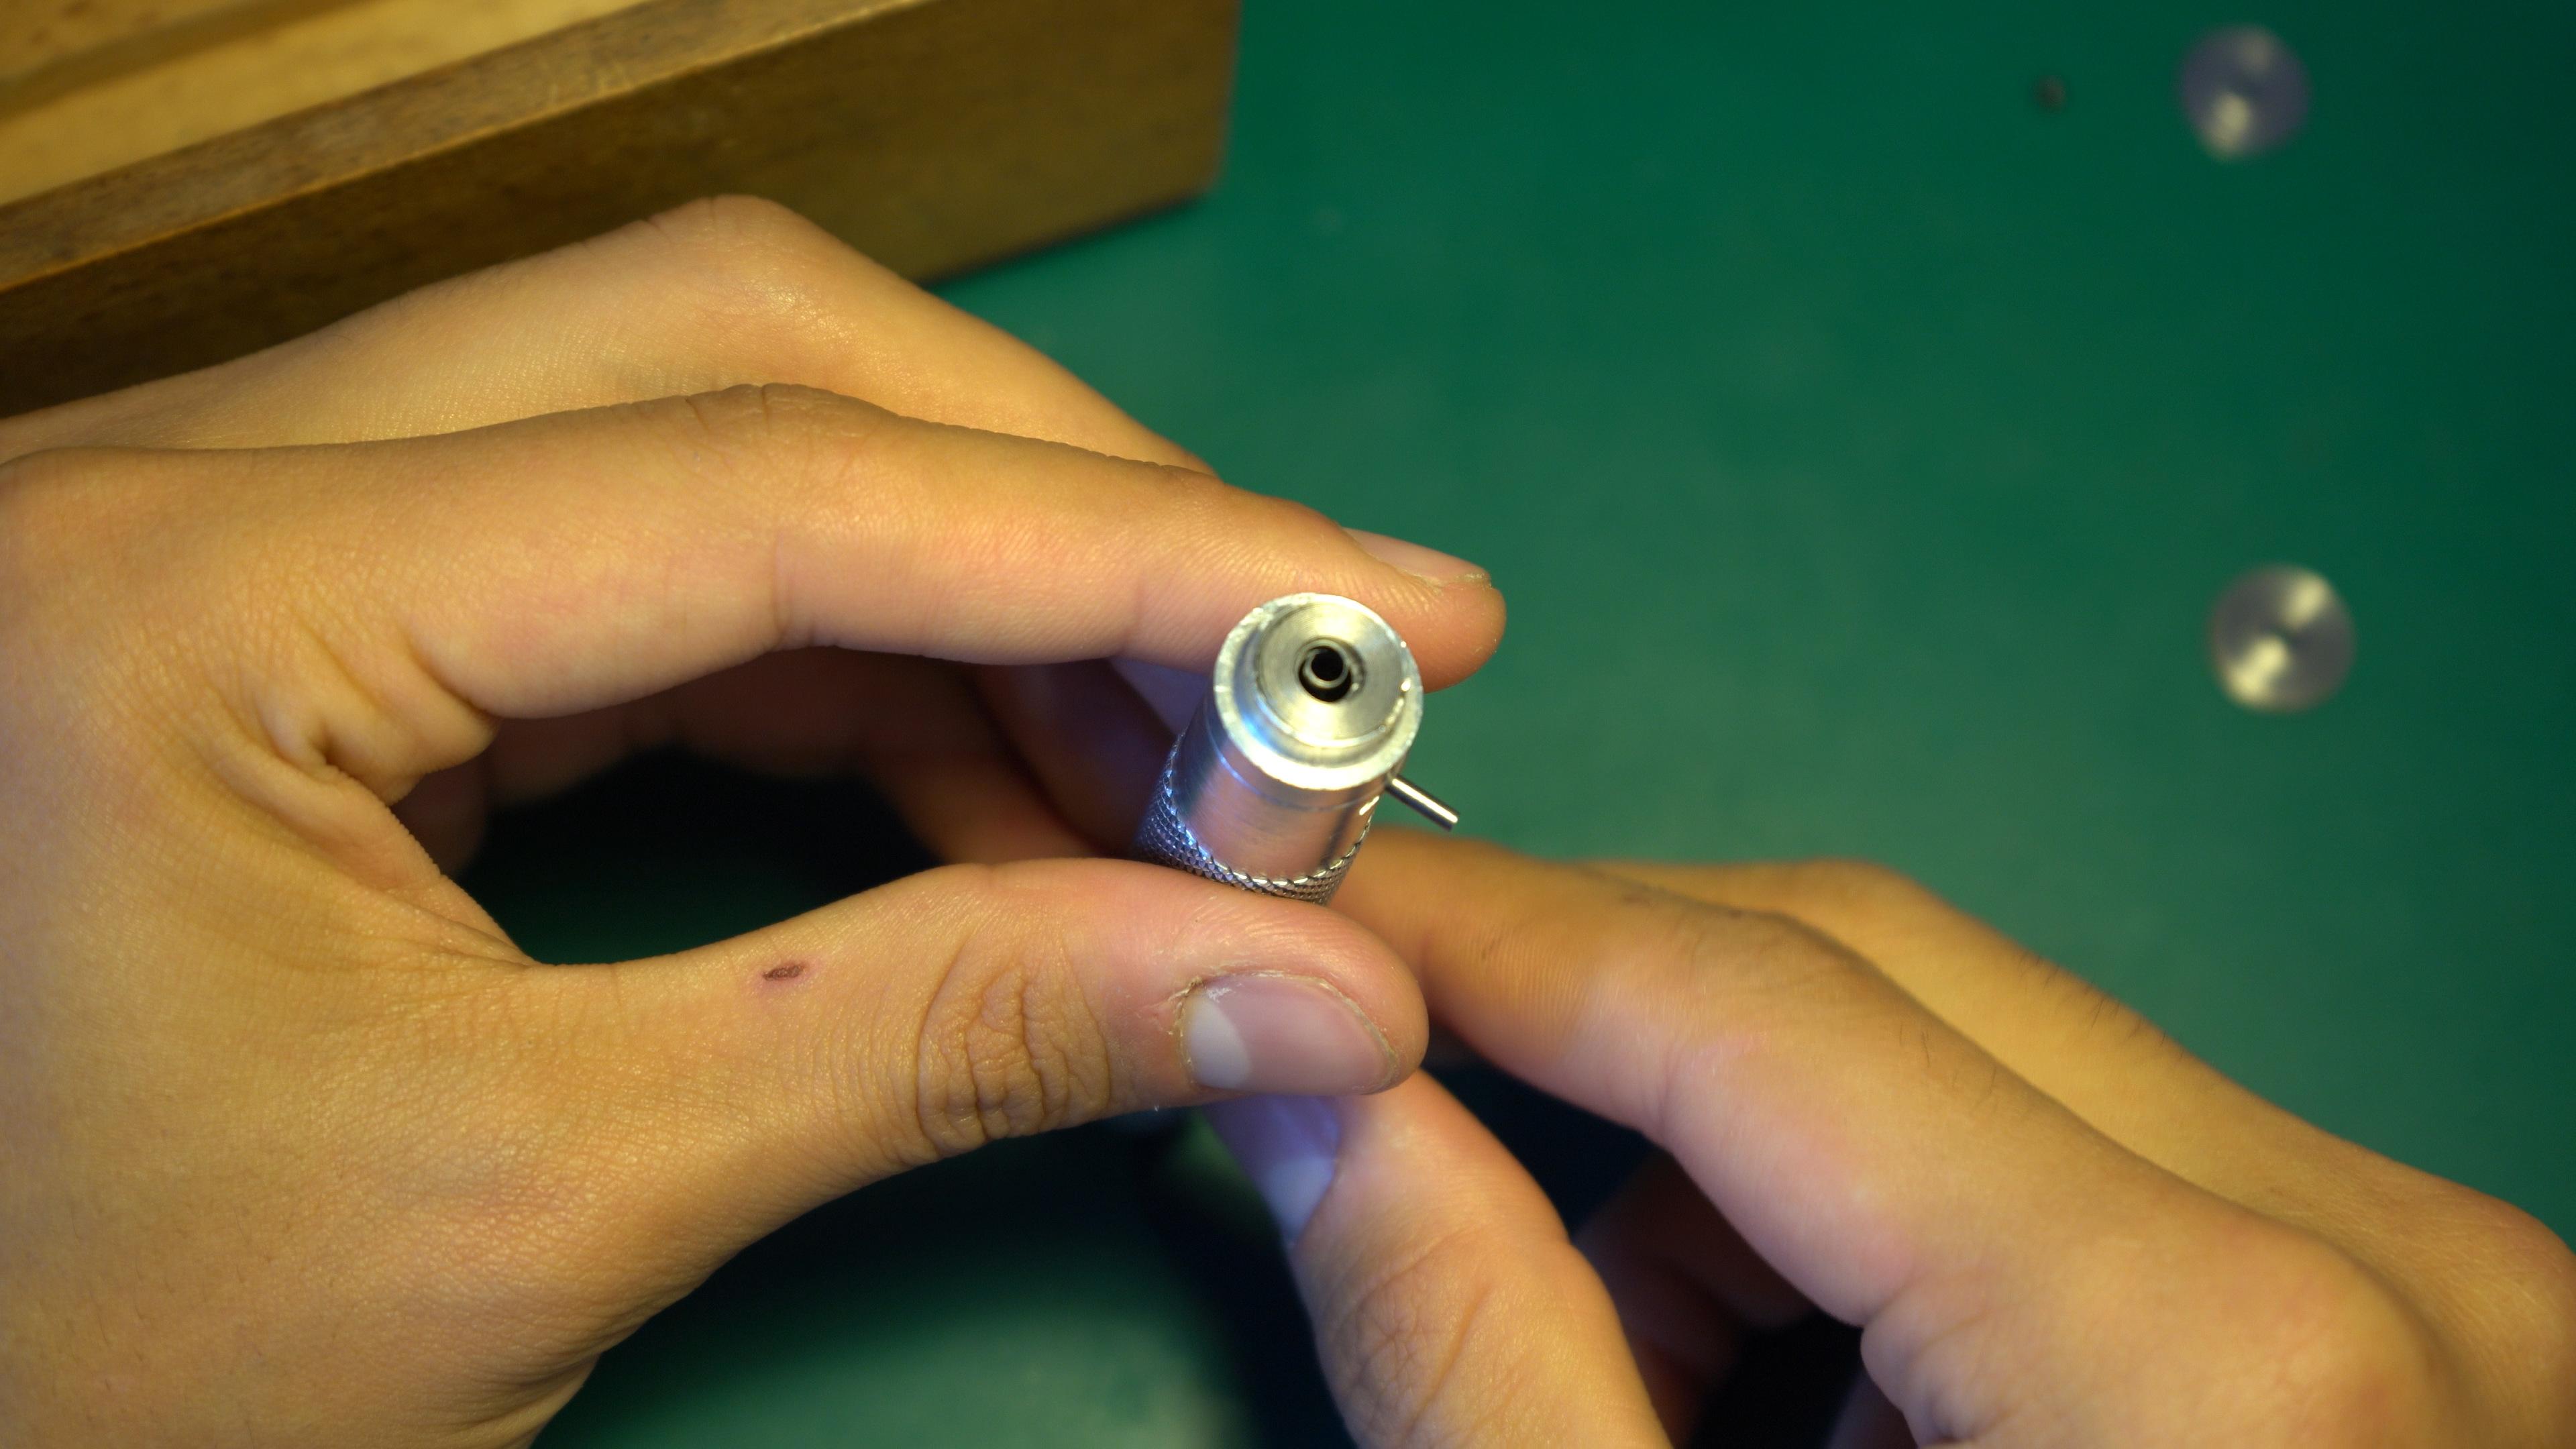
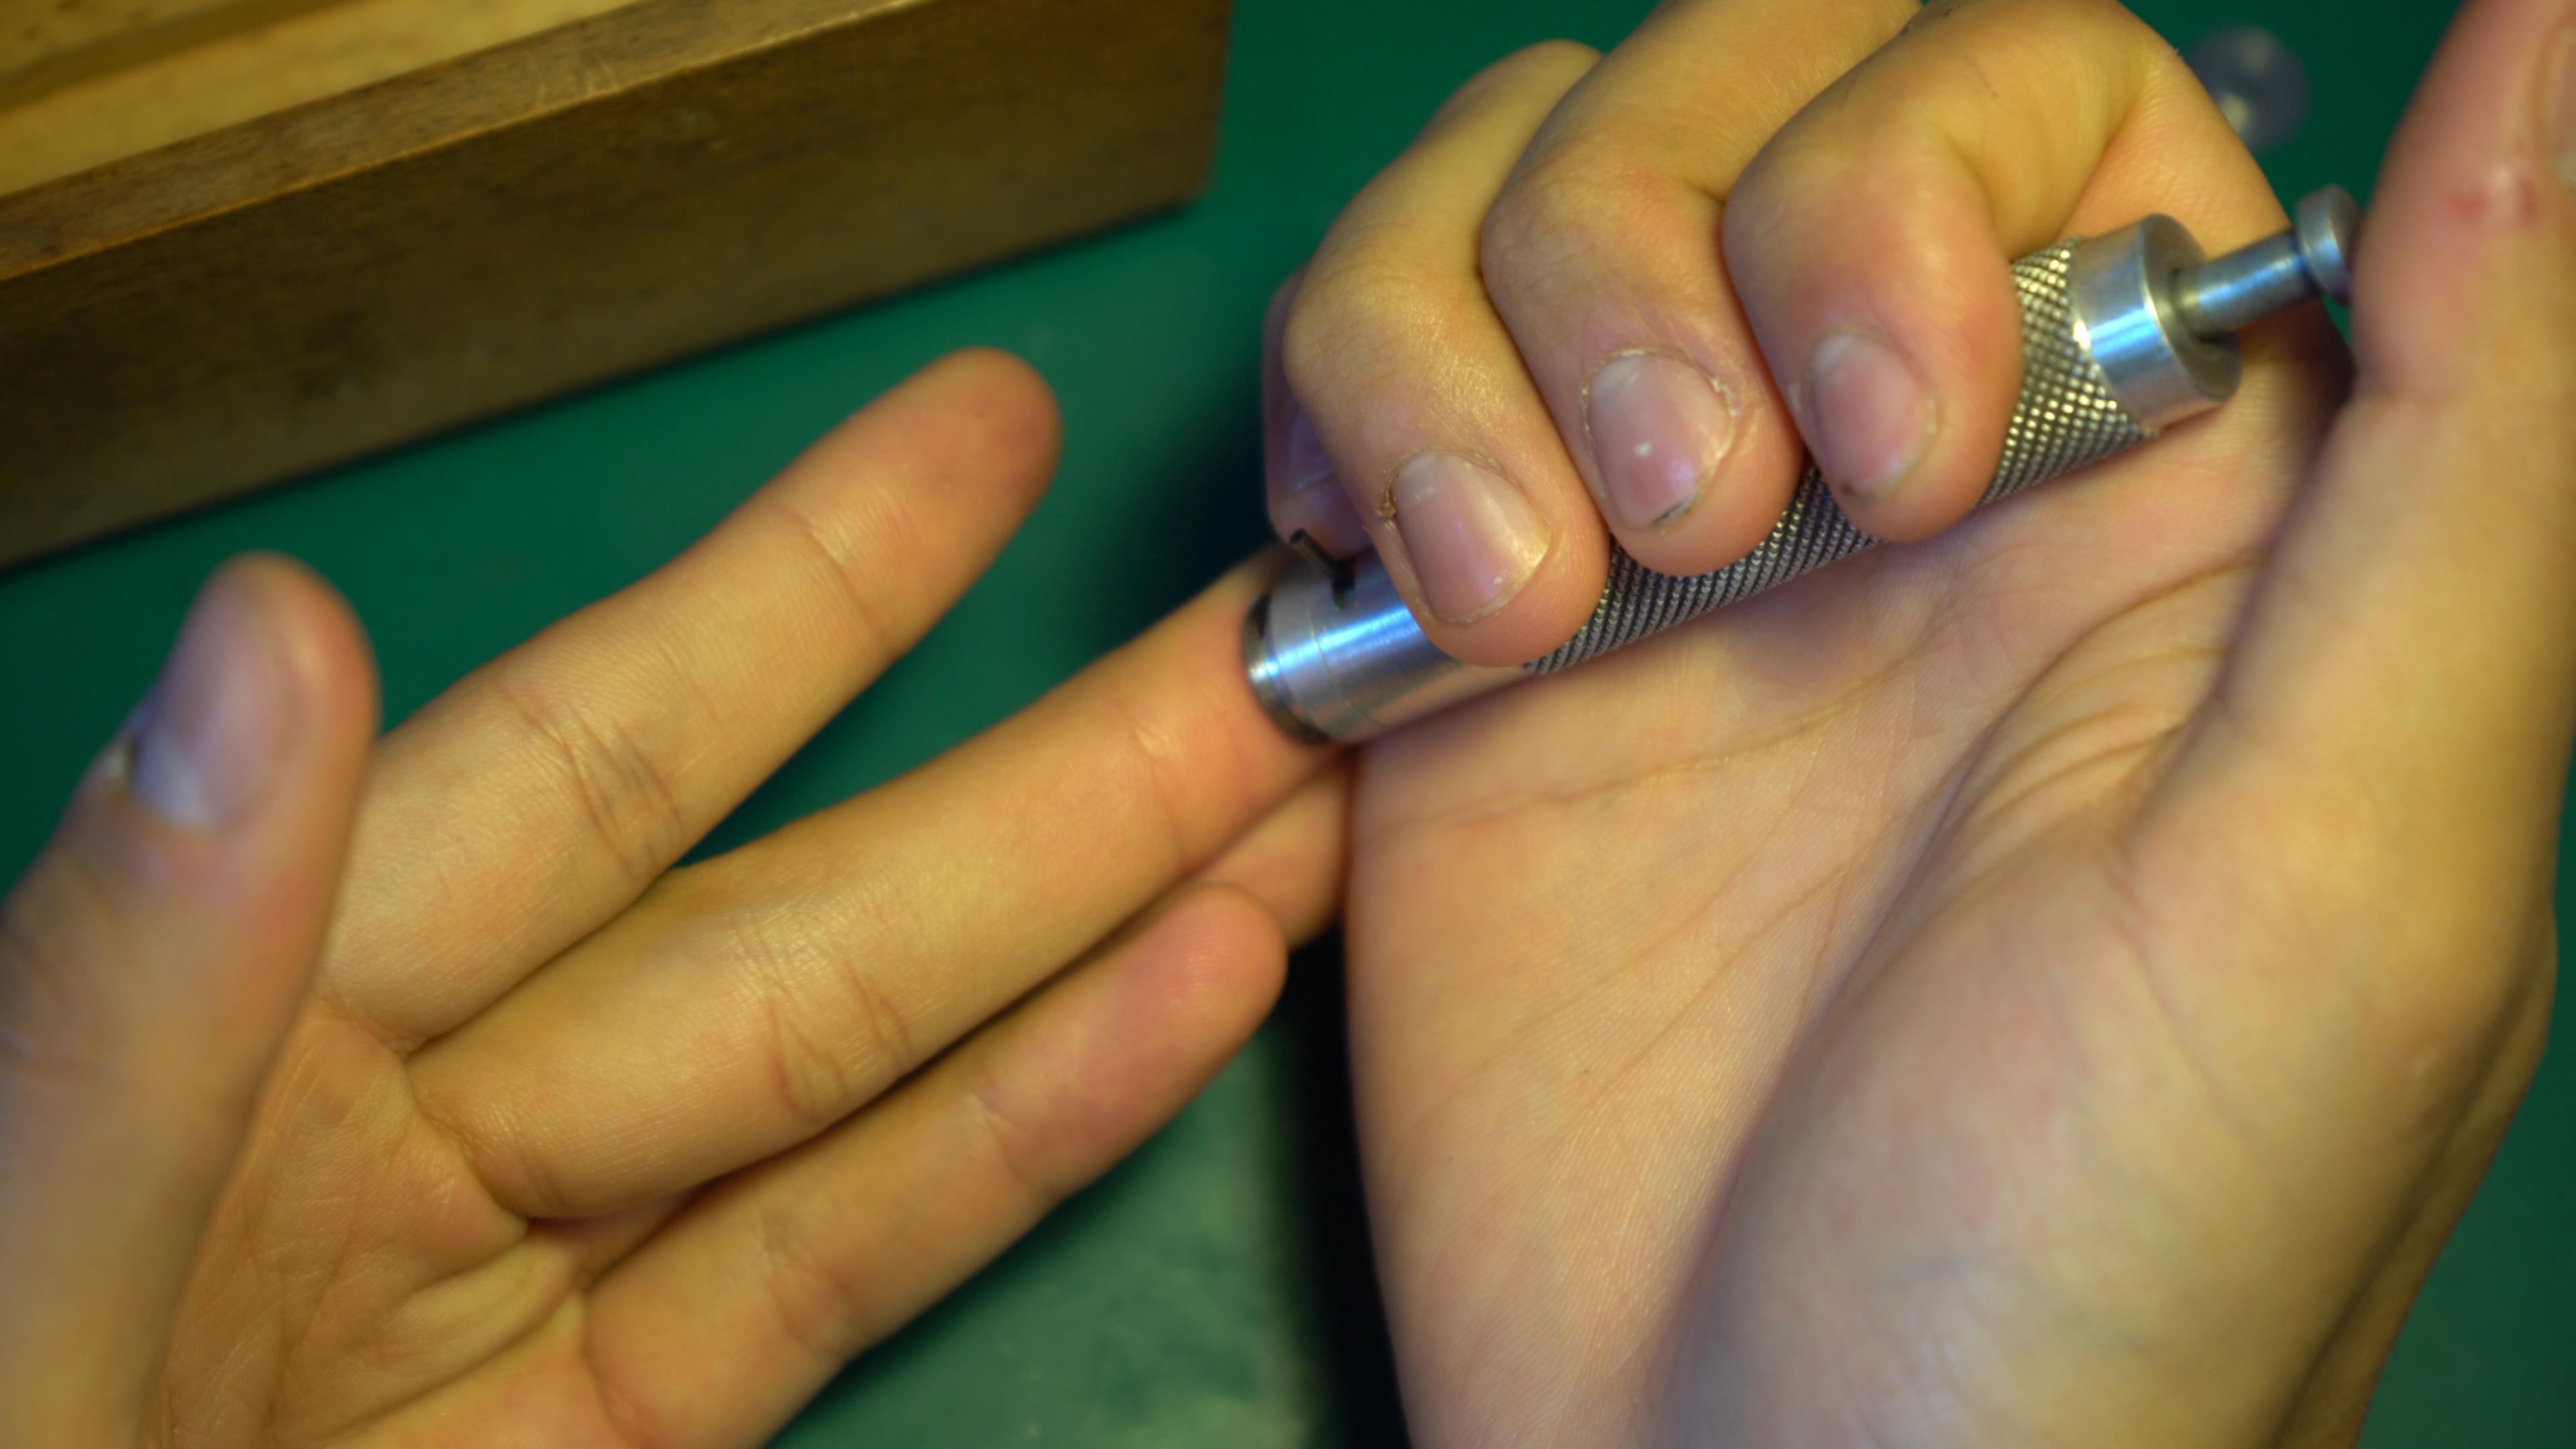
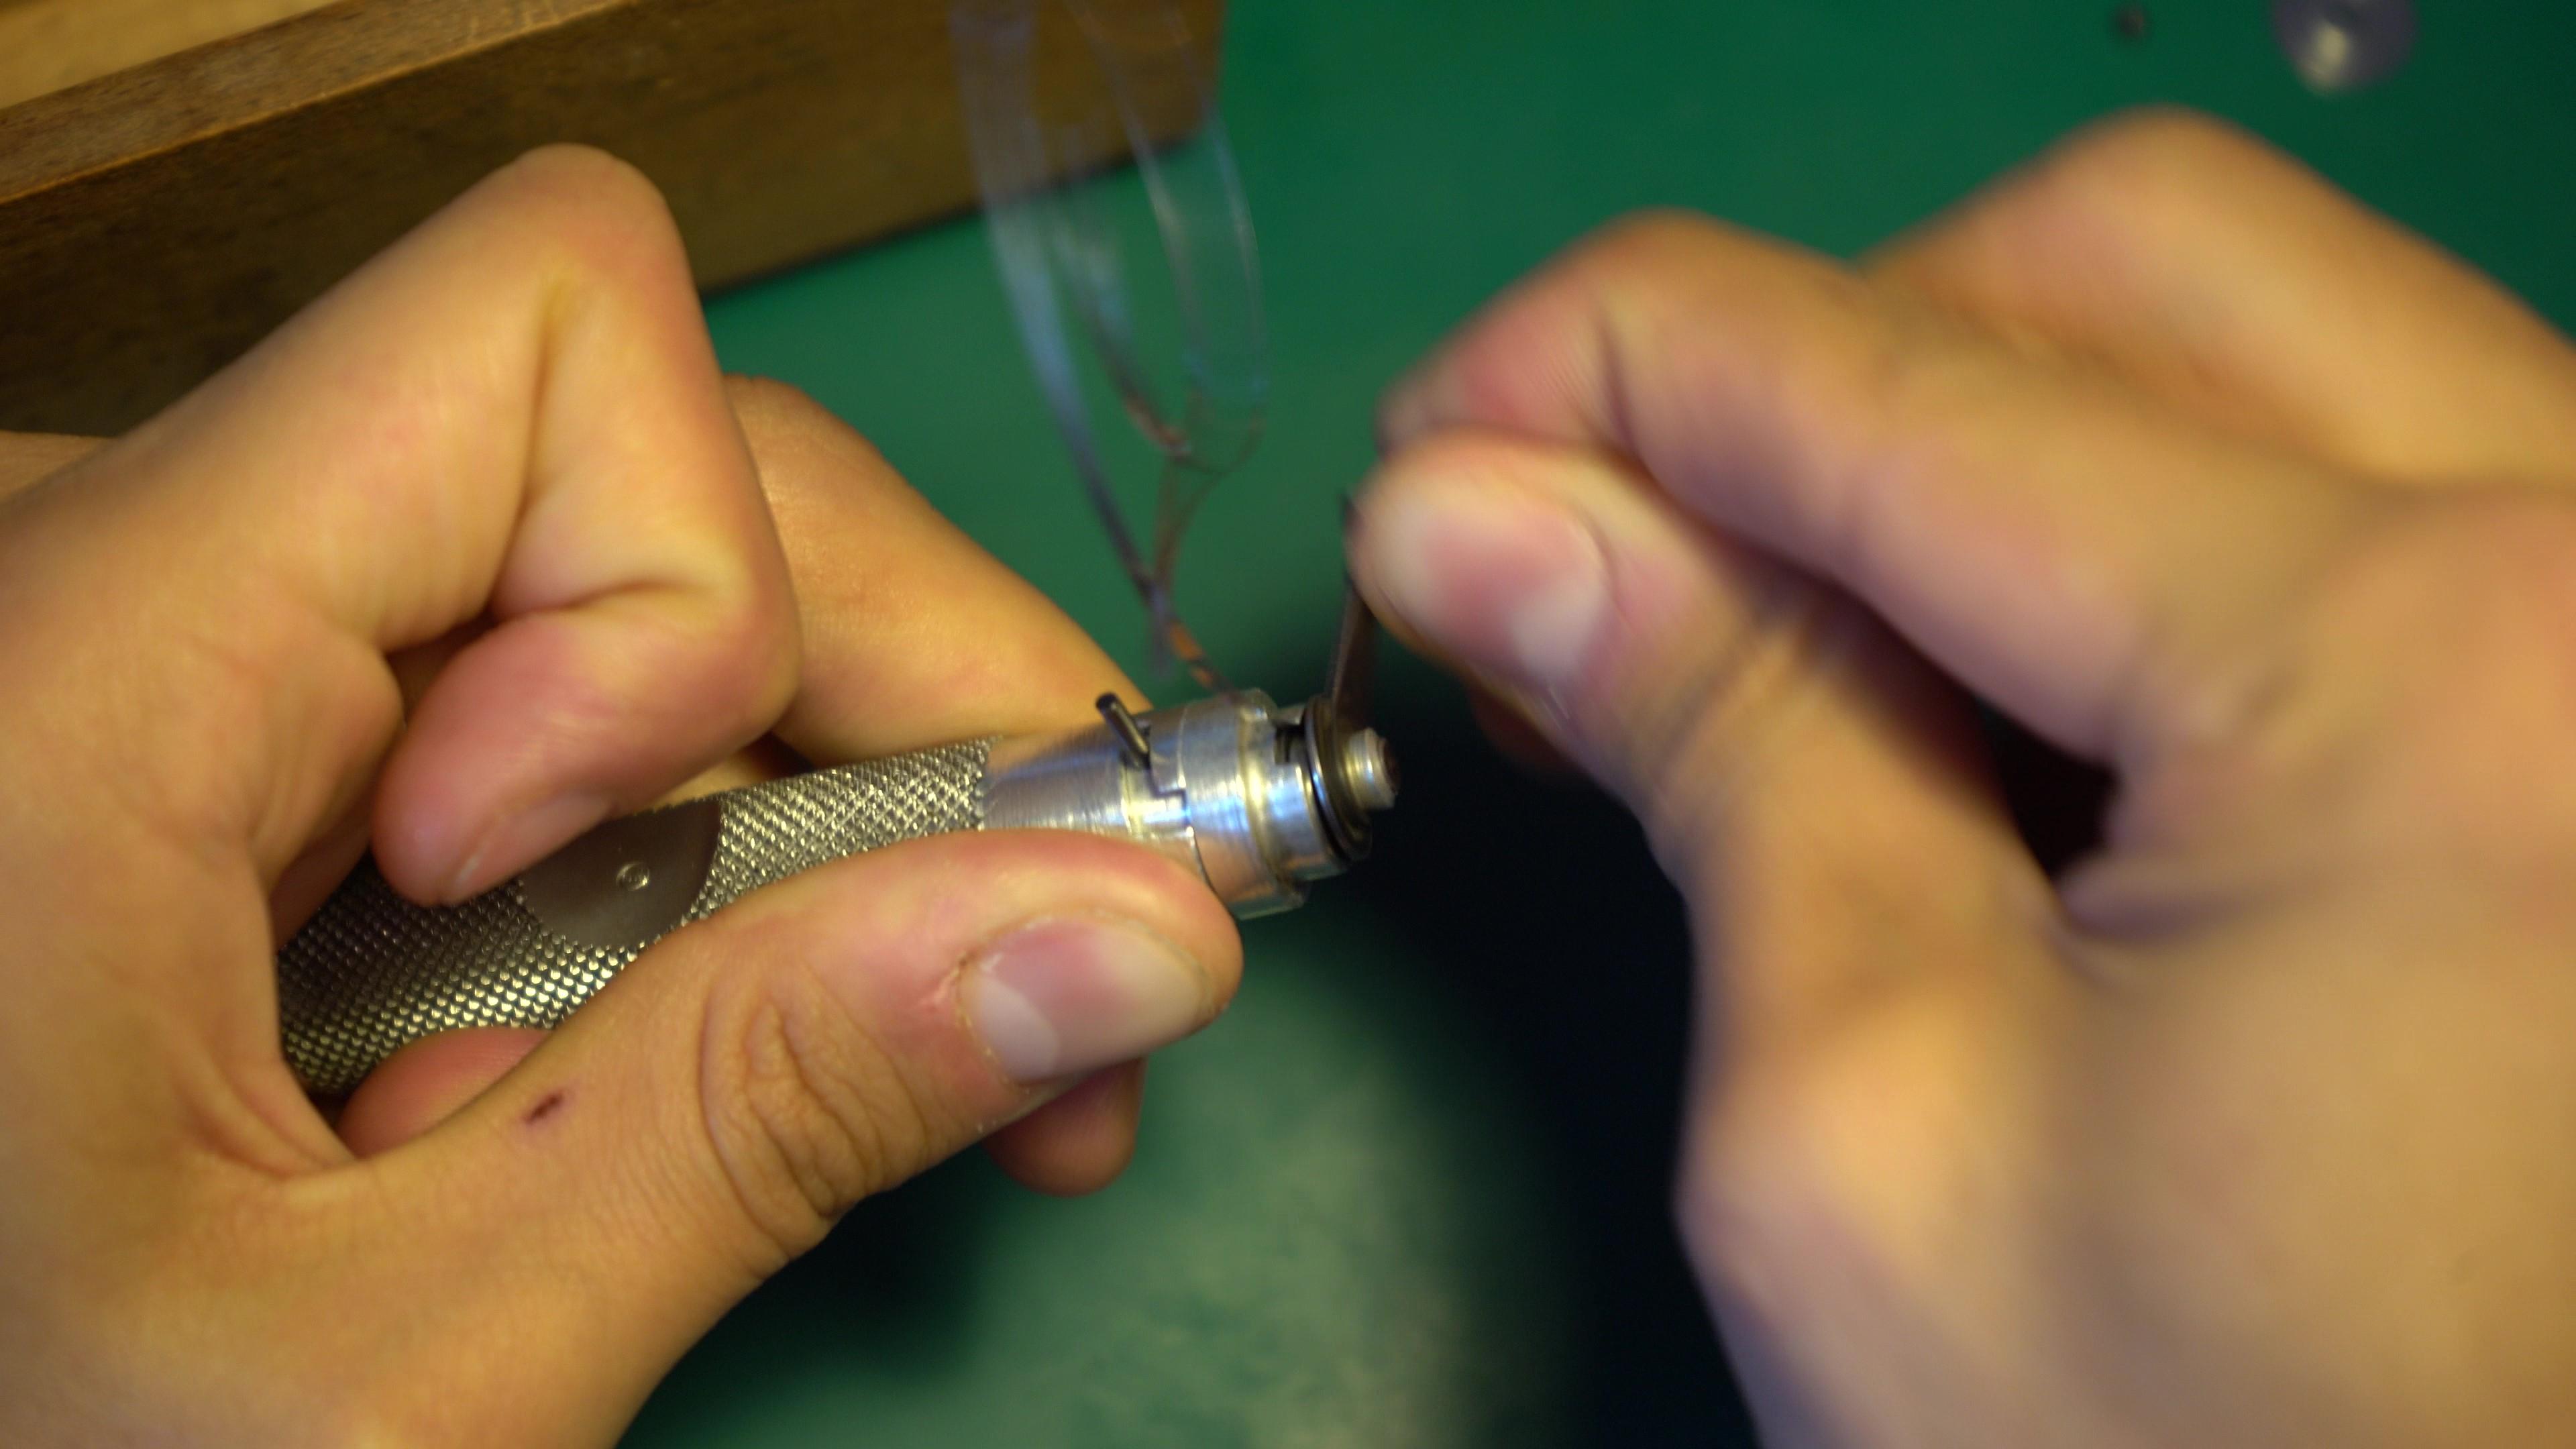
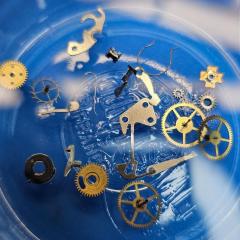
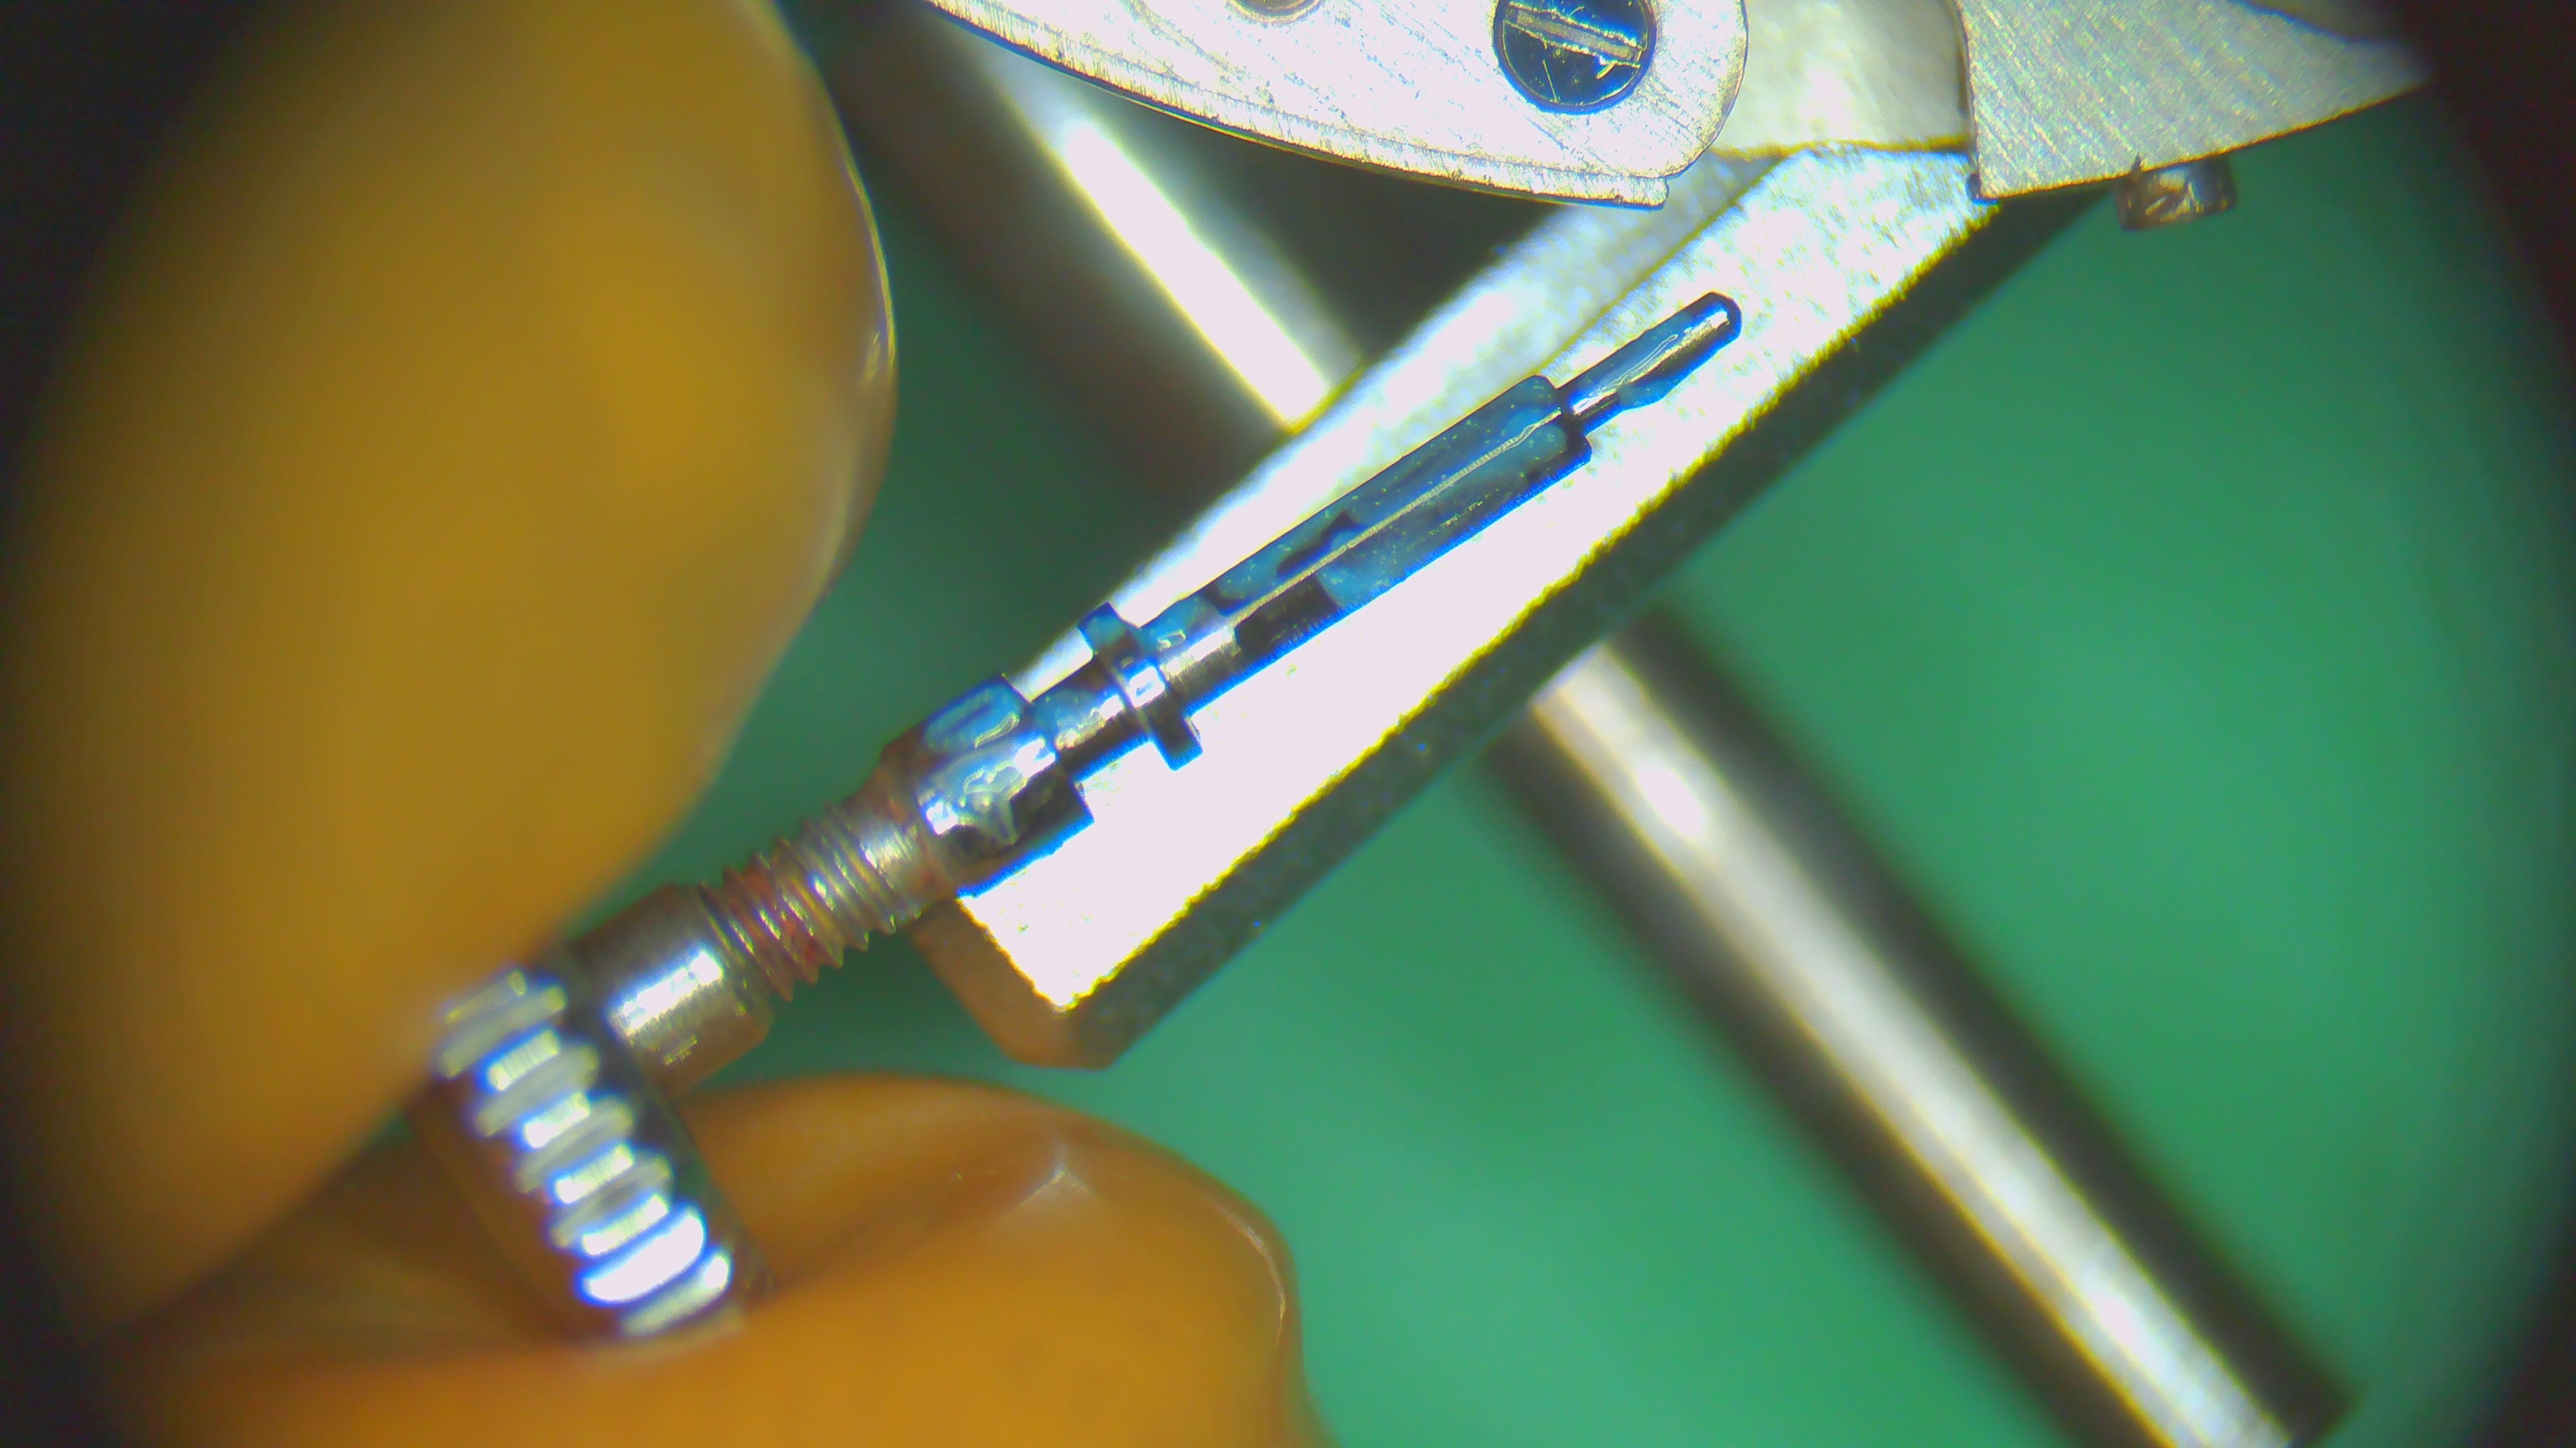
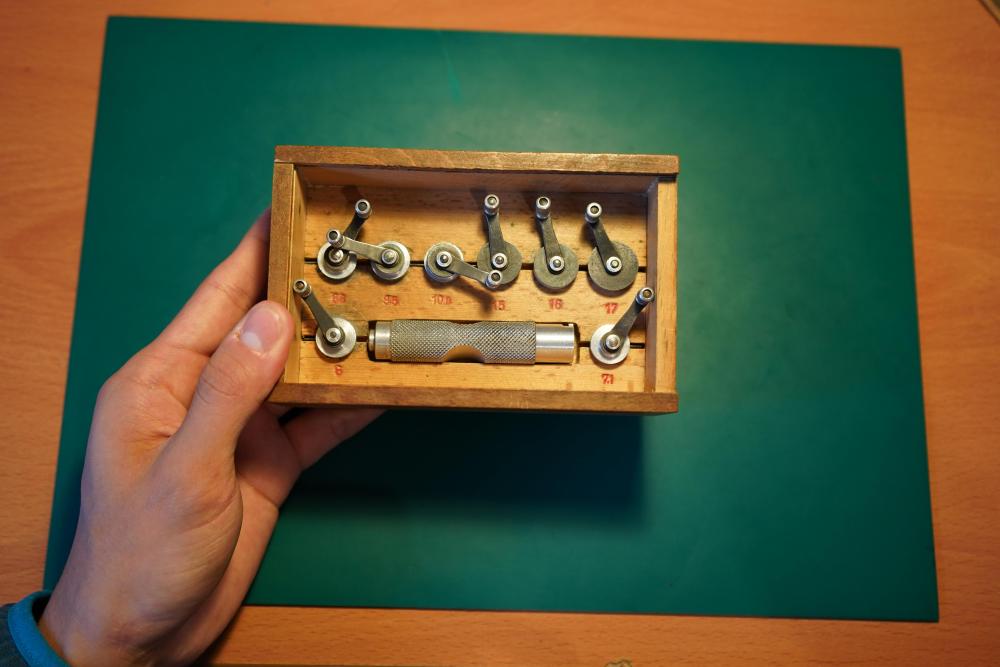
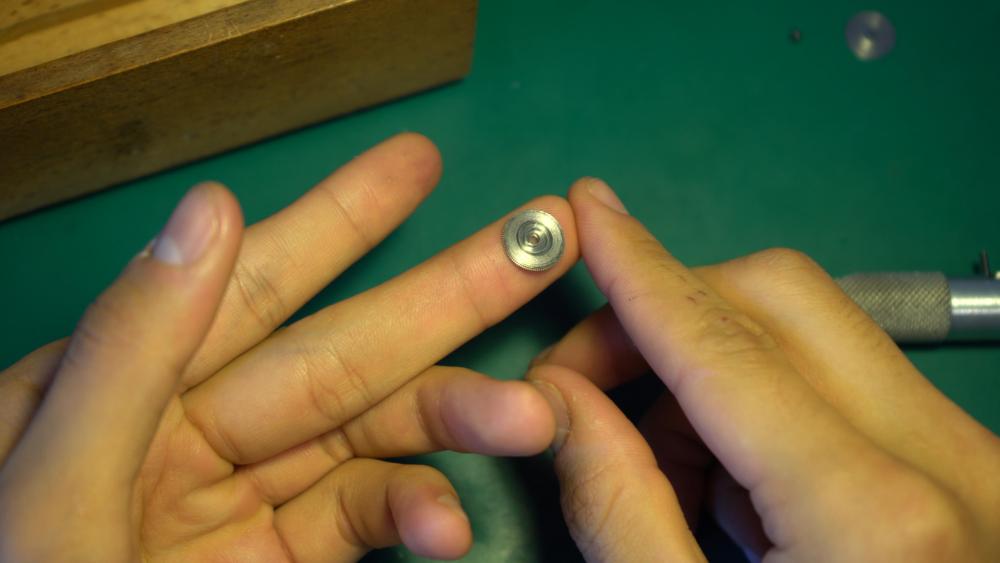
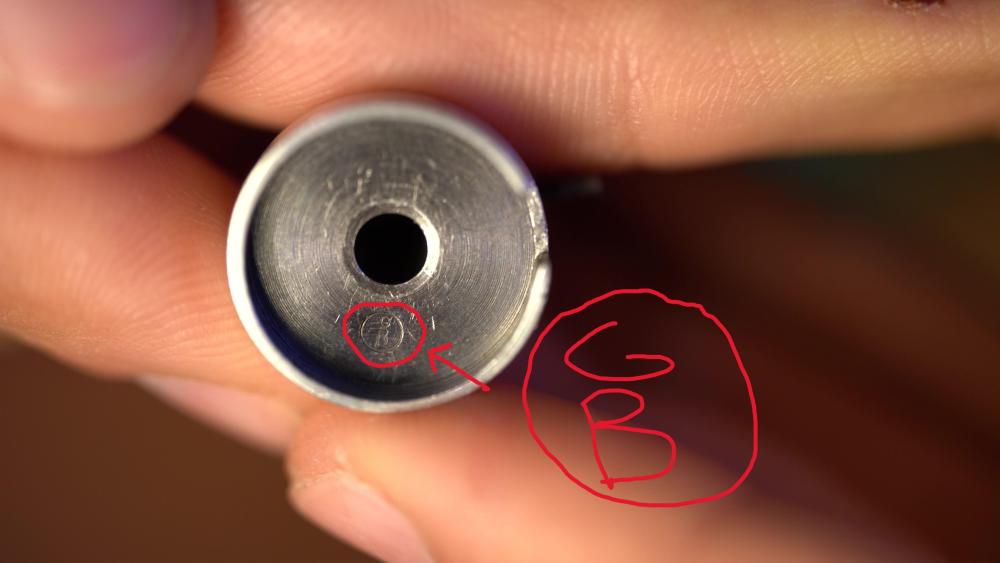
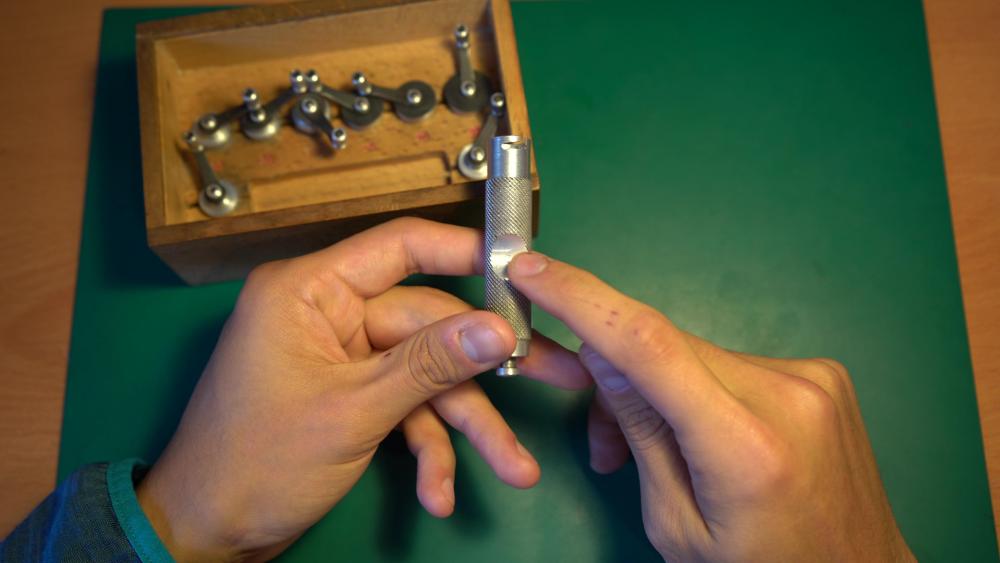
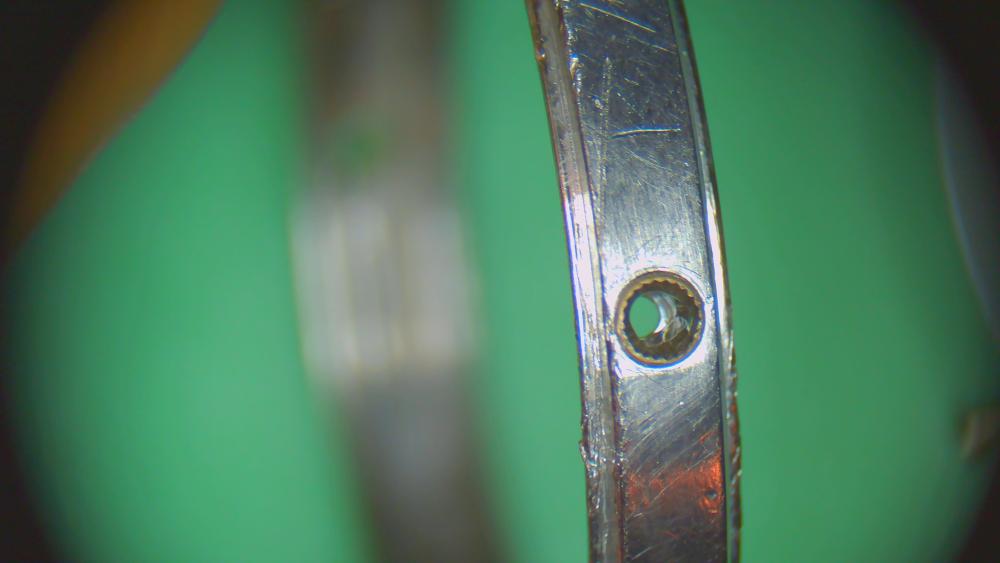
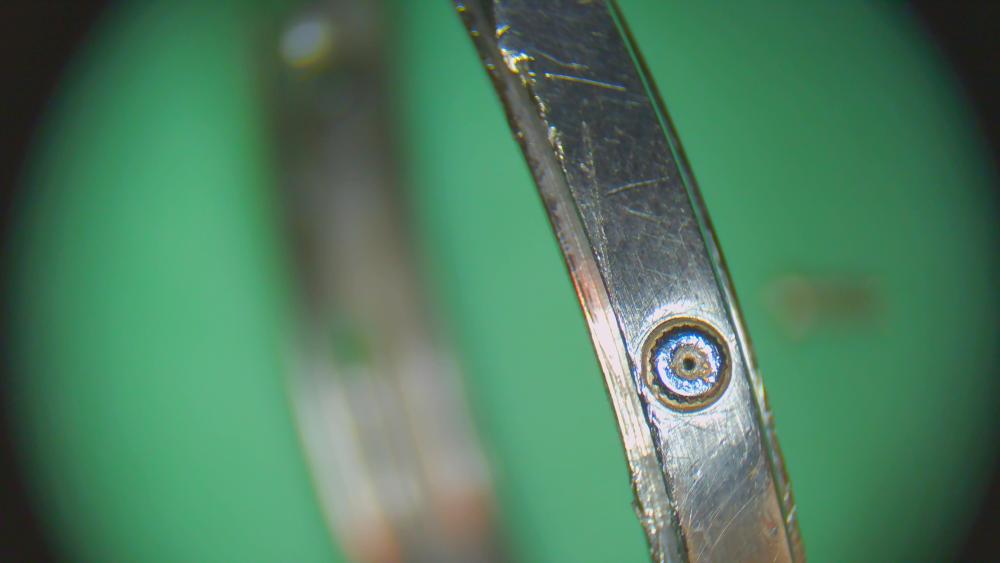
Hello Watchbangers! Today I return with another small post introducing my vintage mainspring winders! For those who prefer watching something rather than reading through the whole post, here is all the contents in form of a video: https://youtu.be/-63Do2Dkikk Now to the written part! While I first started winding mainsprings by hand ( and recommend this method for hobbyists who don't want to break their wallets) it was clear that I couldn't continue this practise due to the wear and damage it left on the mainspring and barrel! Thus I set out on the search for a pair of vintage Winders as the modern alternatives are not financially possible for a student. I was first eying american K&D winders or Watchcraft sets but coincidentally found a unbranded box of winders on Ebay for around 100 Euros: After inspecting and cleaning the set I was delighted to find that they were produced by Boley as they were stamped gB ( Gebrüder Boley) meaning Brothers Boley: The set came with 8 sized drums, their cranks and a holder! While I'm pretty sure that the hooks only point in one direction, I have tried winding left and right turning mainsprings with success, not sure what is going on there haha. Now the process of using these mainspring winders is the same as any other really! 1. You start by pressing the innermost coil of the spring down onto the arbor, making sure that the hook catches the mainspring latch. Be sure that you are attaching the mainspring the right direction/ way otherwise you will wind it wrong! 2. Then you slide the arbor into the drum and start turning the crank to wind the spring! Be careful on manual-wind springs when approaching the part of the spring which hooks into the barrel! If you go too fast these can catch the edge of the drum opening and break off! Just go slow and optionally help out with a tweezer for example! 3. Then carefully lift off the arbor, making sure that the innermost coil of the spring unlatches itself from the arbor hook again. This will make sure that the spring won't be pulled out as you remove the crank. I like using a pair of tweezers here! 4. Finally you just press down on the pusher, pressing the spring out of the winder into the cleaned and lubricated barrel drum underneath. While I am fully satisfied with the performance of my older set, I must say that it is a bit fidgety to use! The spring power often turns the barrel out of the holder slot leaving me no option other than to press against it firmly. Secondly, the lids of the cranks are also a bit bent. Occasionally, when the spring is almost fully wound in, the strong power allows the left over spring to slip between lid and barrel lip, scratching it around for one turn before I can press down firmly on the lid so the spring is wound into where it should be! I hope you guys are also as lucky in finding an affordable set of mainspring winders and if you have any other questions or comments, please put them down below!


 1 point
 -
HWGIKE#20 BFG 866 Finally I managed to service the famous BFG866. Pin pallet, one jewel. Only old lubrication needed to be replaced acted like a green glue. Acceptable performance, parts looked like new, no wear. Red arrow second hand! Woah!


 1 point
 -
Thanks for the welcome. Yes, there should be plenty of OEM available. I would check MBUSA.com or FCP EURO. They will be expensive but original.1 point
-
Welcome to the forum! Many, many more tools and many, many more parts movements are in your future.1 point
-
Cars and watches: sounds familiar.. Welcome!1 point
-
Hello and welcome to the forum Enjoy1 point
-
Hi Jake and welcome to the WRT forum. Kinda like you must always be rebuilding something, used to too buy cars in need of full engine rebuild/ fix/ sell. Stopped back in 1984, as I enrolled in Graduate program in college. Have a 2006 , C200 kompressor Benz now, needs a new catalytic converter. Are genuine ones still made? Your thoughts and many thanks.1 point
-
I'd put the convex side against the smaller part, whichever that is, or which ever way keeps the washer evenly compressed? It would not make any difference if both parts were larger in all directions than the spring washer, but if it could overlap one with the concave side towards that, it could wrap over the edge and snag rather than turning smoothly, as well as reducing the applied force.1 point
-
I just ordered a set of the GB winders (which stands for Gebrüder Boley = brothers Boley; a renowned manufacturer of tools). It's really great to know that the Bergeon arbor fit as replacments if needed!!! Thanks.1 point
-
I don't know the answer to this but it looks to me that if you install it the opposite way to what you are describing (the smaller hole down to the pinion, bigger to the jewel) it will actually push the pinion down and away from the jewelled bridge which is what you want. You look like you have a few spares so, why not try it both ways and see which gives the best result? It might possibly not make a difference.1 point
-
Hello and welcome from Leeds, England.1 point
-
One thing that cracked me up was the eta 2824 service doc i used which is a modern one and it said don't clean OR lubricate the wheels at all, don't even use them unless it's a brand new factory straight from the eta factory if they need lubricant. That seems like a great way to sell new parts even though the old ones appear to last almost a century with probably only various degrees of competency in their lubrication. So looking at modern reverser wheels they appear to be identical to the ancient ones in this 2451 only they have jeweled pivots (Honestly i'm not even sure how these things work and why there are jewels in them.) while the 2451 wheels have just brass and steel where the jewels are in the modern version. These things have probably been lubricated with regular old 9010 for 50 years straight and while the pawls on the inside show noticeable wear they clearly work and have held up great for that long. That said. I got the lubeta now. Instead of getting the v106 for ball bearings for my bellmatic i'm gonna try just making my own as others have recommended when i work on that next. Some use 9010, some use hp1300 but in another space i'm at, most of the professionals actually just make their own lubeta and it works fine.1 point
-
Thank you for your detailed photos of when you did your watch, it helped me a lot. I was also a little hesitant to try and get the bezel off, but I just pulled it in a couple of places with just my finger nail, and it popped right off. I tried the bezel spring in the second hole at first, but it was still off, so tried the third hole and it was spot on. You right about the micro adjustment on the bracelet, it's one of the reasons I bought it. I have a Tag Heuer formula 1, but cannot get the correct fit for the bracelet, and they do not sell half links for it, which would solve the problem for me. I bit the bullet a couple of weeks ago, and got the watch I had wanted for a few years now, a Omega Seamaster diver 300 professional, which also has the micro adjustable clasp, and I'm really pleased with that as well.1 point
-
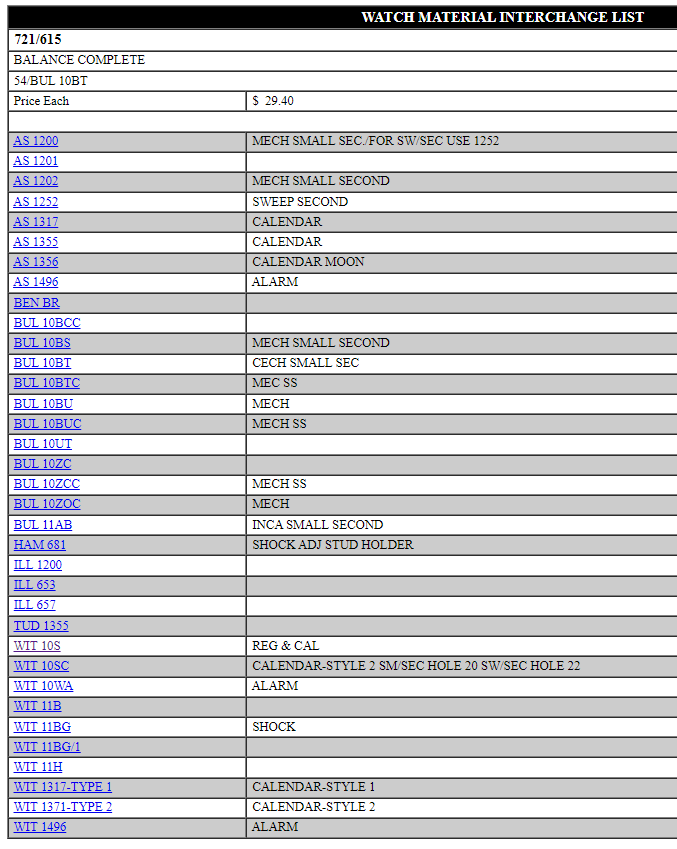
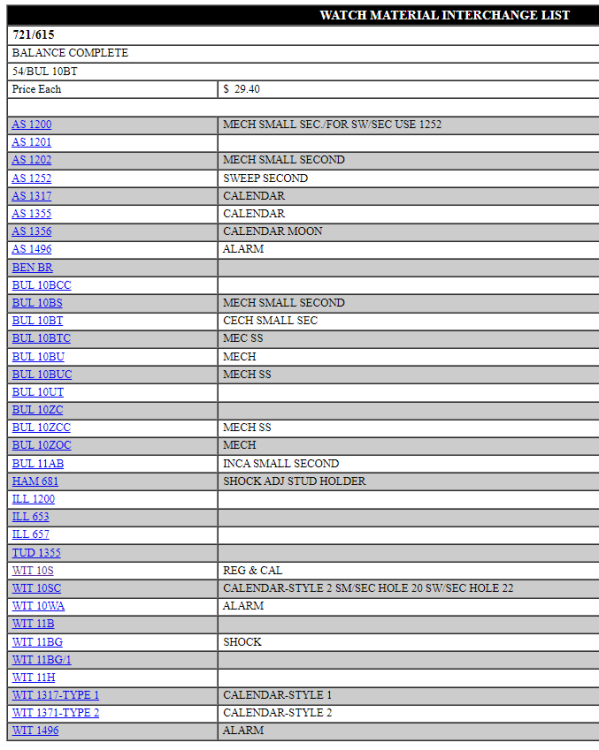
There's also this site that confirms the same thing. https://www.emmywatch.com/db/part/balance_complete--721_615/wittnauer--10s/1 point
-
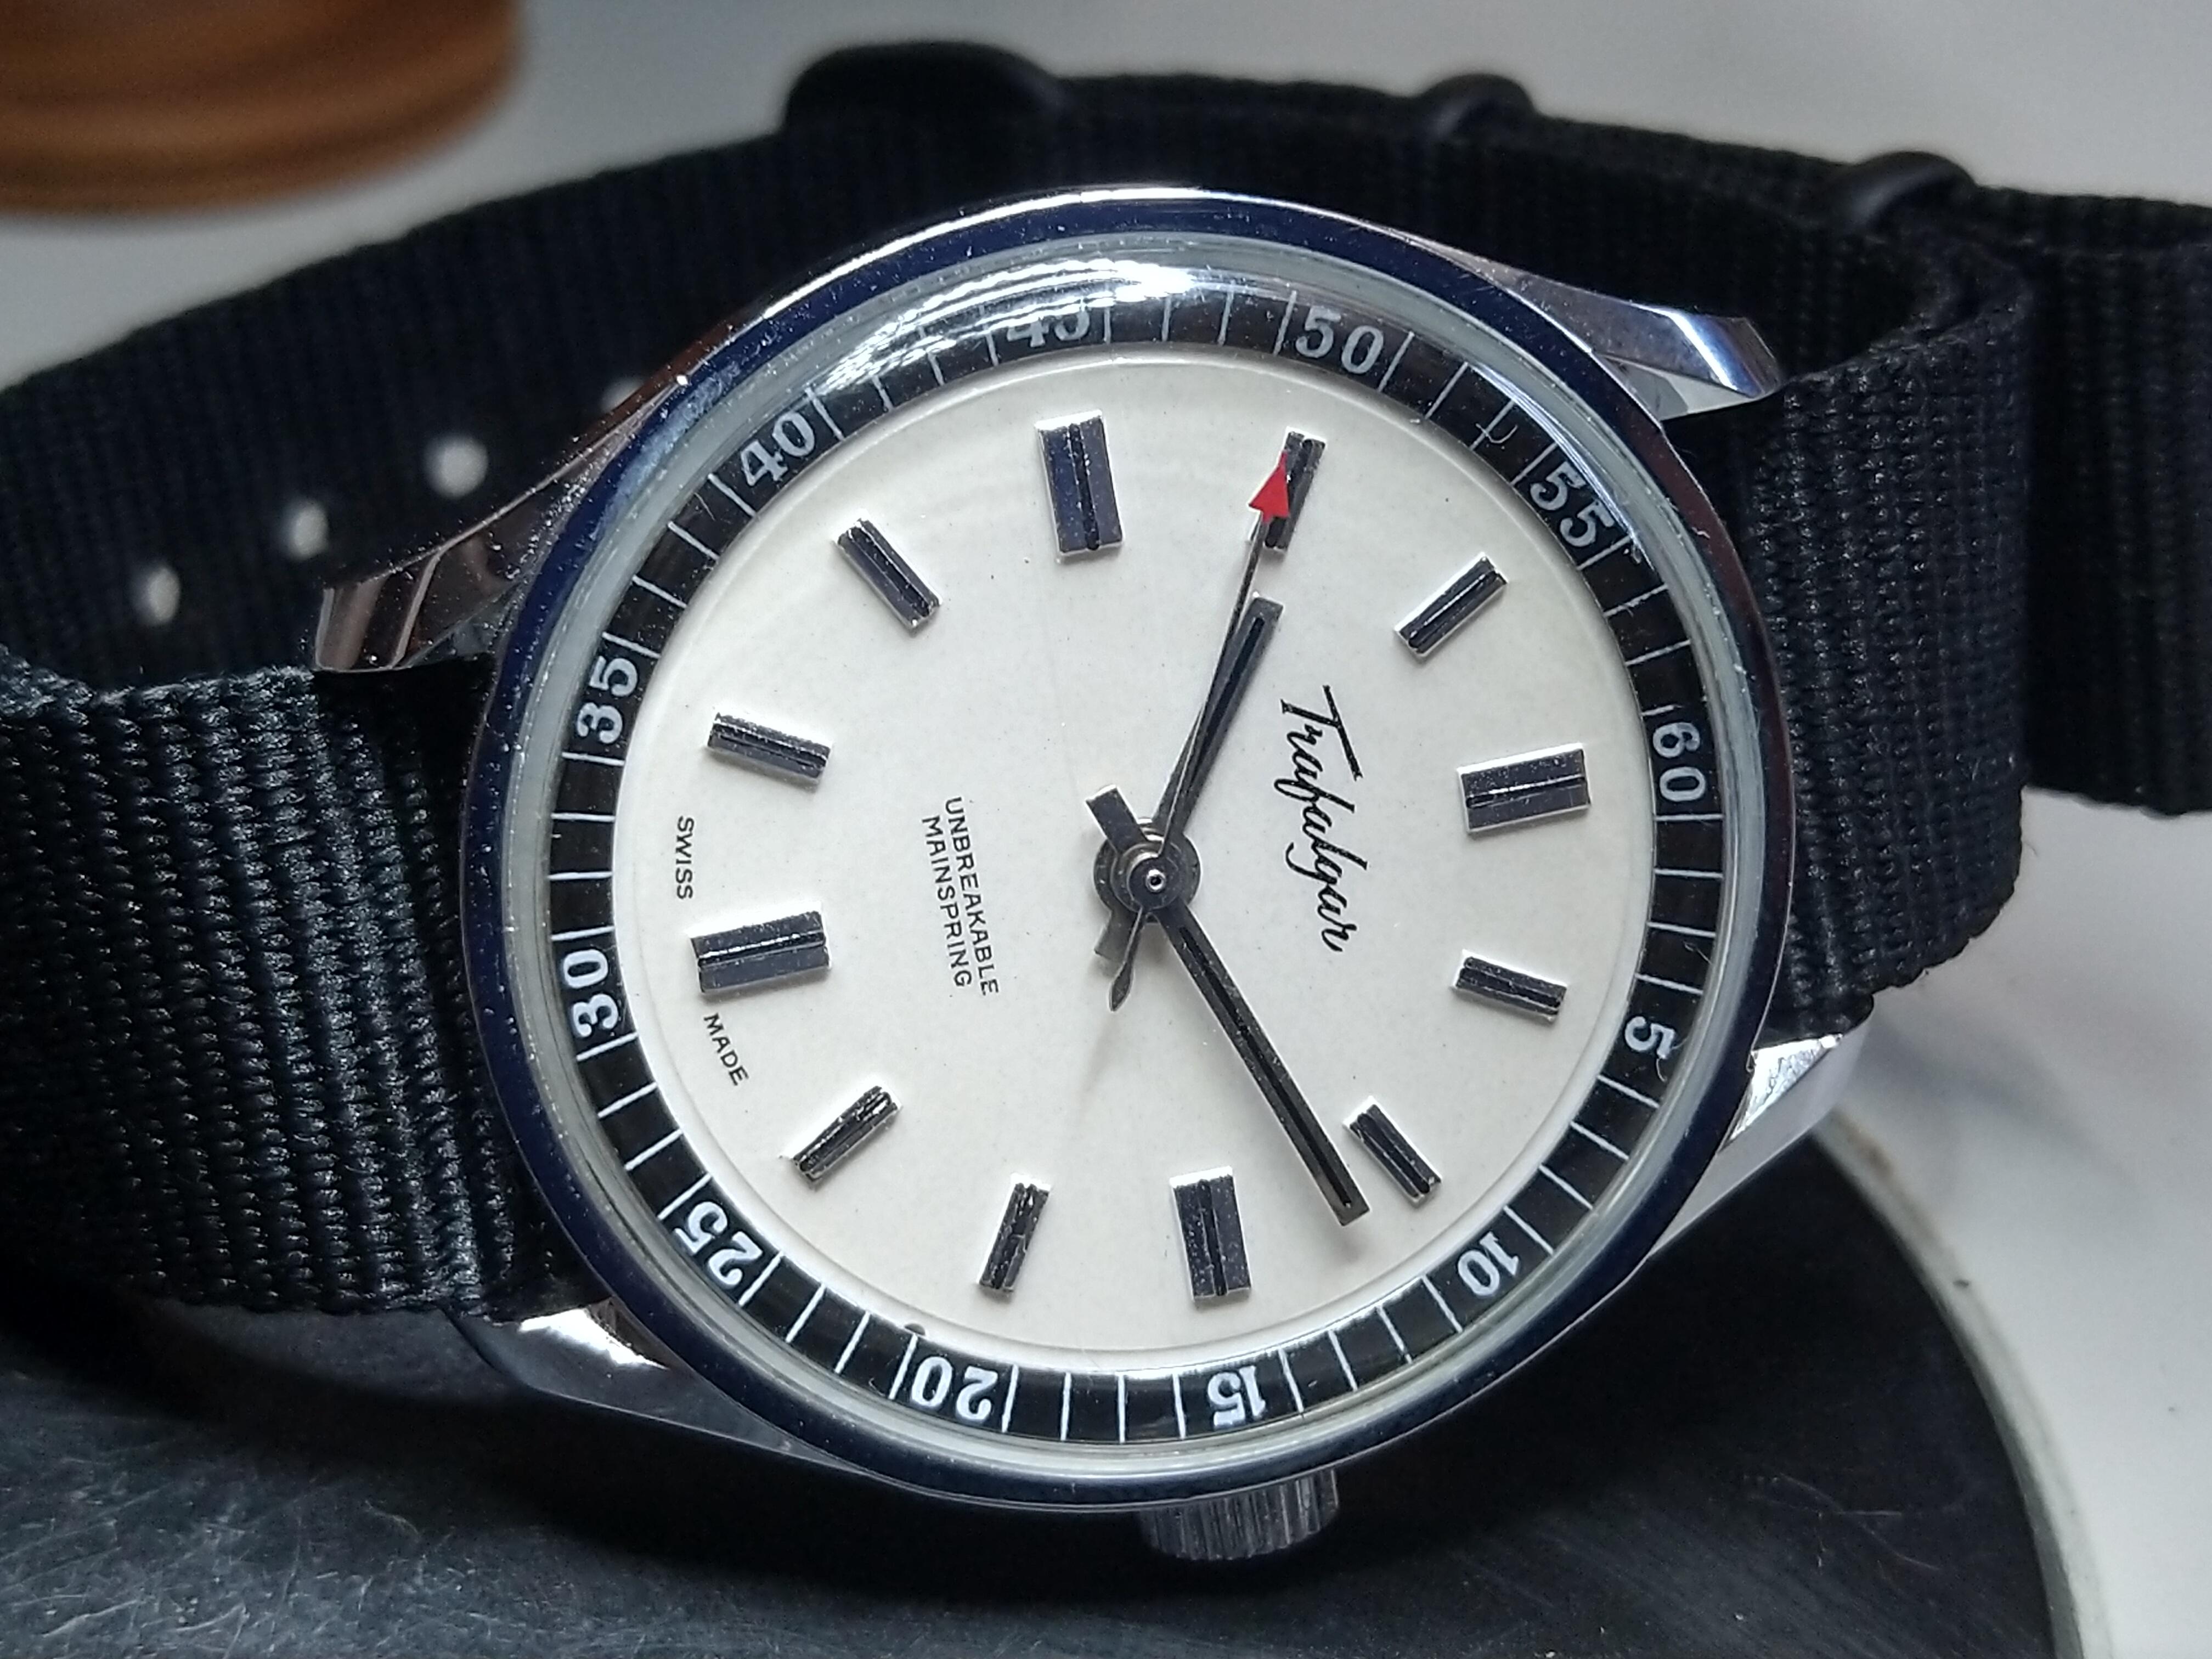
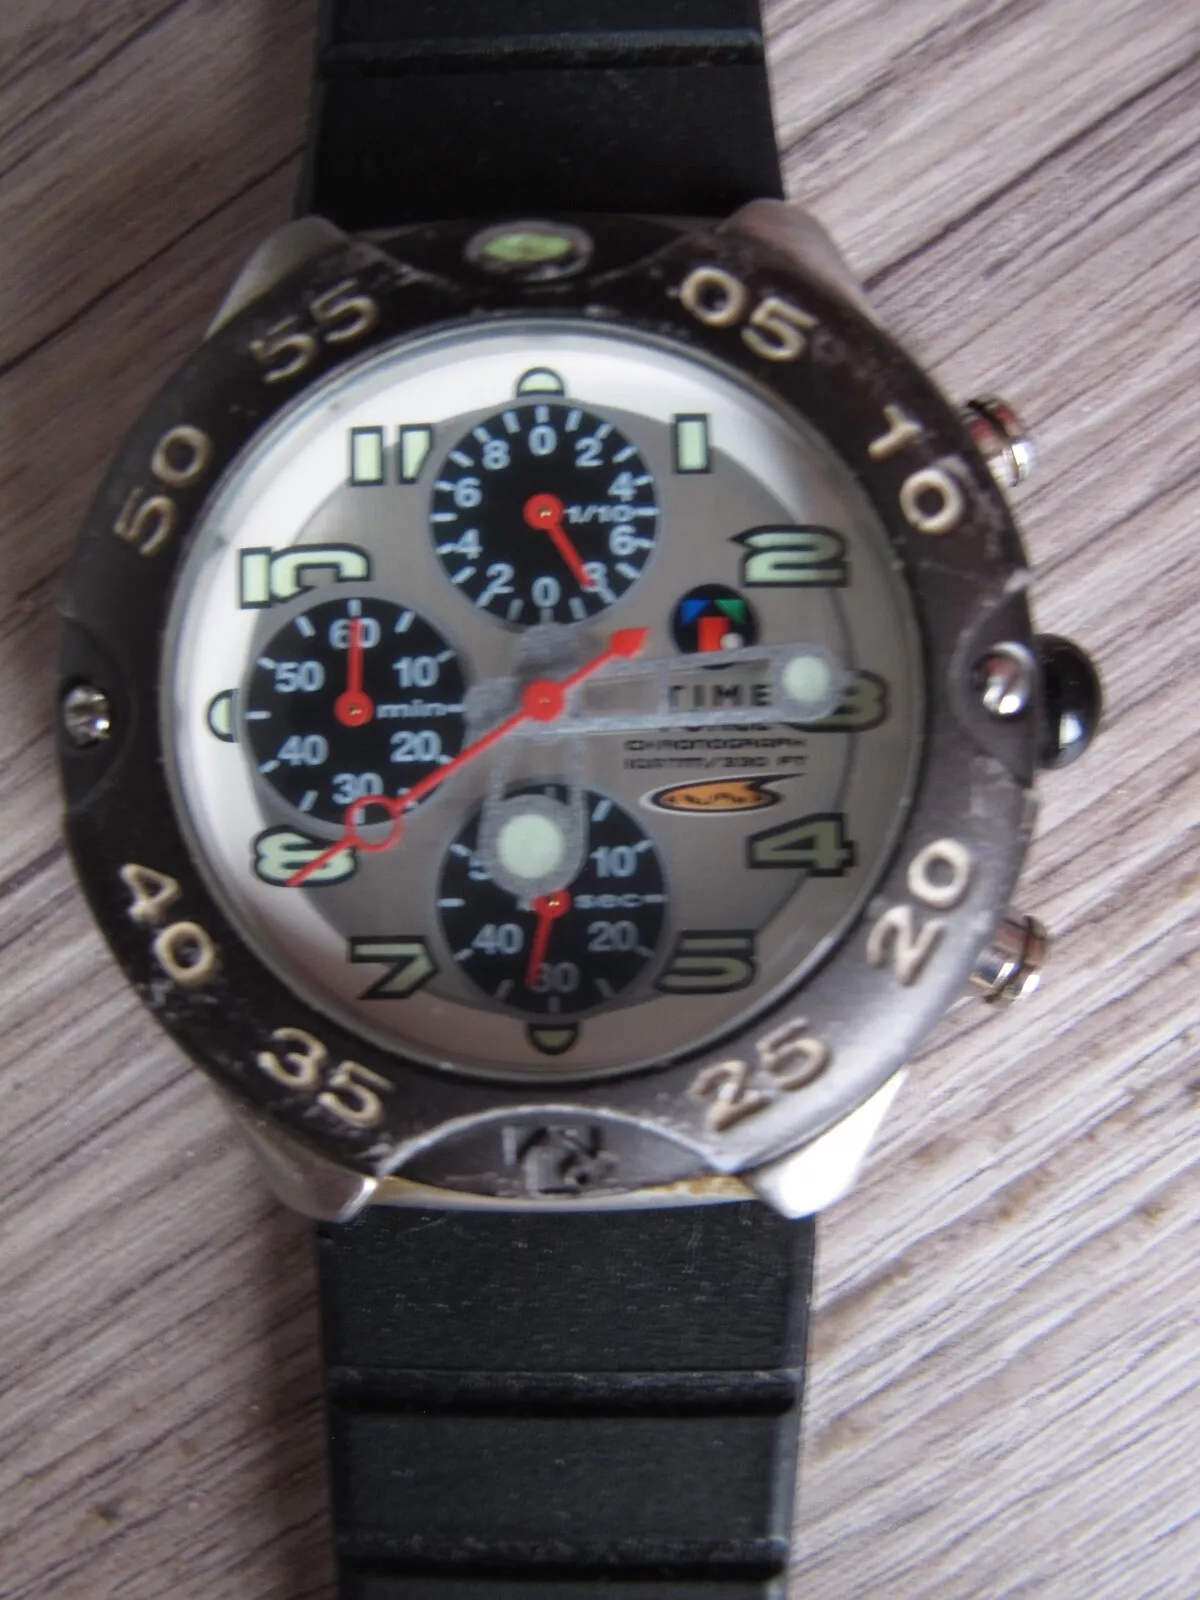
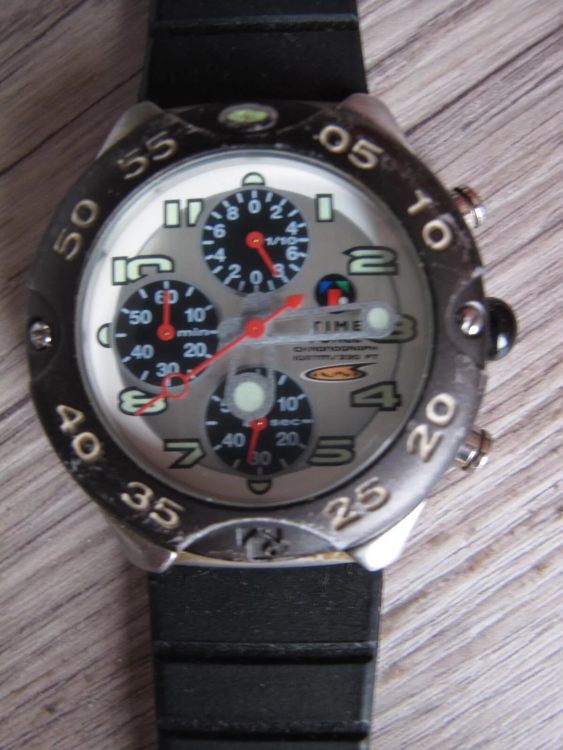
Another 404 club chronograph. This one is a "Time Force model 9346". No idea what calibre is in it, nor what the missing widget at the bottom of the bezel was, but Its a chronograph, and it was well within the 404 club rules at 2.50 GBP. Furthermore I suspect it should clean up pretty nicely. Suggestions for what to put at the 6 o'clock on the bezel anybody?
 1 point
 -
That's the way I read it. Also, looking in the Jules Borel database for 10S Balance Complete - all these movements are listed as using the same balance
 1 point
 -
I serviced a Soviet movement with a "T" looking spring (broken) a few weeks ago. I'd never seen one like that before. I had a box of assorted springs & one type in it looked perfect except it had a standard end. I cut the end off the original spring, leaving it double thickness, and used that in the barrel to act as the "step" for the outer end of the conventional spring. That works fine!1 point
-
Its used to set the dive time, various factors determine that, in the main the amount of air the diver is carrying, depth also plays a part, further down the more air the diver needs to return to the surface, but yes you're right decompression times would also need to be accounted for when setting the dive time. A traditionally marked bezel can be used for both time elapse and time remaining were as this one is really only time remaining without causing confusion.1 point
-
Seems to me its a better way of determining how much air you have left. Your tank gauge tells you have 20 mins of air left in your, set the 20 marker on the bezel to the minute hand then see the minute hand closing down on the zero marker. So technically not a time elapse bezel but a time remaing bezel. Anndd would you trust this to tell you when your air is going to run out ? I think not lol.1 point
-
Yes, @nevenbekriev is correct. I worked on a couple of them that said "Omega", "Made in Swit zerland". The movement is really low quality. But there are supposed to be real Omega ball clocks in existence. I've only seen one on eBay. But I'm not going to risk good money when there are probably a few million fakes to a handful of genuine Omega ball clocks. Nice paperweights though. https://www.ebay.com/itm/116329962918?_skw=glass+ball+clock&itmmeta=01J8DTEHBNS4D79J4WVZ1ZTRAP&hash=item1b15ce5da6:g:EPkAAOSwOaFm6bxO&itmprp=enc%3AAQAJAAAA0HoV3kP08IDx%2BKZ9MfhVJKlK4Oum32sHivFRhlqibu8LcXZn4yWj5vKTLdjbeVQRj0kNn6D6epLLJdatYBoWtpuOK77CzjZmAdnpyPOCyM9pvEZrIGSgP%2BIJjYHf6zTRzKjW8KjNpbC%2FuiI8PZMHbEuP%2FEpivIIl8ScVDVl7G46LAHPfDRwa7RrKdnWZuUq%2FwOvuruHUzpeMMsMNaqxfBH0GHEi2lQoXacQ%2FAVRFPtM0NE7tB0I4UNlo%2BJX1Fpxb%2B59AZstw1AUw5jli1YMjYYk%3D|tkp%3ABk9SR_SVurrDZA I just checked eBay for "glass ball clock" and found this and several more costing hundreds of dollars. Honestly, I can't tell if any of them are genuine. Some have nicer looking movements, making it even harder to tell if they are fakes. Maybe @oldhippy could take a look and spot which are genuine.1 point
-
This is cheap Chinese Tongji movement in ball case. Nothing to do with Kundo, they didn't do such watches. This is actually a clock, the rear half must have flat part to put it on flat surface. How to disassemble - the bezels are pressed in the middle part and sharp knife is needed and some force. But, only disappointment will be found inside...1 point
-
@nickelsilver Has given you really good instructions for checking for End shake problems. If we had the service guide you would find that Rolex is obsessed with end shake. If you start swapping out components especially anything resembling aftermarket you'll have to fit every single one and make sure that they actually do fit. Yes I know it's a Rolex is supposed to perfect but still things need to be adjusted in Rolex watches.1 point
-
The roller jewel should be aimed right at the pallet fork center (at its hole jewel) with no power on the watch. Eyeballing your photos that does seem to be the case. Does the balance oscillate freely with the fork out? If you rotate it 90 degrees and release it, does it oscillate for a good while (like 20+ seconds)? If not, check your endshake, which is easily adjustable on this caliber. With the balance and fork out, everything else in, if you put a few clicks (like 2 or 3) of wind, does the train spin freely? If not, figure out why, and correct it. With the balance out, everything else in, fork in, just a few clicks of power, does the the fork snap cleanly from banking to banking with a slight nudge? If not, figure out why. With everything in, no power (fully unwound), does the balance swing freely? If not, you may have a height issue with the fork. Generally it's good to practice on a number of less expensive movements before moving on to something high-grade like this. When learning, you will break and lose things, and the cost of parts is far less. In your pics, you have the train bridge off and fork in, when you put the train bridge on you want the fork out to help check for freedom as you fit it in place. The escape wheel can also get caught under or over a pallet jewel leading to damage.1 point
-
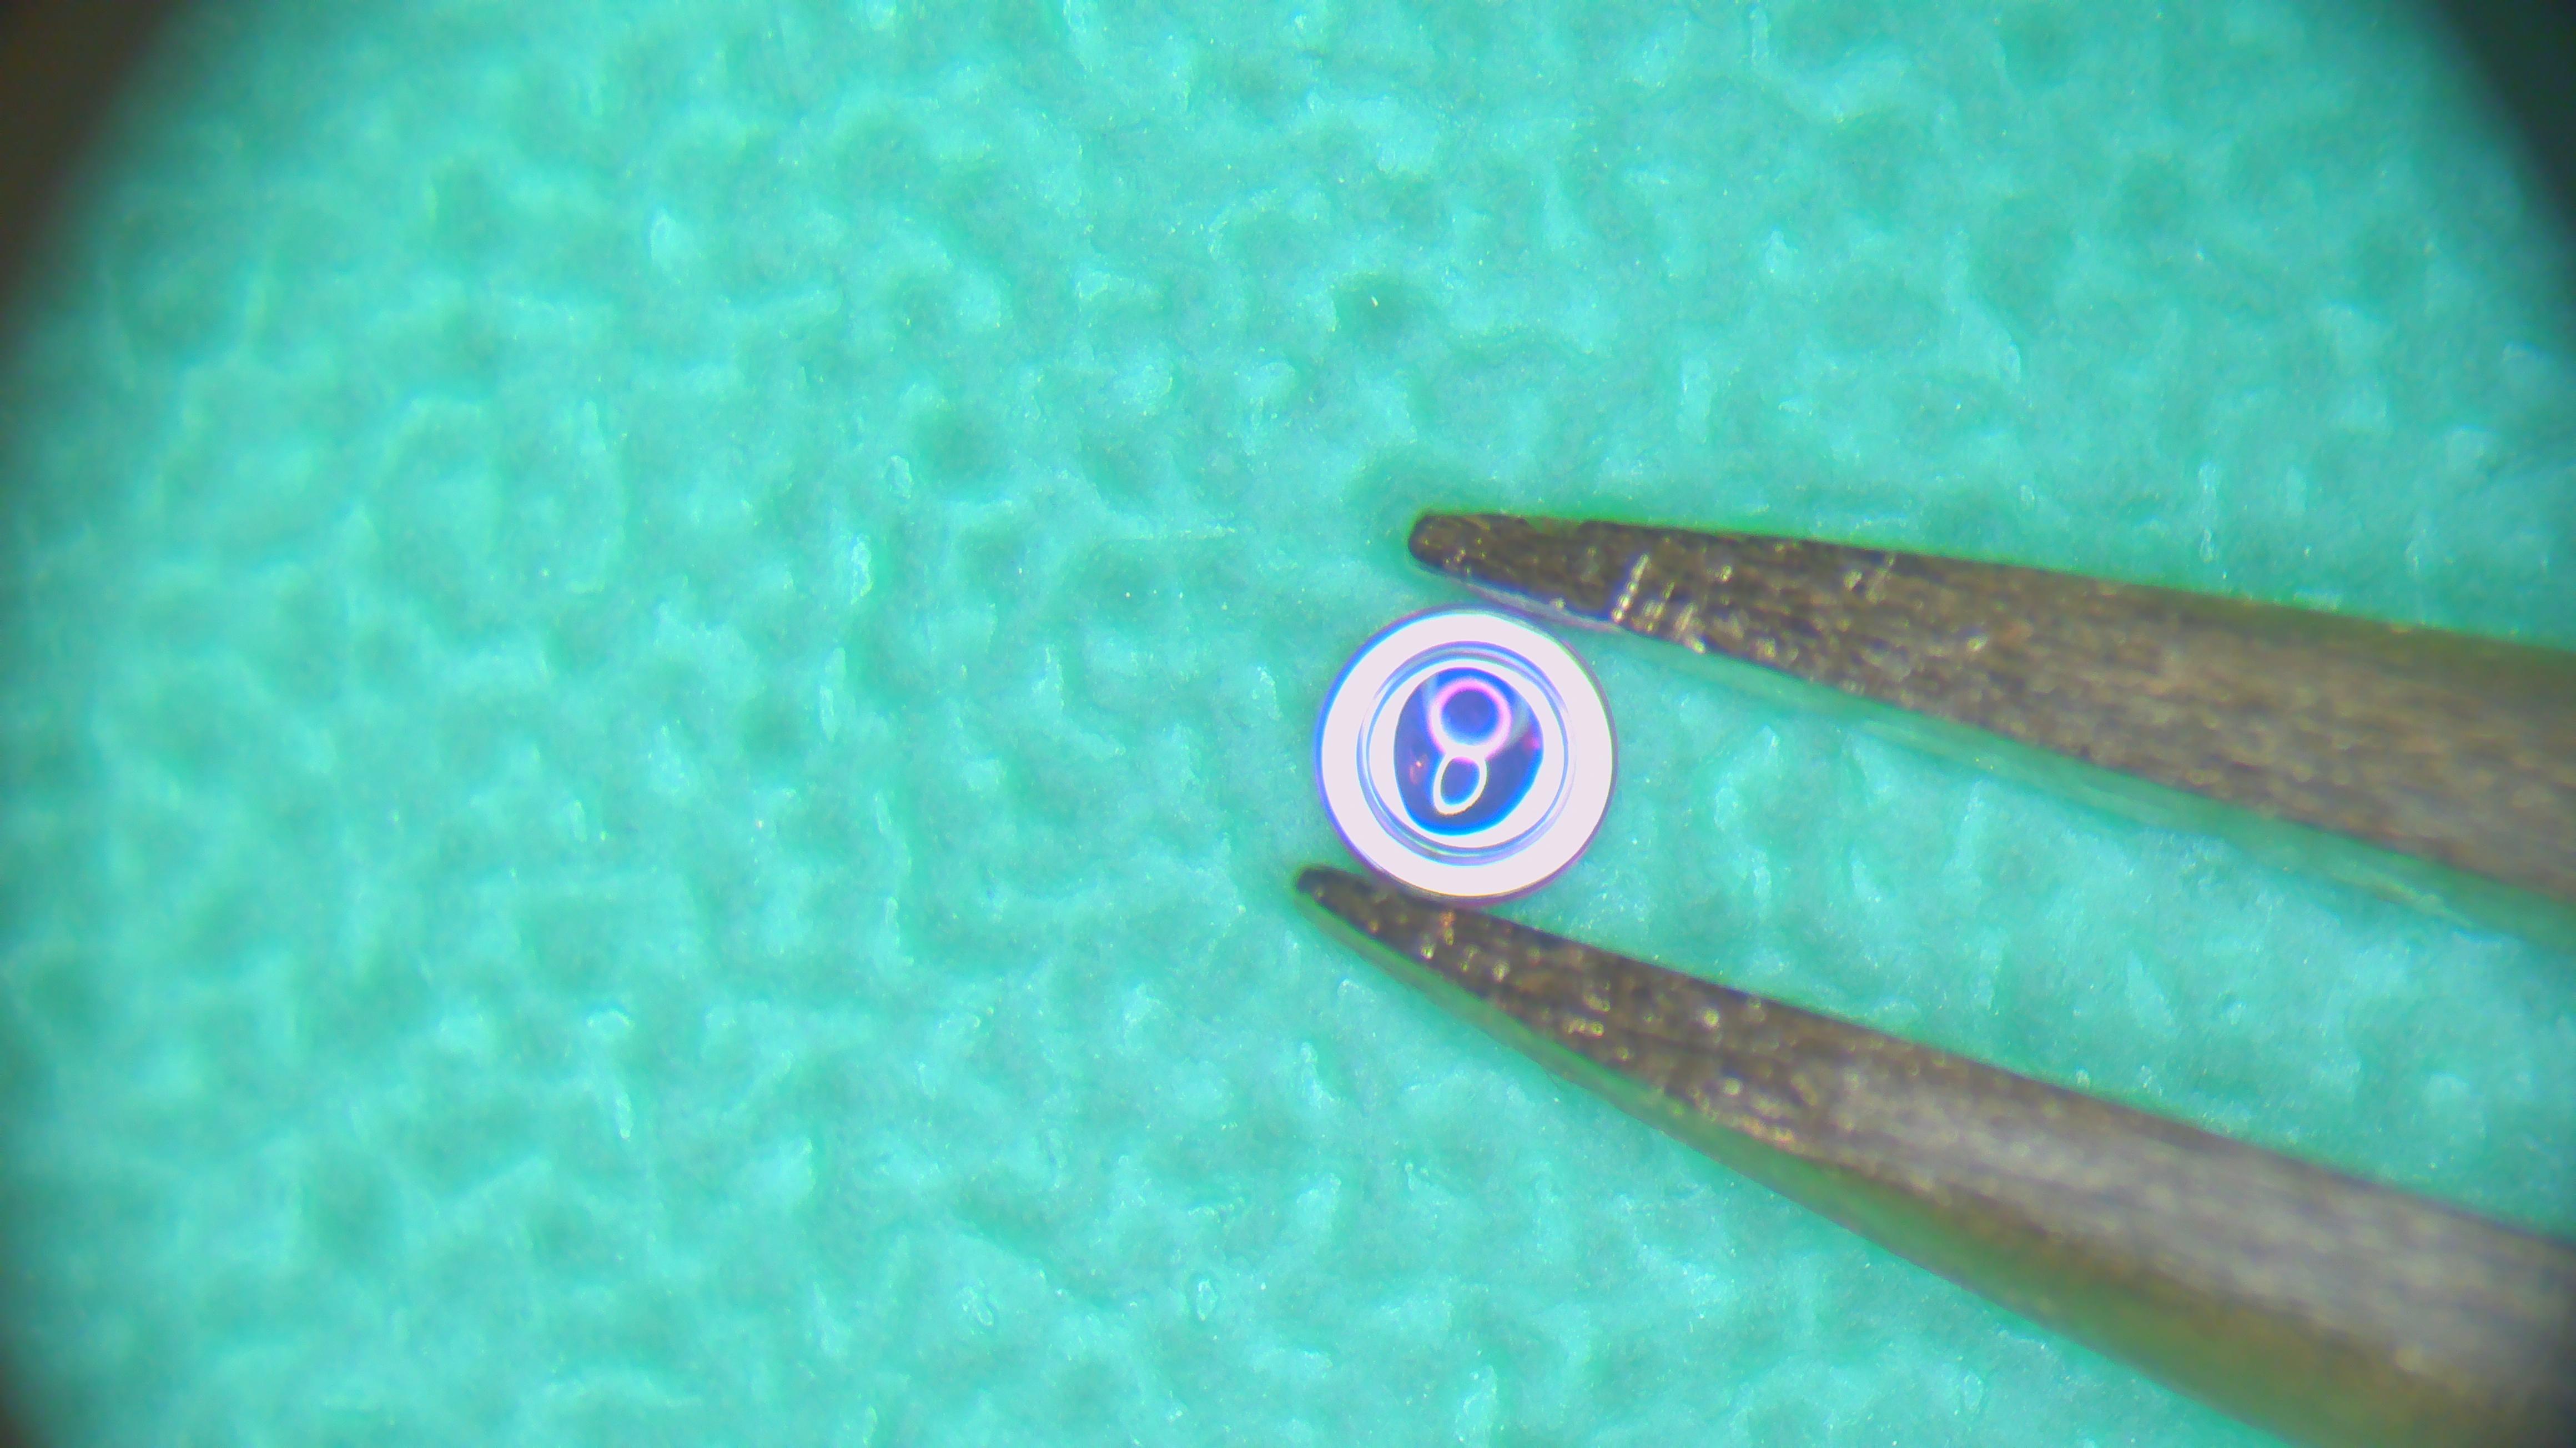
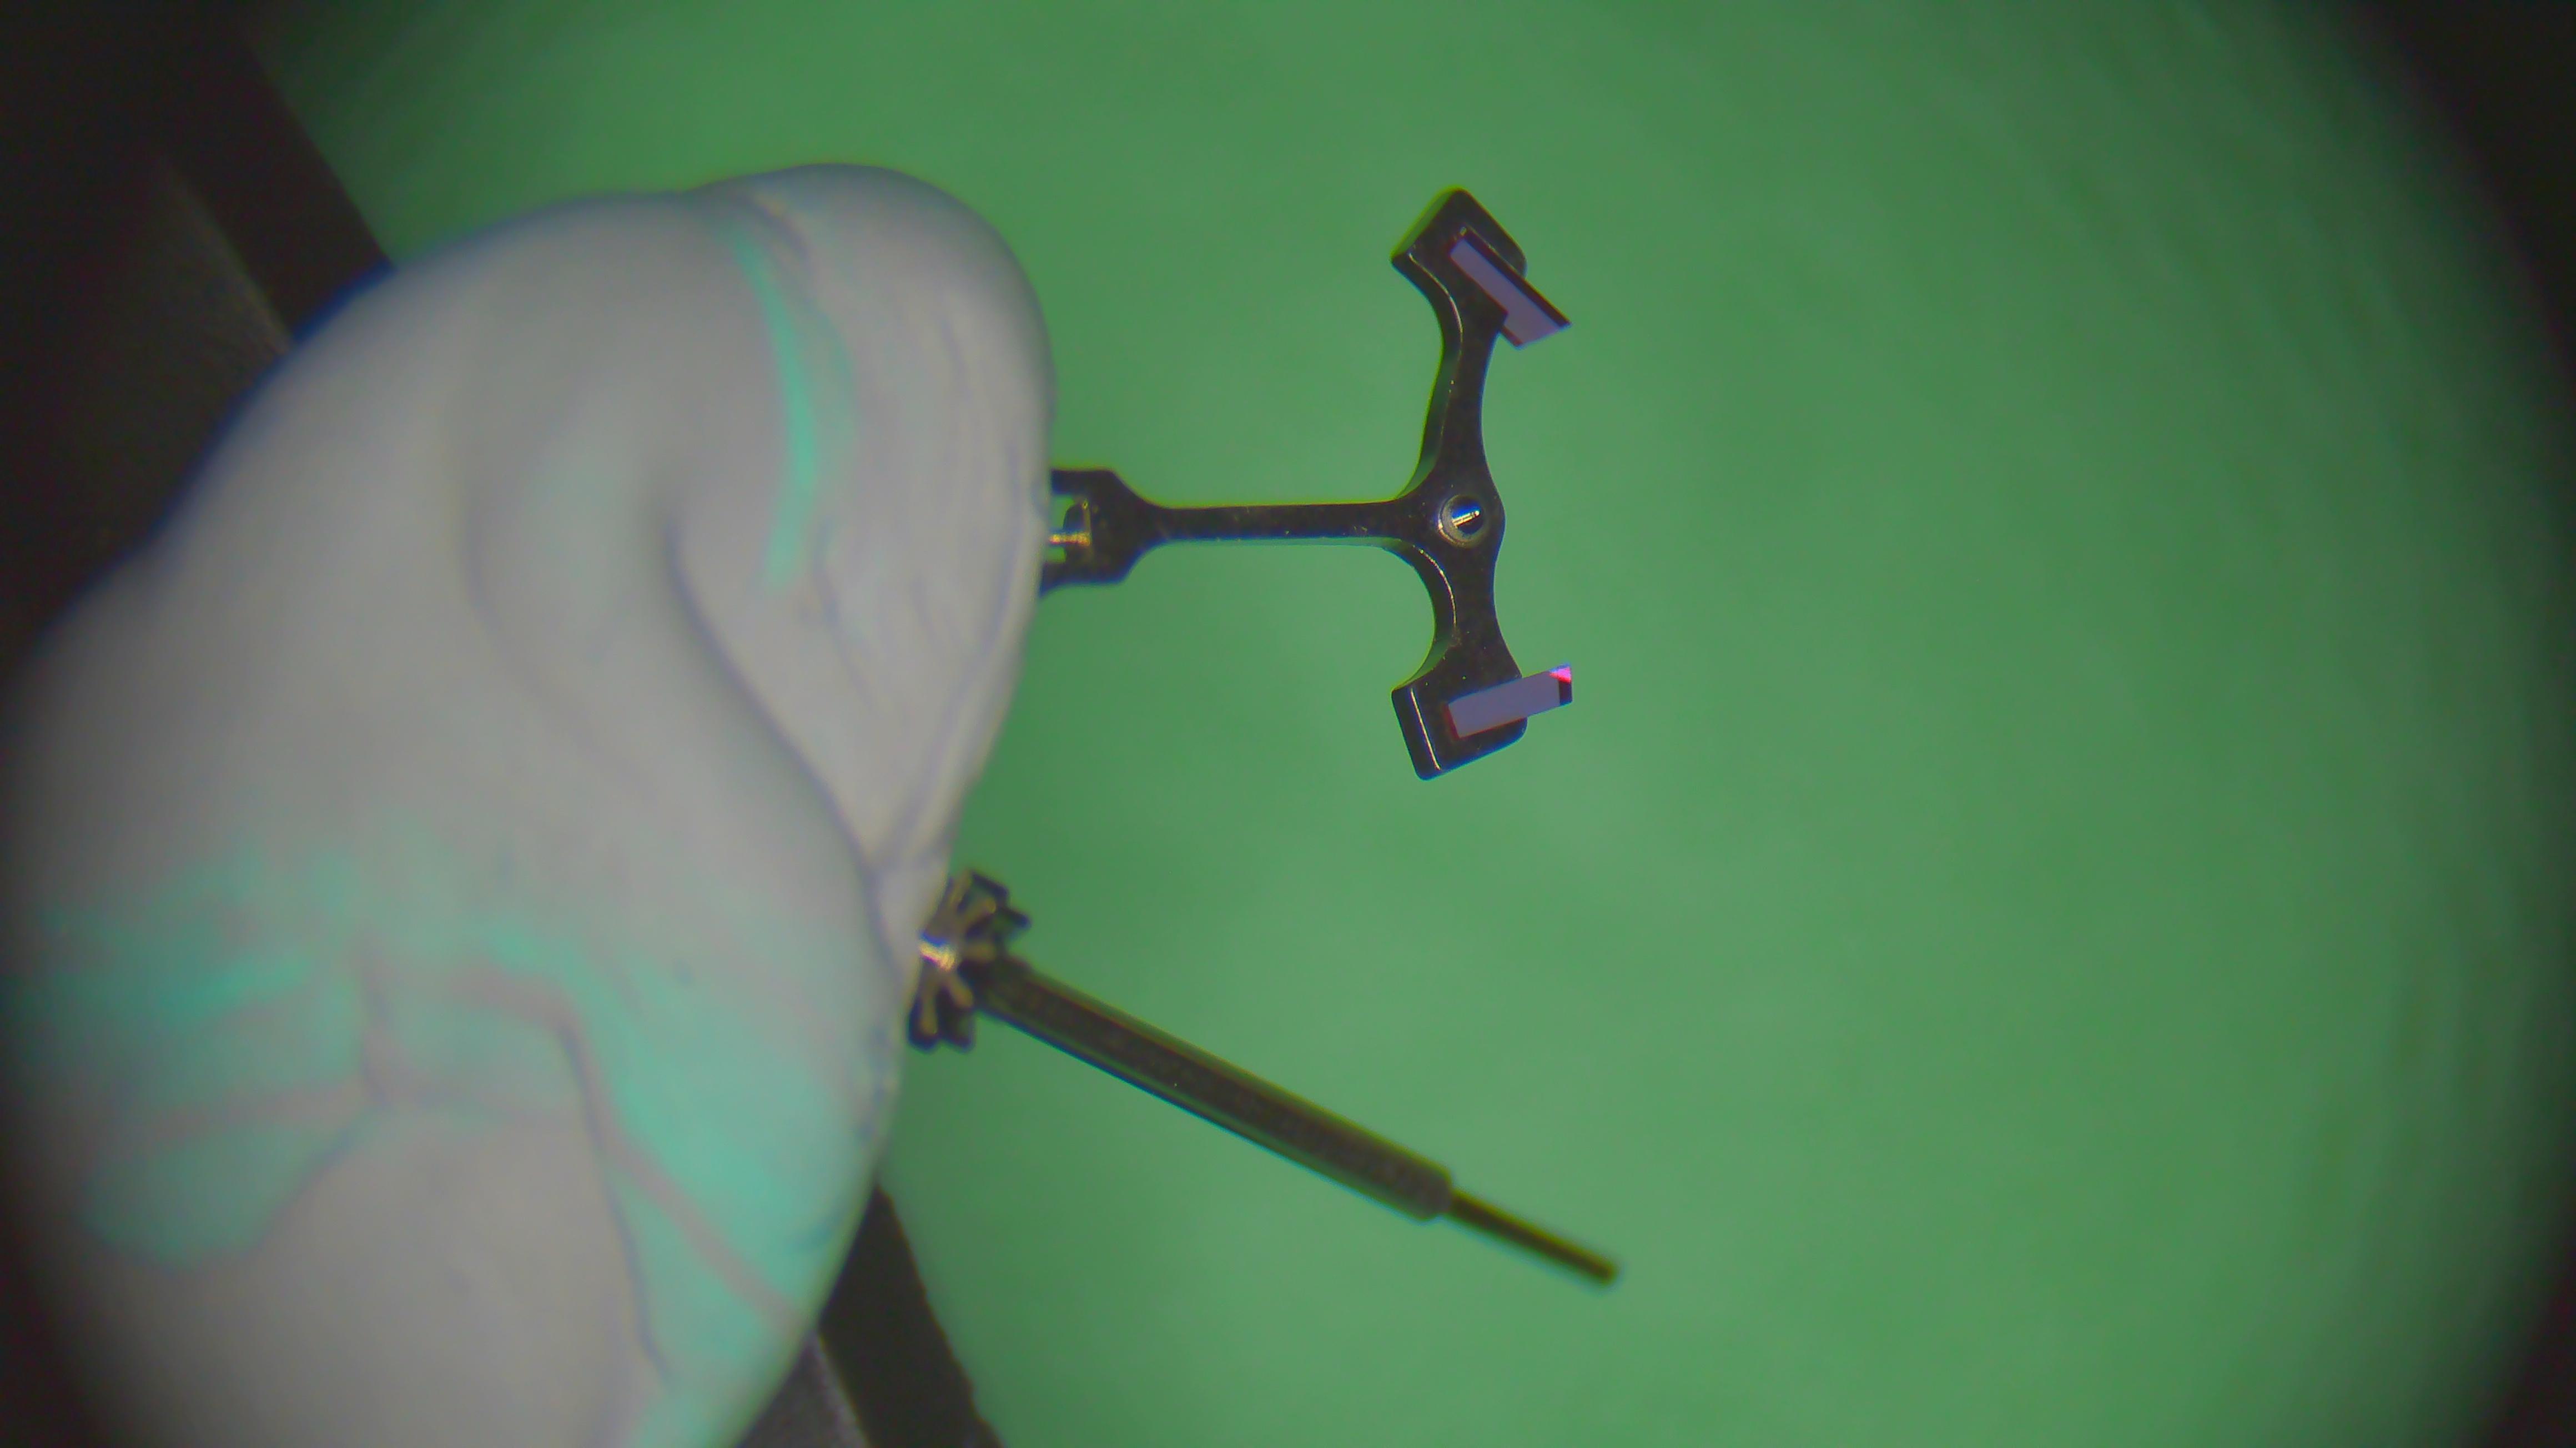
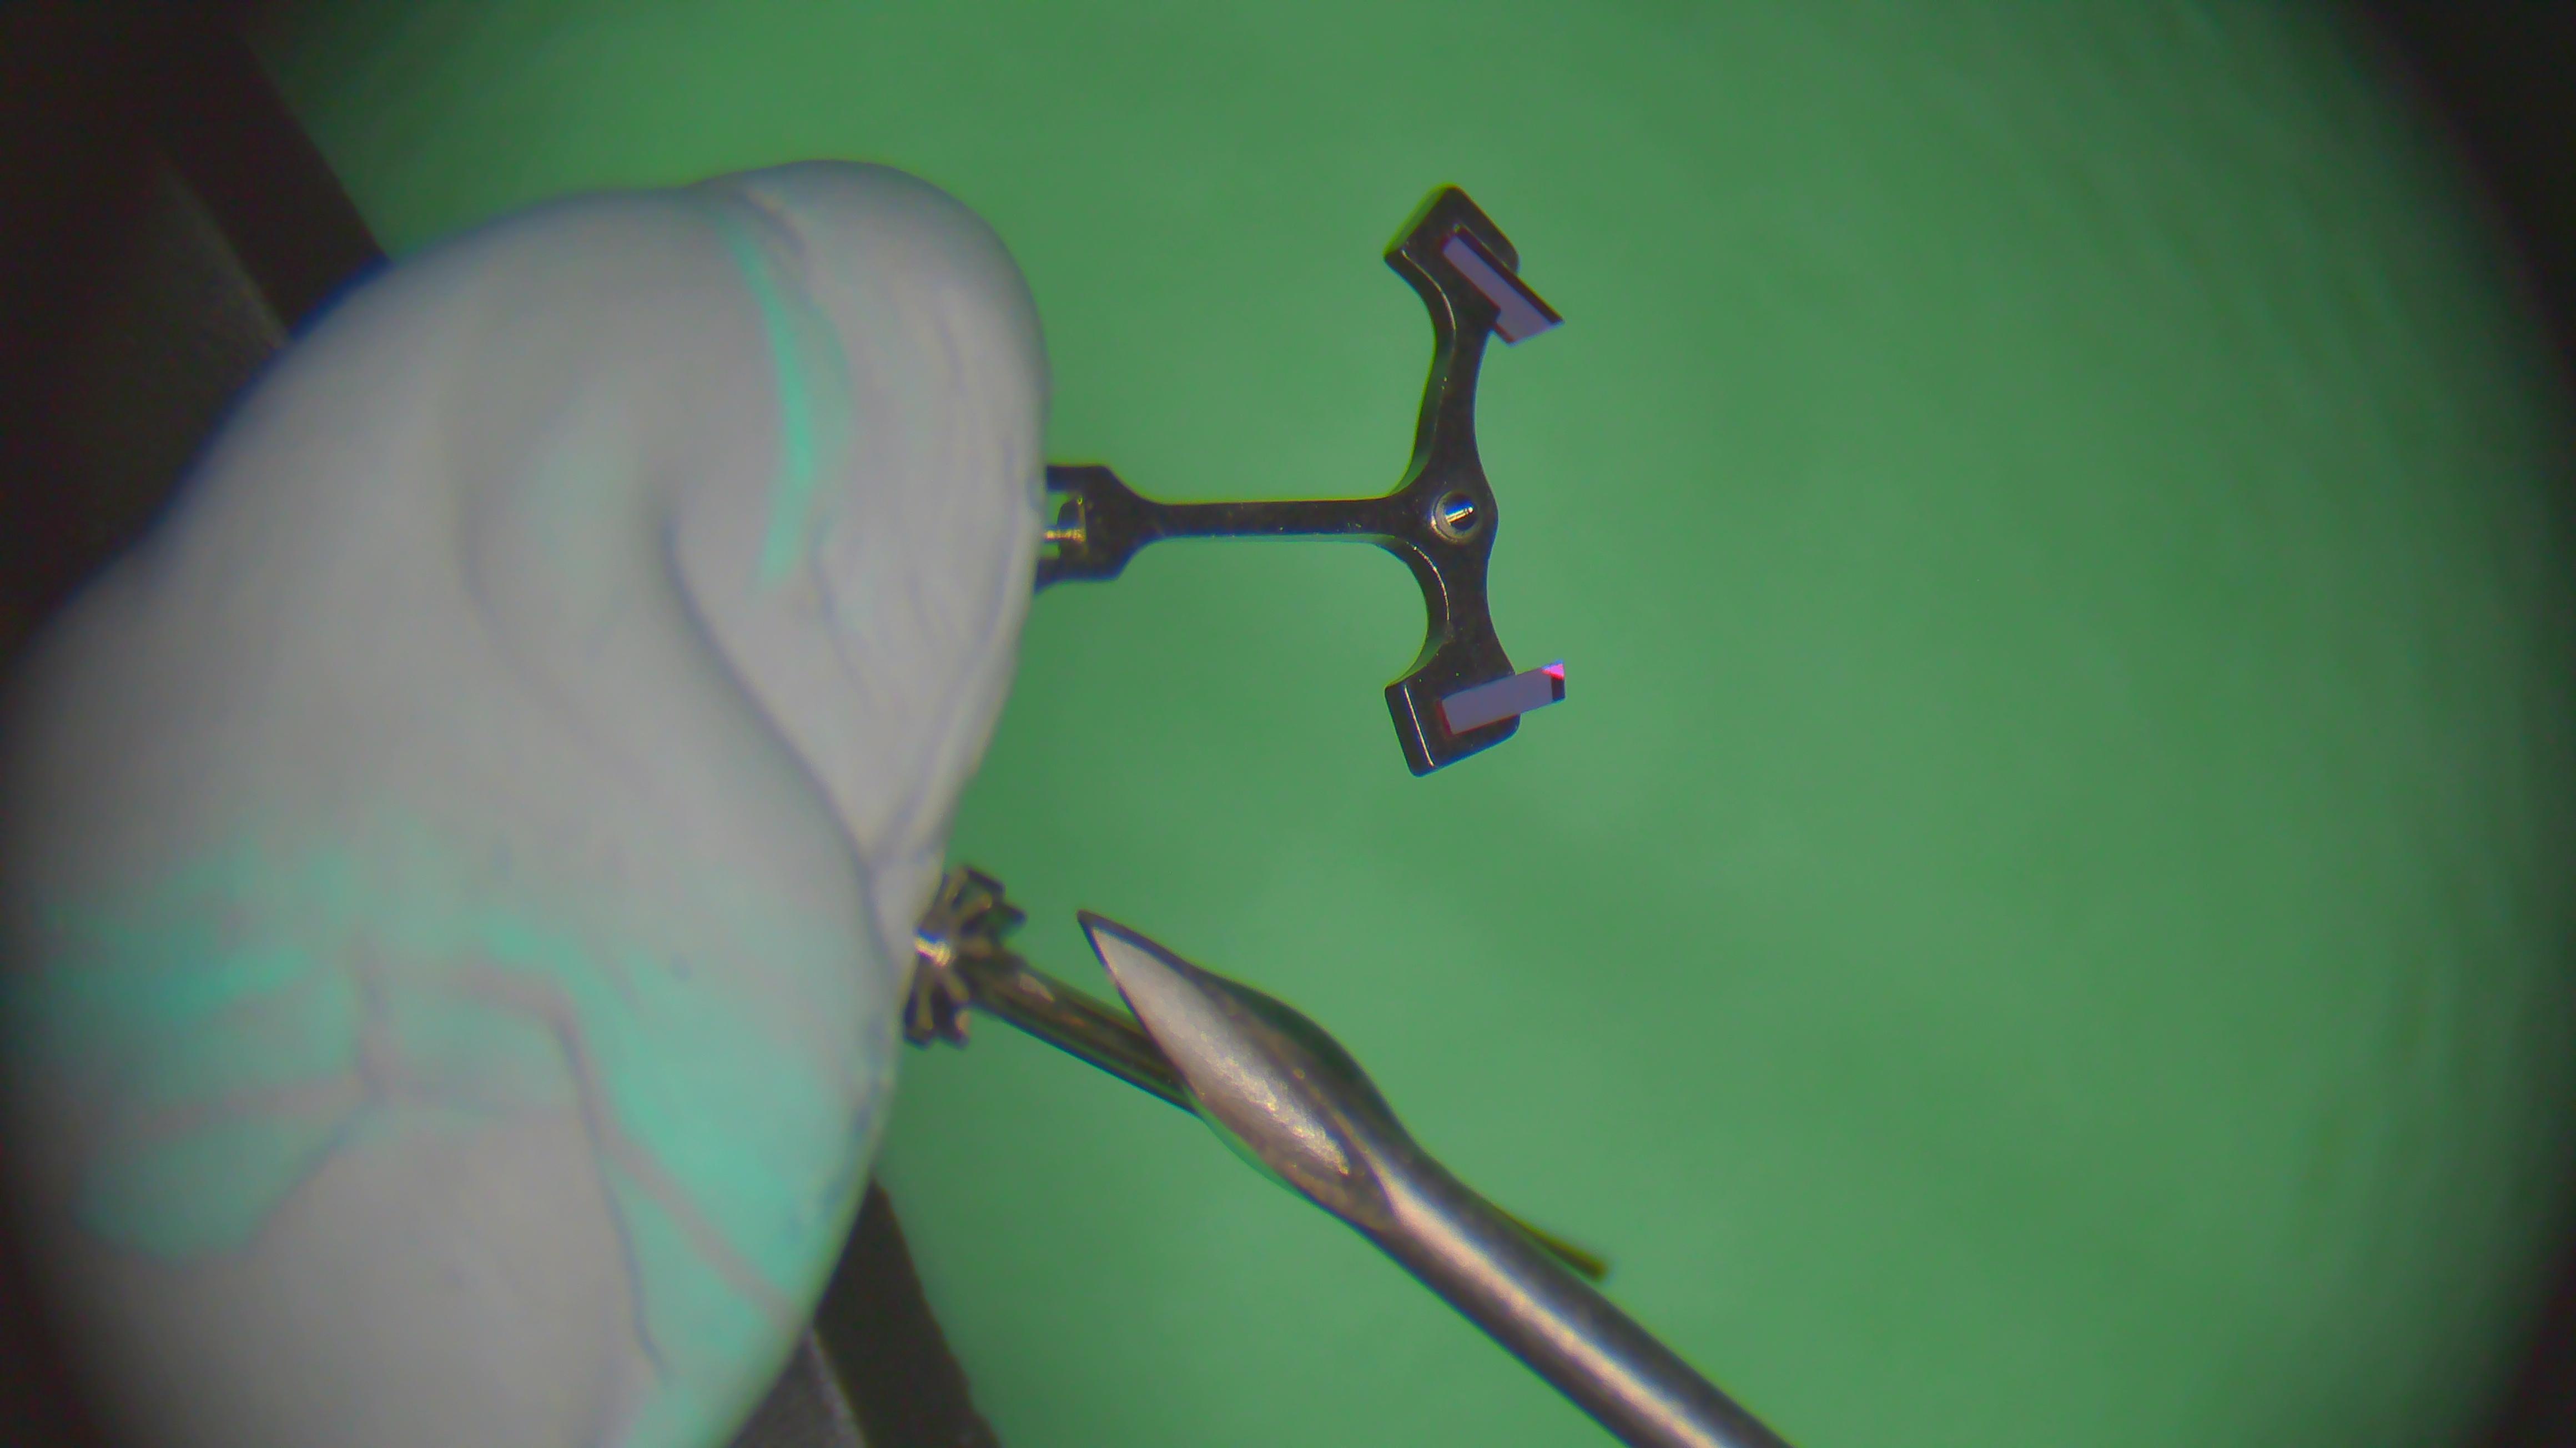
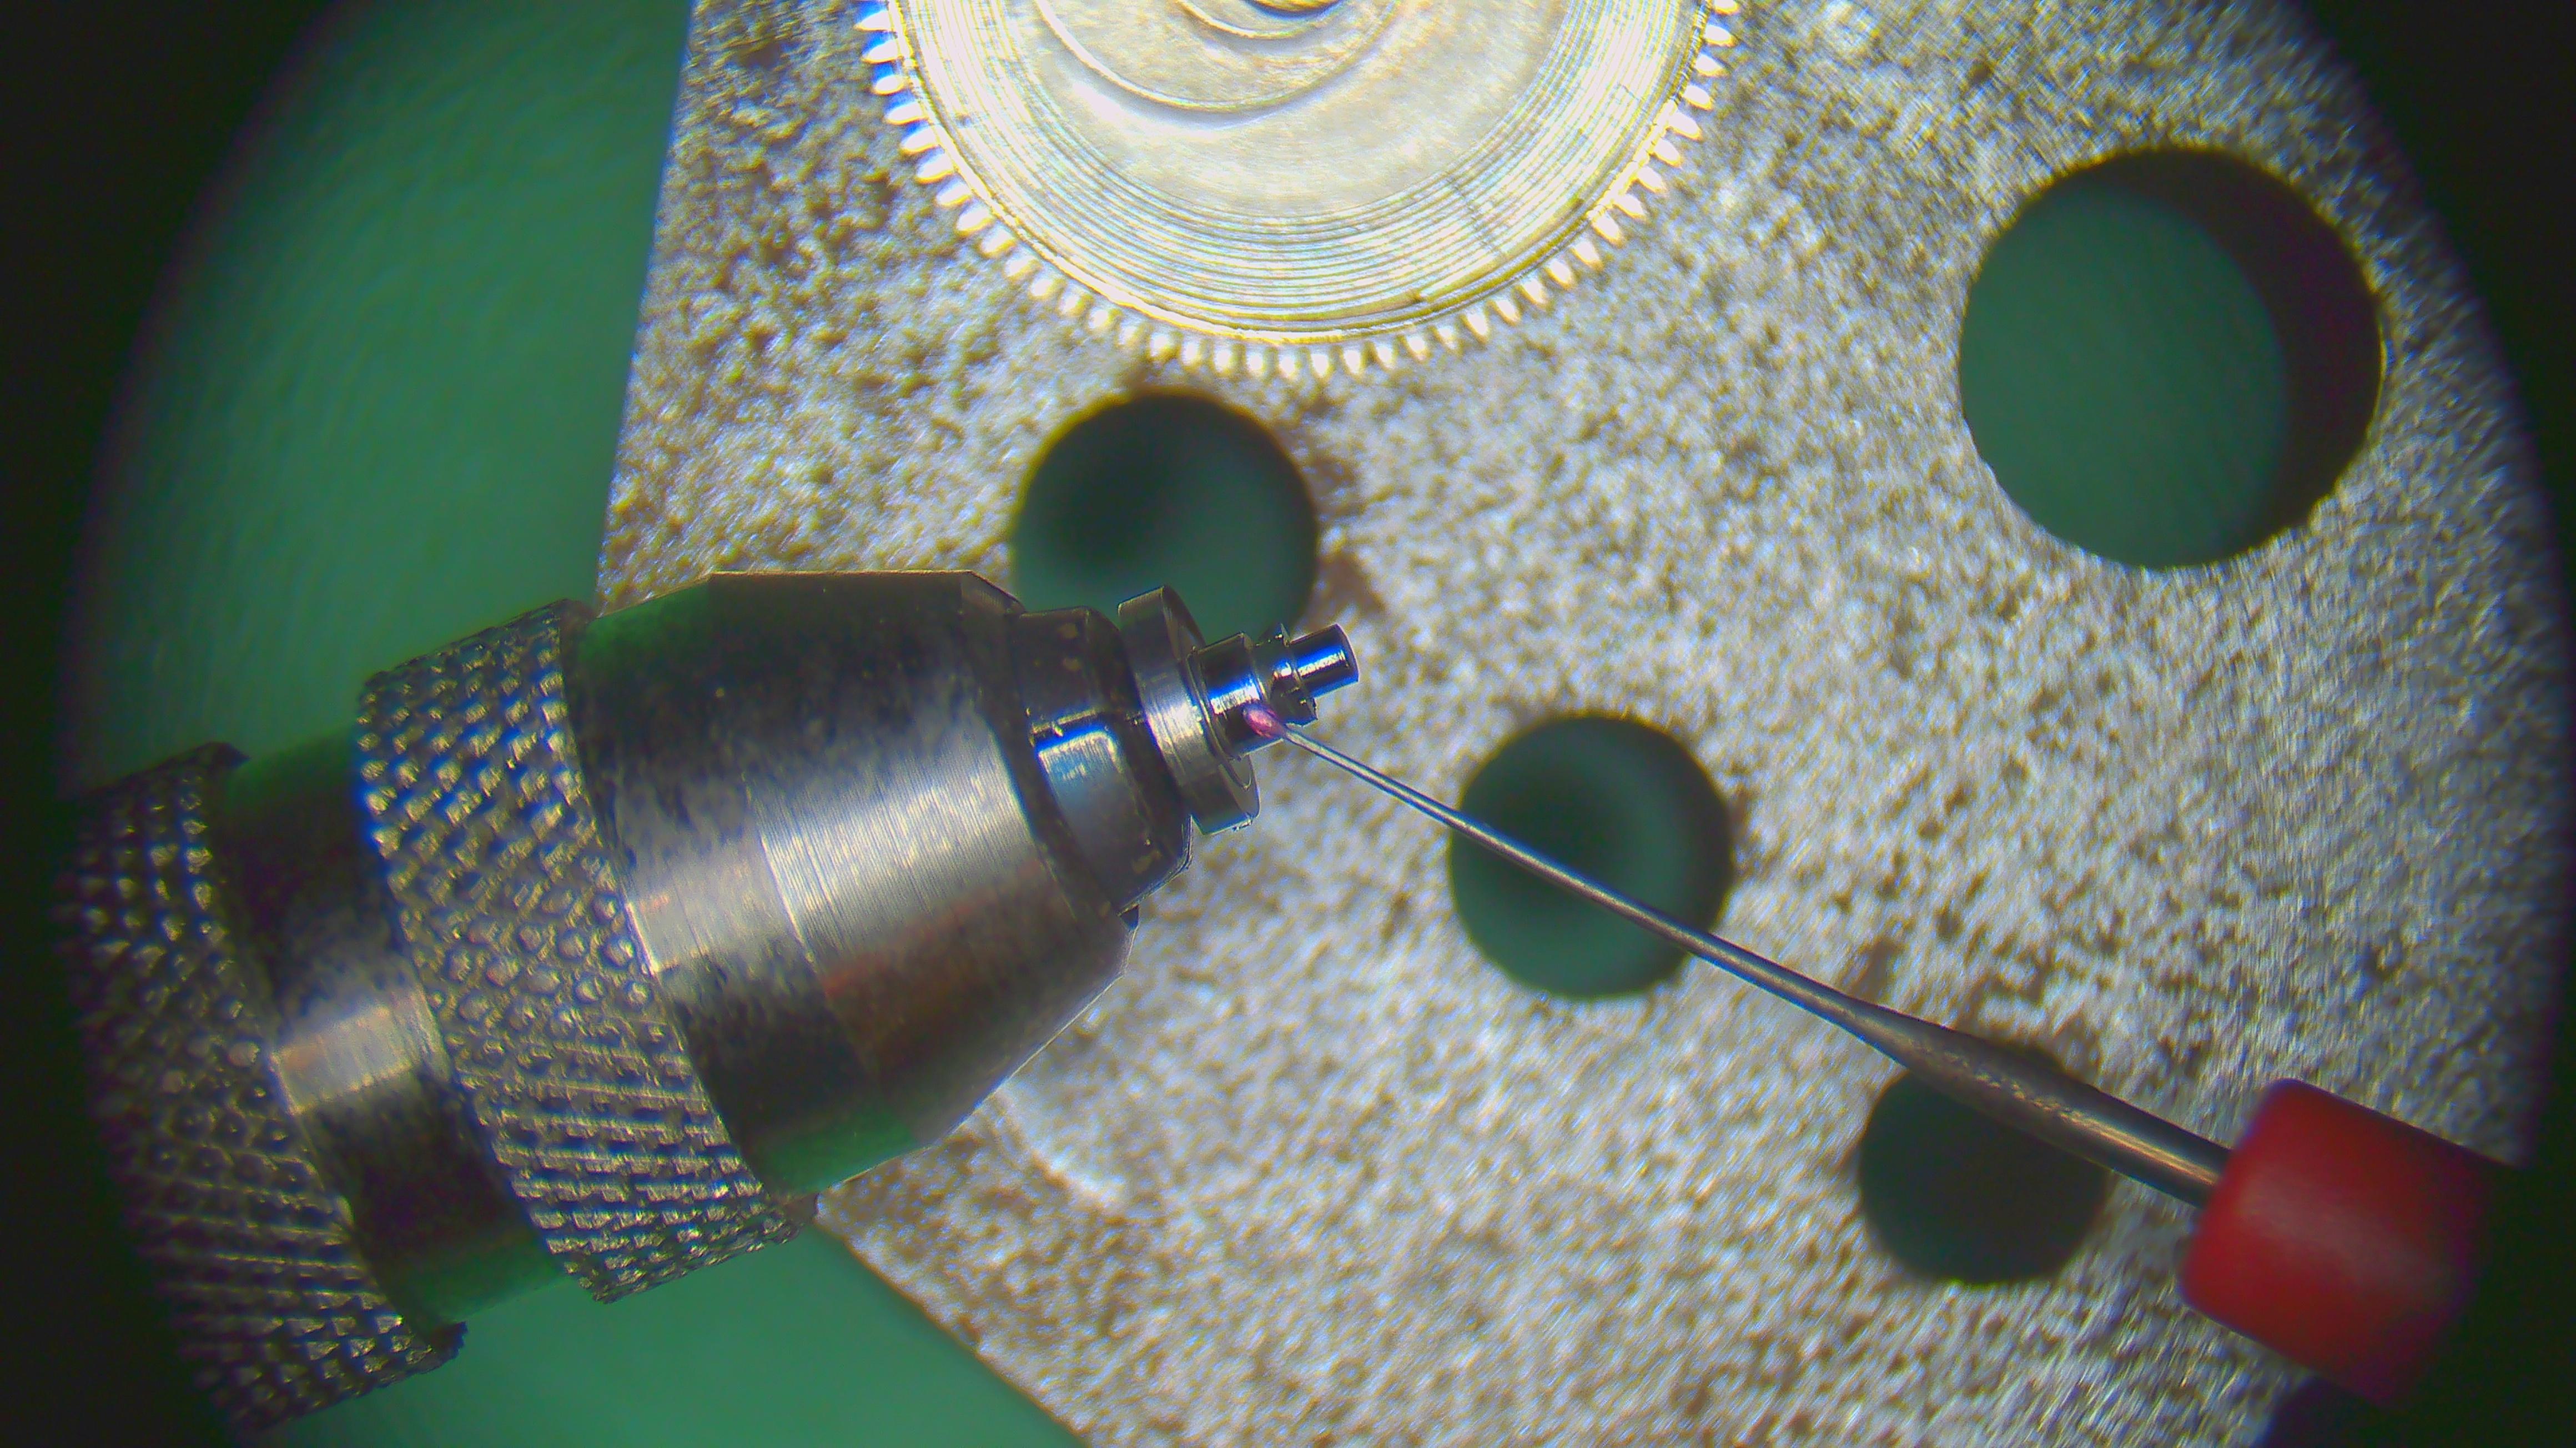
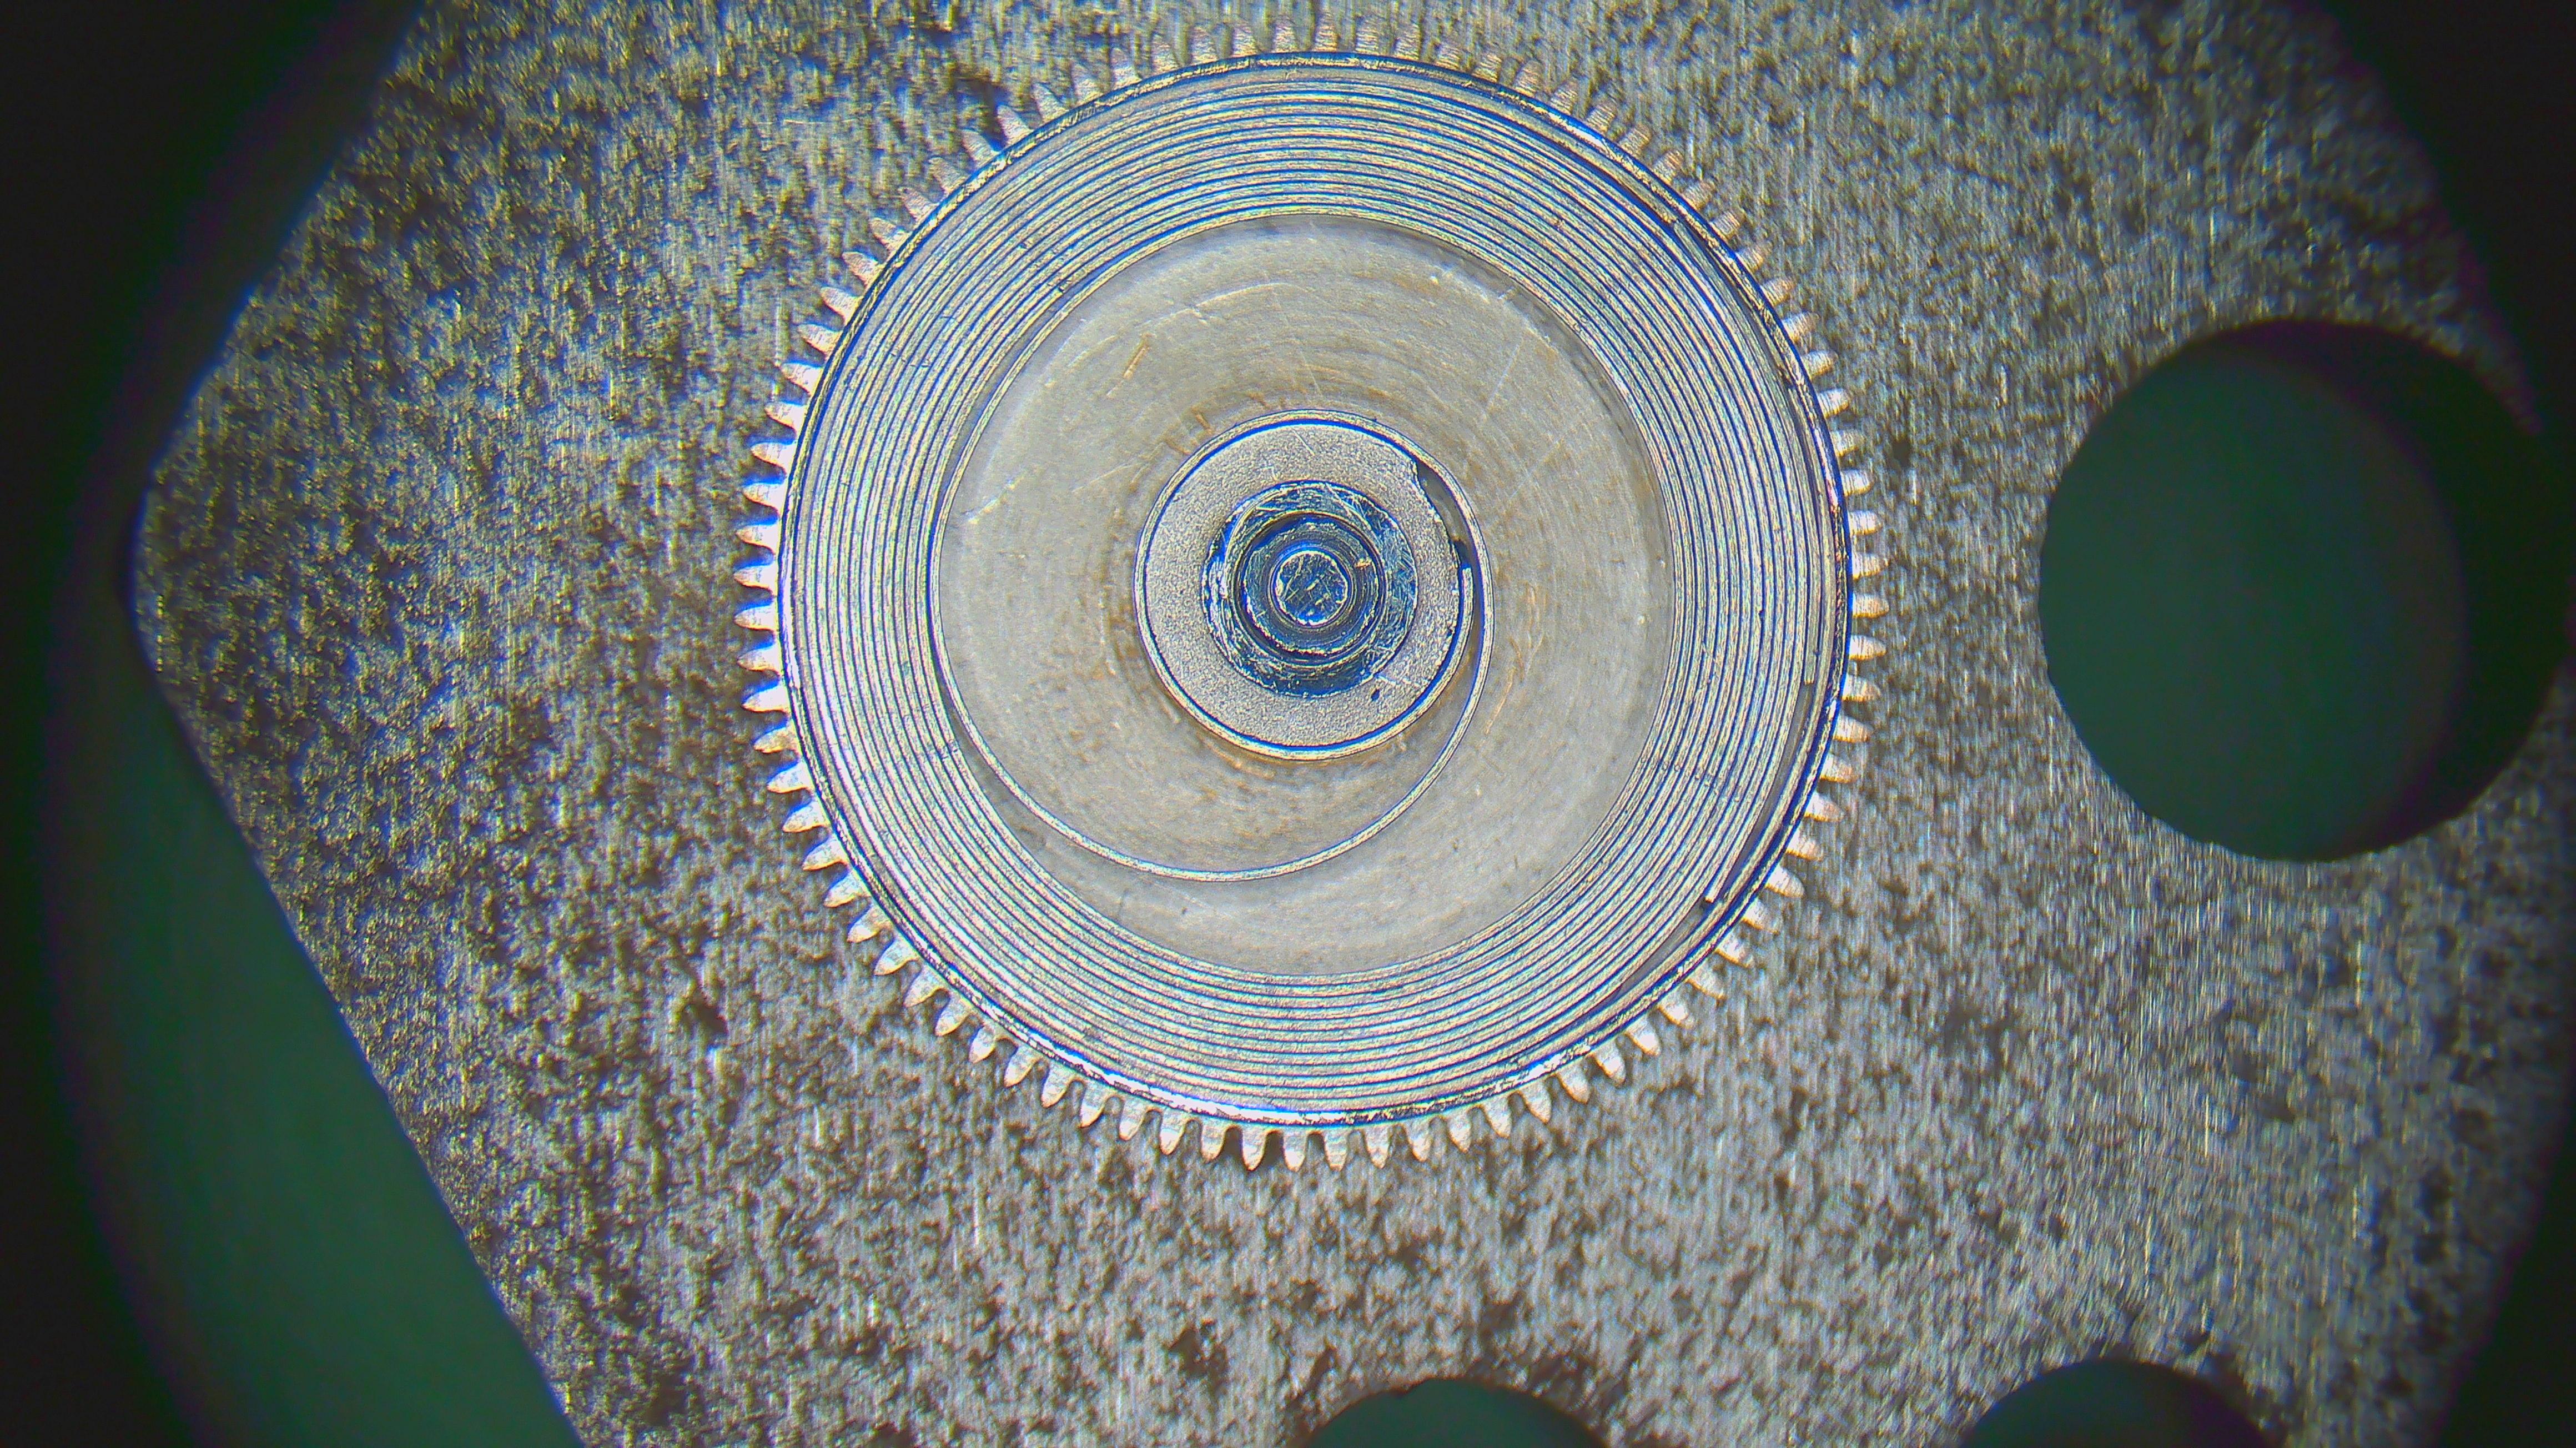
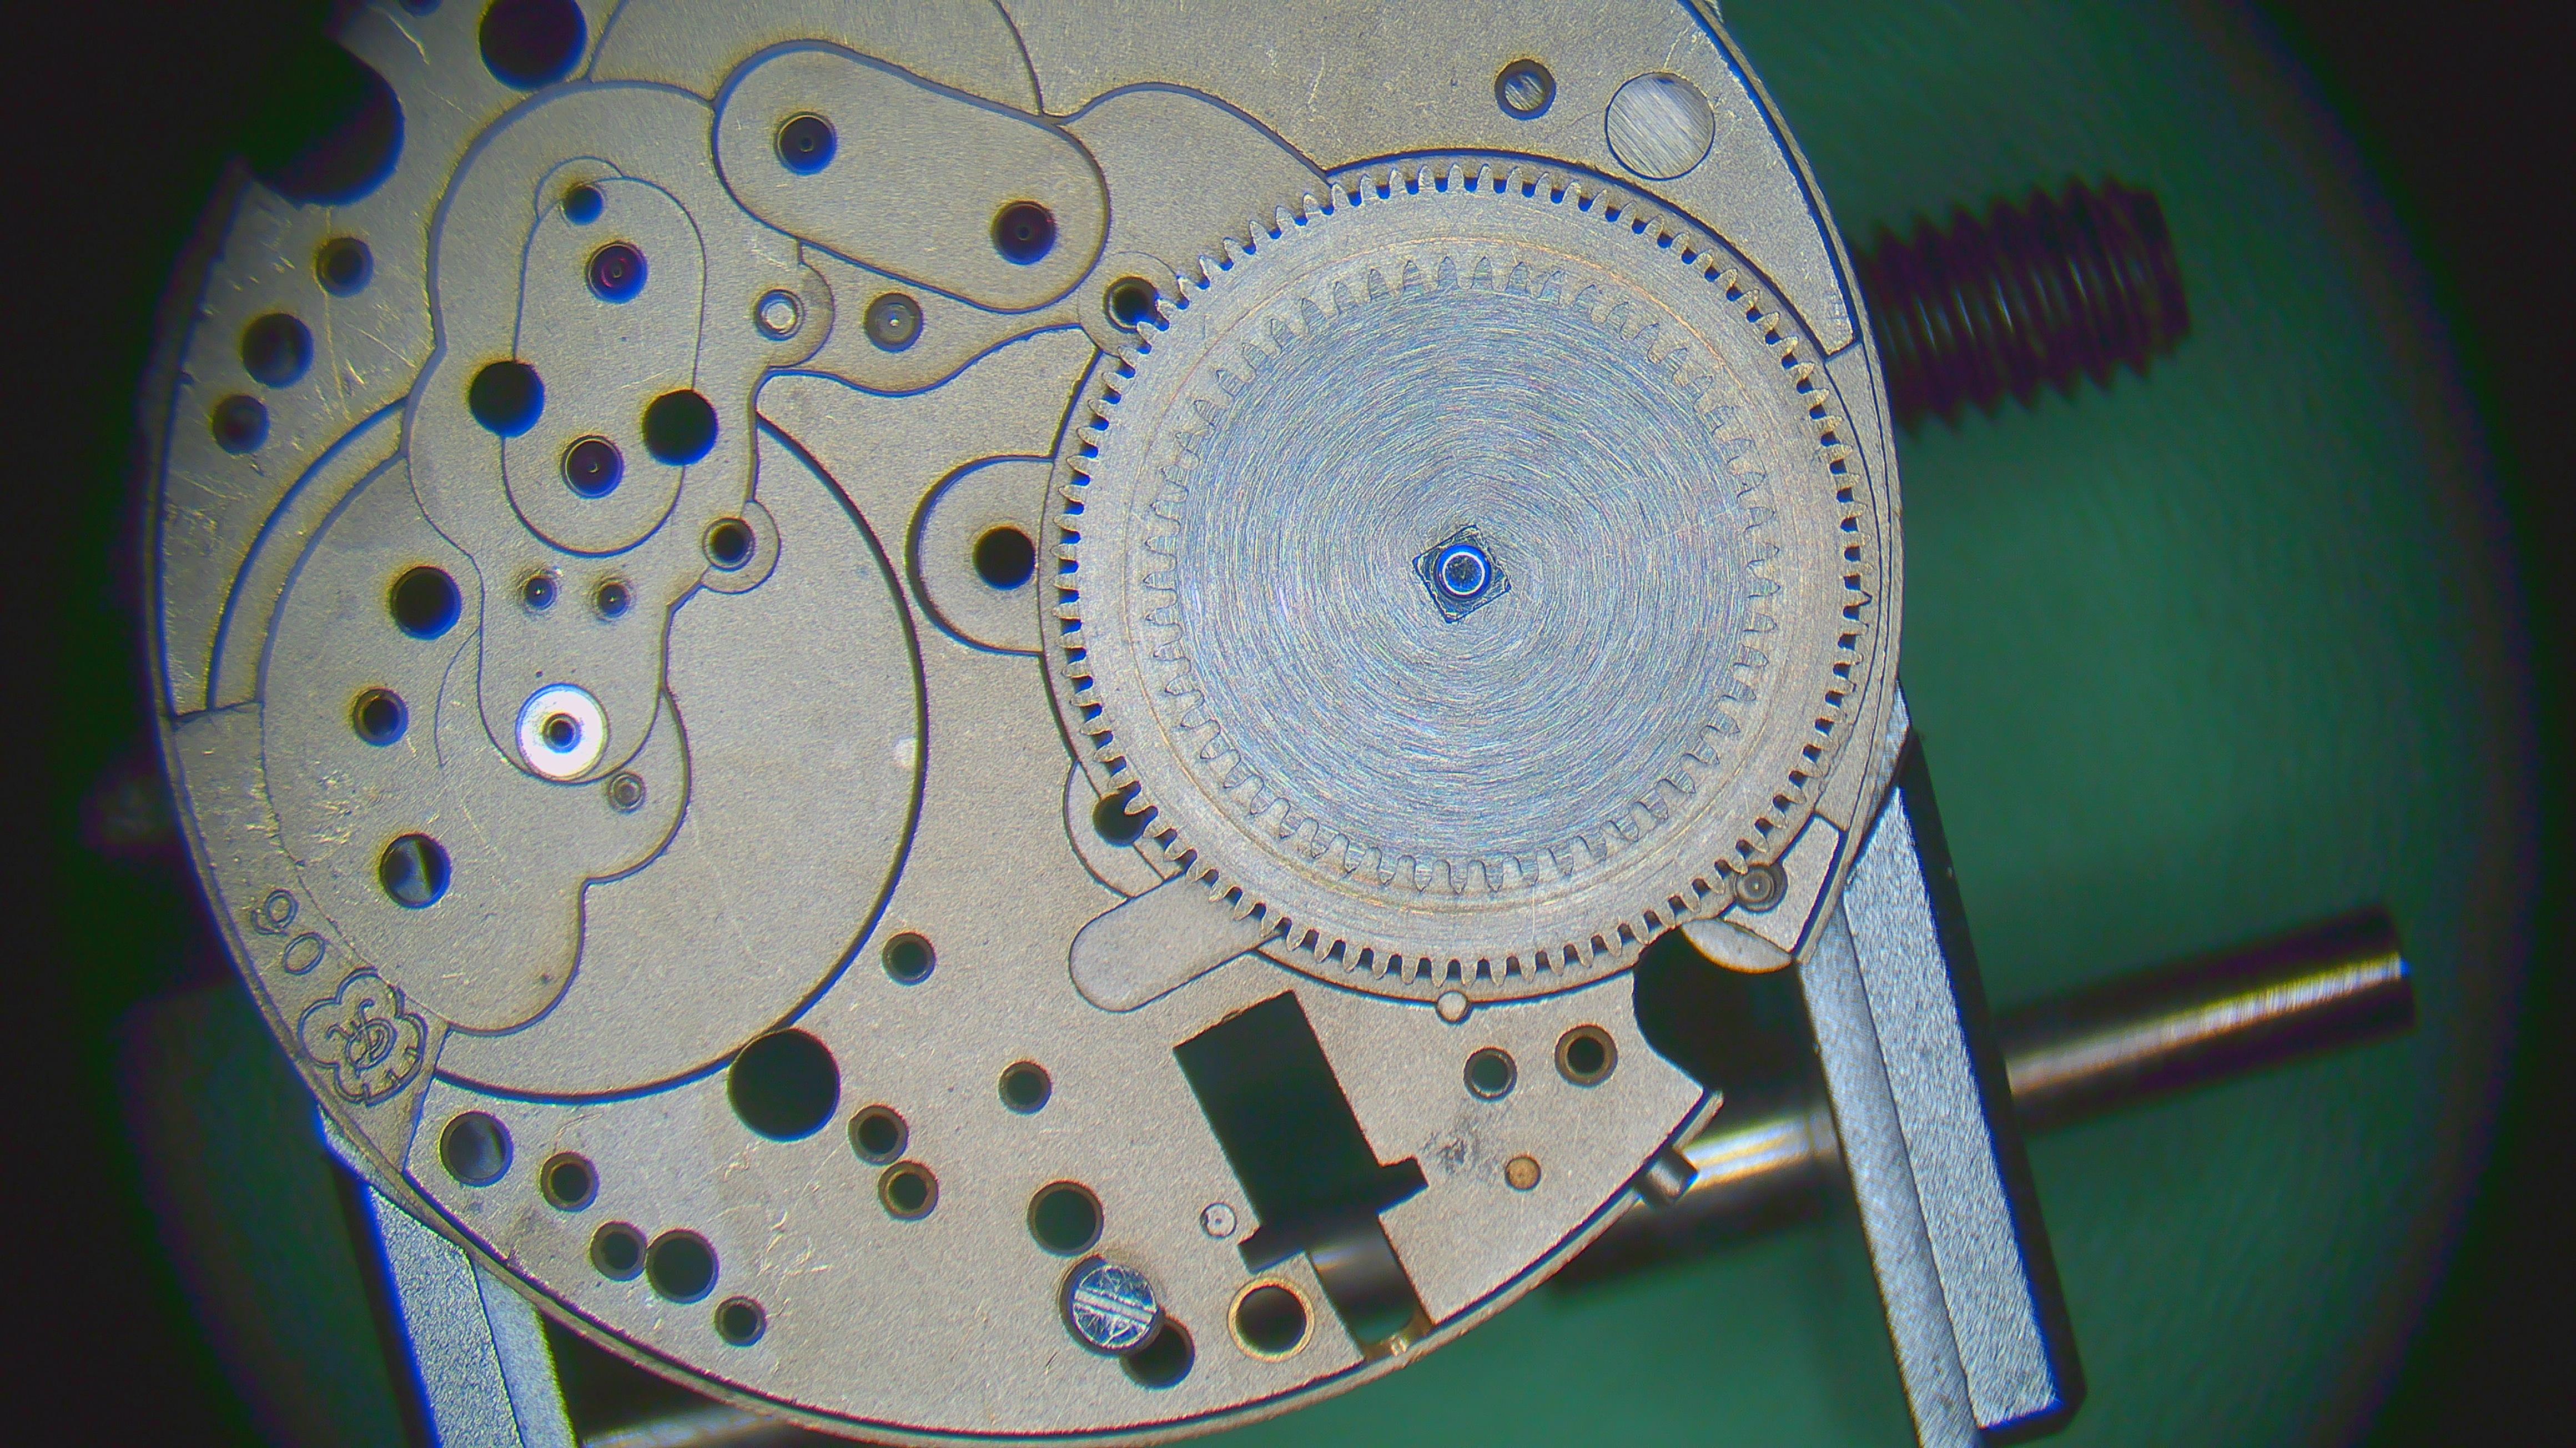
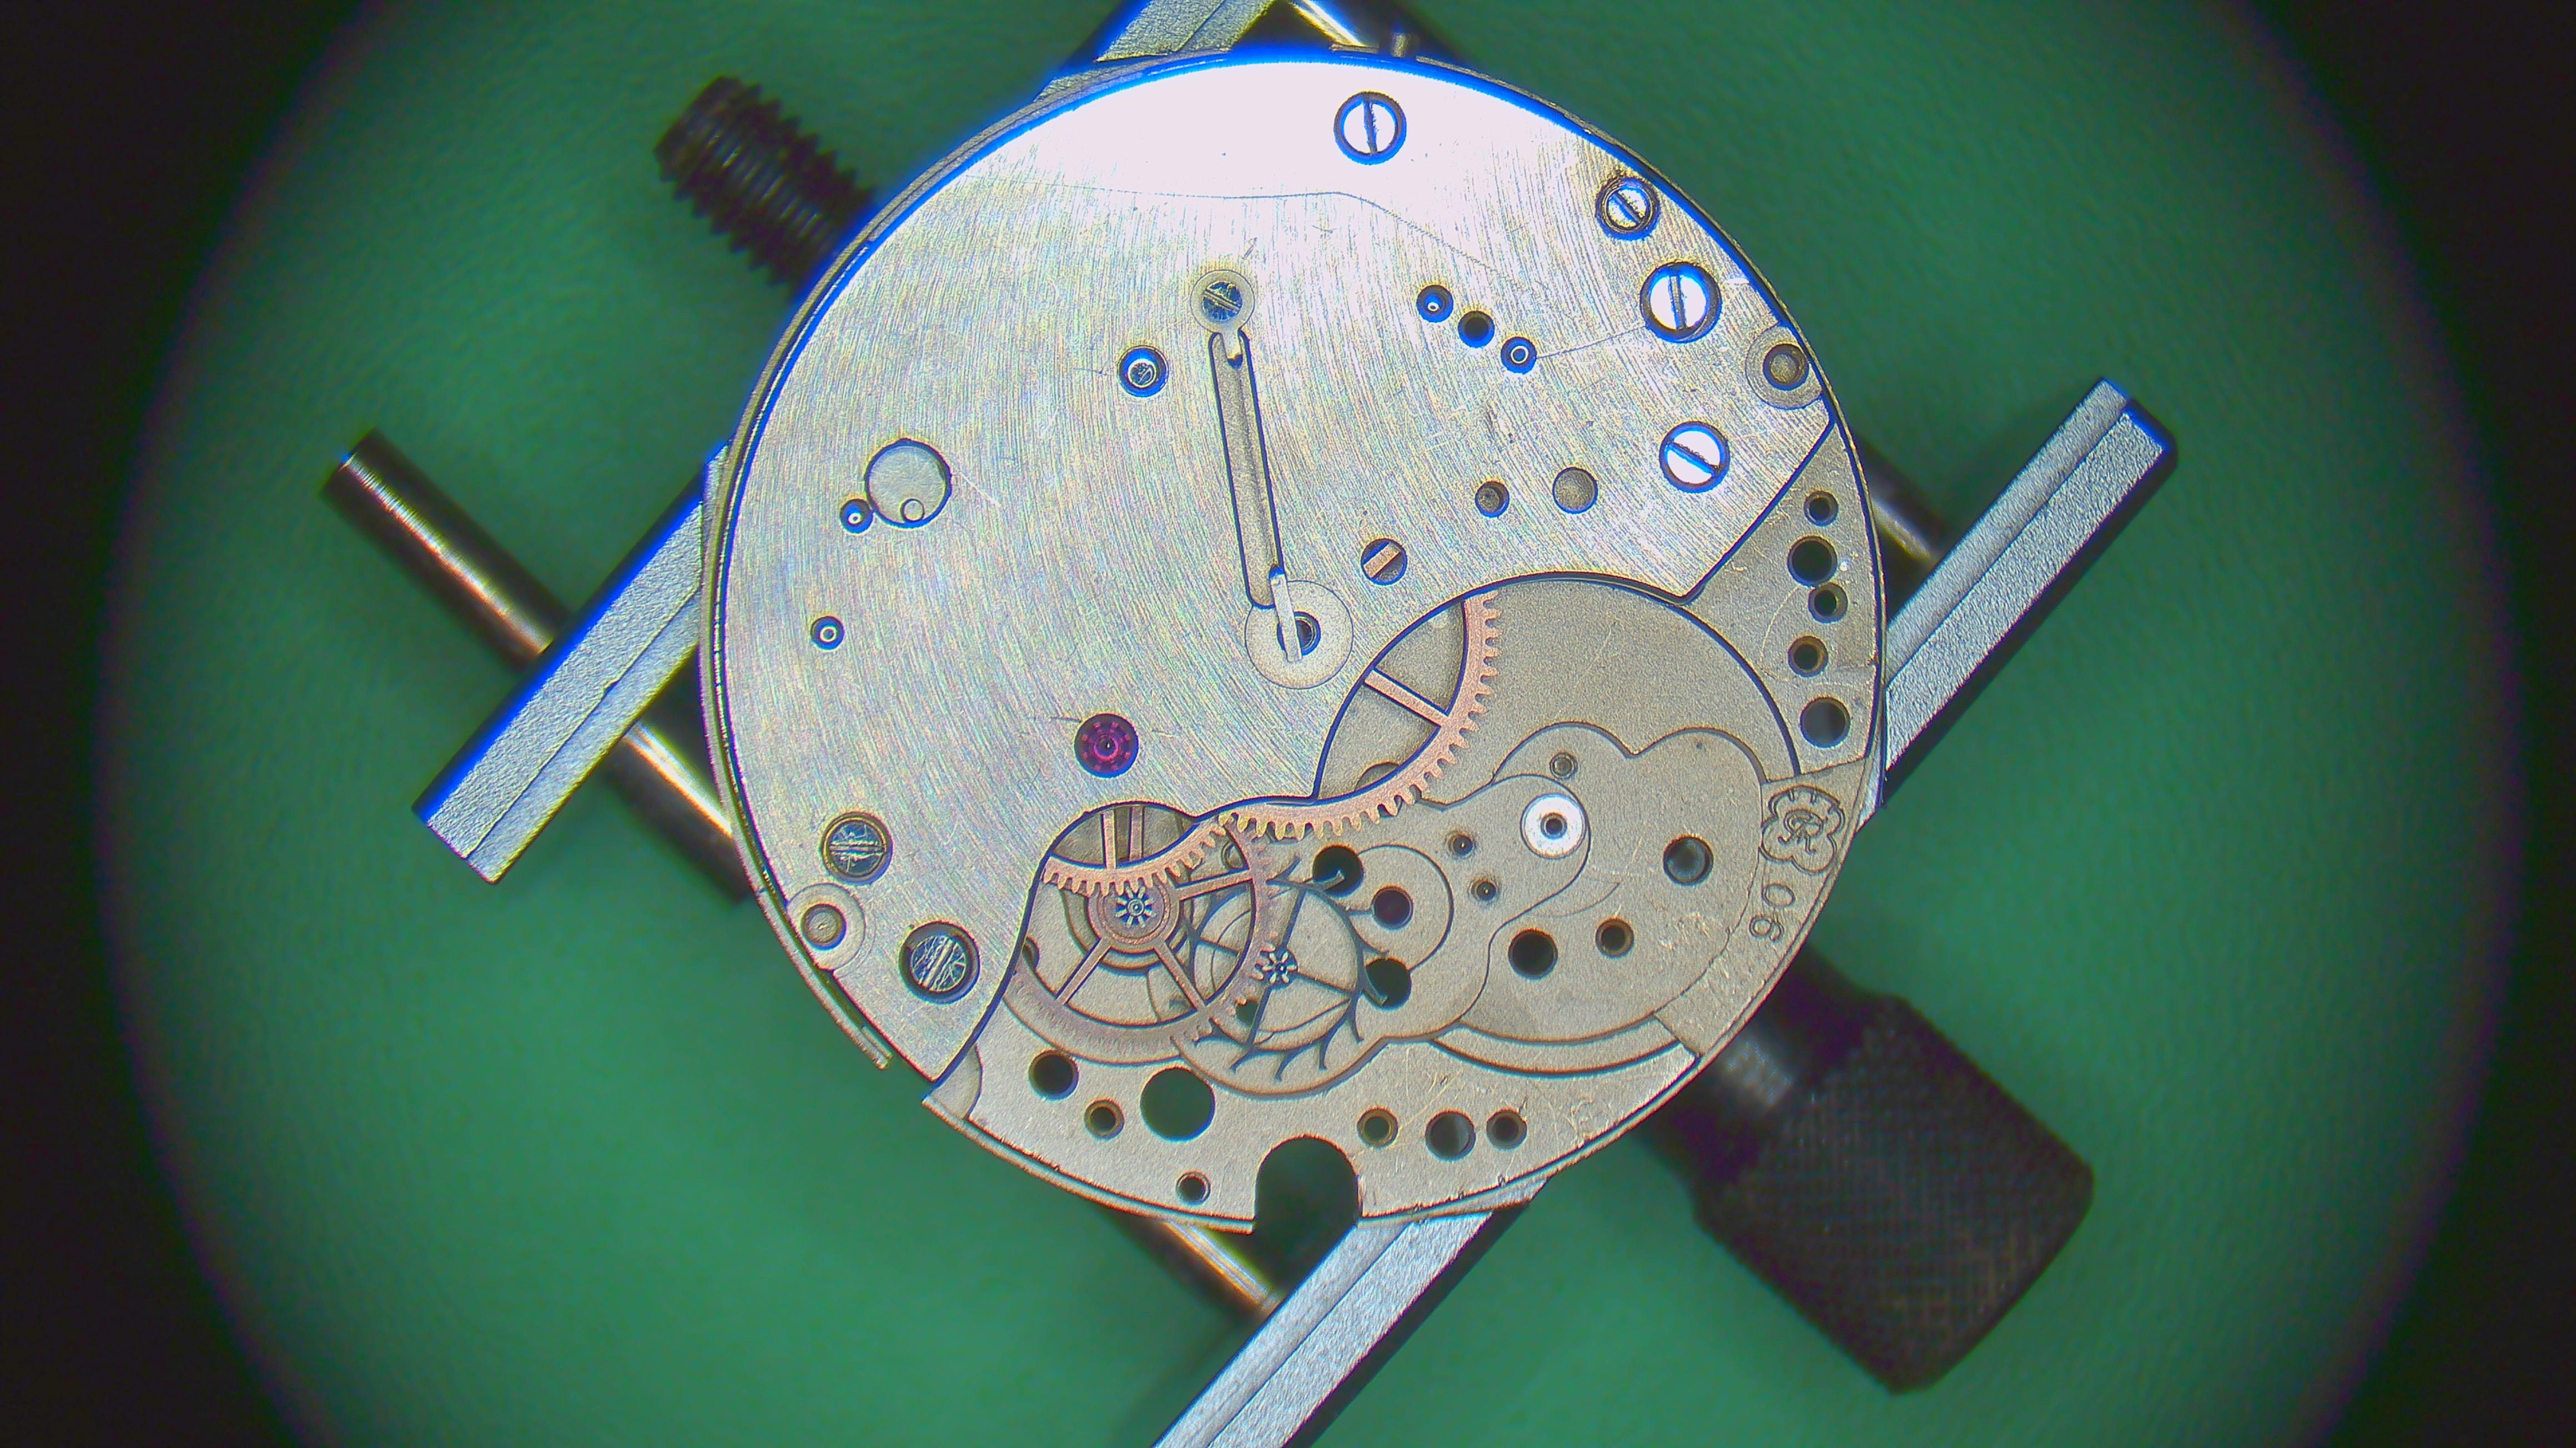
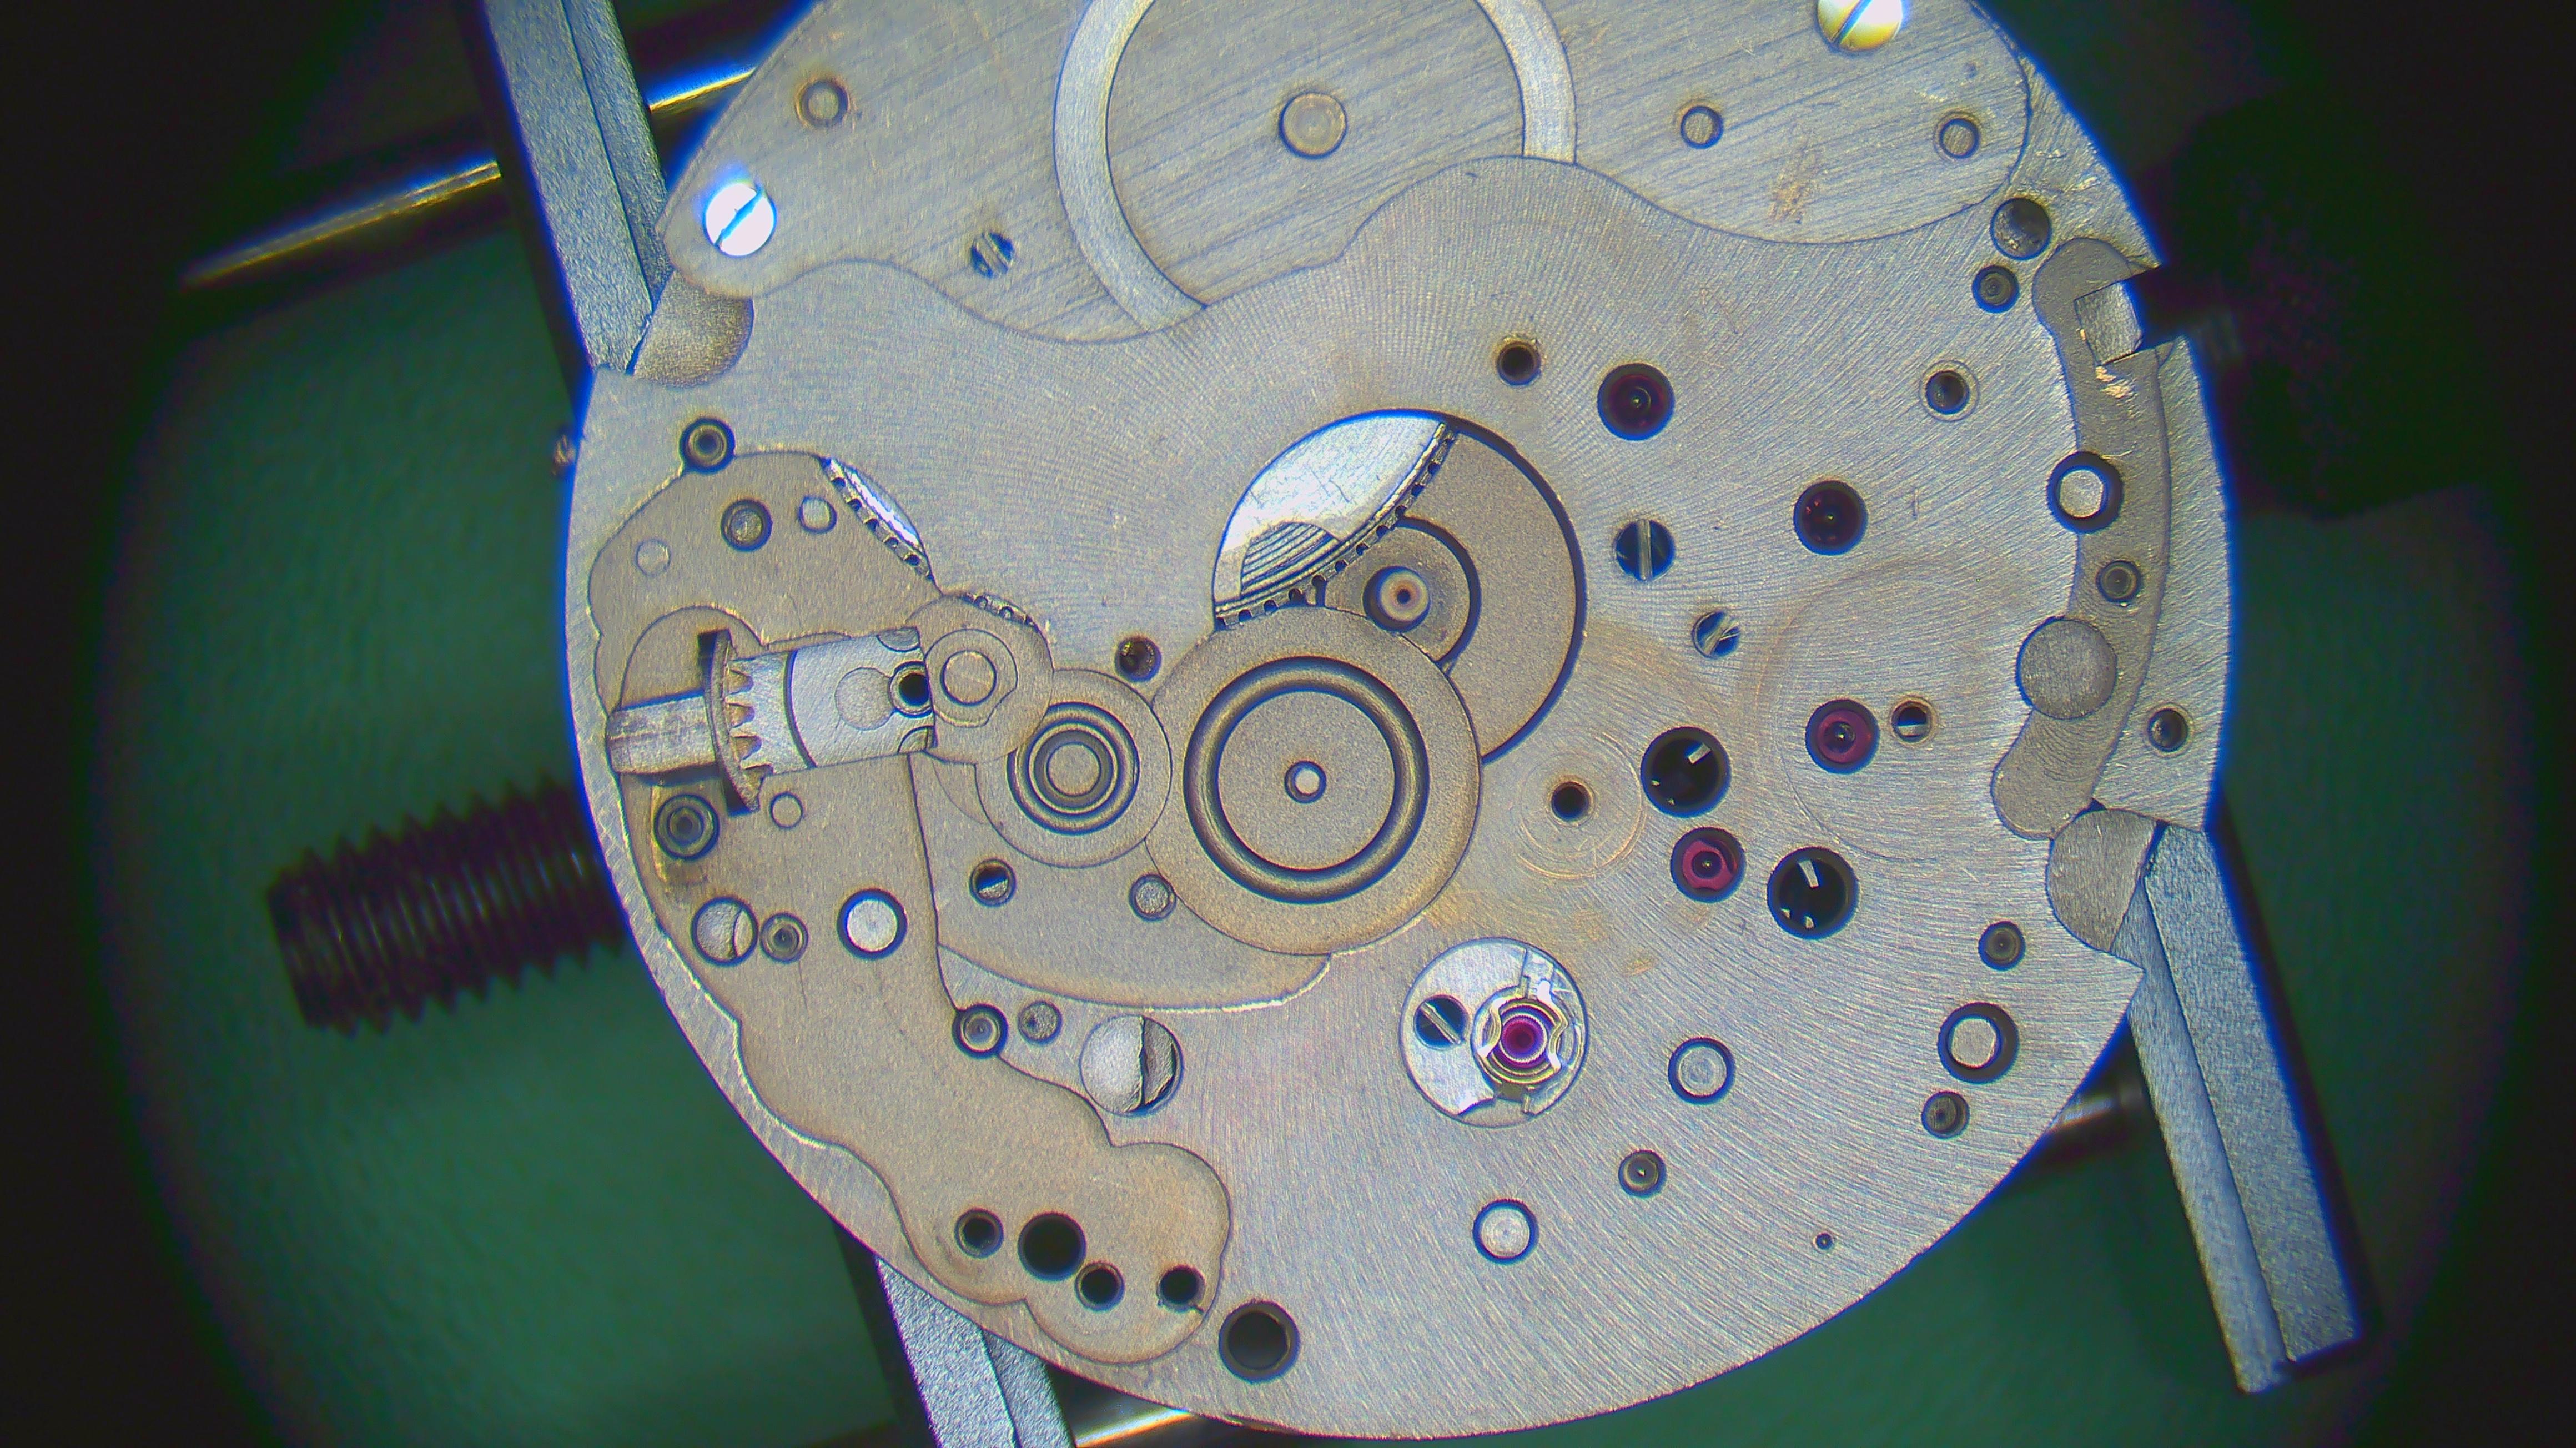
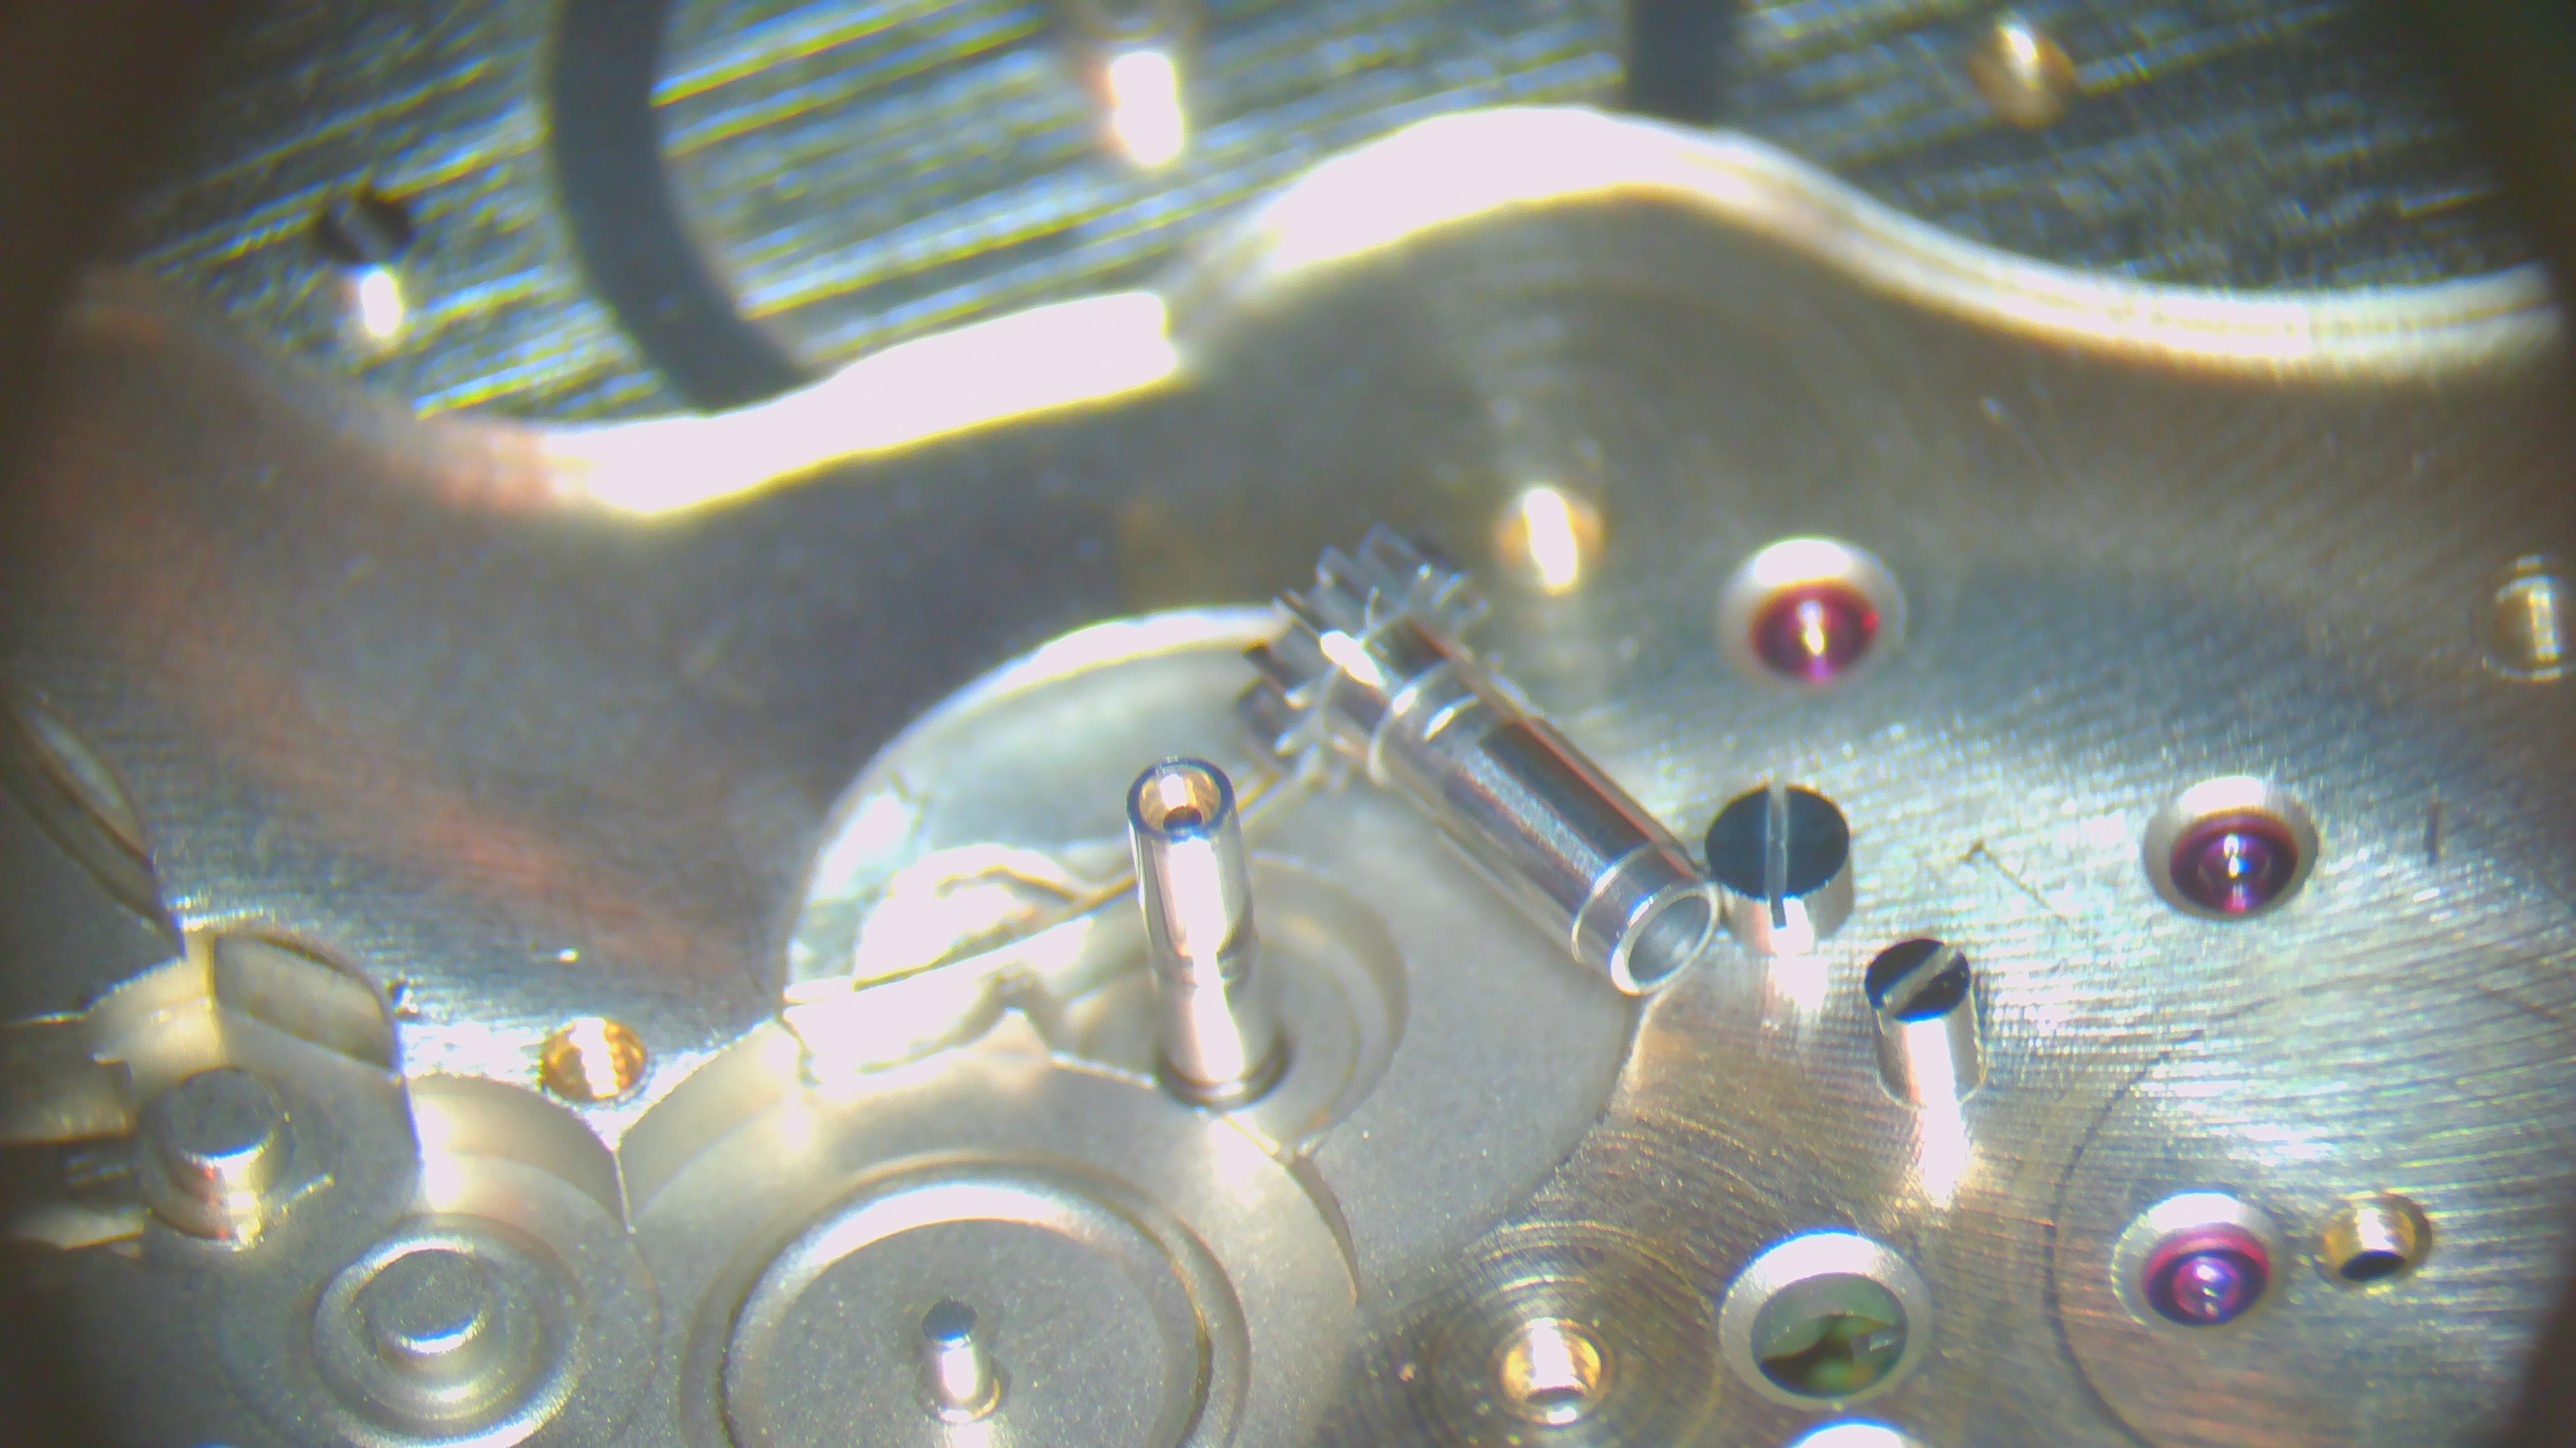
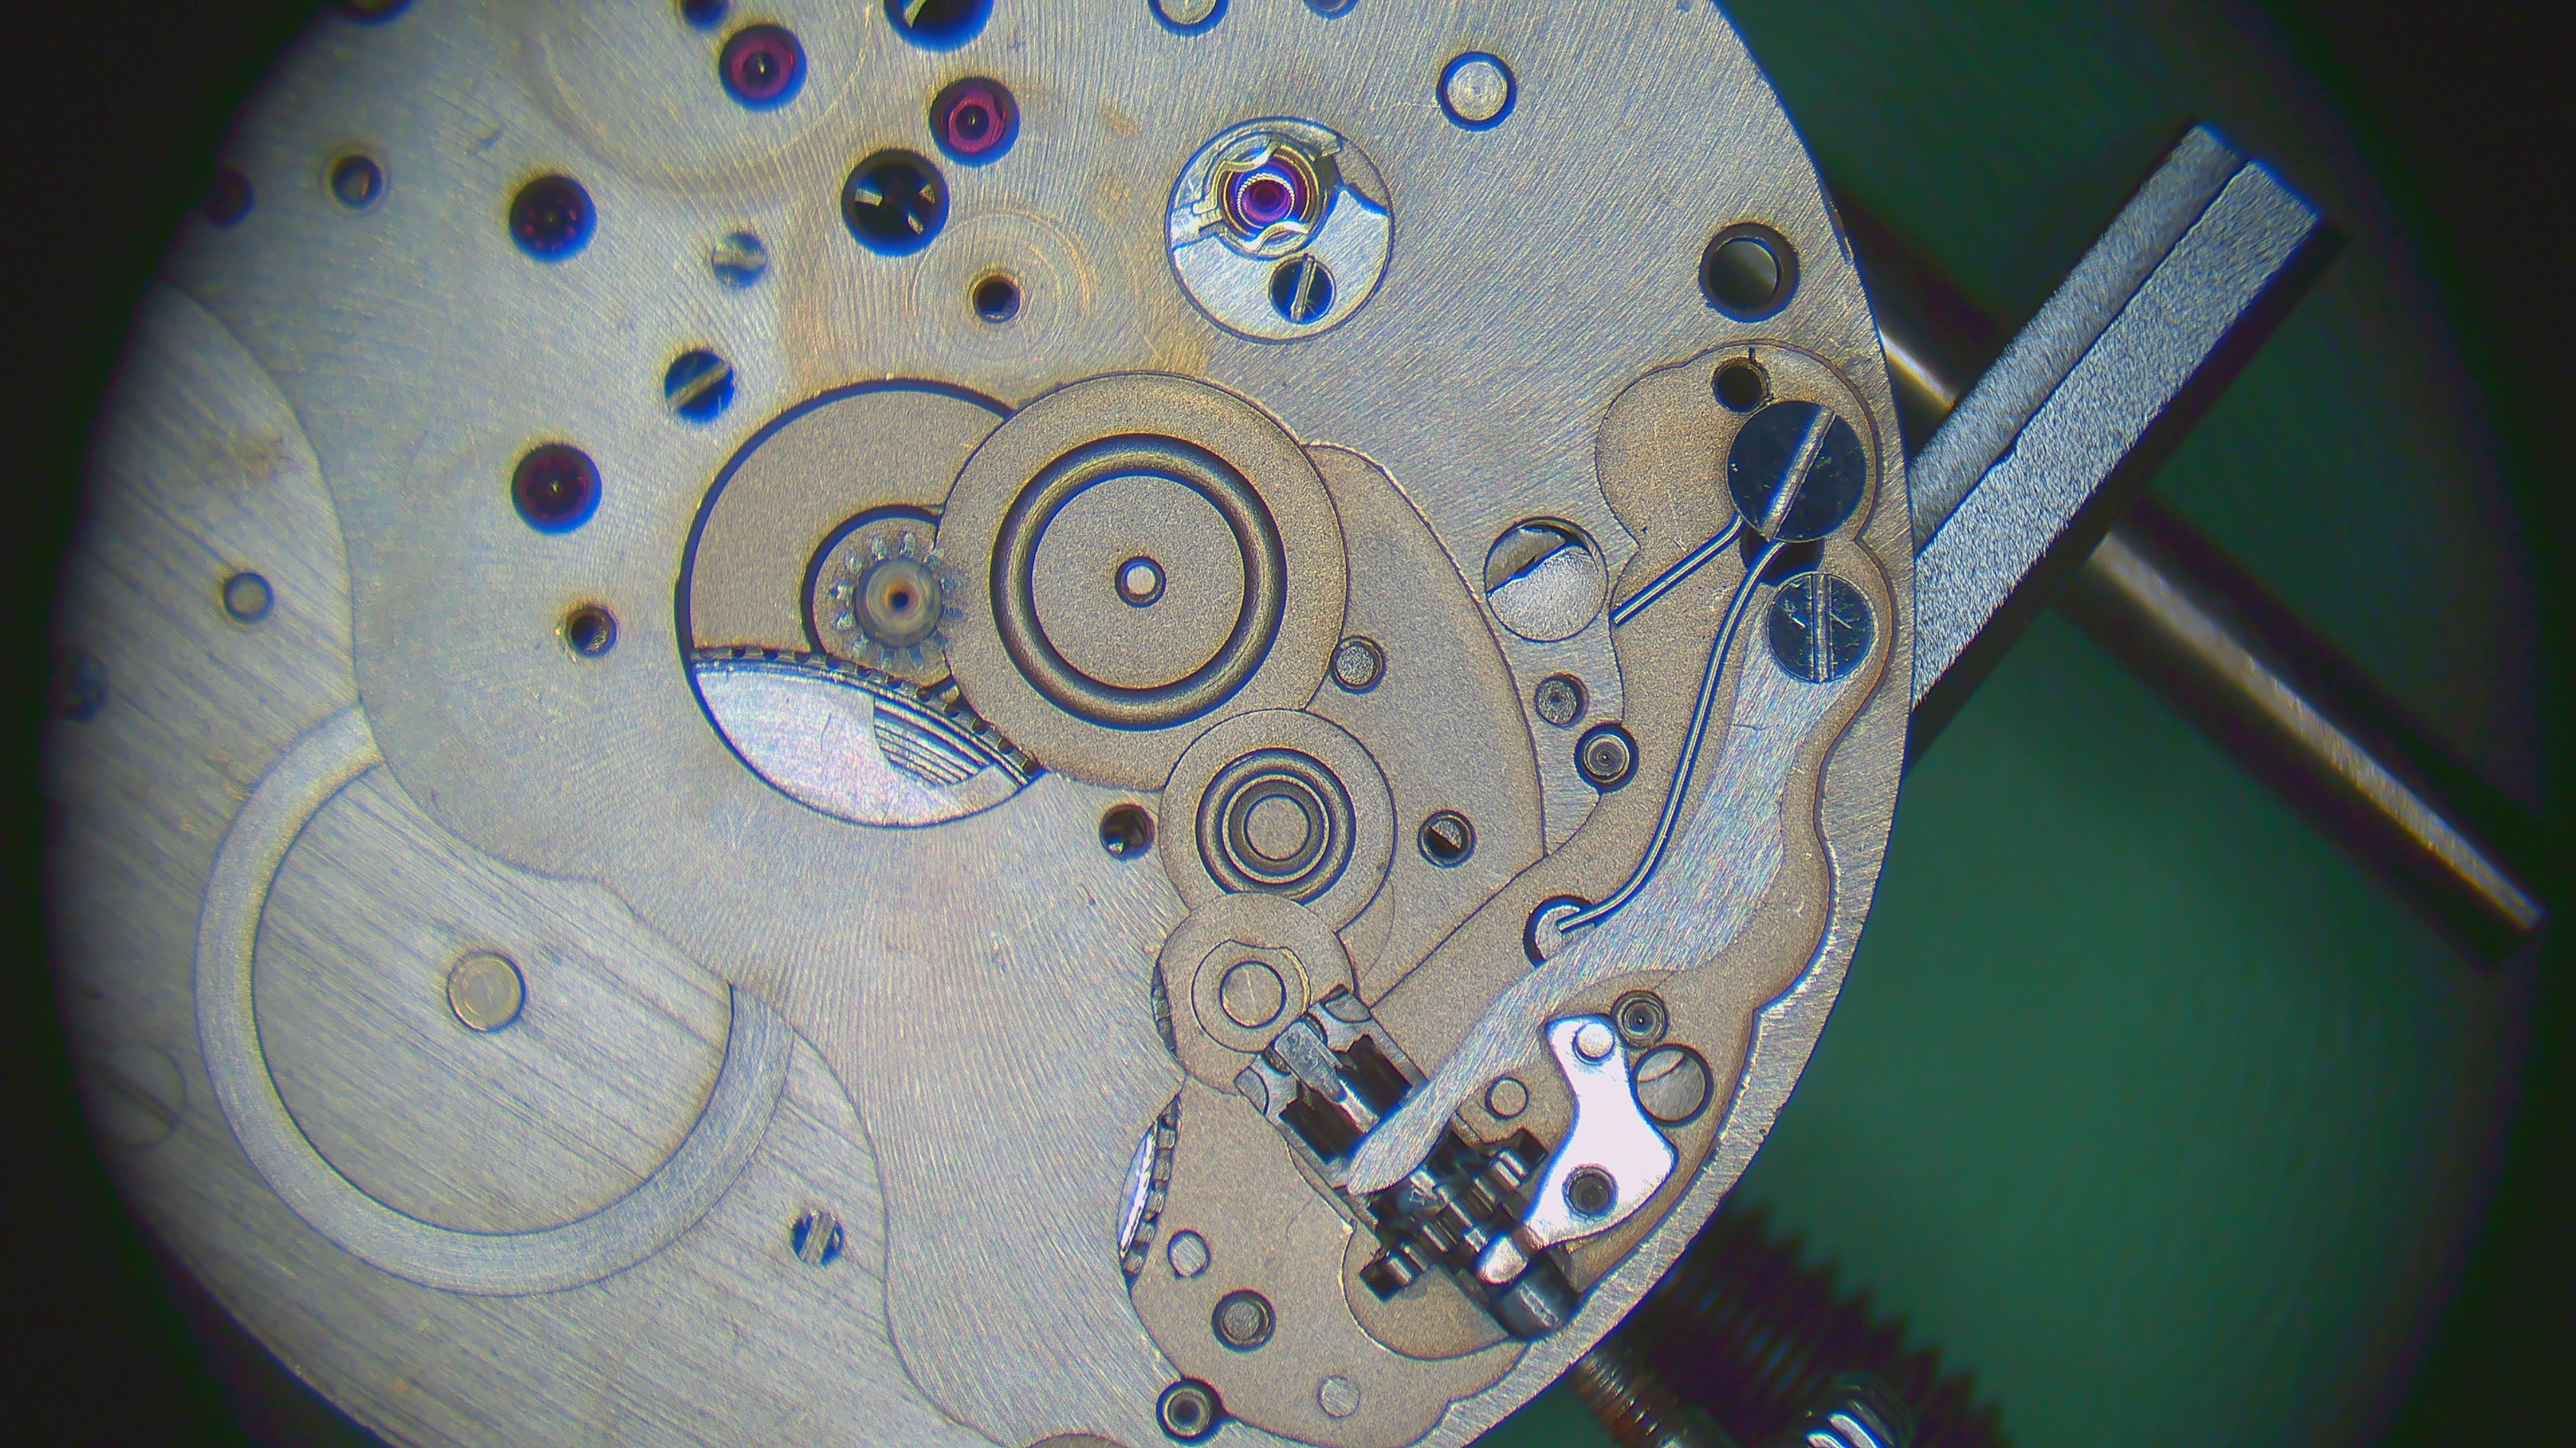
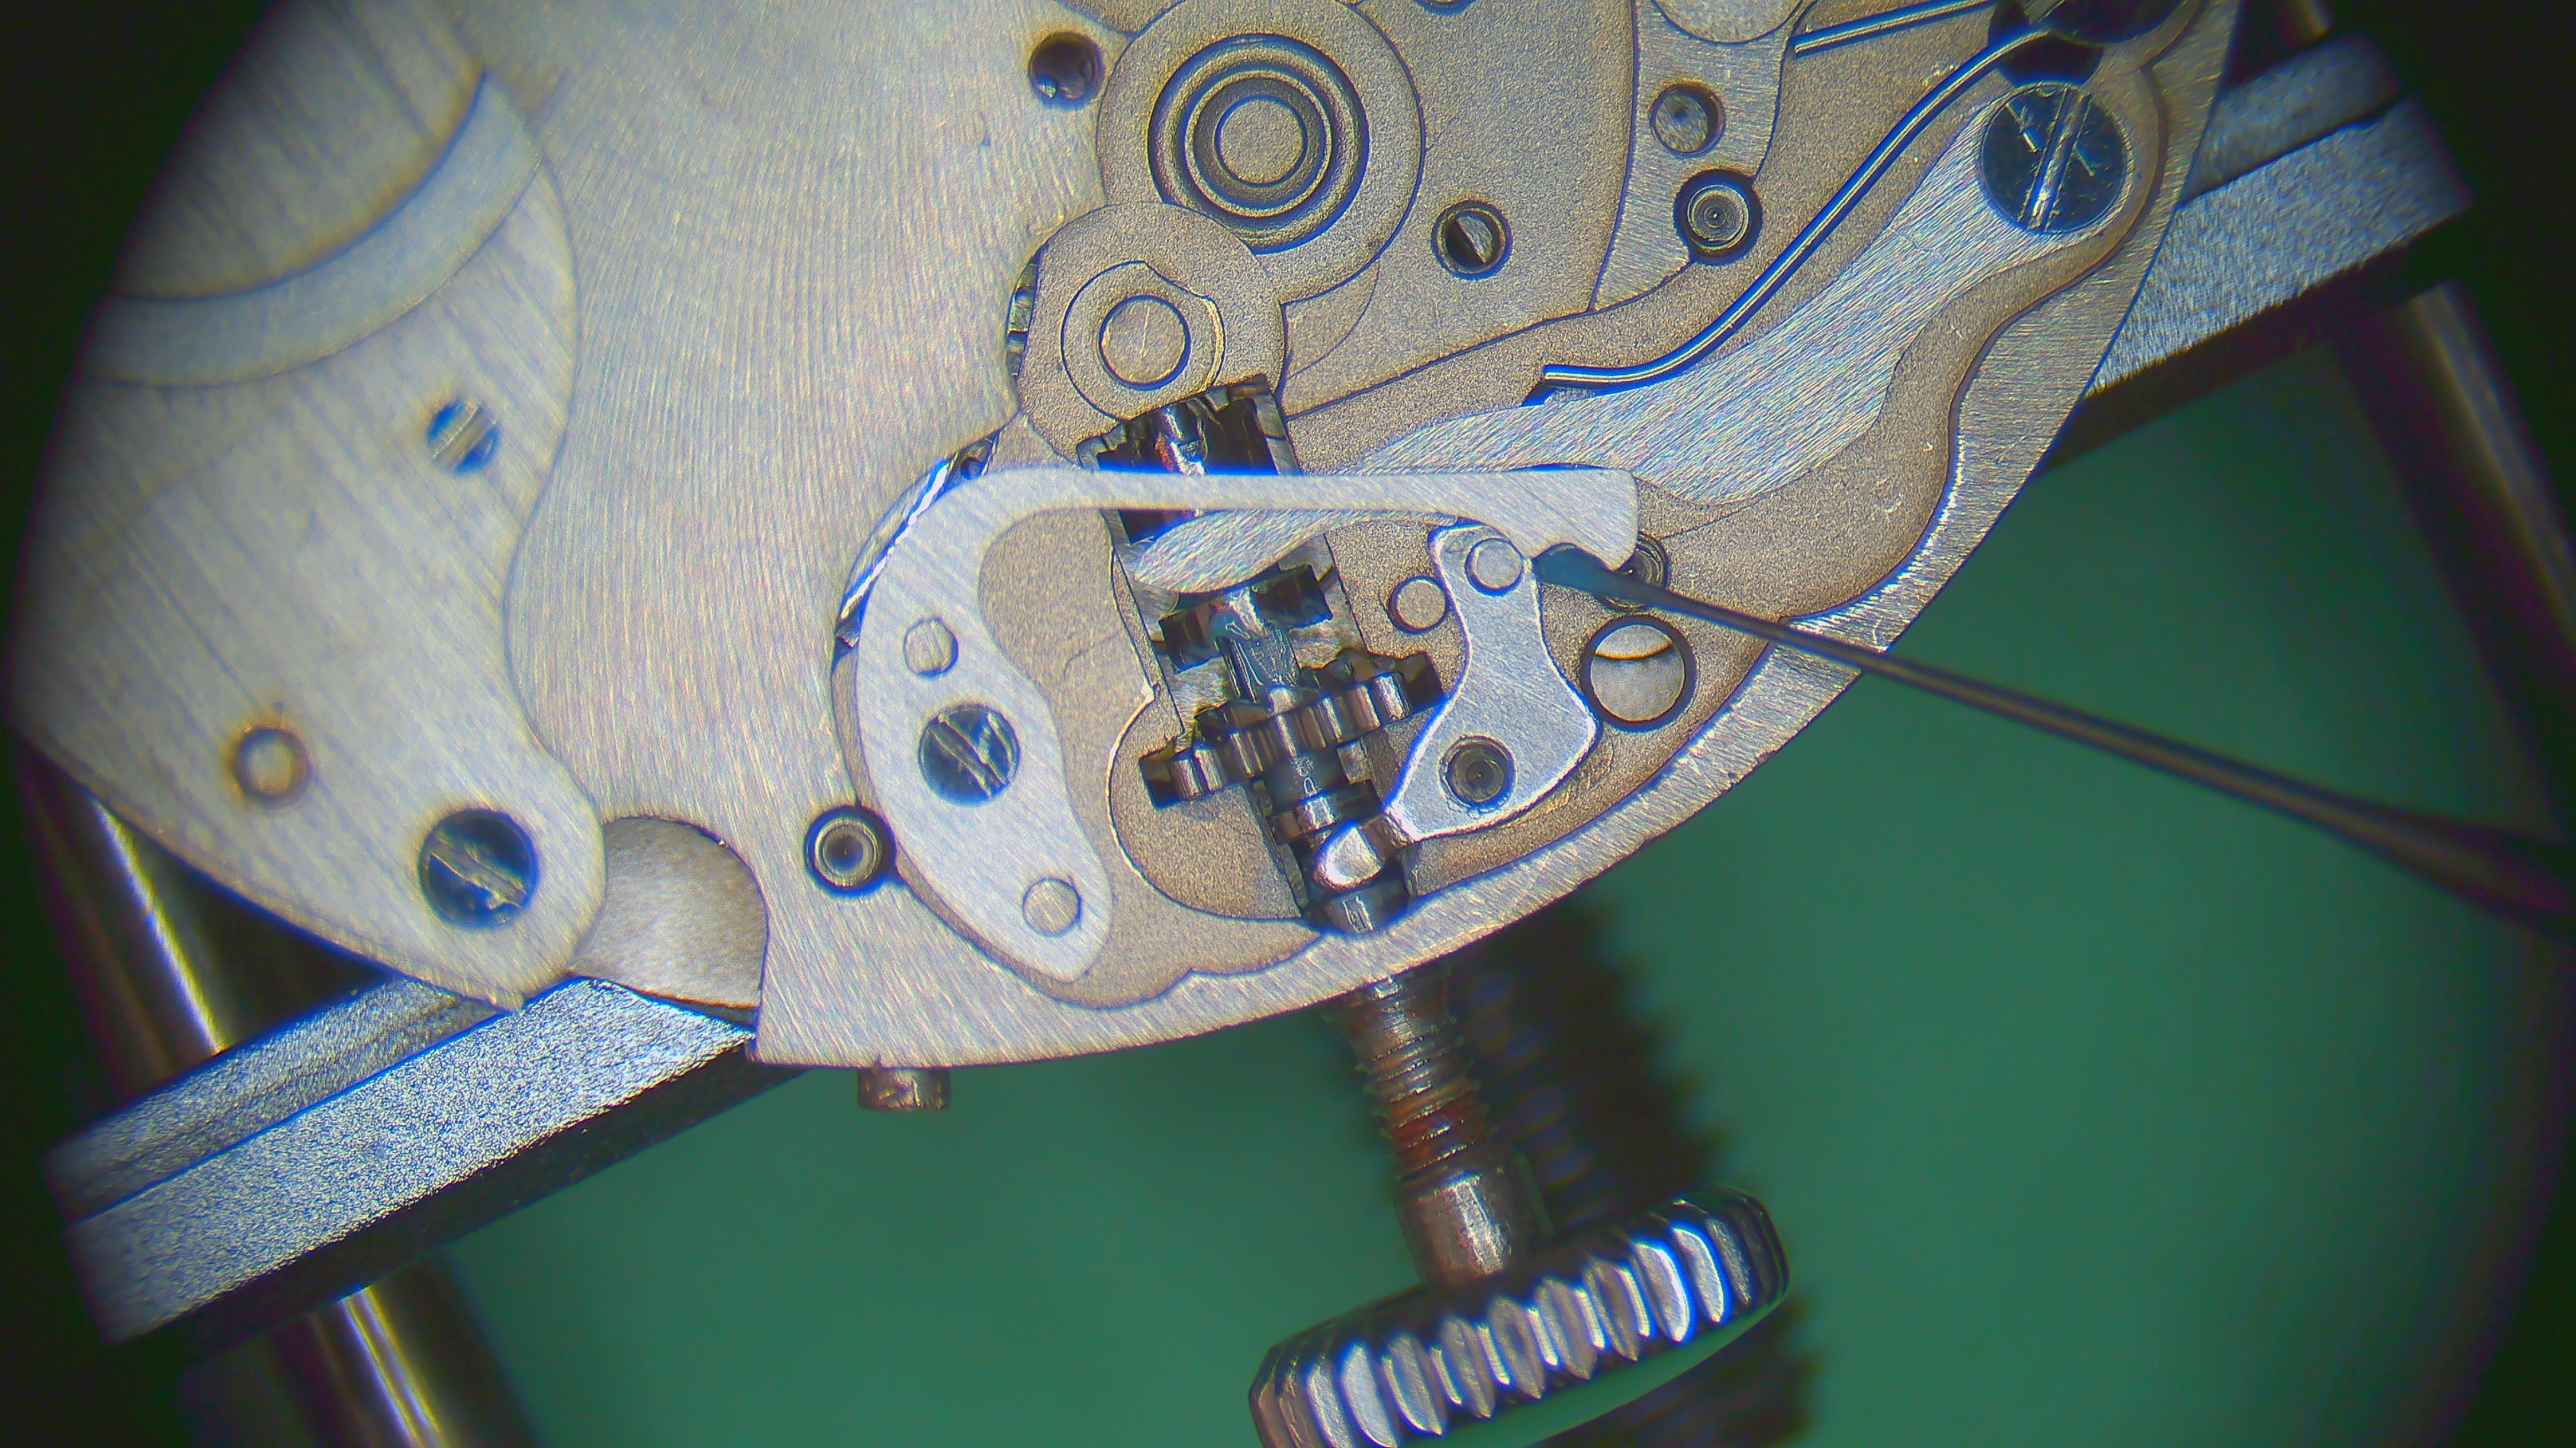
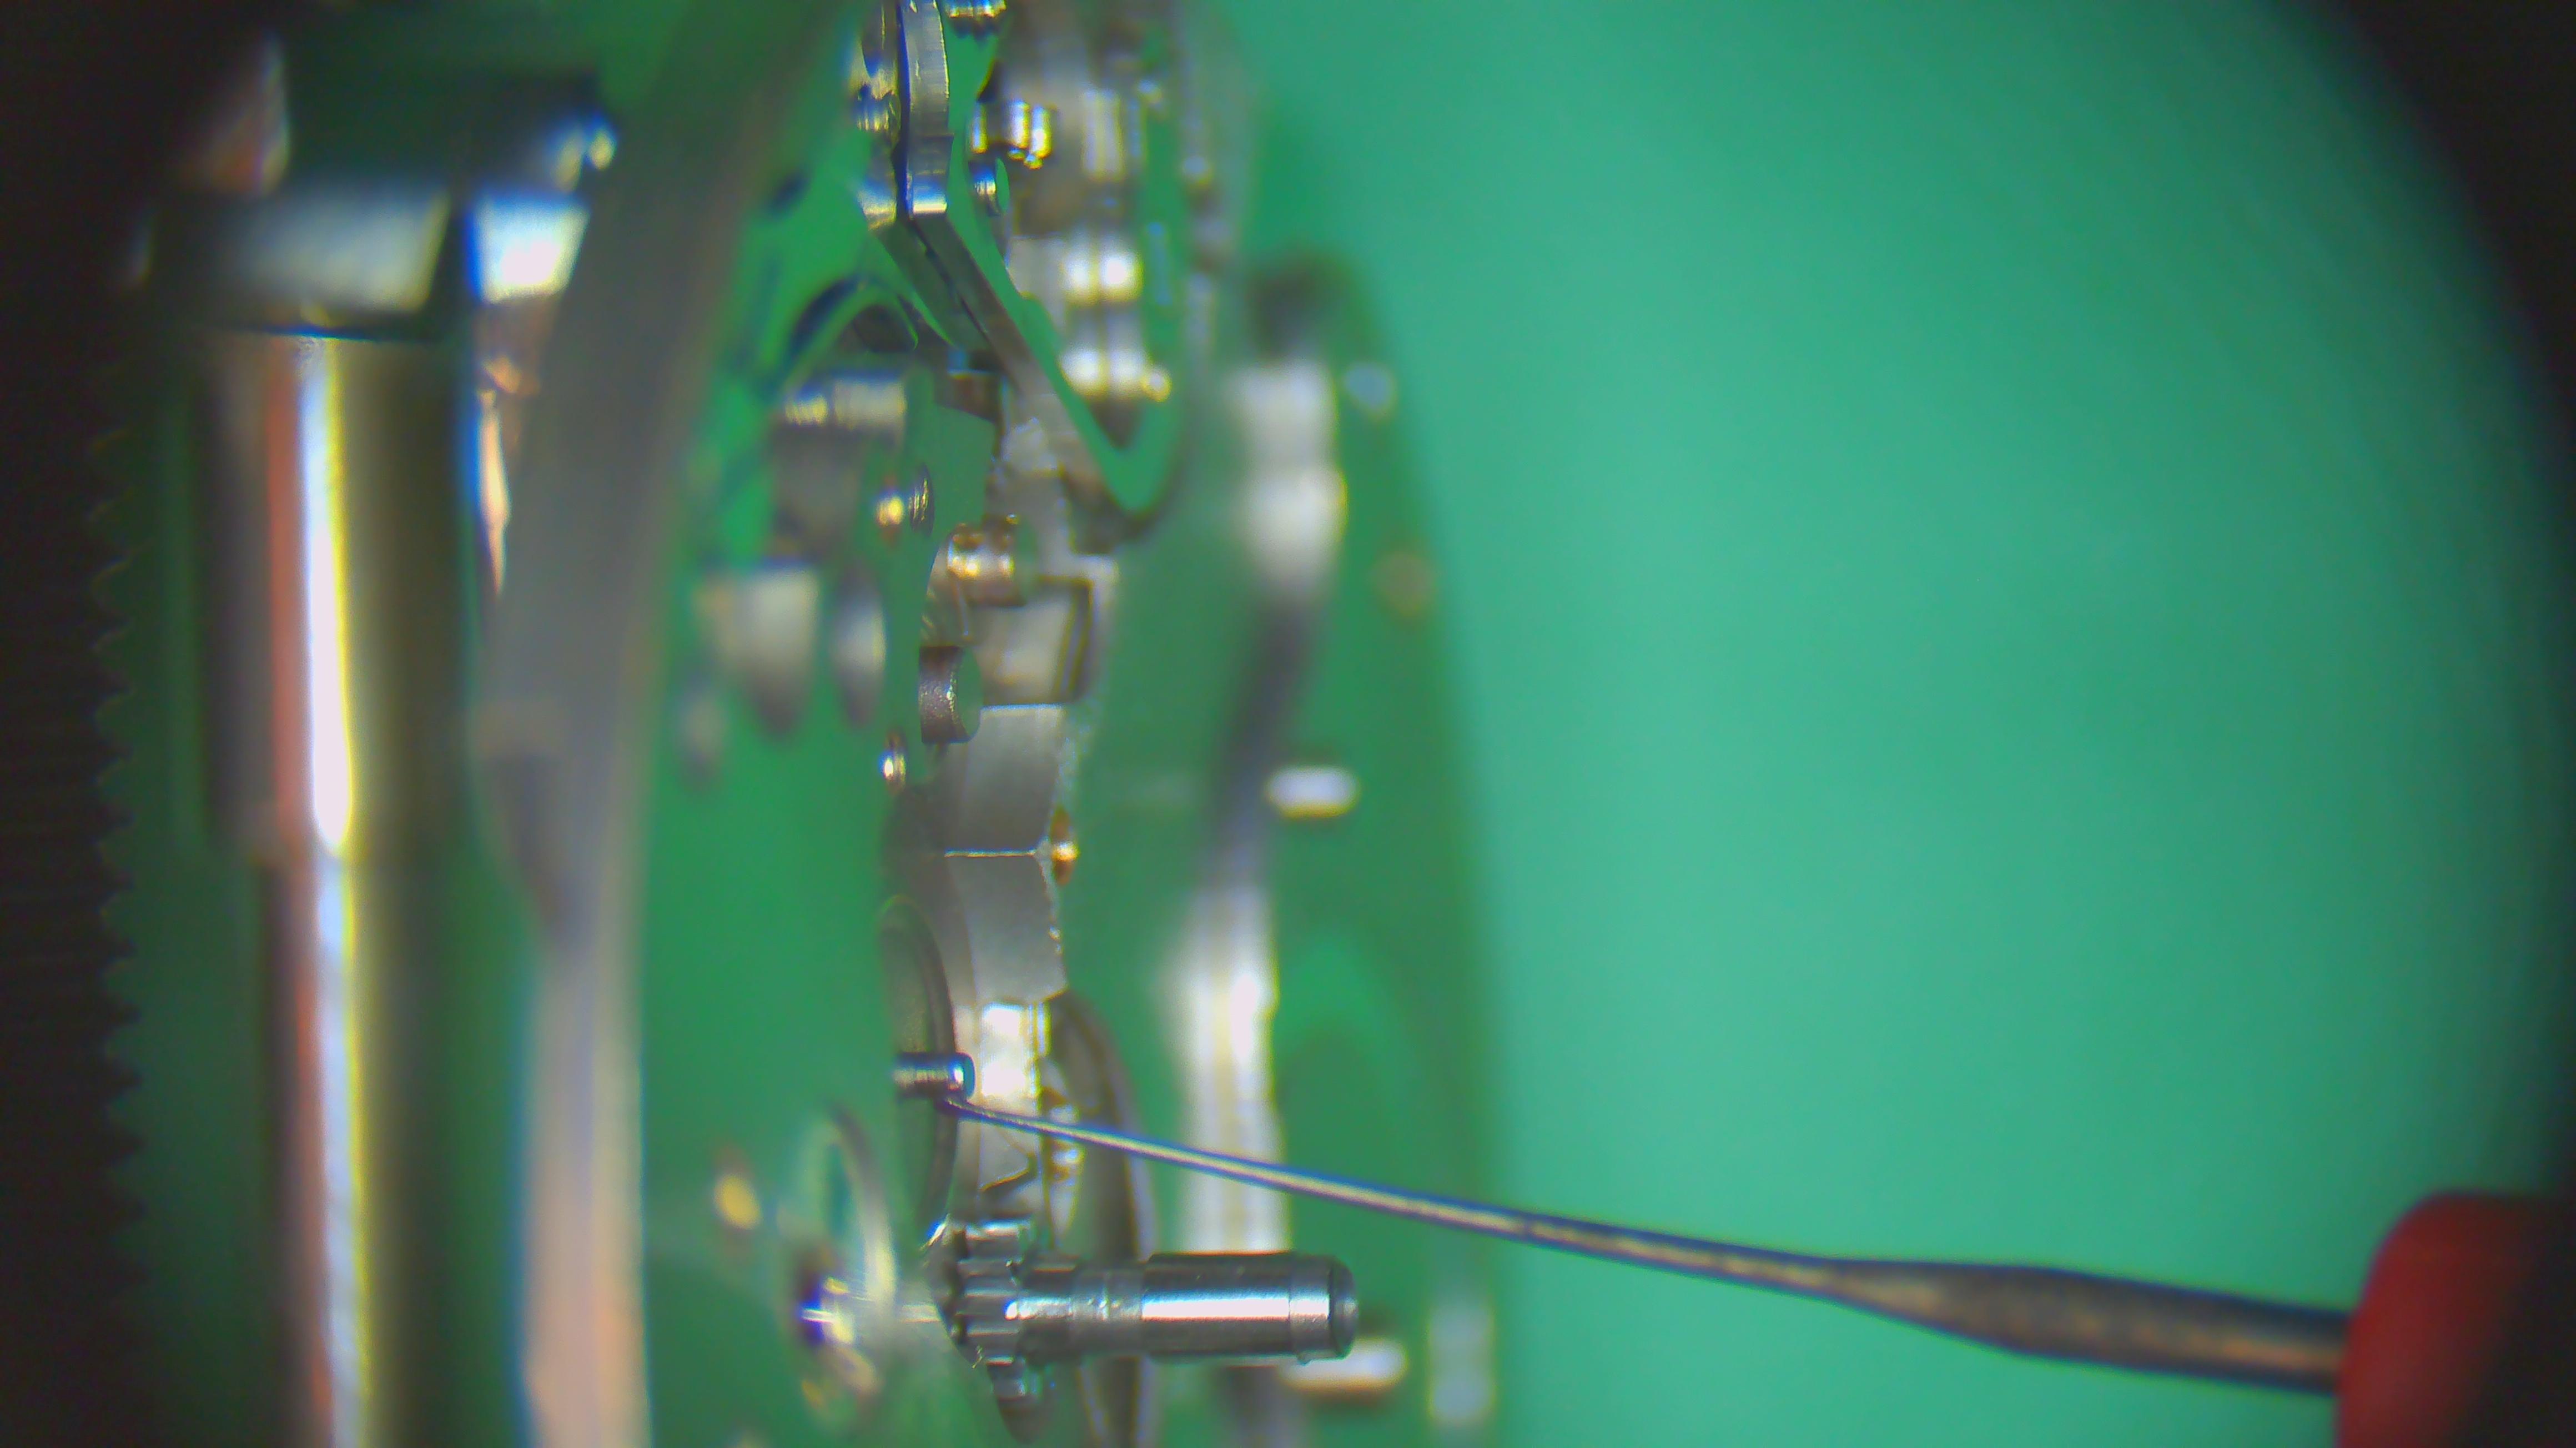
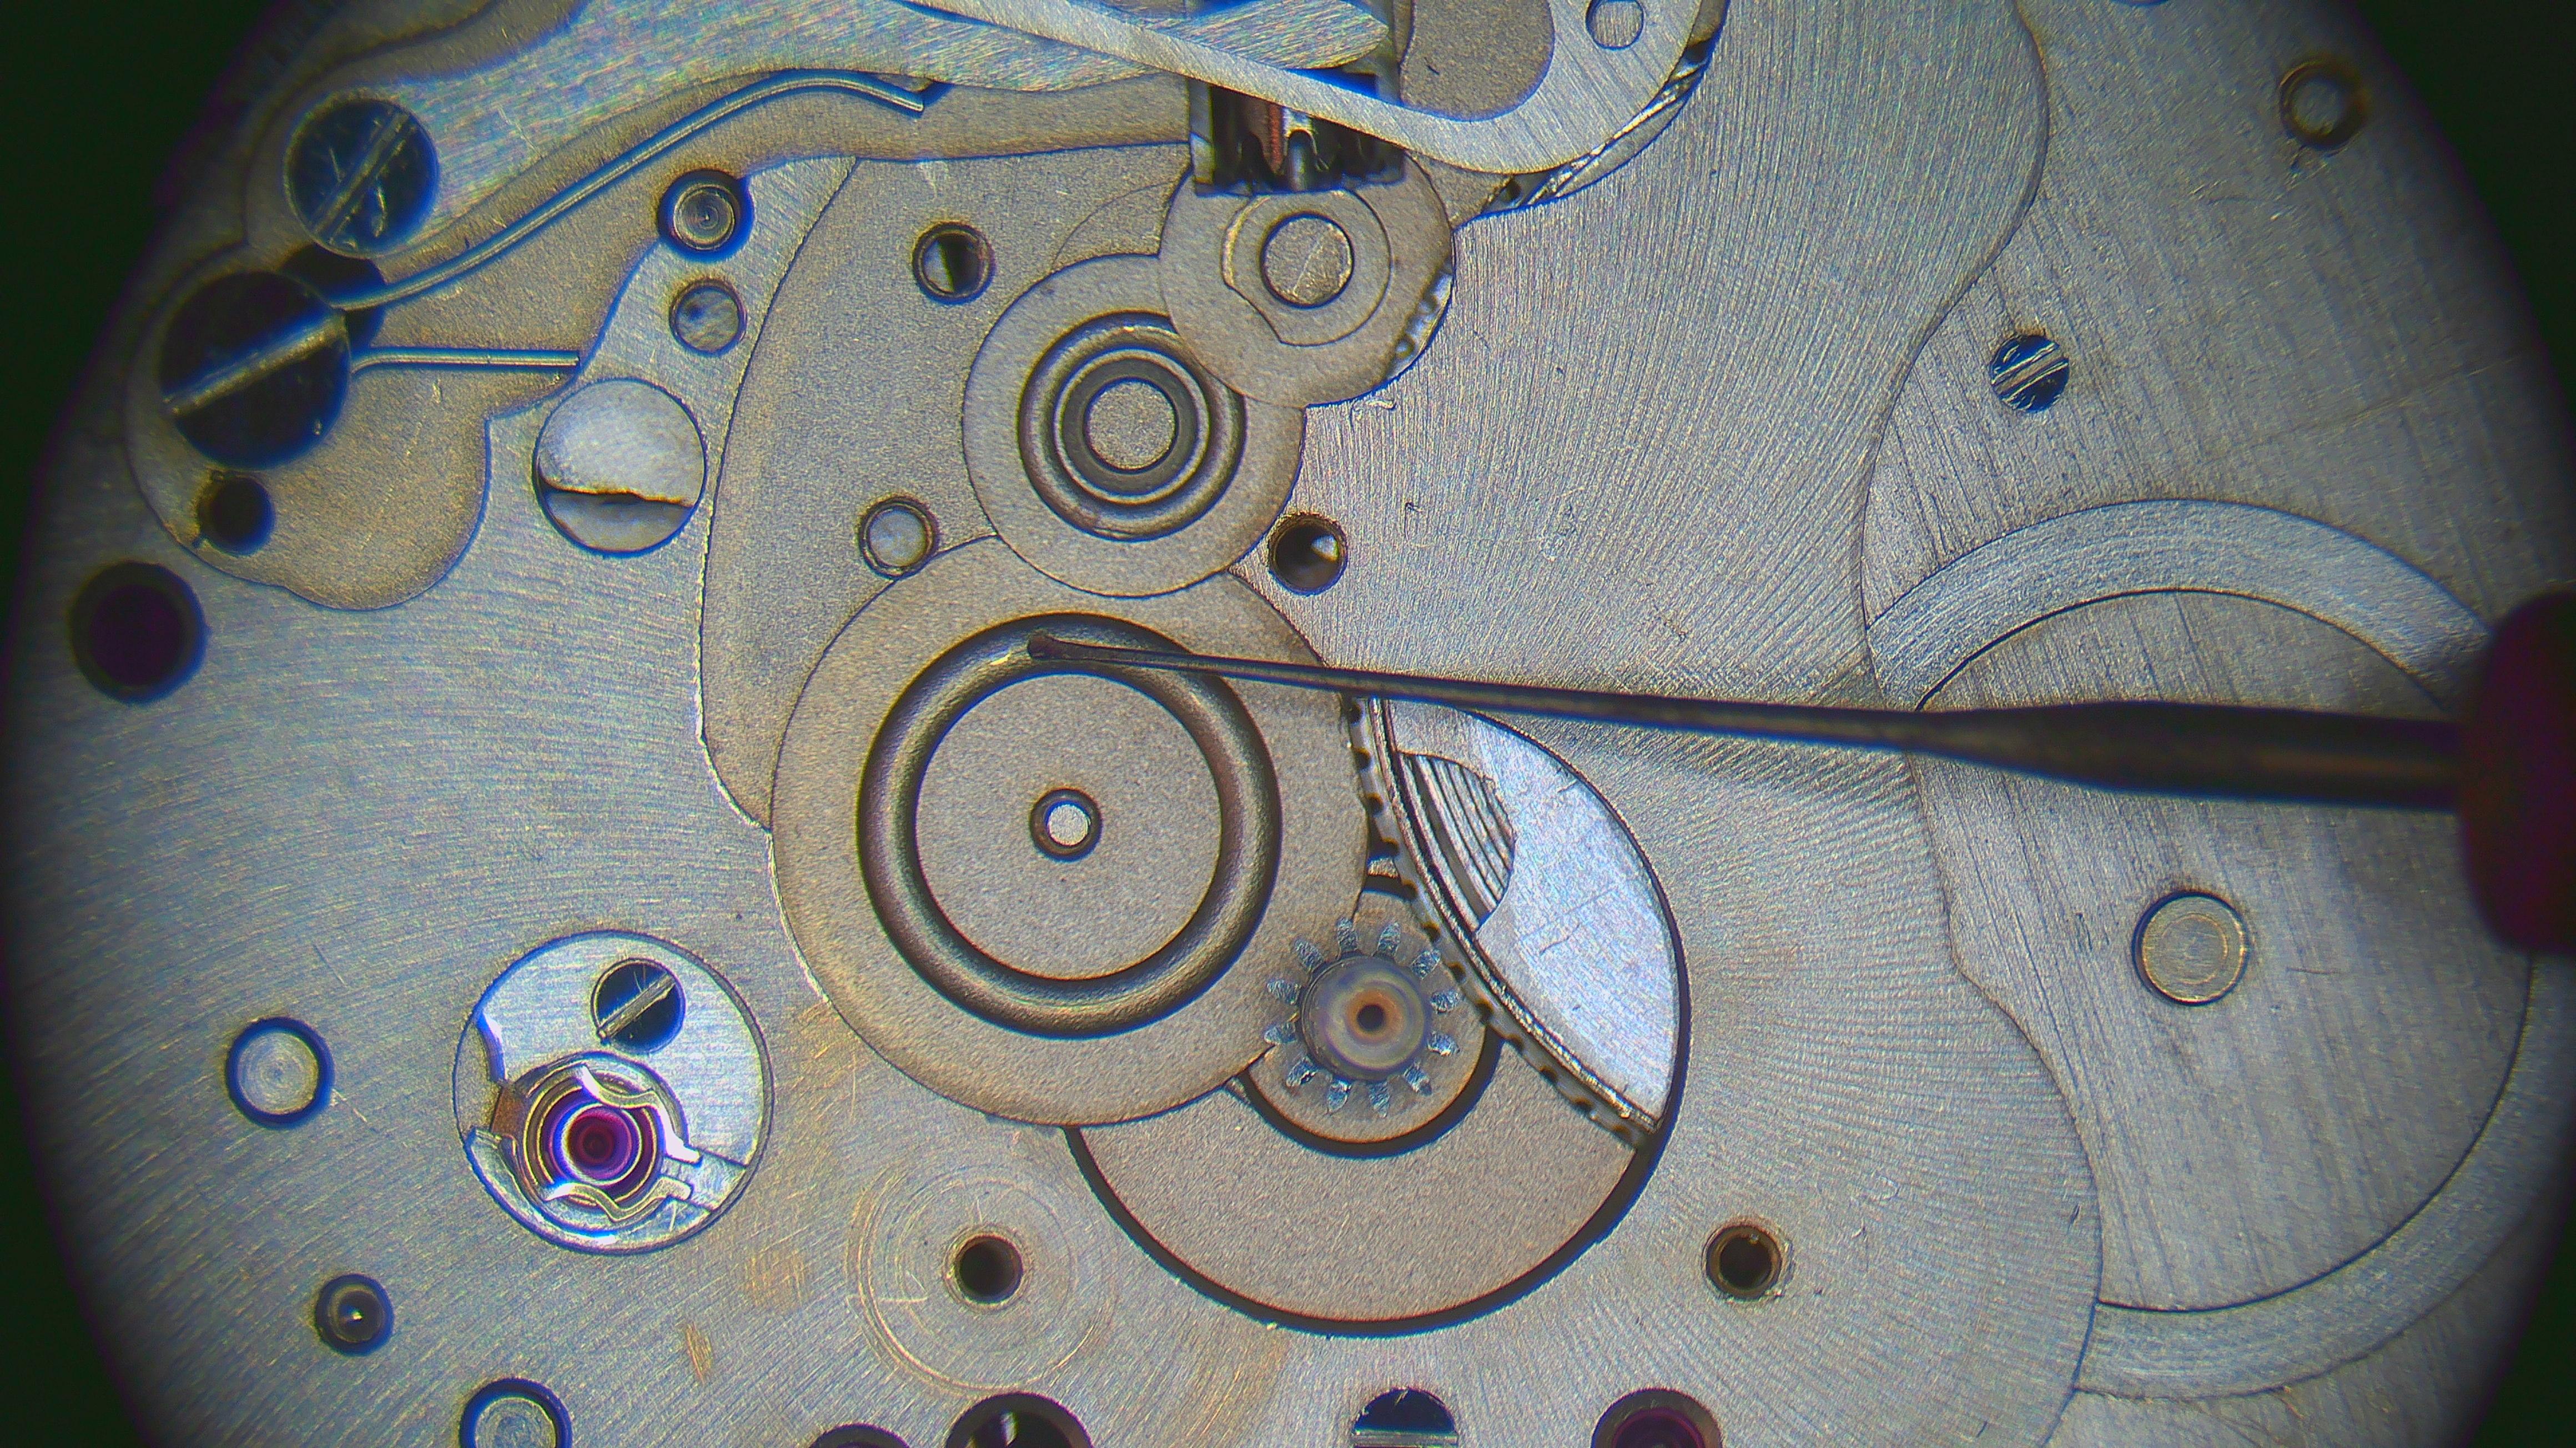
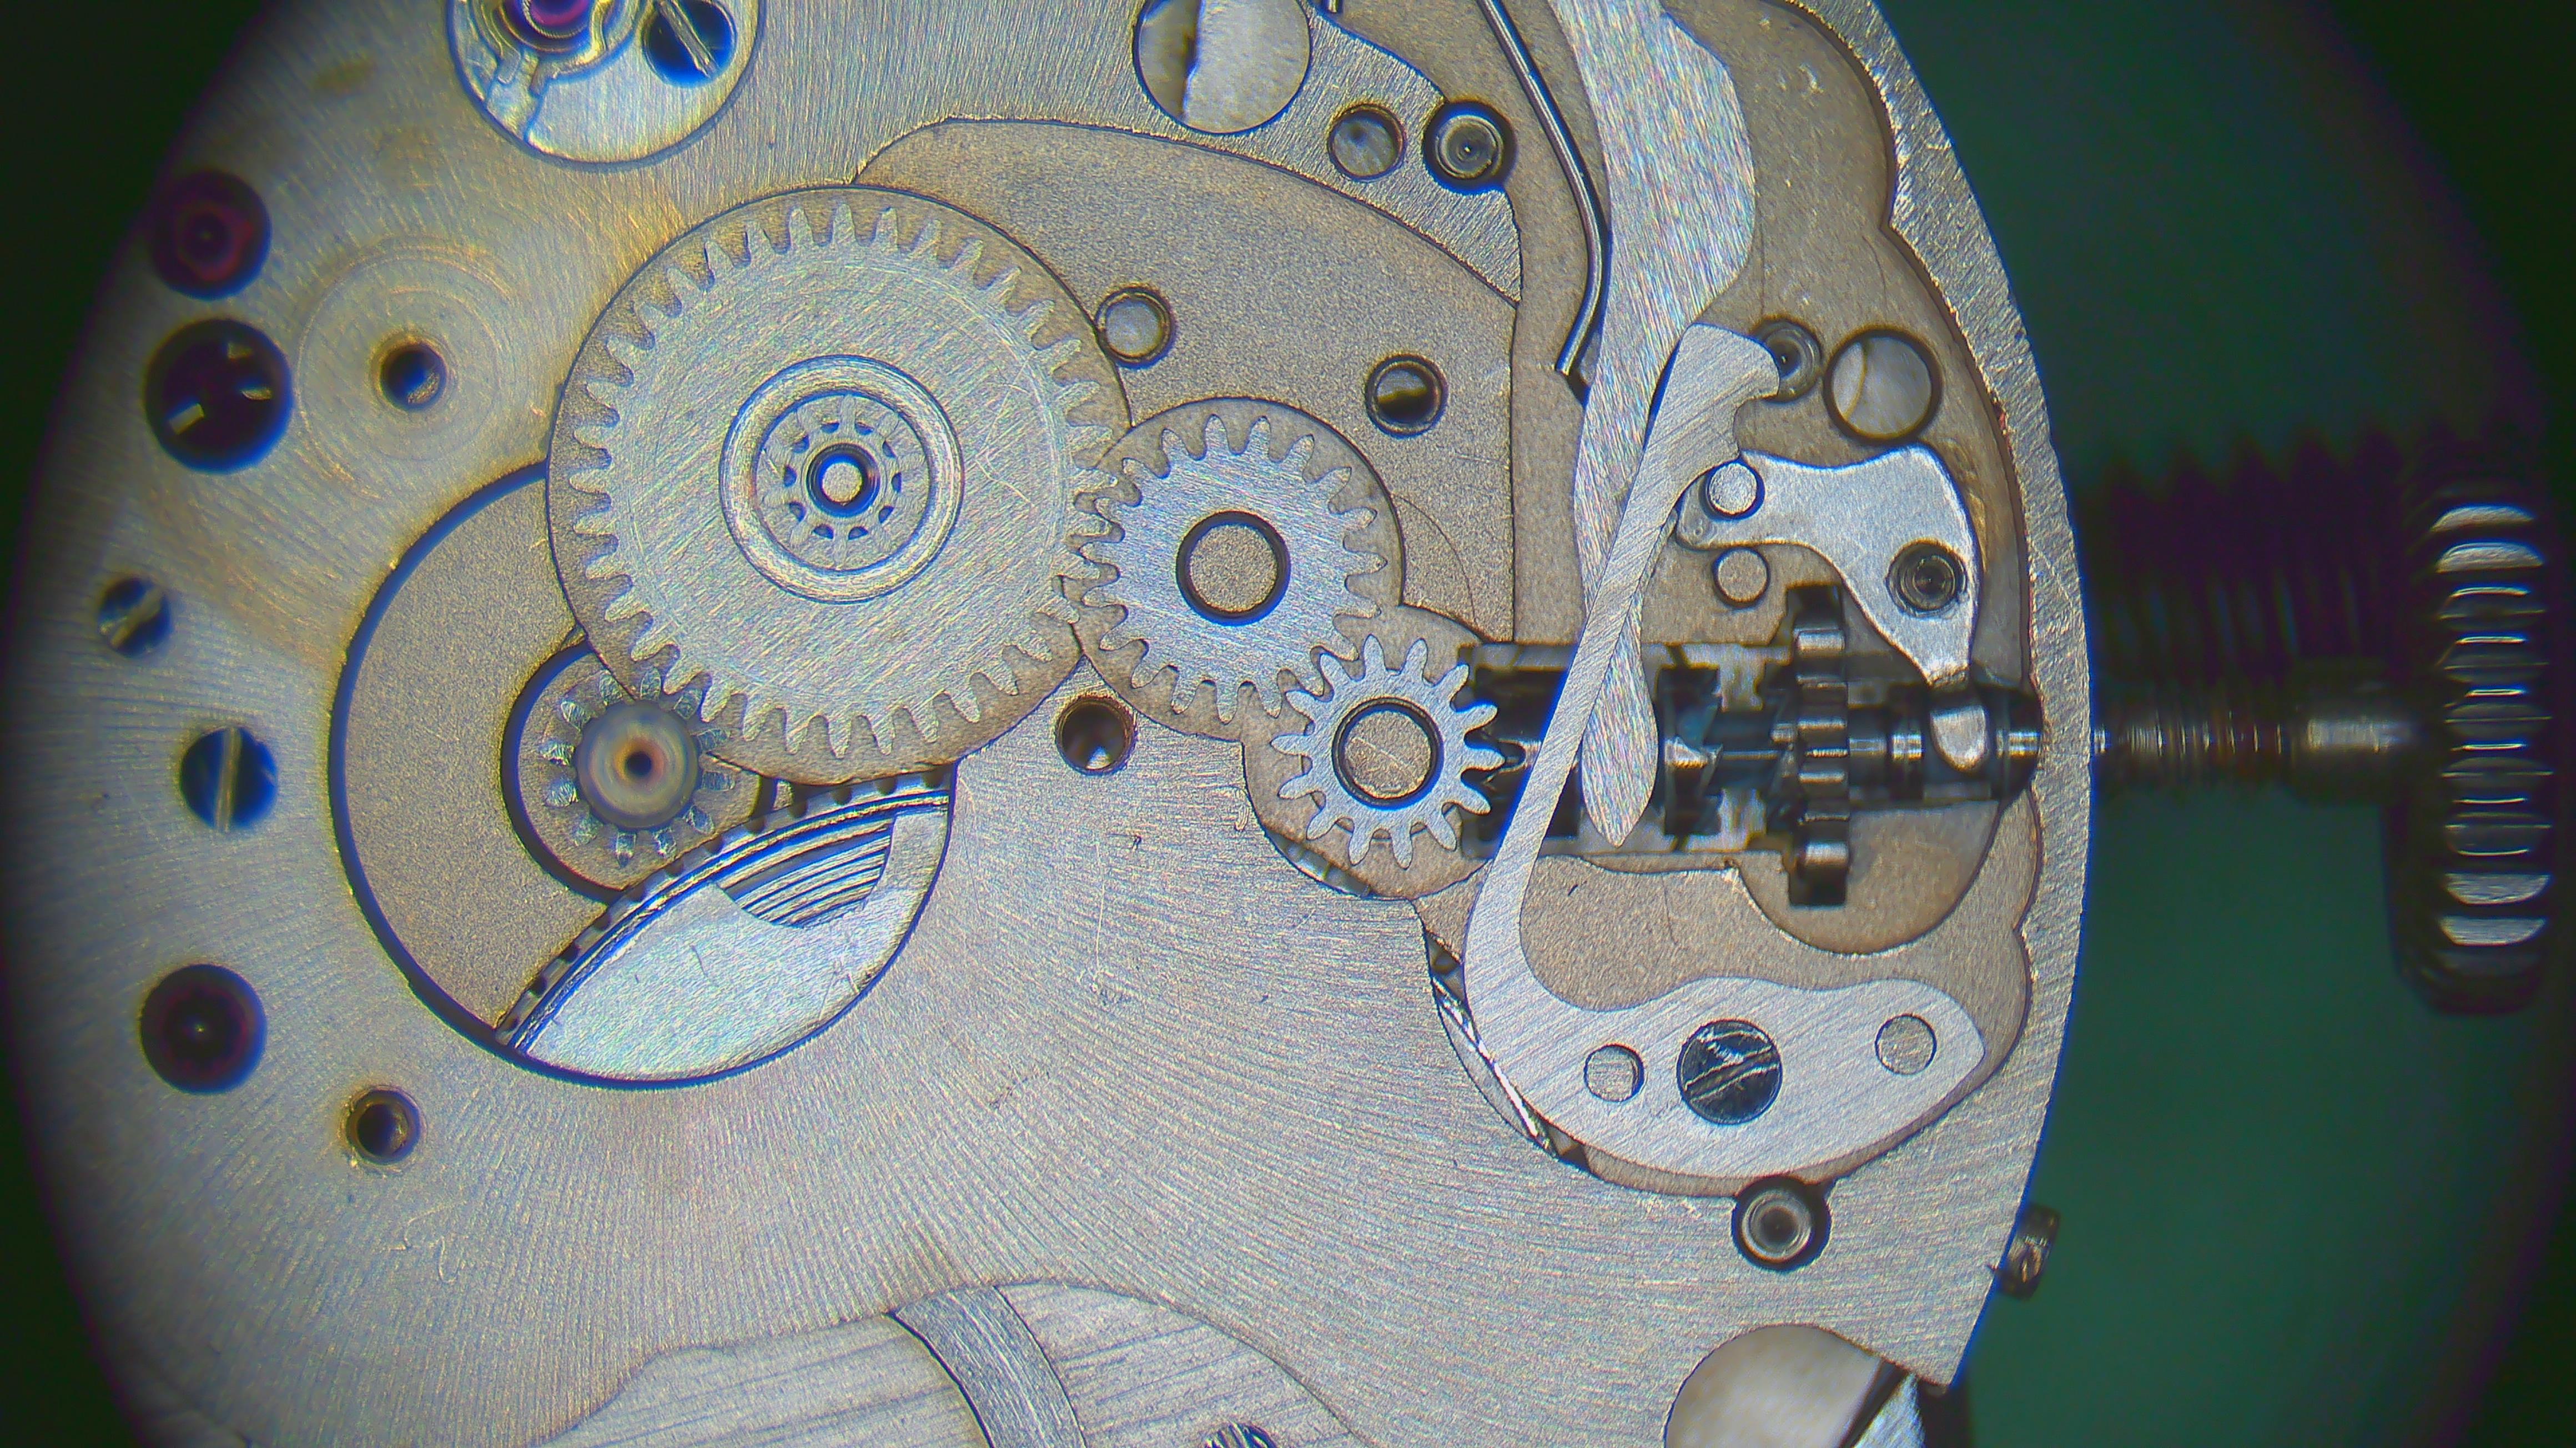
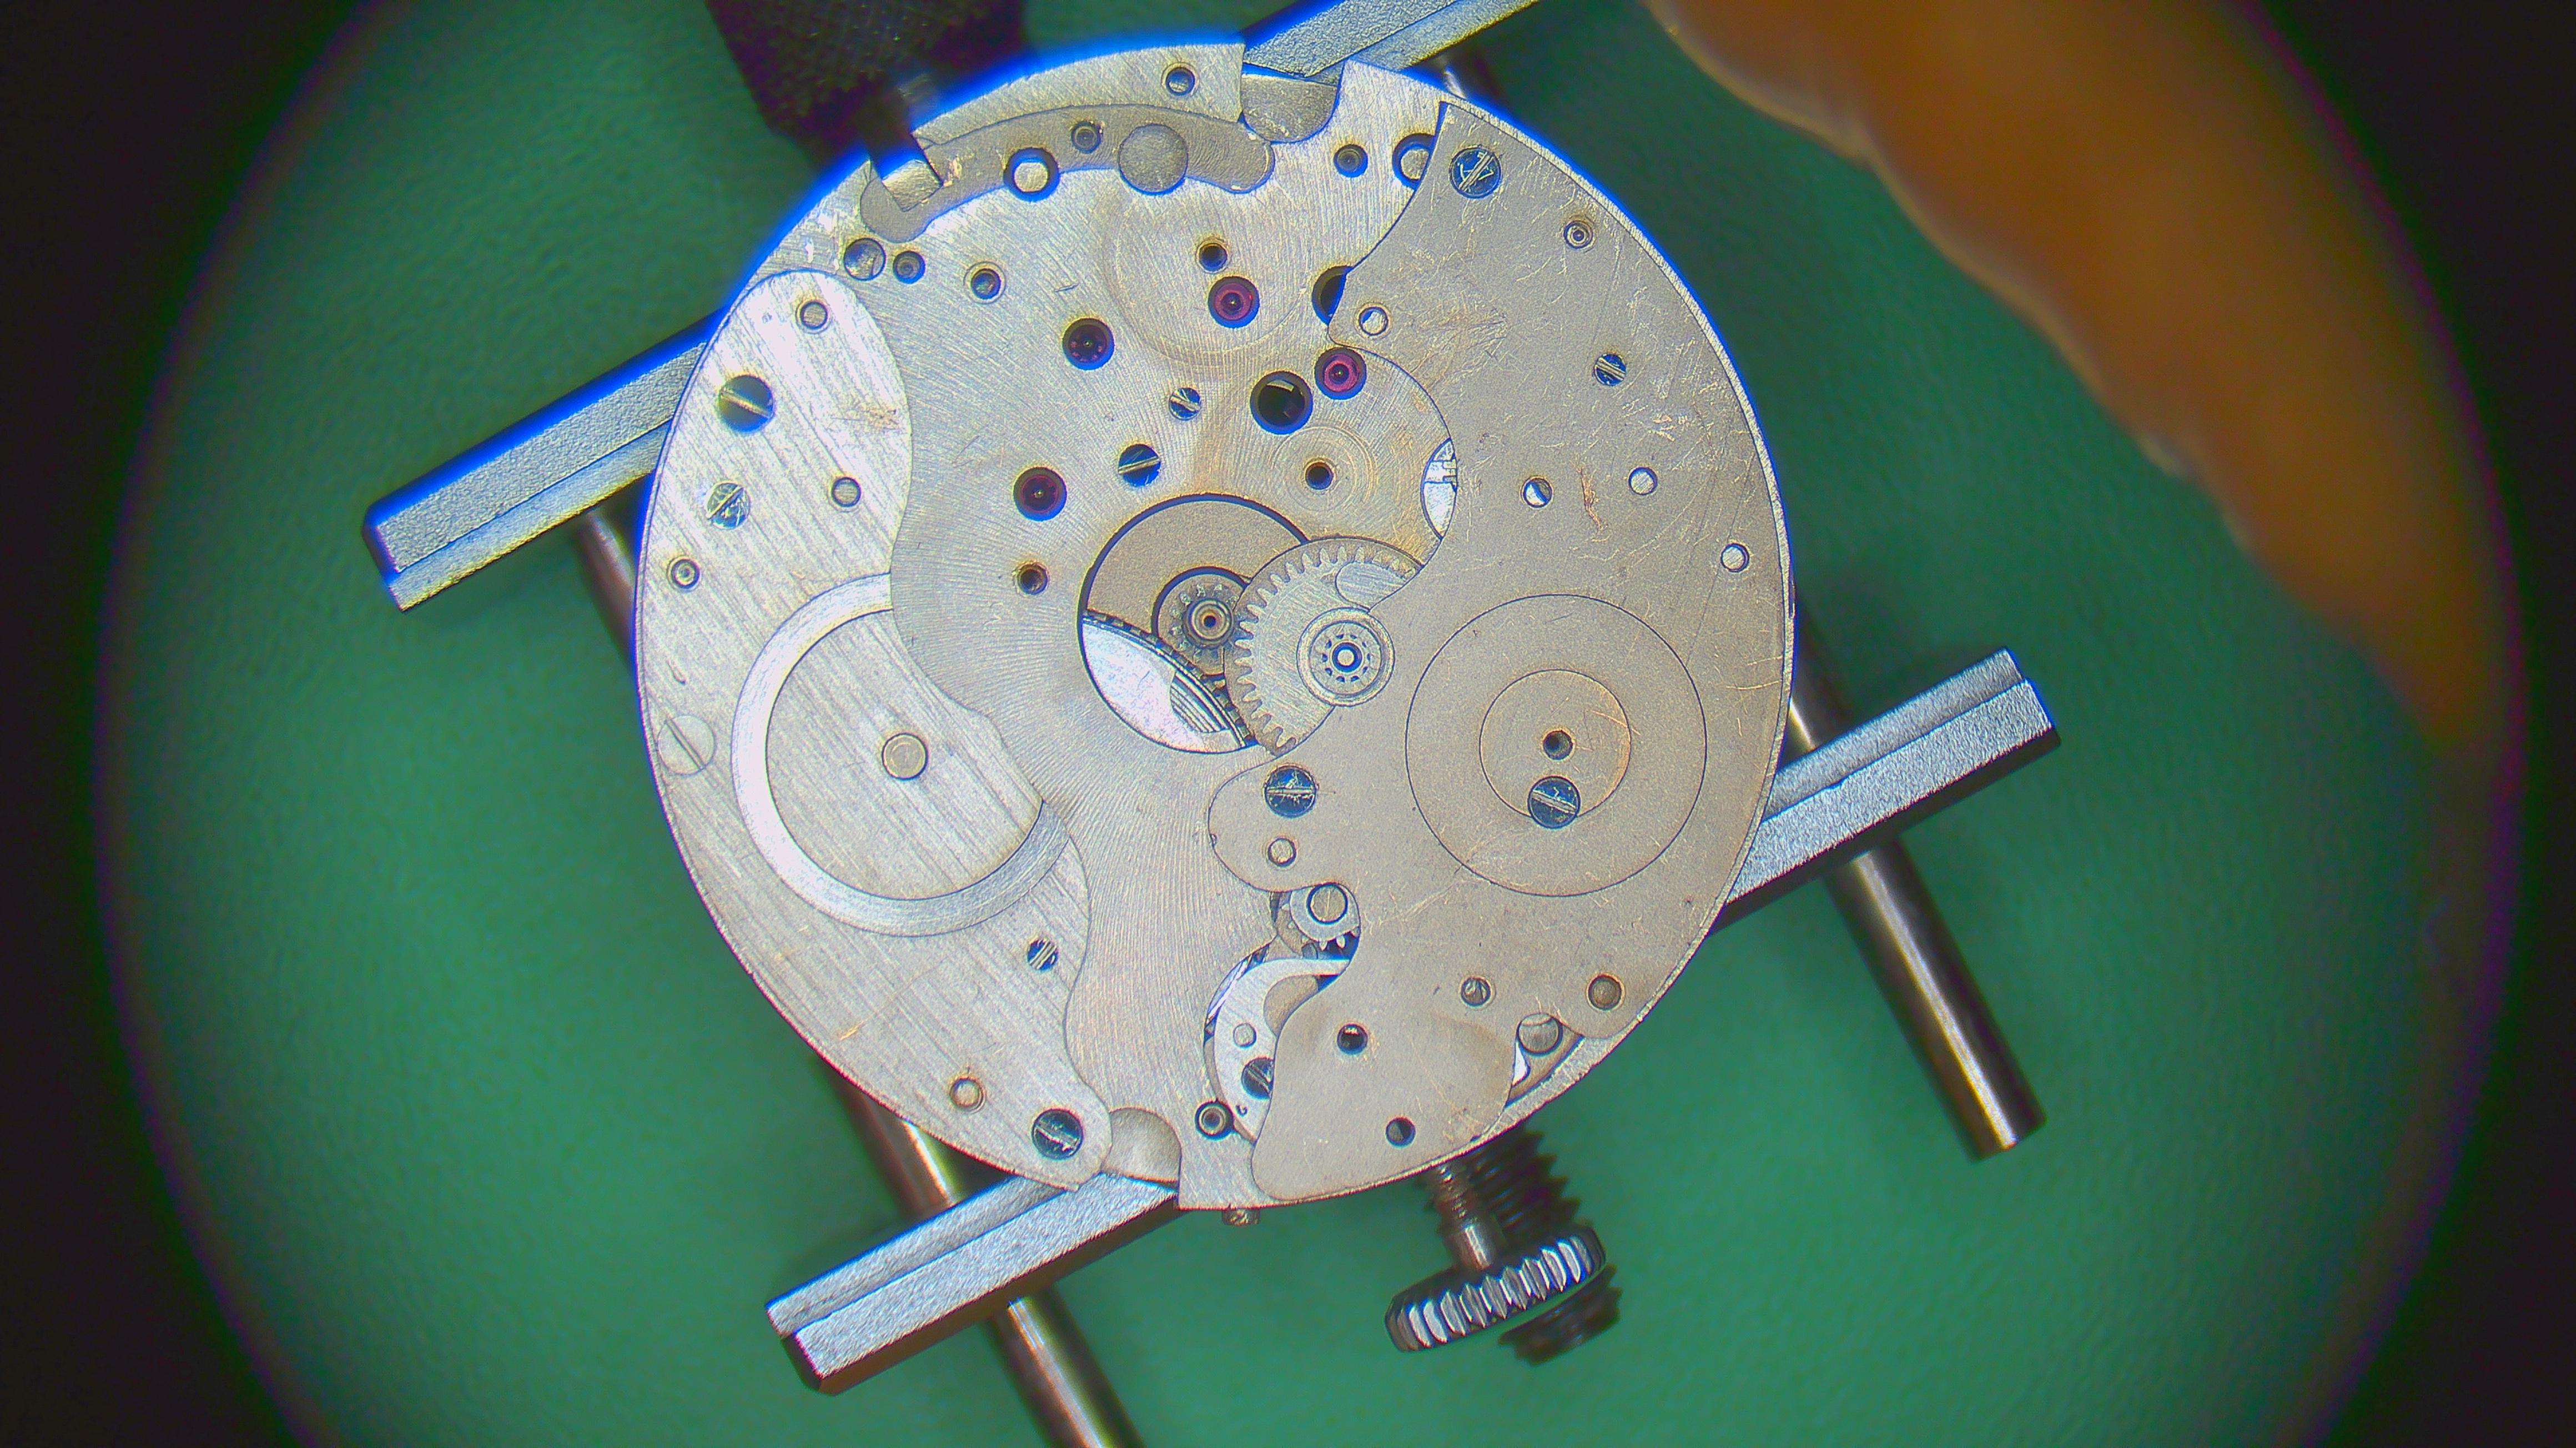
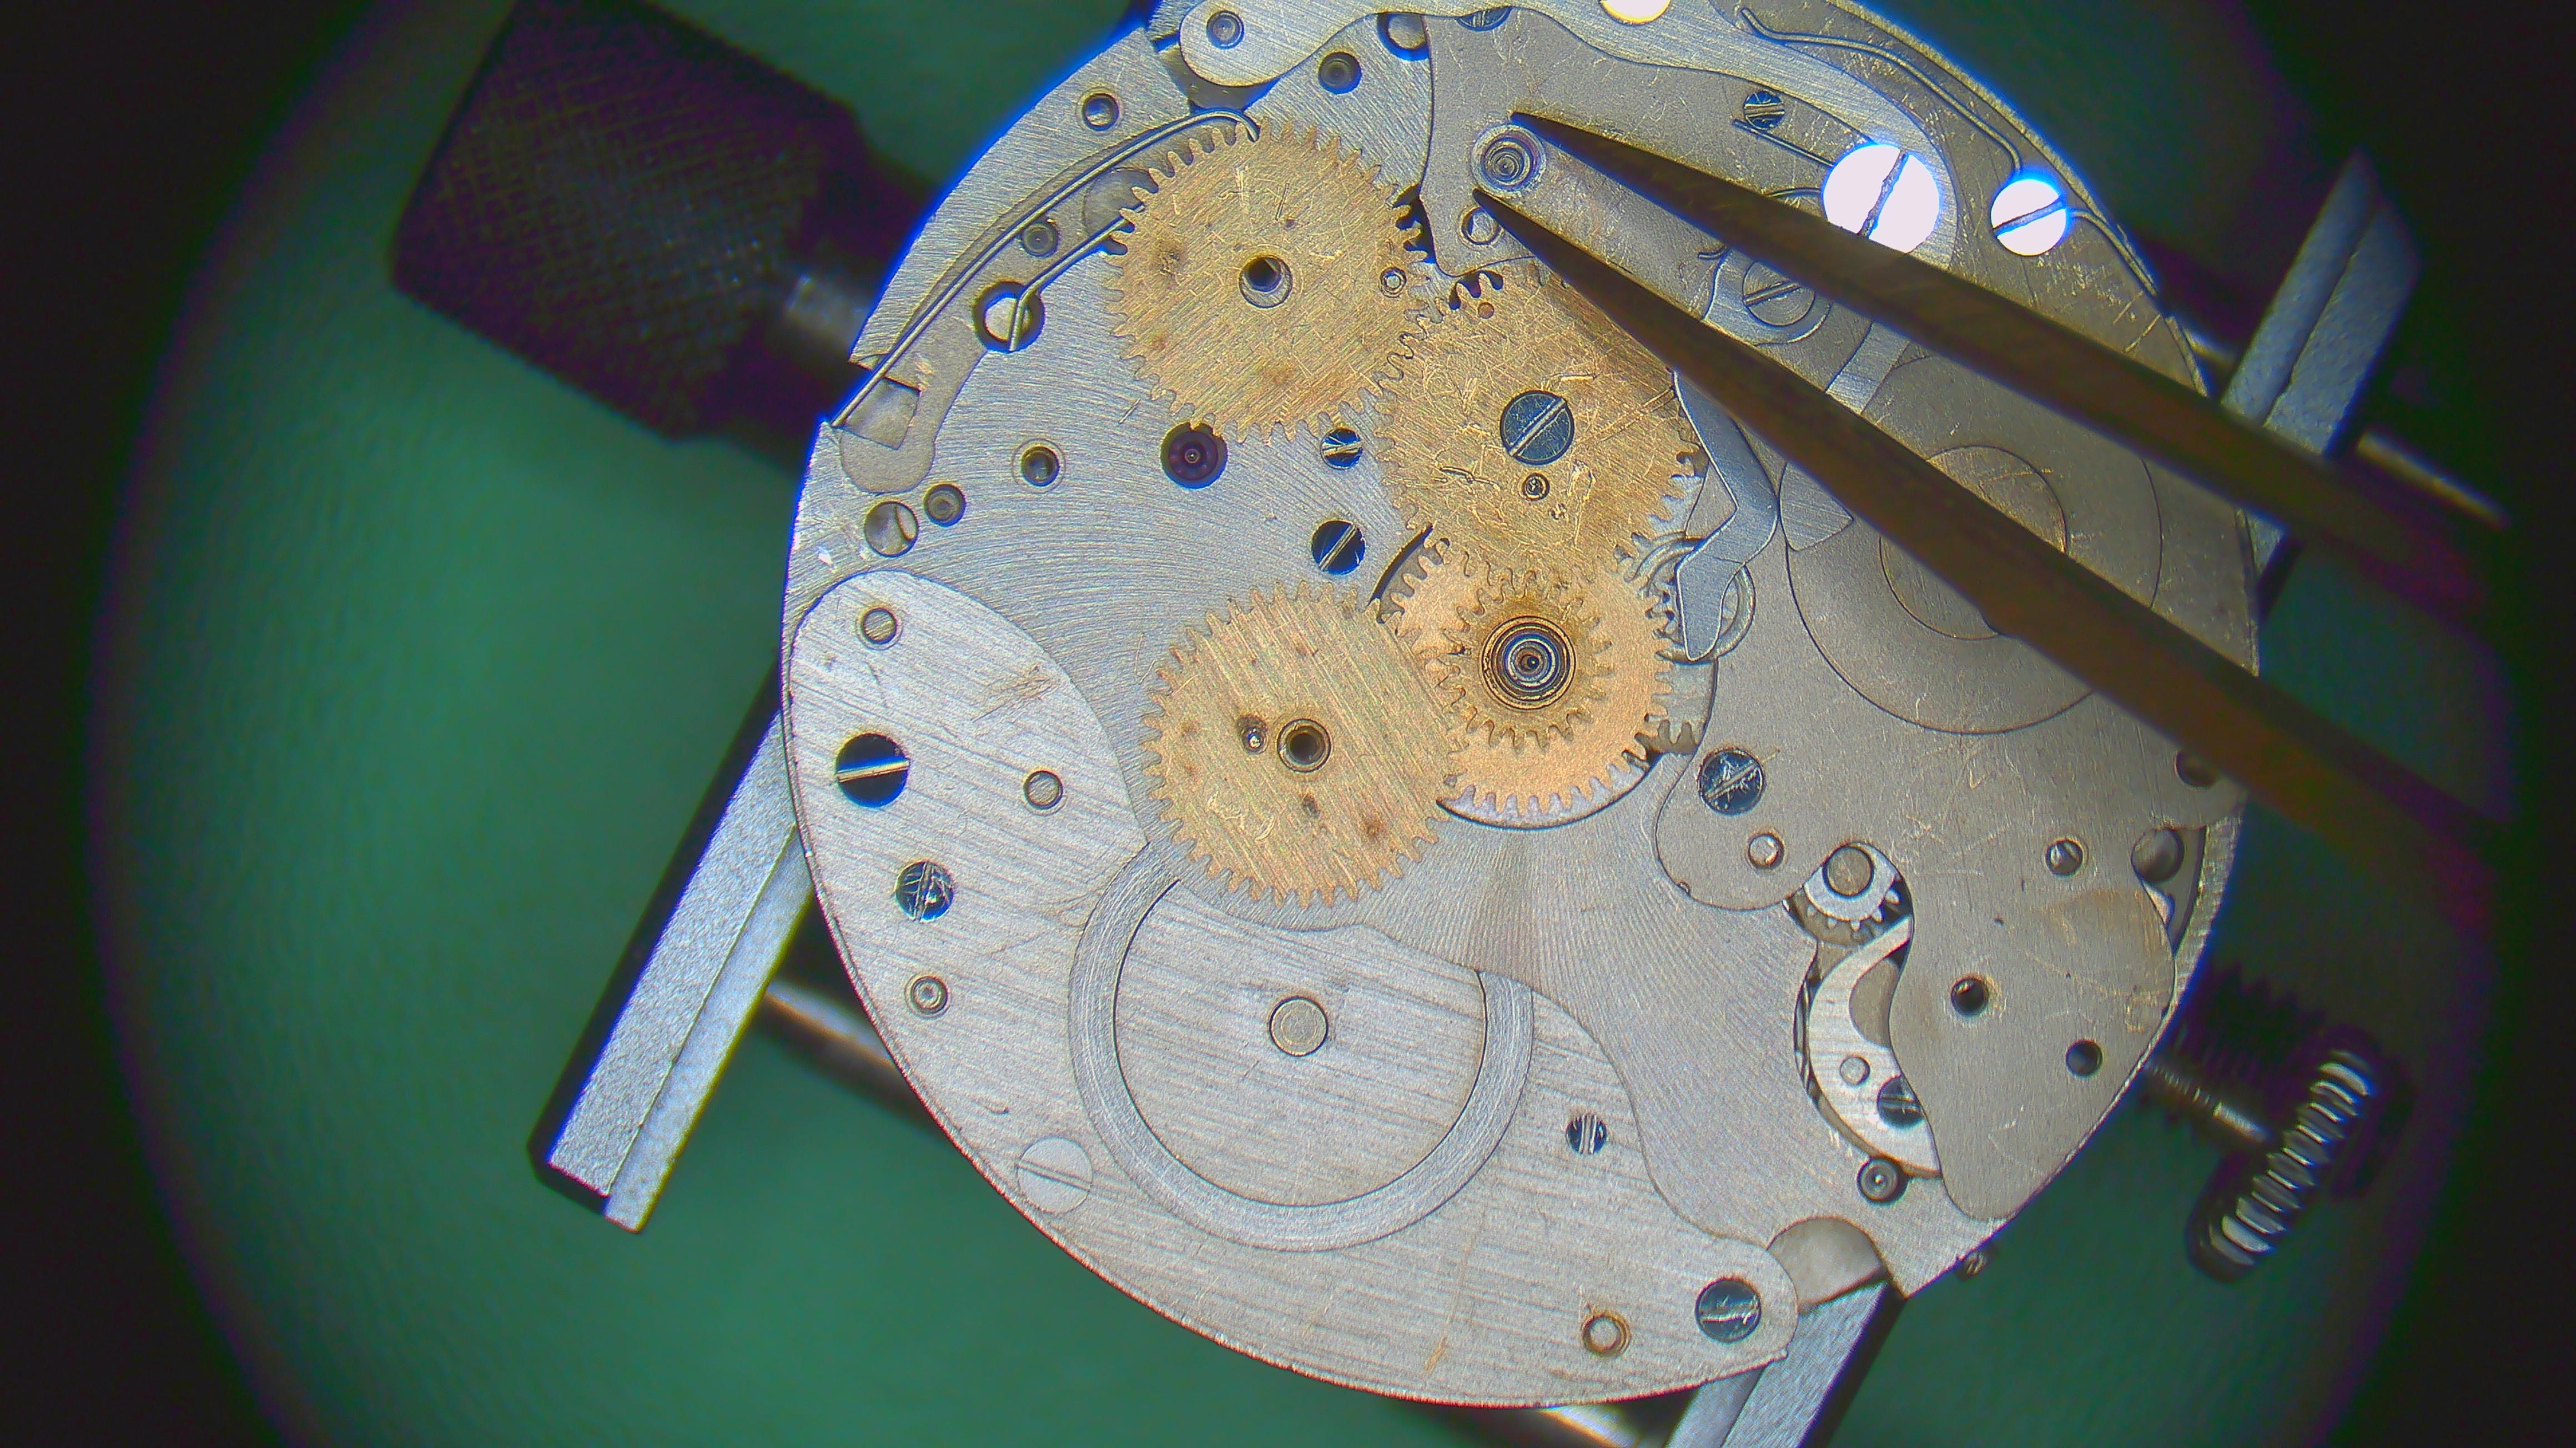
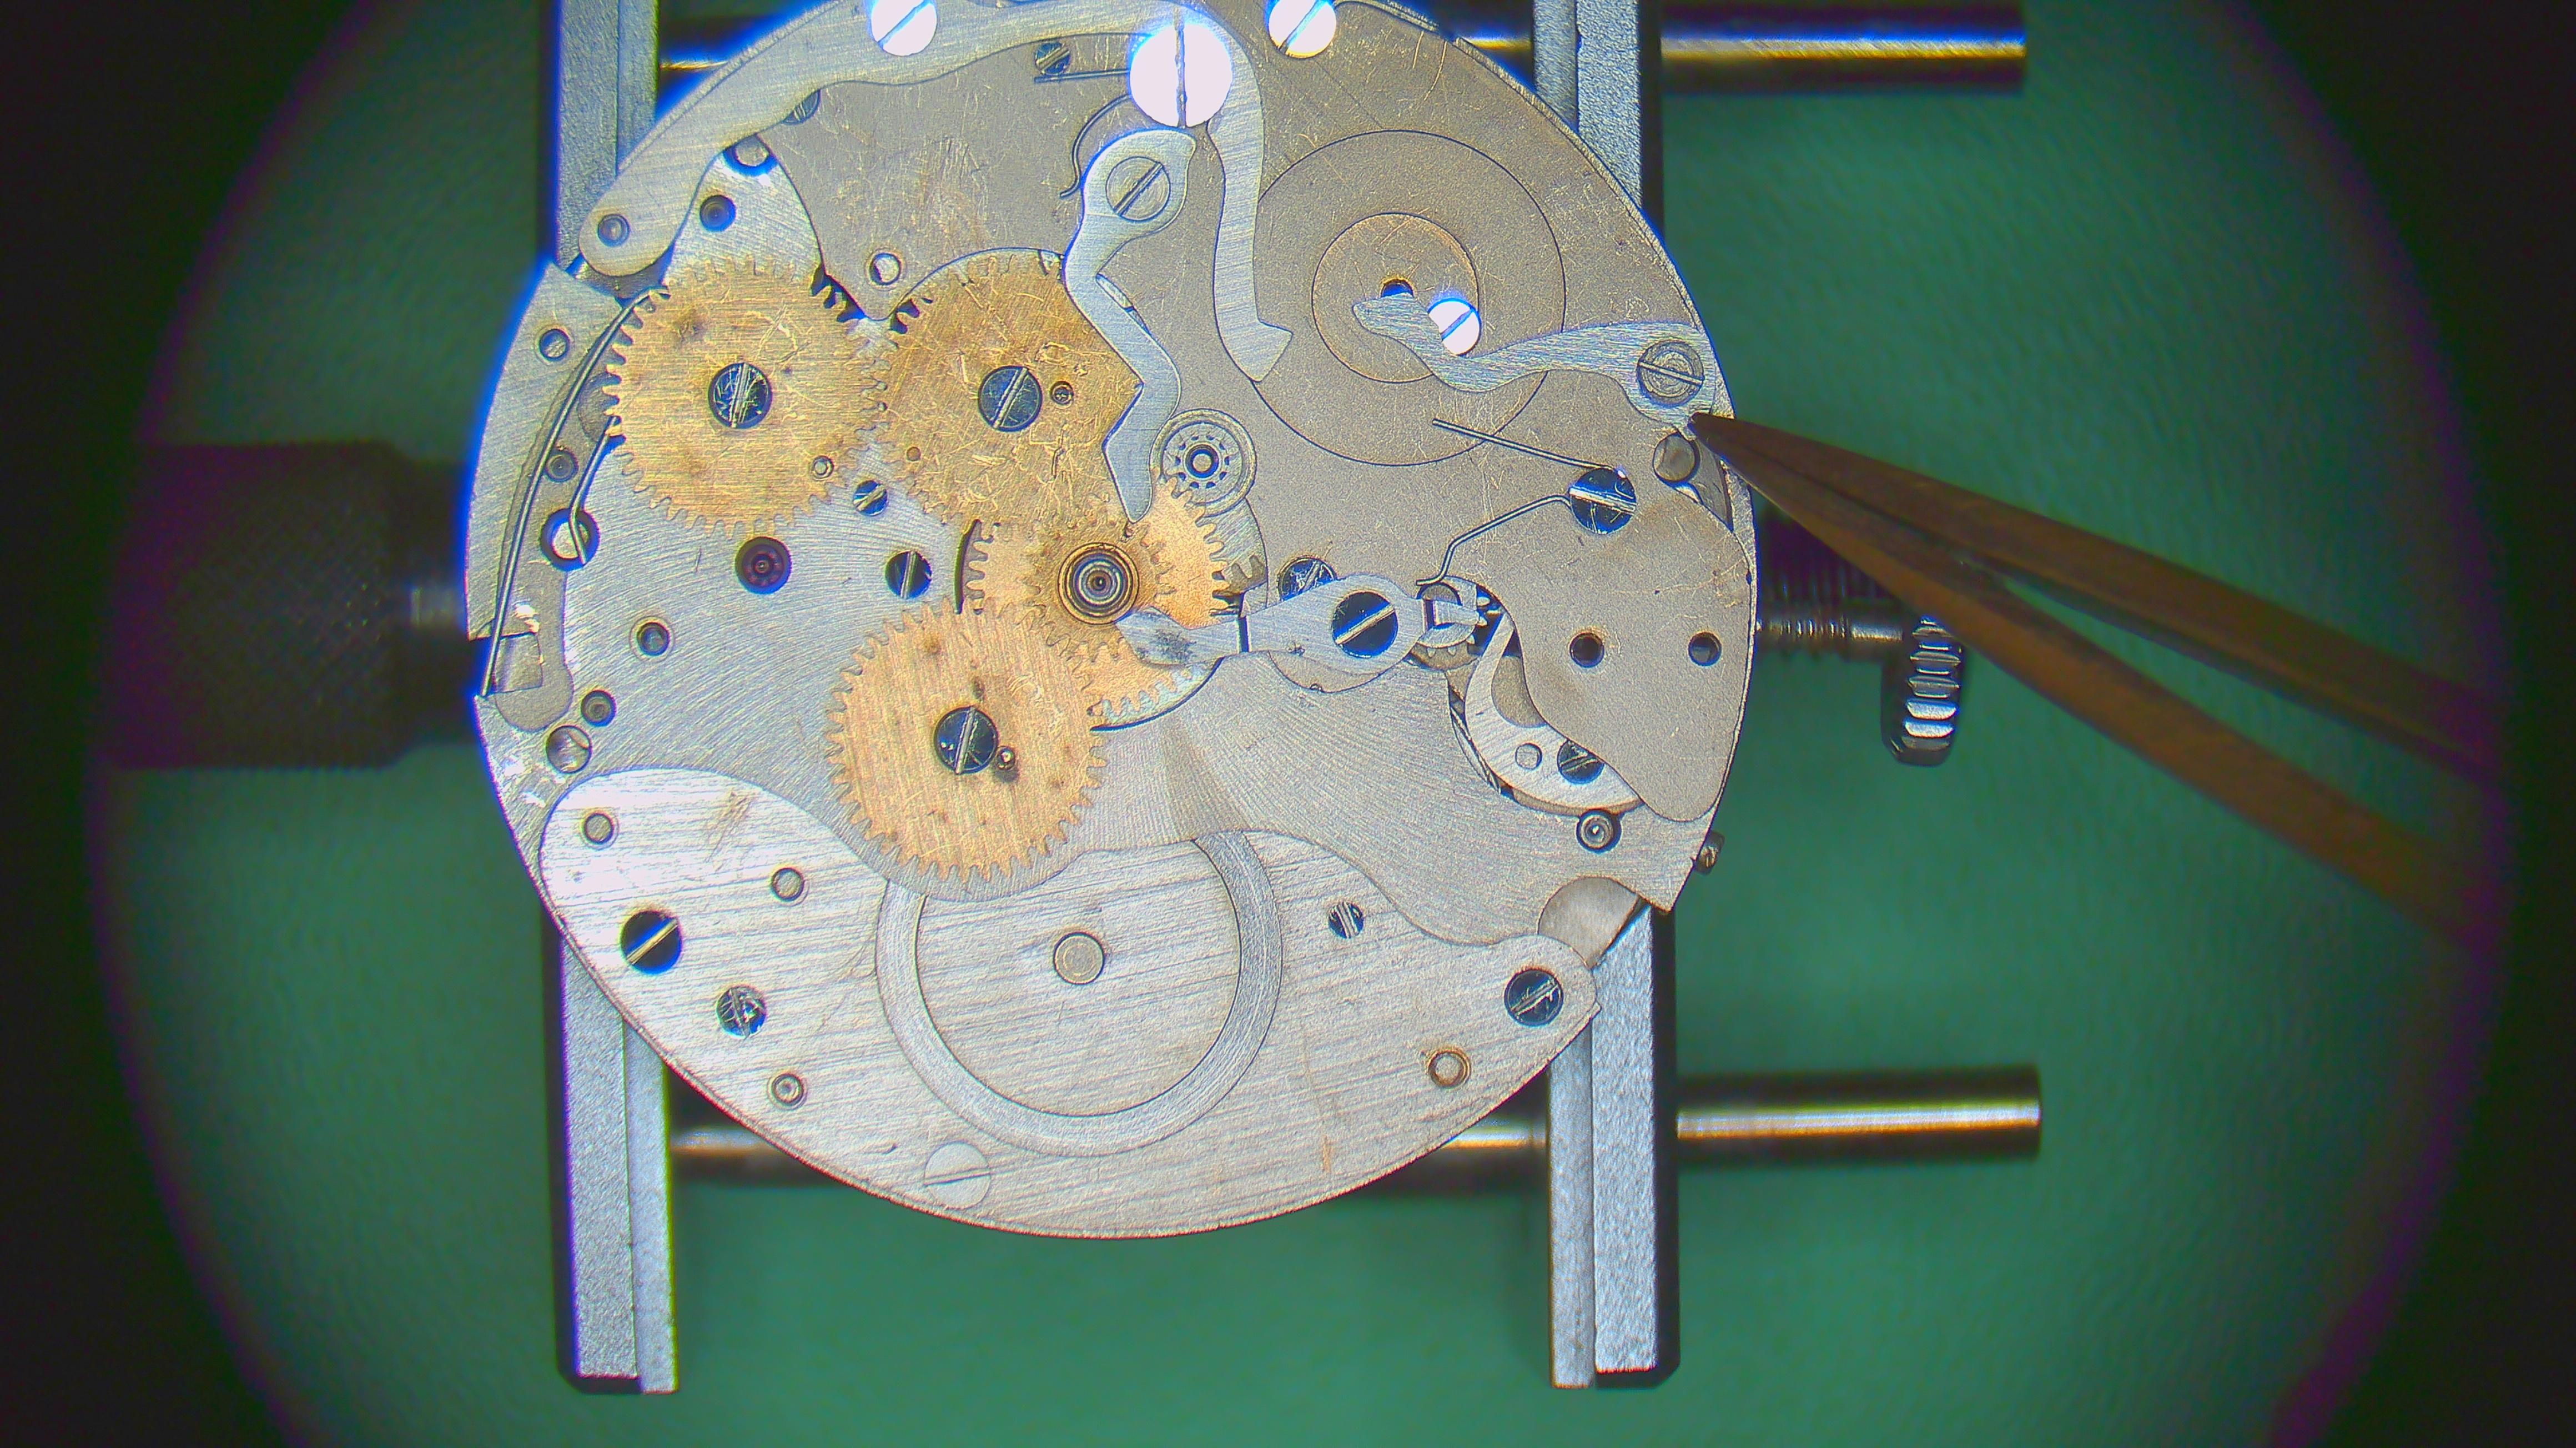
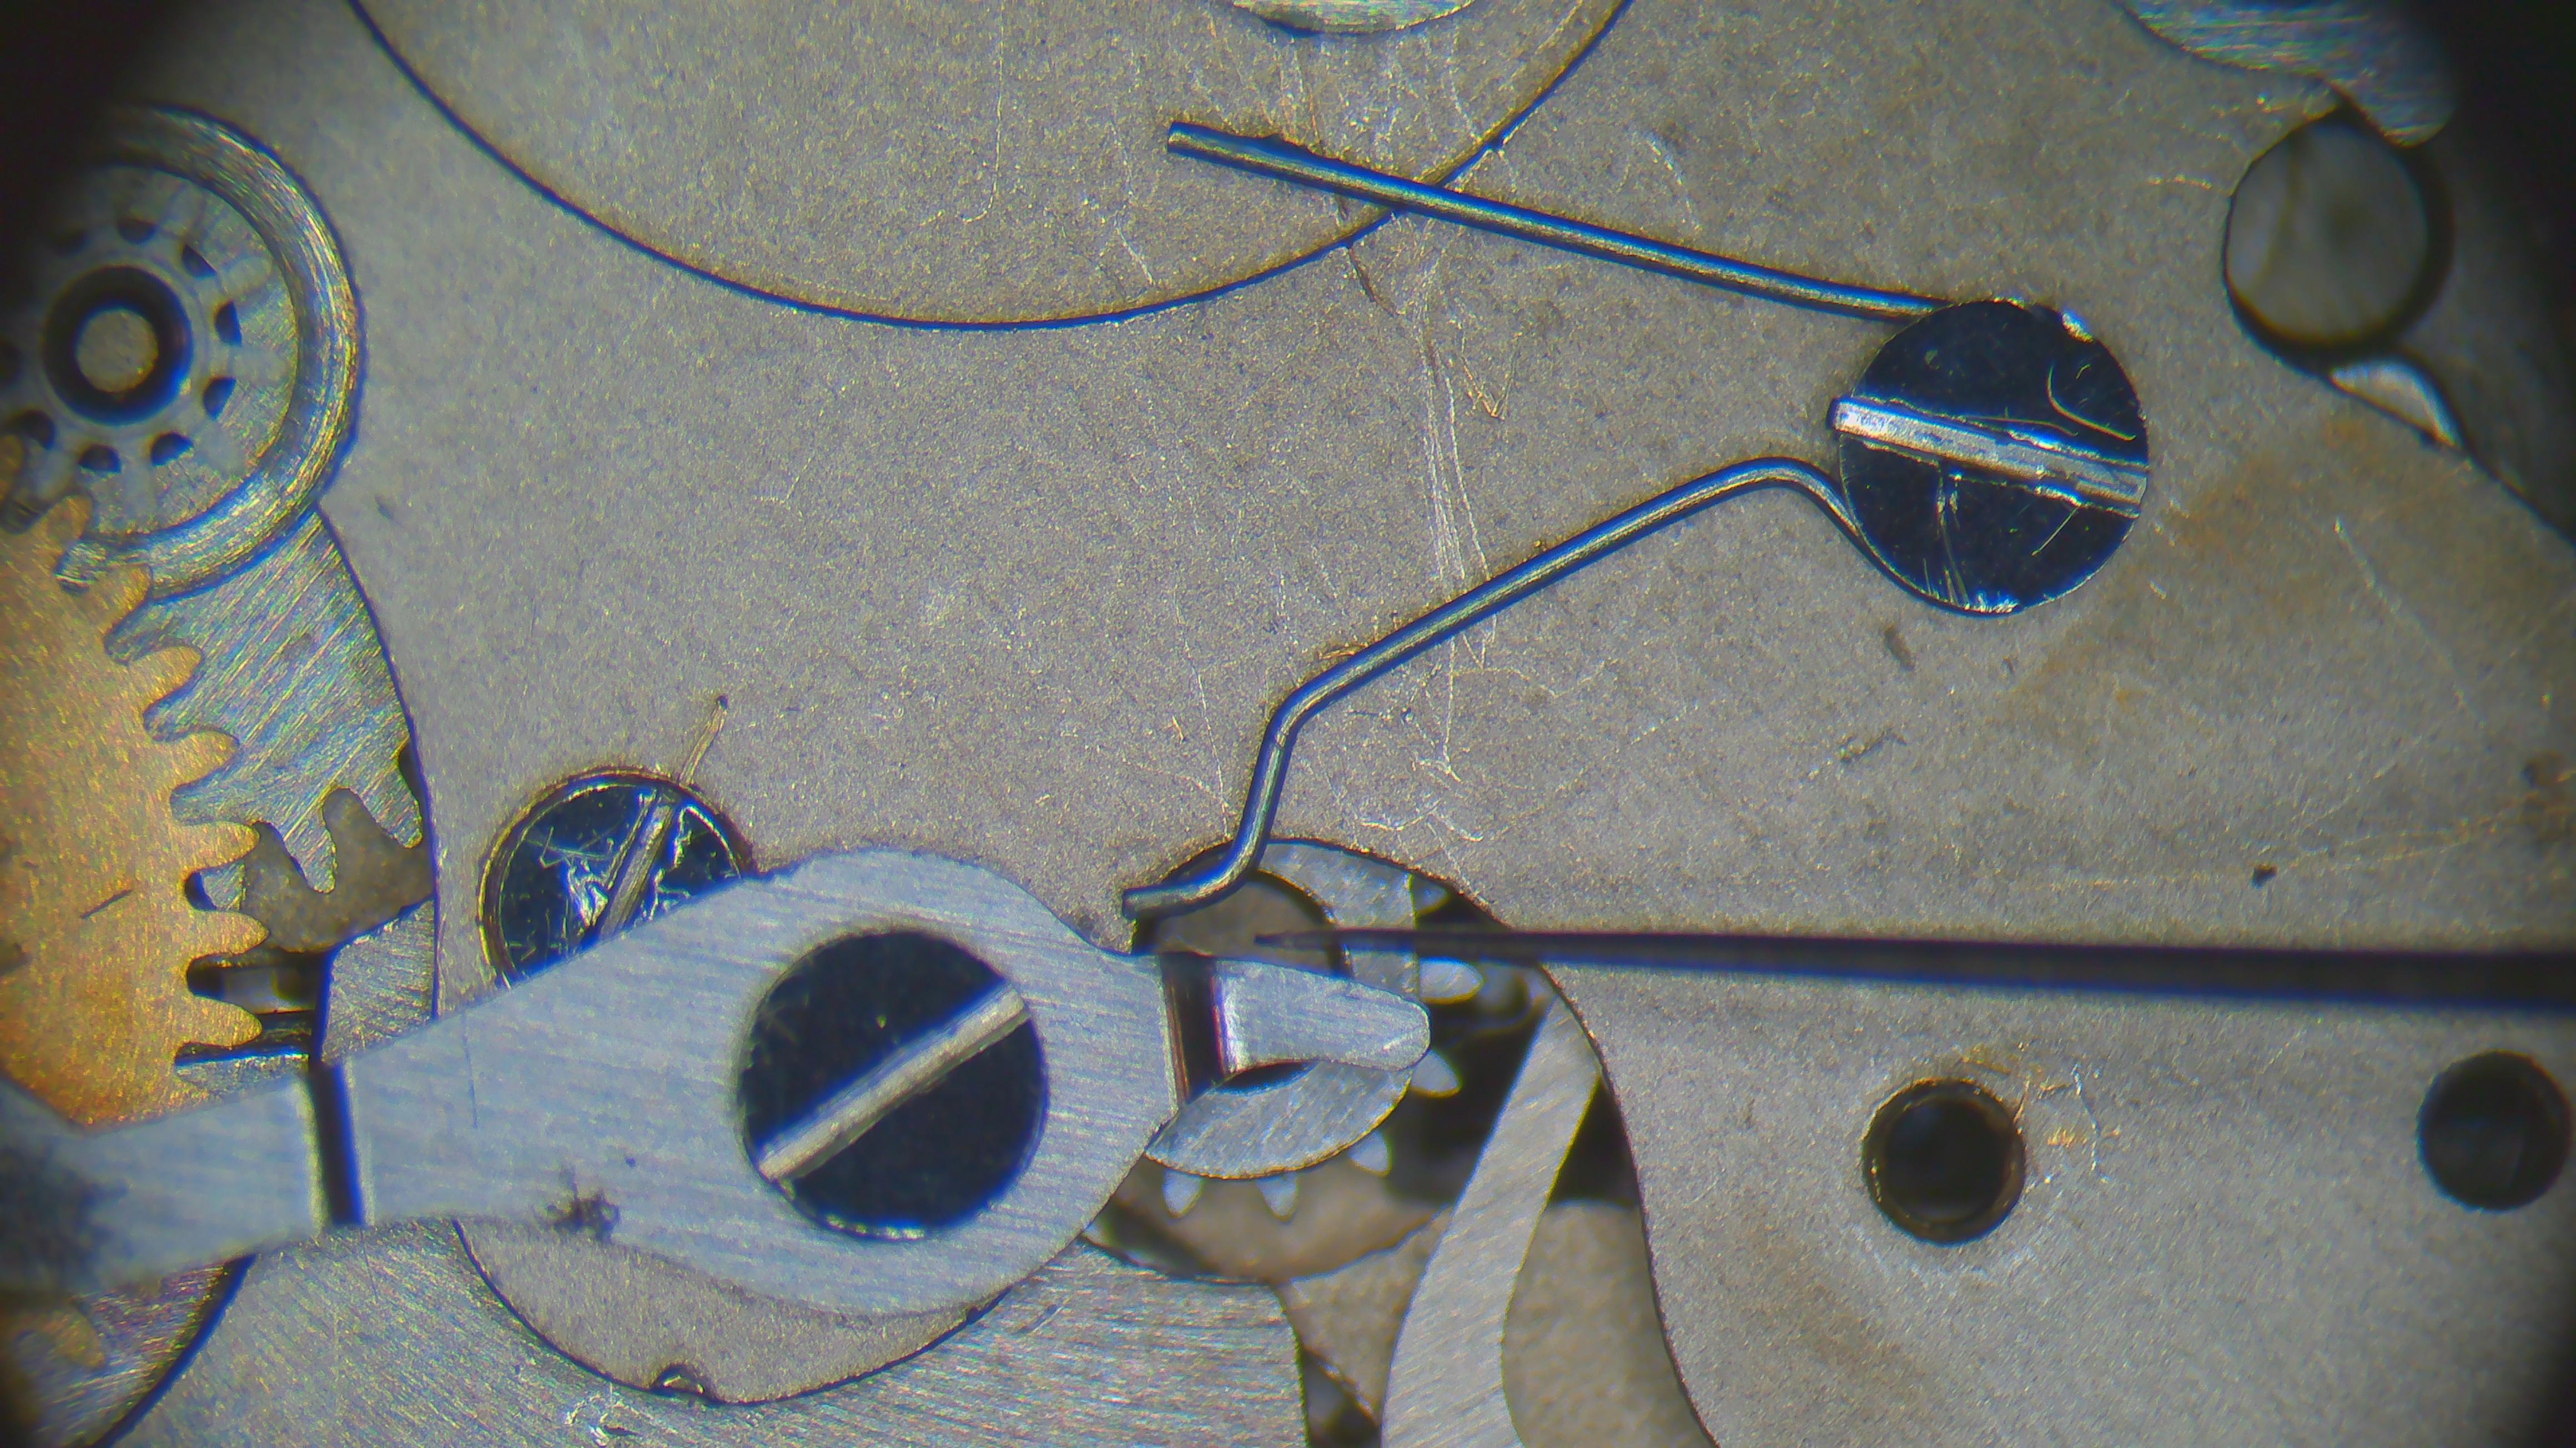
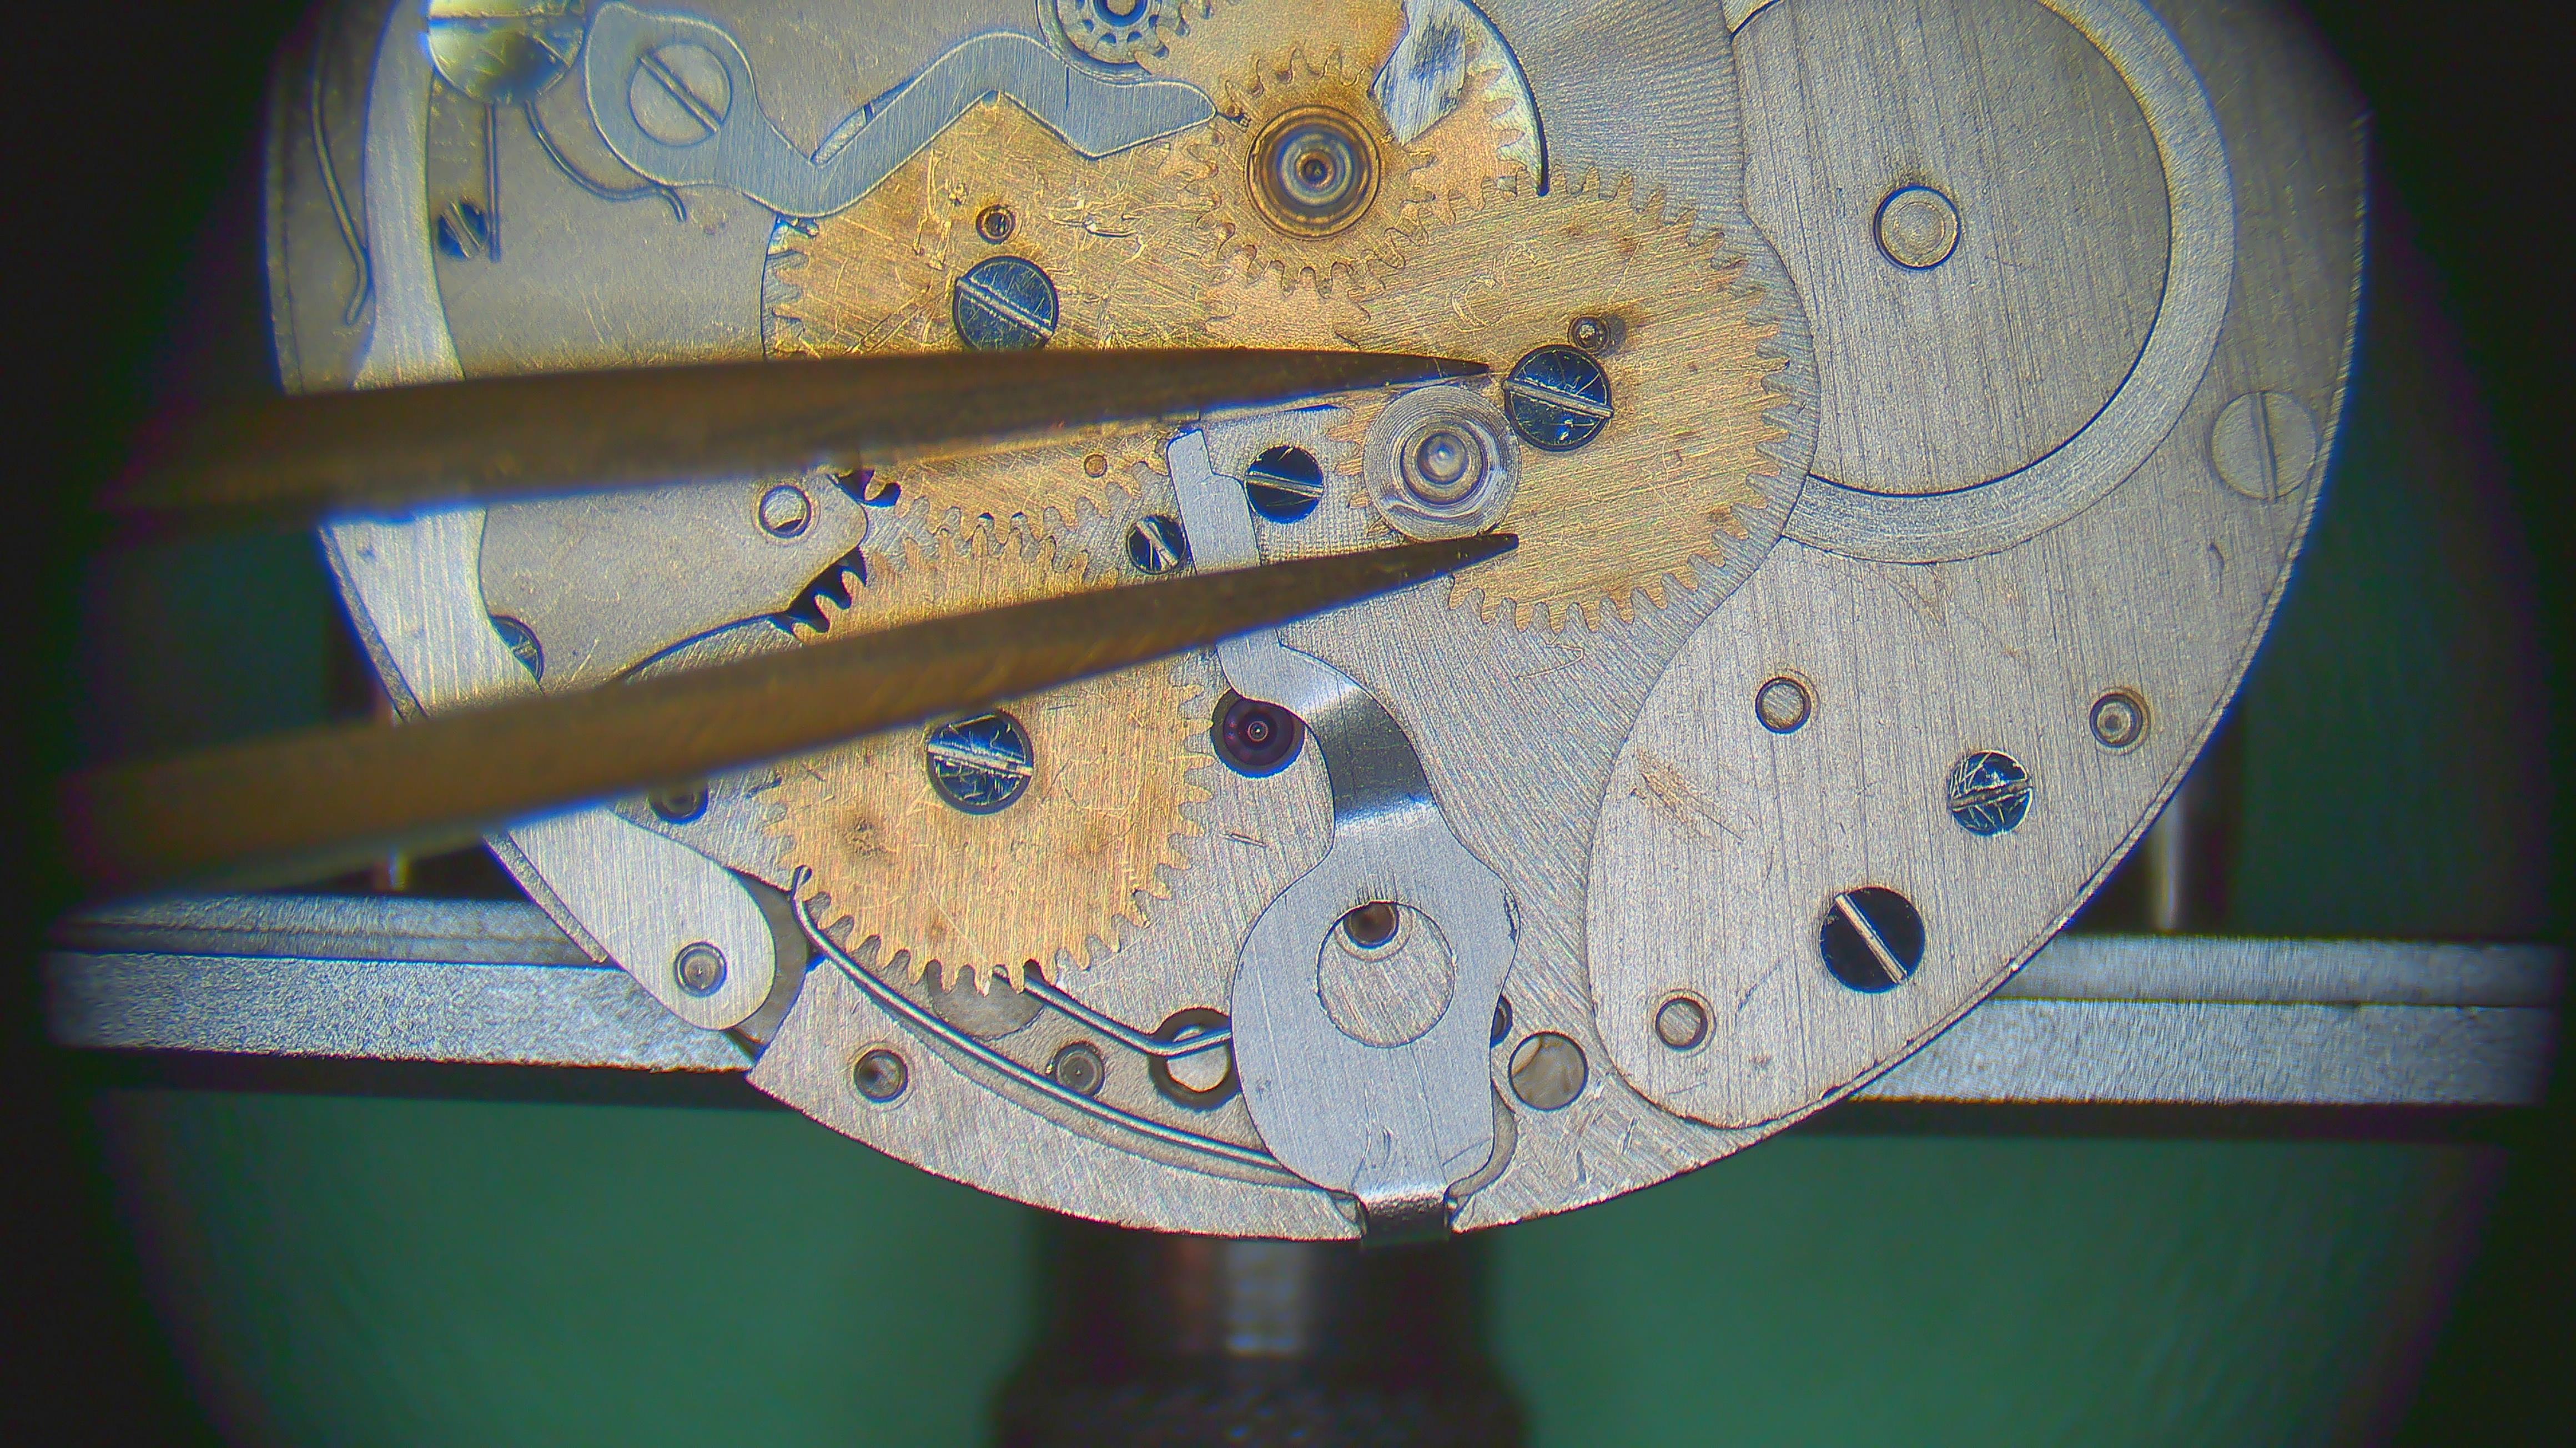
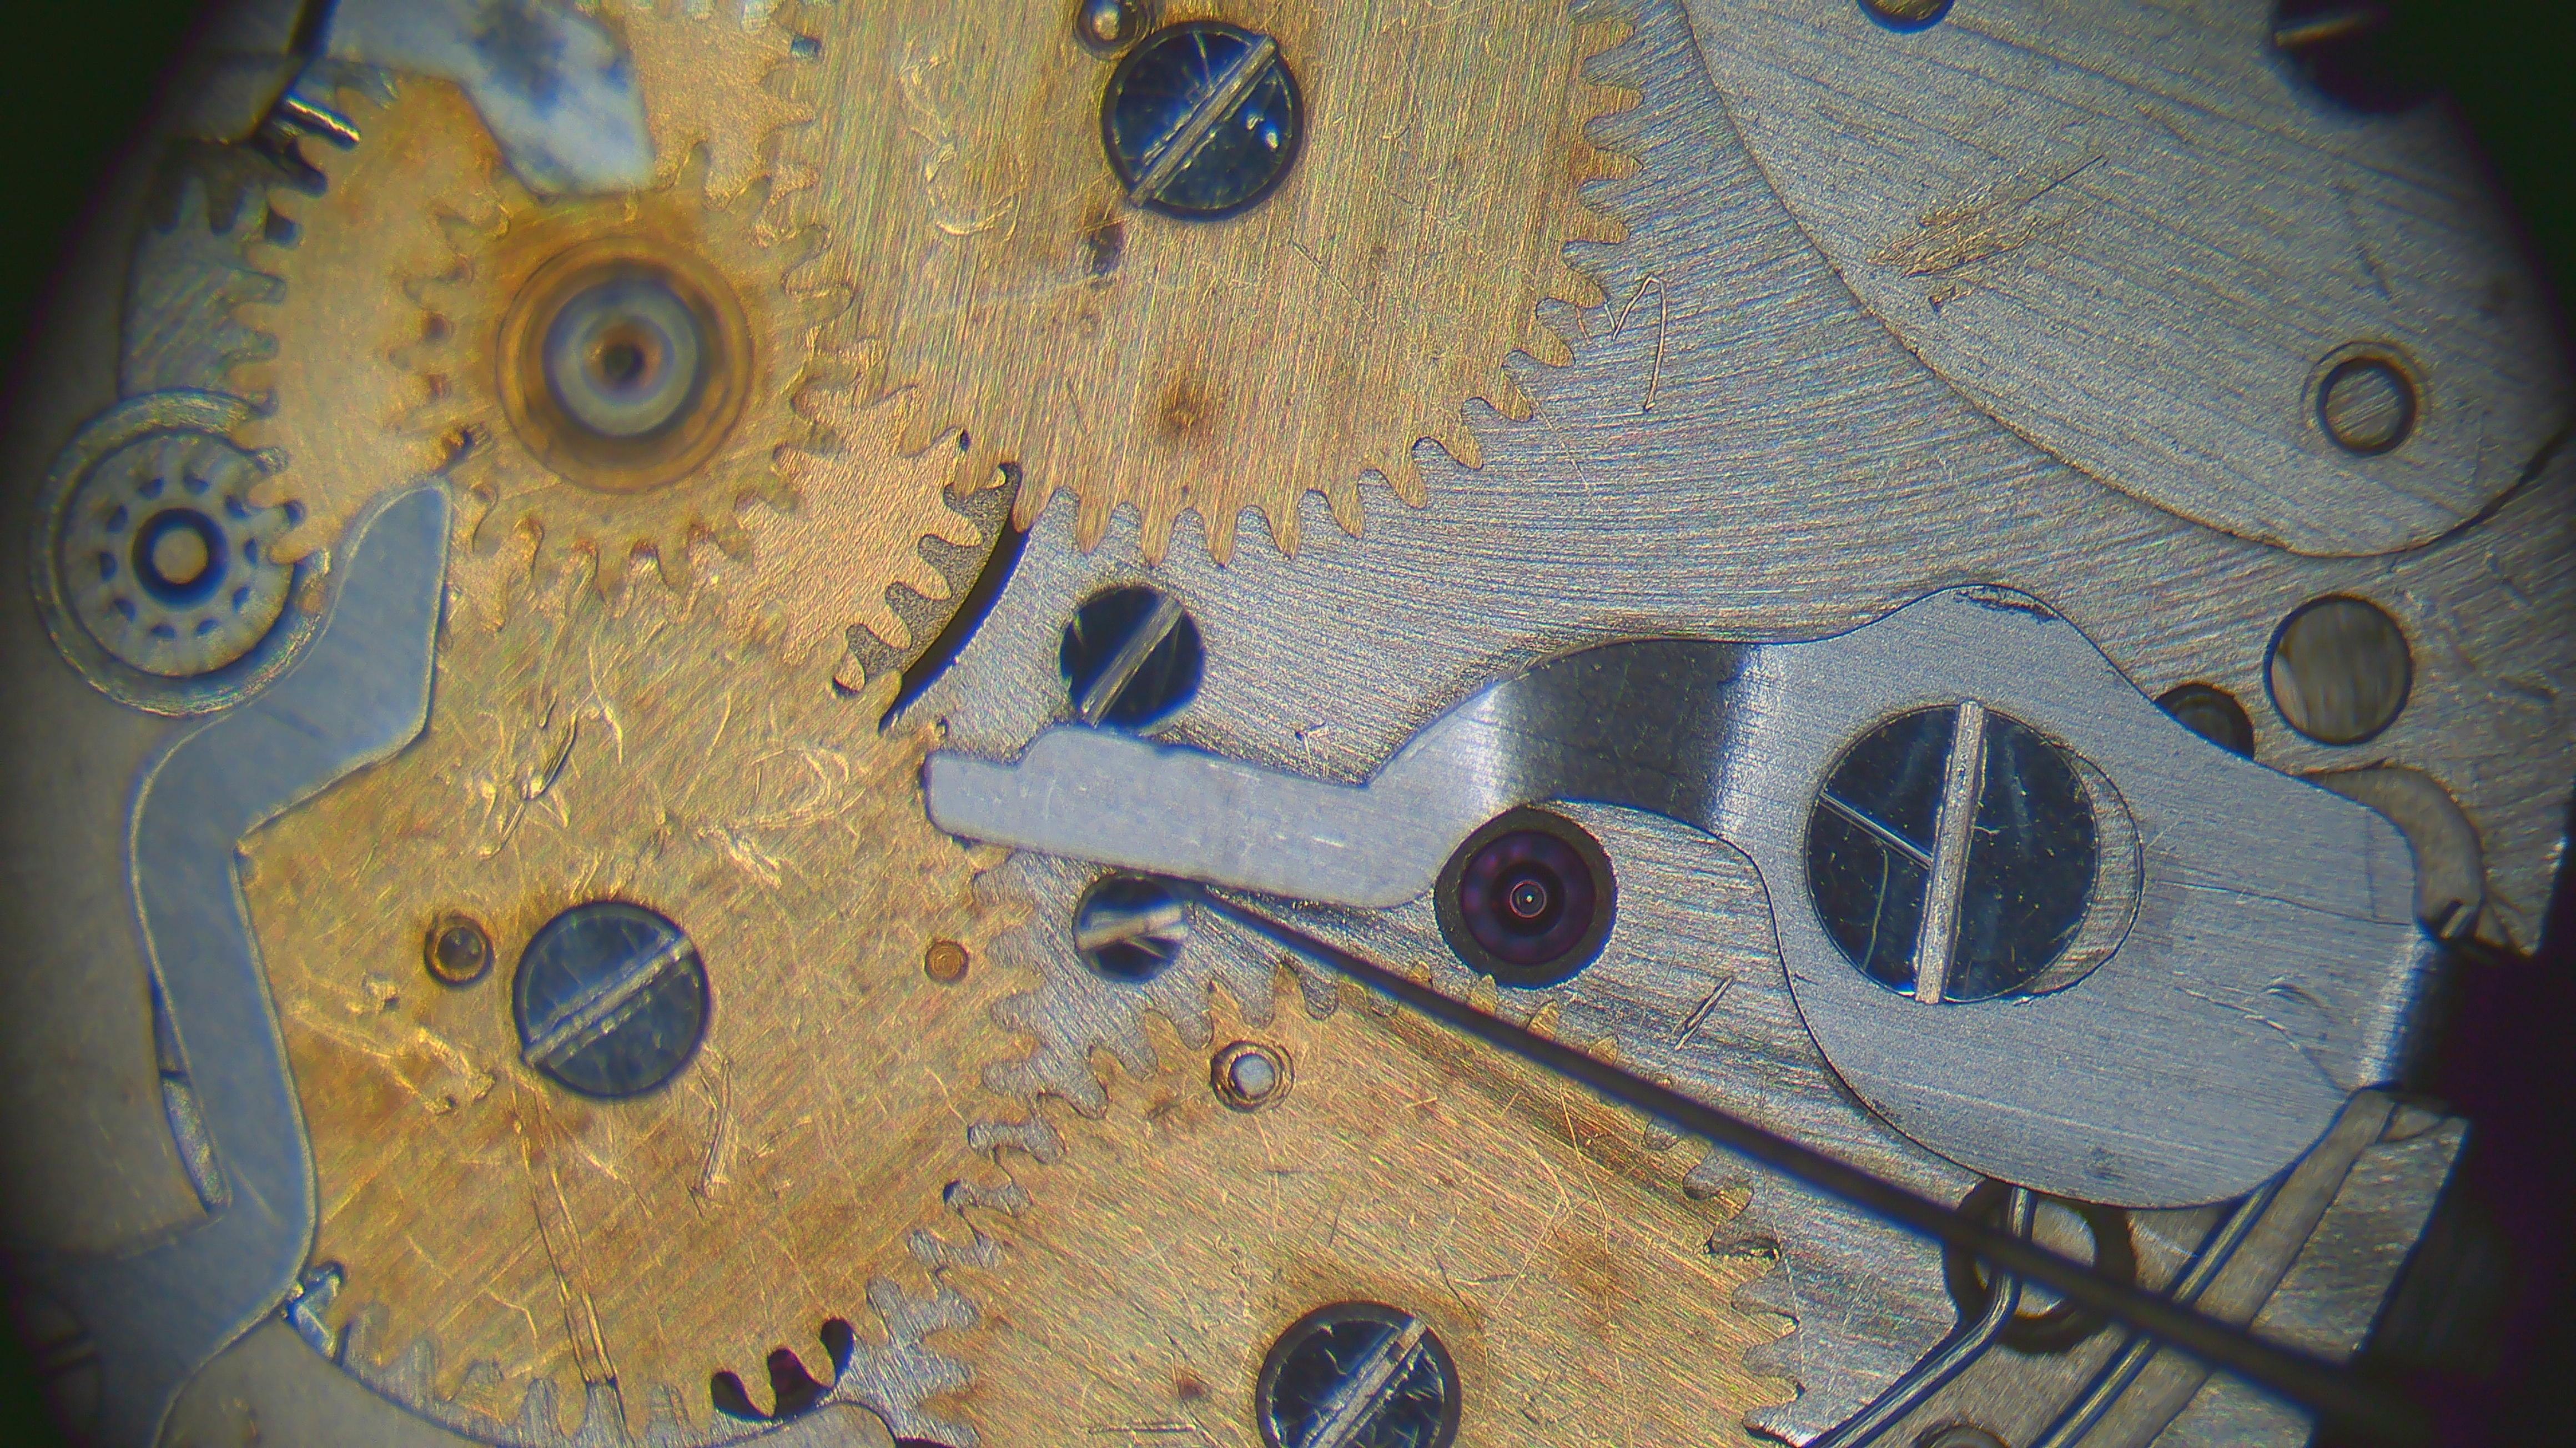
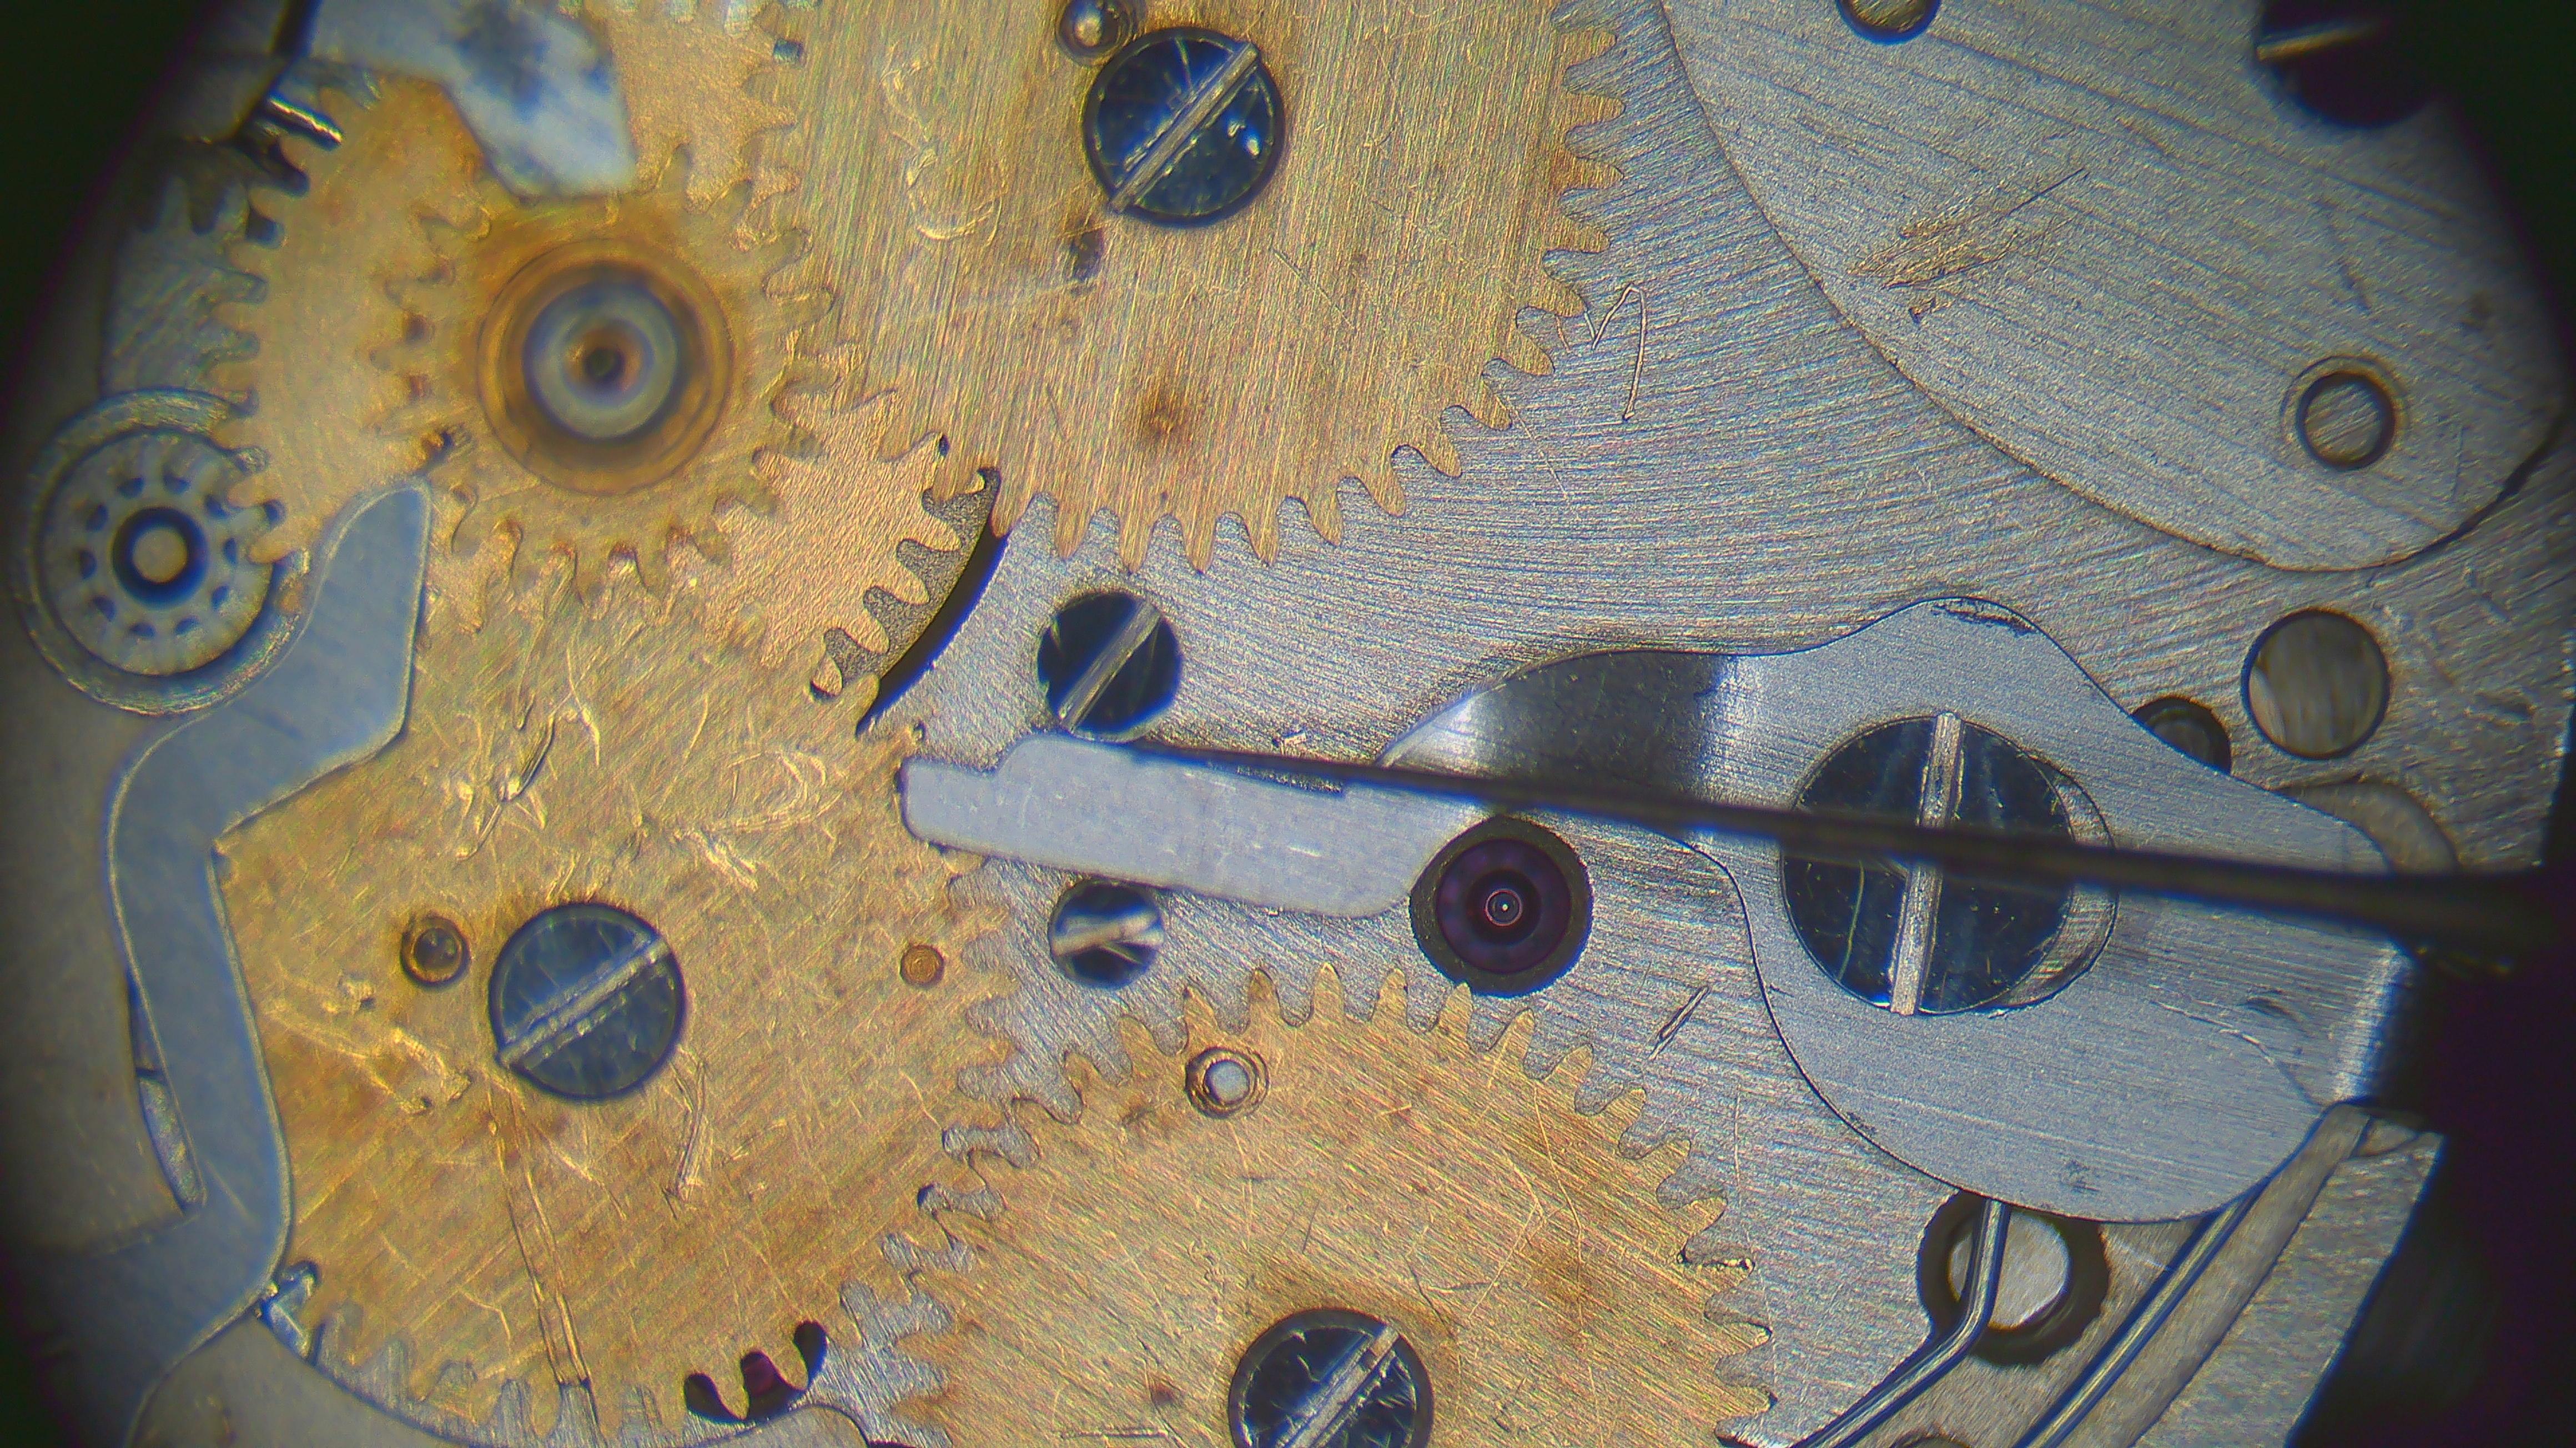
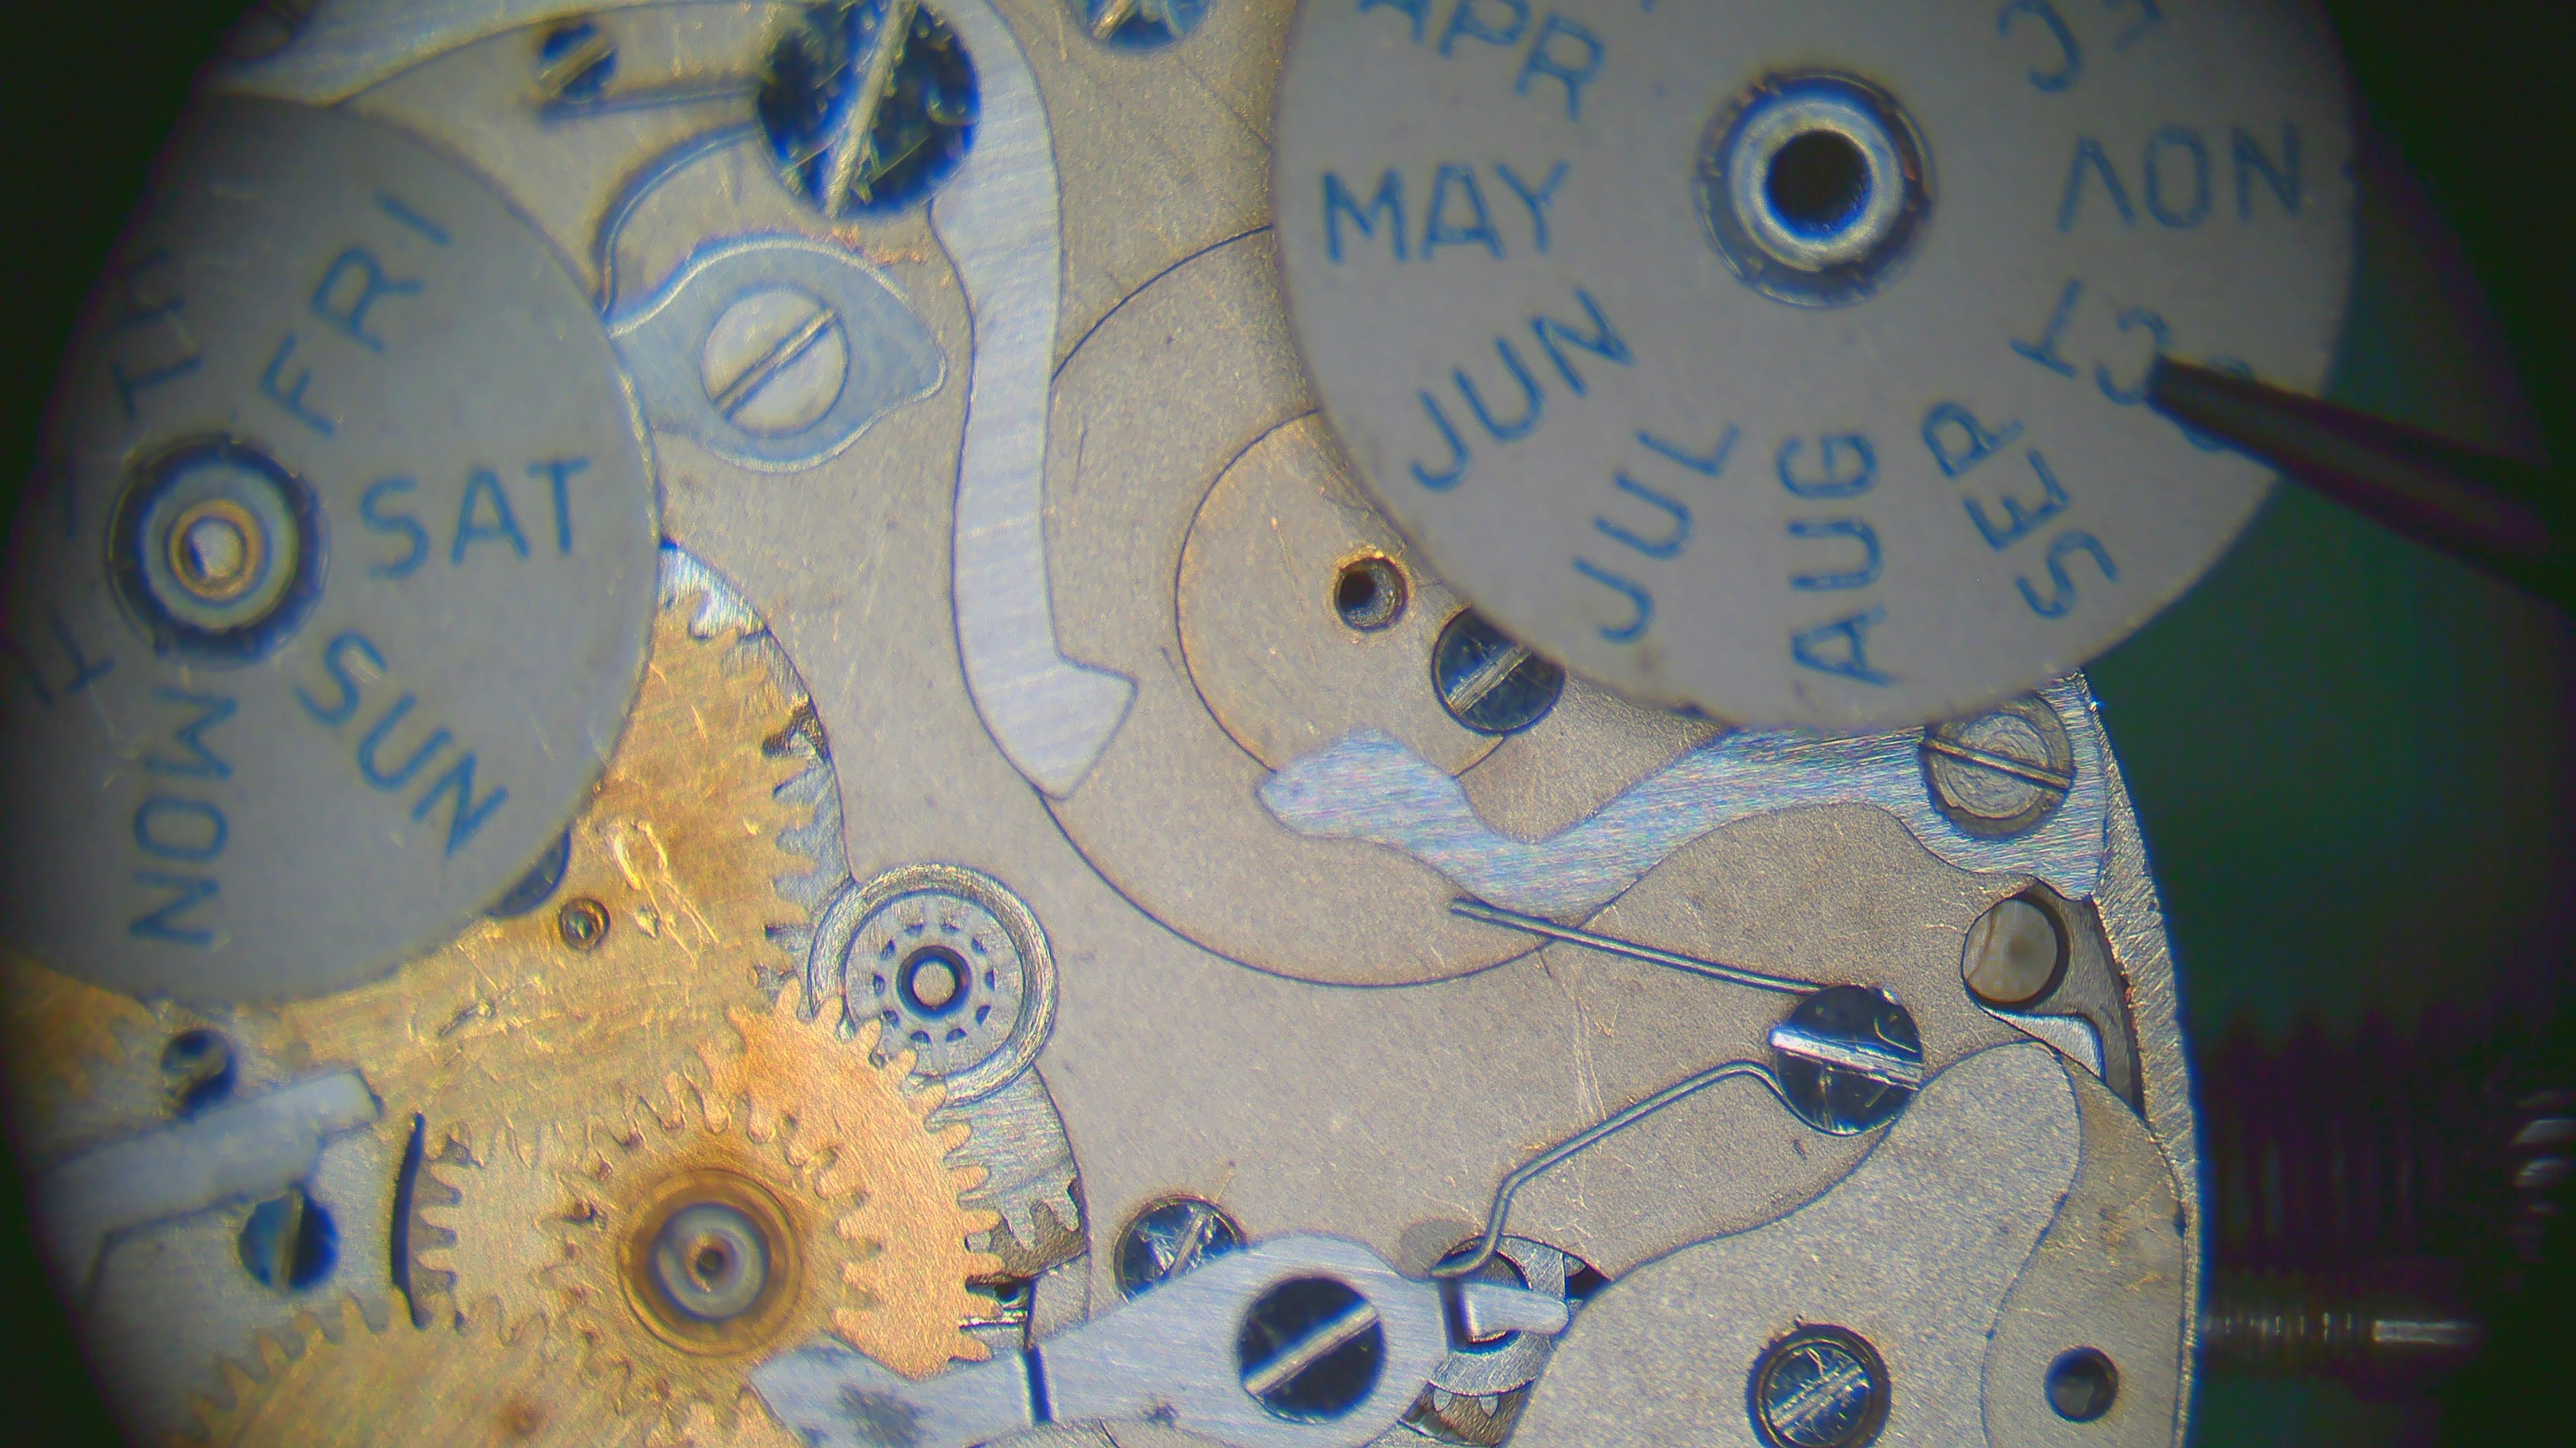
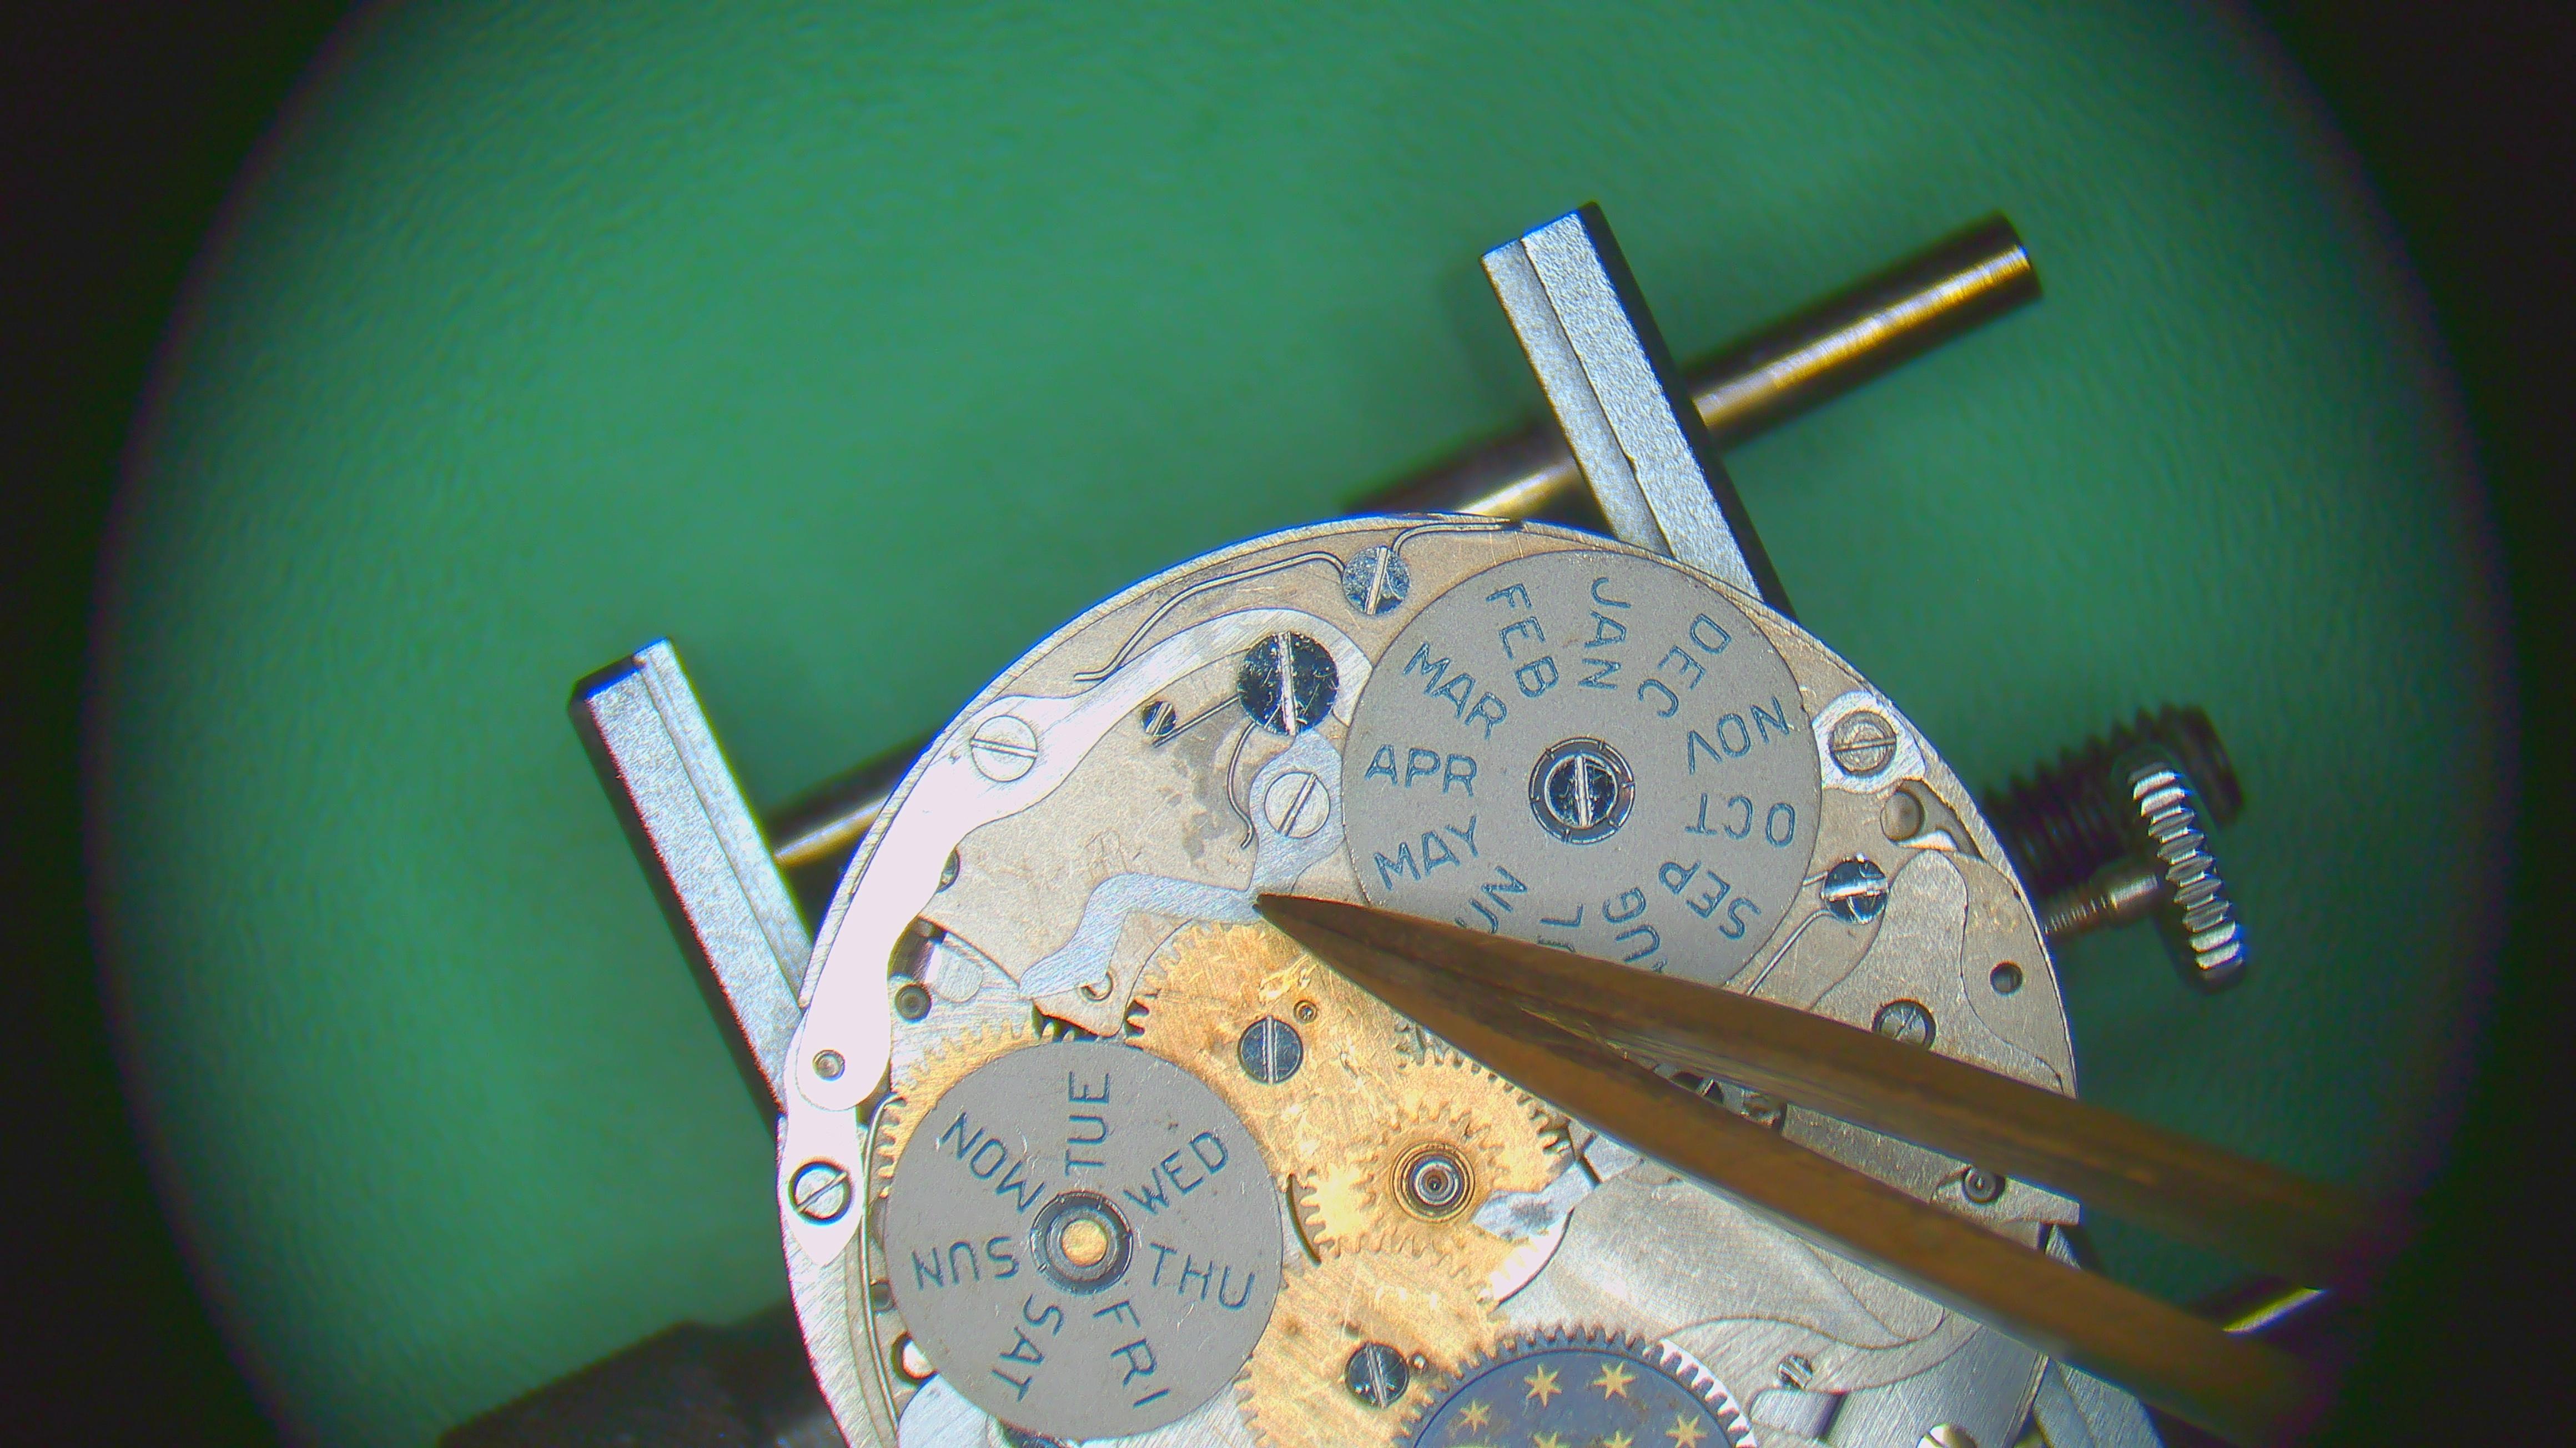
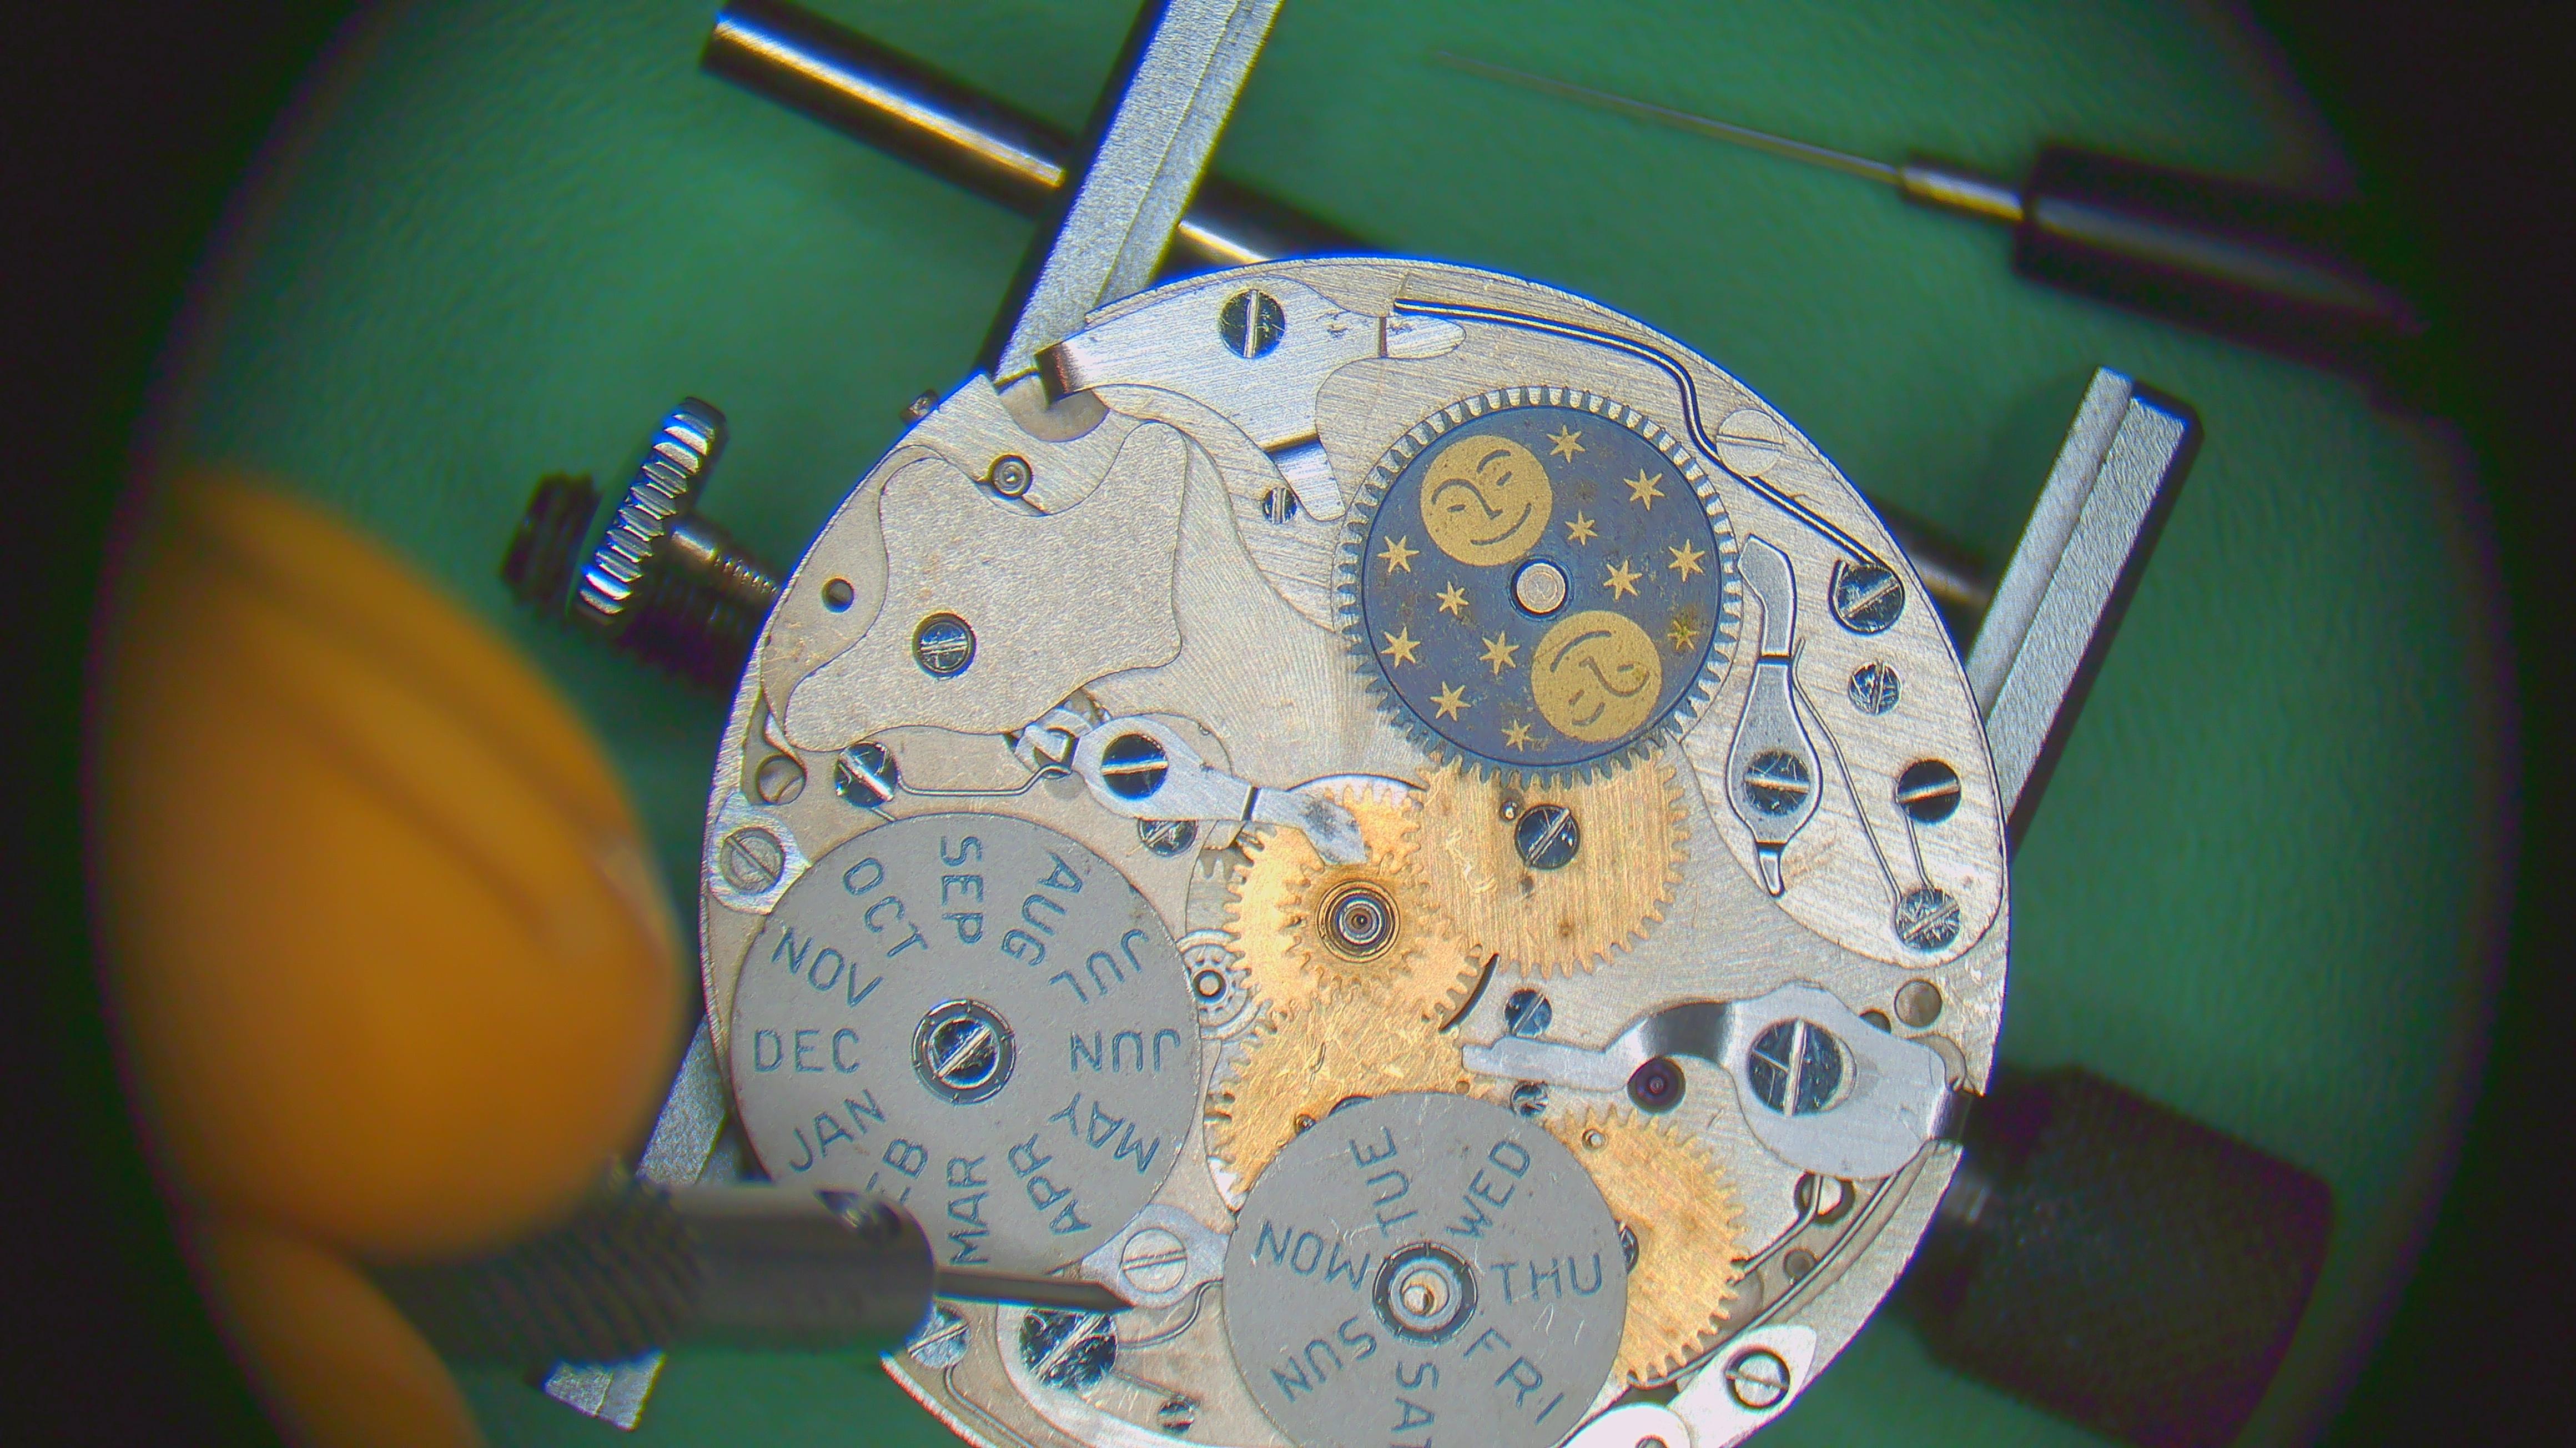
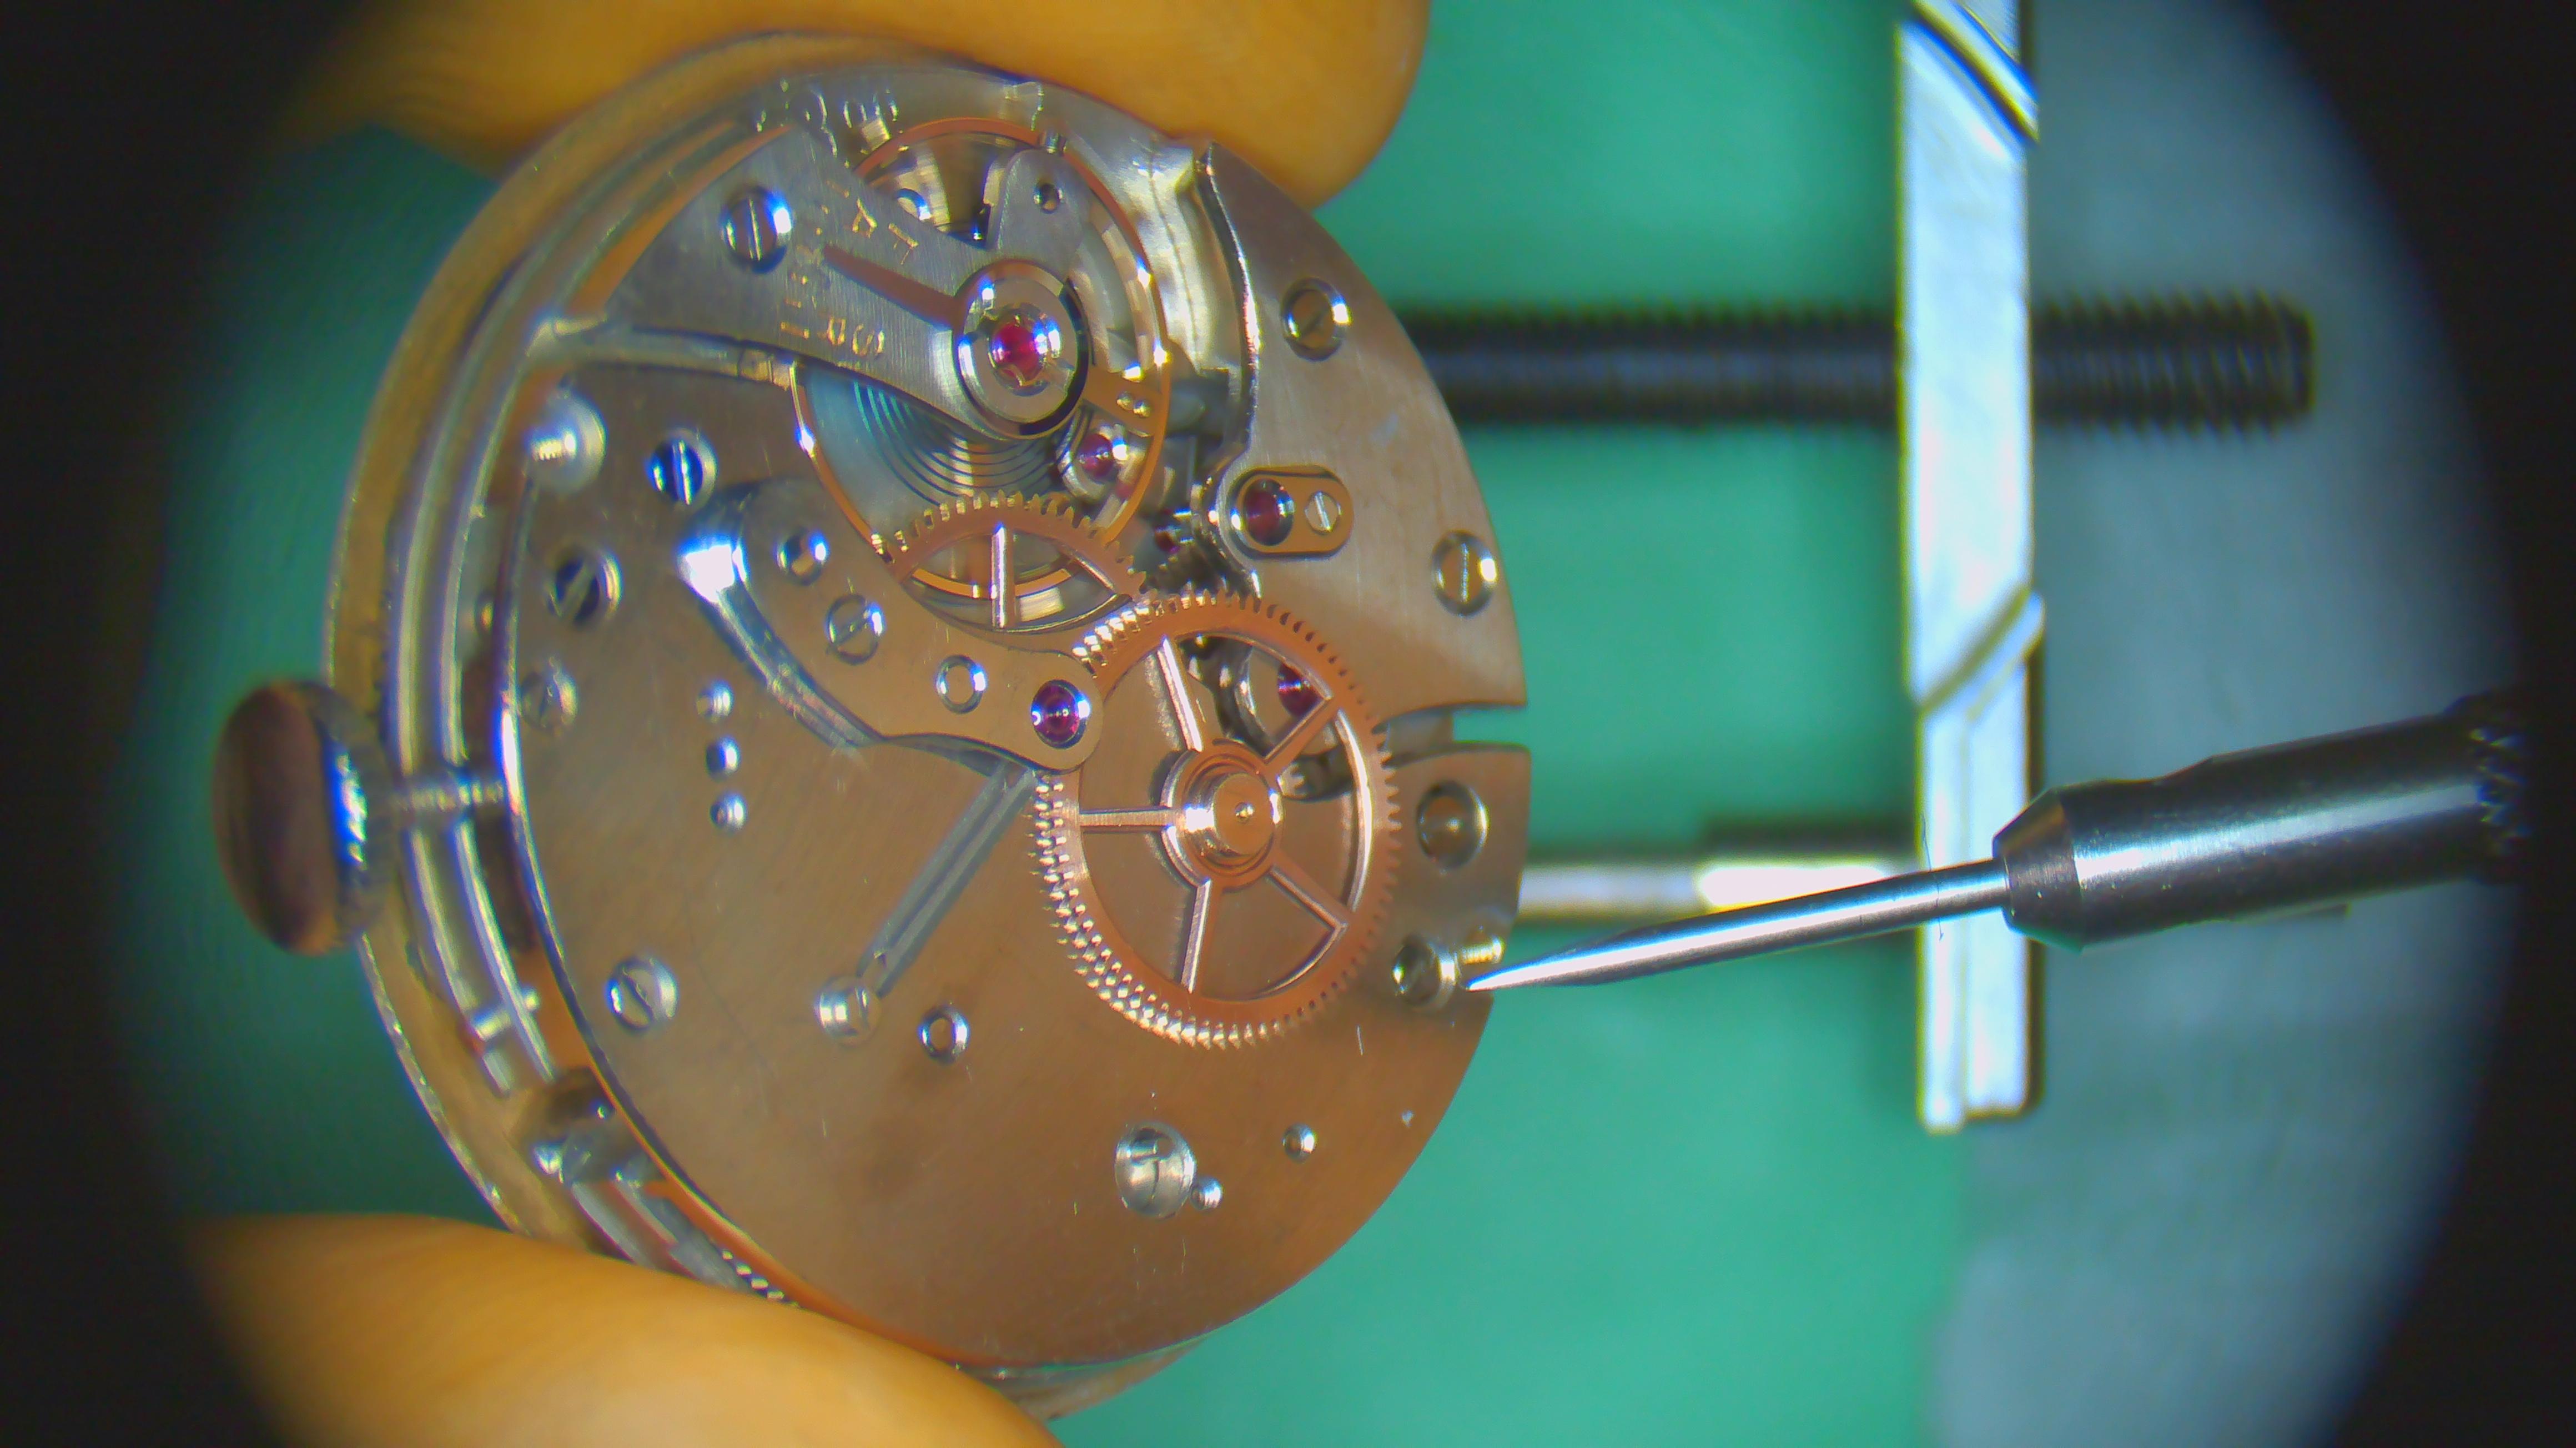
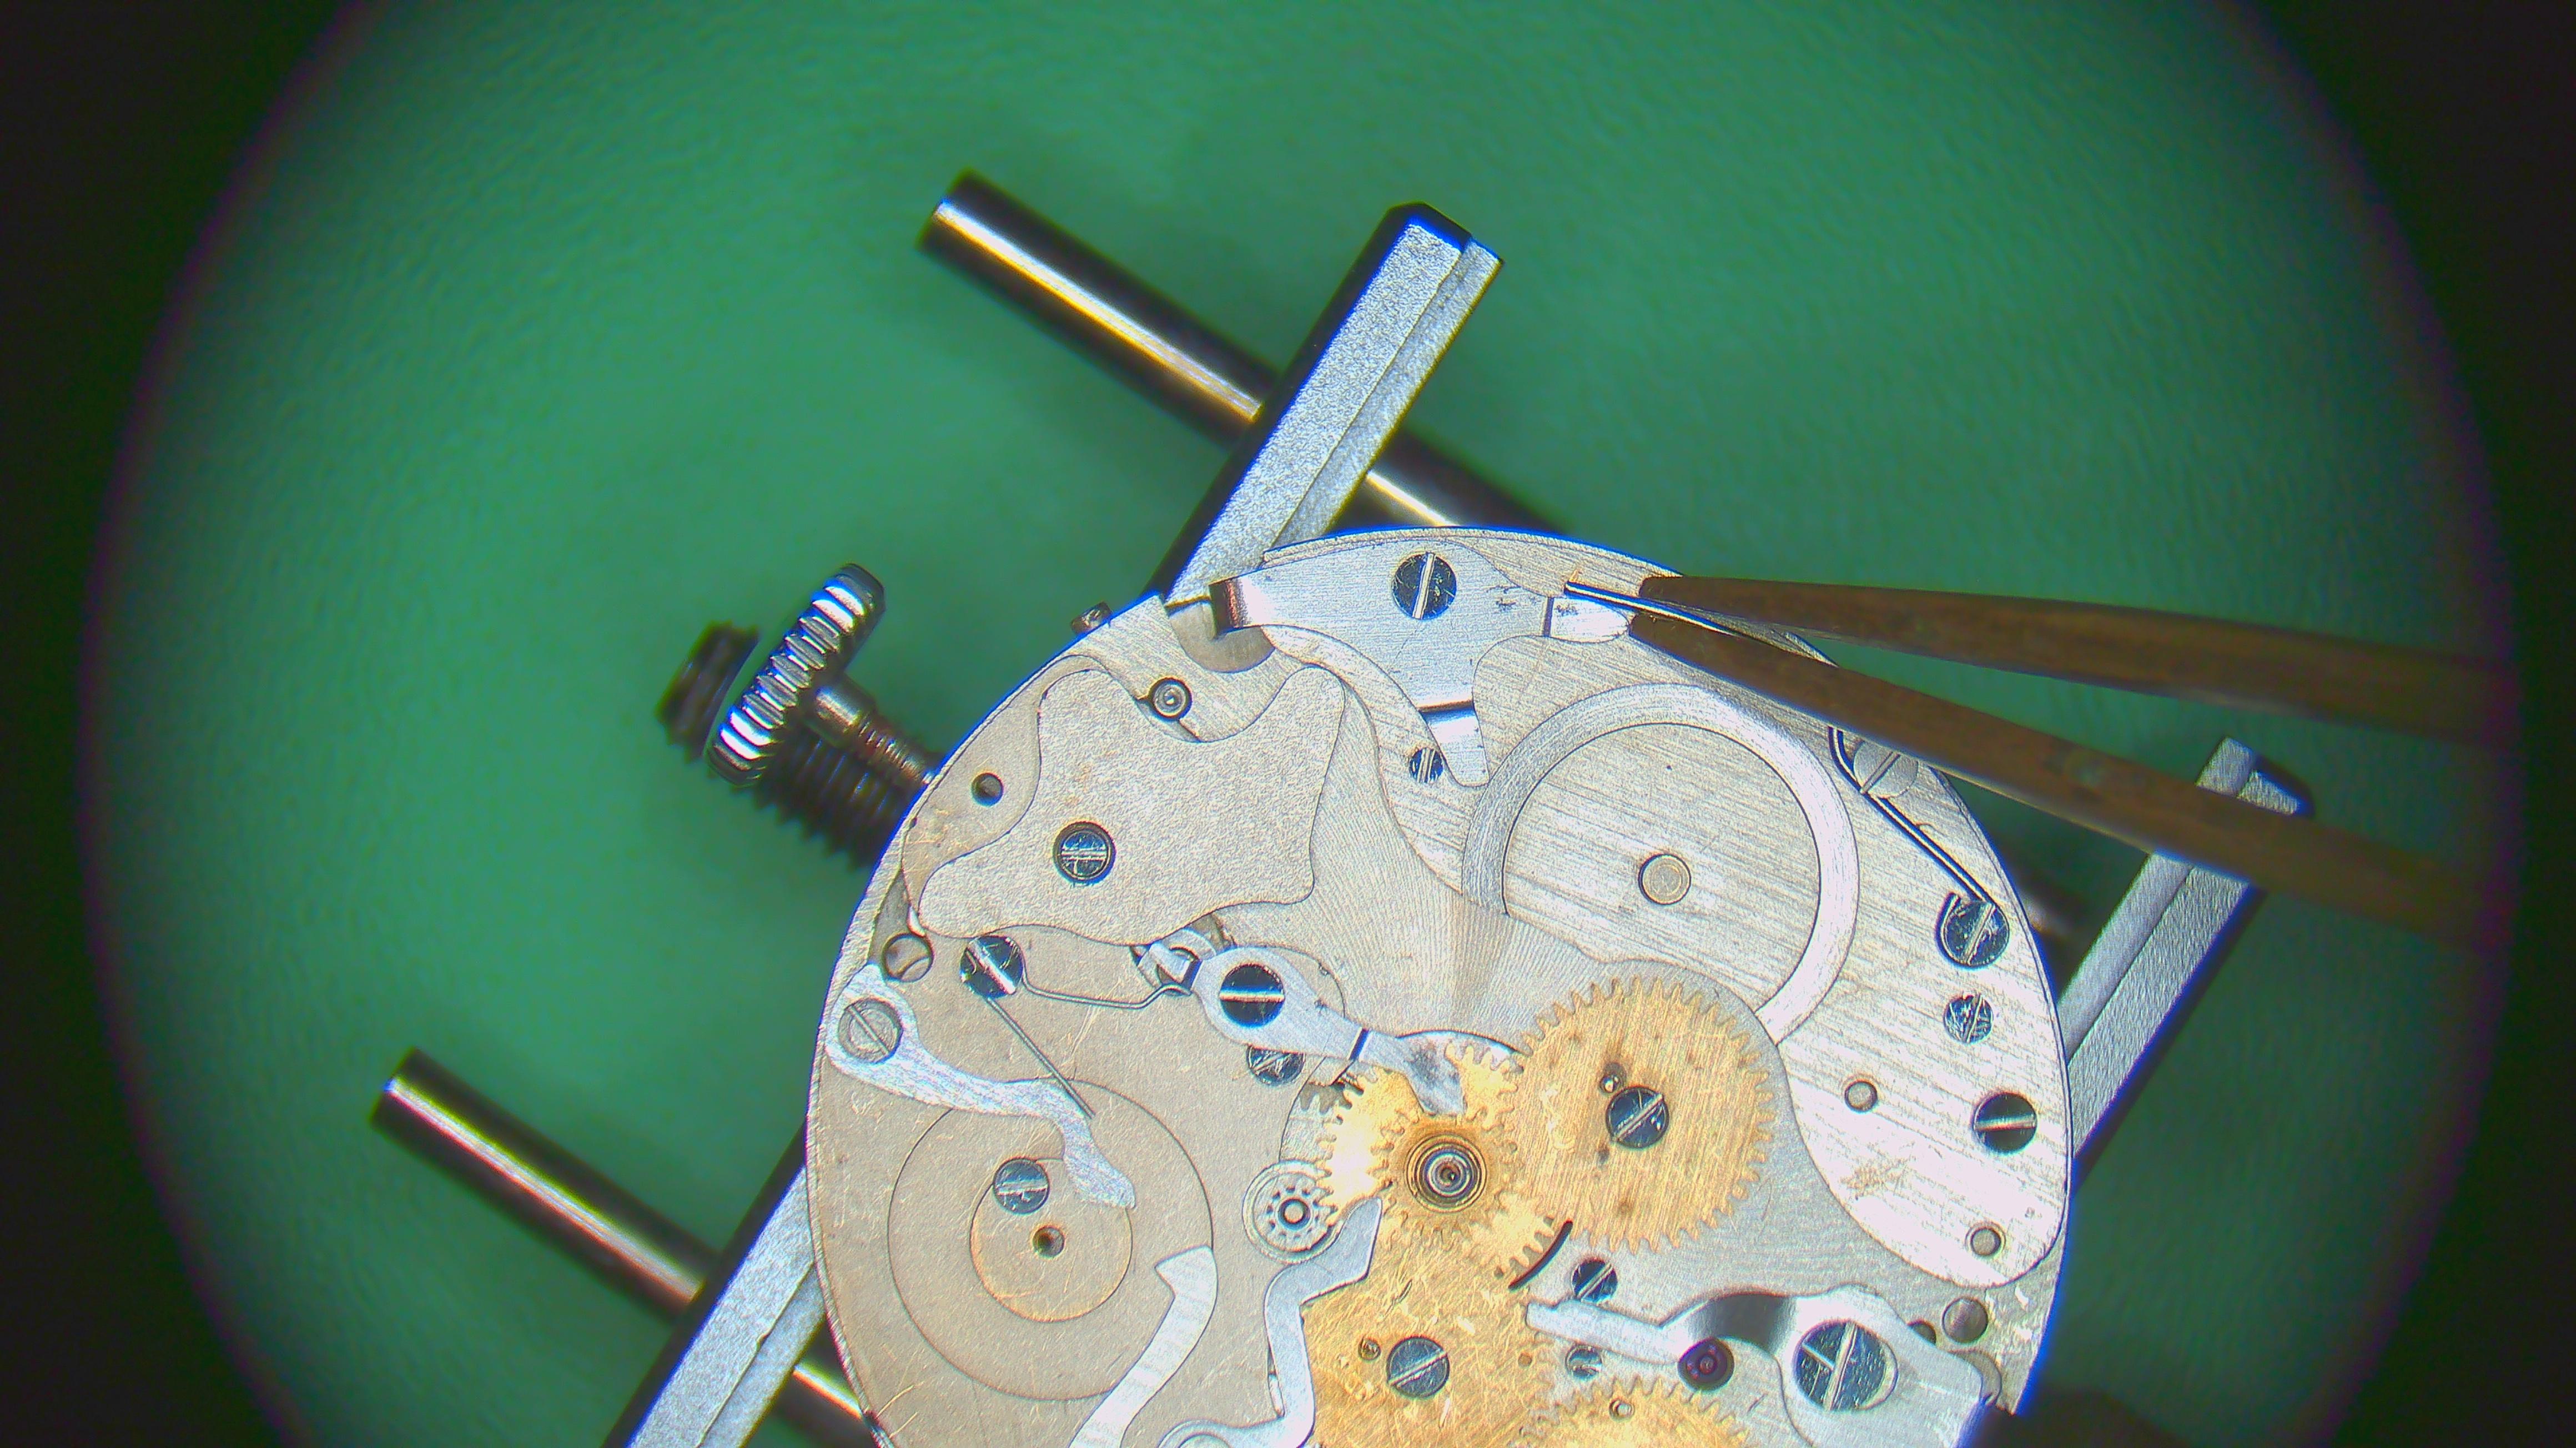
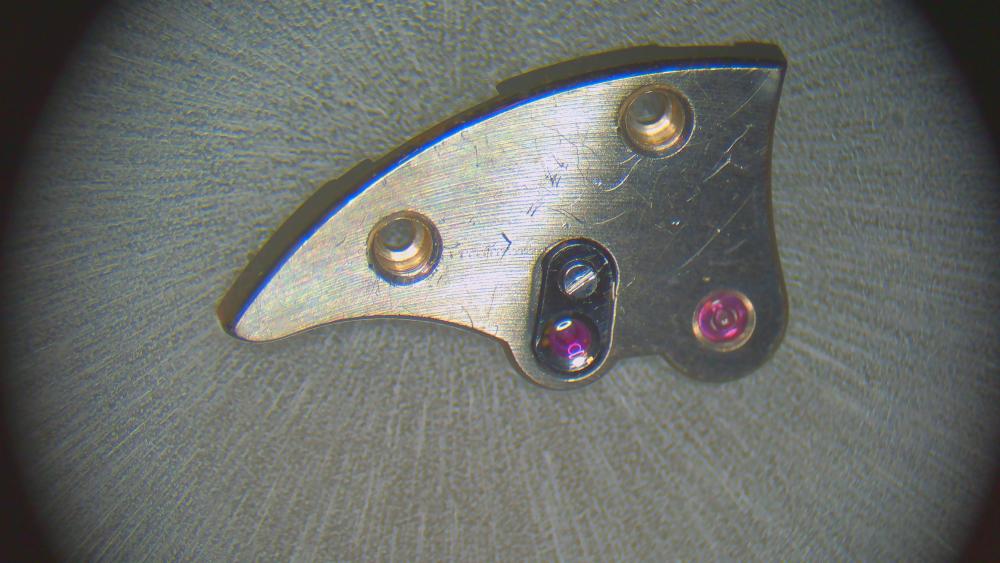
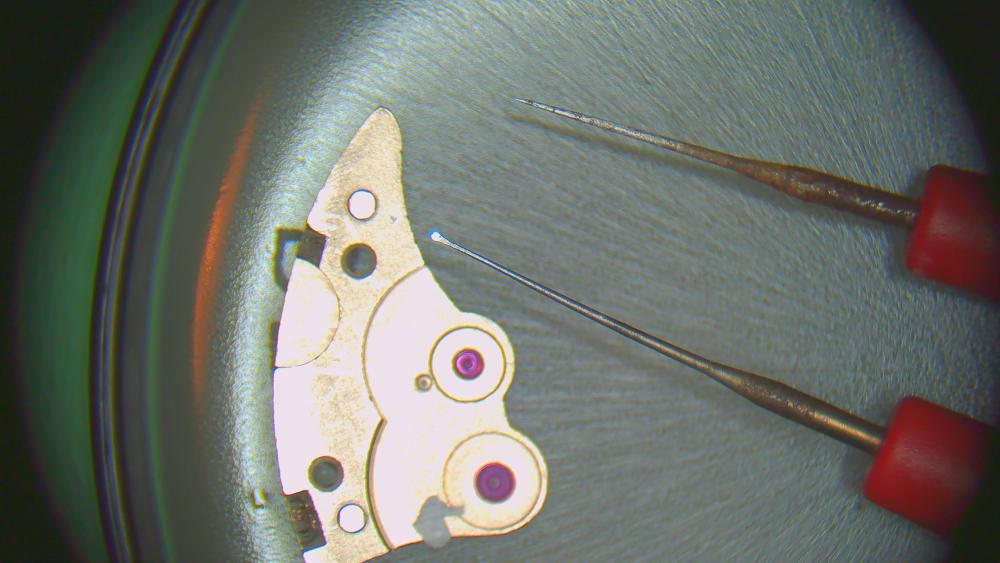
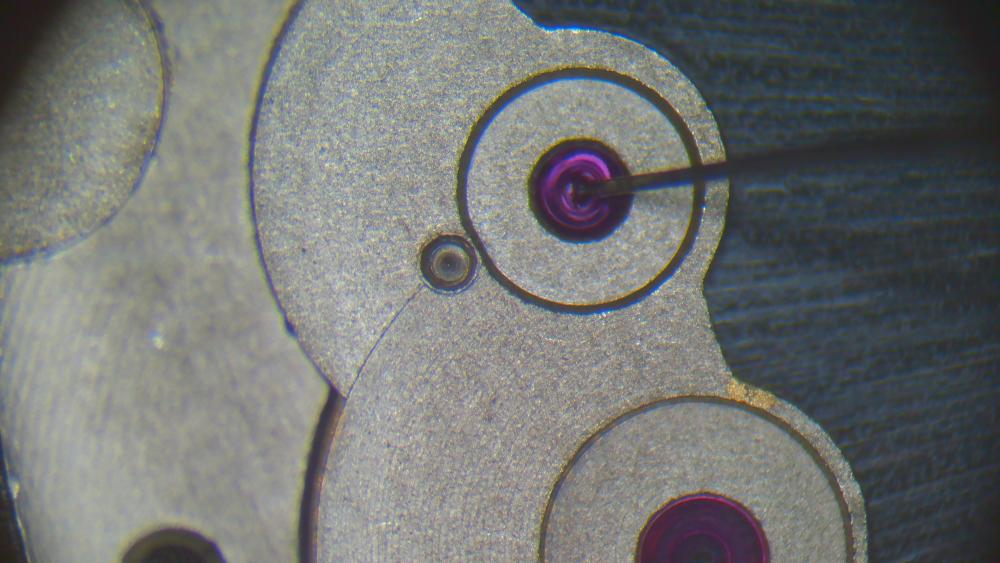
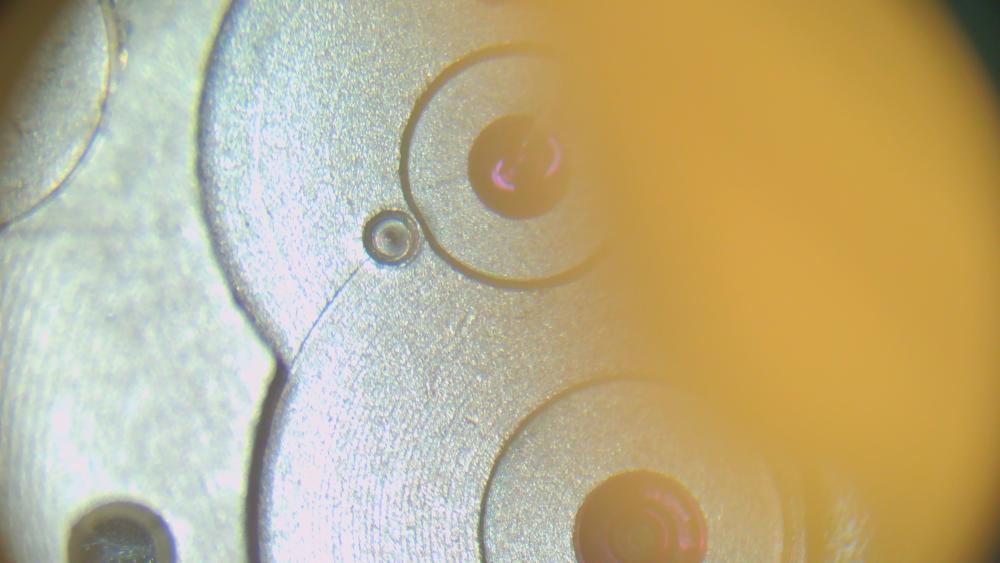
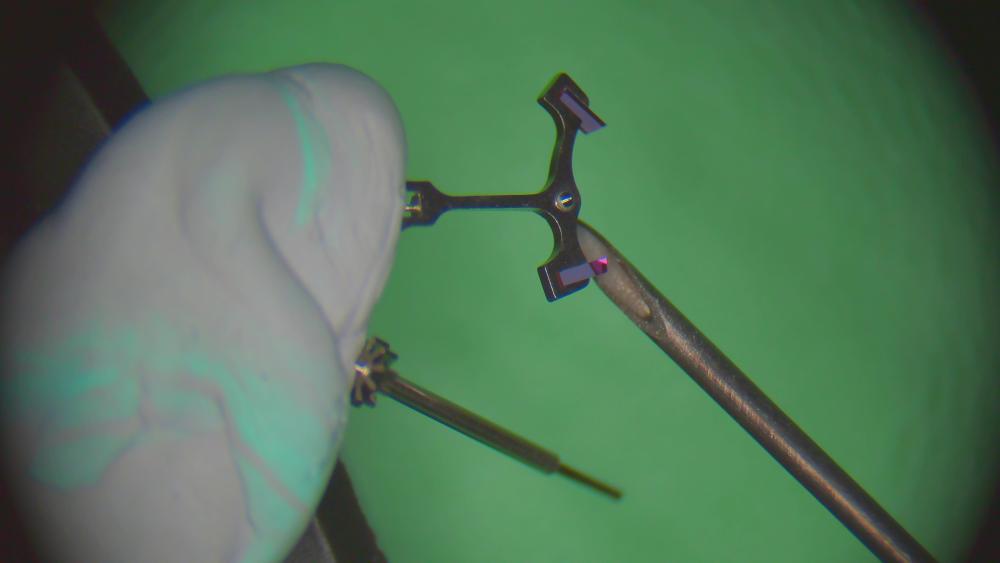
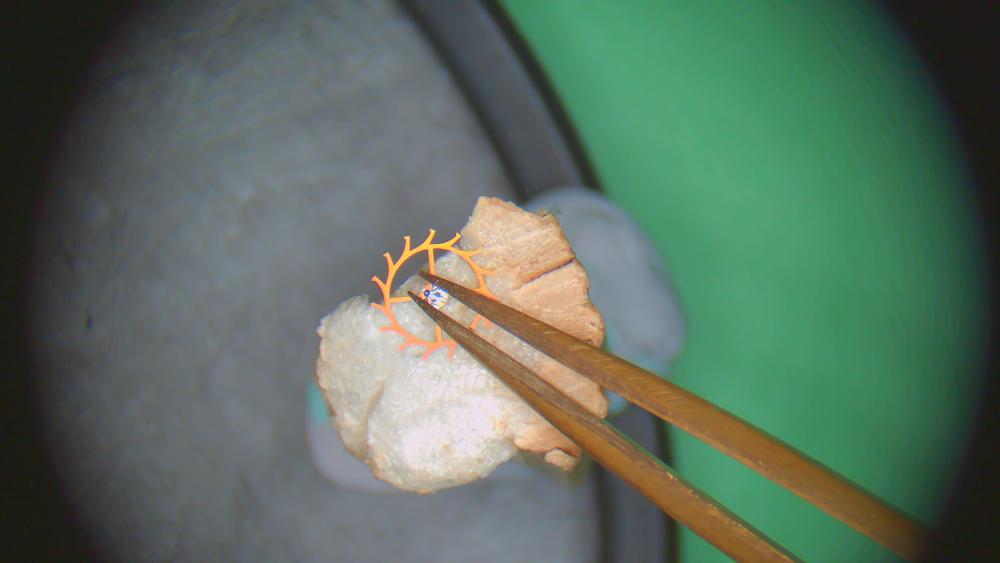
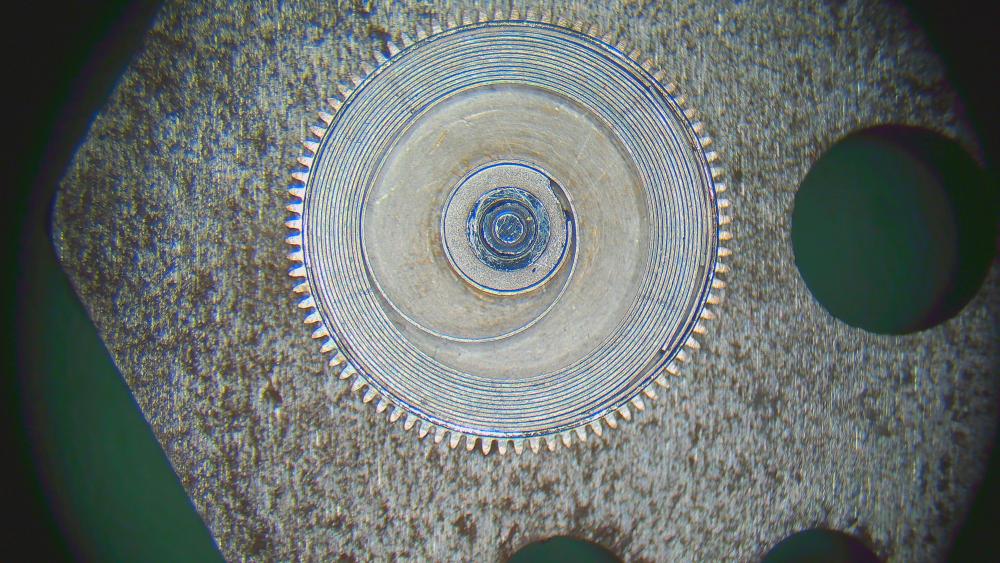
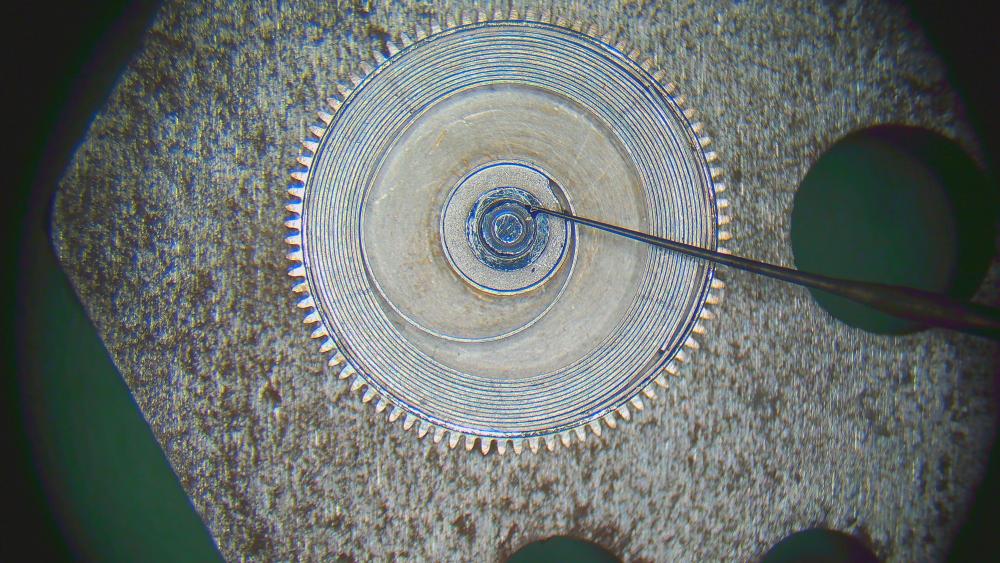
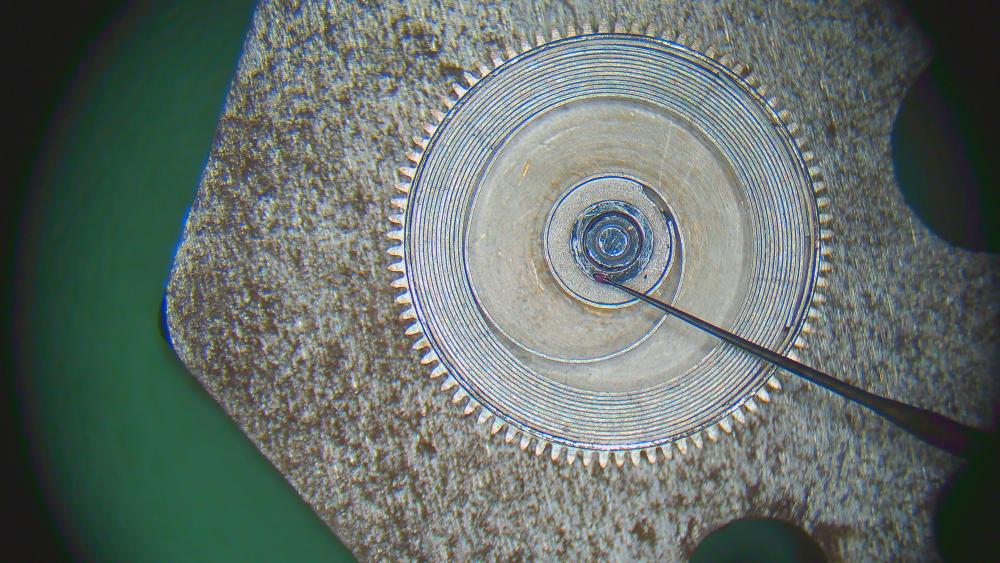
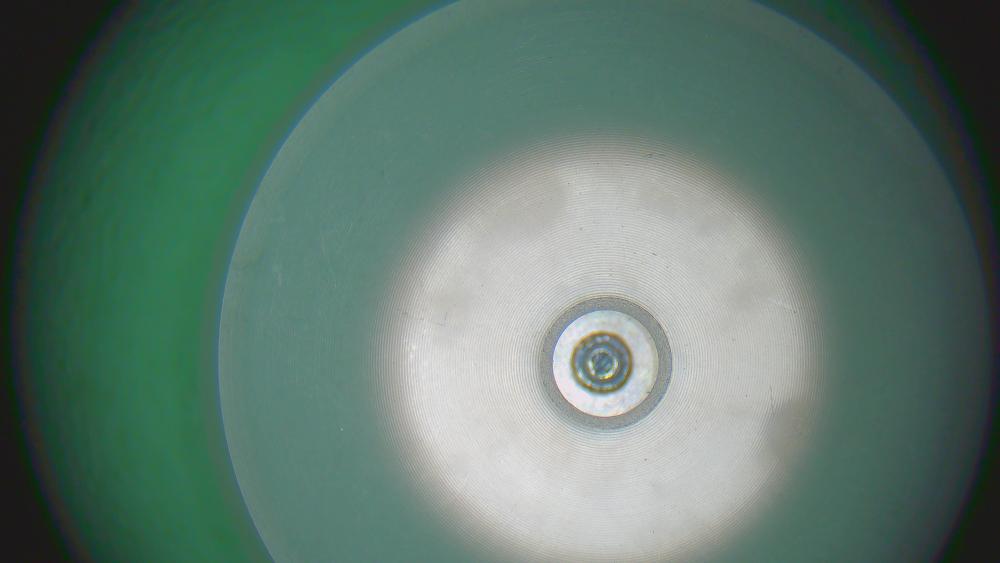
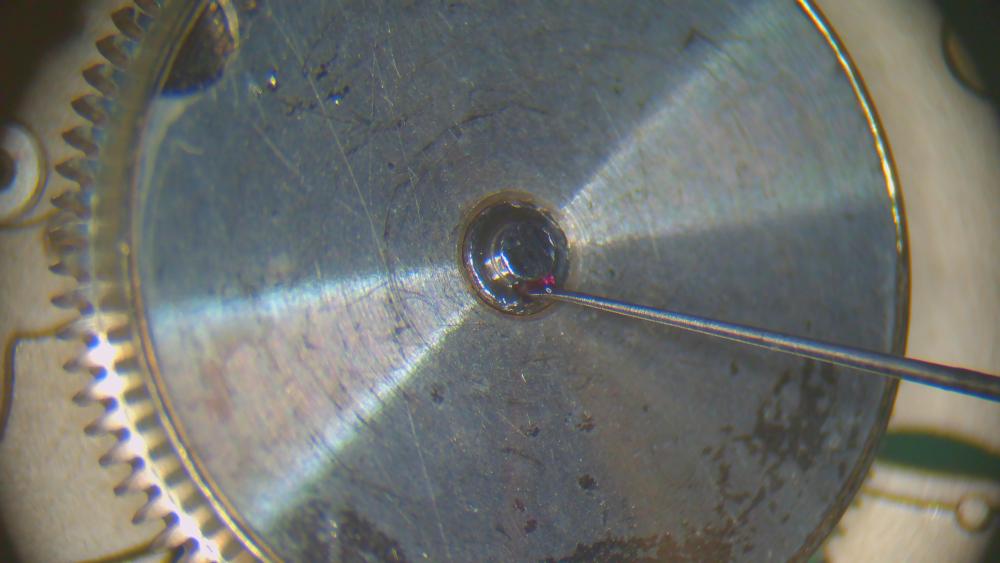
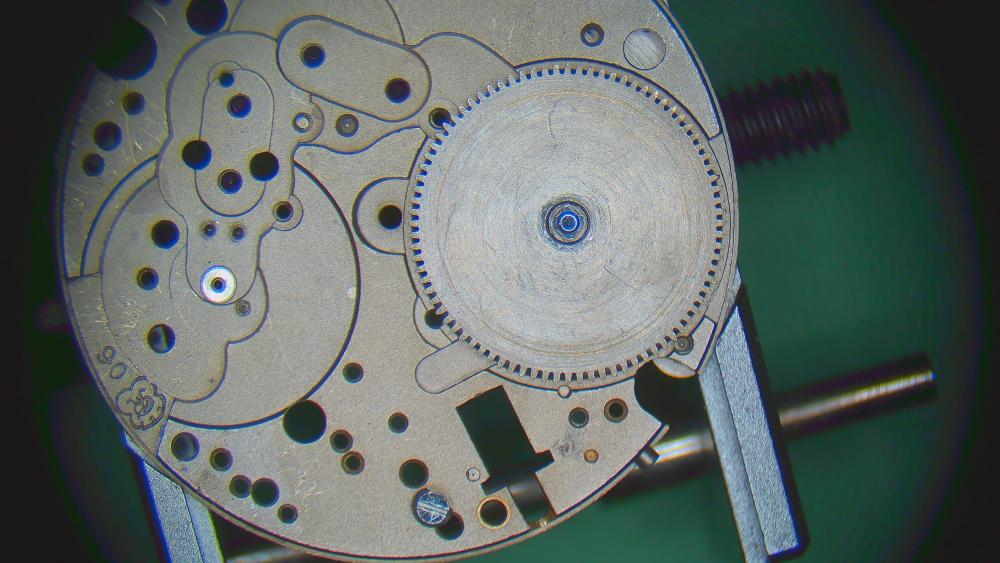
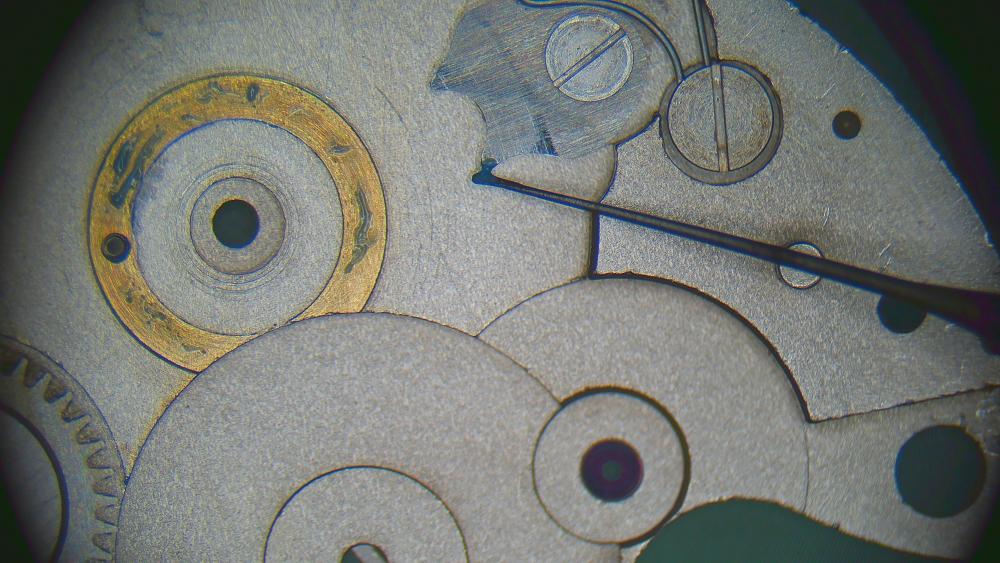
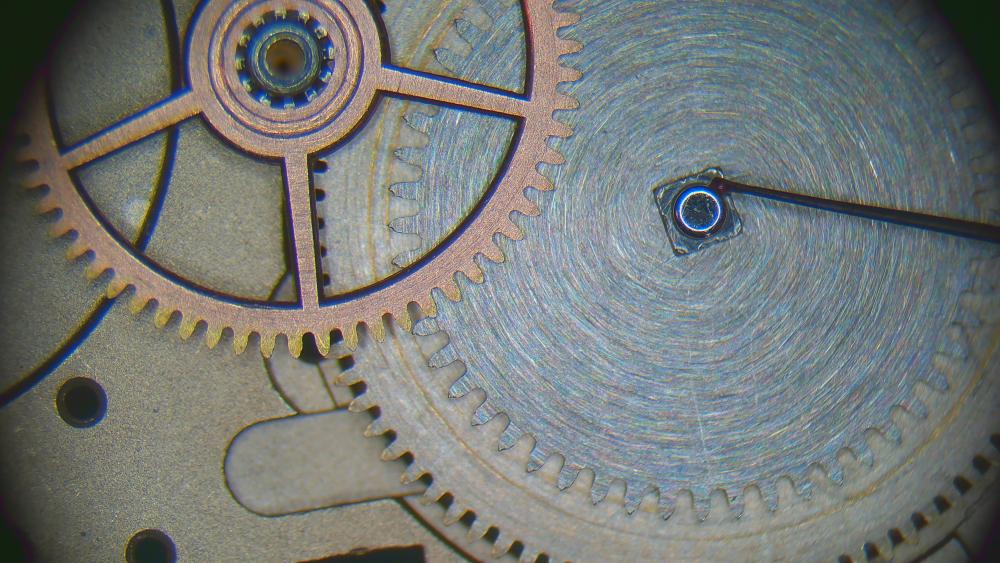
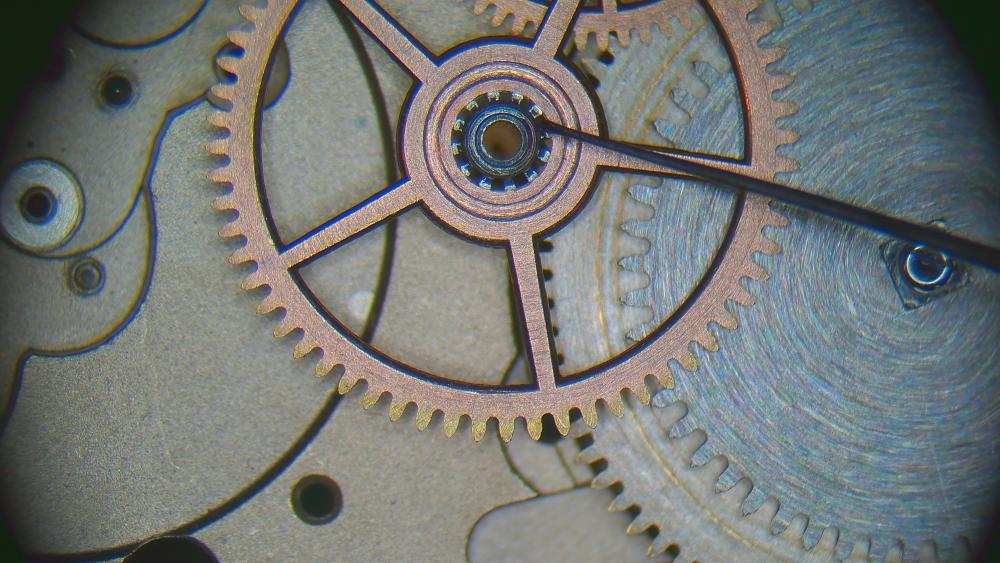
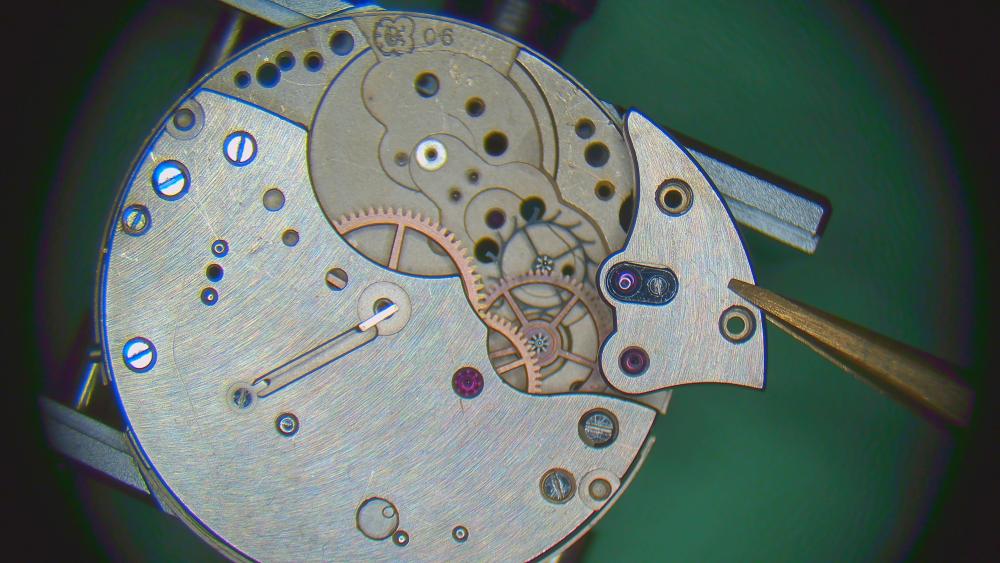
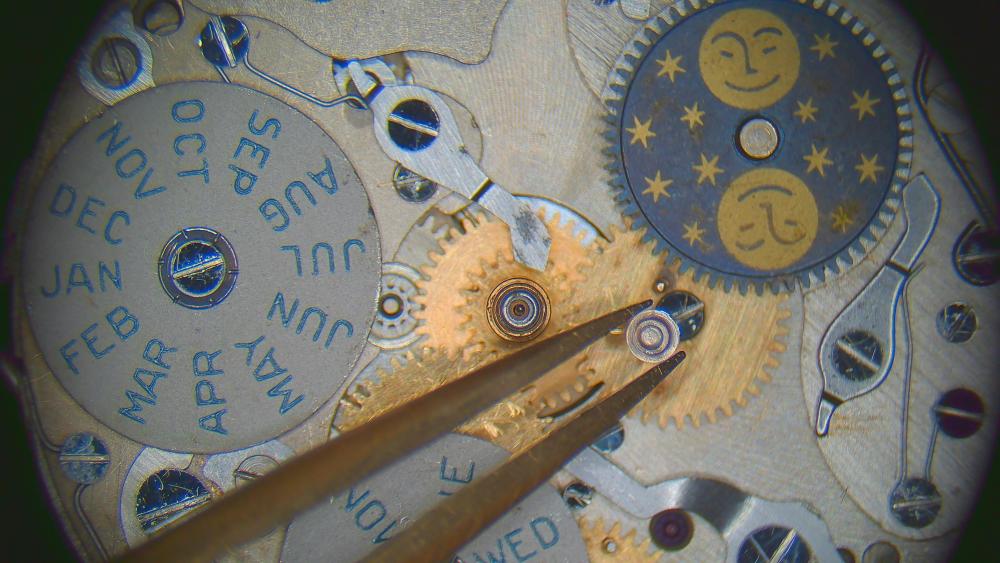
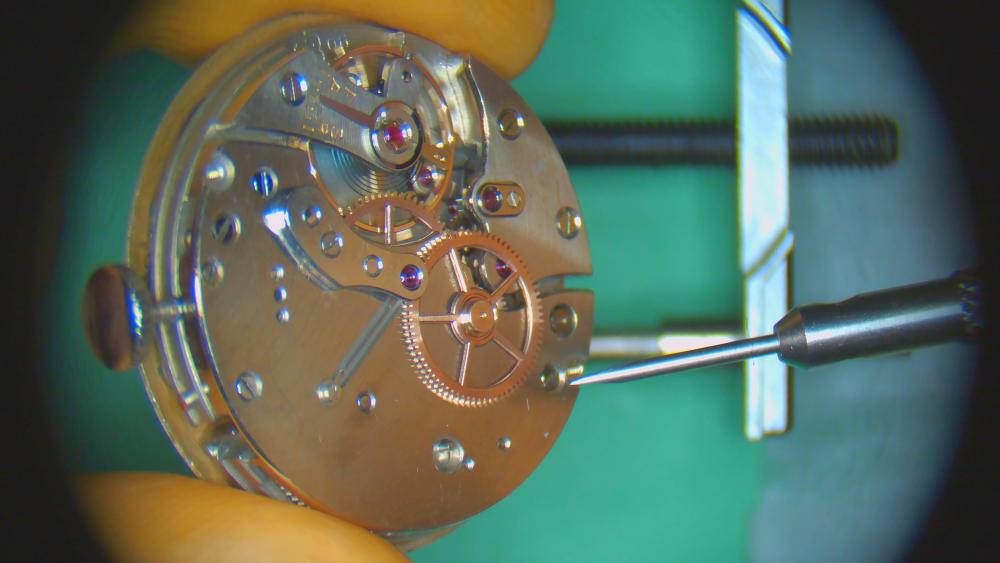
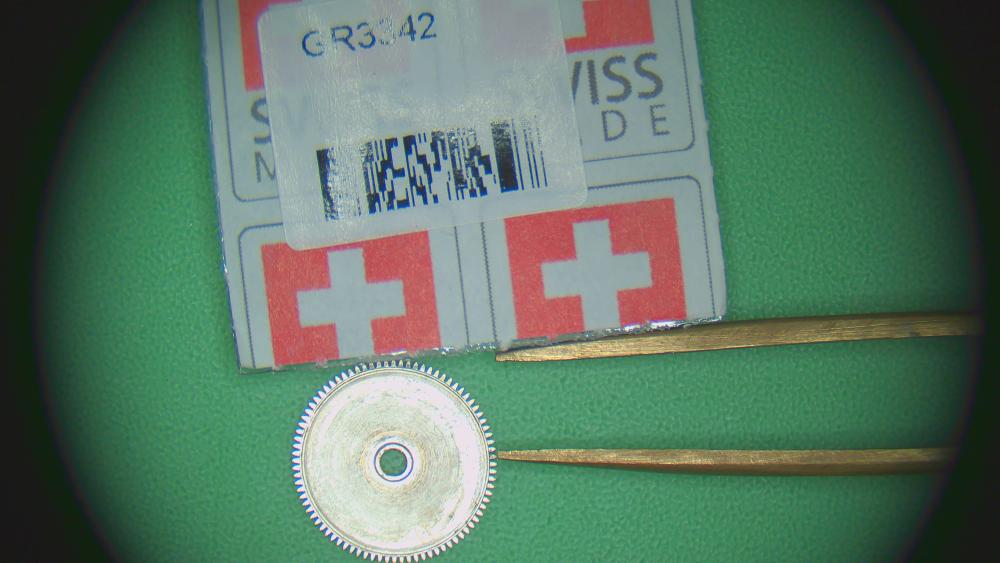
Hello everyone!! I finally managed to finish the assembly and to upload all the photos! It took longer than expected and I had a few issues that took a fair bit of fault-finding and troubleshooting. Great learning opportunitiy. Well, but now step-by-step. Cleaning in ultrasonic cleaner: 1 cycle of 7min in L&R 111 cleaning solution 2 cycles of 7min (each) in L&R watch rinsing solution Since the balance was still mounted on the main plate, I start by oiling the shock-protected balance jewel settings with 9010. Prepping the barrel bridge which has the click and crown wheel on the underside. - a bit of HP1300 around the click post - a bit of 9504 between click and click spring (the photo looks like I'm putting it on the wrong side of the spring, but obviously I put it in-between) two small drops of HP1300 where the outer crown wheel rests (removing the excess HP1300 where it didn't fit under the crown wheel) two small drops (always red oiler, by the way) where the outer crown wheel rests/slides on the inner crown wheel. Prepping the train bridge. The fixed cap jewel for the escape wheel is installed and oiled from the underside. One drop of 9010 into the sink, then using a filed-down oiler (to a very fine tip) to push the oil through. Checking the size of the oil ring from the other side with the microscope and repeating the process with another very small drop of 9010. Now the oil ring looks perfect. Prepping with epilame. Escape wheel (in jar), pallet jewels and centre seconds pinion with a syringe. Removing epilame again from the pivots of the escape wheel. I don't epilame balance jewels anymore since I read in some Rolex service manuals that they don't recommend doing it. Prepping the mainspring barrel. As mentioned before, the watch was originally re-banking (knocking). The mainspring used by the previous watch-destroyer was too thick (0.15mm instead of 0.14mm; and power reserve was rather low). Considering that I'll be using modern synthetic lubricants, I even decided to go down further to 0.13mm (GR3342). HP1300 on the arbor (note, there's no screw hole in the arbor, so make sure that the square bit goes in first) now two small drops of HP1300 on the other side closing Ready for assembly. Another drop of HP1300 on the arbor where it goes on the main plate. and on it goes and the ratchet wheel on top some HP1300 on the centre wheel ..and in I already position the other wheels (not necessary) Don't forget the screw for the setting lever before installing the barrel bridge! I also add a drop of 9504 on the click where it interacts with the ratchet wheel. NOTE: you may see that I put some grease on the discolored ring that slides over the ratchet wheel. I later removed this because it seemed to rather bind the ratchet wheel and cause low amplitude in the dial up position. So I suggest not oiling it at all. drops of HP1300 on upper side of barrel arbor and centre wheel and here goes the barrel bridge. It's a bit fiddly with the click (there's a round cut-out in the bridge on the left side of the photo with a small pin that can be manipulated to pull the click to the side to facilitate process of installing the bridge). the pre-prepped train bridge goes in pallet fork now the keyless works. First, canon pinion after some 9504 on the centre wheel. winding and sliding pinion with 9504 stem with 9504 setting lever and more 9504 yoke and yoke spring don't have posts, but shouldered screws. This makes it a bit tricky: the latter that you install will be under tension and it's therefore not so easy to insert the shouldered screw. I suggest starting with the yoke (a tiny bit of HP1300 on the shoulder of the screw). jumper spring quick turn-around to secure the setting lever screw back to dial side: some 9504 on the two positions of the jumper close up after removing some excess grease small drops of HP1300 on the posts for the time setting wheels (oil covers approx the top 1/3 of the height of the posts) I use the residual HP1300 (almost nothing) on the slightly raised rings on which the wheels sit) big bridge covers the time setting and keyless works. Oiling the train jewels on the dial side. (just one photo). I opt for 9010 for the escape wheel (like on the train side, of course). Then HP1300 for the rest. I know, maybe too viscous and I'm sure I'll loose a bit of amplitude. But I tell myself that HP1300 will last the longest and stay in place the best. Once could certainly use 9020, HP500 and or HP1000. balance in and it ticks. I let it run while I oil the remaining pivots of the train side with HP1300. Then I remove the balance again. I follow this belief that the "dry" running will now have scraped off the epilame in a channel, permitting a more effective oiling at this point. So I oil the exit pallet stone with 3 drops of 9415 (advancing the escape wheel a few teeth each time). Checking the amounts by slowly sliding the exit stone along the escape wheel teeth. Approx 70-80% coverage of the tooth is my aim. AND BIG MISTAKE. I dropped the balance cock when trying to reinstall it The cock dropped on the mainplate and the balance fell down. The hairspring was a bit bent... fortunately only on the end-curve, close to the stud. A bit of bending and it was good again. Here is the result after correcting: Back in and it runs fine. Now pressing on the centre seconds driving wheel thining about the oiling of the centre seconds pinion (this picture was taken earlier before installing the centre wheel). As you can see, even the thicker part of the pinion is thinner than the whole in the centre wheel. Hence, the pinion touches only the jewel at the top pivot (train side) and the tight bushing within the centre wheel on the dial side. Still, I'm applying a tiny amount of 9010 where the pinion rubs against the tension spring the special bridge for the seconds pinion is installed. And oiled with 9010 (9020 may also be good/better). I oil the pinion within the bushing of the centre wheel from the dial side. For this, I carefully apply a drop of oil only on one side of the oiler and slide it down the canon pinion). Some risk of oil spills here, but I think I did it well. This concludes the base movement! At this point, I did some testing. As mentioned before, amplitude was down significantly in the dial up position (minus 40 degrees). I concluded that it was caused by the grease under the barrel bridge. Having removed it, I still have about 15 degrees less amplitude dial up (vs dial down). Might still be the ratchet wheel binding against the barrel bridge, but less than before. I'll call it good. Now to the triple calendar and moonphase!! I guess that's what you've been waiting for. Each disc (day, month, moonphase) has the following: - a wheel with a vertical pin that drives the star under each disc (teeth on outside of moonphase disc) - a jumper (lever + spring) - a corrector (lever + spring) - the disc itself All of the above are held by shouldered screws. I oil the shoulders of the screws for the levers with a small drop of HP1300. The screws for the springs don't need it, I think. The touching points between springs and levers are greased with 9504. Funnily... the very first thing I did was wrong. I installed the month corrector before the day corrector. But the day corrector needs to go in first. So to keep things as a guide, I'm posting a later picture first to keep it as a "correct" chronological guide. So please ignore everything on the picture, except the circled day corrector. The screw is unique and has a tall head (functions also as a distancer for the dial later on). Some HP1300 under it. But back to the mostly empty plate... Now the corrector of the month disc spring for month corrector installed (you now see that I forgot the day corrector, but imagine it's there). 9504 between spring and corrector. this lever and spring will be jumper for the day disc Take note of the oversized screw for the spring, which also holds secures the month corrector. I add a bit of HP1300 where the corrector slides under the screw. 9504 where spring and day jumper/lever touch time for the combined hour+24h wheel after some HP1300 on the canon pinion this spring will later work with the corrector for the date. It's a very strong spring. Time for all the driving wheels with the vertical pins. Their position needs to be exactly coordinated so that date and day would jump at the same time (and the moonphase just a bit later, around 2-3am). Two aspects here: 1. which wheel where? Wheel 1 has the pin furthest out. Wheel 2 is in the middle. Wheel 3 has the pin closed to the centre. 2. how to position the pins? - Pin 1 needs to be opposite the circled dent in Wheel 2. - the position of Pin 3 needs to be in a specific angle to the other ones... If you position everything like in my picture, the moonphase will jump at around 2am. NOTE: the shouldered screws for these wheels have a longer thread than all the other ones (for springs and levers). HP1300 on their shoulders. this spring (close to the crown) will interact with the jumper for date (just below, towards the center) and month Installing the jumper for the month disc (HP1300 on the shoulder) some 9504 between the spring and the two jumpers a funny little plate comes here. For proper positioning, push against it where you see my flat probe. corrector for the date with the other large screw. Some HP1300 under it. the tip of the corrector goes between two screws and I put a bit of 9504 where they touch the corrector next corrector. This one is for the moonphase. big and strong spring for the corrector. To install, I first half-way unscrew the two screws guiding it. I can then lift it up enough to move it over the corrector. tightening the two screws again. (only one of them shown here, but need to do it for both). 9504 at the rubbing point. there are some scratches on the plate here from the spring. So I'm adding some 9504. moonphase jumper (shouldered screw with HP1300) spring for moonphase jumper (screw in half-way; place the spring; screw in fully) the greasing point is where the jumper goes up (where my oiler is, exactly) here you see where the jumper will be when the moonphase disc is in place. The finished setup before installing the discs moonphase first: pull the jumper with one hand, set the moonphase on the post. No screw here. Some HP1300 on the post. Placing the day and month discs are a bit fiddly. So after trying a few time, here is my preferred method in six steps: 1. lubricate the shouldered screw with HP 1300 and set it aside (close by). 2. Pull up the jumper... 3. and insert a 1.6mm screwdriver between the end of the lever and the screw to hold it back. (sorry for change of perspective, now the jumper is on the bottom). 4. position the disc over the screw hole 5. place and screw in the shouldered screw. 6. release the screwdriver. similar for the month disc DONE (or am I....???) Well, what's interesting is that you can only properly test the functioning of the date and moophase corrector like this. The combined day and month corrector needs to be depressed by a very exact amount. So it's not really possible to test like this. So to the case and the pushers. First, I put the dial (which I'll end up taking off many more times...). Two eccentric screws hold it in place. You can see their position from the train side through holes in the barrel bridge. I put crazy amounts of silicone grease onside the pusher hole and around the springs inside then I insert the actual pusher view from the other side. The grease isn't oozing out (good). Push the pusher against your workmat to be able to screw in the screw without pushing out the pusher. Well, the day/month and date correctors didn't work properly. I spent hours fault-finding. There were two issues, actually. 1. The screws for the pushers for day/month and date are not the same. I should have taken pictures of each pusher screw upon disassembly. I had to swap them around. At this point, the date corrector started working. Good. But the day/month still didn't. The day always got stuck in-between days. 2. I found the vertical pins on the wheels to be a tiny bit too high! They were actually scratching the underside of the day and month discs. This made the disc not jump smoothly and get stuck. It also explains the metal shavings I had found in the movement when I first opened it. I used a file and gently filed them down a bit until they'd go under the day and month discs. After this was solved, dial back on. Set the time (clockwise!!) until the day disc jumps. Then install all the hands for midnight (date can be any..). DO NOT test the pushers/correctors until you have advanced sufficiently past the jump of the moonphase. I'd say 6am, at least. DONE!!!! I'll post some timegrapher results soon.


 1 point
 -
The problem with horological literature like service documents are they occur over a large time span. Problem with watch repair and very long time spans are conceivably possibly may be perhaps something's been upgraded and changed but unfortunately technical documents do not change once their printed so we're stuck with whatever they have in the past. So the problem becomes is the new method better than the old can we still use the old and we really care at all? So for instance this comes out of a 2600 series ETA Basically the same type wheels and notice the recommendation is a tiny bit of 9010. Then here's a snippet out of a magazine talks about the nifty modern replacement stuff notice who invented it it was the company who made the movements. Yes the reason for things wearing out can be the lack of proper lubrication and or lubrication procedures. Like you didn't have the service document may be would not lubricate at all. The yes the watch predates the modern stuff by quite a few years. I'm also attaching the technical document for the lubrication. tinf_v105_en.pdf
 1 point
 -
You know what, I agree with you. That makes a lot of sense. I do wish we would see some of the bigger channels do more complicated repairs, like parts manufacturing. Someone like Clickspring servicing a watch that needs parts made would be quite entertaining to watch.1 point
-
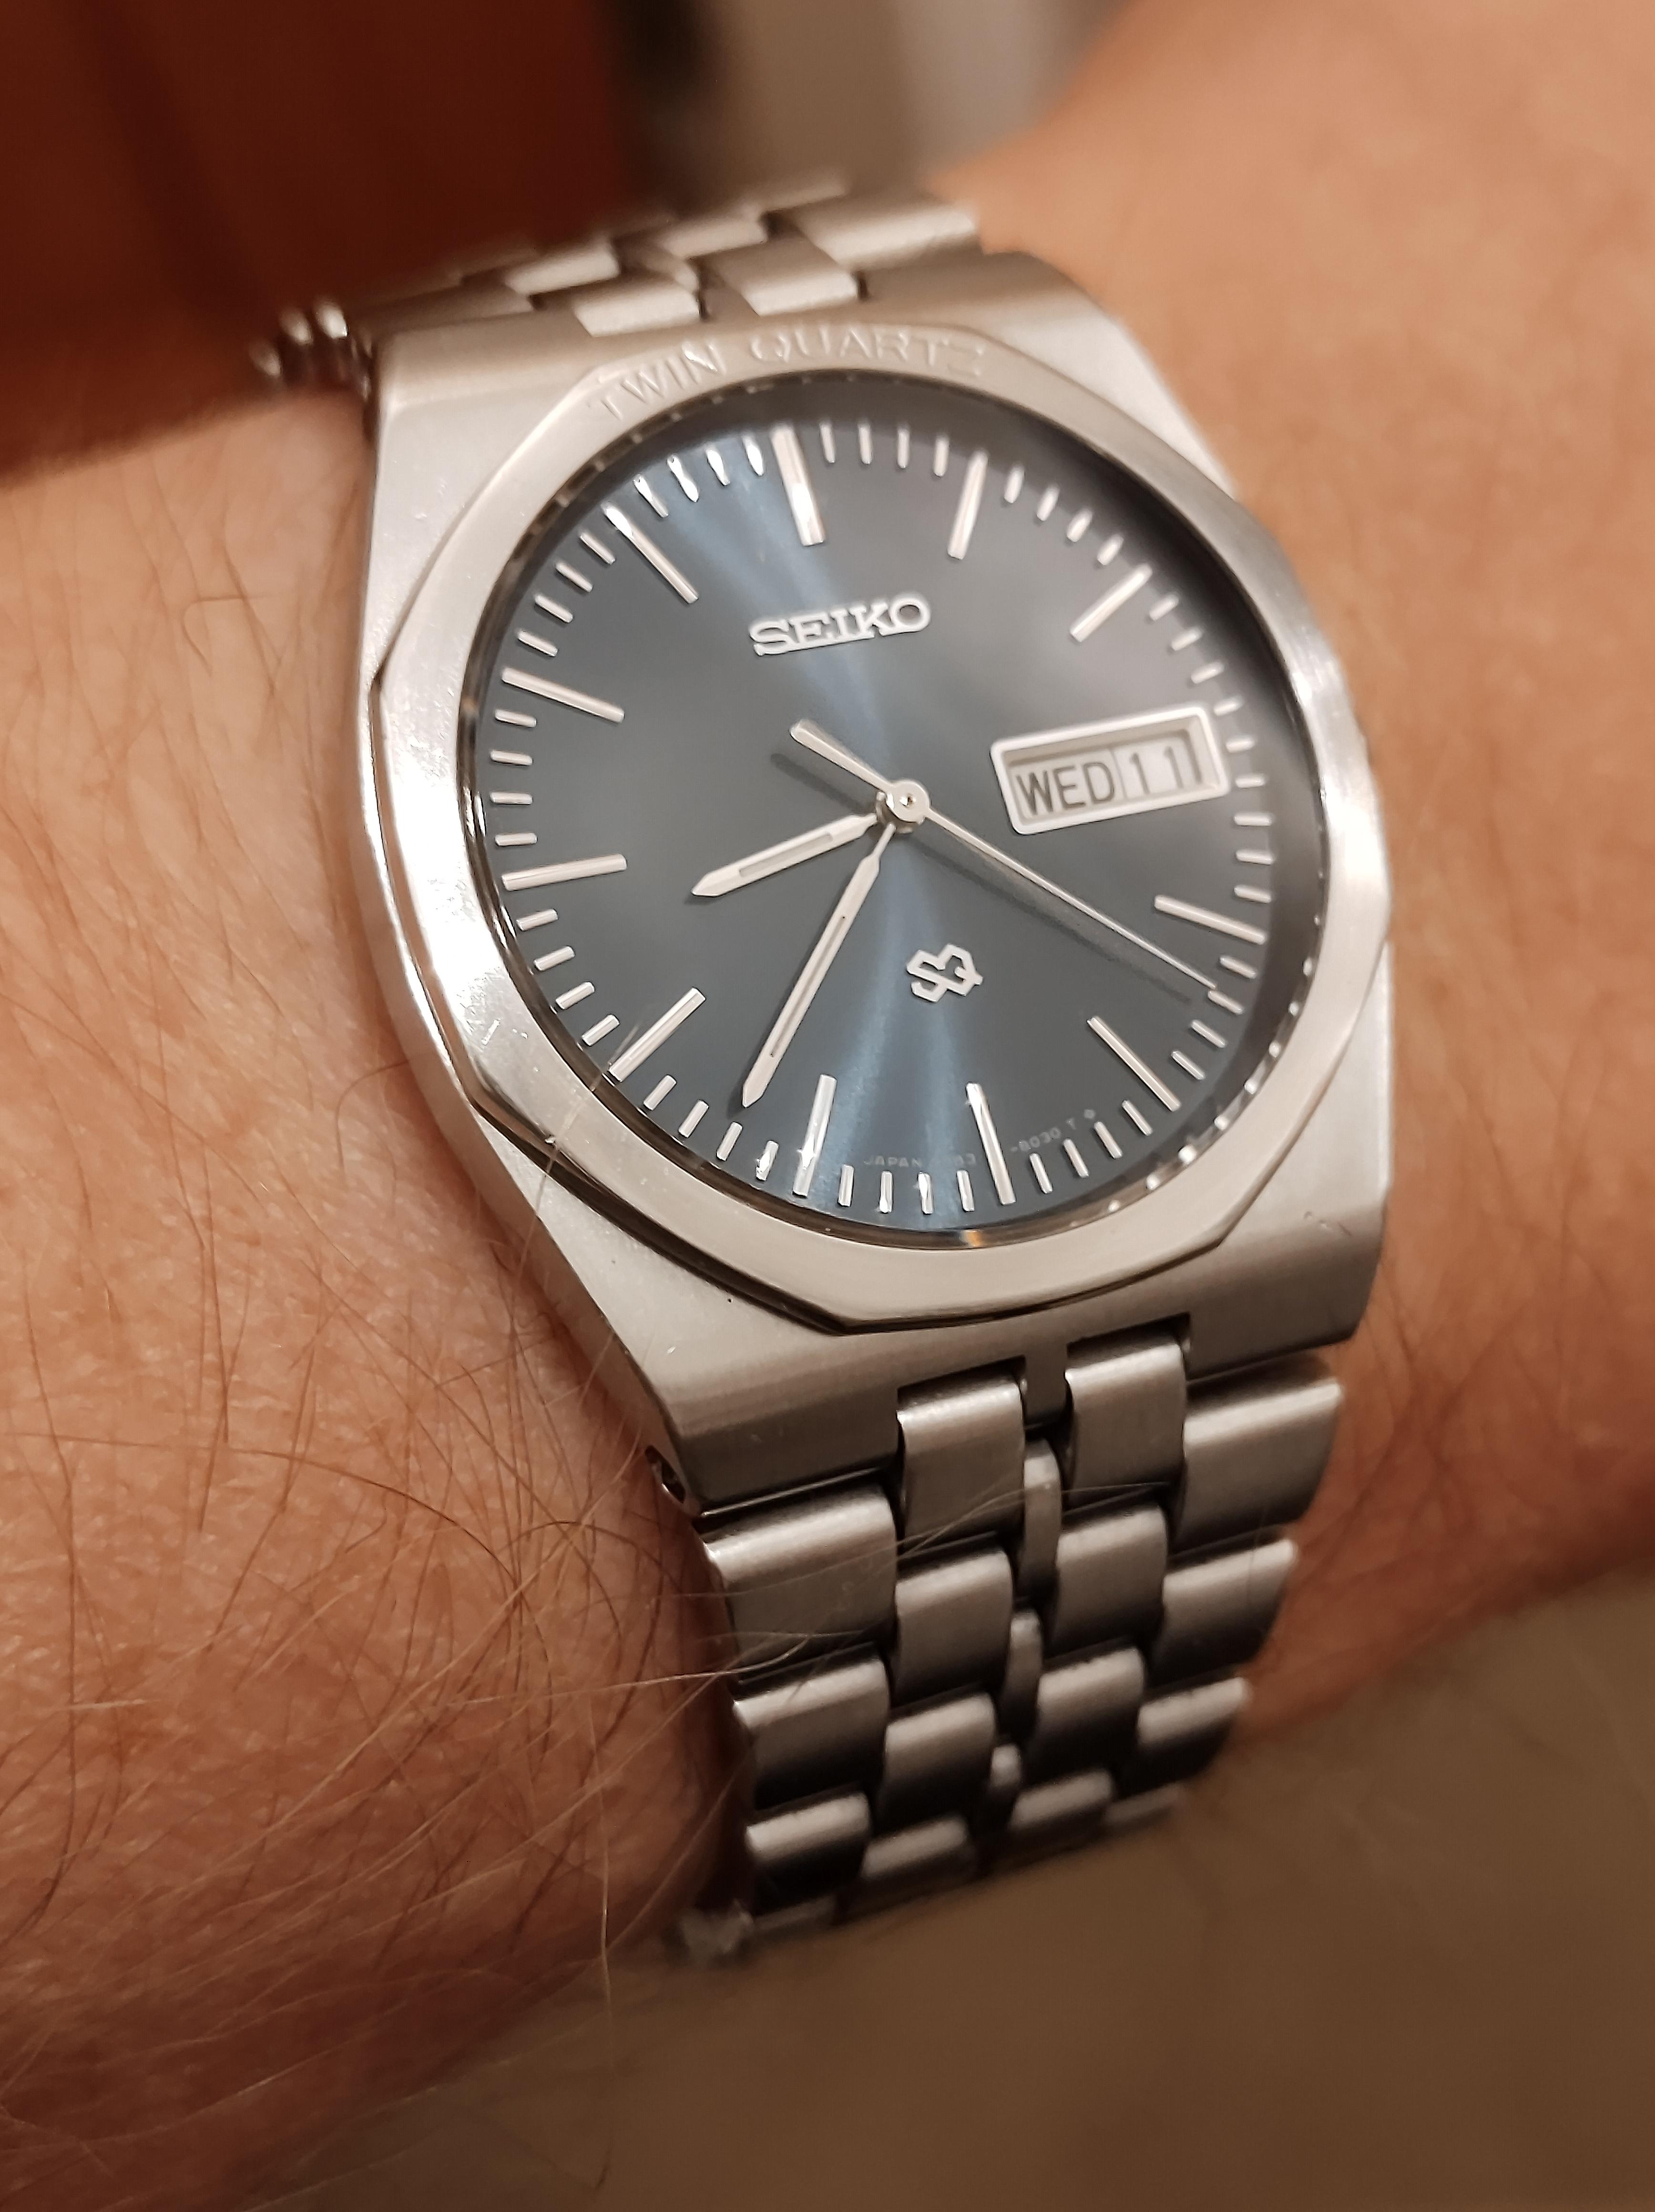
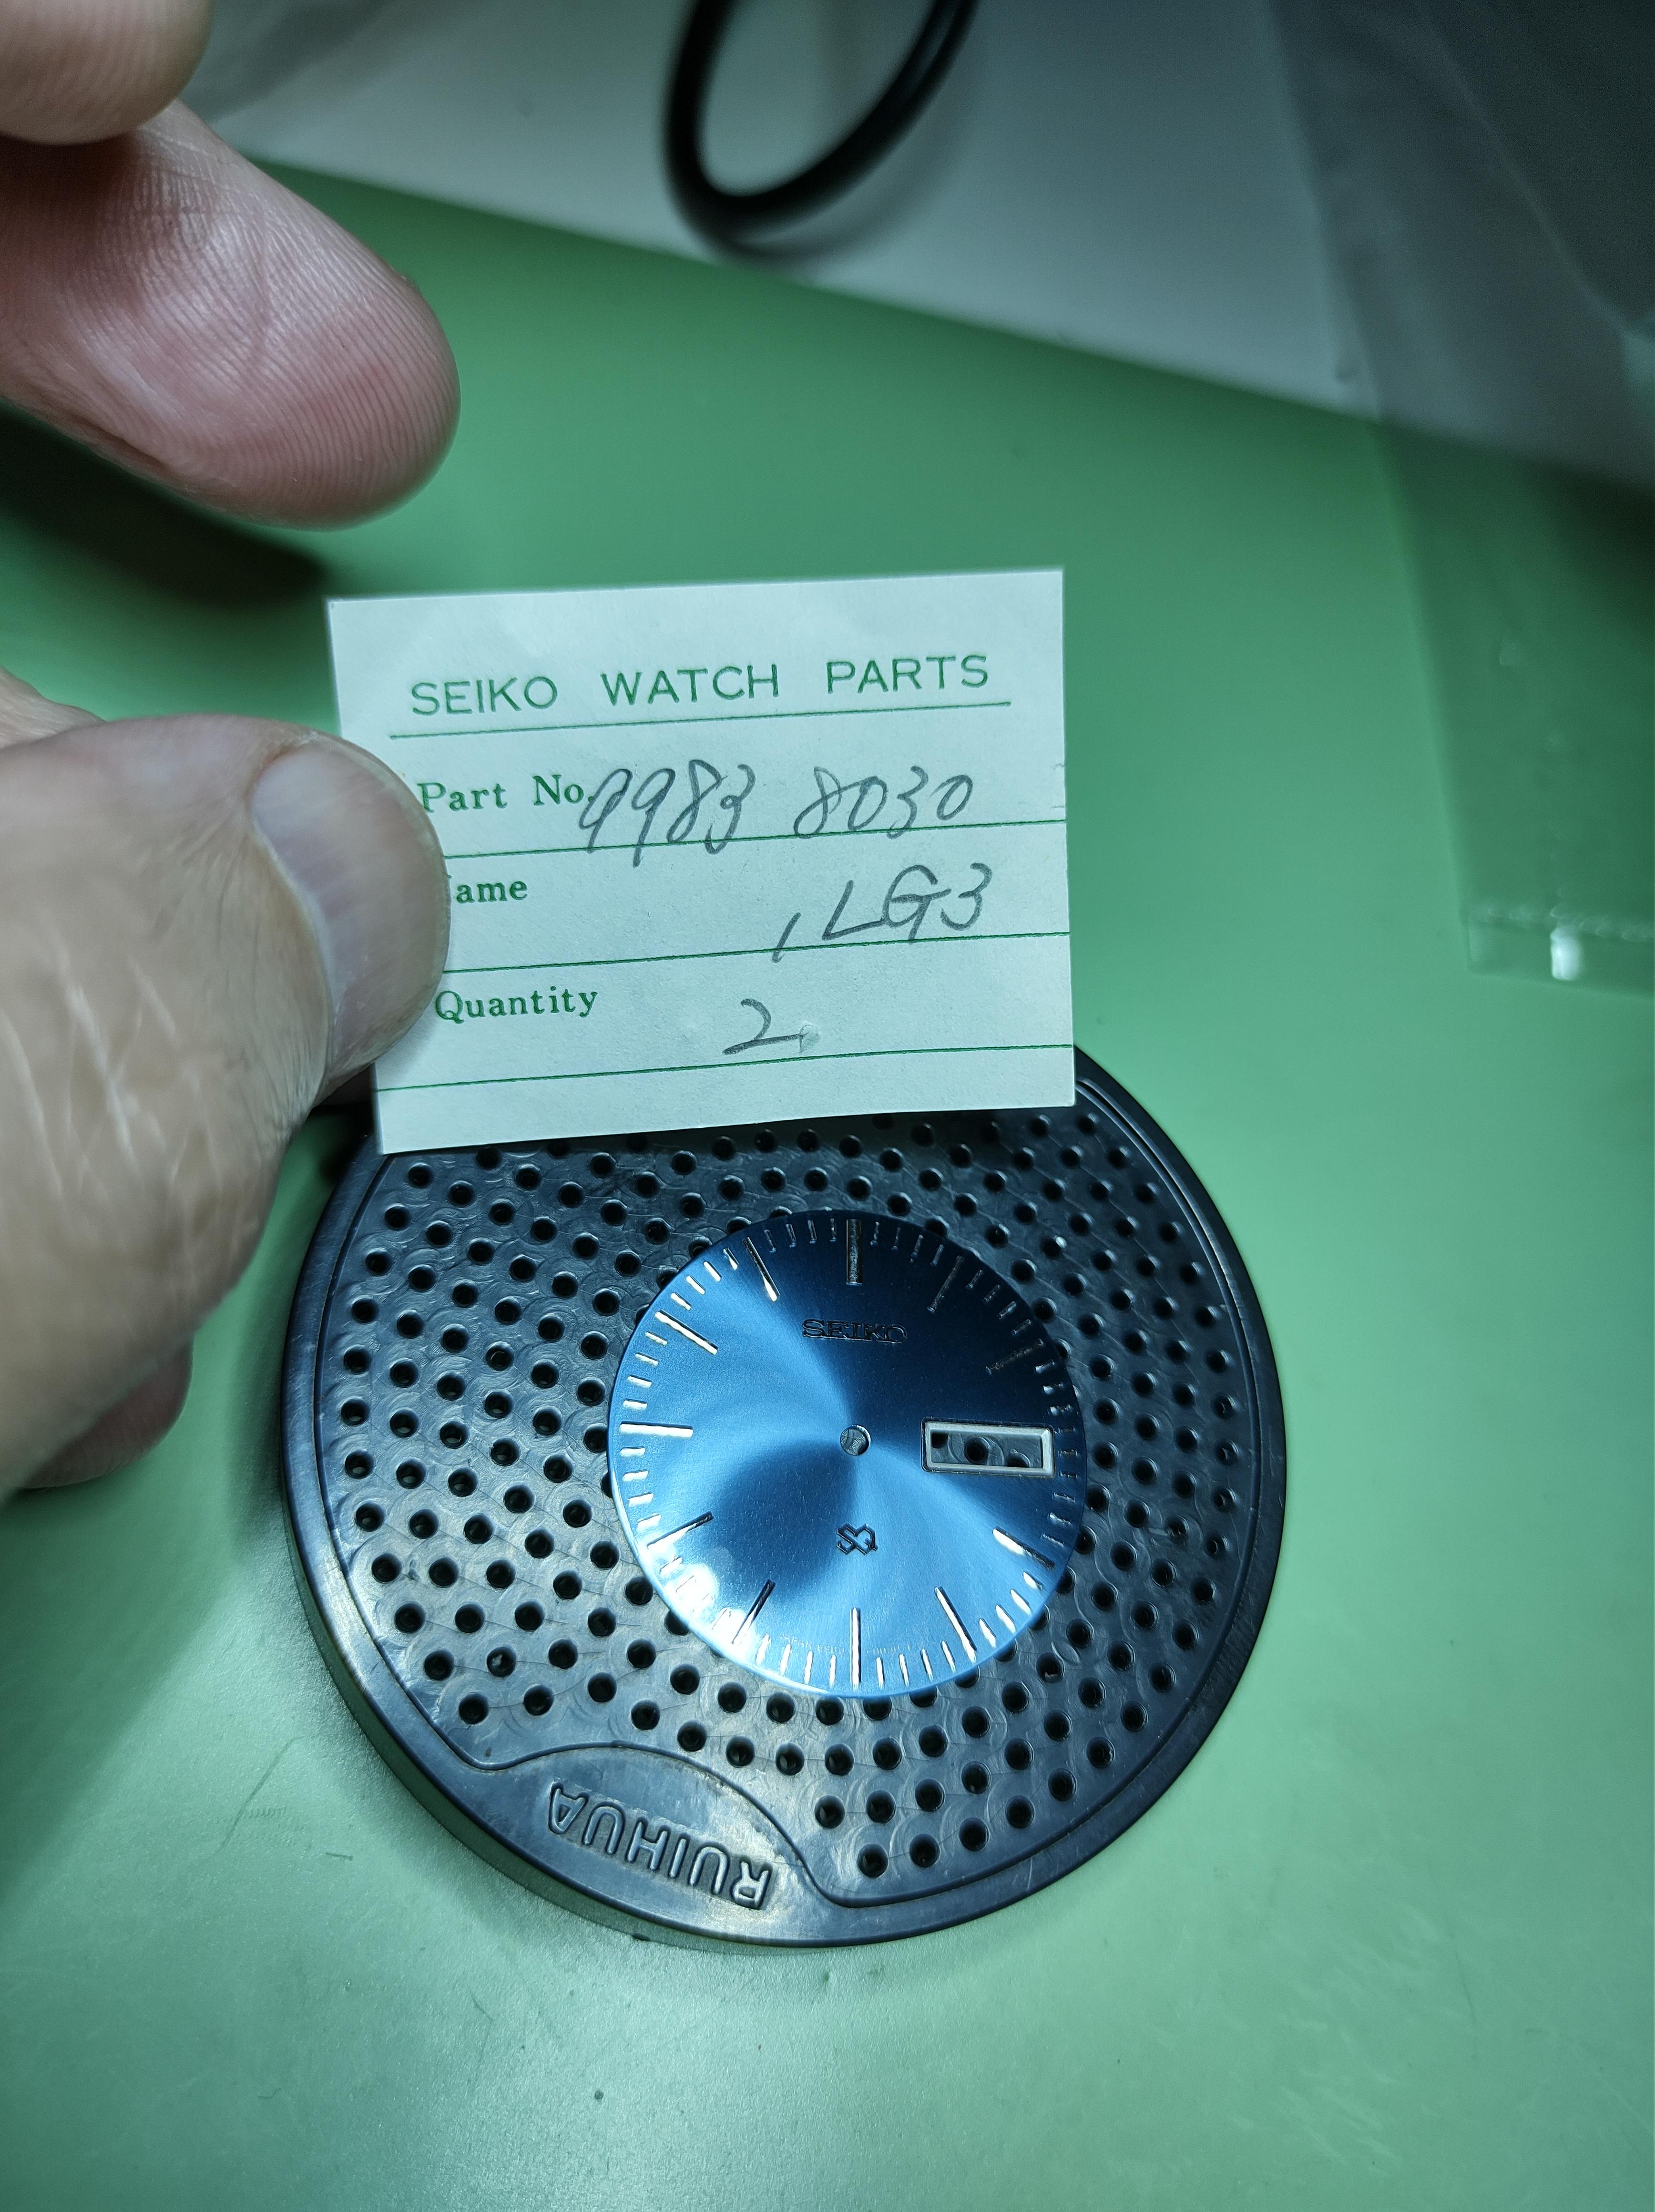
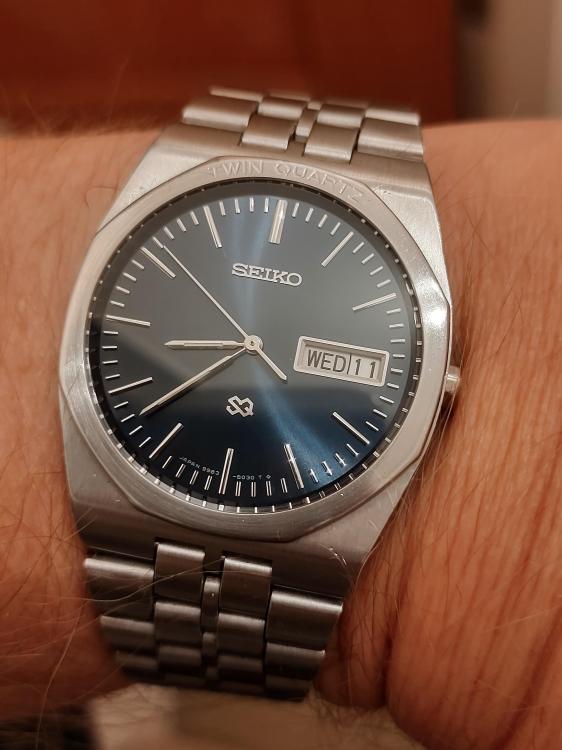
Seiko 9983-8039 Twin Quartz Finally got it running to spec across all temperatures+-5 Seconds per Year. Treated it to a new dial and crystal that I had been searching for for over 8 months. A single dial finally turned up on Cousins and I pounced on it along with the sapphire crystal. The equivalent JDM 'Superior Quartz' model apparently cost as much as a Toyota Corolla back in 1979. Cost my uncle £500 back then and that was a lot, more than a Rolex back then. Also did a bit of work on the case and bezel to bring it back a bit as it had had a really rough life.

 1 point
 -
I think if you want to play Billy big b.ollocks then you have to have something up your sleeve, anyone that knows how to fight, plays dirty. Lets face it a lot of folk that voted for Brexit just rolled up their sleeves to say up yours EU hoping for good changes. We have idiots for leaders and probably none of them clever enough to clean the shitty stick they were given. I didnt vote, what will be will be. You've signed up to another forum !!! Why you defector , you snake in the grass, you infidel consider yourself shunned.... you.......you........you CAD1 point
-
what you really need are some practice jewels to practice oiling with. because as you're finding out sometimes it's really hard to see what you're trying to see. then if either have no oil or you flood them with foil you won't see anythingor probably won't see anything because it is nothing to see. Usually when you have the oil in between it changes the reflective index the material and its darker looking. Then I case you're curious of what or how much Rolex used to give notebooks out to their students they don't do that anymore and this is one of the pages from the notebook while tests like this sound nice on paper it's not what Rolex does so probably doesn't mean anything at all. I believe in the service manual it should have the timing specifications if not I have them somewhere else? All Rolex cares about is they have to meet the specifications that they have
 1 point
 -
I watched your video on youtube showing your homade mainspring winder, your write up gives the bergeon dimensions if anyone wants to have ago at making one or even a full set themselves. If it's ok with you i've added a link below to your flickr page. https://live.staticflickr.com/65535/51890412256_d0f66b7f21_b.jpg1 point