Leaderboard


Popular Content
Showing content with the highest reputation on 10/22/24 in all areas
-
I find using some angles tweezers such as No.7's to gently hold the rim of the balance whilst turning the Microstella screws, You'll be surprised at how much force is needed to turn some of them. Most of the time they turn with a little resistance, but a little, otherwise they would turn and throw the timing out. But every now and then you'll come across one that is a little tighter than you would like and then you'll realiser the importance of the angles tweezers to hold the rim. I've got some vintage Rolex's to service this week, so they don't have Microstella adjustments, but I'll do a video when a newer one comes in. There's no reason not to bring this Rolex within Chronometer standards again; it's like anything, the fist time you do it, there's that voice telling you it'll all go wrong, which it won't.4 points
-
I stuffed two crown o-rings that I had into it. Tried a 3rd, but couldn't get it to sit in there right. I think it will be sufficient. The crown was in good shape, so I wanted to keep it. The 0.9mm thick caseback o-ring that I found at Esslinger worked out perfect. I just finished up the watch and it turned out well. After: Before: (that white stuff is on the inside of the crystal and won't come off)
 2 points
 -
Your interpretation of what I said is correct. In the example of the shop that I once worked at the small ultrasonic machine had a beaker in it. The entire basket was lowered into the beaker with cleaning fluid and it was ultrasonically cleaned. Then it was removed and put on the vintage cleaning machine to complete all the rinsing and drying.2 points
-
So unlike Bergeon2 points
-
My mentor has been using lathes from Michael Chung for many years. He has Generation 1, Generation 2 and Generation 3 lathes. Generation 6 is now already out in the market. Since my mentor is proficient in Chinese and they have become personal friends. He can get customized parts and software from Michael. Michael is a perfectionist and strives to better his products all the time. Hence the many generations of lathes. He doesn't appear to be the typical Chinese manufacturer. But I guess being proficient in Chinese has its advantages.2 points
-
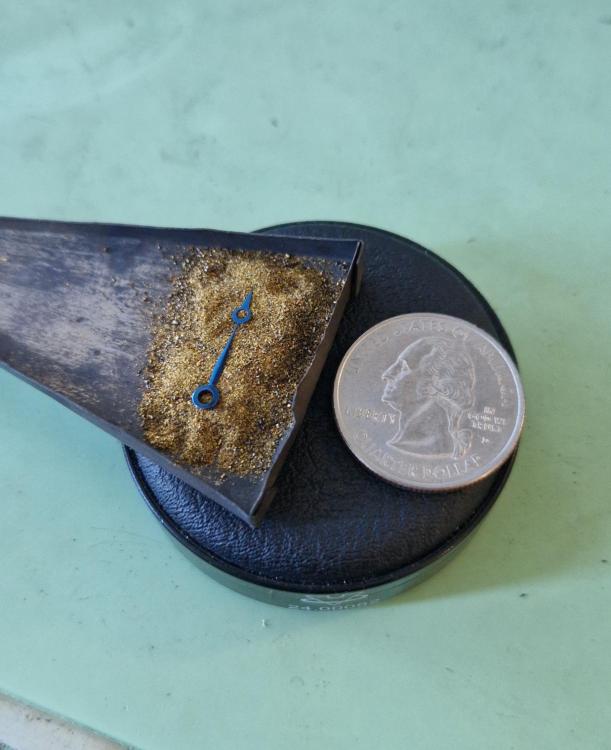
I made a small bluing pan out of some brass stock that I turned into what looks like a mainspring barrel, and filled it with brass shavings.2 points
-
I shouldn't be answering for John, but as I understand it, the idea is not based on rotating the baskets in the ultrasonic cleaner. The method, as I understand it, is to first lower the basket into the ultrasonic cleaner to get the parts clean and then spin, rinse, and dry the parts in the watch cleaning machine.2 points
-
The CZ50 is in another price bracket (around 6000 dollars), but it's top quality. It also doesn't come with collets, but at that price you get the slide rest, milling attachment and digital dividing. My colleague has one, and I've messed with it a bit, definitely worth the price, and it's less than half what the similar Leinen WW82/3 goes for, with more capability (having milling/dividing as part of the package).2 points
-
I watched the videos. Very interesting indeed, especially regarding the (non-)removal of some greases. A bit disappointing (even though pre-cleaning is a standard procedure, I guess). I gently press grease-exposed parts (keyless works, barrel..) into Rodico. This removes most visible residuals. I don't have a rotational cleaner and use only a cheap ultrasonic cleaner. It's actually quite effective with the ammoniated cleaners. However, since there's no spinning off of liquids between cycles (only my manual shaking...), I have a lot of cross-contamination from cleaners to rinses. So I have to swap out the liquids too often (costly...). PS: my thinking is now: after the usual pre-cleaning, I'd put the Elma cleaning jar and basket (when I get the machine...) in my ultrasonic cleaner for 5min. Then I'd move it to the actual cleaning machine for the rotational cleaning process. I'd hope that this could make it perfect.2 points
-
Not to disqualify it no. If considering a new lathe have a search for CZ50 watchmaker lathe. These are made in batches a couple of times a year. The manufacturer is Micheal Chung(spelling?) and they have a very good reputation. Seems to be easiest to contact him via Facebook or instagram. https://www.lathes.co.uk/chung/?fbclid=IwZXh0bgNhZW0CMTEAAR3CMl9futn6ctArdeuSplwjEtxRTlP-yaDWmjimJCVP9Vr1GQhY4TG67Xk_aem_PcXEoEcPMai7PG9jl-mXYA Tom2 points
-
It would help if you cut down the sides of your pan until it is nearly flat. I made my brass shavings by filing some brass.2 points
-
Ethyl alcohol is denatured in numerous ways, sometimes changing the color of the flame. I have tried several brands available from grocery/hardware stores here and found that they don't all perform the same- some are sootier, some don't seem to make quite the same amount of heat. But even those get plenty hot enough to blue small watch parts. I use a small brass pan similar in size to Mike's caseback pan, with fine brass filings in it, perhaps 3-4mm deep. Just a teaspoon or so. For a watch hand, to get the most even color, you want to heat it very slowly. Like take a good 5-7 minutes or more to come up to color. A pan with a handle makes it easy to distance it from the flame to allow the color to develop gradually. Taking time like this will let the color equalize nicely; a typical problem with a hand is getting too much color quickly on thin areas, while thicker ones lag behind, and when they've caught up, the thin areas are too light. Playing the pan over the flame even once certain areas are a deep blue lets the others catch up while not overheating the already-done areas. Letting the blue develop over time also seems to make a more robust (thicker?) oxide layer. You'll have to do a few to get the knack with your pan and lamp. The next most important thing is cleanliness. I take already clean hands, lay them on a clean piece of paper, and rub over them with freshly cut pithwood wetted with benzine (lighter fluid is fine). 99% iso alcohol is good too. Blow off any stray bits of pith with a blower (not your breath!!). If you have fresh brass filings, heat them in the pan for some time before use. This will burn off any contaminants, you will almost certainly see some smoke, and you don't want that happening when going for an aesthetic blue. Here's my pan with the amount of filings I tend to use.
 2 points
 -
Have a look at this video for reference.1 point
-
Hello and welcome from Leeds, England.1 point
-
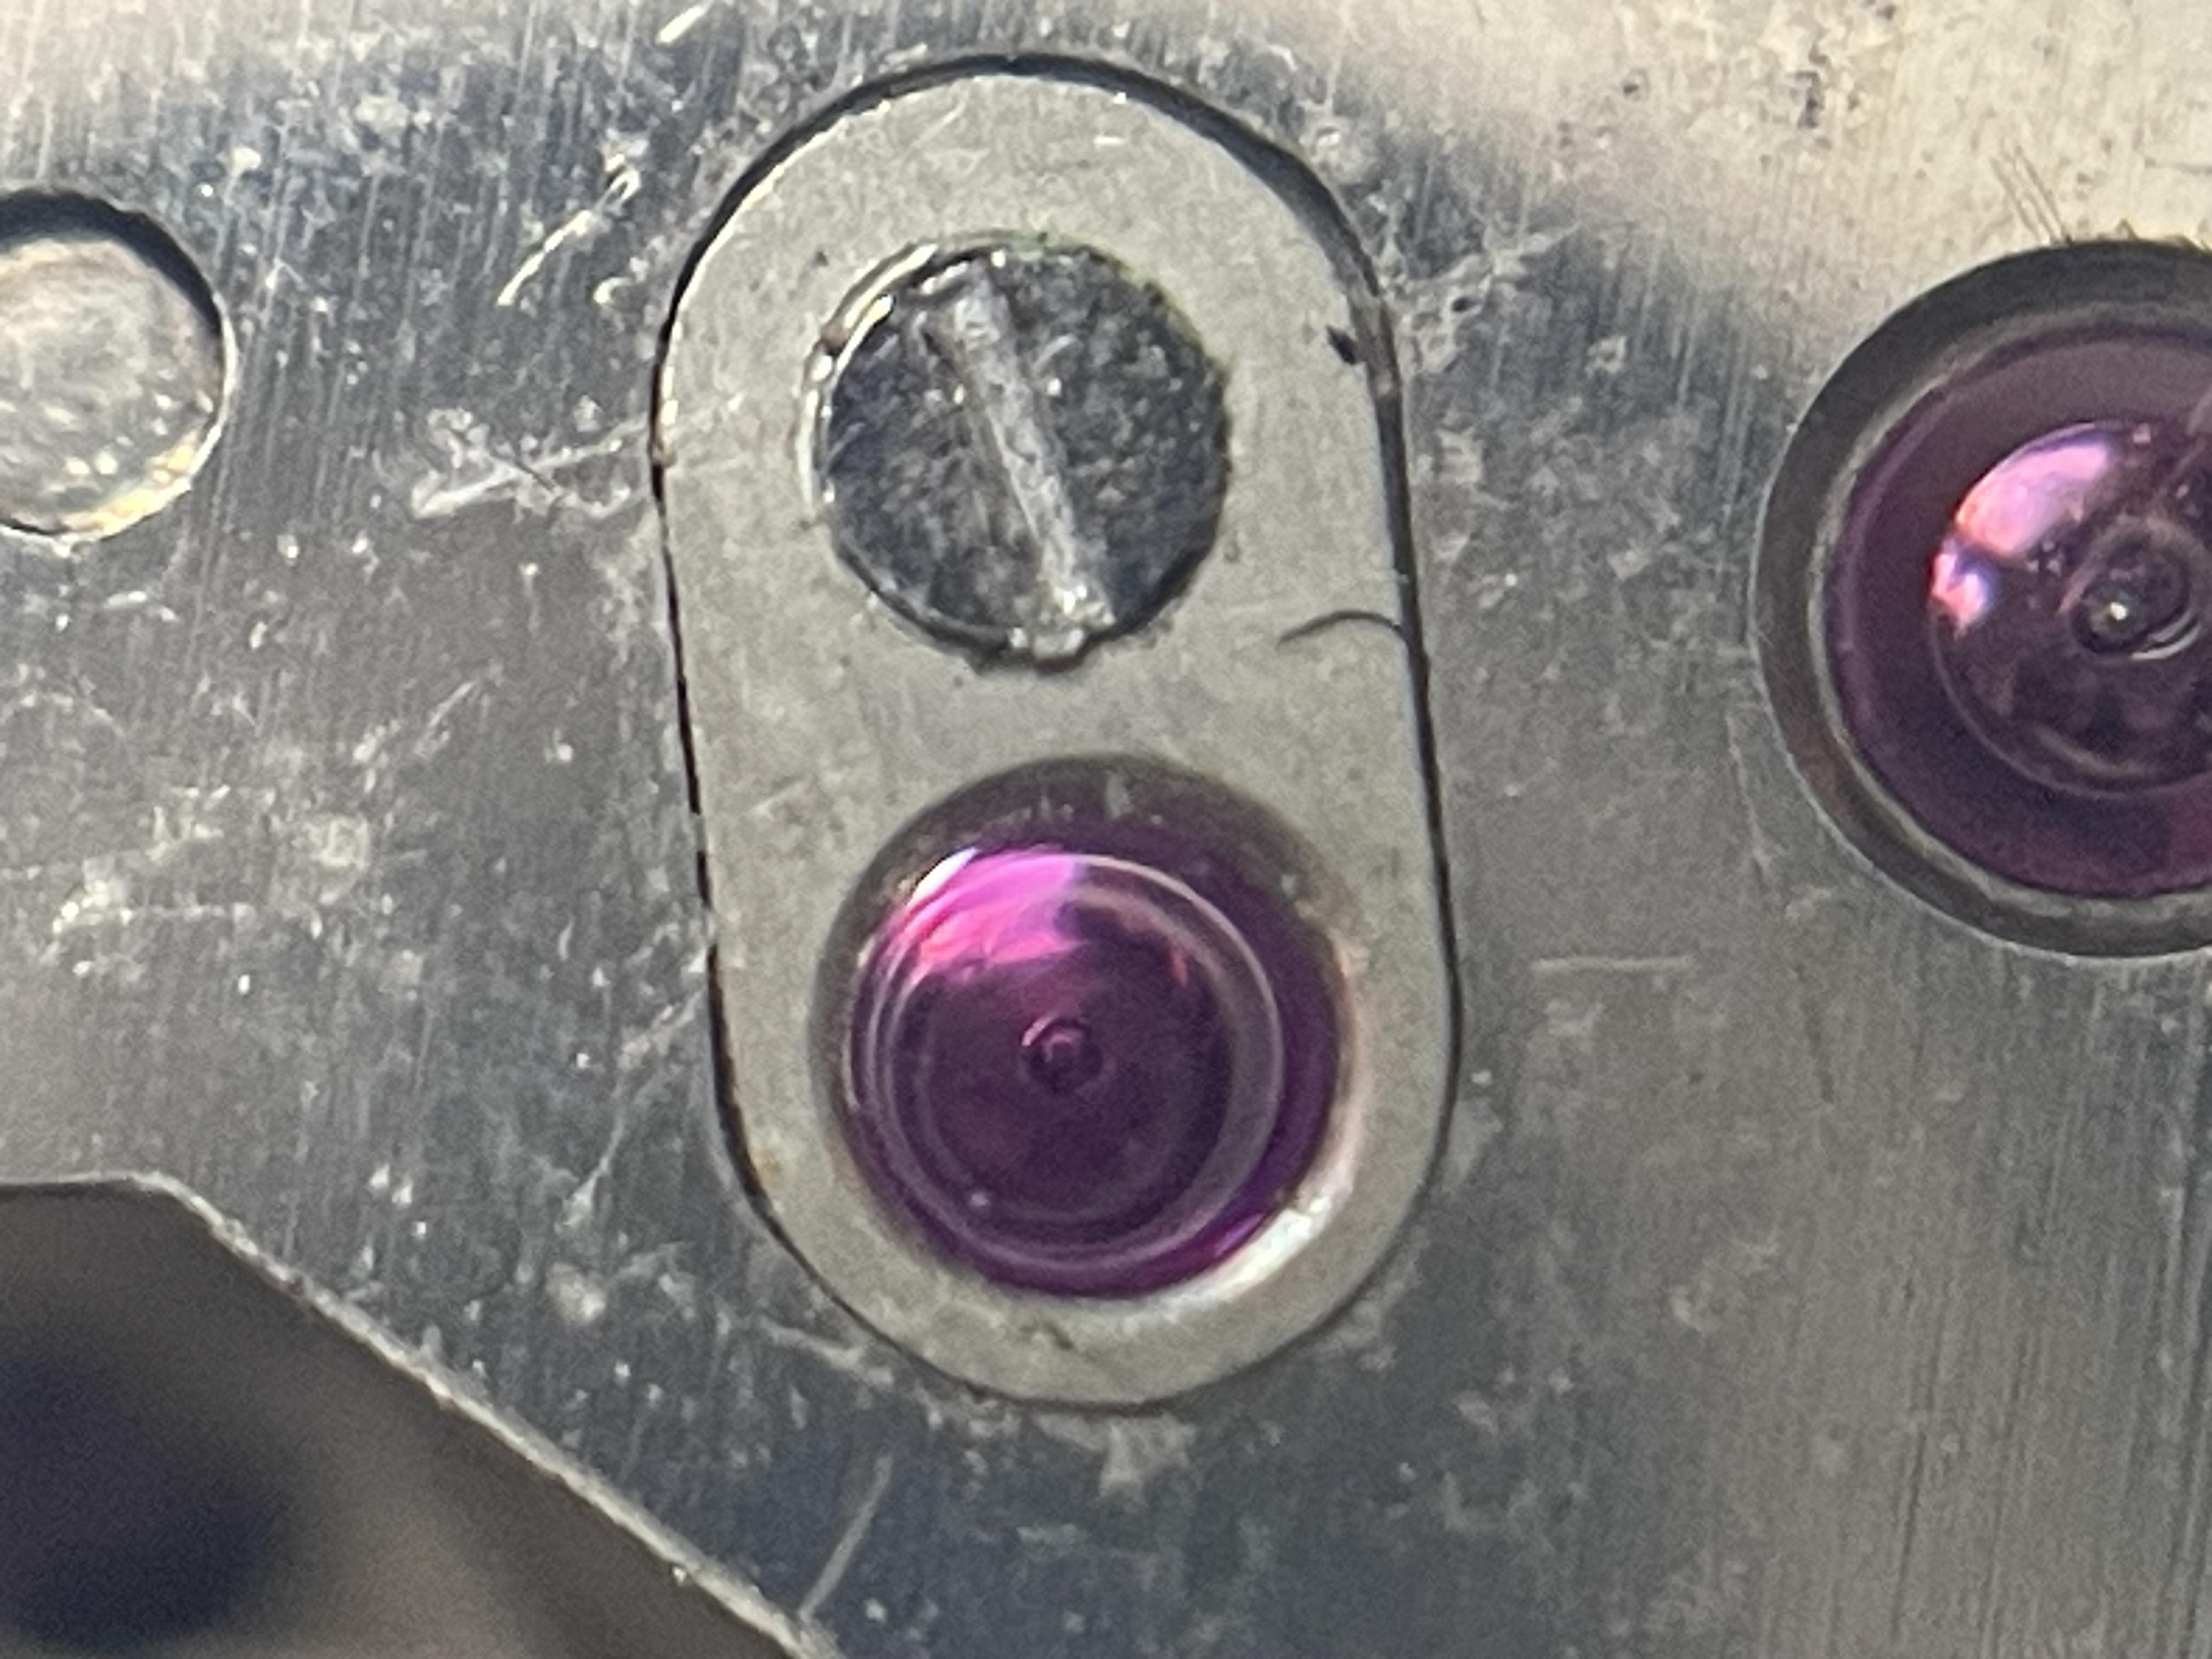
What are the threads like on the ratchet wheel screw? Does it actually fully tighten if you hold the ratchet wheel secure? It looks like you're going to have to take a look inside one of those barrels to see if there is a mainspring in there and inspect the arbour. If you’re careful there's no need to remove the spring for now, just have a look then refit the cap.1 point
-
You could remove the ratchet wheel and screw and just turn the arbor with tweezers or a peg wood. The train wheels should rotate. If not, open the ms barrel.1 point
-
Well I cannot comment on best practice, but I will admit I have used mine many times over. As long as you take a moment to hold them over the flame to burn off any accumulated dust before bluing.1 point
-
No the barrel shouldn't rotate. Do you feel any tension and here the click as you're turning the screw? Are they all 6309 barrels and have you opened them to check the spring and arbour?1 point
-
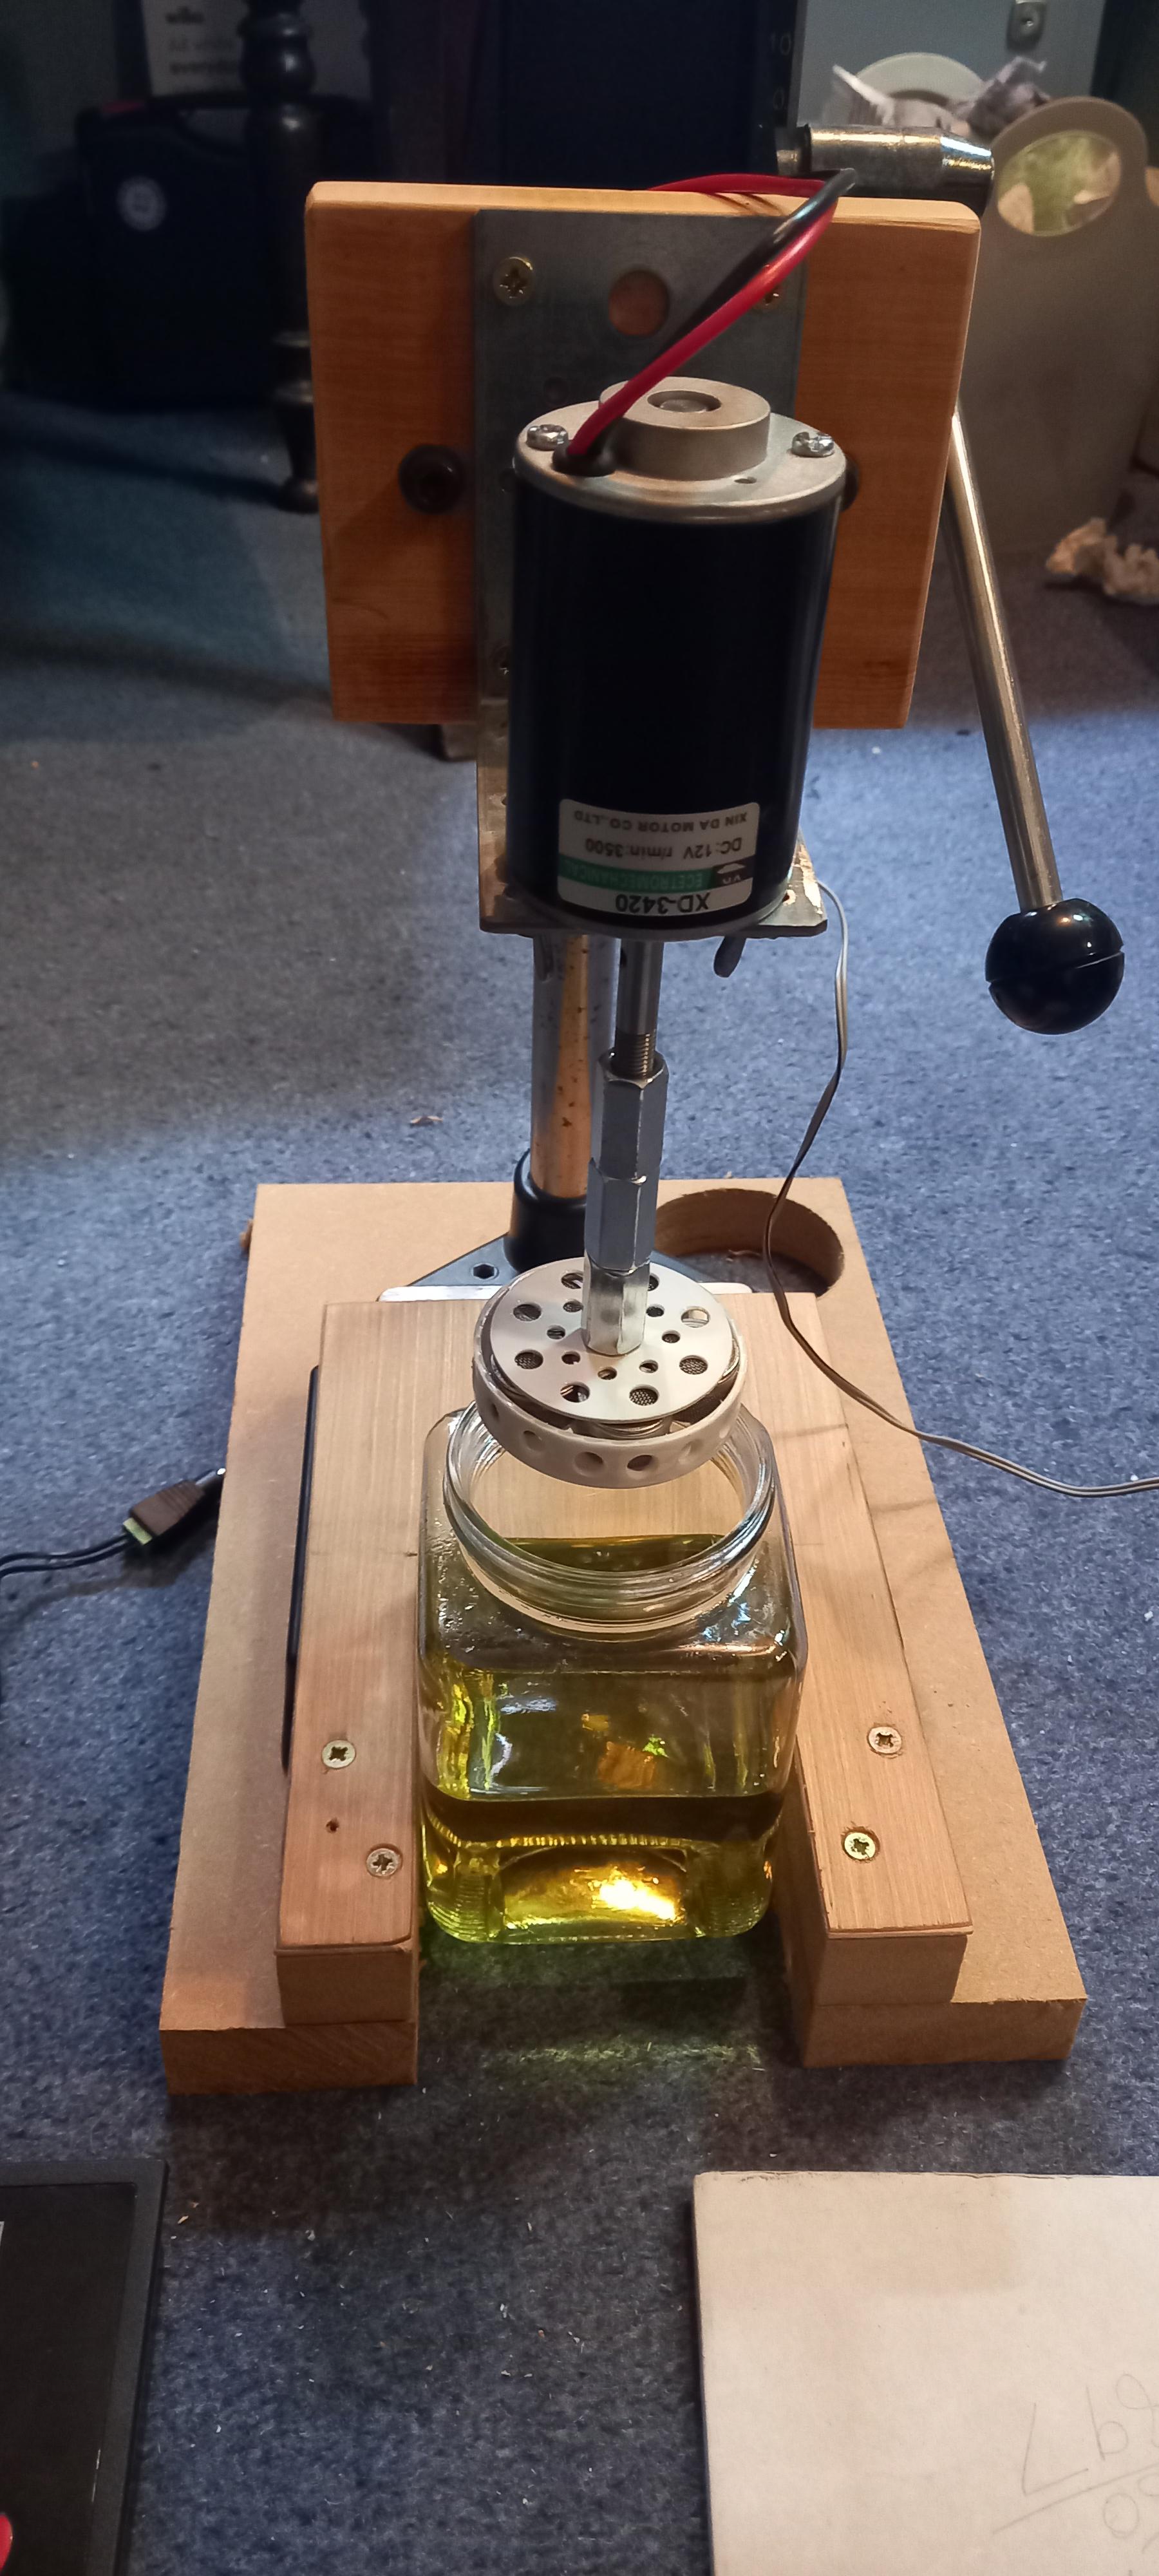
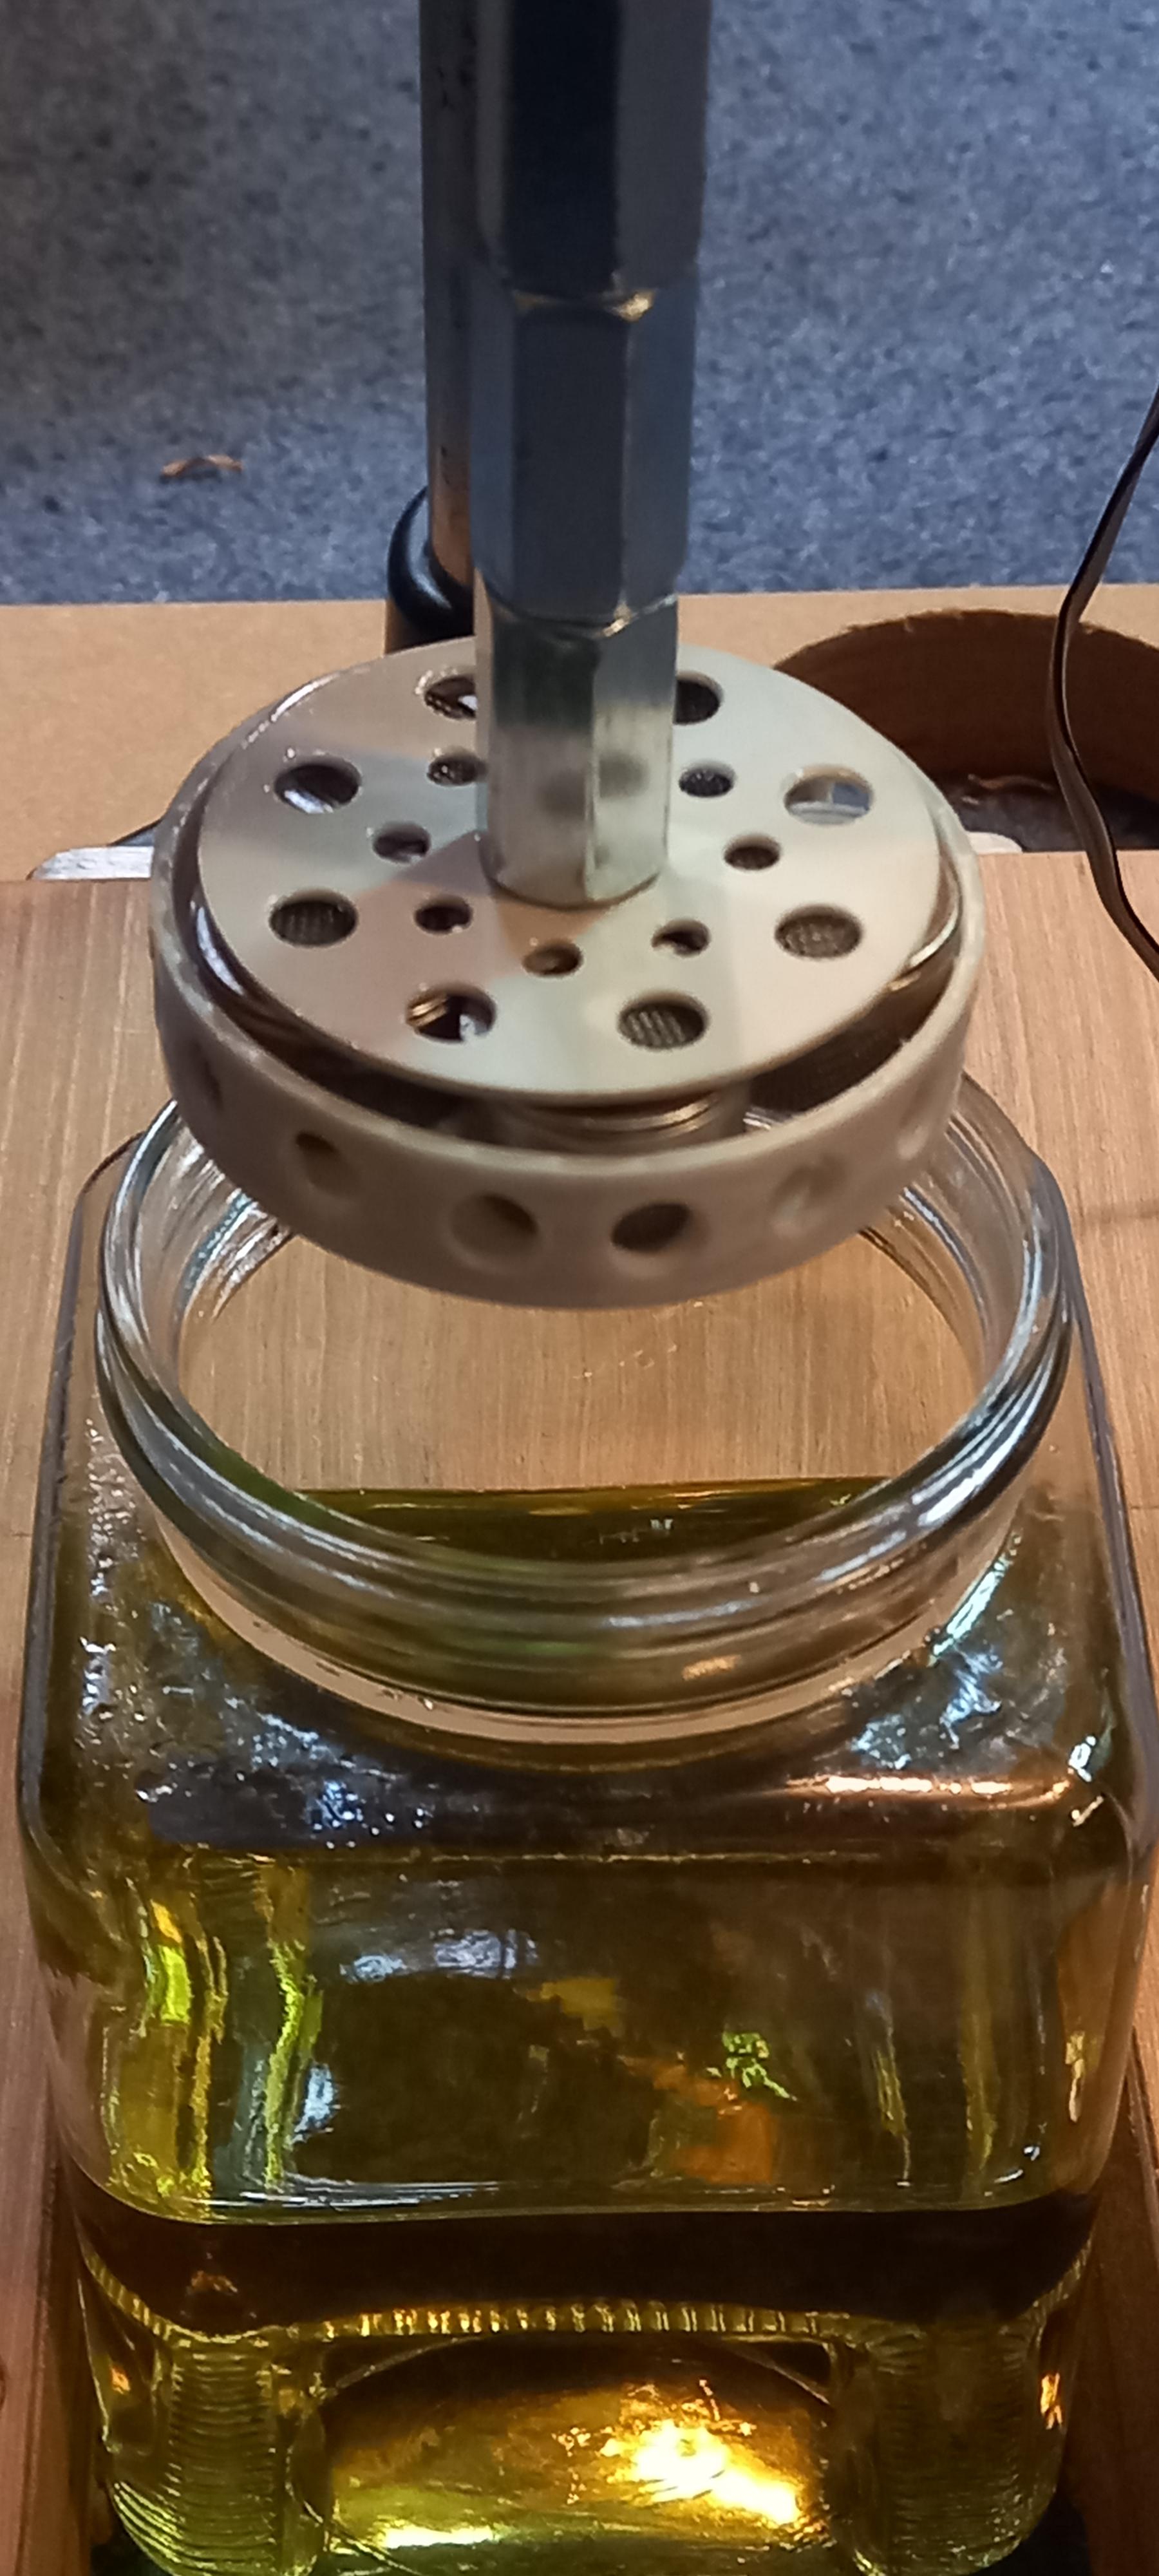
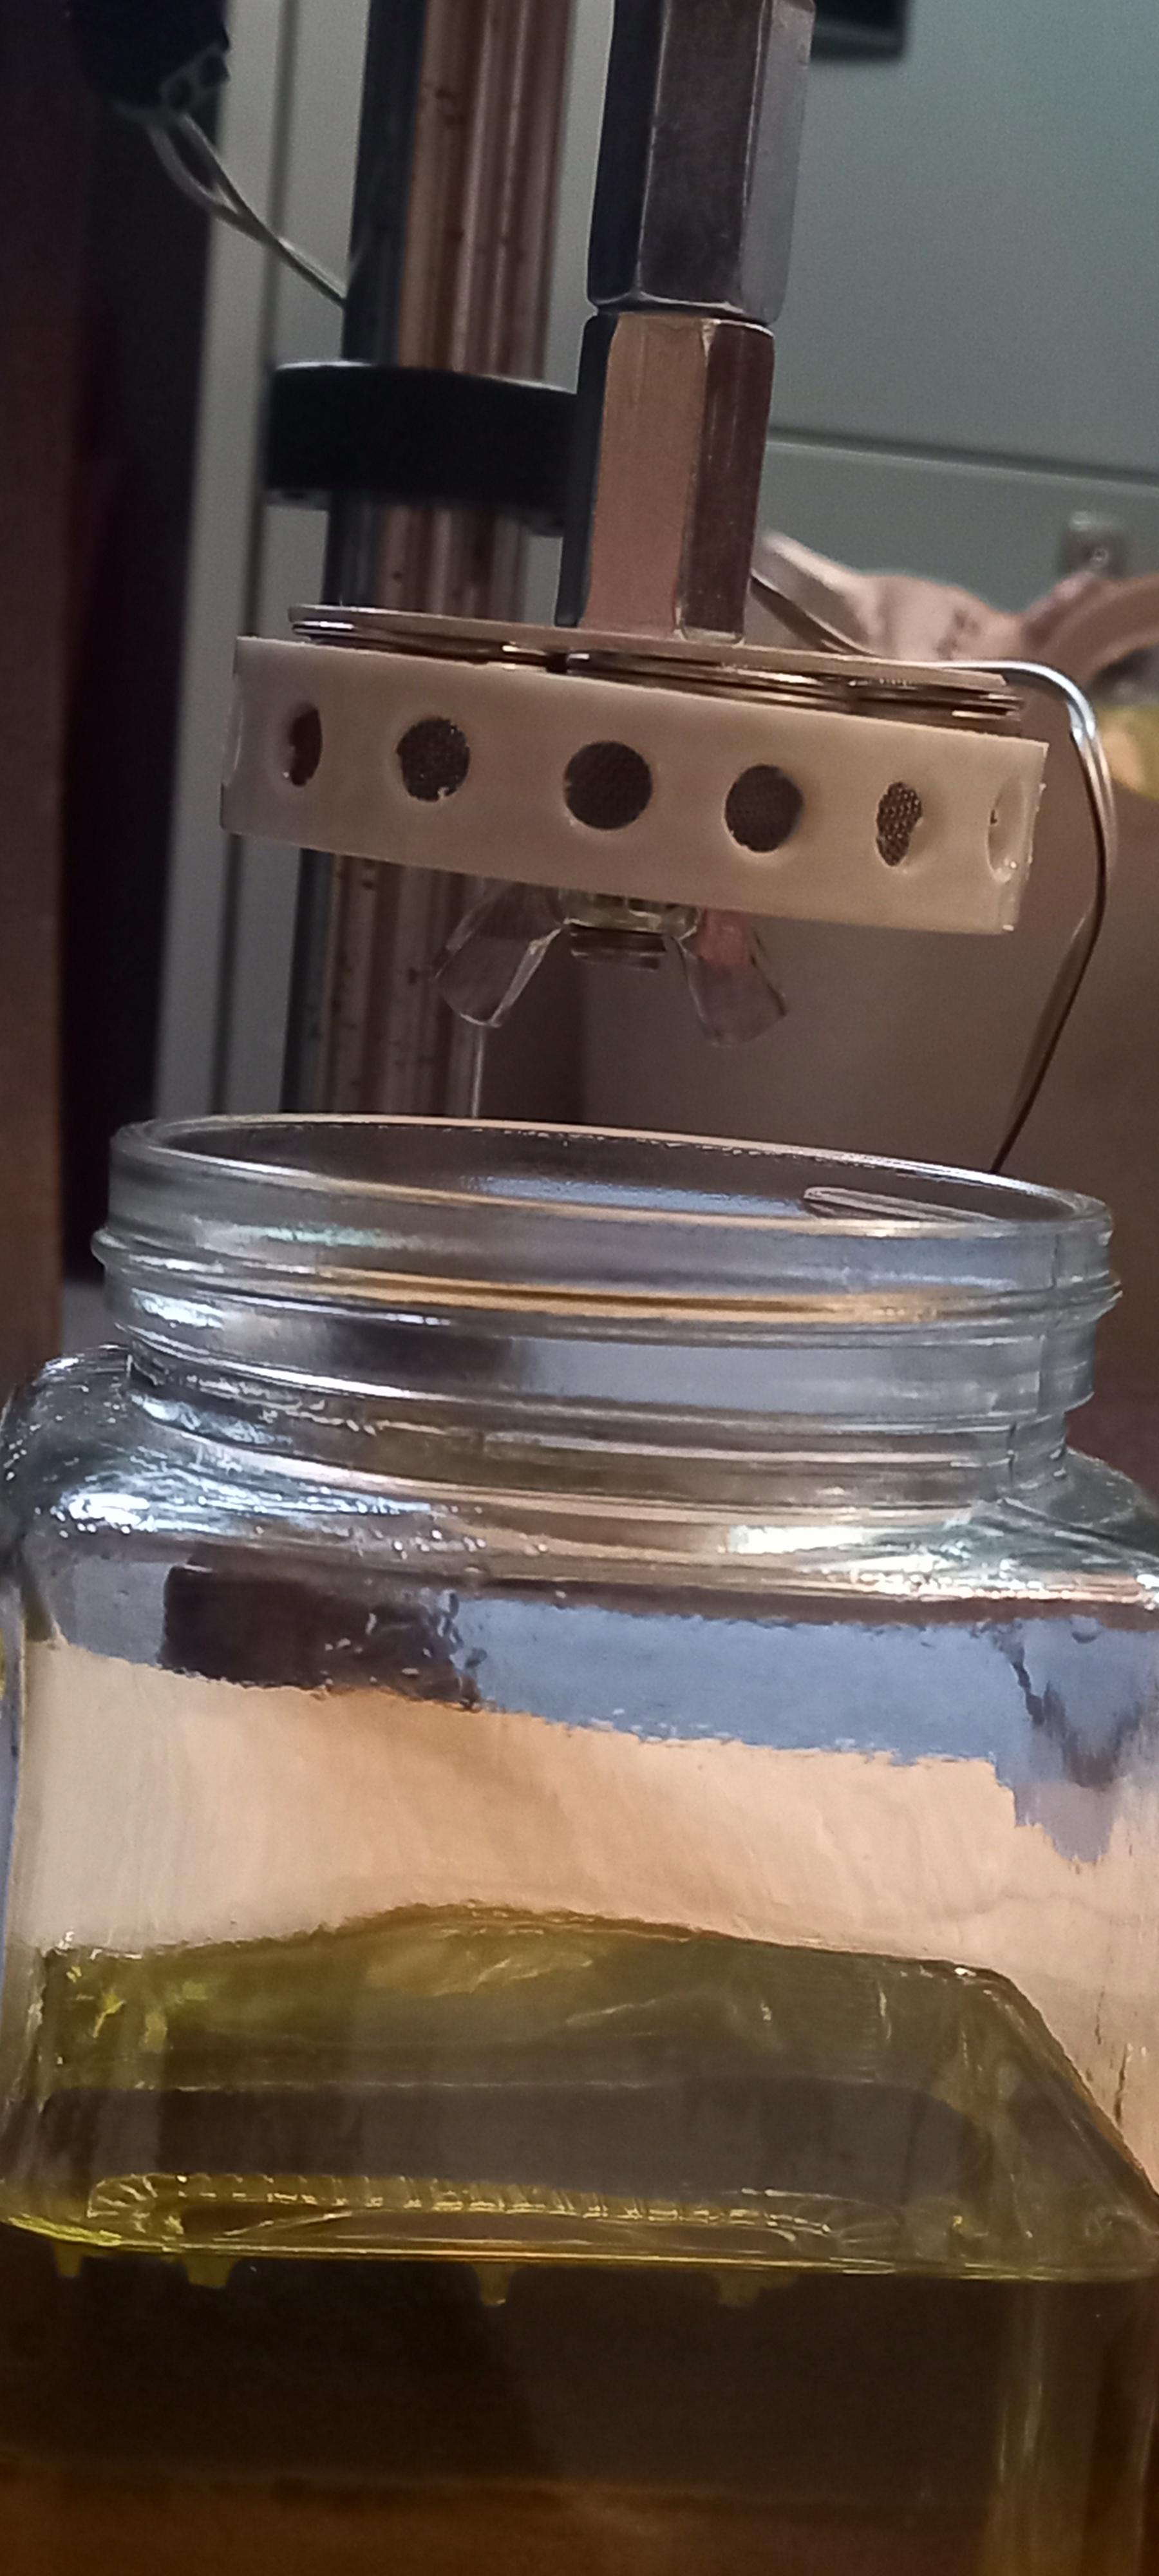
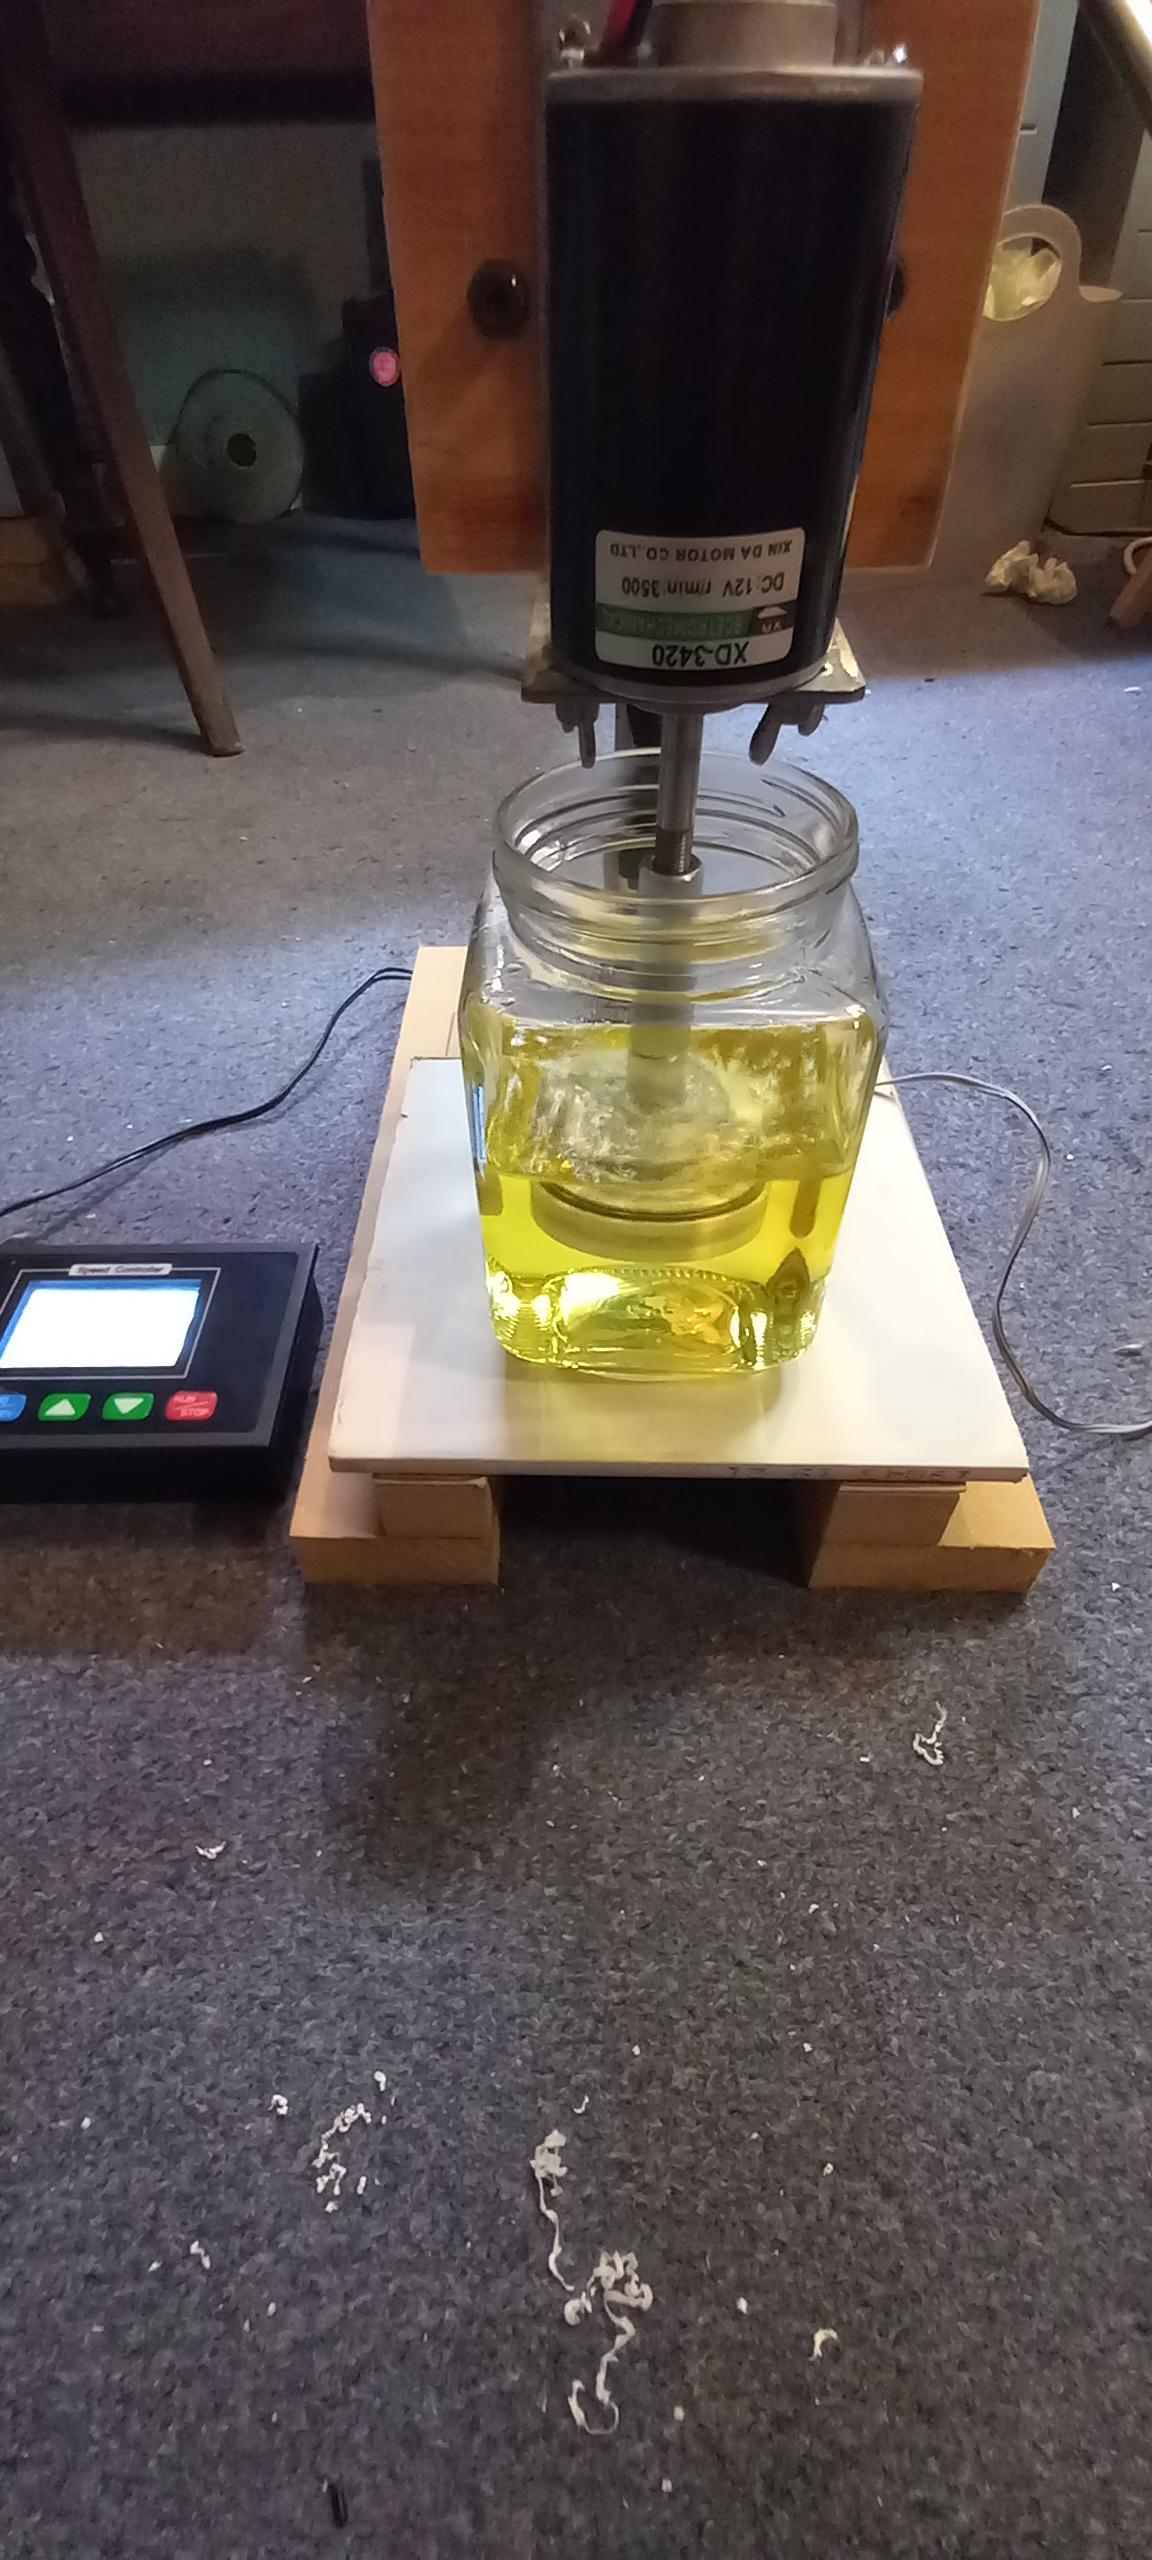
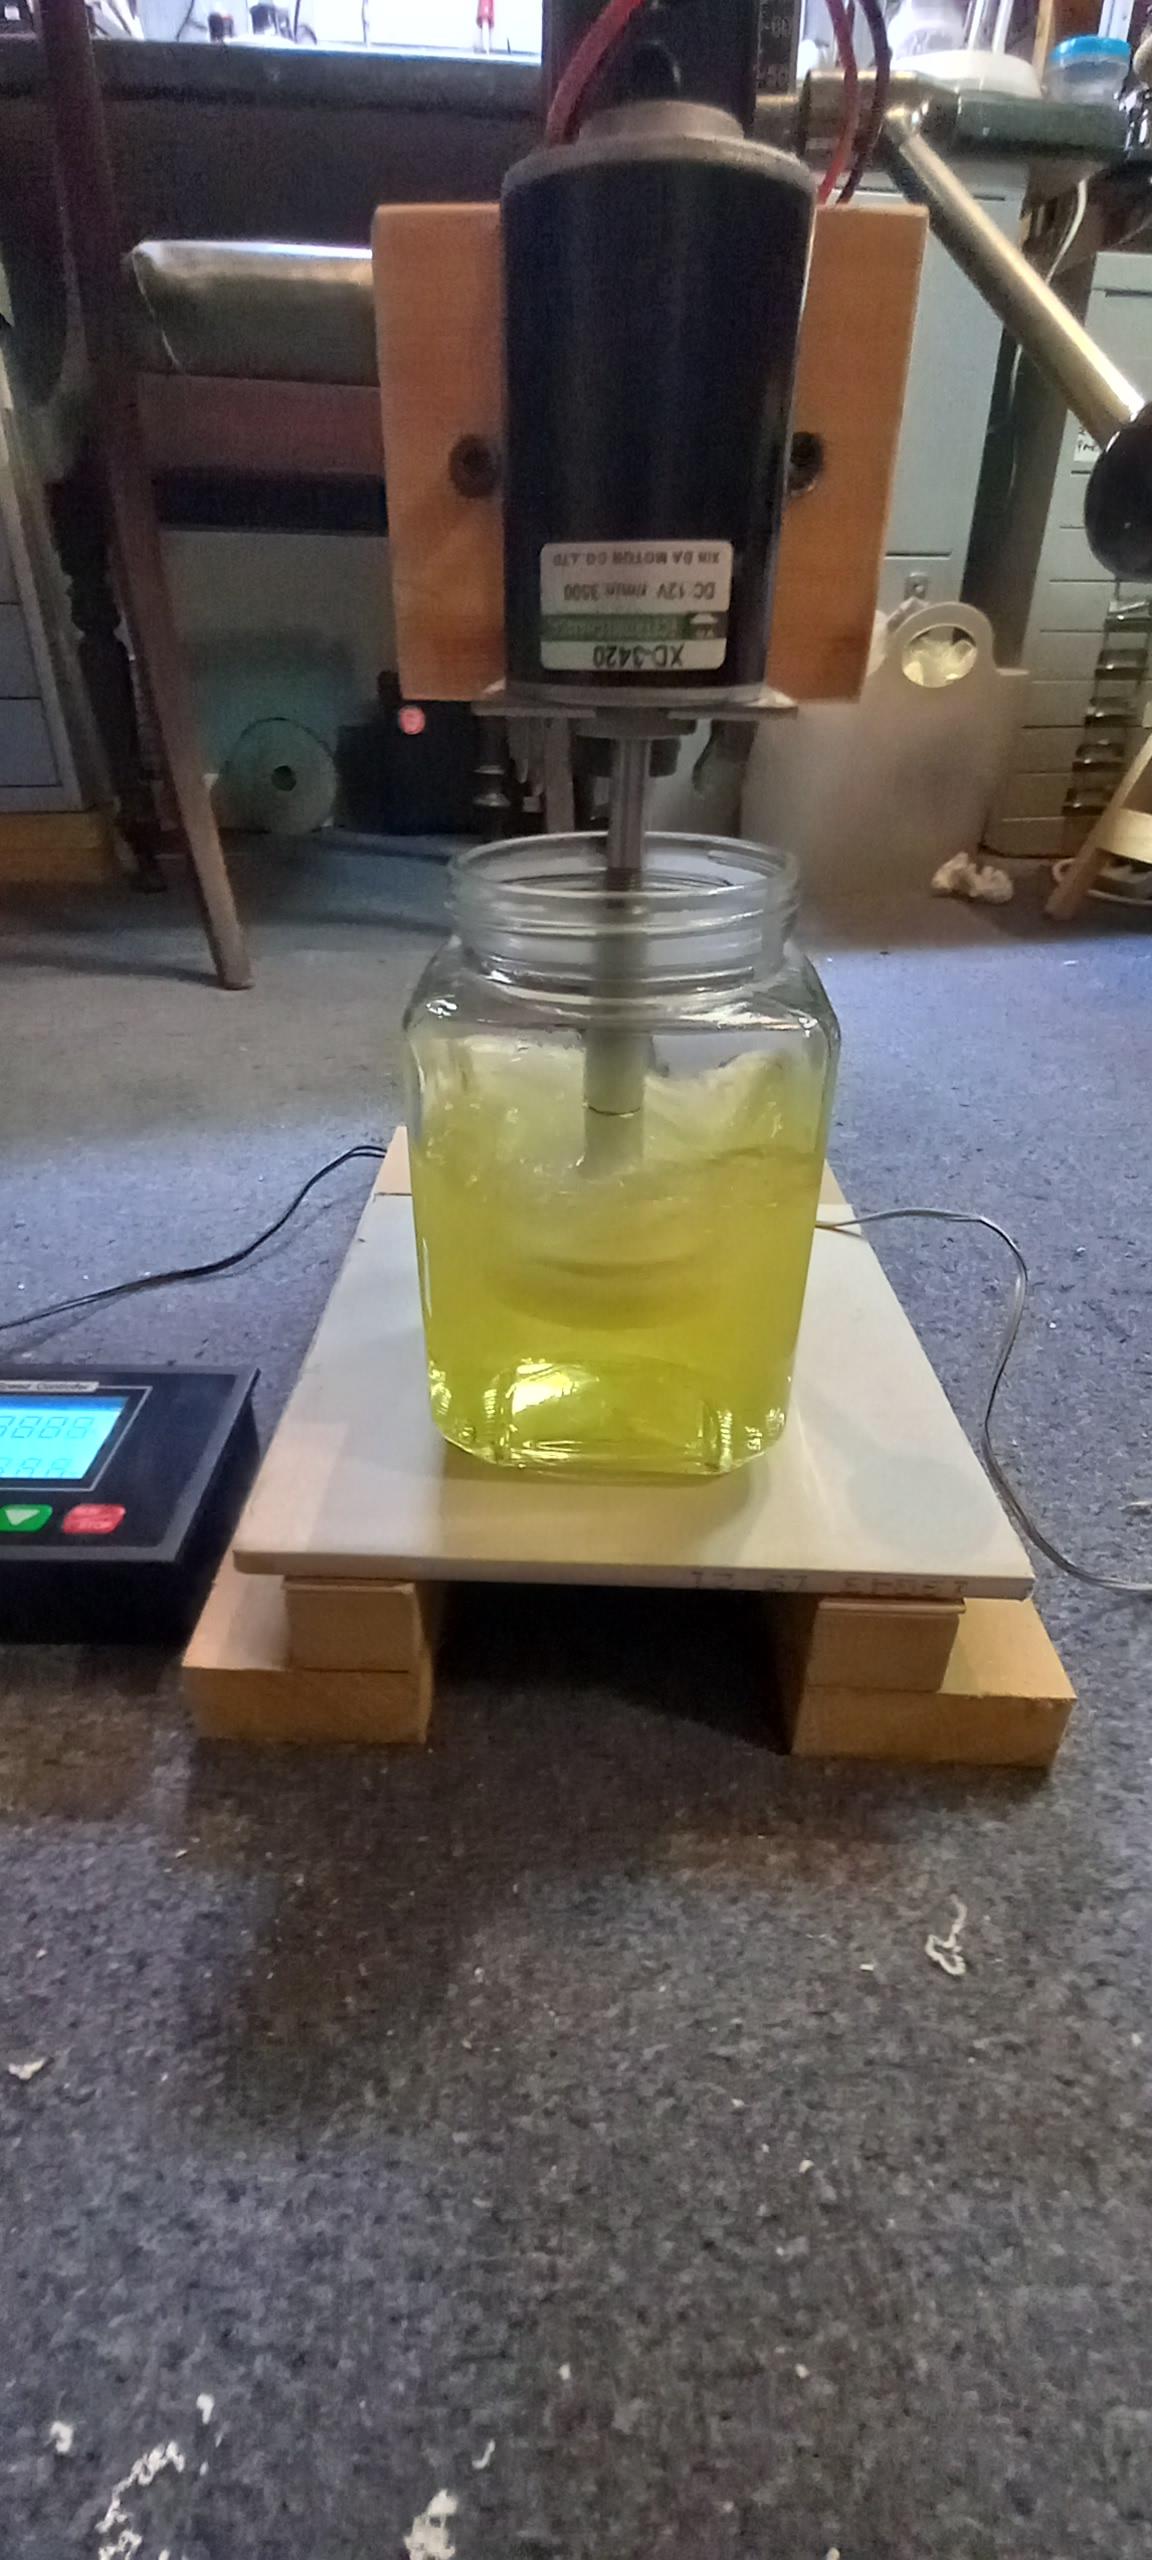
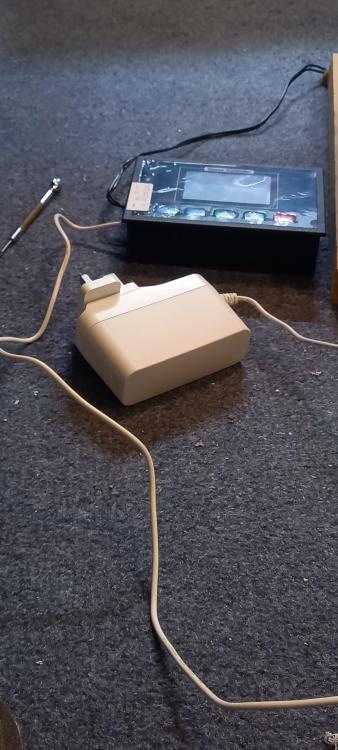
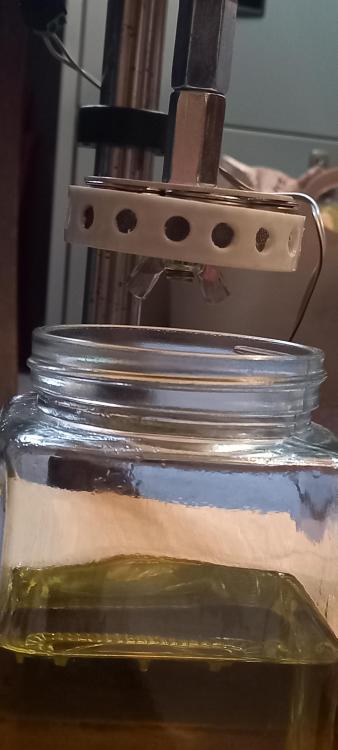
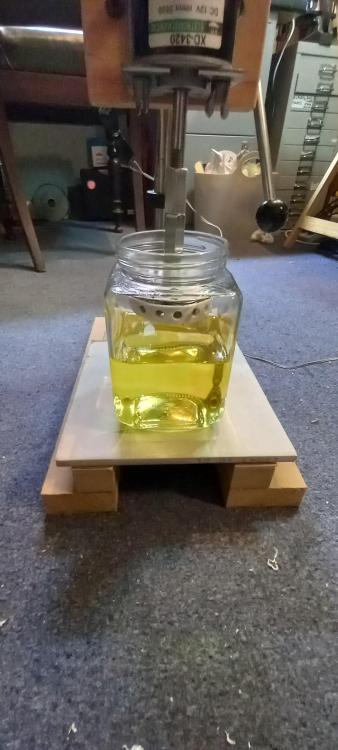
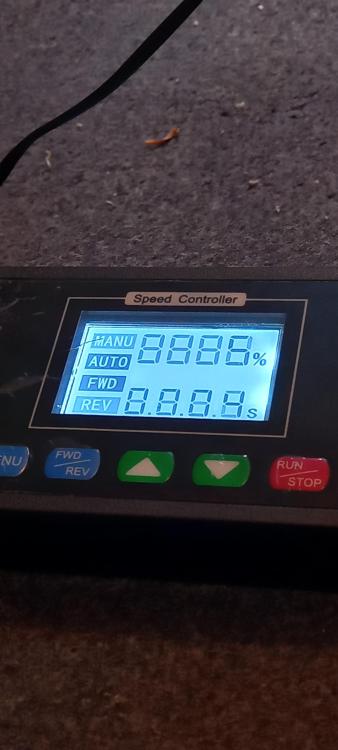
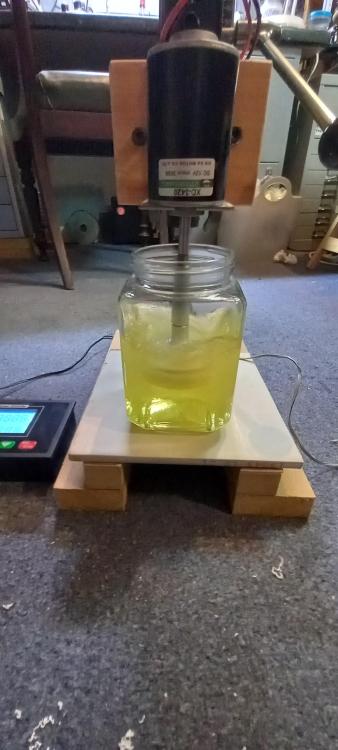
The pictures explain the idea. Fully adjustable rotation speed with timed forwards and backwards intervals. Its still in the rough, mainly because i wanted to make sure it works as i want to and to check the heights. The base of the stand will be fully encased in an mdf frame that allows the jars to slide in, lifted up and set down on a pre positioned wooden plate. The drill stand has 80mm of travel through the press....enough to lower and raise baskets into the cleaner. This has cost about 40 quid in total inc. 4 cleaning jars.The stand was a fiver from a boot sale,the motor 13 the programmer 15, power supply for programmer just a quid, 4 jars at 1.50 each and then a few scraps of wood plastic and nuts and bolts....40 quid all in.


 1 point
 -
I've just ordered an overlength spring and I'll report back - hopefully with a smile. Many thanks you all of you who have helped1 point
-
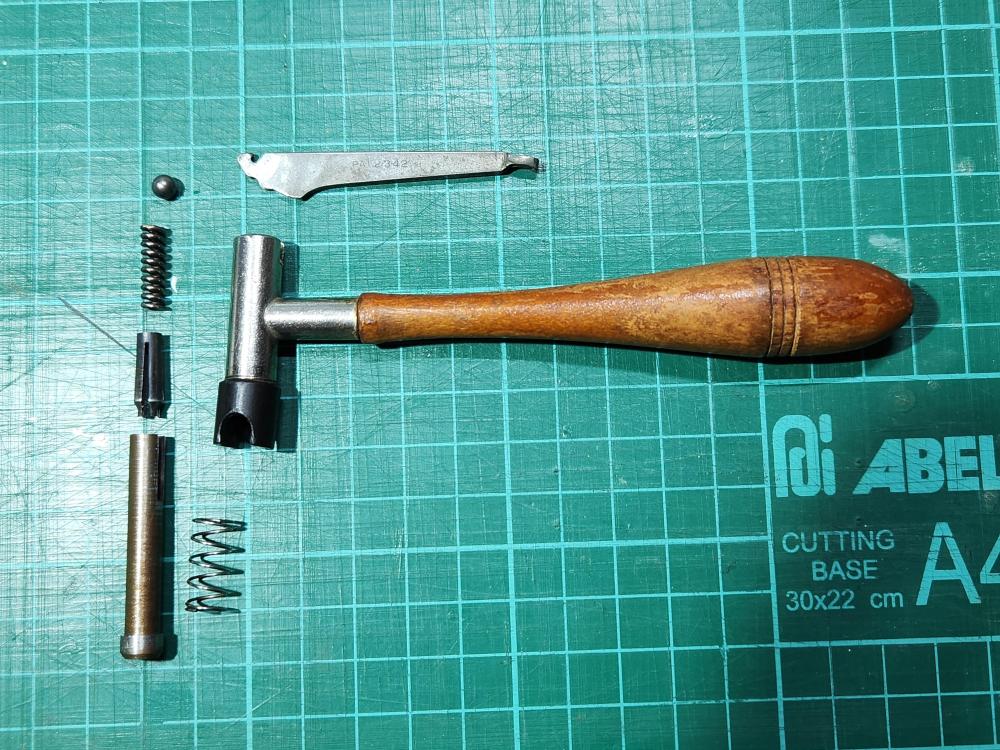
It looks like you have all the parts except the smaller spring beneath the ball bearing. This spring is incredibly stiff, almost can't compress it. Maybe you can customize a spring yourself. The diameter and lenghth is about the same as the collet.
 1 point
 -
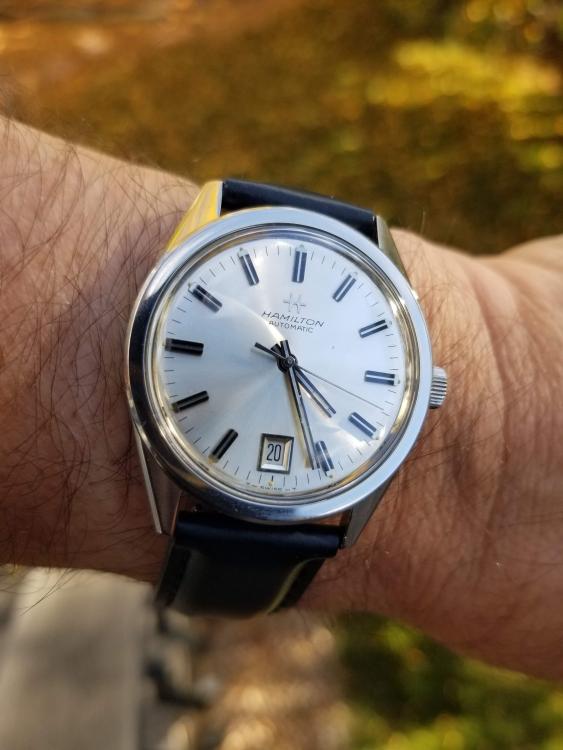
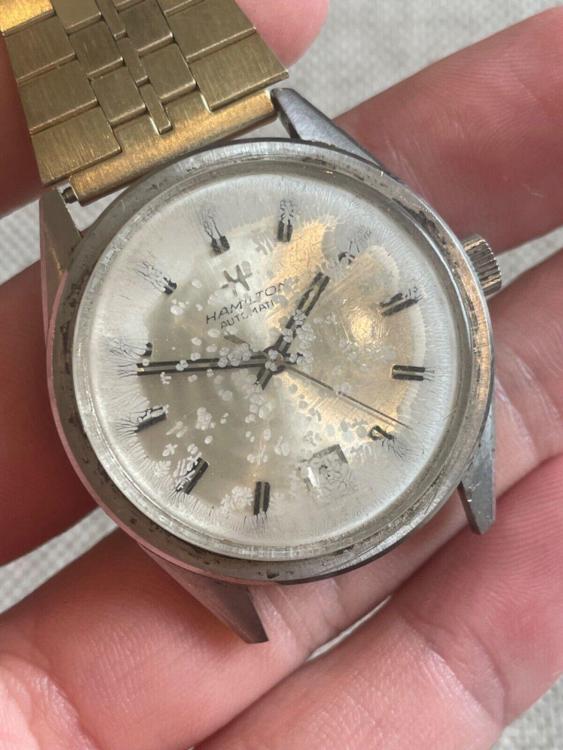
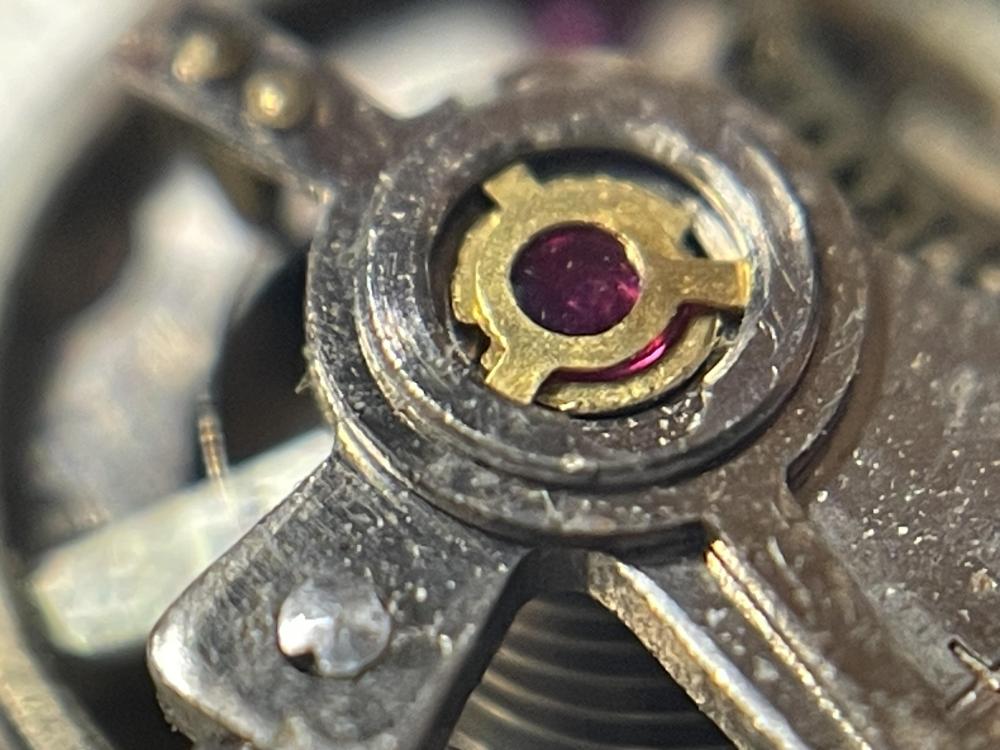
Show the dial, if imperfect I wouldn't touch it with a ten foo pole, plus I don't think it,ll run happy as the coil ( hairspring ) is not centred.1 point
-
Couldn't a clamp be made to hold the balance wheel and leave both hands free?1 point
-
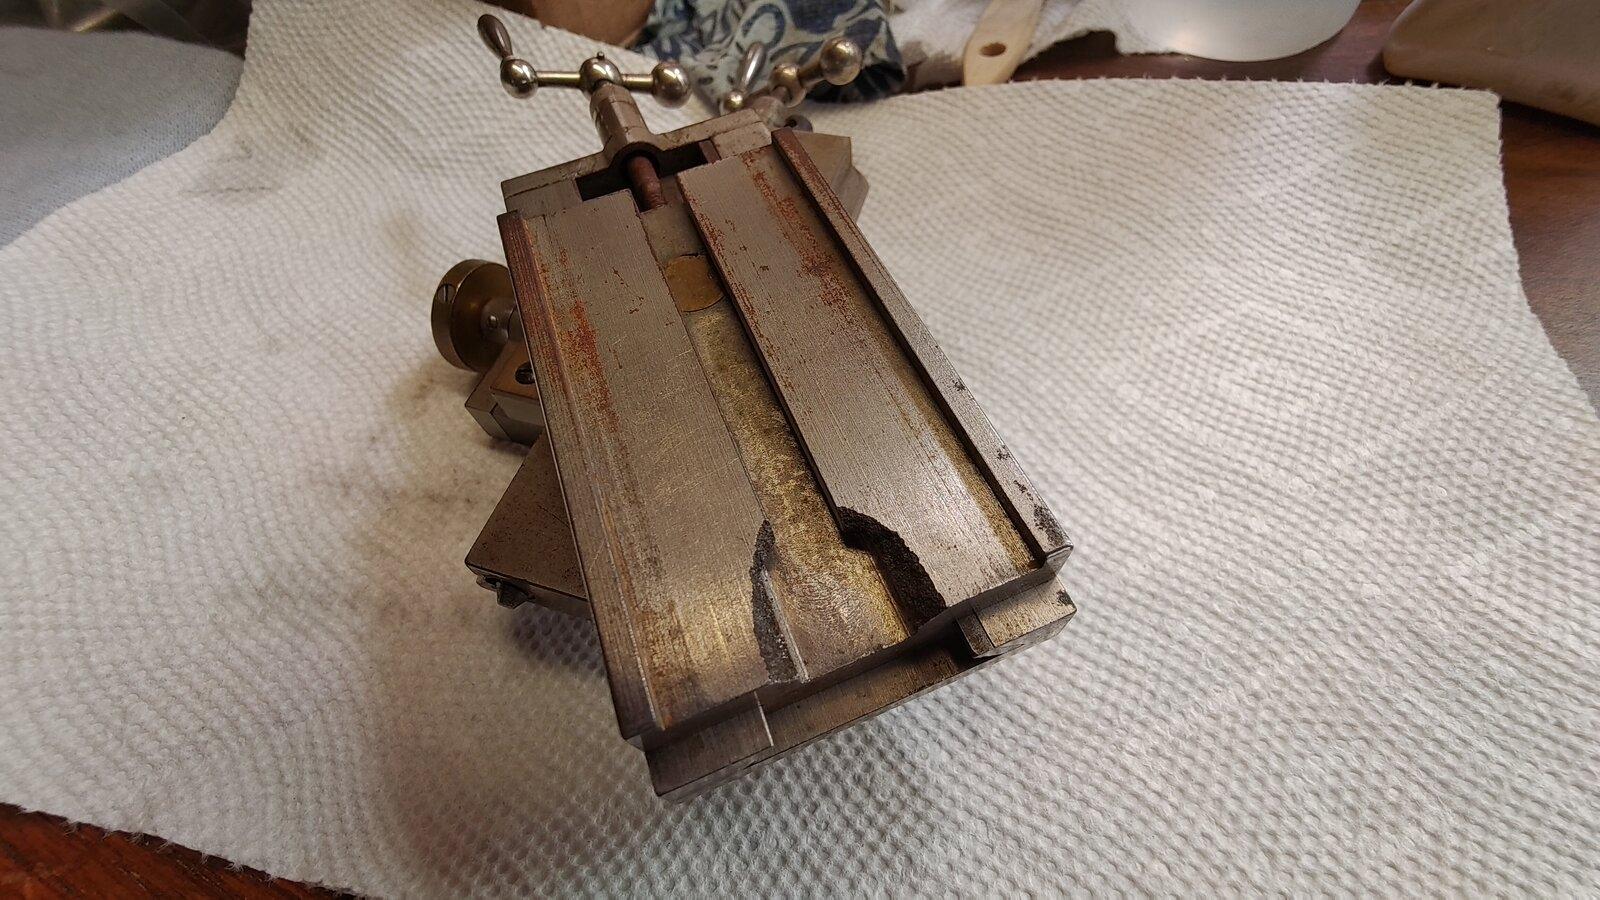
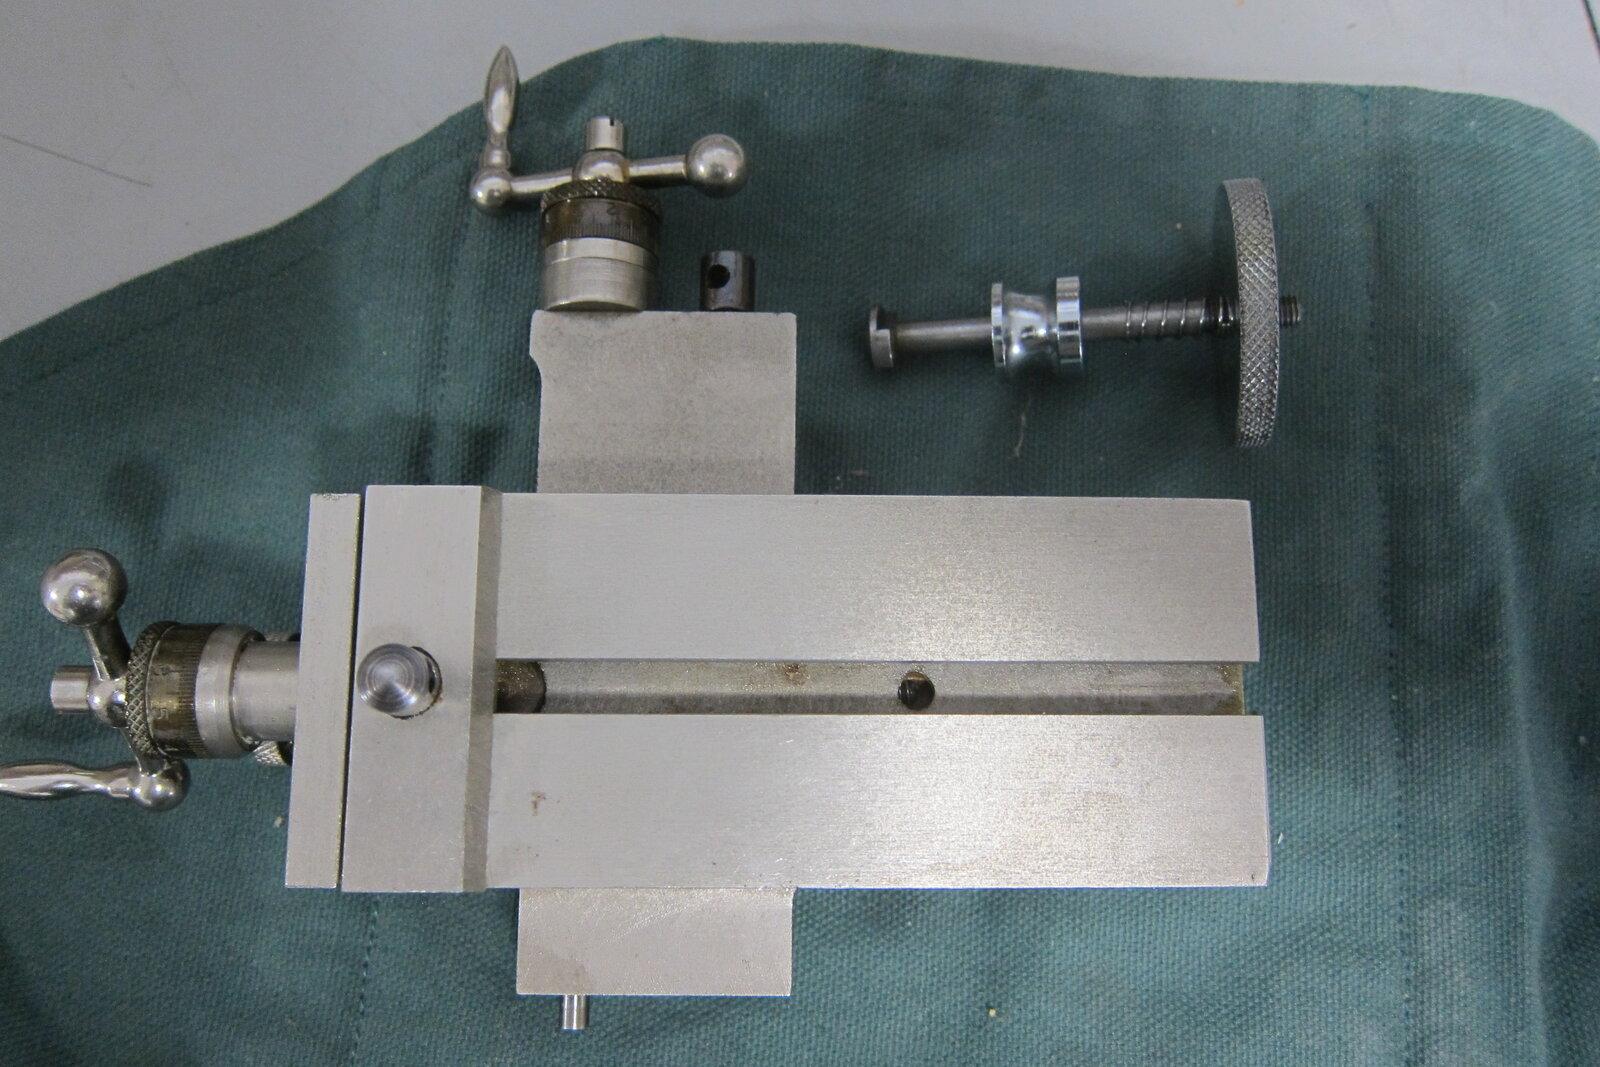
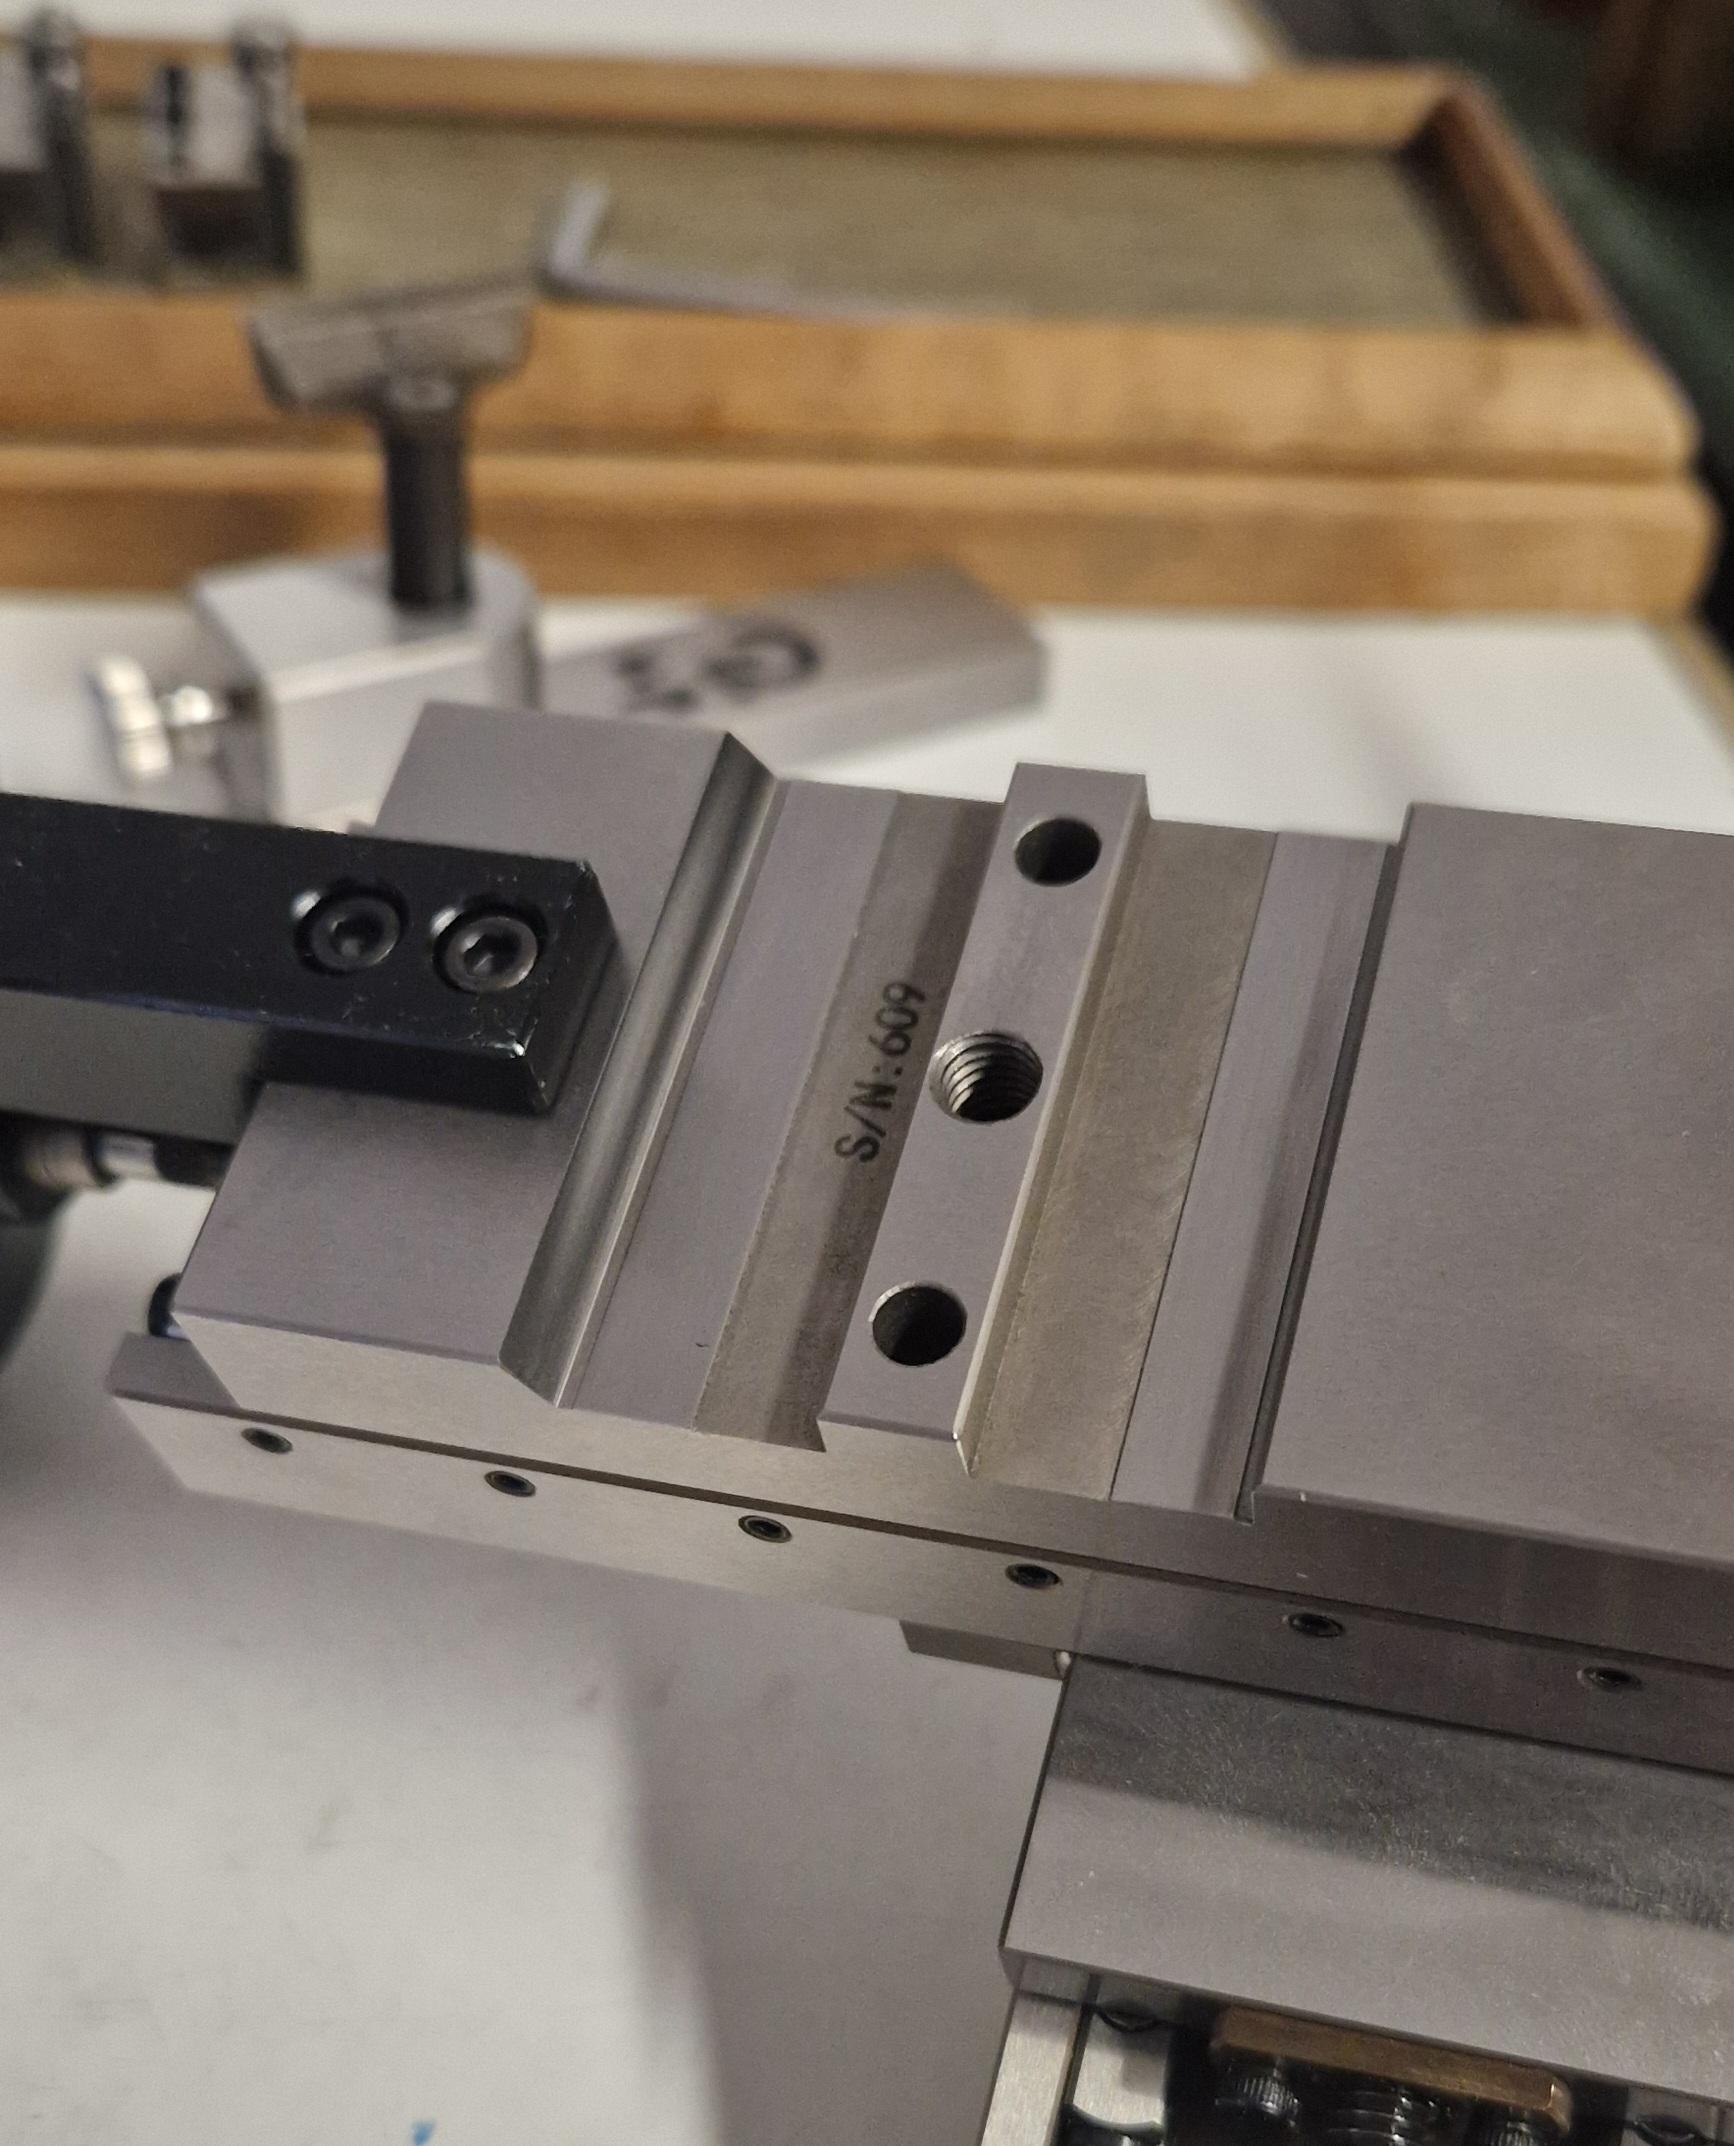
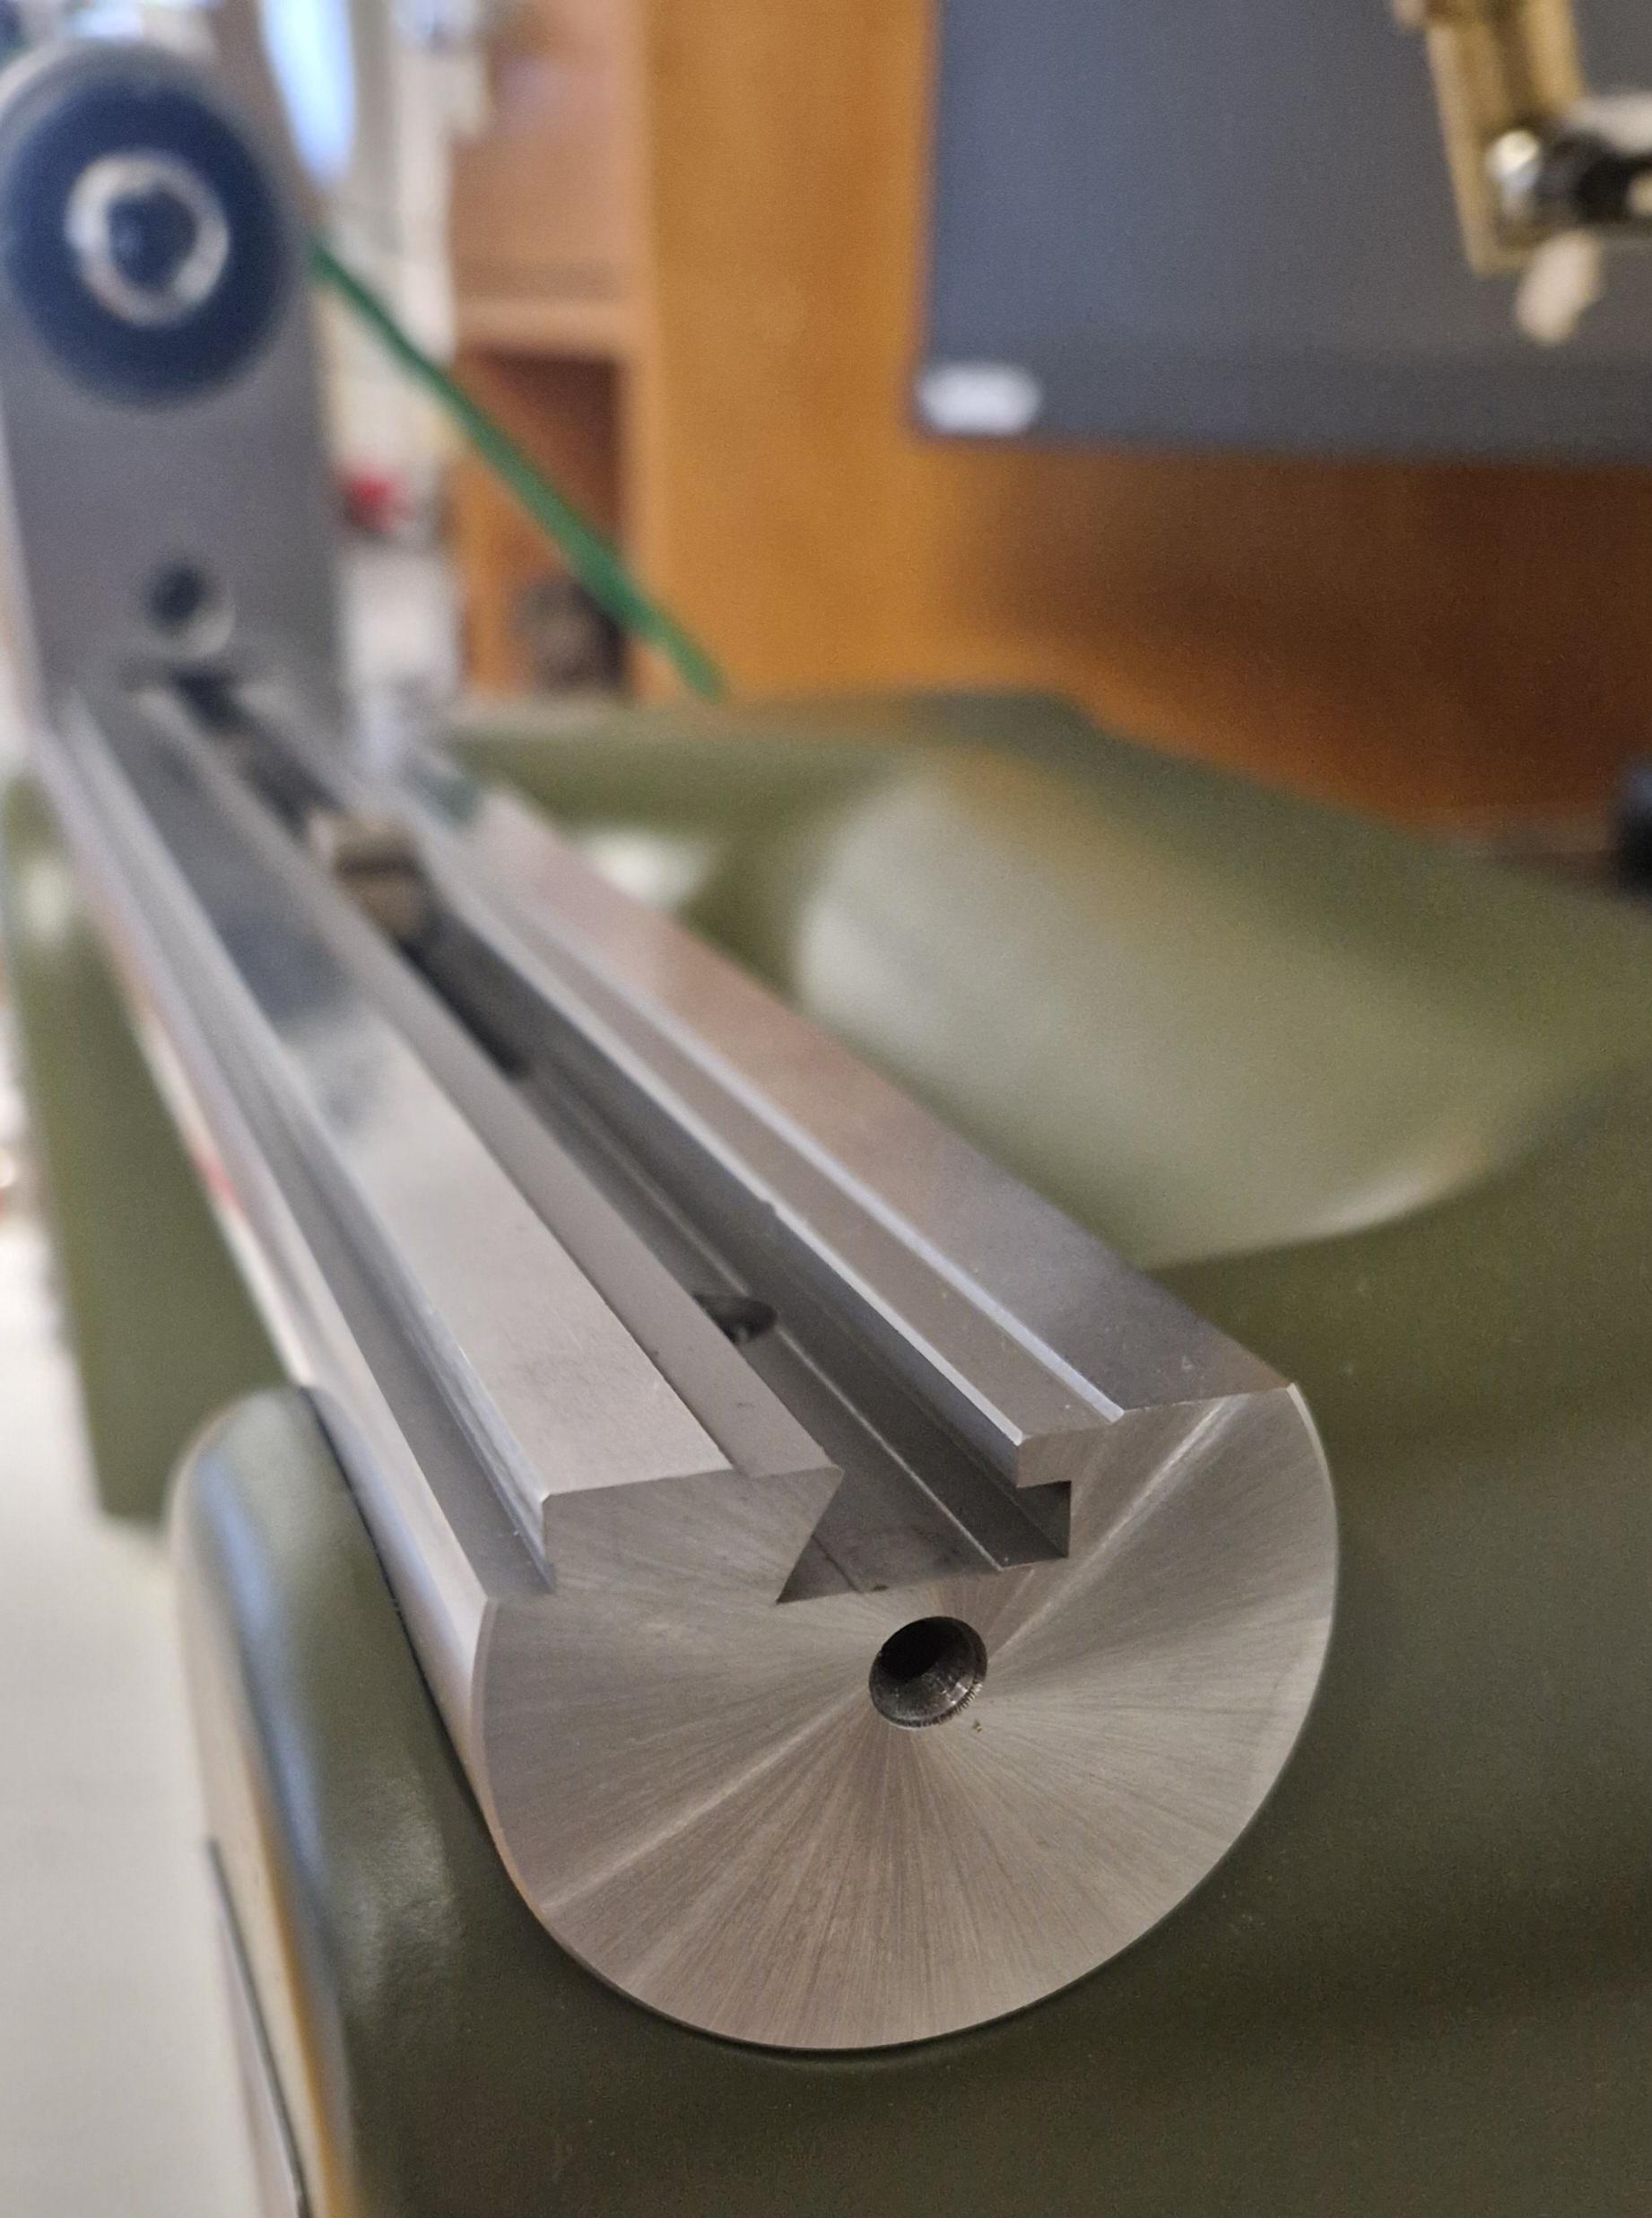
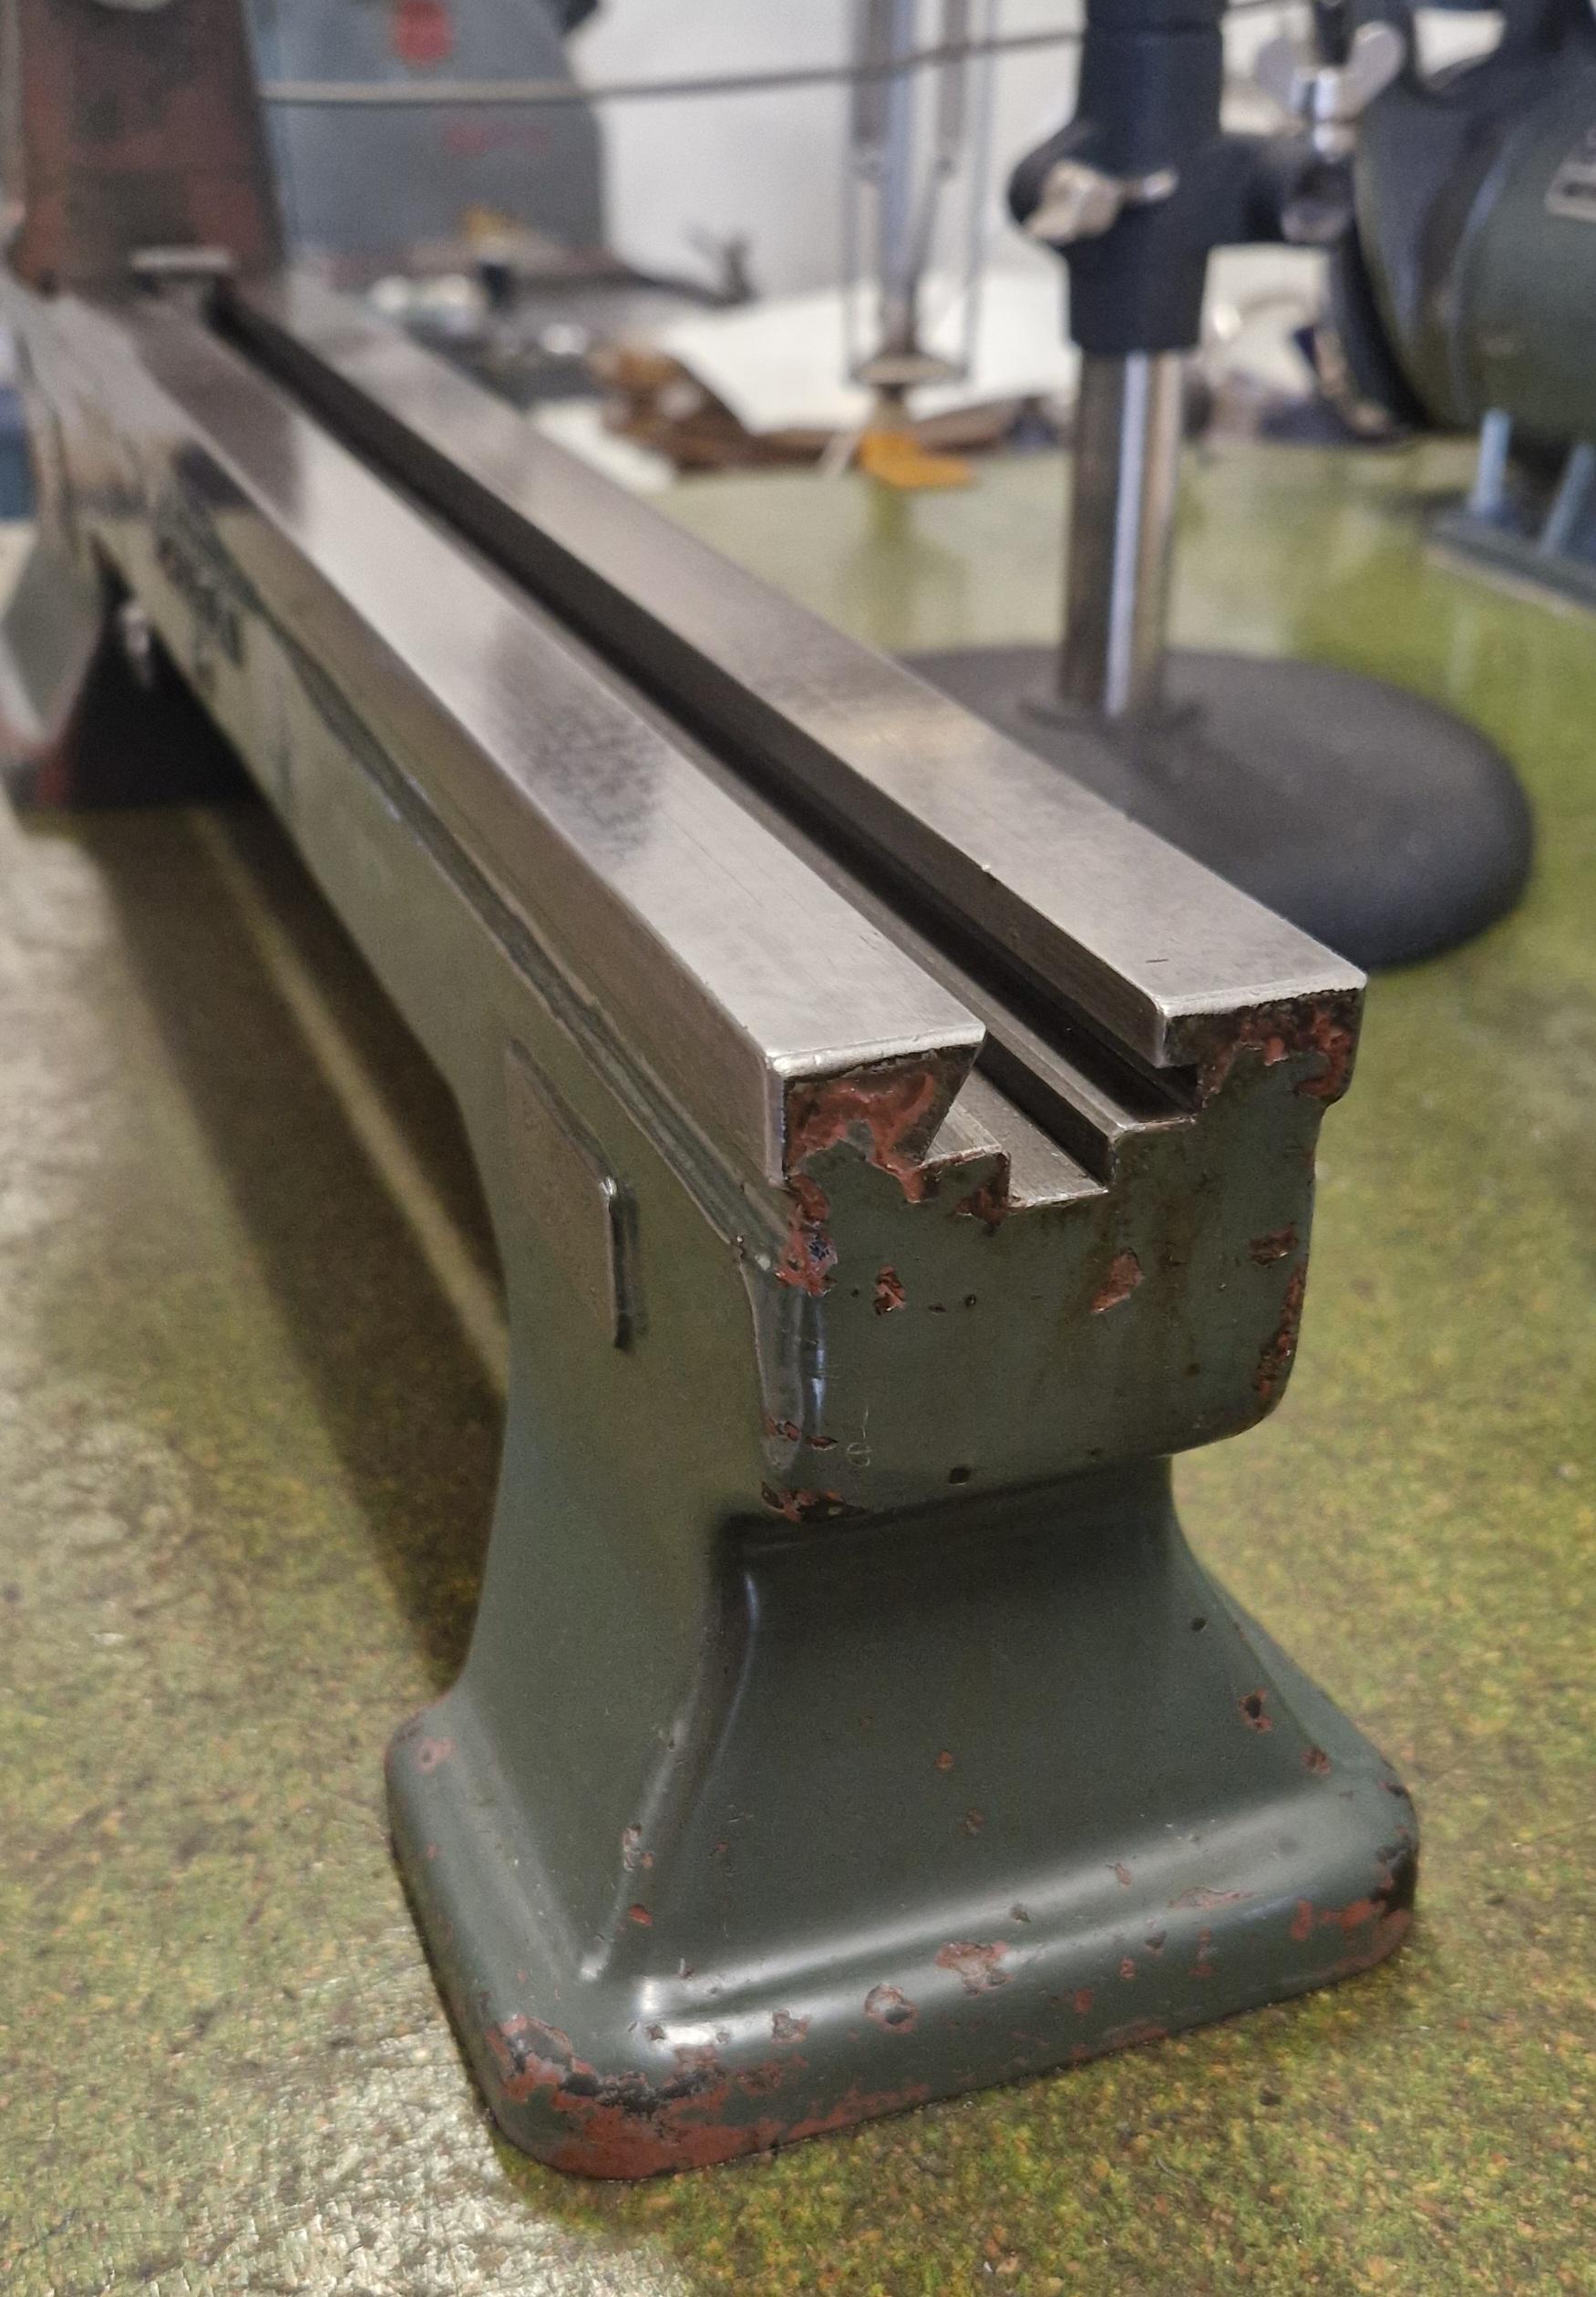
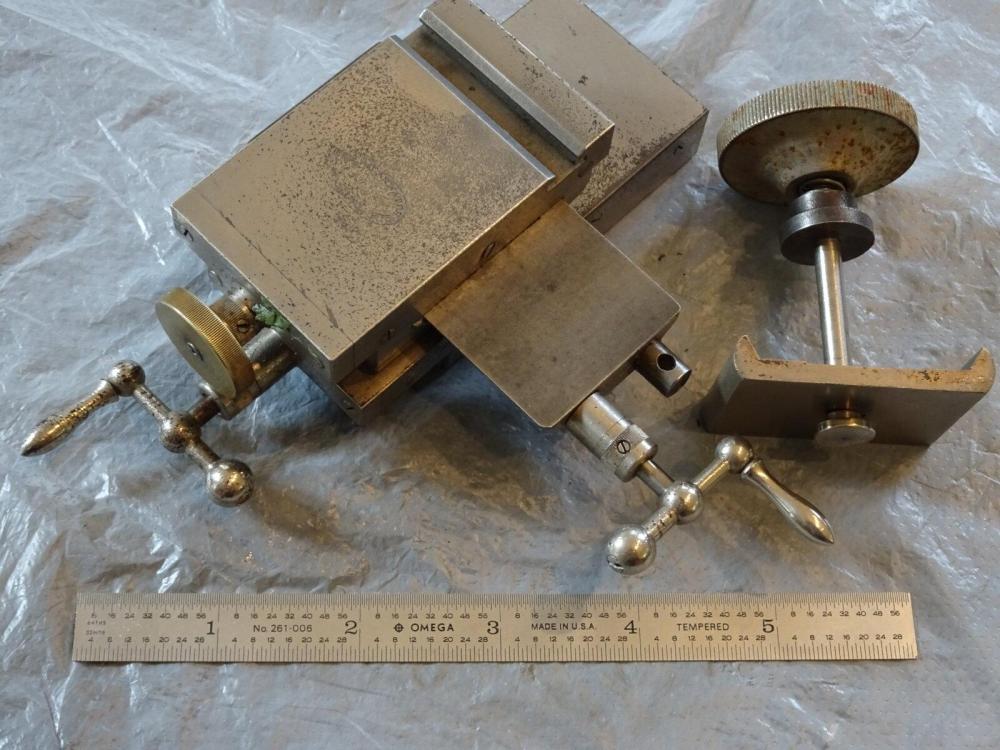
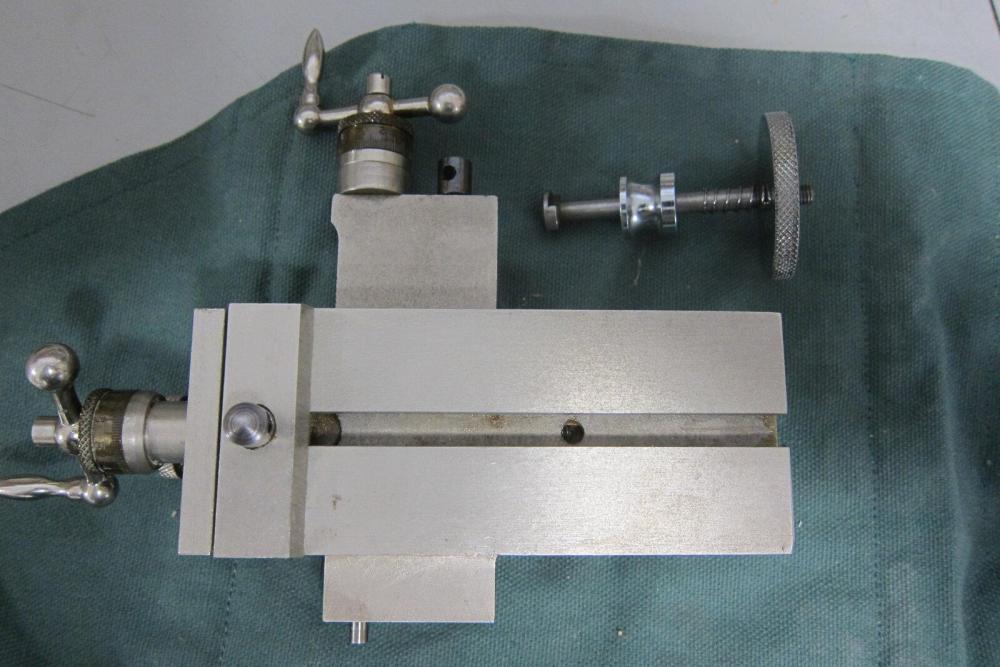
A good slide rest won't be cheap. They all look similar, but you want one with large settable thimbles, 1mm pitch screws that turn correctly, and if for a WW pattern lathe with a good foot system. I know Lorch and Boley made some with reverse screws, possibly Lorch too. Some German makes are for left hand use, with headstock to the right, and they can only rarely be switched to "normal". Lorch, and I suspect some others, also used 0.75mm pitch screws on some slides. That's an absolute b!tch to use. (Same for reverse screws) As for the foot, many slides require a shoe that fits the bed. In the pics is an example (ignore the broken bit), bottom view and top view with shoe. Not all beds are the same, even if nominally a WW pattern. Not all shoes fit all slides (obviously). A better design is the next pic, that's a Marshall slide, made very similarly to Levin. Leinen also made some with this design, but mostly they are found with a shoe. The Levin design will fit any WW bed, and even other shapes like Favorite and even the CZ50. Unfortunately, the CZ50 design of slide will only work on their bed though. Here's a view of the bottom of the CZ slide, and the bed profile. The front "rail" on the CZ is 90 degrees to the top surface, unlike WW, where both sides are 60 degrees. It's a sort of hybrid system, where the tailstock pulls up against the front rail for alignment, much like Favorite did (next pic), which is a scaled down version of what Schaublin used on their 65 and 70 lathes (last pic).


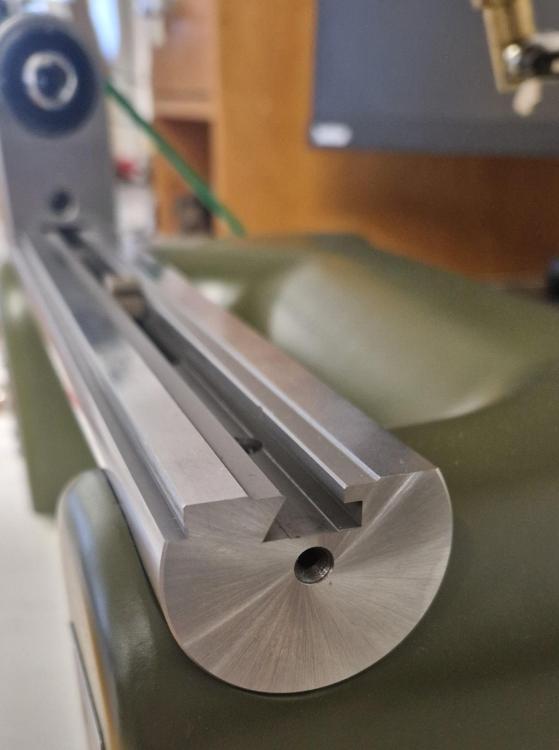
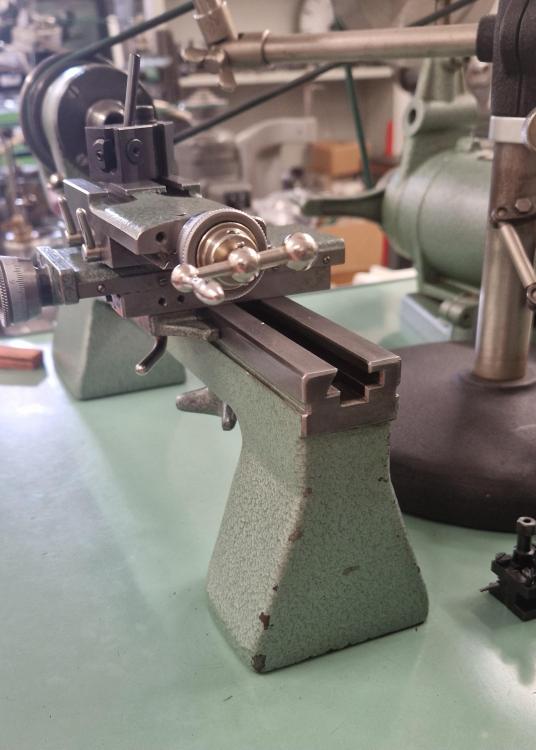
 1 point
 -
Last WJ slide I saw went for a good bit over £400 Rich Tom1 point
-
Yes, I know that video from Kalle. That's a great one. Indeed, the shock systems are pretty good.1 point
-
With me if I consider the movement is more than generally dirty ( i fix mostly 70 + year old watches ) i first remove the pallet fork and balance if they hold schellac...ie. pin lever movements would not...if not then i dont, then suspend the complete movement intact in a tin of paraffin/petrol for a 15 minute soak and then run the tin through a USM for 3 minutes while using a low rev motor to turn the movement suspension wire...this just helps the cavitations to reach all areas of the movement. Then blow through a dryer for 5 minutes....still turning and a final 2 minute turning dip in IPA to rinse off any residue remaining. This is my pre..pre clean, aids freeing up the movement for better inspection and fault finding before disassembly and makes taking it apart easier...effectively taking a cleaner less stuck together movement apart. I would then hand clean the plates, bridges, any large/medium parts and pinion leafs as well by hand if i thought necessary... depending how well they cleaned up in the first cleaning step and decide if they would benefit from a USM clean as well also spun. If not then just a 3 stage rotary wash proceedure. Do you mean rotating the baskets in a jar in an ultrasonic machine ? I also do this, but i wonder how fast the basket is spun and if there is a revolution speed limit that the cavitations are not as effective. A low speed seems to make sense to me.1 point
-
One of the things when you're looking at cleaning machines of any type is functionality and is everything there? So for instance you get a machine really cheap but it's missing things like the jars are the baskets then the cost will go up considerably especially if you're buying original Elma as their stuff is really expensive. Then if you get bonus baskets and things that's really nice. Many years ago one of the shops that I worked at would run the cleaning in a beaker in the ultrasonic tank. Then the rinse was in one of those vintage black L&R machines which they really were meant to last forever which is typical of most watch cleaning machines. Plus I've seen at least one video on YouTube where someone was doing the same thing with that and then the RM 90 machine for the rinsing and drying.1 point
-
When I got my ELMA rotational-only machine I thought I'd never have to clean by hand again, but oh how wrong I was. At first, I thought it was because I was using the wrong cleaning fluids (ELMA RED 1:9) and planned to try more expensive cleaning fluids from L&R and ELMA, but after watching the videos I linked to, I now realise that it wouldn't have helped. My method as I think I mentioned, is to brush off the parts in a degreaser. It's effective but not very healthy if you inhale the vapours so from that perspective Rodico may be better but possibly not as efficient!? To get wheel pinions and pivots clean, I pre-wash them by pressing them into pith wood buttons and to get a better effect, I first drip degreasing (Horosolv) into the pith wood. It works very well and it is critical to get all wheel pinions clinically clean.1 point
-
I think the biggest problem you have here is the use of aluminium for your pan. Aluminium conducts heat fast, too light, the heat is dissappearing too quickly, you need a metal that will absorb and store the heat evenly. Why cast iron is used for heating systems and is good for cooking with, so definitely steel, and thickish would be good.1 point
-
Do you mean manually wind with the crown as this movement can't be wound with the crown?1 point
-
Welcome to the WRT forum. Indicatations point to, Broken mainspring OR spring eye disengaged from arbour hook. Check ratchets wheels square hole for wear. Check arbour's square shoulder for wear. Ratchet wheel should fit on arbour square perfectly. Ratchet wheel fitted on arbour upside down.1 point
-
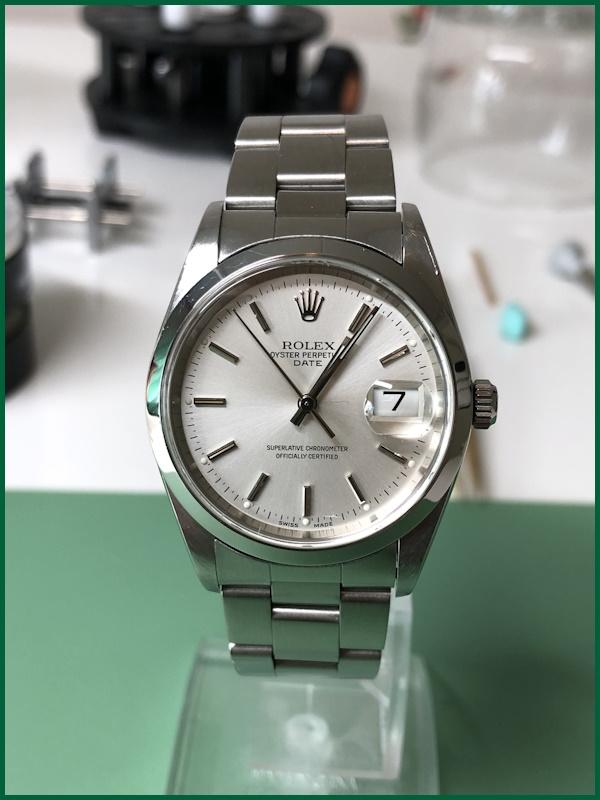
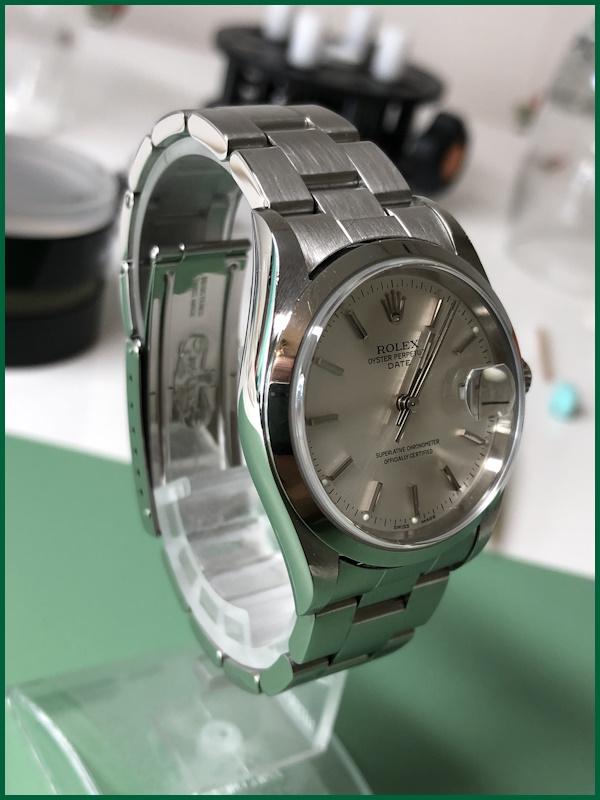
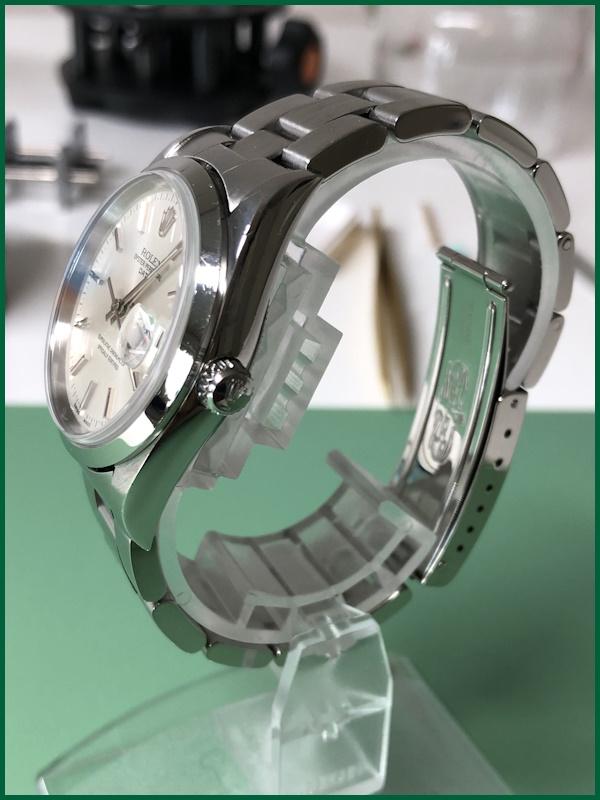
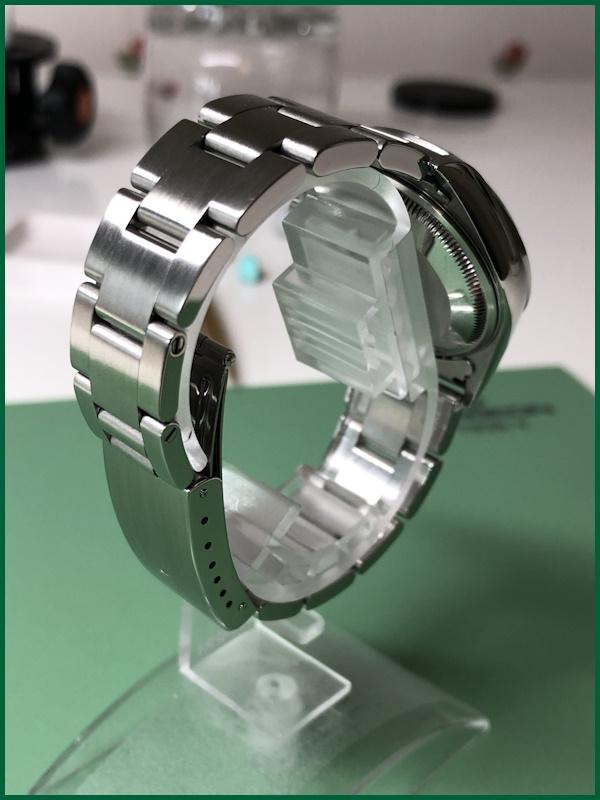
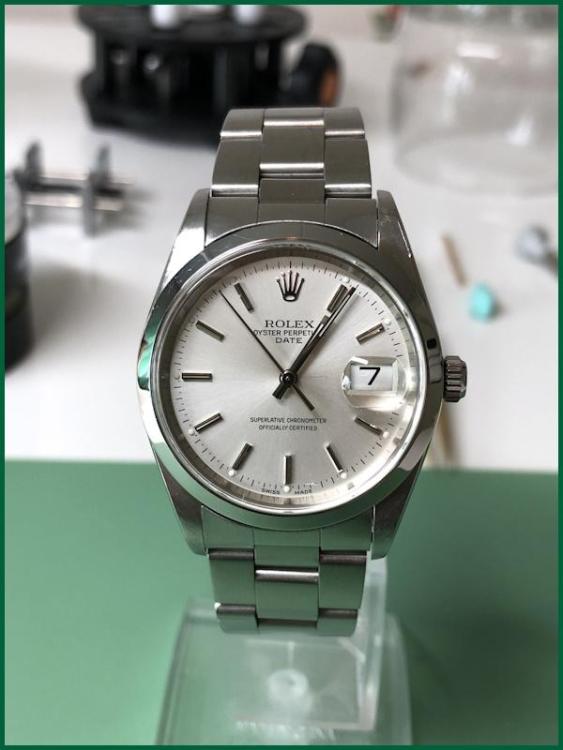
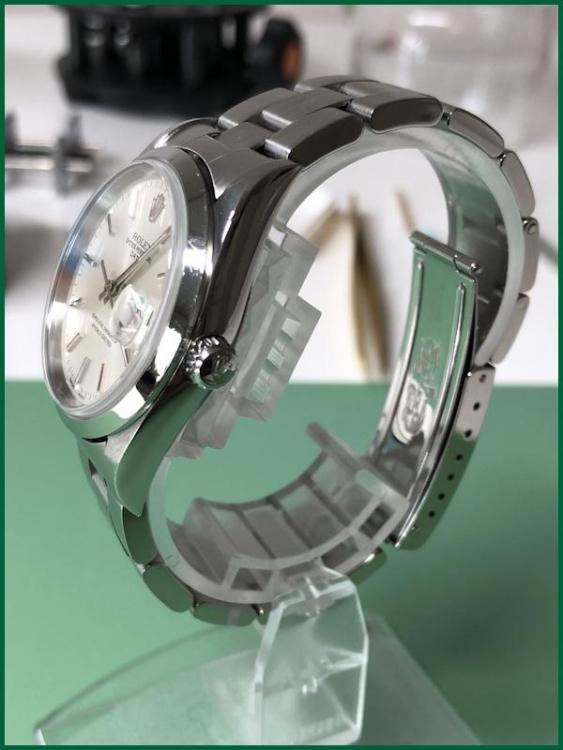
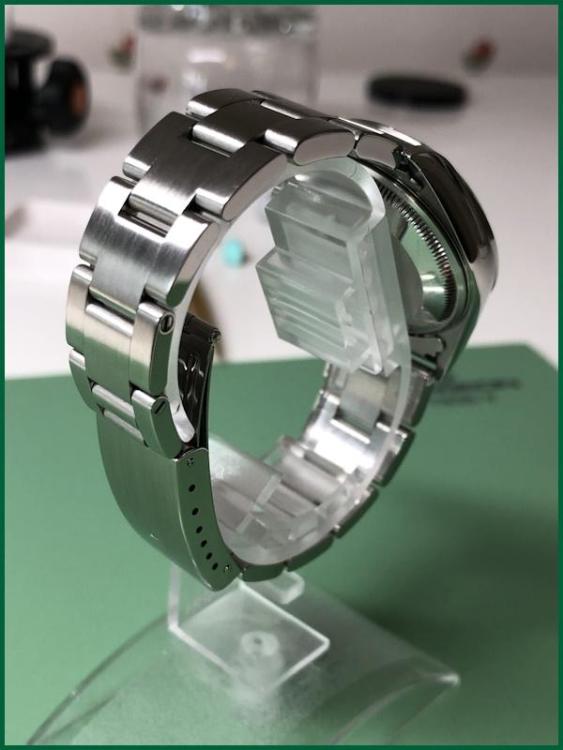
this is one of the reasons Rolex watch repair is so expensive as typically refinishing the case is included in the repair.. then if you really obsessed with case refinishing often times typically the band and sometimes the case will have satin finish with shiny finish. but yes looking at your picture refinishing or polishing the case makes it look better and that's all the customer typically sees anyway all the work that you did inside they're not going to see other than as long as the watch keeps time. So making the outside looks nice makes the customer happy. I think you would have noticed by now if you had needed to regulate. As the timing machine in the shop sits behind me I get to see all sorts of bizarre things like Rolex watches that people of played with. typically a Rolex watch will keep phenomenal time but often times people without timing machines or possibly functional brains. We'll play with the regulating weights and you end up with like horrible positional errors which is very noticeable of course the timing machine. or briefly when we were short a watchmaker we set work out and one day when the persons bringing the watches back I did ask whether he had a timing machine. Yes he assured me that he had a timing machine but based on what we were seeing he never looked at the timing and more than one position. Plus I asked about the lubrication a pallet fork pivots and somebody told him that was a good thing to do. Fortunately we got a better watchmaker in-house and this person went away. Because that meant the owner would spend a lot of time regulating the Rolex watch to the way it's supposed to be regulated which kinda canceled out the effect of sending a watch out to be serviced if it didn't keep time when I came back depending upon the size of the watches you work on the movement holder is below are very nice to use. what makes the holders interesting is one side is for holding one side of the movement and the other side has a slightly different sized to hold the dial side. Typically on Swiss watches the dial side will have a lip that's a slightly different diameter than the movement size. In other words these were designed for specific size watches. Then as nice as they are cousins does not have a nice price at all. I thought they were expensive many years ago where I purchased mine but not as expensive as this. Maybe the Chinese have cloned them now. But still if you're working on similar size watches I found they were really nice. https://www.cousinsuk.com/product/by-size-bergeon-5914?code=M431051 point
-
So finally, mission accomplished! Preliminarily everything looks very good and I am particularly pleased with the repair of the rotor. It was undeniably a bit nerve-wracking to rivet the axle to the rotor but it now seems to work as well as when the watch was new. Who would have thought that you could repair a Rolex by hitting it really hard with a hammer? Although the owner did not ask me to do so, I polished the case and the bracelet. I was cautious with the case so as not to jeopardise its shape. All I did was polish with Polinoxx polishing compound on a Felpato mop to bring back the lustre. The bracelet I fully polished and brushed as it was very scratched and dull and lost most of its lustre. I got the impression that Rolex stainless steel is extremely hard compared to other watches I polished. It now remains to test the watch properly for a few days. It is currently spinning on my cyclomat. Preliminarily, the precision seems to be according to specification. I have adjusted the beat error but lack the Rolex special tool to adjust the rate. We will see if it is needed. In many ways, servicing and repairing my first Rolex has been educational and a lot of fun, if a little nerve-wracking at times, and all the help I've received in this thread has been invaluable. So once again a big warm thank you!

 1 point
 -
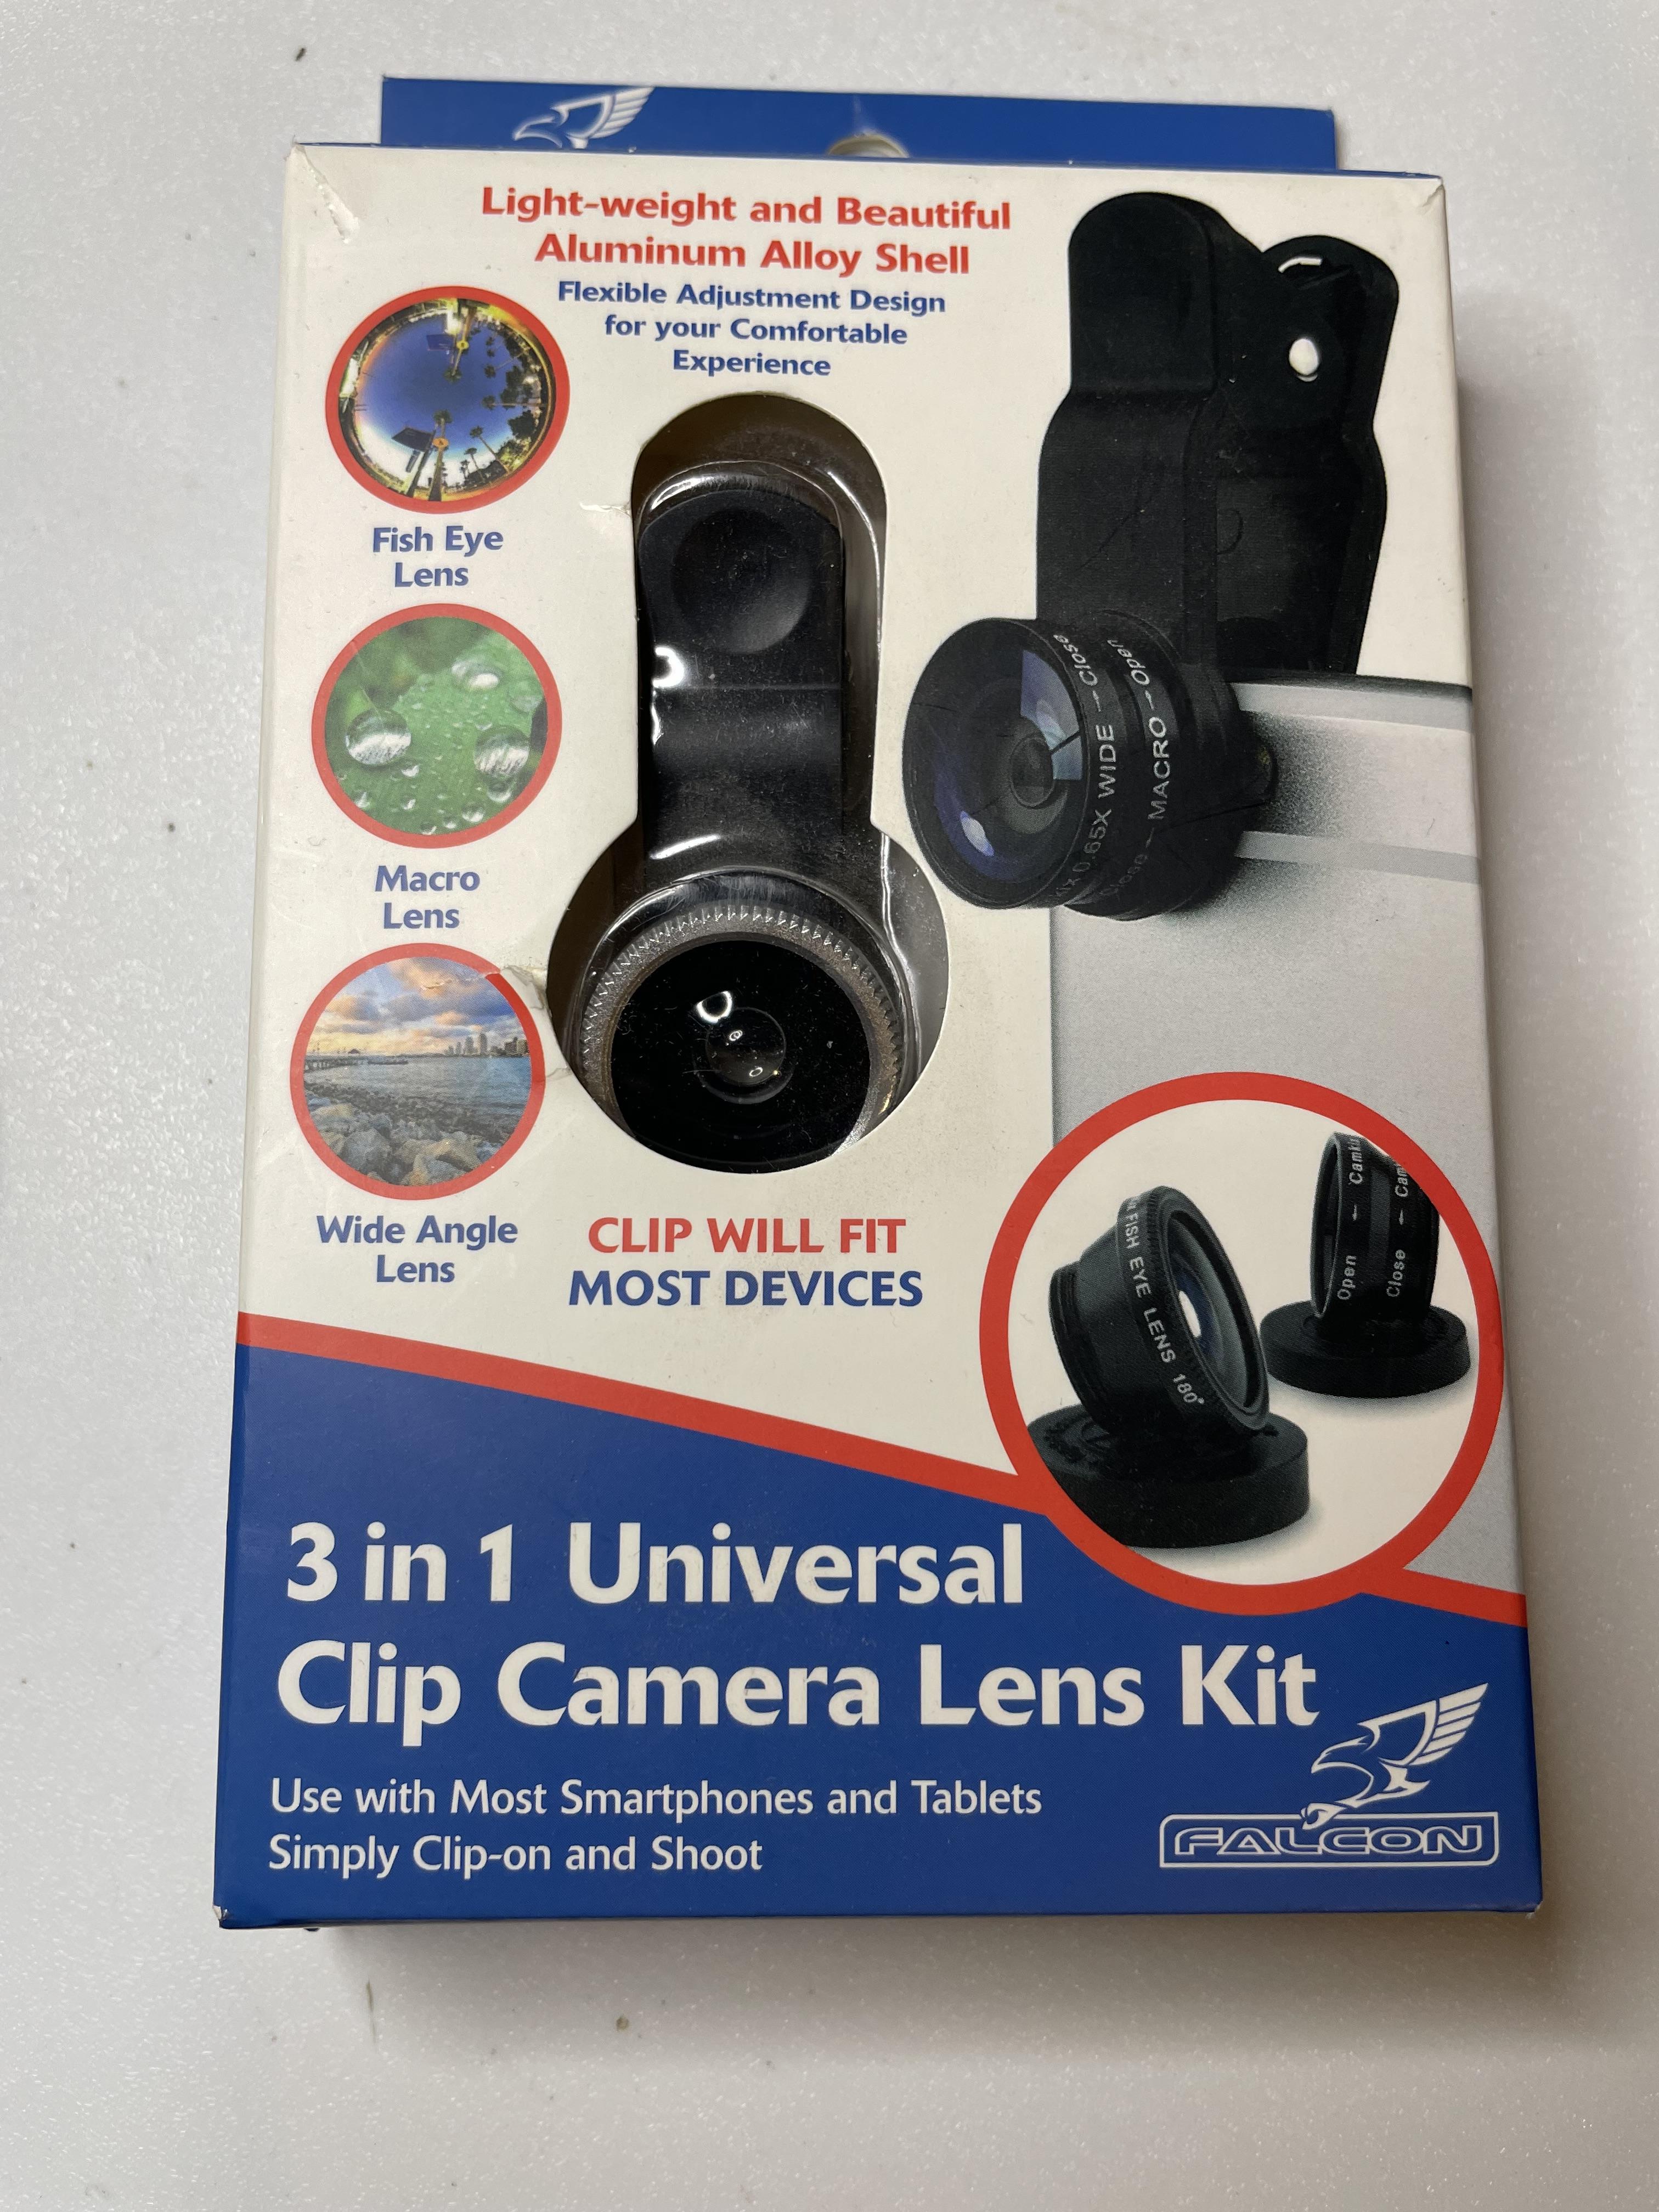
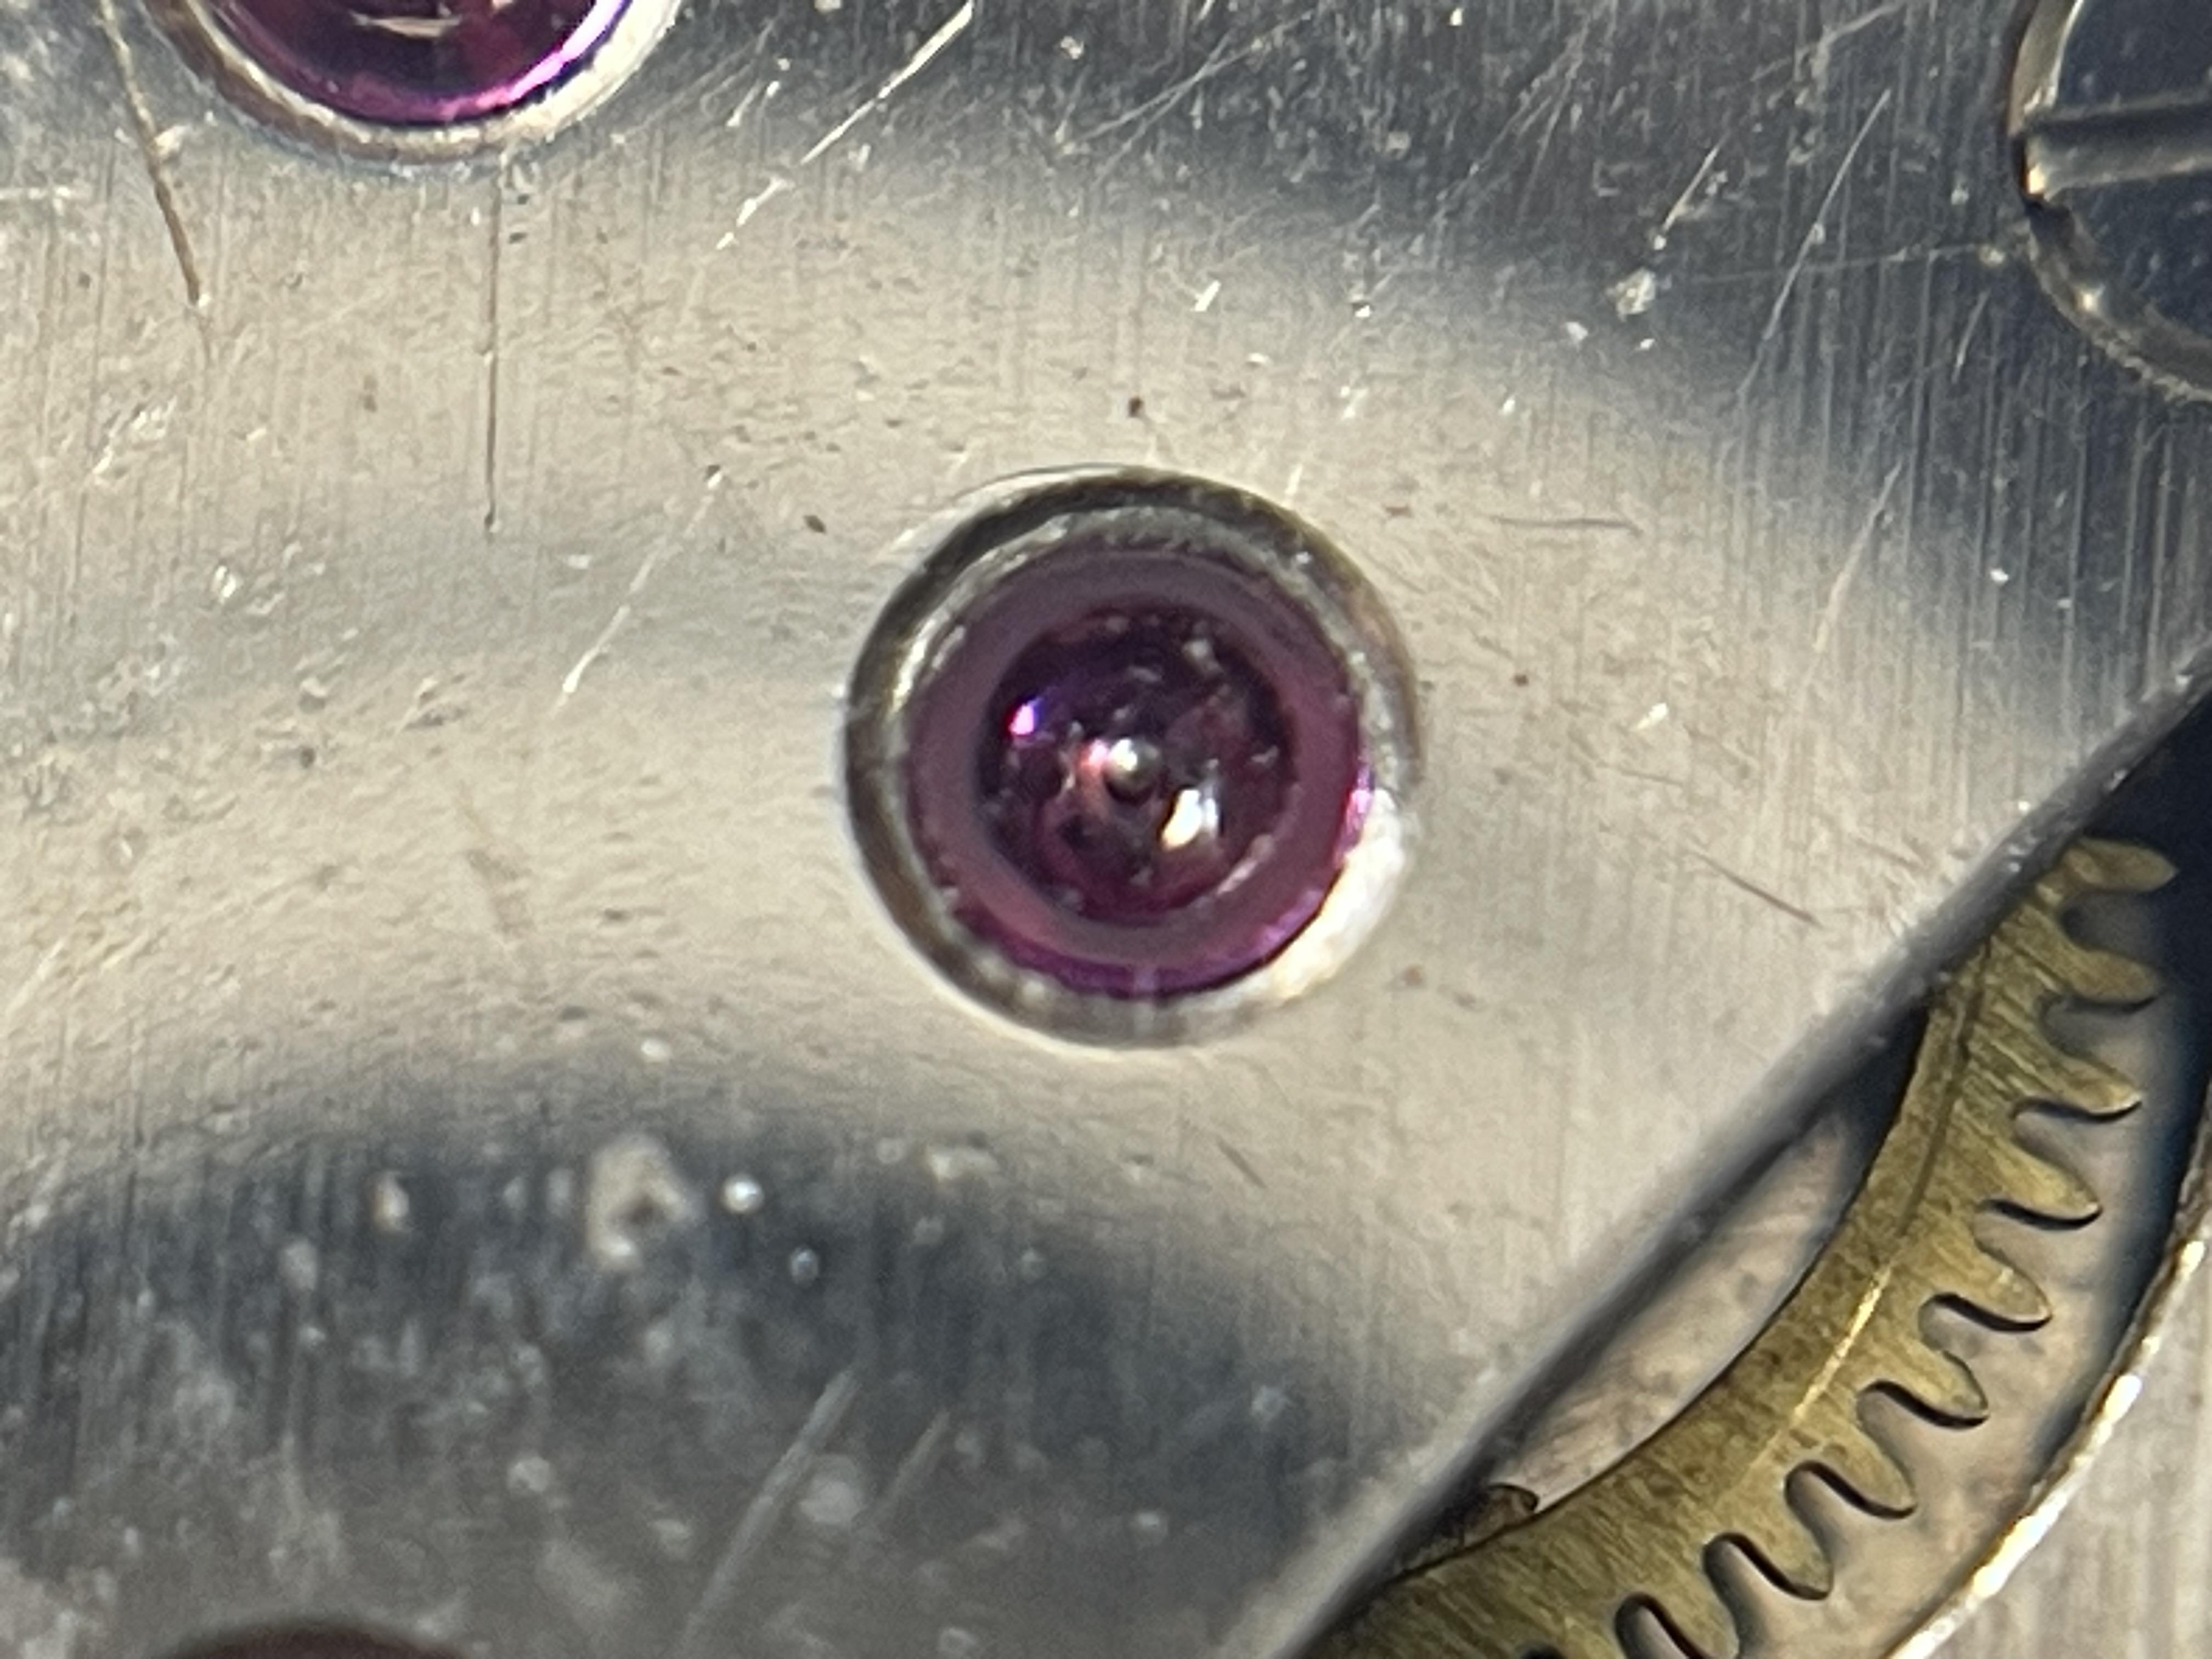
I saw a mention in one thread with the OP saying they could not take good photos of a watch movement they were asking about, so I thought I'd post my ultra-cheapo method: A local second hand shop had a stack of the nasty looking "clip on" lens kits for smartphones; they were priced at 50p so I got one out of curiosity. I didn't even try they for weeks, until I was struggling to take a high enough magnification of a damaged piece of jewellery, for a friend. The "macro" lens in these kits is actually amazing, it's very effective - and the full kits around only around £3 to £4 on ebay. The first photos are the particular 50p lens kit I got, and the lens I'm using from that, then examples photos, using my iphone with the macro lens in the clip and approximately centred over the camera lens. It does need a good light, and finding the exact height for best focus can be tricky sometimes, but the results are worth it. The movement is a Junghans calibre 73 from ebay:


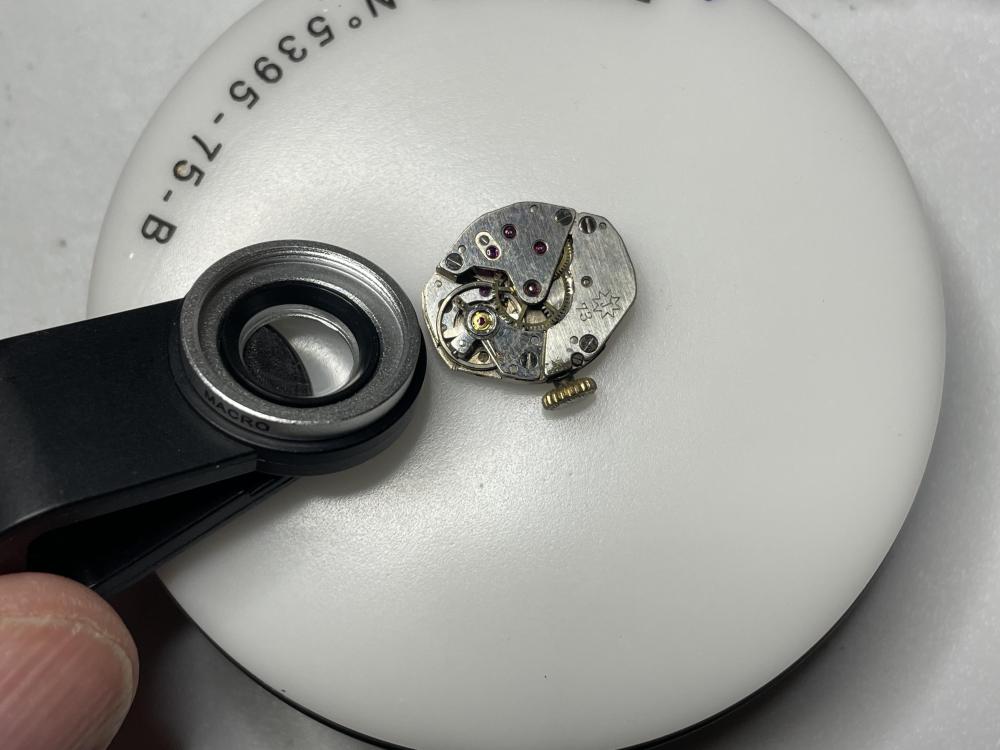 1 point


.thumb.jpg.cb17a66989f1e796fd4217db2e9ca9df.jpg)