Leaderboard


.thumb.jpg.cb17a66989f1e796fd4217db2e9ca9df.jpg)
Popular Content
Showing content with the highest reputation on 10/24/24 in Posts
-
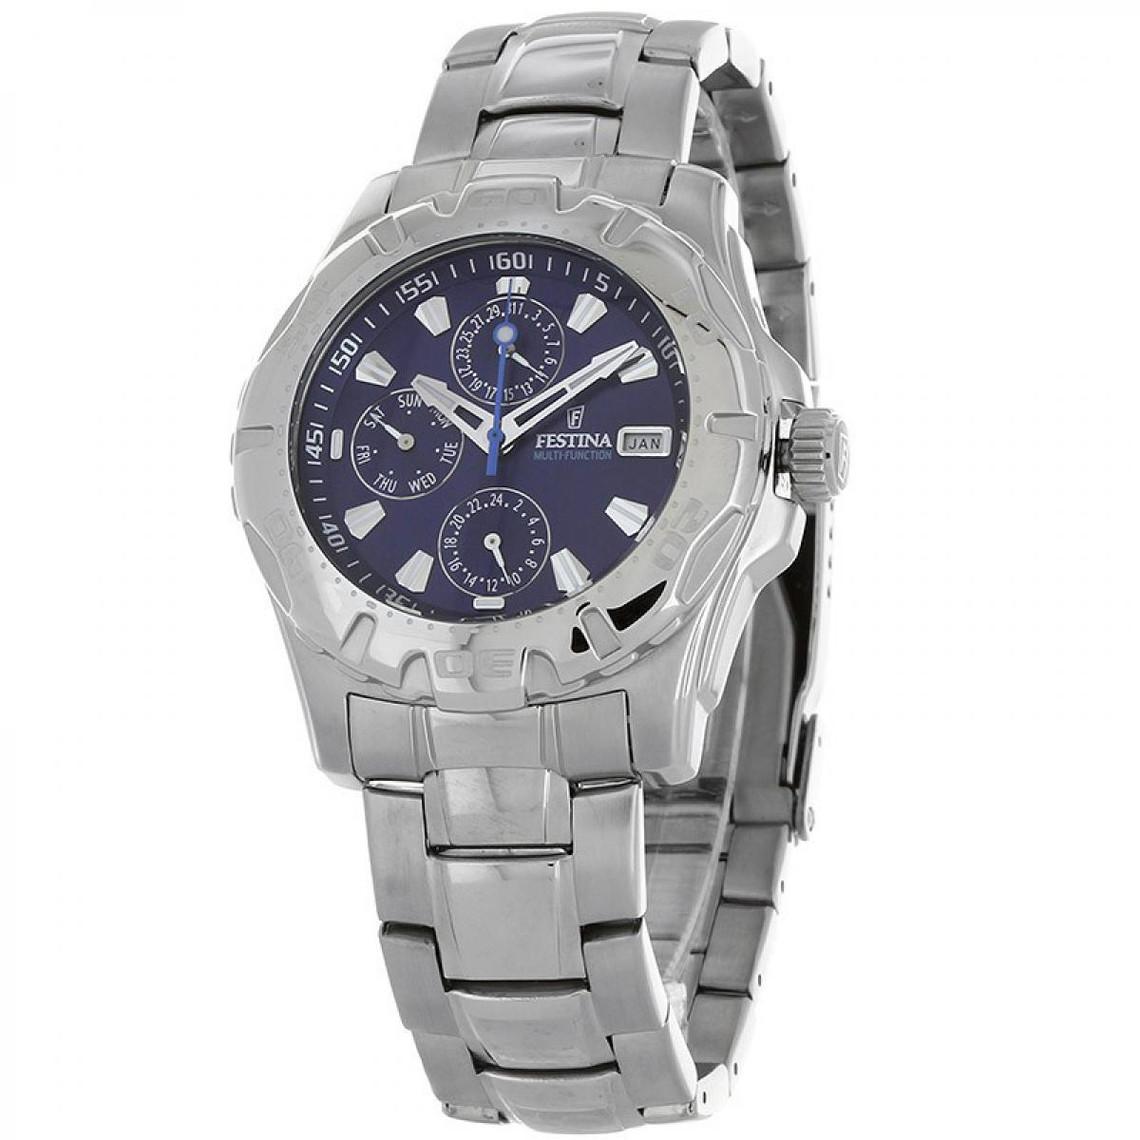
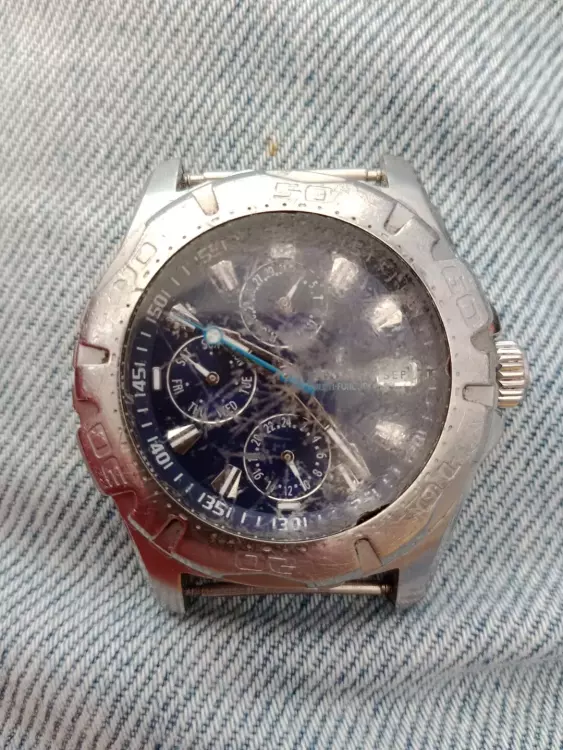
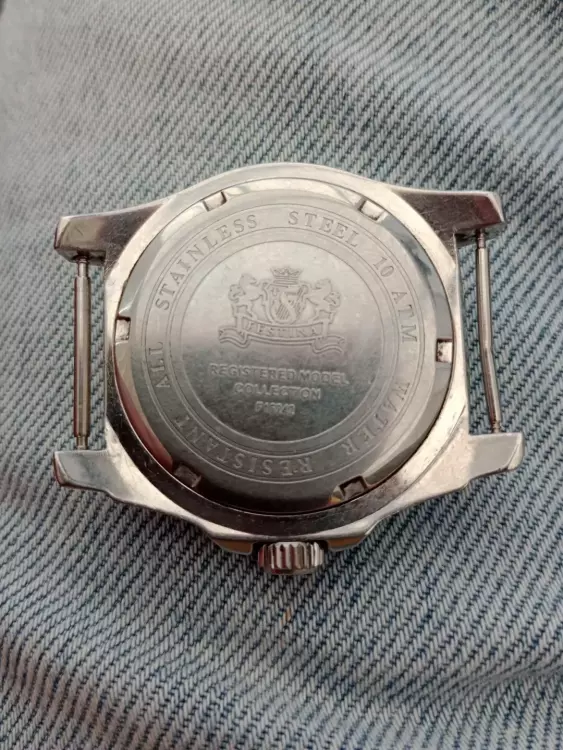
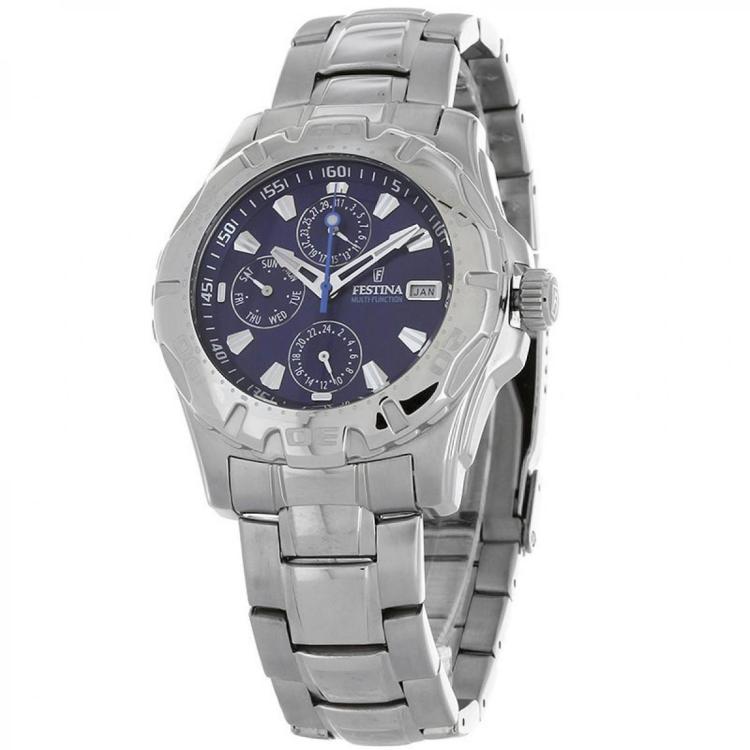
A Festina F16242/A based on the Miyota 6p89 which has seen better days. On the plus side, at 0.99p the price was right. I do wonder how the poor thing ended up in this state. This is what they should look like. Lets see if this one is revivable.
 5 points
 -
I've got a Rolex 3185 GMT that came in today which will be on the bench next week with a rotor axle that needs replacing and I'll make a vid of adjusting the Microstella screws. The angles tweezers you've got will work fine.4 points
-
Its like a fun day out at scammers-ville ..... scammers-0 WRT-lots and lots and lots and lots . Superheros of the unwitting , just off to wash my spandex outfit4 points
-
Appreciate all the information. As mentioned I buy and sell antique jewelry so when my family asked for help I couldn't say for sure. The little research I did prior to finding his forum, made me think it was a fake. Some of the reason pointed out are the ones that made me feel uneasy. Happy you all were able to confirm for sure. I let my cousin know and she was thankful4 points
-
Fair enough but we don't have the same constraints so let's carry on helping genuine requests for help with spotting fakes.3 points
-
The obvious one is the caseback - the early Santos were front loaders - with through bolts from the bezel, the later were square-backed screwed by fours screws at each corner. They were never round screwback cases so this one falls at the frirst fence, at it were. Also look at the bracelet lugs, they should be SEL's. That's the obvious two. No need to look further in than those.3 points
-
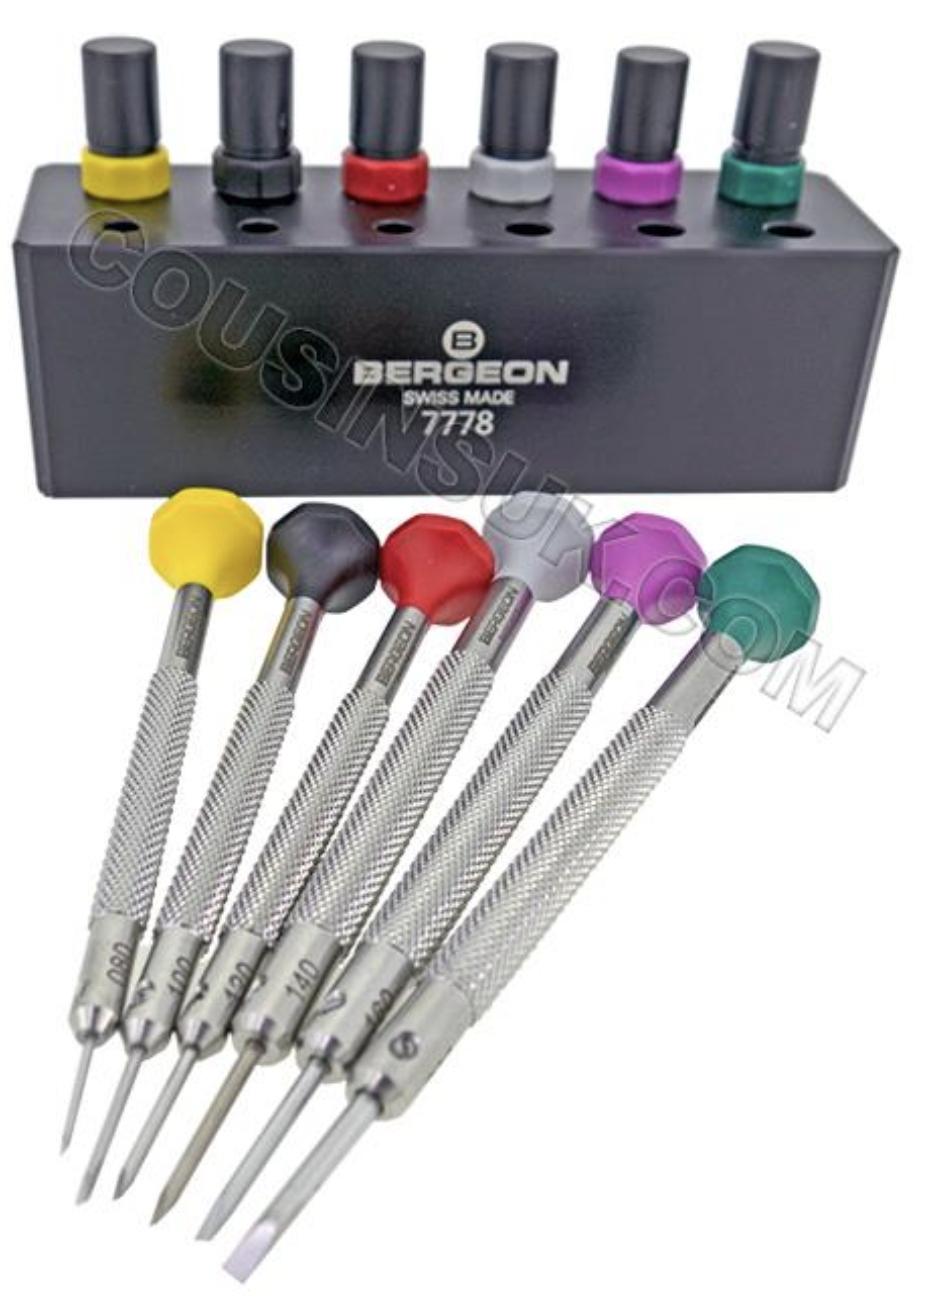
For reference, this is the set I have (80, 100, 120, 140, 160, 200) and all I ever needed. Except, the 60 which is often needed for the tiny screws in non-shock protected balance jewels. I bought that one extra. https://www.cousinsuk.com/product/bergeon-screwdriver-sets-static-stands
 3 points
 -
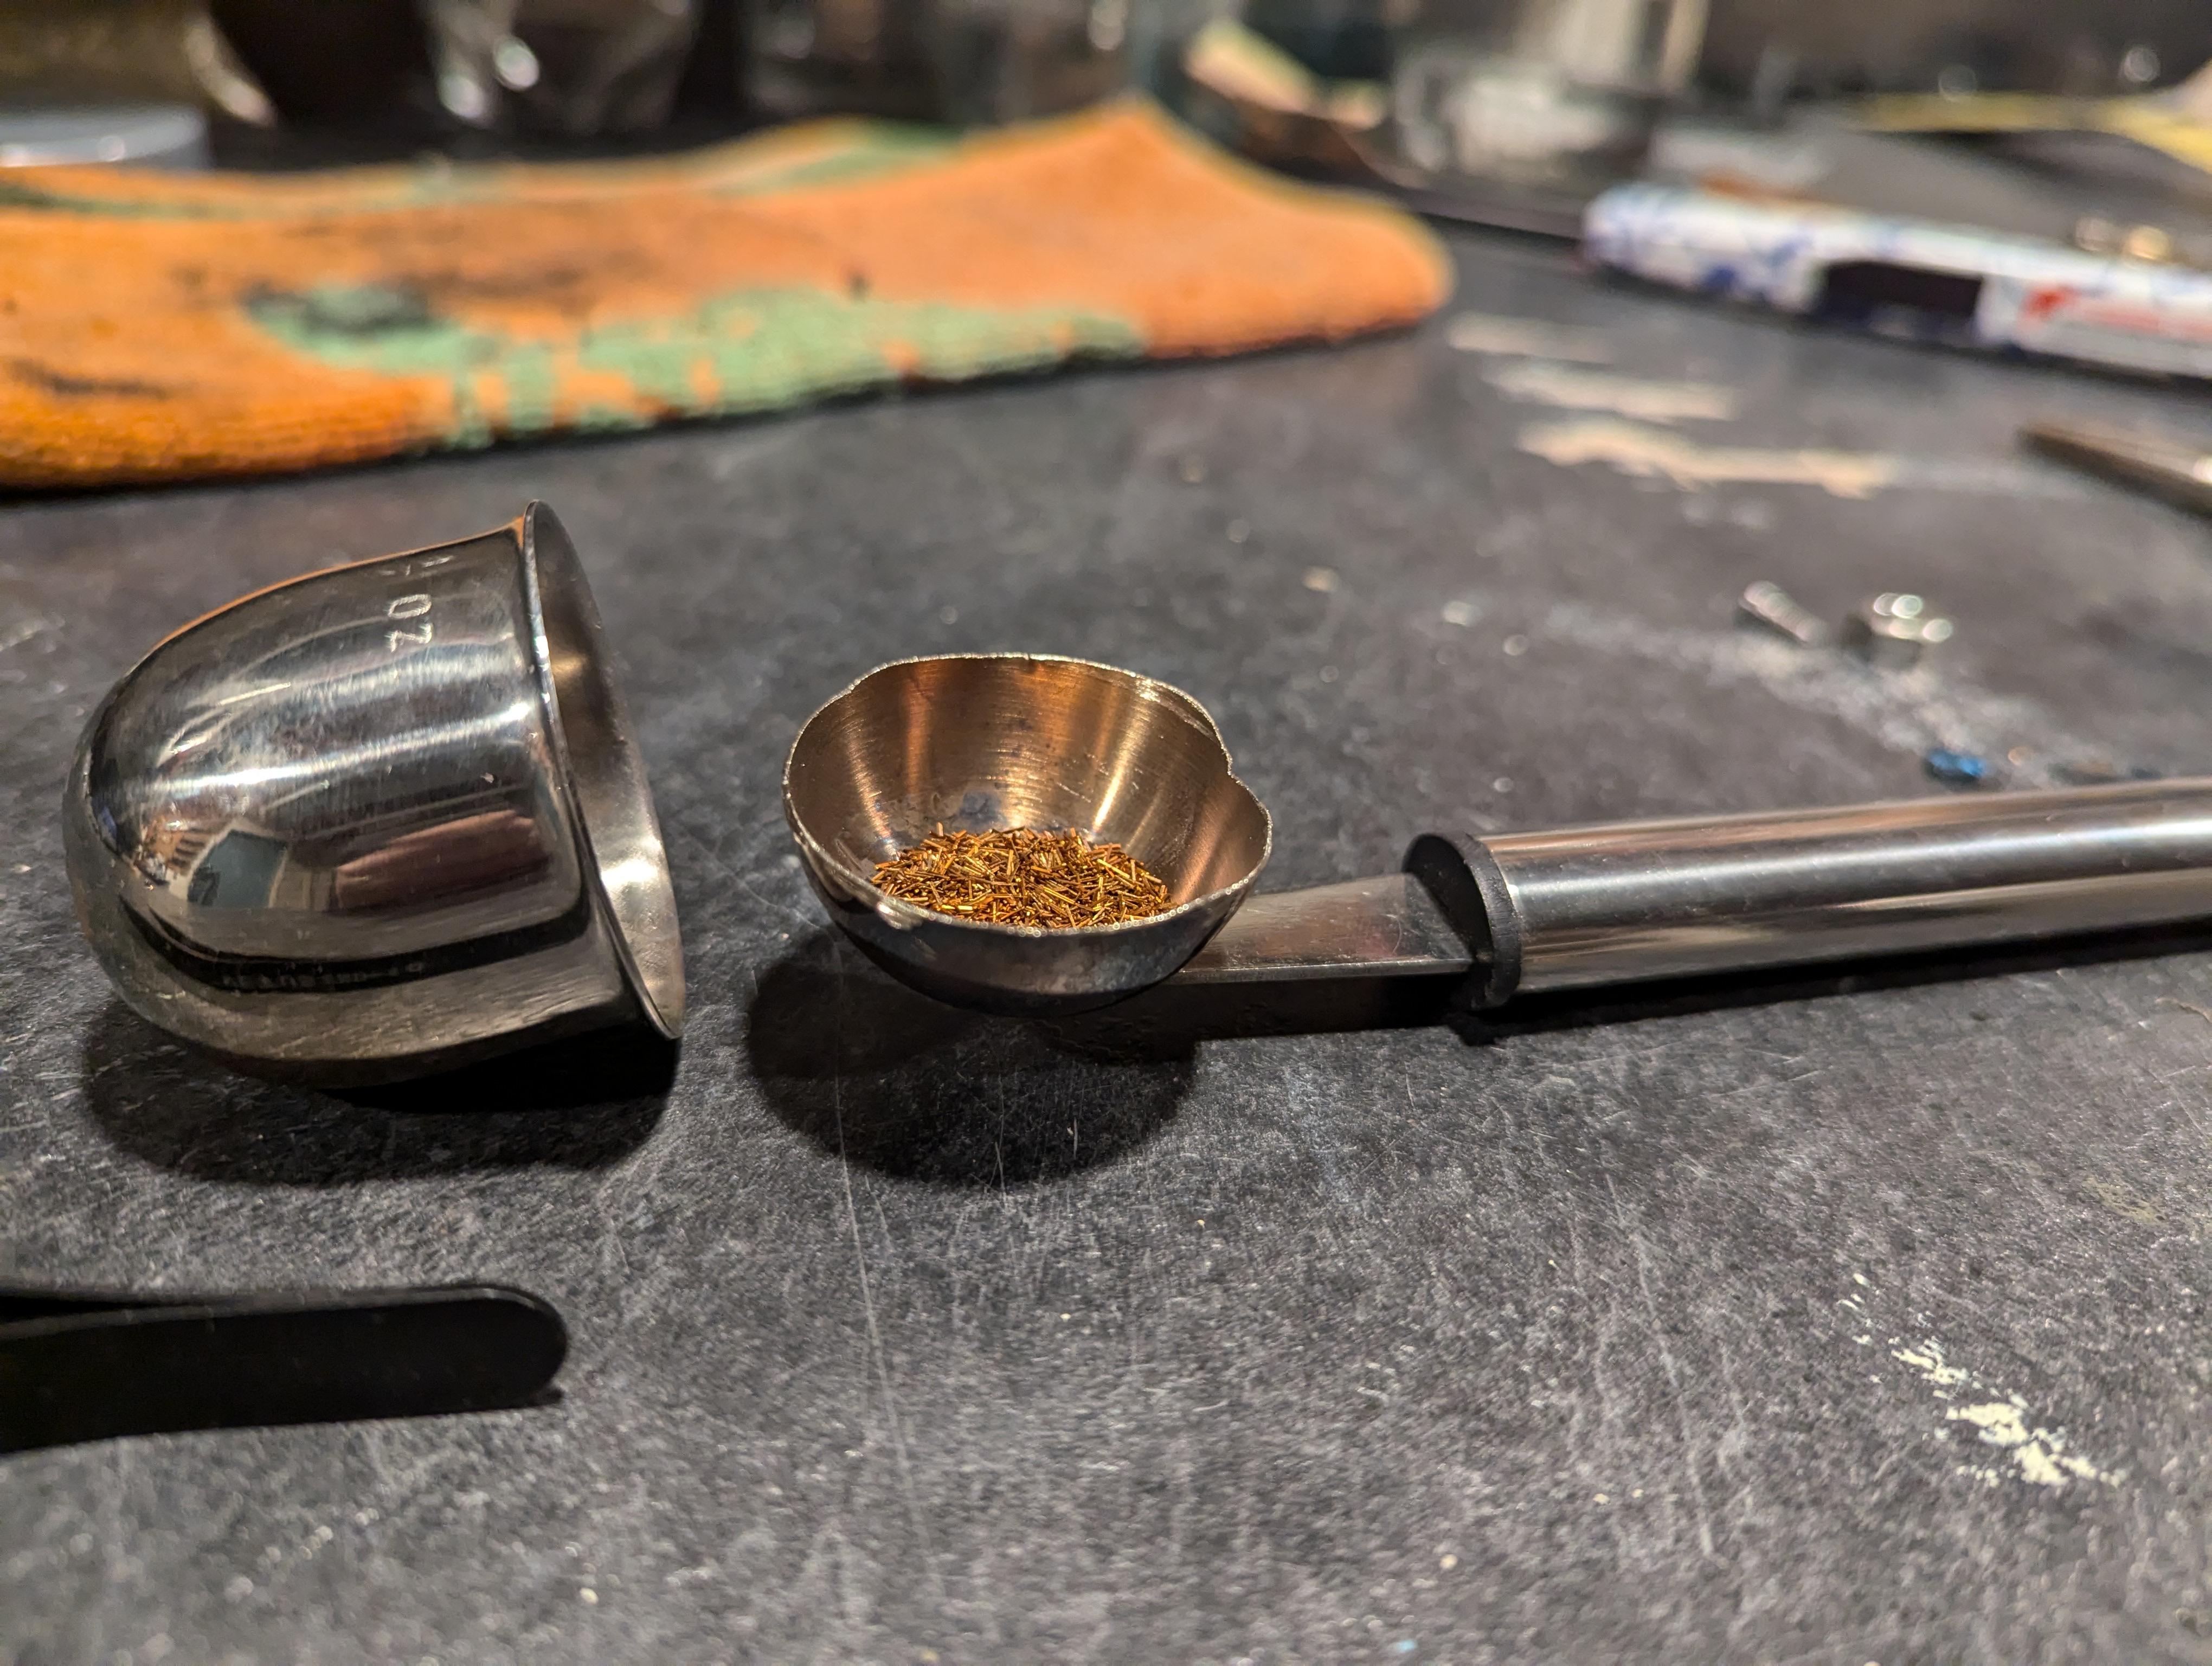
I have my working solution. This started out as a 2 way liquor shot pour with 0.75oz and 1.5oz stainless cups pointing different ways. It hasn't been used for its intended purpose in decades. I was able to snap the larger cup off at its weld and then cut down the smaller cup with a Dremel cut off wheel. I did a haphazard effort at filing the sharp edges away and tested it out. That plastic rim at the top of the handle might melt if I left it in the flame, but the pan heats so quickly I don't think that will be an issue. It turns out that cheap modern pocket watch caseback I was using yesterday is made of something like zinc, brittle and powdery. Also explains why it was bubbling after 10min over the flame. This one took only about a minute to heat up to a working temperature over the alcohol burner, the handle does not get hot. And some random parts from a watchmaker junk drawer lot blued in under a minute. That wheel, looks like maybe it was from a verge escapement? It looks beautiful.

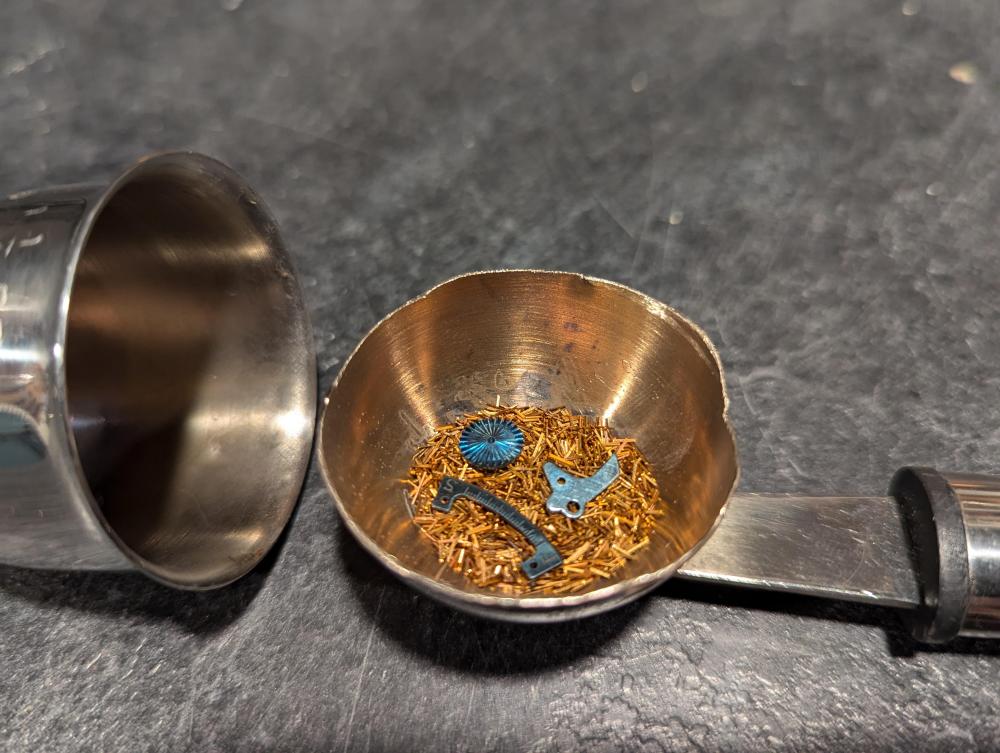 3 points
 -
Some of the photos appear to be taken from this ebay listing: https://www.ebay.com.my/itm/176066667133 But, with the one of the back substituted with fake. Definitely a scammer!2 points
-
This parts are not completely replaceable. Well, depends on how old the movement is, but generally every movement was made for itself and nobody even thought that part from one would need to fit to another. No problem to cut new clock pinion. The problem actually is it is big and a lot of steel must be cut by the milling machine, so bigger one is needed than for watches. Here I have shown how I have done on my general purpose lathe with home made lathe attachments. http://forum.watch.ru/showpost.php?p=4423044&postcount=418 http://forum.watch.ru/showpost.php?p=4450639&postcount=419 http://forum.watch.ru/showpost.php?p=4590238&postcount=425 http://forum.watch.ru/showpost.php?p=5816394&postcount=529 Also possible to use another longer pinion with the same diam and leaf count and reshape it to fit2 points
-
Clearly some sort of scam going on here, compare picture 2 with folded bracelet ends and no through bar holes in the case lugs and then the solid end links in the rest of the photos. Can also see more engraving on the caseback of the last photo, totally different back !! someone is frigging around with 2 watches here What a joke, if you're gonna try to pull the wool over someone's eyes...make sure the bloody sheep is still attached to it I hope it isn't the OP.... i hate having my time wasted2 points
-
That is a very, very poor fake of a Cartier de Santos I'm sorry to have to tell you. There's a number of things wrong with it apart from the obvious - the back is the main giveaway but there are further "tells" all over it. I specialise in trading Cartier - particularly de Santos.2 points
-
something not quite right with the OP's .....again if in doubt....walk away. If its bought for re-sale which most watches eventually are...then potential buyers will also be in doubt...then you can possibly have no buyers.2 points
-
If i had to choose then possibly the second bigger box if the spares cases were full...can never have enough quality spare tips to dress in different ways, shame there are gaps in the driver sizes...addition of the smaller box does fill two of those gaps but also gives you 3 spare duplicates. I would probably go with Klassiker's advice and buy both you then just need to make up the 140 and 160....for 60 bucks you're getting 10 hopefully genuine Bergeon or at least Swiss, all the good Swiss ones i have ...have shallow slots up the heads....this is what you need to be inspecting....for wear in the revolving head.....i still use my first bought cheap ones lol. Oh and the 250...sorry i didn't see that one missing. It would cost you more than 25 to buy the 2 new to fill the .5 and 1mm.2 points
-
My thoughts looking at the ones for sale at the link below is that it's fake. Mains reasons are the lack of details on the case back and the incorrect position of the date window. https://www.chrono24.co.uk/cartier/ref-187903.htm2 points
-
Get both. You can dress the tips of any duplicates for different slot widths.2 points
-
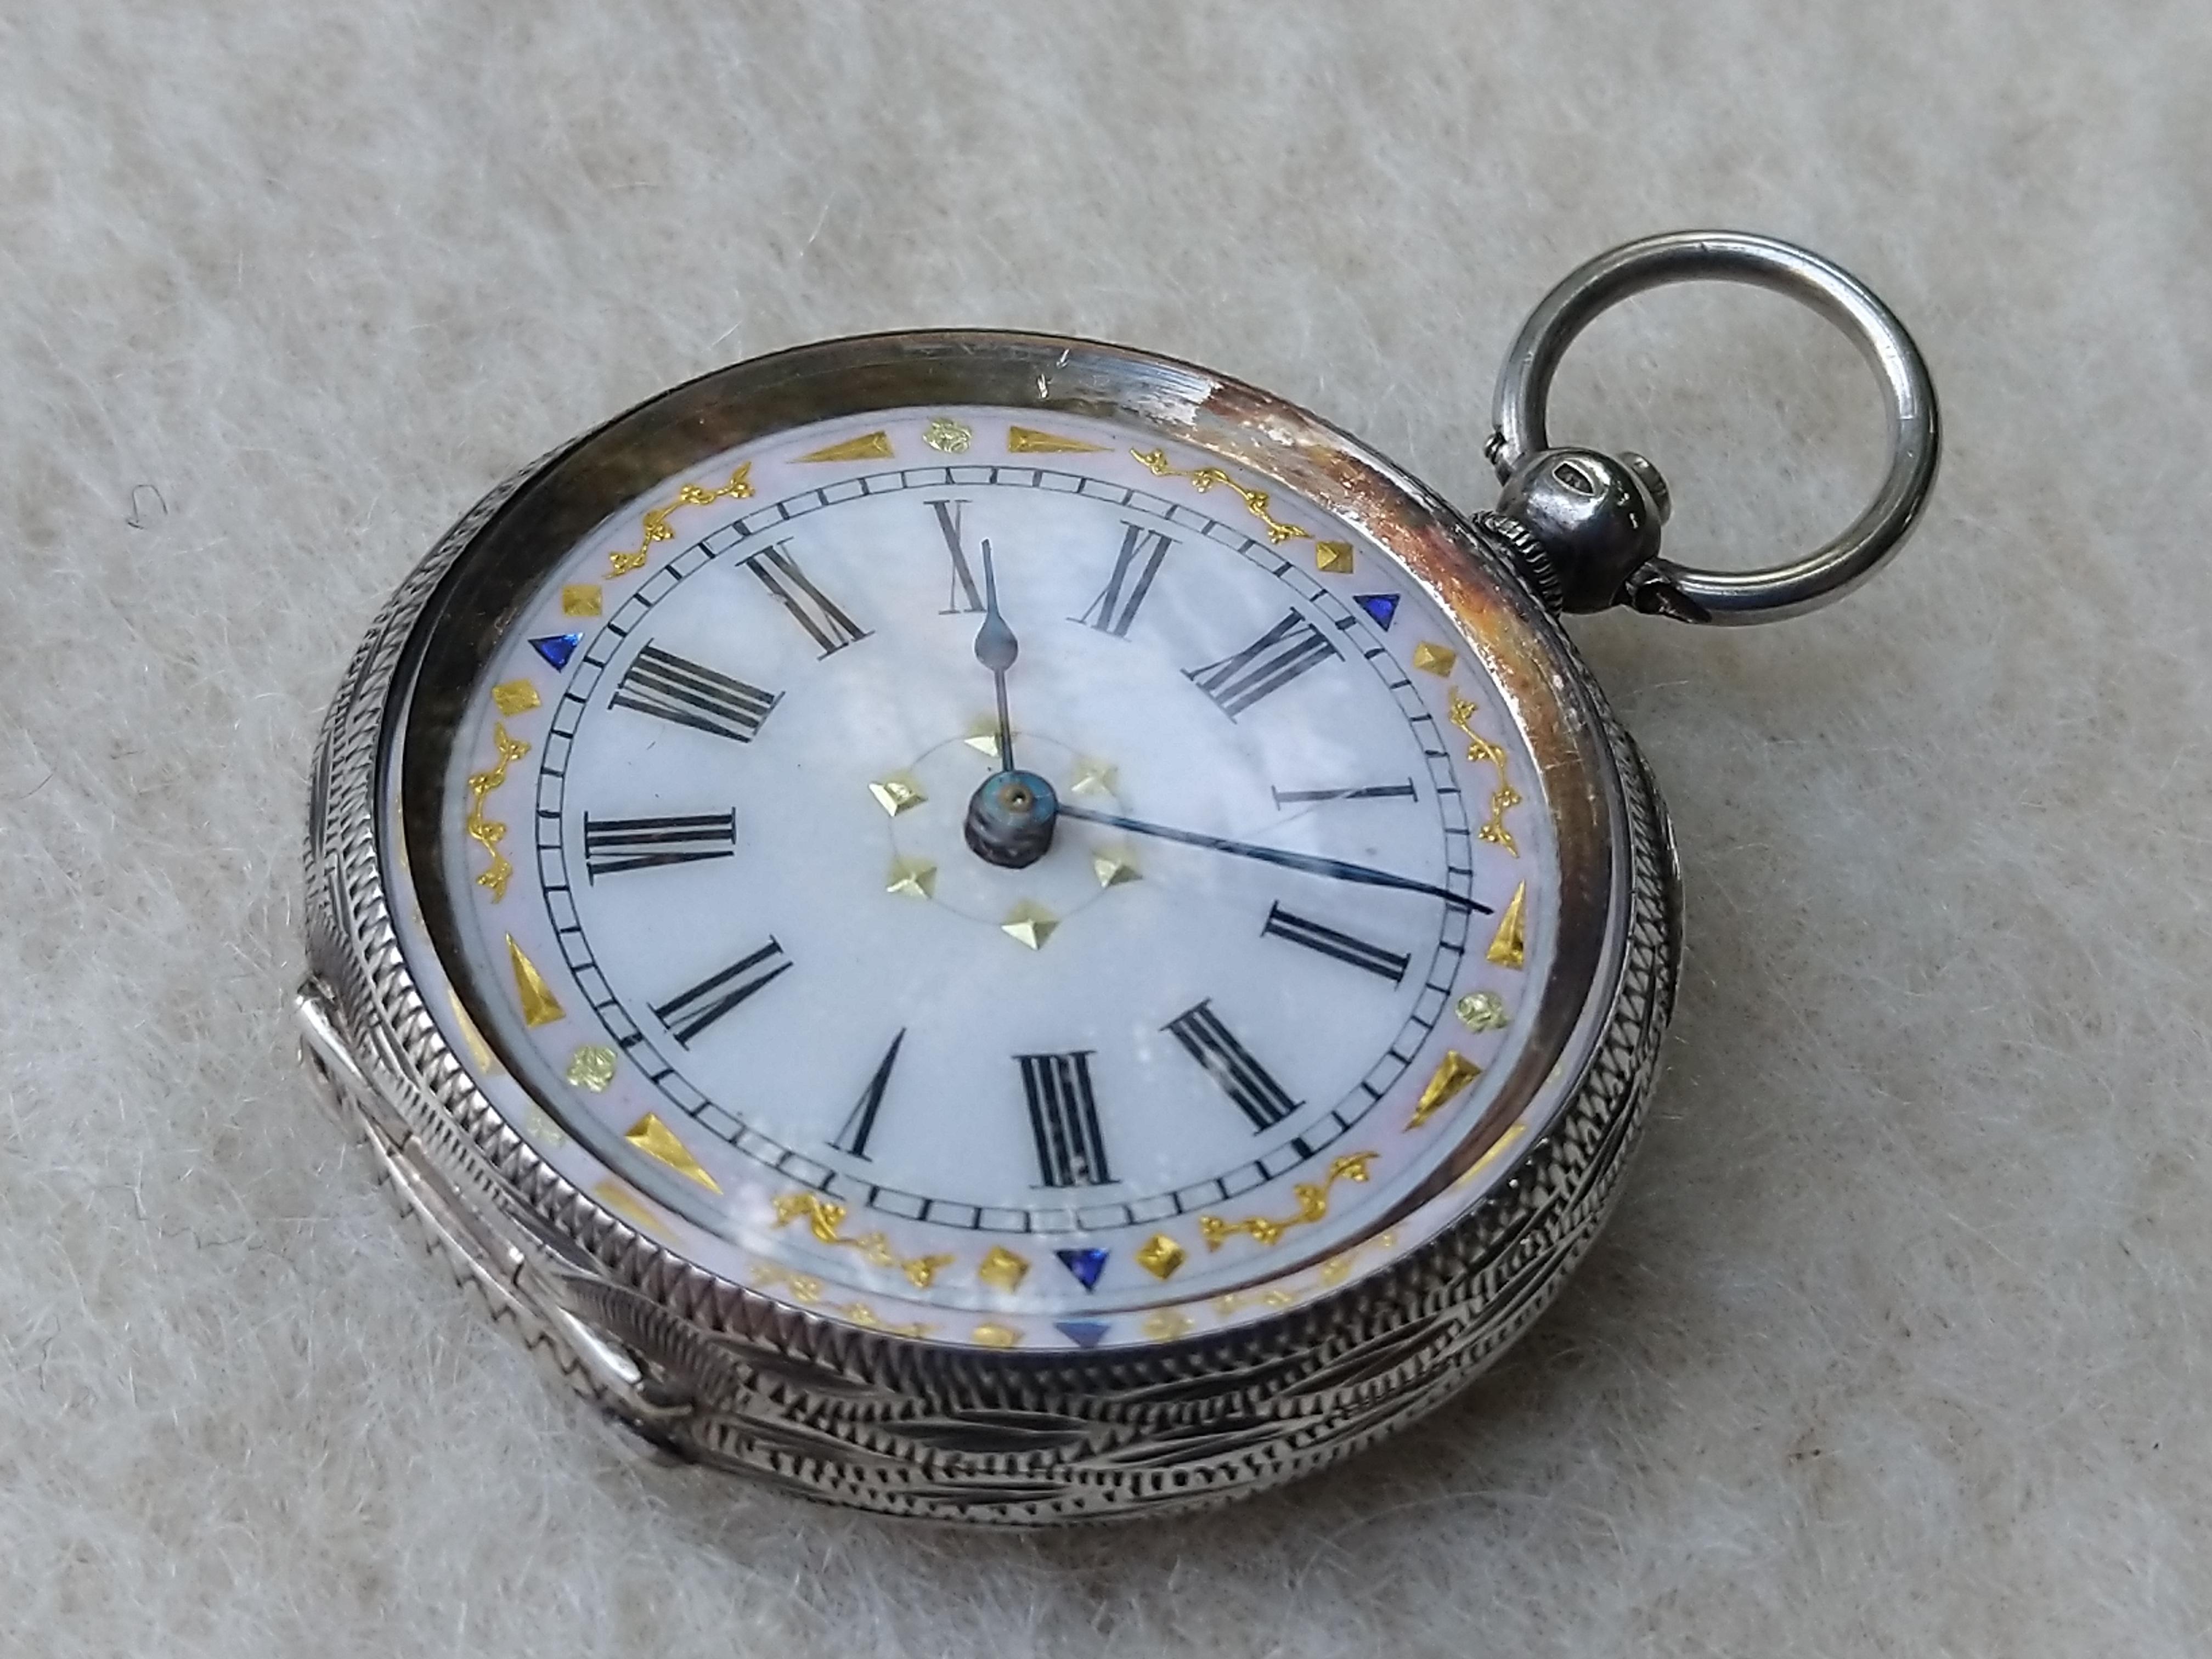
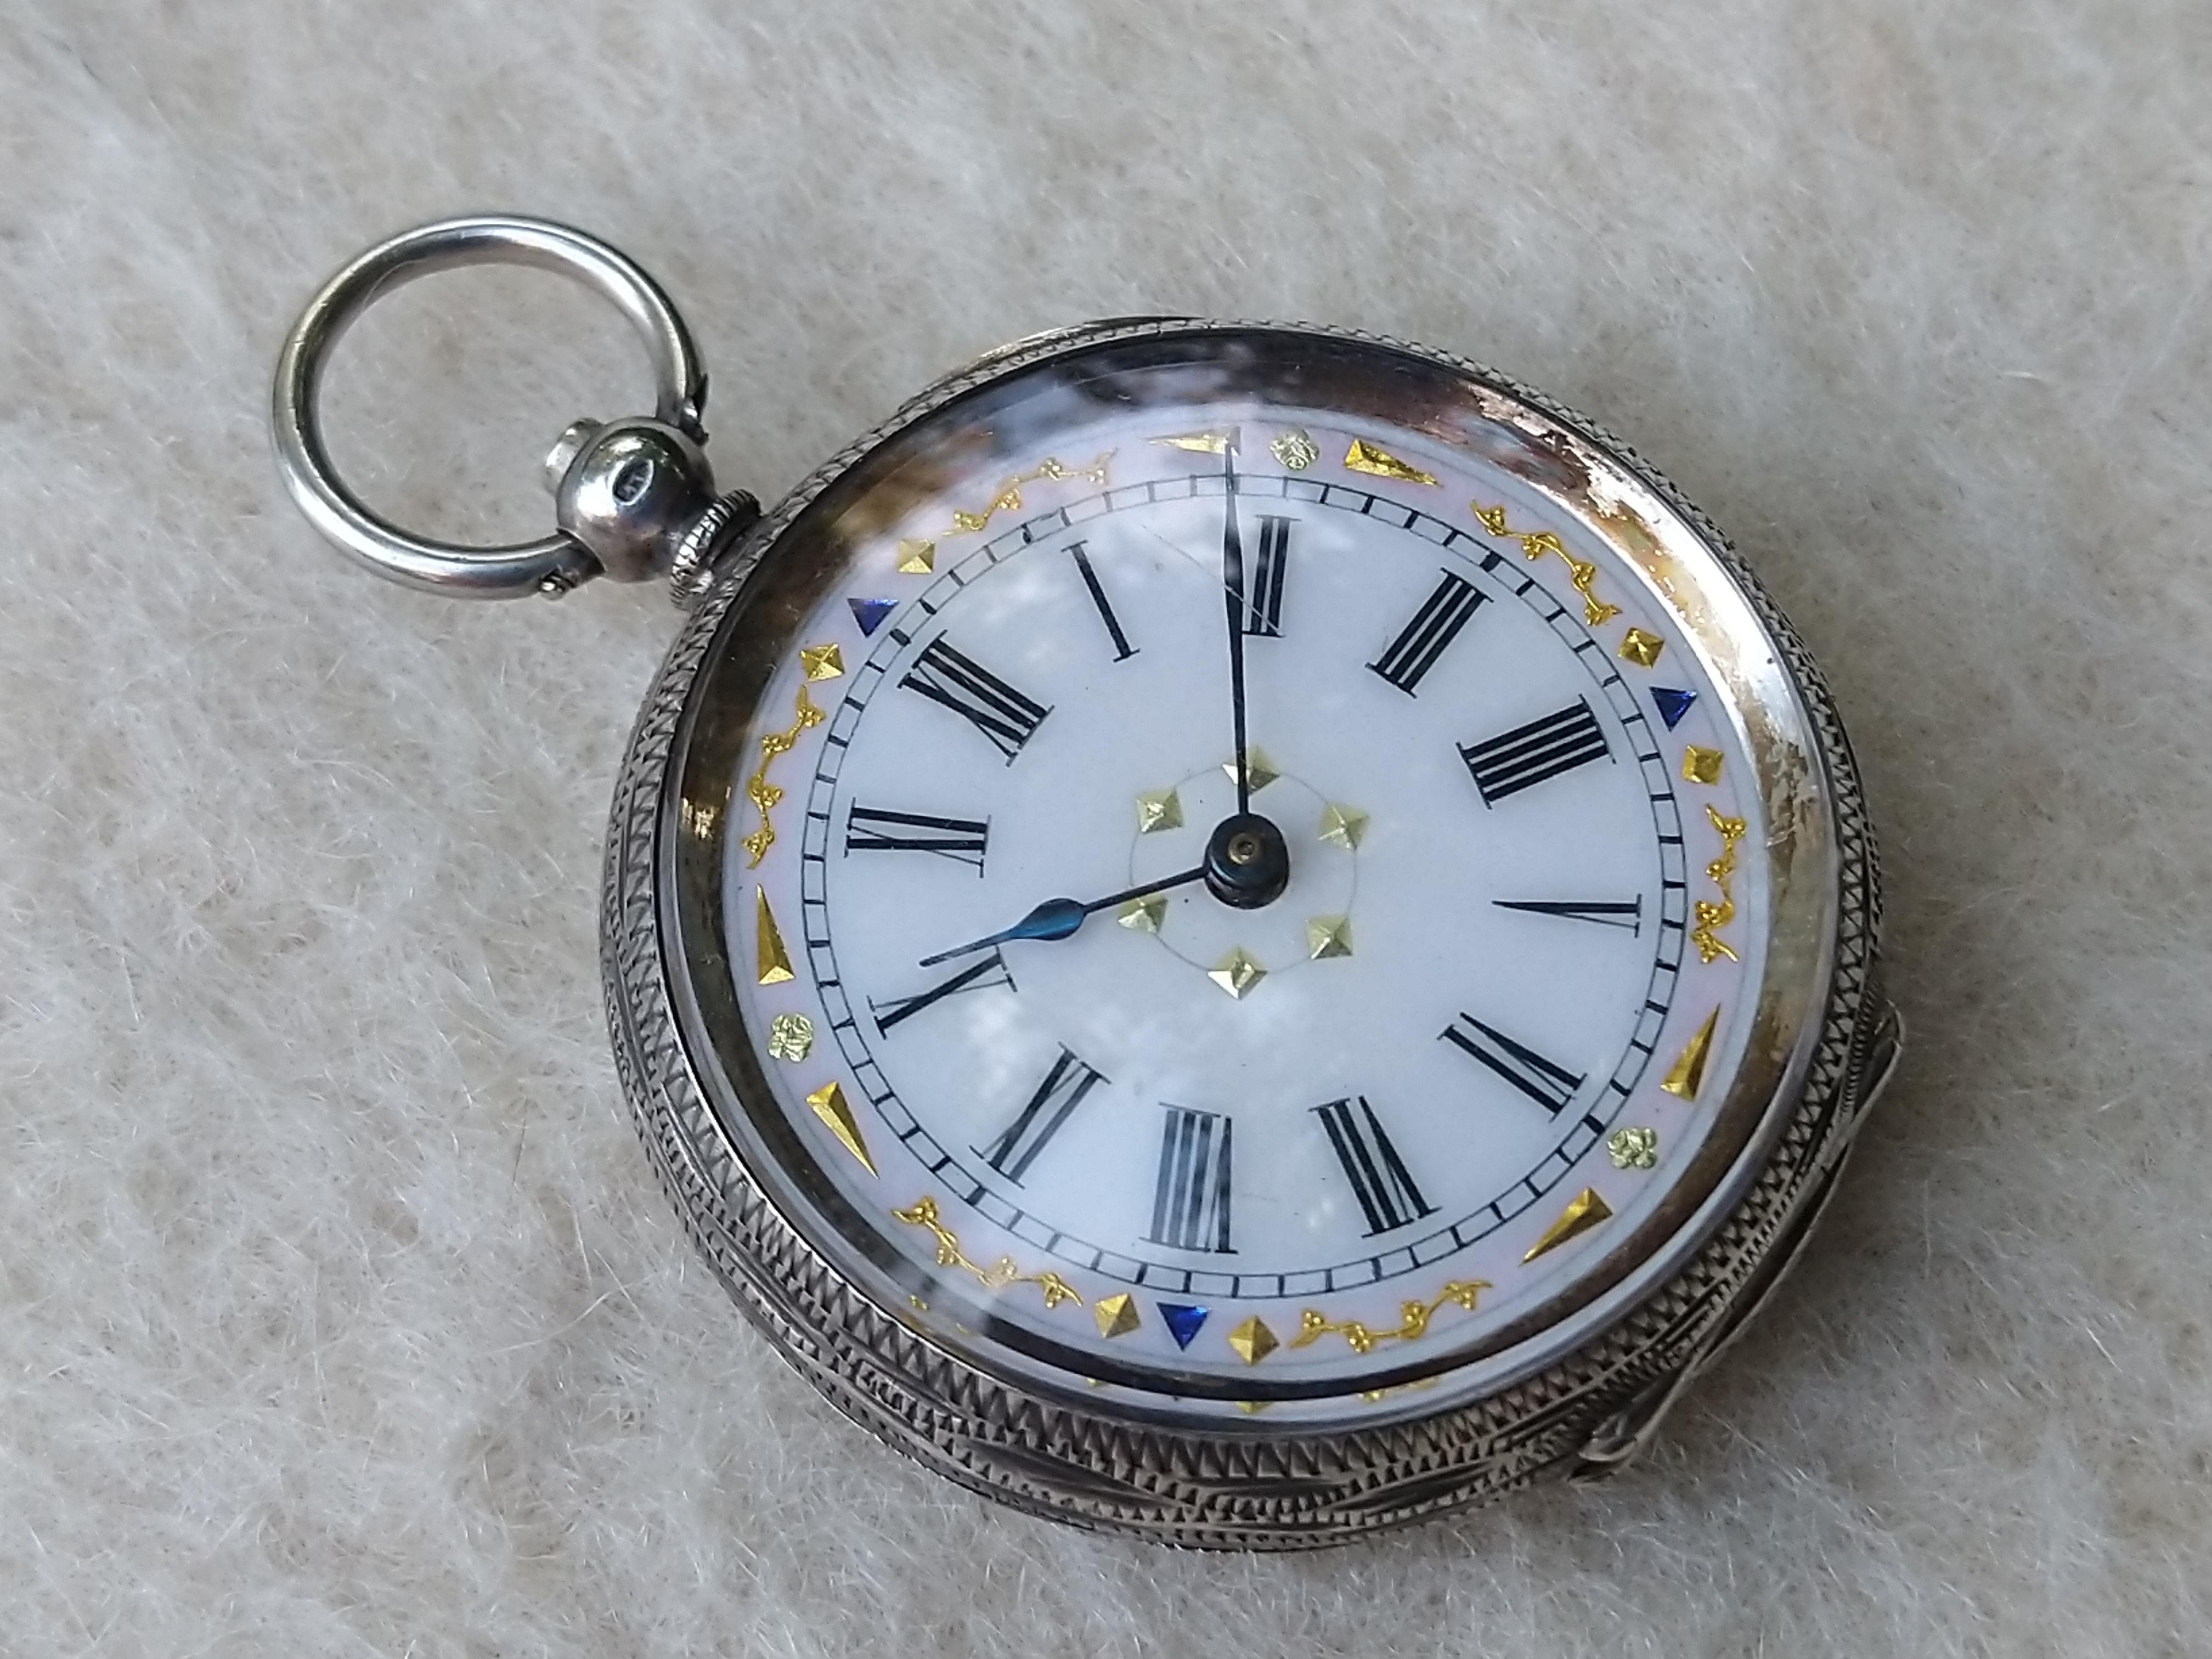
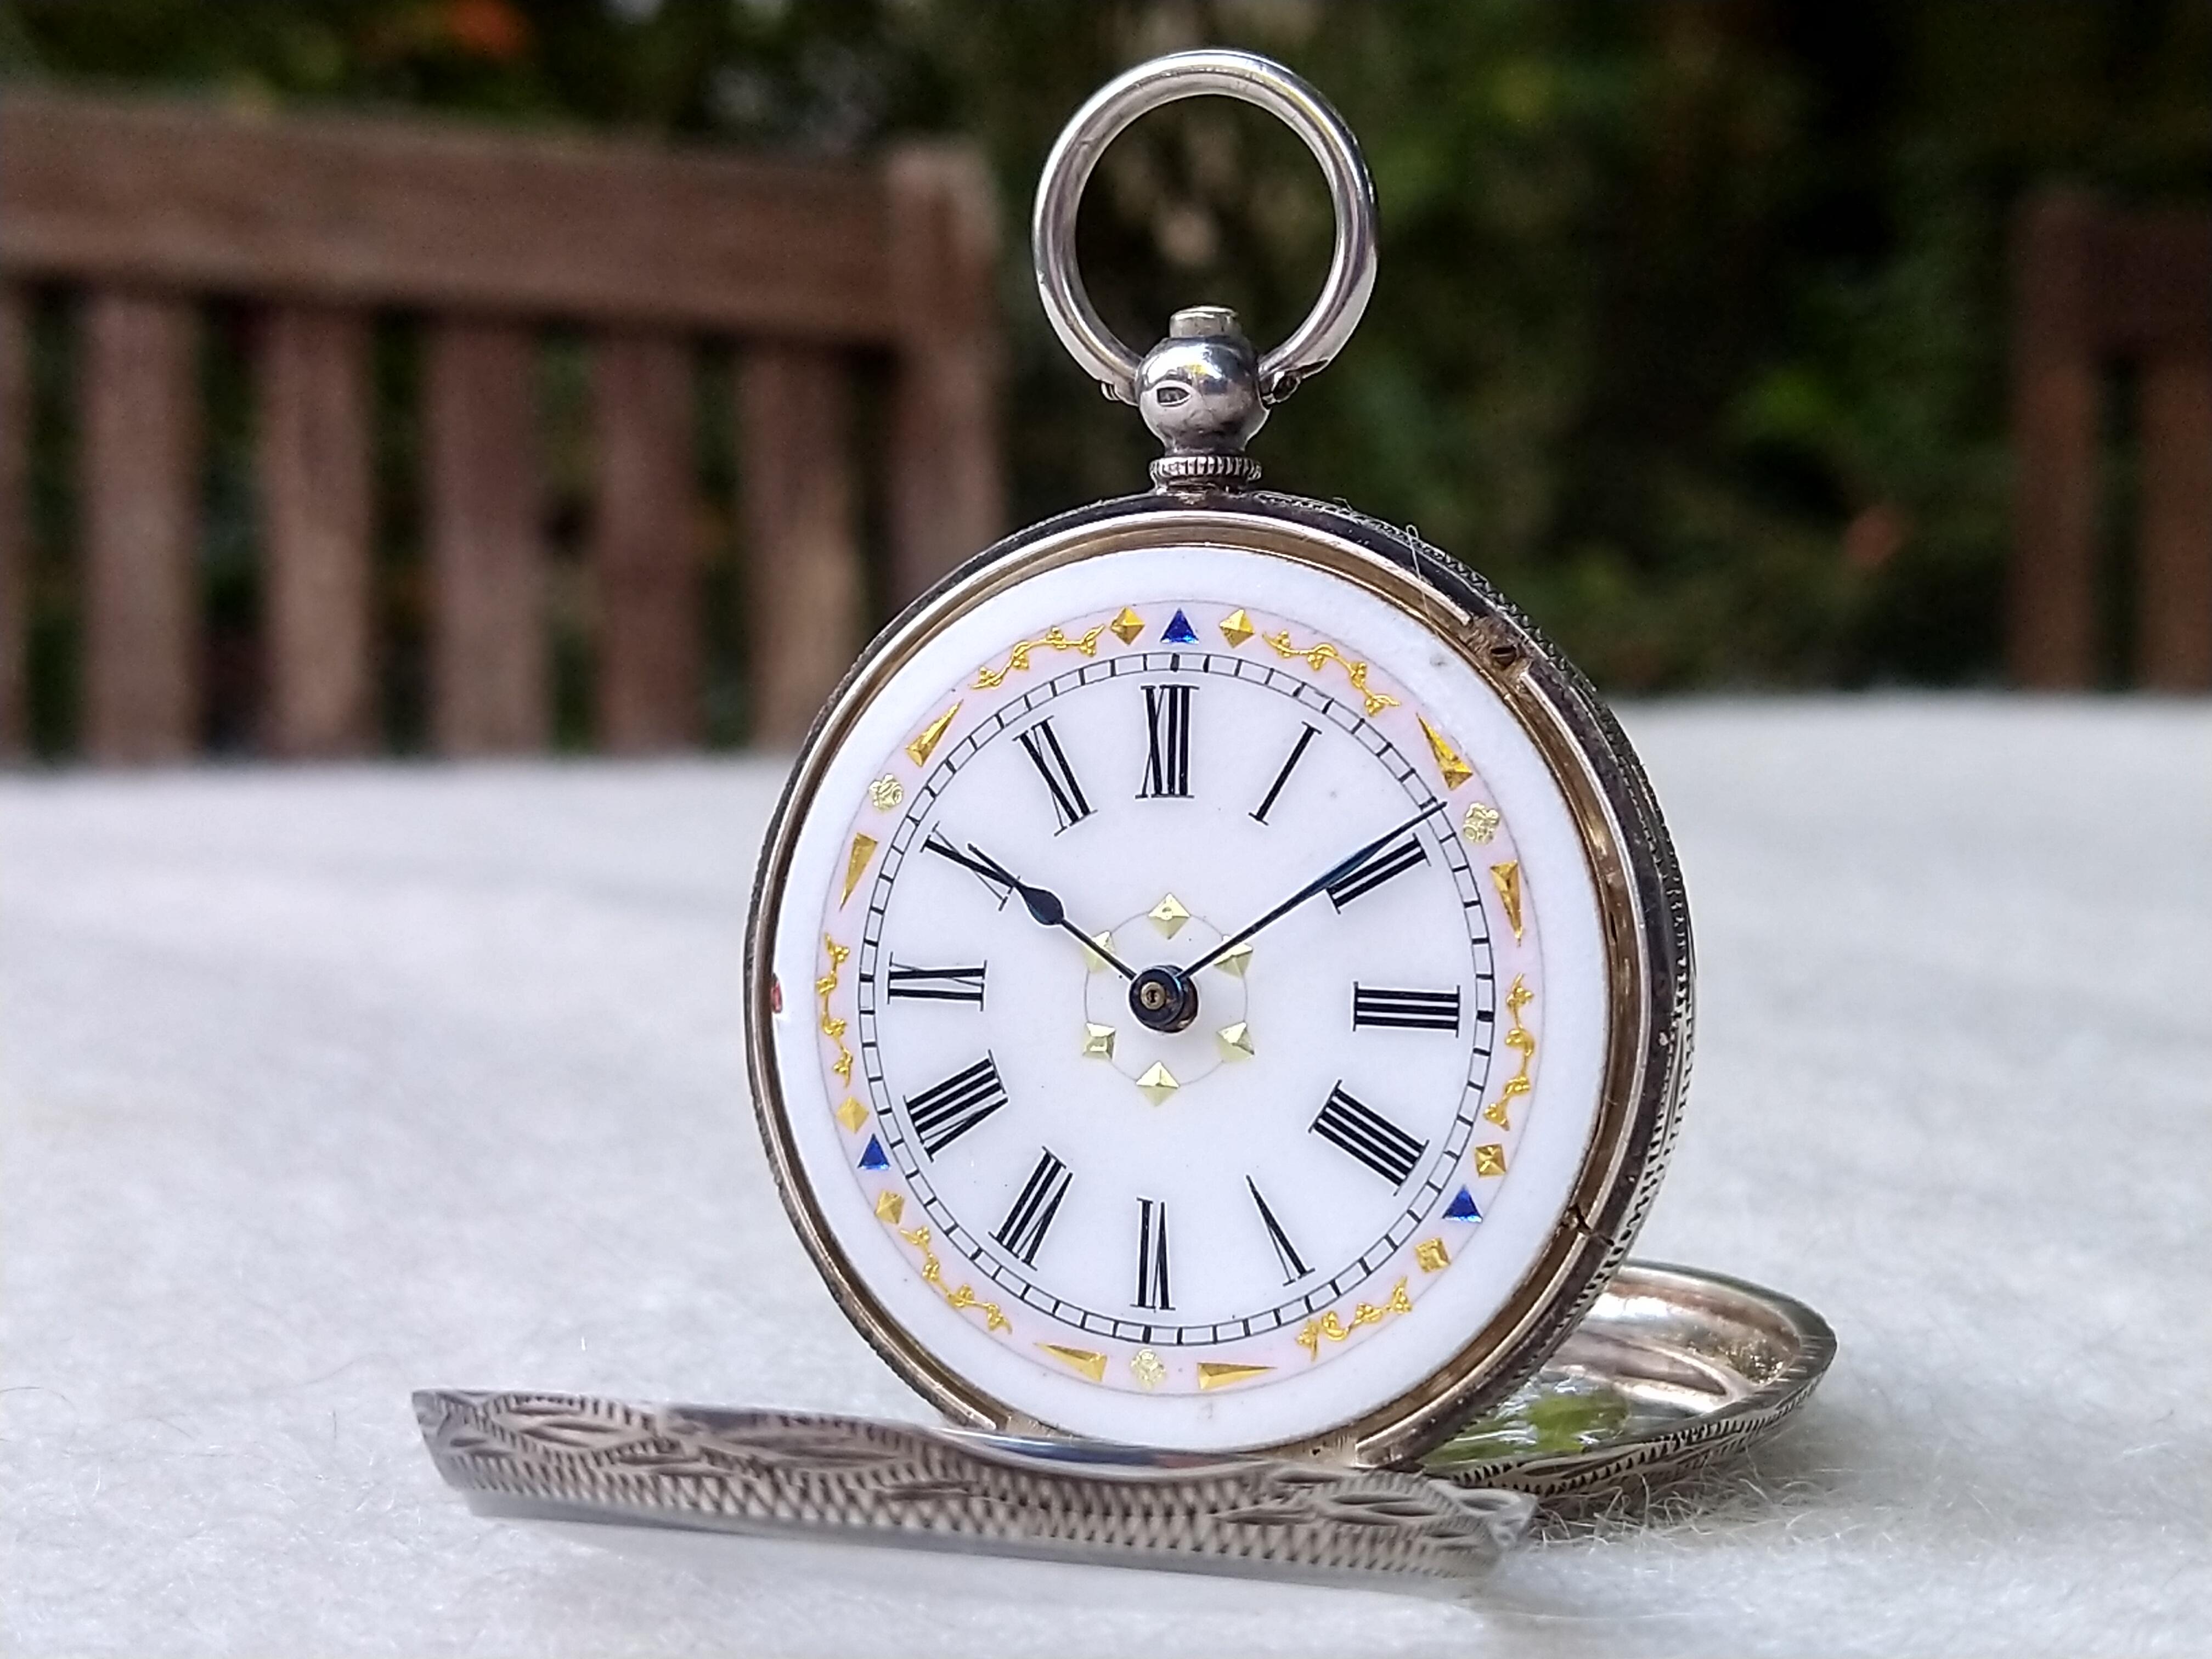
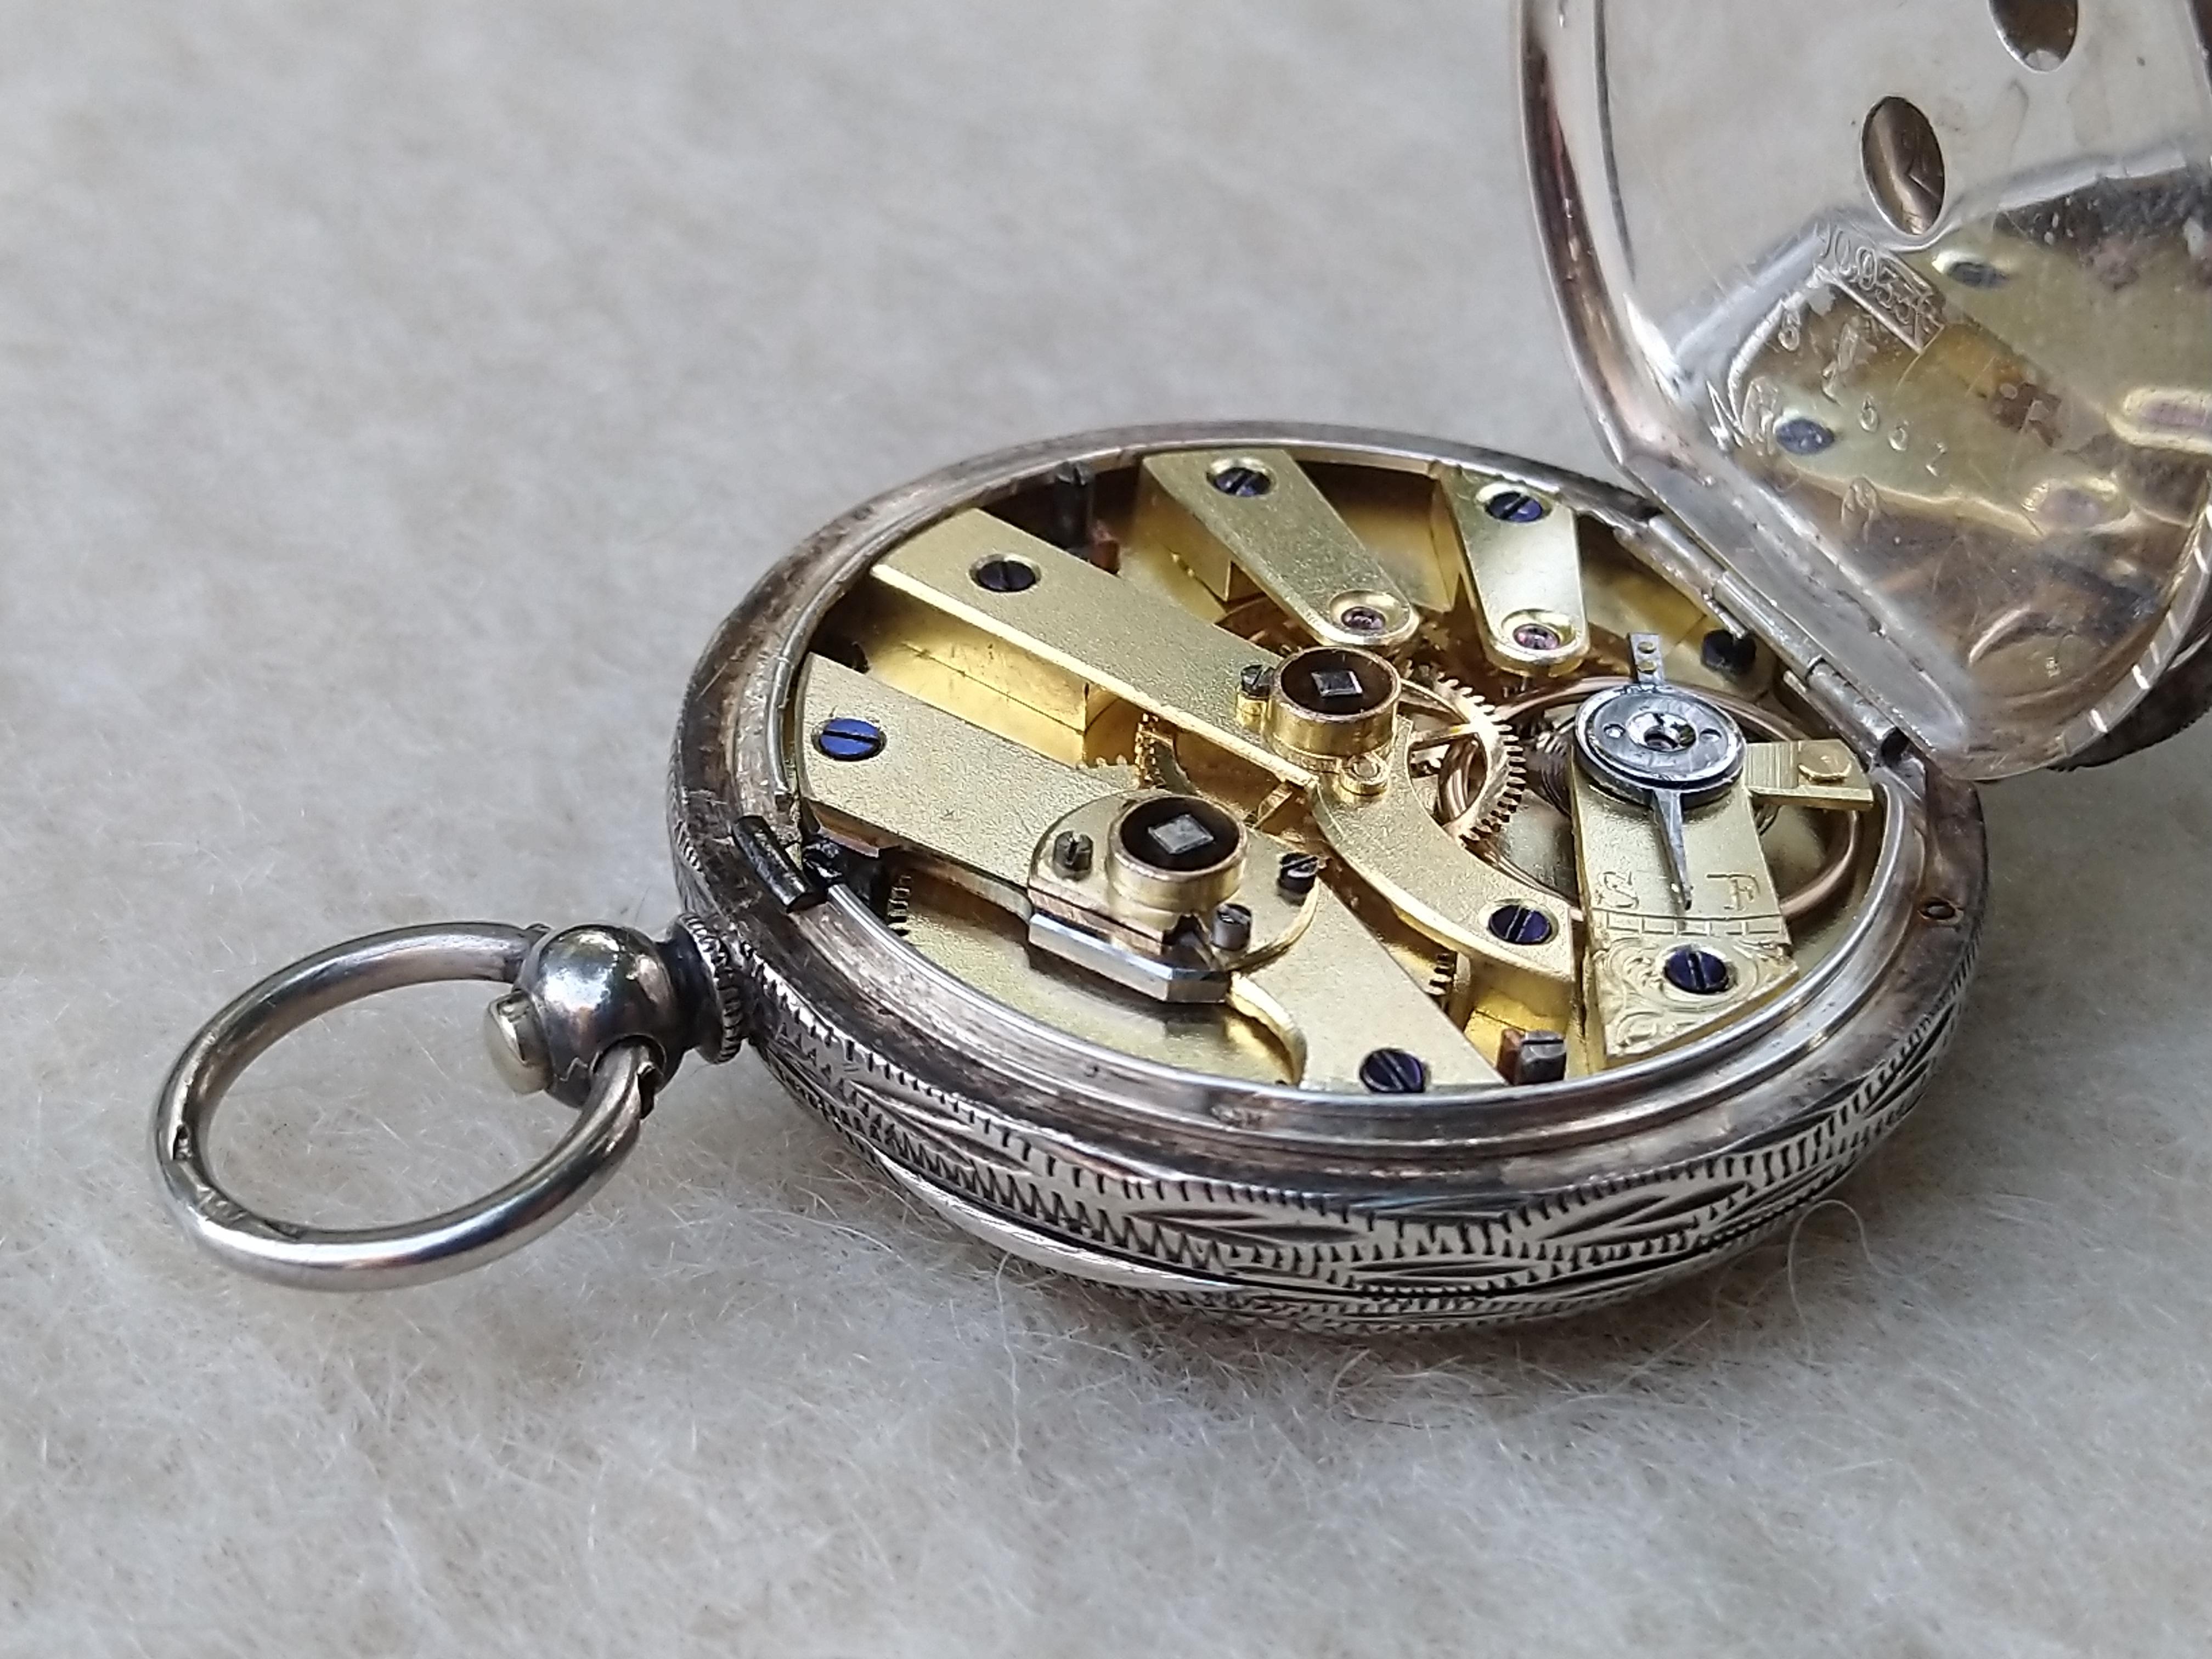
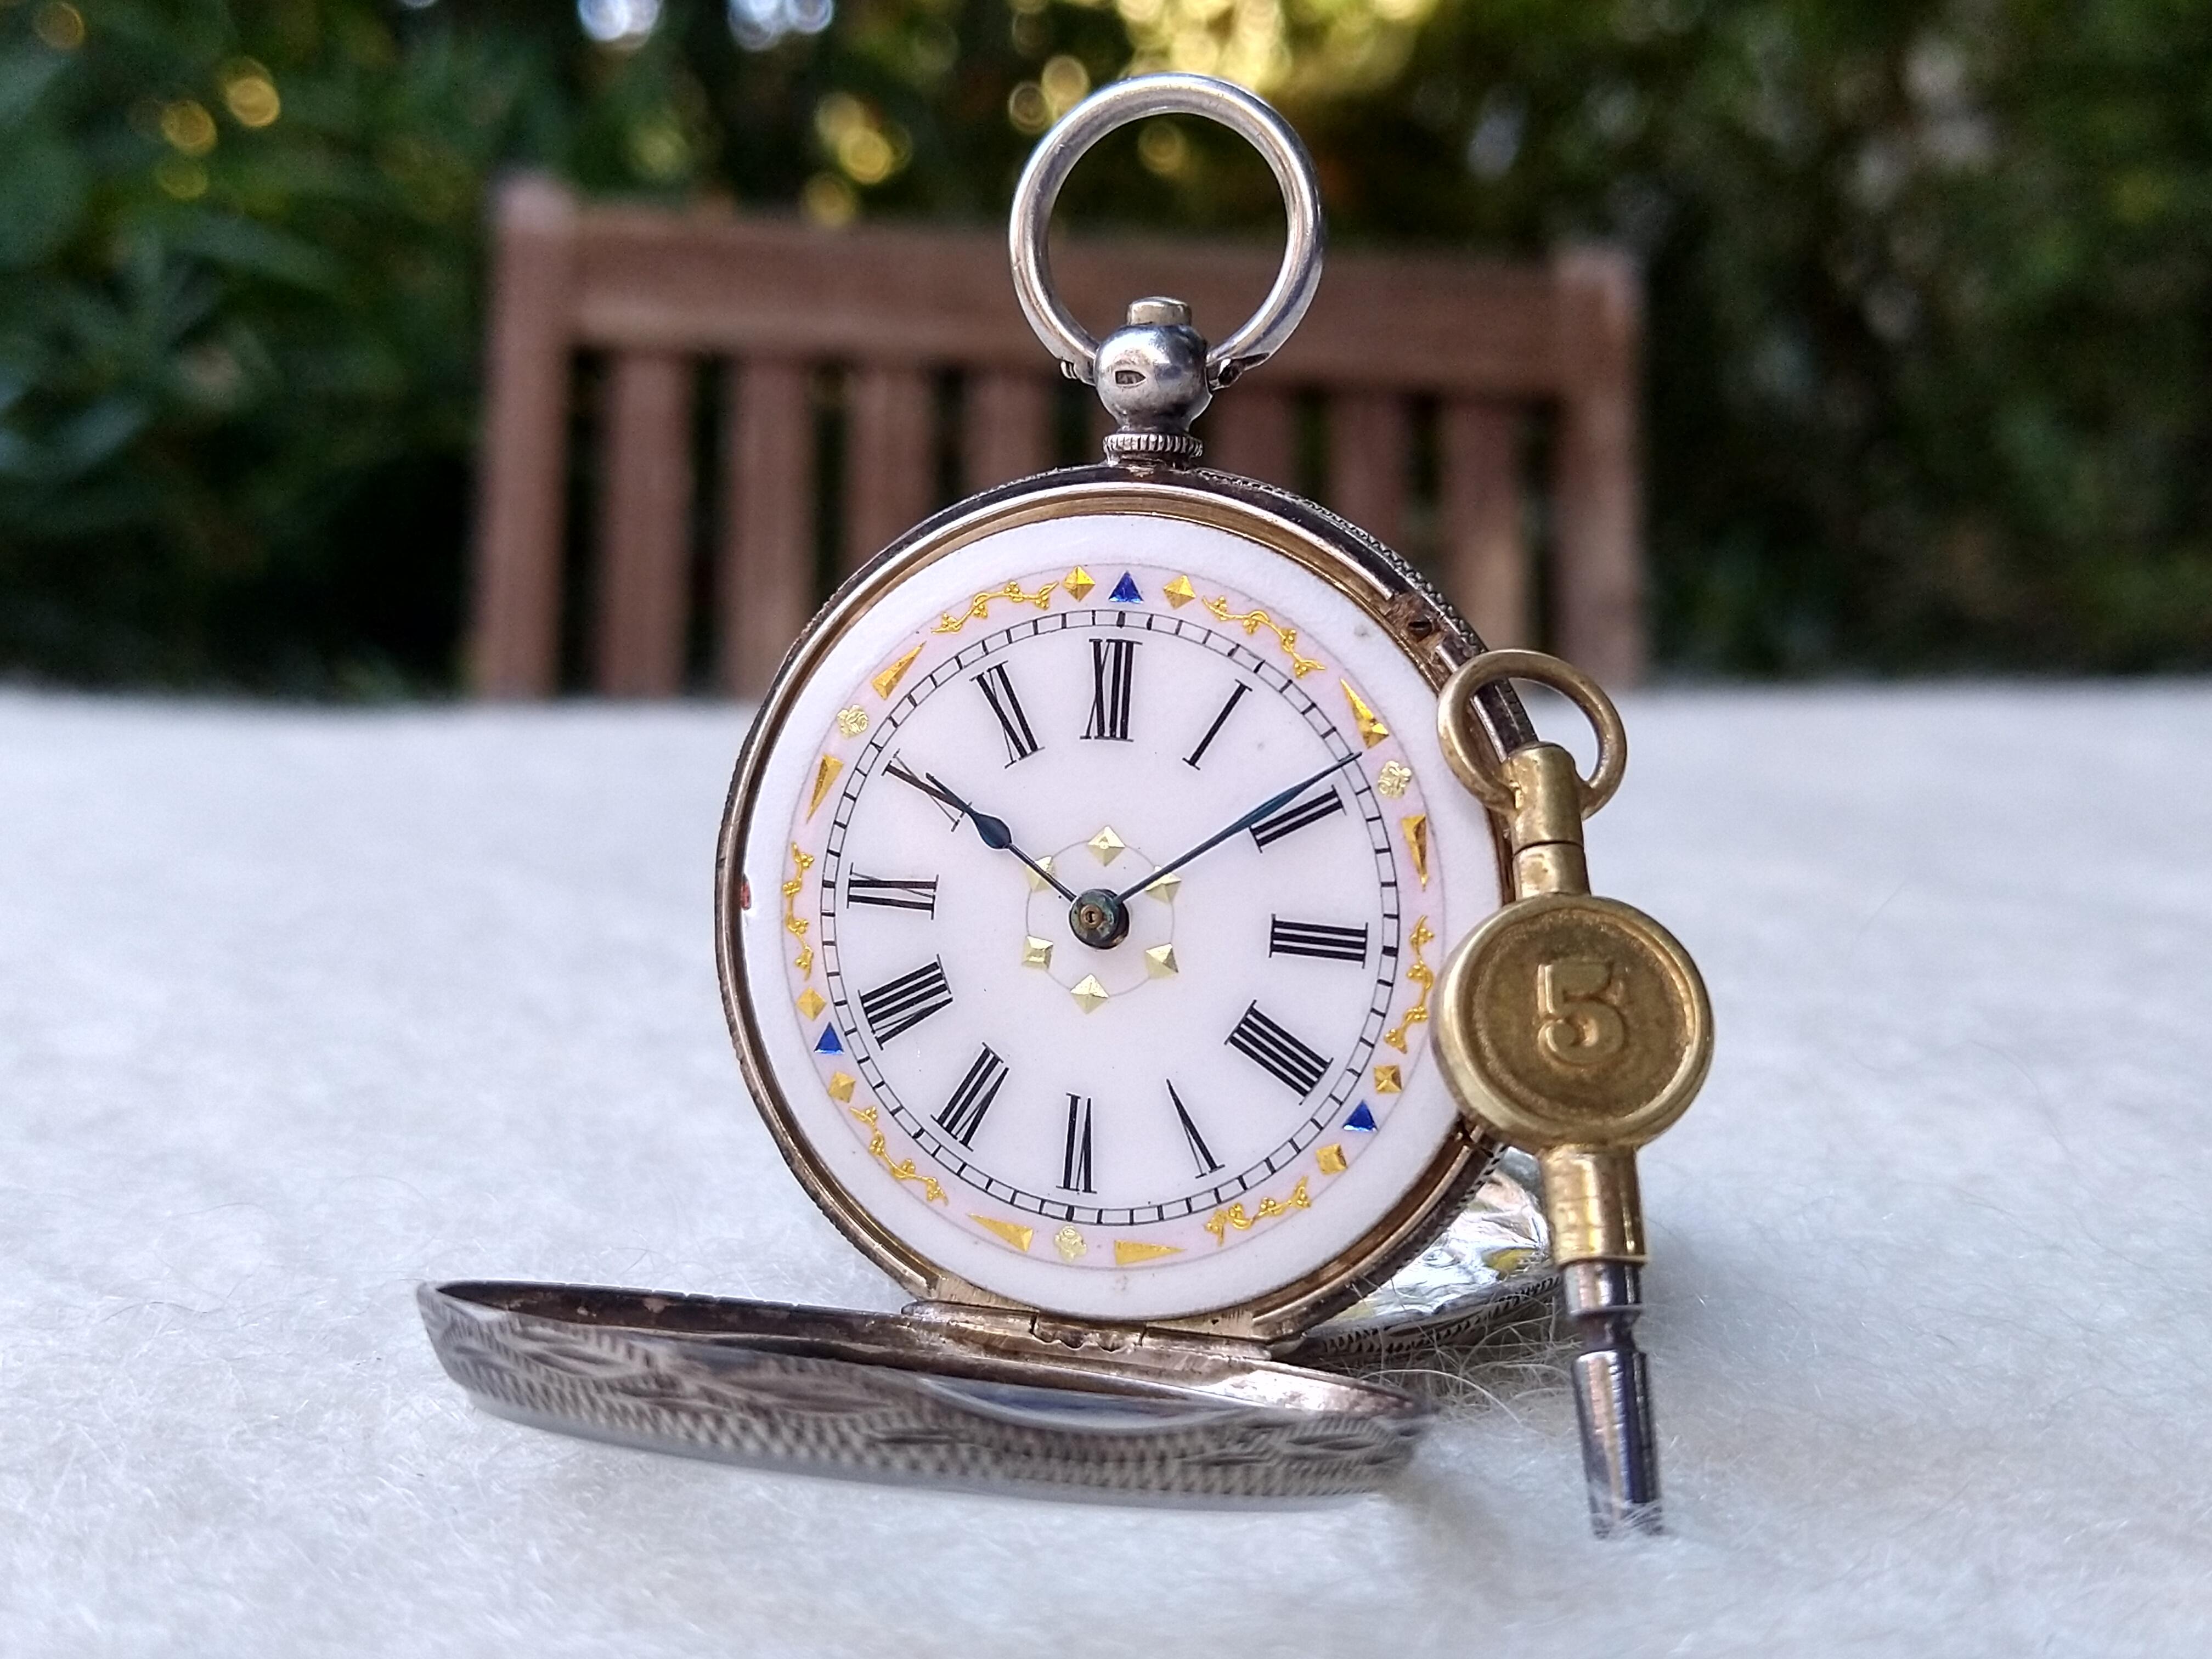
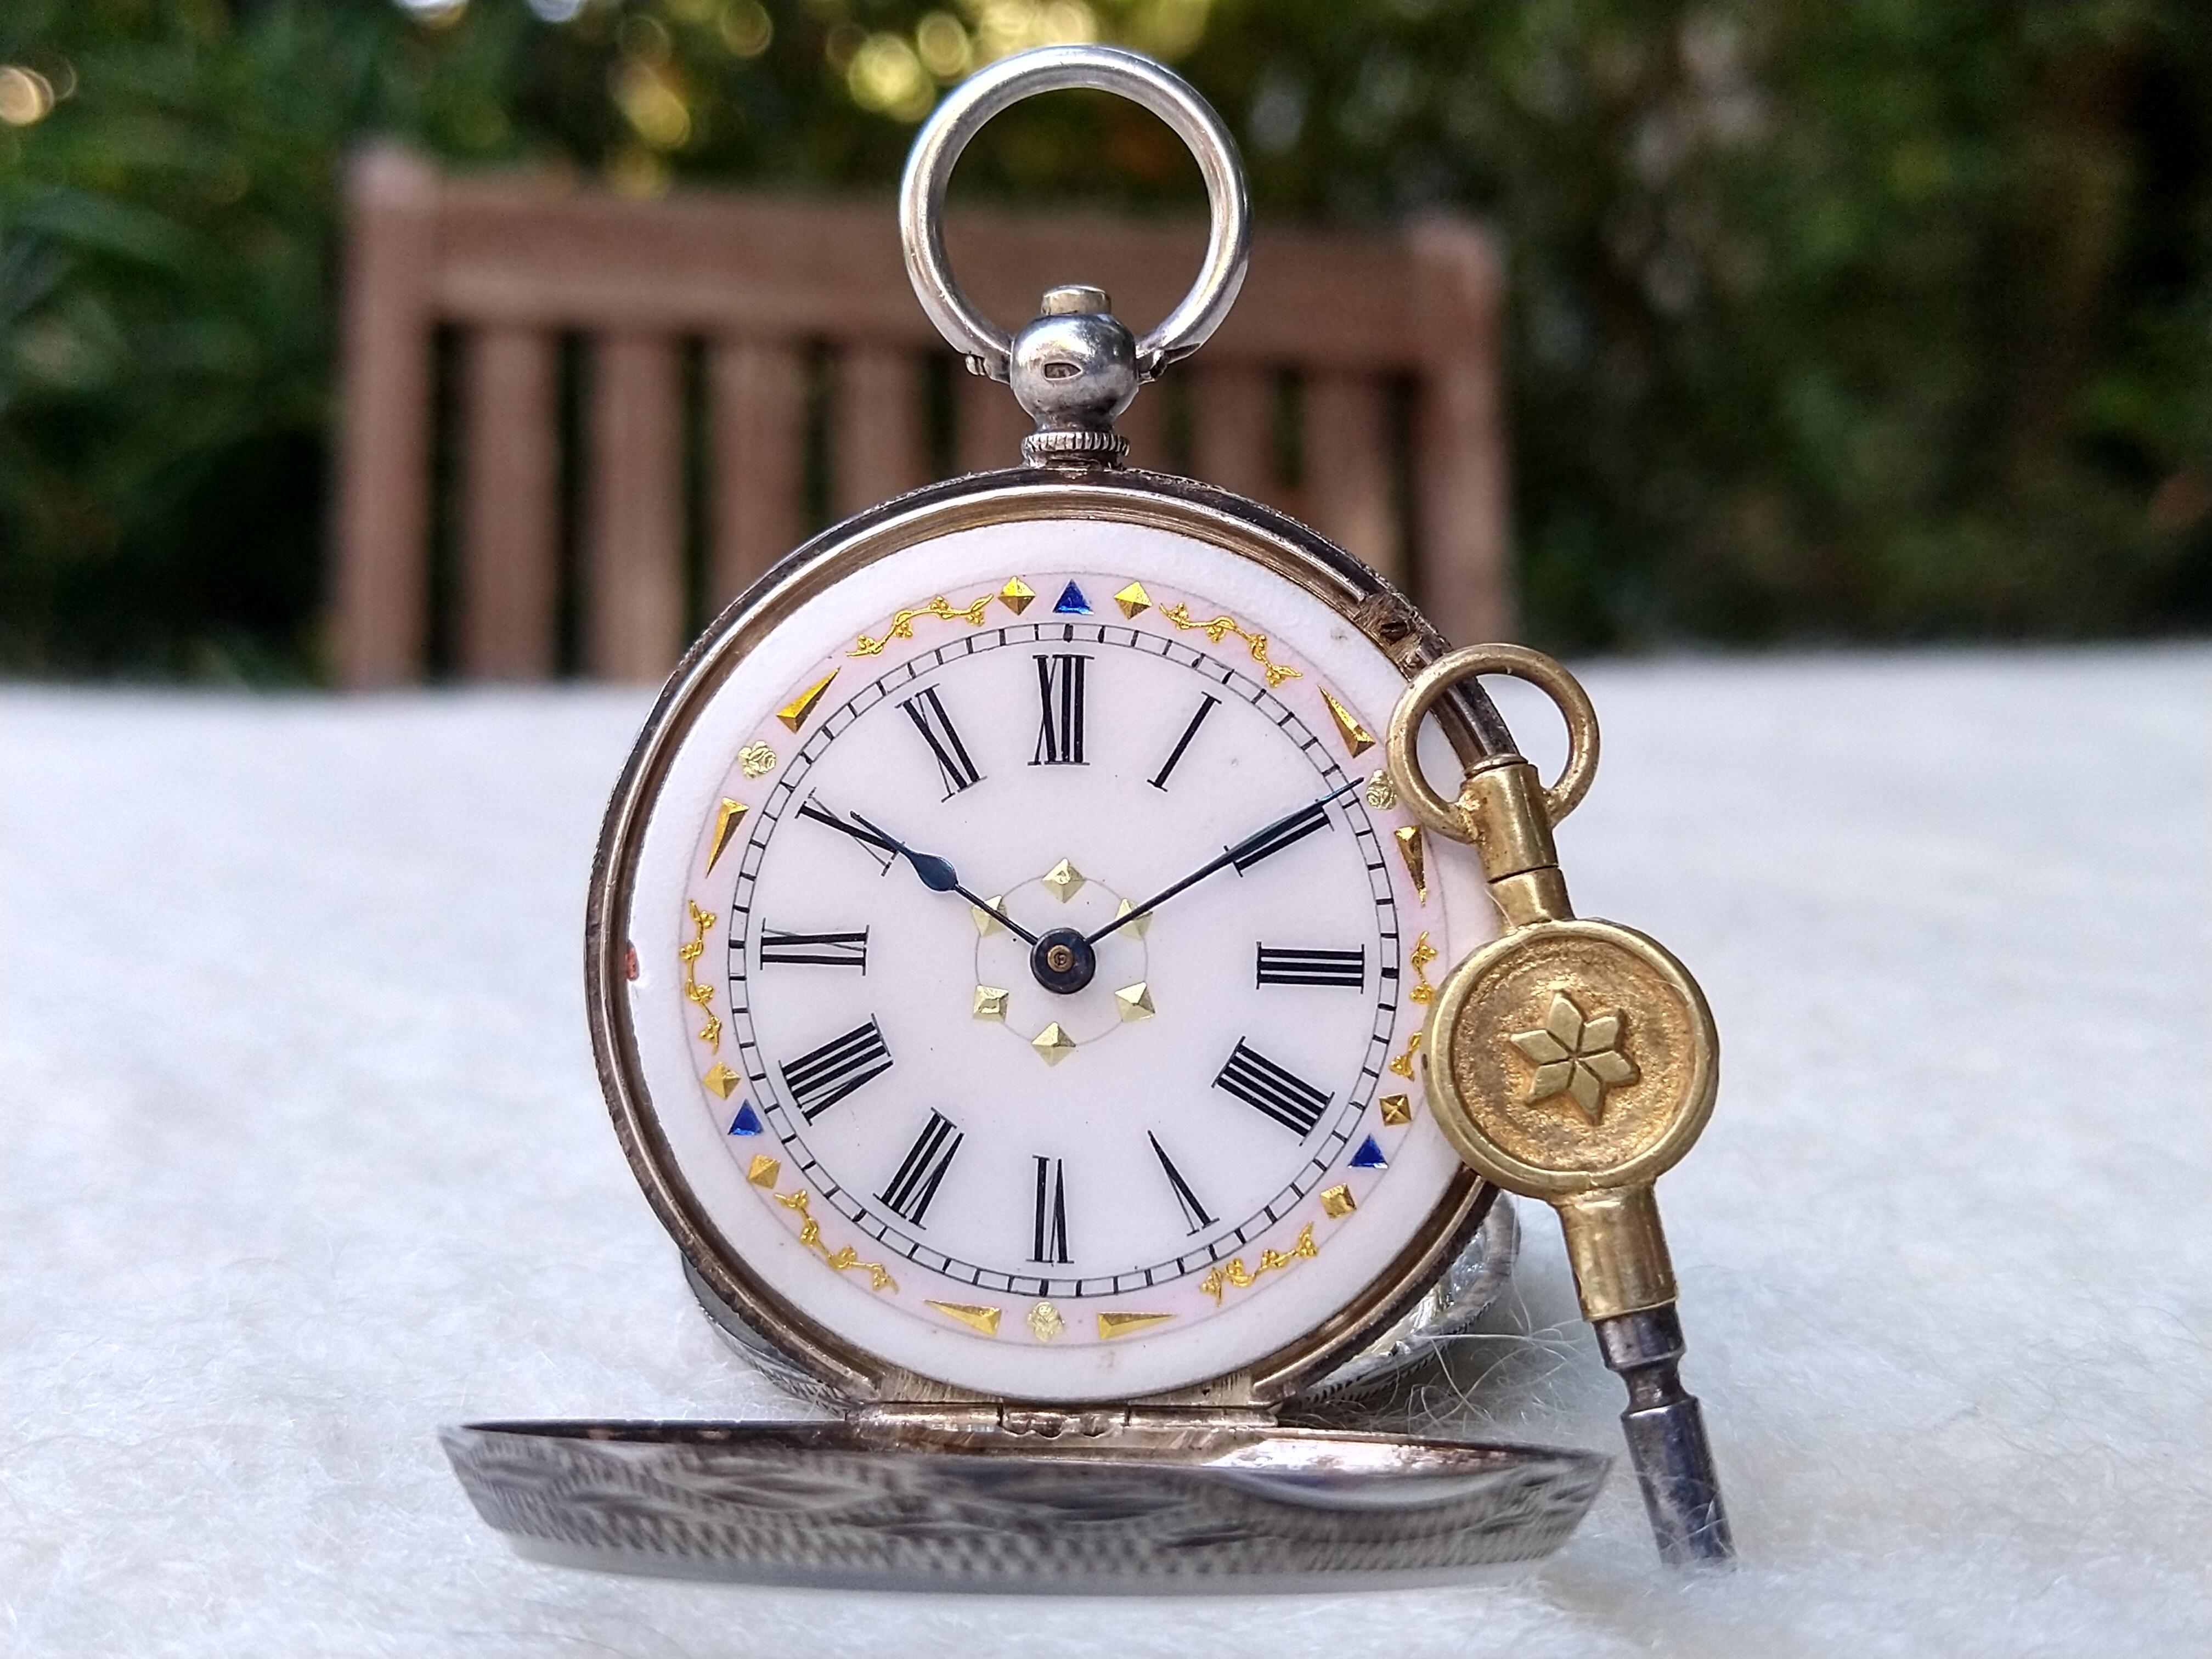
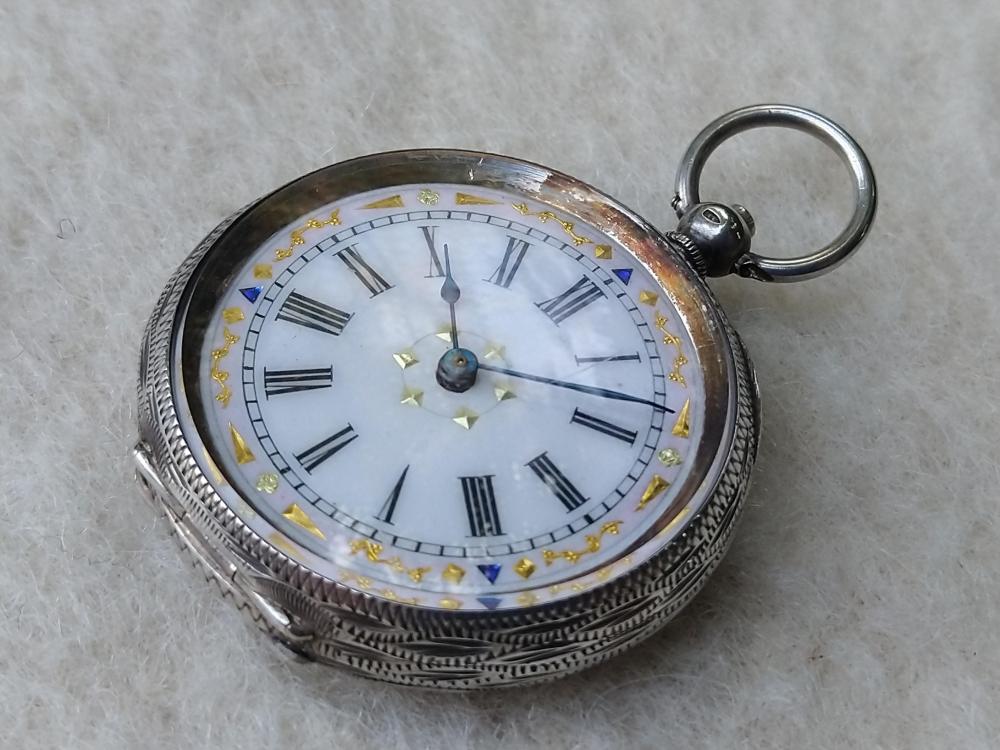
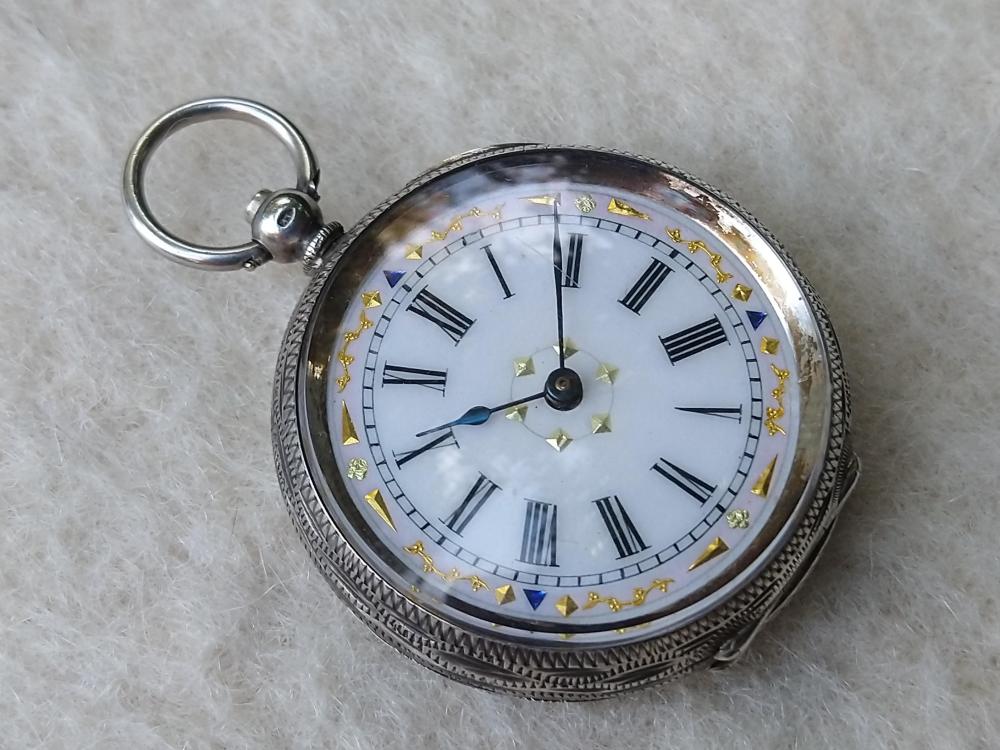
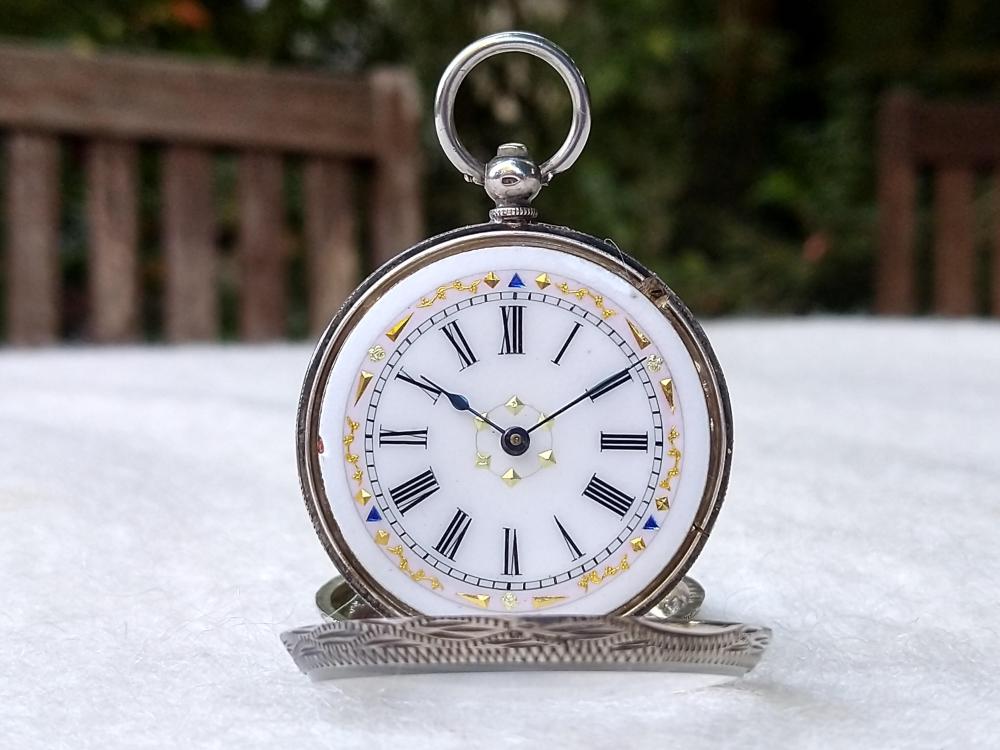
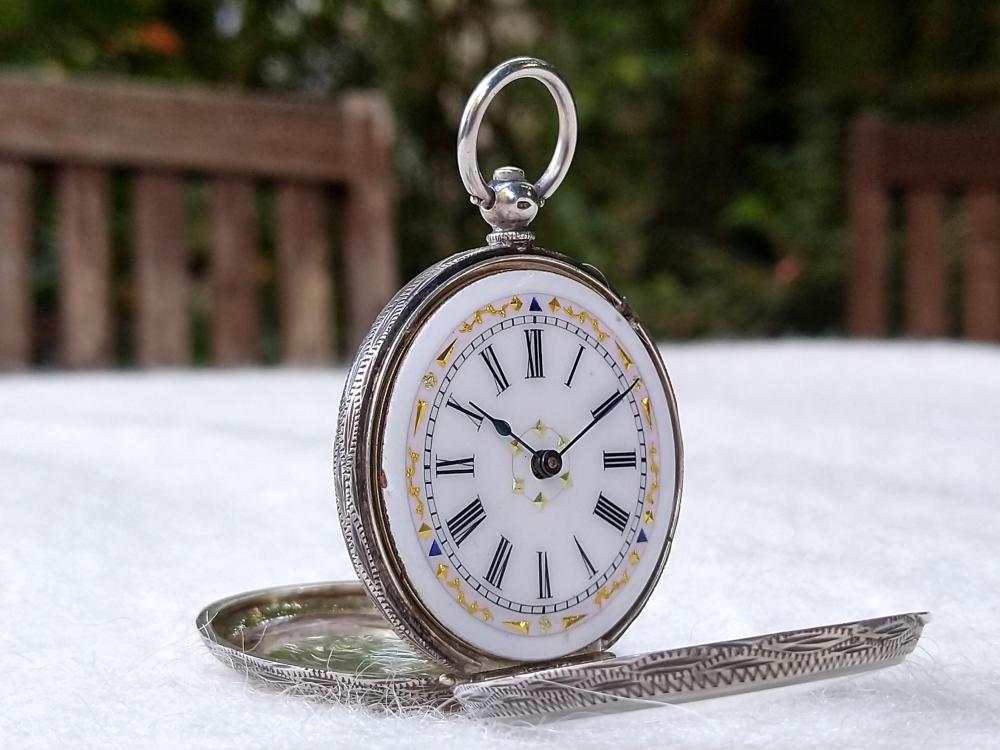
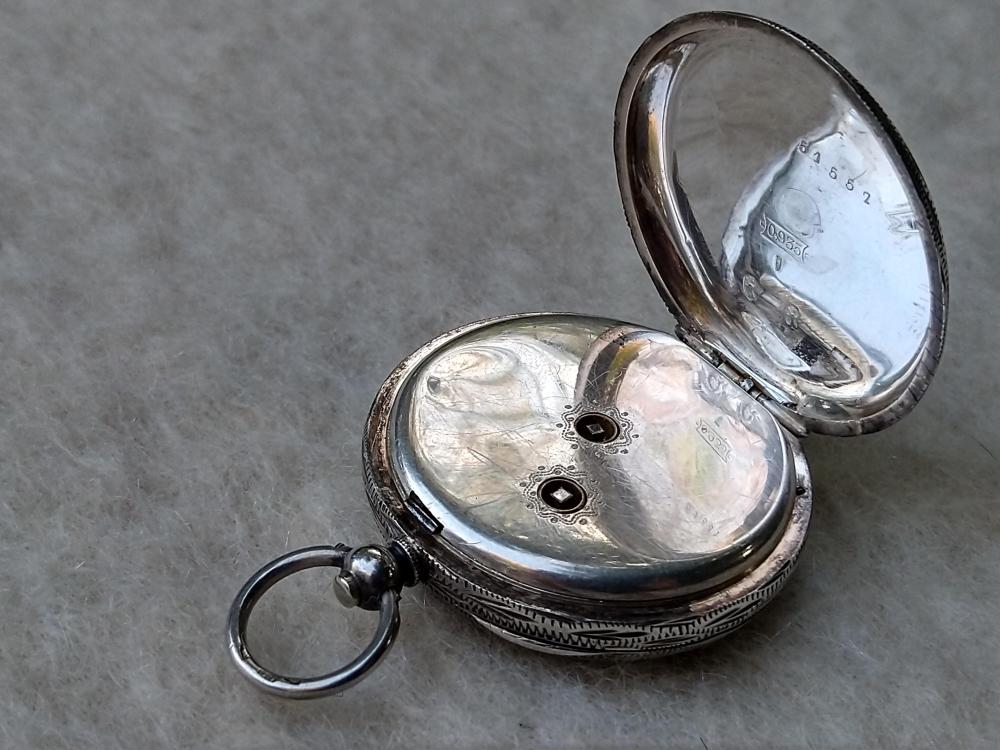
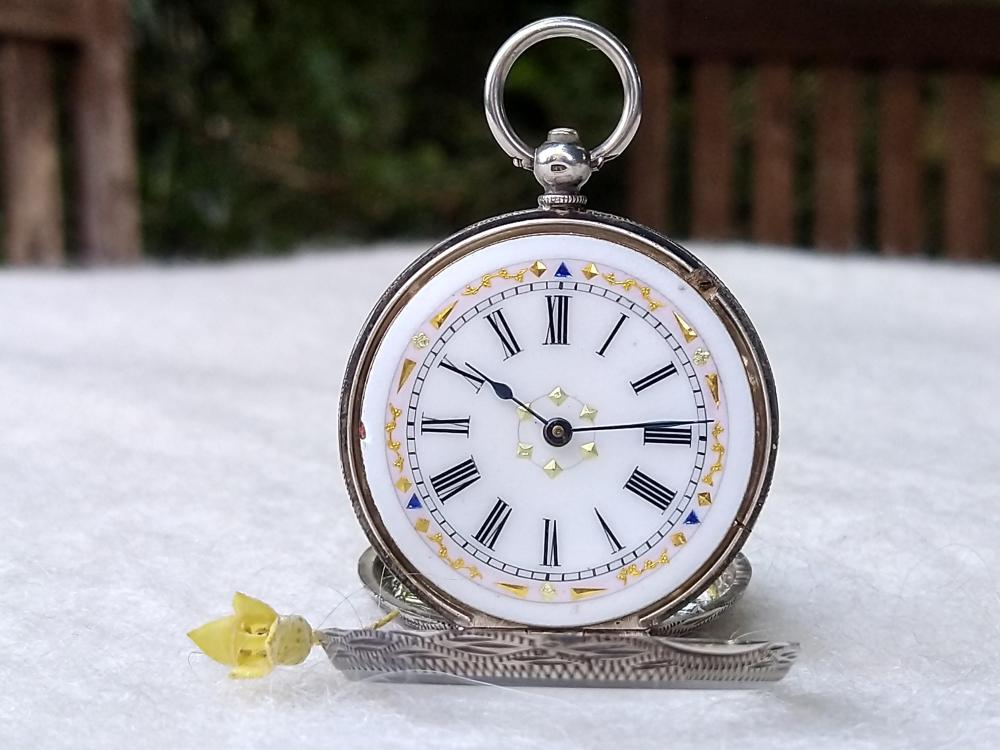
HWGIKE#26 Ladies silver pocket watch with cylinder escapement and natural ruby. Full service, hole for the center wheel tightened, mainspring was broken, but I found one in my secret MS stock, hairspring made flat and concentric, pin in the balance wheel replaced, both of the balance staff pivots (0.35mm) were polished in the Jacot tool and the same time straightened, end of the pivots are also polished. I am very happy than I accomplished this without breaking anything and the end result is acceptable.


 2 points
 -
If you look at this you'll see it is quite a strong spring. https://www.ebay.co.uk/itm/154289348754 I can't remember the size now but I have made them in the past from spring wire.2 points
-
The have a dry lubricant applied at the factory, and it really has no limit especially if in the sealed pack.2 points
-
If it's not automatic, you do not need to lubricate the barrel. Though I do put a few drops of HP11300 on the top of the spring and the base of the barrel - some do, some don't. I have a bag full of these old washers. If I have to re-fit a reverse wound spring, and don't have the correct winder, I fit the spring in to one of these washers, then I can reverse it when fitting.2 points
-
I apologise, but an error has slipped into the assembly sequence of pictures. For detailed info, please read this post: OneDrive Disassembly pictures here (please sort by name in ascending order) OneDrive Assembly pictures here (please sort by name in ascending order) When I first started out trying to service and repair watches, I took a picture of every step, and I needed those pictures as I didn’t have the knowledge to deduce where the parts should go, how they worked, and how they interacted. Now that I’ve gained some experience, I no longer need all those pictures, but I still need some pictures. For example, it’s very convenient to have pictures of the train of wheels or certain parts of a date complication, and so on. Anyway, I enjoy taking these pictures as I go, and I organise them and keep them on my OneDrive for future use. For this project, servicing my brother’s Atira Plana housing an ETA 2472, I felt it would be fun, interesting, and perhaps even useful not only to take the pictures but to edit the pictures, adding visual and textual instructions. These pictures are made for my personal use and are not intended as a tutorial or to tell other people how to service an ETA 2472. The pictures simply document how I went about it. Nevertheless, I guess others may find my work useful, so I’m happy to share it. There are many ways to service a watch, and I’m still learning. That said, I do follow the practices taught on watchfix.com, and they work very well for me! Here's a post with links to some of my other service walkthroughs on WRT:1 point
-
I have had a chance to use them now and can report that they are great. The arbors are all in good condition and seem relatively large compared to equivalent winders like Bergeon (or Chinese) so the springs fit snugly over them and grip well. The arbors are all marked as 'R' for right-hand in the box but they seem to be able to wind springs in both direction if the spring is a good tight fit over the arbor. Being able to detach the arbor from the winding handle allows easy removal once the mainspring is in the barrel (grip the arbor with a pair of pliers while straddling the mainspring with a pair of brass tweezers).1 point
-
It's a simple job of removing the c clips to remove the pushers and then clean everything properly.1 point
-
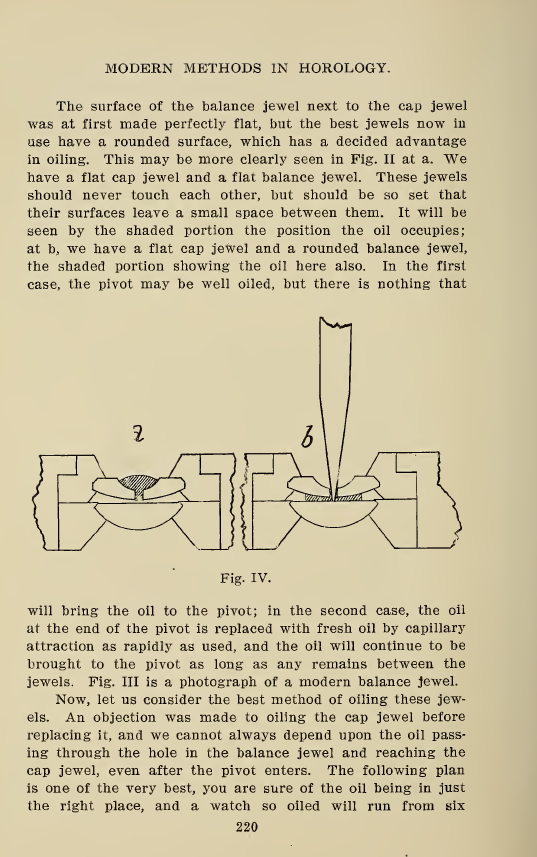
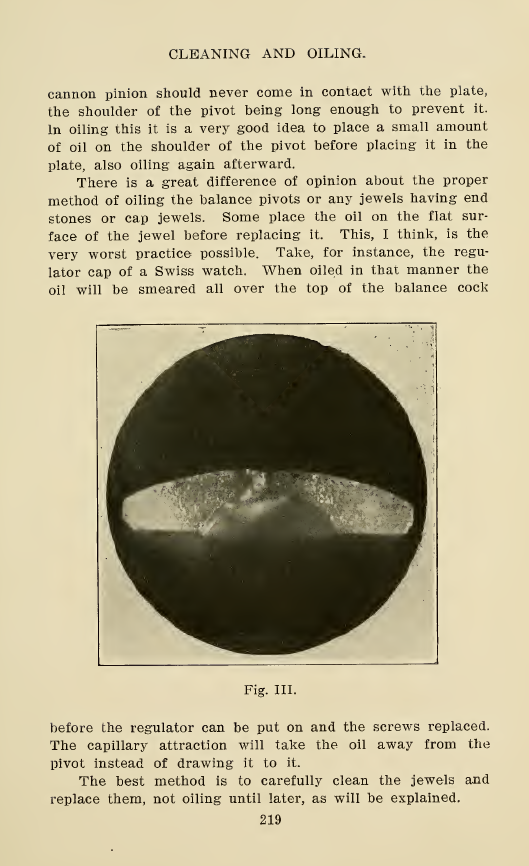
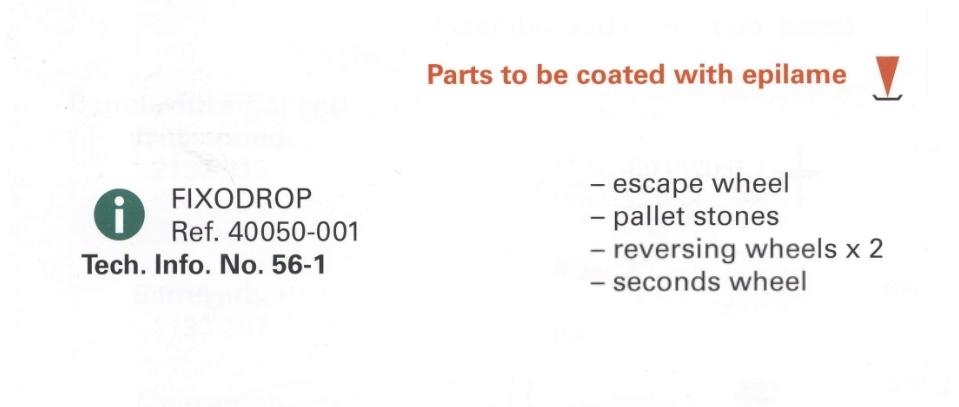
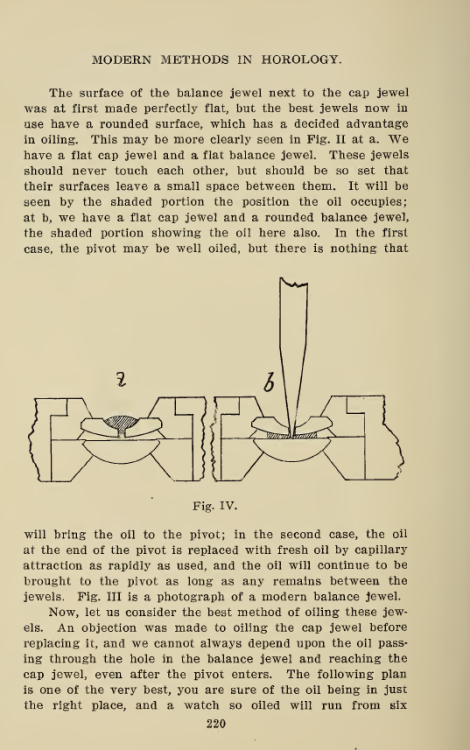
This ia an interesting debate! Here are my five cents (little money, but lots of words to come, hahaha) : 1. I think the book that @SwissSeiko scanned here may come from the era of non-shock protected balance jewels. And then, I'd totally agree with the statements in the book. For those settings, oiling the cap jewel, and then putting it on the hole jewel that is fixed on the balance cock and screwing in those tiny screws to fix it, is a recipe for oil just smearing around. And yes, then the hole jewel may end up dry. The prescribed method in the book works much better. And it's so much easier, too. ->One note, though: when sharpening whichever pin or oiler to push the oil through, one has to make sure to polish it nicely. Ideally a mirror polish. Why? If filed down too rough, it can easily happen that debris/shavings from the metal will come loose when pushing it through the hole jewel. Those shavings will then end up in the oil and around the pivot, causing problems. I've experienced this at the beginning of using this method (for non-shock protected balance jewels). If you have a microscope, this is a moment to inspect carefully (looking through the cap jewels towards the oil drop and pivot). 2. In "modern" (last 70-80 years, haha) shock-protected jewel settings, I don't see the same problem. The two jewels are usually easily put together (after the drop of oil is applied to the cap jewel). And one can/should check that the oil remains in the center (20x loupe or microscope should show the oil ring clearly). IF we know that the oil is held in the center, all will be fine, I think. (BUT, yes, if you're not careful when putting the jewels together and not checking the oil ring, it's totally possible that the oil spilled to the side of the chaton and then your oiling is a fail). But if the oil is in the center: when the balance pivot is pushed through the hole jewel and gets into the oil on the cap jewel, it'll draw the oil into the hole through capillary action. -> Another note here: and this one may be controversial. Epilame... I personally stopped applying epilame to the balance jewels - at least not the hole jewel. A Rolex manual from 2009 (so very recent, see screenshot below) does NOT mention the balance jewels for epilame treatment. And I read somewhere that Rolex determined that the residual from epilame could cause wear. It makes sense to me: When I see the residual of epilame (under very high magnification under the microscope) on the pallet jewel surface, it is clear that it is non-negligible -- especially, in contrast with the "channel" of clean jewel surface after running it dry for a few minutes (when the escape wheel has scraped off the epilame in this particular area). So, if we apply epilame to the hole jewel, the balance pivot will rub it off. Then the oil can move to the hole and pivot (if it didn't rub it off, we'd end up with a dry hole and pivot as epilame is supposed to stop oil from moving - we also don't want that as discussed in @SwissSeiko's book). That residual is now around the pivot, I suppose. Can't be ideal. Some may say that we need the epilame there to keep the oil from spreading down the balance pivot towards the wheel/spokes. I very much doubt that this happens IF the oiling is done right (right quantity and central on the jewels). Capillary action should hold it. At least I've not observed this in any of my watches. Pandora's box = opened
 1 point
 -
Fantastic news Jon! Can't wait for the video! I was on the verge of ordering some other tweezers for this job so much appreciated for suggesting I can use the one I have.1 point
-
Rationale & some discussion linked. I don't think the people testing the reactions to their fakes was the main reason, but there were tons of threads there daily on identifying or fixing fakes. https://www.reddit.com/r/watchrepair/comments/1ftmuc5/new_rule_no_posts_or_discussions_on_counterfeit/ I found it surprising that so many people there conflated branded counterfeits with clone movements. The difference seemed obvious to me.1 point
-
It depends on the type of illumination so photos would help. When it comes to the buttons all I can say is it can't be much of a repair shop if they can't remove and clean the pushers.1 point
-
Crap you are right. I wonder where I got that idea.1 point
-
Agreed - that is exactly what I expected to see. The hole jewel's dome meets the flat surface of the cap jewel installed atop it just as in Hood's drawing. No reservoir between the jewels.1 point
-
Oh, well that’s great! Stop by with more photos again …1 point
-
So, the theory on this may have changed, but my information is from the old books, and they say to put a drop of oil on the pivot side of the jewel after it has been installed, then use a fine oiler or something similar(I sharpened an old oiler to a very fine point) and press it into the hole, and let the capillary action pull in the oil. I think its probably OK to do it with his shown method, but the method described by Grant Hood I think is better. He explains that when oiling the jewels separate, the capillary action pulls the oil to the surface of the cap jewel, instead of keeping it in the middle. Again, the old saying goes, if you ask 5 watchmakers how to oil a watch, you'll get 10 different answers. I could be wrong, but at 32:34 of the video, it looks like the jewel surface is the domed towards him and I don't see the oil reservoir, but I could be mistaken. Its not super clear in the video, but something that I thought looked off.
 1 point
 -
Thanks for your question and apologies for my late reply! You can absolutely apply a drop of oil to the back of the sweep second tension spring, but I would suggest Moebius 9010.1 point
-
It does potentially look like it's just a new crystal as long as the battery hasn't leaked.1 point
-
Look for "Universal watch parts holder" - that produces tools such as he showed, around £1001 point
-
The shorter spring will be slightly stronger.1 point
-
Well, this case is meant for normal plexiglass pan shaped crystal of the type that crab-tool is needed for installing it. The crystal shown is not original. 0.5mm is huge step, so may be 31mm crystal will break if shrank enough to get in.1 point
-
I've burnished my first pivot this evening! It was a nice learning process. @VWatchie's youtube video was very helpful in getting a good hand position and feel - thanks! It took me some time to get a smooth and fast-enough motion, but I kinda got there (to "ok", not yet great) after some time. The pivot I was practicing on came out nice and shiny after a few tries. I'm super happy for today ! Will practice some more soon.1 point
-
That's funny. I have two TT1s and they're fantastic watches. Have not experienced a single problem in fact they not only look great, hold their value, but don't lose much time. Your post and the headline are not only irresponsible but wrong.1 point
-
That sort of dial you should never use any sort of eraiser, you will sure bugger it up, it is lacquered to start with. The only way to get it back to its original likeness is to have it restored.1 point
-
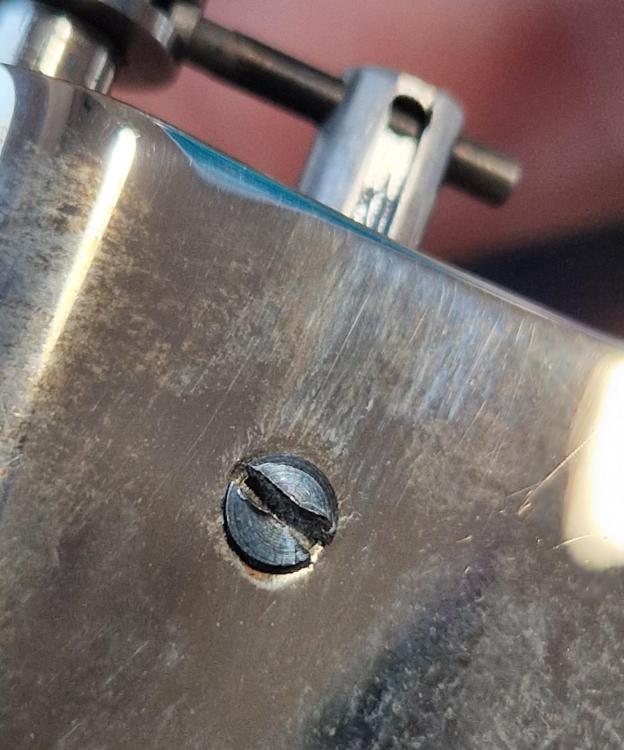
That's great! I have had at least a dozen of these (at least) over the years, and seen 2 or 3 where that screw/key had half the head cracked off, and of course the shaft was well stuck. Another common issue is the runner the pulley rides on gets knocked out of true. That's hard to rectify if you don't have a lathe you can put it in (it's 5mm diameter). In the lathe, you can put an indicator on it and bump it back true. A very nice feature on these Steiners is that you can adjust the headstock to line up perfectly to the tailstock. I seem to remember explaining the procedure once, will try to find the post.1 point
-
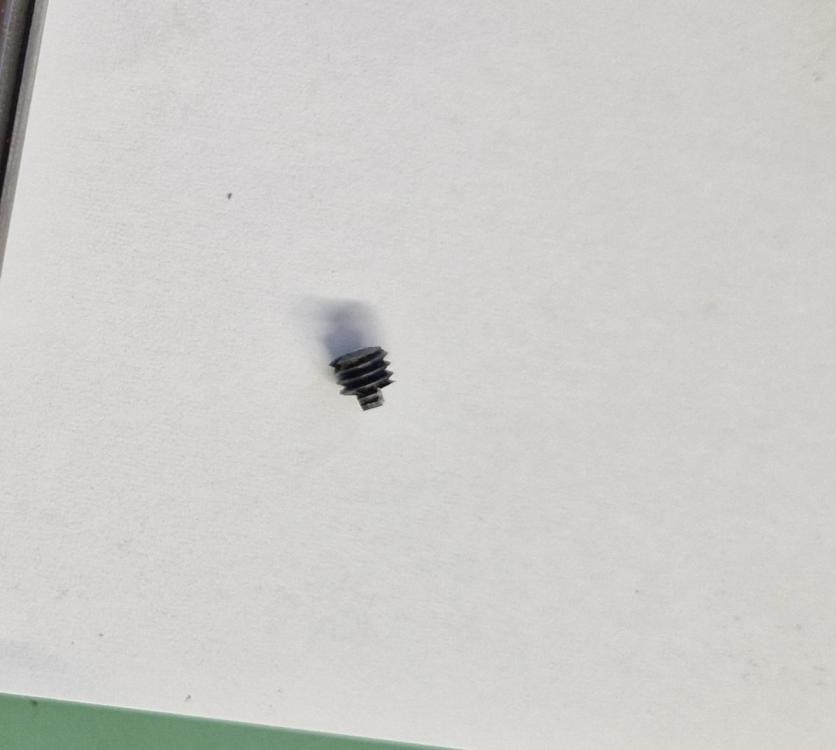
@nickelsilver, honestly, I can't thank you enough!! Without you, I'd NEVER have figured this out. And would probably have caused damage to the tool in the process. I followed your guidance (everything was VERY hard to remove) and found massive burrs (more like proper deformation/bending) in the shaft around the screw on the side. See below the picture of the screw (this was not me!). You can deduct from there how bad it was... Anyway, I filed away the burrs/deformation and now it's working very nicely! I'm super happy!
 1 point
 -
Yes, unscrew that, then you can pull the whole assembly out that side. It's a normal thread (unlike the thread that moves the pulley position shaft). If the keyed shaft does have burrs, it might take some effort to pull it all out, that's normal.1 point
-
The shaft that positions the pulley is keyed, and the key is the screw you see there on the side. Often folks who want to take the tool apart will try to unscrew that screw, but it will only come out once the shaft is out. If you turn it with force it raises burrs on the shaft, making it stick in the bore. The whole assembly comes out the left side, the boss on the tool is threaded in. If you remove the upright pin for the pulley (held by a set screw, and generally rather tight in its bore), you can unscrew the boss, and pull the whole works out the left side. It should unscrew without too much force, protect it with carton or something if you grip it with pliers (I grab it in a 10mm lathe collet but I have a large lathe). Check the shaft for burrs along the keyway, pull the screw on the side and check the flats for burrs. You can remove any with a fine file.

 1 point
 -
If you don't have spring winder, keep this ring, springs can be wound in it , when refitting used springs.1 point
-
You need to lubricate the barrel and then fit using the ring it's supplied in, that way you don't need a winder.1 point
-
https://youtu.be/YF-Rf1Cxx94?si=9uXa39qyiRBCHv1O I came across this some time ago, it's very old and the quality isn't great but it's certainly watchable. It's also quite long and I hadn't intended to watch it all, but I found the whole process fascinating and saw it through. Apologies though, I can't seem to inbed the video ftom youtube, says youtube won't allow it. I'll submit this post anyway, might be a case of copy and paste the above link.1 point
-
Based on the photo, you're doing this without the pallet installed. In that case, the barrel should turn as you turn the ratchet wheel as any wind you put in the mainspring should immediately unwind through the train, and you shouldn't feel an accumulation of tension. If you've done that with three different barrels it seems unlikely that none of them would have a properly engaged and unbroken mainspring so if you are not seeing any movement in the train the problem is likely not in the barrel. You said the train moved freely when you turned the barrel before installing the ratchet wheel. Can you still turn the barrel and see the train move with the ratchet wheel in place?1 point
-
Something a little different from a recent job lot so cost me about 85p. Odyssey Diplomat Mk 8 Alarm which was Dixons own brand.
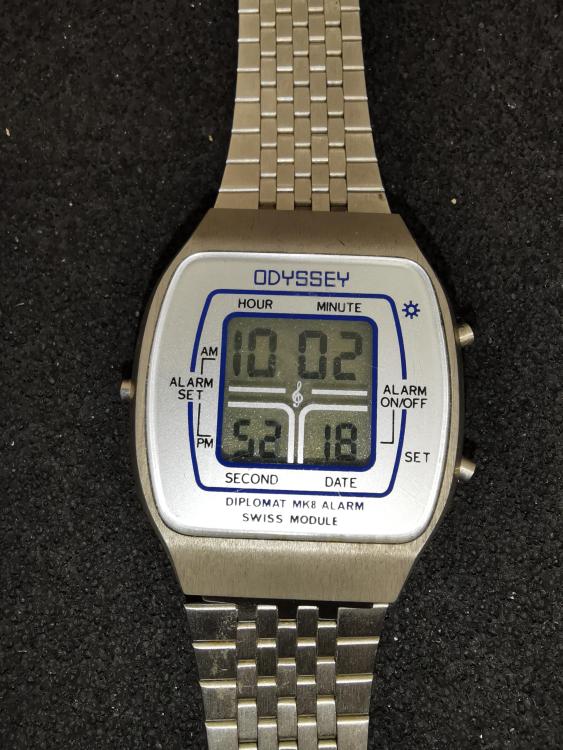 1 point
 -
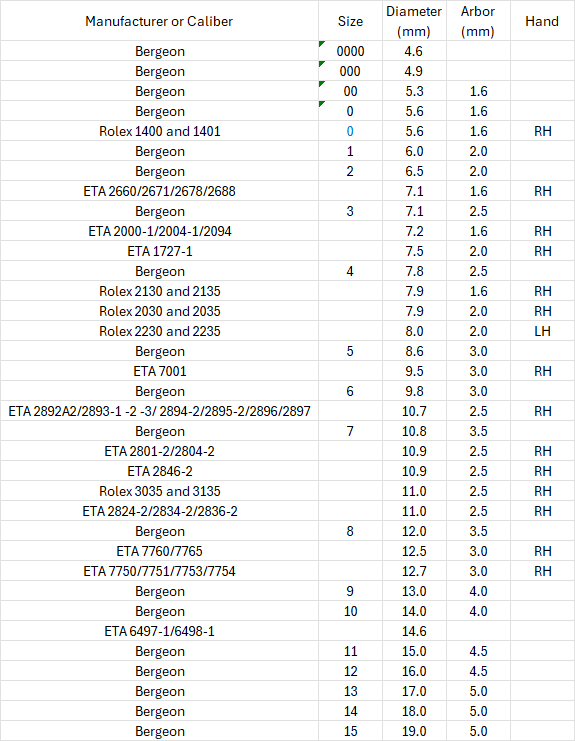
Hi there, I know this is an older thread, but I was wondering what to do with the Chinese set of caliber specific winders I purchased back when I was starting, I decided to track down their sizes and see where they fit in with the Bergeon generics. Here is what I found, hopefully someone will find it useful, sorted by diameter and then arbor size:
 1 point
 -
Firstly, although it's counter-intuitive, you usually don't oil these friction springs. They are there to create drag, and in some cases to hold the sweep seconds pinion in place if there is no seconds pinion cock. There should be just enough drag created to help the motion of the seconds pinion become smooth. This is needed as this is an indirectly-driven design and has some "slack" in the meshing of the seconds pinion. You should notice a slight drop in amplitude; say 5-10 degrees for example when the spring is fitted. Adjust to suit. This is a later Omega calibre with fine pivots. The jewels and pivots must be scrupulously clean. Especially the balance pivots and towards that end of the train. Inspect the balance jewels with a high magnification loupe and look for any smears on the surface when the jewel is reflecting light. I find that dipping or rubbing with naphtha sometimes helps before going into my cleaning machine.1 point