Leaderboard


Popular Content
Showing content with the highest reputation on 11/14/24 in all areas
-
I had one but found it useless when trying to release the back and only any good once I'd used a proper tool first.3 points
-
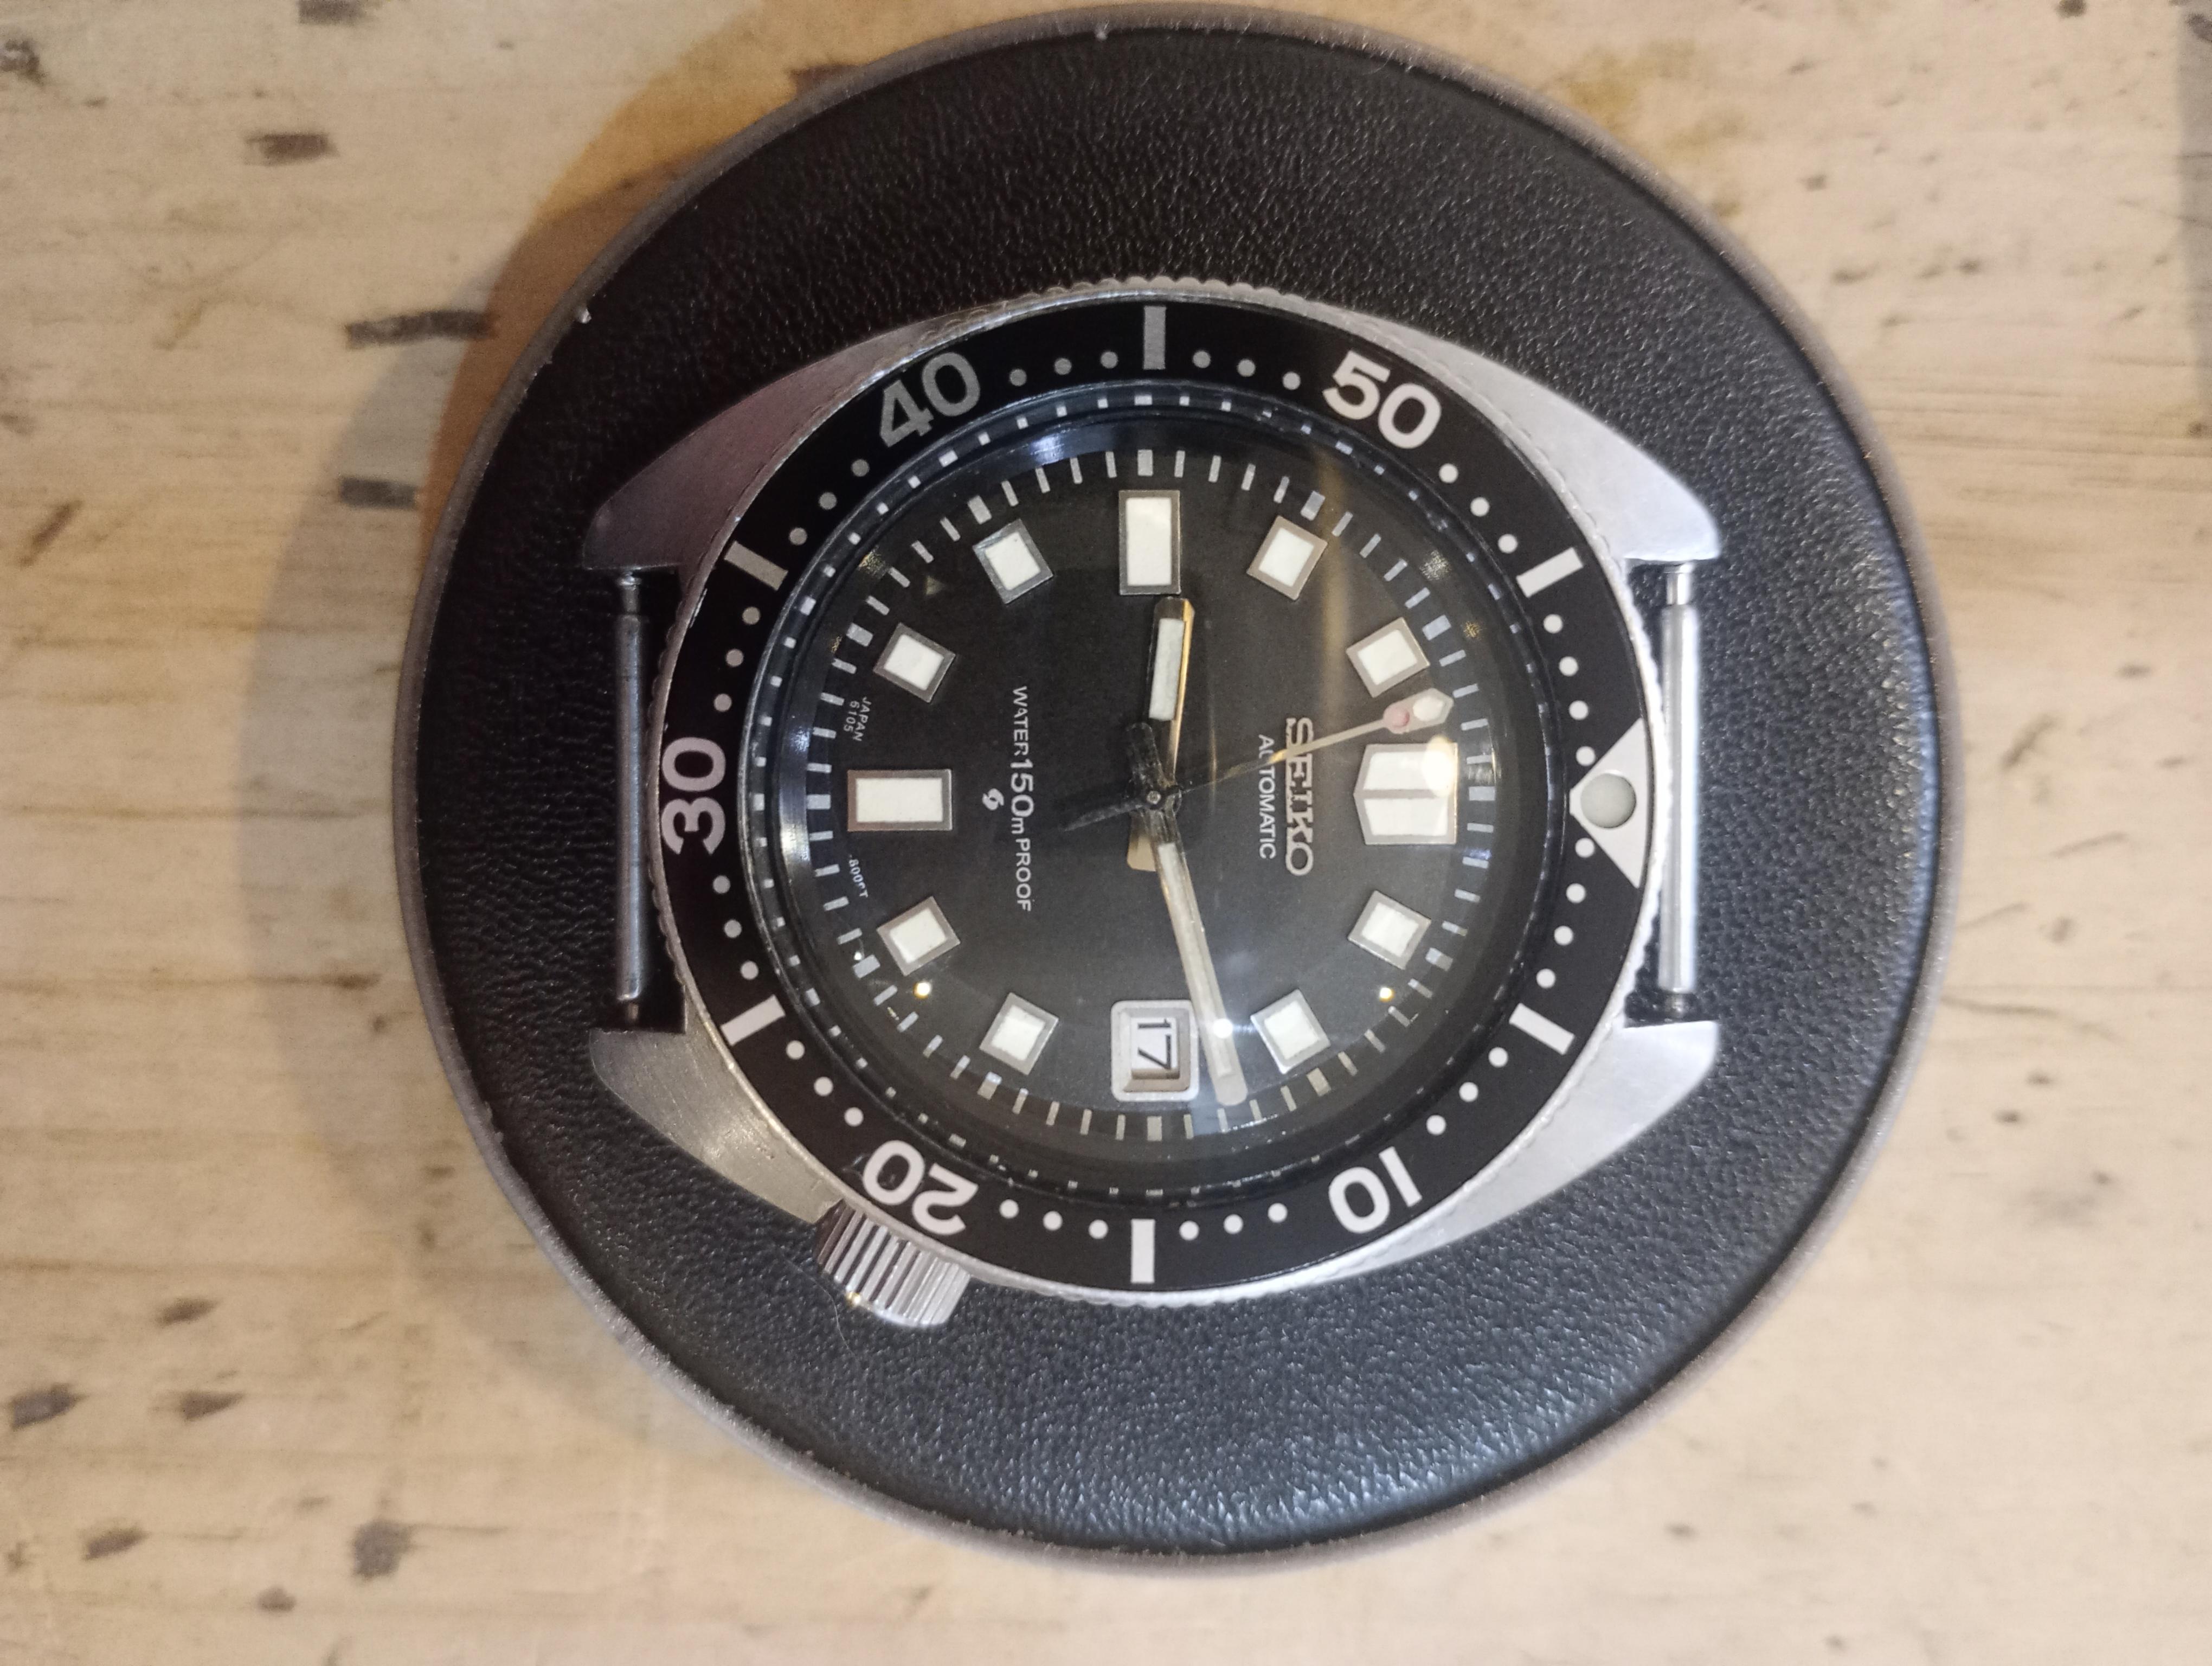
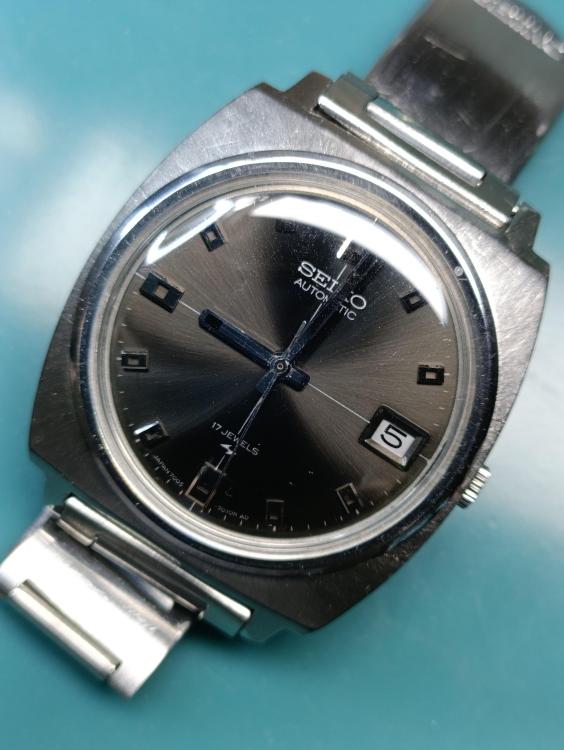
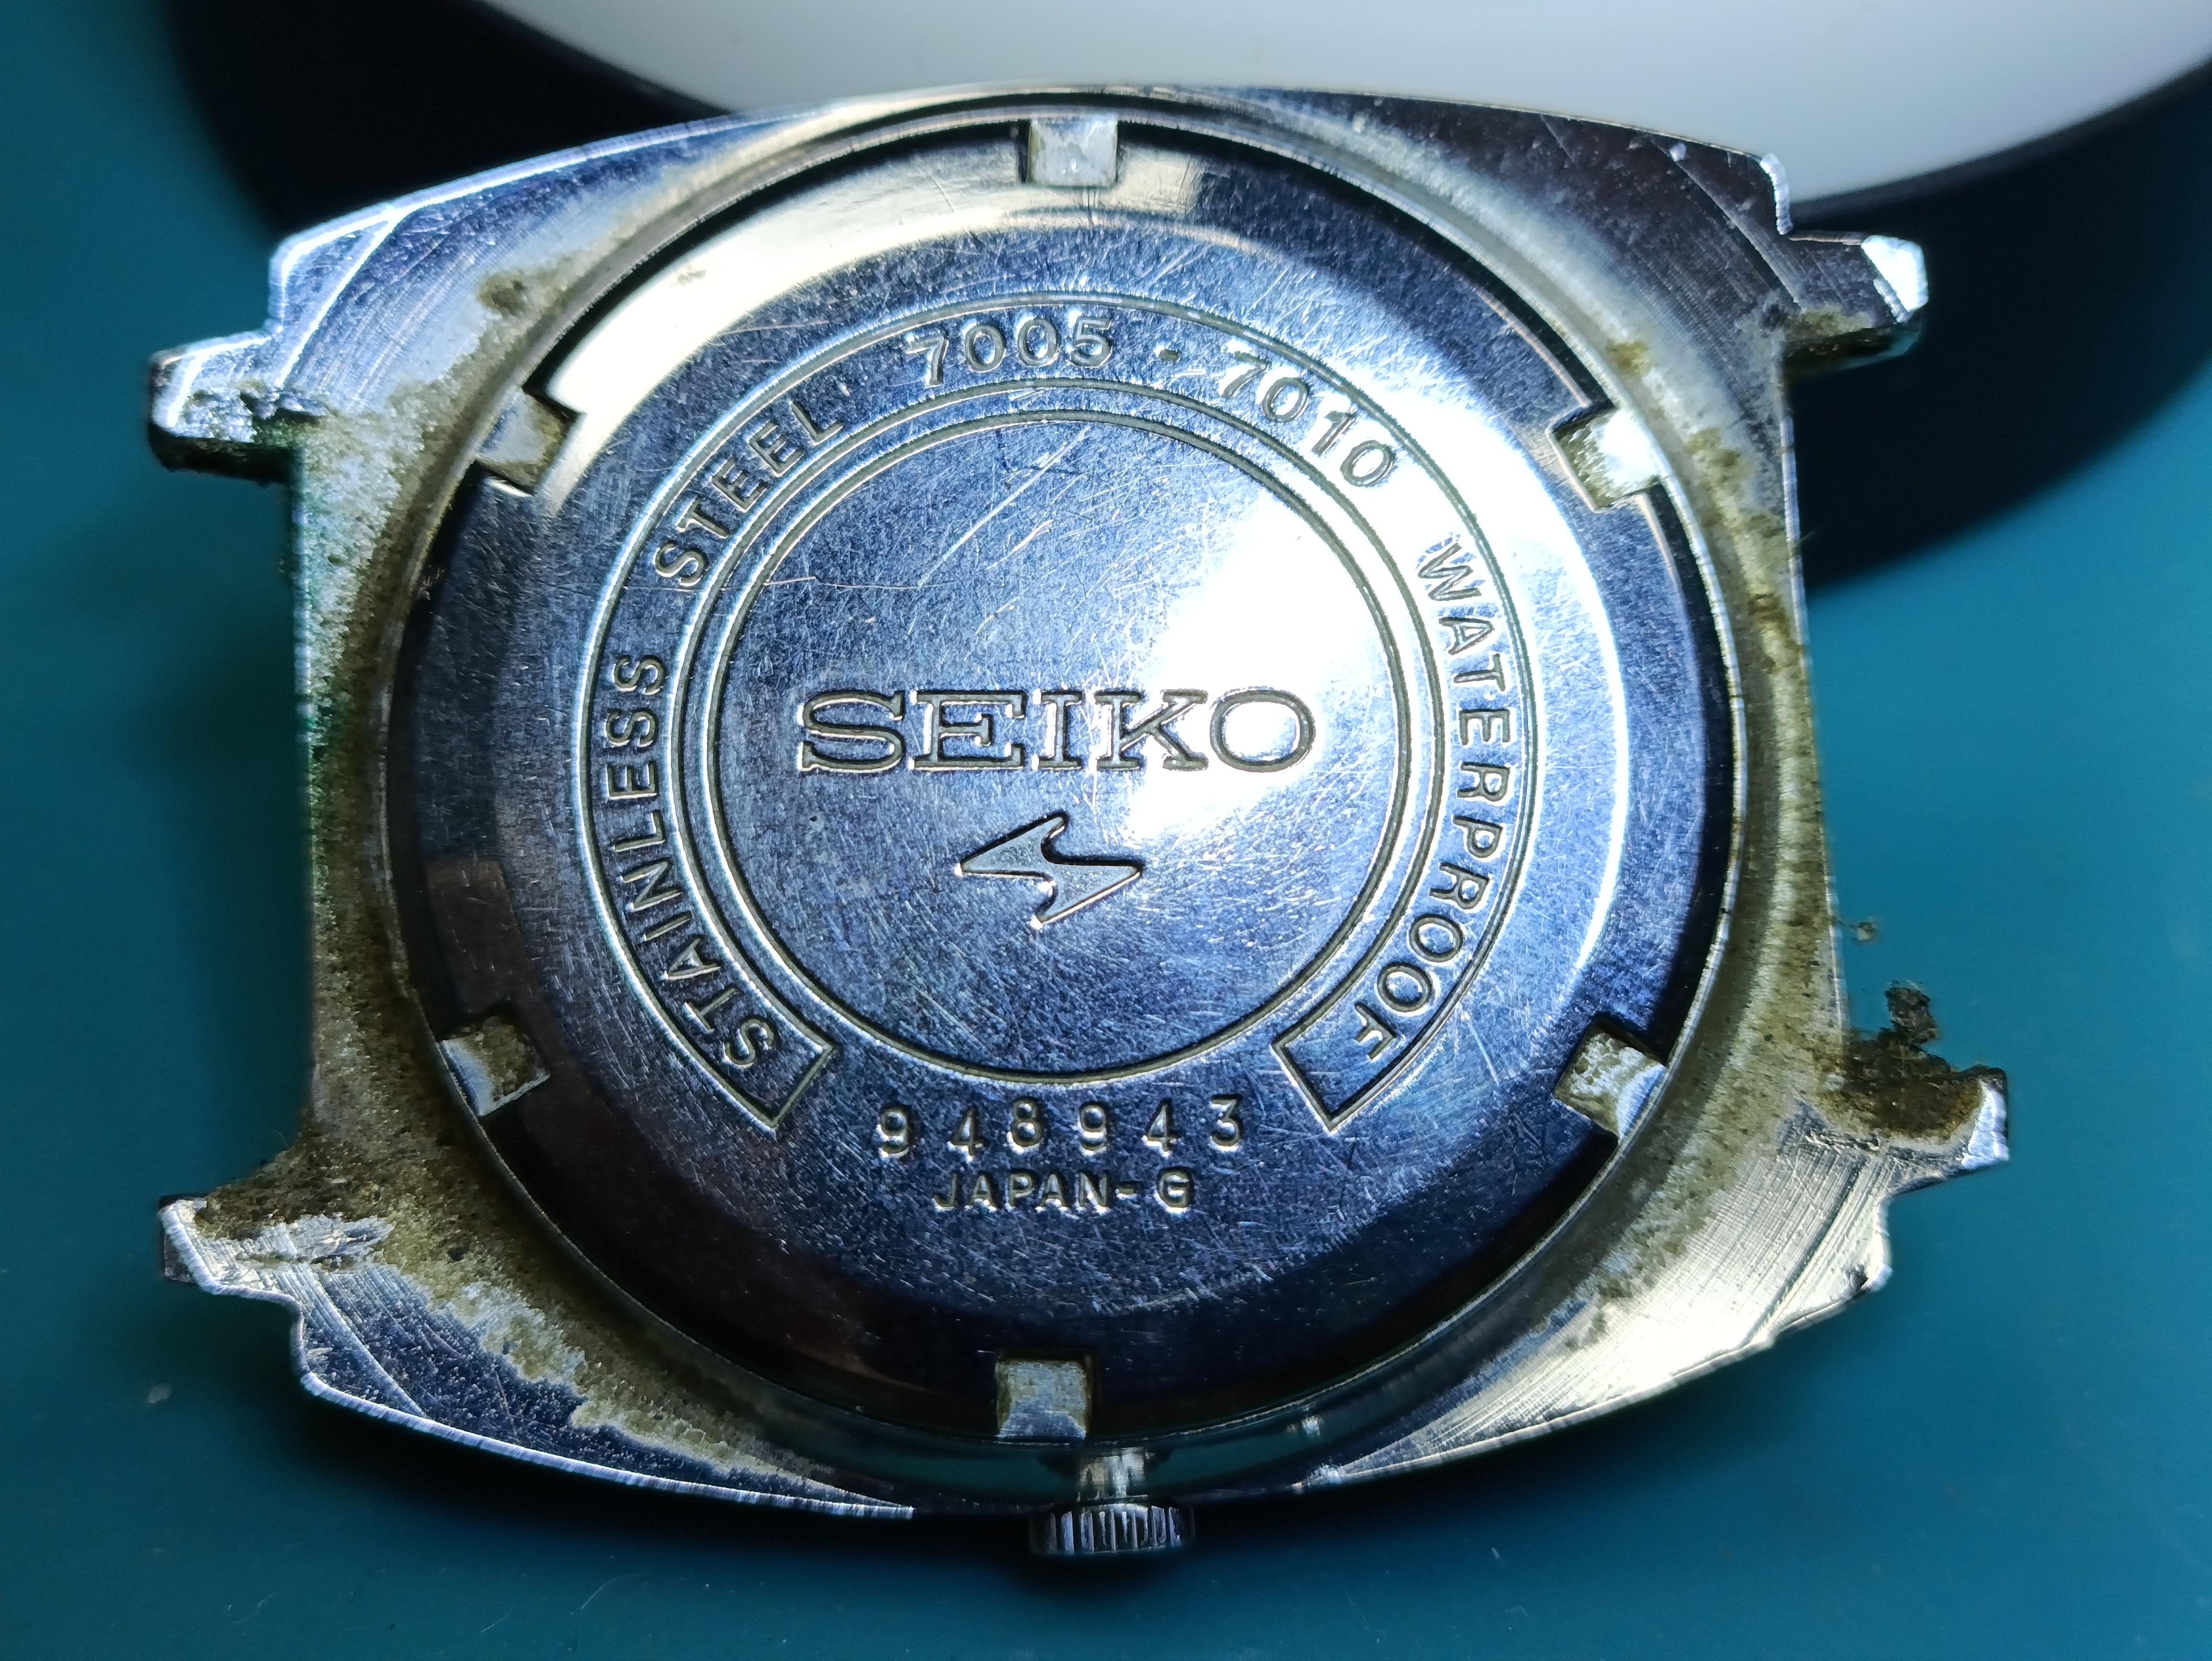
Hi everyone, been a while since I posted, but just moved house and then getting ready to move back to the UK to start a whole new career, so my watch shenanigans have had to take a back seat. Anyhow, I recently managed to sneak in a Seiko 7005, I think it was made in April 1969. Here are the before and after shots. Here is the front, I had to replace the cracked crystal, but it was hiding a nice dial, not 100% convinced it's original, but suits the watch: Here is the back of the watch, with a generous helping of arm cheese: And here is the finished watch, I managed to save the bracelet and everything else is original, apart from the crystal and mainspring , and bearing on the rotor.


 3 points
 -
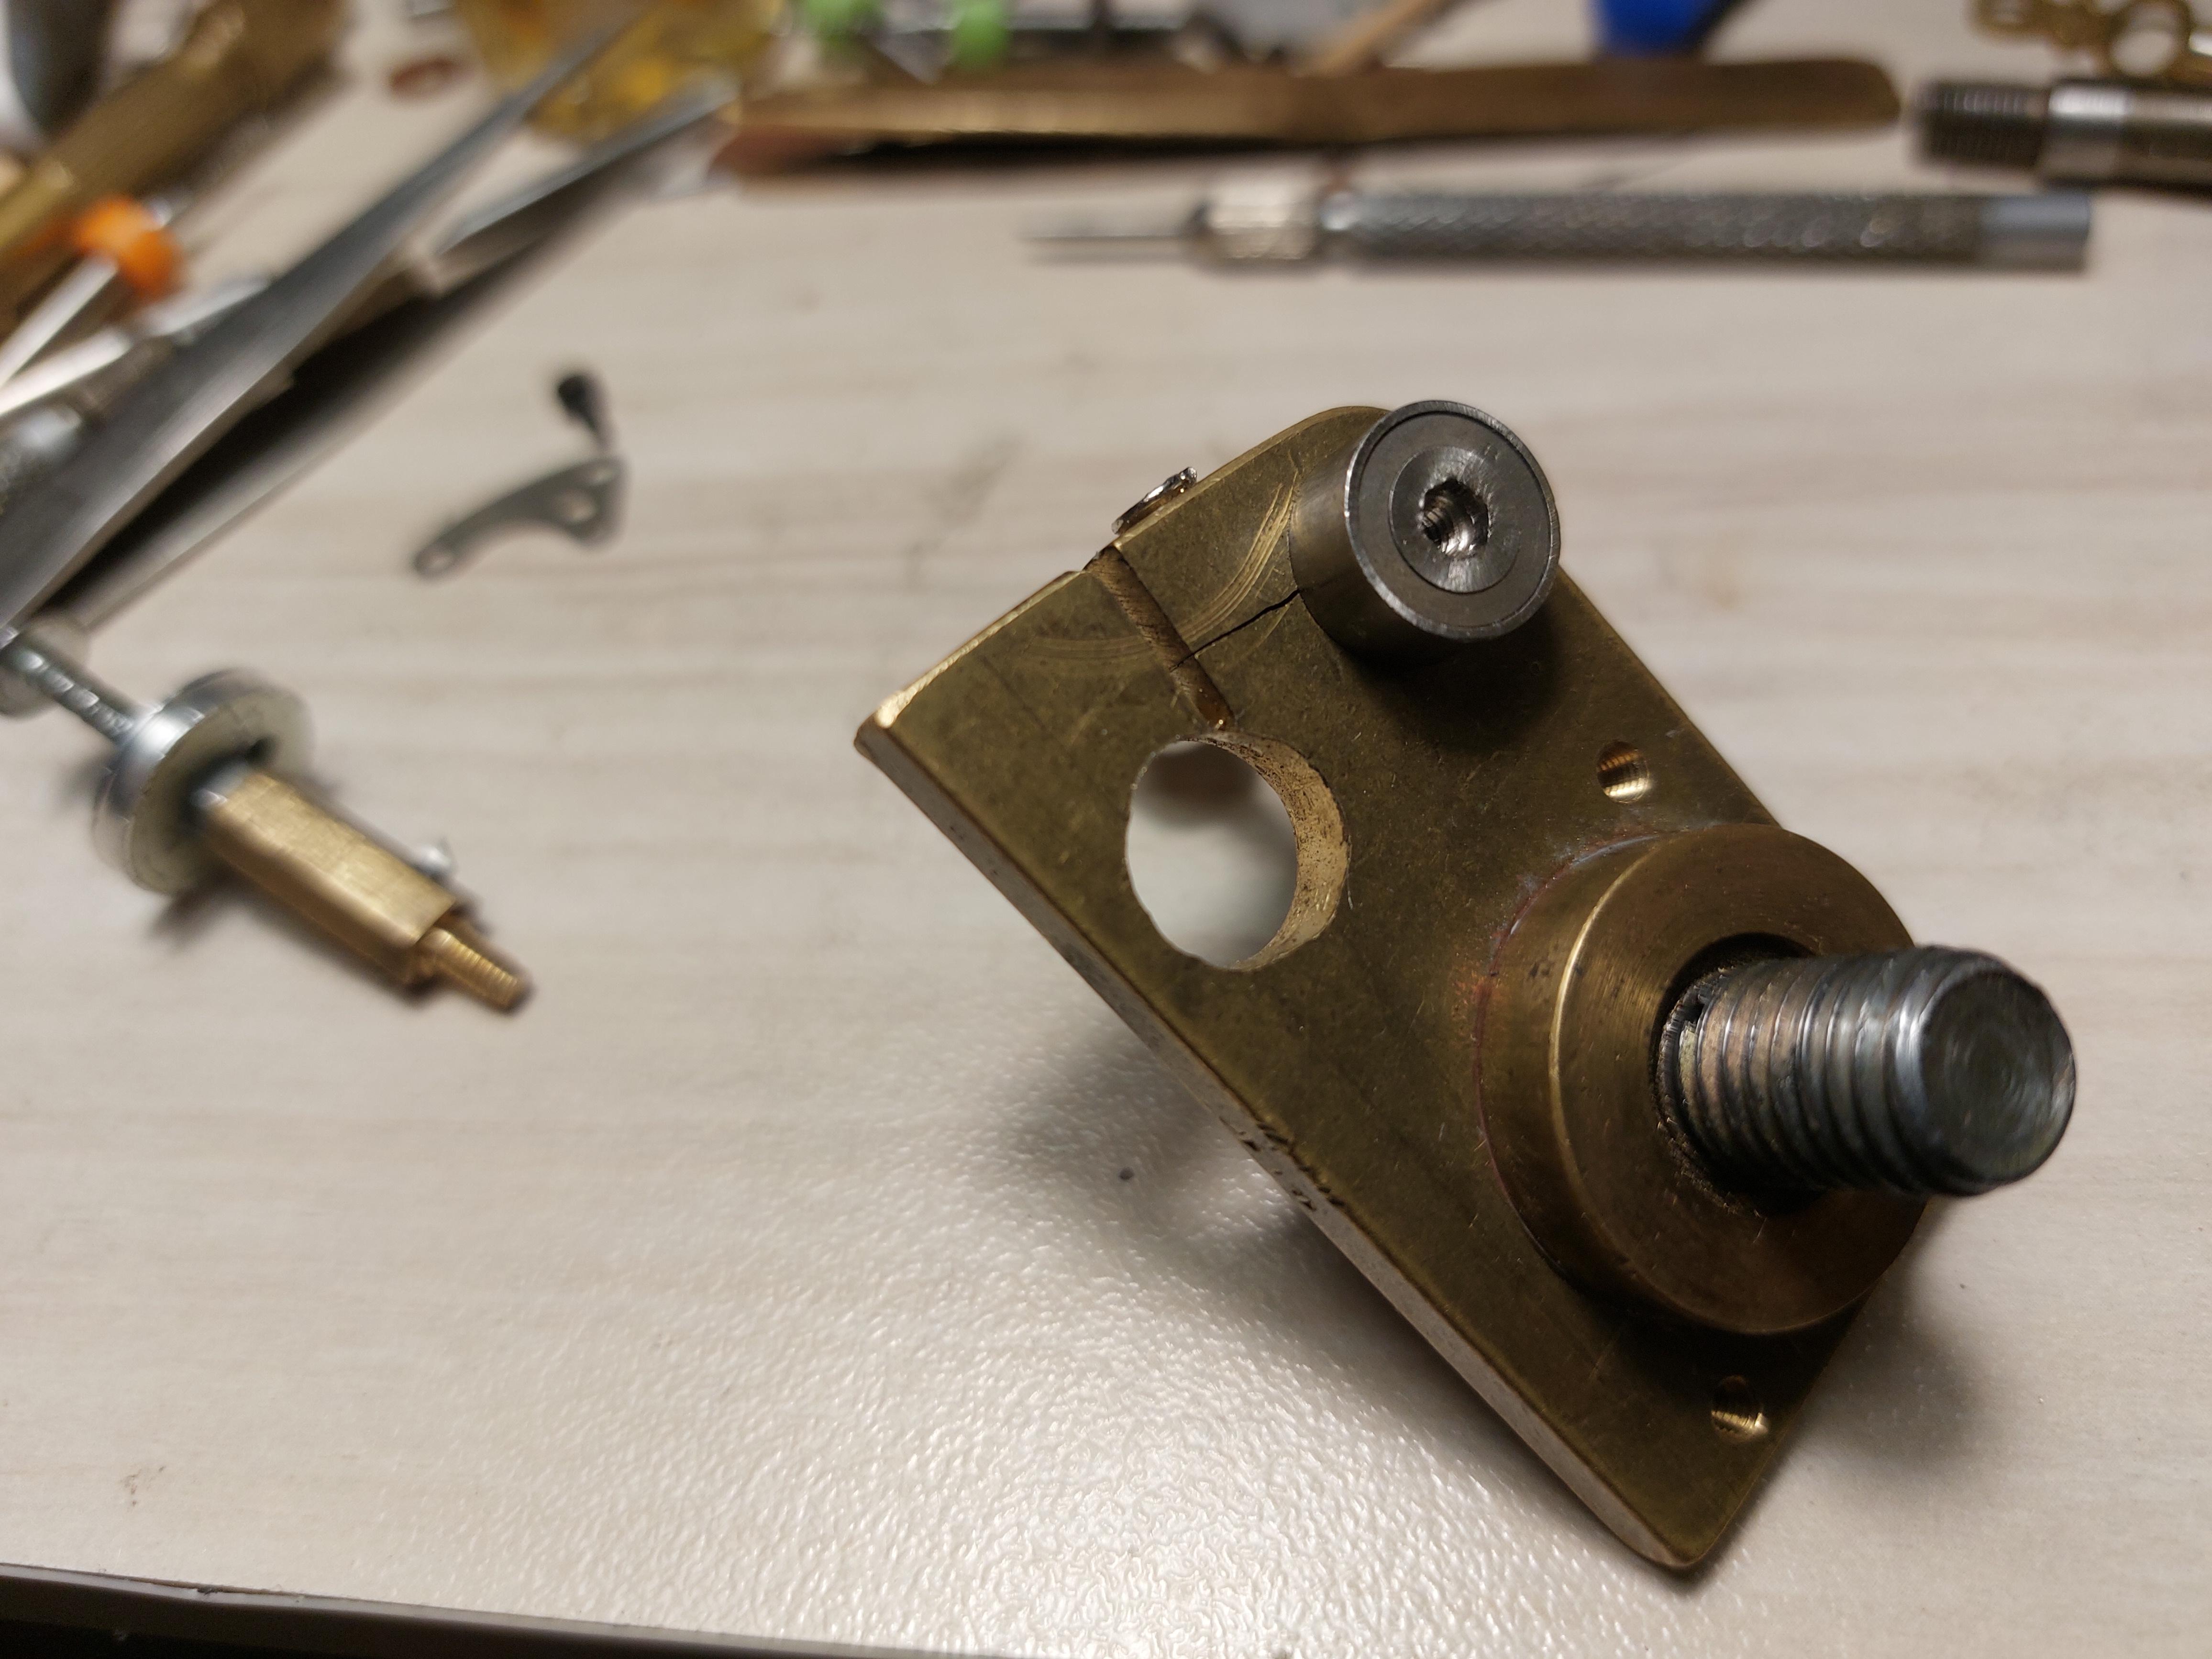
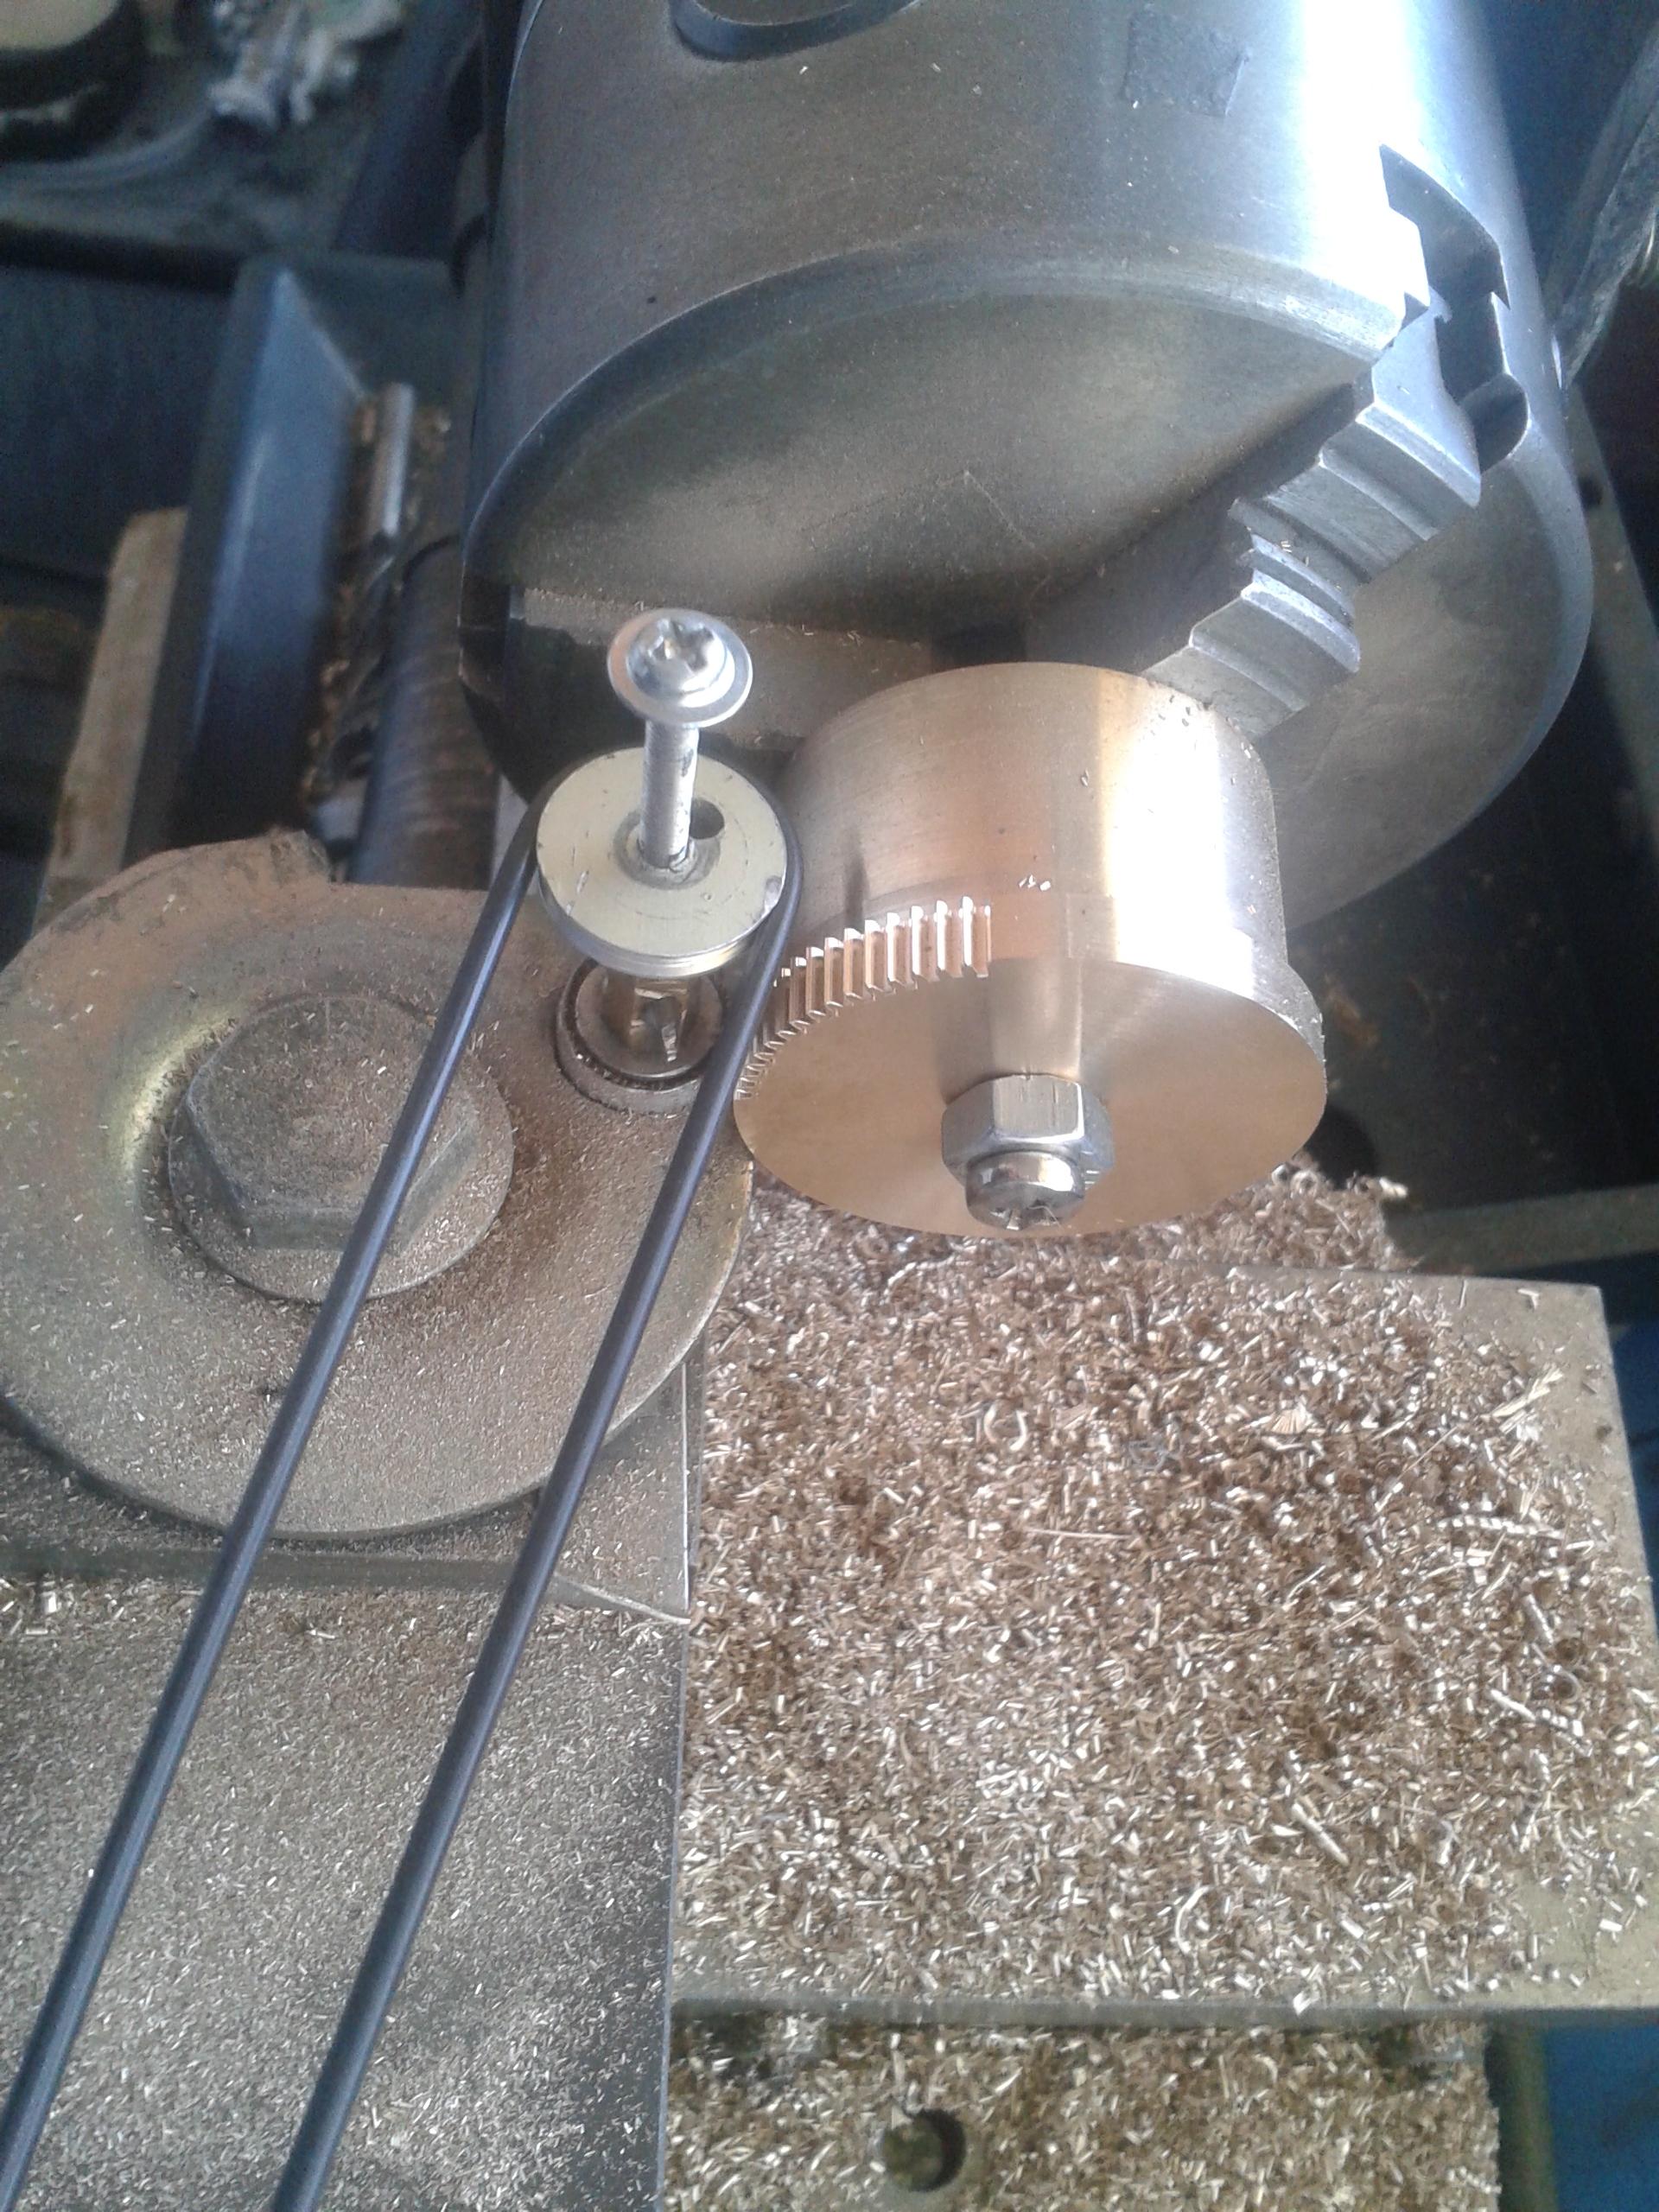
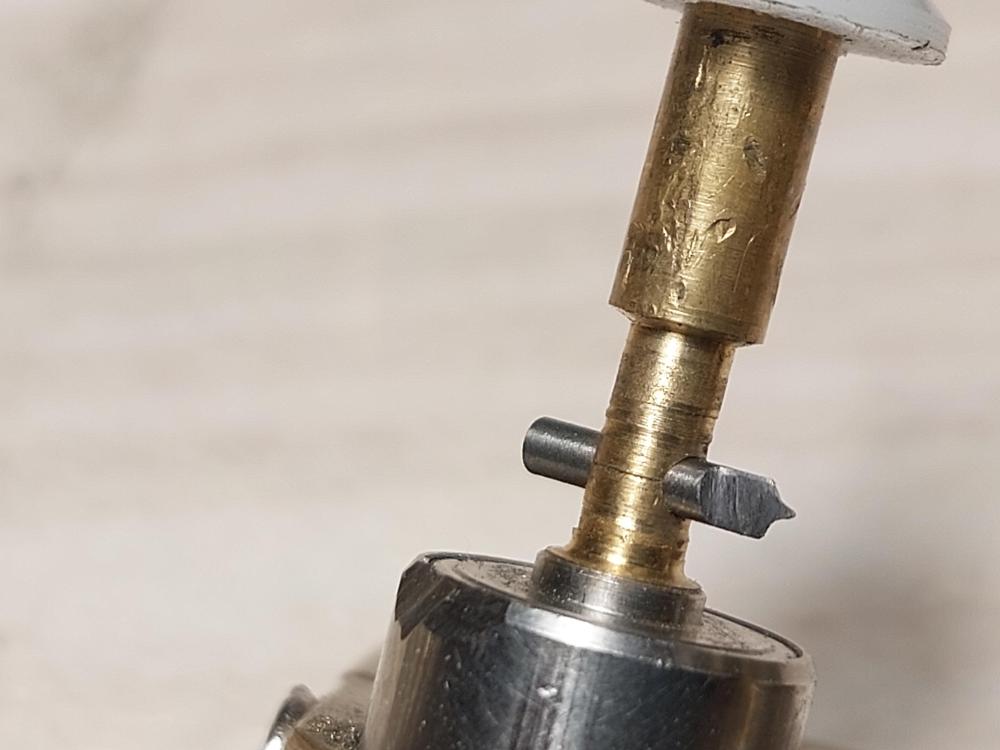
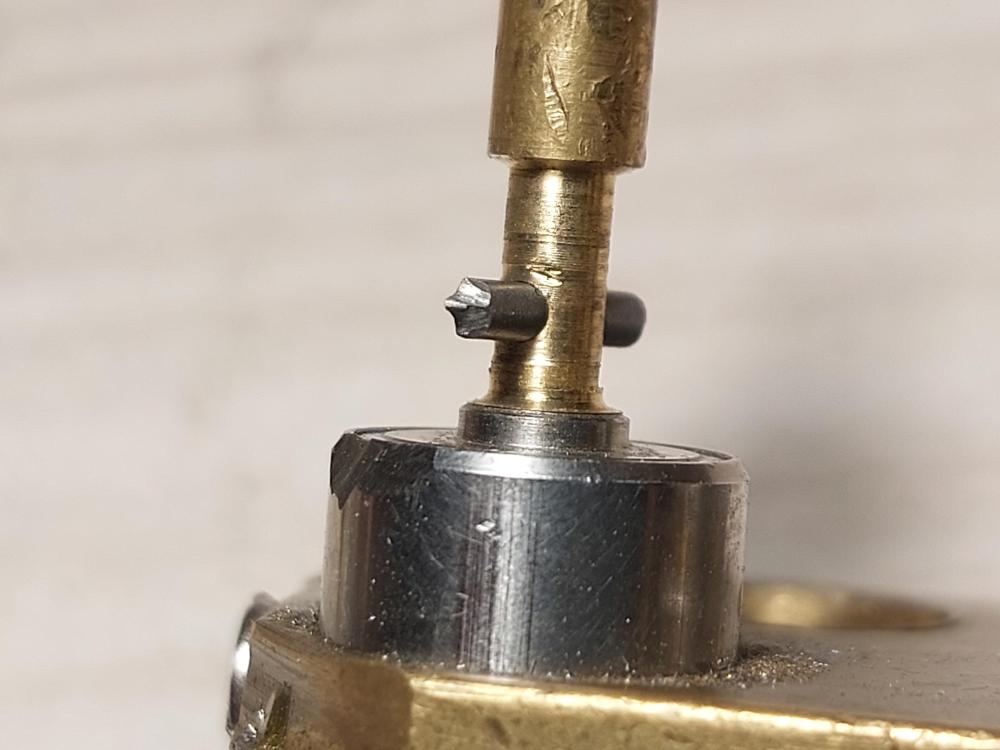
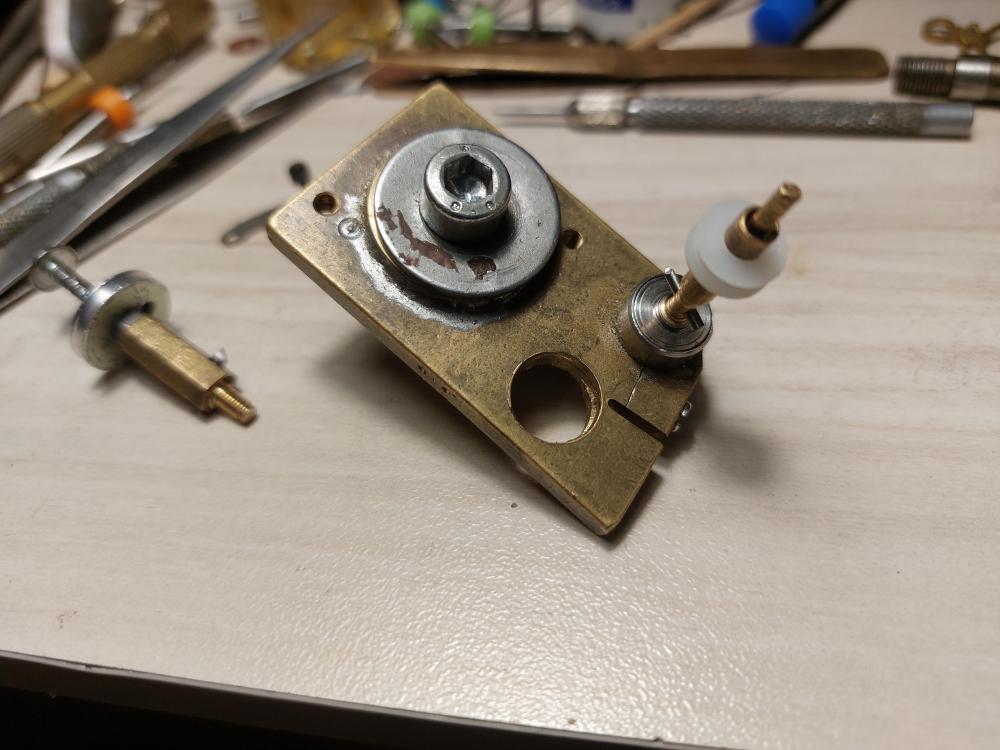
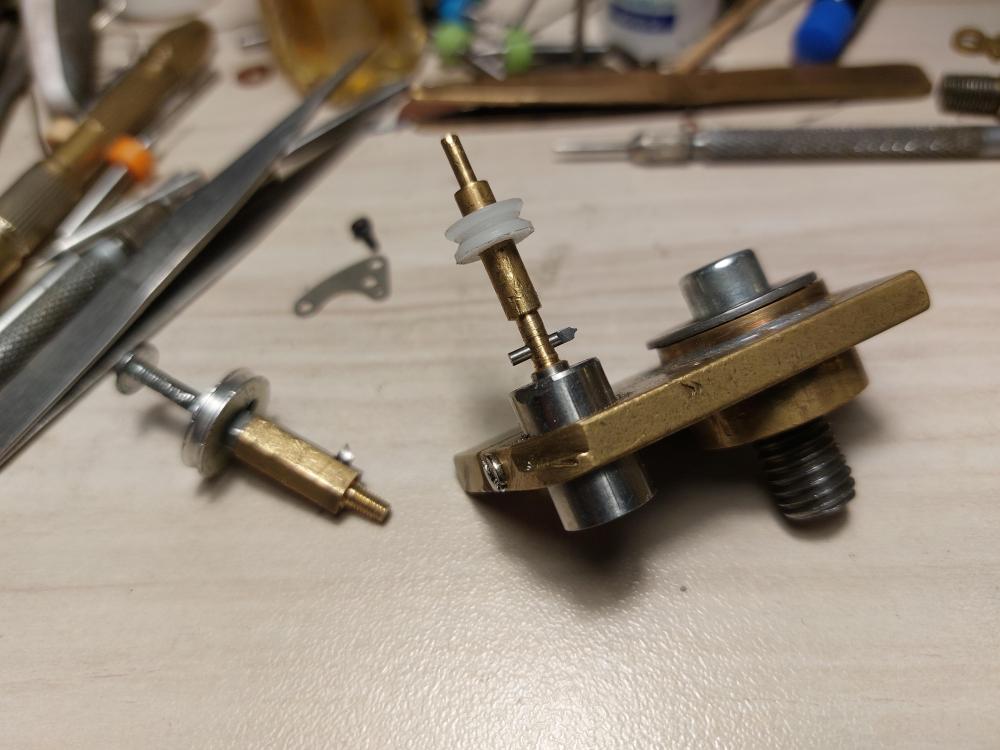
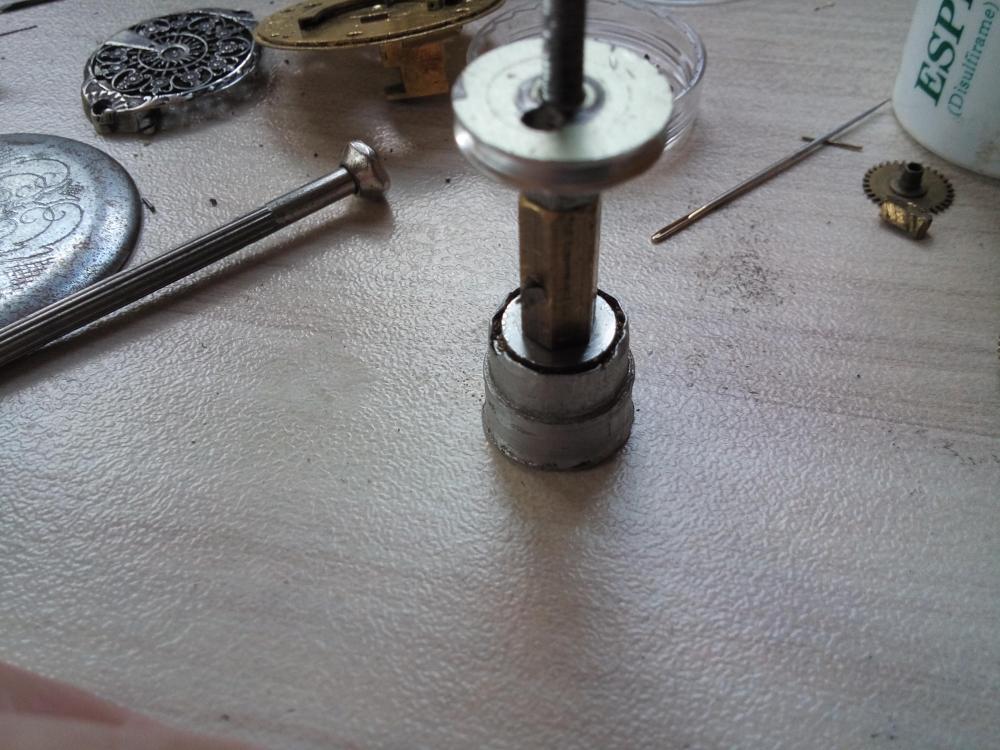
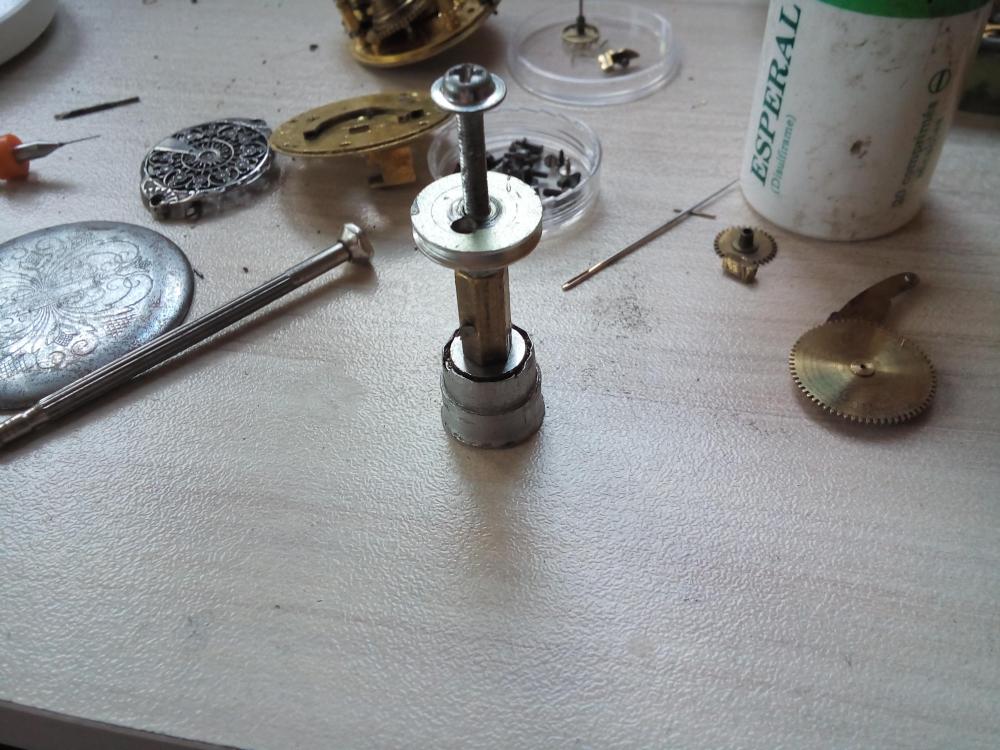
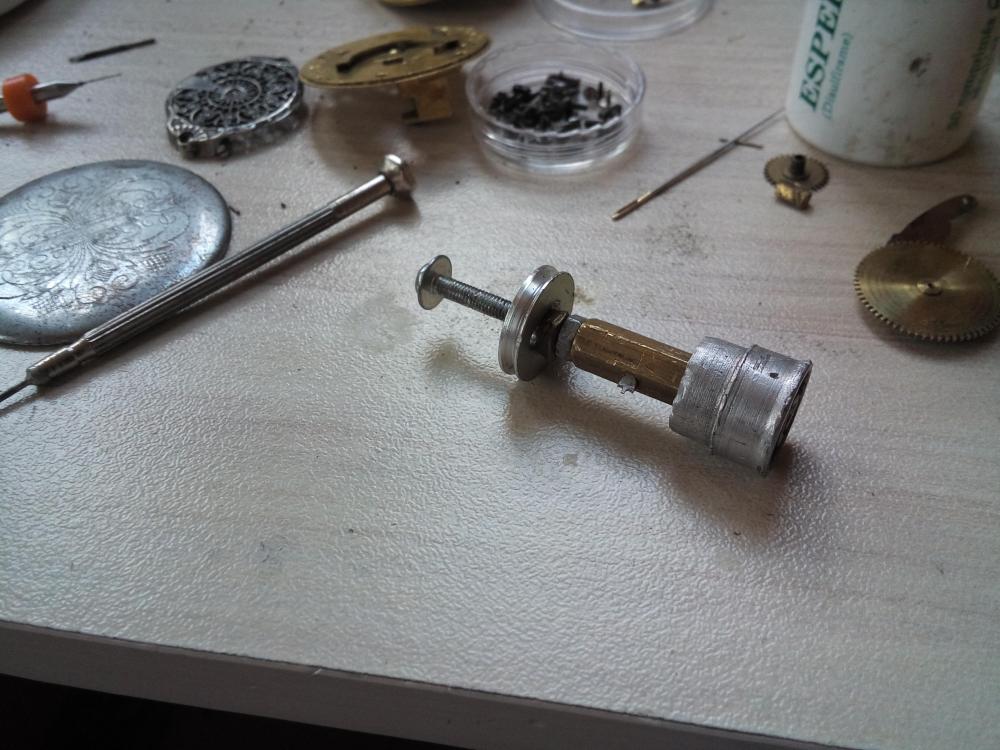
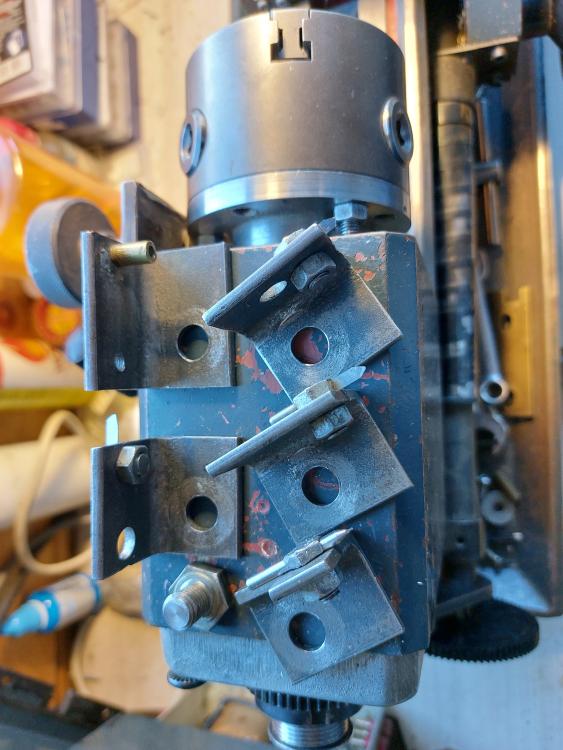
Following your suggestions, I've made something vaguely resembling a cutter. I'll set this up on my milling machine and will try using it on brass first to see what it does..
 3 points
 -
YouTube the home of tools that are interesting but not necessarily practical.2 points
-
They work in many cases for removal and then are also an easy way to get a pretty firm tightening when replacing a back. They do pick up dust and finger oil which reduces the “sticktion” so clean them with dishwashing soap as needed, keep them in a plastic bag for storage and handle them in a way to keep them clean.2 points
-
I have the same verdict. 80% of the time it works and there's probably no significant difference between them. I think it's an essential tool to have. Go for it.2 points
-
And it's pretty much done, at least until I can find an original bezel/insert and do the crown gasket replacement... Need to build courage for that (and get my dad to make a tool)... But yes, the result is very pleasing indeed!

 2 points
 -
One thing I forgot to mention. If you take the pendulum to pieces to clean or repair mark where the pendulum had been at least you will have a good starting point.2 points
-
There is good Stephen Pahlow video about decoration https://www.youtube.com/watch?v=S_S8oA9HdlY&t=168s2 points
-
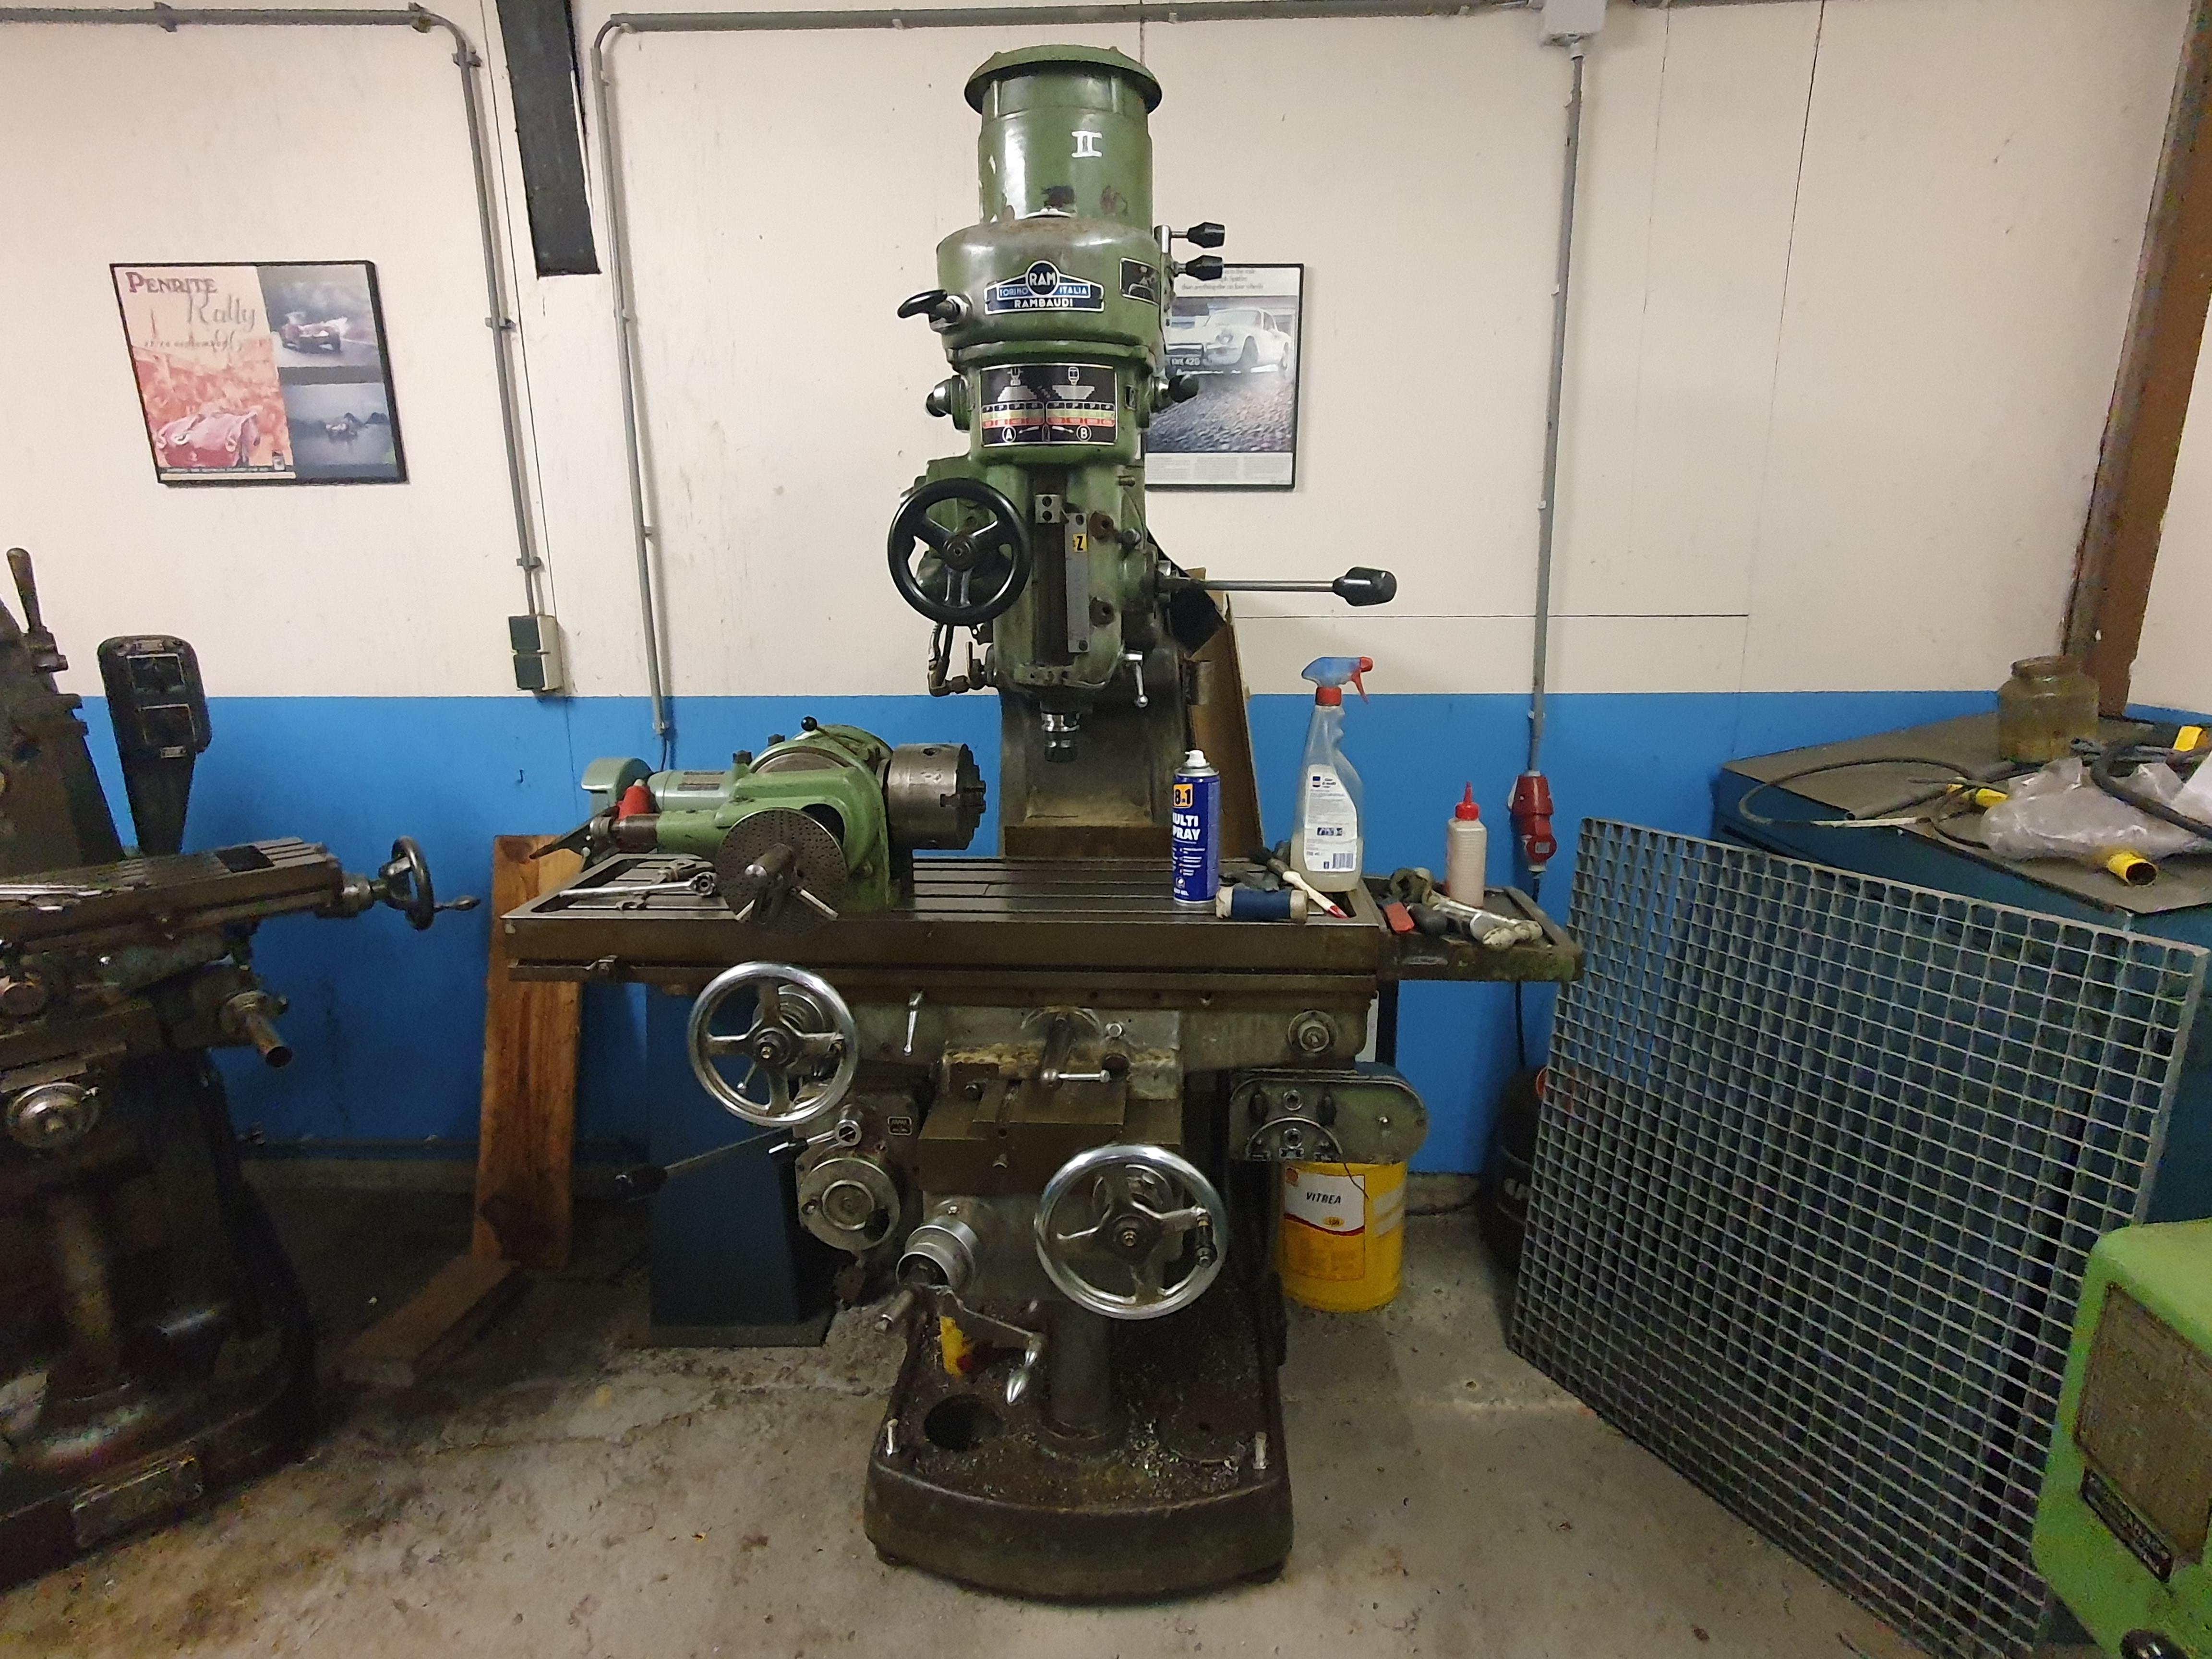
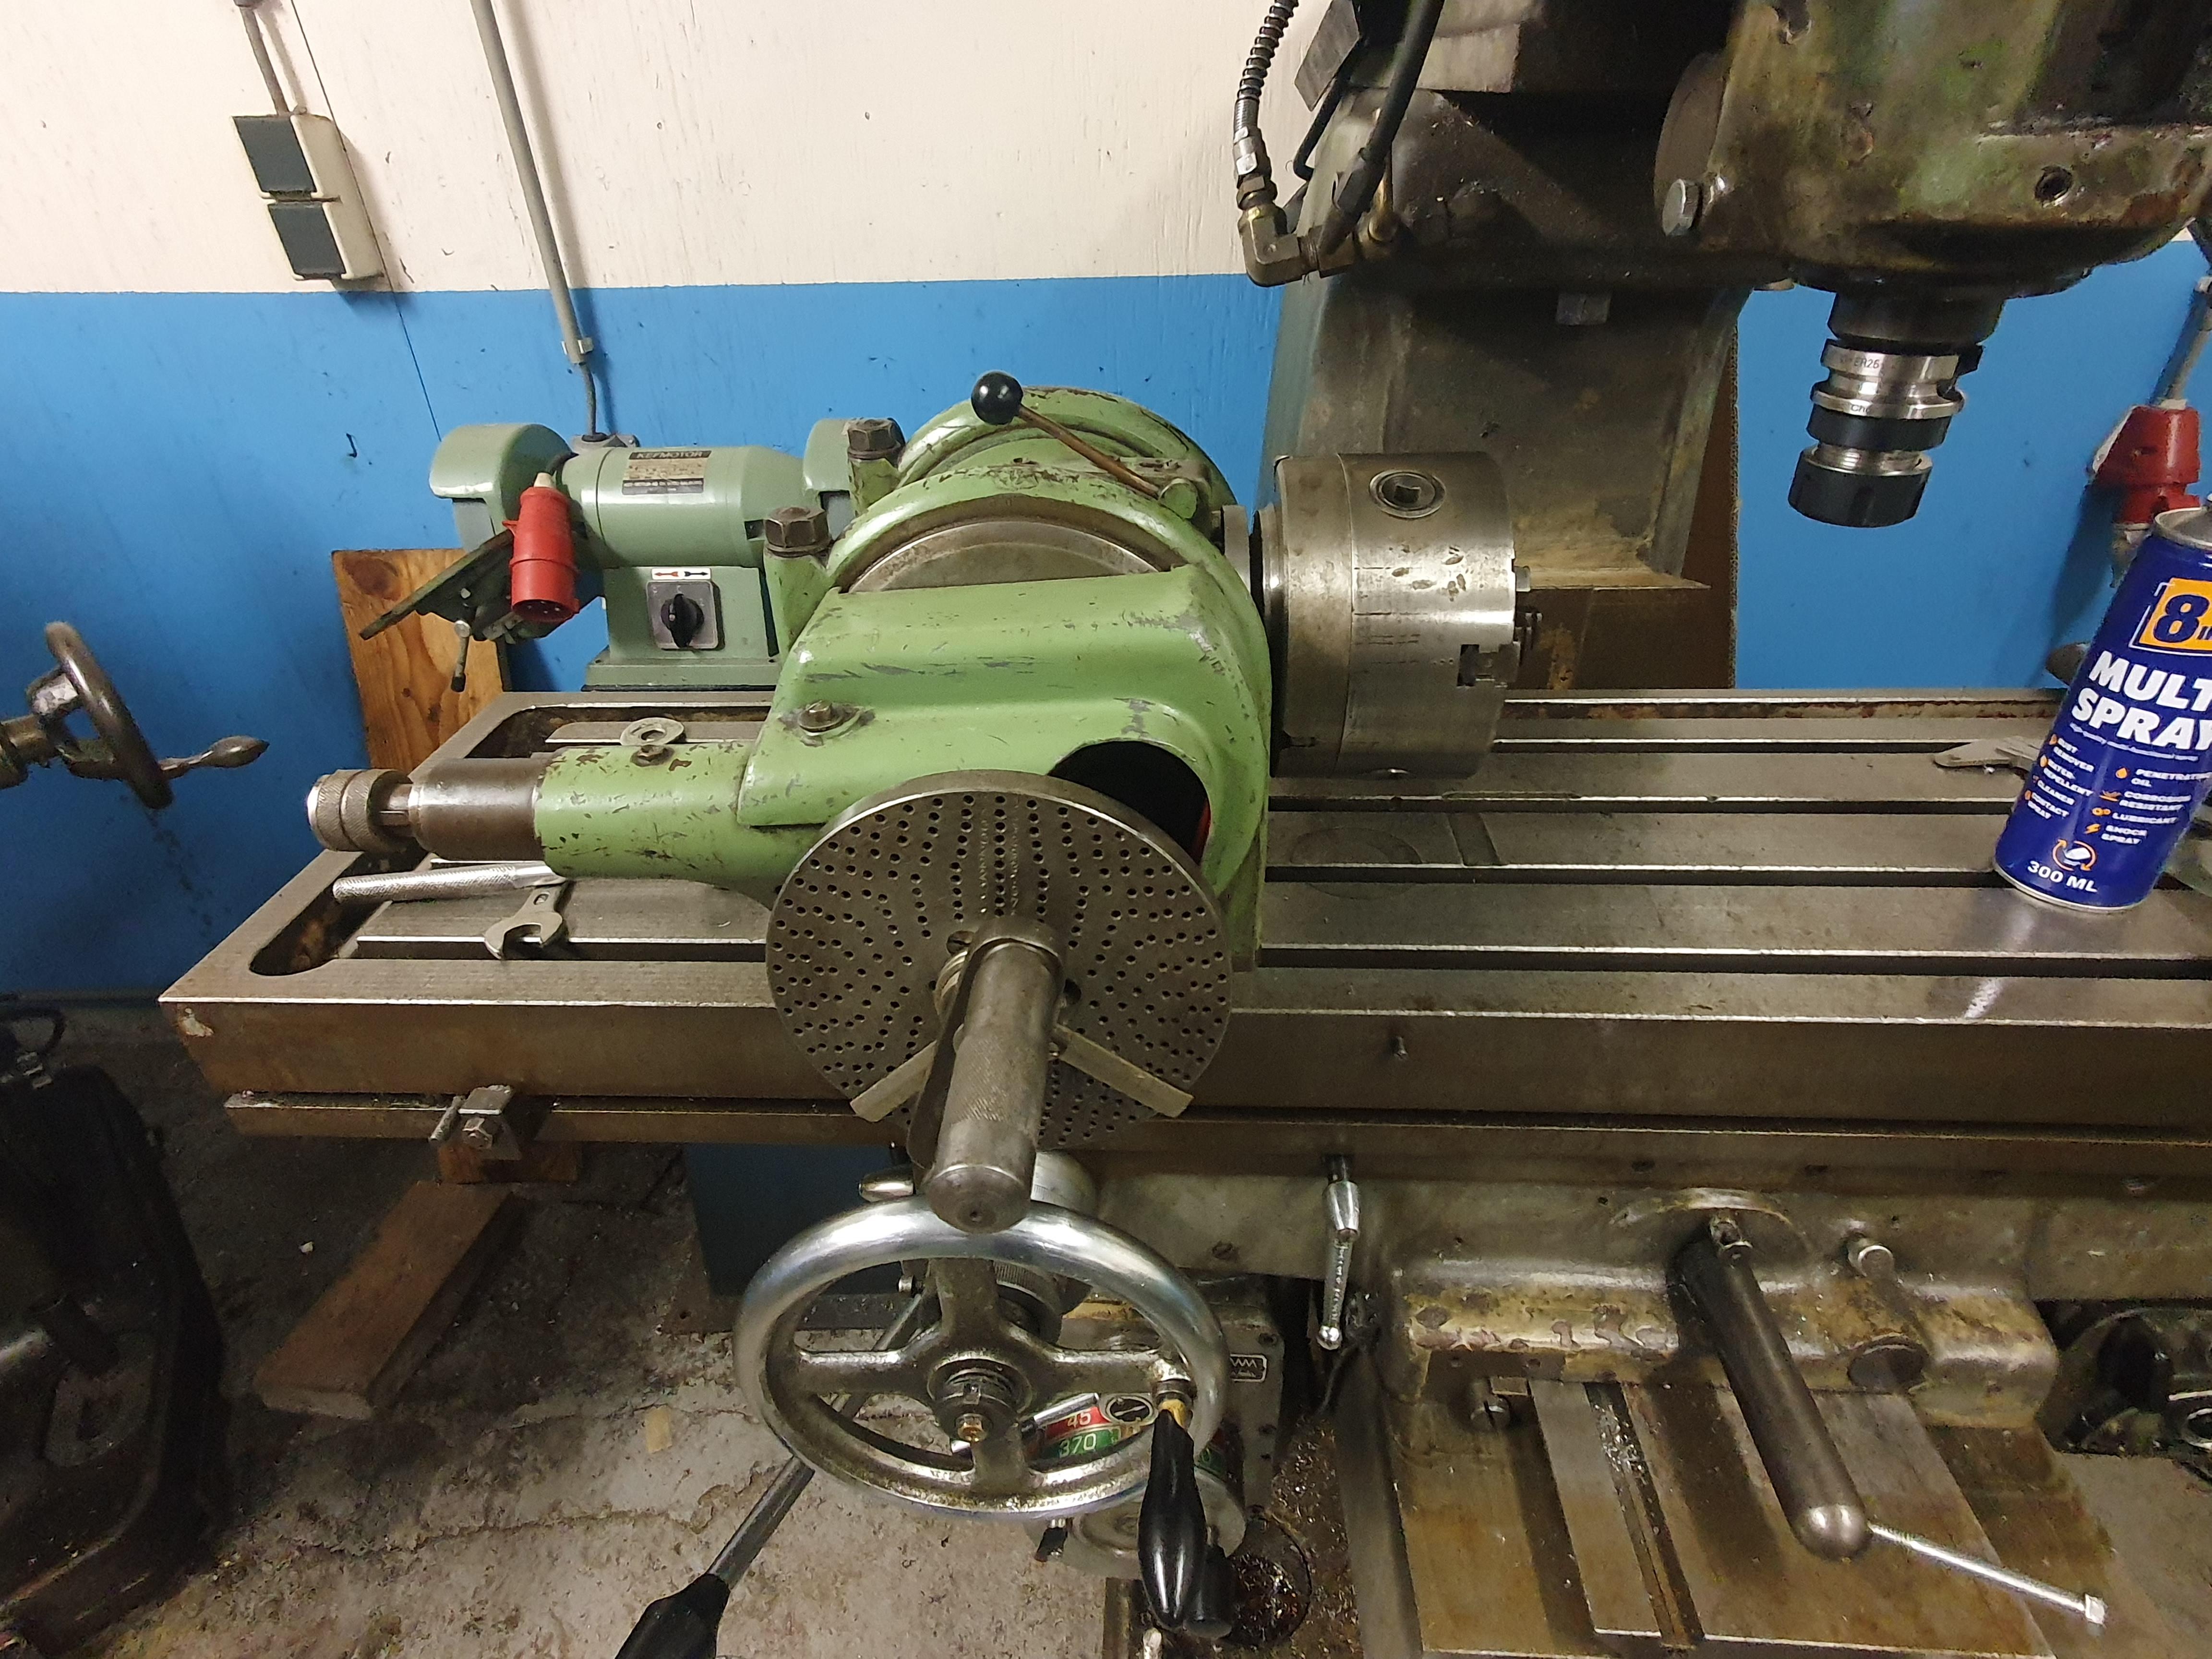
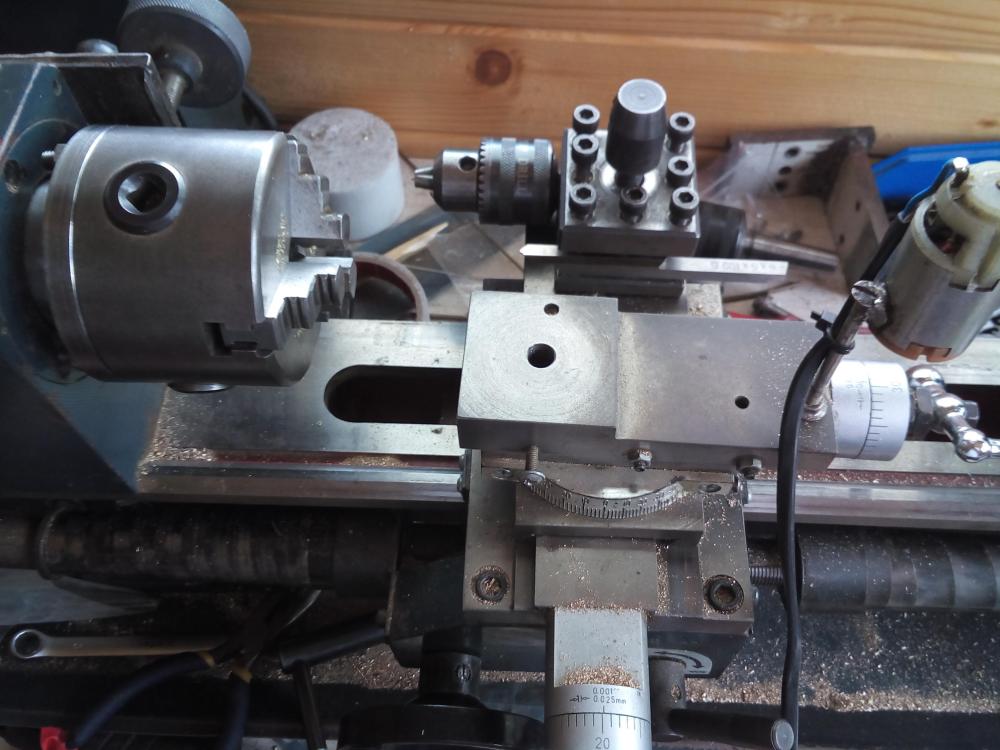
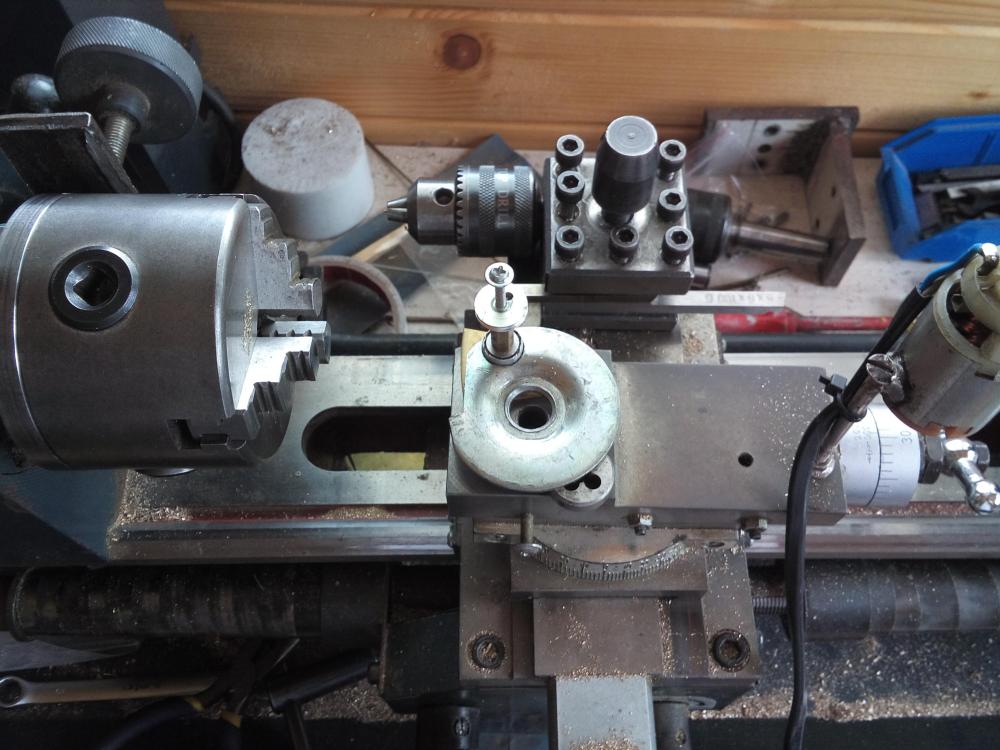
Probably too old and worn (talking about the machines...) to do any real precision work, but you never know until you try, right? The milling machine is a Rambaudi.

 2 points
 -
Well, I am so glad to see the movement working. Actually, from very long time I don't feel some kind of excitement or something of the sort when putting watch movement alive, but now this here awakes feelings and reminds me of my youth, when such excitement was normal. Amplitude... Have said it many times - it is easily seen without timegrapher, especially when balance is with arm (2 spokes). Try to put a dot with marker on the balance rim. The best place for the dot is under the cock, when balance in rest. Then observe the dot, it is perfectly seen when balance stops in order to change the direction, and smashed when balance rotates fast. So You will be able to see the dot positions when balance is rotated to the maximum, and this is all needed to determine the amplitude. Then, the next step is to learn to do (see) the same, but without dot. Observe the place where the arm (spokes) is connected to the rim. This is like a dot, but actually they are 2. Not a problem at all... Seems that You amplitude is not so big, but watching it on a video is not relevant, so try to determine it the way I wrote above. Thus You will be able to check if the timegrapher reads amplitude correctly.2 points
-
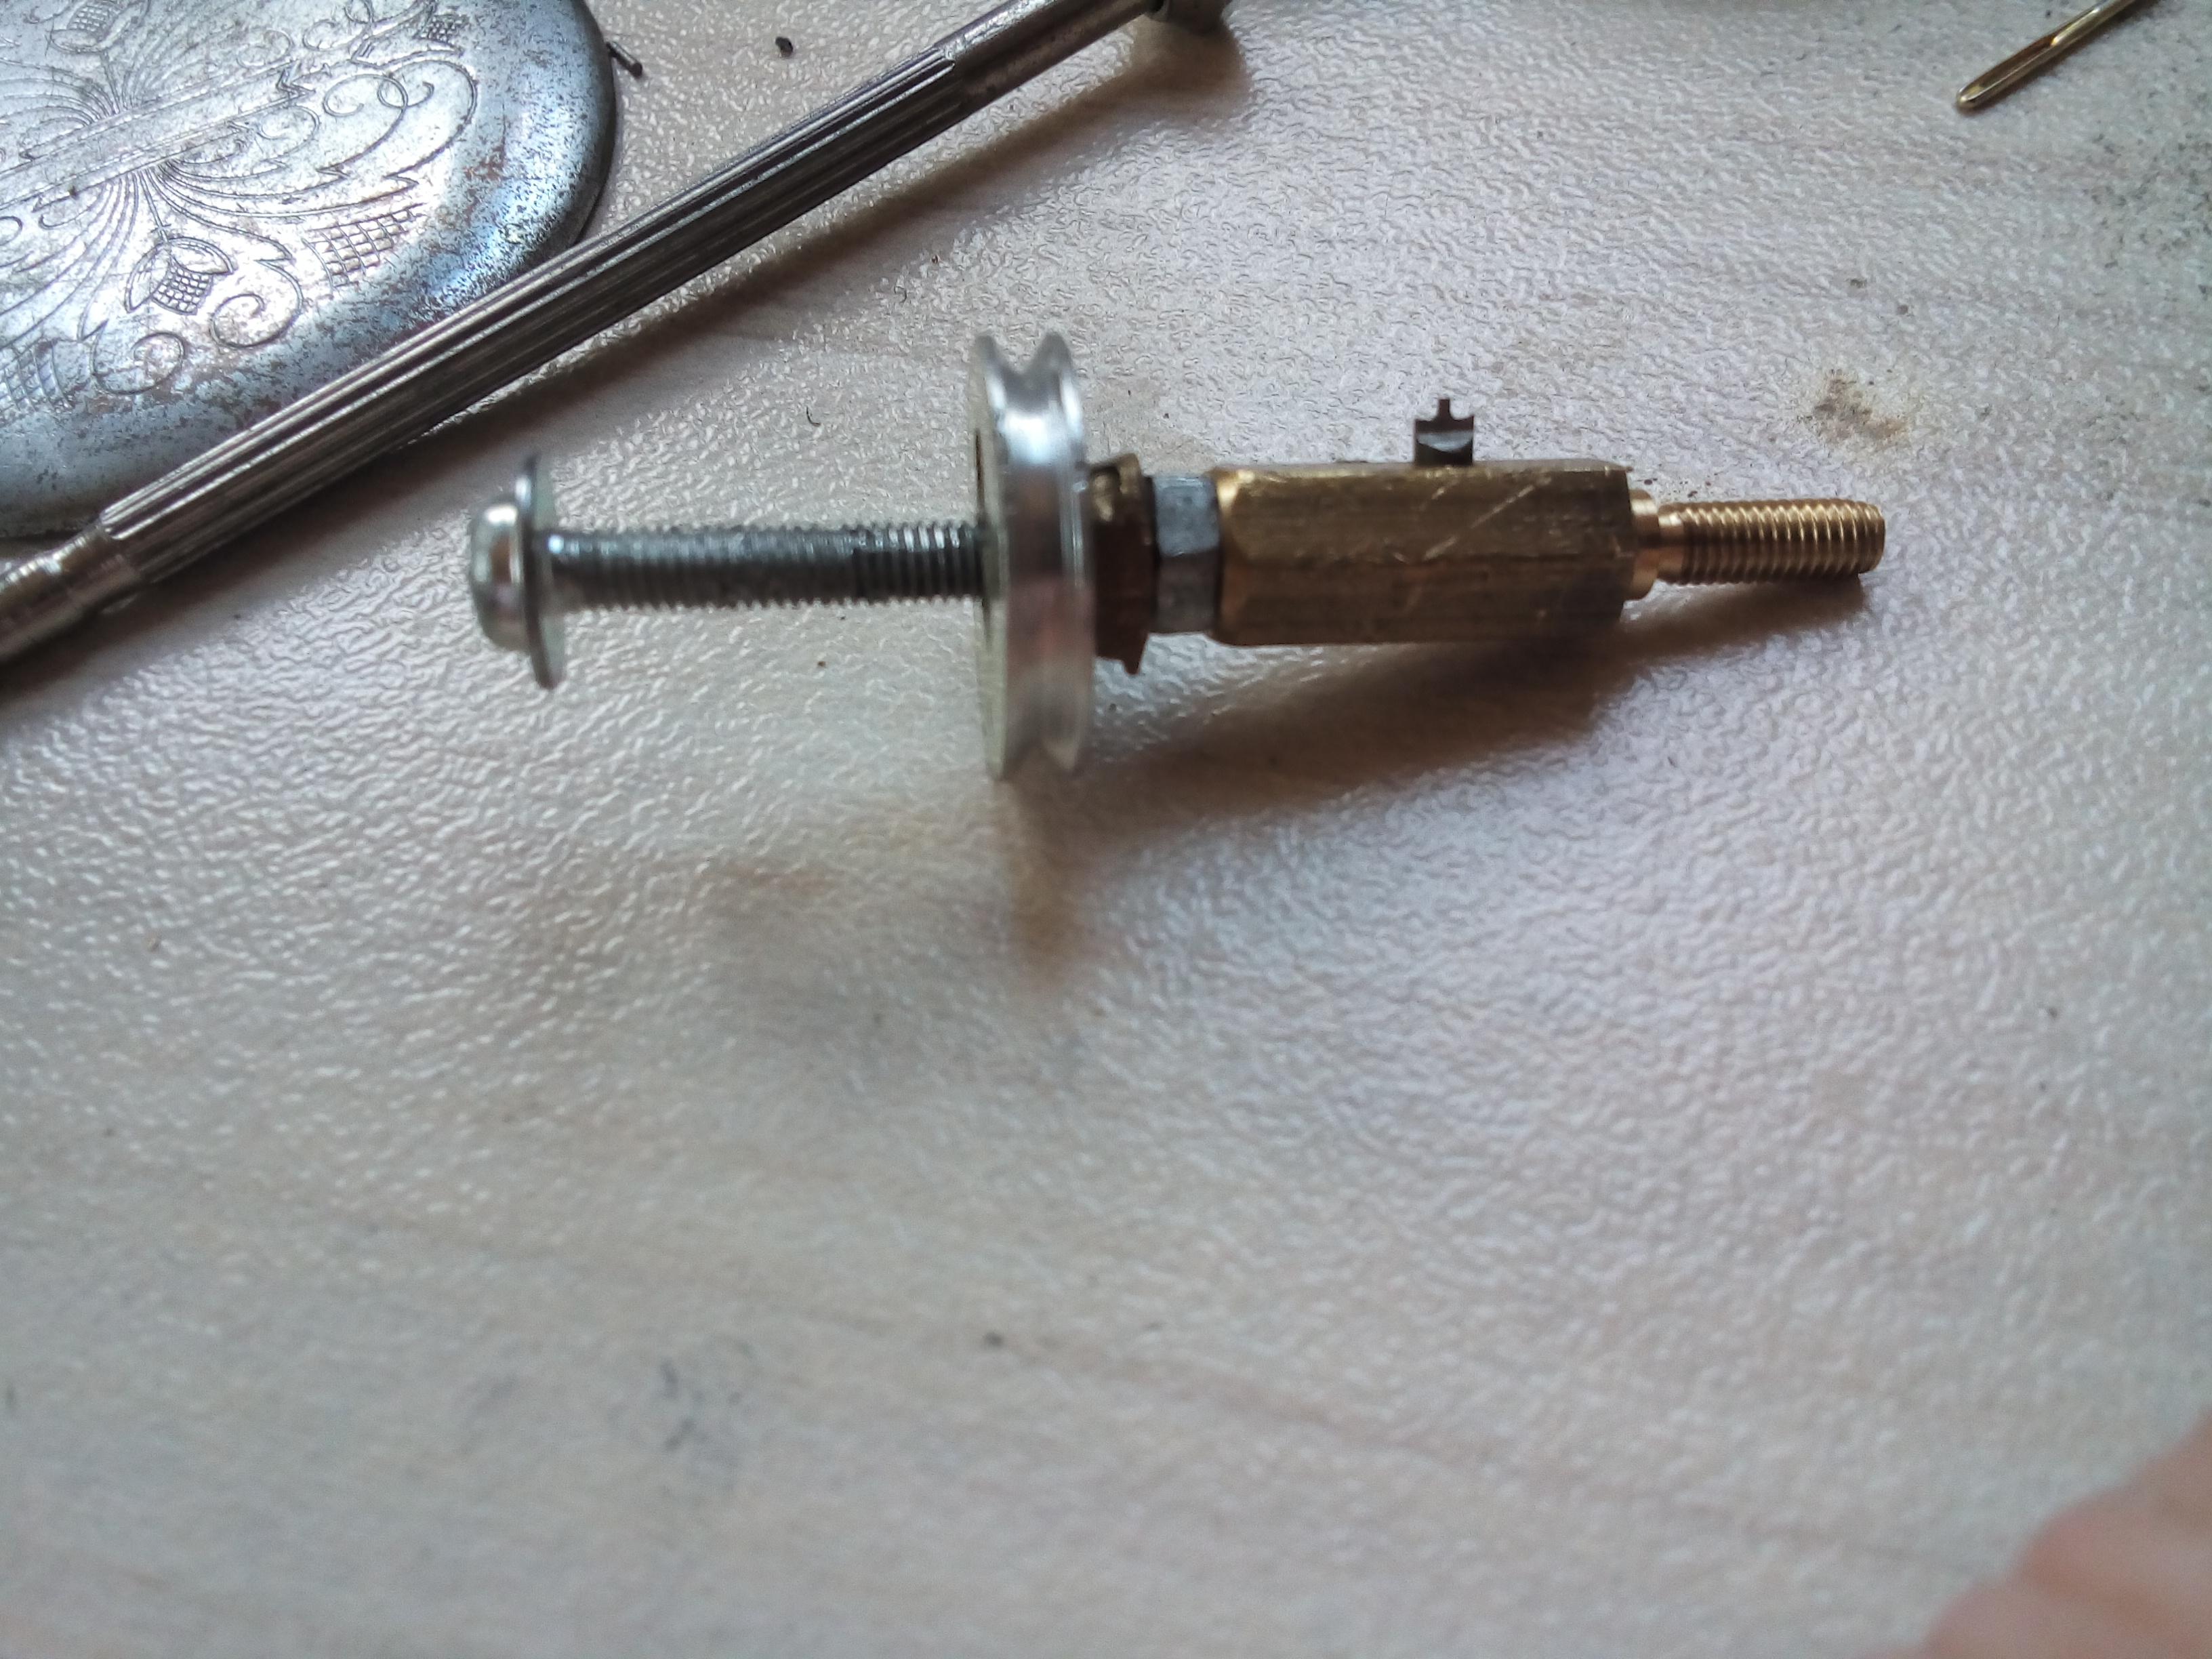
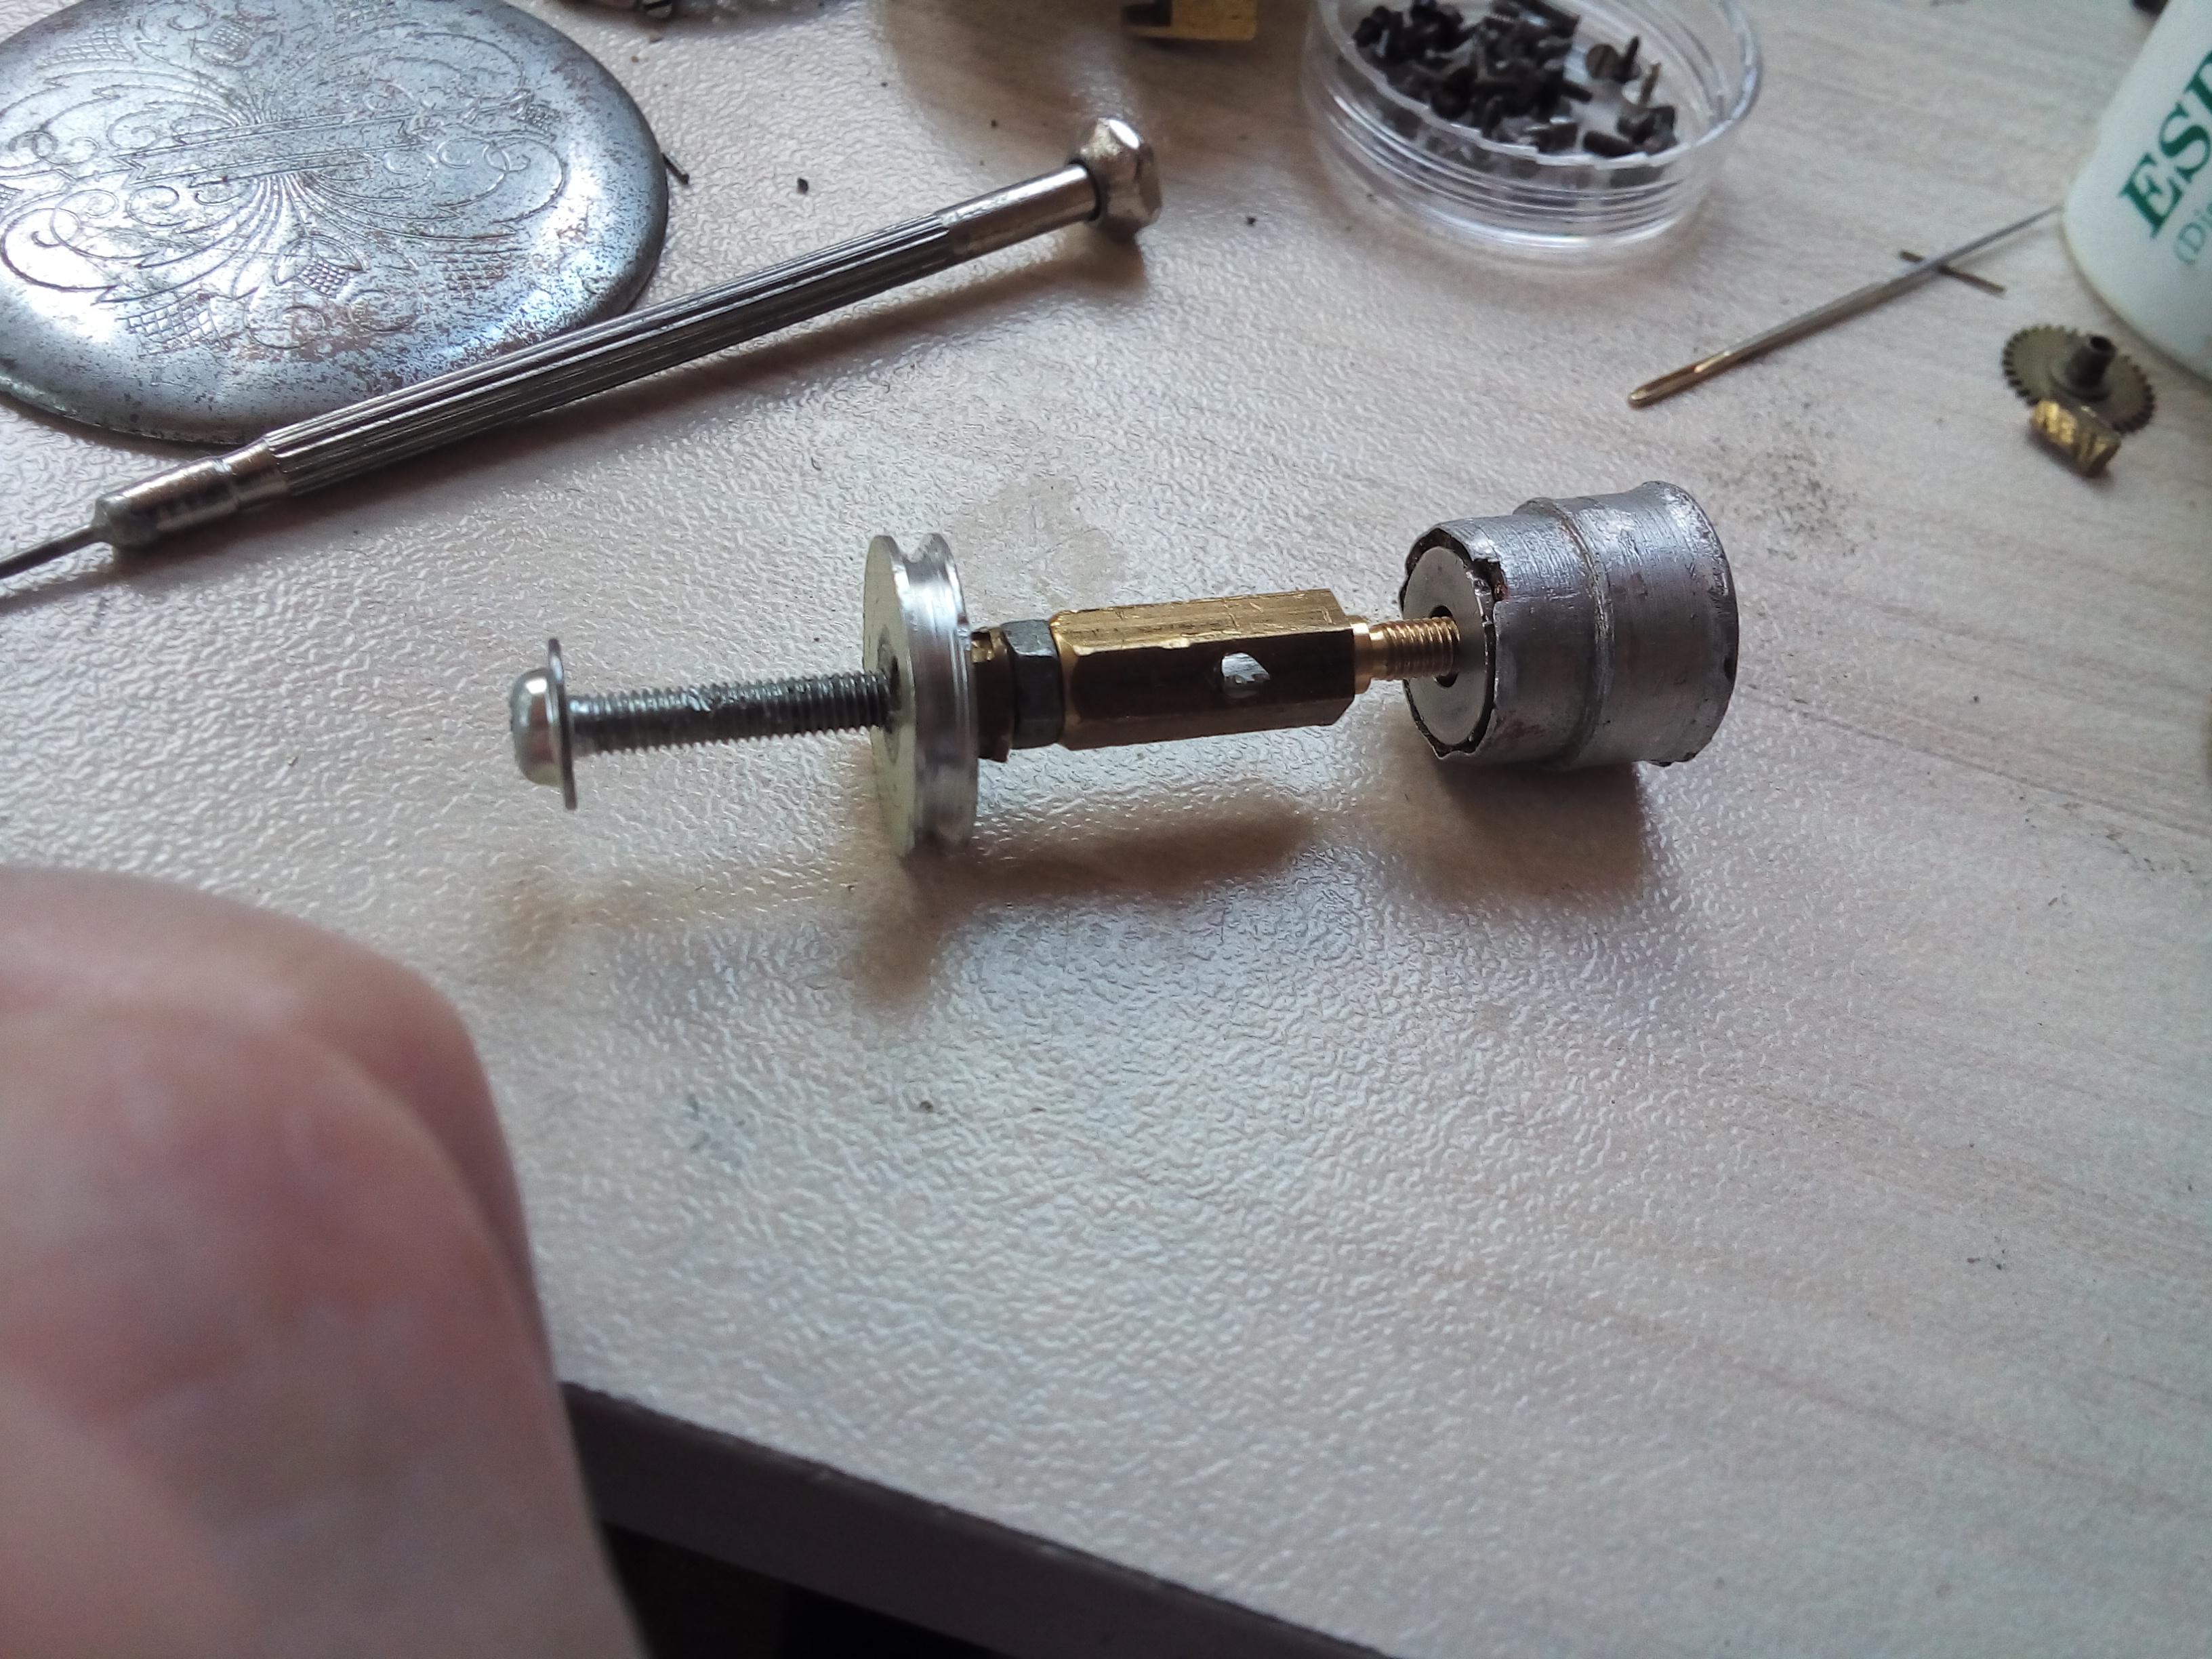
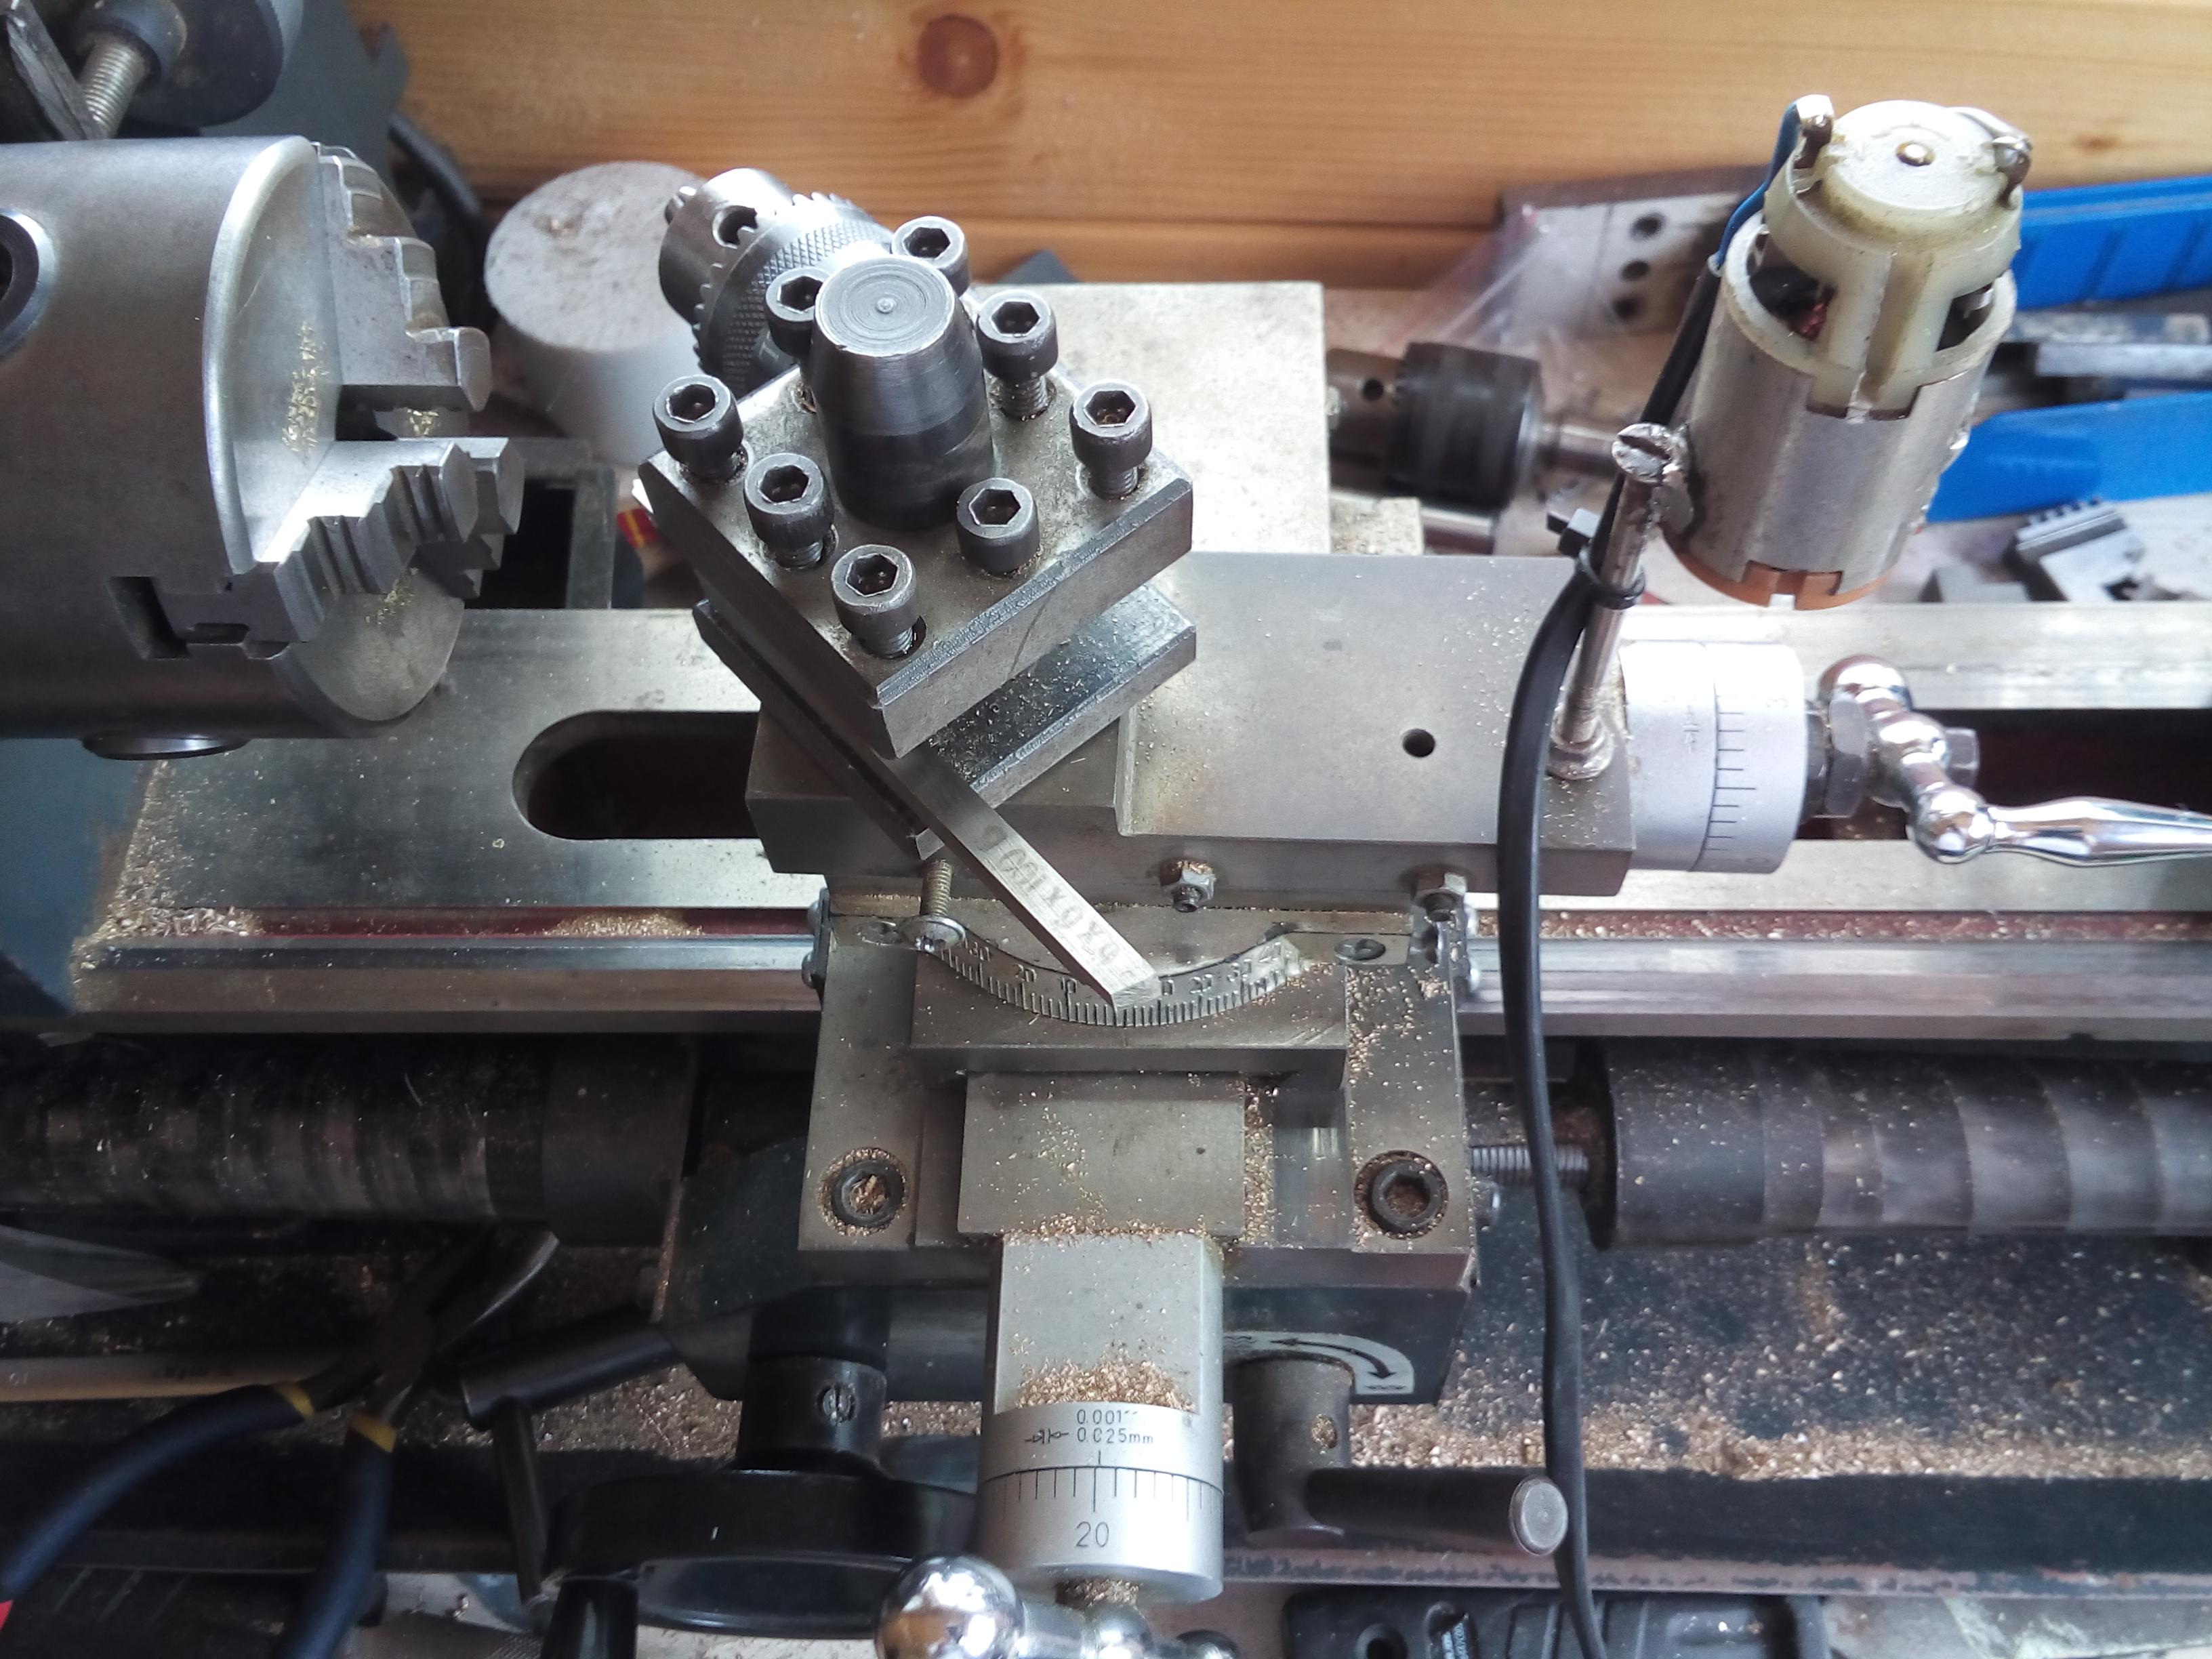
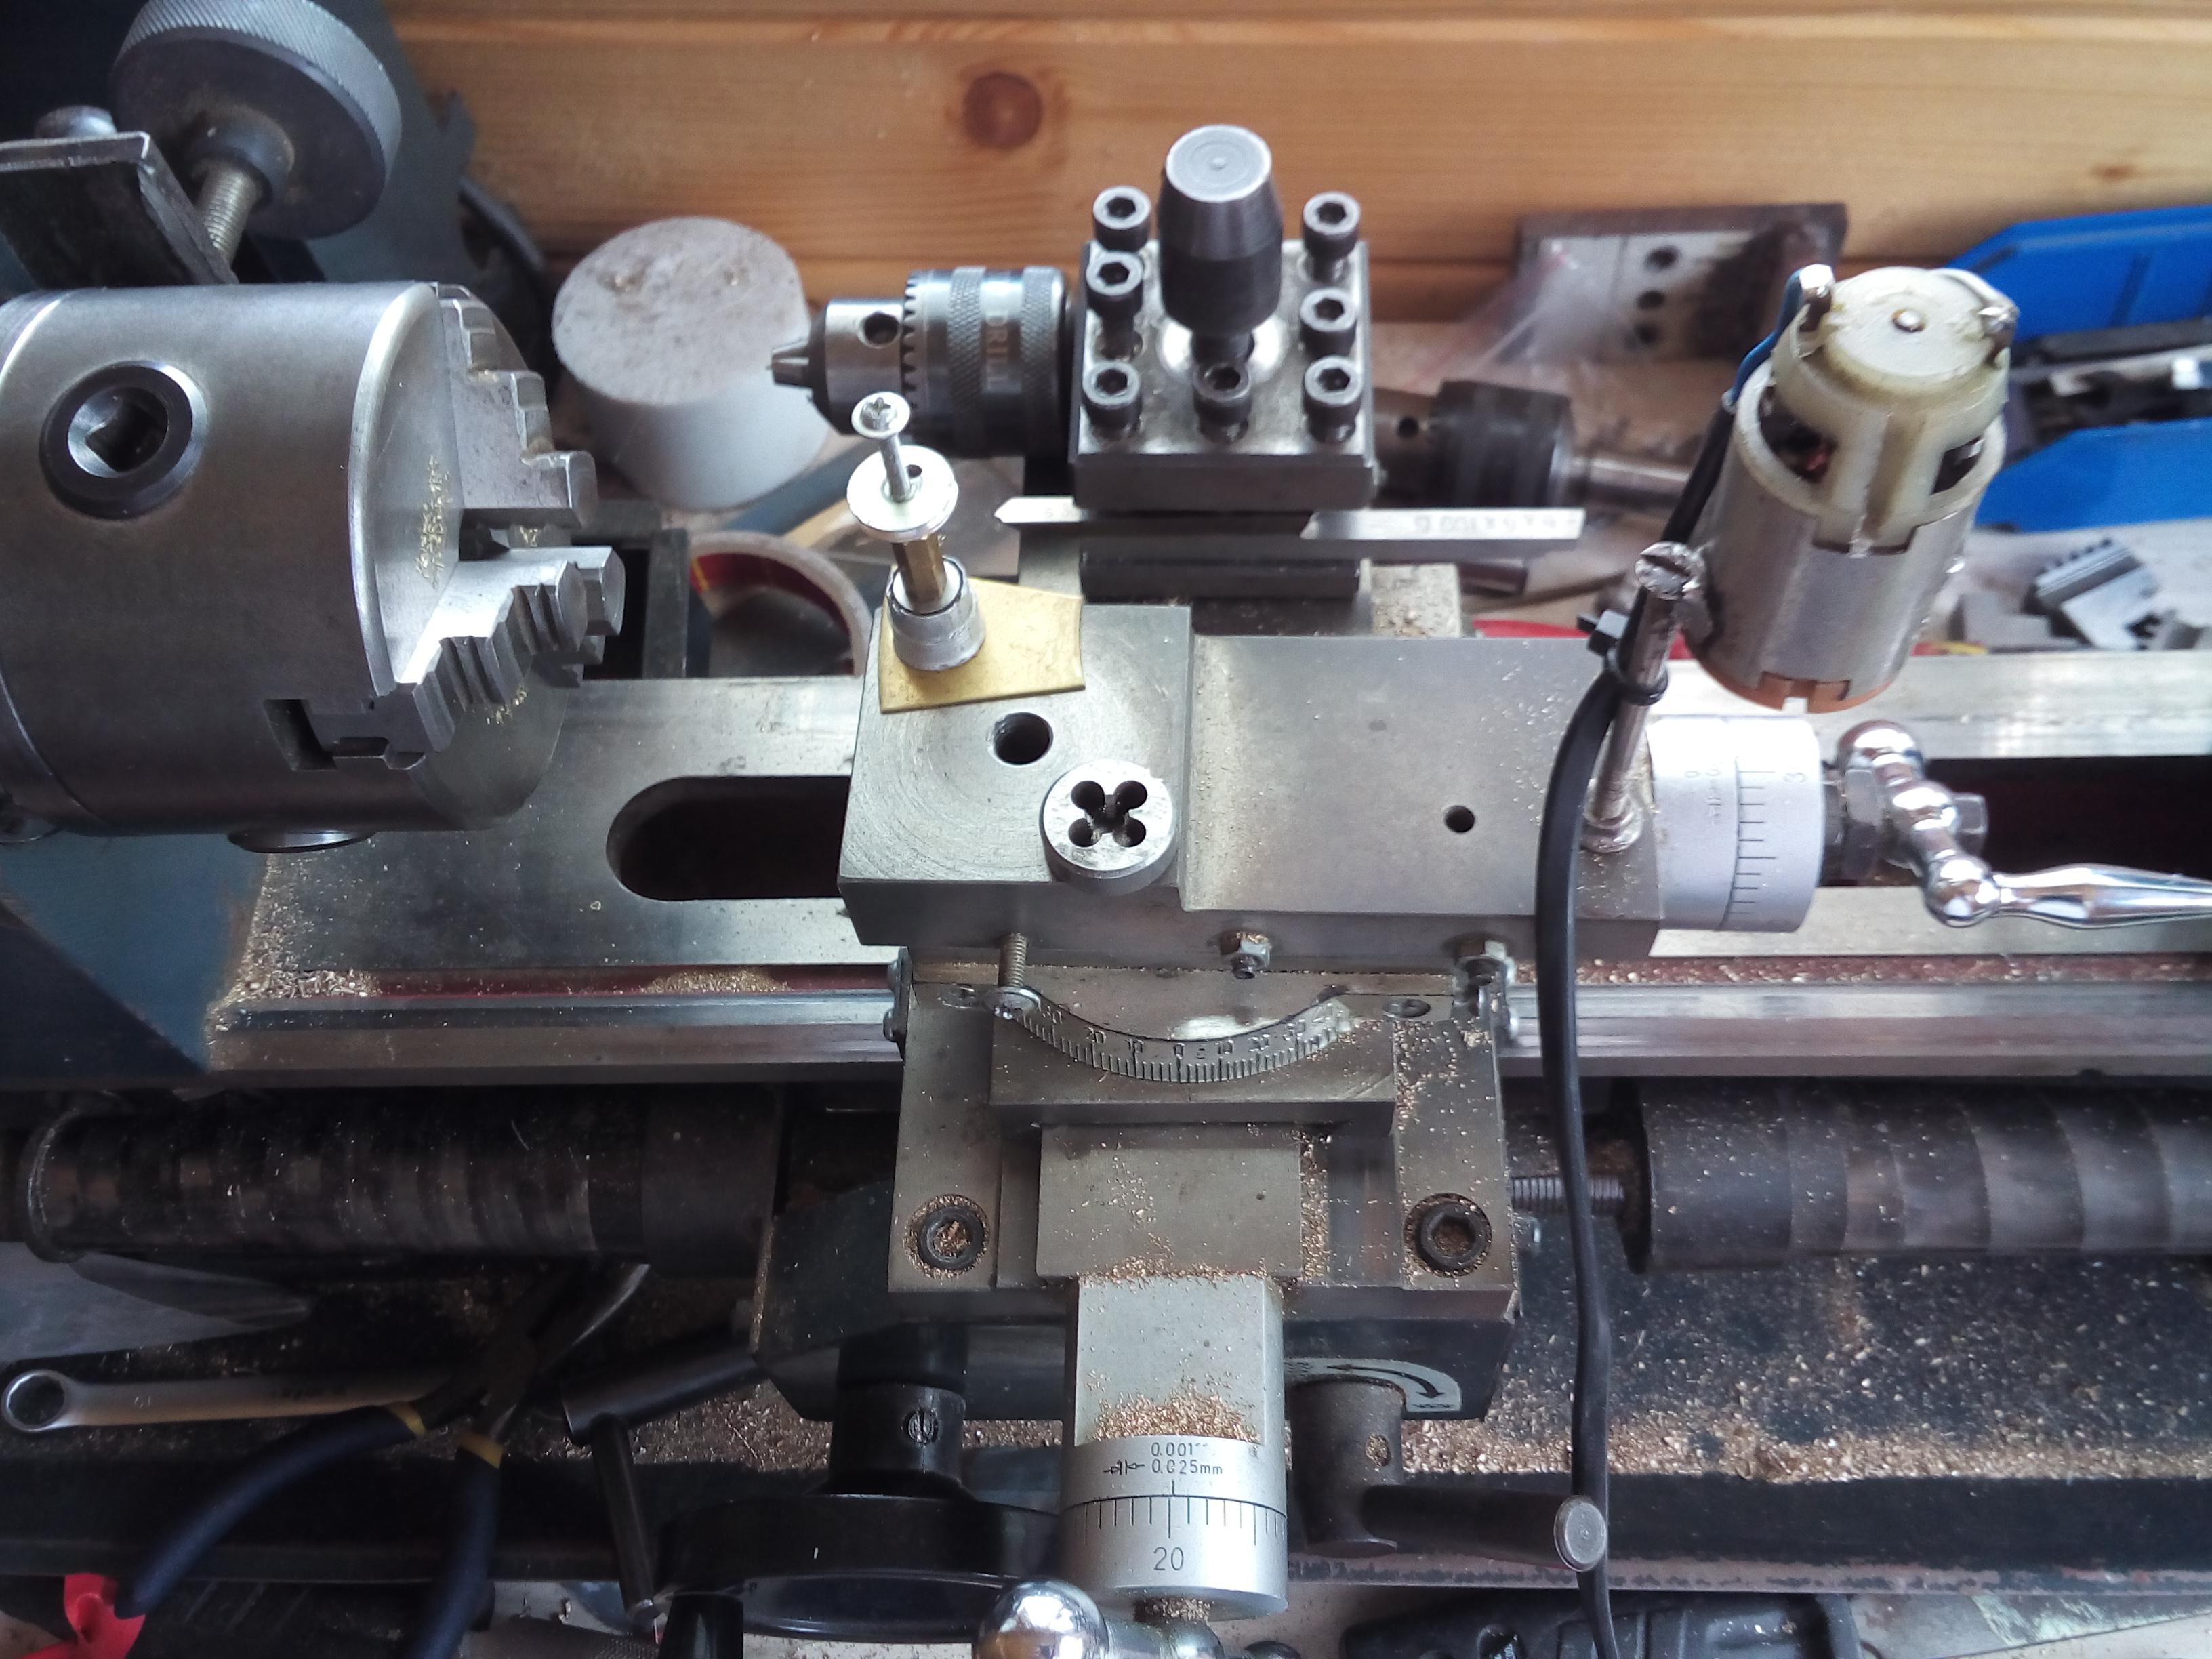
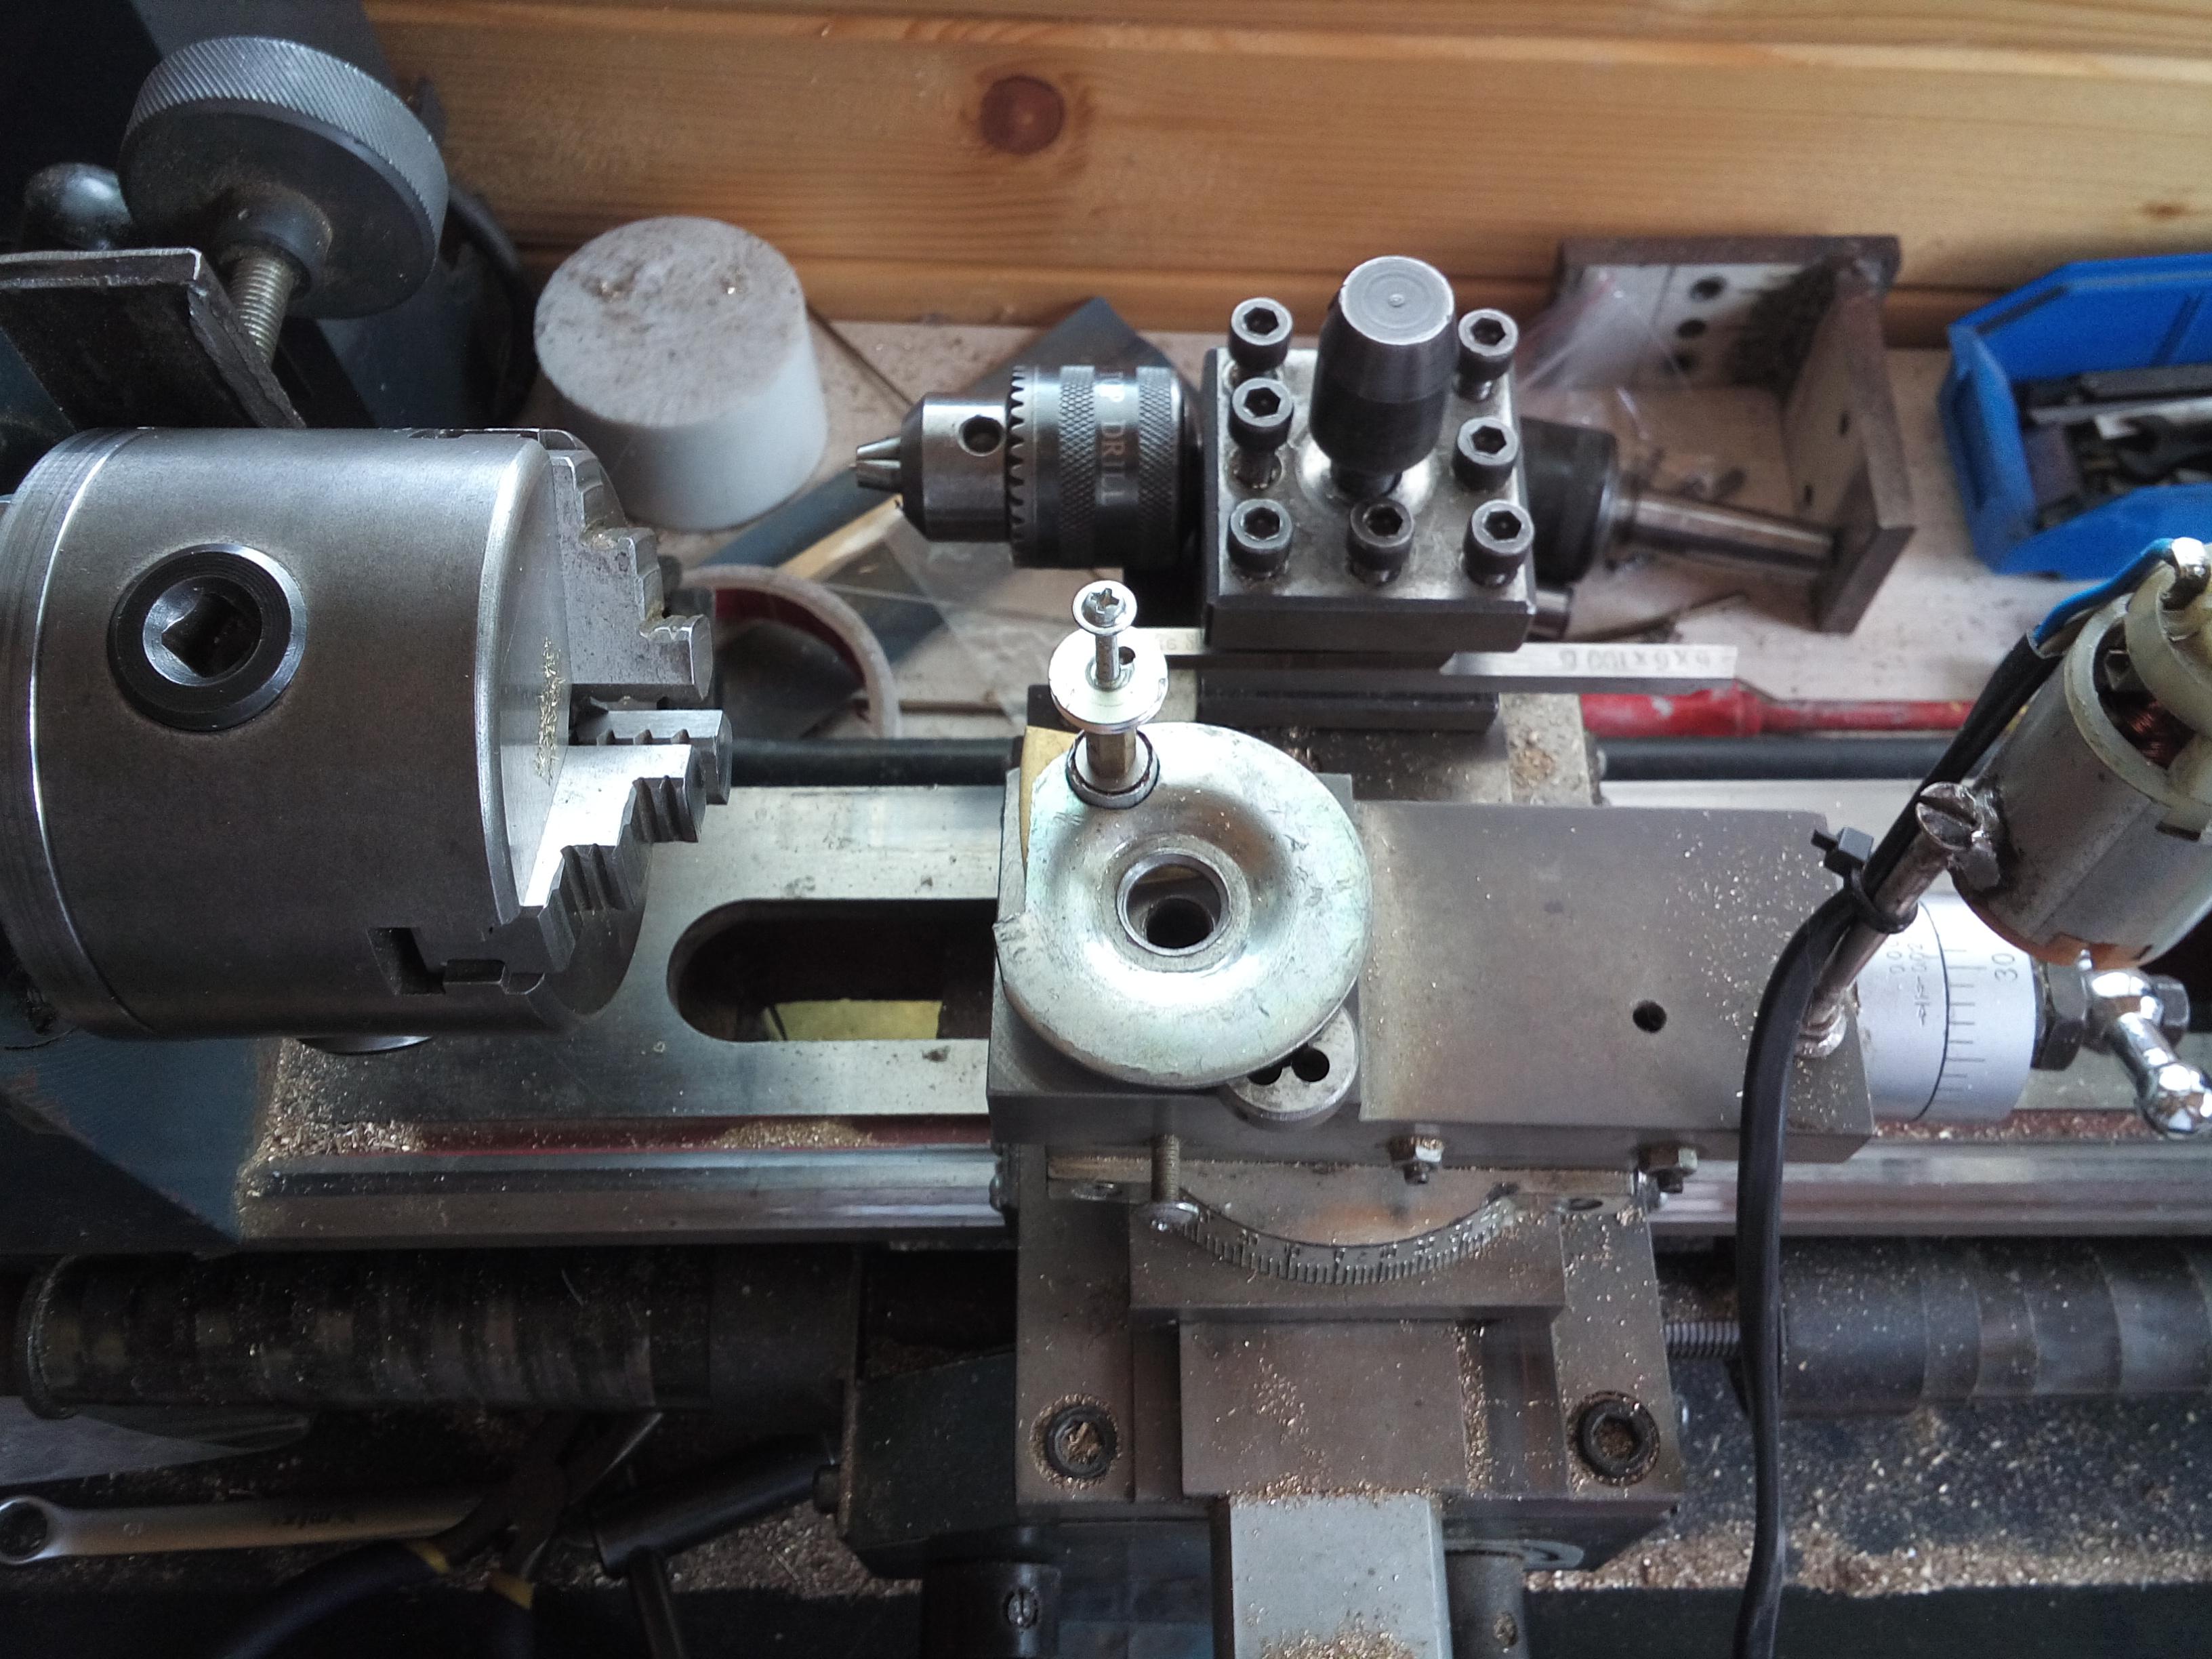
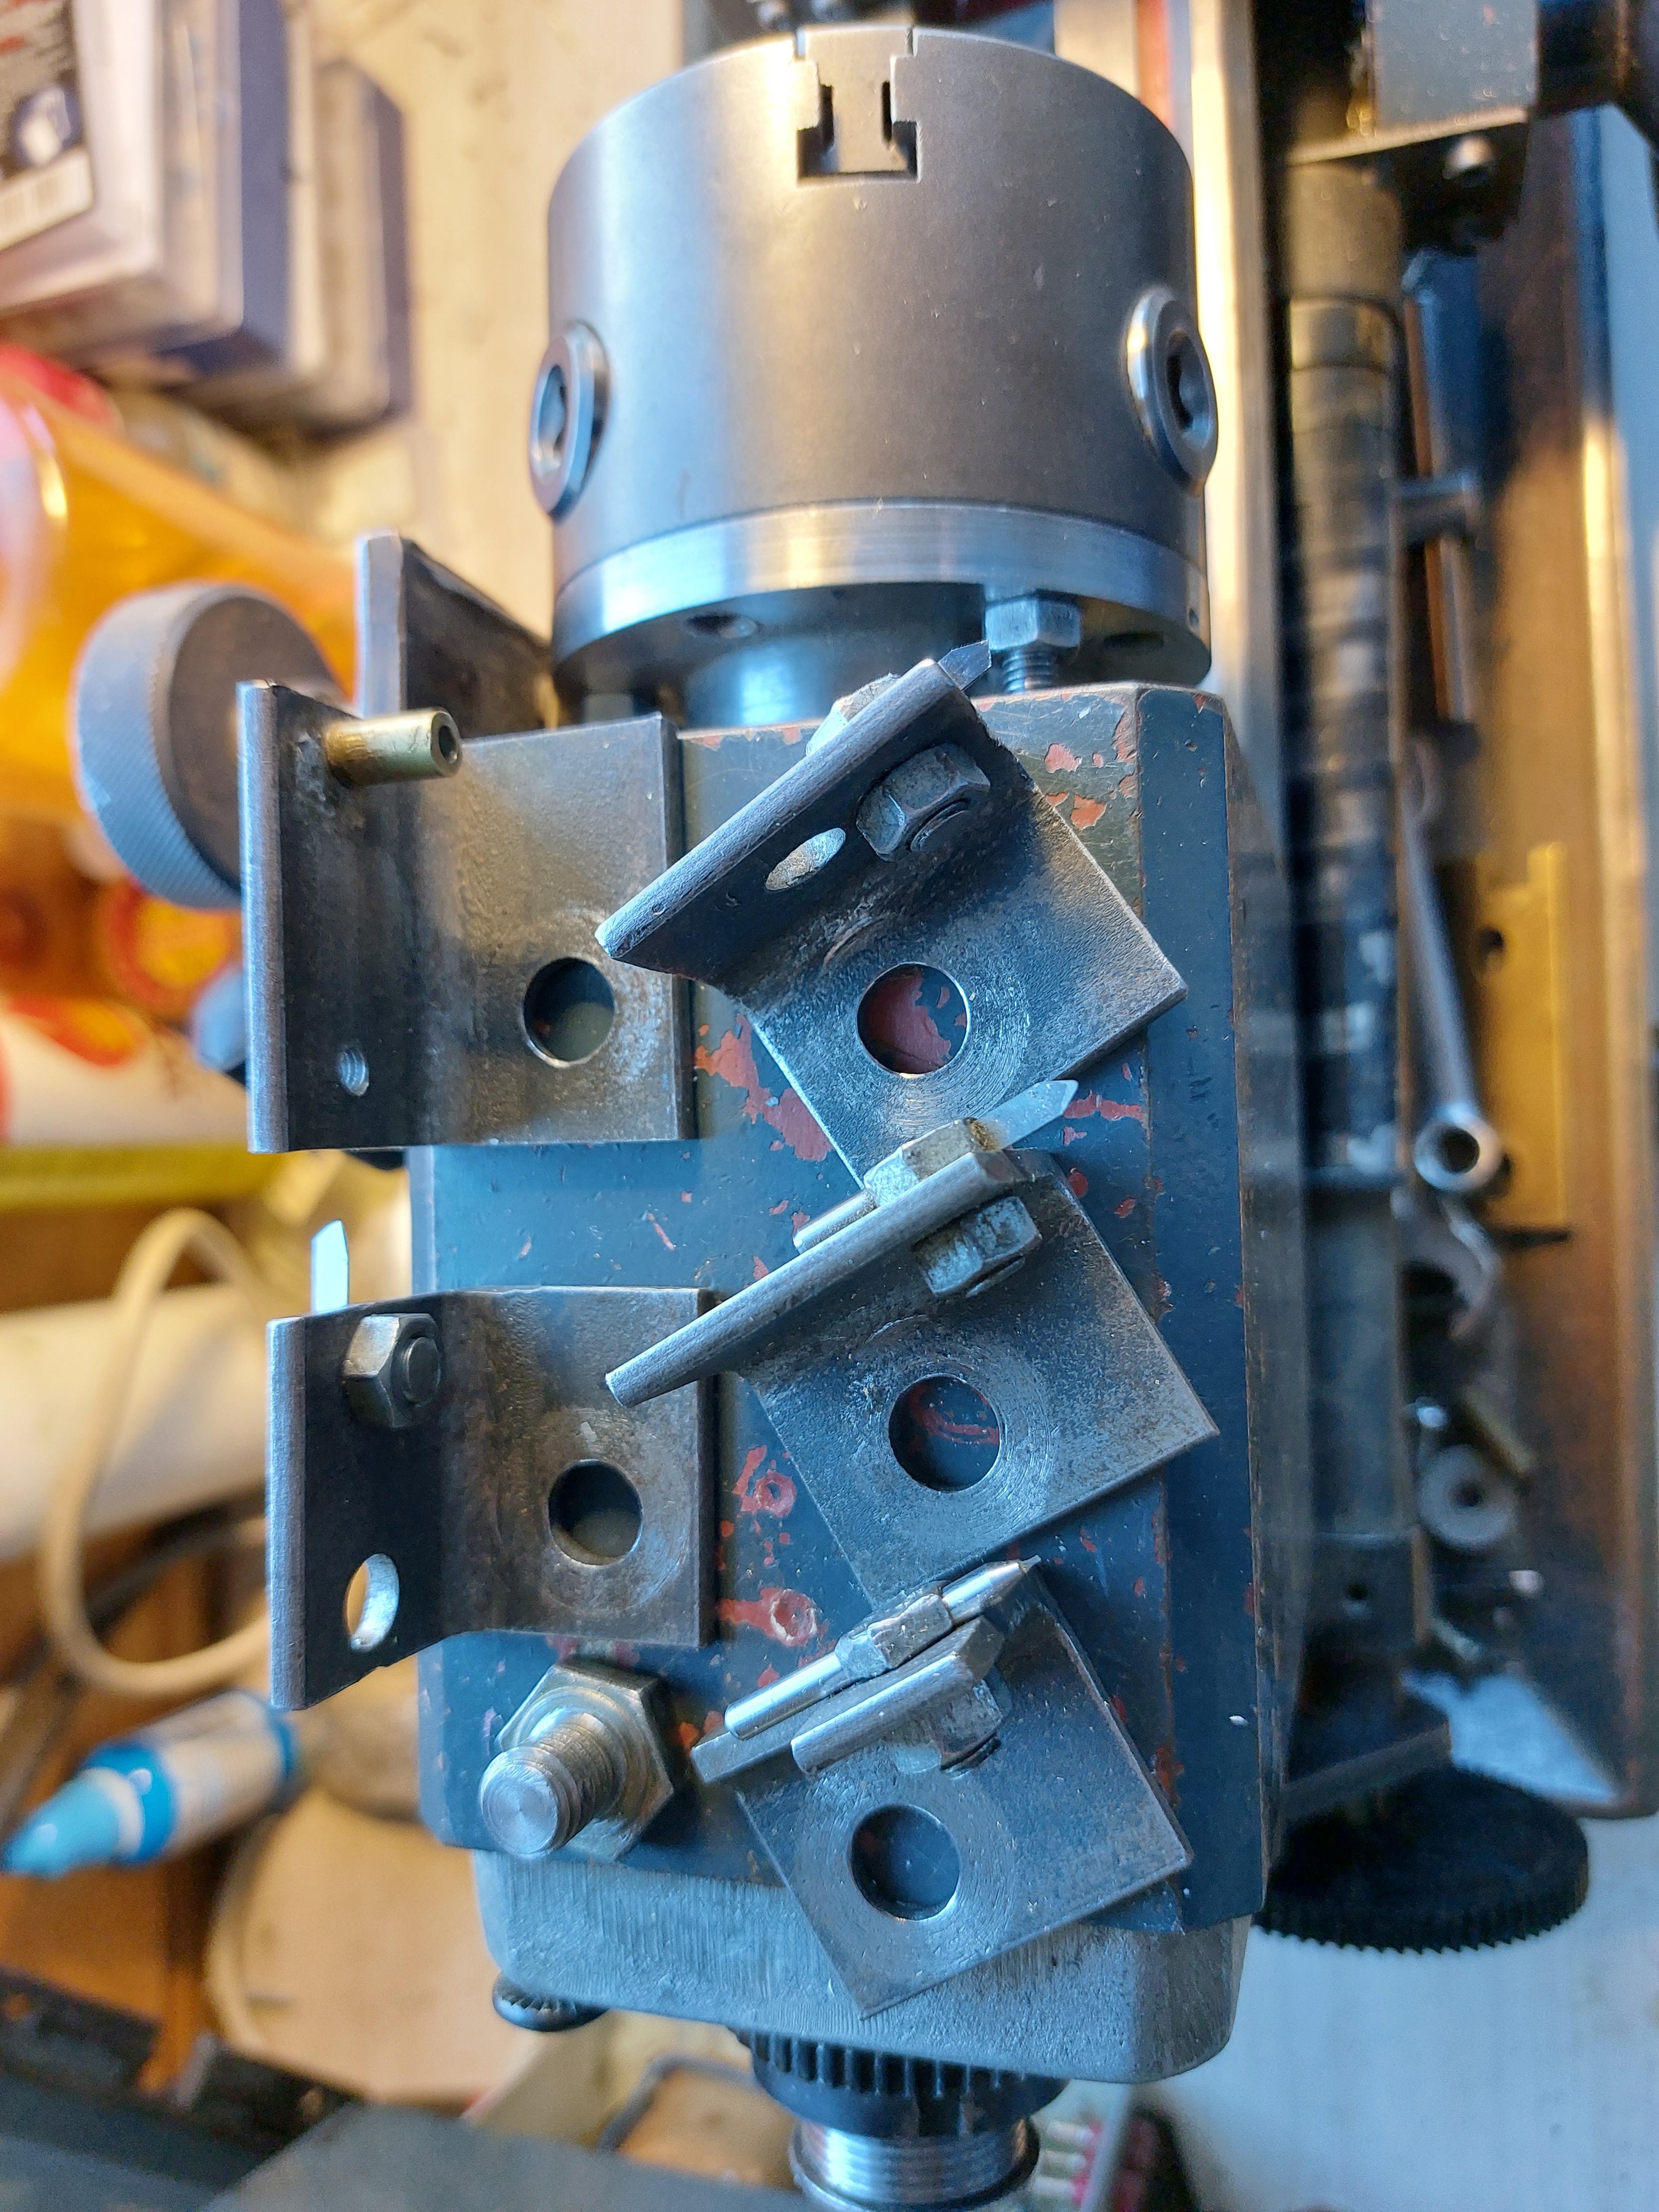
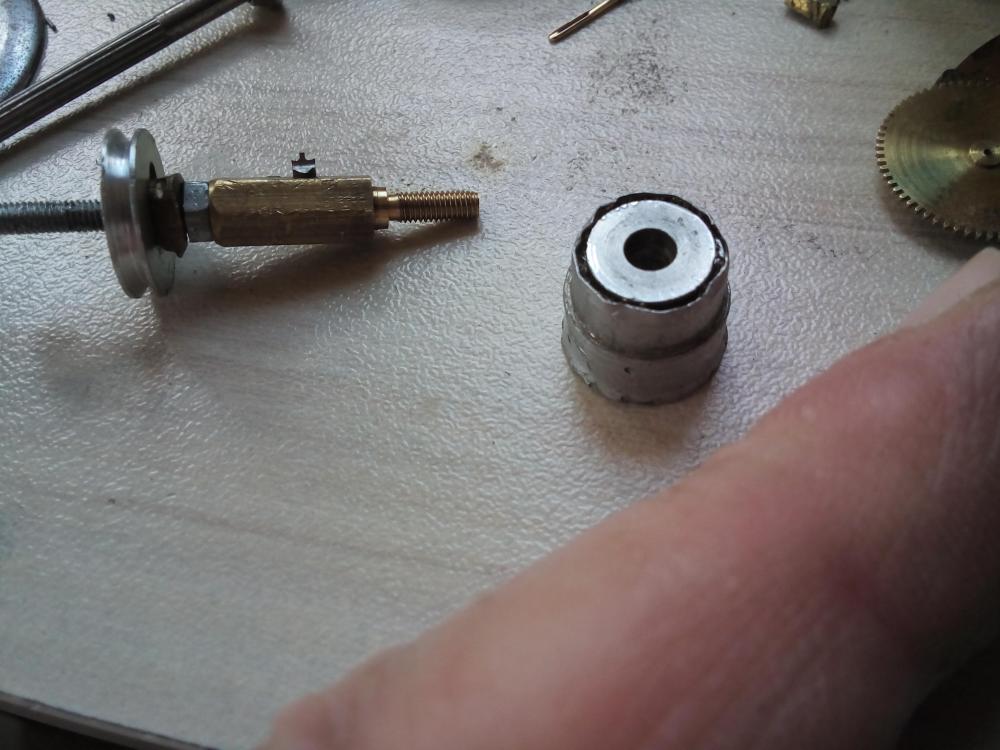
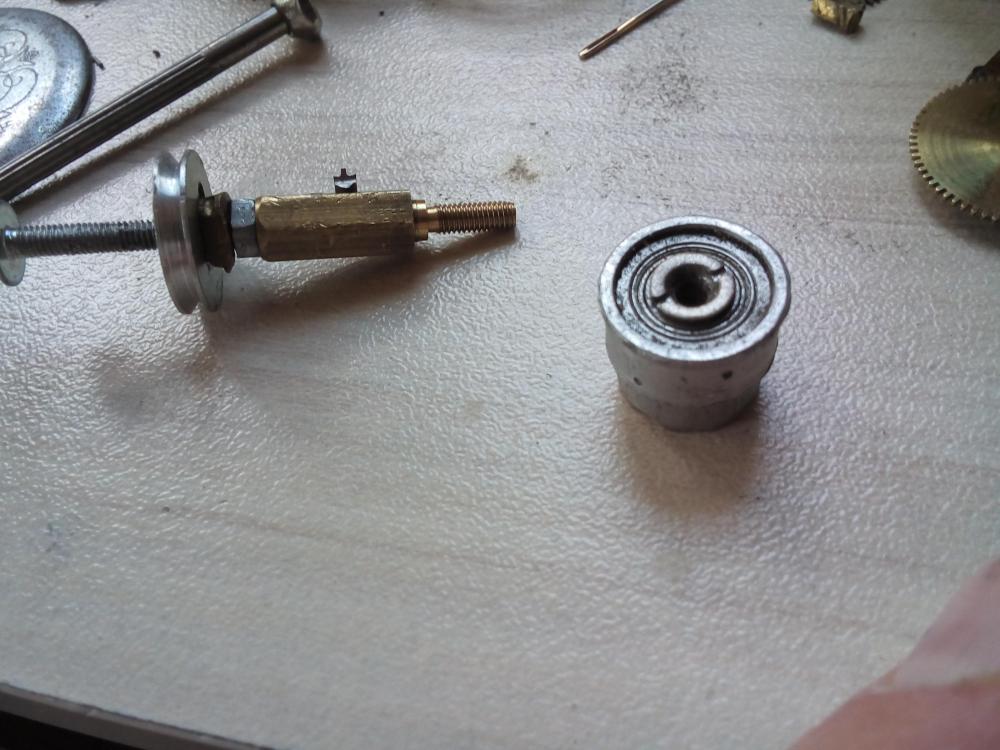
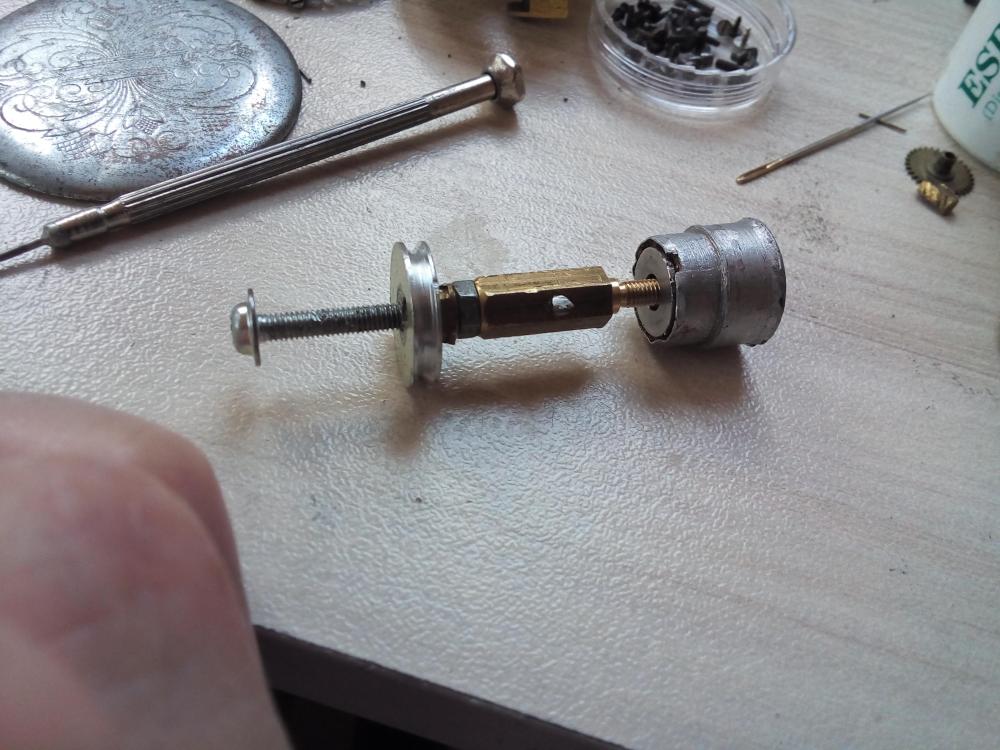
Hi Rich, The brass plate is for regulating the height of the cutter, like shimming. The die is to keep the big washer horizontal. Indexing is ... see this video, the index is shown in the end. Here is REV 2.0. The design is similar, but the height can be adjusted by shifting up/down when the small screw is loosen. There is a big double bearing that lets the whole brass plate rotate when this is needed in order the cutter to be able to follow templates. The tool bit is held by tightening the long steel screw, just like in chandelier terminal. This particular bit is not carbide, but yes, a carbide one will look just the same. And yes, I shape them with diamond disks, diamond files and patience. But the gravers that we use for lathe cutters are to big, this is the only problem with them. There are carbide Chinese drill bits with tail 3.17mm, the tail is not carbide. The small sizes carbide tips has something like tail, which is 1.2mm in diam. and about 2mm length. I make the carbide cutters for small wheel modules out of them. Will show pictures... Actually, when cutting small gears like the ratchet wheel You need, there is no impact on the lathe bearings. The revolutions of the cutter are big and the shavings are very fine. I can't say nothing about the milling machine, but no problem to use the lathe as a device for small gears cutting.

 2 points
 -
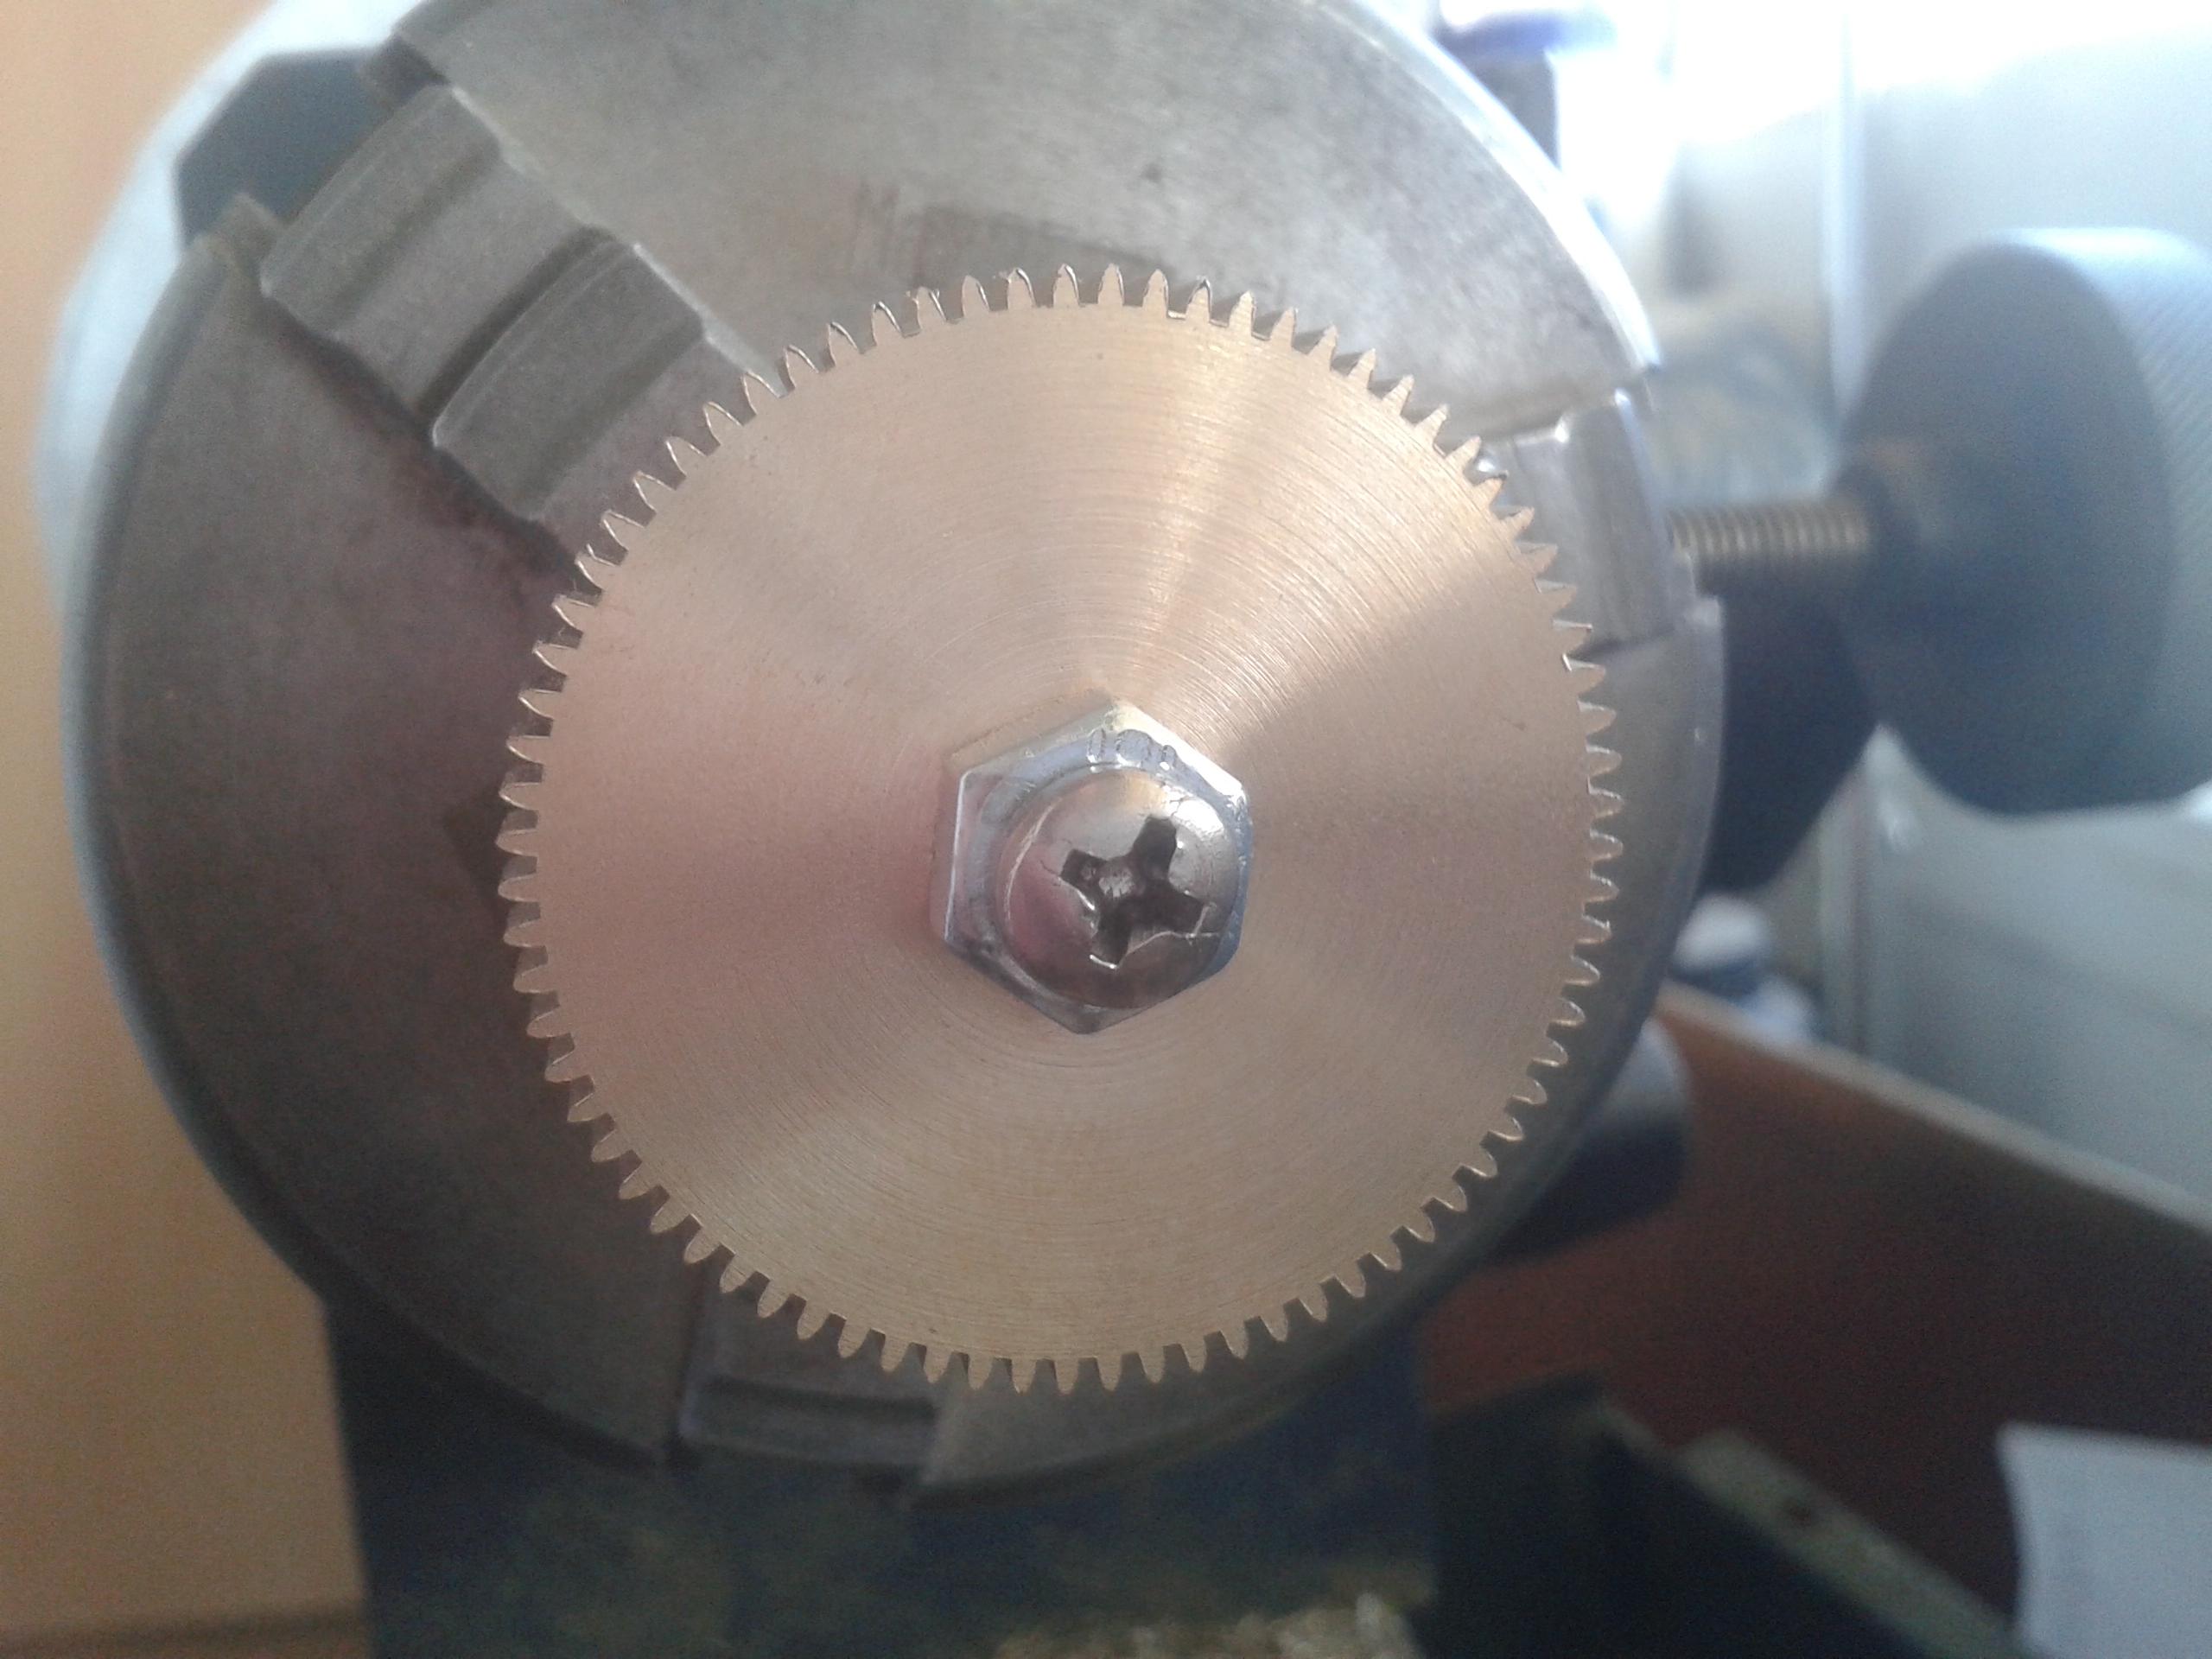
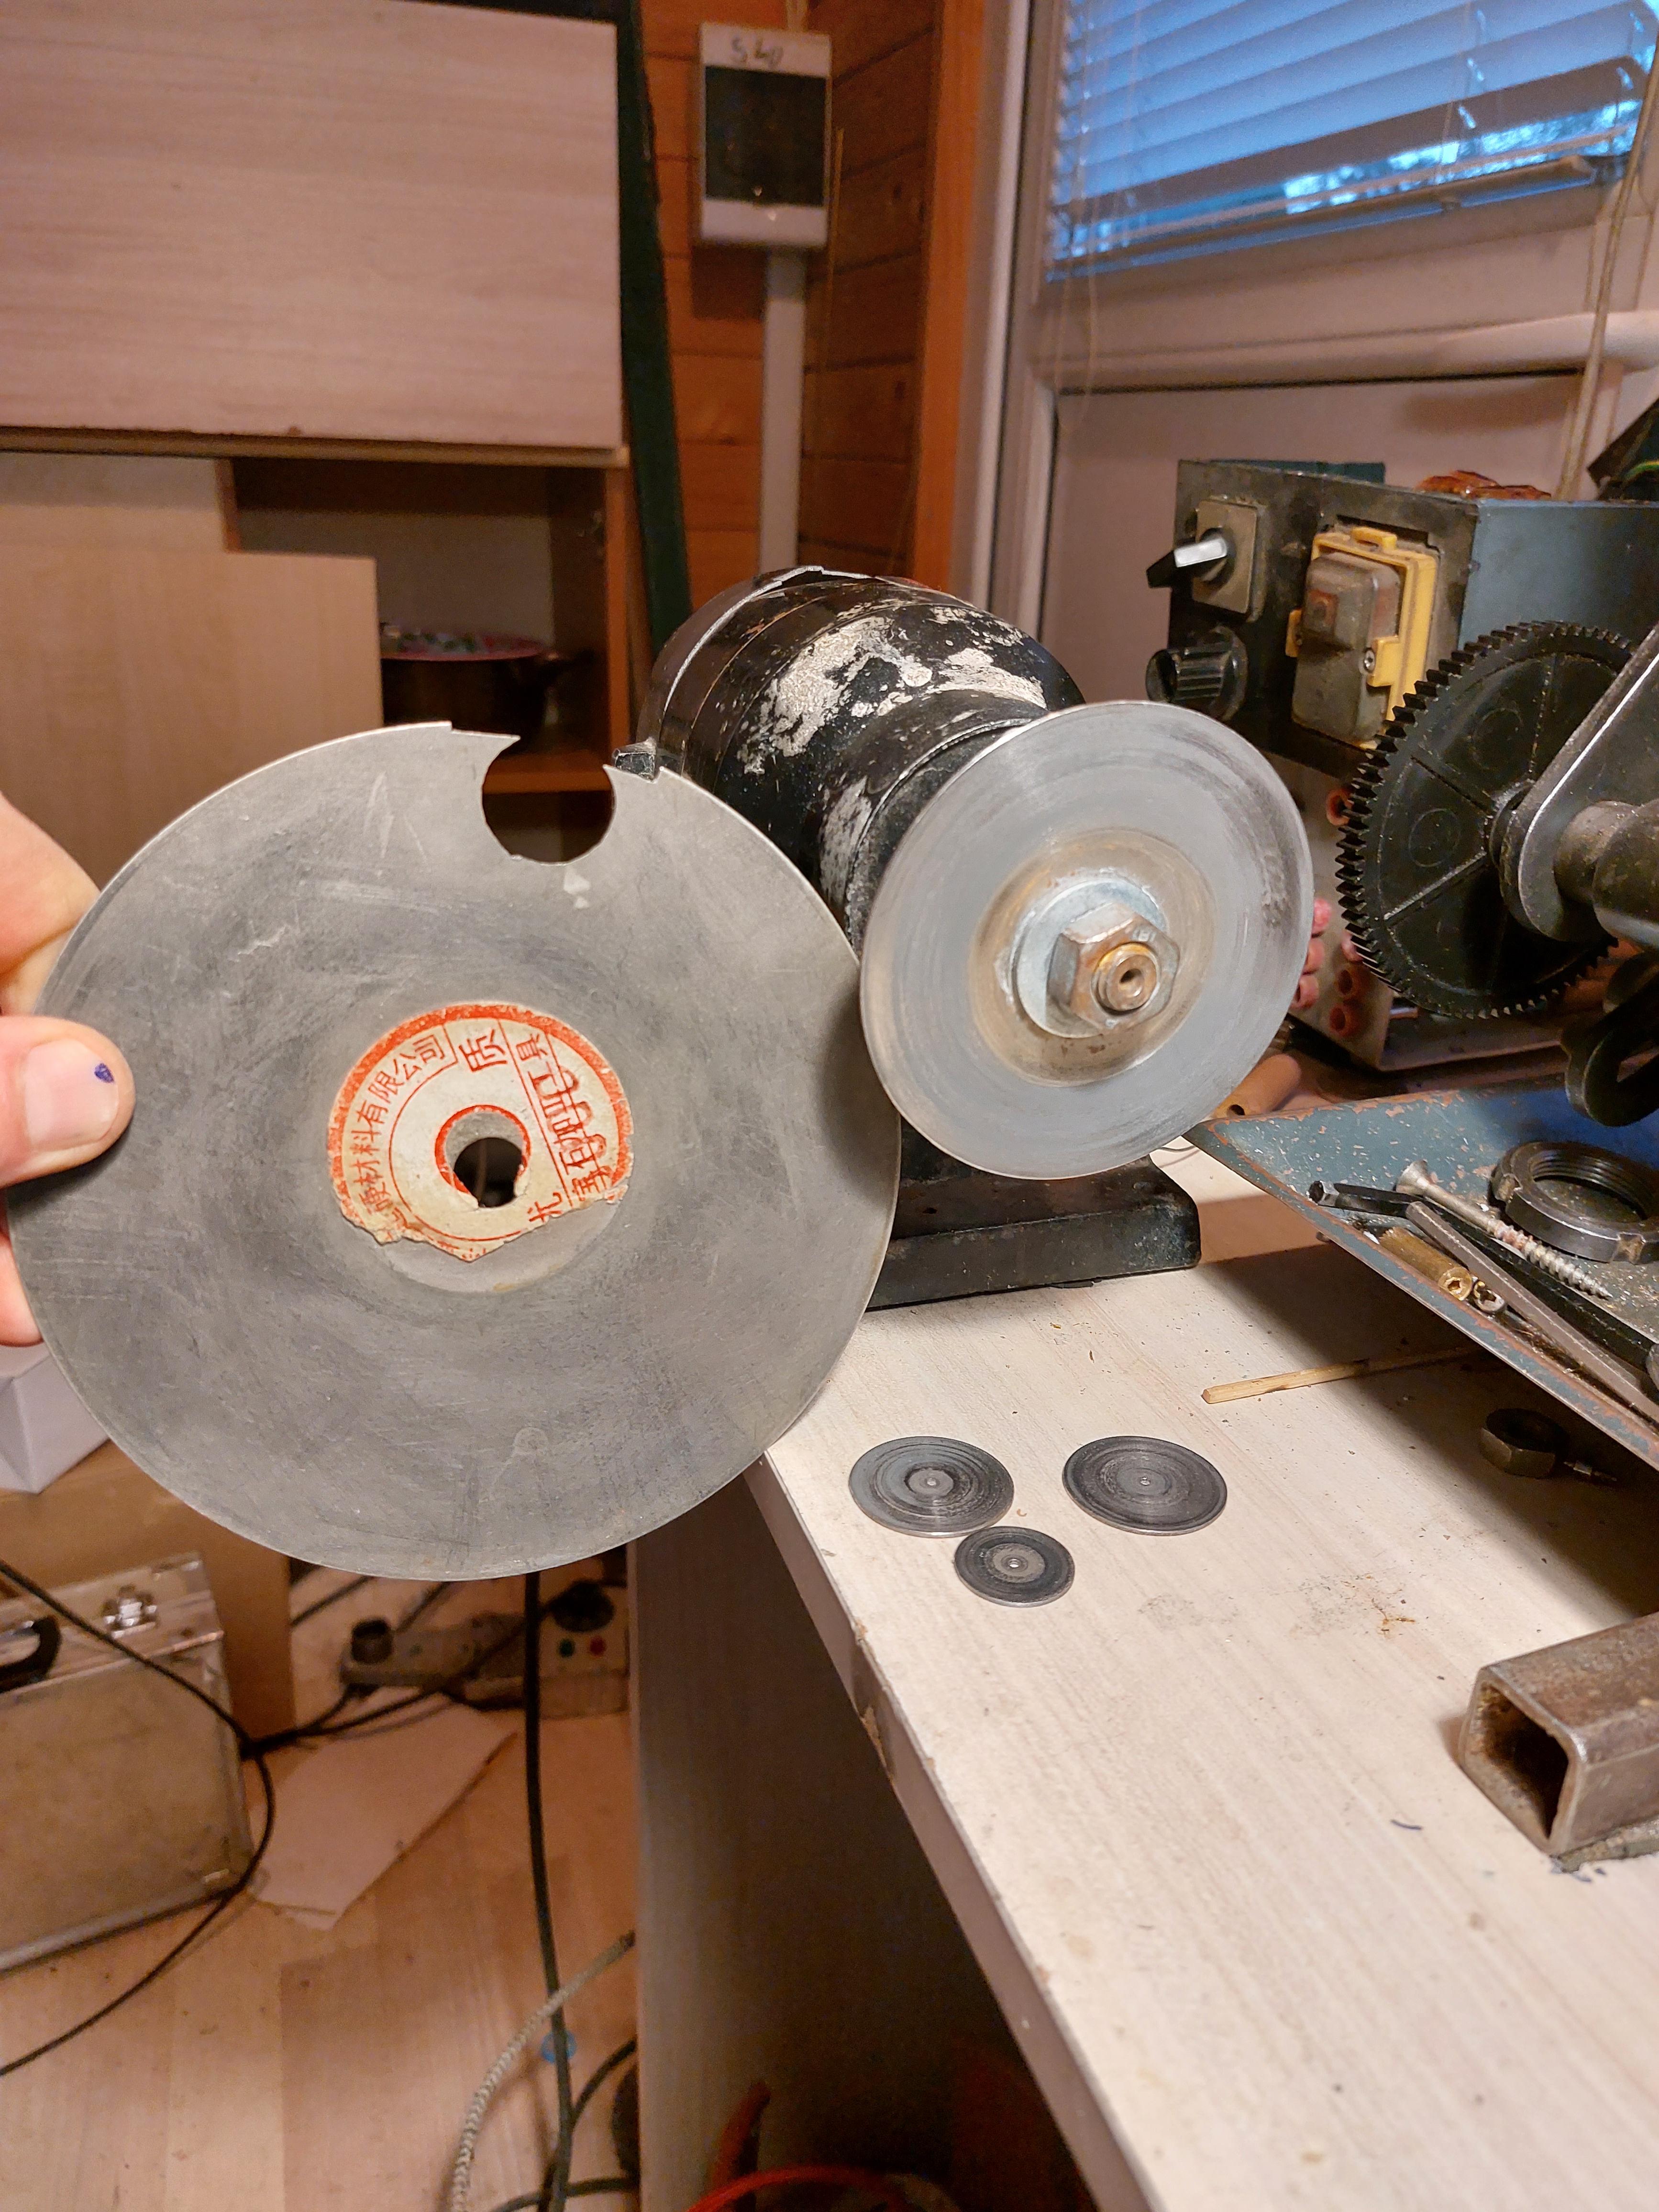
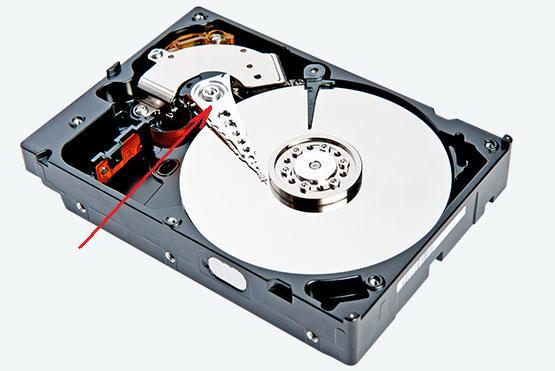
The base is double row ball bearing from the head block of hard disk drive. It is experiment that I made to see what will happen, but the result was surprisingly good and actually this pictures are taken after 10 years of use. Here for example some pictures from a french clock barrel cutting.


 2 points
 -
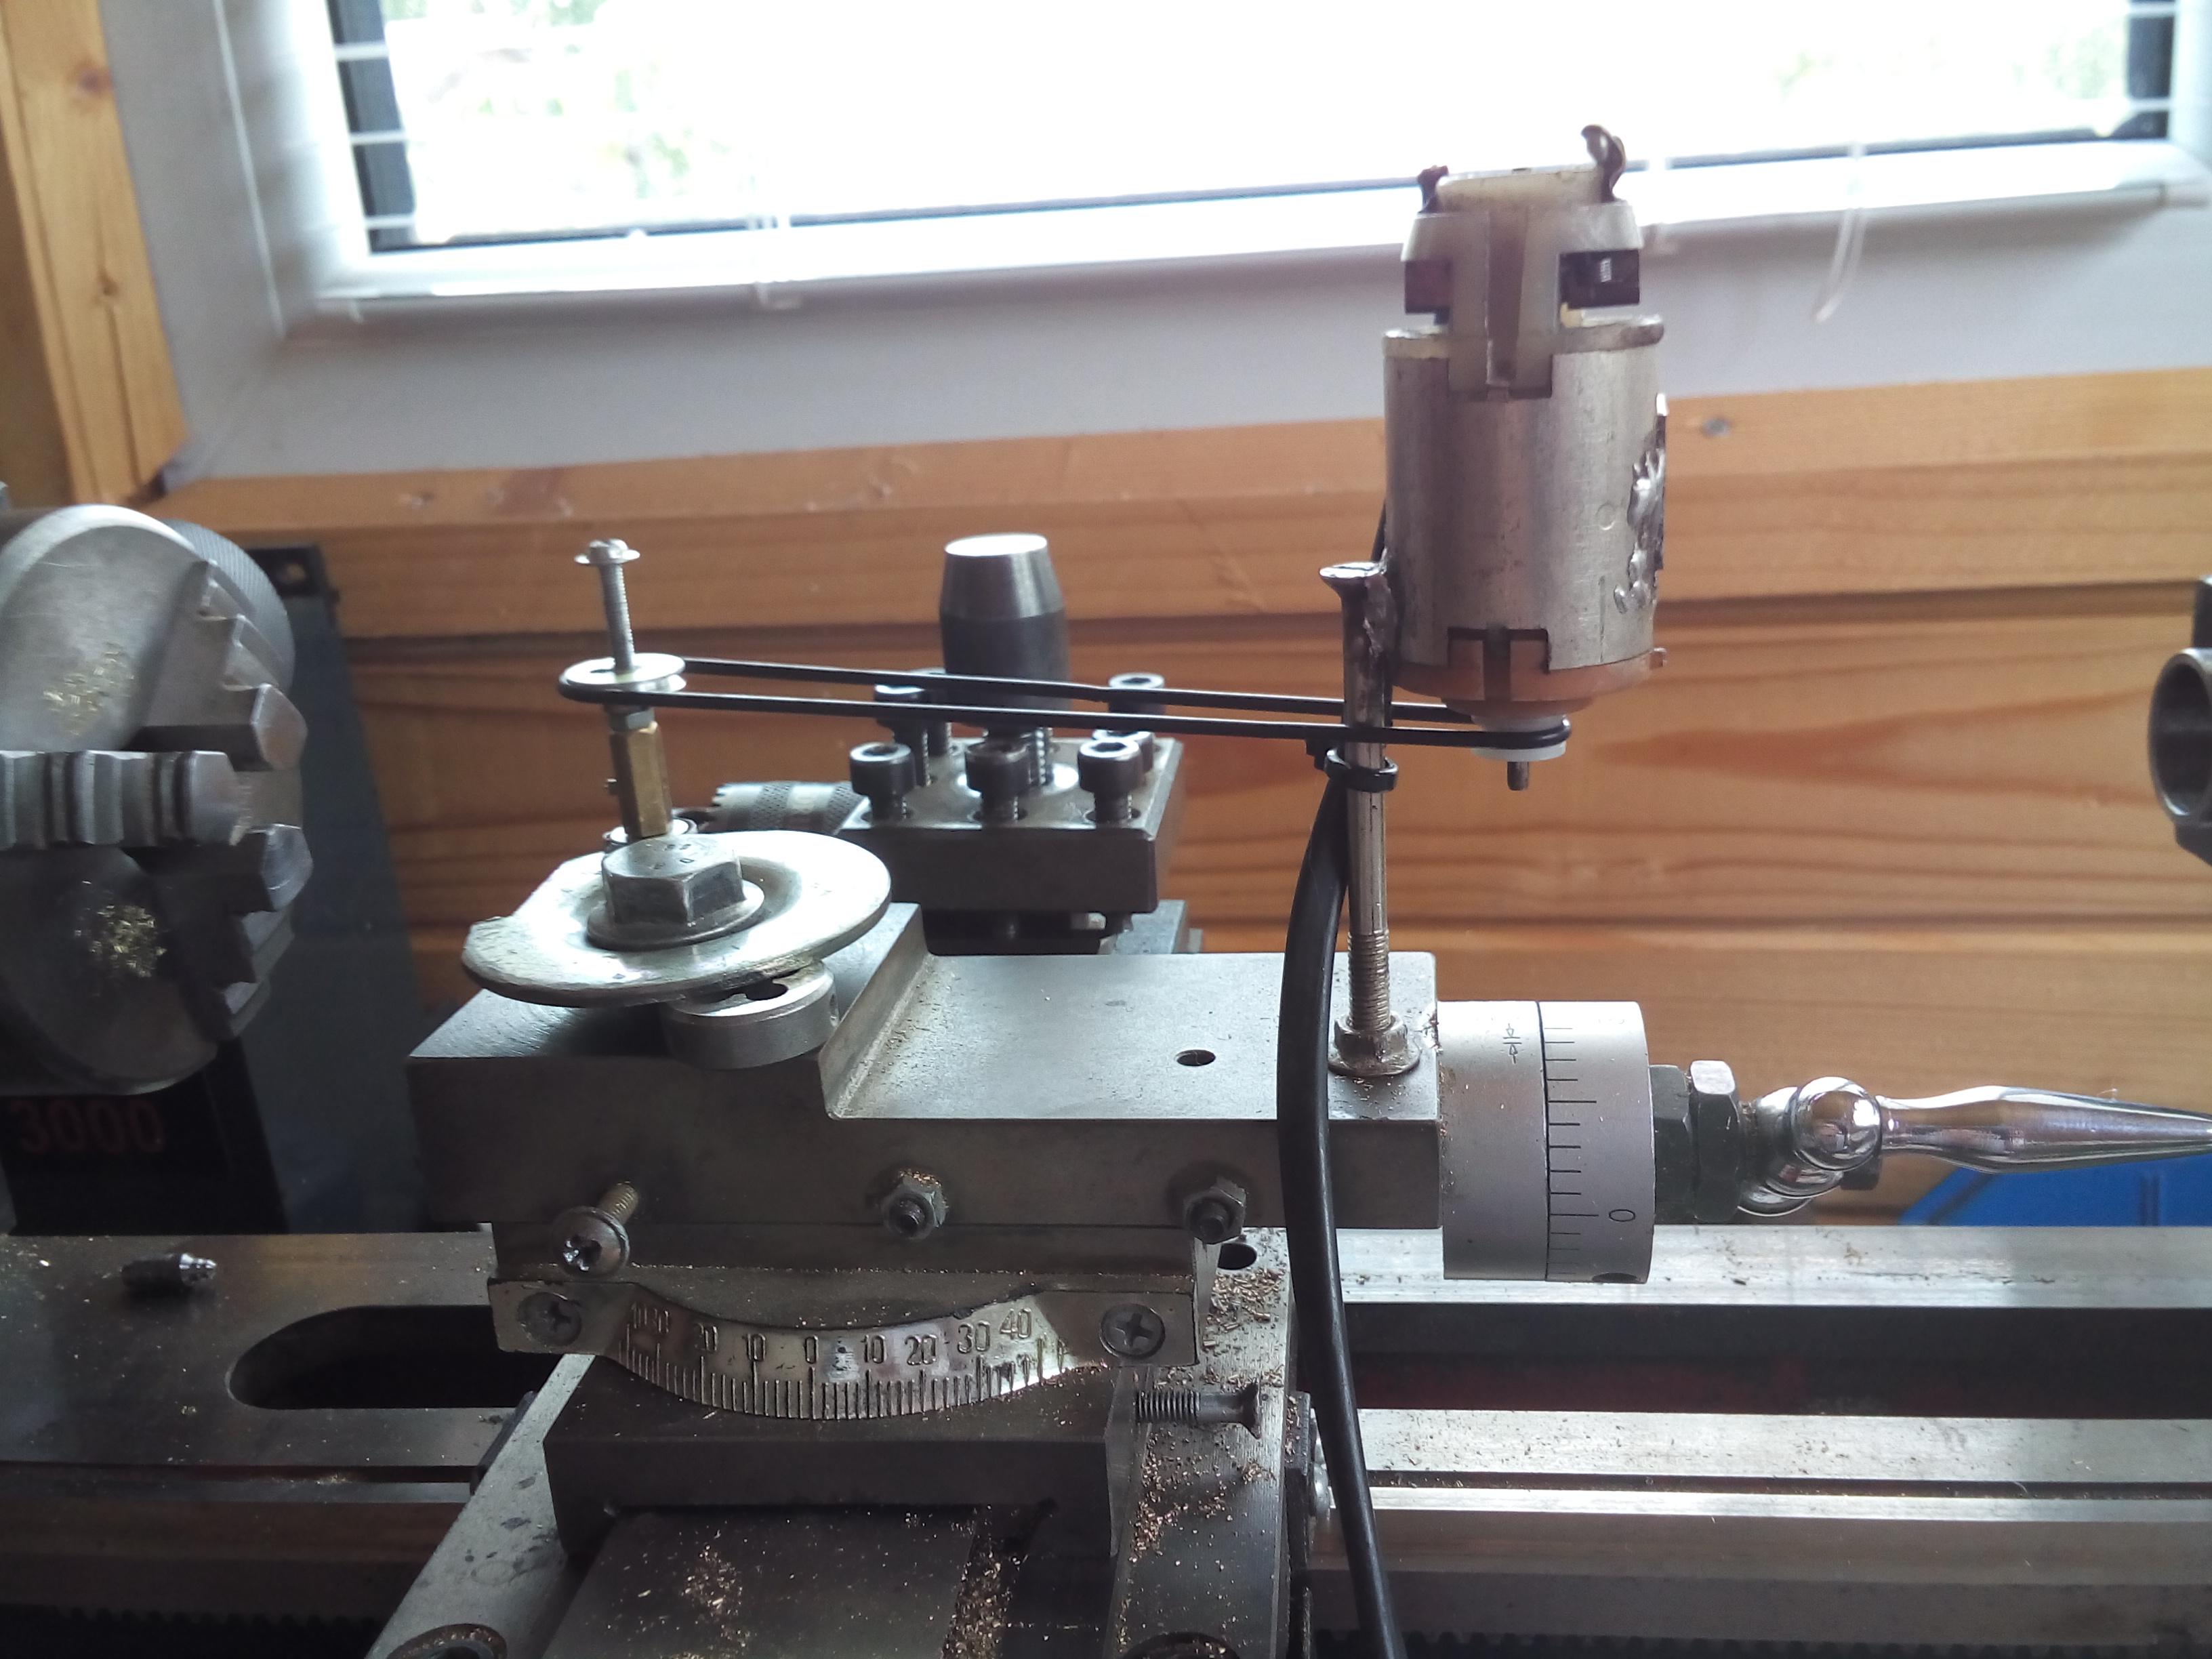
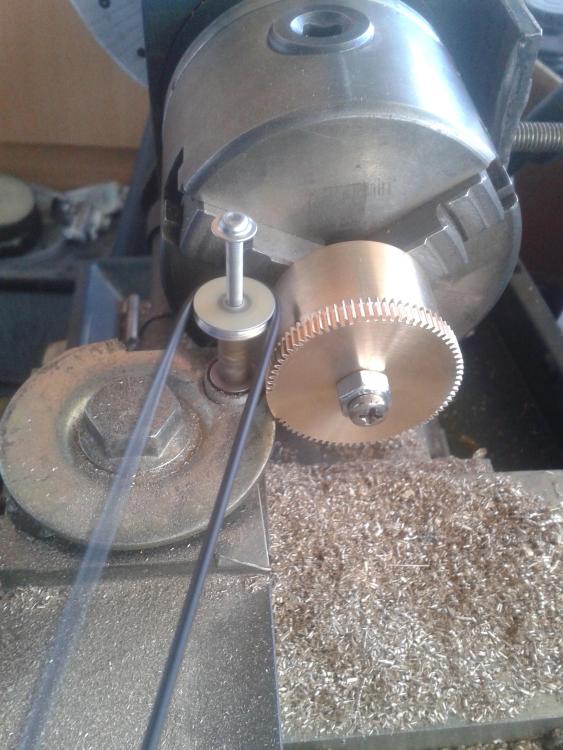
OK, here are some old photos of the first design of my milling attachment. Ver. 1.0.


 2 points
 -
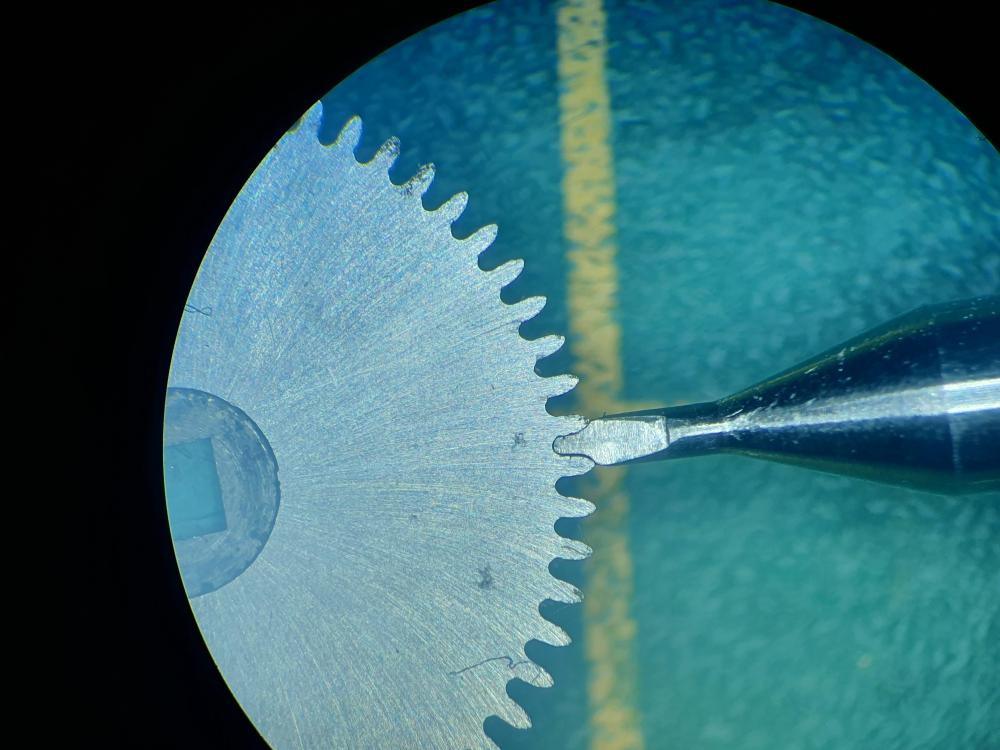
Some important things. Making brass gears with fly cutter is a piece of cake. You can make the cutter of HSS, even of tool steel, and it will cut many wheels without significant wear. The cutter itself is easy to form, as the hardened steel is easy ground by dremel tool with small carborund disks (dental separators). The cutter needs high speed (RPM) and doesn't overheat. But, cutting gears of steel is another thing. Only special steels can cut steel, even soft steel. Hardened tool steel cutter, even HSS one, will not cut more than the half of this wheel before getting complitelly dull. And sharpening of fly cutters is possible only in limited cases of cutter design, and sharpening in the middle of cutting process is not wanted as the teeth may get not equal in different parts of the wheel. Lo RPM and lubrication needed in order to avoid overheating and damage of the cutter. On other hand, if cutter is made of tungsten carbide, it cuts easy soft steel and even possible to cut hardened and annealed to blue. Cutting such ratchet wheel of soft steel is easy and high RPM are used, even with no need of lubrication. The main problem here is forming the carbide cutter. Only diamond grinding tools work here, so such small diamond disks needed and some practice to learn how to form the cutter. Once the cutter is formed, then the wheel cutting is easy. Will try to show how I form the cutters I will show the design of the milling attachments I use on my lathe. The construction is simple and easy to reproduce, it is based on using a double row ball bearing from the head block of a computer hard drive. I must search for some old pictures and make some new ones, so give me a little time. There are some videos in my Youtube channel that may help to understand the way the attachment works, will give the links to them.2 points
-
If you check the drills, you'll see they have a peculiar shape at the business end. These tools were bow driven, so the drills cut (or more like scrape) in both directions.1 point
-
somewhere in the universe I've seen where someone made a new holder for carbide drills.1 point
-
Cheers Tom Thanks Waggy Cheers for the advice Andy Thanks Knebo Sounds good advice Geotex, Thanks. Thanks for the advice Vwatchie. I'll have a look at Vid in a bit. Thanks Mbwatch, much appreciated.1 point
-
Regarding the less expensive (non-Bergeon) balls... I have an unbranded ball I probably bought from Esslinger when starting out. I believe it is 10-15mm smaller in diameter than the Bergeon 8008 and I do think that makes a difference. There are some casebacks I cannot get good purchase against even though they are not tightly screwed down. So if others are saying 80% success, I would put my cheaper one at only about 65%. Get the 8008 (or figure out its size and buy a generic one that size). I have not spent the $10 to upgrade my inferior ball because I don't actually work on many screwback cases. It's mainly snap cases or the 2 piece screw down ring on older Russian watches.1 point
-
It is one of those already mentioned 1000 tools that owners of a lathe don‘t need. Frank1 point
-
I agree with most of what has already been said. If you don't already have it, I recommend buying a cheap ball pump as the ball tends to deflate after a longer period. As for the brand, it probably doesn't matter much, but why not a ball from Bergeon? You can enjoy the feeling of operating with a genuine watch tool As far as efficiency goes, I would say that most case backs can be unscrewed with this type of ball. As someone else mentioned, you may need to start with a more powerful tool. Preferably a clone of the Bergeons. Google "Vevor watch case back remover tool". I actually get a bit upset if I don't manage to open a case back with my rubber ball. Upset because there's no reason whatsoever to tighten a case back so much that it can't be opened with a rubber ball. I never use anything other than a rubber ball to tighten a case back, but of course, I then tighten it as hard as I can. I reviewed the Bergeon 8008 ball on YouTube a few years ago.1 point
-
If you are new to watch repair then do not attempt this yourself unless you feel very confident with removing and replacing the crystal and/or you are prepared that it may not go the way you hope.1 point
-
Yes. Finally, I got the chance to see clear images of what I have seen on your YouTube channel for a long time. You are truly an inspiring and creative person and that is what makes me follow you actually. I hope you continue to share your work because you have a different approach. Thank you very much1 point
-
The balls are great, they work most of the time (80%??) and are guaranteed not to scratch or slip. I think the balls are all pretty much the same.1 point
-
I have a cheap one that was around £3 iirc and it works fine. I have seen around folk using balls much cheaper than that and not a watchmaker tool. At the end of the day it’s just a rubber ball to give you some friction onto the caseback and easy to grip in your hand. Tom1 point
-
Hi, I’ve worked on that and it’s so easy. I assembled the gears and the bridge screwed it all down and then slid the spring in behind the gear lock. Once I’d push the spring in as far as it would go I took the screw out and push the spring a bit further so I could see it then I put a fine needle in the hole to pull the pin across. The great thing is it kept the spring located in tbe recess. Putting the mainspring in and tbe gears, bridge and click spring took me 20 mins. I’ve been trying this for weeks on and off. I never even lost tbe spring. Thanks again. I can’t believe I didn’t see this but I didn’t think there was enough room. That’s the difference between knowing what you’re doing and an “ Old starter” . Thanks again.1 point
-
https://ranfft.org/caliber/9309-Revue-591 point
-
Is the advert actually misleading ? You dont get the watch that you expected to get ? Risky for any company to try to misrepresent their product if thats the case.....they will have it covered somewhere in some smallprint that youve missed.......you'll know soon enough. As far as i know that inner bezel is loose and traps the dial into place when the crystal is clipped down. i have an 80 Timex part stripped down with something similar....its stored away for now....... could i as hell get that watch to tick with good amplitude Installing the balance with the top plate on is a complete barsteward.1 point
-
Thank you for all the responses. I turns out that when I applied a little more force than usual to the opening next to the crown, the whole movement and dial popped out. It was just wedged in there a little harder than expected. I nice result and experience from my first post1 point
-
The arrow on a British military watch is usually broader, Indian military may make sense due to being formally part of the empire.1 point
-
I was sceptical from the Timex 'Photos' that it did cover the bezel but after finding this I now see that it does and also clearly shows the unpainted bezel. I guess this is a classic example of just buying on the internet and expecting to get one thing and actually receiving something else, where if you'd bought from a shop you'd know exactly what you were getting. Looks like you'll have to figure out how to remove the crystal.
 1 point
 -
Usually any time I see the arrow symbol on A British watch I do think of army as I think it's their symbol.1 point
-
I've managed to open the link and see the with and without black paint which for me would have resulted in a question to Timex before I bought it. As per my previous post, if you want it black then just fill it with whatever you want that's black, simples!!!1 point
-
From what you just posted it was stated that this is a version 2 of this watch with no black infill on the bezel. So basically you want to mod a Timex watch. If not you need to take your complaints to Timex and/or the trading standards organisation of your country. Don’t hold your breath for the outcome though. Tom1 point
-
Why aren't you doing it in your workshop? Hehe. Sorry couldn't resist.1 point
-
The video actually shows the thread making. Sorry, it is not at focus, but I recorded it with my phone and when saw it on the computer display, it was to late. But it shows in real time how the thread is cut.1 point
-
That crown is bottoming out on the case so I expect it's the wrong one. You can stuff the old crown with o-rings or sometimes you can just pry the washer out with small hooks.1 point
-
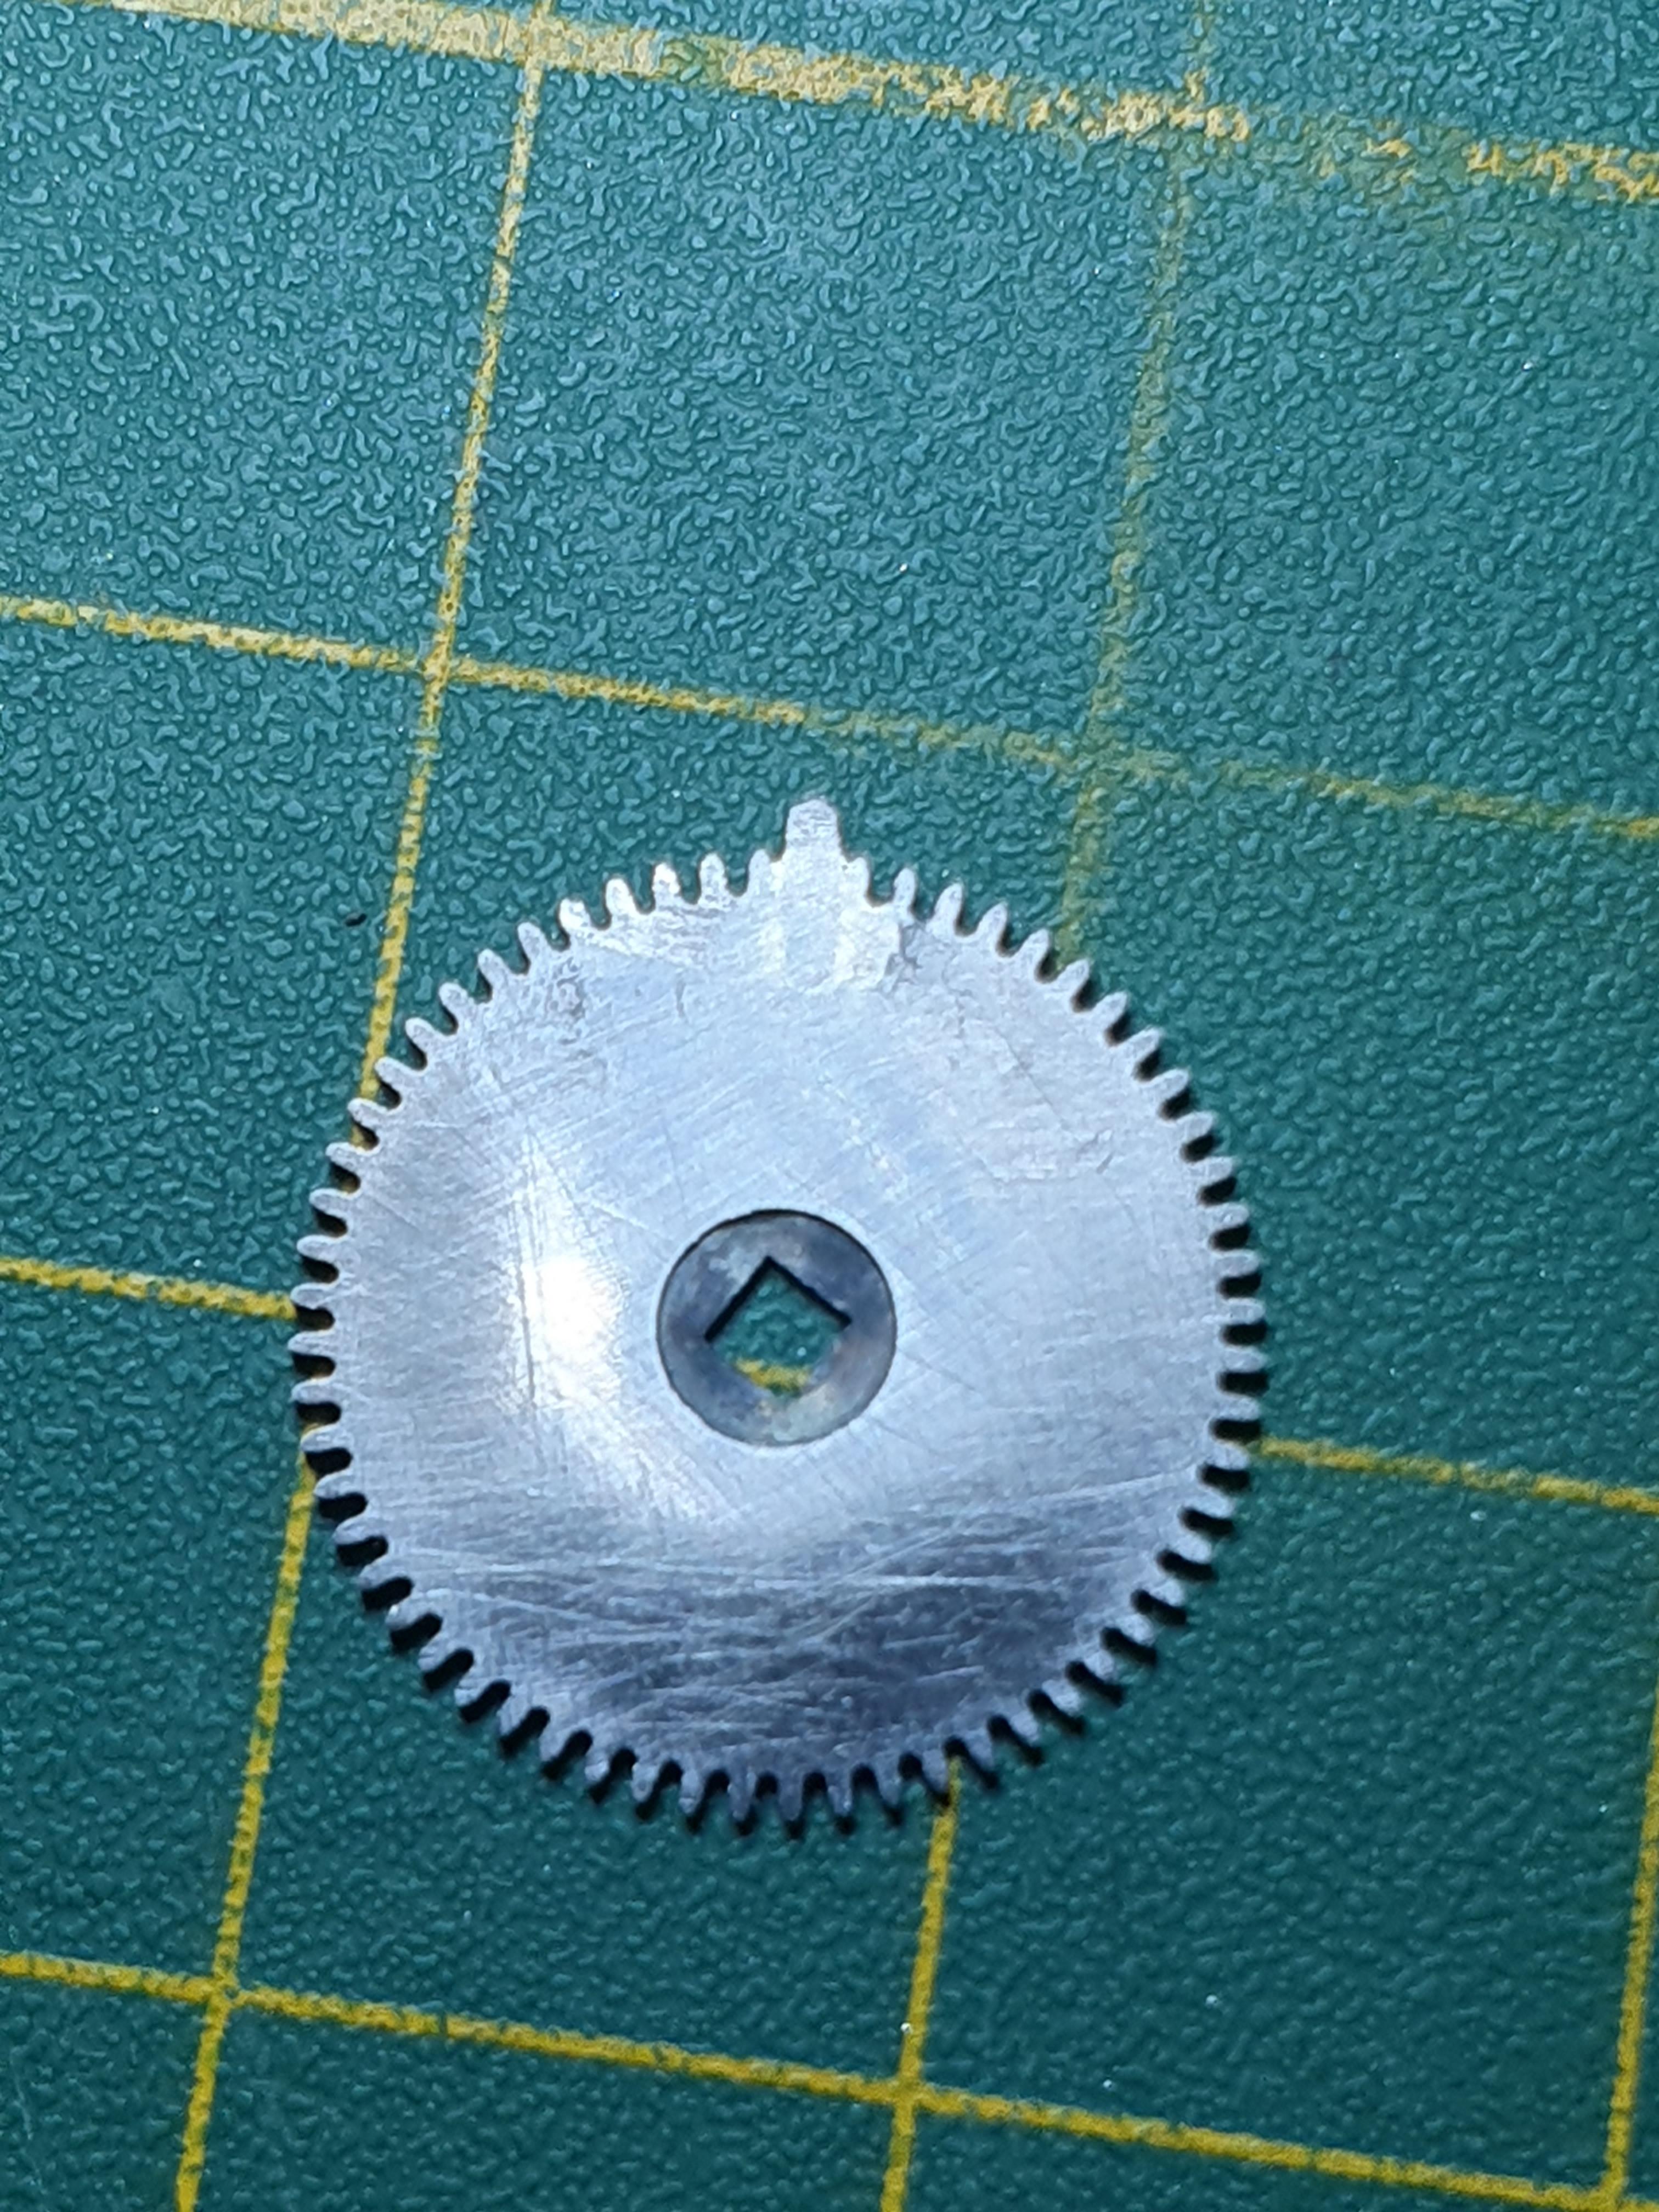
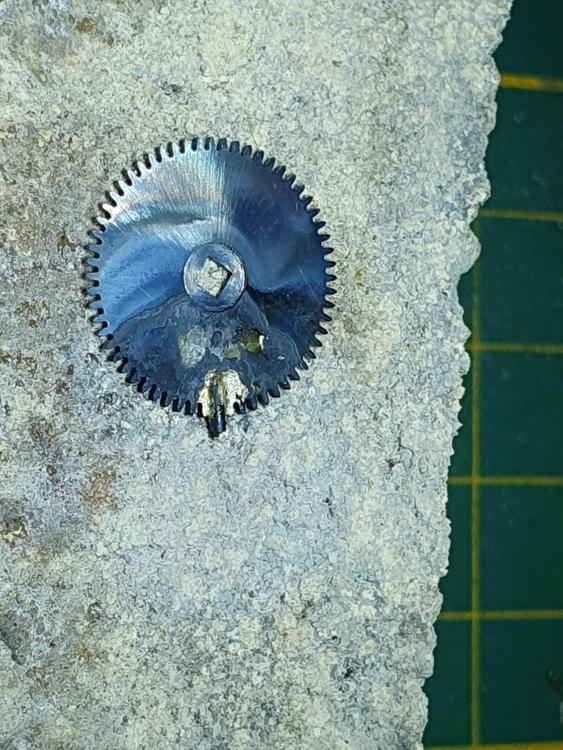
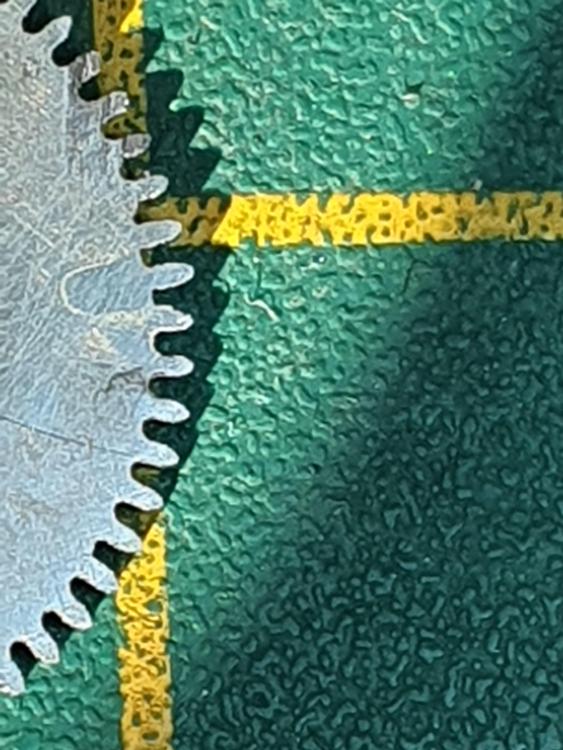
While attempting to make a new ratchet wheel (btw, does anyone please have any suggestions on the steel I should use? O1 perhaps?), I decided to try the other route as well, if only for the learning experience.. So I cut a slot in the wheel and silver soldered in a piece of steel wire that was ground square(ish). The result isn't too bad. But before I go ahead doing some polishing to make it look a bit nicer, should I heat treat it? If it was hardened originally, I imagine the soldering will have made the part softer. Or am I overcomplicating things now?
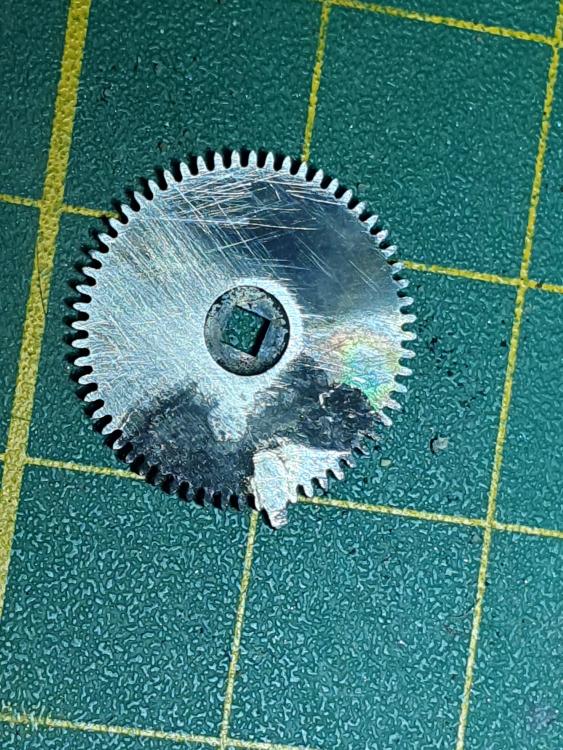
 1 point
 -
The old Bergeon catalog lists it as for "removing and holding seconds hands". There's the 14a which has a sliding lock on the side as well.1 point
-
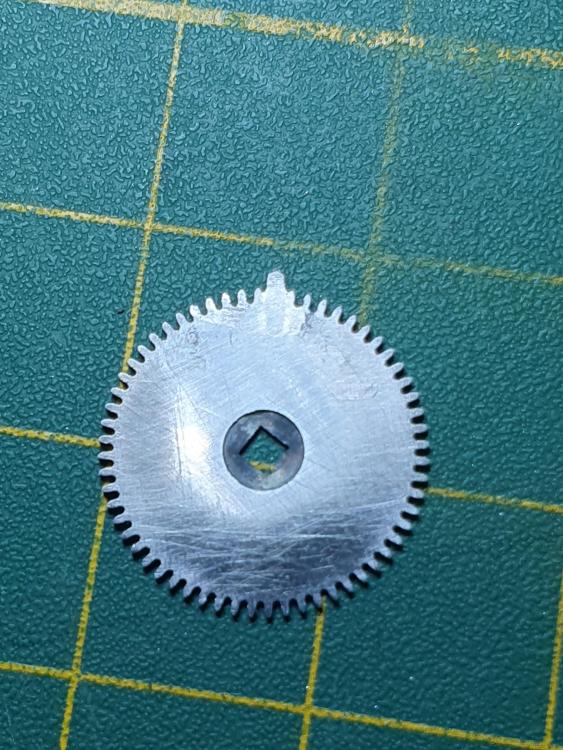
My fine laser cutter‘s charge would not exceed the value of your watch. But you can repair the tooth only, I did it sometimes before I had such wheels laser cut. Well made it looks not at all ugly as Nev said and you don‘t need milling gear. Cut a slot in the wheel, wide and long as the missing tooth. There are thin separating wheels, use your lathe and a table in the hand rest post. Silver solder a piece of steel into the slot, replacing the tooth. Grind / finish to a tooth shape. Frank1 point
-
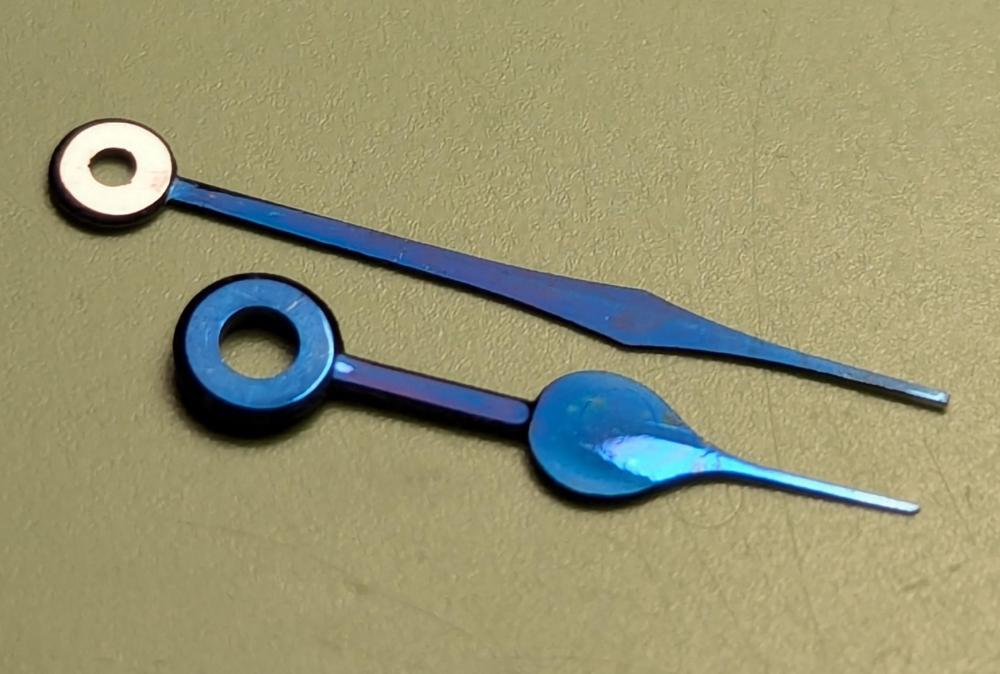
A pair of Hamilton 16 size pocket watch hands restored for a long term project watch, not my first bluing, but my first really meticulous polishing job. Through 12 grits of diamond paste, repeated cleaning, bluing, then attempting a black polish on the minute hand boss. I can't say I achieved a true black polish because it isn't a perfectly flat surface. But I got it very close. I tried to use a technique as demonstrated by Roger Smith but didn't get a good polish when running it face down against either a smooth steel block or glass. The steel was probably a little too hard and abrasive and the glass didn't keep the paste in place well. Maybe lapping film on glass would have worked better and I will get some soon. But ultimately I just taped the hand to a steel block so the blued area was masked and worked the finest 6 grits of diamond paste over the boss with pegwood. The polish is very nice and consistent now but it could be flatter. And a special shout to Macro Restorations (Leo Vidal) on YouTube from whom I lifted a lot of the hand polish technique. The small seconds needs to be blued once more as I am not happy with it, but otherwise I am very pleased with the results of about 4 hours work.
 1 point
 -
I would use the existing staff to determine is this fork able to work correctly with this movement. This means the rear part to work well with the balance roller and the front part with the escape wheel. If You need guidance, I will explain everything that needs to be checked, but it will need some writing. Actually, the pallet fork is complicated part that have to comply with many things in the movement1 point
-
Nothing is lost at this stage. But You first have to take out the clutch part from the pinion. Then next is to fix the wheel table to the pinion. If it can not be riveted, then must be soldered. Then trueing, and clutch part reattaching. It is possible to make a bush that will stay press fitted between the table and the clutch and will hold tight the table in place instead soldering.1 point
-
The original 6139A manual is very clear in how to disassemble and how to assemble ...... step-by-step. However I haven't seen the 3169B manual, even in the Japanese version around, which clearly highlights the difference in center-wheel. 6139A Seiko Technical Guide.pdf 6139_A.pdf 6139A.pdf 6139b.pdf 6139B repair guide jp.pdf1 point
-
Hi as an addition a pertaining to the assembly of a 6319B which will be handy for those working on this caliber Polly's 6139 guide.pdf 6139A.pdf 6139B.pdf1 point
-
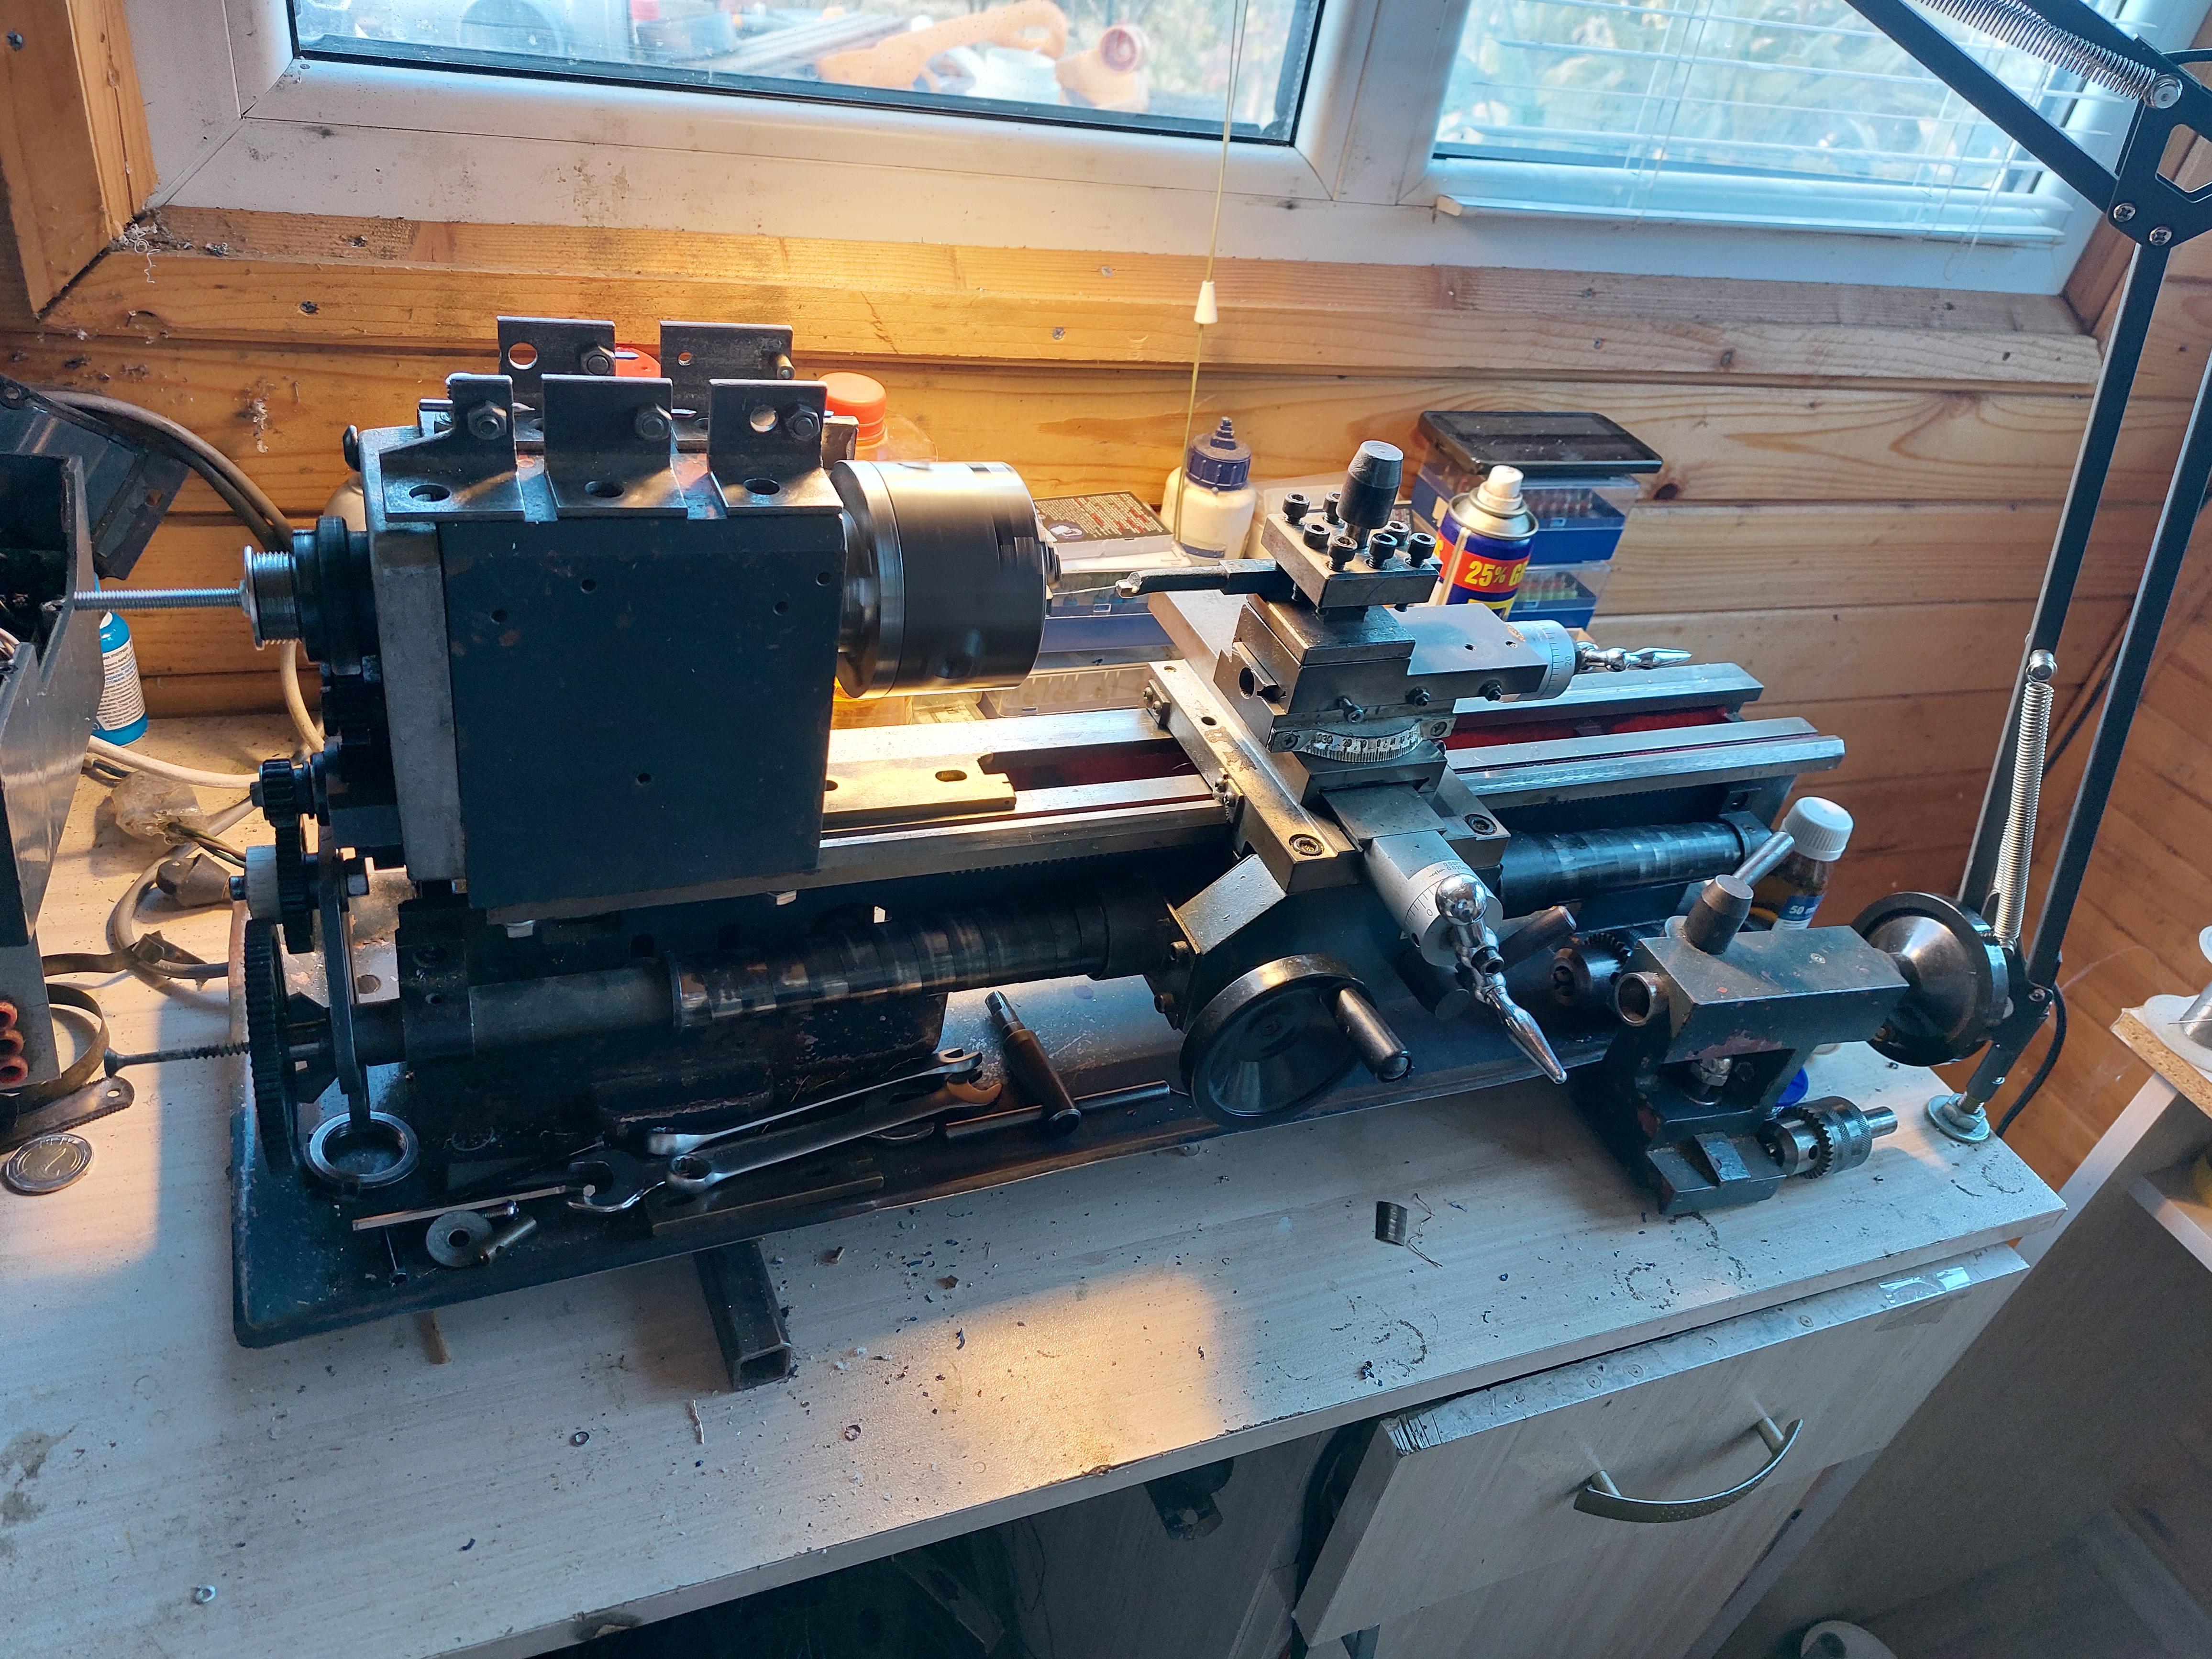
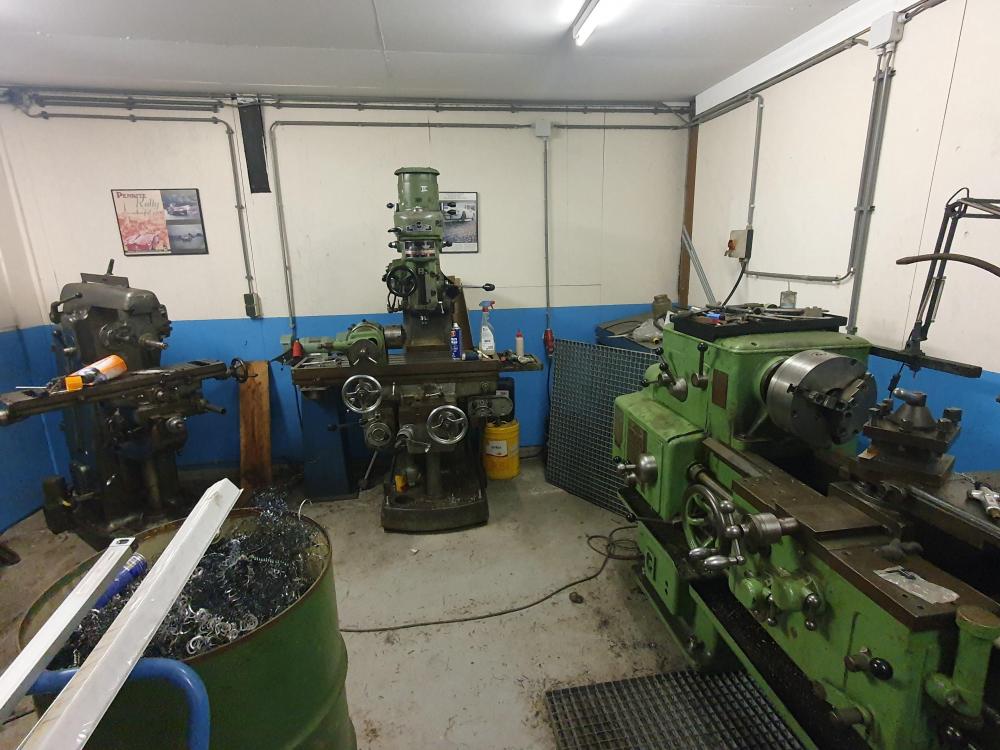
OK, I usually make balance staffs for big pocket watches out of rollers from roller bearings. This are rollers from car driveshafts bearings. I know people with car services and thus have unlimited source for material. The rollers are size 1.8-2.4mm diam. X 10-15mm, usually made of good steel and are hardened, need only tempering to deep blue. Actually, the tempering slightly depends on the steel sort, and there is a rule by G. Daniels that says 0.1mm test pivot should bent to 30 degr. before it breaks. I also check if the test pivot is normally strong, as in some cases it will break much easier than a normal pivot, and then this lot of rollers (or steel) is not good for staffs. For wrist and small pocket movements, where the pivots are thinner than 11, I usually use 115CrV3, this steel is superior to everything else that I have ever test, but I have limited quantity, it is soft and needs hardening and tempering. Working with this steel is a pleasure. I also have and use soft У10А, which is Russian analog to O1. Usually make of it screws, stems, etc. It needs very careful heating when hardening, as overheating is easy and it ruins the steel, developing big grains structure and parts break easy. Here is my main lathe, as You see it is really big and actually nothing to do with watchmakers lathe, just regular general purpose 70 cm lathe. But, I am able to make staffs for the smallest wrist calibers on it. I also make threaded parts on it, directly from blue steel, but with milling attachment instead of cutter. The interesting here is this set of cutters, which are accepted on the place of the tool post. They are pre adjusted in high and ready to use. Changing the cutter takes minimal time. The cutters are tungsten carbide and are made of CNC router bits, which are cheap and easy to source. I use this kind of diamond disks to sharpen cutters. The smaller disks are cut from a bigger one, the disks also easy to source, grit 600 or 800. I sharpen the main cutter every time when start new staff turning. If the cutter needs re-sharpening during the turning, this usually means that the steel is to-hard. If it is possible to turn 2-3 staffs without re-sharpening, then the steel is softer than needed. I have developed technic for easy maintaining the sizes in high and making one staff usually takes me about 30 min.

 1 point
 -
Guys, I have never claimed that banking pins are not important and further more – to get rid of them. This is a nonsense. Please, try to read this instruction for pallets depth adjustment, which I pointed, and have written it back in 2012. The first thing I say to start with there is ‘Straighten the banking pins!’. As this is written for a movement made in 70’s, which means modern one, straightening the pins means ‘Bring them to their right position!’ And, this is because in the pallets adjustment I have used the banking position as reference for the pallets position. Made this way, the adjustment in the end is correct, but this is right ONLY if all is originally made or suitable for this movement. If, for example, the pallets has less sloped impulse planes, the locking will be too deep, and if planes are more sloped, no locking will happen at all. This kind of adjustment is the one that has to be made if the things are totally messed, or if no pallets at all in the lever and everything must be done from the beginning to the end. And there beginning means banking position, and end means receiving correct locking in the end. But, if we don’t need to go all the way from beginning to the end, and see clearly that just a correction is needed, and it is clear what this correction has to be, it is naturally to do the correction, and check the result, but not to start from the very beginning of the process, as it is no needed. I will claim again here, that locking is different thing and is not the same as total lock, and the locking happens without participation of the banking pins. And no matter what one will do with the pins, if locking was bad or not enough, it will not change. Of course, if the pins are in wrong position, they must be adjusted. But if the pallets position is correct, wider pins than needed will only result as little lower amplitude, and narrowed pins just slightly than needed will result in rubbing of imp. stone in horns or guard pin in roller or just stop of a tooth of the esc. wheel on the very edge on the end of the imp. plane of the pallet1 point
-
I find it's an interesting hand out as I think it comes from several sources. Then if you like handouts here's a few more. Handouts and different sources on escapement become amusing because of slight difference of terminology and well they just become amusing then if you want to know where the handout originally came from a came from a lecture. Now the lecture is a very very good lecture but. The speaker is outstanding lectures outstanding but the people filming the lecture are not outstanding there are quite stupid. I was watching another lecture on YouTube where the speaker or a headset with a microphone and it would bid noise canceling microphone. Noise canceling microphones only pick up sound from the speaker anything in the room is canceled out. Unlike here were he's holding his microphone and unfortunately very noisy room. What becomes interesting with all of this is that if you were in the room which I was by the way he gave the lecture twice at the convention so I watched twice. So yes some of the background noise was noticeable when you're in the room but for some reason his microphone picks up all of it so if you can work your way through his accent and listen to it it's a good presentation. Escapement Detached Lever Escapement.PDF Escapement Elgin setting up the escapement.PDF1 point
-
sometimes pictures help.
 1 point
 -
You try can source a Seiko 401615 From Cousins I think this one would work Mainspring, 1.00 x .11 x 420 x 10 Automatic - GR24571X1 point


.thumb.jpg.cb17a66989f1e796fd4217db2e9ca9df.jpg)
.thumb.jpg.19a9c4ff164d78d516aa9f05a063752b.jpg)