Leaderboard
.thumb.jpg.cb17a66989f1e796fd4217db2e9ca9df.jpg)


Popular Content
Showing content with the highest reputation on 12/04/24 in all areas
-
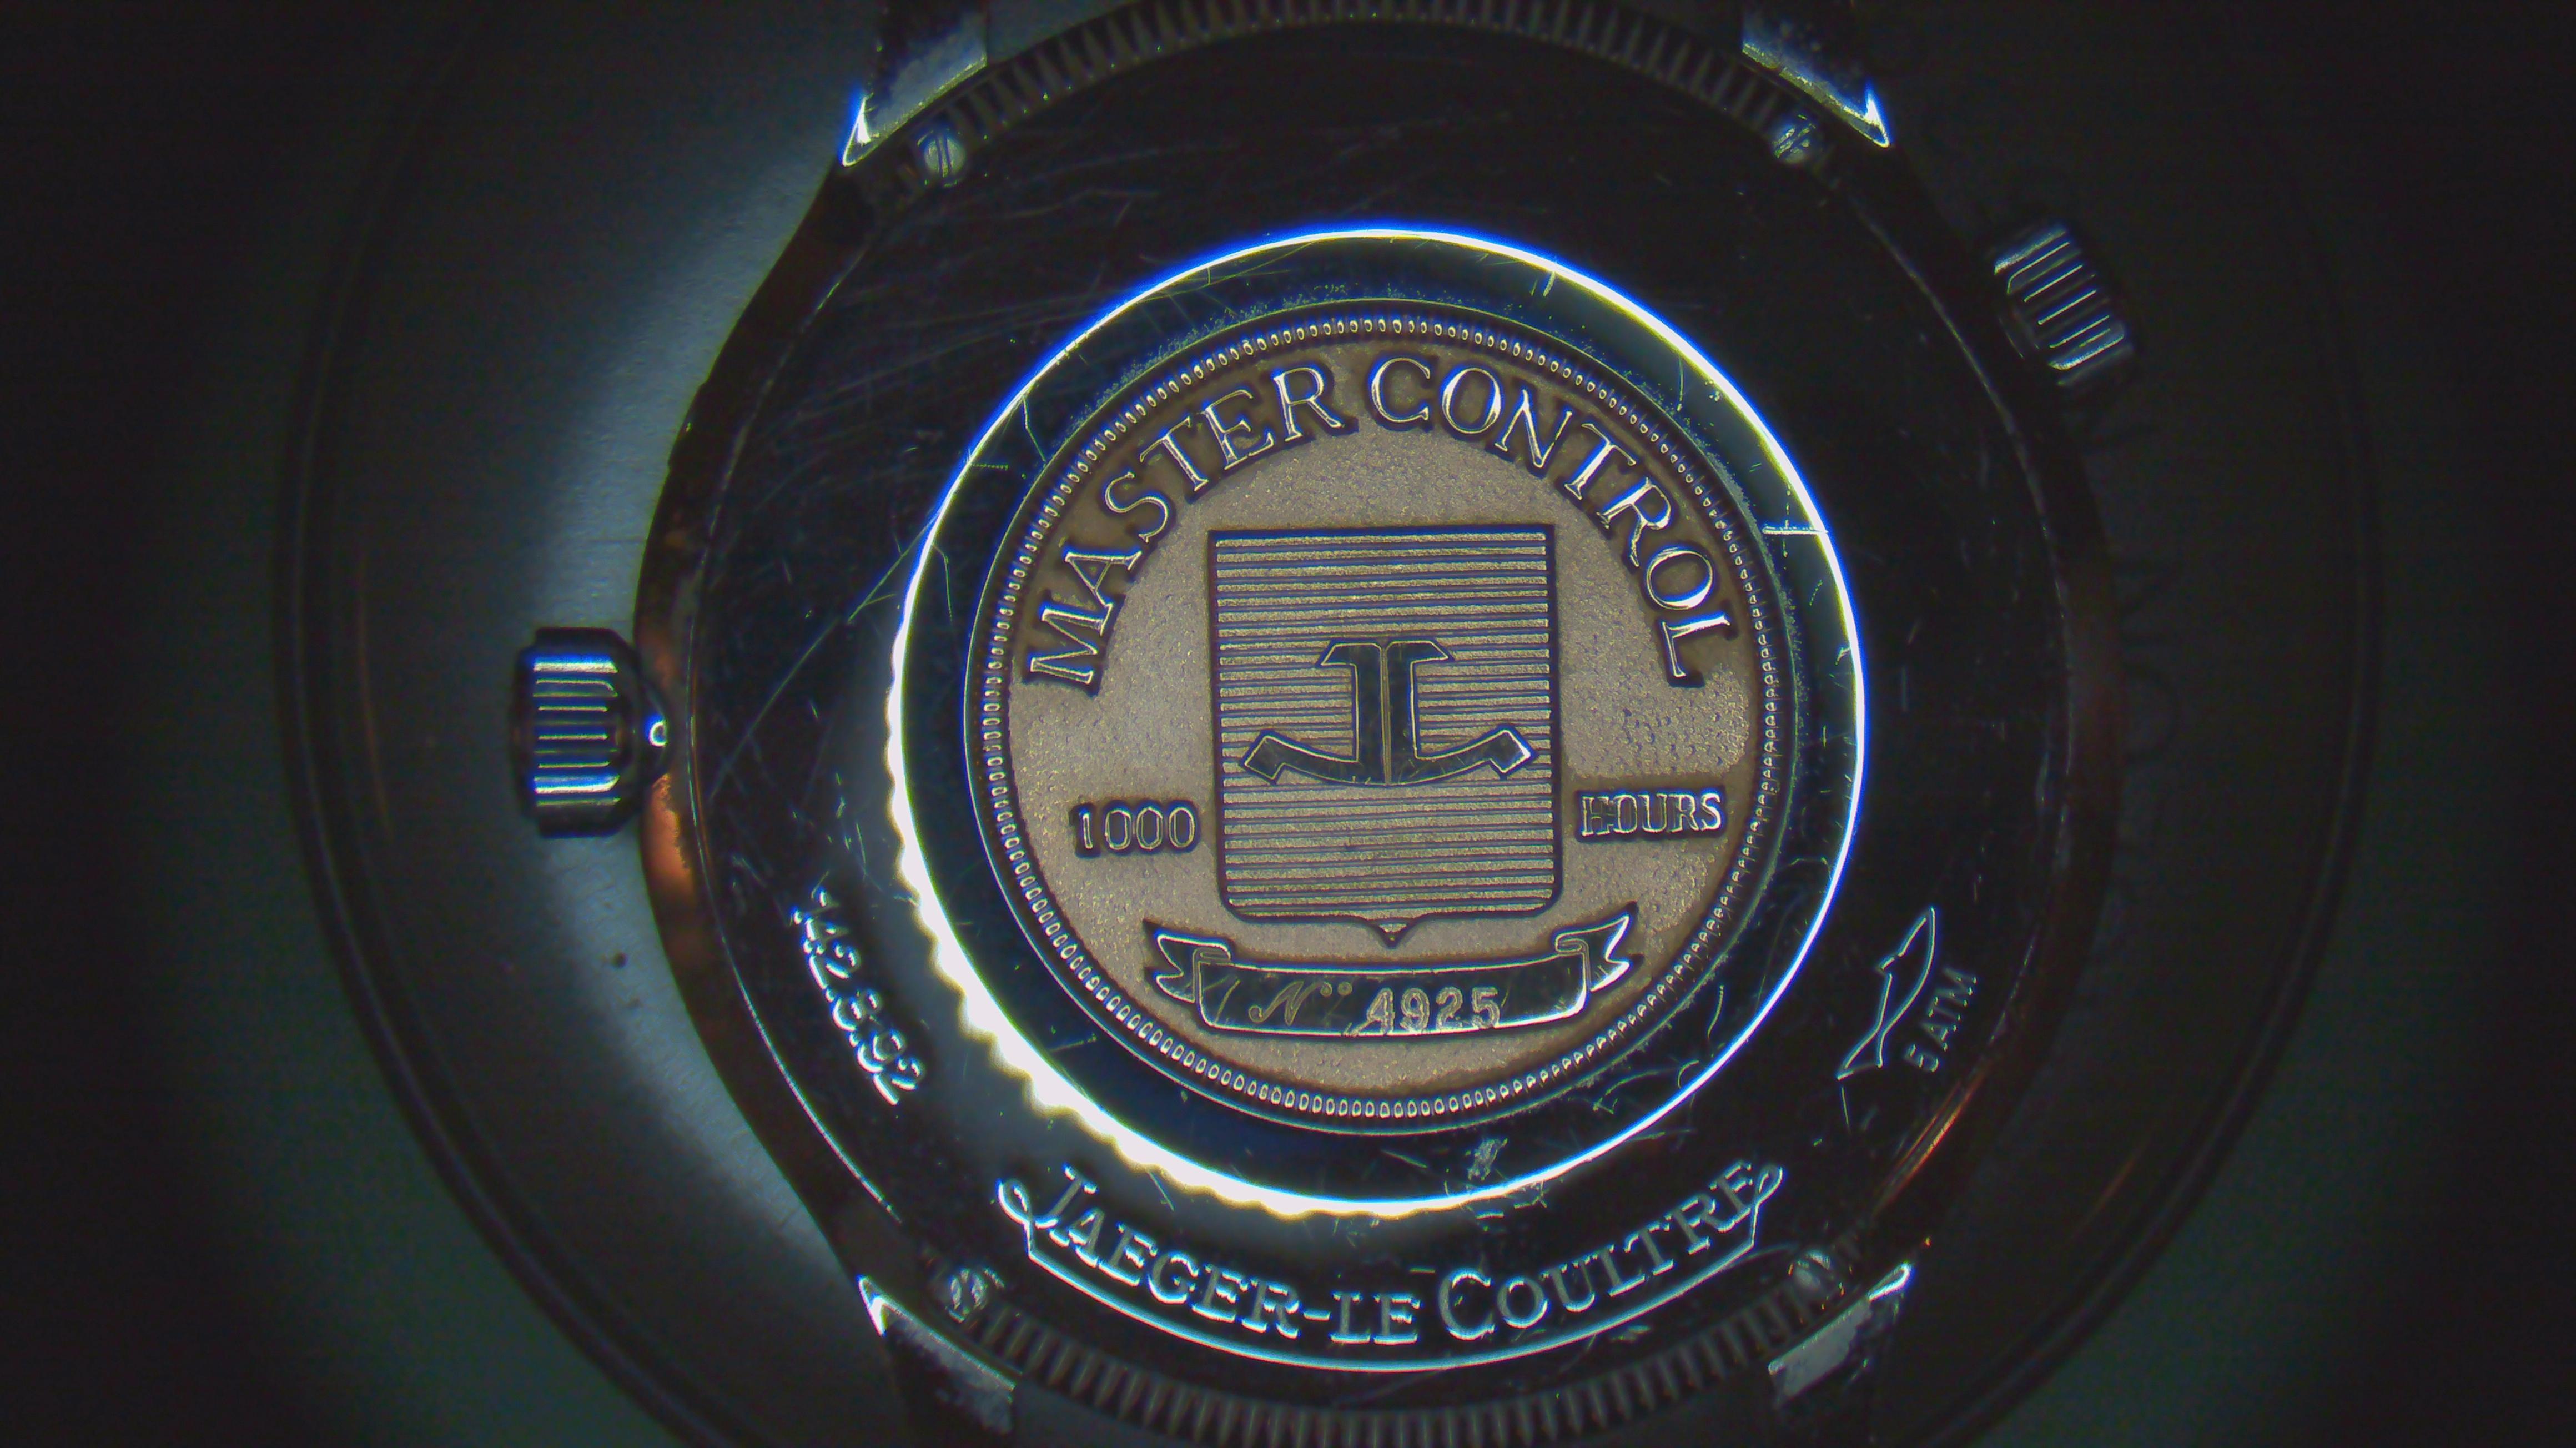
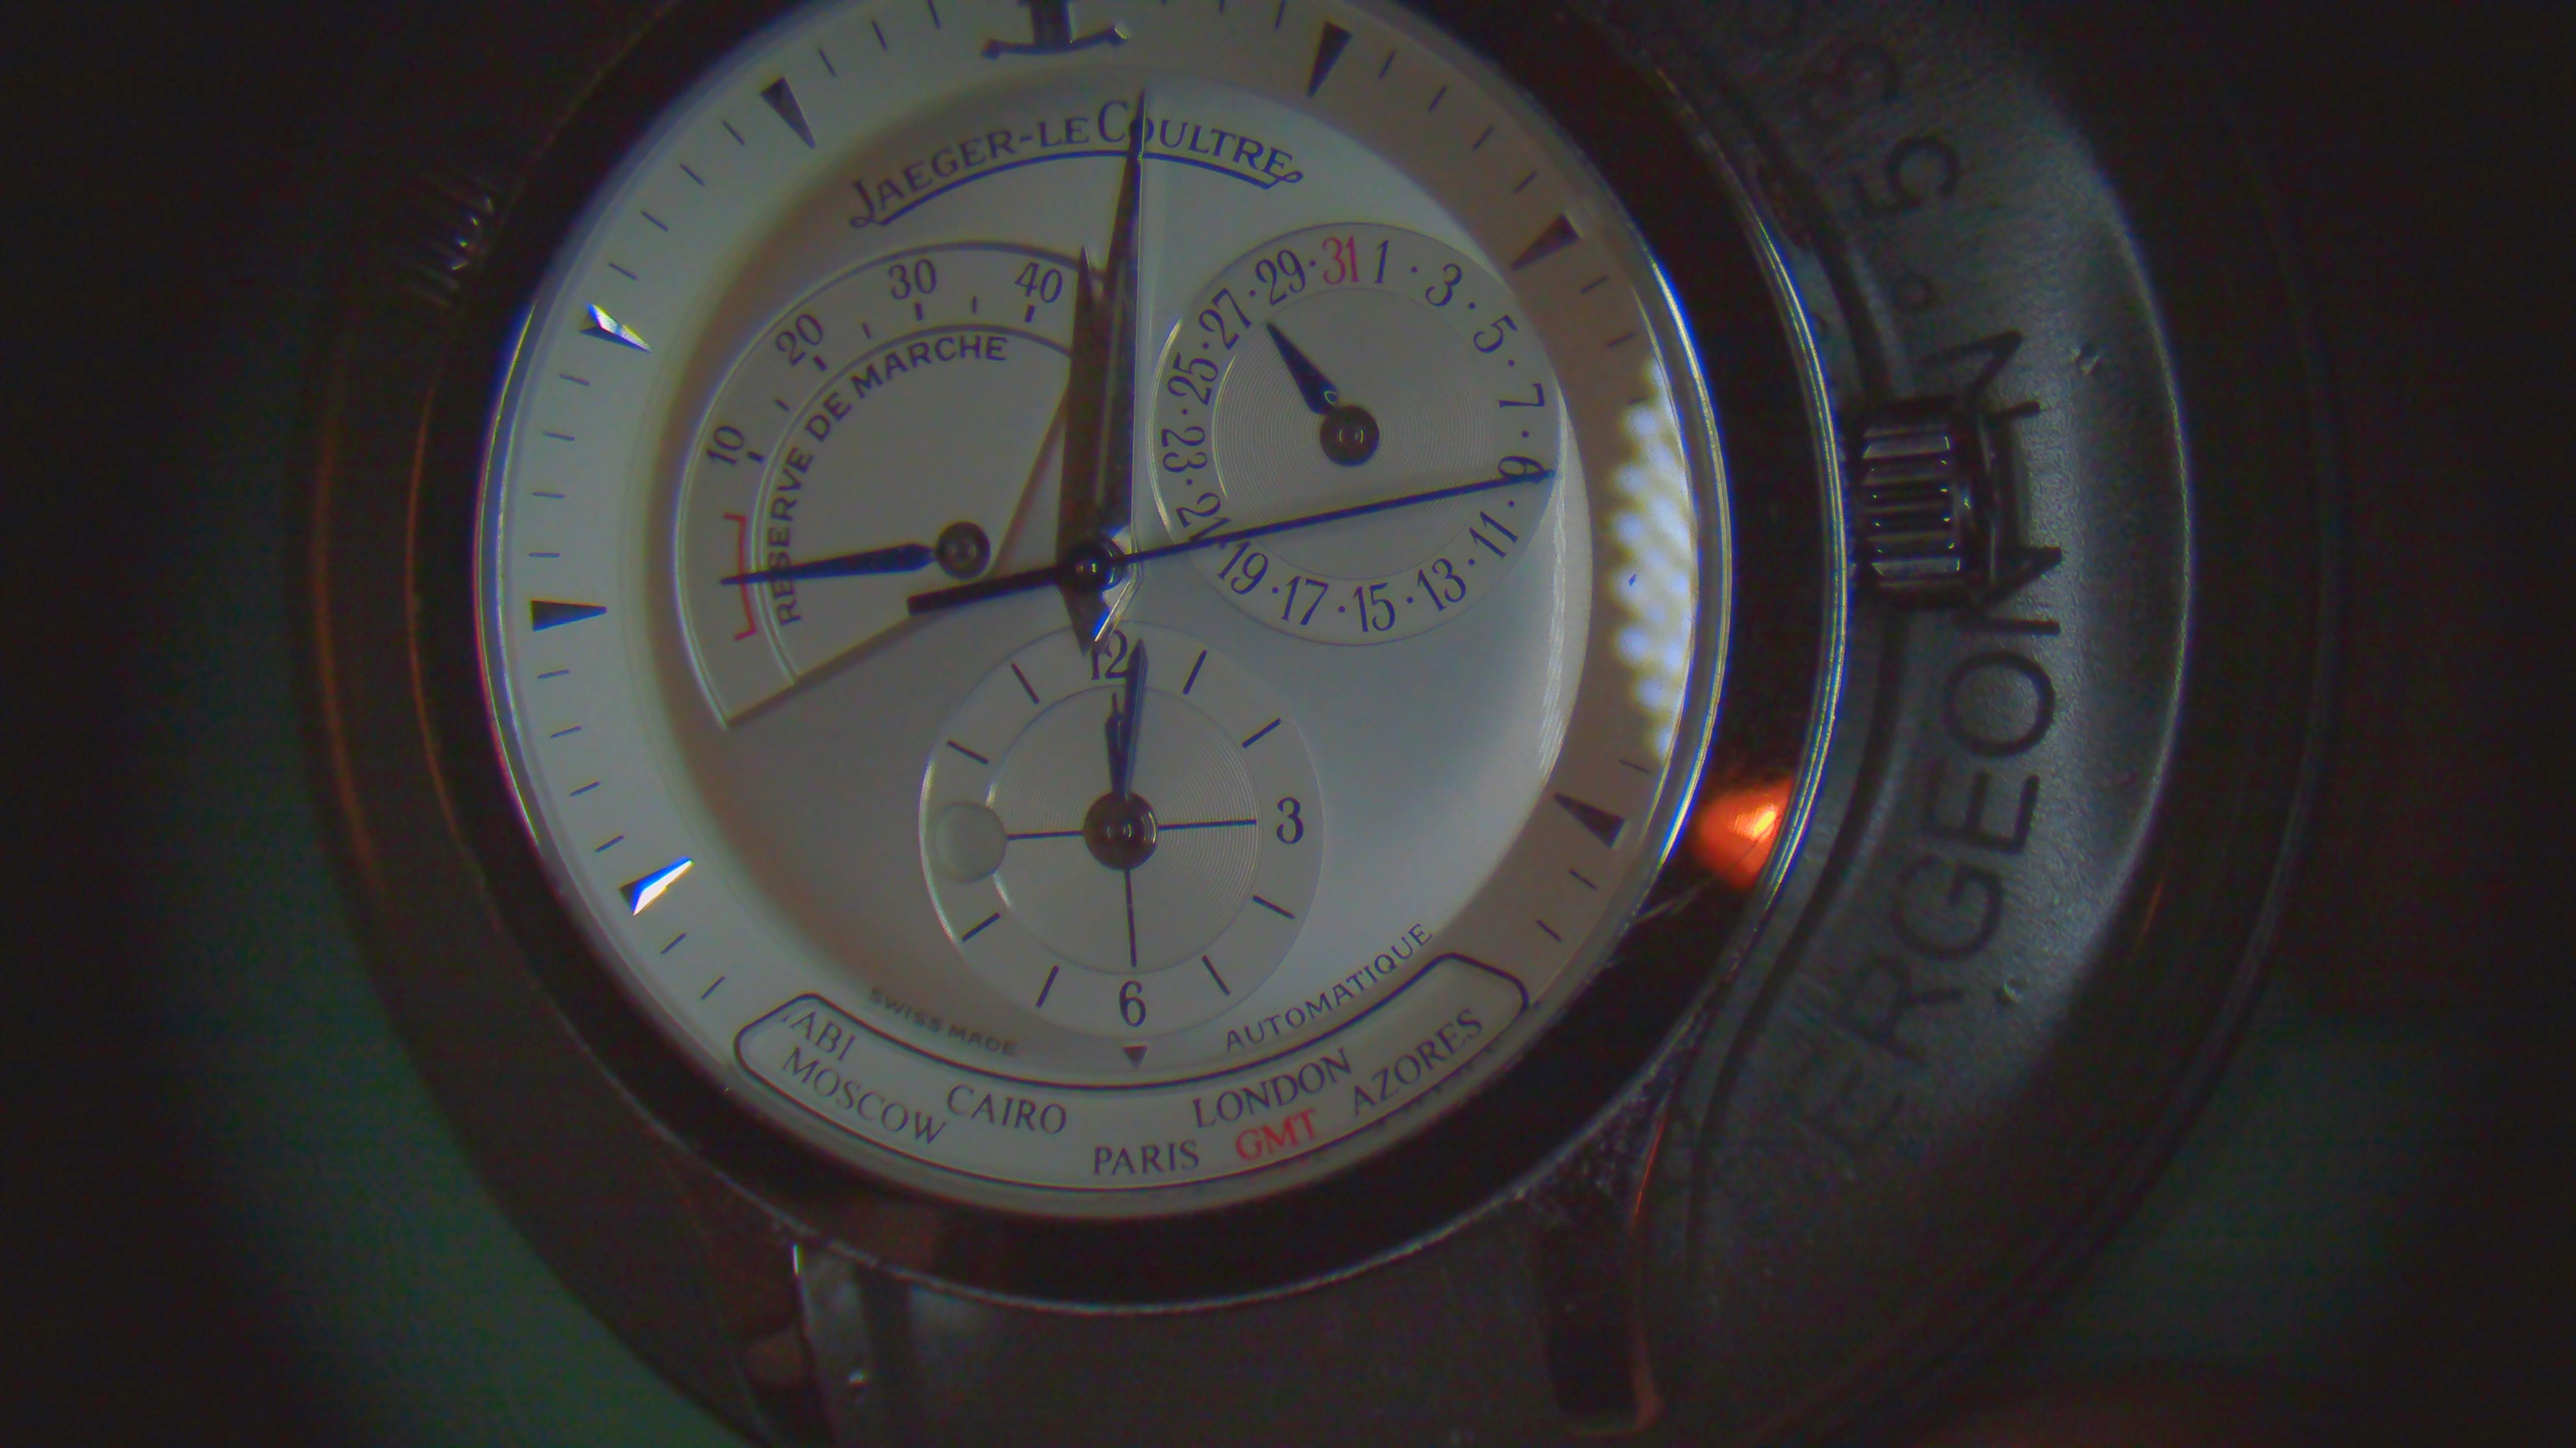
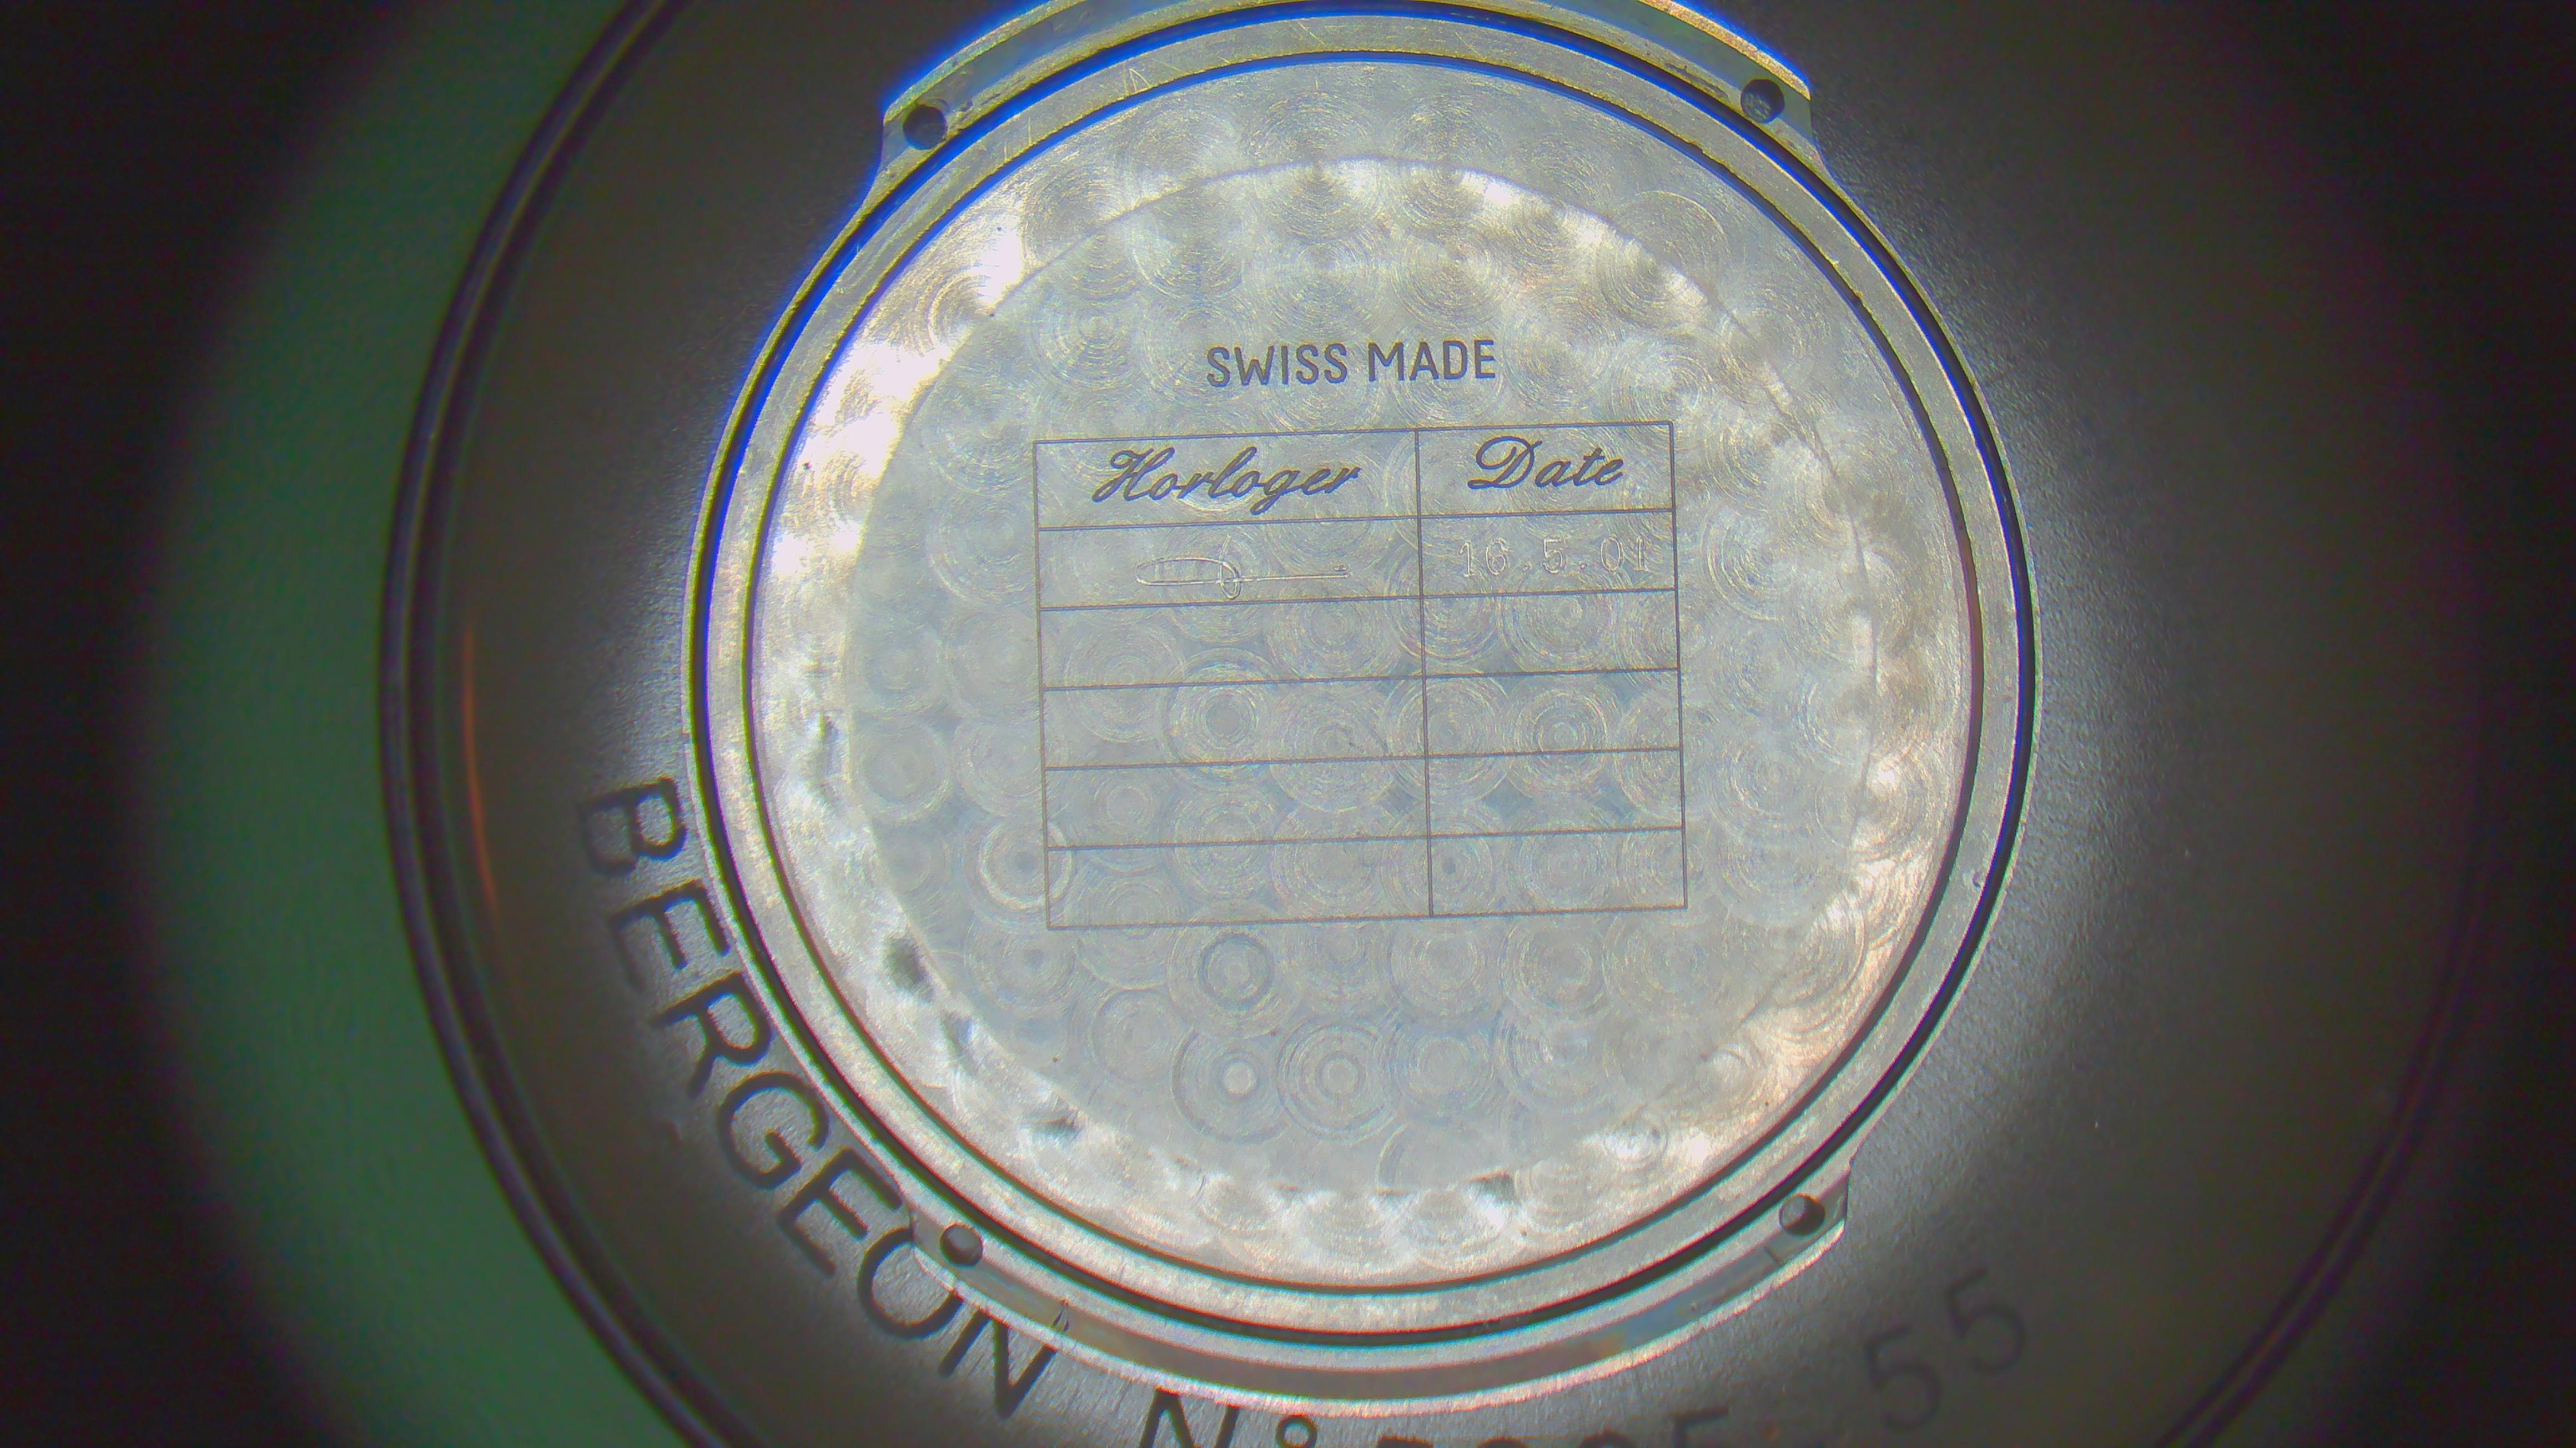
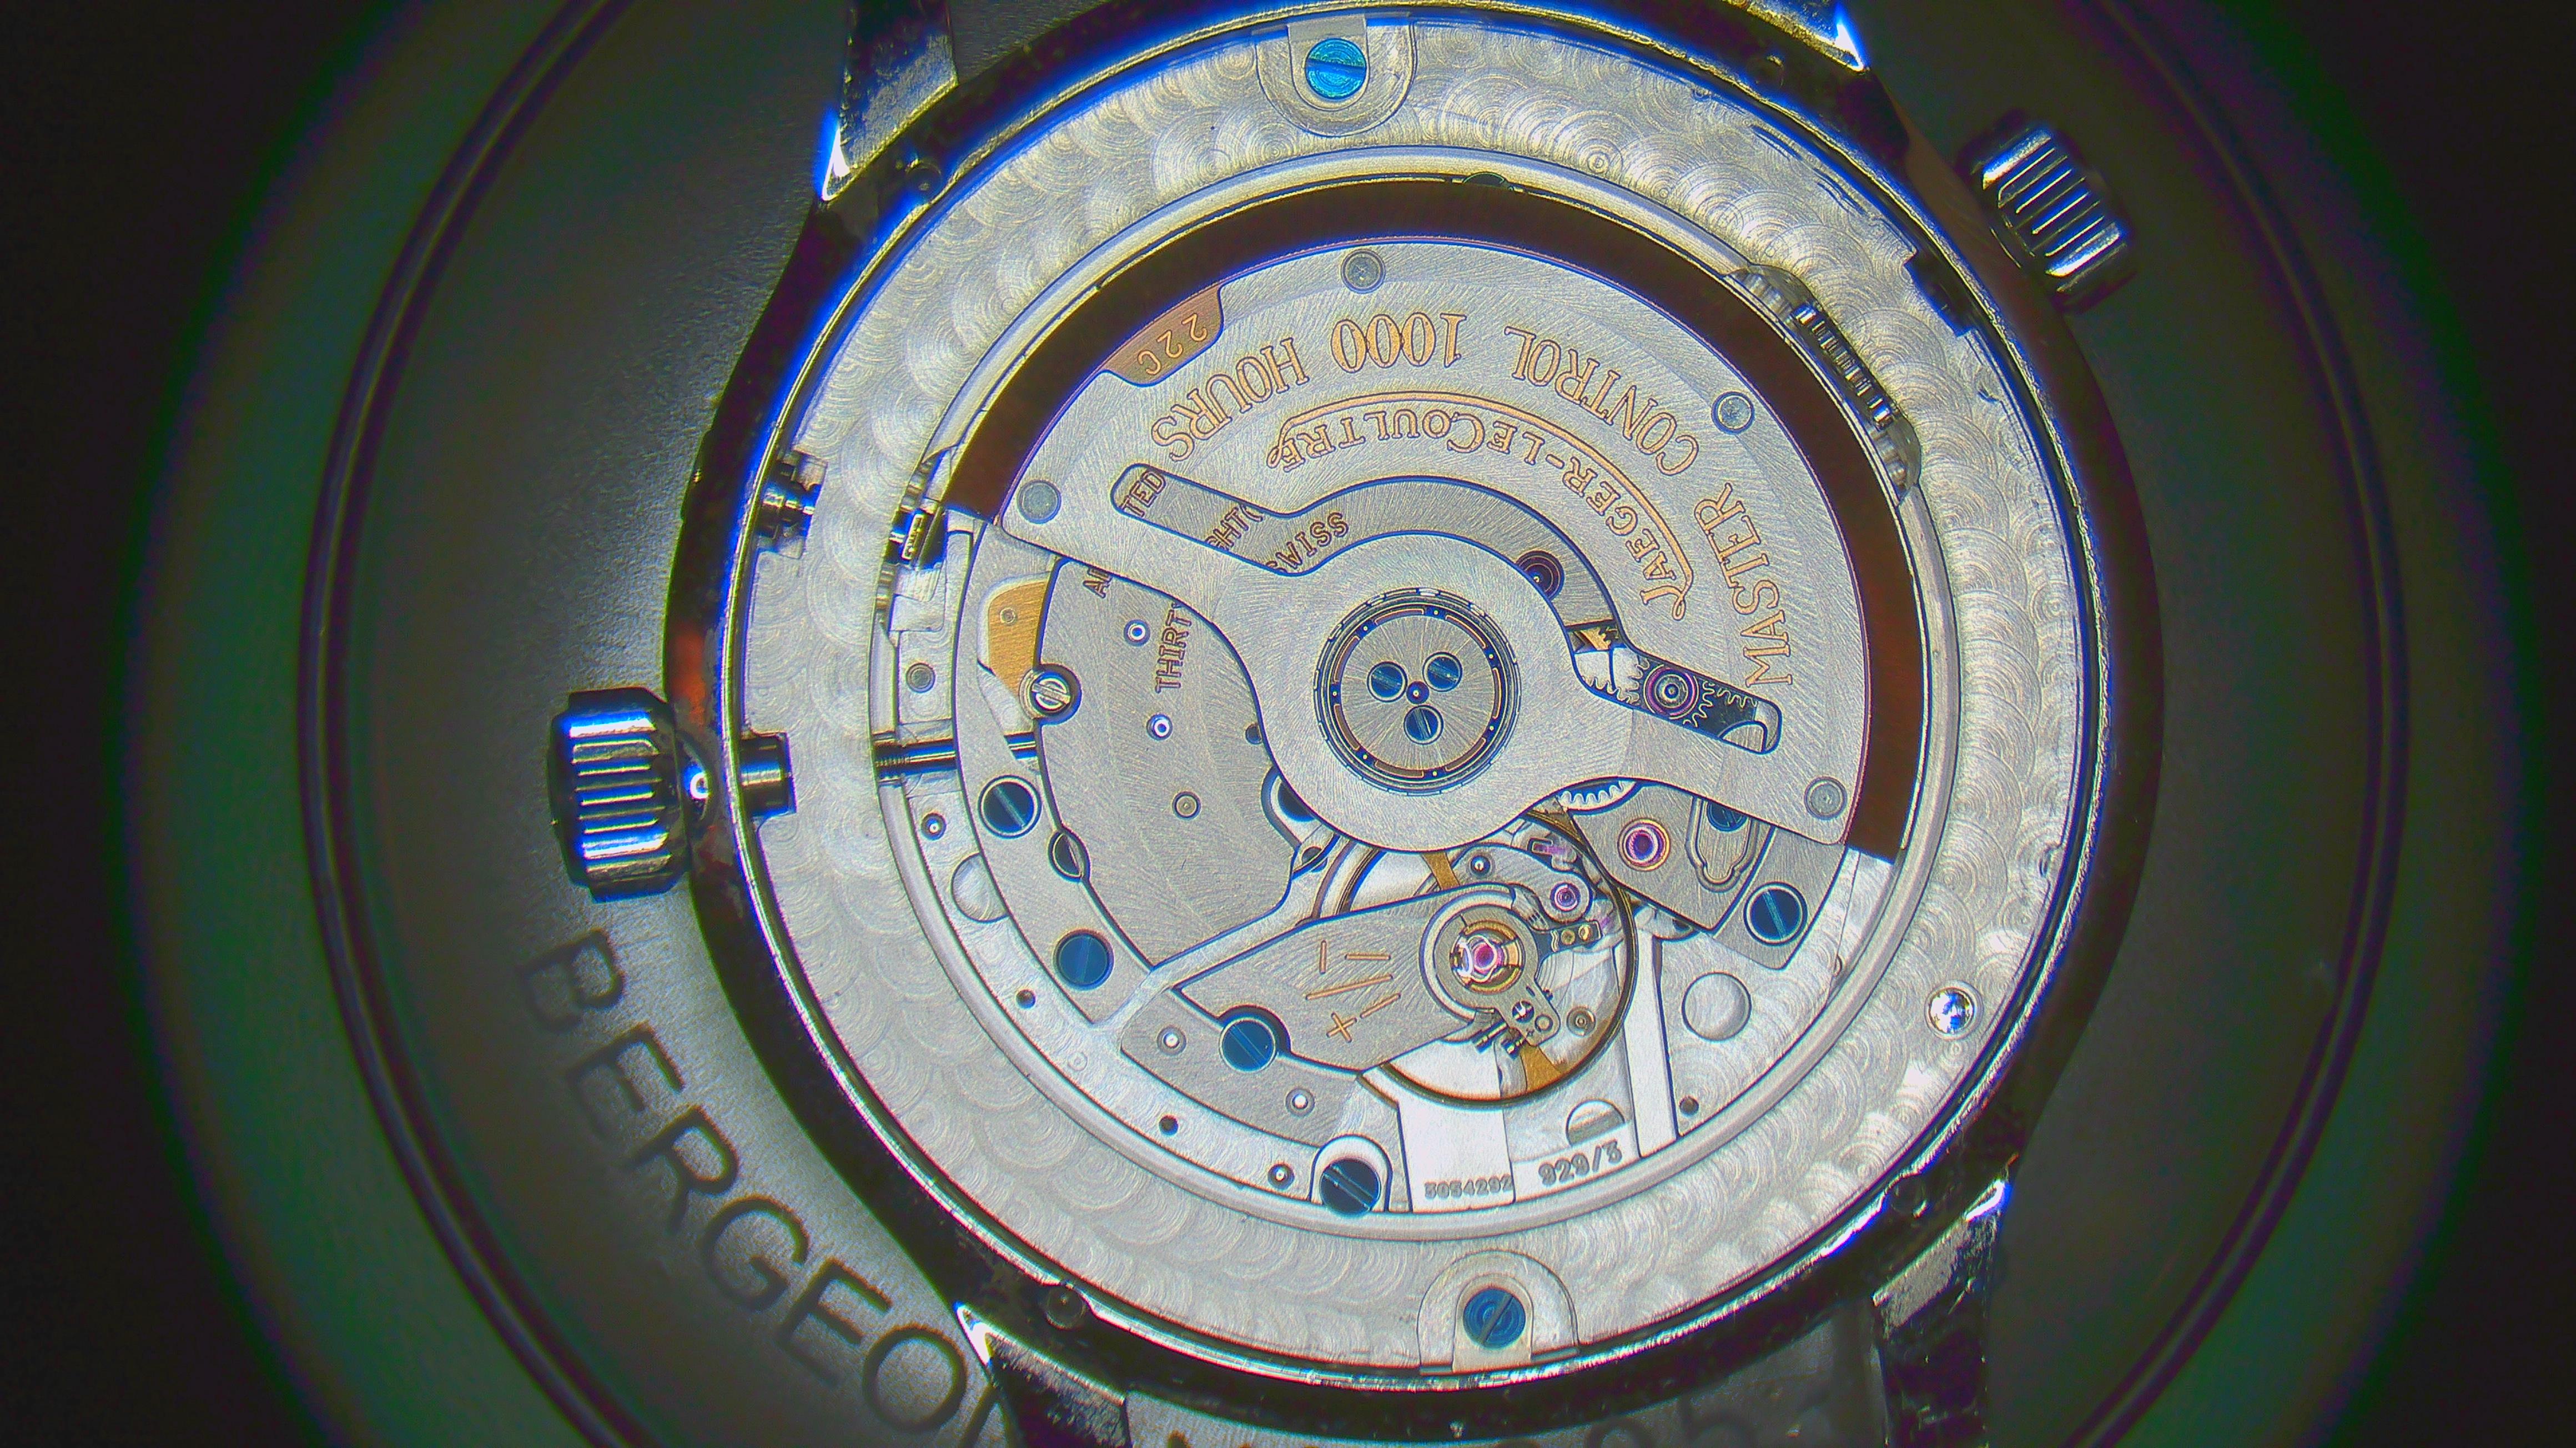
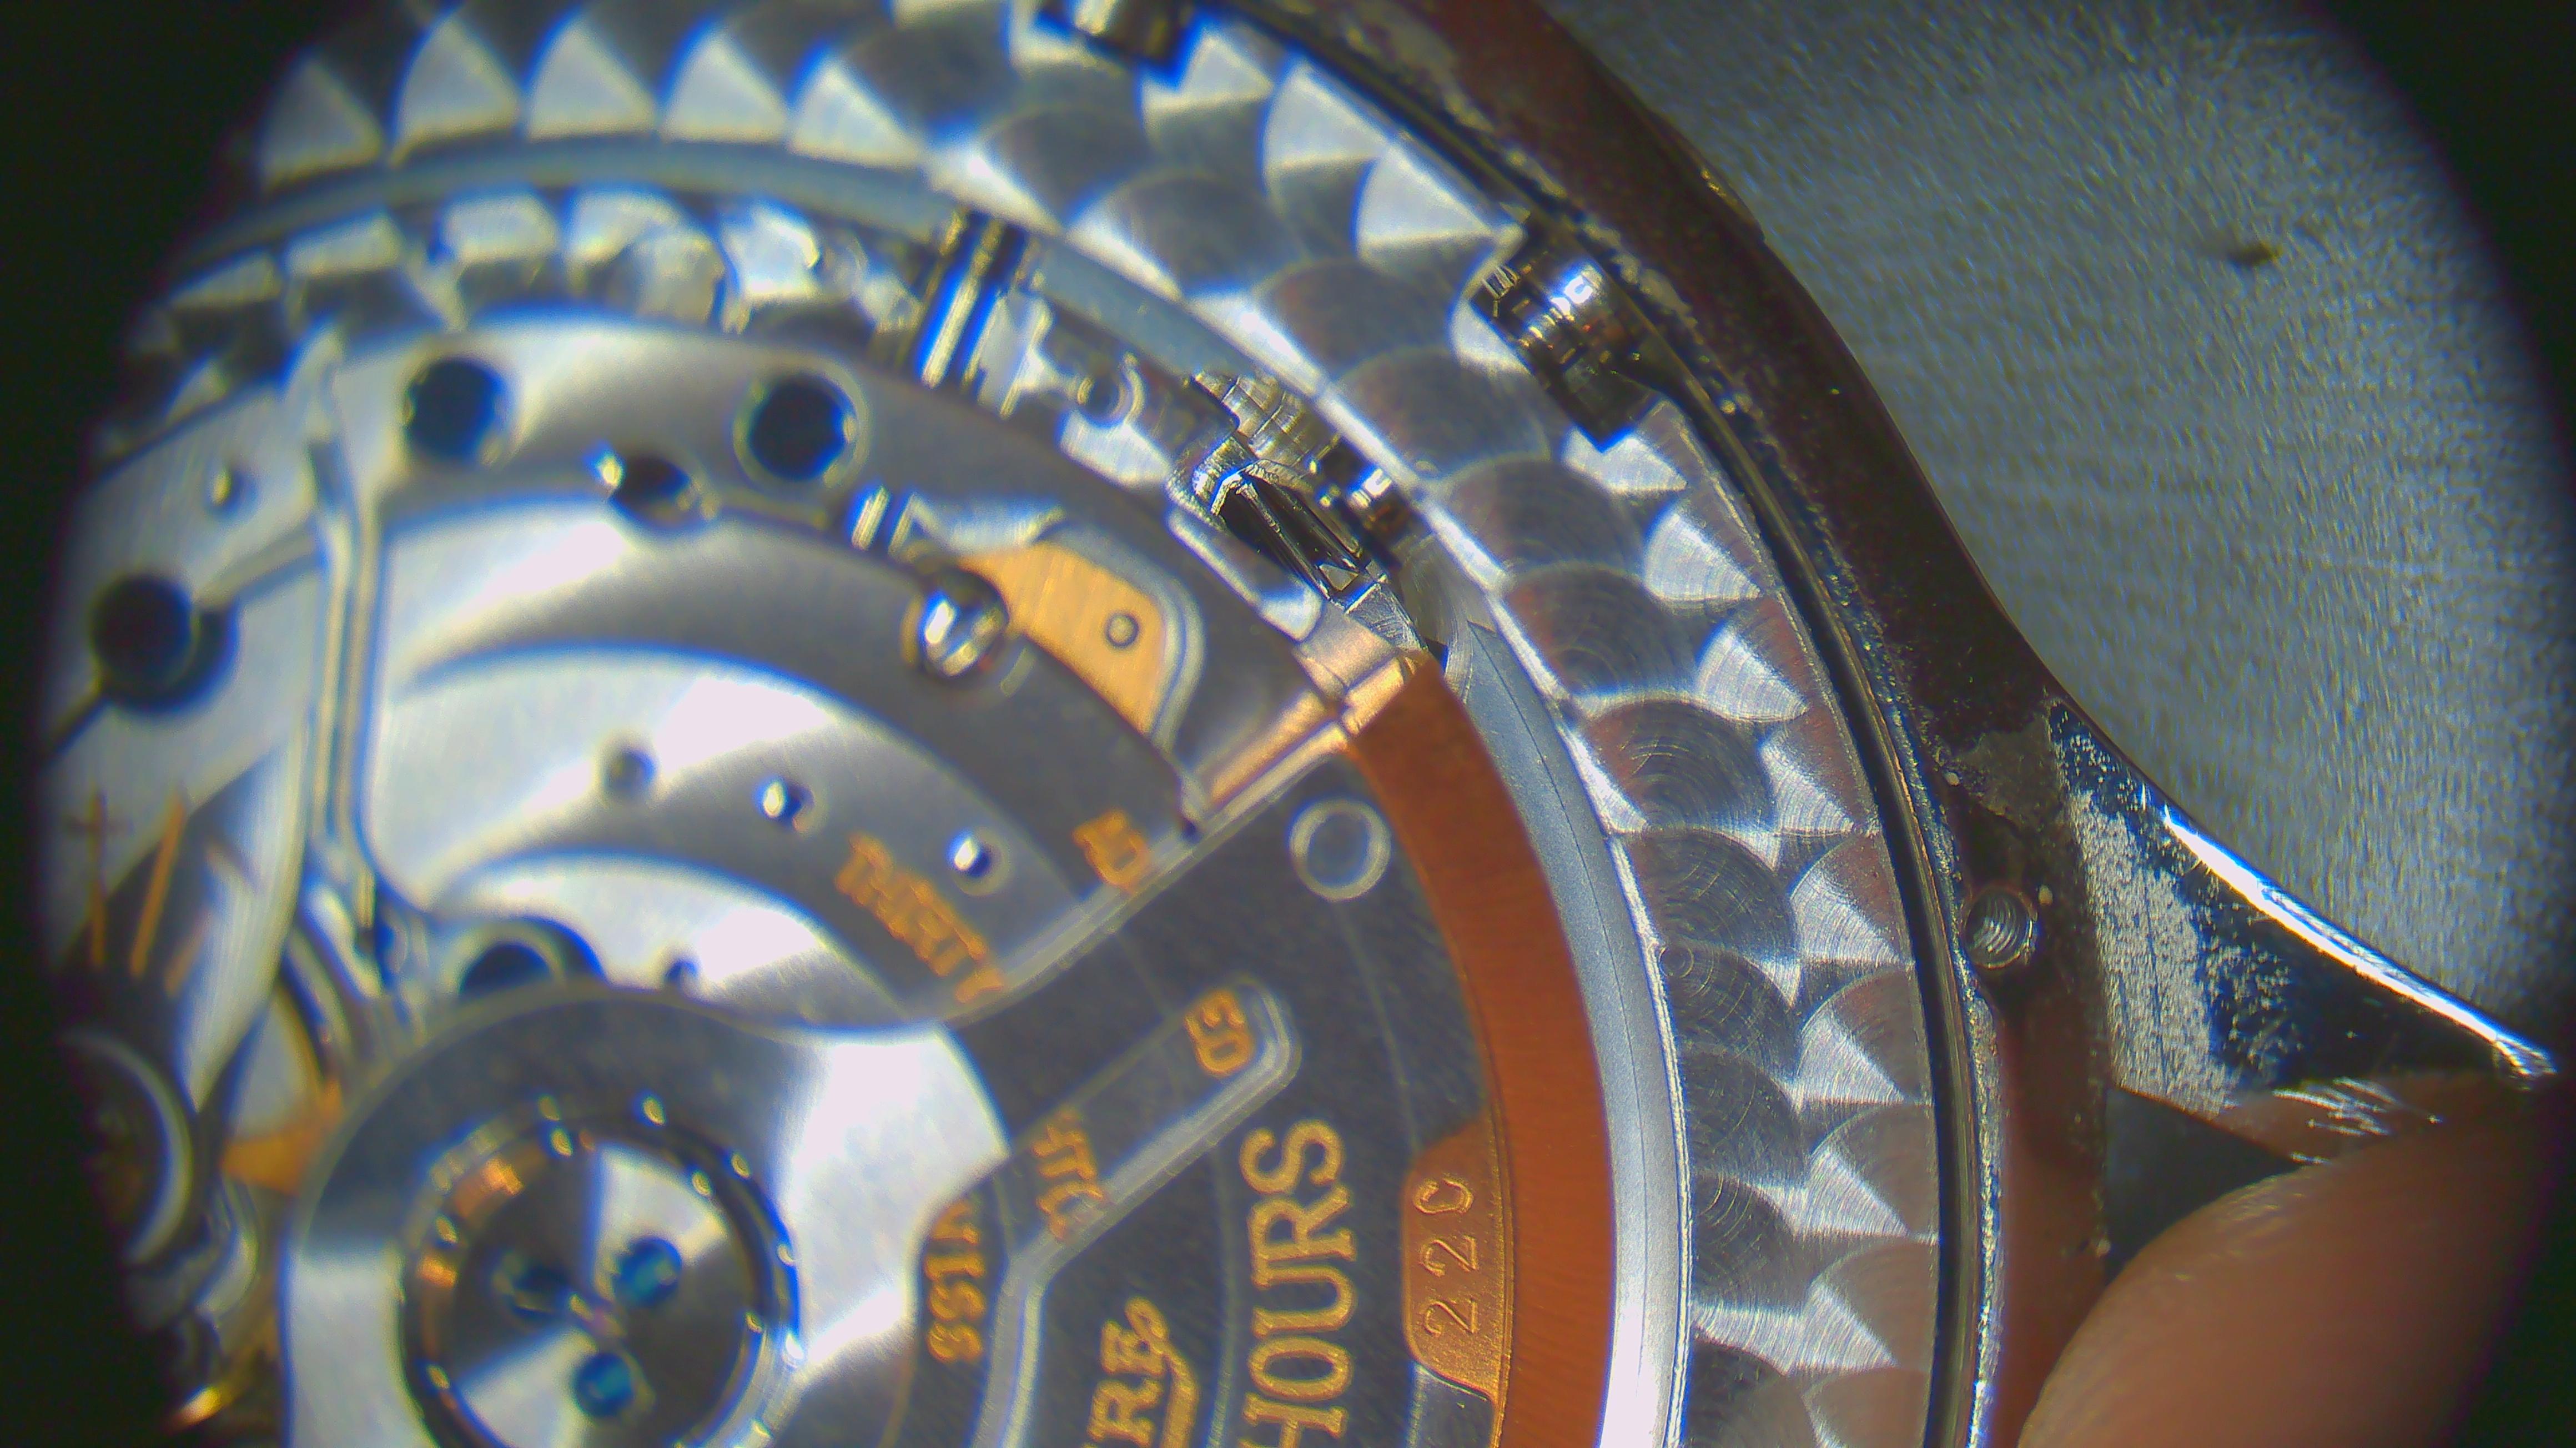
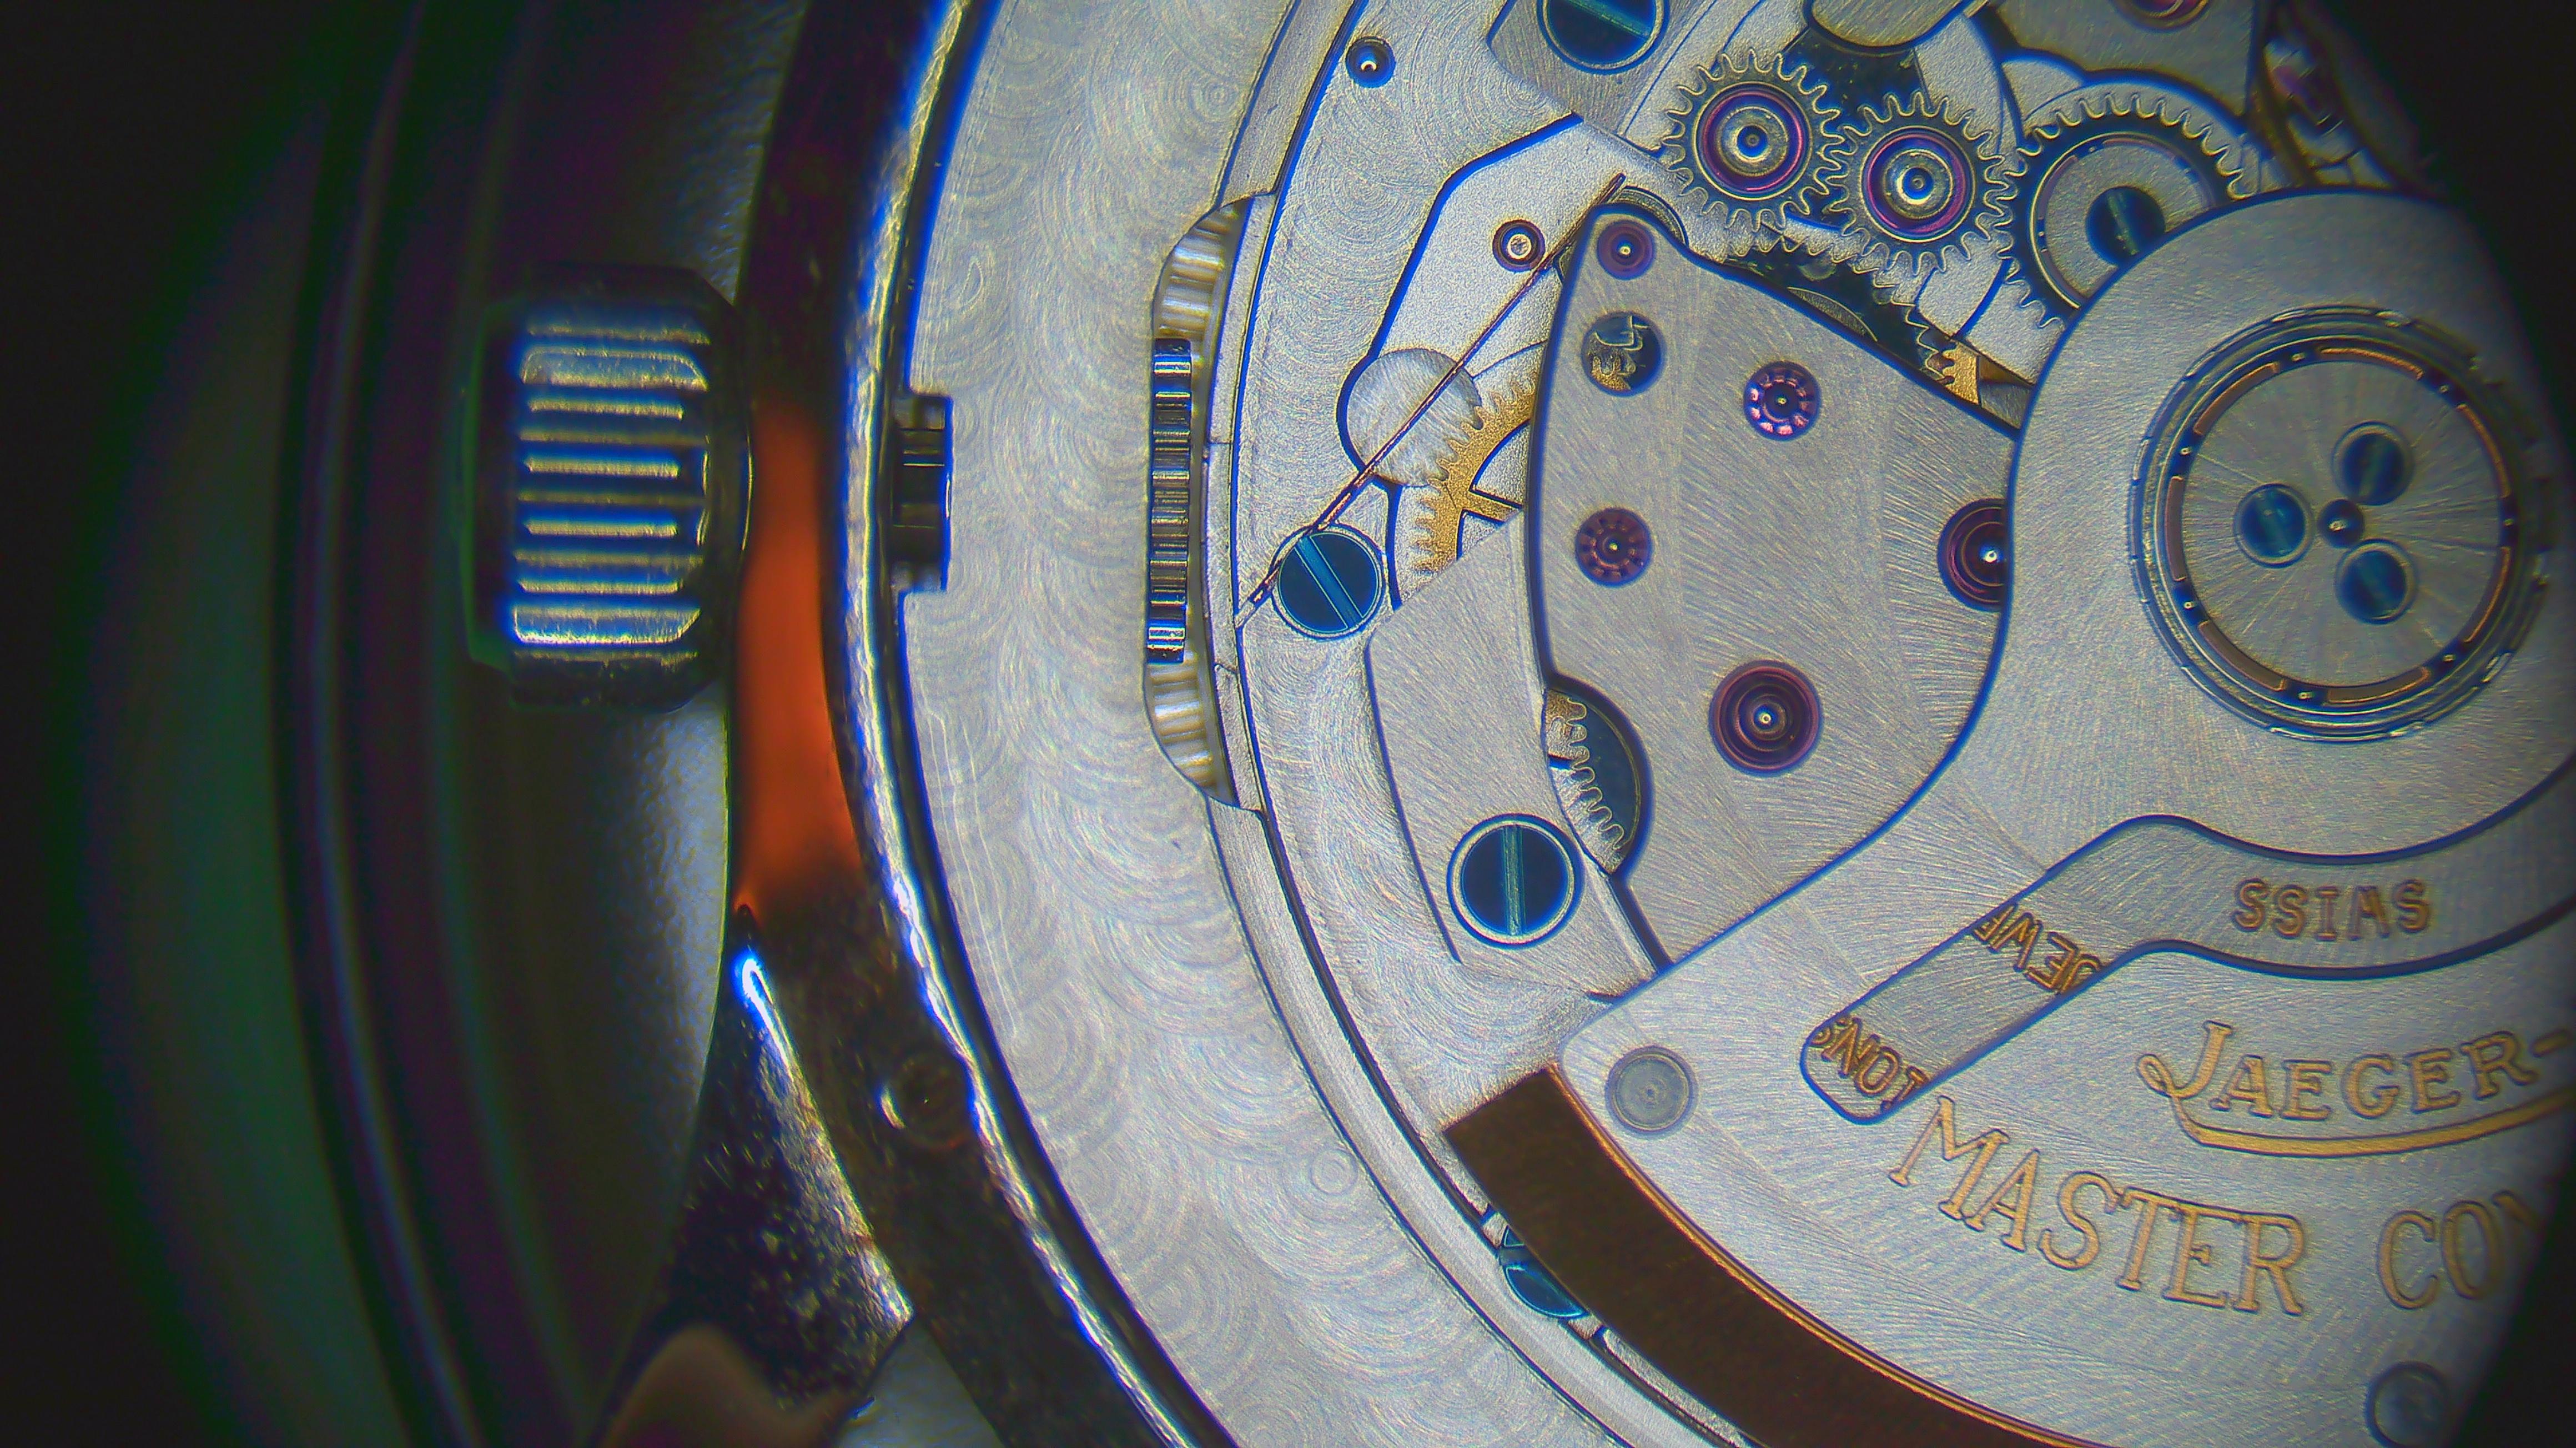
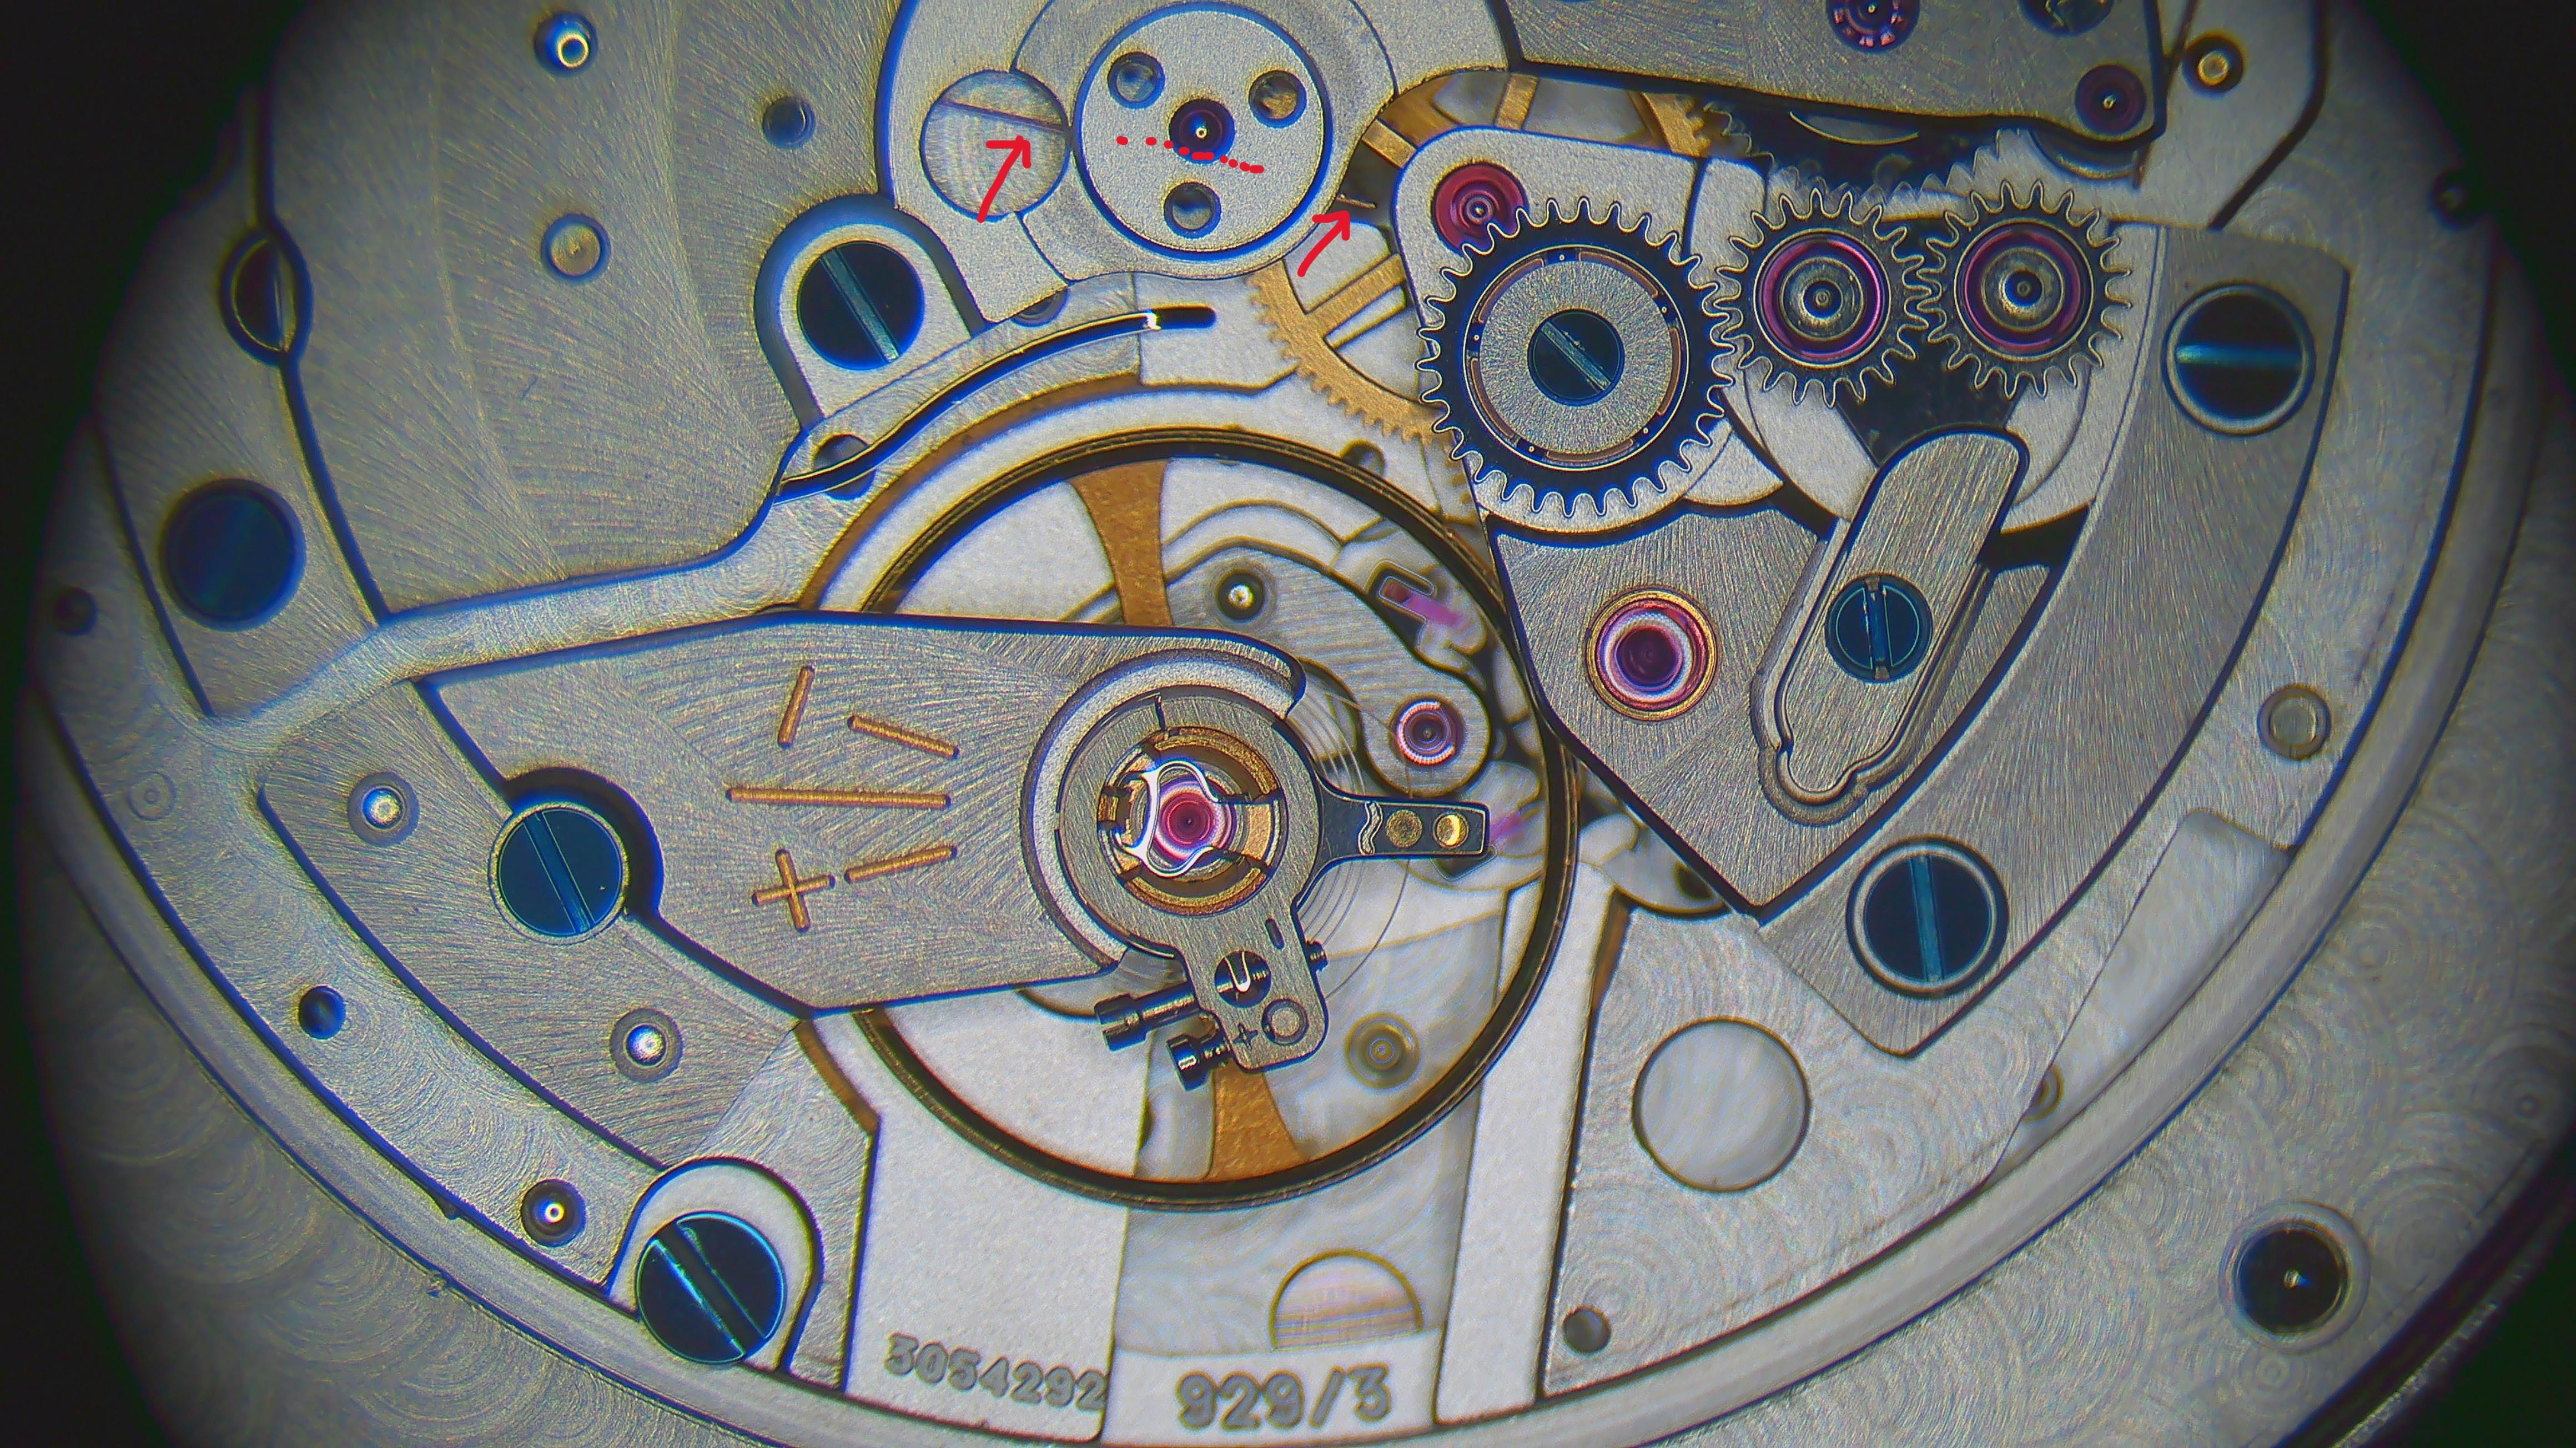
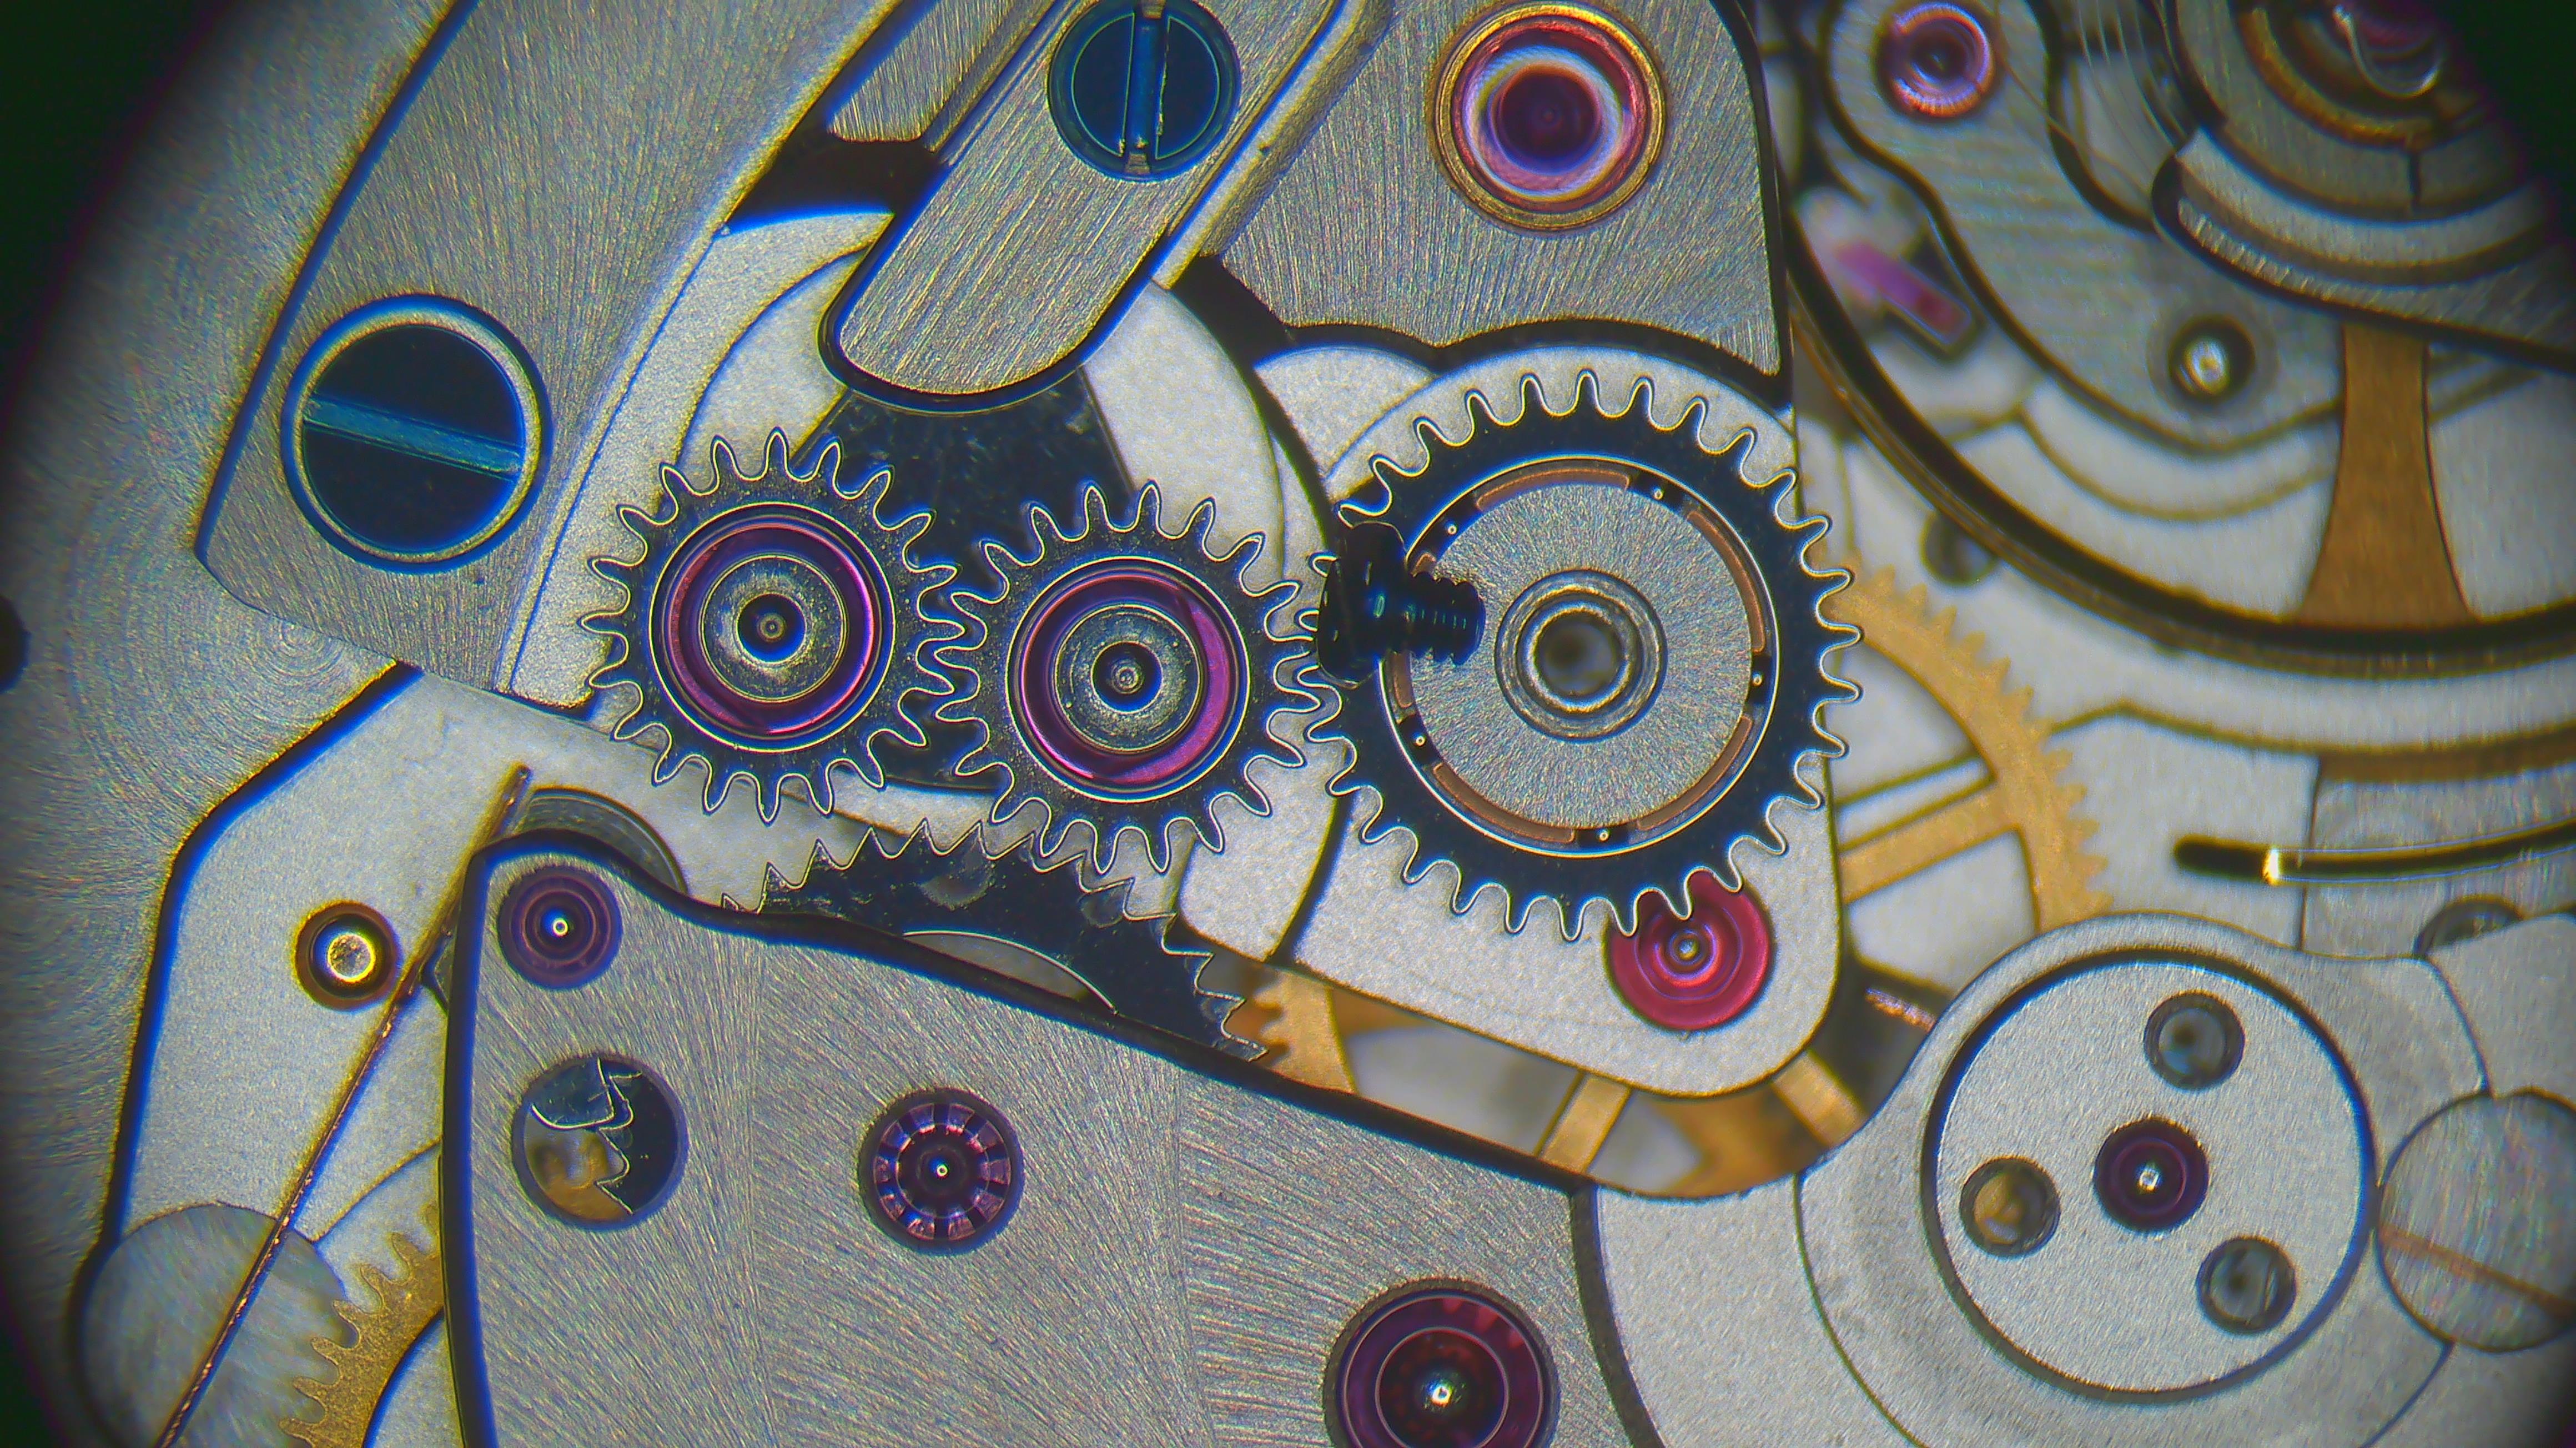
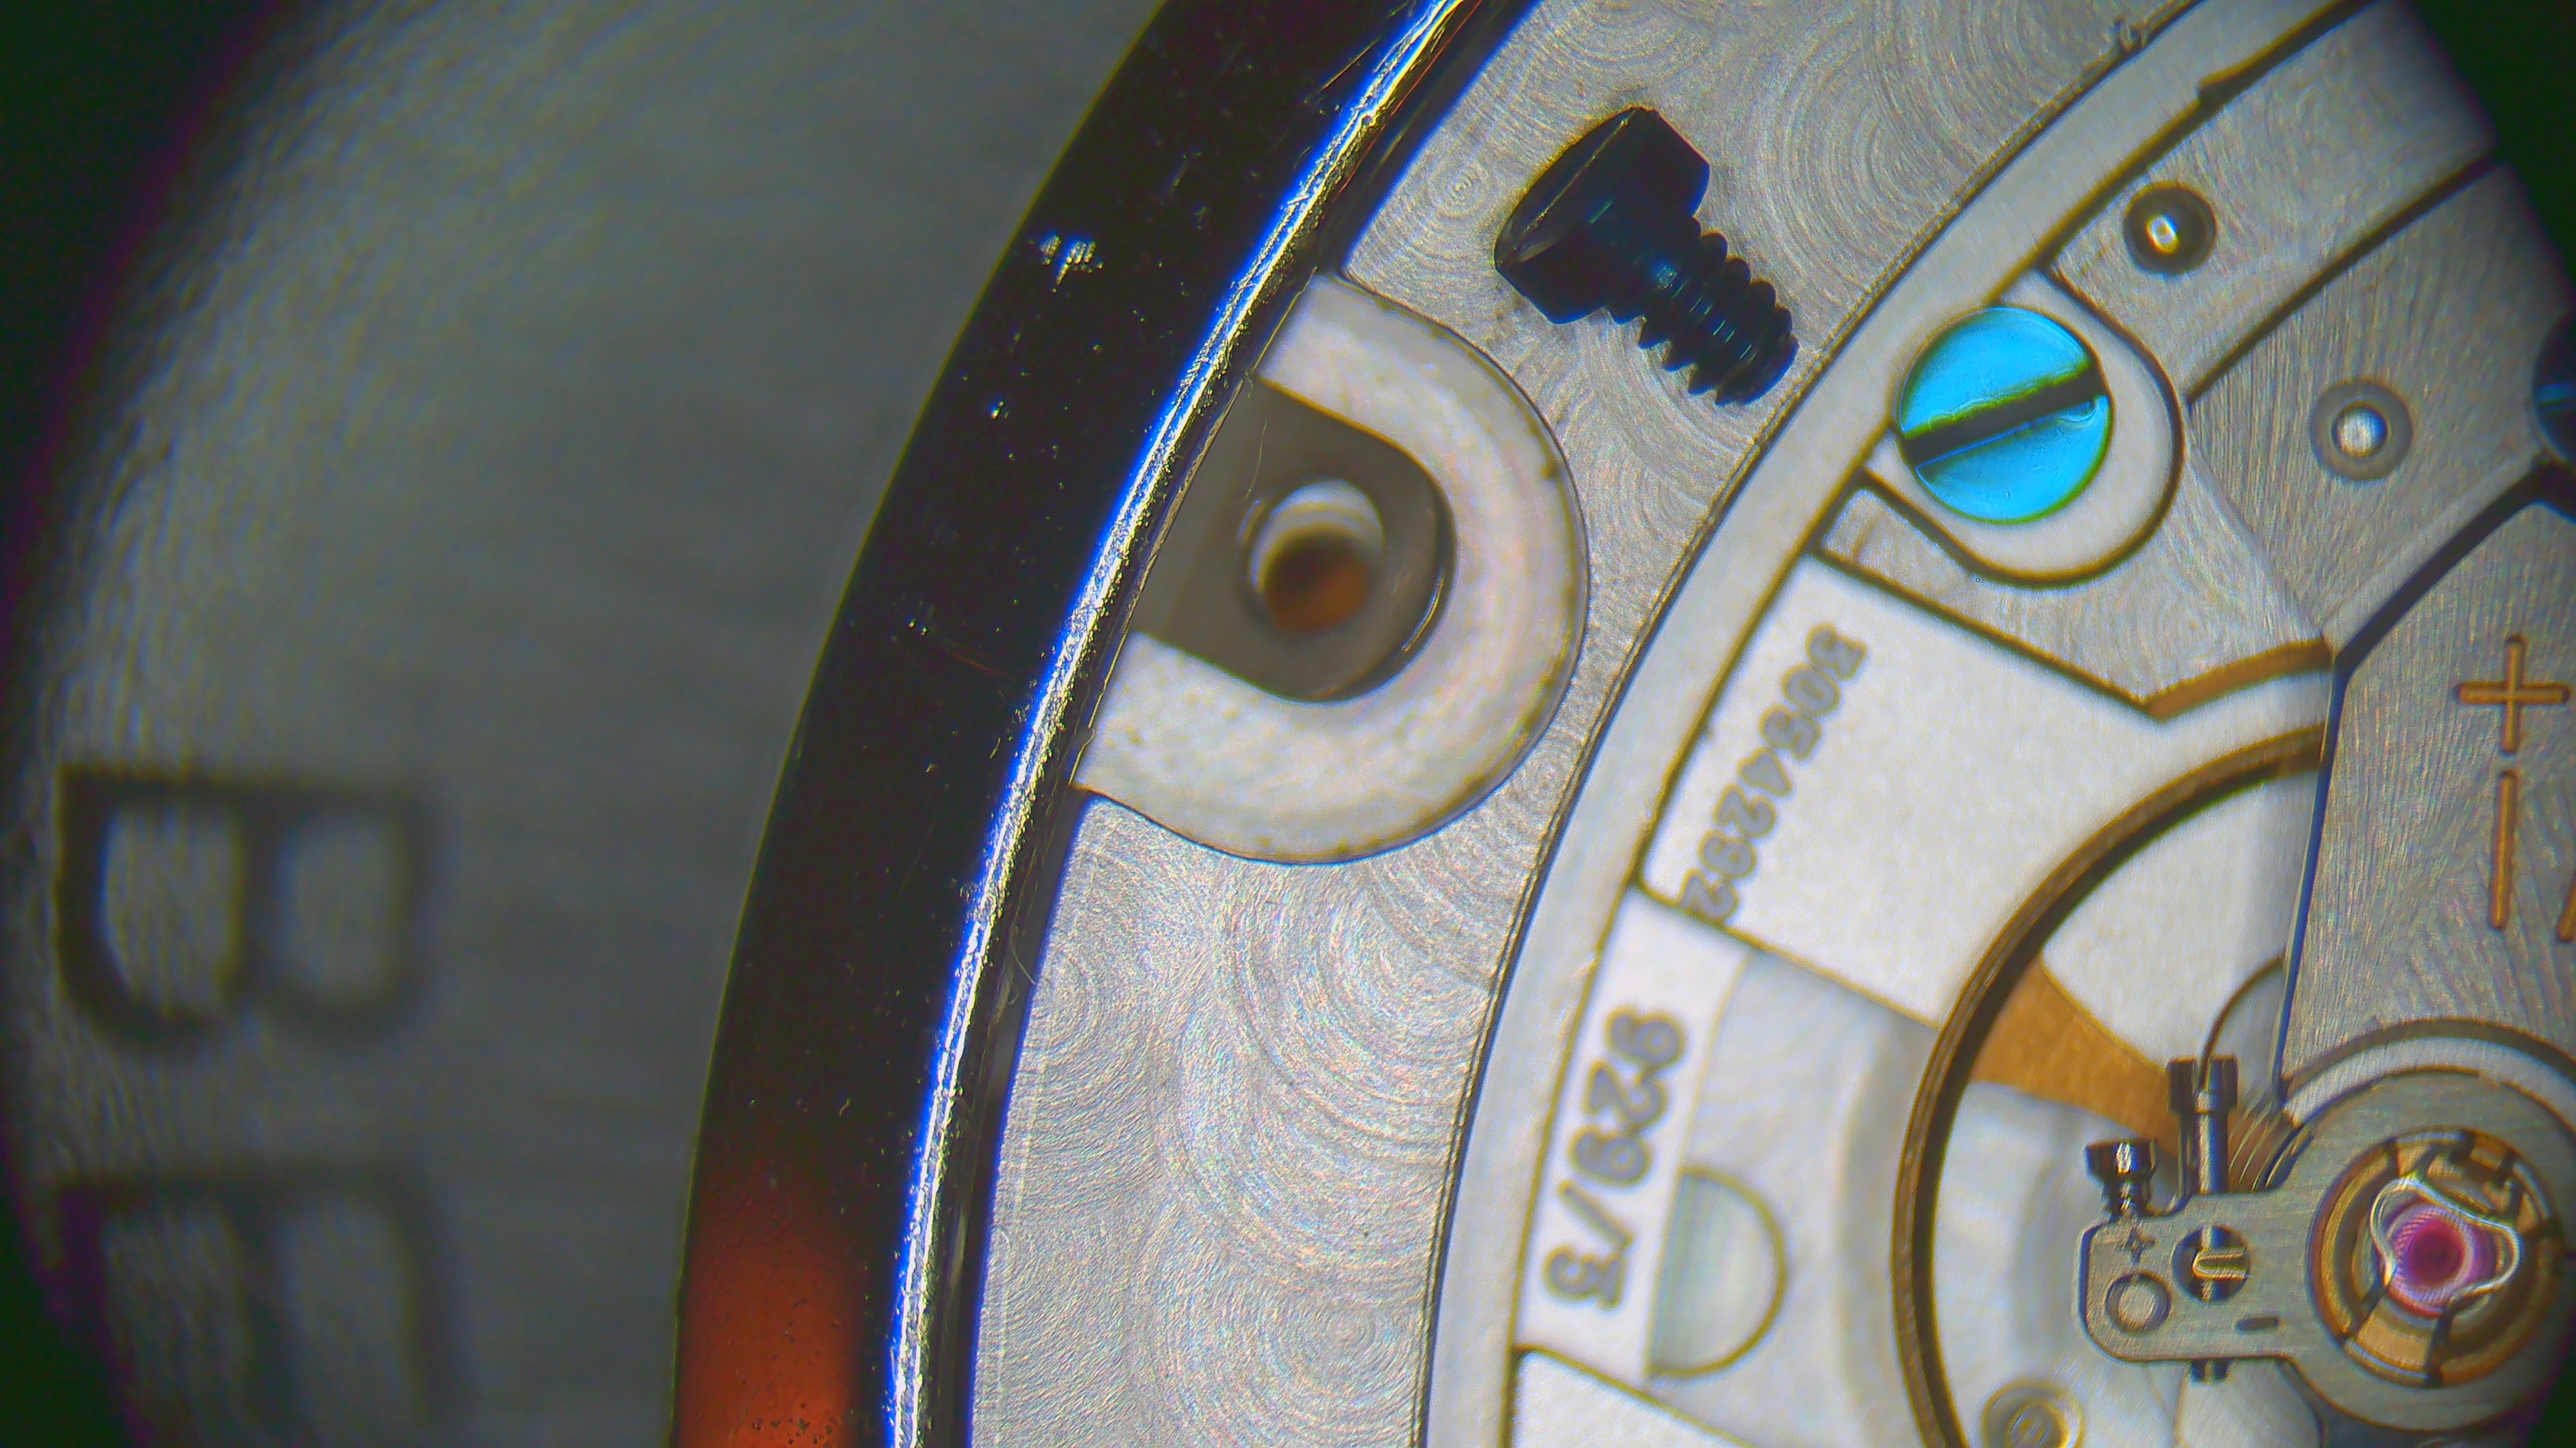
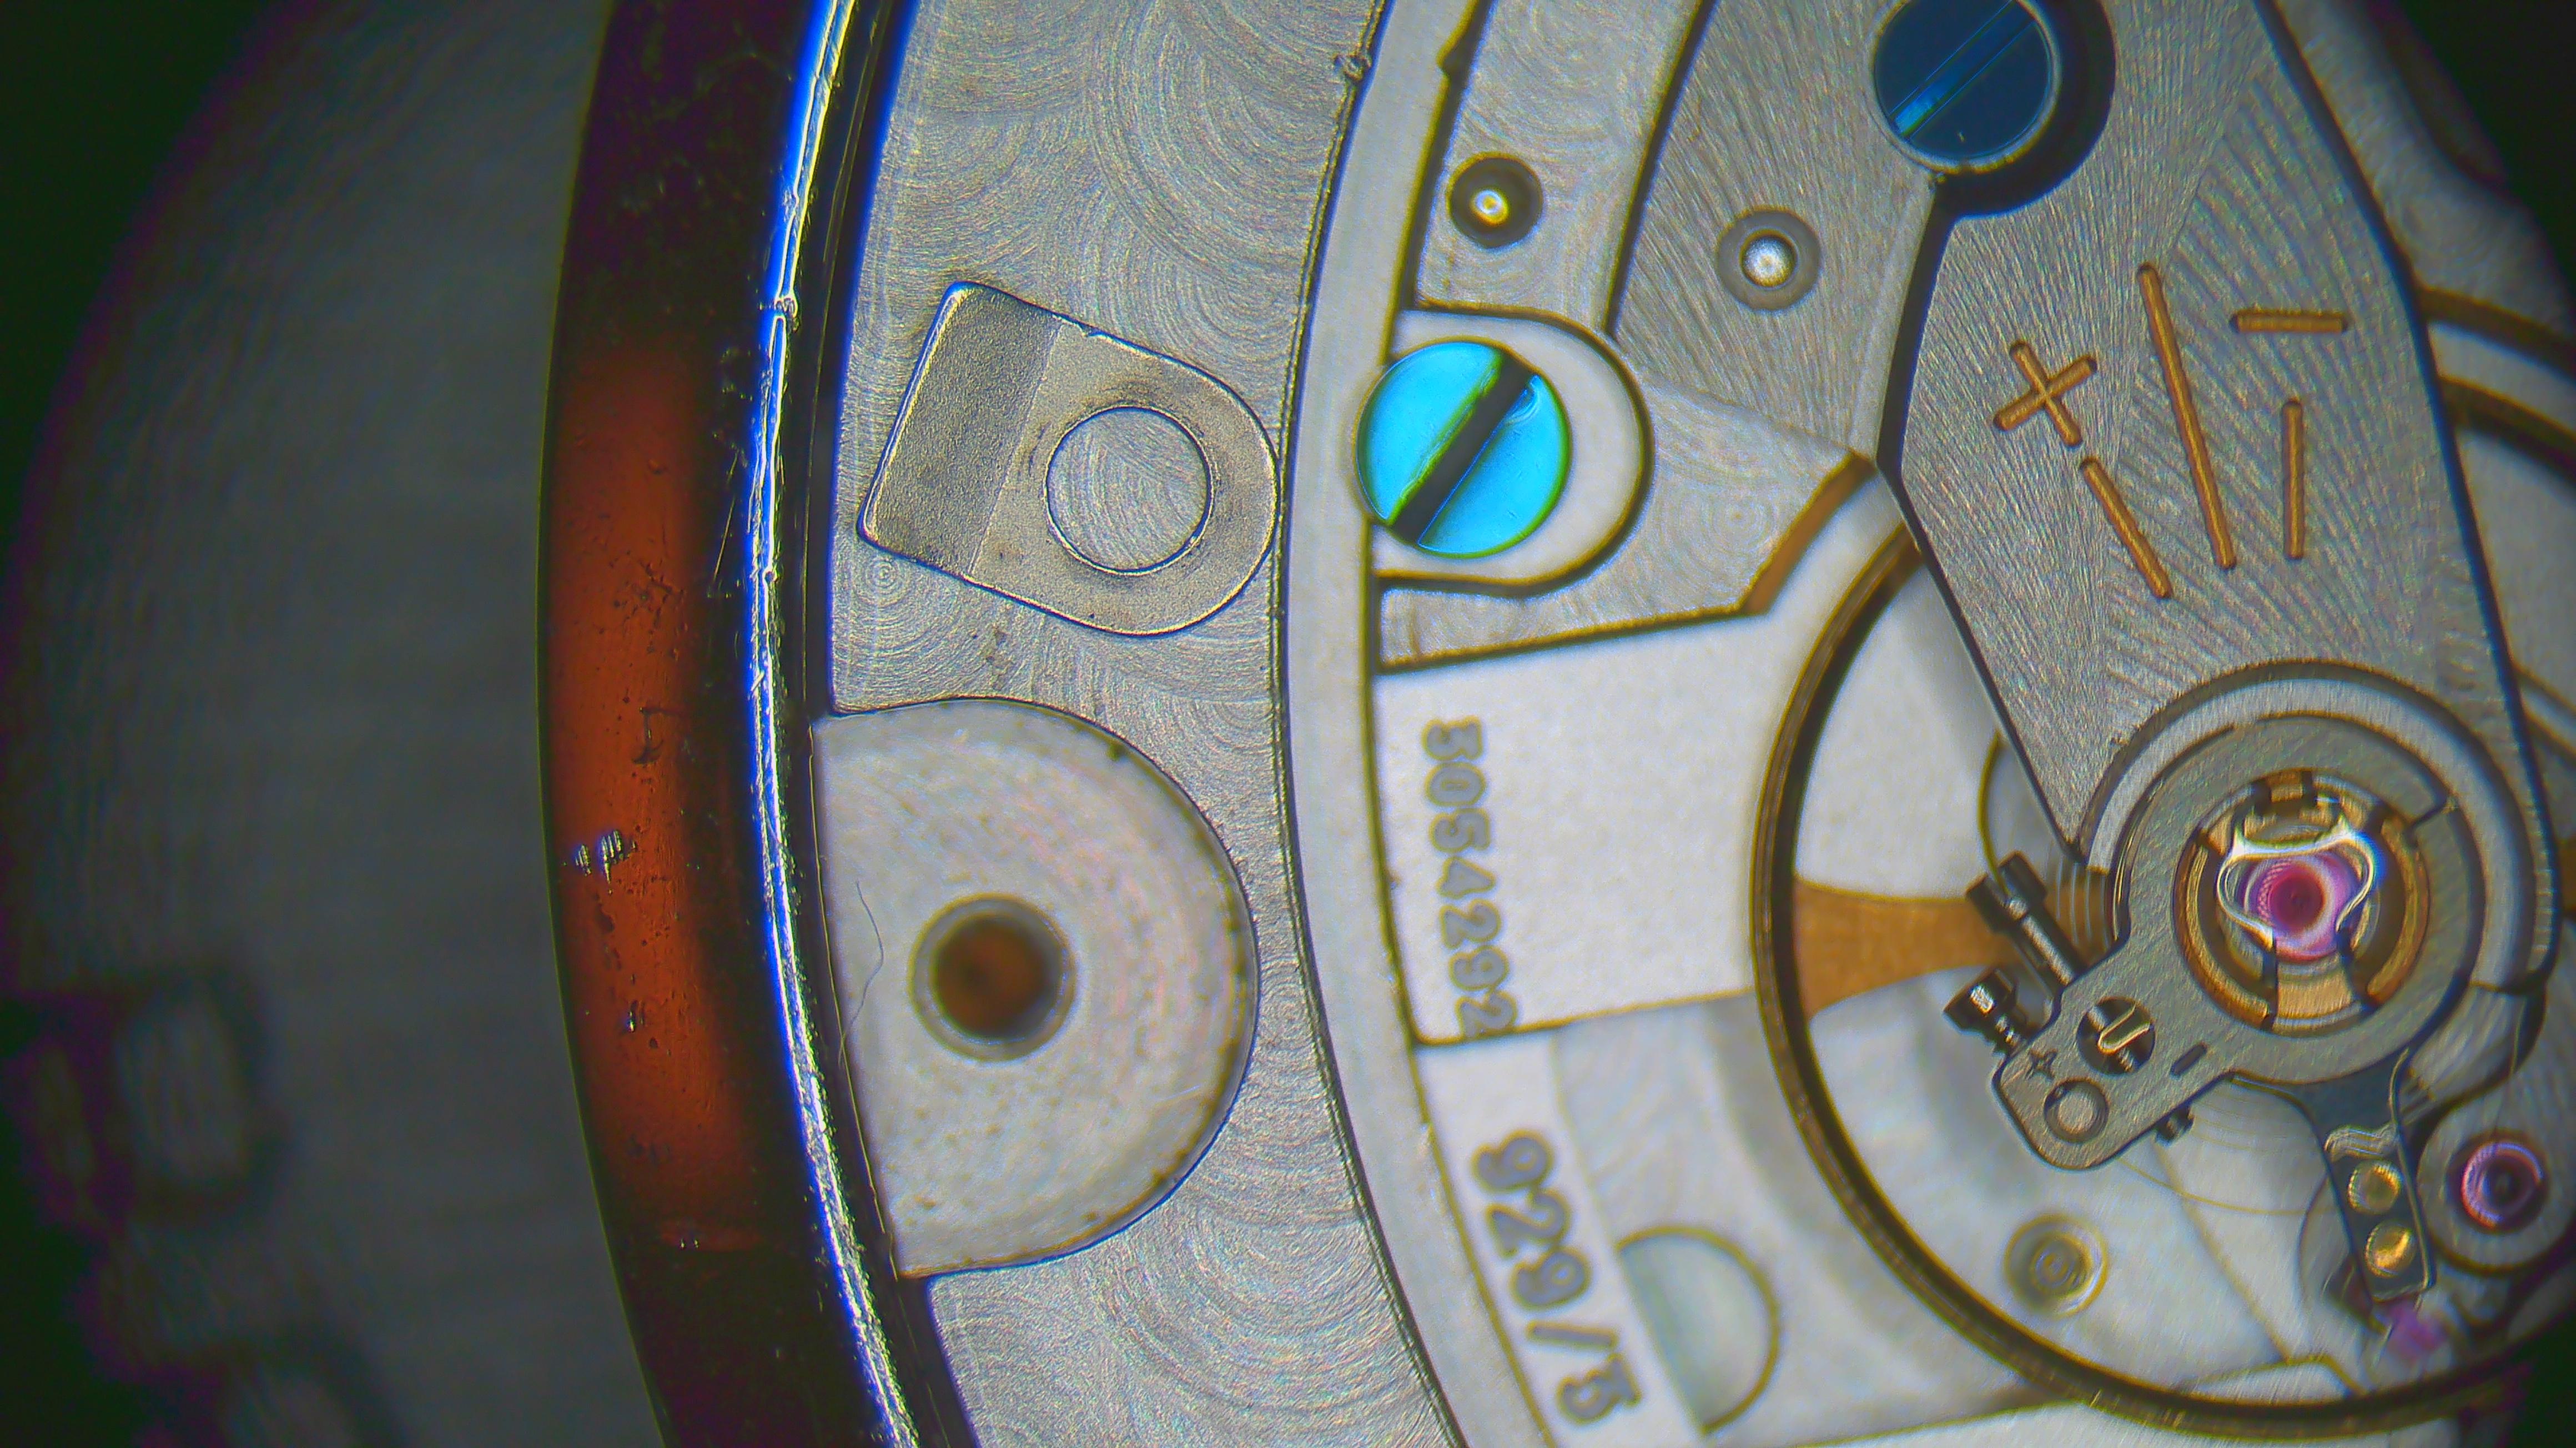
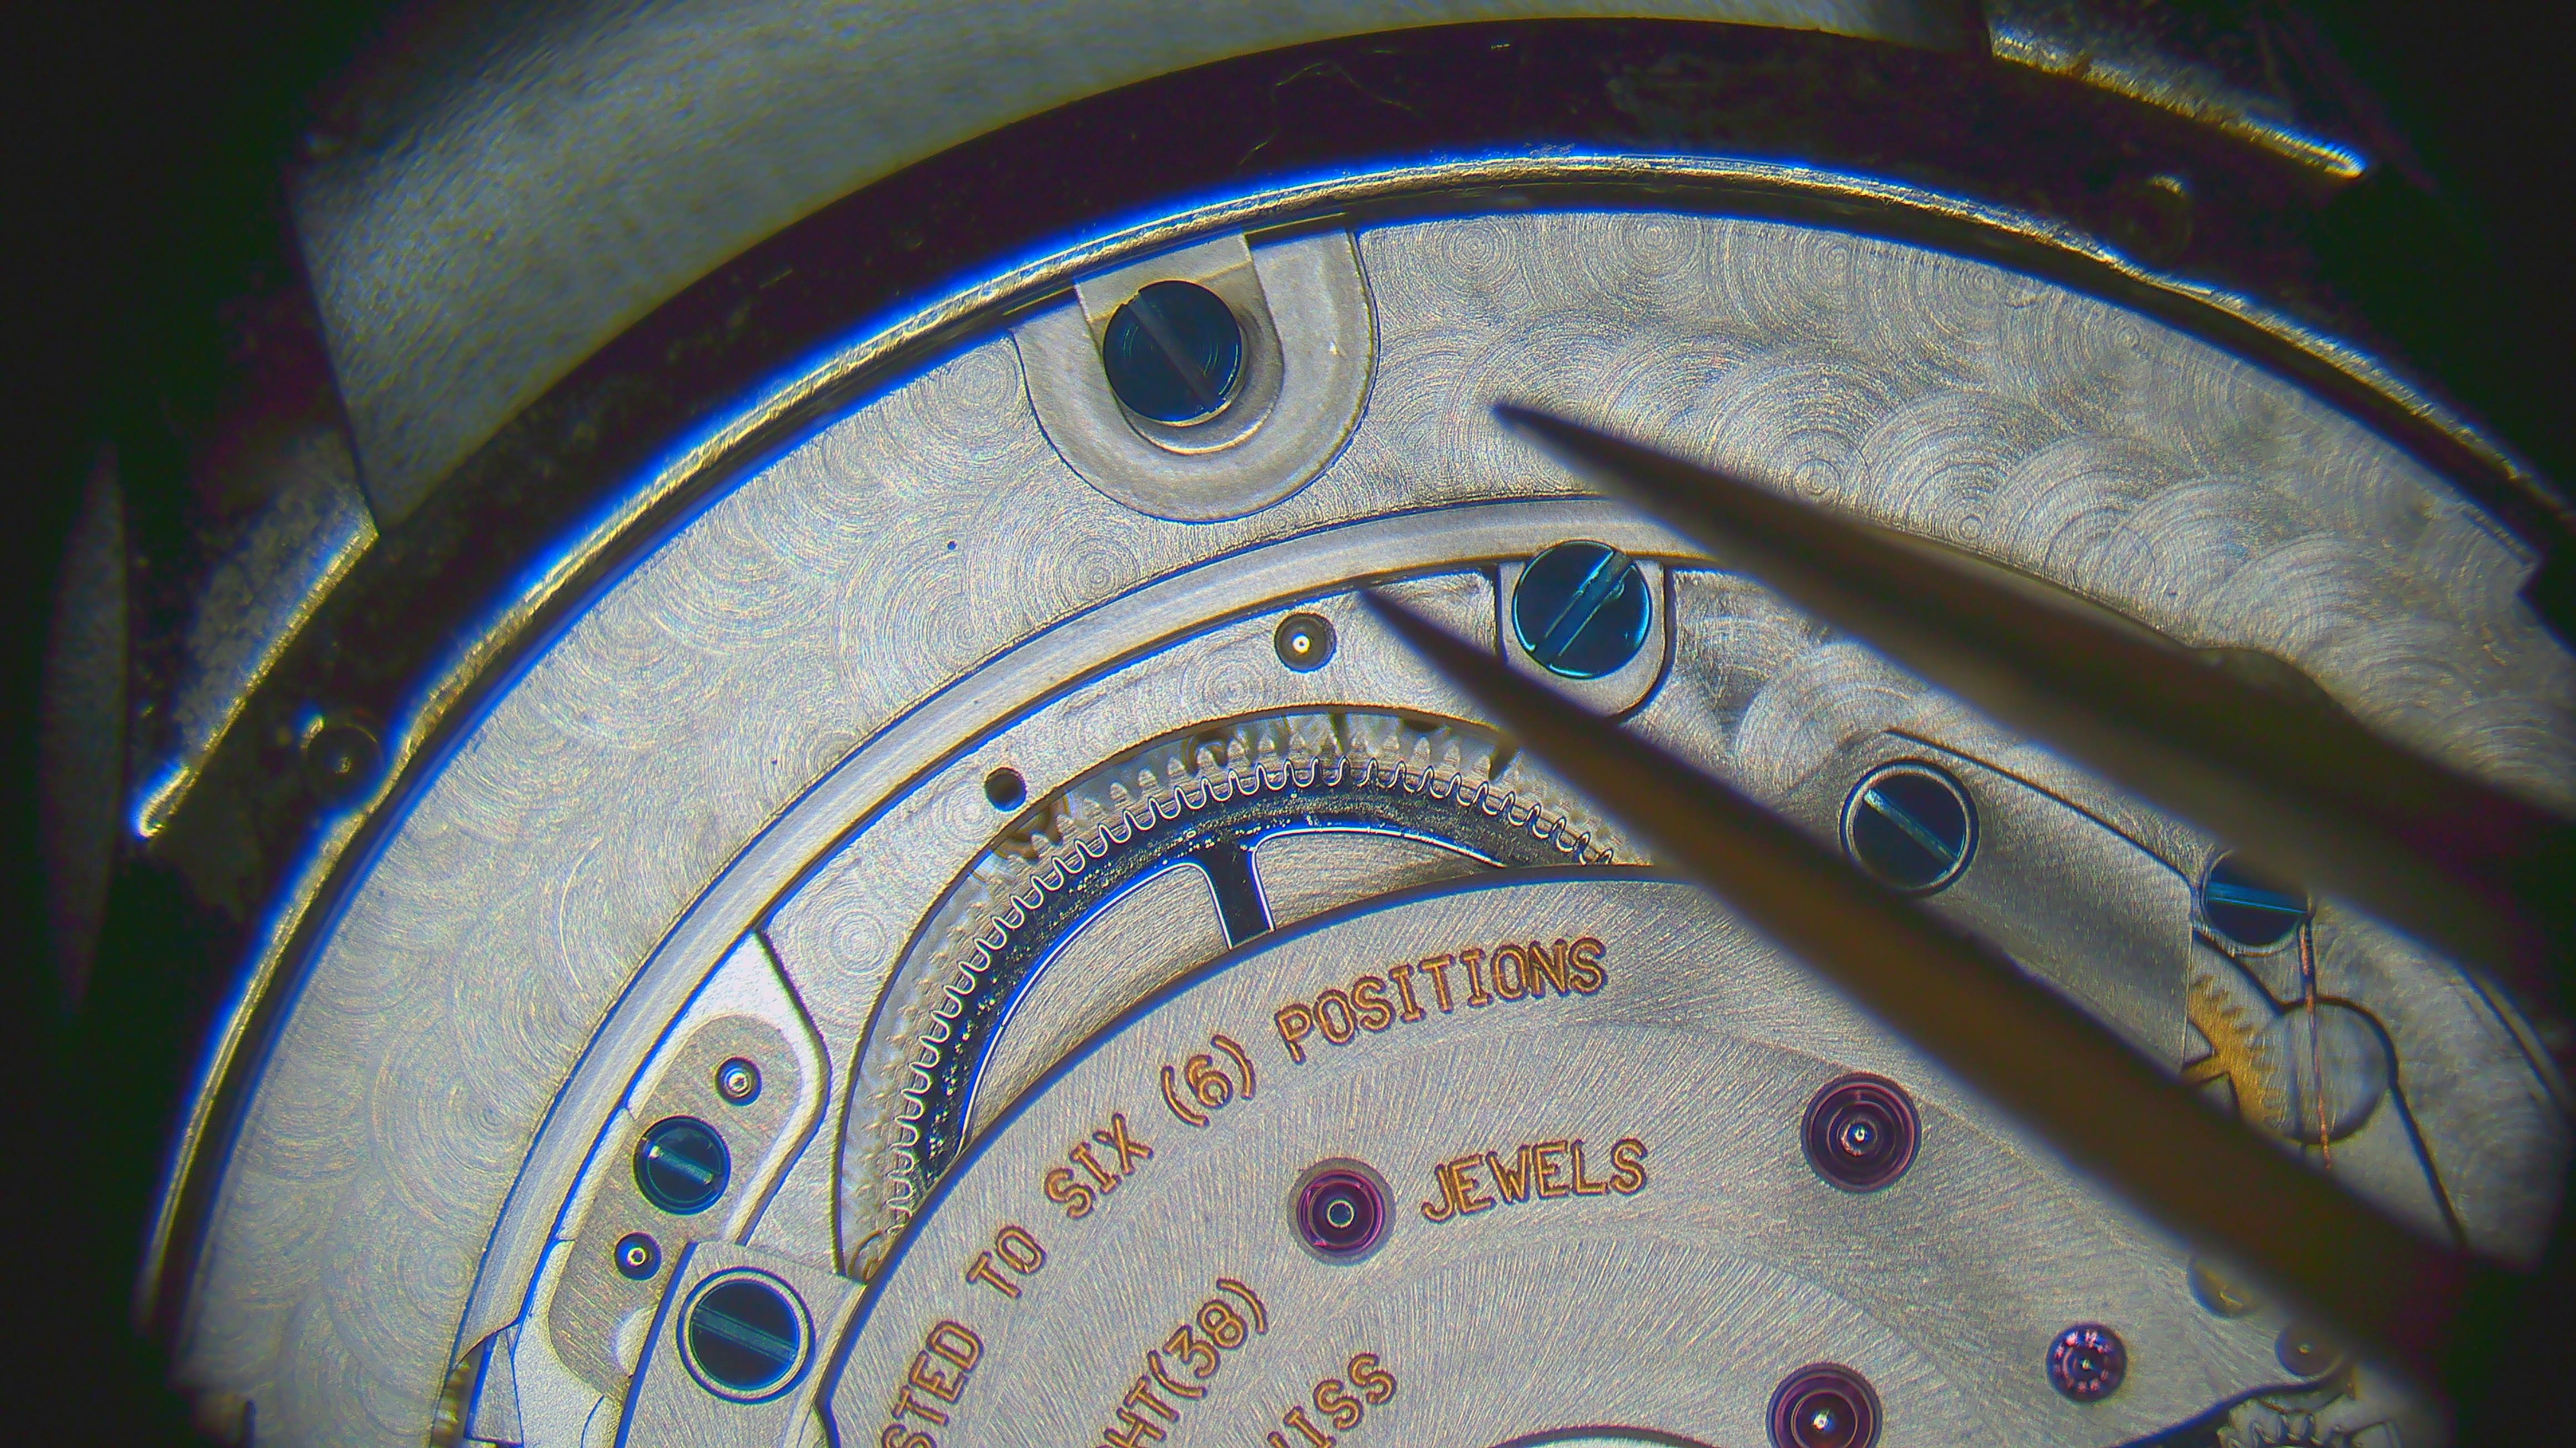
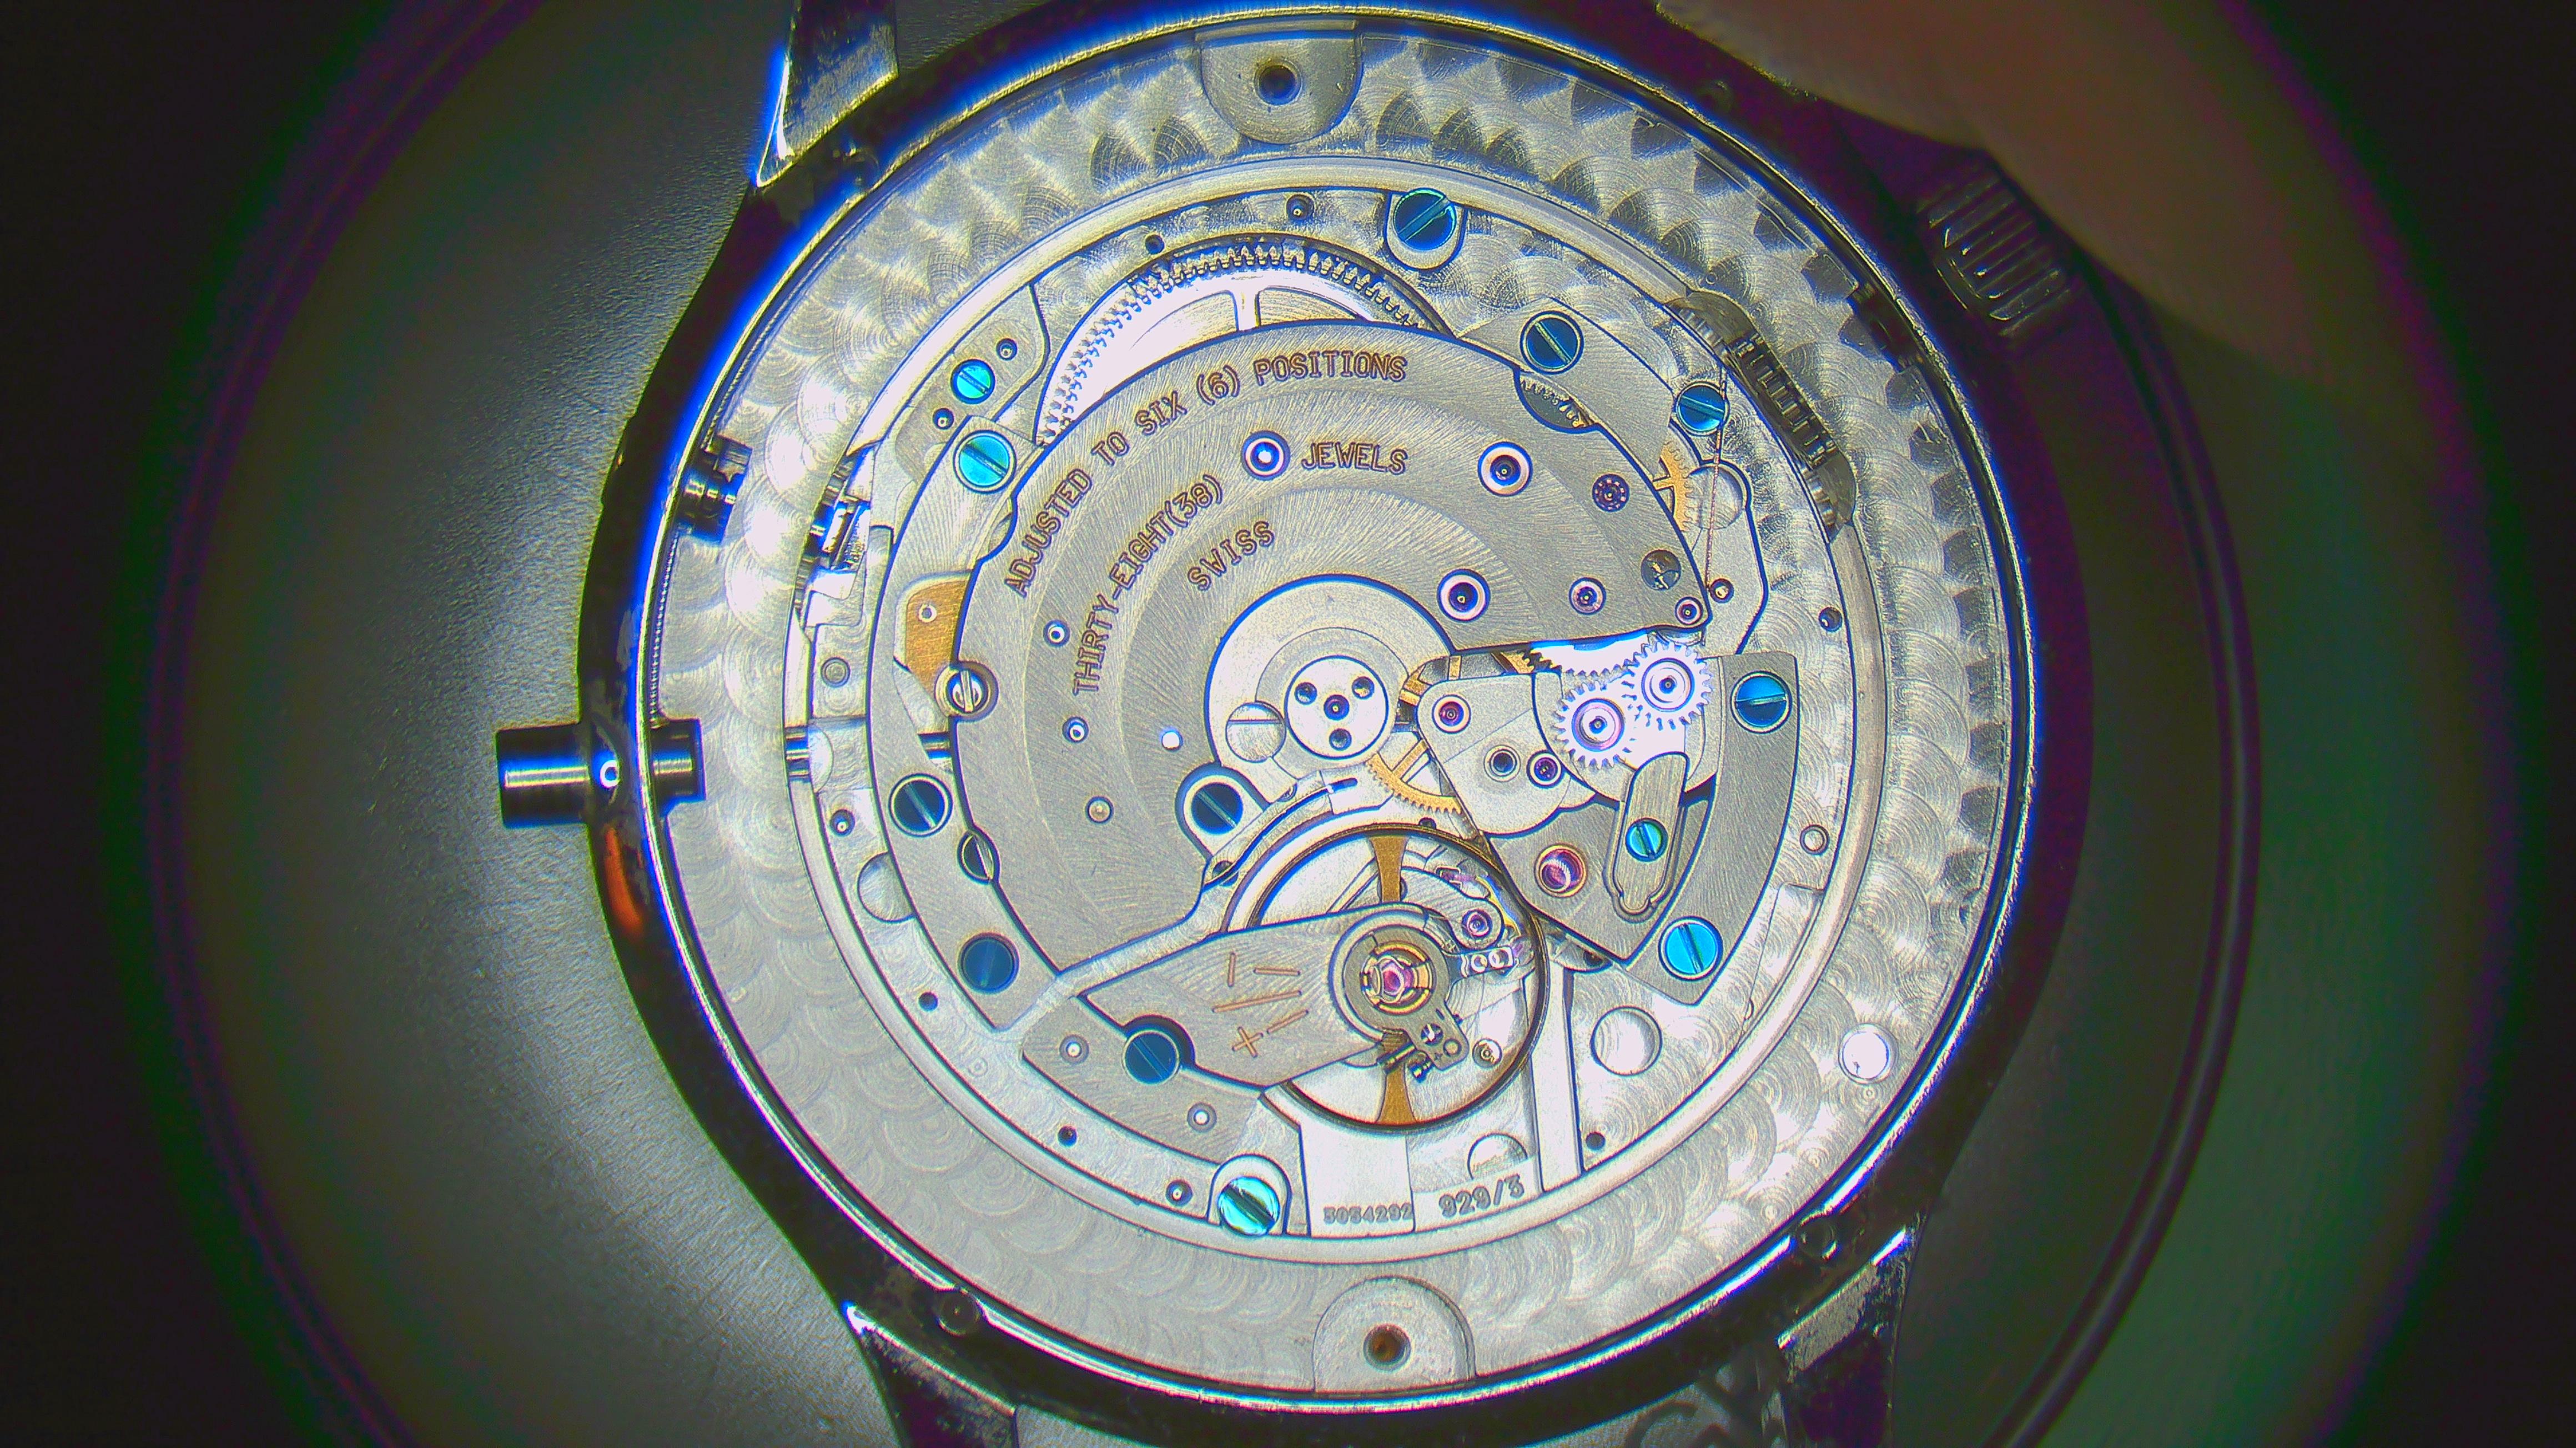
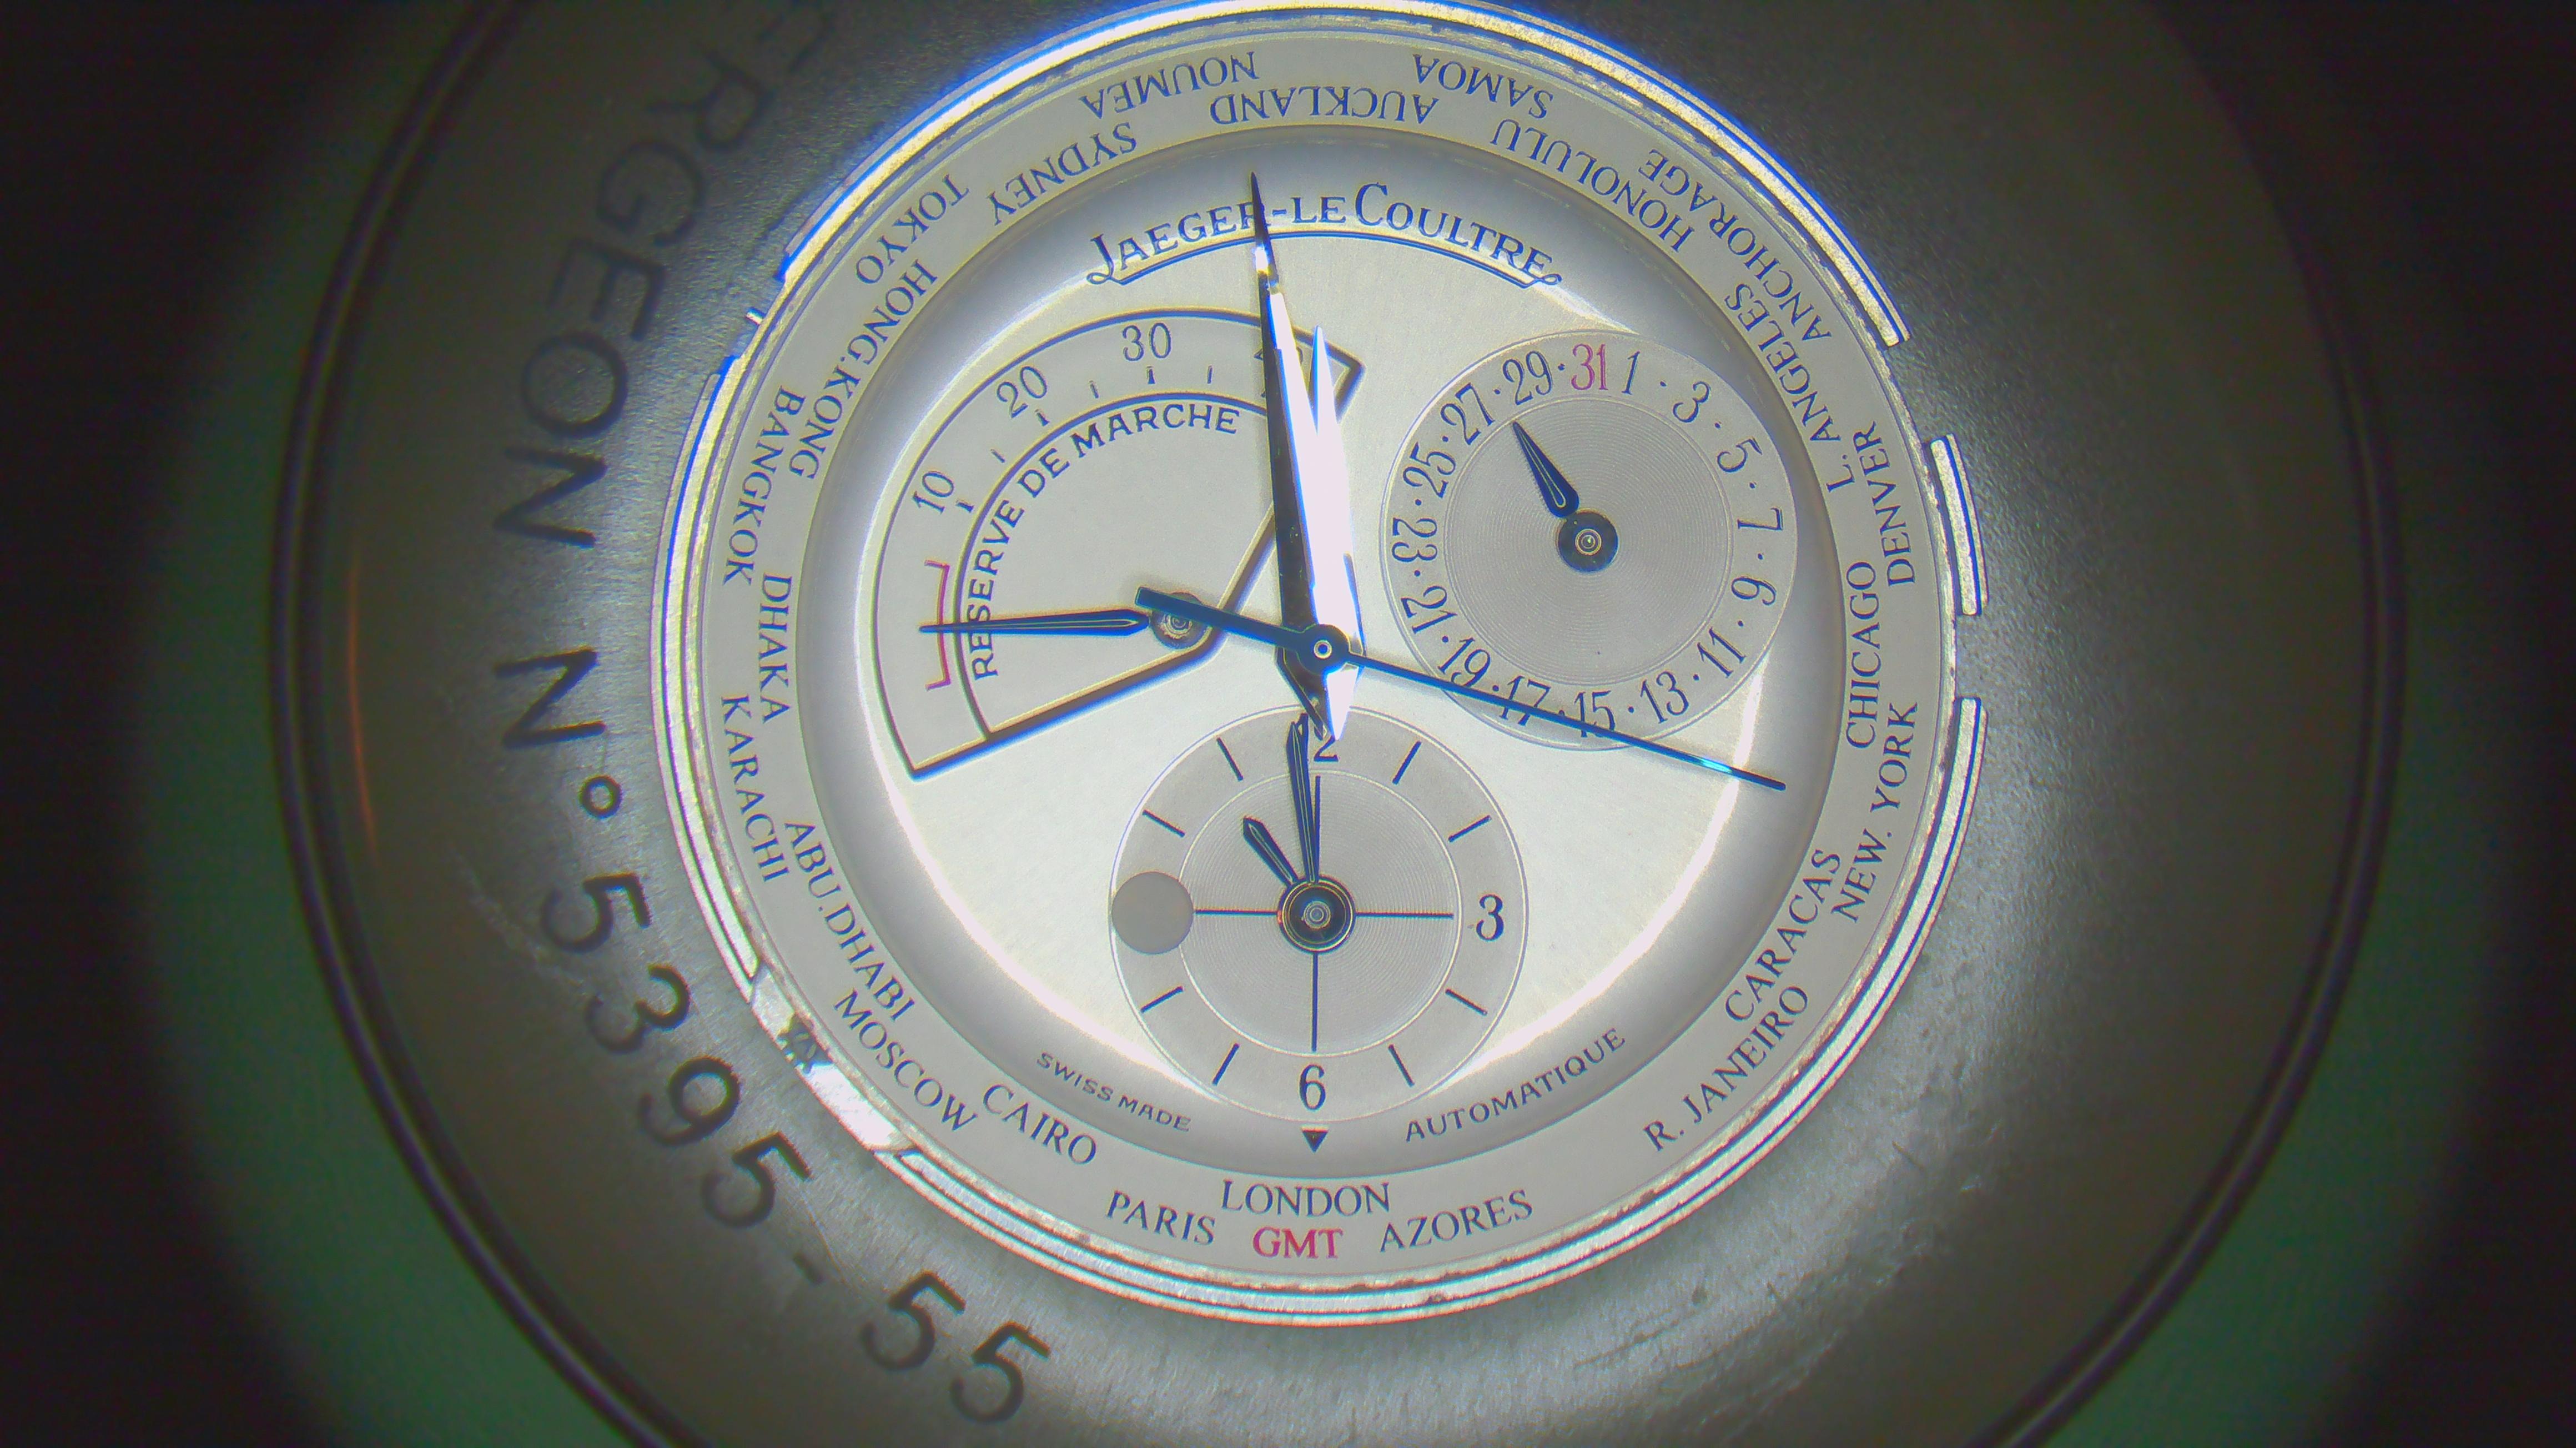
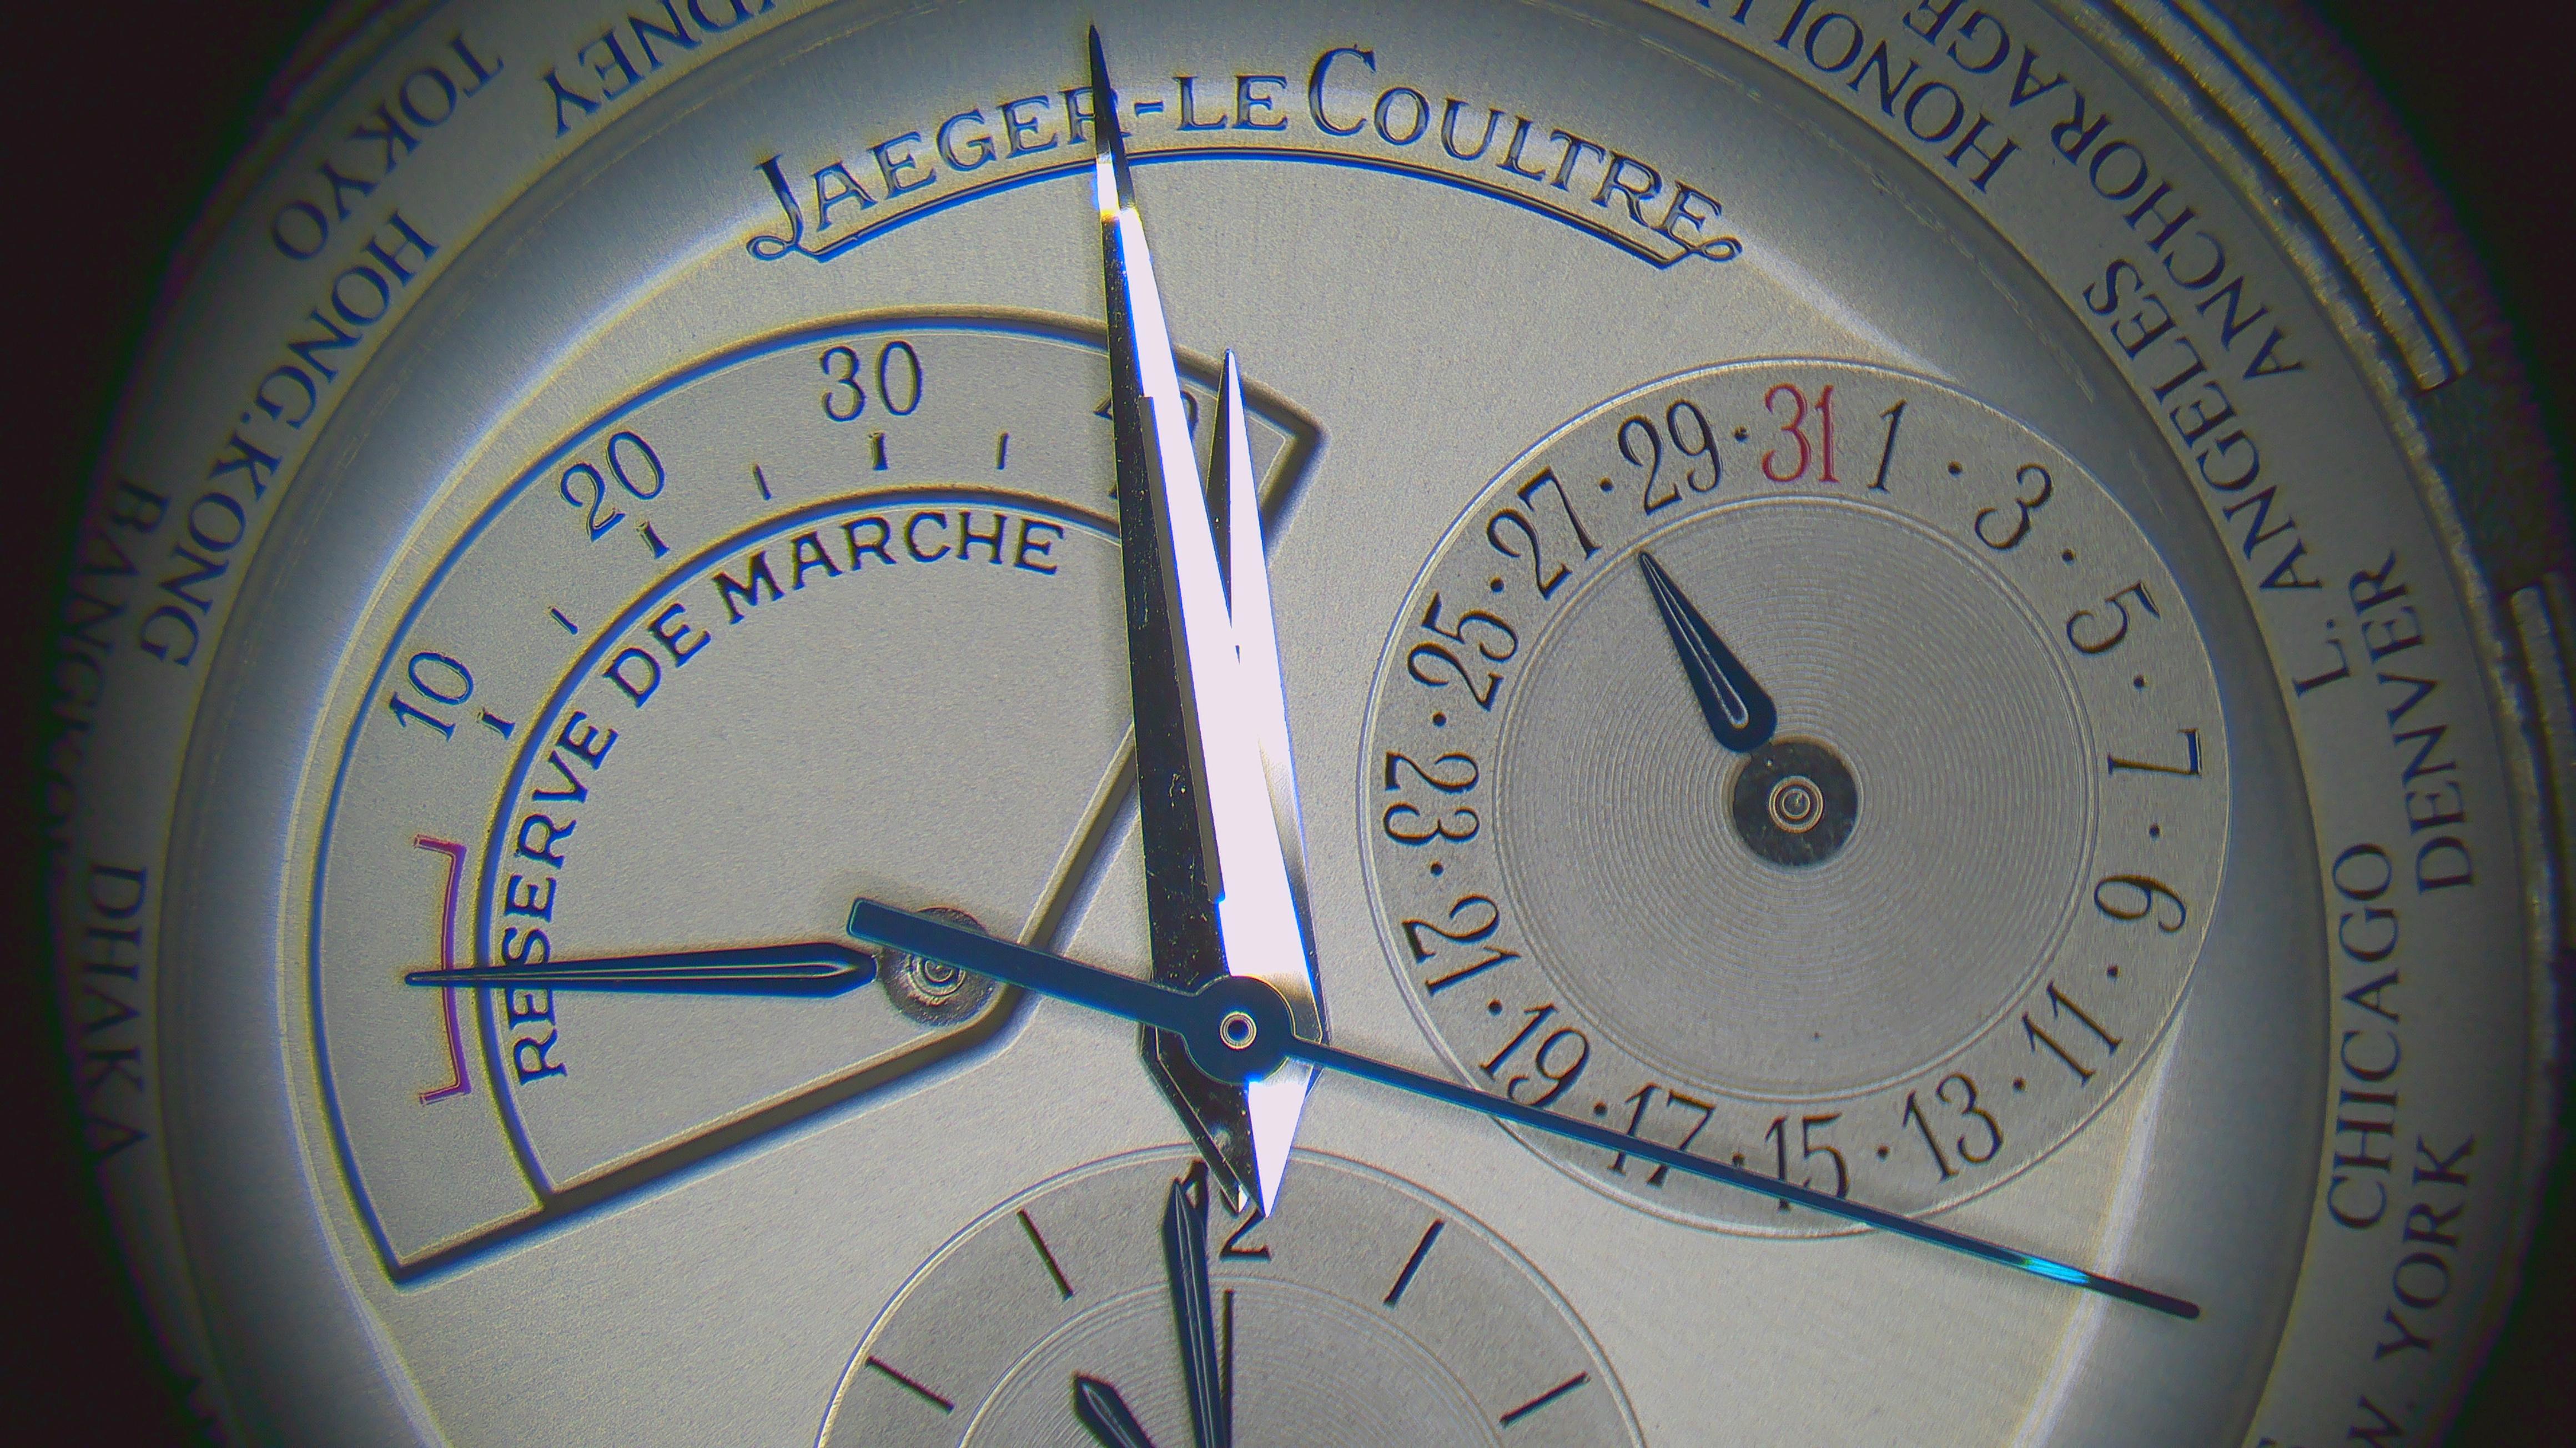
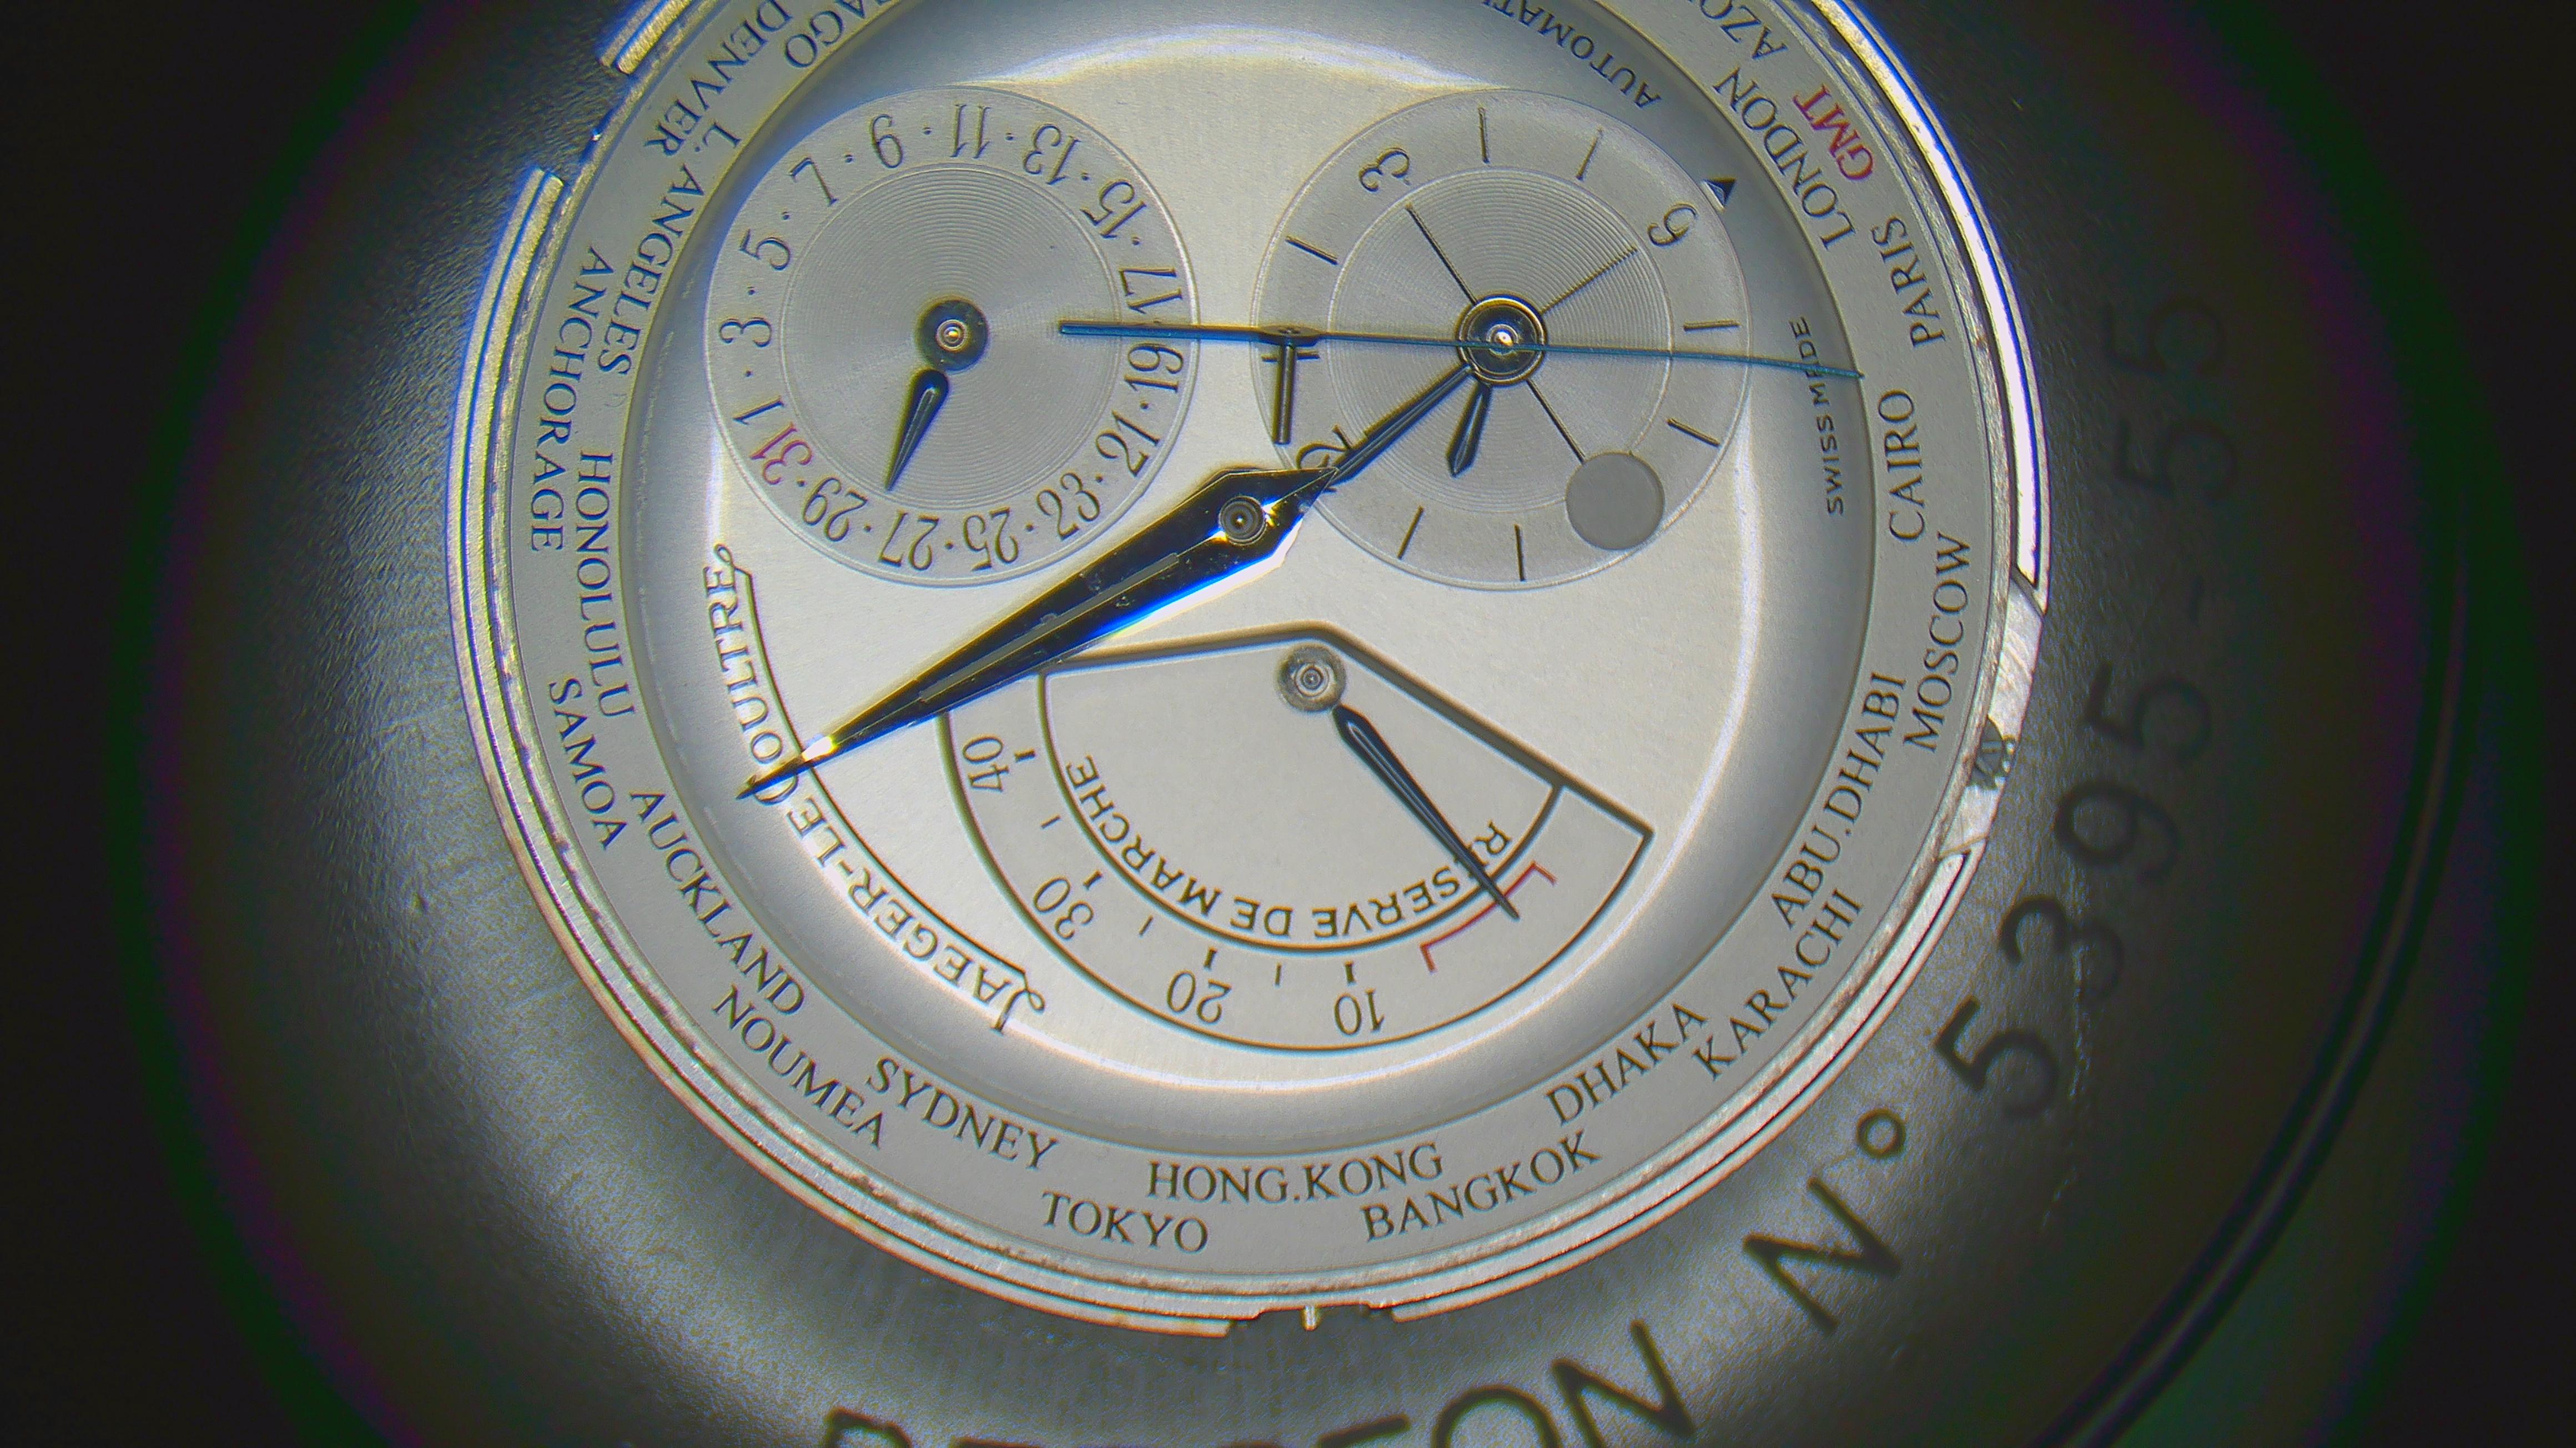
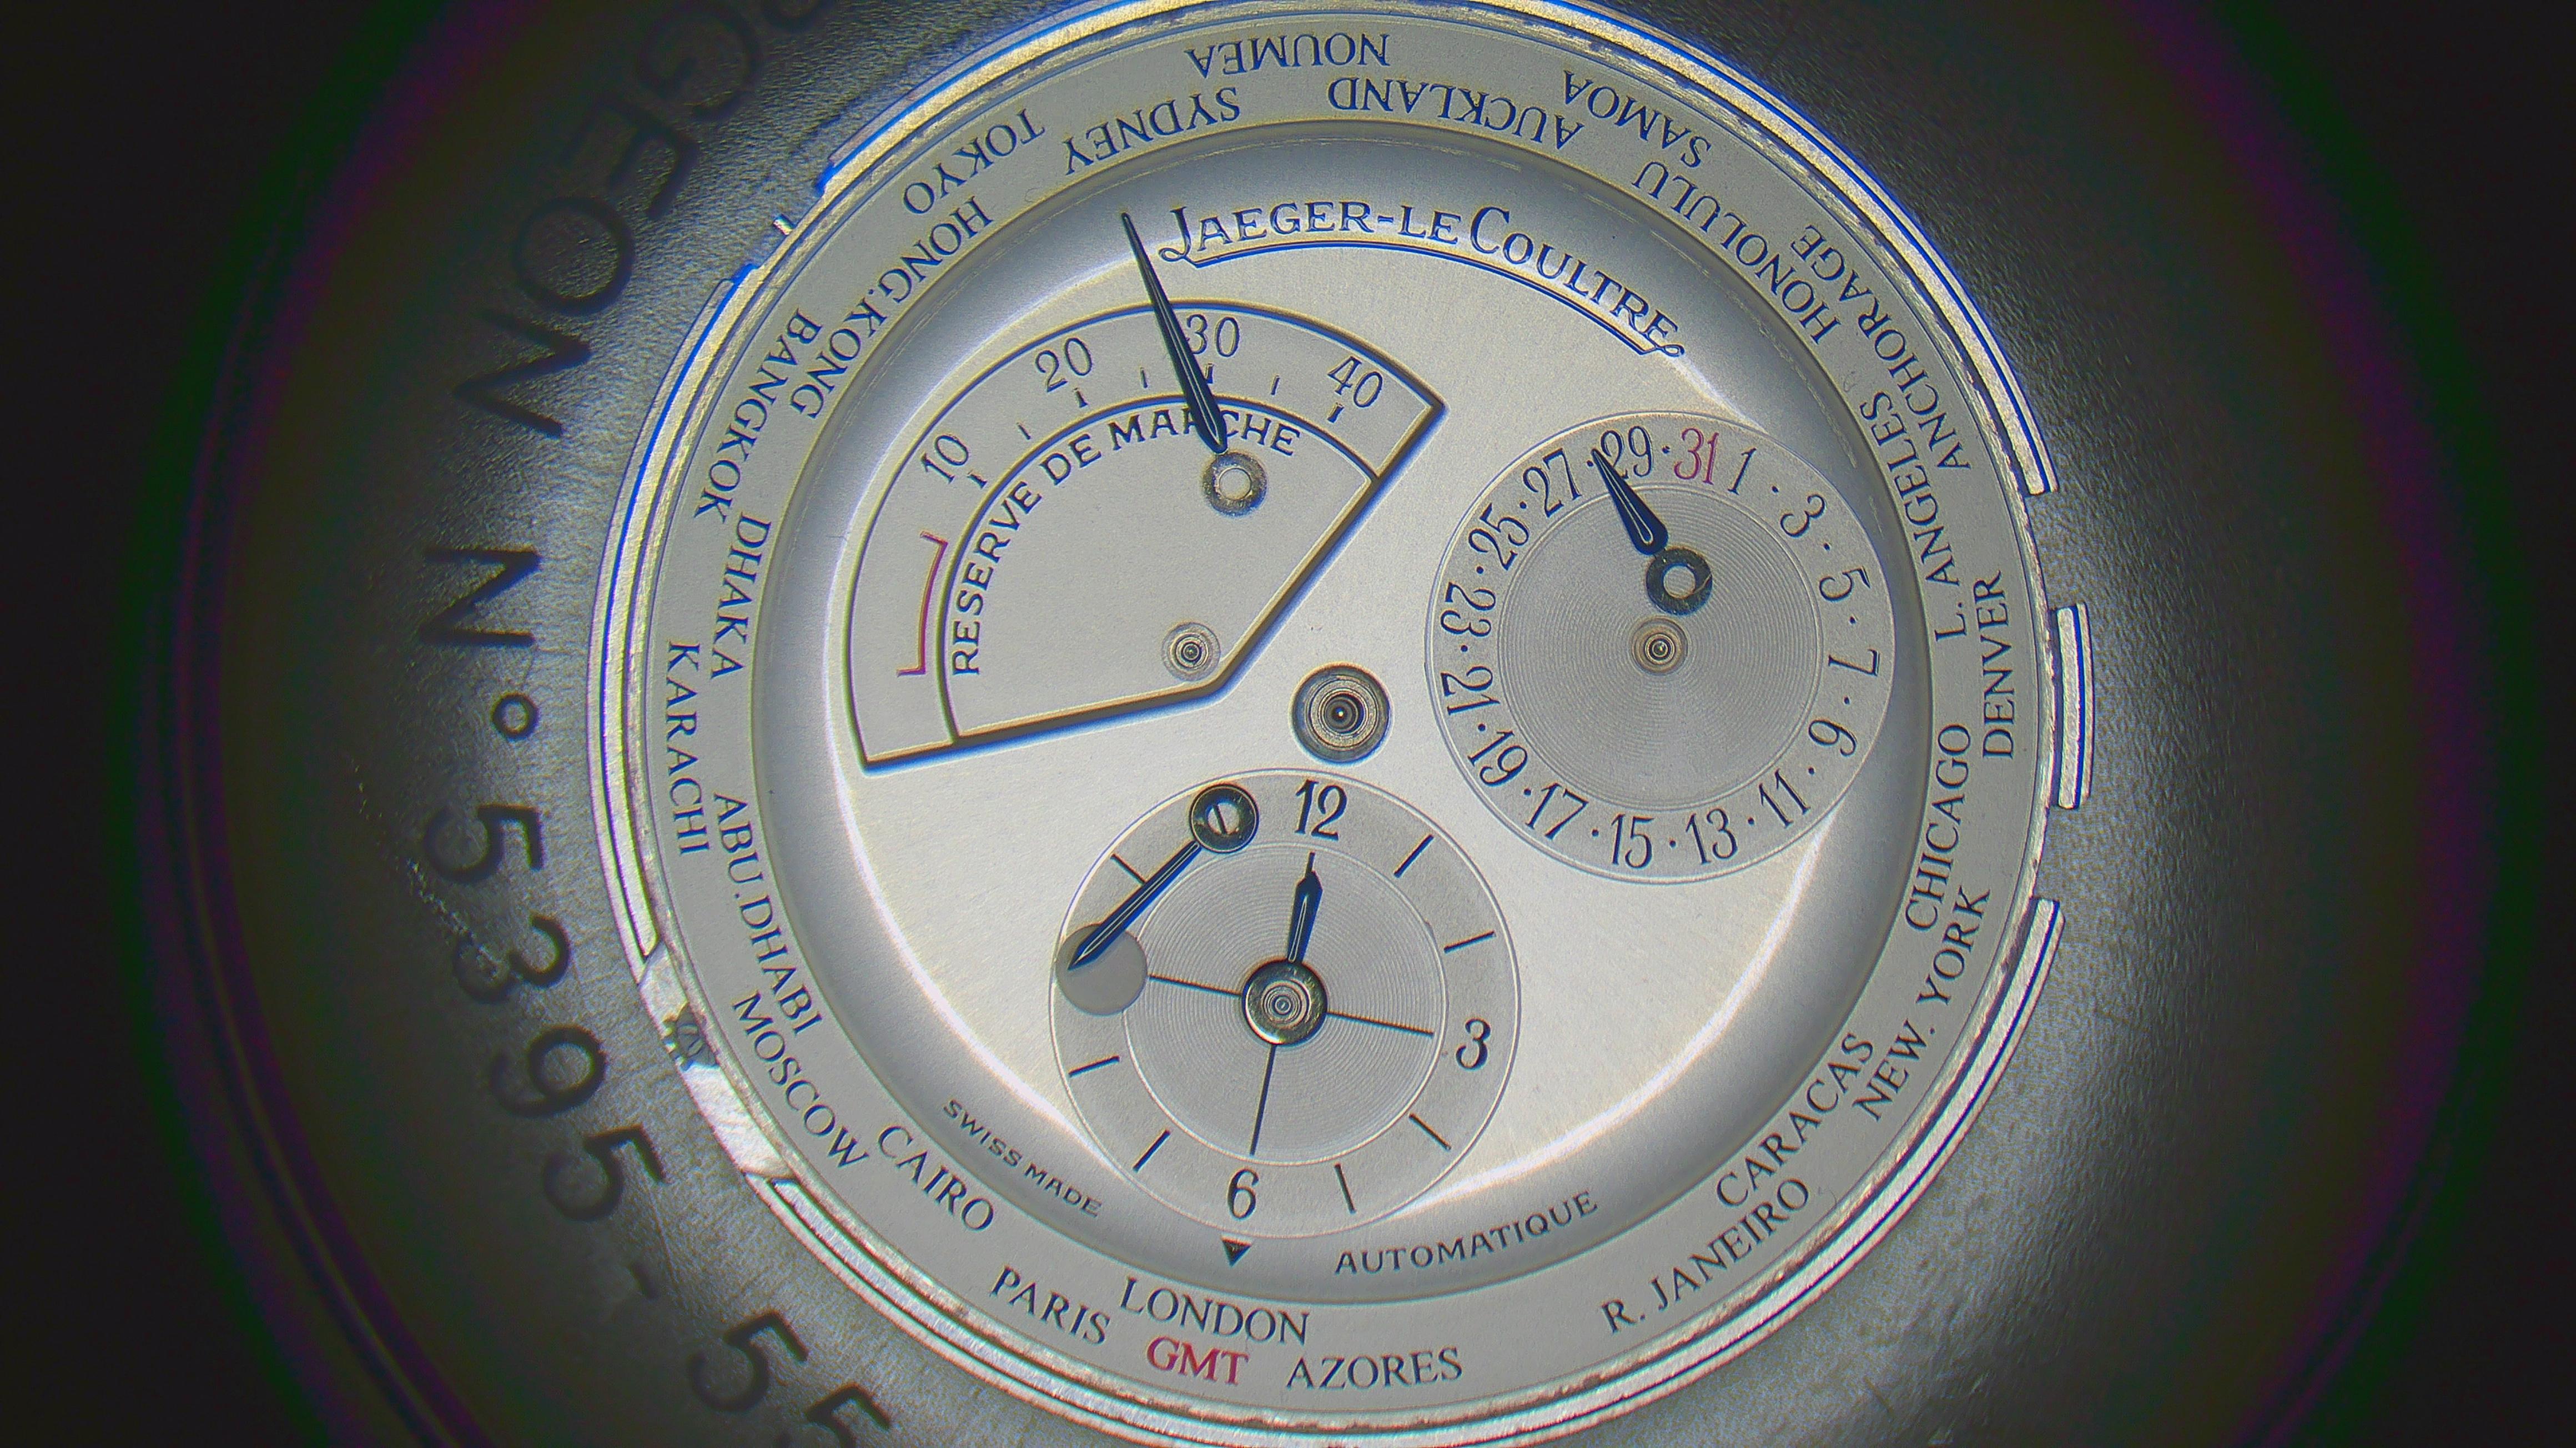
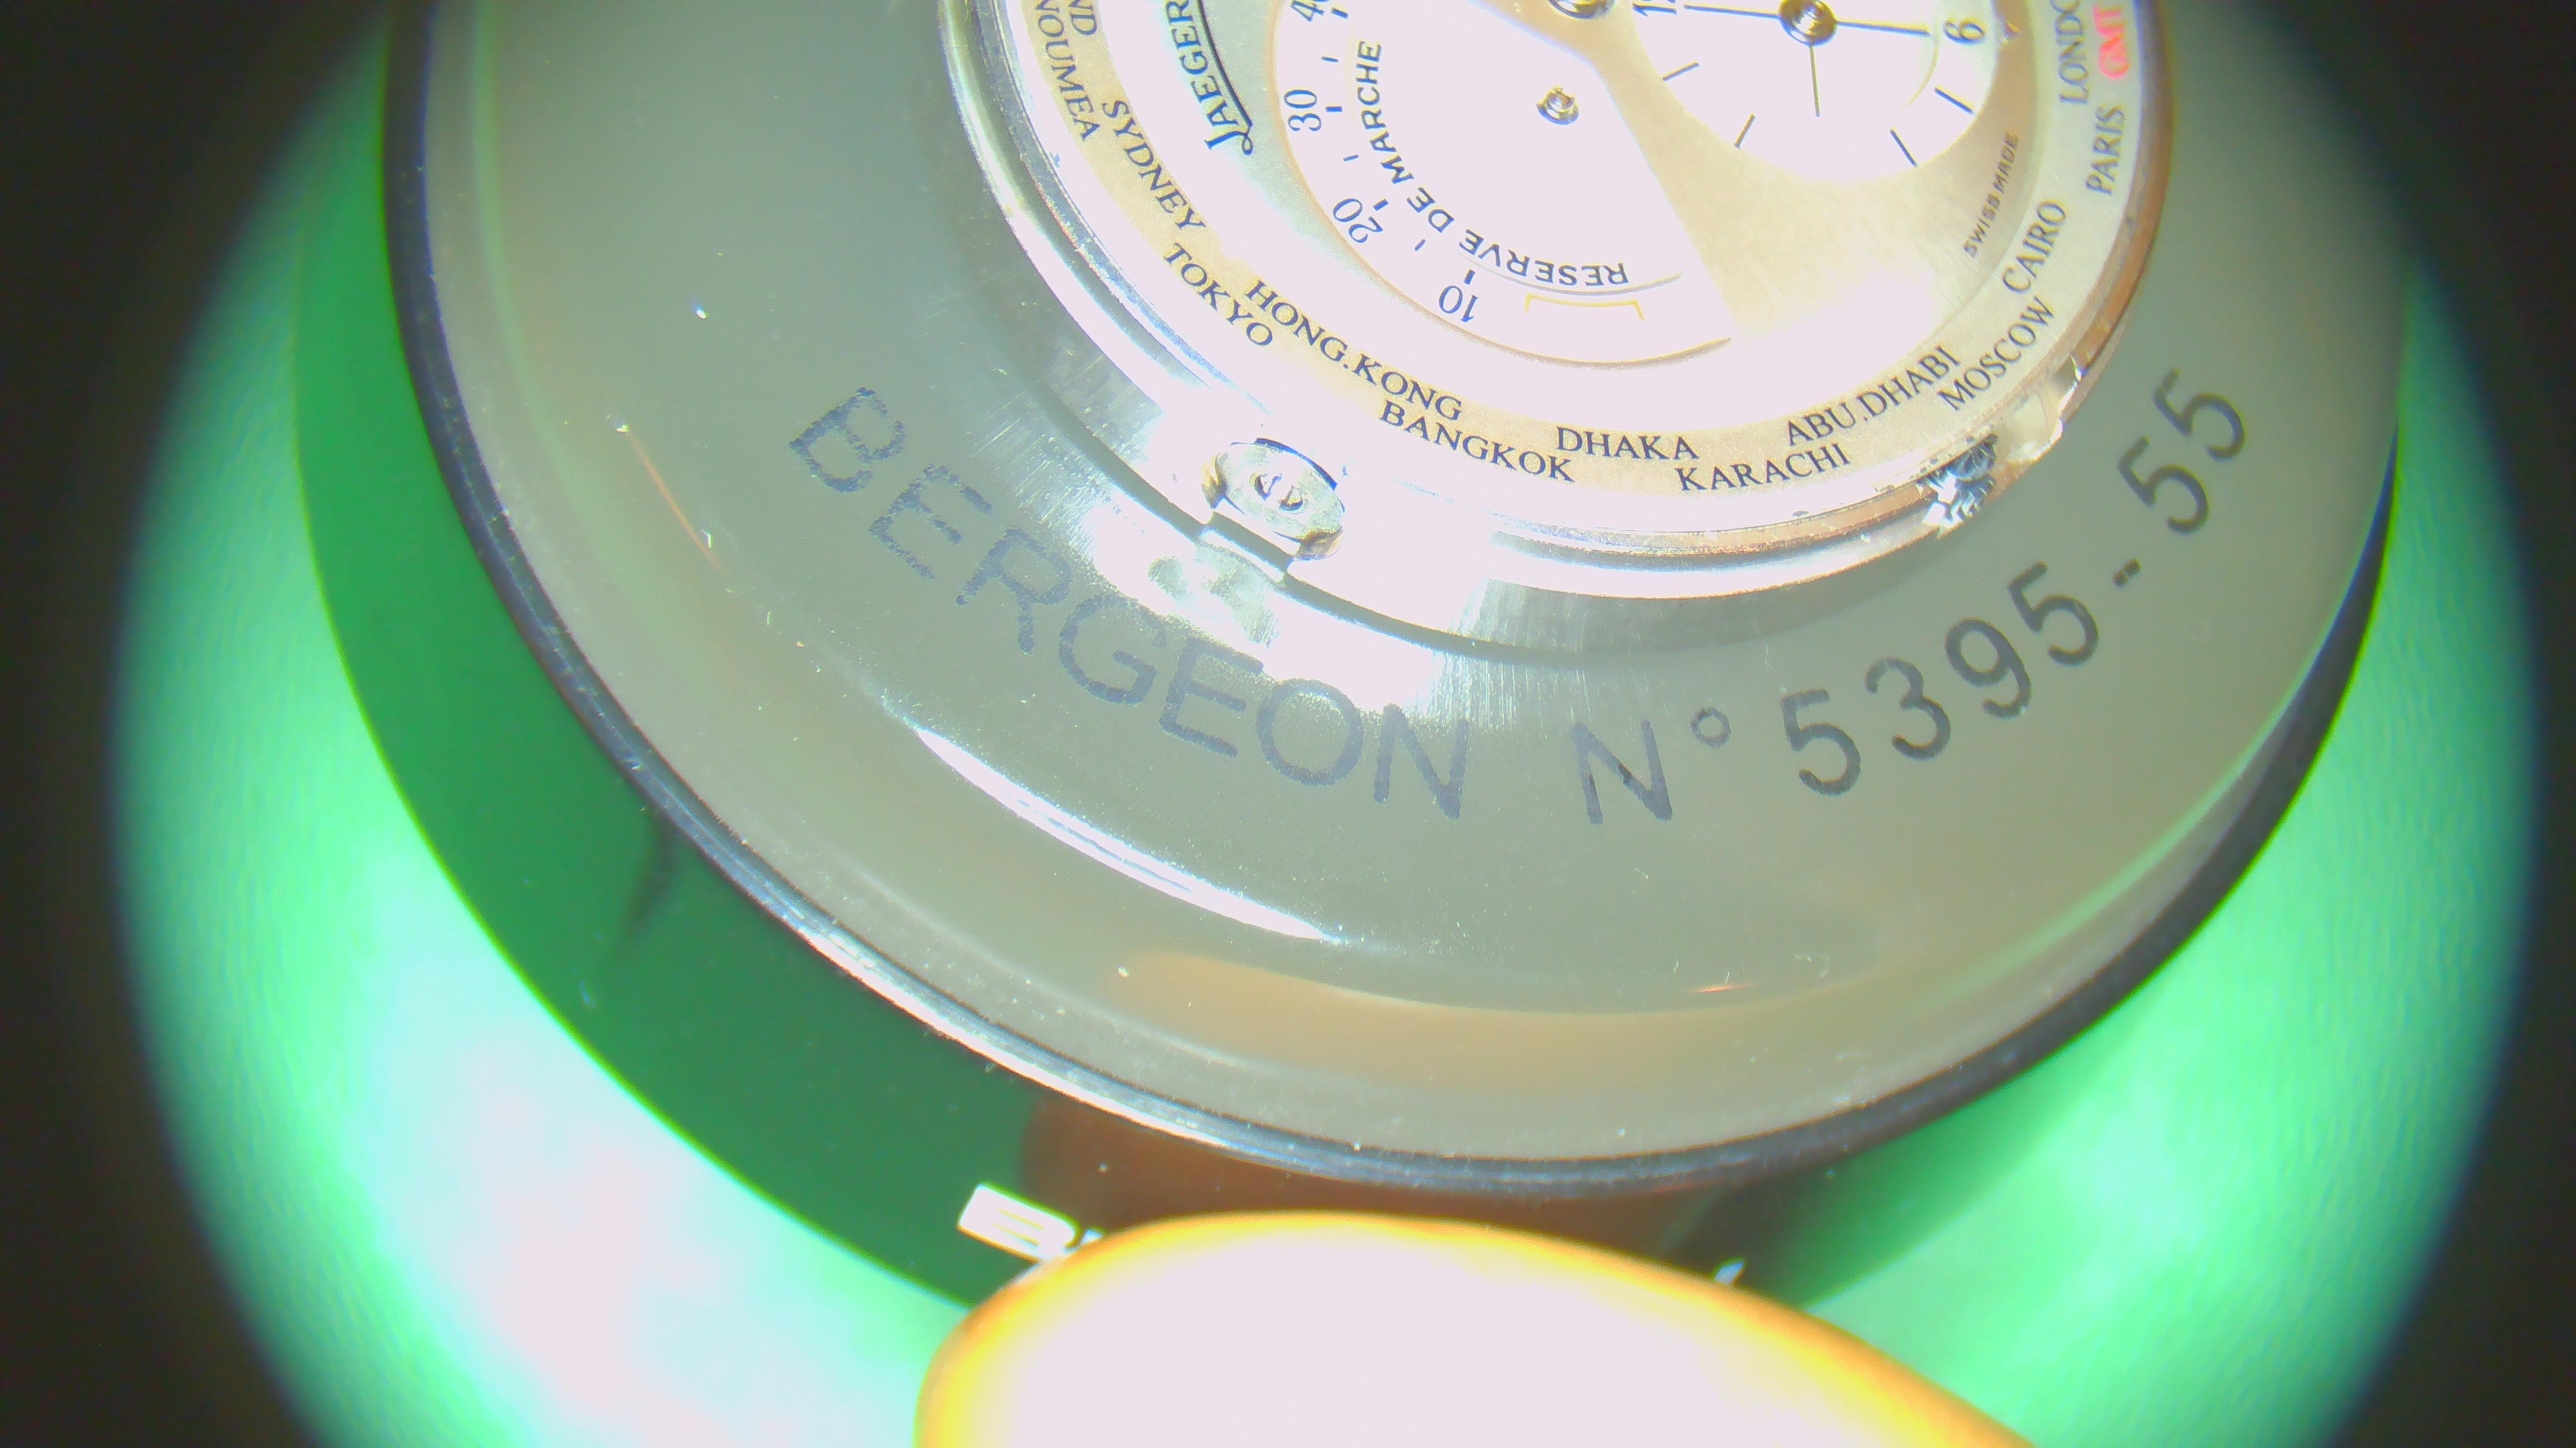
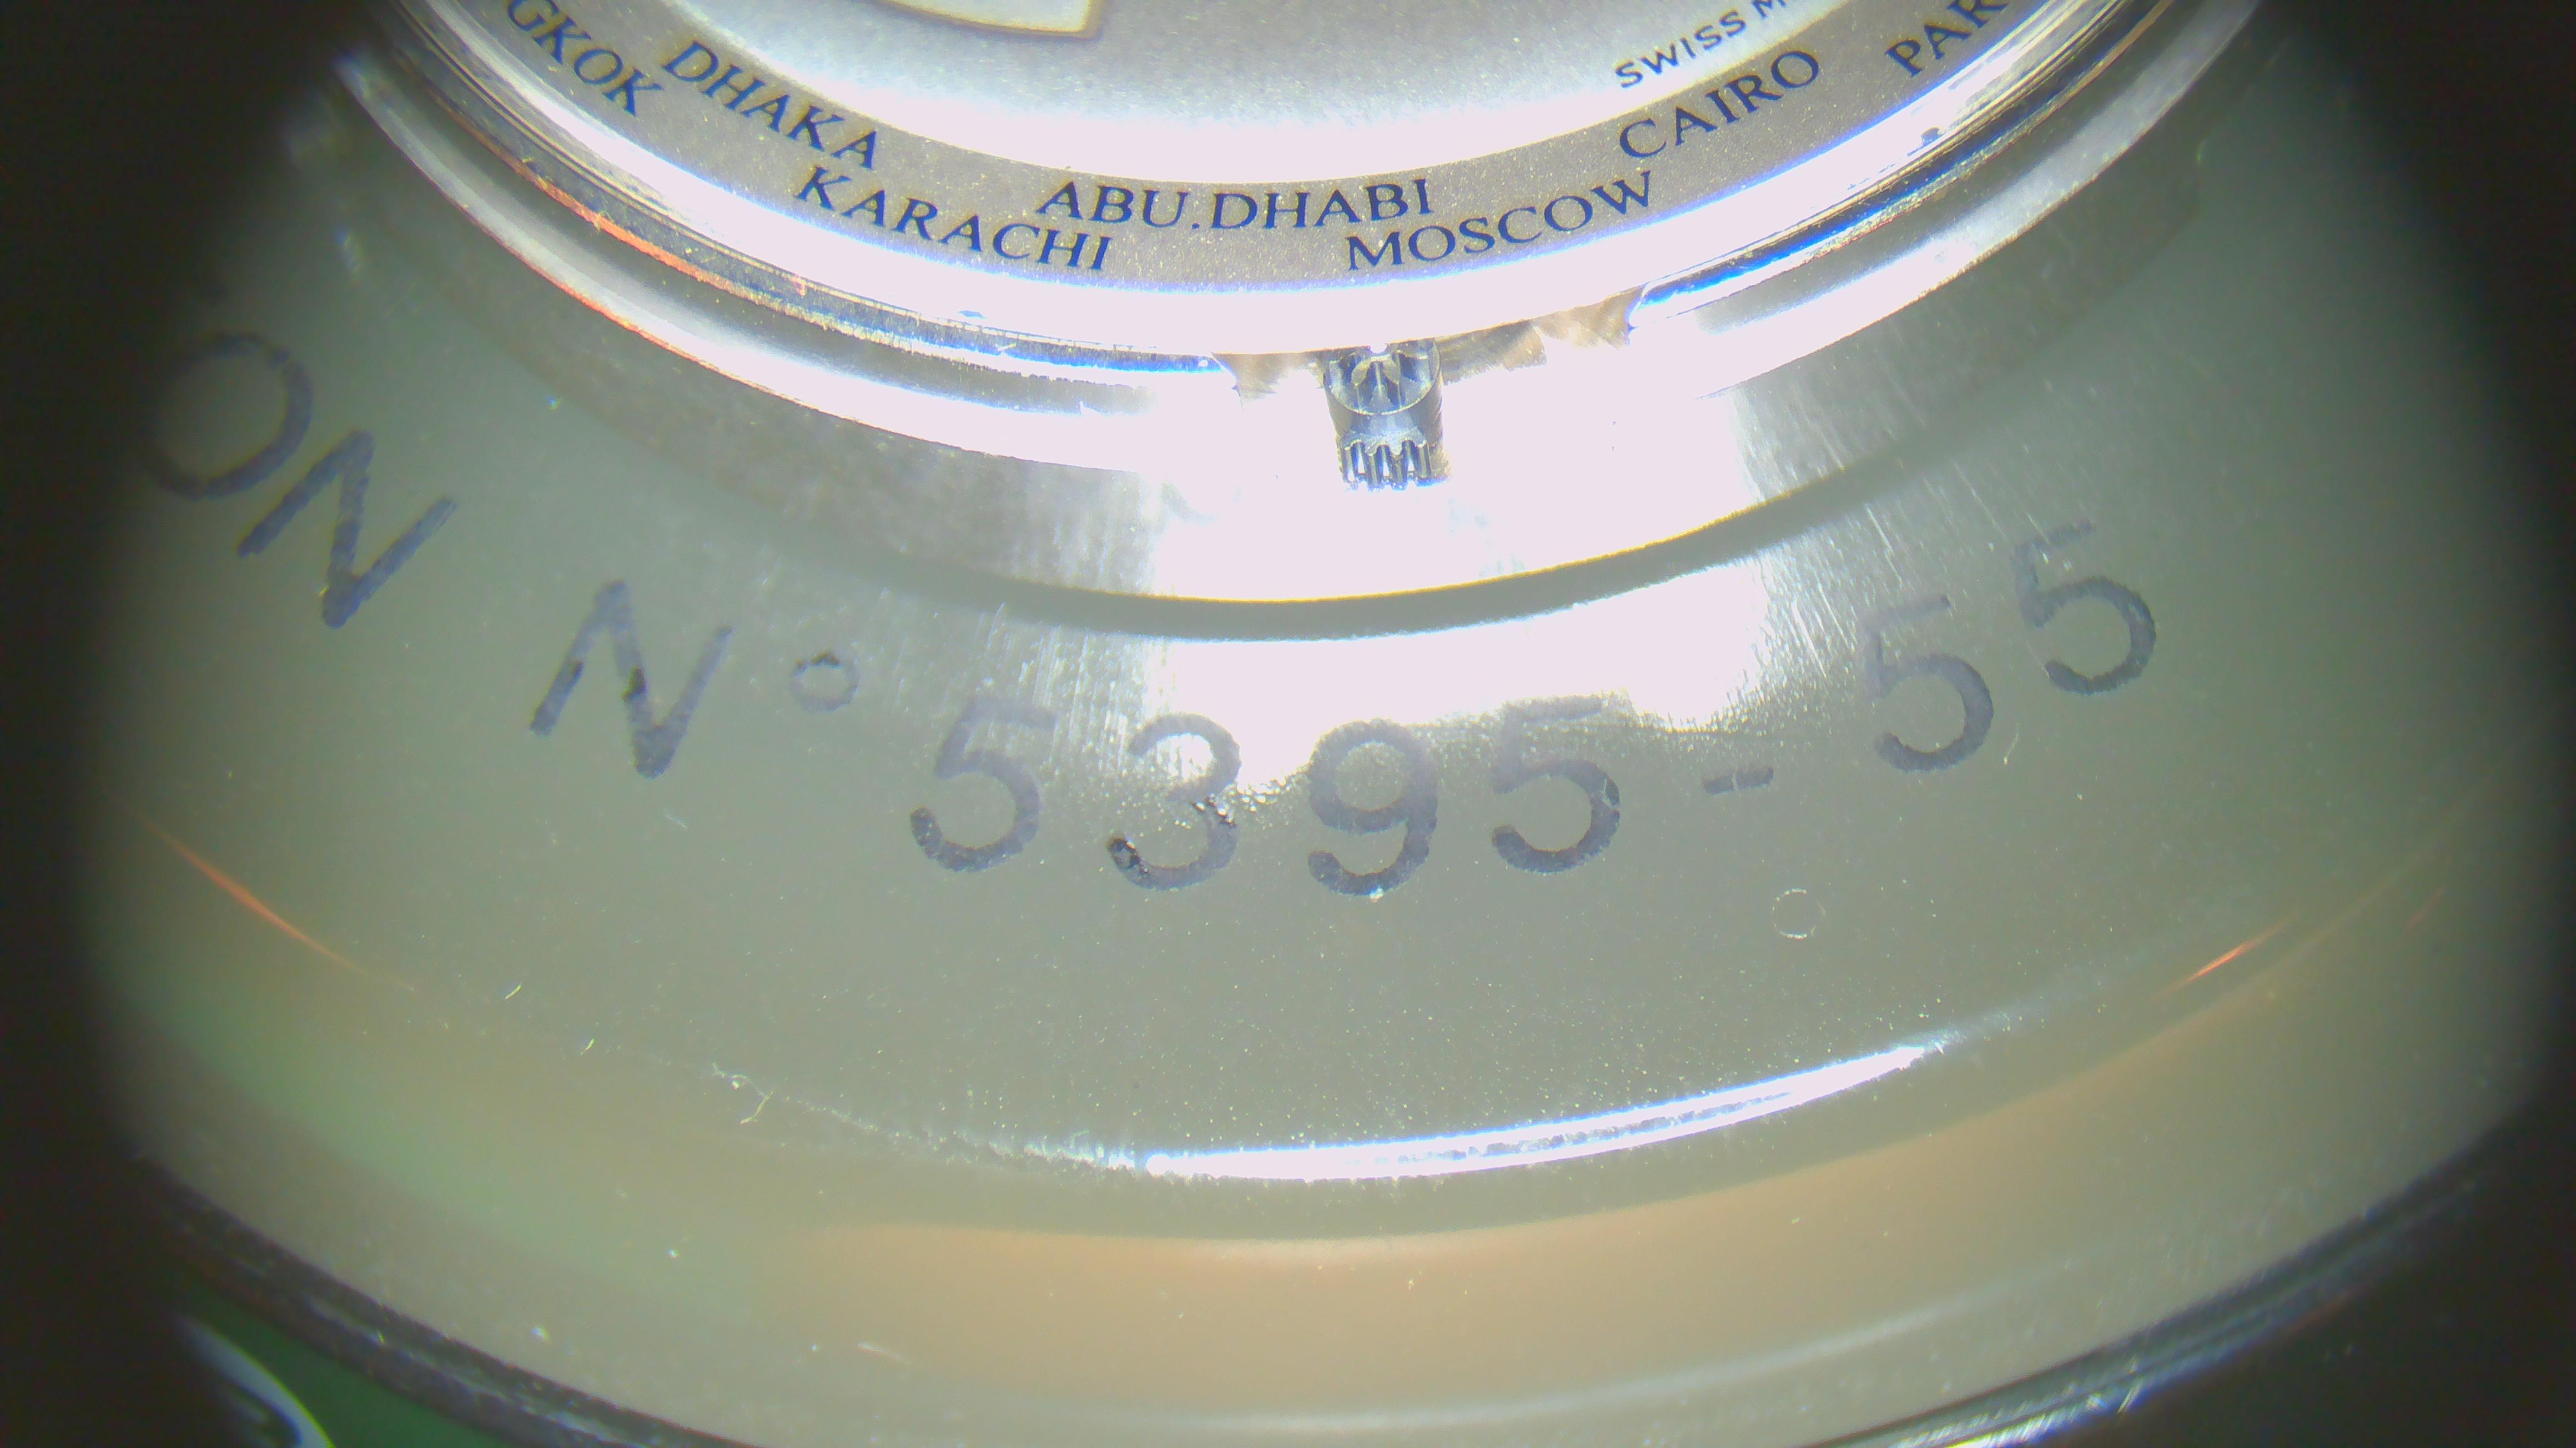
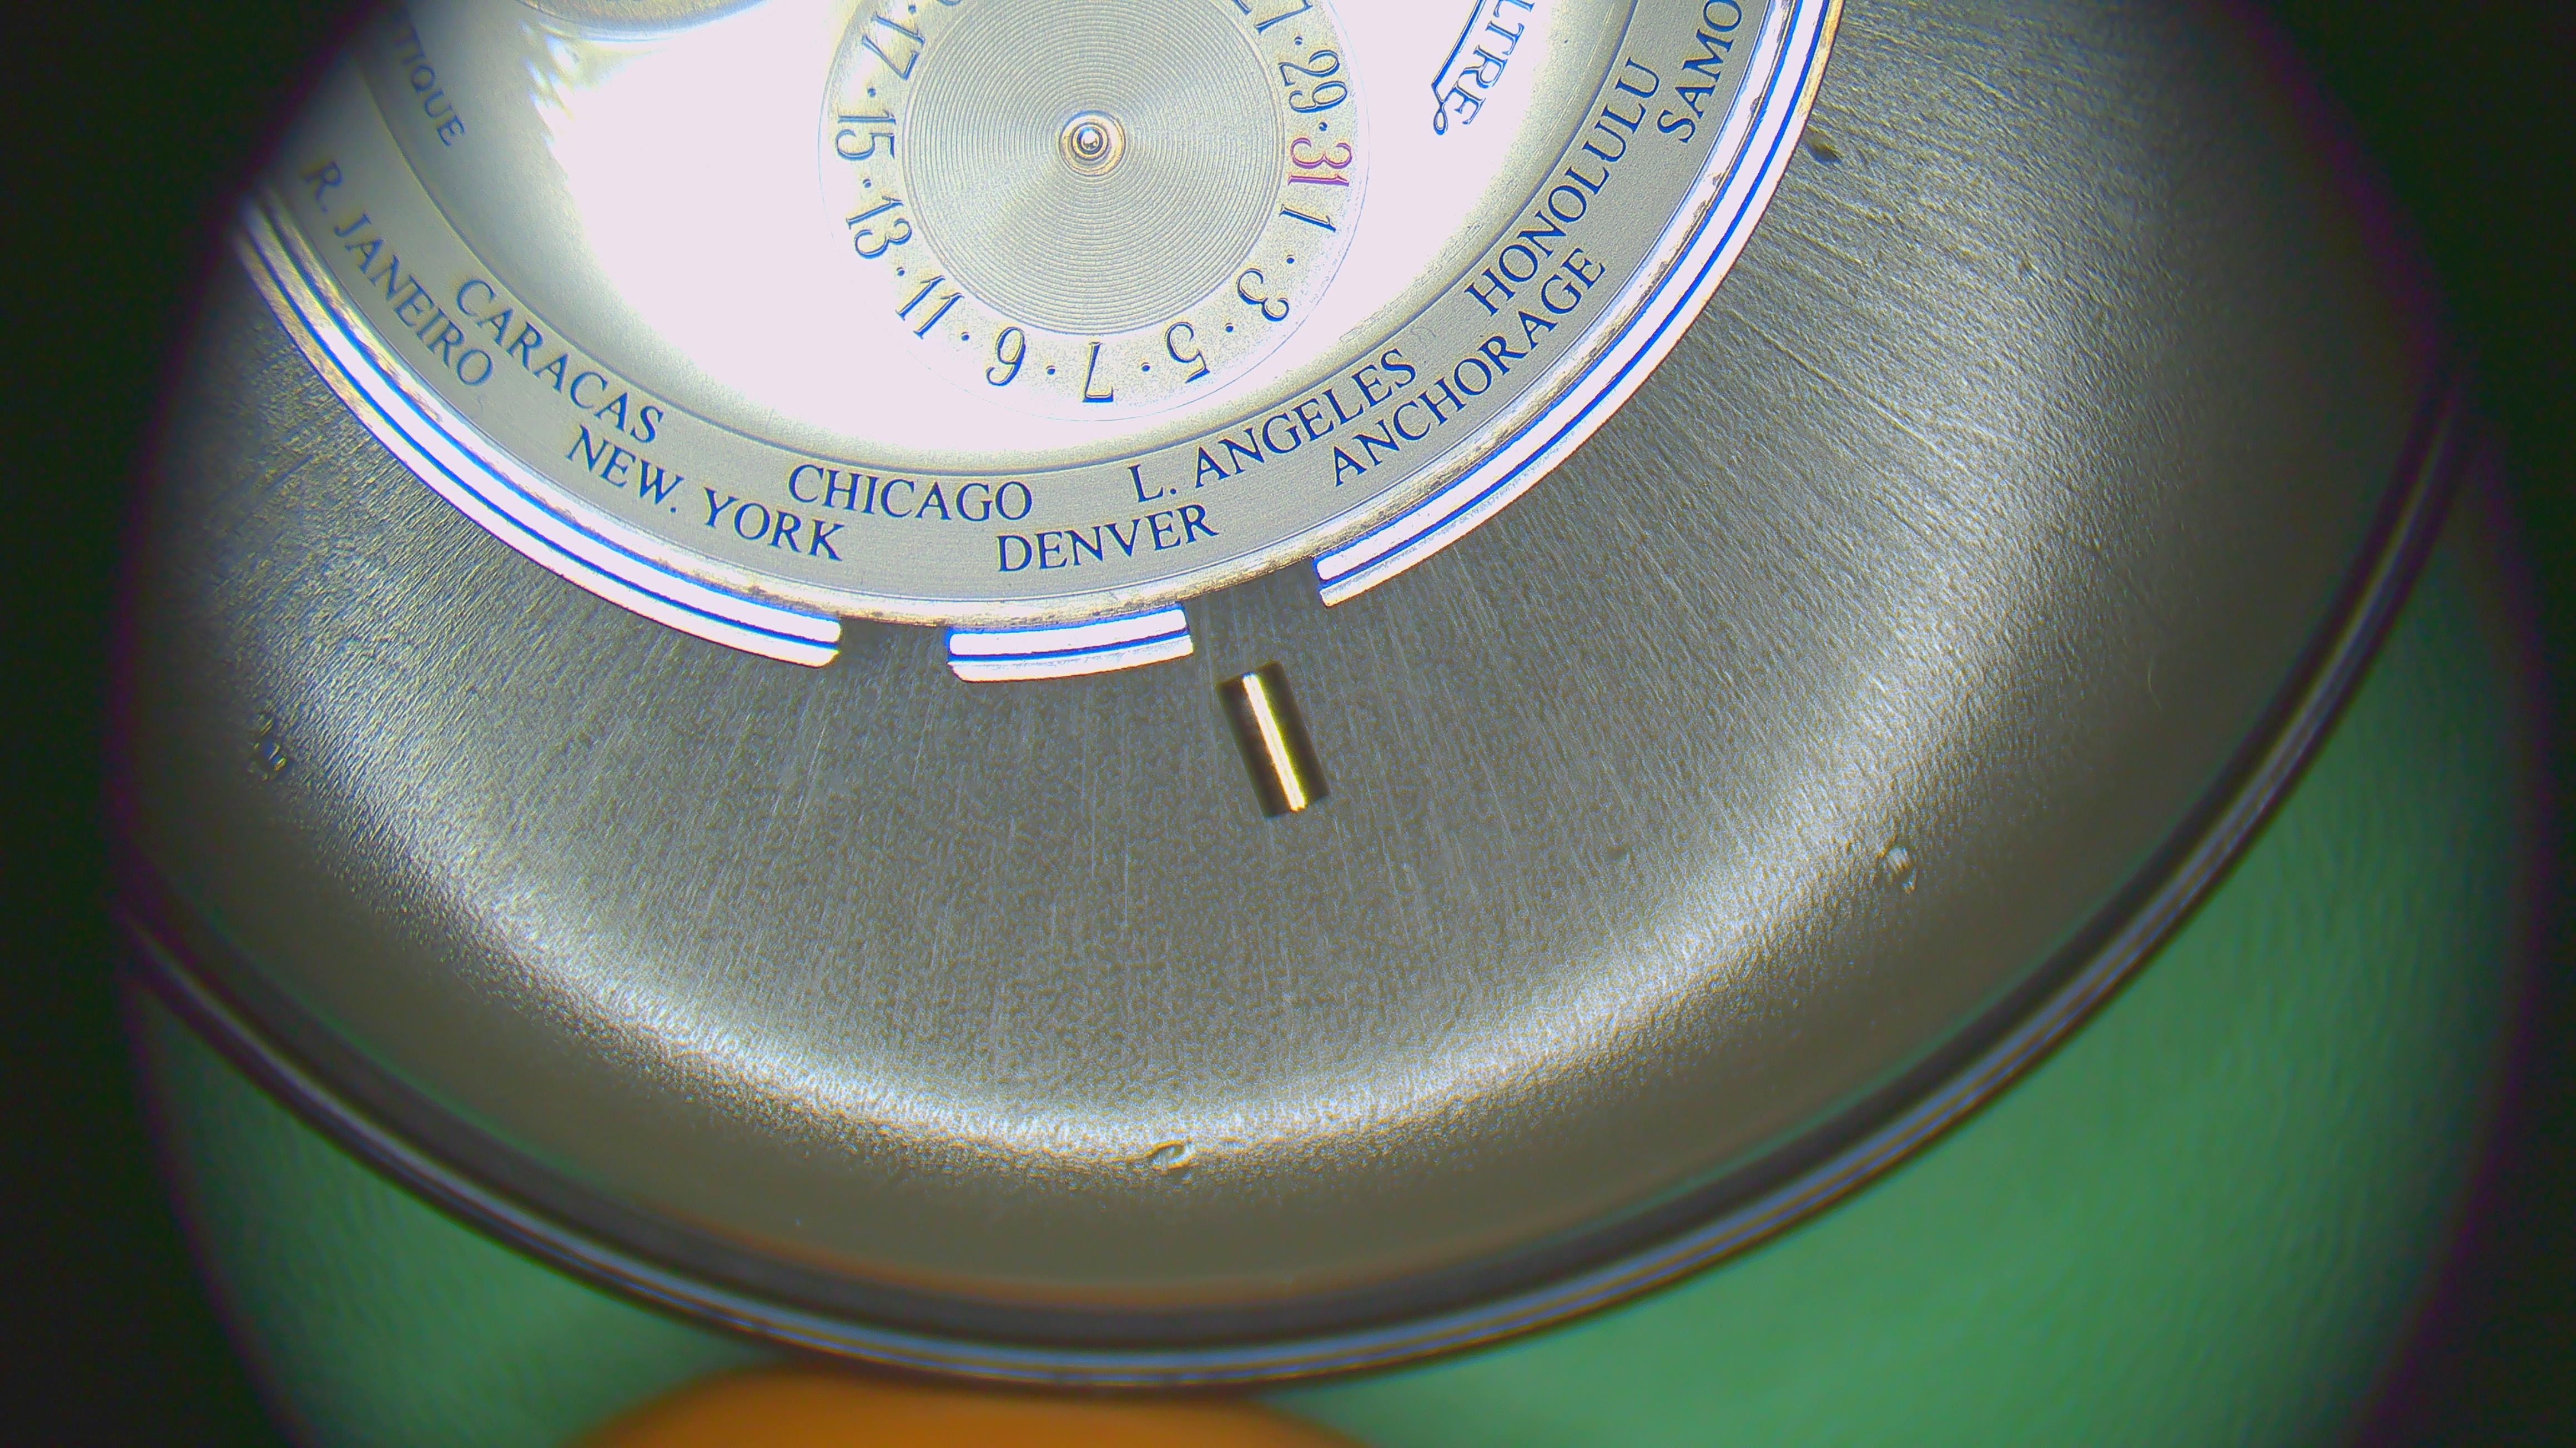
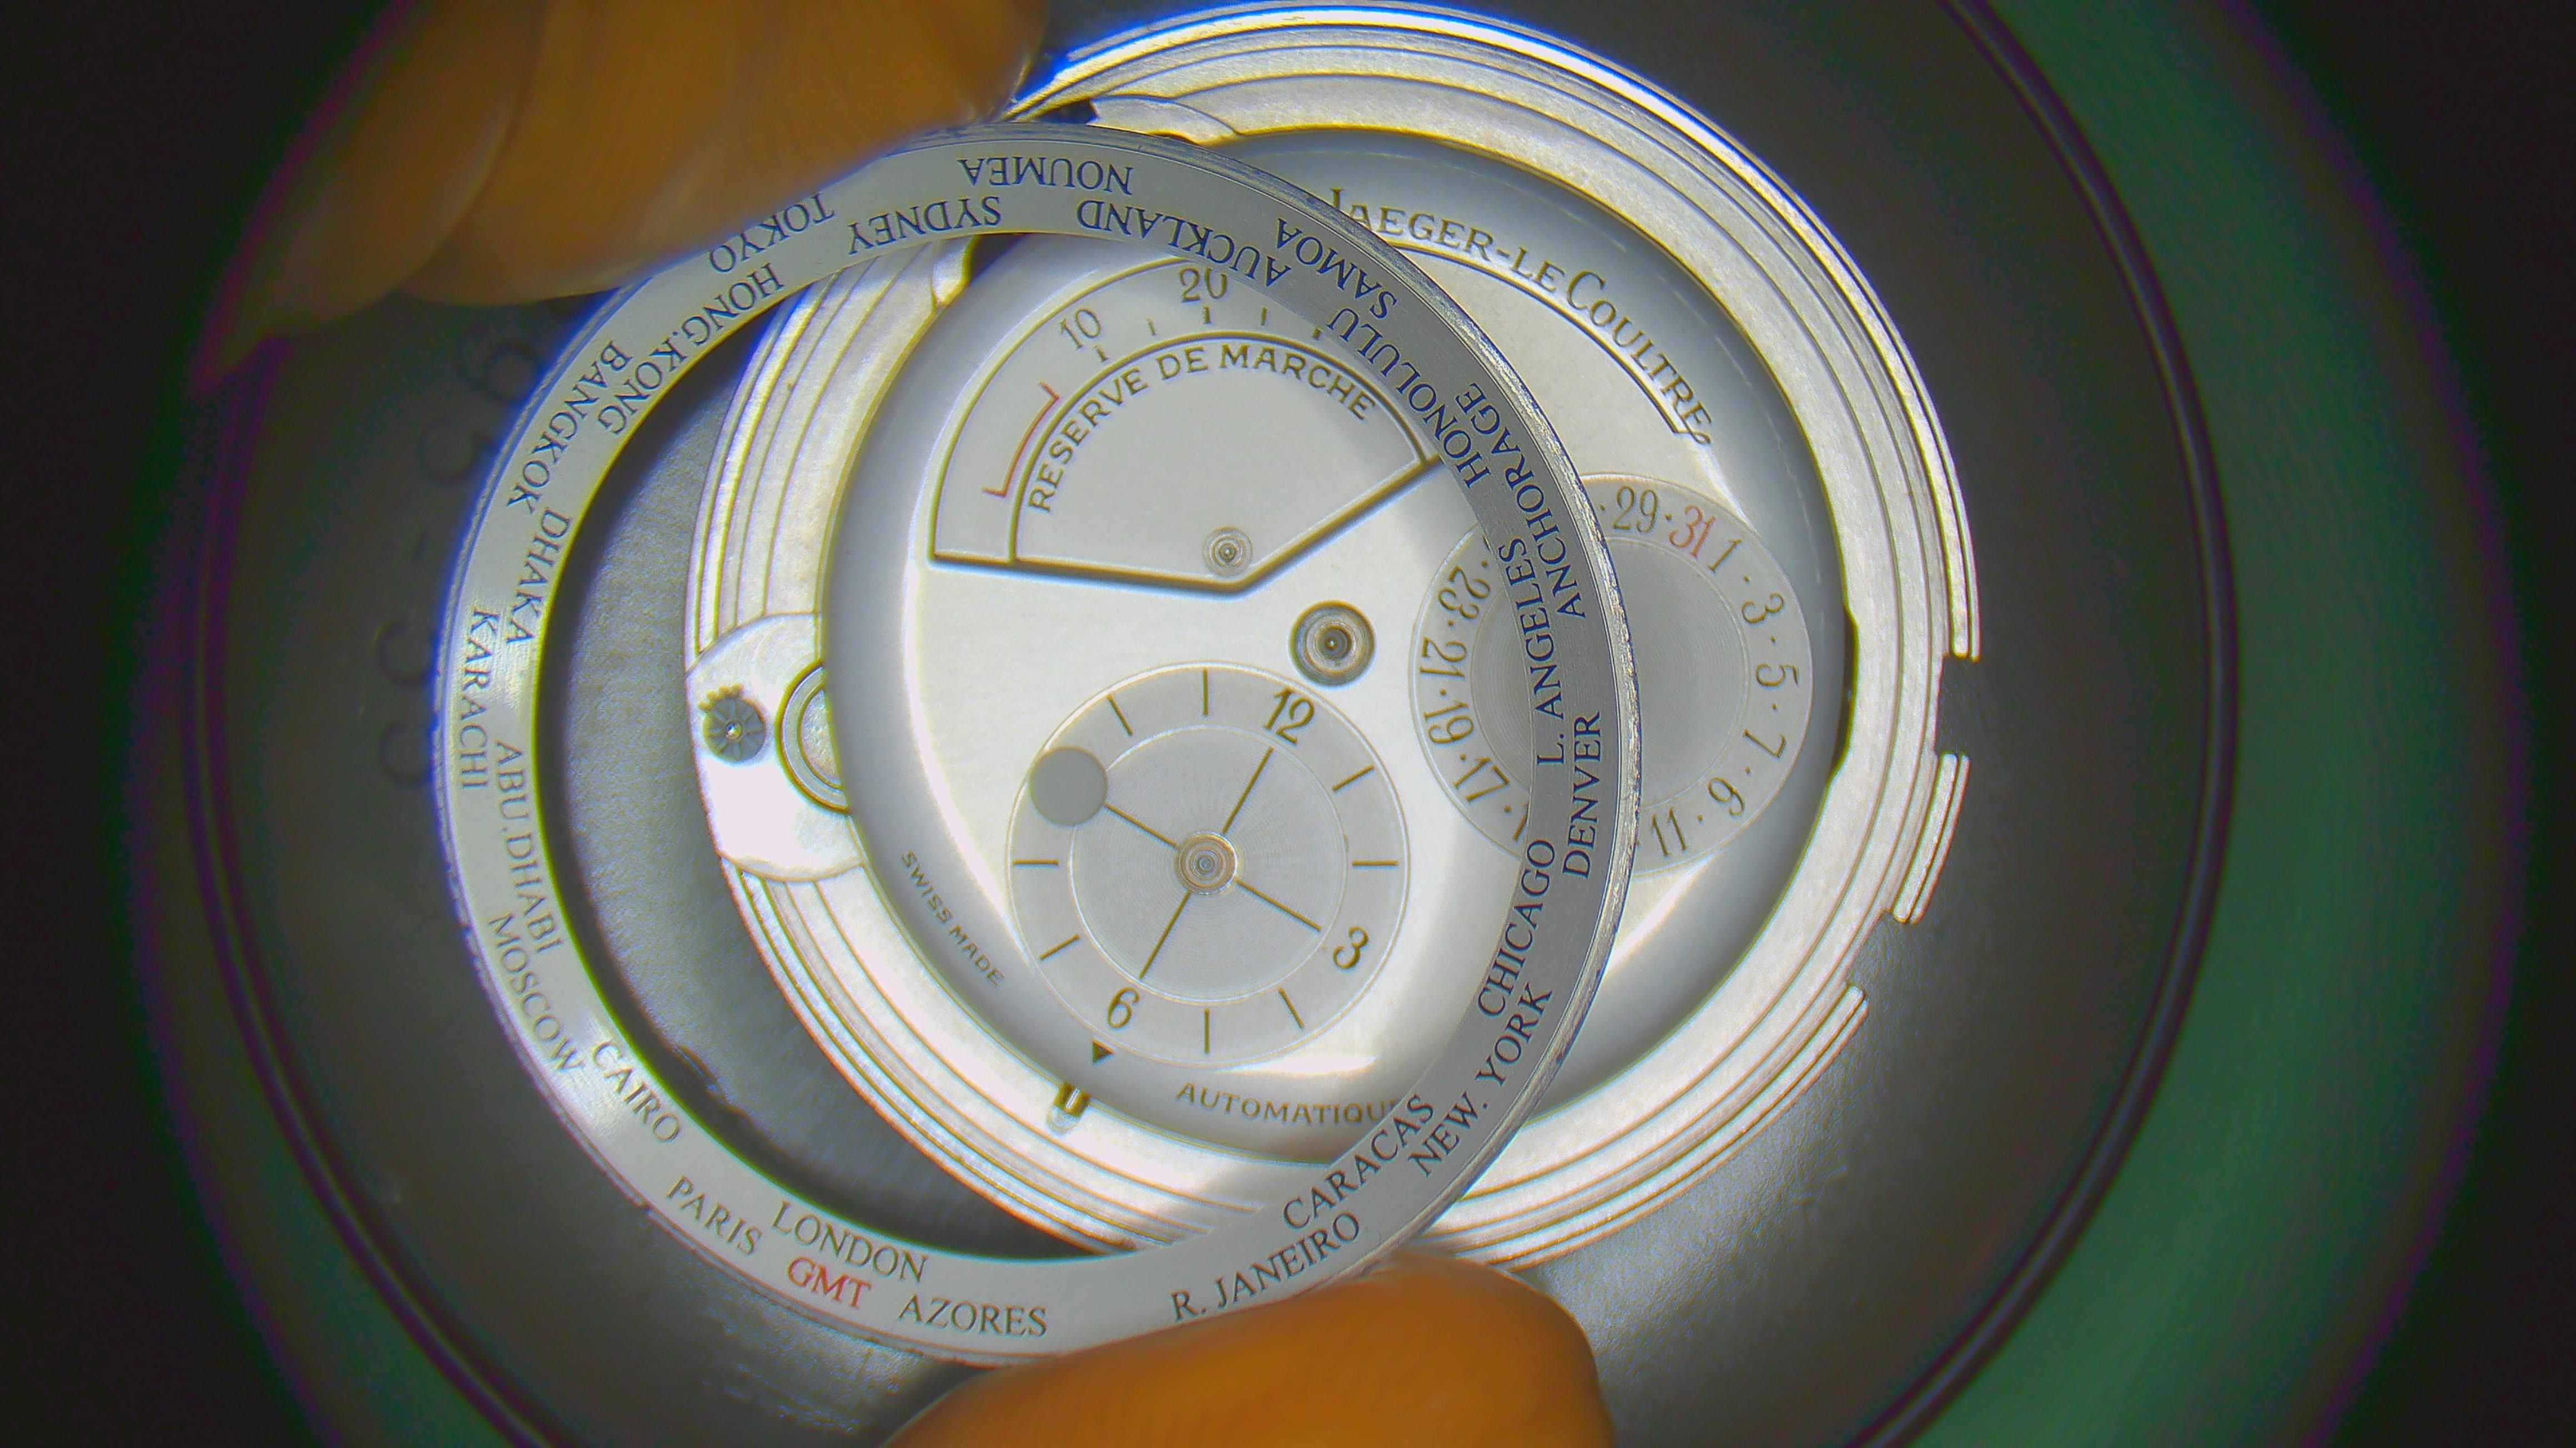
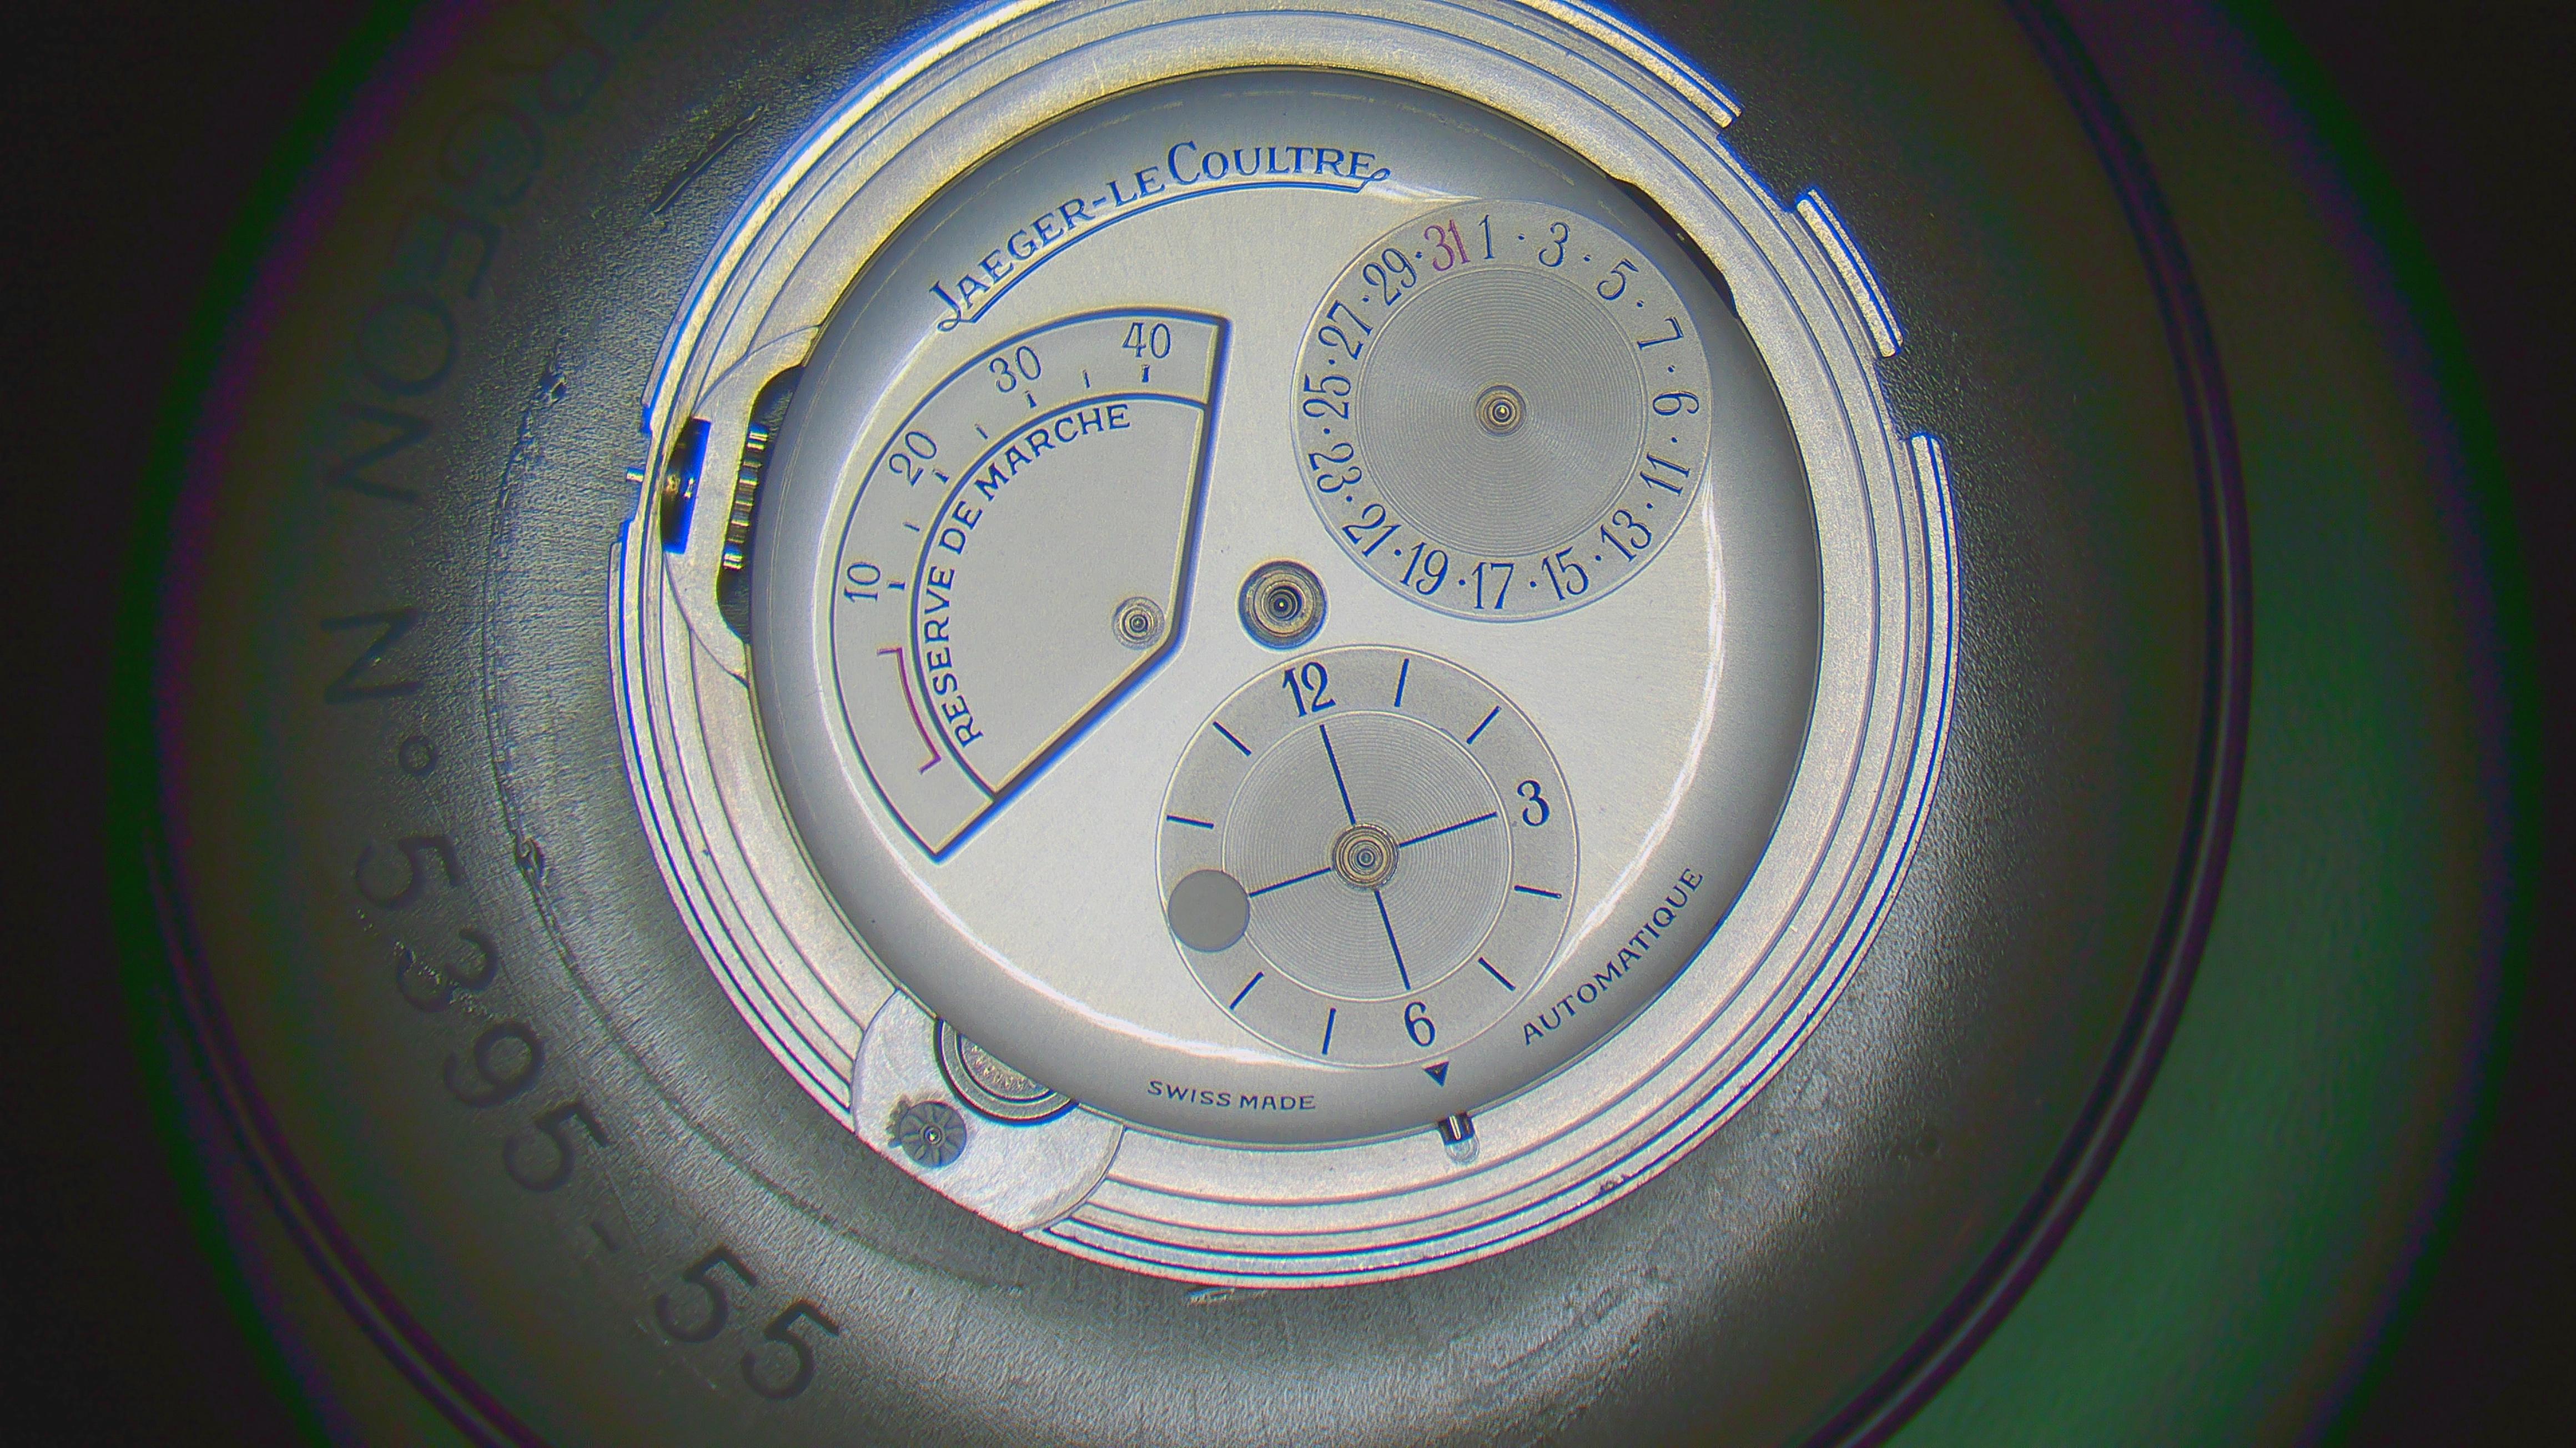
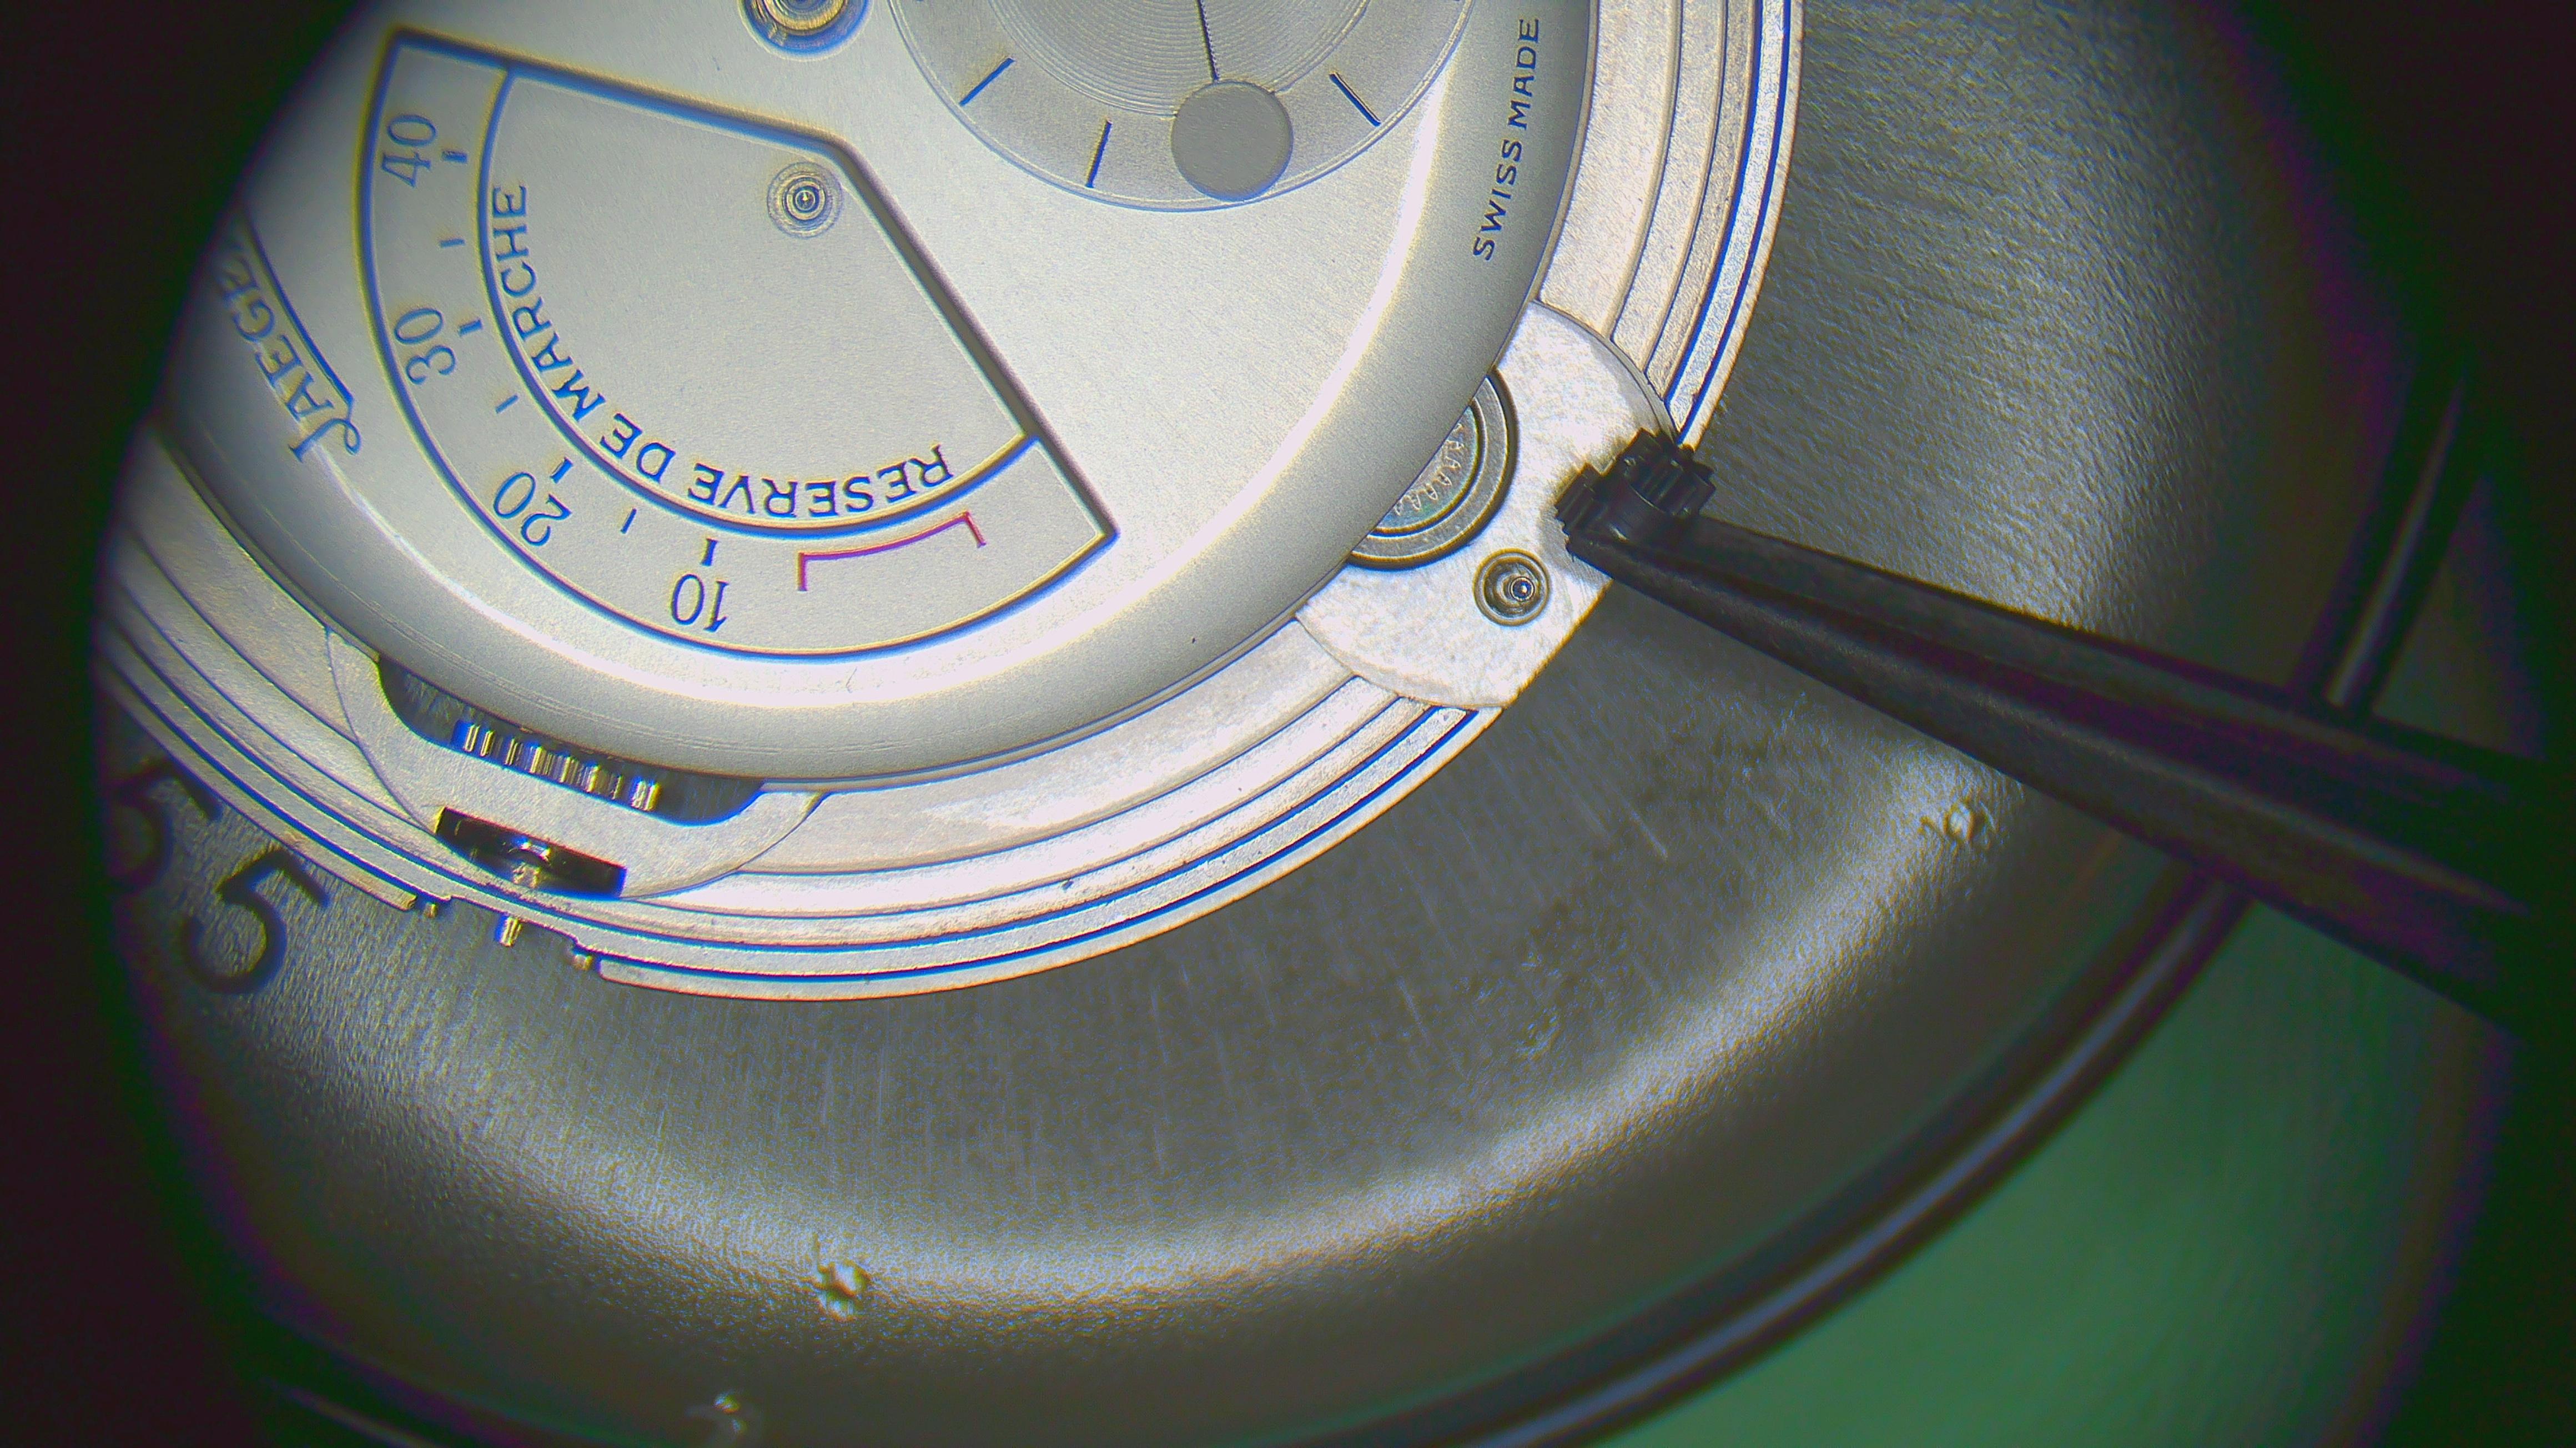
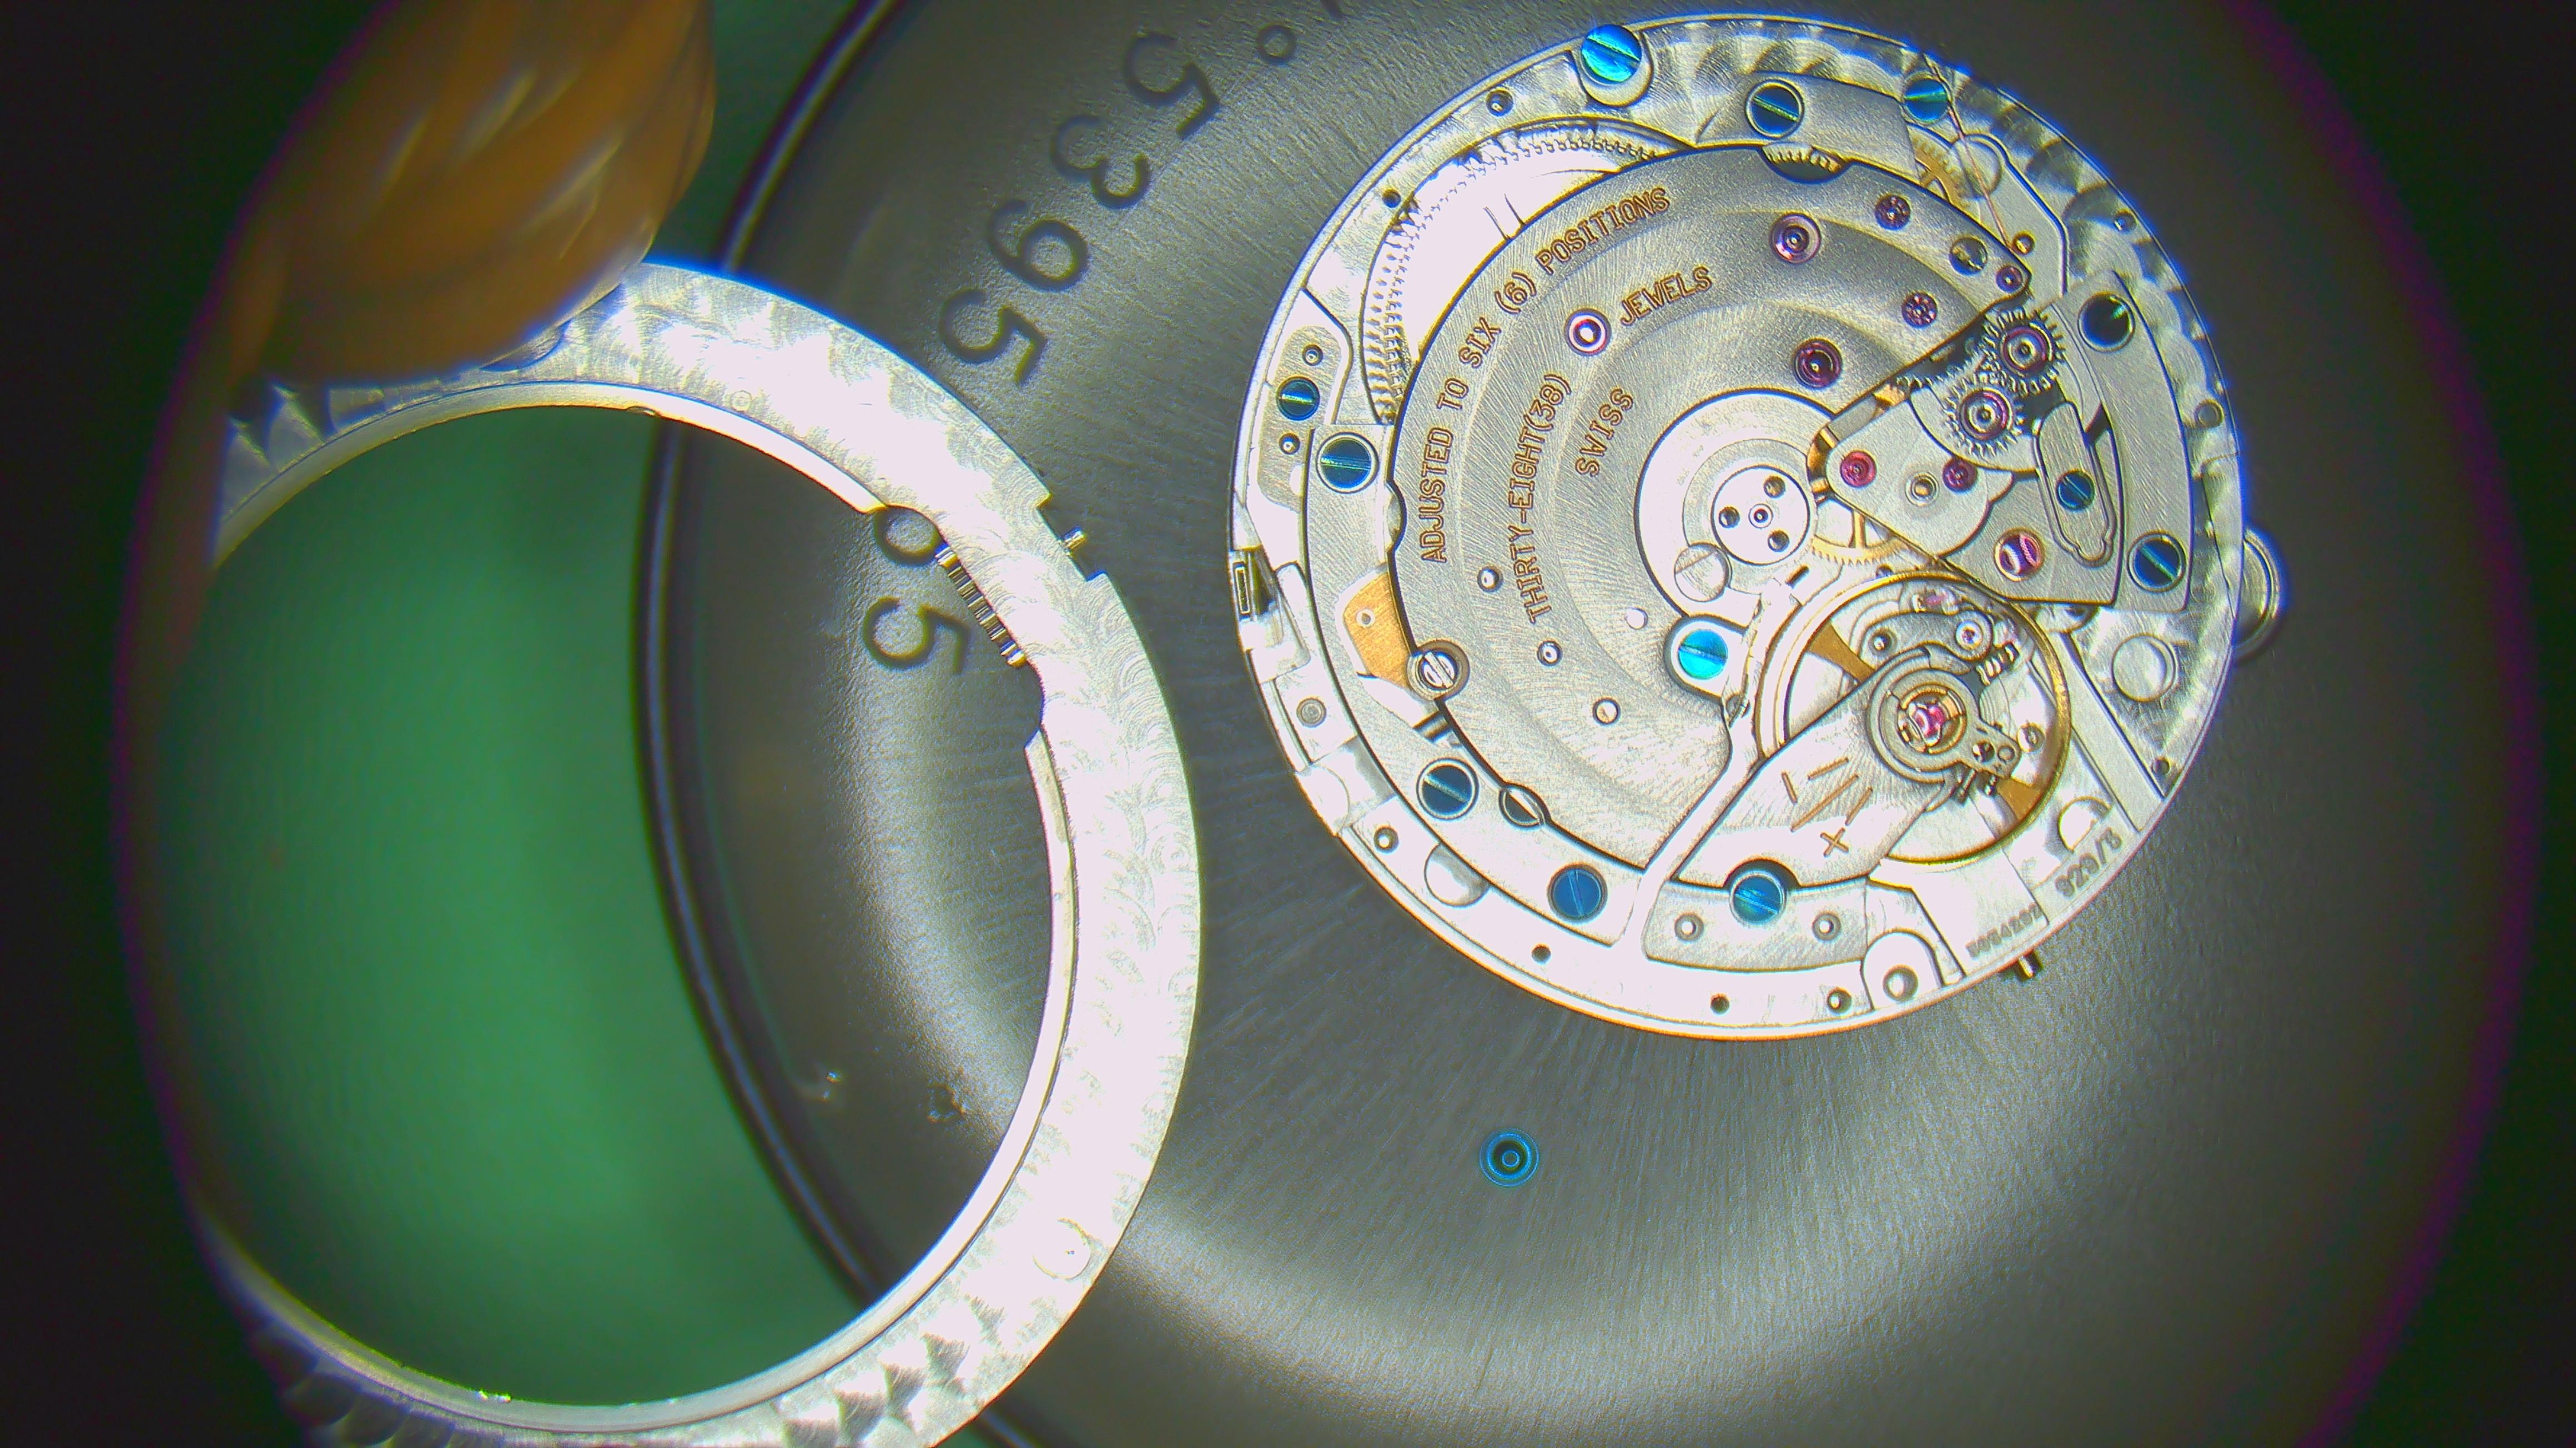
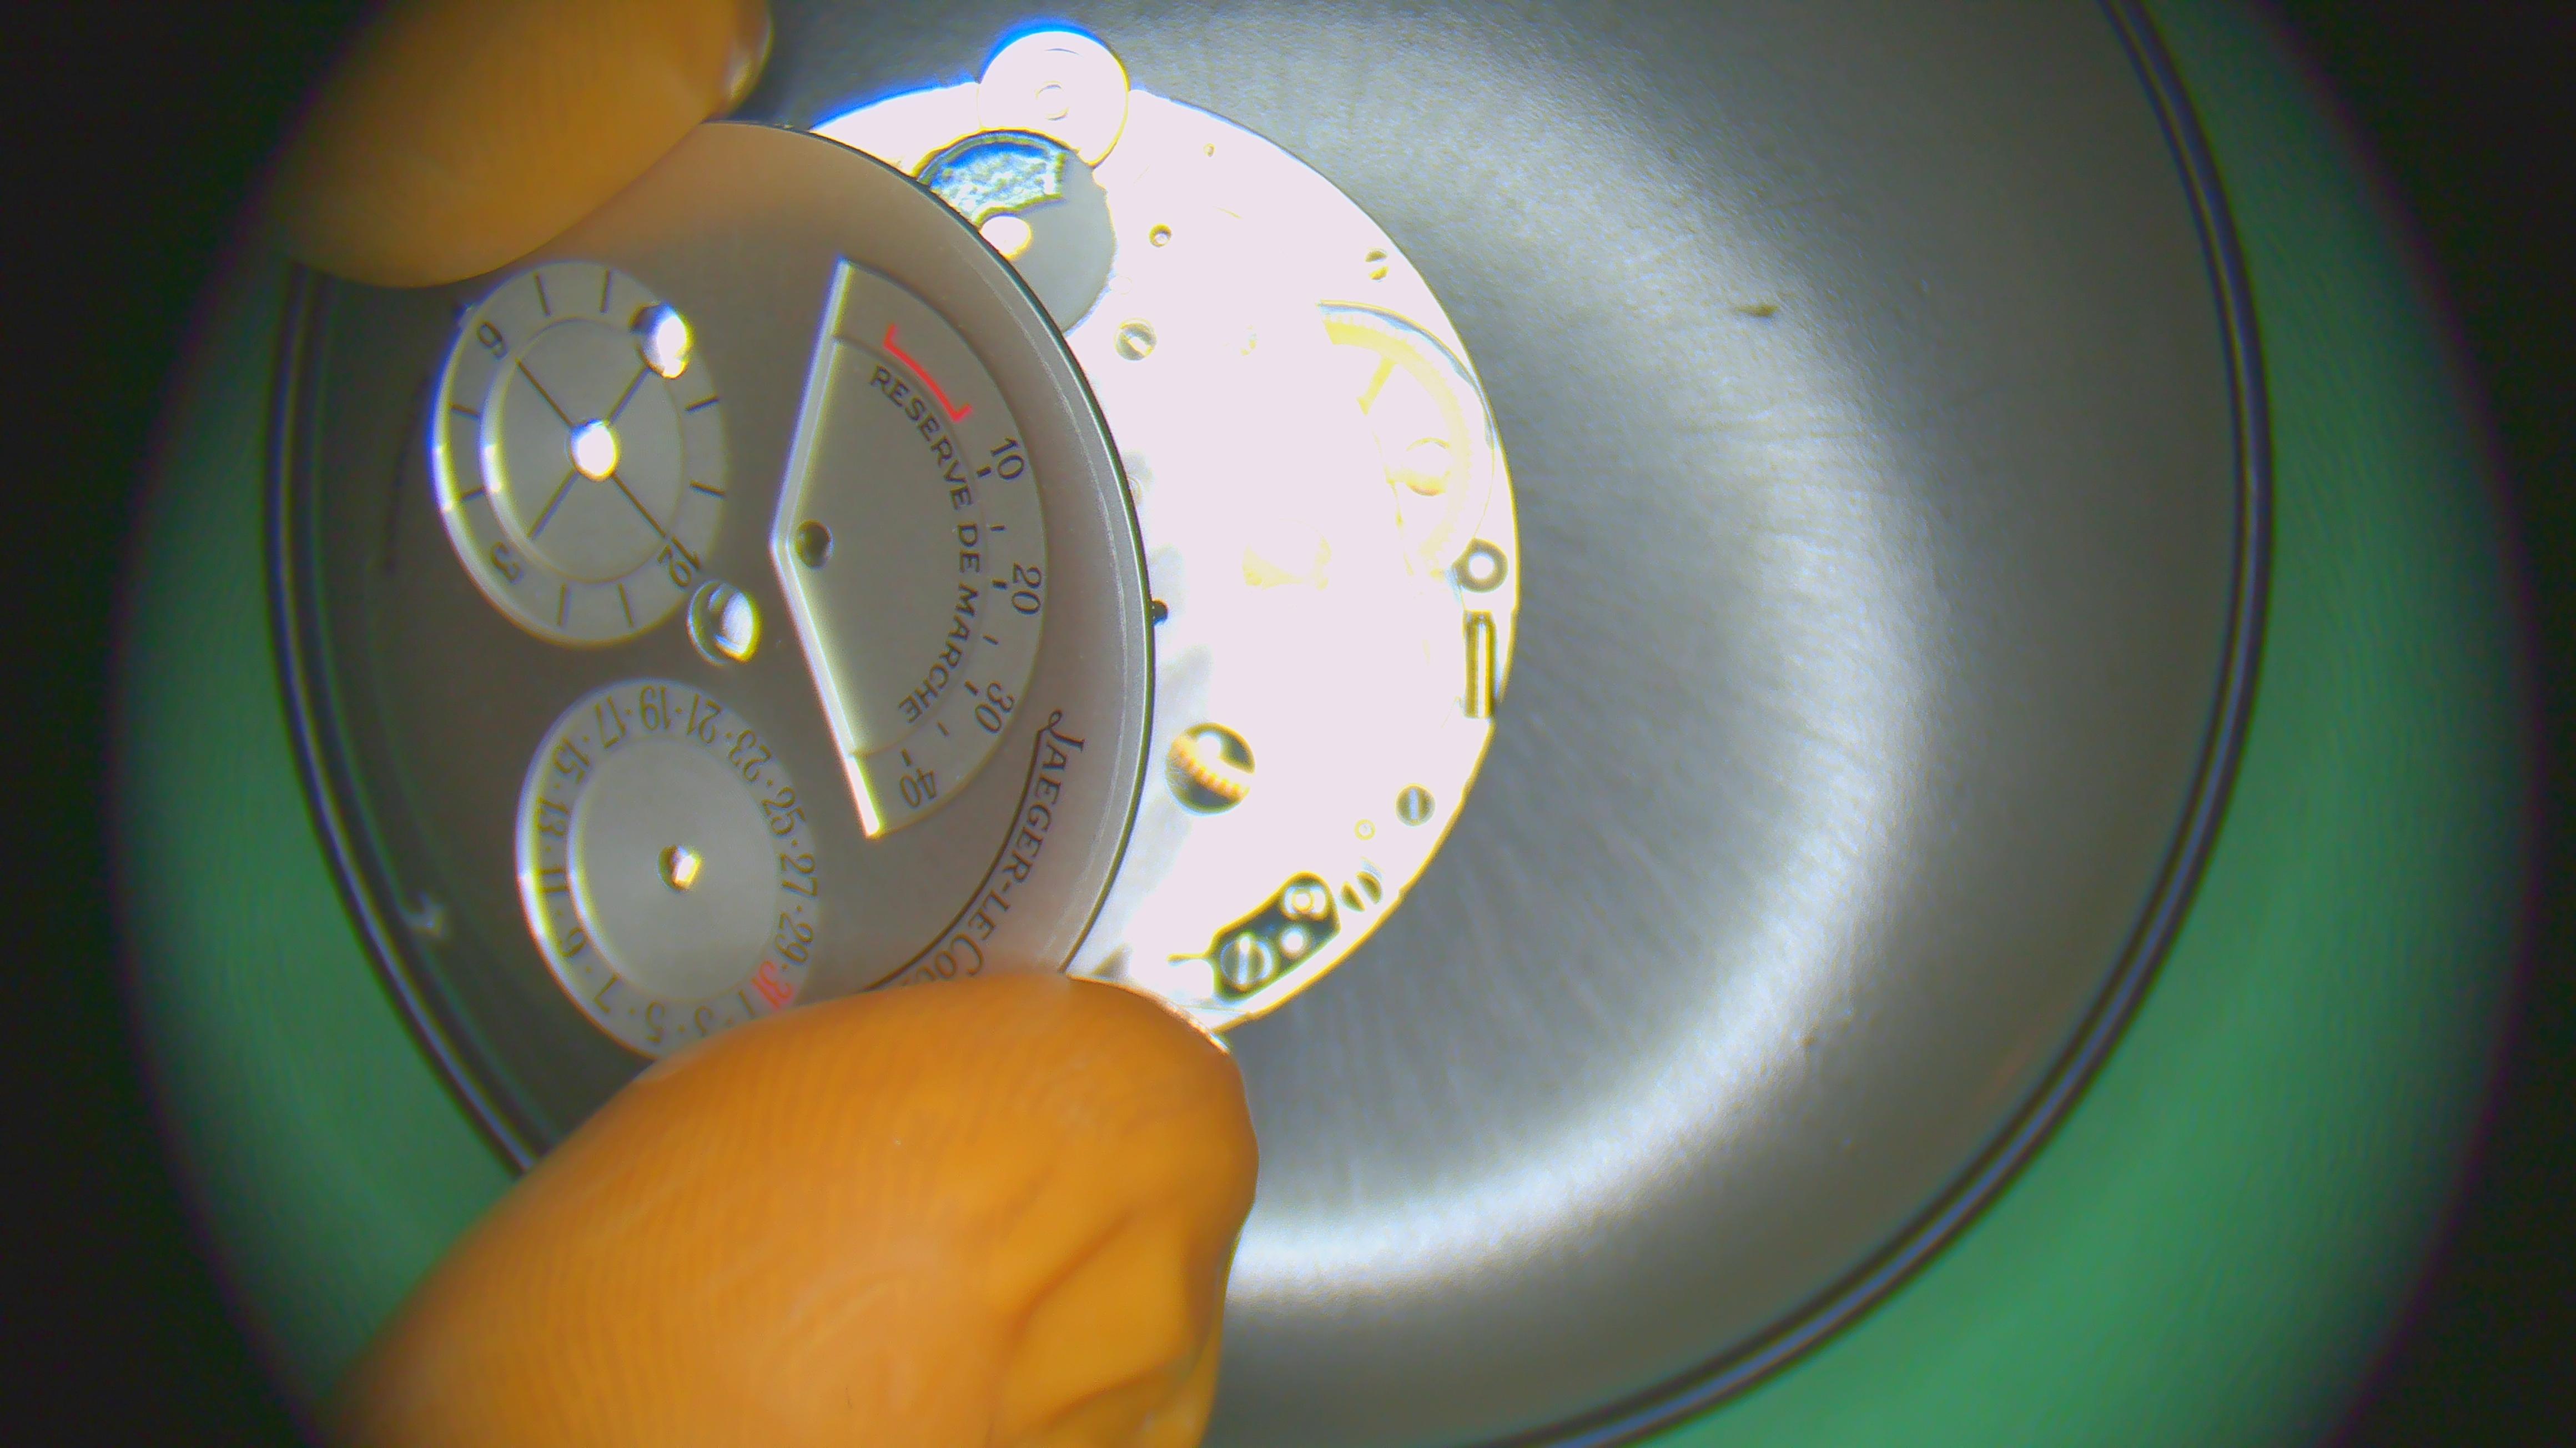
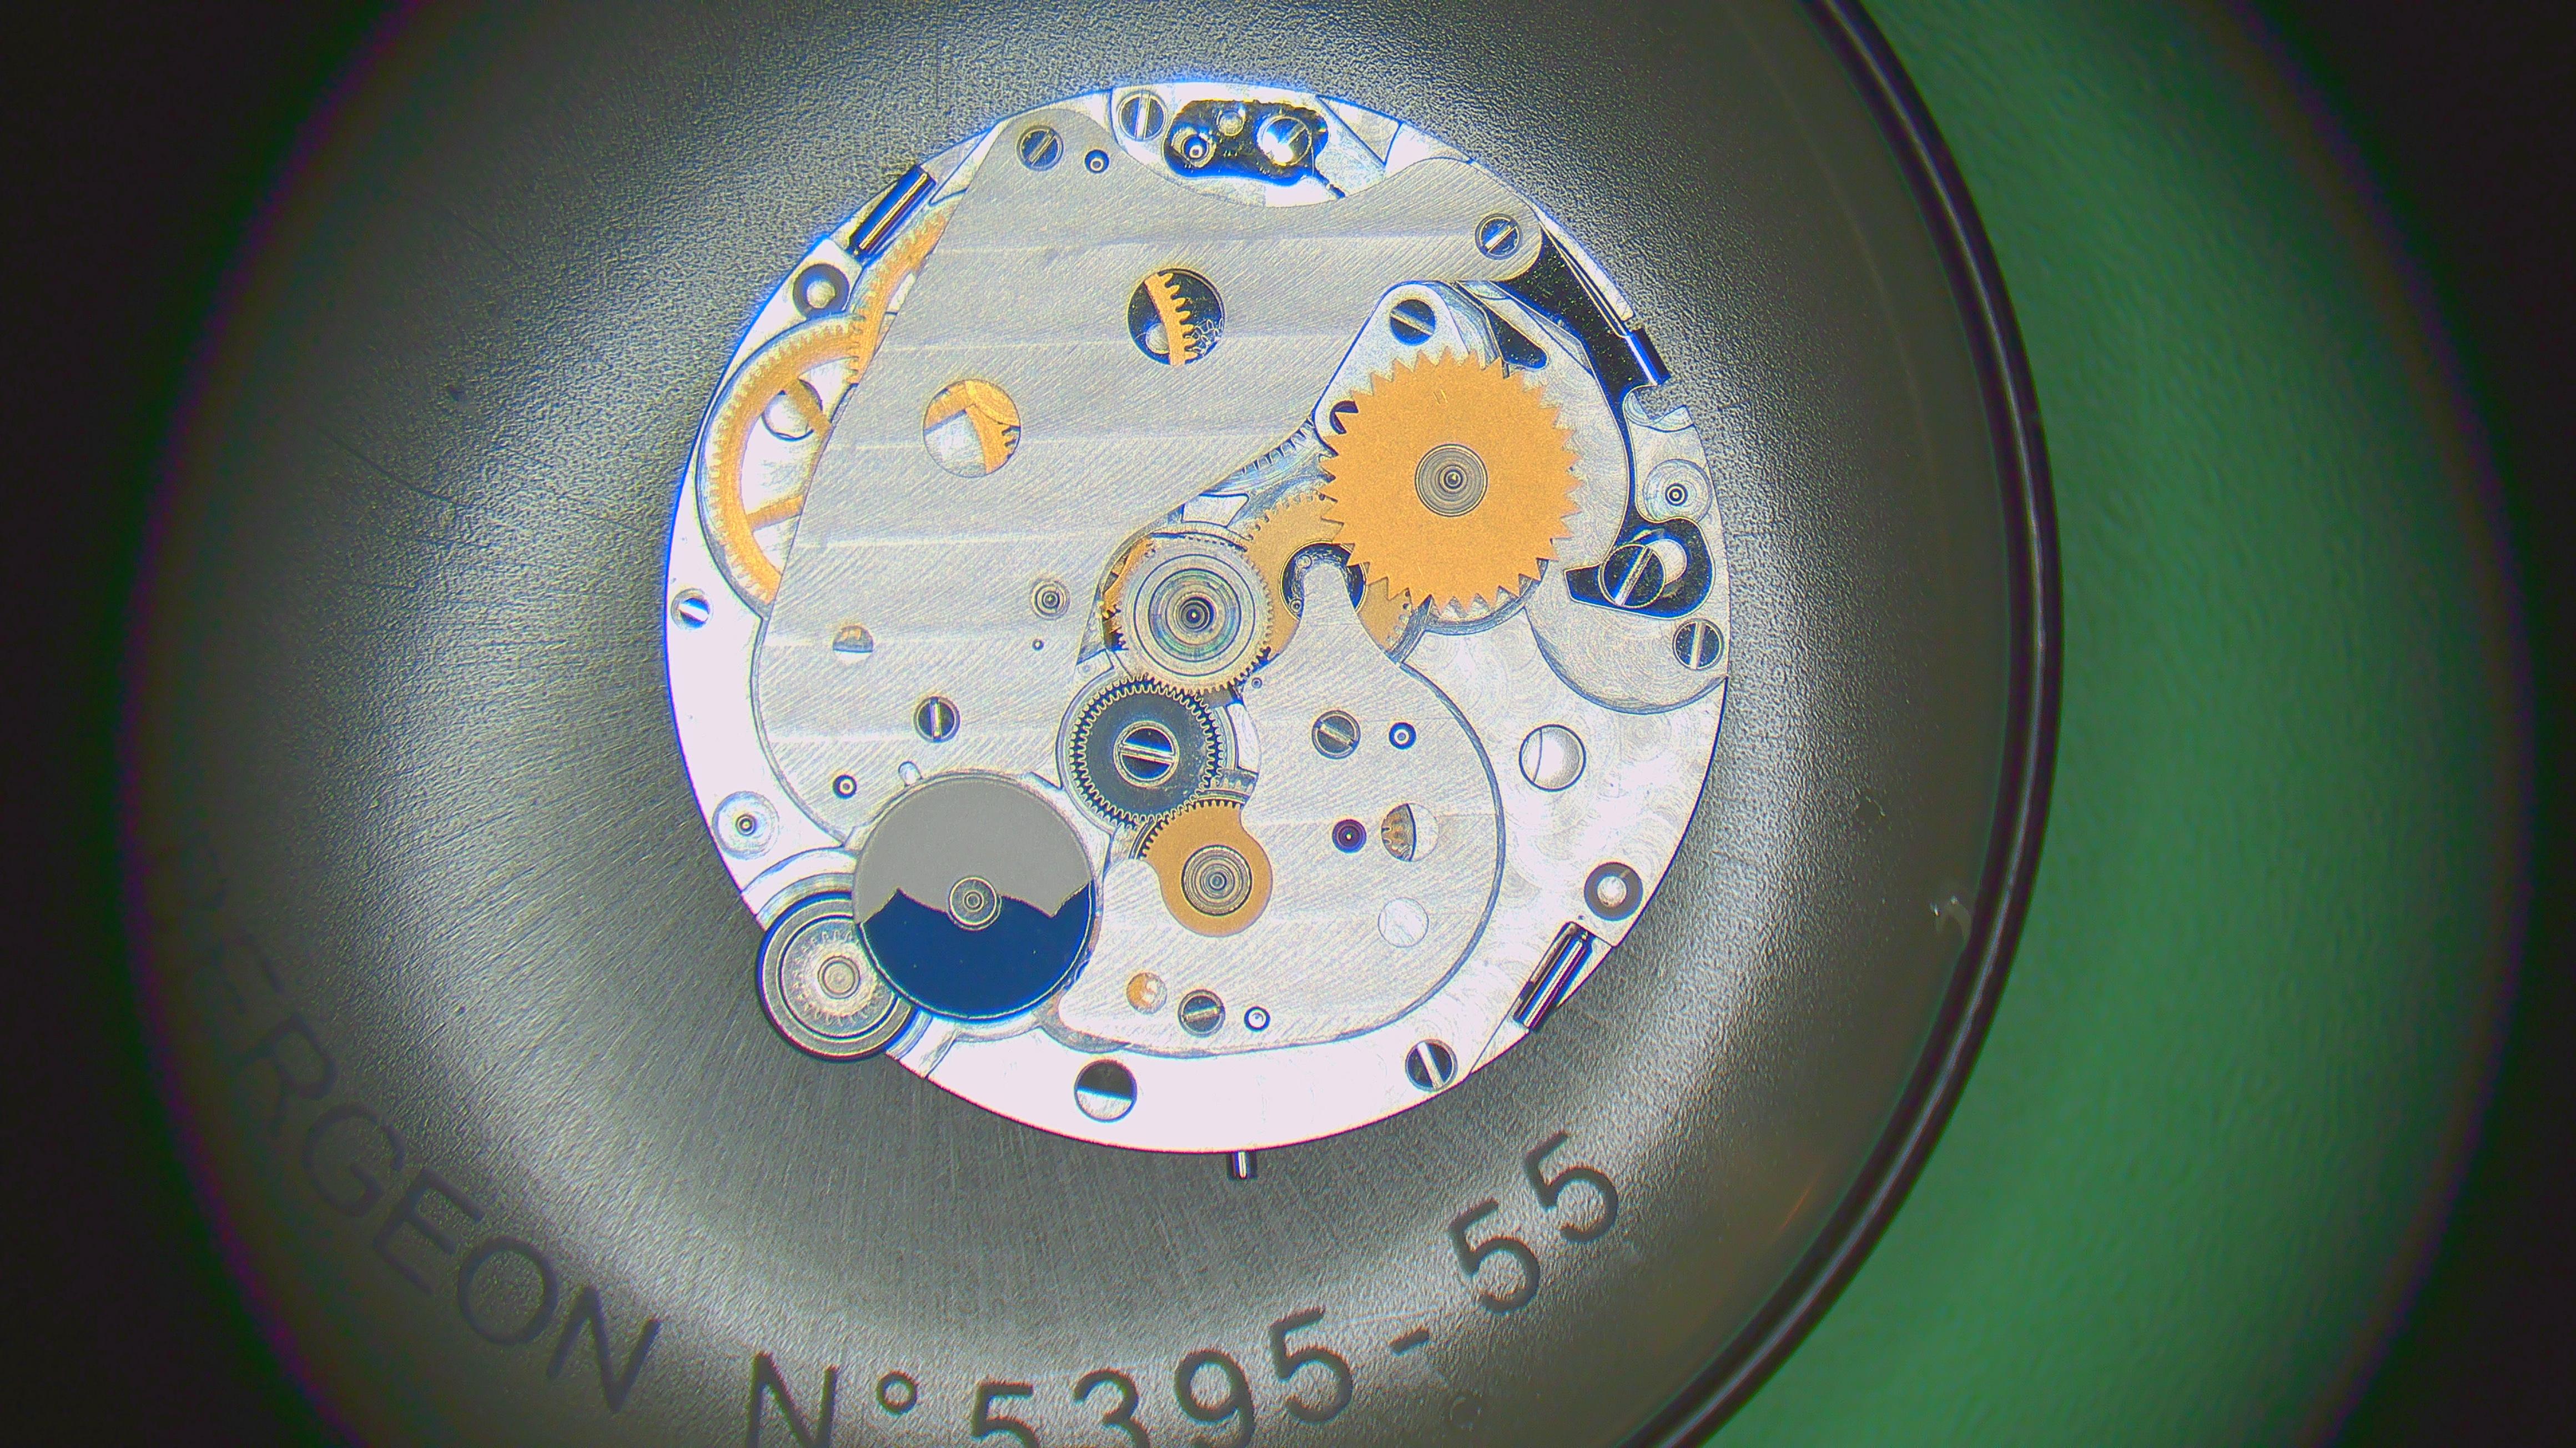
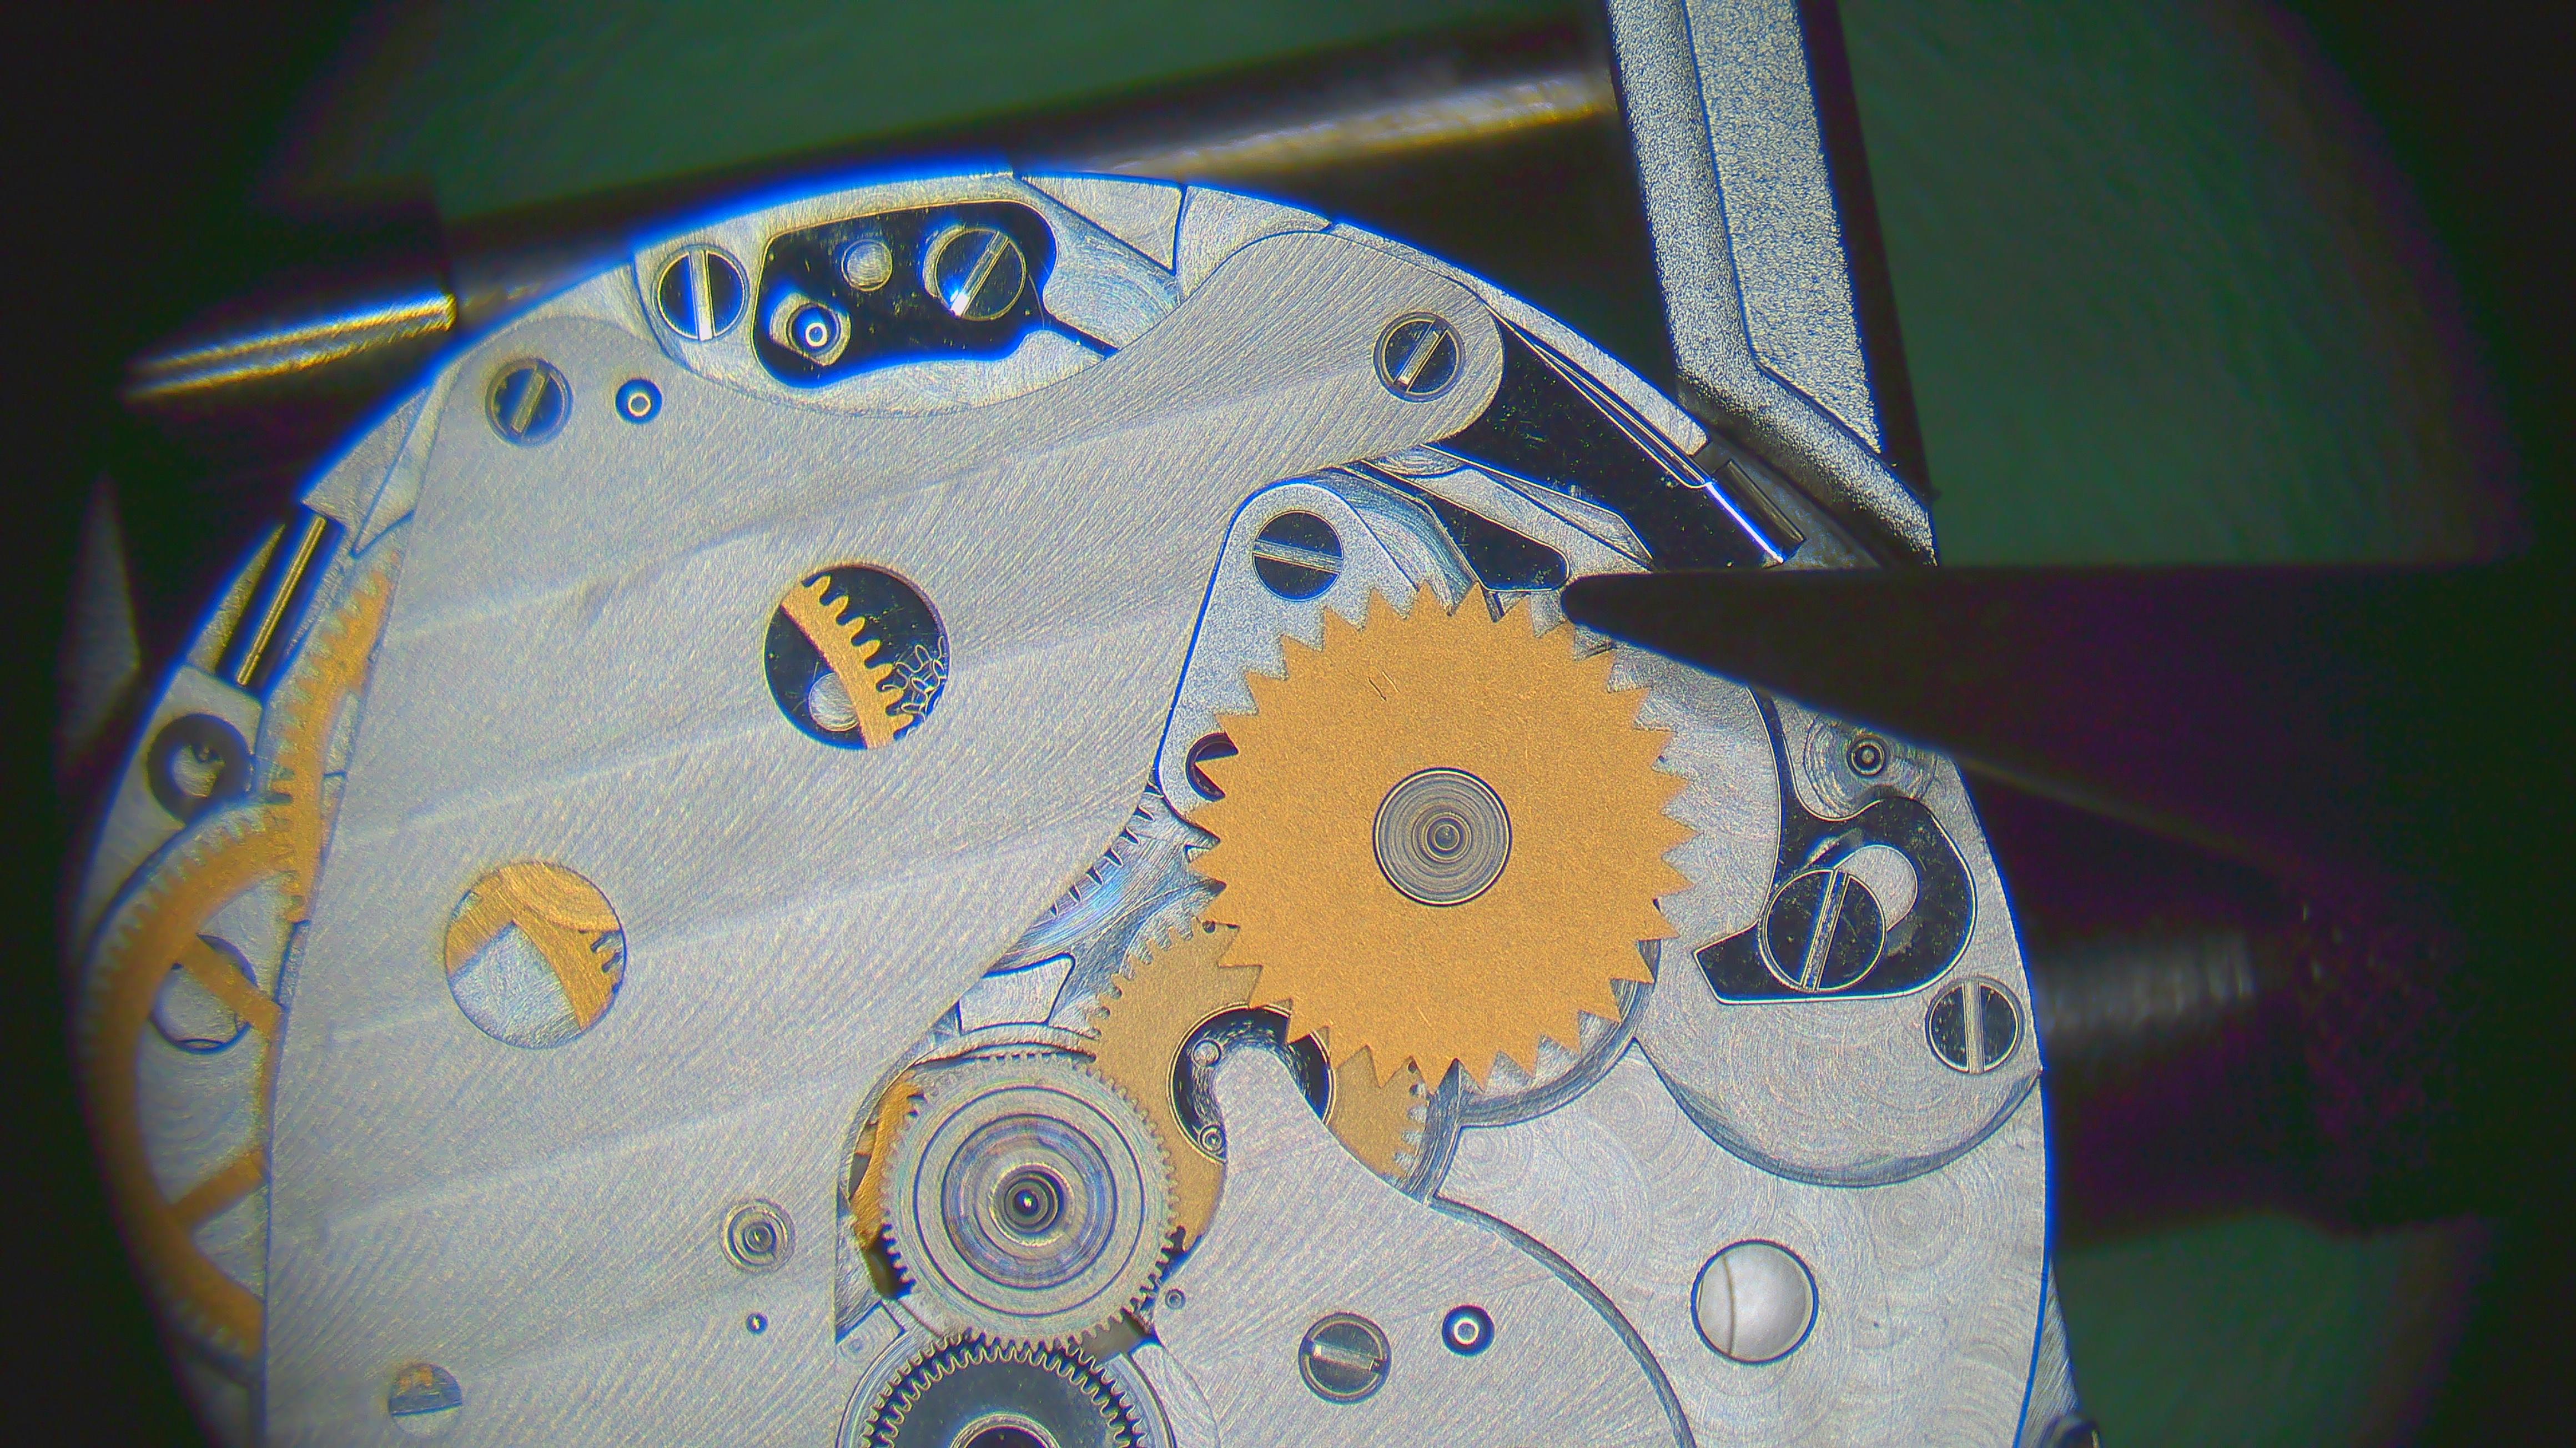
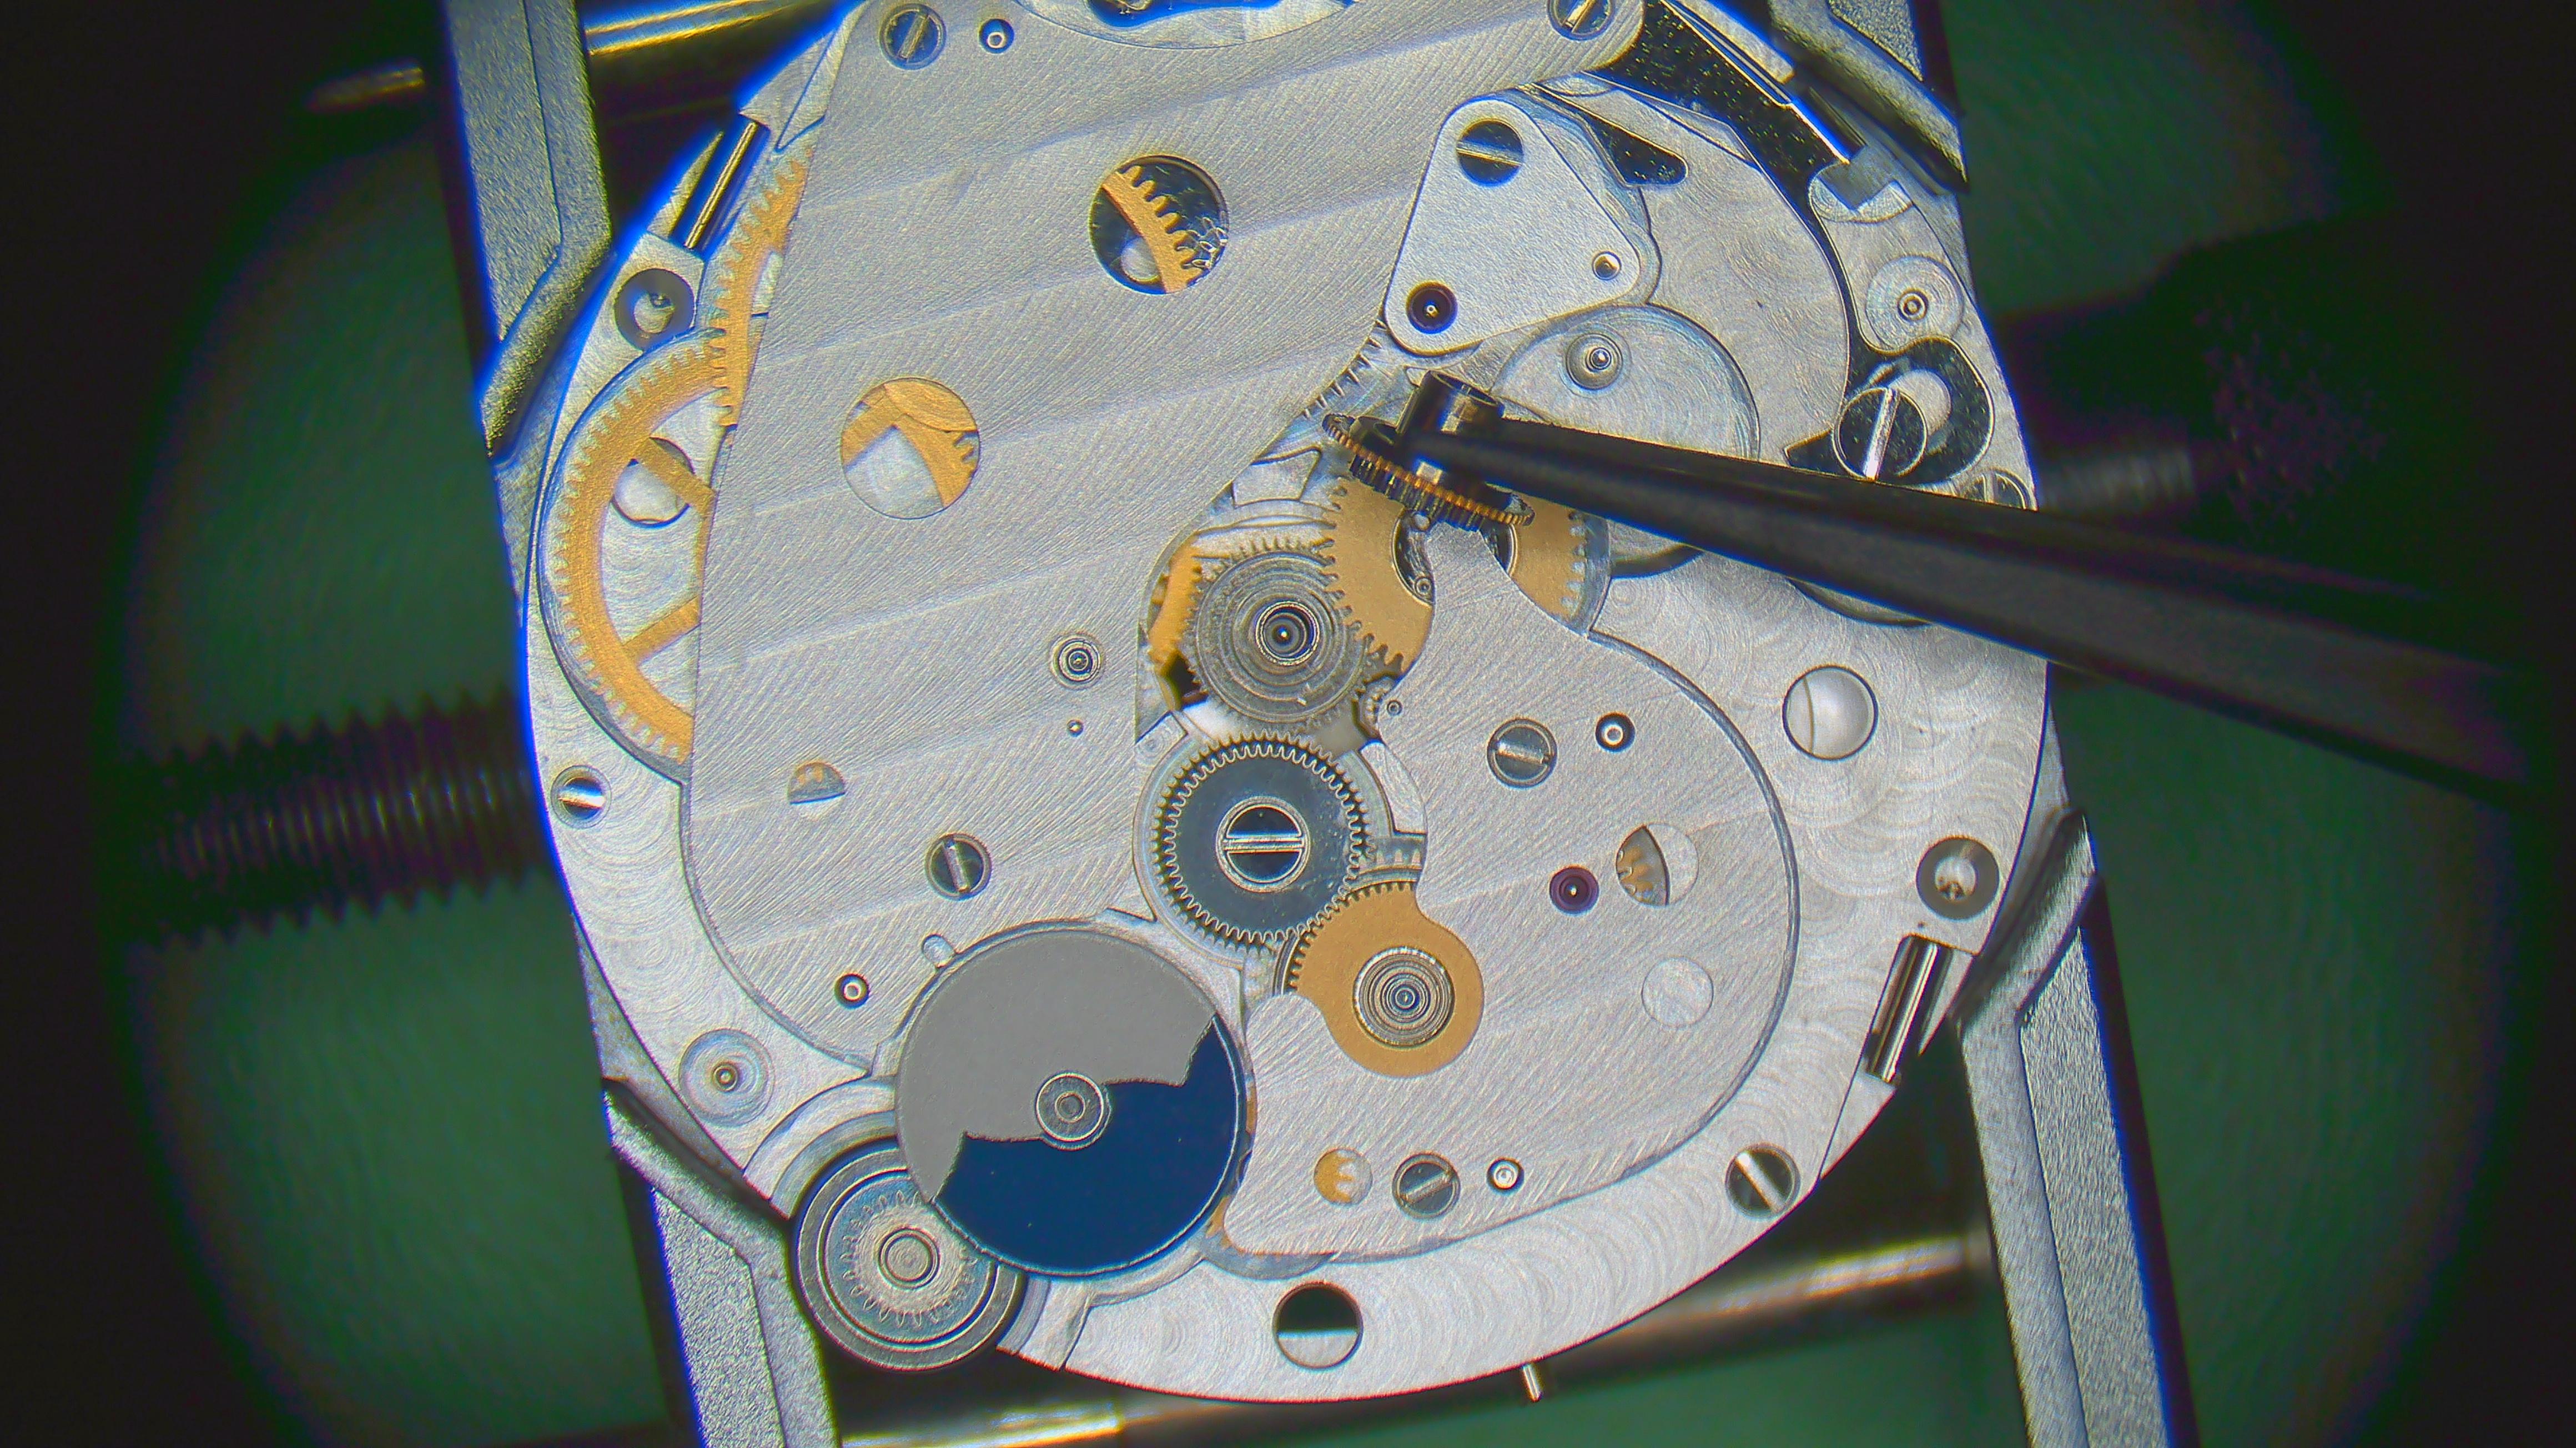
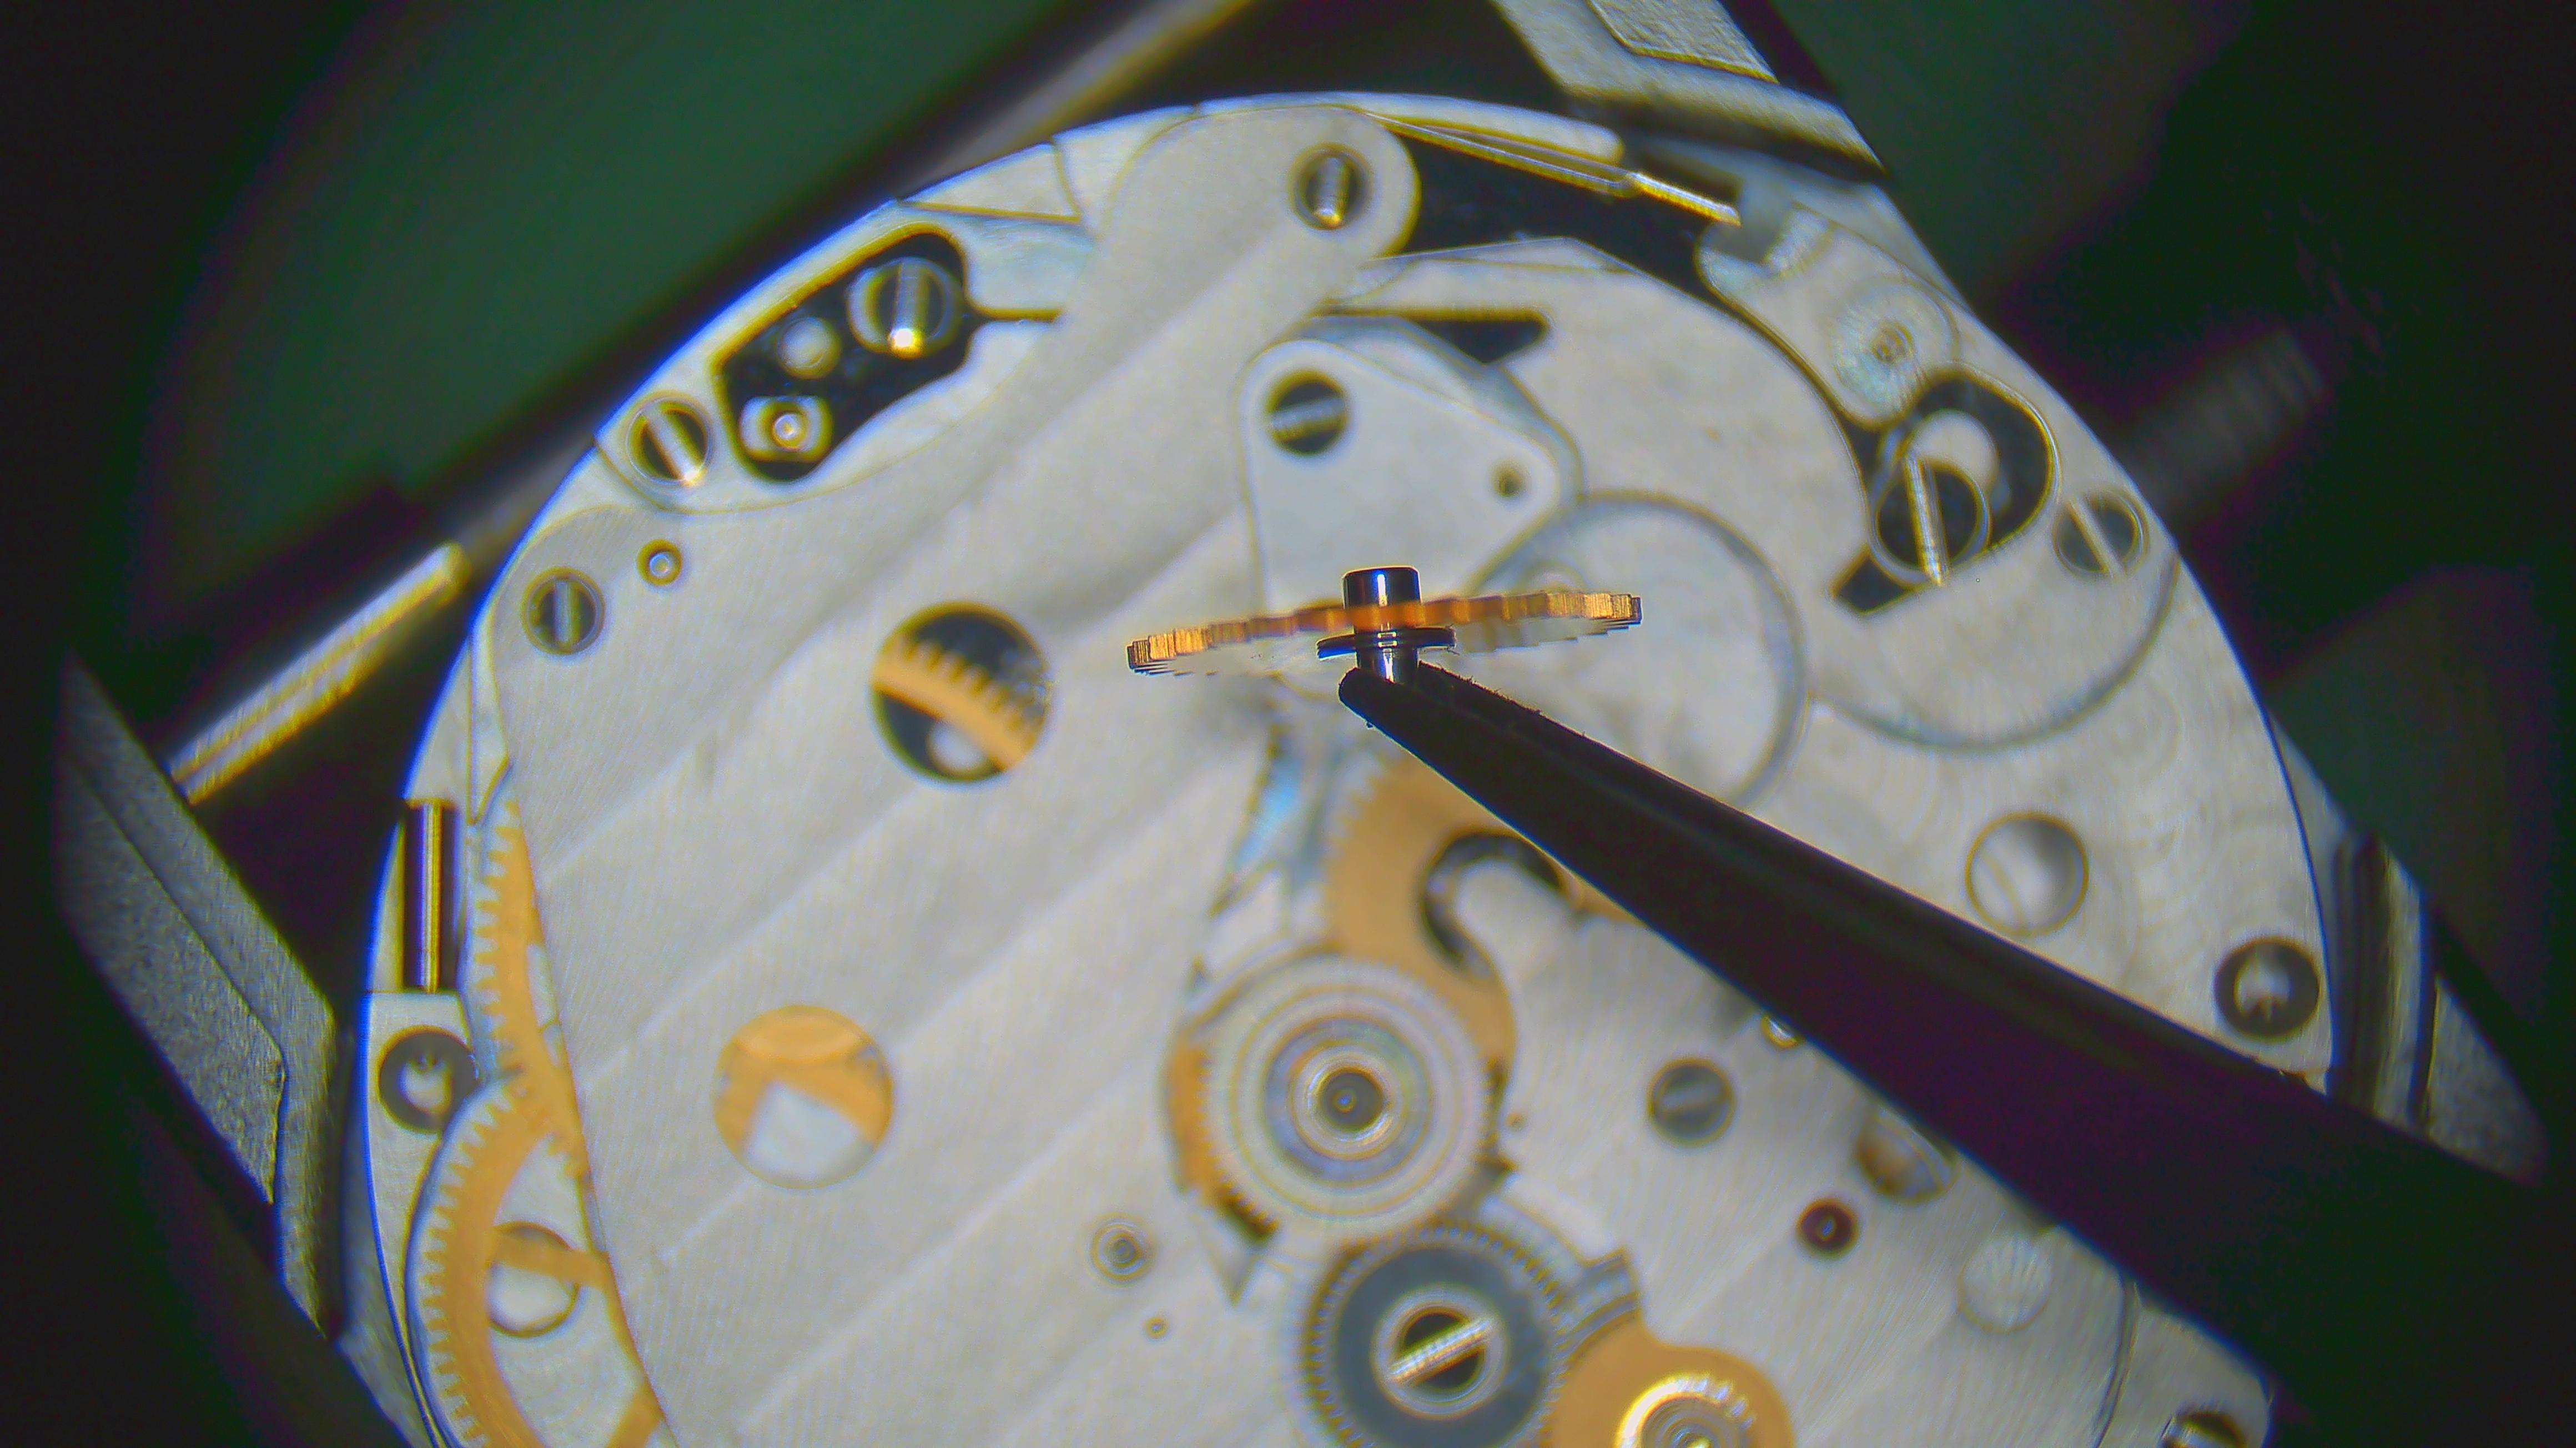
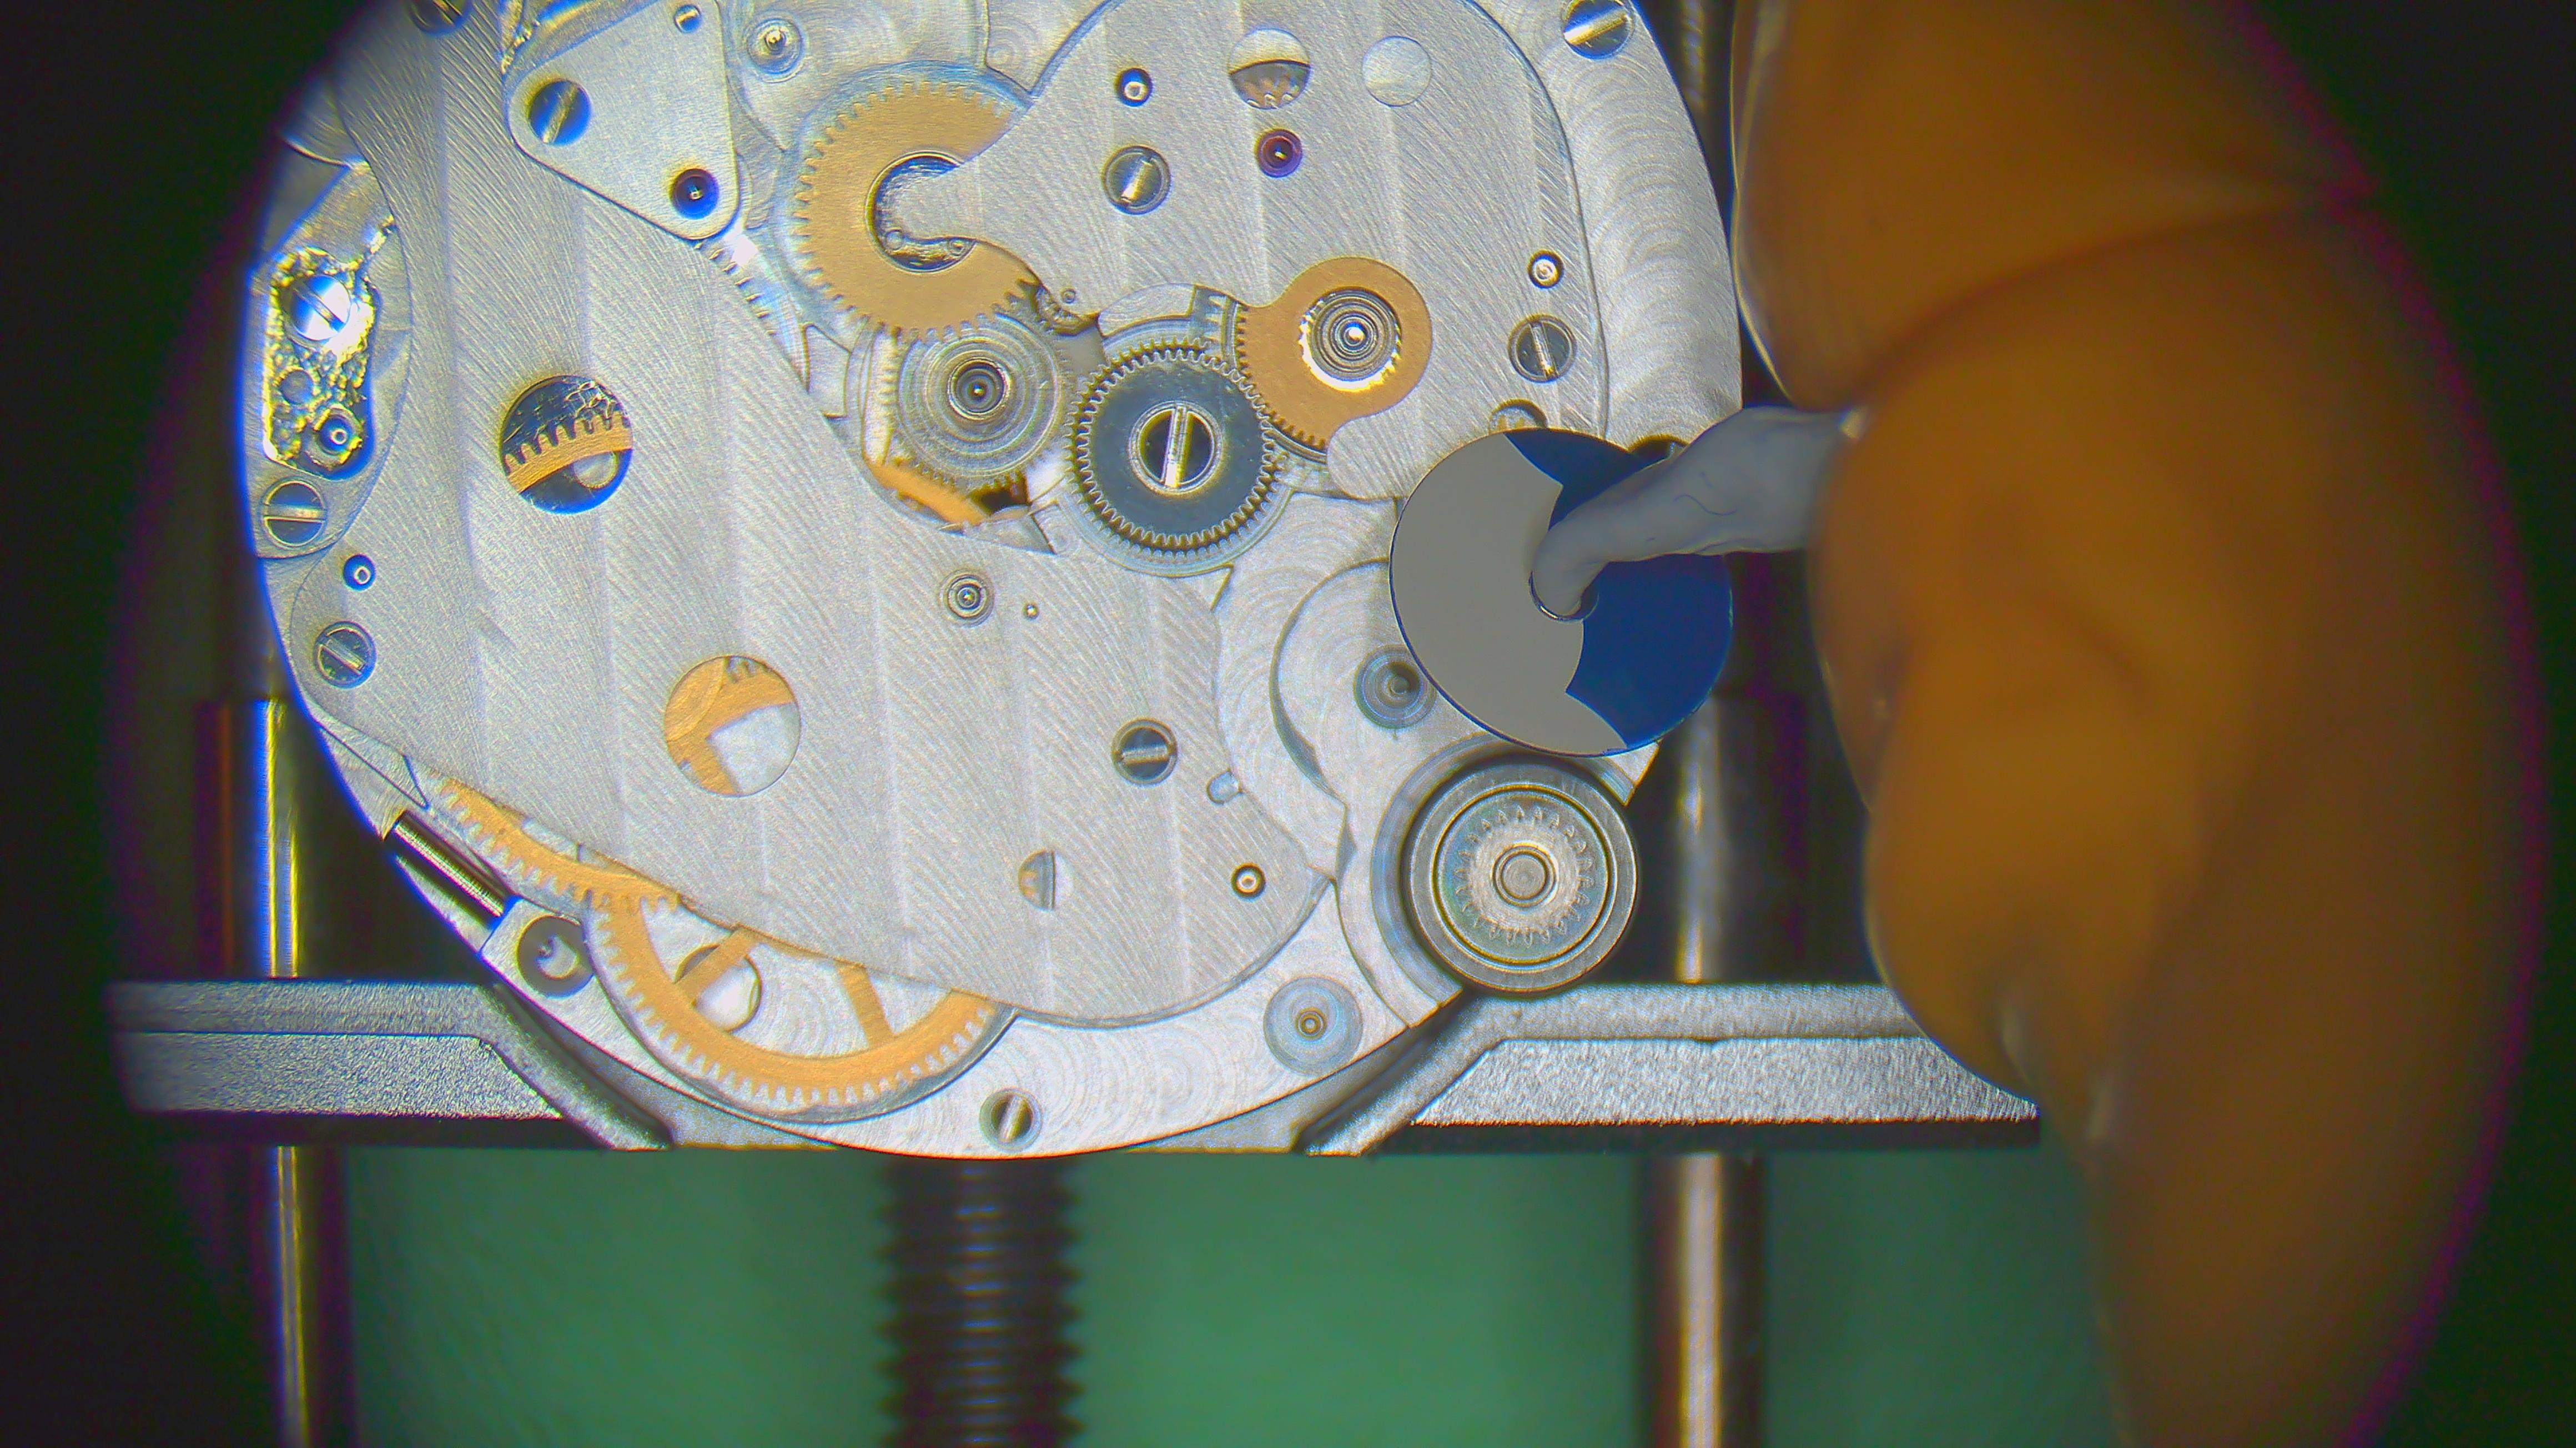
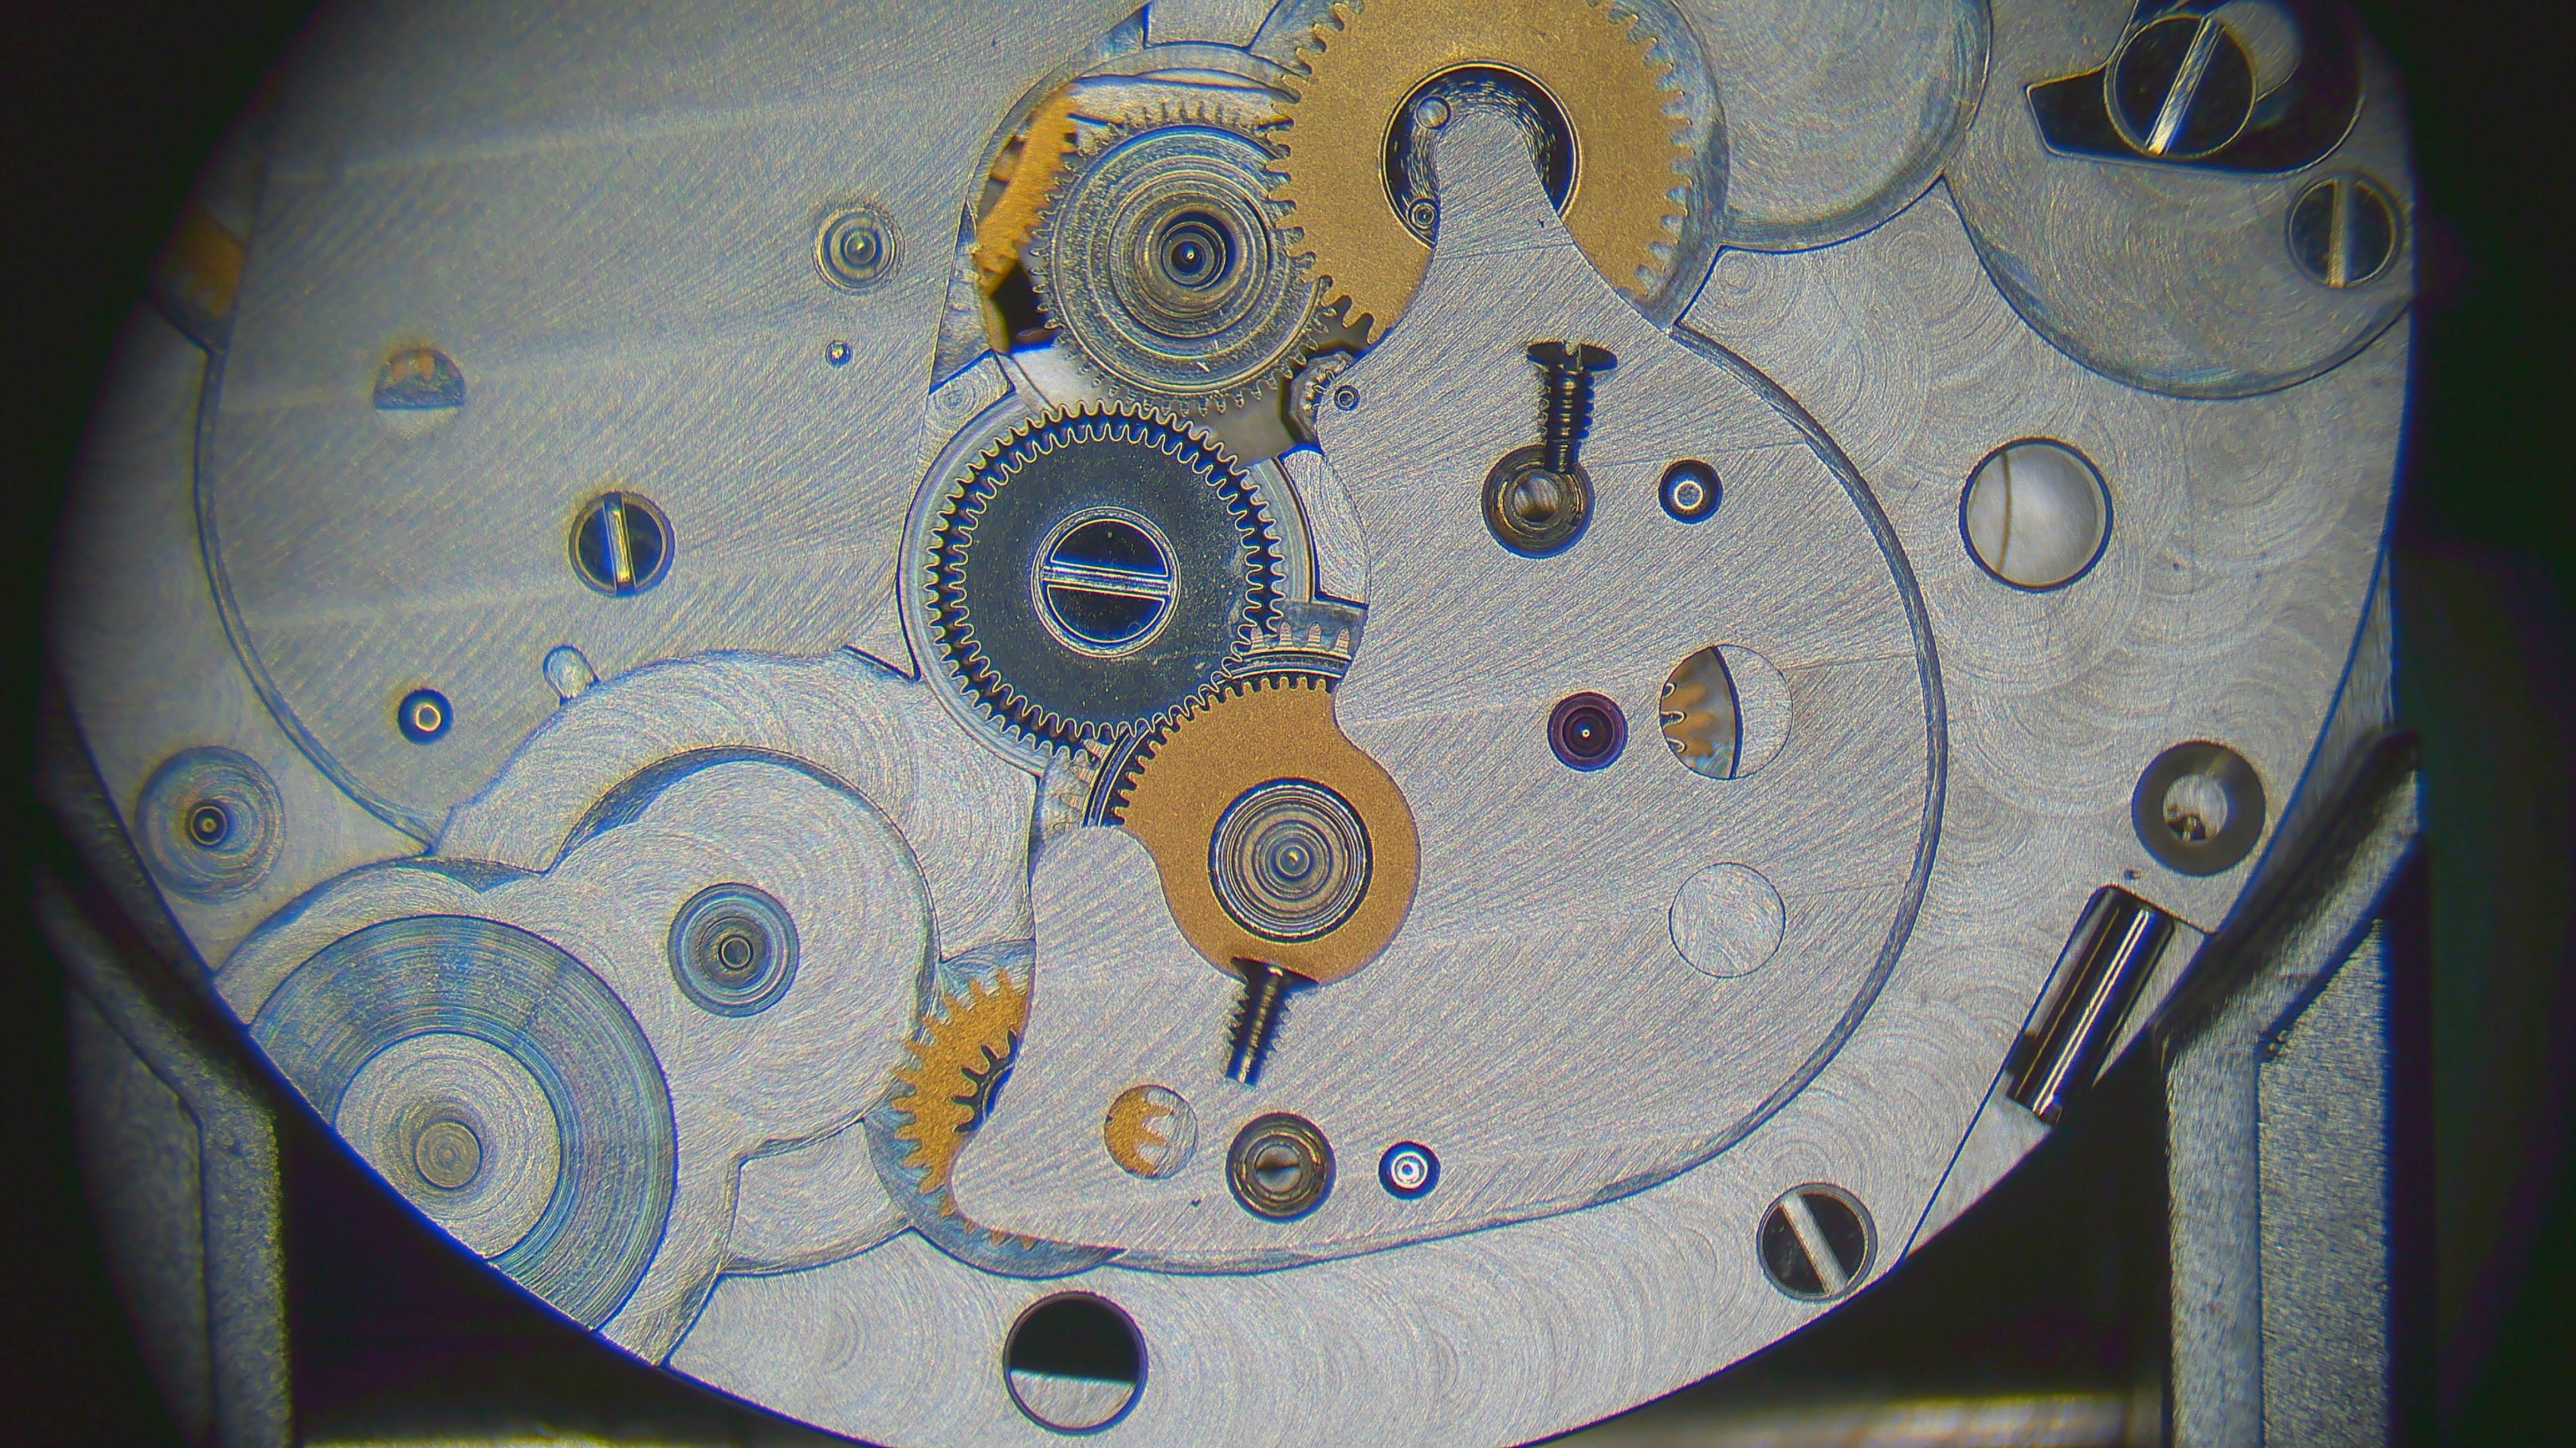
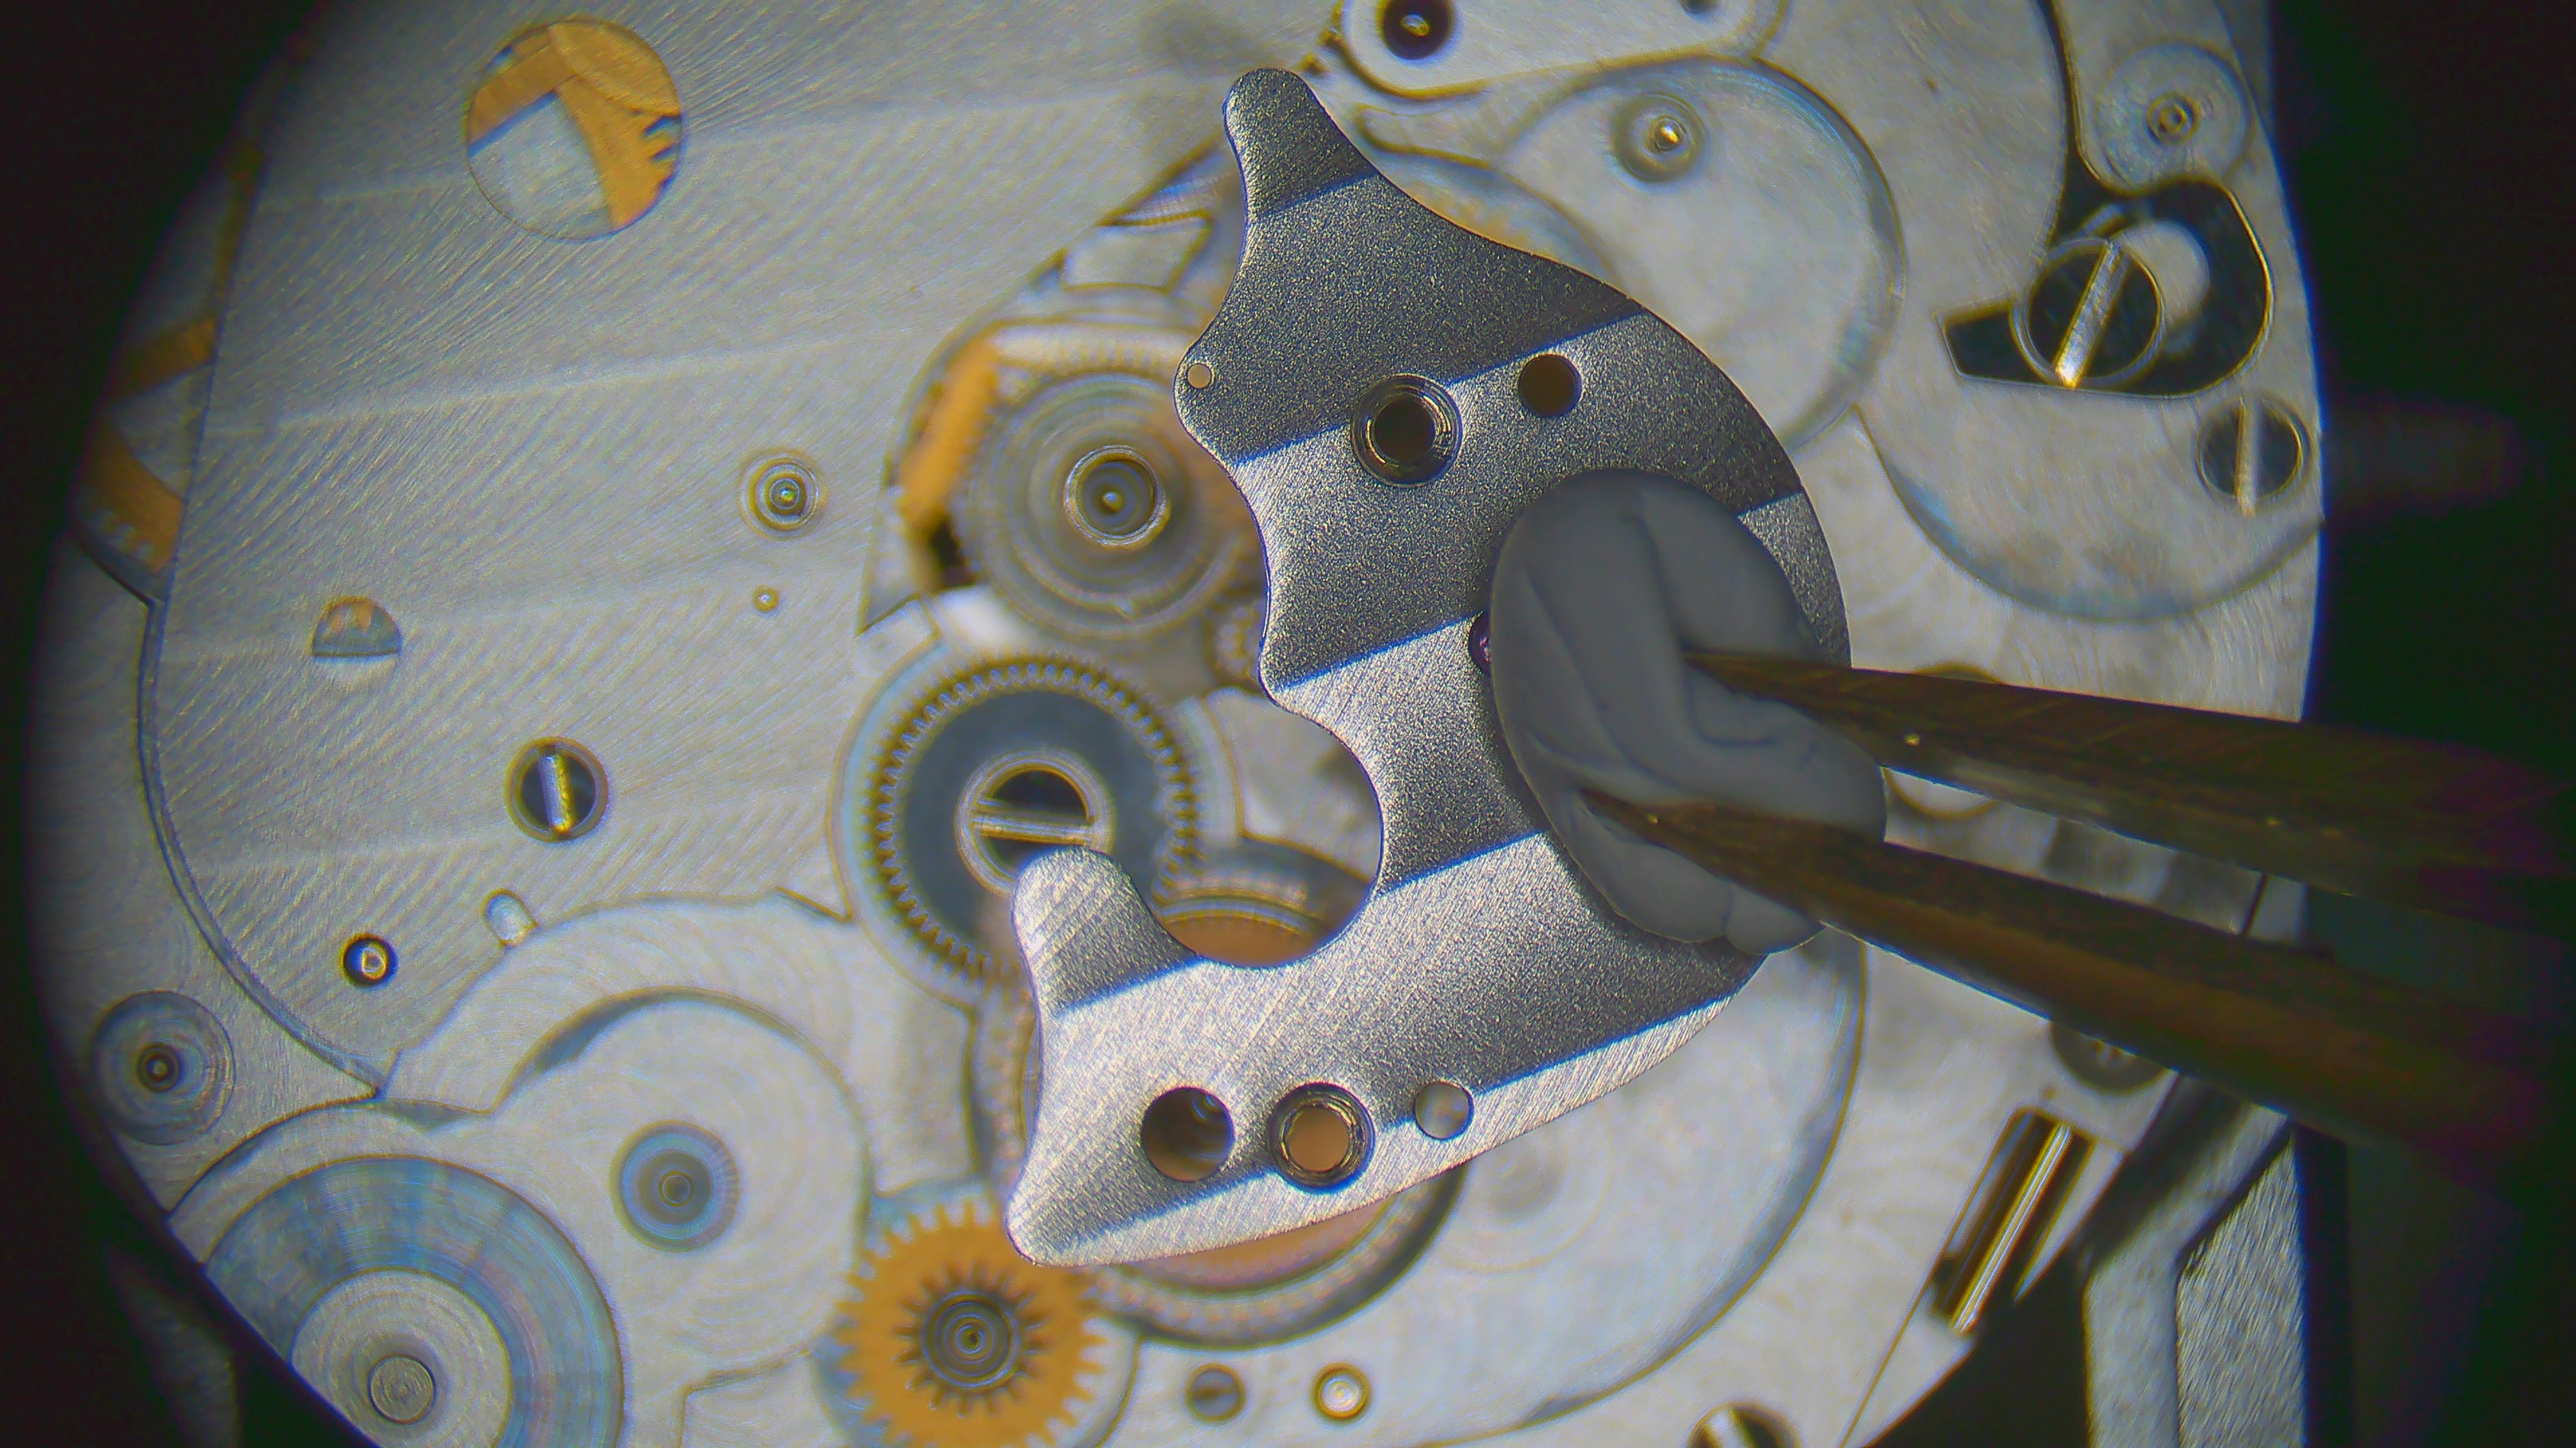
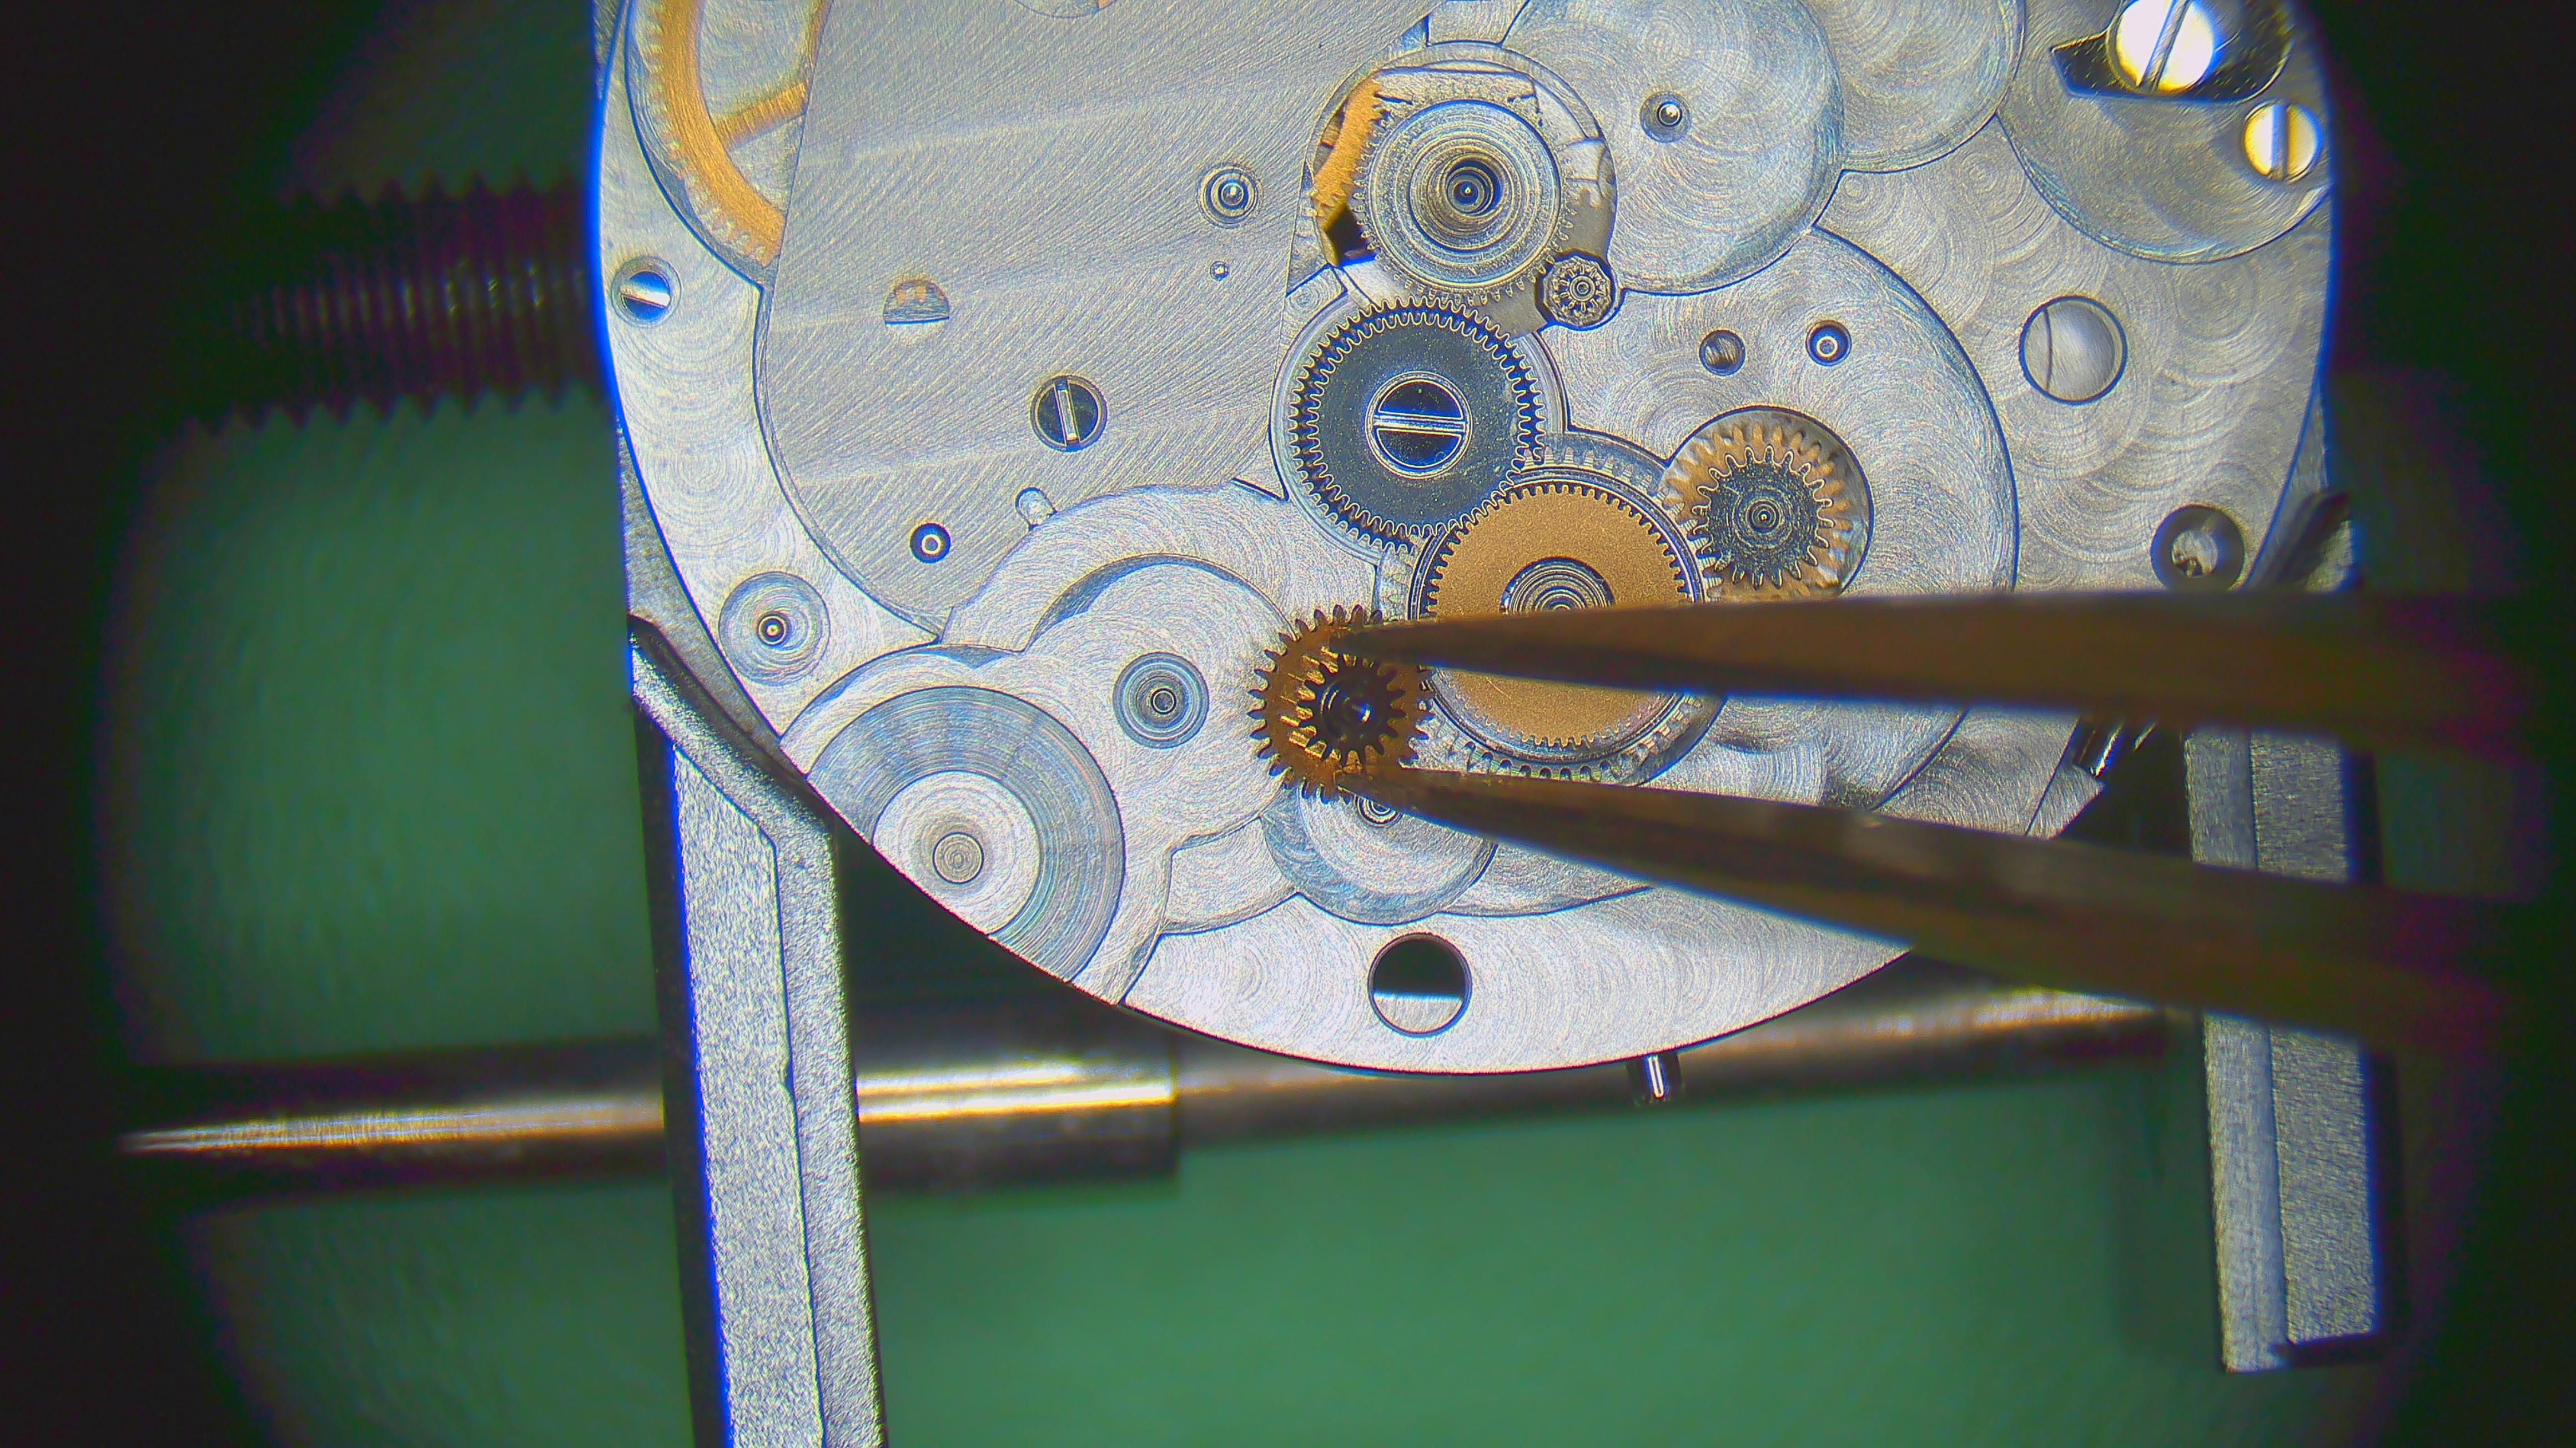
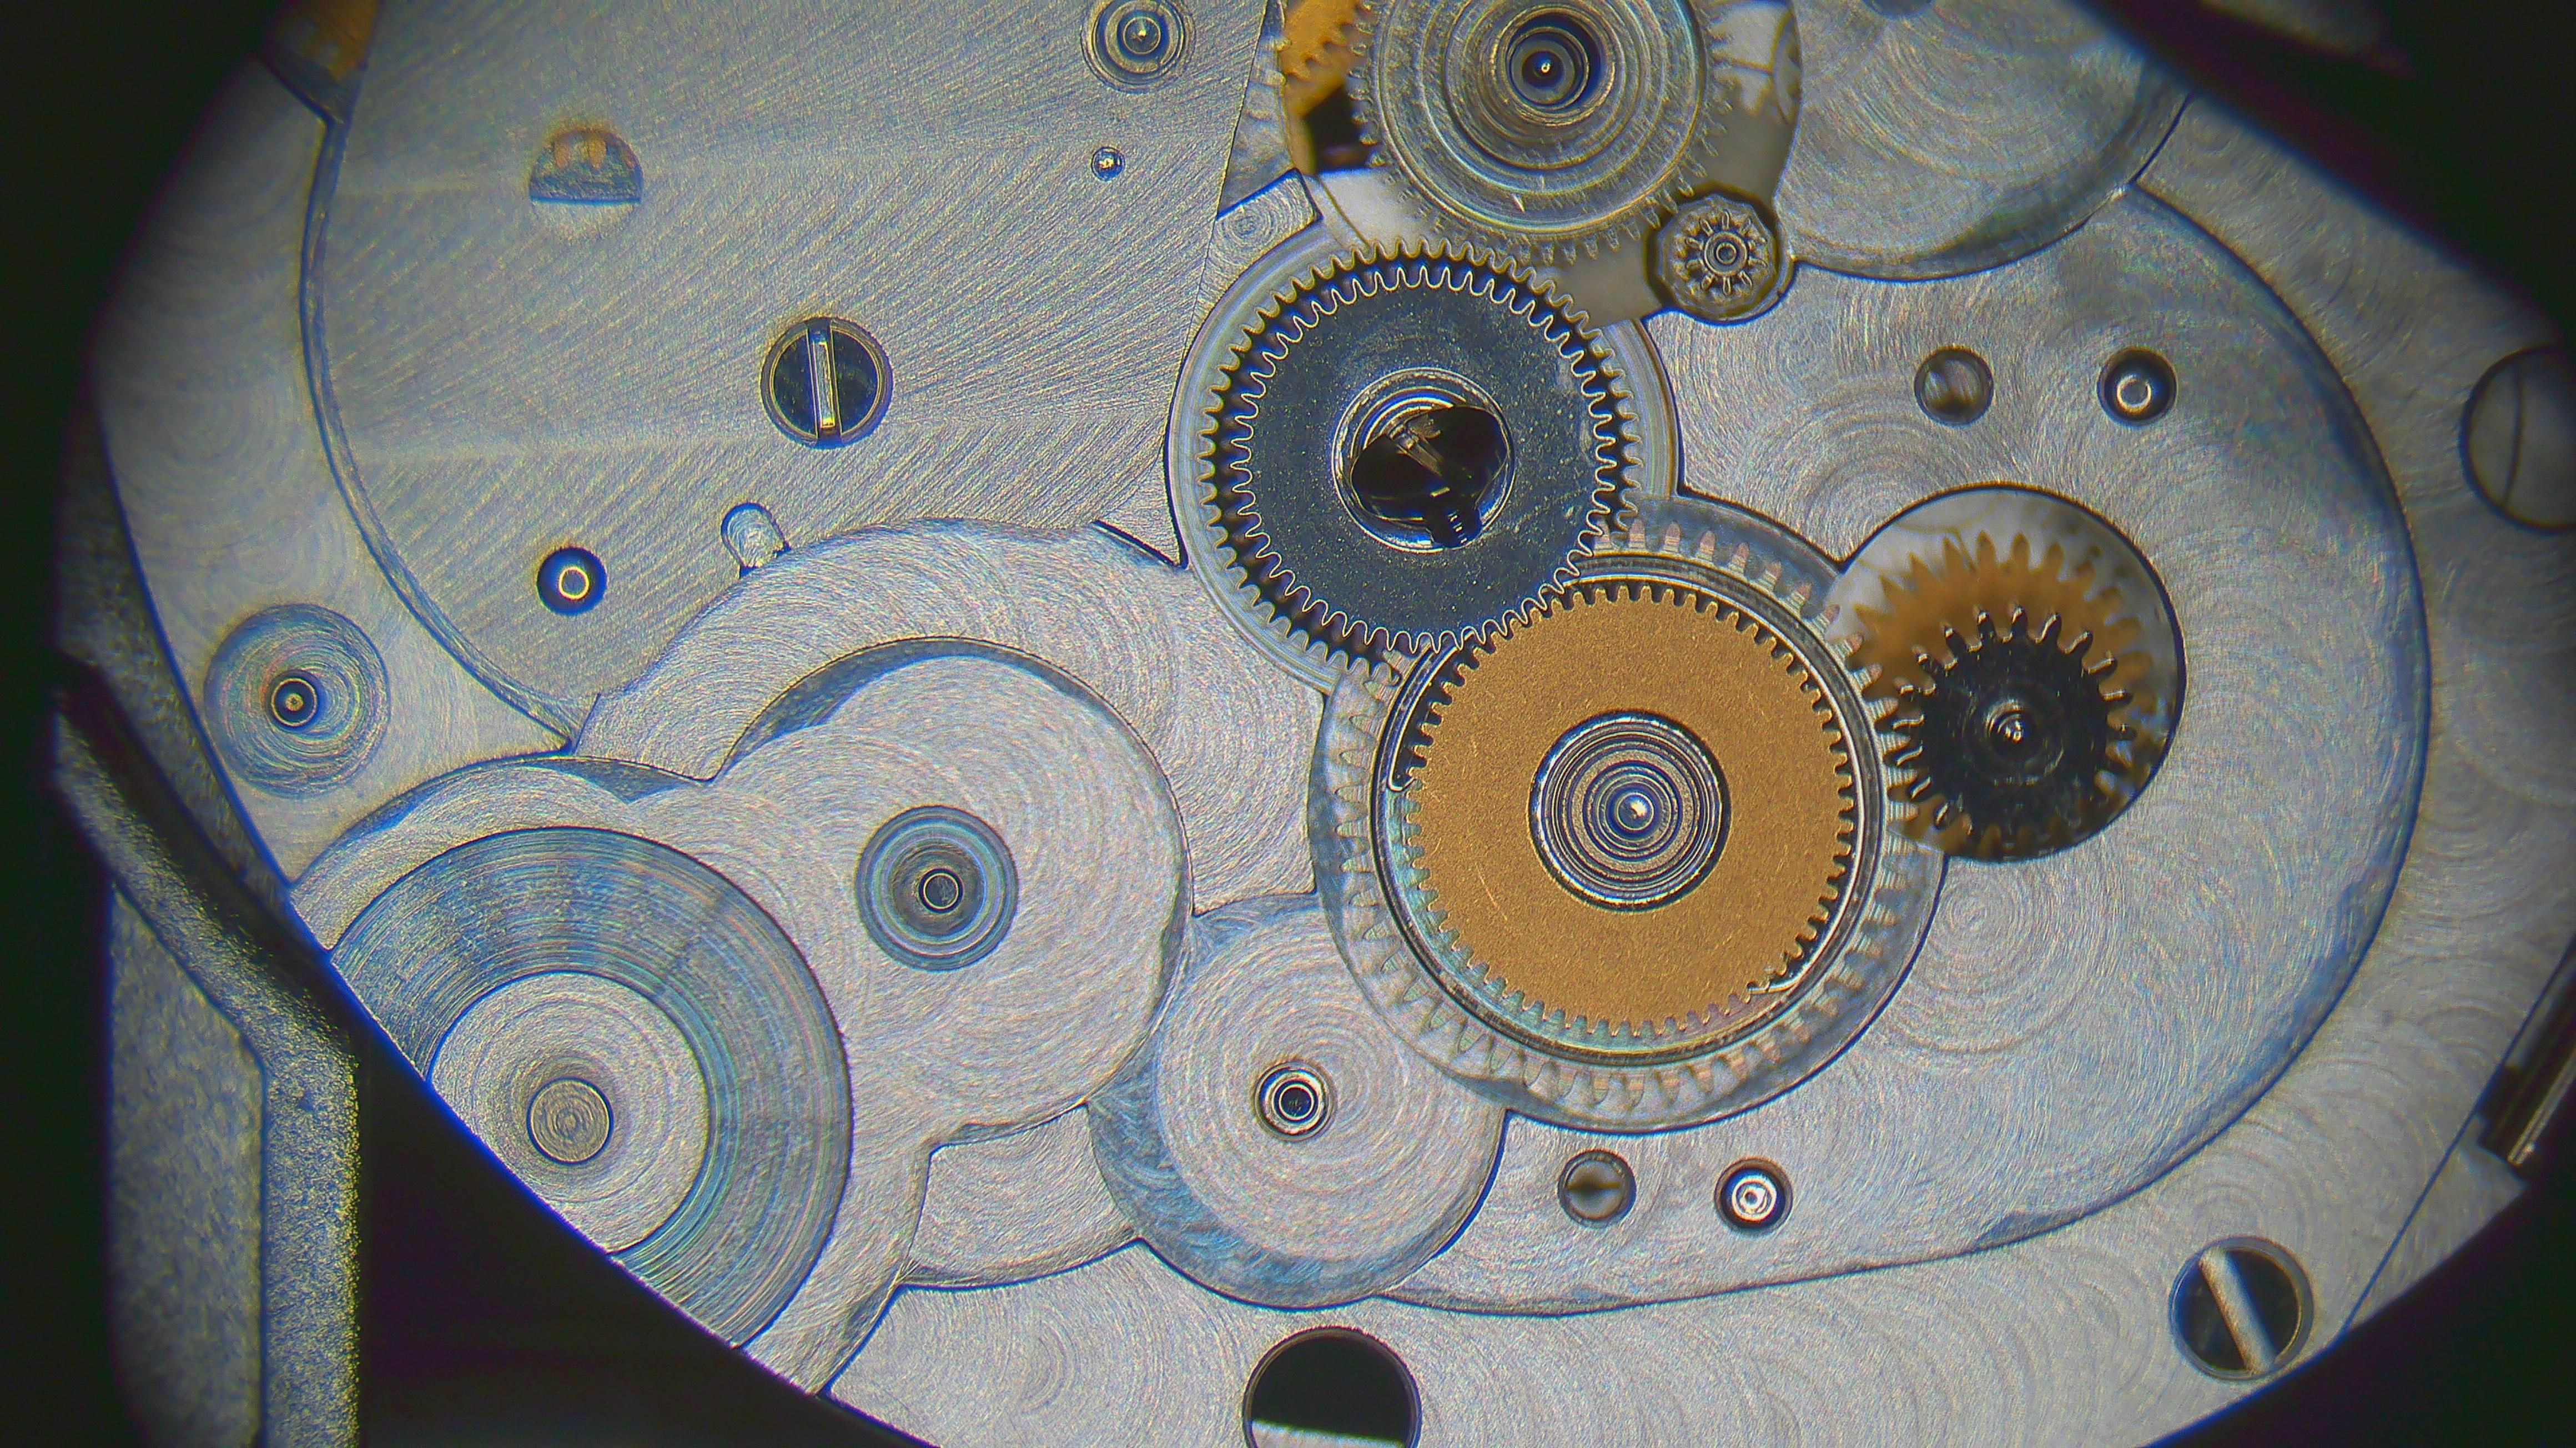
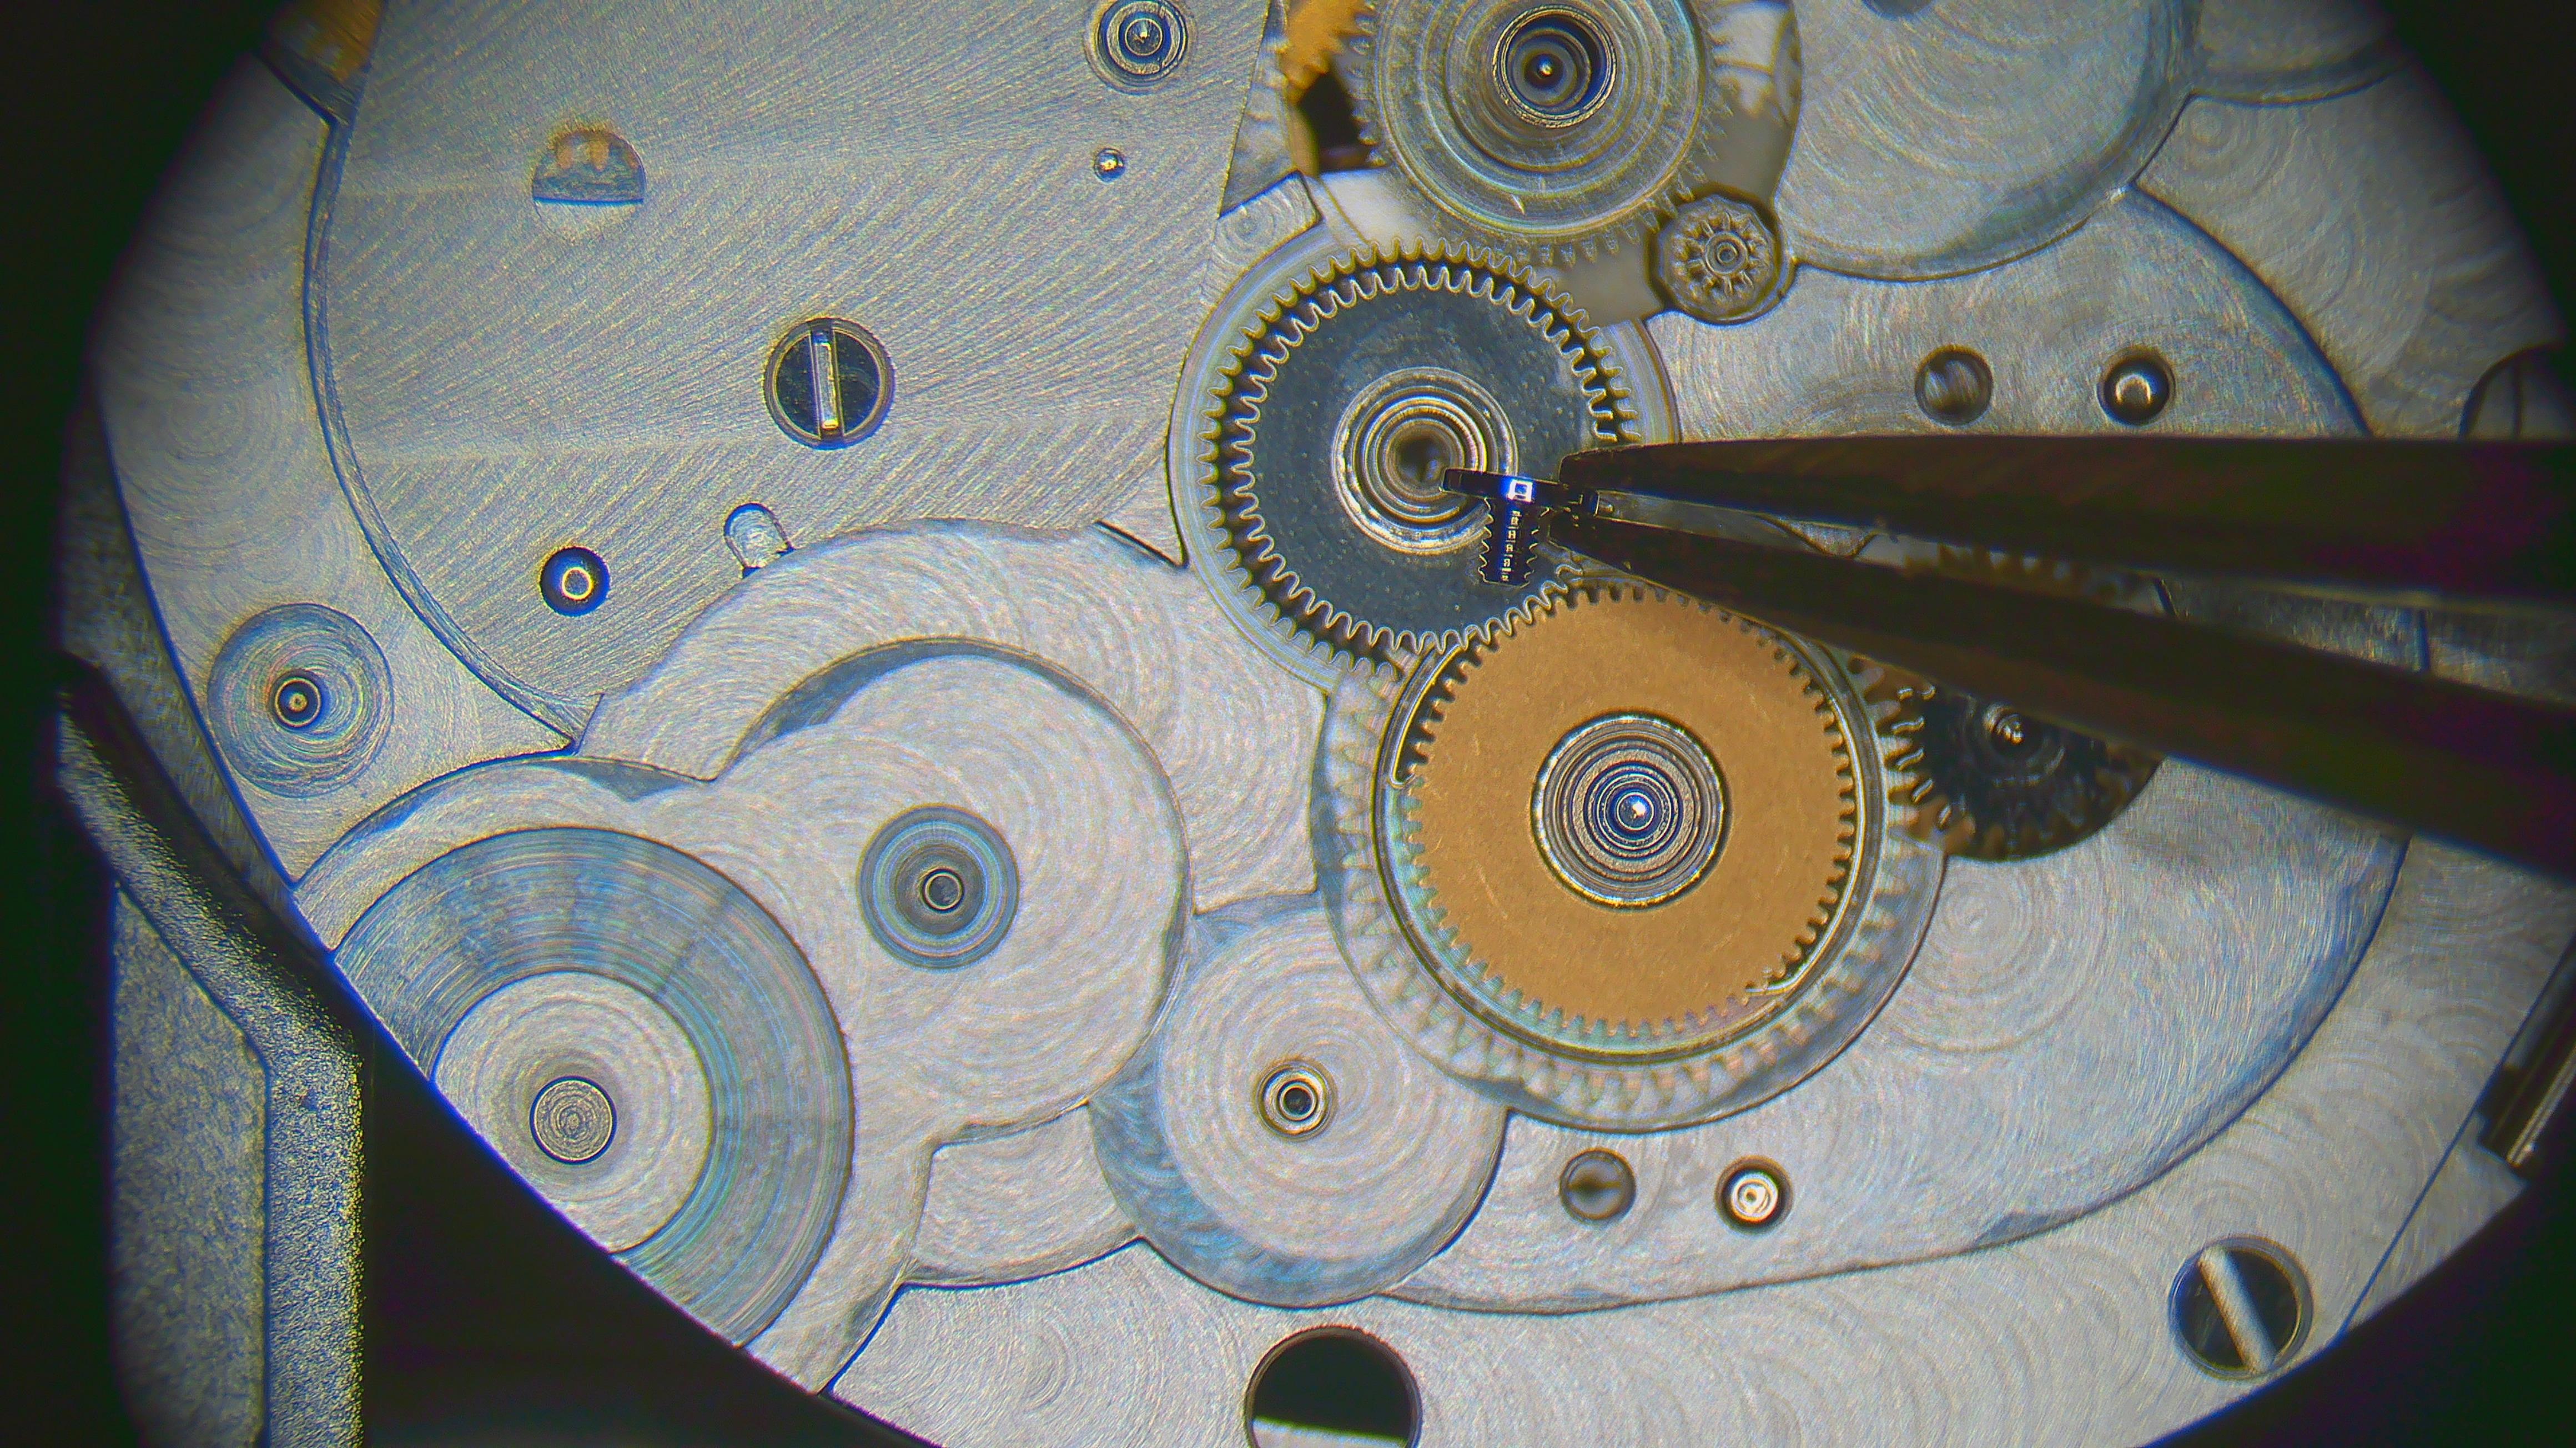
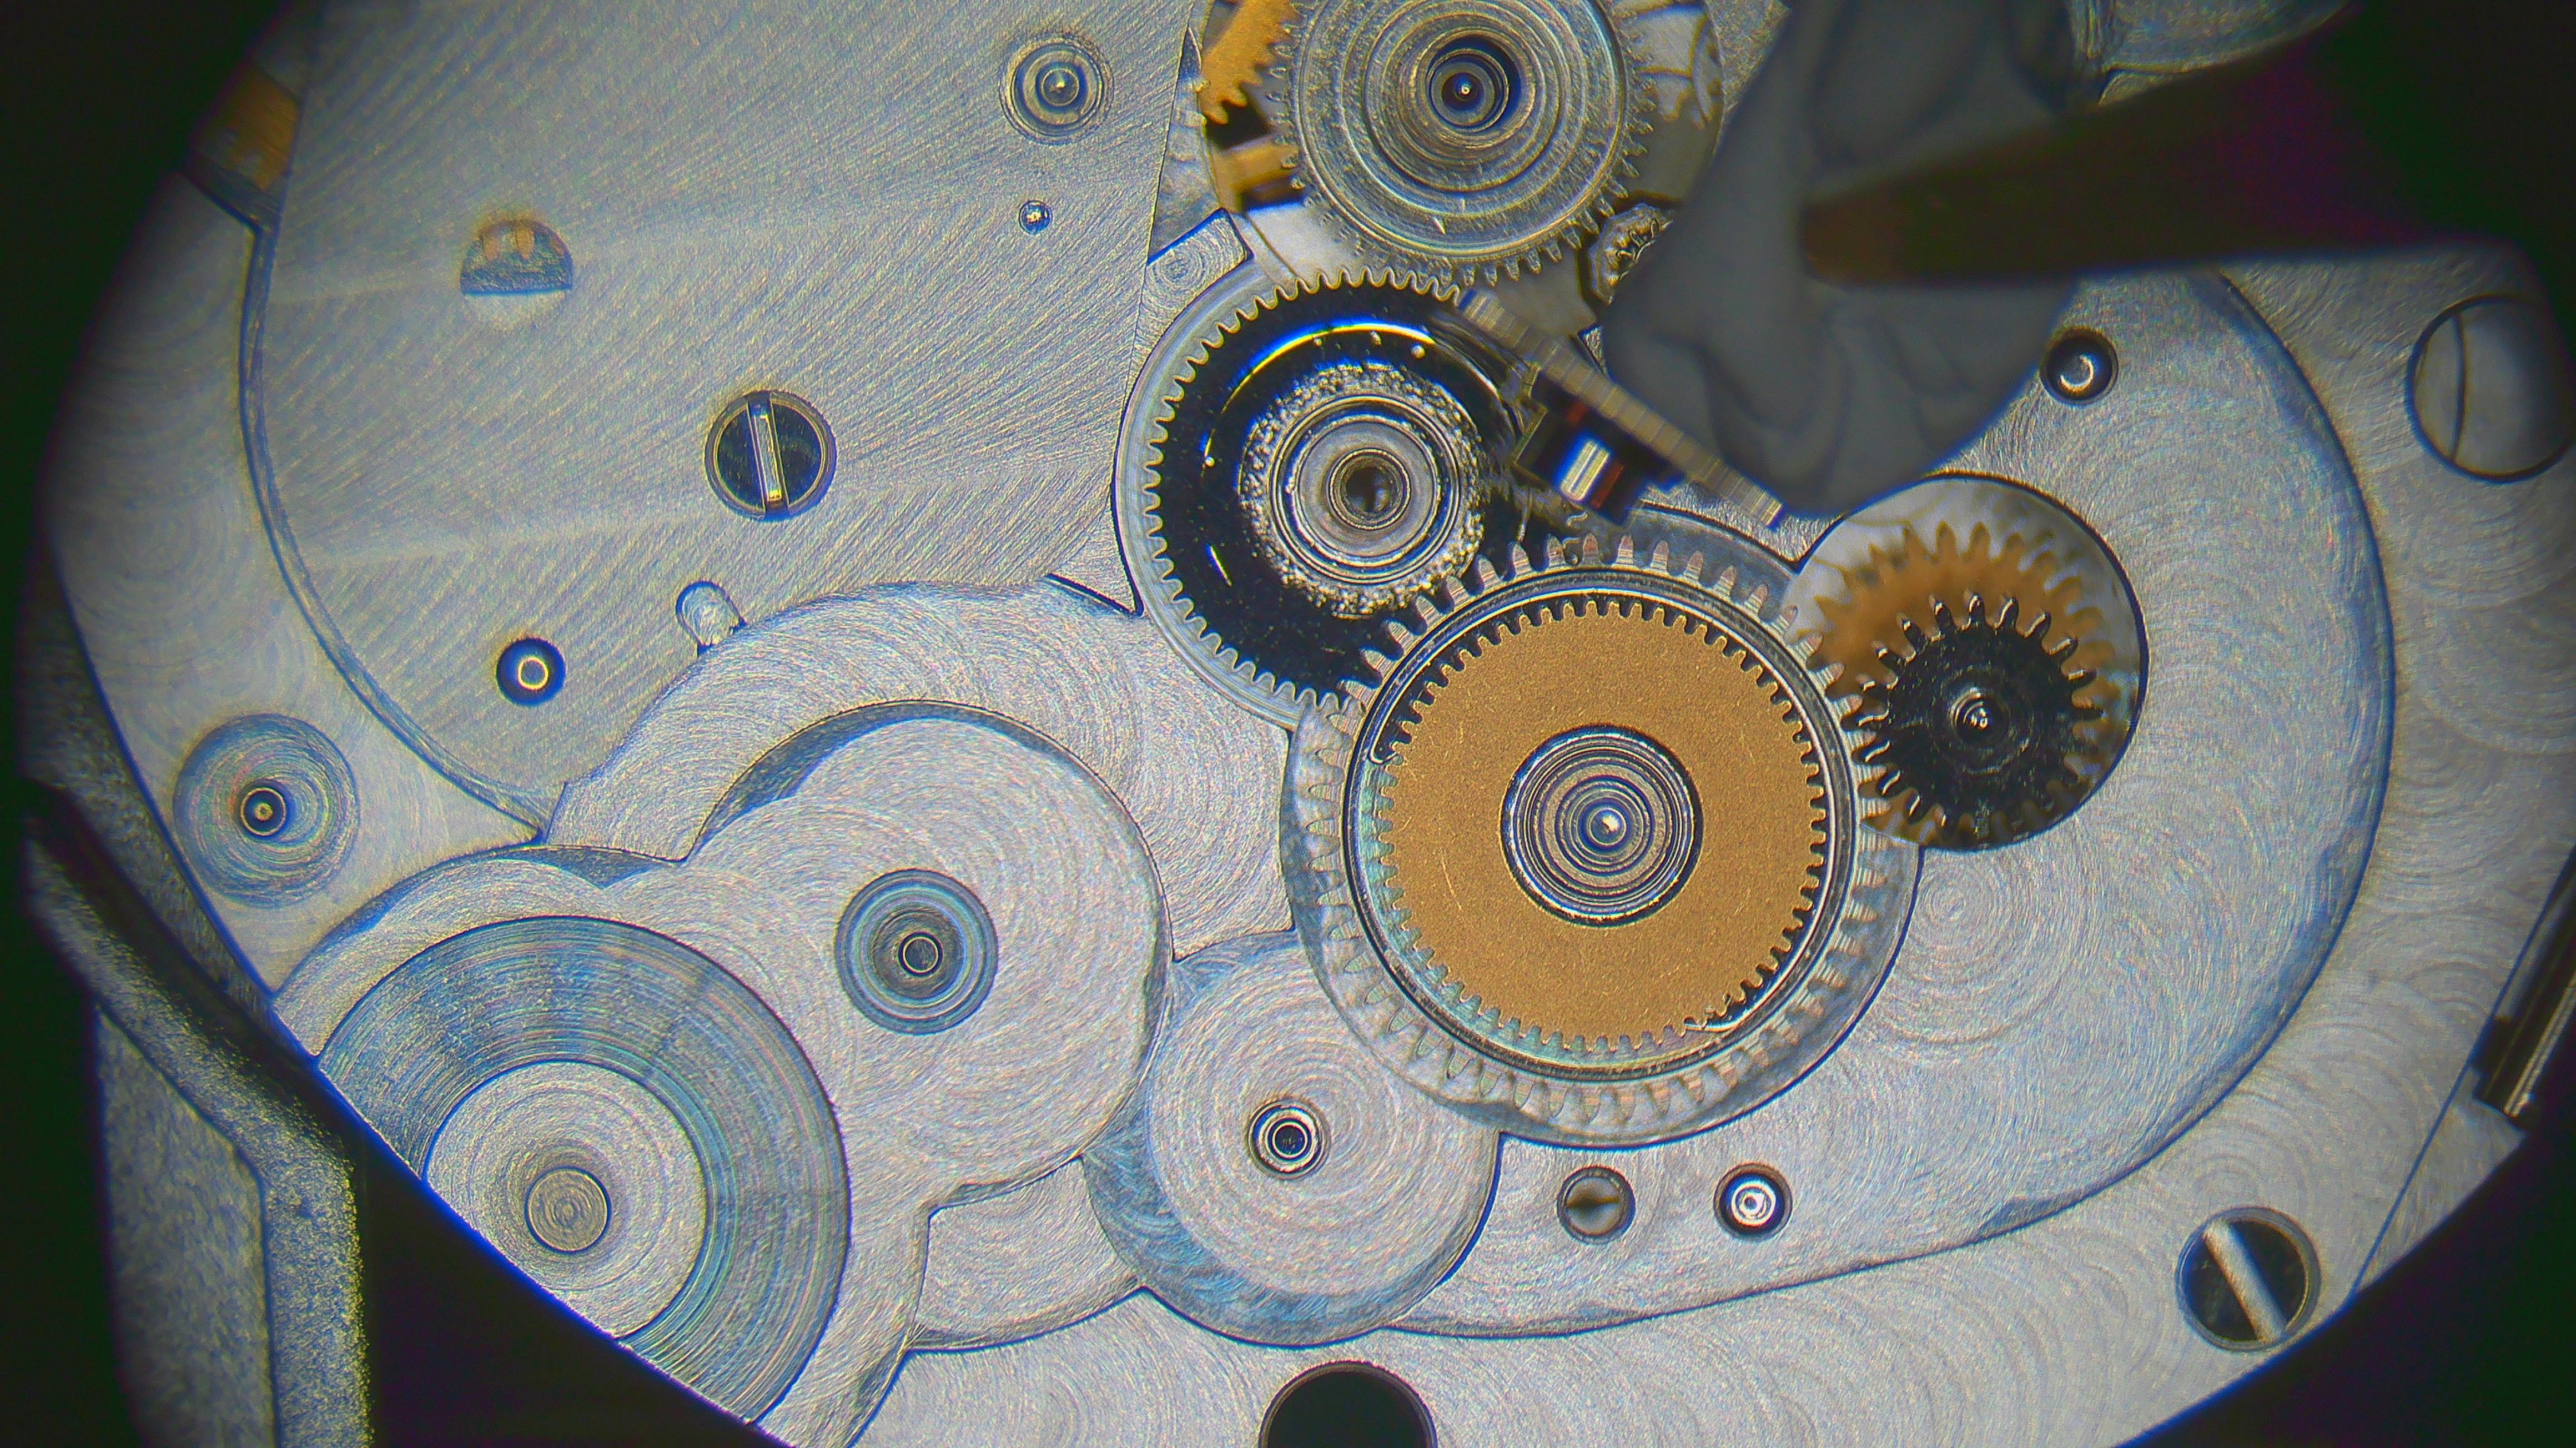
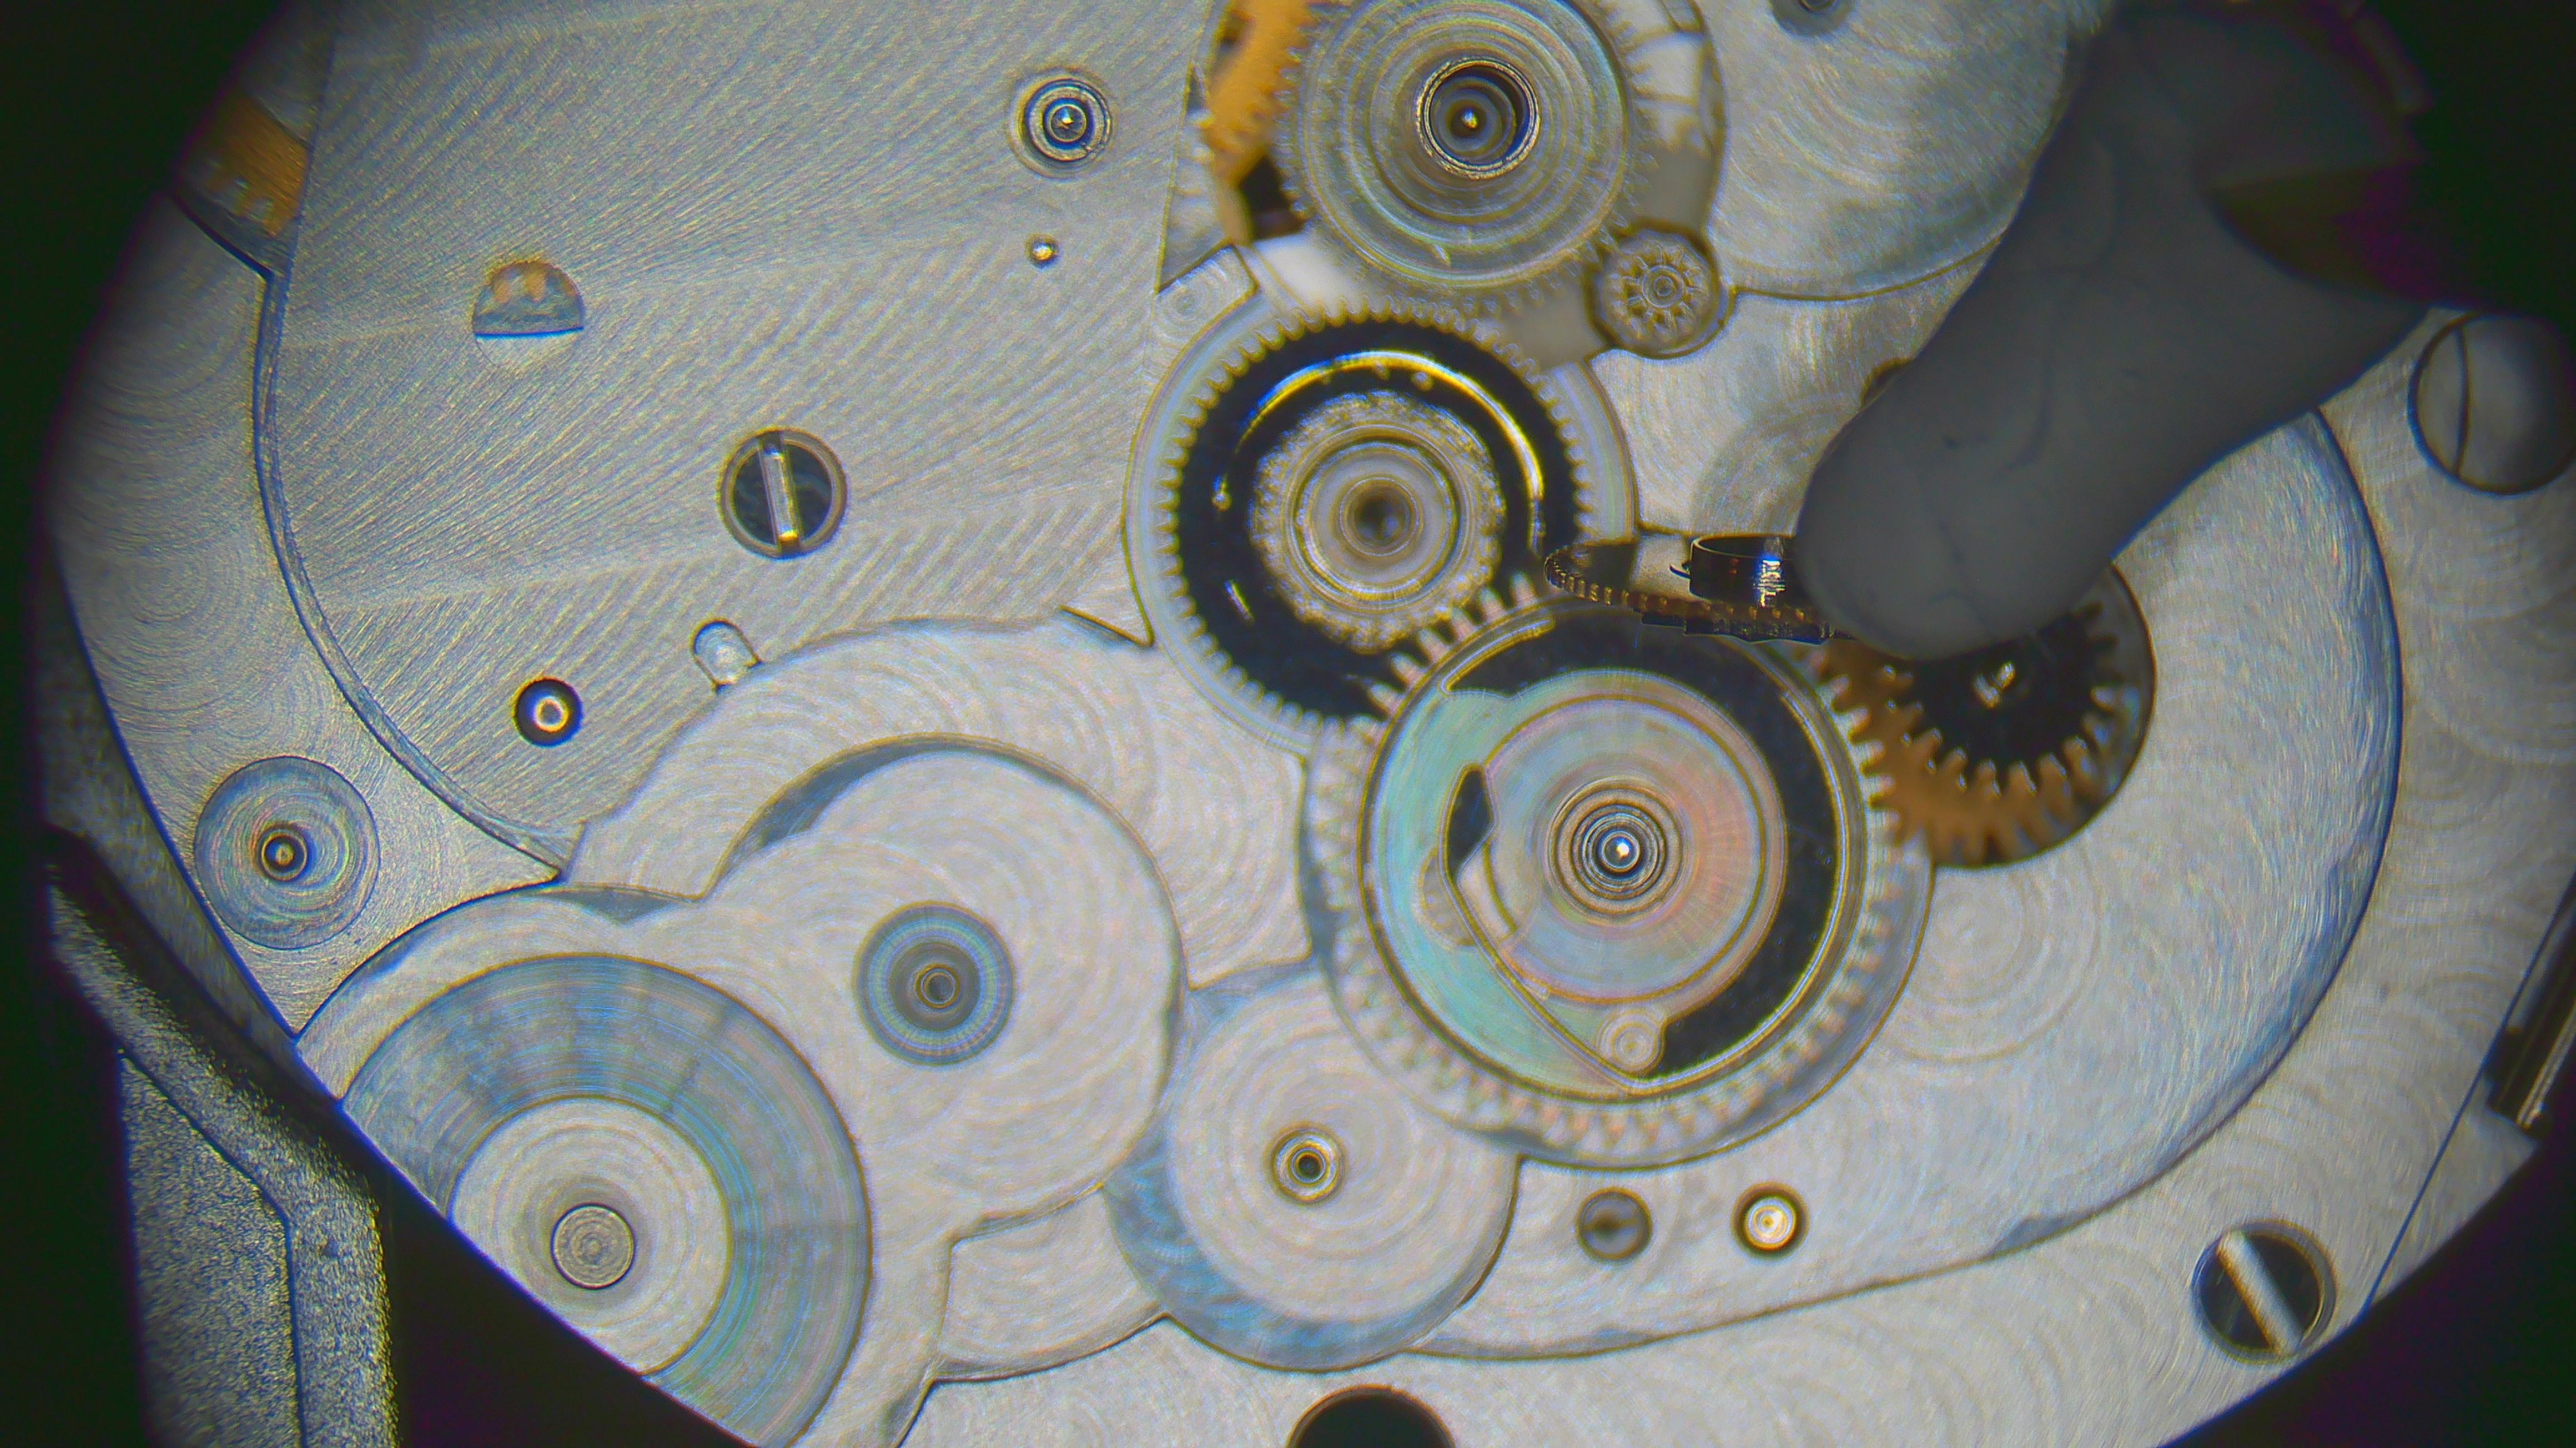
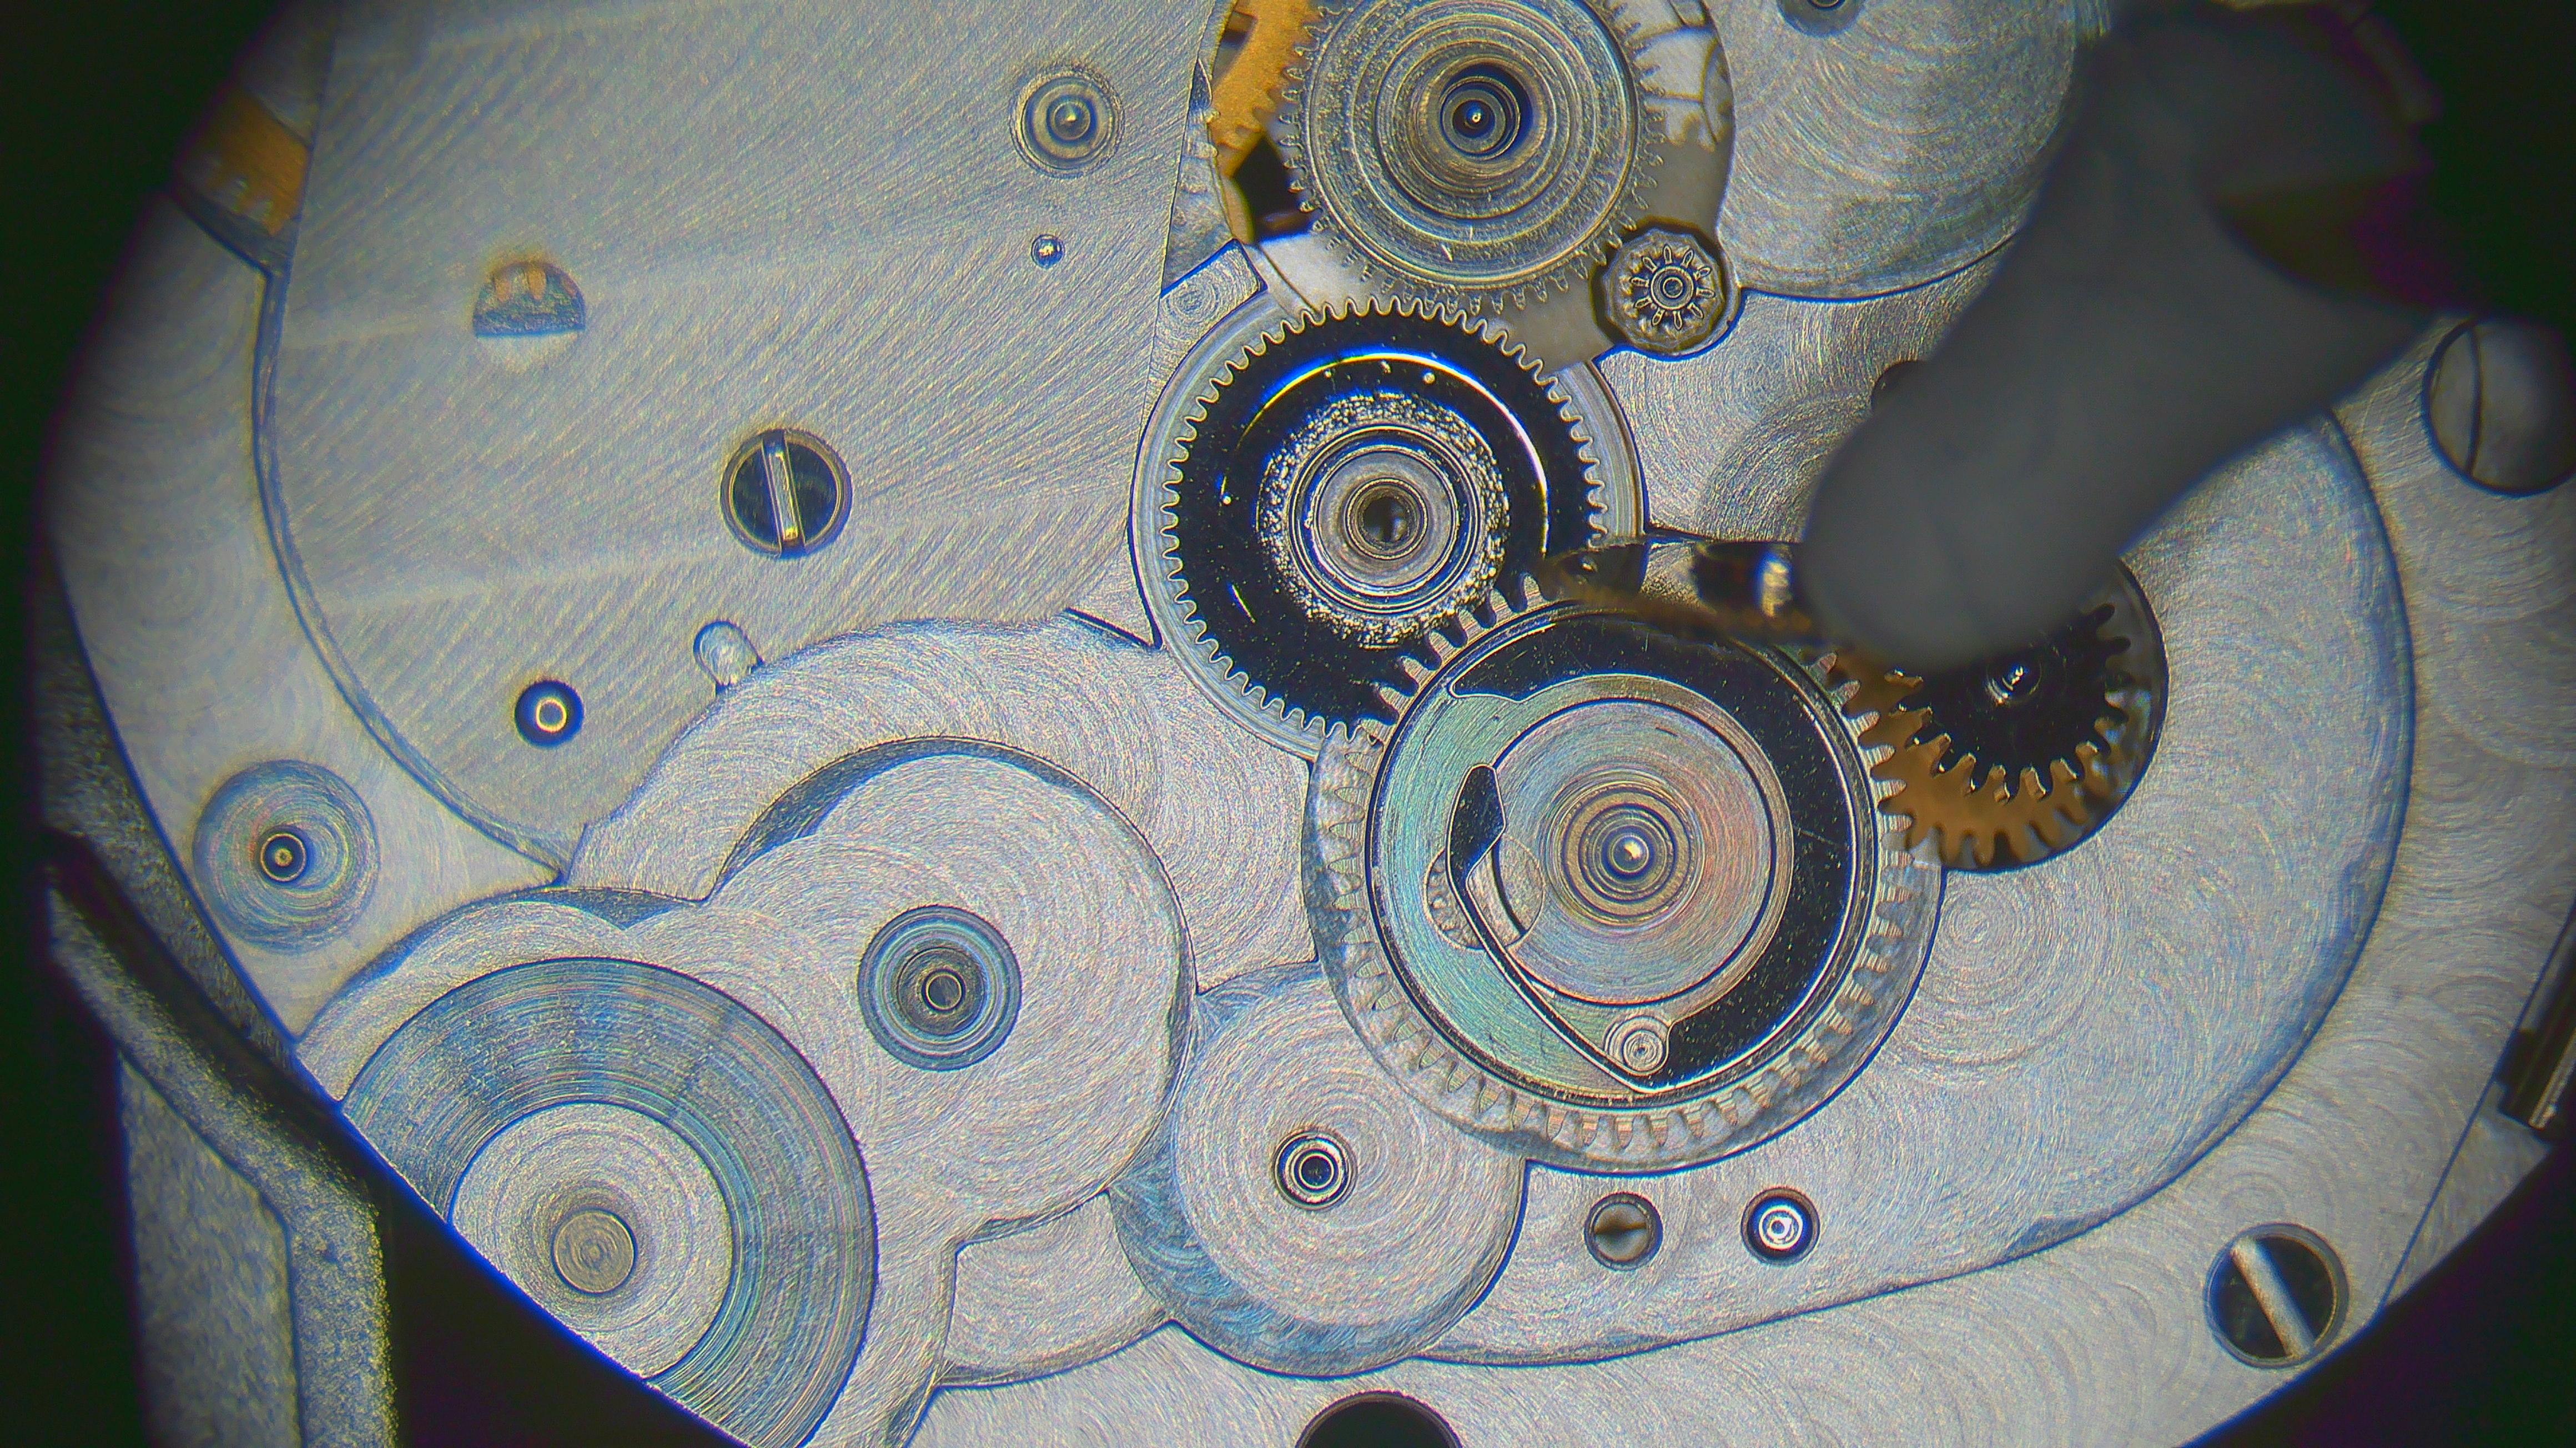
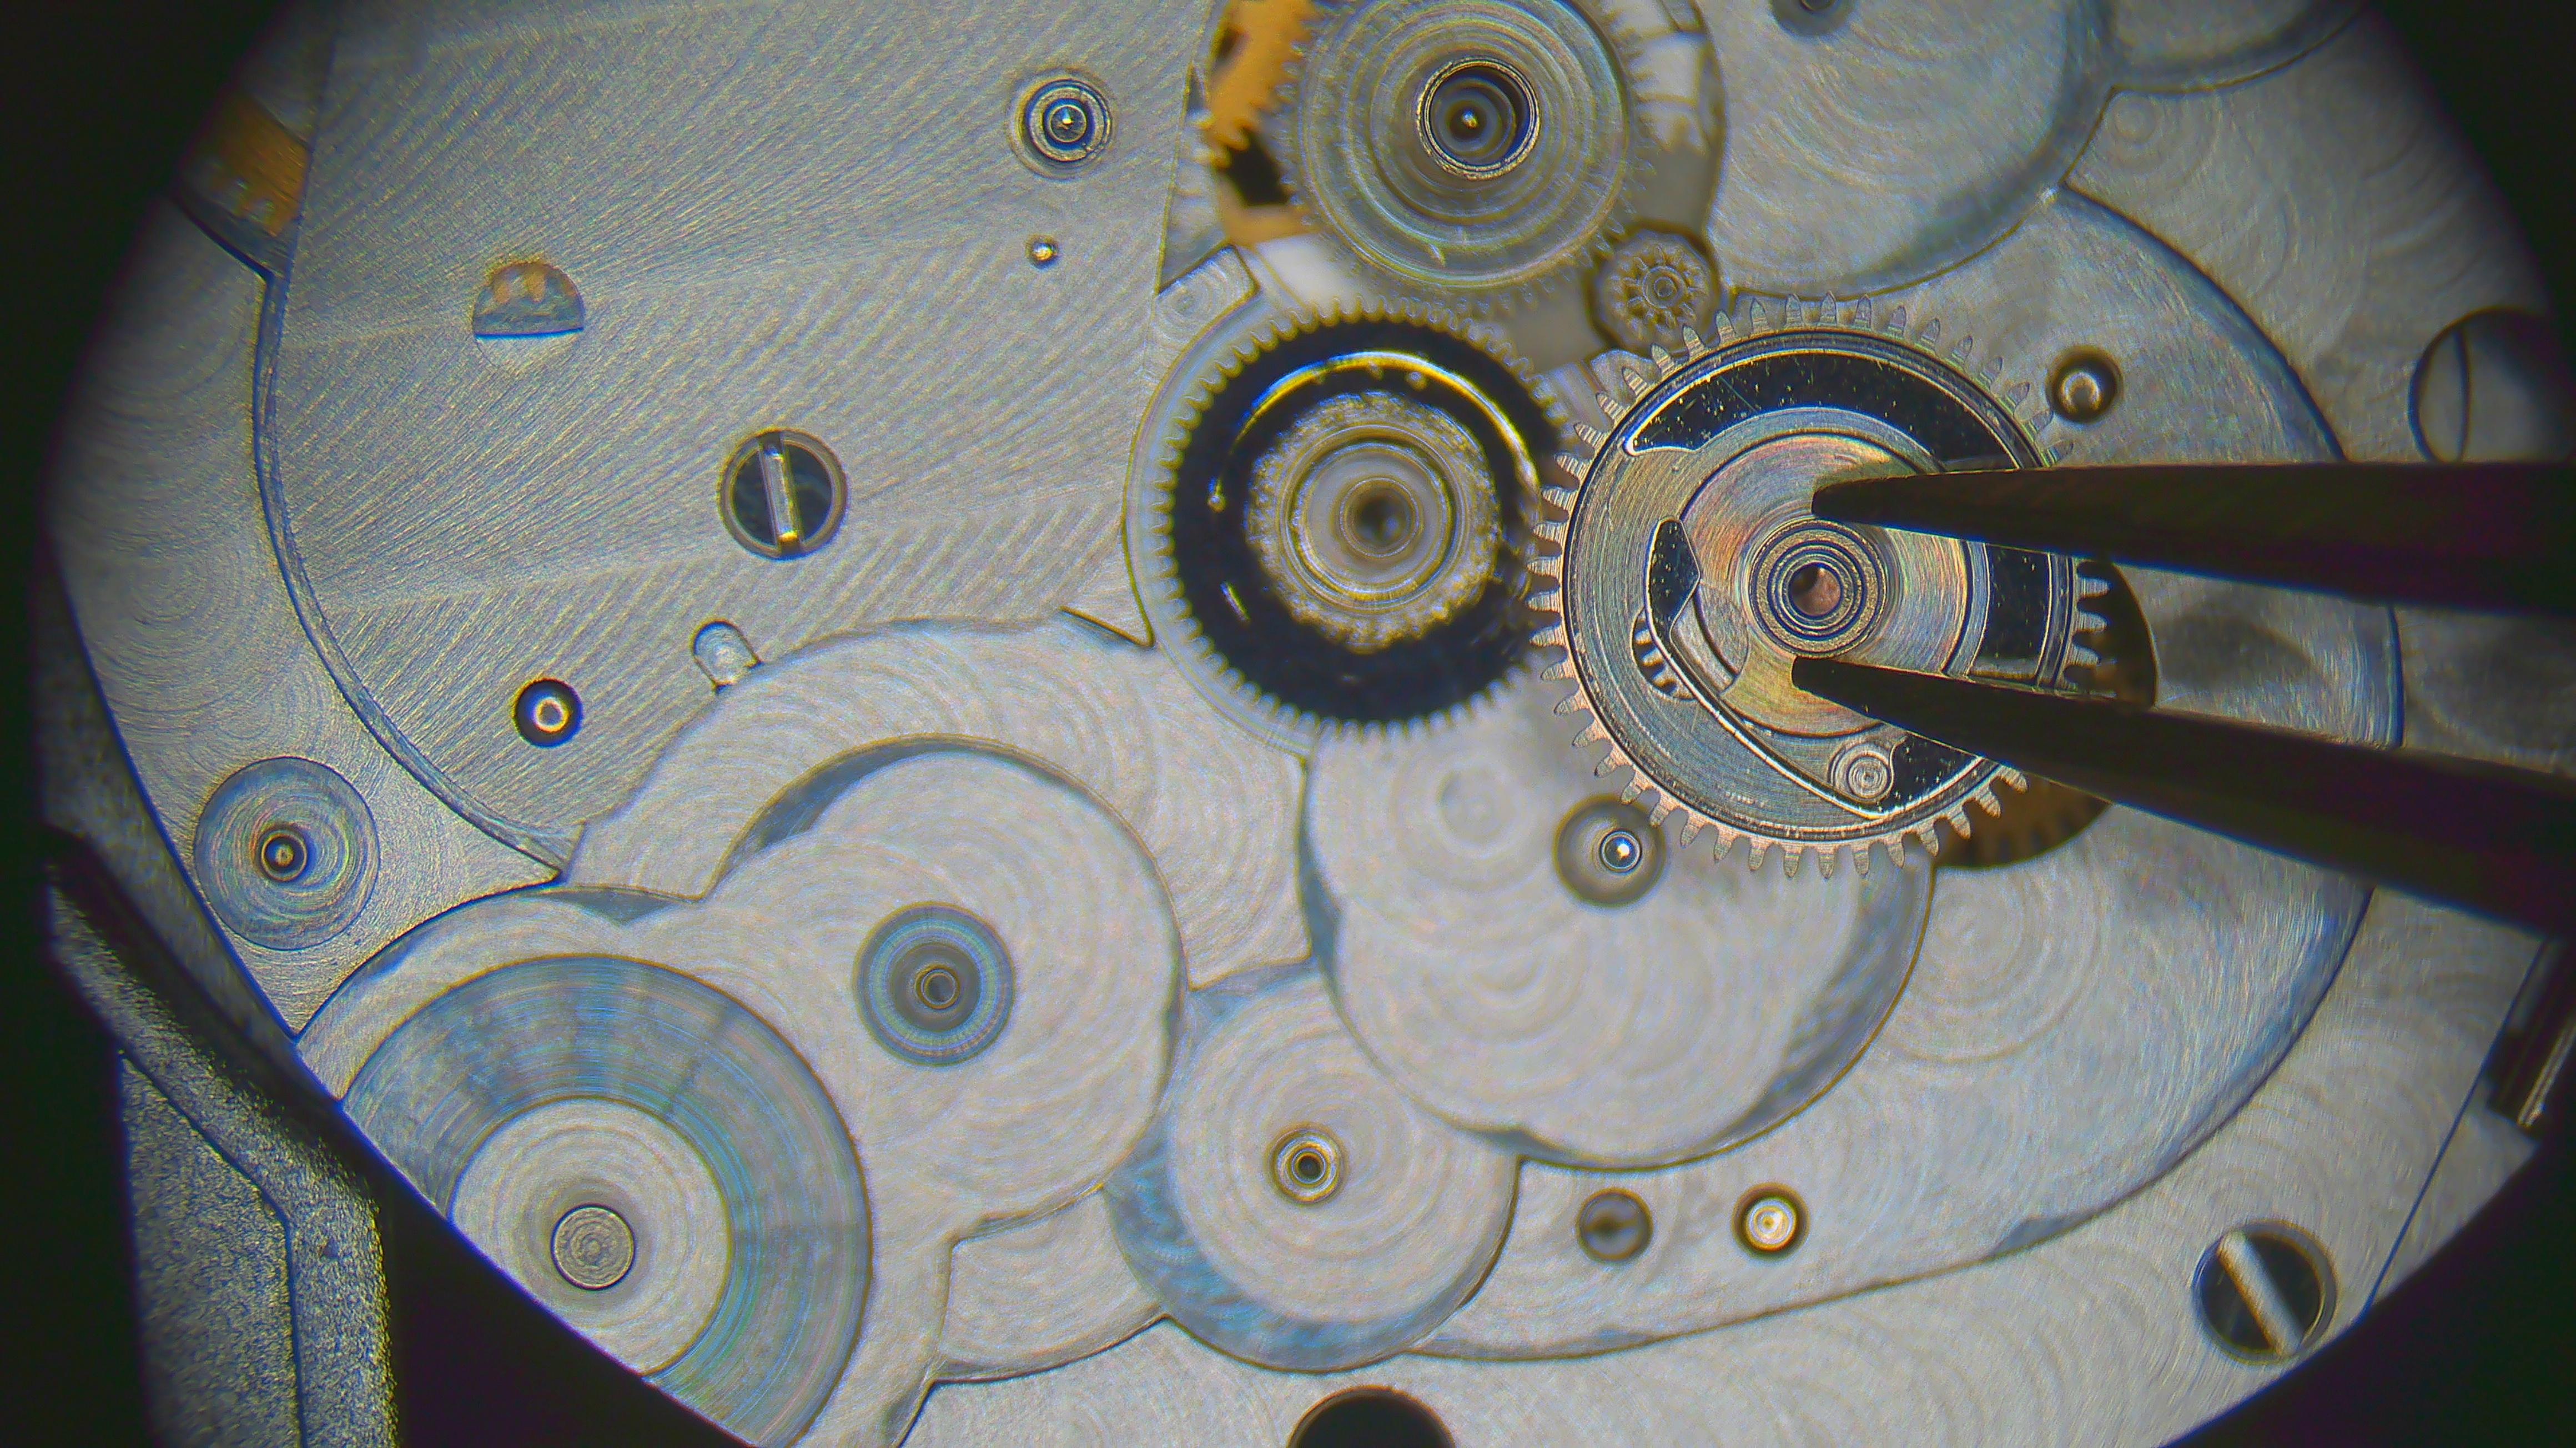
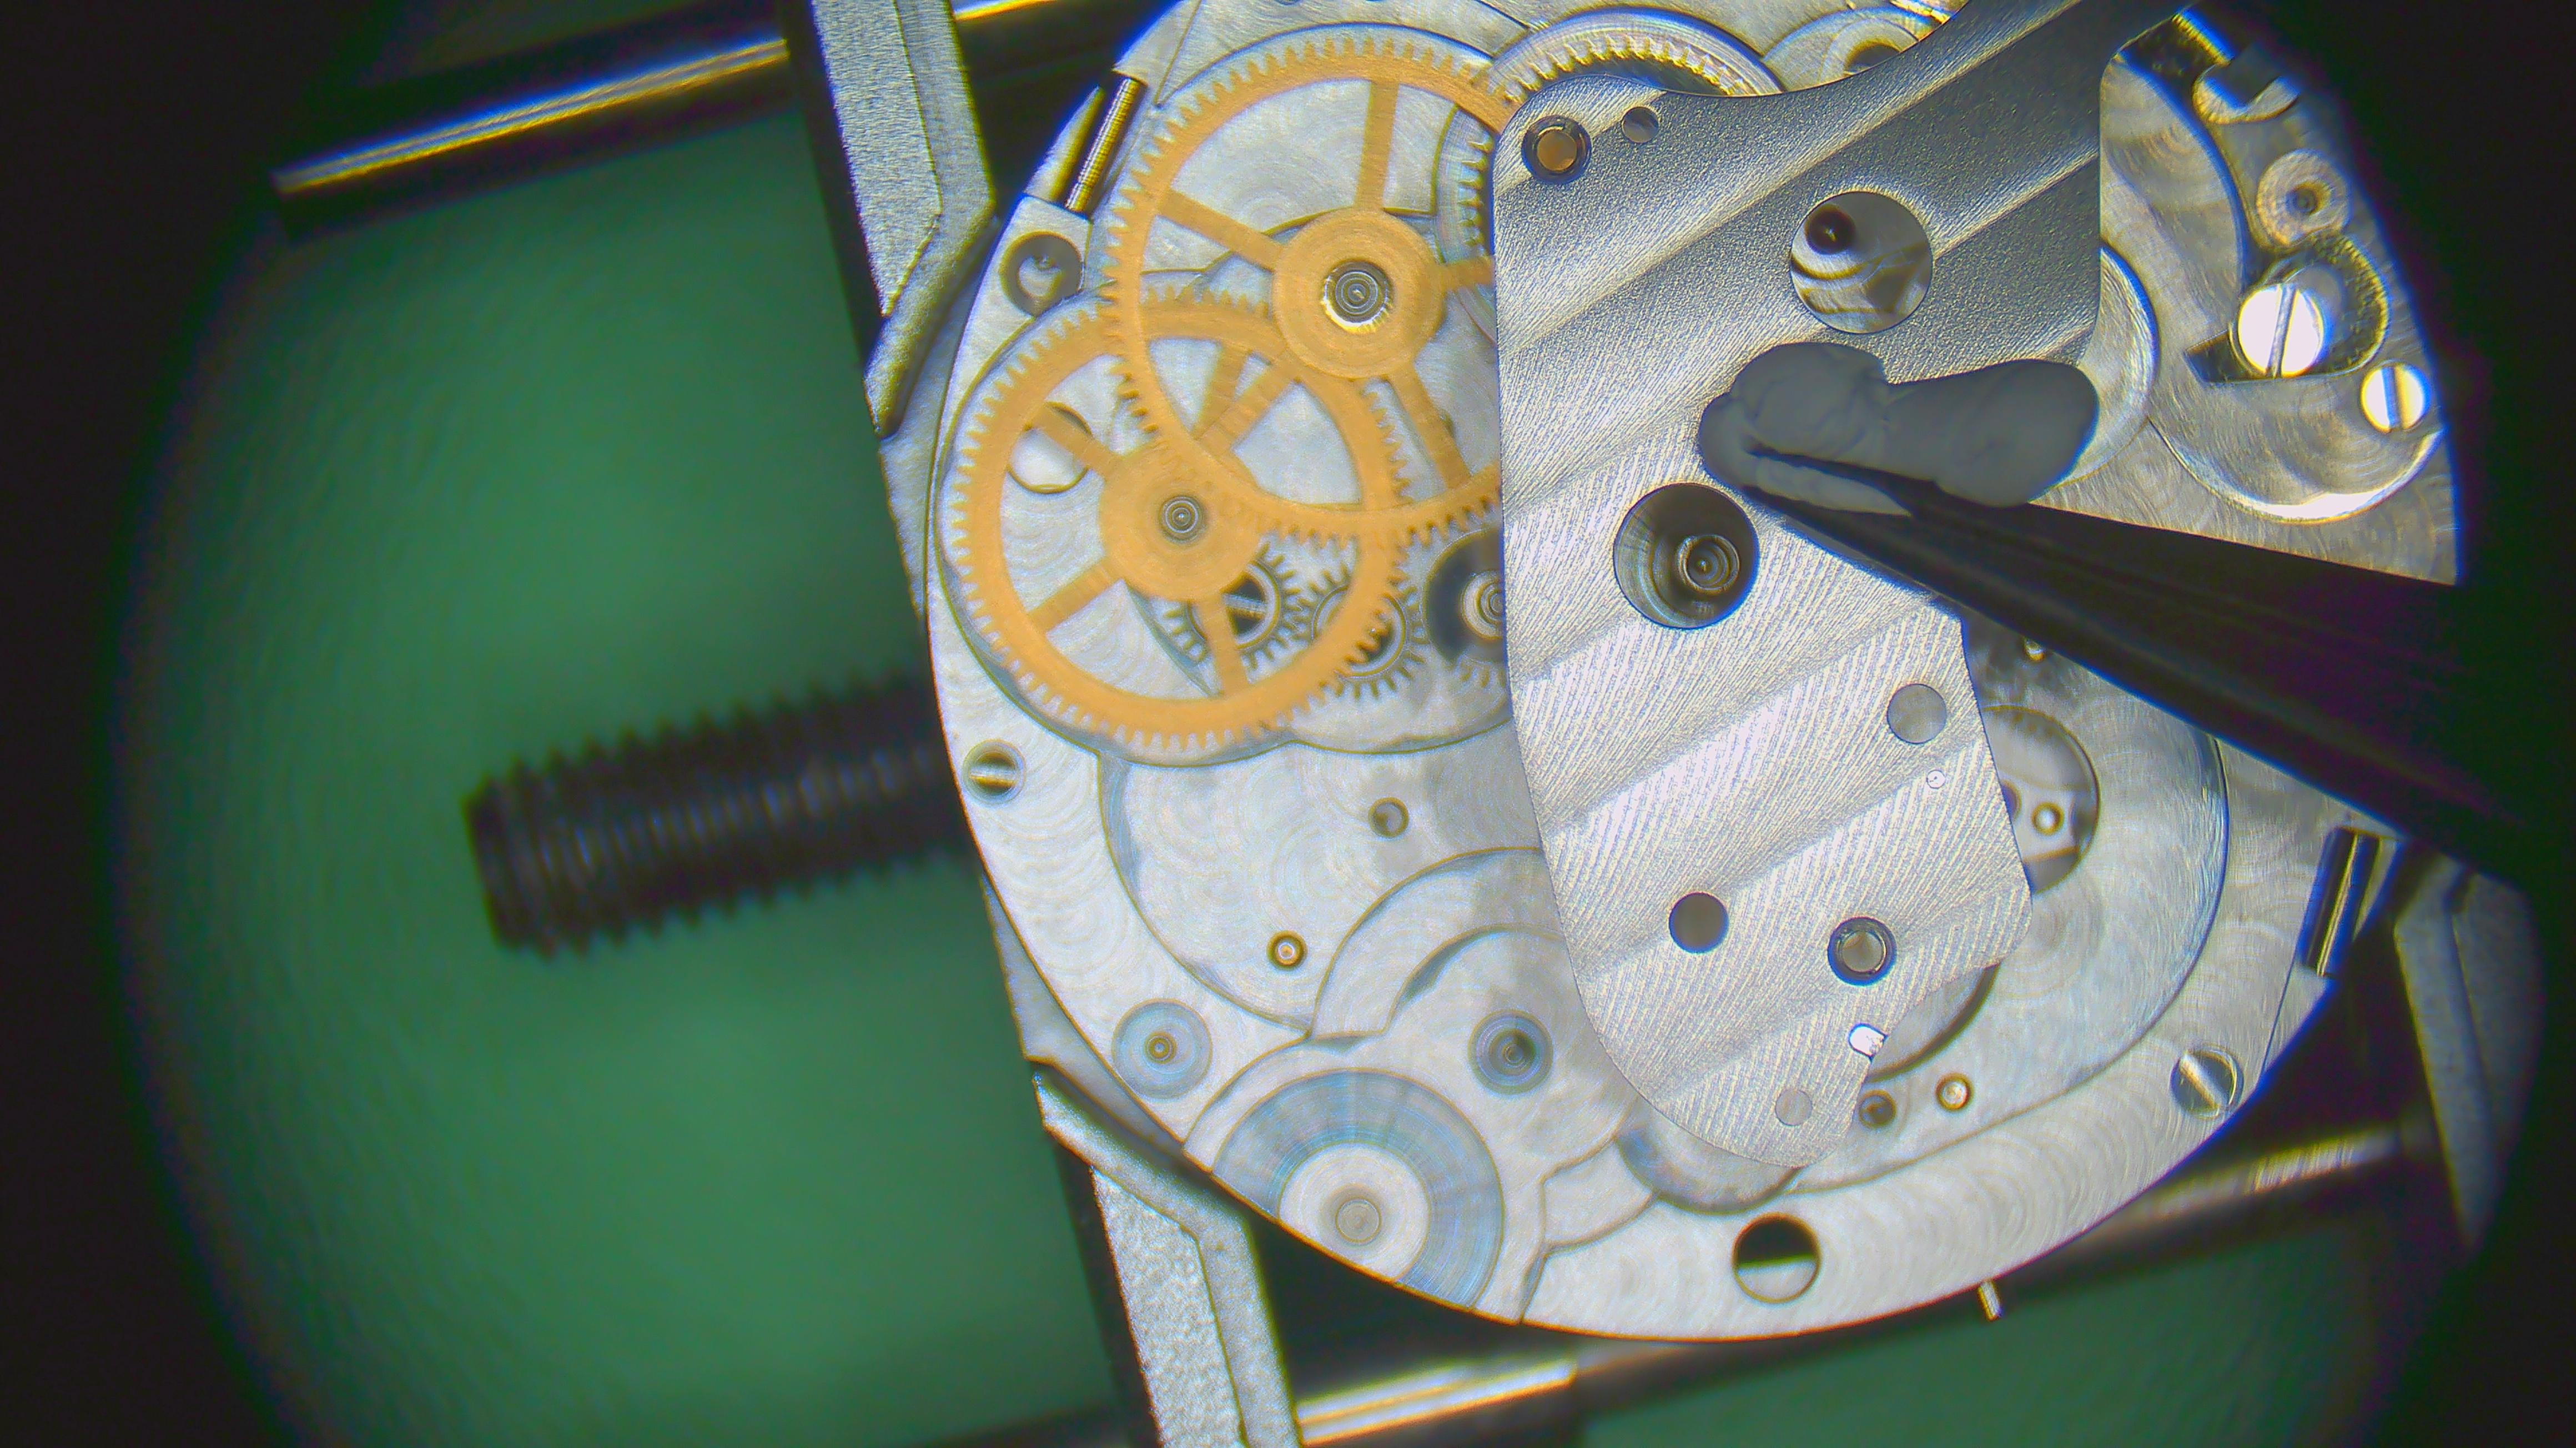
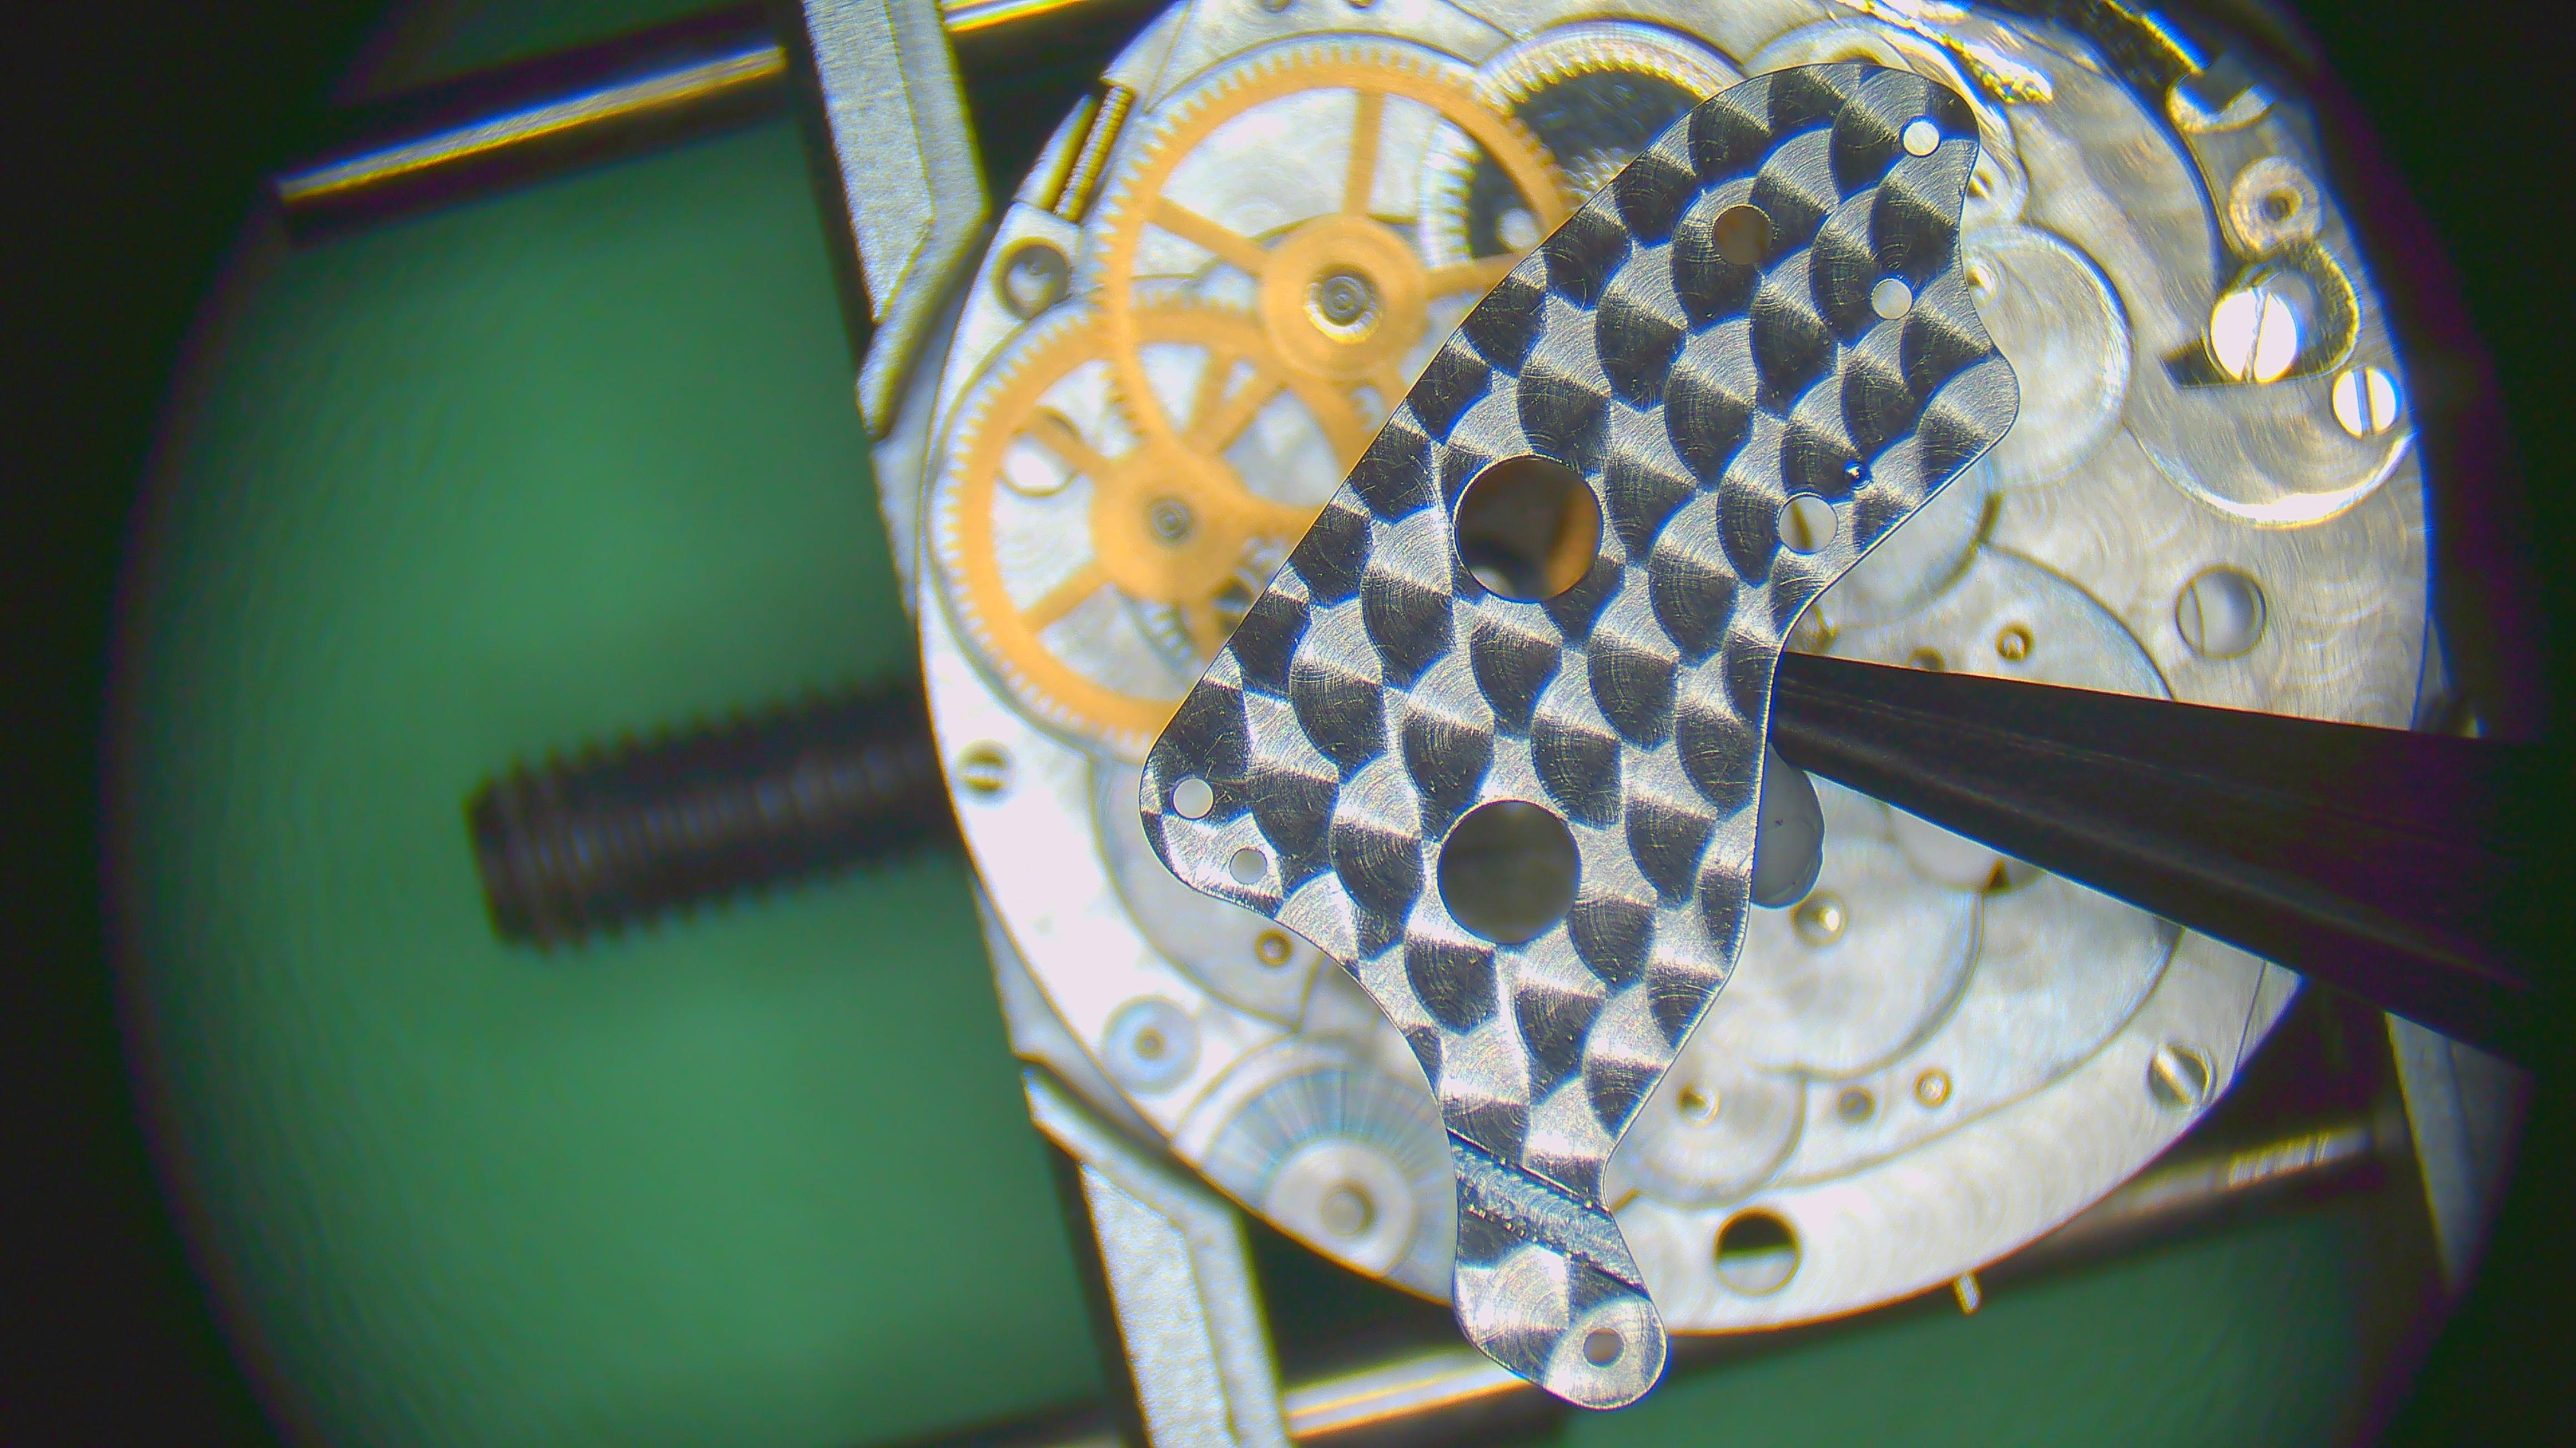
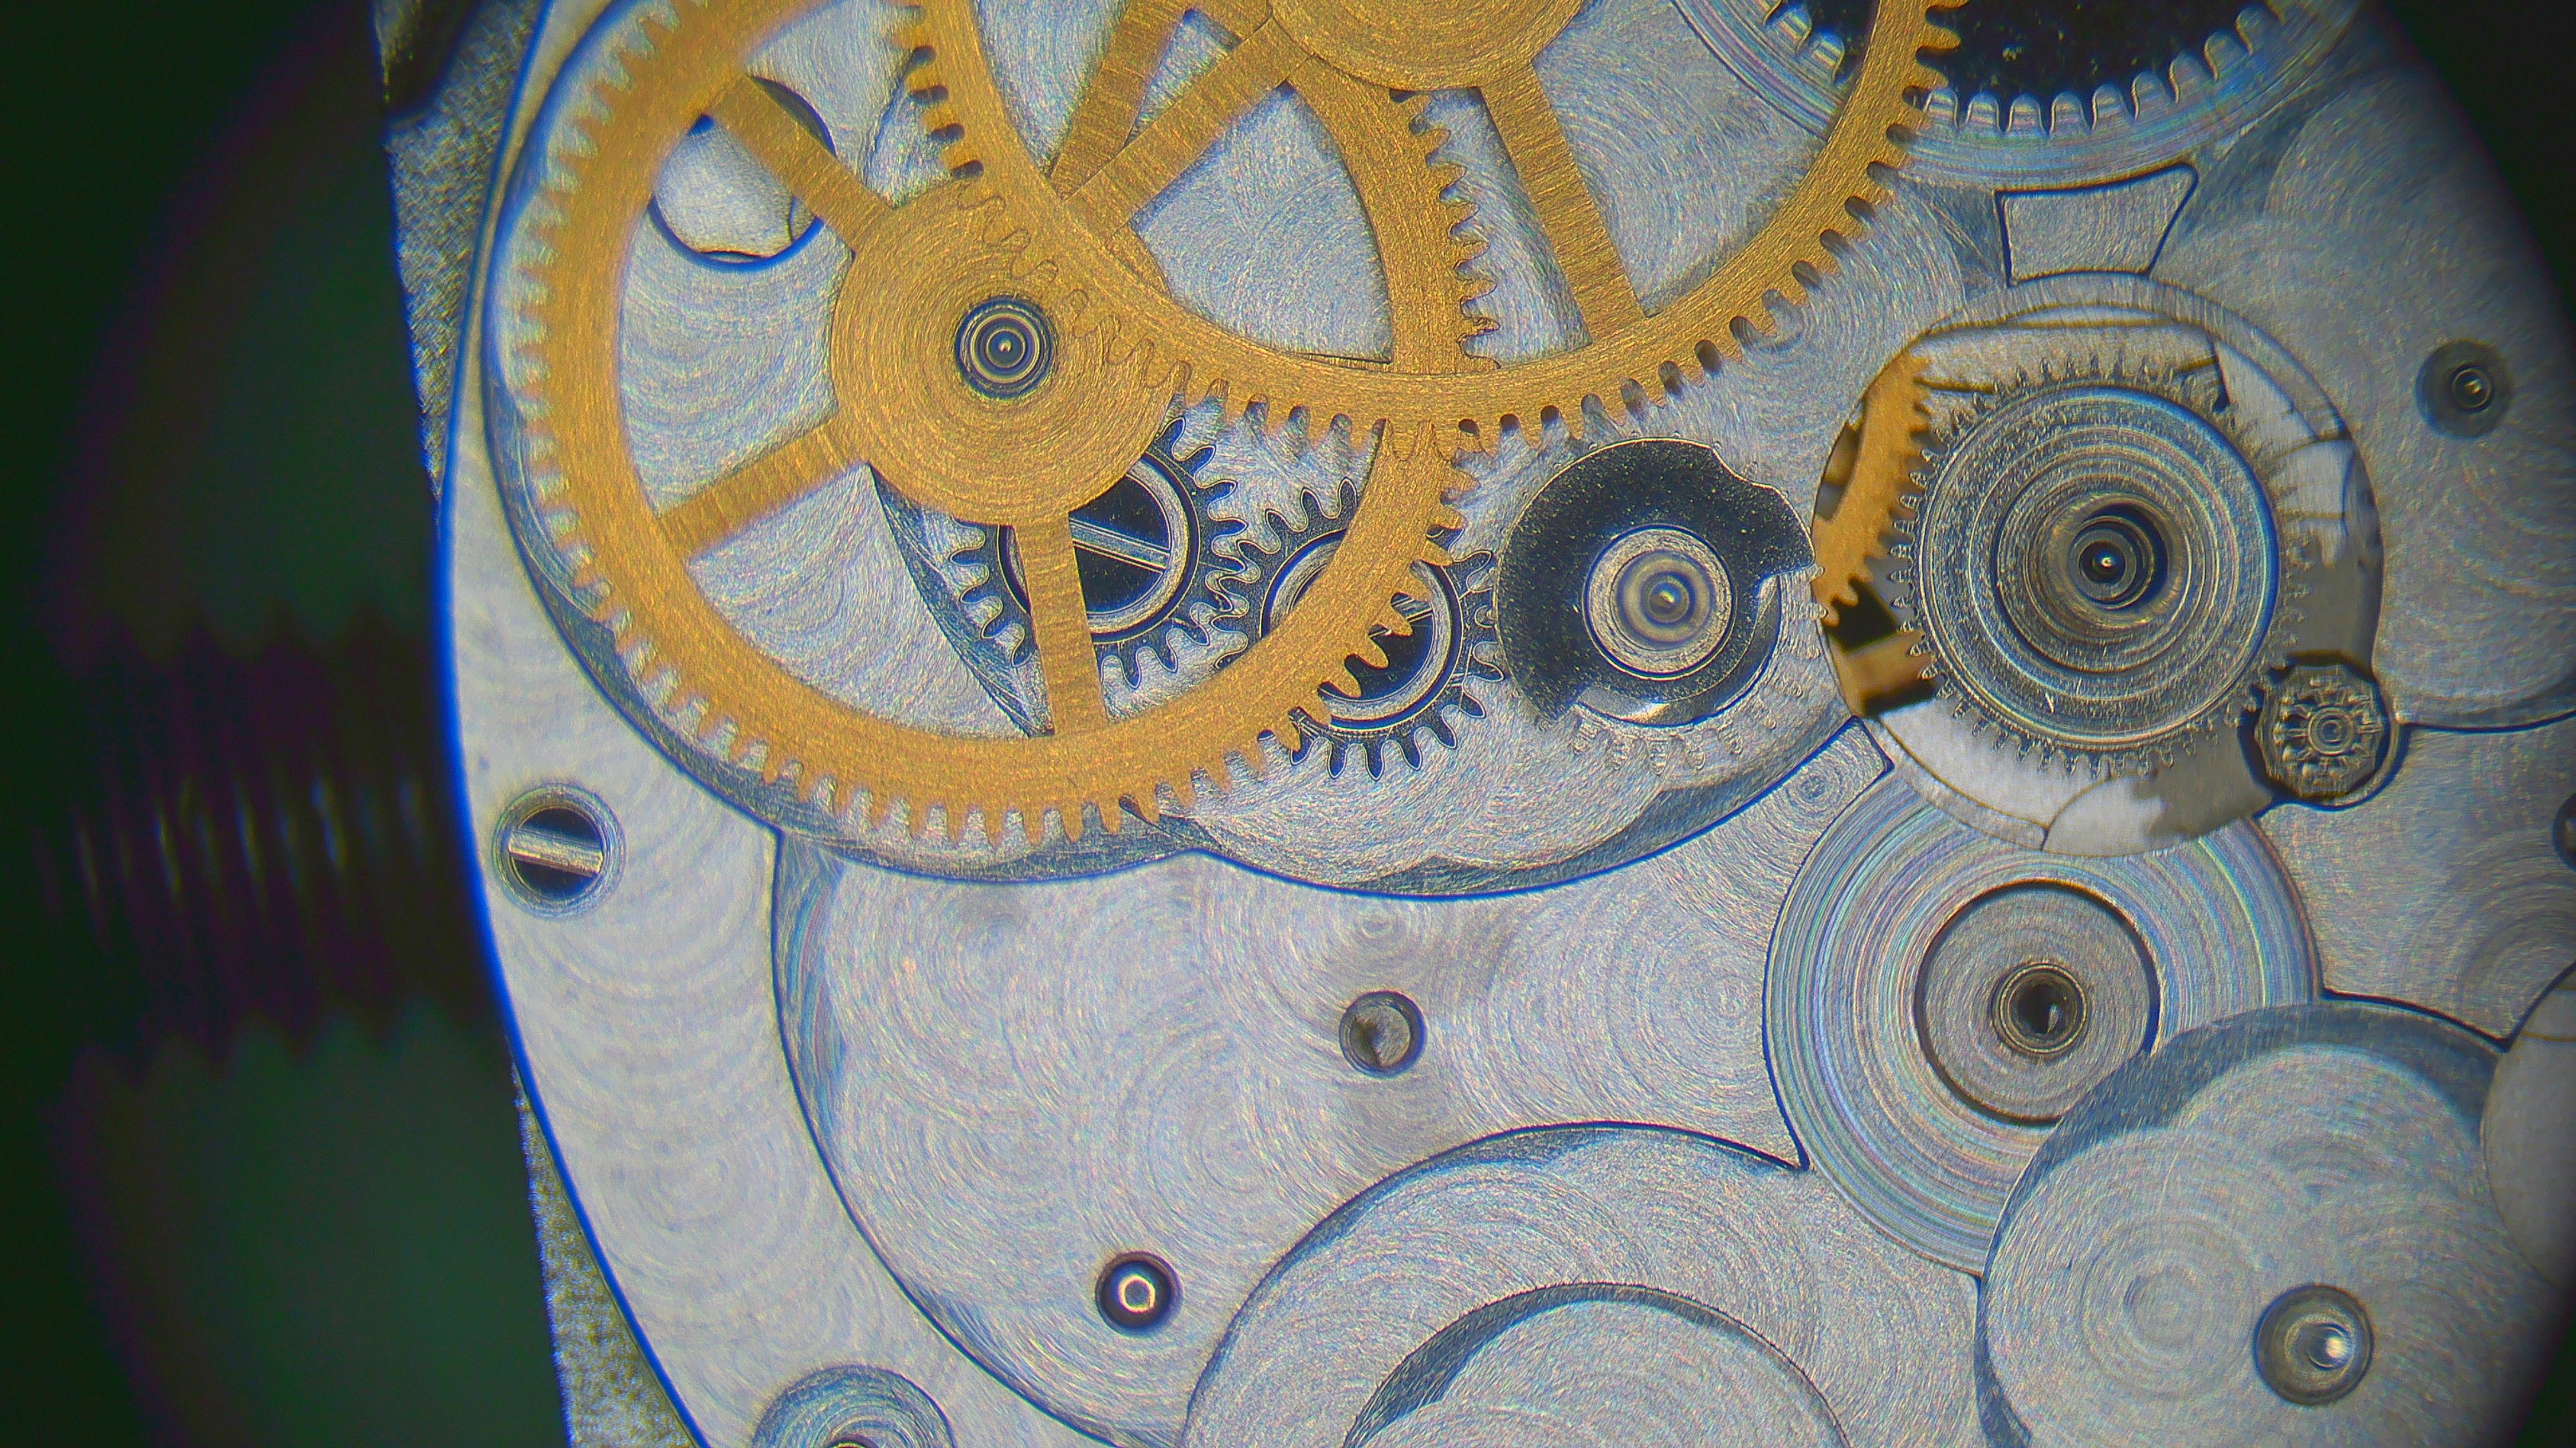
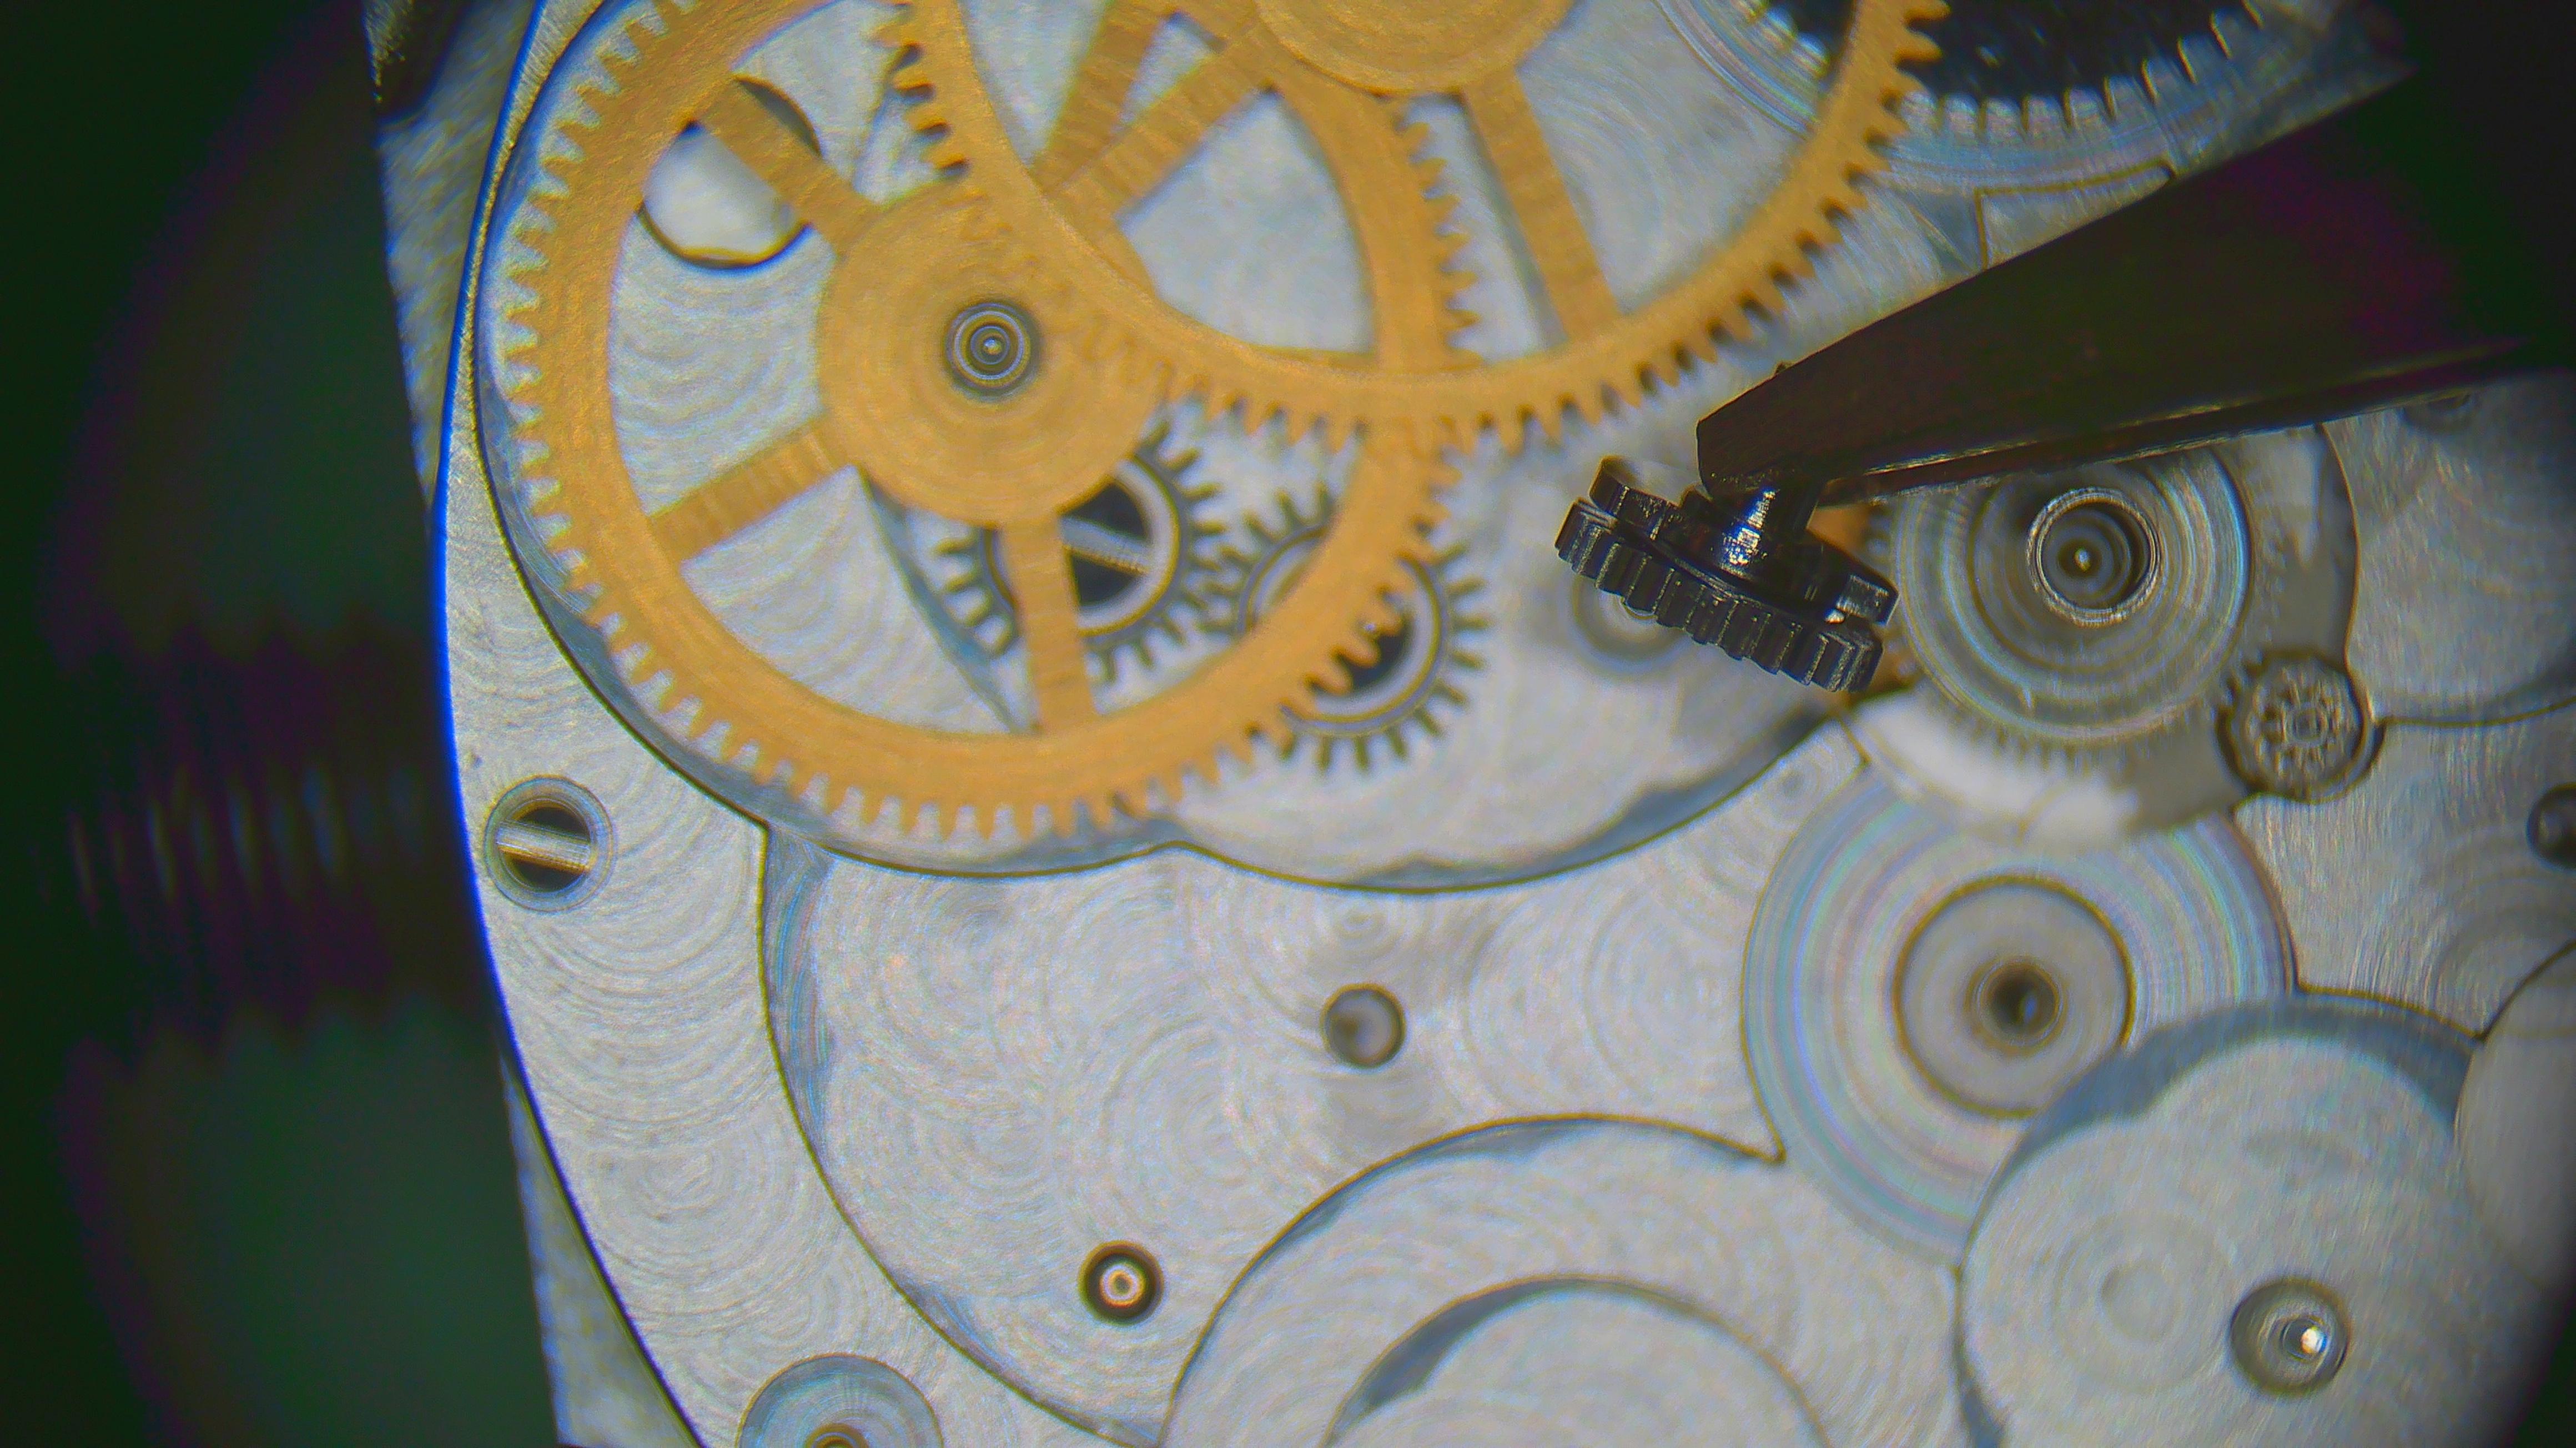
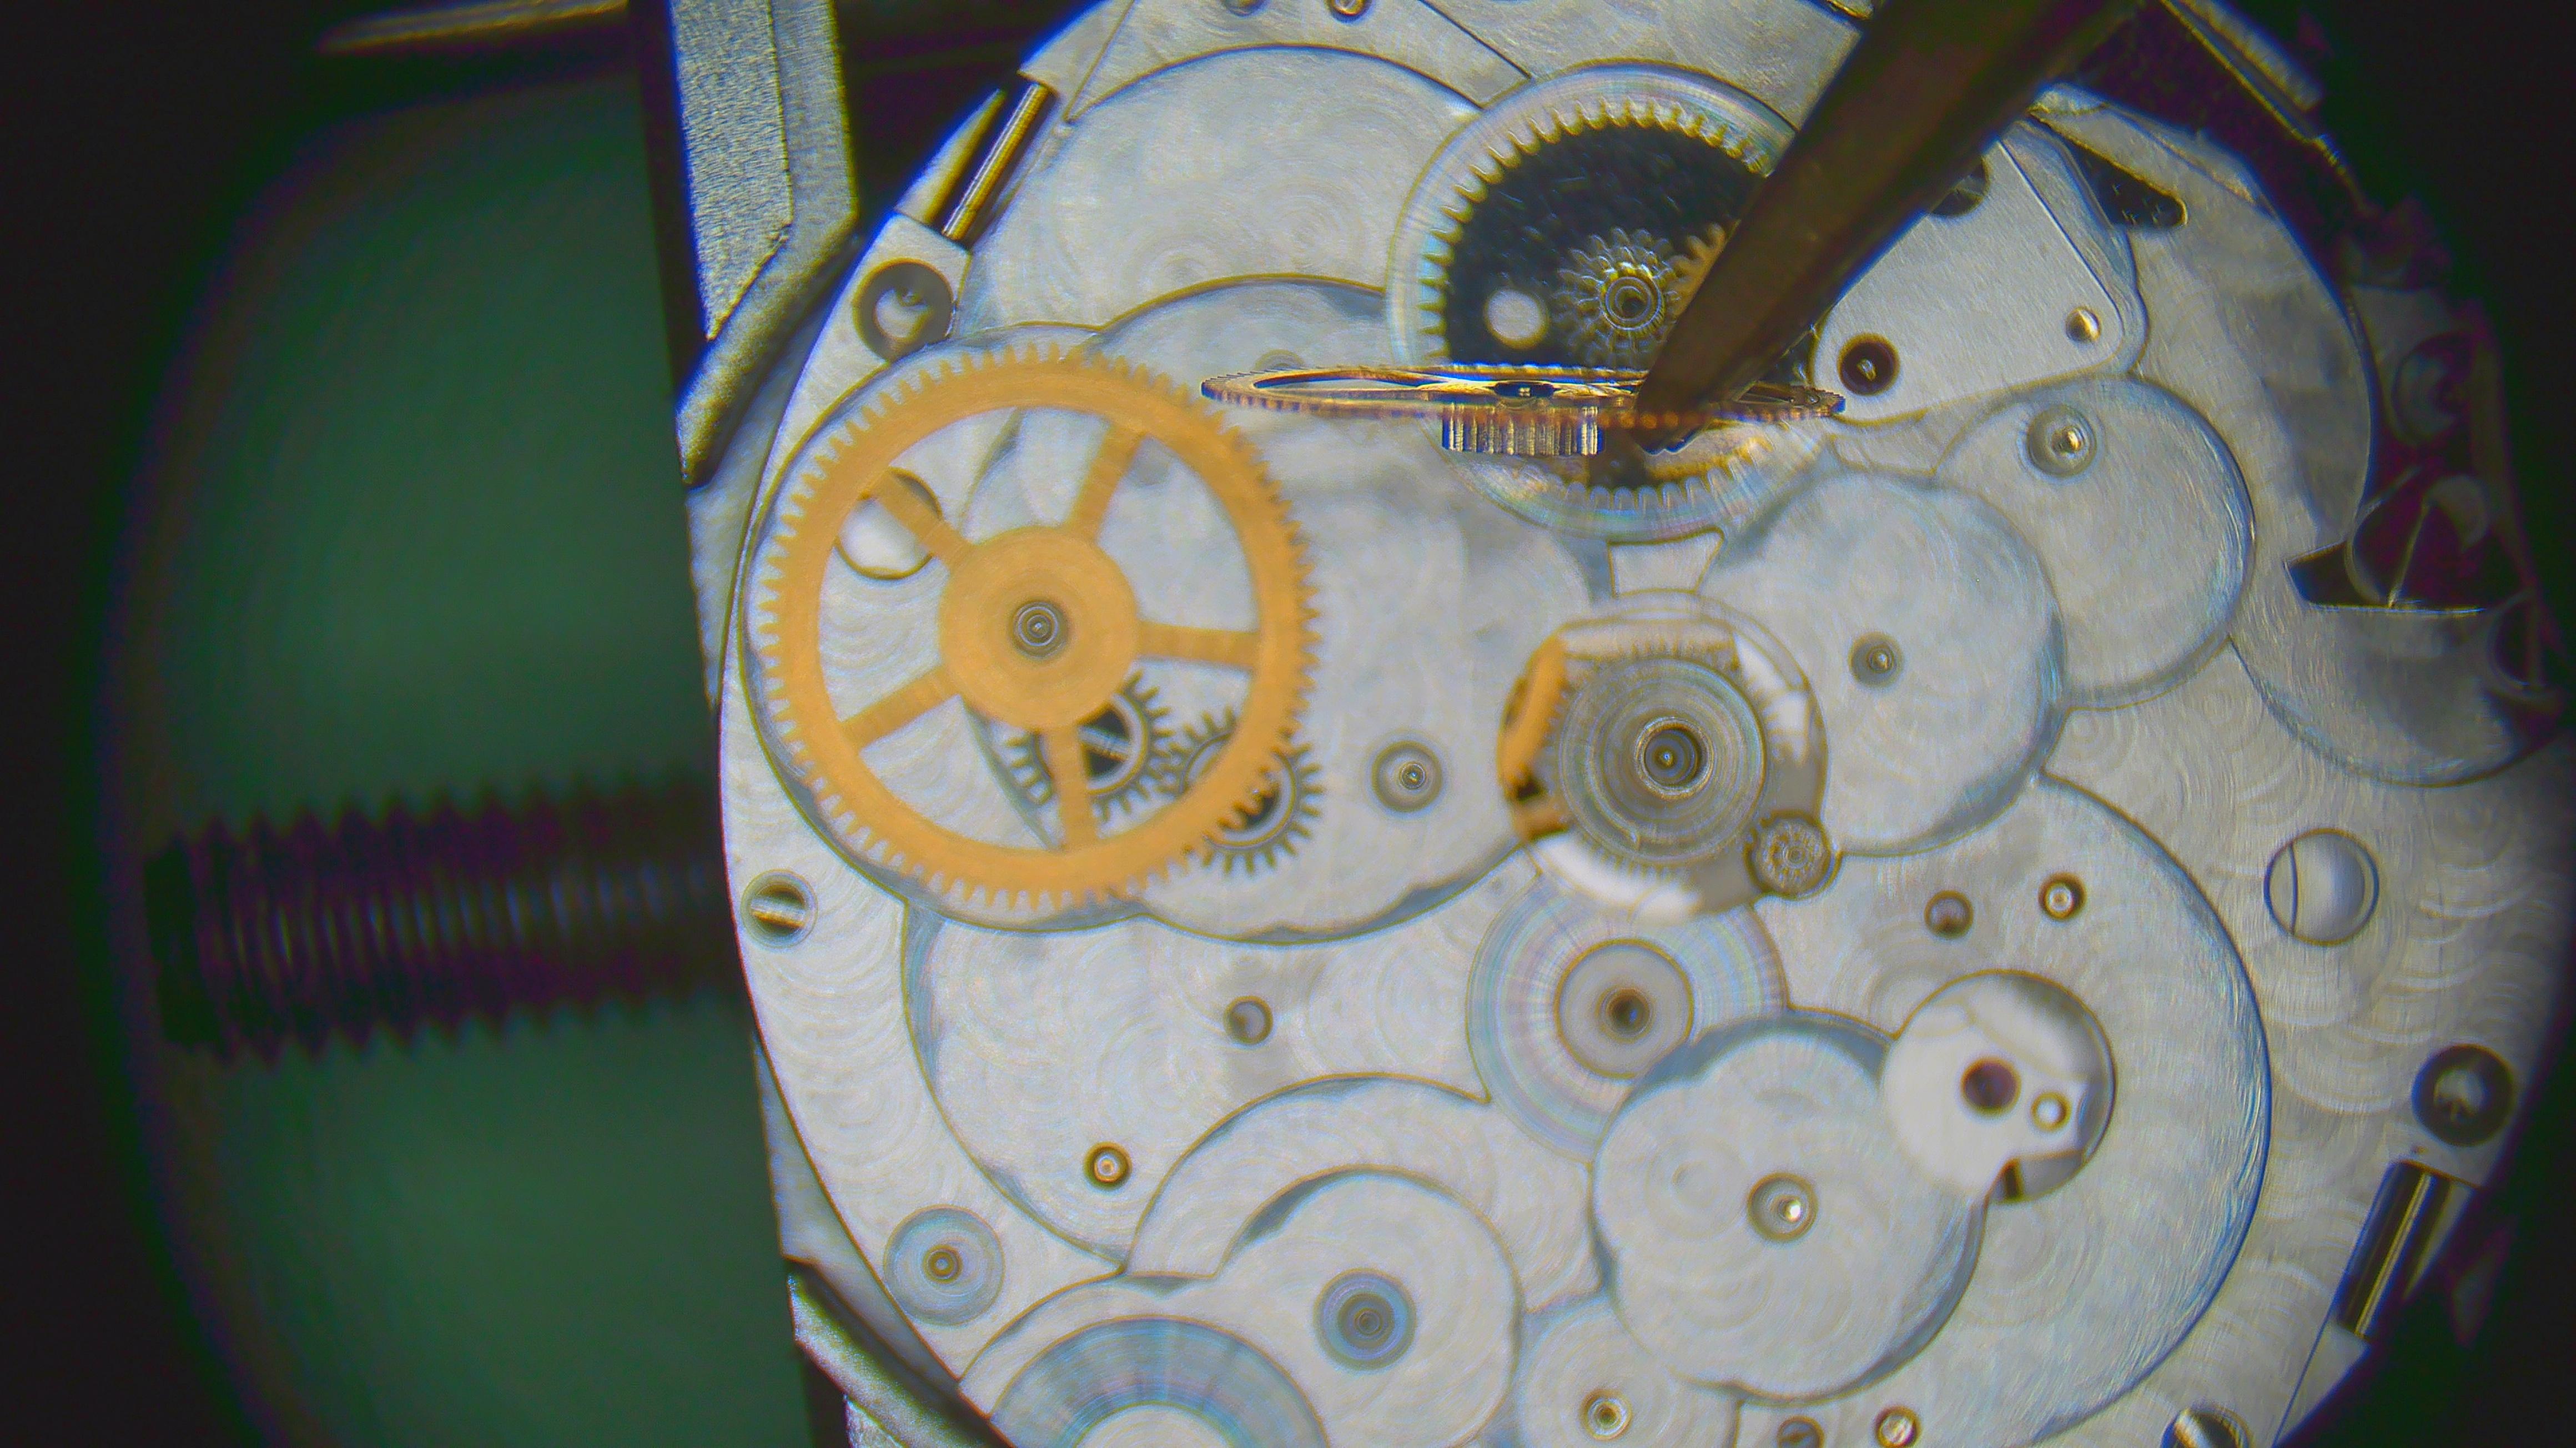
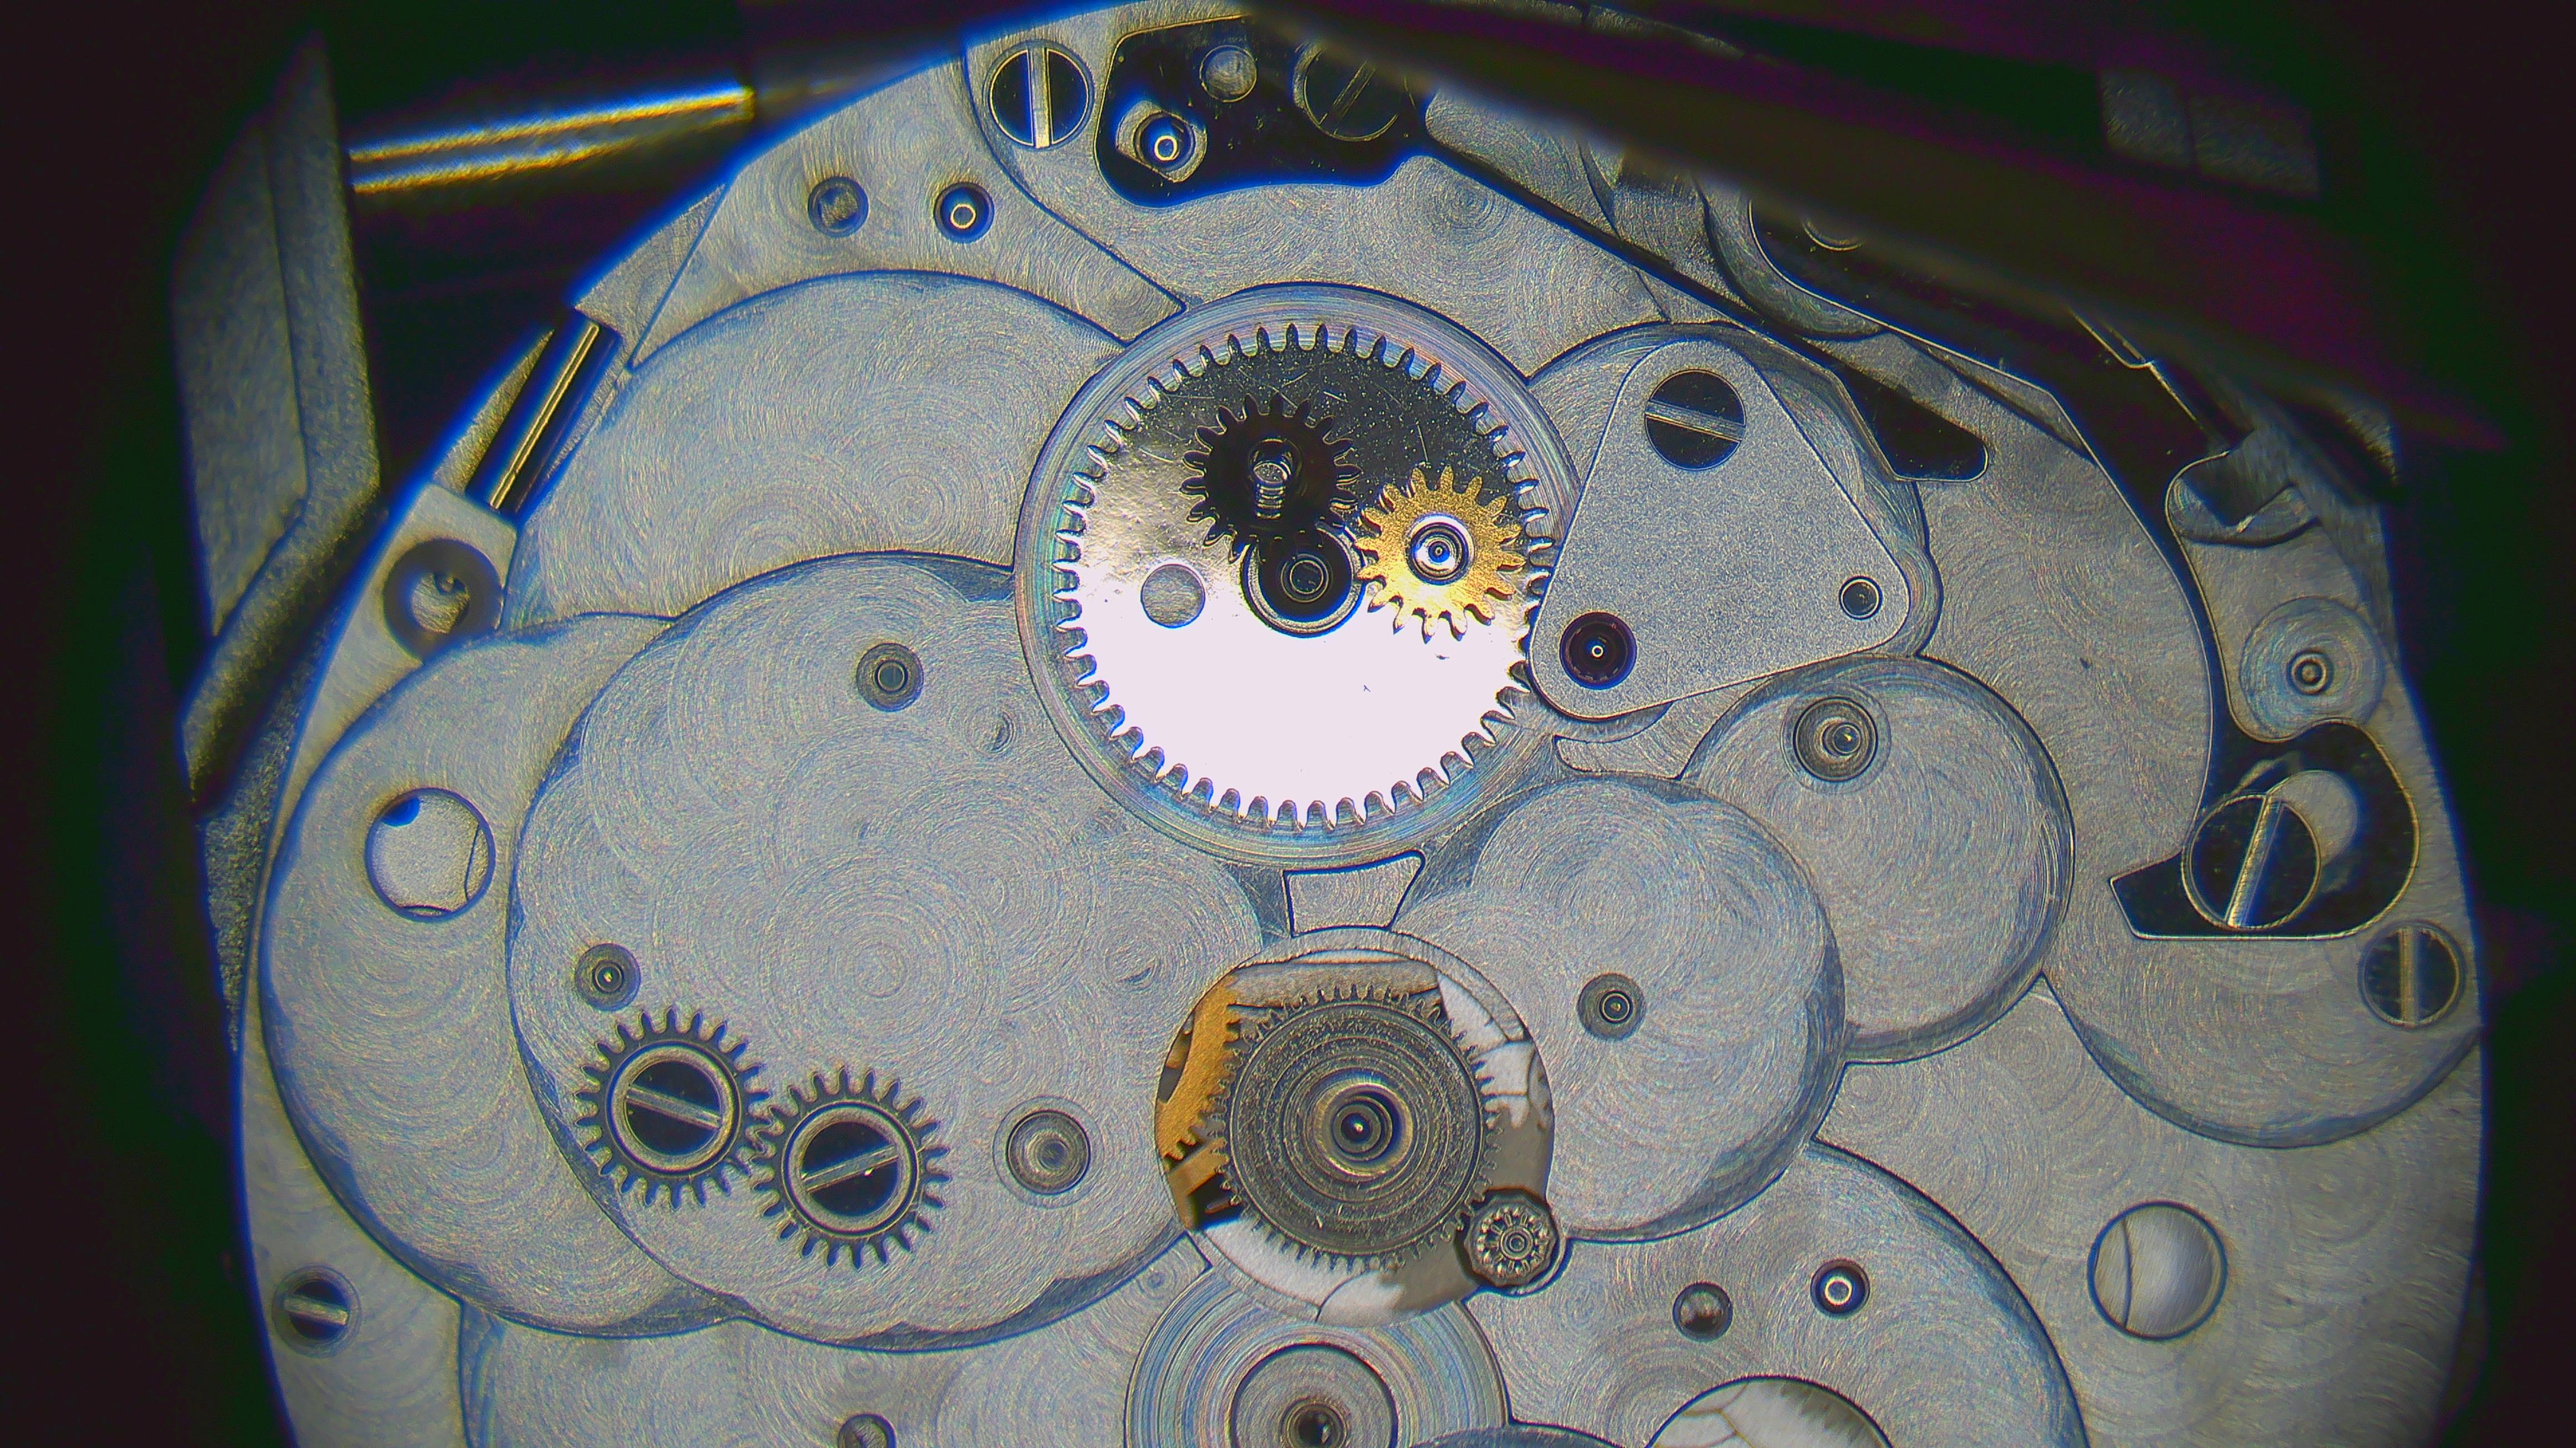
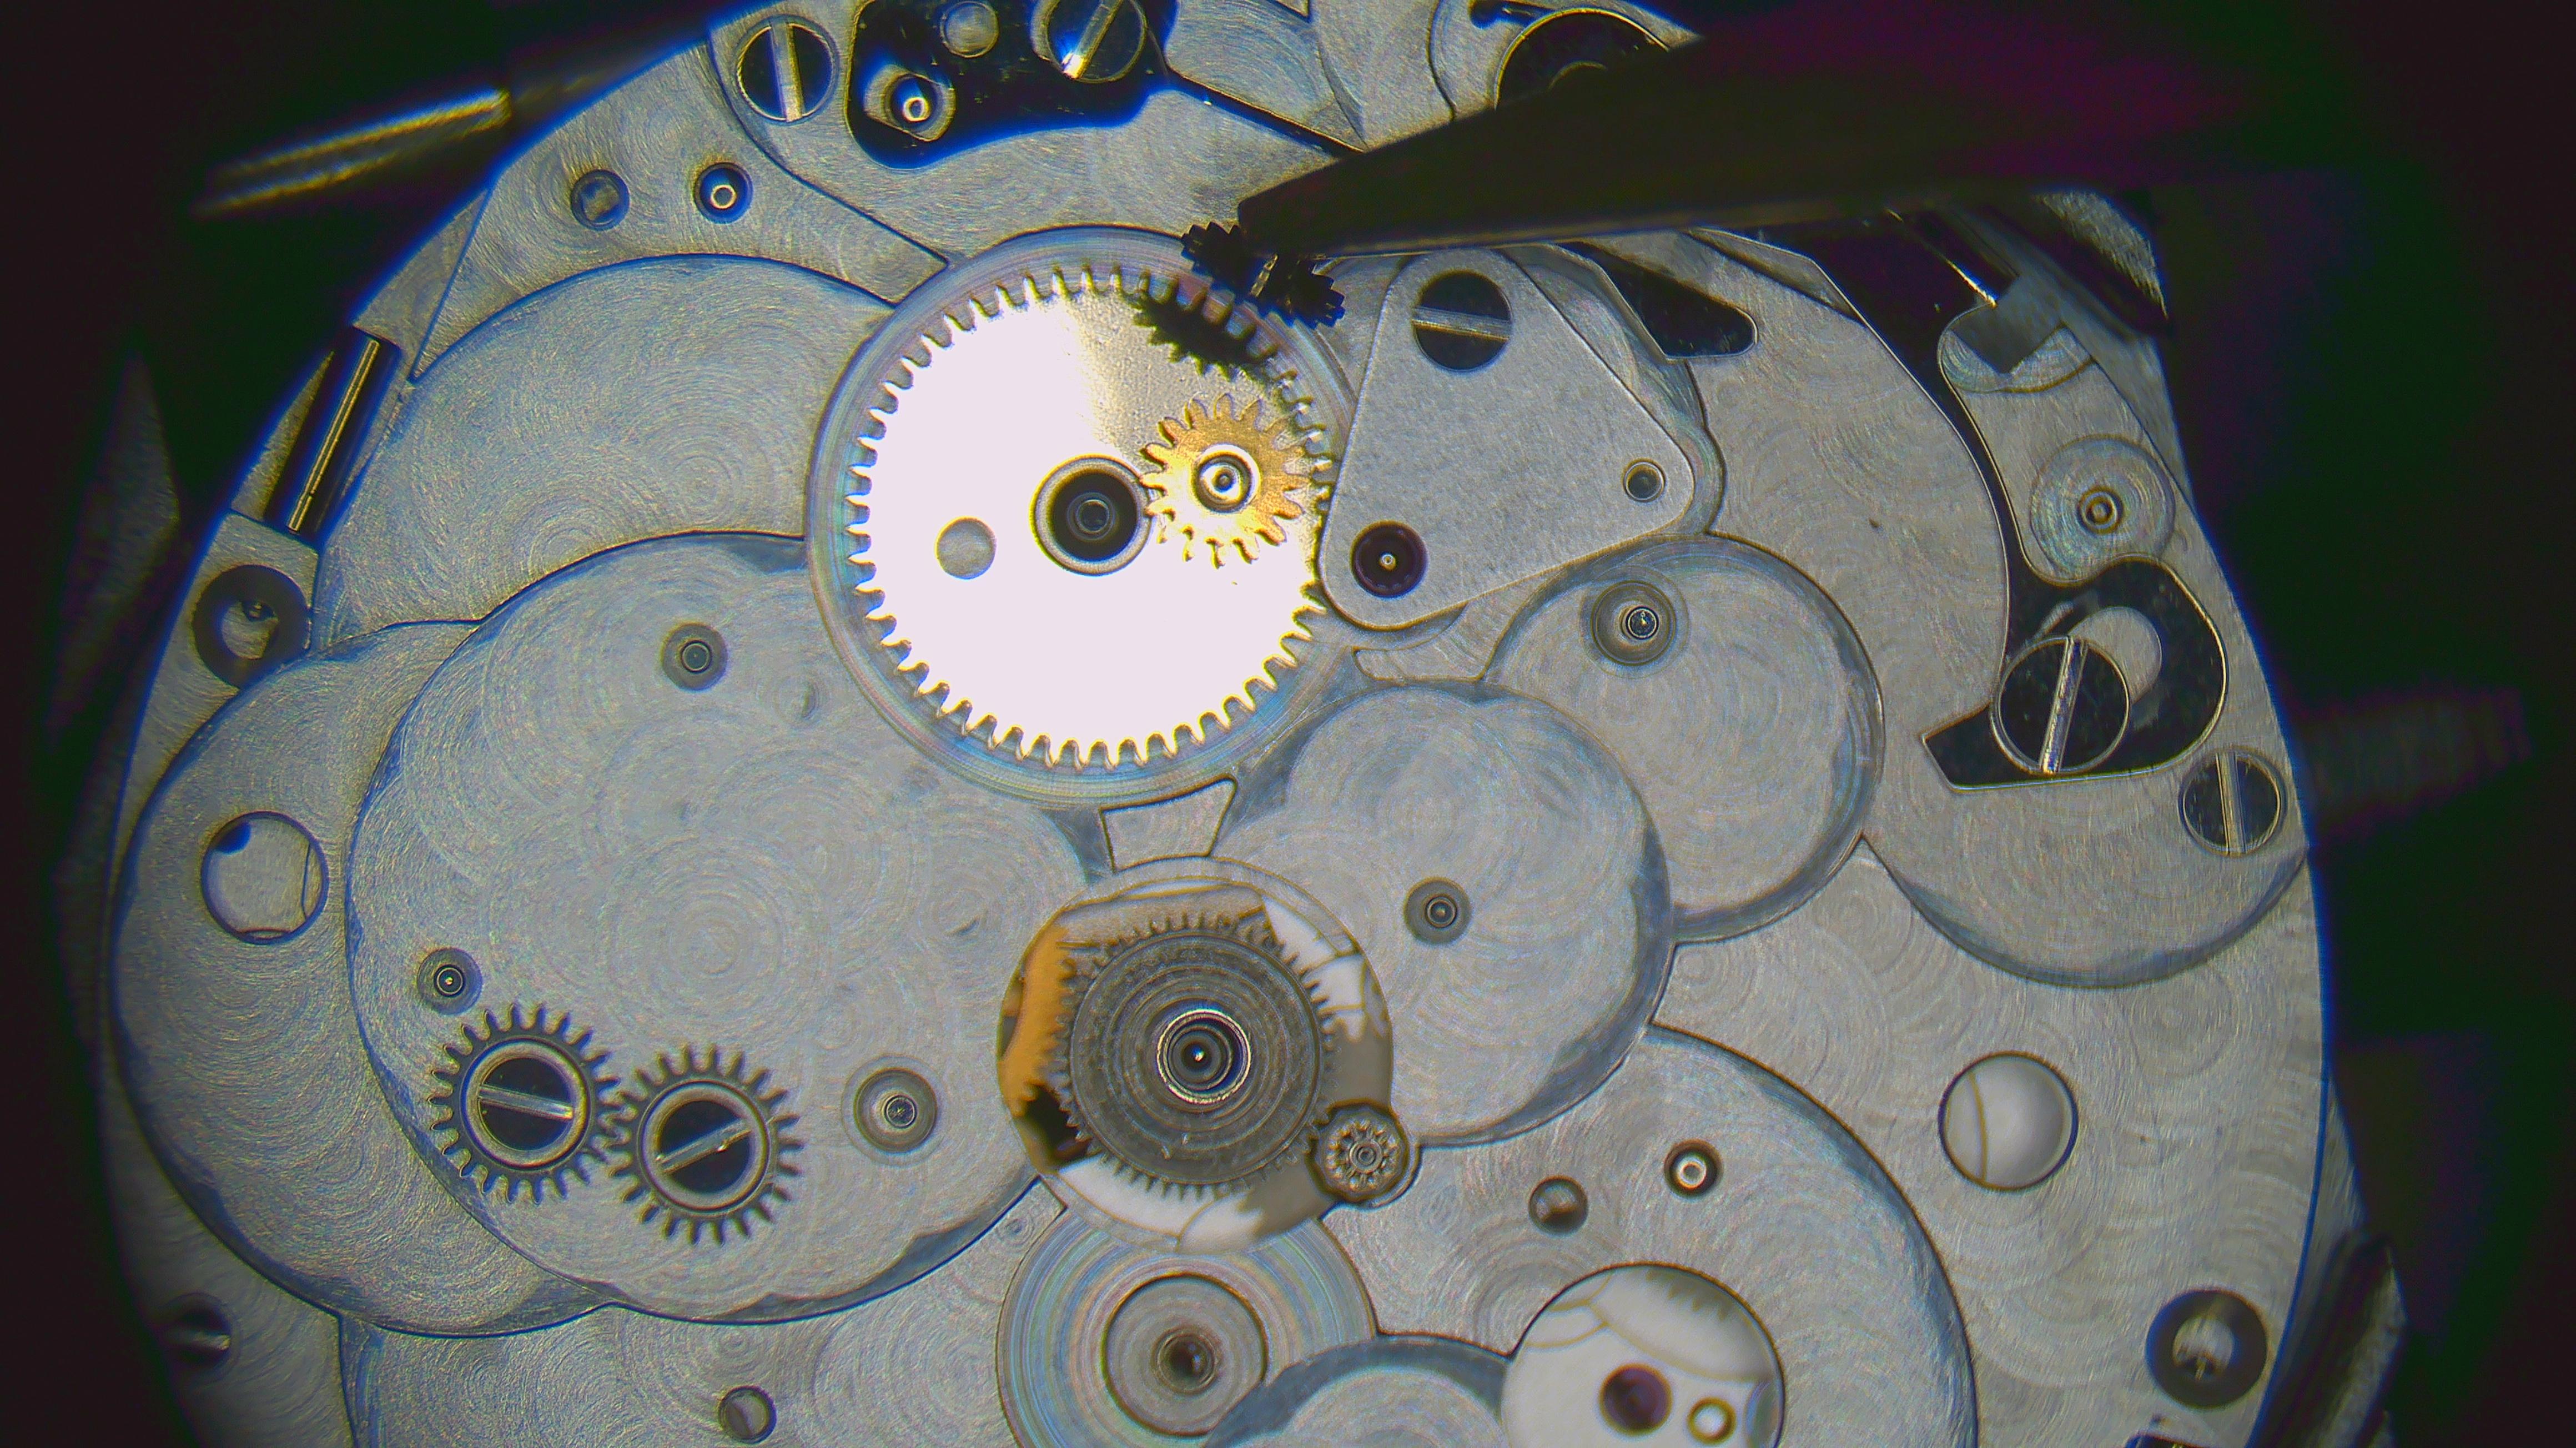
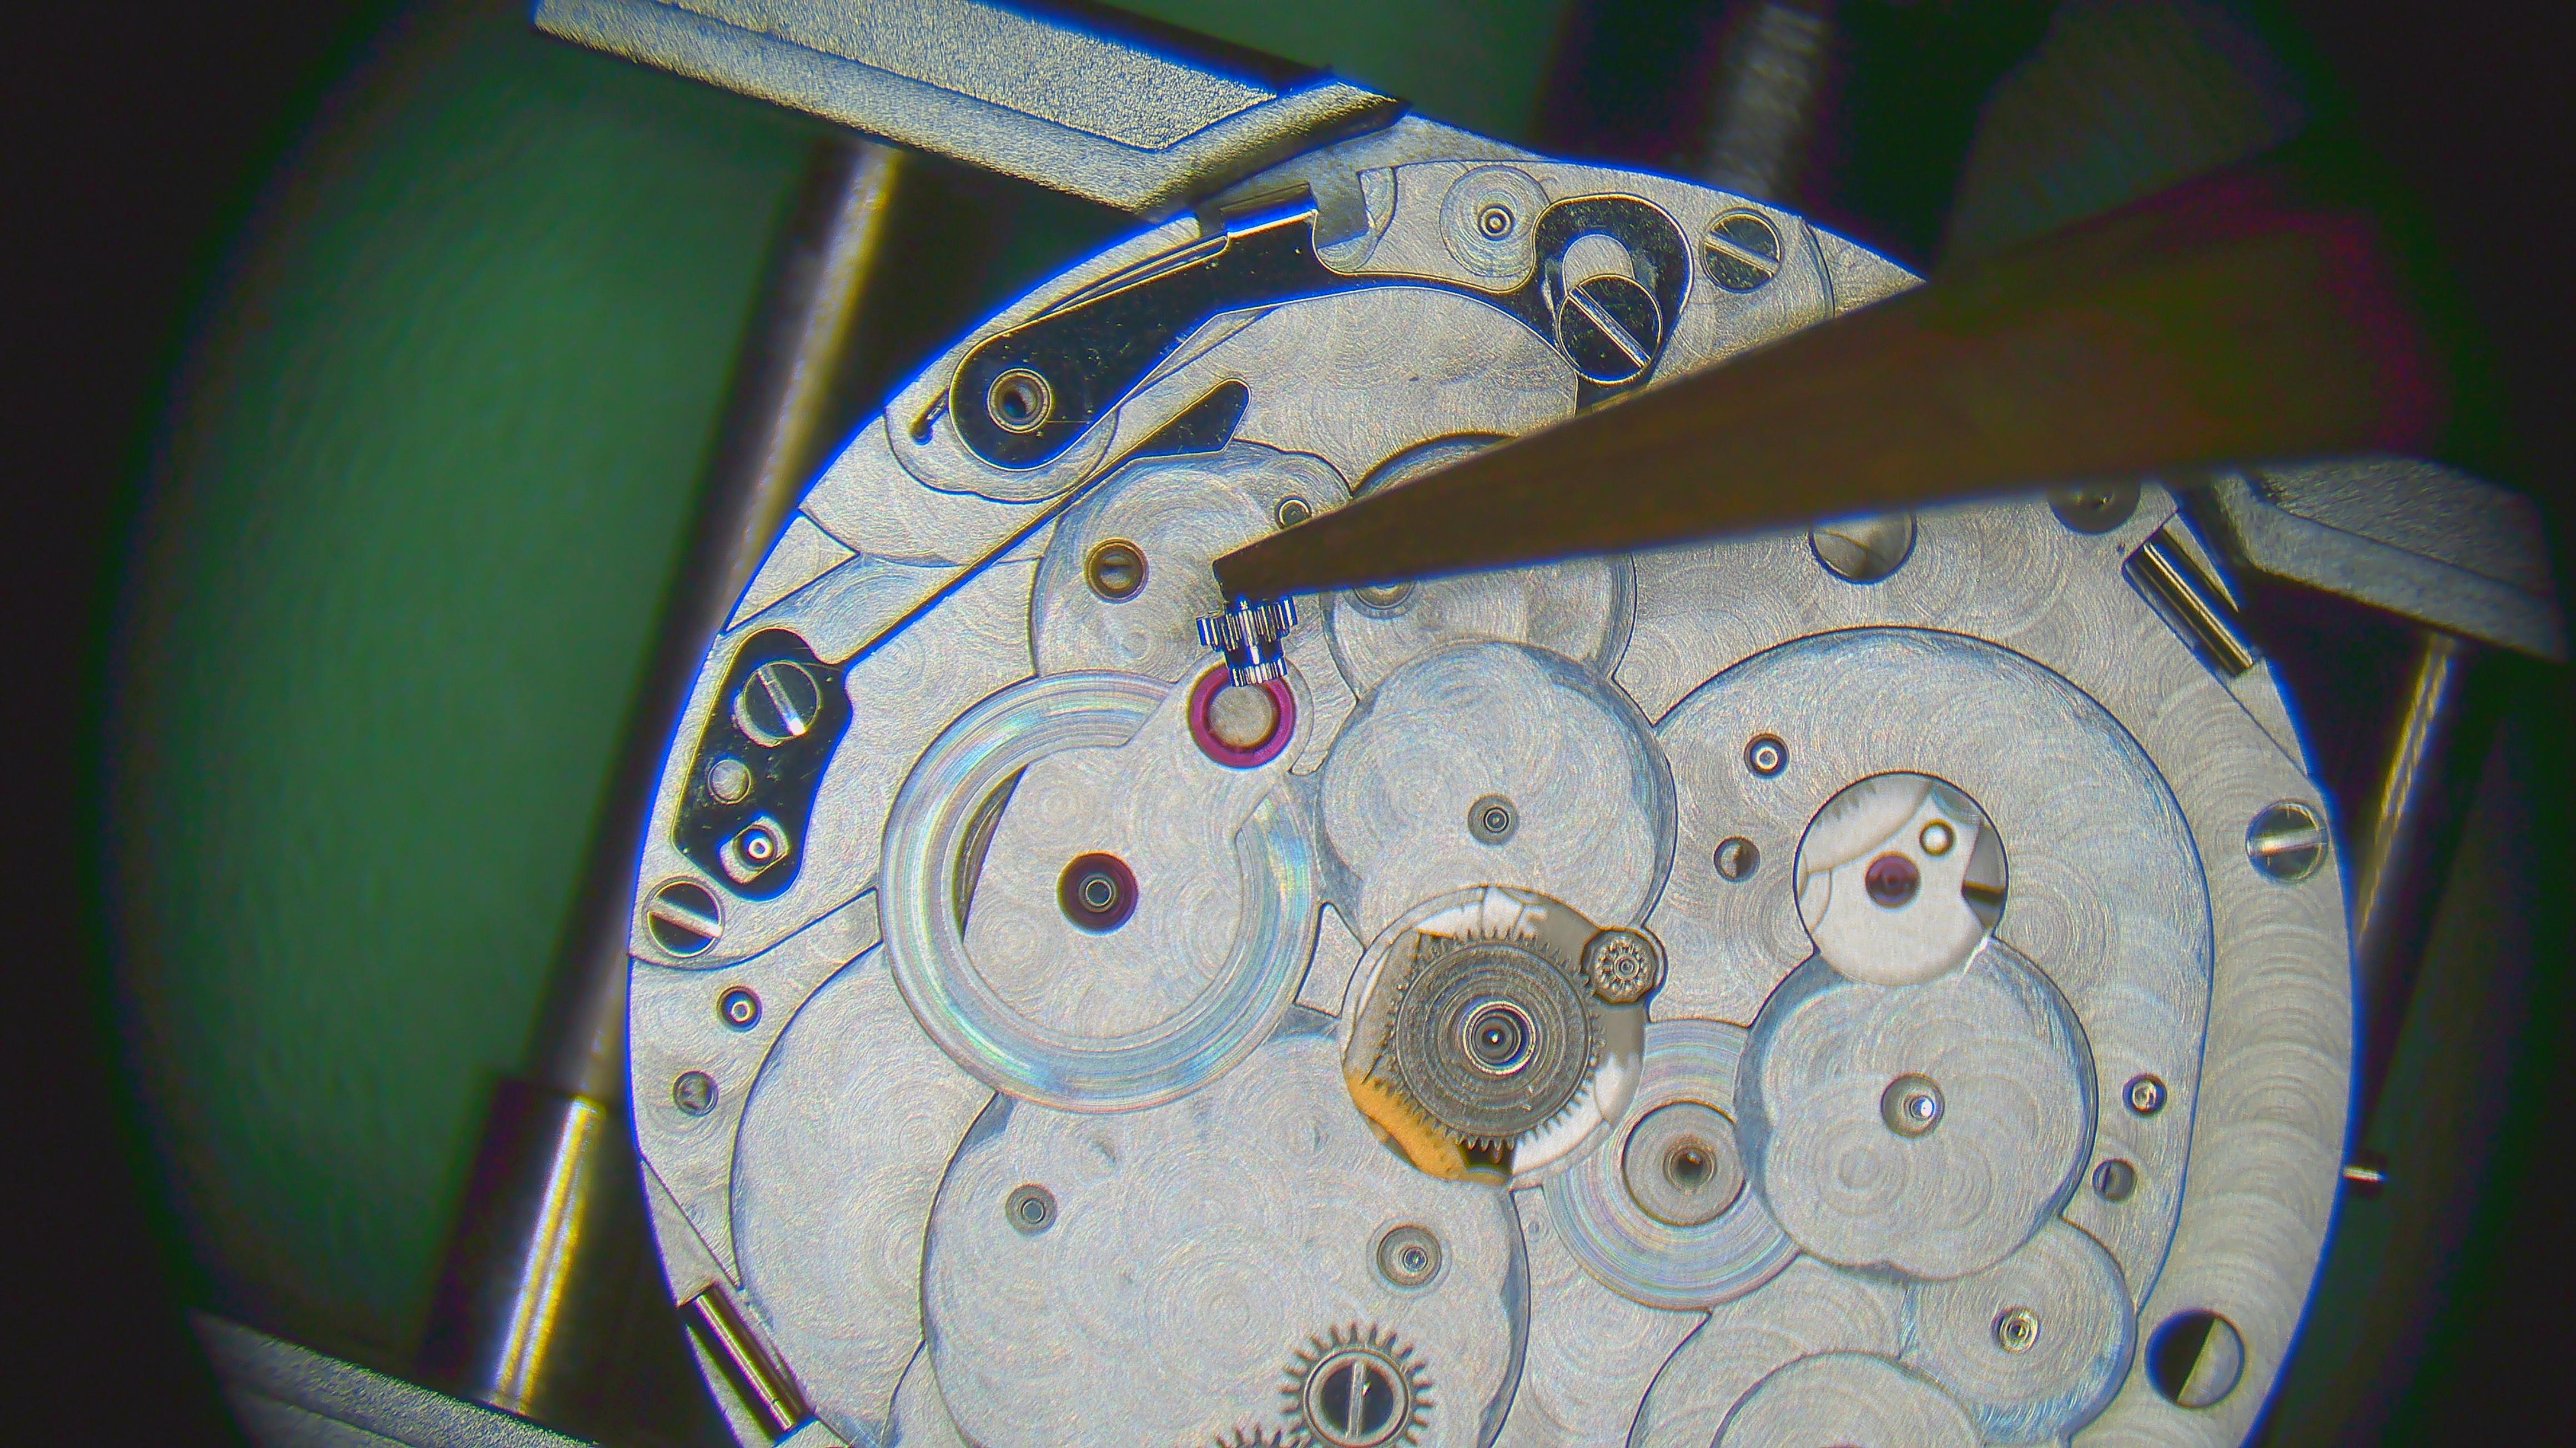
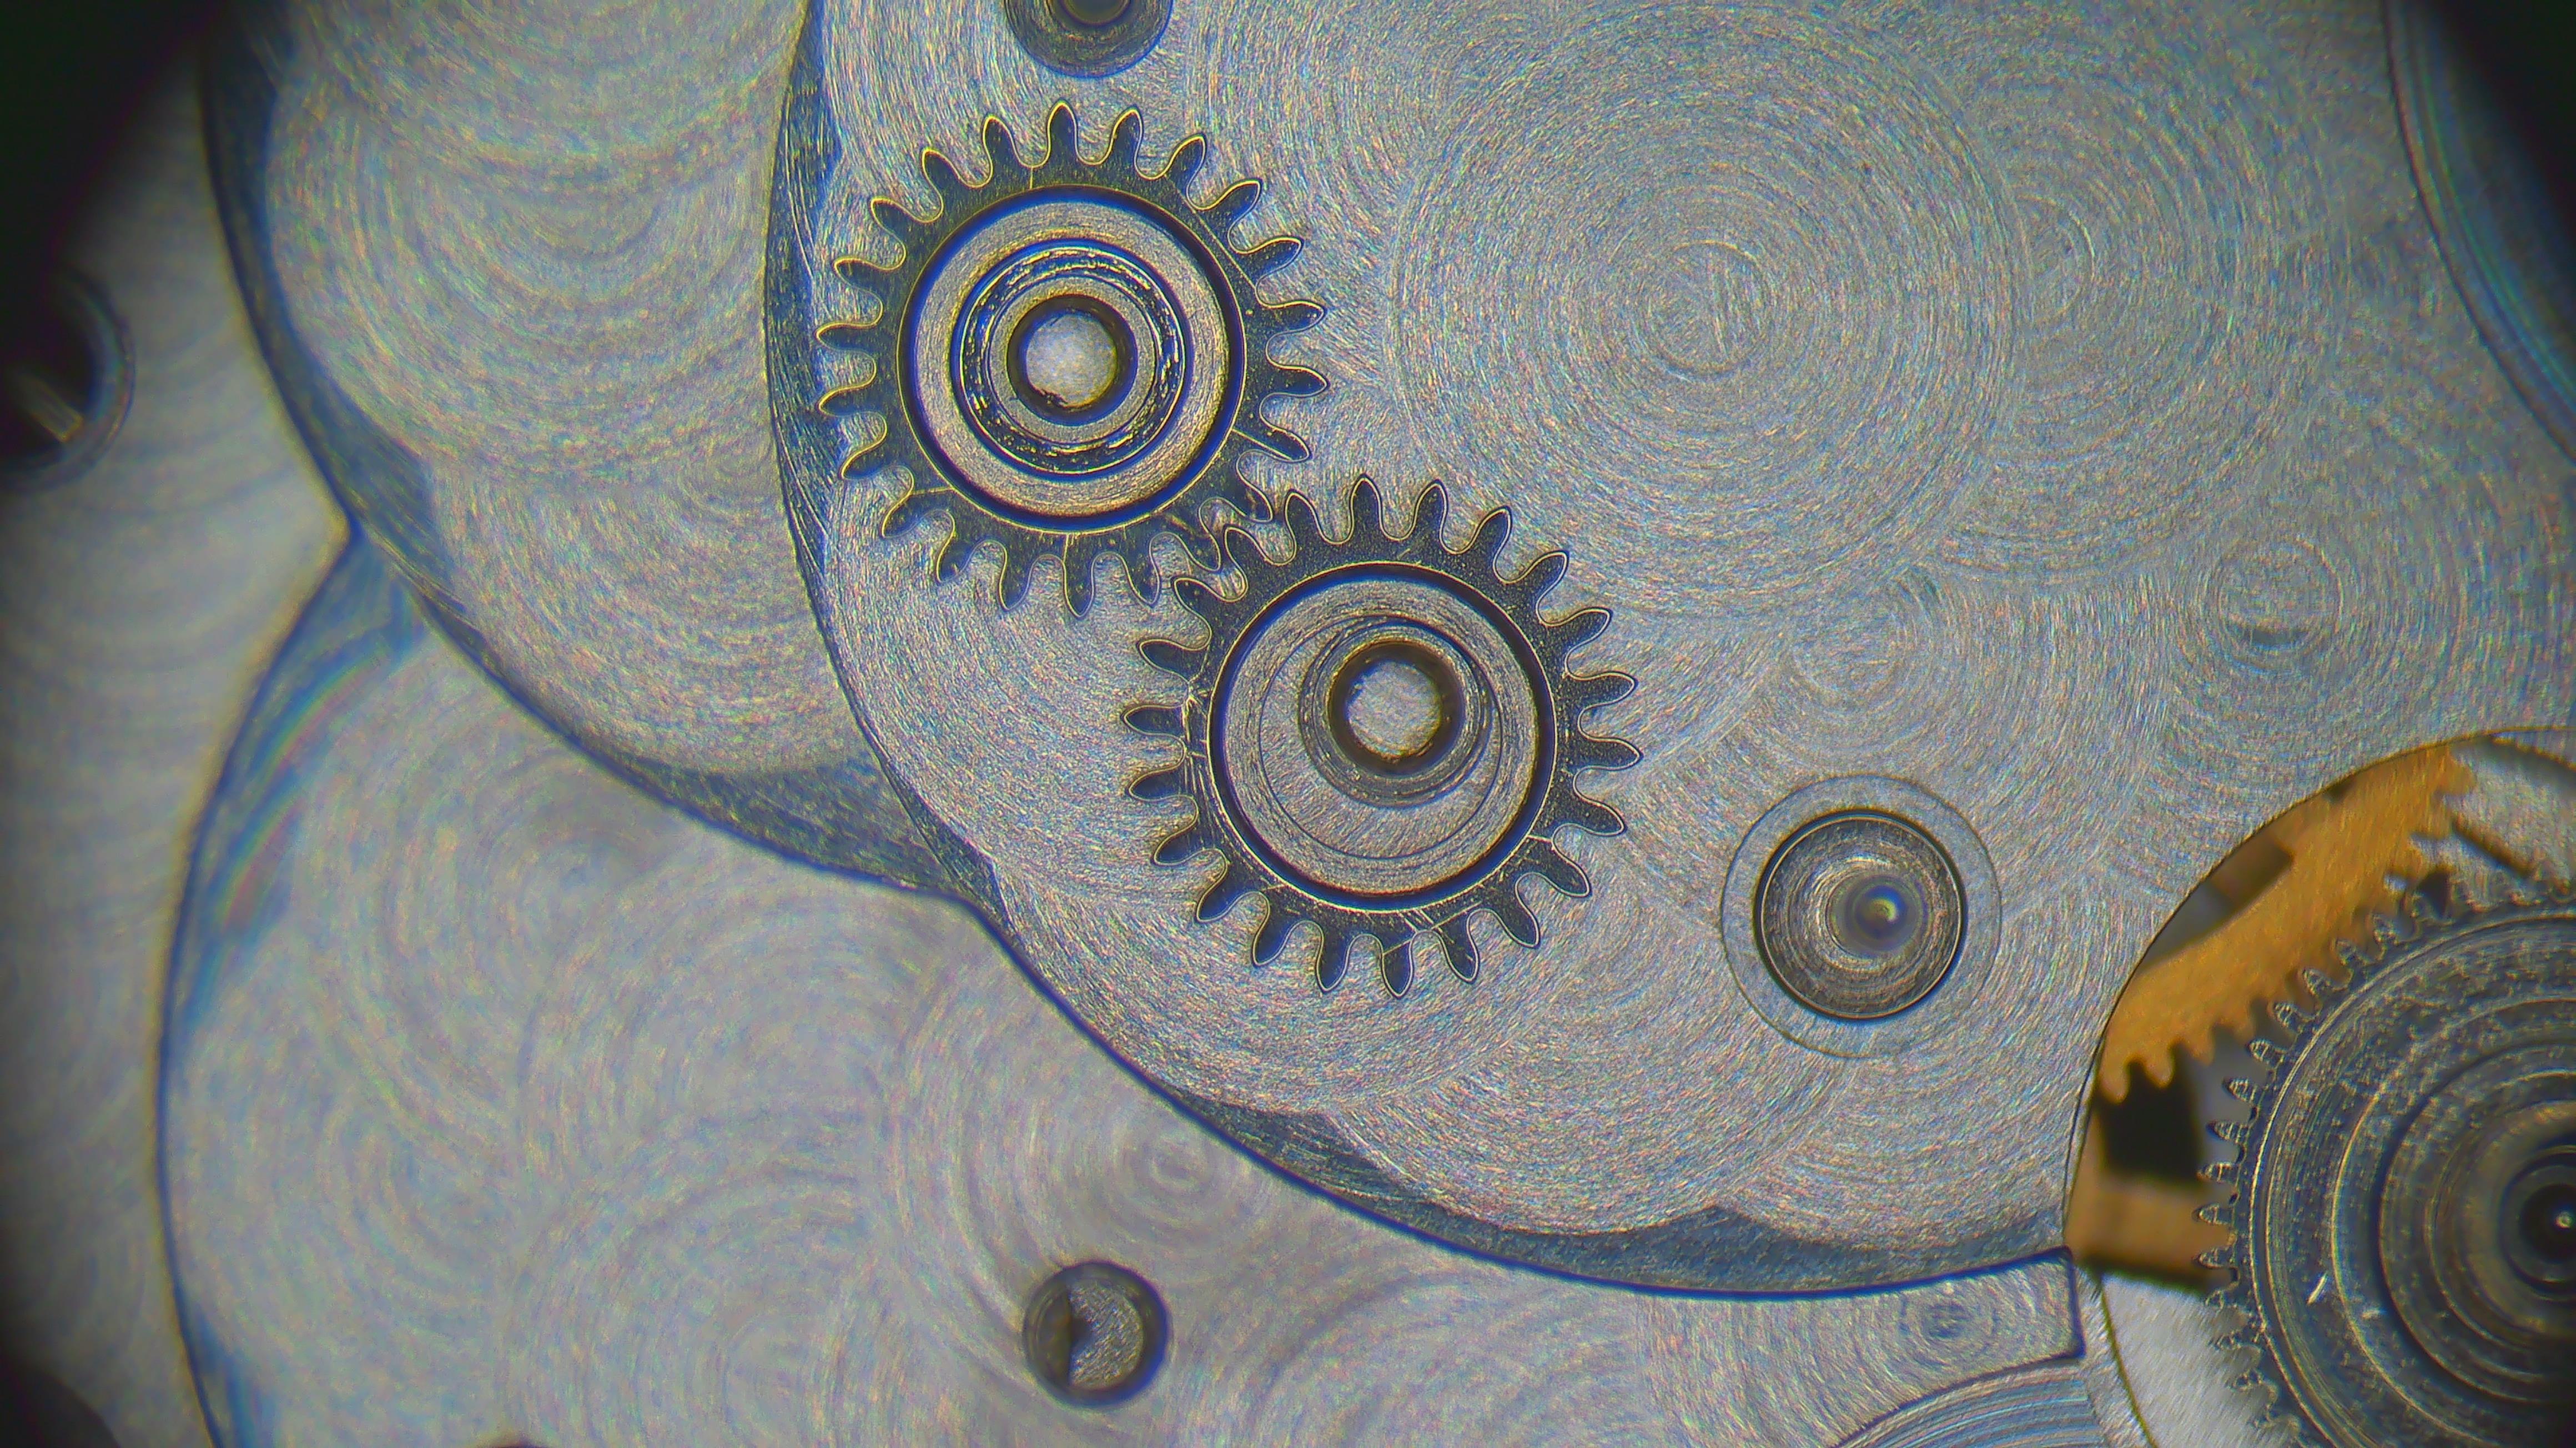
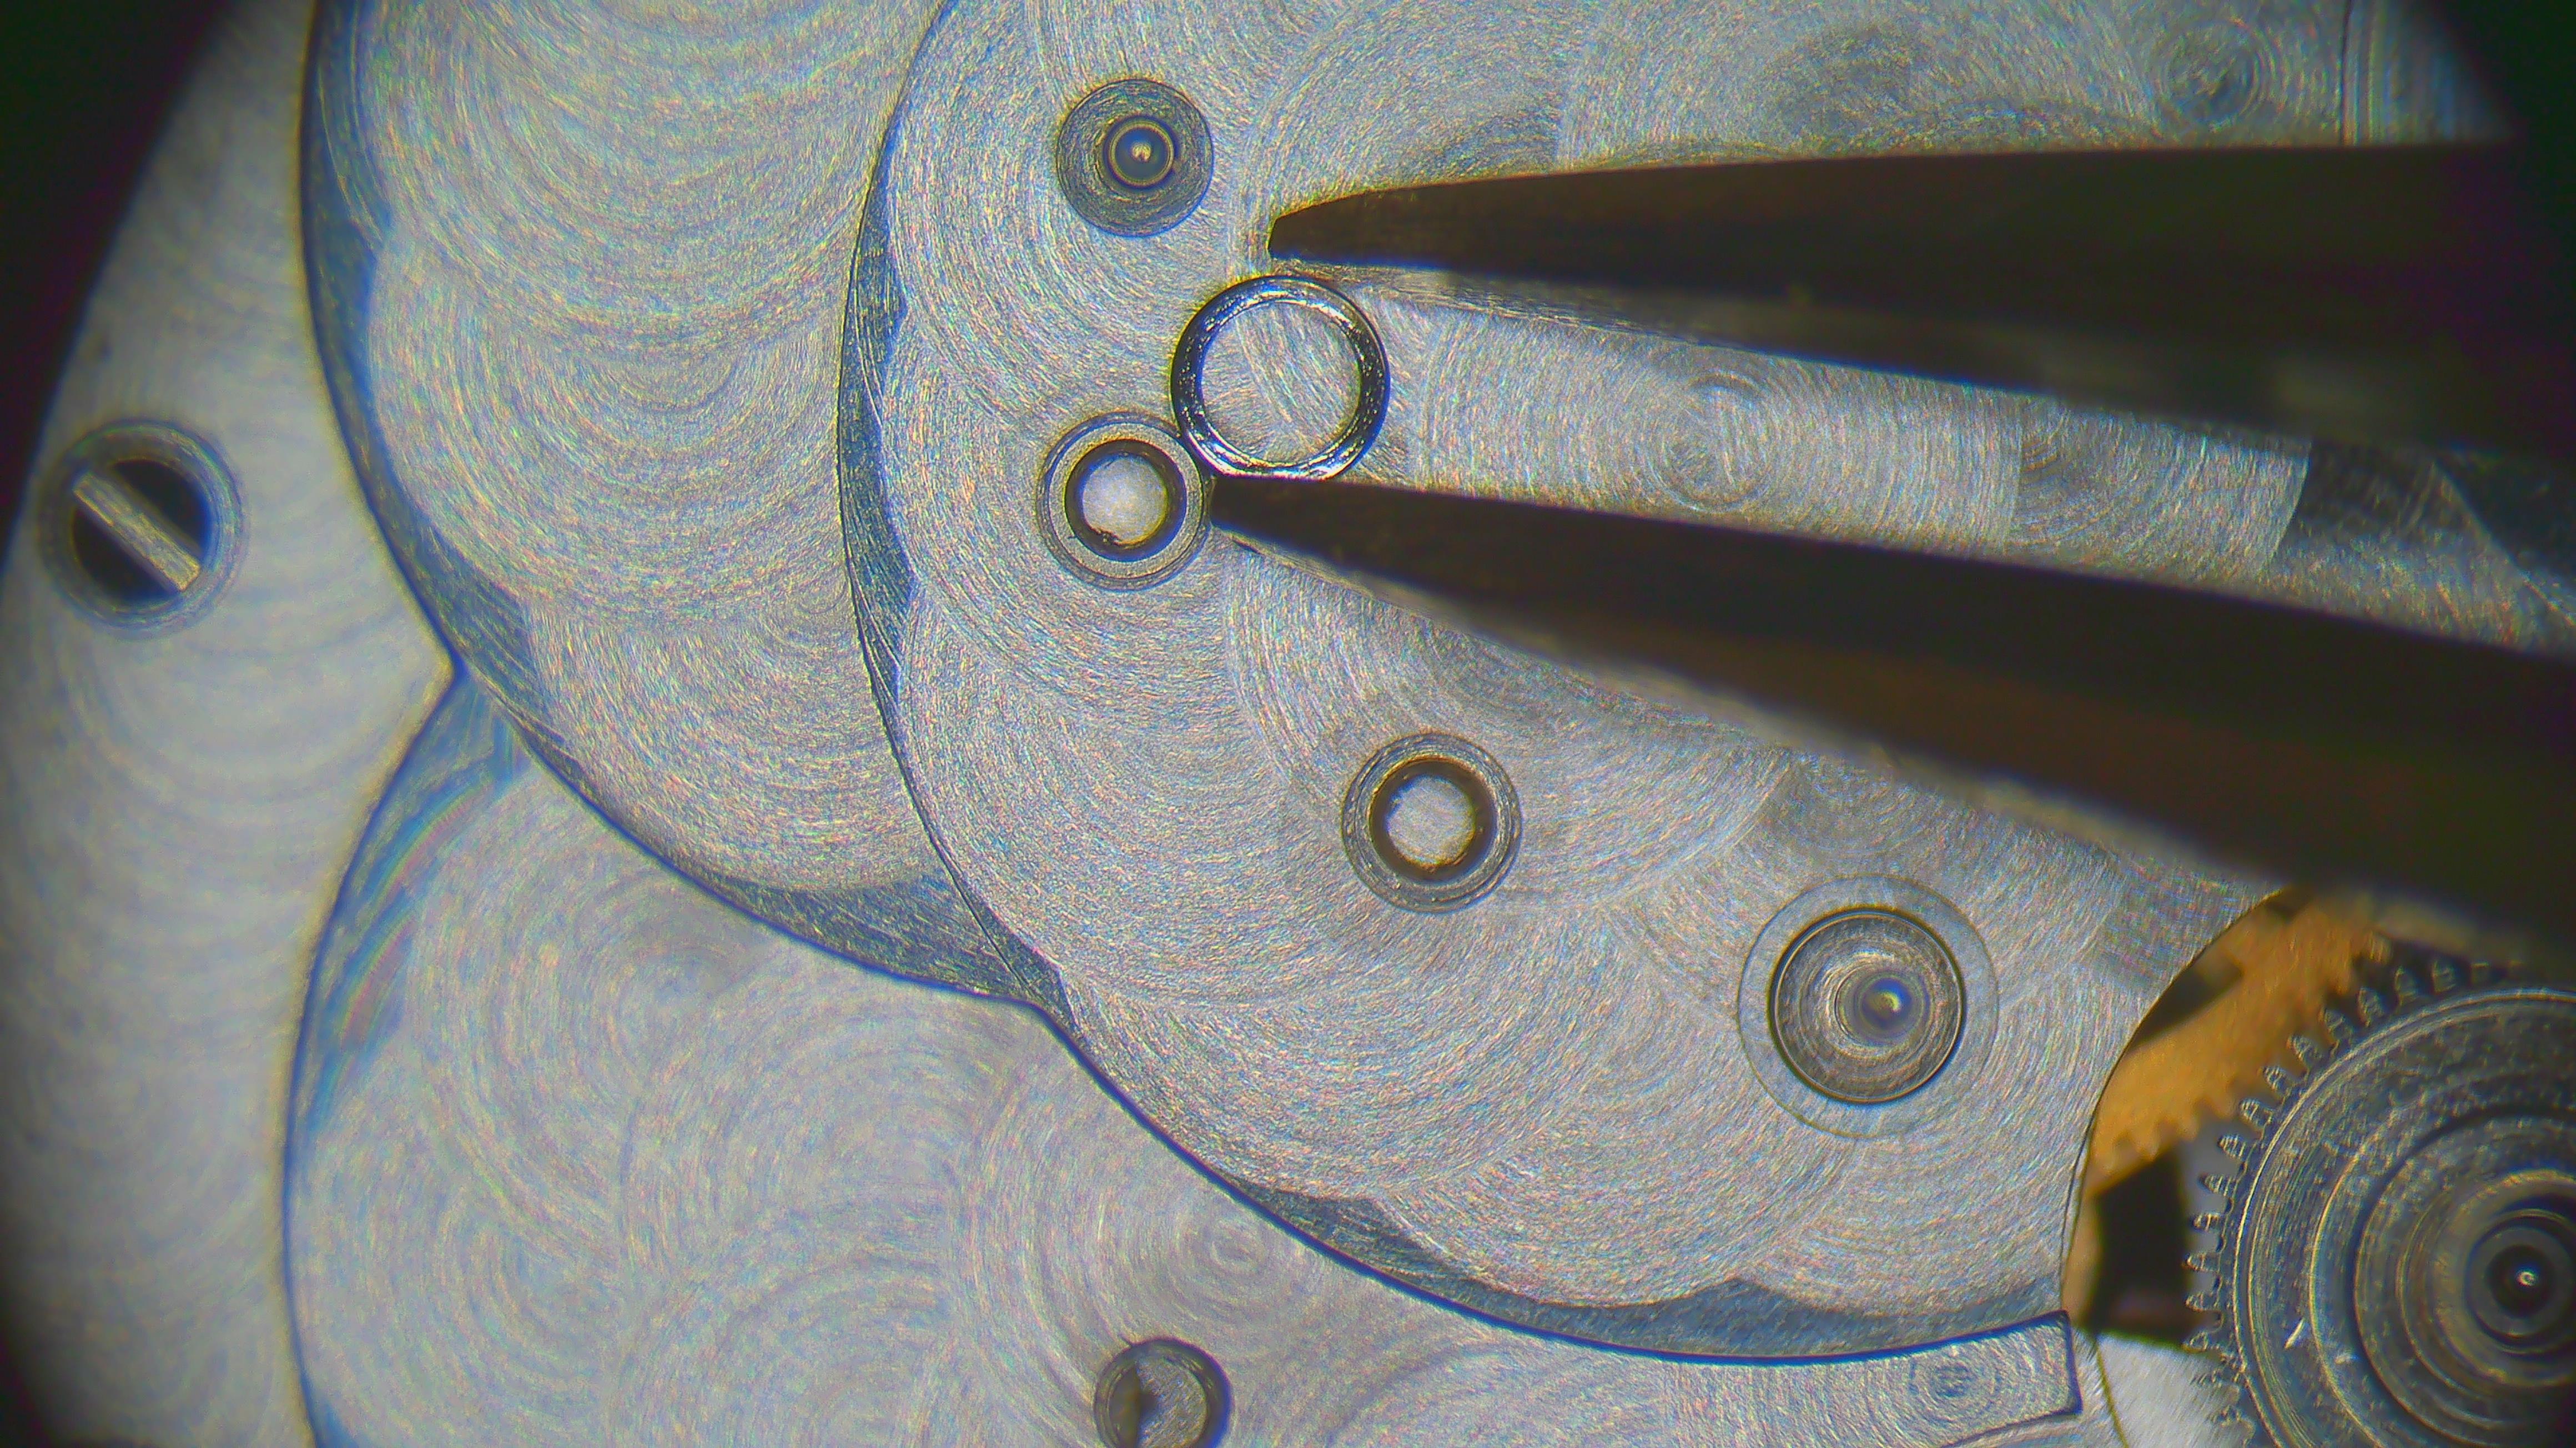
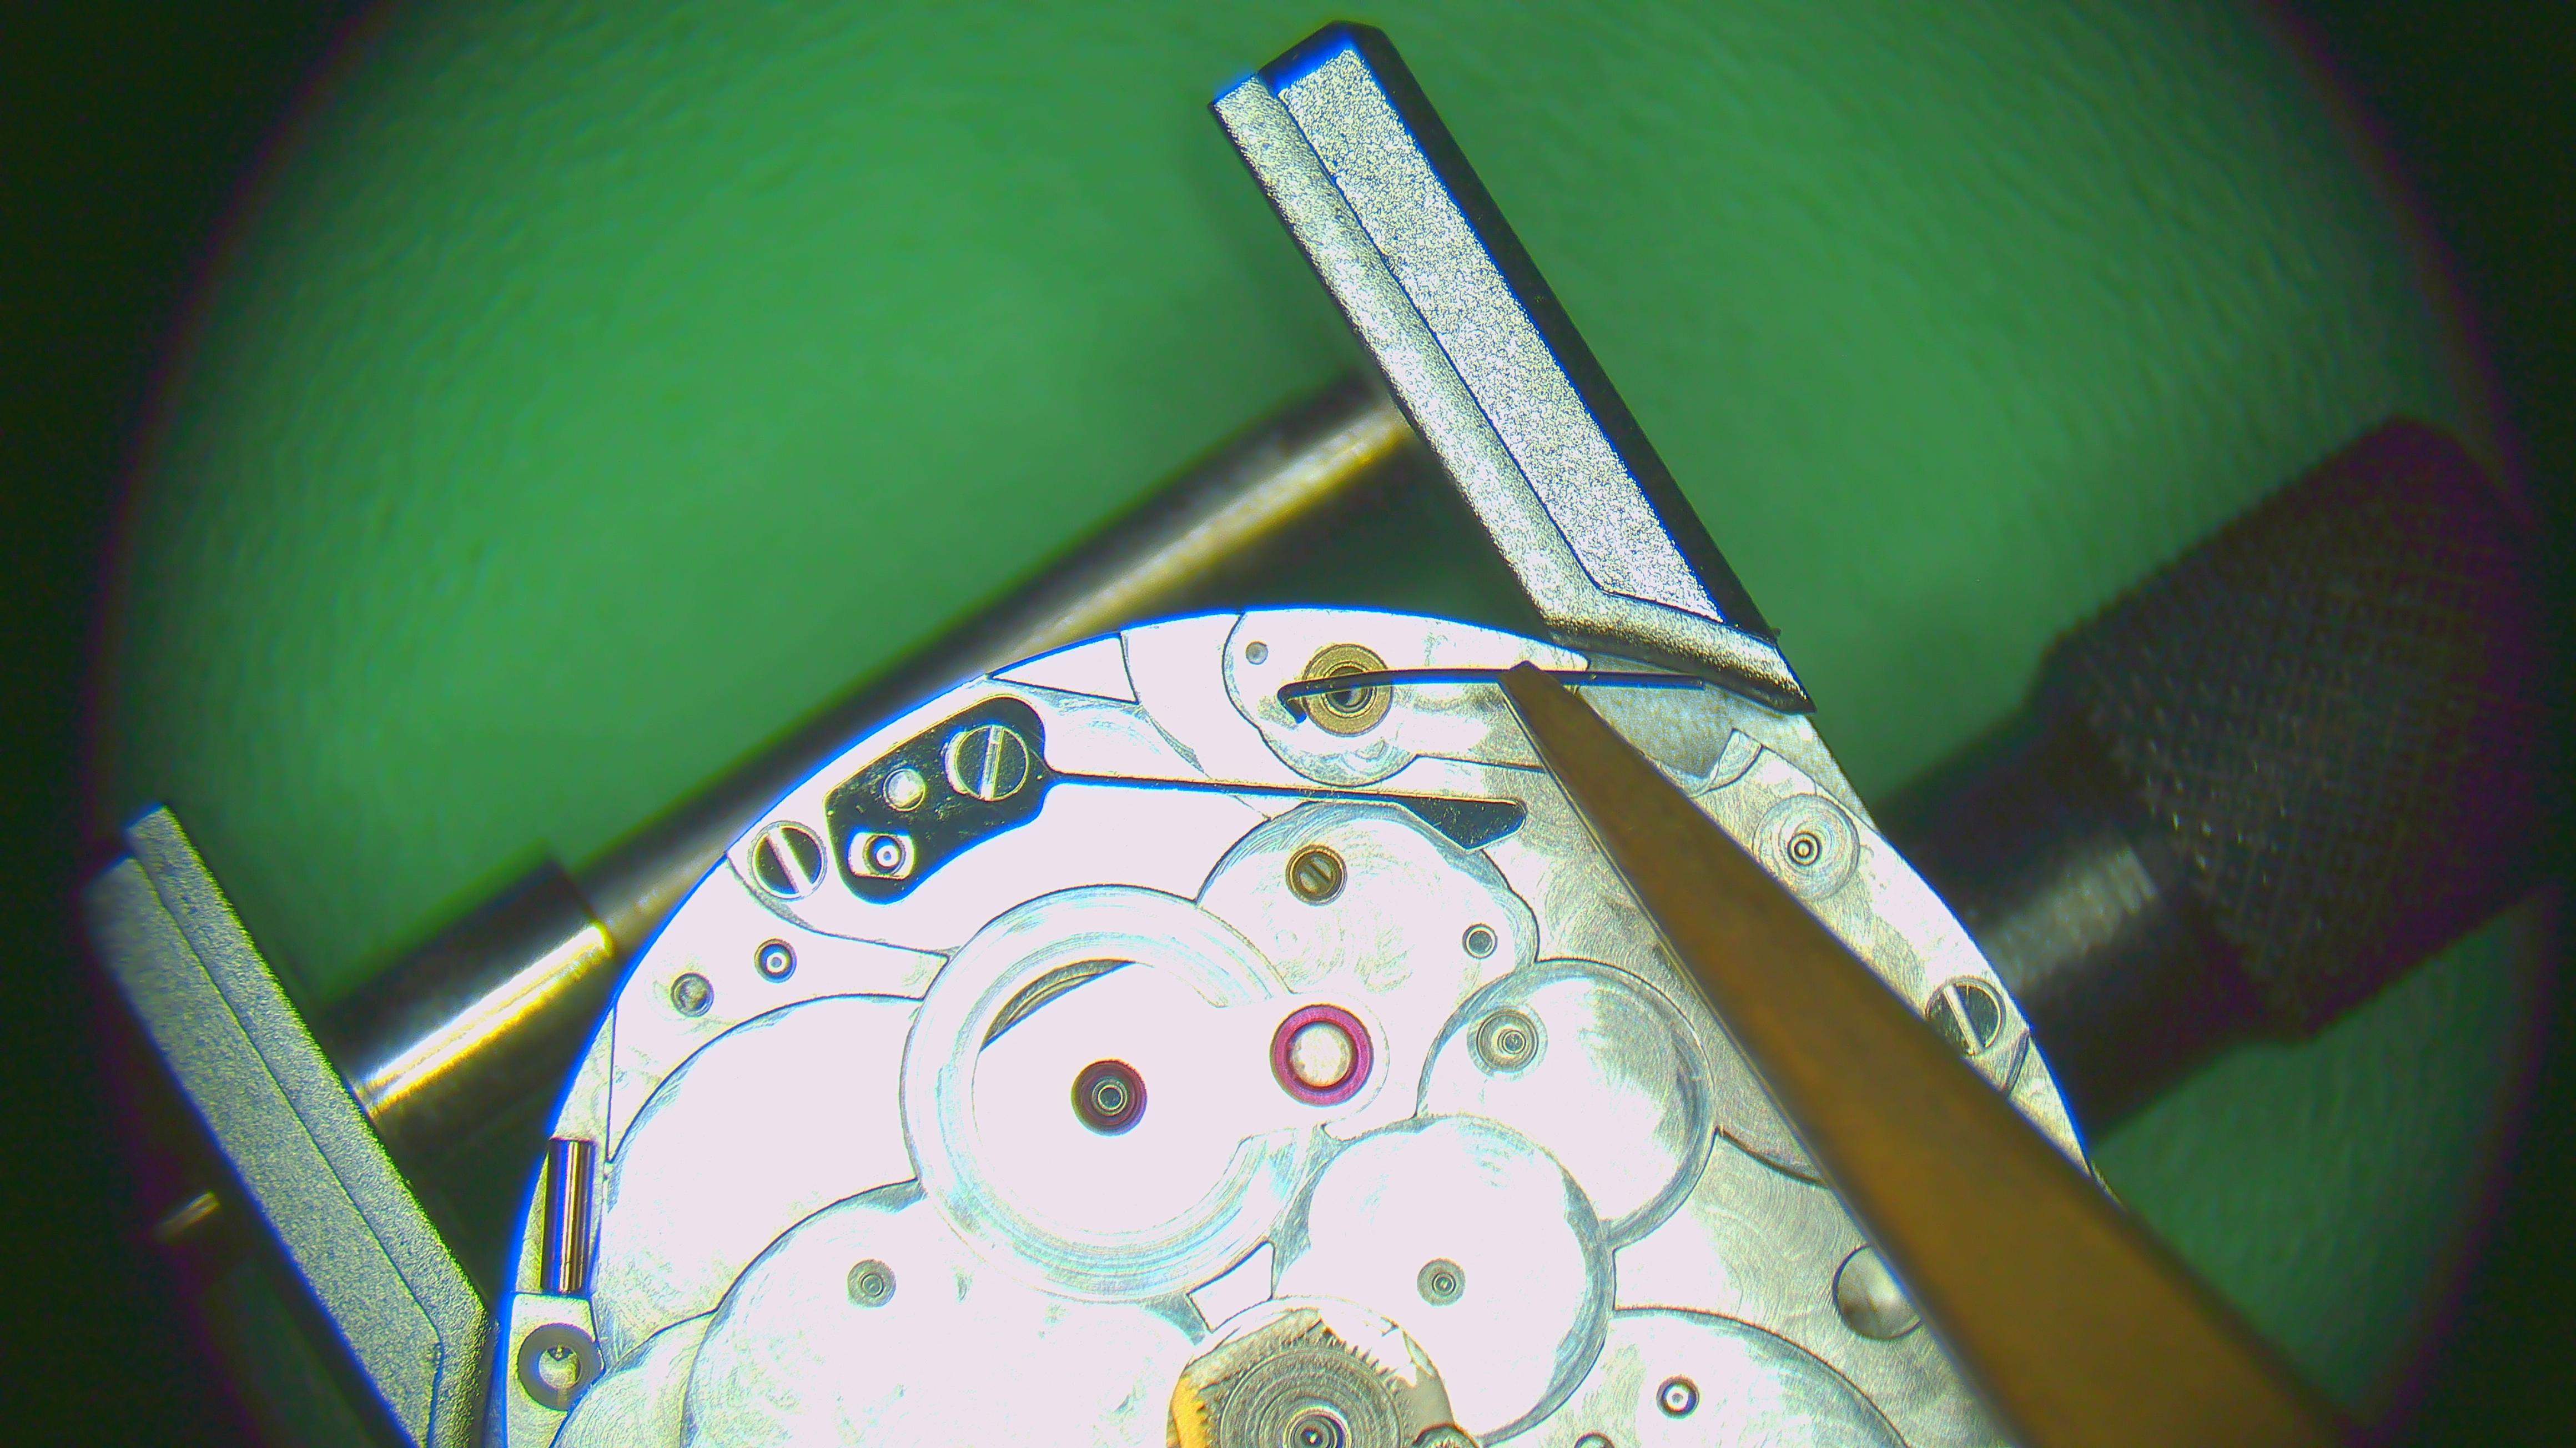
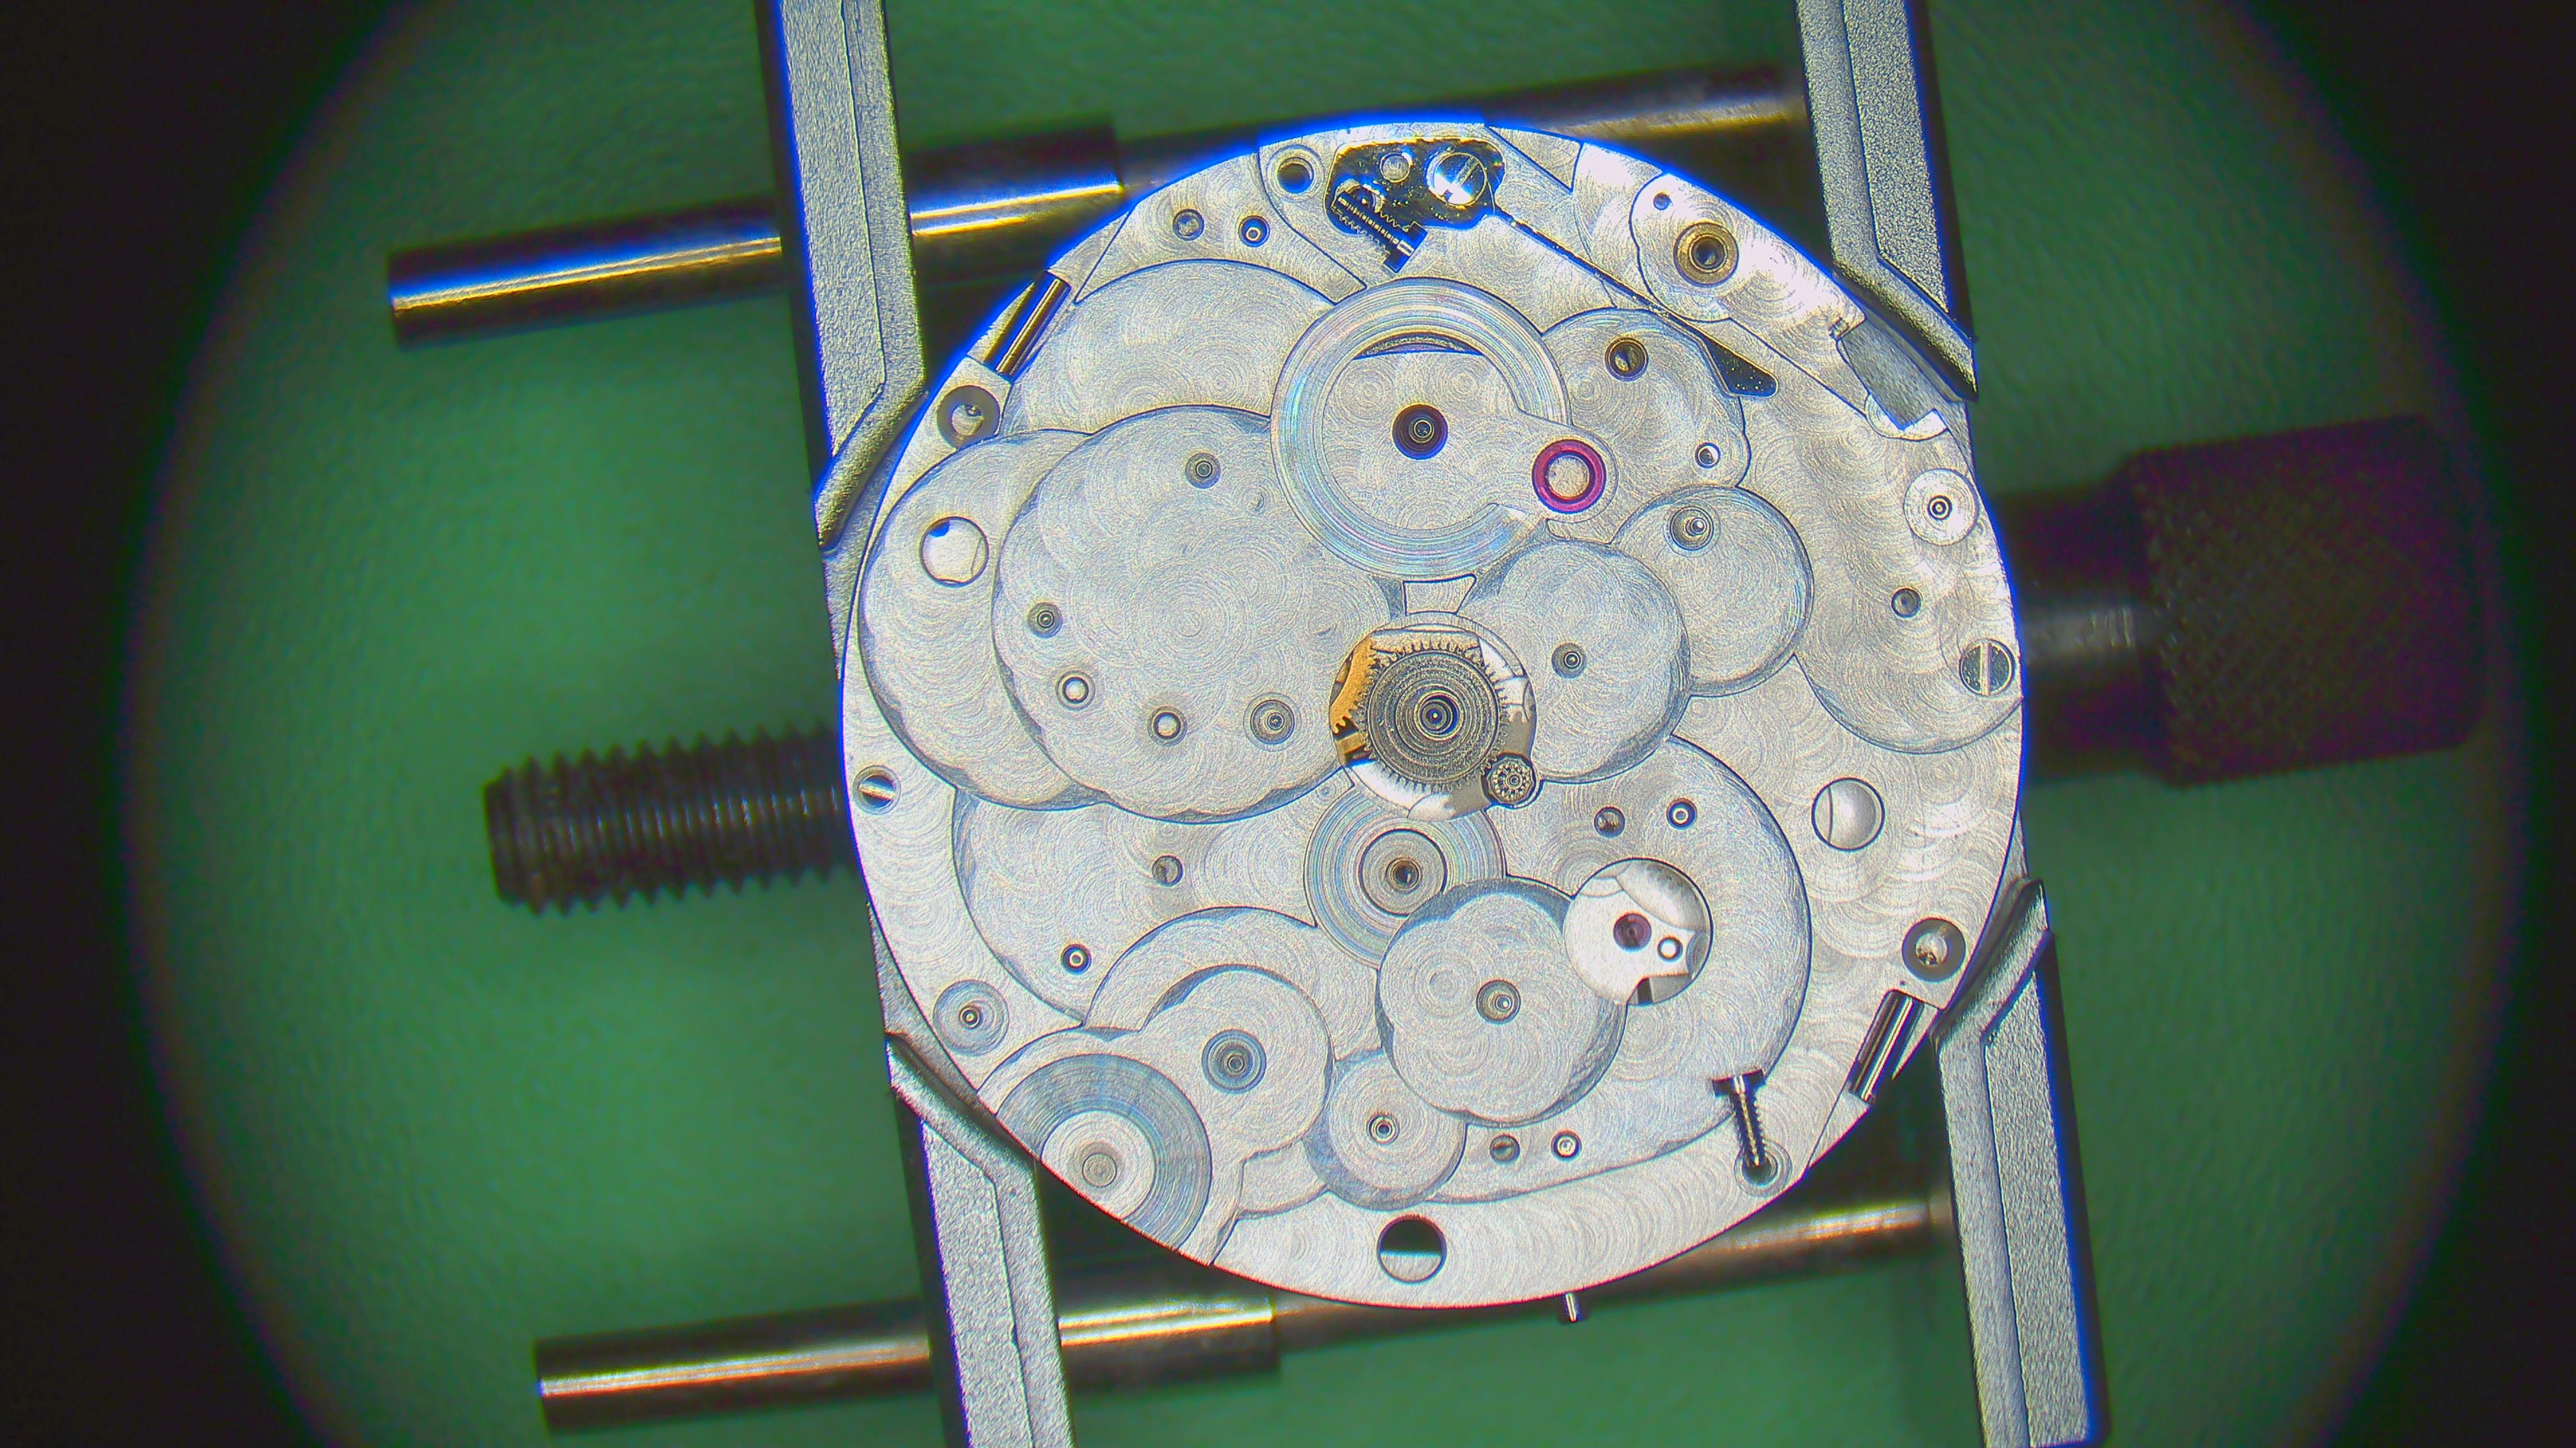
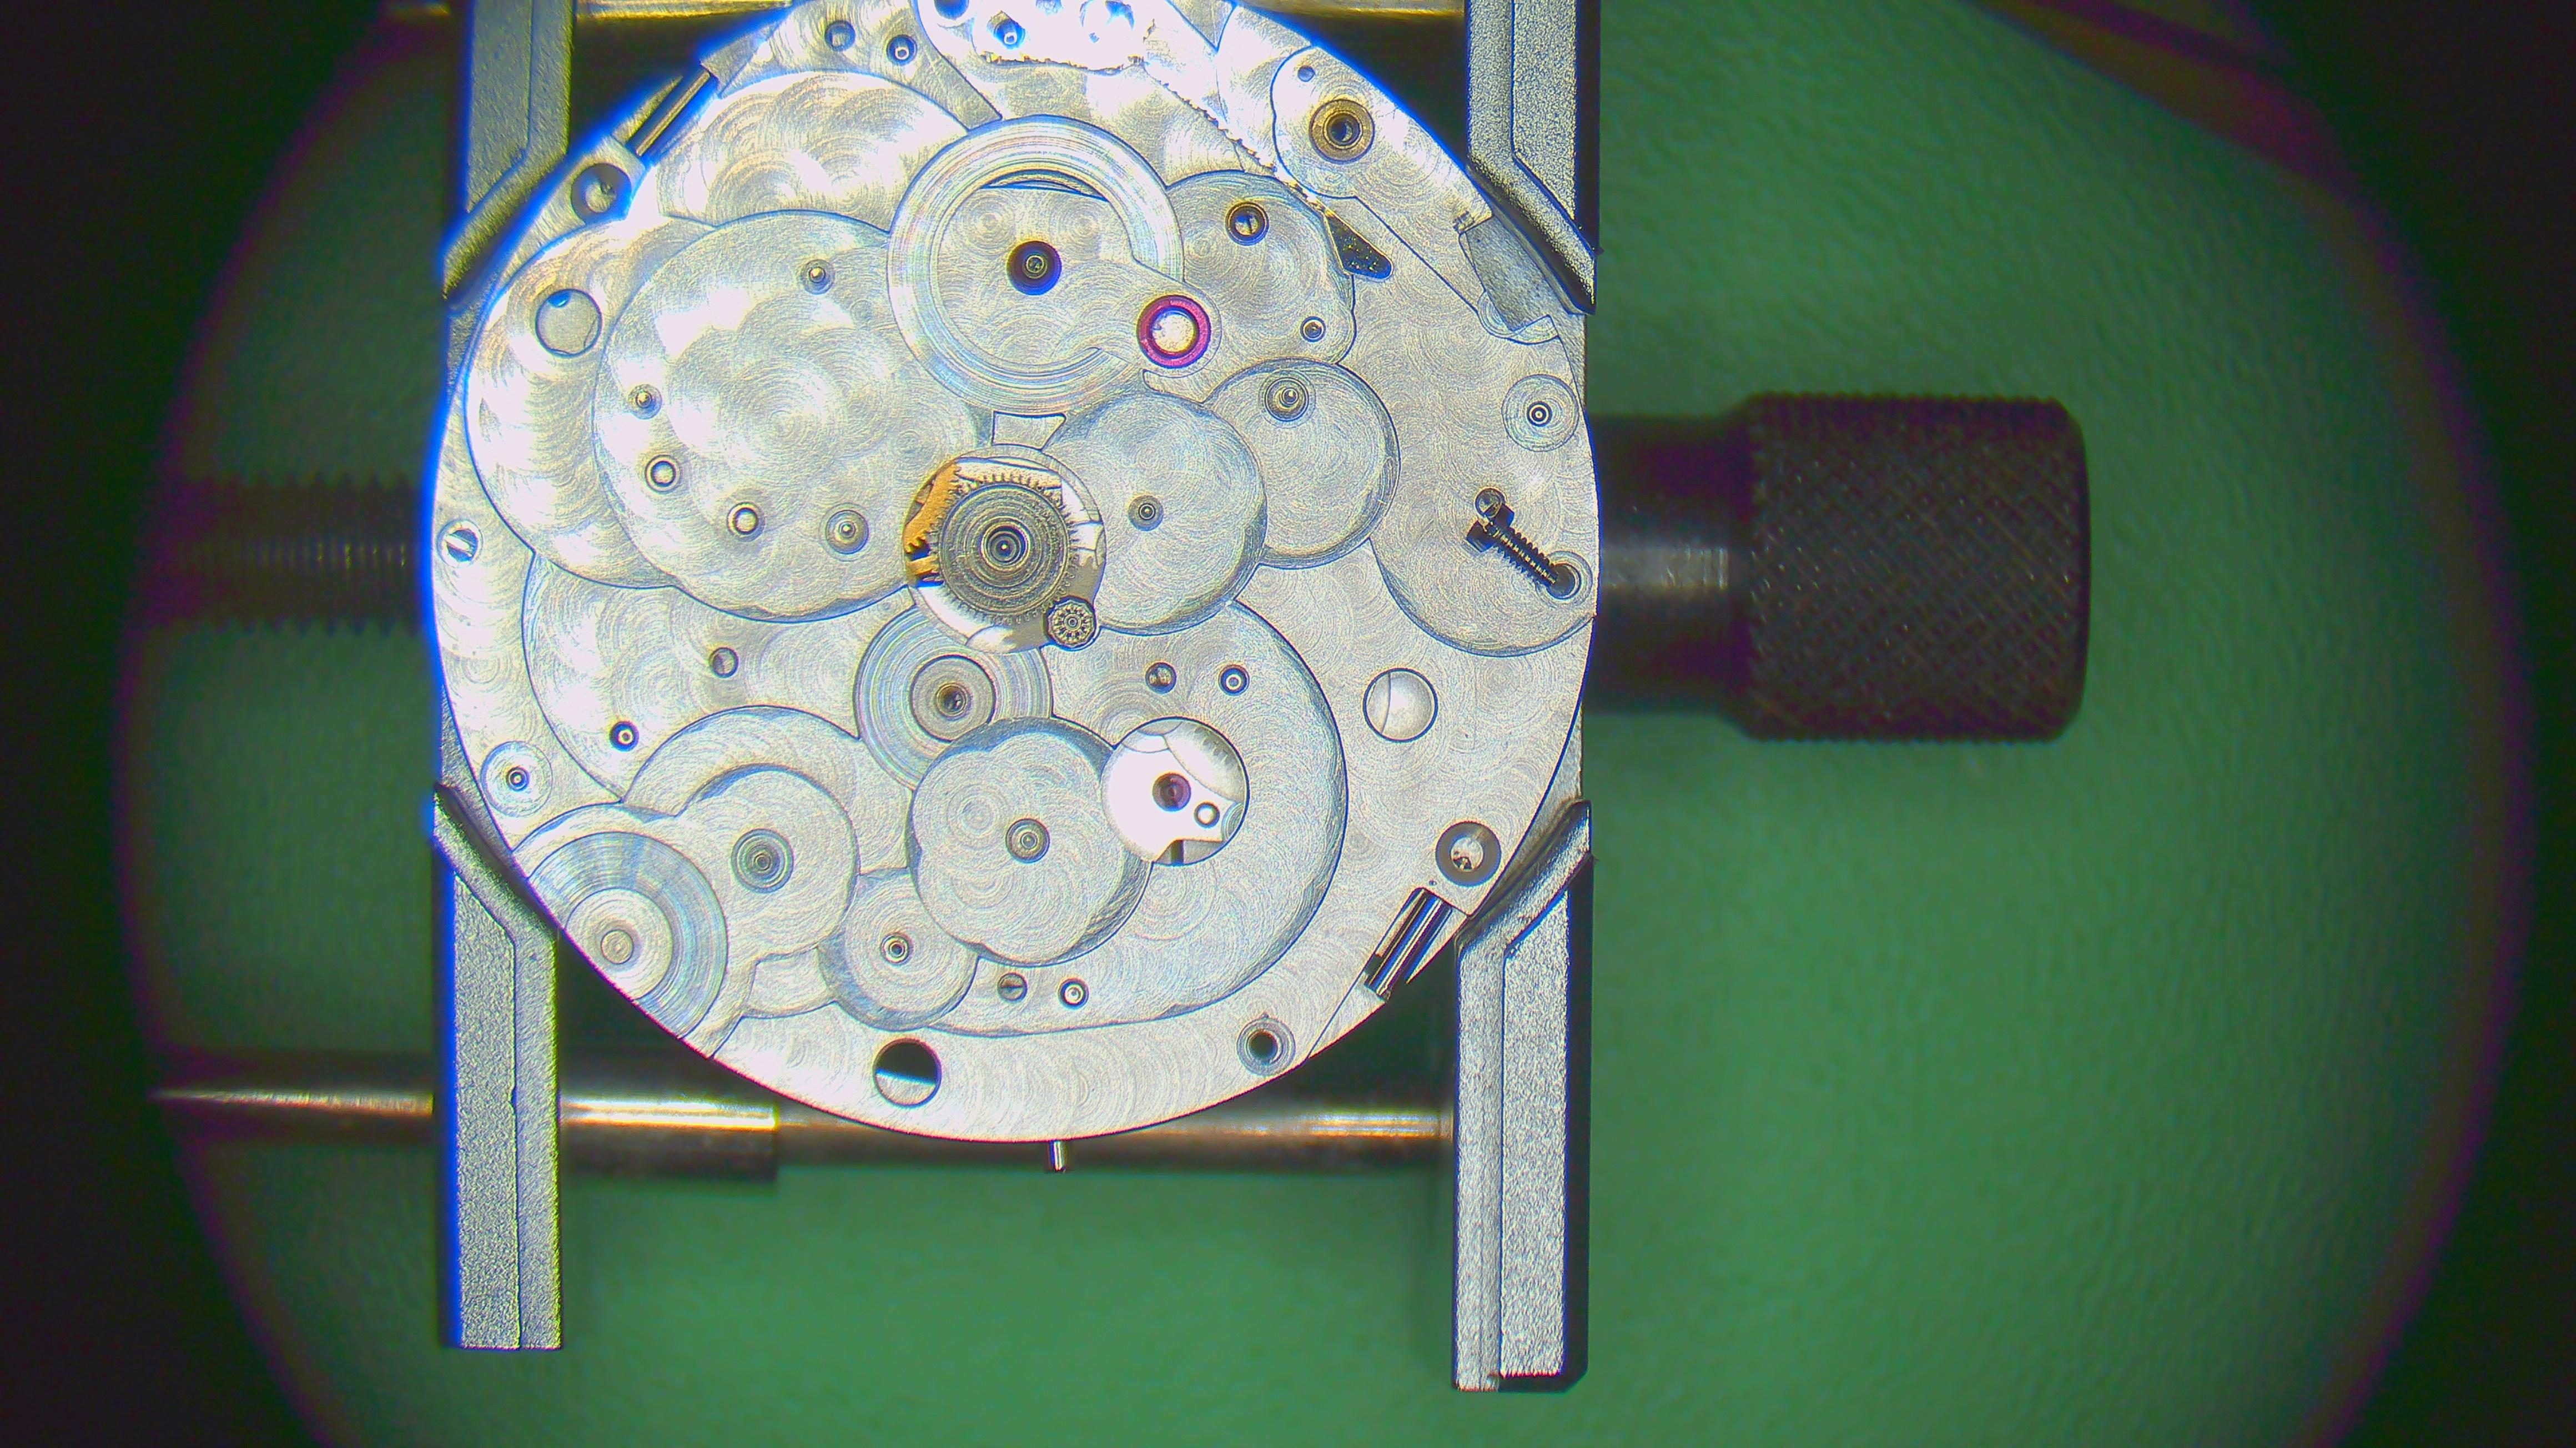
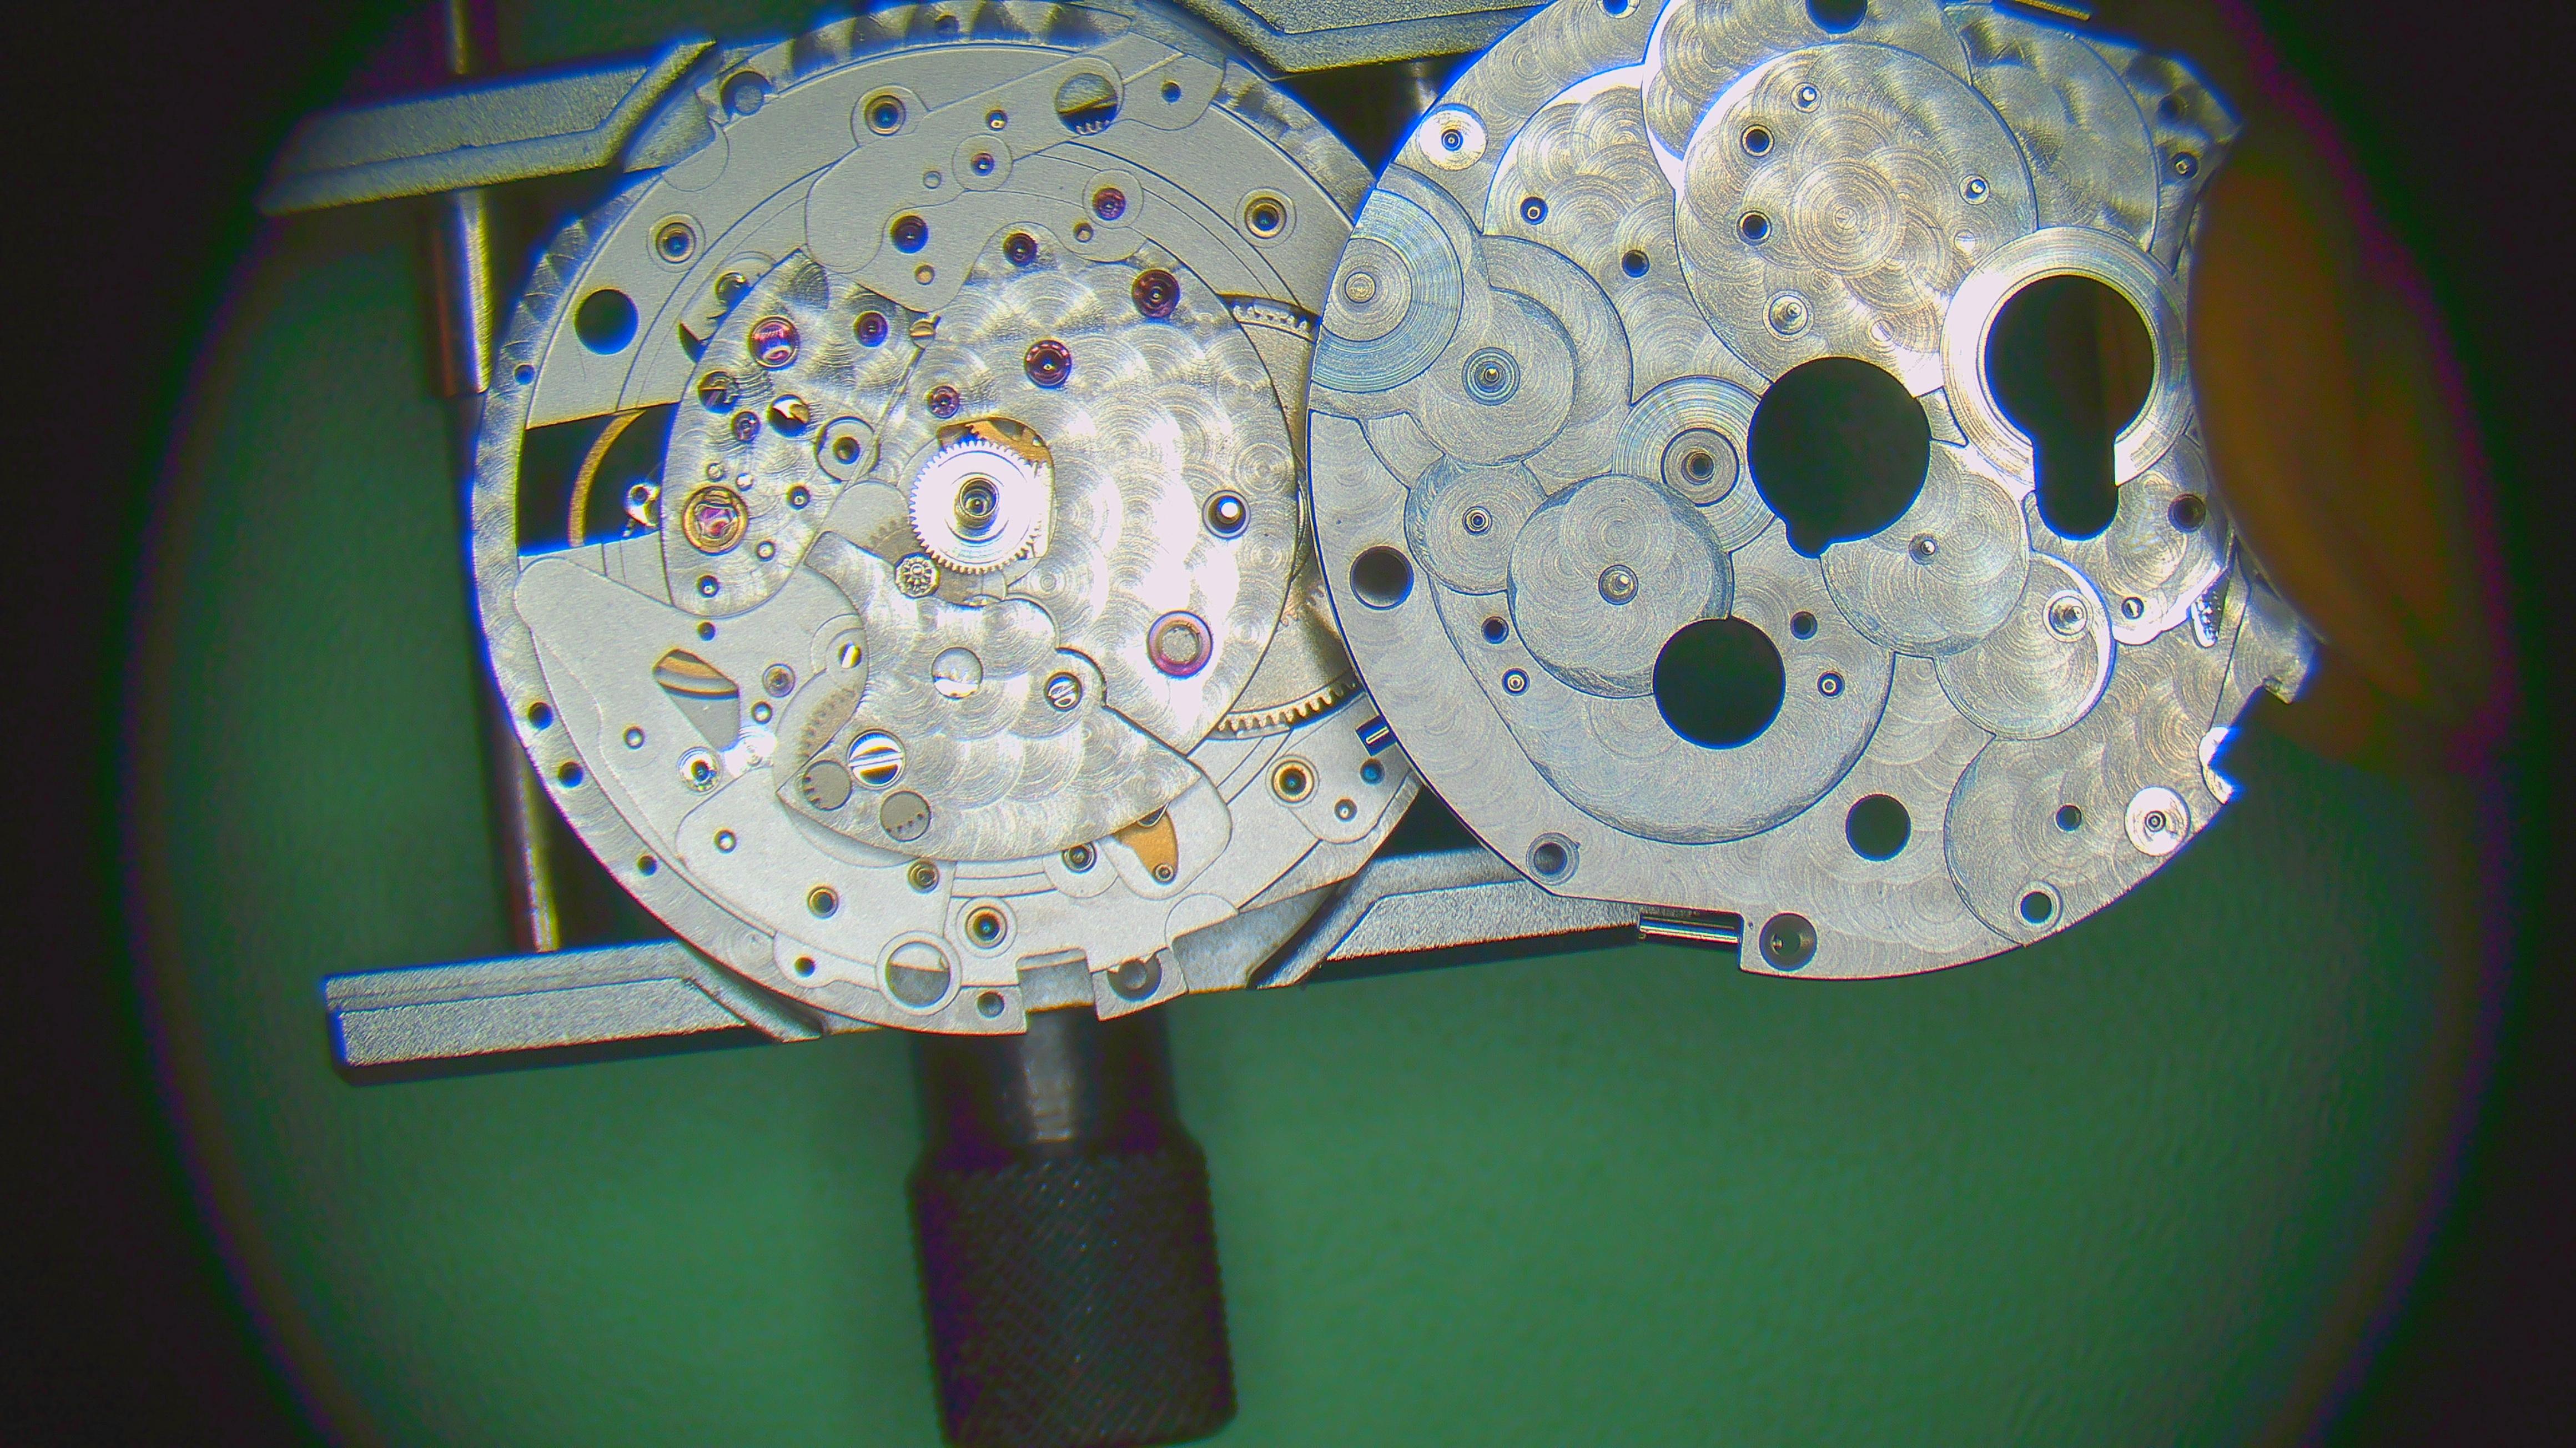
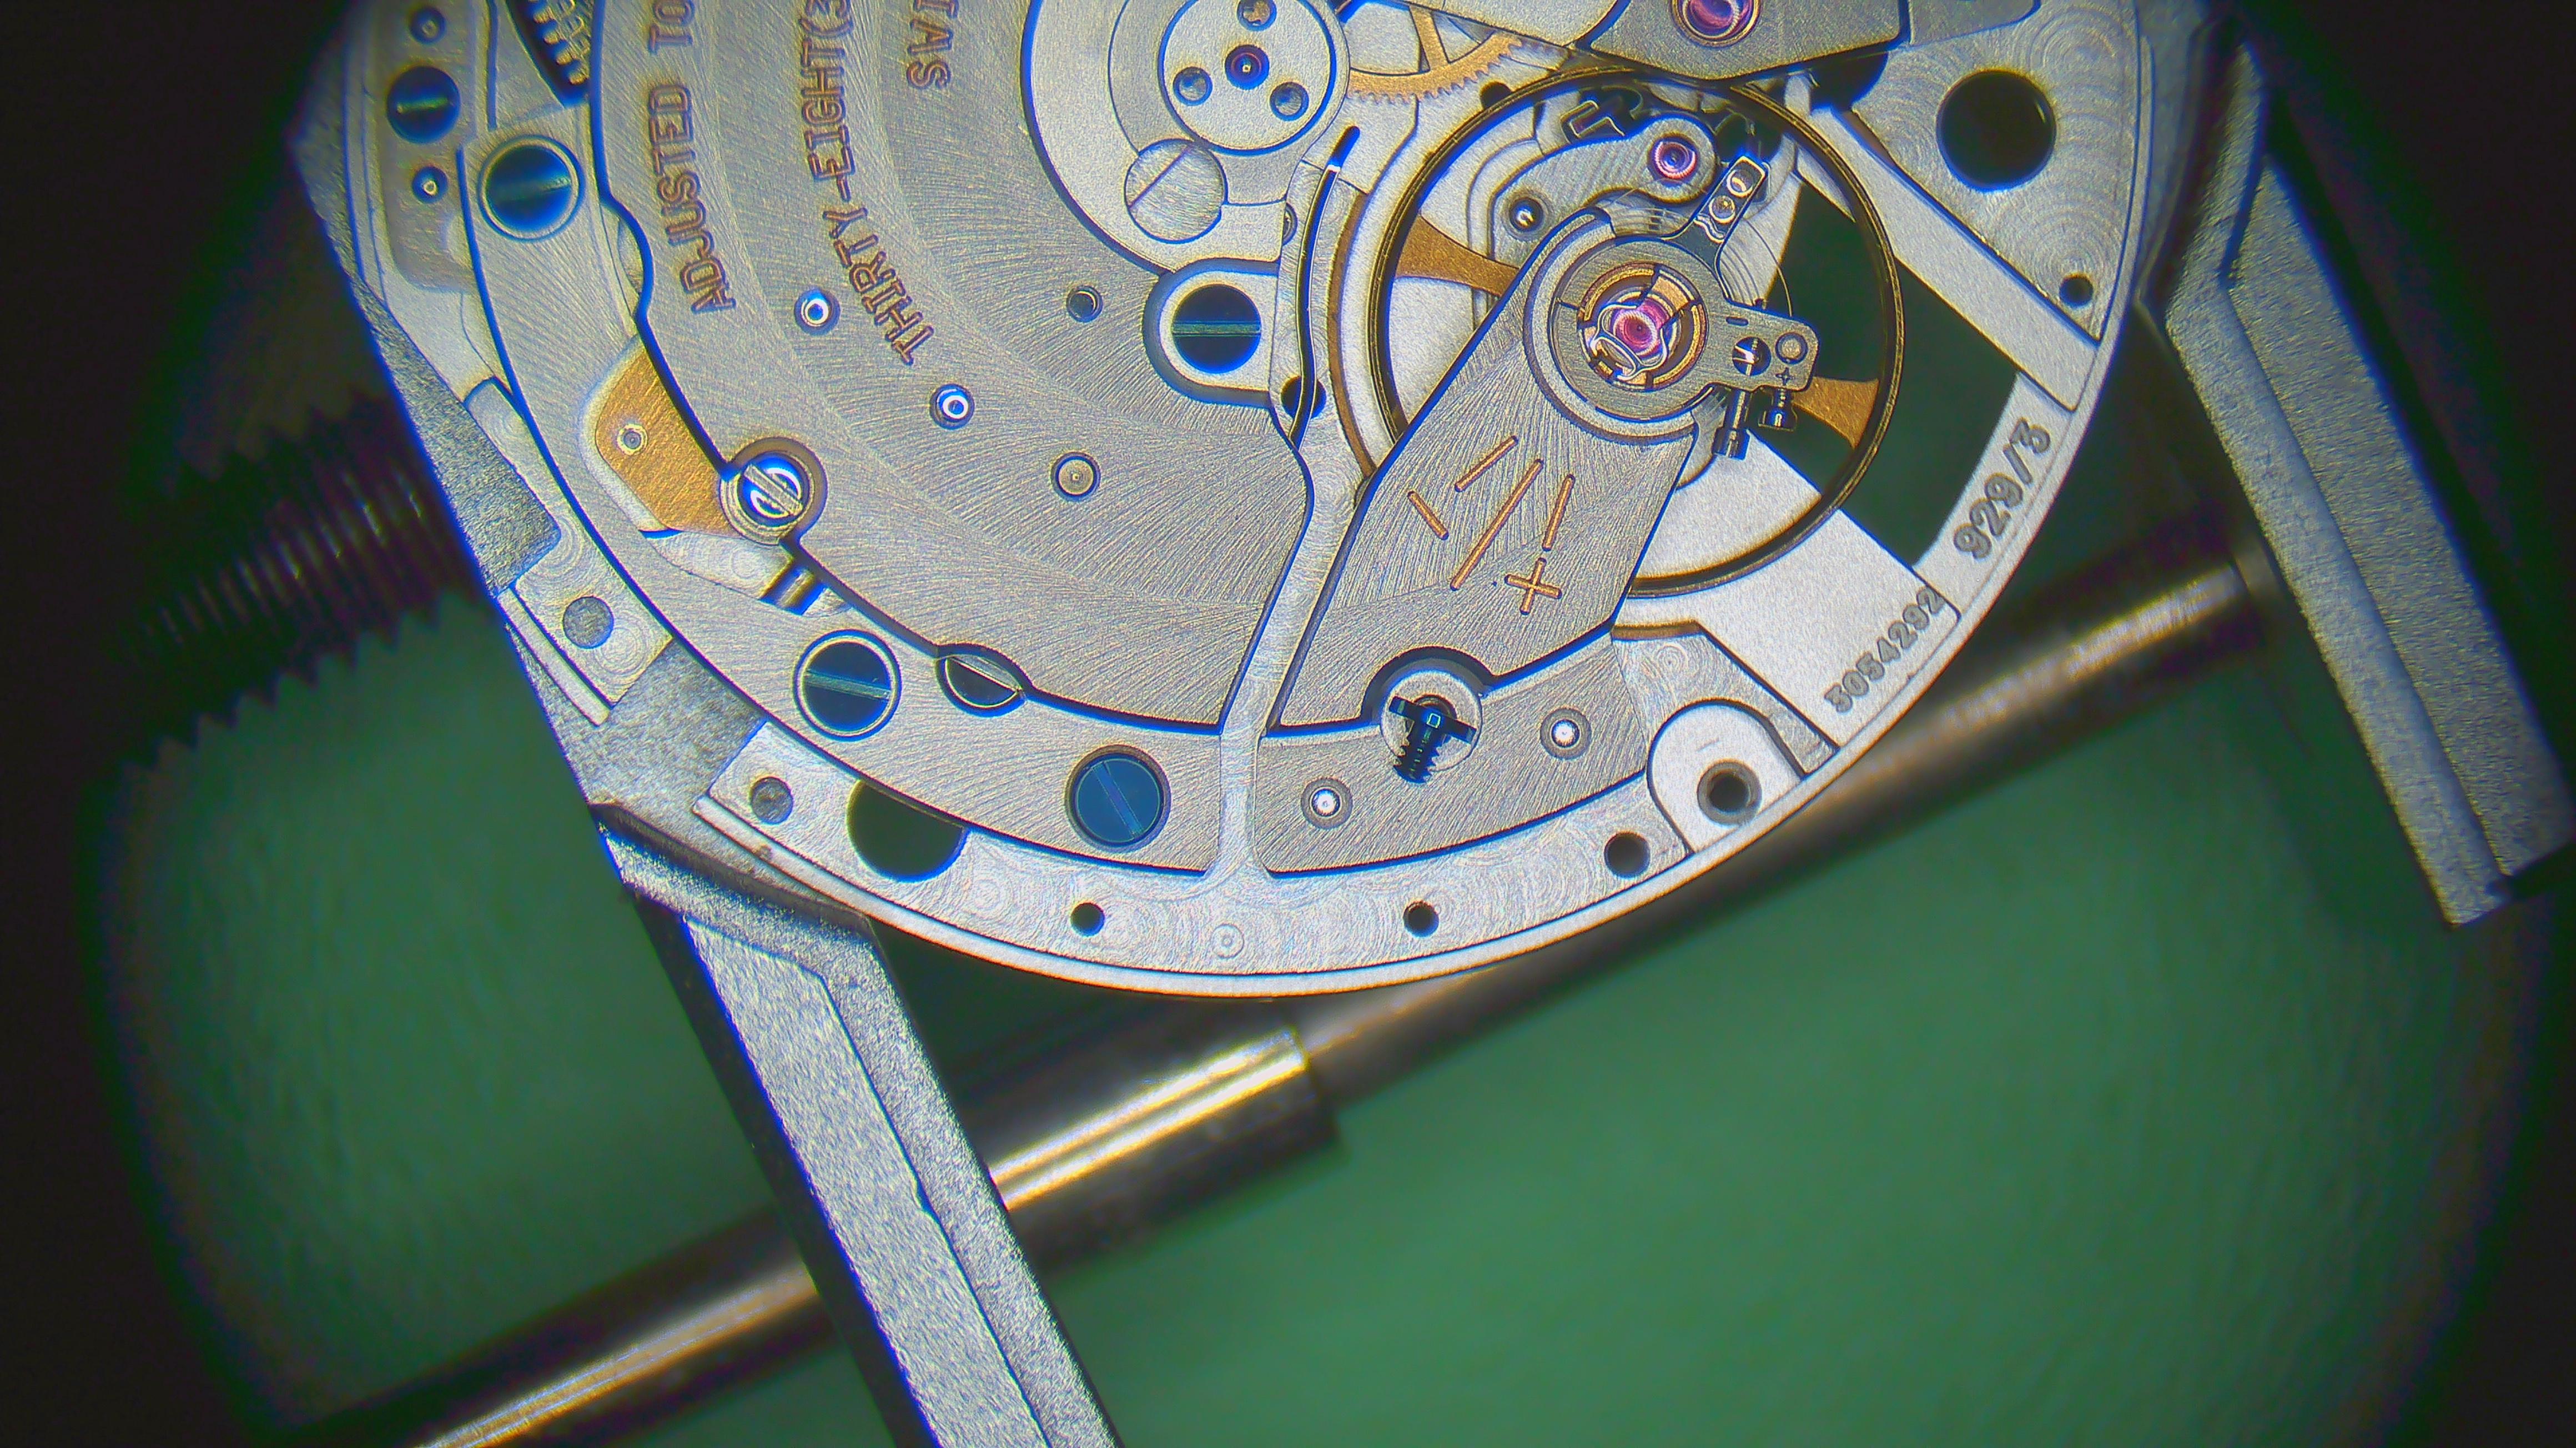
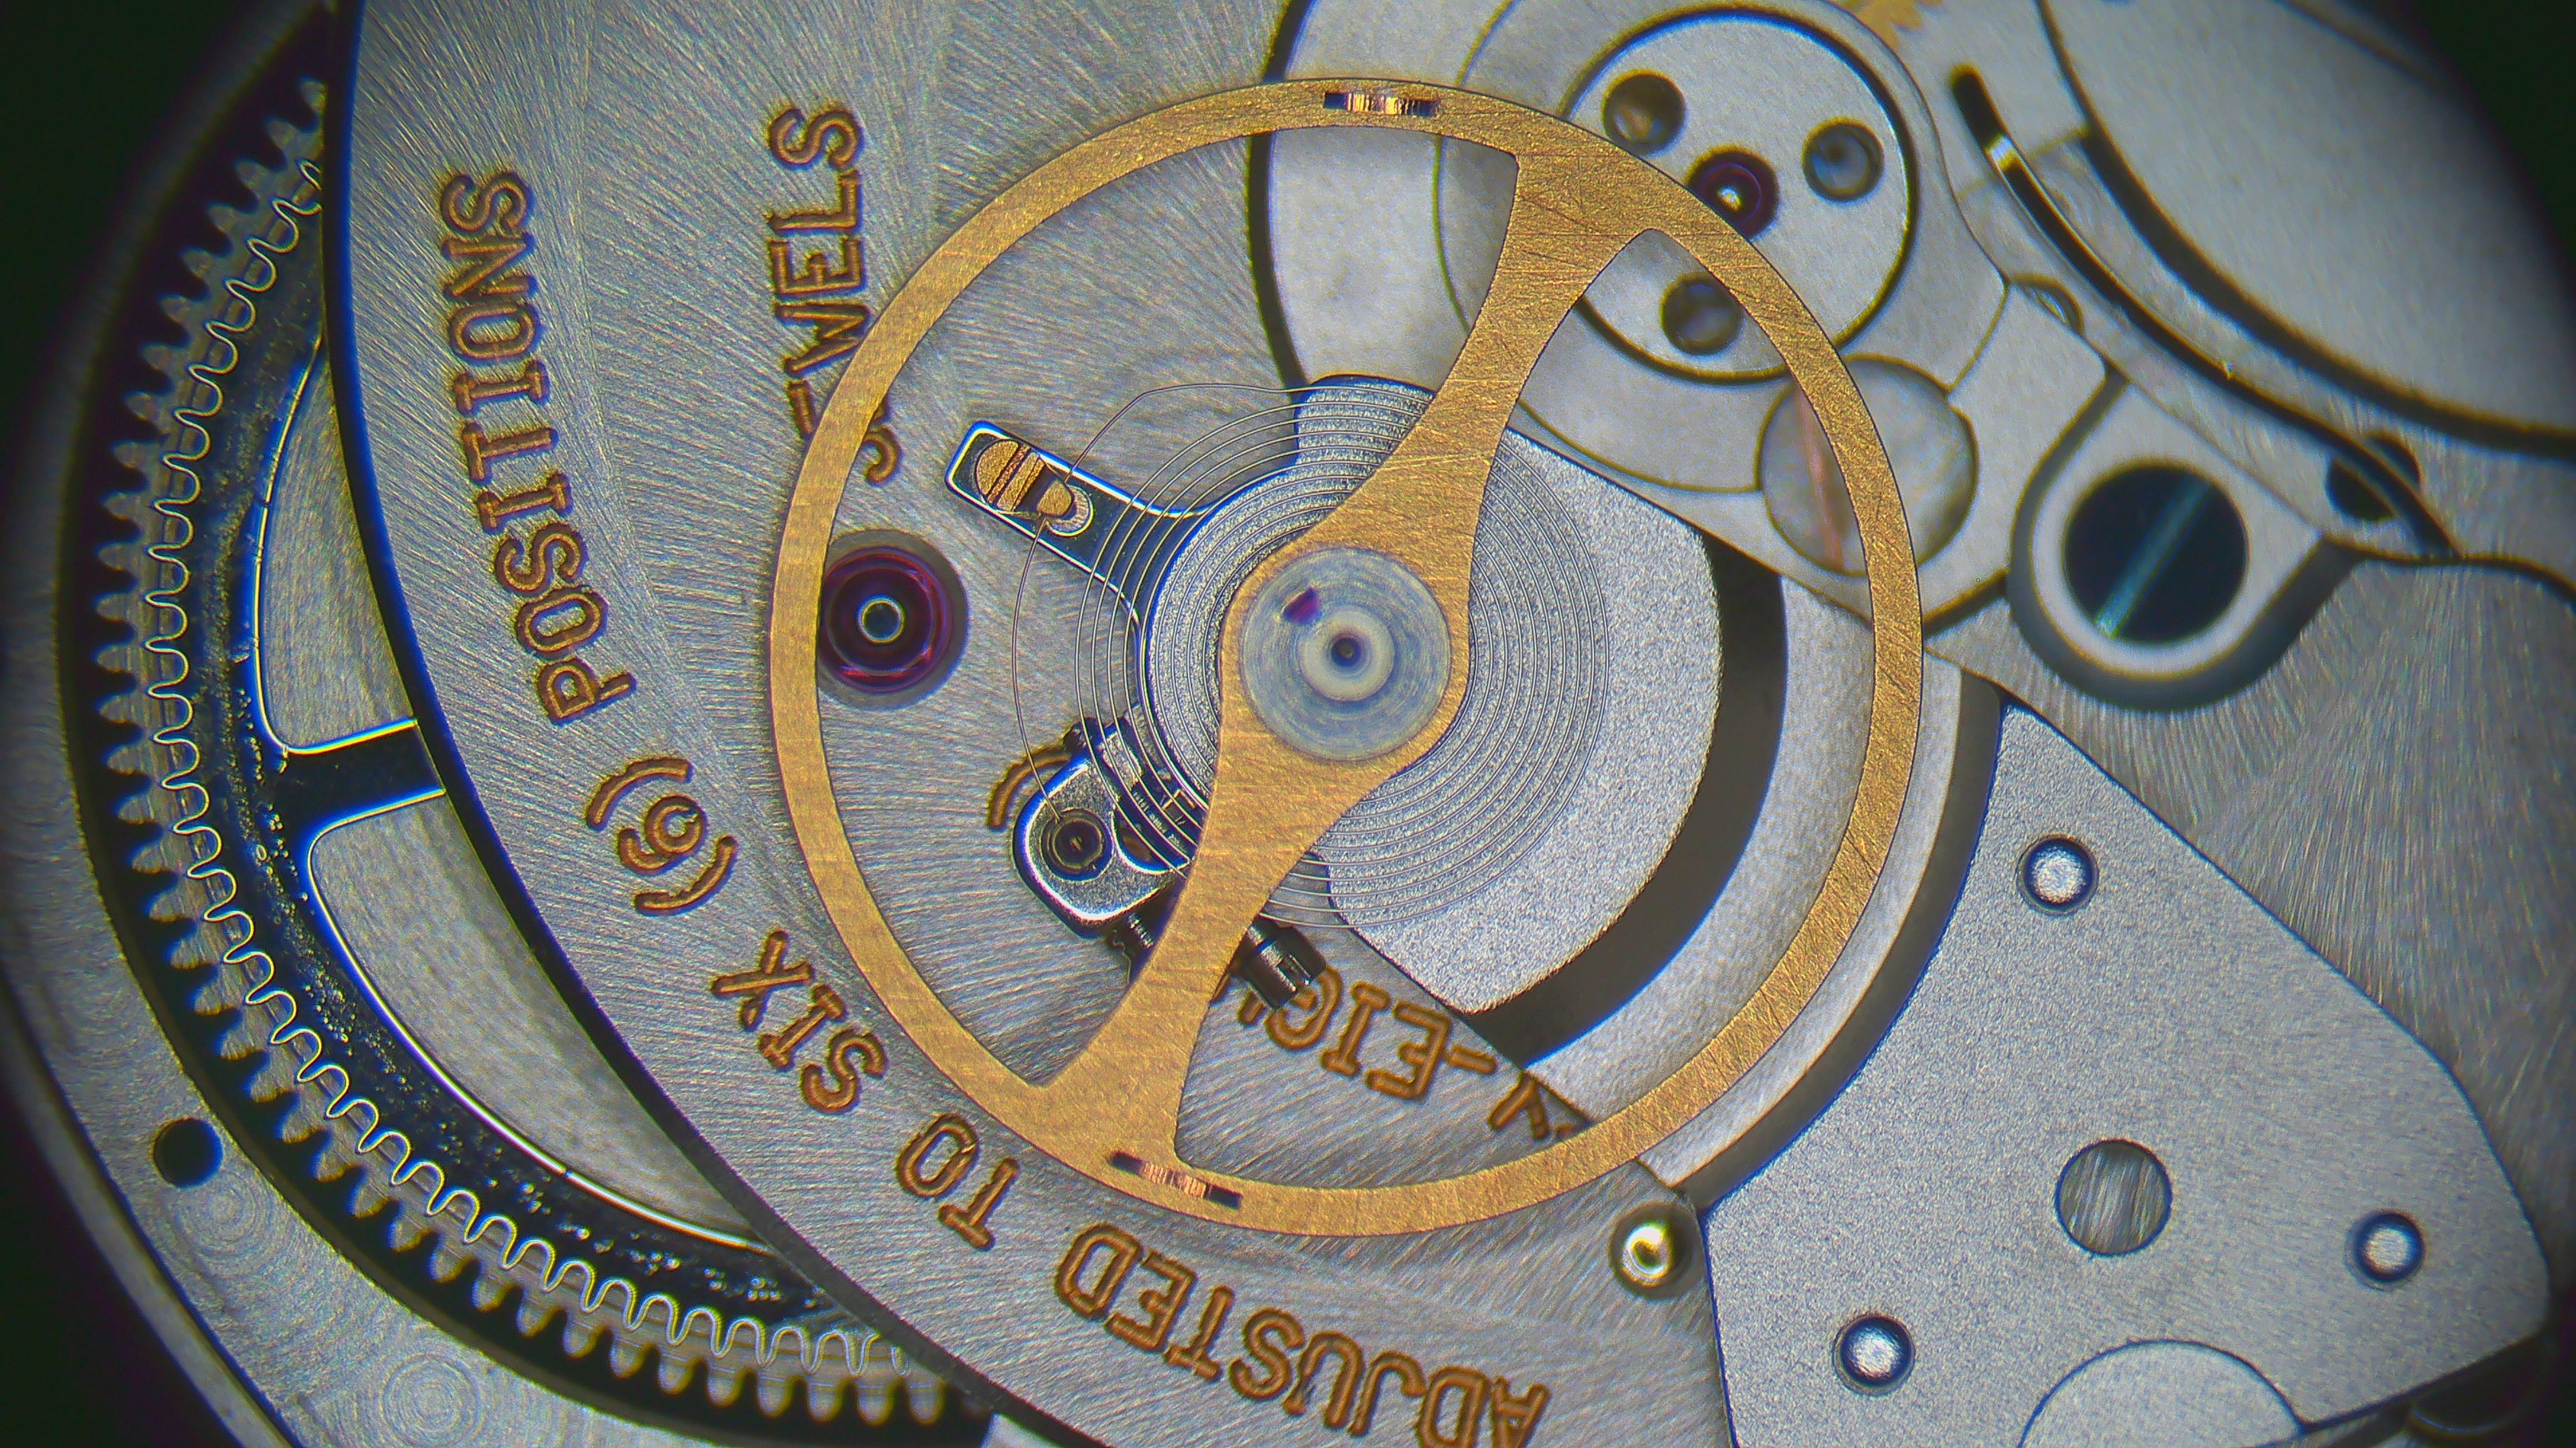
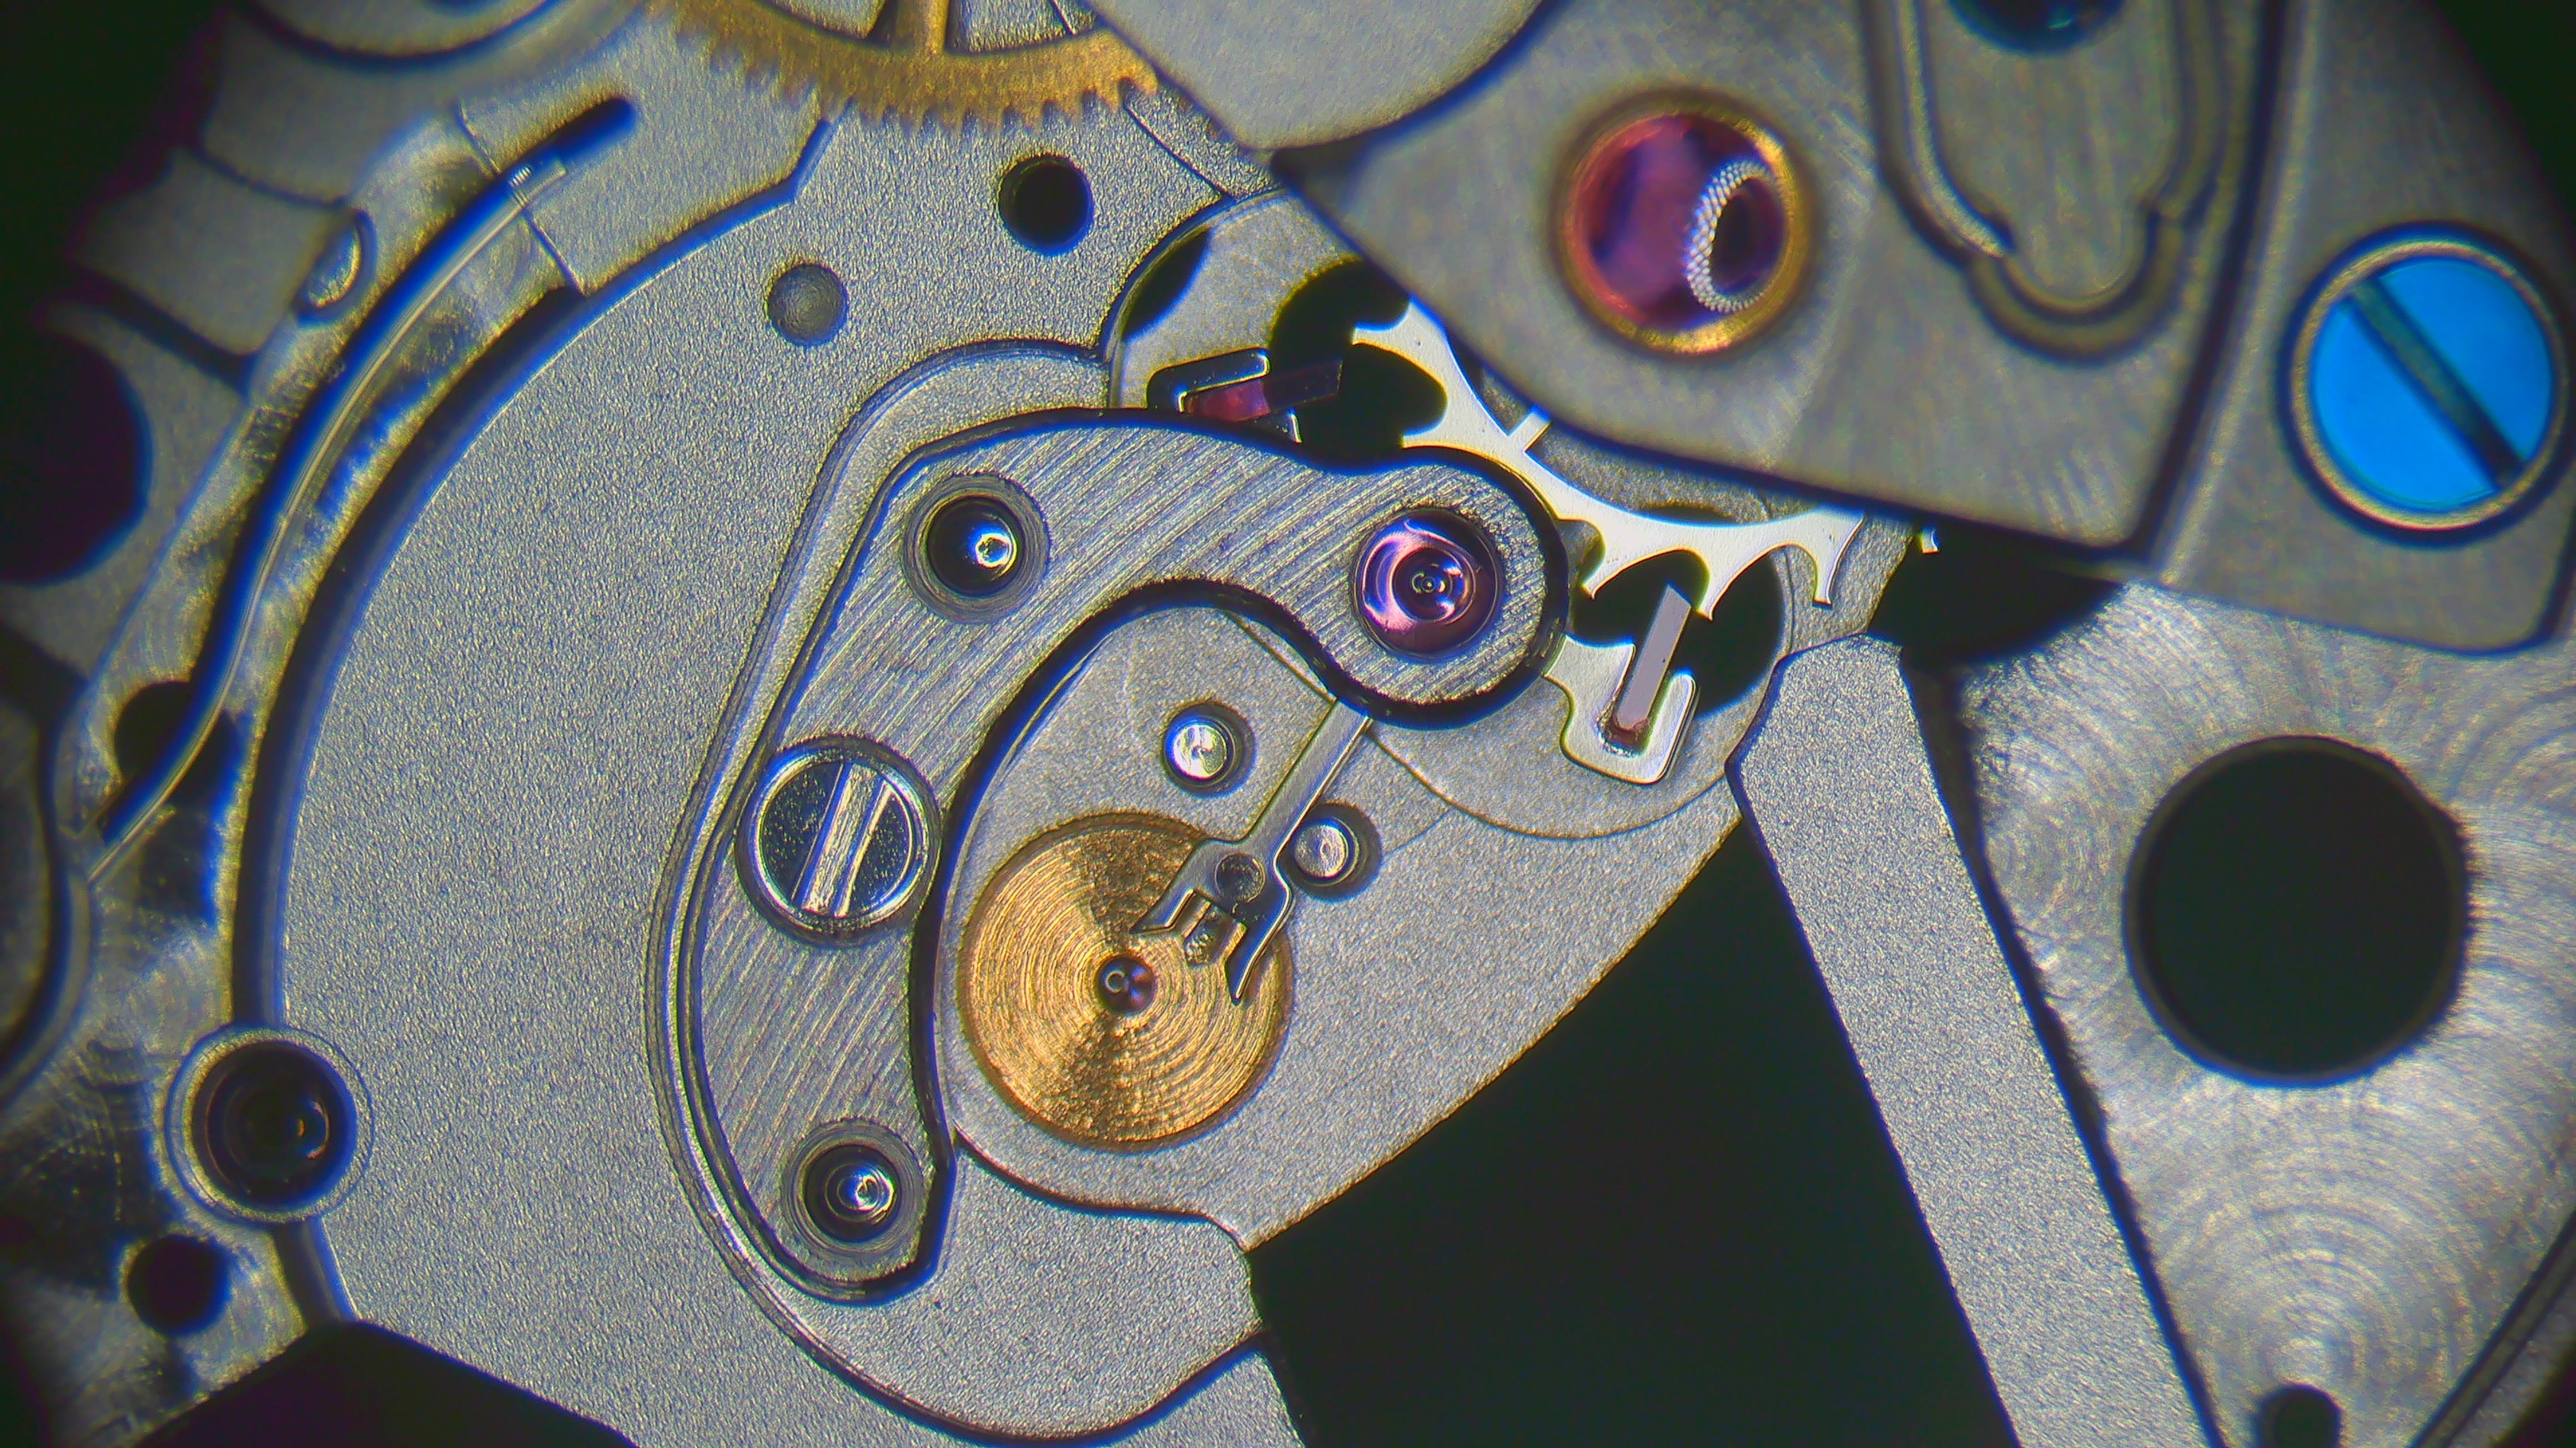
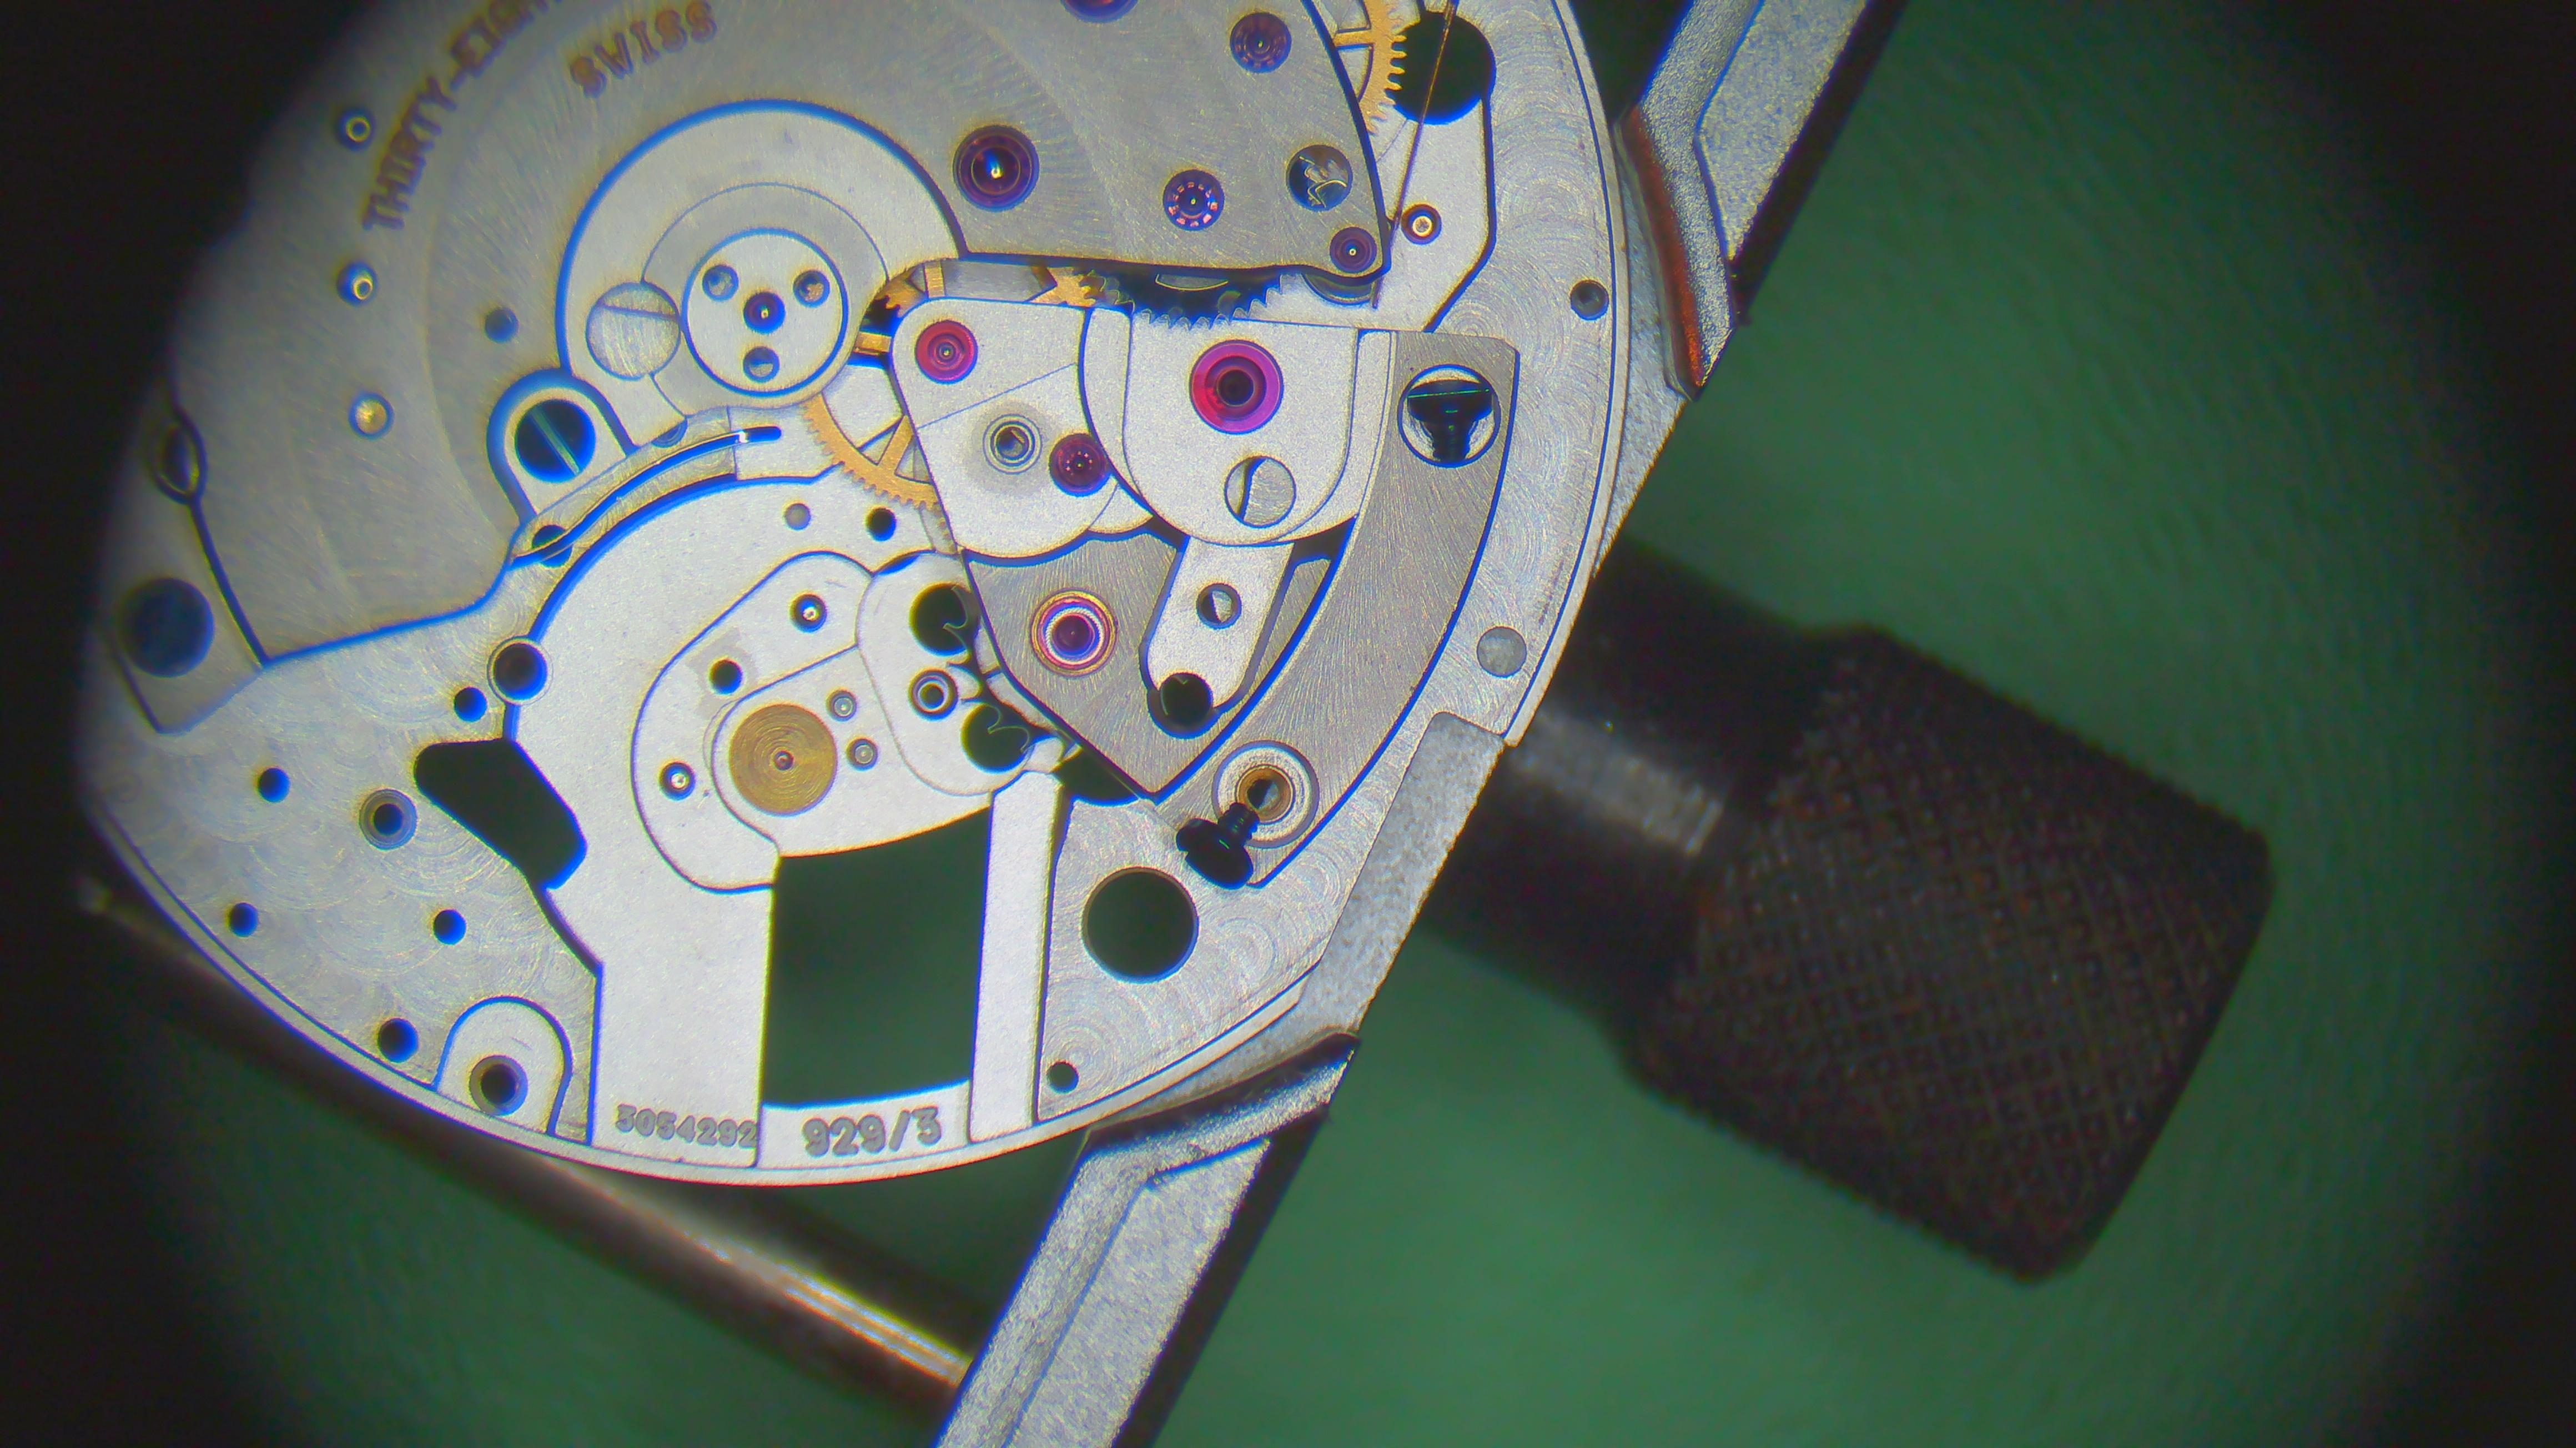
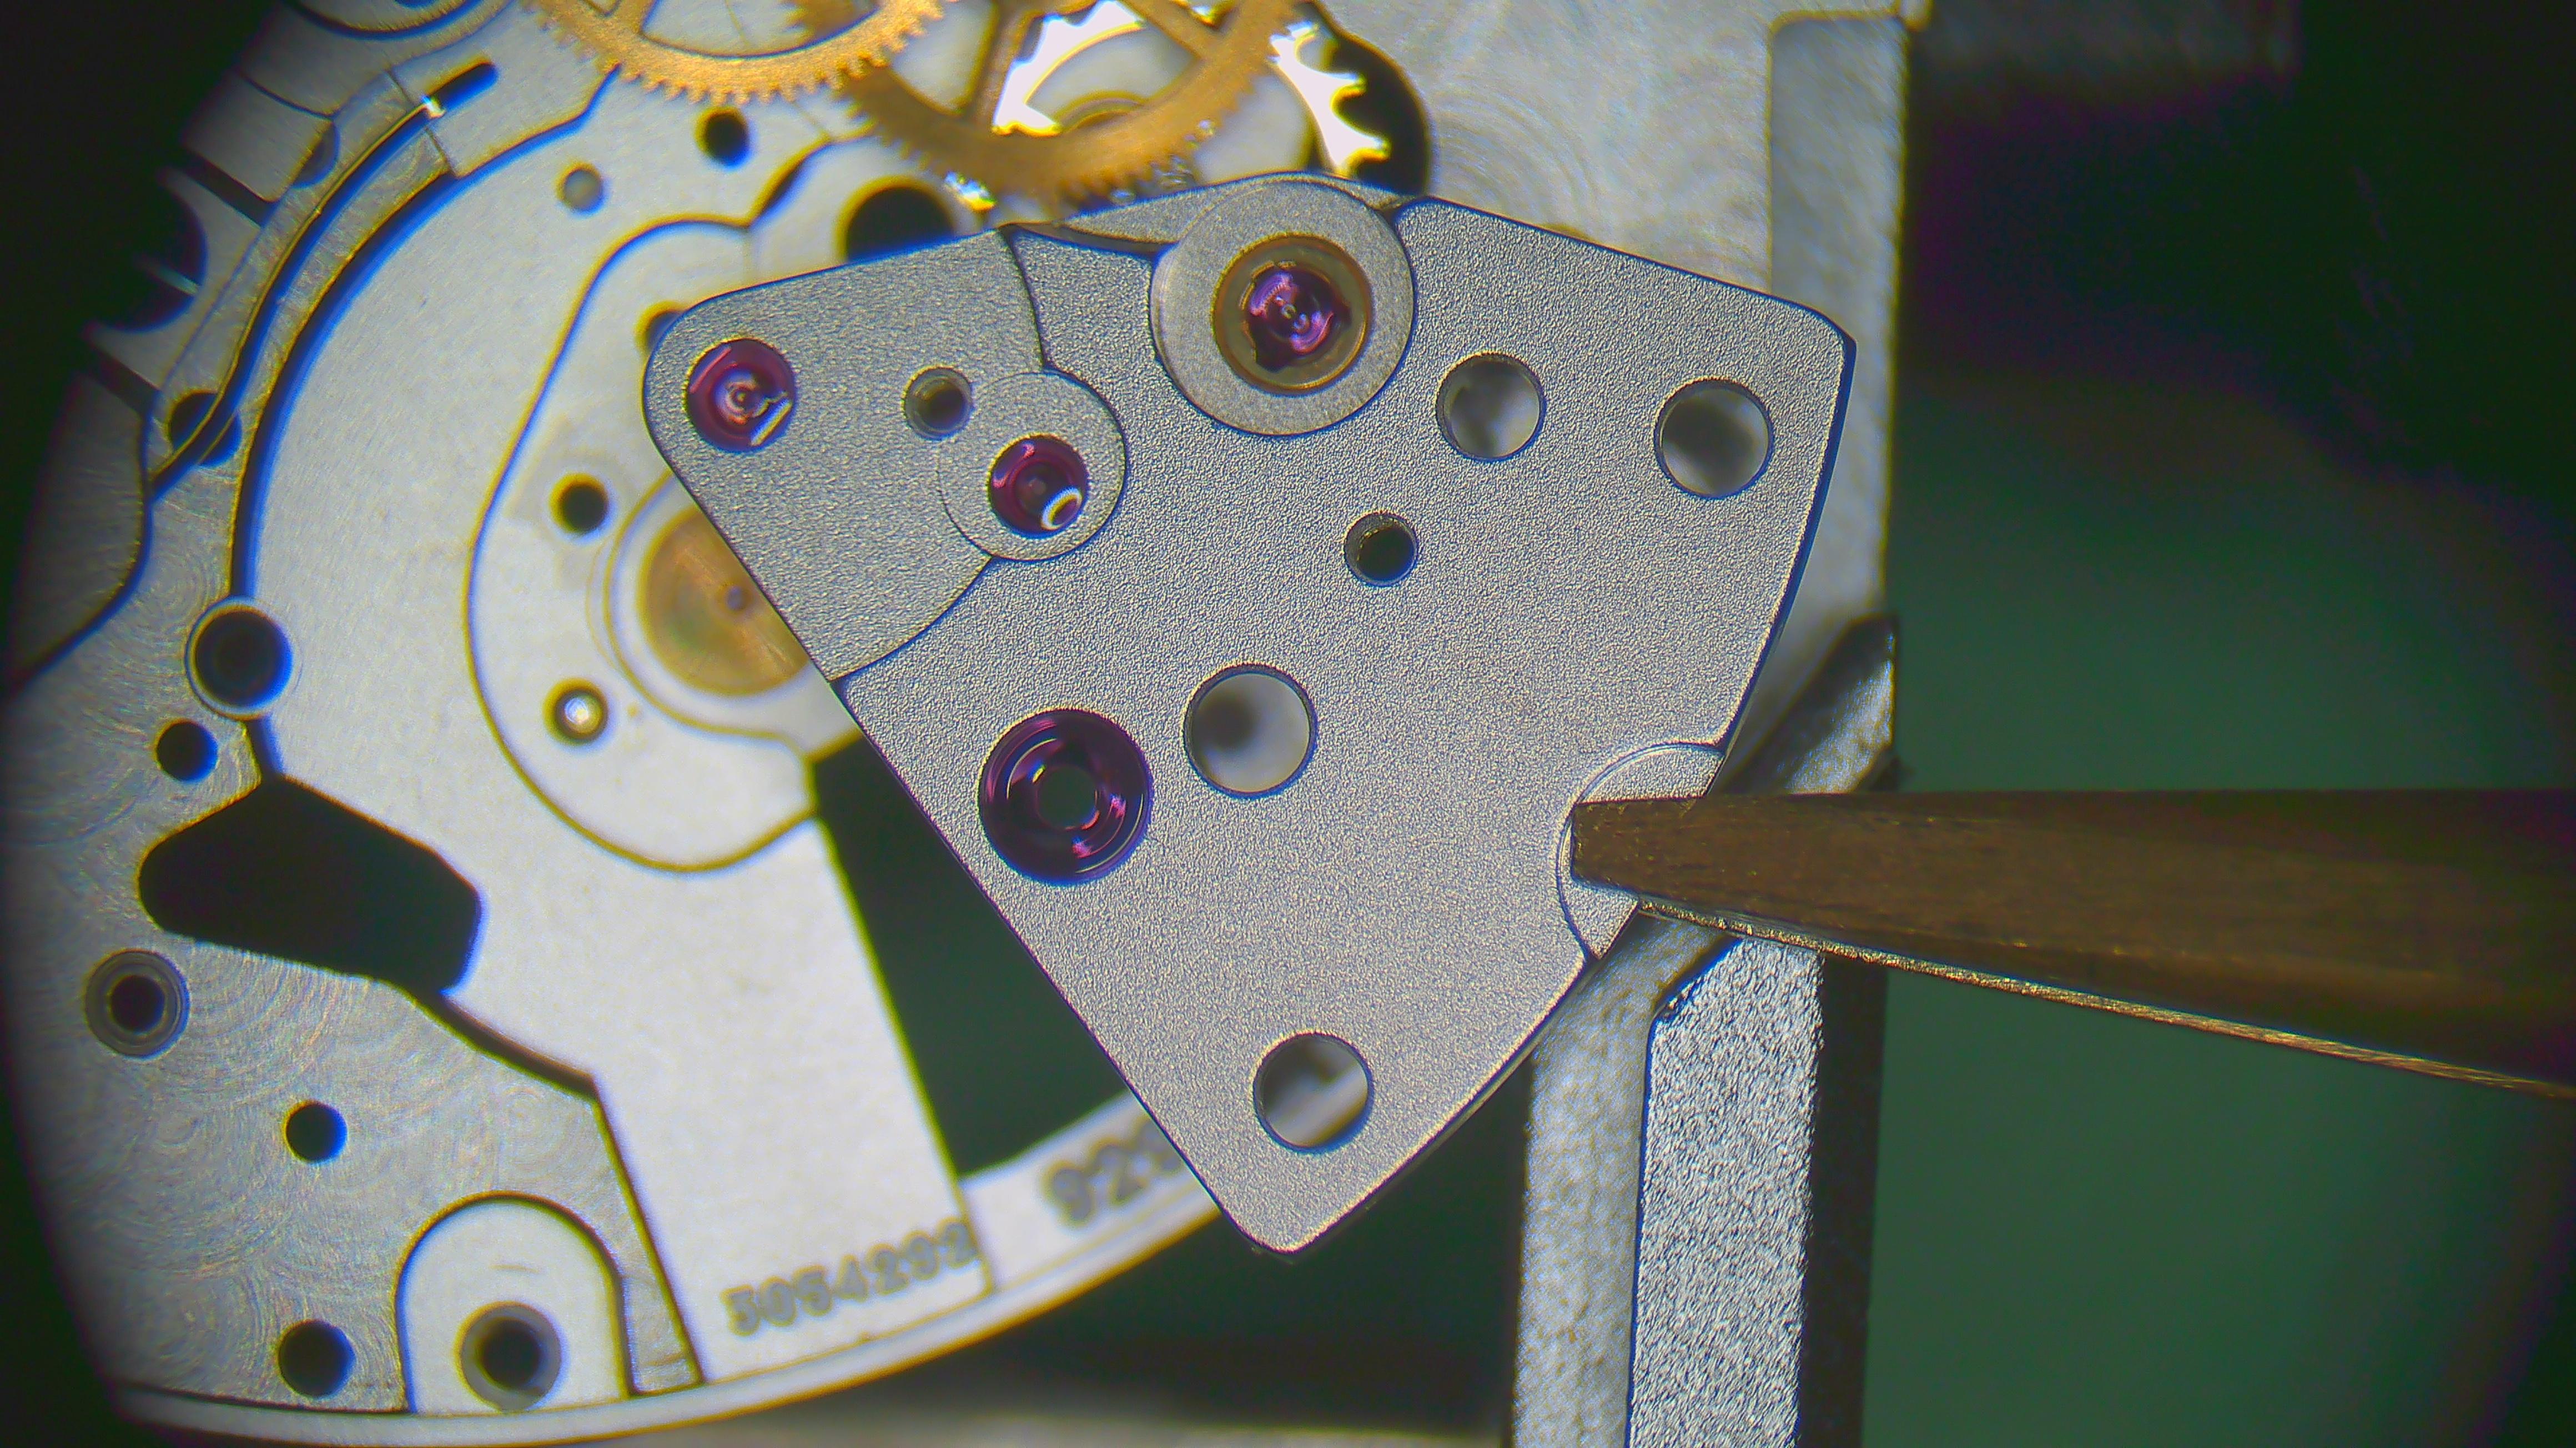
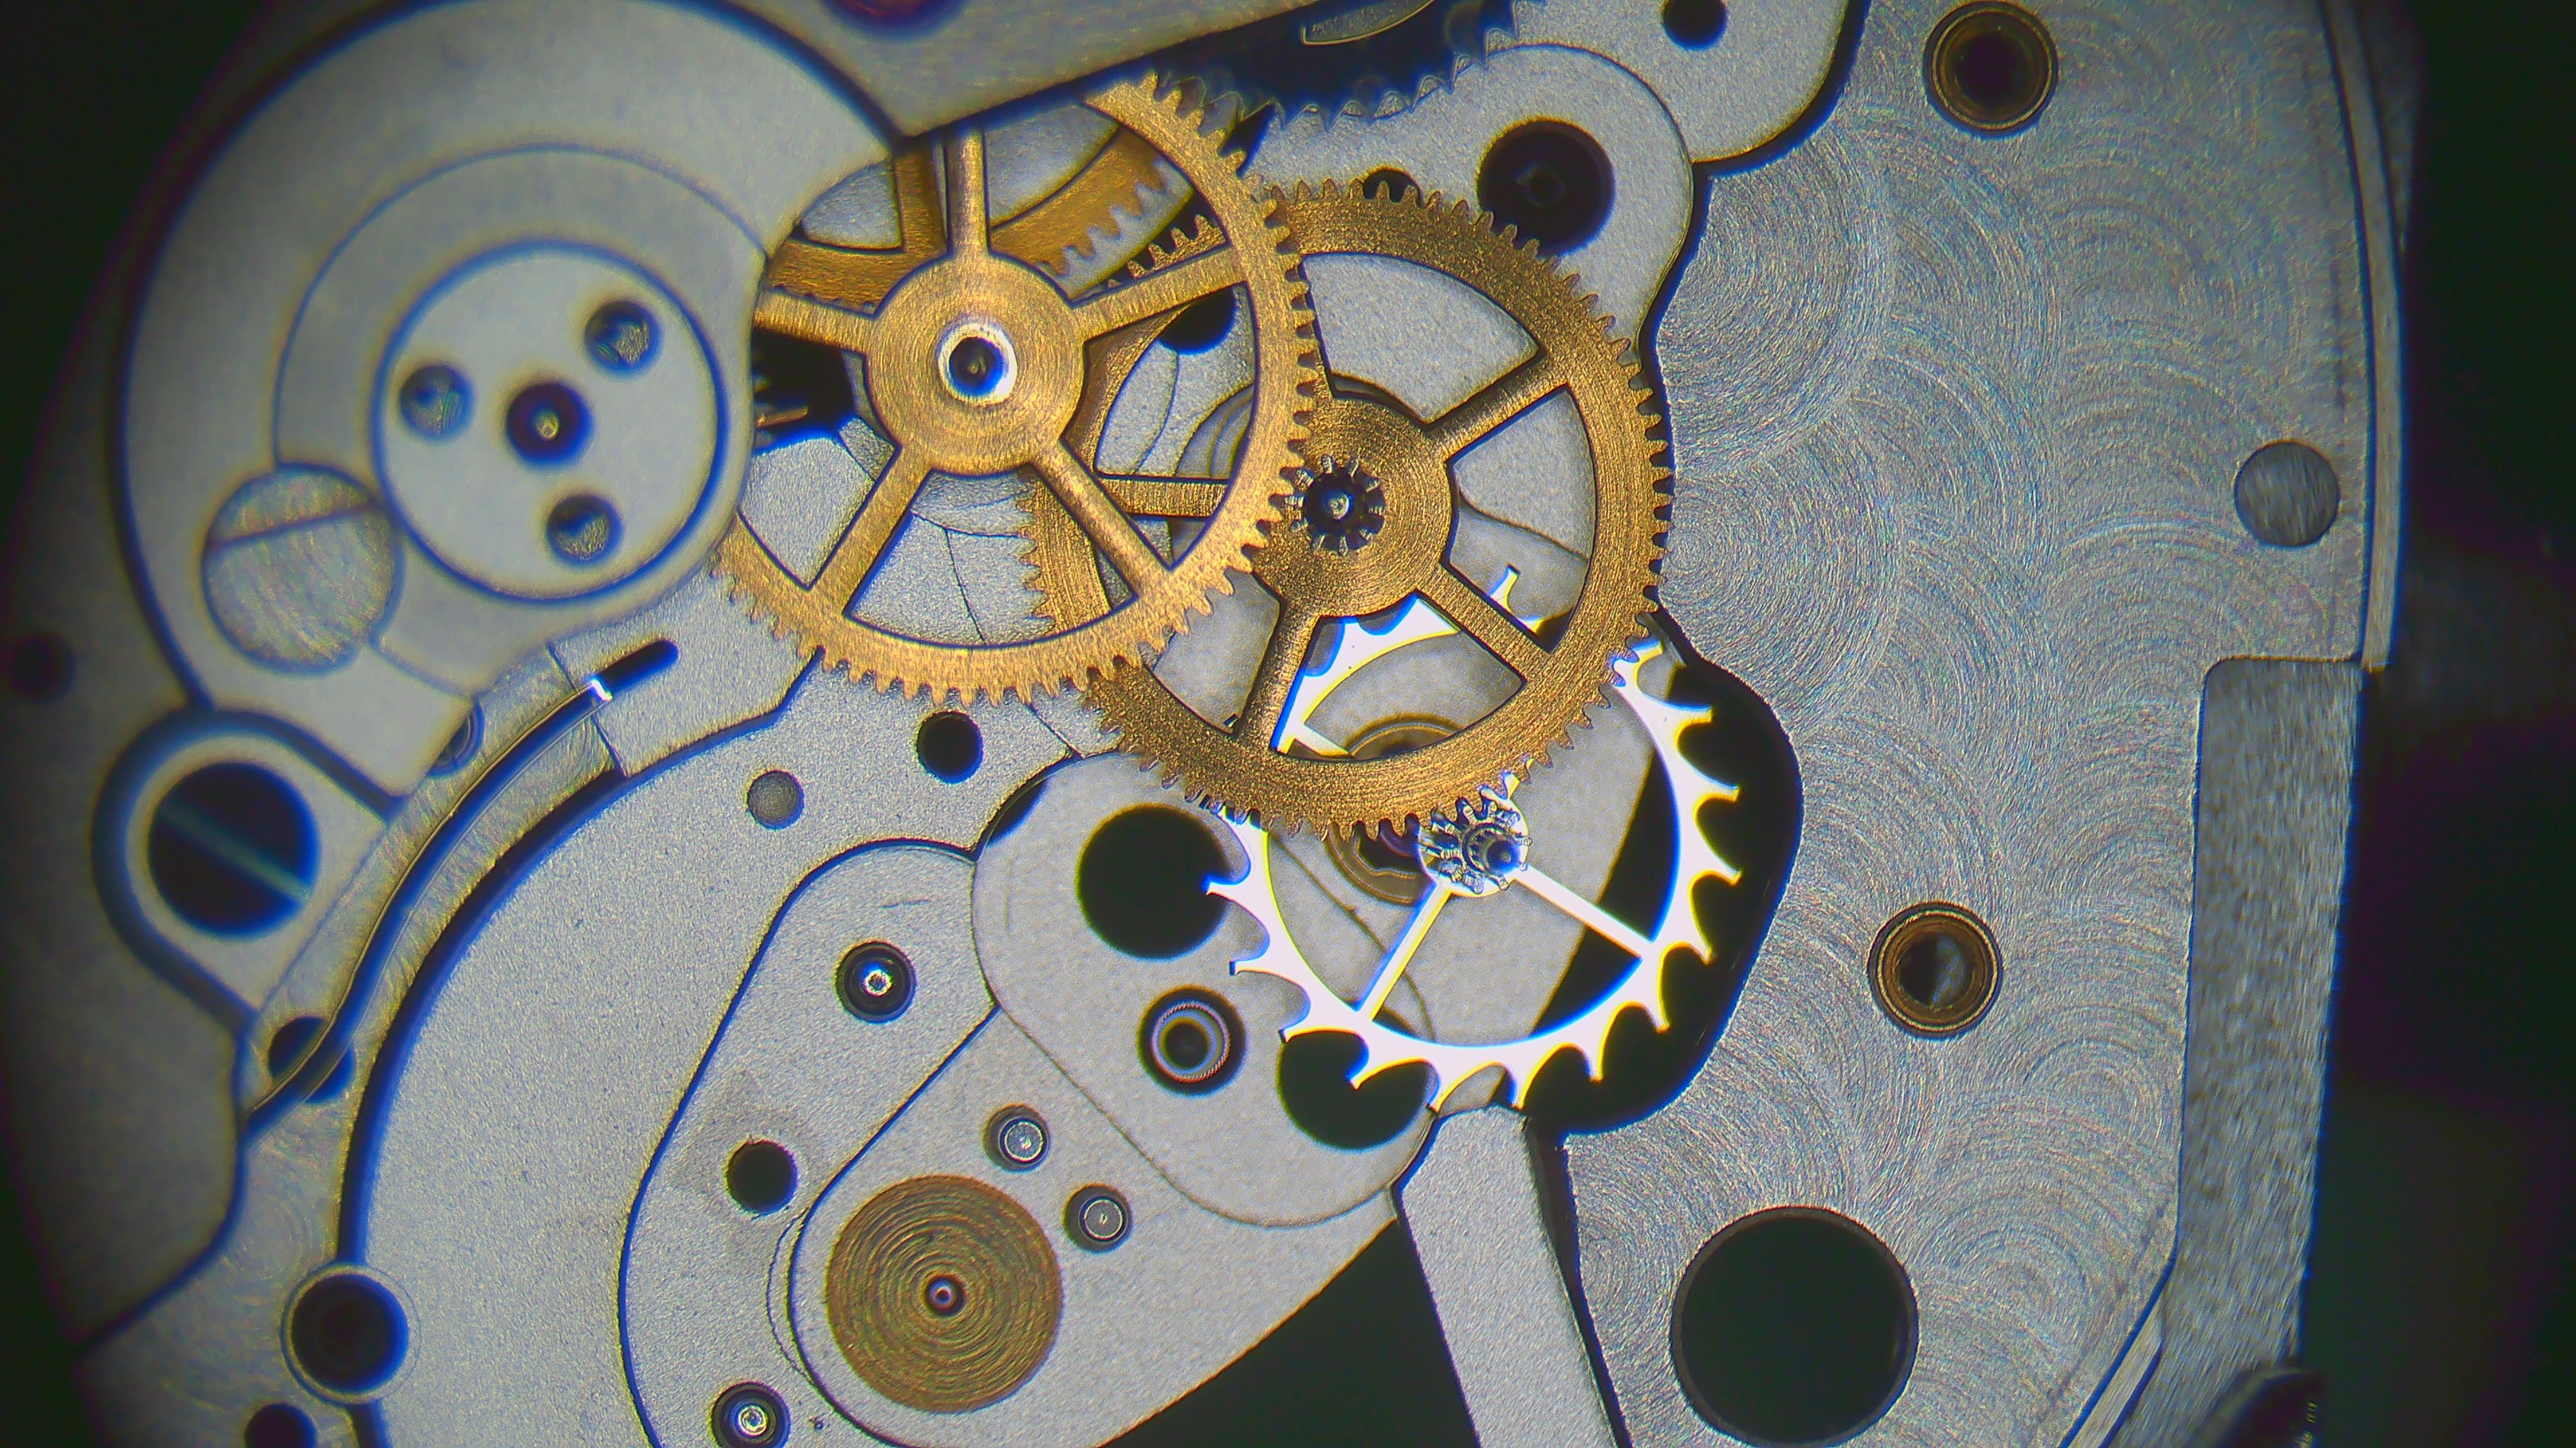
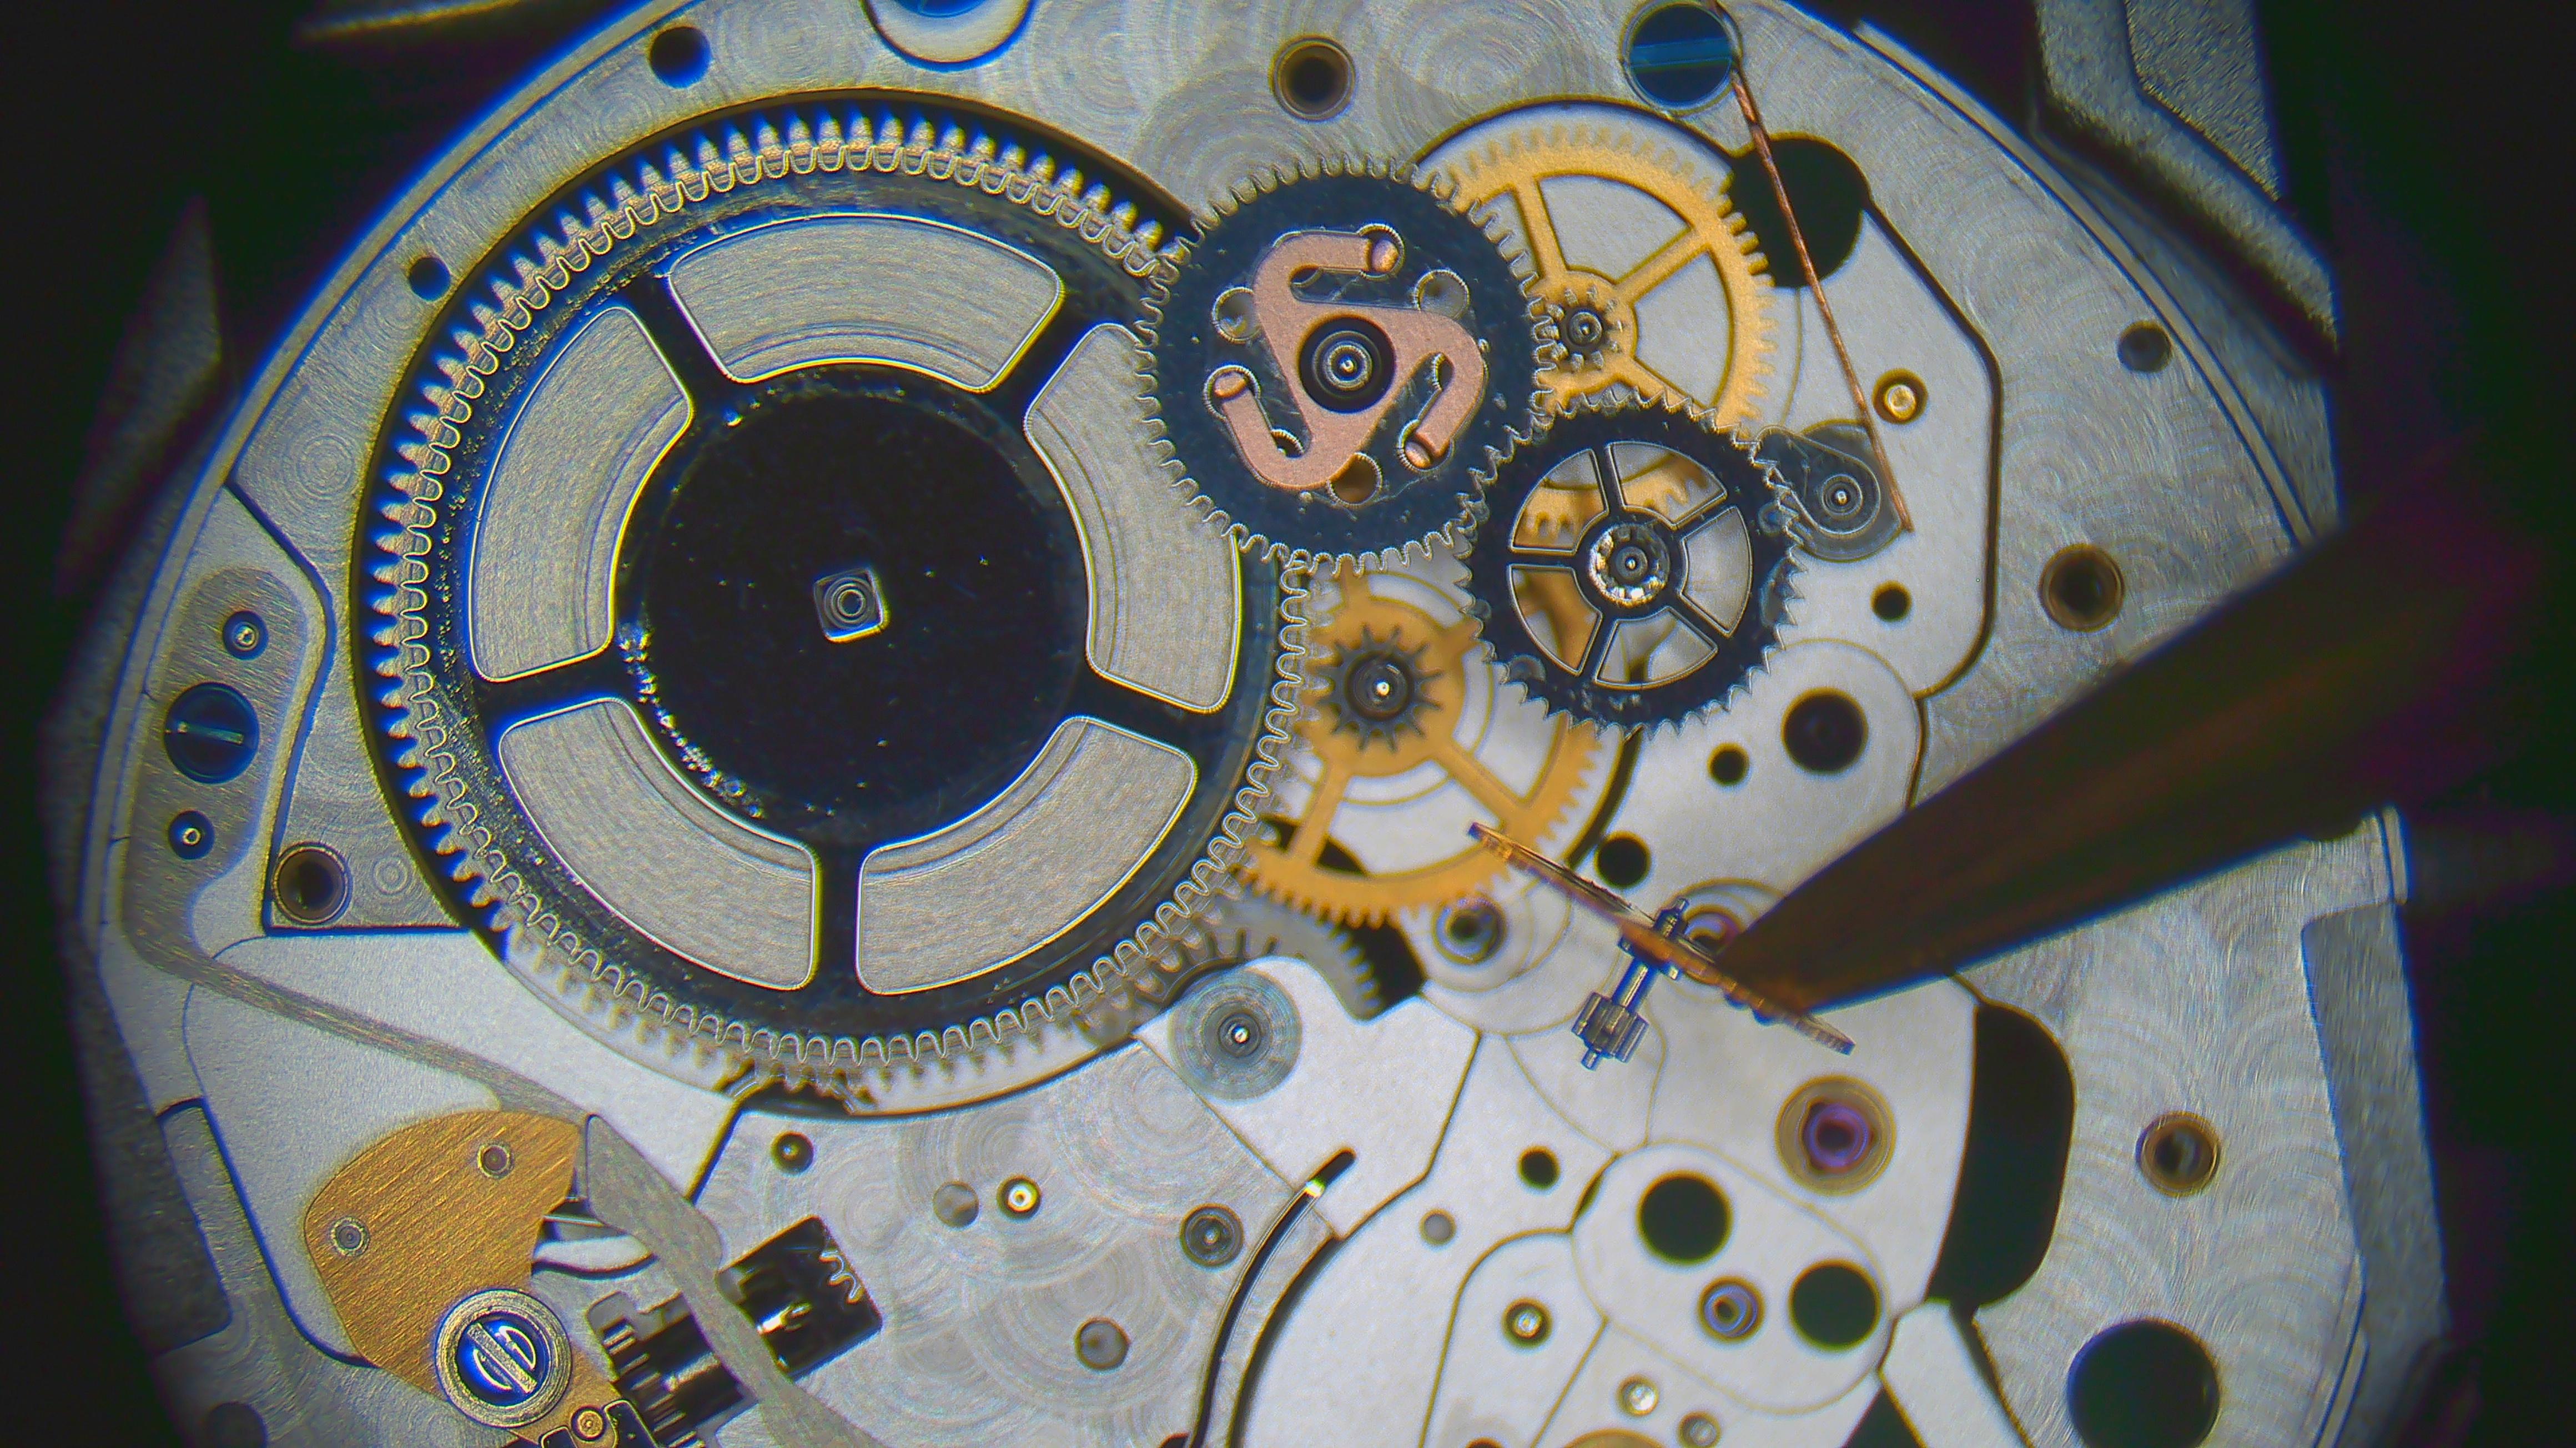
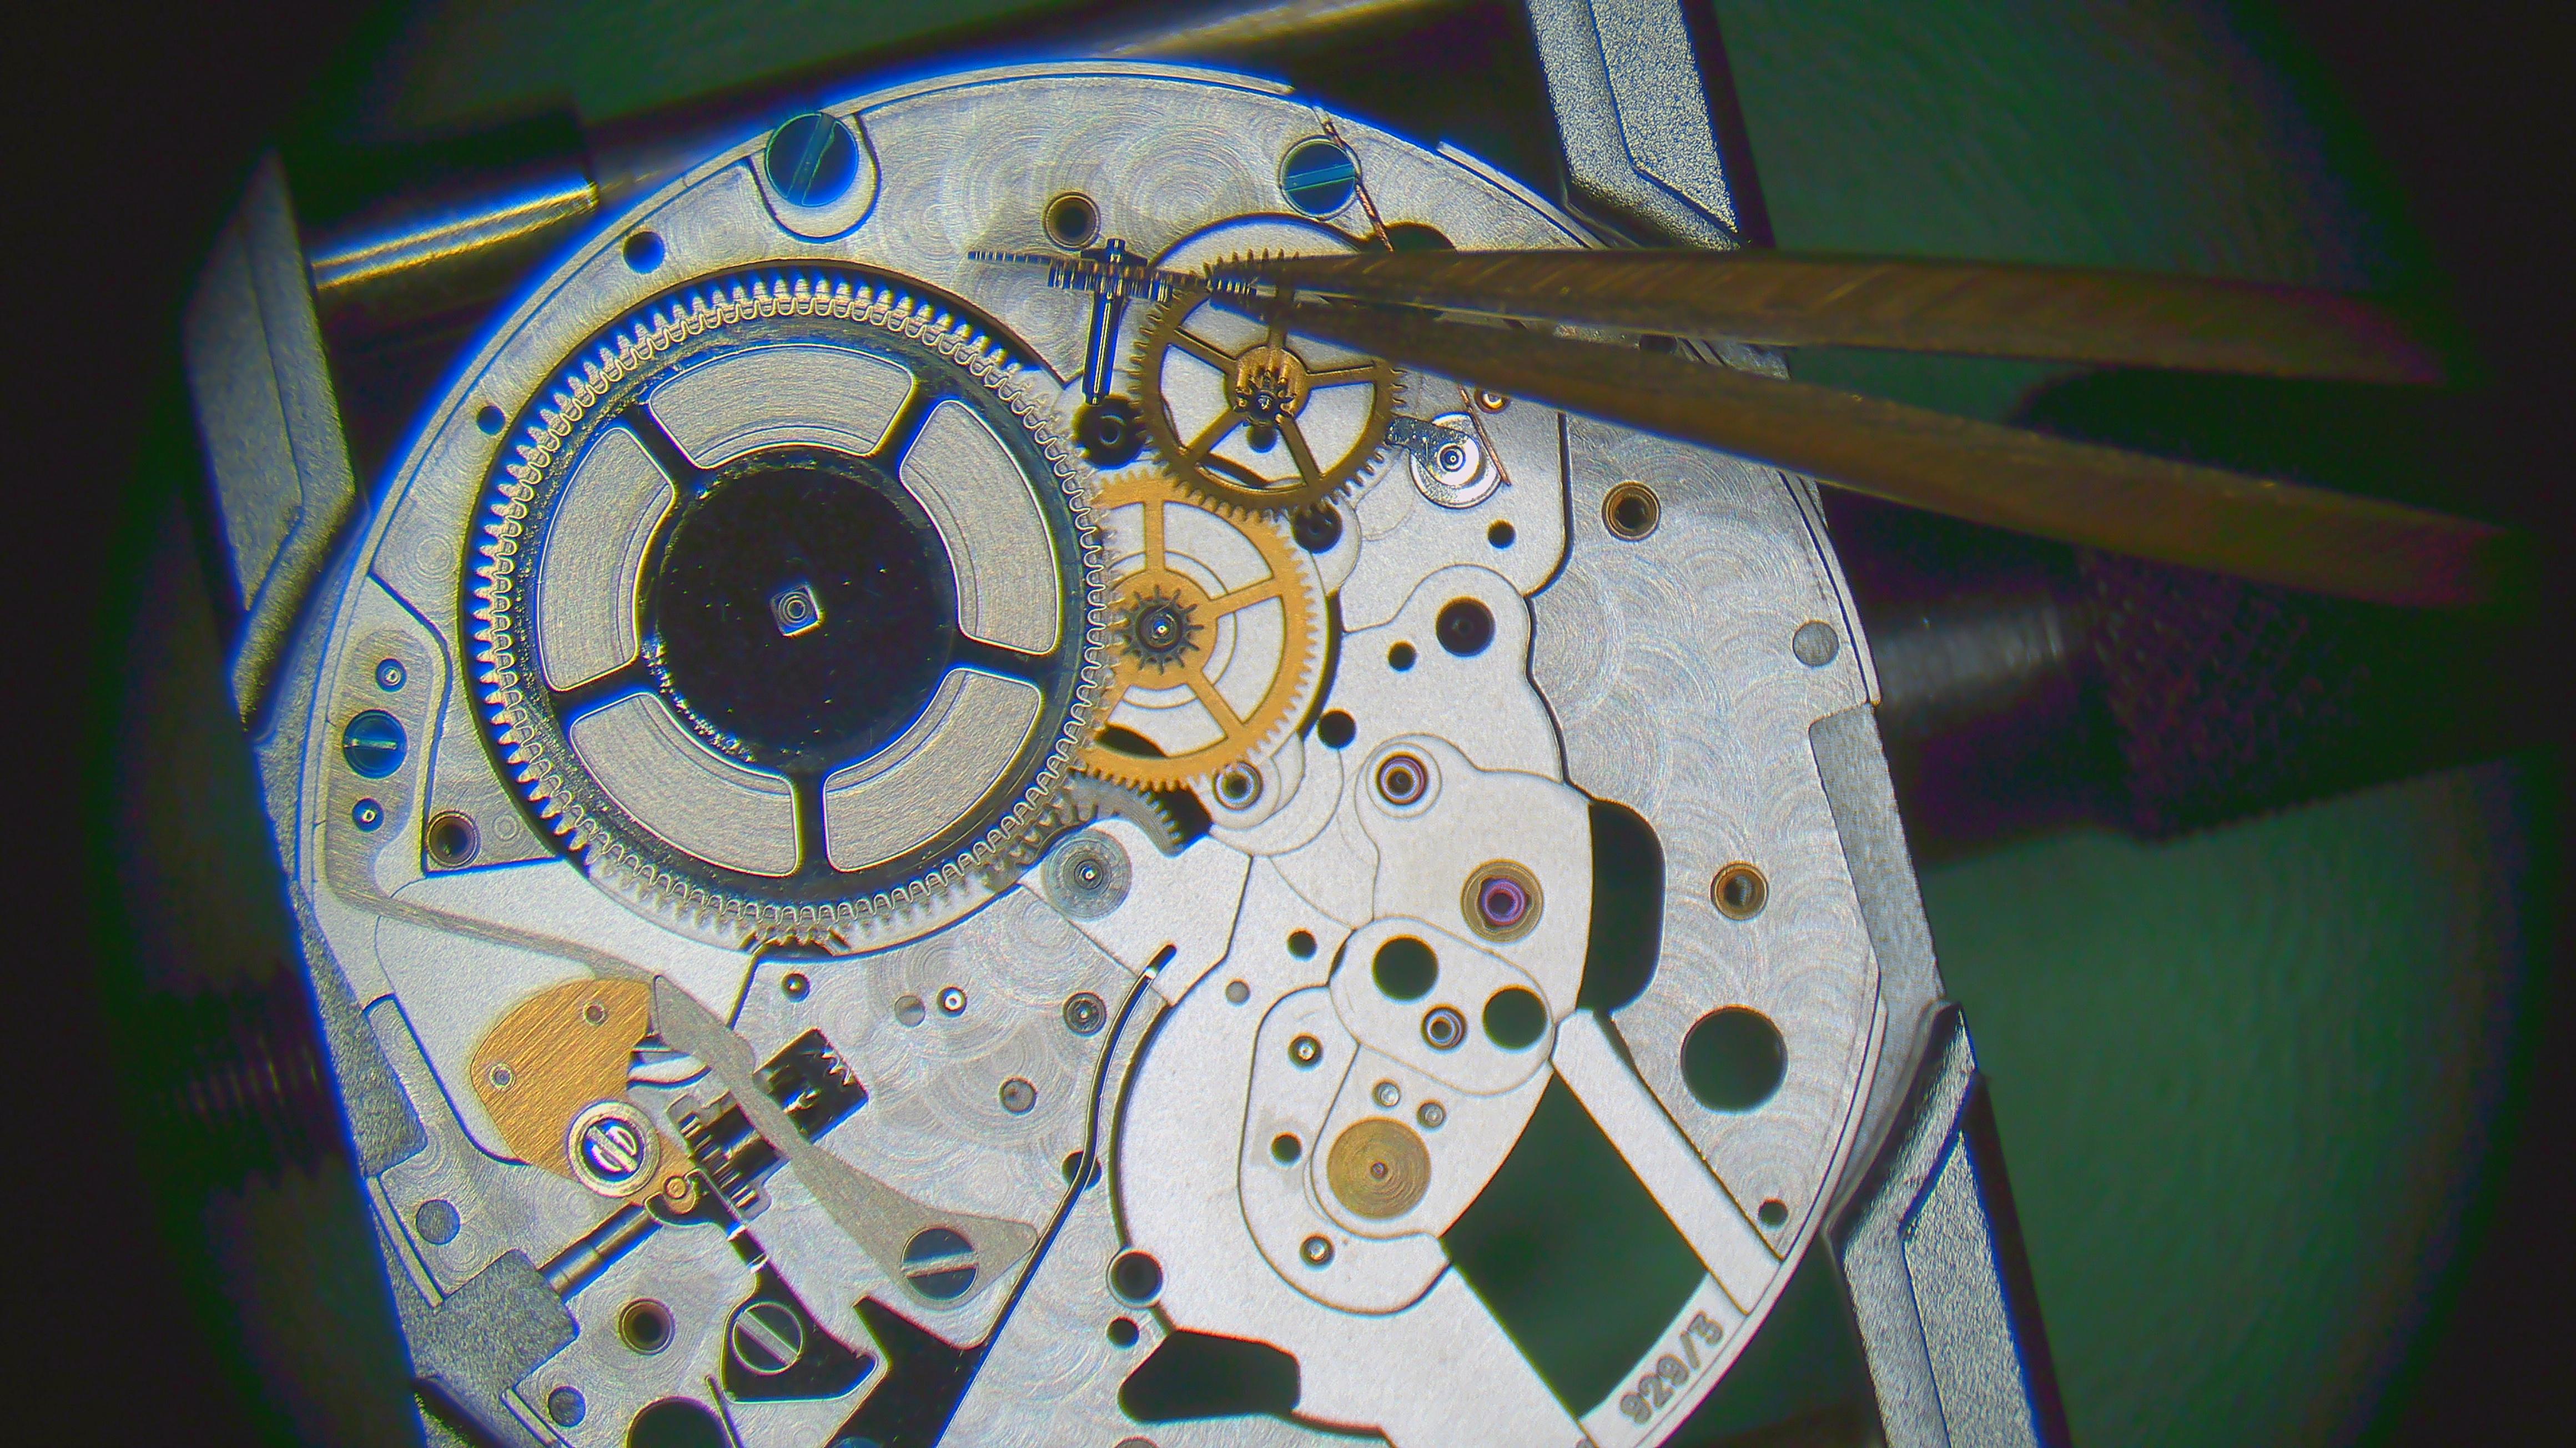
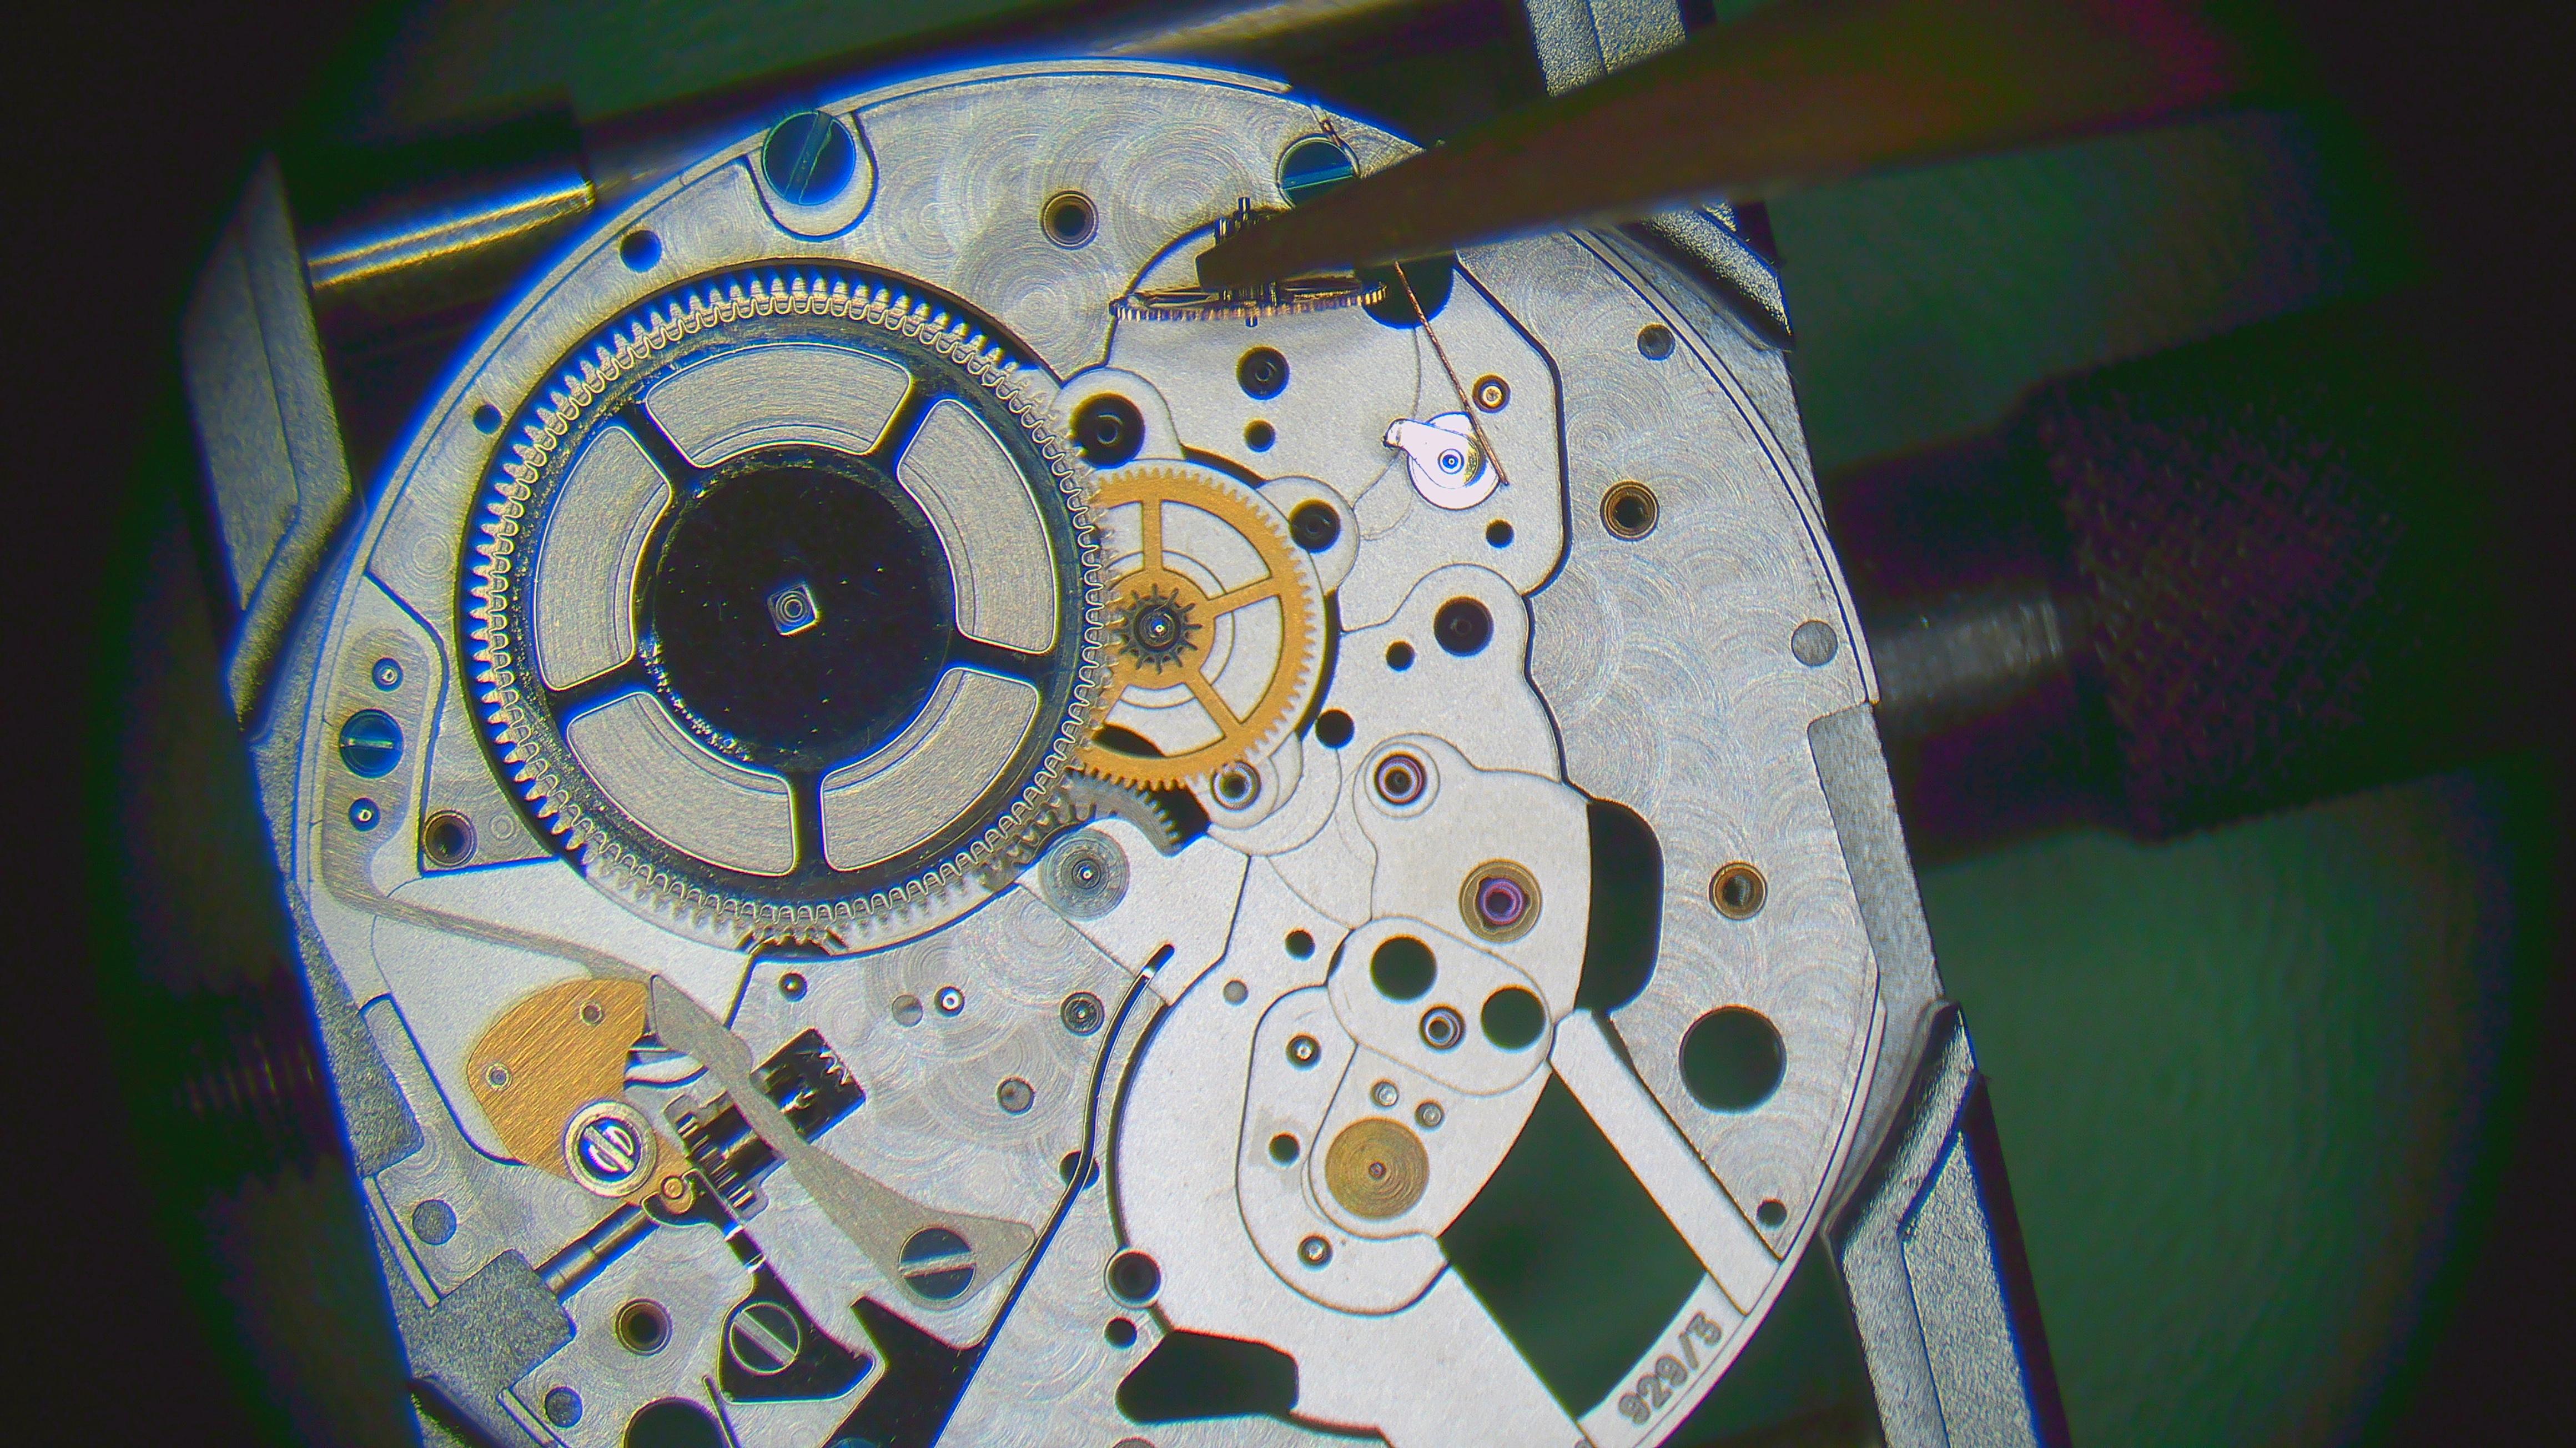
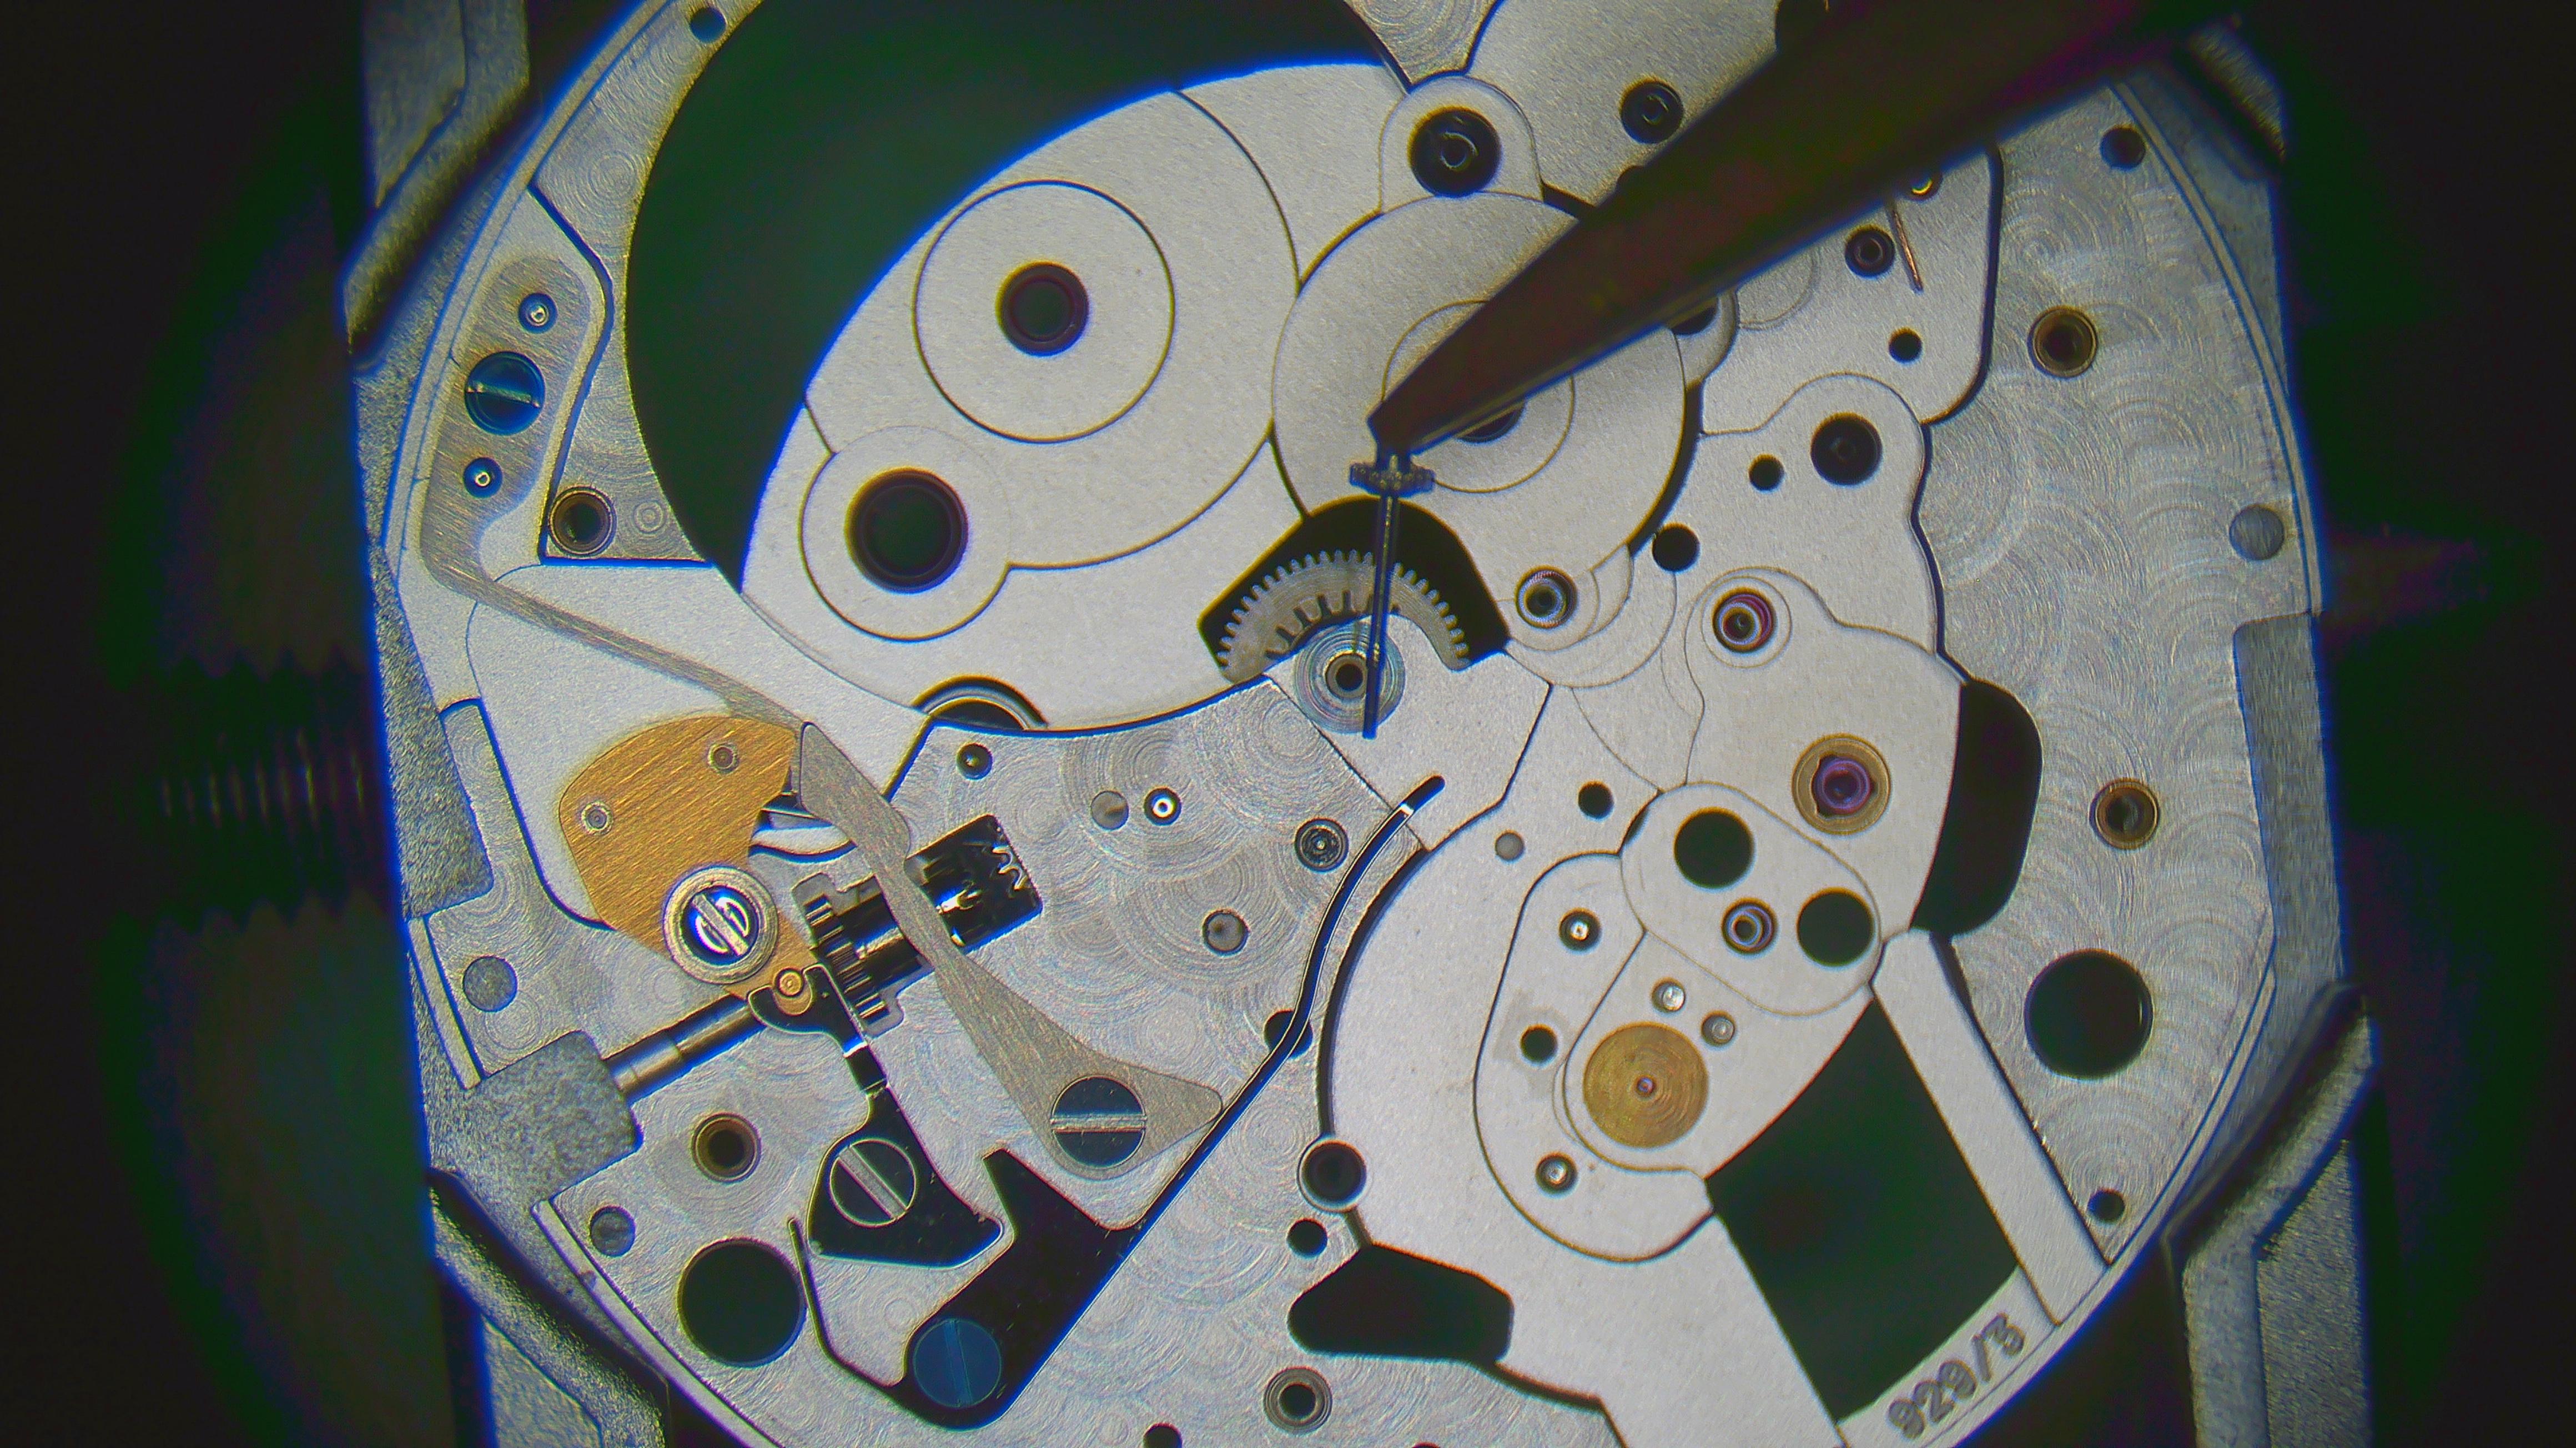
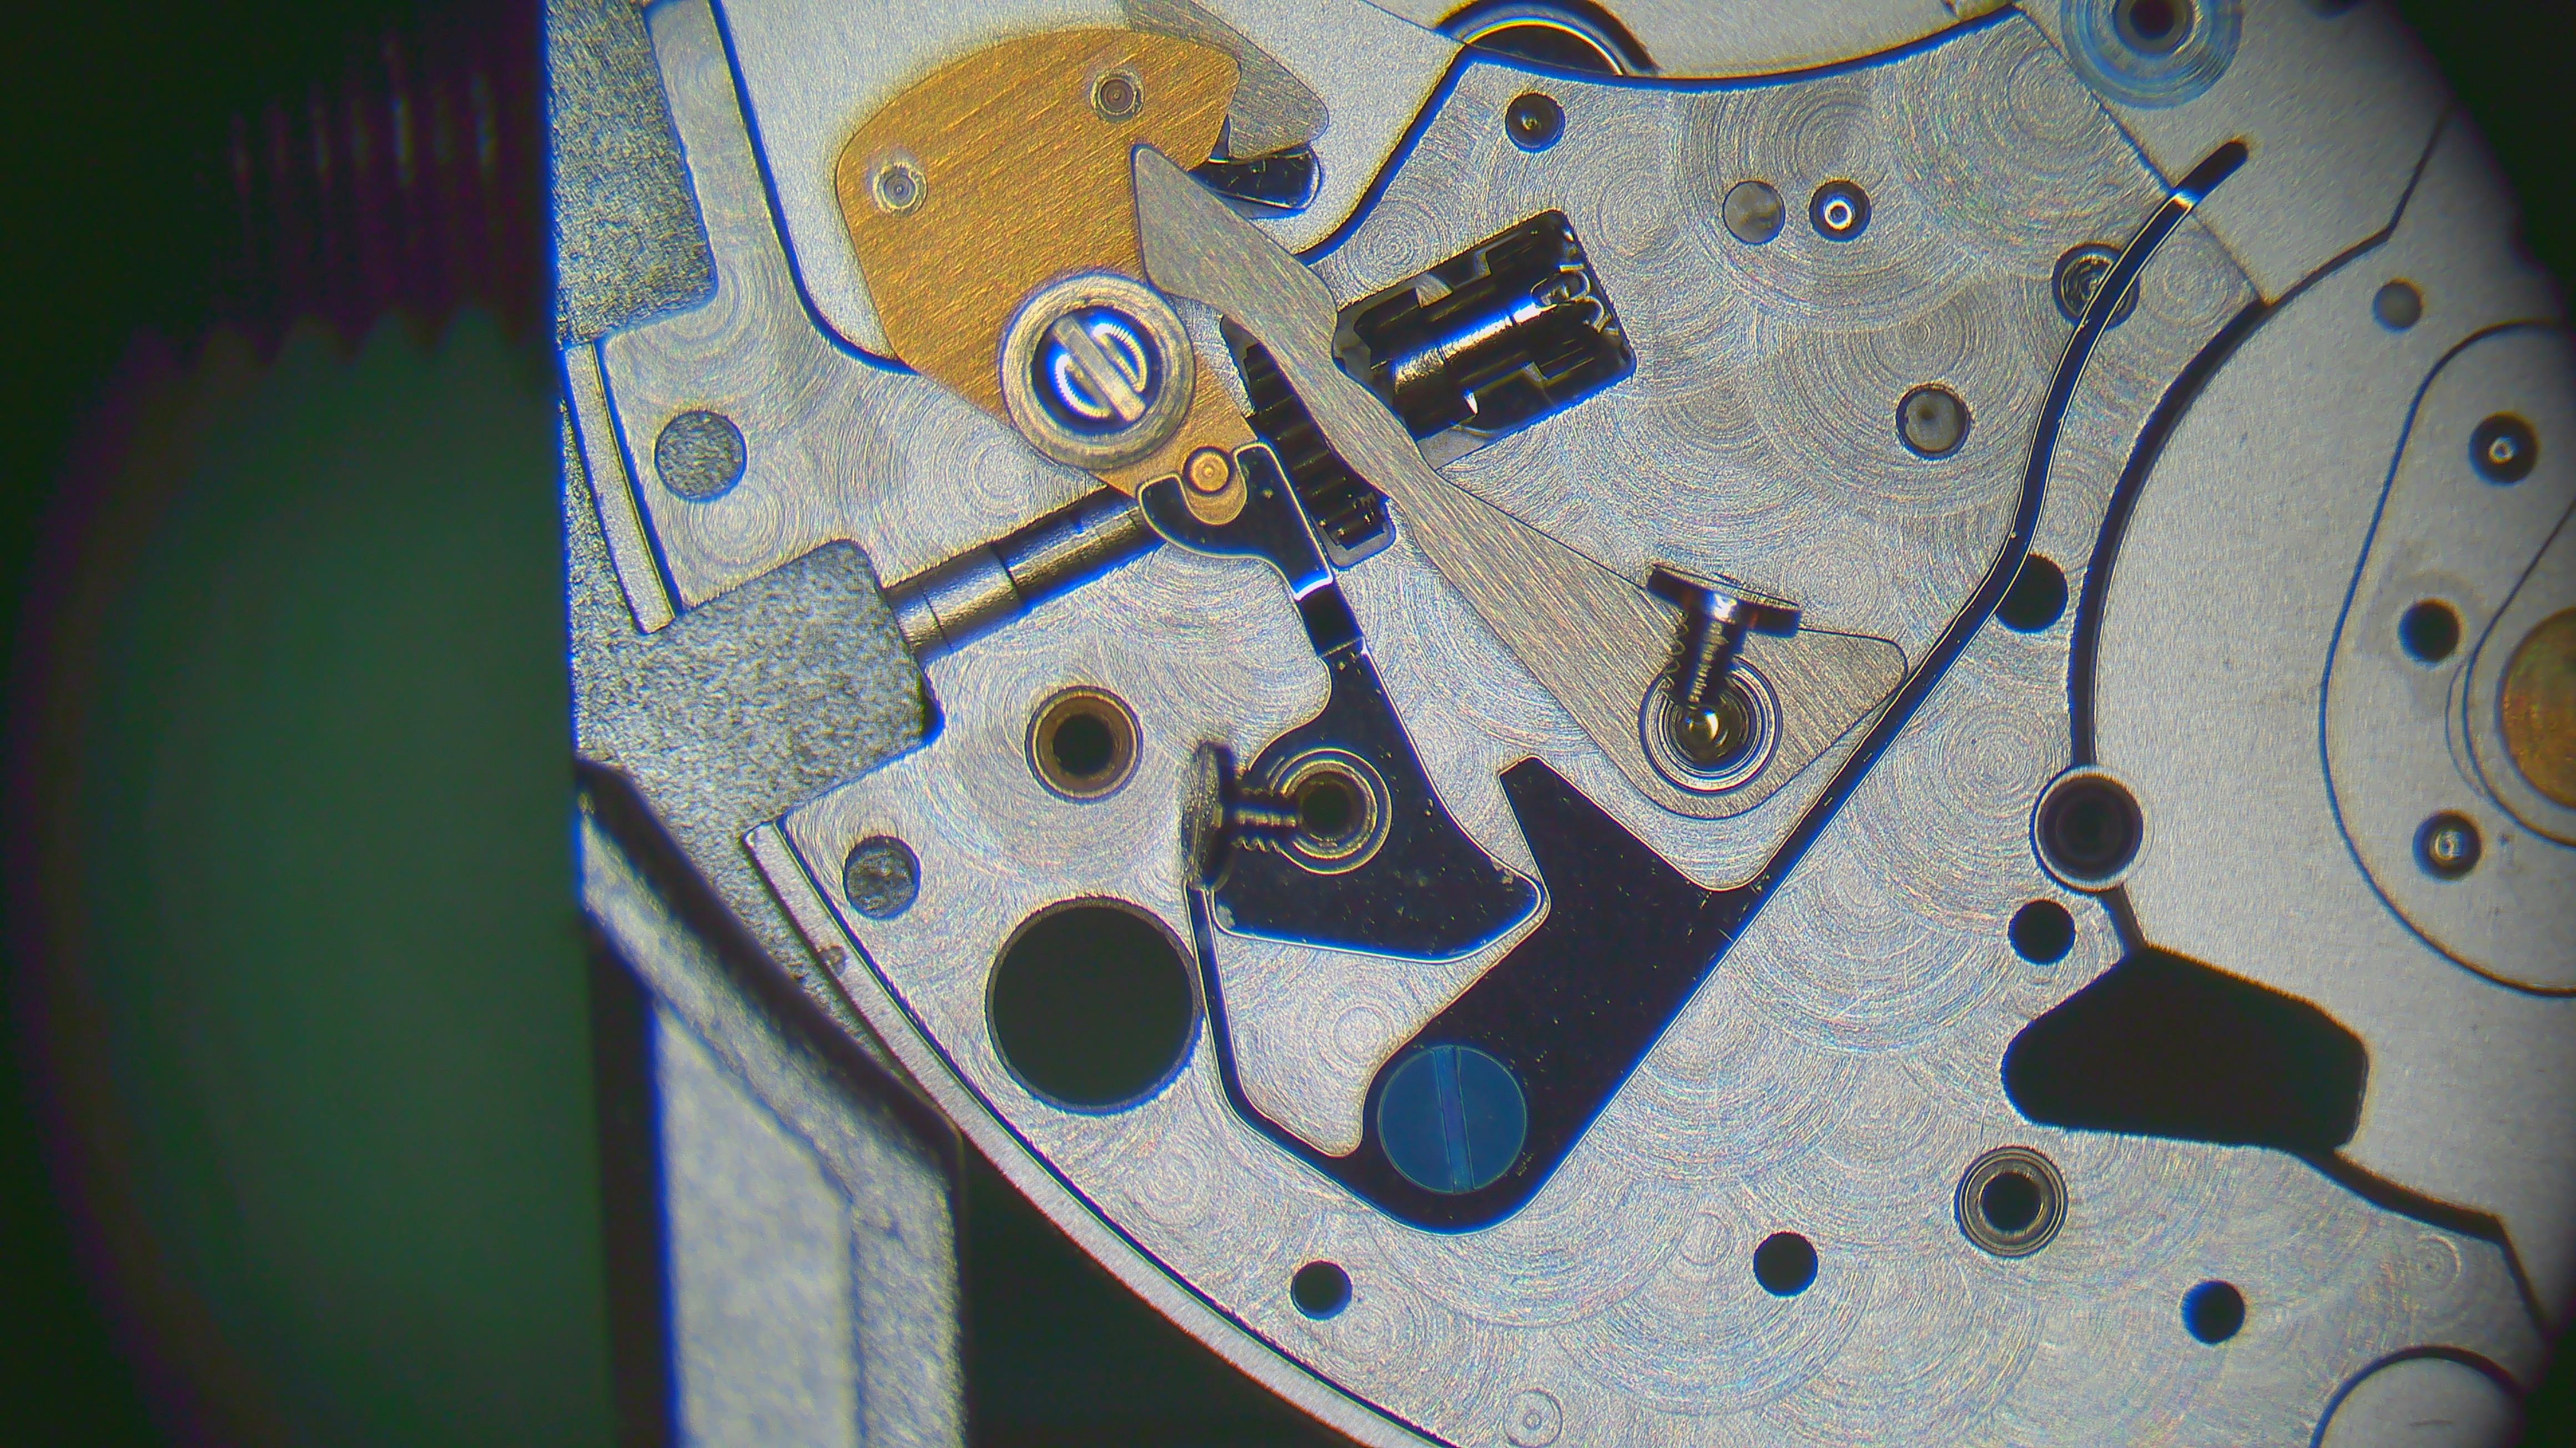
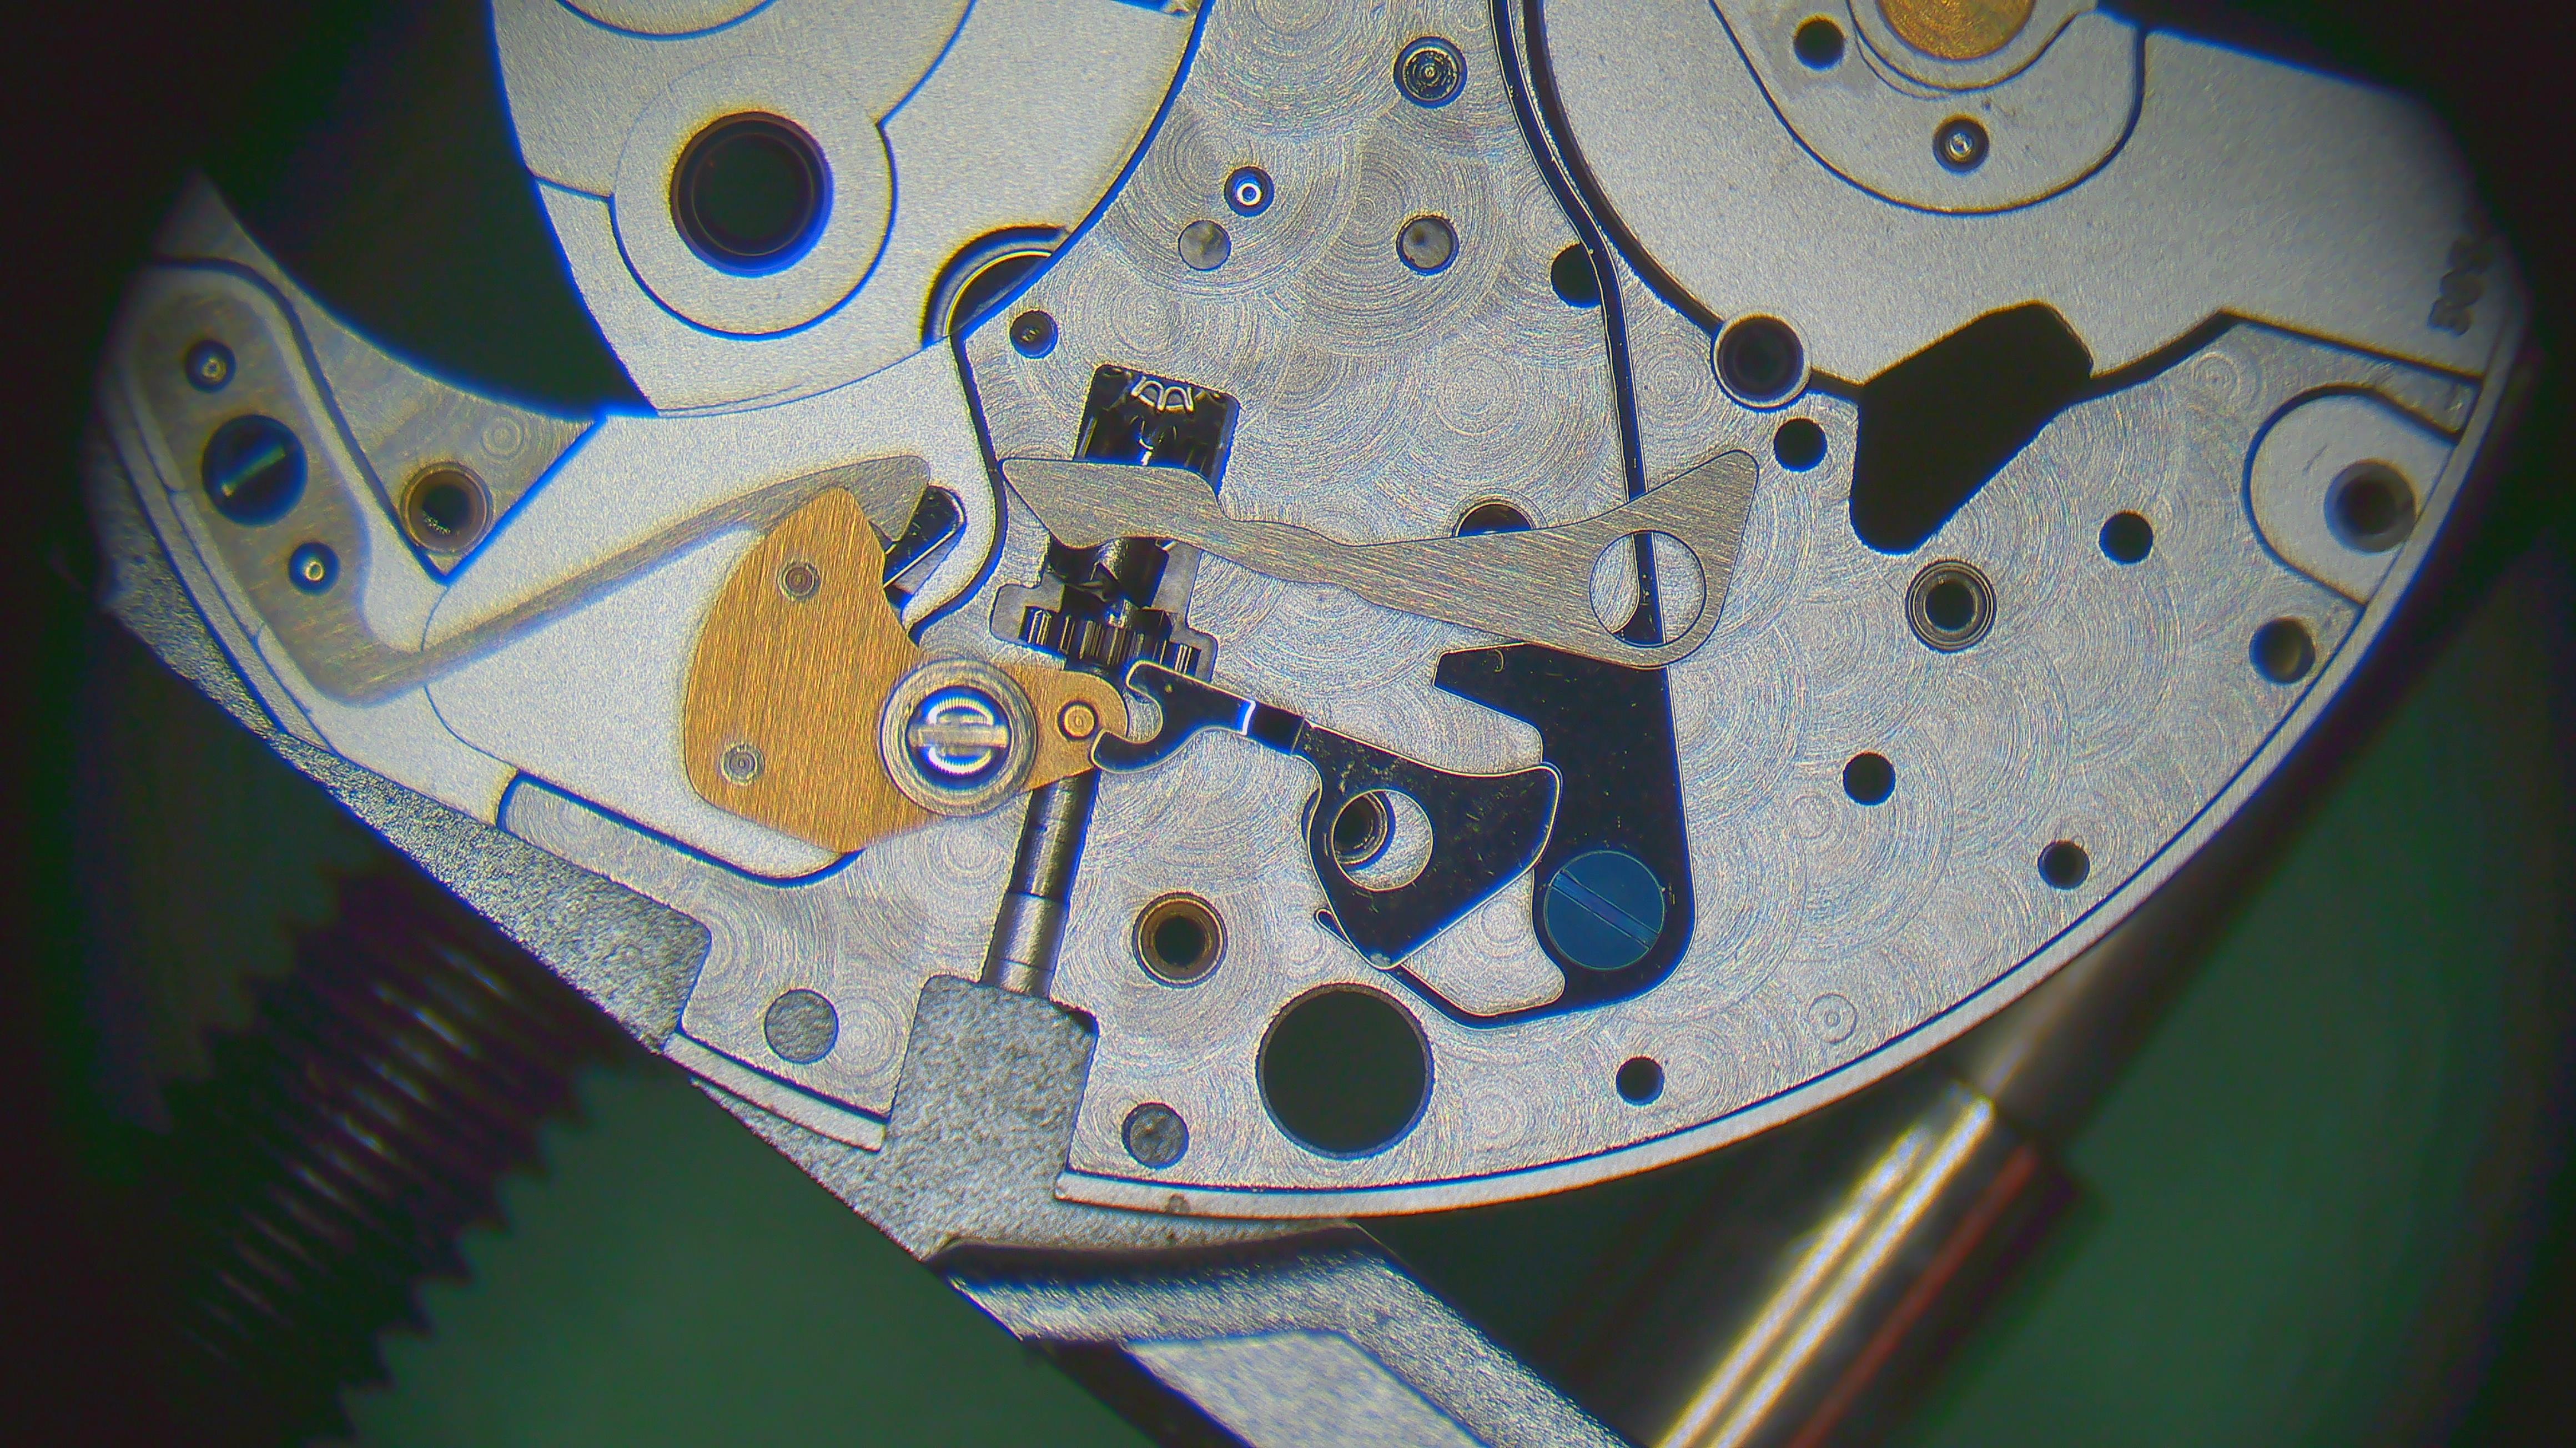
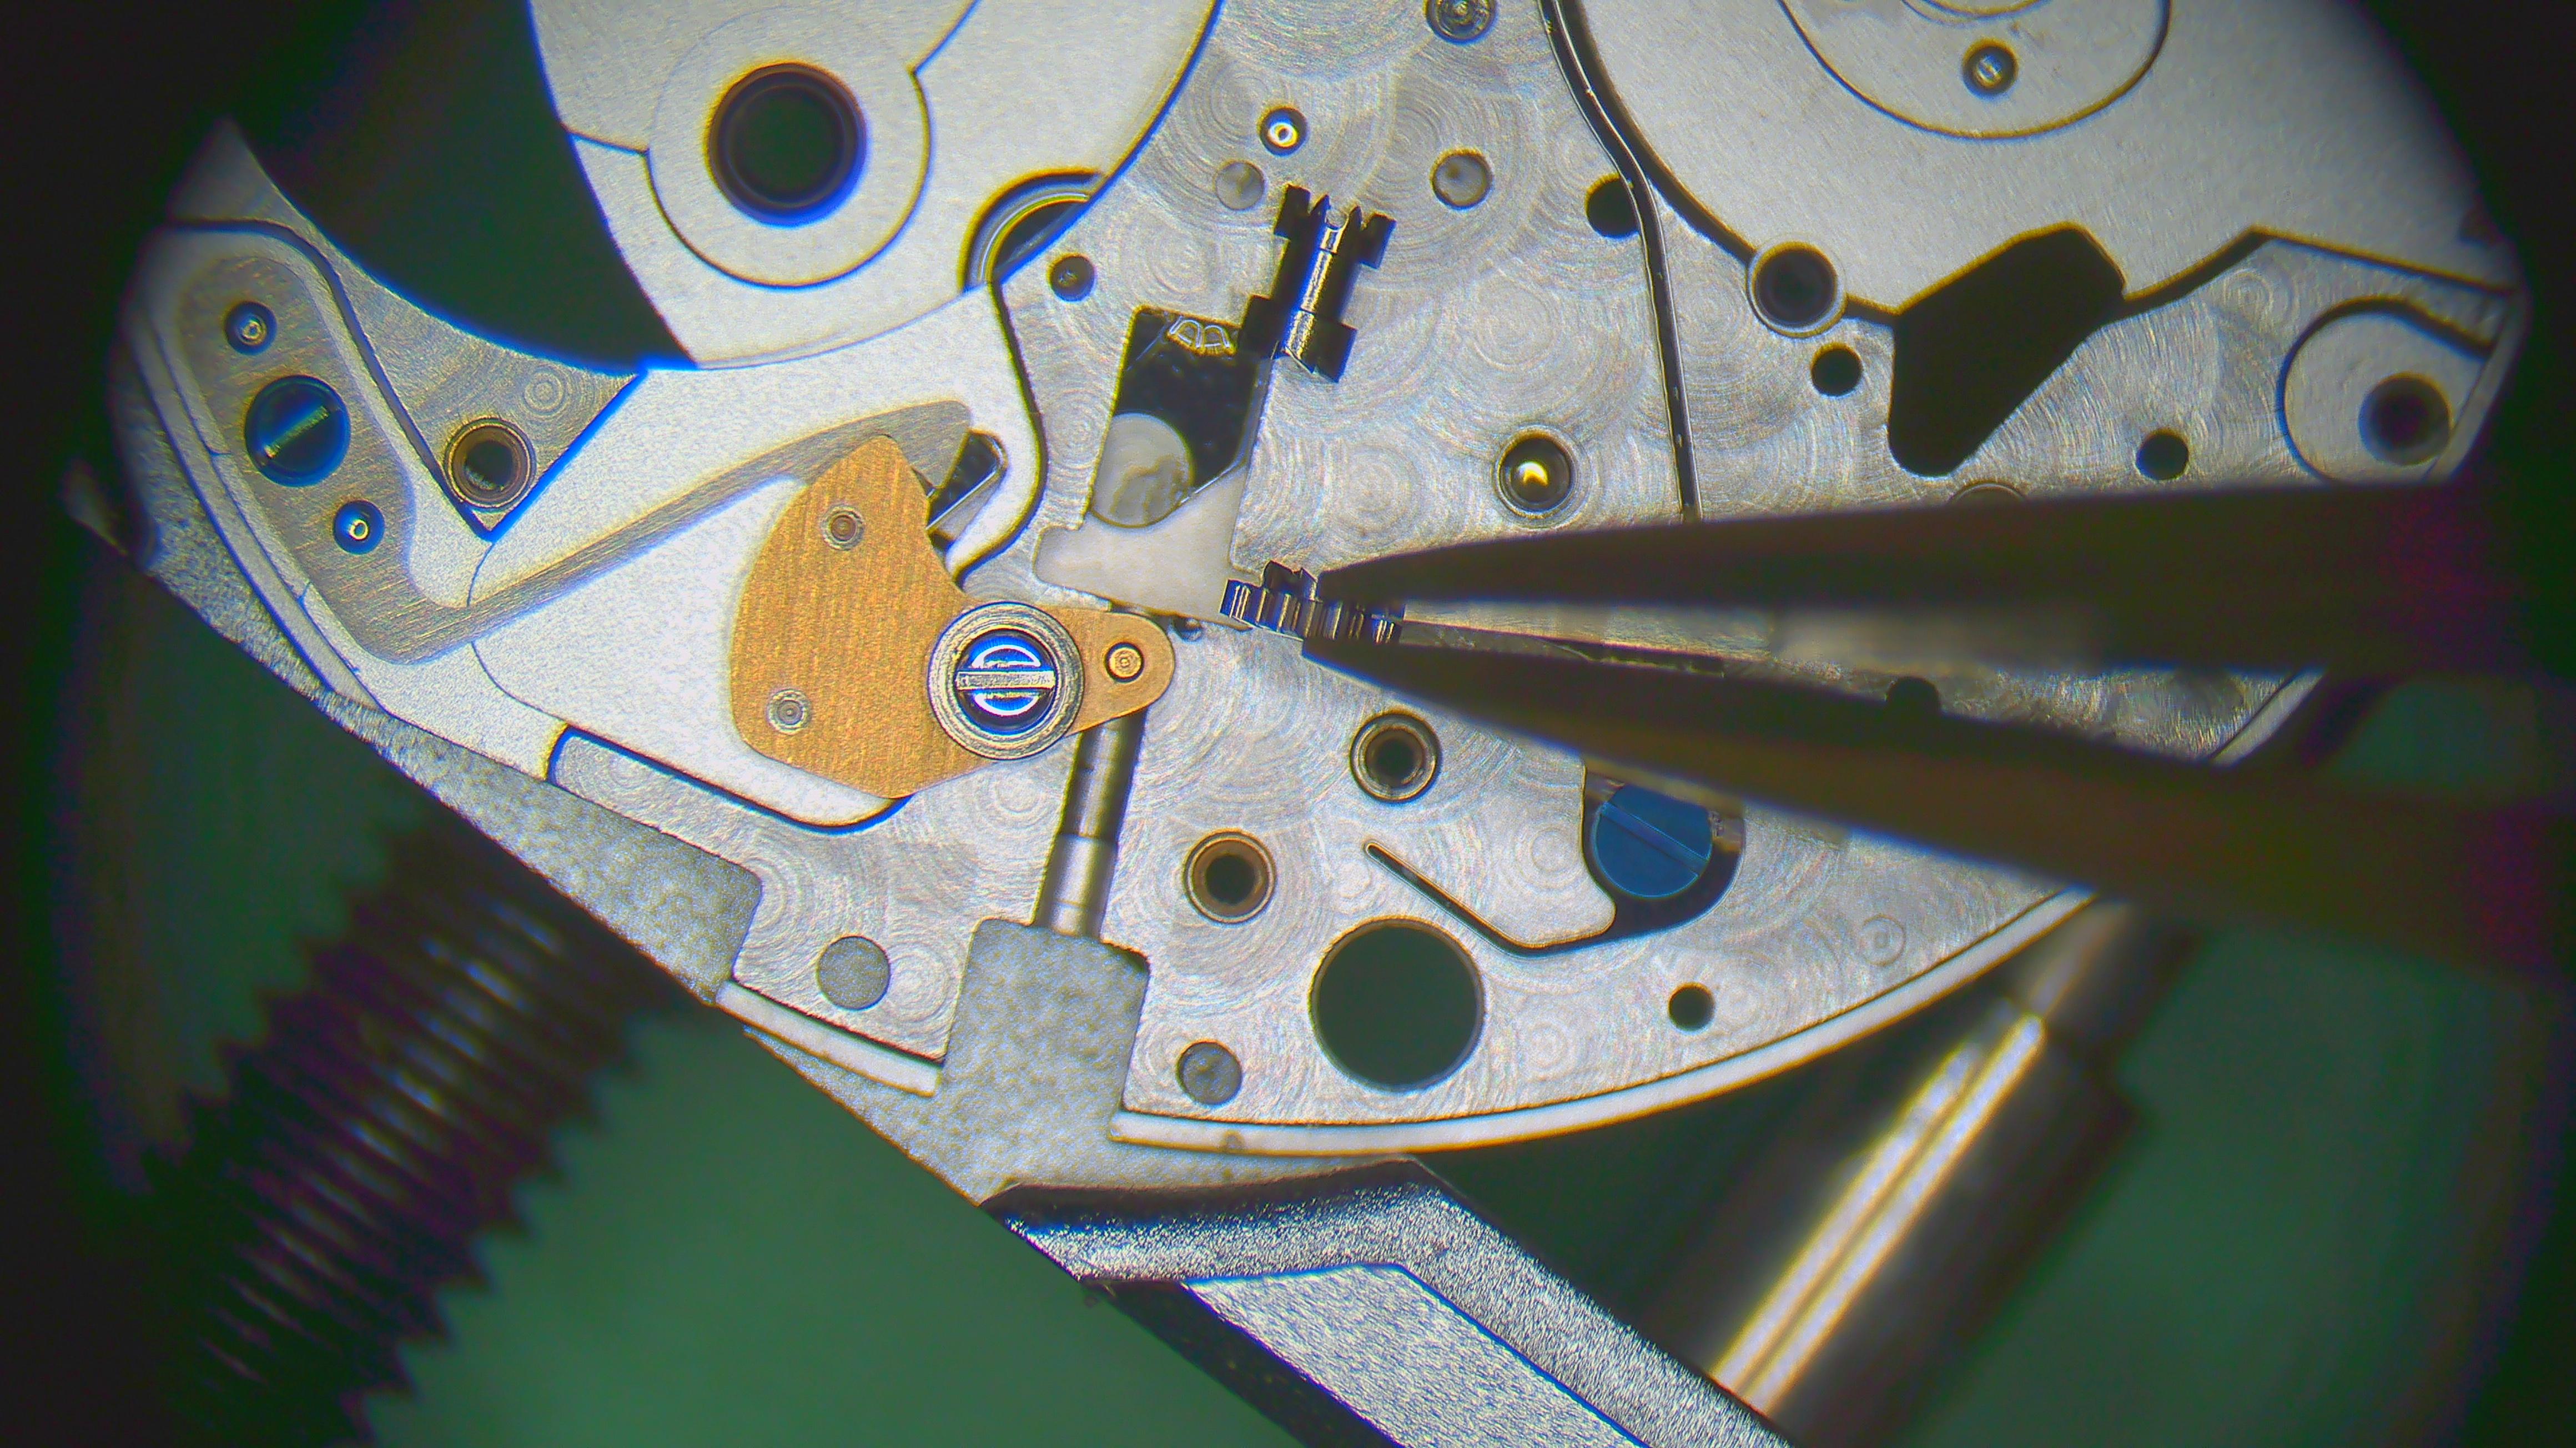
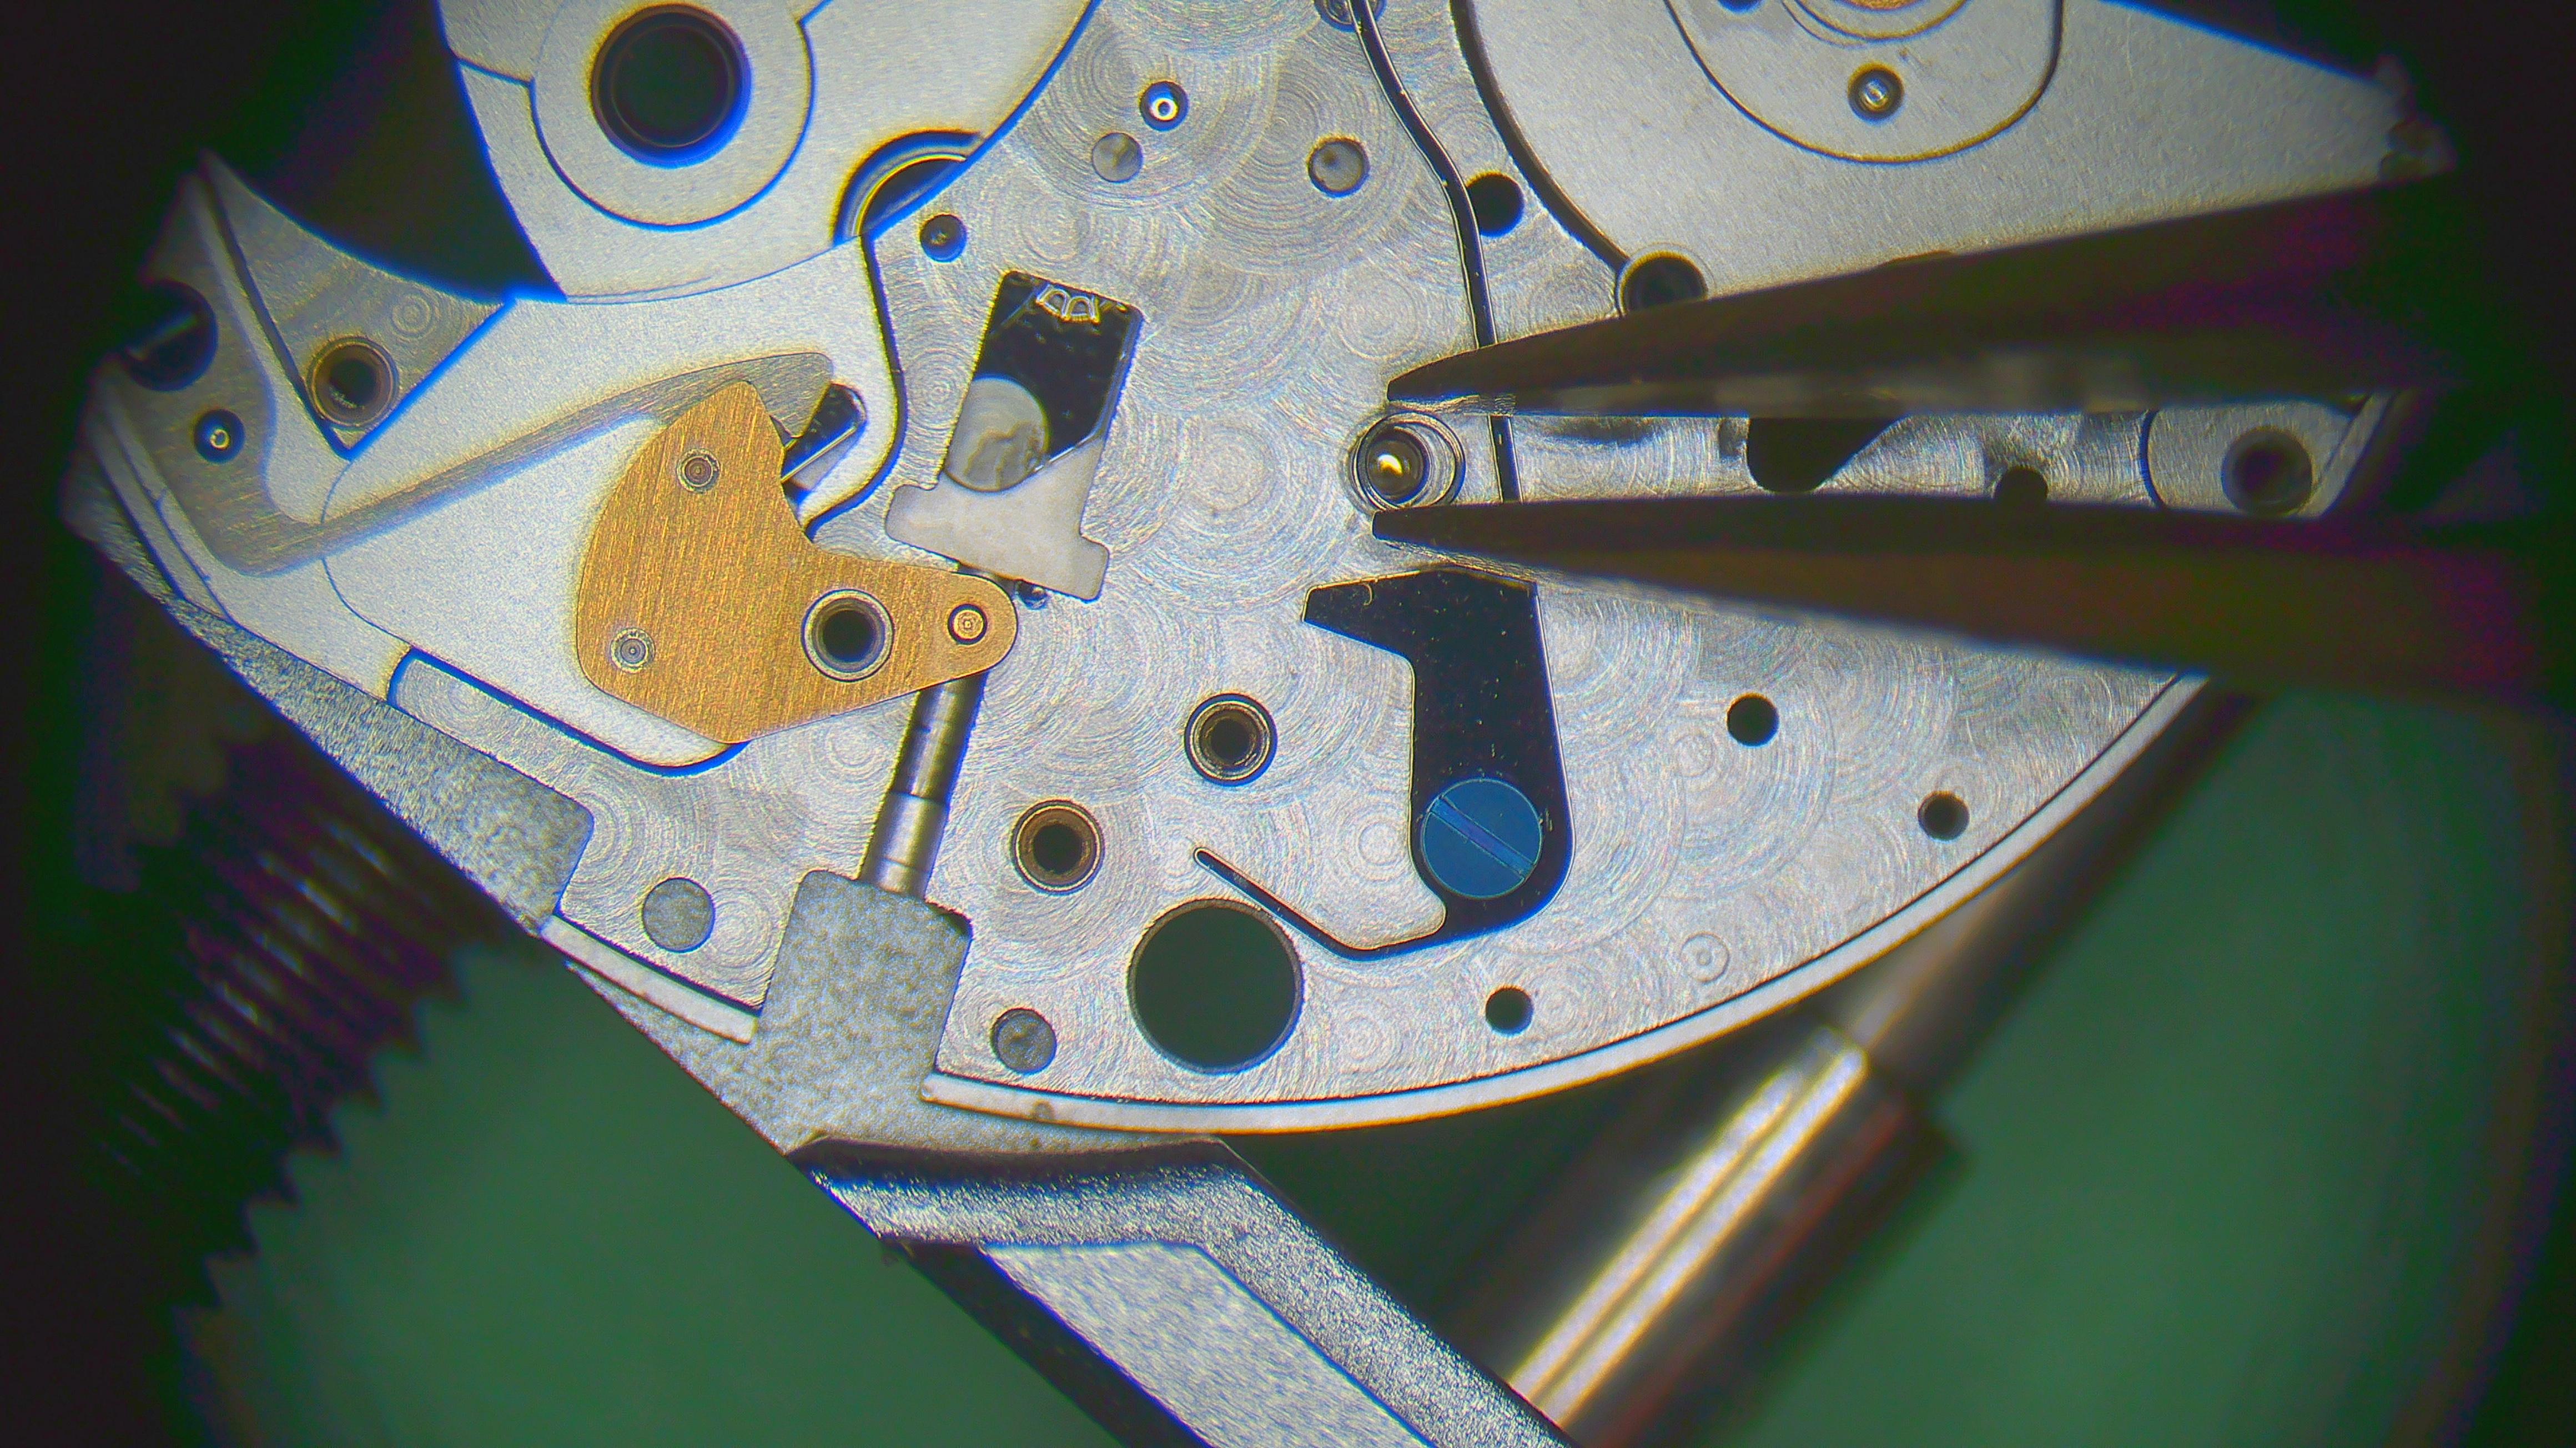
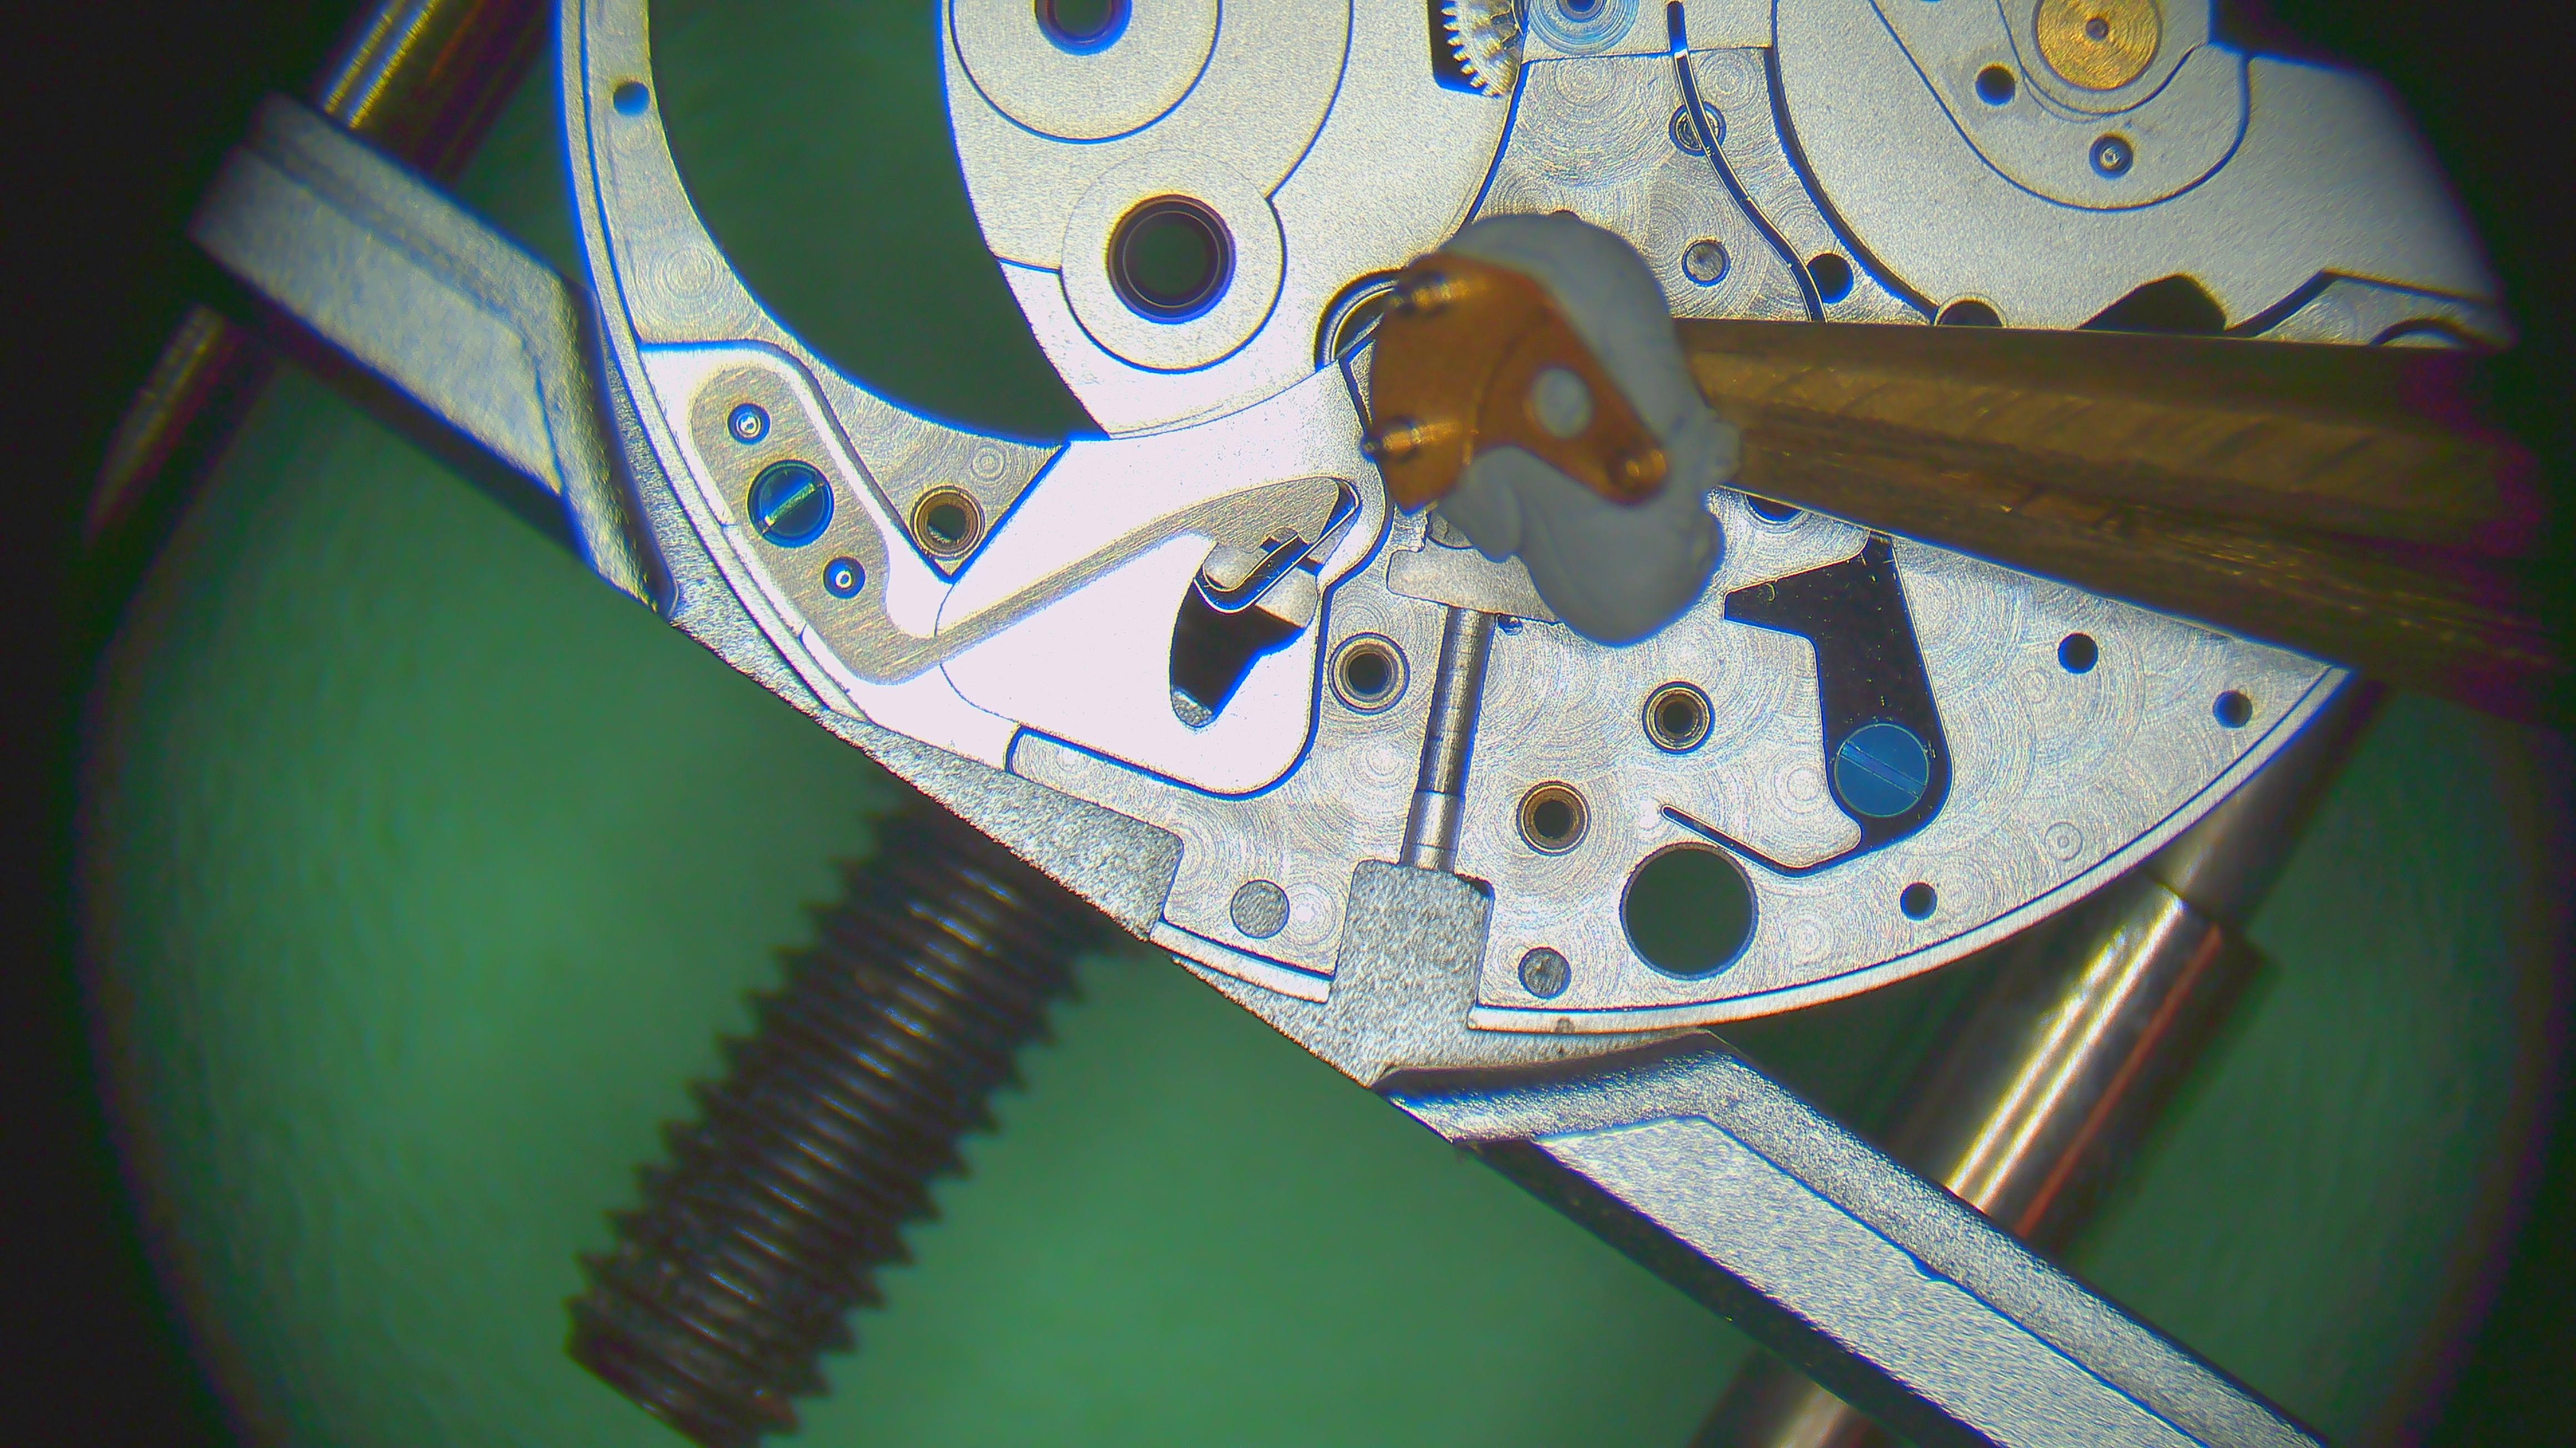
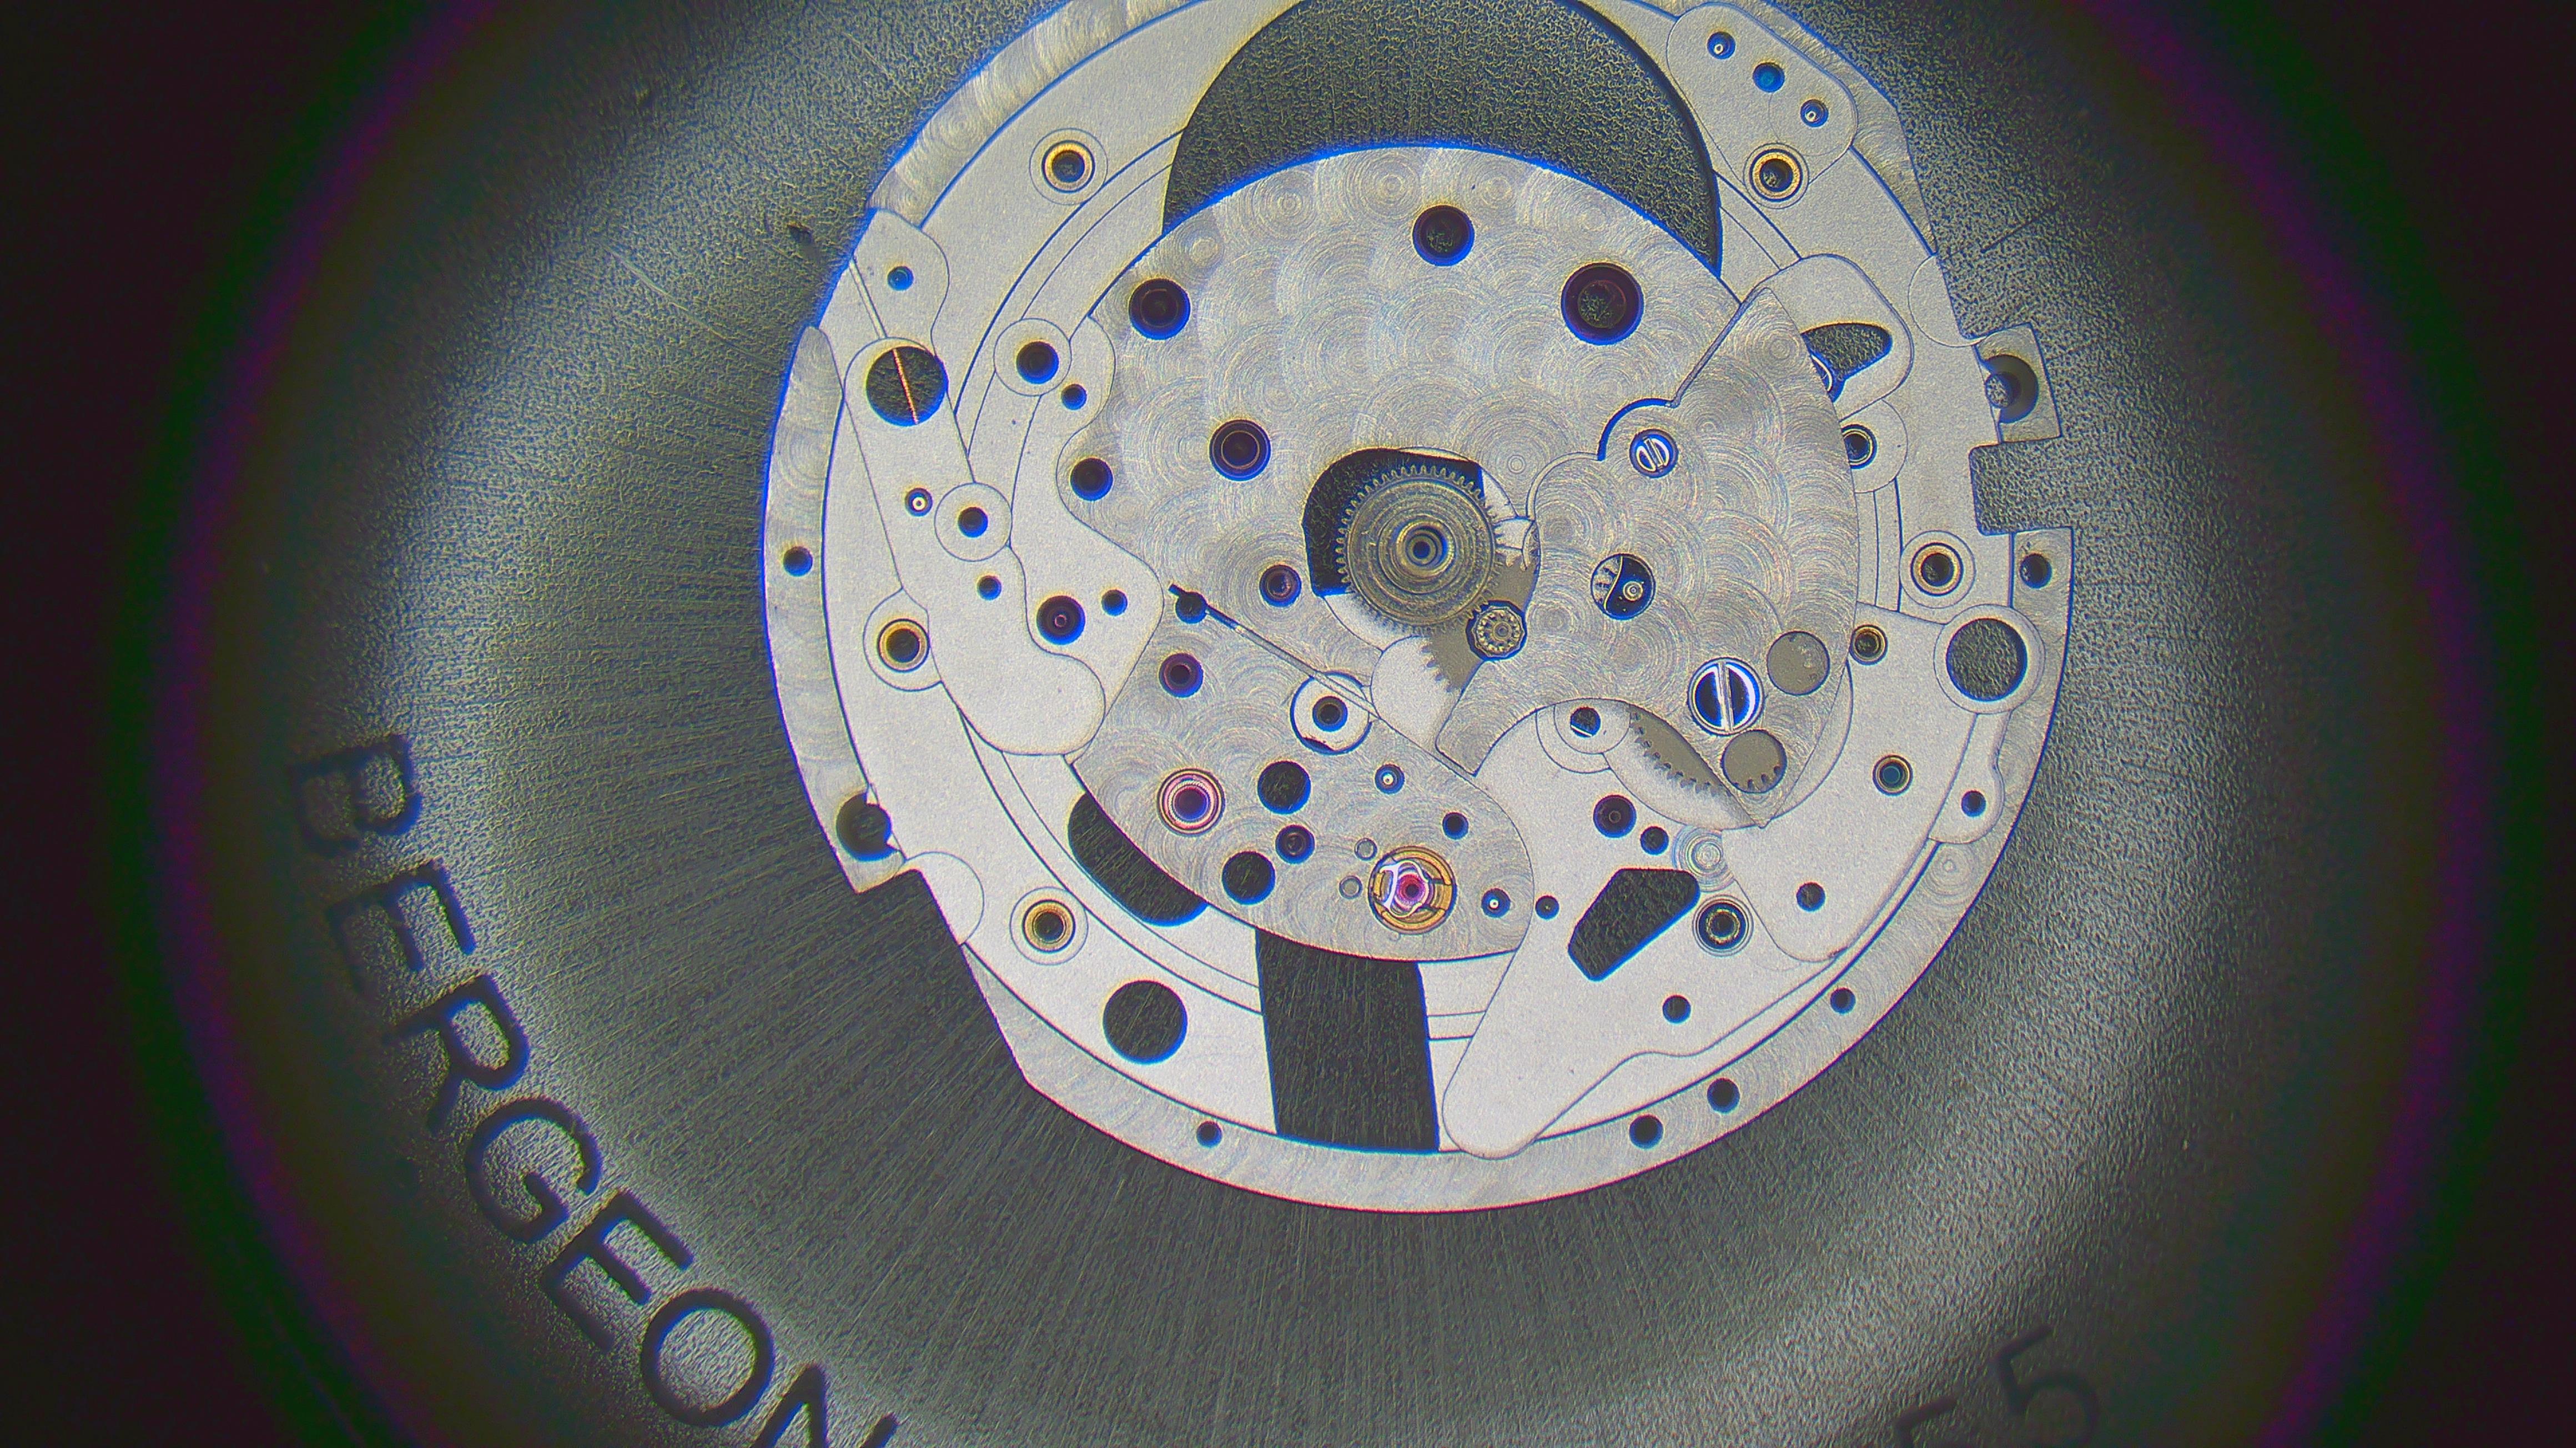
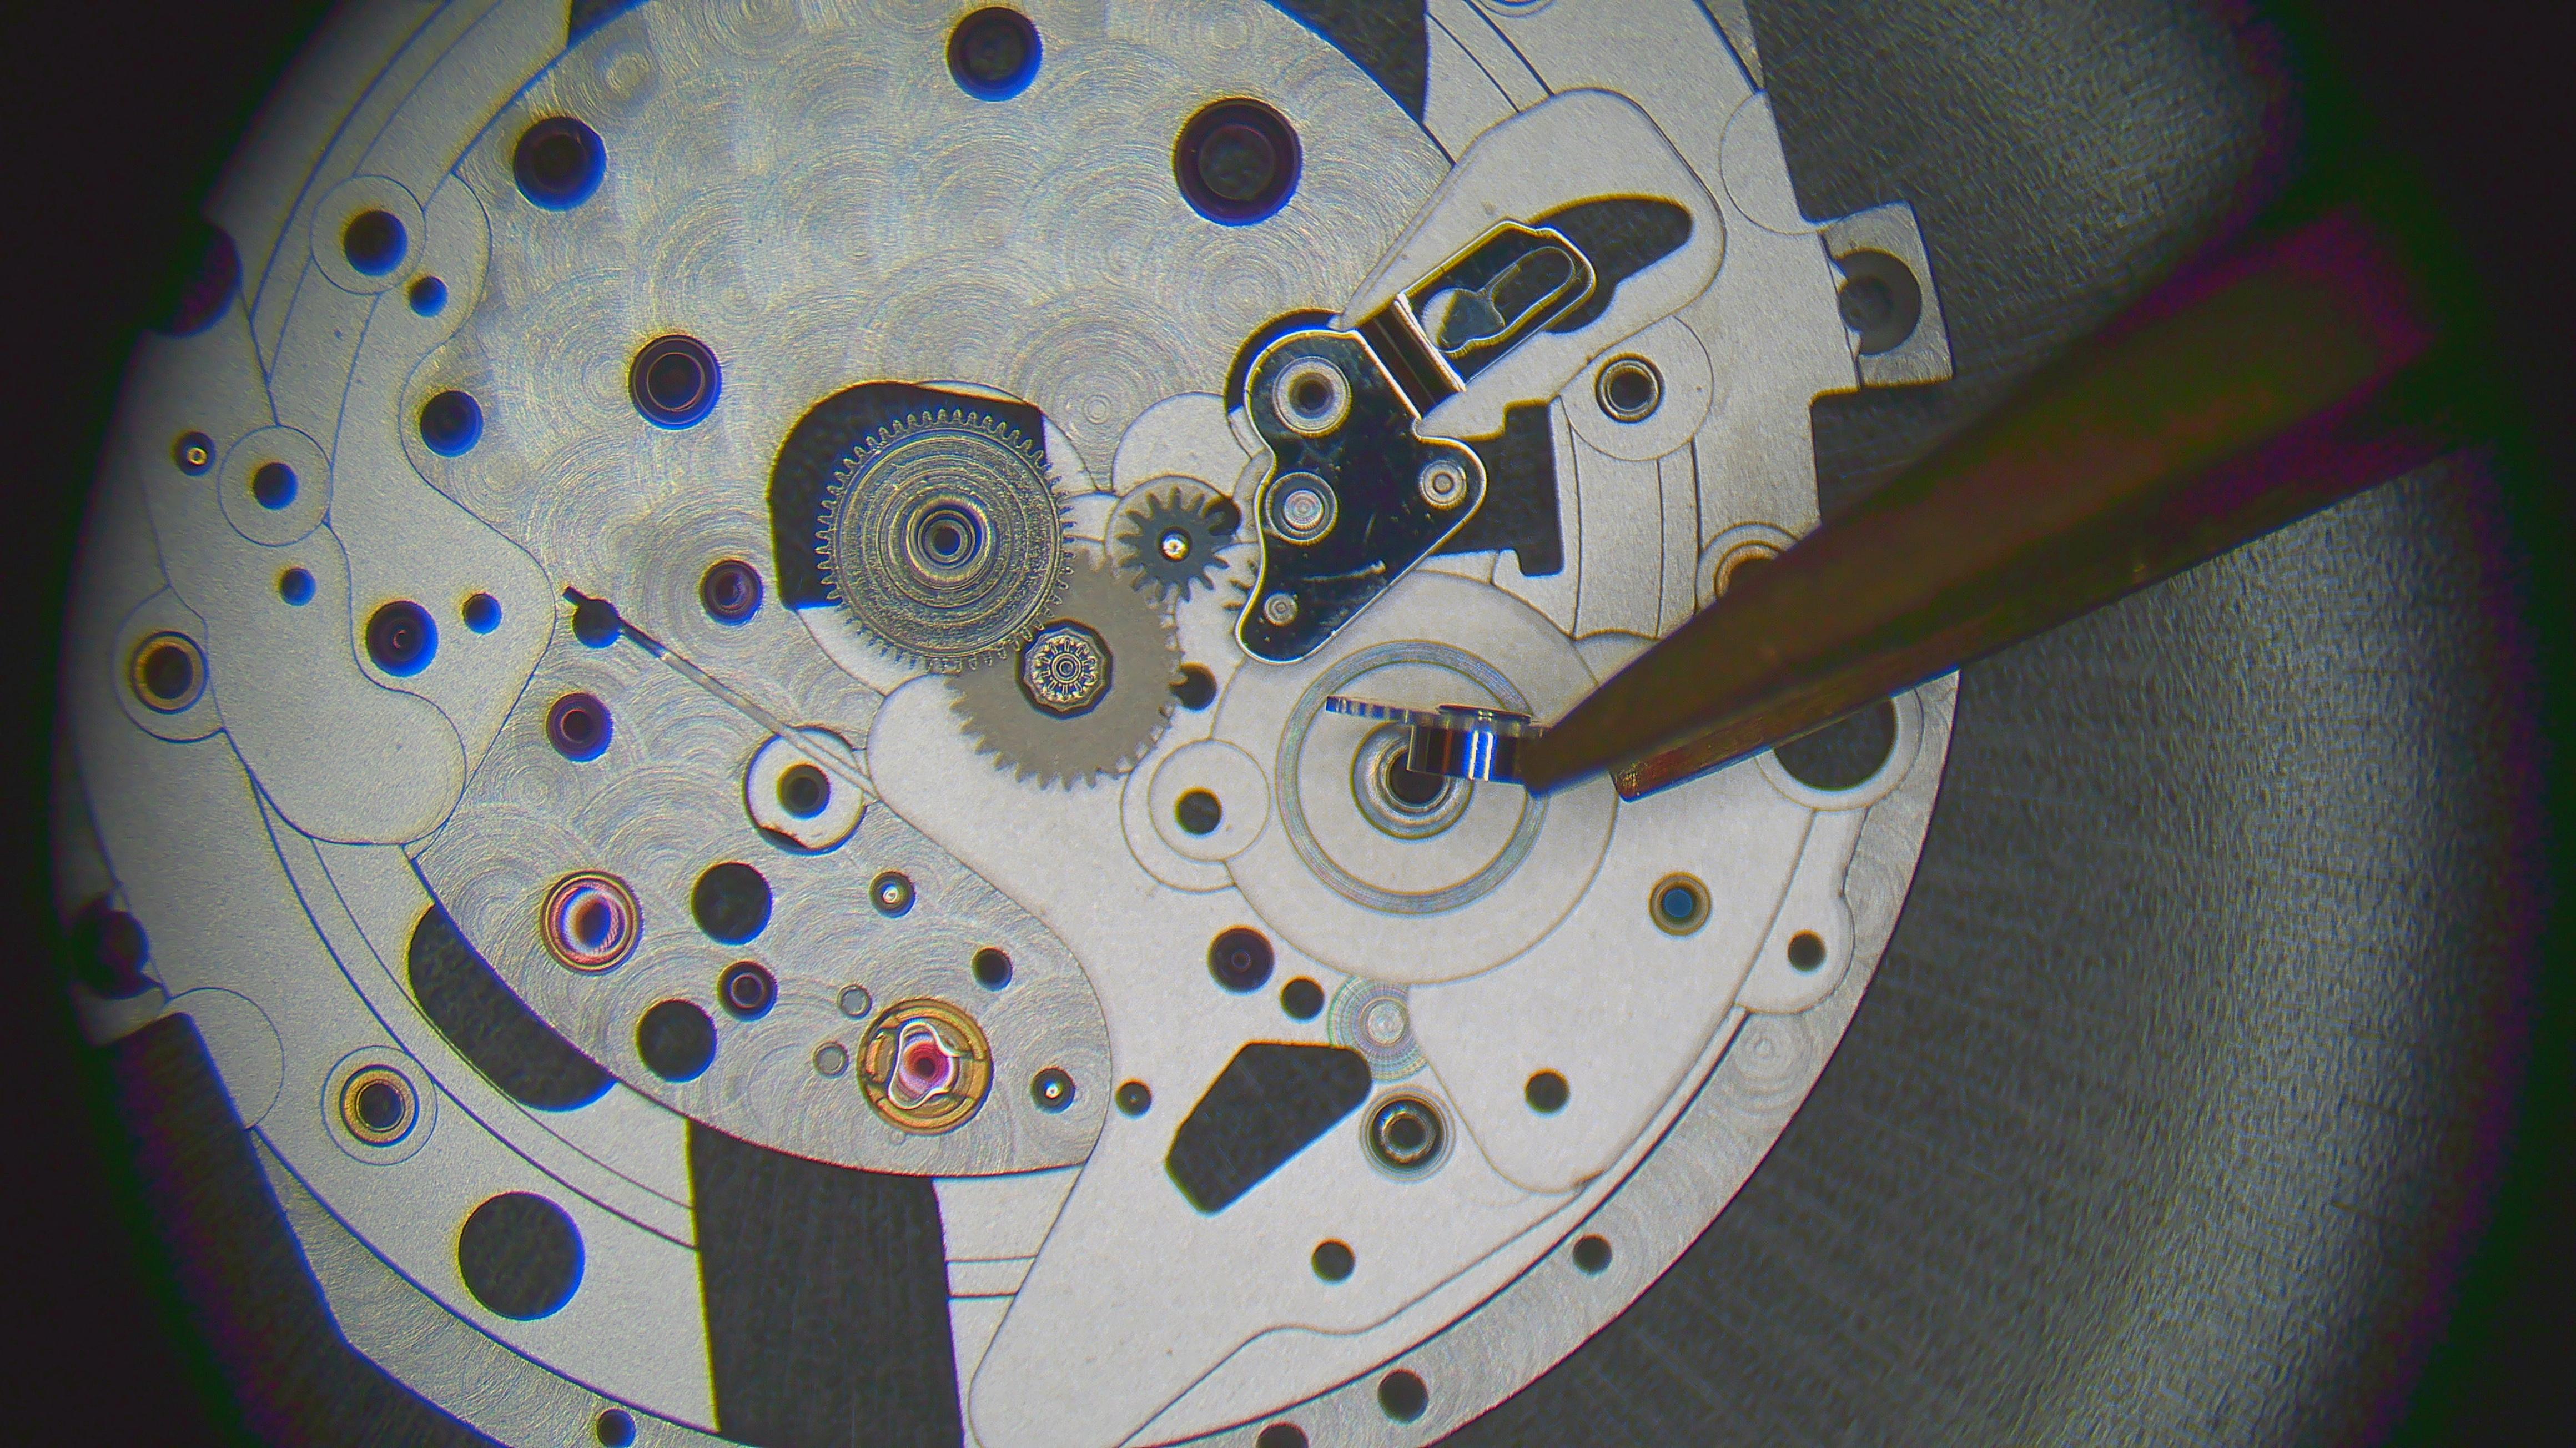
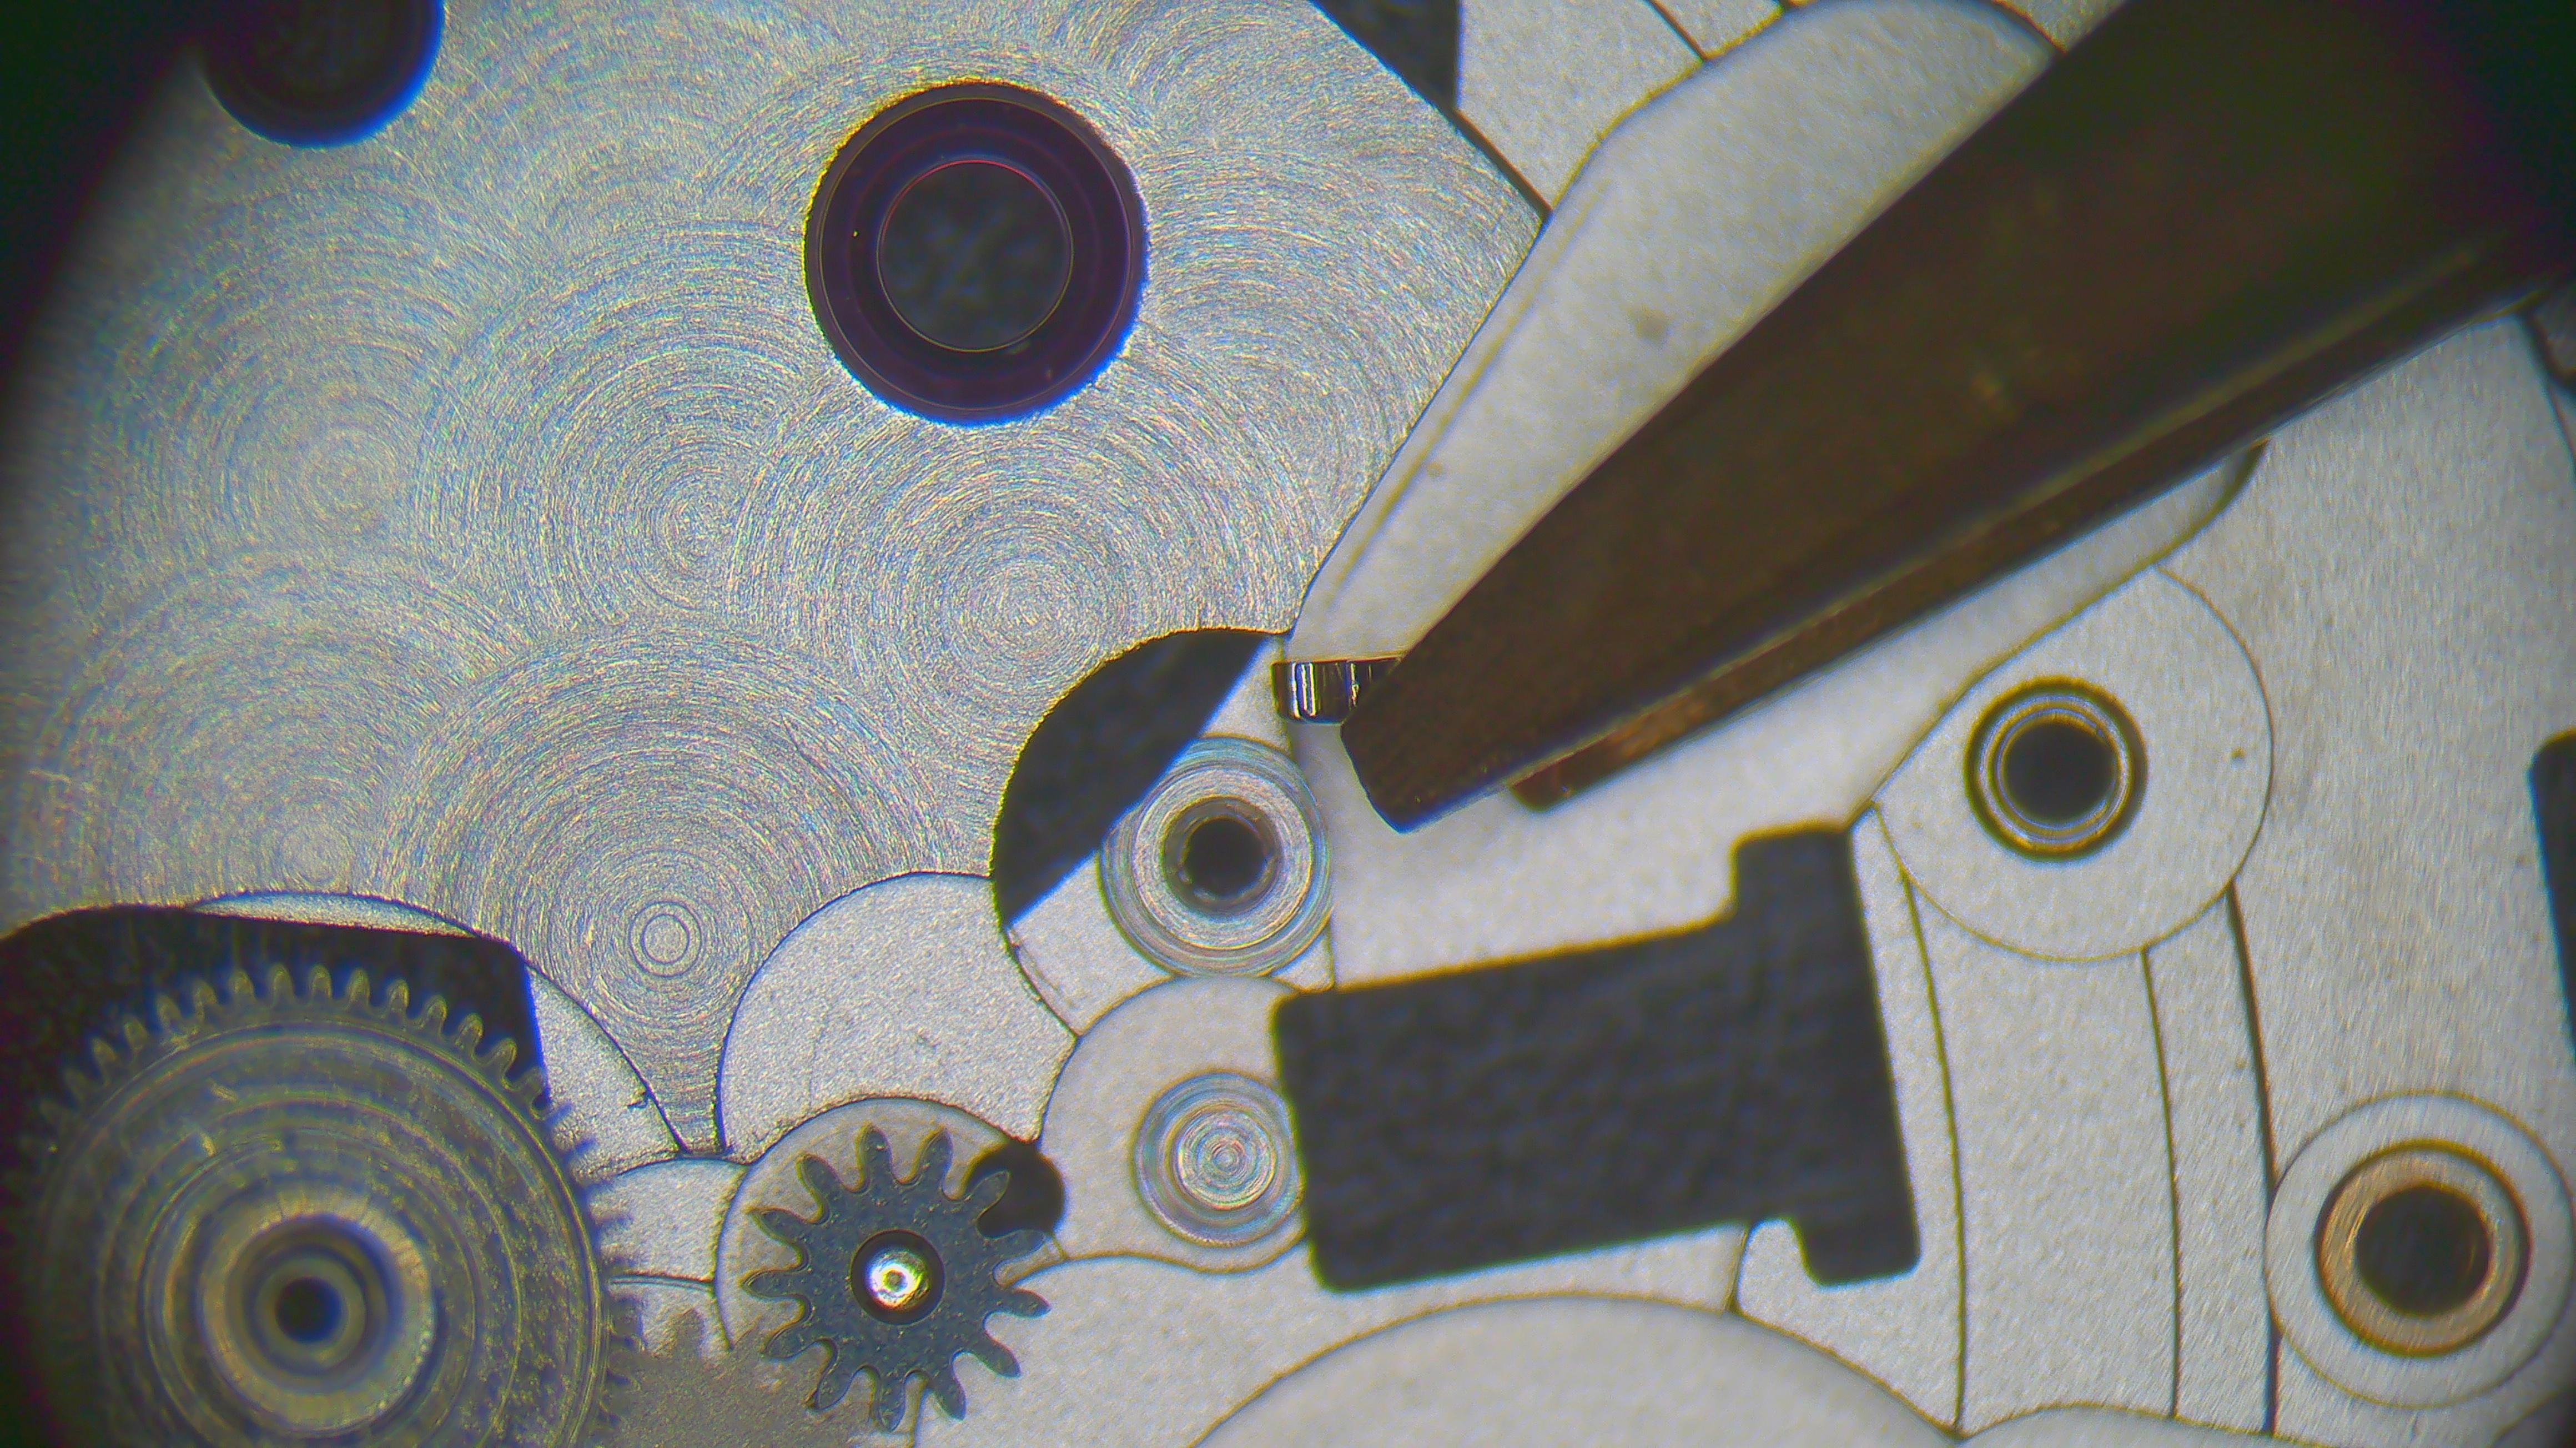
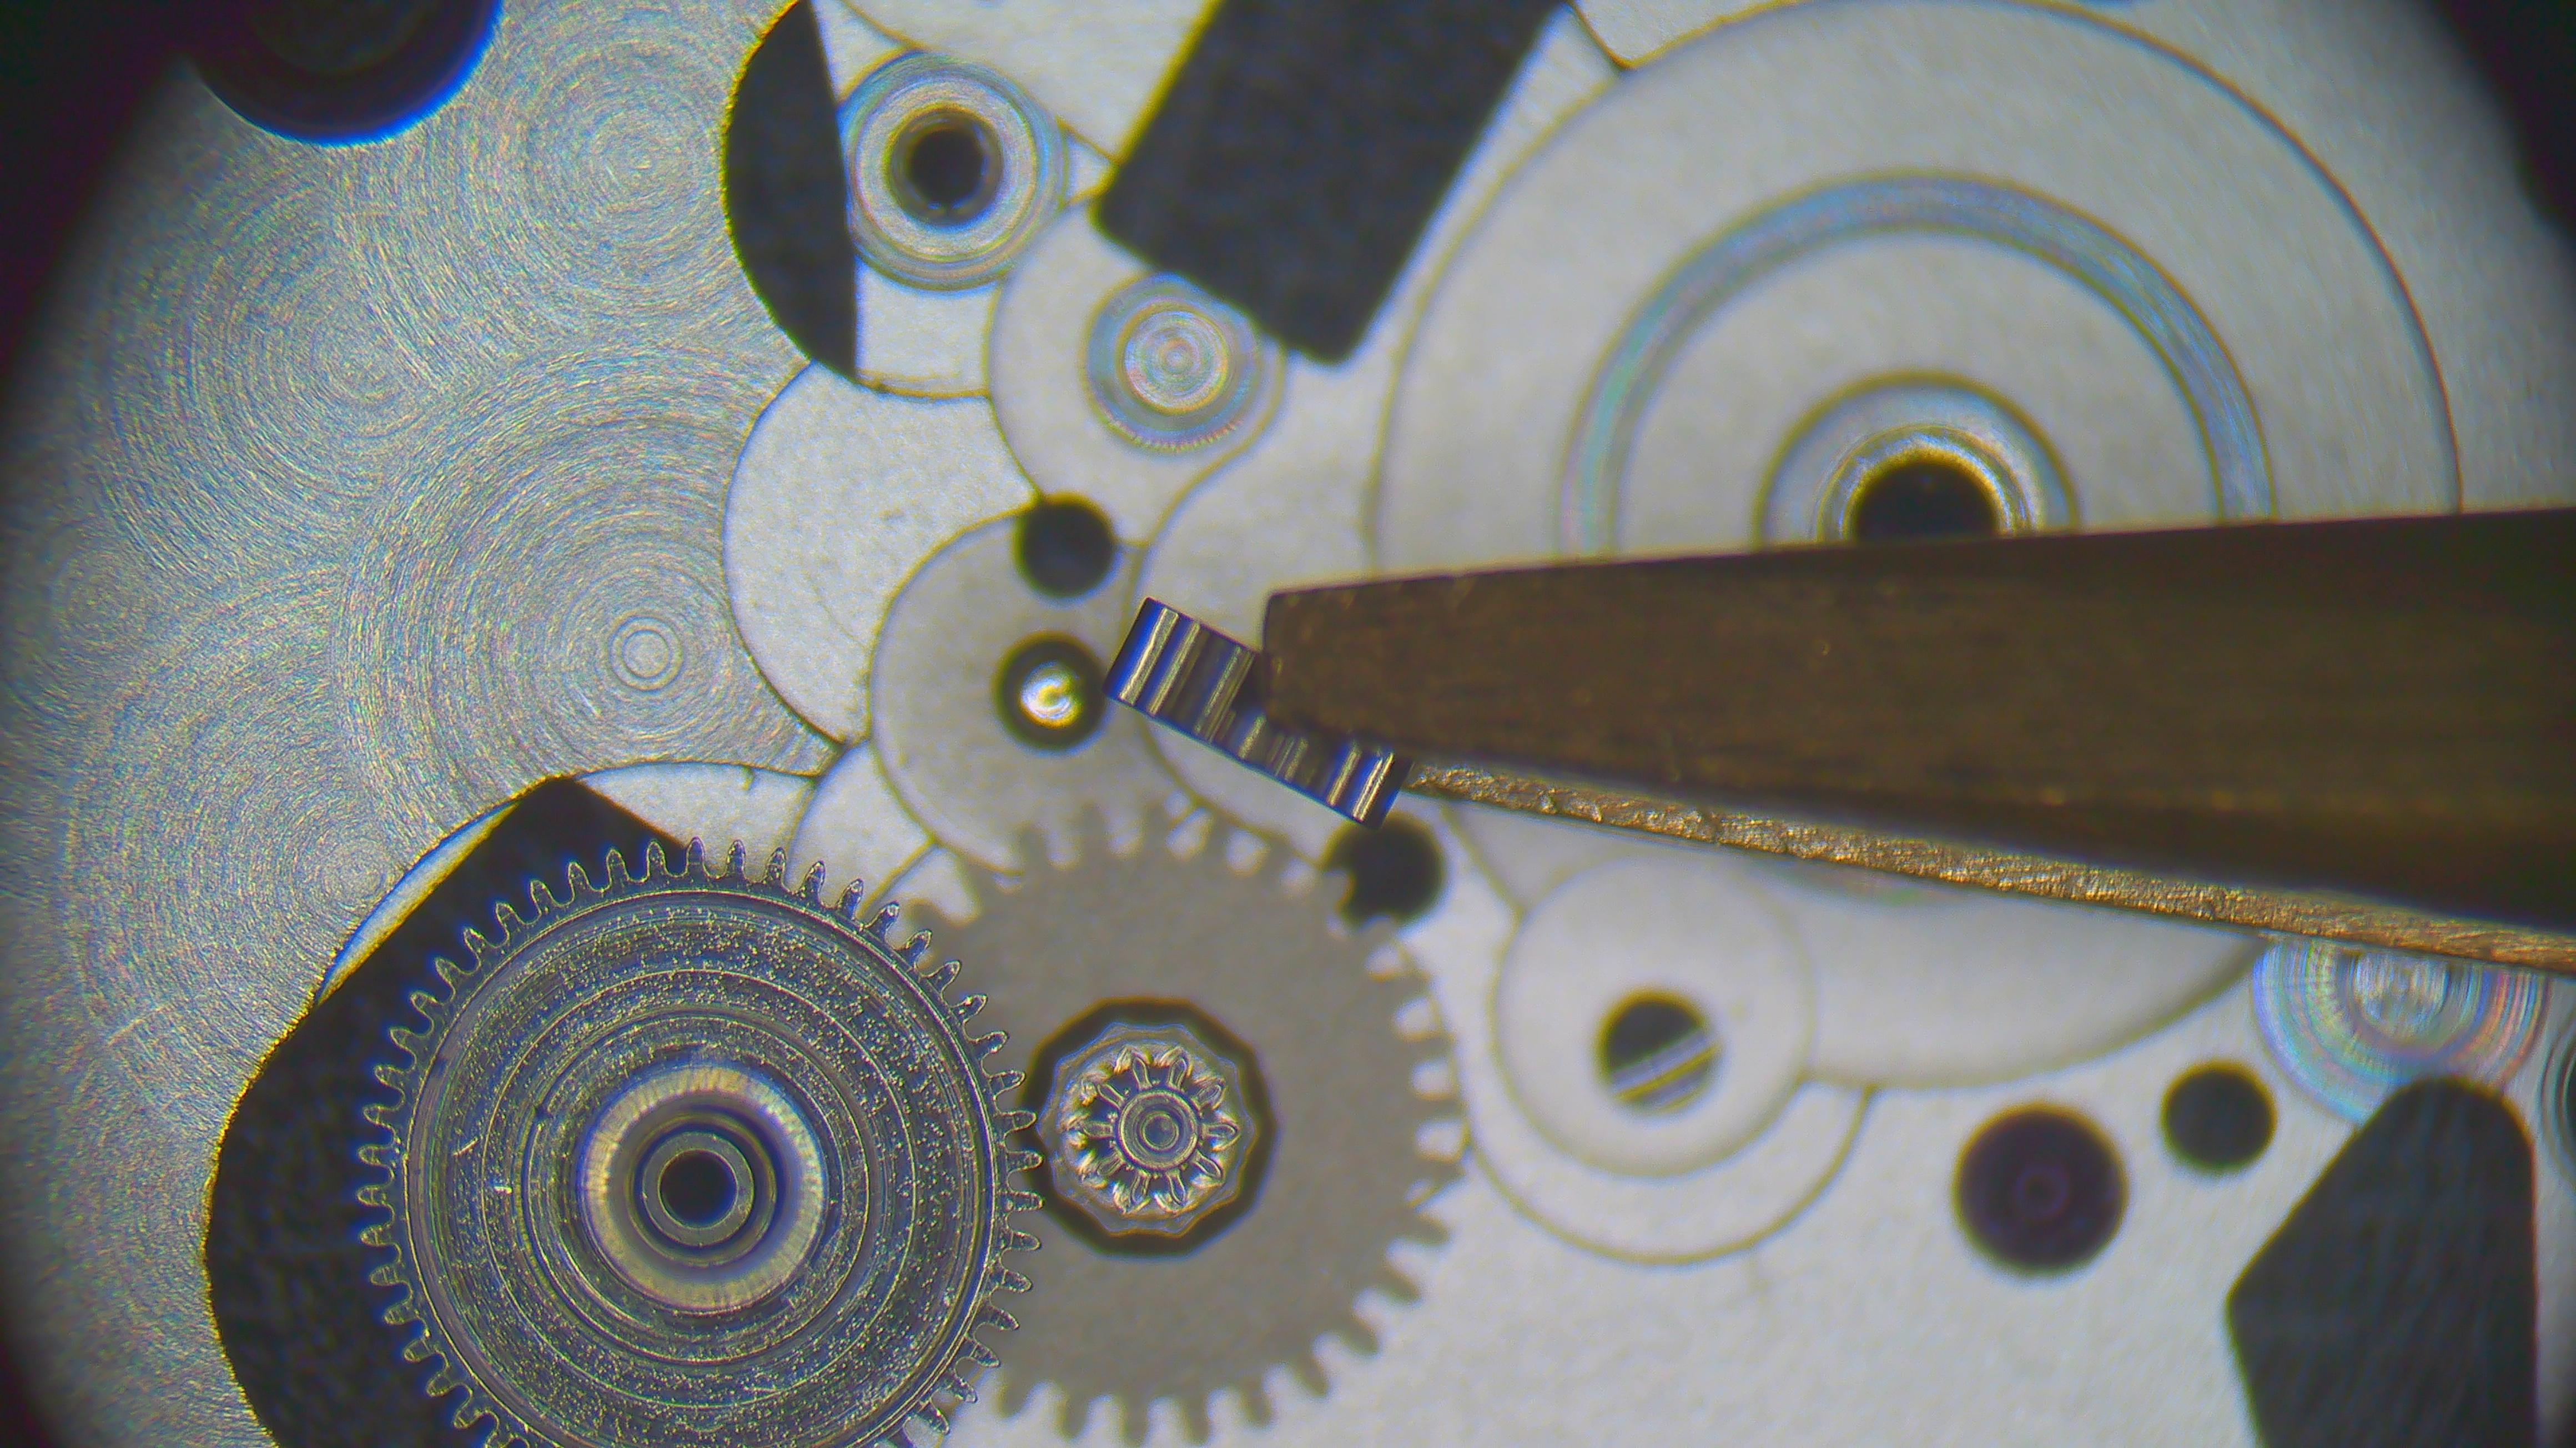
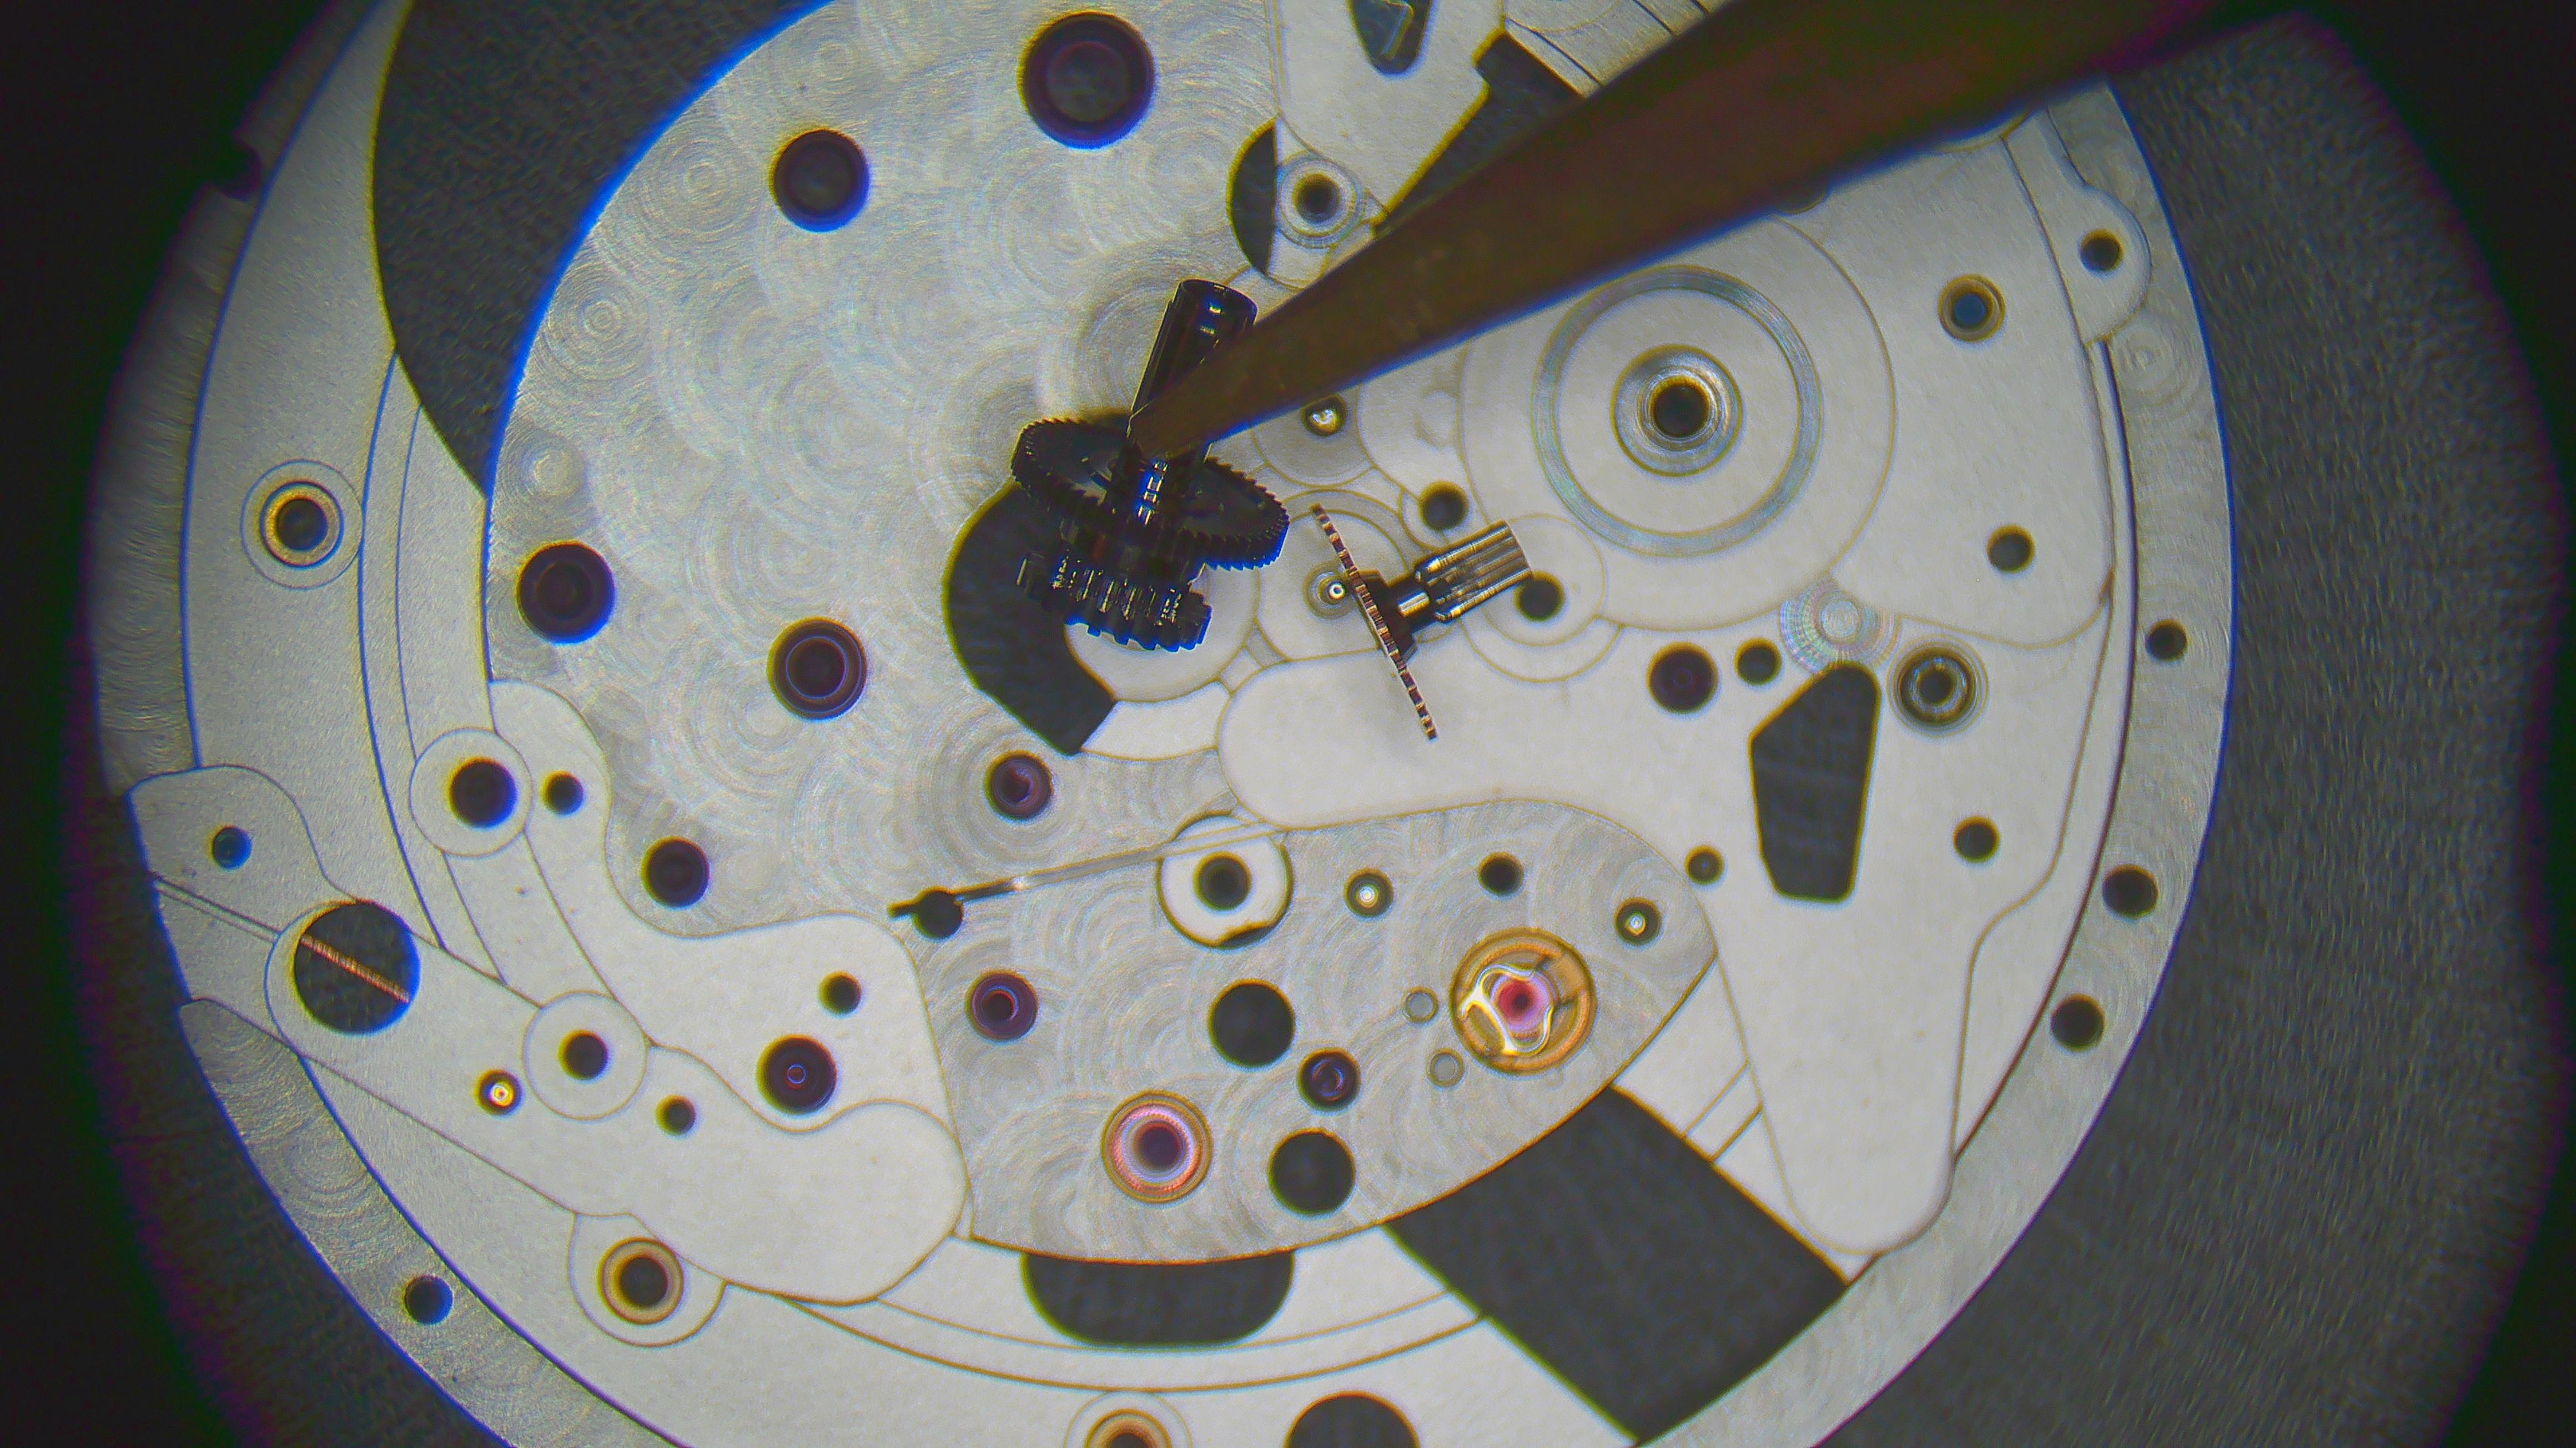
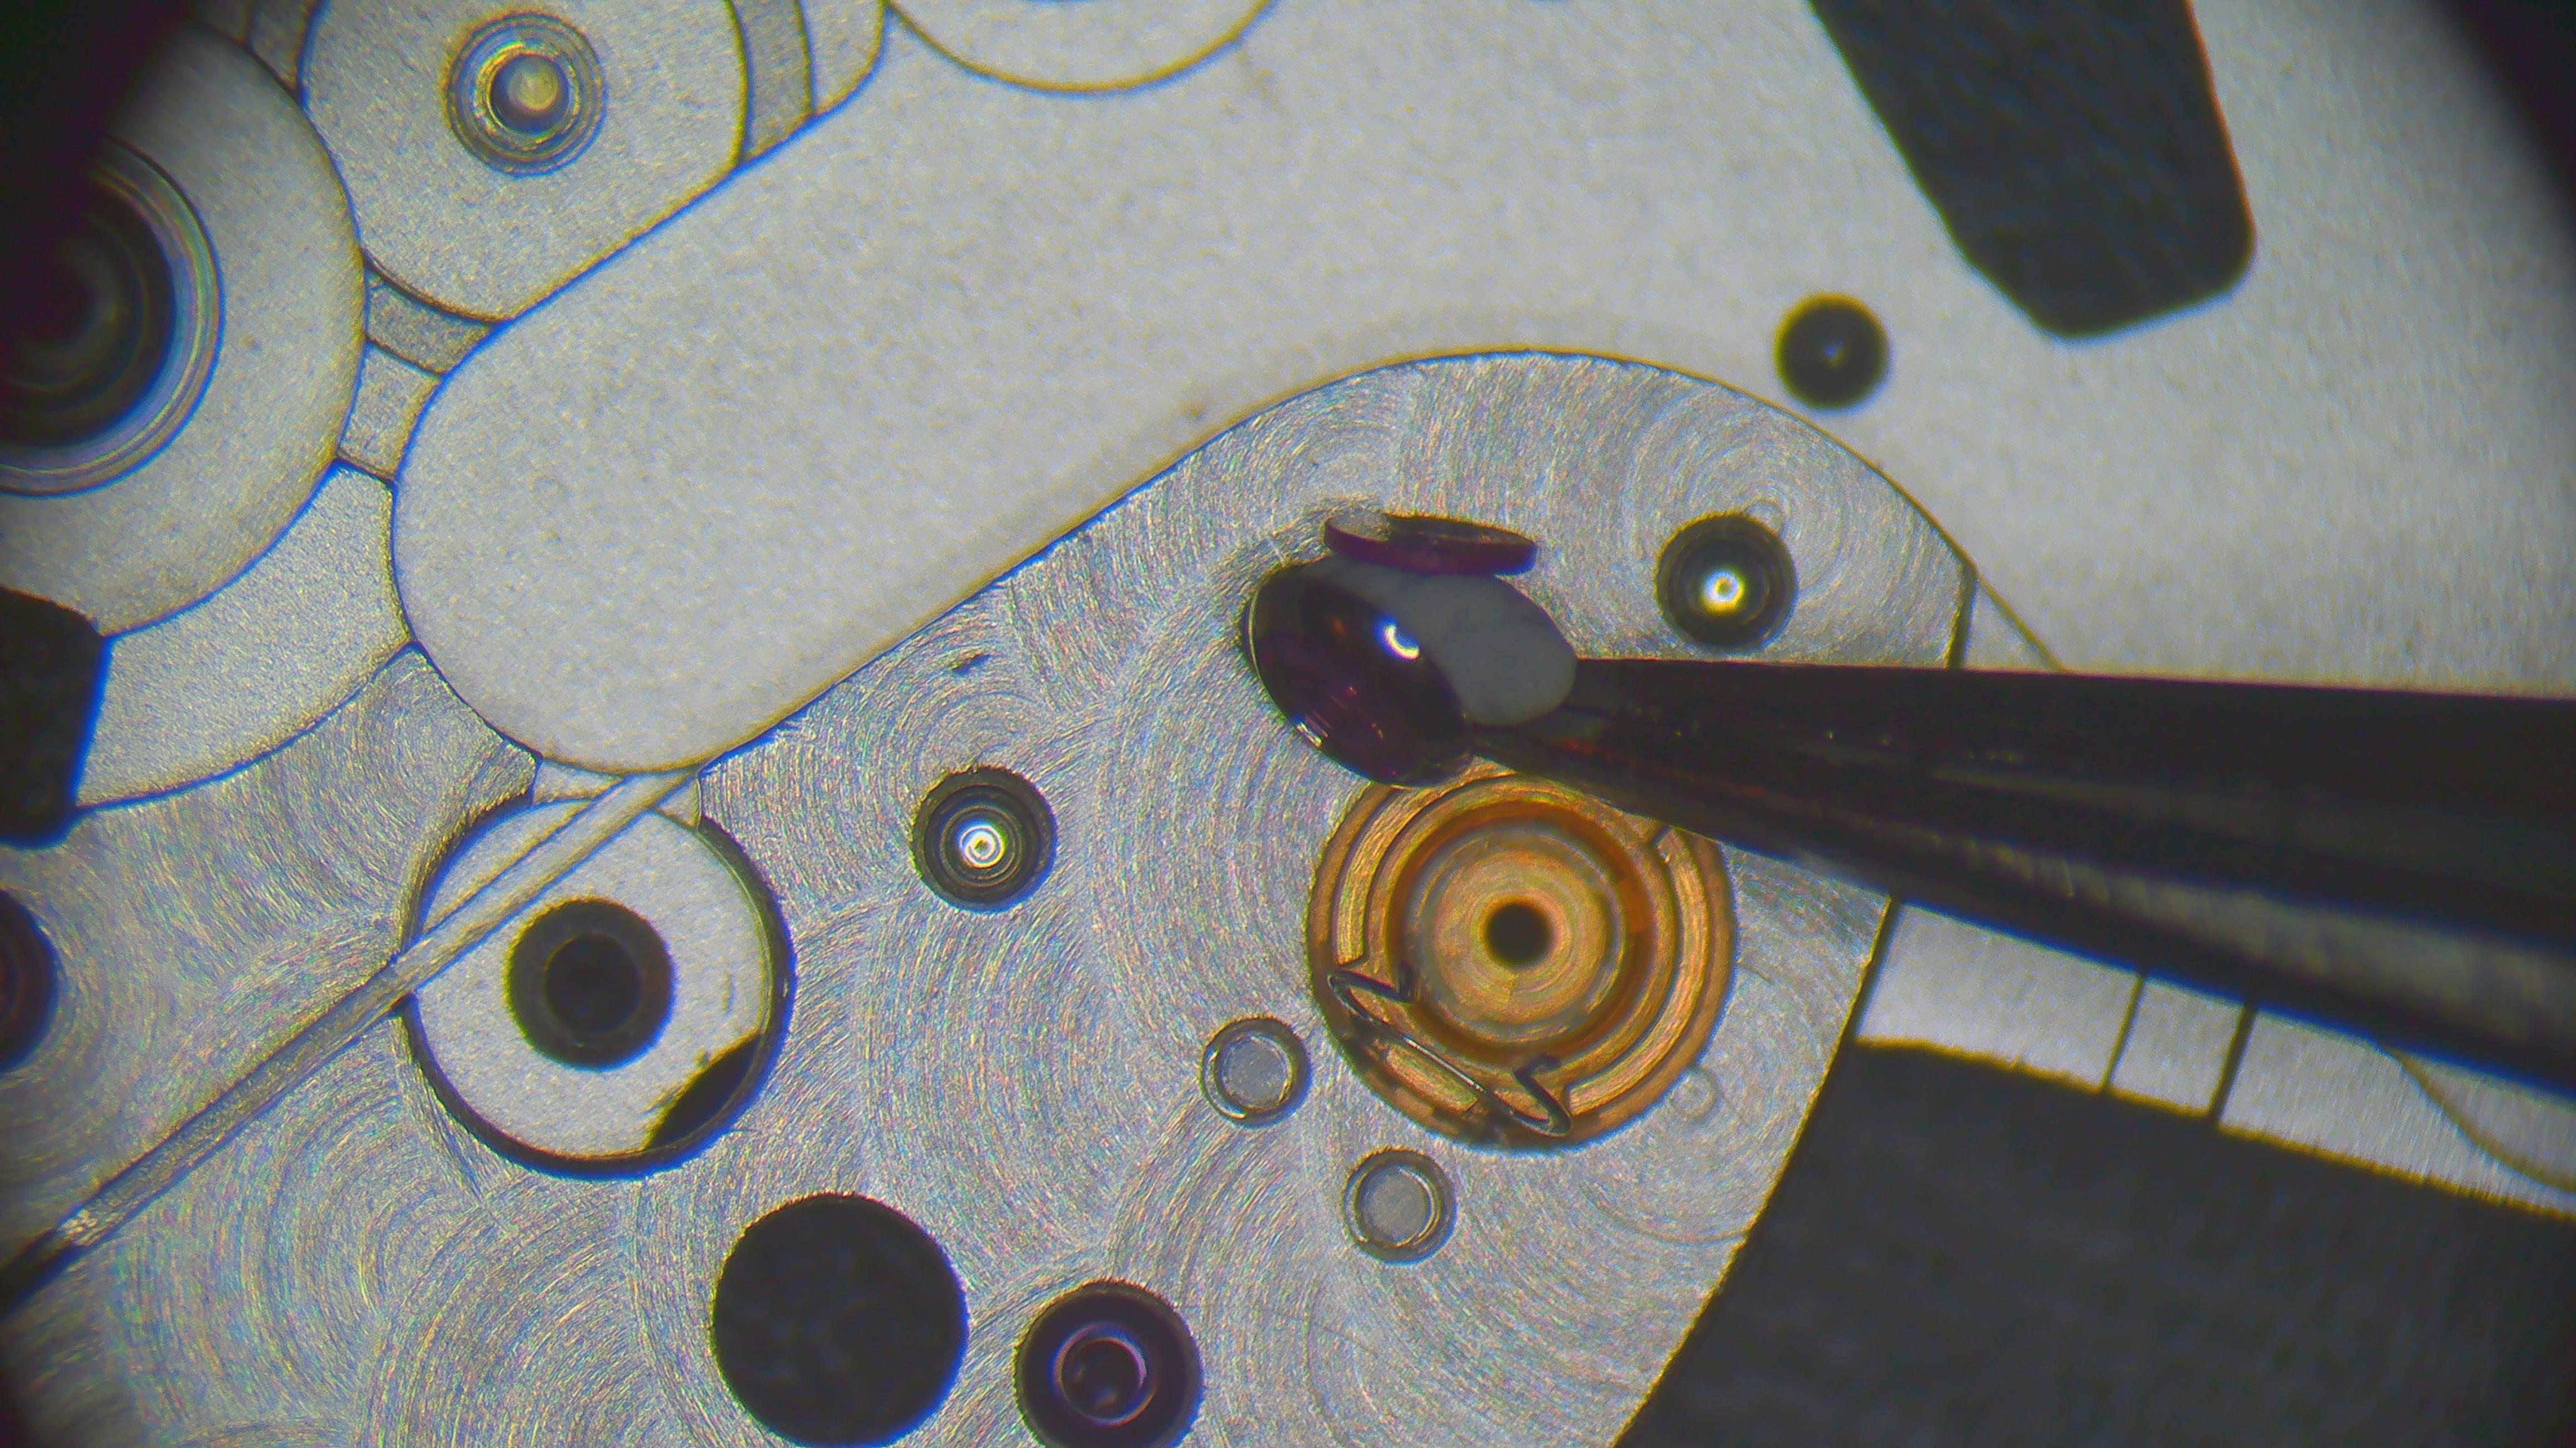
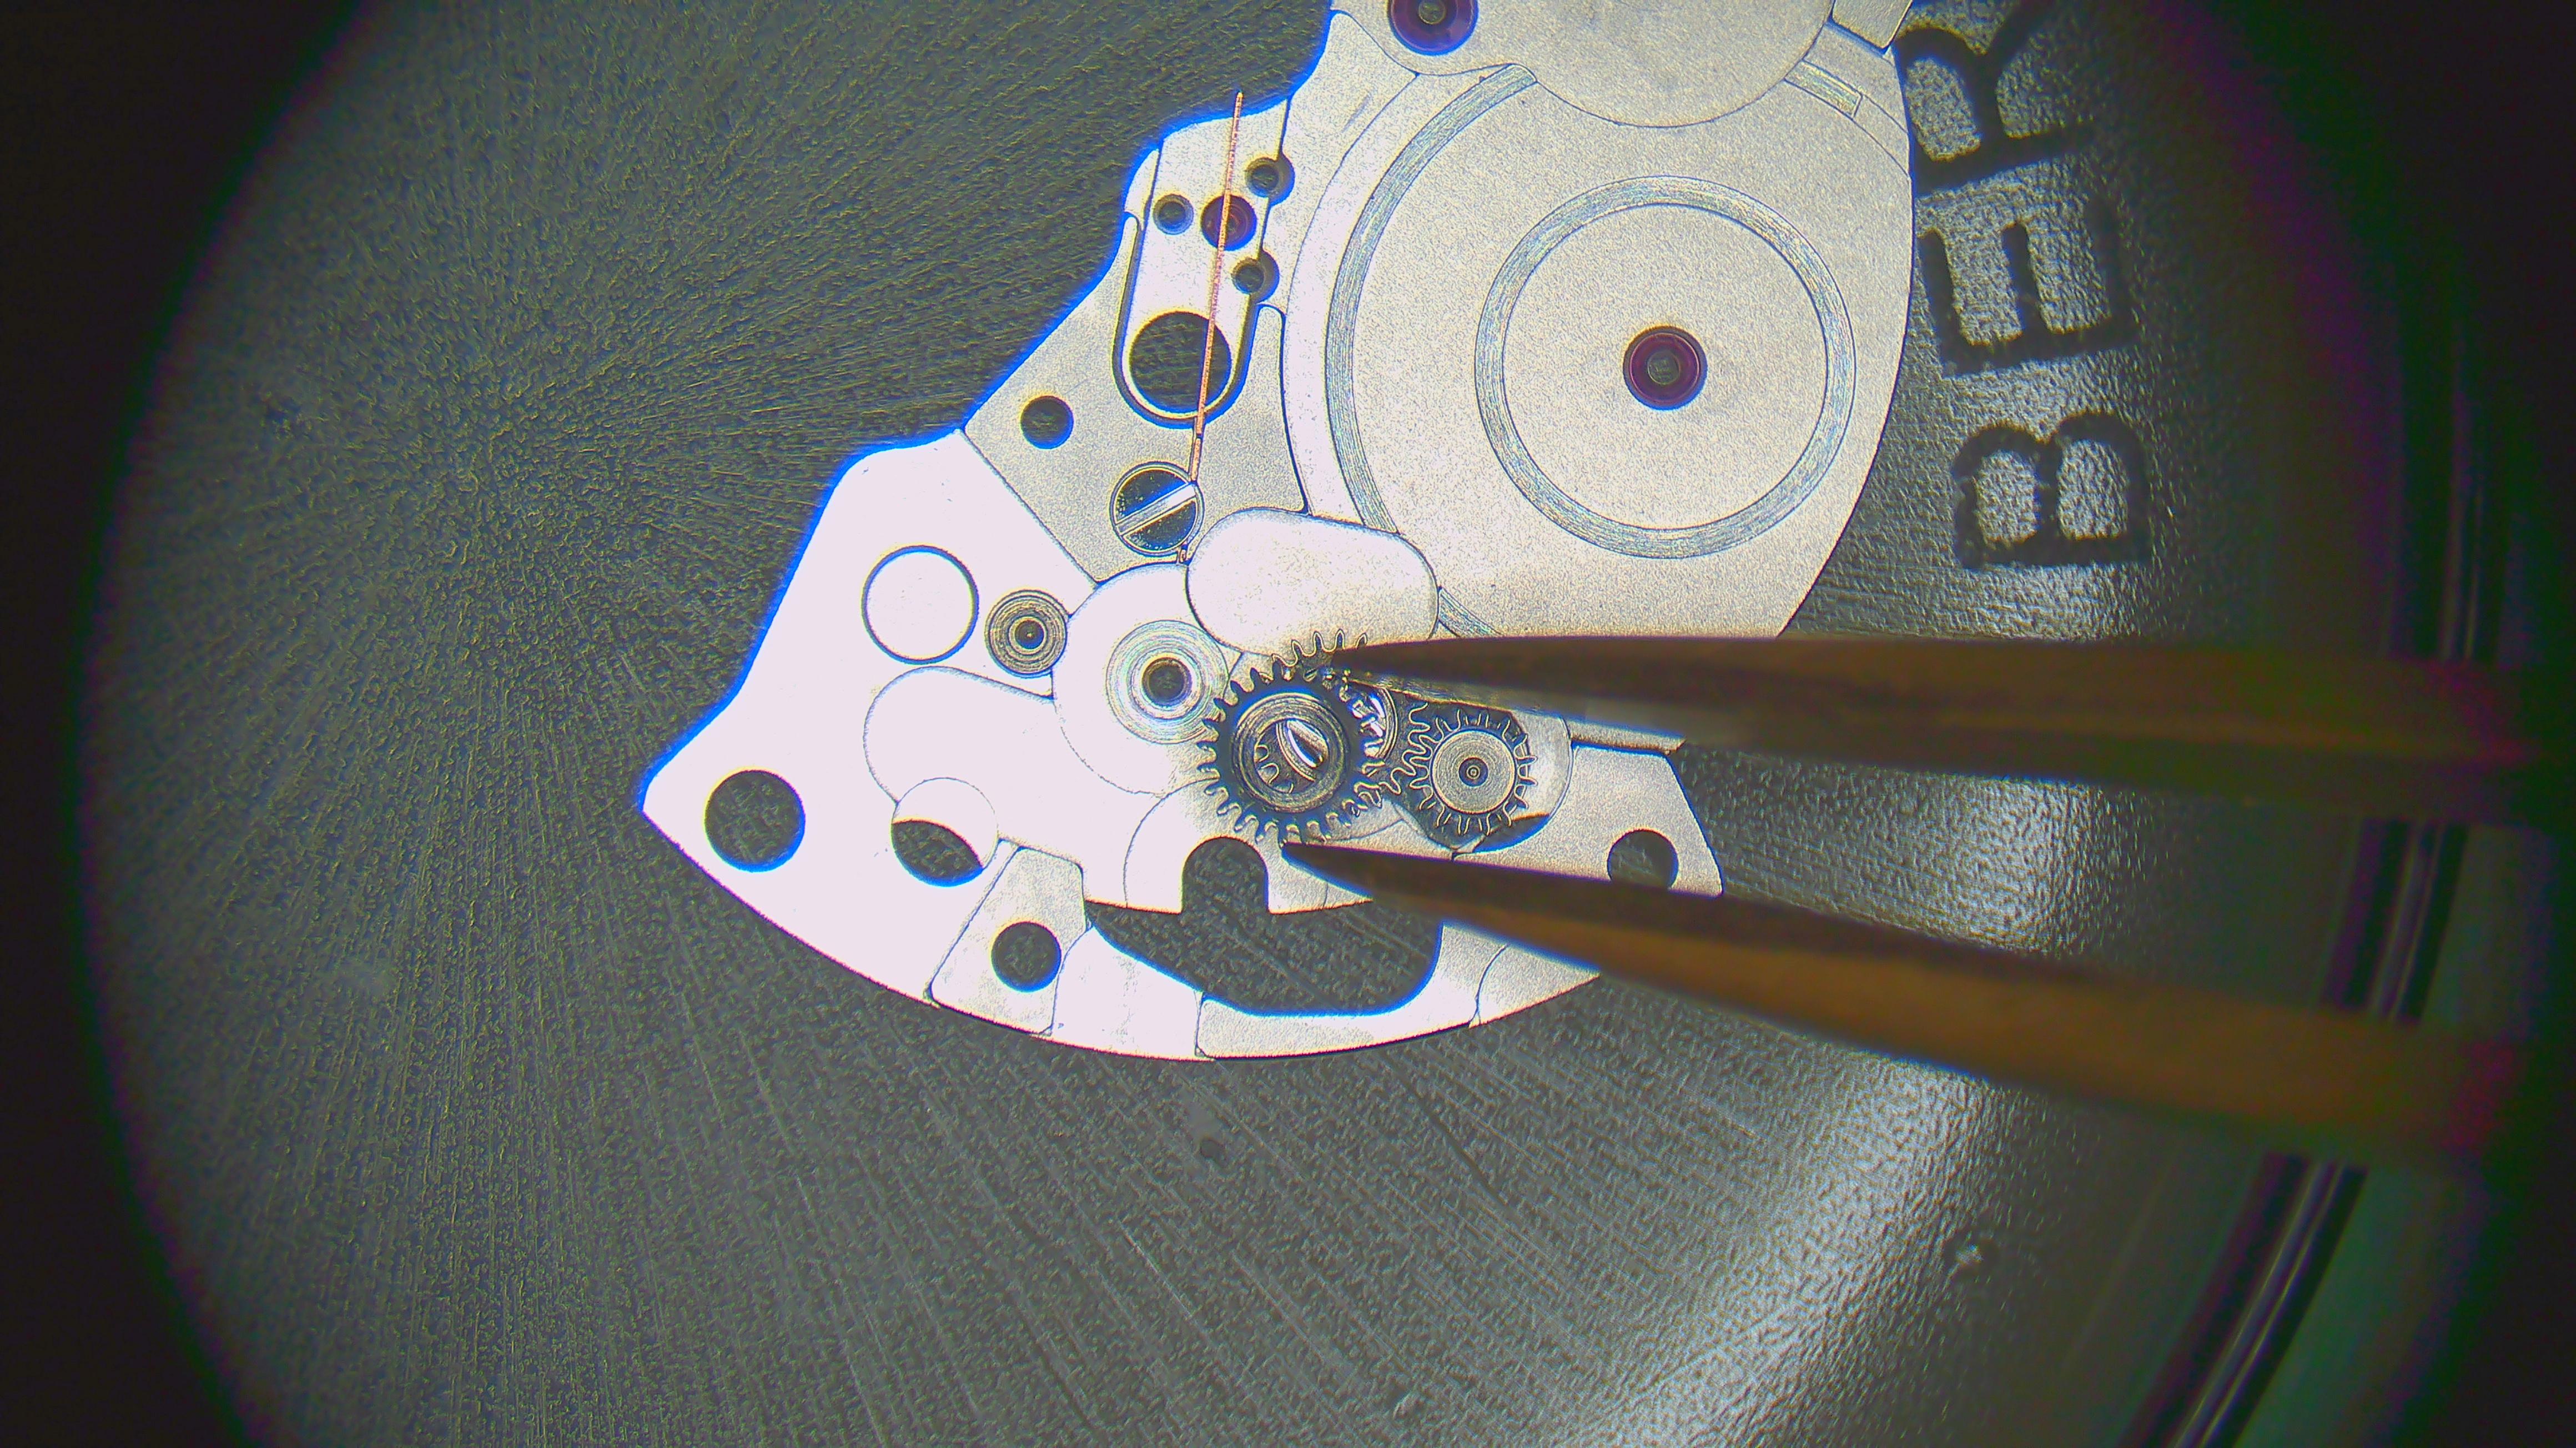
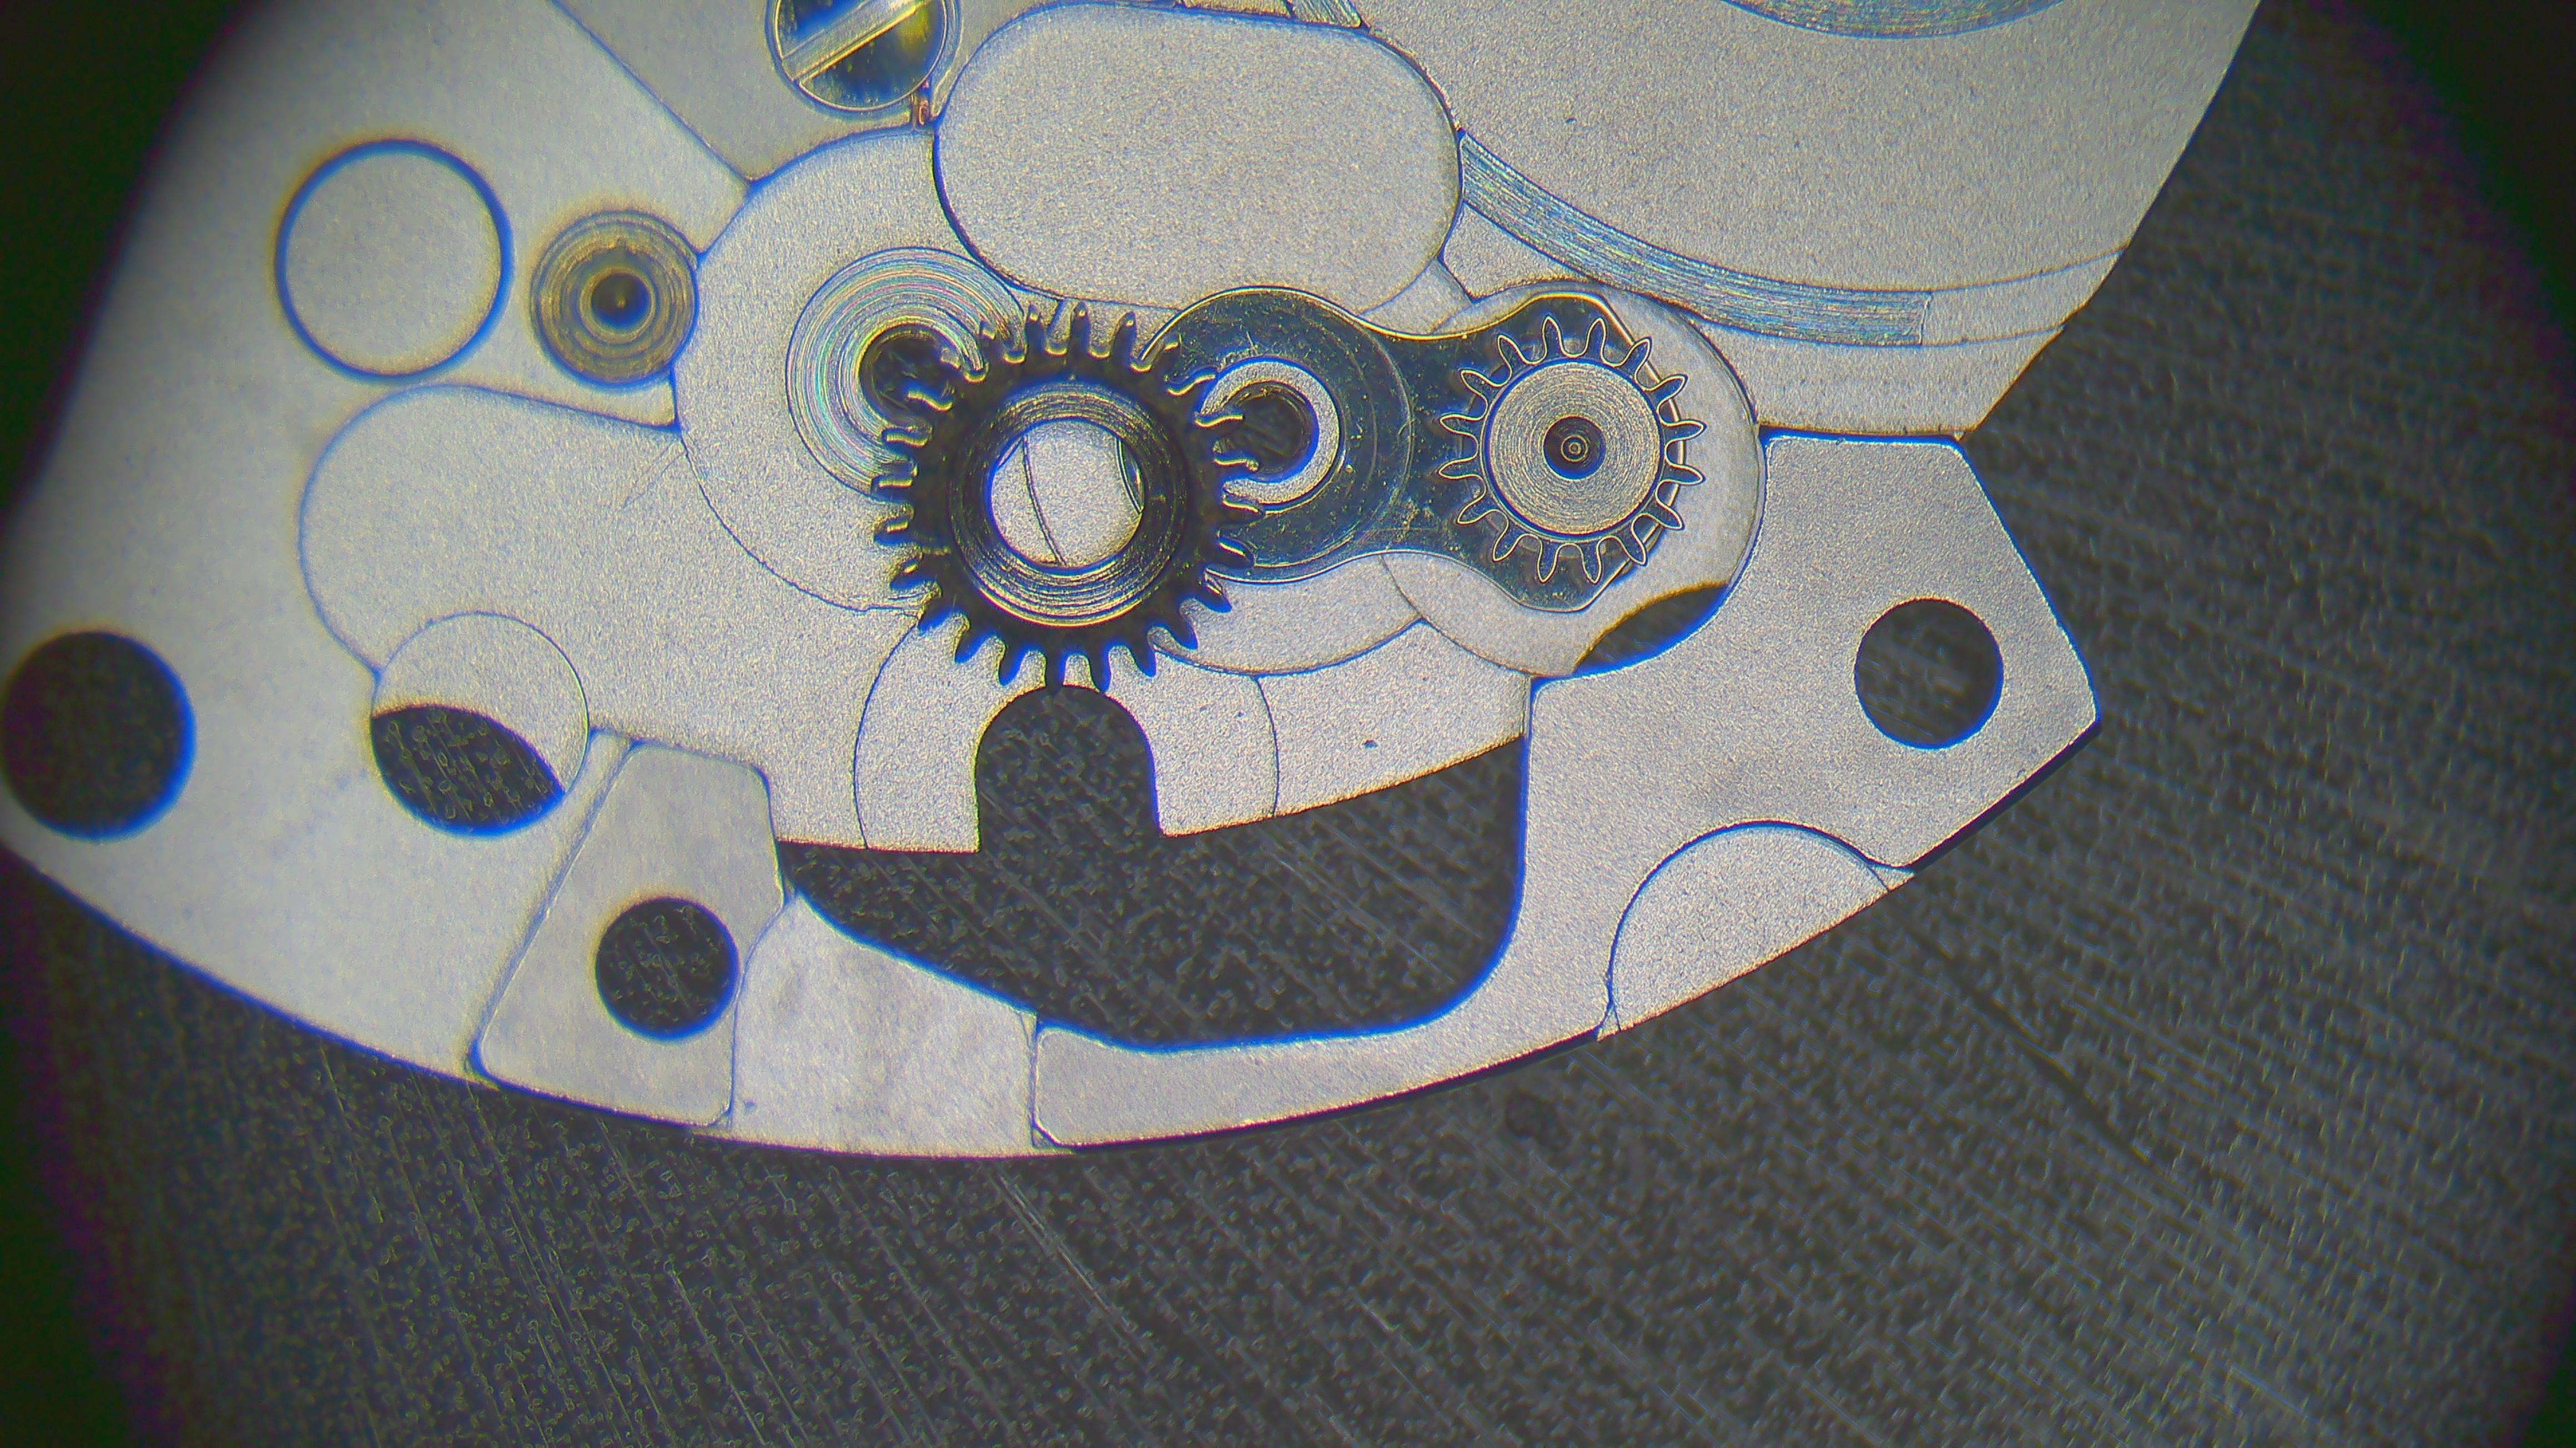
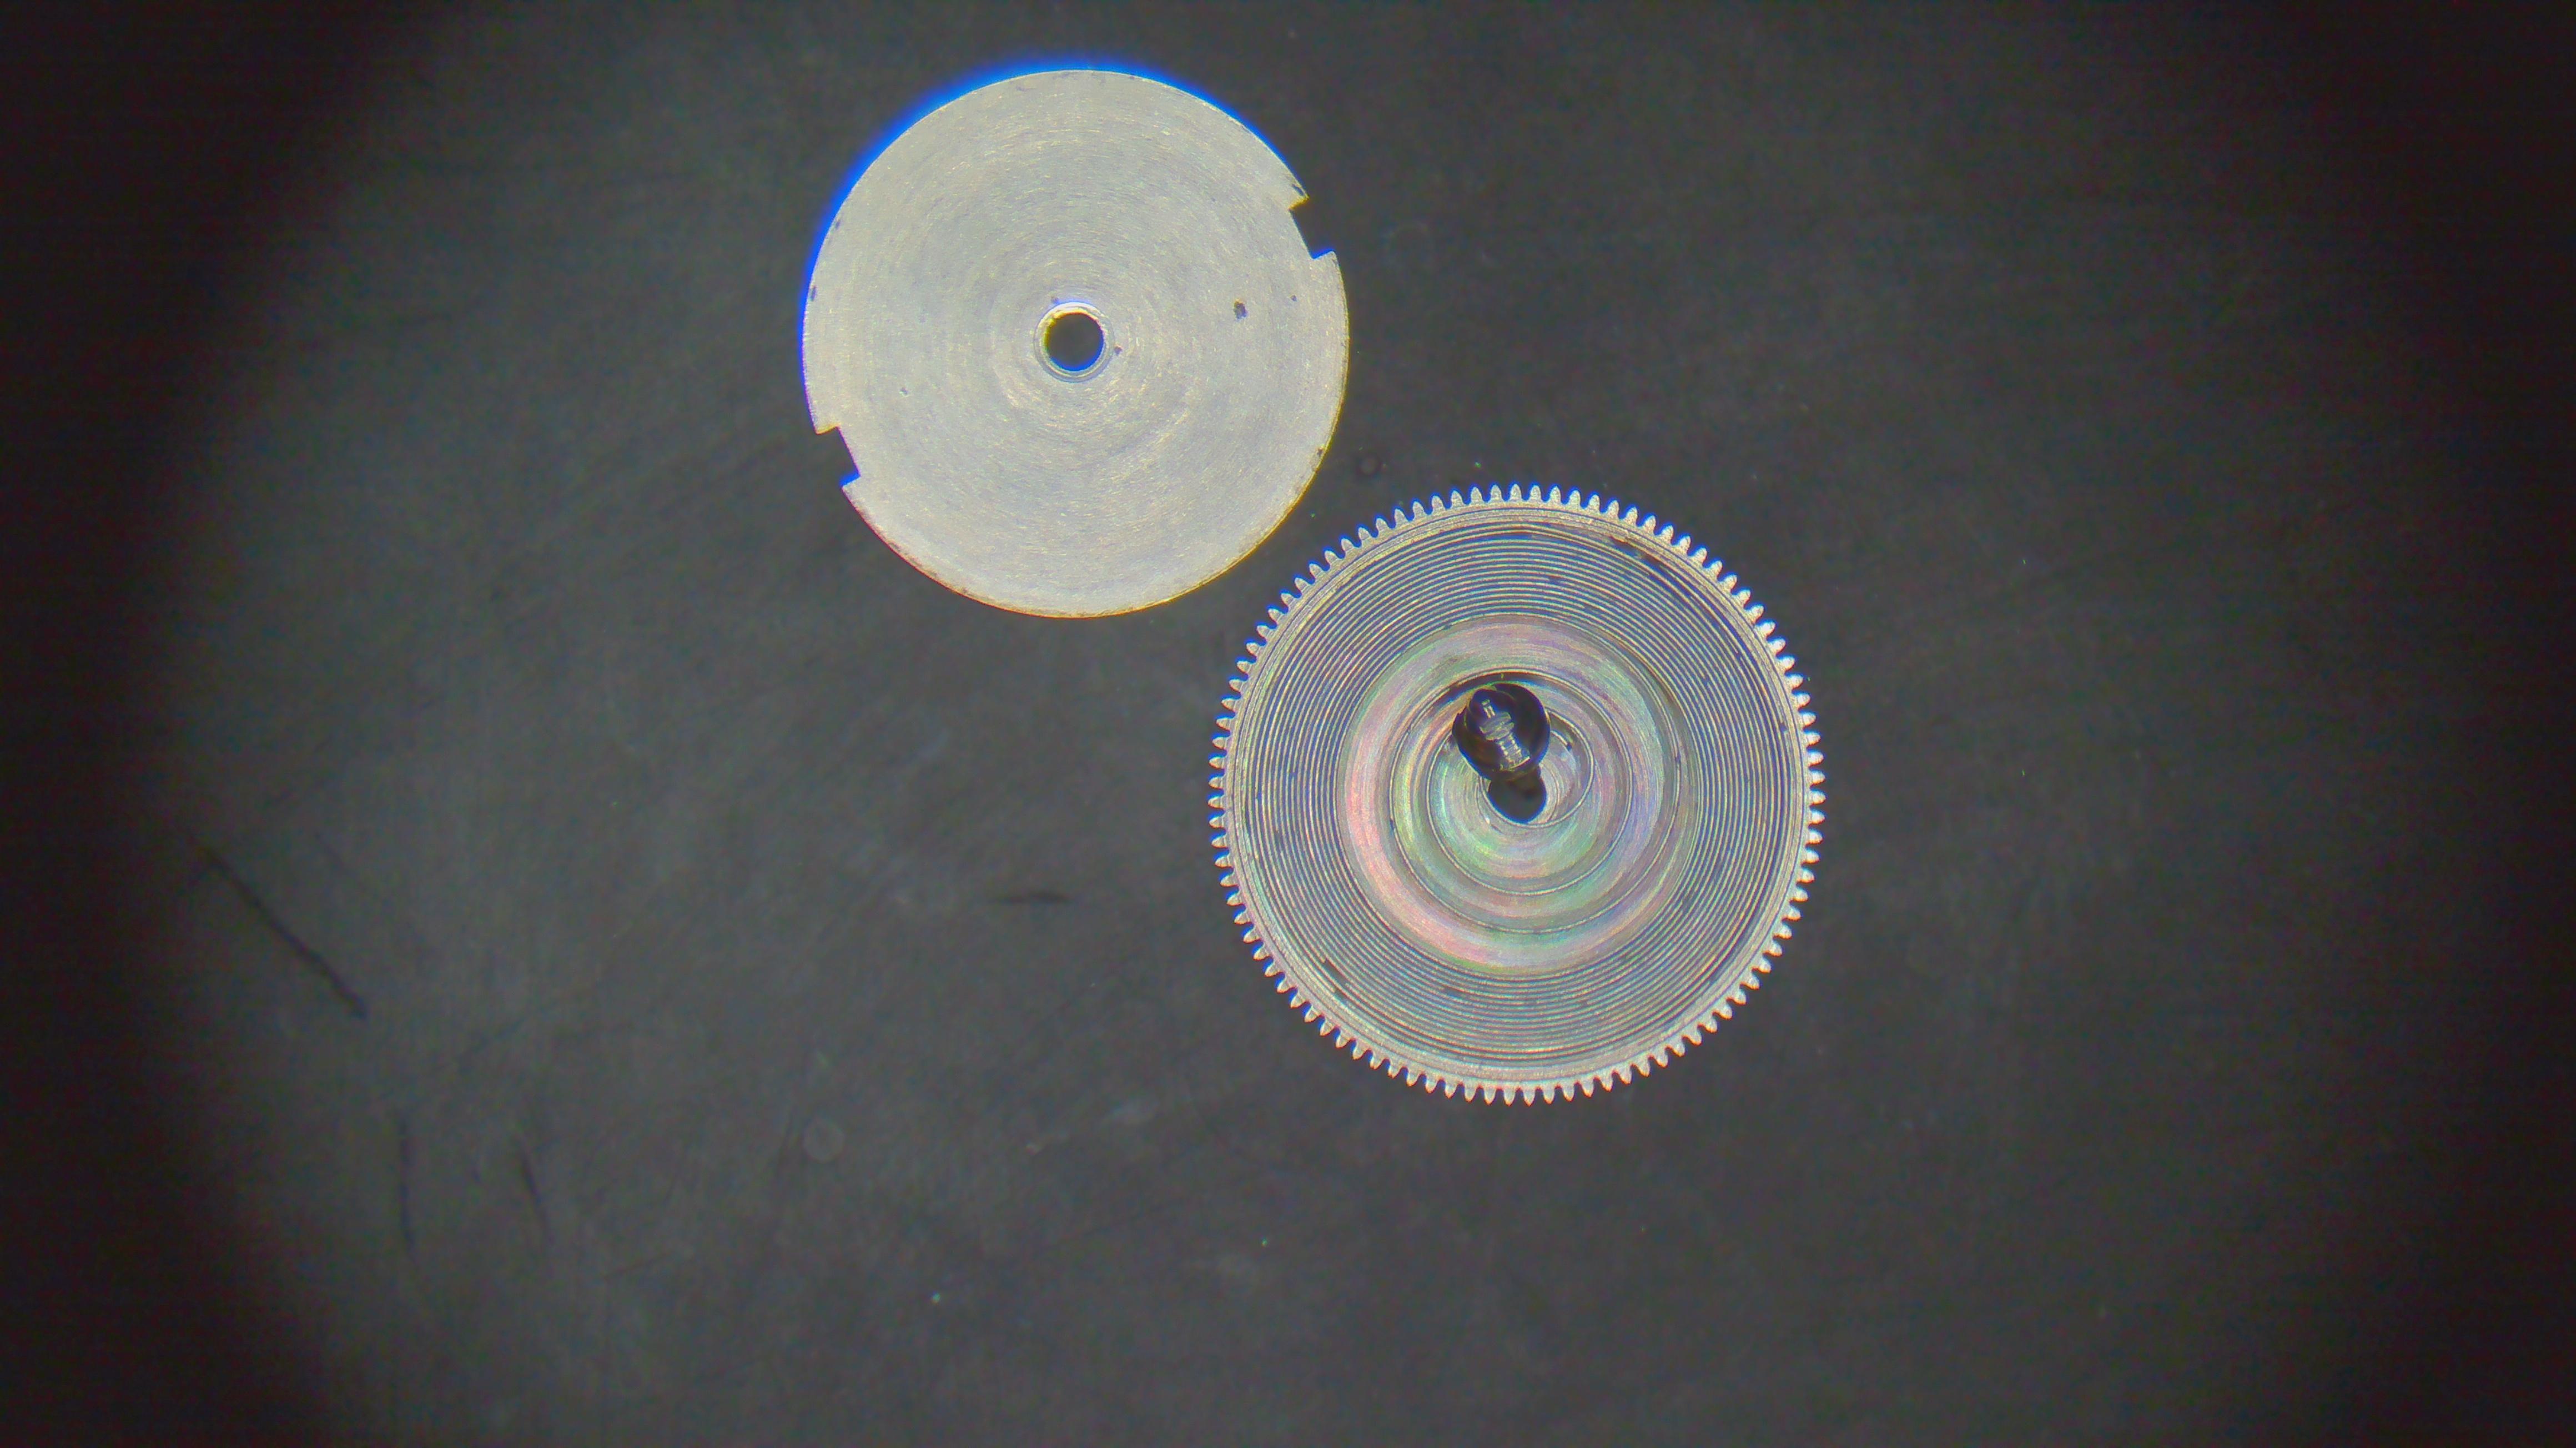
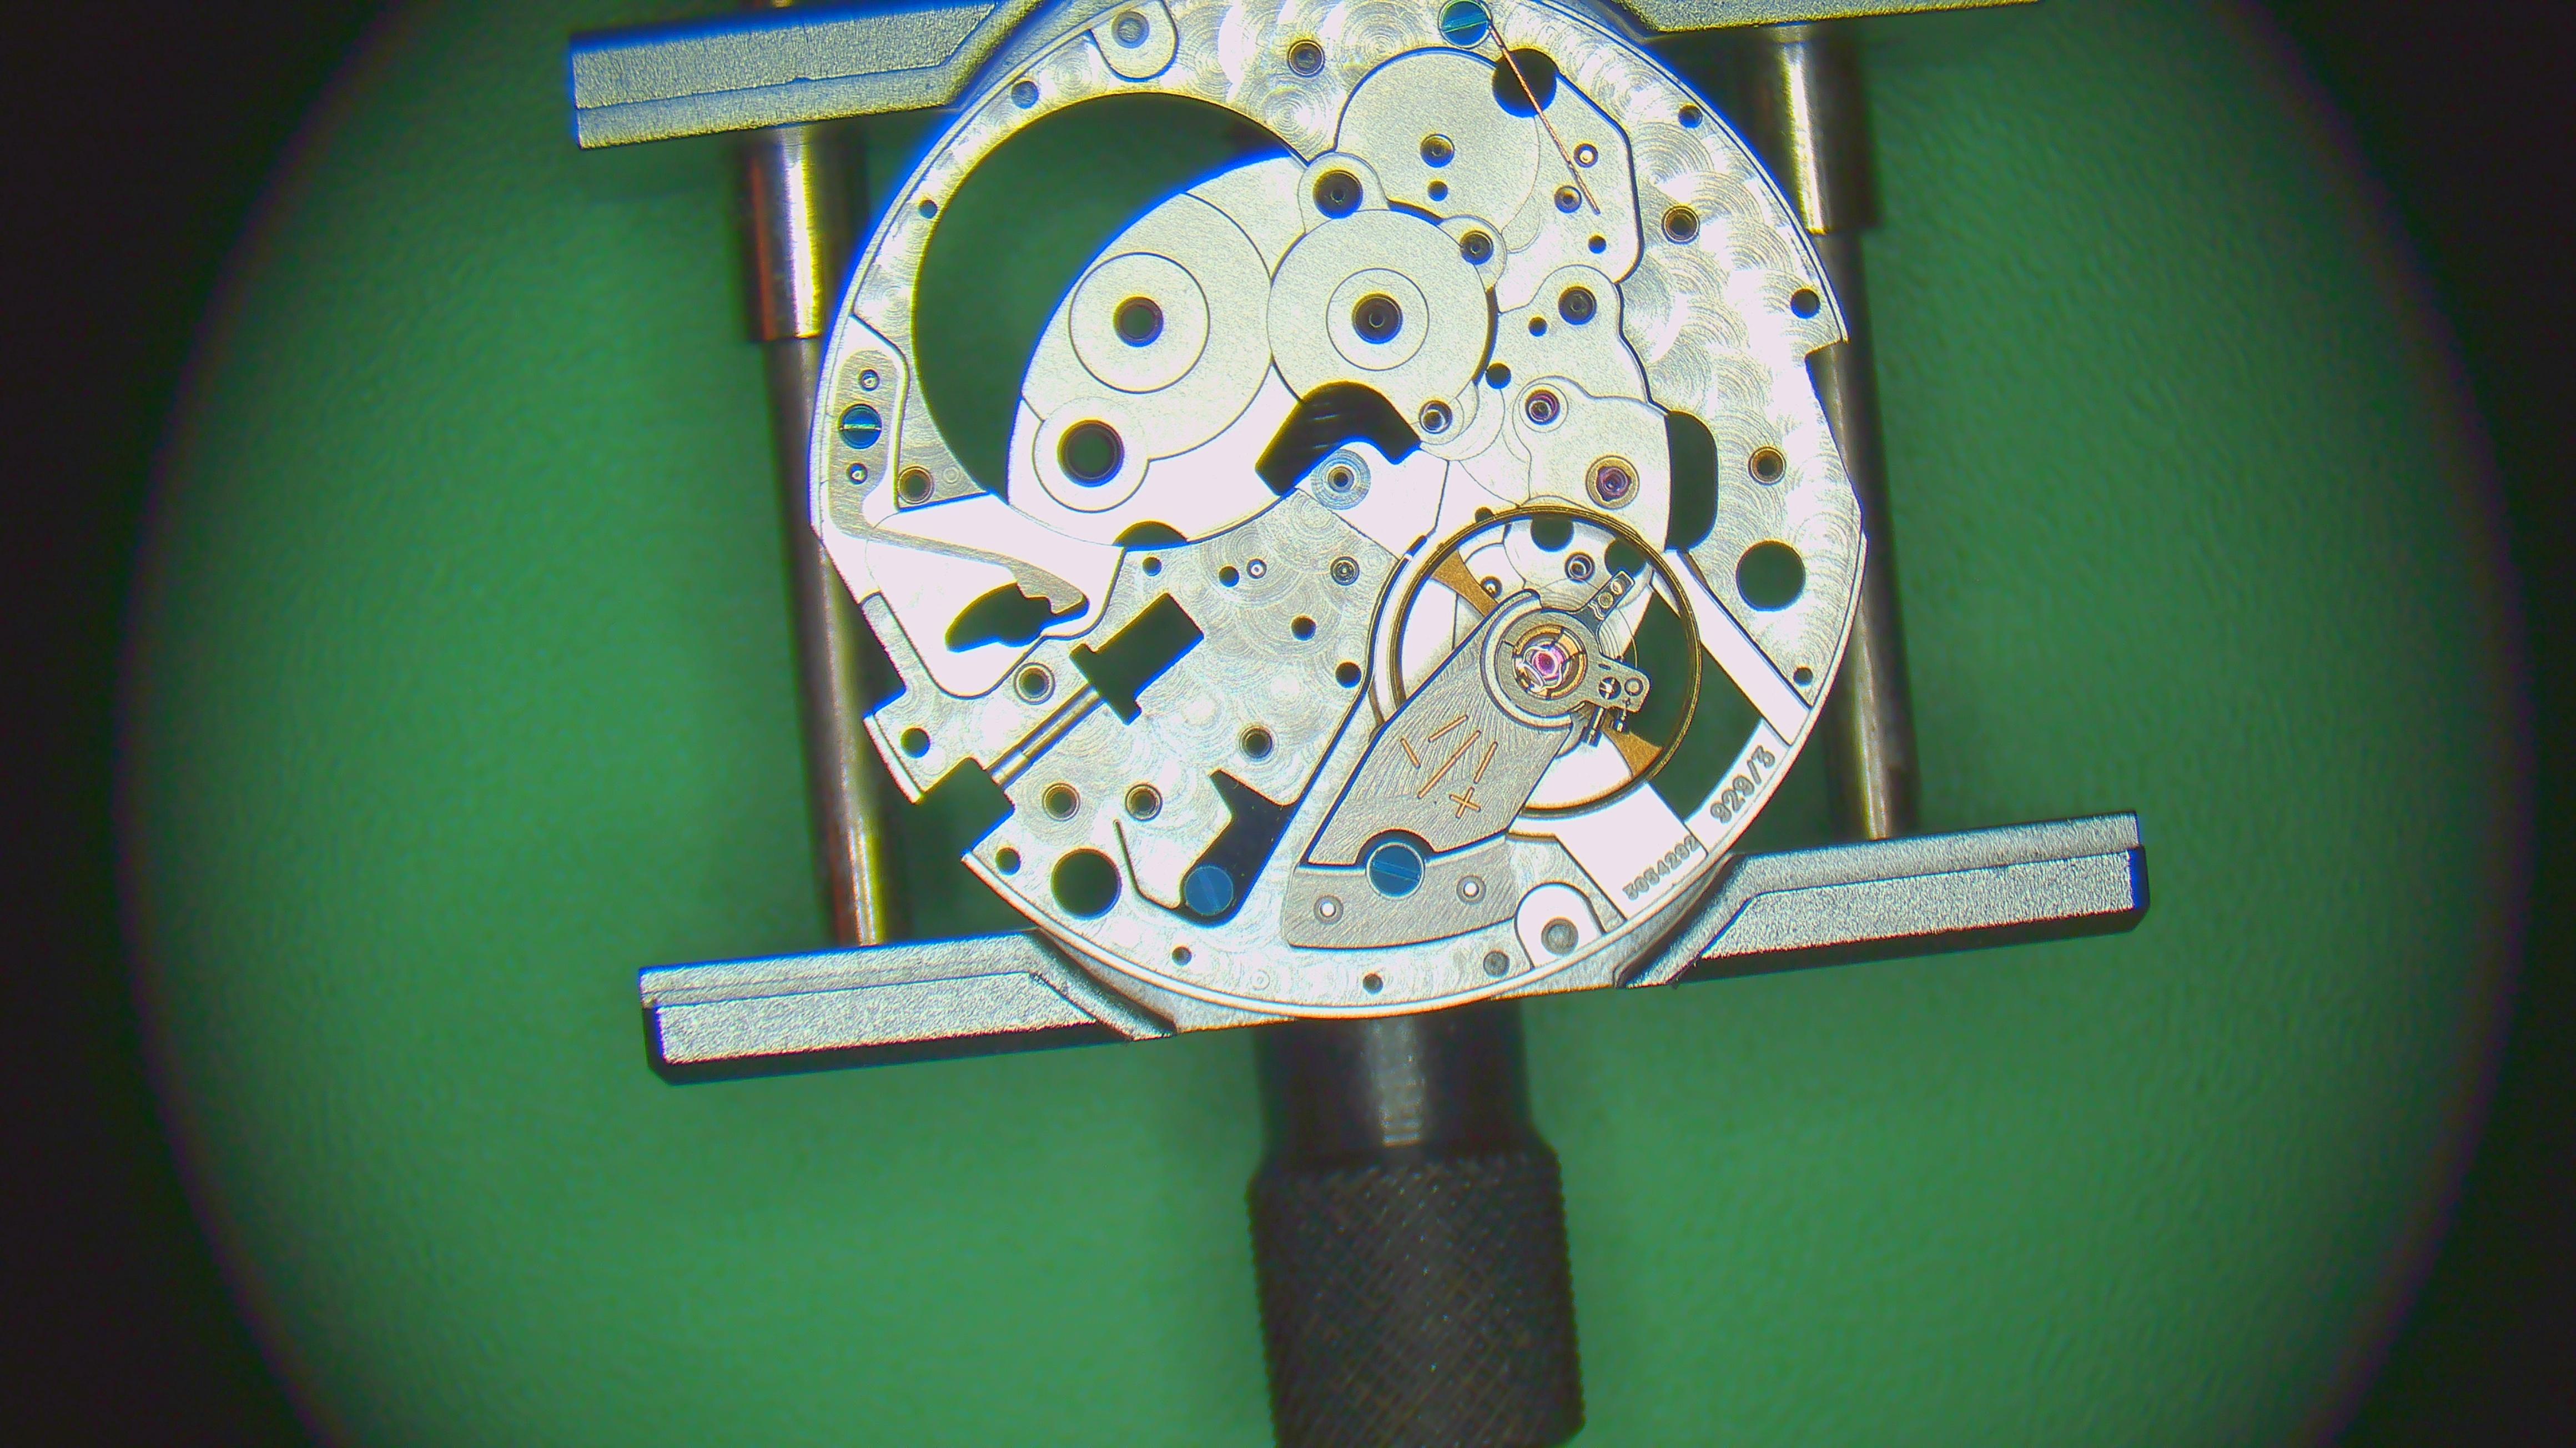
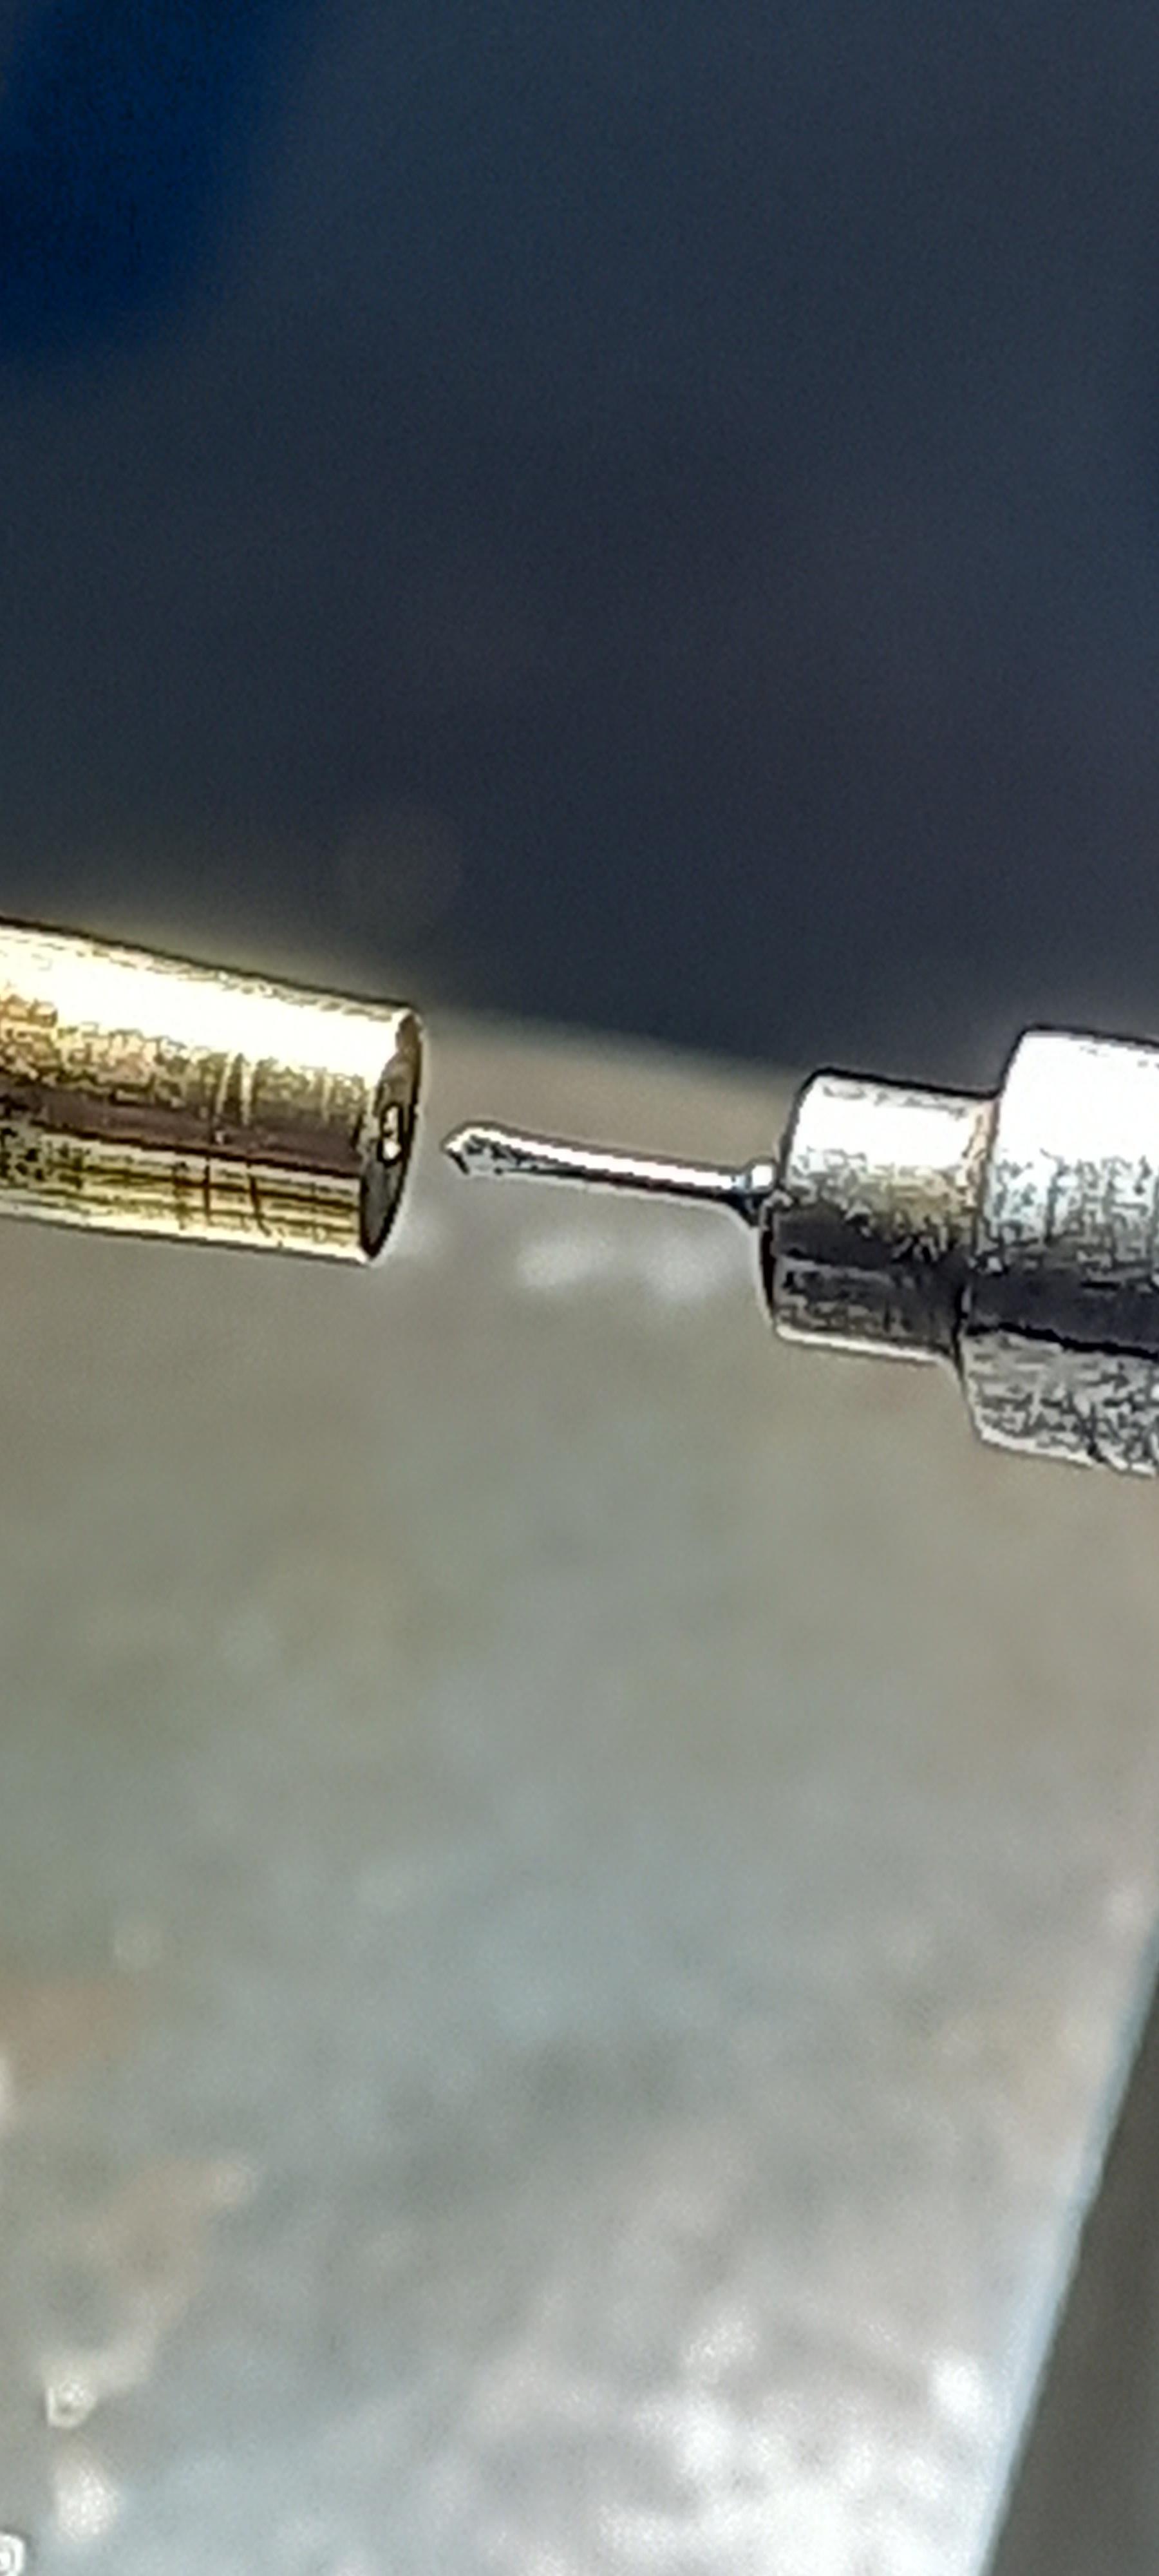
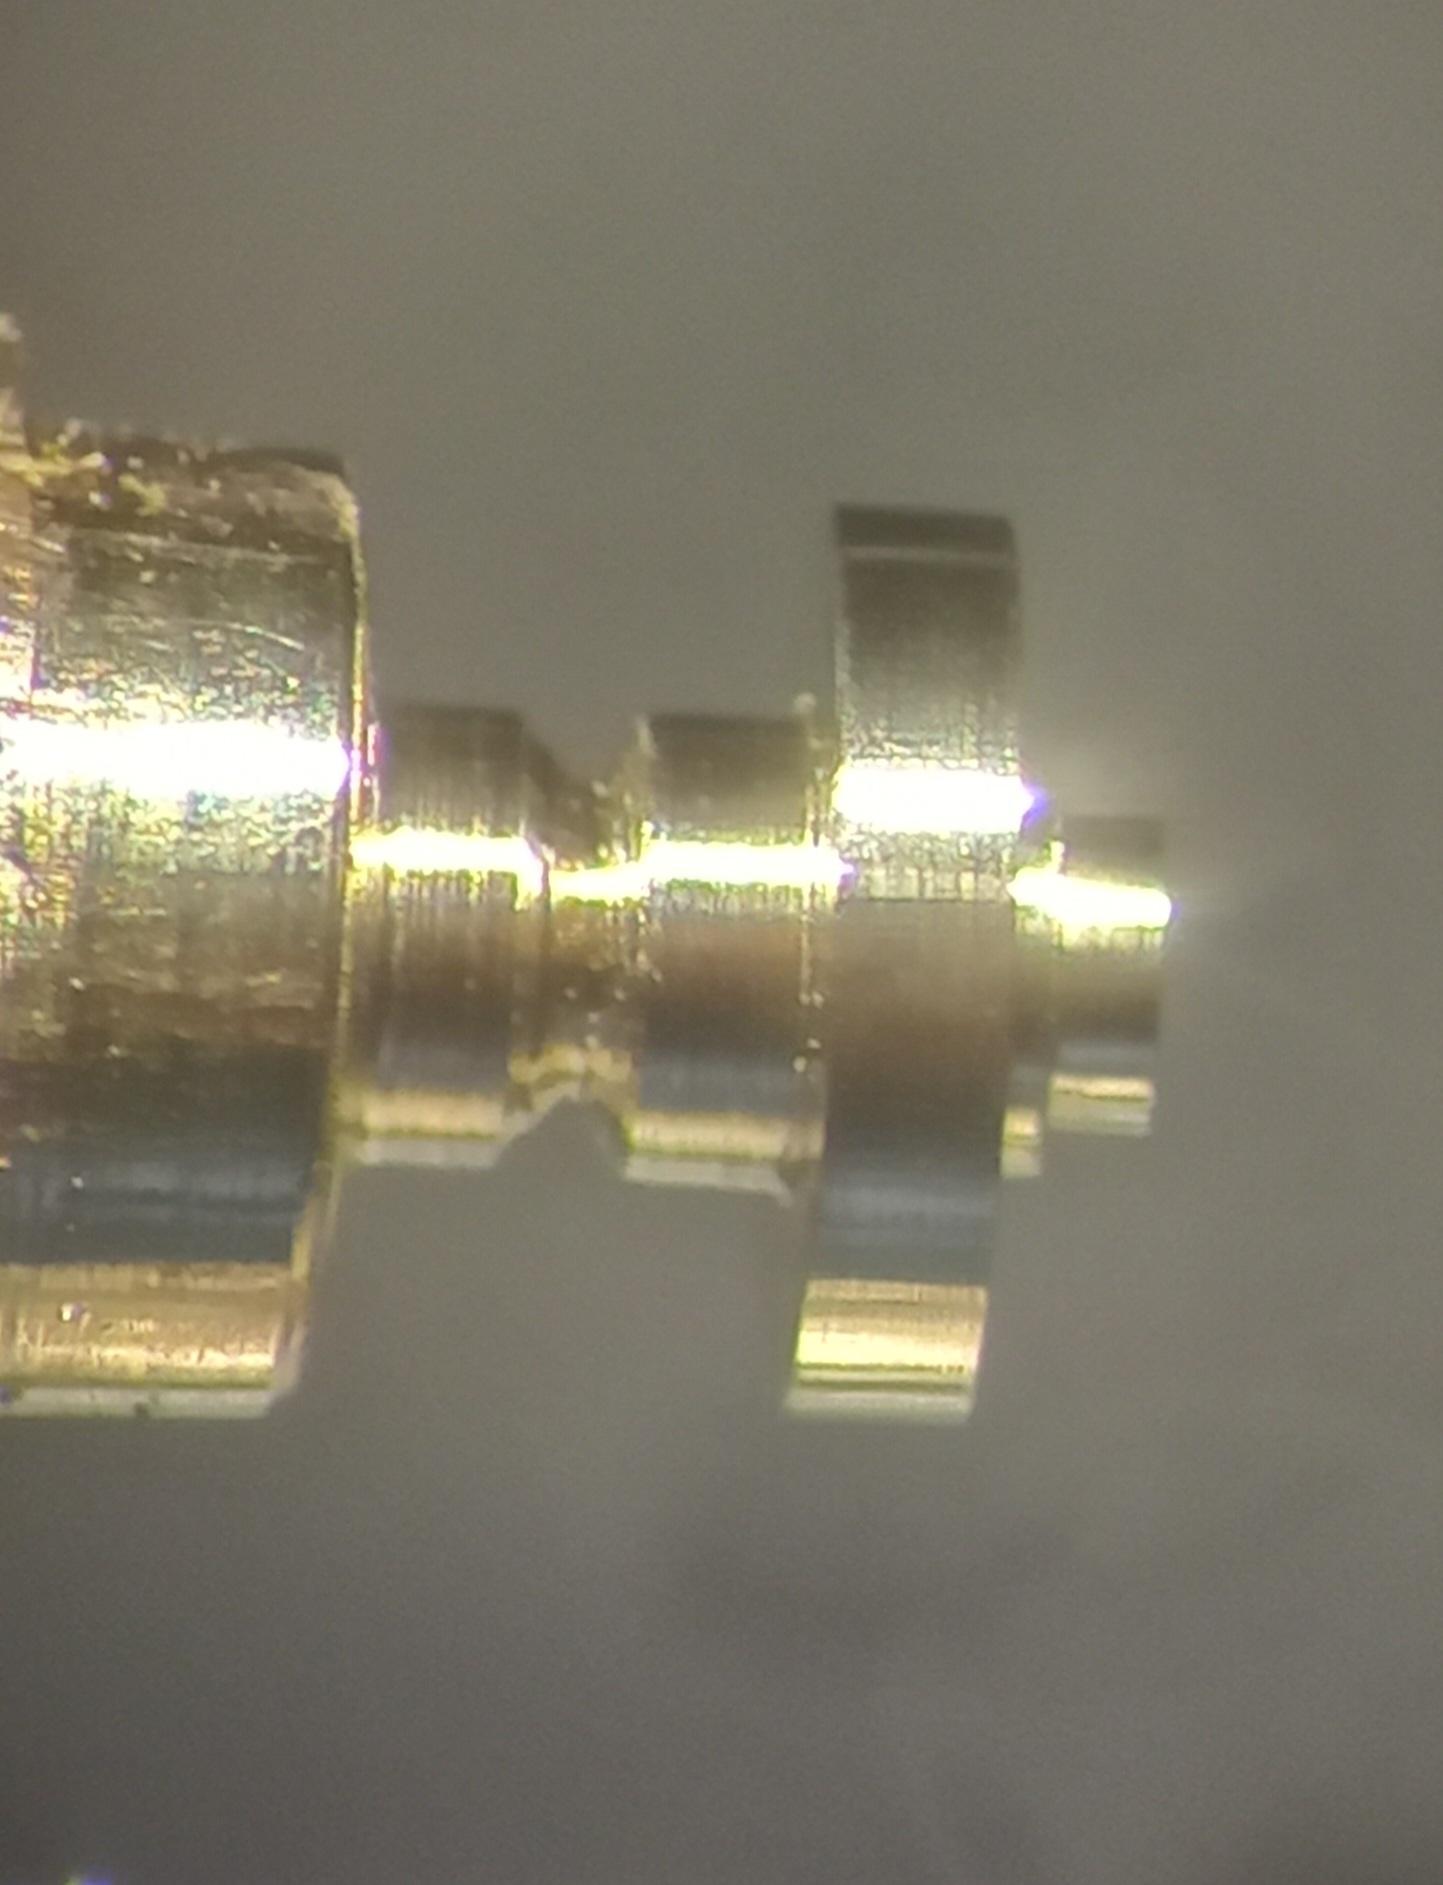
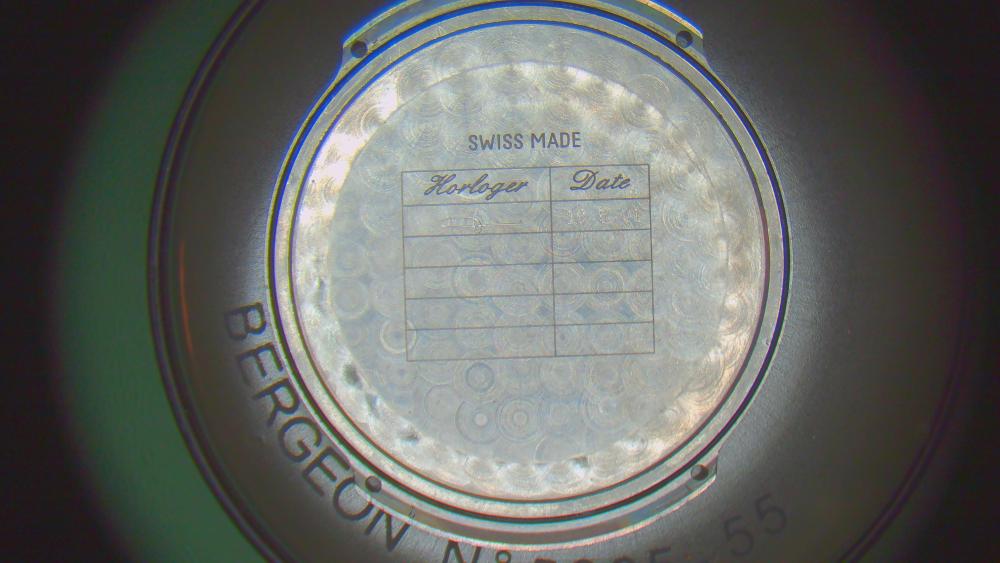
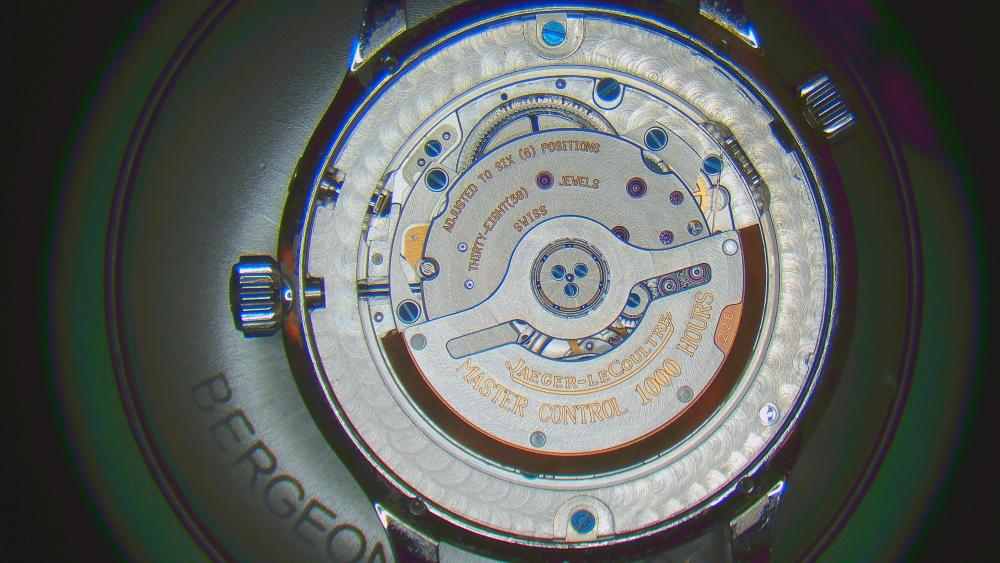
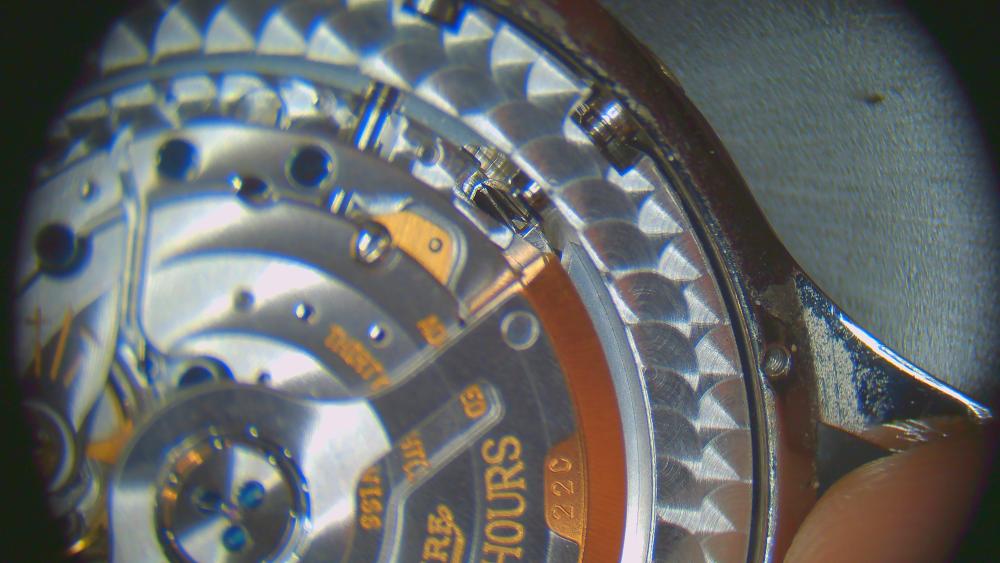
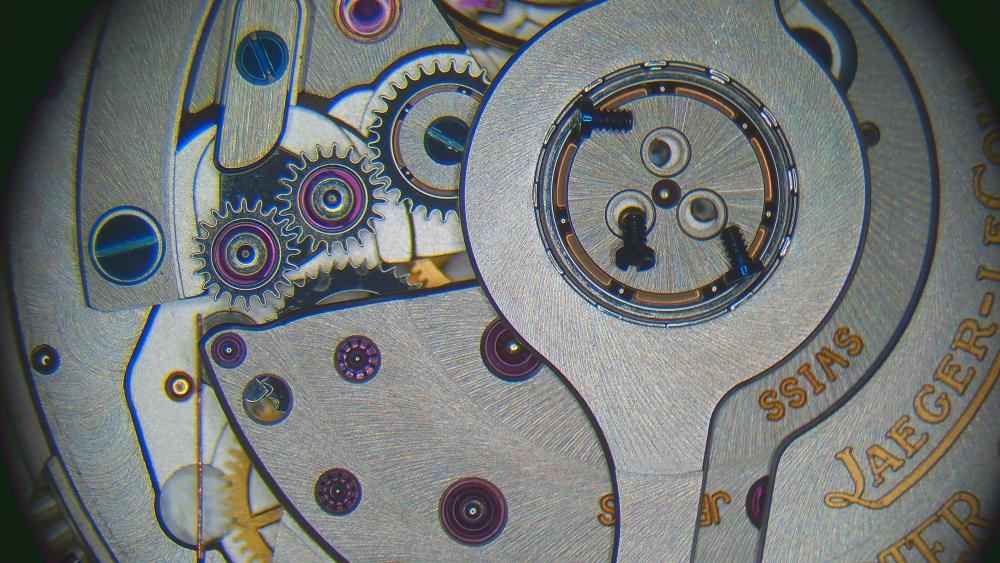
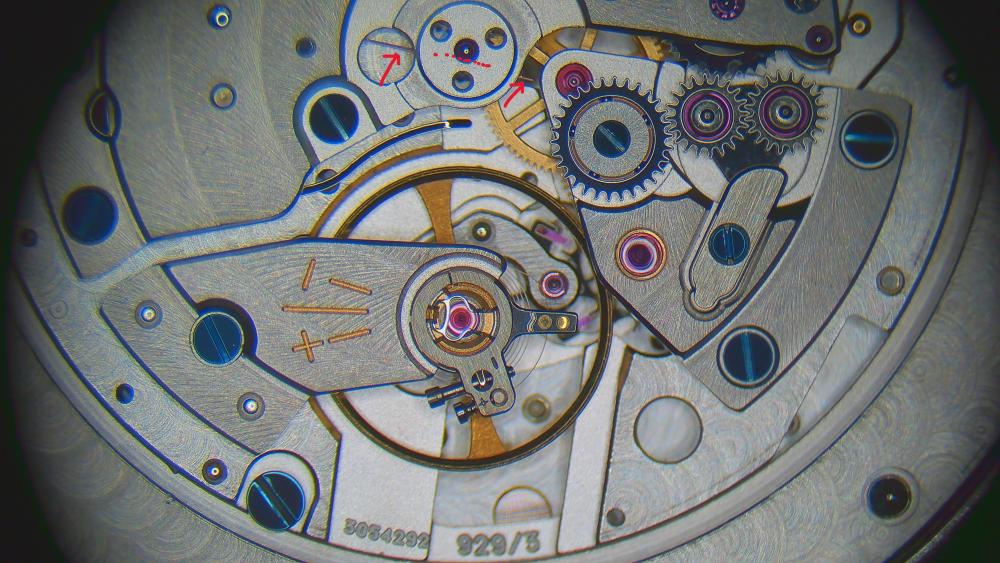
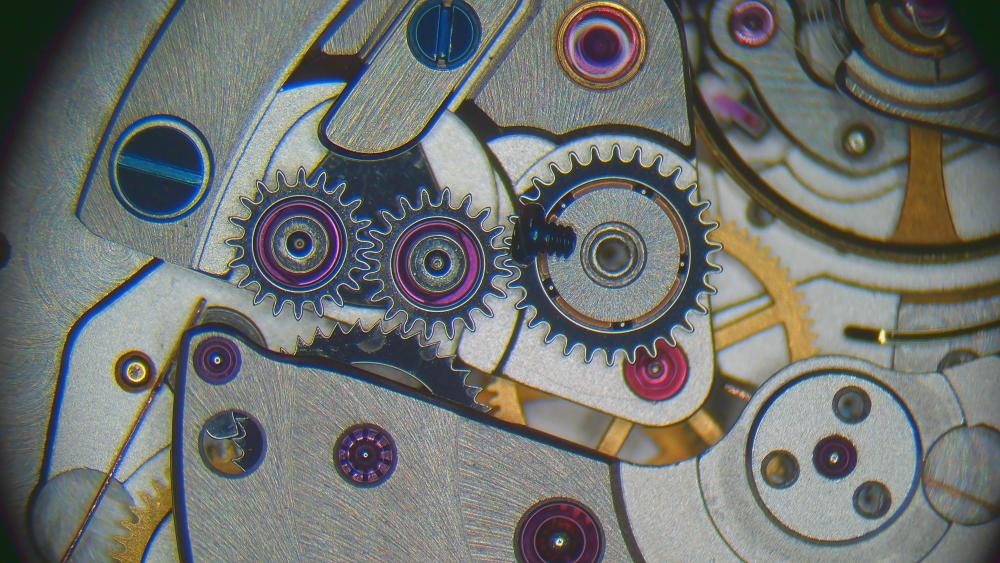
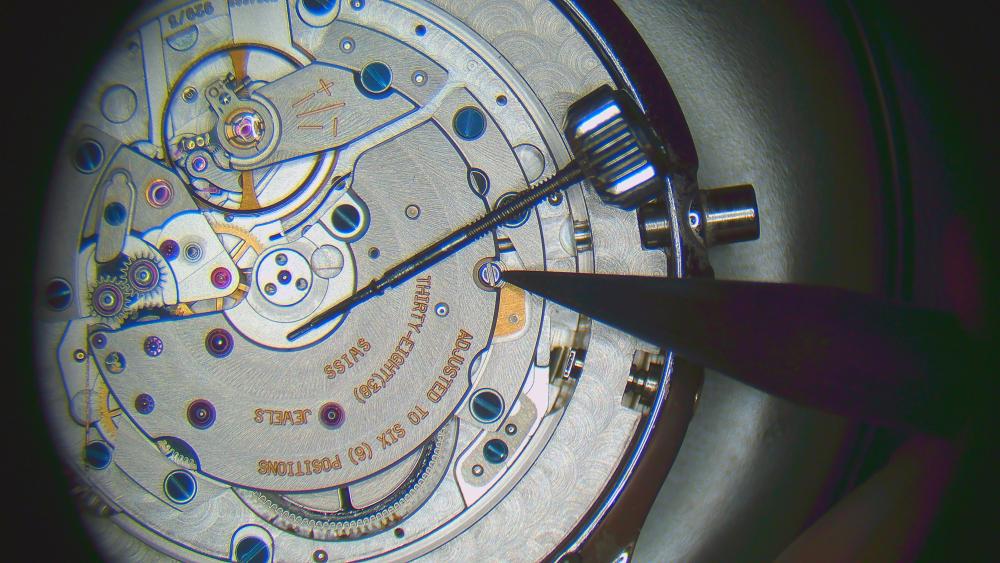
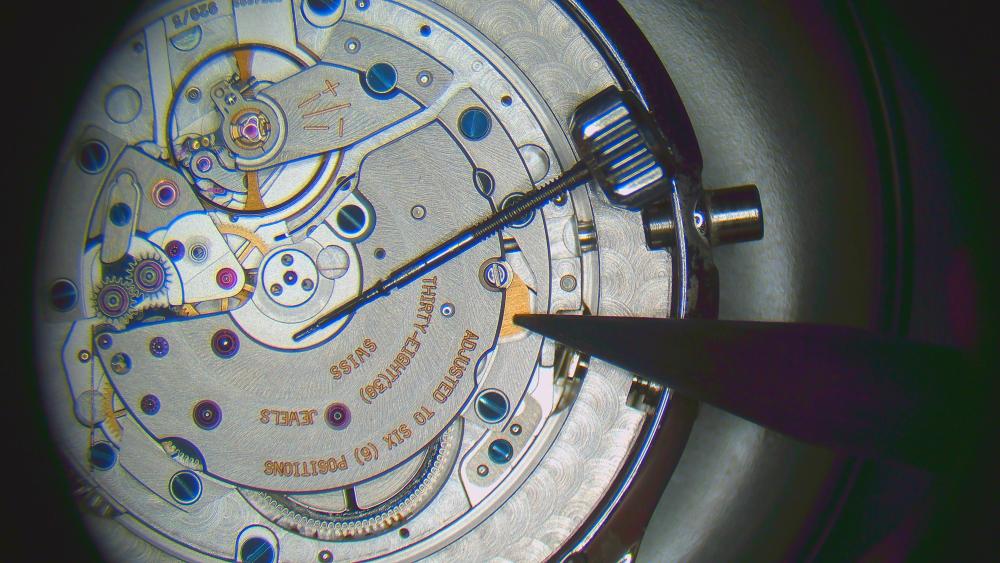
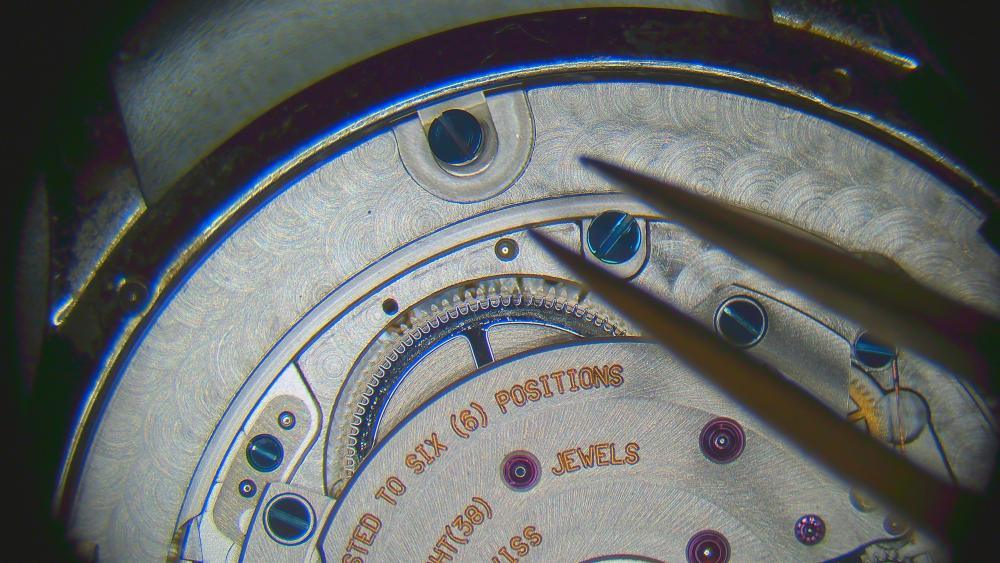
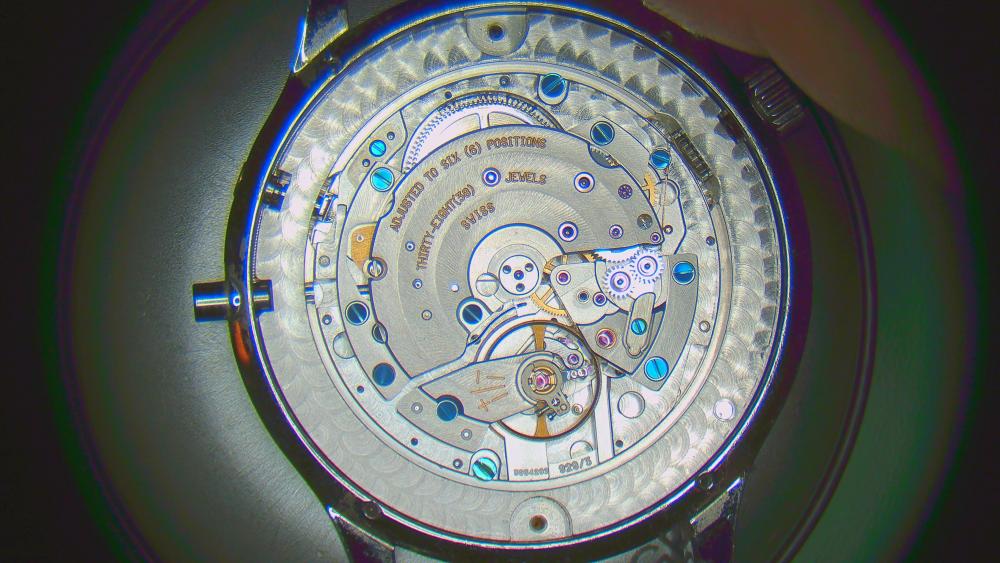
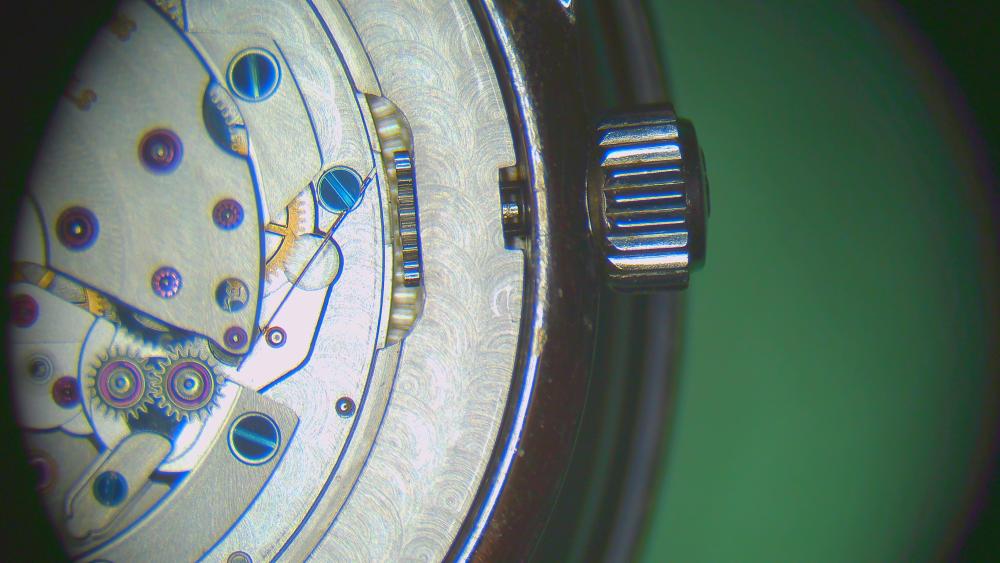
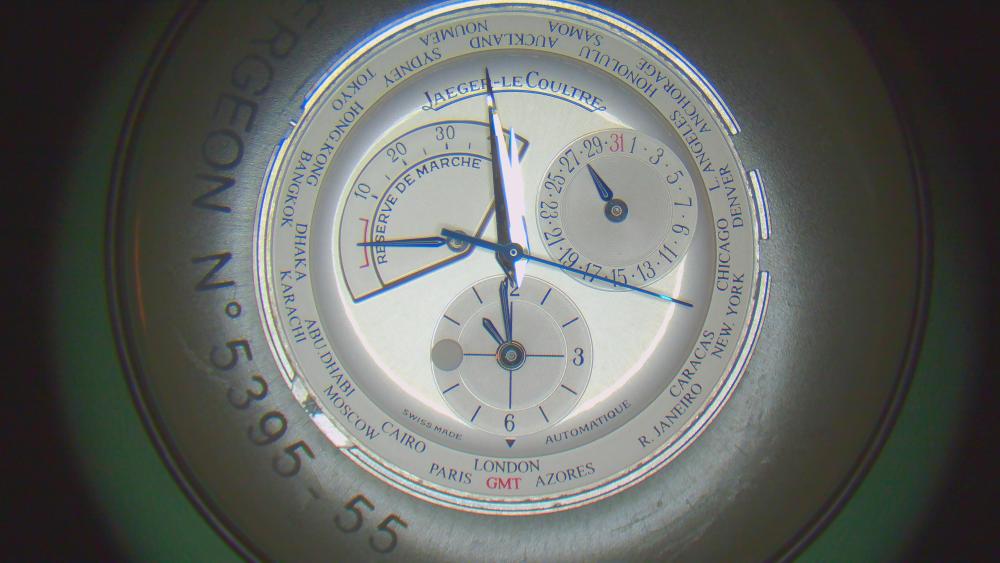
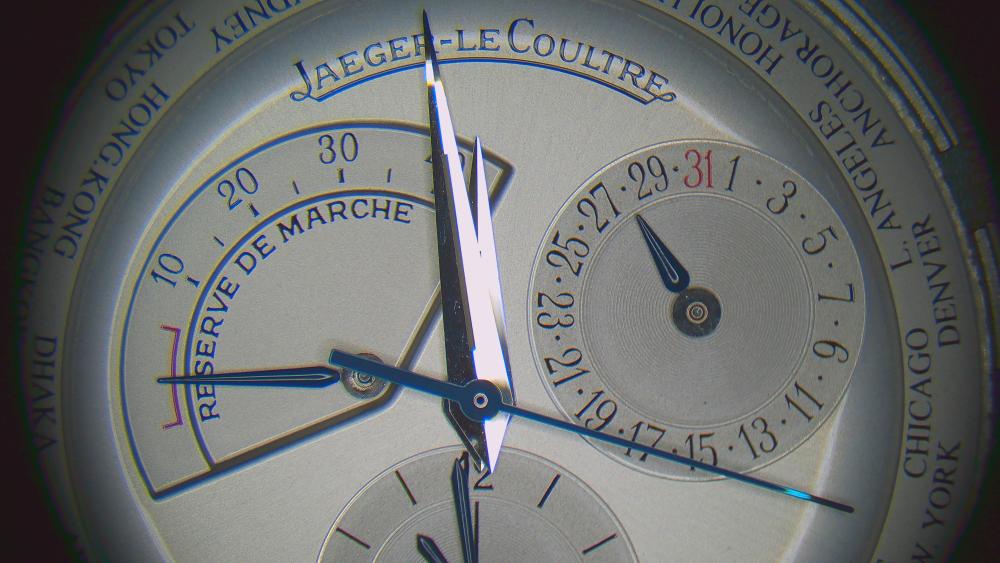
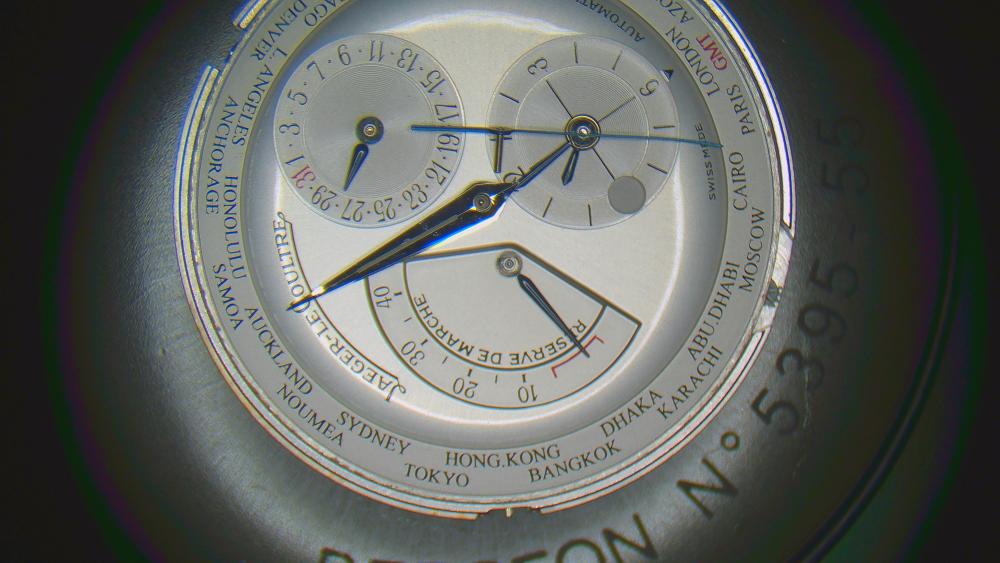
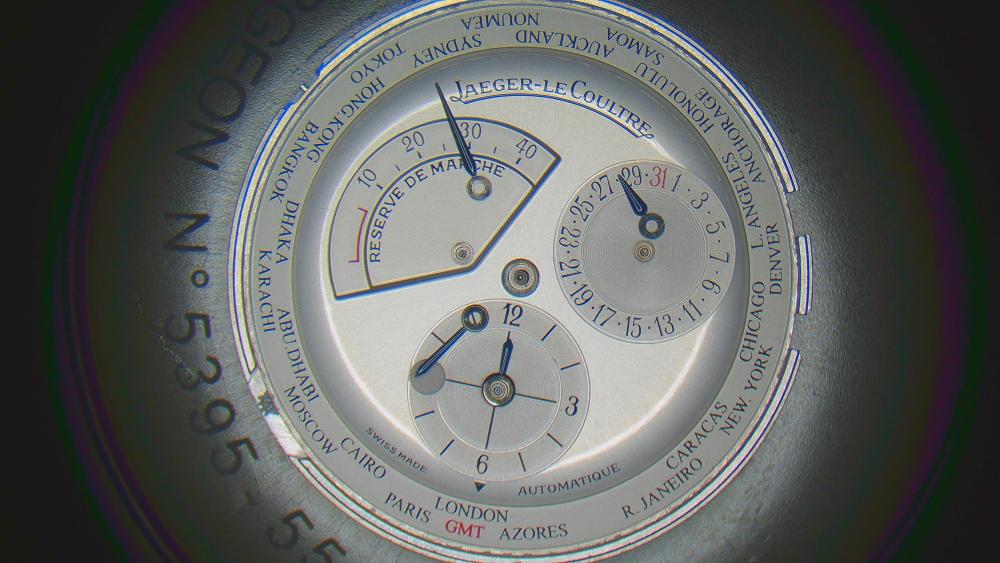
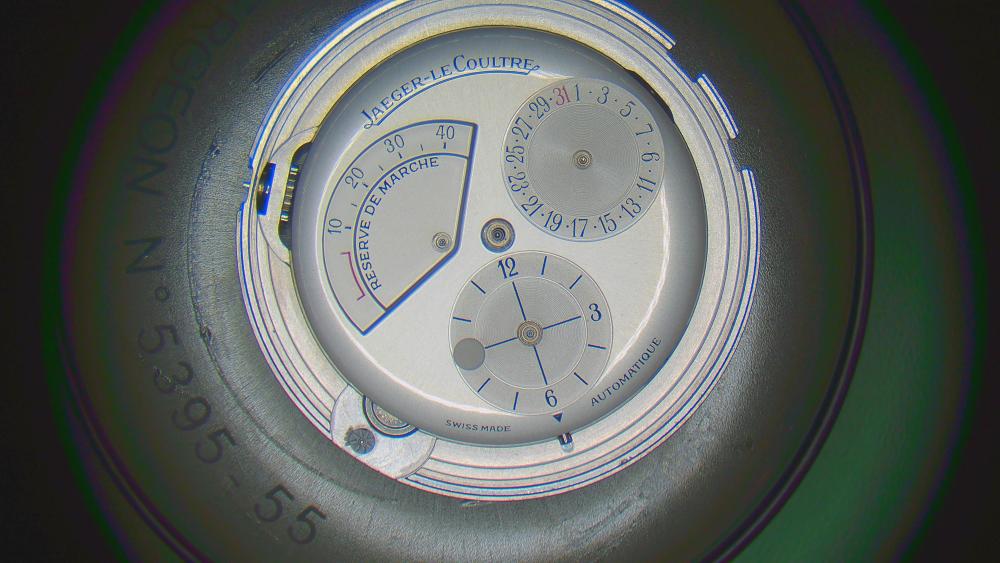
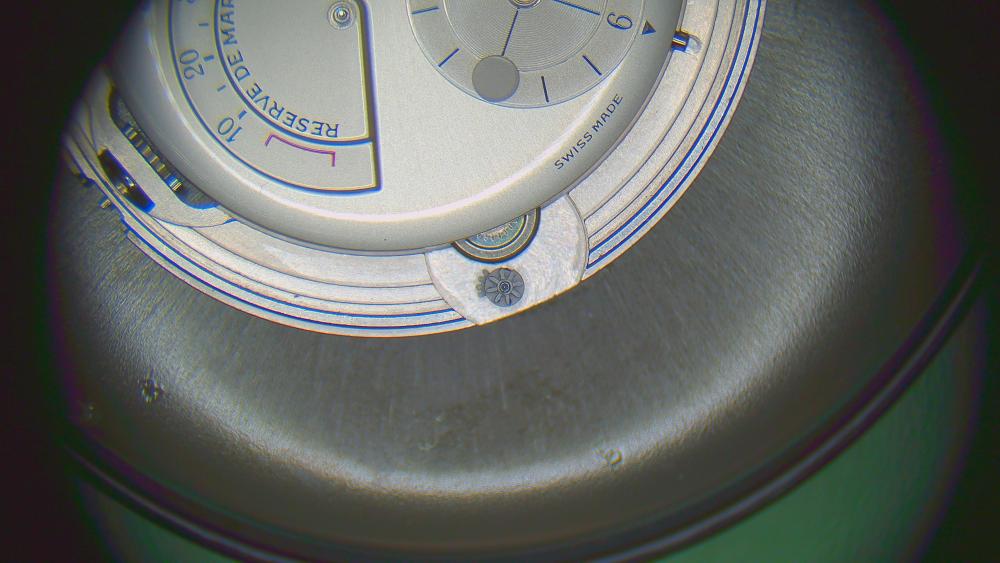
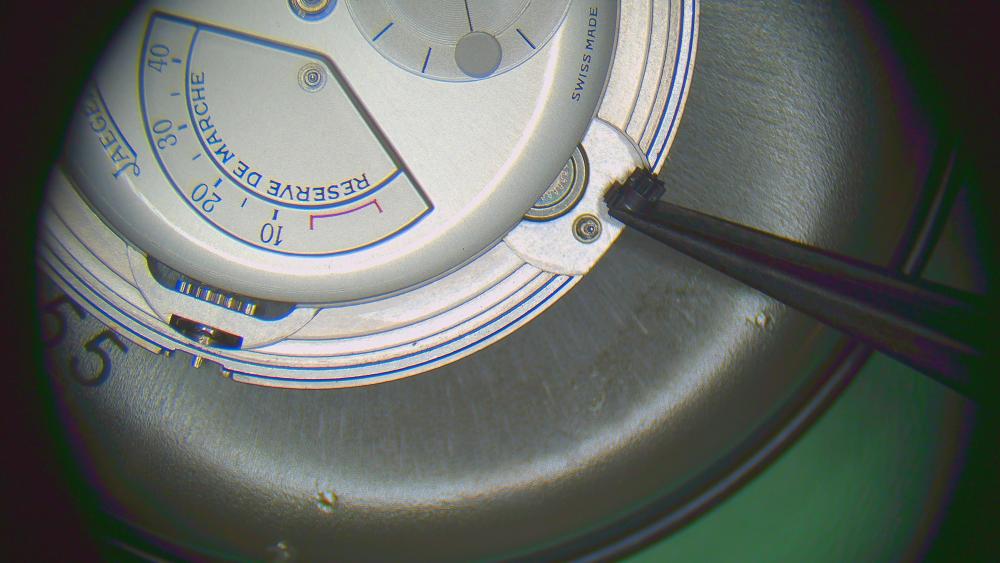
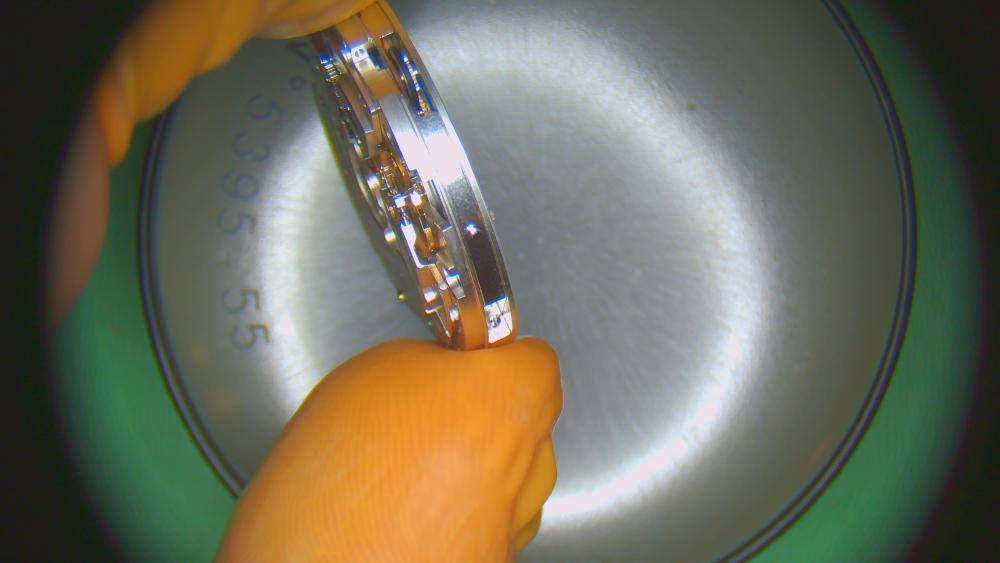
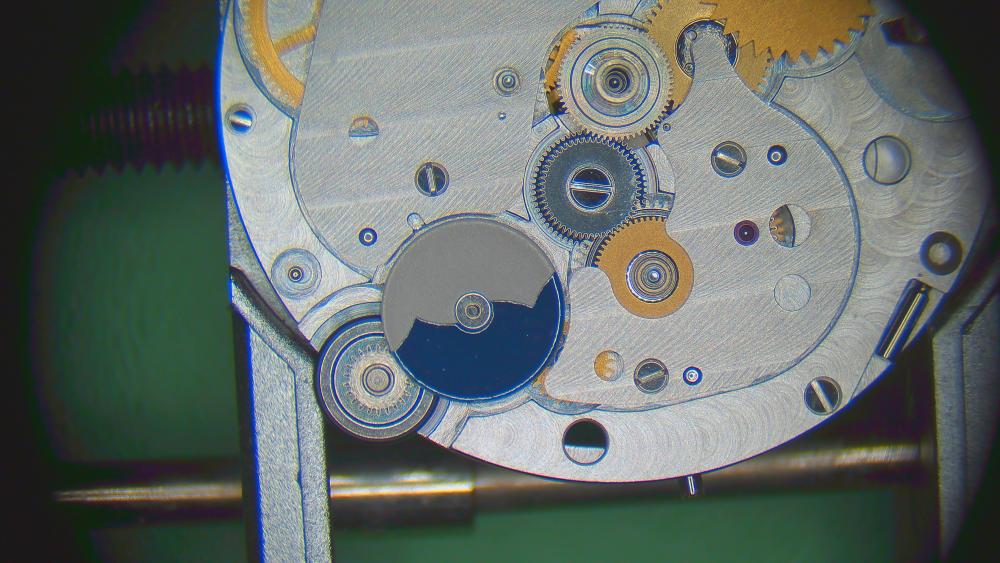
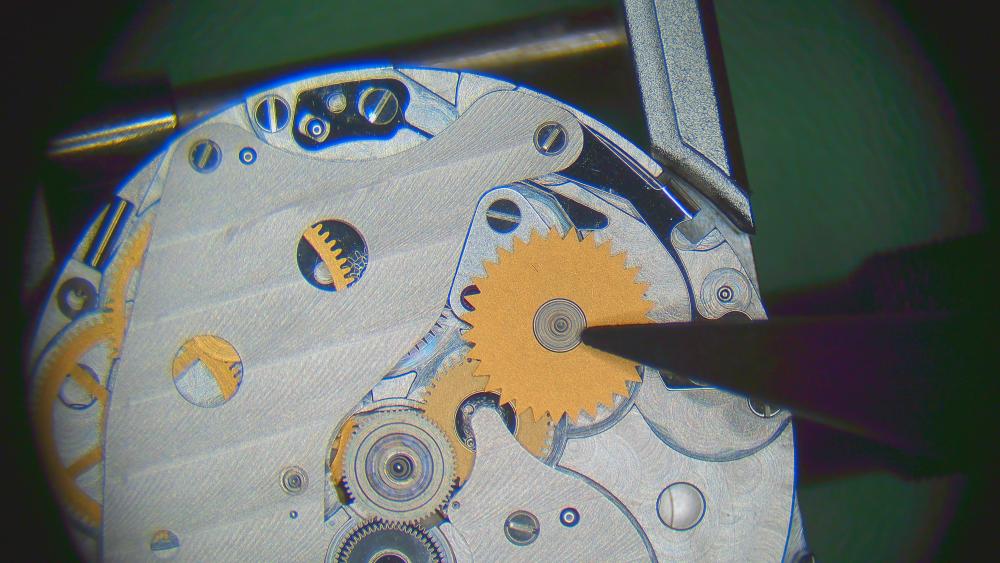
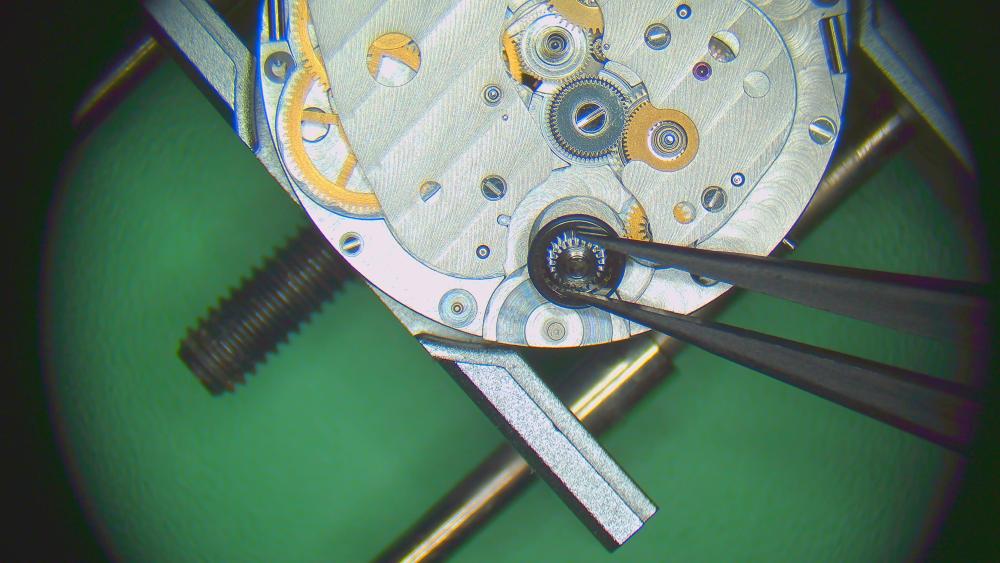
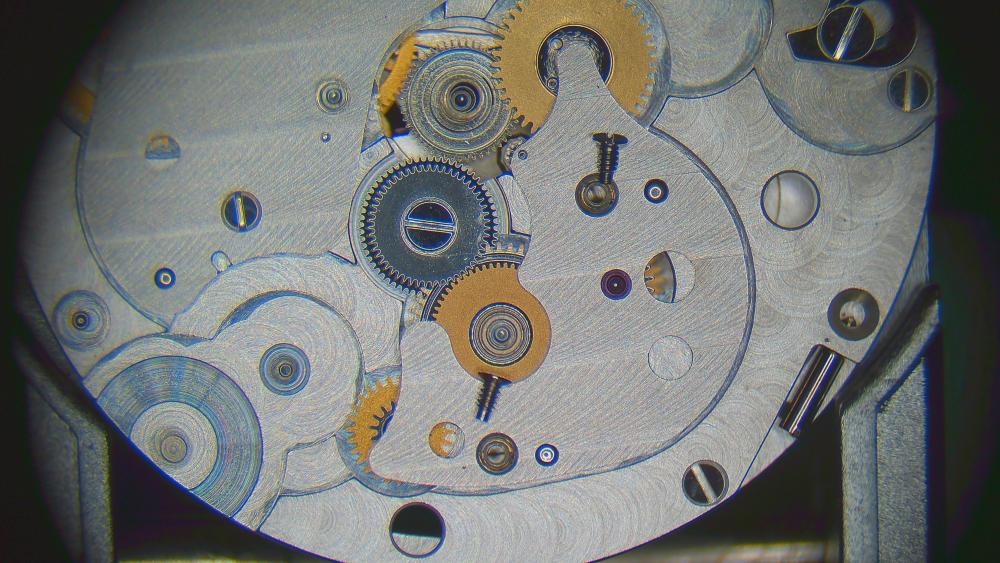
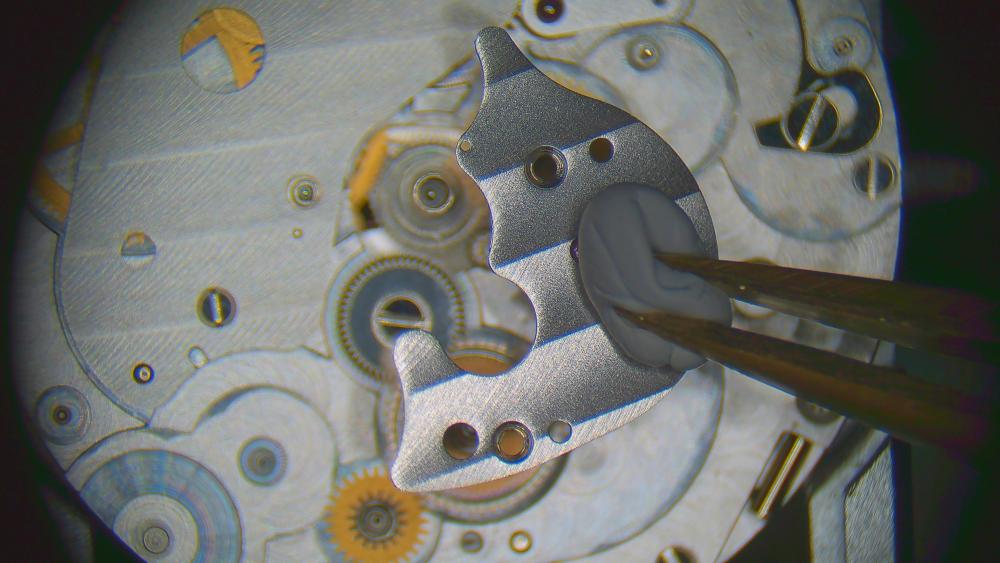
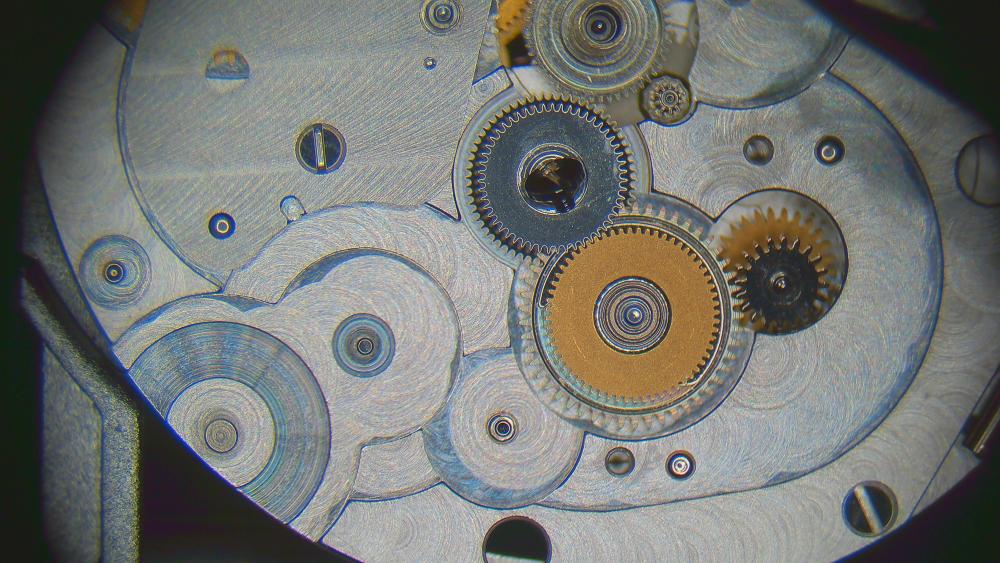
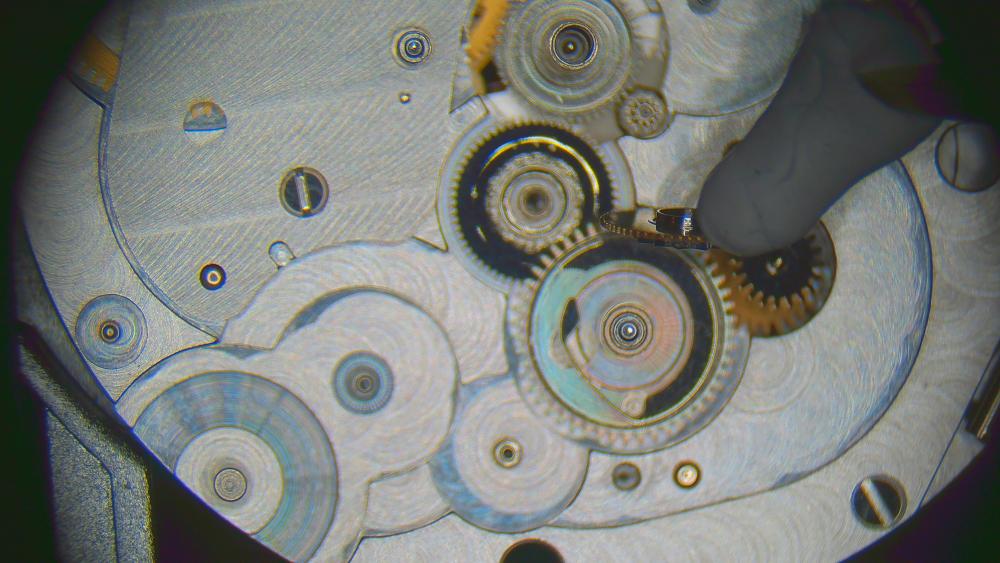
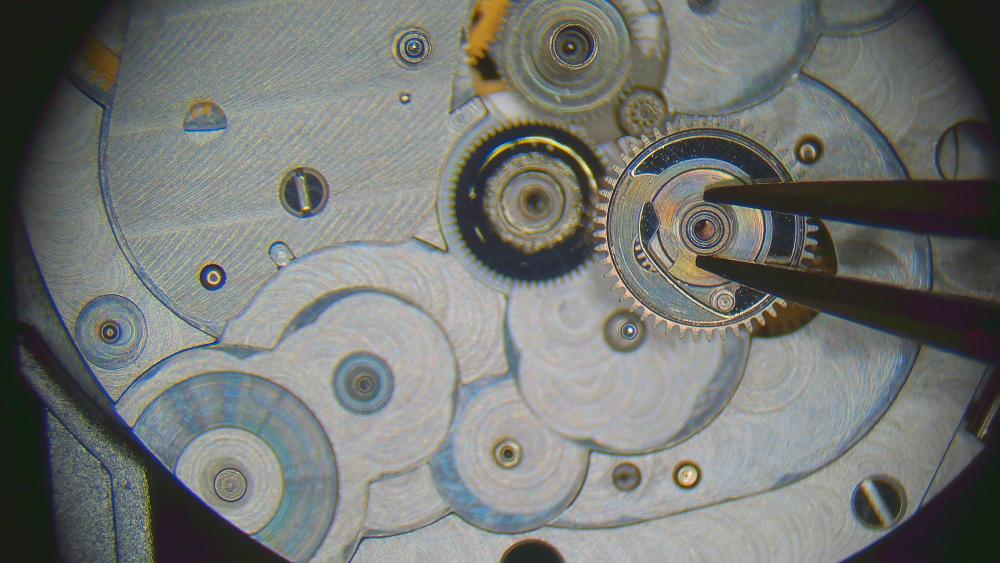
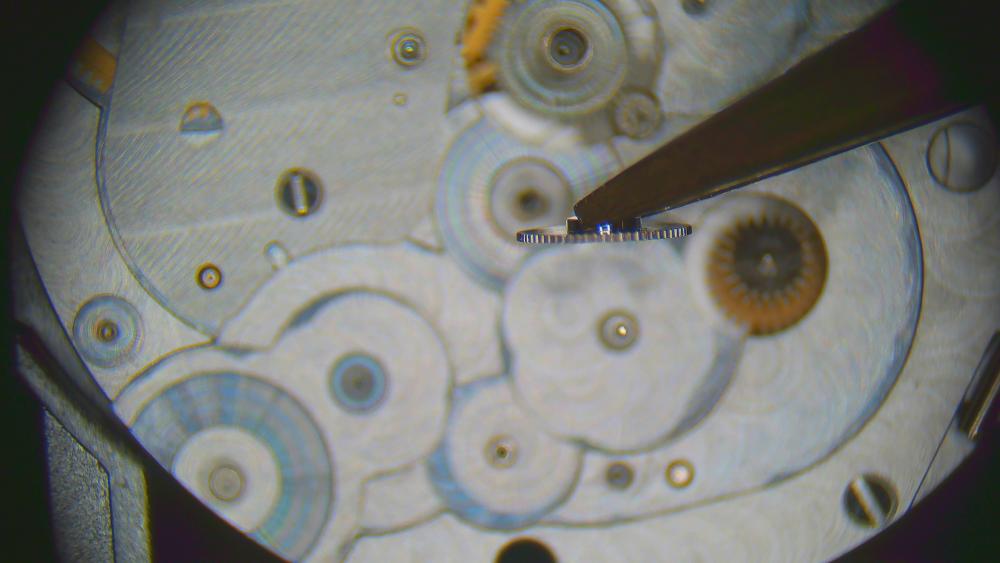
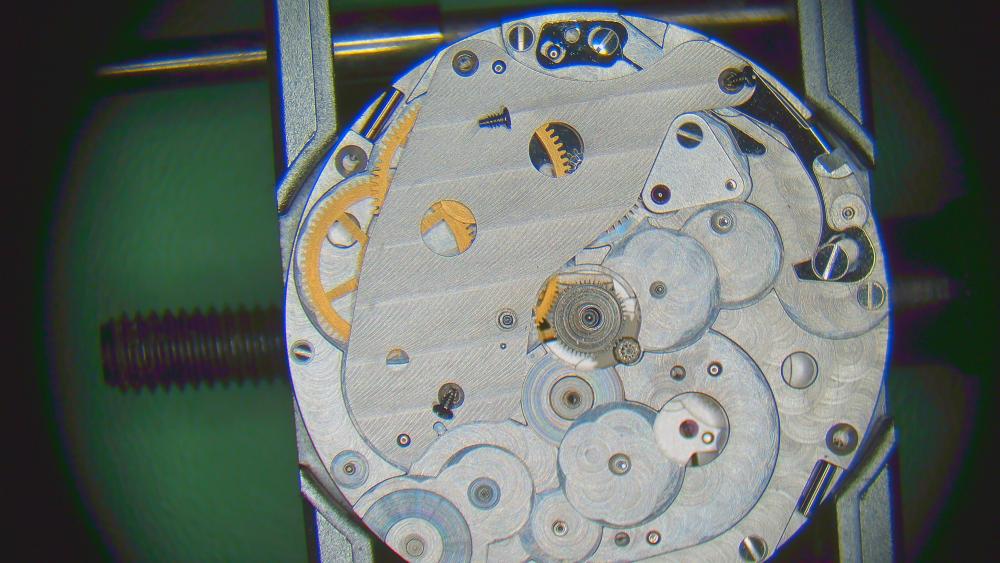
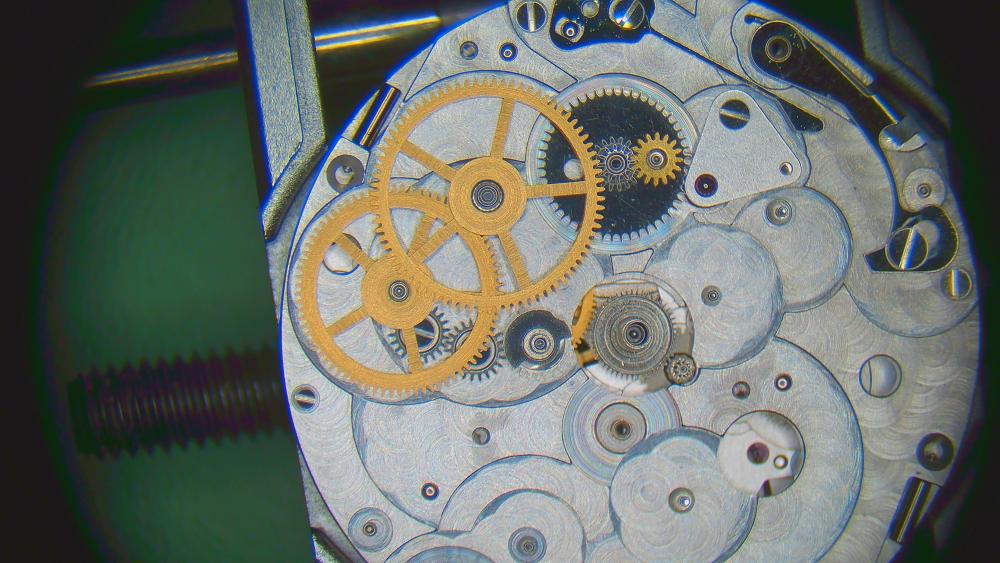
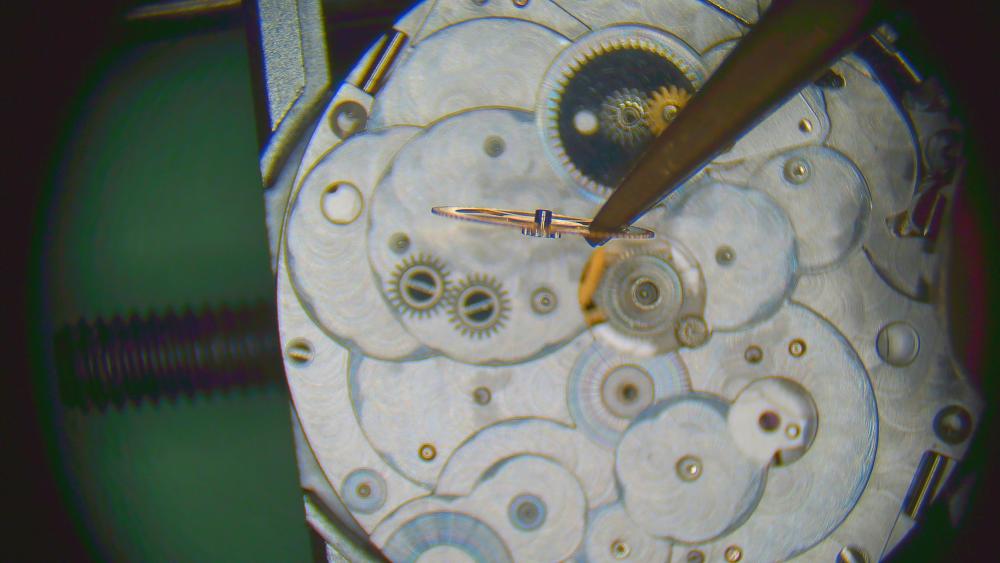
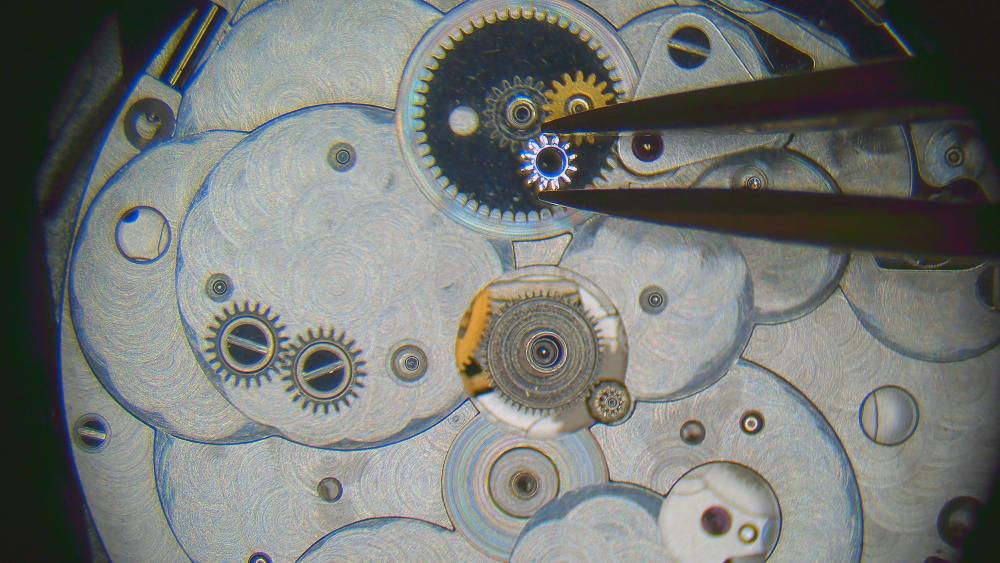
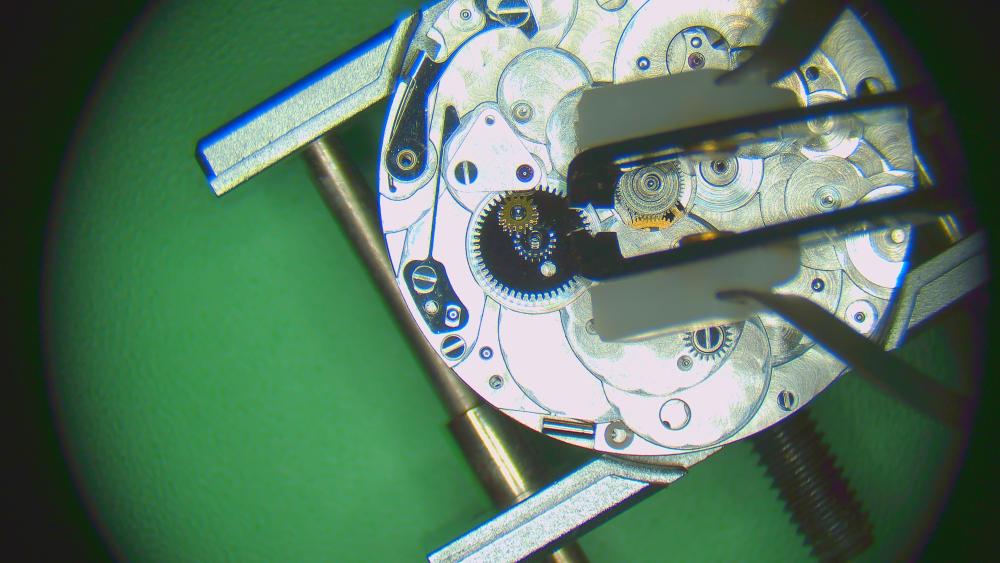
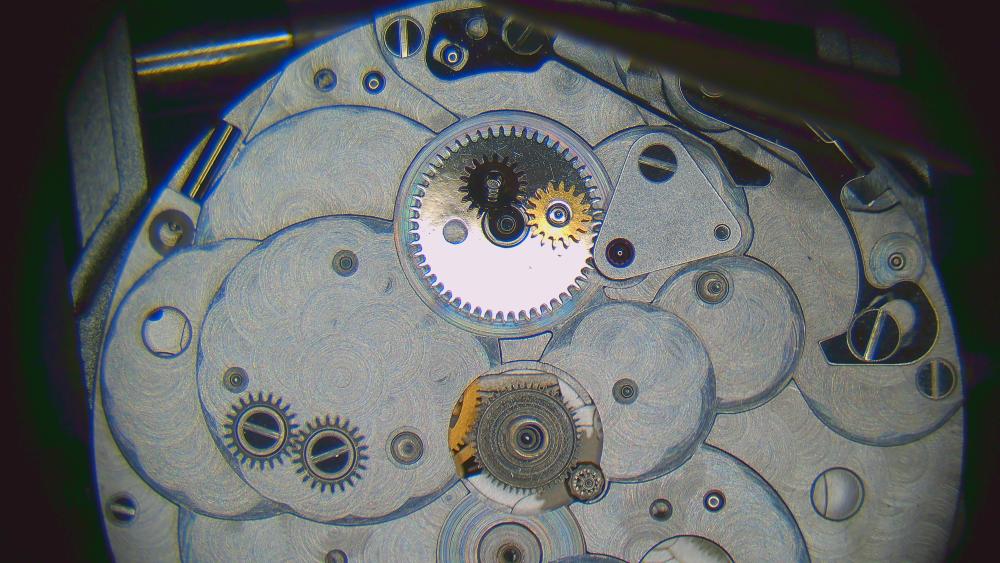
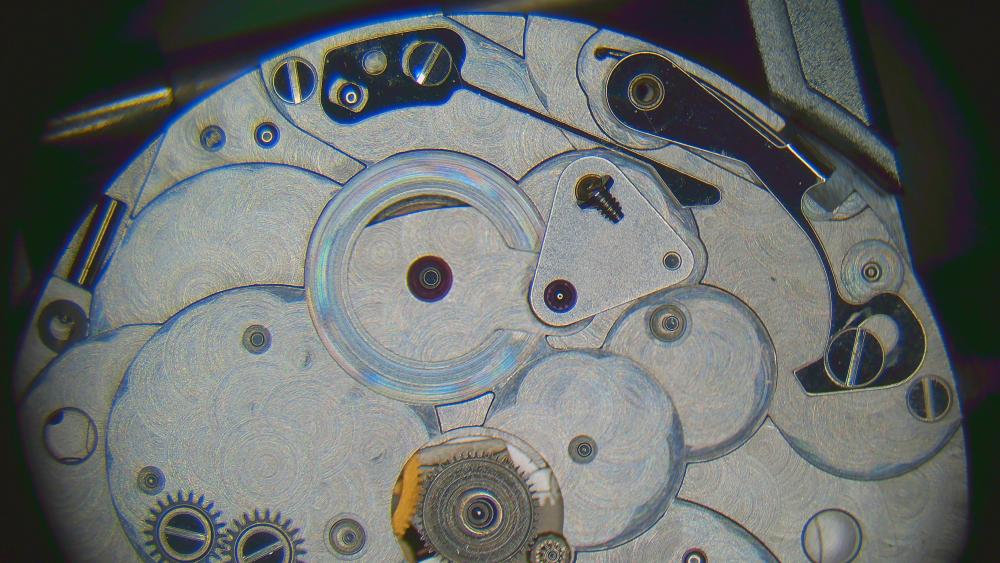
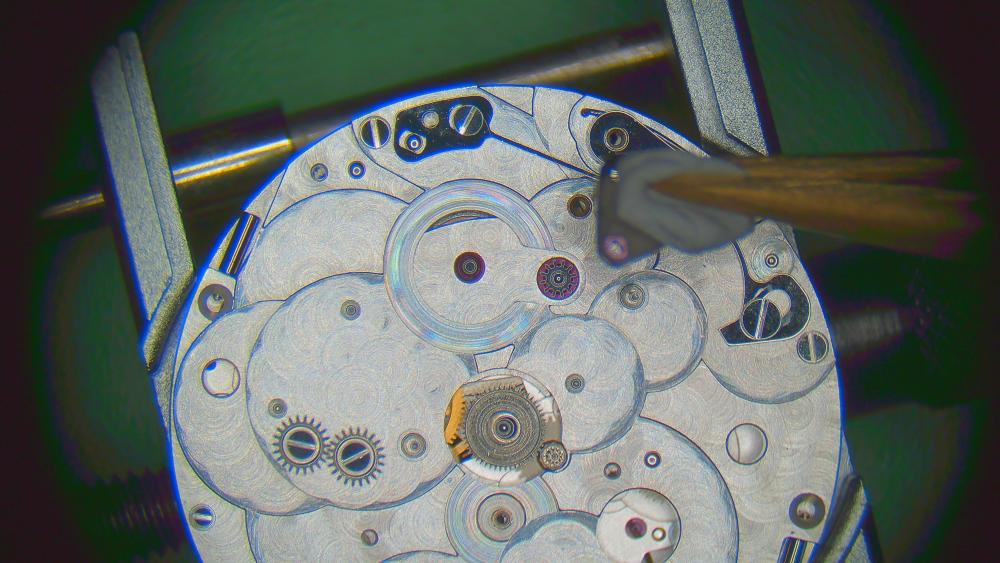
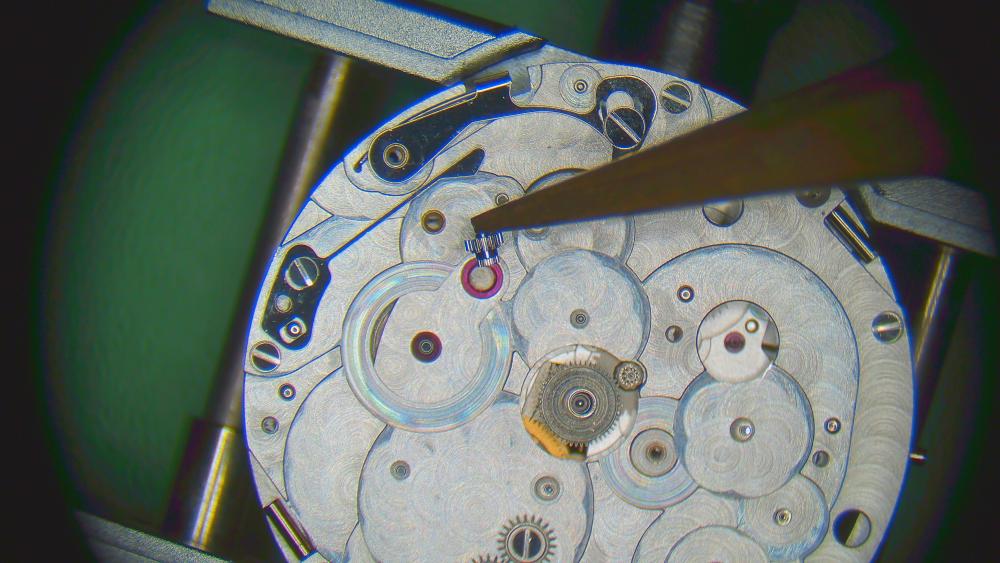
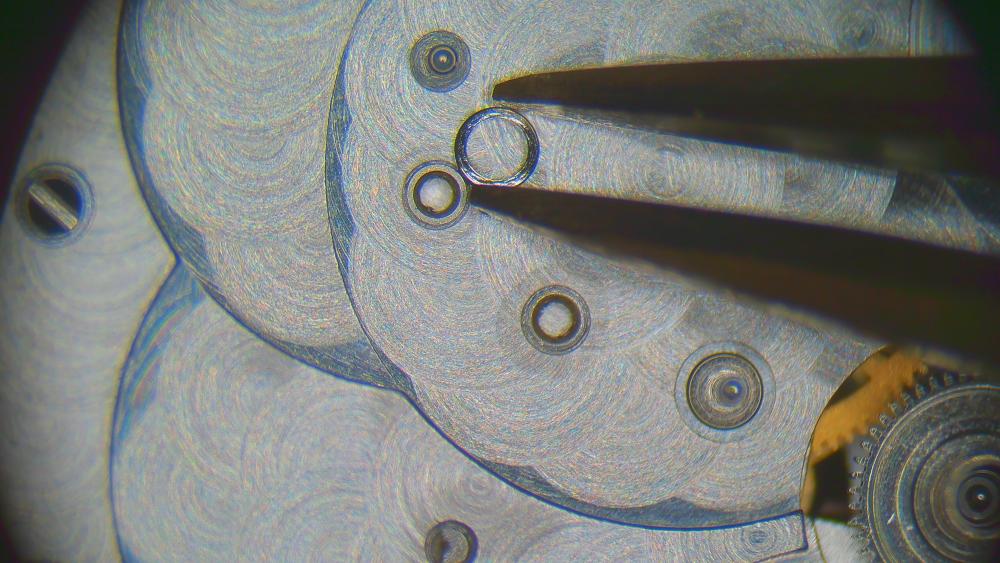
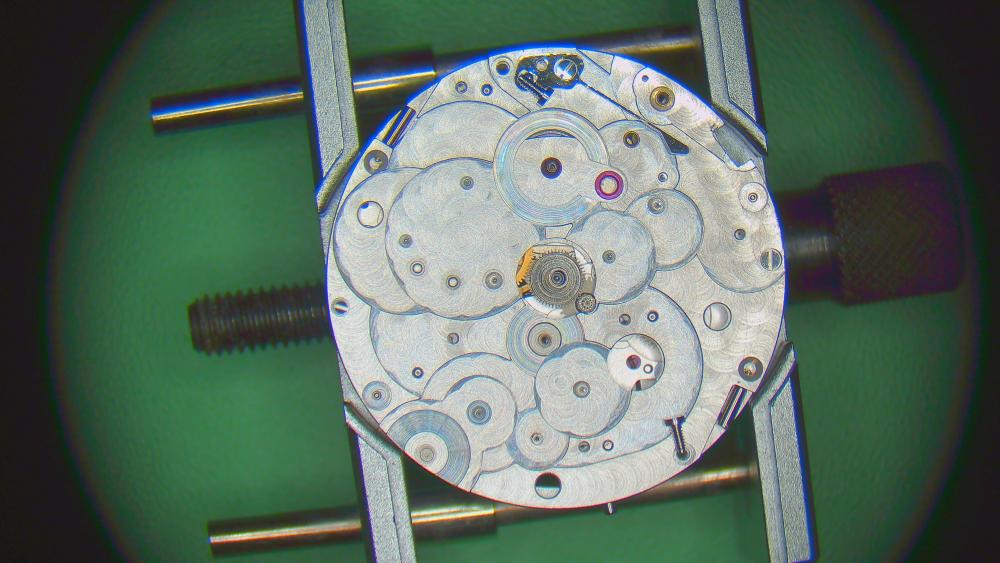
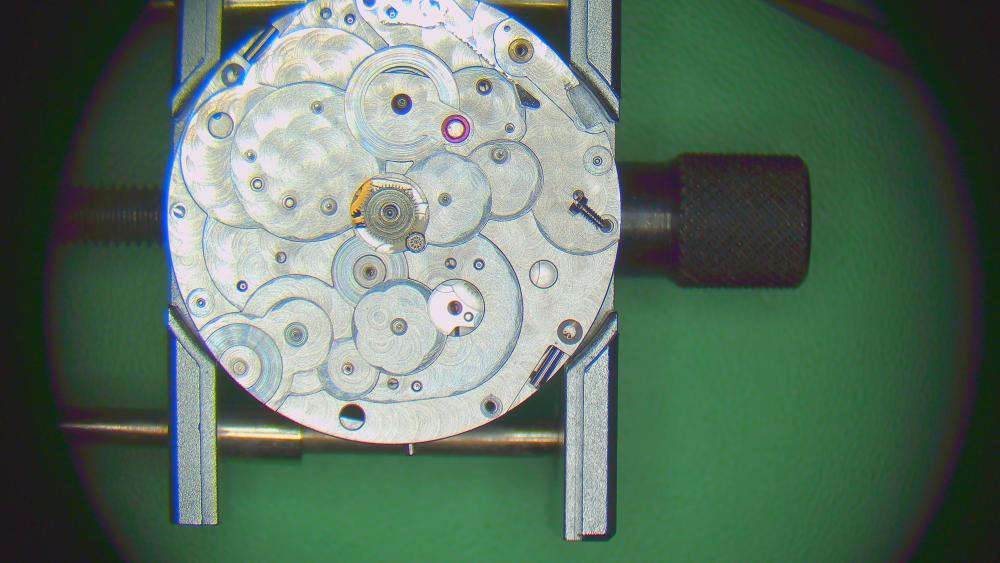
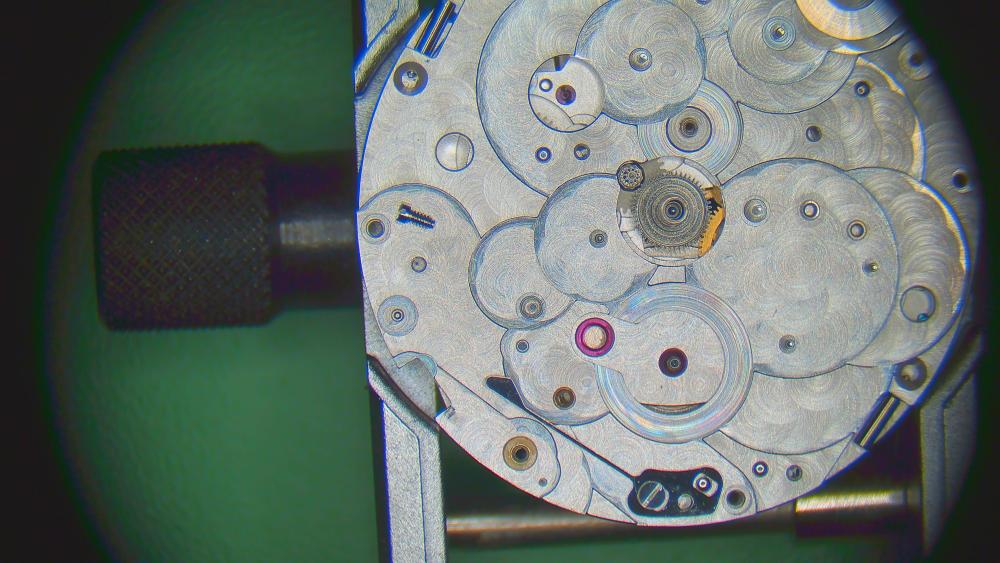
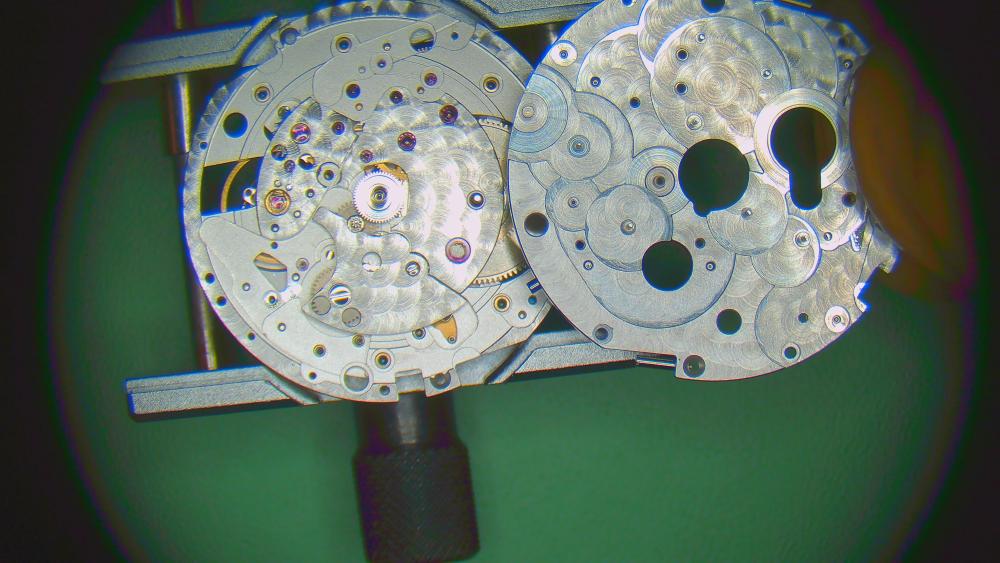
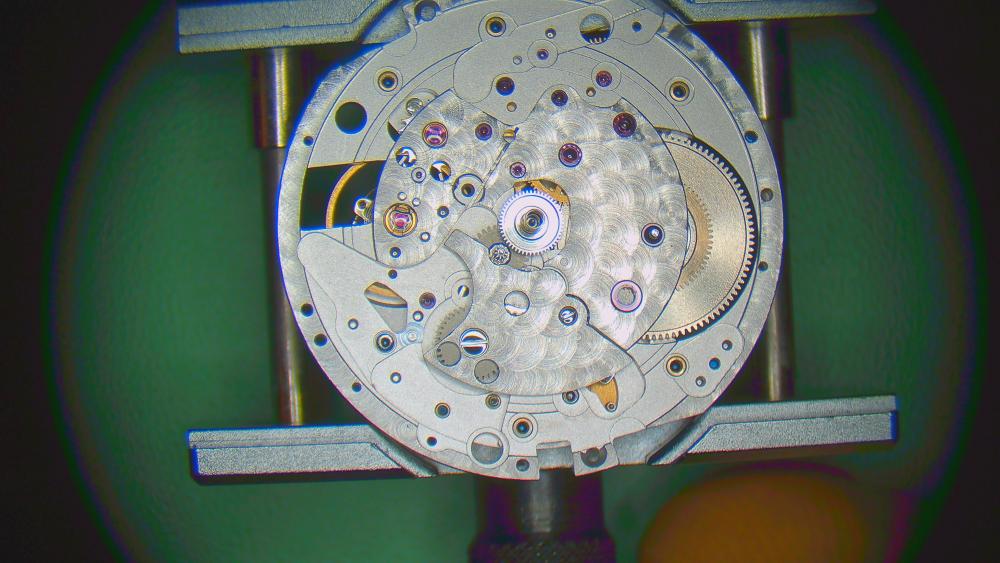
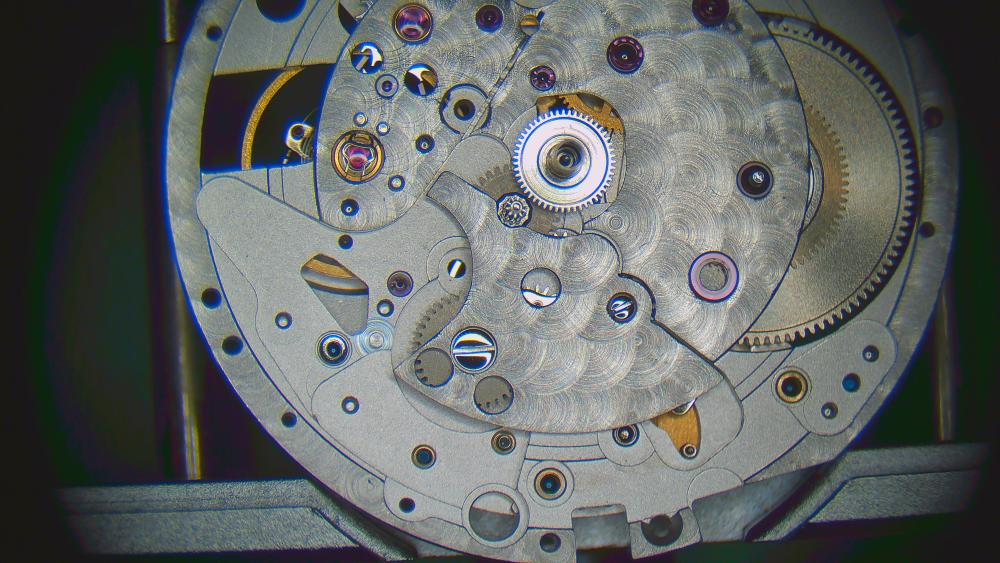
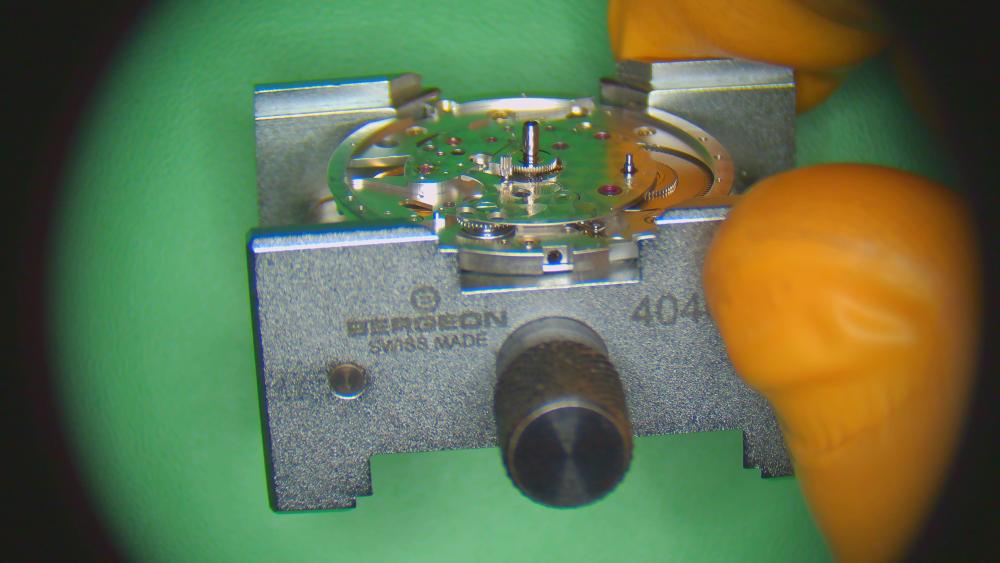
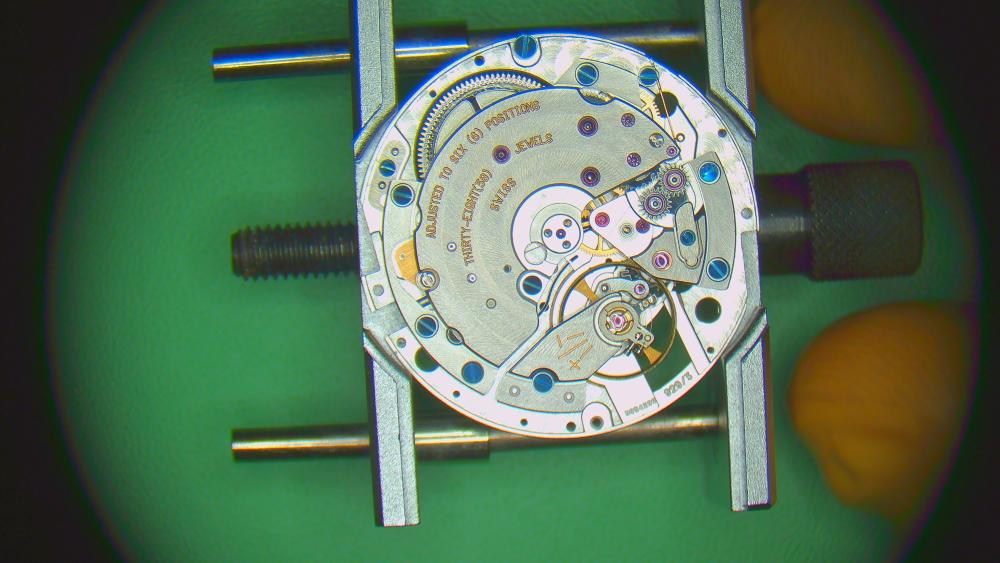
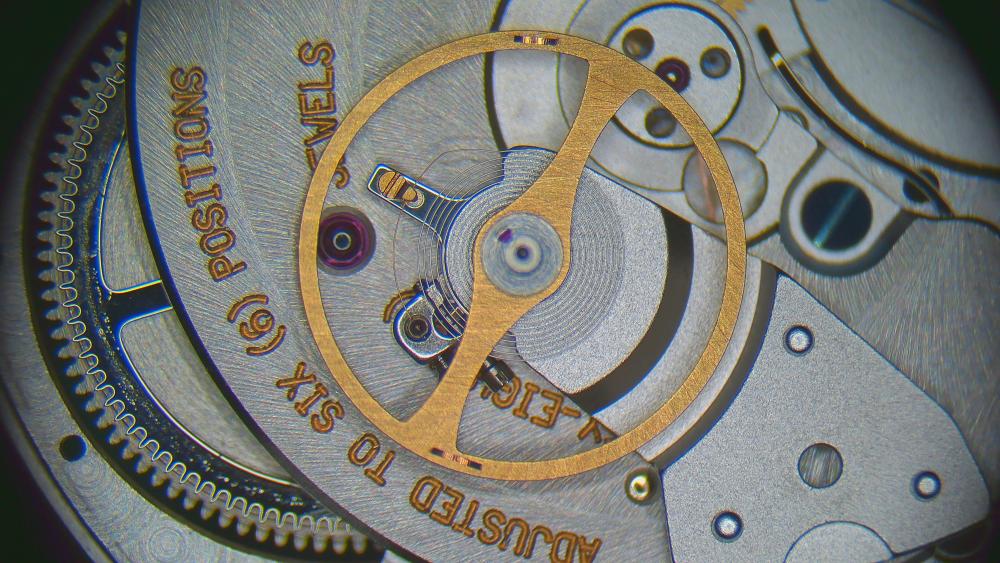
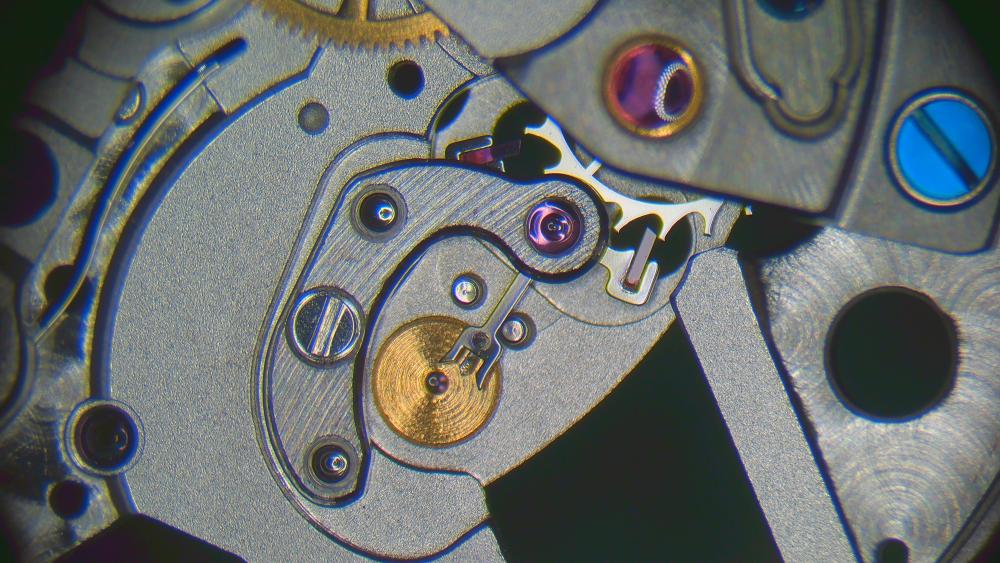
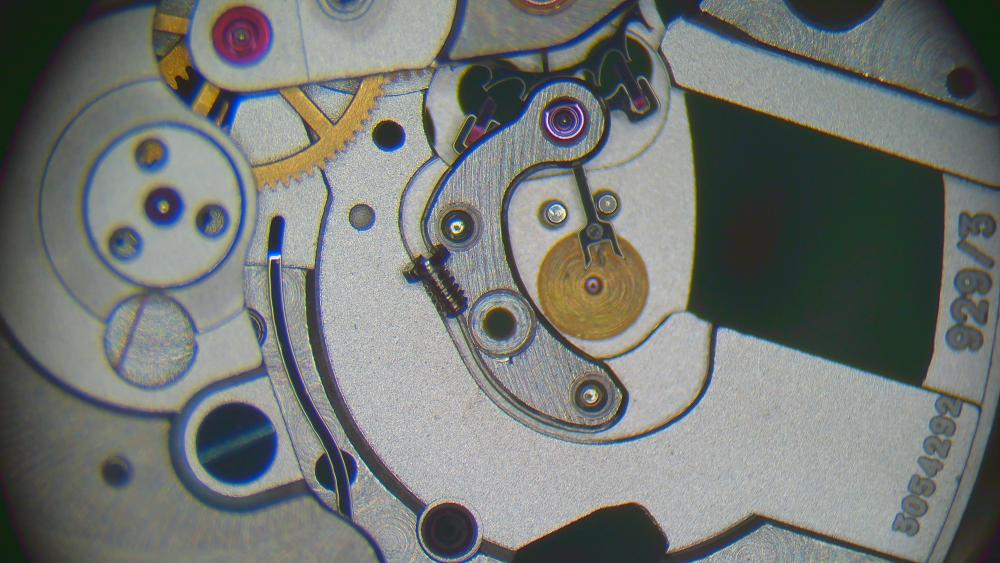
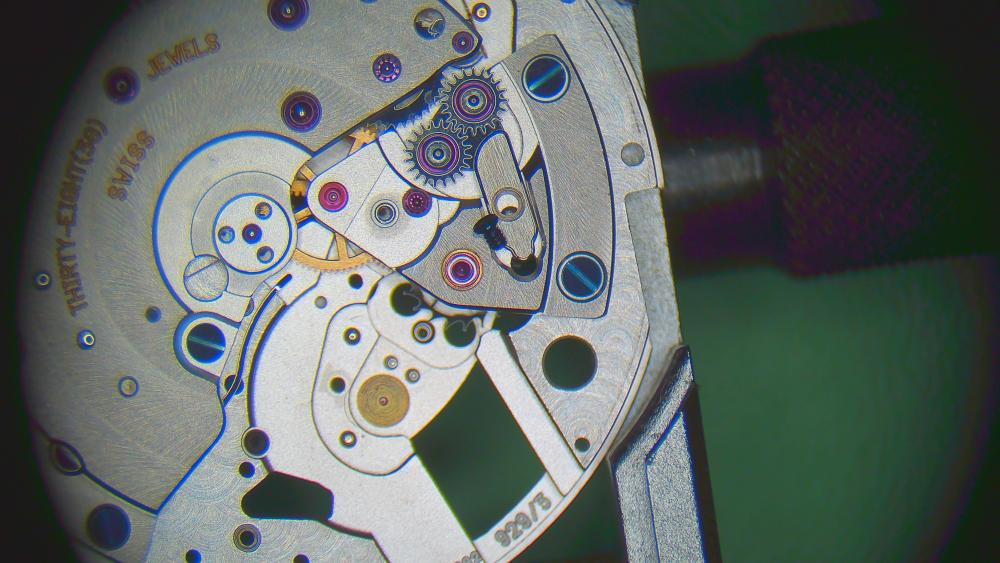
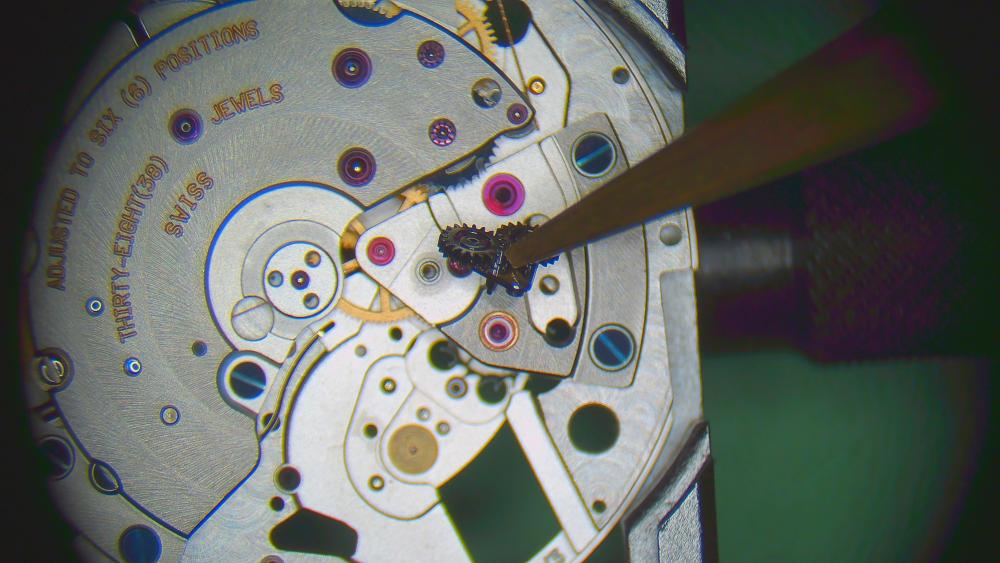
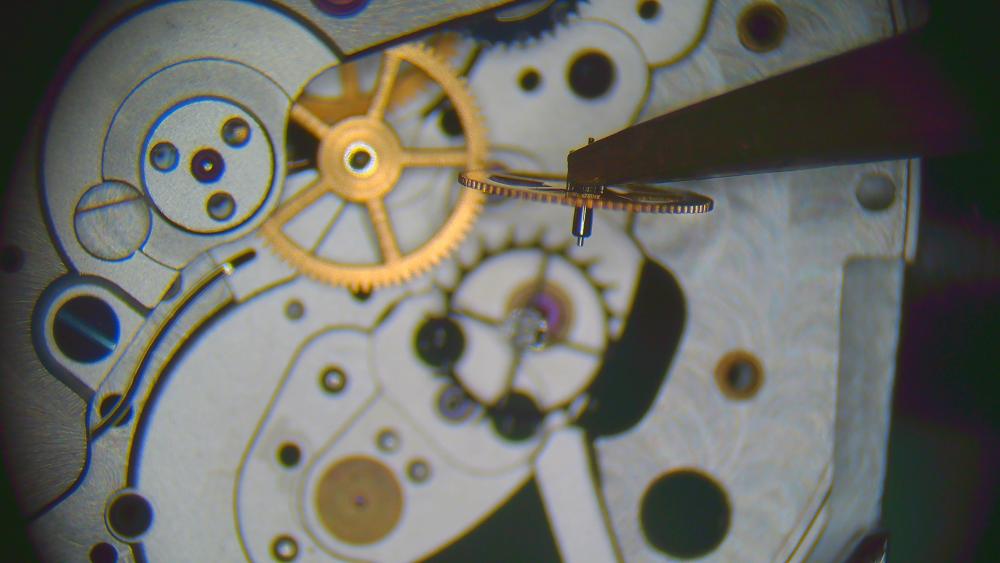
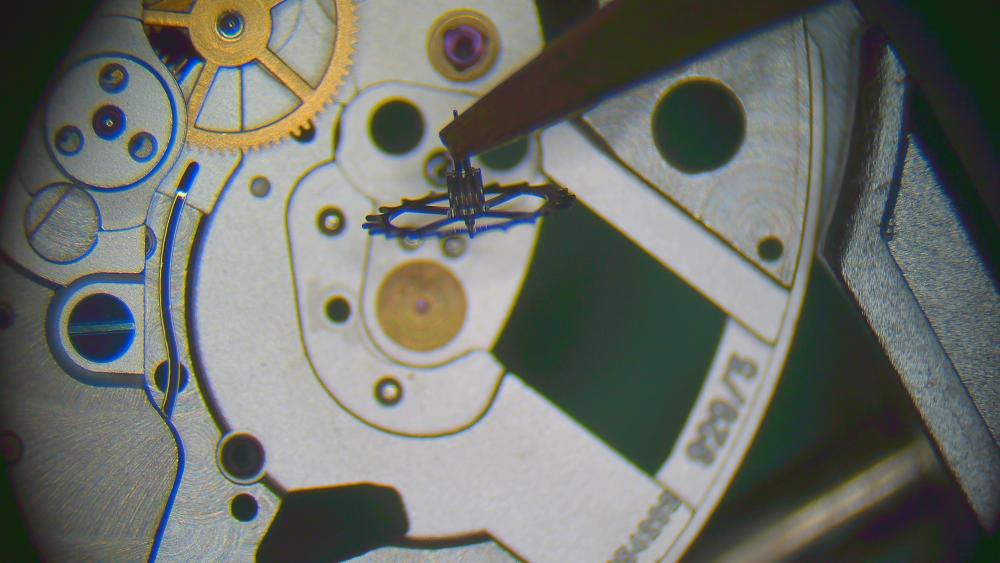
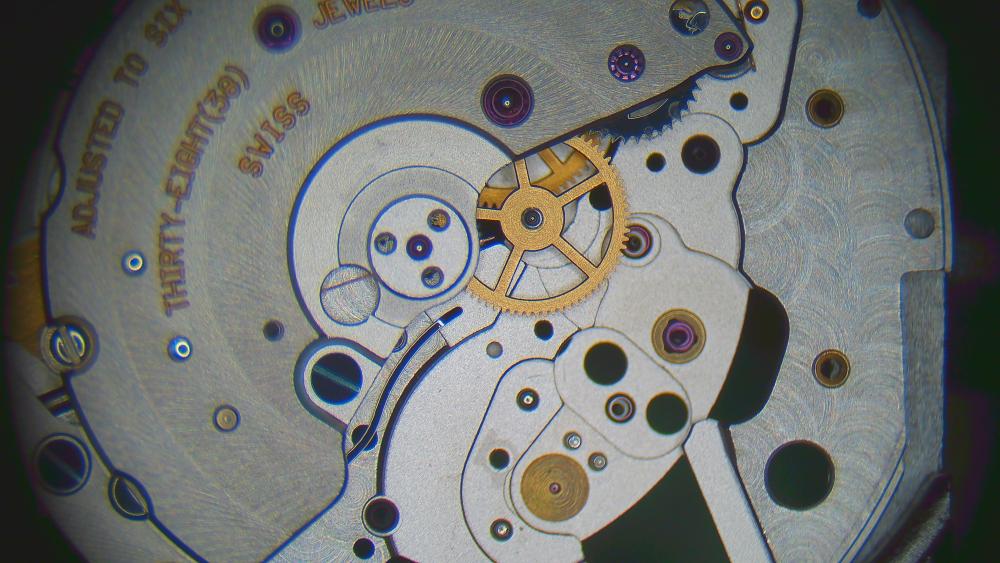
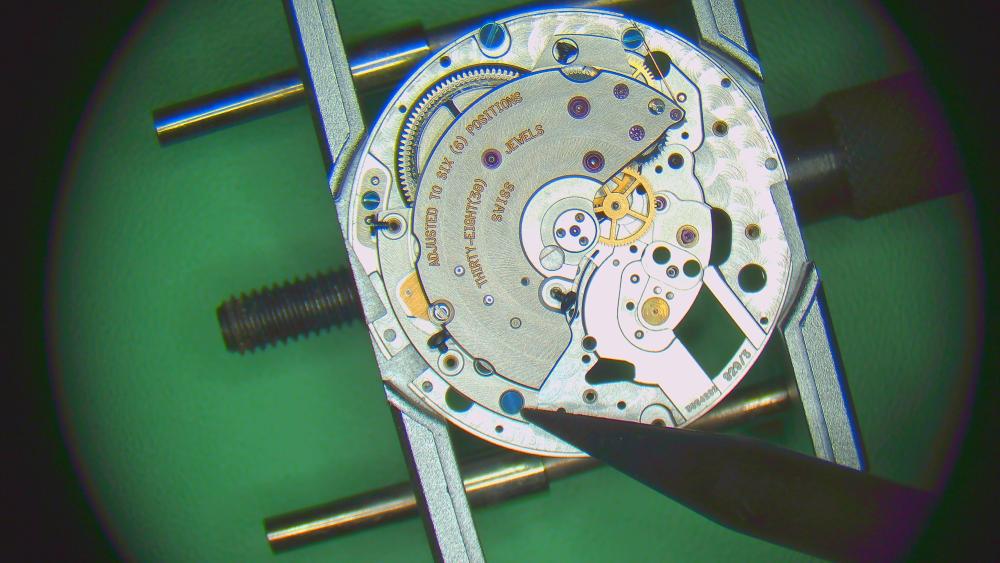
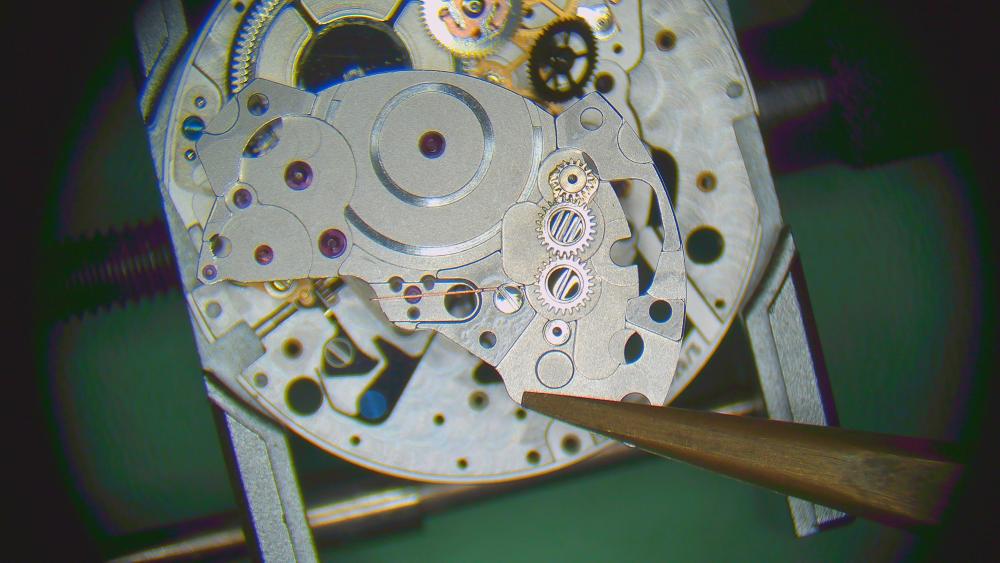
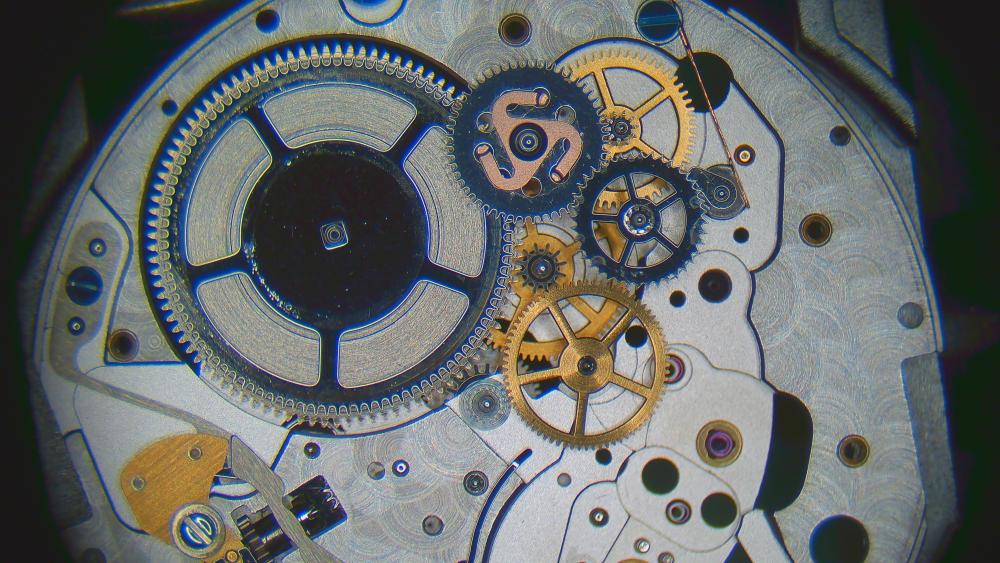
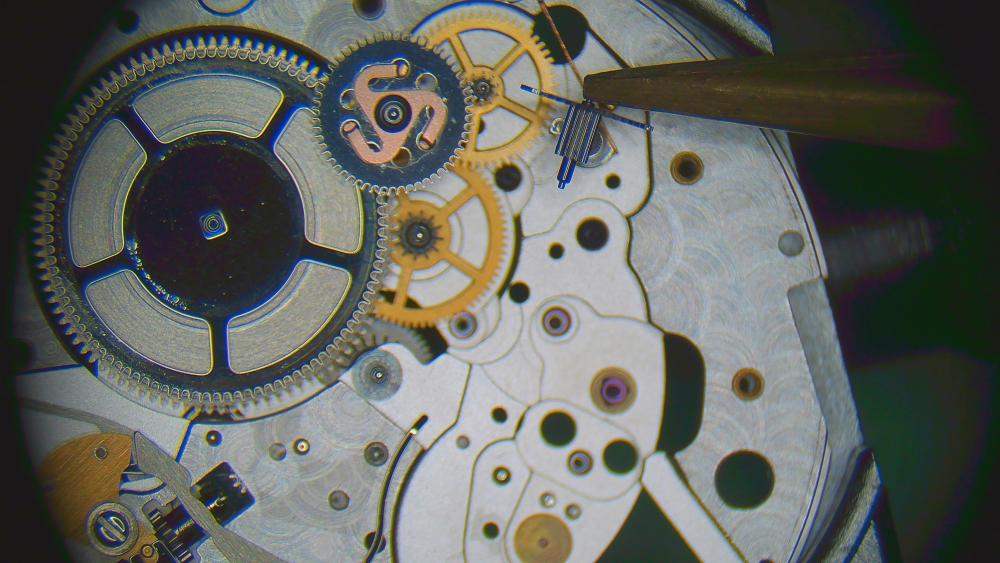
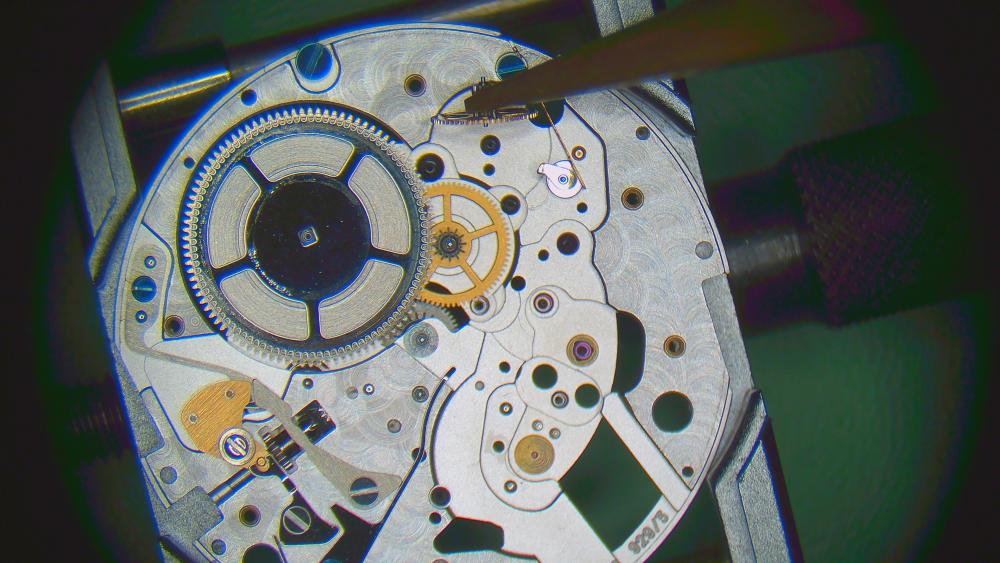
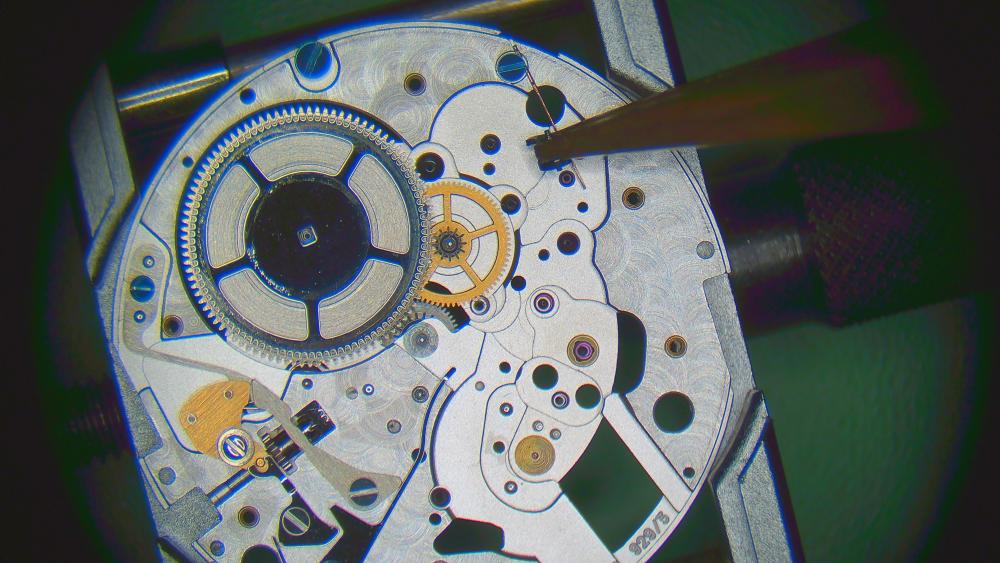
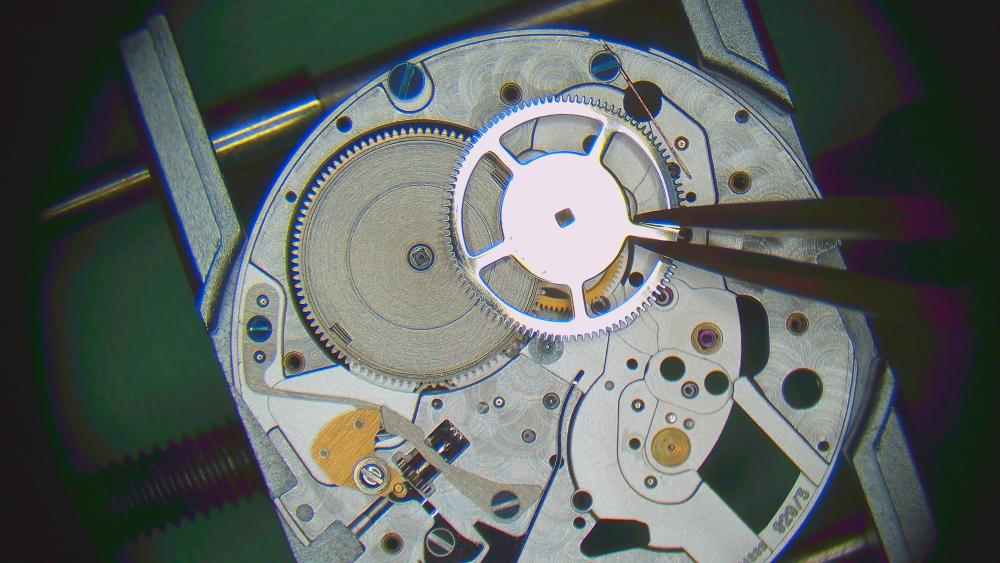
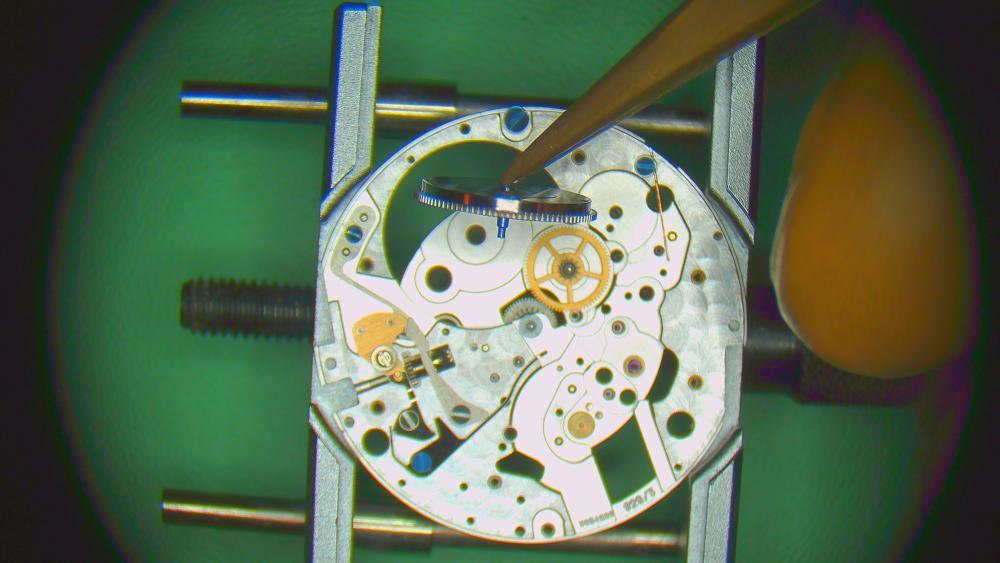
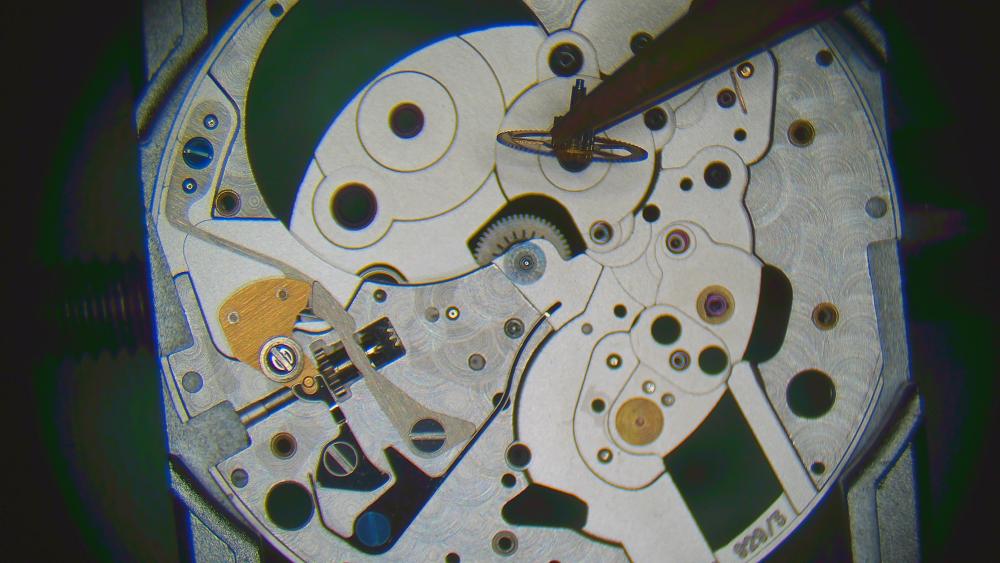
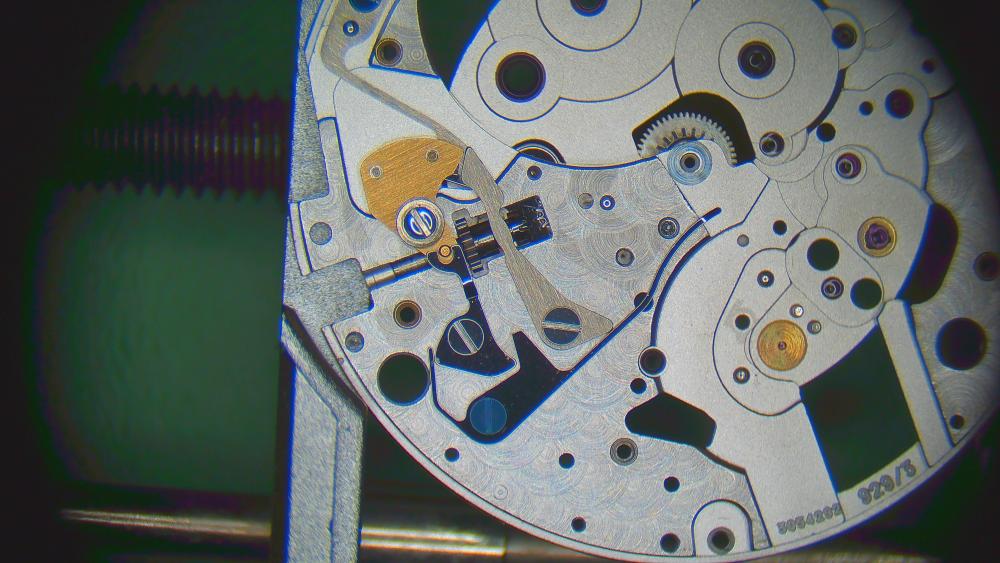
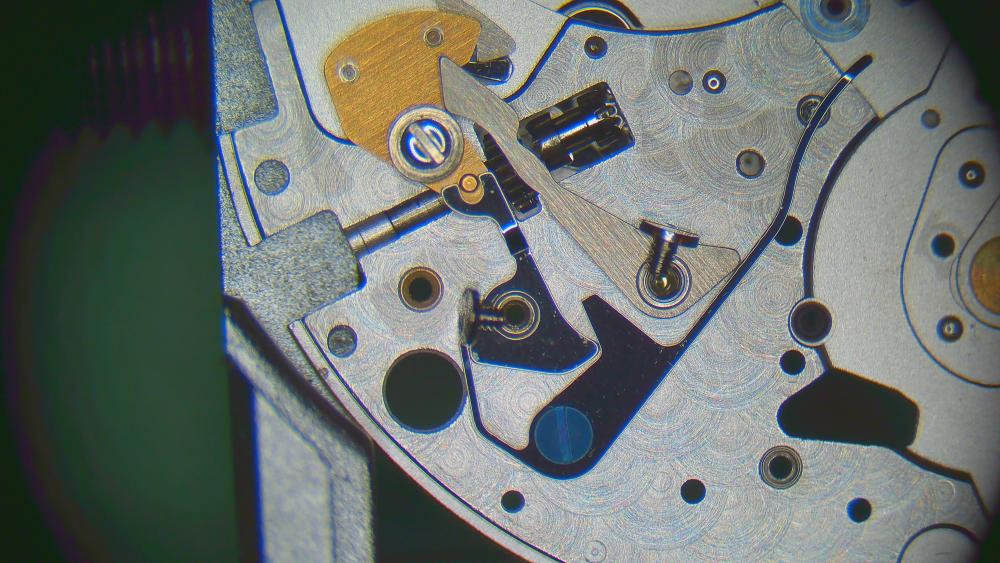
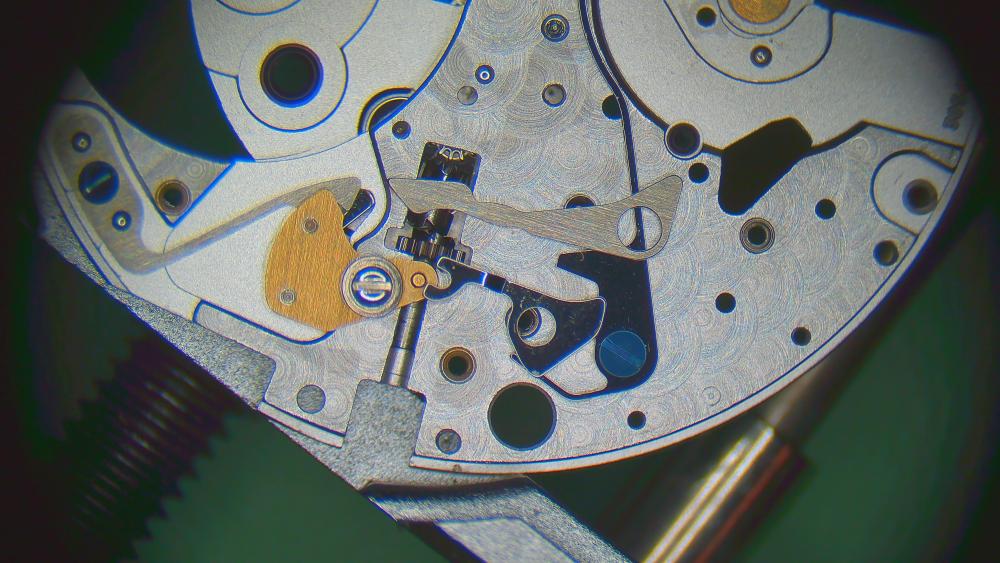
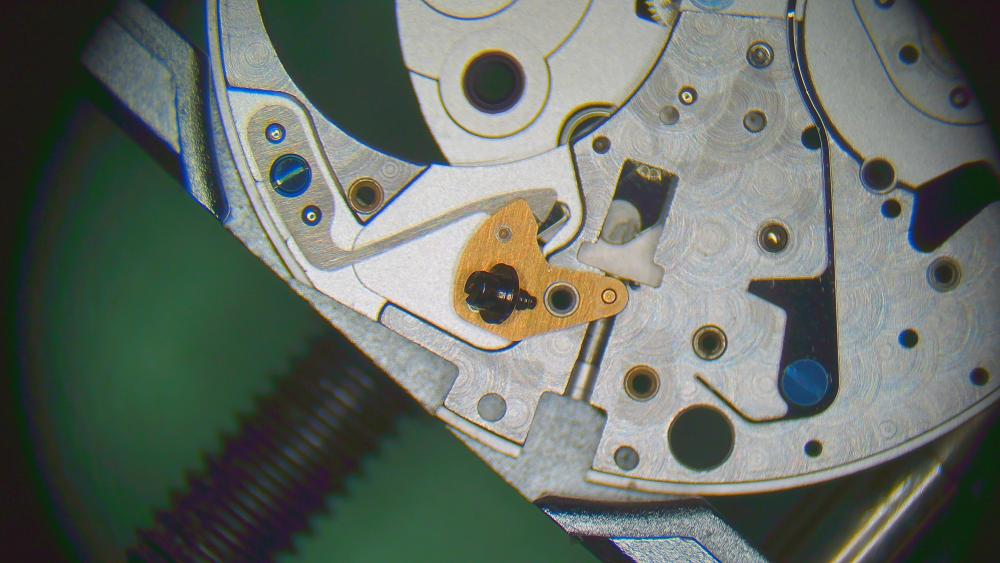
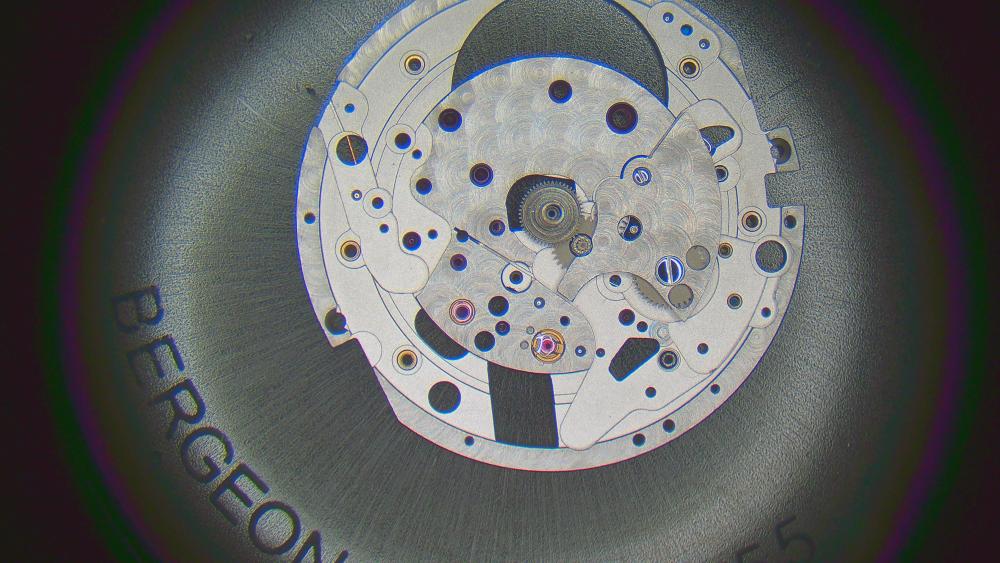
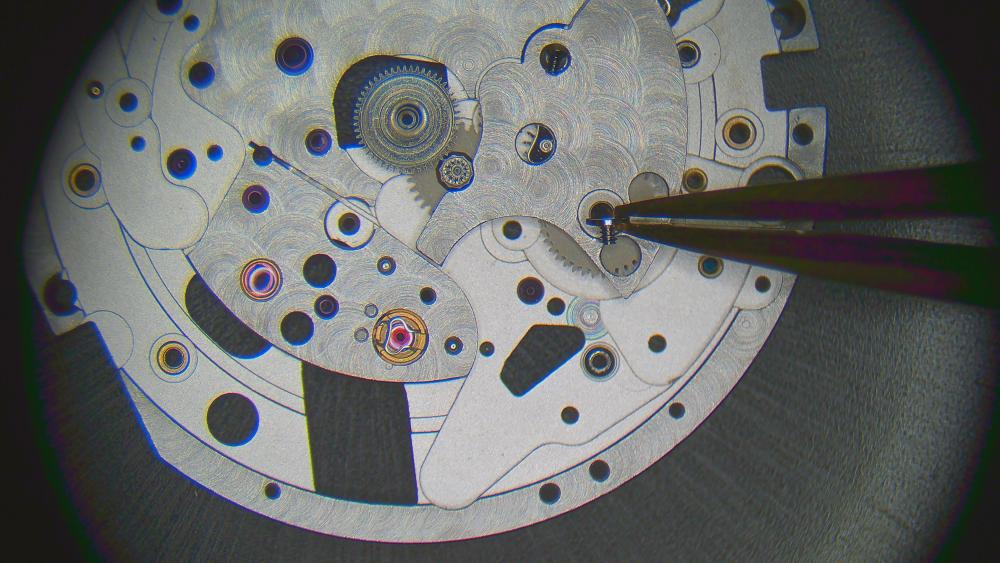
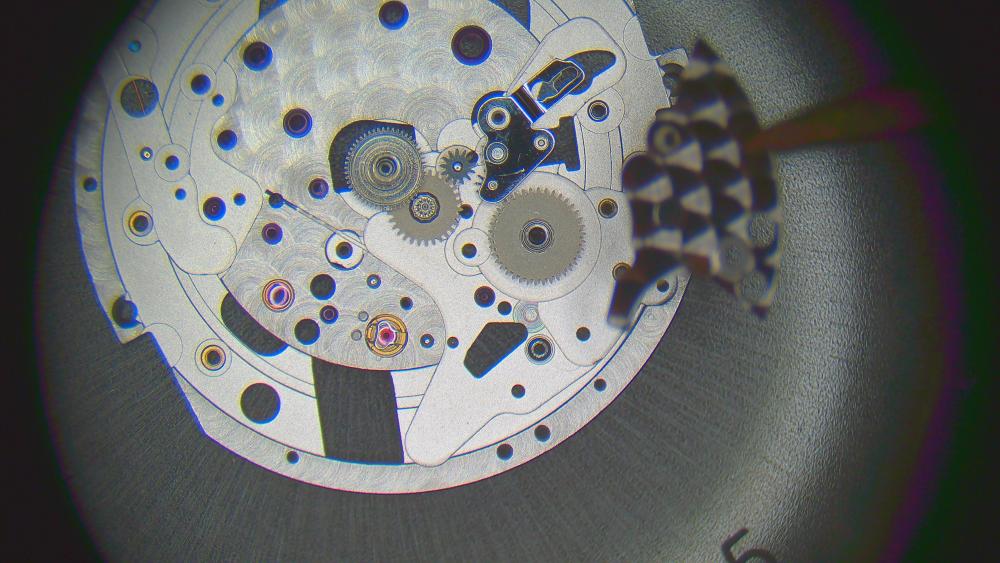
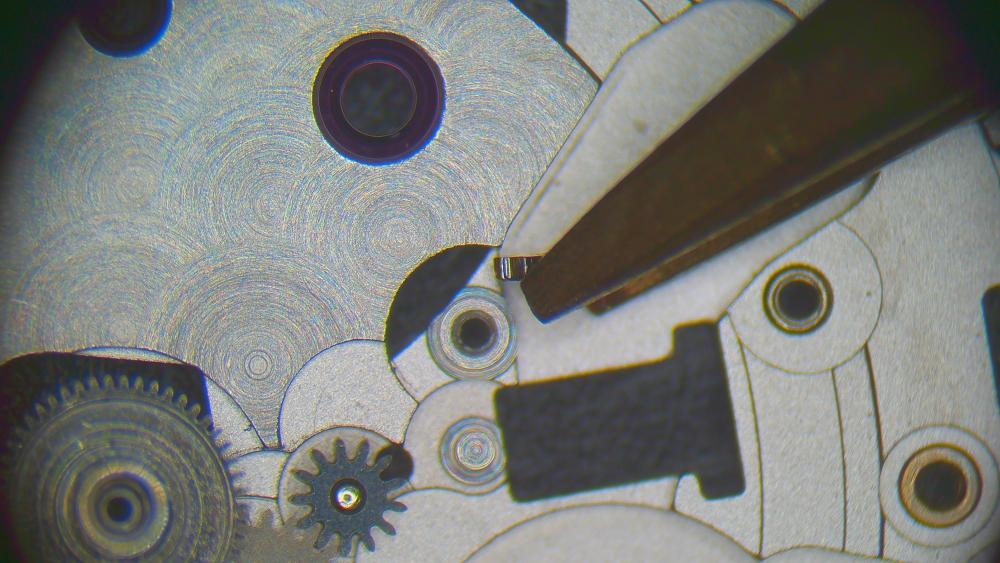
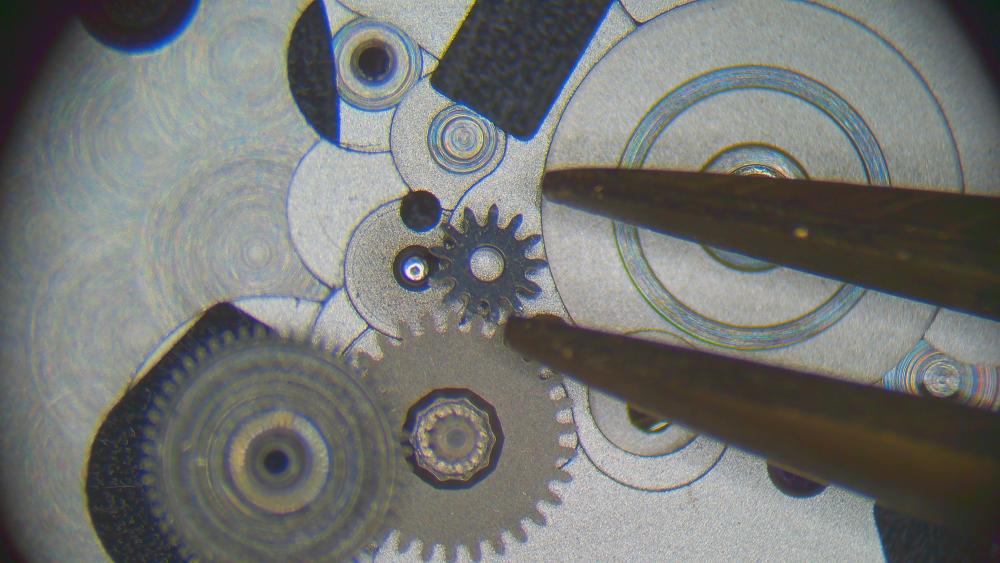
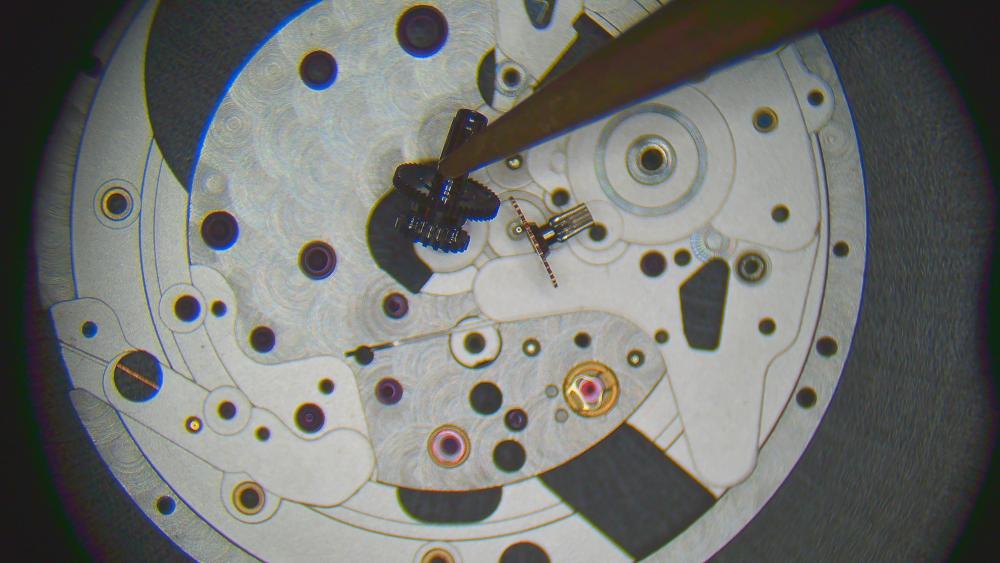
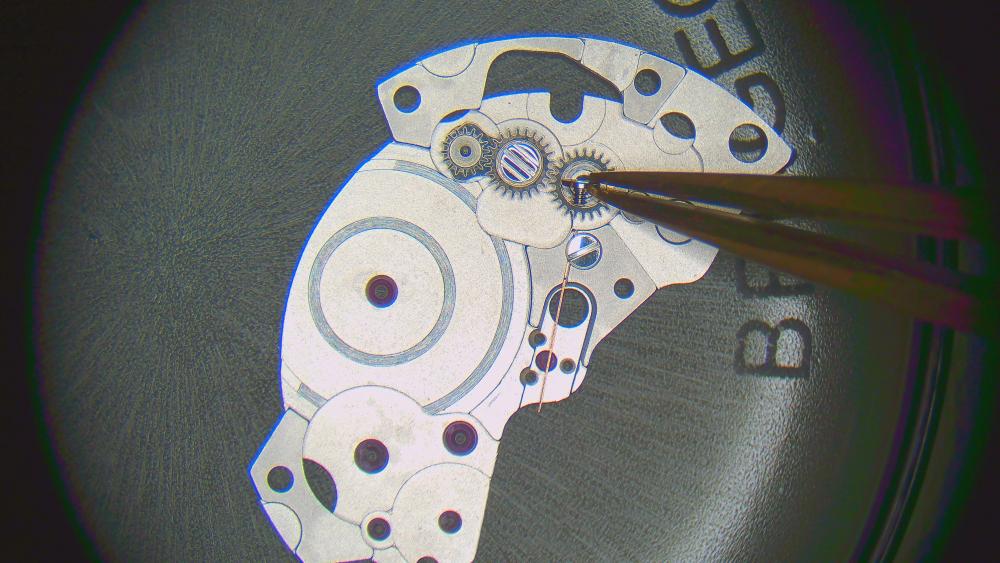
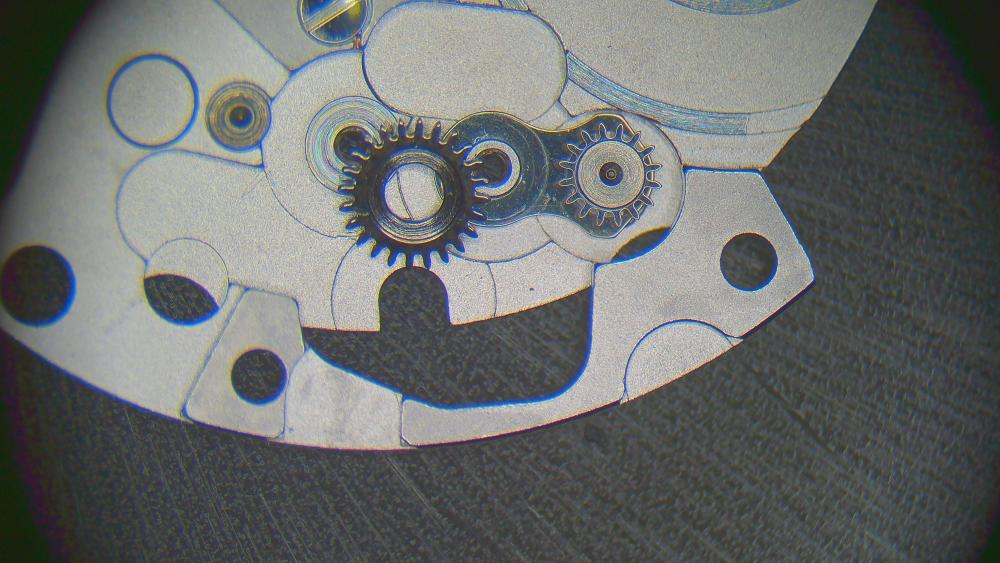
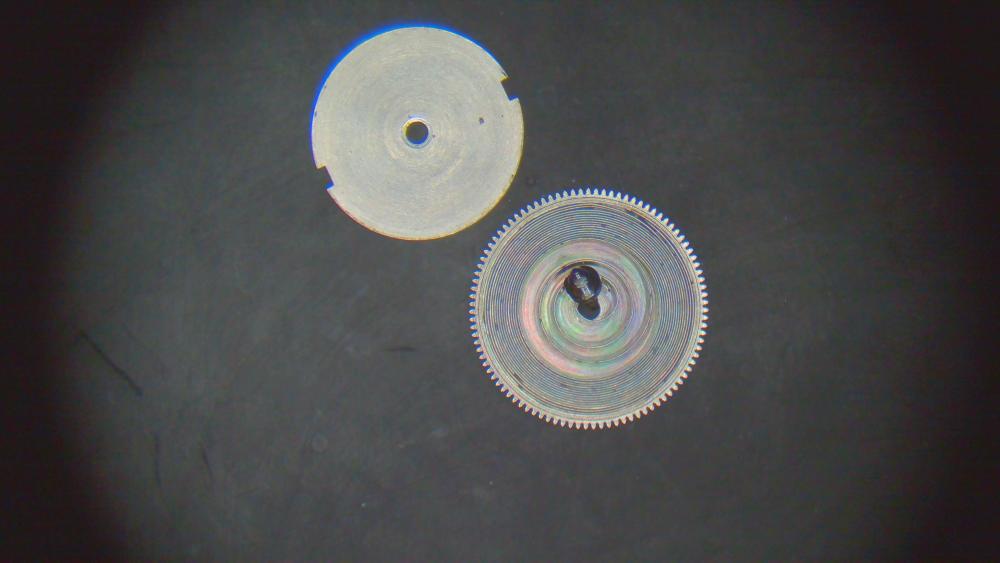
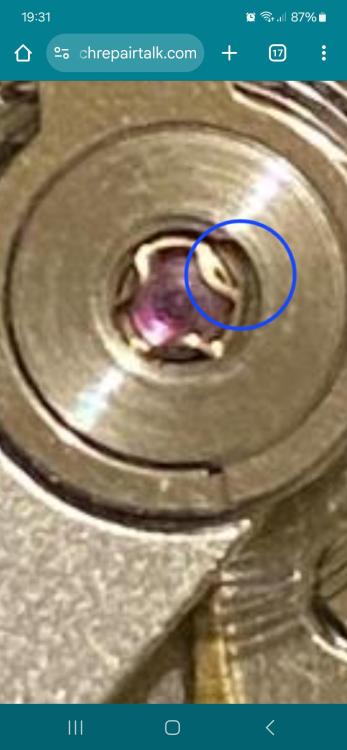
Here comes a disassembly mega-post! Step by step, screw by screw. Not many explanations, only where I feel it's useful. only one watchmaker, probably the one at JLC that built this baby, signed the service log Overview 1 Overview 2 closeup of data corrector city-wheel/second time zone crown first I take the rotor of. 0.8mm screwdriver. remember that the position of the centre-seconds spring is towards the balance wheel intermediate wheel for self-winding mechanism (next is the wig-wag style wheel/pinion -- comes later) to remove the crown: 1. loosen the screw that I'm pointing at 2. push down the brass-plate at the indicated position case screws (2x) overview without rotor to be able to remove the movement, the city-crown needs to be positioned such that the slot in the inside is "open" (see gap in casing ring) main hands removed complication hands removed side of casing ring for the record pinion on casing ring to change city/2nd time zone Metal pin that acts as extension of the data corrector... don't loose that one! city ring just lifts off overview. city-change-pinion again removing casing ring (two screws) the pin on the side helps to correctly position the movement into the casing ring two long dial screws to loosen... and off comes the dial complication module 2nd time zone side power reserve (left) and date (right). date wheel comes off without screws more wheels without screws day/night indicator (for 2nd time zone). 2nd time zone changing wheel cover plate for additional 2nd time zone wheels overview and the removing everything layer-by-layer now over to the power reserve this wheel is friction-fit to the extended barrel arbor. removed with presto tool. these two wheels, screws and seats are the same. I overlooked that one of the seats (on right) was stuck to the screw, so it looked different. It came off during cleaning. removing corrector lever and spring I leave the date jumper in place for cleaning finding/cremoving screws for module plate (1+2 of 4) 3 of 4 4 of 4 complication module coming off overview of mainplate dial side side view shows extra high (two-part) canon pinion (for 2nd time zone and date) and extended barrel arbor (for power reserve) continuing disassembly on train side perfect hairspring wow, look at that beauty of pallet fork and its cock further parts of the automatic works taken off wig-wag wheels for bi-directional winding train bridge escape wheel cap+hole jewel setting is fixed. There are three holes around the hole jewel to ensure that cleaning is effective. train wheels second wheel can't be removed until barrel bridge is off, too. For assembly, I'll therefore start with the train bridge (before barrel bridge). Three screws to remove the barrel bridge. The one screw pointed at is NOT part of them and holds the hacking lever. underside of train bridge with winding wheels and centre seconds tension spring (the latter can stay in place for cleaning) under barrel bridge this is still the second wheel from the gear train the click (click spring can stay in place for cleaning) centre seconds pinion the keyless works is distributed on both sides of the mainplate beautiful curved hacking lever don't overlook the seat for the yoke dial side keyless works note that the rounded side faces downwards no top/bottom difference for this one the two-part canon pinion needs to be disassembled for cleaning (later) removing balance jewels (also on balance cock) underside of barrel bridge barrel disassembled. IMPORTANT NOTE: mainspring is left-handed! So, ordering an original JLC mainspring from Cousins because I don't have left-handed mainspring winder. https://www.cousinsuk.com/product/under-100mm-height?code=M65598 I strongly suggest taking the original JLC spring and NOT the generic GR24473 because the barrel arbor is very small (in diameter) and I'd suspect that the GR spring comes with a too-large centre coil. MORE TO COME SOON.


 4 points
 -
It helps to keep in mind also that the hobbyist youtube guys (with some exceptions) do not show you their mistakes. You don't see the 2 or 3 attempts to get the mainspring properly hooked onto the arbor before cranking on in and maybe the failed attempt to slot the bridle end in before unwinding and redoing it. I assure you these things happen from time to time but don't make the final edit.3 points
-
As usual there are tools for this but members have made their own from peg wood. They just cut three prongs.2 points
-
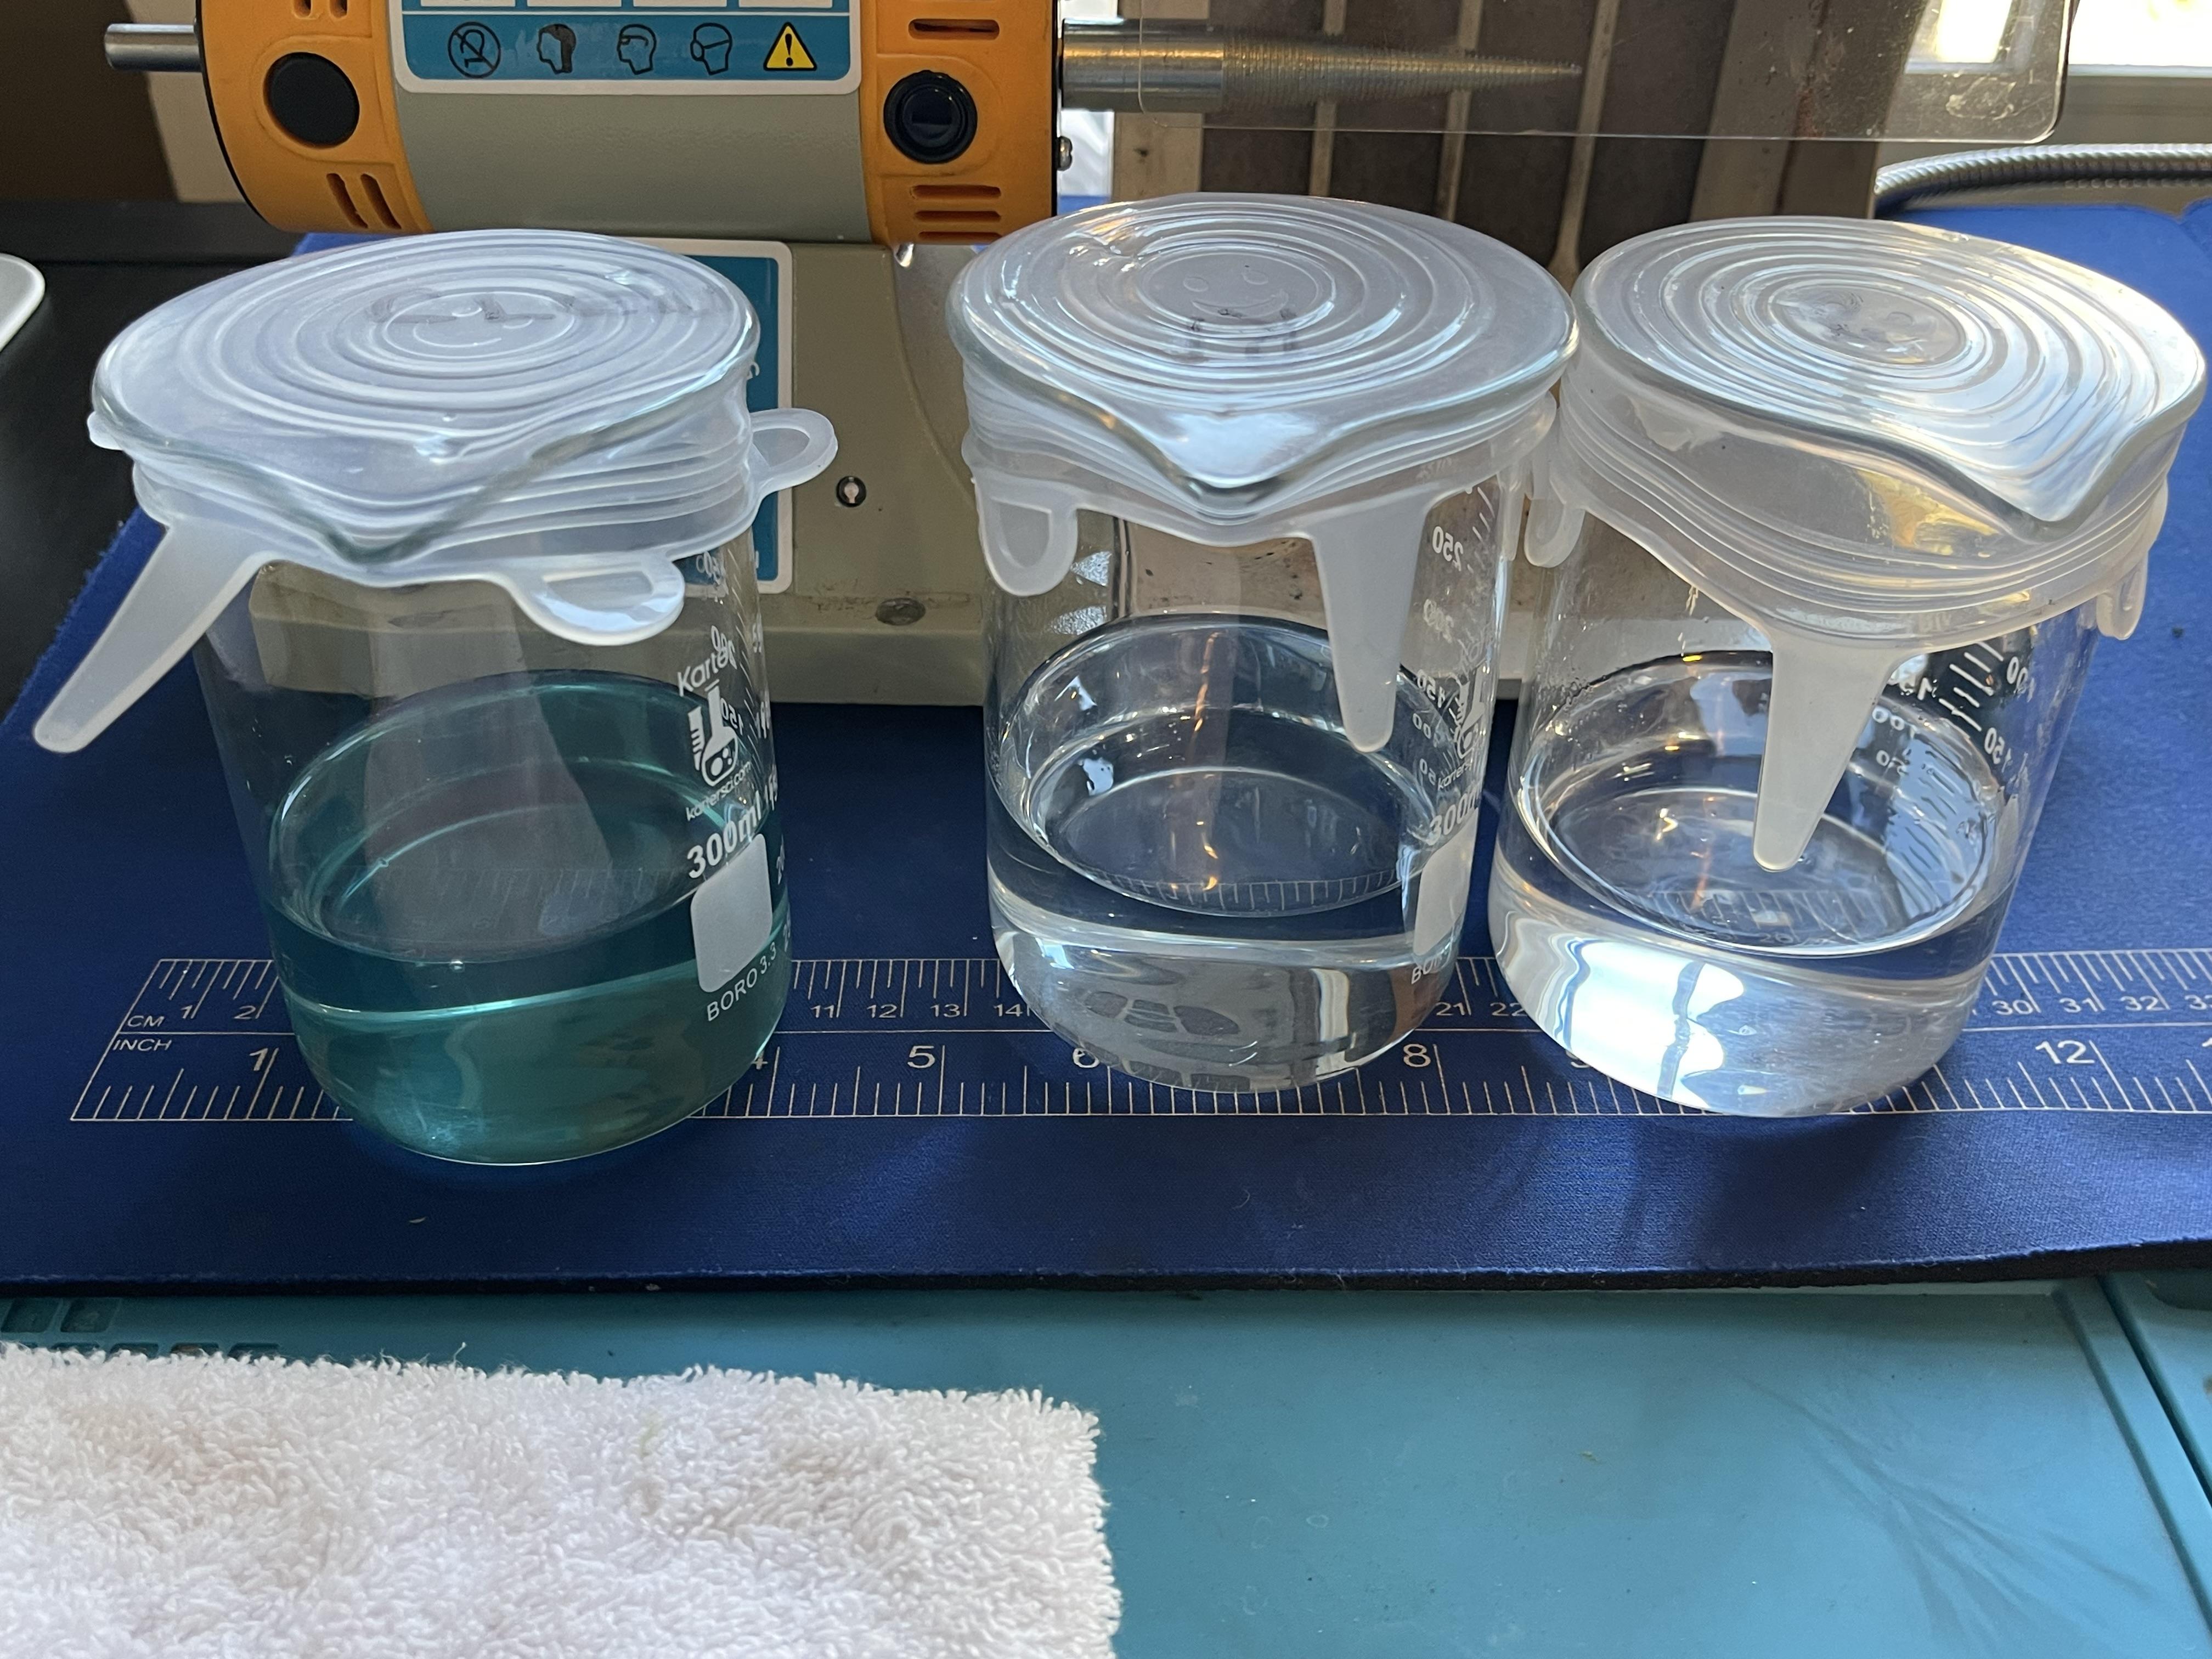
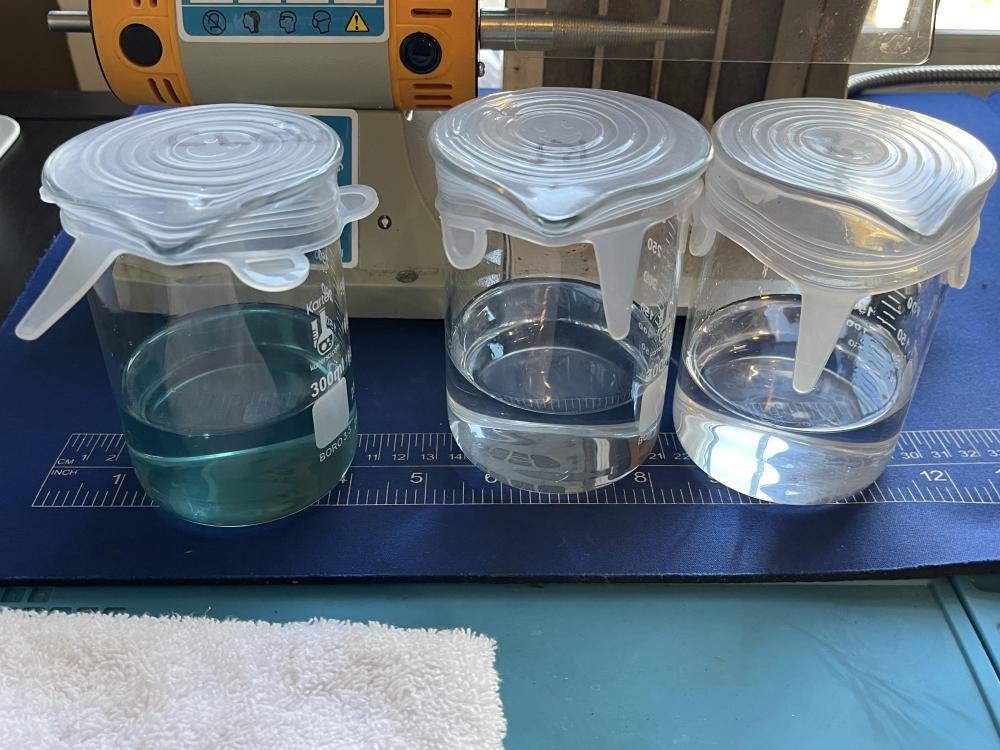
I just picked up silicon tops from Amazon for my 300ml beakers. They come in various sizes so I suspect the next size up would fit you beakers. Seems to work well, and according to Wikipedia silicon should hold up when exposed to petroleum based fumes.
 2 points
 -
Definitely Tom, I will do the same. All three of mine have very different shapes, from really shallow curves to full on rounds.1 point
-
The second press I have Rich is a lever type with Bakelite domes and cups of all sizes. If you need I’ll be happy to measure them. I would be interested in the dimensions as well as I have one missing and might be able to make one if they are comparable to the robur ones. Tom1 point
-
I have Robur sets, in both aluminium and bakelite. If you need measurements, just let me know.1 point
-
If you need anything else and don't want to post here then just PM me.1 point
-
It needs rotating until the narrowest arm comes out of here
 1 point
 -
Just a note- I've filed down hooks on many winders. The hook has to be nominally the same height as the spring thickness, but a little shorter works fine too. Once the first wrap of wind comes around it's going nowhere, and this strength increases as you wind.1 point
-
Cheers all, and nickelsilver, this is 100% exactly what happened: "if you keep the tension where it was, there might be enough tension to whip the bridle around and poke it back out the slot, usually snapping it off" New MO, keep pressure on the winder. Plan B if that fails, ease off half a turn, etc. I confess this was sort of what I was trying, but I think I relaxed the tension too much. Thinking about it mechanically that's not going to work (sadly I'm a Chartered Engineer so you would have hoped I'd get the mechanics that without wind, the spring will relax and compress against the barrel wall- sigh). Thanks again all for the suport, it's most appreciated.1 point
-
With manual springs, I find that the bridle often opens up and slides past the slot in the winder. In this case you have to ease off the tension as described above, then pull the the spring back out so that the bridle is clear. Then squeeze the bridle together with tweezers and feed it back in.1 point
-
As far as I know, Mark has to change your status. When I became a Moderator, I was logged out and when I logged back in my status had changed.1 point
-
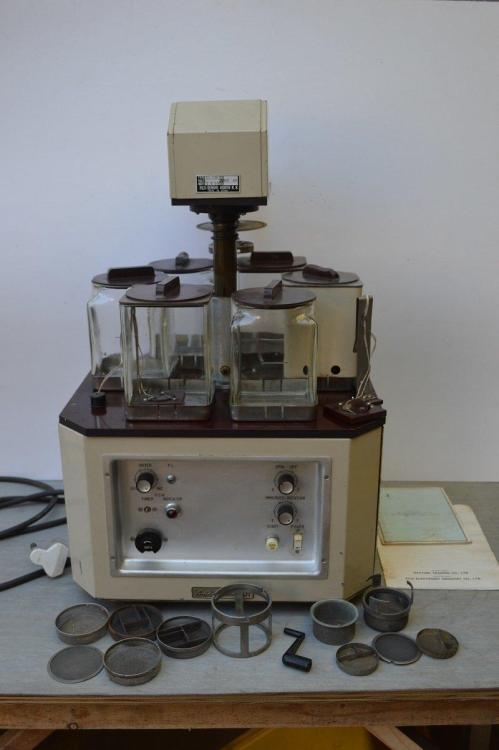
Last night I spent some time making additional code to add the linear Z axis. So far it appears to be working(simulated) well. I've also eliminated 2 of the buttons, and automated the entire cleaning and spinning cycle. I've no way to simulated a drying step in the form of a heater and fan on the software I'm using, so that will need to be done once I order the parts. Once I finalize everything in the code, like adding a limit switch for the Z axis, ill order the parts, complete the build, and post it here. So far, I'm at around $120USD for the build, without frame, but with the Z axis. Removing the Z axis, the cost is around $70USD without the frame. This does not include jars or basket costs though.1 point
-
This is the other auto I had before this is japanese and I got excellent results with it it has ultrasonic in the cleaning jar. You can see the ultrasonic unit on the bottom of the jar on the left and to the right of the heater a spare one.
 1 point
 -
I'm happy with the foam bung I made. It fits perfectly, doesn't seem to be affected by the solvents, stops the smells, and is free !1 point
-
1 point
-
Even though this is a different brand for those curious as to what exactly the tool is used for here is examples of how the tool can be used. Then you will note that he has one single cutter that rotates I know often times though have individual cutters. https://www.historictimekeepers.com/Making a center jewel.htm1 point
-
I will open a secret for You: The hairspring of You watch can't be magnetized. What can be magnetized is the stud carrier and the regulator, but I doubt that it is the case. To check if the demagnetizer works, You need to magnetize something, then demagnetize it. Get some sewing needle, put it on a magnet, then check if the screws from the movement will stick to it. Then demagnetize the needle and eventually the screws, and check again... See, no need to disassemble the movement and start all over. The result of course will be the same. No need to change the magic words You use too. You can do the free oscillations test that will eventually show the problem is in the balance.1 point
-
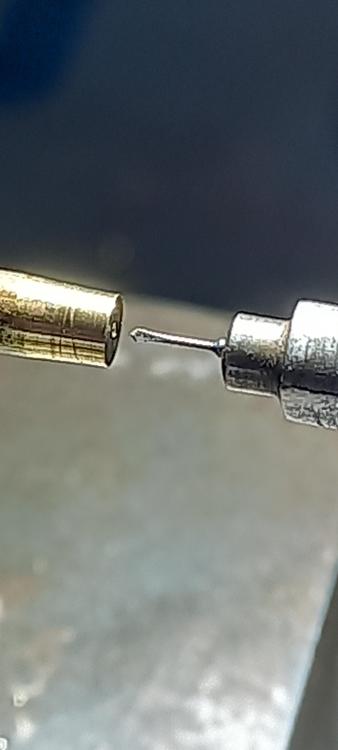
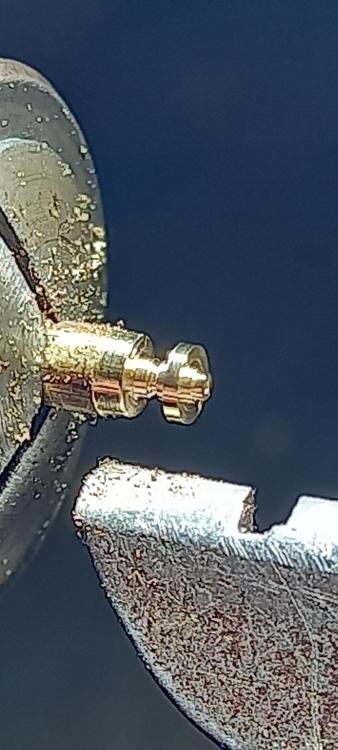
Thanks for confirming! I guess both greases are good for this purpose. I have 9504, but not M-DX... so I'll go with the former. By the way, I just separated the canon pinion. It came off rather easily (hopefully not too easily..) when sliding a scalpel in-between. I'll see later if any tightening of the CP is necessary. But hopefully/probably not. Thanks for your advice!1 point
-
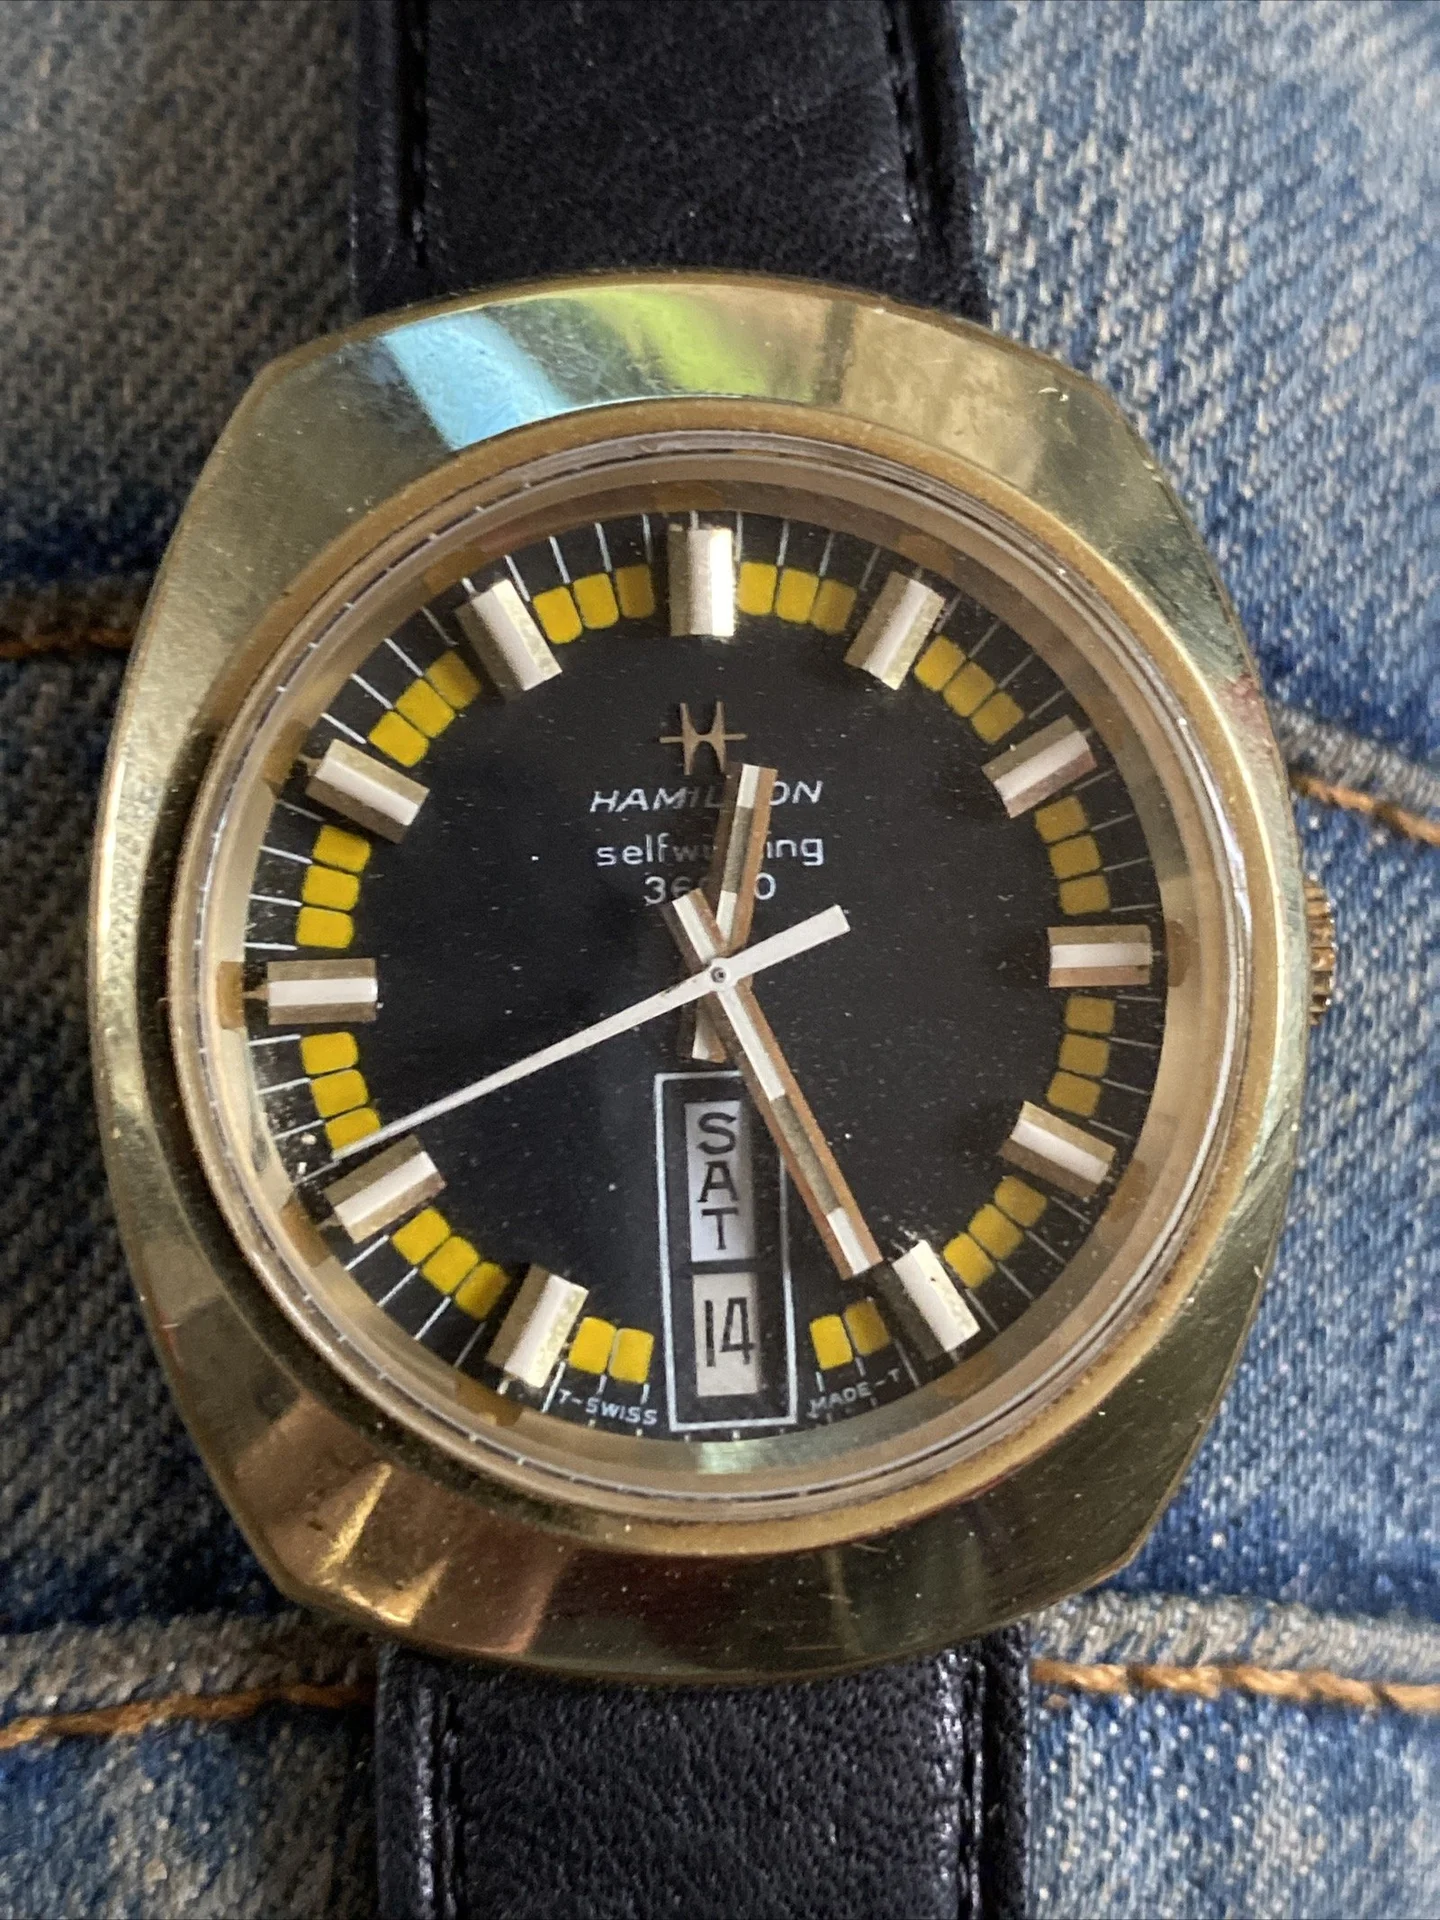
I have been a watch hobbyist for 25 years. 5 years ago, I opened my watch repair shop in the Durham, North Carolina area and also via mail-order. My website is TheWatchFixer.com . The watch in question is a customer's watch and is currently disassembled in a parts tray. It's a 1975 Hamilton Clermont model. I am attaching a photo of what it would look like if assembled.
 1 point
 -
No reason to make it easy for the next owner . Leave a detailed list....or not Finallt found time to make the bush to Actual size, its only just over half a millimetre in length
 1 point
 -
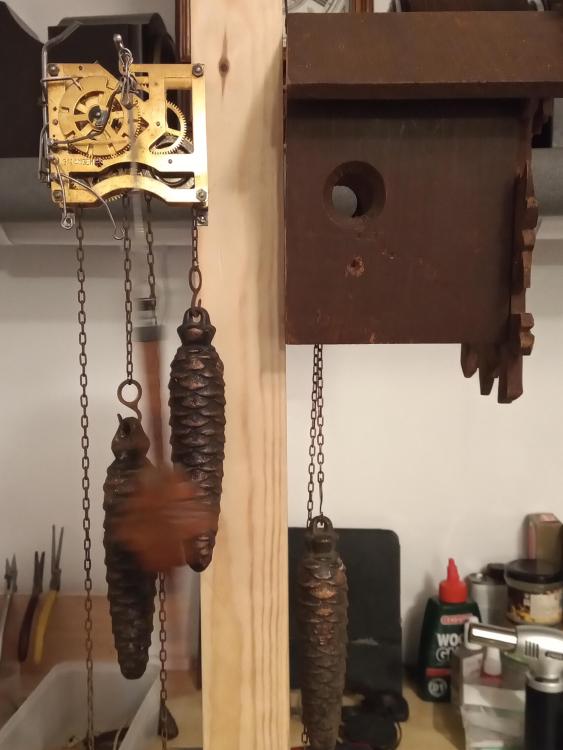
Hi transporter, I picked up 3 weights with chains and a pendulum on eBay and now have the movement working on my test stand, it seems to be running well, so fingers crossed. I bought a cheap music box on eBay, and swapped the prongs over, it works, but it isn't great so I bought a second one which should arrive later this week, this one looks closer to the original so hoping it will be a bit more tuneful. I bought the paper to repair the bellows, which looks simple enough so that's my next job when it arrives. I also found a back with the gong attached which I had to modify slightly but that now fits. It has been an interesting project so far. The wooden case needs some TLC, its covered in paint splashes which I have tried to remove but I think I am going to have to repaint at least some of it, it looks like a chocolate brown matt emulsion so I thought I might buy some tester pots to see if I can find a match.
 1 point
 -
To others that are looking at this and wondering if its worth the effort, only you can answer that question. But, I have written some basic code to build one of these machines, for fairly cheap, with a stepper motor, driver, and an arduino. Whole thing can be built for around $100-150. I can start a new thread if interested. The plus side, is it can be expanded and updated to whatever you might like it to do. Right now, I have it set up to have 3 buttons, one for starting the cleaning, one for a spin cycle, and one for a drying cycle. I am working on adding a linear Z-axis, so that the cleaning and spinning are automated. Eventually, ill have a turntable axis as well, so all the cycles can be completed with the push of 1 button.1 point
-
I think I know the kind of plastic 'demagnetizer' you mean. Something like the one here, I'm guessing: https://www.altronics.com.au/p/t1475a-screwdriver-magnetiser-demagnetiser/ It might be useful for working on 6mm screws and such like, but it's useless for watches. The cheap kind that @mikepilk showed above work fine, but you have to know how to use them: press the button with the part/watch/tool in contact then slowly move the it away while keeping the button pressed. Only release the button when the part/watch/tool is well away. I found, though, that the steel tweezers and screwdrivers that I had for electronic work weren't any good for watch work as even very slight magnetism can mean that a screw doesn't let go when you want it to. Jobs that should be routine become nerve-wracking!1 point
-
Welcome to the forum,enjoy. Lubrication is always an interesting debate amongst horologists. Personally you cannot go far wrong by using the range of MOEBIUS SYNT-HP lubricants.. If you go to Cousins Uk web site you will find all of the range variations explained. PS only purchase small quantities.1 point