Leaderboard


Popular Content
Showing content with the highest reputation on 12/06/24 in Posts
-
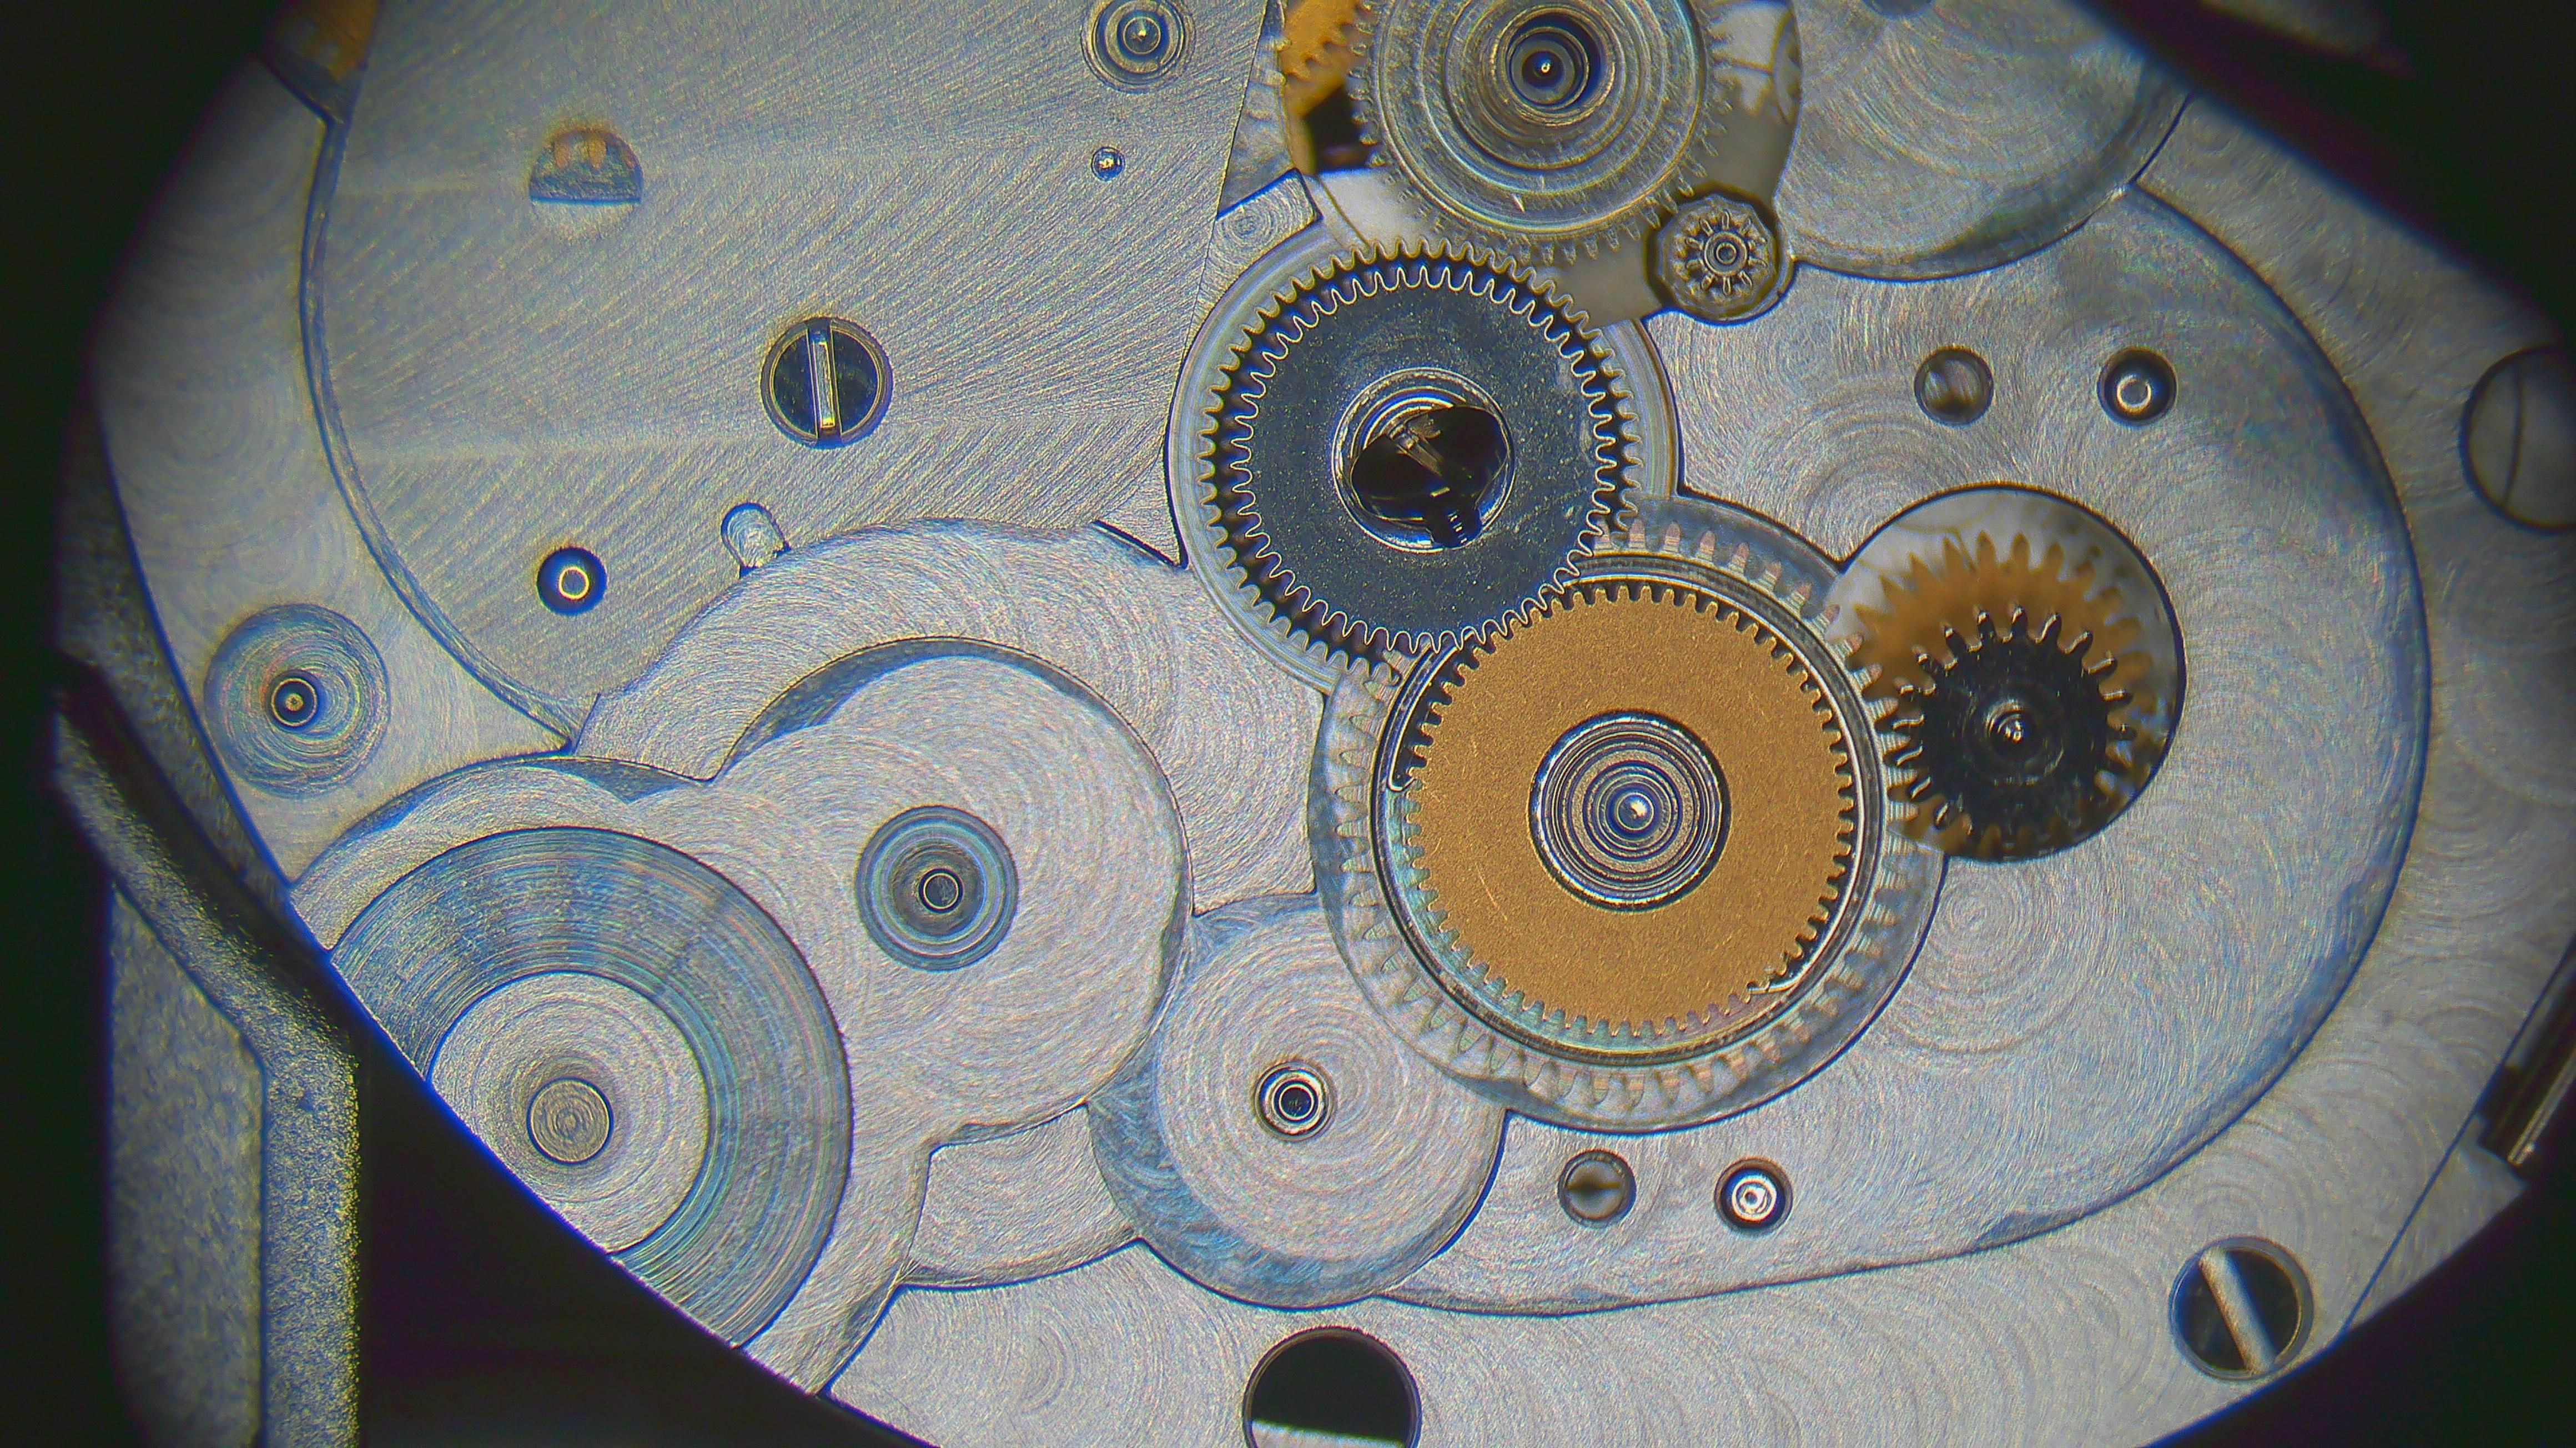
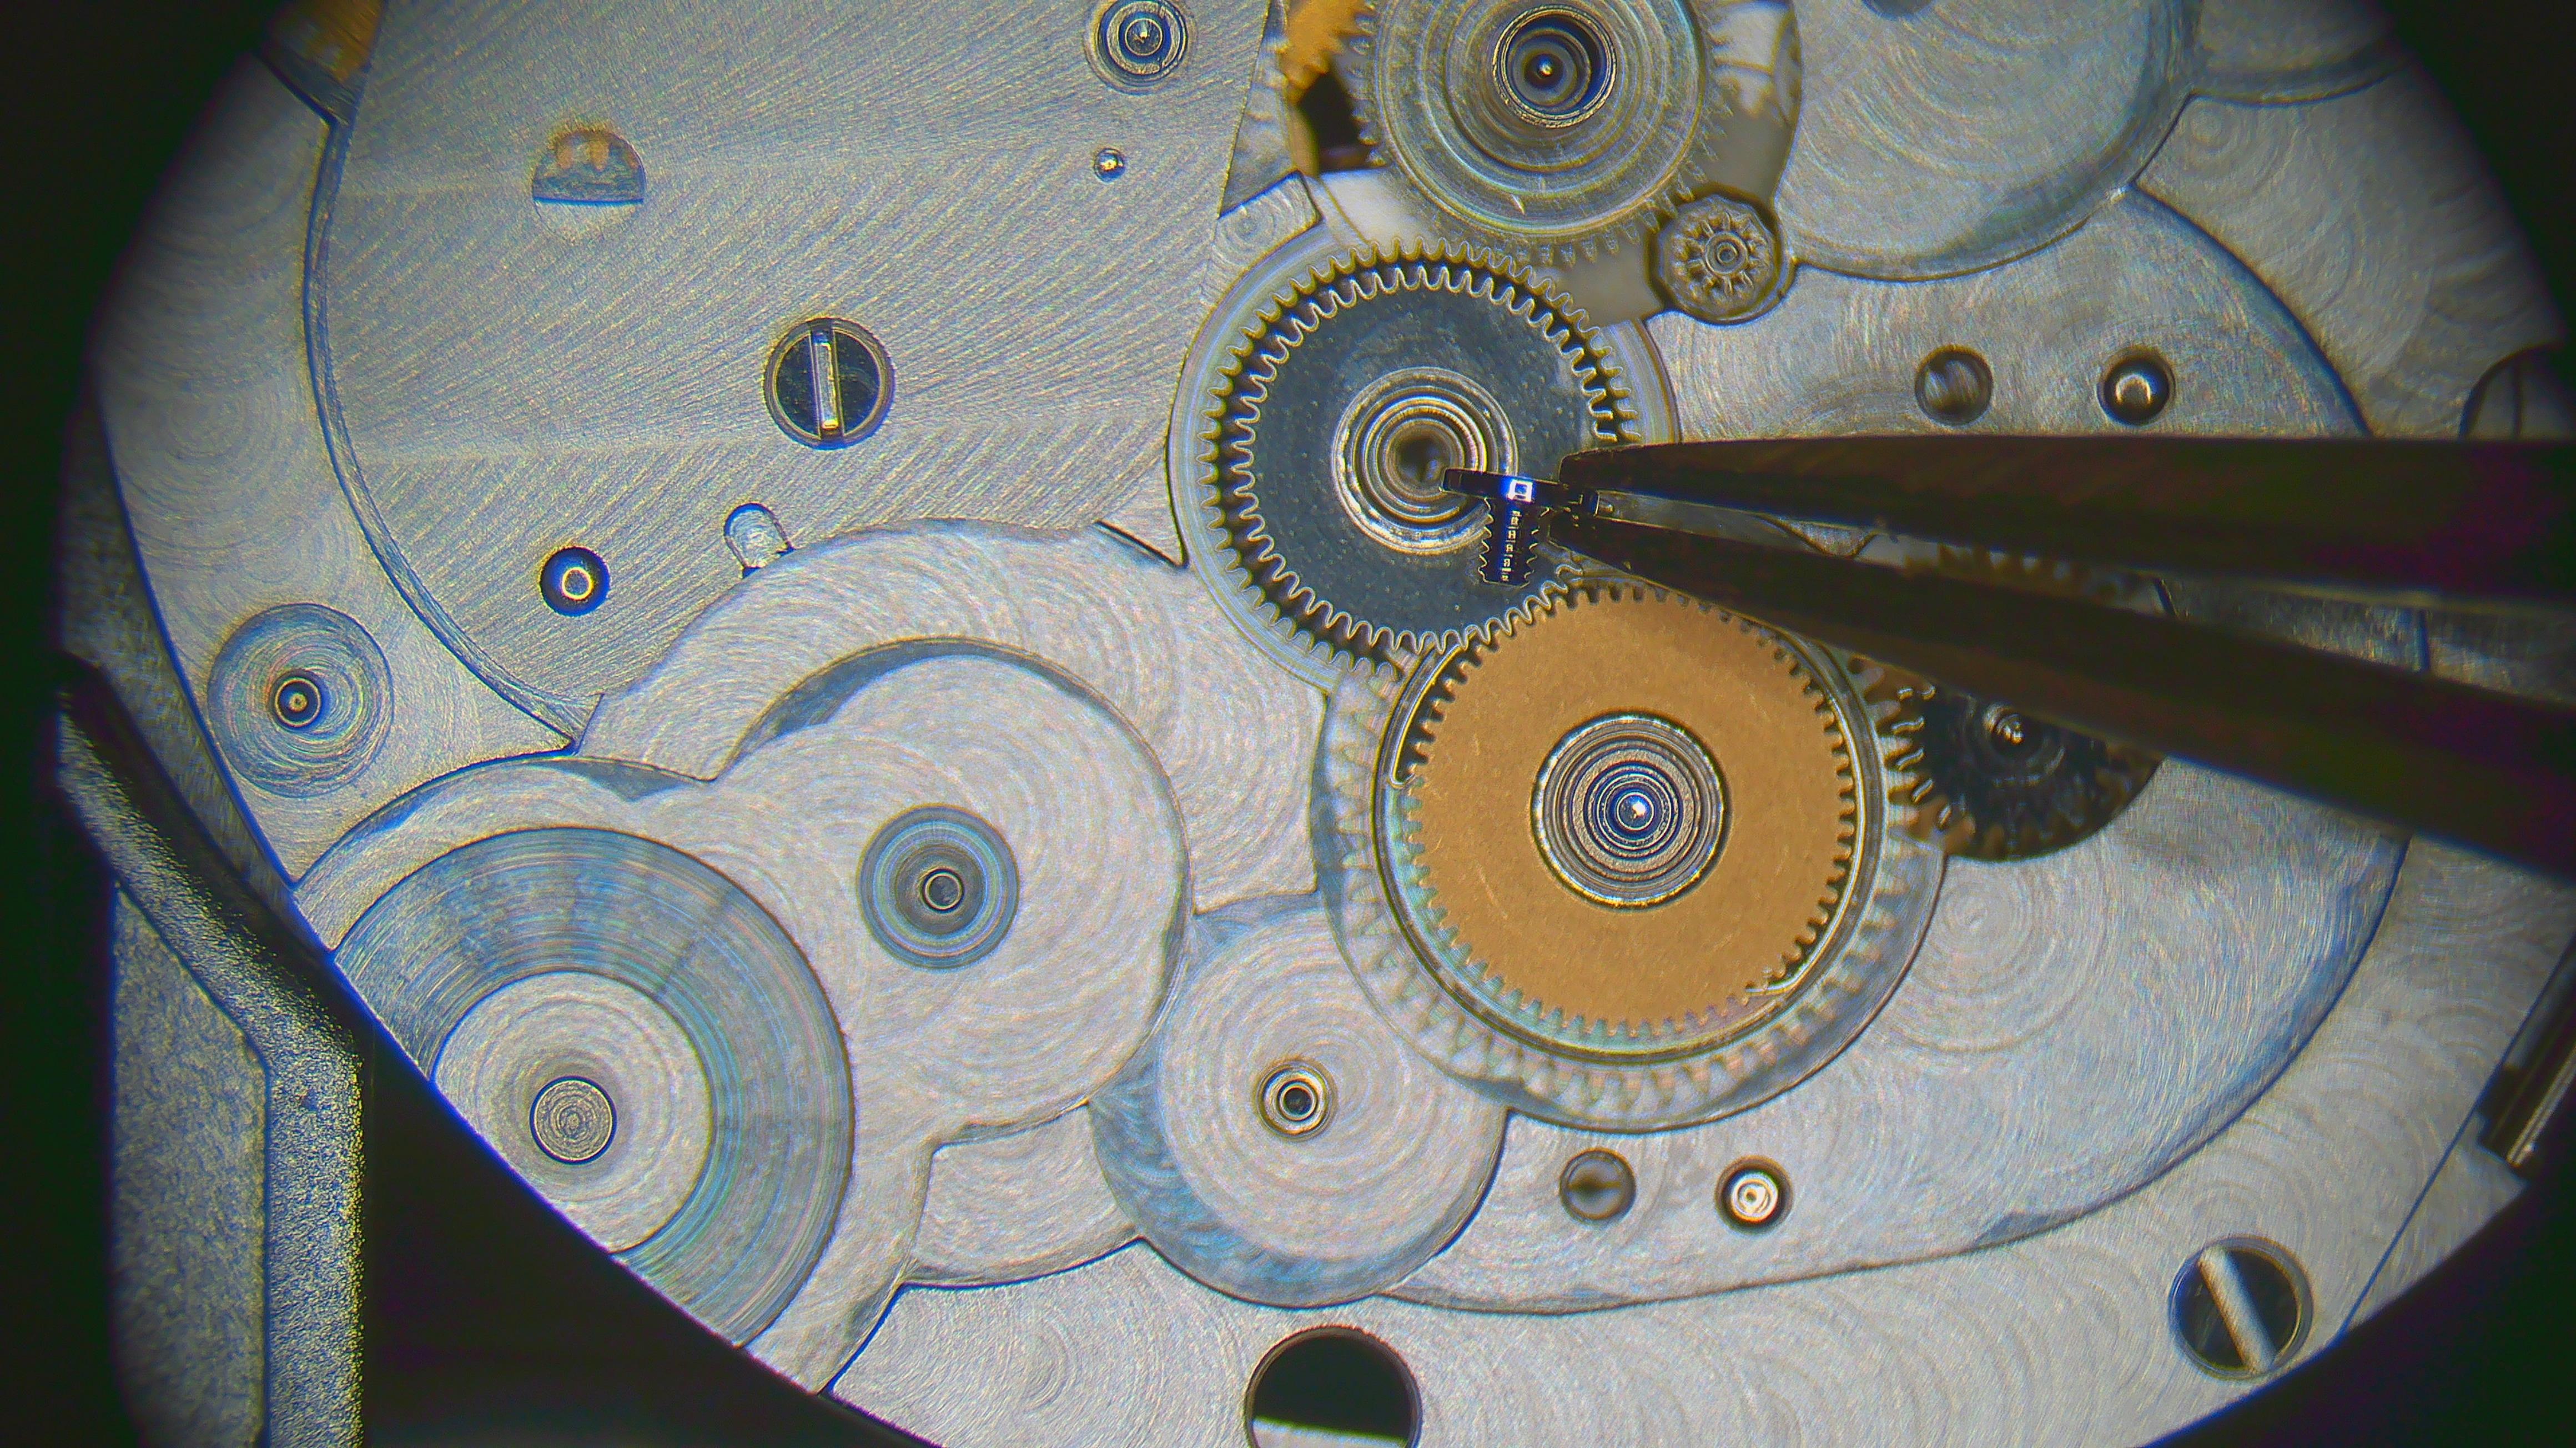
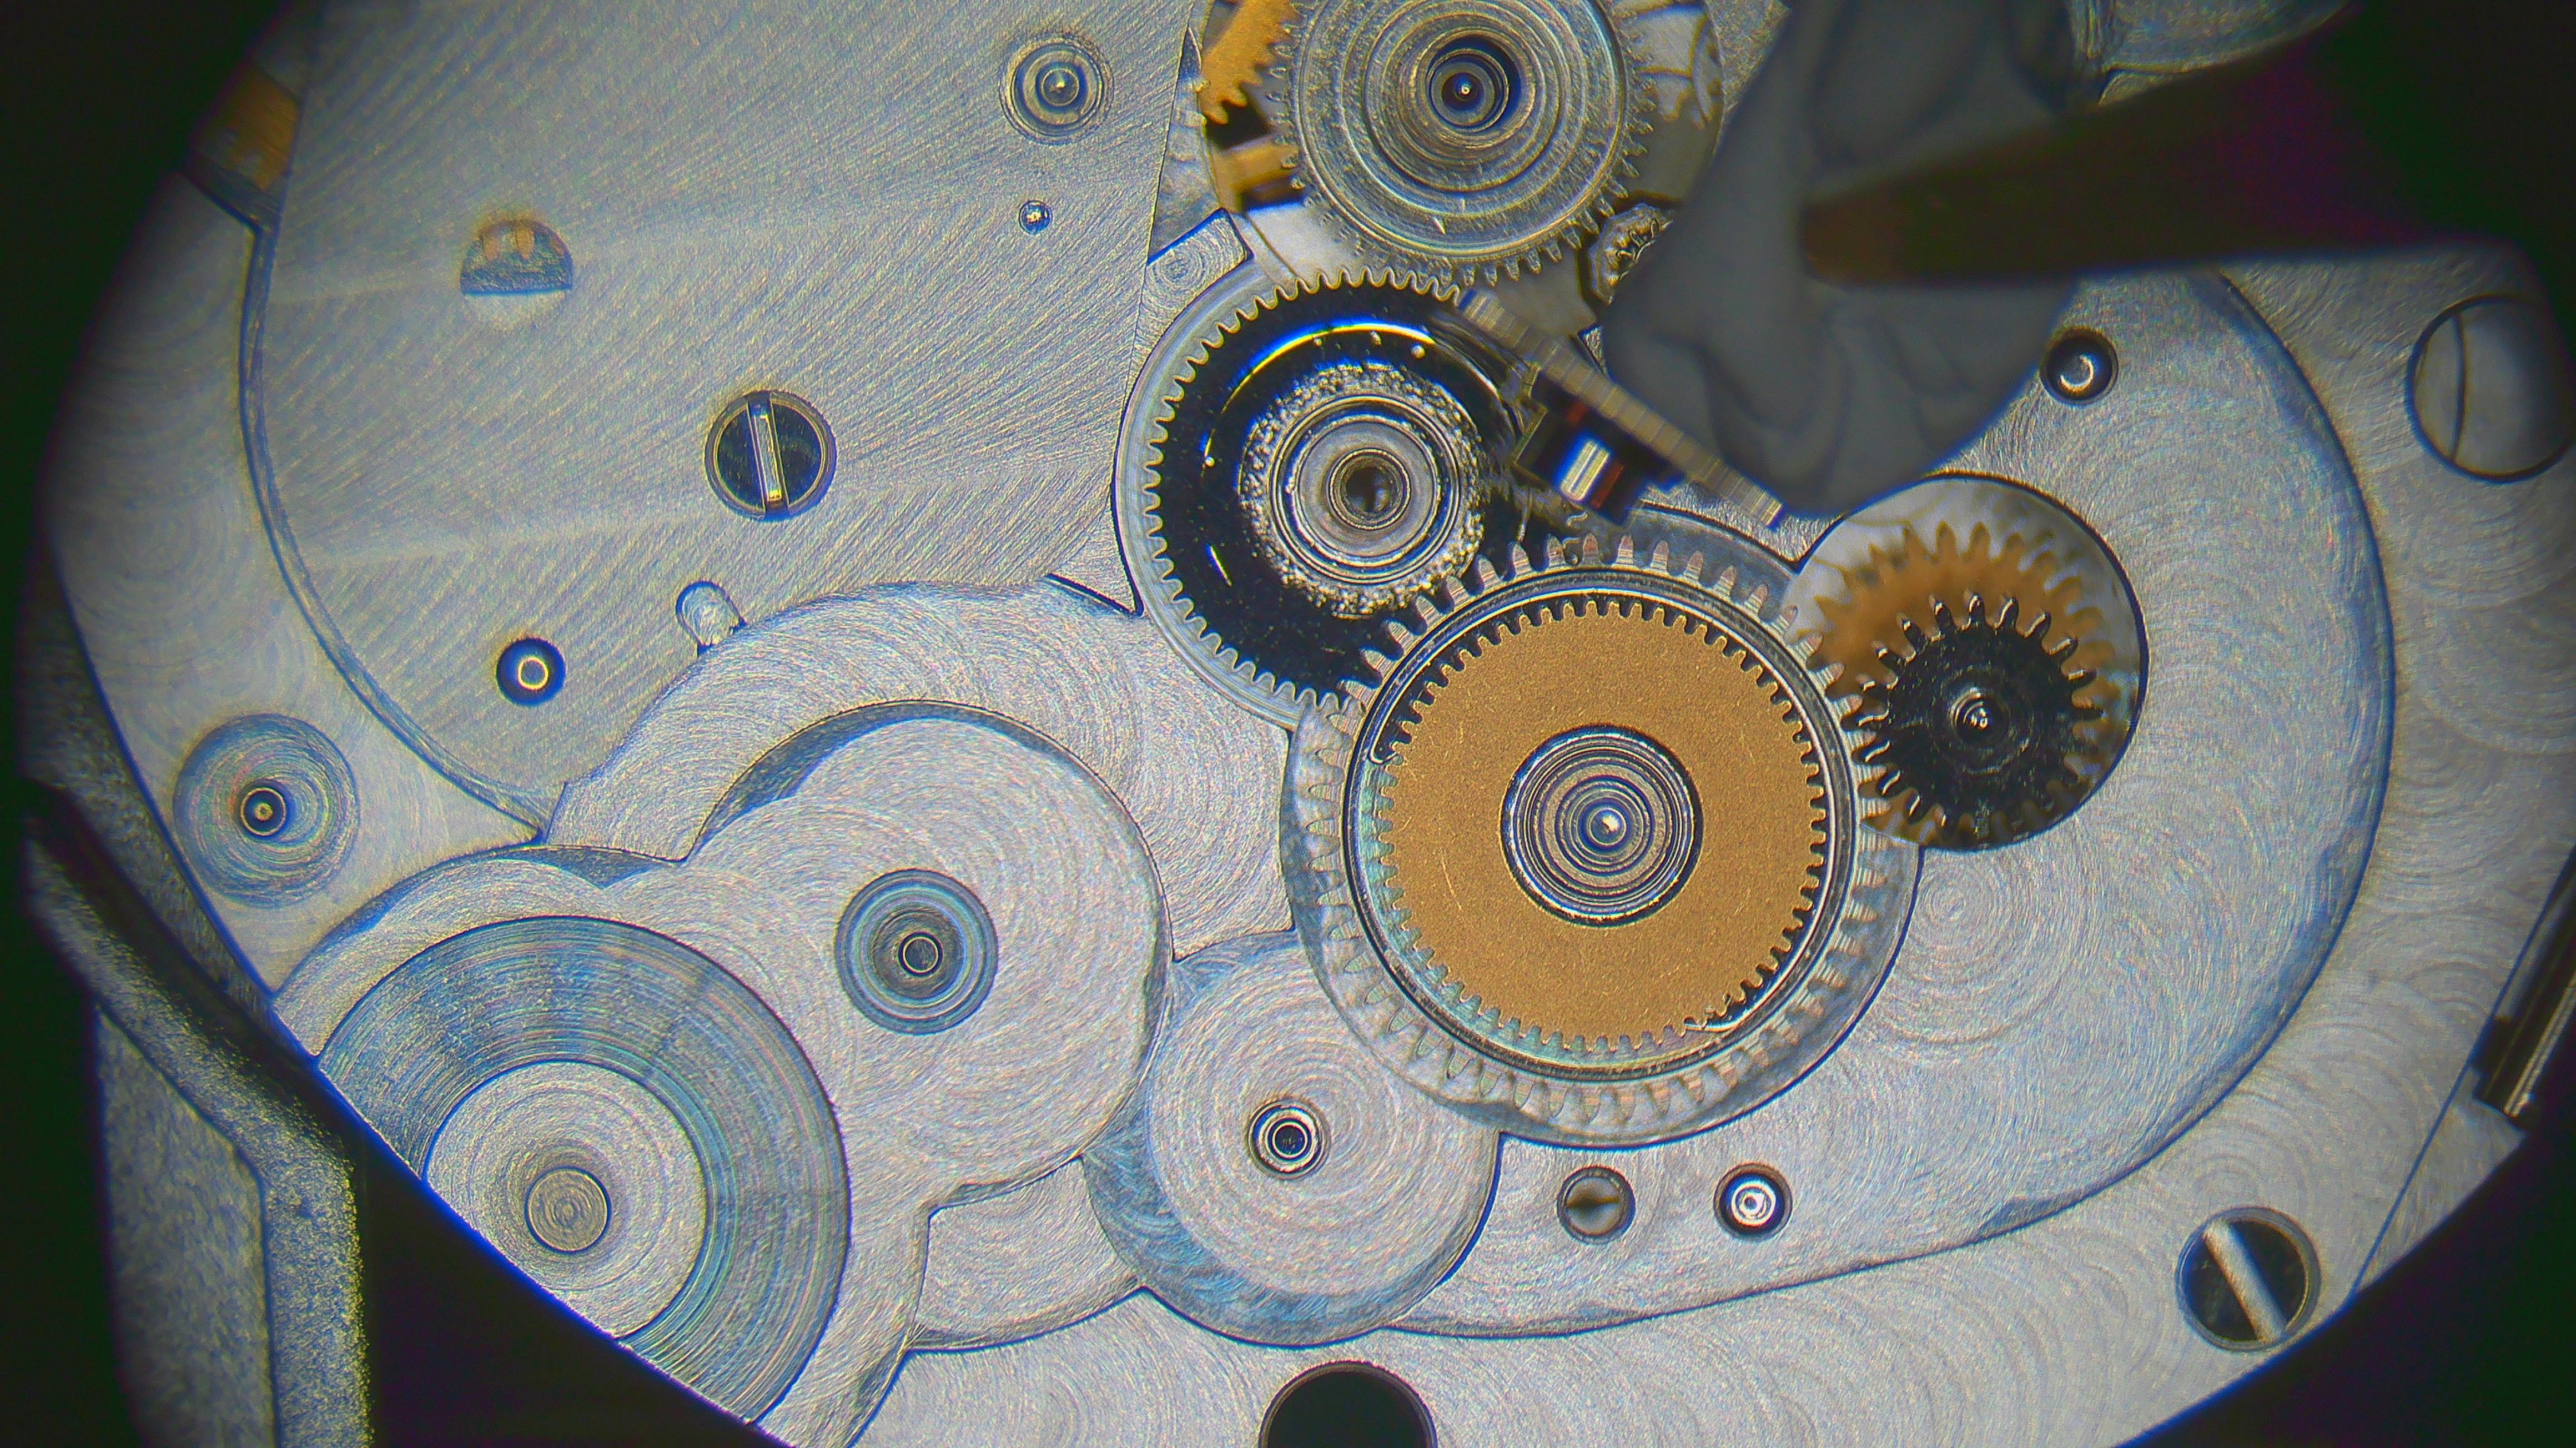
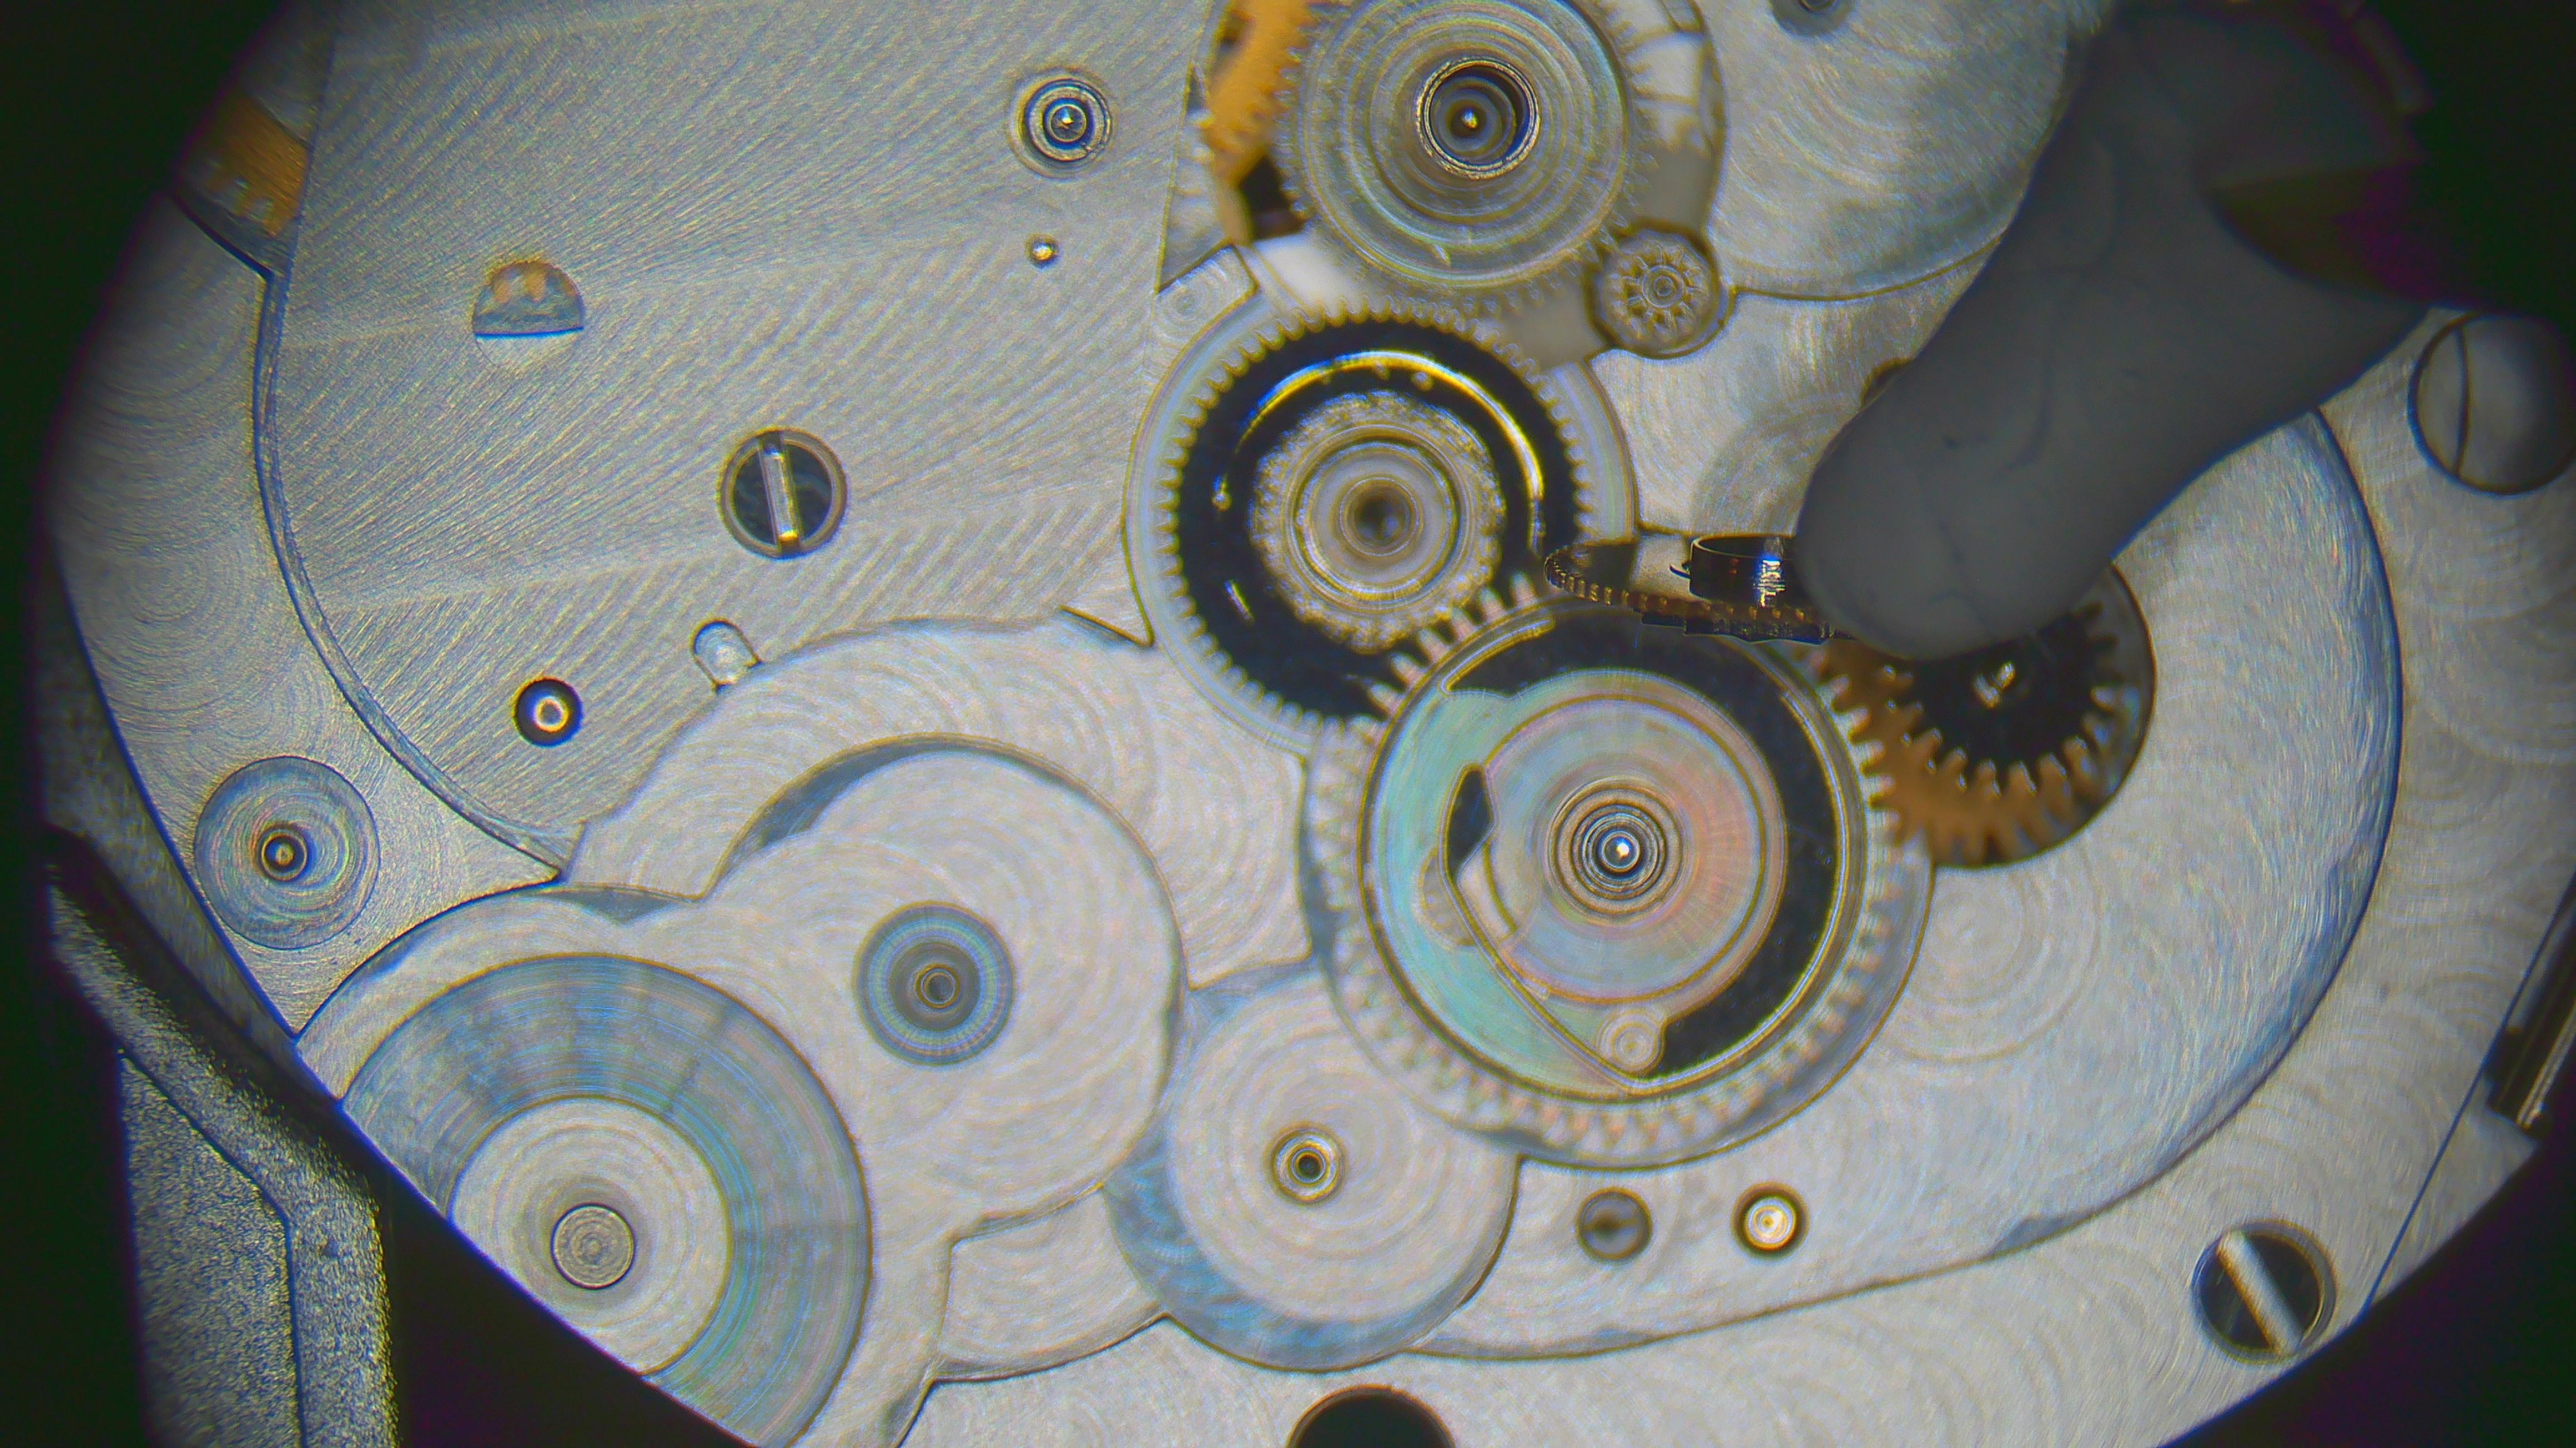
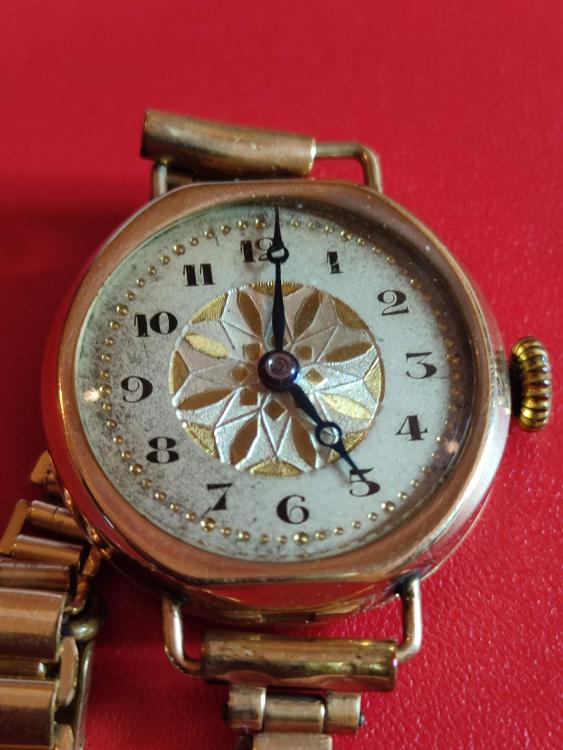
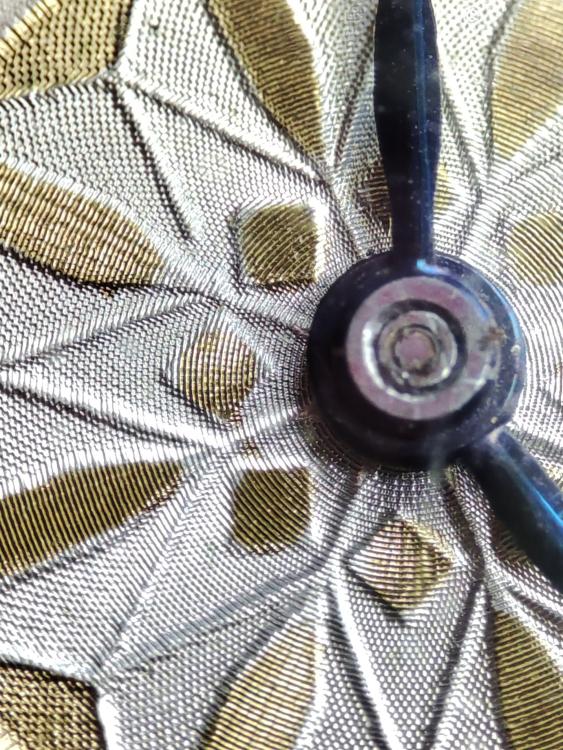
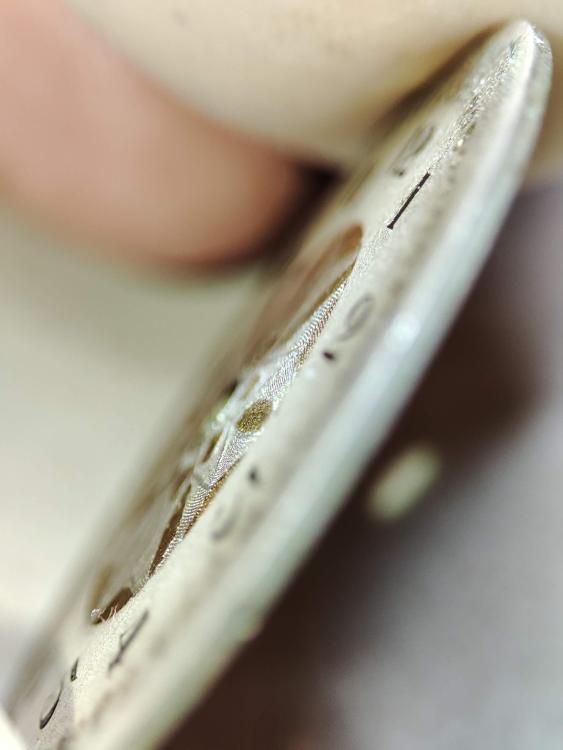
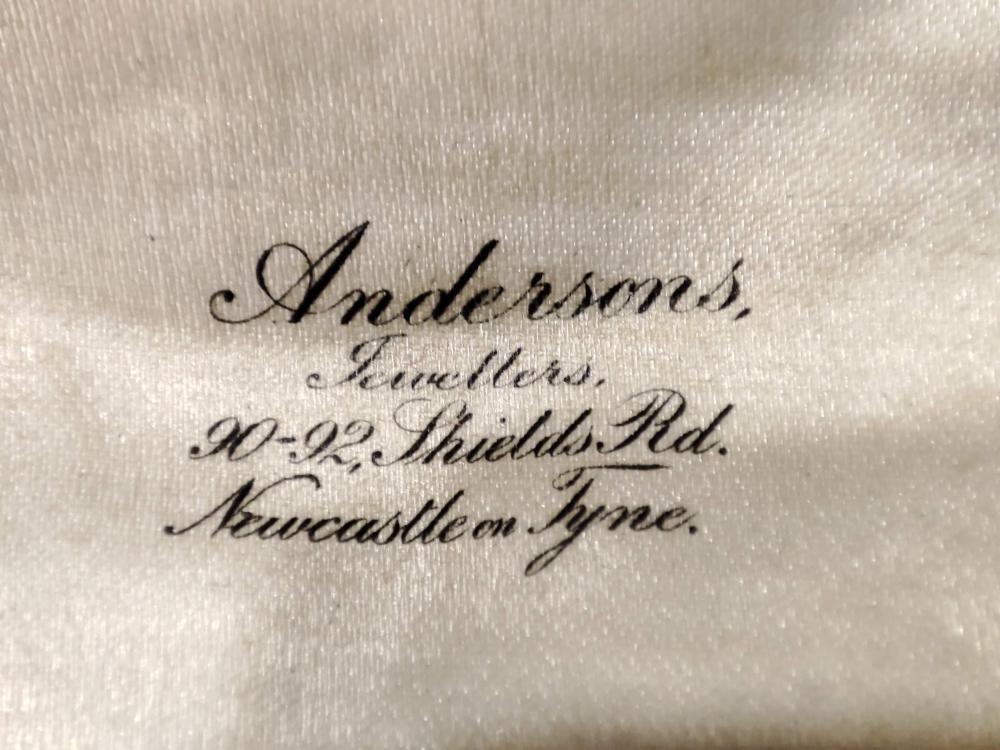
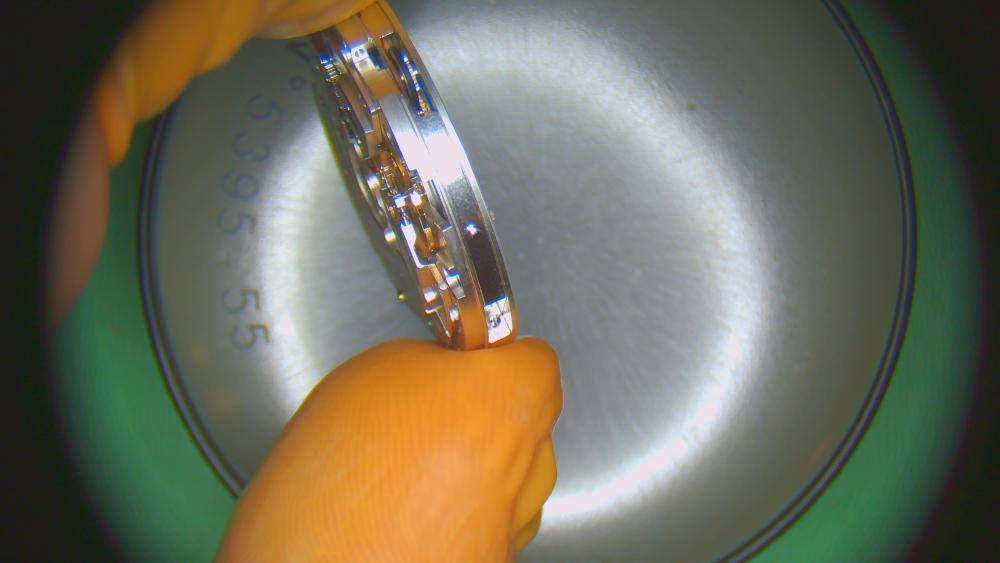
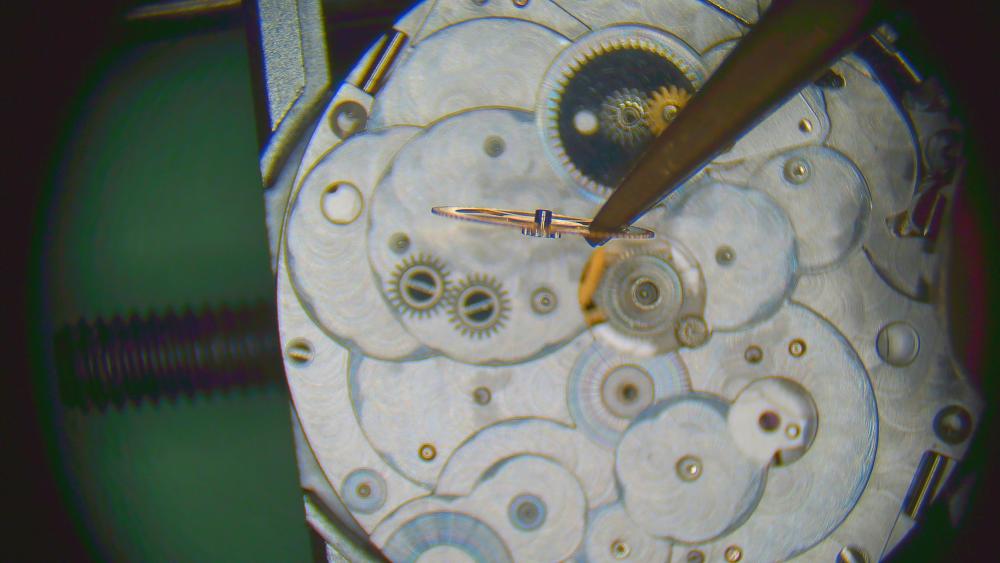
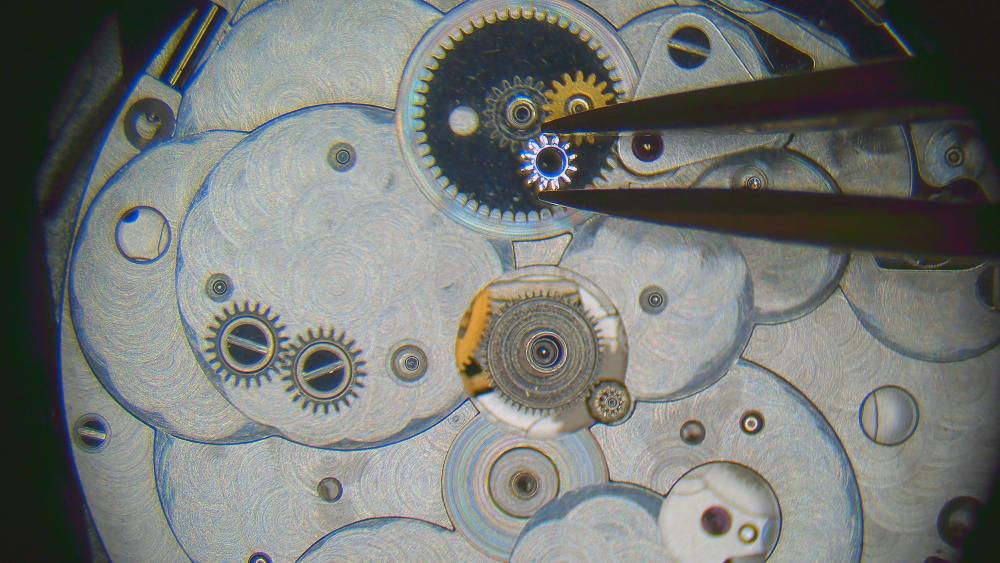
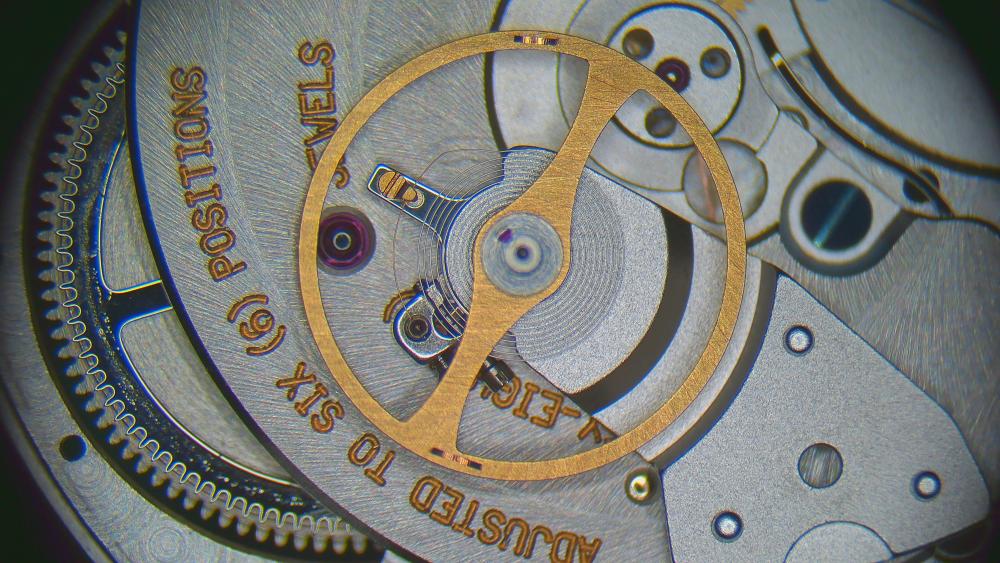
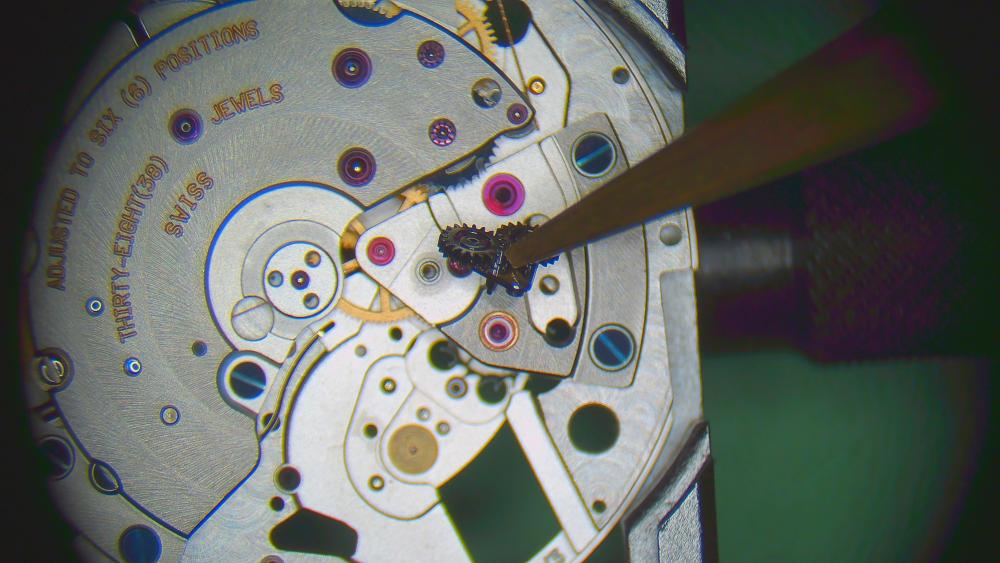
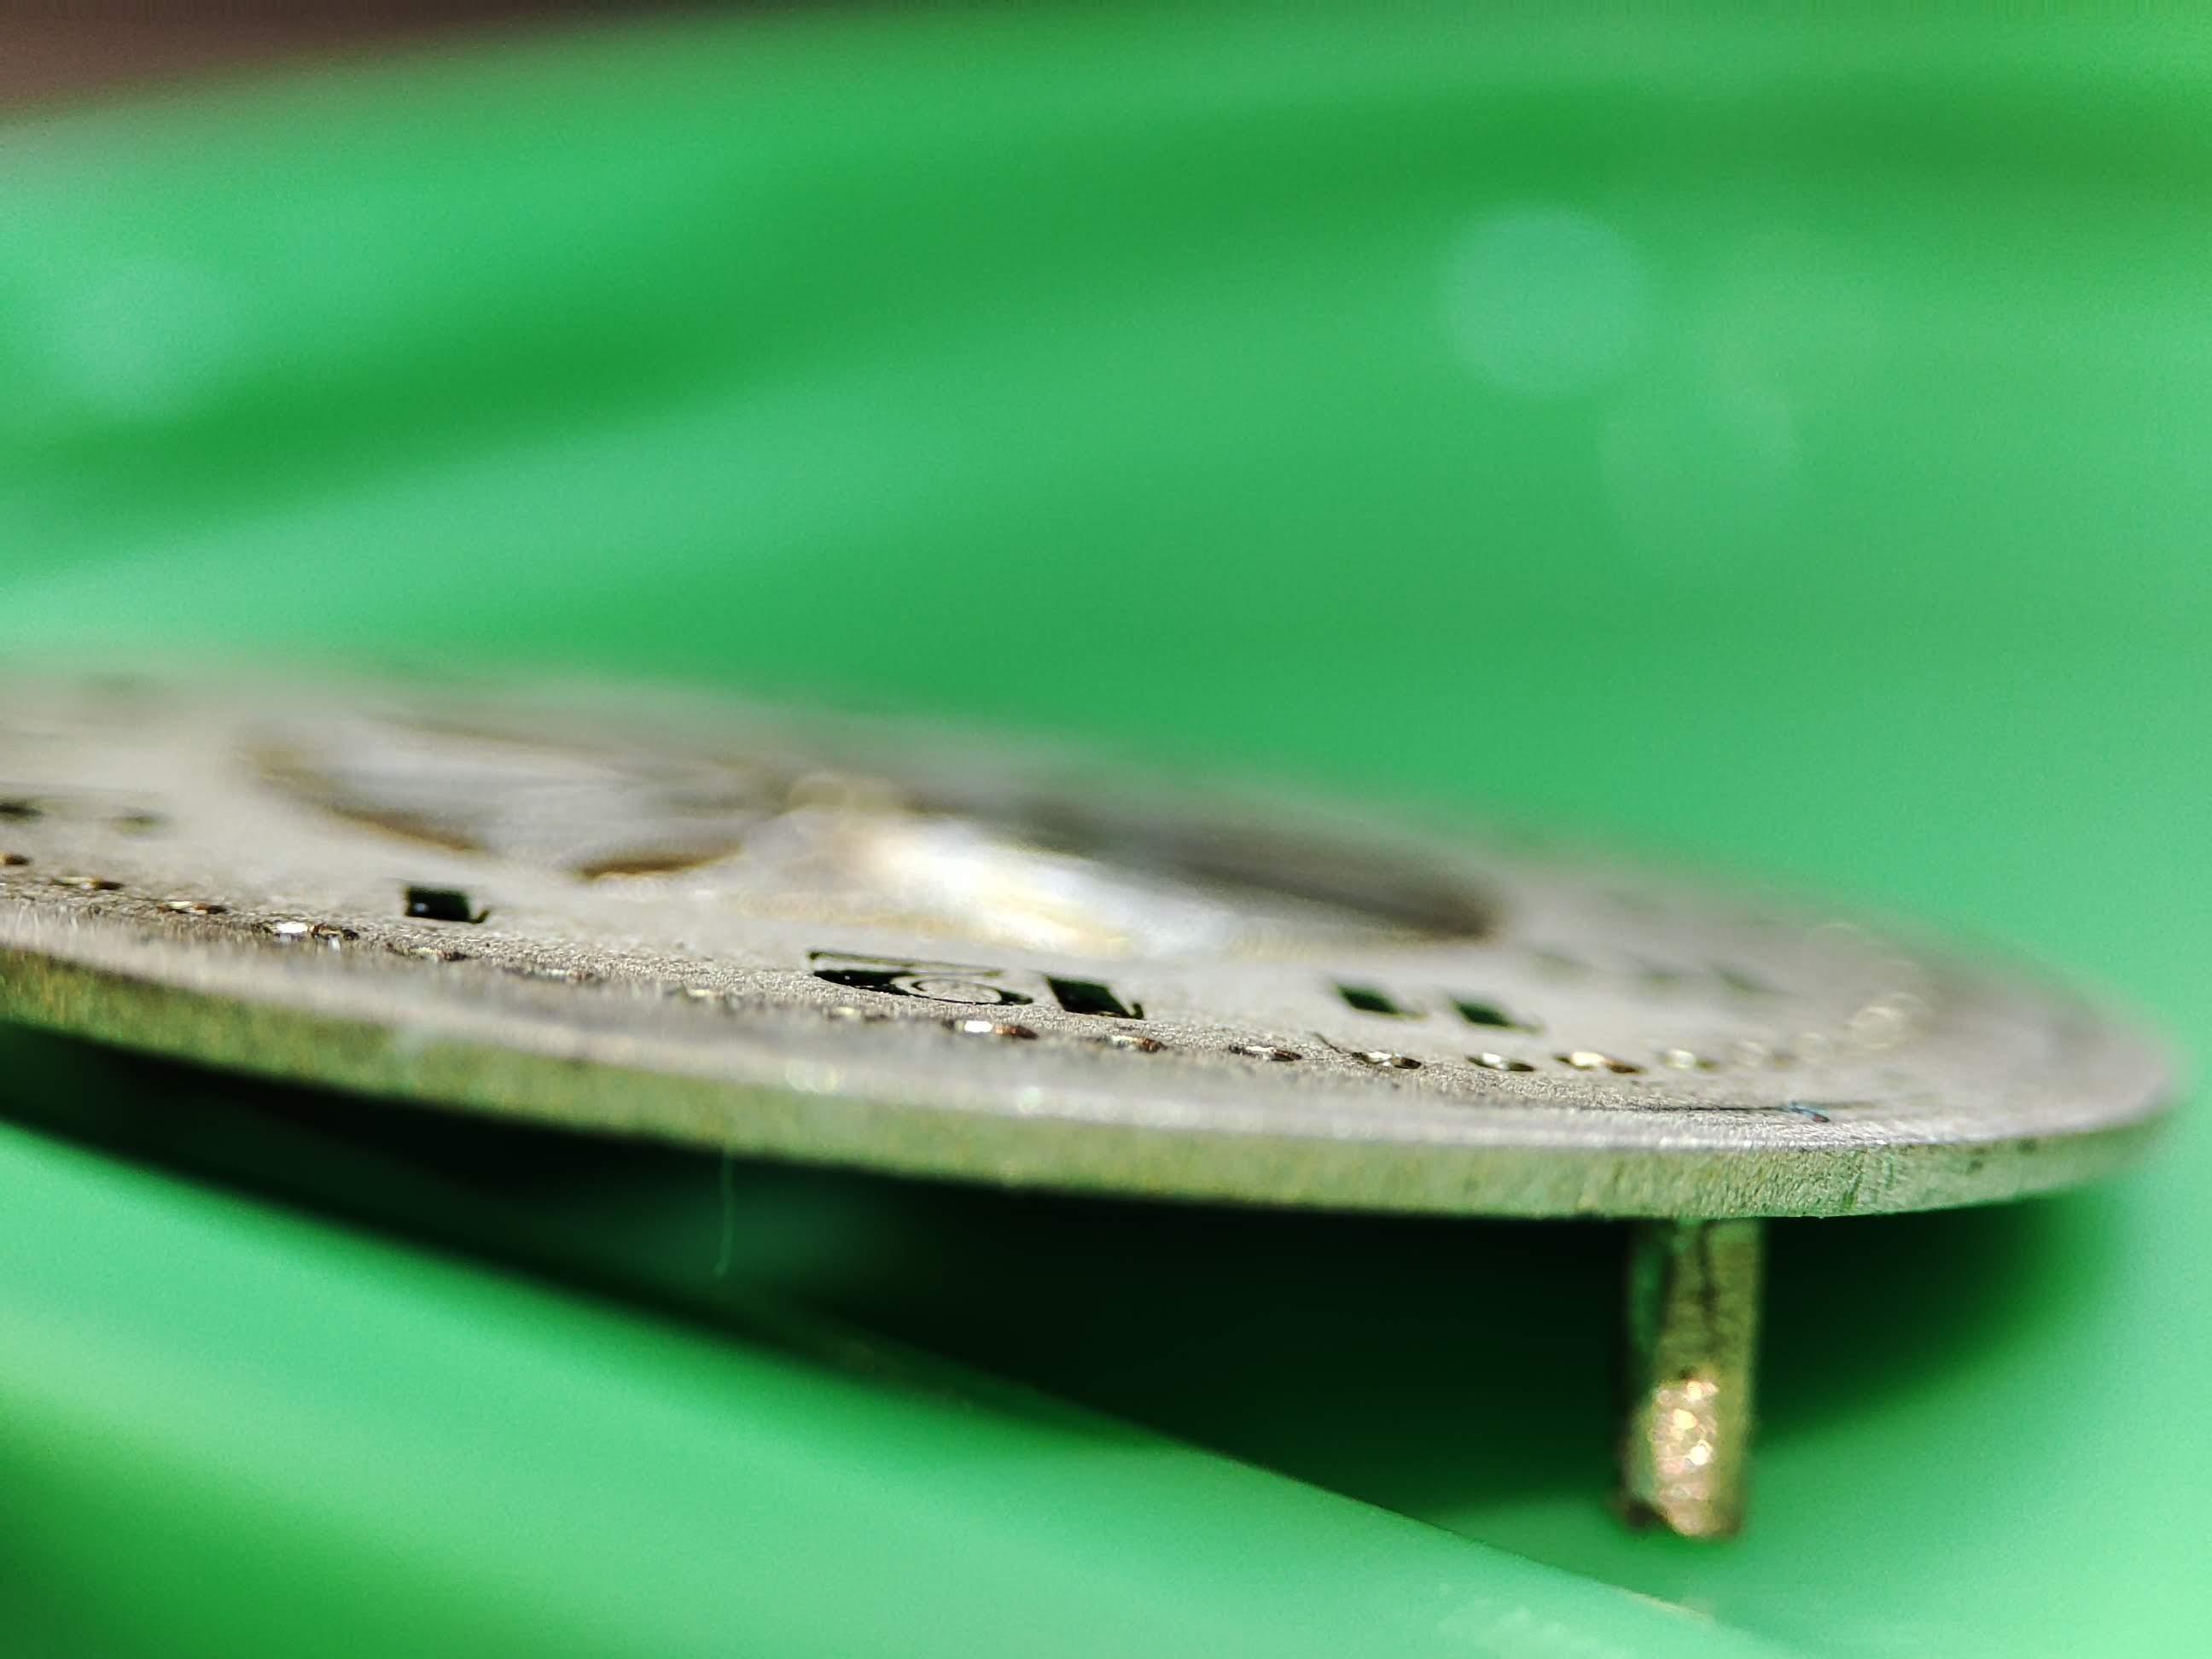
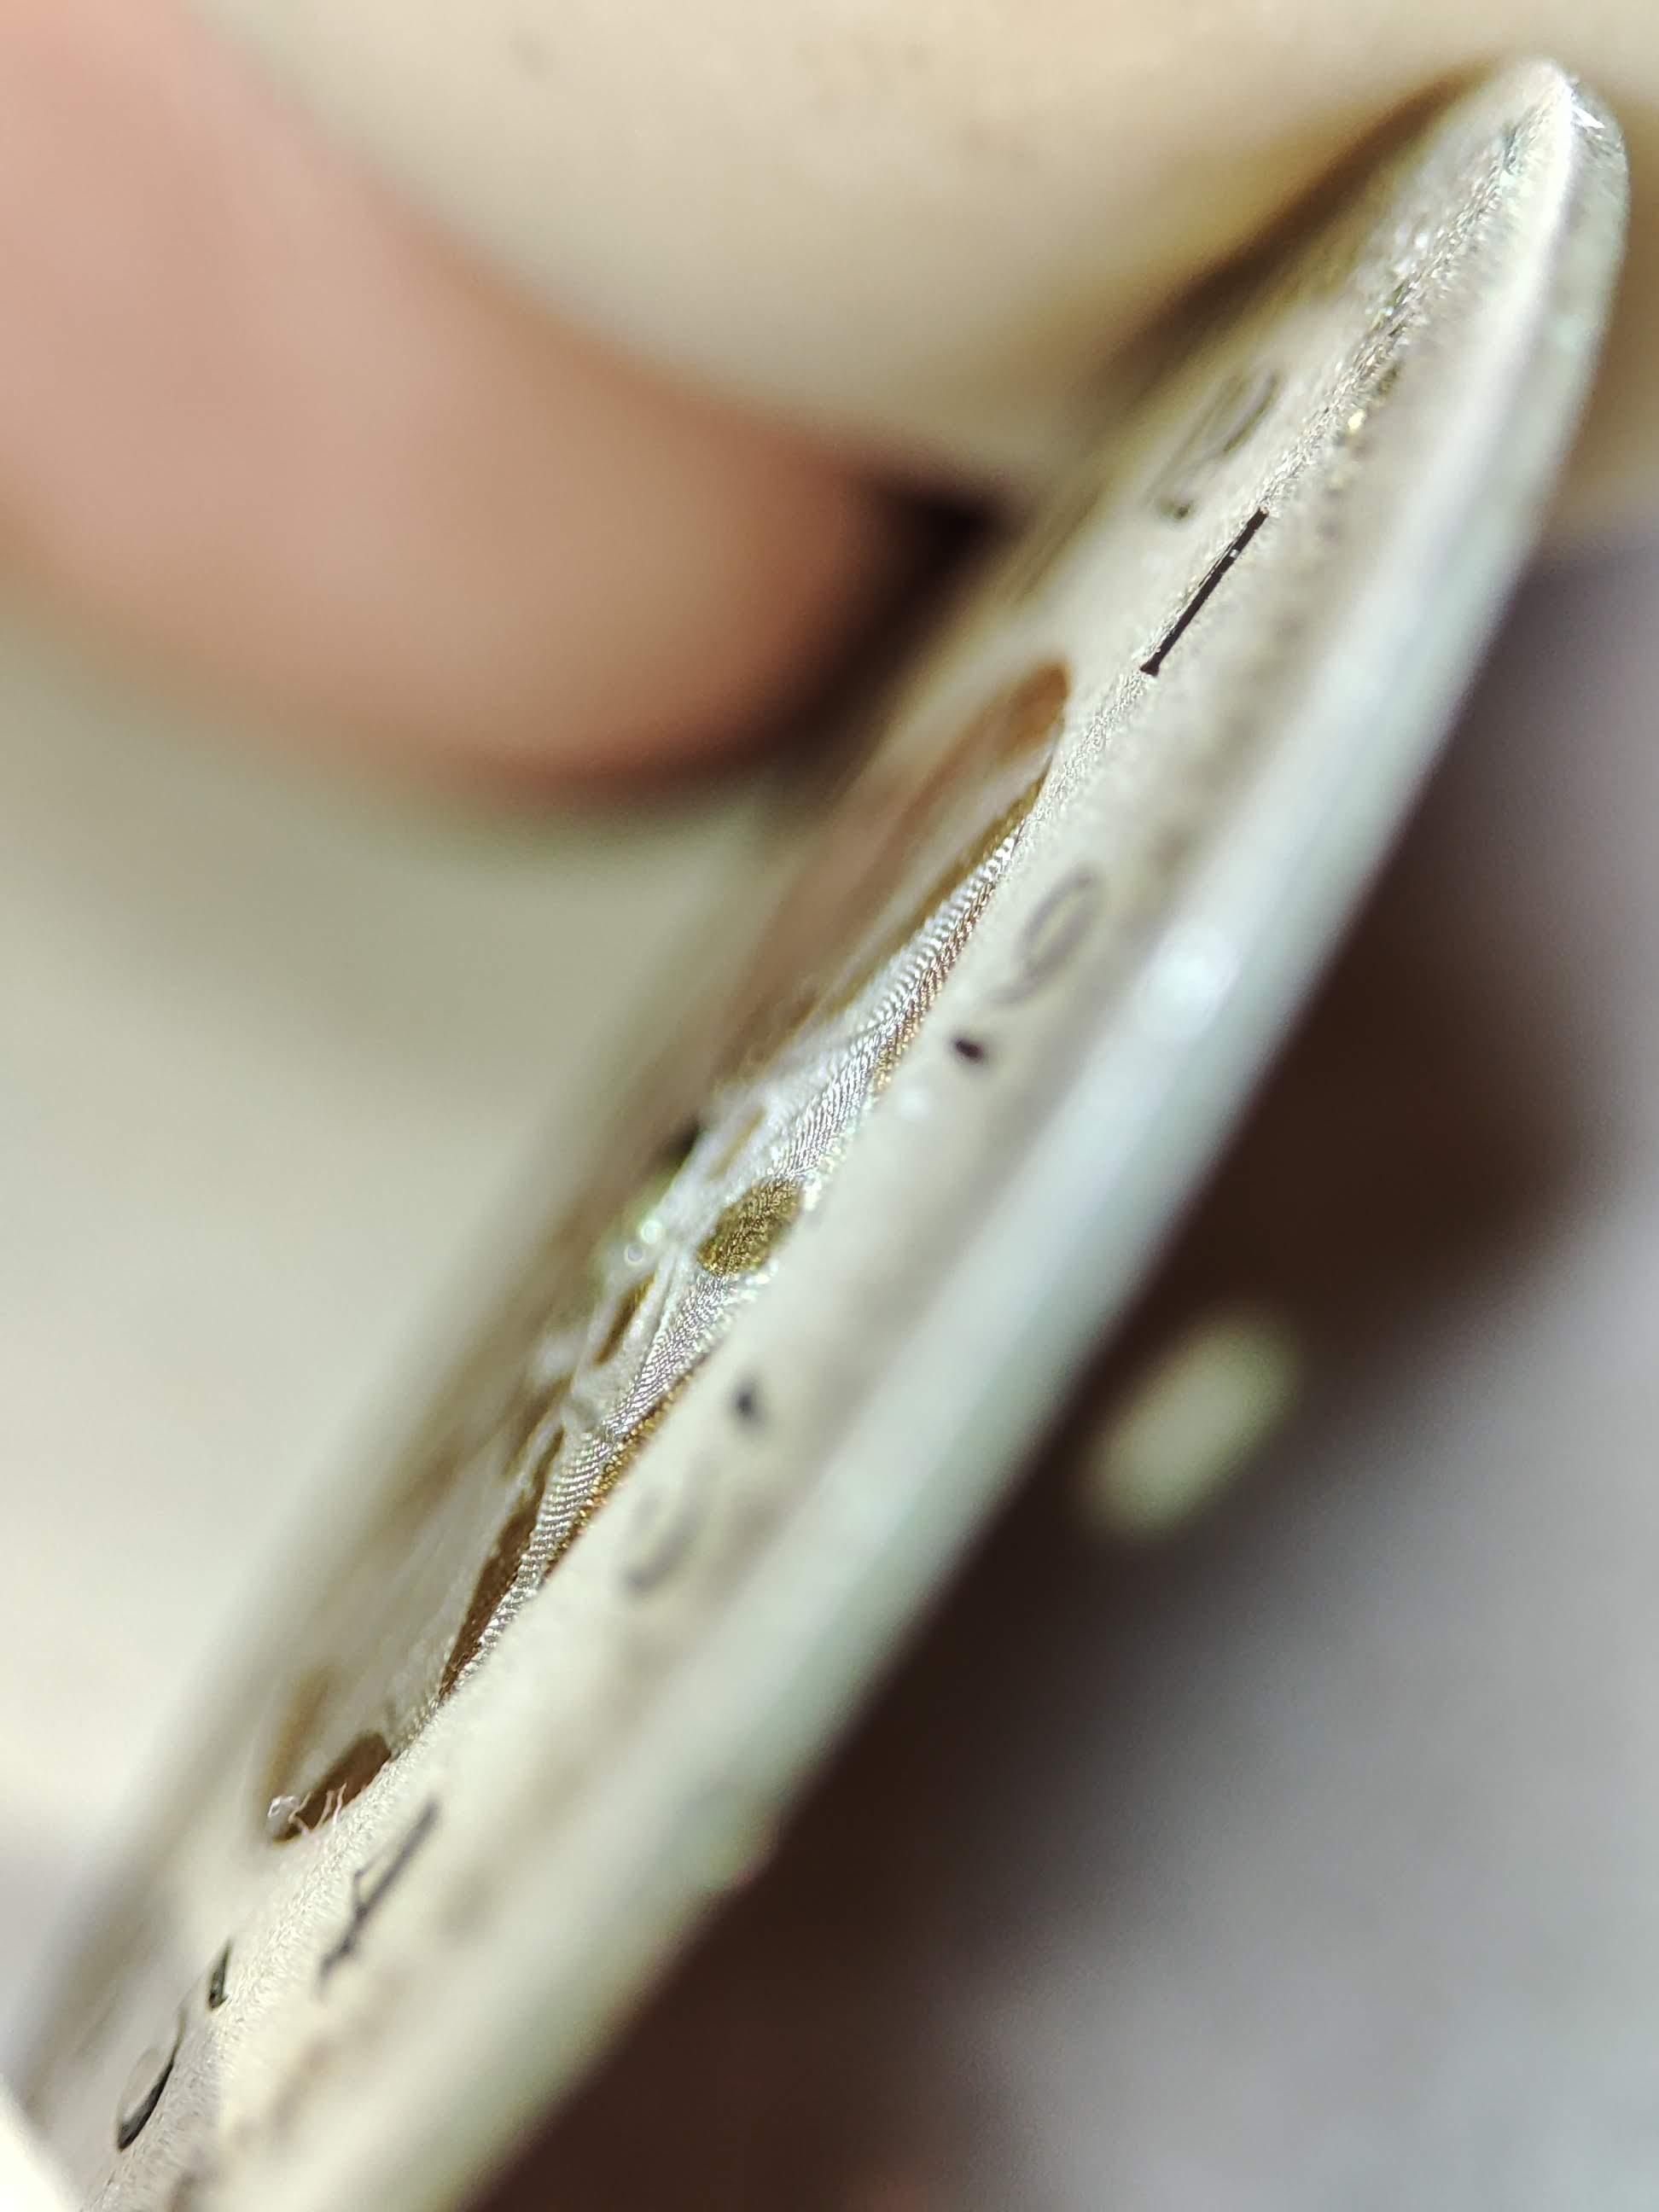
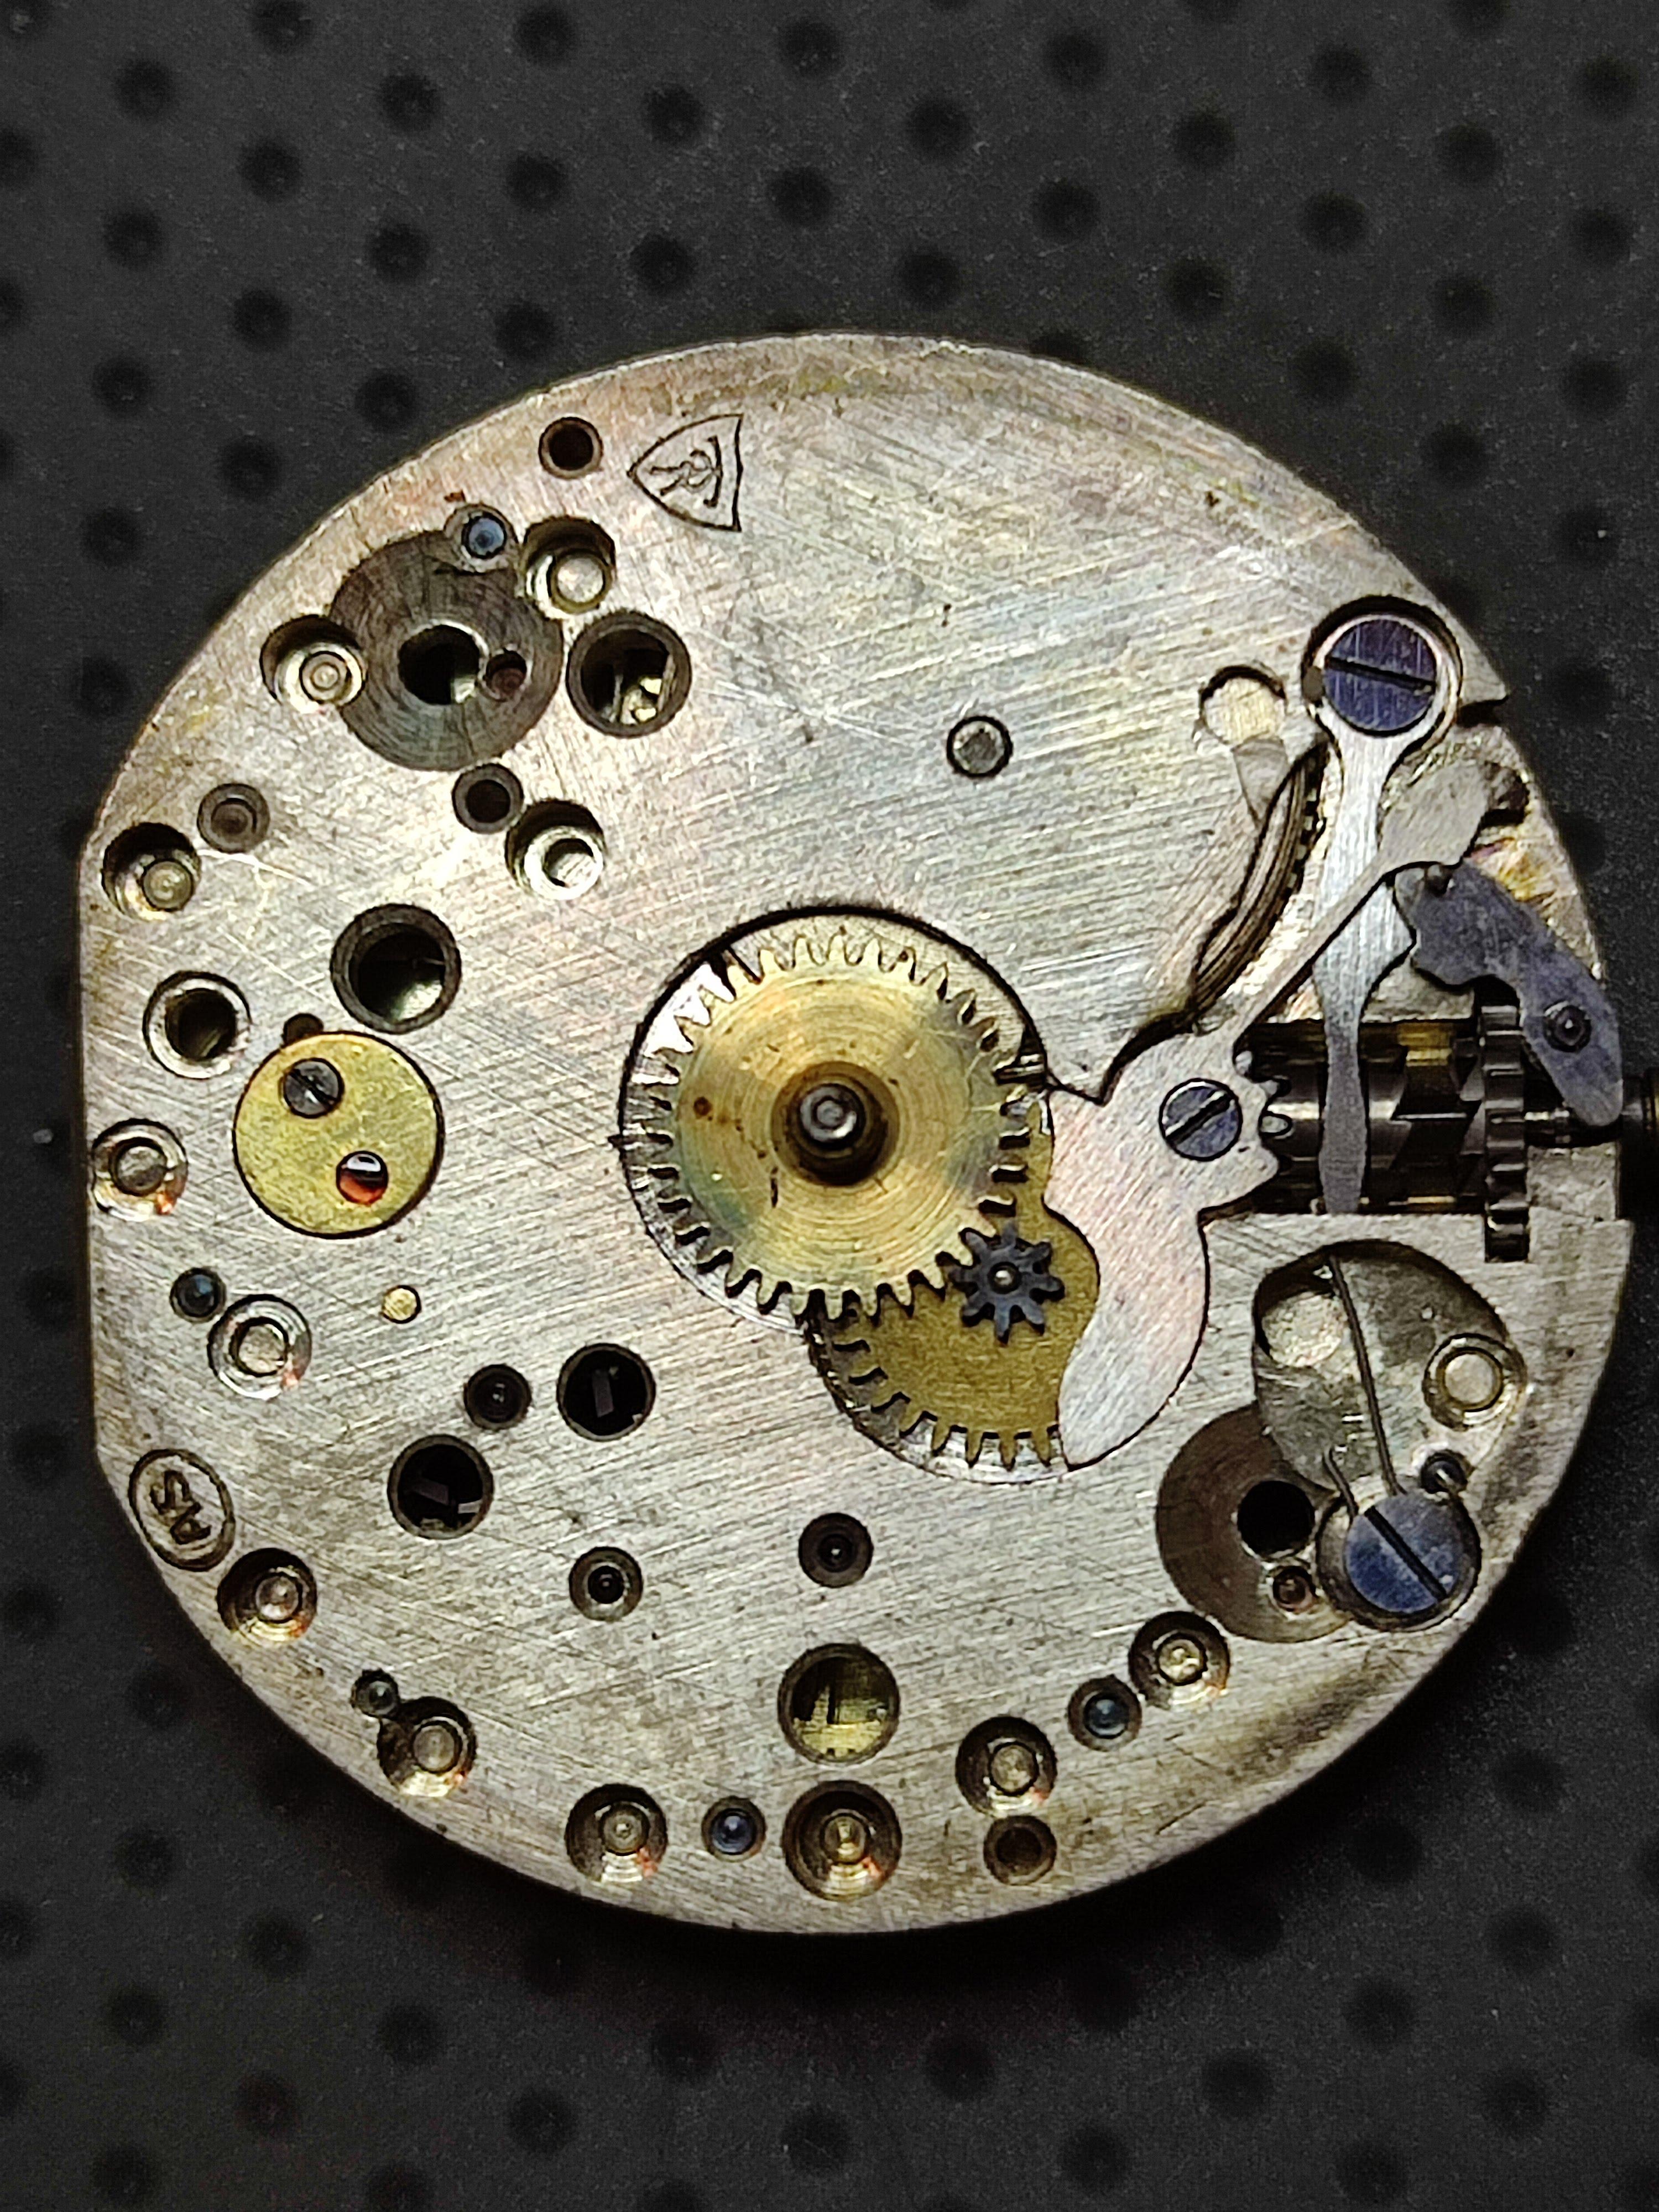
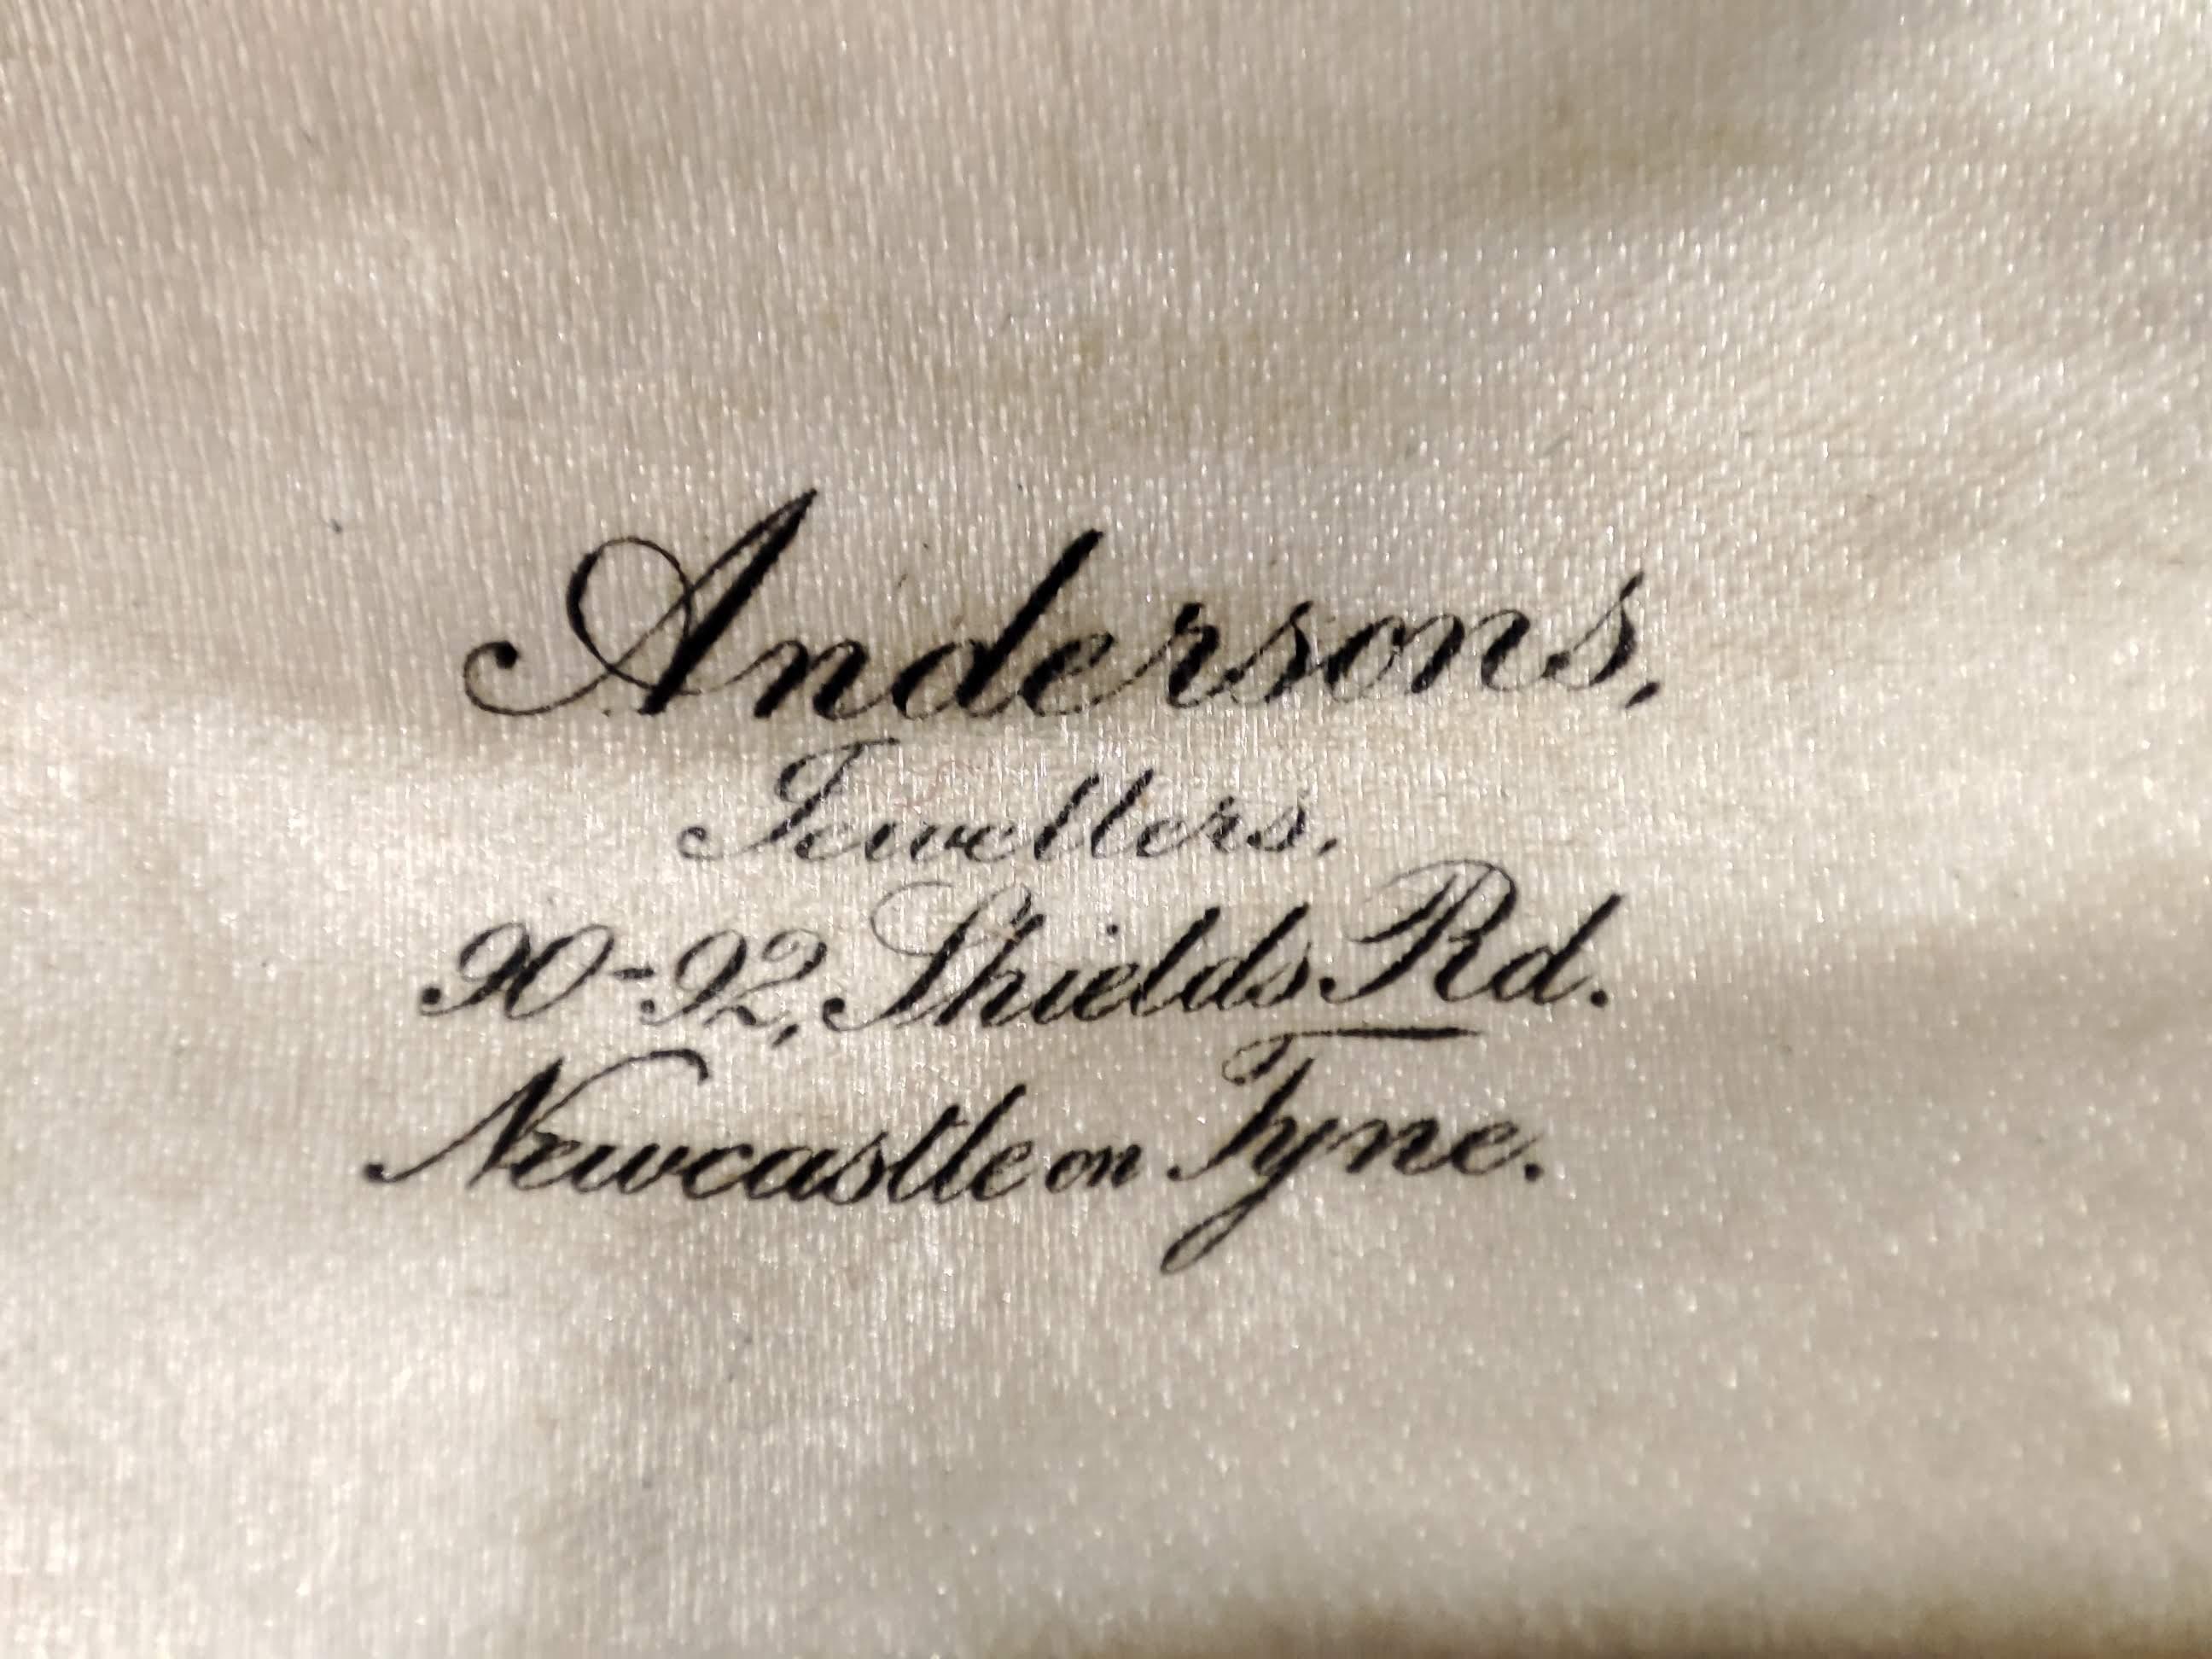
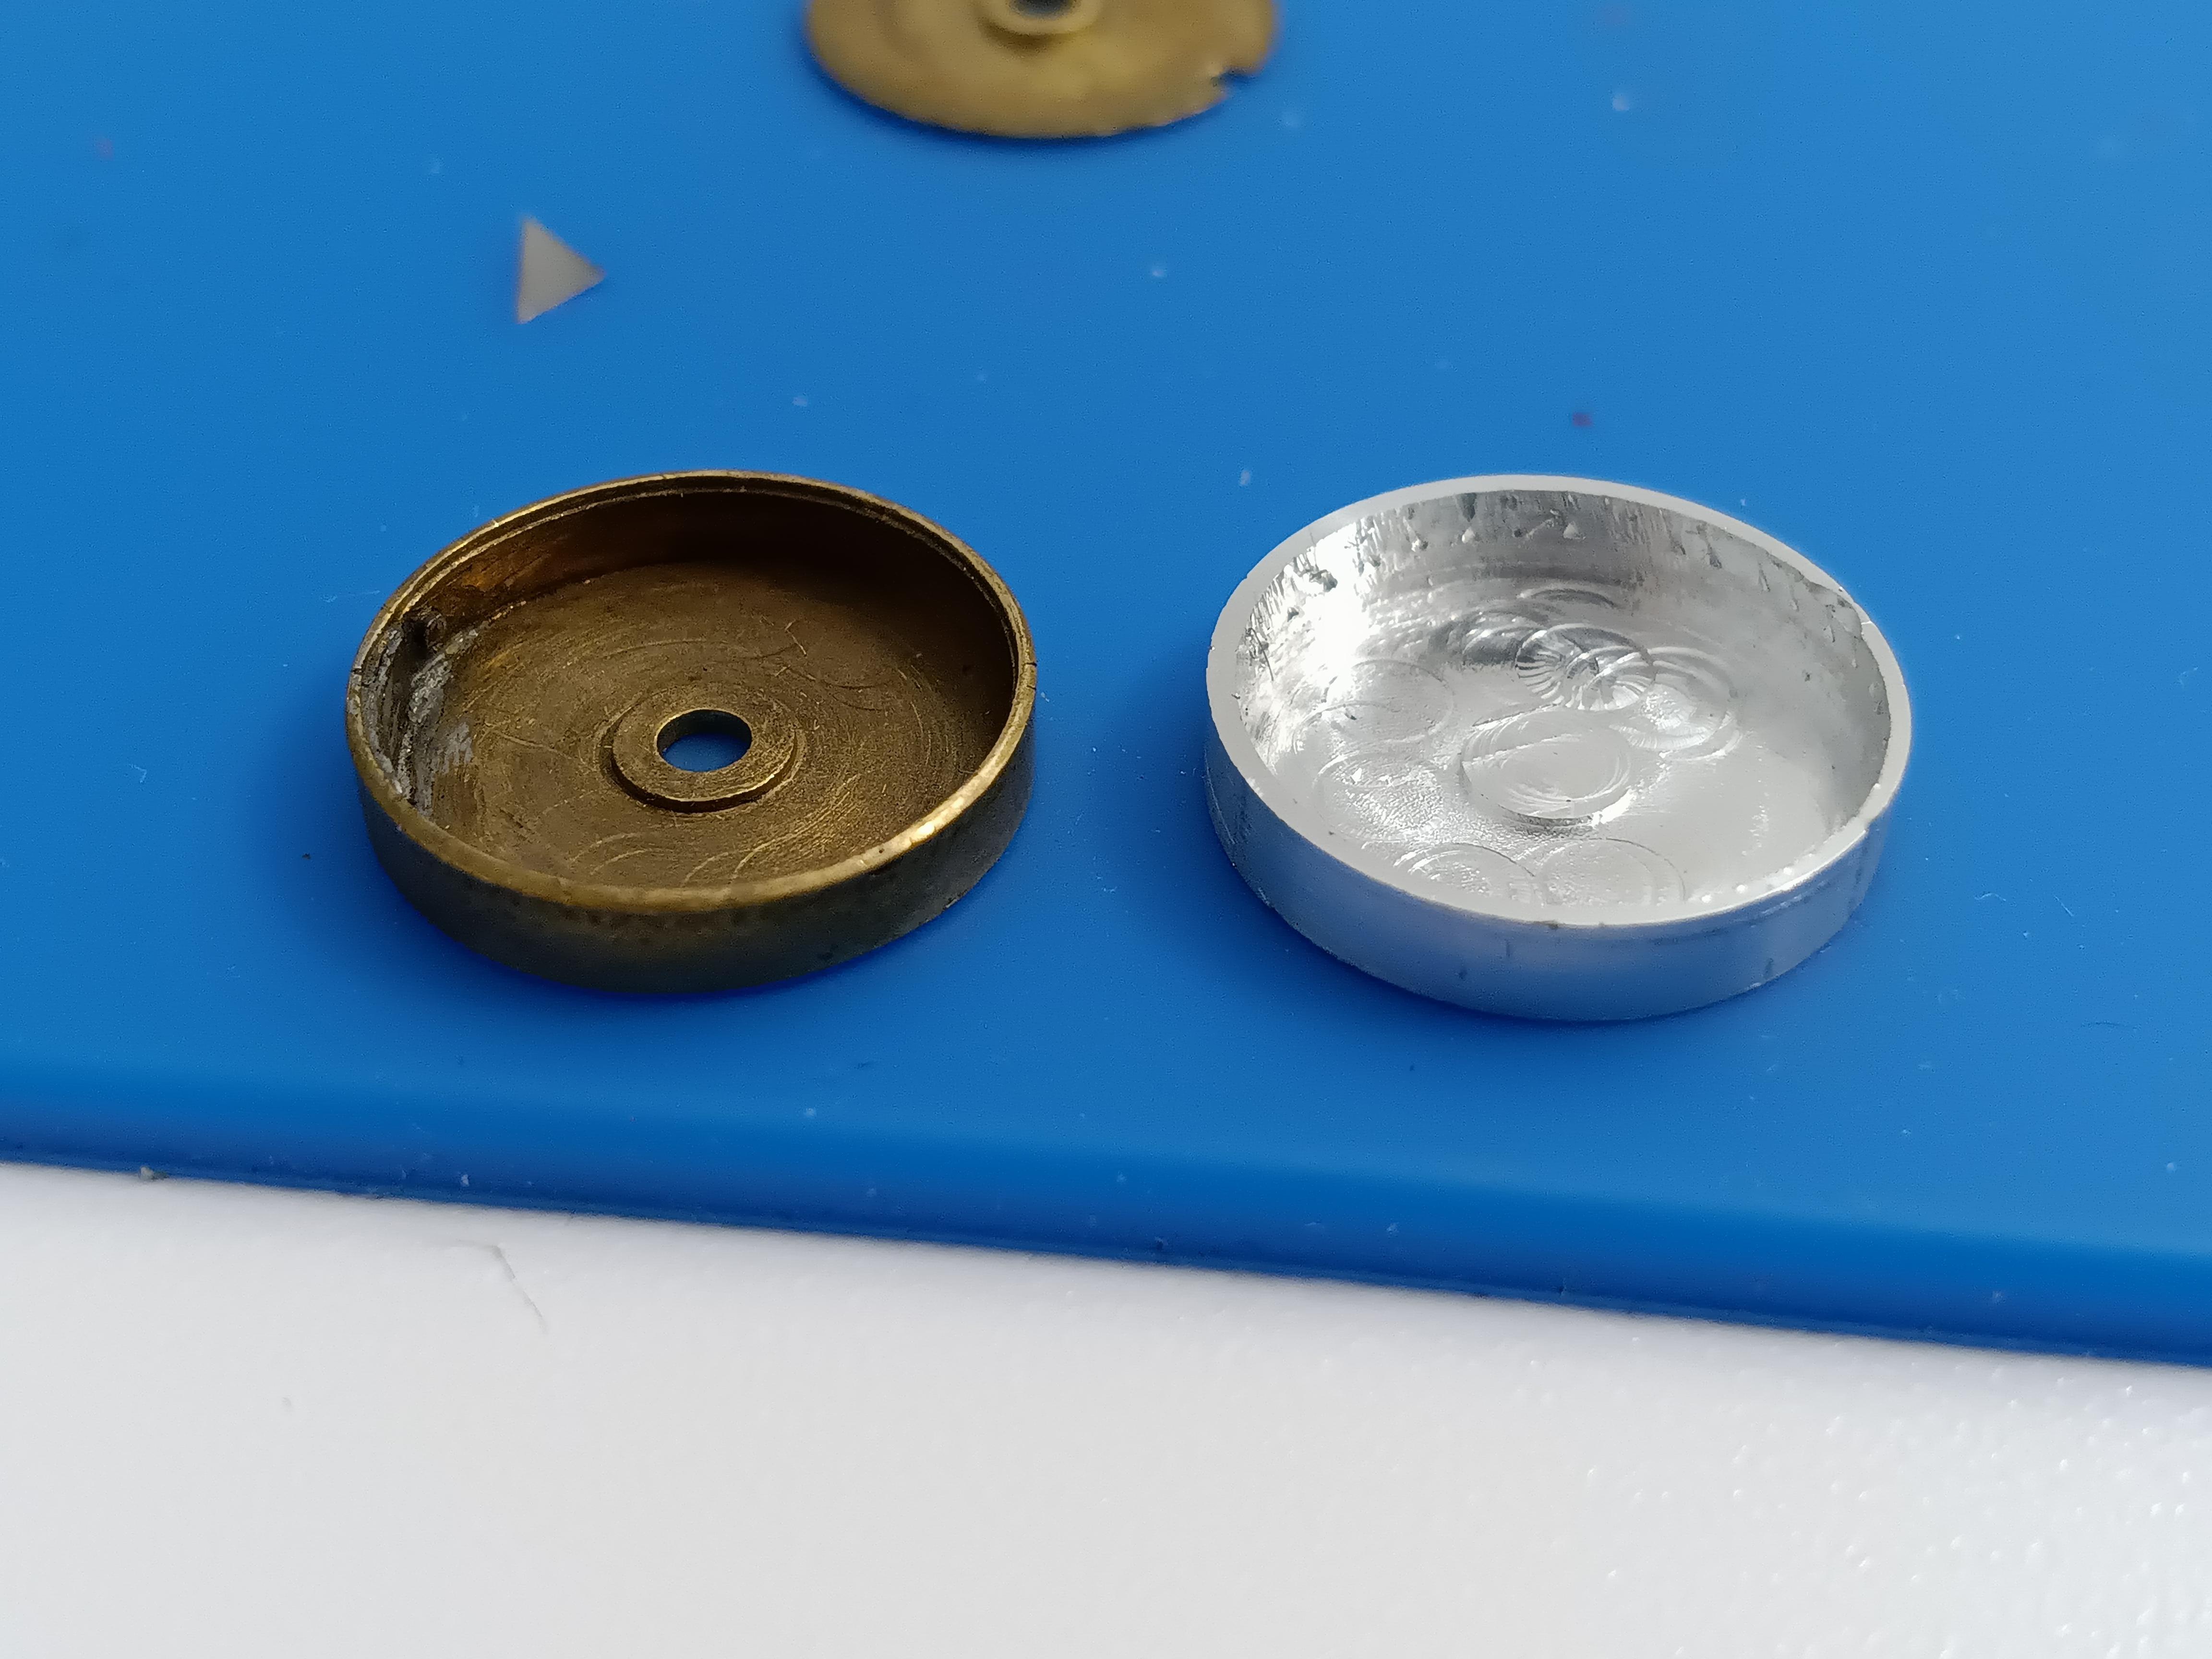
Just out of curiosity, can anyone tell me how the beautiful embossed effect was produced on this dial? I was surprised on removing it to find that the pretty surface doesn't noticeably protrude above what looks like brass. Could it be engraving on a mass produced watch? The watch has a 10.5''' AS movement bearing the overlapping TR shield - I read in an old post from the late great Ranfft that ESA used this "almost only" in 1936. The case is a gold Dennison Cachecase hallmarked 1929. The watch was bought new in Newcastle, England, and the only other branding on it is a "Rotary" logo on the ratchet wheel. Whether or not you have any insights on the dial, I hope you enjoyed the pictures! If the answer should be obvious, then forgive me but I am all the more eager to learn it. Thanks and best wishes!


 2 points
 -
Why not try watchmaking naked, just make sure your workshop is well heated and keep away from the windows.2 points
-
You take care mate and look after your mum.2 points
-
Hope everything is ok Andy2 points
-
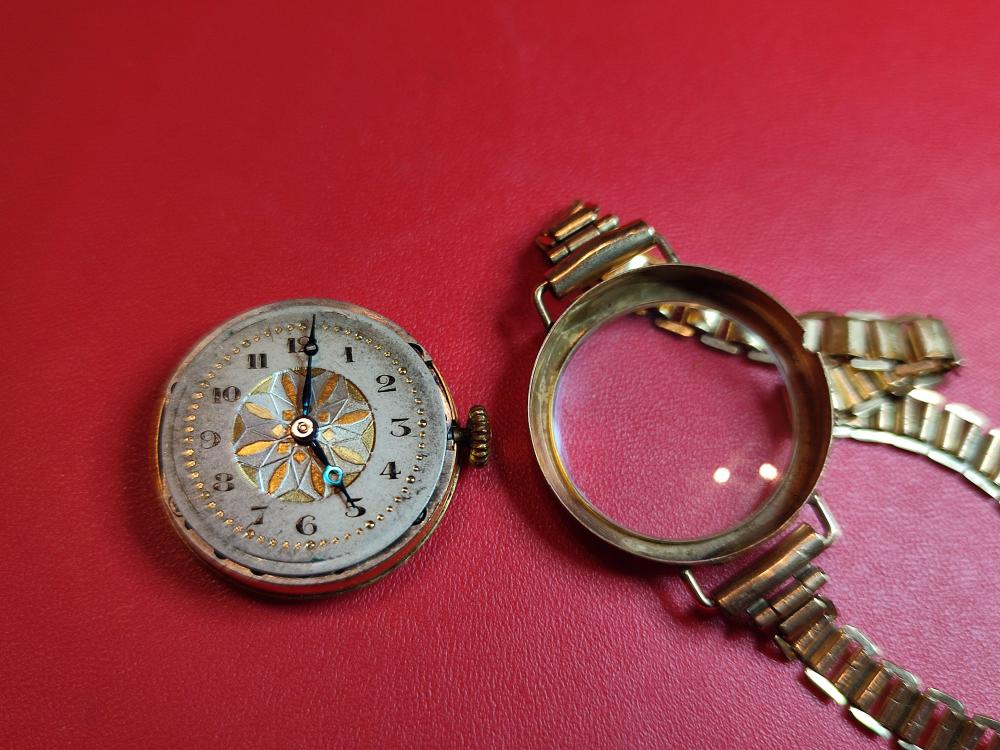
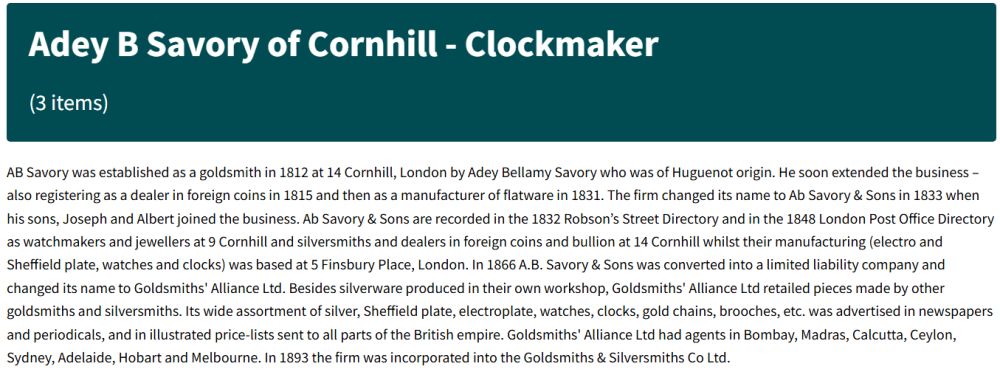
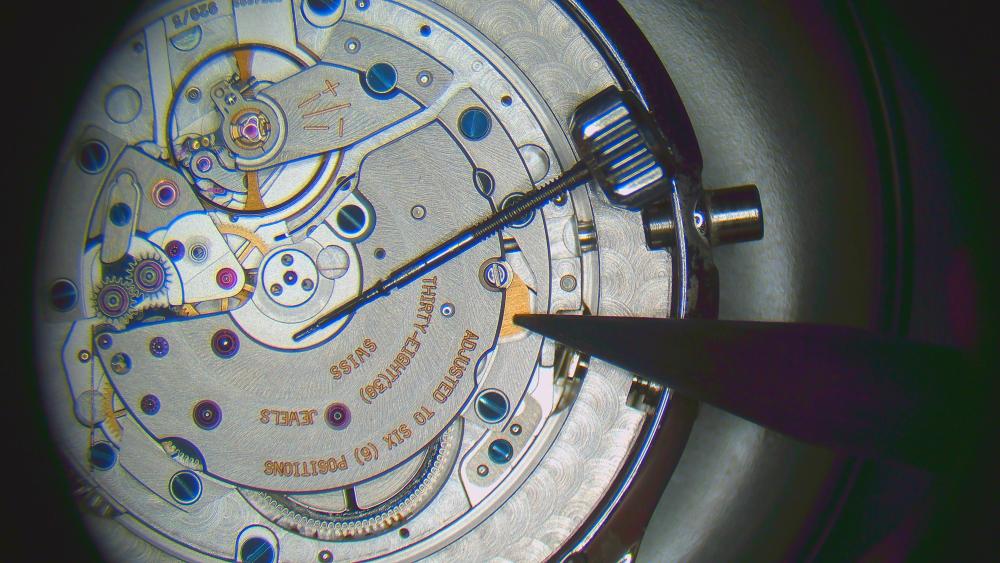
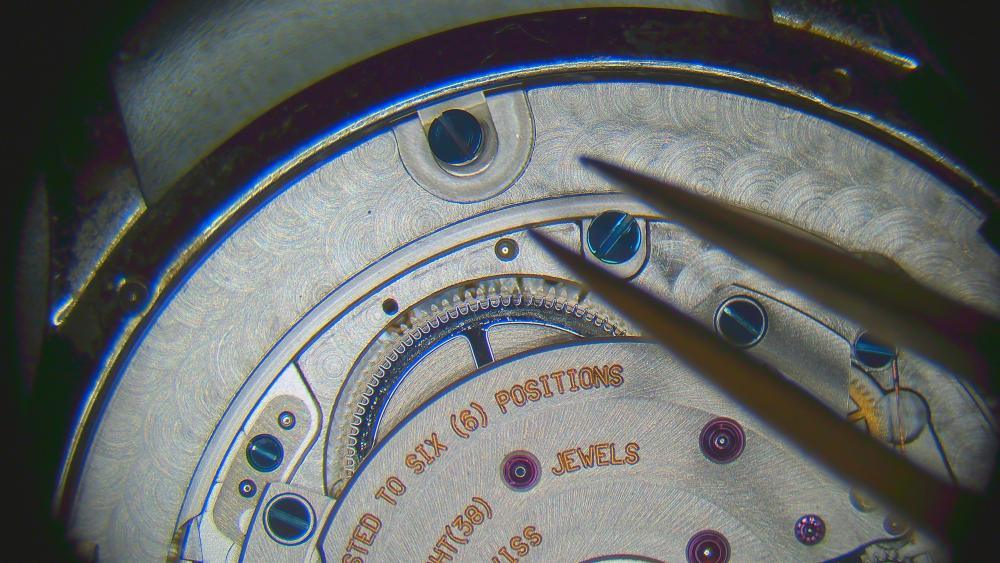
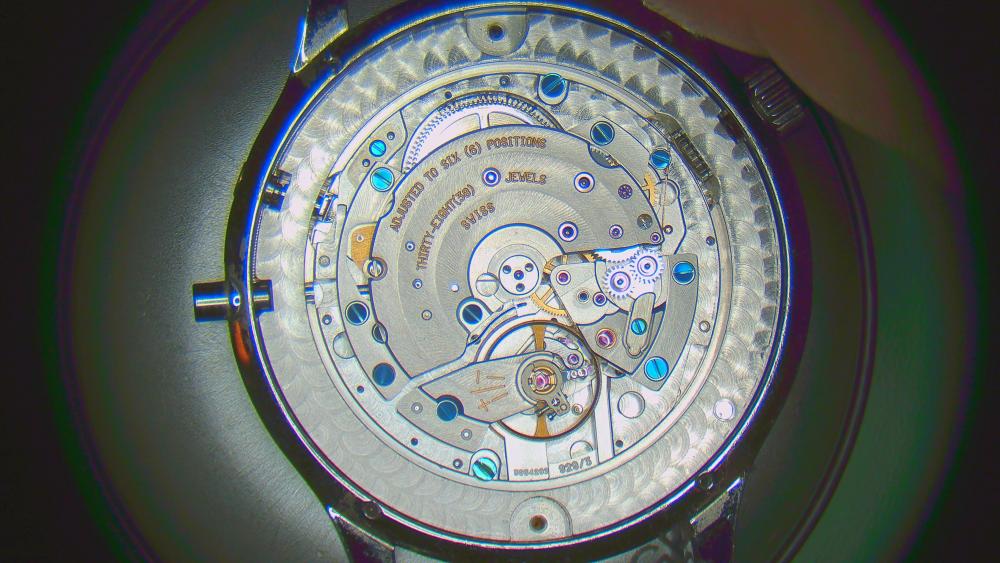
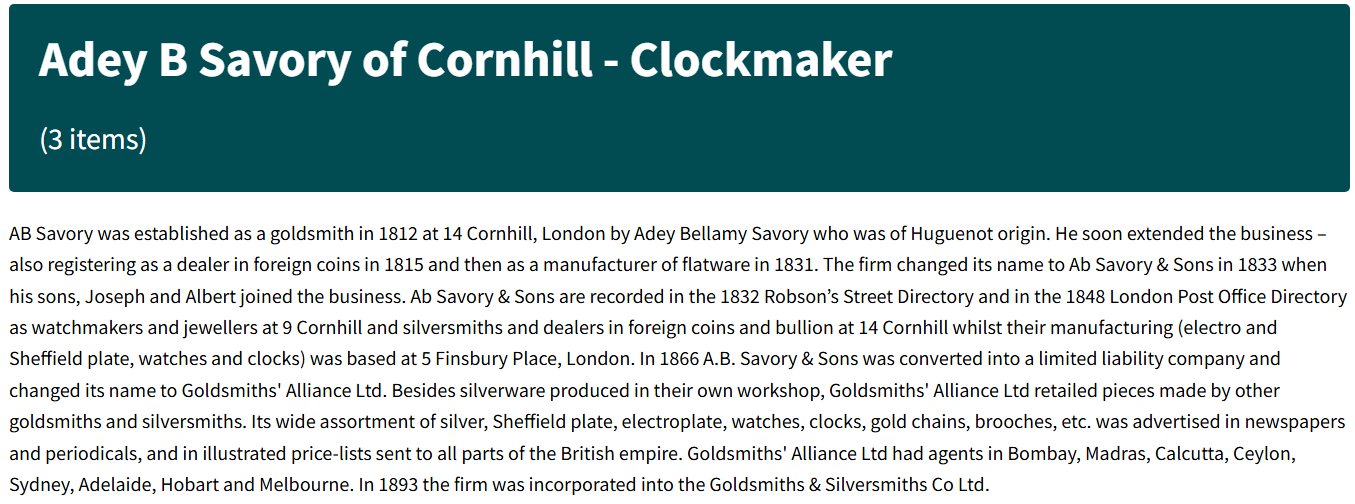
Strange how the movement is marked Coinhill but everywhere I look for Savory & Sons it's listed as Cornhill?
 2 points
 -
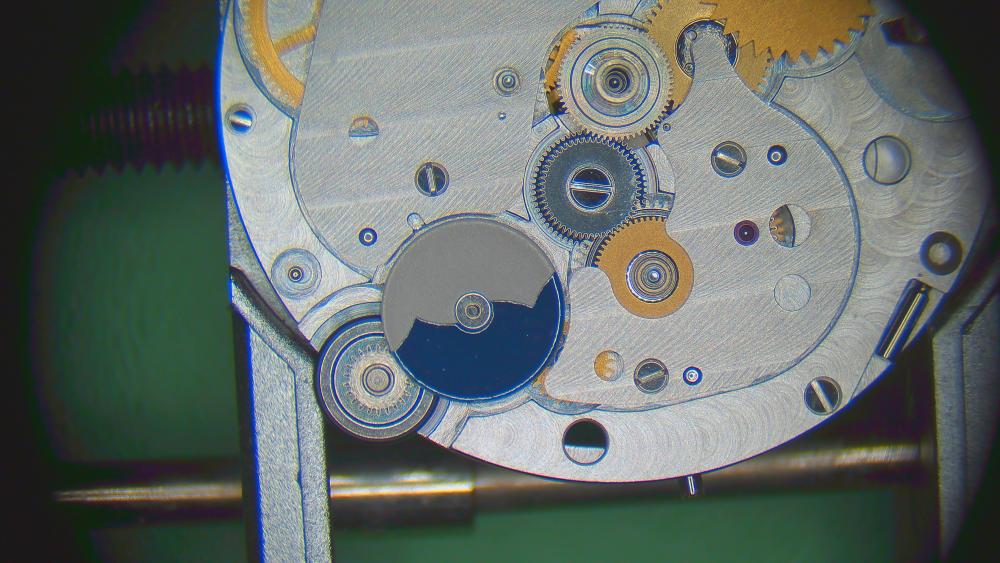
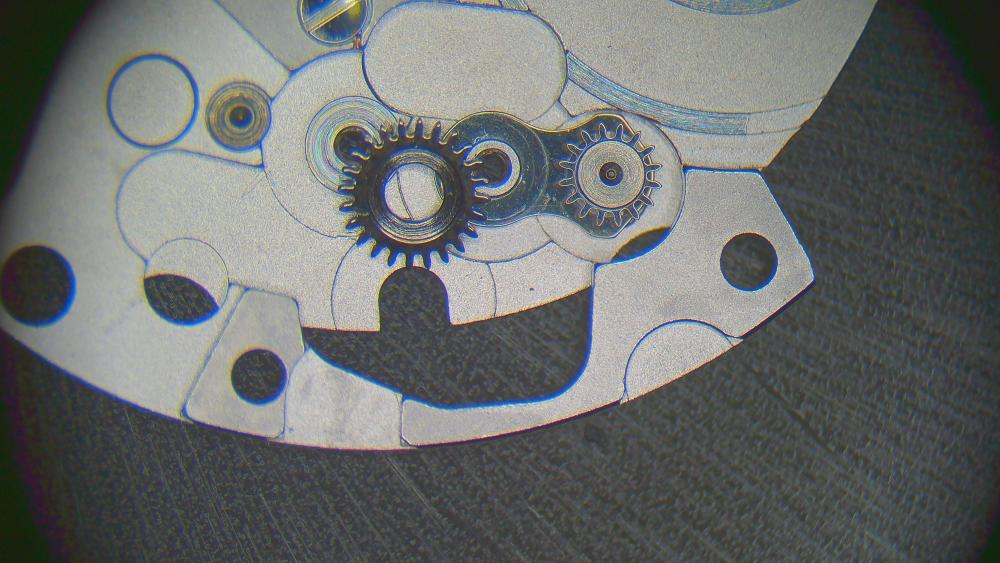
Really regret to have to disappoint you all Not this mass produced dial was made by Guilloche but the die was. Guilloche will not produce tiny pits, separated by crossing walls - but the contrary in the die will. Frank2 points
-
No. Too many cracks and crevices for parts to hide in.1 point
-
Wow! I had been reading that as "Cornhill", but when I compare it with the second "i", I can see what you mean. Now you've pointed it out, it is impossible to unsee. Probably ruined his whole day, or worse. I wonder if it was an apprentice, and if he tried to cover up his own mistake, or perhaps someone helped him. I do wonder what life would have been like in that workshop, 40 years or so before my grandfather was born. Like something from a Charles Dickens novel perhaps. I don't suppose they would have imagined that 170 years later, their watch would end up in Australia, with an amateur wondering about how to repair it.1 point
-
I have a couple that I wear. I have a cheap one I got on amazon, and a much nicer one my wife ordered me with my business name and my name on it. The cheap one works well enough, but the buttons on it are snap buttons, and they come unsnapped if you get out of your chair often. Maybe my belly is just too big. The nicer one has actual buttons, and its a bit thicker. I prefer that one. But its good to have 2 for when 1 is in the wash. And yes, it does help you see parts that ping off your tweezers. But that happens less and less as the days go on.1 point
-
JohnR posted this somewhere else
 1 point
 -
1 point
-
Its not actually your problem mate, you don't own the patent Andy does . Think I've wet myself laughing so much1 point
-
That's weird, I didn't post that now. No need for me to run around with a micro torch, the disclaimer states " I'm not responsible for any damage " hehe. No, it reposted all by itself.1 point
-
I'm going to start calling you Thomas, as in Mr Eddison. Invented nothing, patented everything.1 point
-
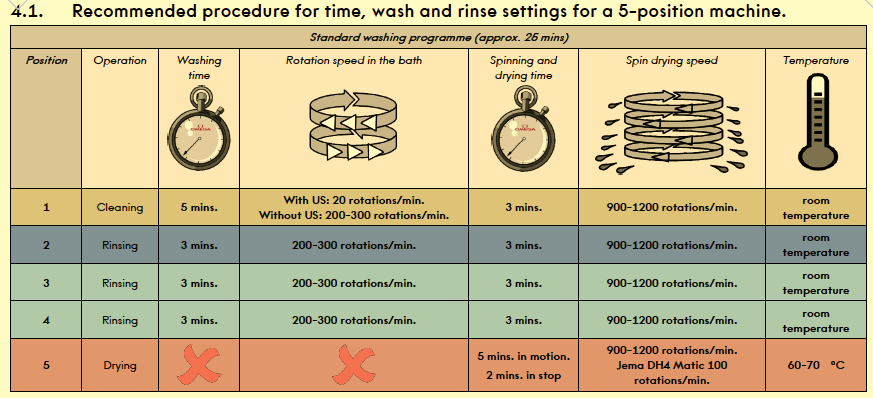
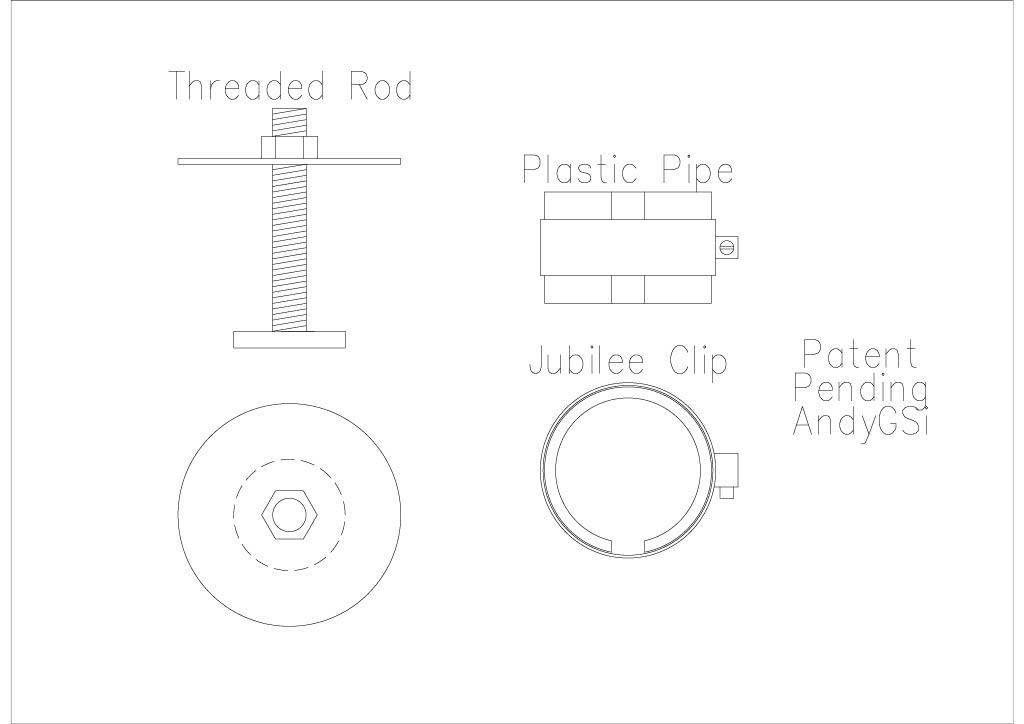
Someone's posted a table of speeds and times for wash and rinse cycles in this forum, i can't find the post but from memory i think it was 200 rpm. You should include a dc speed controller to your set up i have one of these in my homemade cleaner, inexpensive and you have more choice of 12v motors as it lets you adjust the motor speed to get the best results in your set up. This as a switch for manual forward and reverse, i have the output of this that goes to the relay input of an automatic forward reverse circuit set at ten seconds, the forward reverse module can be swithched out with a DPDT switch so you can control the motor directly for spinning excess fluids off at the end of a cycle.
 1 point
 -
What is the motor you are using to drive it? Brushless? Stepper? I think 60rpm is too low. 300rpm would be a good start1 point
-
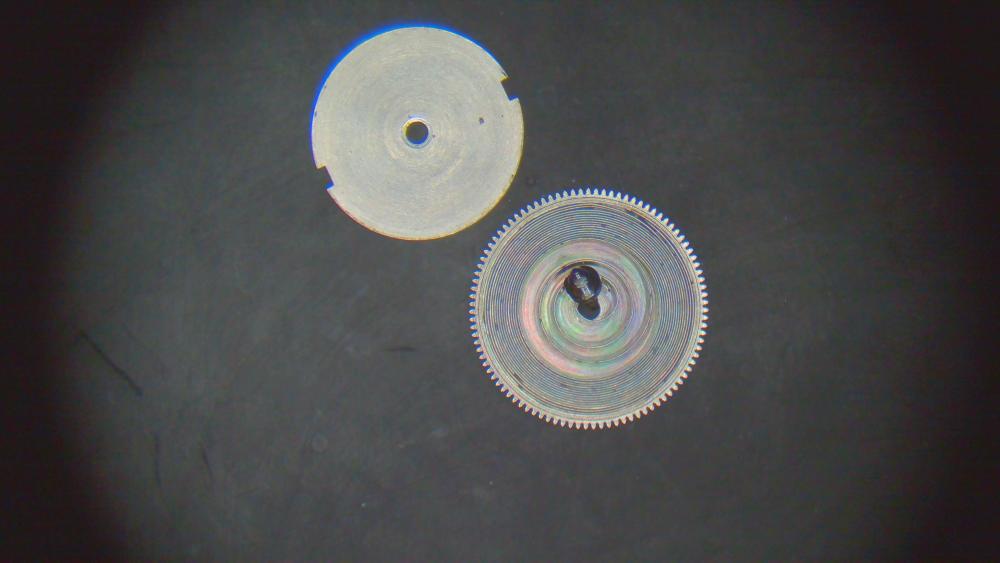
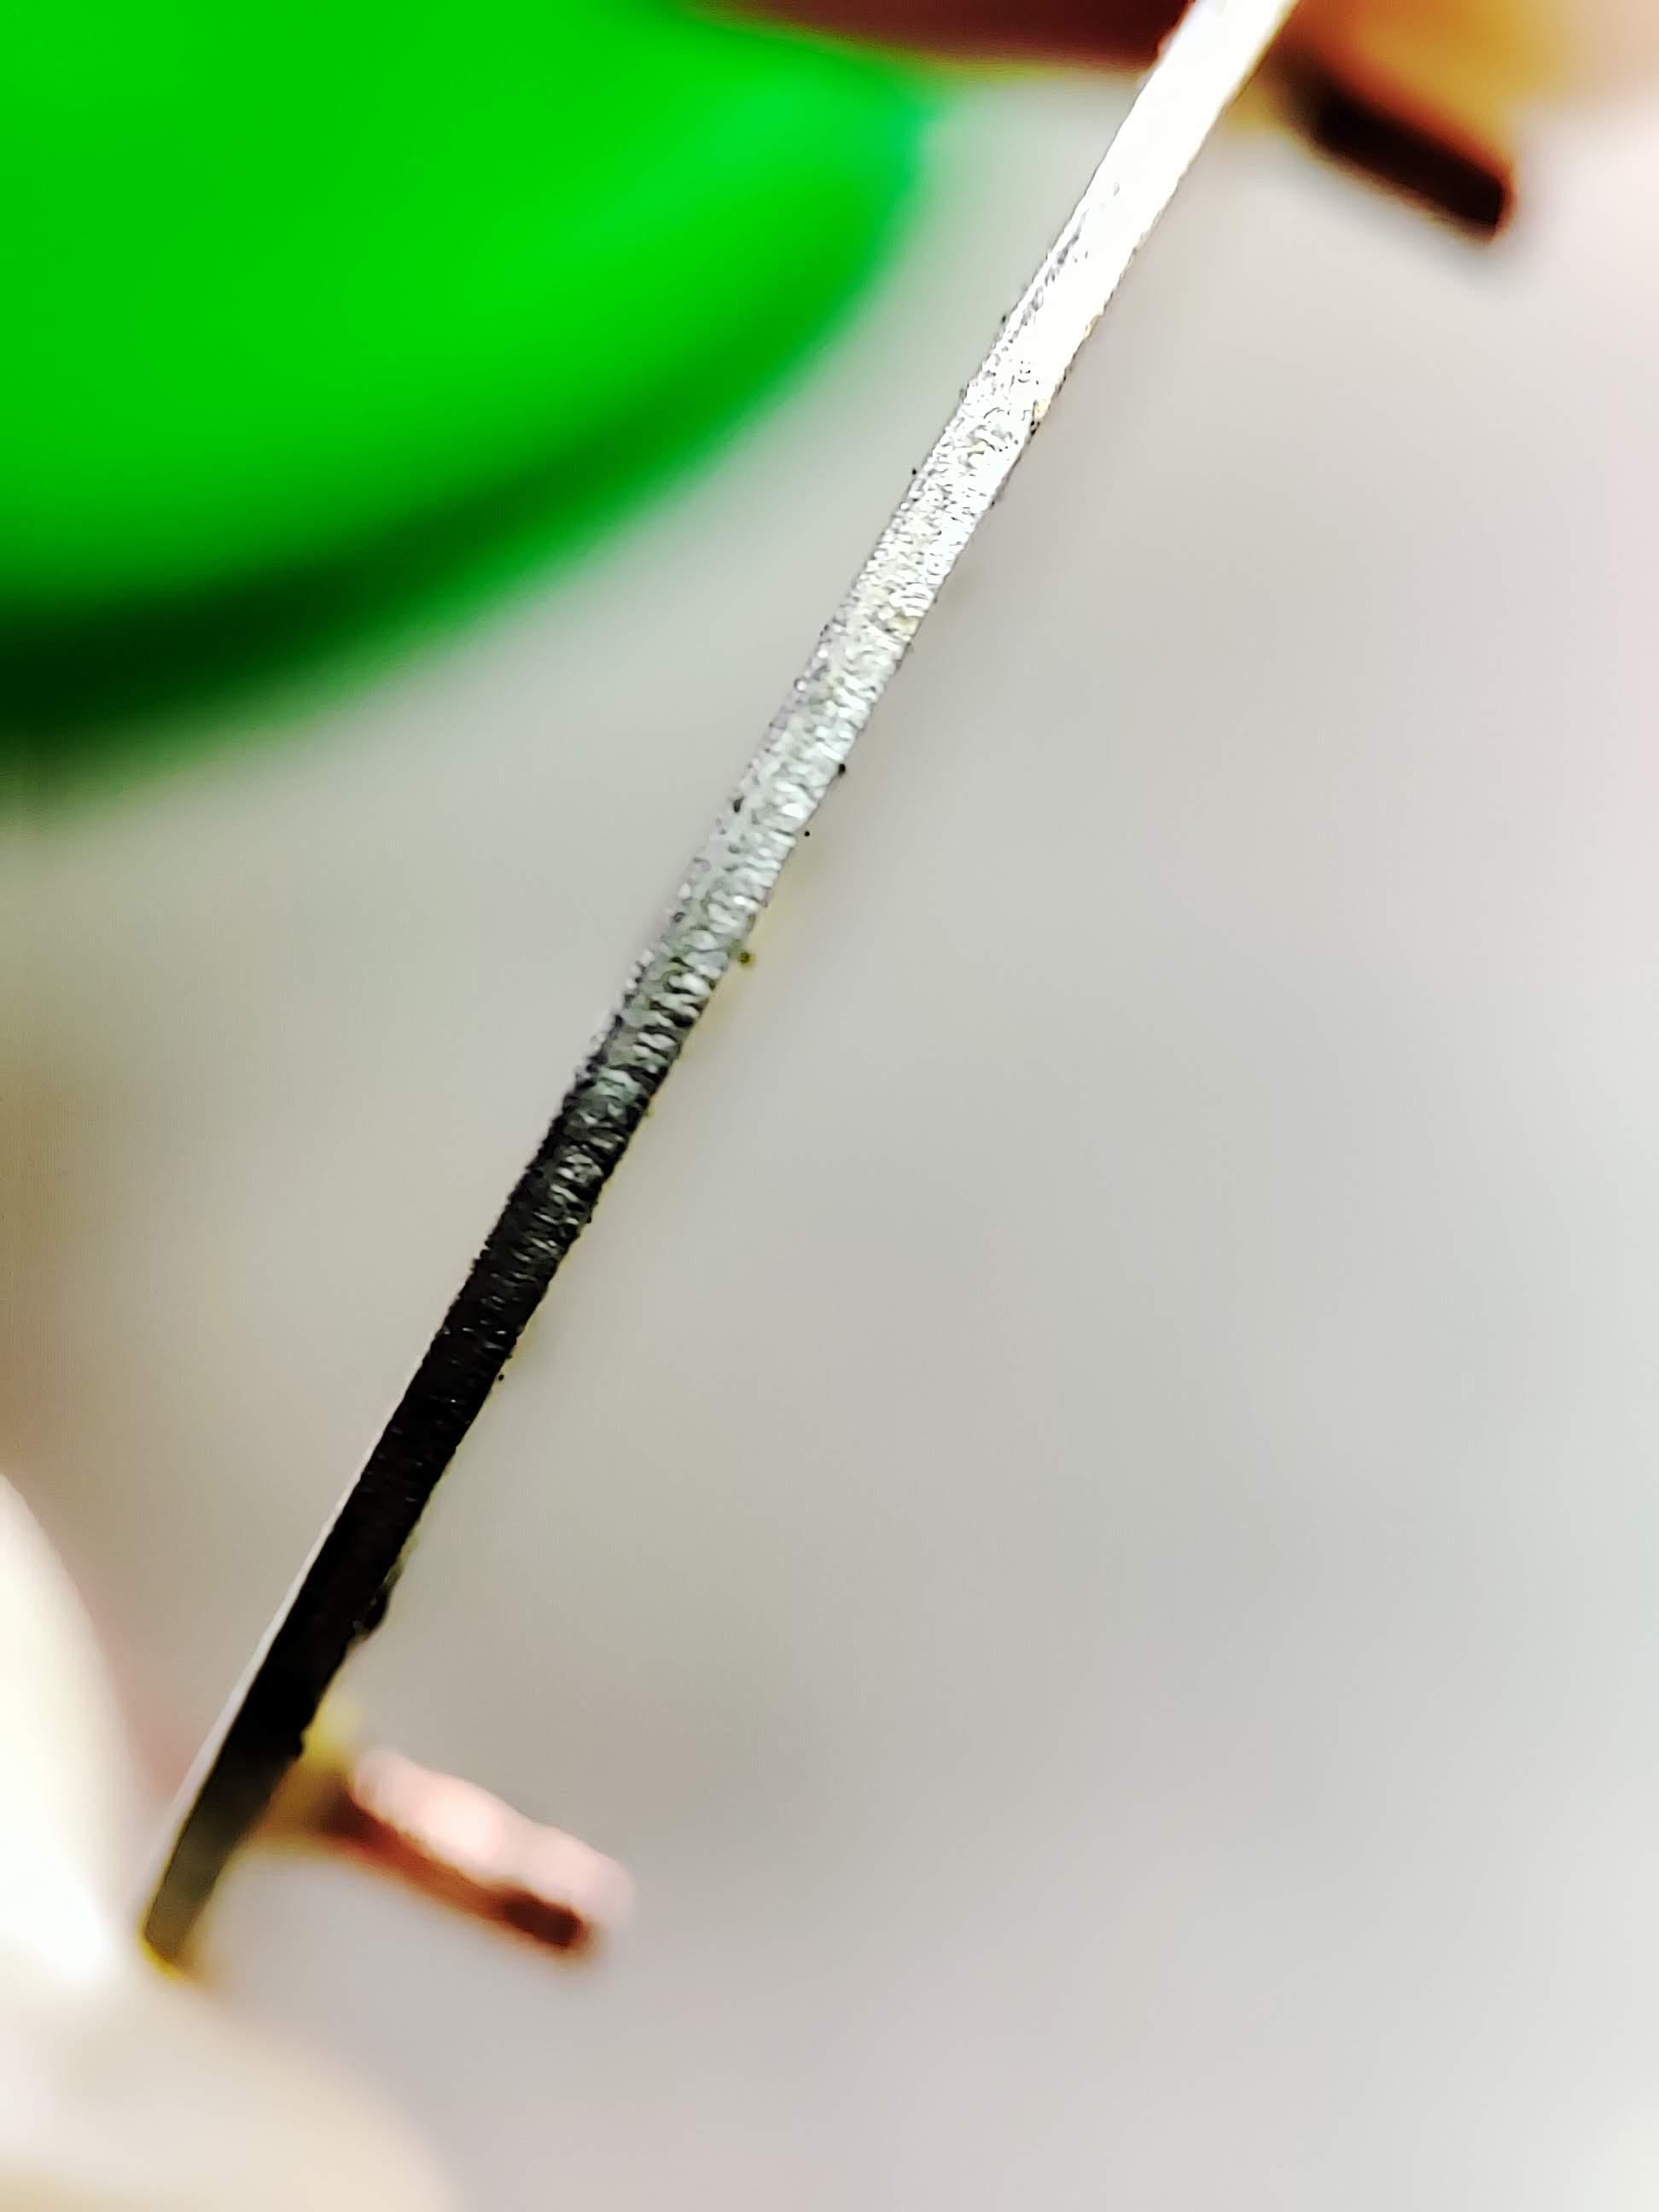
I'm with praezis on this. That's stamped and painted with silvering. Look at the transitions between the high and low elements; the details shift with the topology, and the color is independent of it. Get too agressive with the cleaning, and you could very well find yourself learning how to silver dials. Resilvering very selectively like that dial seems pretty challenging to me, but I hate painting with a passion.1 point
-
Spelling lost in translation...English engaving to English text lol. I think the engraver actually messed up and then tried to rectify it with a half attempted r. Notice the apostrophe over the r and the enlarged over the i dot with half the r.....and then he thought "oh fuk it " Thats a big piece to mess-up and have to remake , one of the lads may have done it and then probably got a good hiding when the old man saw it.1 point
-
Yes, the square is for setting the hands.1 point
-
I'm going to start calling you Thomas, as in Mr Eddison. Invented nothing, patented everything.1 point
-
I tested out my new lathe and mill to fabricate the barrel. I'm practicing on aluminum first because lead-free brass is more expensive. Side note, I didn't think there could be a machine as messy as a mill. There are aluminum shards everywhere. I still have to dial in a few things with the lathe to get it running true, as my barrel ended up slightly taller than the stock one. The width was dead true to the original, 14.50 mm. Overall, I'd say this was a pretty good first attempt.

 1 point
 -
Ok lets have it, bush ready to press in.
 1 point
 -
I was bored.
 1 point
 -
The idea of the little cutouts is that cleaning solution can get in and out. We've all seen jewels though that just won't come clean without a little help from pegwood, including cap jewels. I've had to disassemble these types of settings to get them properly clean, with a jeweling tool.1 point
-
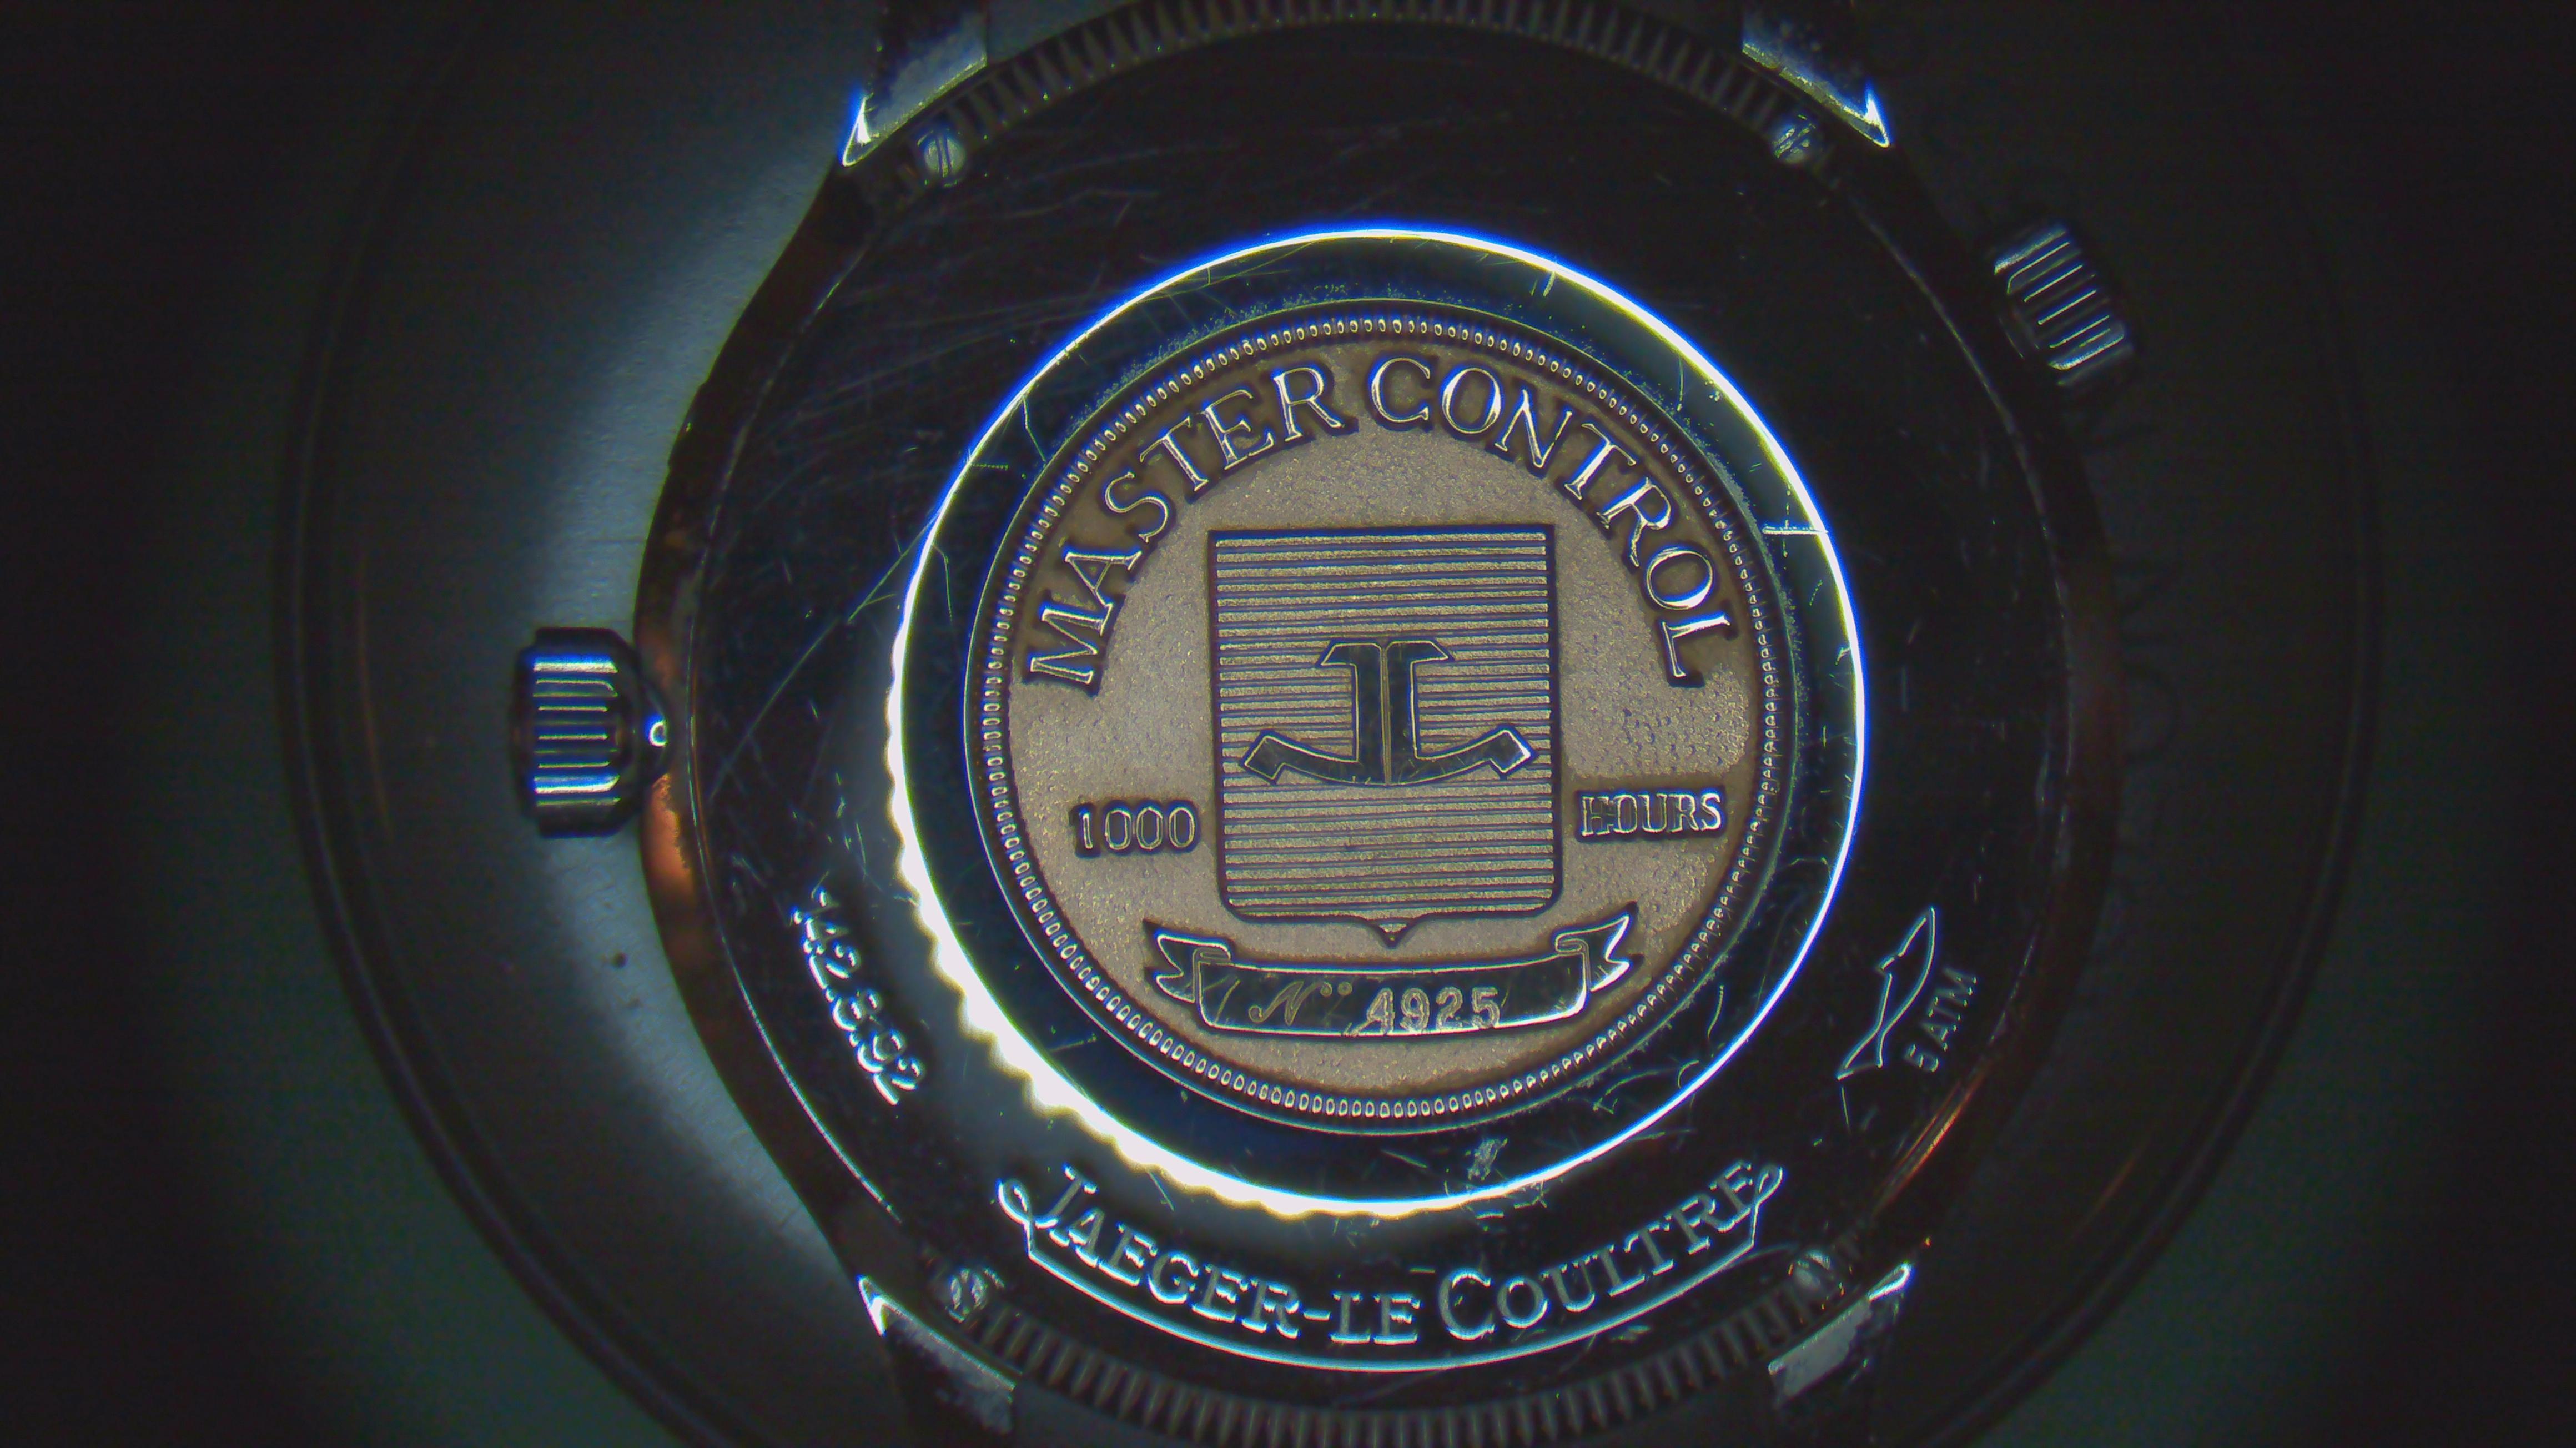
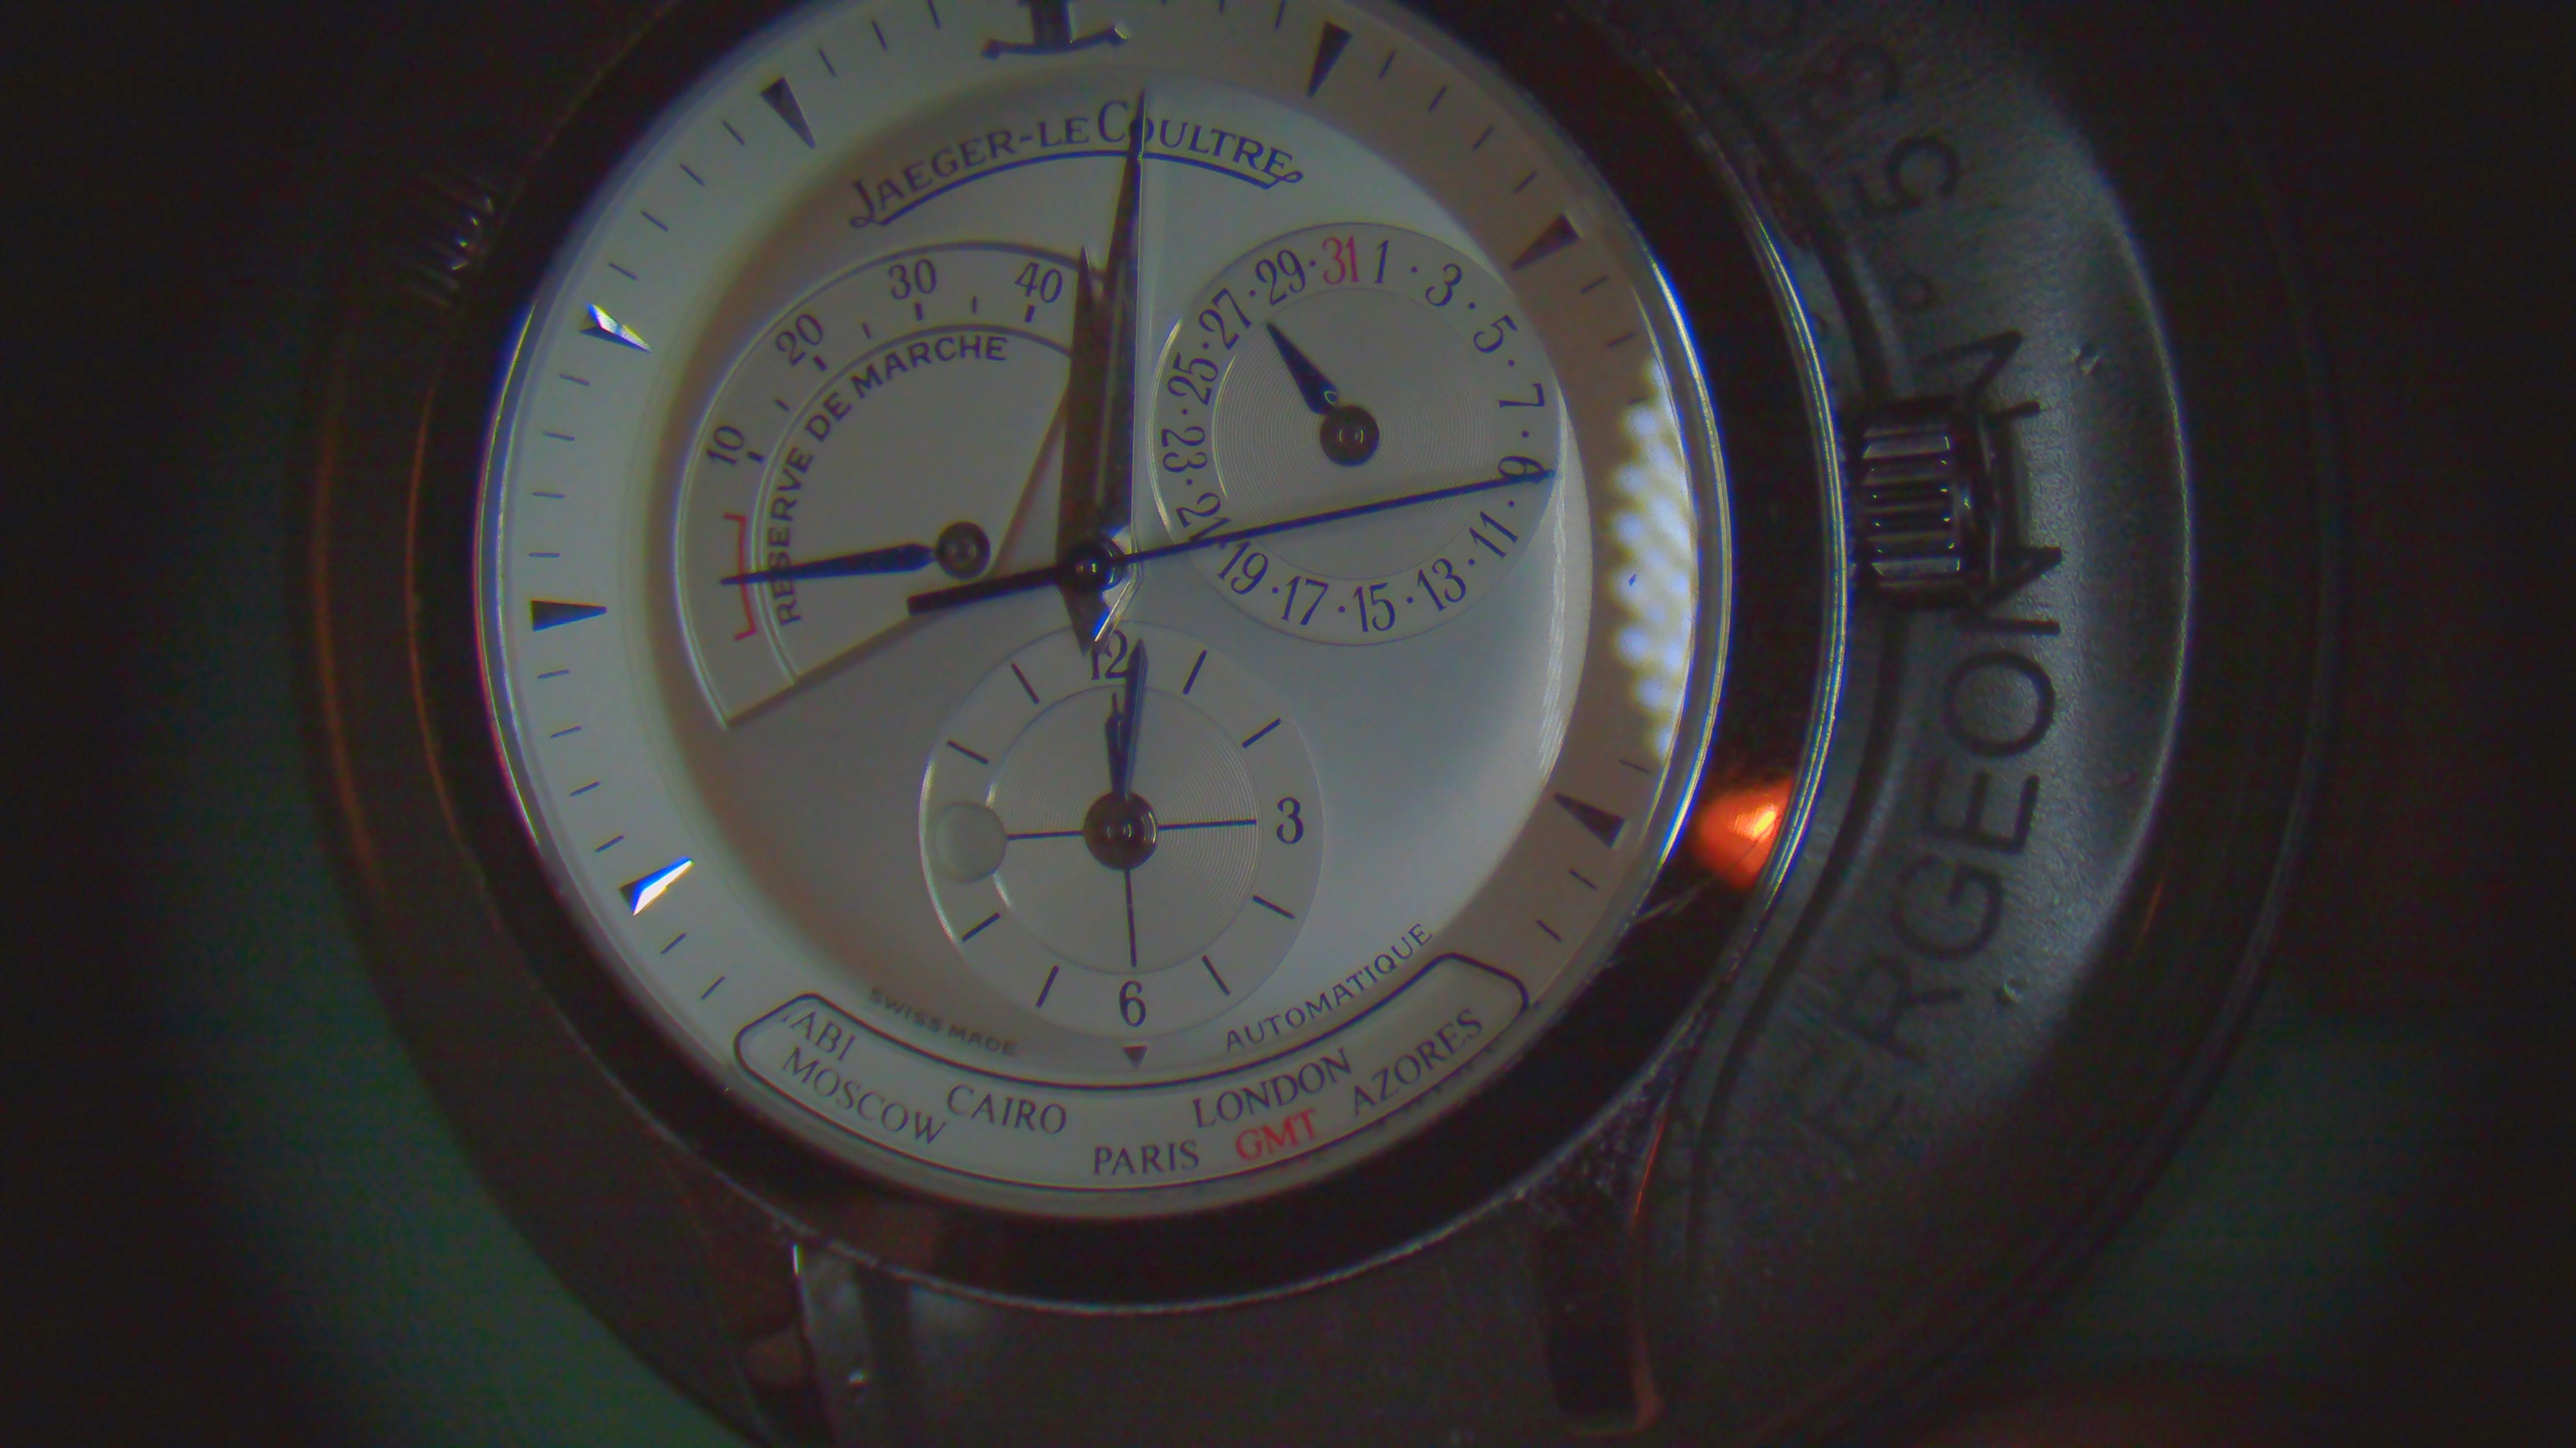
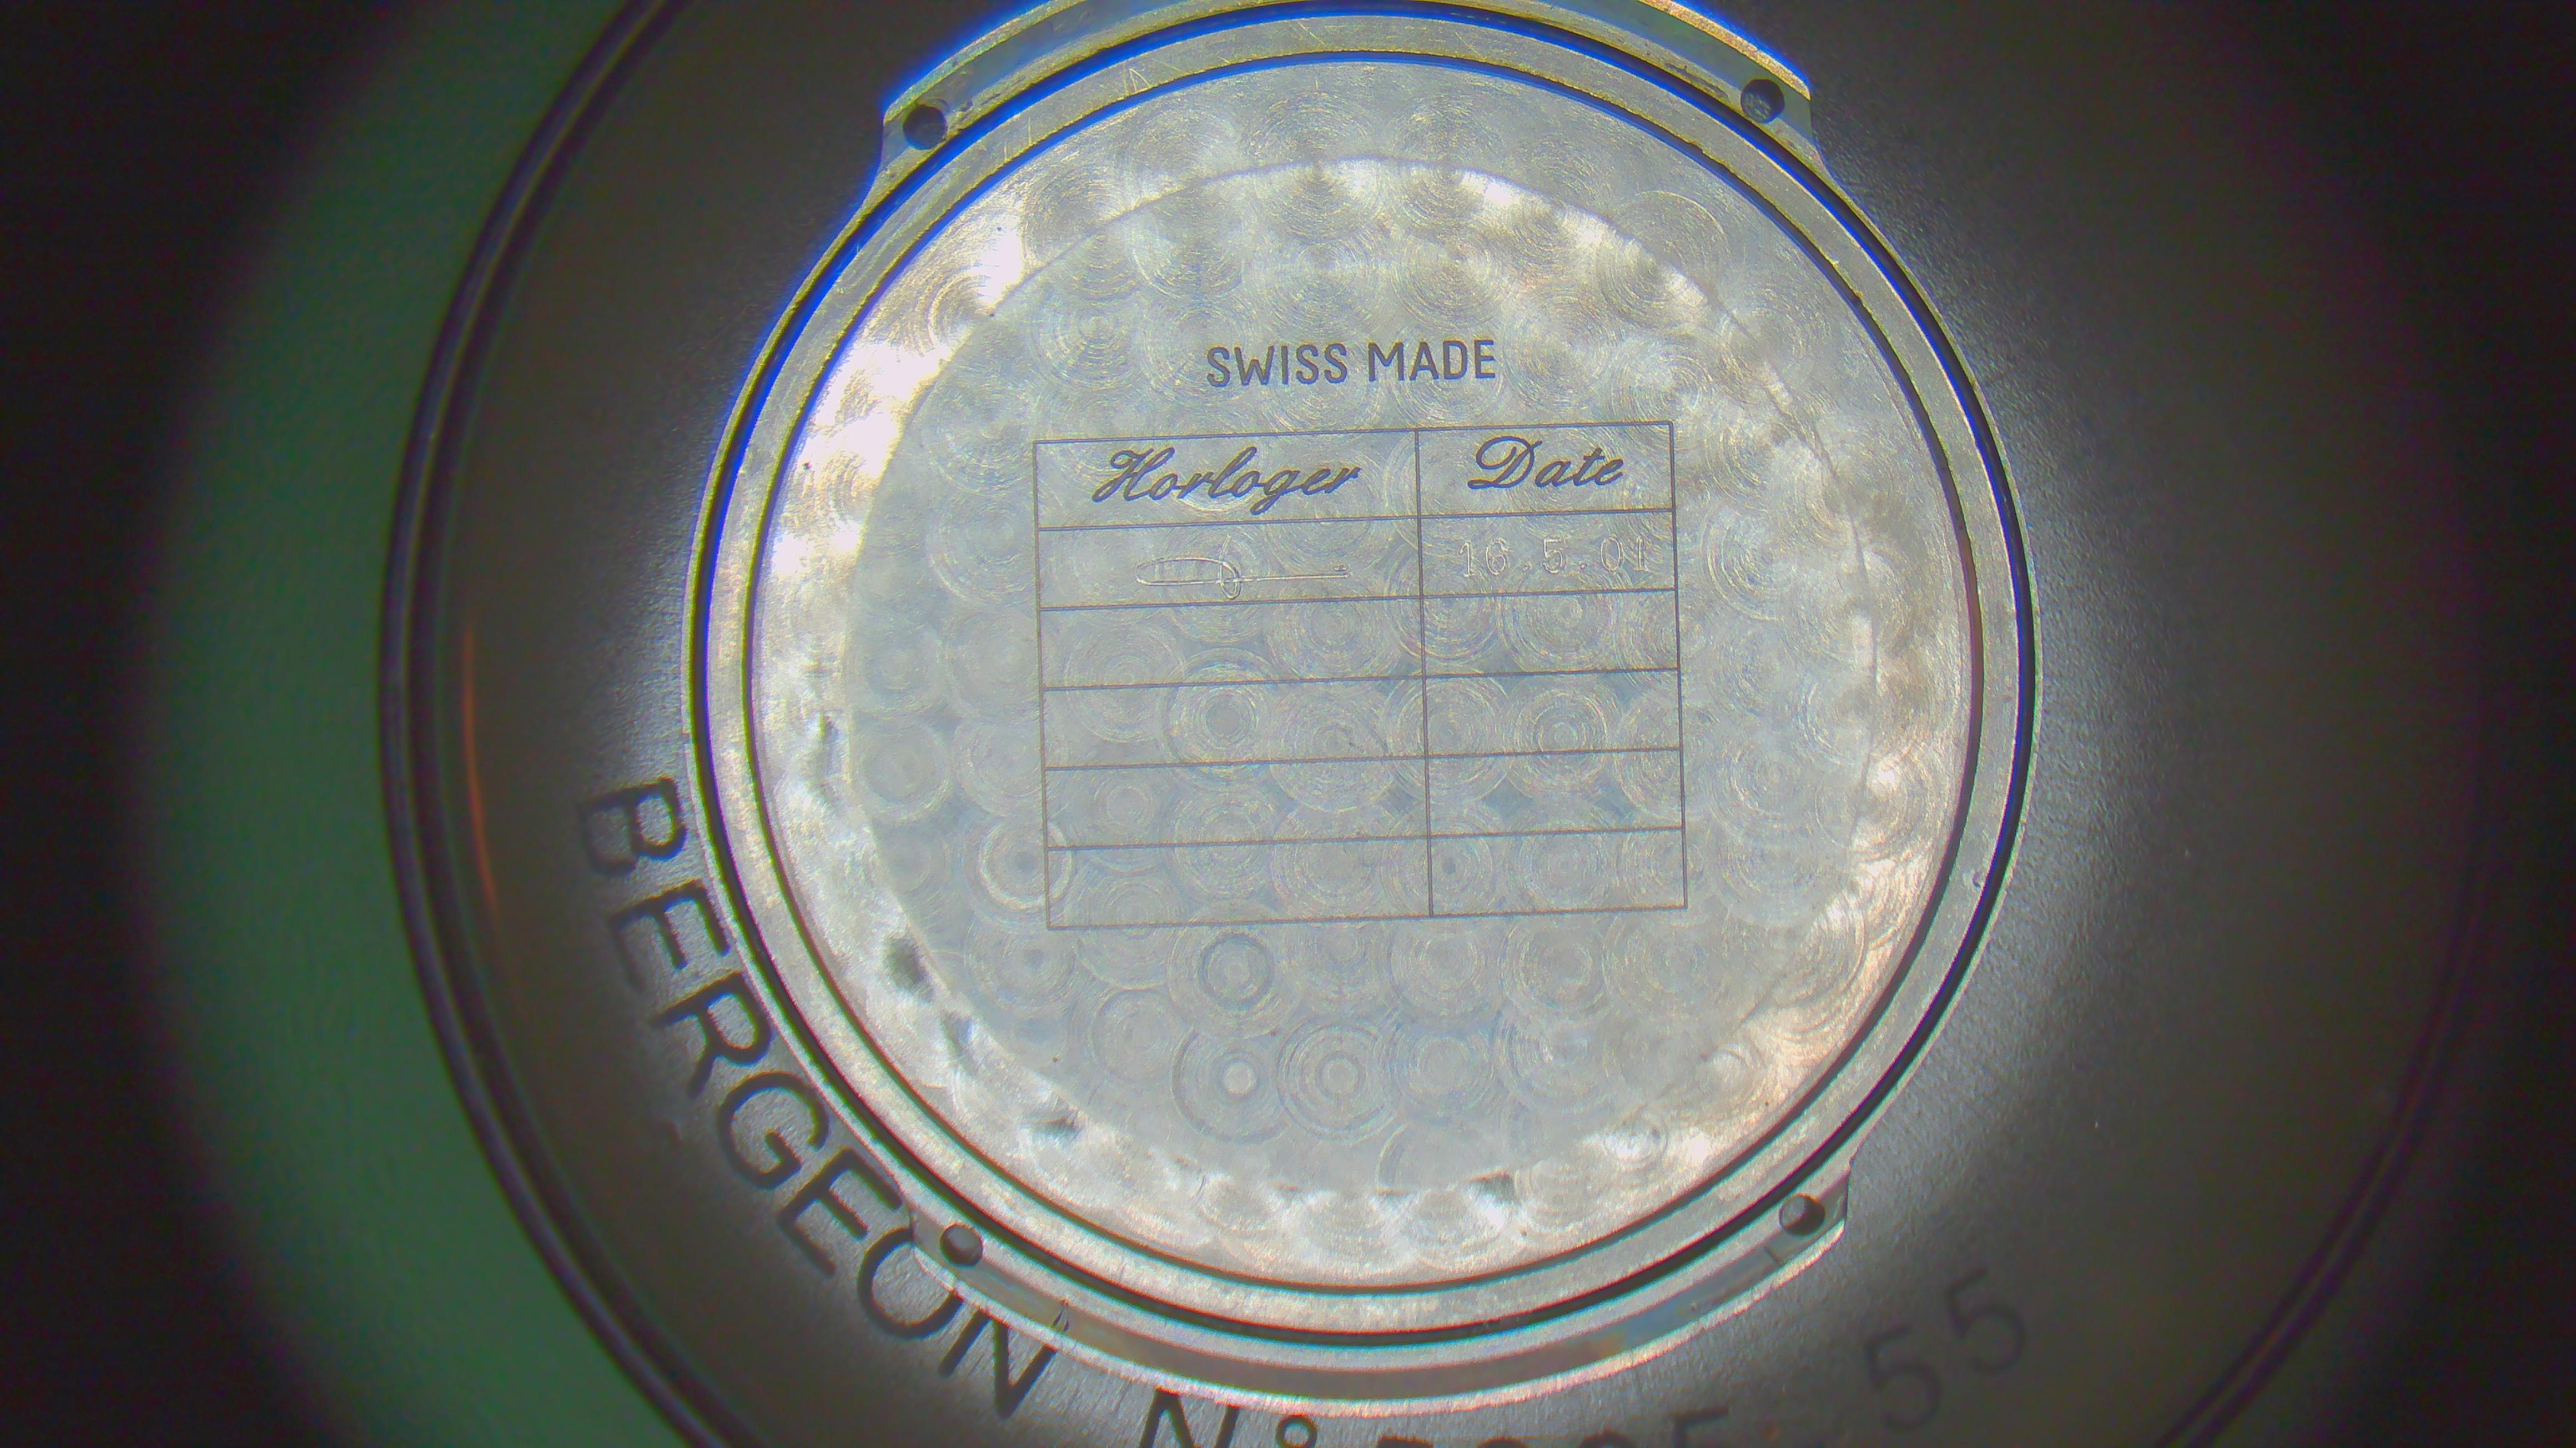
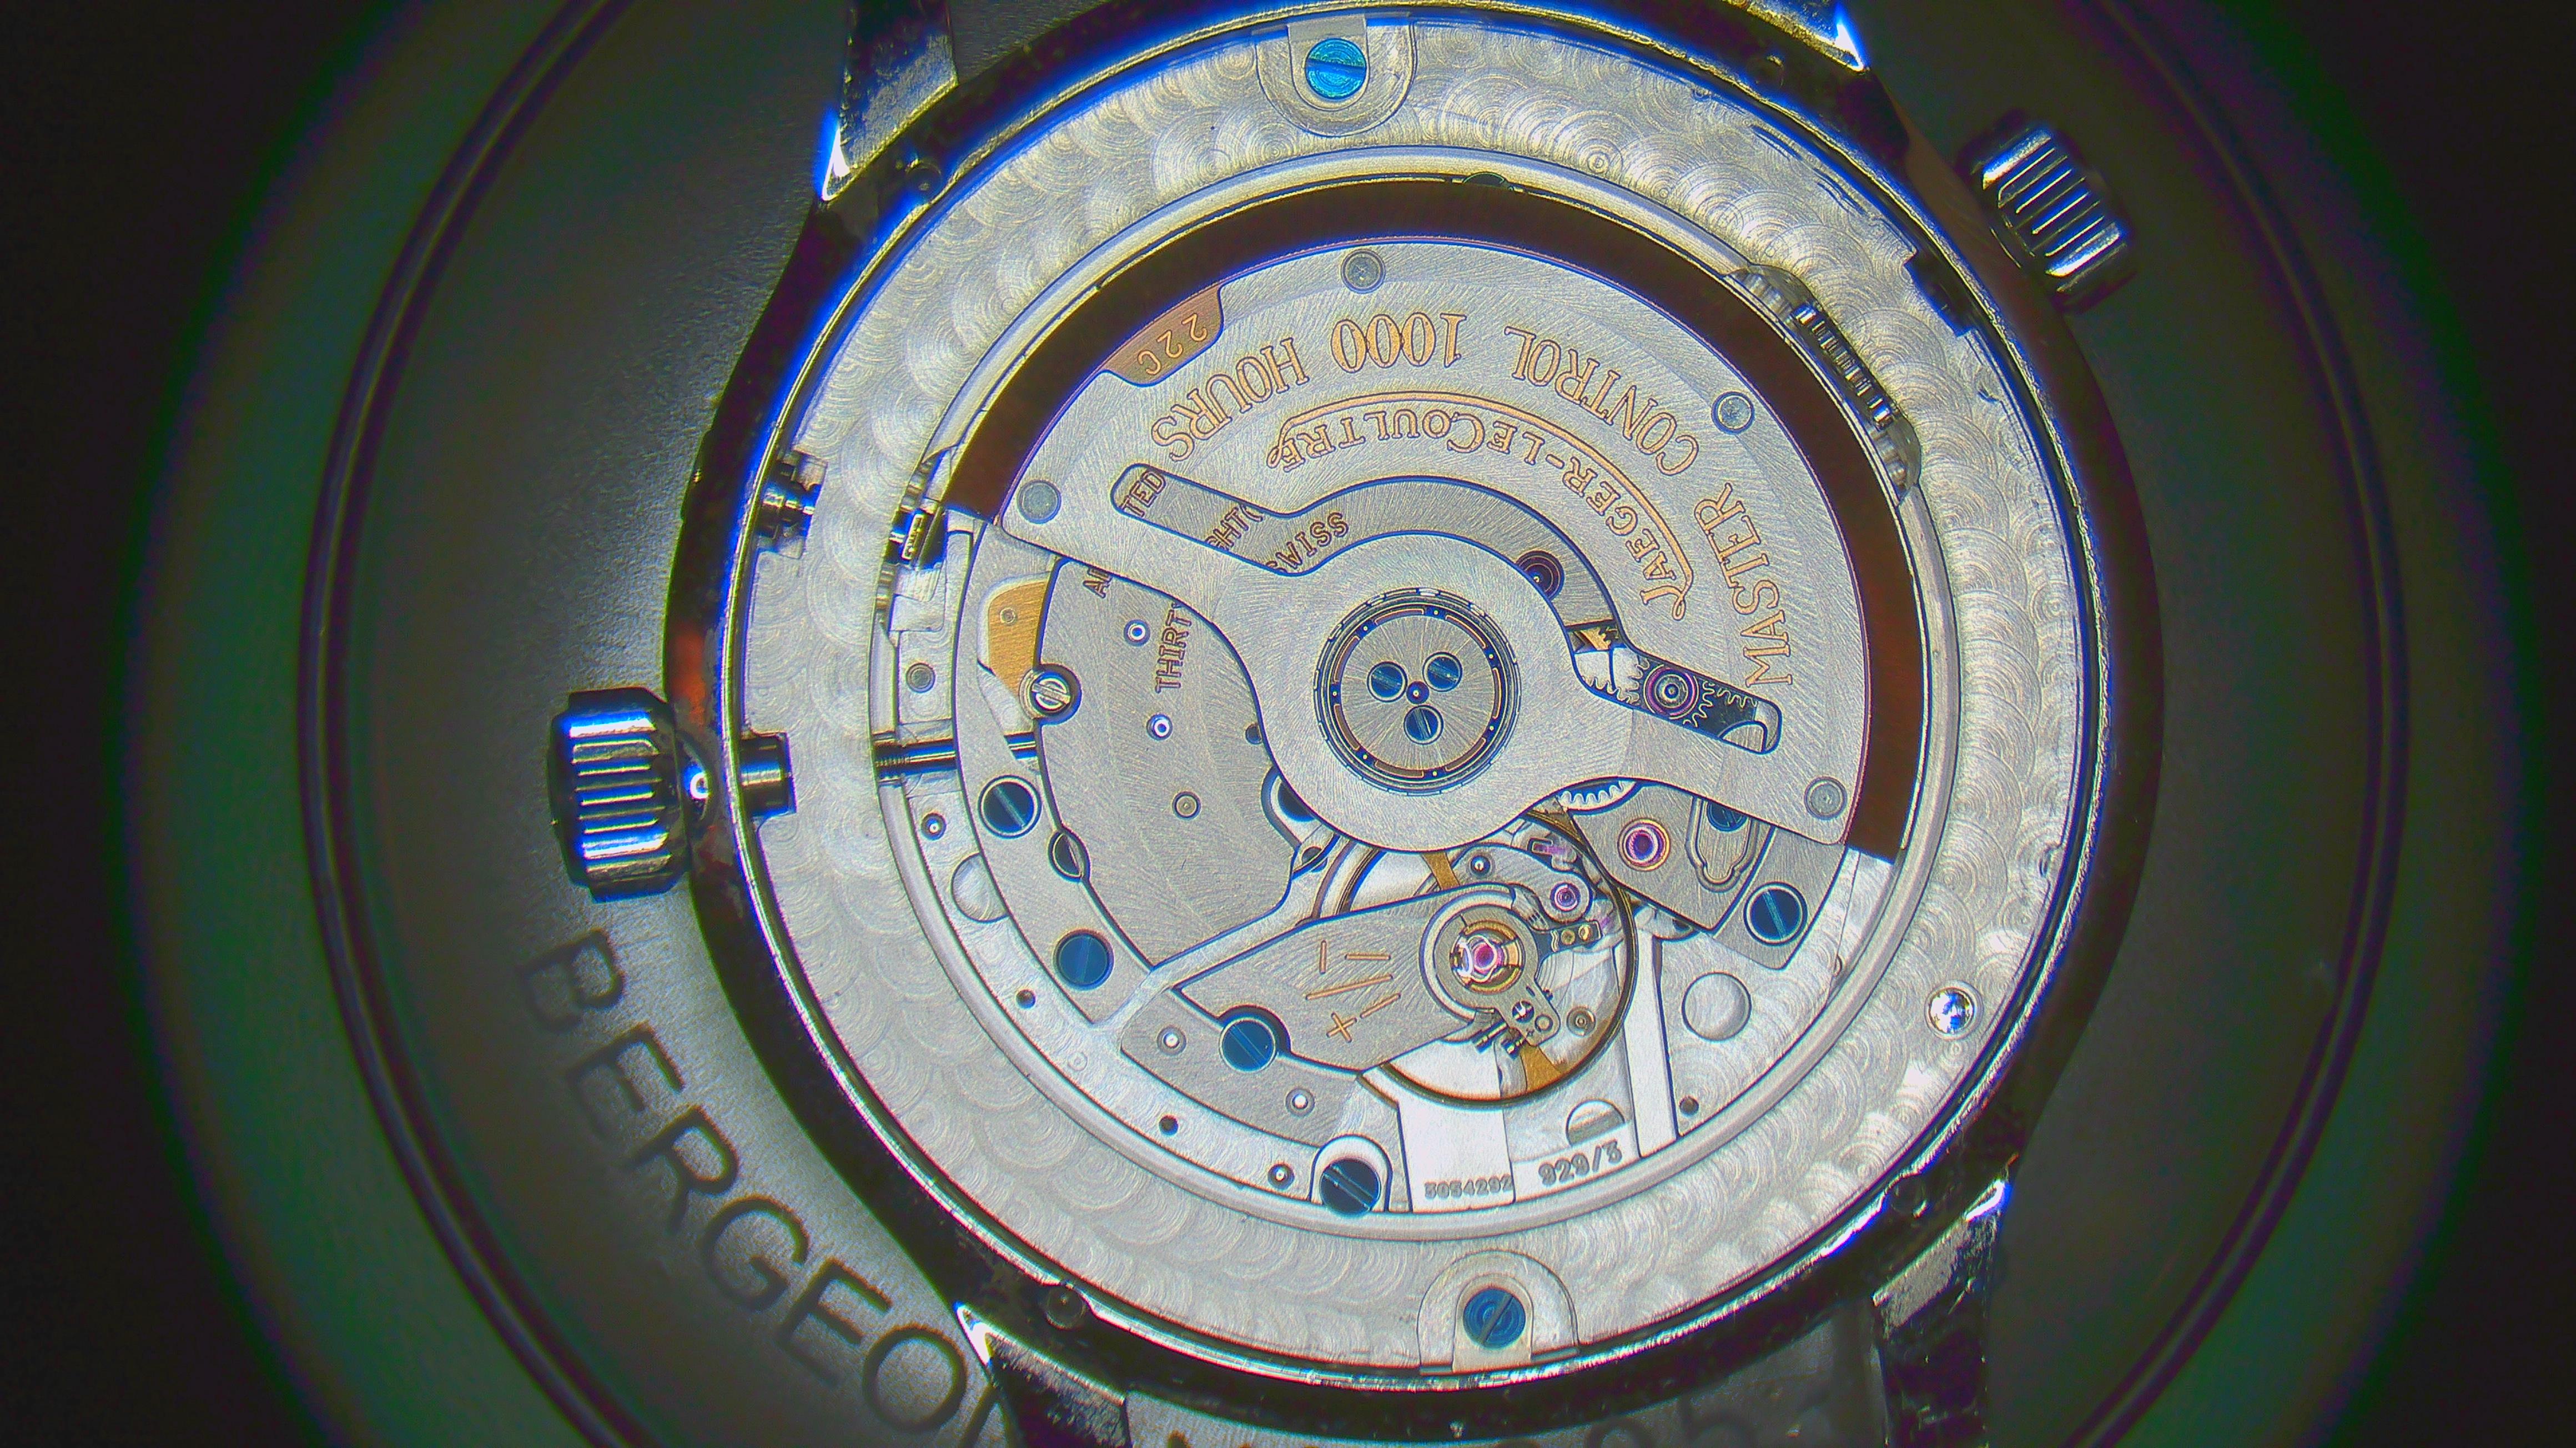
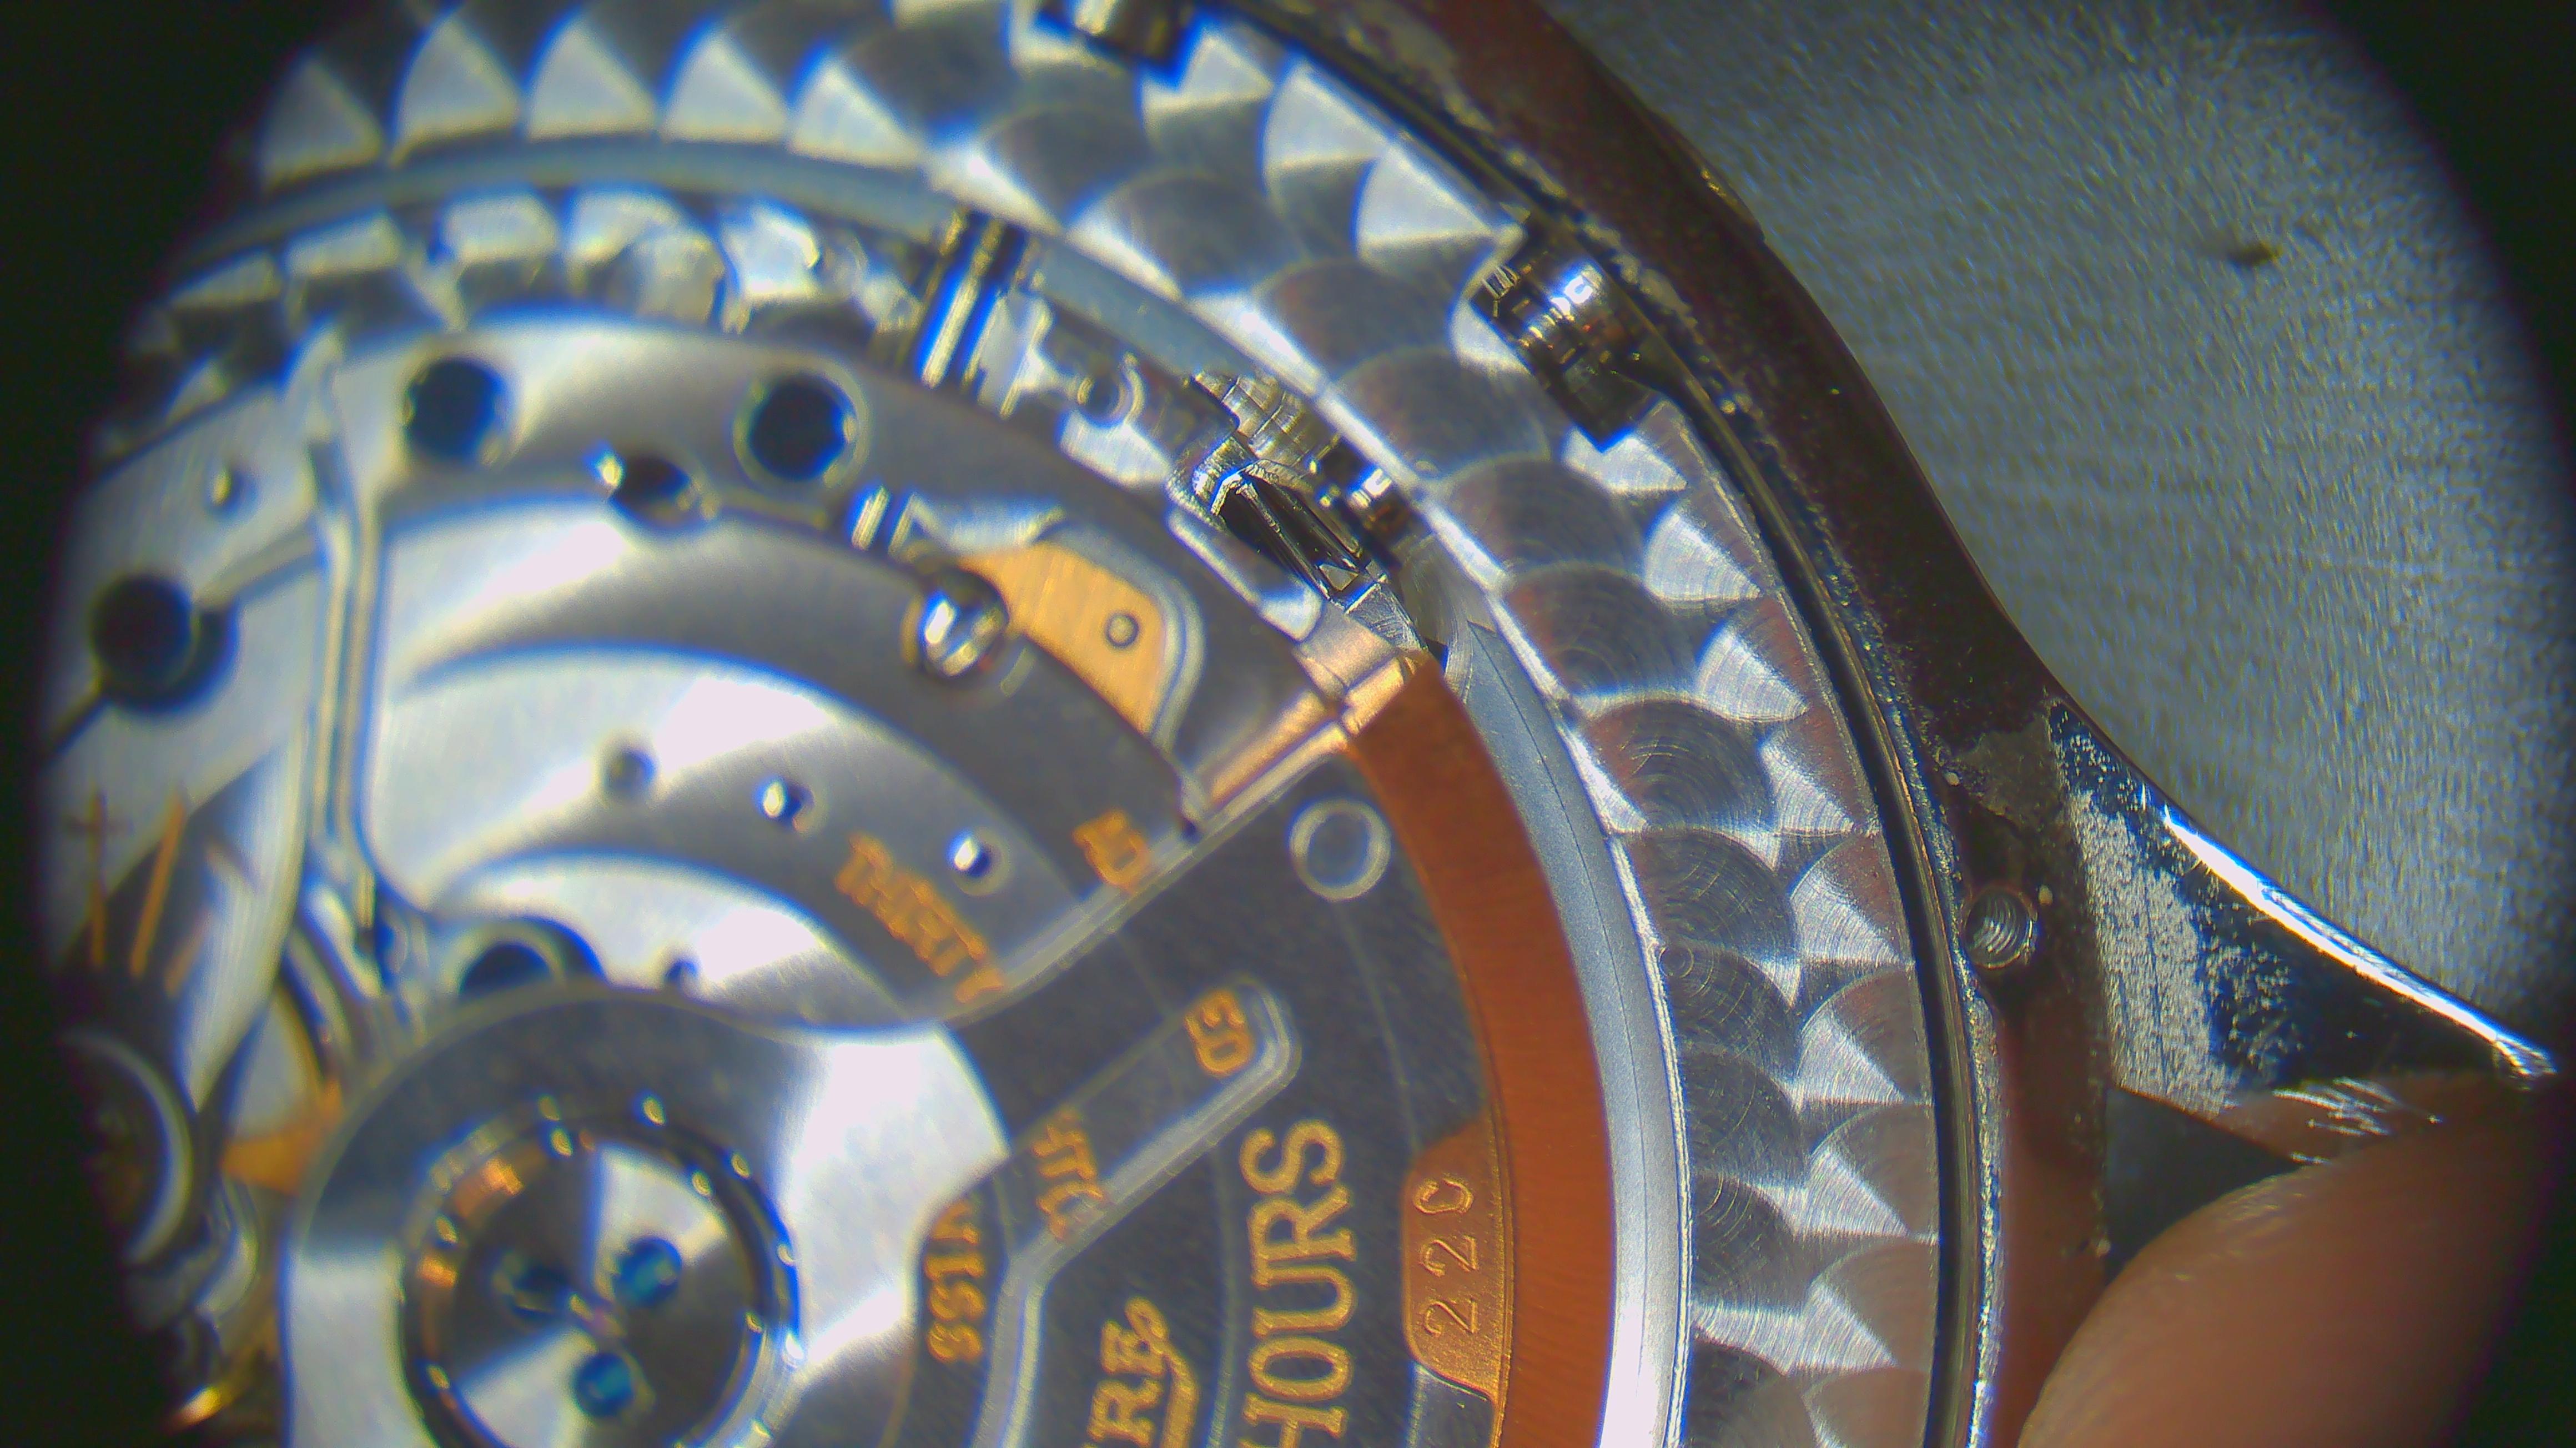
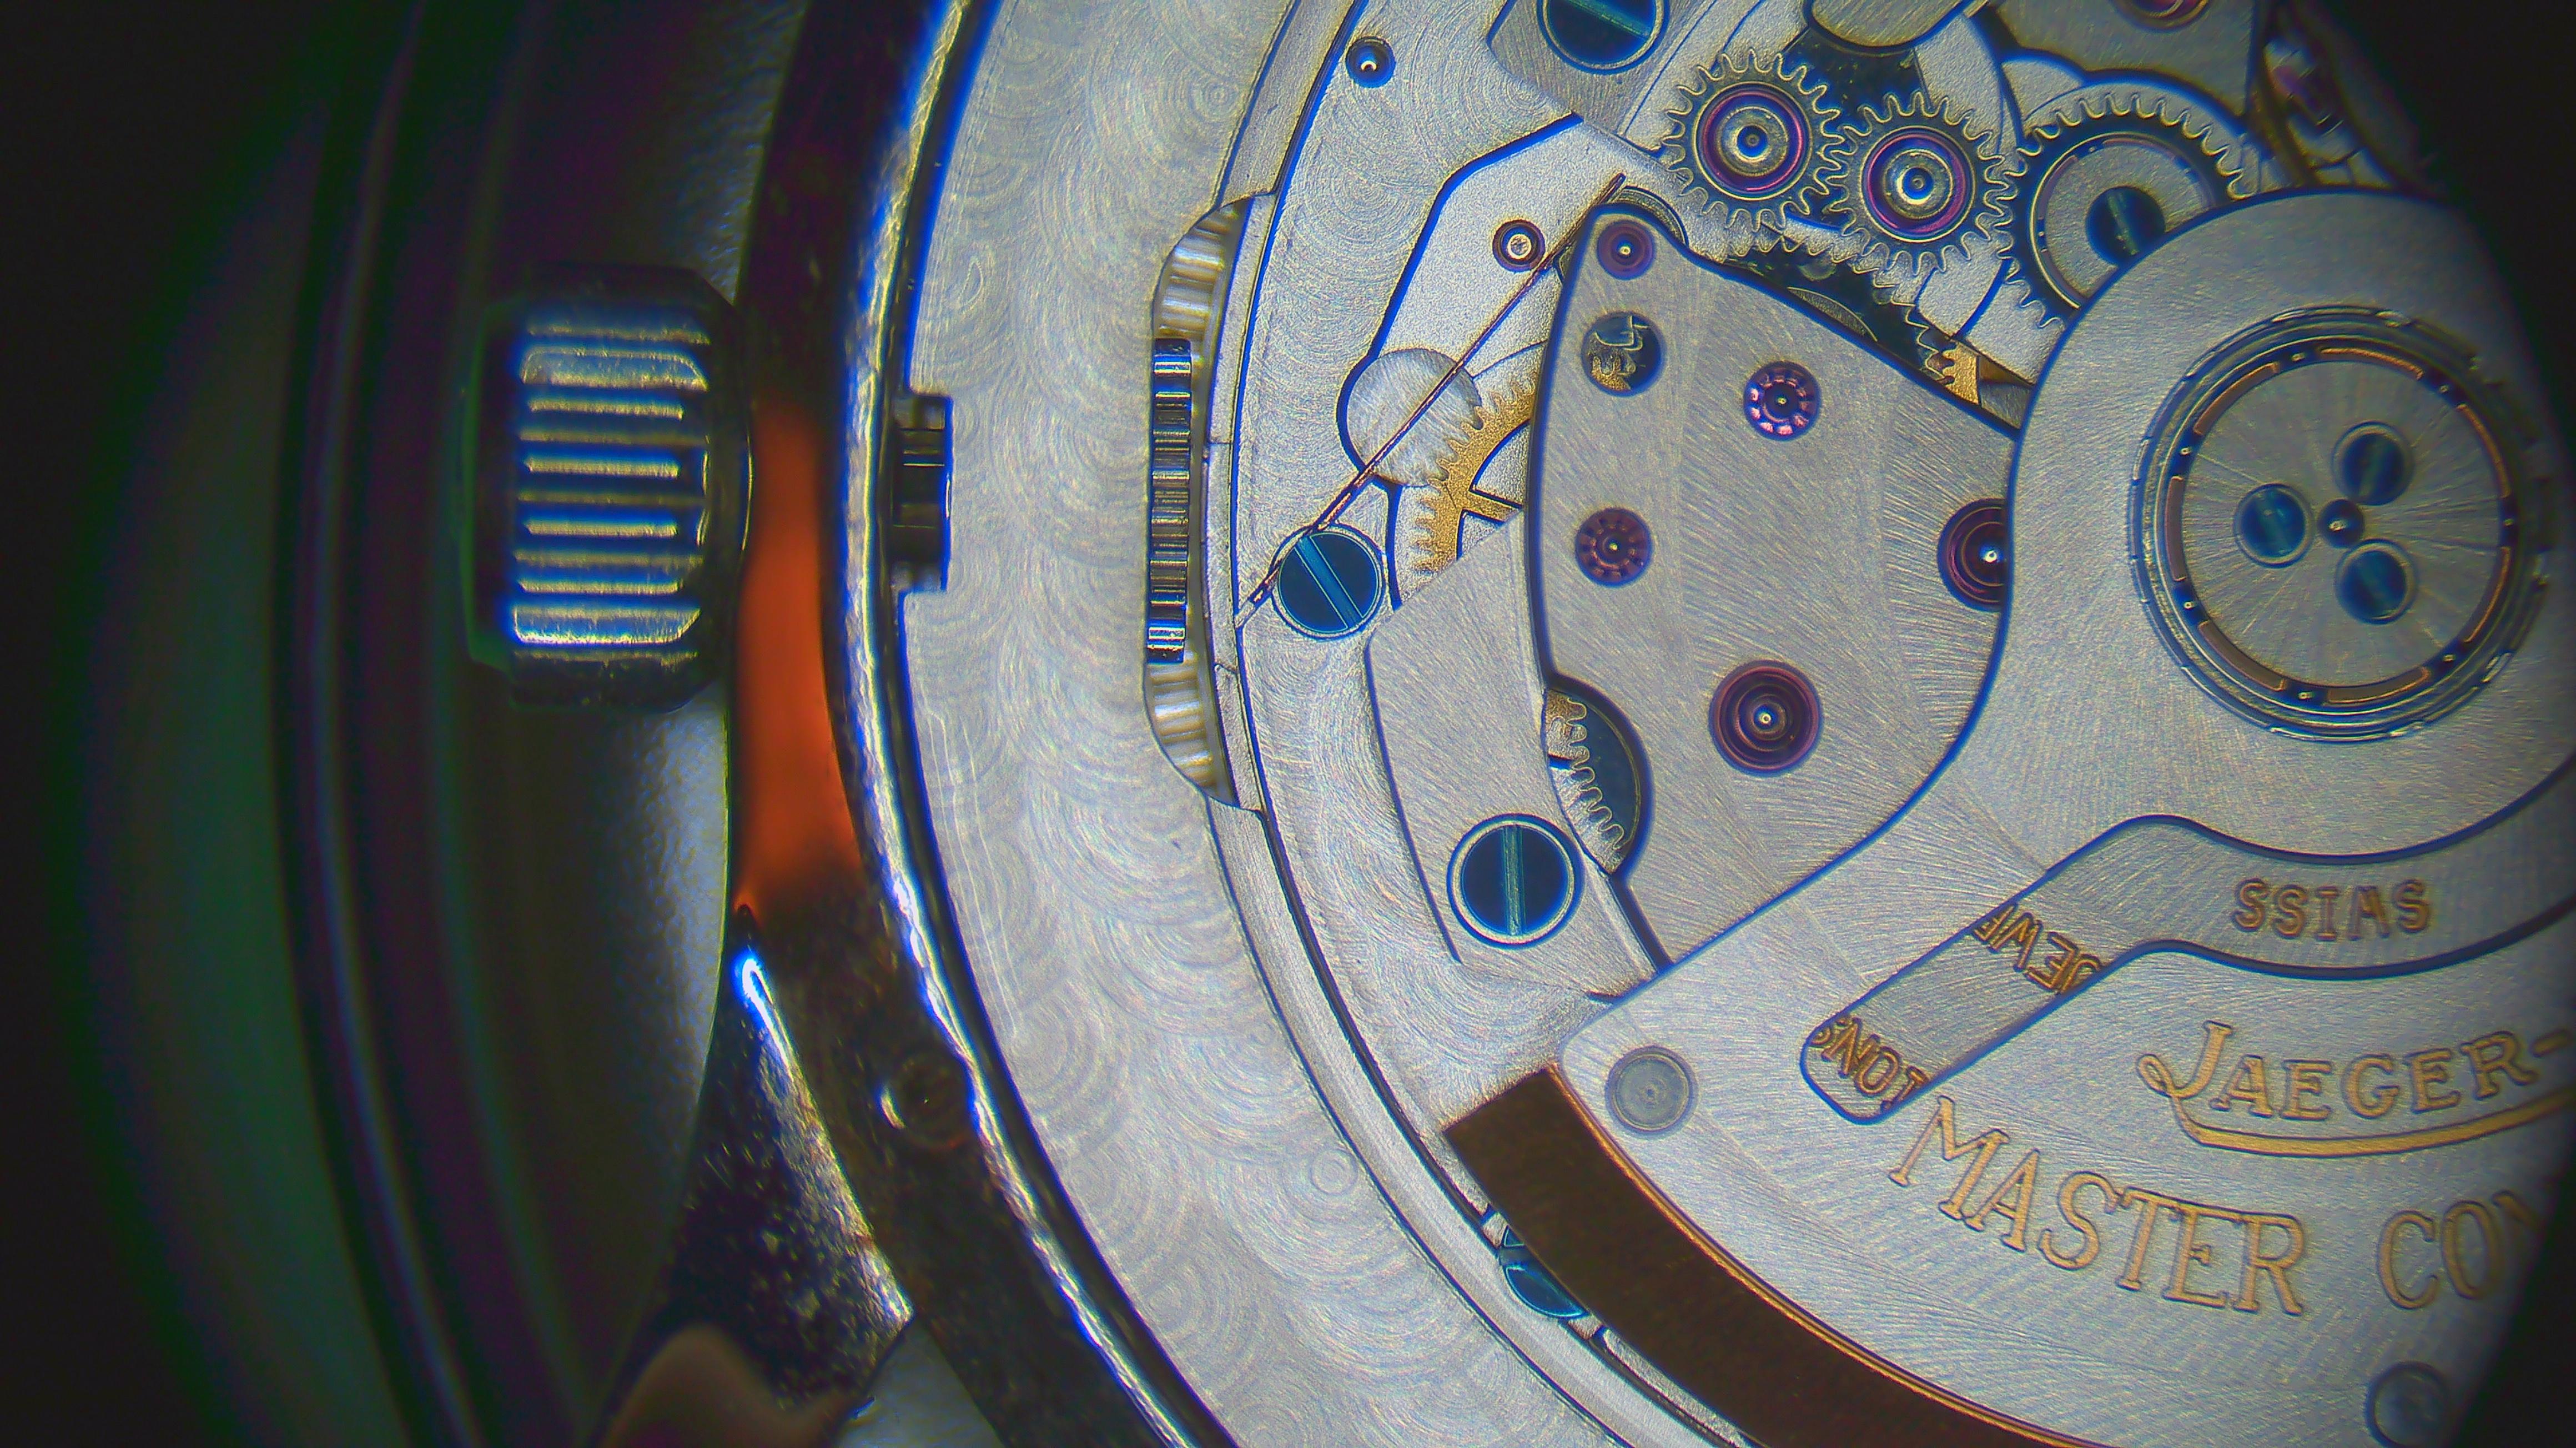
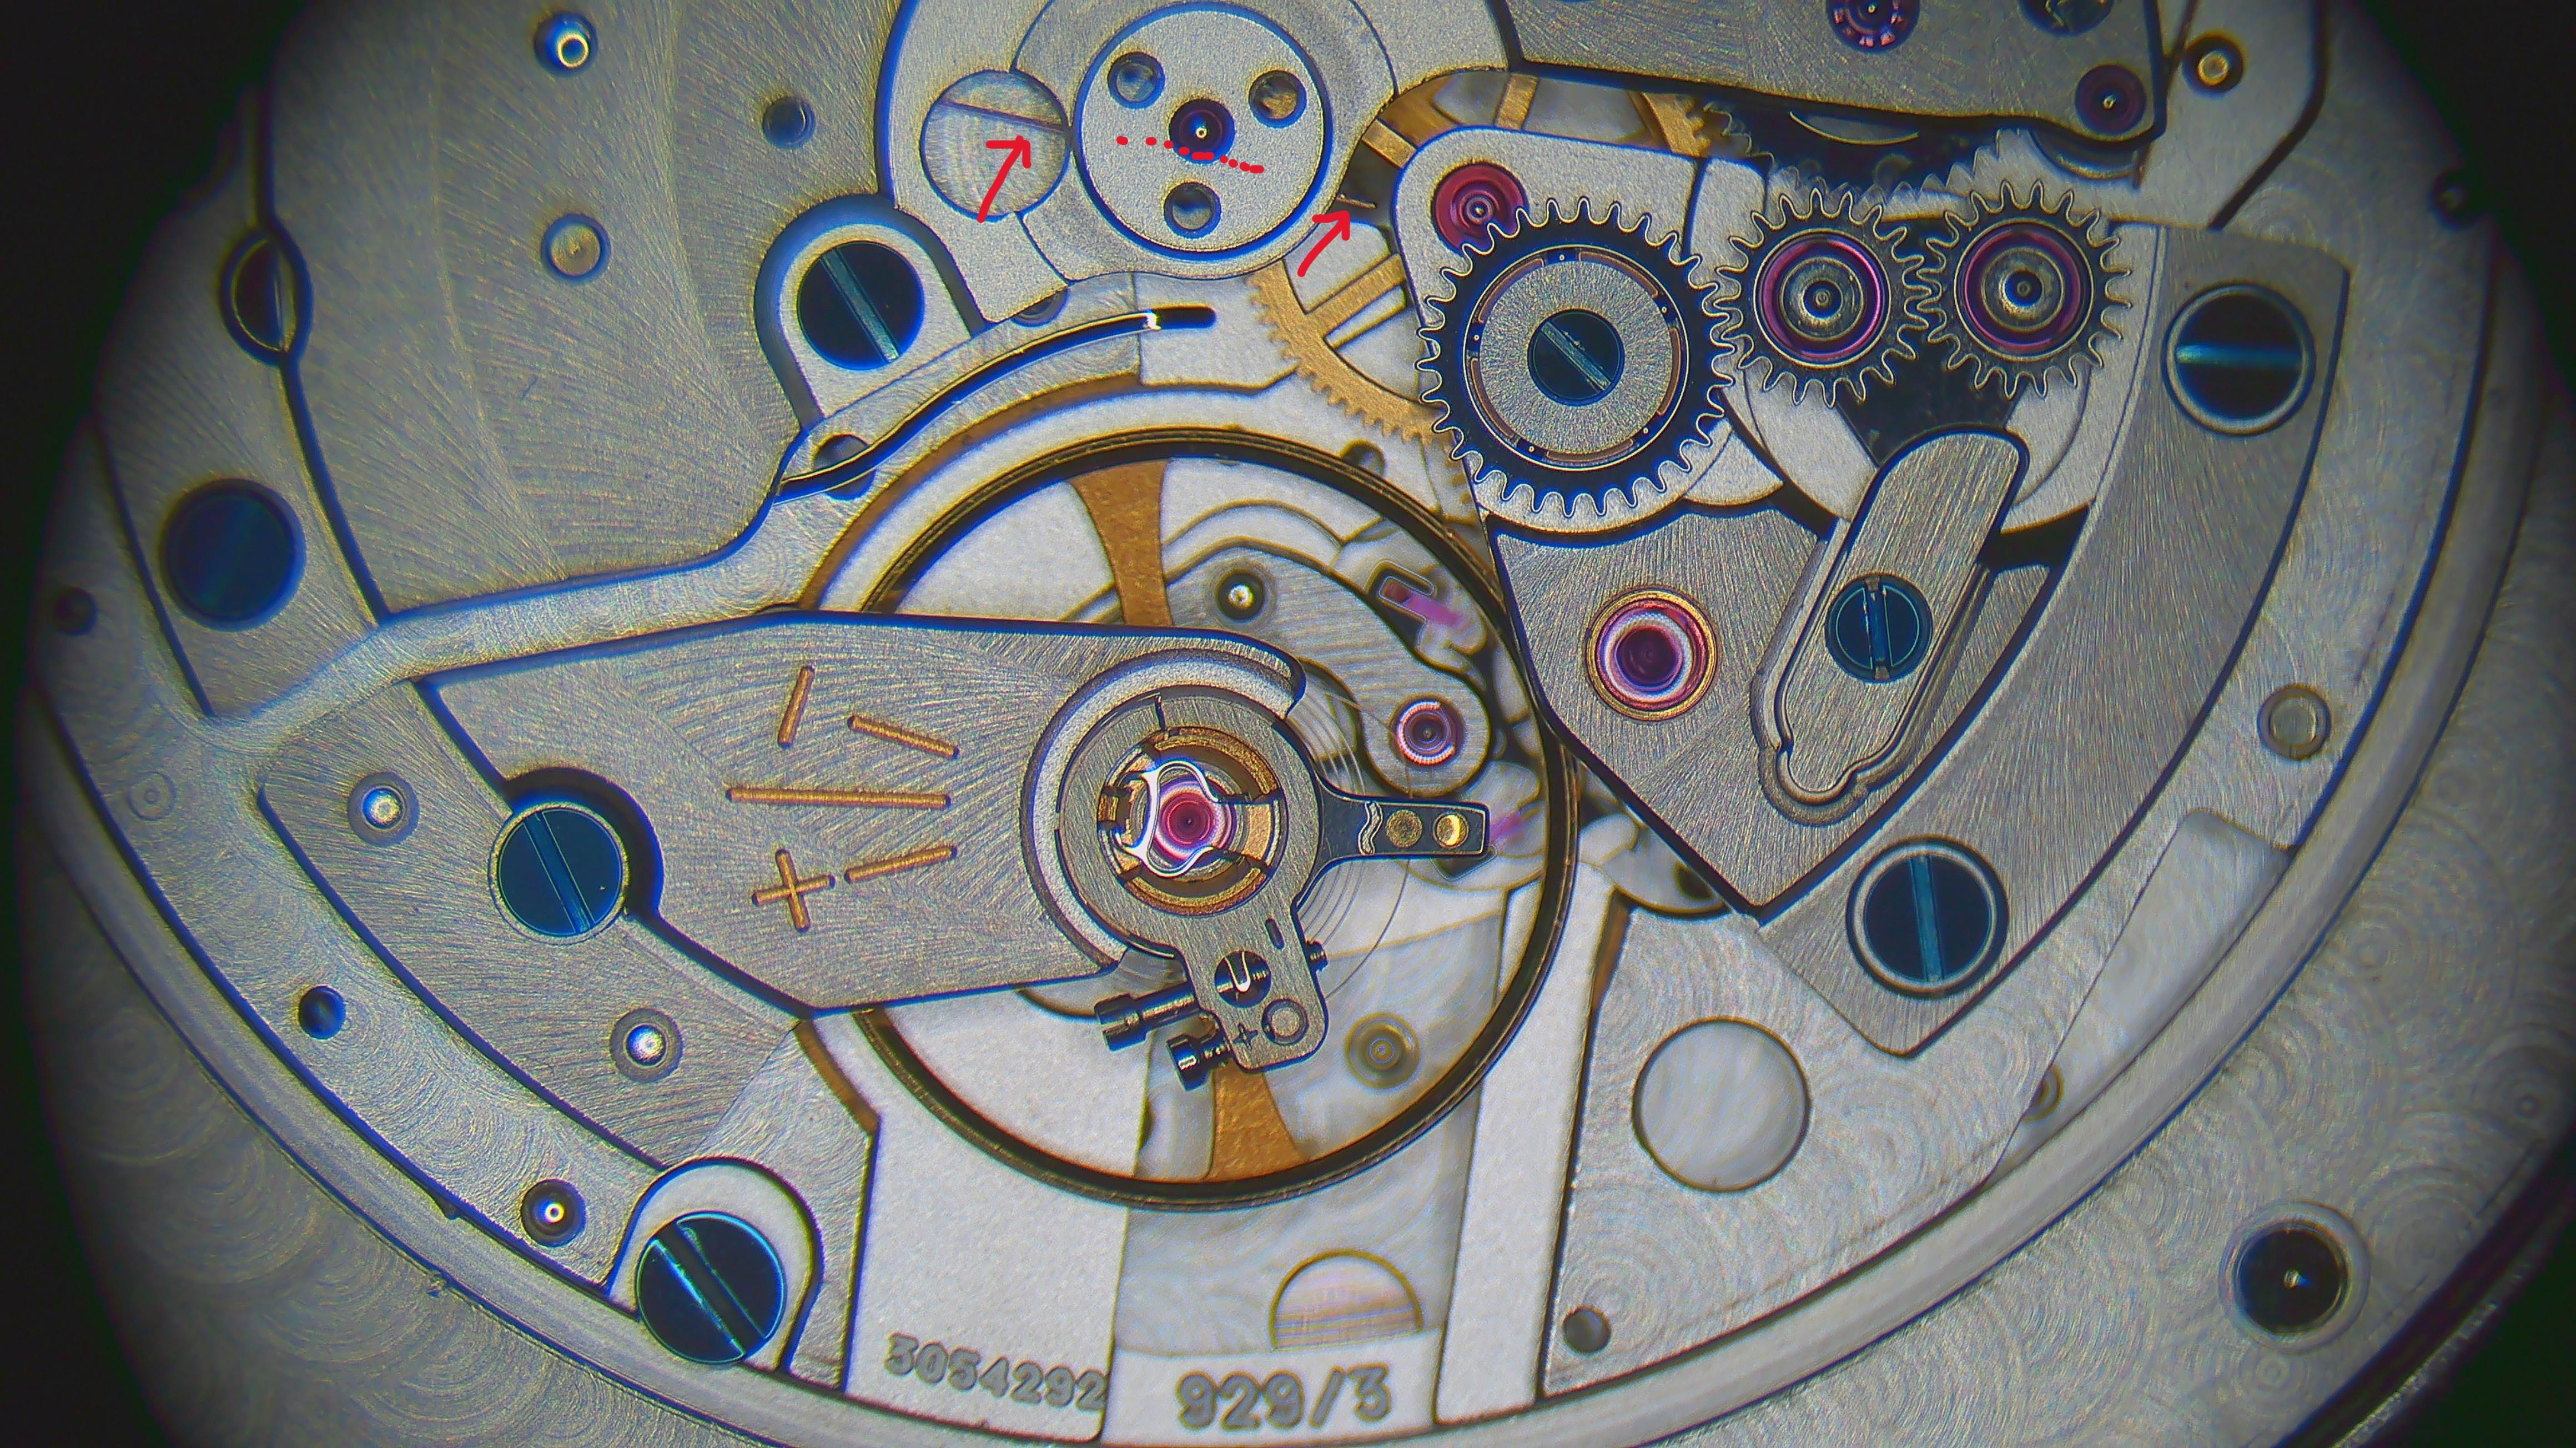
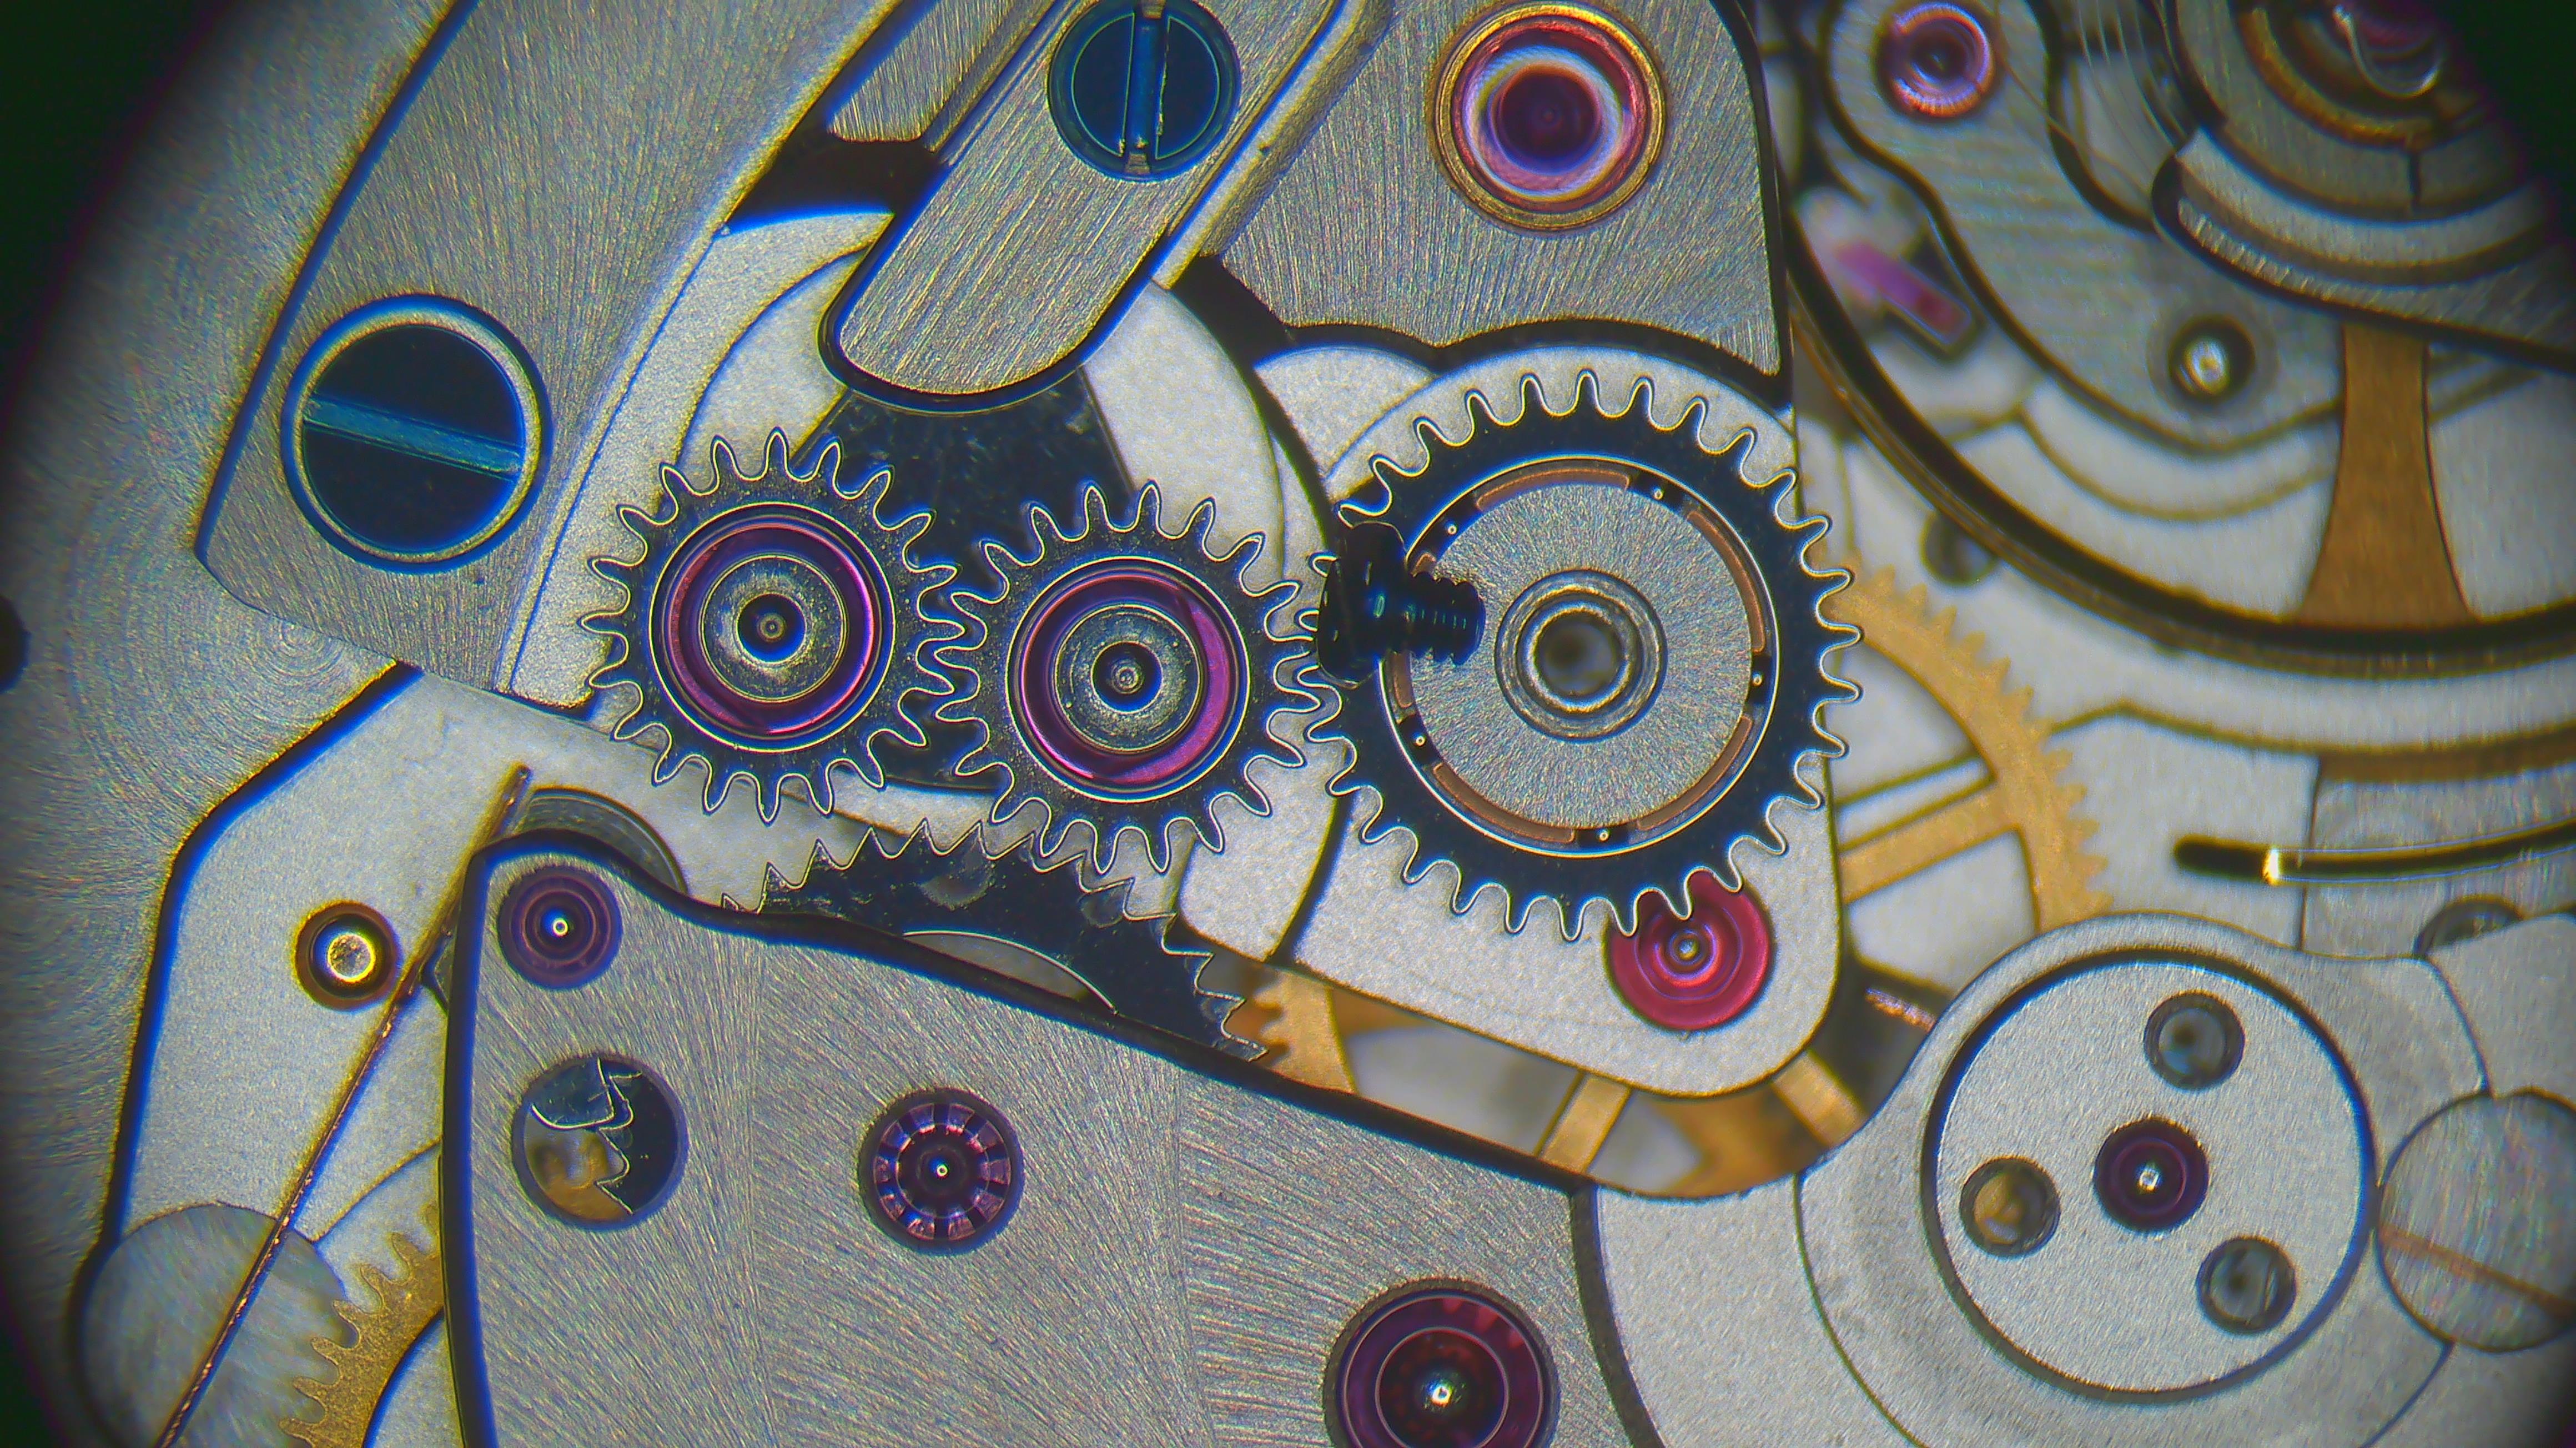
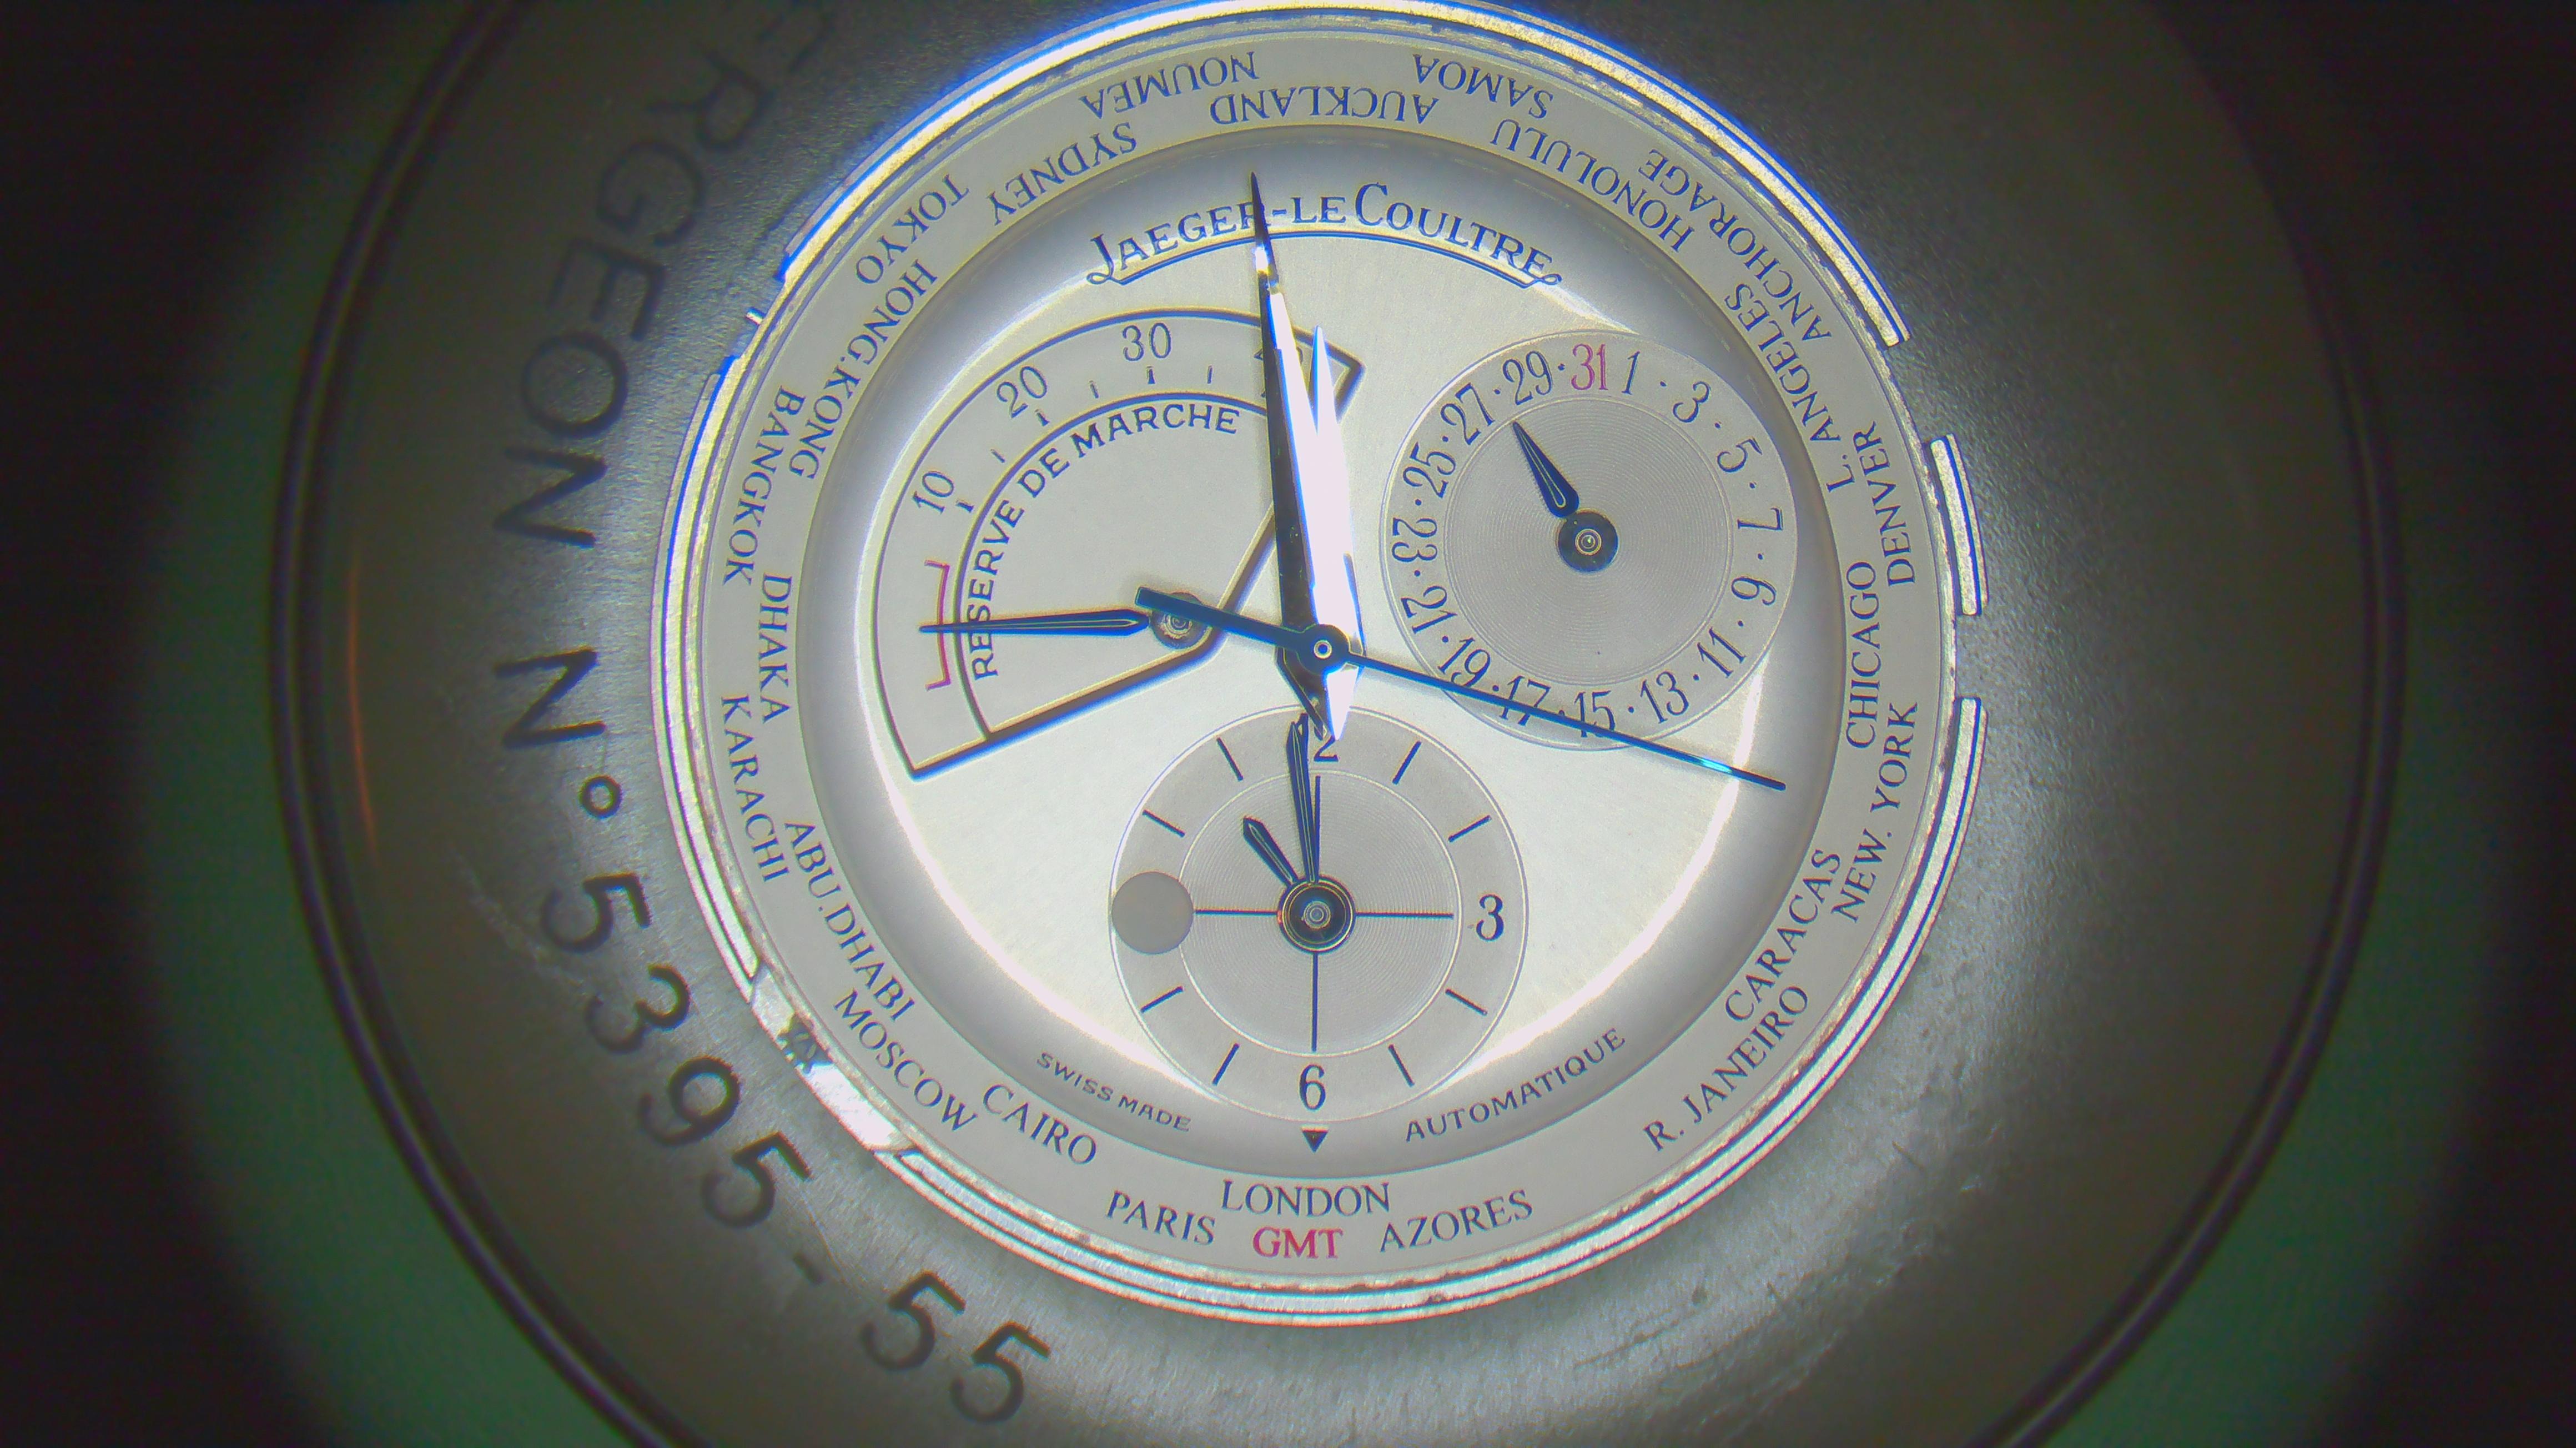
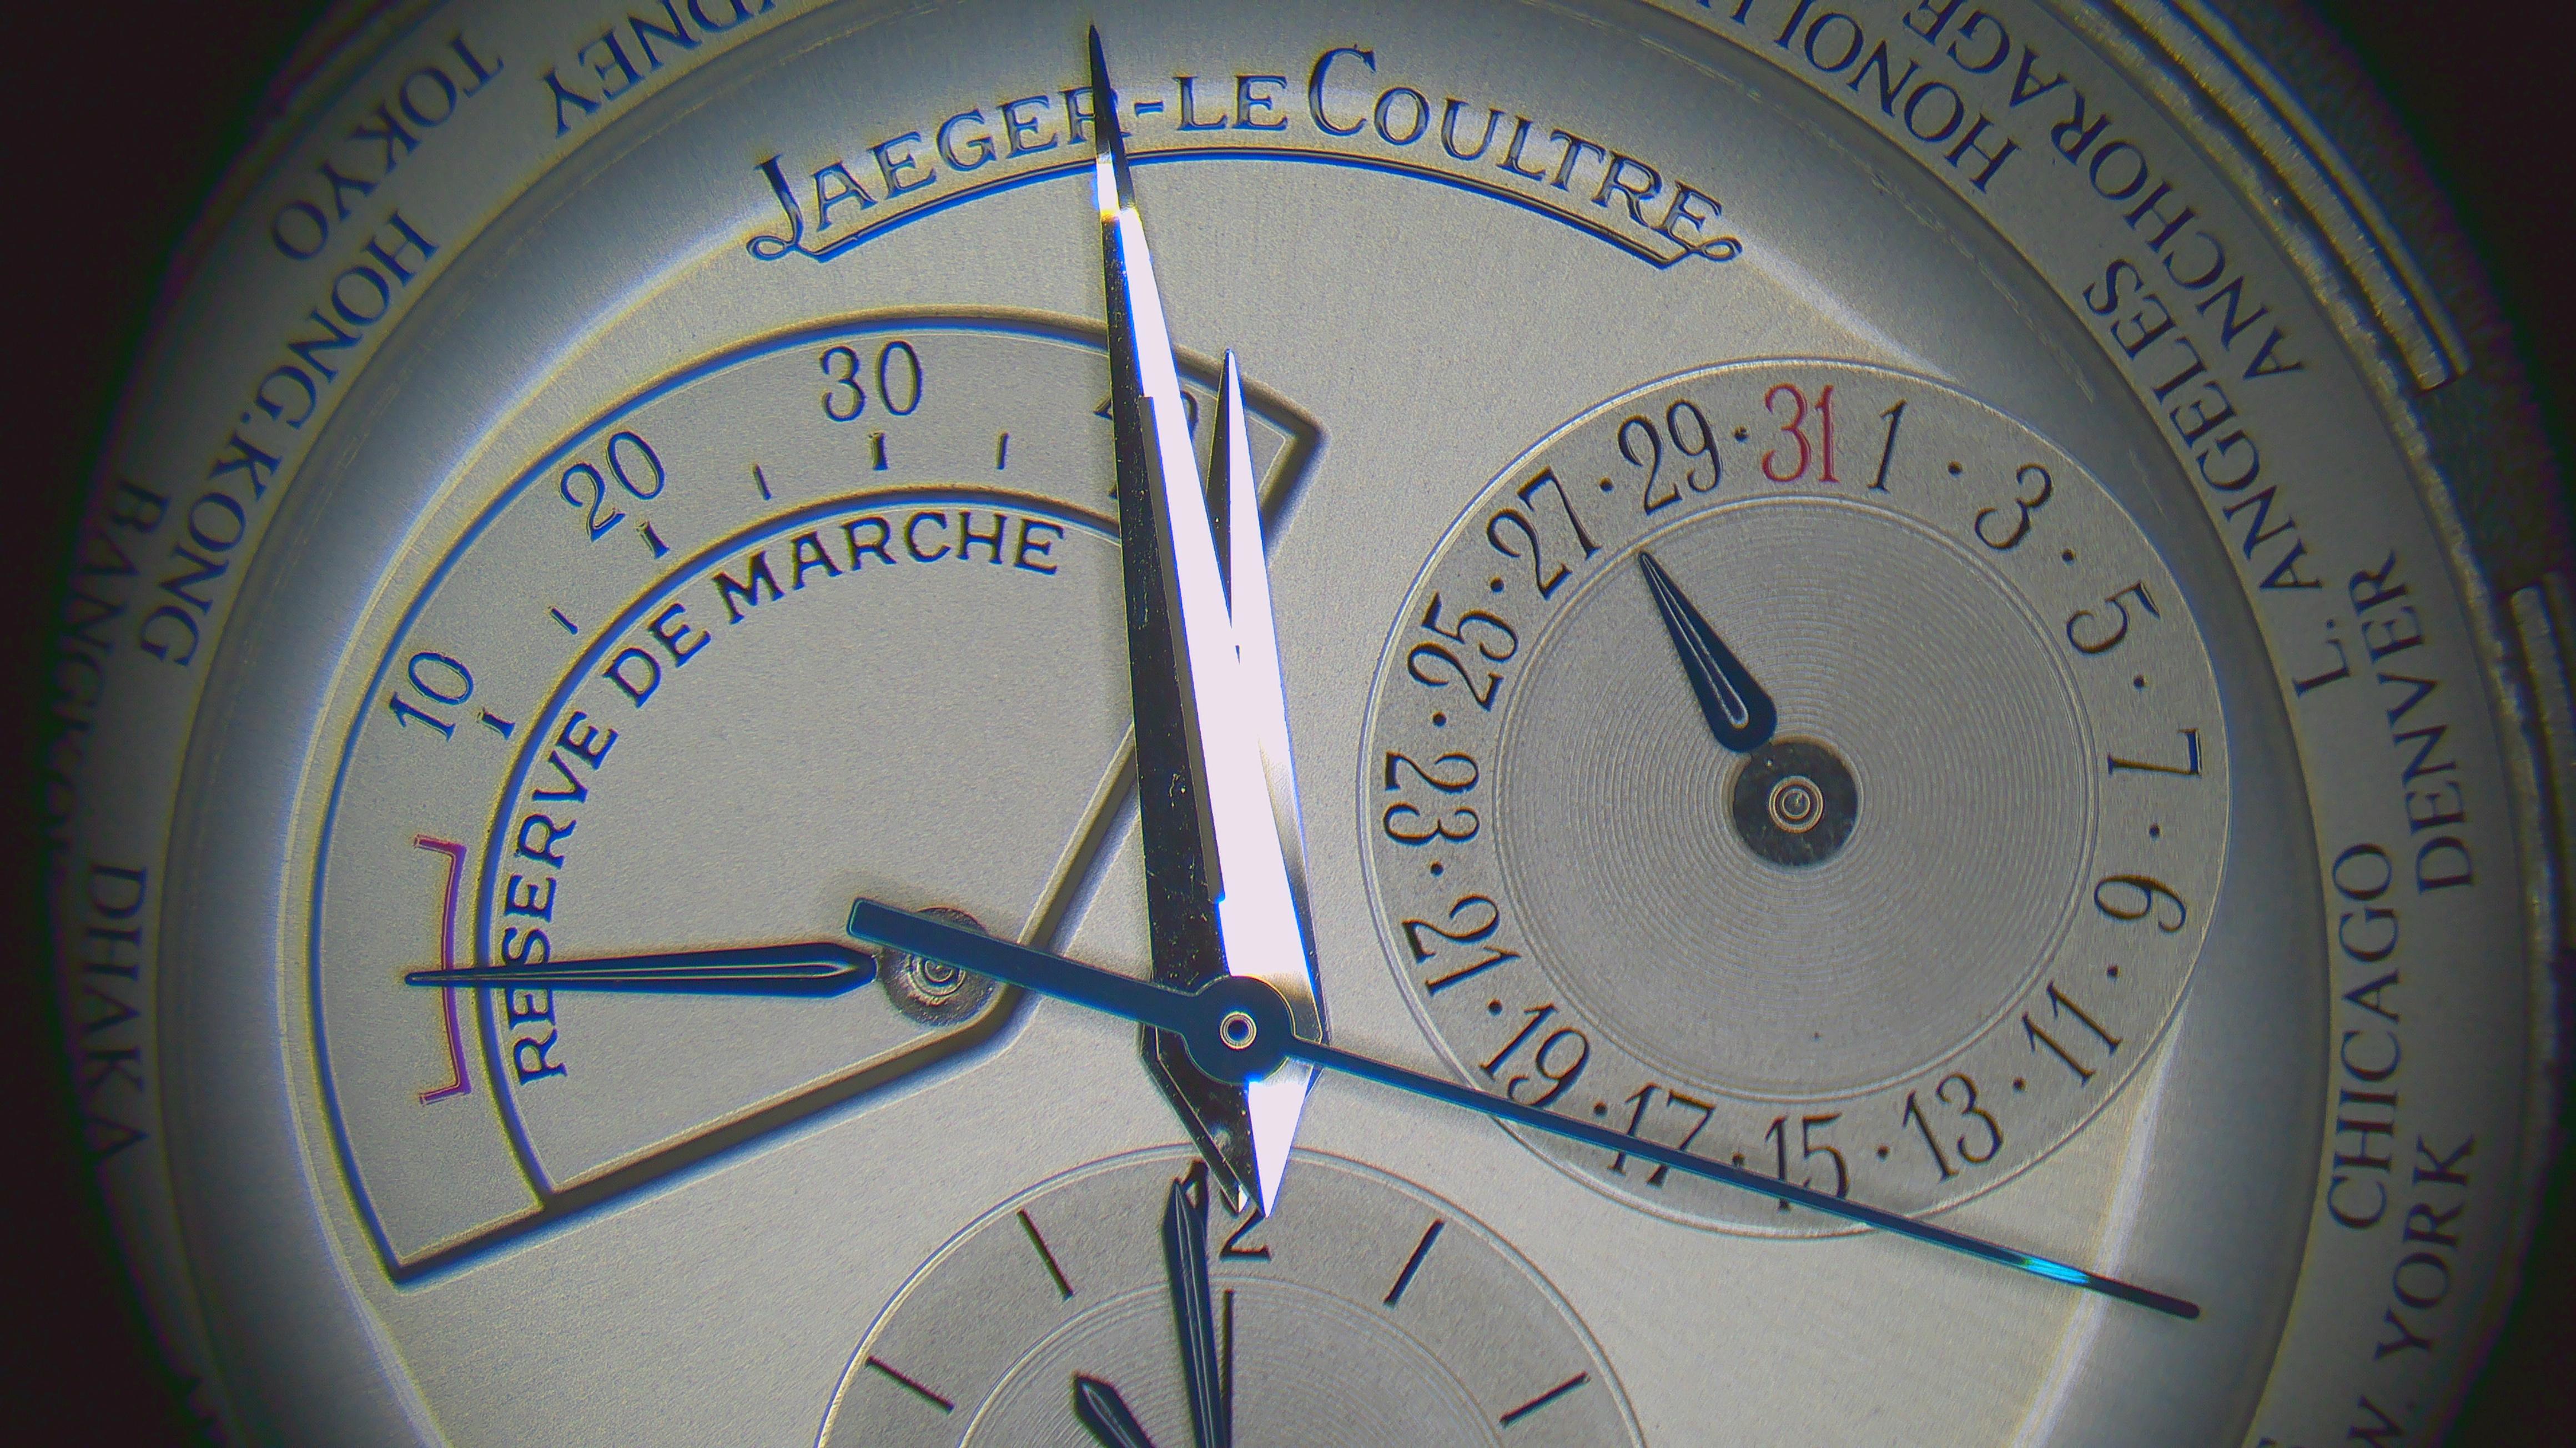
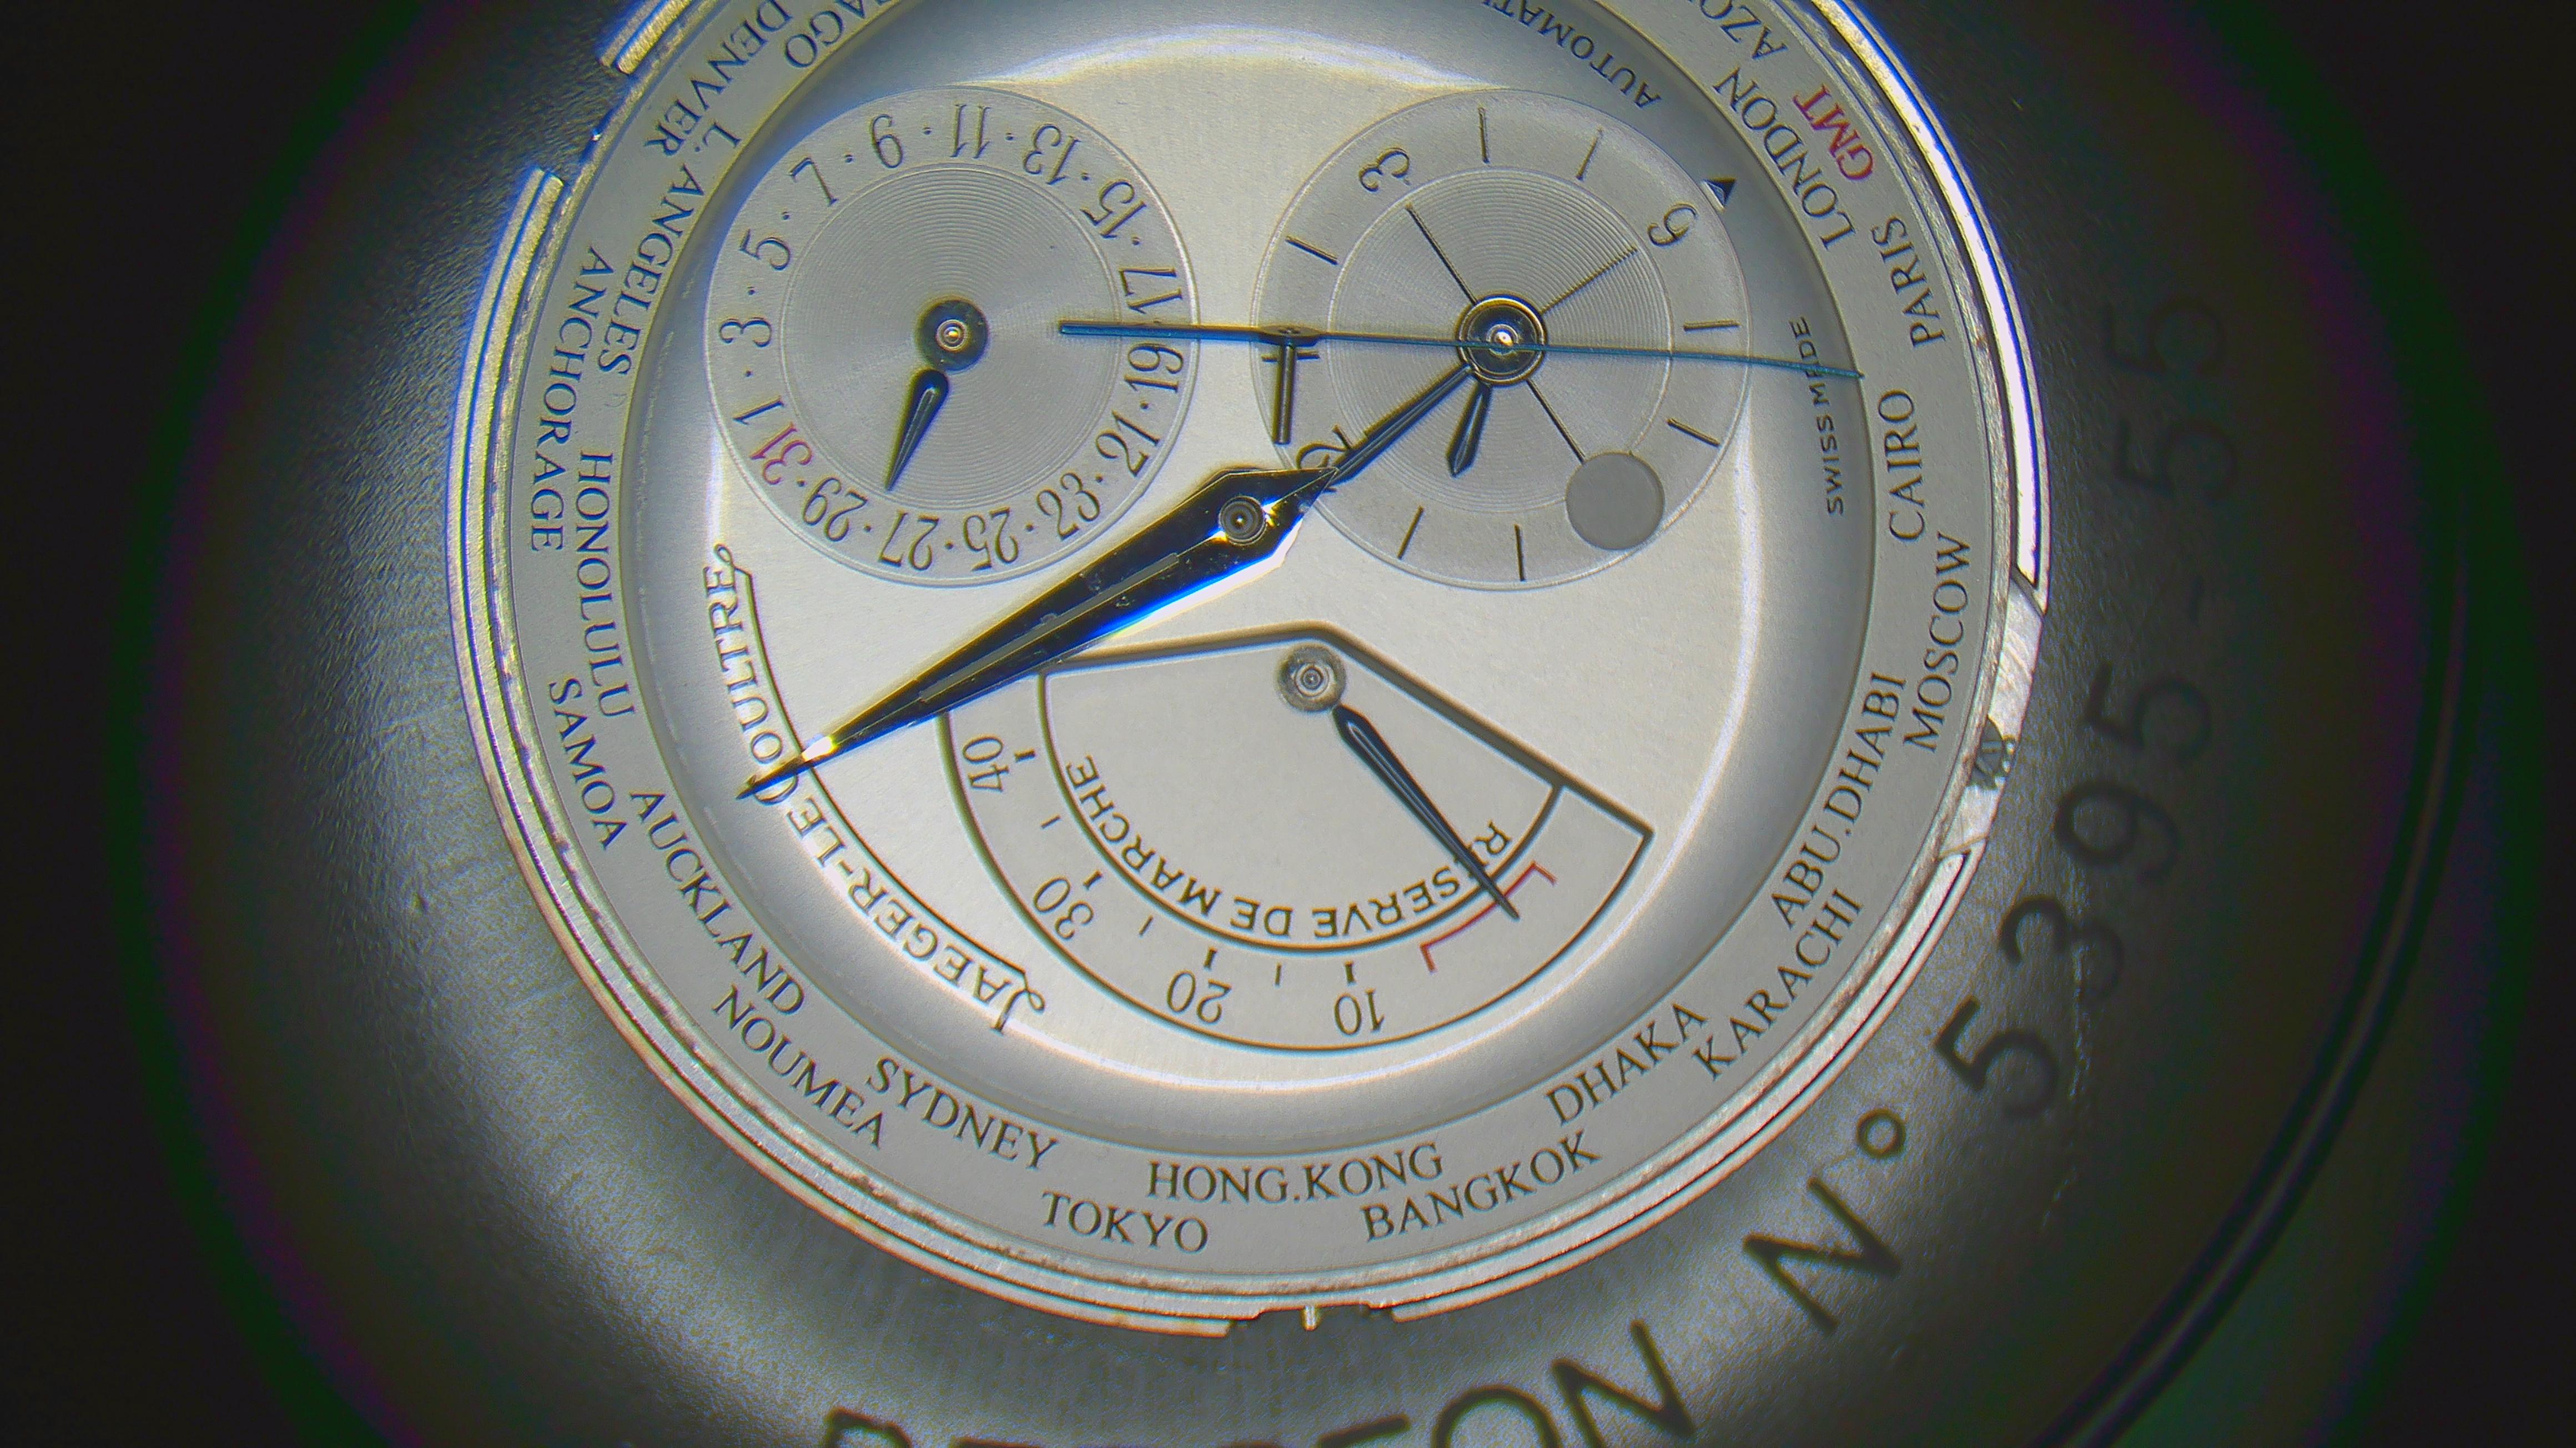
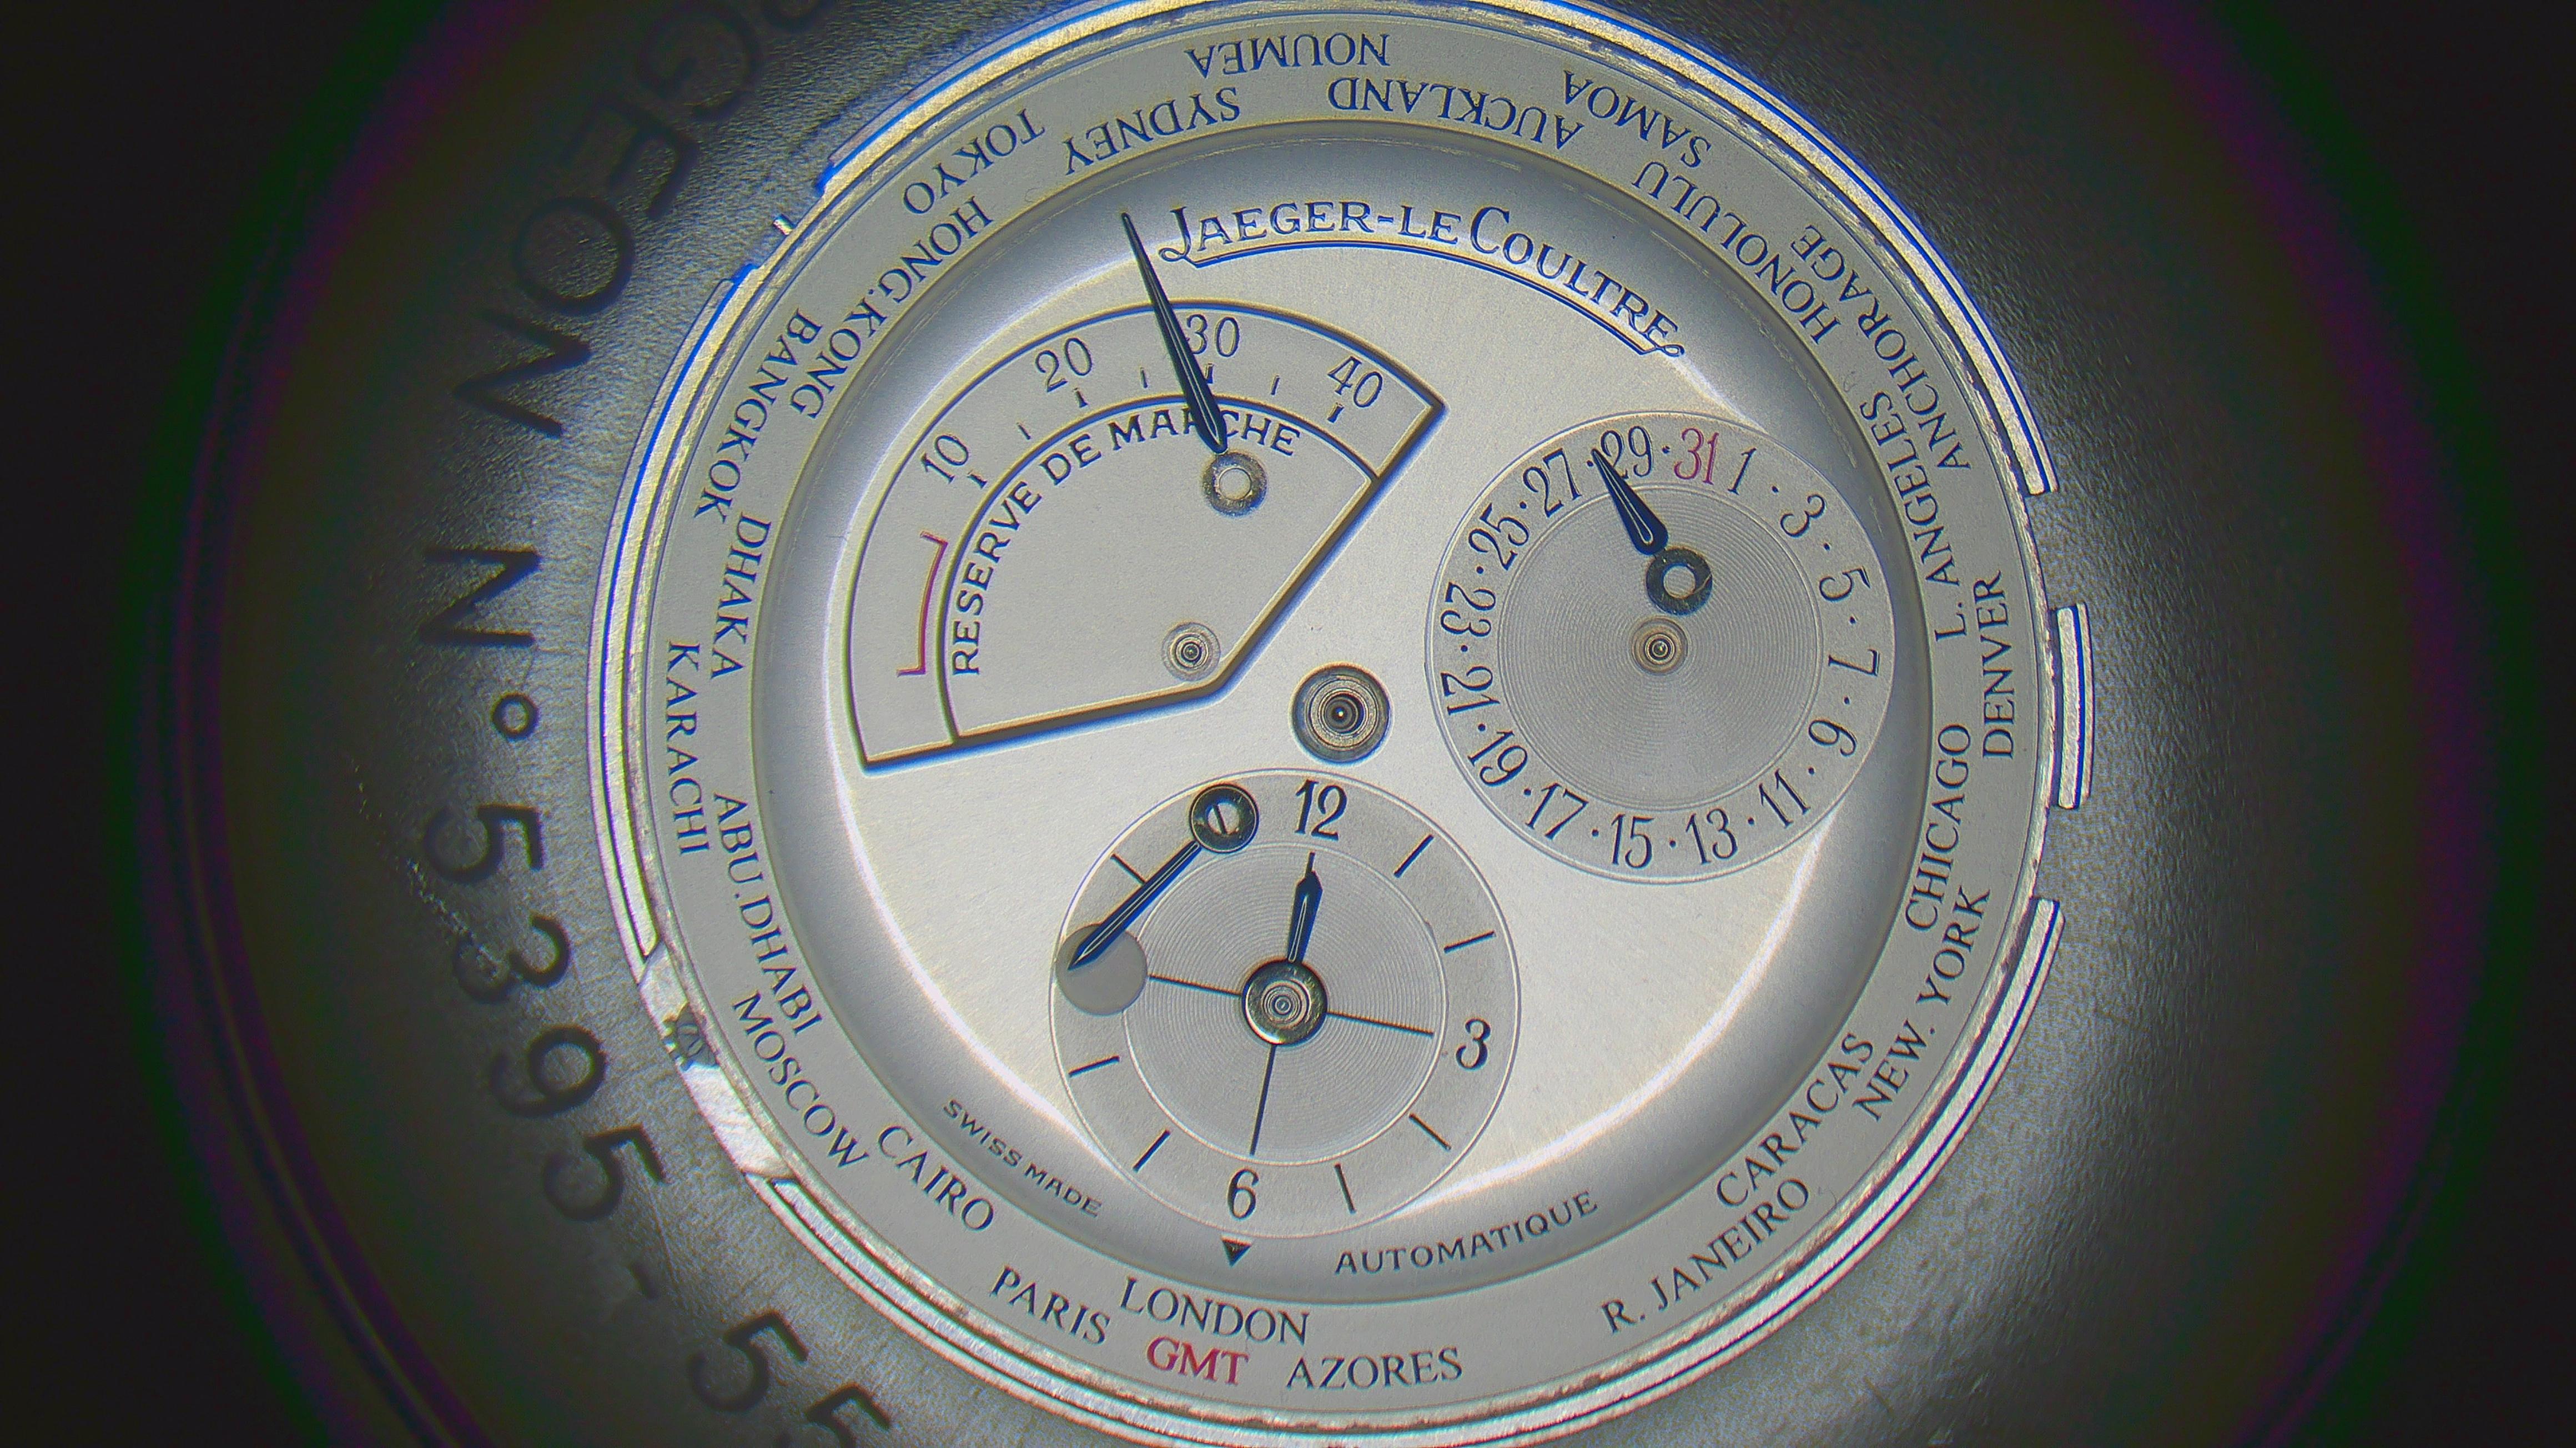
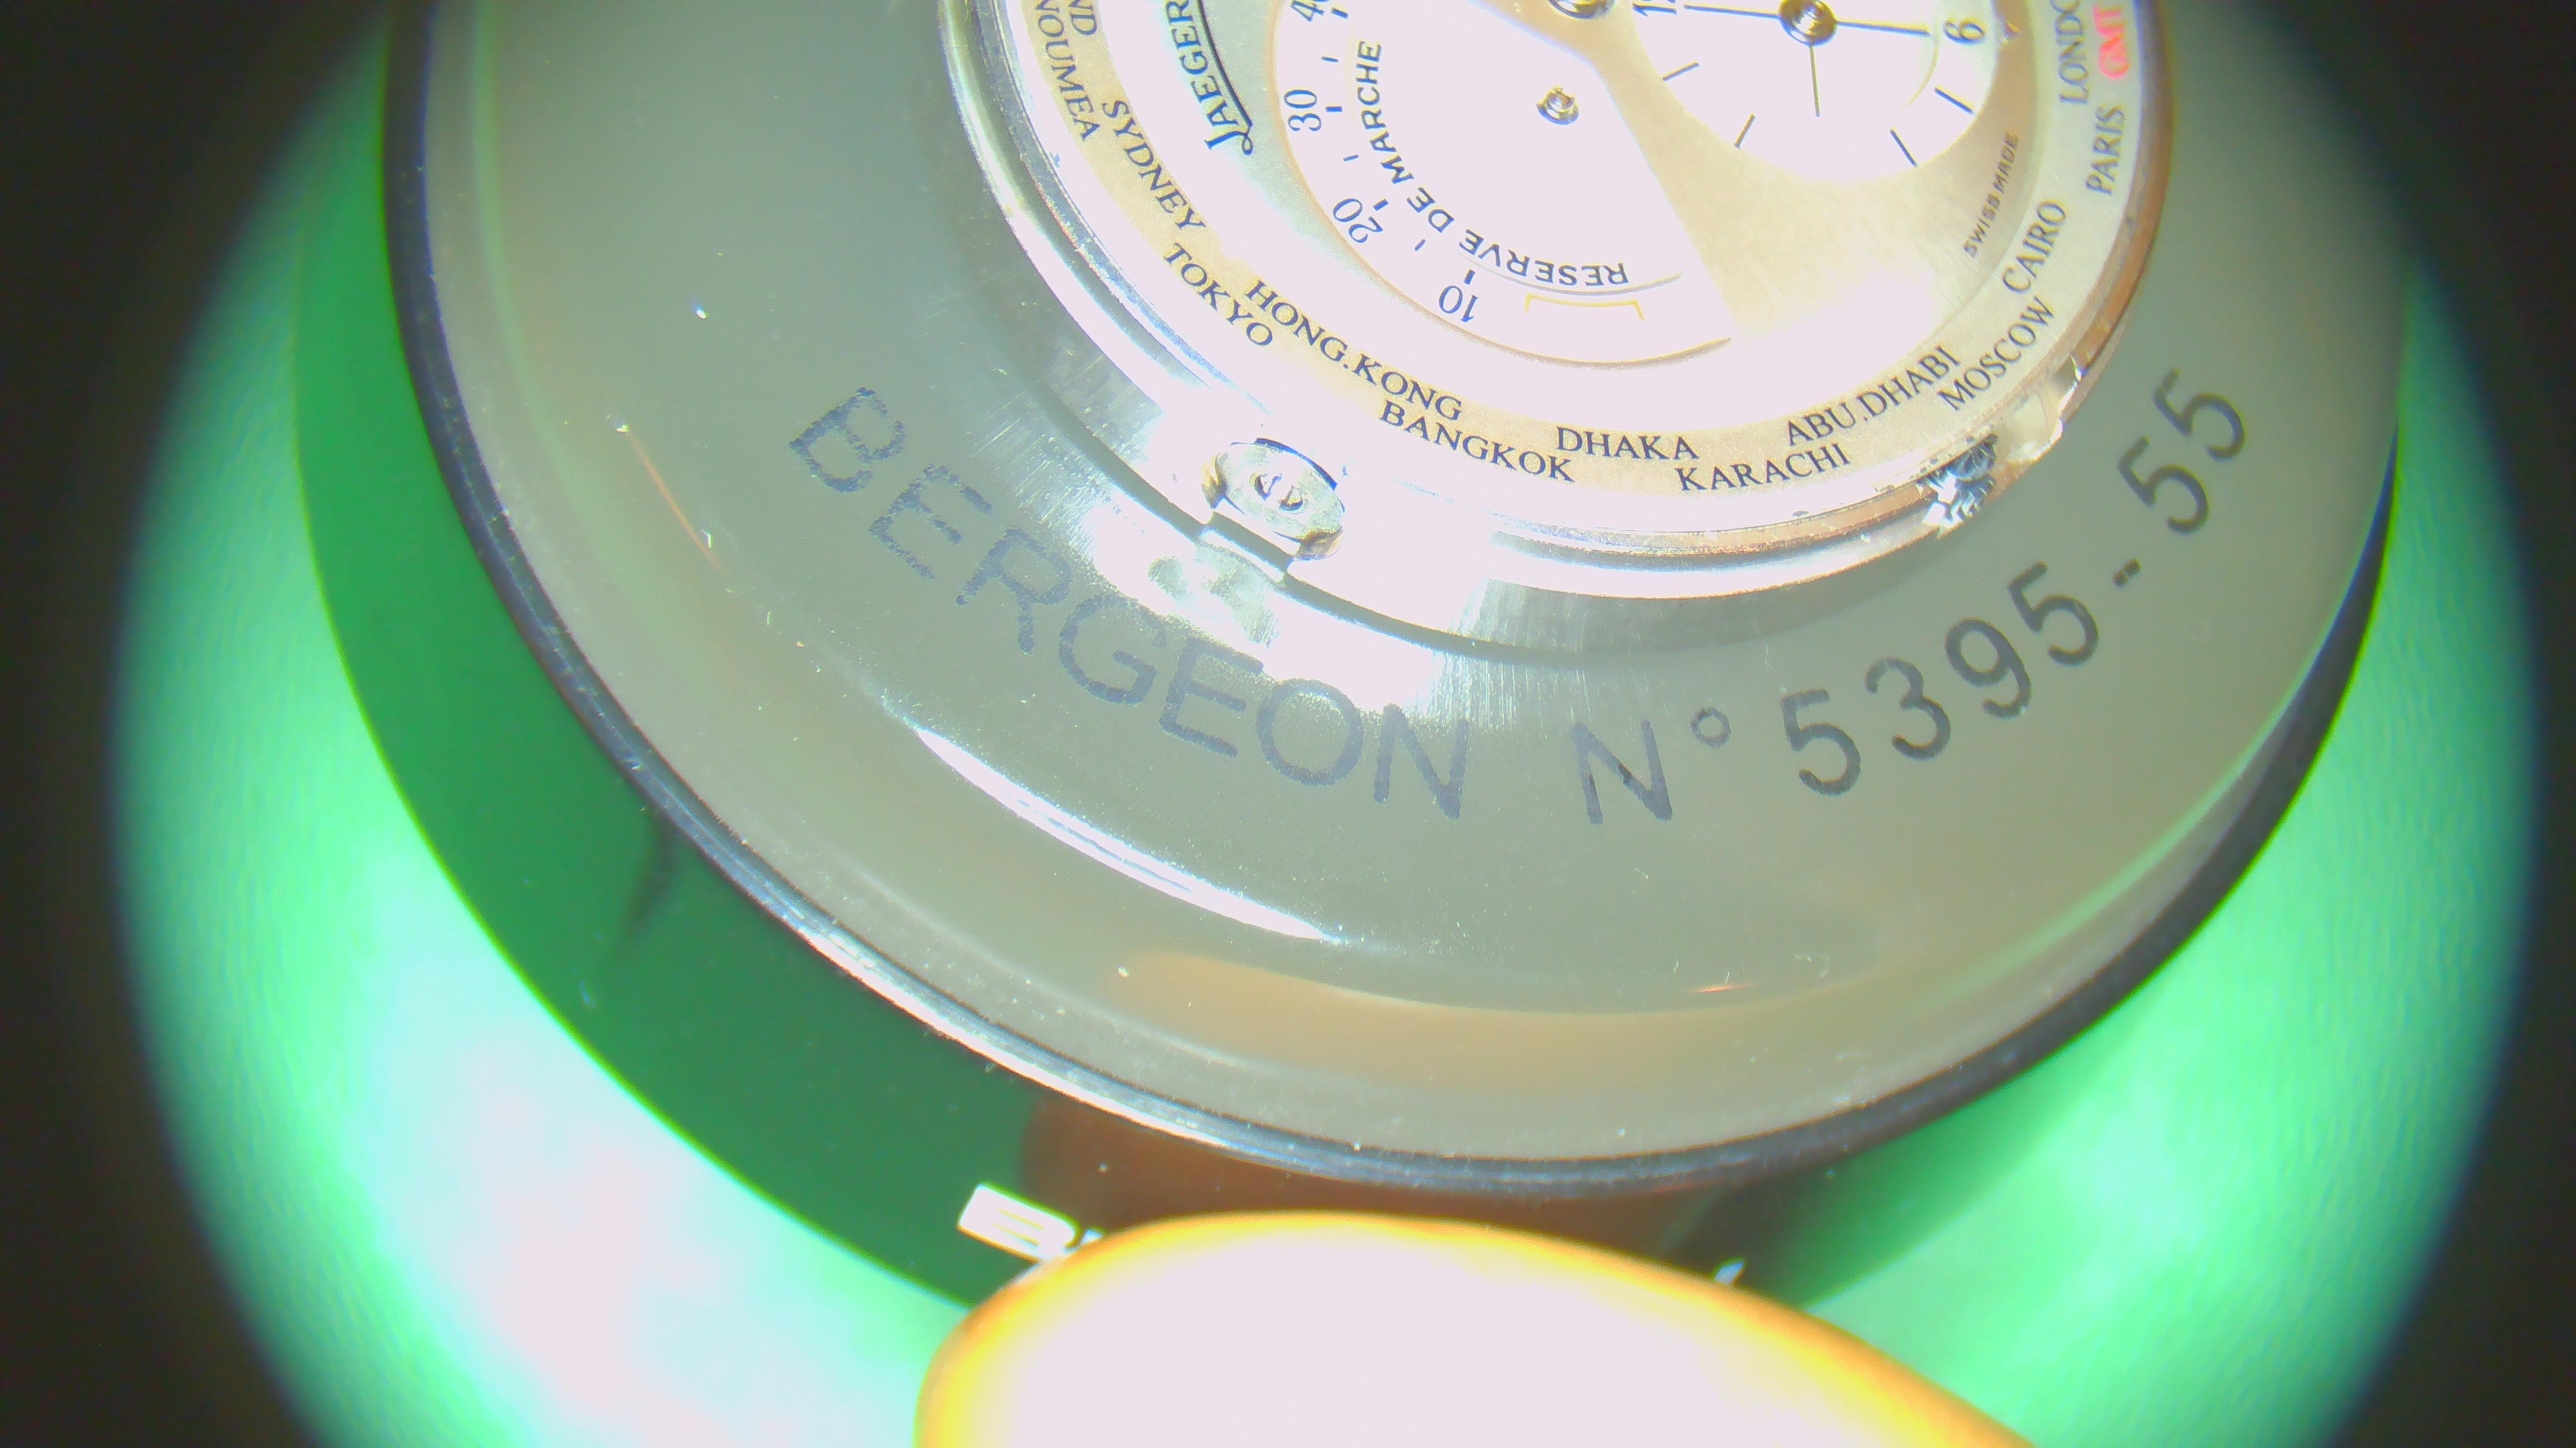
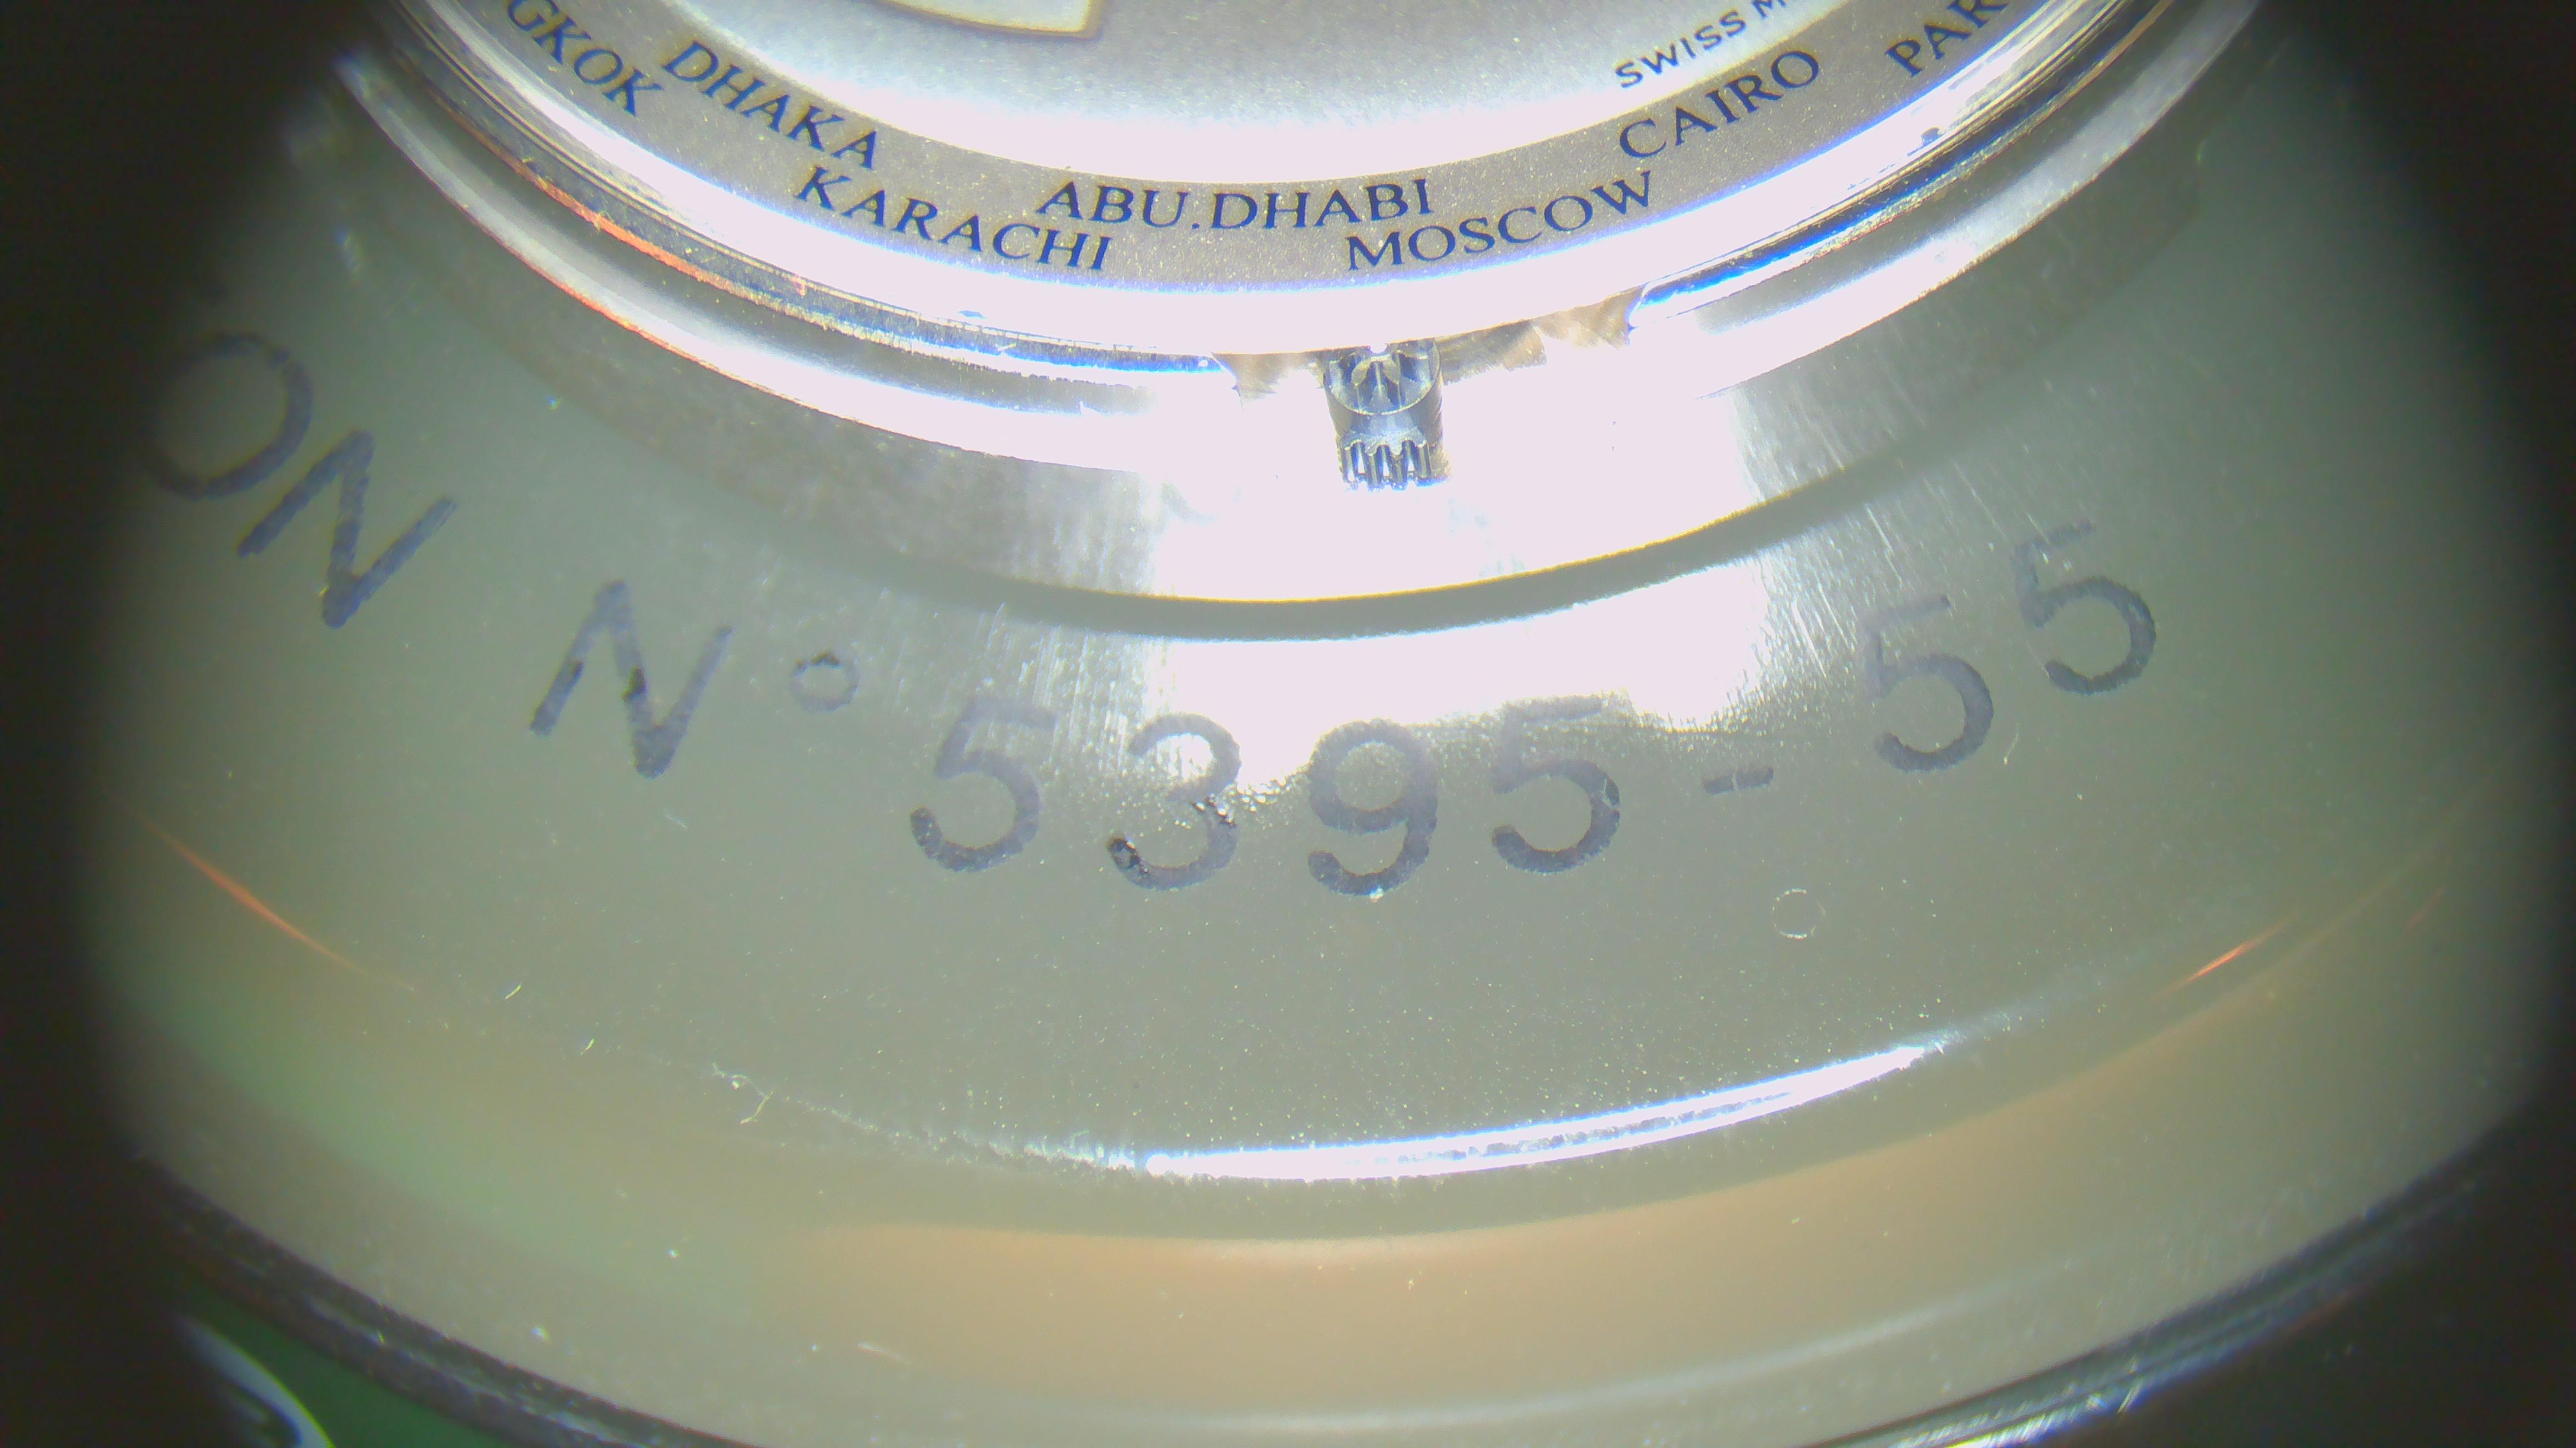
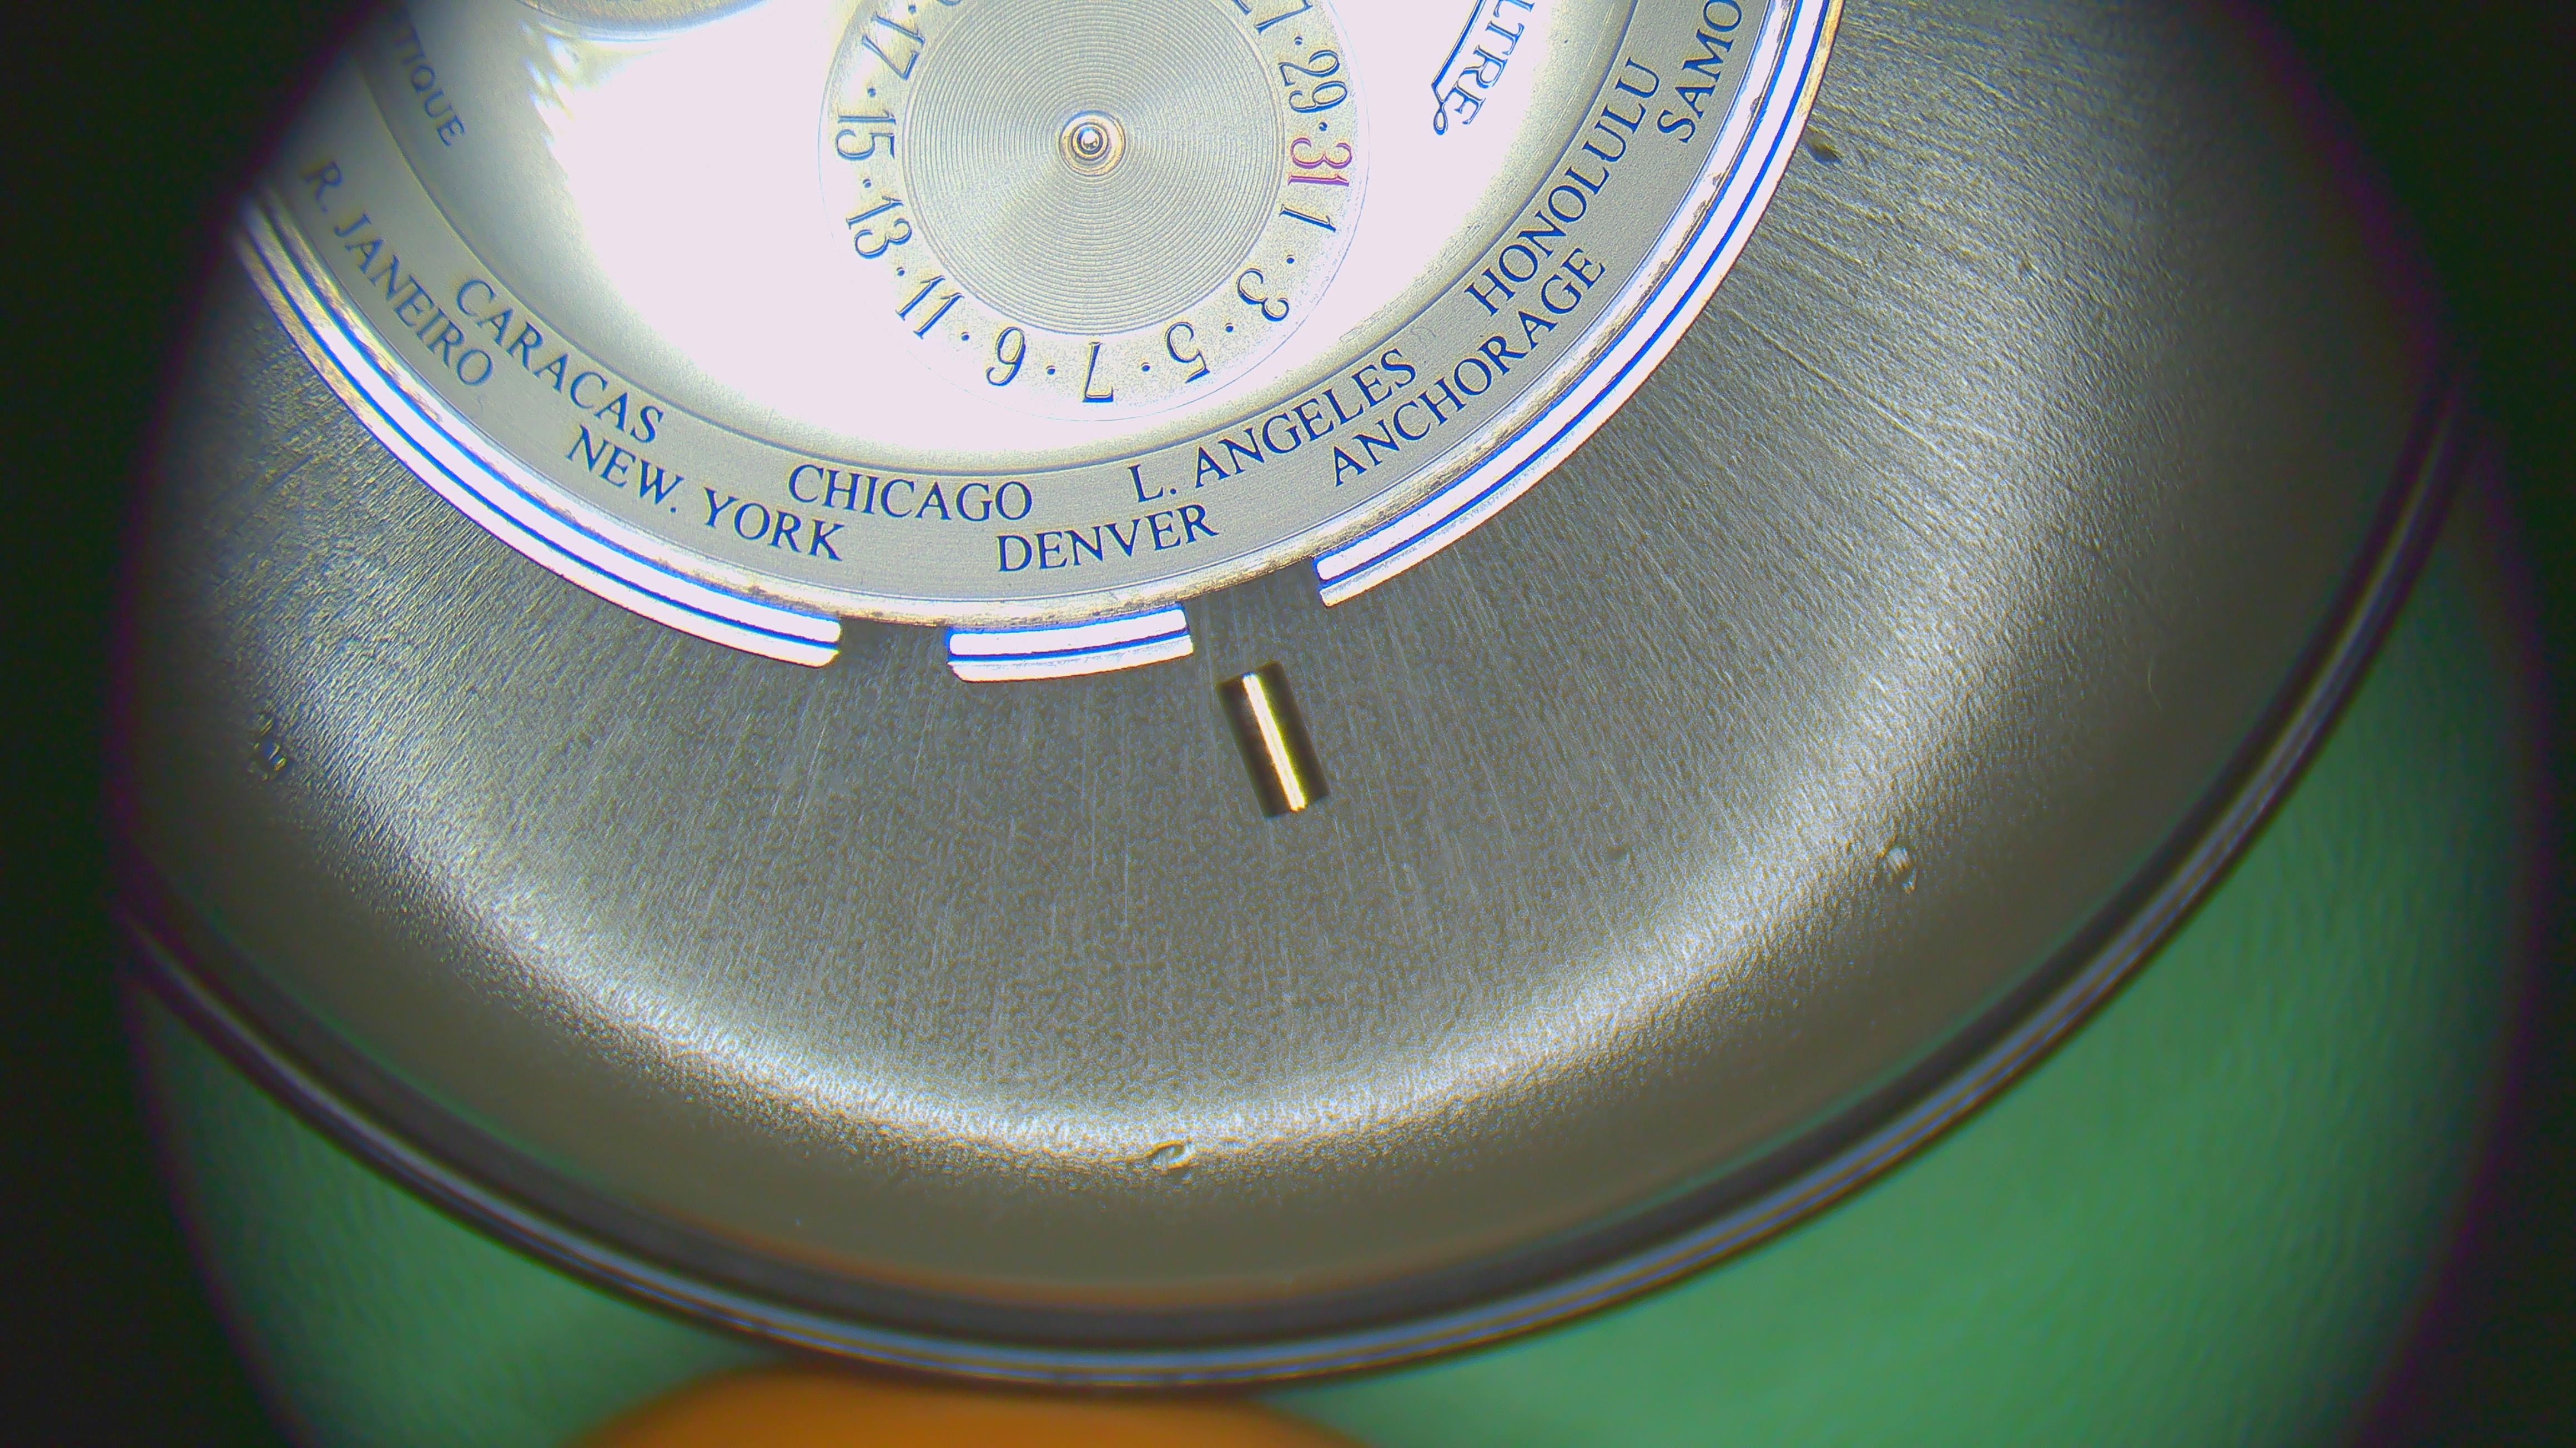
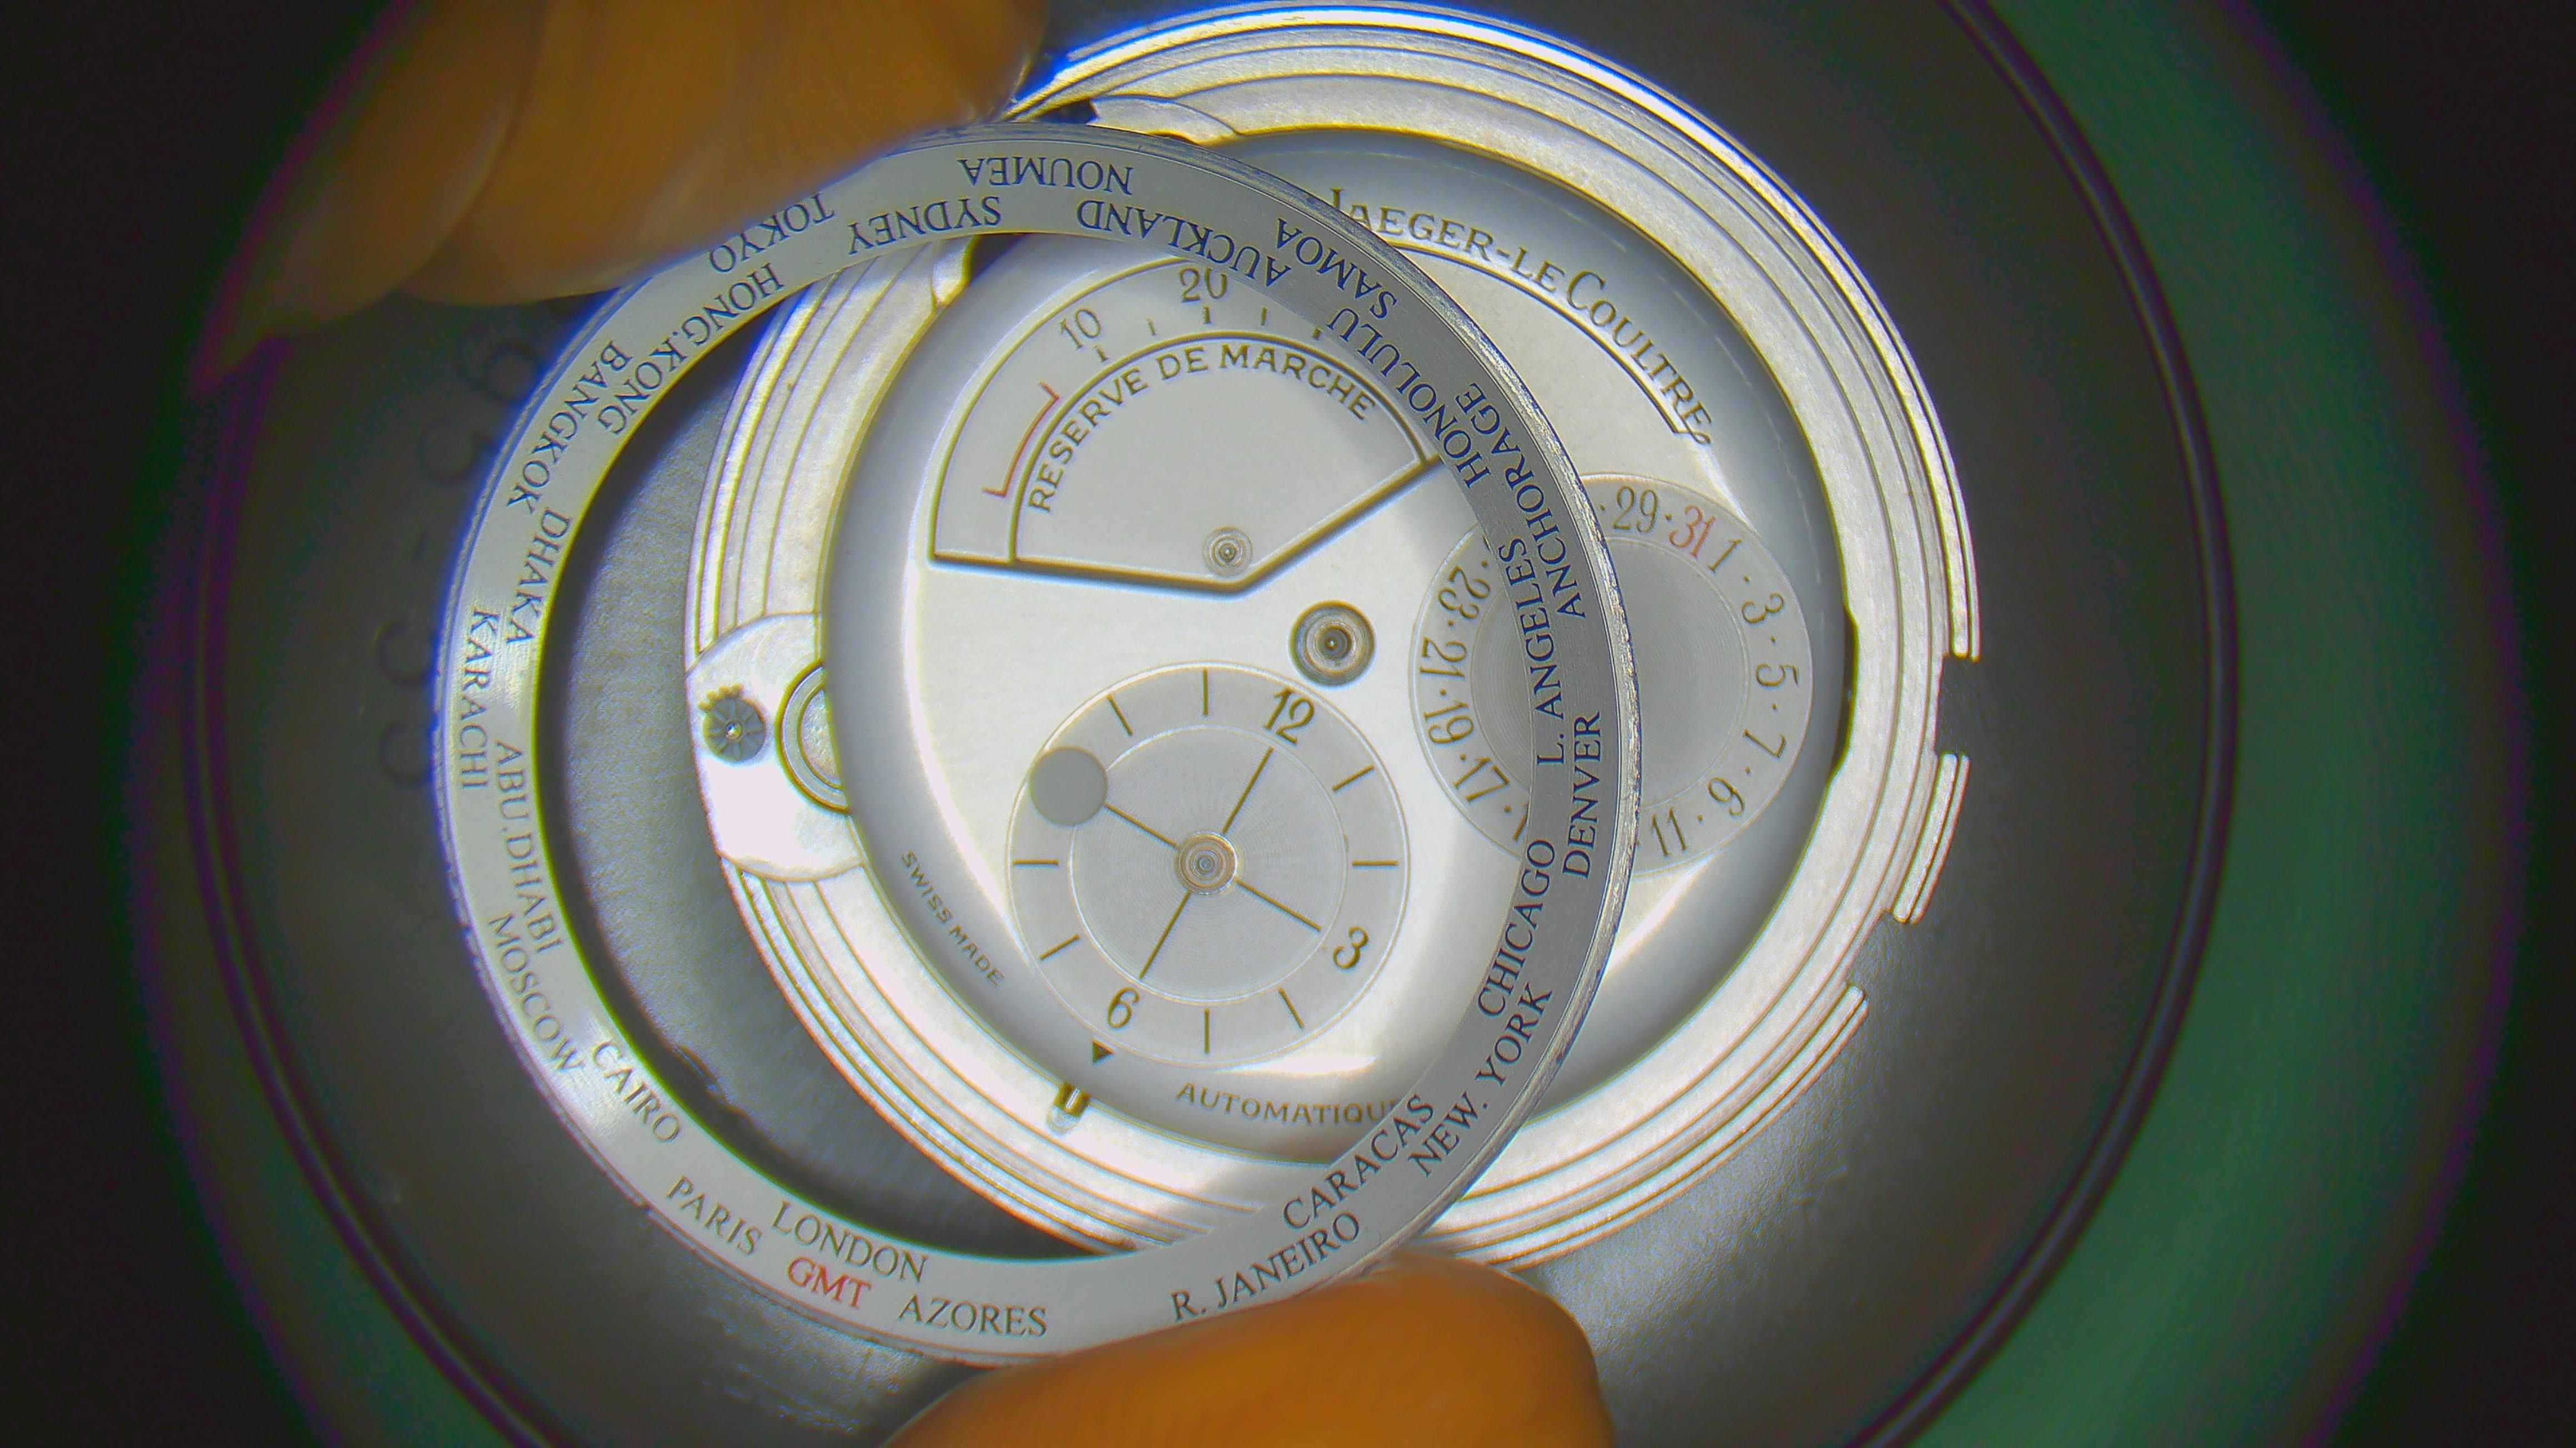
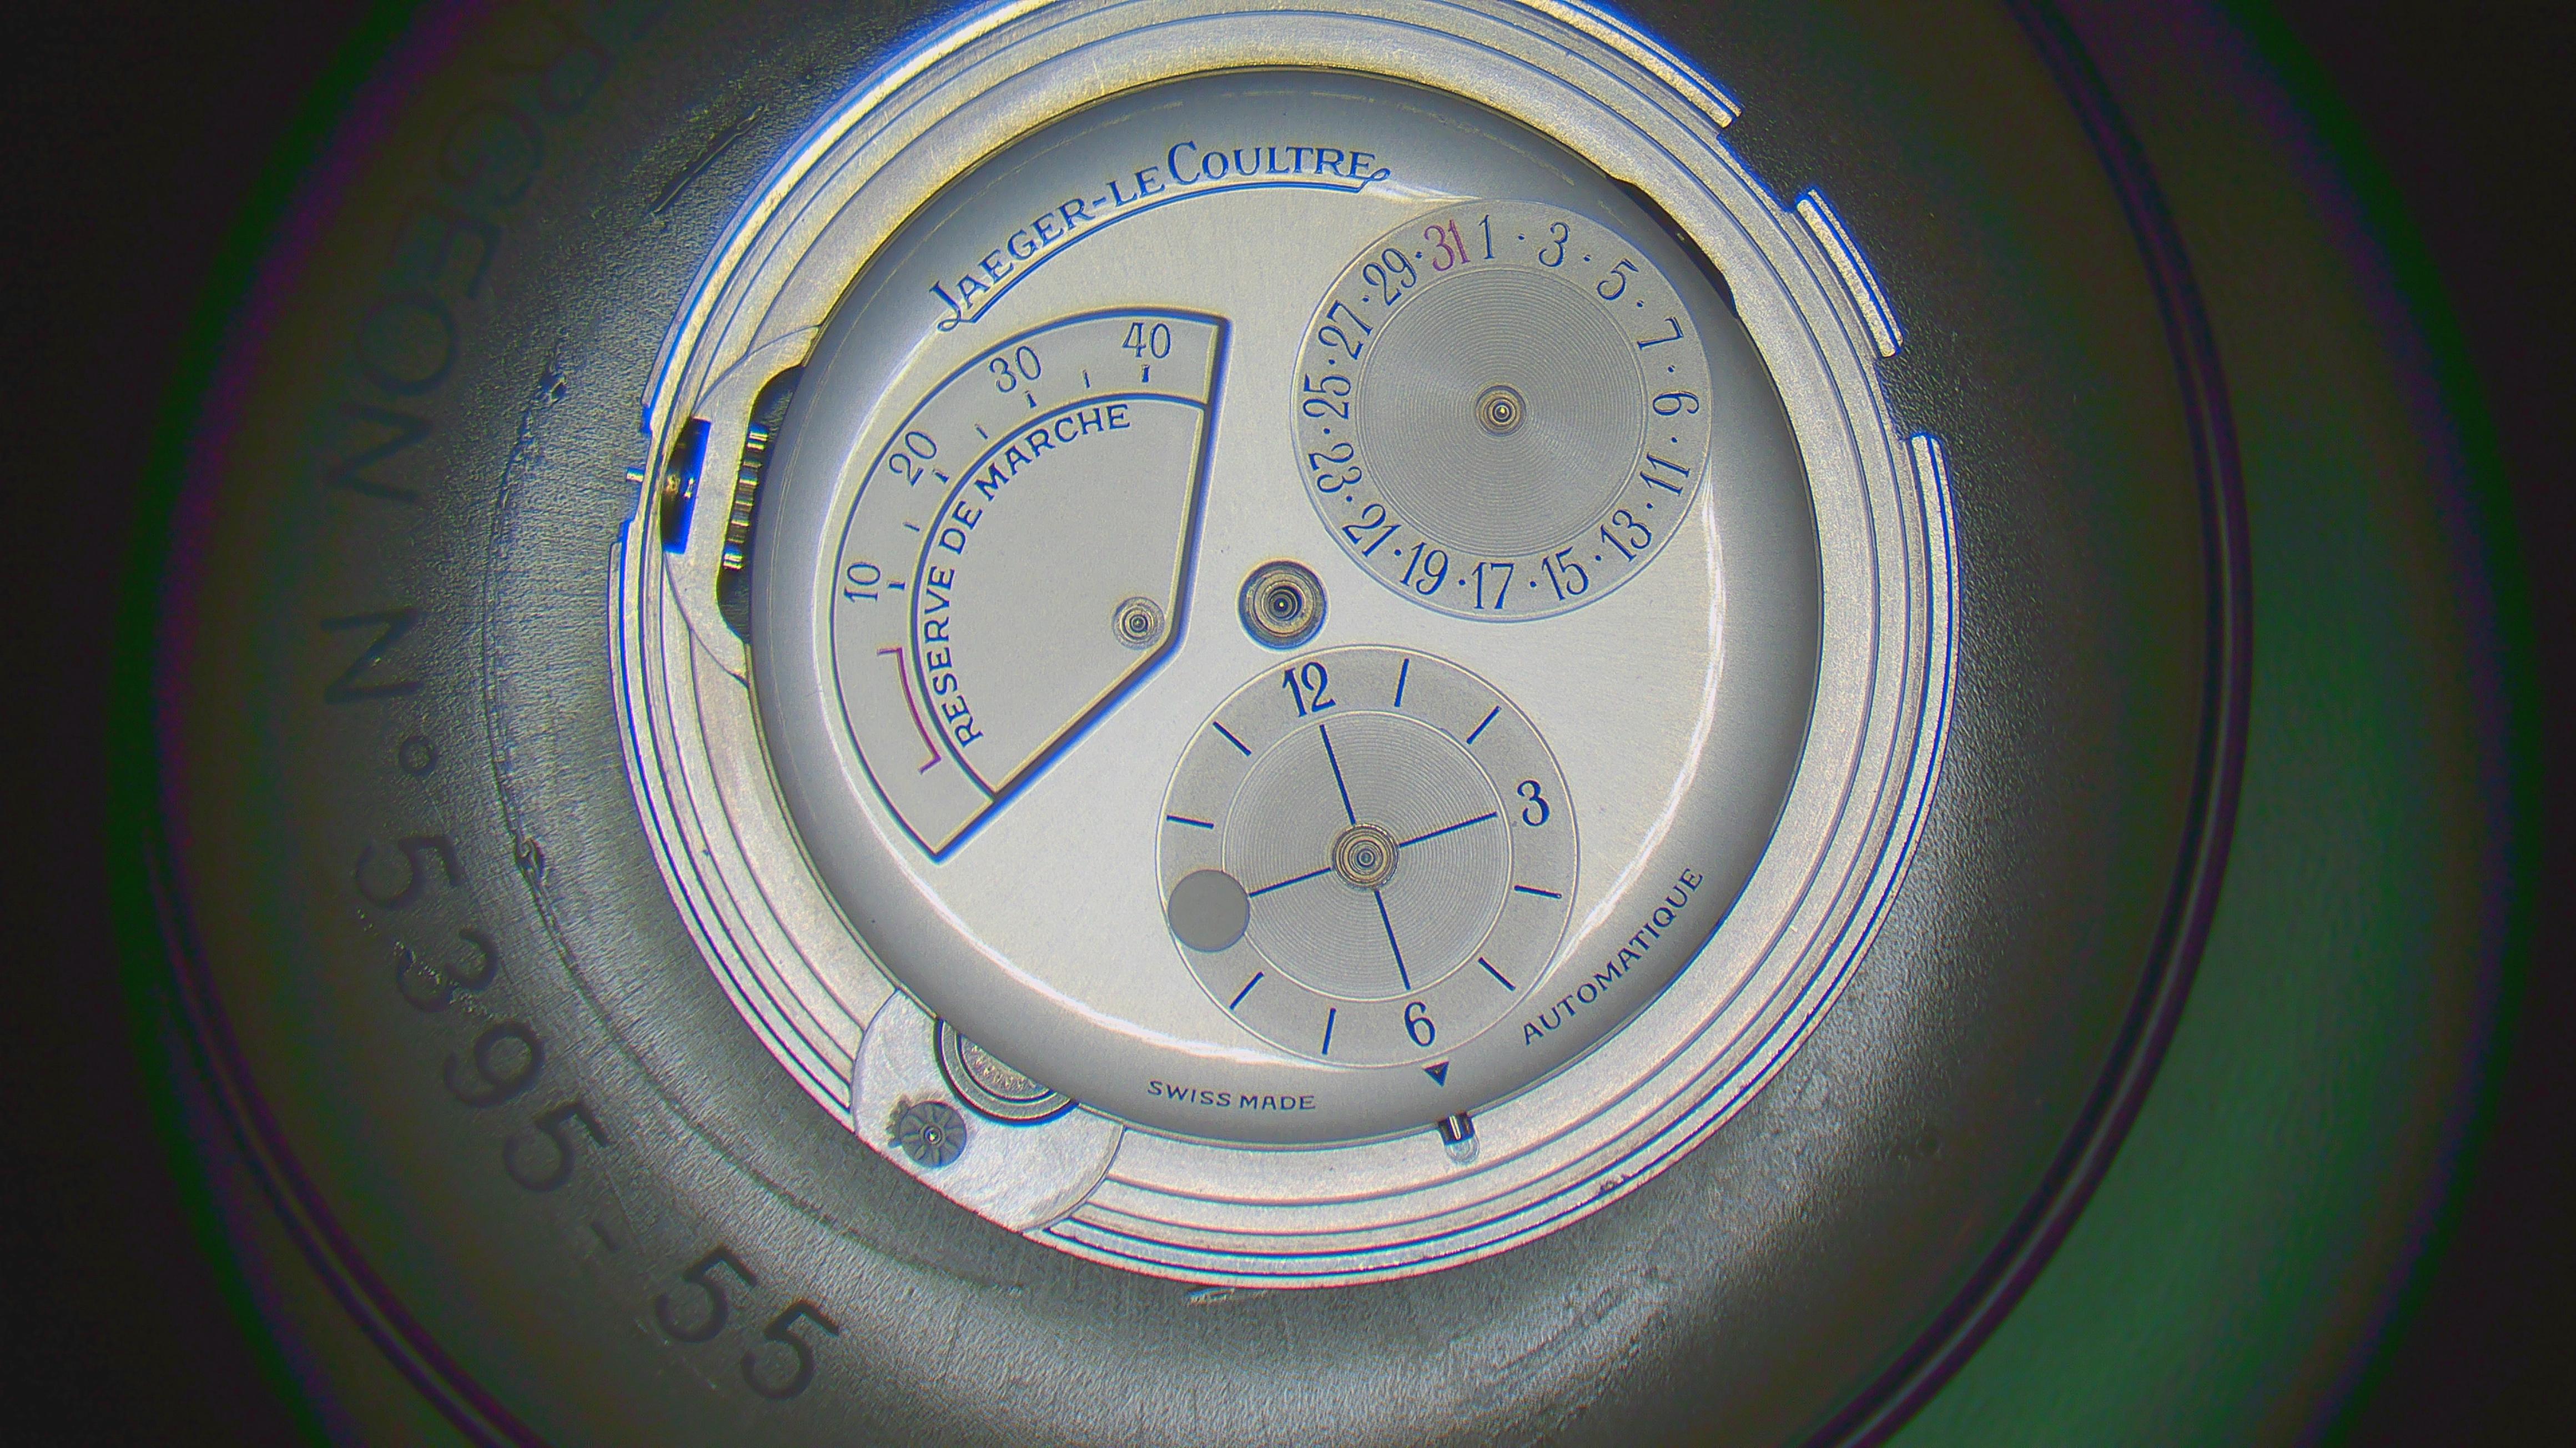
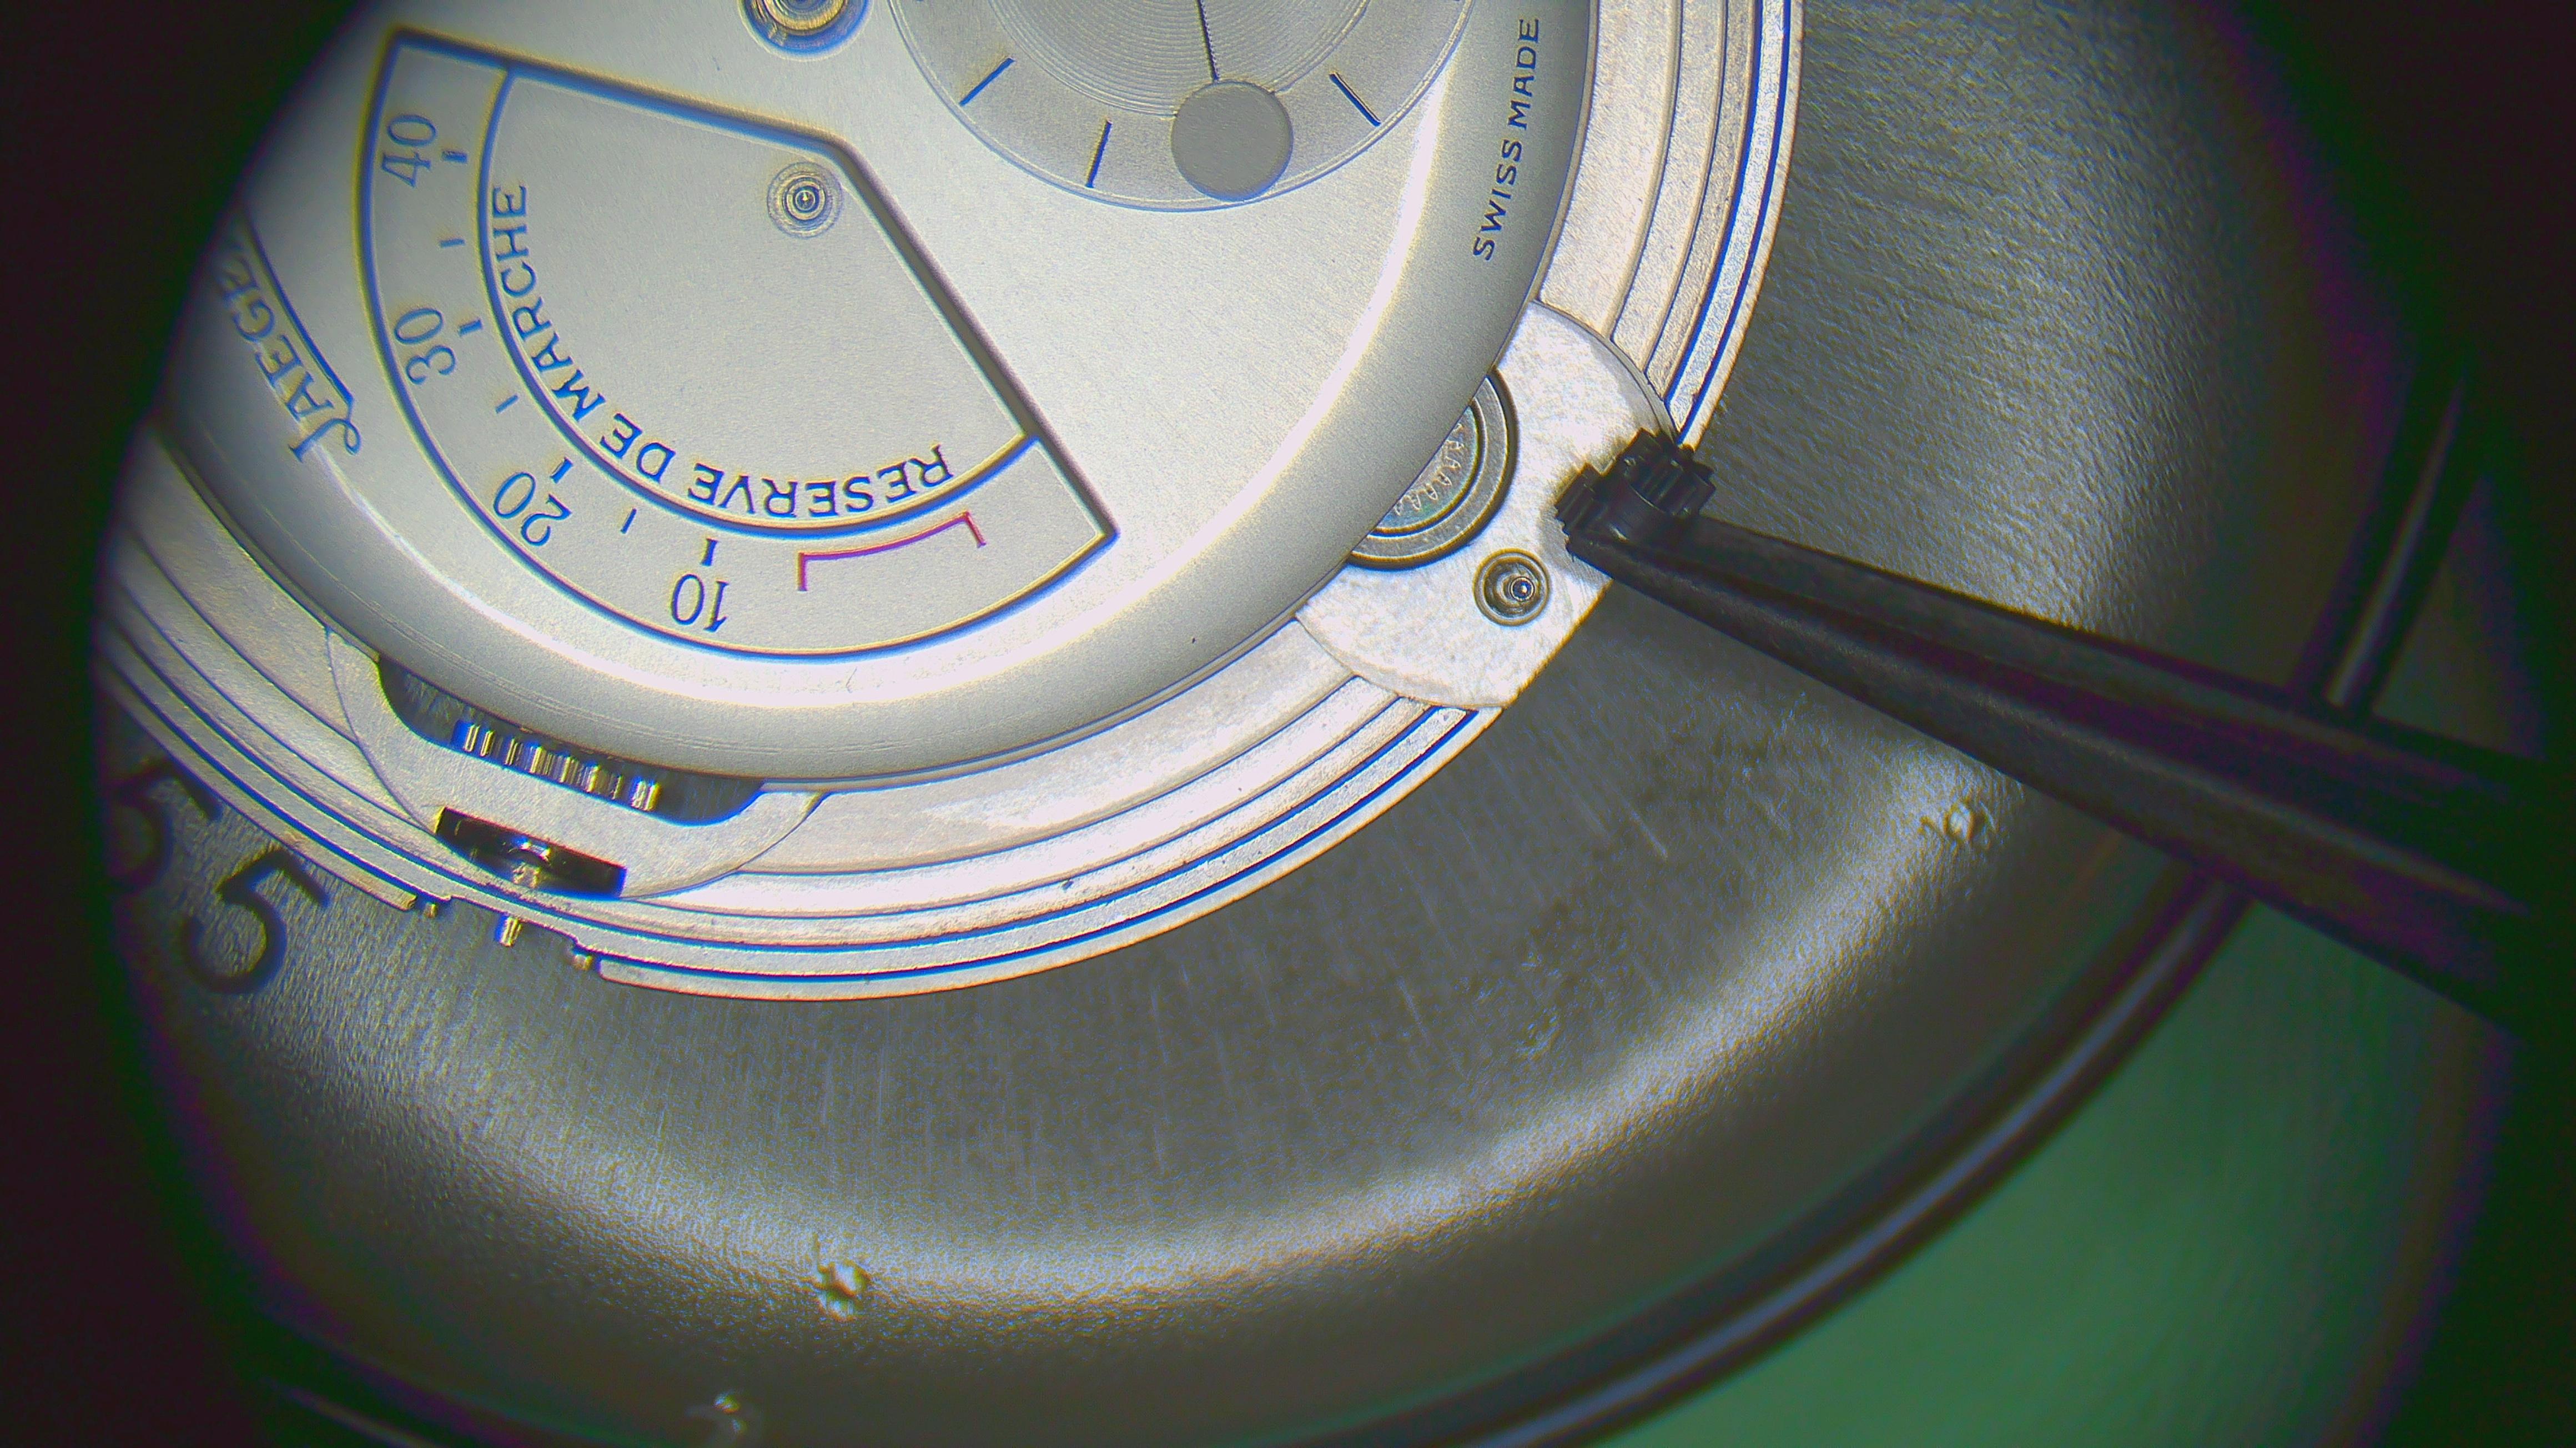
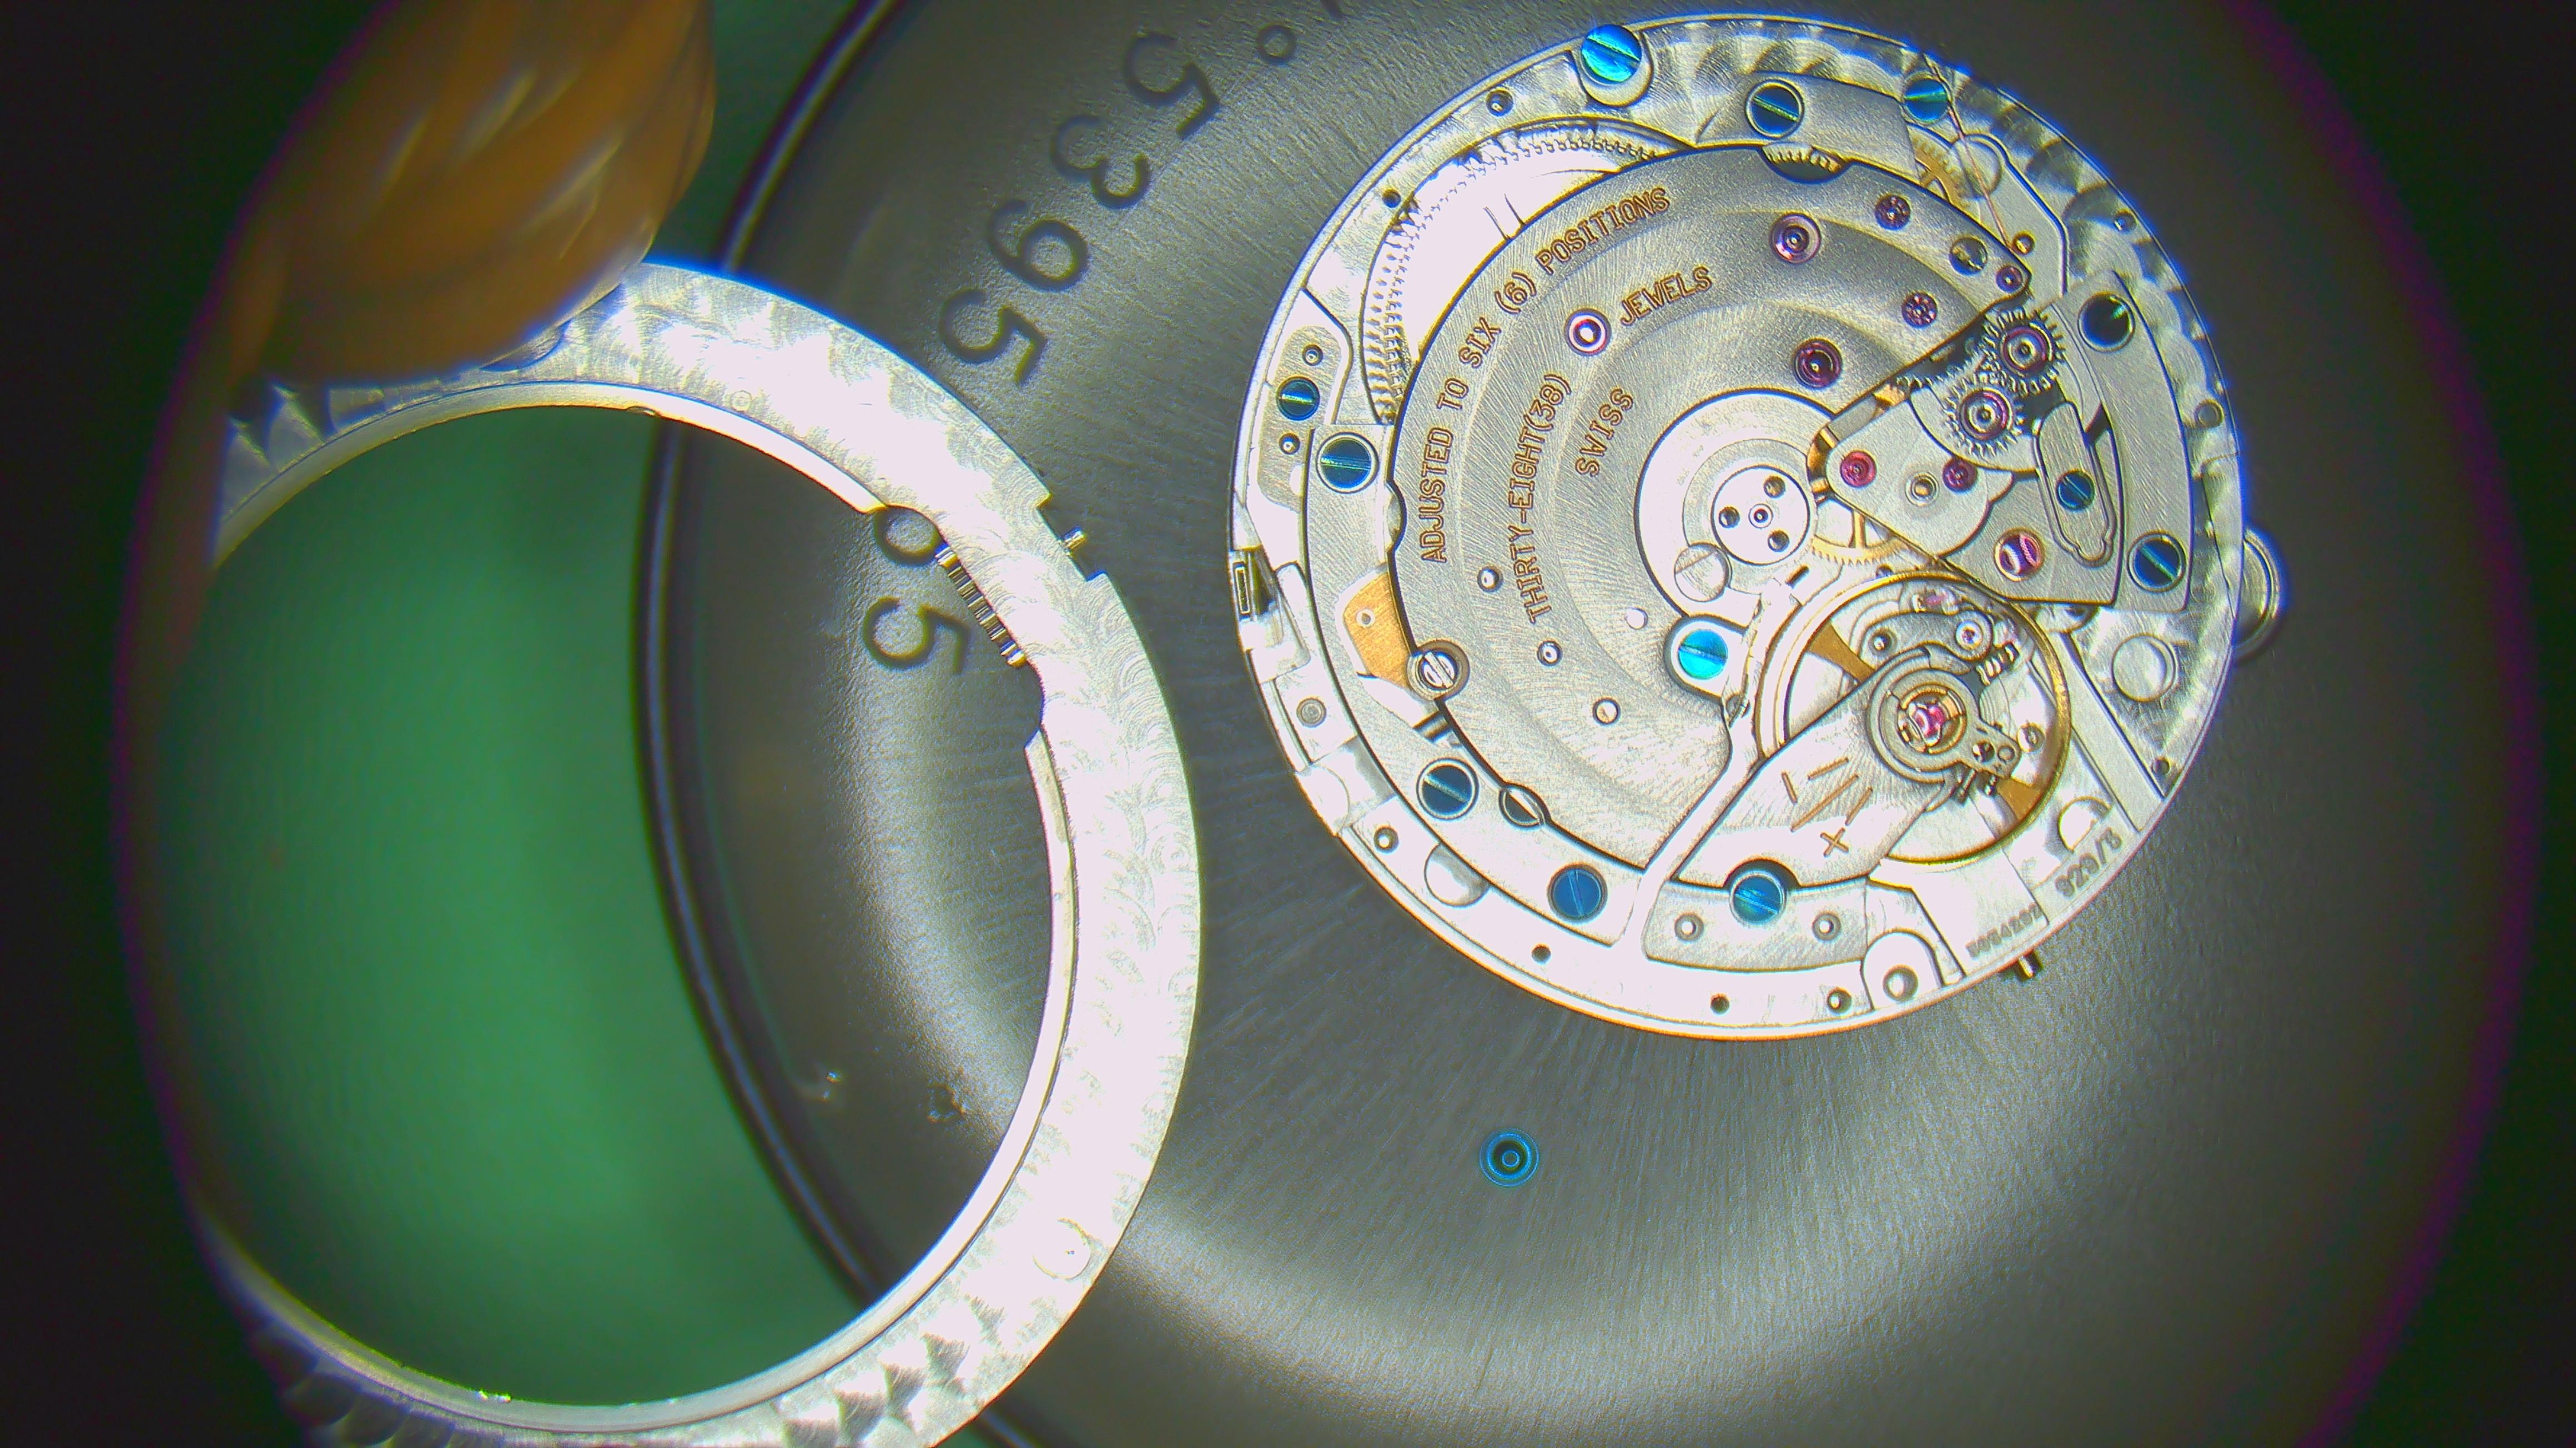
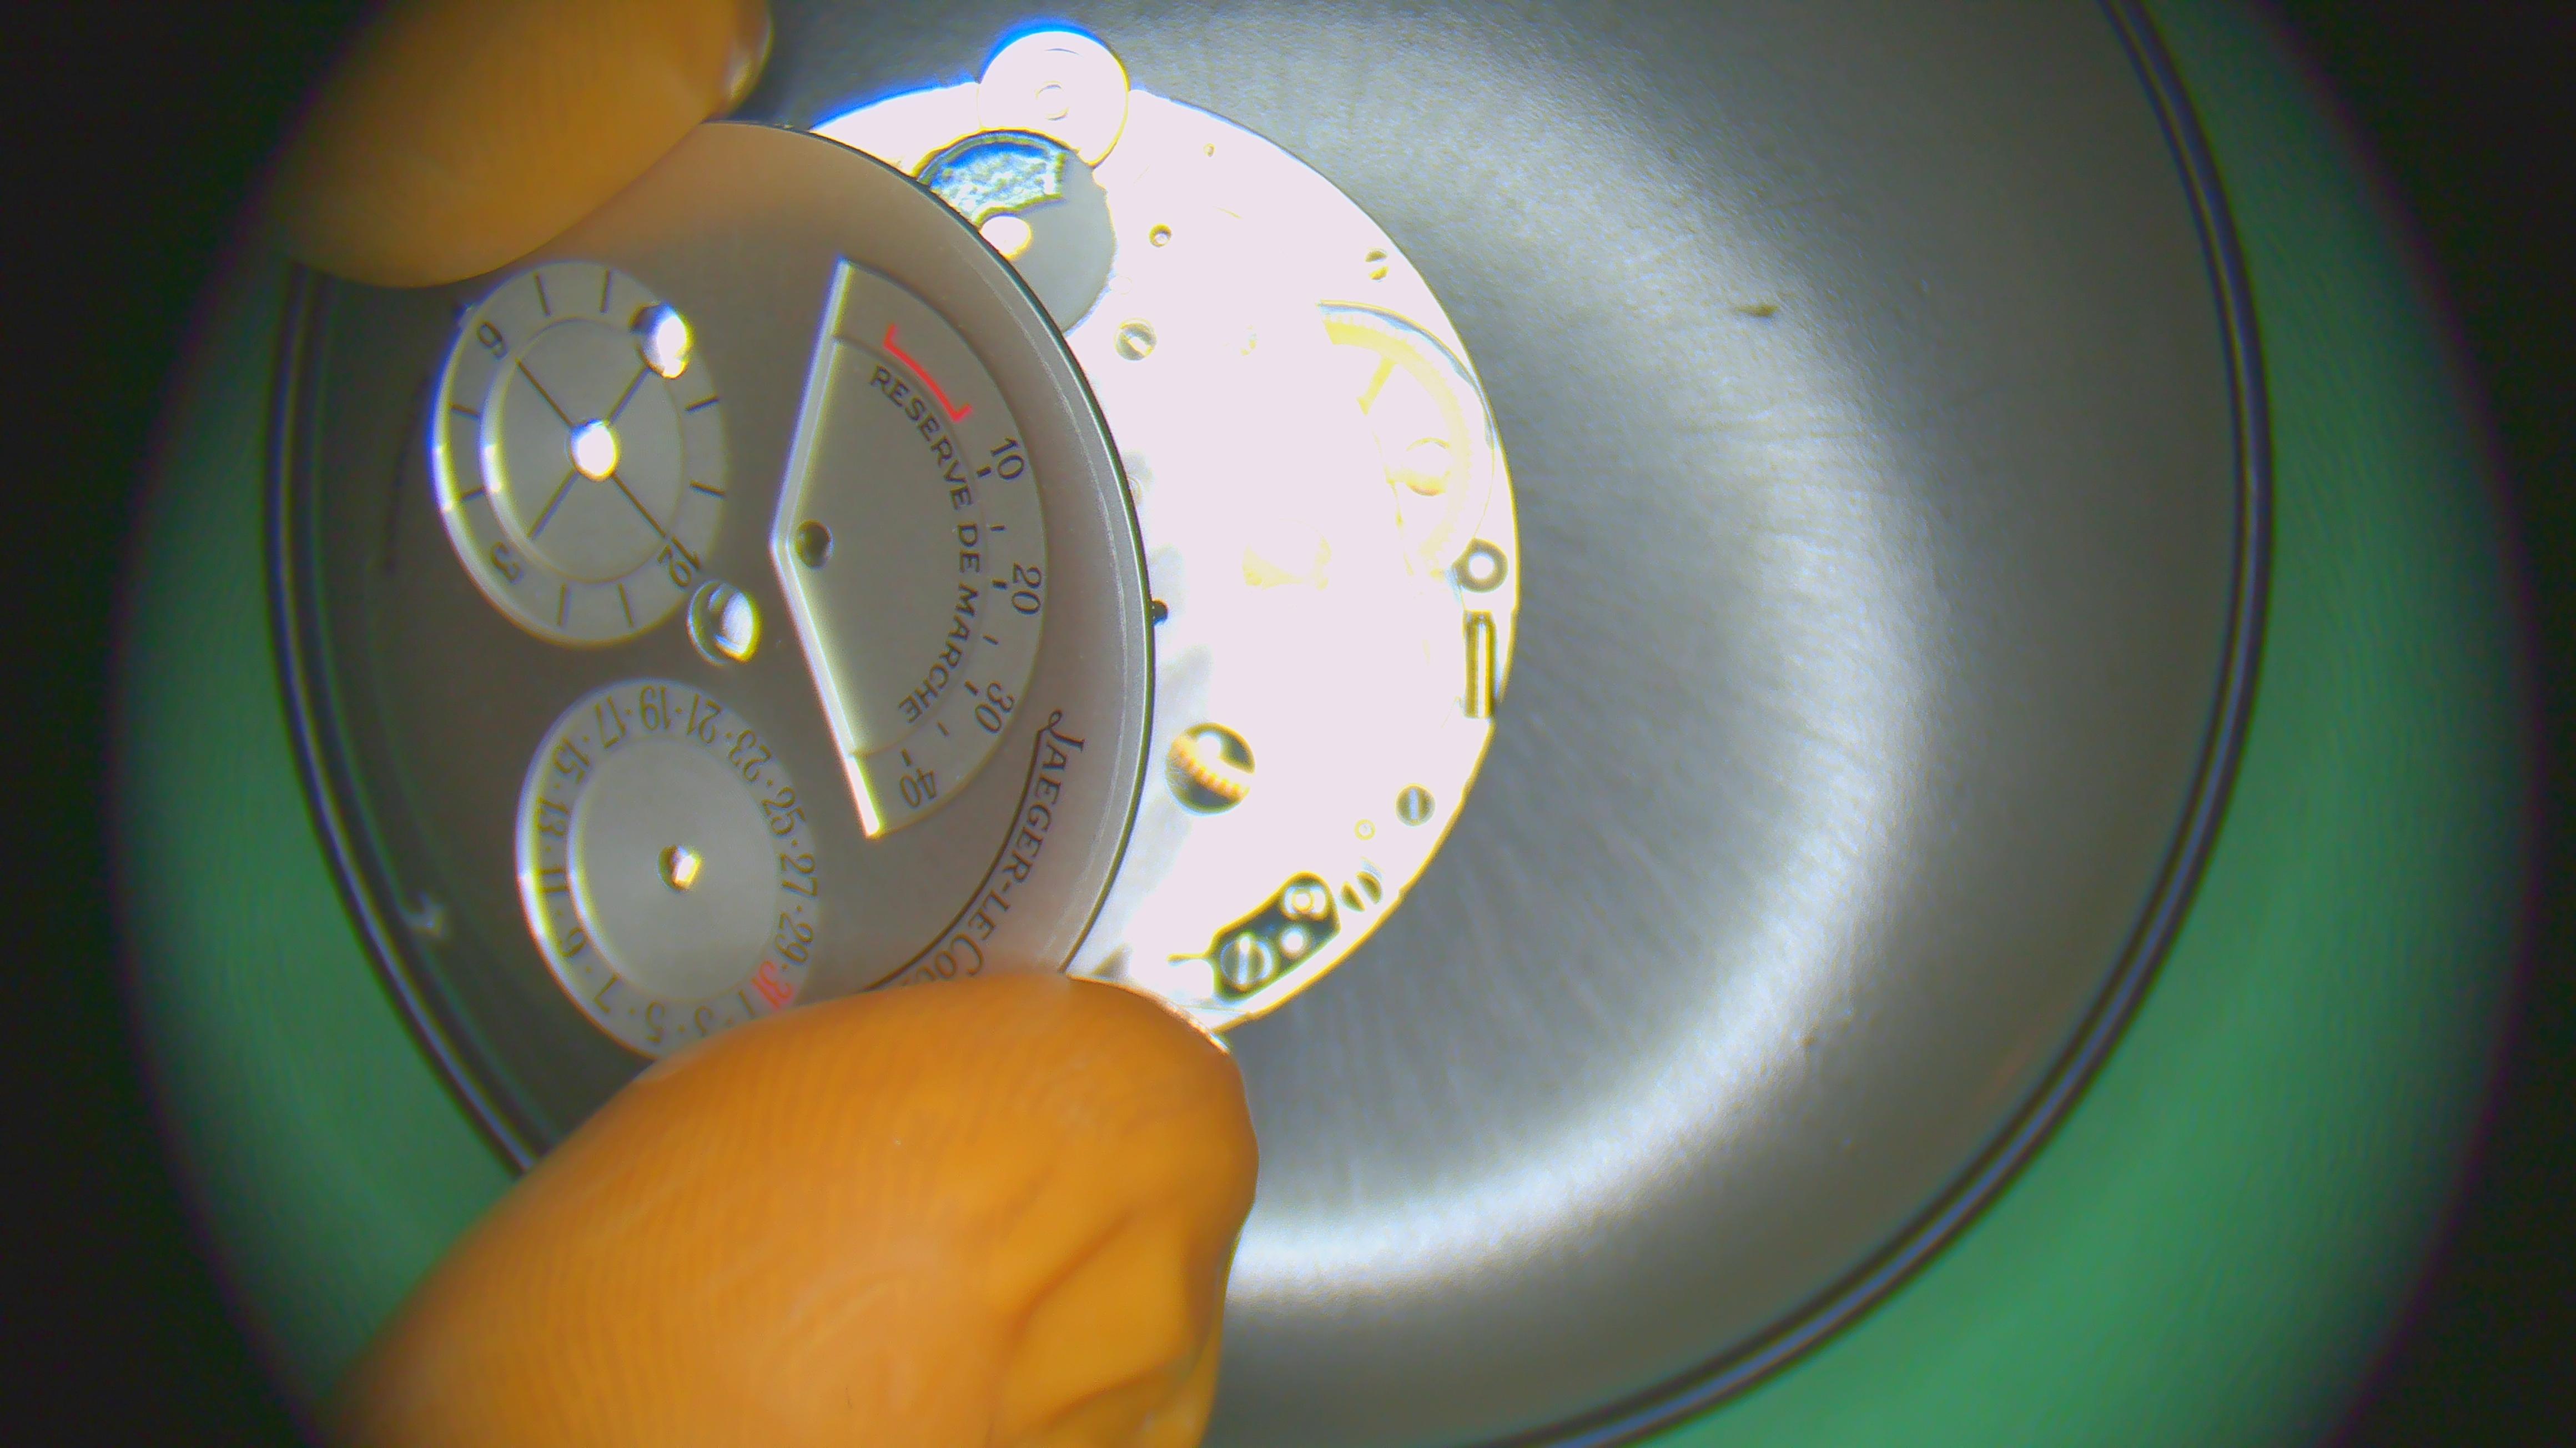
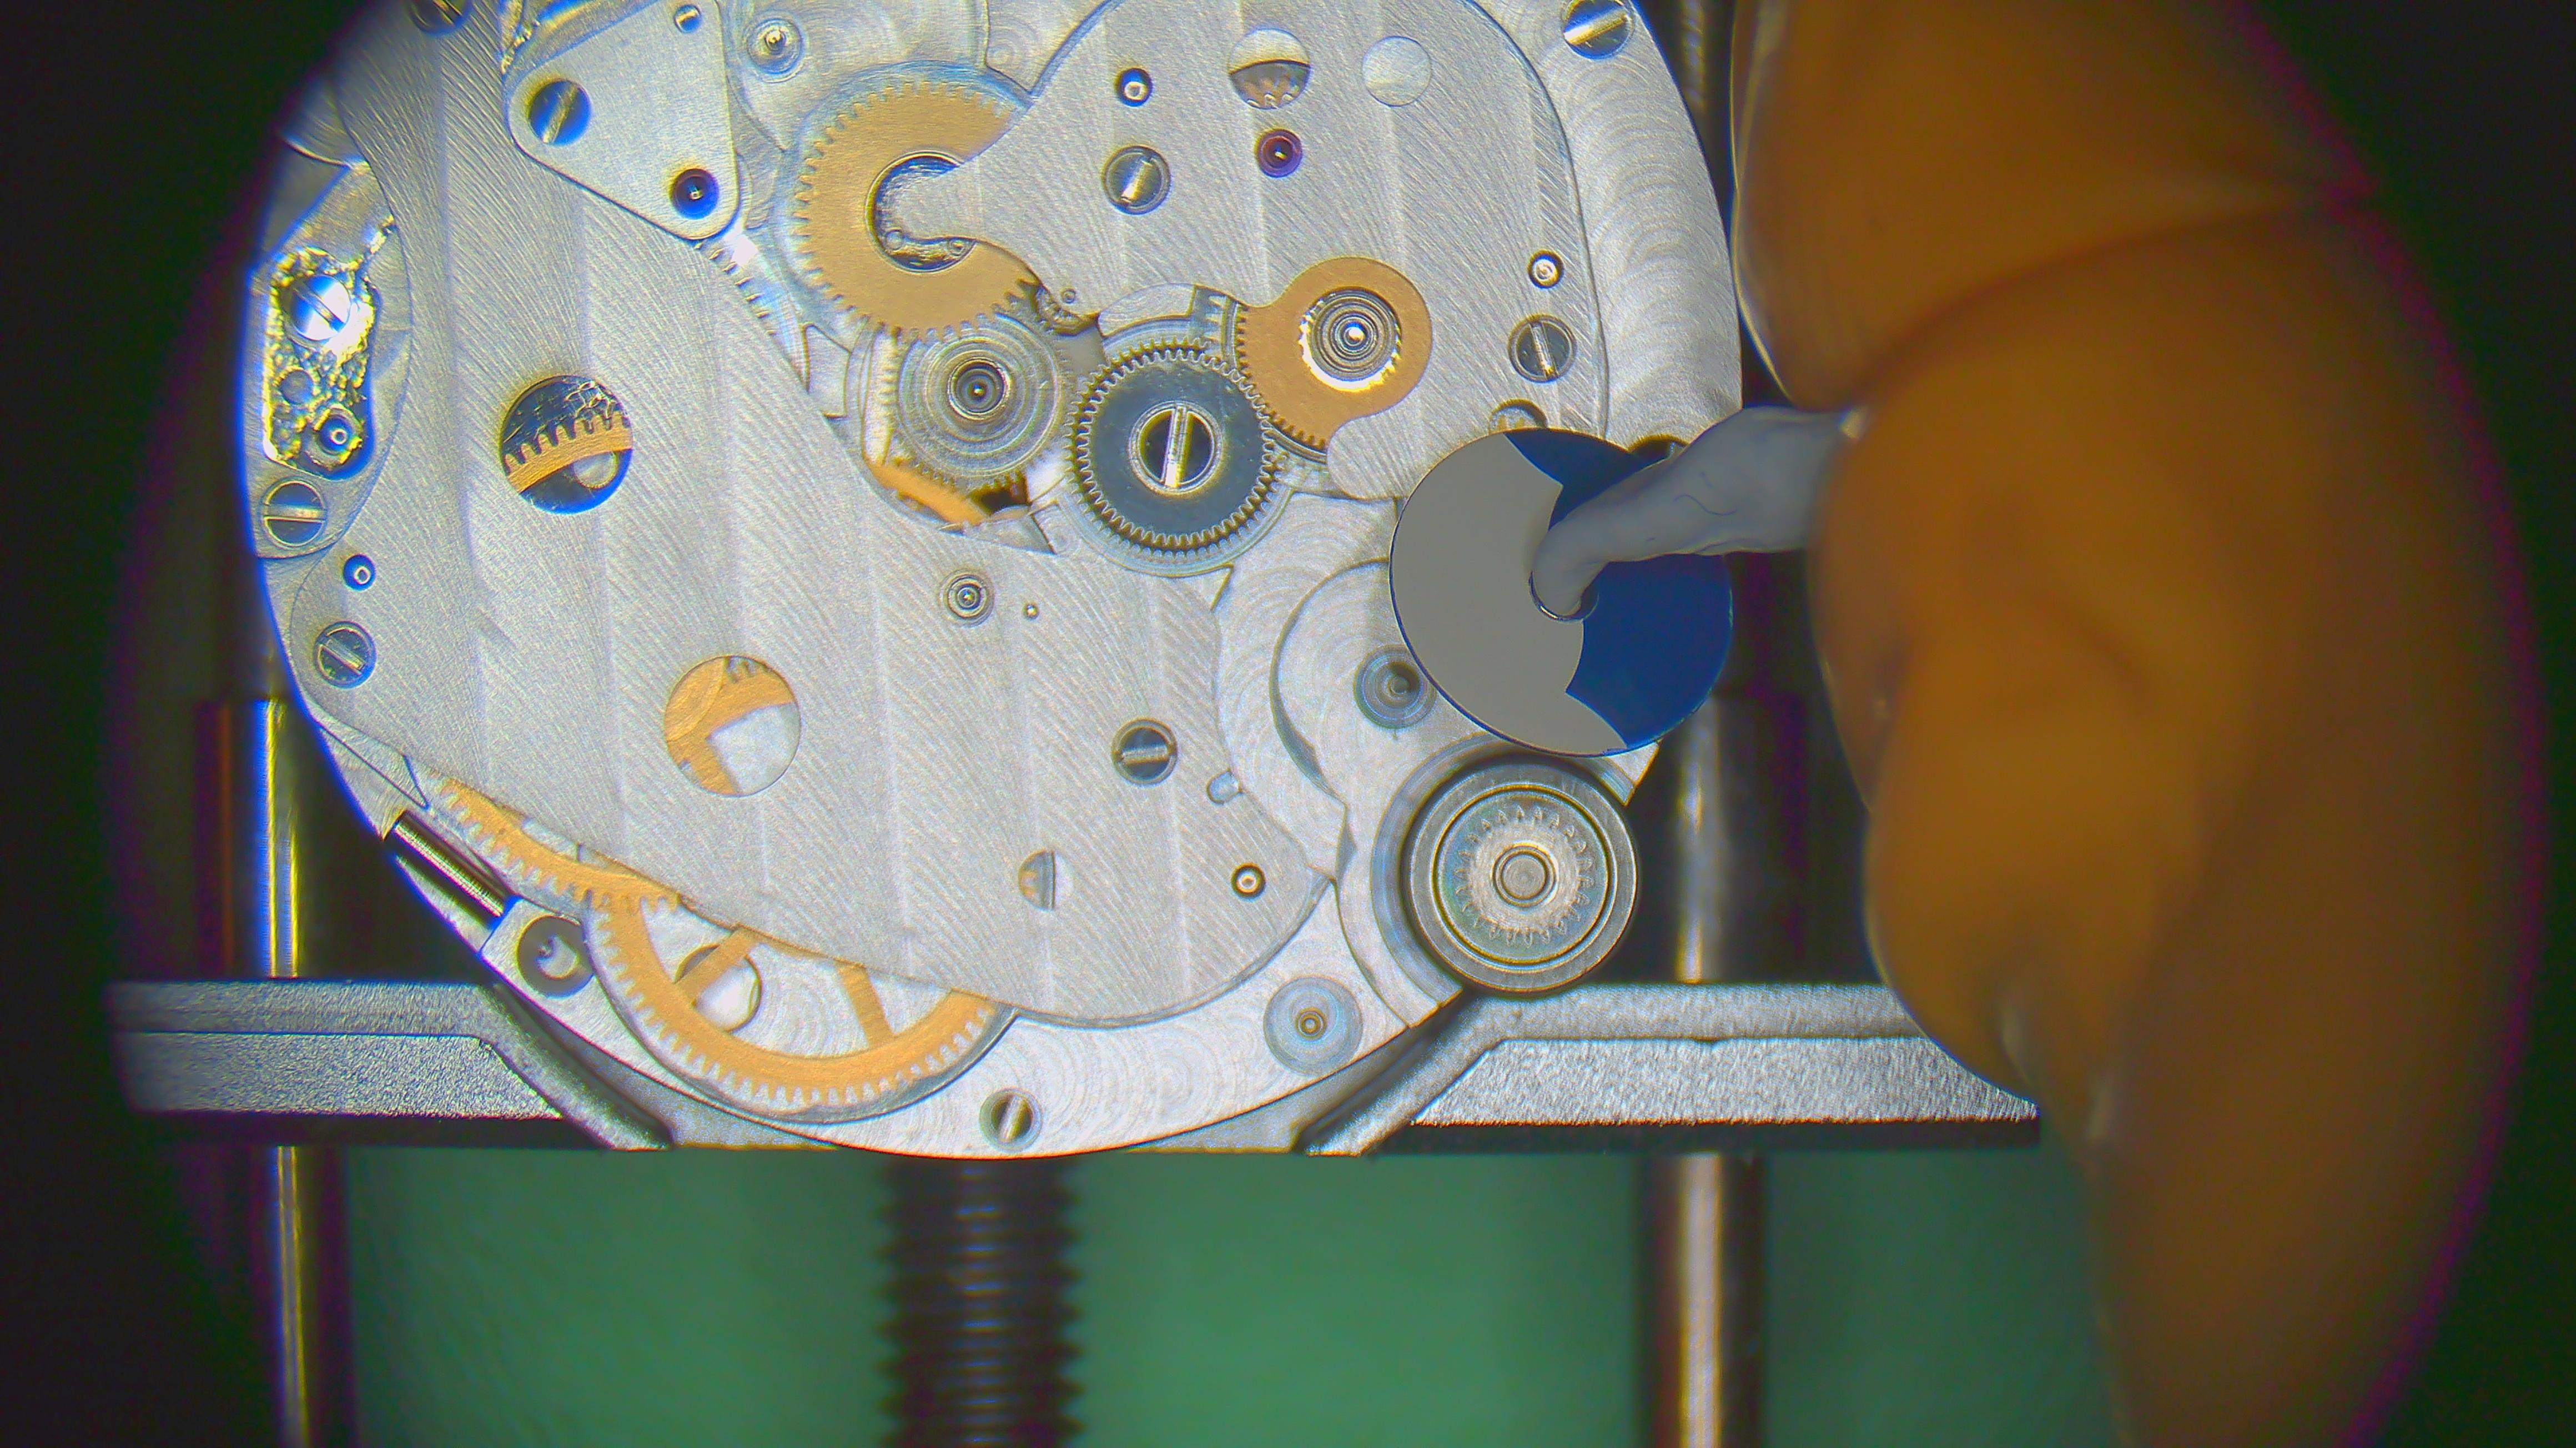
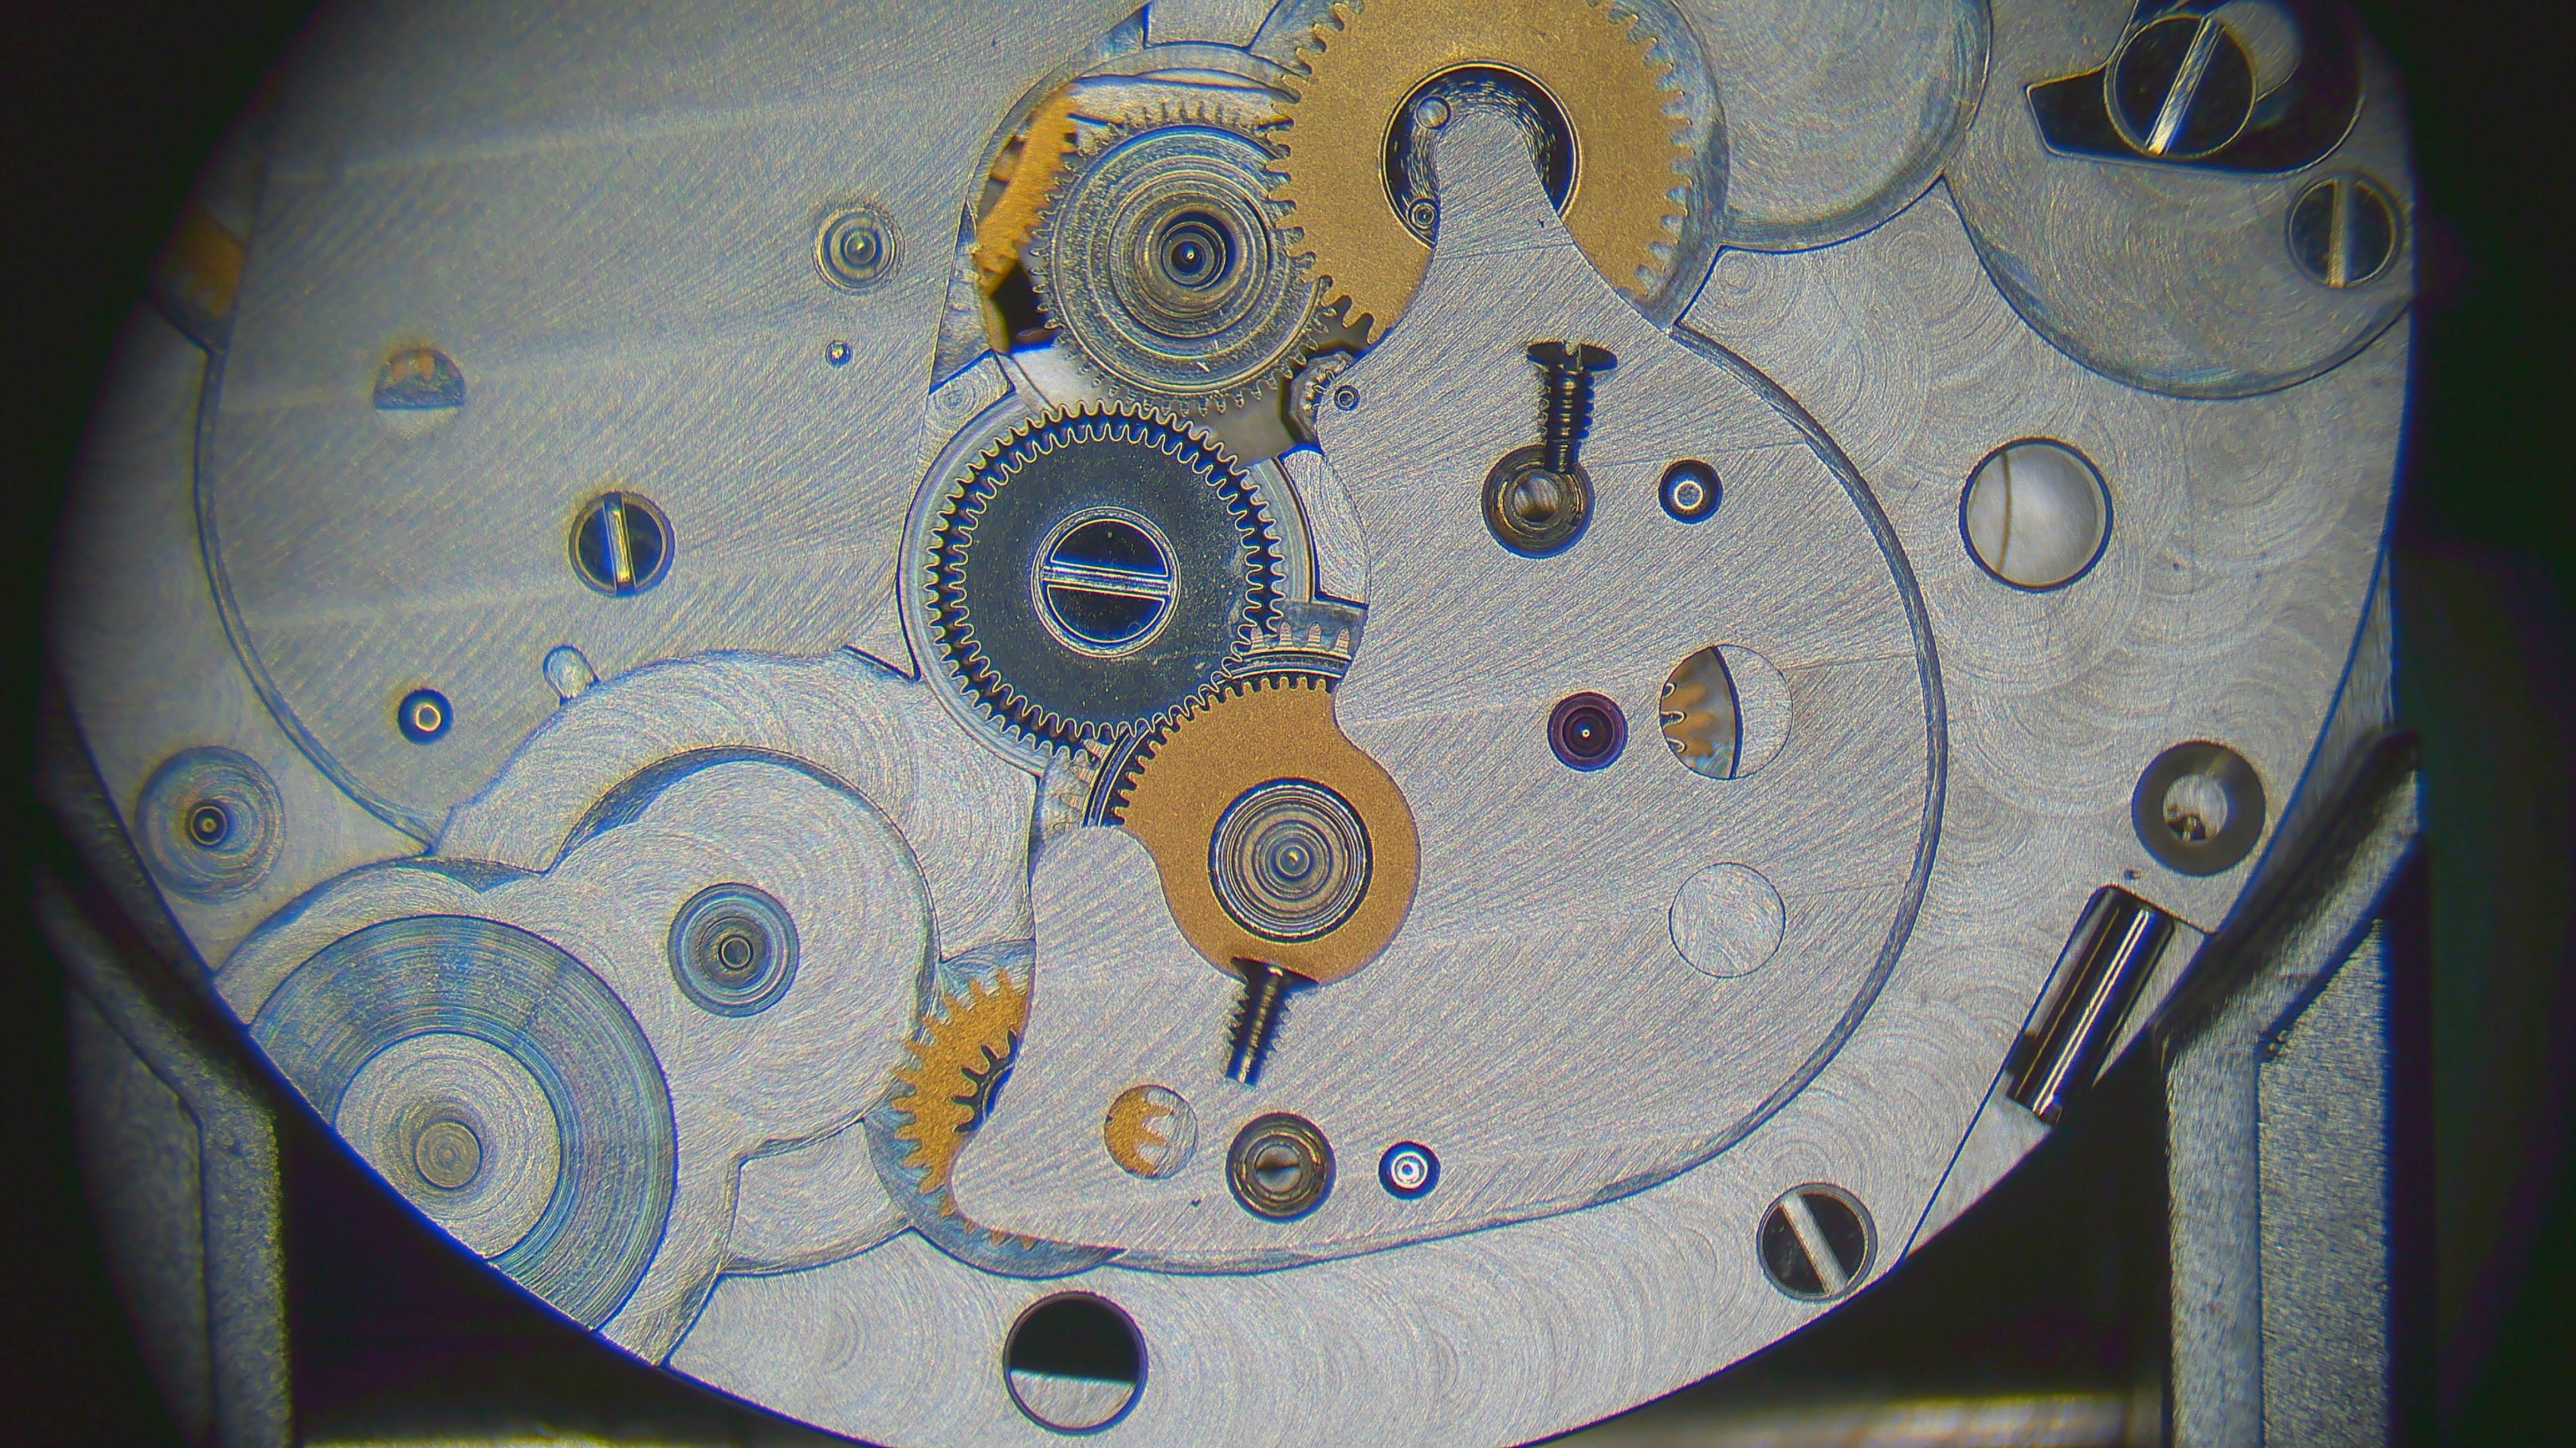
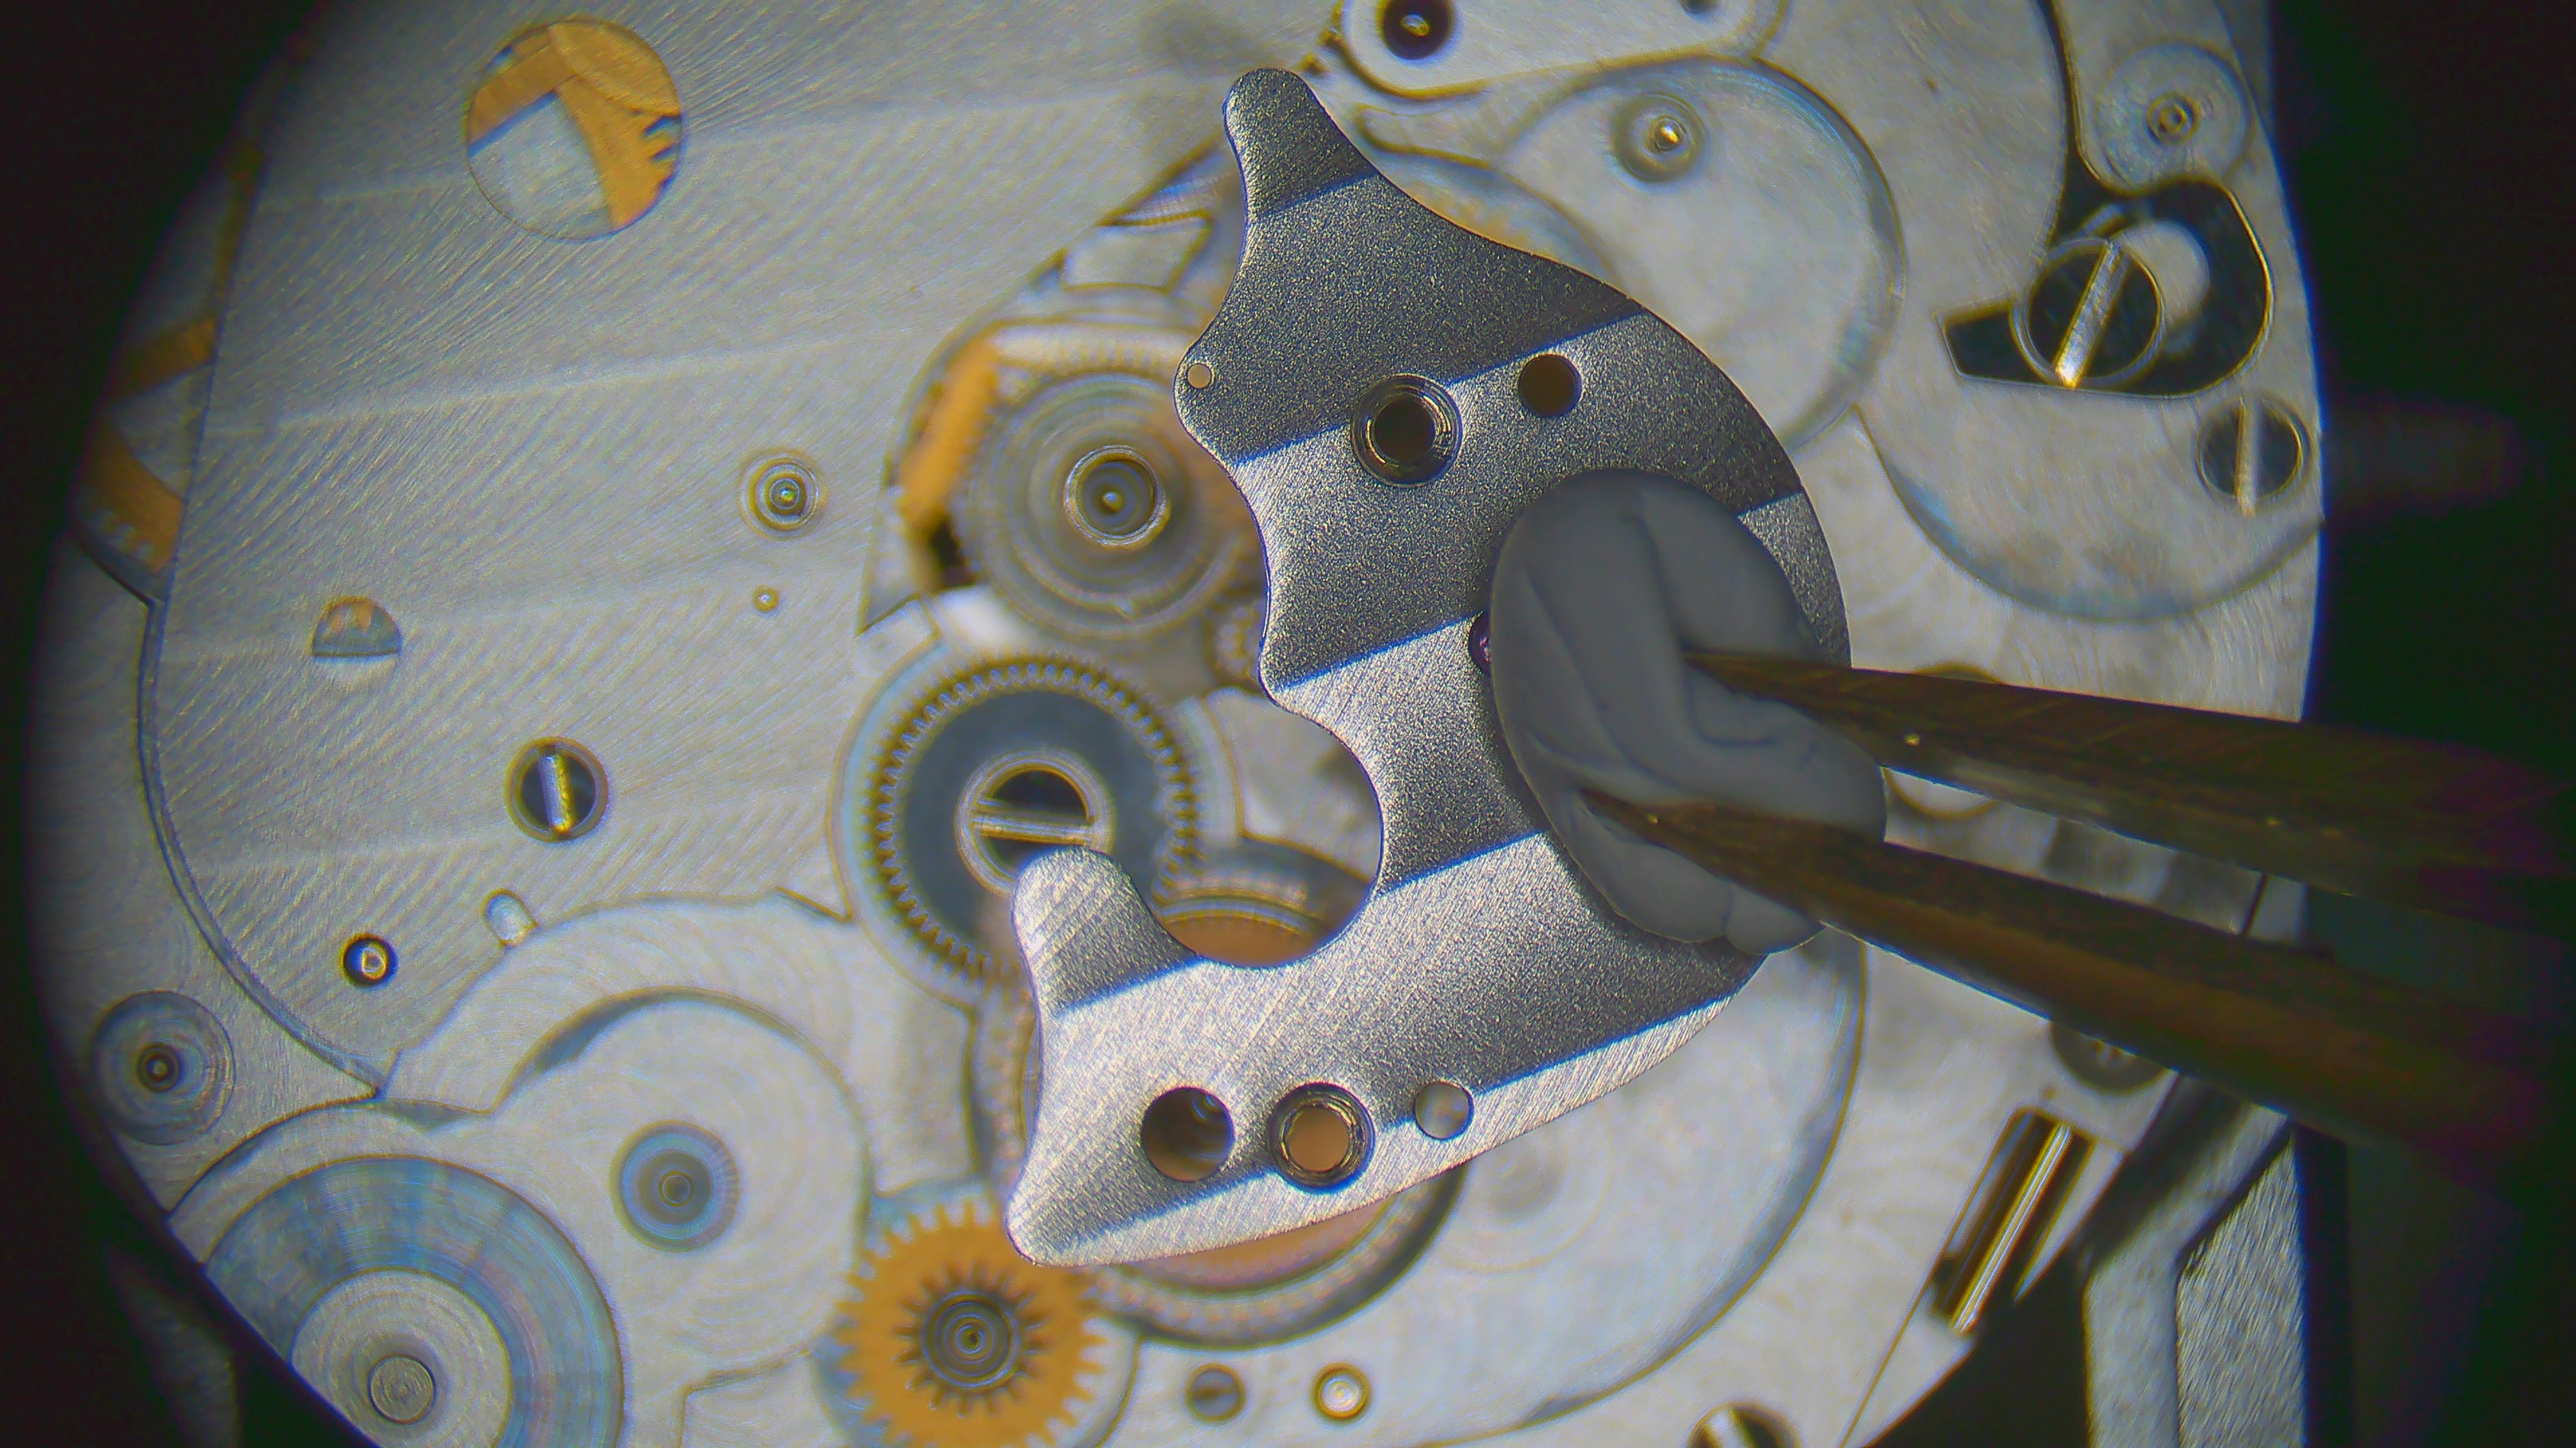
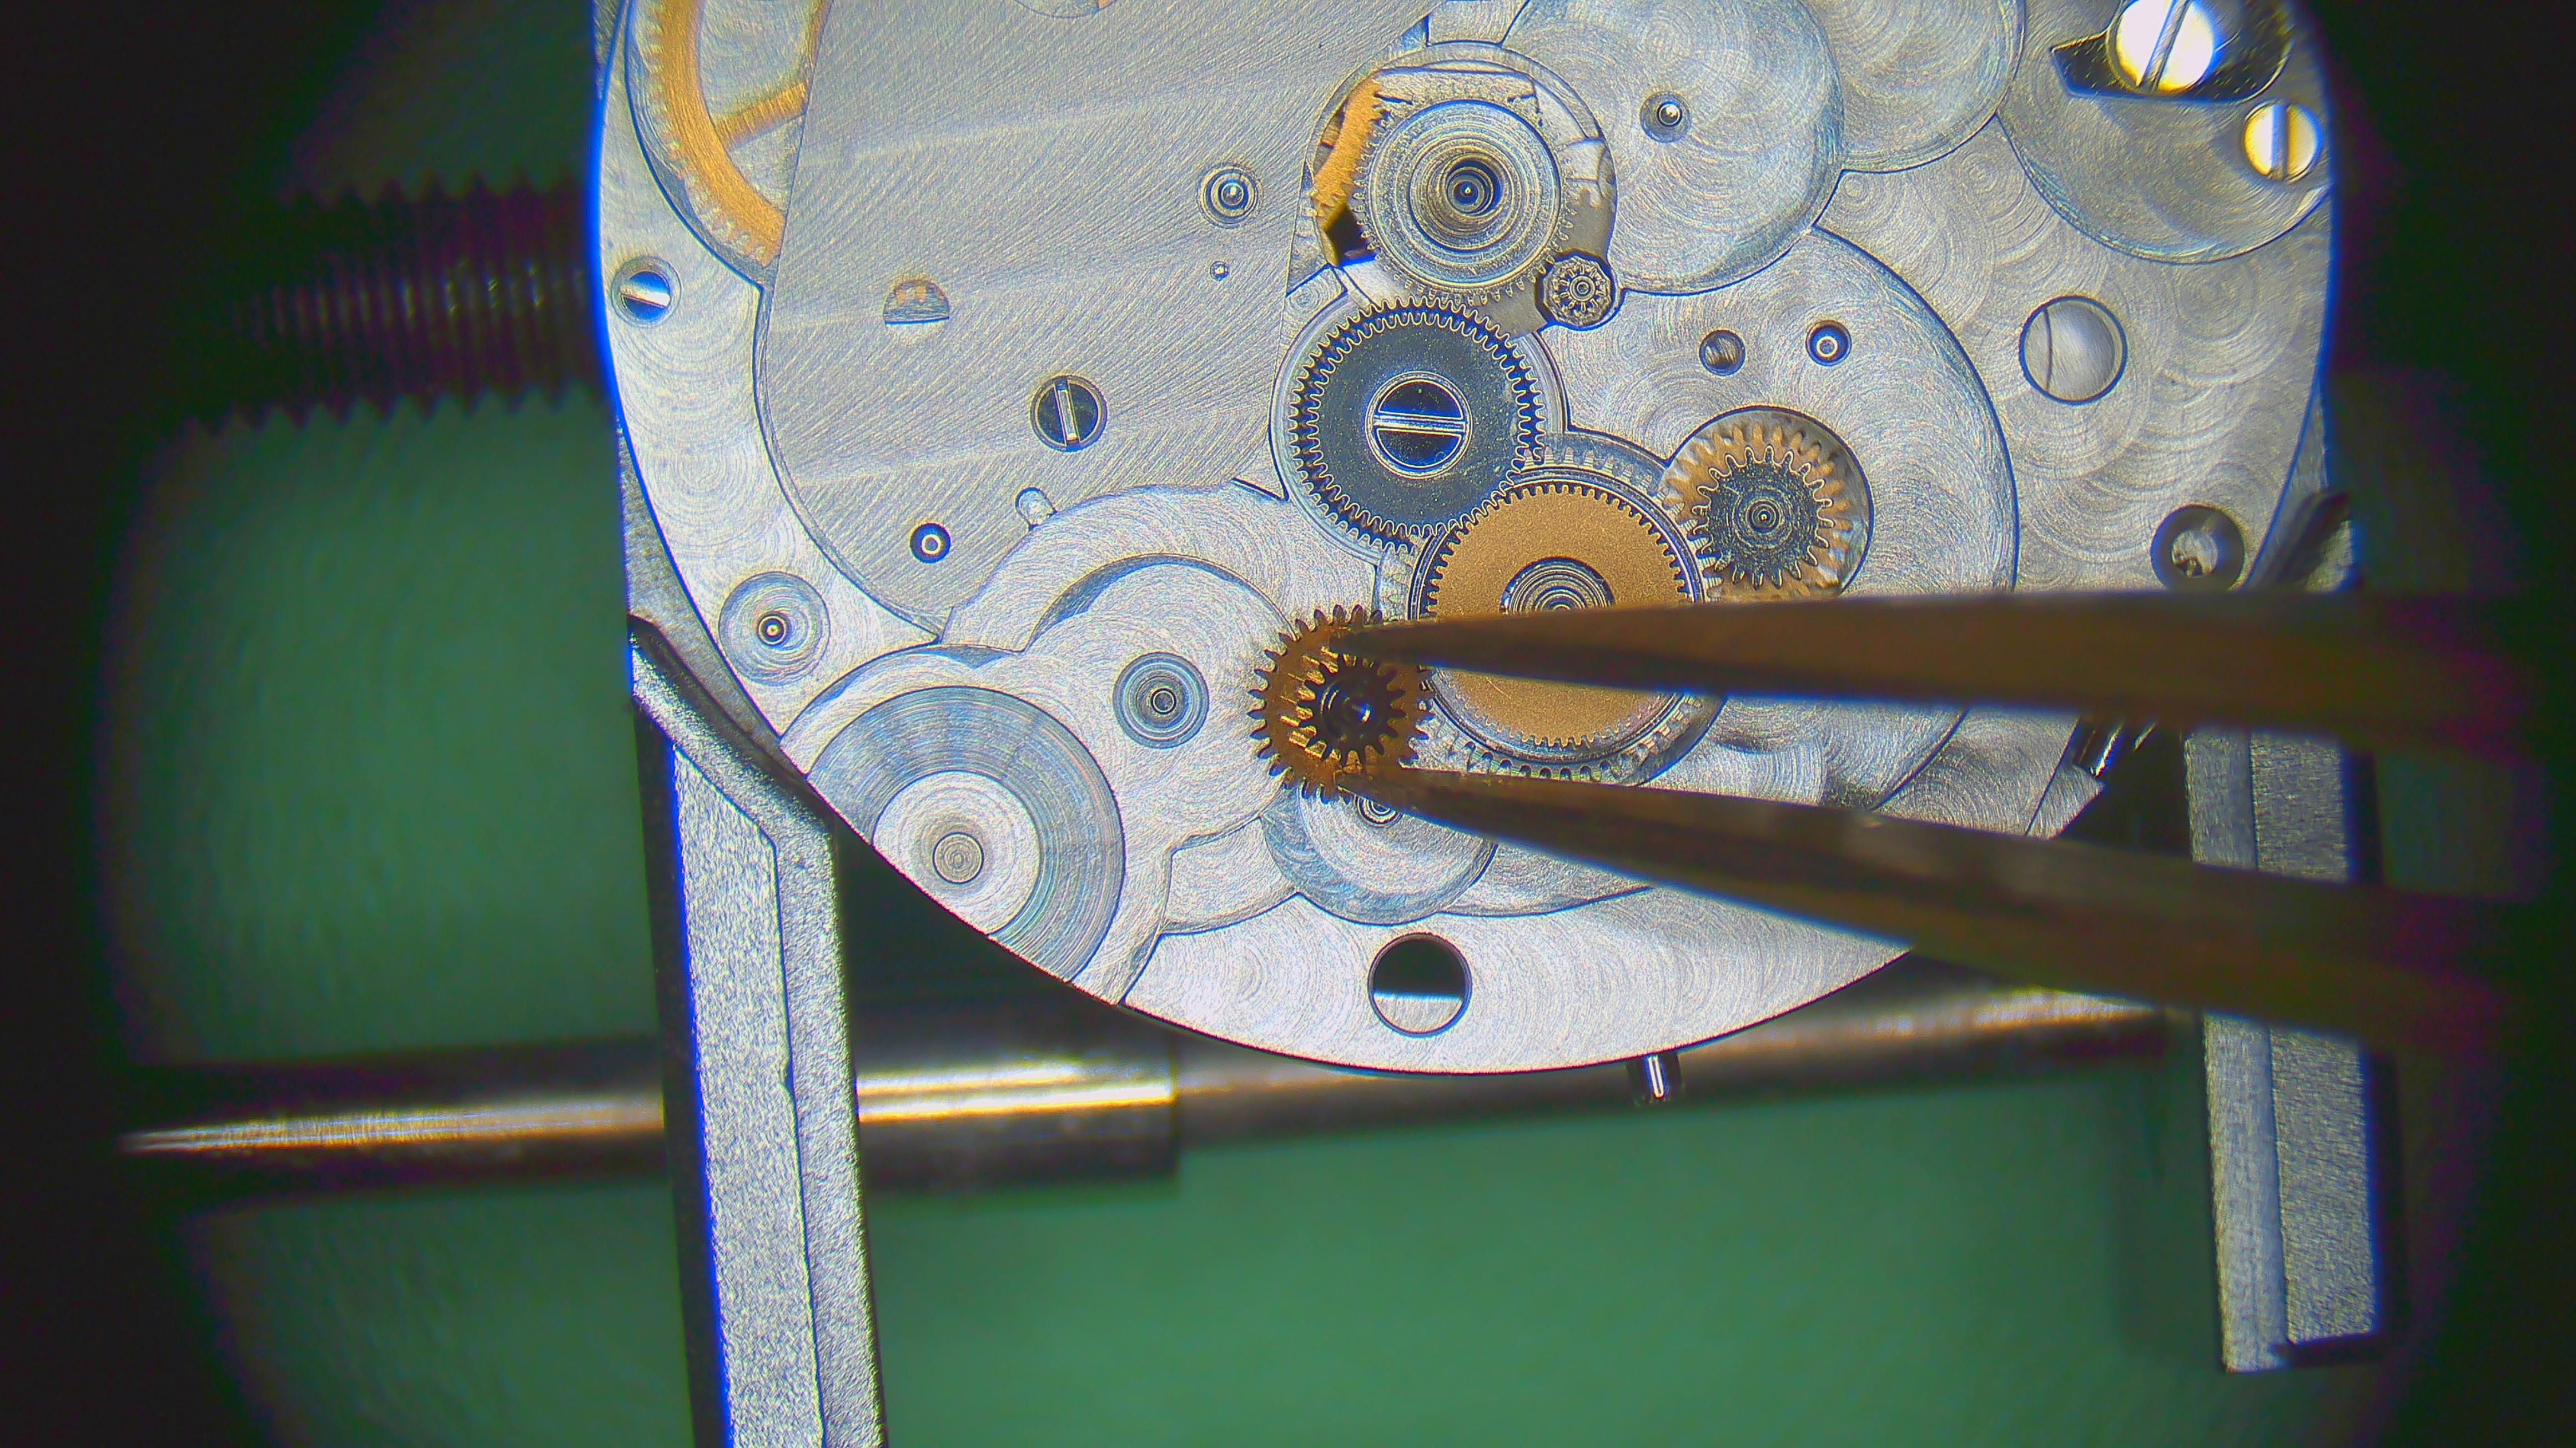
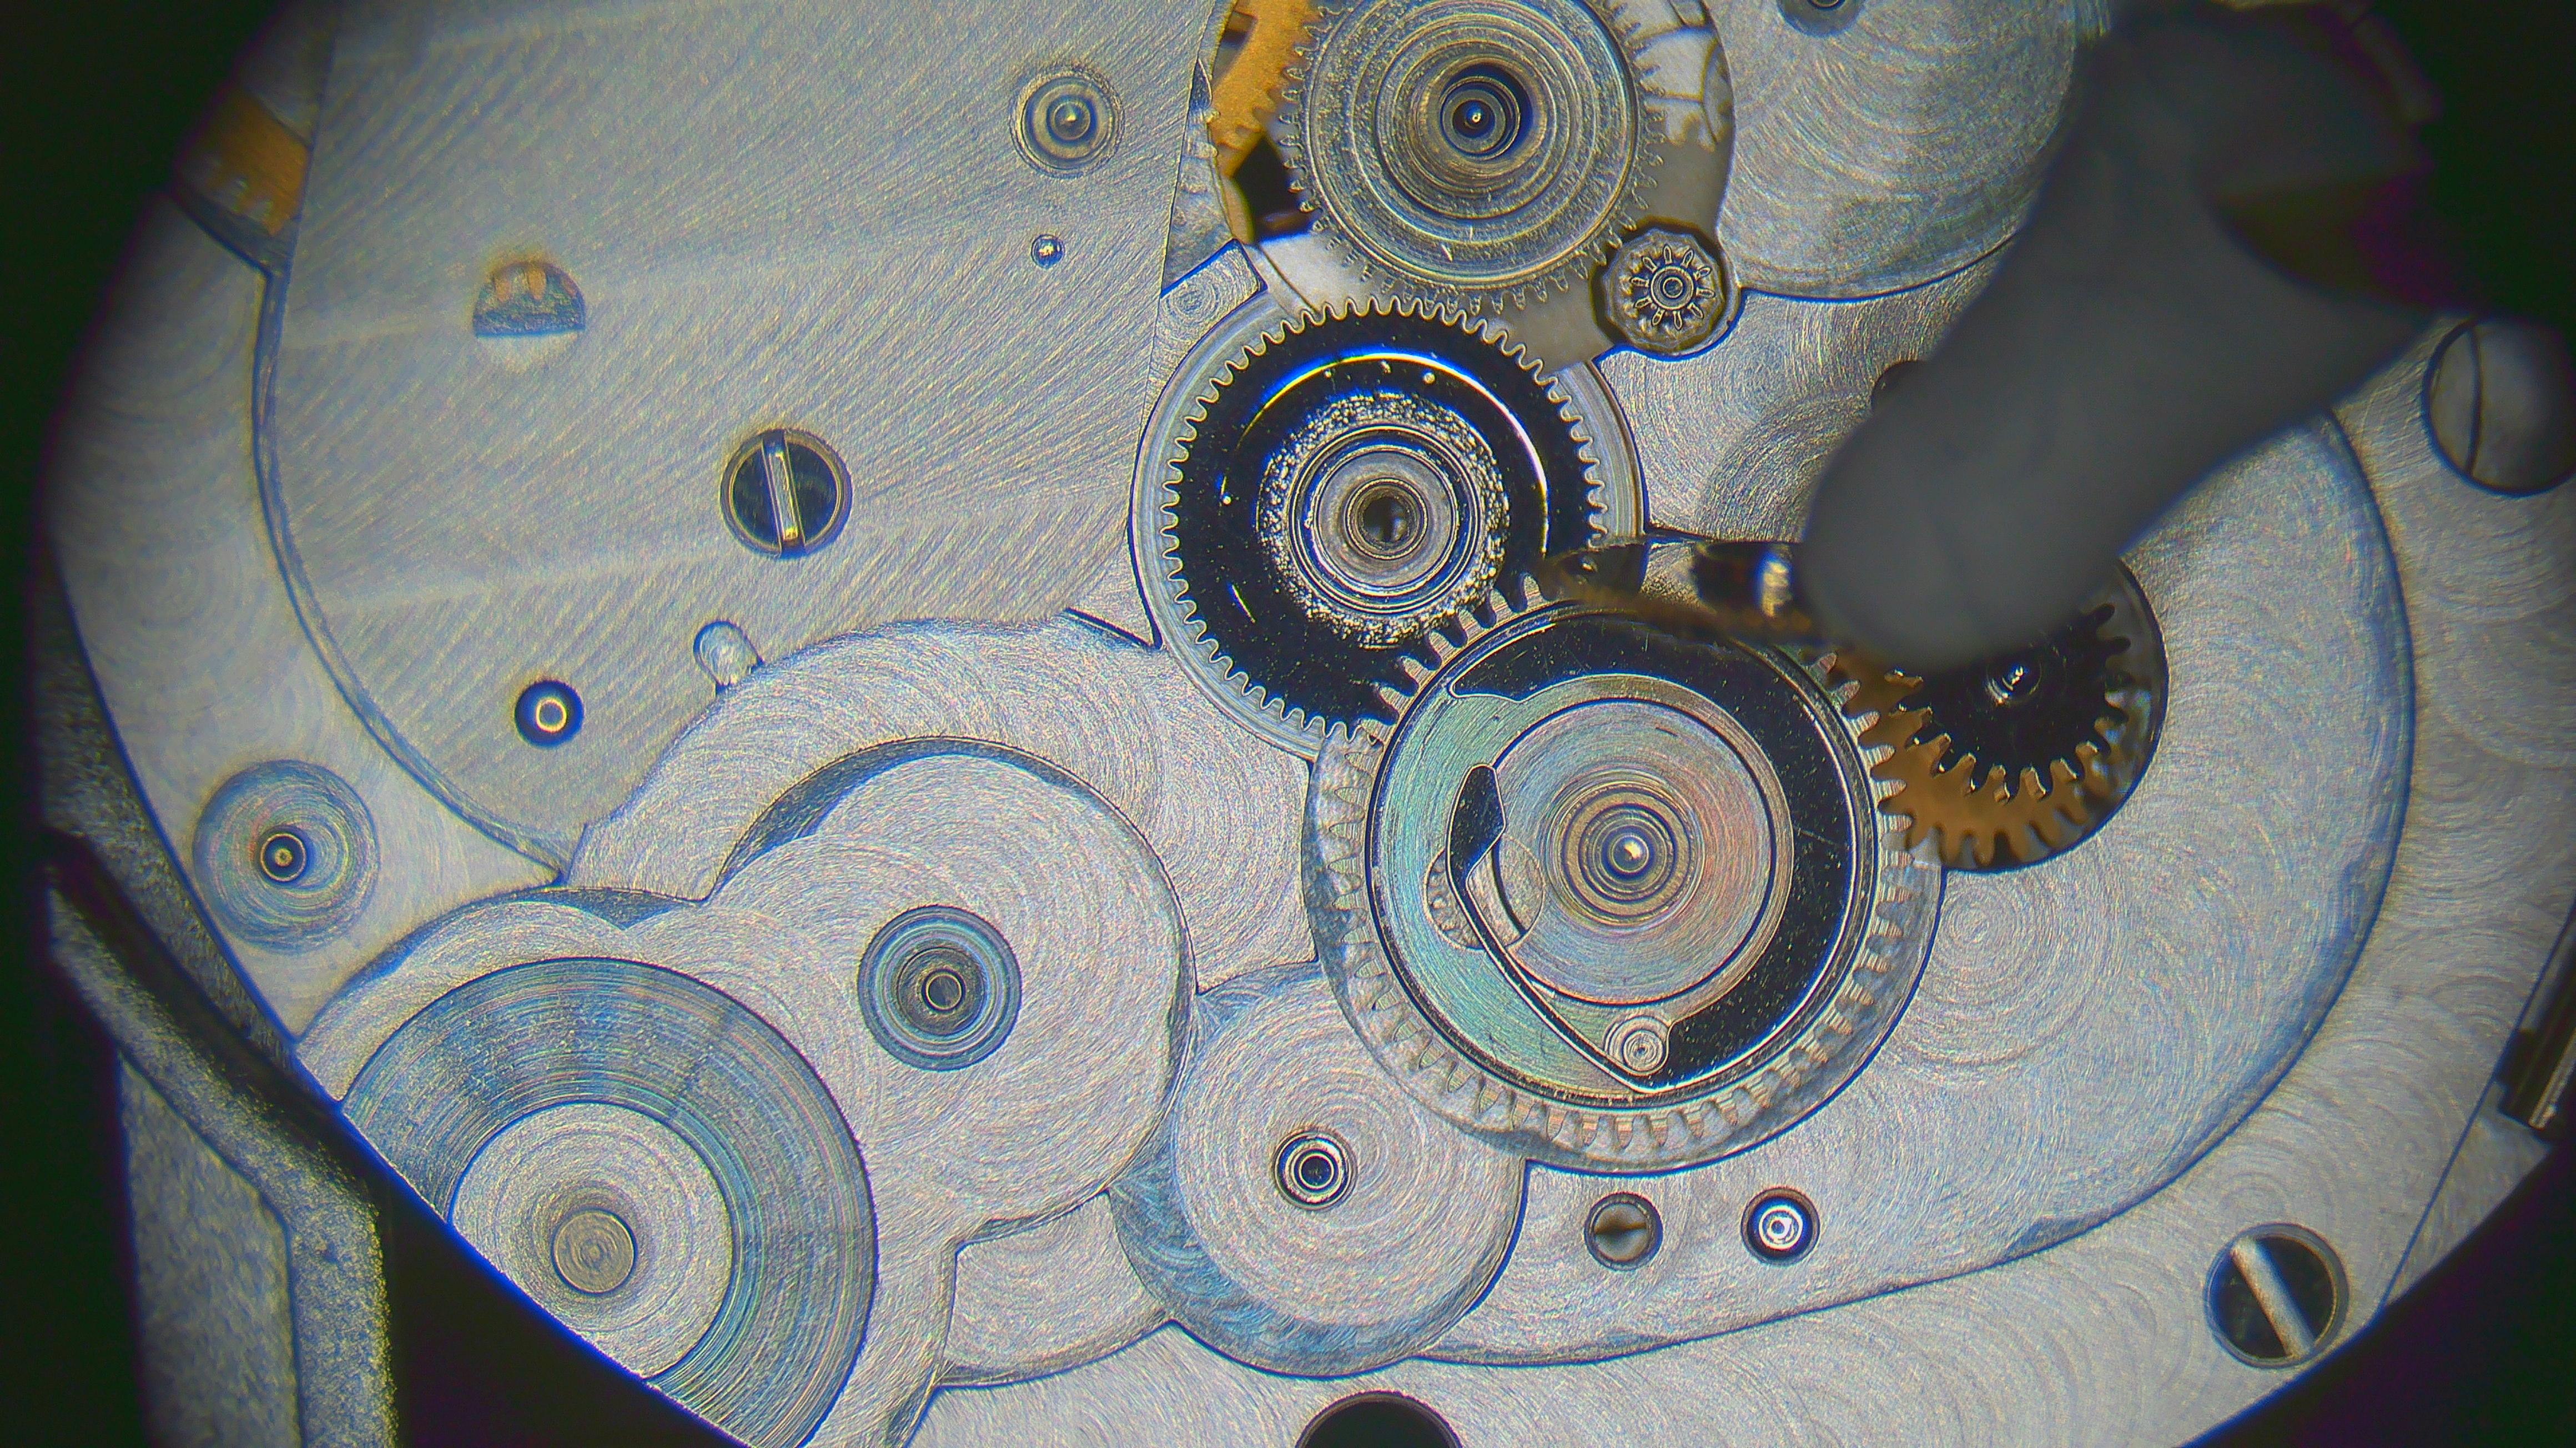
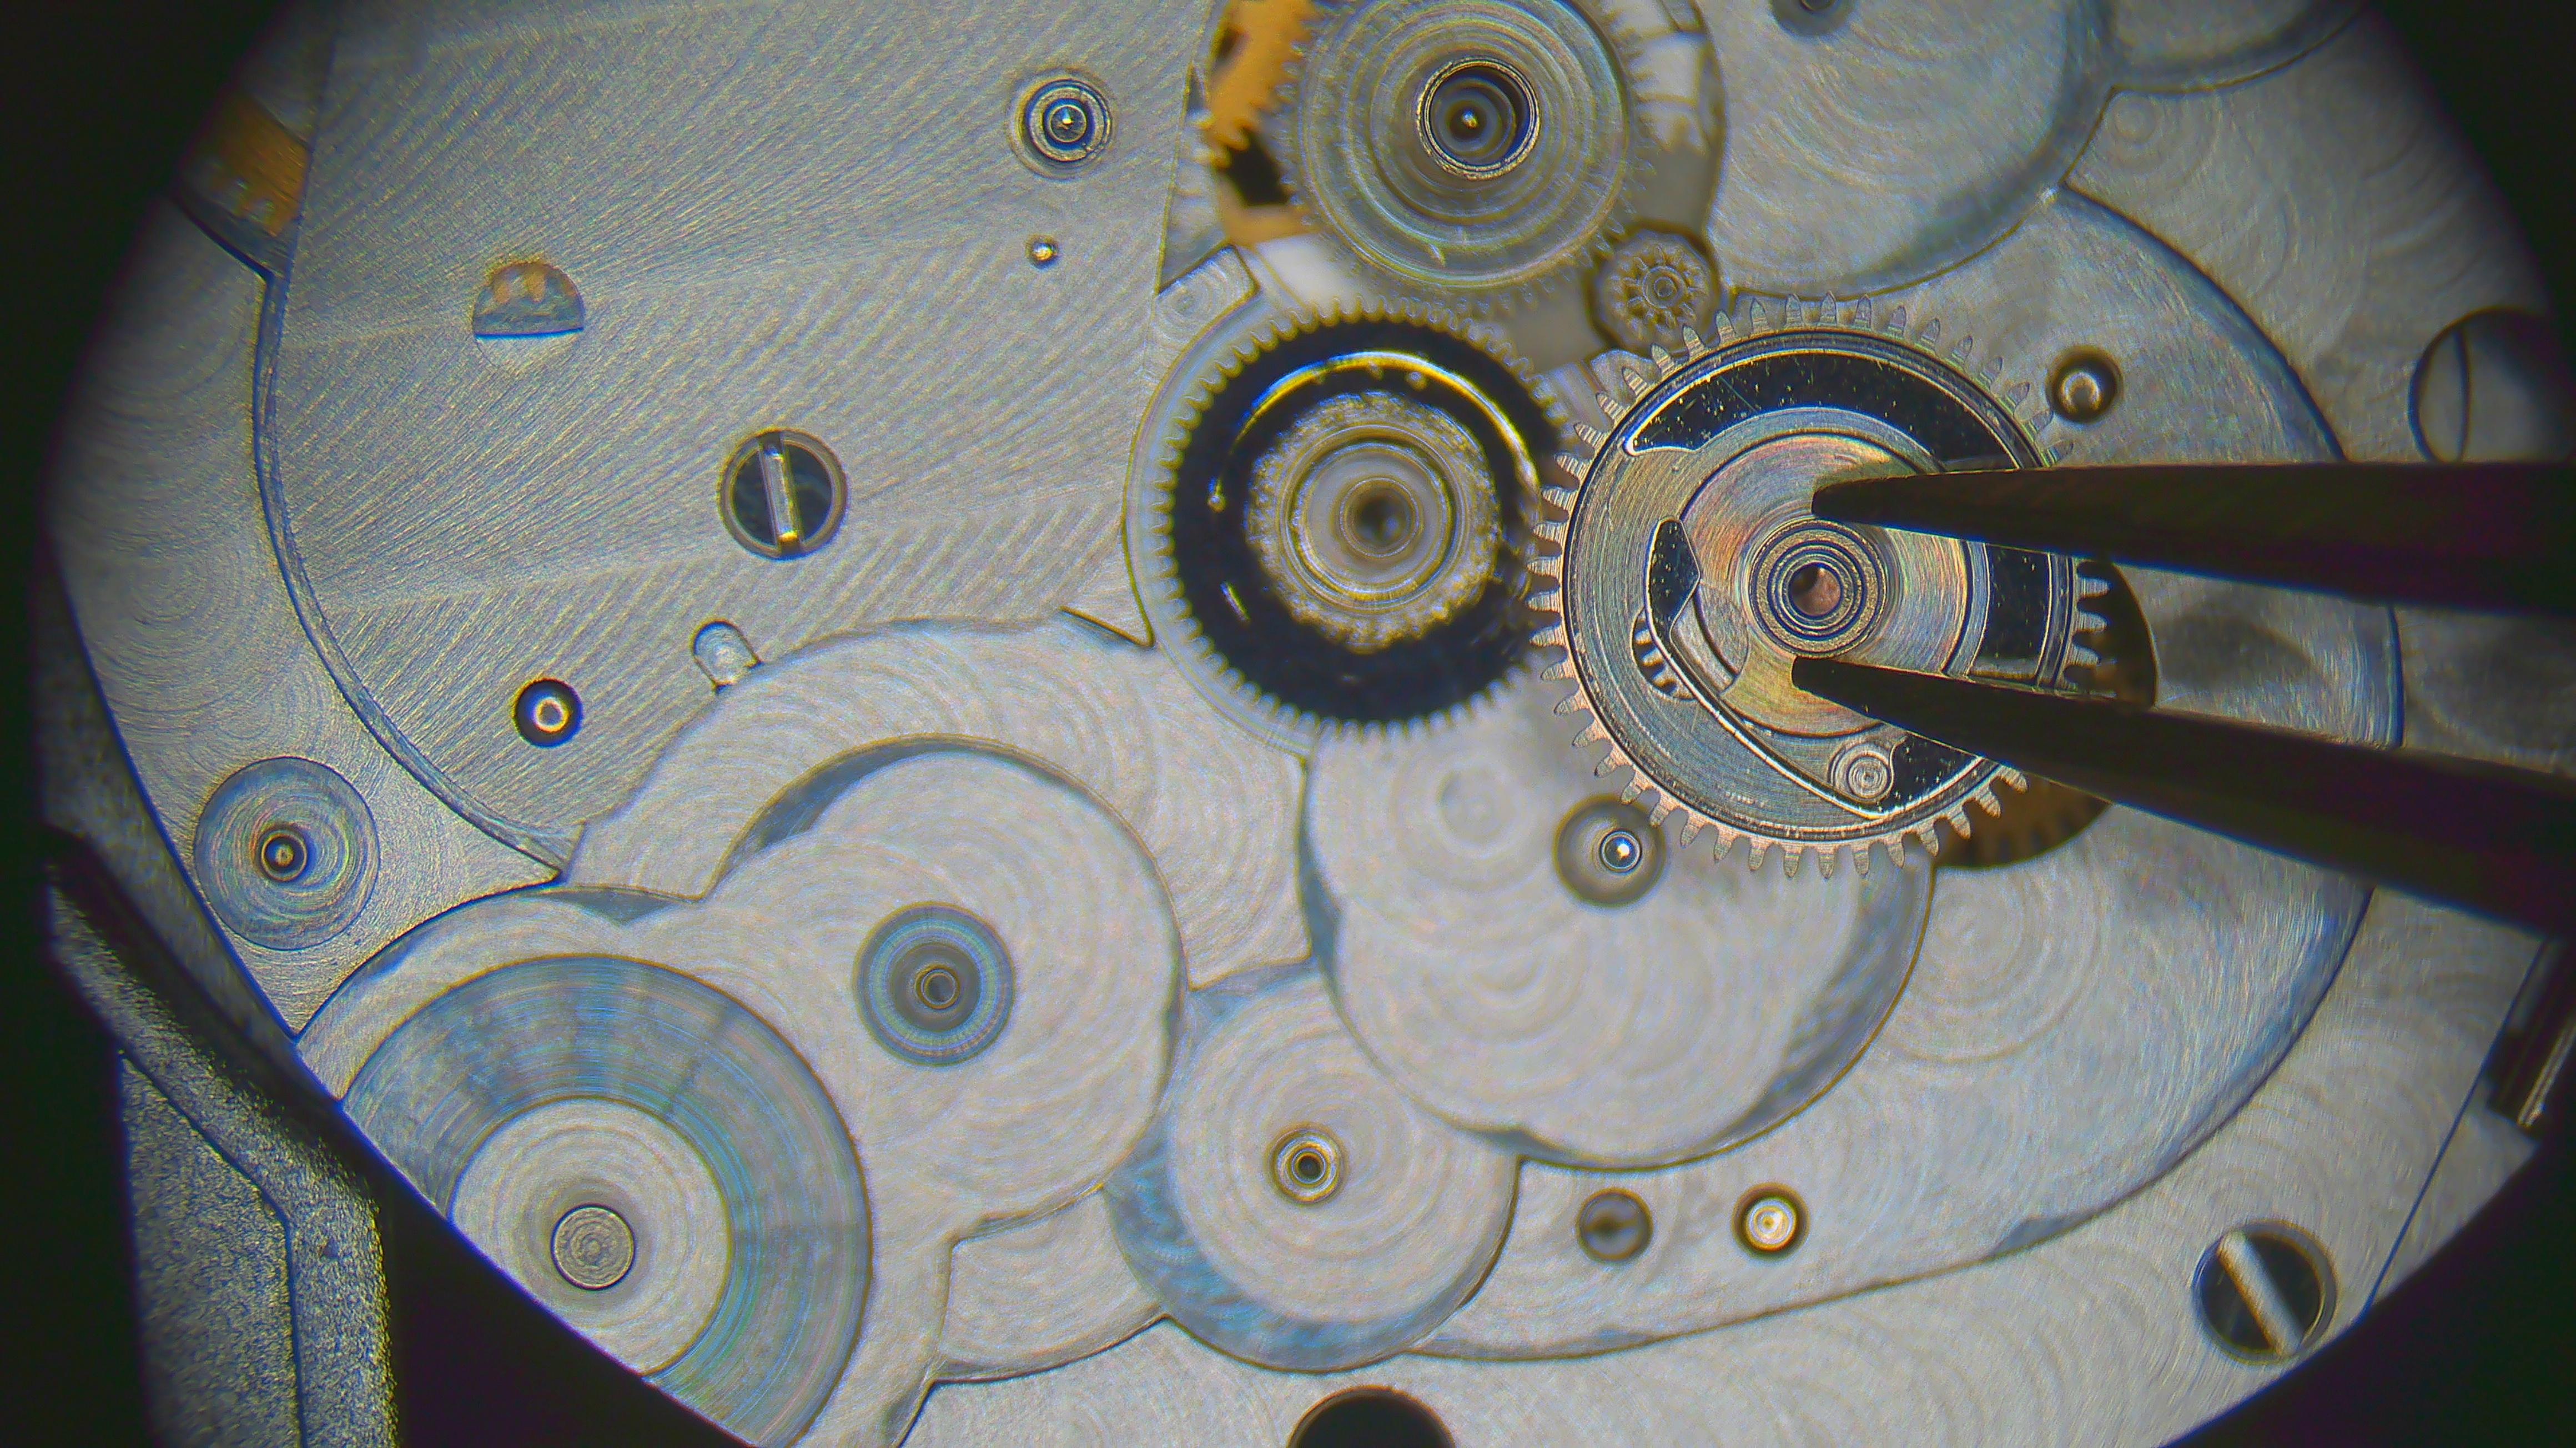
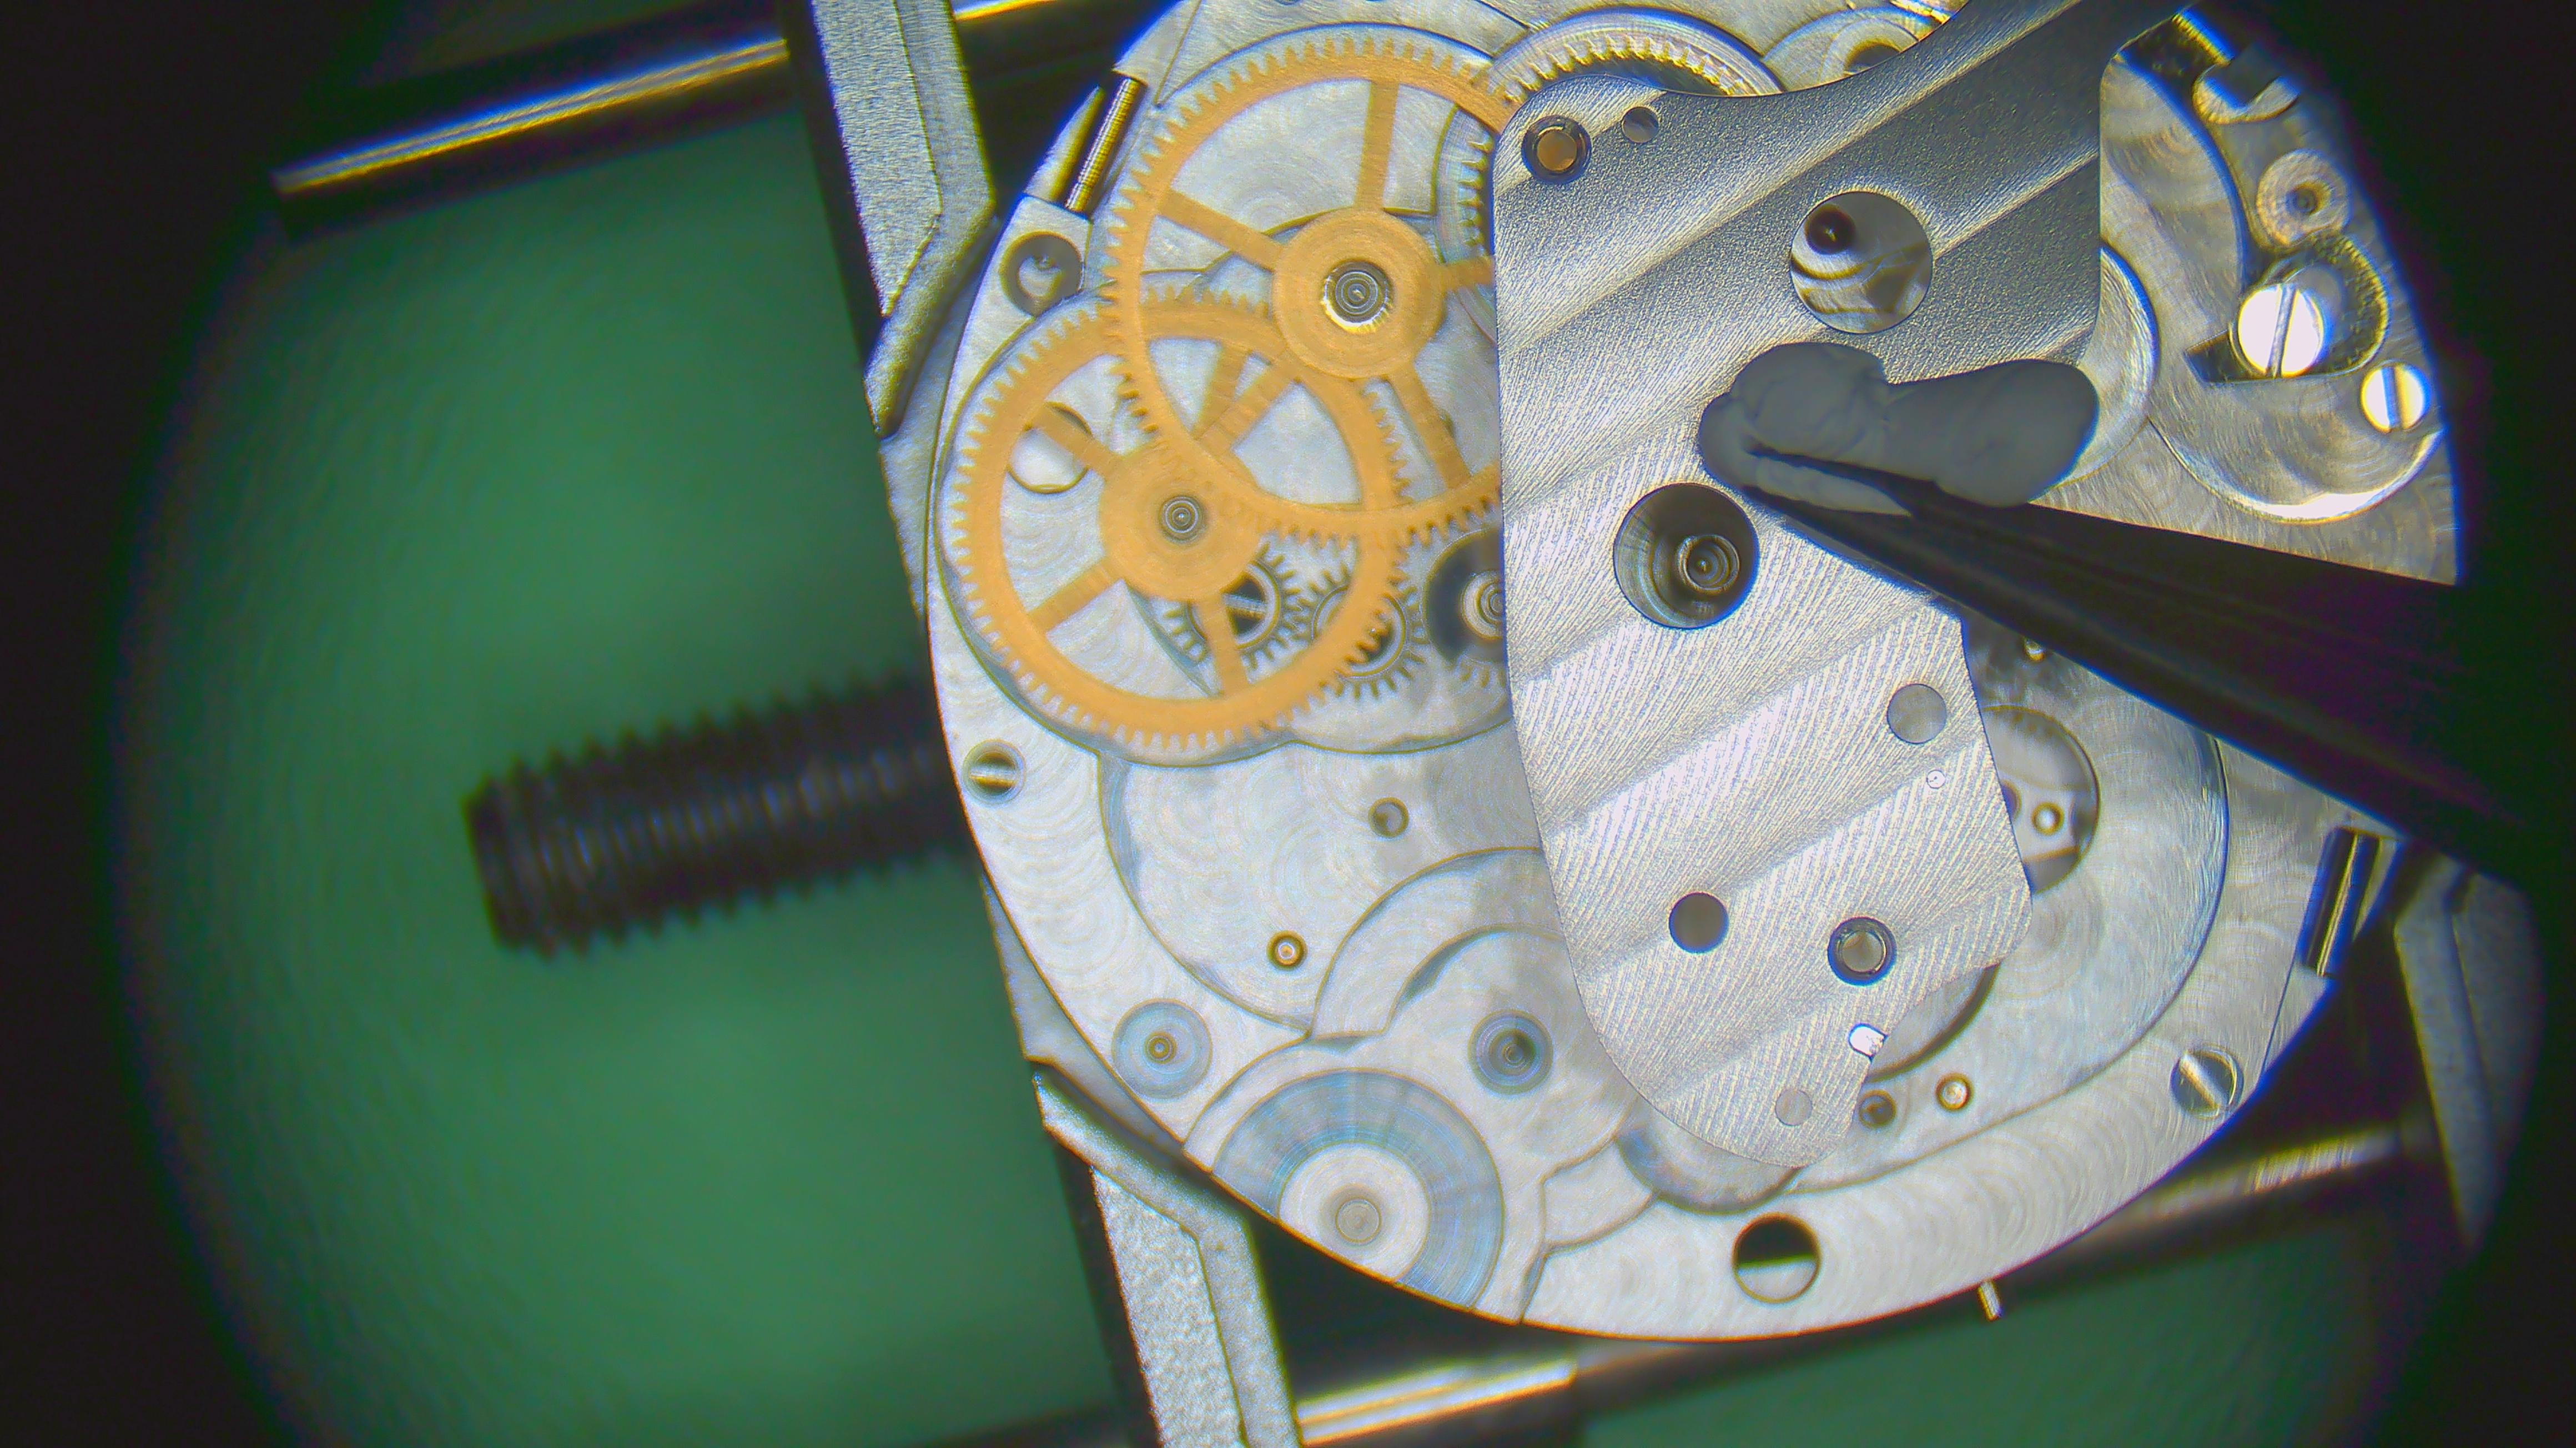
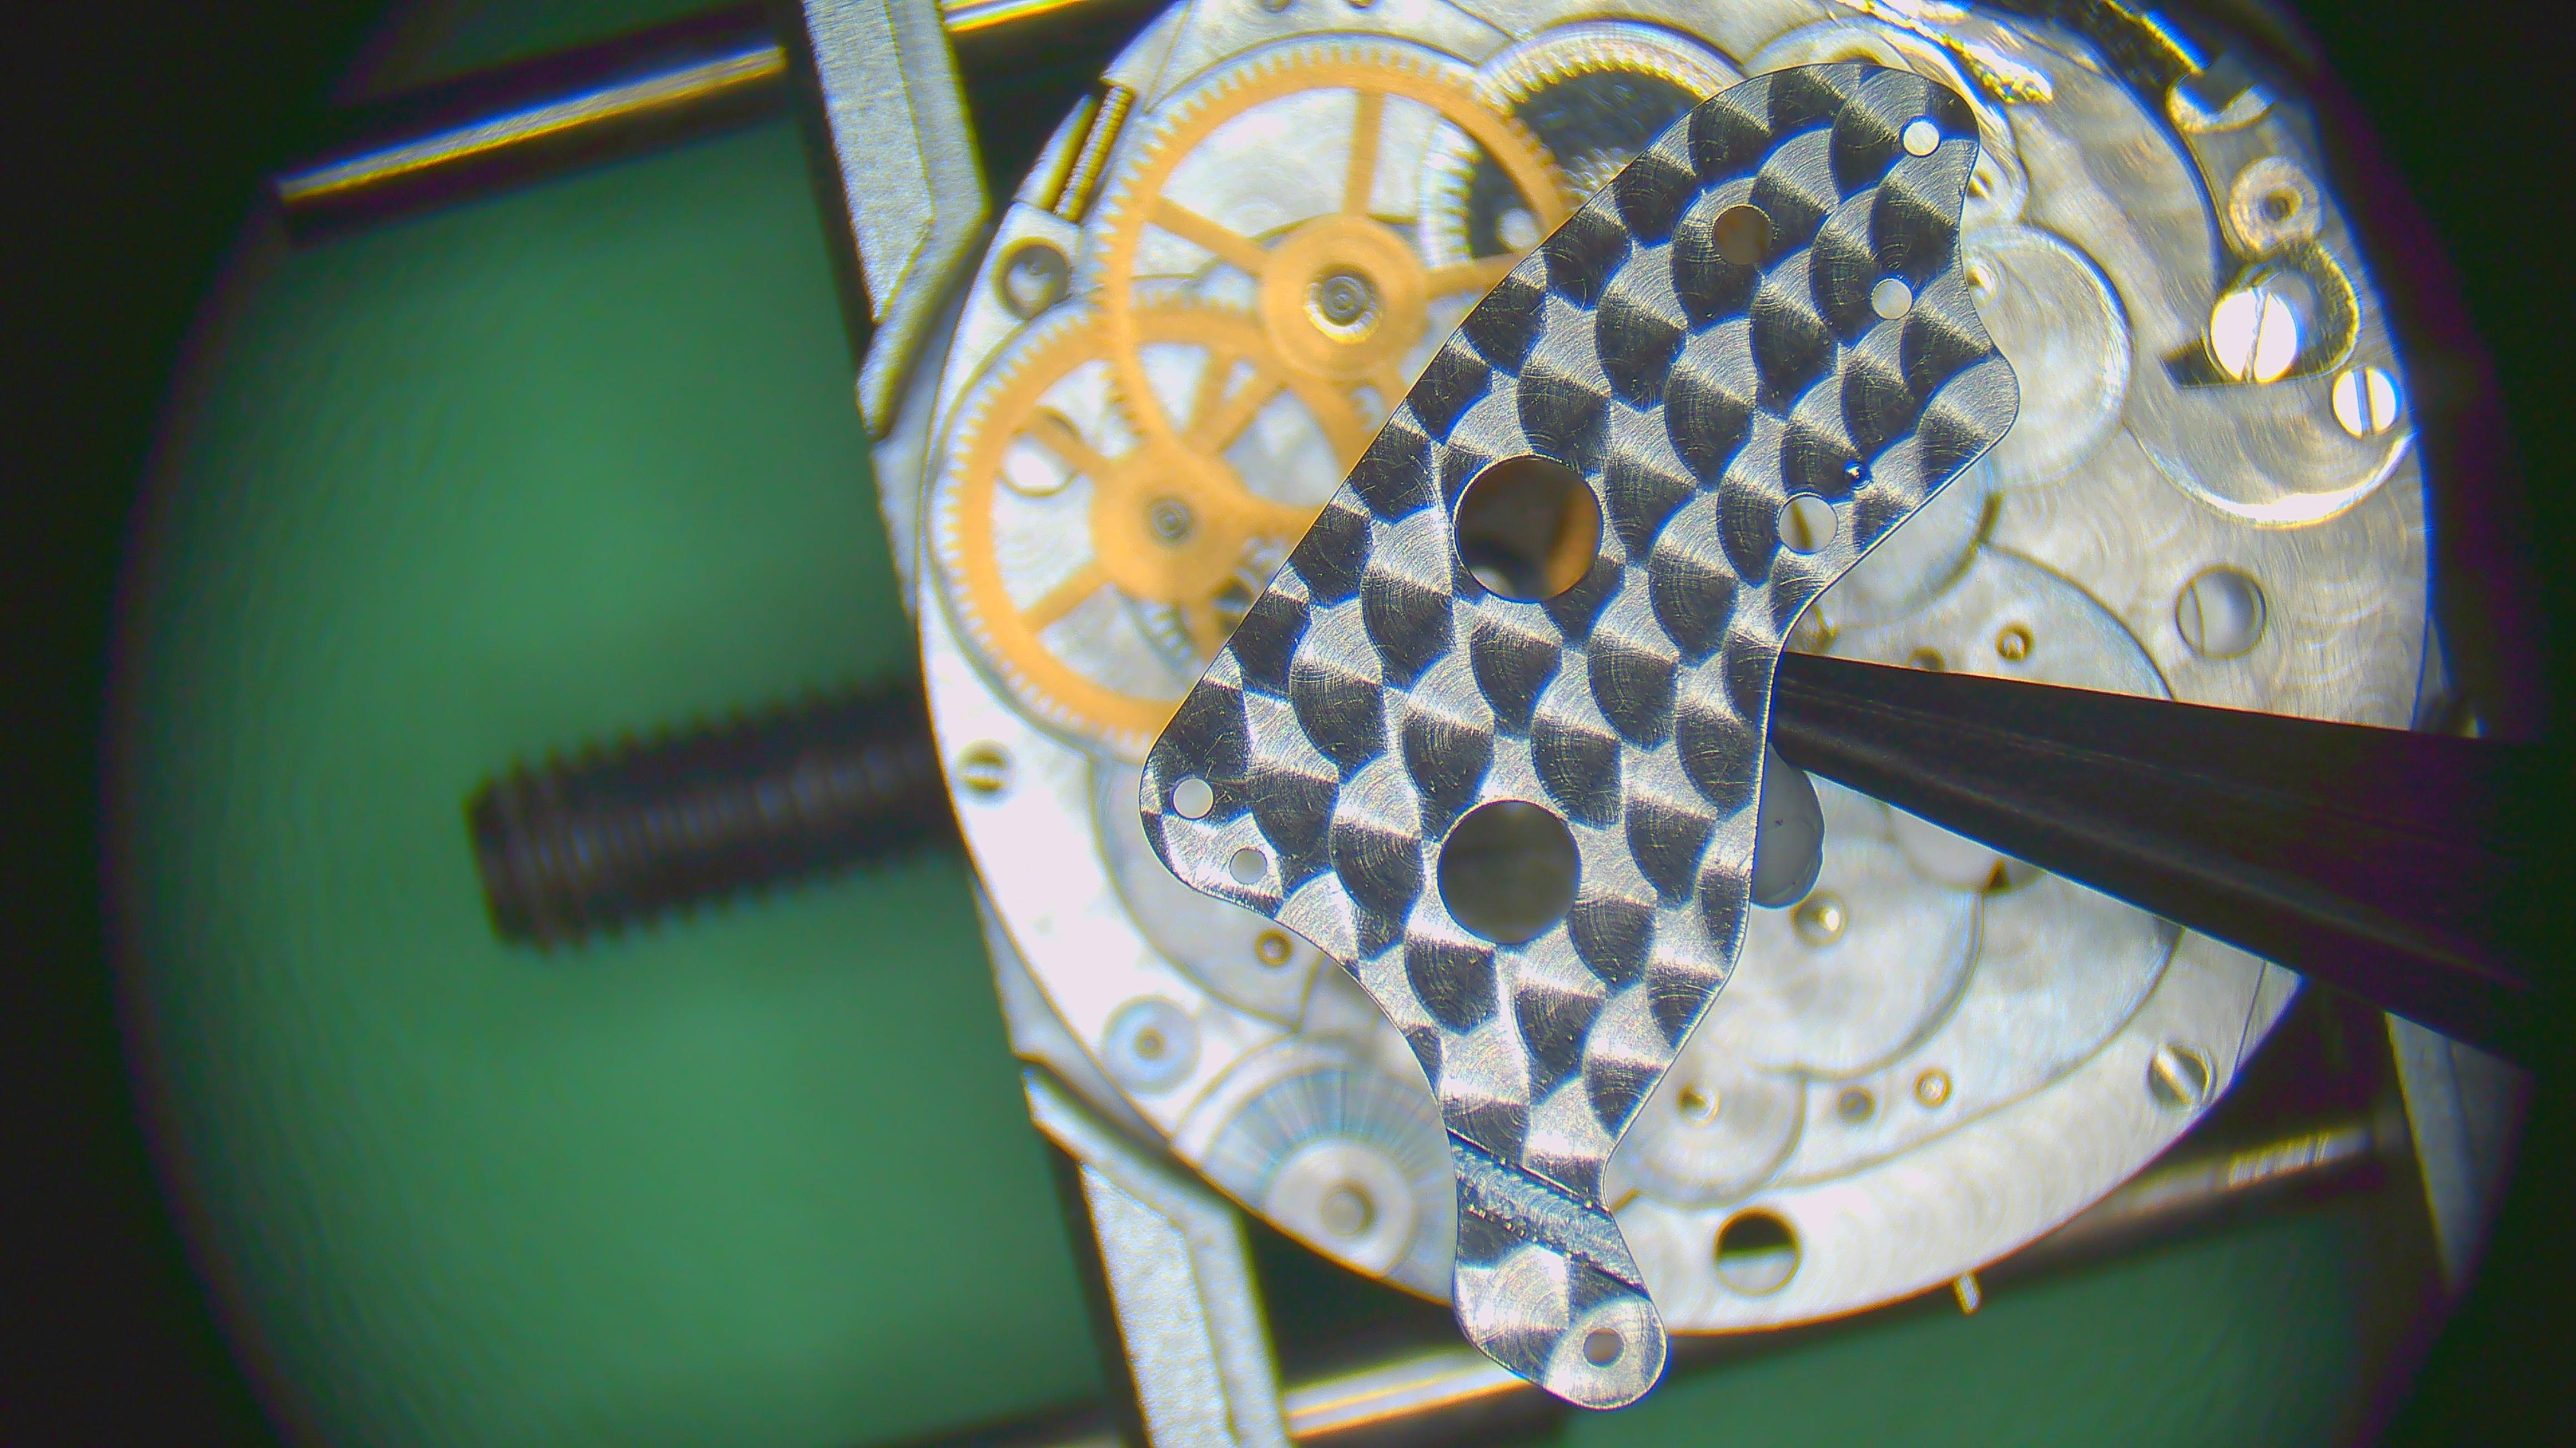
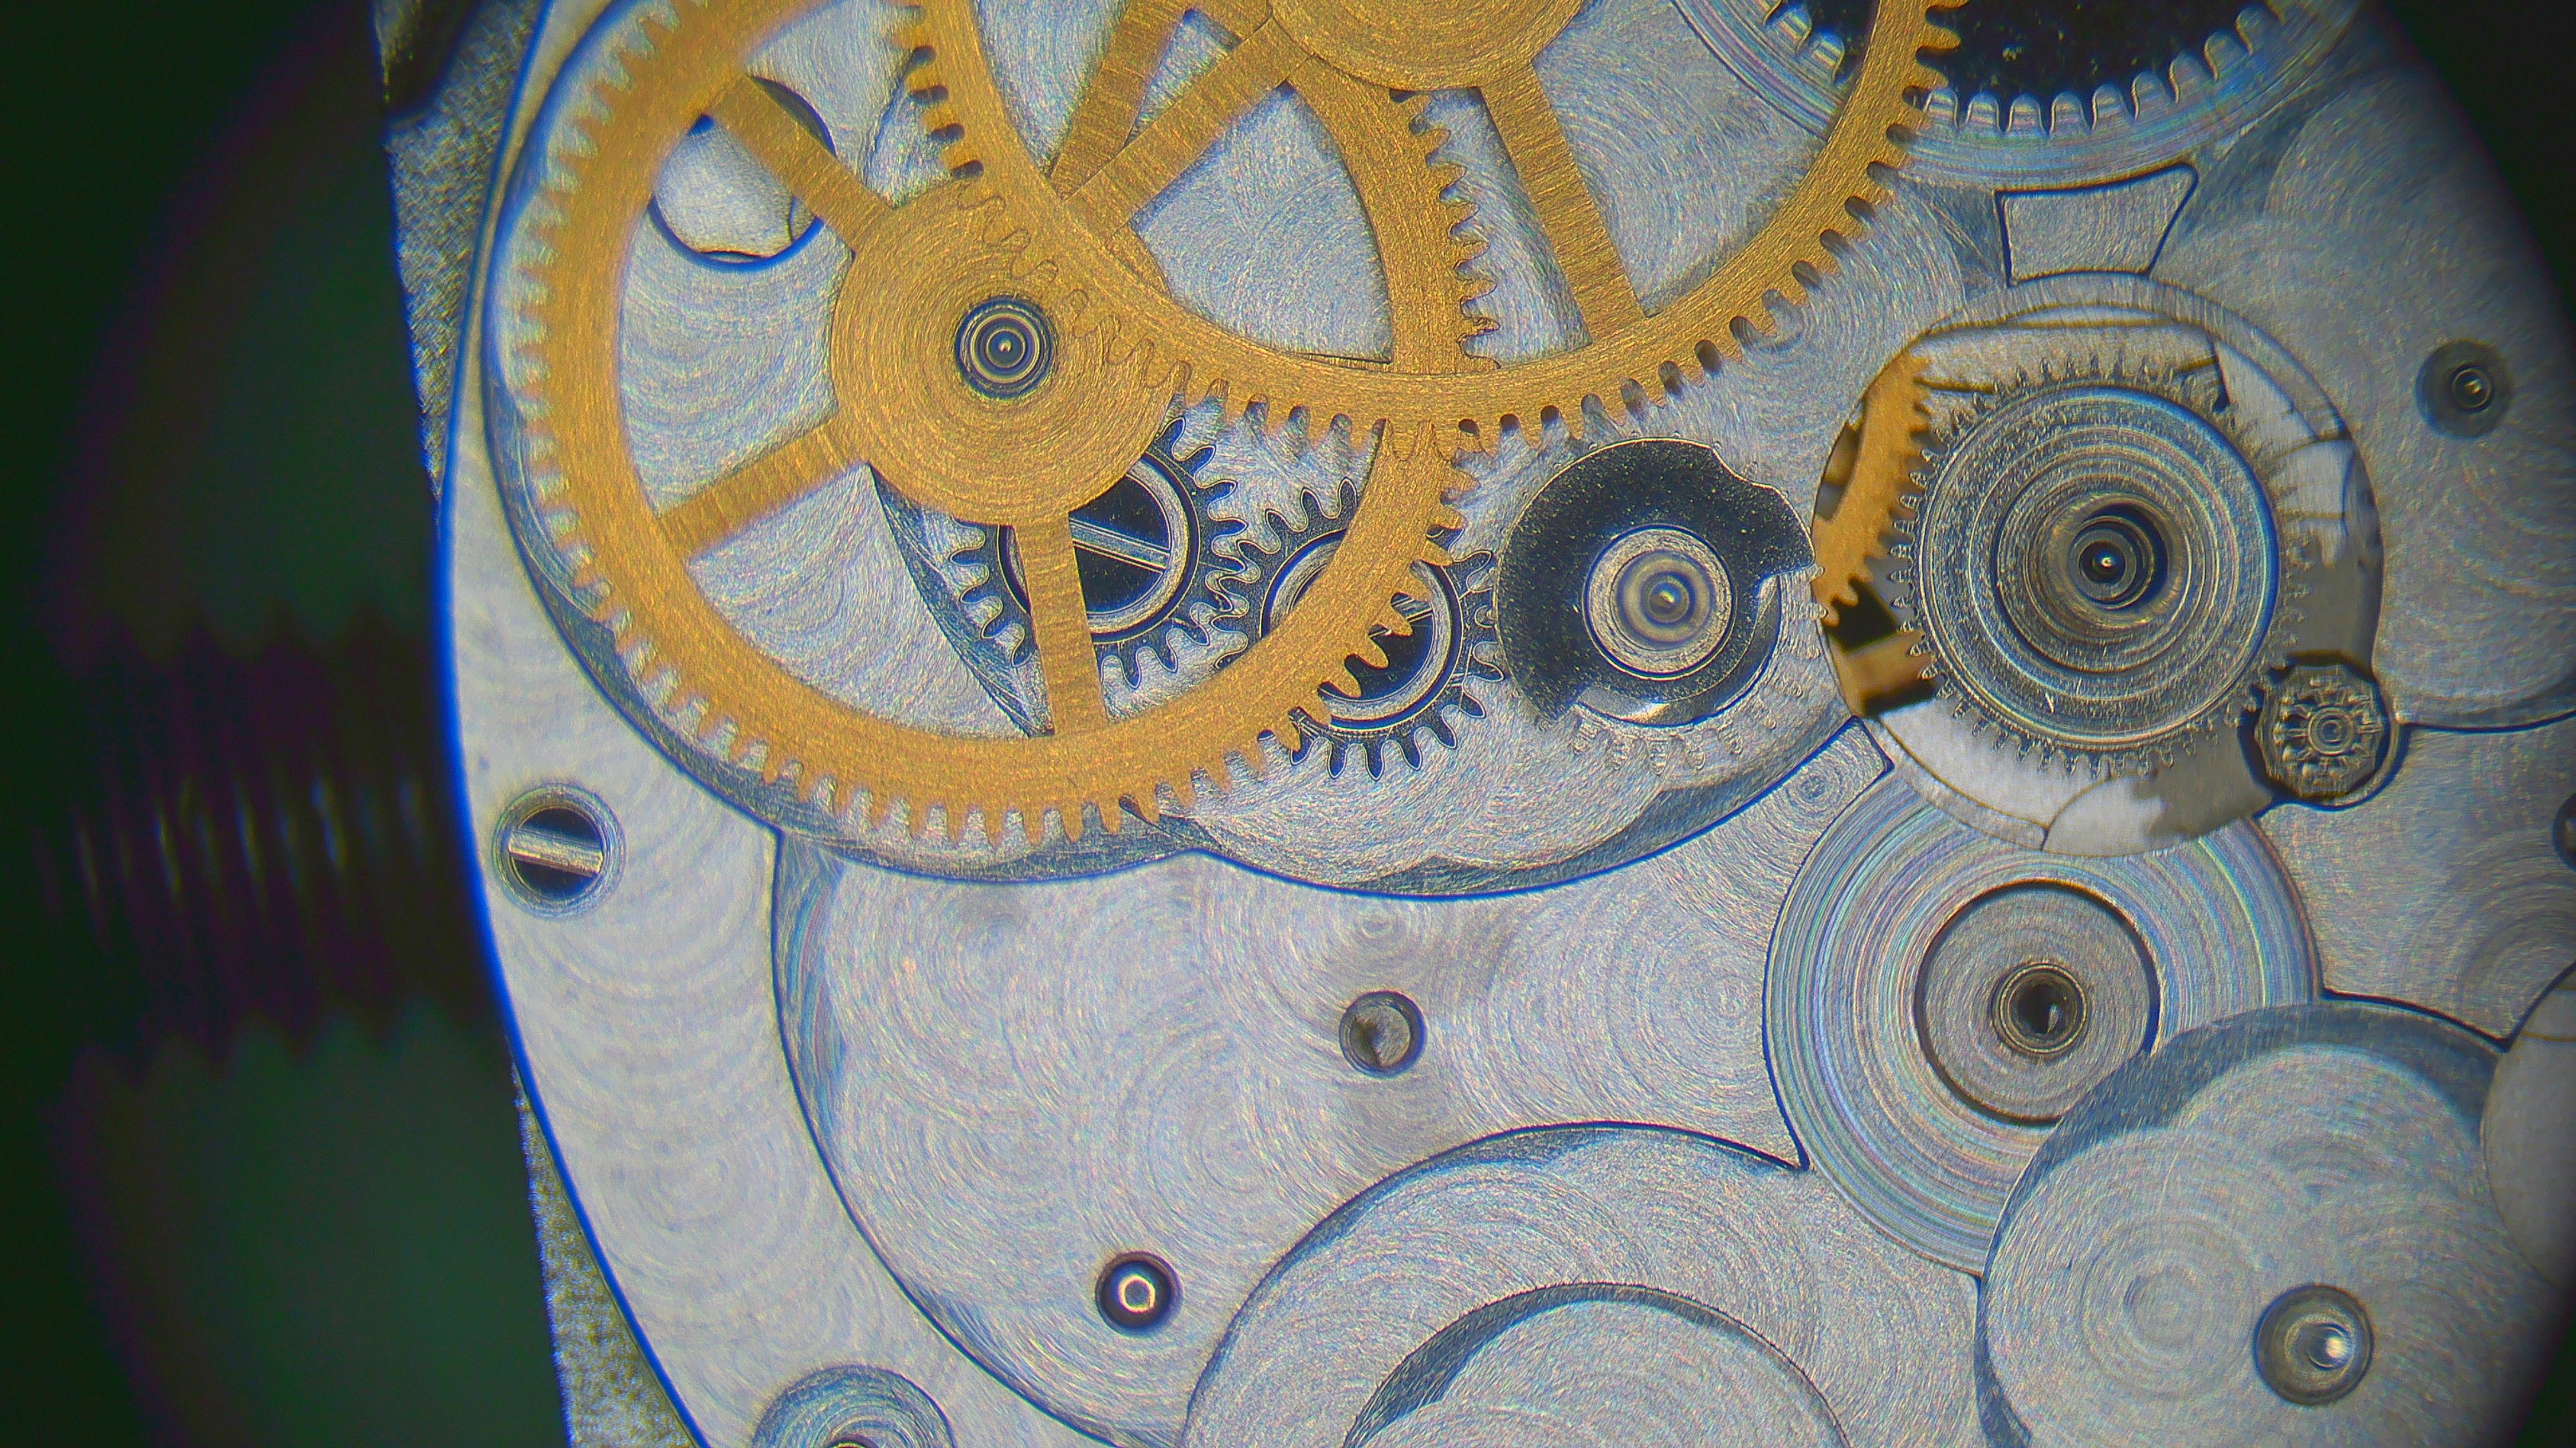
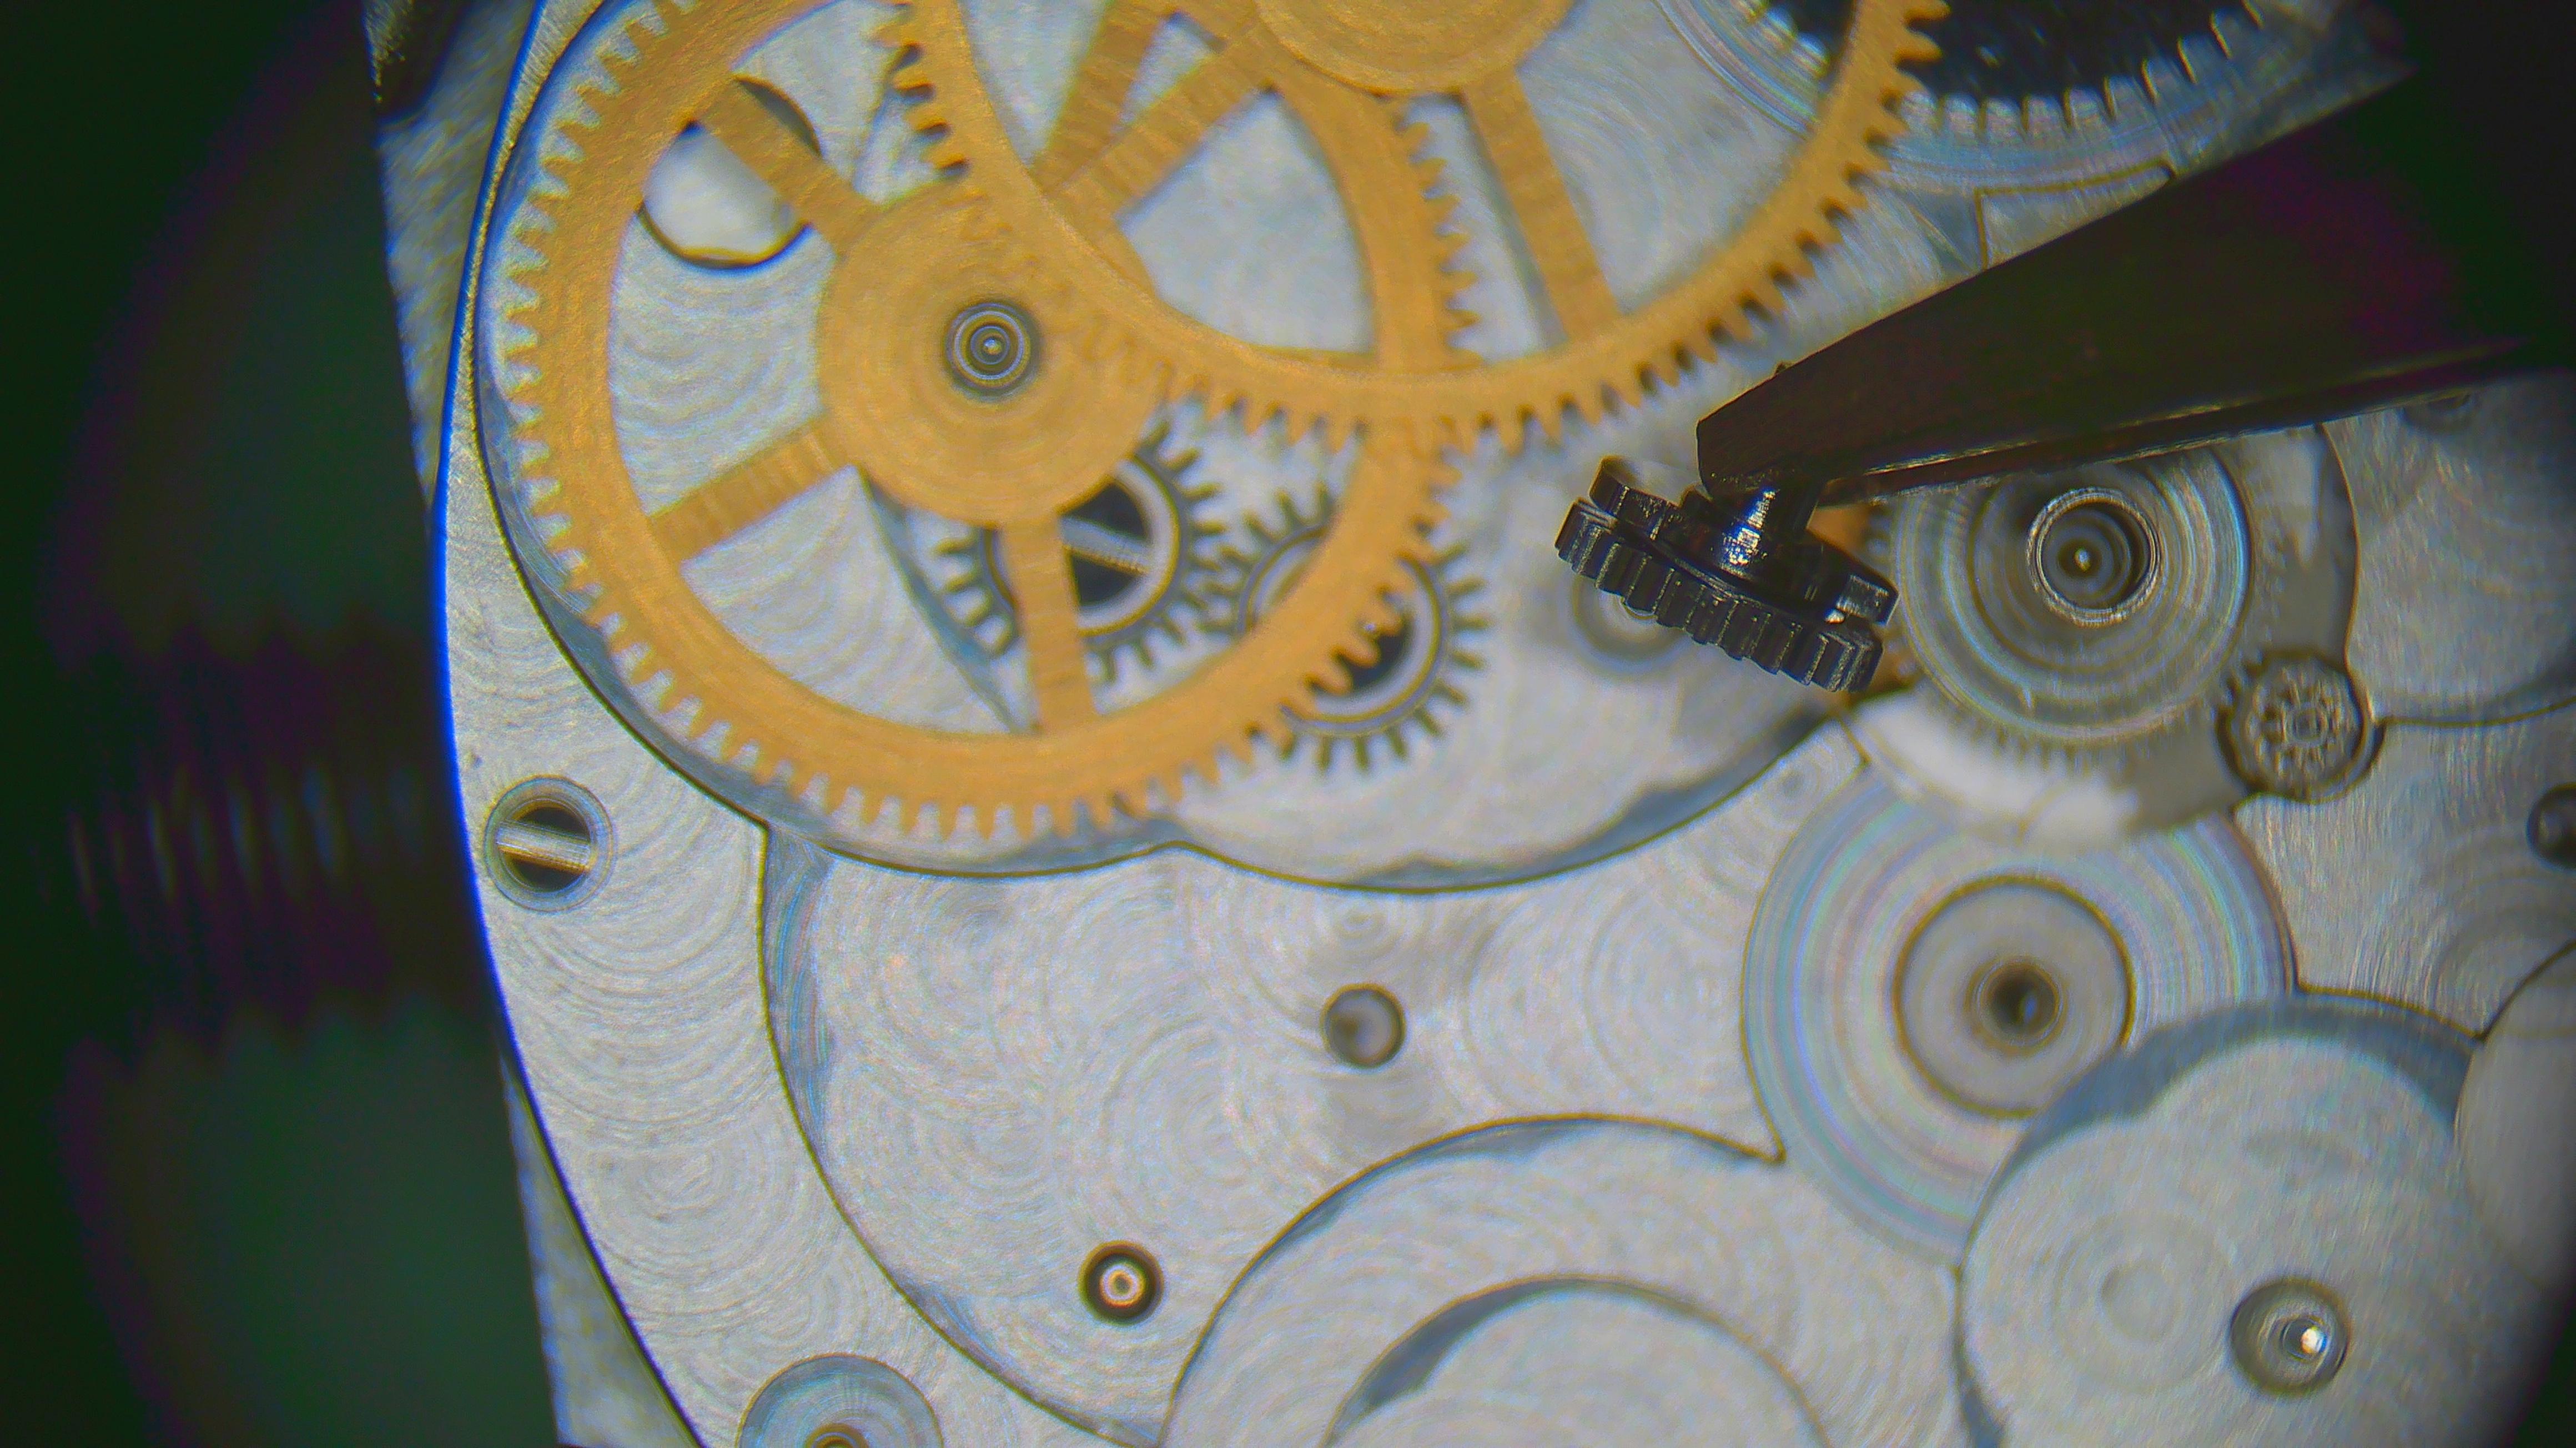
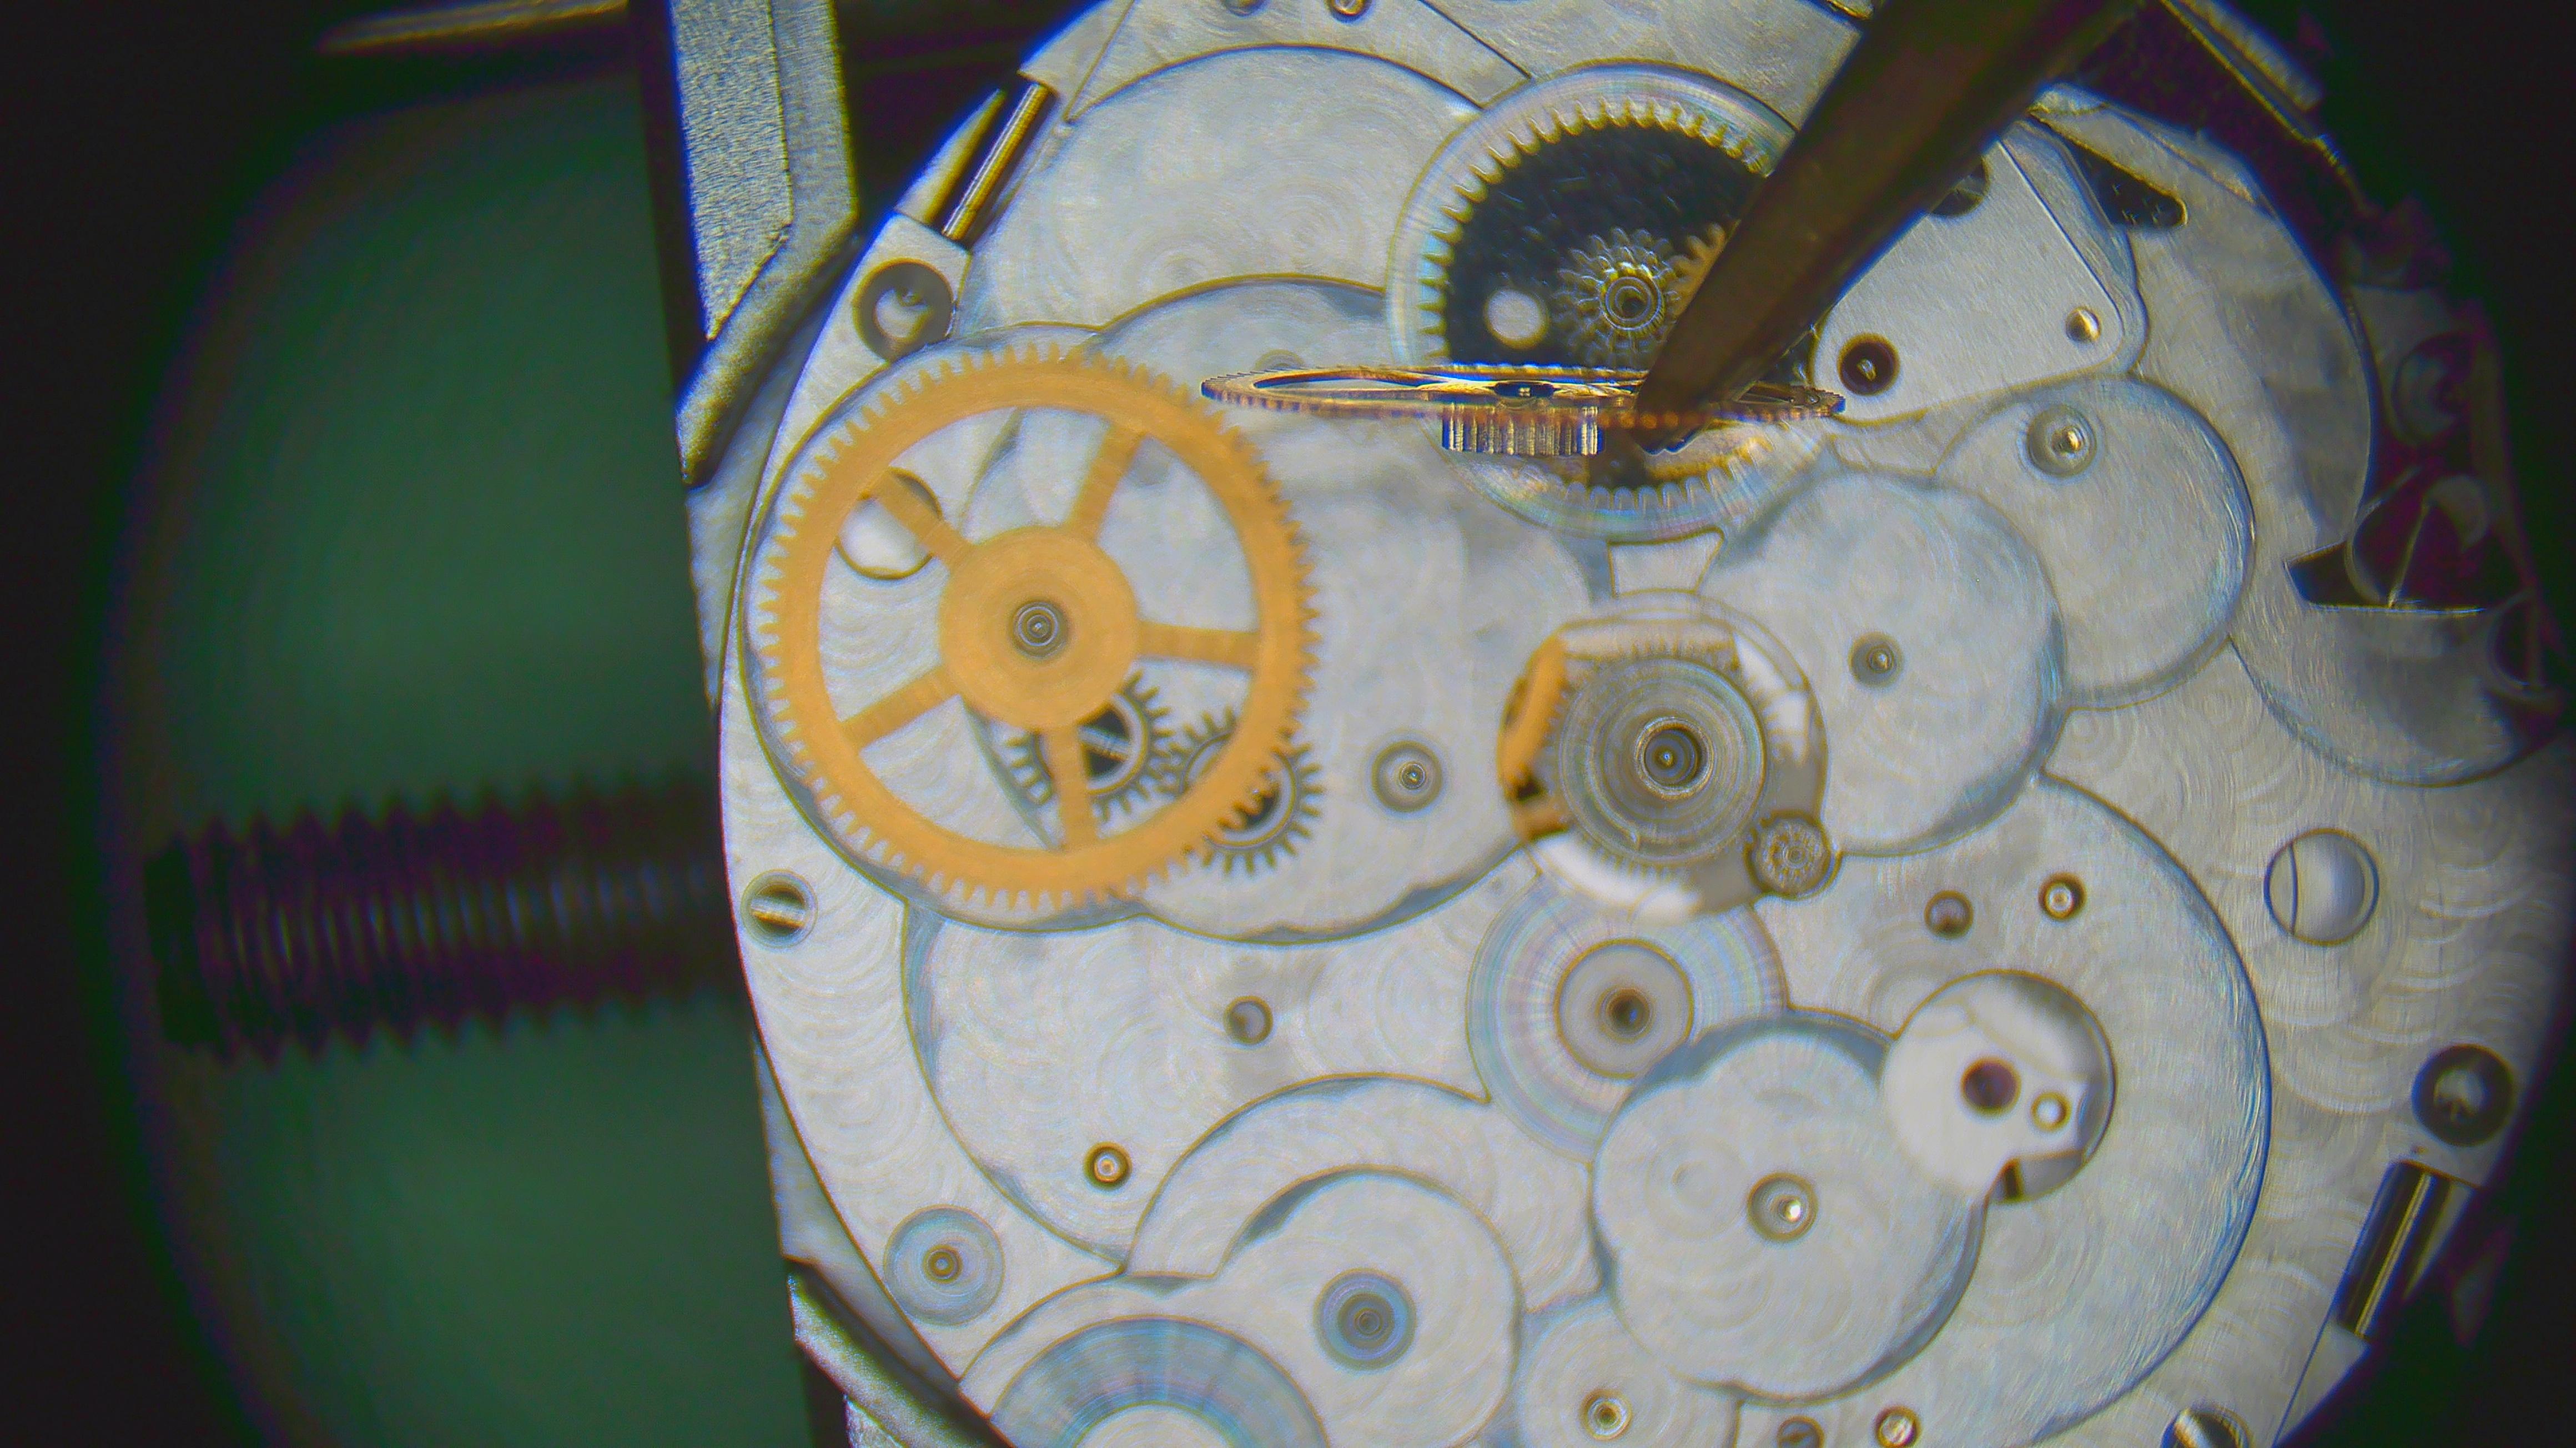
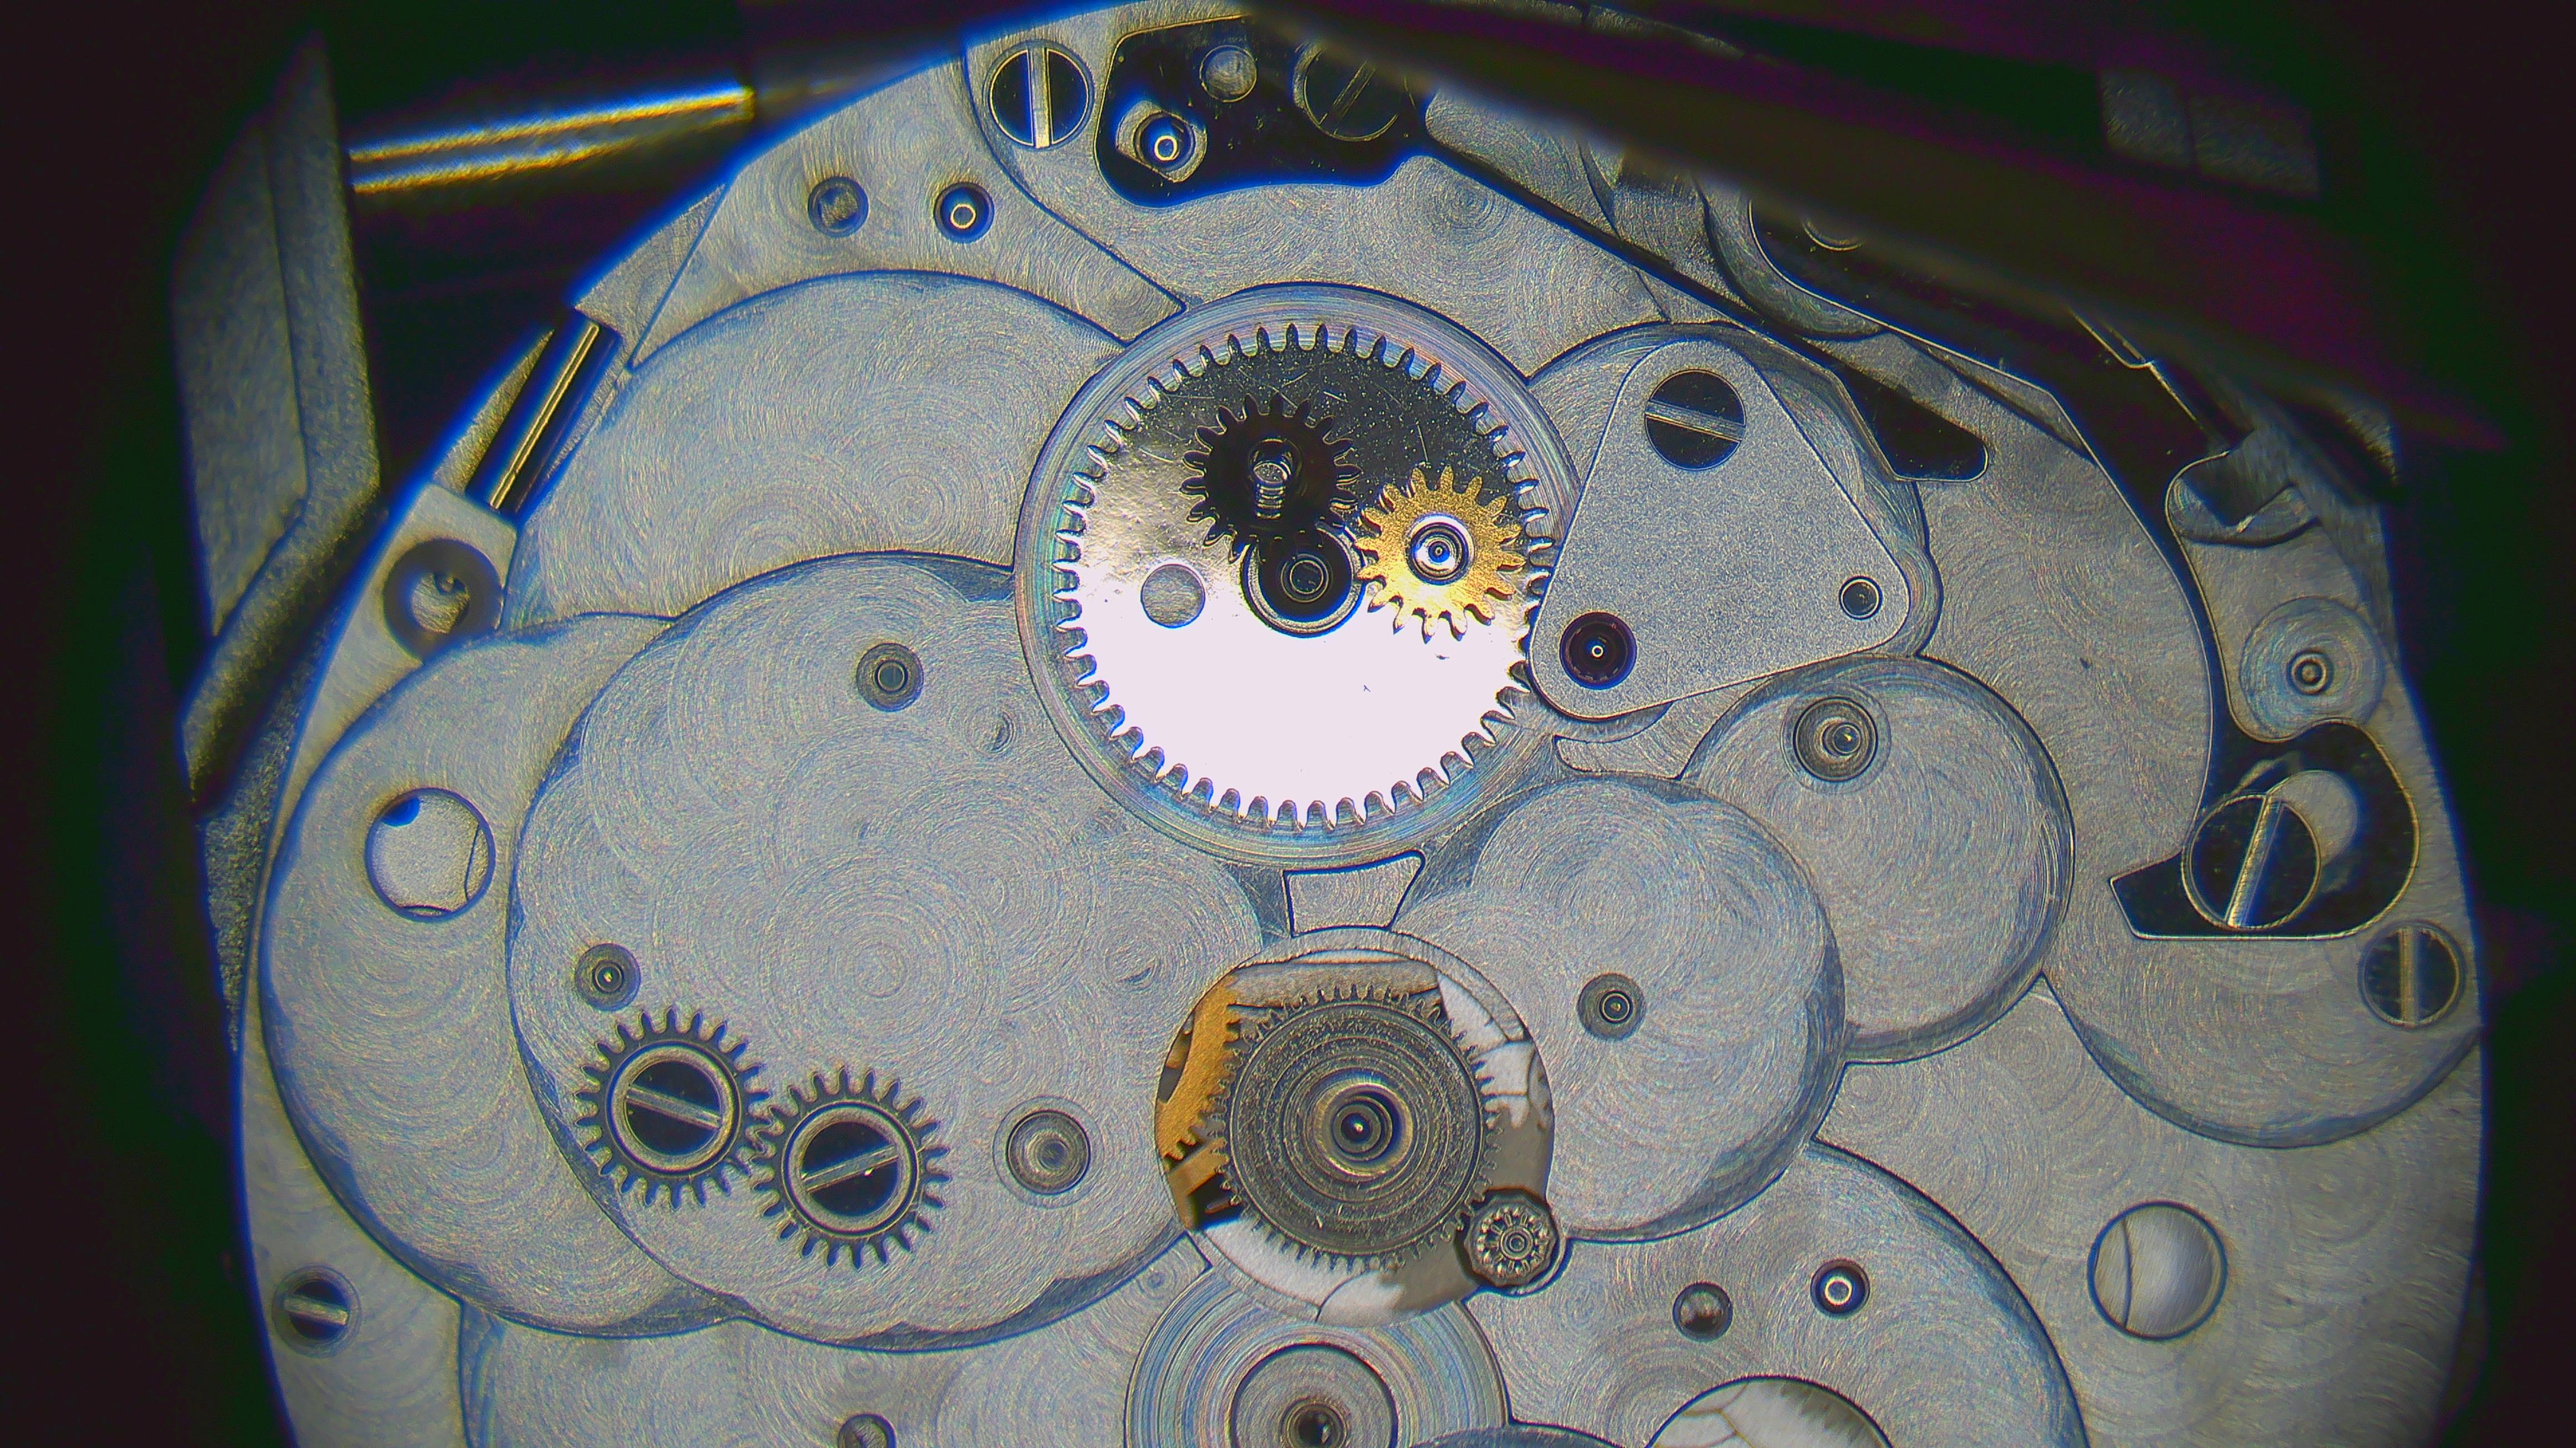
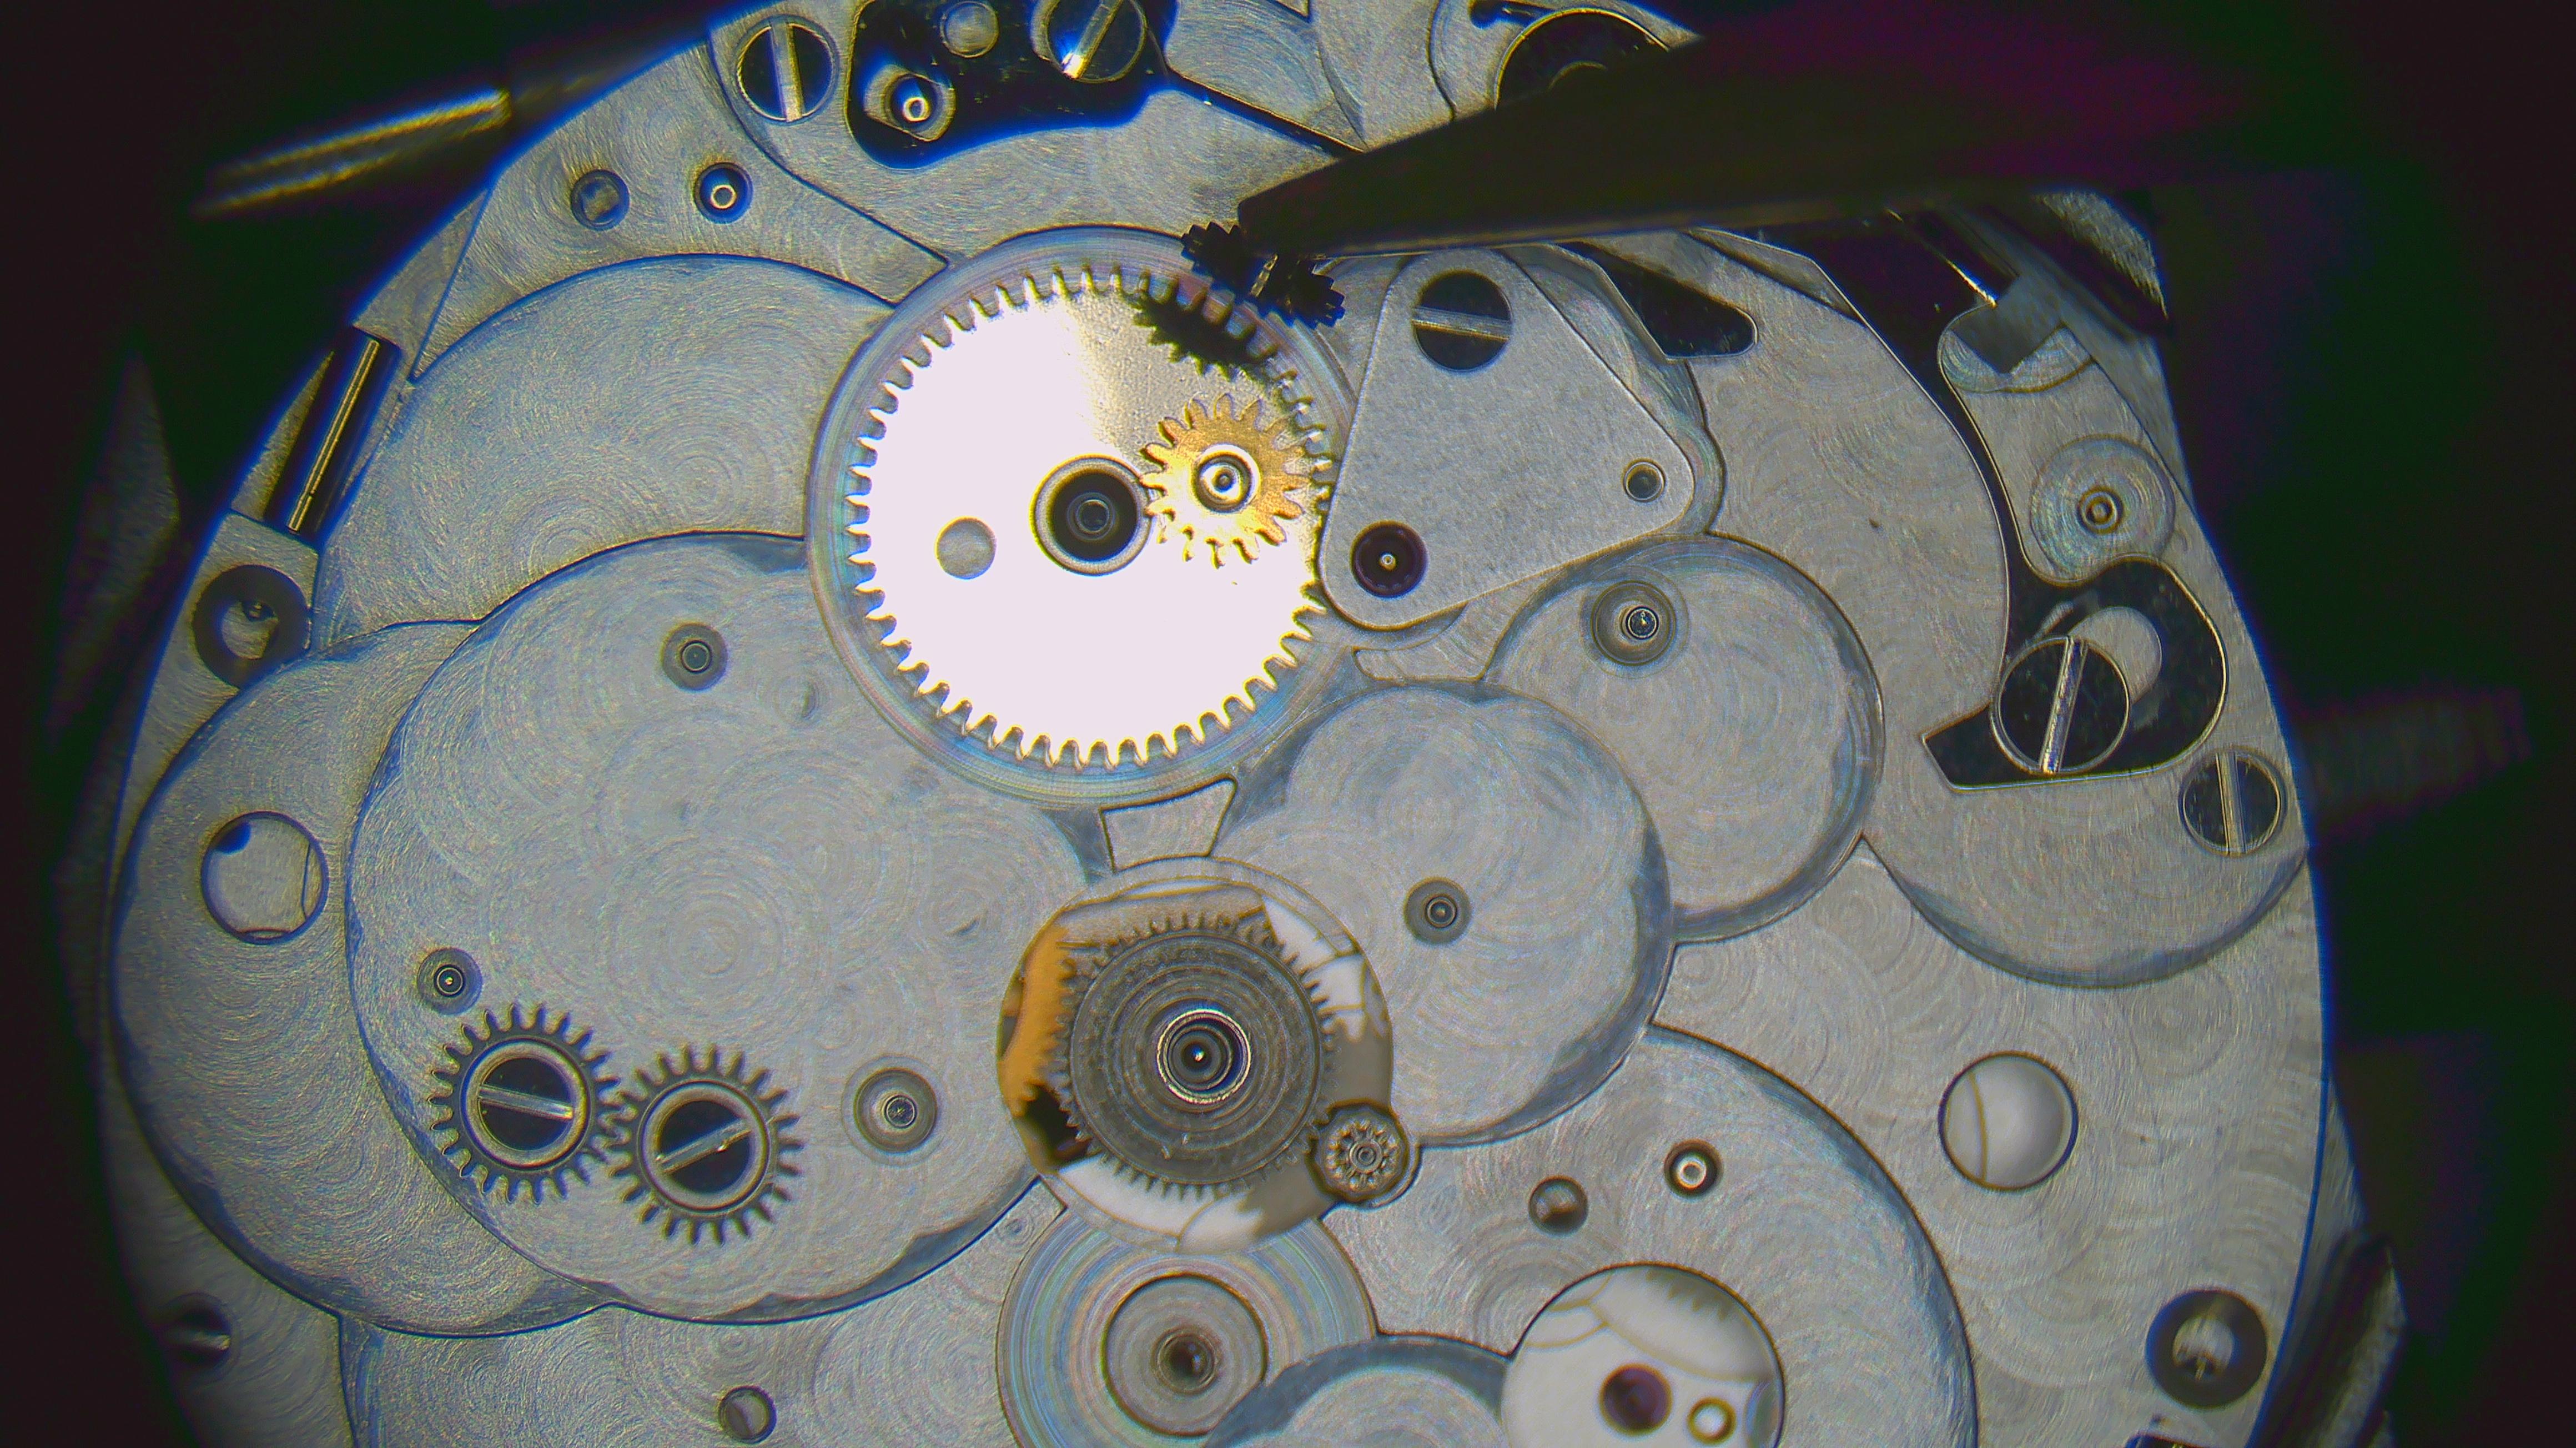
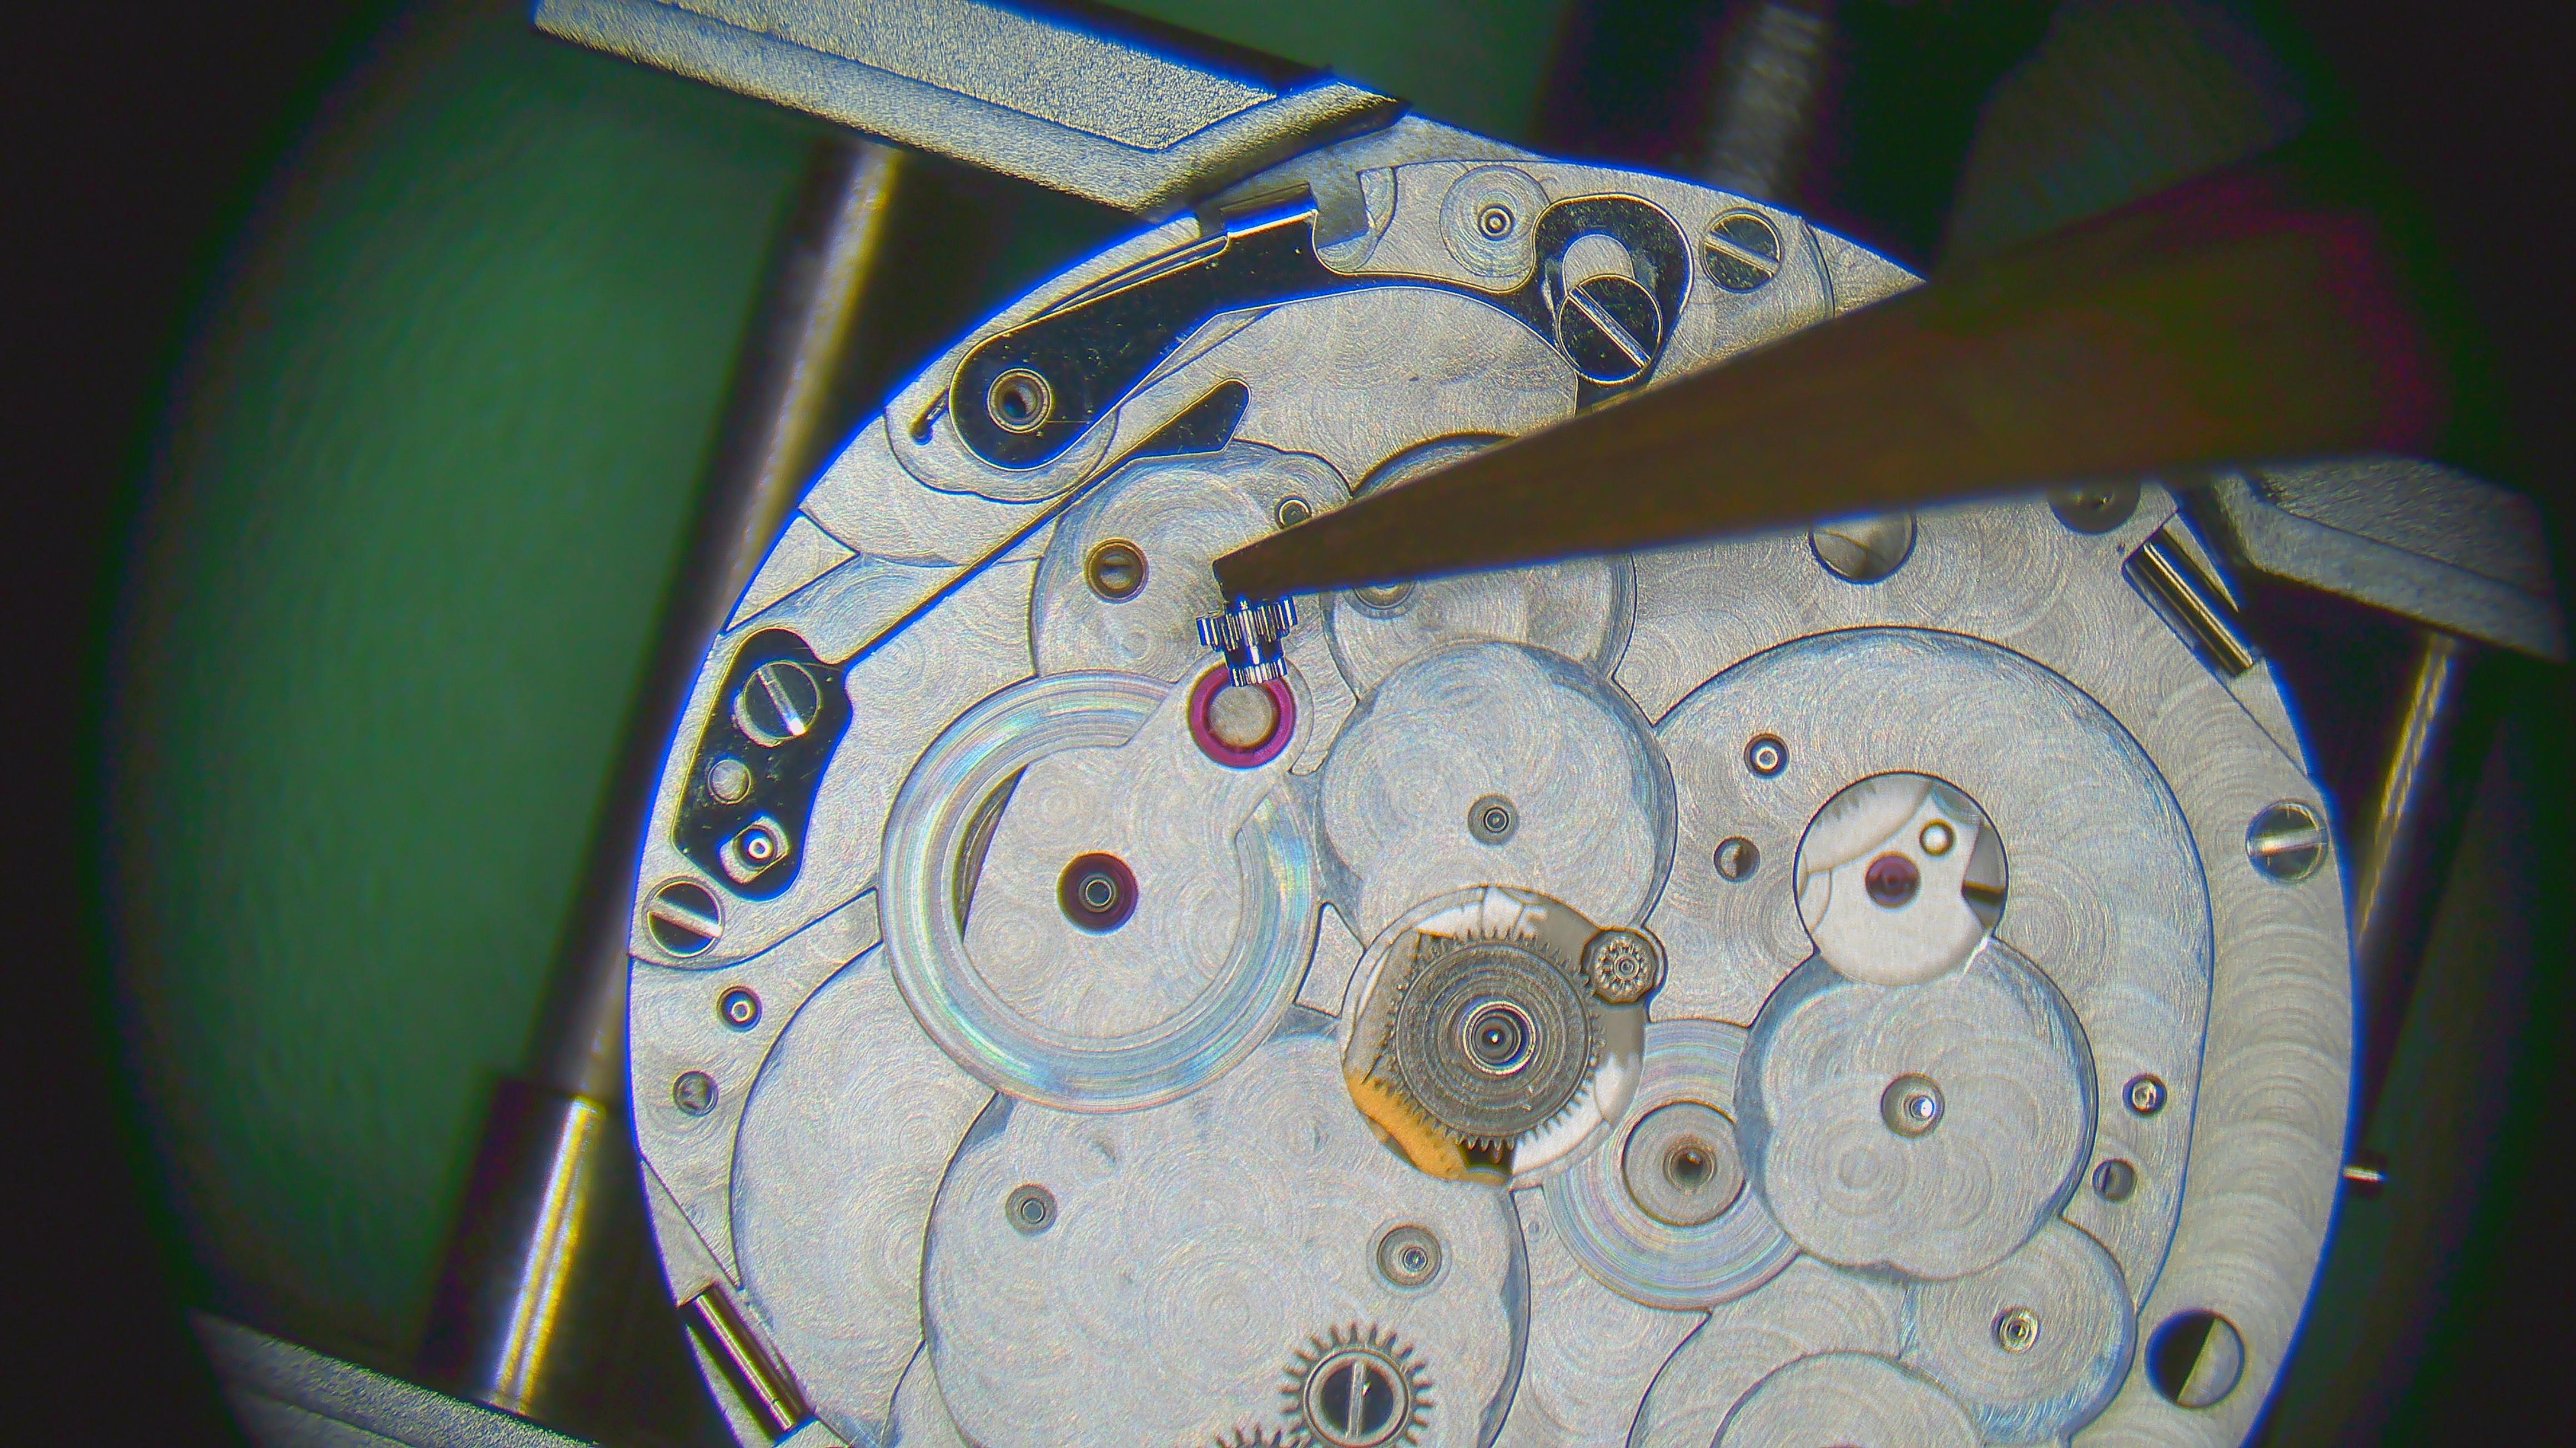
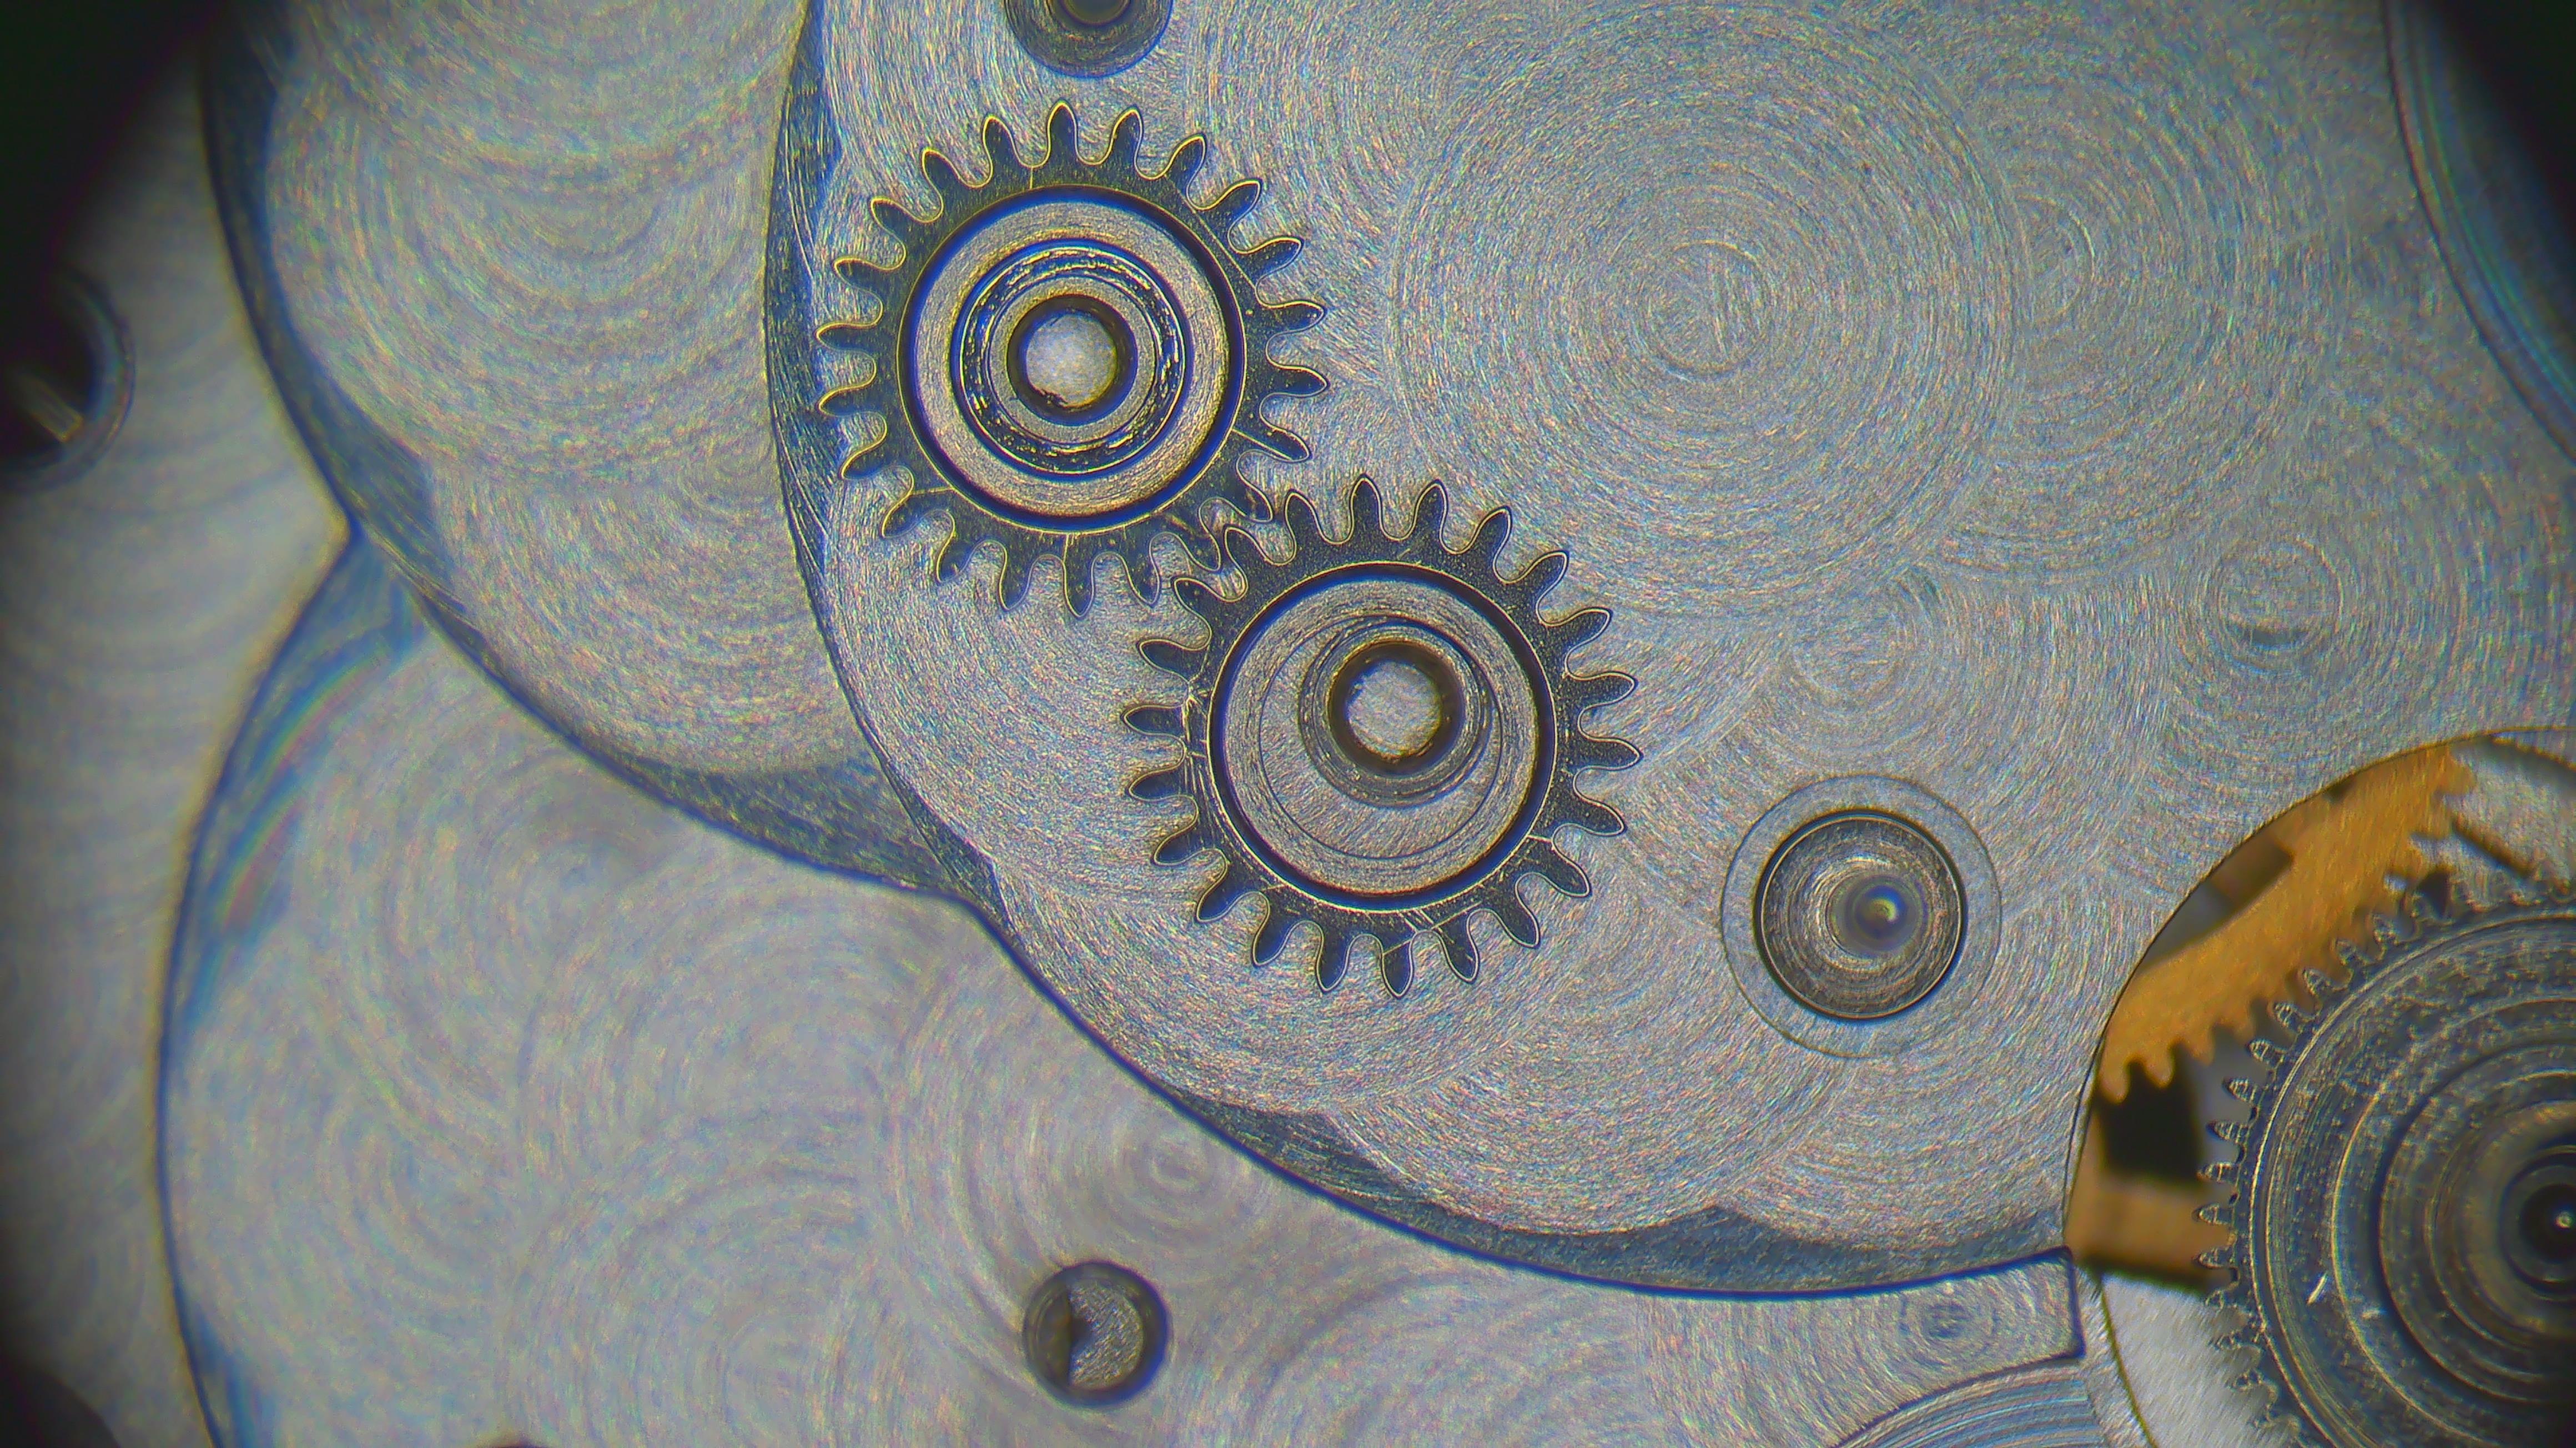
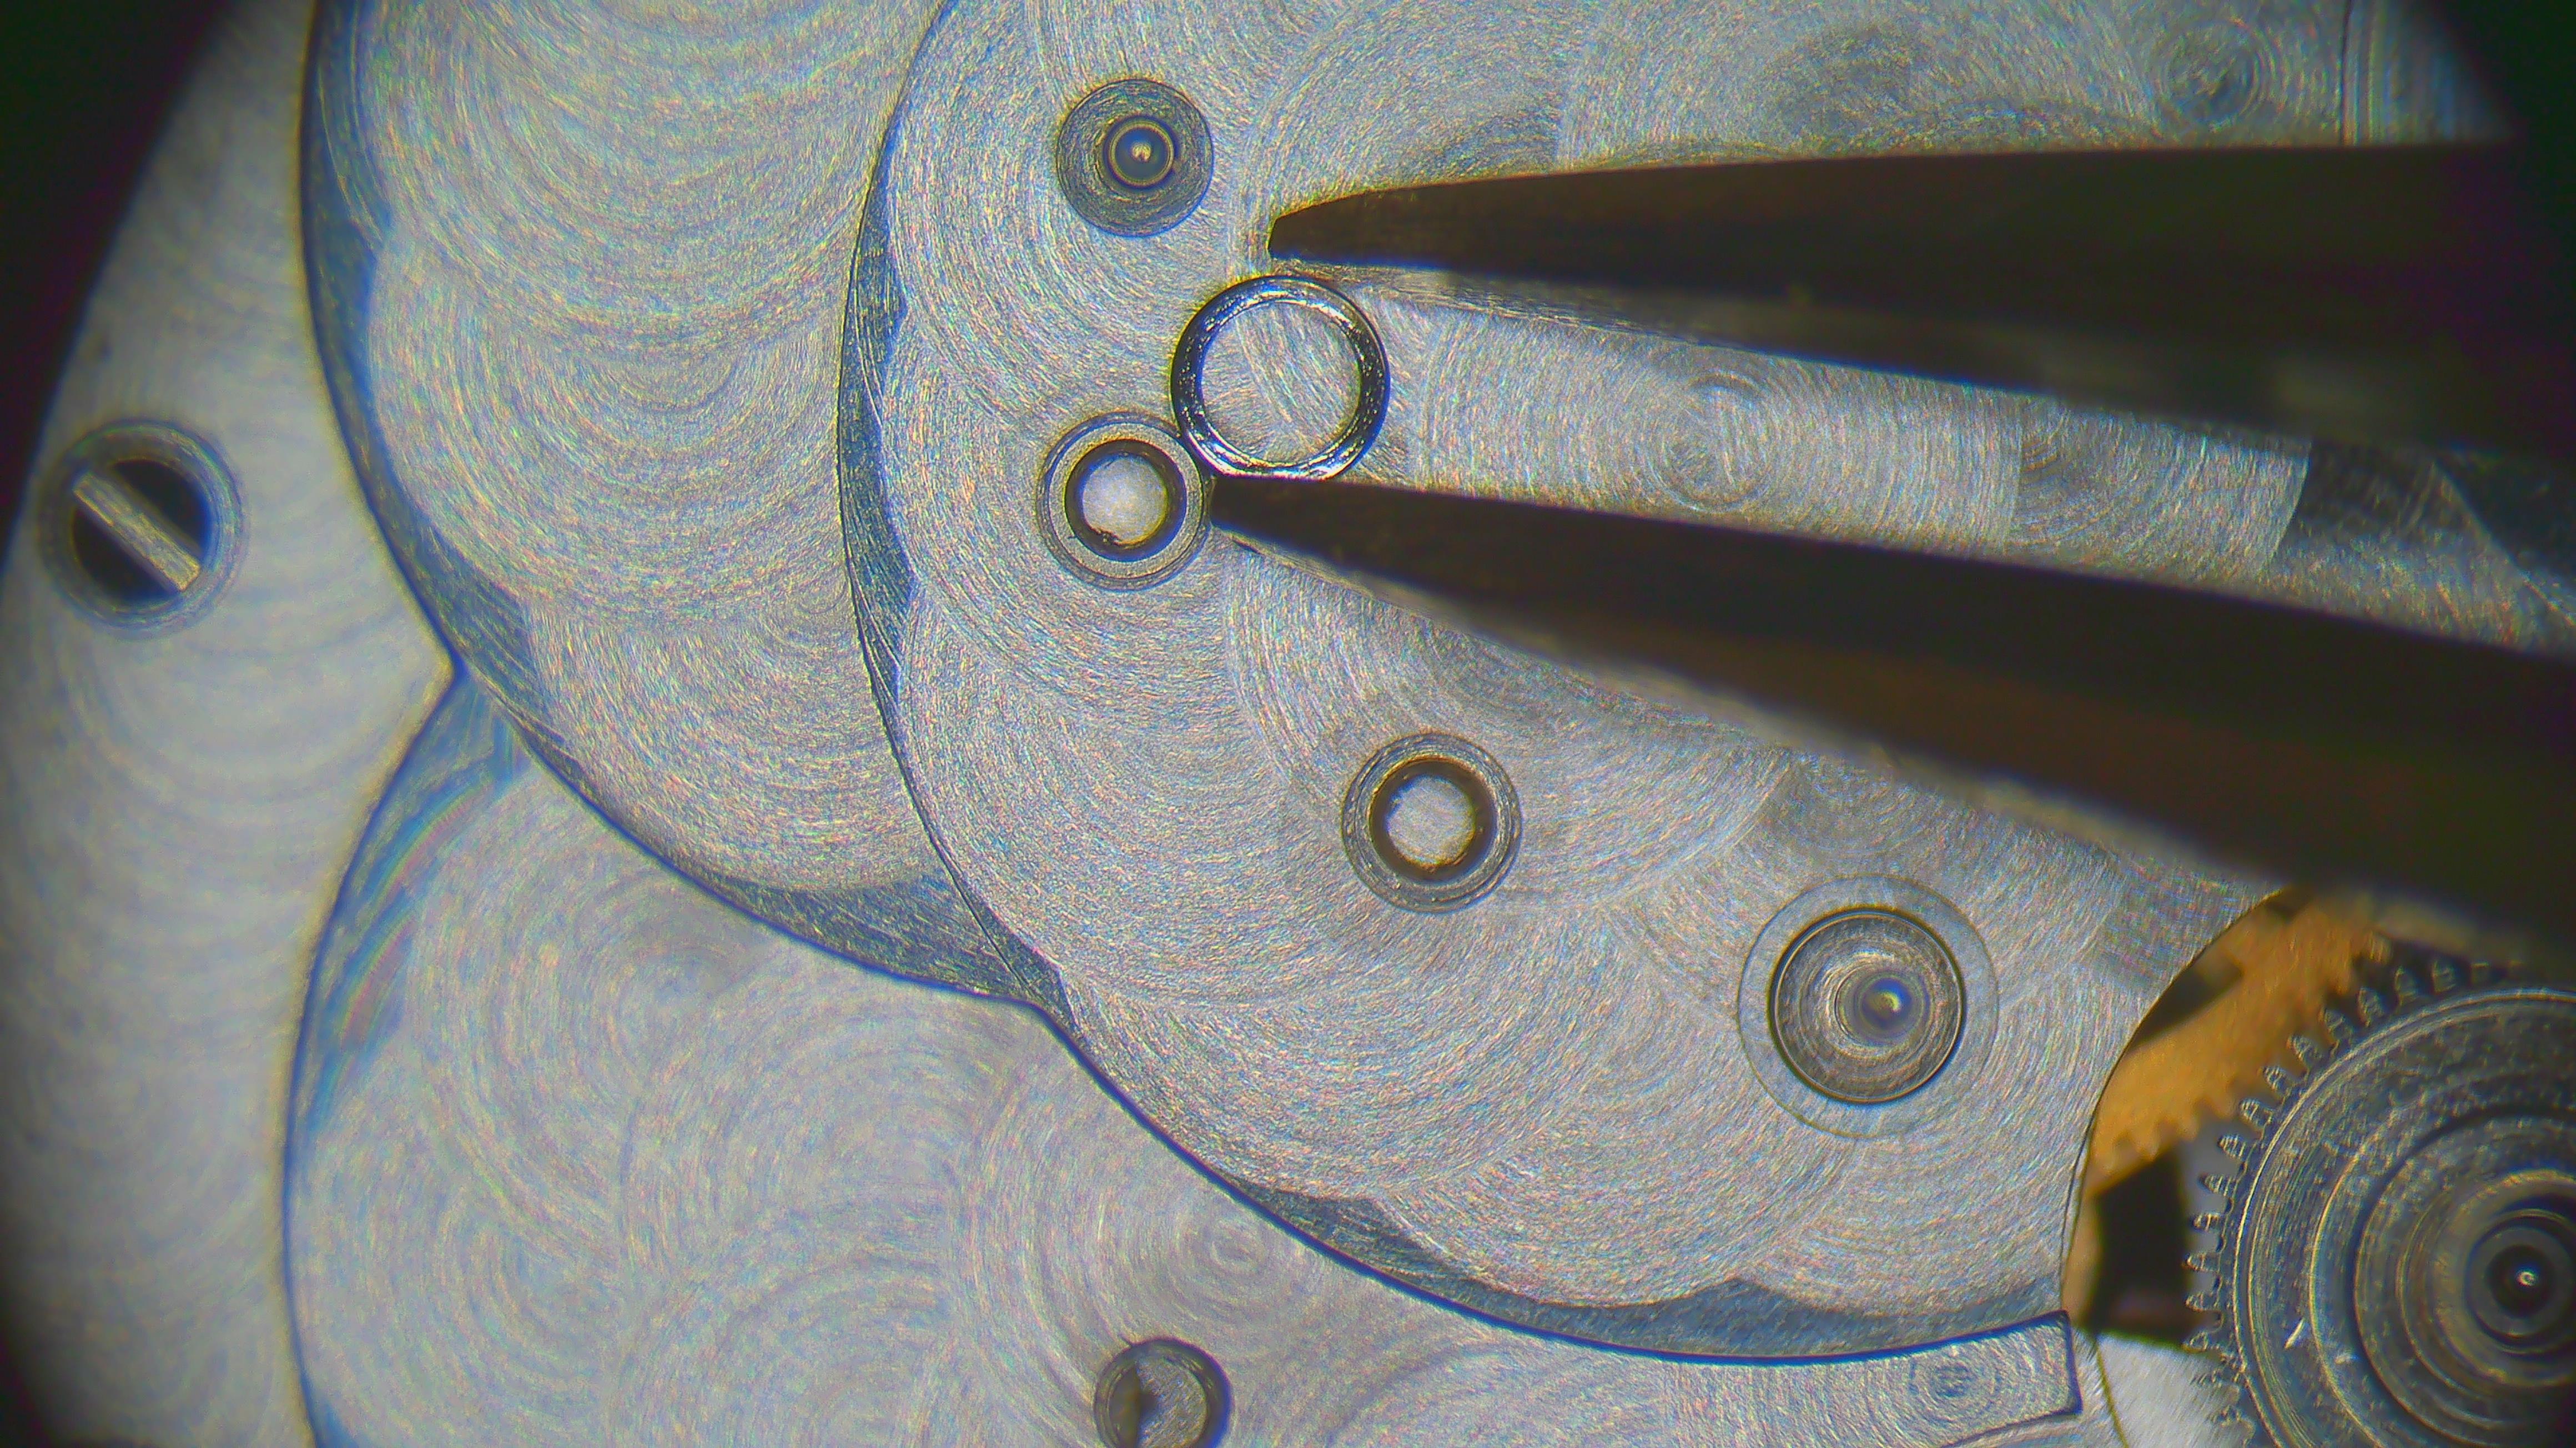
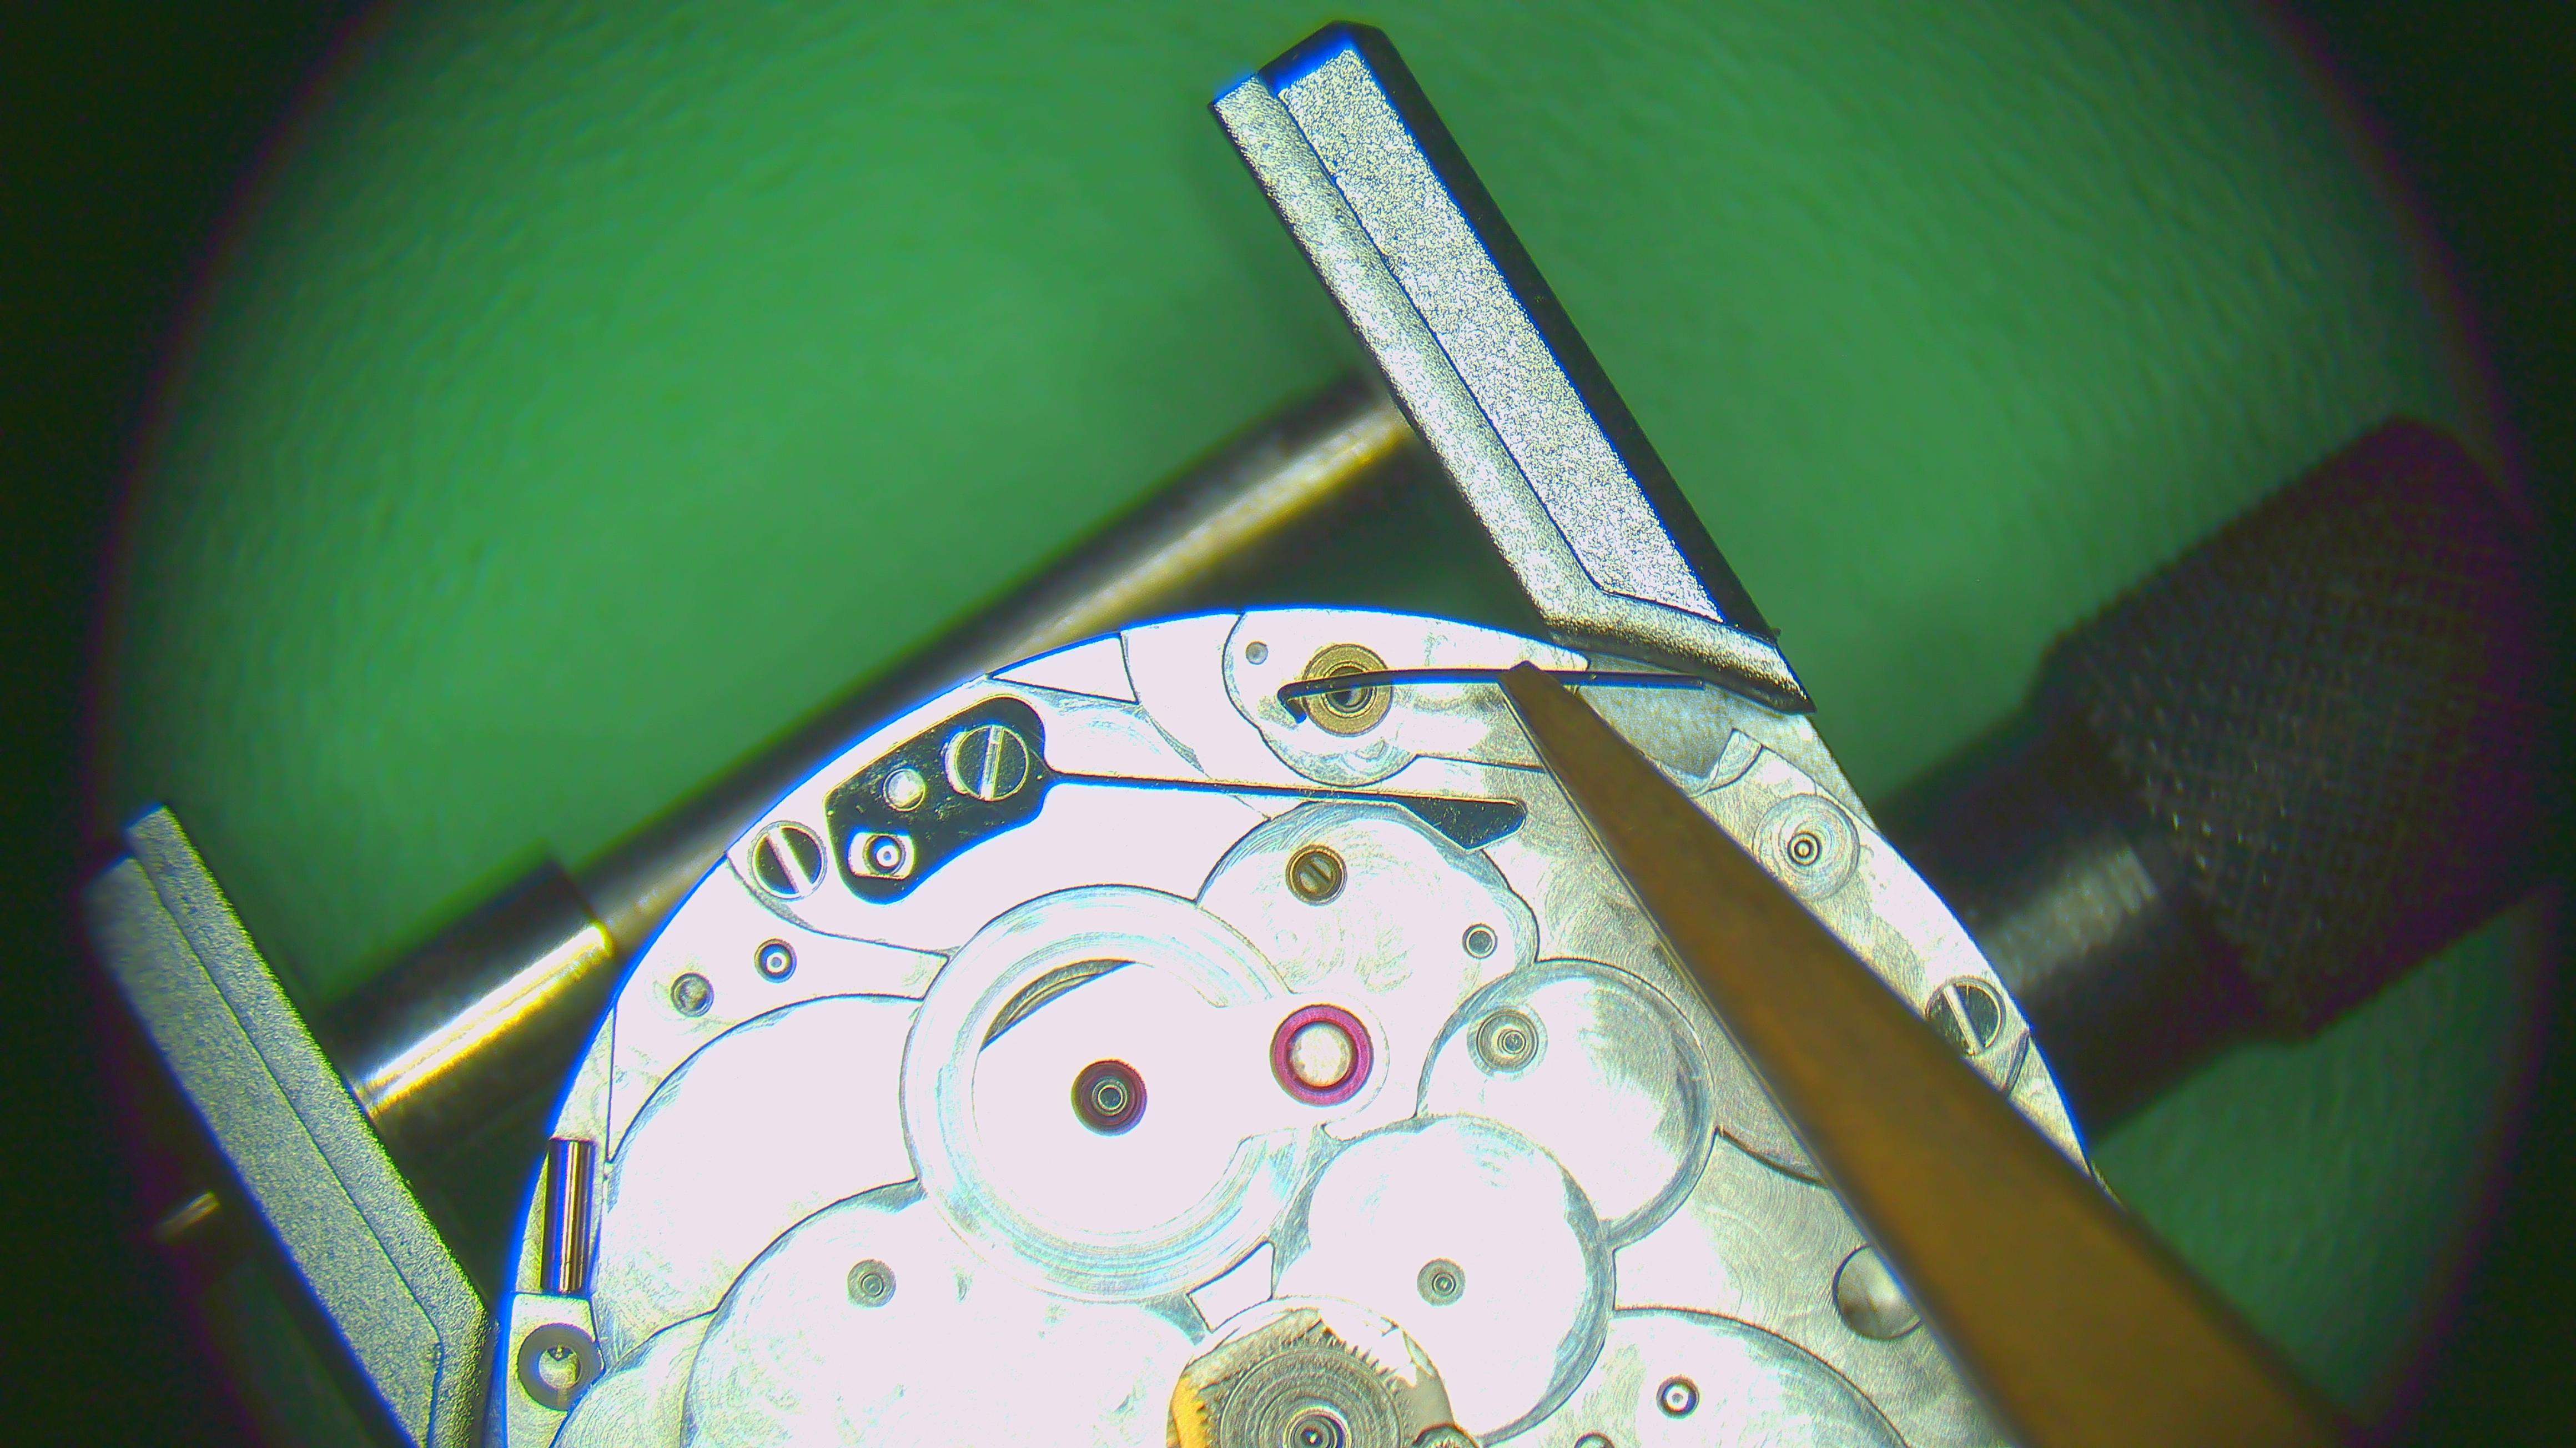
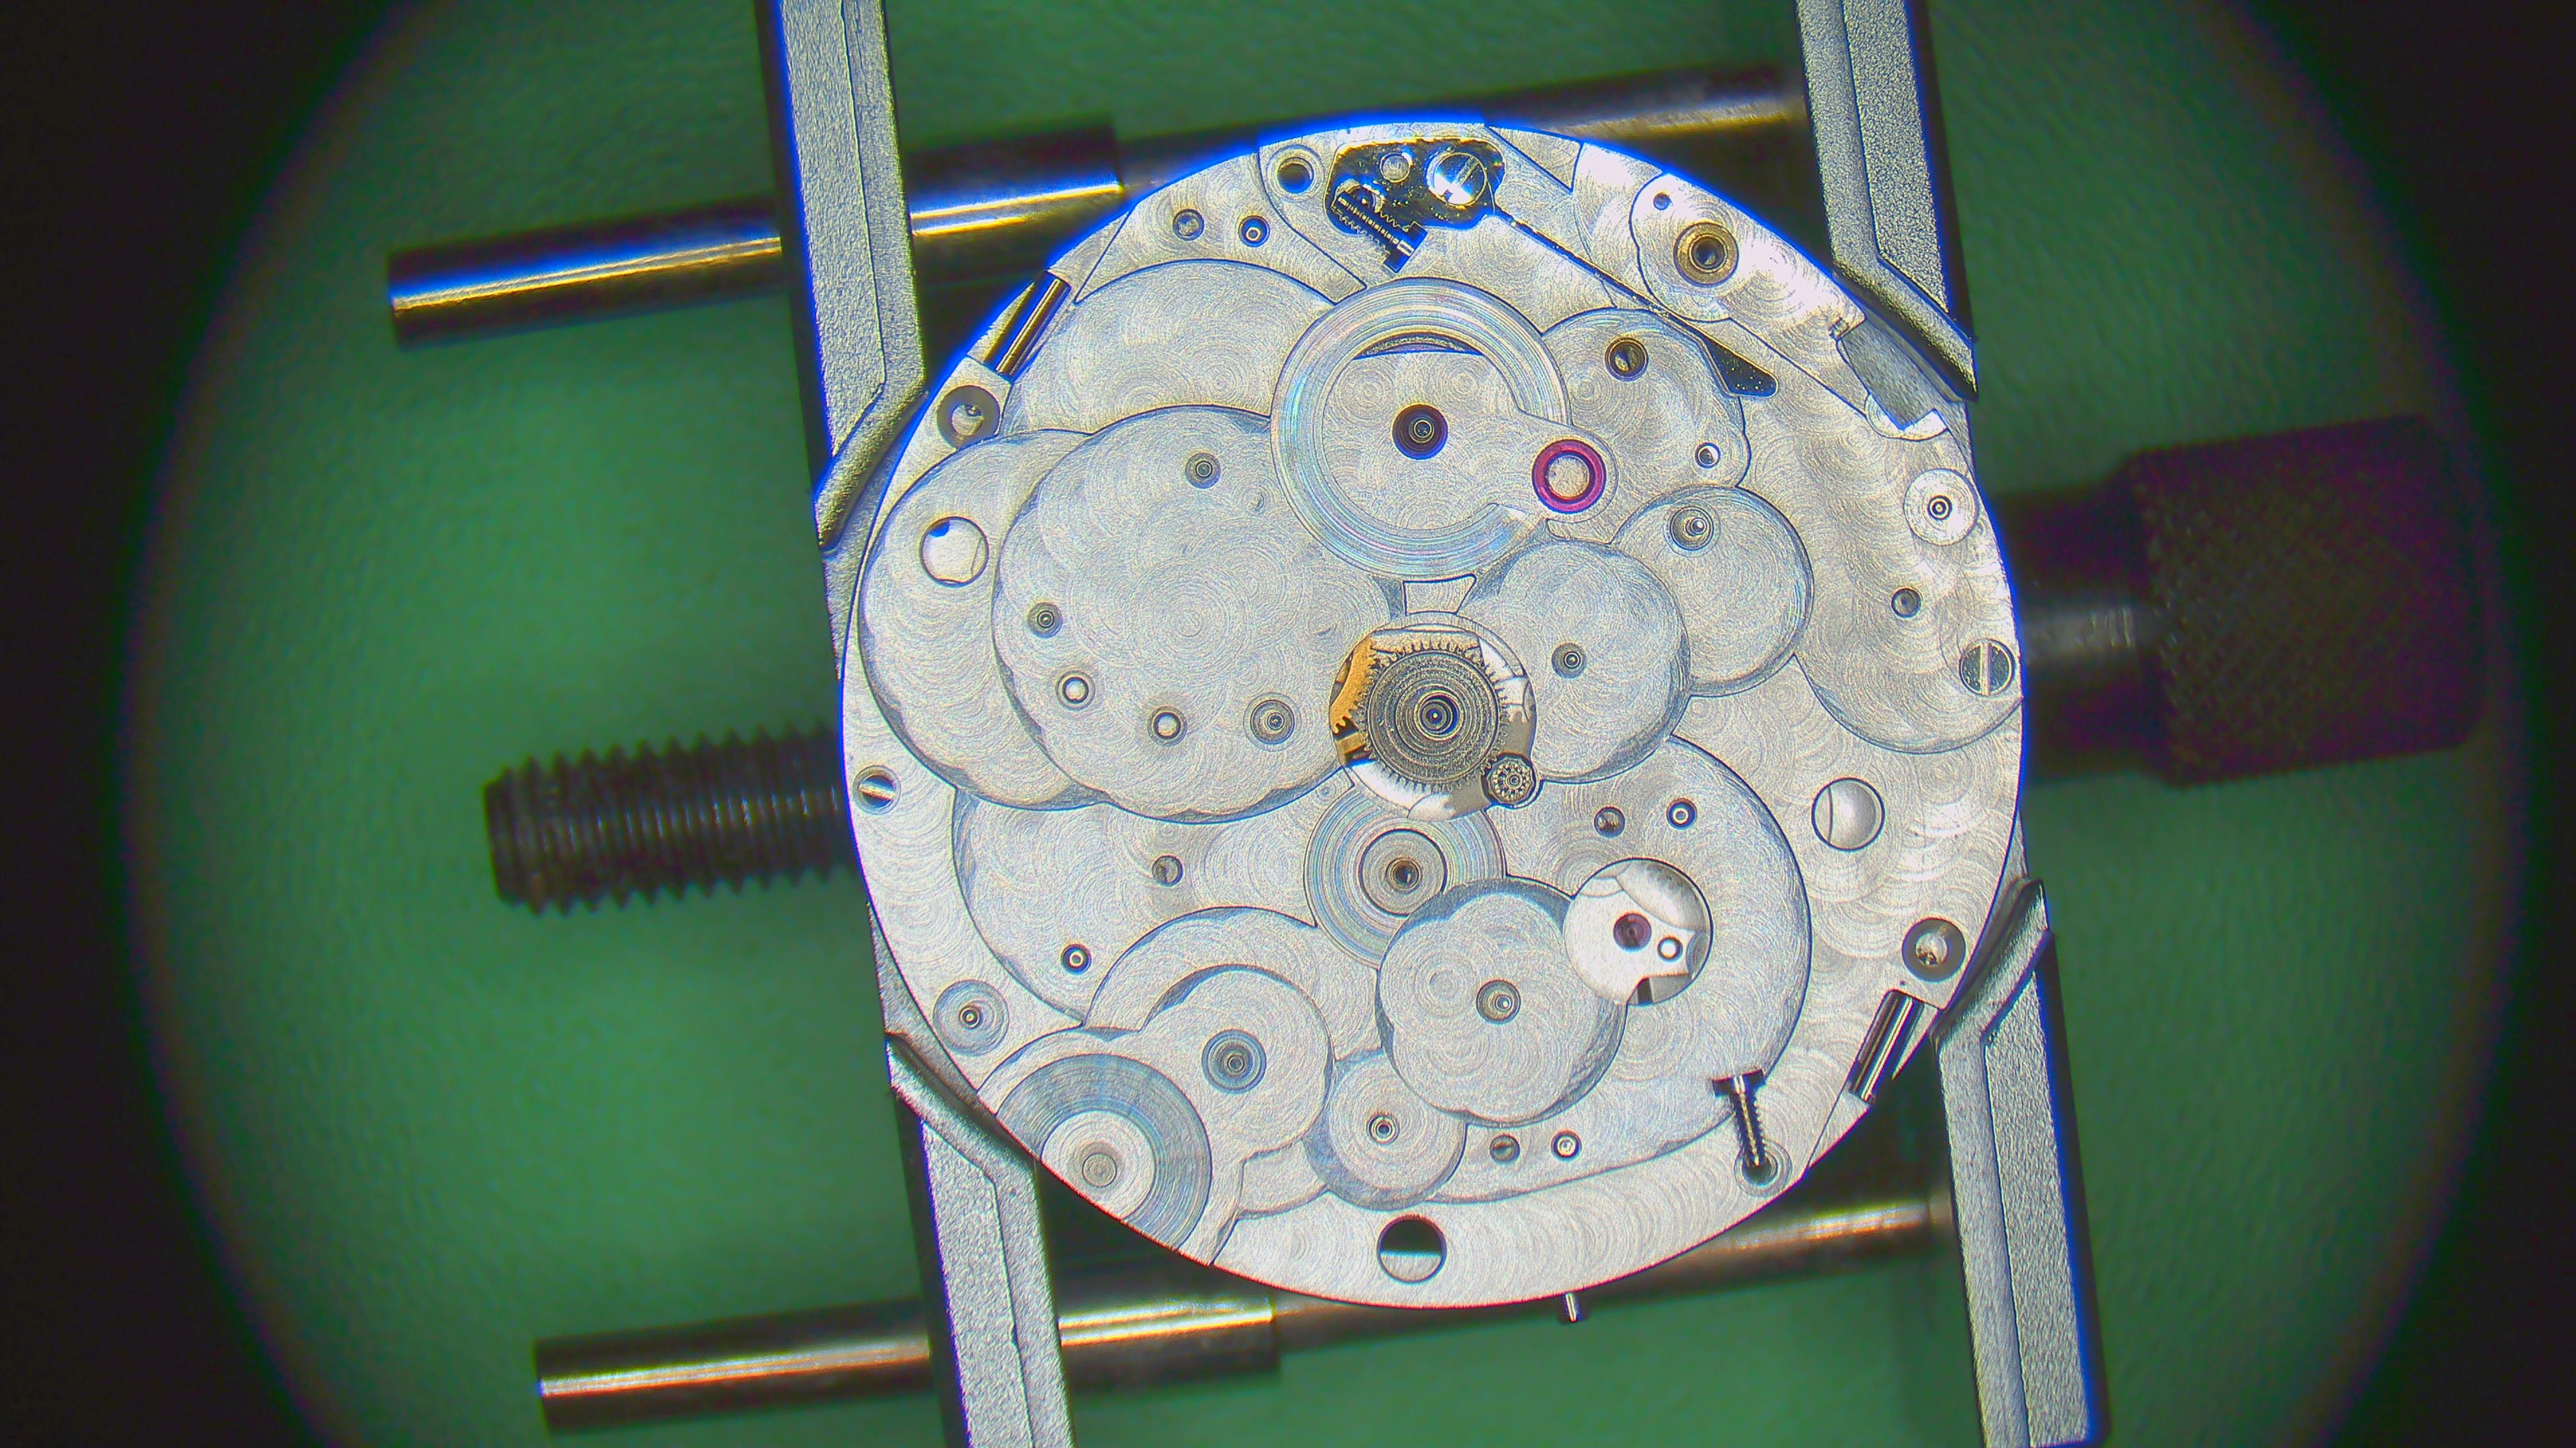
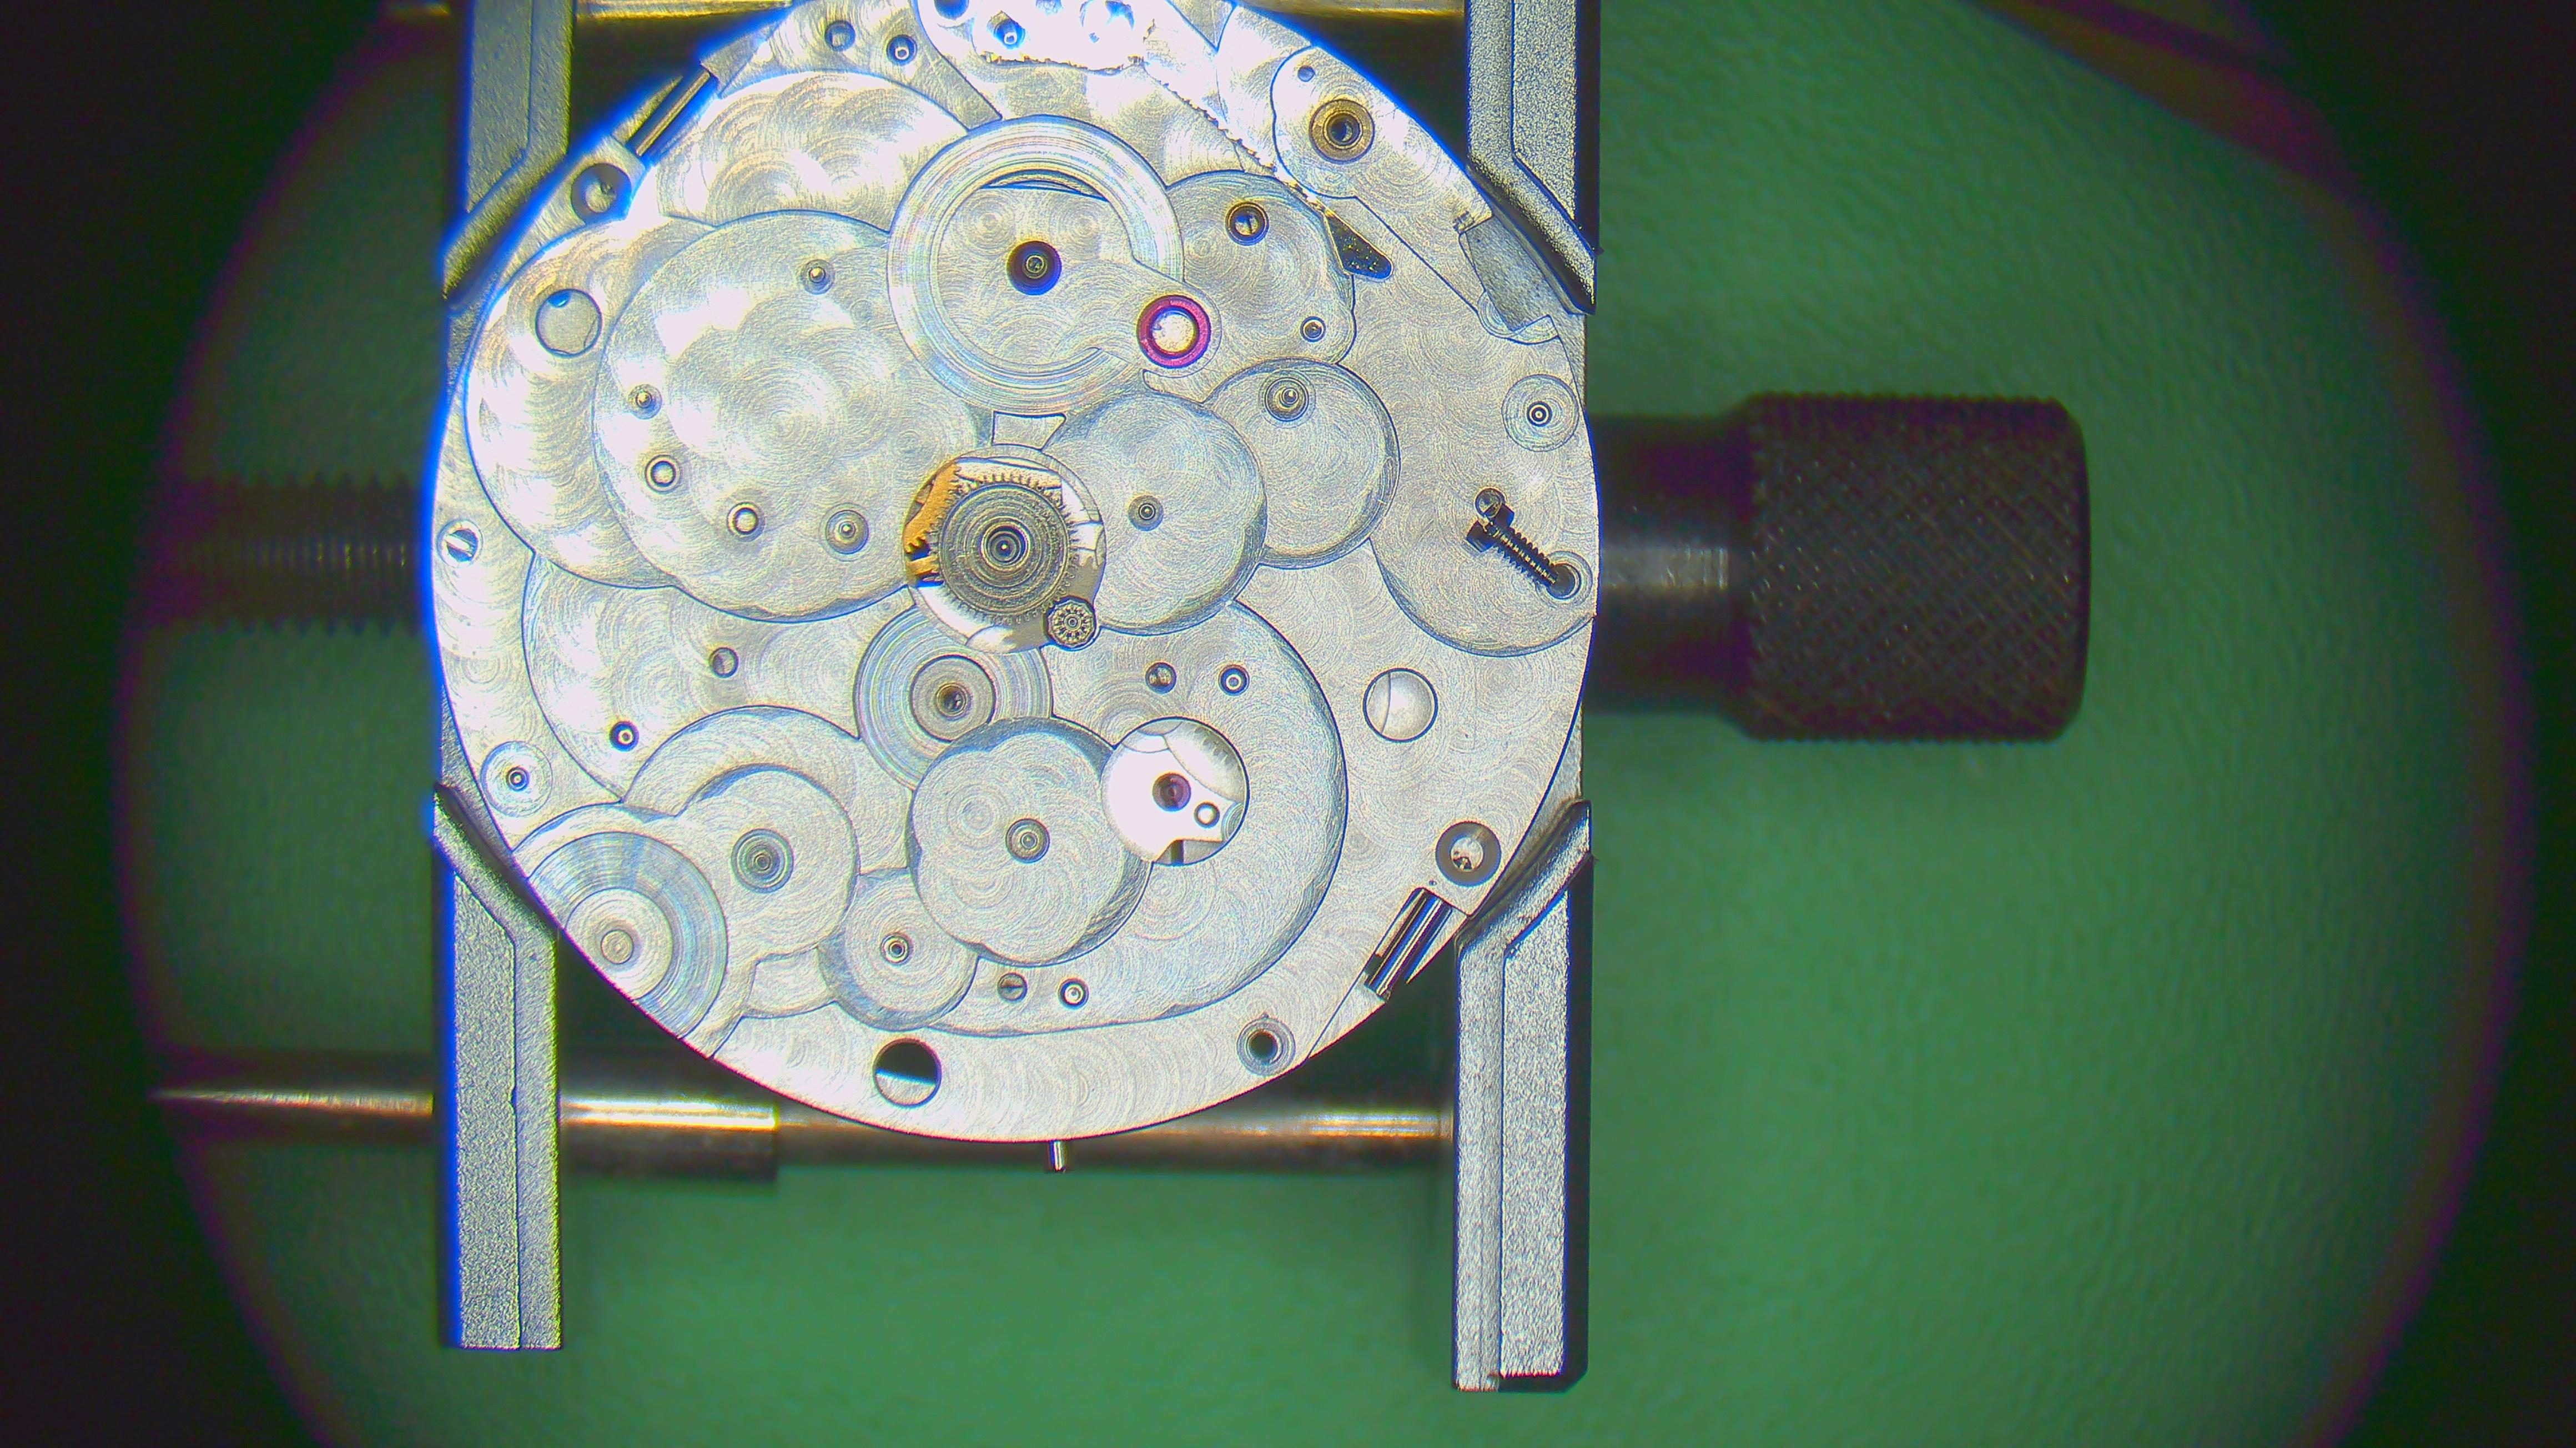
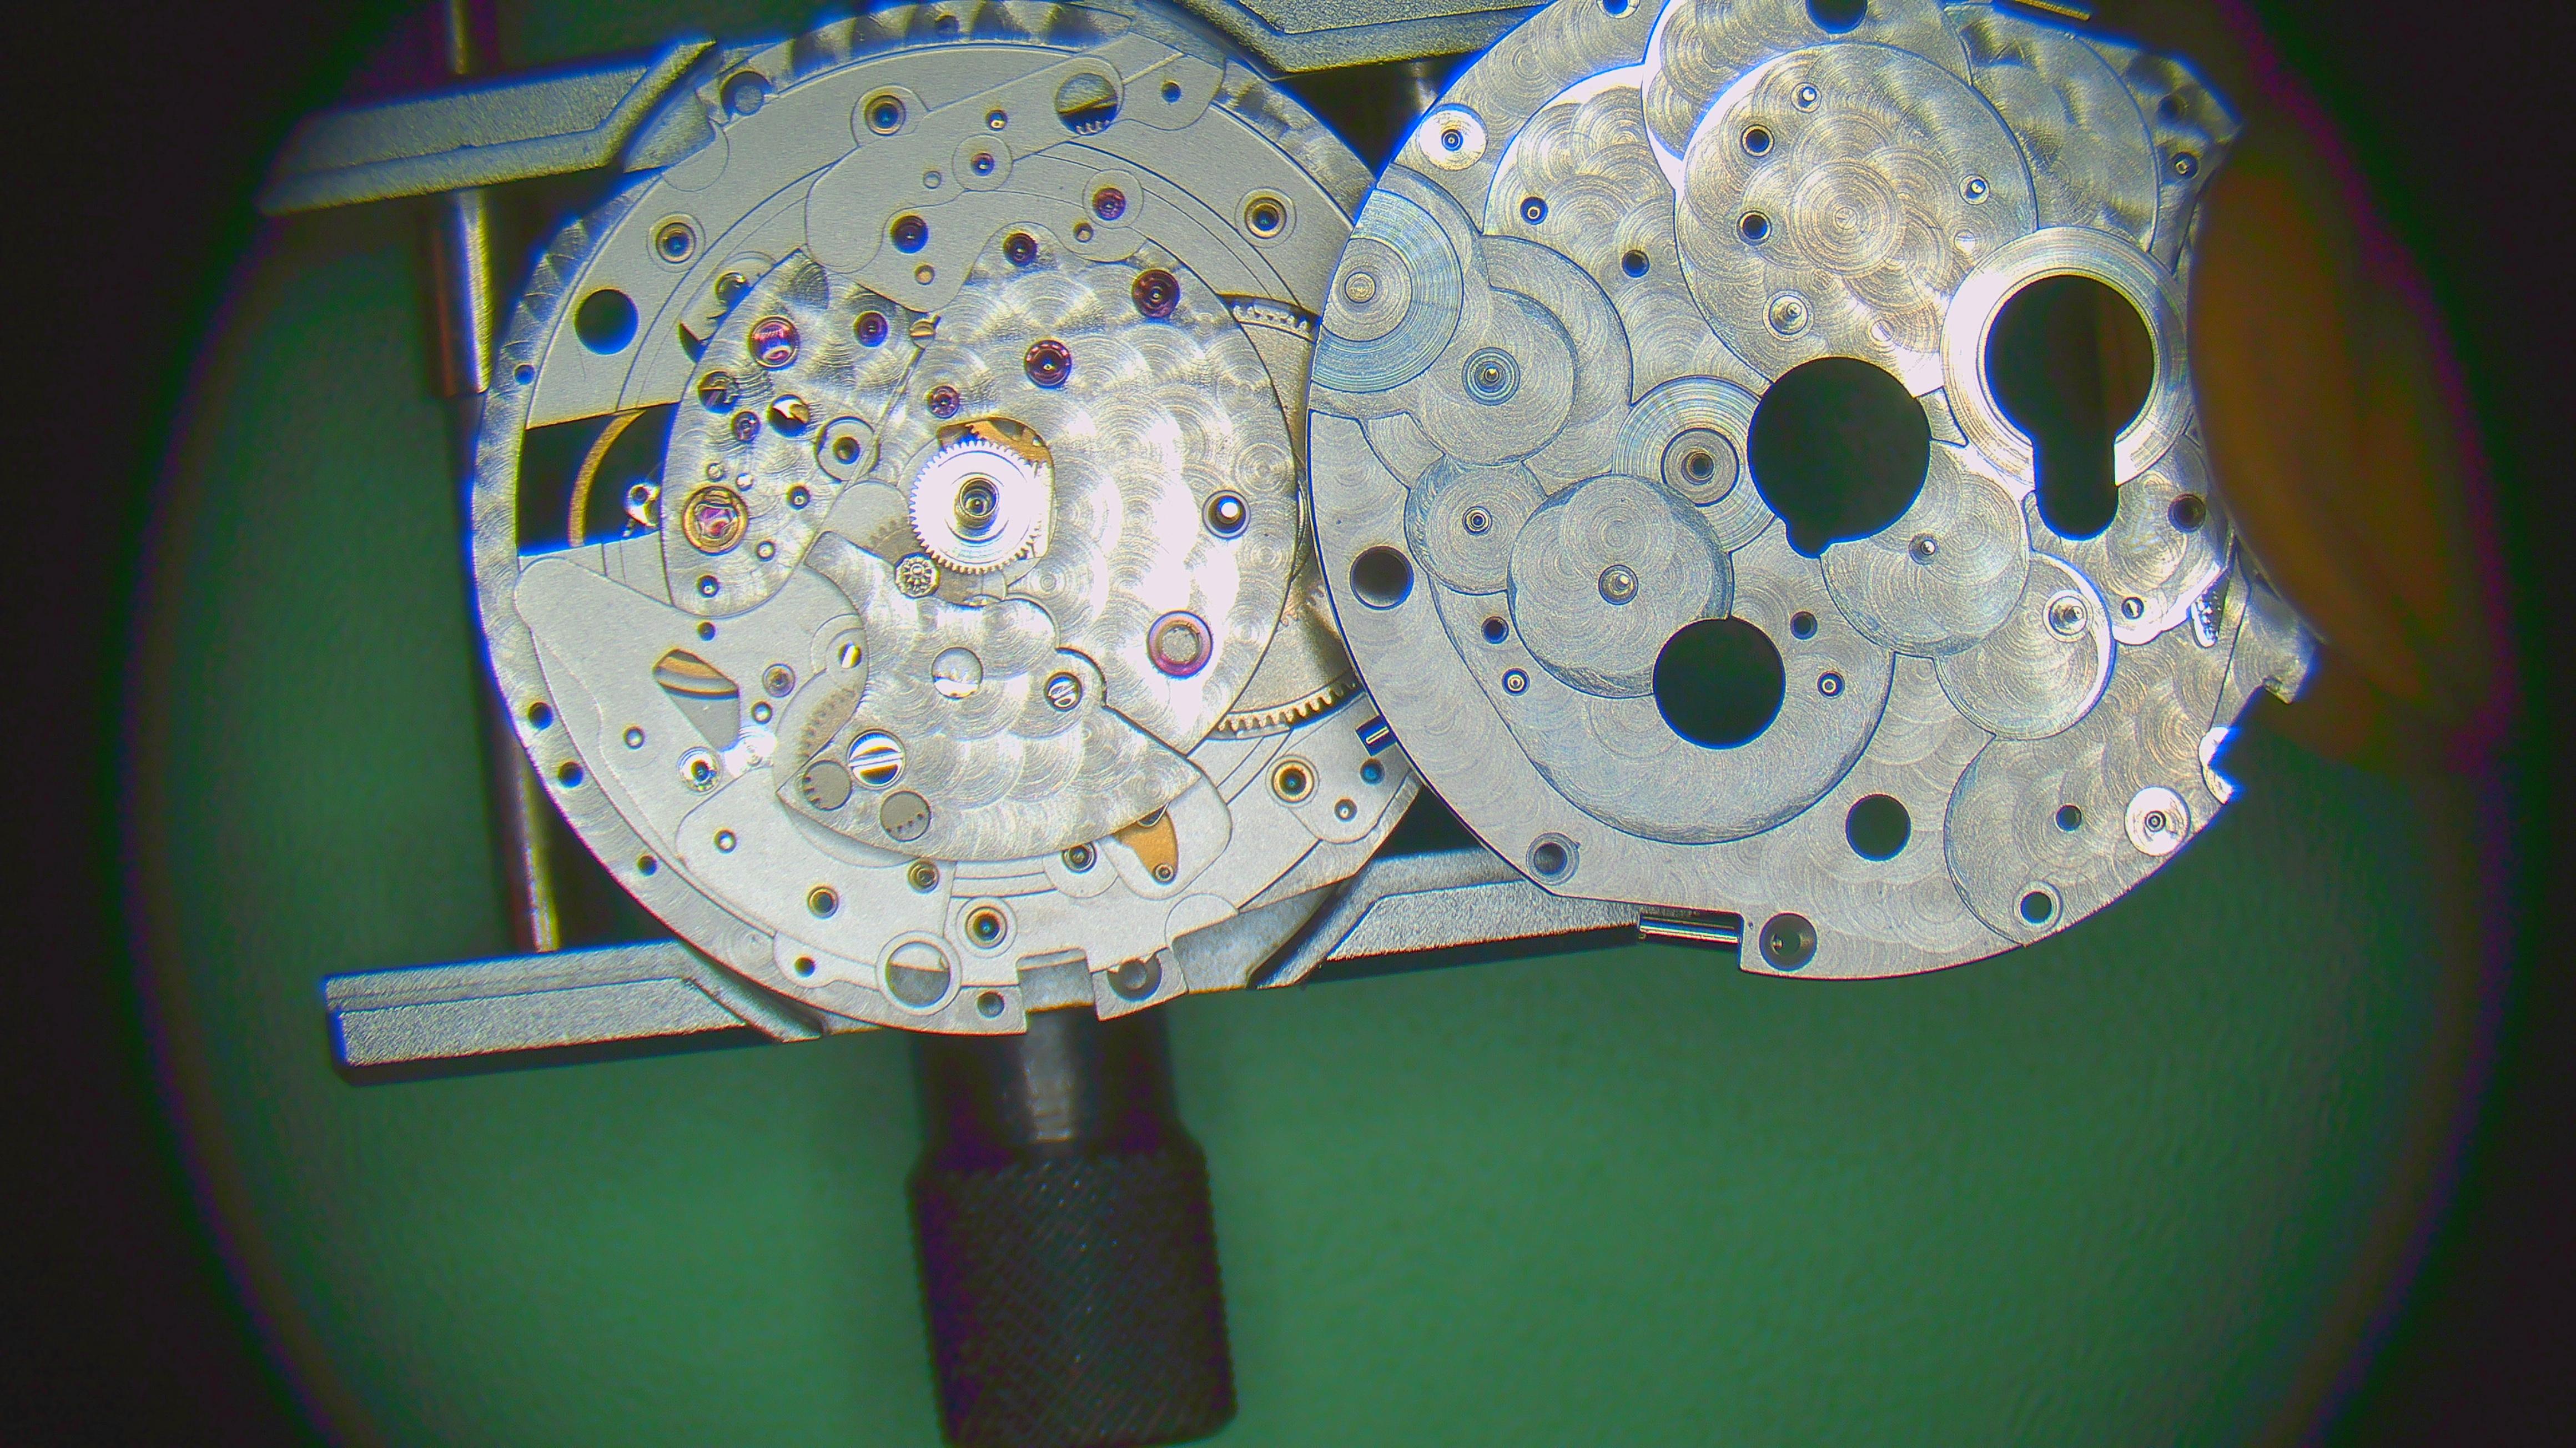
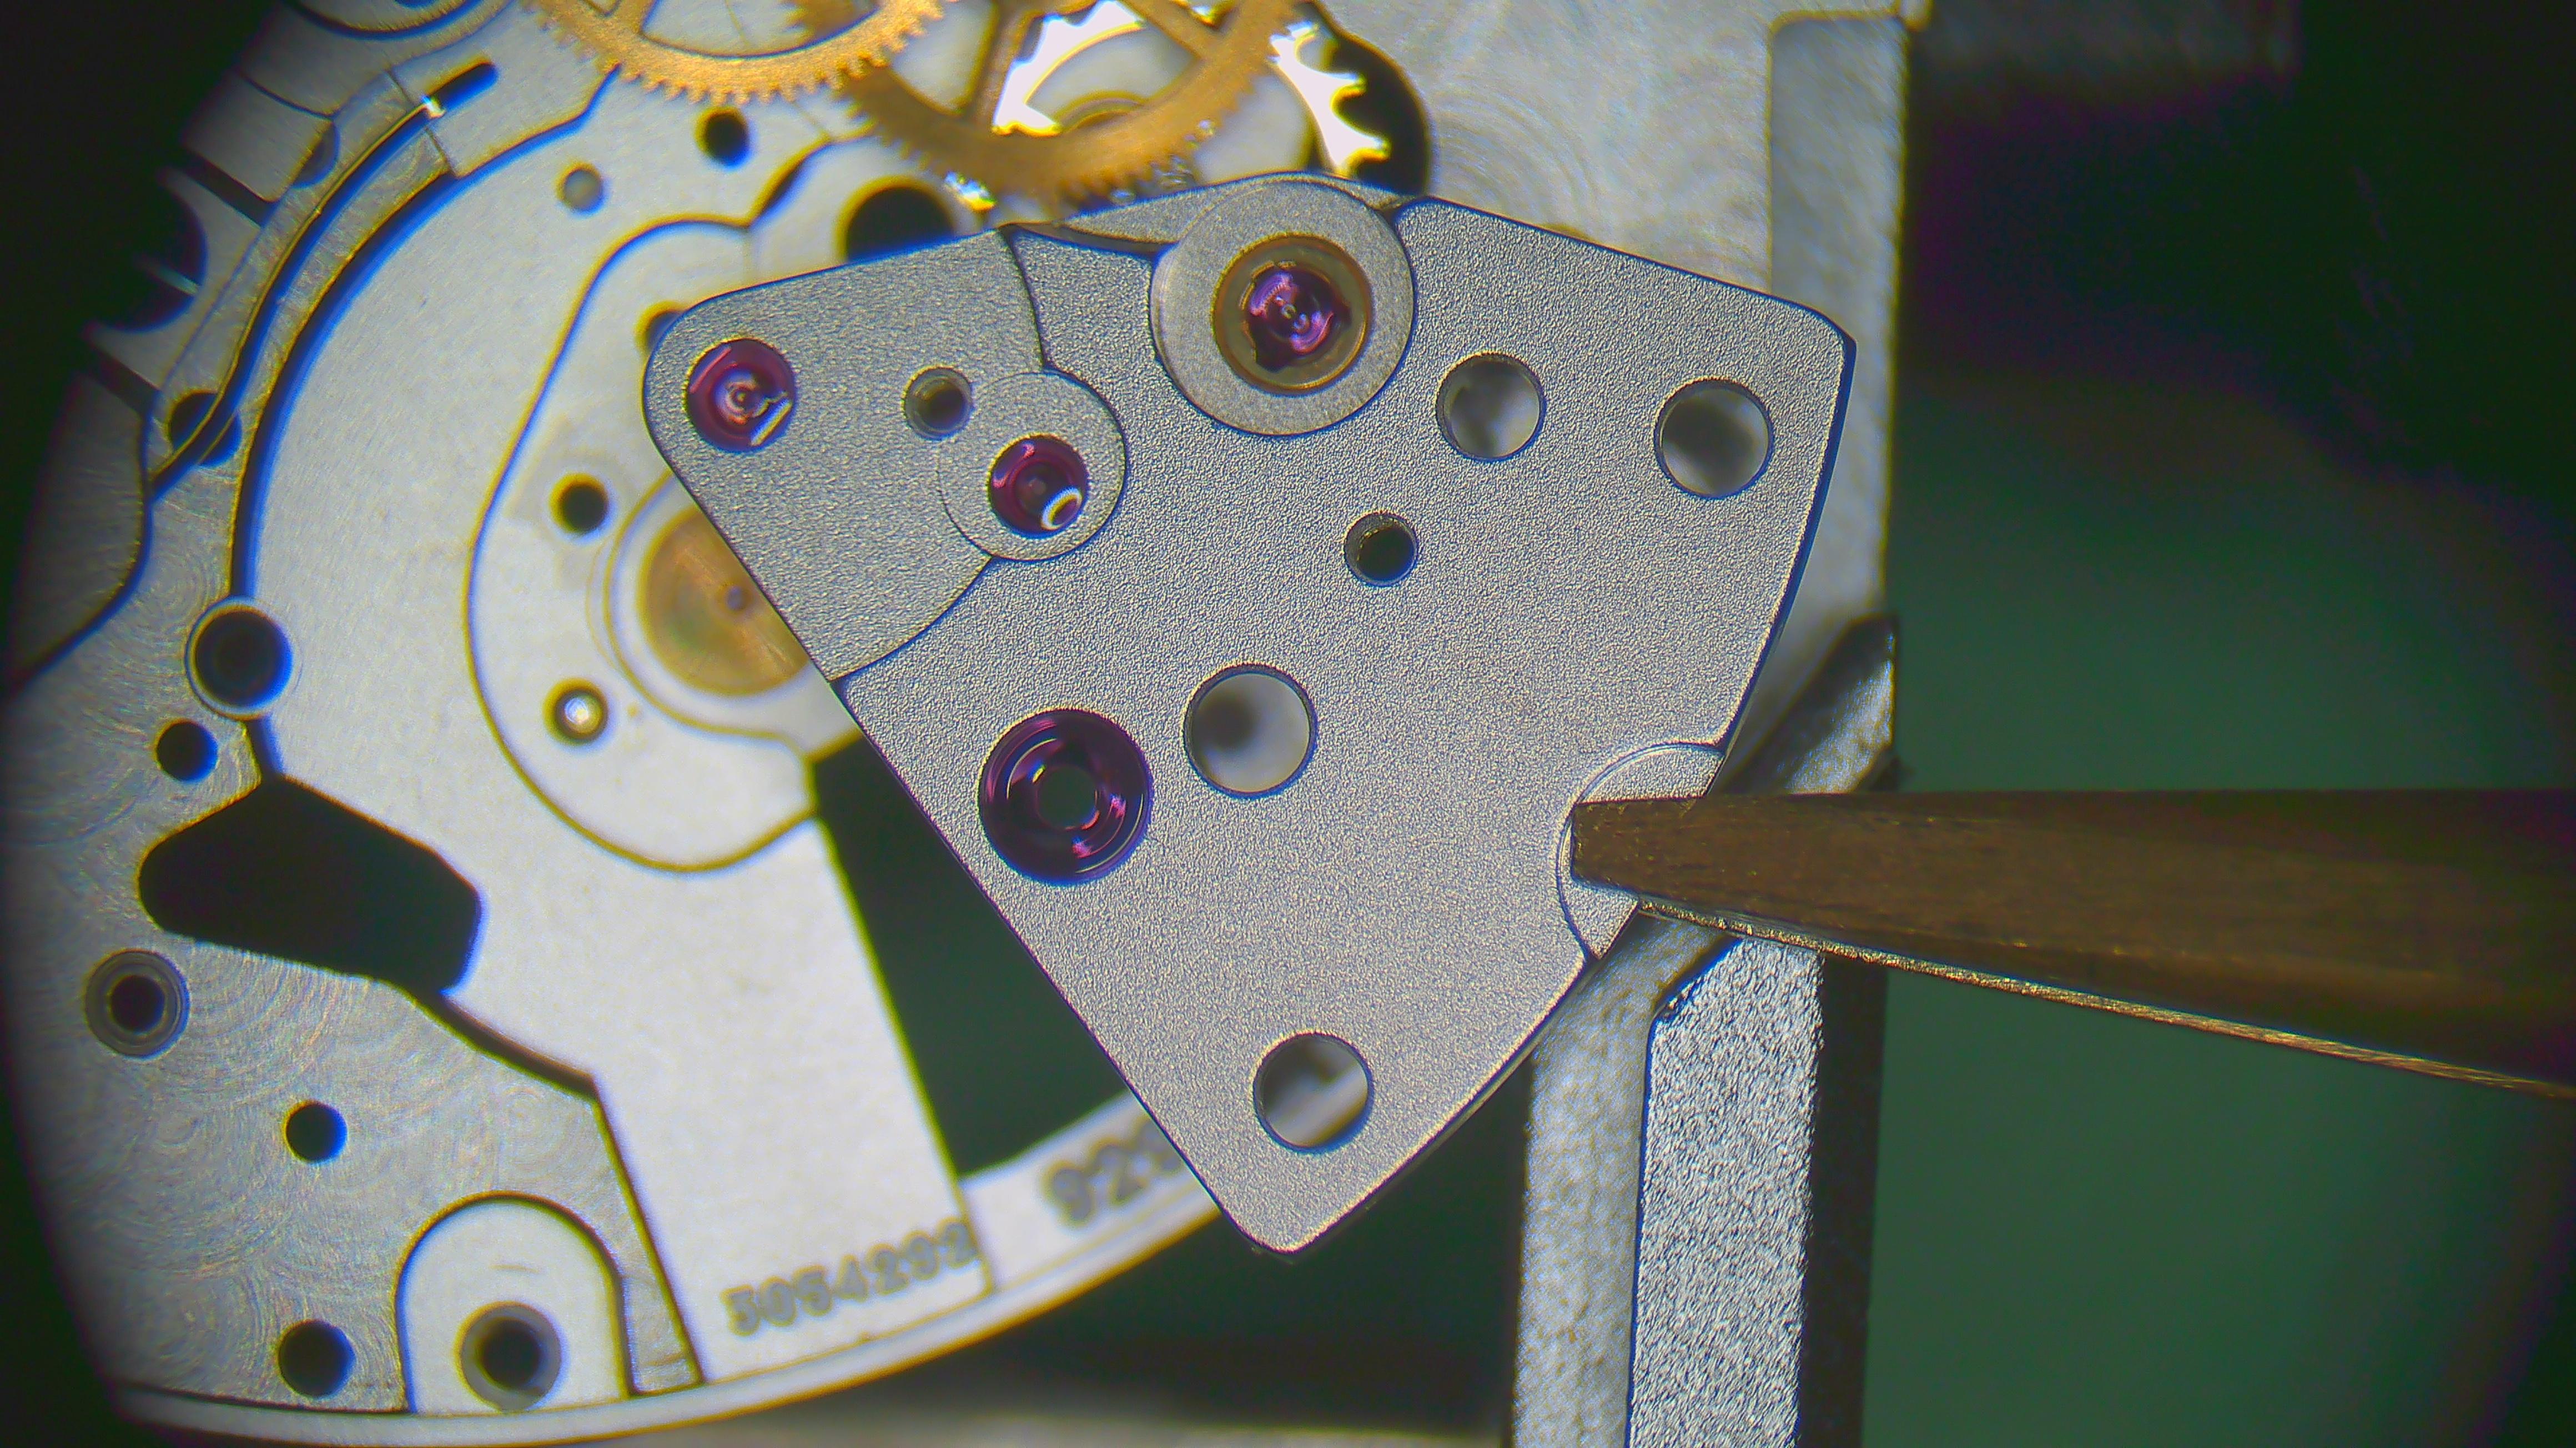
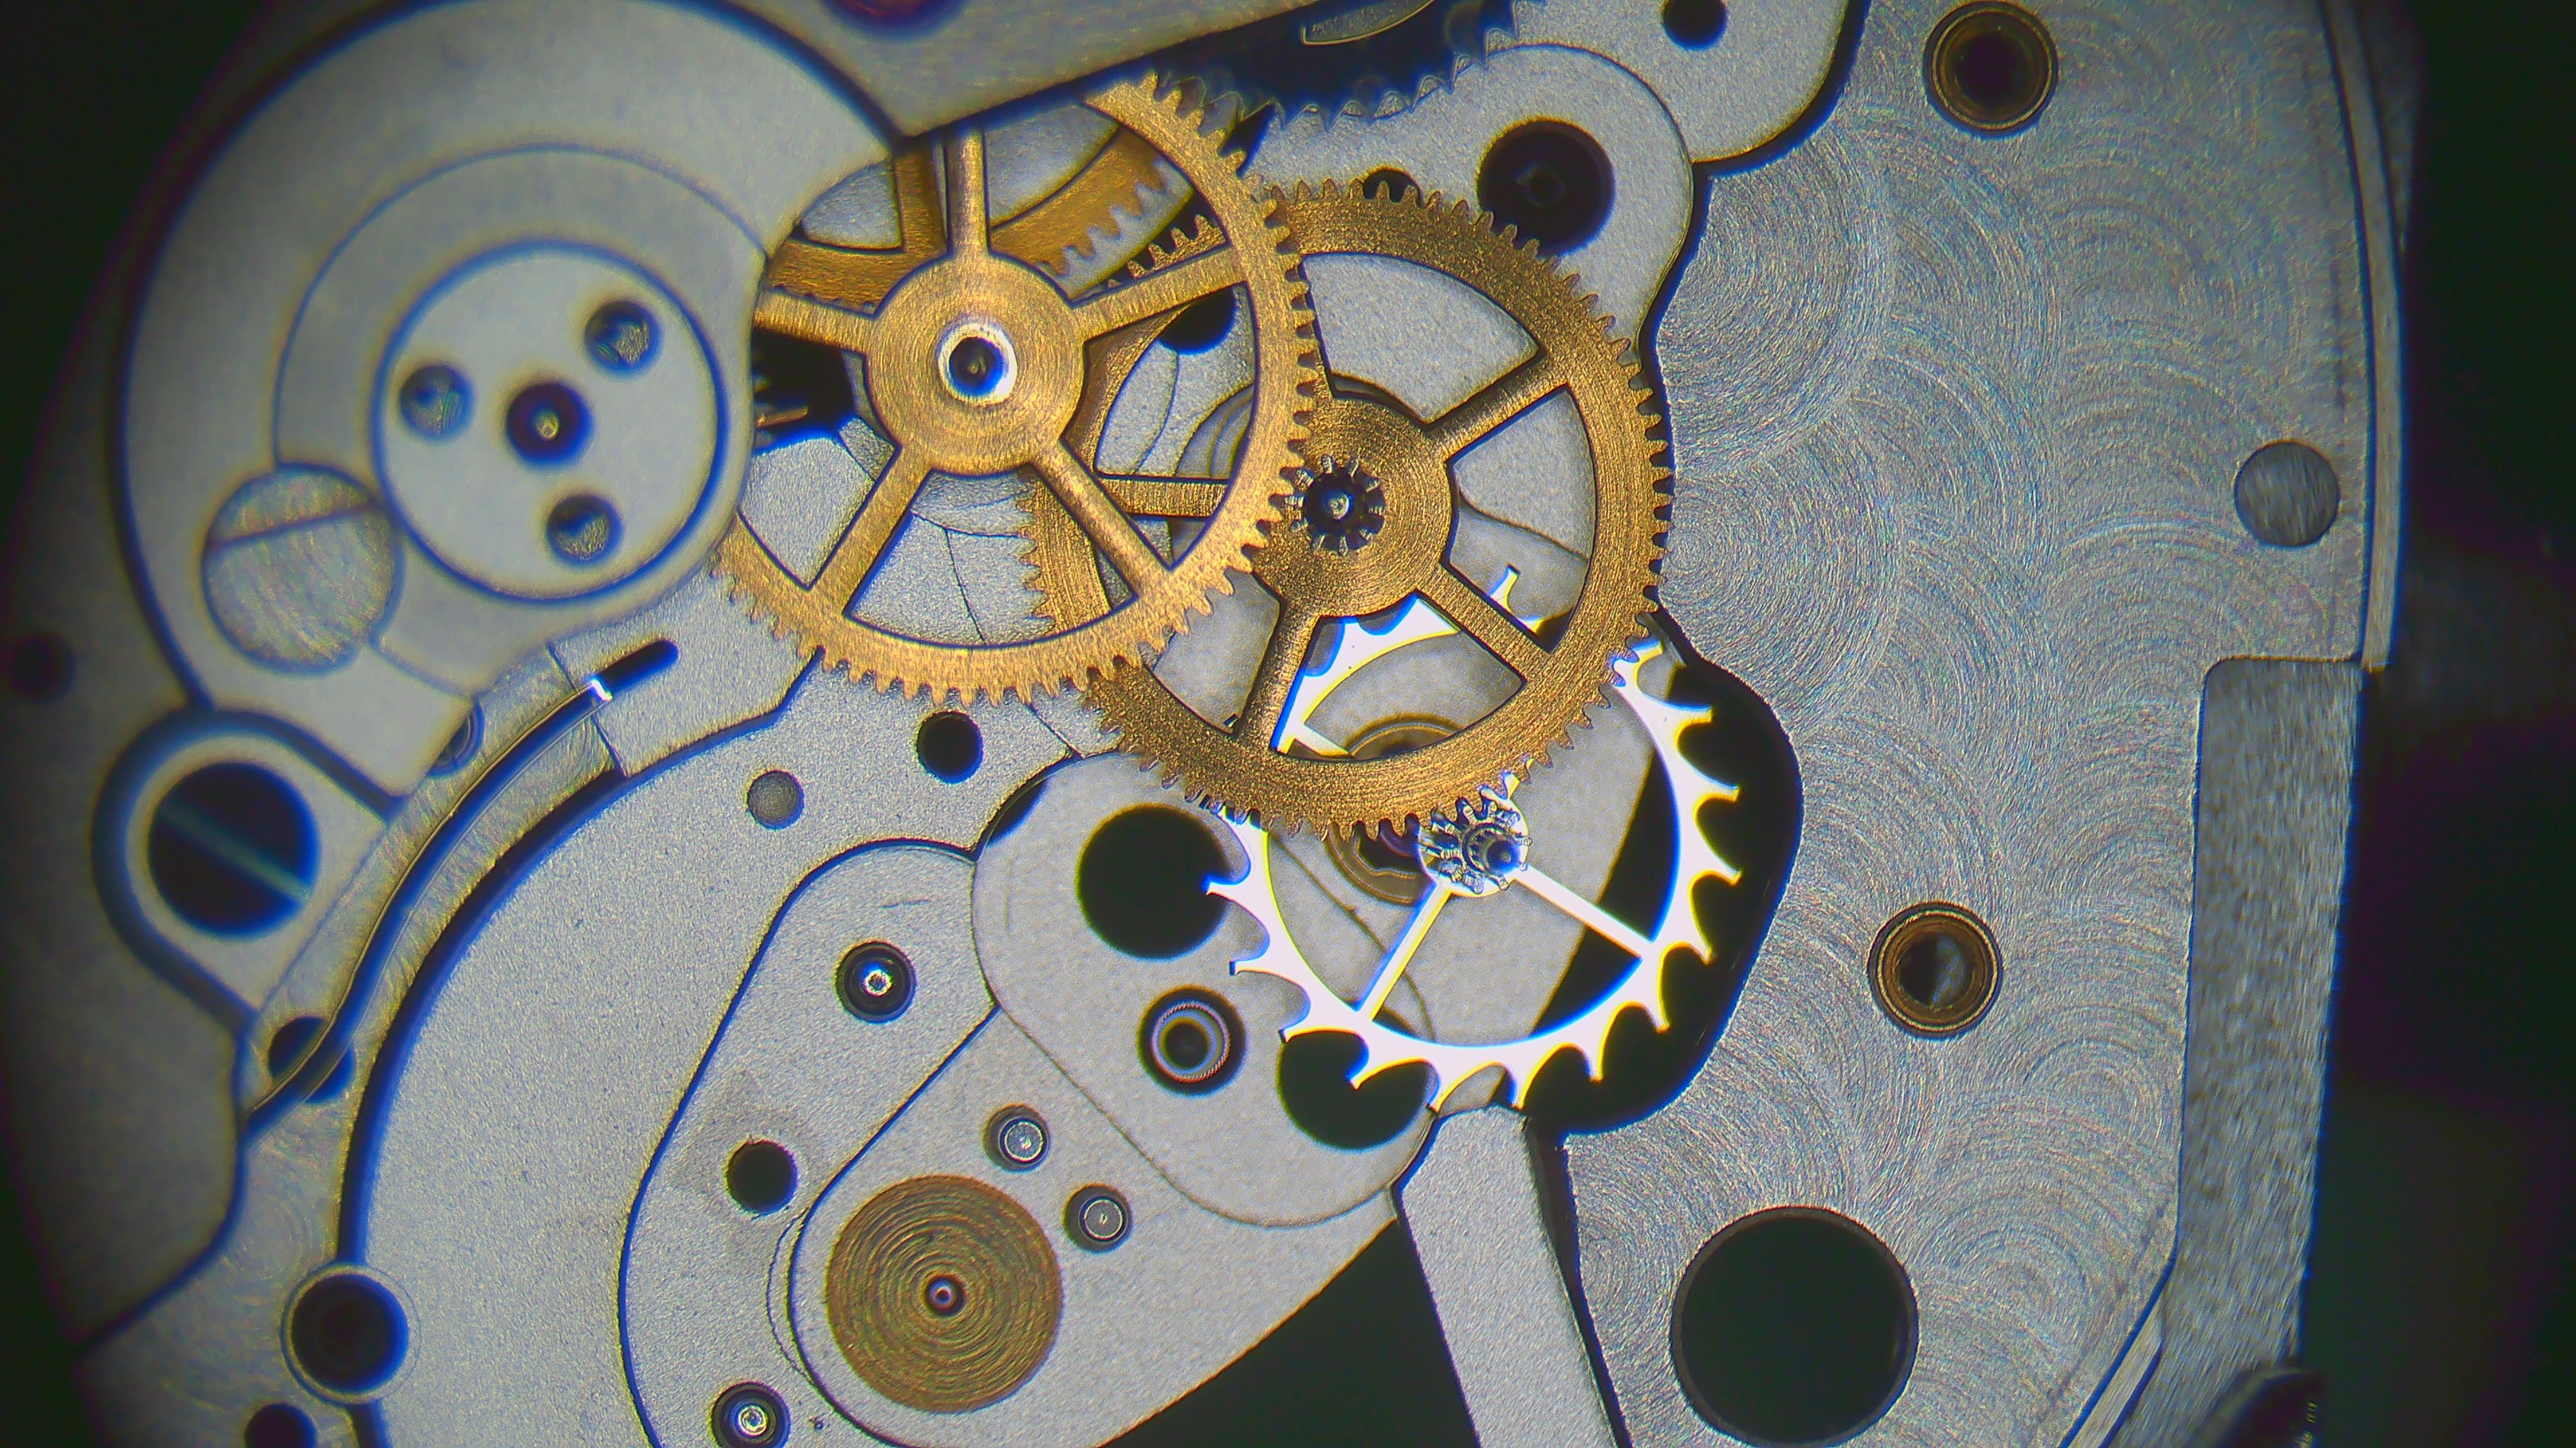
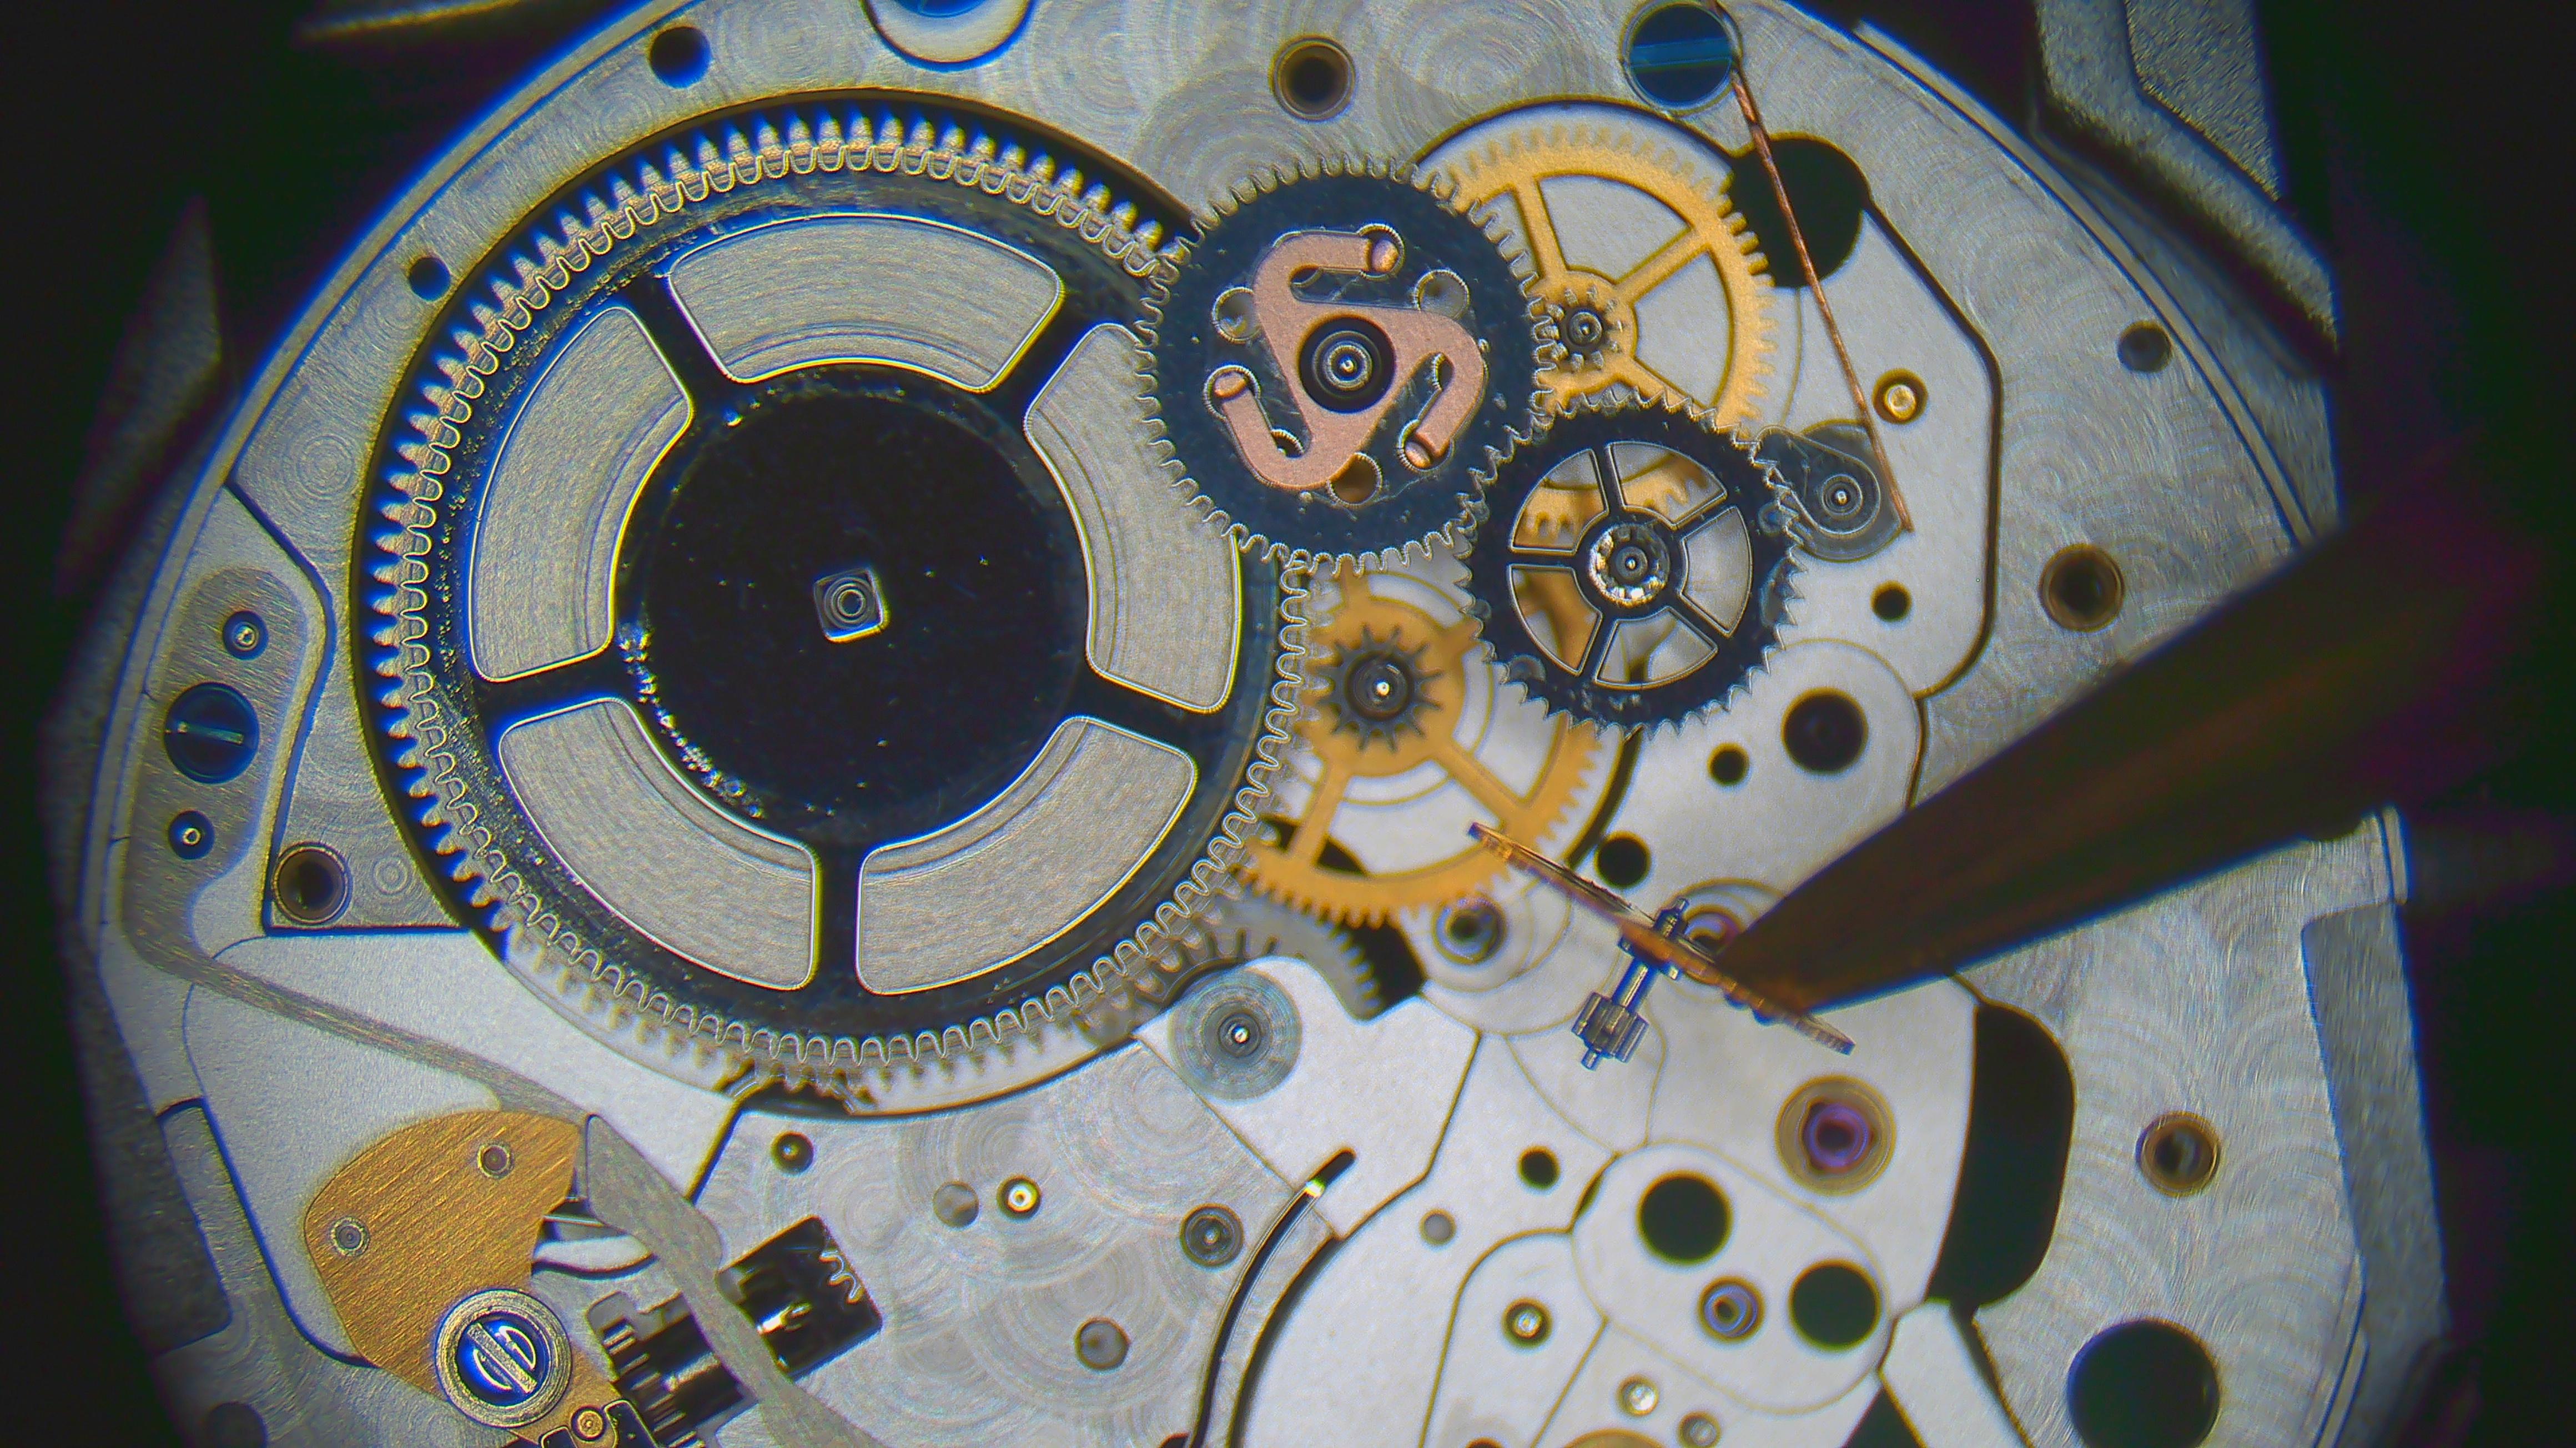
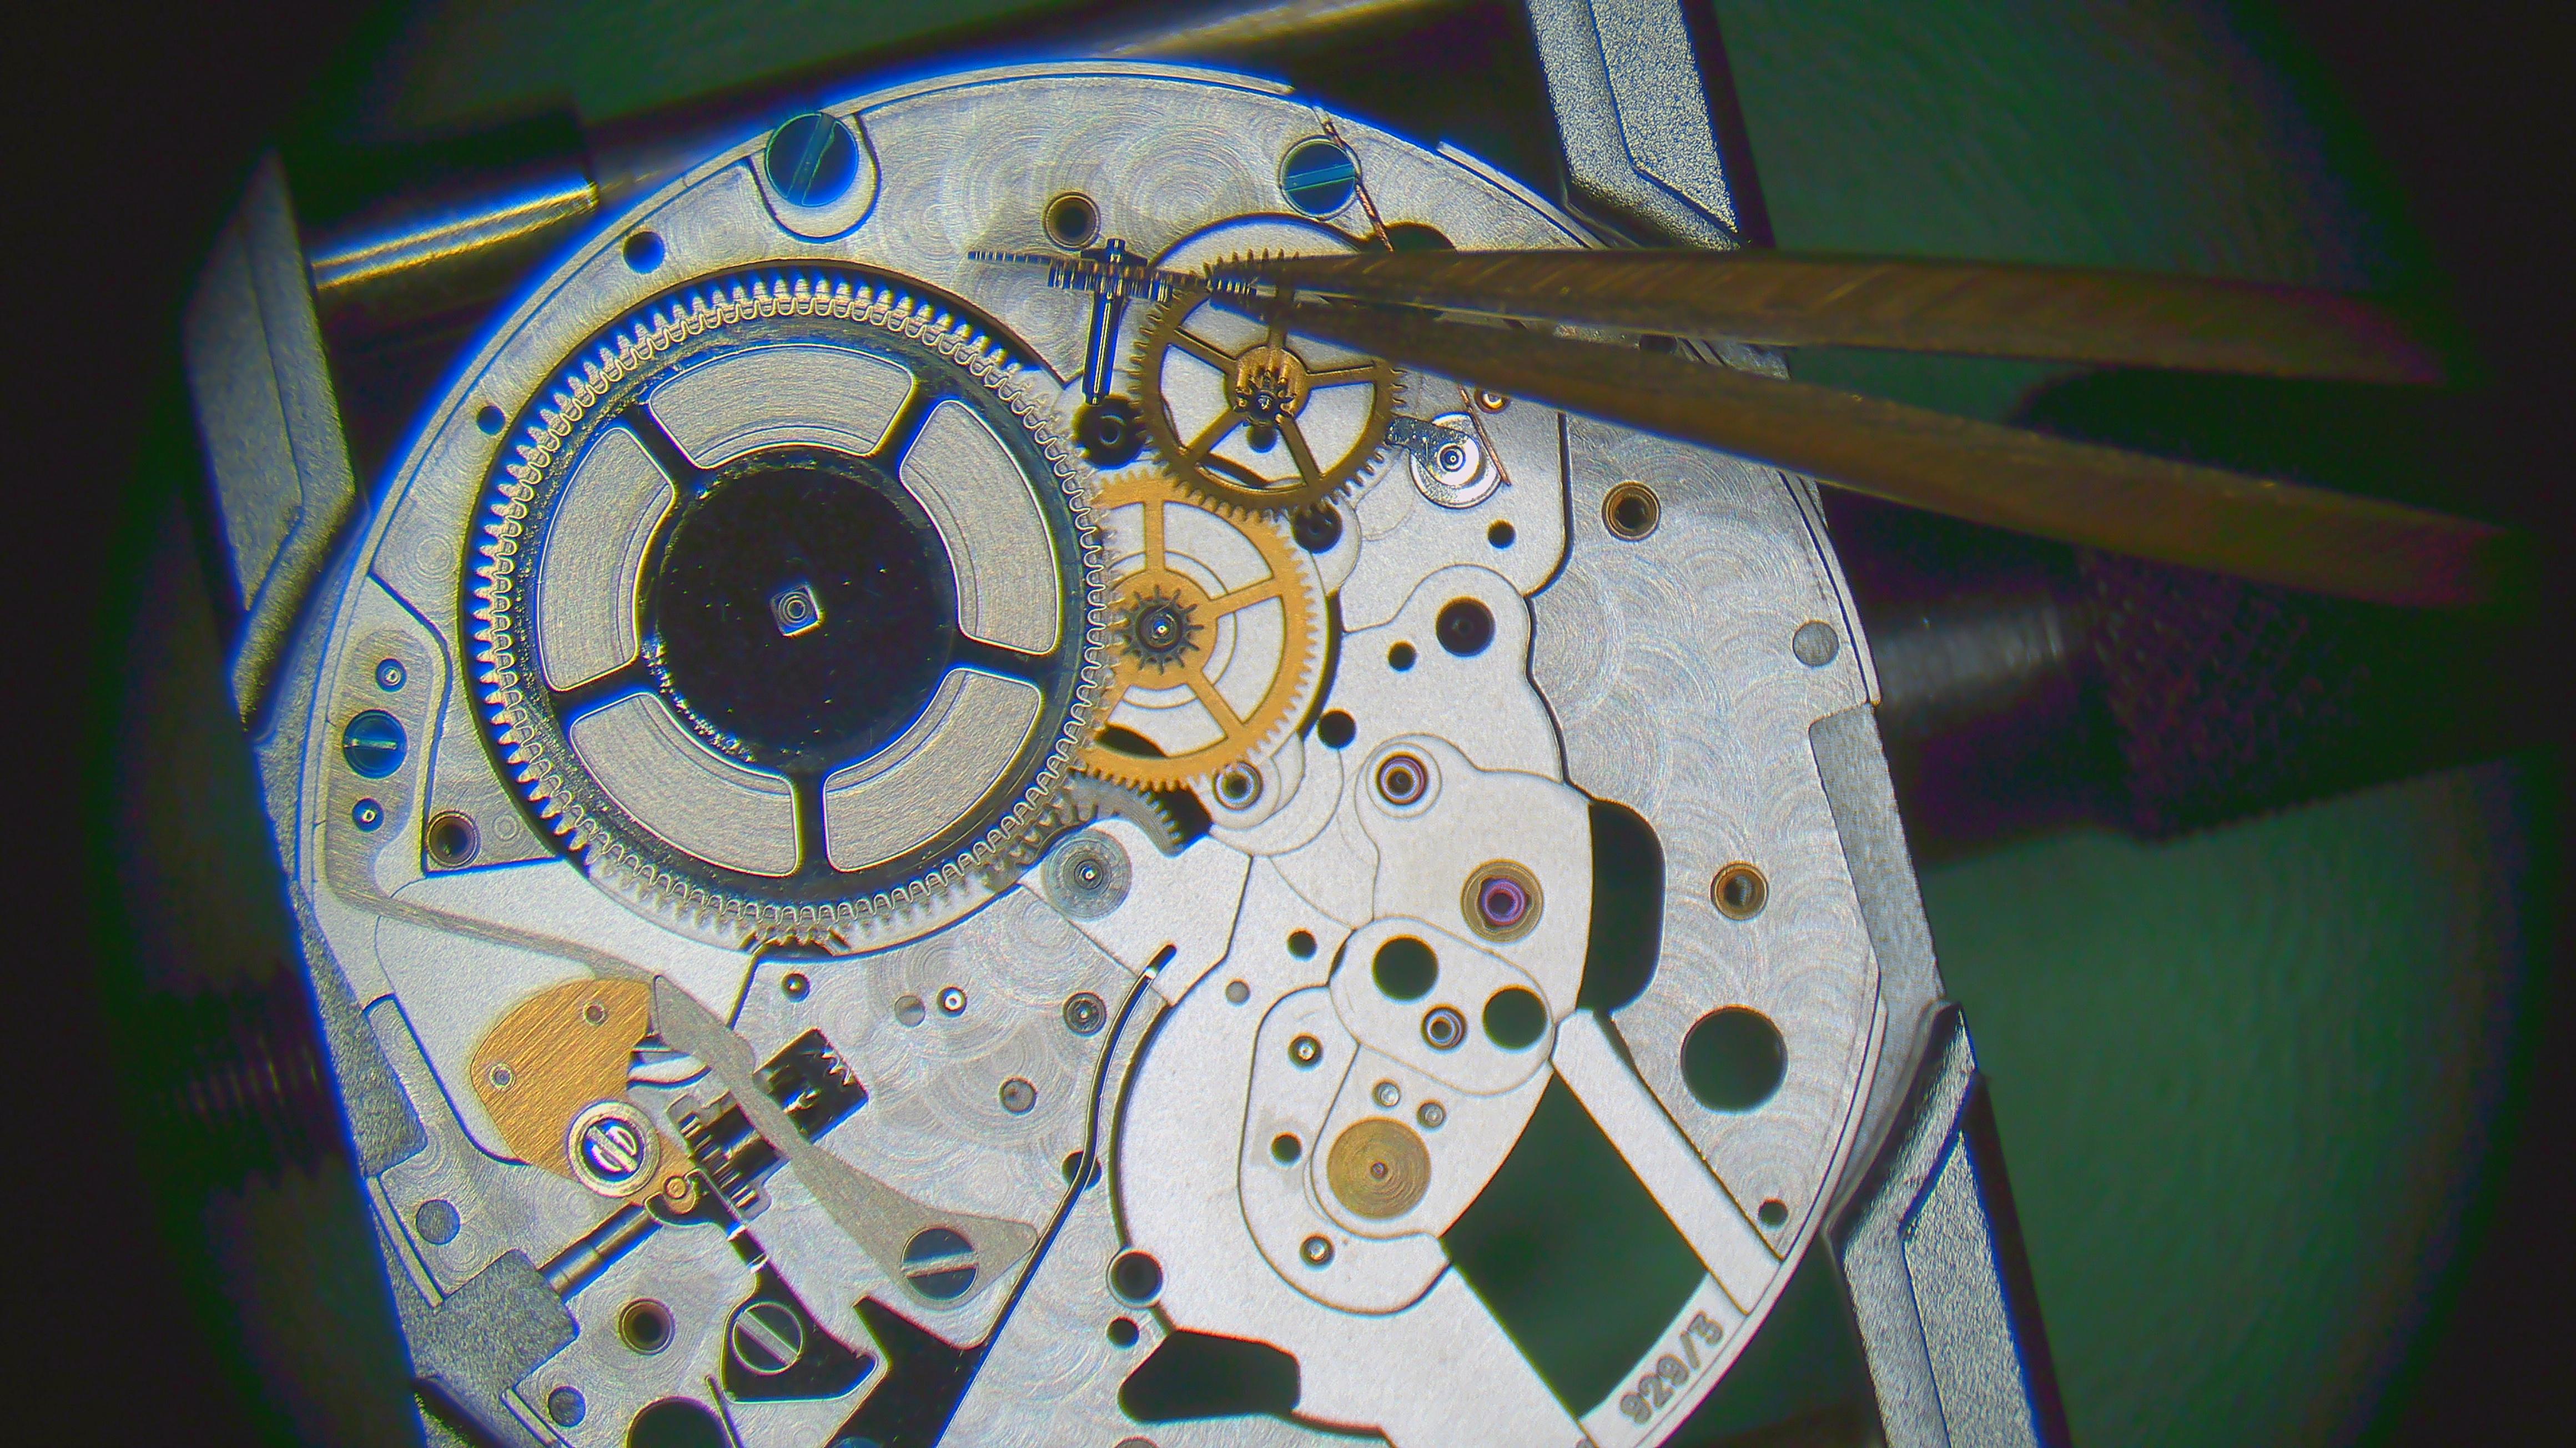
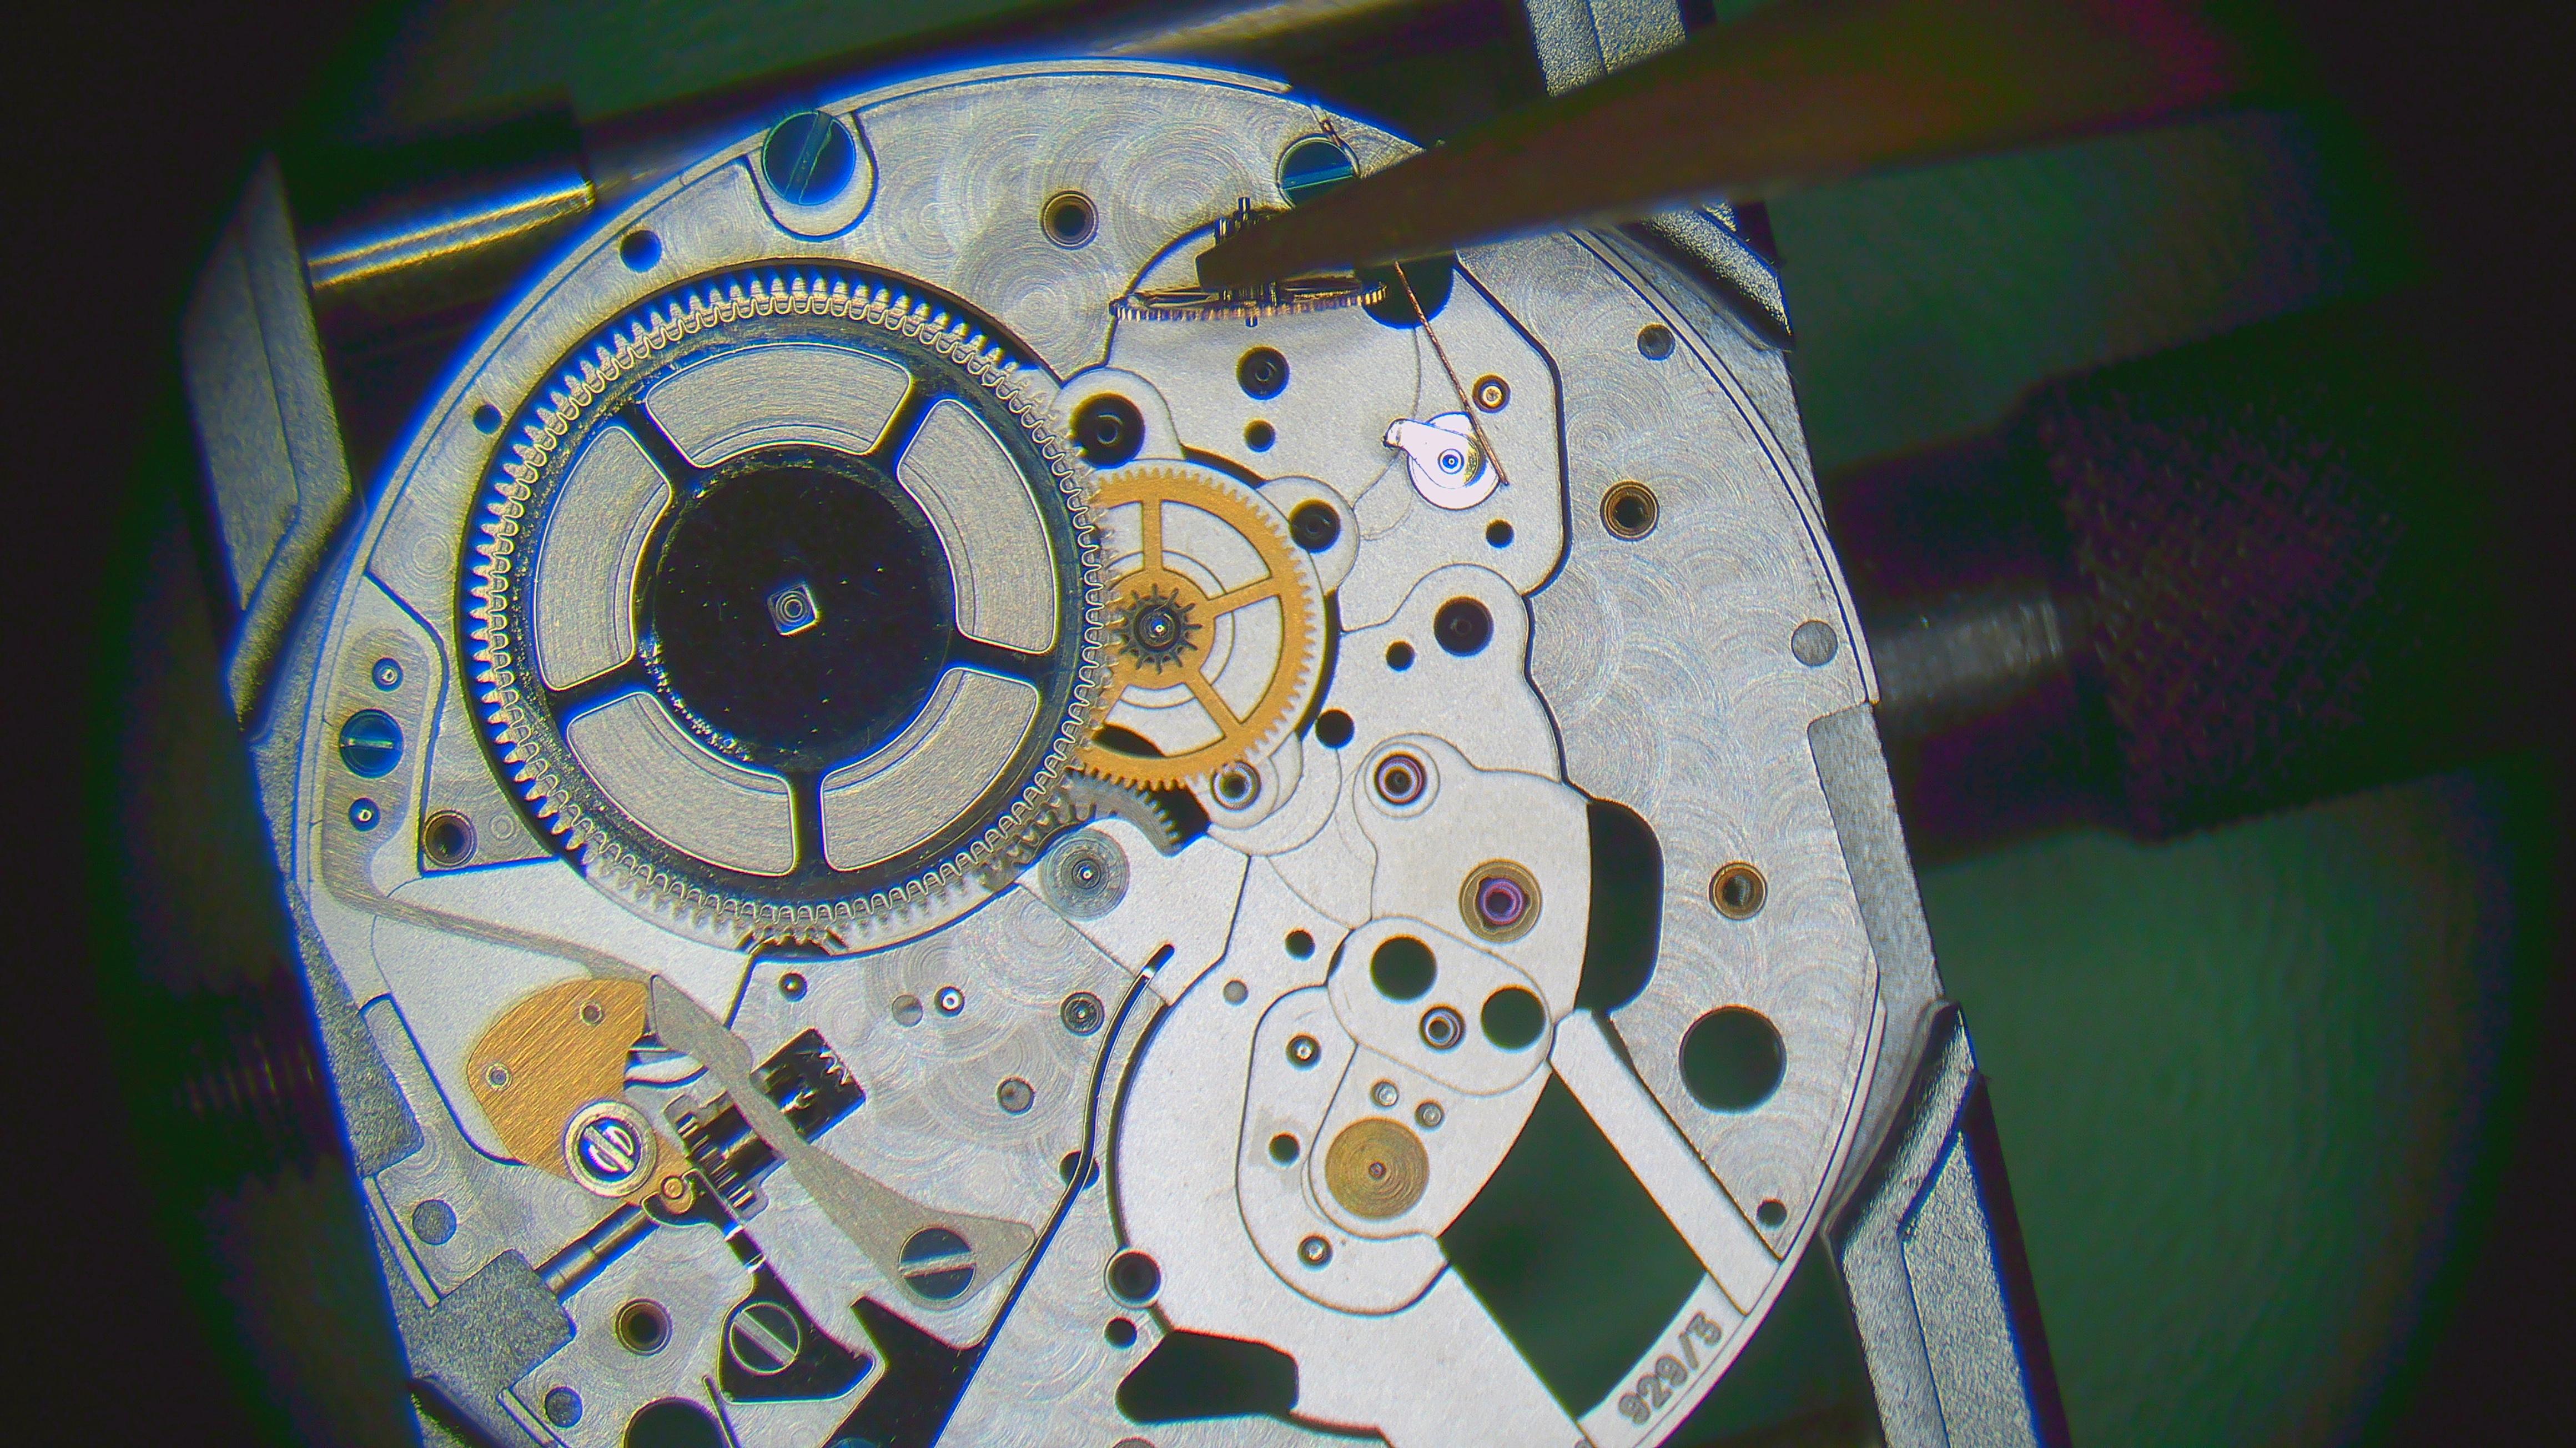
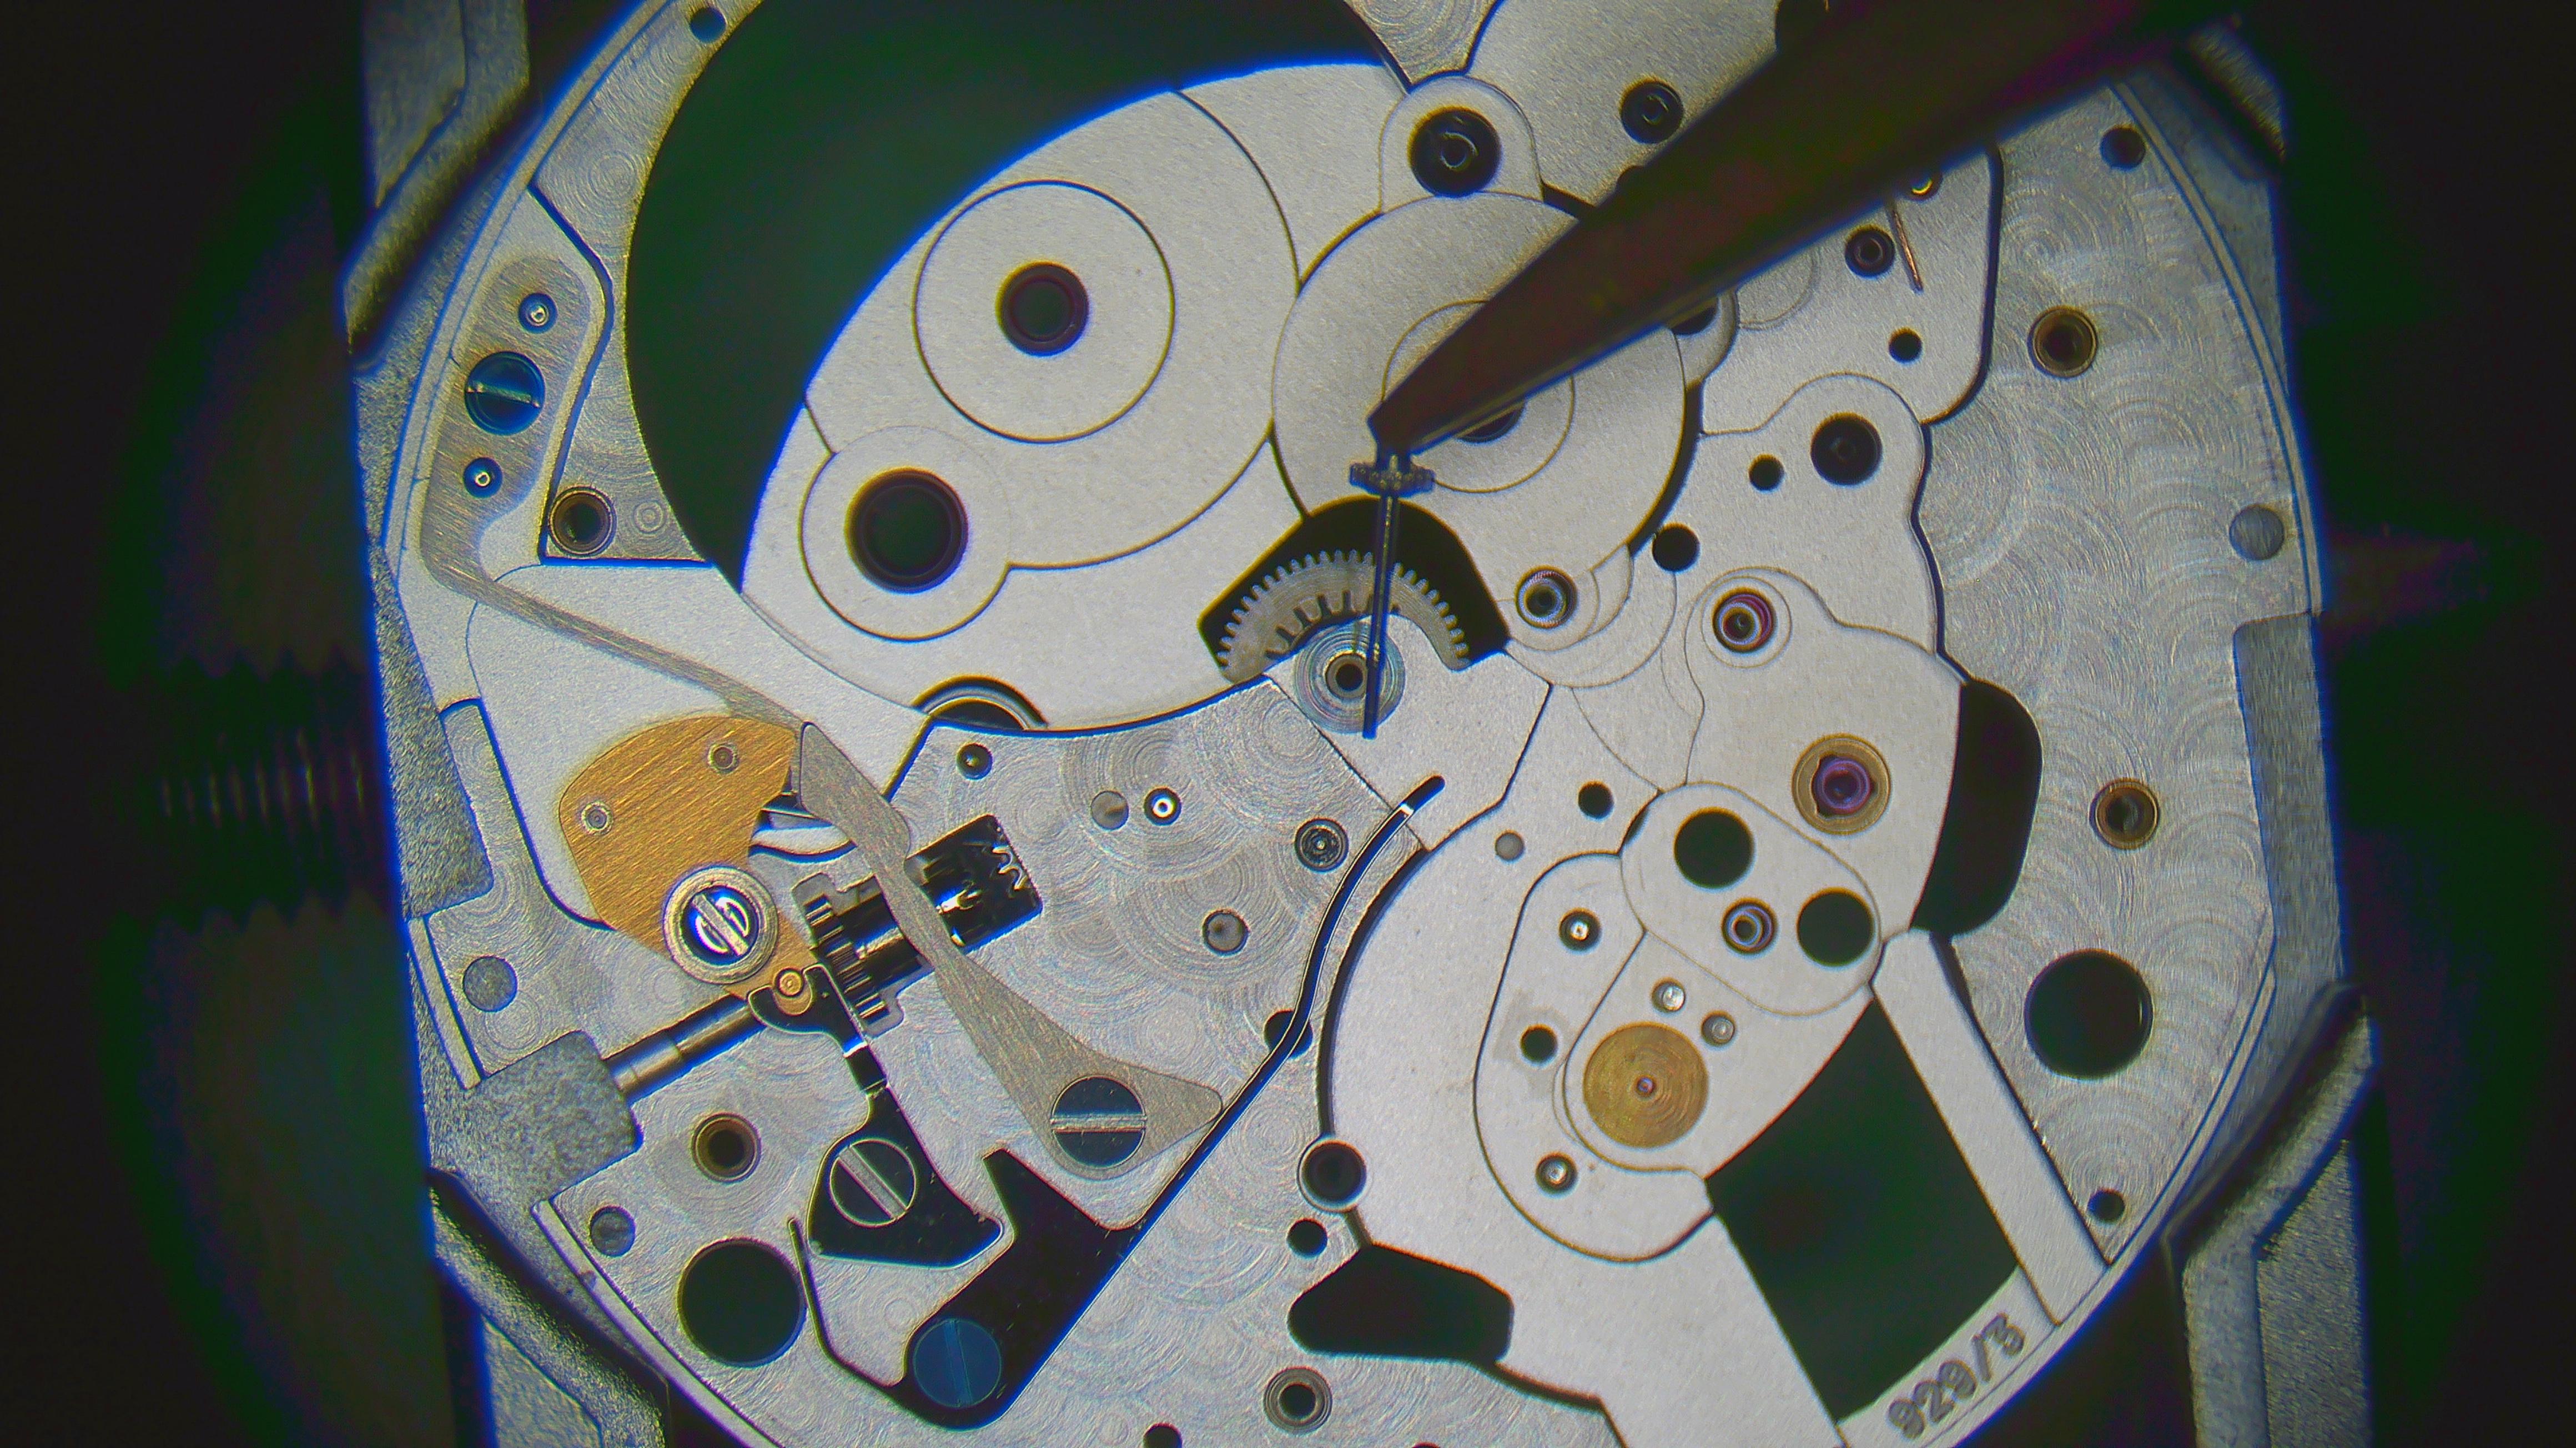
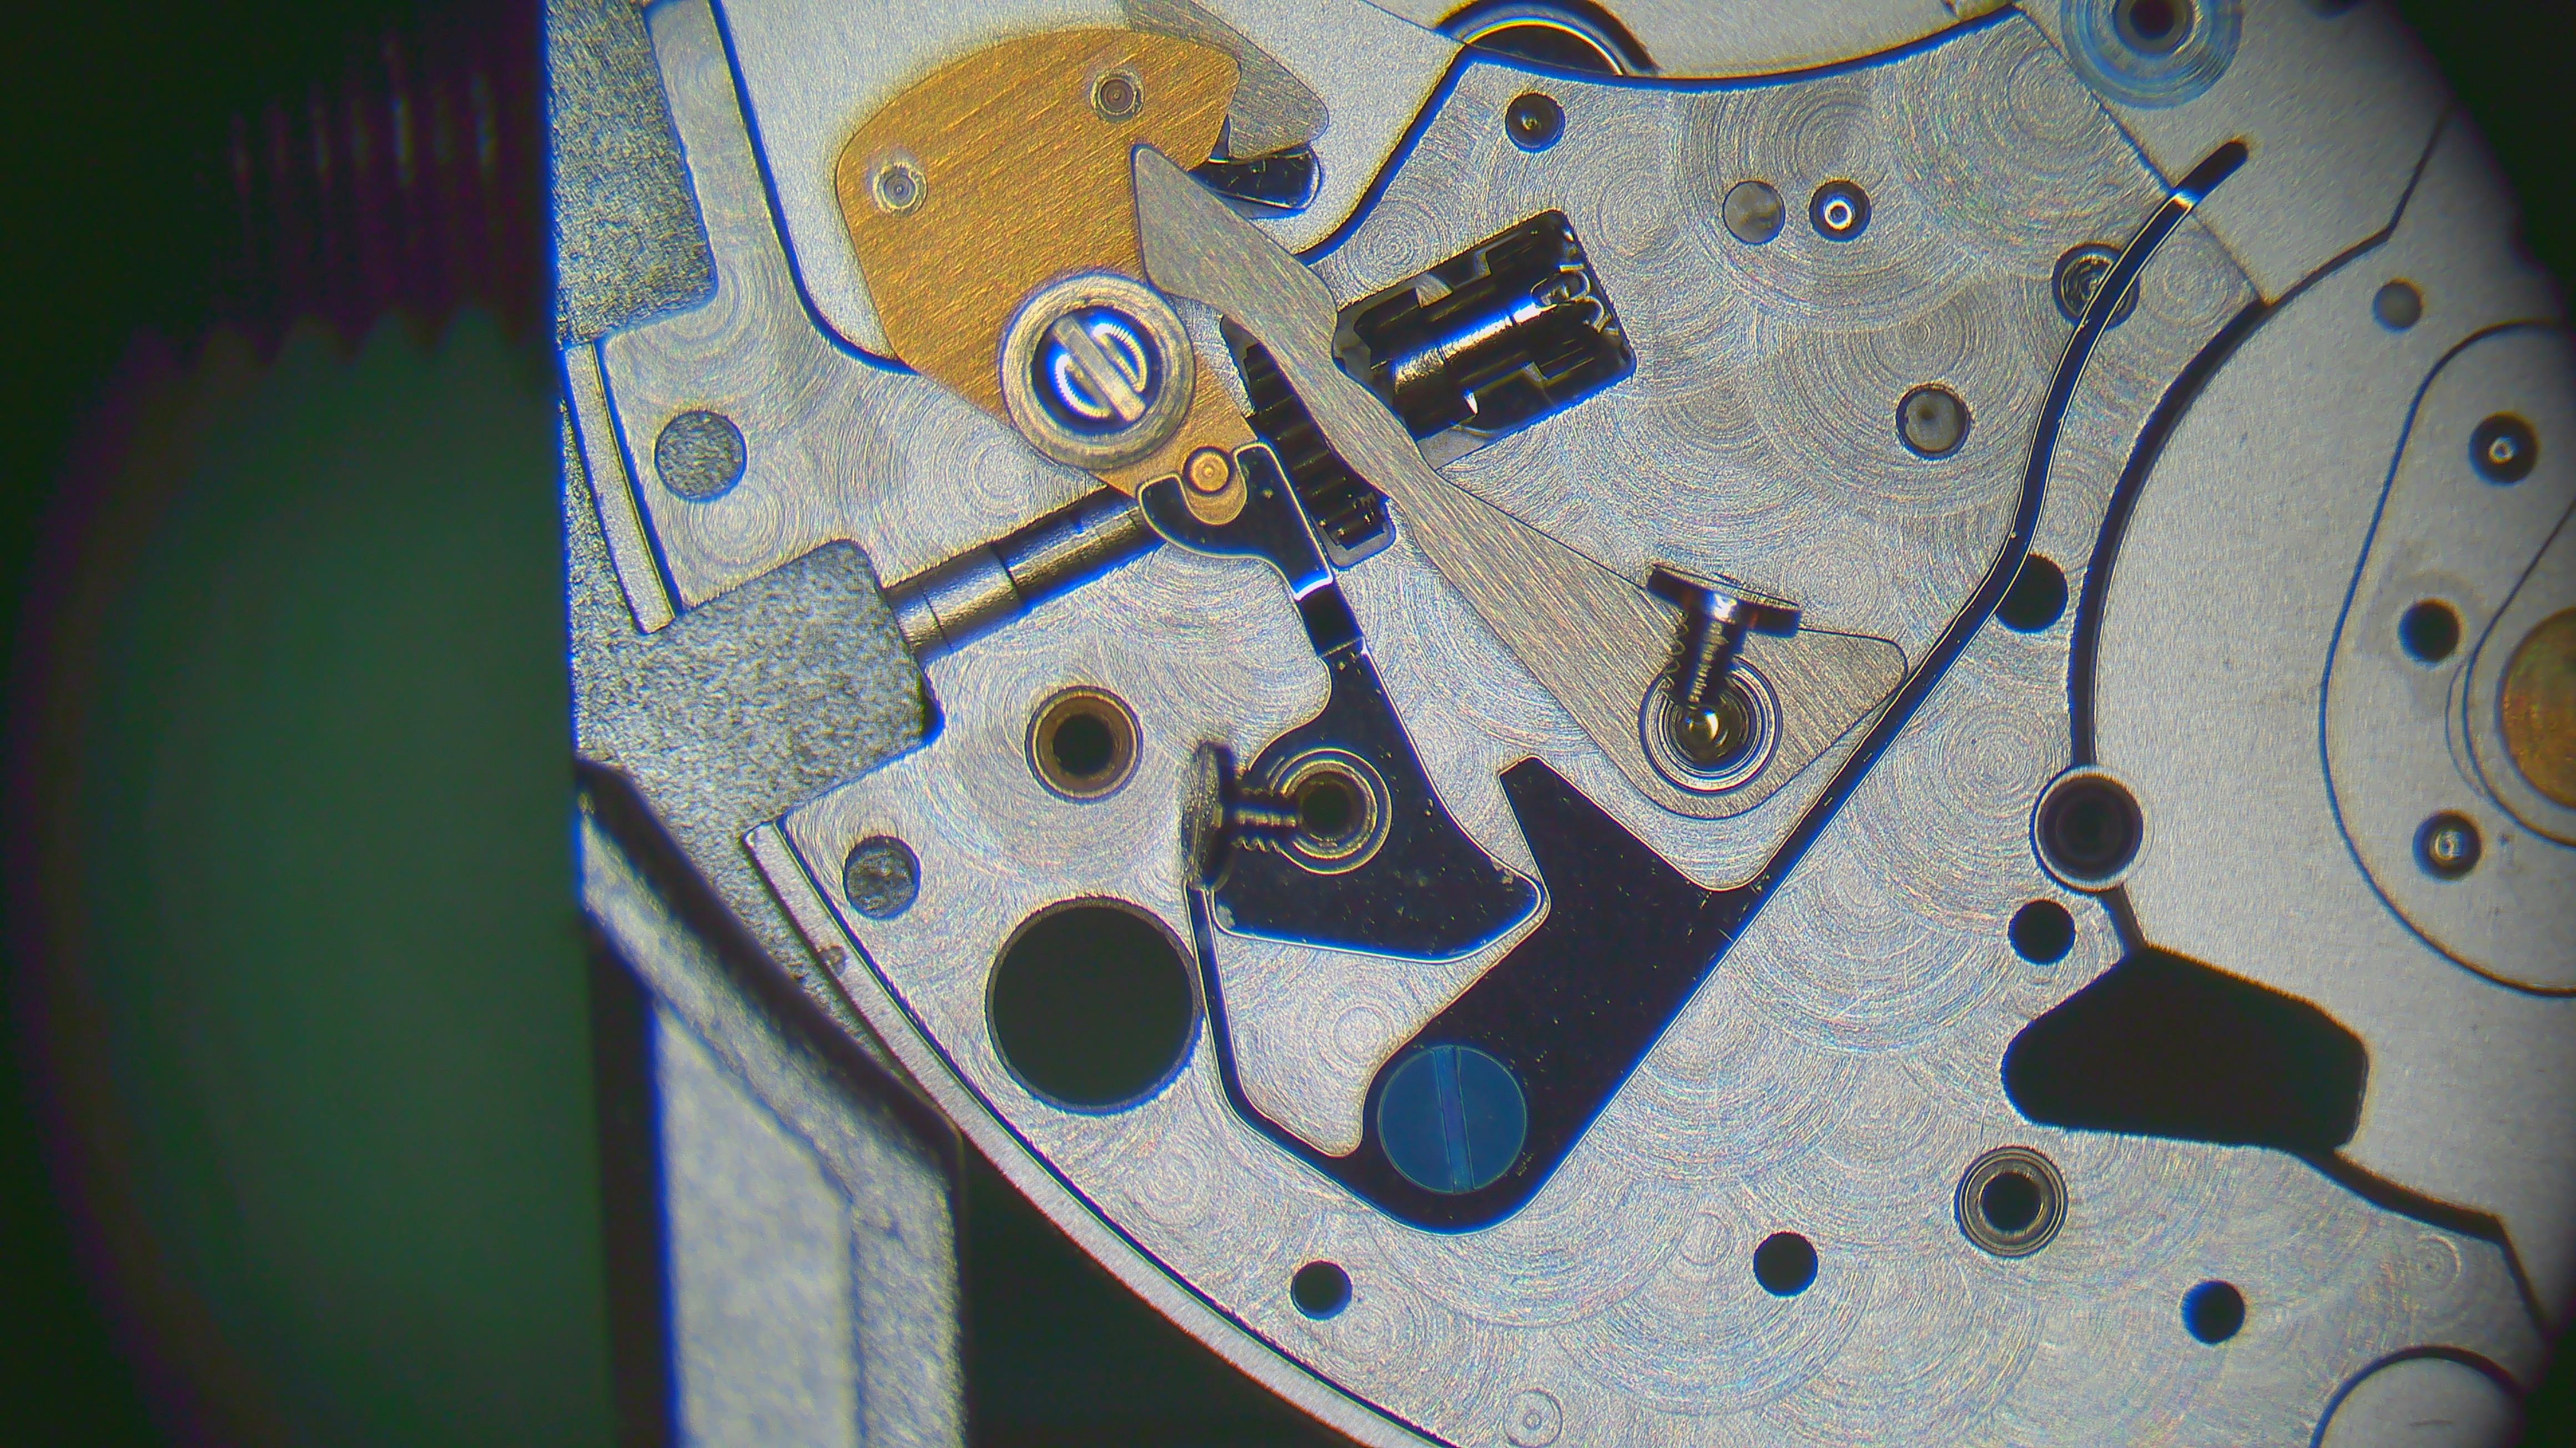
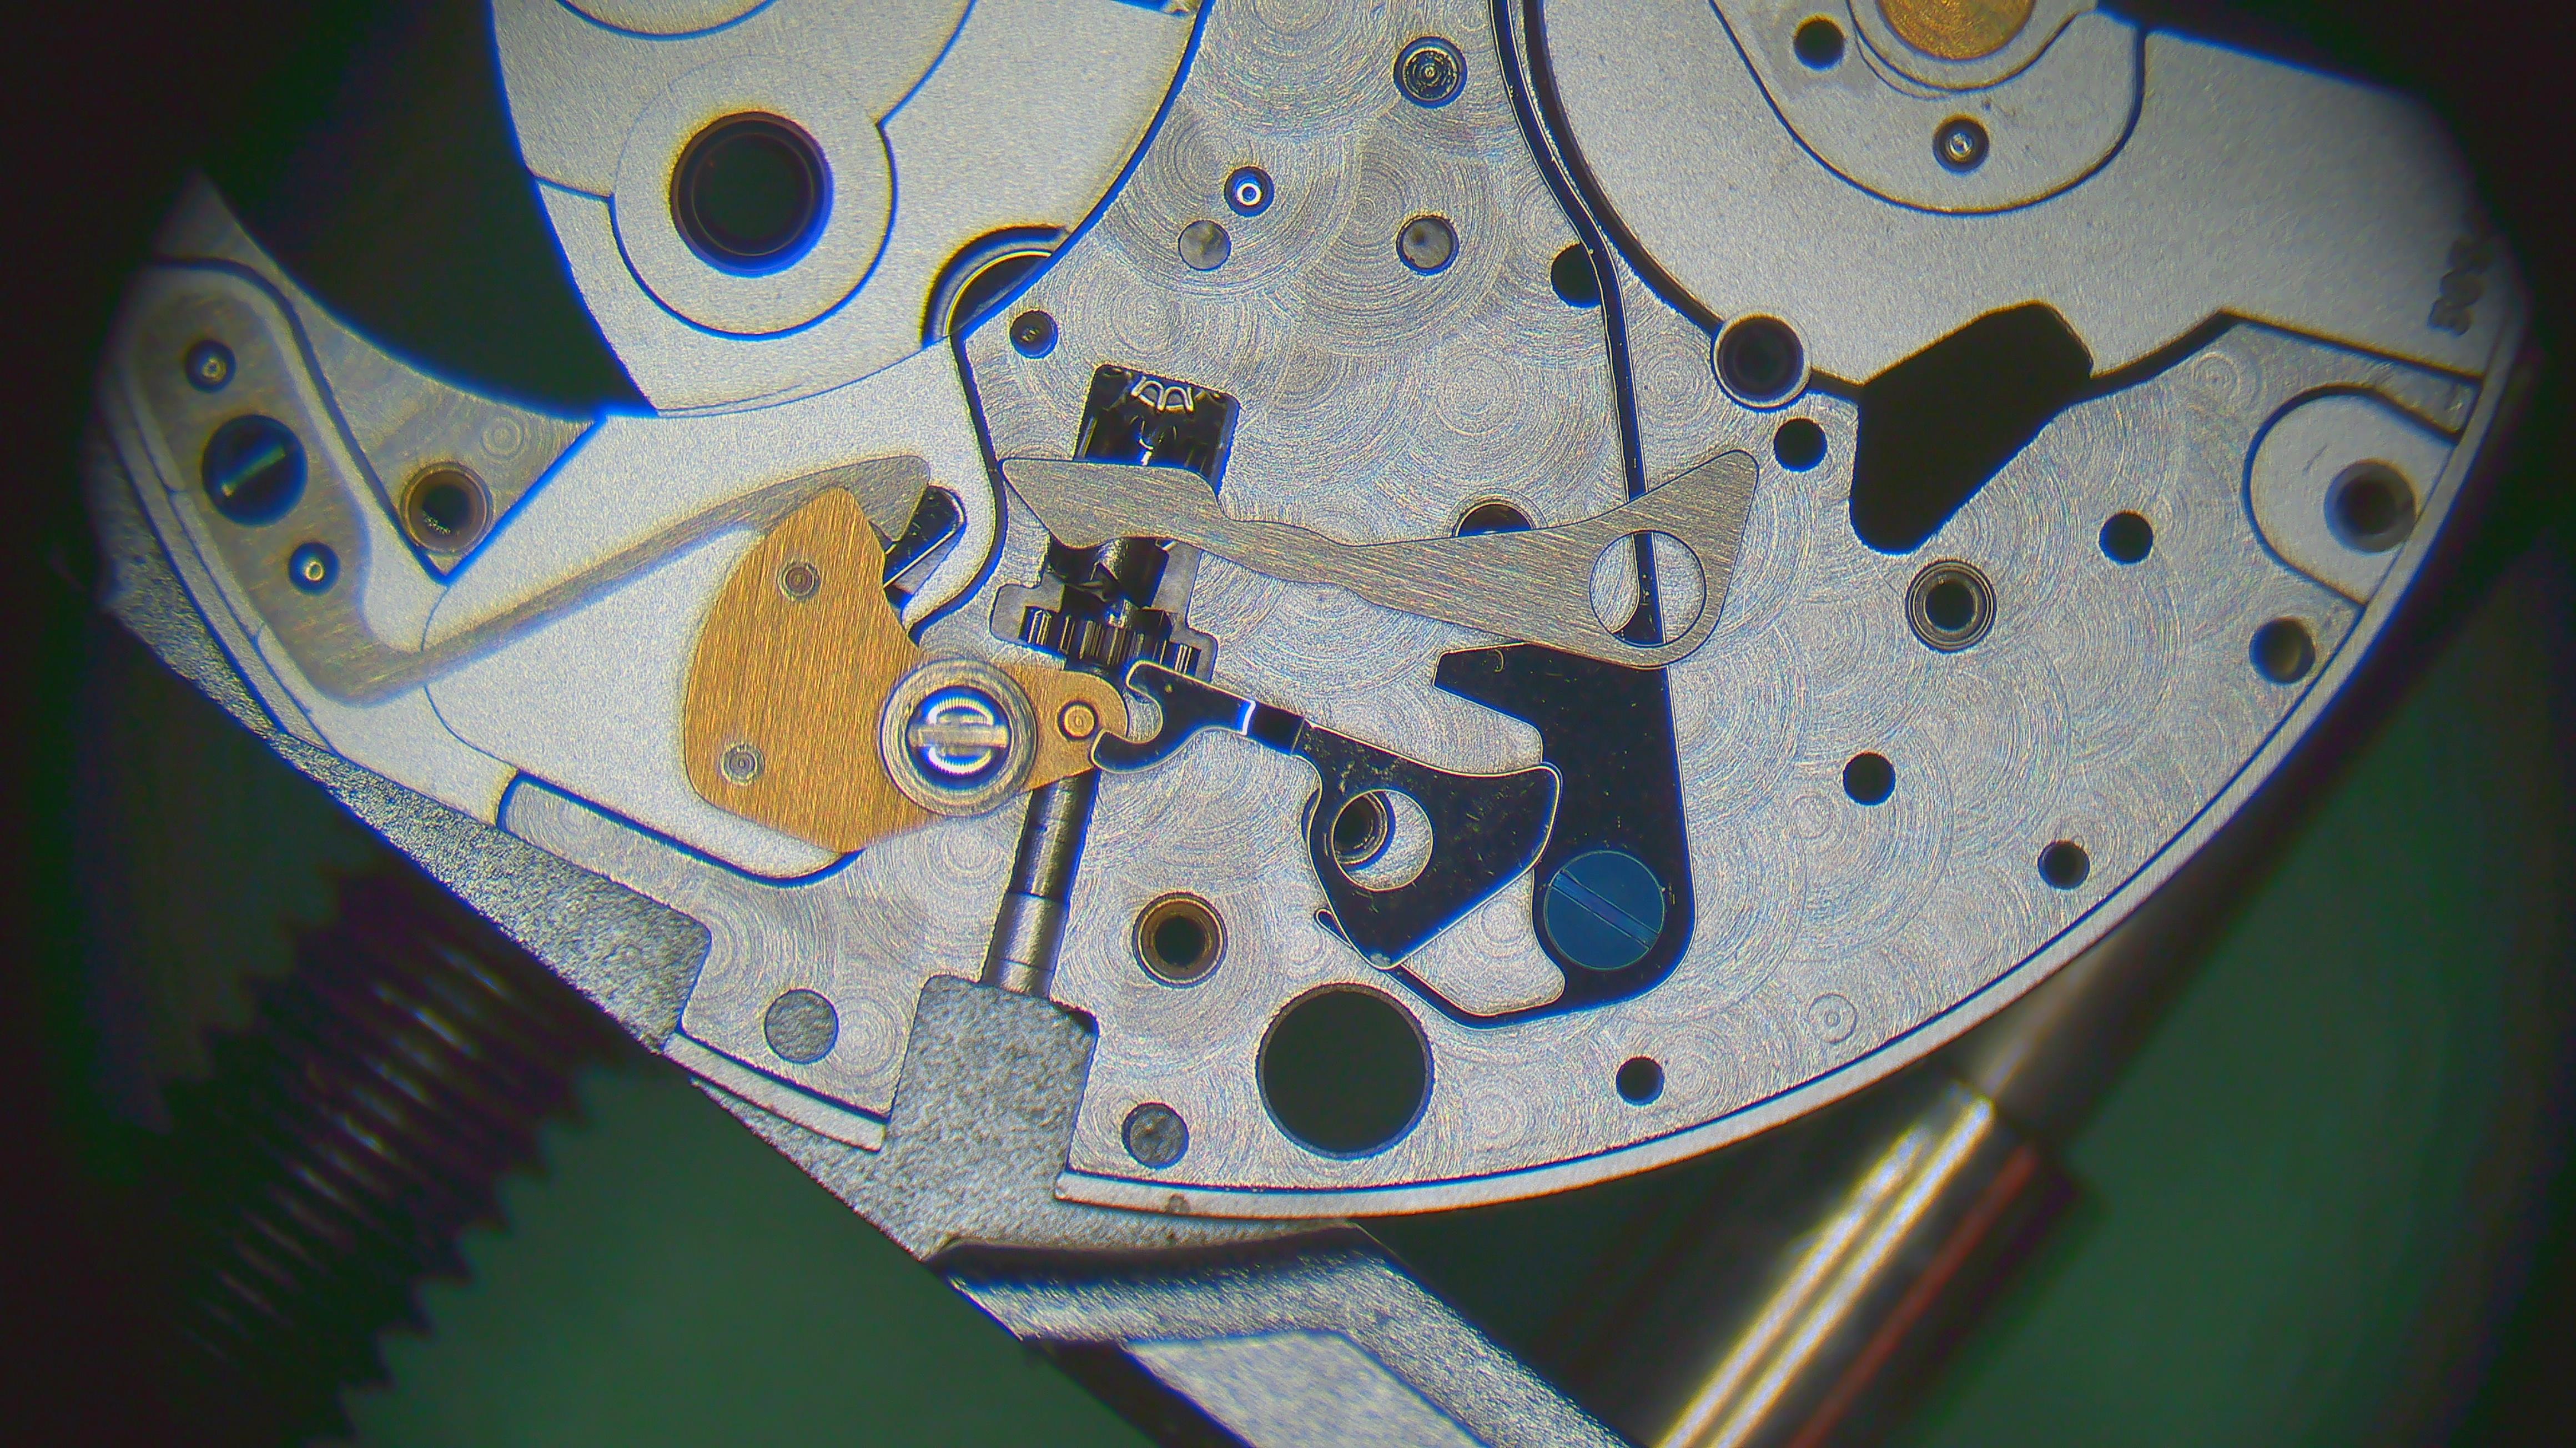
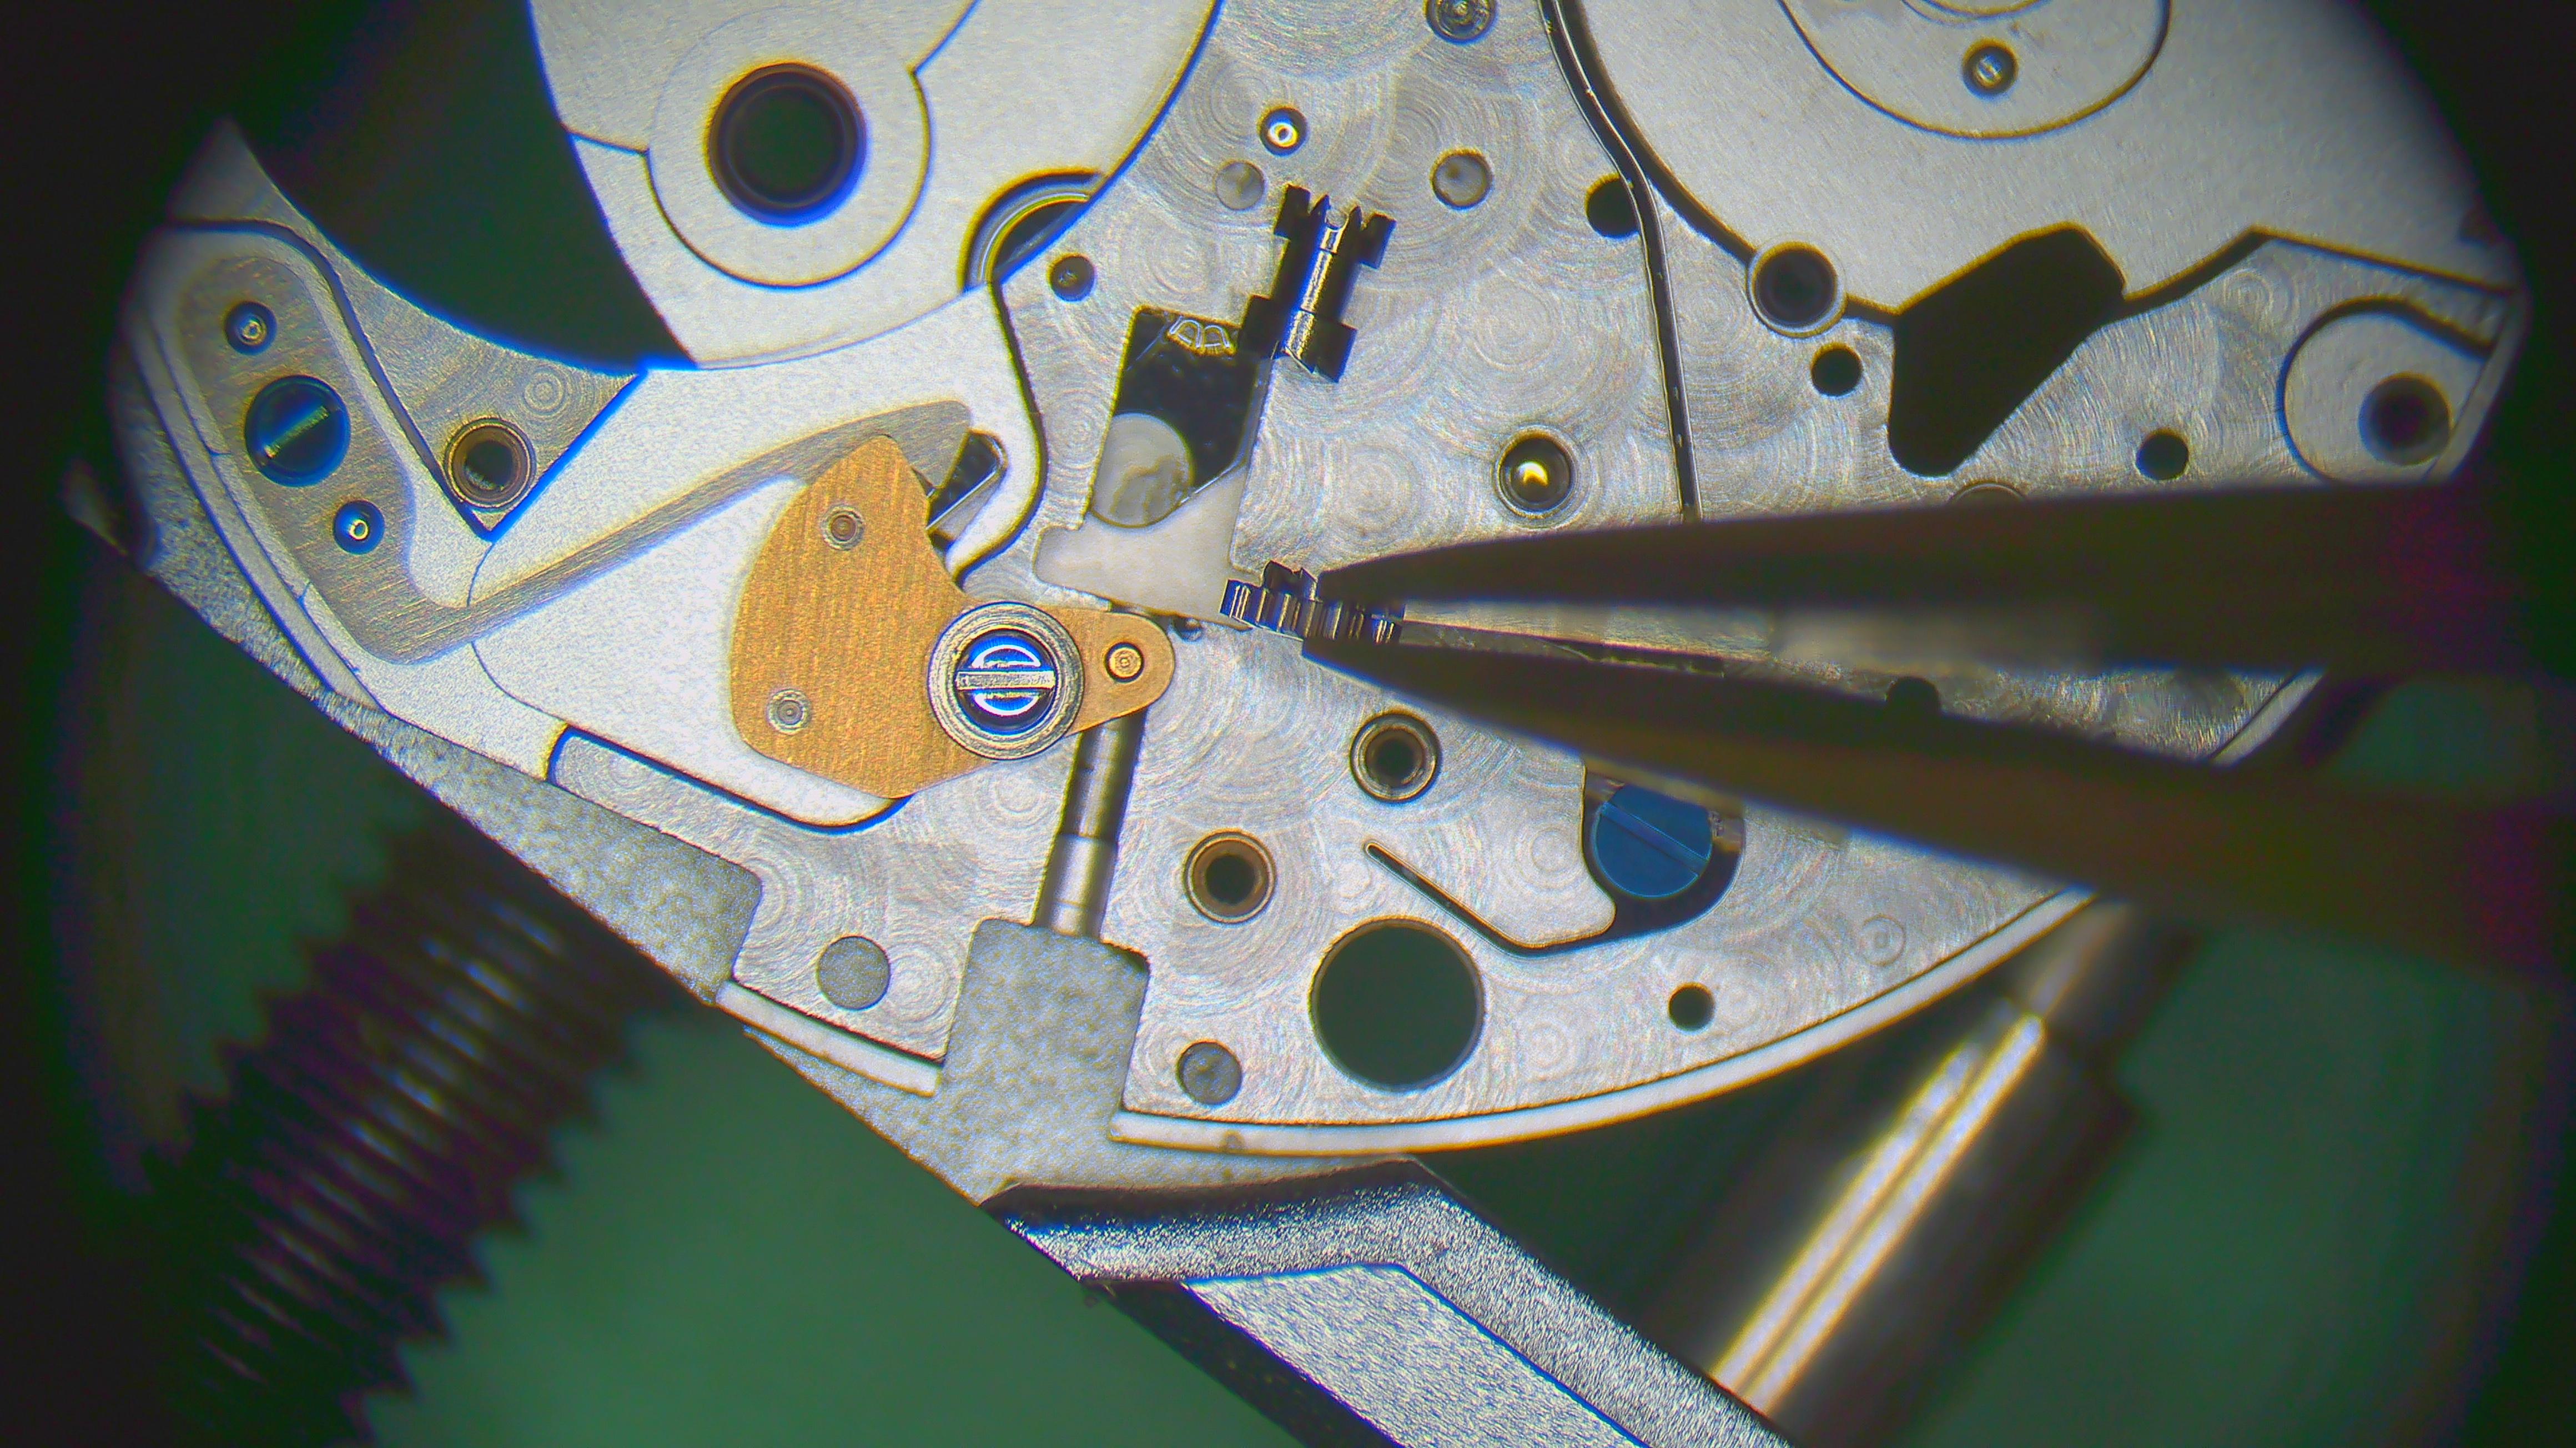
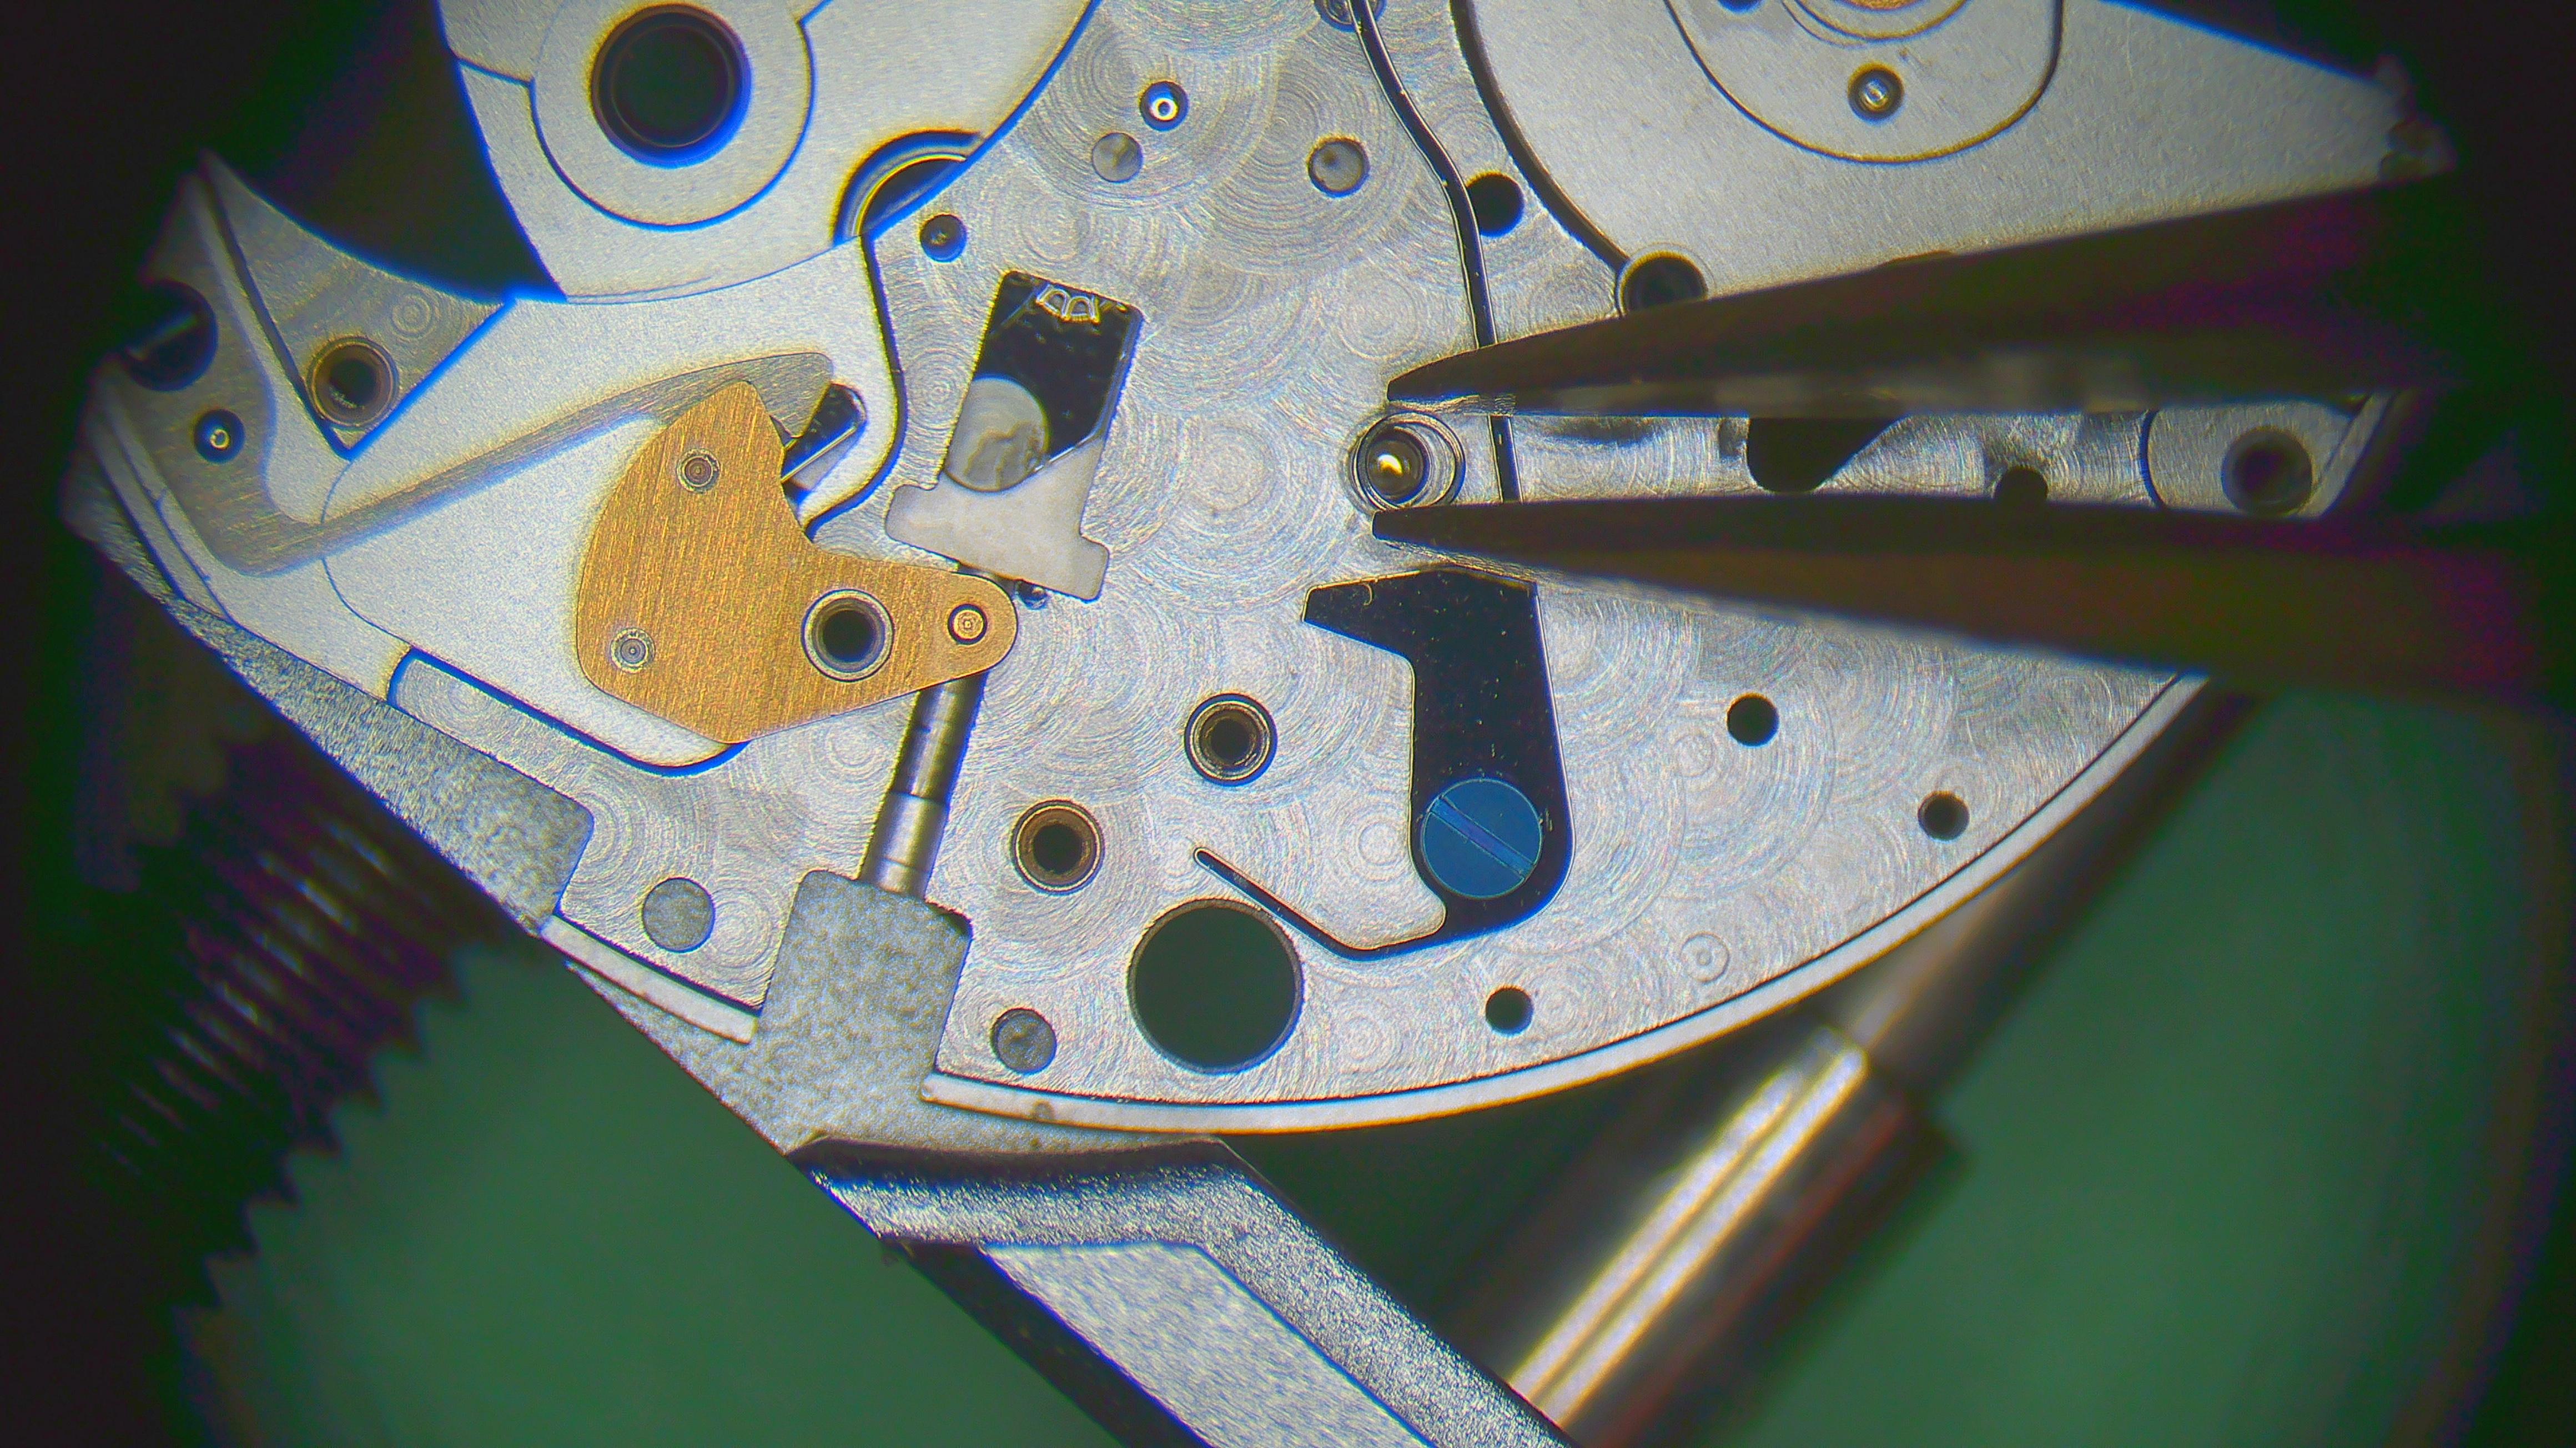
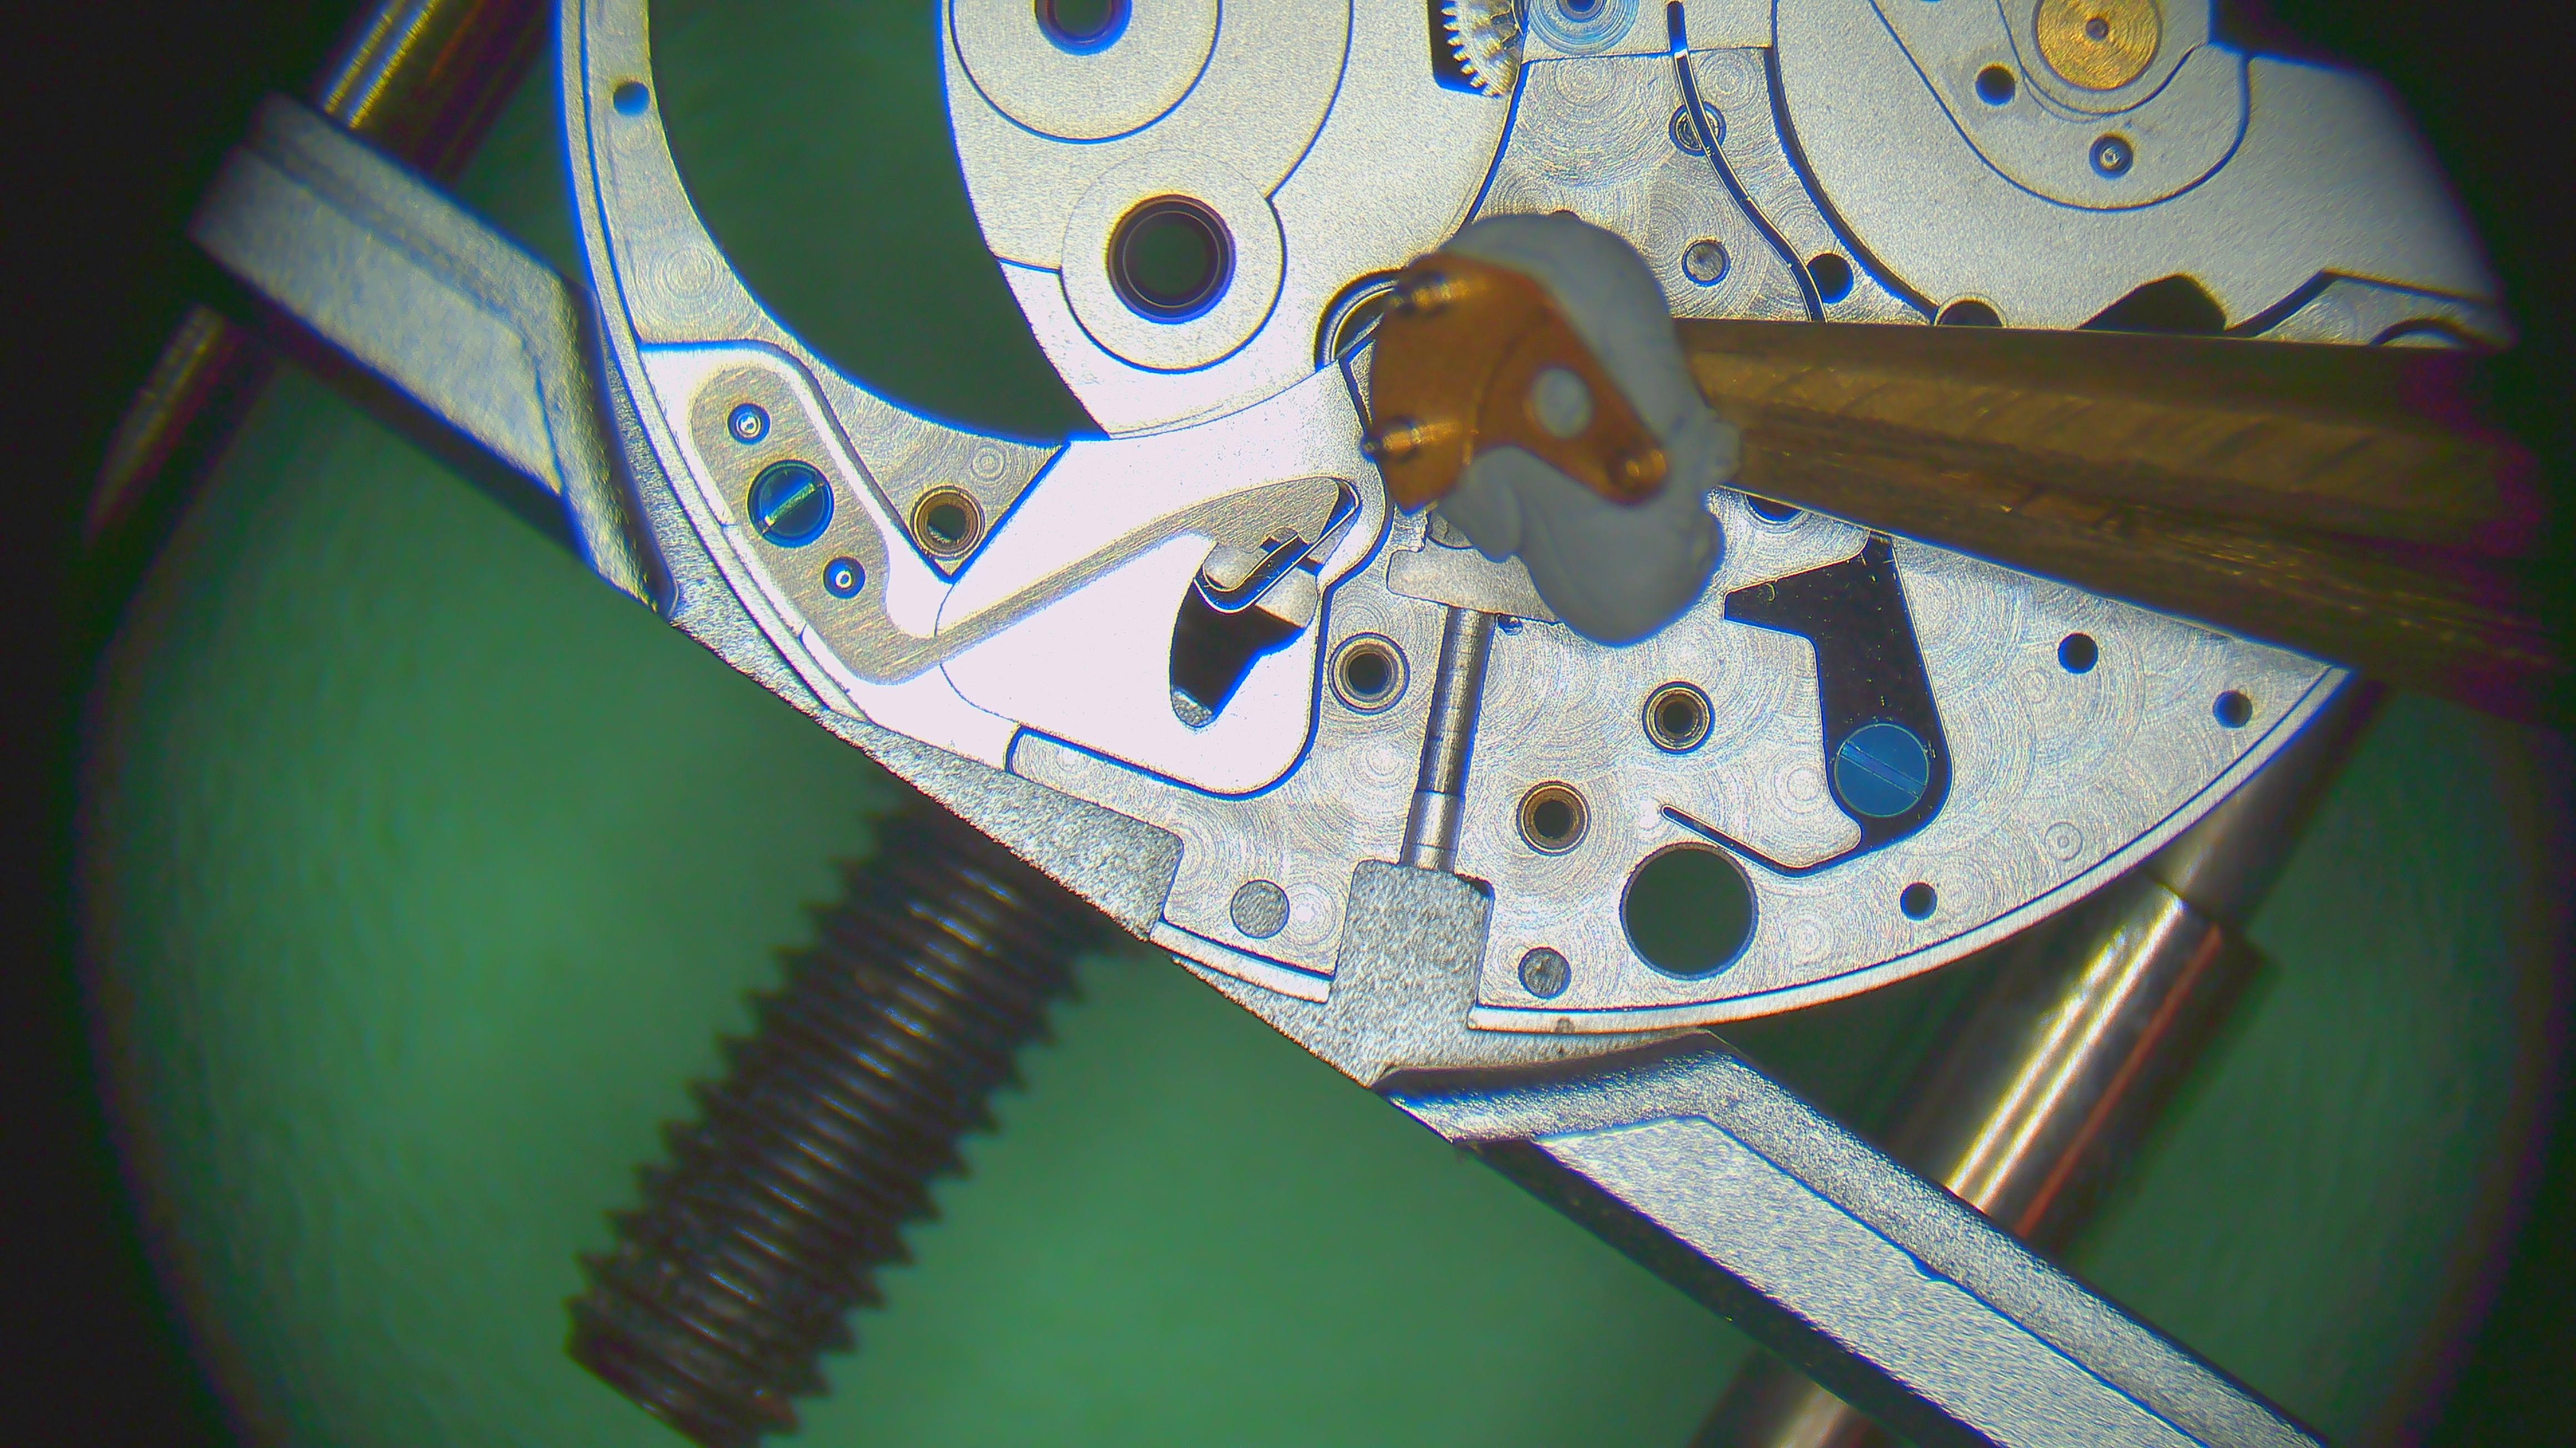
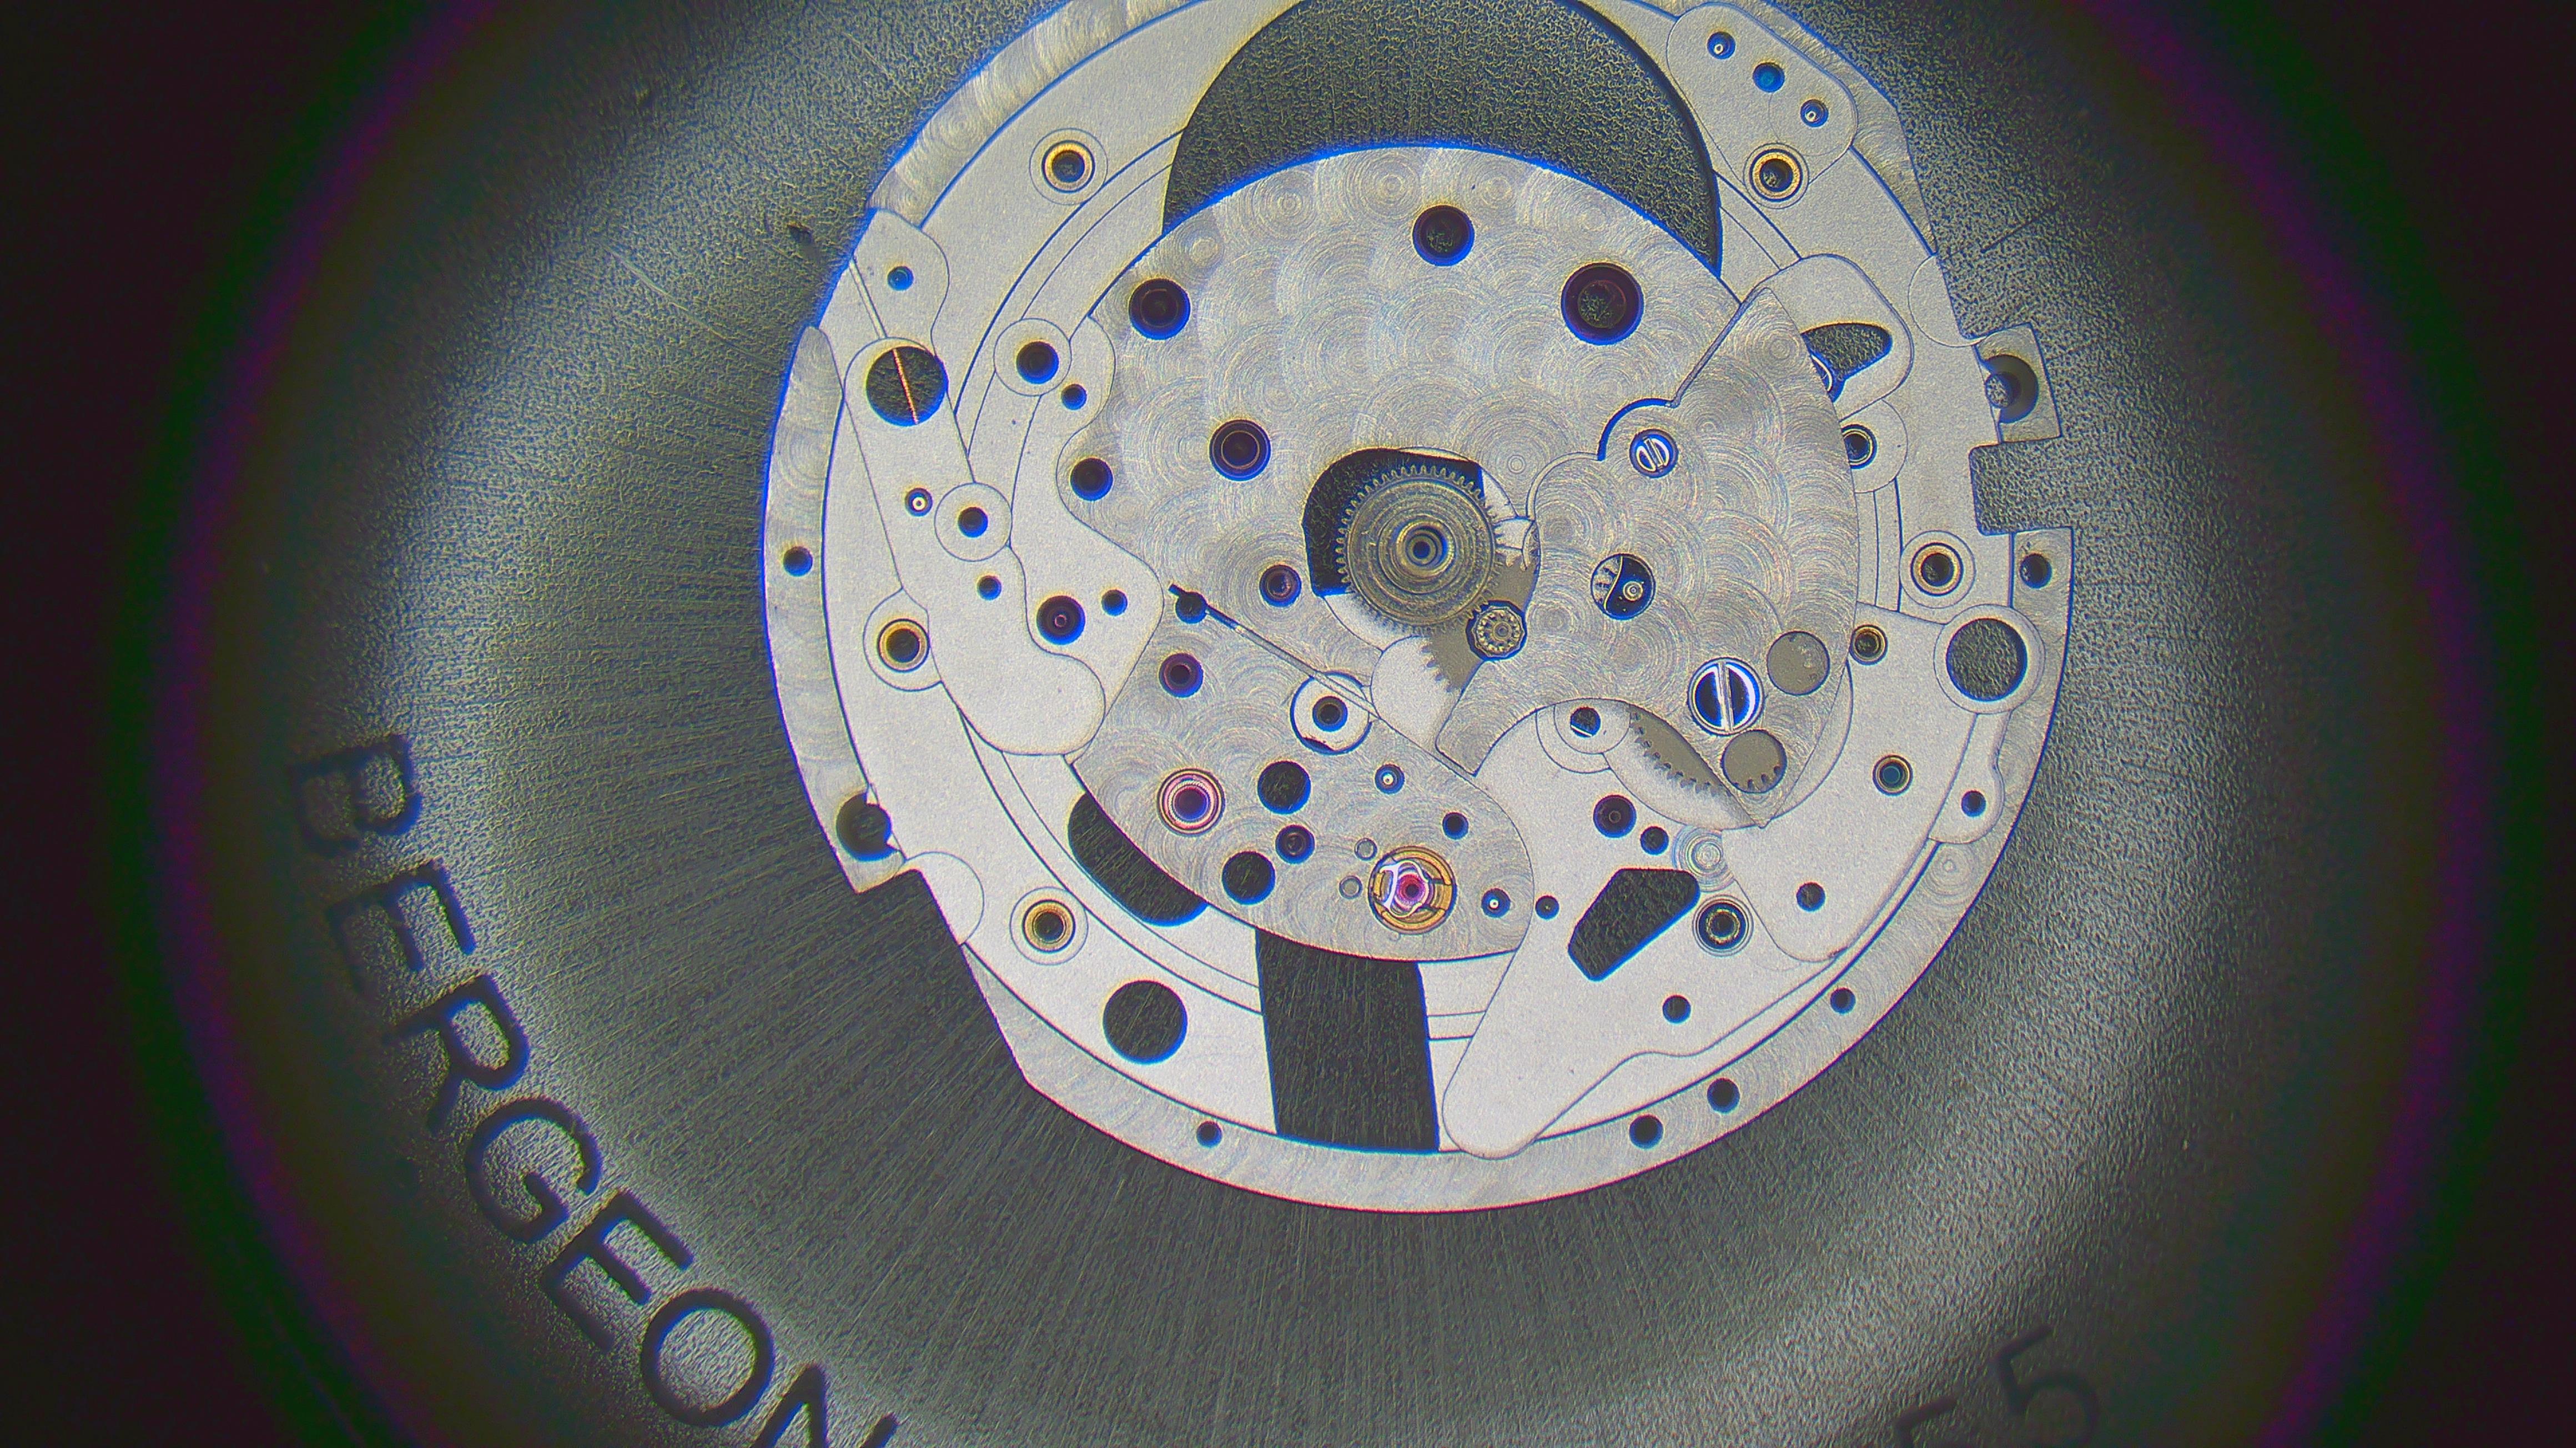
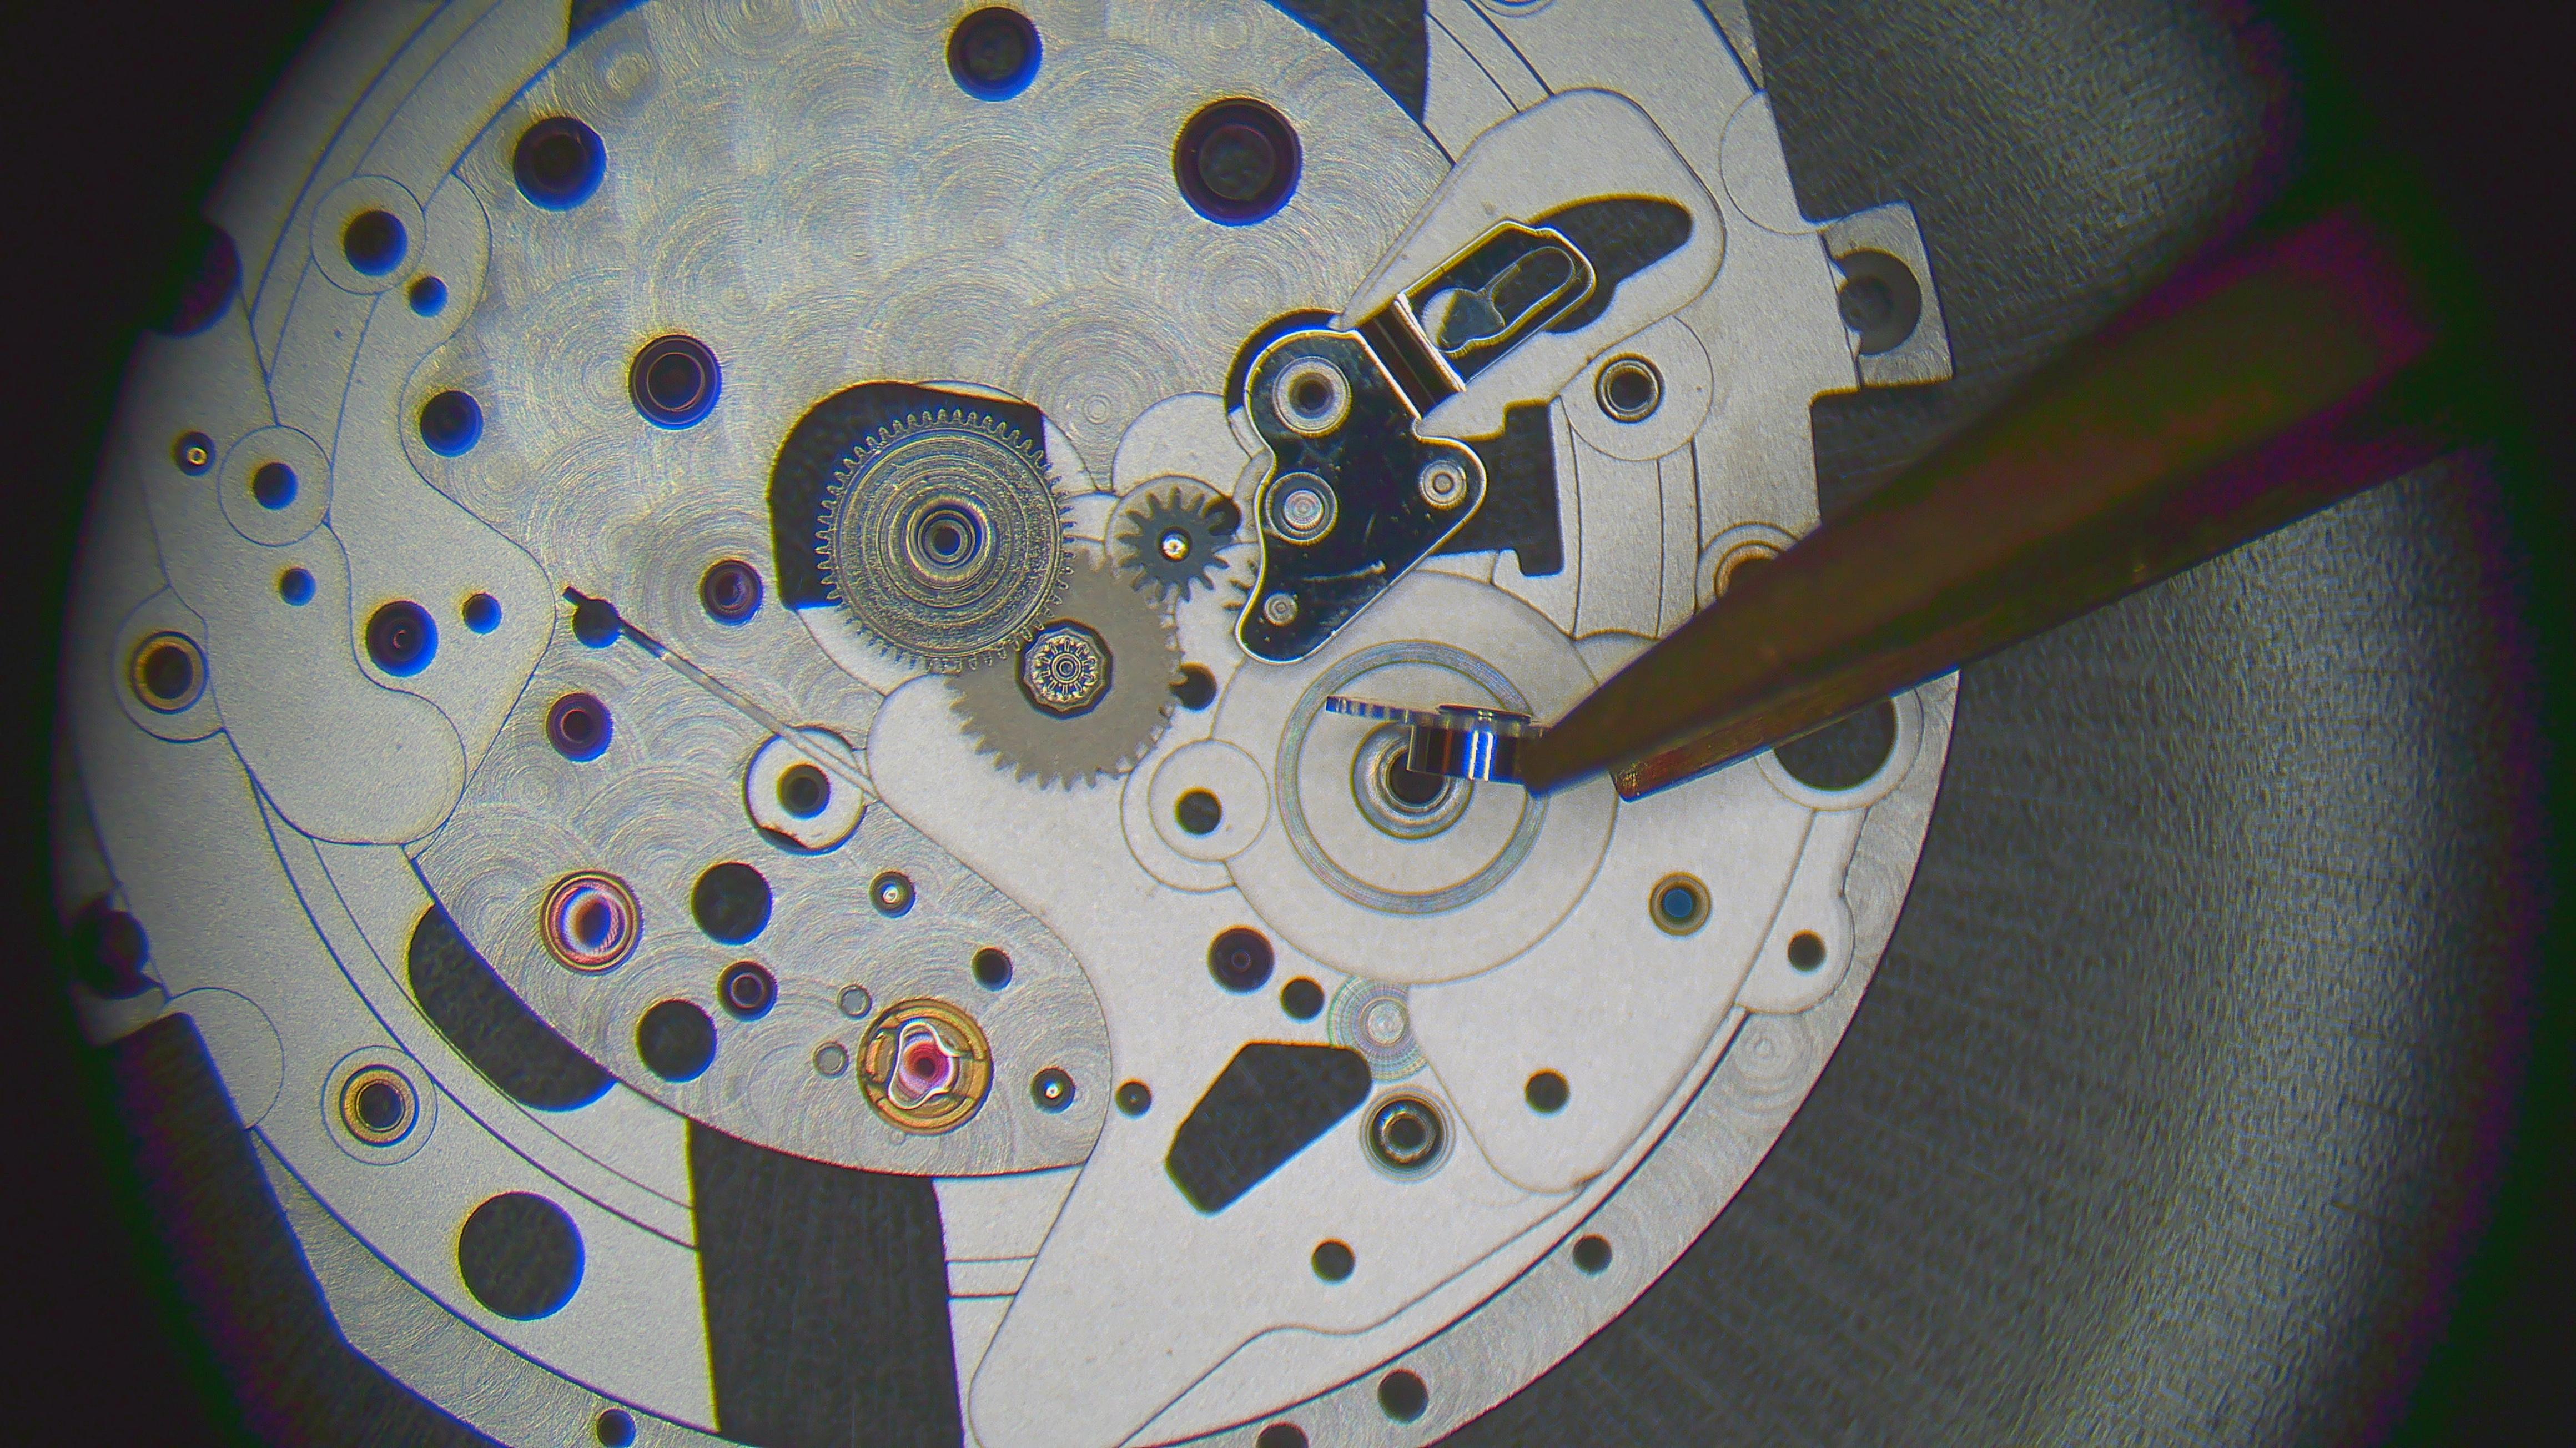
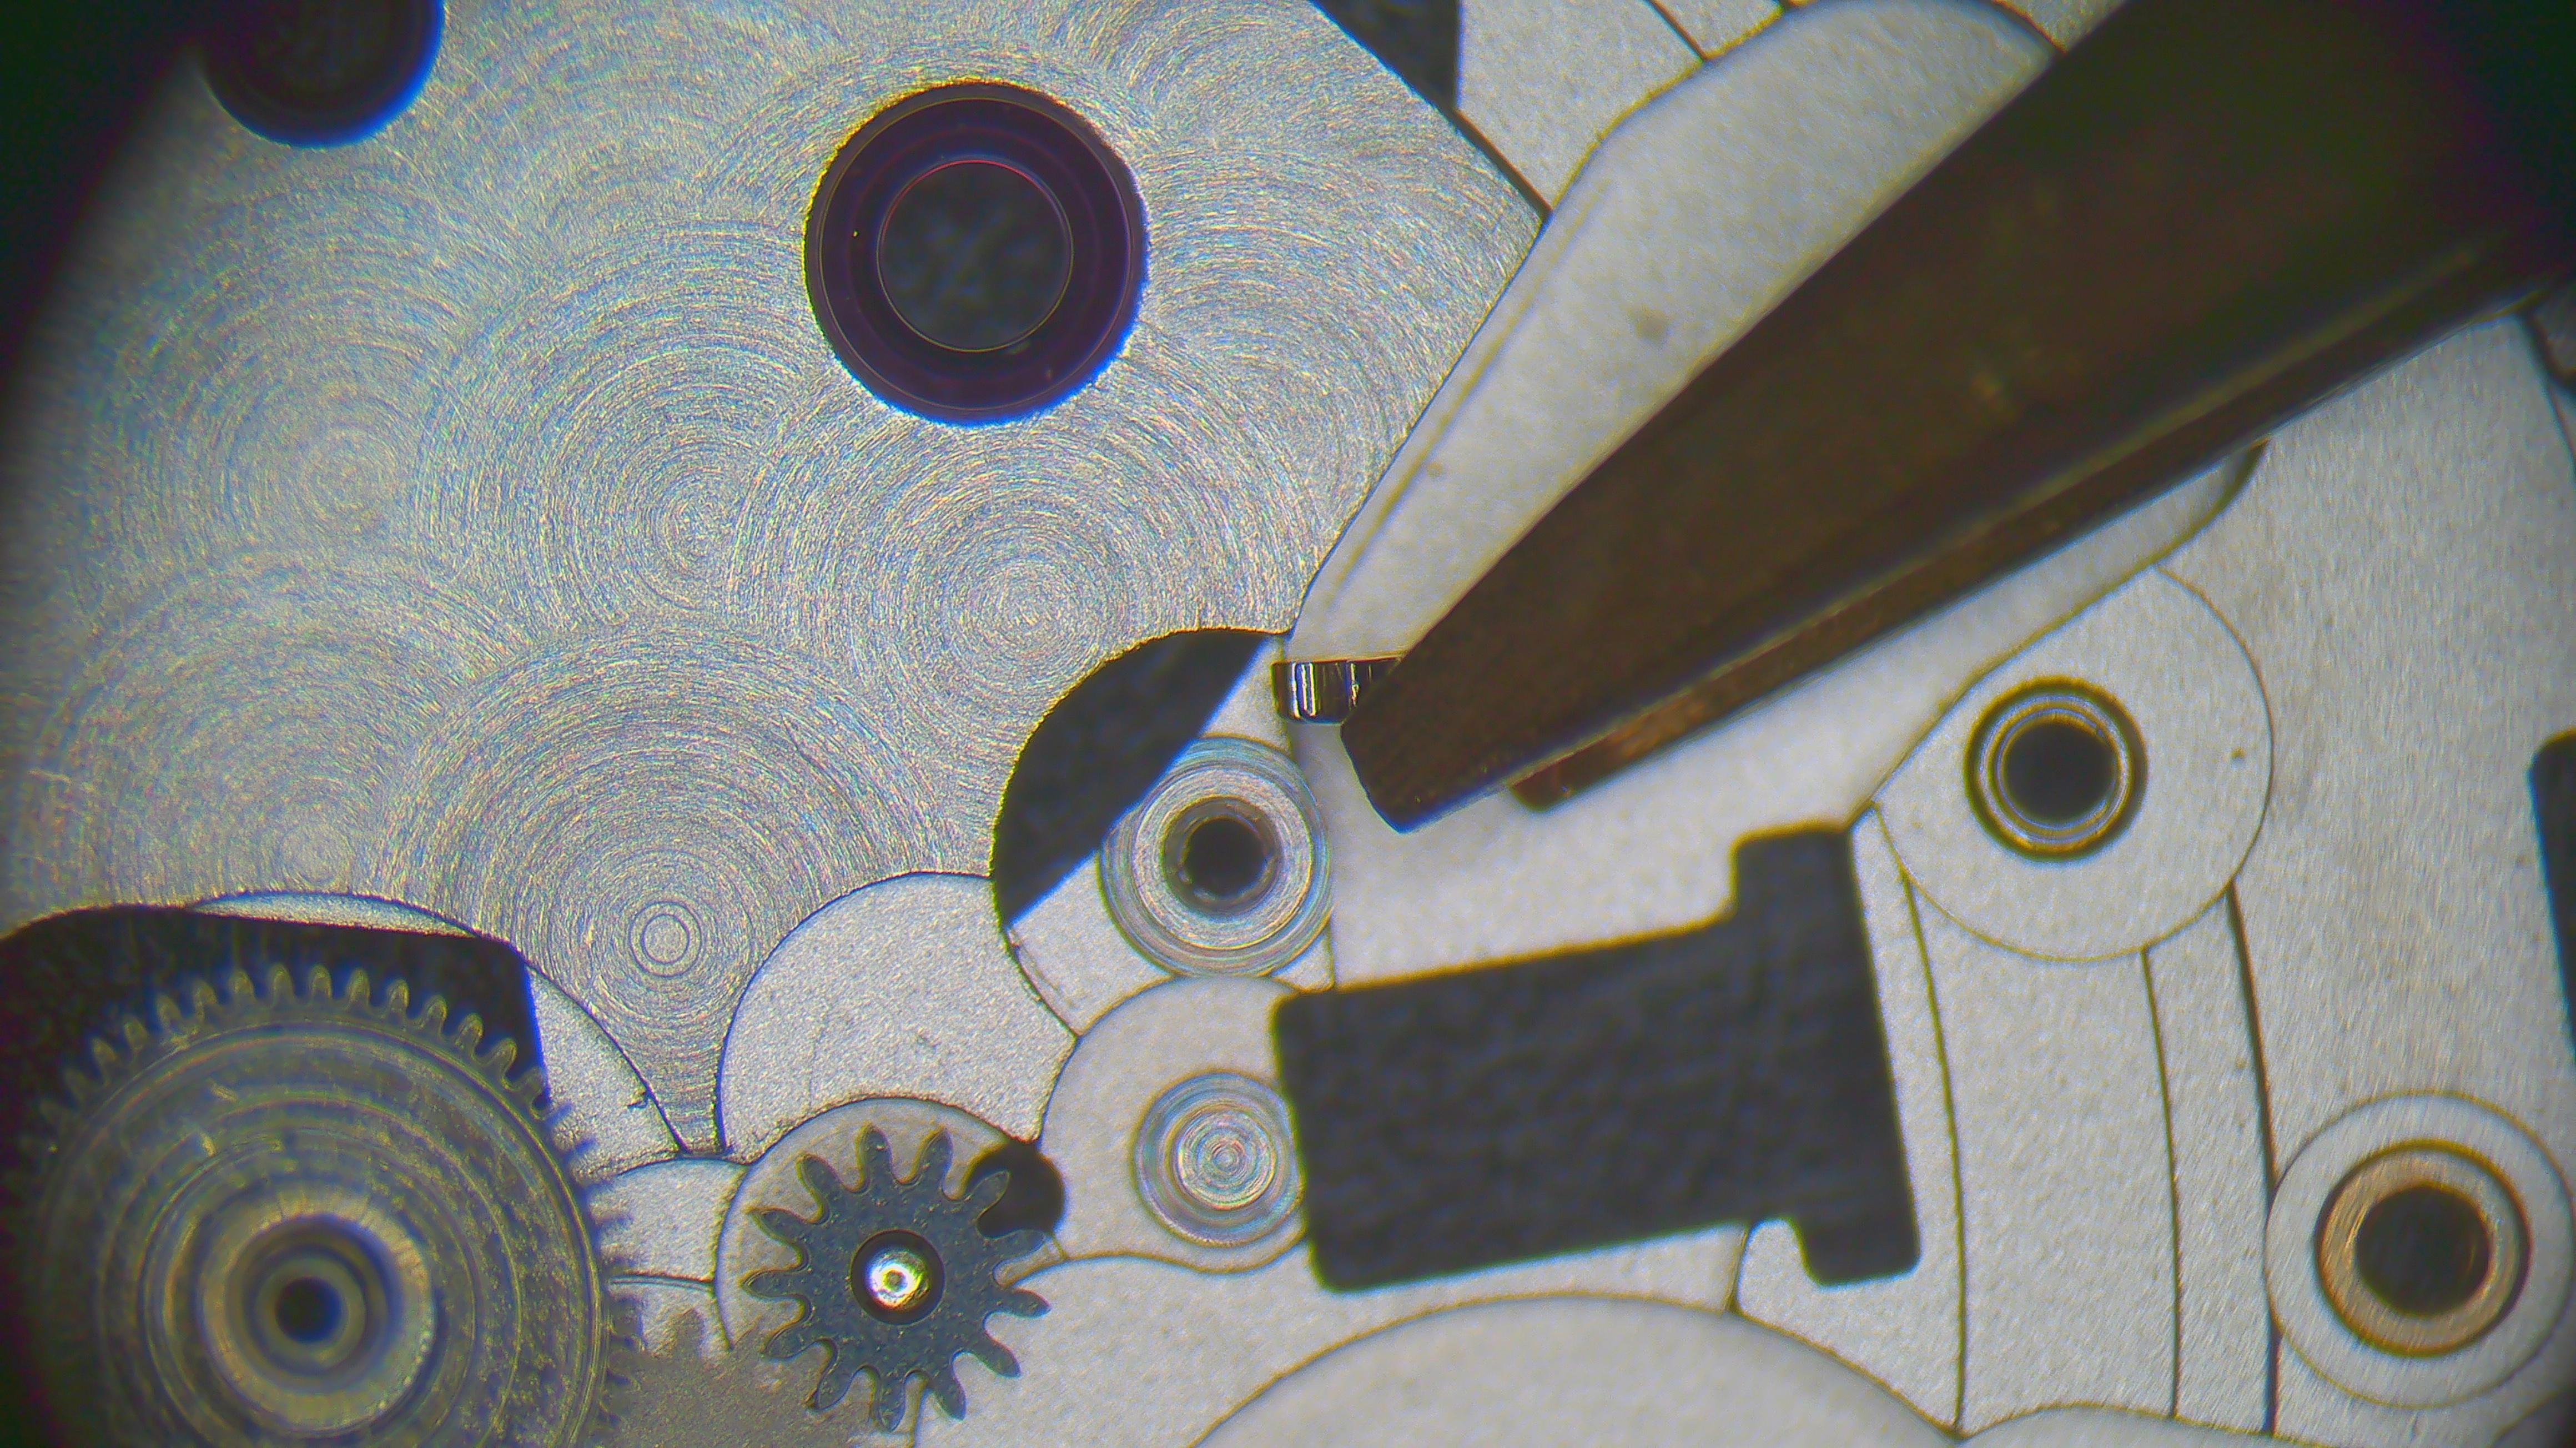
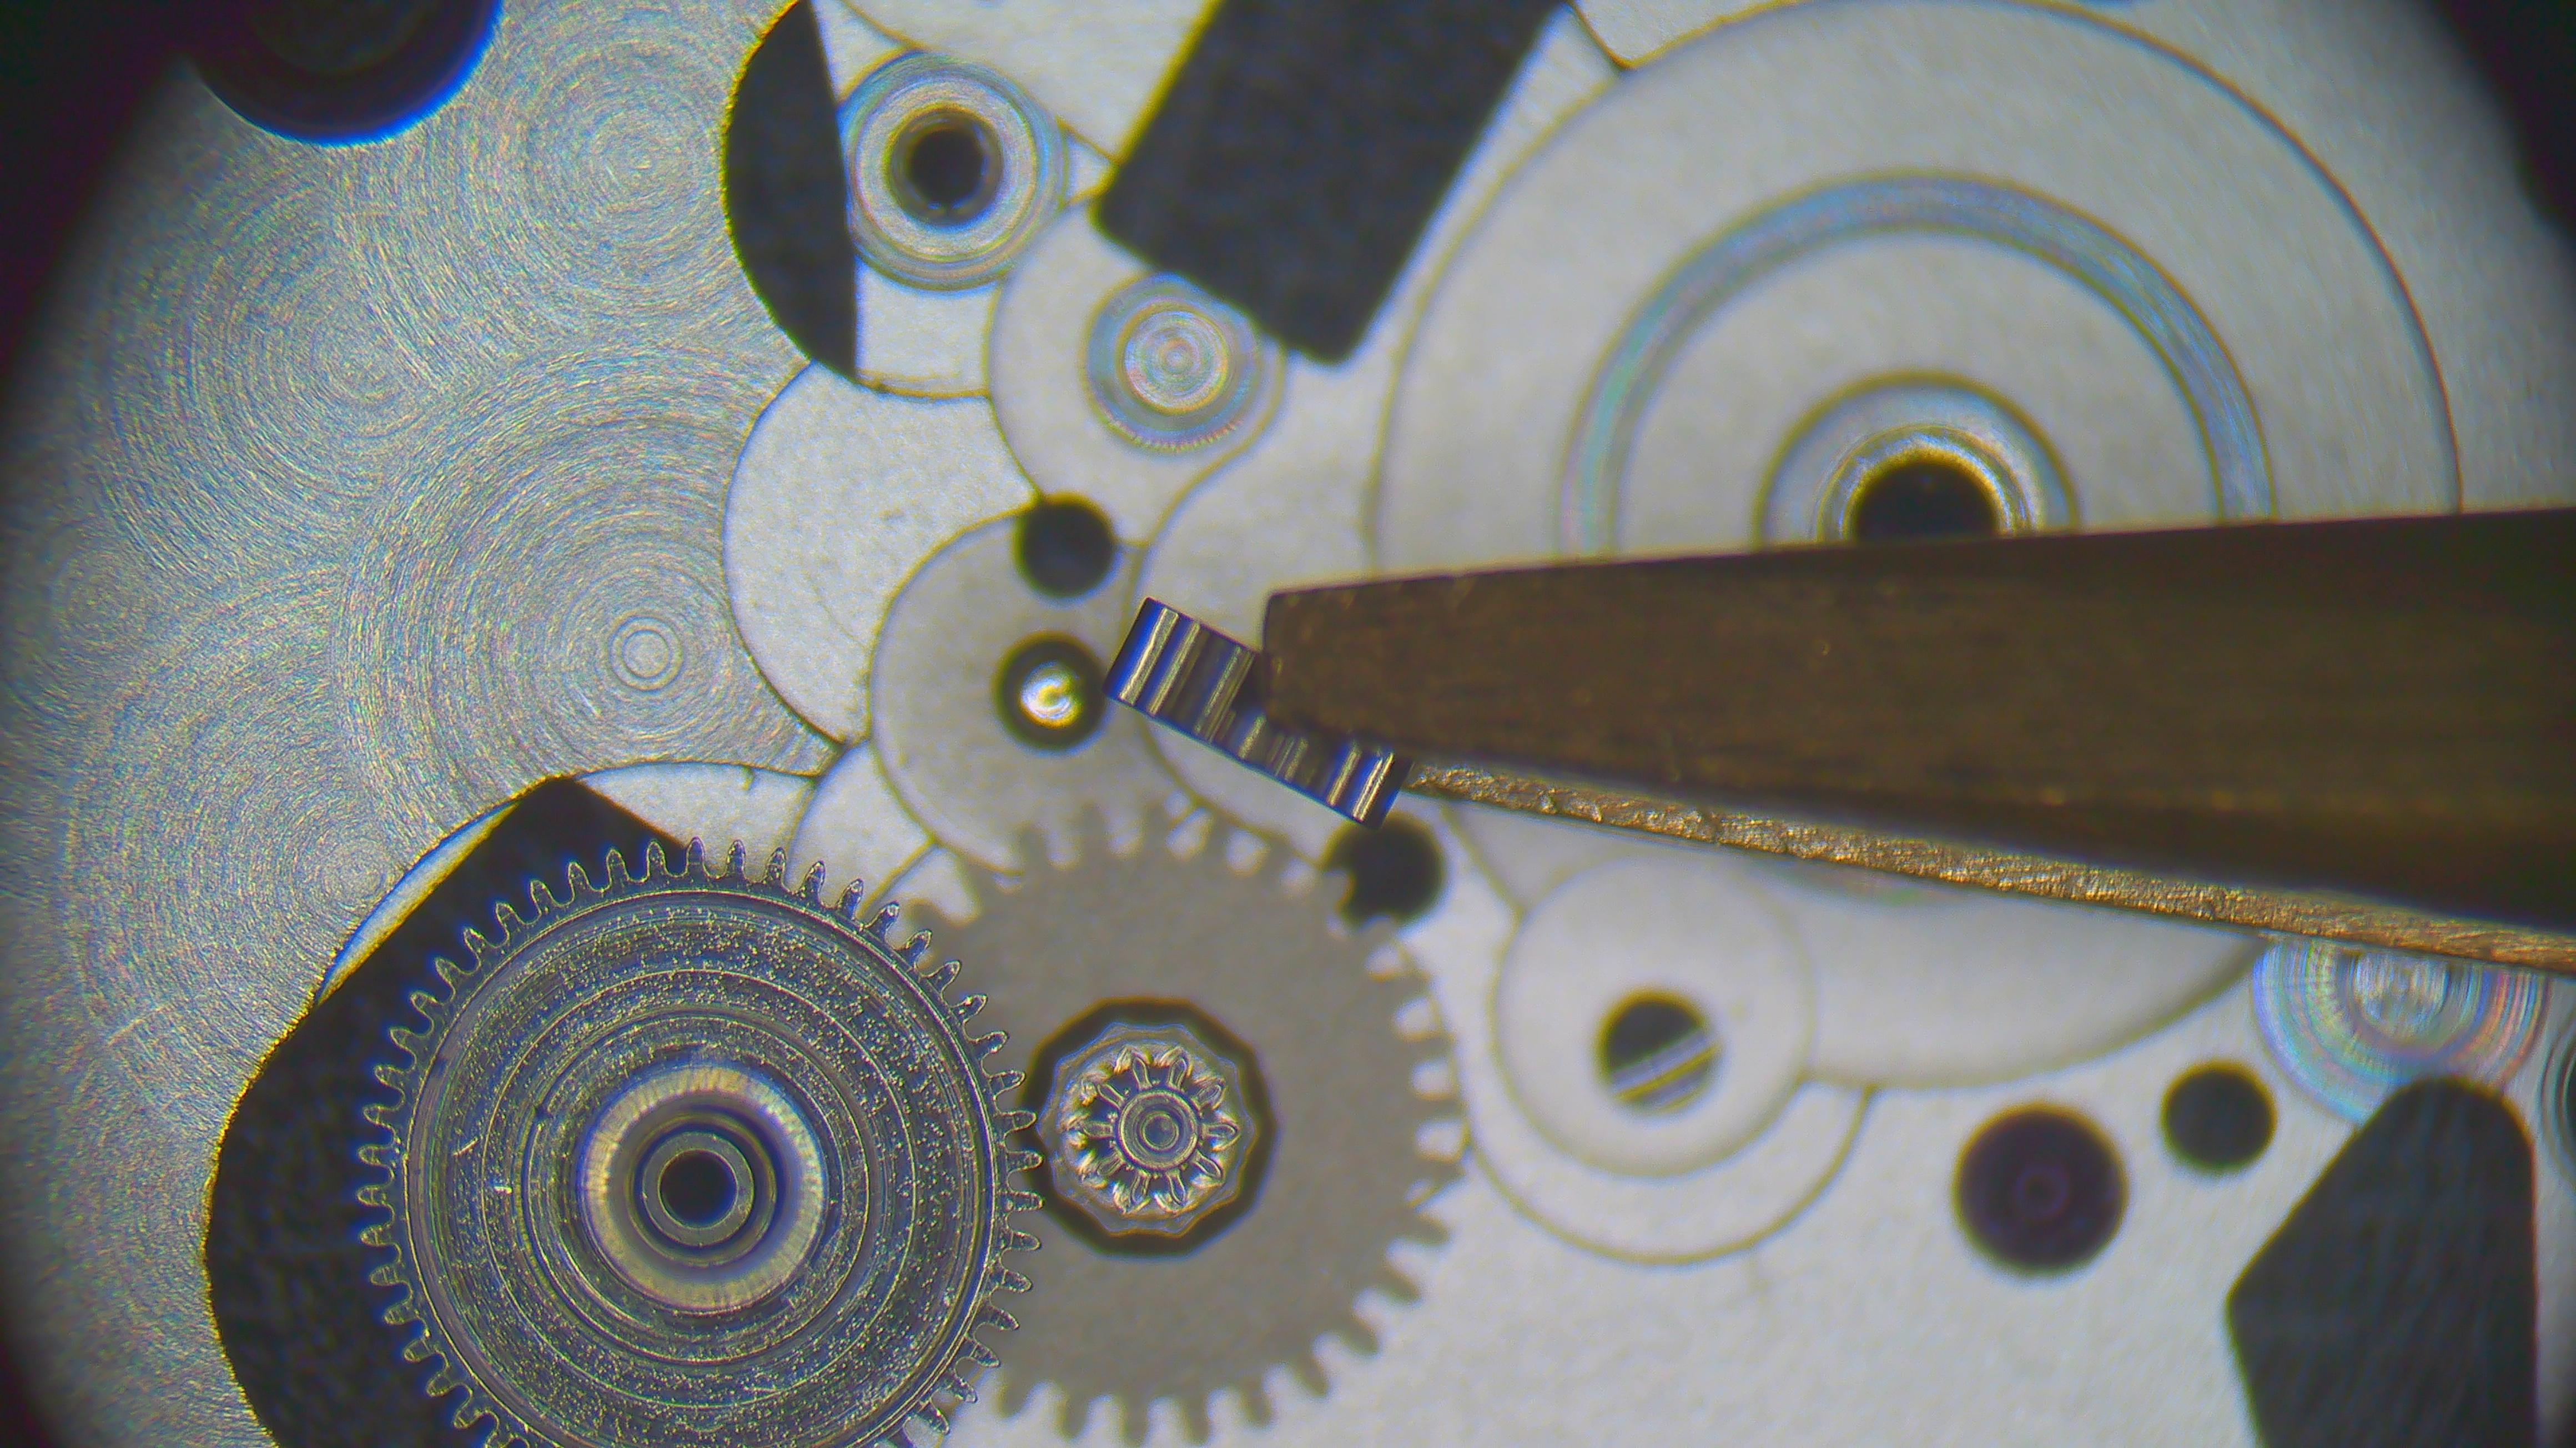
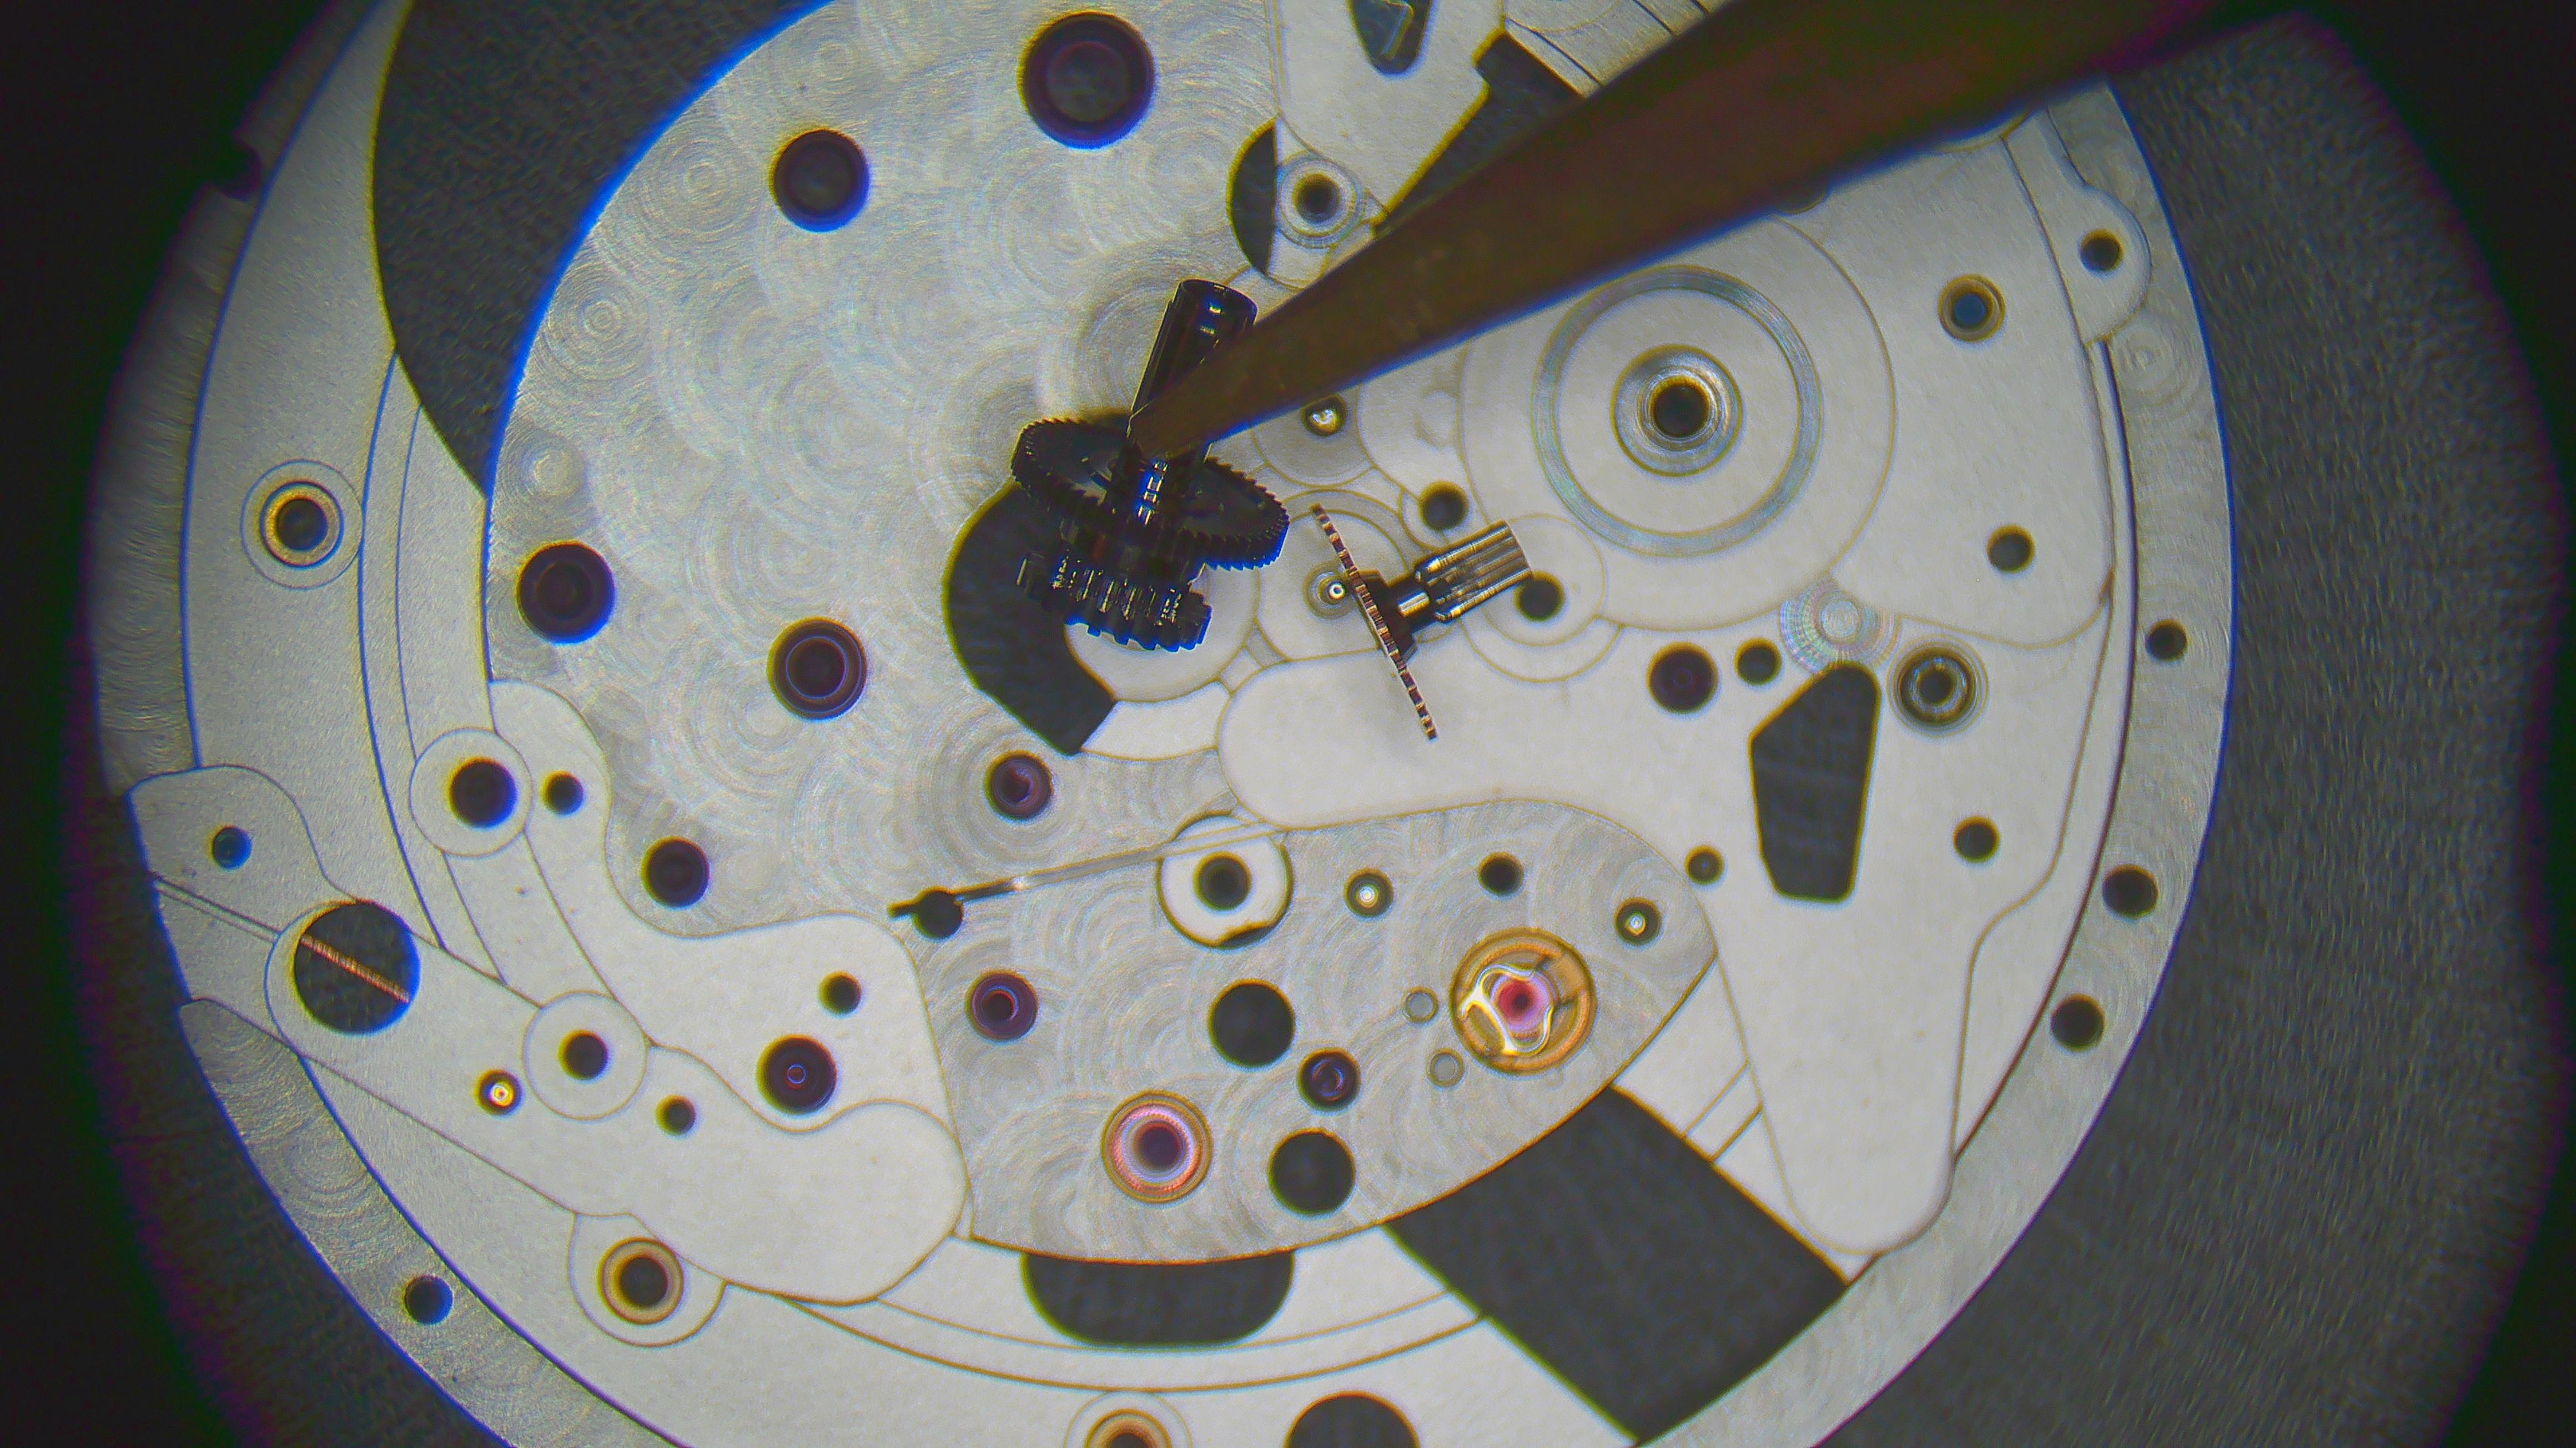
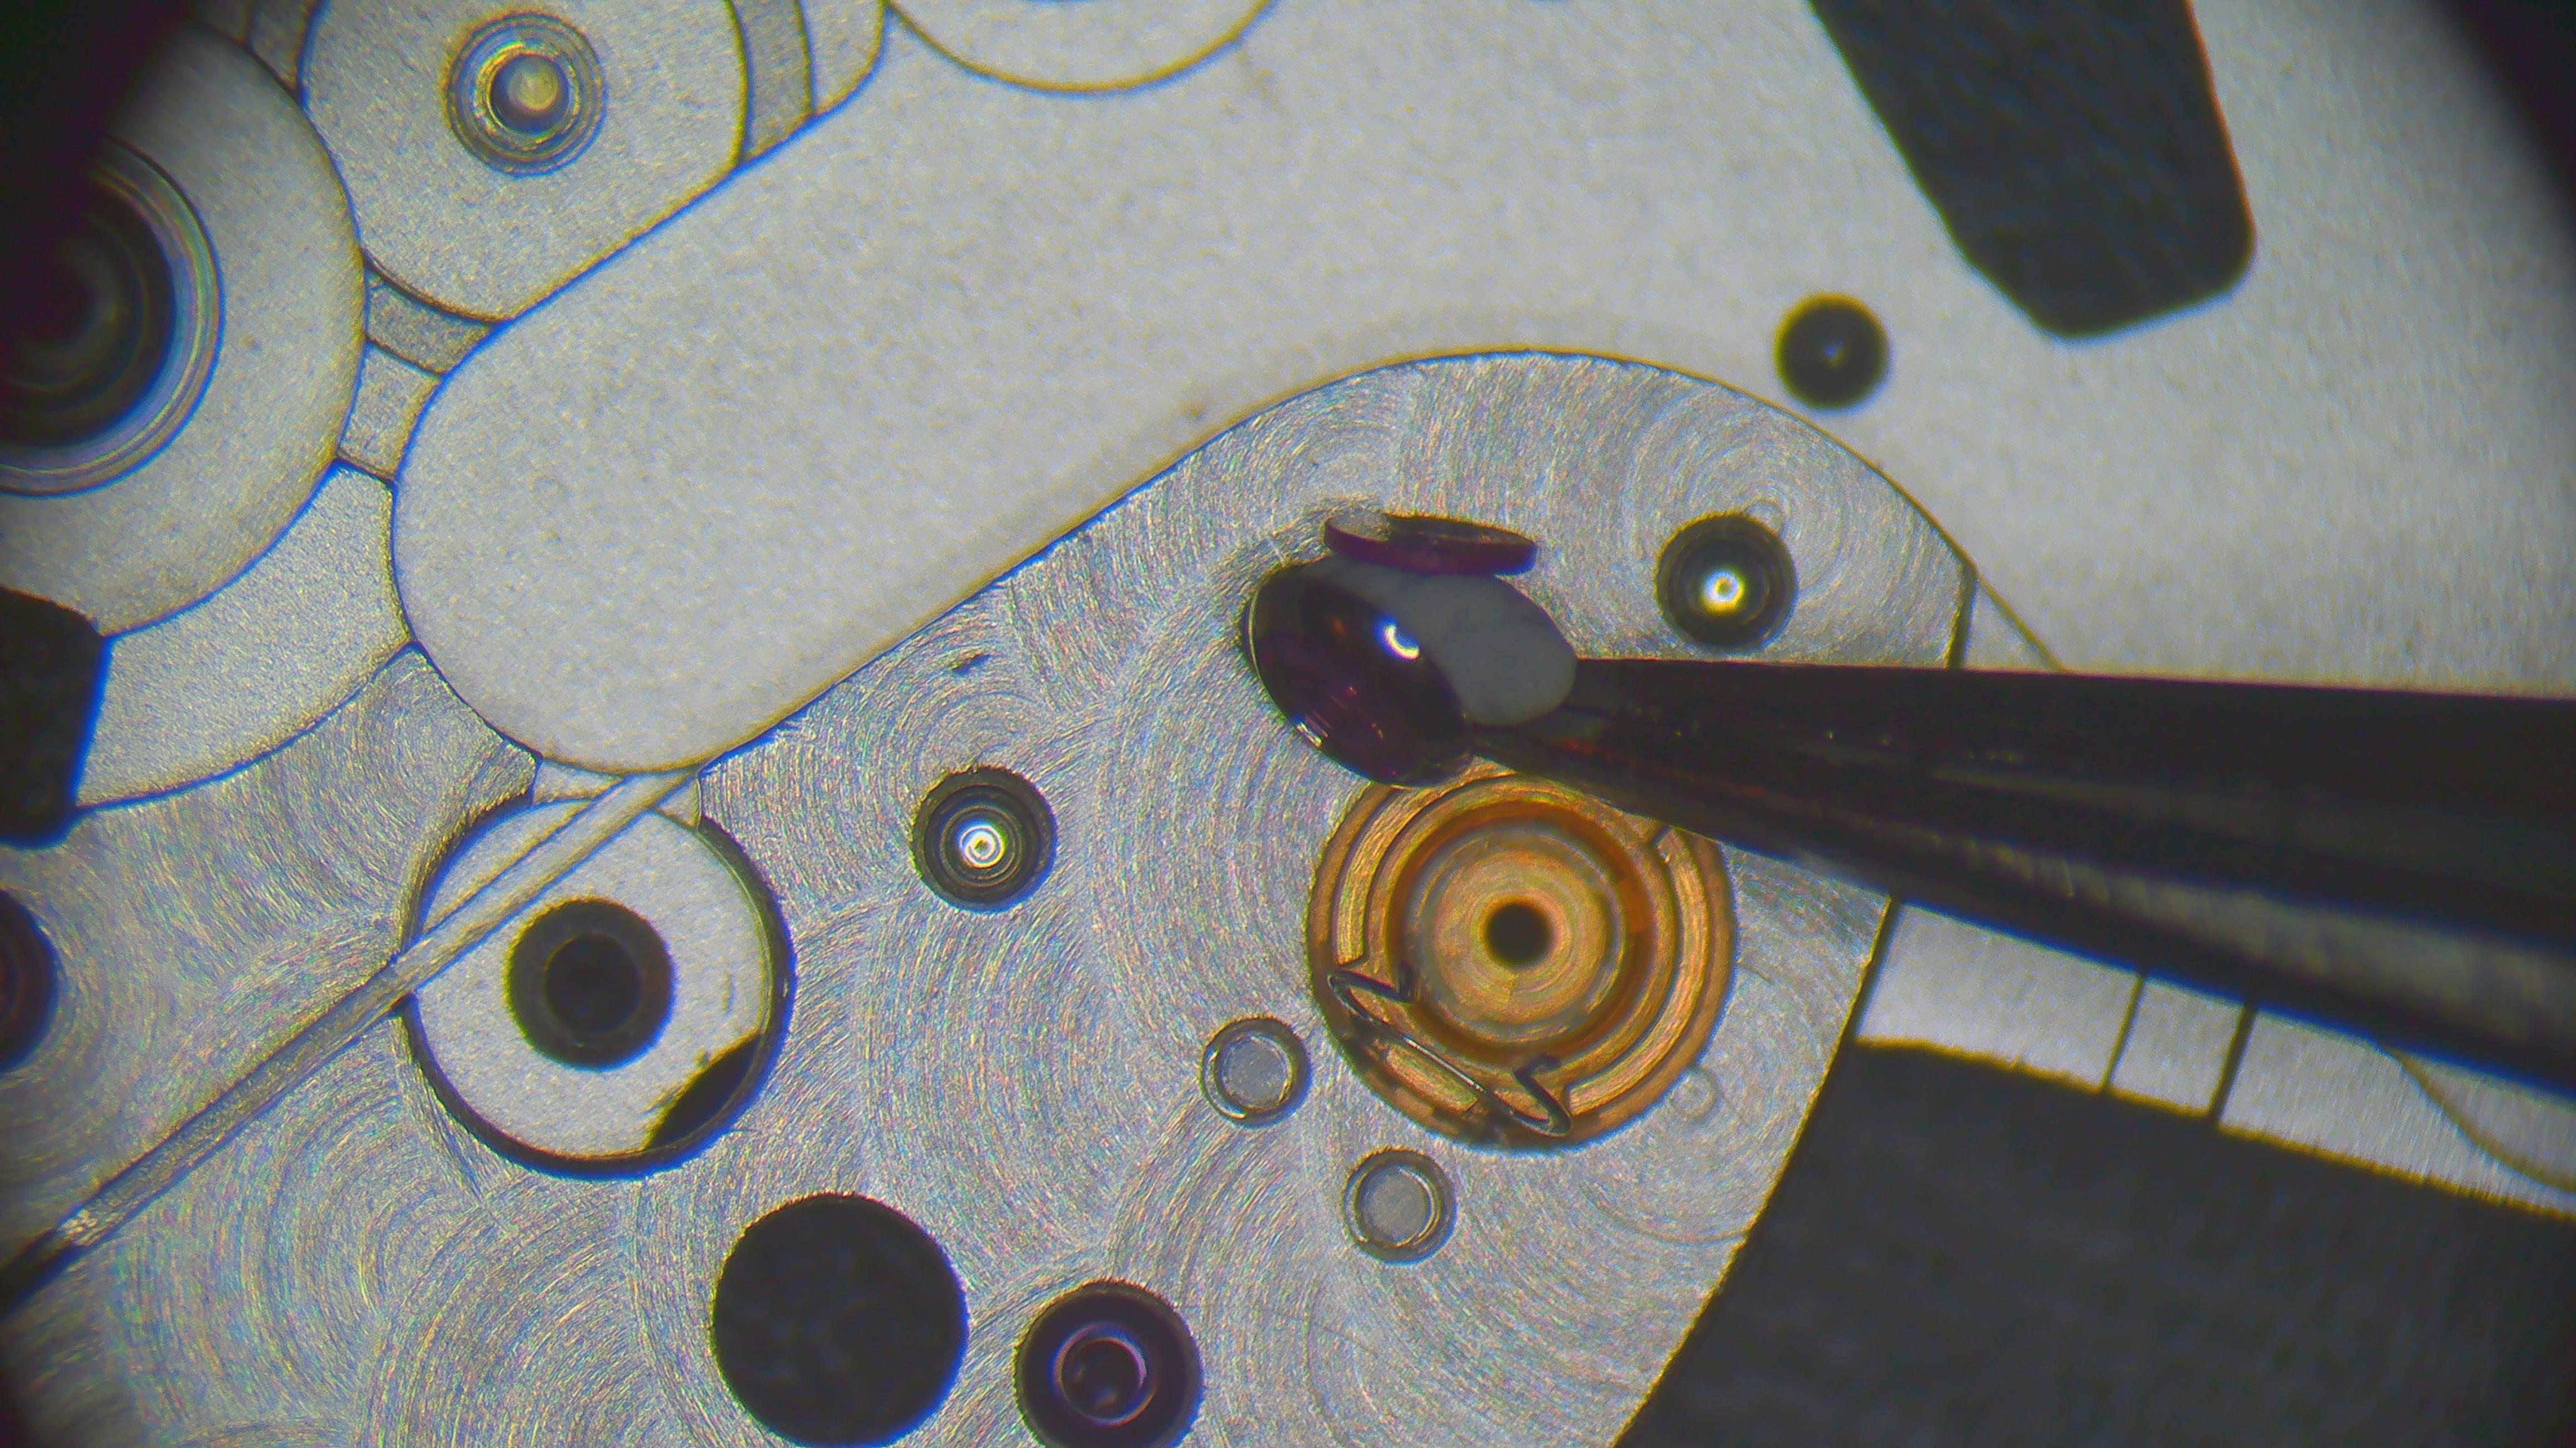
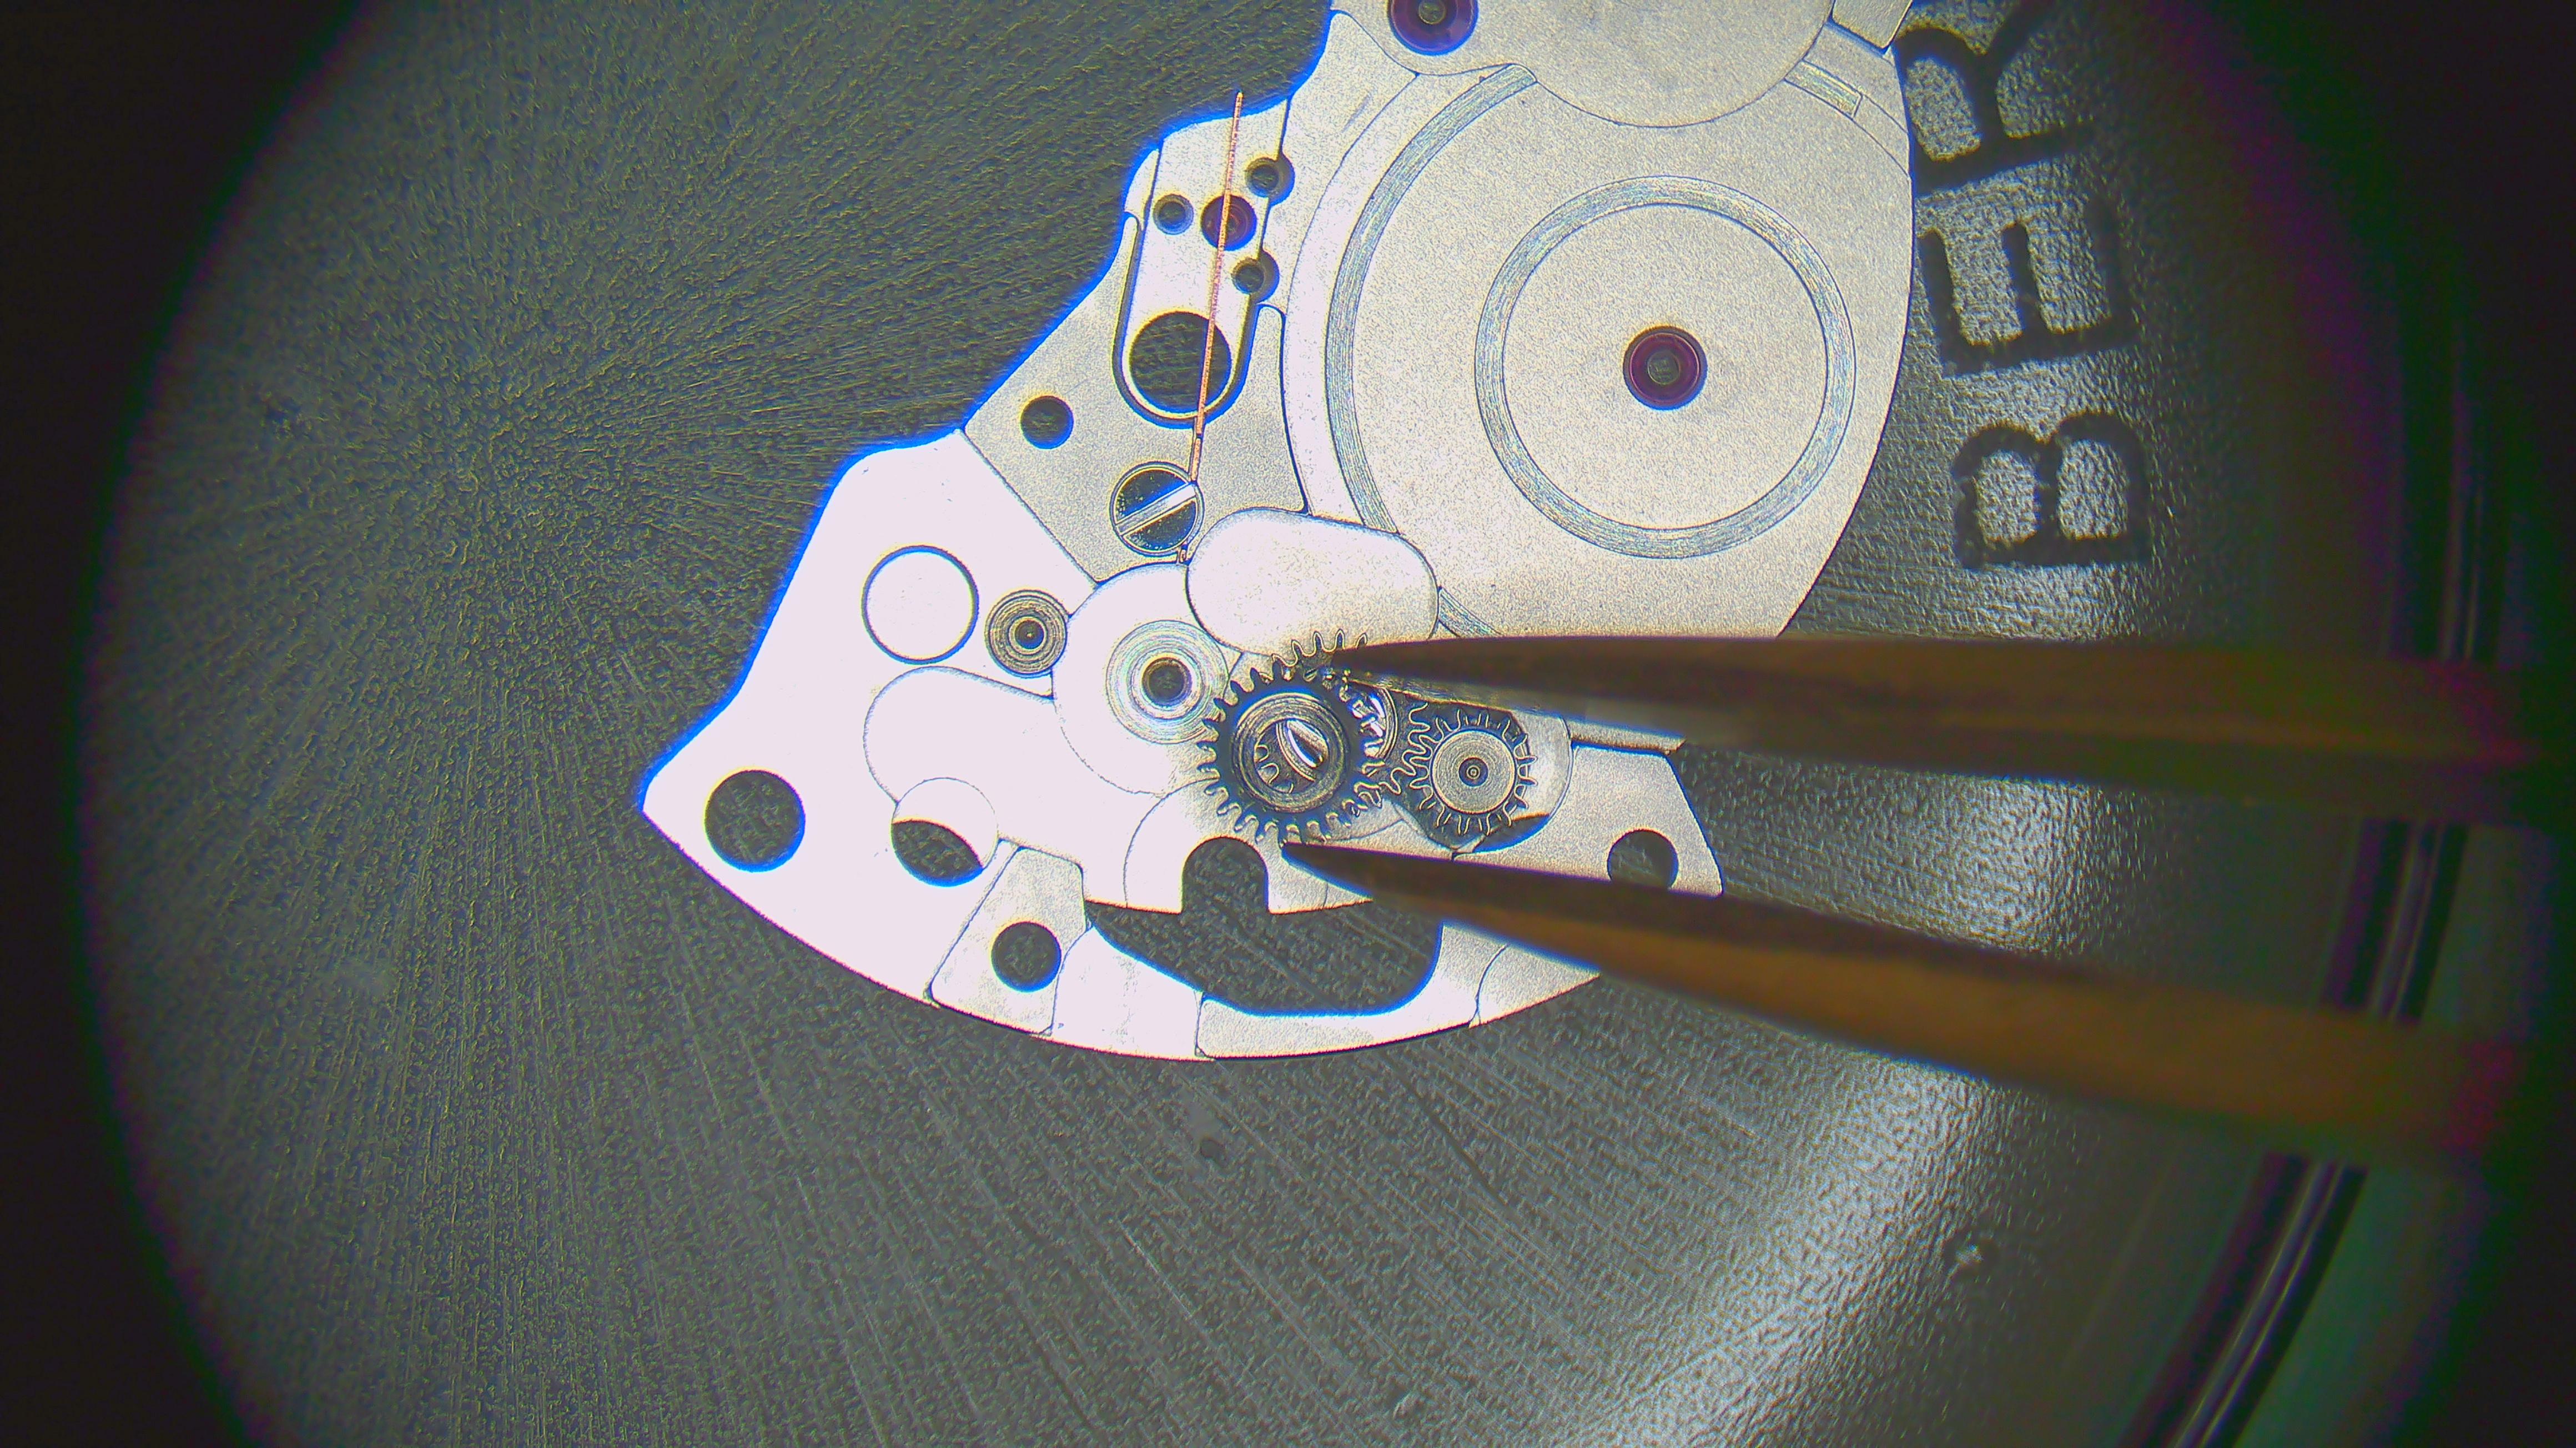
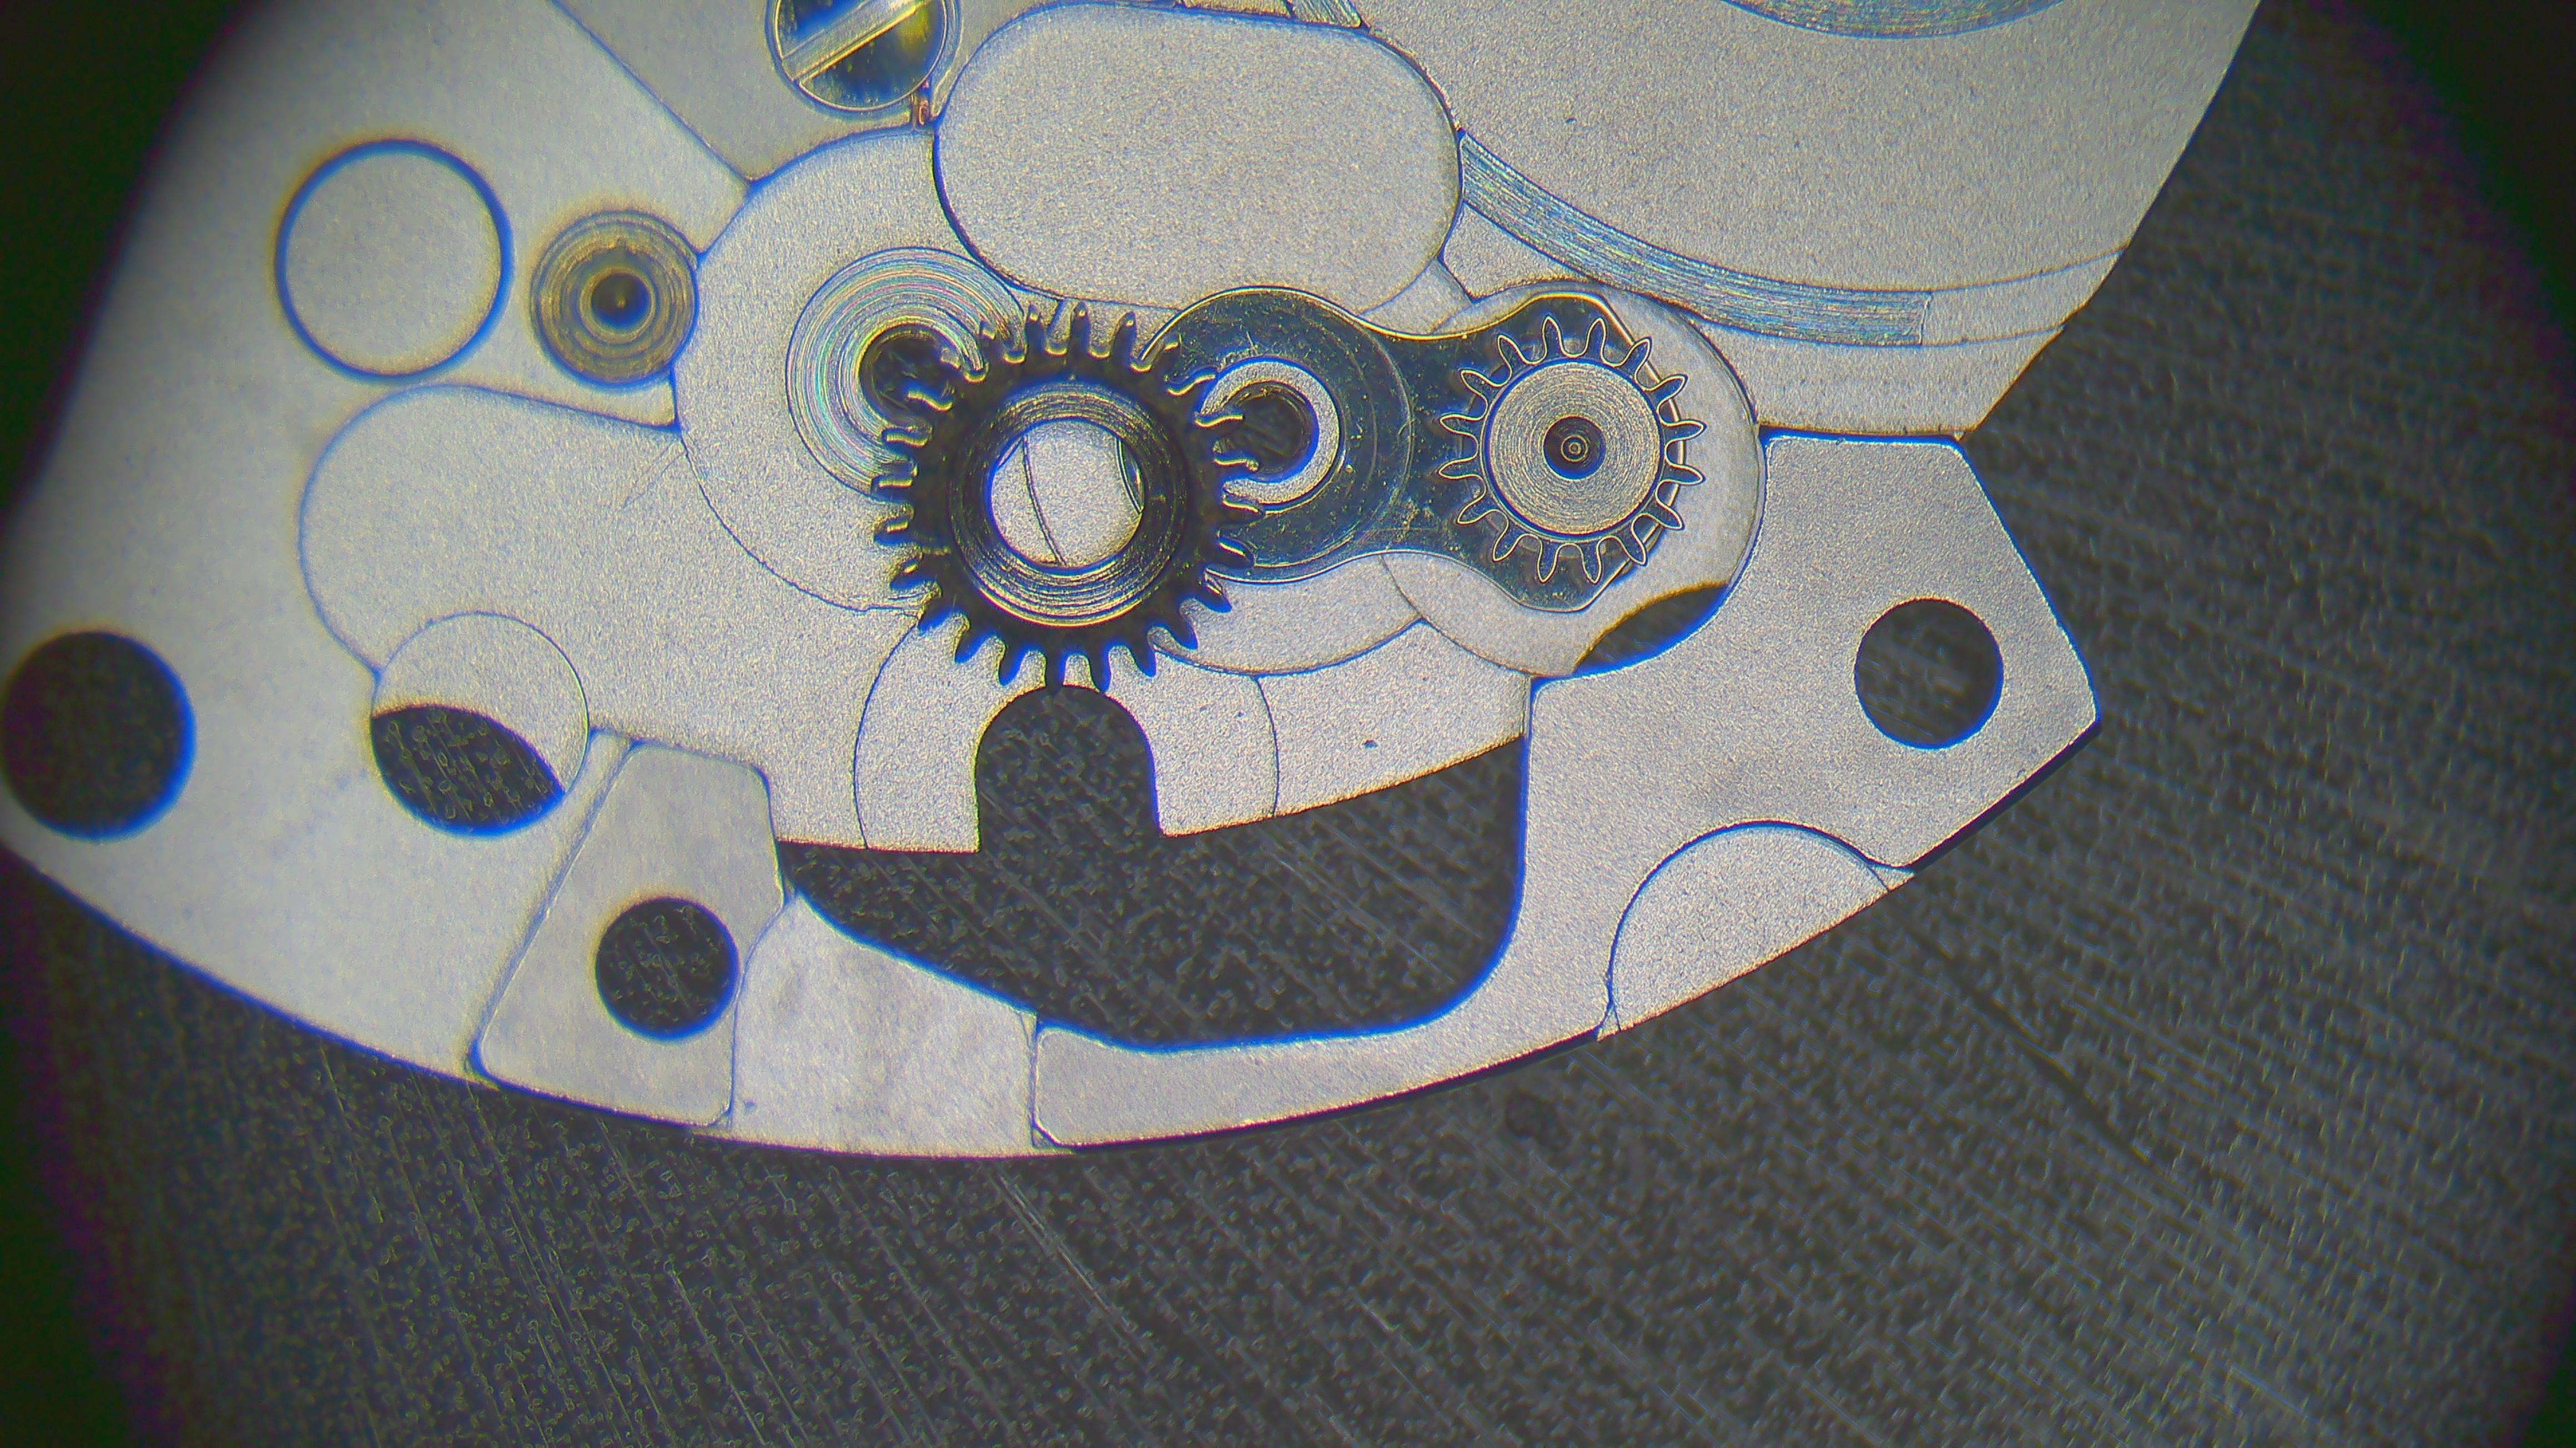
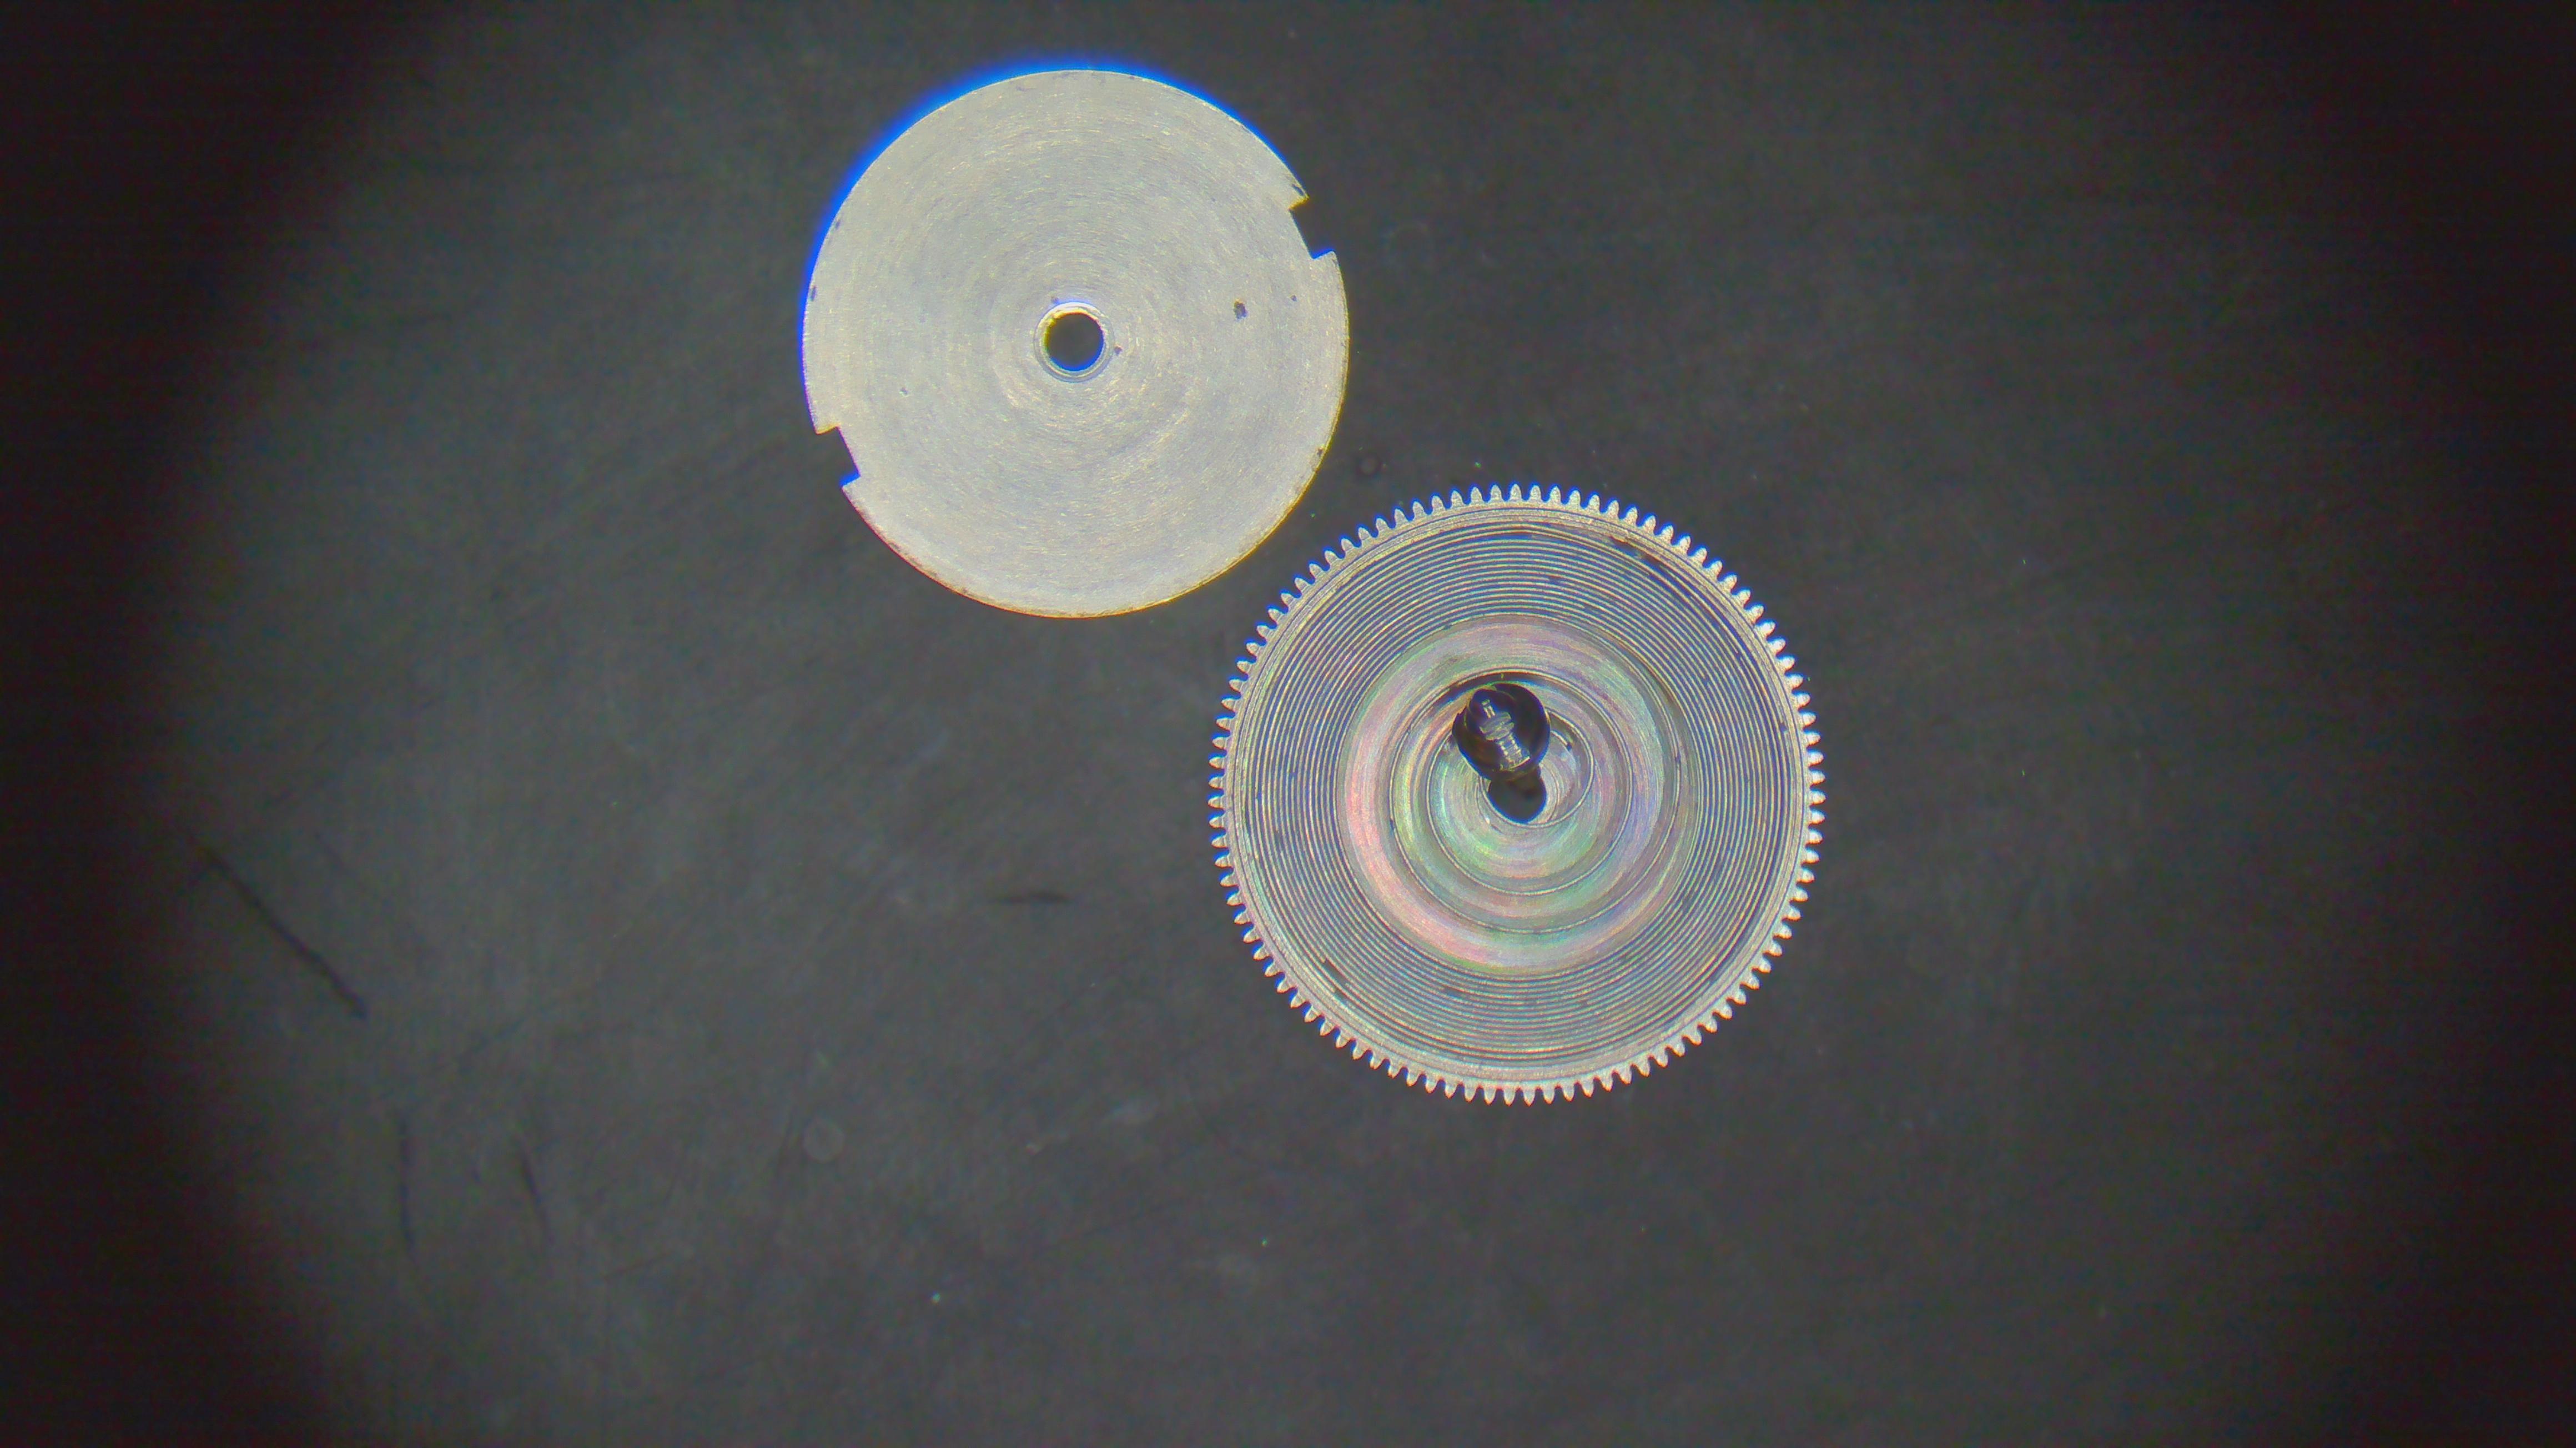
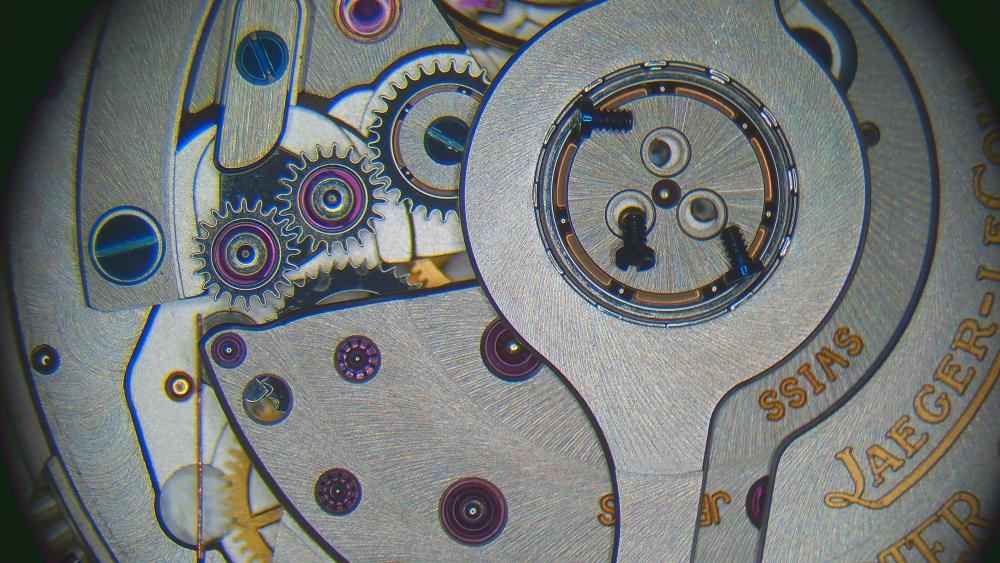
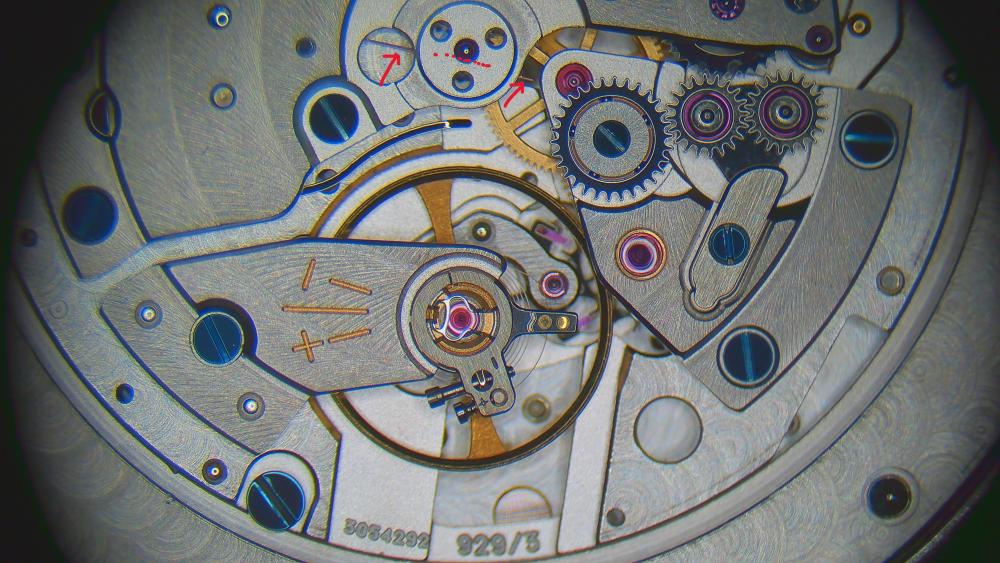
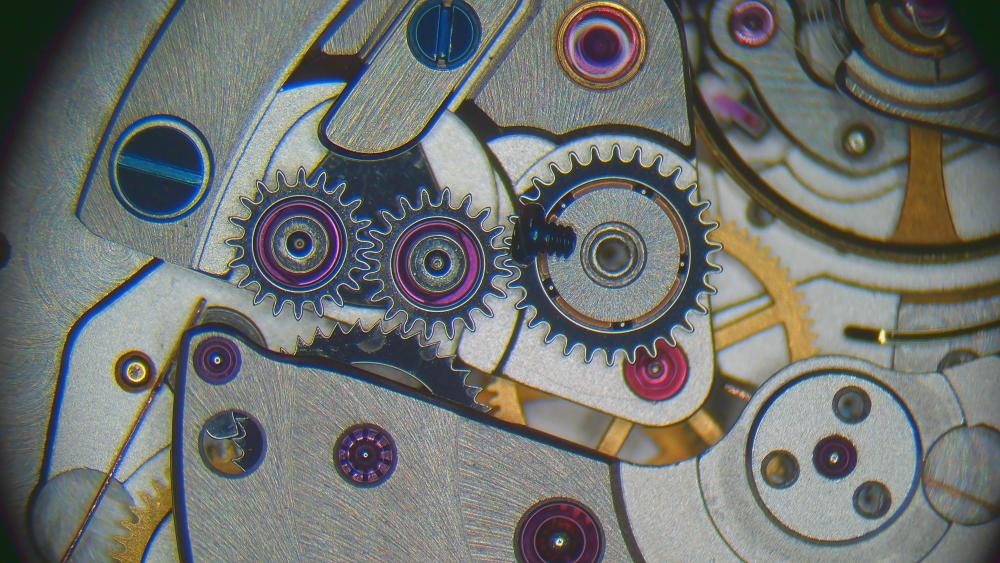
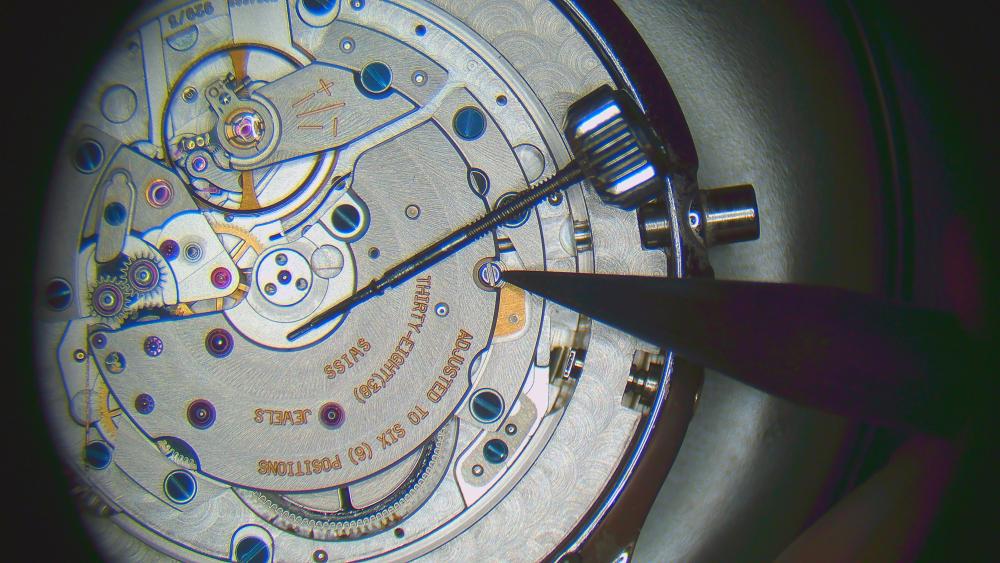
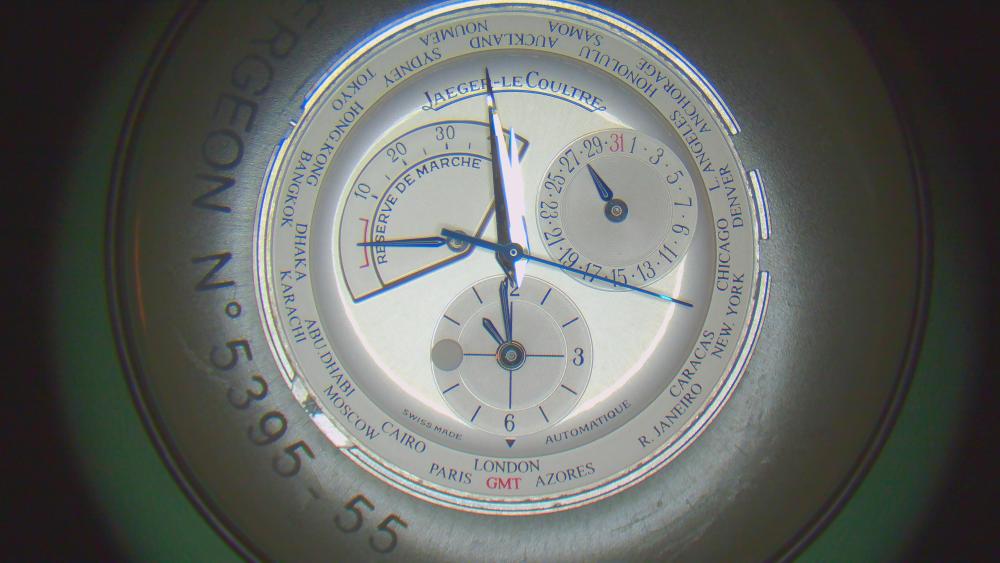
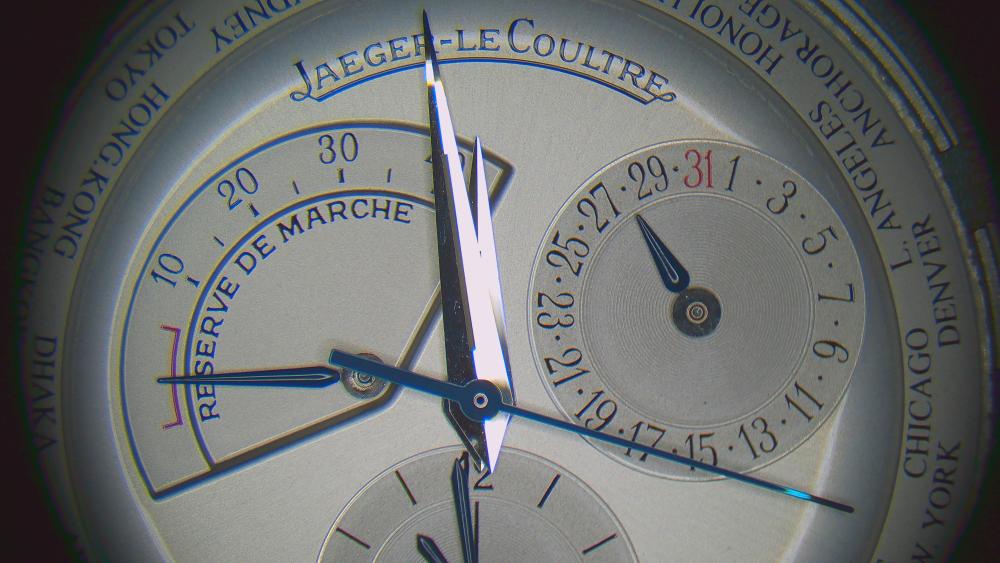
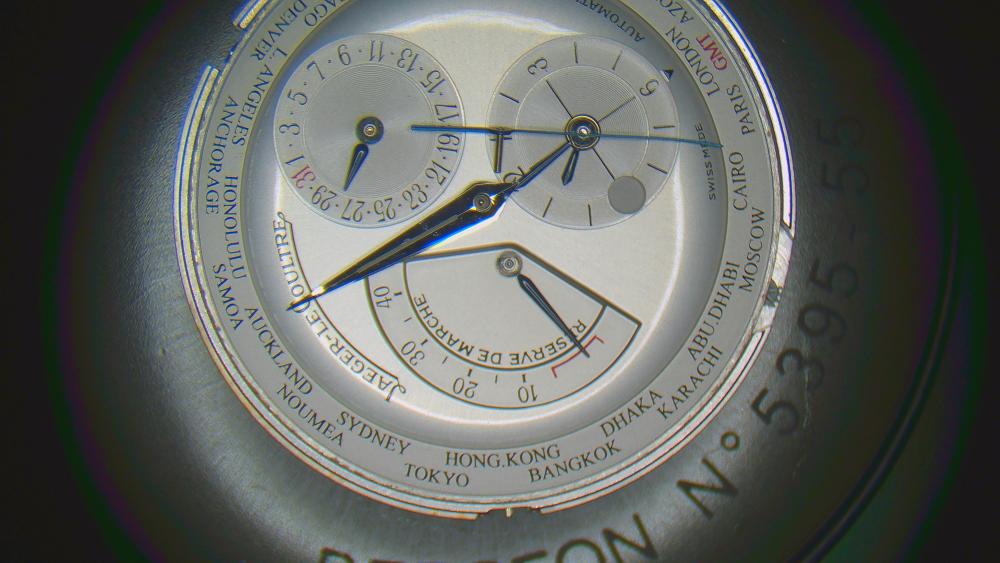
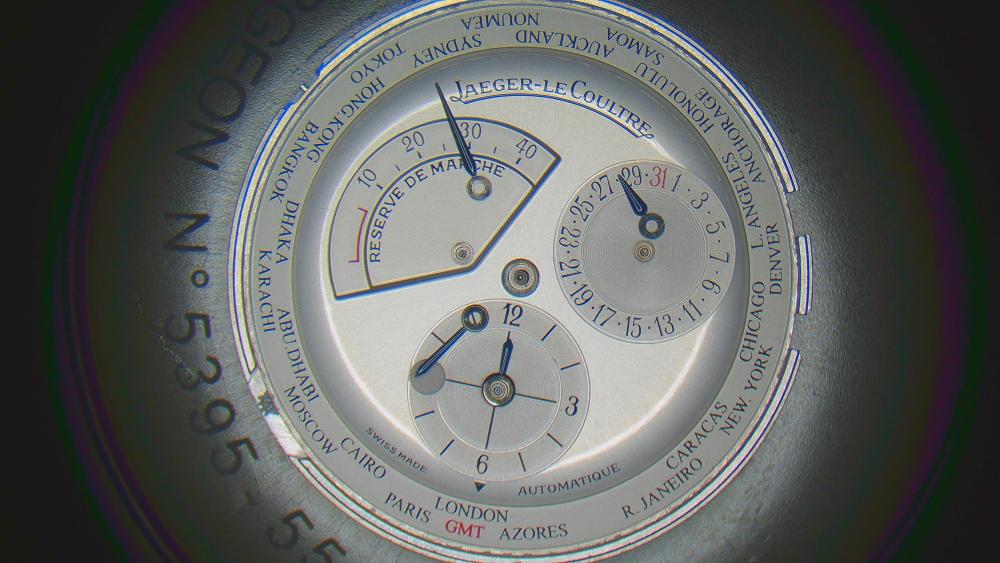
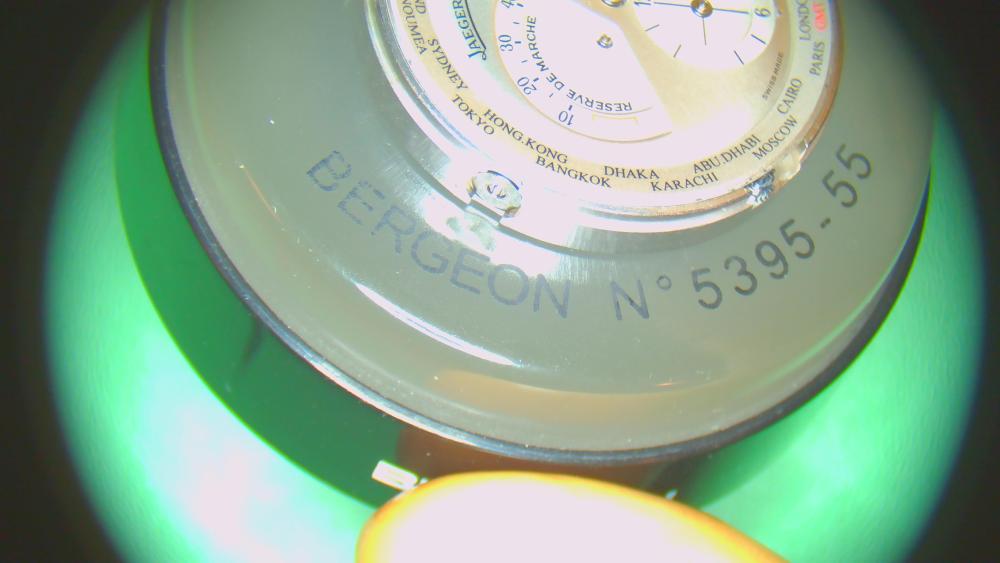
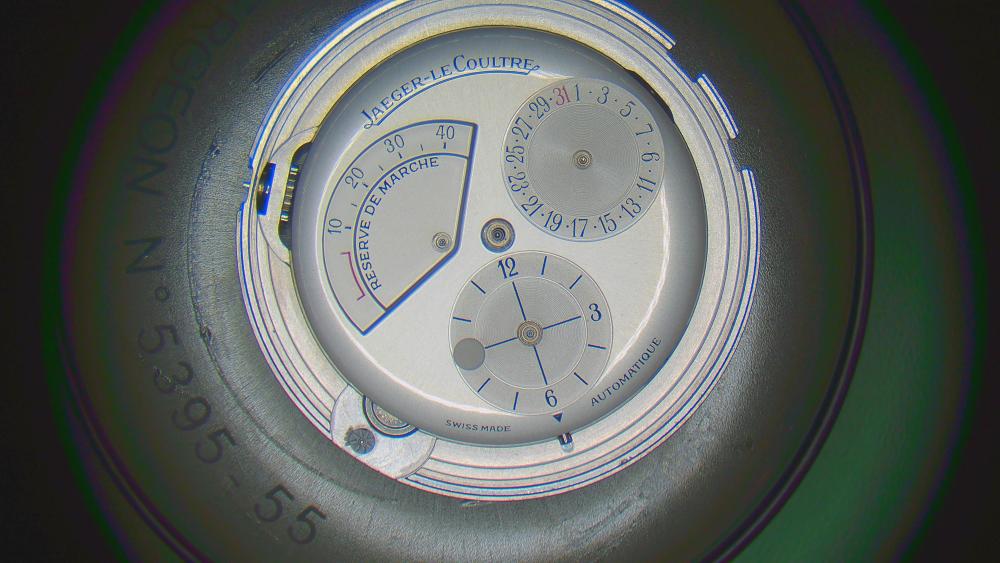
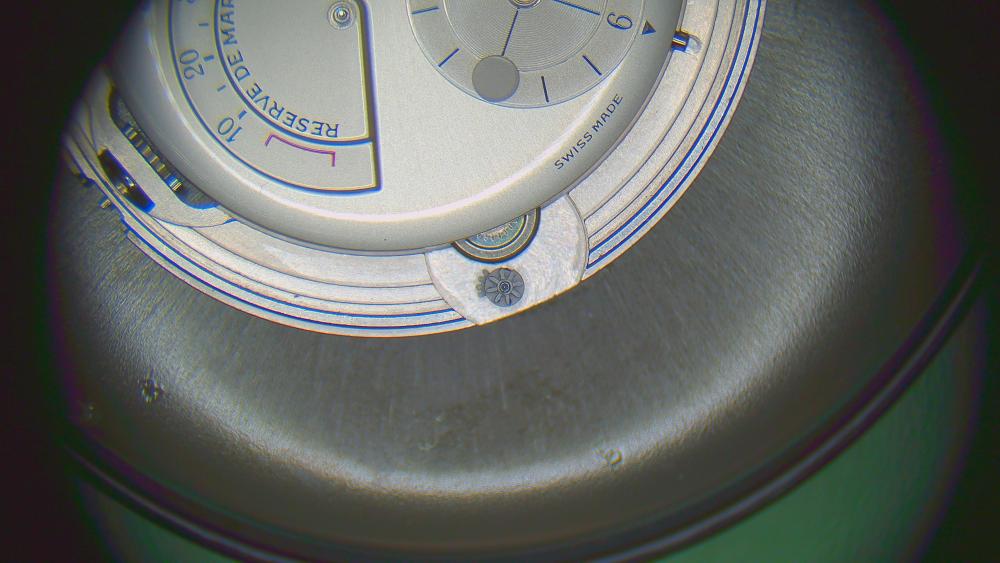
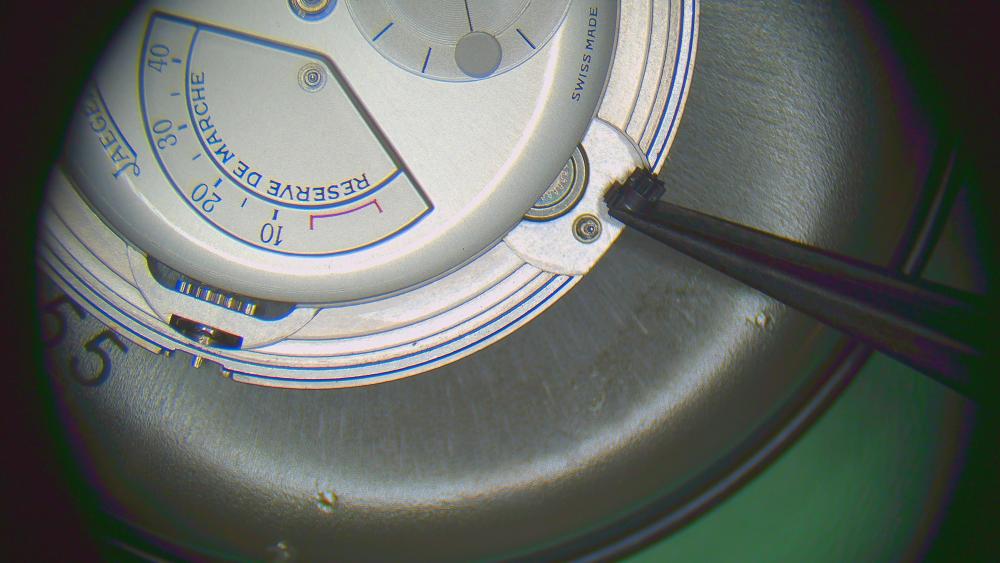
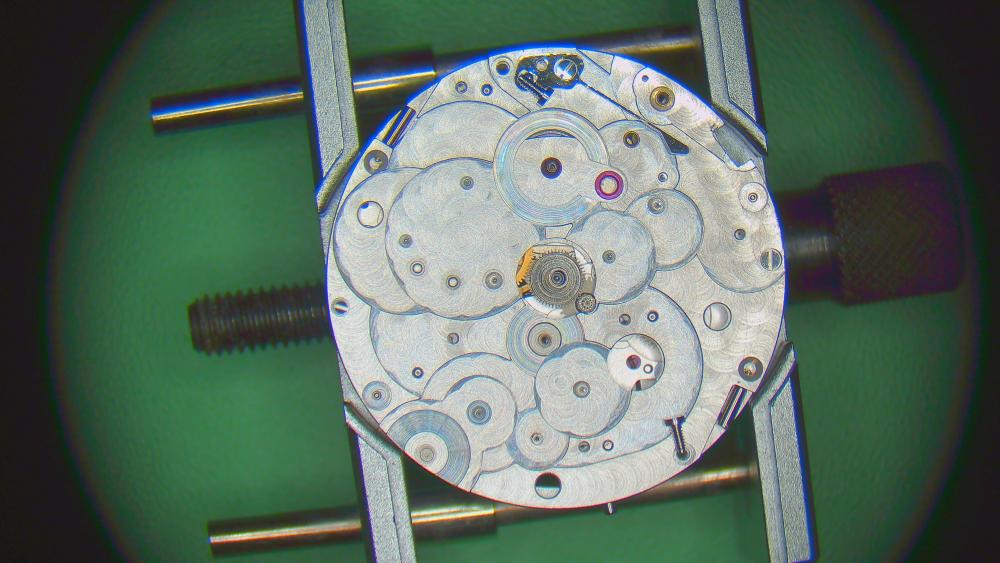
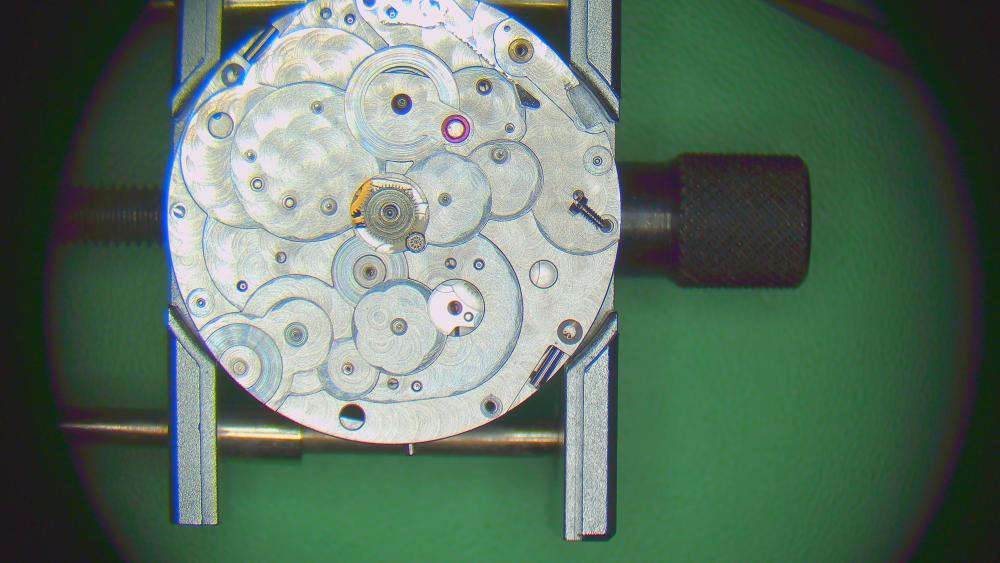
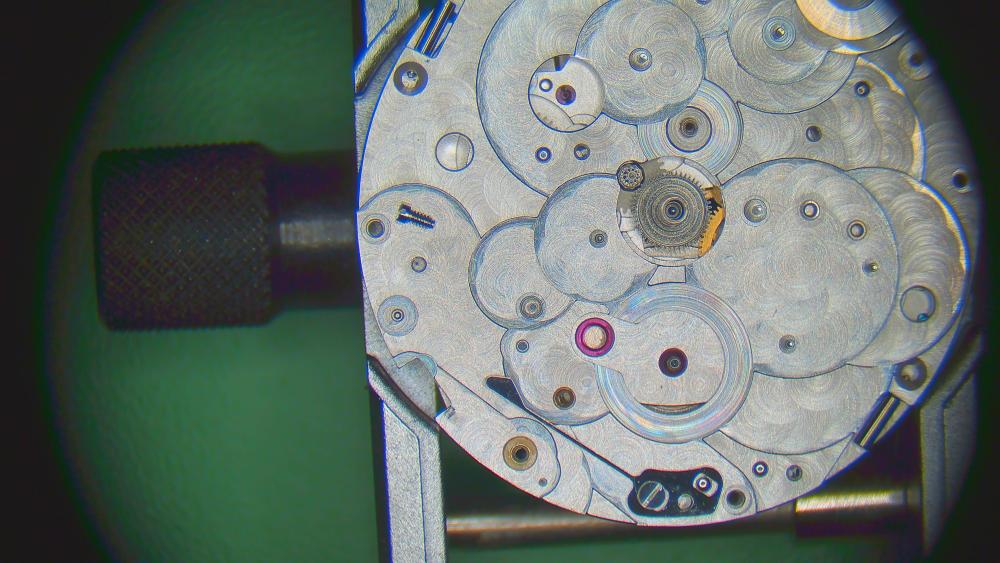
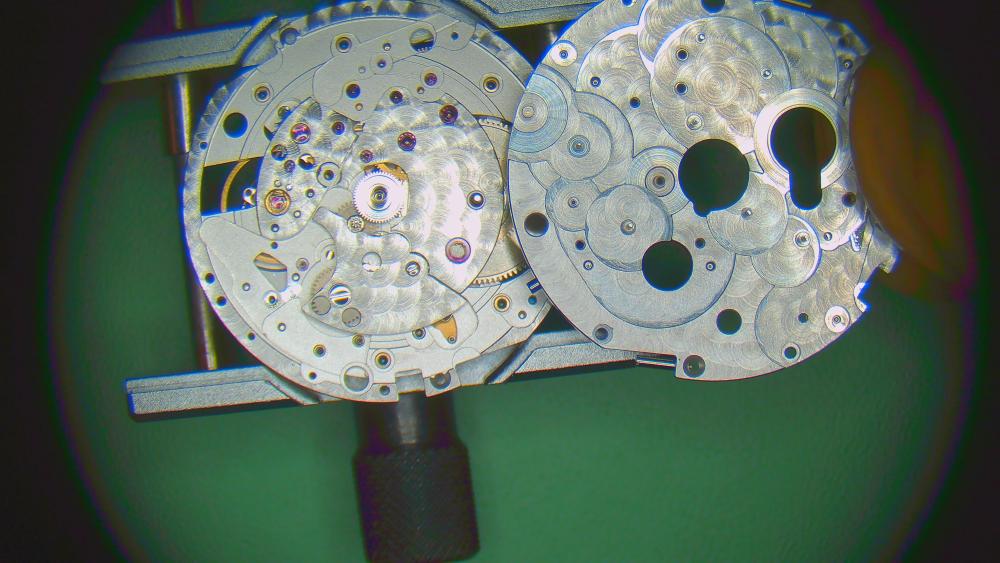
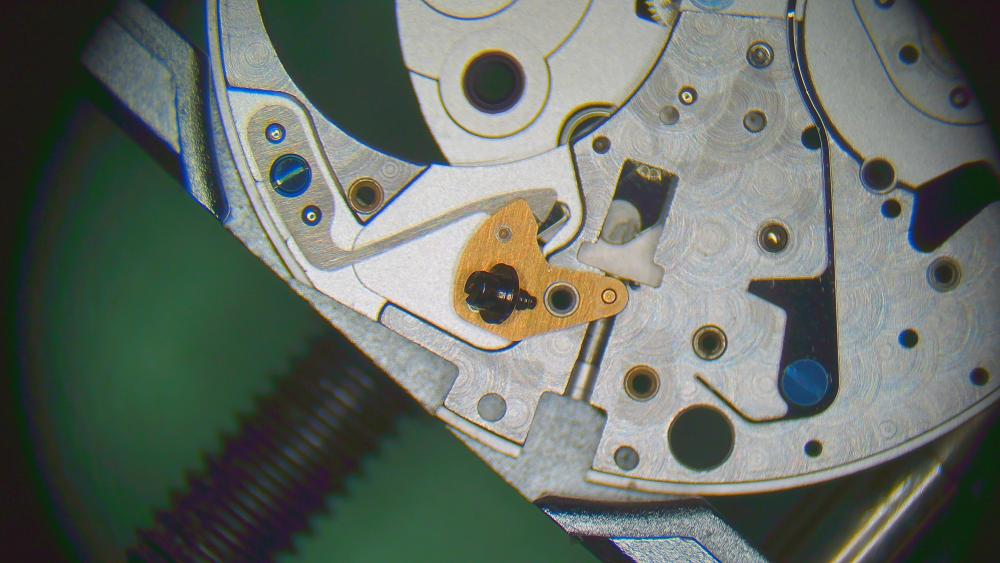
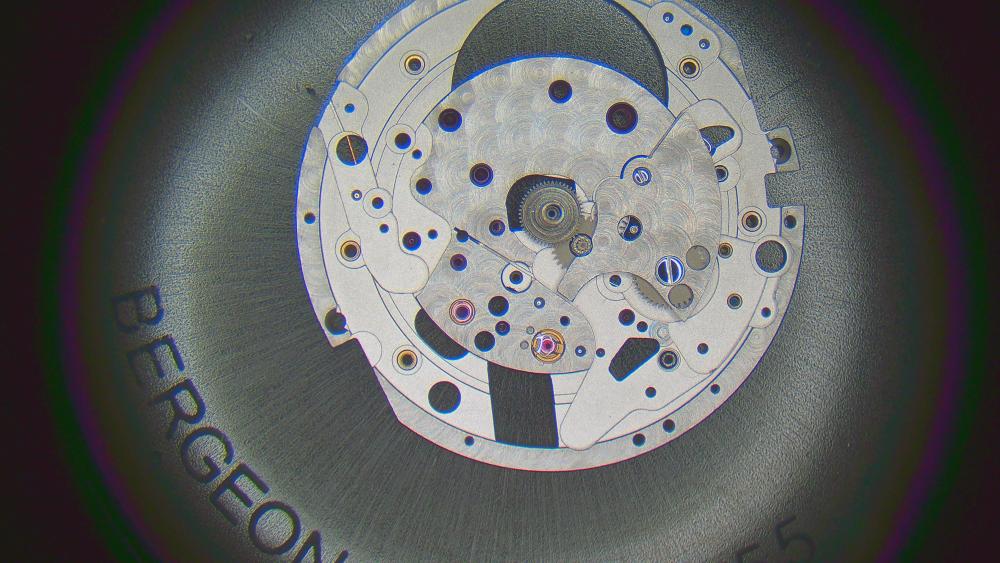
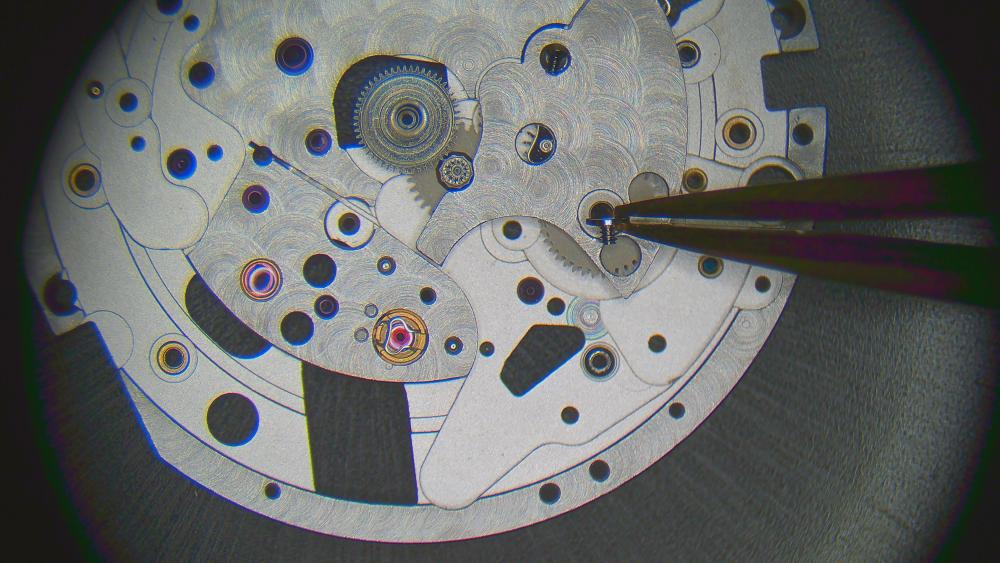
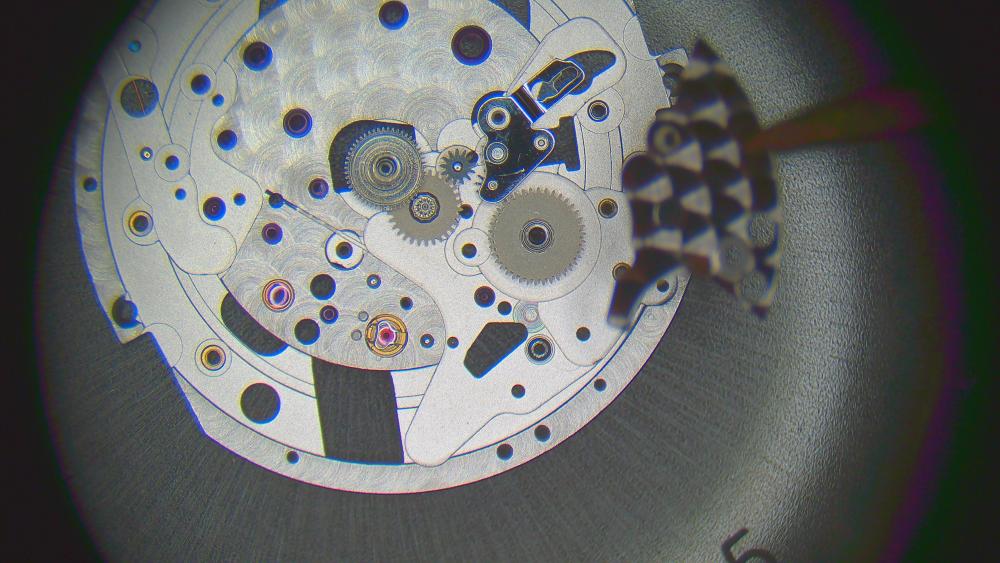
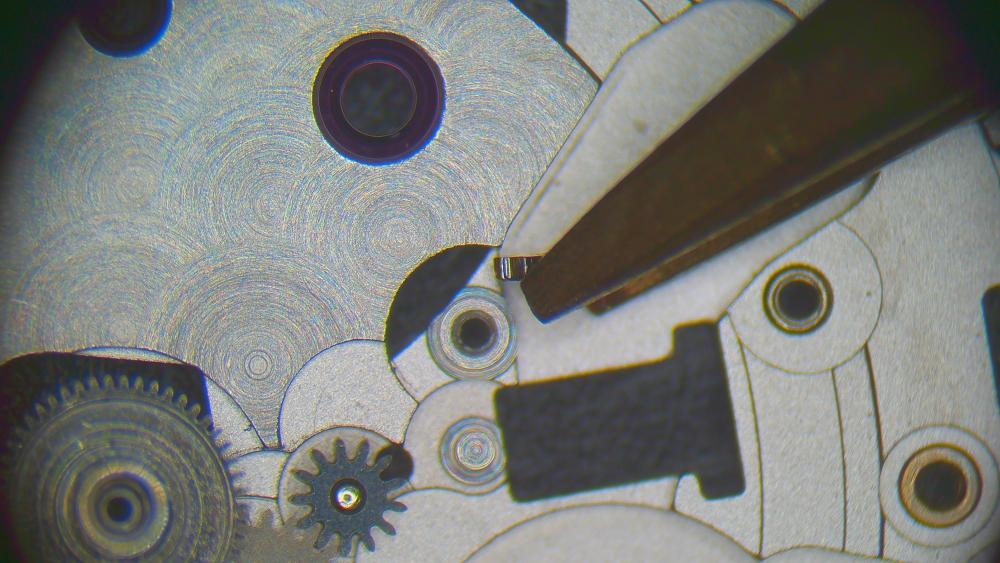
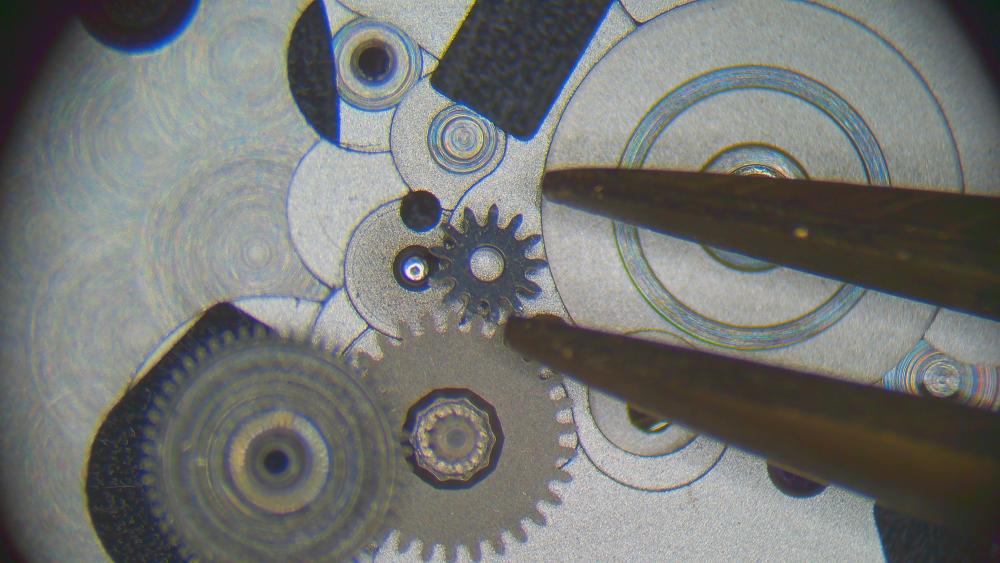
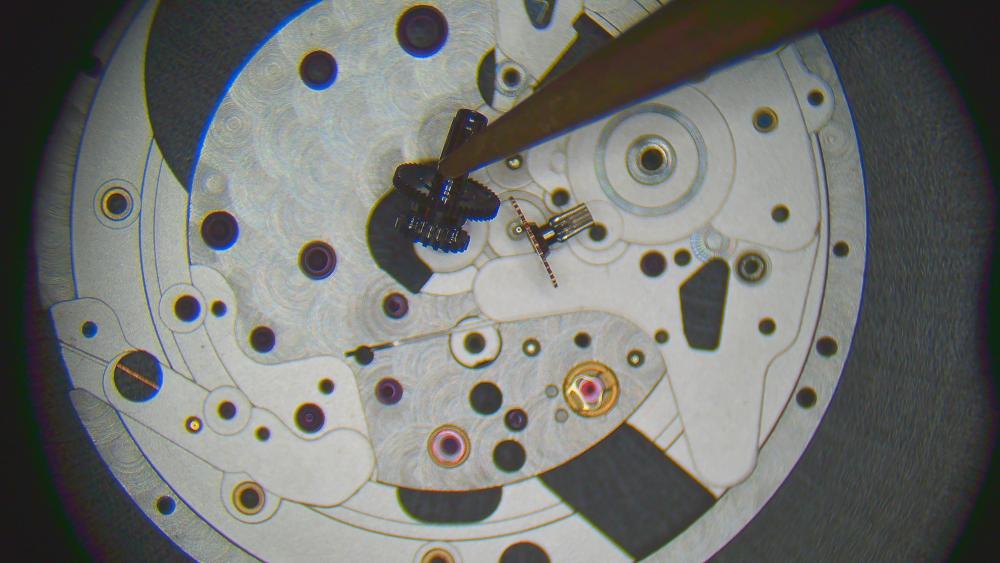
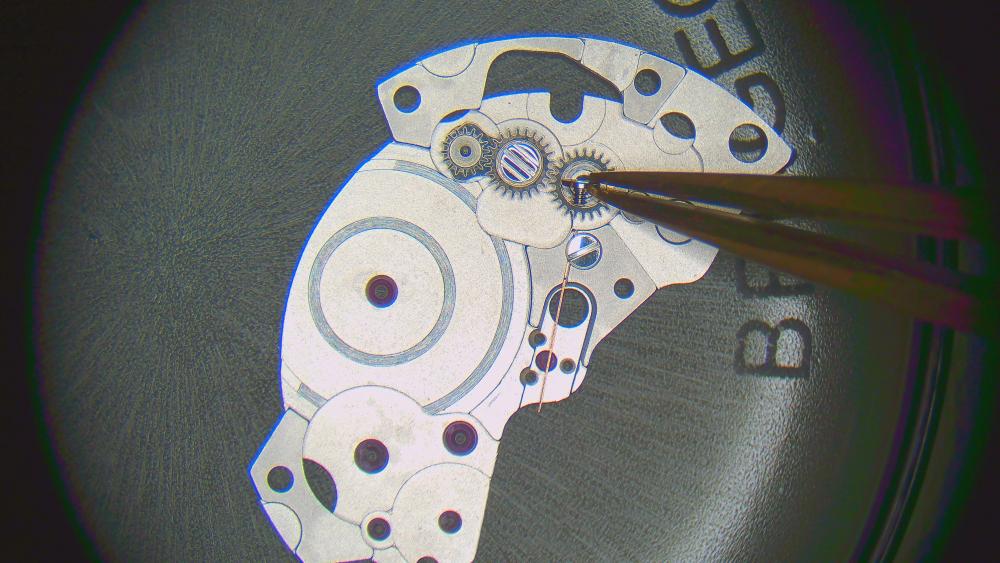
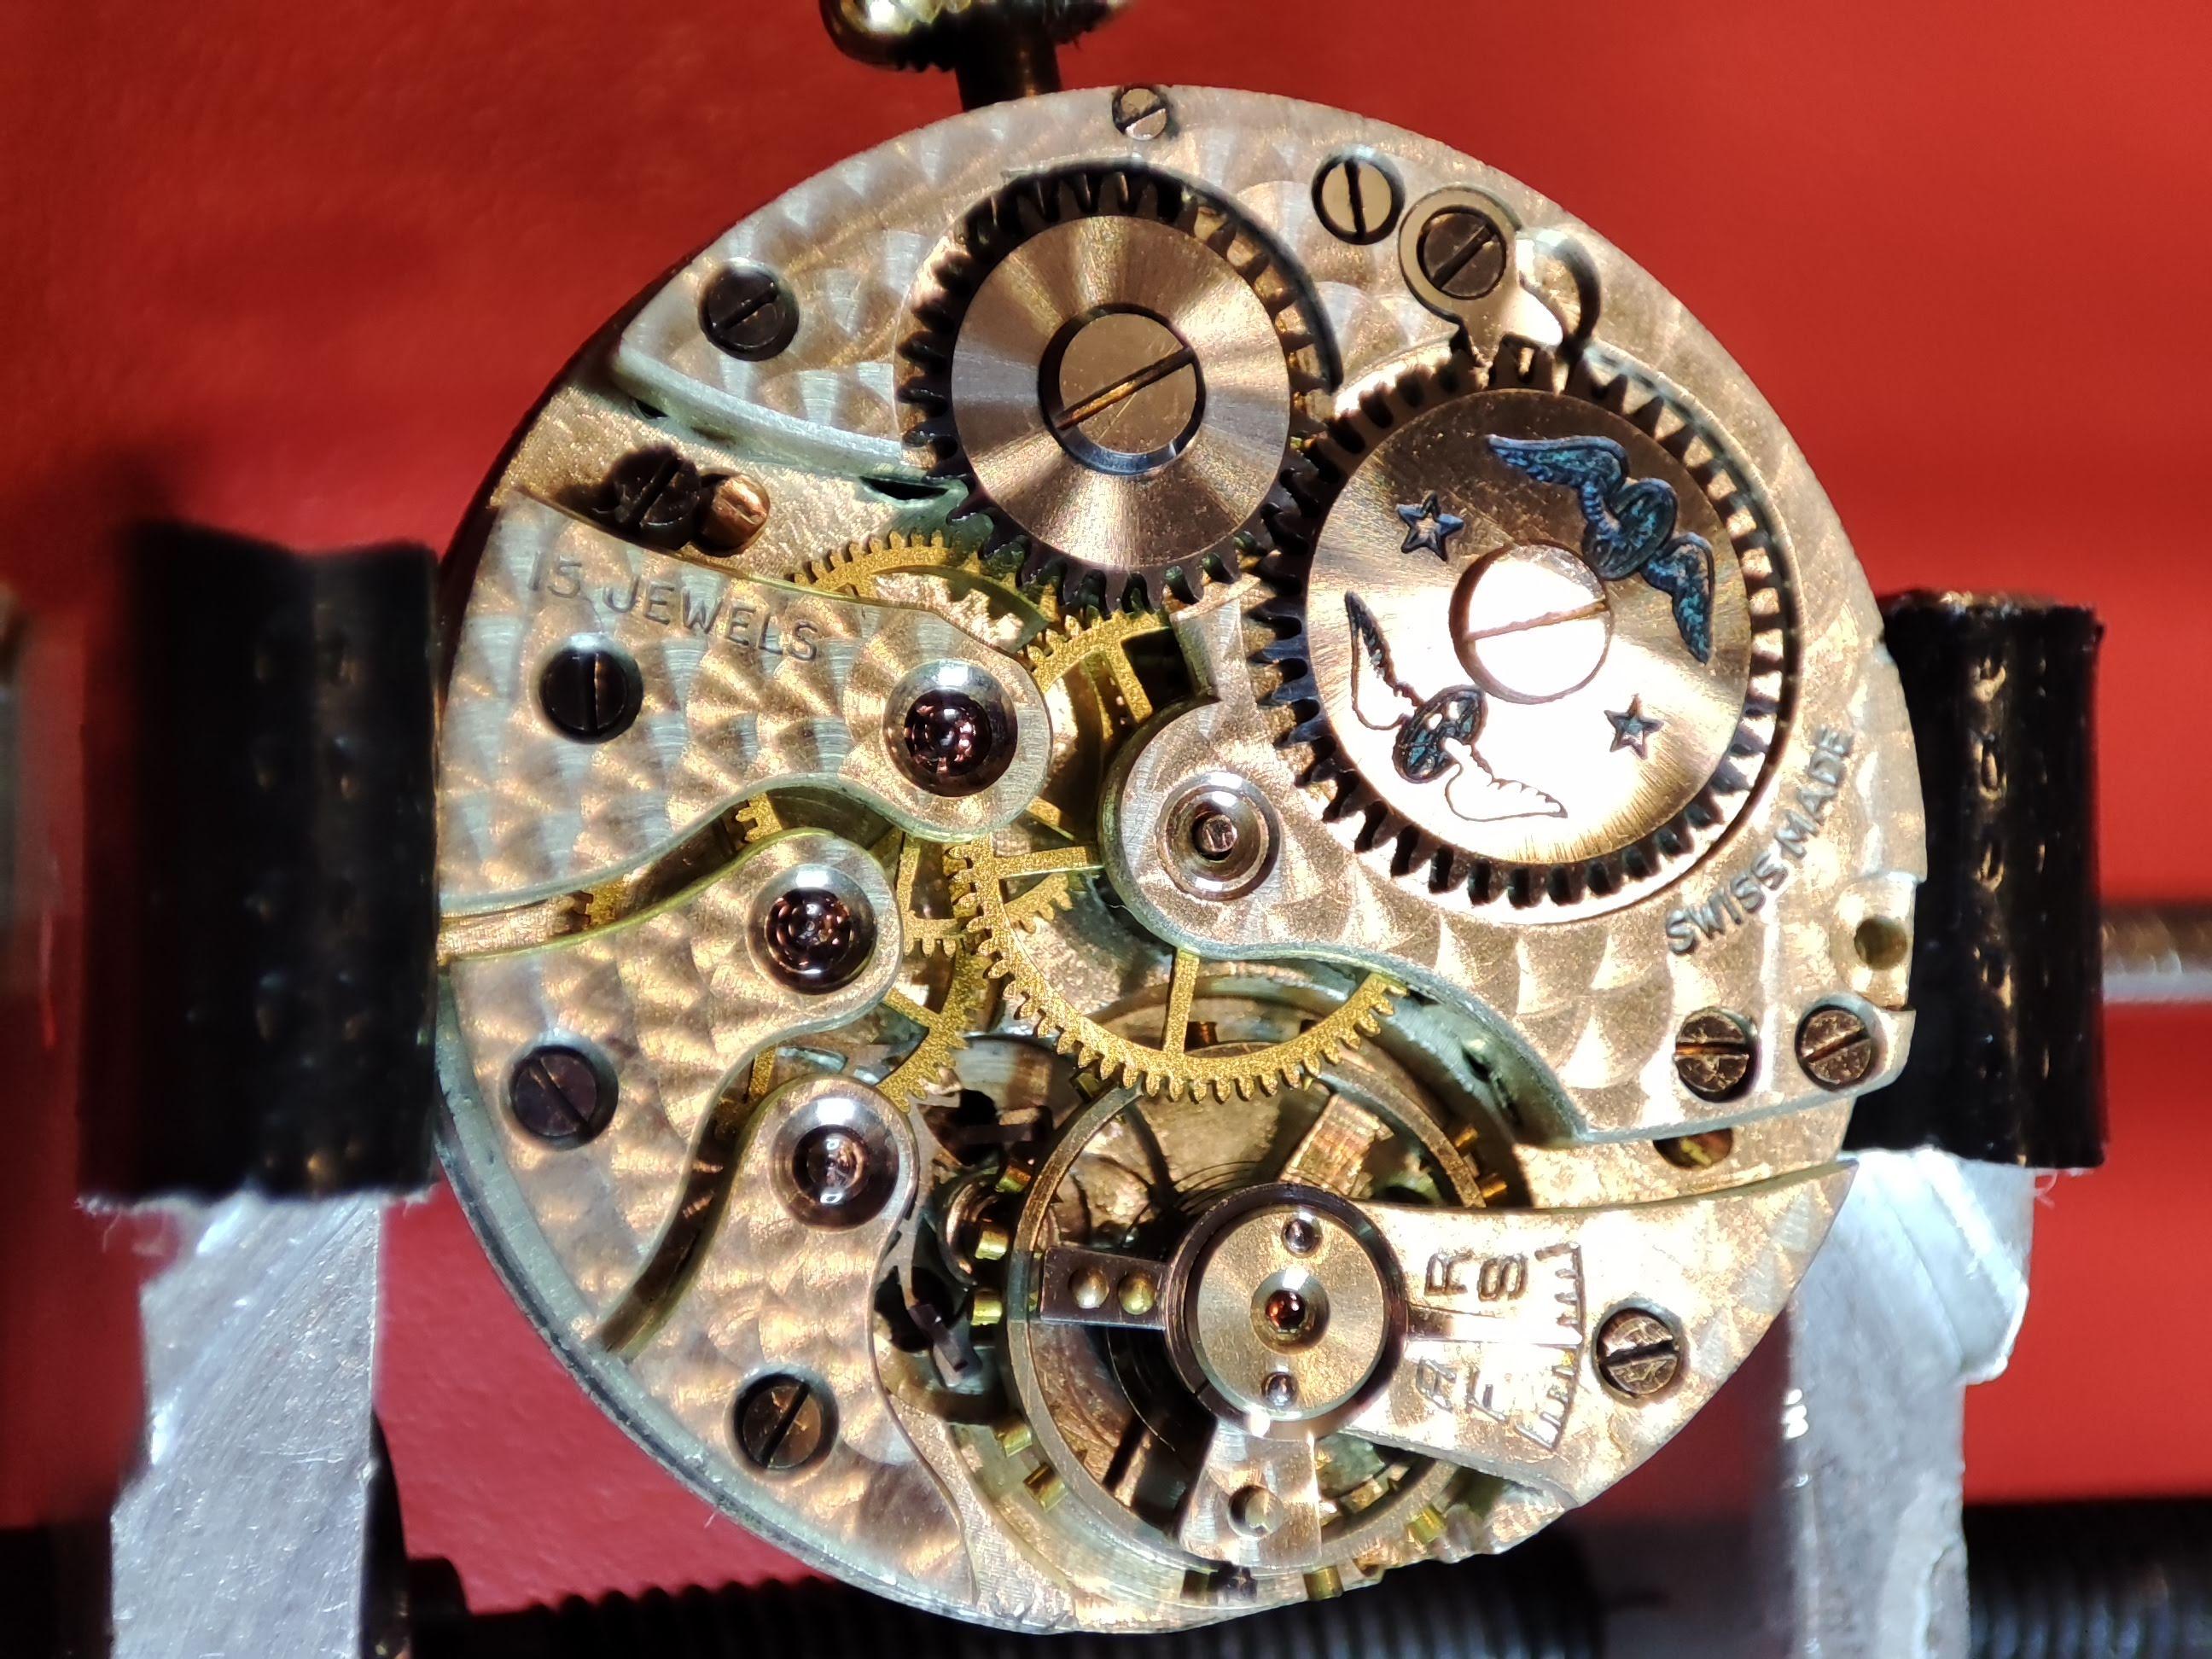
Here comes a disassembly mega-post! Step by step, screw by screw. Not many explanations, only where I feel it's useful. only one watchmaker, probably the one at JLC that built this baby, signed the service log Overview 1 Overview 2 closeup of data corrector city-wheel/second time zone crown first I take the rotor of. 0.8mm screwdriver. remember that the position of the centre-seconds spring is towards the balance wheel intermediate wheel for self-winding mechanism (next is the wig-wag style wheel/pinion -- comes later) to remove the crown: 1. loosen the screw that I'm pointing at 2. push down the brass-plate at the indicated position case screws (2x) overview without rotor to be able to remove the movement, the city-crown needs to be positioned such that the slot in the inside is "open" (see gap in casing ring) main hands removed complication hands removed side of casing ring for the record pinion on casing ring to change city/2nd time zone Metal pin that acts as extension of the data corrector... don't loose that one! city ring just lifts off overview. city-change-pinion again removing casing ring (two screws) the pin on the side helps to correctly position the movement into the casing ring two long dial screws to loosen... and off comes the dial complication module 2nd time zone side power reserve (left) and date (right). date wheel comes off without screws more wheels without screws day/night indicator (for 2nd time zone). 2nd time zone changing wheel cover plate for additional 2nd time zone wheels overview and the removing everything layer-by-layer now over to the power reserve this wheel is friction-fit to the extended barrel arbor. removed with presto tool. these two wheels, screws and seats are the same. I overlooked that one of the seats (on right) was stuck to the screw, so it looked different. It came off during cleaning. removing corrector lever and spring I leave the date jumper in place for cleaning finding/cremoving screws for module plate (1+2 of 4) 3 of 4 4 of 4 complication module coming off overview of mainplate dial side side view shows extra high (two-part) canon pinion (for 2nd time zone and date) and extended barrel arbor (for power reserve) continuing disassembly on train side perfect hairspring wow, look at that beauty of pallet fork and its cock further parts of the automatic works taken off wig-wag wheels for bi-directional winding train bridge escape wheel cap+hole jewel setting is fixed. There are three holes around the hole jewel to ensure that cleaning is effective. train wheels second wheel can't be removed until barrel bridge is off, too. For assembly, I'll therefore start with the train bridge (before barrel bridge). Three screws to remove the barrel bridge. The one screw pointed at is NOT part of them and holds the hacking lever. underside of train bridge with winding wheels and centre seconds tension spring (the latter can stay in place for cleaning) under barrel bridge this is still the second wheel from the gear train the click (click spring can stay in place for cleaning) centre seconds pinion the keyless works is distributed on both sides of the mainplate beautiful curved hacking lever don't overlook the seat for the yoke dial side keyless works note that the rounded side faces downwards no top/bottom difference for this one the two-part canon pinion needs to be disassembled for cleaning (later) removing balance jewels (also on balance cock) underside of barrel bridge barrel disassembled. IMPORTANT NOTE: mainspring is left-handed! So, ordering an original JLC mainspring from Cousins because I don't have left-handed mainspring winder. https://www.cousinsuk.com/product/under-100mm-height?code=M65598 I strongly suggest taking the original JLC spring and NOT the generic GR24473 because the barrel arbor is very small (in diameter) and I'd suspect that the GR spring comes with a too-large centre coil. MORE TO COME SOON.


 1 point
 -
Maybe this has been discussed, but why not both. Keep the 404 thread going as is and start the 10.10£ club in a brand new thread! Problem solved for the purists loyal to the 404 and a new cool thread as well!1 point
-
Are you all jerking my chain, I'm a yorkshireman £4.04 is too much1 point


.thumb.jpg.cb17a66989f1e796fd4217db2e9ca9df.jpg)