Leaderboard


Popular Content
Showing content with the highest reputation on 12/08/24 in all areas
-
Use the replacement bridge until you acquire more knowledge and tools?3 points
-
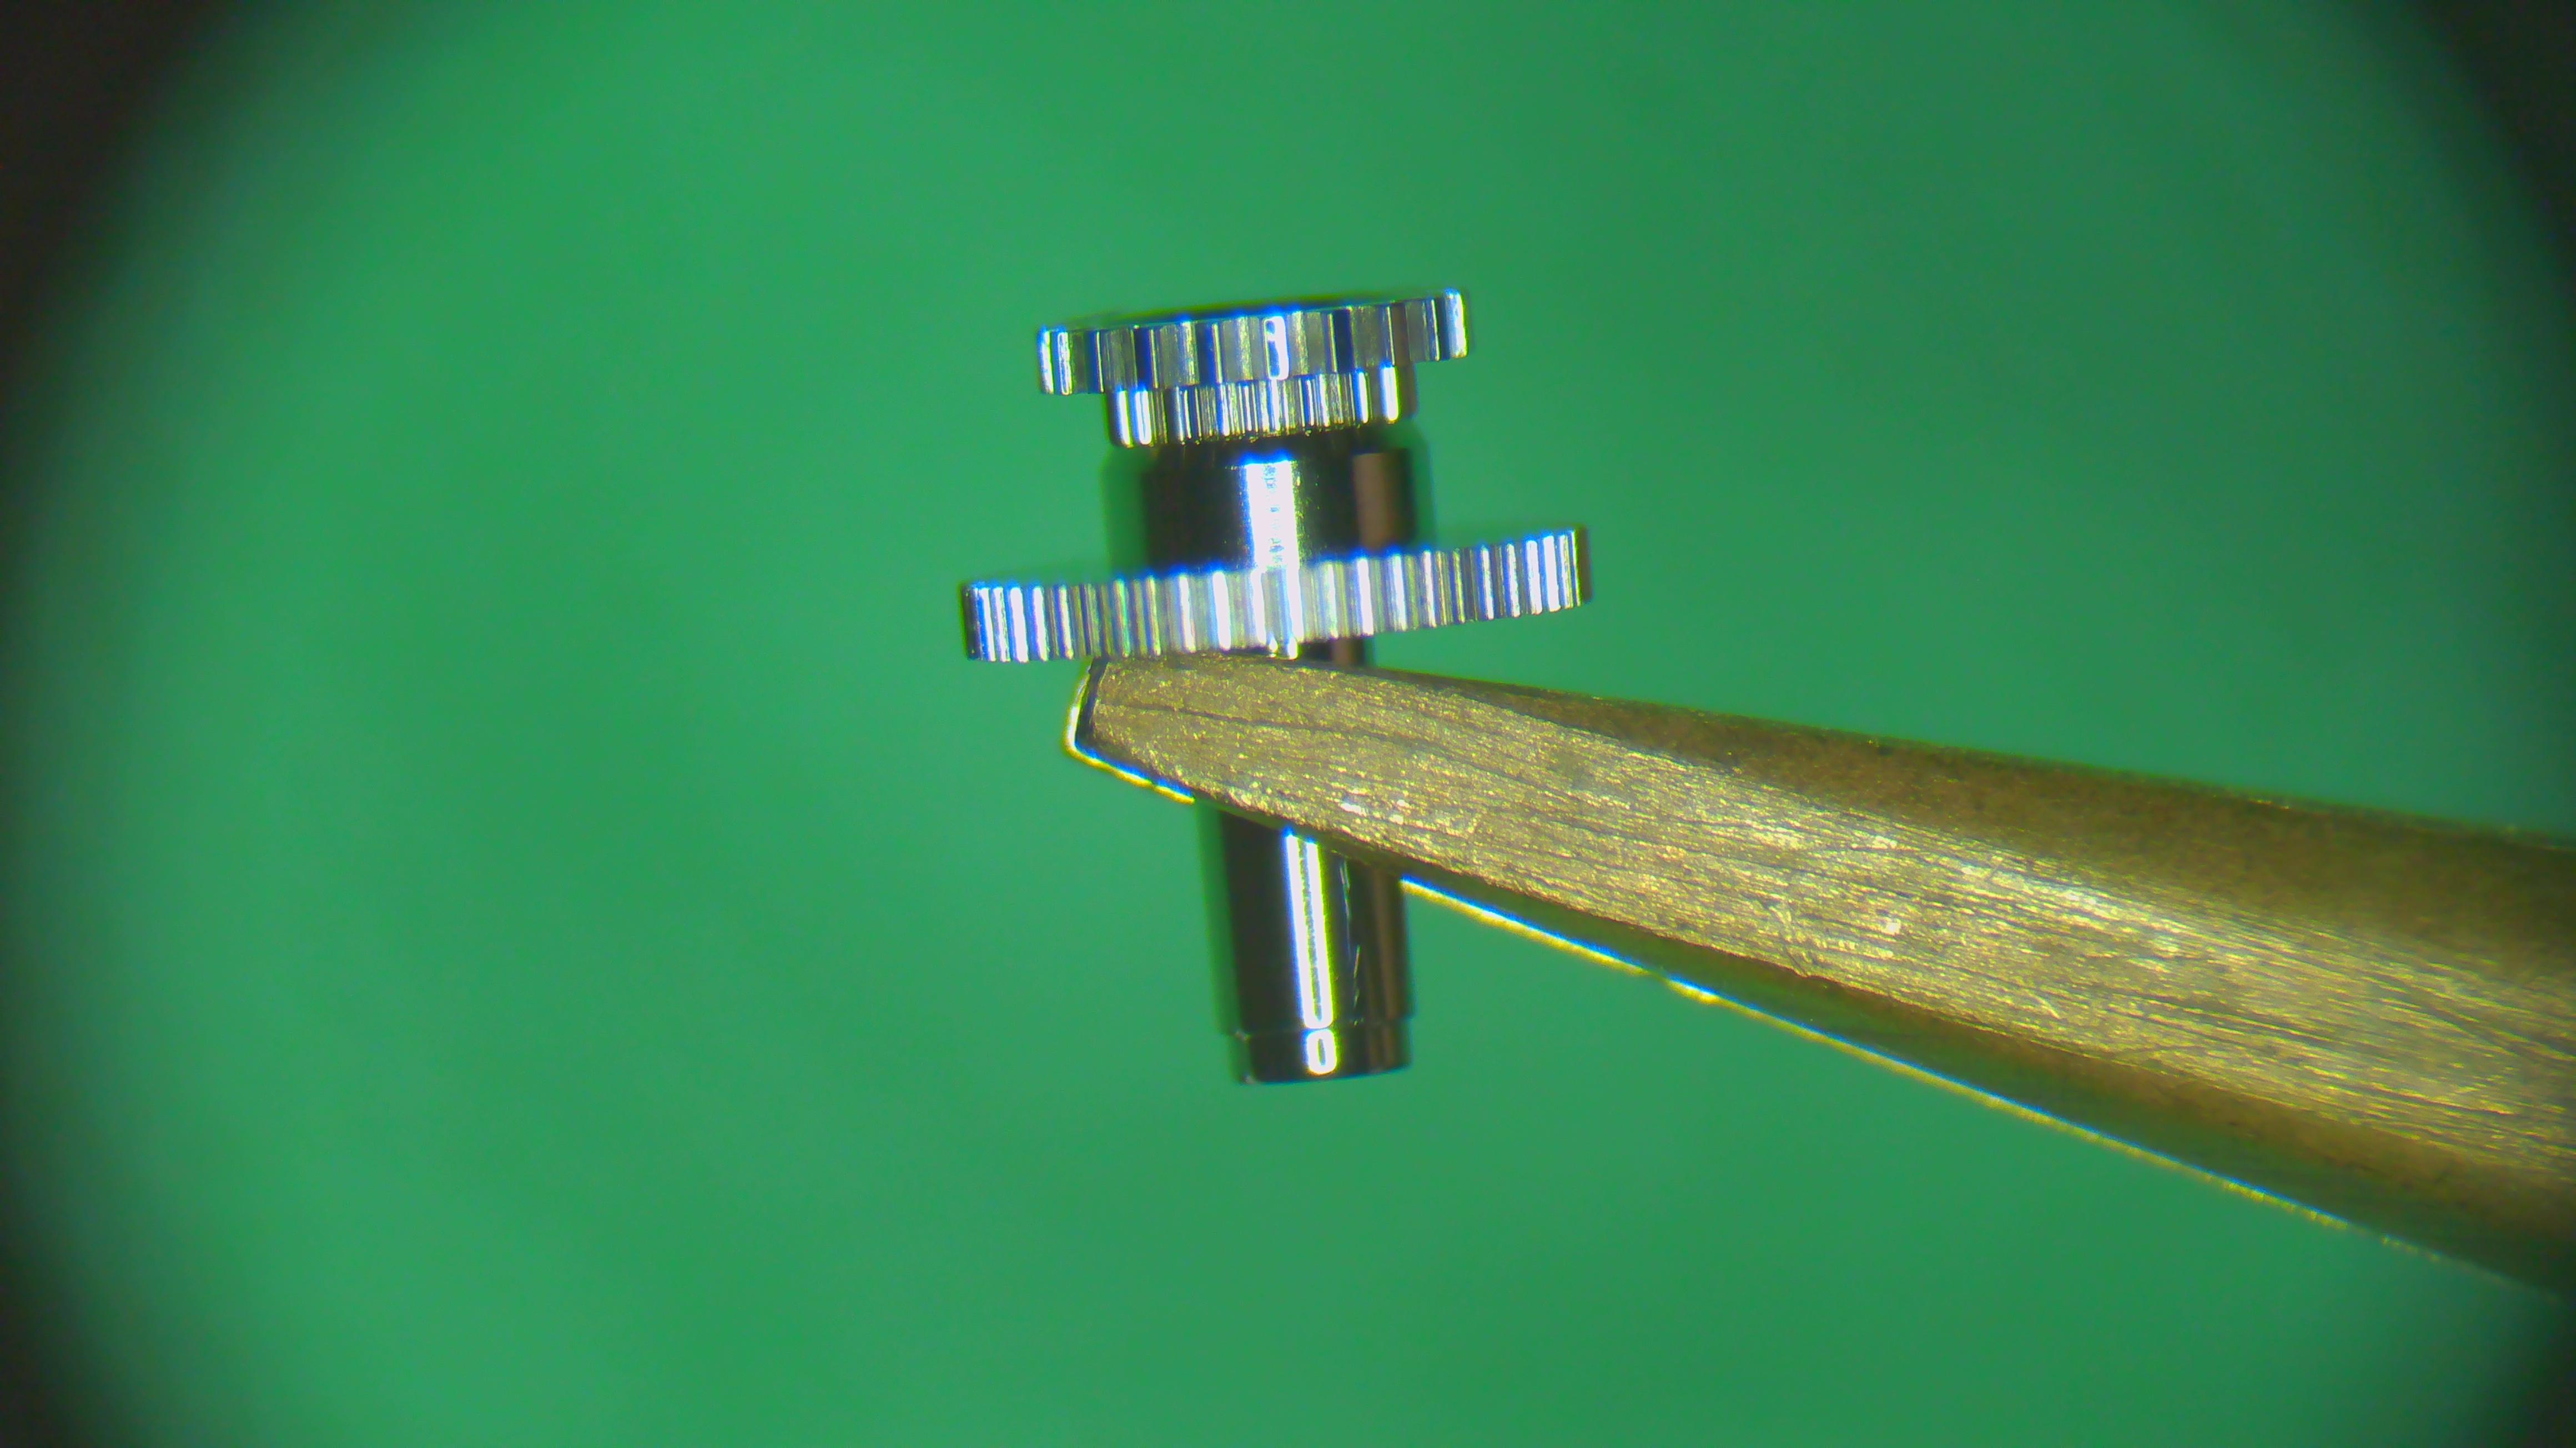
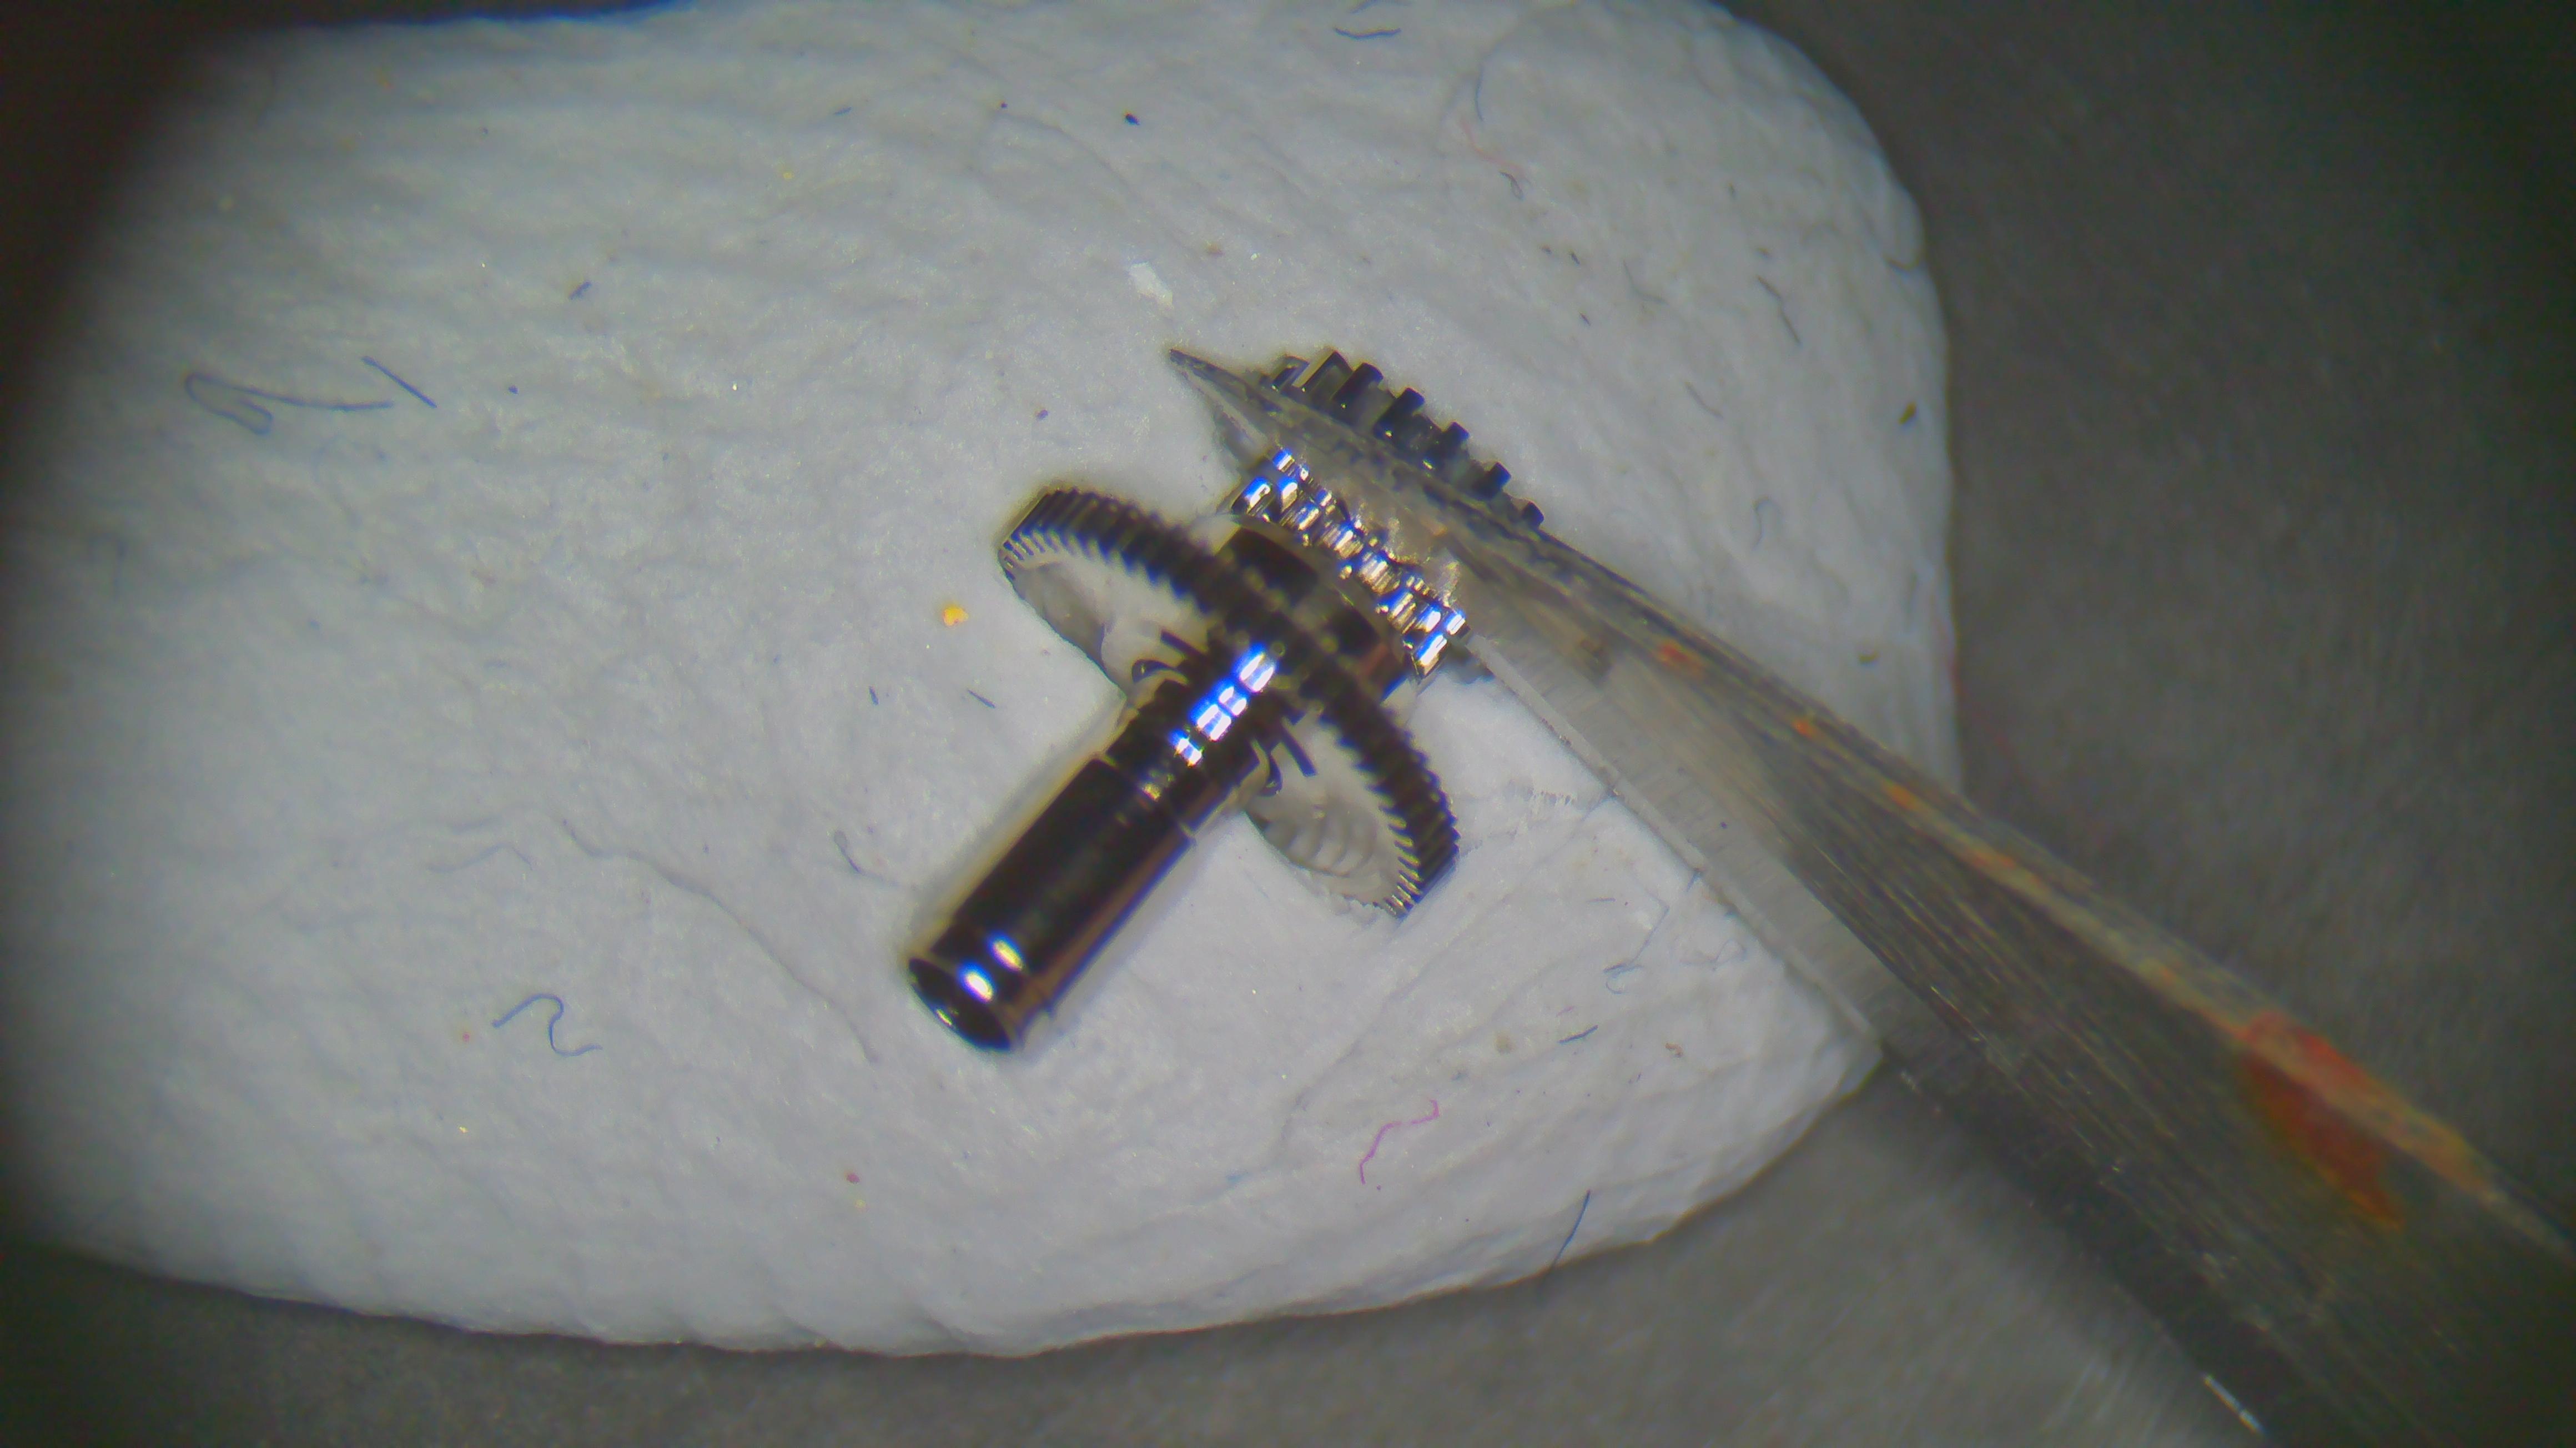
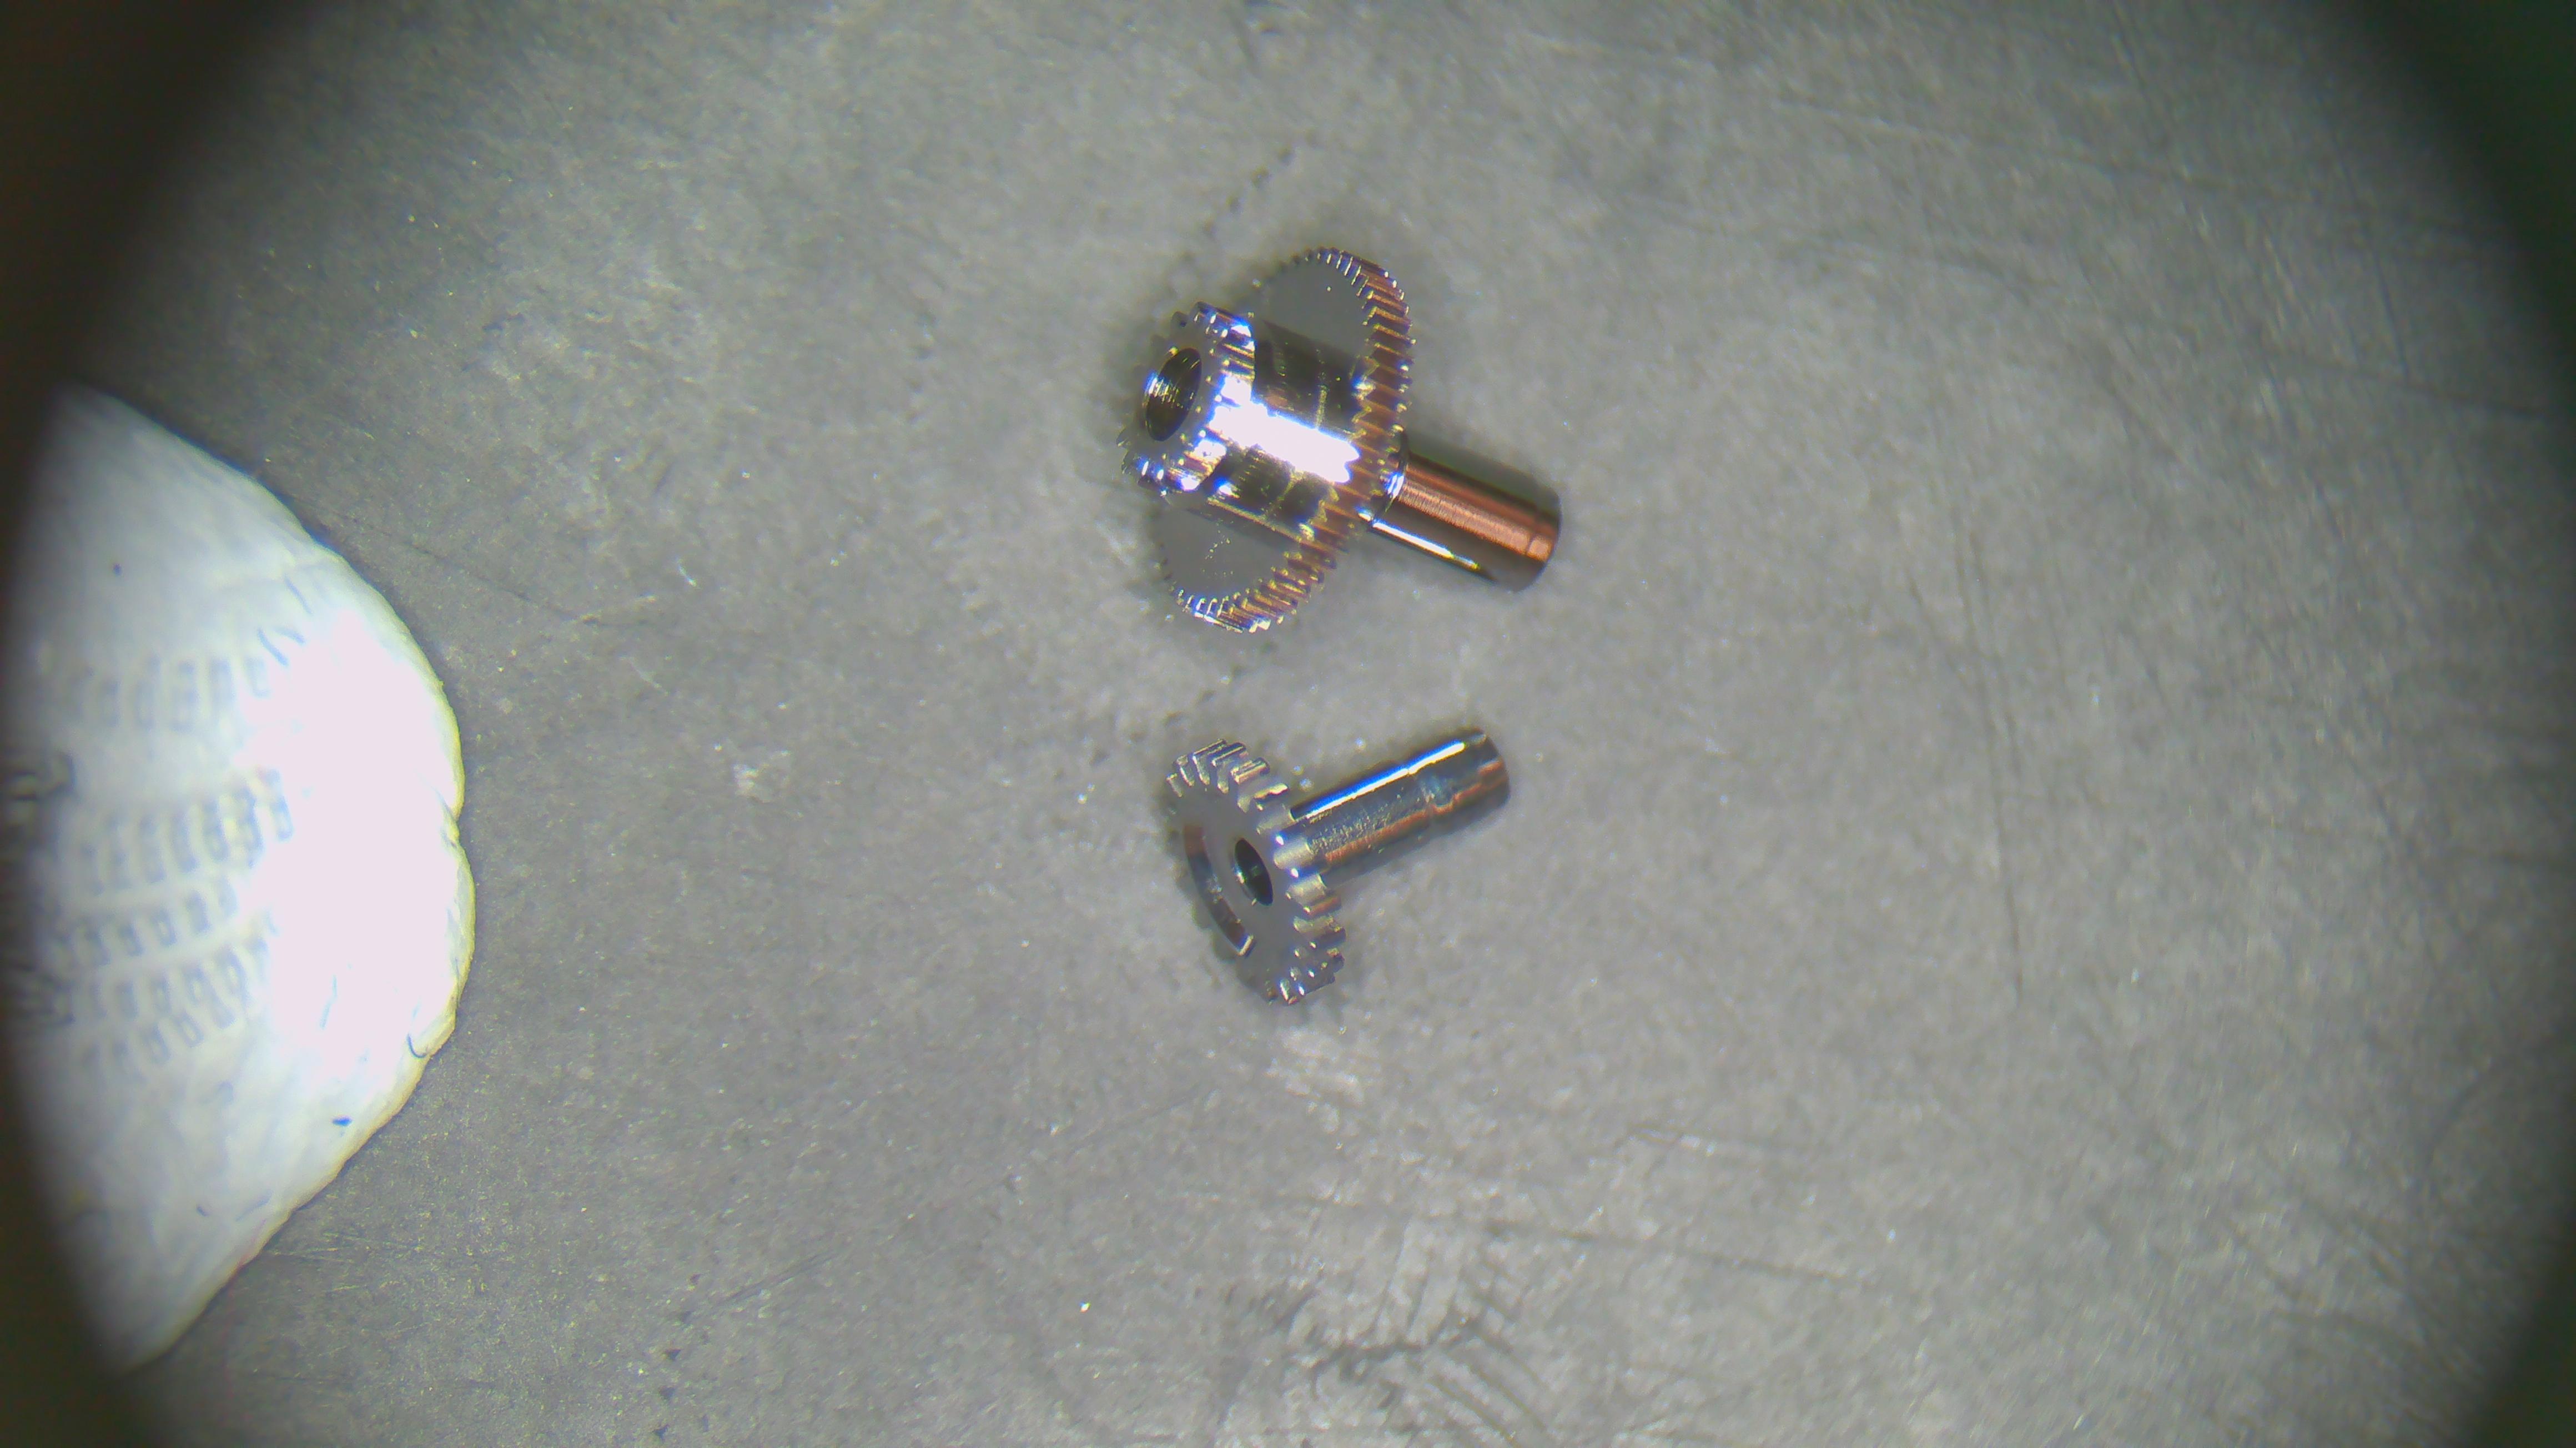
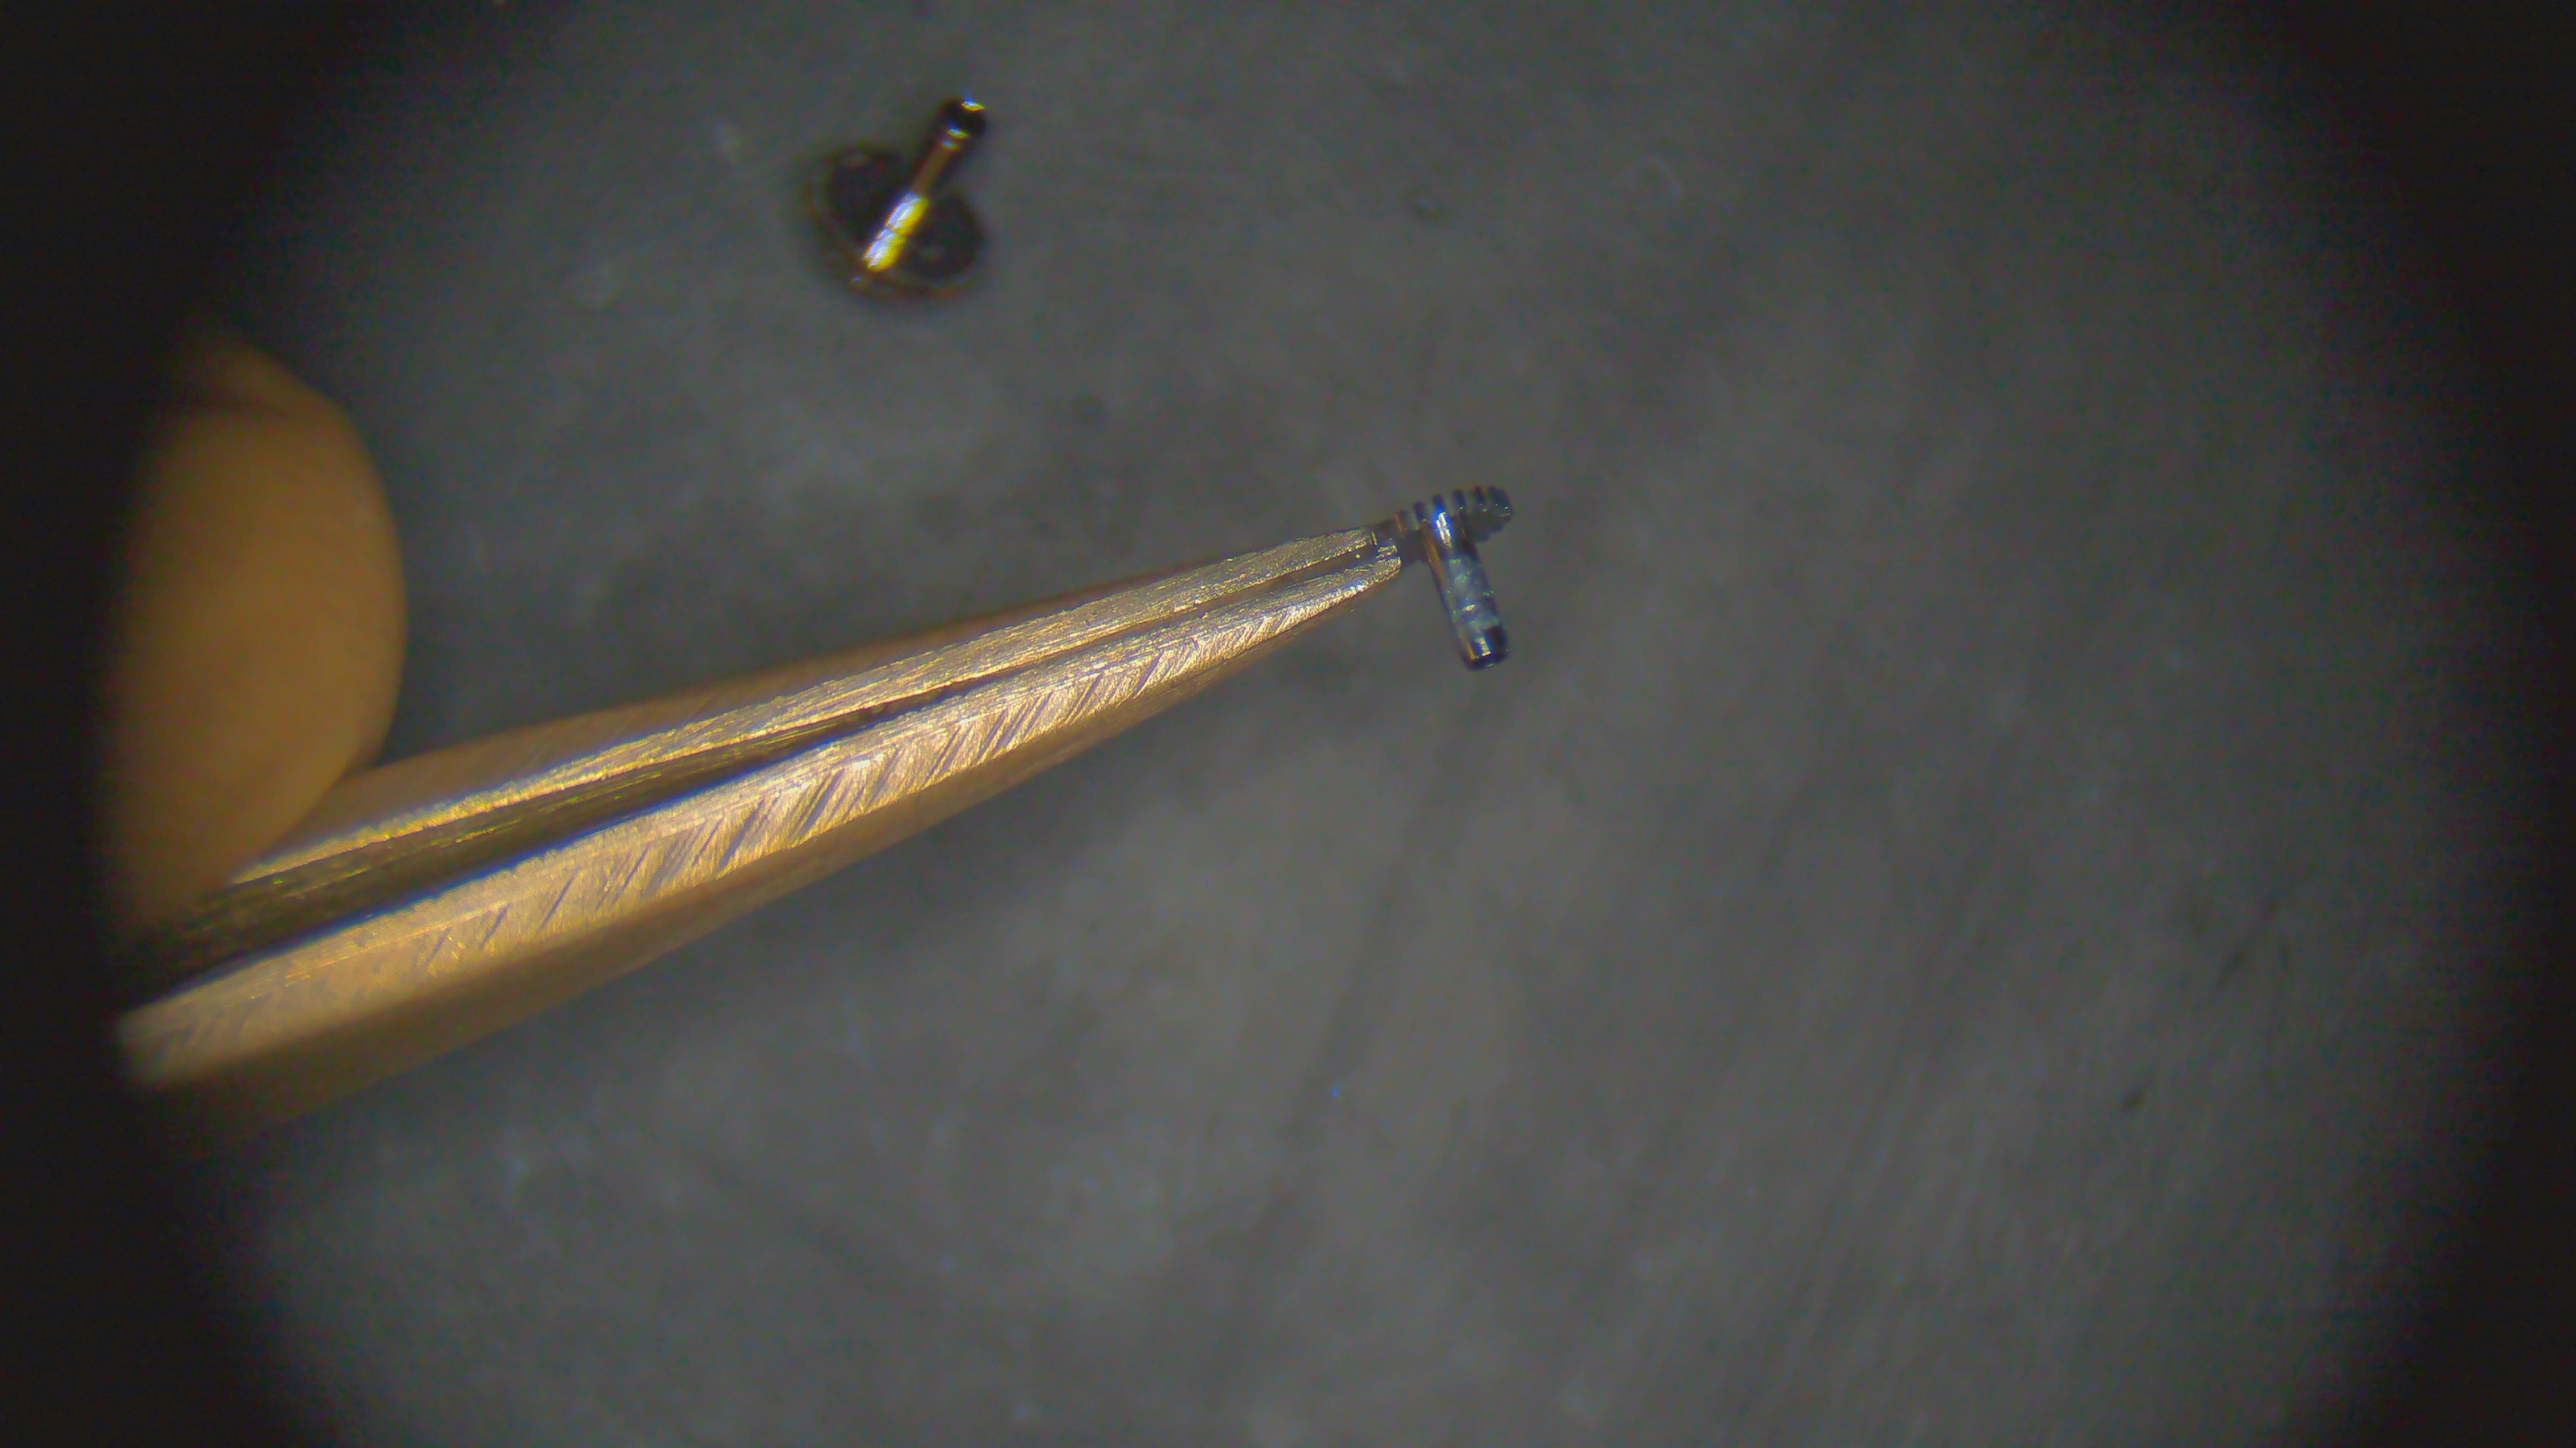
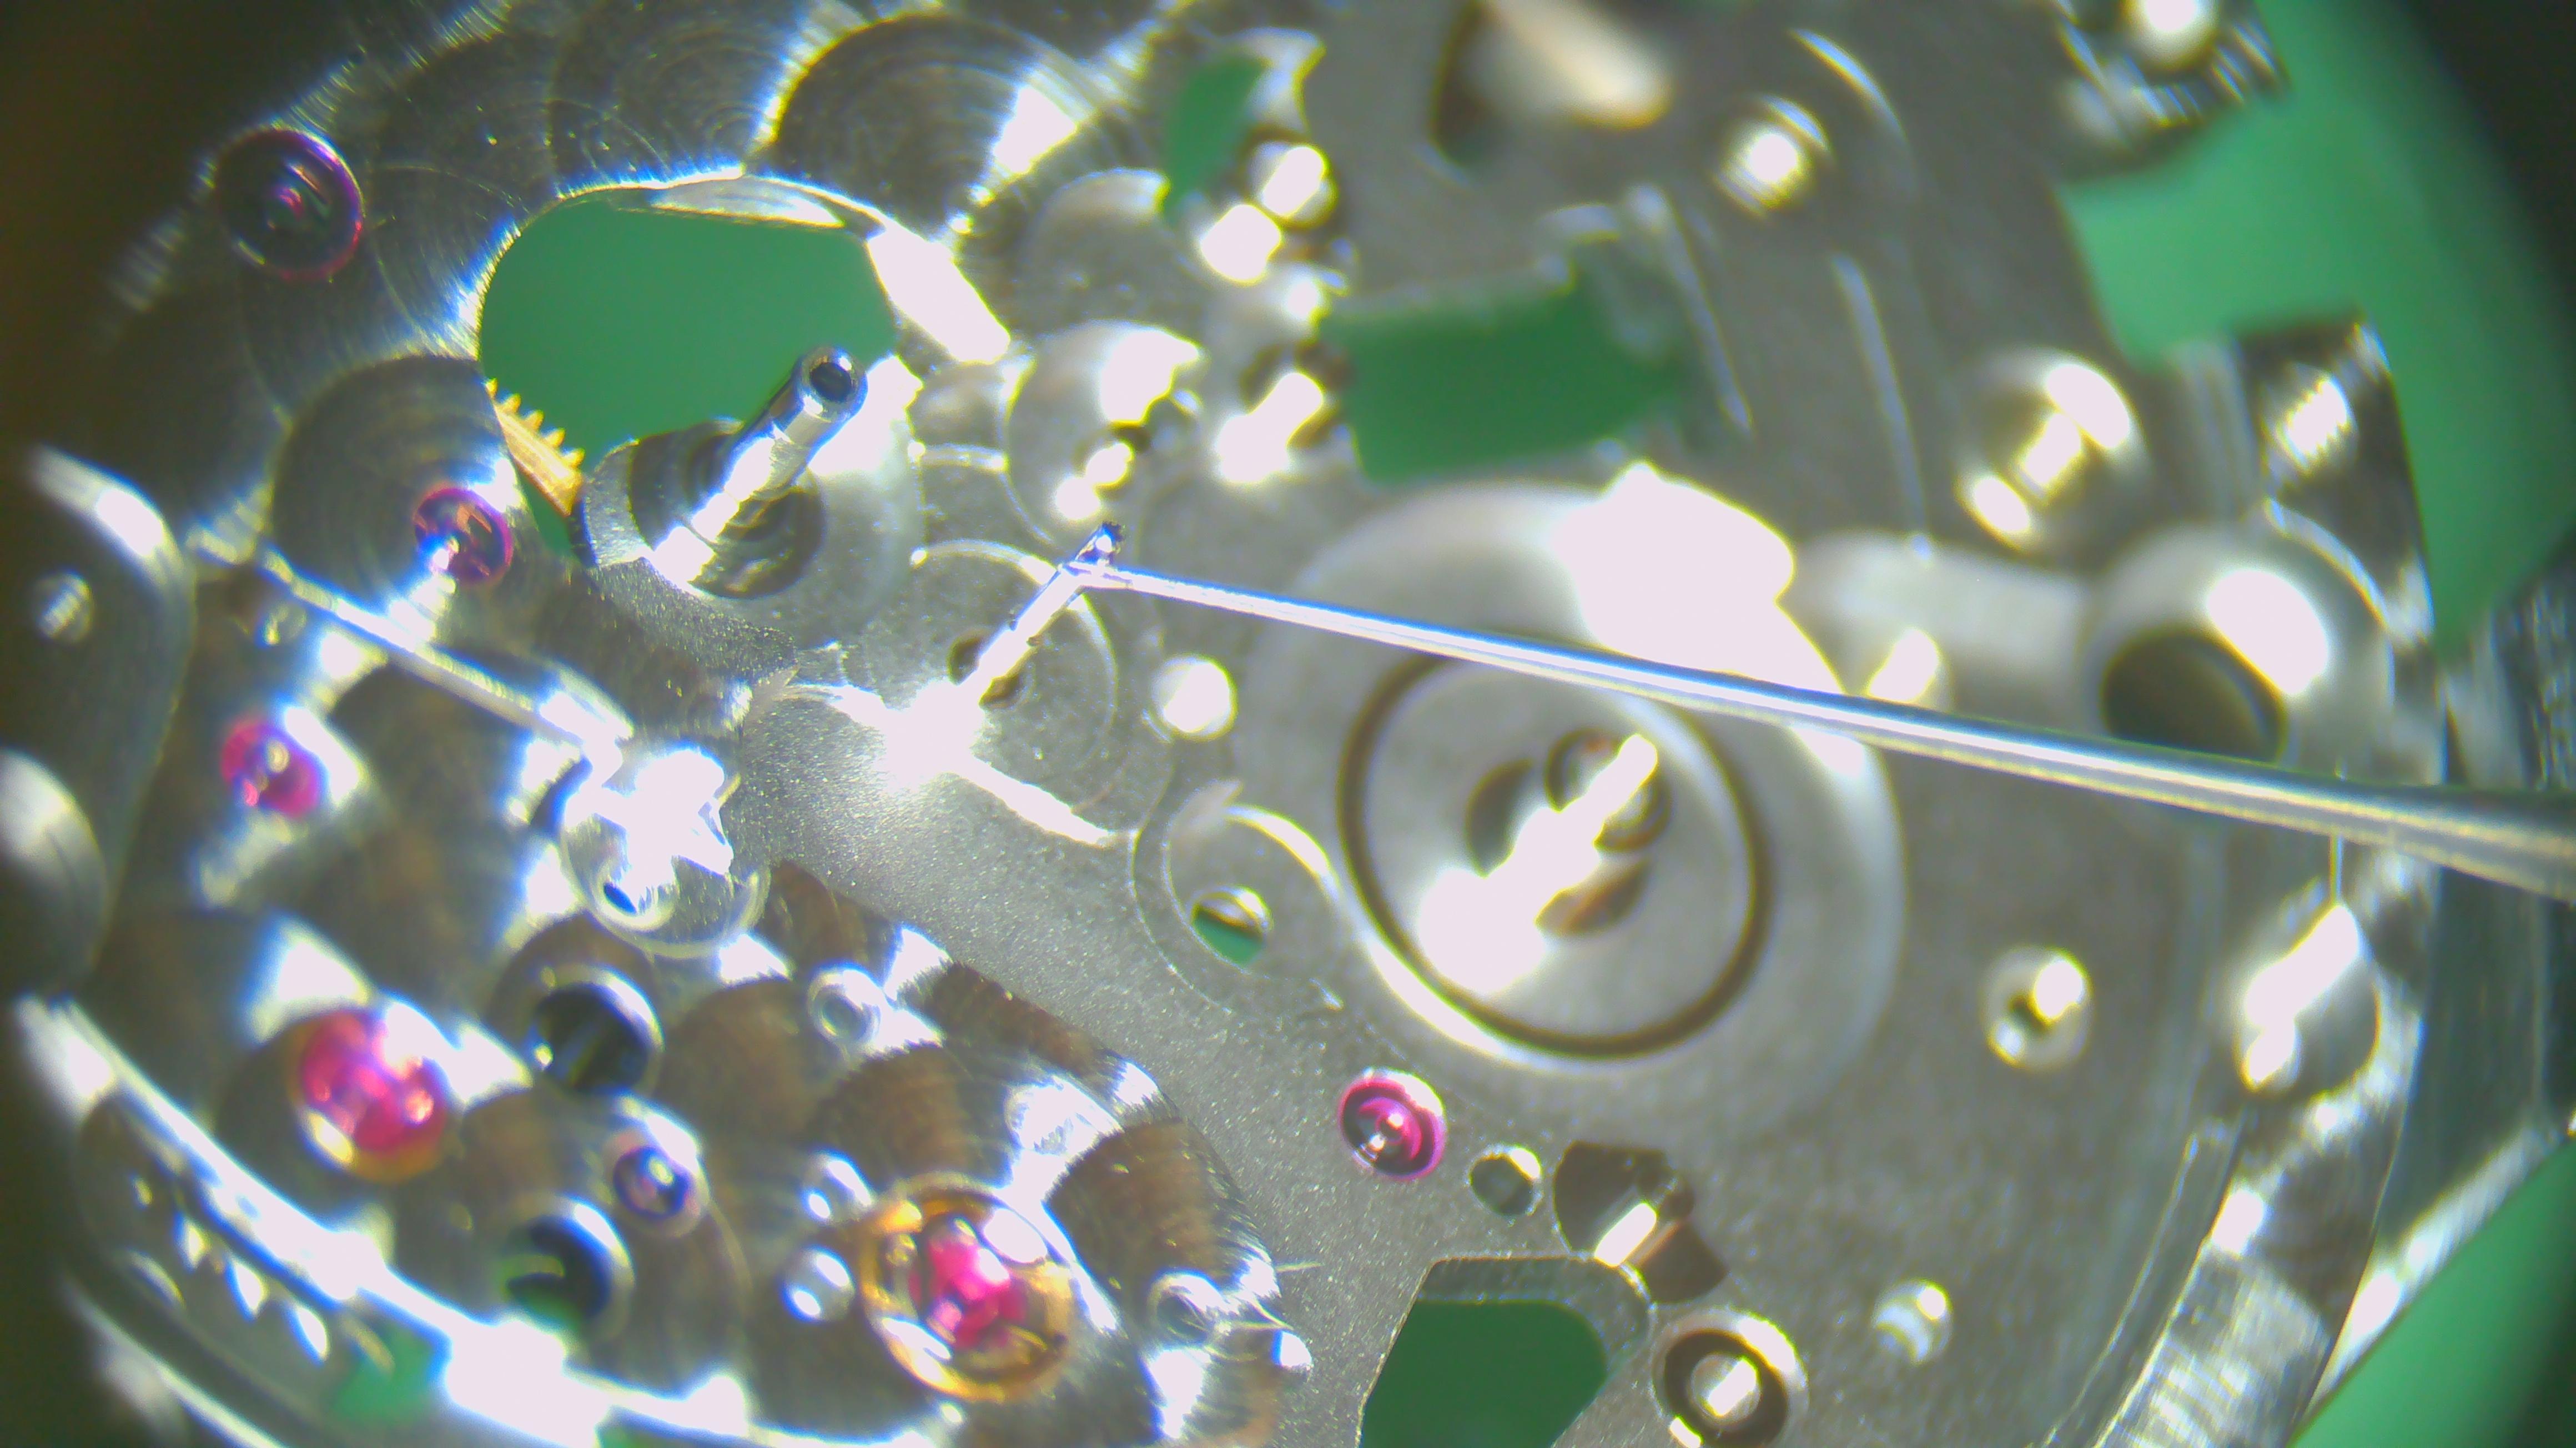
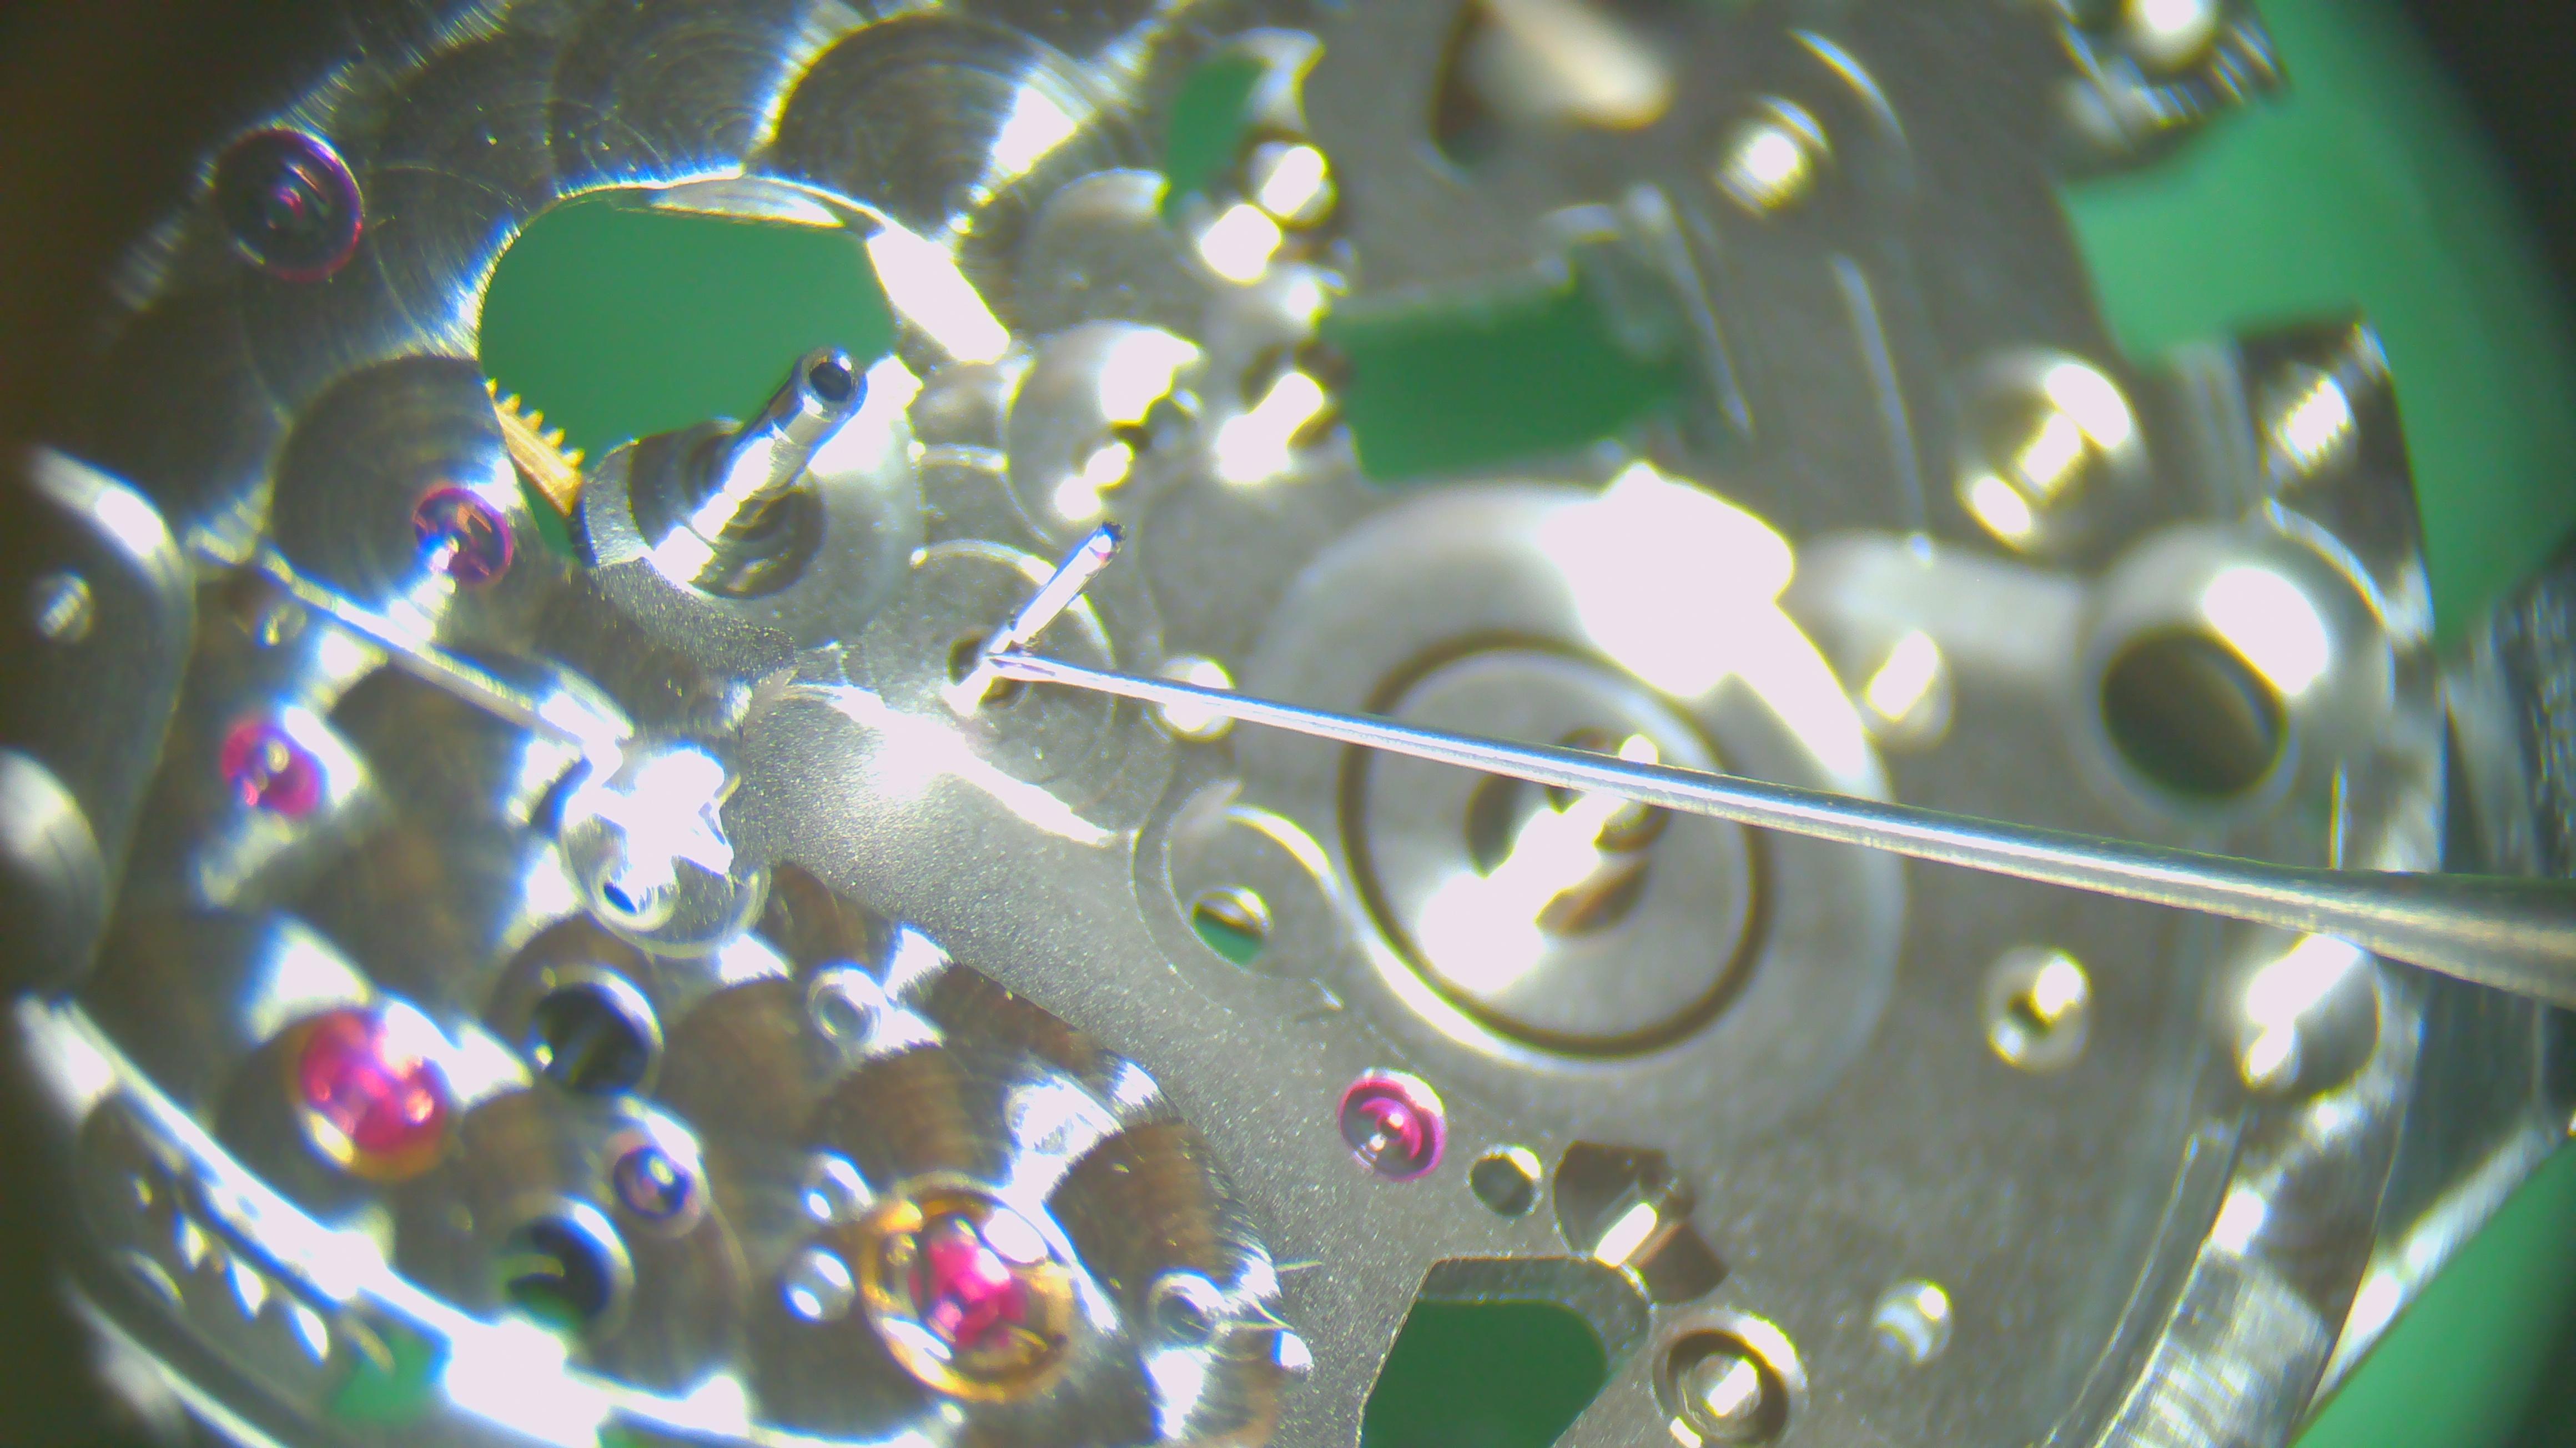
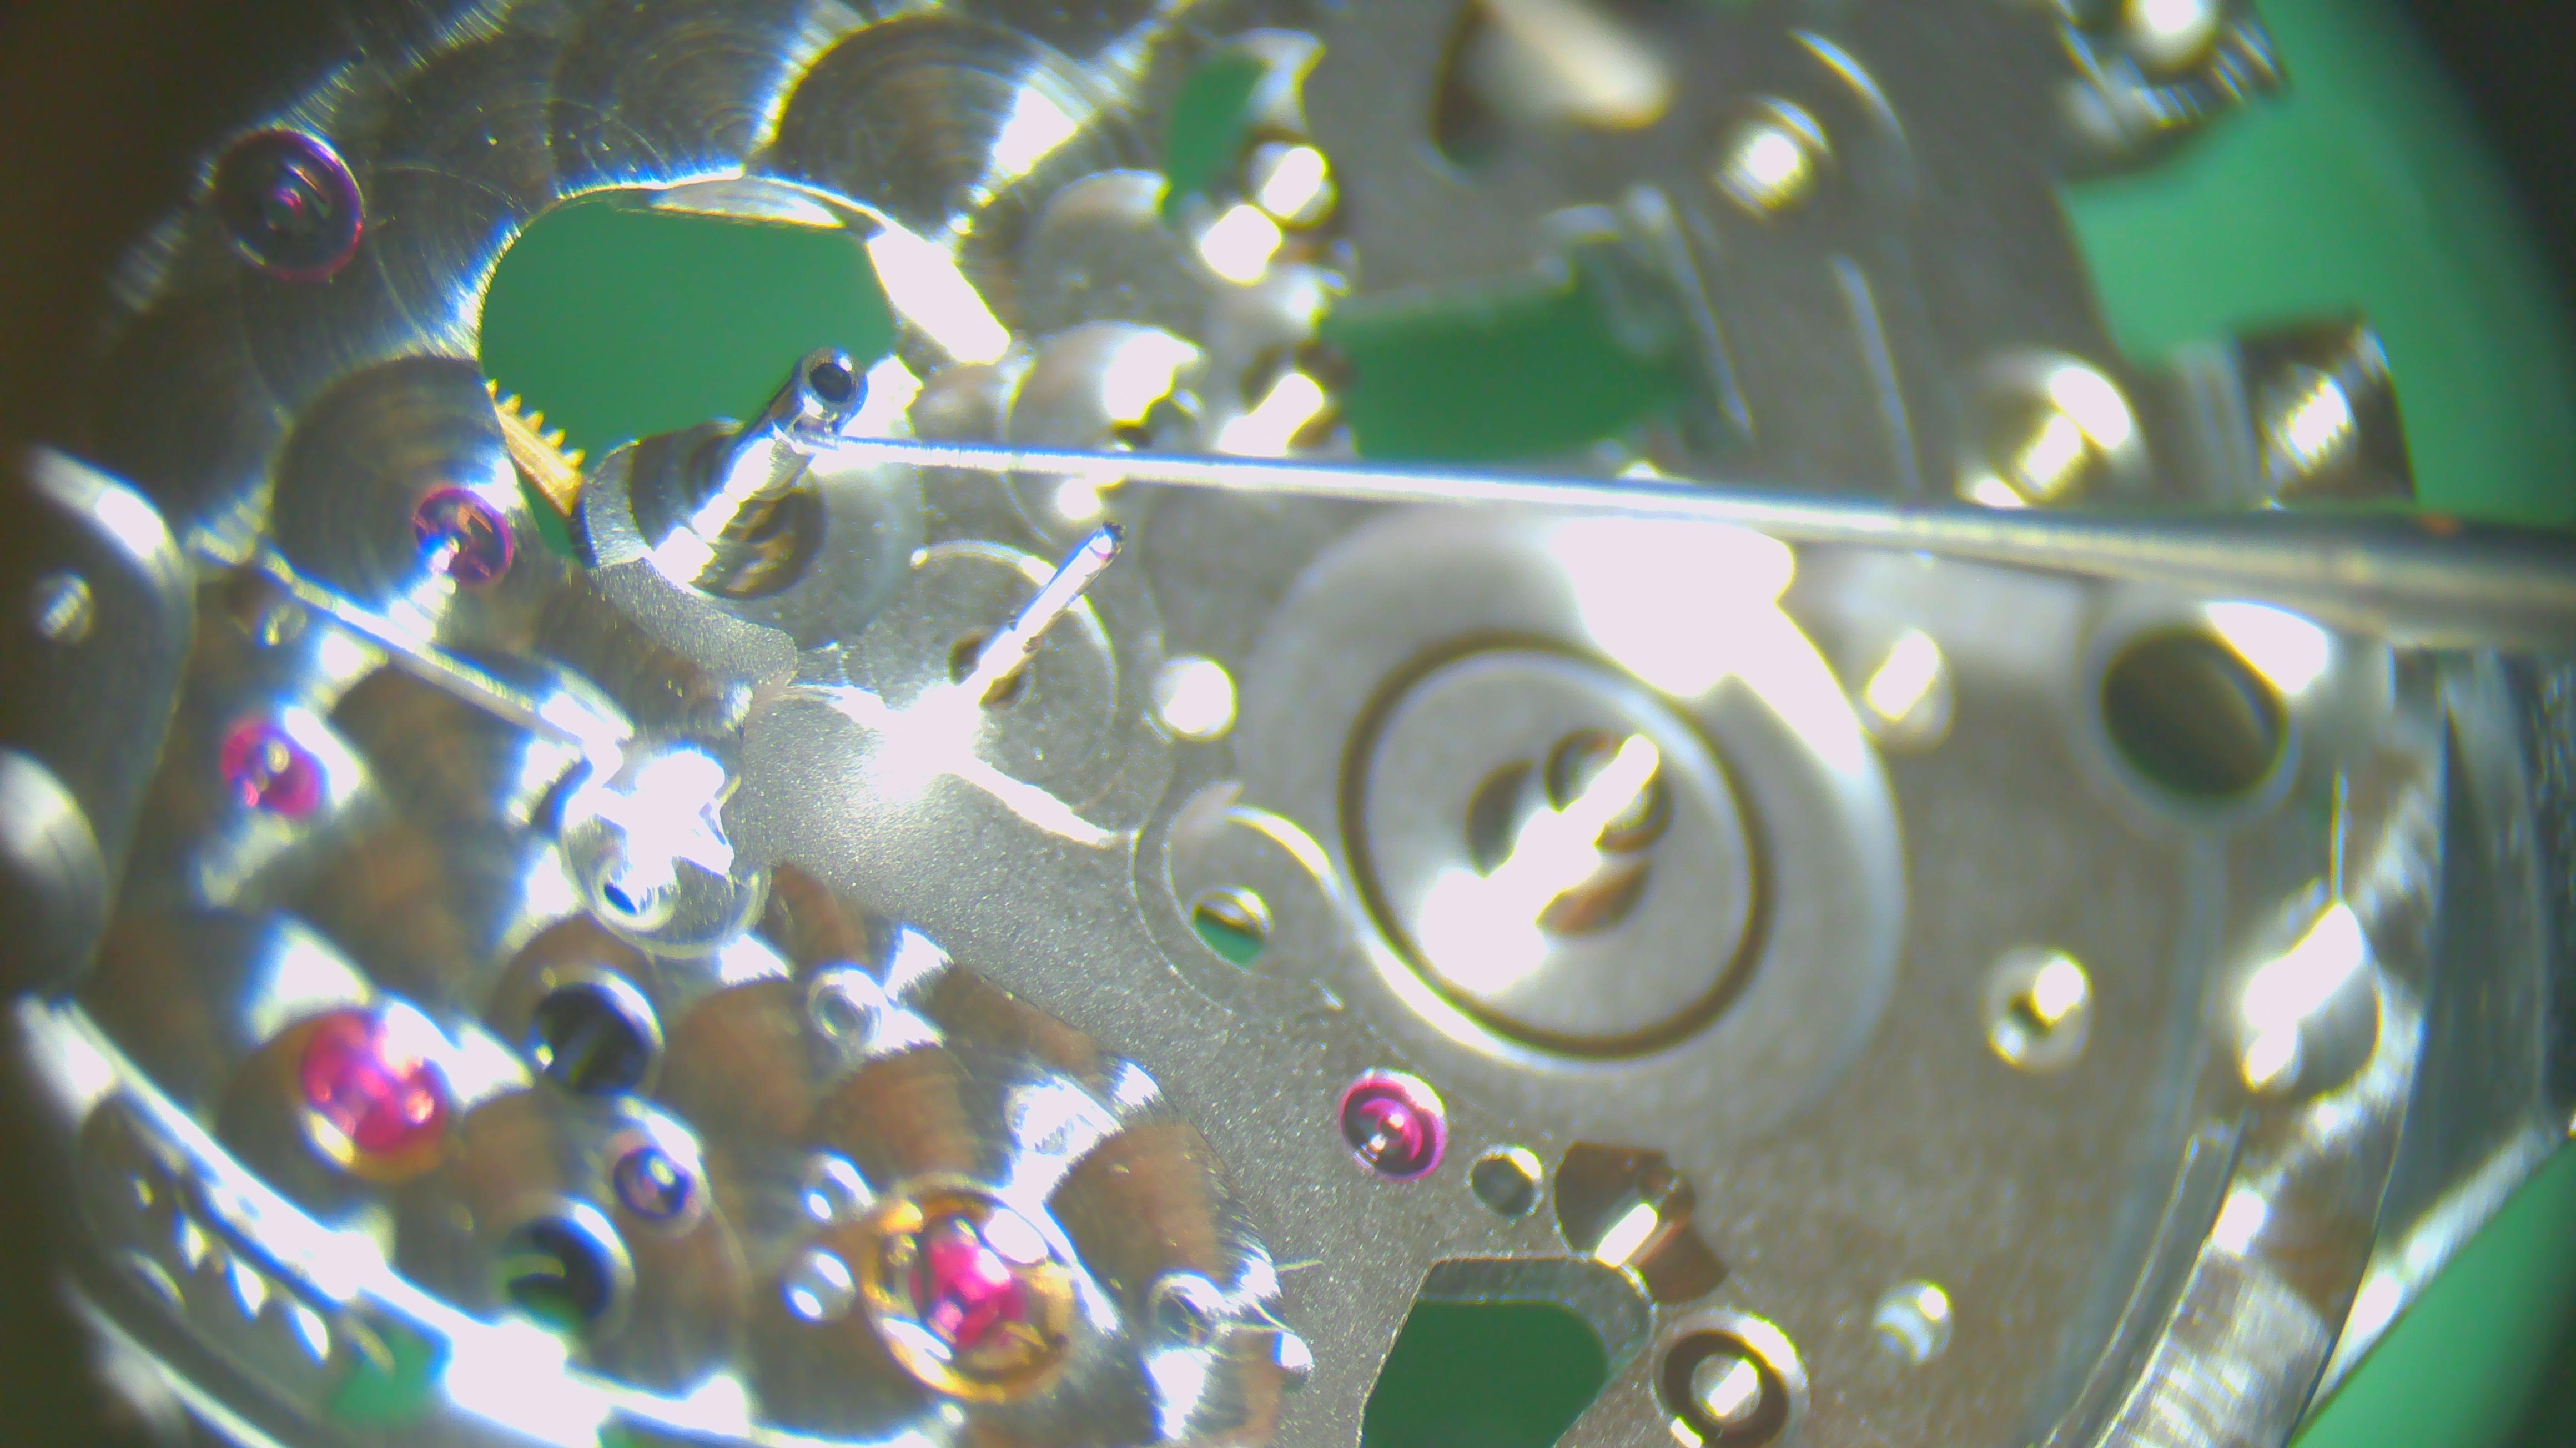
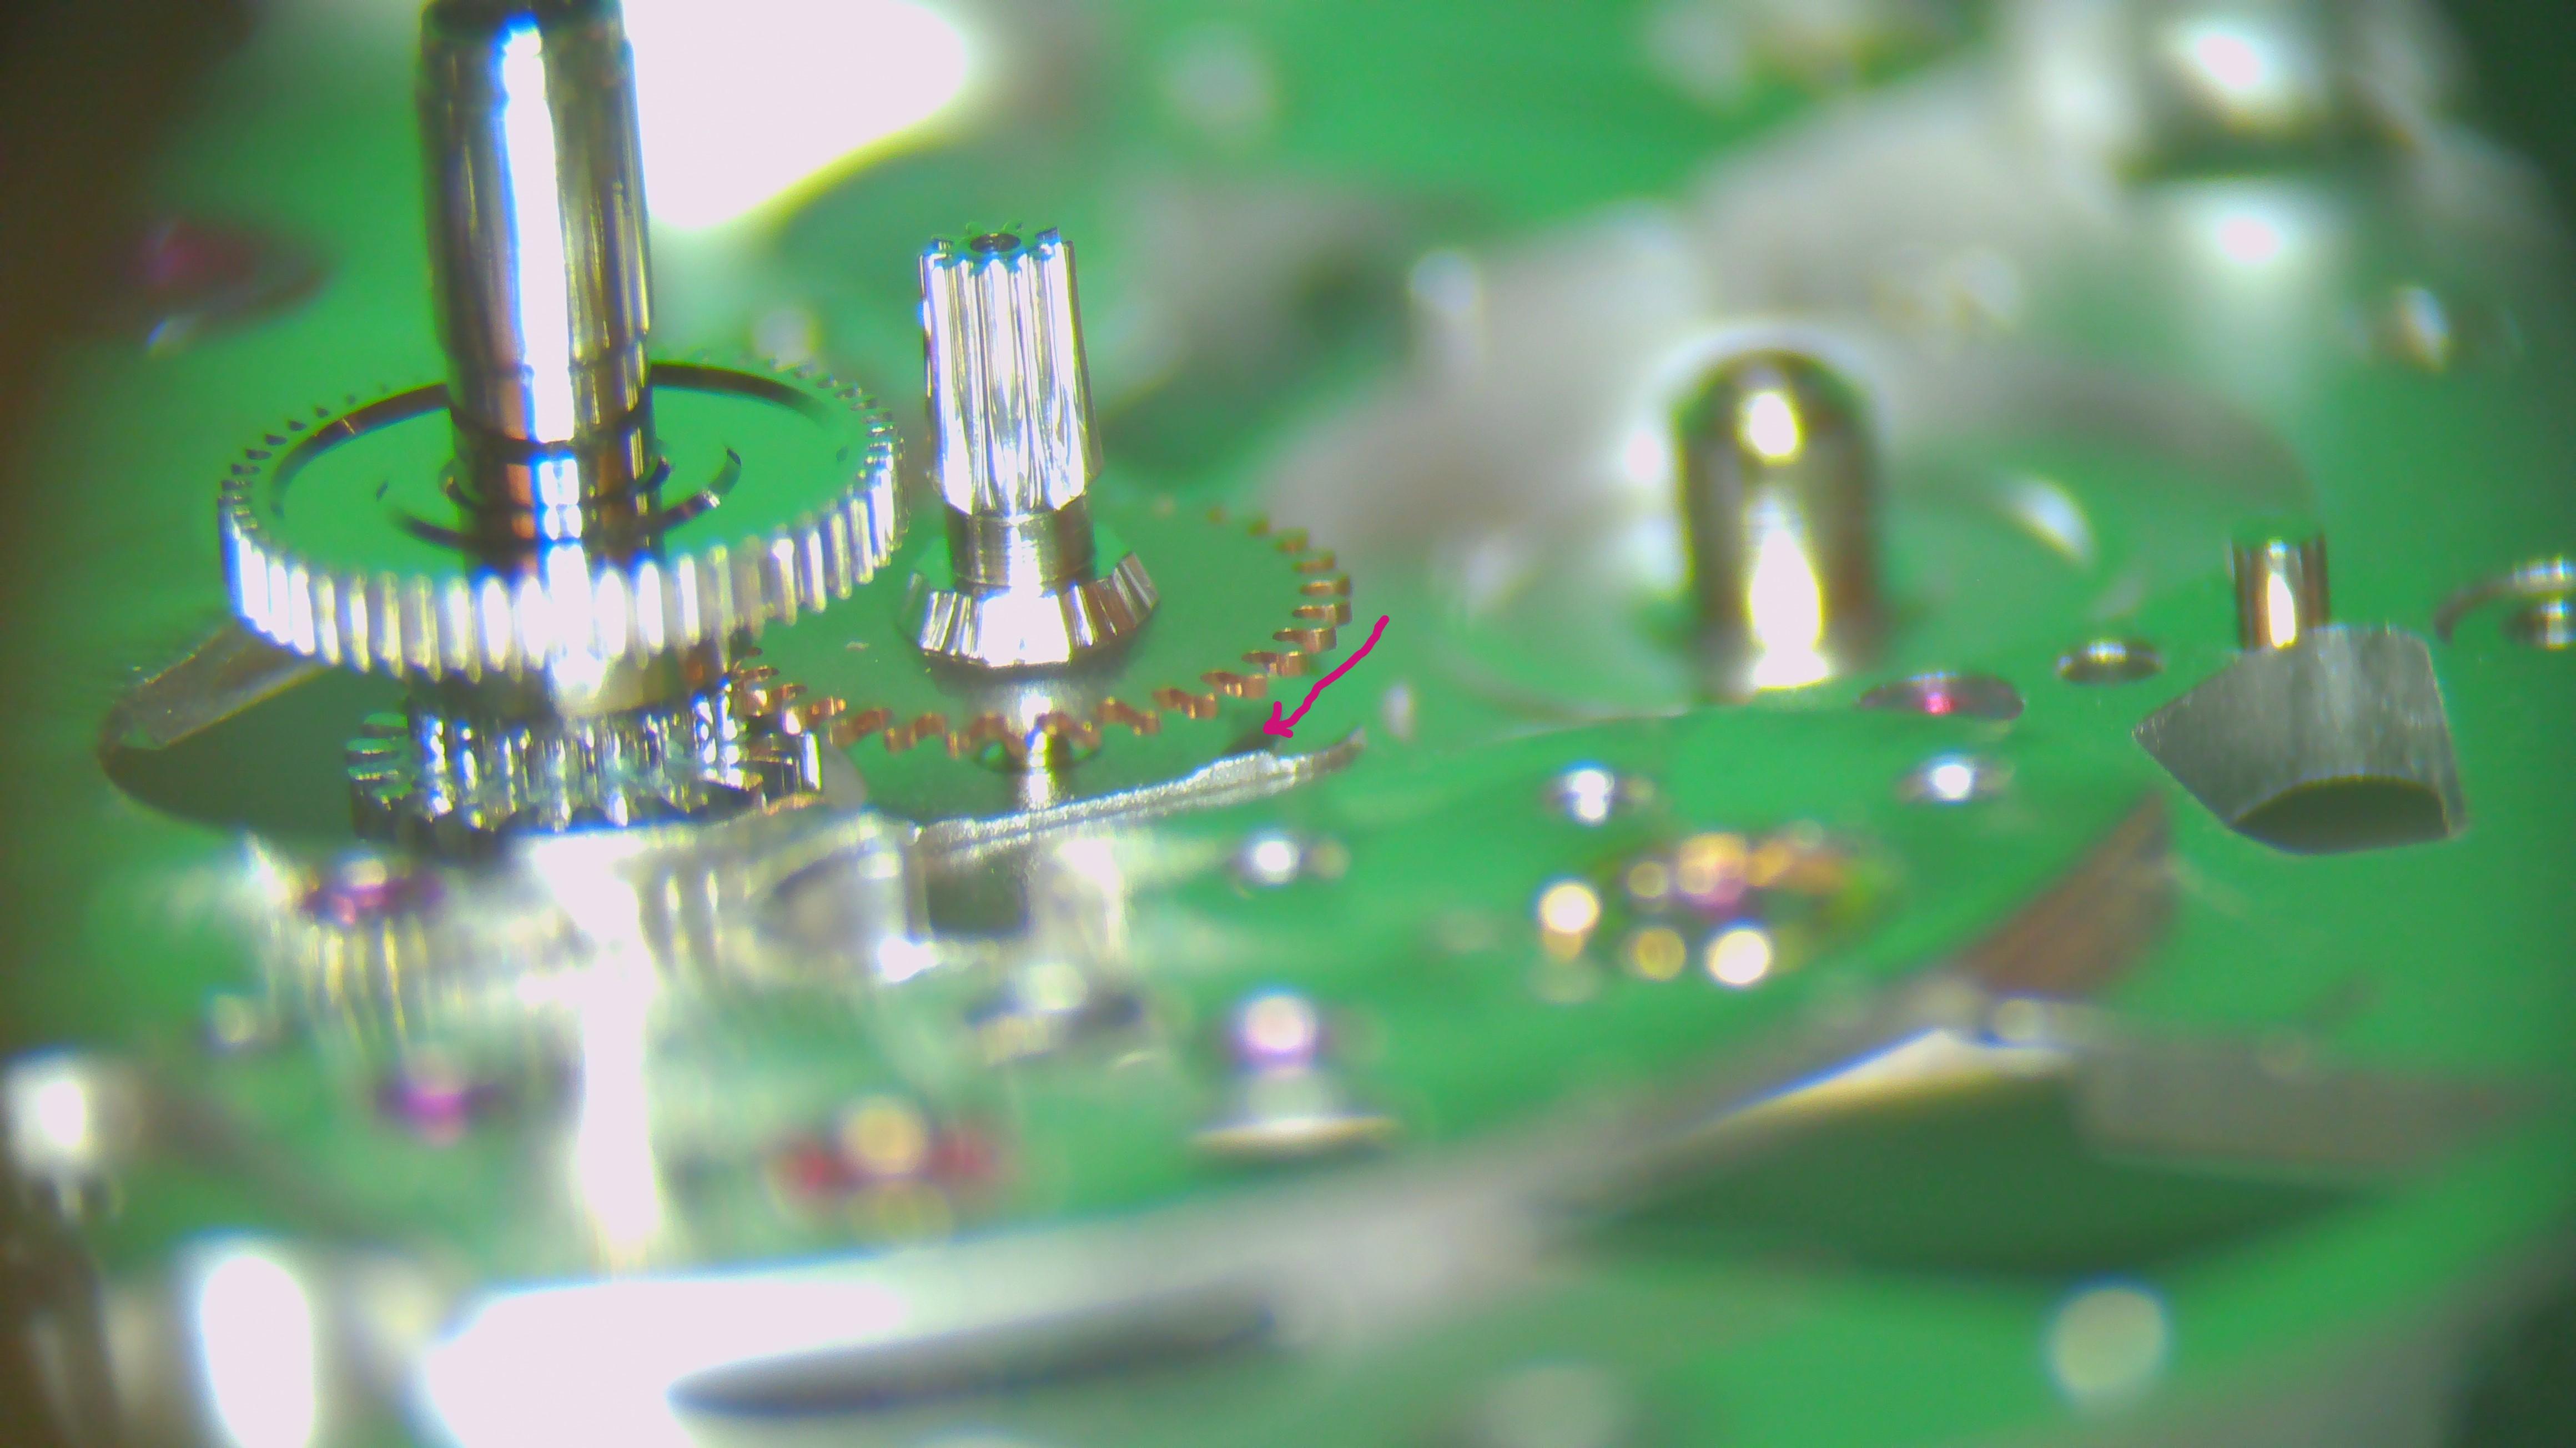
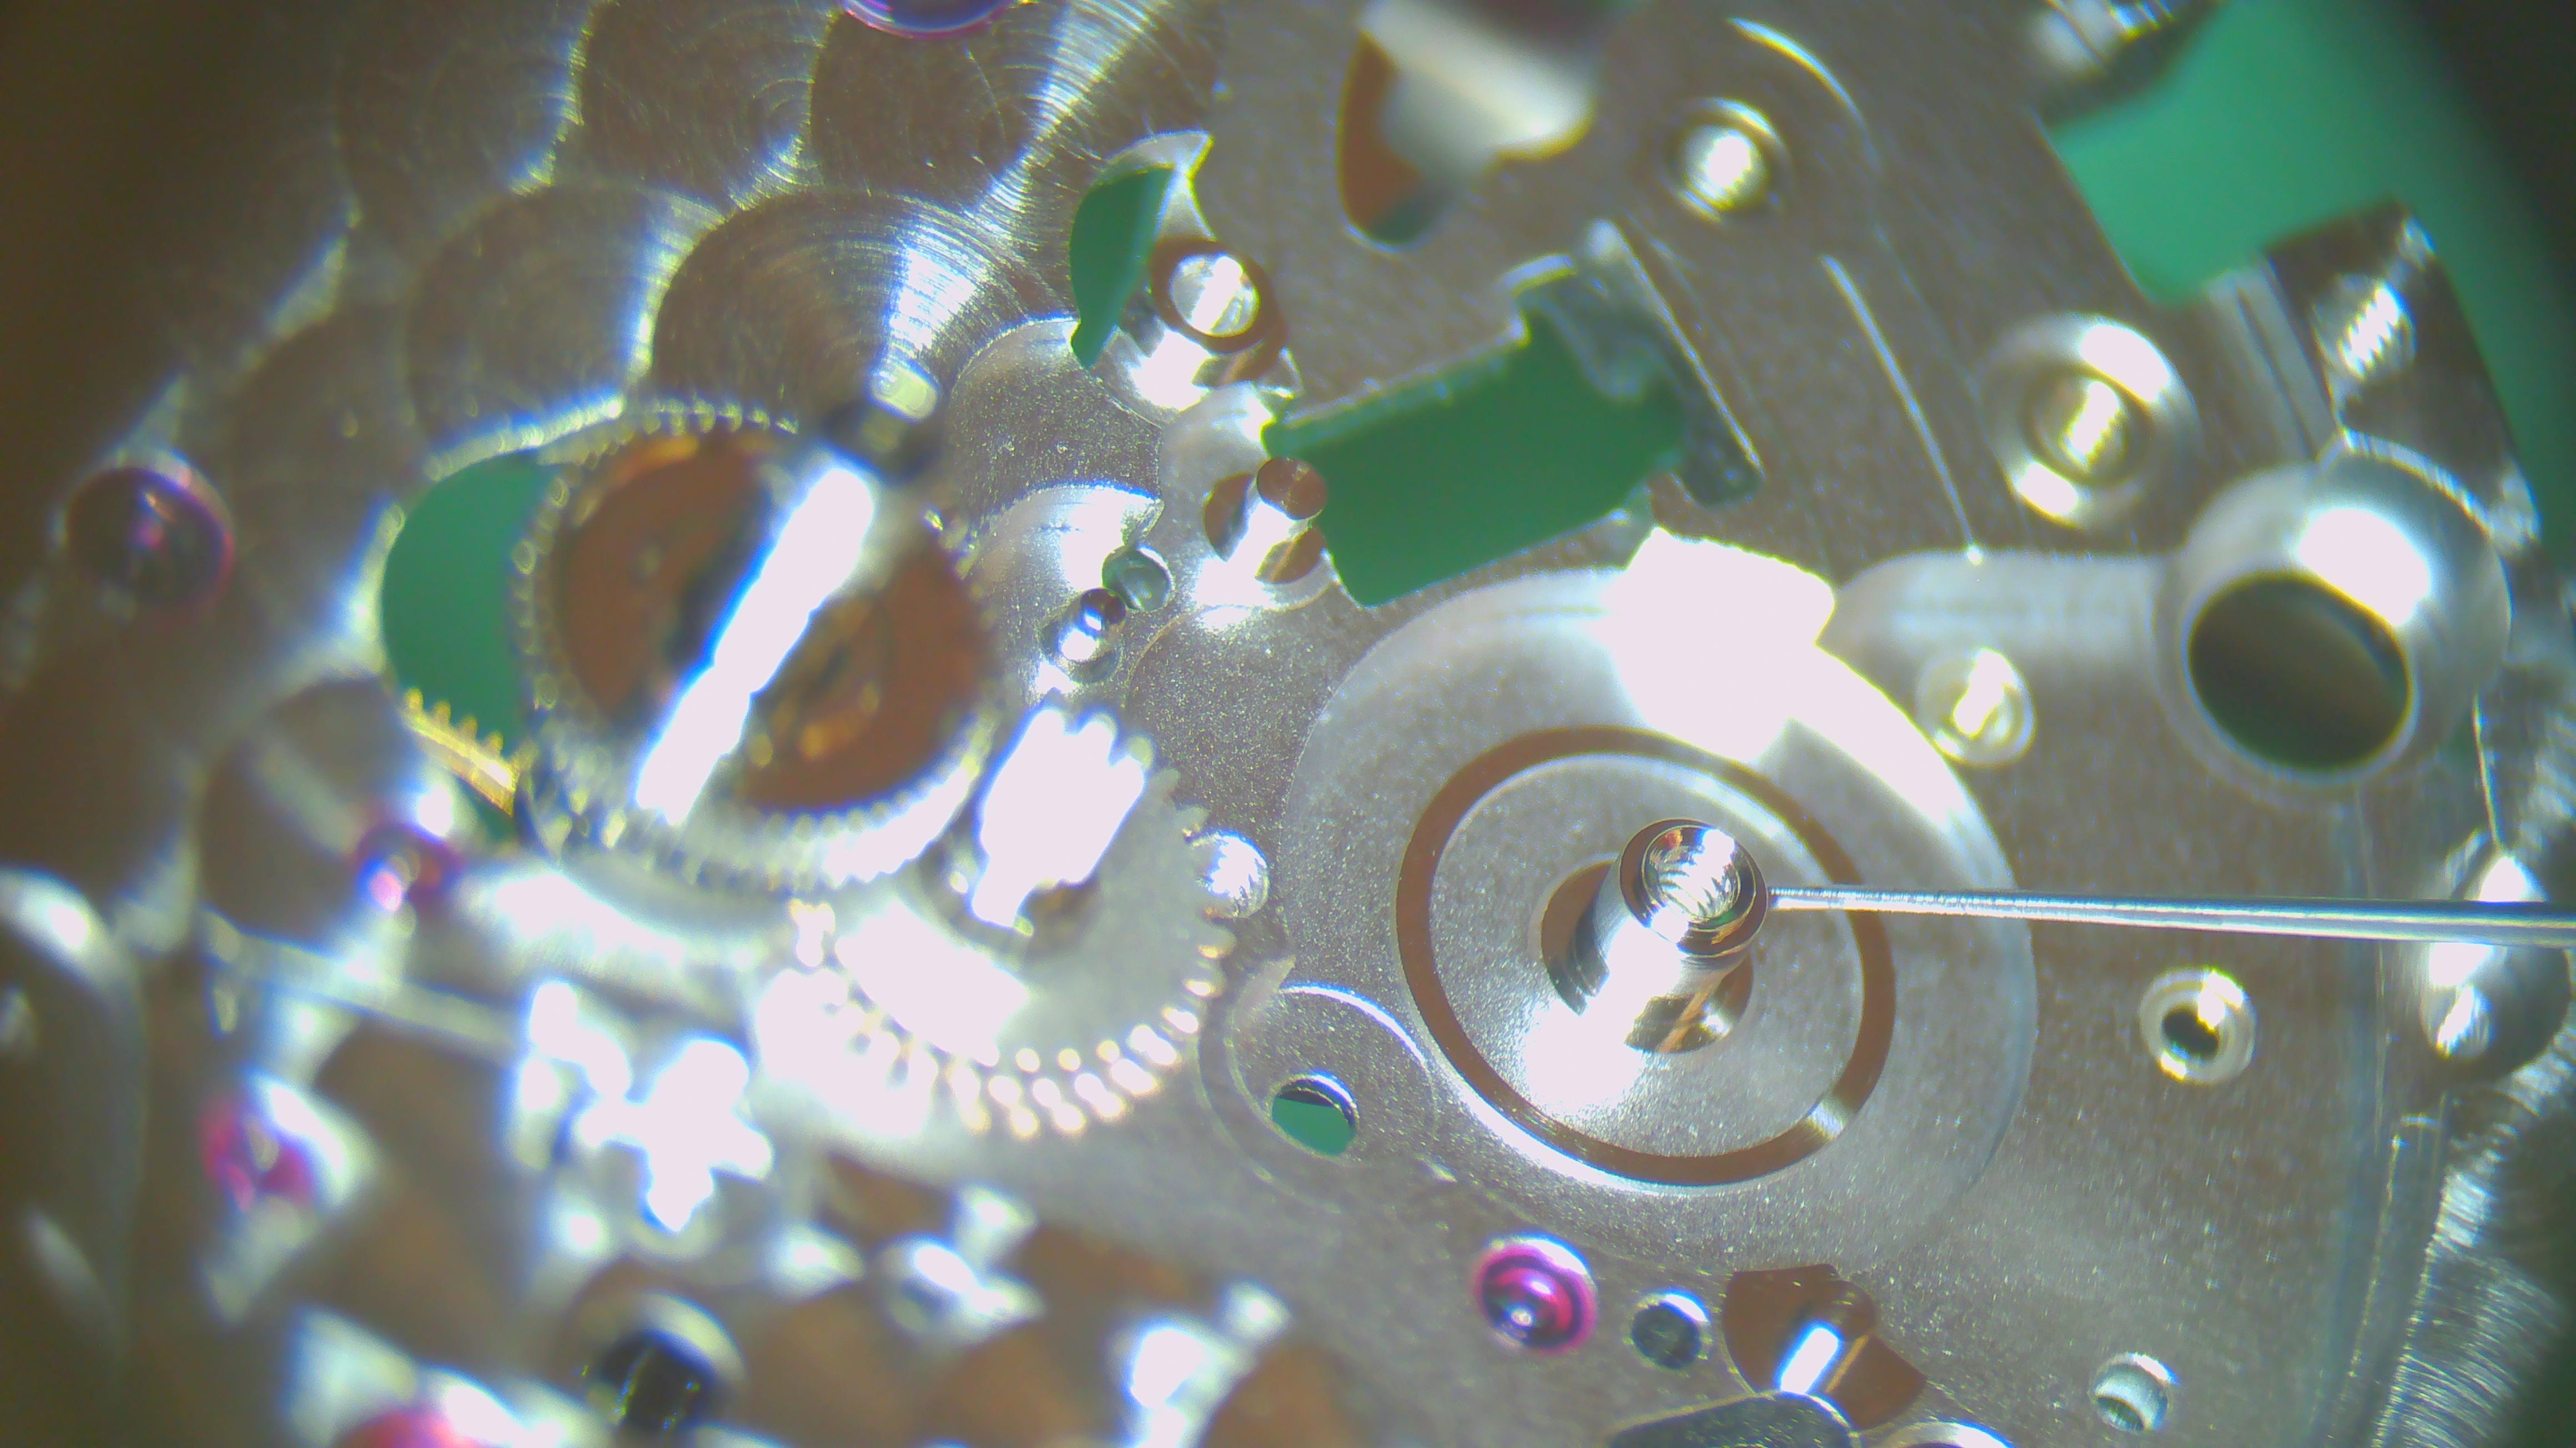
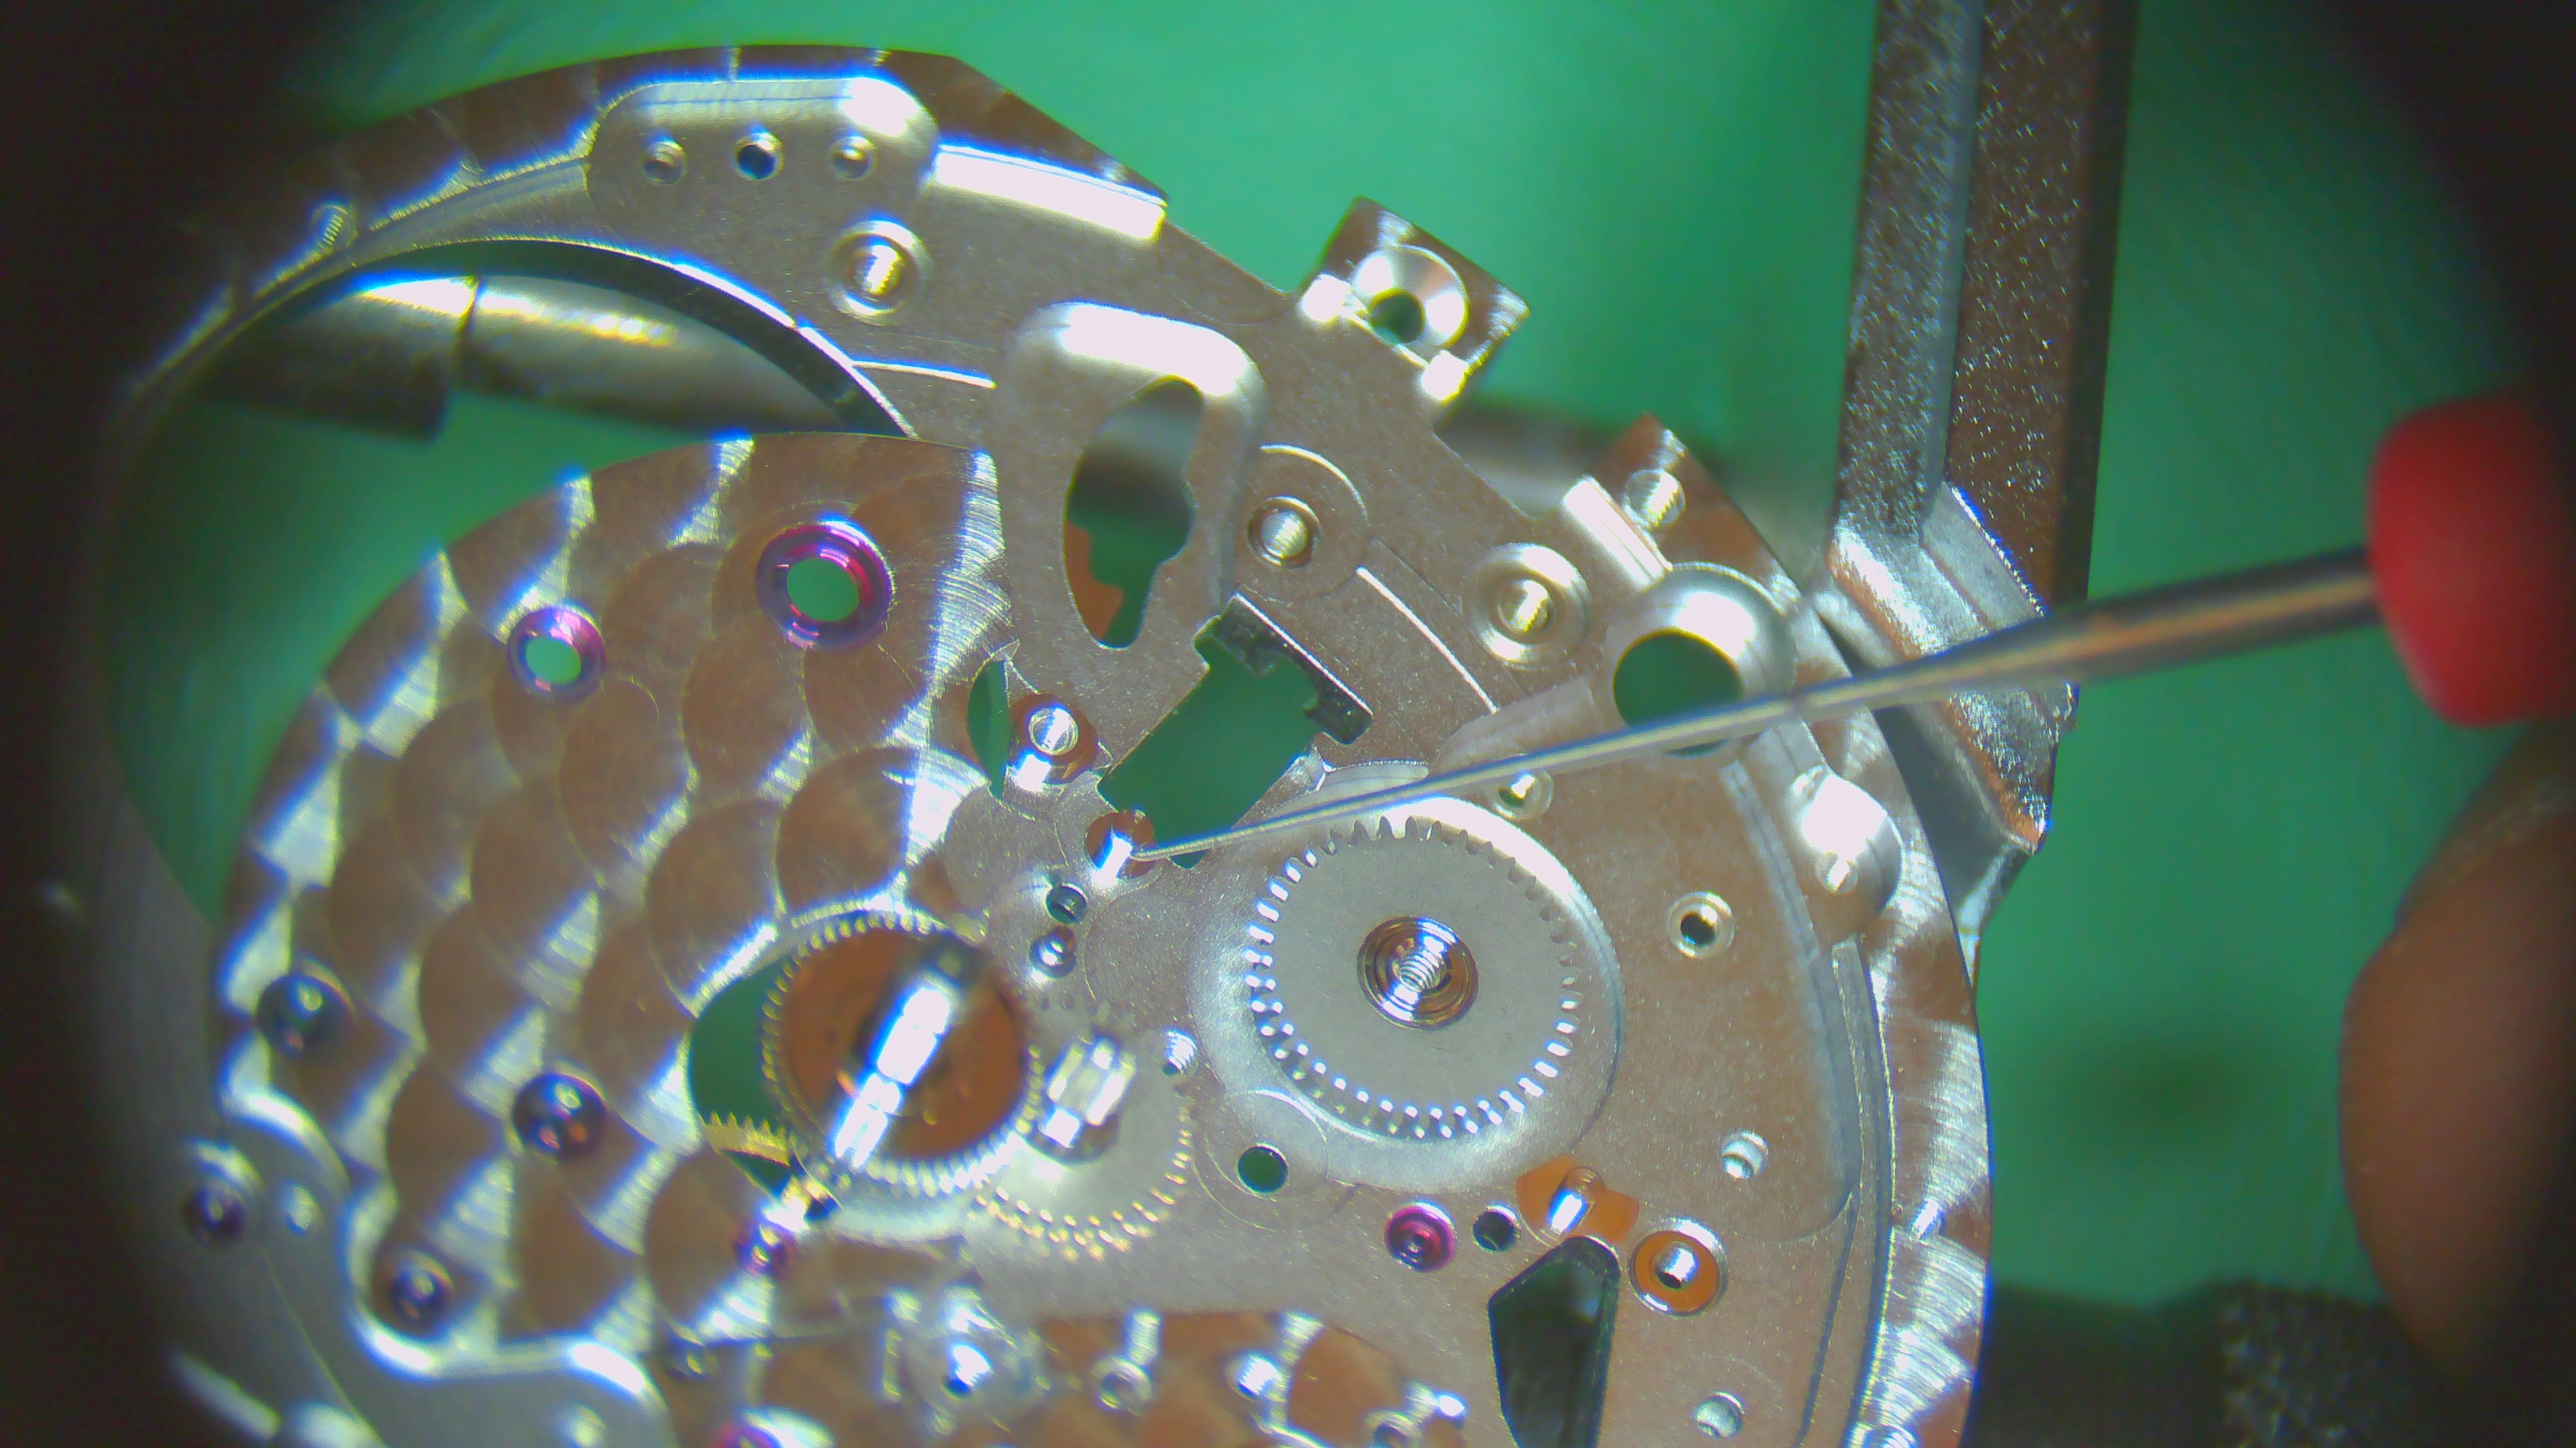
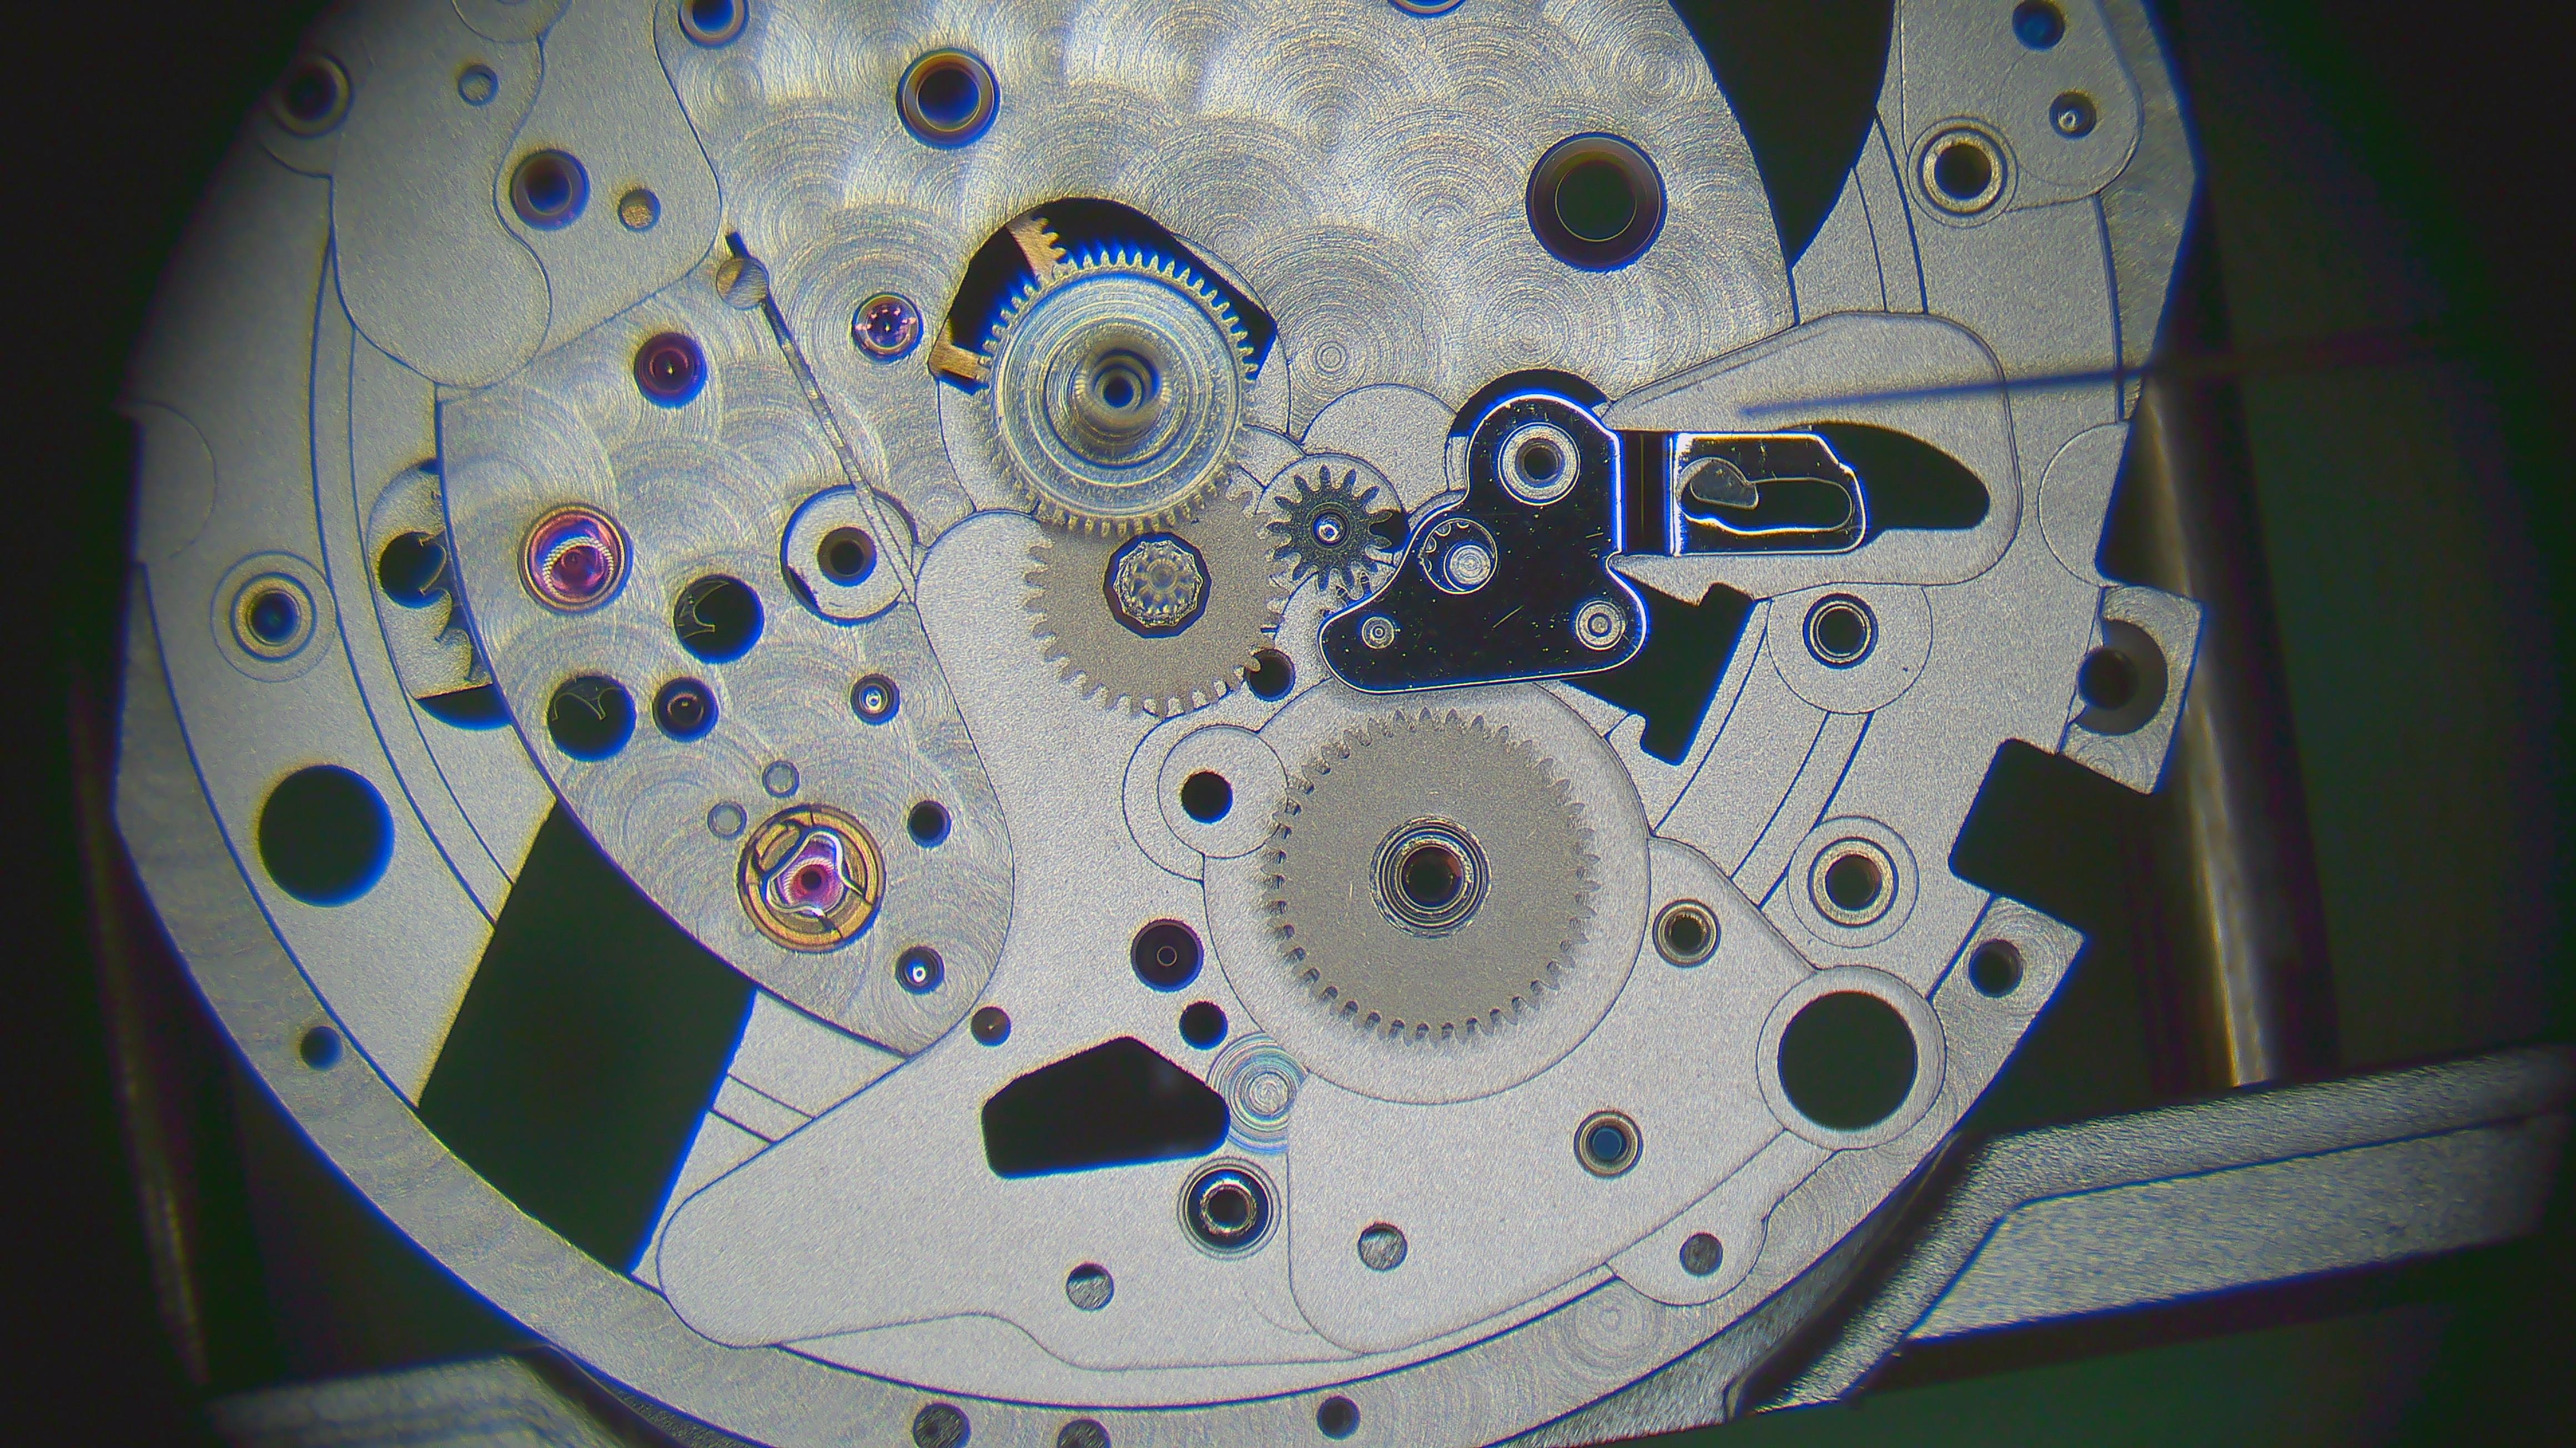
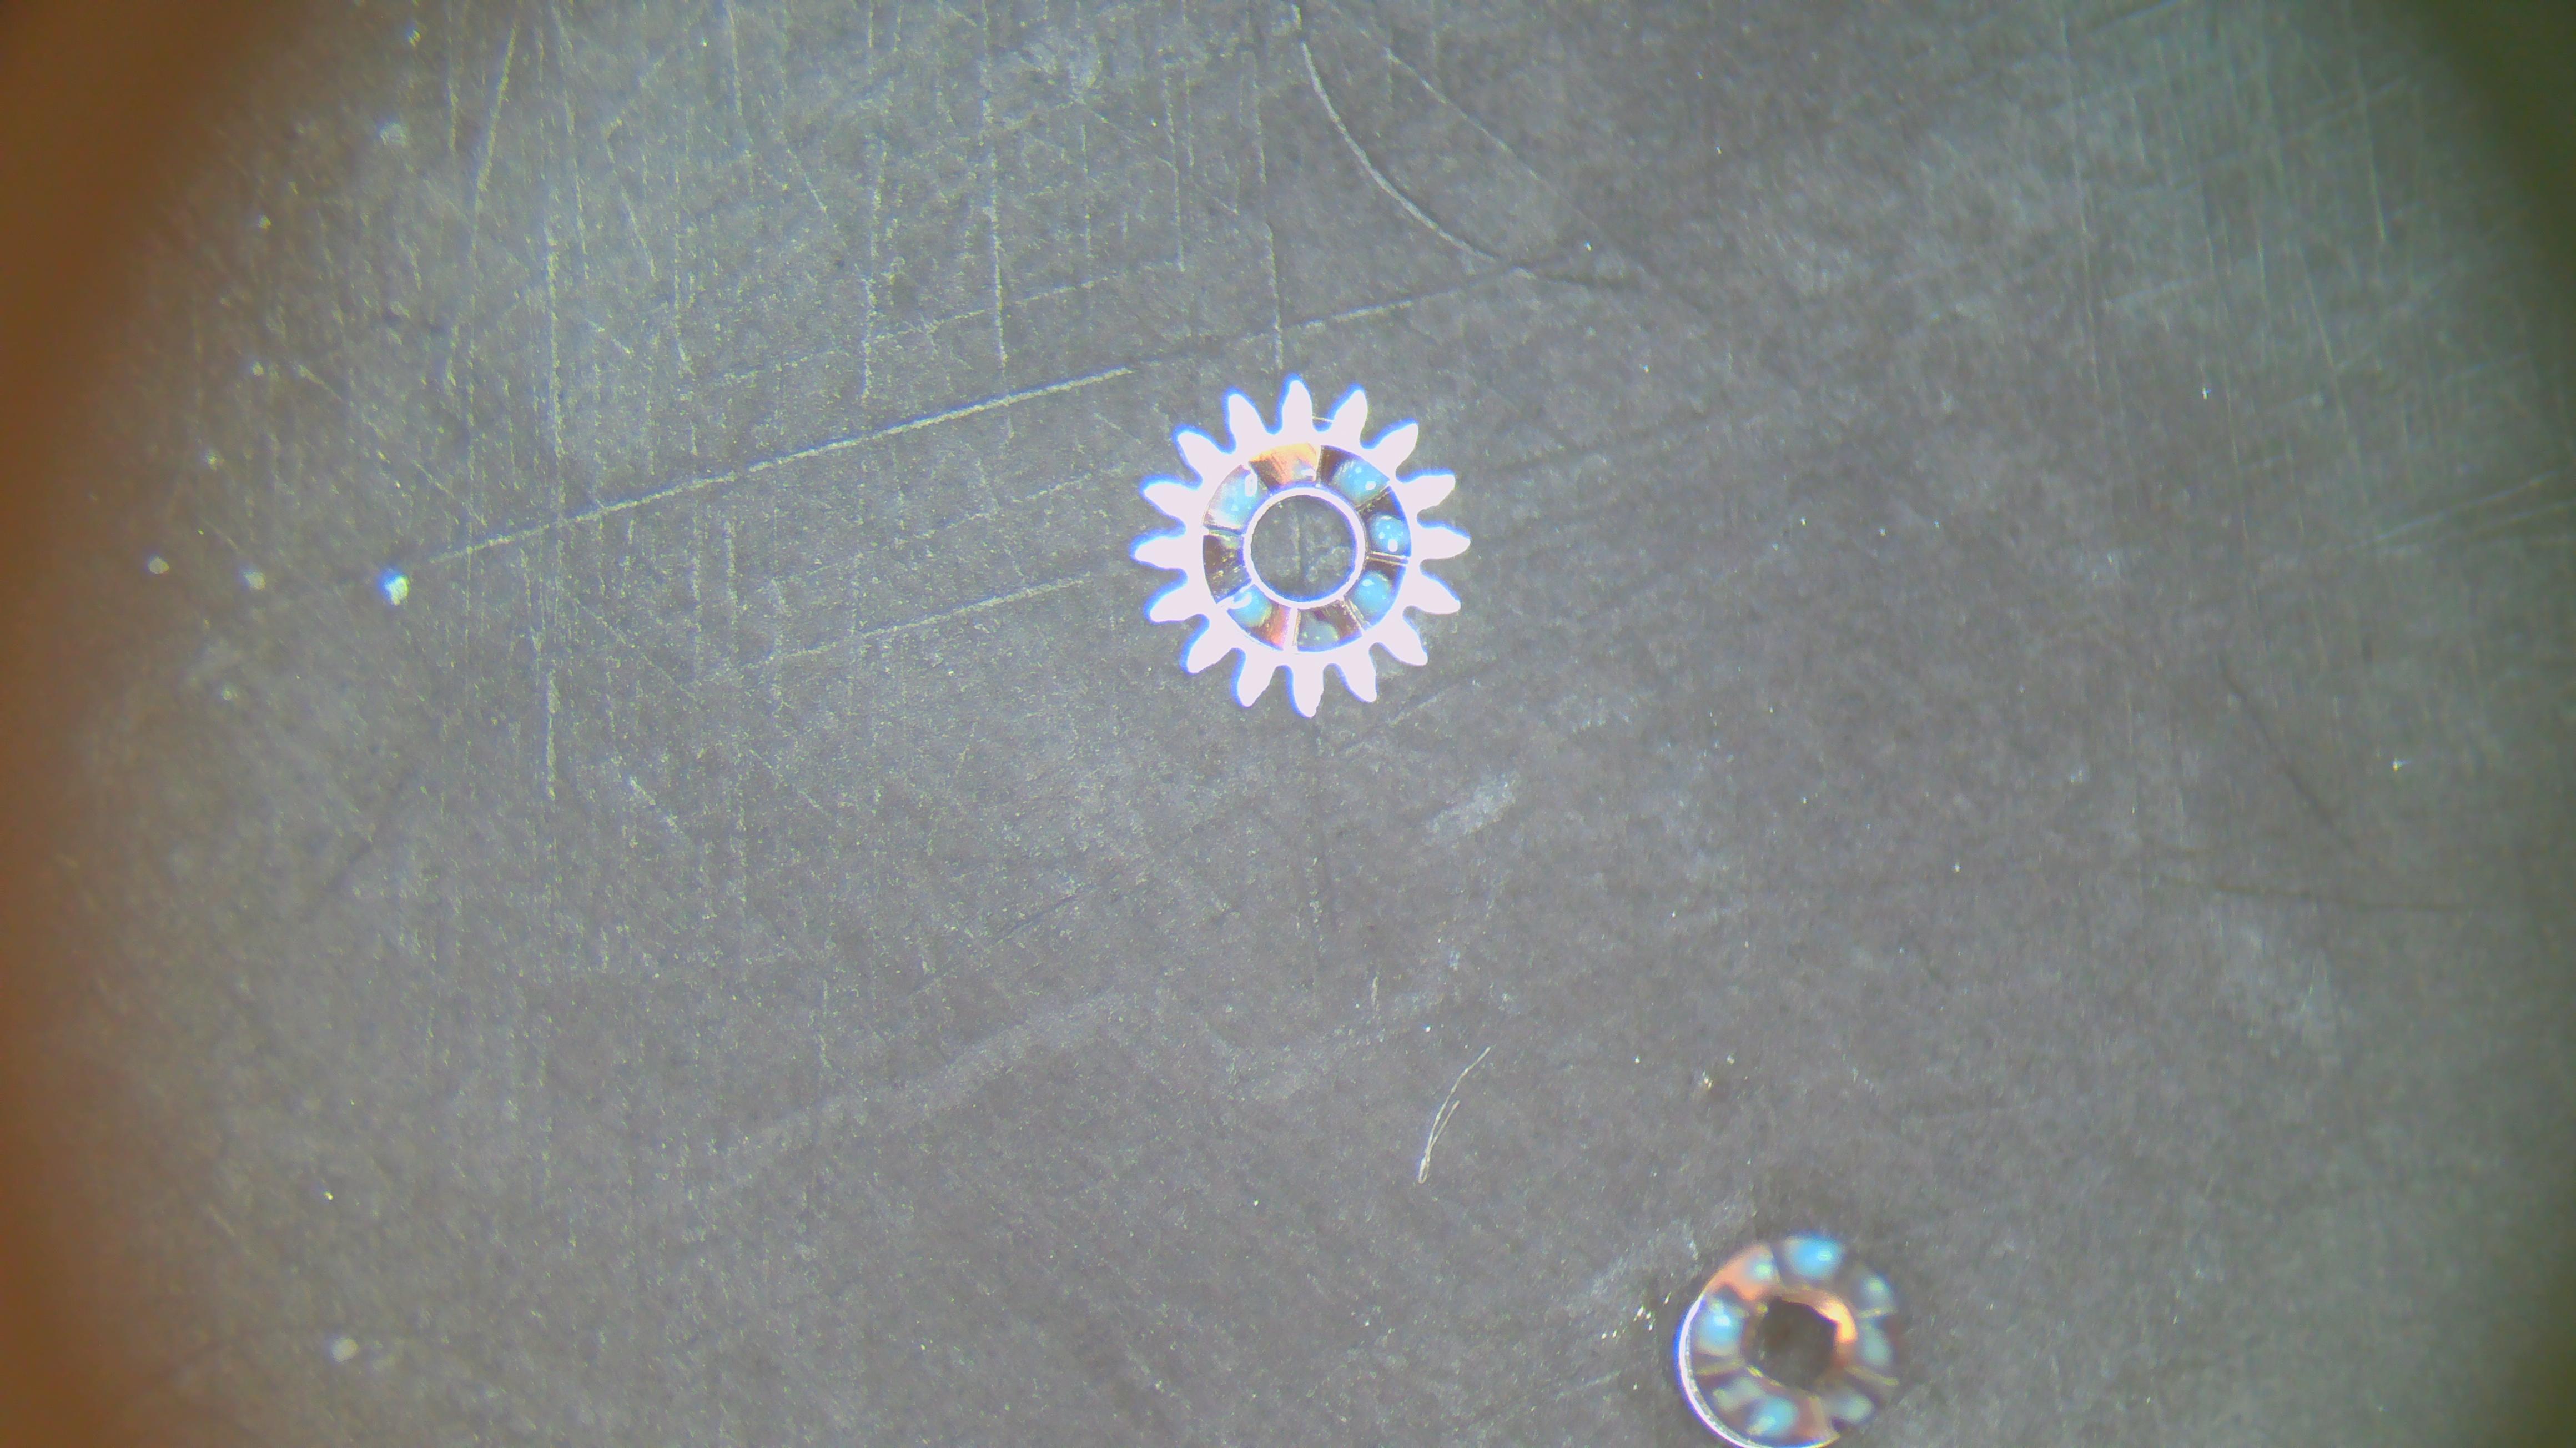
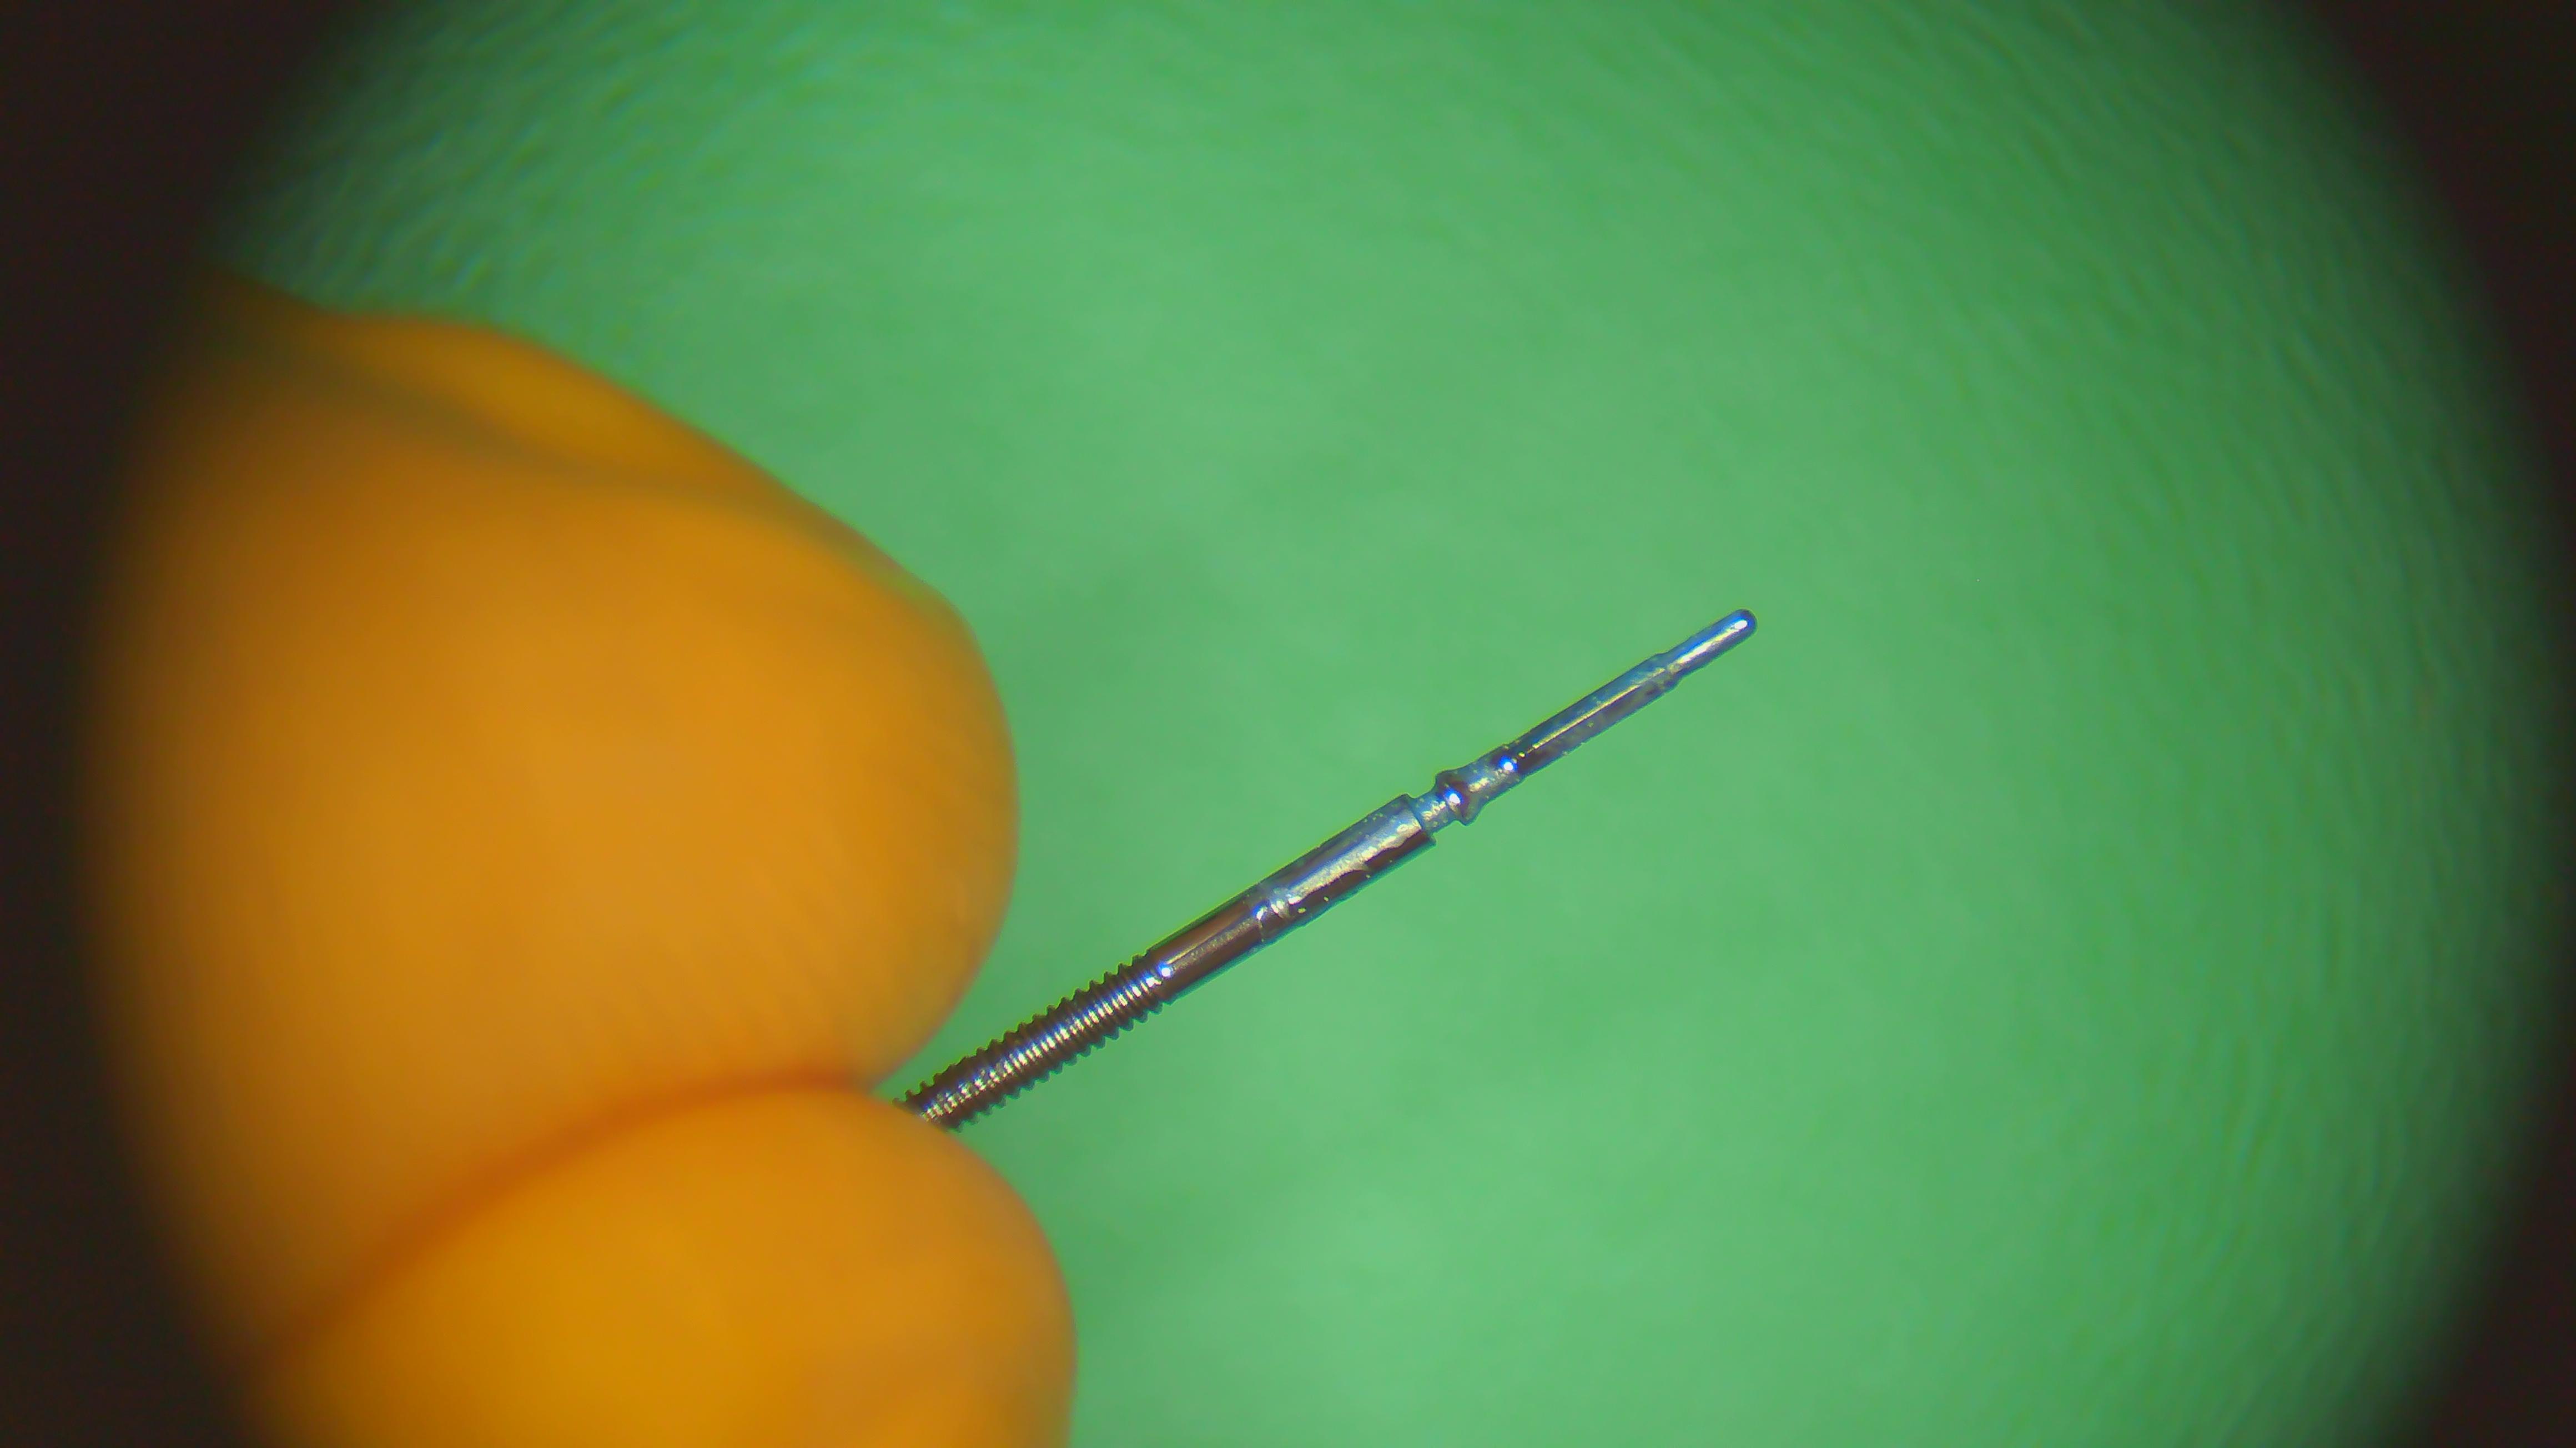
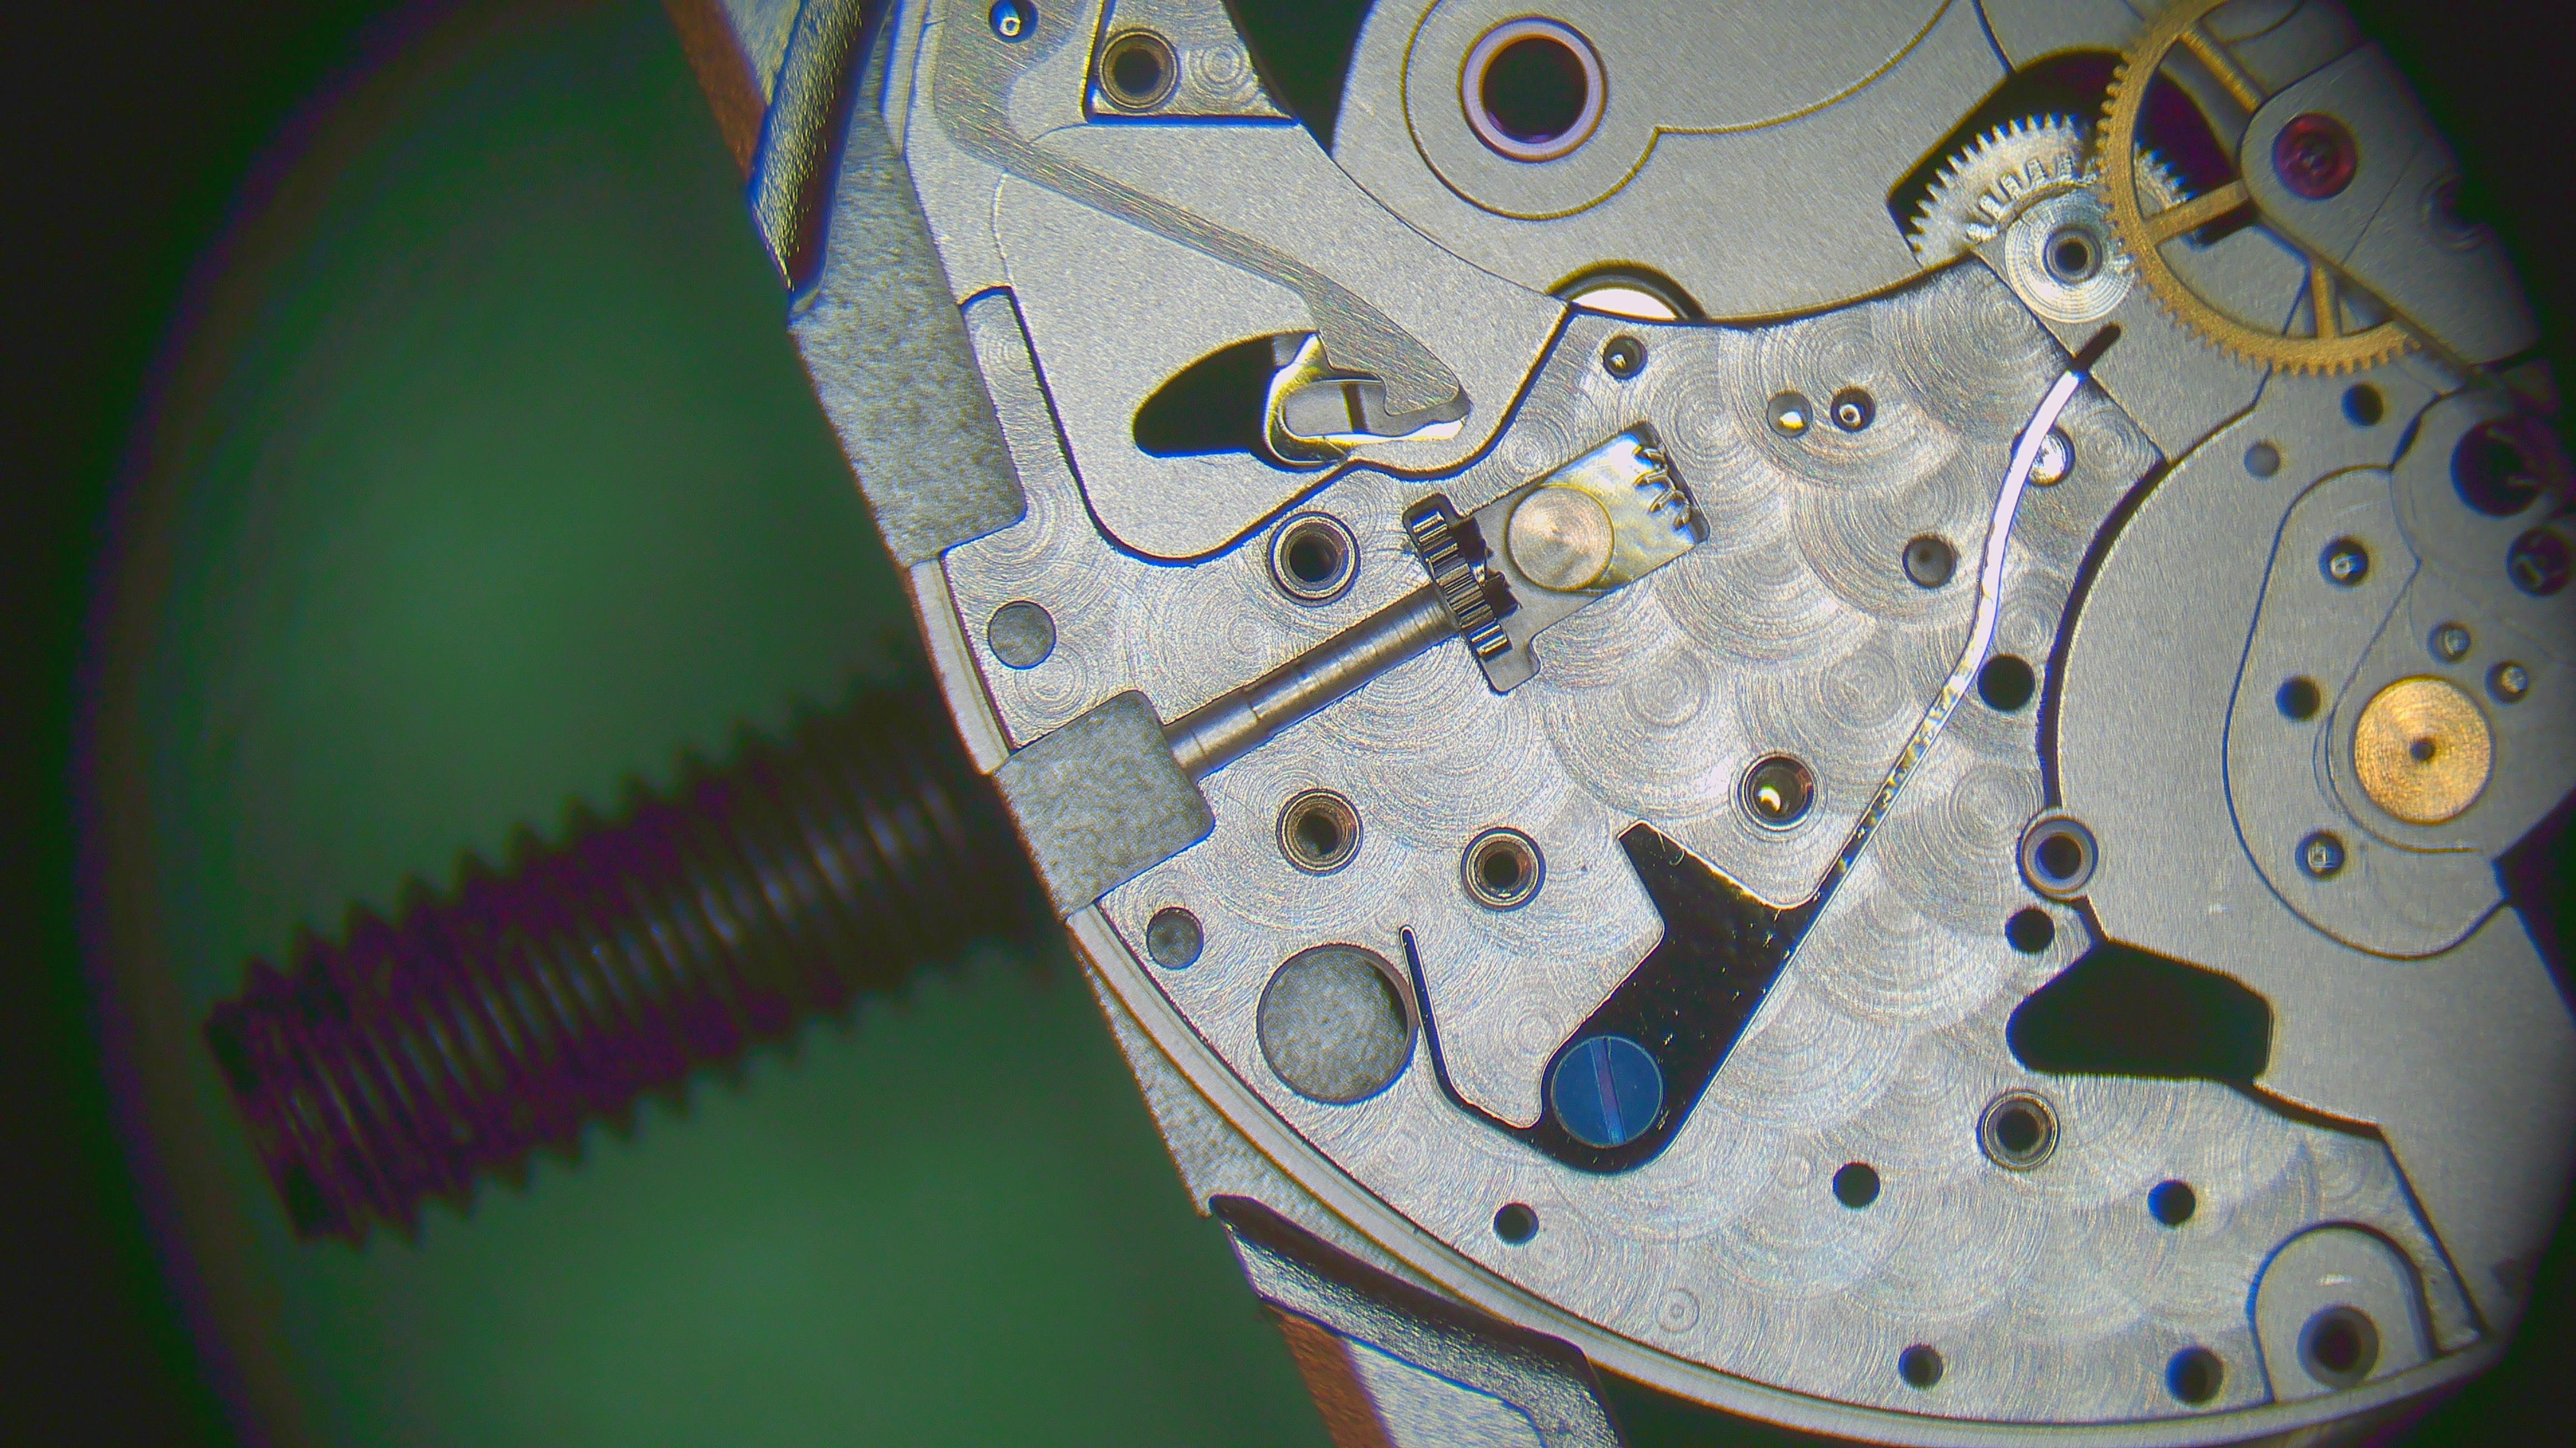
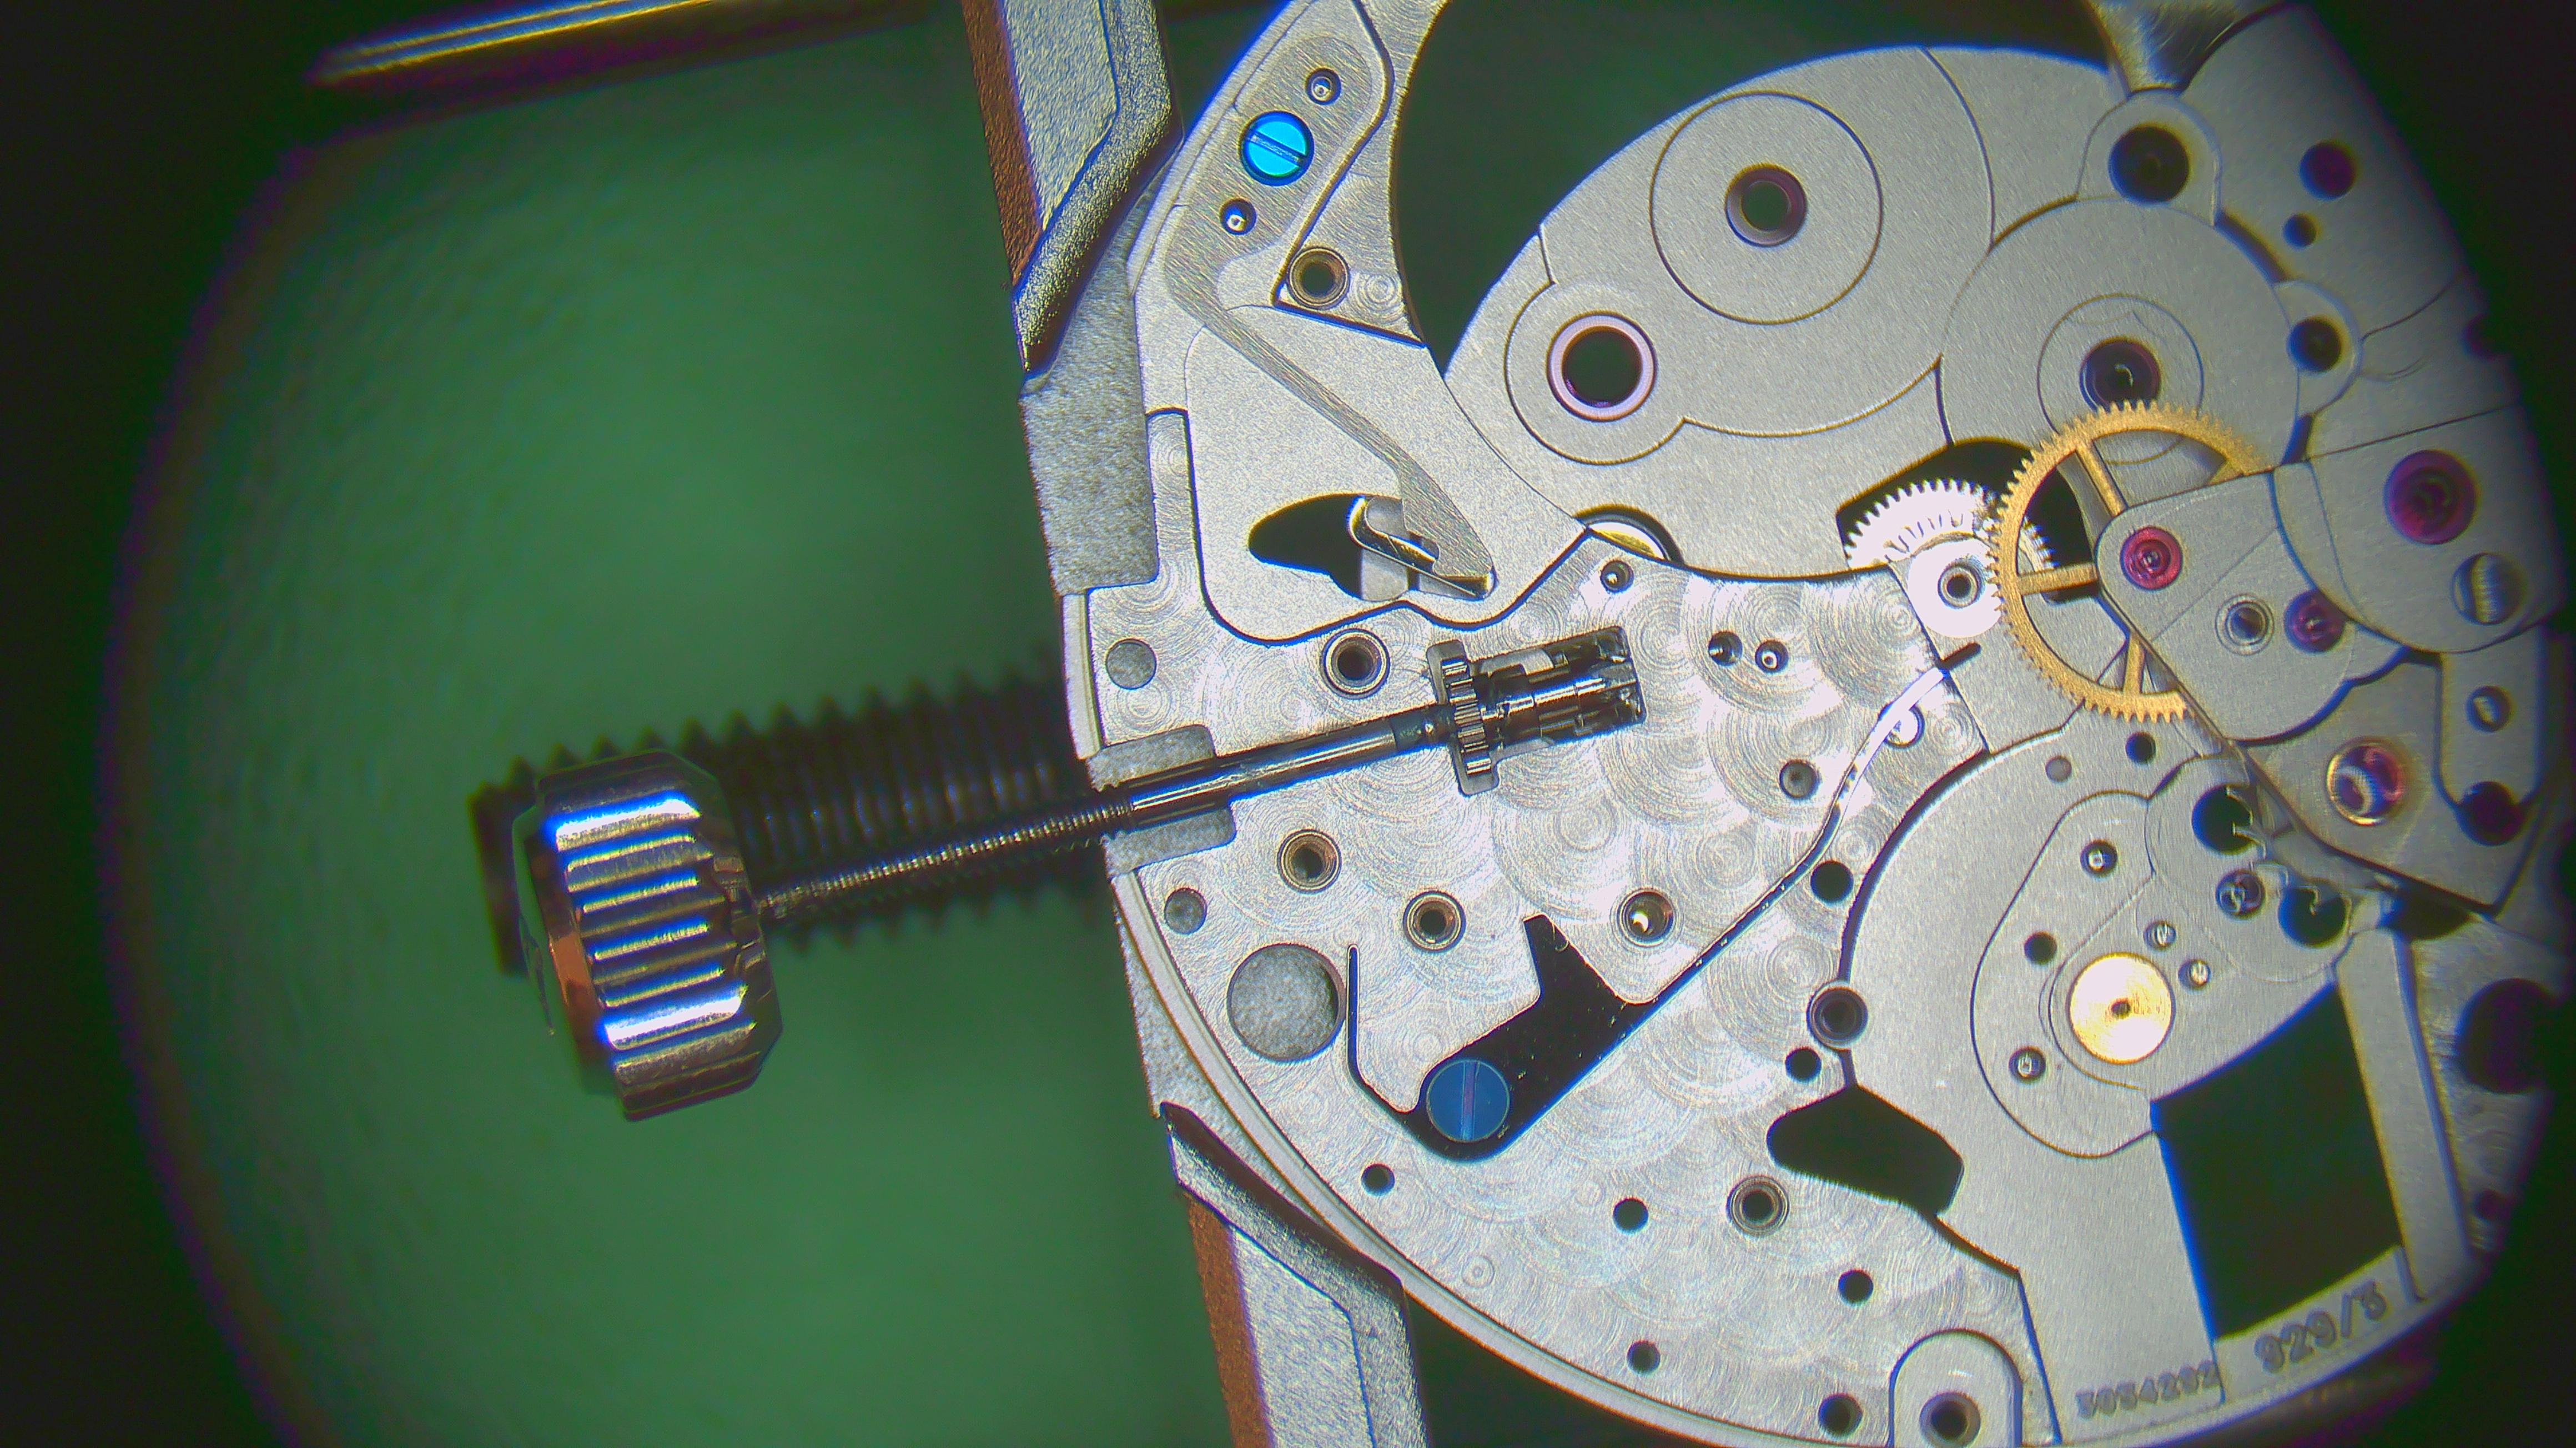
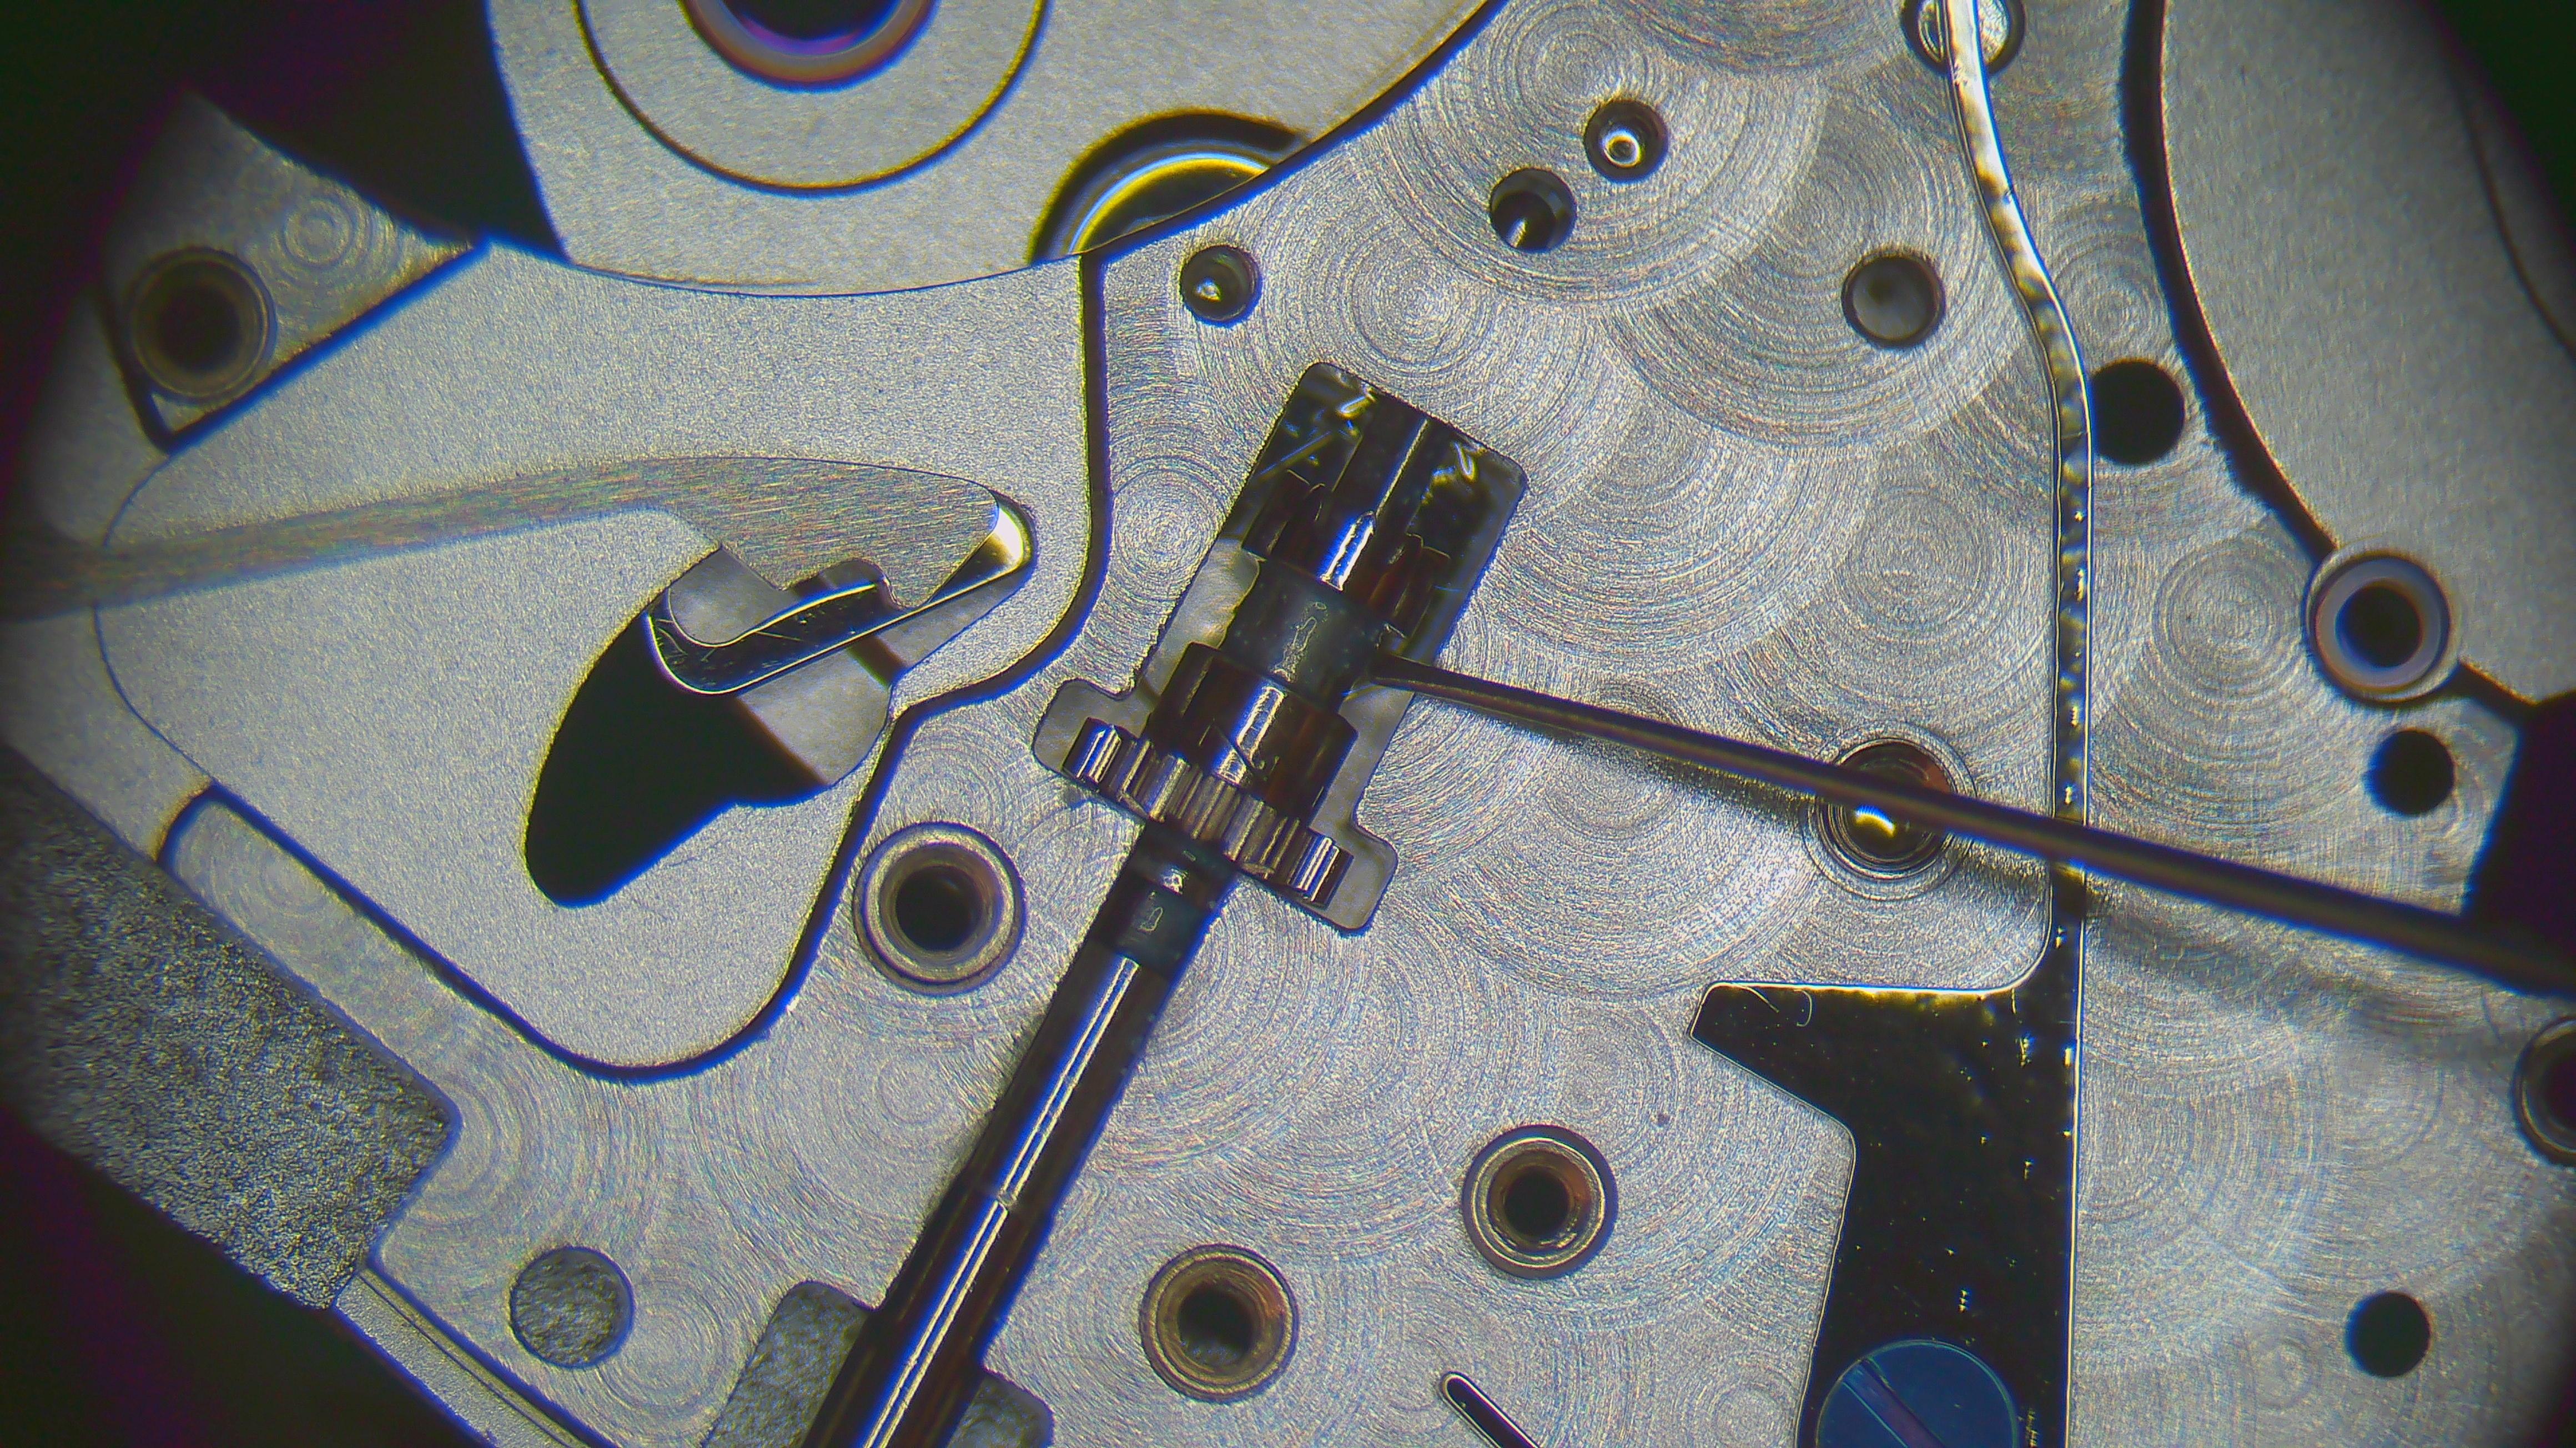
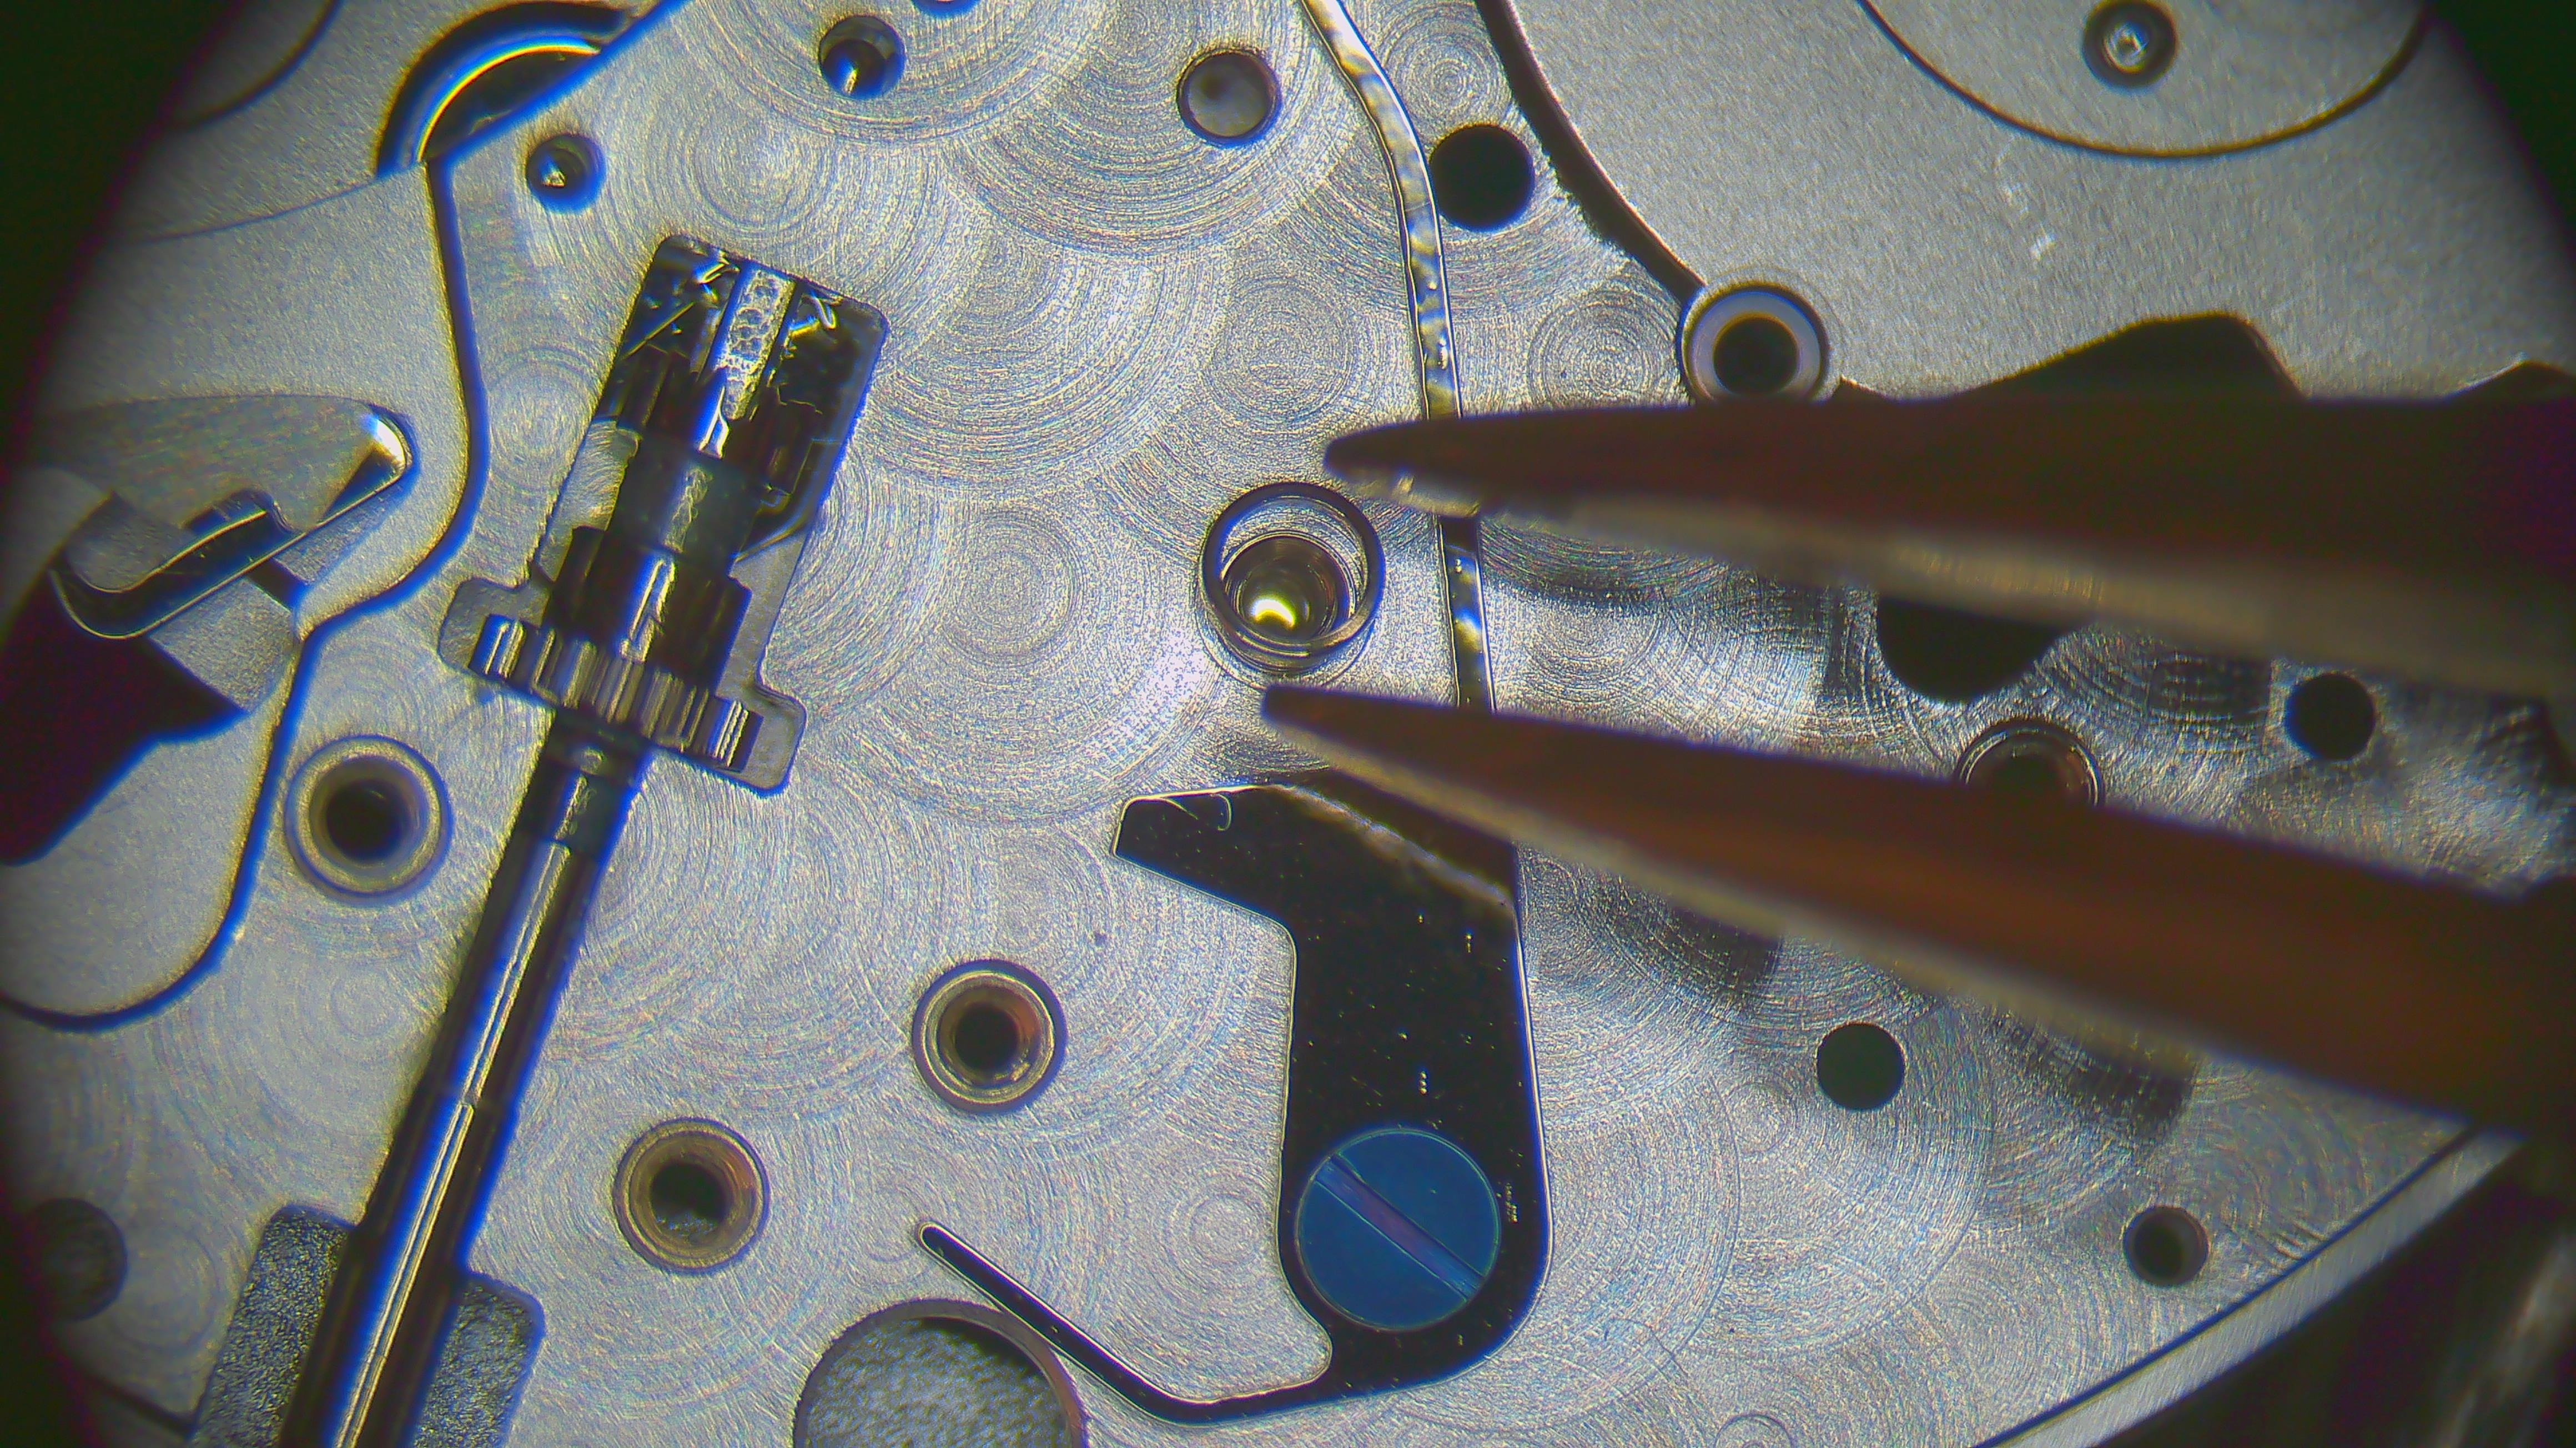
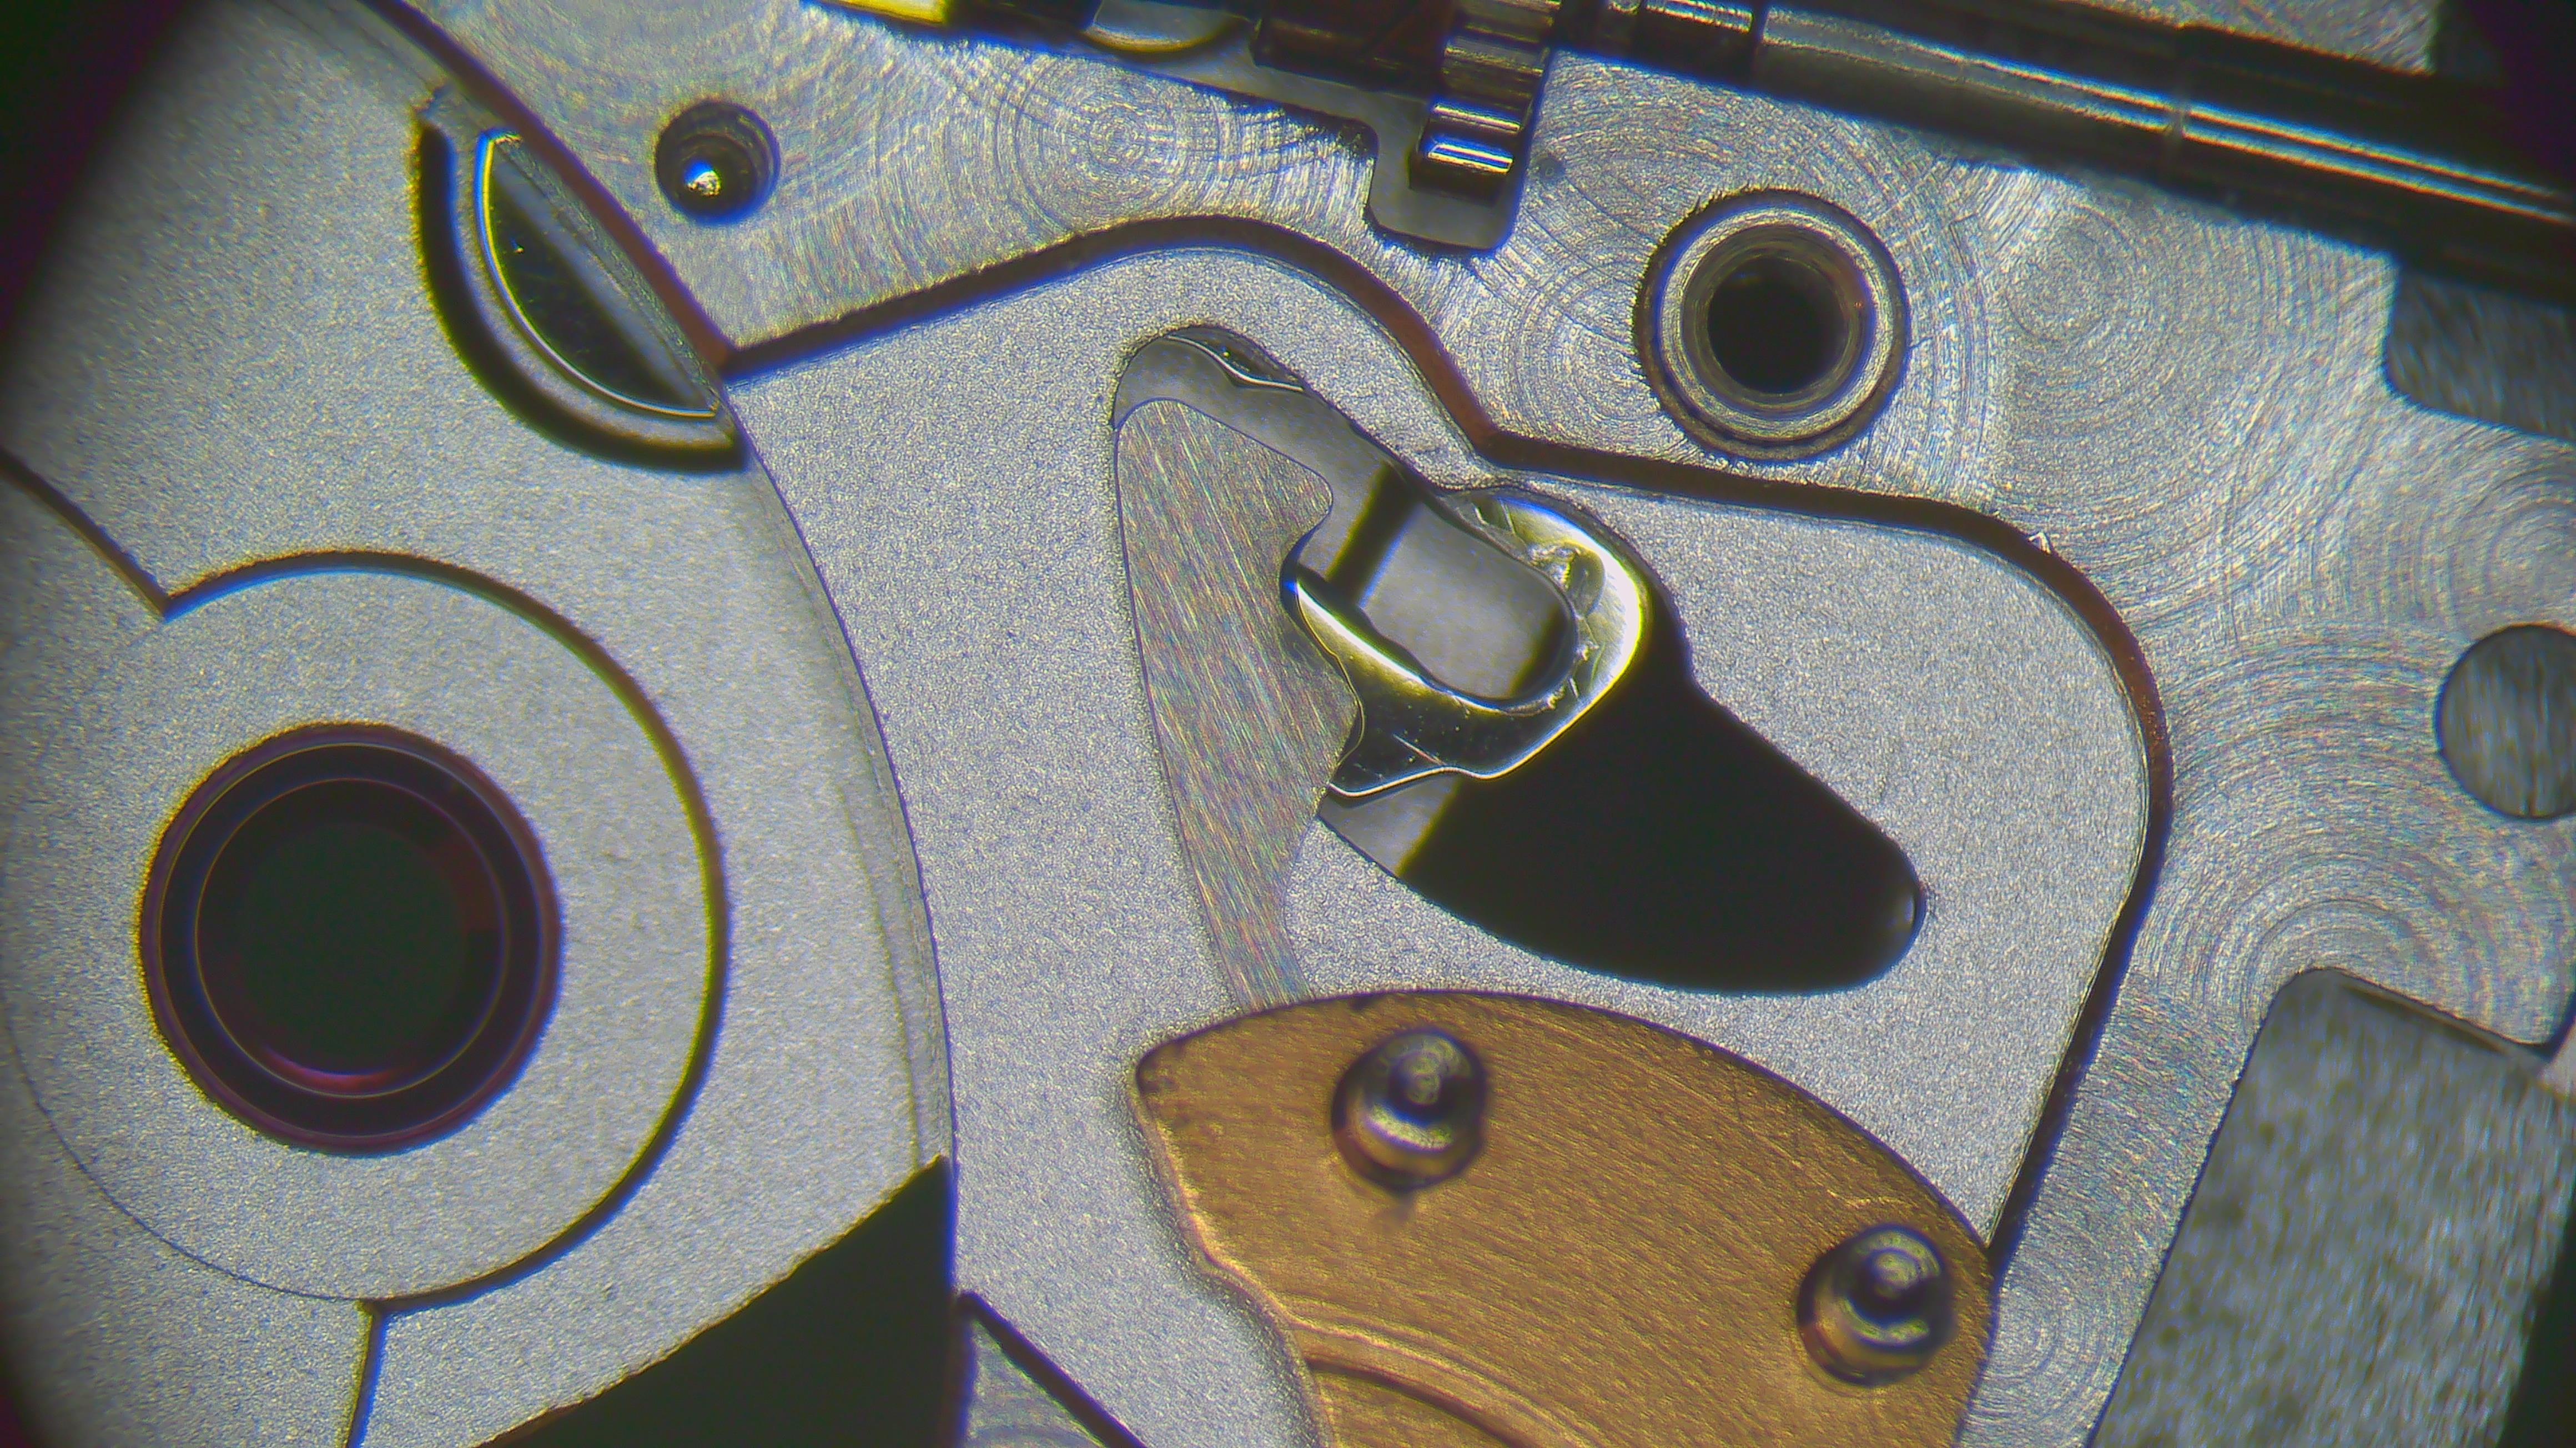
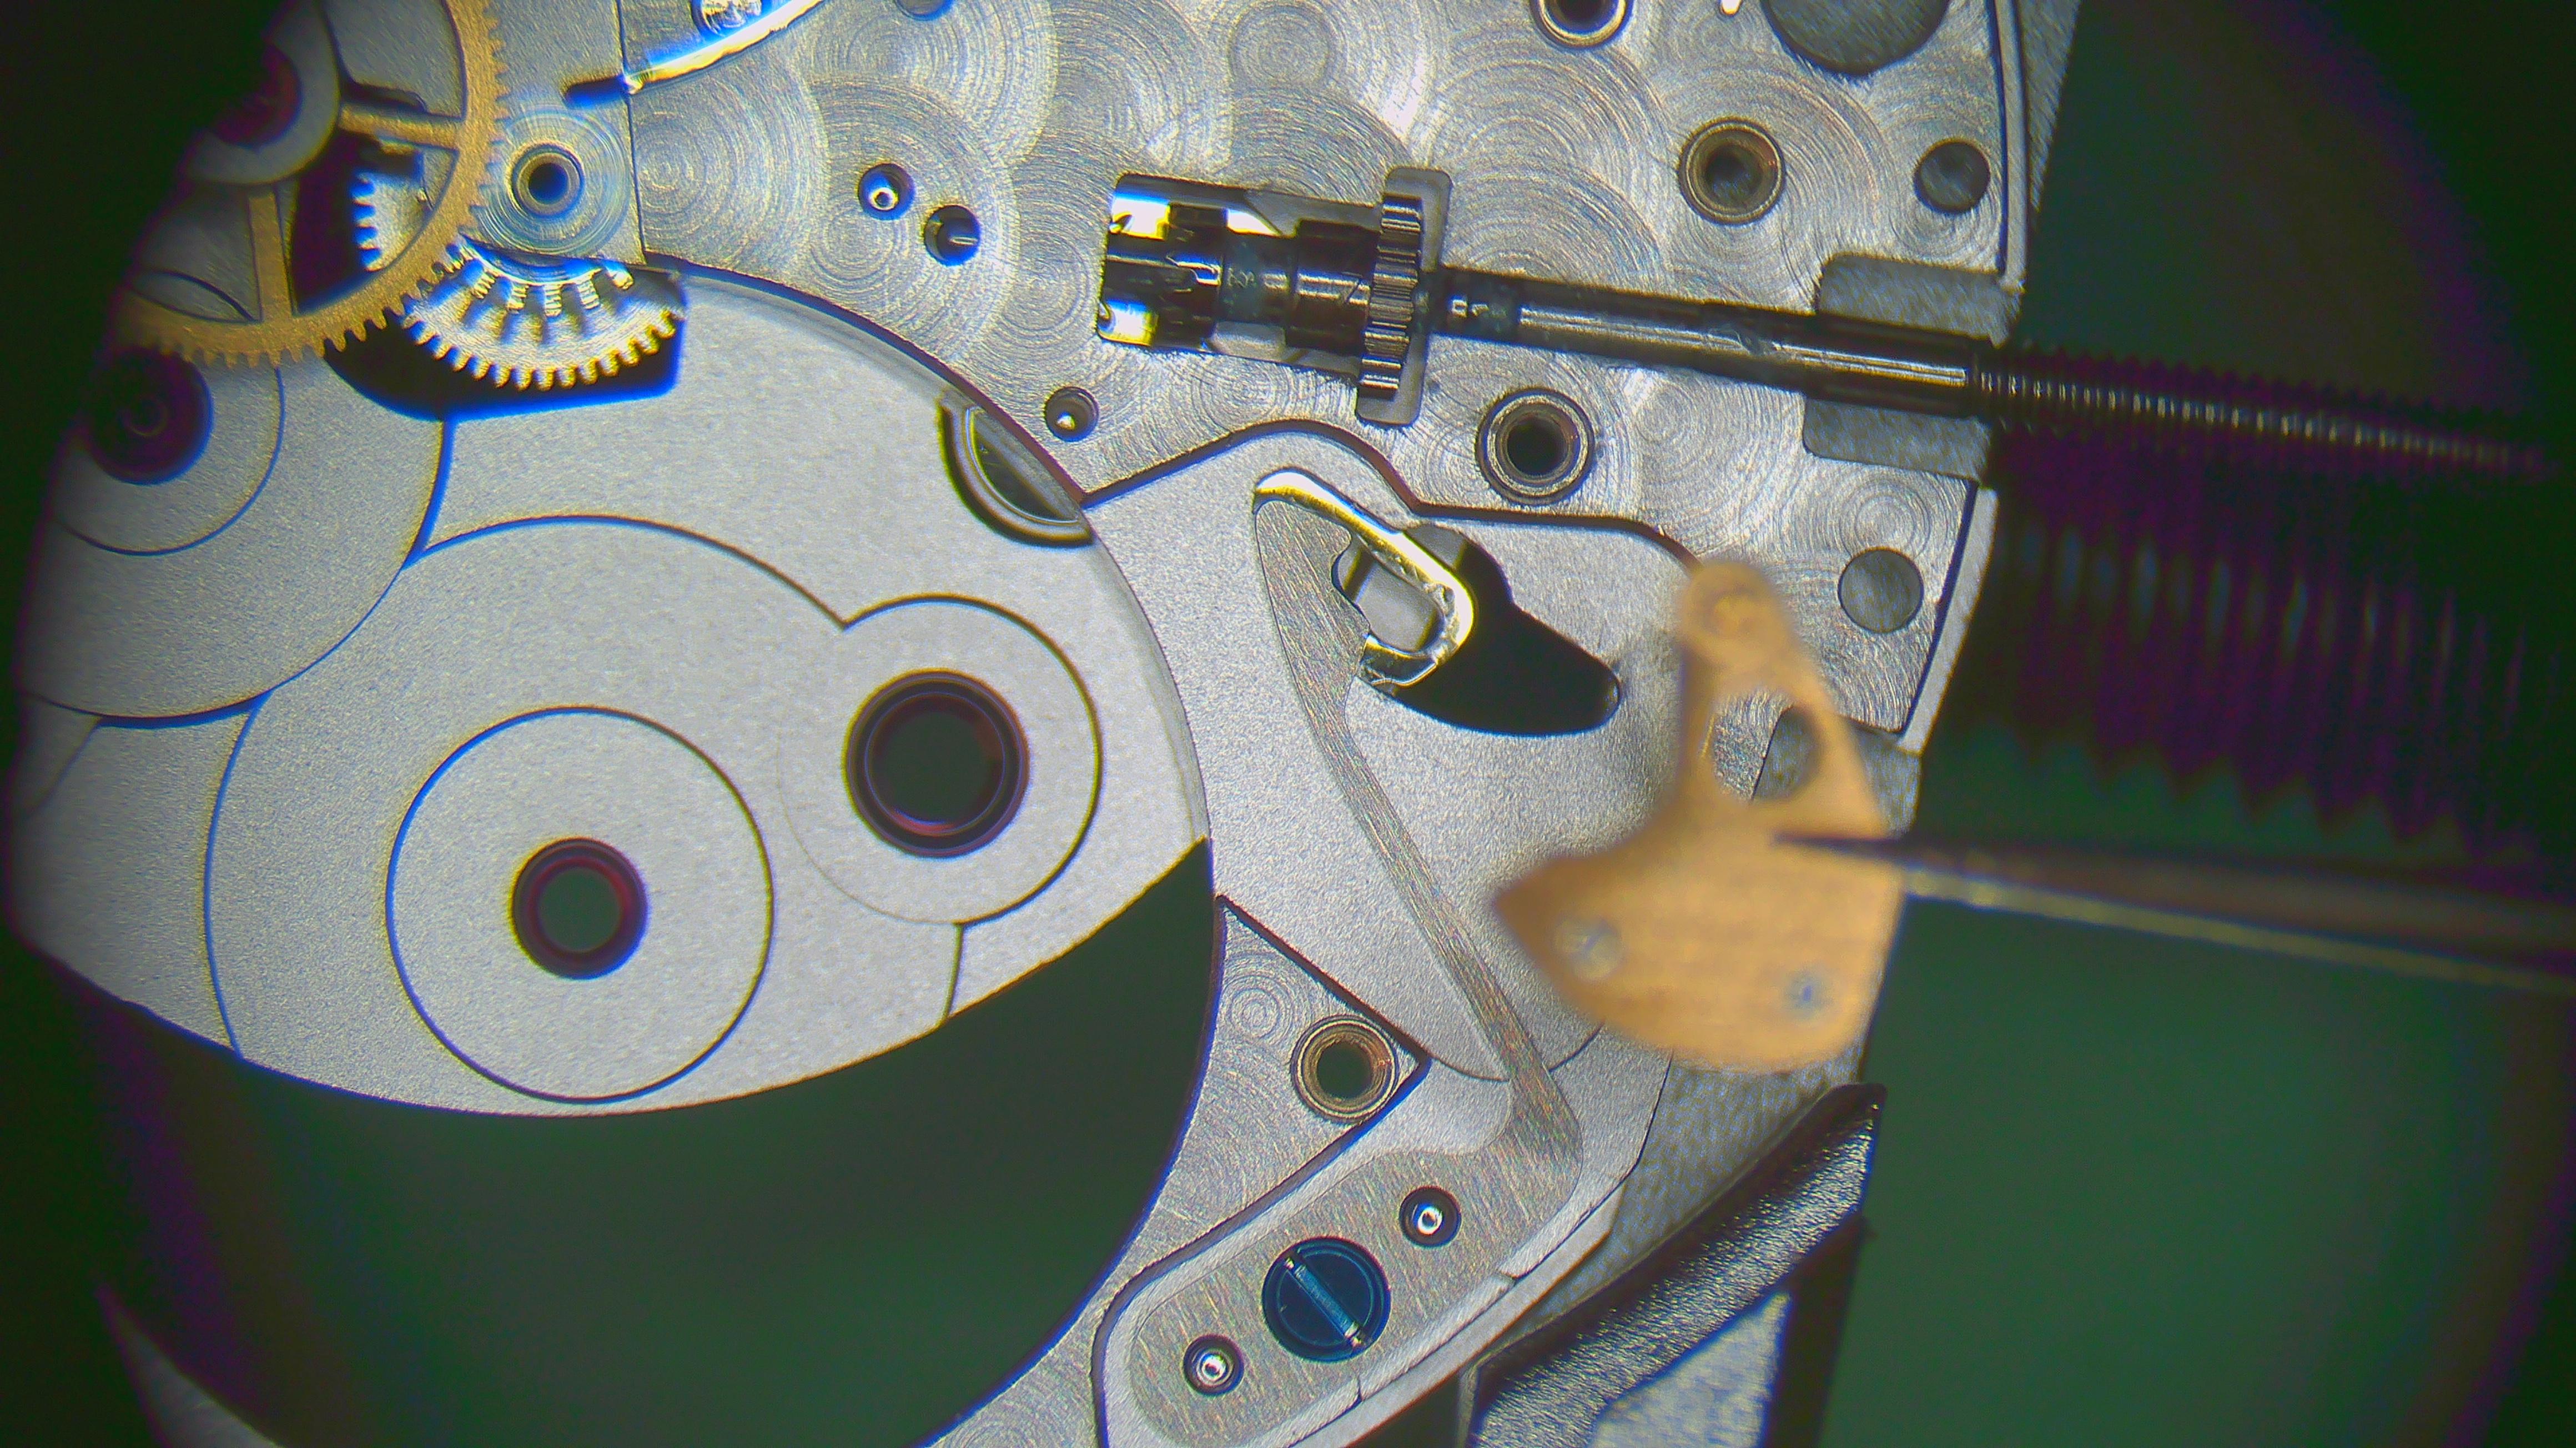
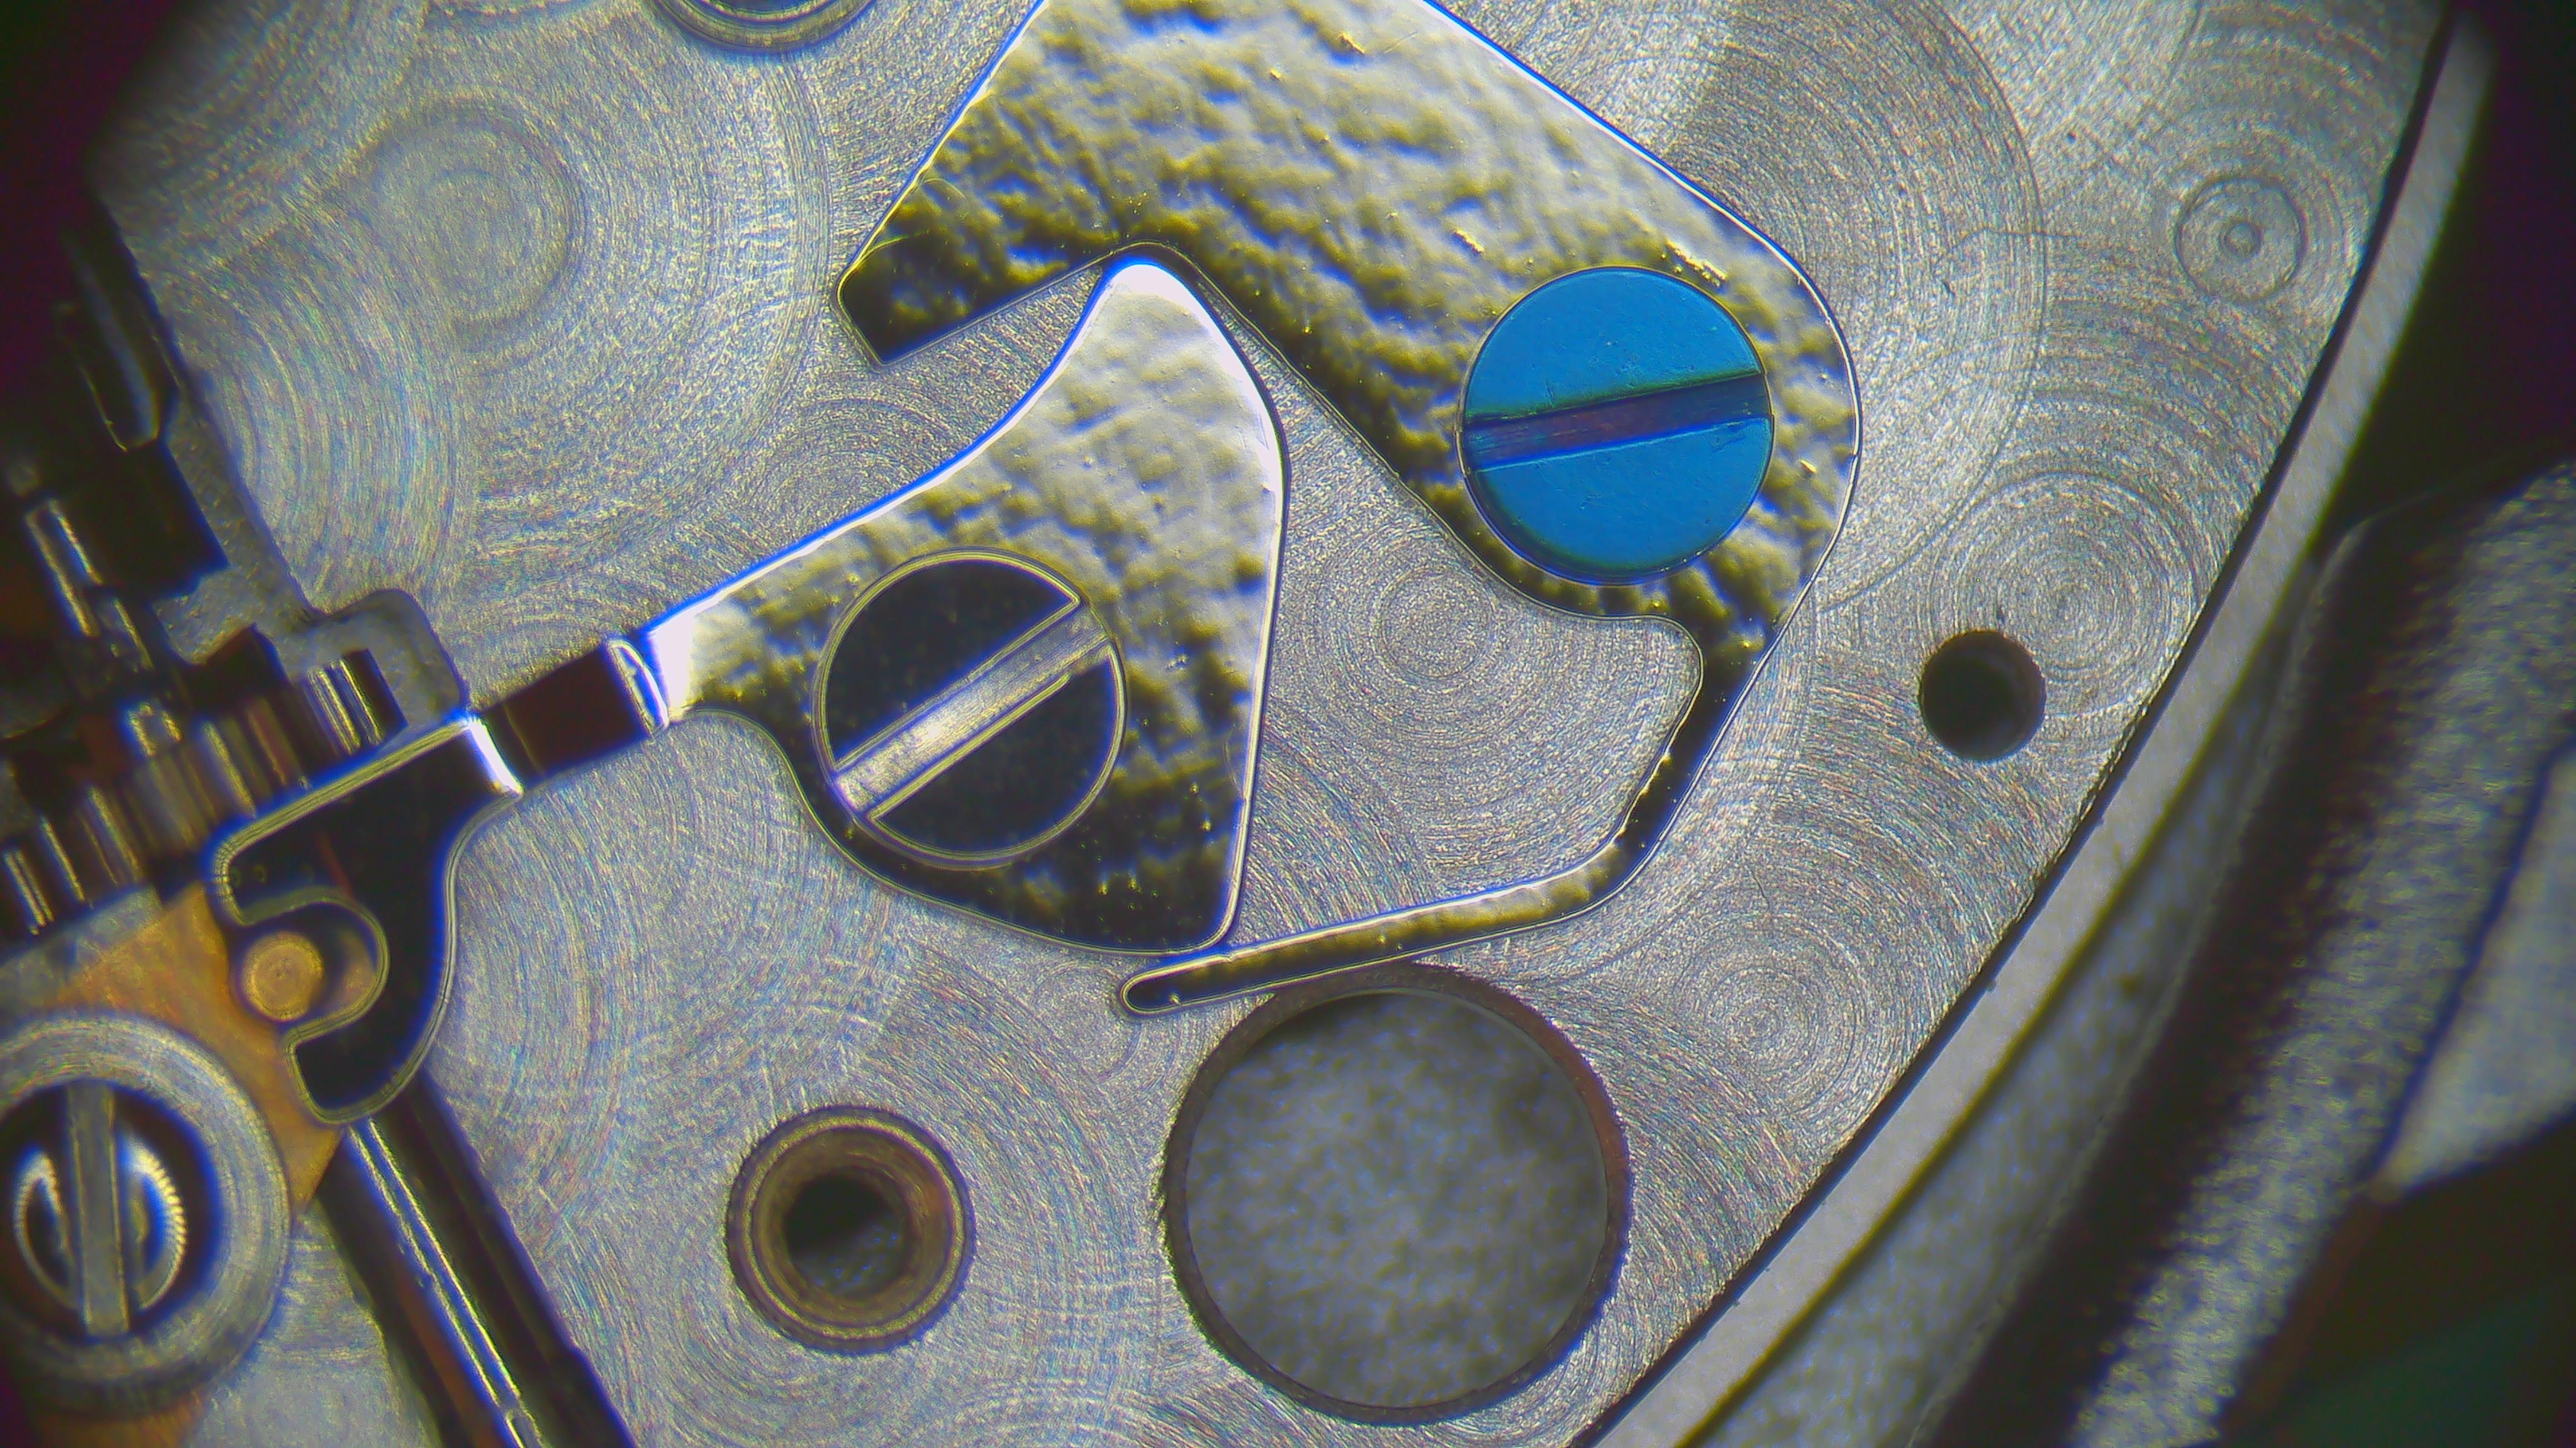
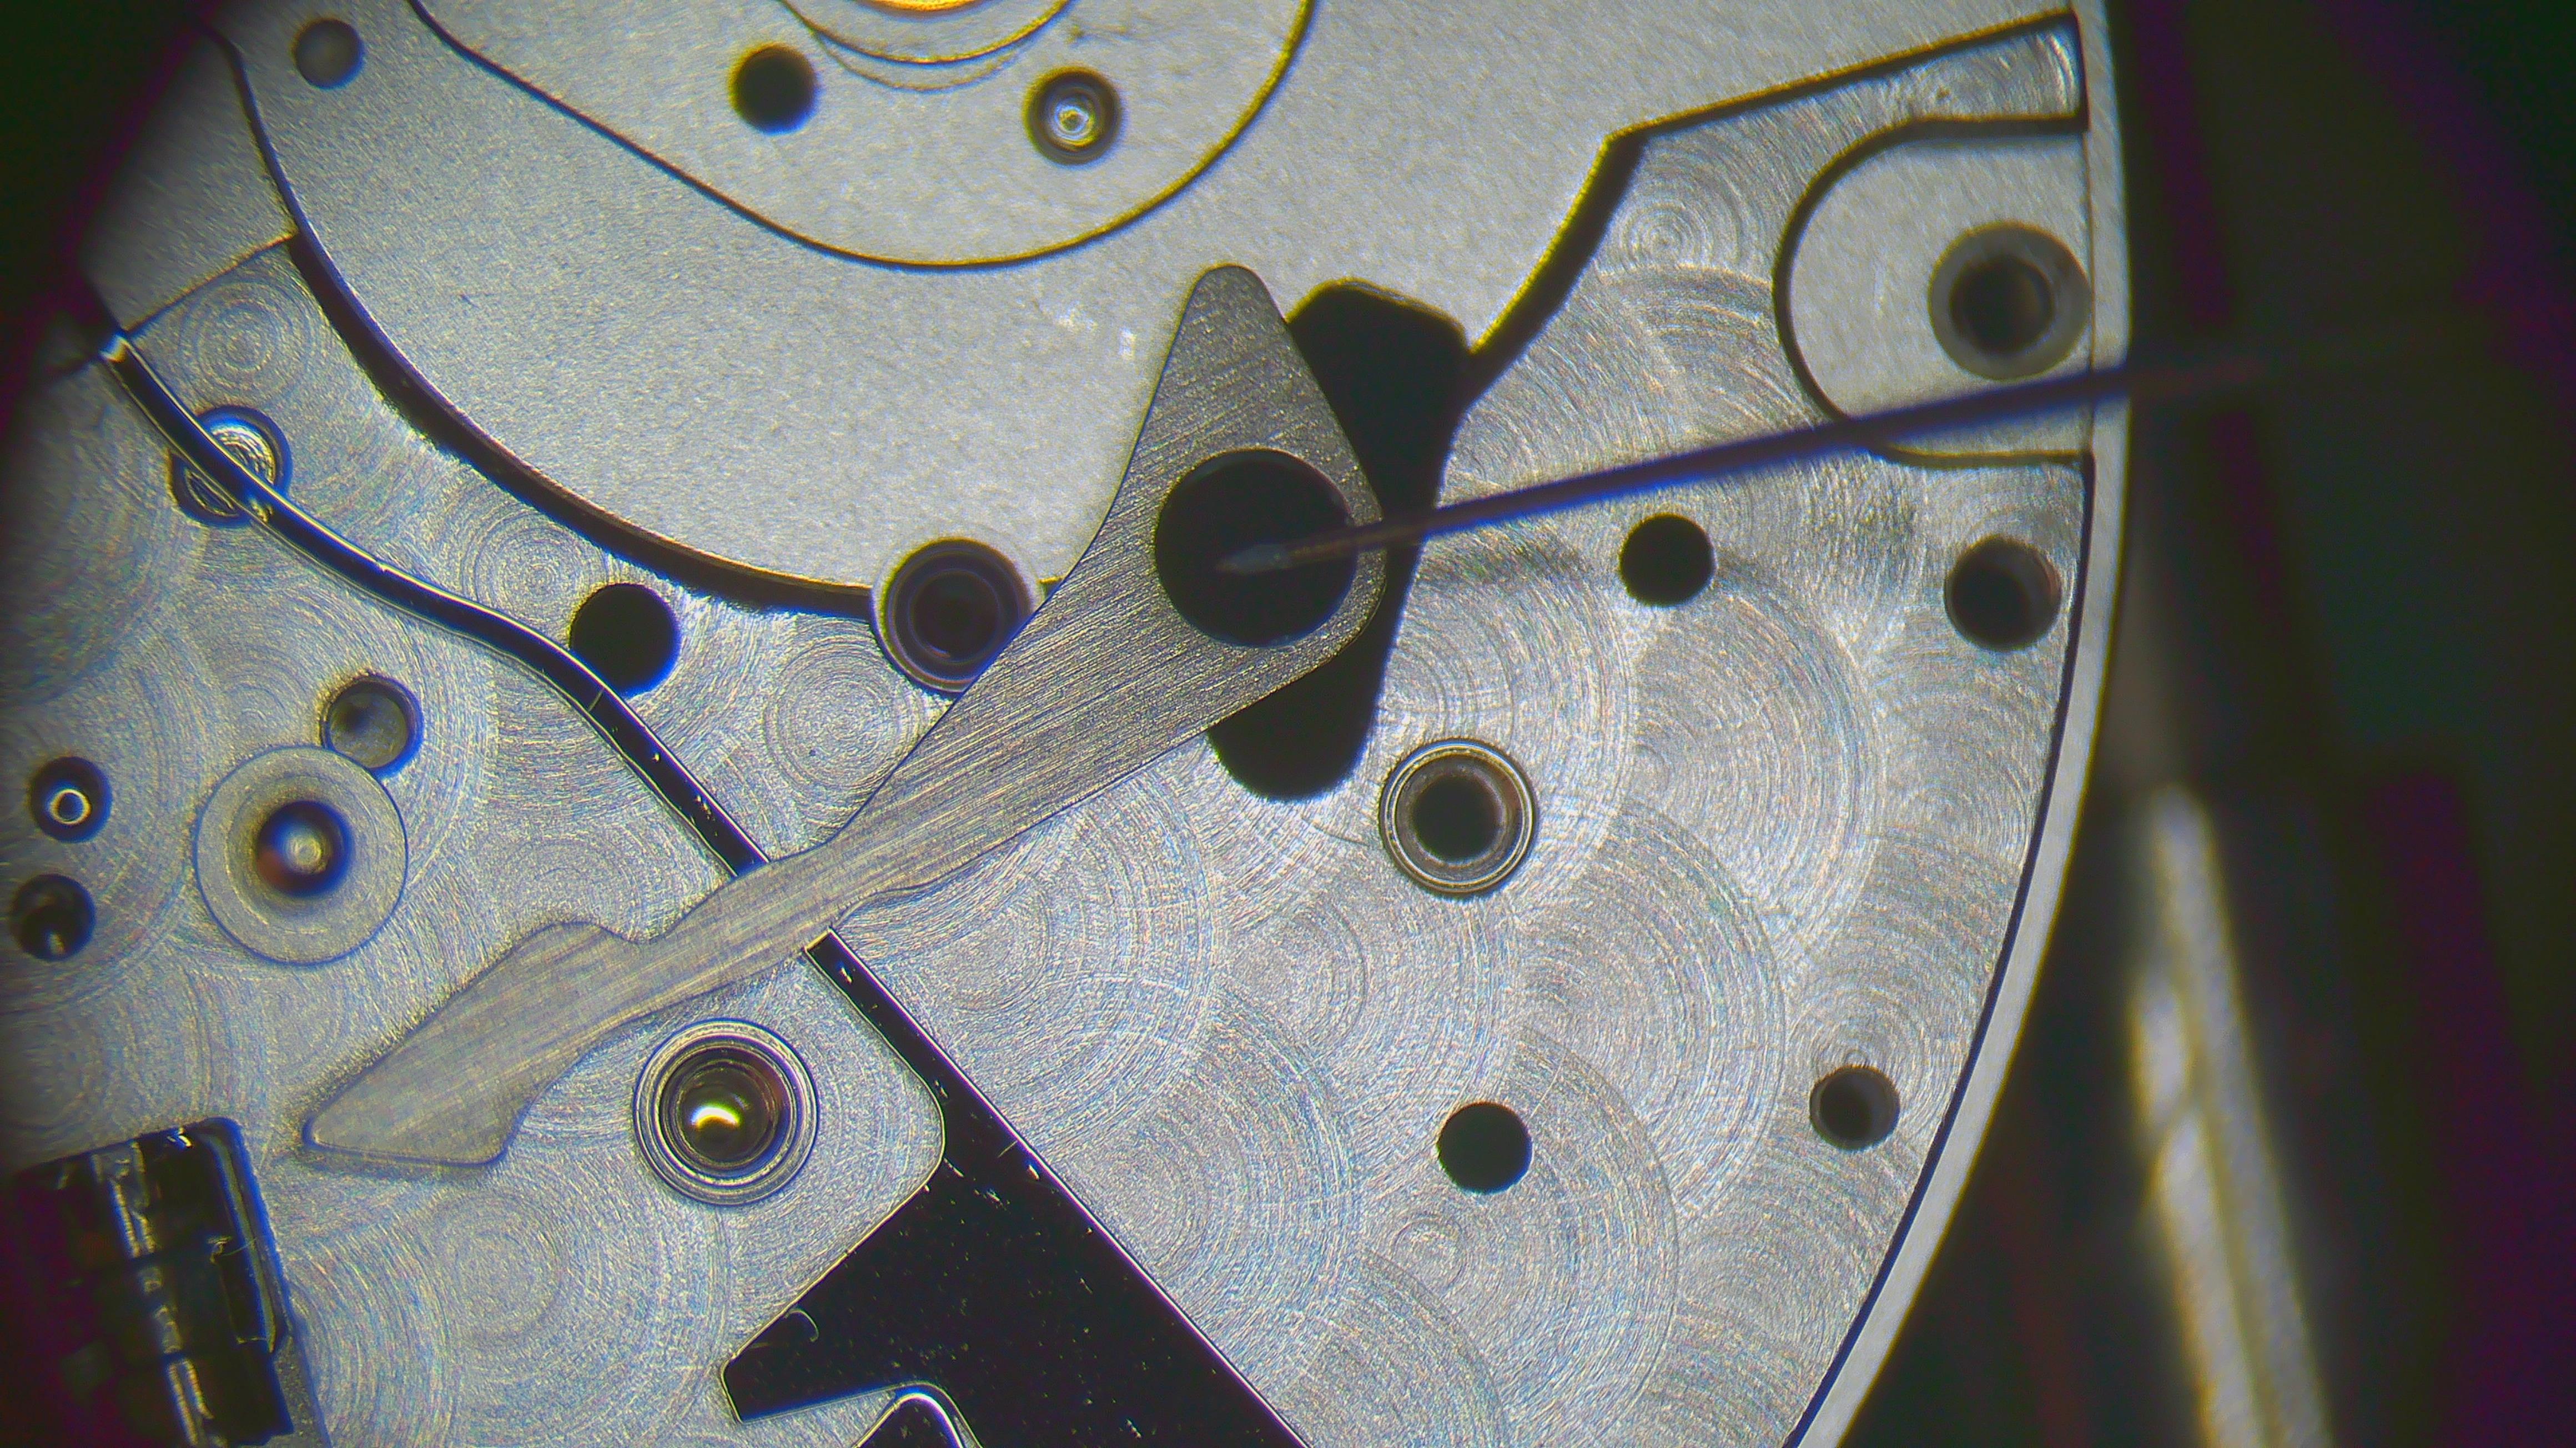
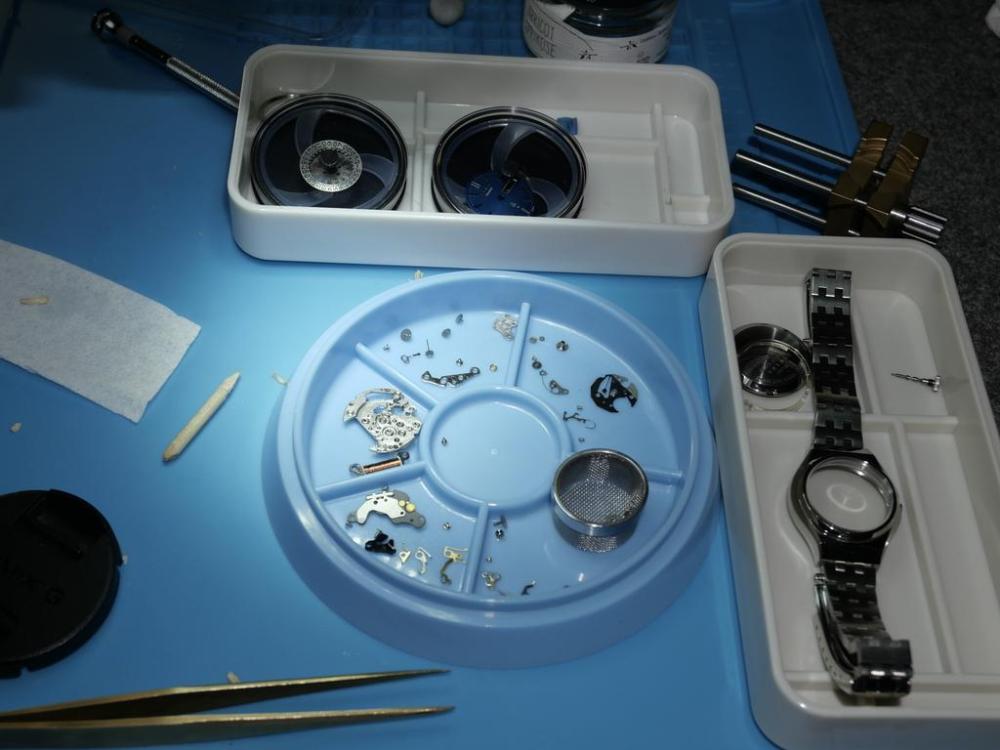
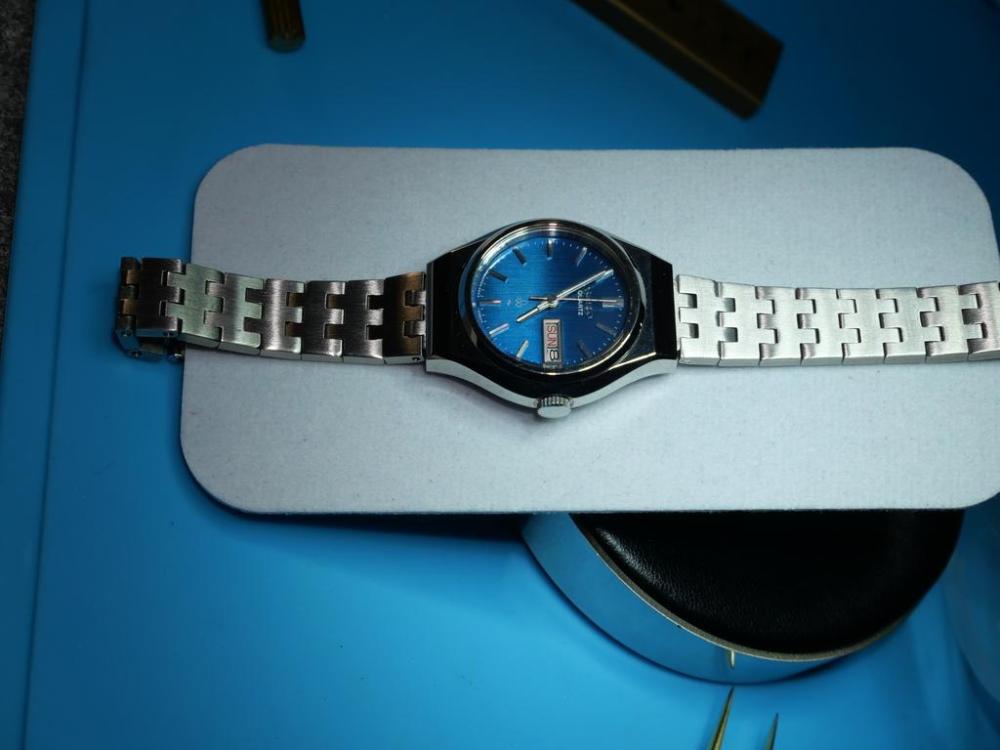
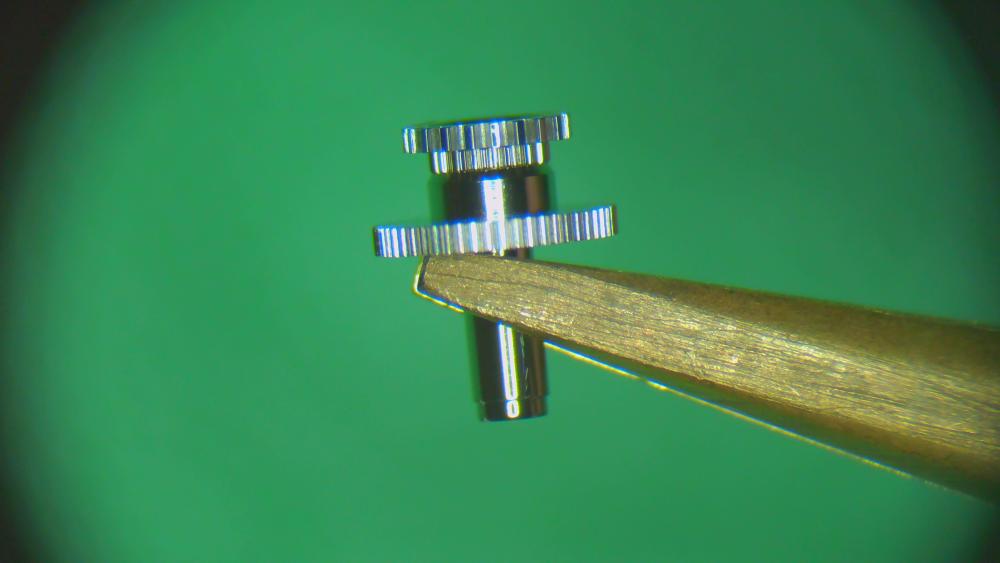
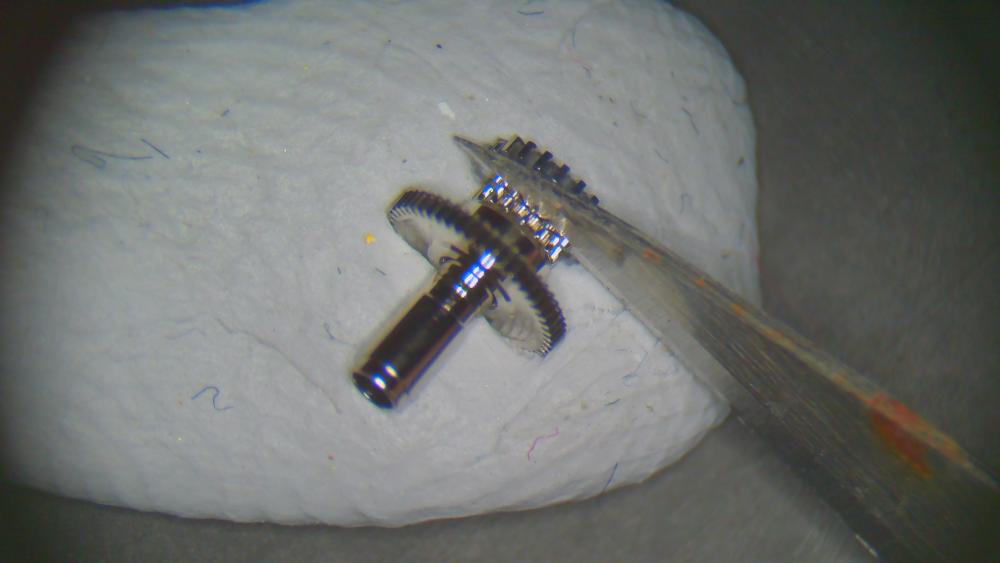
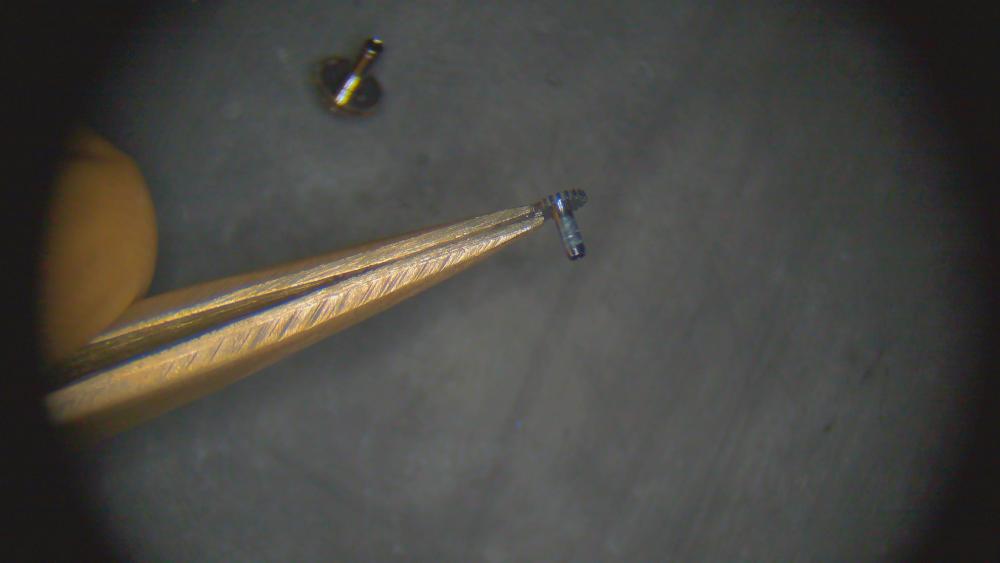
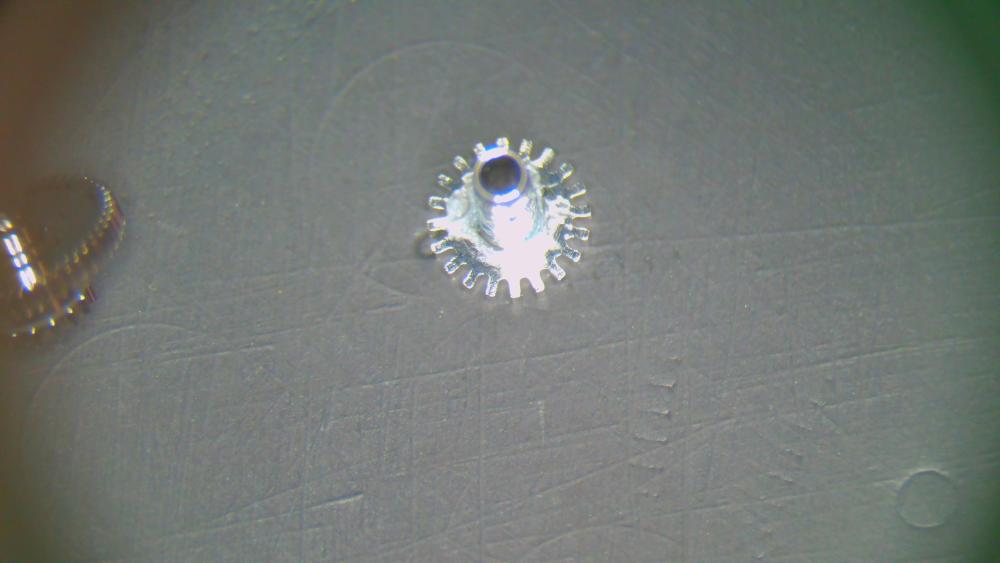
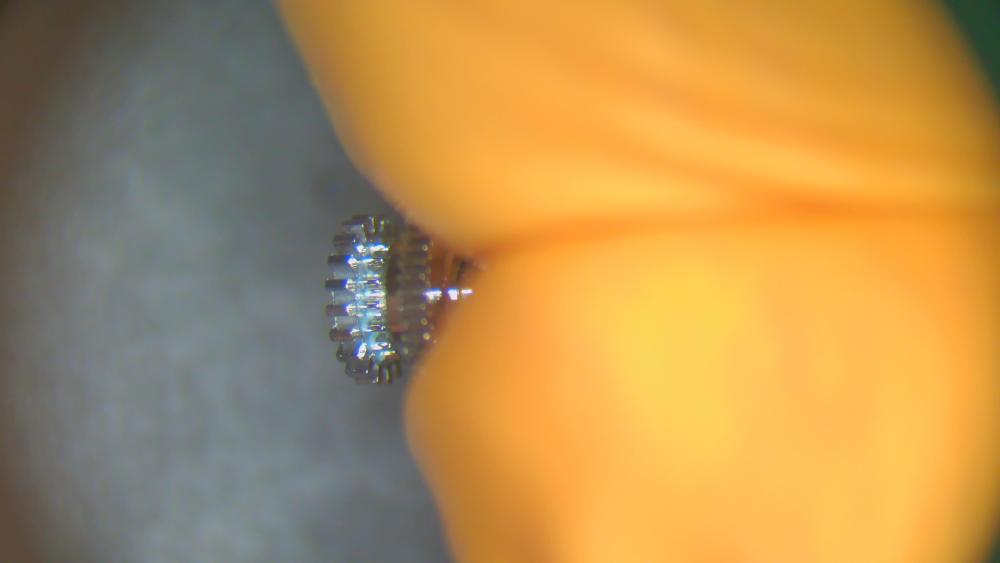
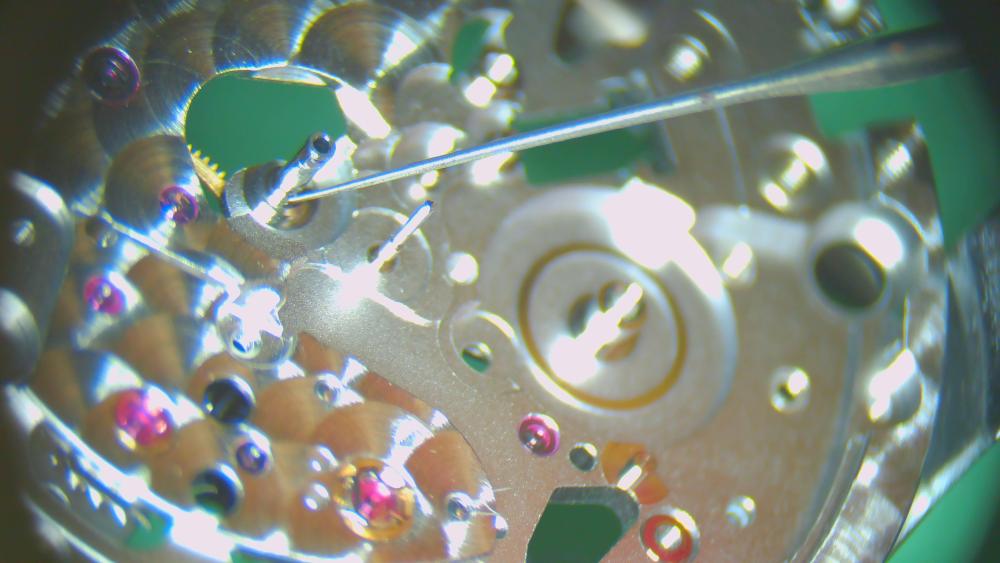
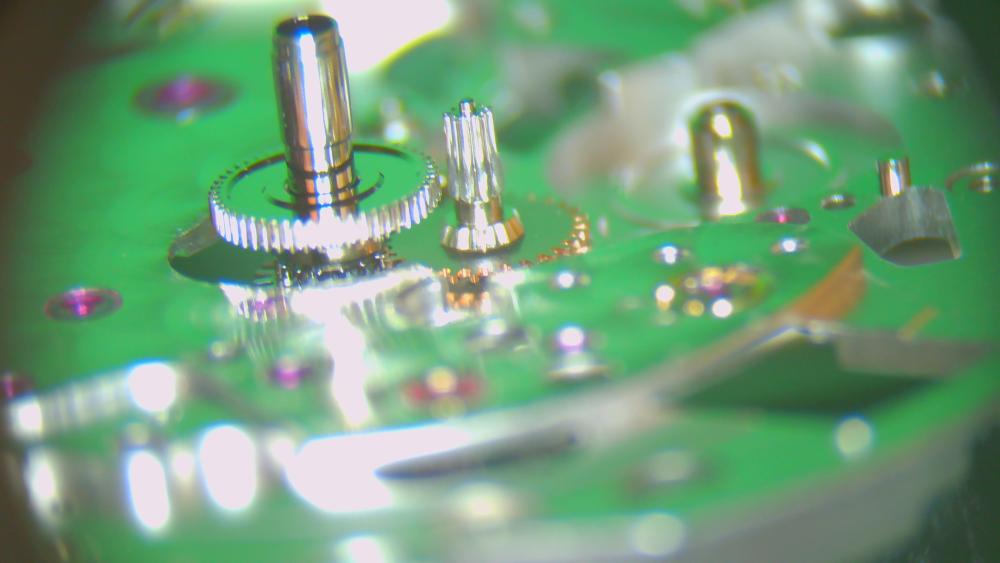
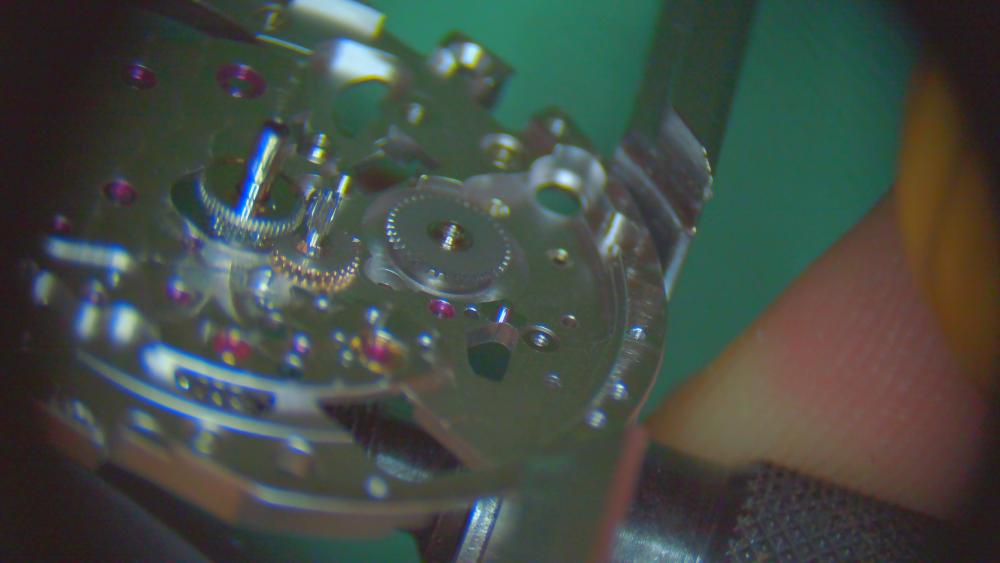
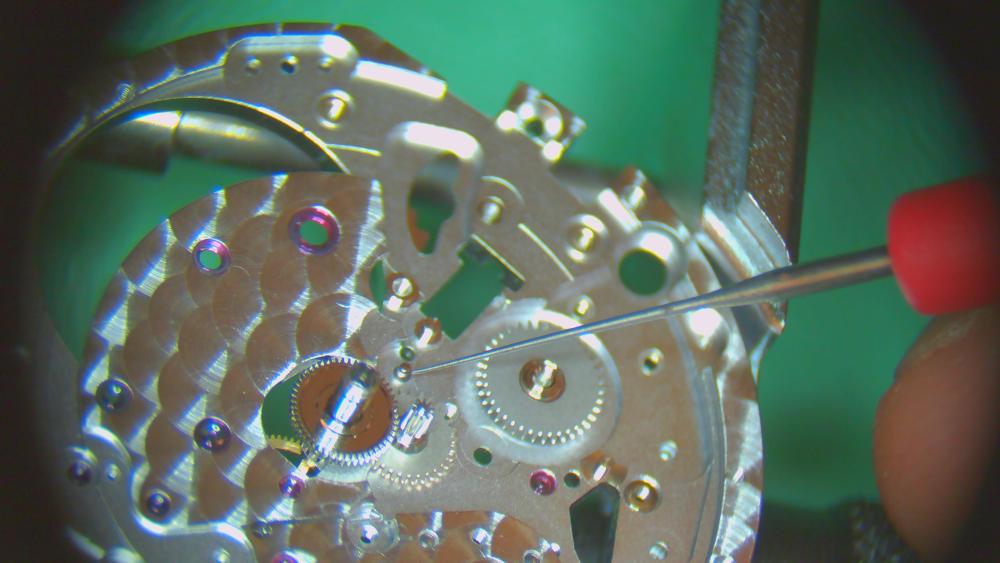
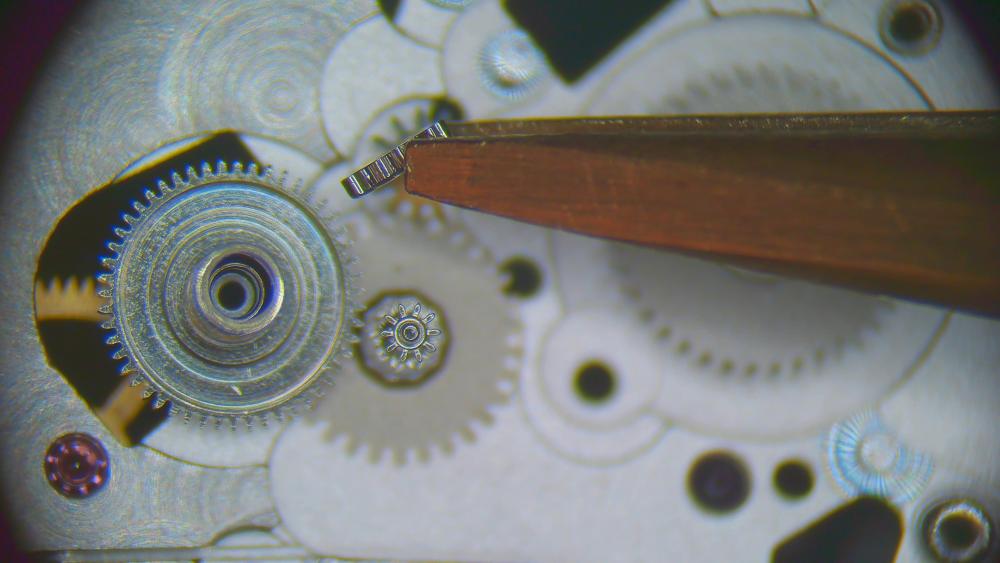
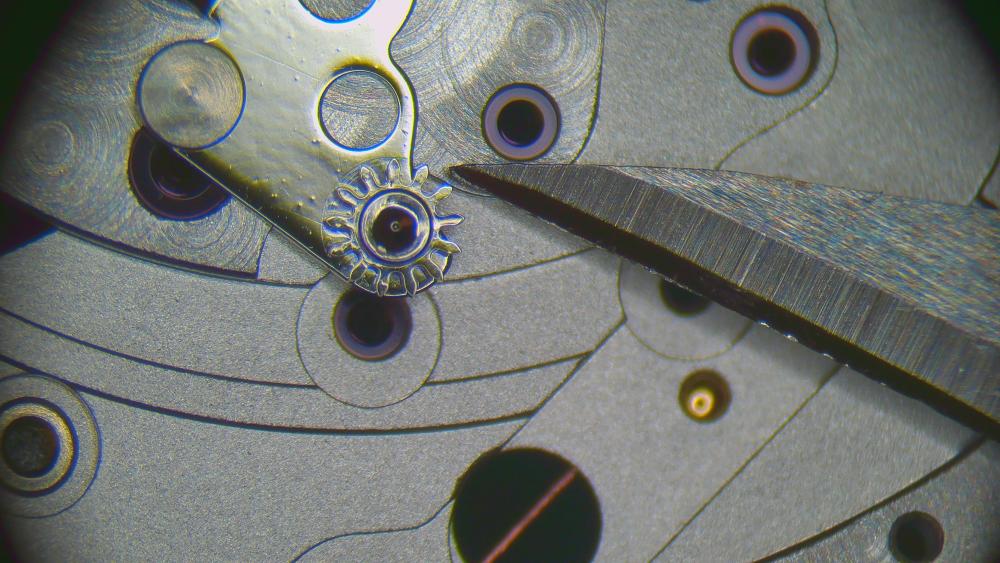
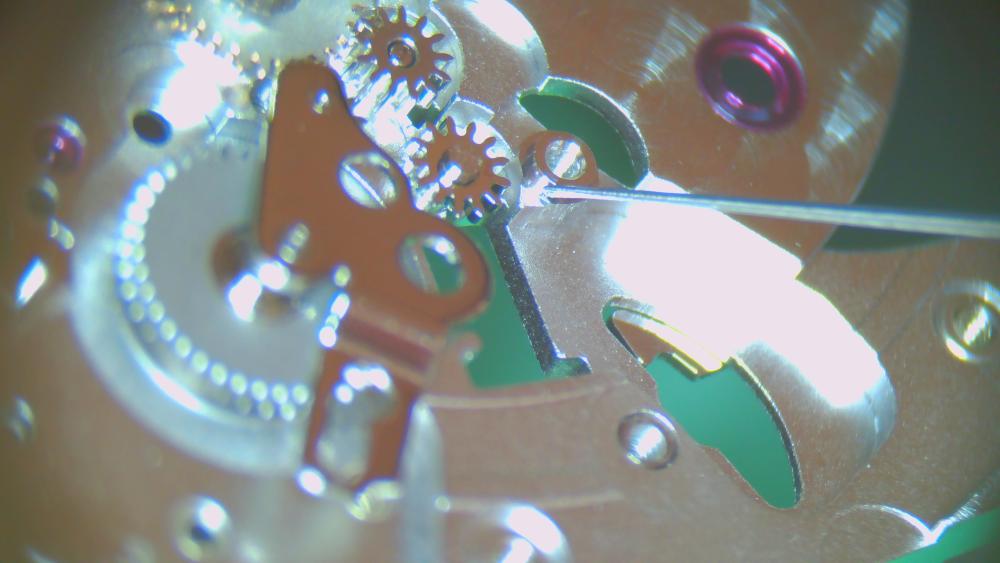
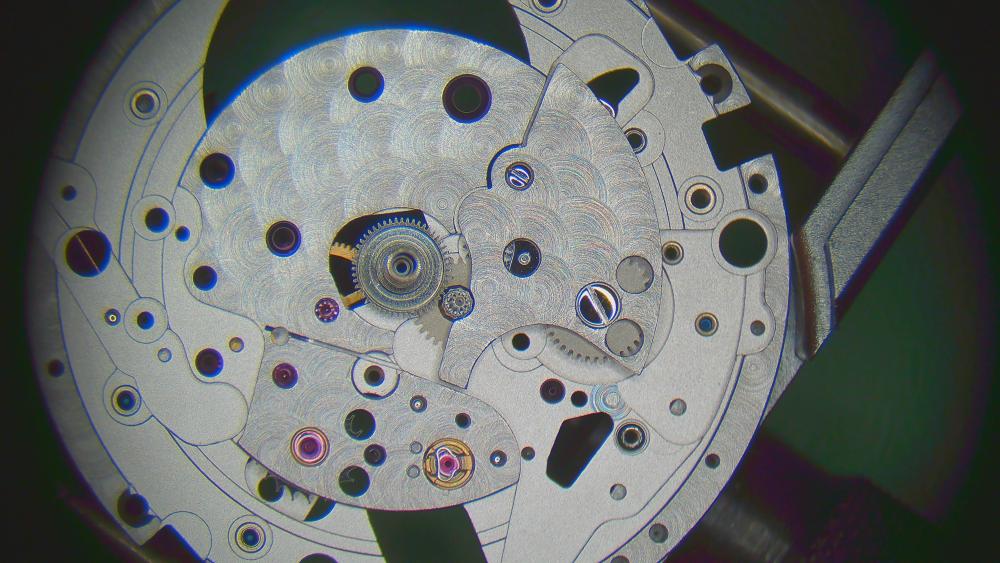
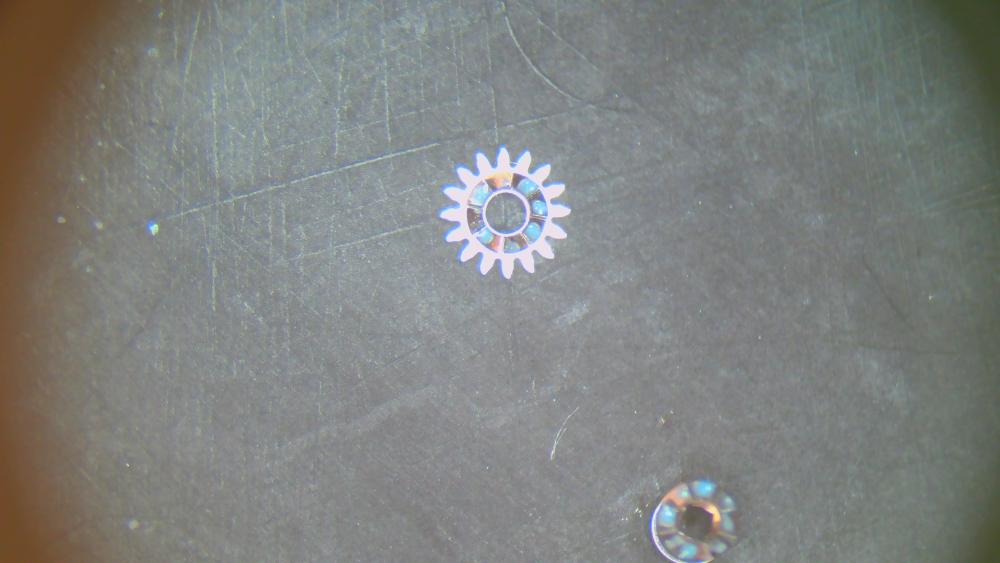
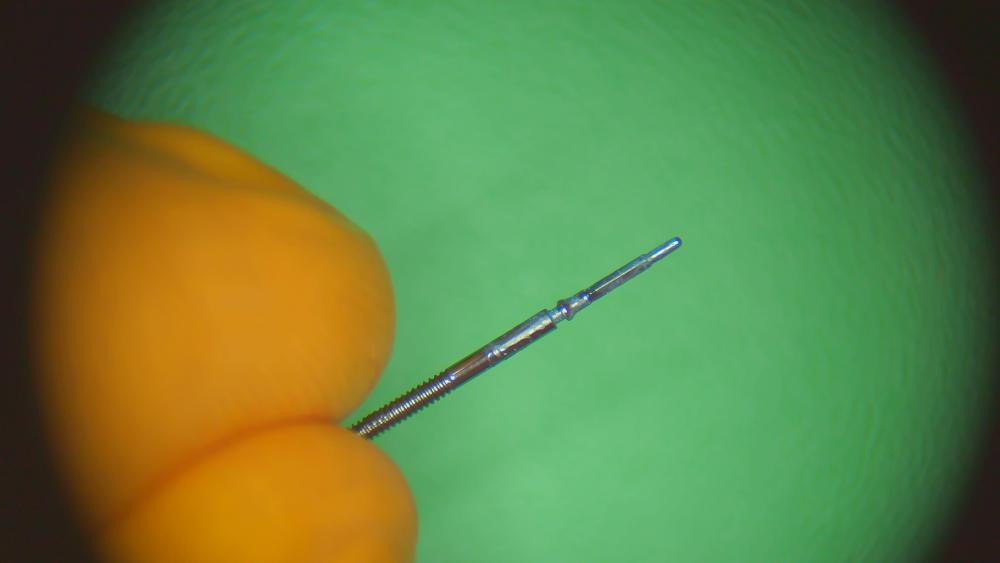
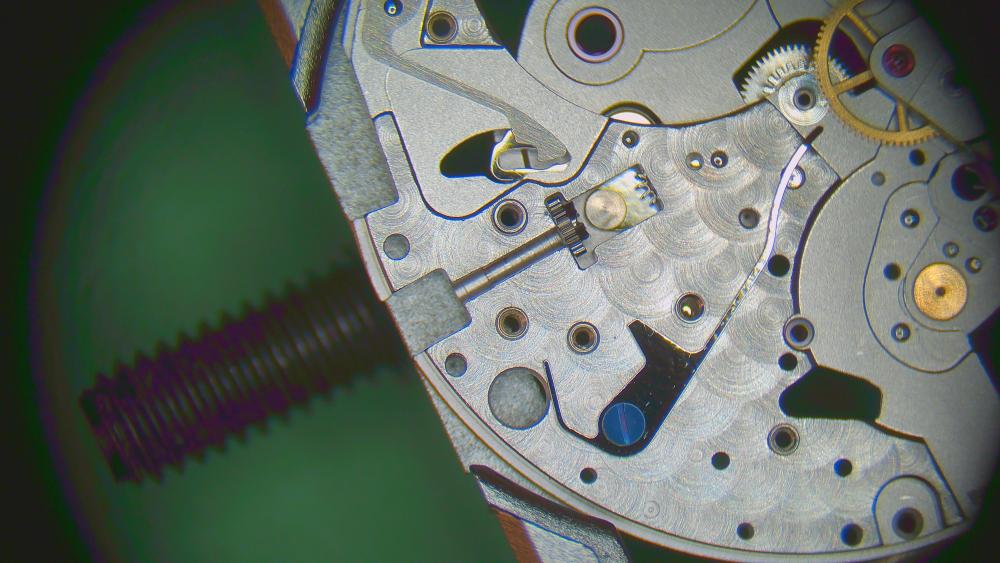
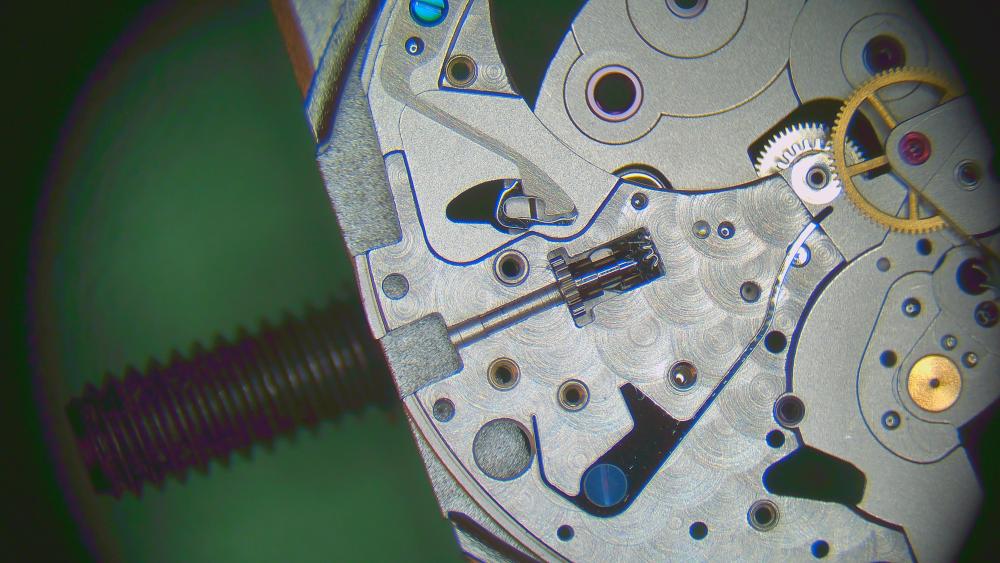
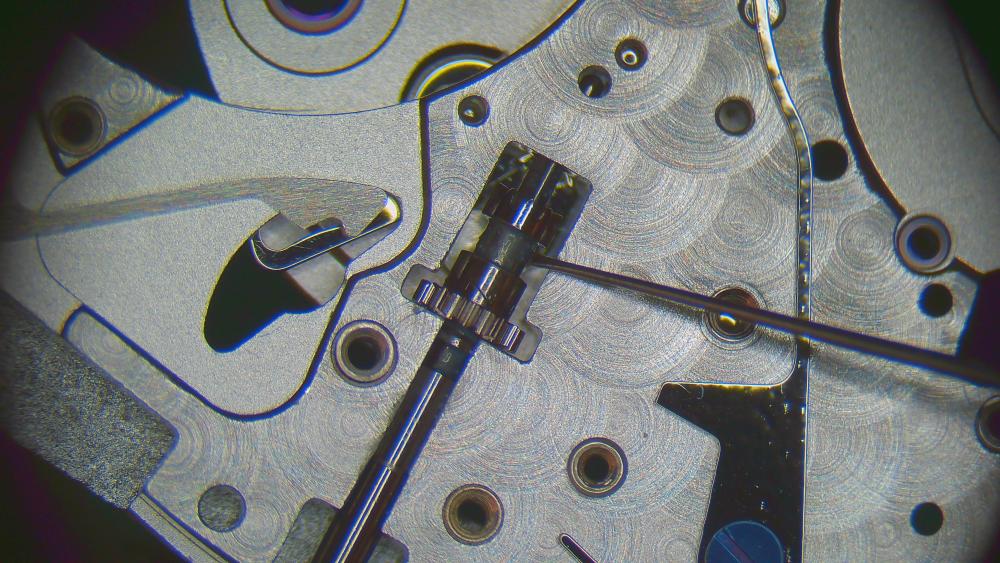
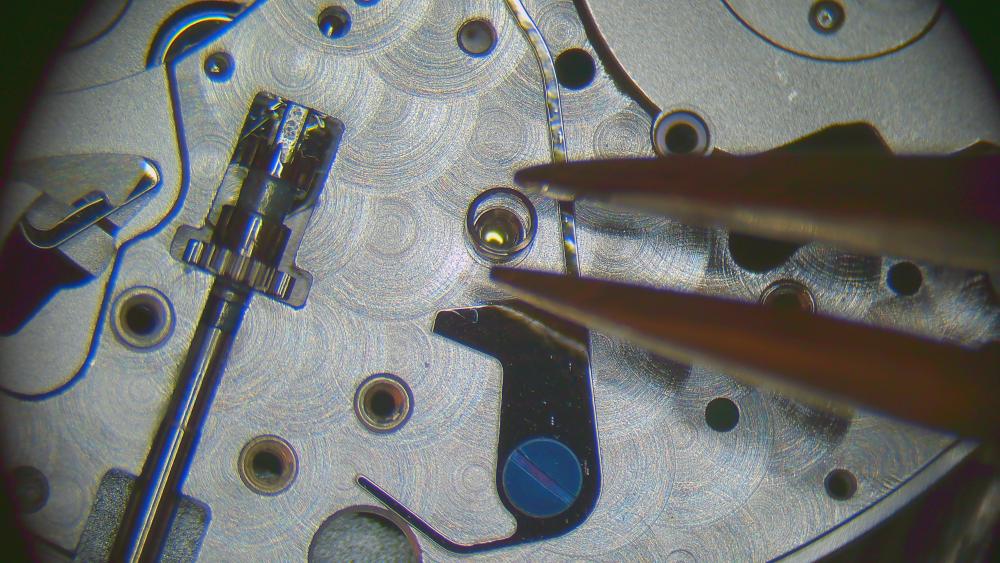
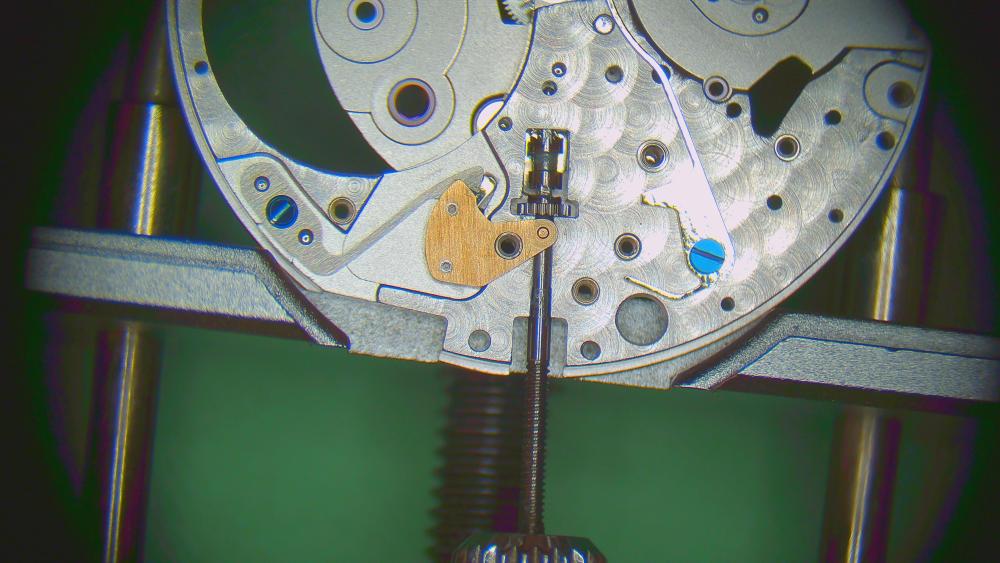
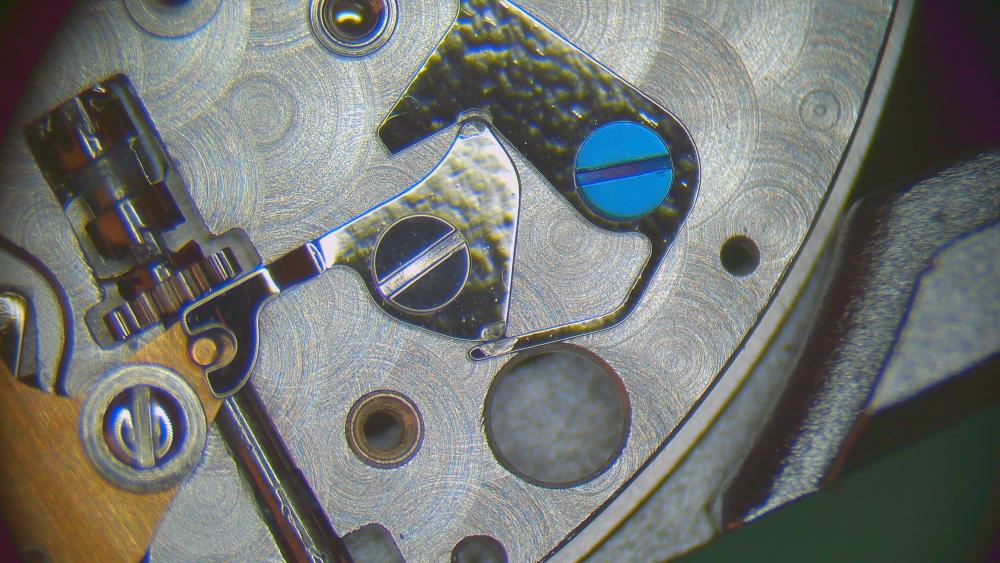
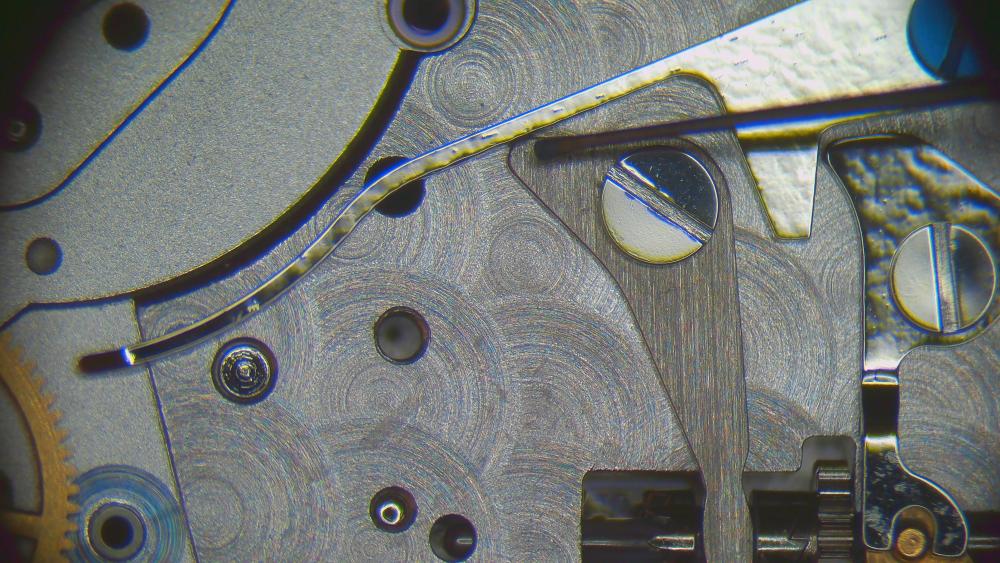
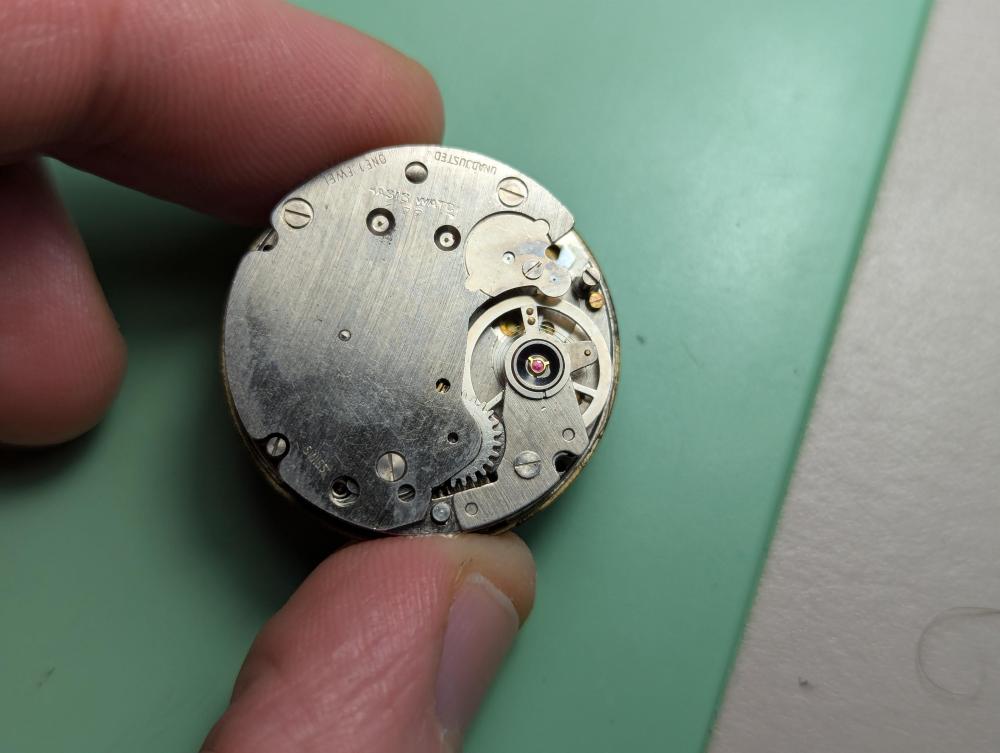
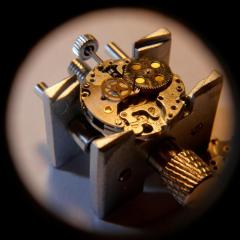
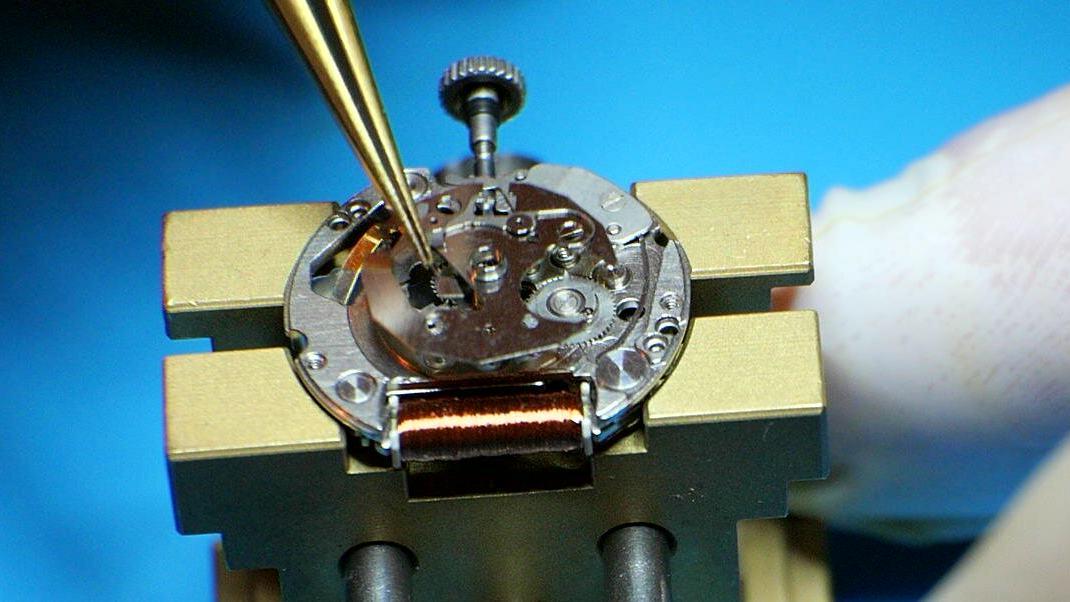
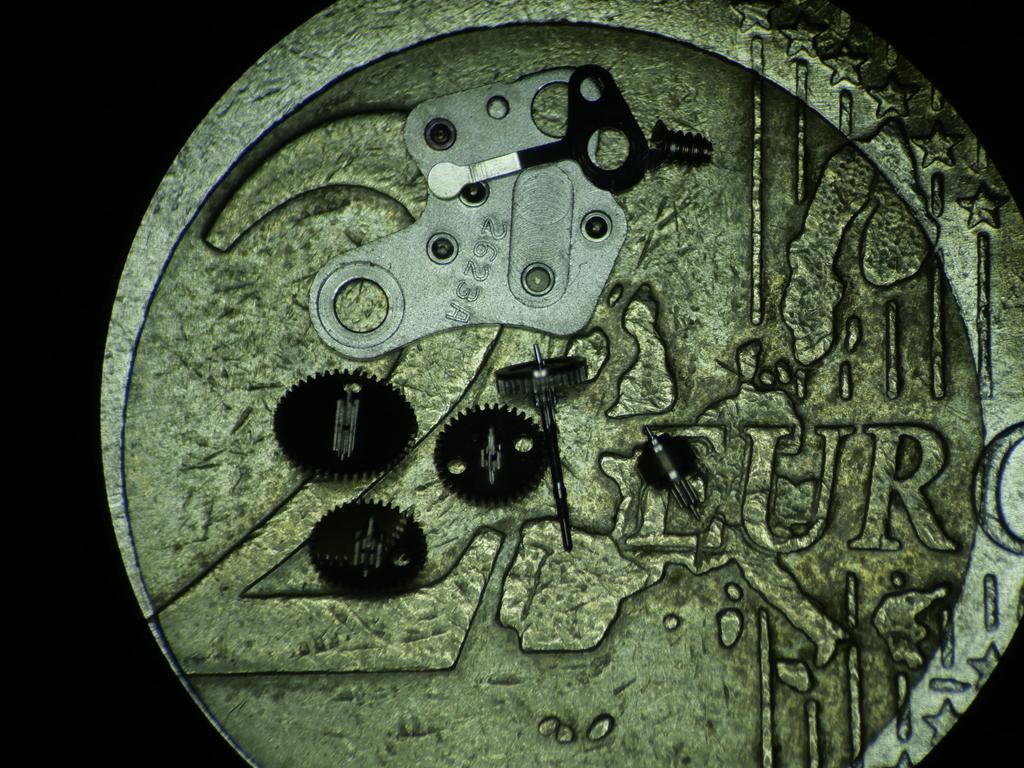
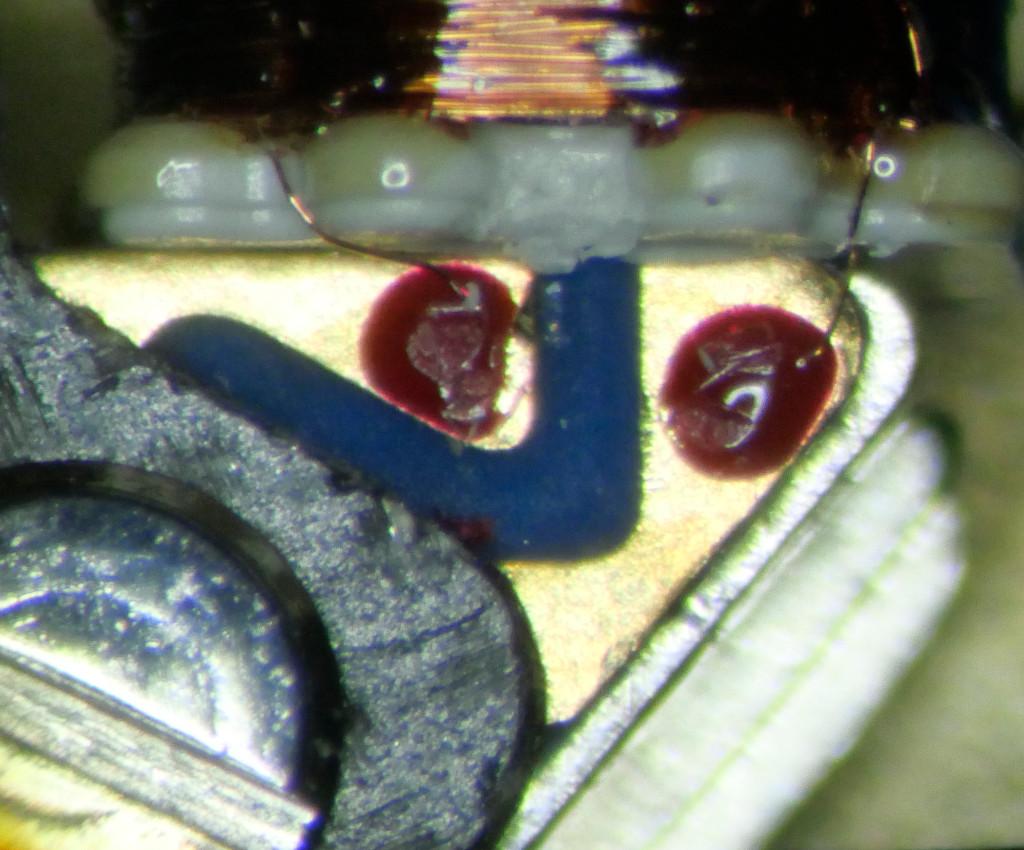
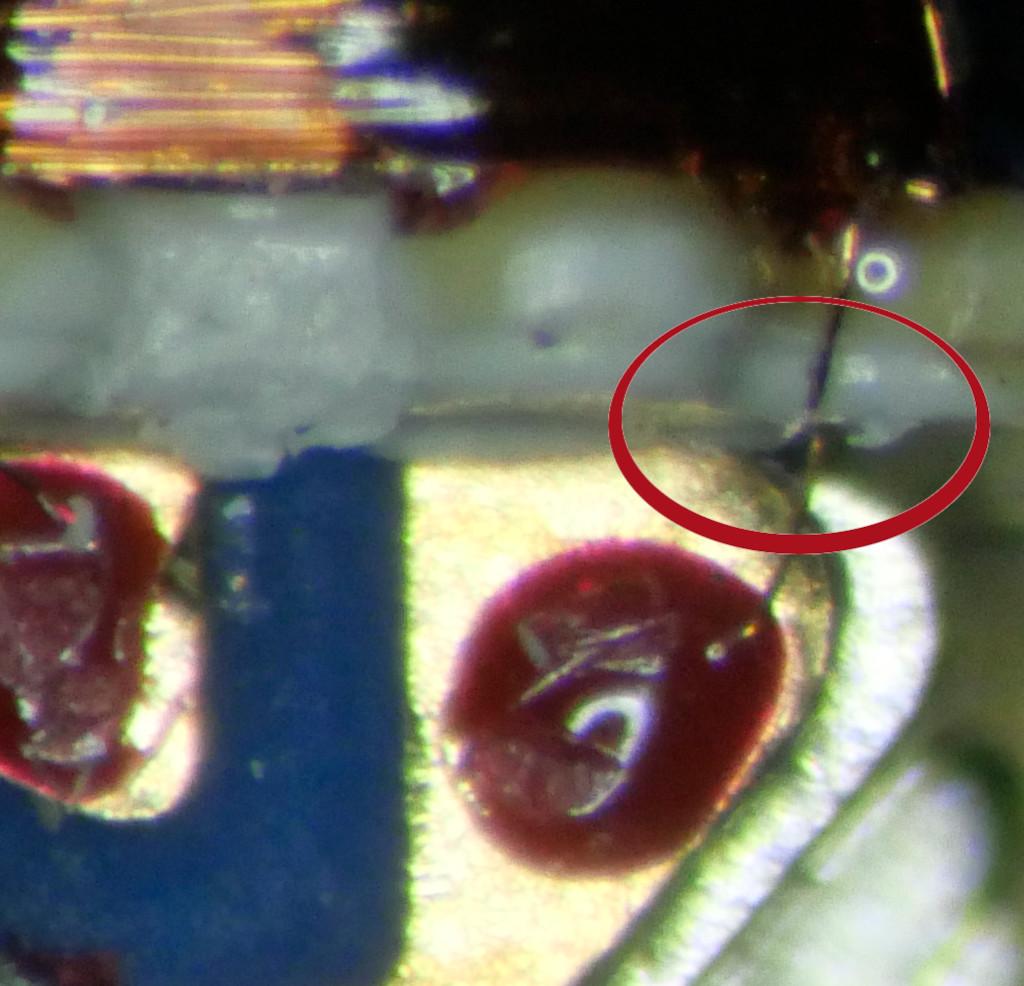
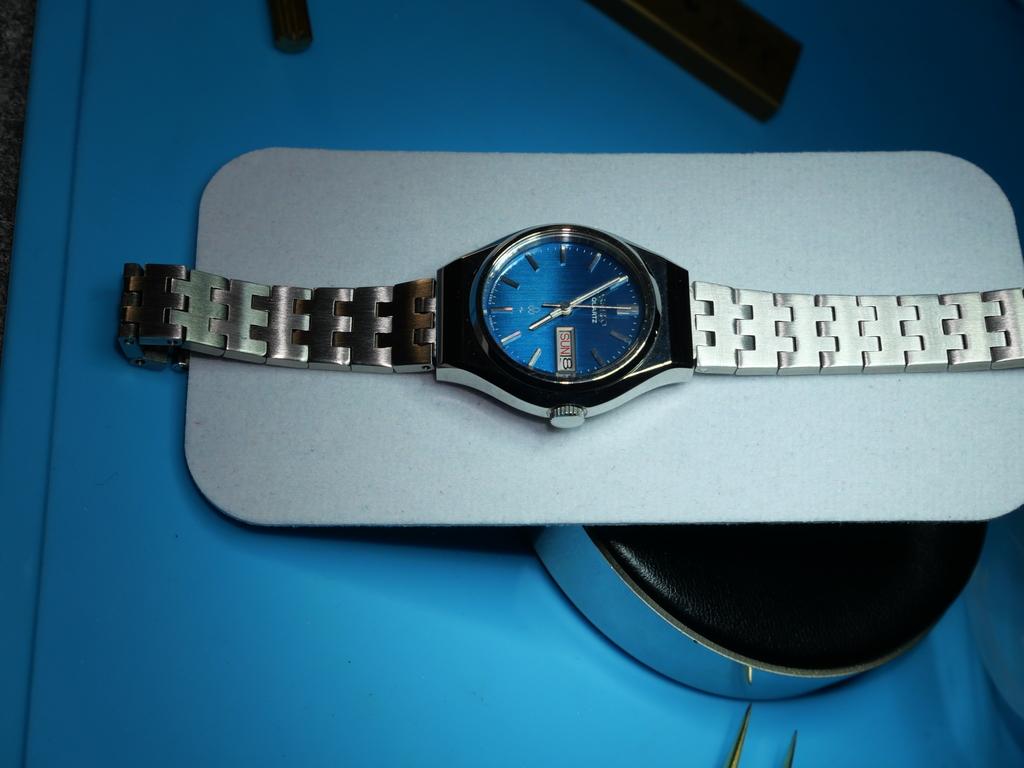
Sorry for not posting so often, I began a year ago, worked on some Seiko 2220 chariot, hi-beat 5740C, more using my little time to practice than to try to write on a foreign language since I'm not so fluent in english. Also my apologies for my cumbersome english As computer scientist, I worked on tools to document and follow my work (a kind of personal and private blog). I plan to publish a simple tool to calculate some data from timegrapher measurements. That said, here is my latest project I finished today. Since I planned to gift a watch to a lady in my family, I searched for a long time a nice Seiko (I'm mainly focused on 1970's Seiko) and finally found a beautiful 2623-0080, with a wonderful blue dial, unworn, from 1978 ! I trained myself on one of this kind of movement, a diver, and knew the challenges. For me, the difficulties resides mainly in the magnetized rotor and the tiny gear train with its bridge. I assumed that the lubrication requires some common sense and I had a look on a quartz ETA oiling chart. So I started doing the service, almost confident. It was an uneventful clean-up. Everything was very clean, the screws were untouched, only some old grease and oil in contained spaces. I could imagine that the oil was just in god proportions, never touched, right from the Seiko's Daini factory. (the gear train on a 2€ coin, the magnetized malicious rotor a bit appart, on the "E" of Euro. It took time to set the scene of this picture) No noticeable problems, until reassembly... When I finished on the back side (côté ponts), I put in a battery... And nothing moved... Not the slightest sign of life... And we're only a few weeks away from the deadline Hopefully I had other movements on this kind, and that's how I started debugging. Quickly I found the issue : Do you see it ? Great ! Yes, just here ! I don't know how I made that, but I'm sure it's my mistake. I (should) always do a thorough diagnostic and (should) take notes on everything I can notice. As I've the continuous improvement mindset, I have to find out how this happened. Not sure, but maybe I screwed the movement holder on the fragile part, or, less tangible, I slipped with my screwdriver on one time or another. This is how I replaced a brand new electromagnet with an old one I encountered some concerns on the other side, since I didn't worked a lot on date/day modules, which I overcame with a bit of observation and patience. Then... Finally, I'm ready to face Christmas holidays ! This is how I finished my (around) 10th project, my second and most important quartz movement... At leas until now !


 2 points
 -
As far as book recommendations, I recommend “The Swiss Watch Repairer’s Manual” by Hans Jendritzki. It is more expensive than most of the other books that are often recommended, but it won’t teach you any bad habits that you’ll have to unlearn later. DeCarle’s books are a bit dated, but contain plenty of good information. Another excellent resource, as @JohnR725 often suggests and provides links to is the Joseph School of Watchmaking, which was the textbook for the Bulova School of Watchmaking. You can find all sections of the book under the heading “Joseph School of Watch Making” here. In addition, I’d recommend the YouTube channels “Chronoglide” and “Watch Repair Tutorials”. I hope that helps, Mark2 points
-
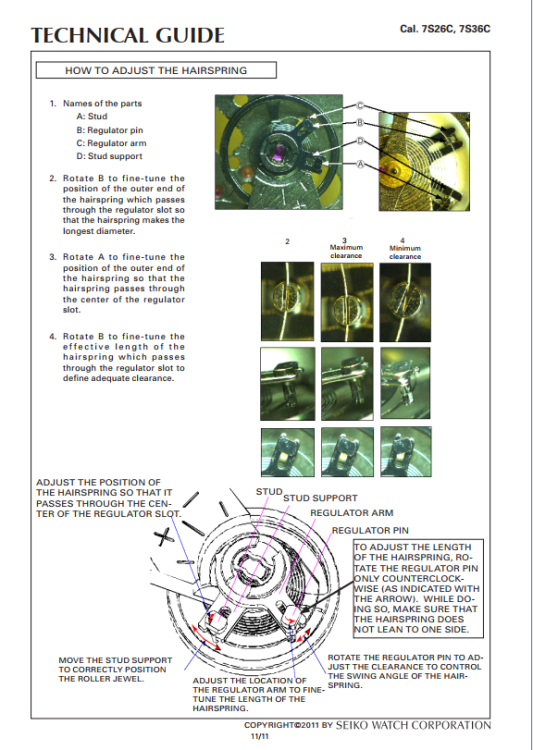
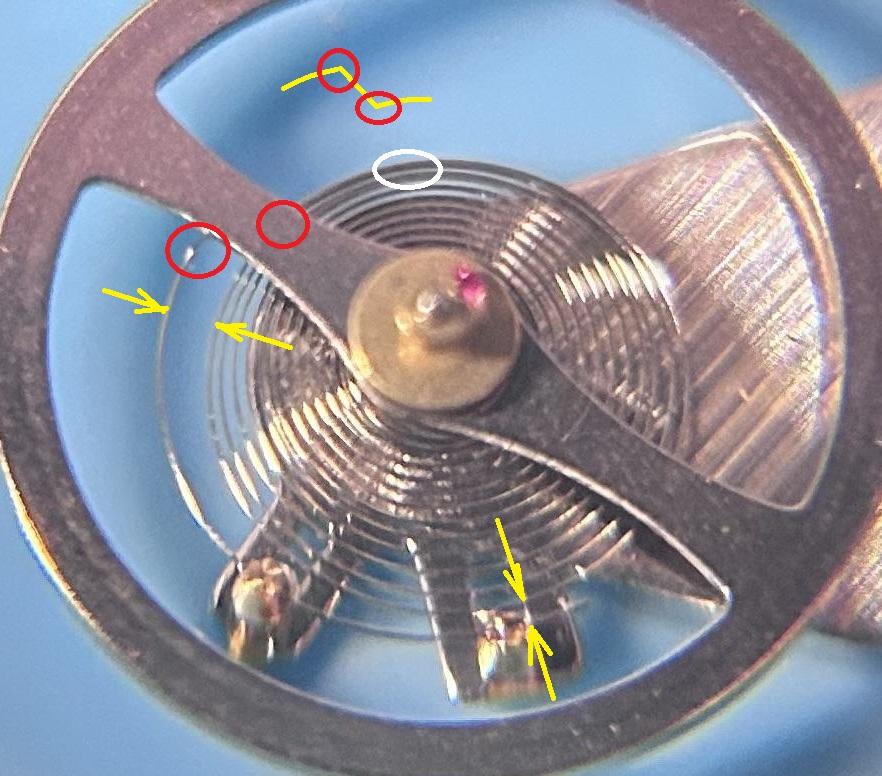
Sorry, but what are You trying to do without the jewel setting of the balance? Seems that the hairspring is a little bent, it will need rectifying. Moving the regulator in reasonable limits should not change the amplitude. I just looked at the hairspring picture in the page1. You will have to do some work with the hairspring. Two problems are seen aside from the fact that the spring is not centered. The white circle shows that two pairs of coils are stacked together. The yellow arrows at the bottom show that the spring is touching the stud. Now, the stack coils show the spring is sticky or magnetized. As the spring can not be magnetized (it is made of material that don't magnetize), magnetized can be the regulator and stud holder. This is not very probable thou. Did You check if the demagnetizer actually works? Most probably, the spring is sticky. This means that is is not well cleaned or actually contaminated by the process of cleaning. But, what is seen from the picture is that making the spring unstick will not improve it's position (the two problems) I have placed two red circles. The balance arm covers the spring there so it is not seen. I have drawn it with yellow just to show how it looks. This red circles show where You have to manipulate the spring. You have to open the angle with the bigger circle, this will make the spring concentric and get away from the stud. This will get clear in the process, but may be the angle with the smaller circle will need a little opening too. The idea is the distances shown with yellow arrows to become equal and in the same time the spring to stay concentric. Yes, this is like etachron stud carrier/regulator that can be moved, but i will advice at this point to touch the spring only.
 2 points
 -
Without a jewelling tool to press one out and one in , you wont be able to do this effectively. Klassiker's suggestion will get the watch on your wrist, you can cope with it being temporarily non original. I like it though, you think like me and want to keep the watch as it was made, I'm not a big fan of part swapping although I know it is often the only option for amateurs.2 points
-
I can assure you...you can do it fella, but it will take some mental and physical adjustment to develop the ability. It is perfectly doable. So my trade is construction, I've gone from sledge hammering into position 600kg RSJ s to cutting the hub off a balance staff on a balance assembly. Its quite amazing what we are capable of.2 points
-
Just think of it like it's something as a deposit return scheme . You'll get it back if you ever decide to sell it..2 points
-
I haven’t used them in anger yet but I and a few others here got 0.01-1.00 mm pin guages from Aliexpress for this. I think that would be easier than a microscope insert. Tom2 points
-
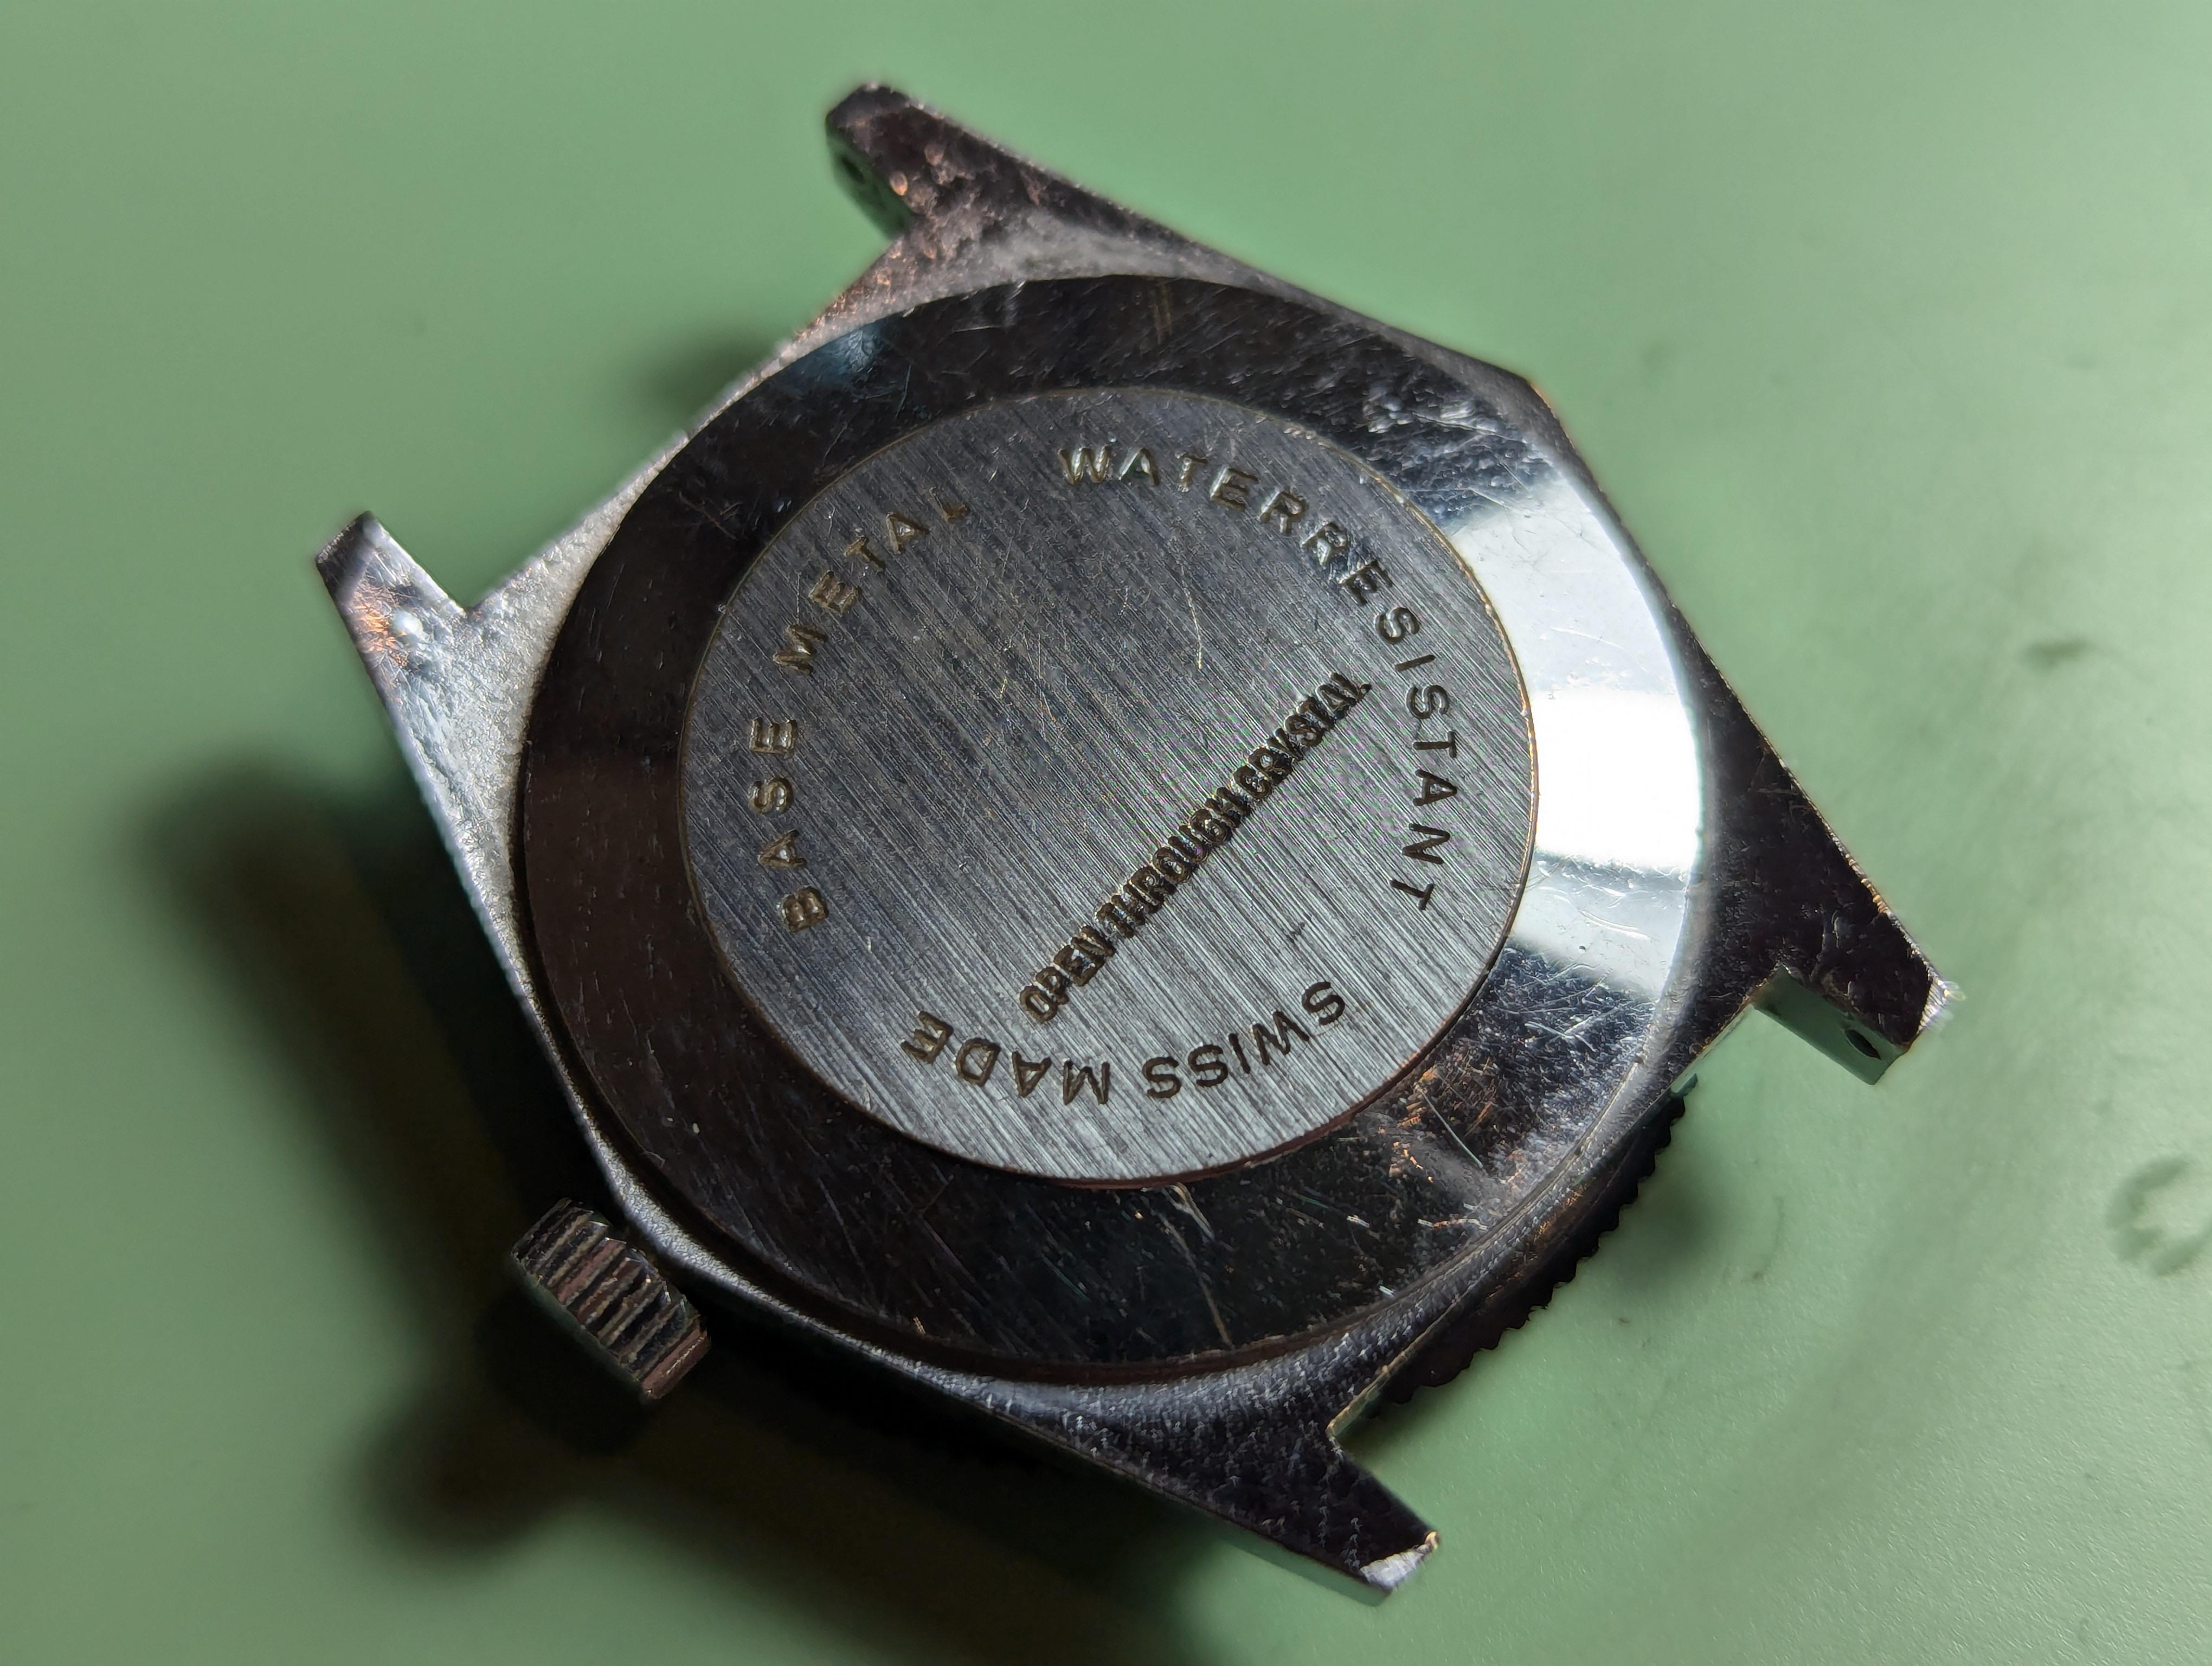
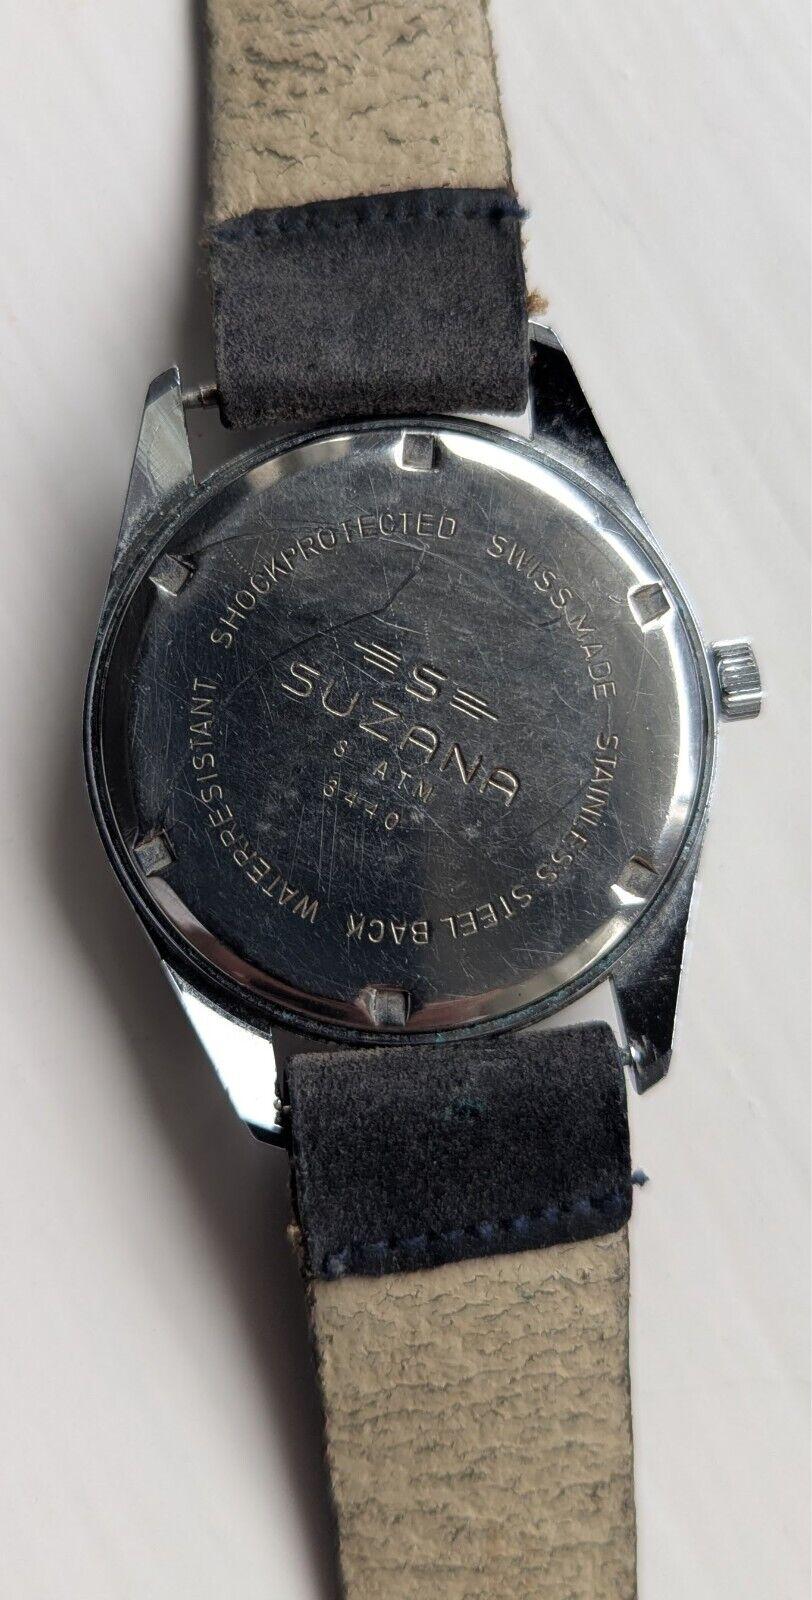
This little beauty is on its way. It is apparently "working", which is always a bonus. It just didn't quite make it into the 404 club, but easily qualifies for the 1010 society. I have no idea what is in it, but it does at least claim to be Swiss and 17 Jewels. I'm going to guess its an EB880, but place your bets ladies and gentlemen. EDIT: Well 'aint that curious in light of the current situation.

 2 points
 -
Really regret to have to disappoint you all Not this mass produced dial was made by Guilloche but the die was. Guilloche will not produce tiny pits, separated by crossing walls - but the contrary in the die will. Frank2 points
-
This dude Bartosz is amazing. Bit of a renaissance man judging from the breadth of topics on his blog... https://ciechanow.ski/mechanical-watch/1 point
-
Have a look at this. https://connoisseuroftimewatches.myshopify.com/collections/dorex/products/1940s-swiss-vintage-professional-sporting-telemeter-mens-chronograph-watch1 point
-
Thanks, I'll look into this a bit further. For now, as I'm still waiting for a new mainspring, I started assembly with the keyless works. First, I still need to disassemble the canon pinion A scalpel slid between the parts and it came apart easily. Through the cleaning machine again.. Then 9504 on the shaft and a bit on the base Pushed together on a hard flat surface with hand setting pushers. The excess 9504, I'm removing with Rodico. Oiling posts with HP1300 (wider parts, top and bottom). Canon pinion and minute wheel need to go on at the same time. A bit fiddly. I add a tiny tiny drop of HP1300 on the elevated ring below the minute wheel (red arrow). More posts, HP1300. Note that the elevated ring on the plate has no purpose. The wheel goes on with the bigger side up. Remember that the rounded side goes downwards. Post for the rocking bar, HP1300, small amount, careful spread around the post. Oiling the riveted wheel on the rocking bar is a bit tricky. There's not enough space for even my smallest oiler to really get in-between... so I use a scalpel. A bit messy. Rodico for some cleaning. The three positions of the rocking bar. 1. Time setting, 2. Winding, 3. Setting the hour on the second time zone. Cover plate on. On now moving to the train side of the keyless works (interesting and unusual design). 9504 greasing of sliding/winding pinion and stem Positioning is straight forward 9504 also here. Distributing it by turning the stem. Lubricating edges of rocking bar and setting lever spring with 9504. Honestly, positioning the setting lever was very fiddly. I tried various positions of the rocking bar and I'm not sure which one finally worked.... Securing setting lever with screw and then the stop operating lever. Greasing (9504) the touching points with the hacking lever, then removing excess with fresh Rodico. Placing seat for yoke. Note that there's a top/bottom side. If it doesn't place easily, don't force it, just turn around. Carefully spreading 9504 around the hole of the yoke (since this doesn't turn 360°, I make the effort to spread it out). After positioning and securing the yoke, I also observe and grease the touching point between yoke and hacking lever. That concludes the keyless works.


 1 point
 -
Not this type really, It's not something I would attempt, I'm sure there are those that do and certainly did do it without a jeweling tool. Friction jewels do need to be positioned accurately and set to the correct depth required, which is why the jewelling tool is used and was created, amongst its other uses.1 point
-
Great staking set! I have the exact same and love it. Congratulations on an excellent buy. Is the jewel aligning with the metal? If so, maybe you could. If it's not, there's no way you can control the depth of the jewel with the staking set. I've never used a staking set for jewelling, but I think I've heard others do it. But obviously, a Seitz or Horia jewelling tool should normally be the safer choice.1 point
-
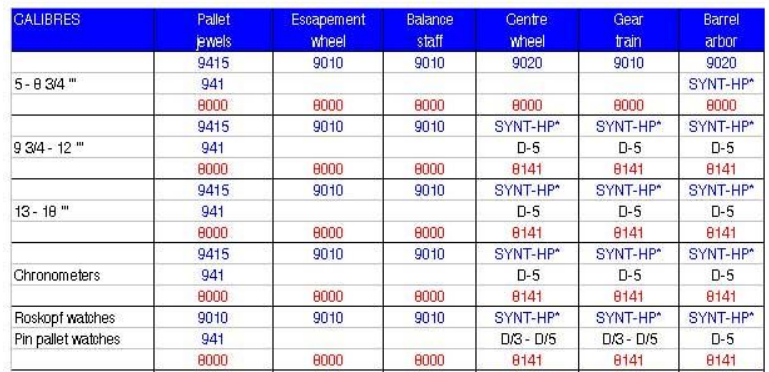
Hahaha, never a place where a Monty Python reference don't work, innit? Well, as @JohnR725 wrote and as @mikepilk diagram shows, 9010 is usually considered too thin for centre wheel and maybe also the slower of the train wheels. The issue with that is that it's easier for 9010 to creep away from where it's supposed to be. In my opinion (and lubrication is always contentious), an HP oil (mostly HP 1300, or D5) should be used on the centre wheel. And I usually use thicker oils like 9020, HP1000 or even HP1300 on the 3rd and 2nd wheel as well. But it's contentious. I have a service manual for Rolex 3135 and 2nd/3d wheel are HP1000, whereas a JLC 899 manual prescribes 9010 for those wheels, too. Escape wheel and balance always 9010. Anyway, if we focus on your specific problem of this watch which is rebanking (=too much amplitude): here we can either take a weaker mainspring or use heavier oils (i.e. HP1300) for the train wheels.1 point
-
Pocket watches can present interesting challenges depending upon when they were made. In other words in the early days of watches they were trying to get around patents so I have clever methods of doing things and clever is not necessarily in your best interest of your learning watch repair. Then Waltham has some interesting mainspring barrels with the word interesting and not really being good for the watchmaker. It means typically after slightly modify the mainspring otherwise it's never going to catch but it depends on which Waltham were discussing. Is actually quite a few things to see on the site including. Basically a U.S. Army training manual of watch repair which hasn't really changed much since 1945. 1945 TM9-1575 War Department Technical Manual Then if you have a choice go for the older editions as it tends to cover things like making stuff where the later addition doesn't. But any addition is still outstanding to have.1 point
-
The great thing about this place is the diversity of backgrounds and experiences everyone brings which gives us ideas of how to accomplish stuff in a variety of ways. Tom1 point
-
@Neverenoughwatches iirc you got the lathe itself pretty cheap Rich, adding a good selection of collets will put the total value way over the purchase price for both. Tom1 point
-
I found this book very good to kick things off maintaining and repairing mechanical watches, a practical guide Mark W. Wiles ISBN 978 1 78500 155 0 this is a more modern book, 2016, and is well illustrated with good photography and a few of us have recommended it here. I would also recommend our host Mark’ online courses. These are inexpensive and get to the heart of servicing and repair of movements. Tom1 point
-
How were you regulating it? Did you turn the regulator pin? If so, you may just need to turn it back.
 1 point
 -
I know I know I know. A year ago I assumed I would never ever reach a point or skill level where I would need a lathe, but I admit I have been shopping a little and doing the background research. Still, jacot tool comes first and maybe then a microscope. I don't have the money for this stuff but ...1 point
-
It may be galooping (overbanking?)1 point
-
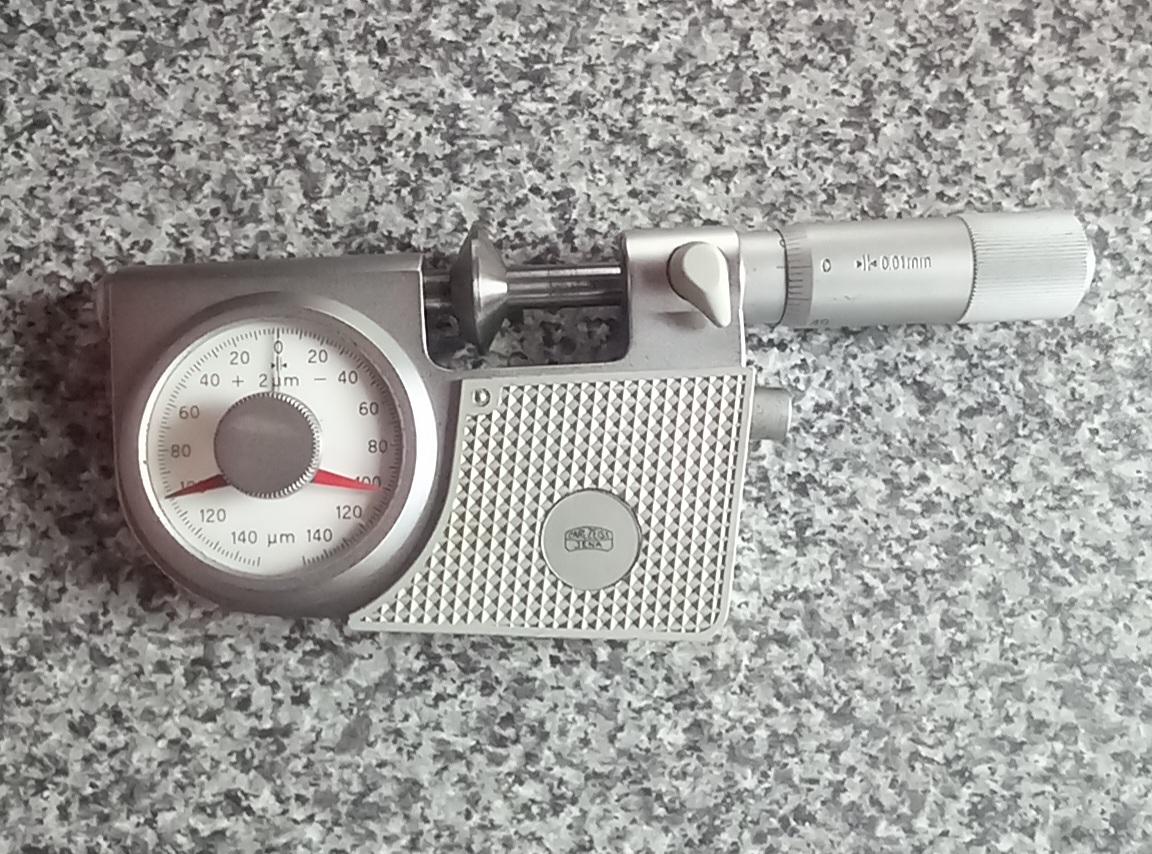
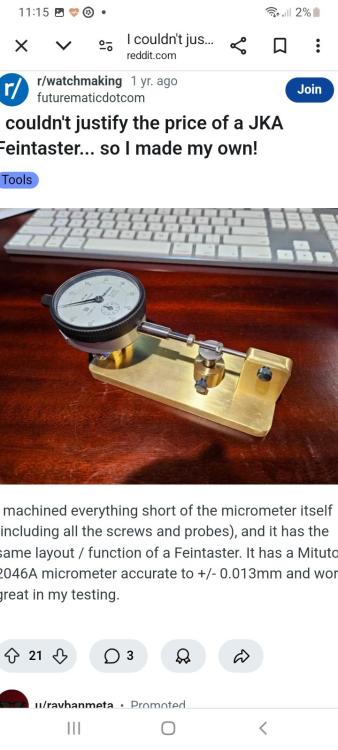
Thought I would post this up . It just came in the post this morning. As we can see a micrometer so no mystery item today, but a nice quality measuring device I picked up on Ebay, I was drawn to it, as it had a feintaster feel about it. Wether I can apply it to watches I'm not sure yet, but I could probably make a holder and a part platform for it. This will measure to single microns, so thats pretty cool, and as it is, it's right on the money with the gauge zeroing down to 1 micron. Below that is a guy thats copied a feintaster design and made his own with what looks like a dial gauge. Correction not single microns, as the dial markers increment to 2 microns, still pretty cool though

 1 point
 -
I do not intend to become a YouTuber, but if I ever did my channel would be called "Mistakes were made" and would be principally about my stuff-ups, what I learn from them, and how I recover.1 point
-
Hi Andy Is that one a DIY or purpose built. It looks professional built. The cheap ones made in India by Rohan industries were cobbled together poor soldering and wiring. Always interested in tools. Who made the one shown . Hi. Attached is the training manual supplied by Witschi regarding both mechanical and quartz watches. witschi_training_course.pdf1 point
-
I rather suppose: simply stamped with a die. Frank1 point
-
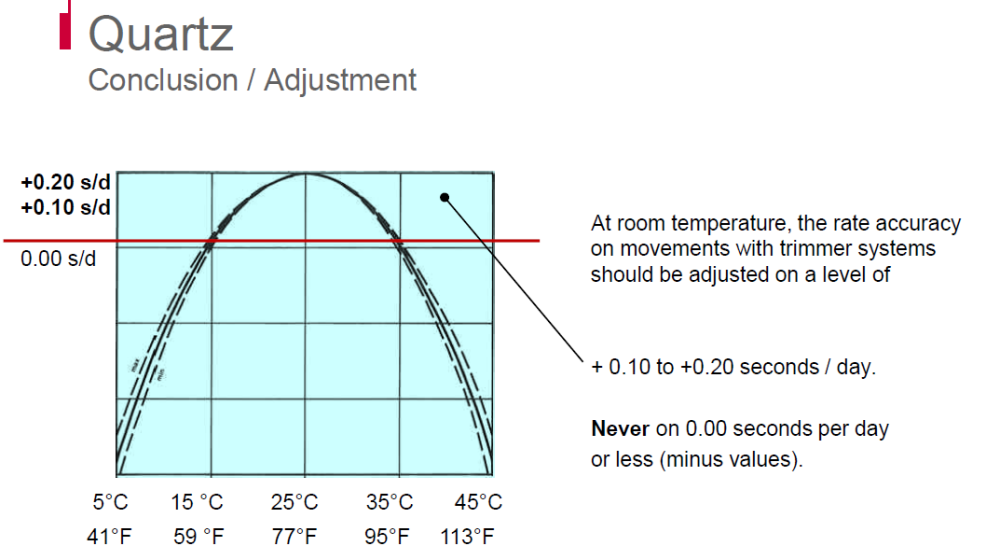
Interesting because? I'm attaching specifications of Omega quartz watches because we have nice specifications for quite a few watches and we can work out a approximation of what a quartz watch can and cannot do. So excluding the best timekeeping and one of the extreme worst the majority of quartz watches keep time within -9 / +15 Seconds per month. Then your timing machine has a problem as well let me give you something that witschi has the commenting on the effect of temperature and did notice when they give a suggestion of rate it's in seconds per day but it is a fraction of a second. You run into several problems first most quartz watches no longer have trimmer capacitors to adjust you cannot adjust the rate at all. Then whatever you're comparing You are quartz watch to has to keep time better than the quartz watch by quite a bit. Then were talking about seconds per month fractions of a second per day and measuring fractions of a second per day is not impossible but in the case of the quartz watch would be impossible. Typically a quartz watch would step once per second which means you cannot break its accuracy down to less than one second. Mechanical watches typically at 18,000 beats per hour there secondhand step five times per second and you can get a fractional seconds. So can you regulate your quartz watch yes if it as a trimmer and if you want to take months to do it. 8641_WI_18_QUARTZ MOVEMENTS - TECHNICAL CHARACTERISTICS E cousinsuk.pdf
 1 point
 -
I too hope to someday acquire highly sought-after tools by accident.1 point
-
They are a pain. I used the chisel end of peg wood to stop them flying and a cheap oiler to get under the spring end. Using a tweezers on both ends at the same time to compress can apparently break them. They have a tendency to be old, so are prone to breaking anyway. I bought a small number of Raketa watches for parts after breaking a couple. I believe I saw a suggestion as well of leaving them in place, cleaning the movement as normal, then oiling with an automatic oiler or oil the chaton with a standard oiler and push the oil through with a hair from the back of your hand, or a special tool for the job. Good luck1 point
-
It is correct, confirmed with a slow-motion video and when it knocks it is easy to hear. The thing just has very high amplitude. If I open it again I'll measure the mainspring, but there was no evidence the movement had been disassembled before. Plate screws were factory tight and not a mark anywhere on it.1 point
-
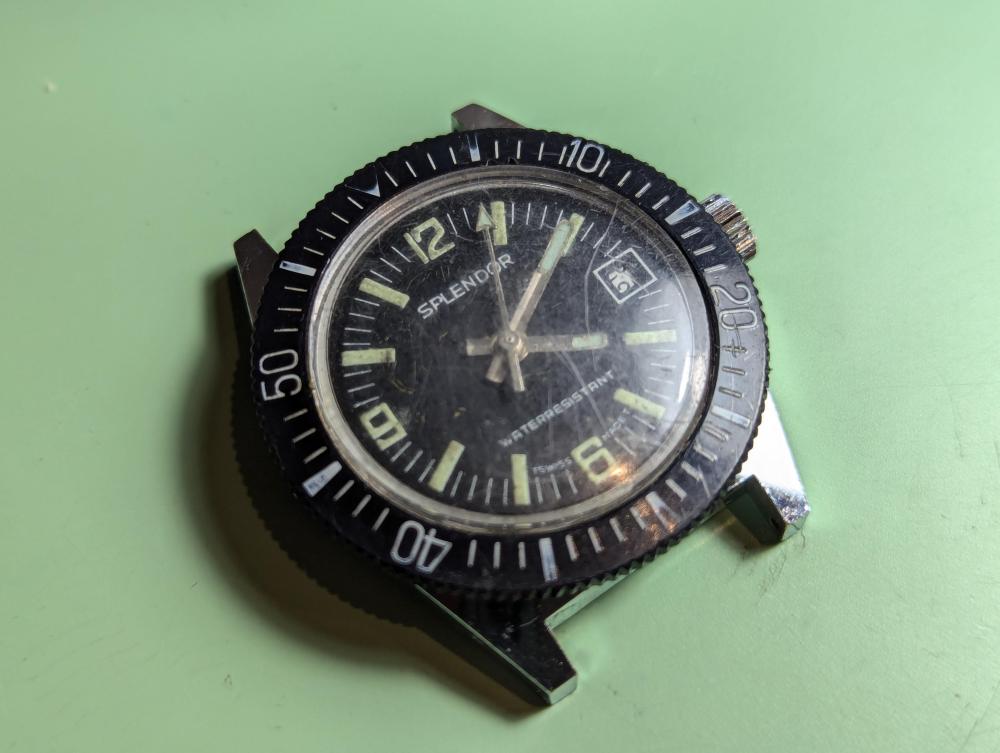
I've been sitting on an Autocrat for over a year, it needs a balance staff after I replaced some jewels but the one I installed initially is incorrect and I have not returned to it. Finally a worthy contribution: $10 US, a "Splendor" skin diver in a monobloc case. I was hoping for an EB8800 movement, but could tell by the slow calendar change action that isn't it. I also assumed a 2 piece stem and firmly pulled a 1 piece stem right out! But apparently this is by design? It reinserts and still works correctly. Also expected a tension ring crystal I would have to blow out, but no it is a basic crystal removable with a lift tool. The dial is pretty marked up unfortunately, and the hands don't look great. The movement I expected was a Baumgartner 866, but I'm not sure yet what this thing is. Edit: Ah, the movement must be a Brac 500 series something or other.

 1 point
 -
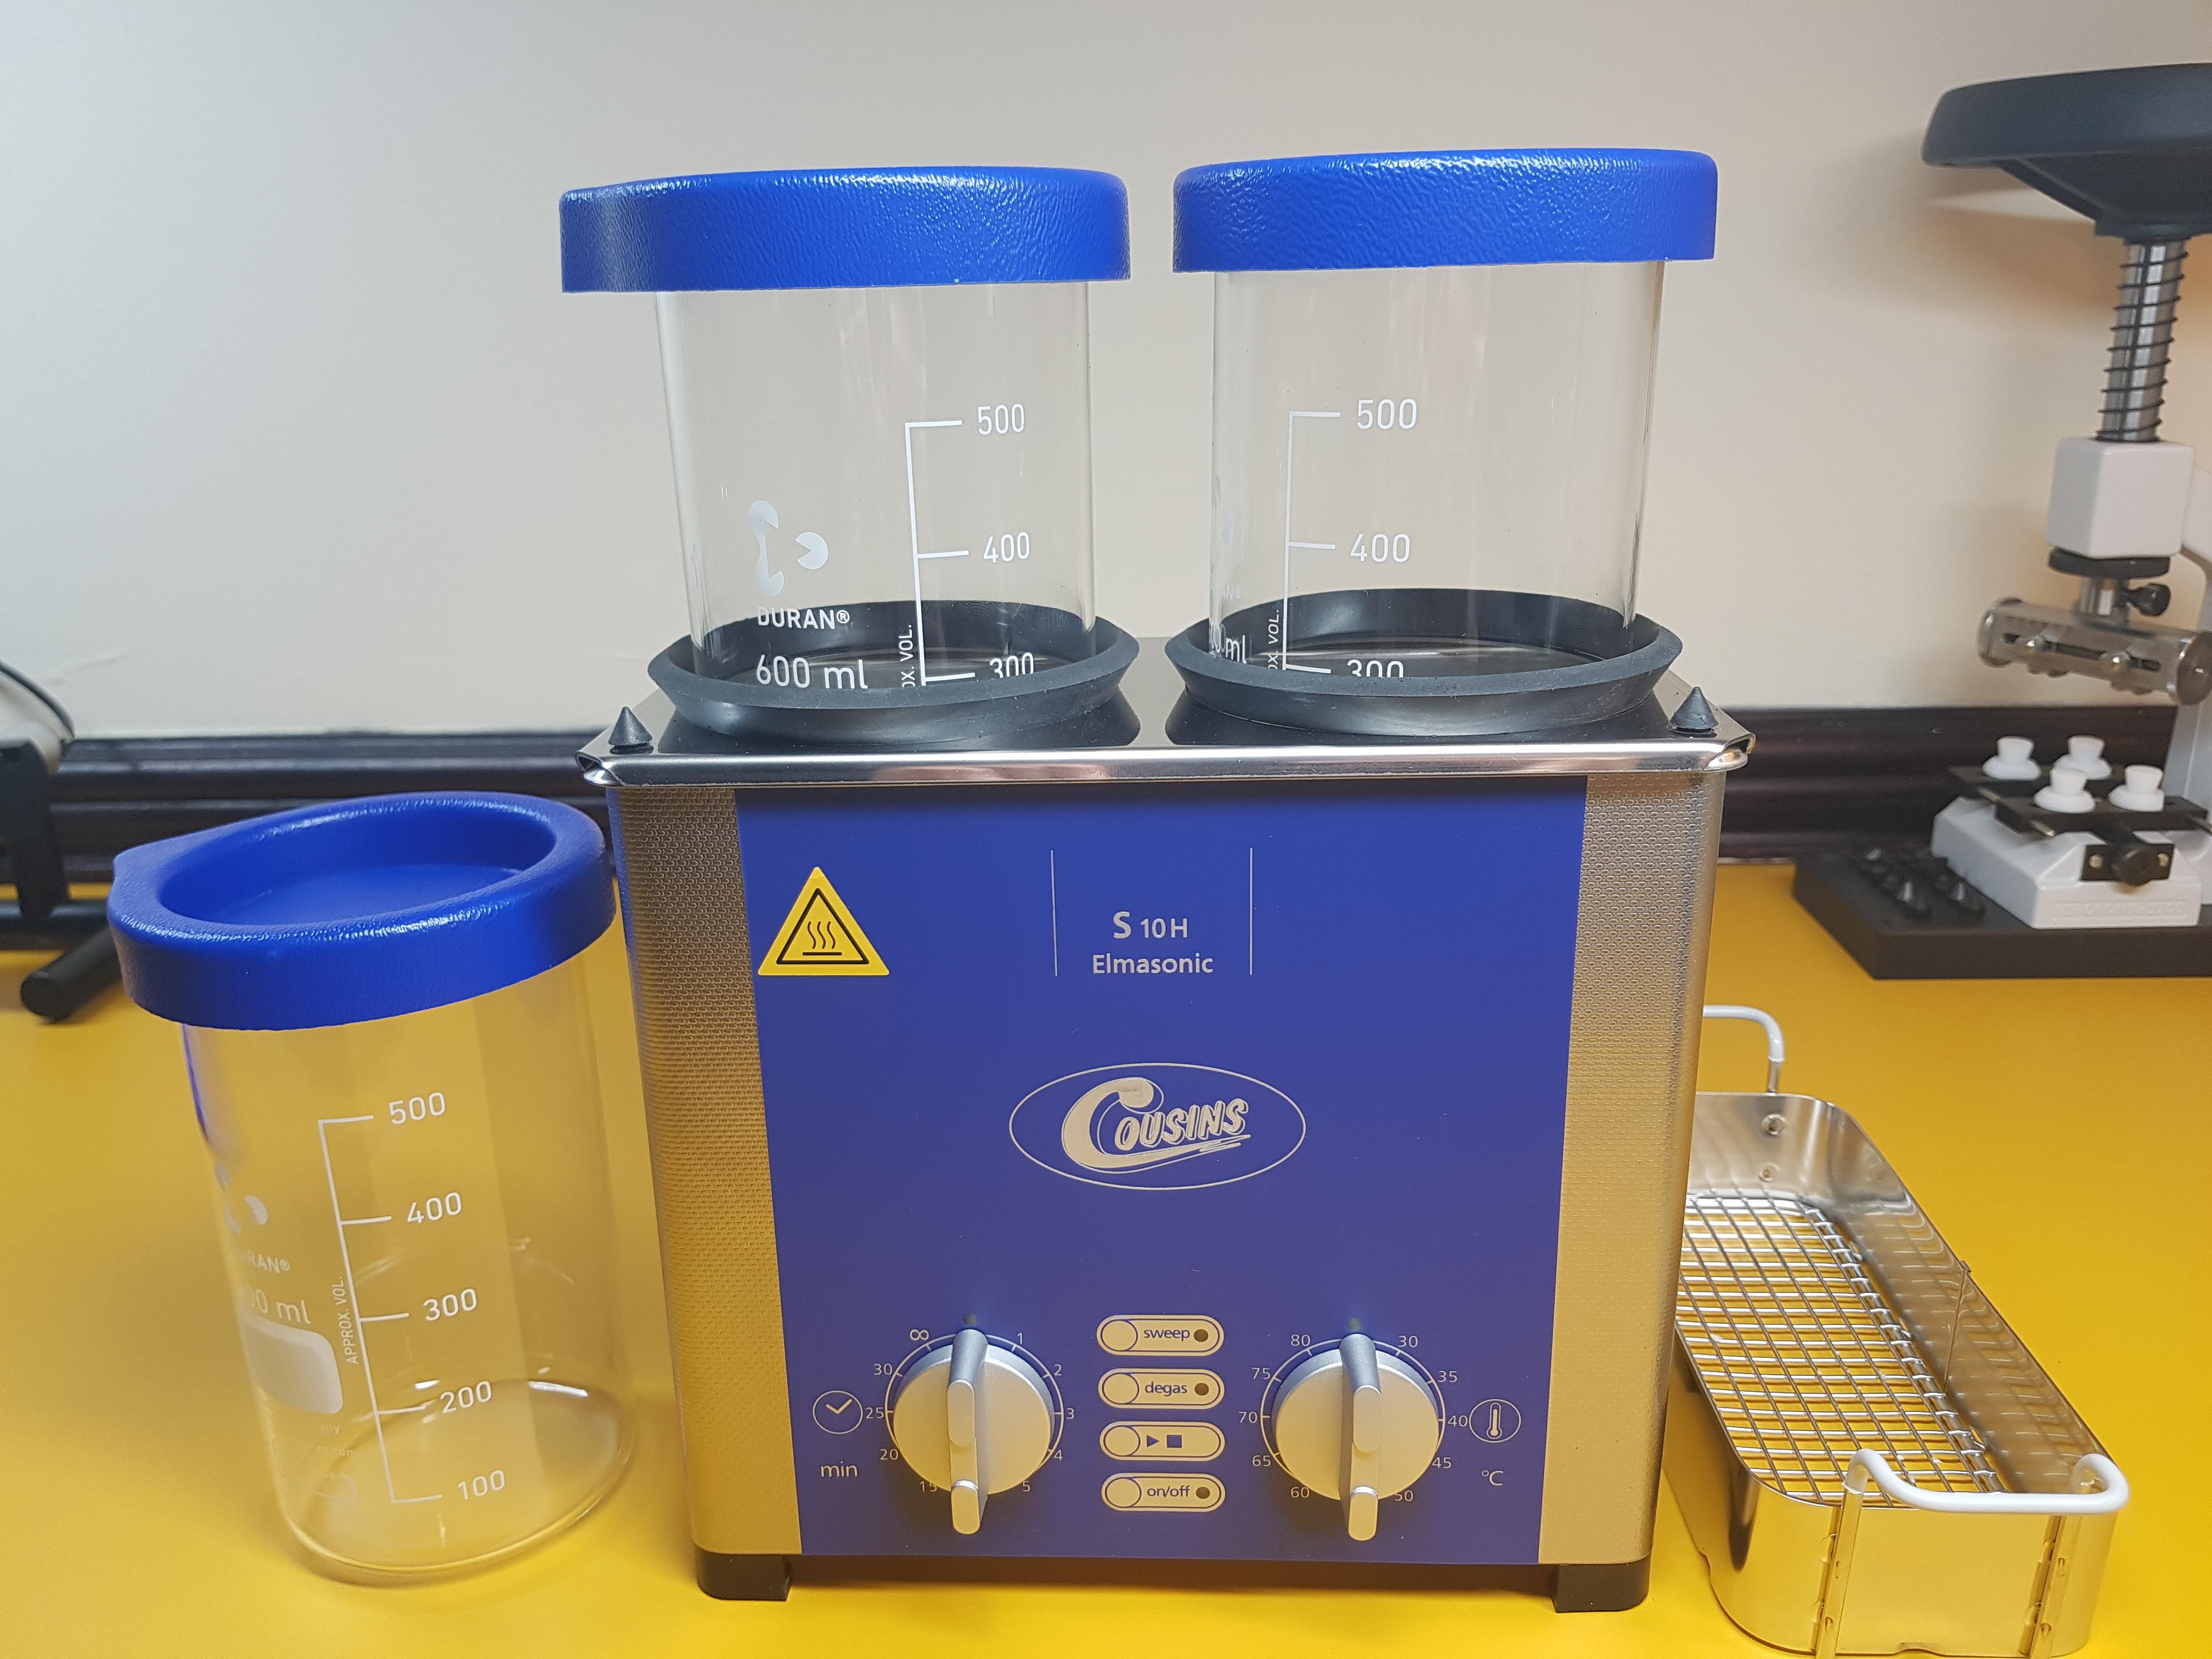
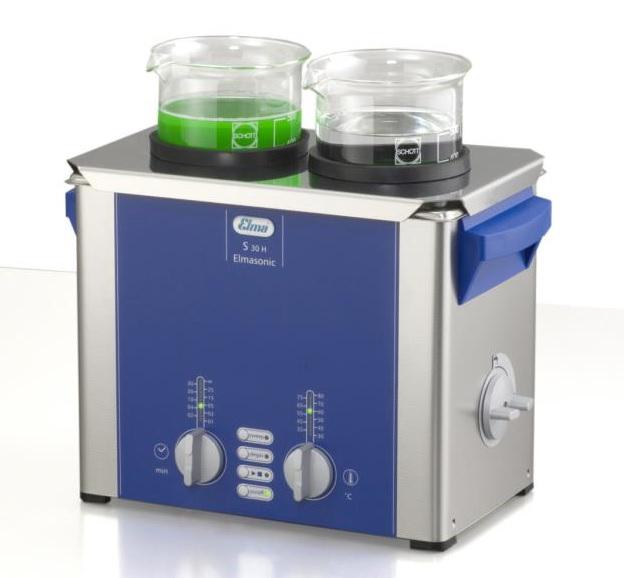
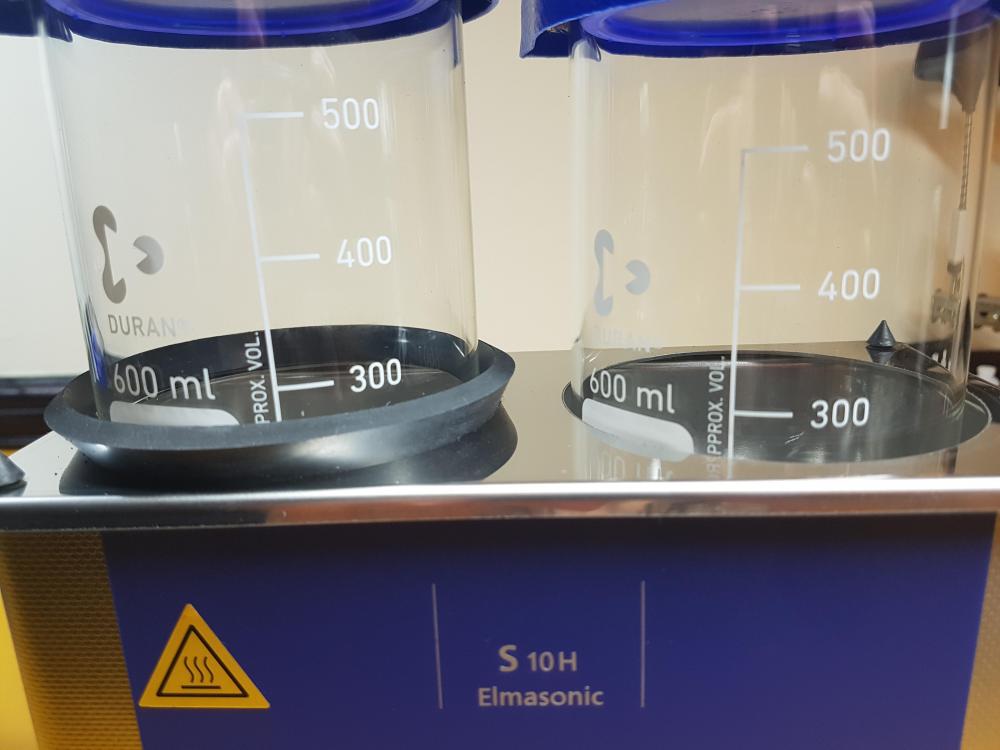
I wonder how much I can fill the beakers for the ultrasonic to be effective. If I fill them higher than the level of the water in the tank, will the ultrasonic be effective throughout the solution in the beaker? Should they perhaps only be filled to match the level of the water in the tank? Reading through the beaker documents it states that they should not be held by hand when the ultrasonic is on as the ultrasonic waves would be transmitted into the human tissue. That makes me think it should work if I fill them above the level. They also show a picture of the beakers with solutions in the beakers above the tank:
 1 point
 -
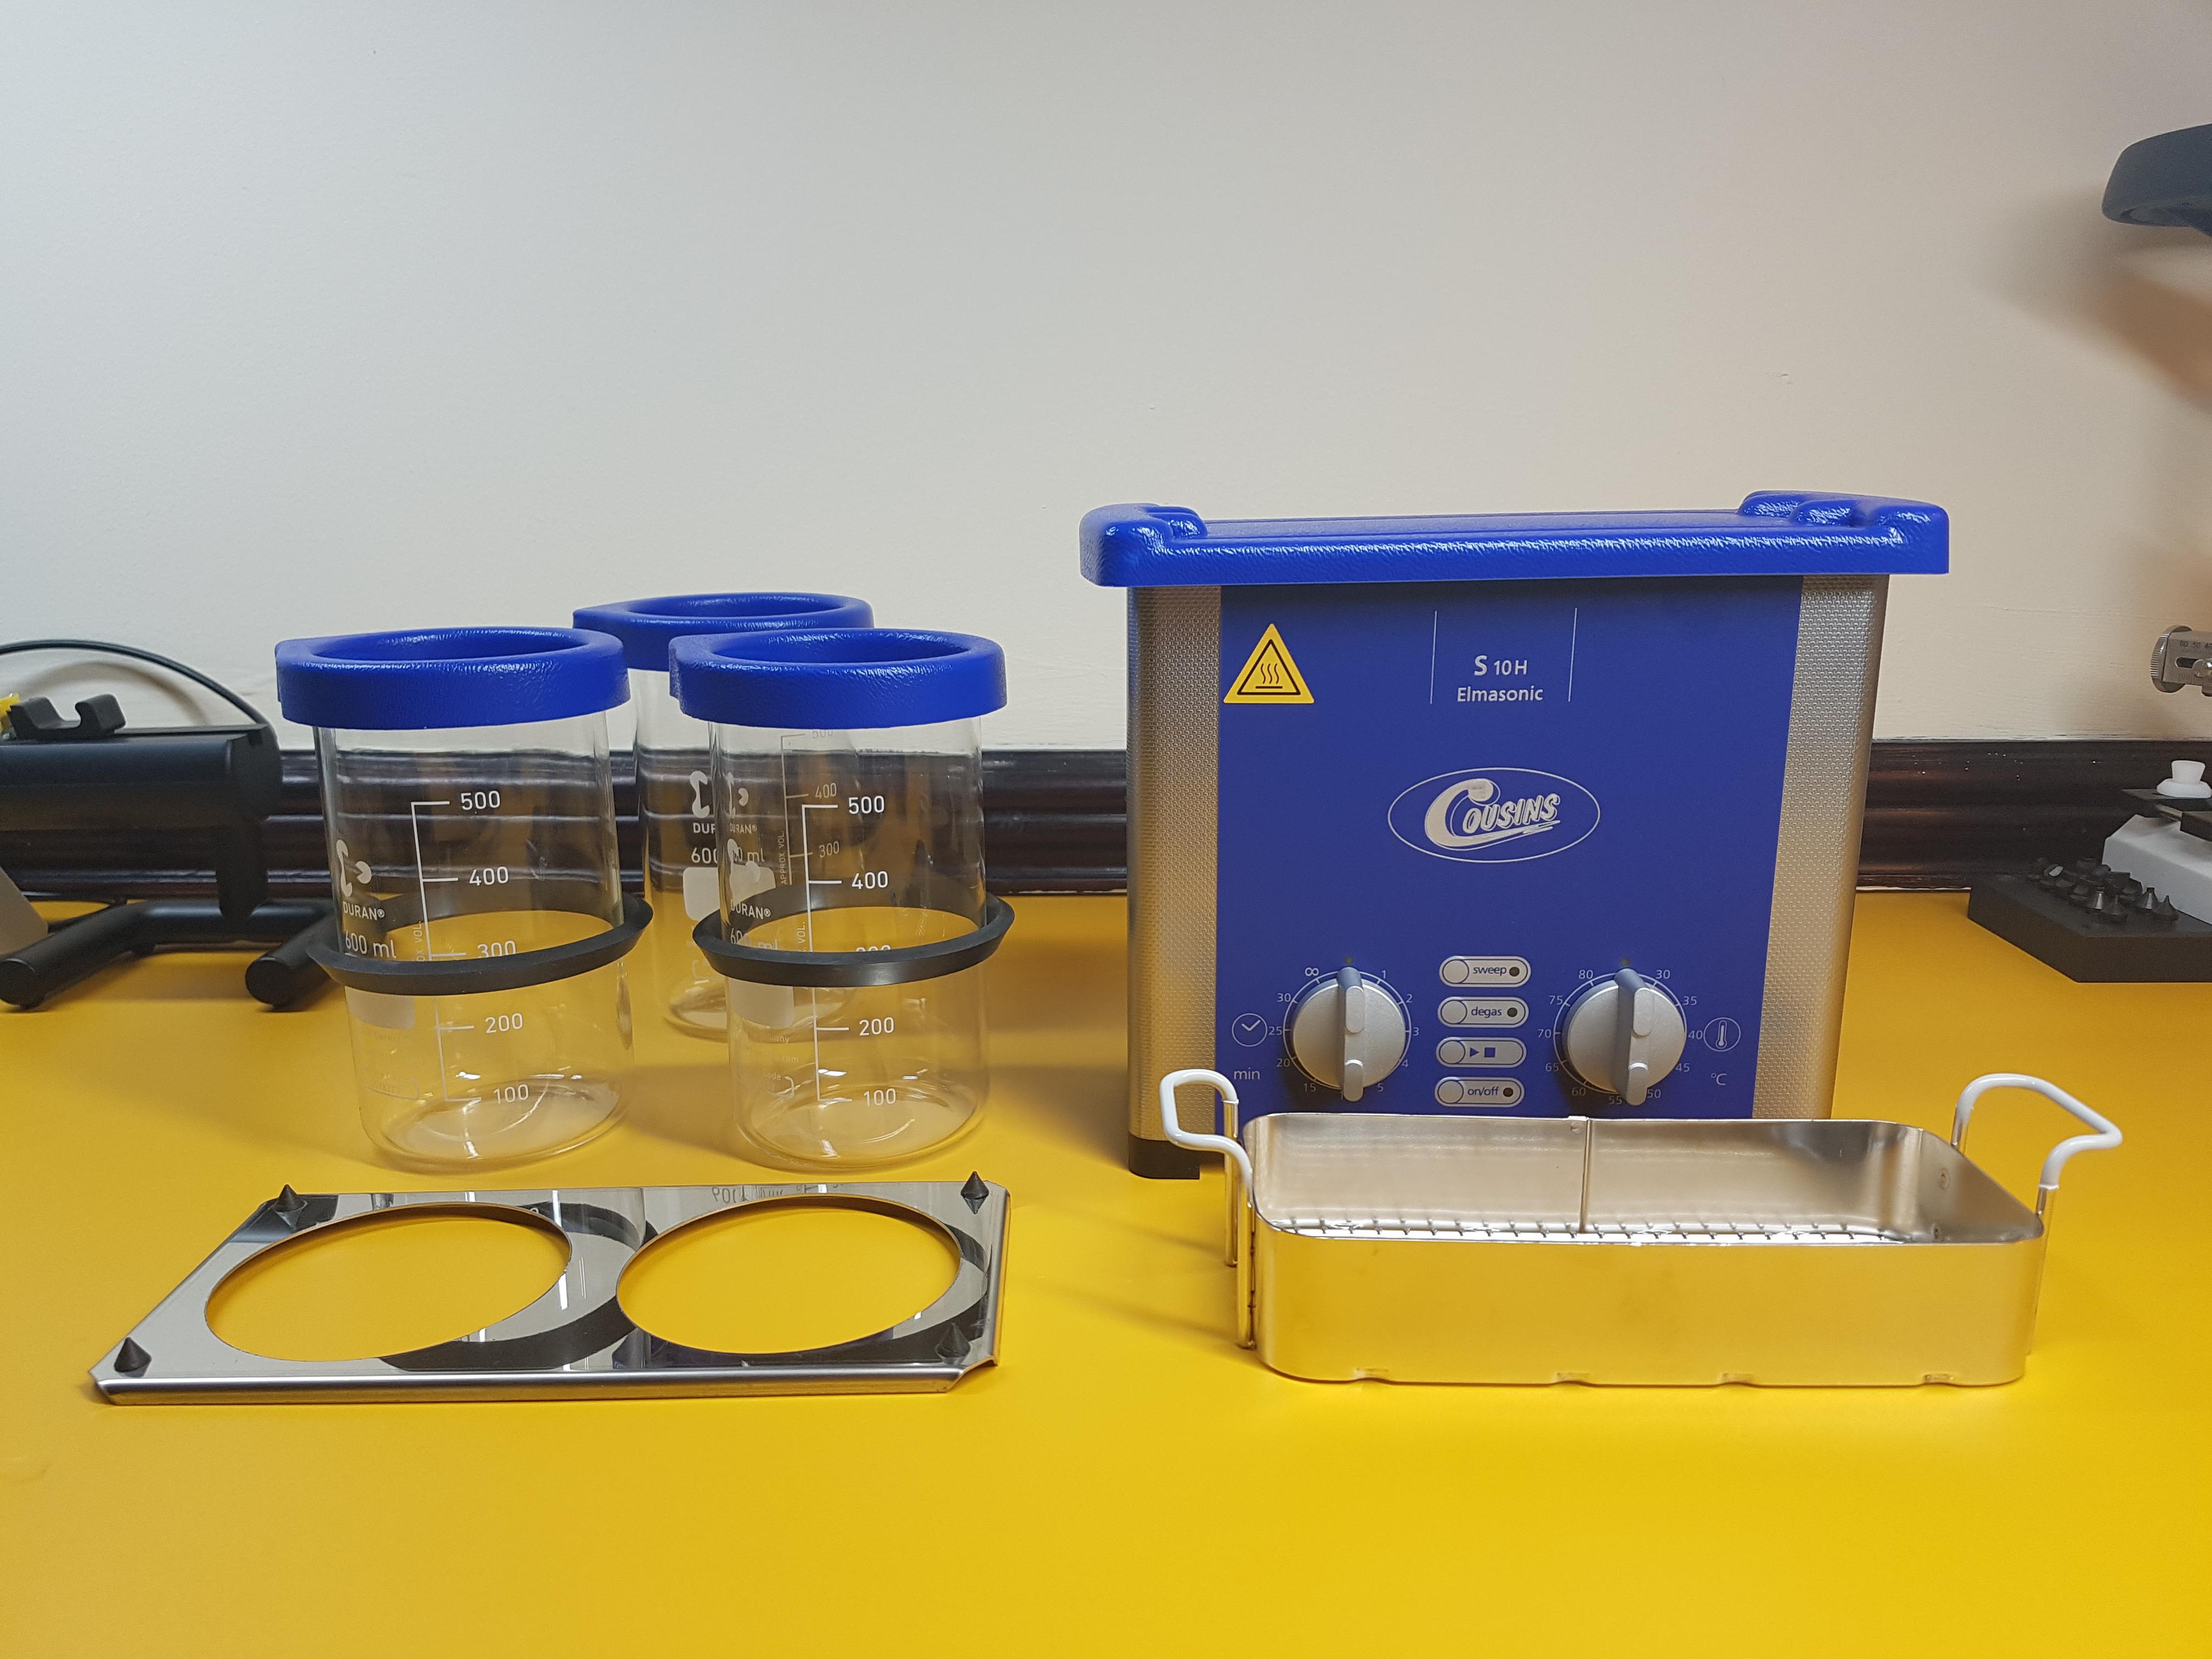
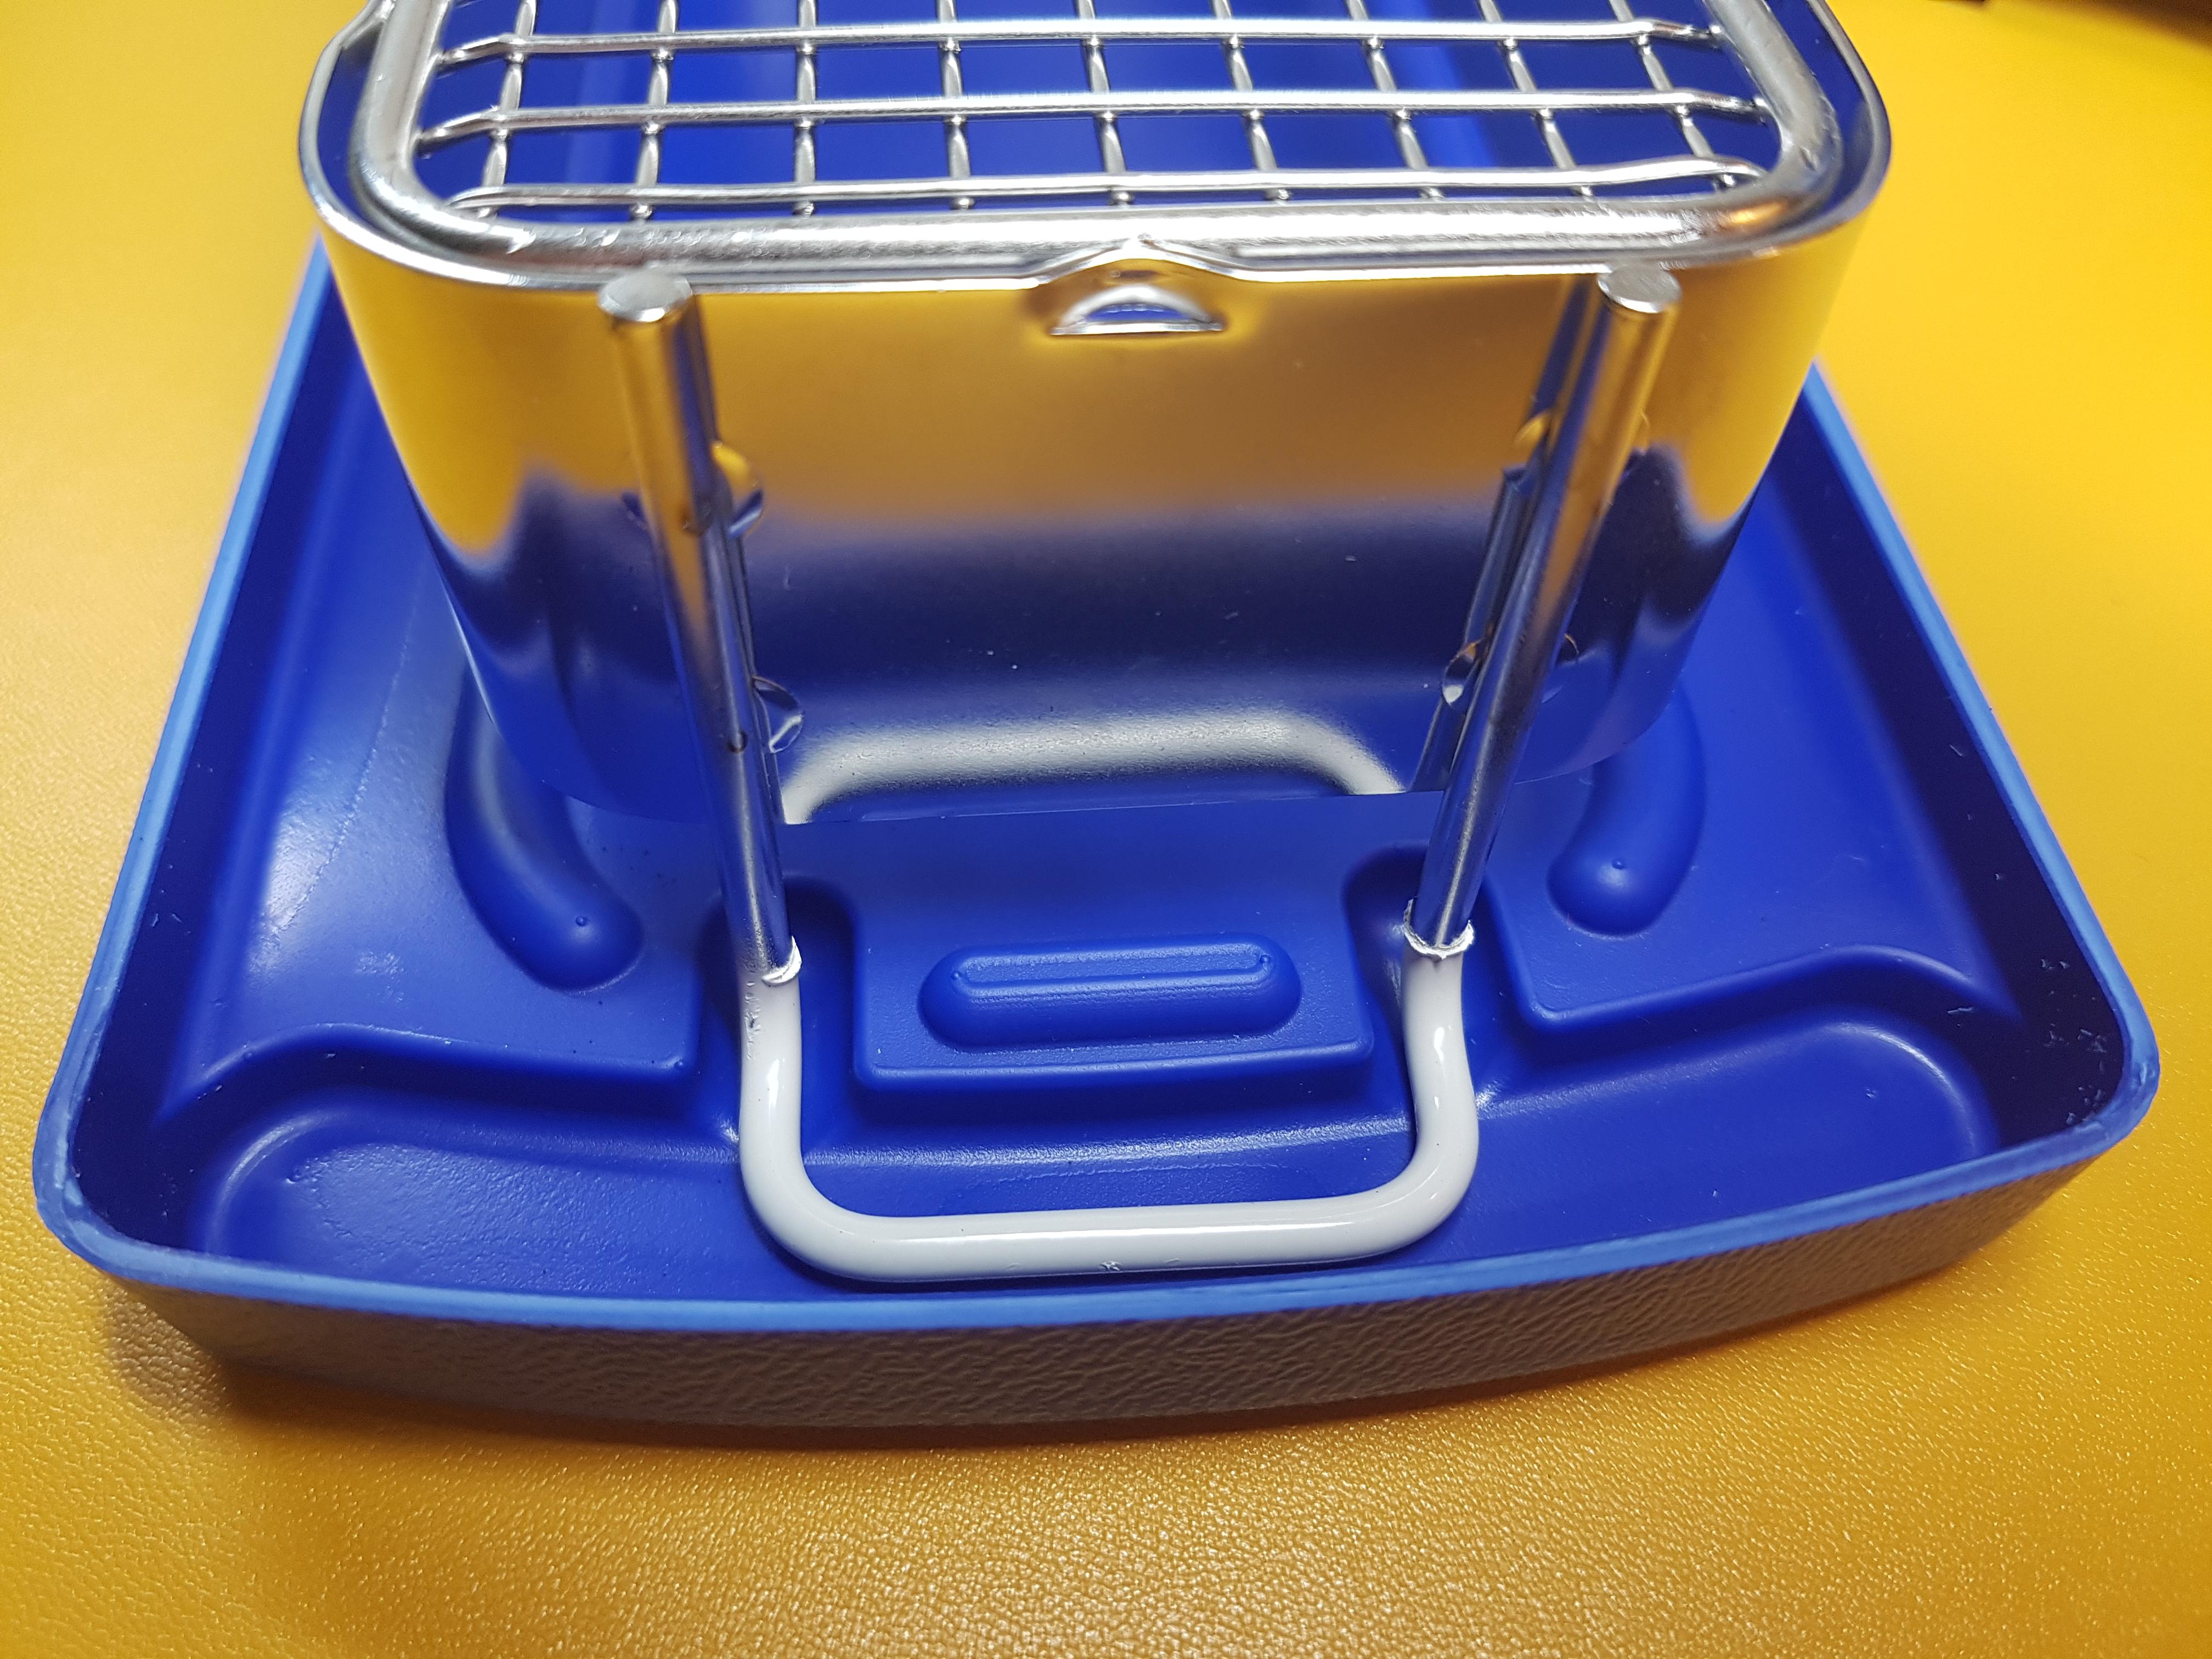
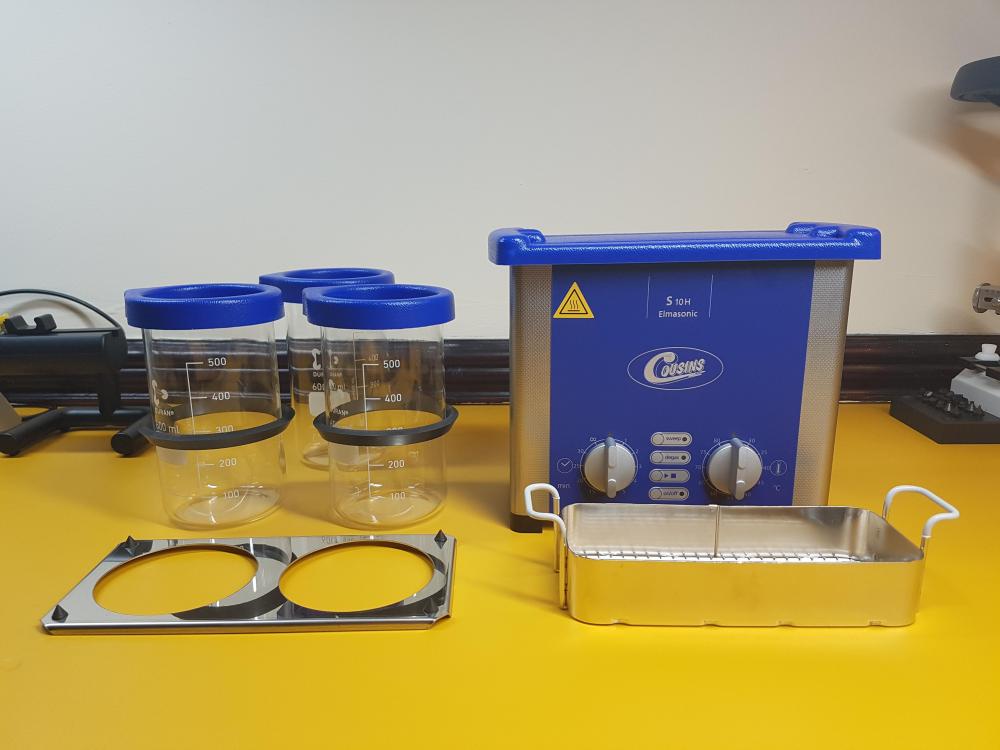
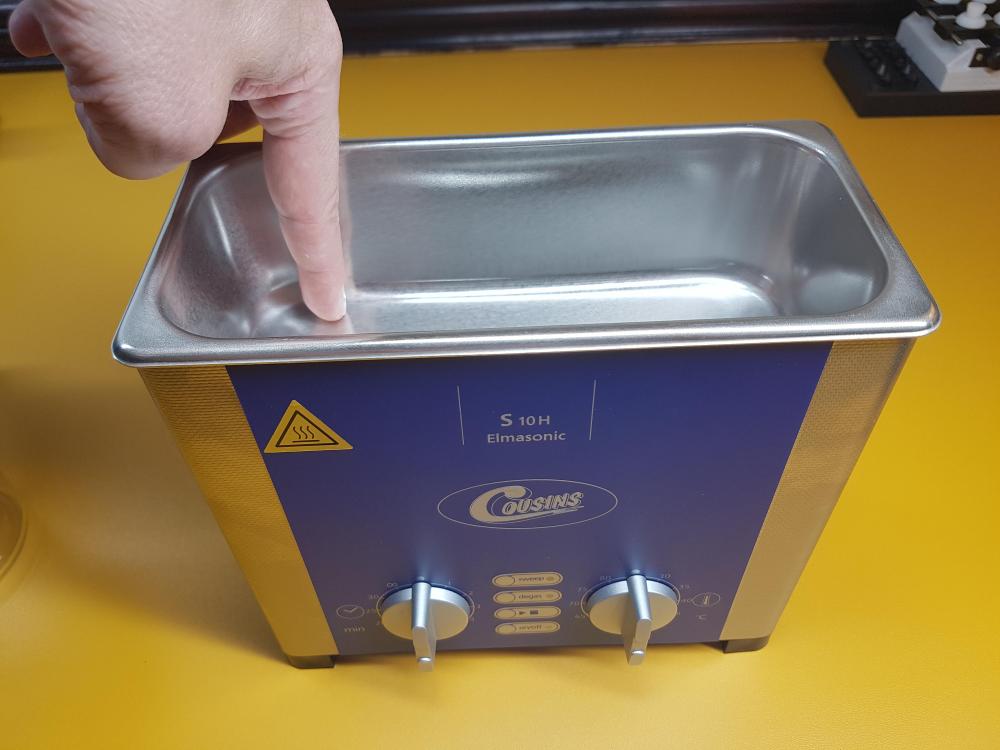
Thank you for the tip. However I have already received the Elma S10H. I will get to try it out this weekend. It's certainly big enough for watch movements, bracelets etc. Pictures below for anyone browsing looking for an ultrasonic cleaner and considering this unit.

 1 point
 -
9010 everywhere? Even centre wheel?0 points
-
Welp my luck ran out! I just broke the 4th wheel center seconds pinion of an Enicar 1010 with a tweezer slip on the cannon pinion. It had been a very lucky 404 Club find for such a brand, but now will be a lot costlier.0 points


.thumb.jpg.cb17a66989f1e796fd4217db2e9ca9df.jpg)