Leaderboard


Popular Content
Showing content with the highest reputation on 12/16/24 in all areas
-
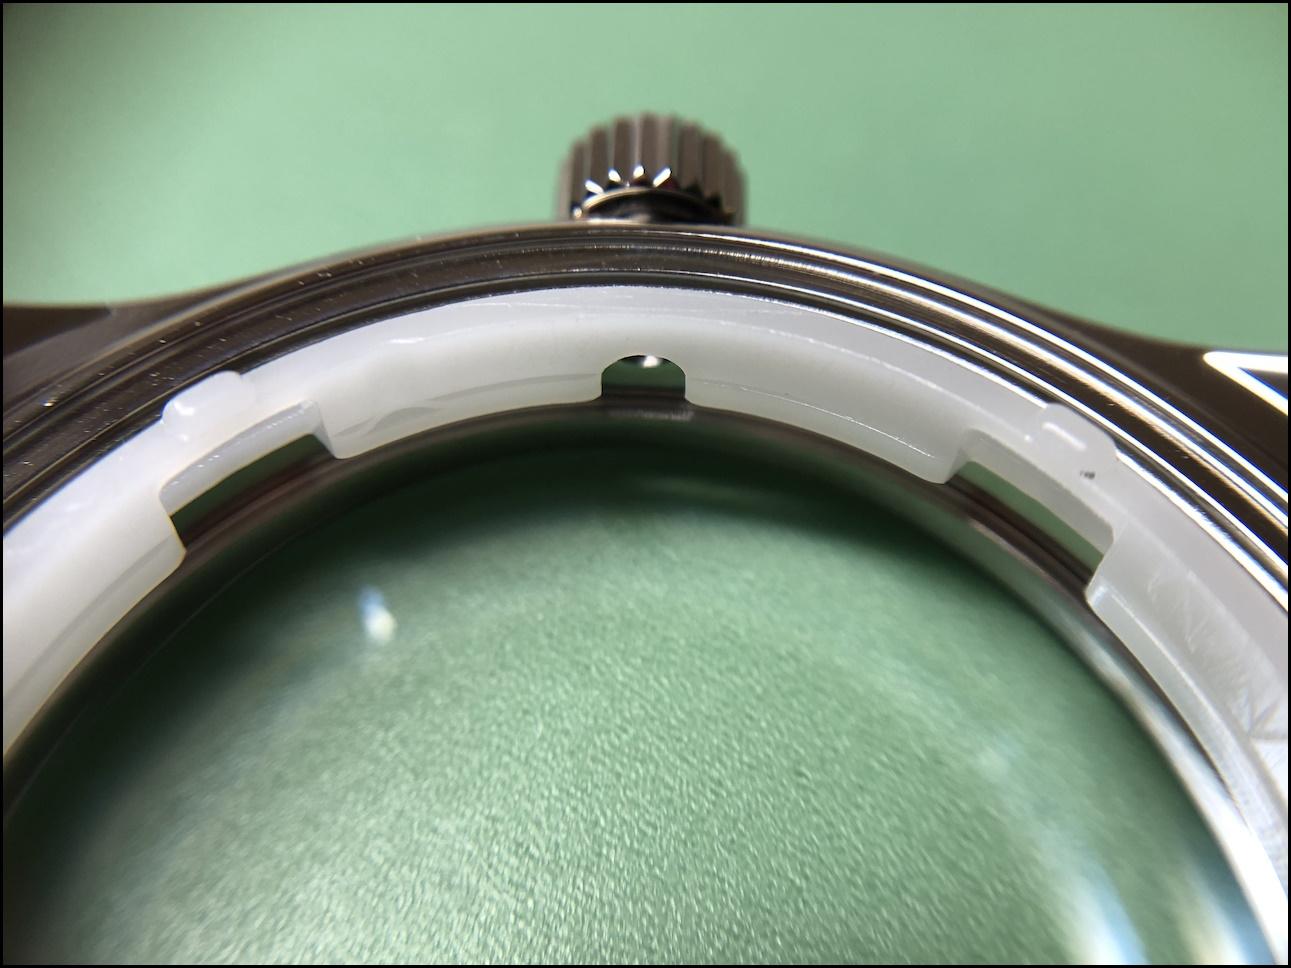
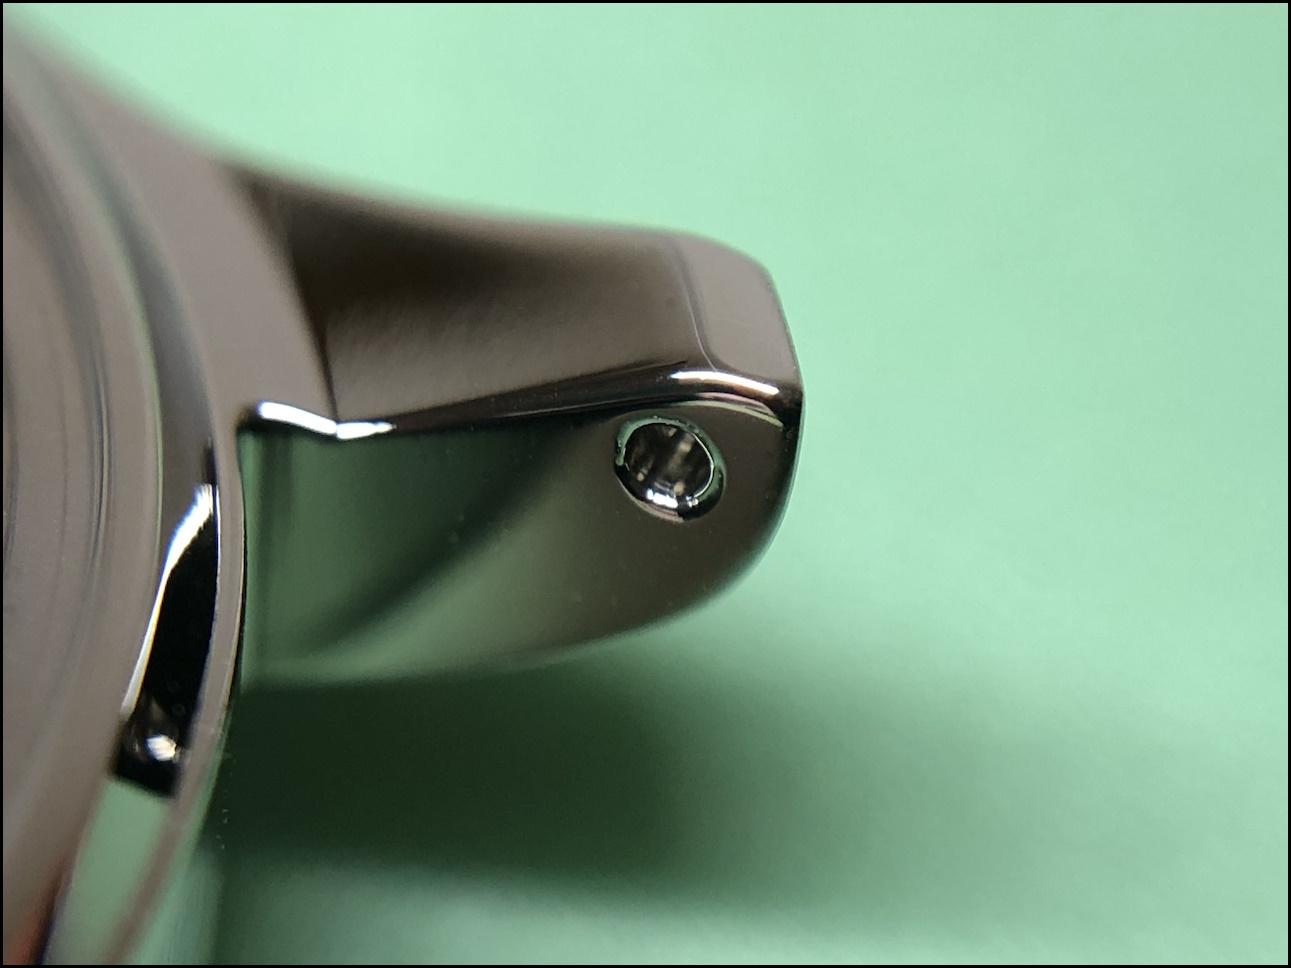
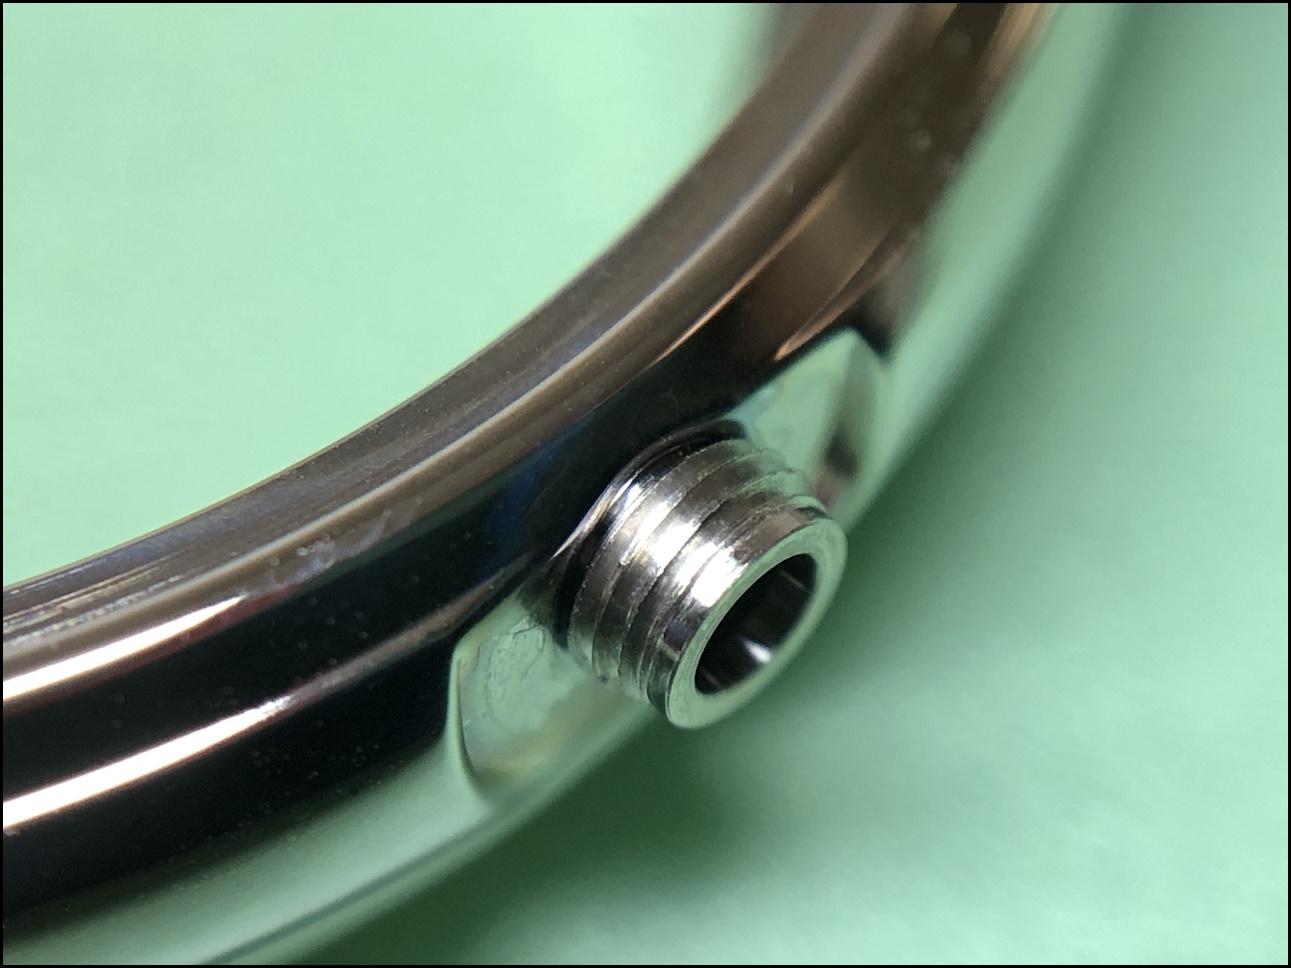
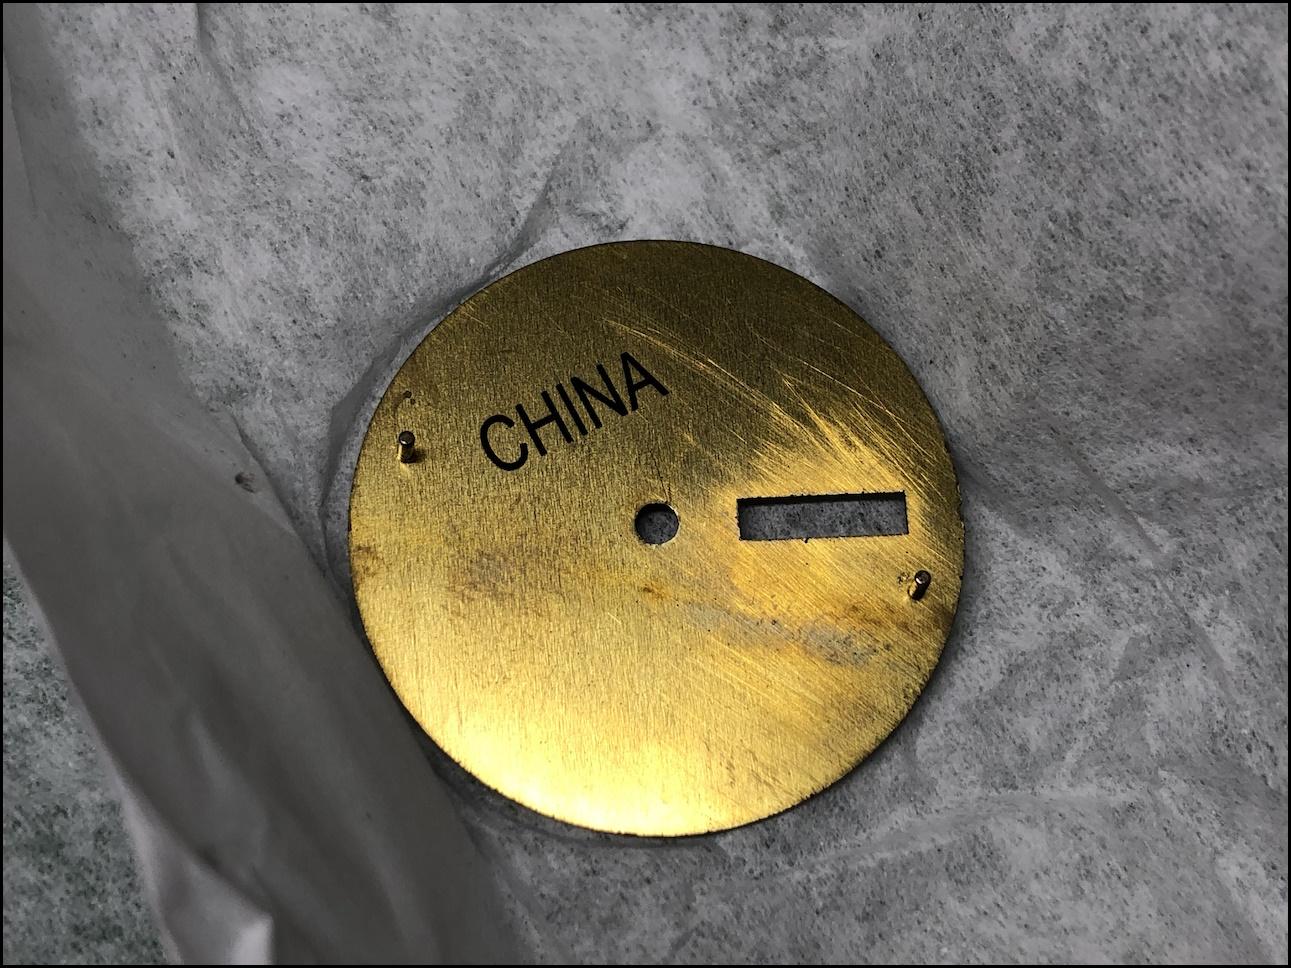
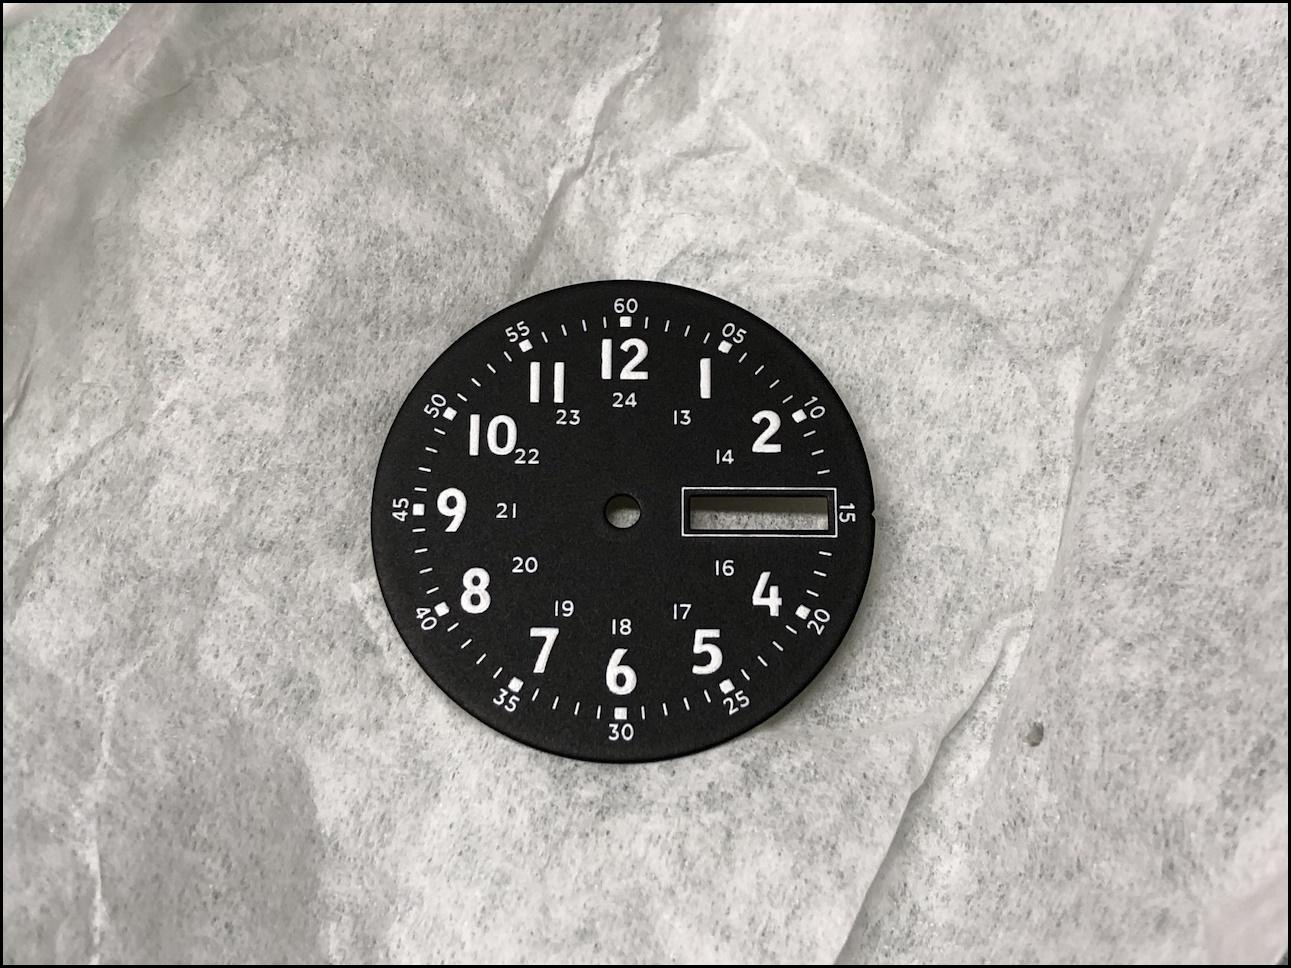
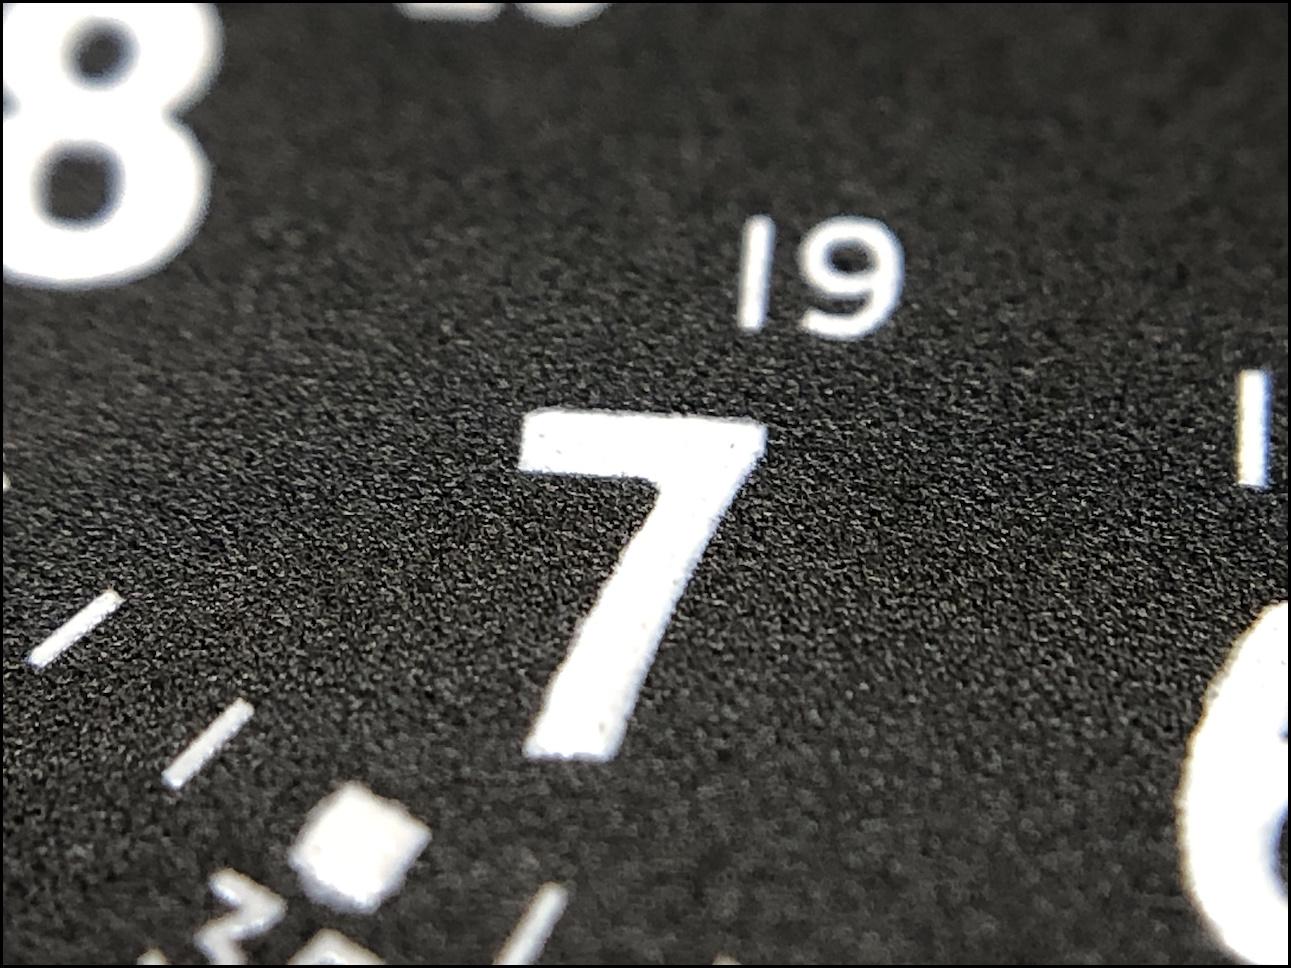
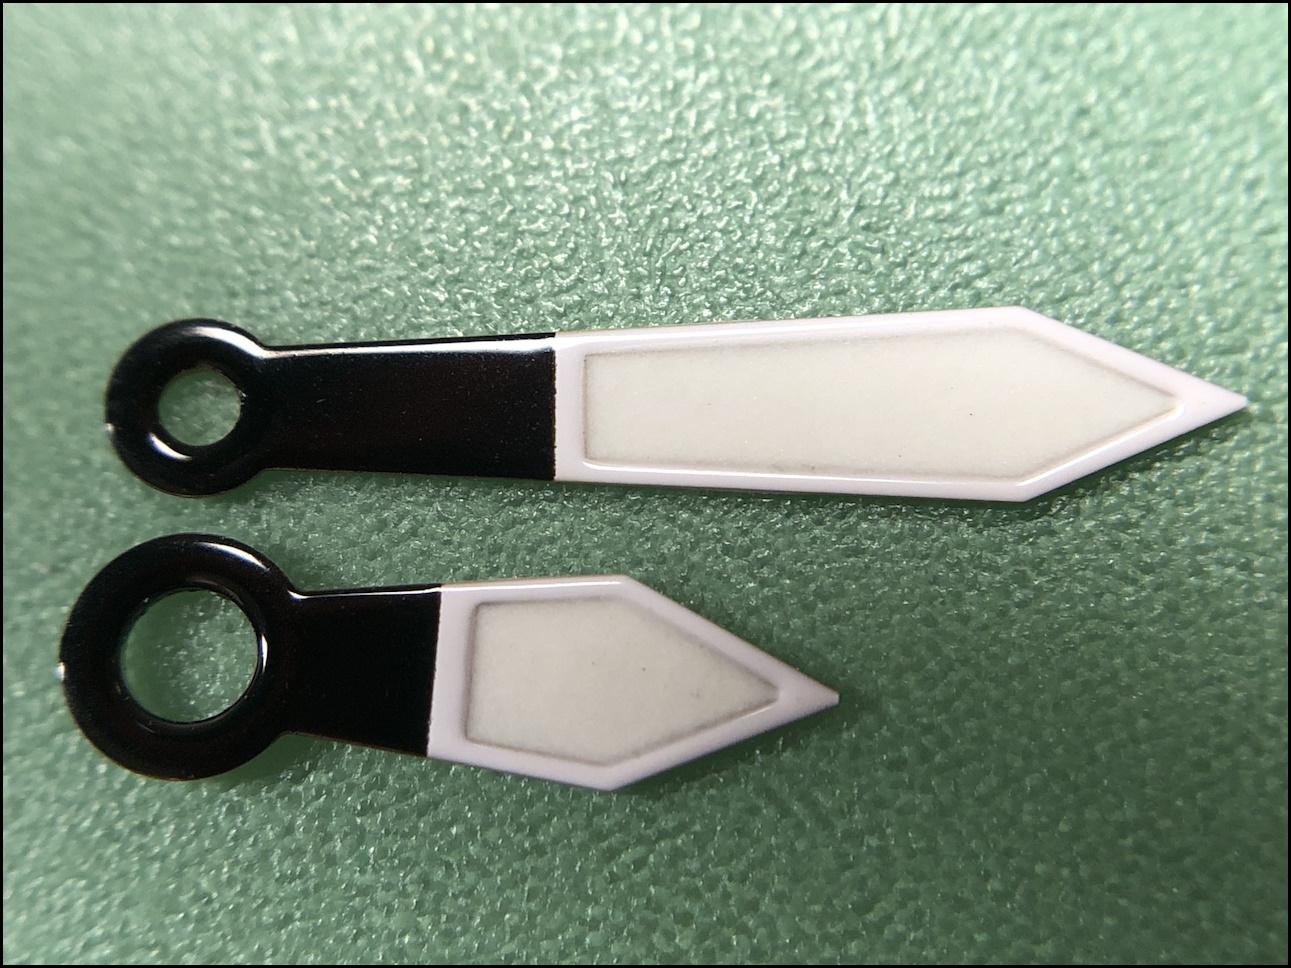
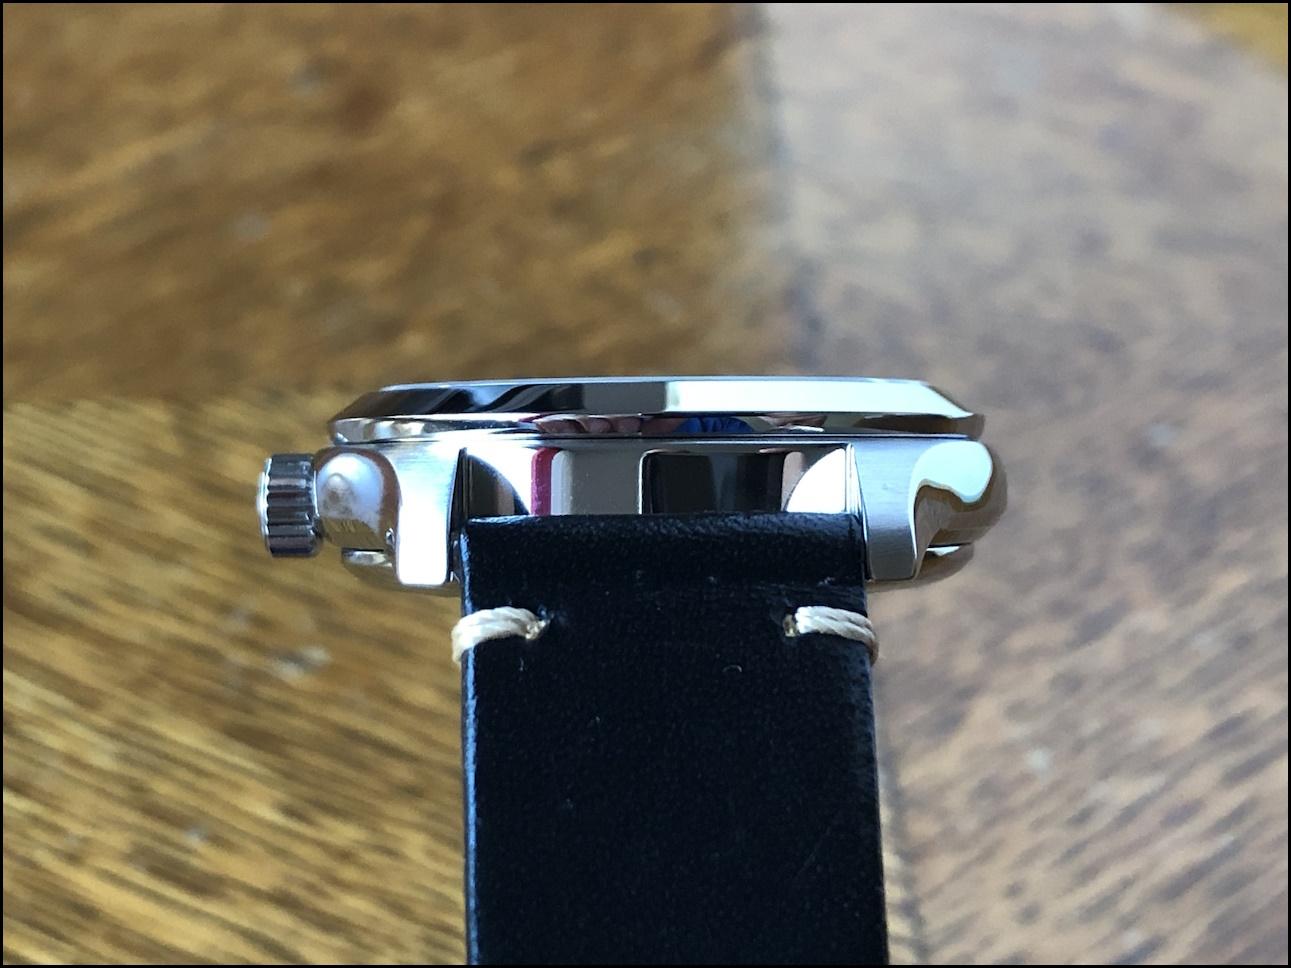
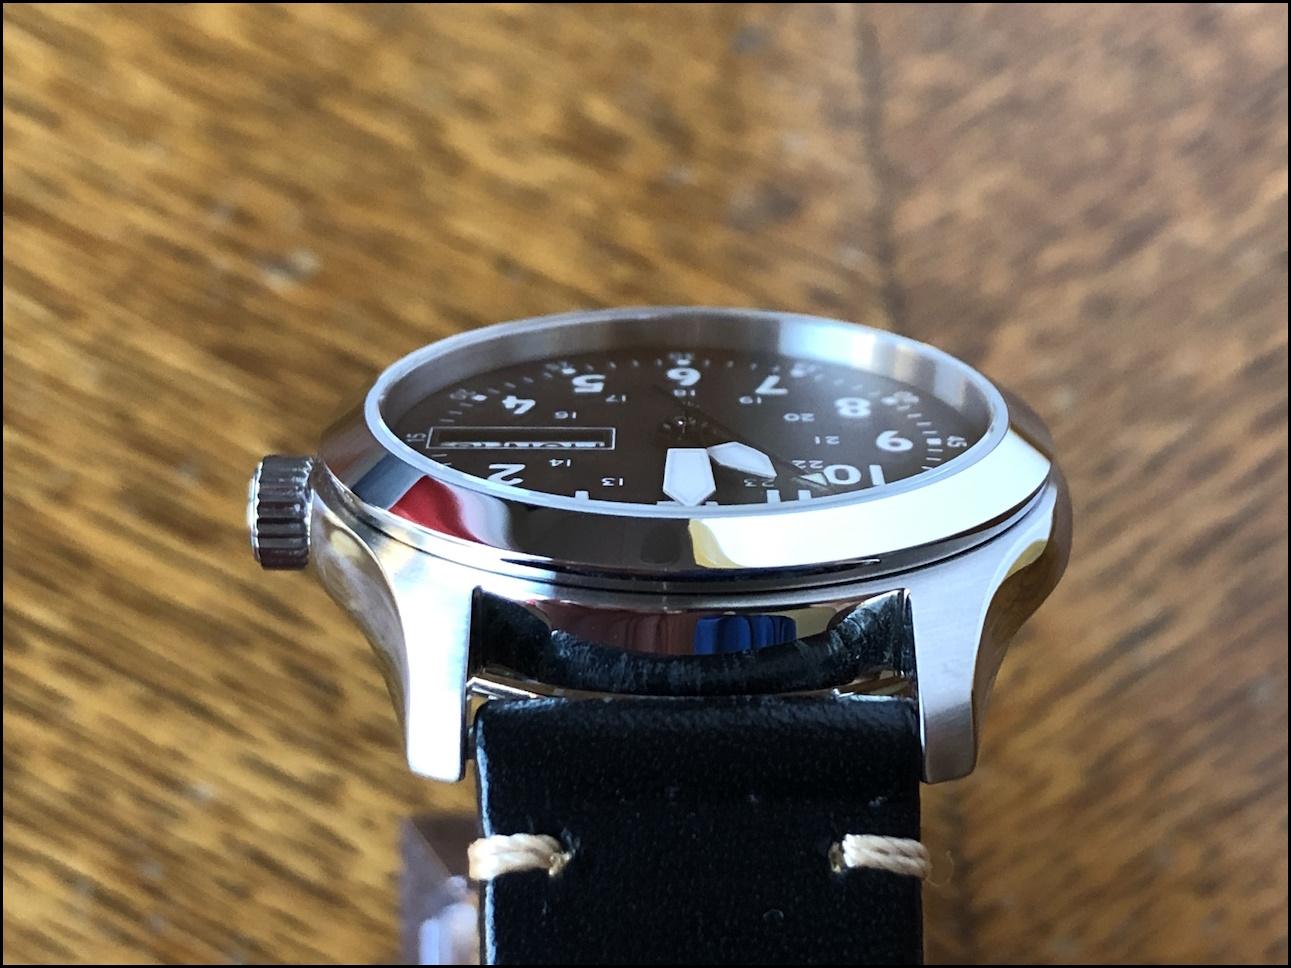
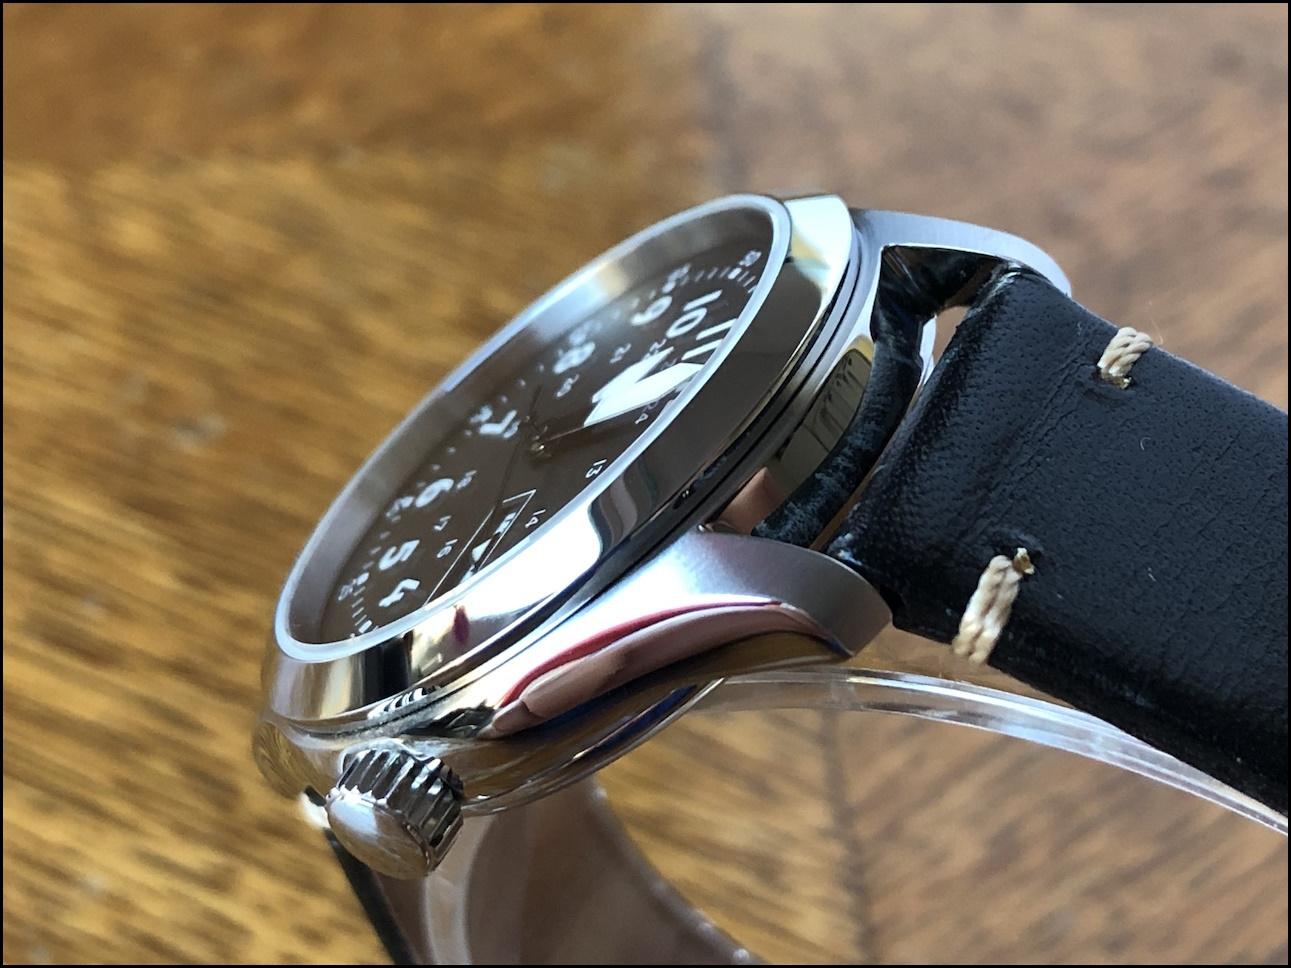
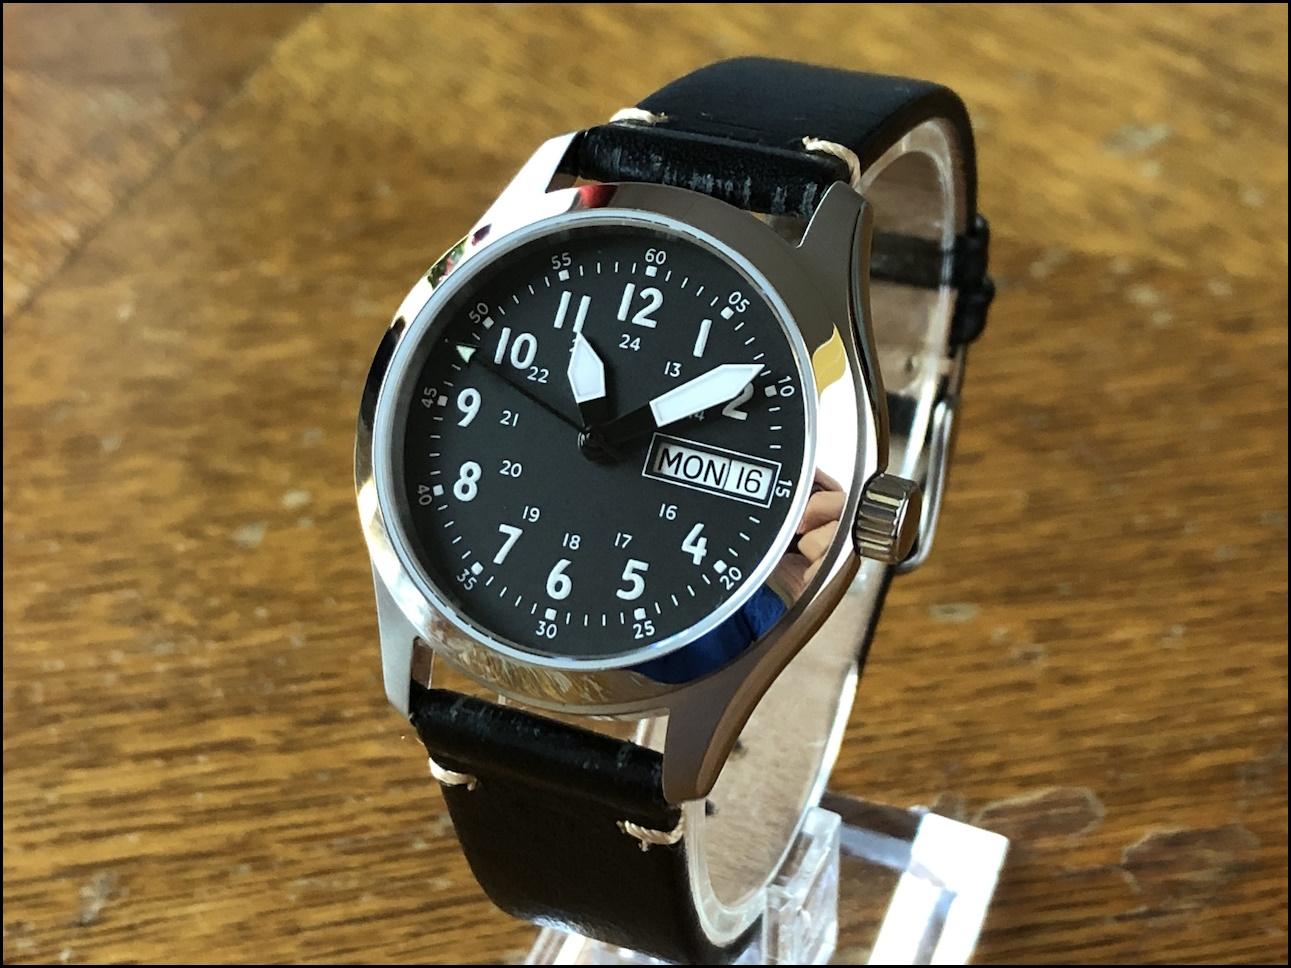
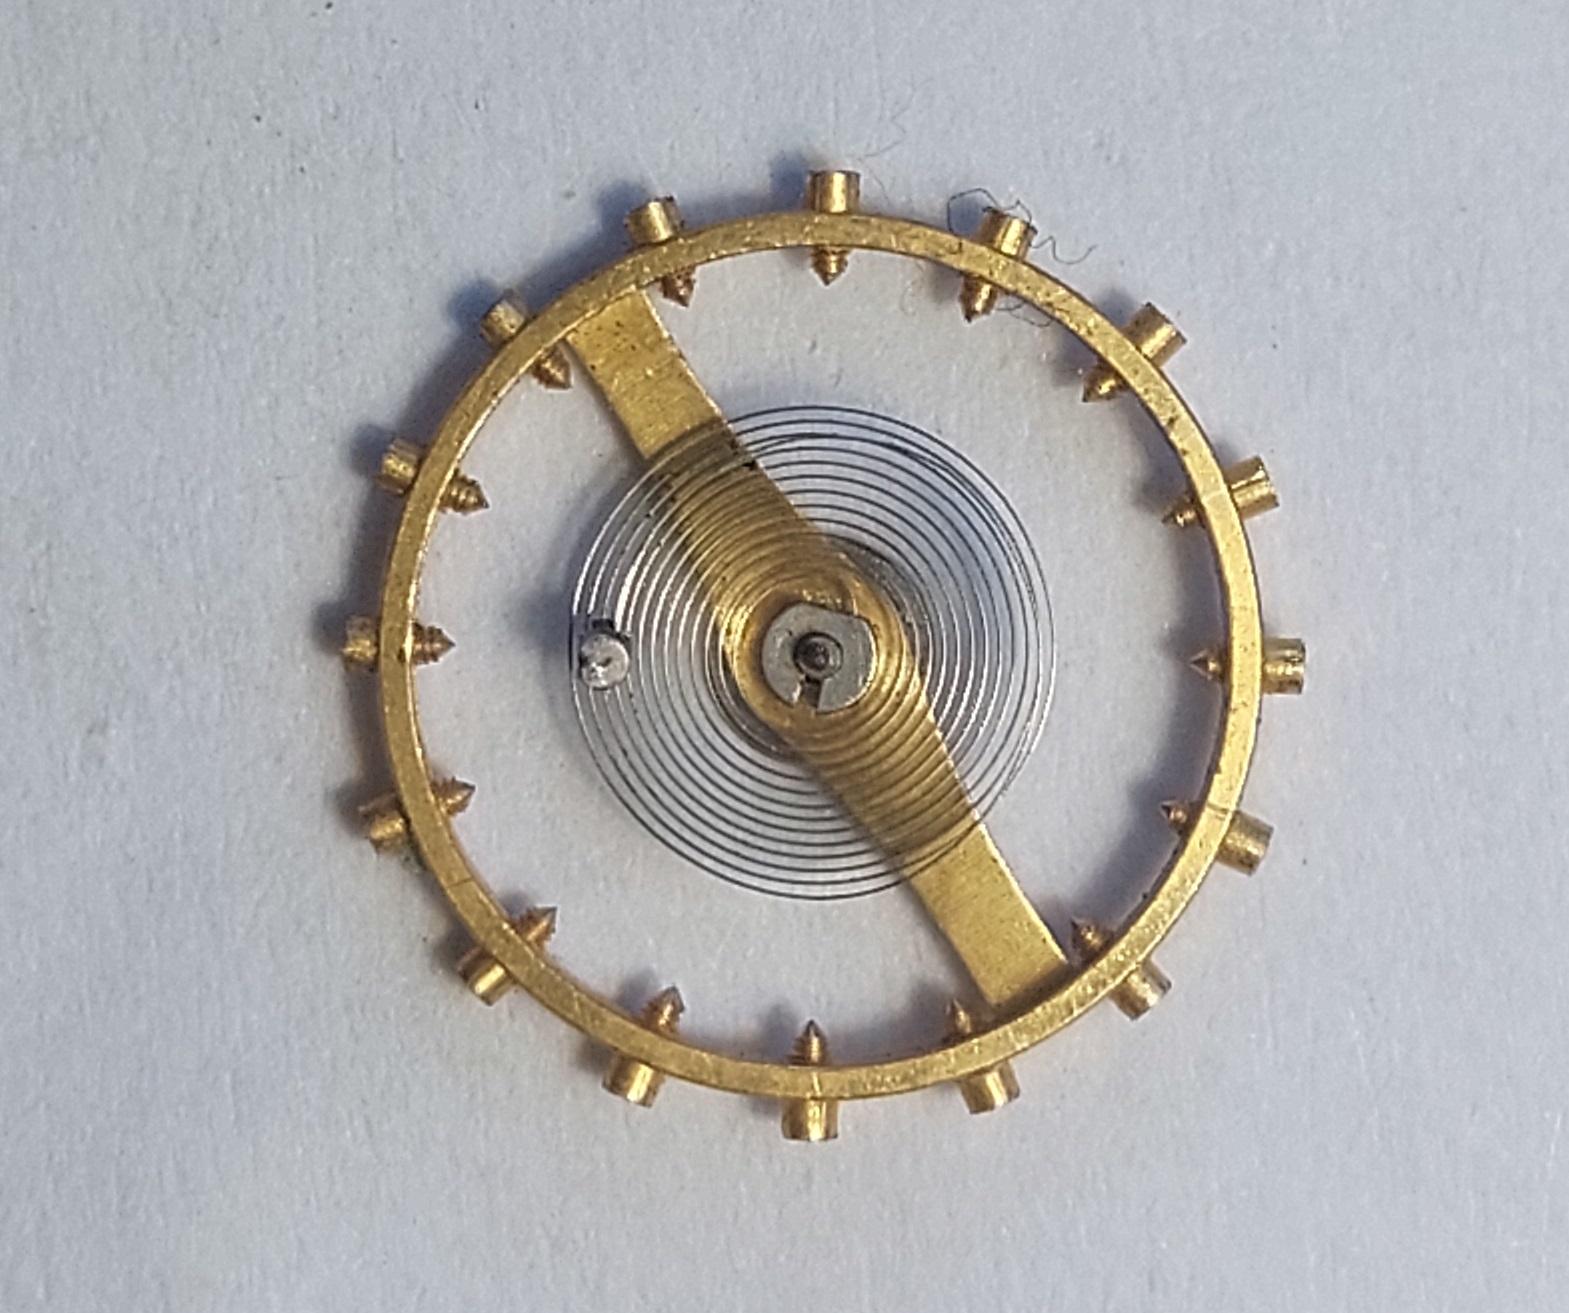
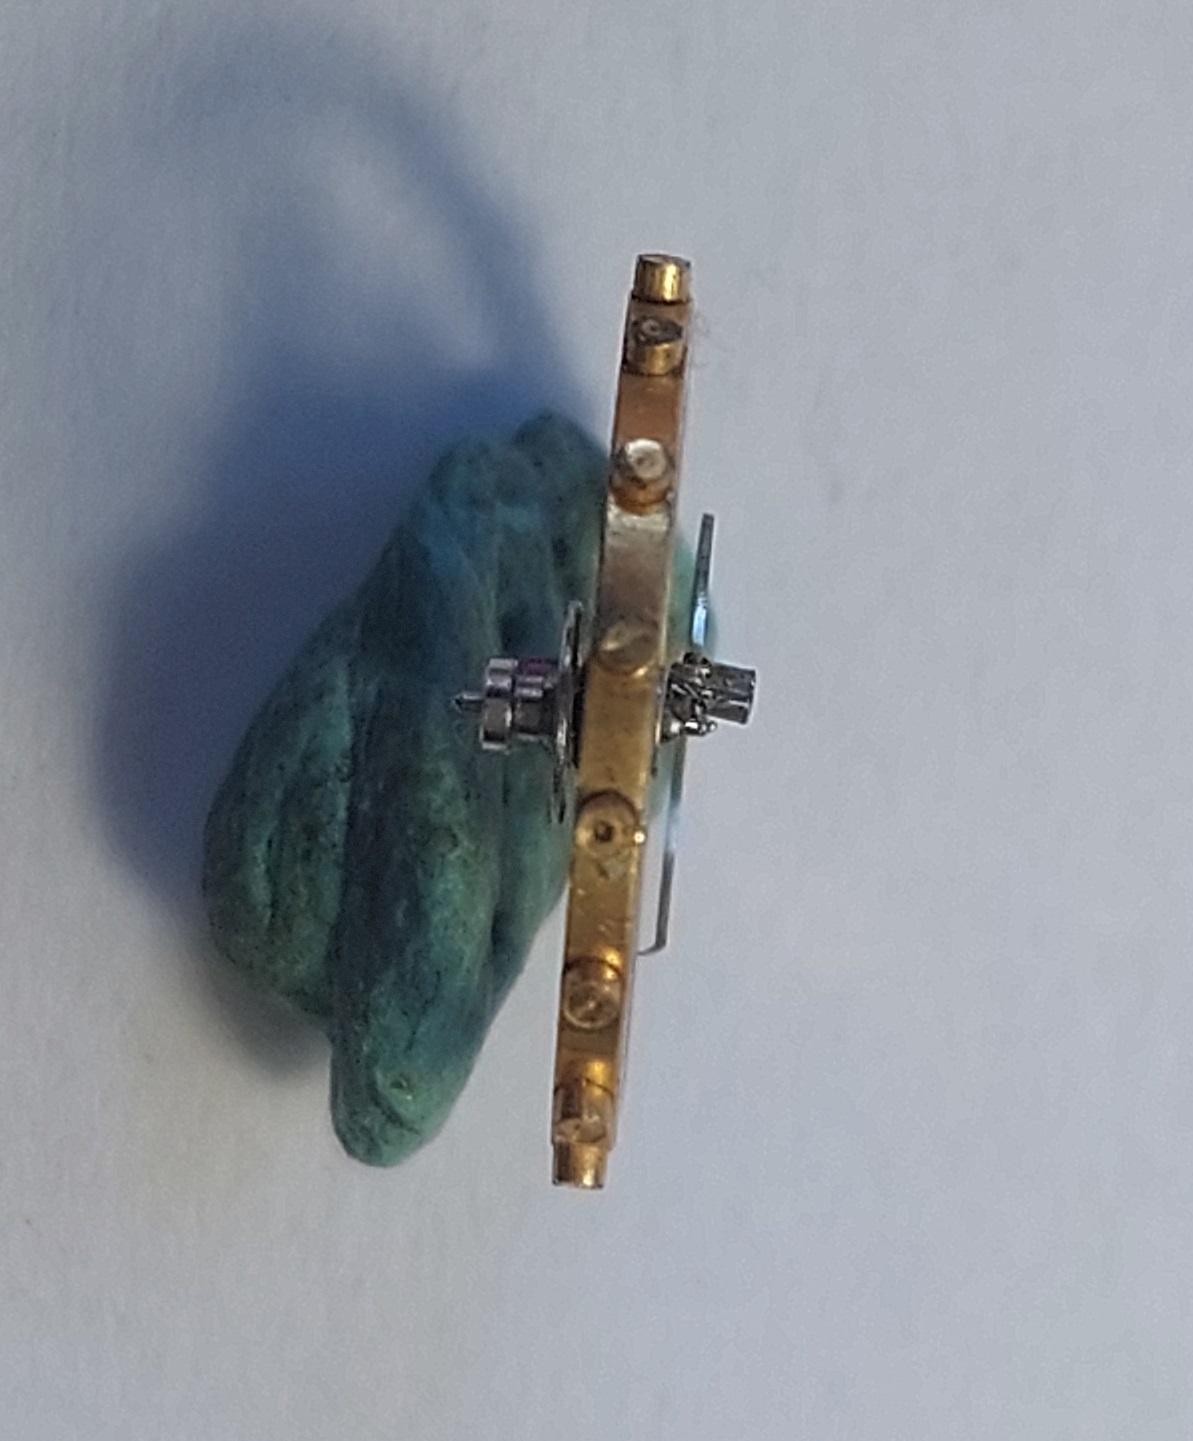
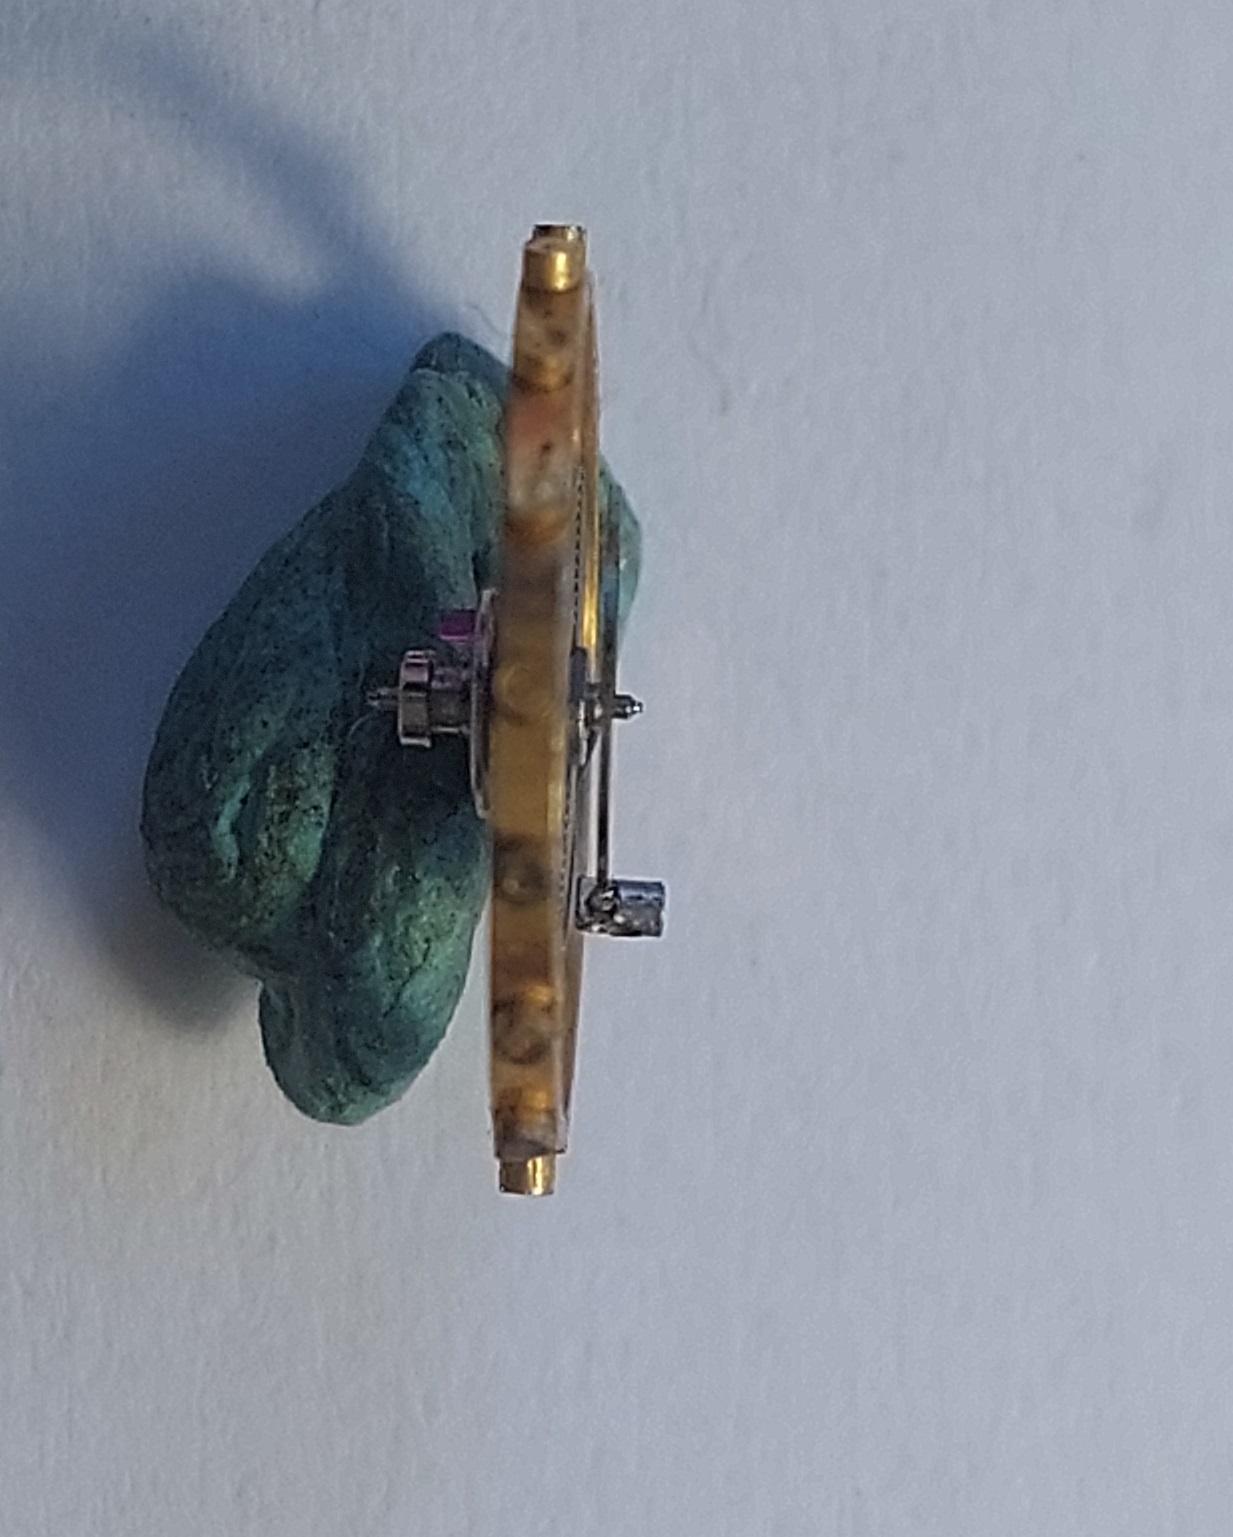
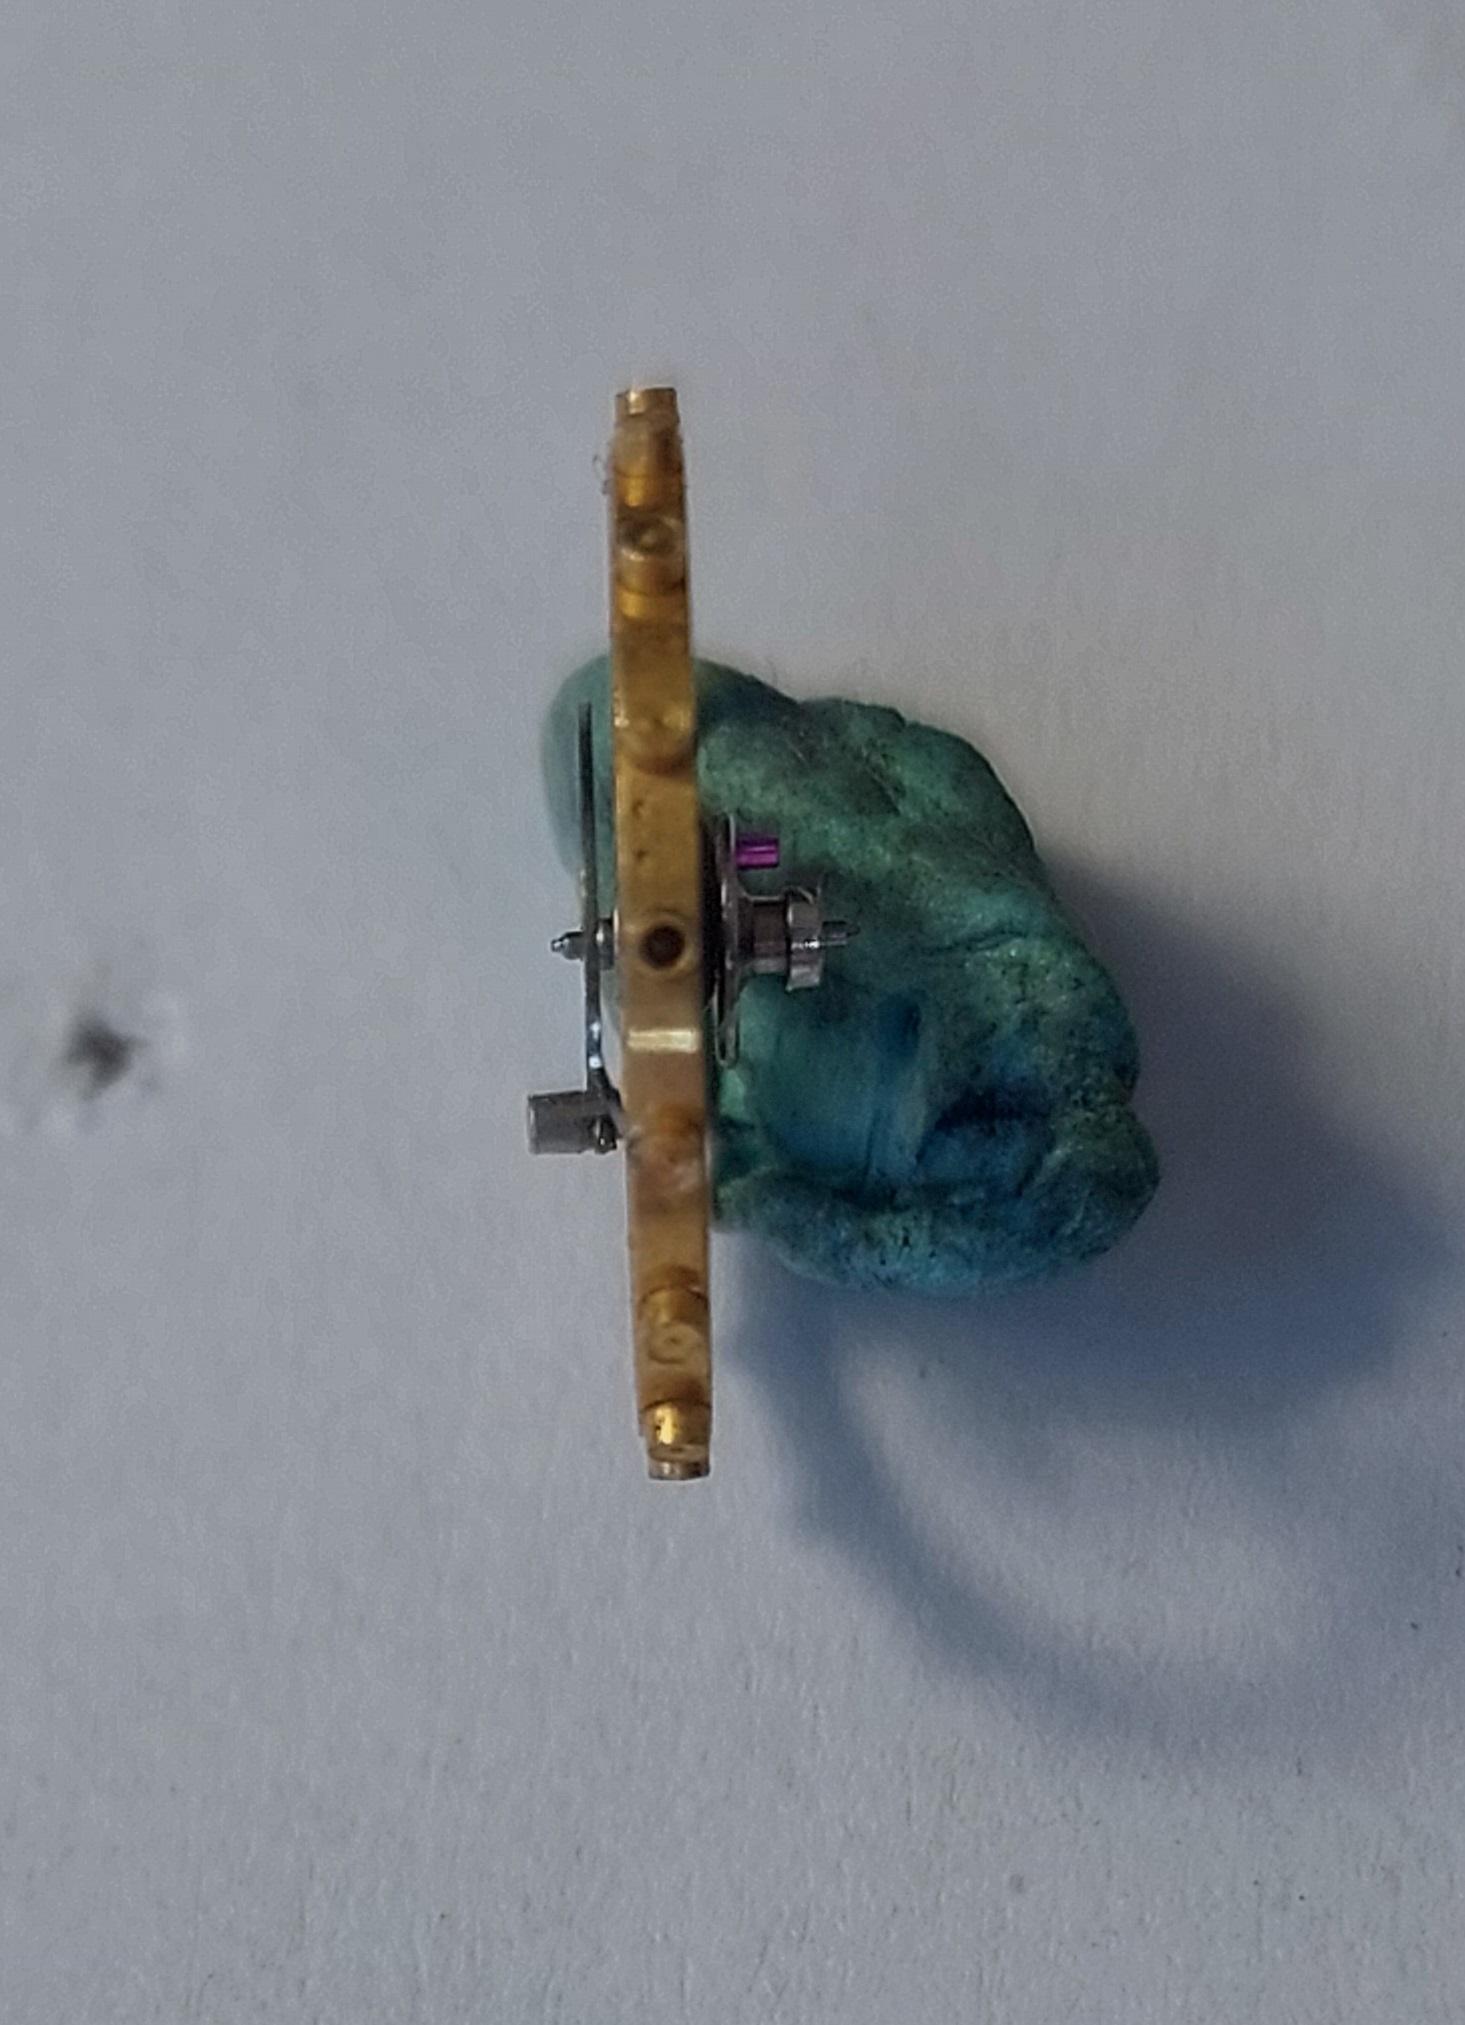
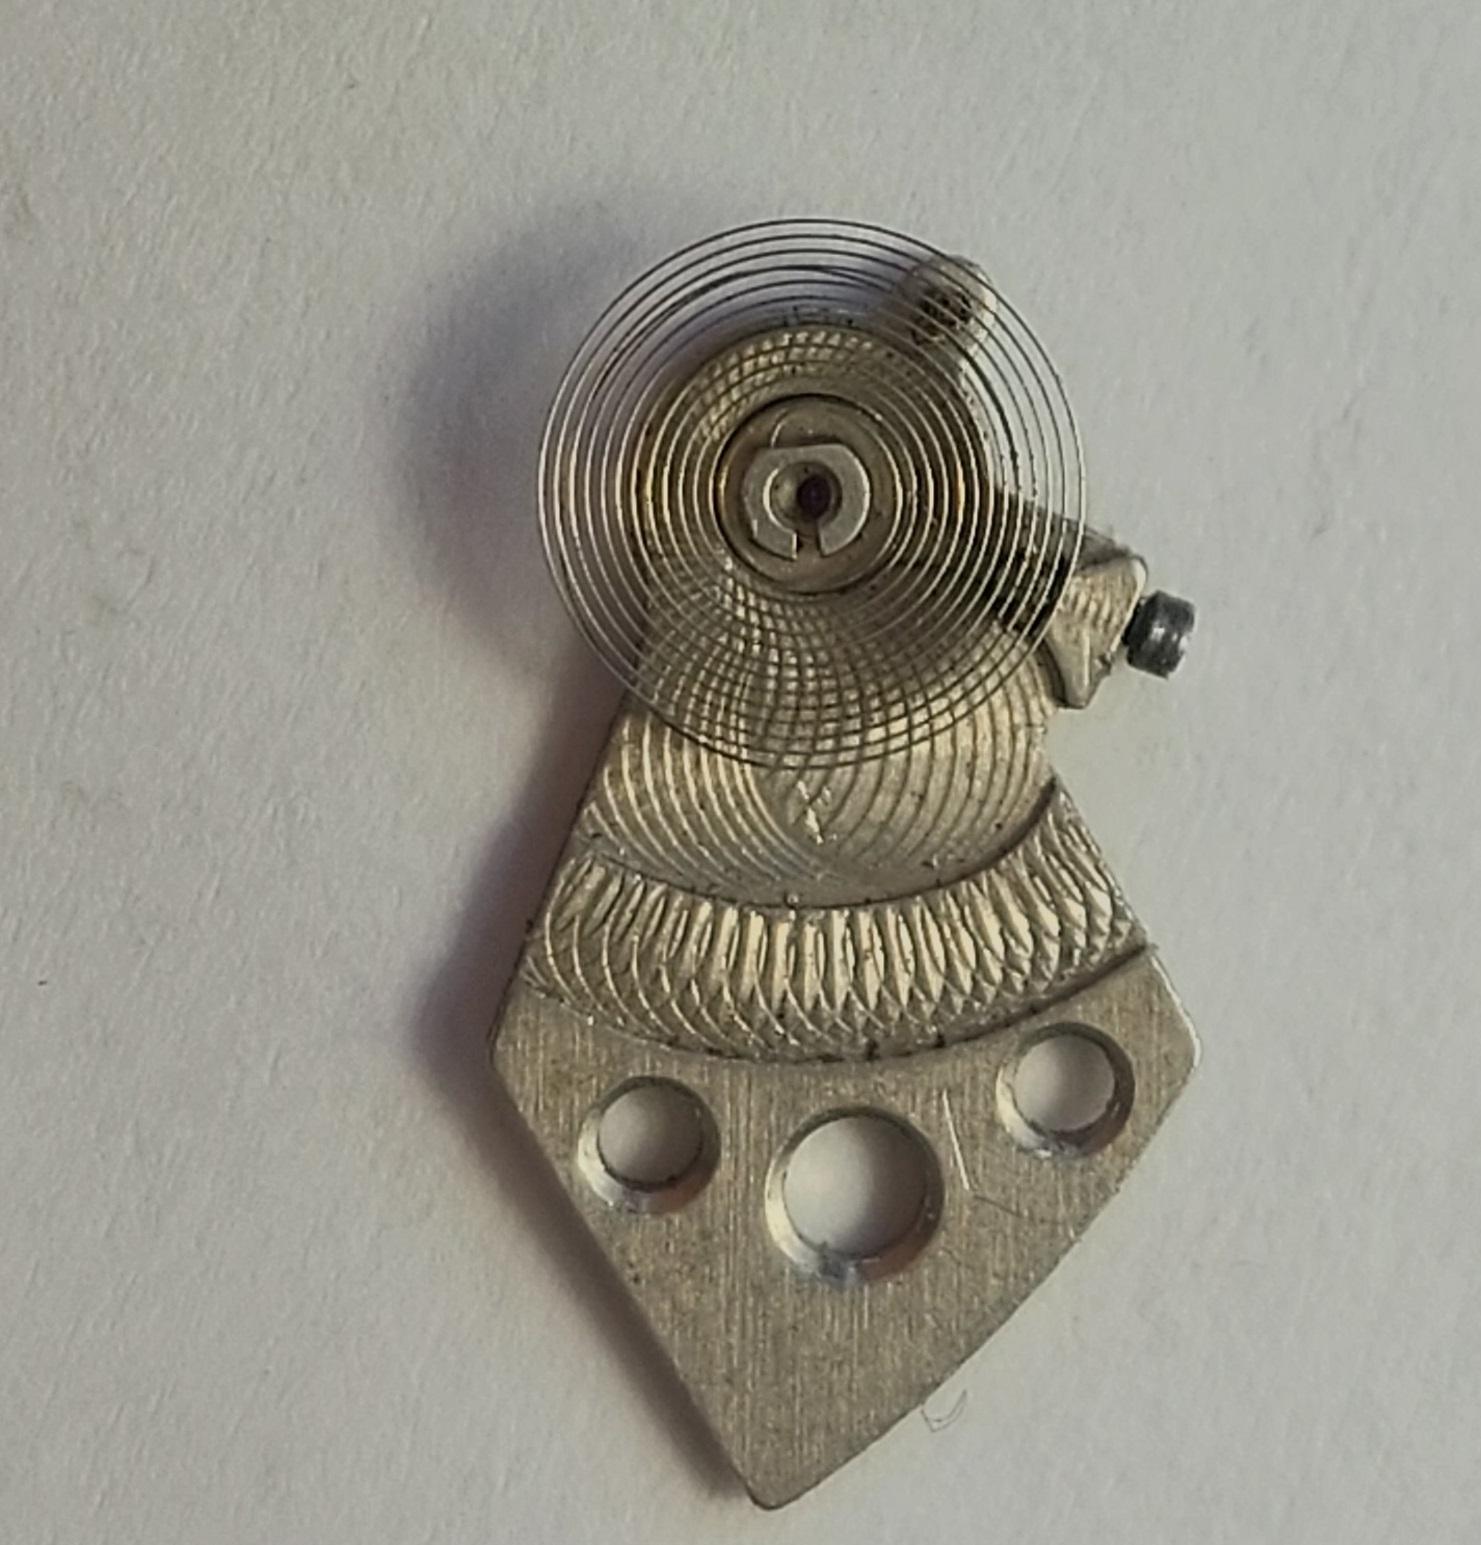
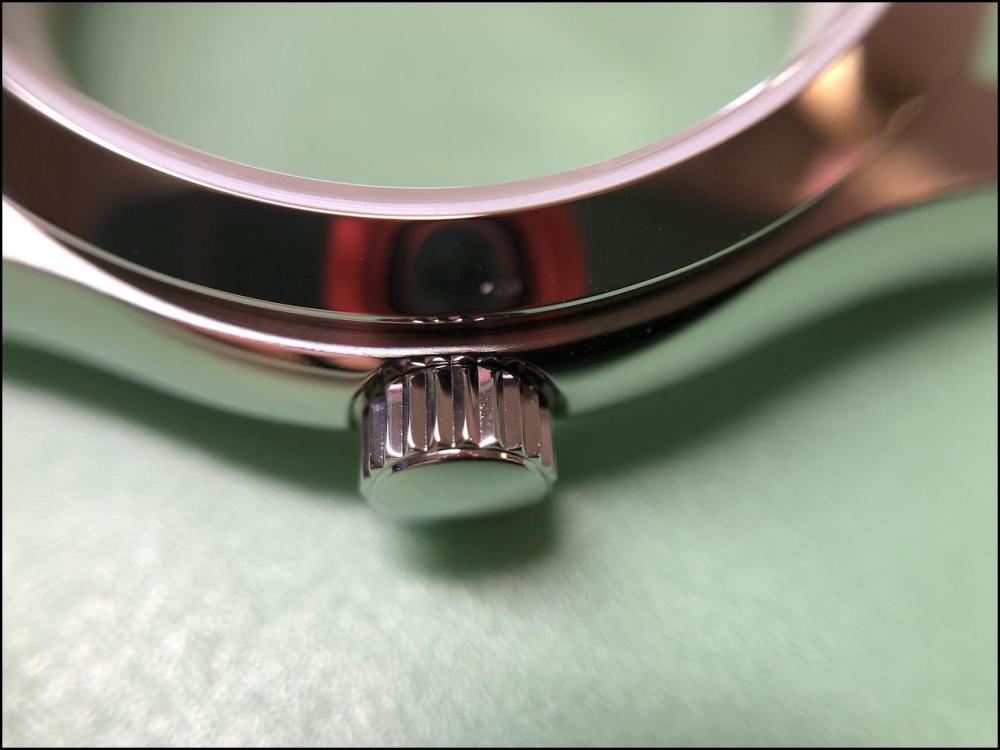
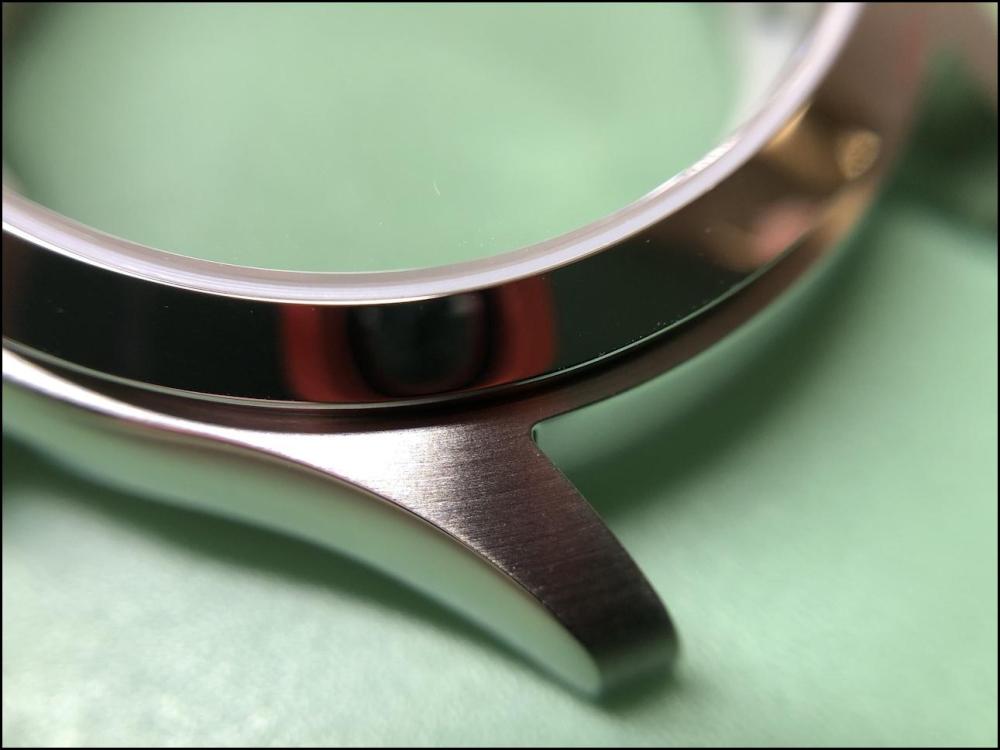
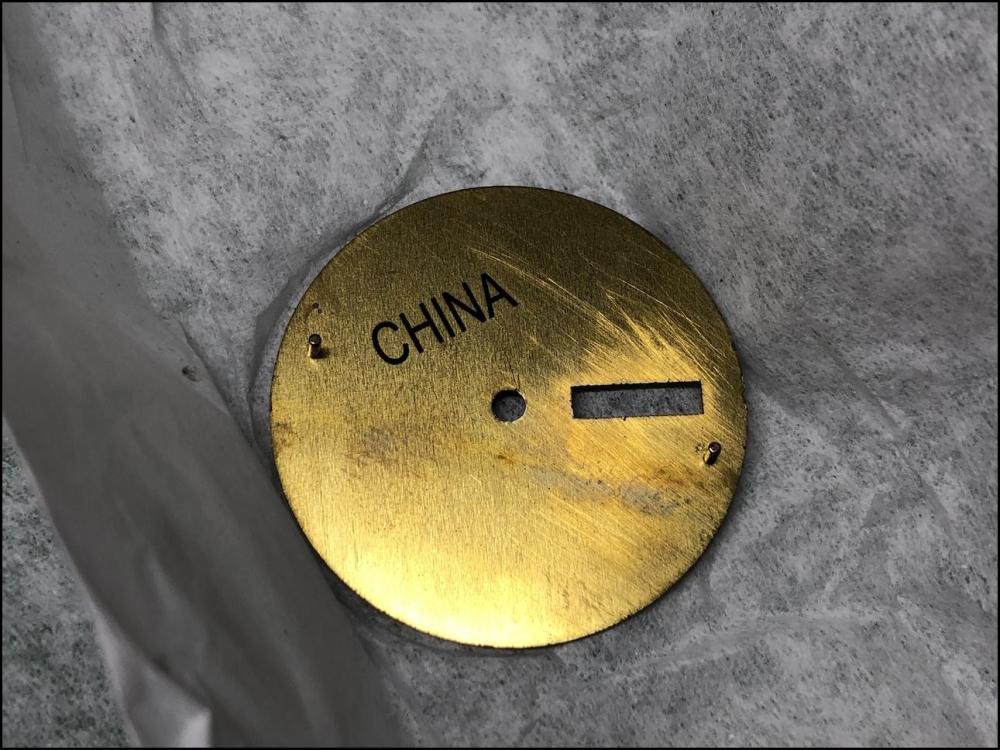
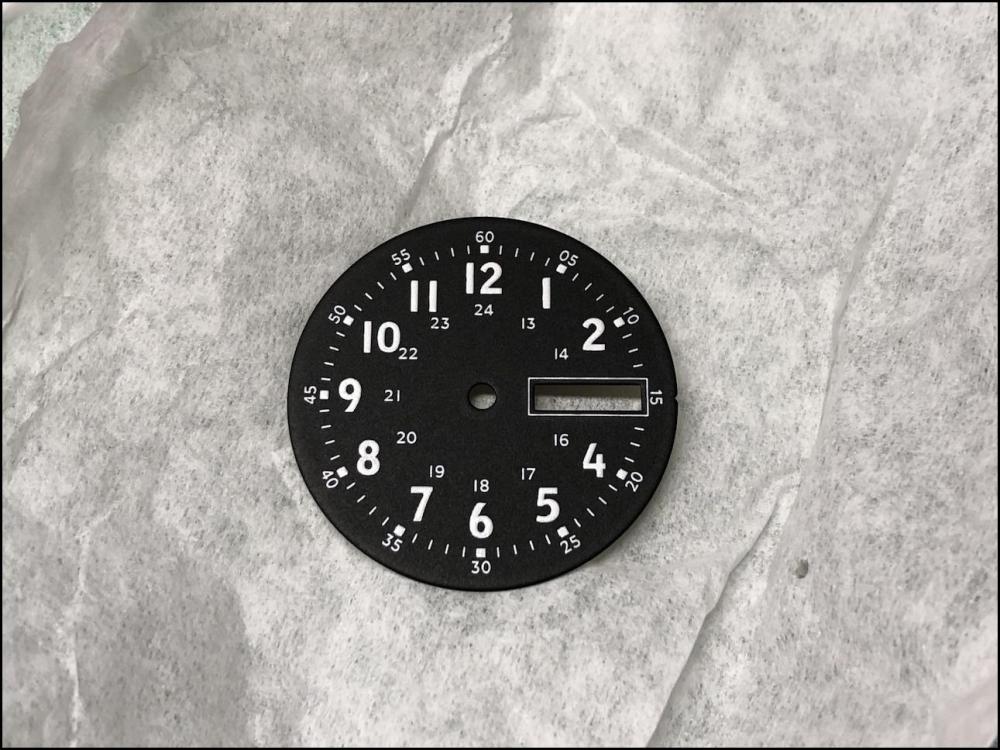
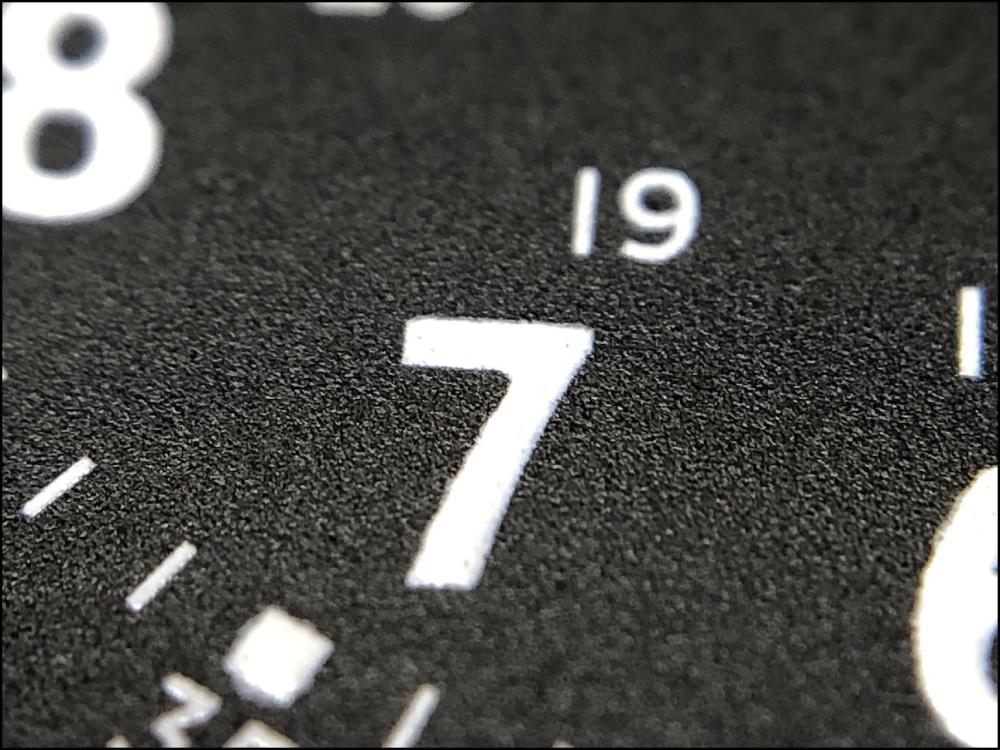
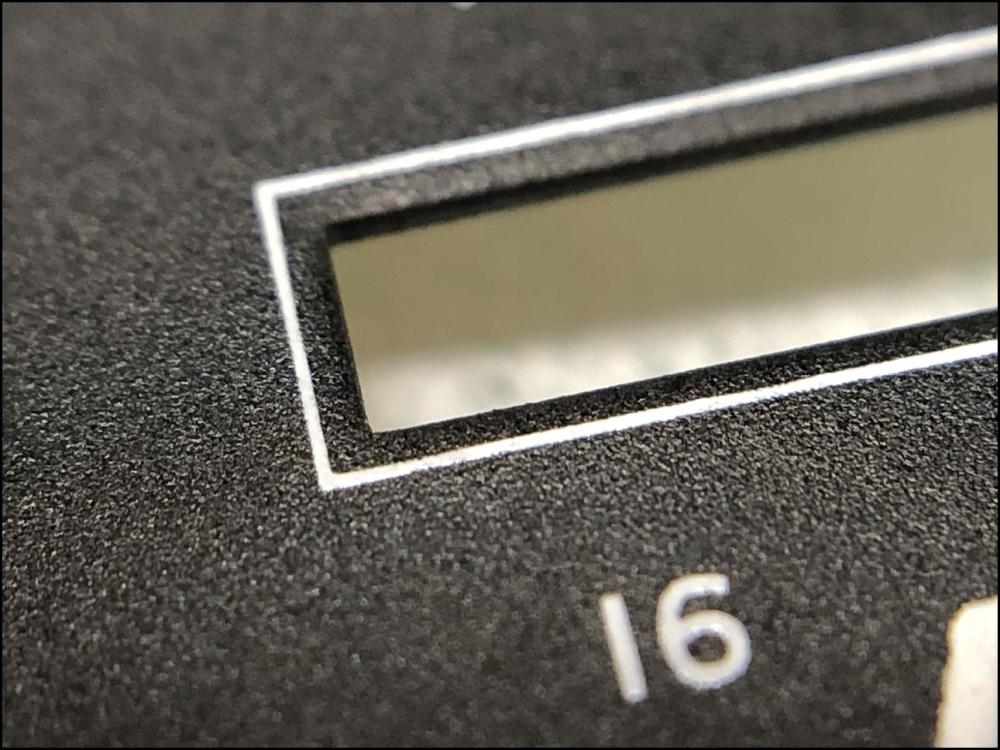
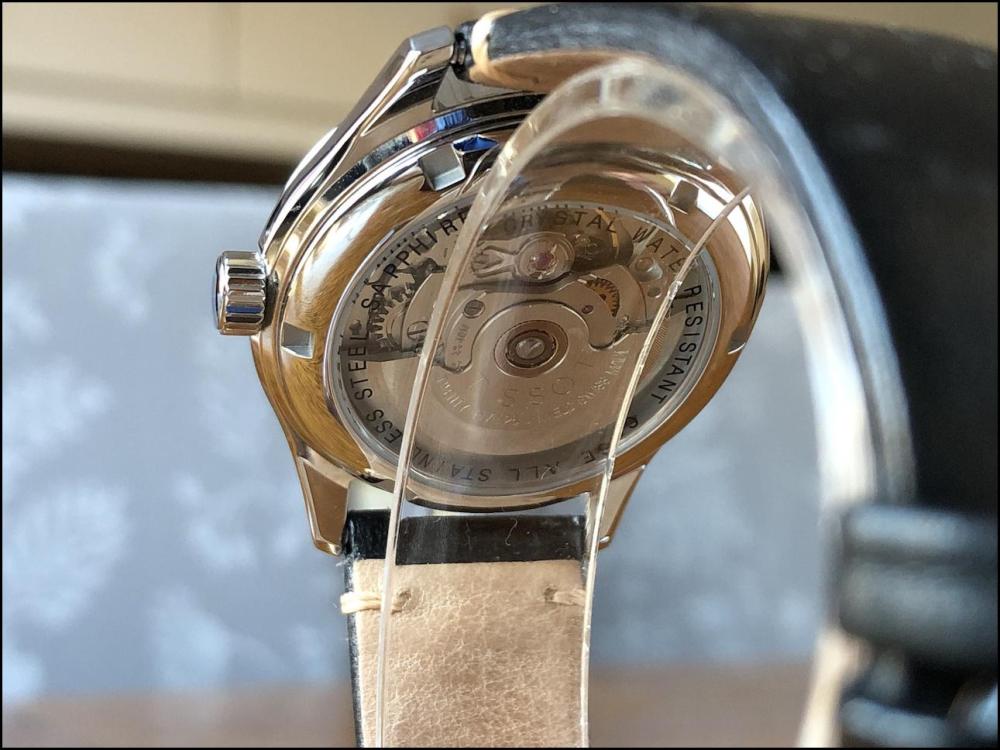
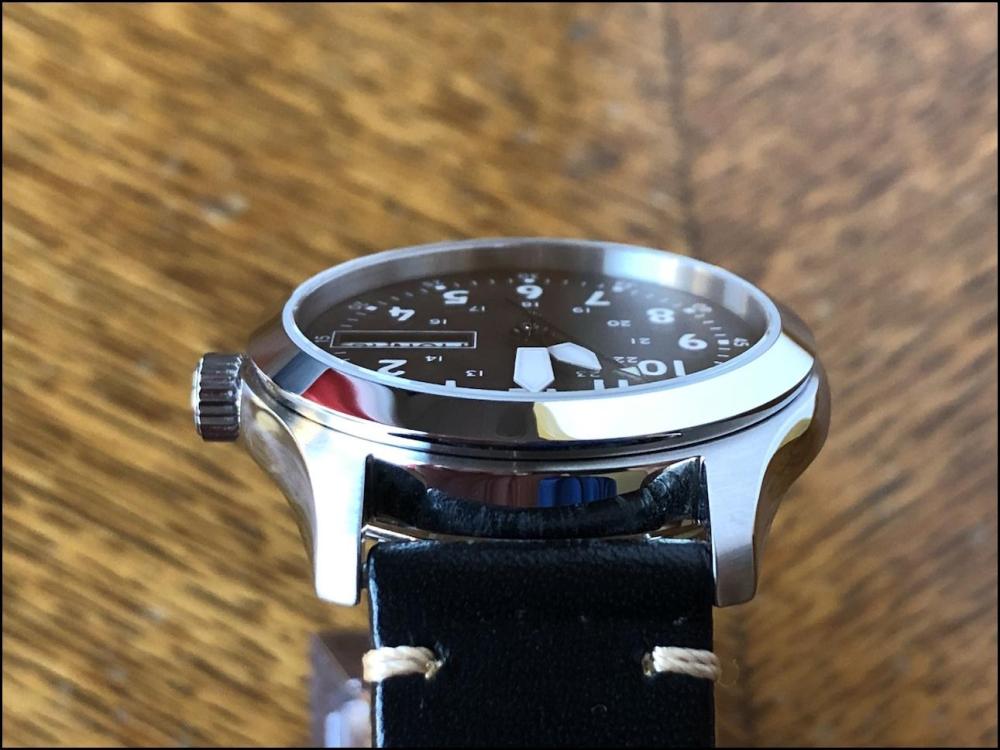
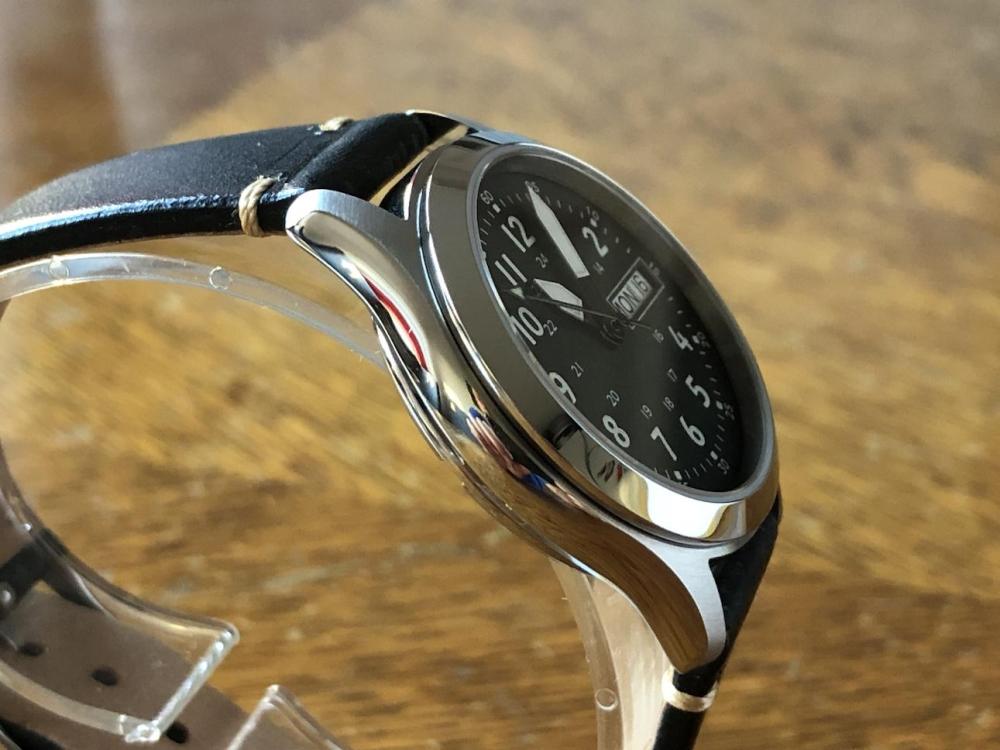
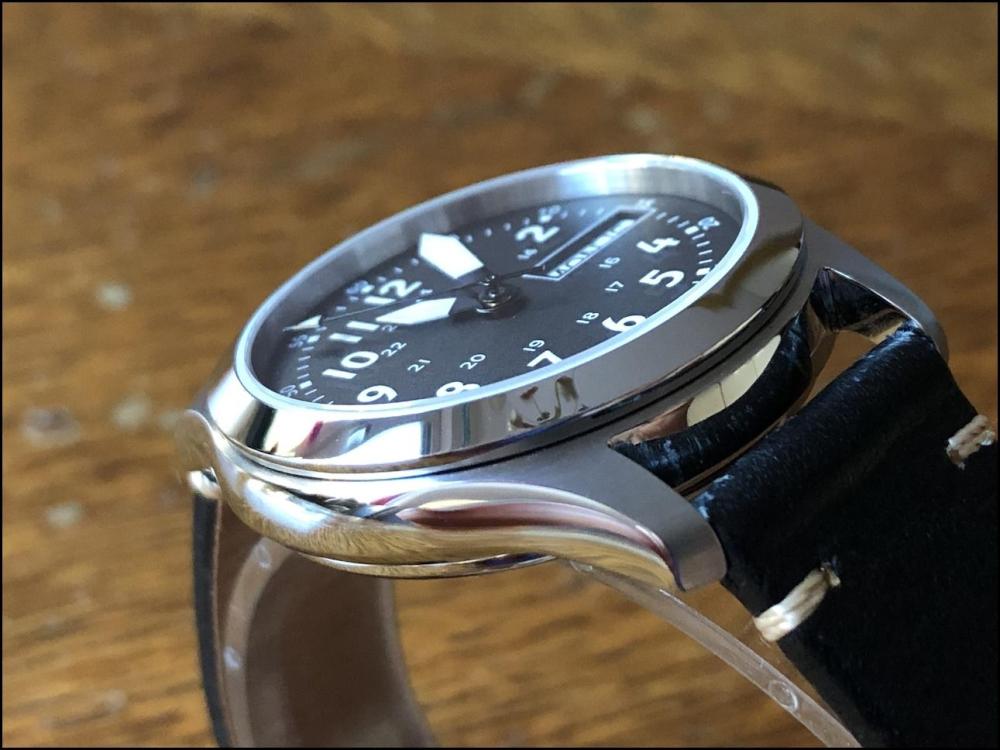
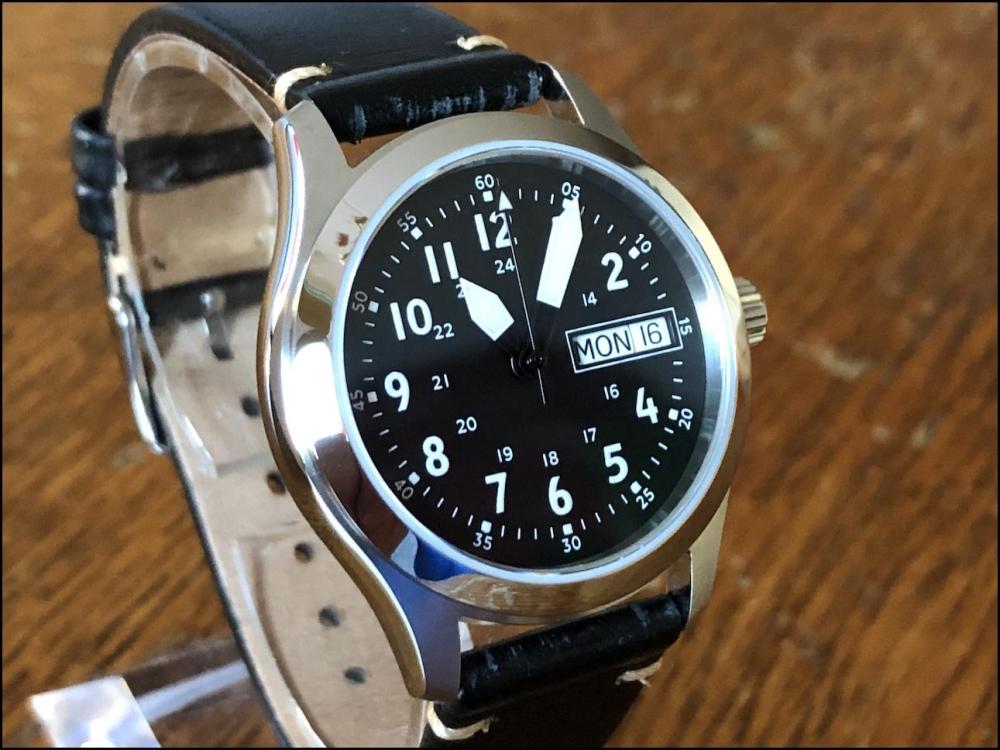
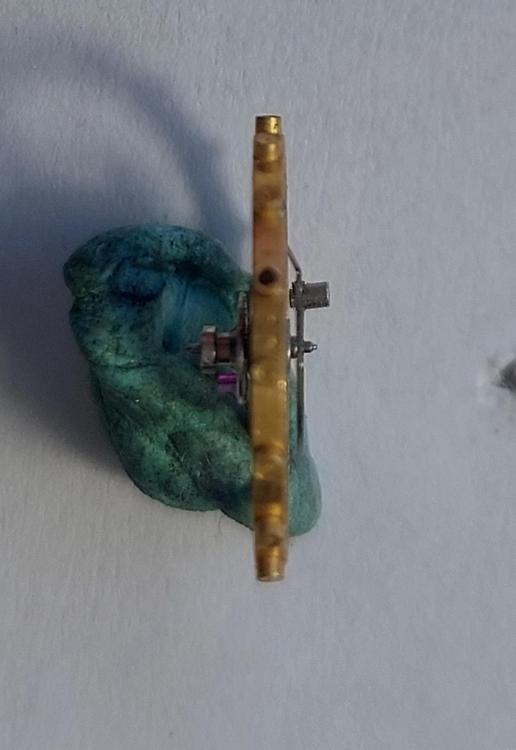
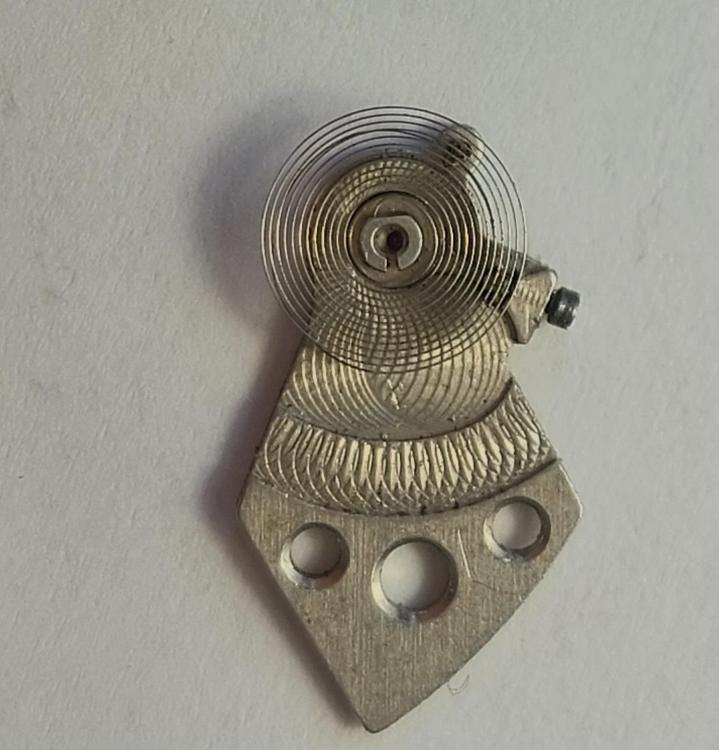
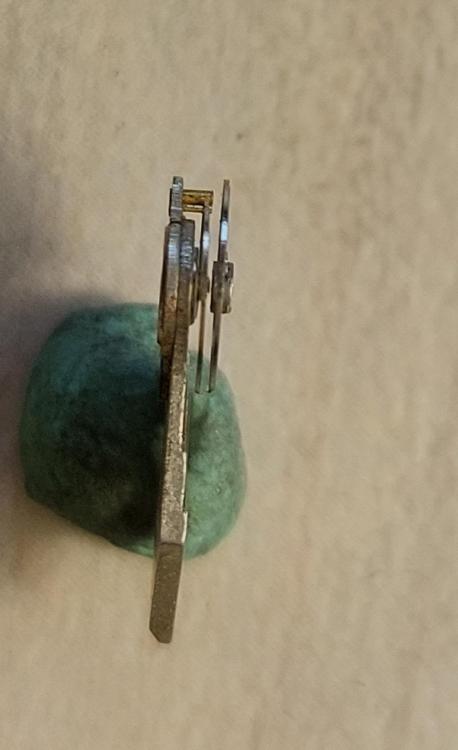
A few years ago, when I was still relatively new to the service and repair field, I found an intact but non-functioning ETA 2836-2 calibre movement in a bag of watch parts I had purchased at an auction for about 30 US dollars. That movement has now found its home in the Ofrei watch shown in the pictures. Apart from the movement and the strap, I bought all the parts (case, hands, and dial) from the American website Ofrei.com. It cost me about 200 US dollars, nearly half of which was spent on shipping, import fees, and European taxes. As a non-American, I still feel it was worth the money. If I had been American, I would have found it exceptionally affordable. The first time I disassembled the movement, the obvious and seemingly only issue was a black, sticky "gunk" on the pallet fork's impulse surfaces. At the time, I had no idea what caused this black and sticky "gunk." Now I believe, though I’m not entirely sure, that it was epilame that had somehow degraded or gone bad. Despite great efforts, I couldn’t clean the pallets, and I ended up buying a new one. Even so, the watch didn’t run very well. A couple of years later, with more knowledge and experience, I disassembled the movement again but found no obvious issues. I serviced the movement again and adjusted the side shake and end shake of all the wheels as precisely as I could in the hope that it would help, but it didn’t. Then, a few months ago, I decided to take the movement apart a third time, and this time I finally found the reason for the irregular and poor timekeeping: micro-oxidation and micro-rust on almost all the wheel pivots. Barely visible even at 40x magnification. I brought out my Jacot tool, and the problem was finally solved! This wasn’t the first time the Jacot tool had brought one of my movements from either poorly functioning or somewhat acceptable performance to function as if it were brand new. The Jacot tool requires a significant investment, not least in acquiring the knowledge and training to use it, but it has once and for all proven to be worth the money and effort. The decisive moment for me was when @nickelsilver showed me how to hold the burnisher properly. For those of you who want to know more, you can click on this link: "How to hold a Jacot tool burnisher" So, why buy a case, hands, and dial from Ofrei.com instead of from eBay, where a "stainless steel" case from China usually costs less than 50 US dollars? If you ask me, the answer is that Chinese cases on eBay are junk and a scam. The three I’ve purchased in total all had numerous issues, the most serious being that they rust (stainless steel, really?) and cause skin problems since I’m allergic to nickel!!! Less serious but still annoying is that the movement fits poorly in the case and that the threads are generally poorly made. There are several issues with these cases, but what I’ve described here should suffice. No more Chinese cases from eBay for me! Are Ofrei’s cases manufactured in the USA, Germany, or Switzerland? I don’t know. They’re probably made in China as well, but at least there’s a contractor (Ofrei) who knows their stuff and has quality-controlled their deliveries. It may not be Rolex quality, but the case is symmetrical and carefully polished, and the case back fits the case like a glove (buttery smooth!). The dial is perfectly symmetrical, and the hands are straight and well-made. Best of all, all the parts fit together perfectly with the movement. I’m so satisfied that I felt it was my duty to share my experiences. I hope someone finds it useful!


 7 points
 -
Yes they did. They used a metal oxide resistor instead of a carbon one.3 points
-
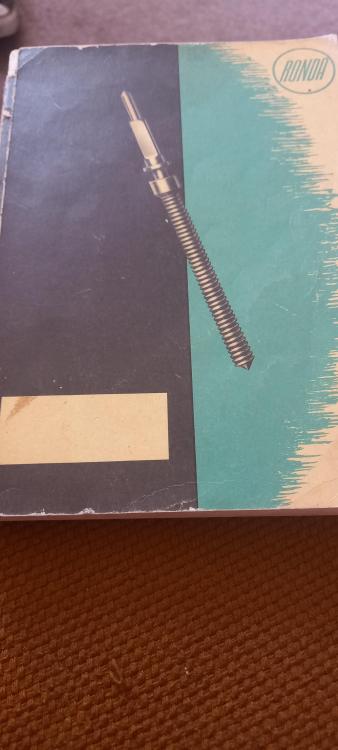
After @Mercurial posted about some of Jendritzki’s books being reprinted and available on eBay I bought a couple and thought it would be a good idea to do a review of them. This being the first. Book: THE WATCHMAKER AND HIS LATHE Author: H. Jendritzki ISBN: 2-88012-037-3 Pages: 86 A4 Reprint: 2018 Publisher: Historische Uhrenbucher, Berlin, Germany Website: https://uhrenliteraturshop.de/Foreign-Languages/Horological-Books:::47_21.html eBay: https://www.ebay.co.uk/sch/i.html?ssPageName=&_ssn=uhrenliteratur According to the publisher this 2018 edition has been re-edited updated by Hans Jendtritski and Marcel Bergeon. This book is intended to be a basic starting point for anyone wanting to get into using a lathe for watch repair, in this my opinion is it does an admirable job. At only 86 pages it may sound like it would be more of a pamphlet than useful, however it does go into the basic aspects of the Geneva style watchmaker lathe and its use in a very clear and concise manner. There are in depth chapters on turning a balance staff, making a winding stem, jewel settings and bushings, replacing pivots and making screws. Most of what is needed in the day to day of repairing vintage and antique watches. i have found this book extremely useful in understanding much more of the mechanics of using the lathe and making/using gravers including special shapes. I would recommend this book to anyone embarking on the journey of taking watchmaking to another level. Tom P.S. the books arrived to me in Scotland from Germany in 3 days3 points
-
Hi dnhb, I am completely self taught so maybe others will spot an error in what I am about to say - I have done this once by following instructions I found on the internet. I made some notes based on those instructions which I'll attach. The Westminster Chime Note Sequence.pdf3 points
-
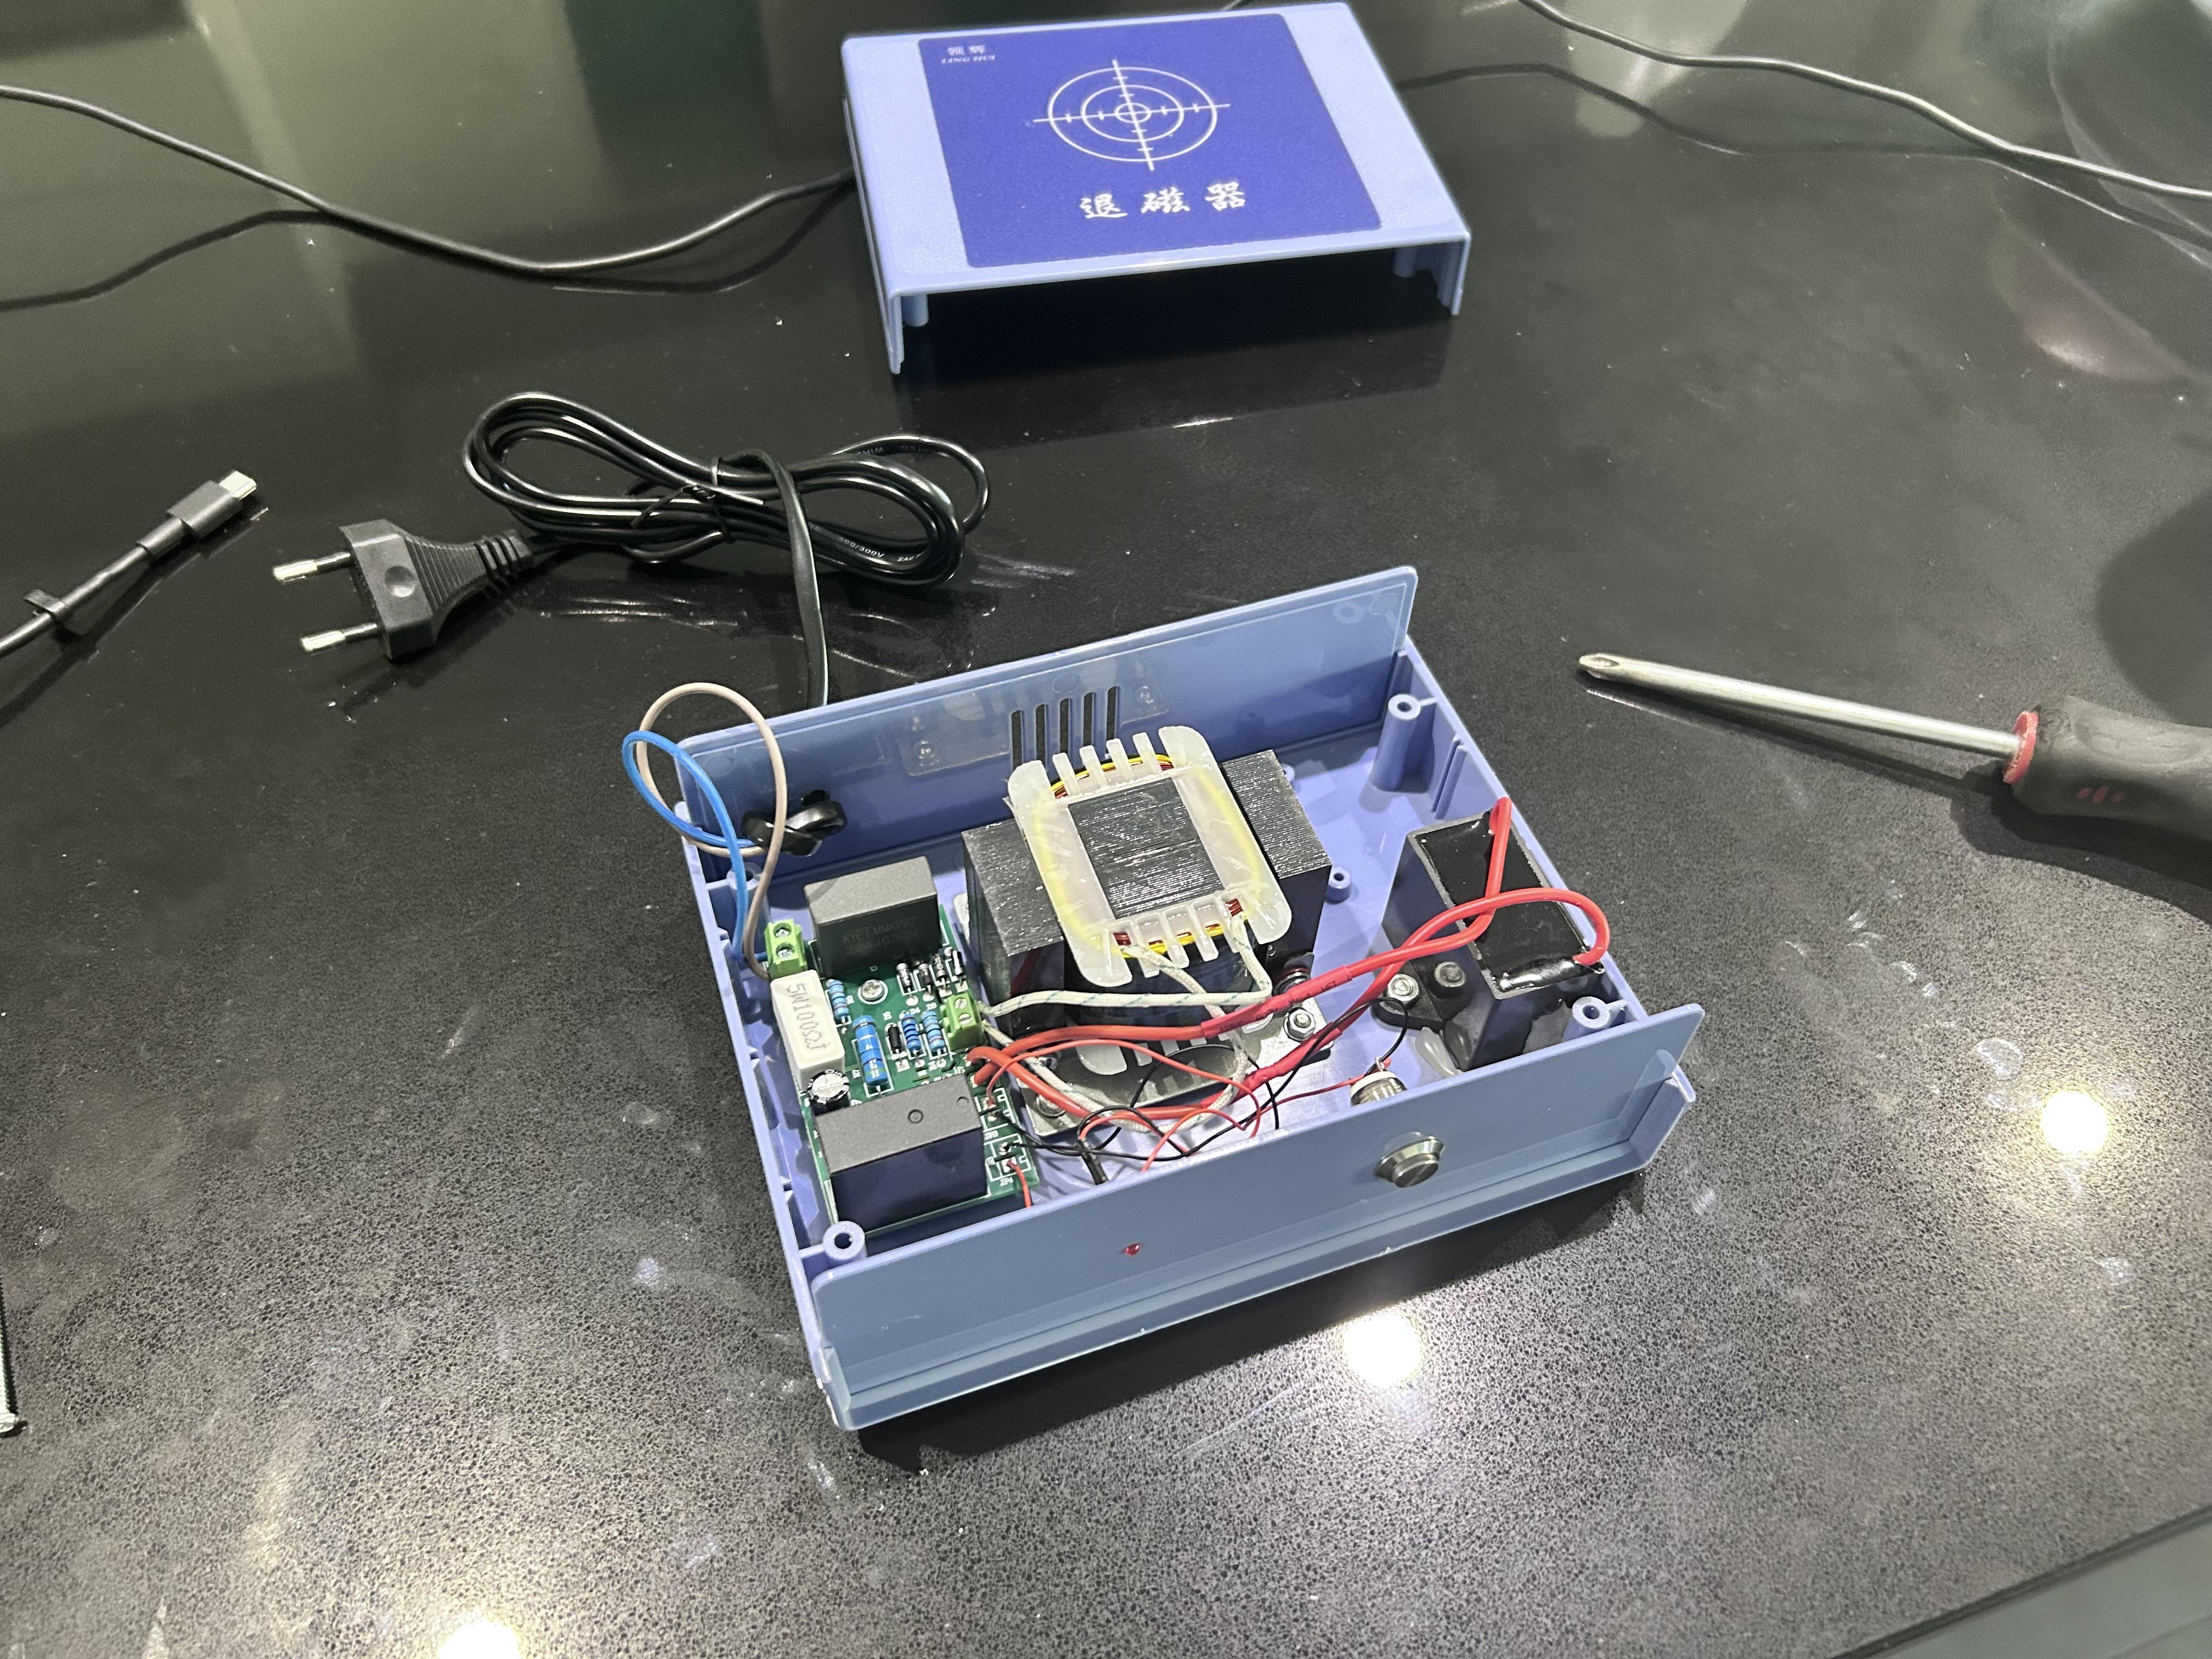
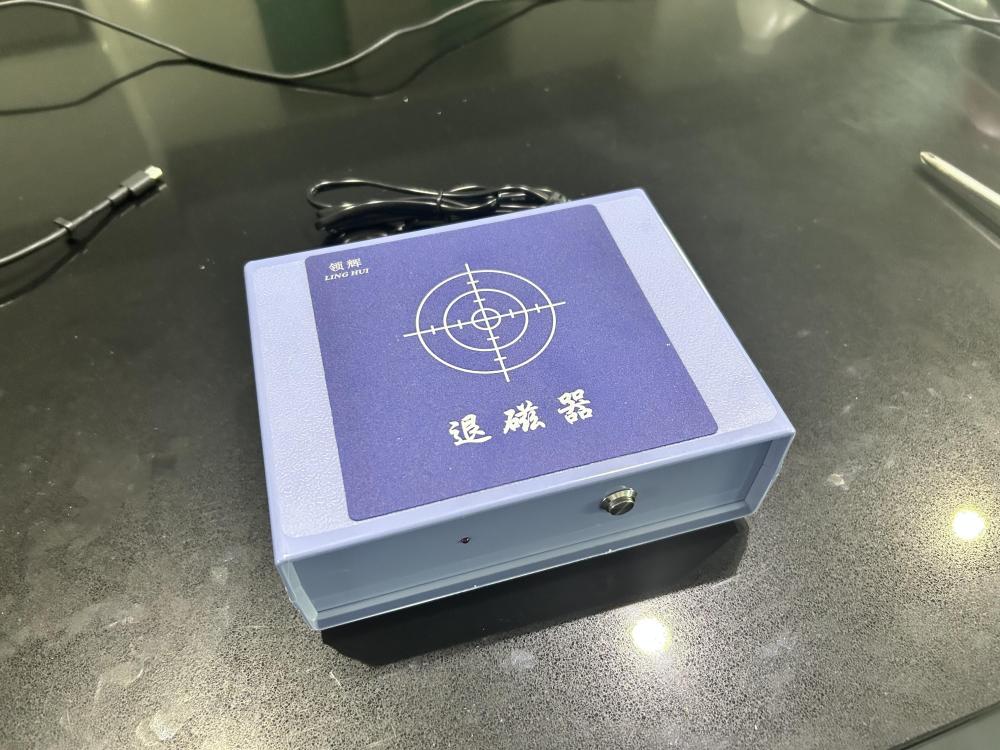
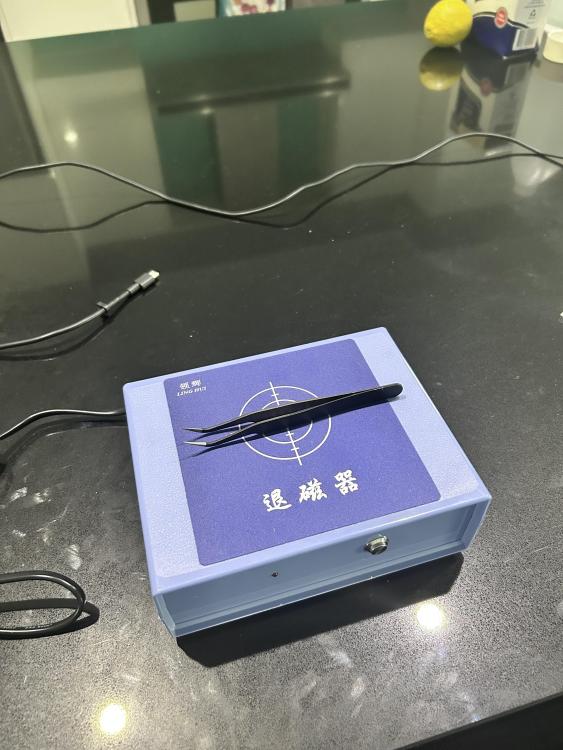
@JohnR725 the demagnetiser came in and here it is with the lid off. Nothing too crazy but looks like a transformer to generate the electrical field, a momentary switch and some electronics that I assume is doing the switching for the collapsing electrical field. I put my tweezers on it to see if it worked as they cause everything they touch to stick to them. A couple of things to note: 1. it moves the tweezers as it activates. Clearly the crosshairs are there for a reason to make sure the object is centralised. 2. I moved the tweezers 90 degrees in between button presses. No idea why I’ve just seen someone do it on YouTube 3. it completely removed all magnetism. Result!

 3 points
 -
His blog post post is what got me into watchmaking. Truly next level stuff. All the animations are lovingly hand-written in WebGL. It has been a dream of mine to construct a real-life exploded watch movement. I've been working on it on and off for a couple years now. I'll post somewhere on this site if I ever manage to work out all the kinks...2 points
-
what I was curious about is how closely does it resembled the Elma. I have one lurking around here is supposed to be fixing it just didn't quite get around to it. Then I know I posted the pictures on the discussion groups there lurking someplace. Then occasionally thinking about it yes it is a different circuit board because there is a rather live sizable he physically large motor starting capacitor that they were using the charge up to discharge through the coil. Basically with any of these units you want to keep your fingers away from things. They usually charge up a capacitor with depending upon where you discharge and lethal voltages and then discharge it through the coil C as well be careful not to put your fingers in a place where it could go through you. Similar to the old photo flash circuits found in cameras you can charge up a really nasty voltage and those capacitors before it fires the flash tube. Or it's really amazing what you do with a couple of tiny batteries and a capacitor.2 points
-
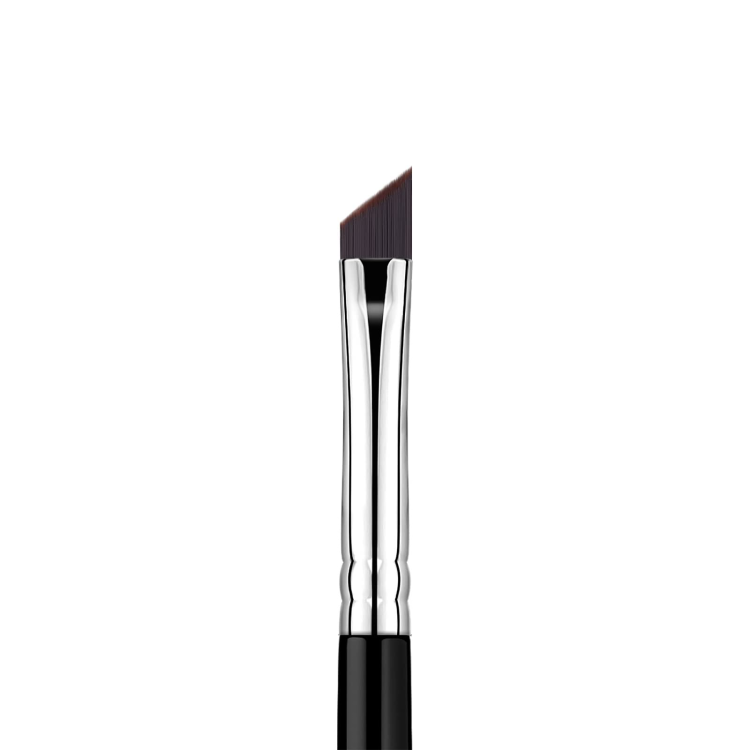
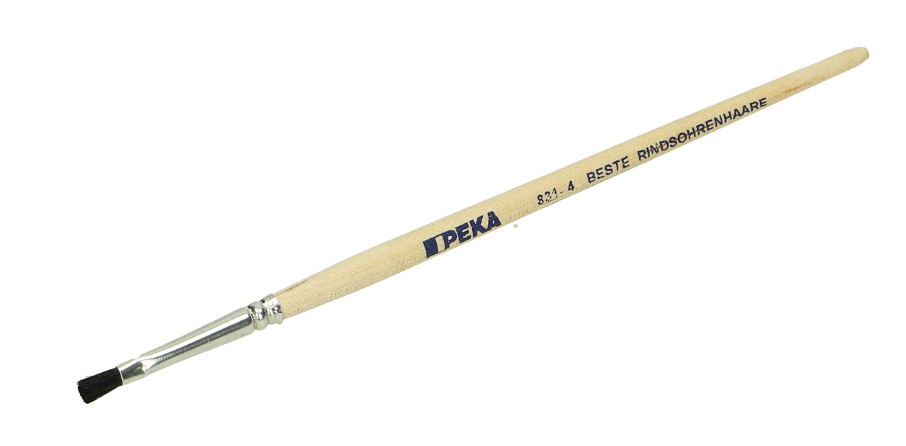
I tried a bunch of "arts and crafts" brushes but found them to be too soft or too coarse for my liking. Then one day I stubled across what are called "eyeliner brushes" in a random cosmetics store. They seem to be mostly fashioned out of black and very fine but stiff nylon hairs and are often angled. The angle is perfect for getting into nooks and crannies. As far as I remember, the cheapest ones only cost a few € a piece. They seem to stand up to naphtha and IPA just fine and don't shed.
 2 points
 -
I use the cheapest brushes I could find at a hobby store. I cut them shorter to make them stiffer. Good for cleaning stubborn gunk from mainplates and mainspring barrels etc.2 points
-
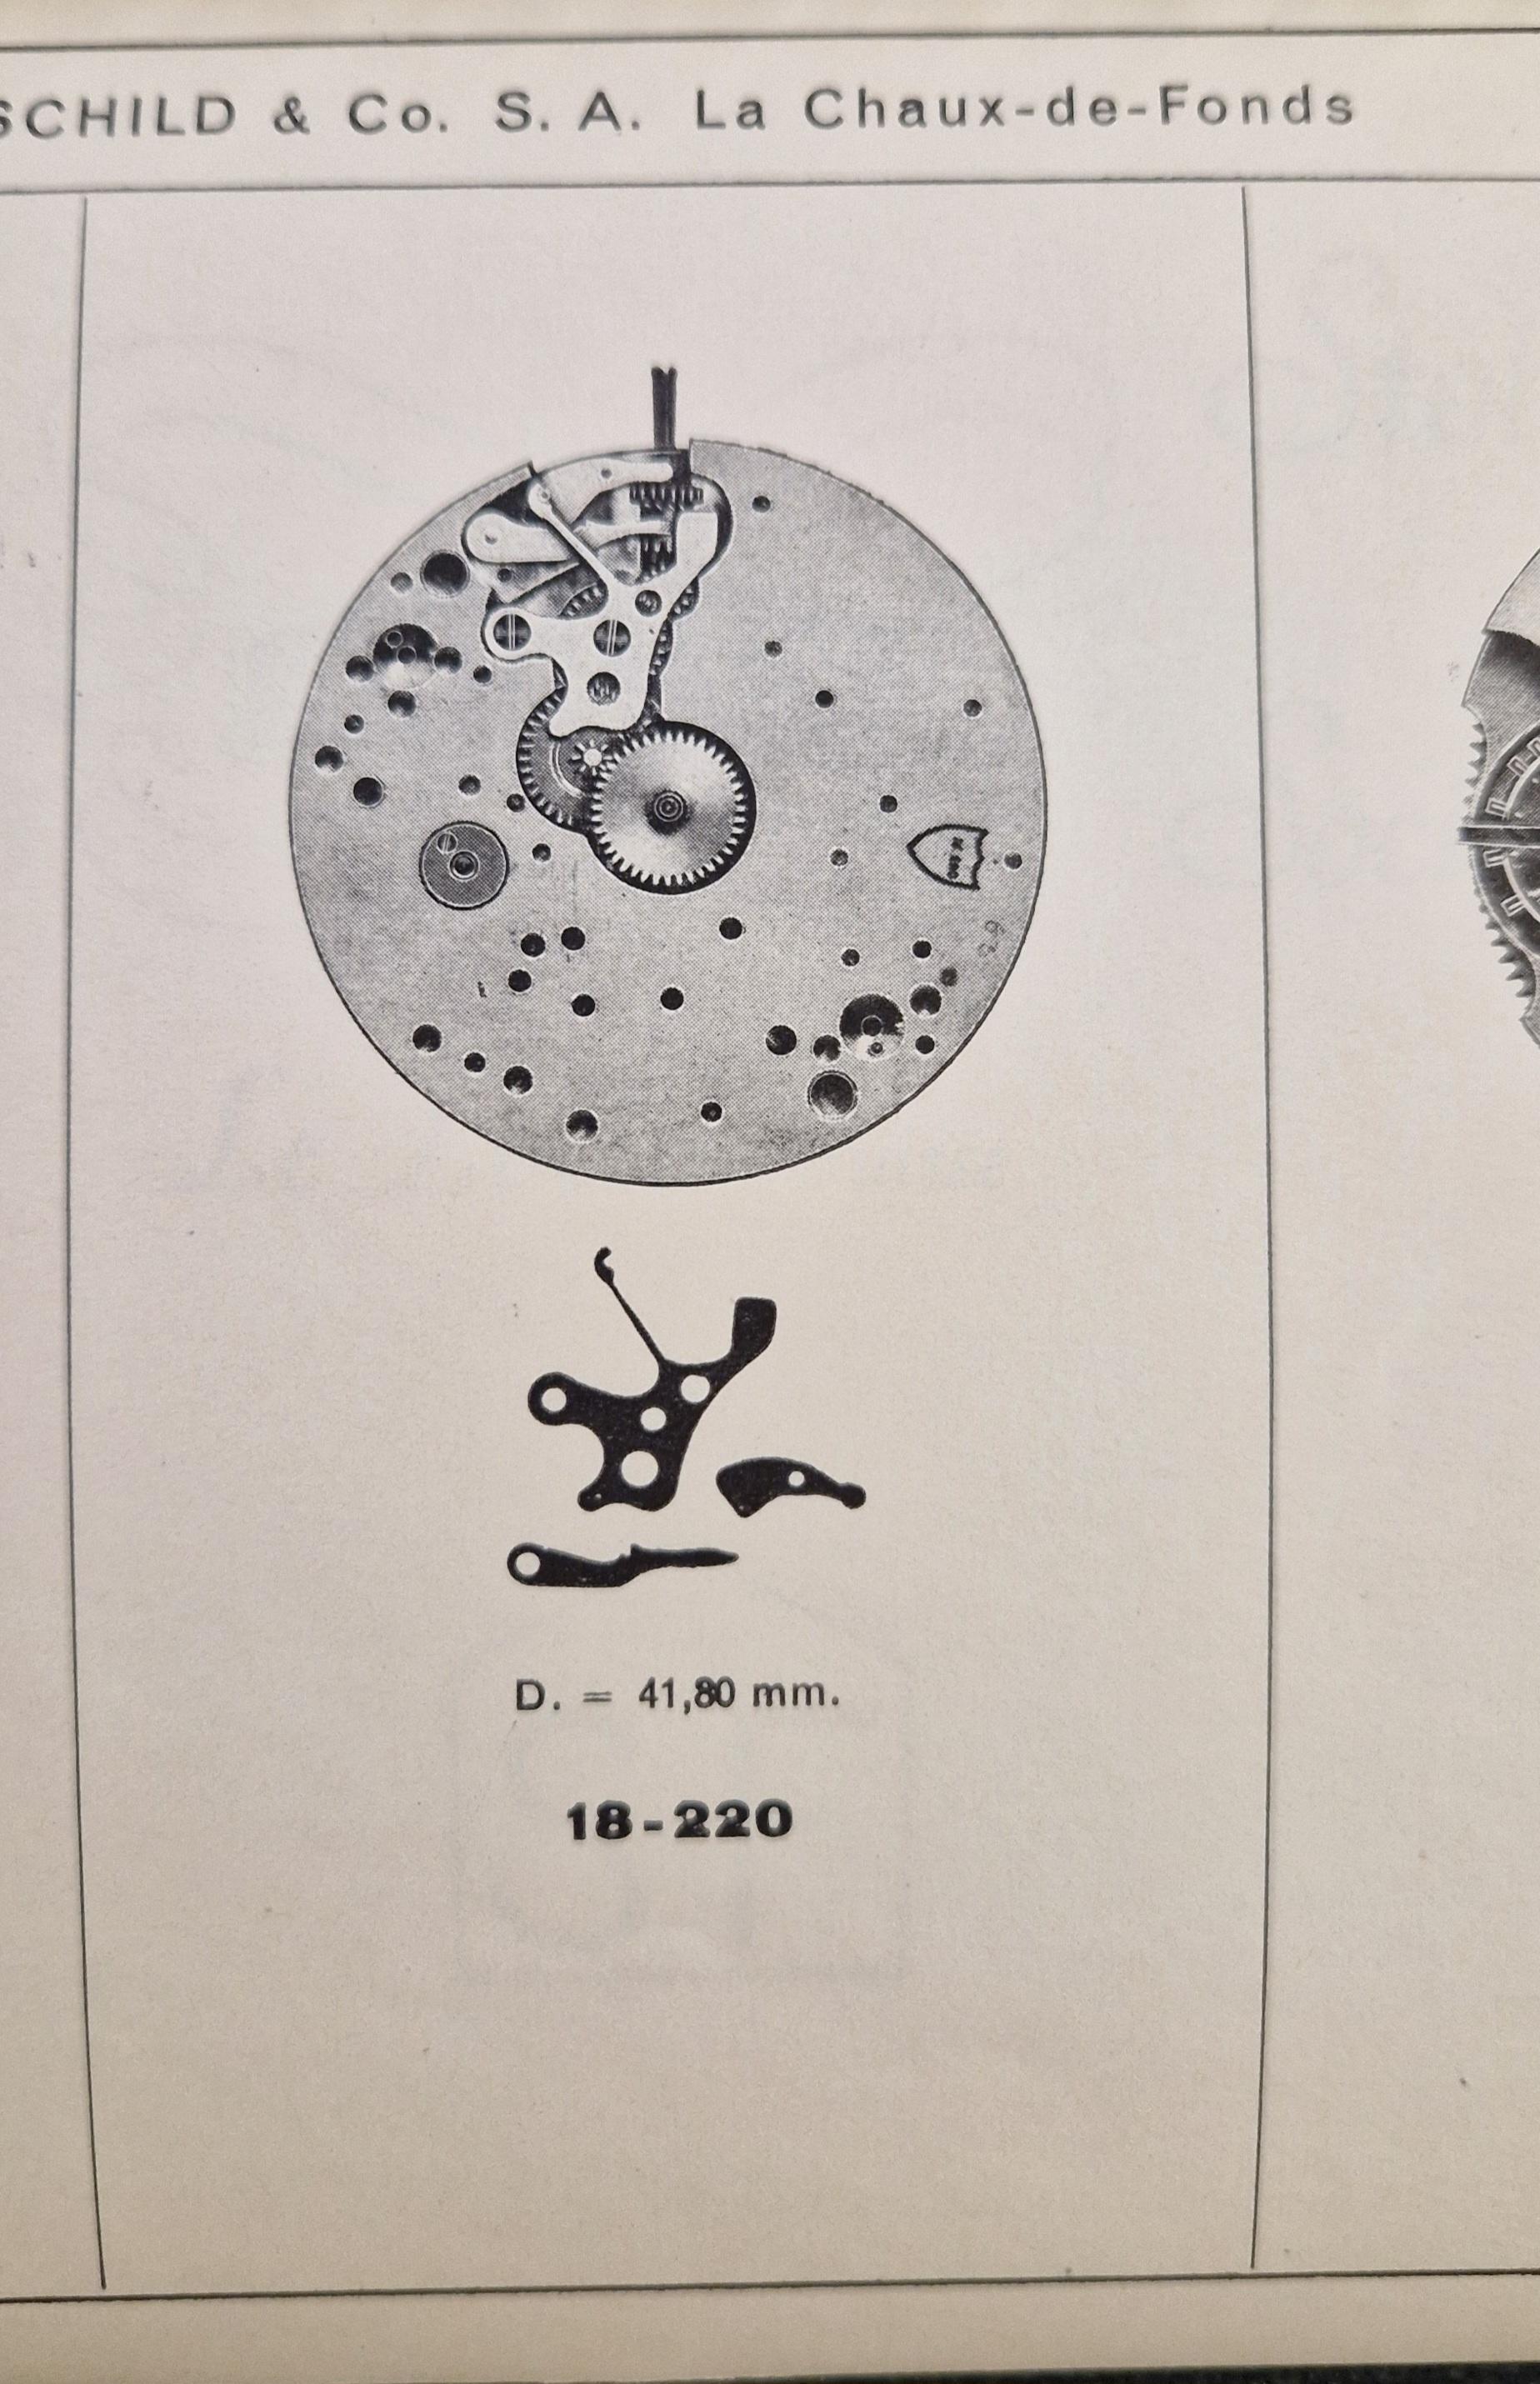
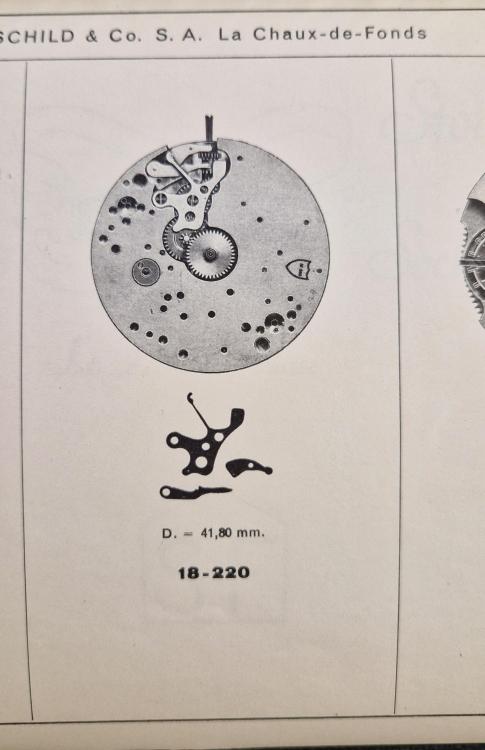
This appears to be a Schild & Co. 18-220. Jules Borel list the set bridge in two versions, left or right, I guess they mean looking down at the dial side crown up? Swiss part # is 445/616 for left, 445/615 for right.
 2 points
 -
Gouging, raised material on the plate? This is a common practice among Soviet watches, seen it many times on the 2609 ha model, a few times with 2 brass shims.2 points
-
All the other watches I have so far are broken in one way or another- which is why I got them for free- so I haven't been able to get them working yet (need a staking set, etc). However, I did get a practice movement that I just took apart completely and reassembled. And if runs. I feel like it's a milestone.
 2 points
 -
Eyup watch peeps. I have just received another useful book addition . There are sites containing this information, one in particular is the balance staff and stem .com site. A very handy database when searching for information on sizes. But it is an actual retail site so may not be around forever. If you google ronda catalogs there are also pdfs that you can download, i will add a link, but the stem pdf are not complete to the book. Everything is there but only is alphabetical order of make. Not grest if you have a stash of stems by ronda number order which i happen to have. This book will save days if not weeks of searching and identifying ronda numbered stems also unknown stems. https://vintagewatchparts.net/ronda-winding-stem-catalogue/
 1 point
 -
wnlewis here. I've long had a fascination with clocks, watches, and anything that takes small precise parts. Primarily I am interested in railroad pocket watches and wrist watches. I have a stainless steel Hamilton 992-B that I need to get back into running condition. I also have my father's Bulova Accutron. It needs a good cleaning, and the special battery adjuster that adapts a modern battery to the old watch. I have a Branson ultrasonic cleaner that can help with the cleaning. Now to be very careful and patient. Slow and one step at a time. My other great desire is to build a grandfather clock, including the mechanism. I have a Unimat SL lathe and intend to get the watch maker's spindle and other accessories for it to help with that project. I cut down a large black walnut tree several years ago and had the trunk slabbed. It is ready now to be cut down into good furniture and instrument grade lumber fit to make such a clock. Right now, I'm trying to ferret out a small screw from the back of a Garmin Forerunner 25 that I lost, and need to replace. So the challenge is to find a thread checker, measure an existing screw, find a suitable replacement, and turn it down to the proper length - if needed. Not exactly a mechanical watch, but a good start on getting into hobby; learn the basics, things like screws, etc. Hope to hear about other people's projects. Thanks and best wishes.1 point
-
You guys are brilliant! You are correct at the time of the photo being taken (so I could put it back together properly) the part was intact. Not the case now though. TBH I wasn’t being overly rough, I just looked up from the tiny tiny screw and notice the thin arm wasn’t attached anymore - never did find it either. Will I be able to order it directly from the company? Many thanks once again.1 point
-
I use brushes from Peka, the 831-4 and 831-6 (the 4 and 6 are width in mm). Not sure how available they are worldwide, but these have held up well for me. About 2 bucks a piece.
 1 point
 -
Thanks for this great tip! I purloined one of my wife's and was delighted to see under magnification that it was a lot like the ones I'd tried before except the fibers are appropriately fine for things like cleaning around the impulse jewel & other small pivots & jewels. No more dreaded twisty fibers shedding off after the first couple of dips in IPA or hexane. Will be getting more.1 point
-
Here you are.
 1 point
 -
I can't answer your question but looking at this from Cousins the others should be different sizes. Maybe the threads are the same and you can just get these as replacements for your clone? Edit The Cousins clone appears to have them all the same size but smaller than yours.
 1 point
 -
A little...1 point
-
Yes, it could help. But the correct solution is to make spring parallel, as it now is tilted. The spring vibrates and changes it's position when position of the movement changes fast, so it is good to have safe distance around it, and it is easier to achieve when the spring position is by the rules - parallel and correctly centered. Well I felt a little overestimated here1 point
-
I'm pretty sure that is not a Swiss movement in the ebay link. They probably say Swiss because it's from a Rotary, but they use cheap Chinese skeleton movements. I tried to repair one for a friend, but the quality was so poor, I gave up and just changed the movement - about £25. I have never seen a stem on a Swiss movement break there - I can't see how you would break it. I think it says something about the (lack of) quality of the metal. Length E is important, but you also need C,A,F to match. Fortunately the Cousins Chinese stems are cheap, so get a couple of the closest.1 point
-
Your watch is likely to have multiple faults. No doubt the overcoil needs adjust, neven's point is solid.1 point
-
Nevenbekriev, Thank you taking your time to explain what needs to be done - very concise and the pictures are most helpful. I am away working for a week or so, but my intention is to try and follow your advice and try to manipulate the spring when I return. I am glad I asked about this as obviously there is so much to learn. The amateur guys on You Tube make it look so easy. In truth the Balance seems to be my weak spot - it has frustrated me to the point where I had to walk away on more than one occasion - I just want the movement to work and have a sense of achievement, especially after spending a few hours working on a movement. Again, many thanks Bill.1 point
-
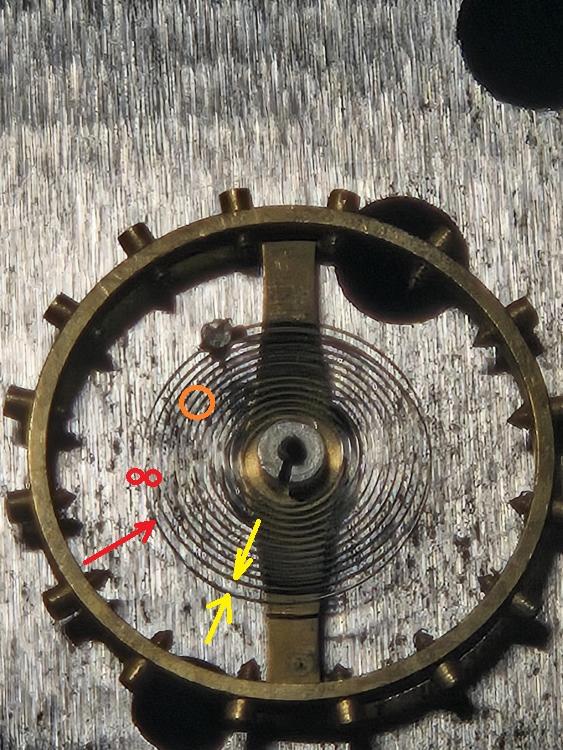
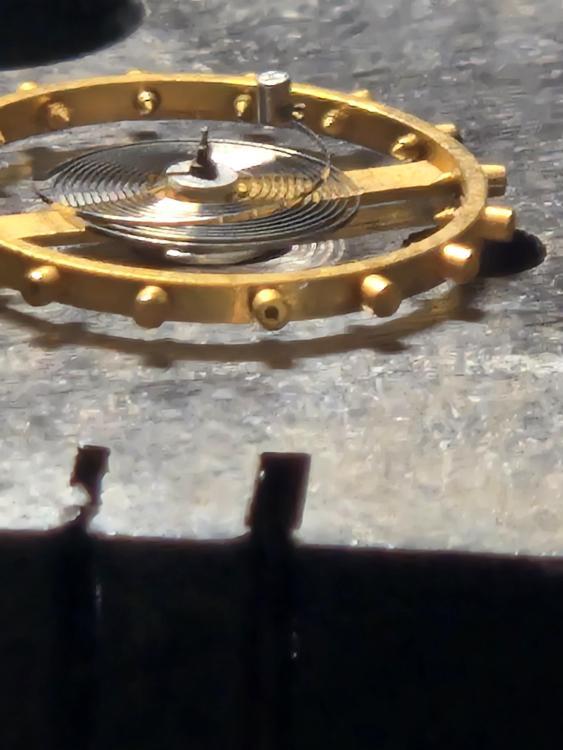
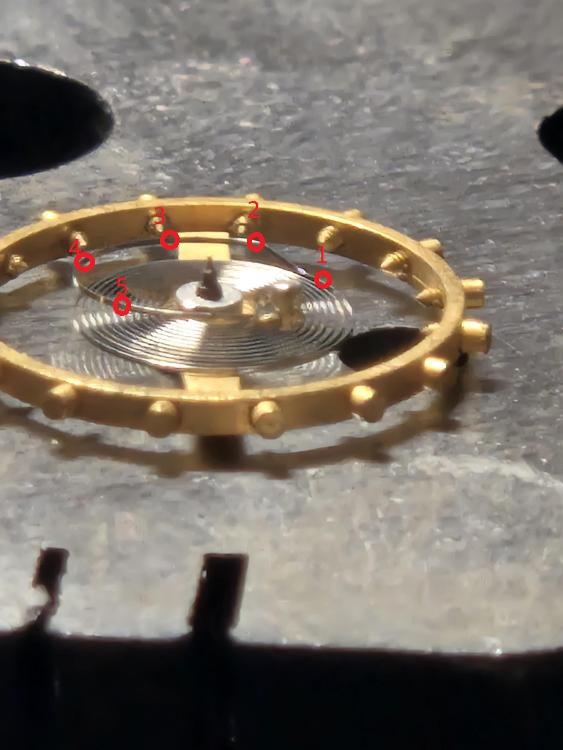
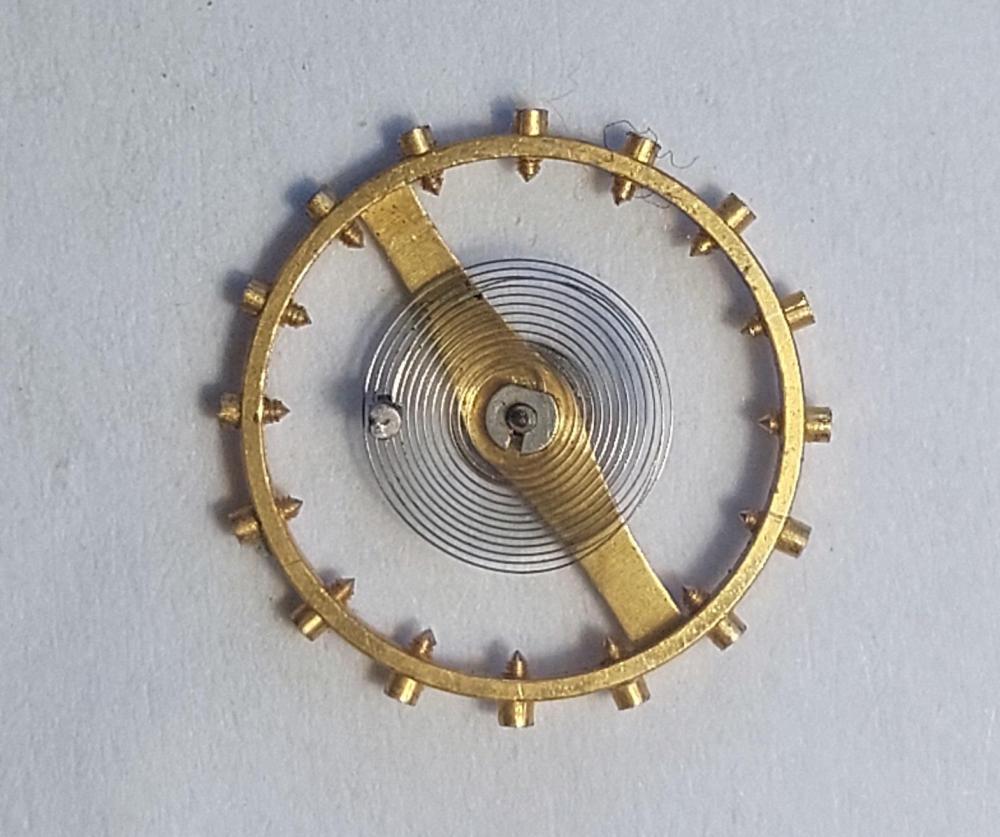
OK, I will start with some pictures of the spring as it should be. As You see, most of the picture are from aside and the aim is to show that the overcoil must be in a plain that is parallel to the spring body. The distance from every point of the overcoil to the spring body is equal. This distance is determined by the 'Z'-curve, which is actually the place where the overcoil lifts above the spring body. Then I have shown a picture from above - this is to show how the overcoil must look and where is the place of the stud relative to spring body - this is above the 4th coil from the periphery to center. Now here is You spring: It is obvious that the overcoil is twisted up. This is the main problem, as the spring with such overcoil will be pressed towards the balance arm. What to do? You need to untwist it. You see points from 1 to 5. The idea is to untwist portion by portion. You must use 2 tweezers. One will grasp the spring in point 1, the other in point 2 and You will twist by rotating tweezers 2 relatively to 1 in untwisting direction. Actually, tweezers at 1 will stay still, the tips of tweezers 2 will be guided in place and the tweezers tilted a little in a manner that grasping the spring will cause twisting. You look at the height of point 3 and when it gets equal to the height of point 2 (looking from aside), then this is done and You move one point ahead - grasp in points 2 and 3 and observe at 4, and so on to the end. This will need some practice, but what is needed is patience and good sharp tweezers. The good thing is that the overcoil is above the spring body and grasping with tweezers is easy. In the end, the overcoil must be in plain and parallel to the spring body. The distance between the stud bottom and the spring should be about the 1.5 height of the spring (width of the band of which the spring is made). Next is the overcoil shape. You must bend the overcoil inwards in several places, beginning where I have shown. Use one tweezers and needle (or the other tweezers, but hold them closed and use as a needle). The tweezers must grasp where shown with two small red circles, the needle will press in place and with direction shown with red arrow, the aim is to bring the distance which is shown with yellow arrows the same as the spacing of the coils in the untouched places. Then continue shaping the overcoil moving ahead and to the end, when the stud will come where shown with orange circle. and the overcoil will start looking as needed. Then, check again the height of the overcoil and if needed, make small corrections. The lat thing is the portion where the spring is fixed to the stud. The interest thing is that the hole in the cock not always holds the stud upright and fixing the stud when replacing the balance assembly is always connected with spring adjustment near the stud. If the spring is OK, then it can be done without removing the spring from the balance, but for a newbie it will be easier to see what He does if the spring is removed. The last pictures show how the spring must look when fixed on the cock. To achieve this, the spring can be twisted and bent up/down near the stud in order to bring it parallel and bent left/right in order to make it stay without pressure between regulator pins. The collet should stay right above the stones, thus guarantee the spring is centered. I realize that it all sounds simple, but it is not so easy to do if one has not practice. And it is easier to start with alarm clocks first, then big pocket watches and then wrist ones. The idea is to understand what needs the result to be in the end and what is the way to do it step by step. In the end the spring should not touch anything, which means there should be safe distance between it and all the other things, no matter what the position of the movement and the position of the balance in the movement is.


 1 point
 -
Hi Bill, No need to make other pictures, everything is clear. Give me some time, I will explain what to do and how exactly. I will need to make some pictures and put some points and arrows there and in You pictures too.1 point
-
The balance needs to be rotated slightly to match the position of the pallet fork, as you fit it. eg. Imagine you are looking at it with the fork above/behind the balance; if the fork, at the balance end, is to the right, you need to put the balance in with it rotated somewhat clockwise. Or vice versa, if the fork is to the left, rotate the balance anticlockwise. Whichever way around you assemble it, the as the balance turns through centre, it has to engage the fork and take it across. I usually set the fork so that it suits the position of the balance with the end of the balance cock (and balance wheel) rotated away from the movement, as I find that's the easiest way to lower the balance in while supporting it.1 point
-
Any generic crown would work it's just a case of measuring the stem for the tap size.1 point
-
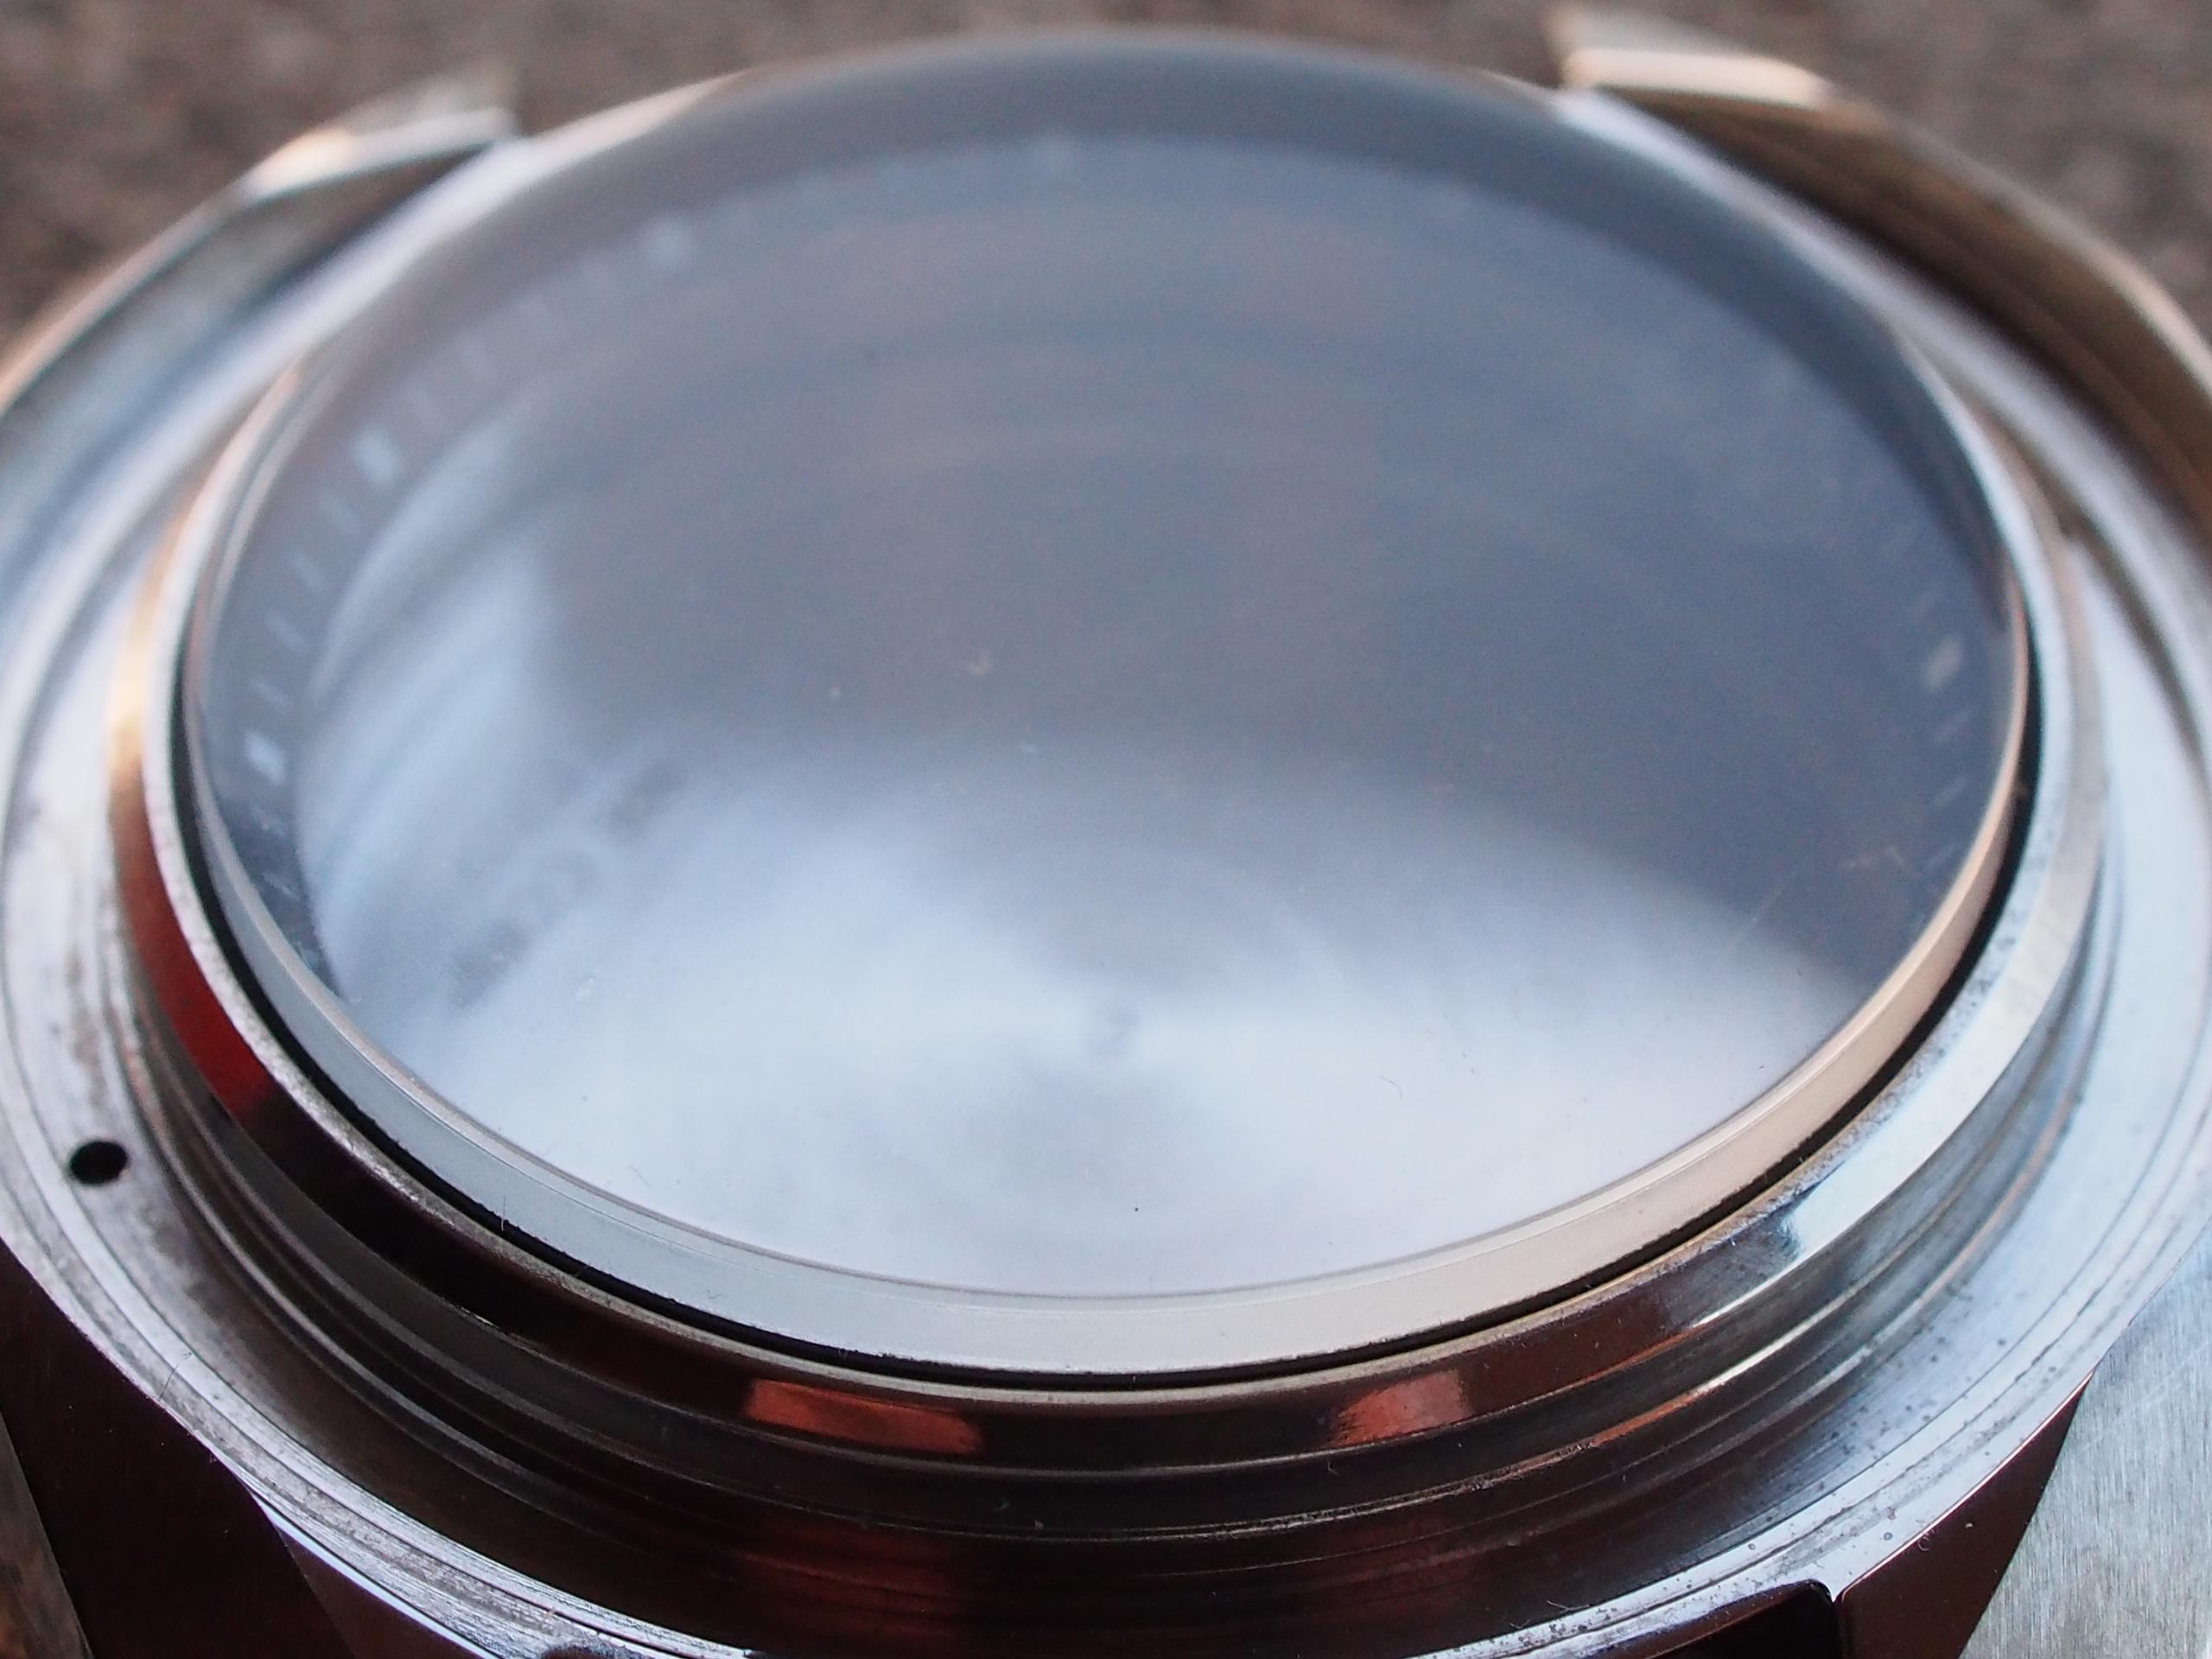
Beginners often ask about where to find this or that crystal, as it happens replacing is cheap and easy as long they are just flat round ones. But the crystal may not be found as generic, or can be expensive, or hard to find. So good old polishing is needed. Here again my technique key points: Crystal mounted on case, that will make it so much easier and safe to handle. Caseback removed, check below why. Jeweller's motor or other rotary tool with a fixed stand. You really want a screen like a carton box. Plastic roundel from a credit card as big as its size allows. 600 grit wet paper. No other grit is needed, as it will lose abrasiveness already after 20 seconds of use and become comparable to finer grades. Try to got directly over the deepest scratches, but without insisting too long (as in 5 seconds max) so to not dig valleys. Find the right compromise regarding the work angle, going flatly is good, but isn't even reasonable to try to sand the entire surface even. Look at the white streaks from inside the glass while working. You will see if you're getting right at the scratch or nick because if so the defect will show up in contrast Be patient with the paper stage. After a while it becomes hard to see if all scratches are gone, but you must remove them all before going to the next step. You should have made a mental note or drawing of where the defects are, rinse it up and observe at different angles. In difficult cases you may need to replace paper once or twice. Crystal will look now very foggy, that is normal Once happy refit caseback and crown, or rodico in the tube. The diamond paste is much more messy and you don't want that inside the case. Mount an hard felt wheel like 7 or even 10 cm dia, 2cm thick, place 1 cm of diamond paste (No. 10 or 14 good, but others work too) on the section toward you while keeping the crystal horizontal. Let the wheel grab the compound one bit a time, keep well pressed up and go over until all paste is used and you can present the entire surface to the wheel, rotate the watch and collect the past on the other side, place it on the crystal again on the other side. You can't do more than 30 - 40 seconds of work before adding fresh paste. Usually I do 4 or 5 passes like that. When working with paste is almost impossible to see the result with cleaning up. Clean with dishwasher detergent, dry it and observe well. Very likely you will notice some small defects, up to you if you want to go back to paper, concentrating on the spot only. Final polishing can be done switching to another wheel and finer paste, no less that 10 as these have no practical effect. Cerium oxide is another option but I didn't try it extensively so far. Below what I did today in about 20 minutes. The central scratch was quite deep. No final polishing or cleaning yet. After:

 1 point