Leaderboard


Popular Content
Showing content with the highest reputation on 01/04/25 in all areas
-
Having a box with random parts seems like bad practice to me. Keep a parts movement in tact, place in a zip lock bag and label the caliber. Only one part left, do the same.4 points
-
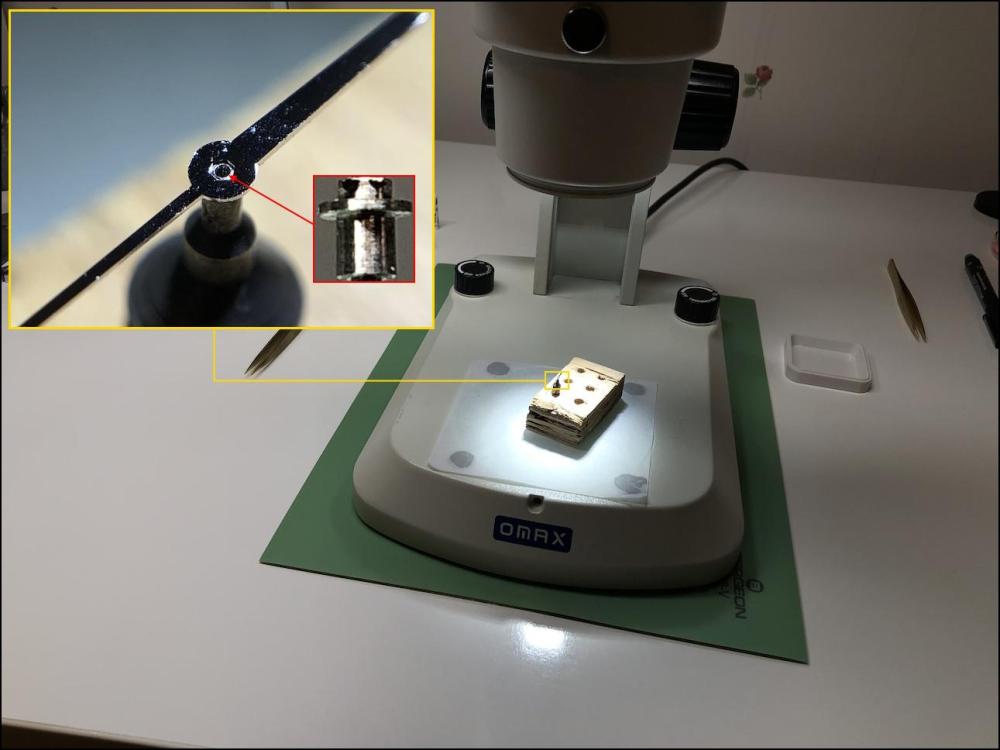
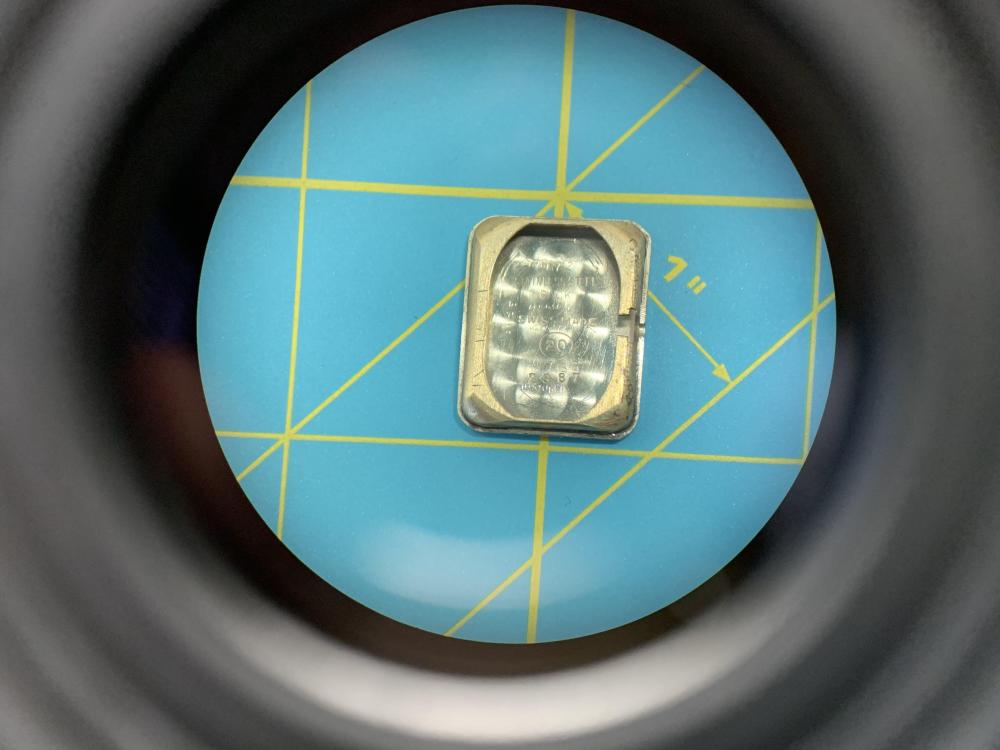
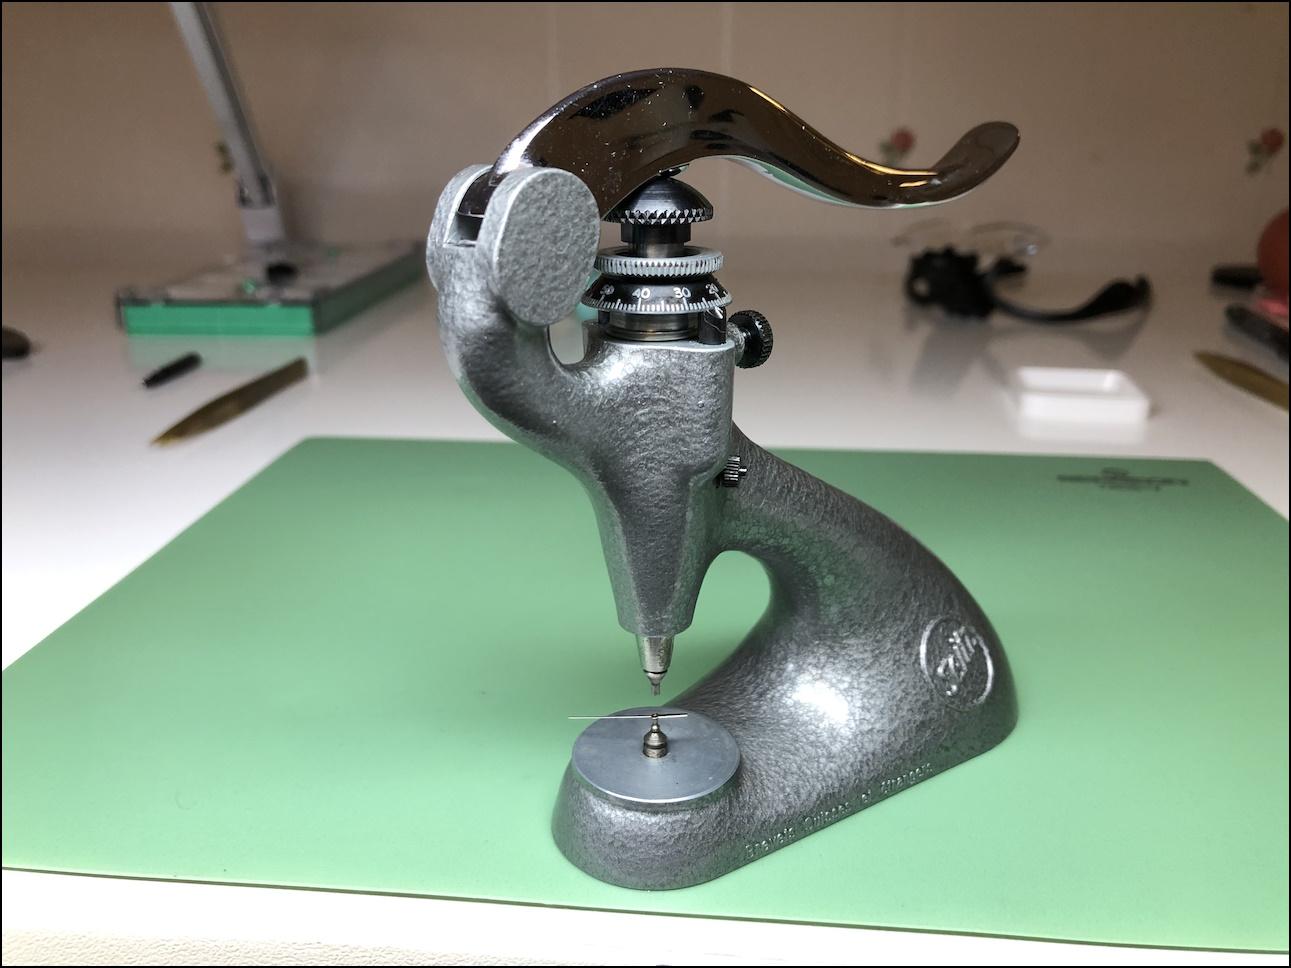
As the proverbs say, "necessity is the mother of invention" and "where there is a will, there is a way." After much thought and several failed strategies and attempts, I finally managed to figure out and carry out the mounting or riveting of the second hand. As I mentioned earlier, I don't consider myself particularly skilled when thinking outside the box (and thus probably one of Bergeon's best amateur customers), but practice makes perfect, so I can't help but feel a little proud today OK, it's not rocket science, but still. I placed the second-hand tube into the hole of a suitable pusher from my jewelling tool. To work under my stereo microscope, I placed the pusher in a hole in a wooden block. Without the stereo microscope, the operation would have been impossible, at least for me. Then, I manipulated the second hand with two brass tweezers until the hexagonal hole in the hand aligned with the hexagonal top of the tube and gently pressed the hand, hoping it would attach well enough not to fall off. Fortunately, I got the hand to attach, albeit slightly crooked and very loosely. After this, I very carefully transferred the pusher to the jewelling tool so the hand wouldn’t fall off in the process. I had pre-set the micrometre to minimize the risk of crushing or damaging the hand if it became necessary to apply relatively high force on the jewelling tool lever. Finally, I carefully lowered the lever, and almost immediately, without applying much force at all, the second hand clicked into place. It was a distinct click—the kind that gives you a satisfying feeling in your body. My only concern was that the tube or hand might have been damaged when I removed them, causing the hand to spin freely on the tube. Luckily, my concern proved unfounded, and the hand fit perfectly onto the tube. Now, all that remains is to press the tube onto the fourth wheel’s pivot when the time comes.

 4 points
 -
The wobble is definitely not the only issue with the machine, but in my opinion the most significant one. So far my other modifications include re-machining the groove on the polishing wheel to resemble that of the Rollifit. In this machine the groove is square shaped and too narrow. The O-ring rides on the edges of the groove and slips easily. The face of the wheel was also way too coarse and there was a really weird edge where the two functional faces meet. I'll probably make new wheels from tungsten carbide. The mounting of the wheel is also pretty rudimentary. Not great at all. I really don't understand why it was made the way it was, because the Rollifit is a fine example how to mount it properly. This is also on my modifications list. All of the bearings were too loose and I'll probably end up replacing the bushing on the wheel arm as well. The O-ring operating the Jacot tool runner is also way too tight, so that needs to be replaced too. All that said, I knew what I was getting into with less than 300€.3 points
-
Moly DX was a popular used grease a couple of years ago, Kalle over at Chronoglide even recommended it. Its since being considered somewhat a less of an option as cleaners don't remove it, which you would think is a good think. Apparently it was also suggested that it contaminates cleaning solutions. I think Mark meant if you were using D5 as a sliding lubricant on keyless works etc DX could be used instead, so not in relation to train lubrication. I think we can more or less ignore what Mobius suggest, they're only going to change which oil and grease does what in a couple of years time anyway, and then again two years later,and then again......depending on what is the current best seller ( I'm so cynical ) D5 and HP1300 have similar viscosities, both around 12-1300 cst. D5 being mineral with some longevity additives and the HPs are fully synthetic...and have different price tags...we should start a thread on making our own lubes like some have done with solvents. I started with my own solvent experiments today, ammoniated solutions after reading the last thread on the subject. The one I'm working on is sometimes coming out a bright yellow colour depending on how much sugar I've had in my diet that day.3 points
-
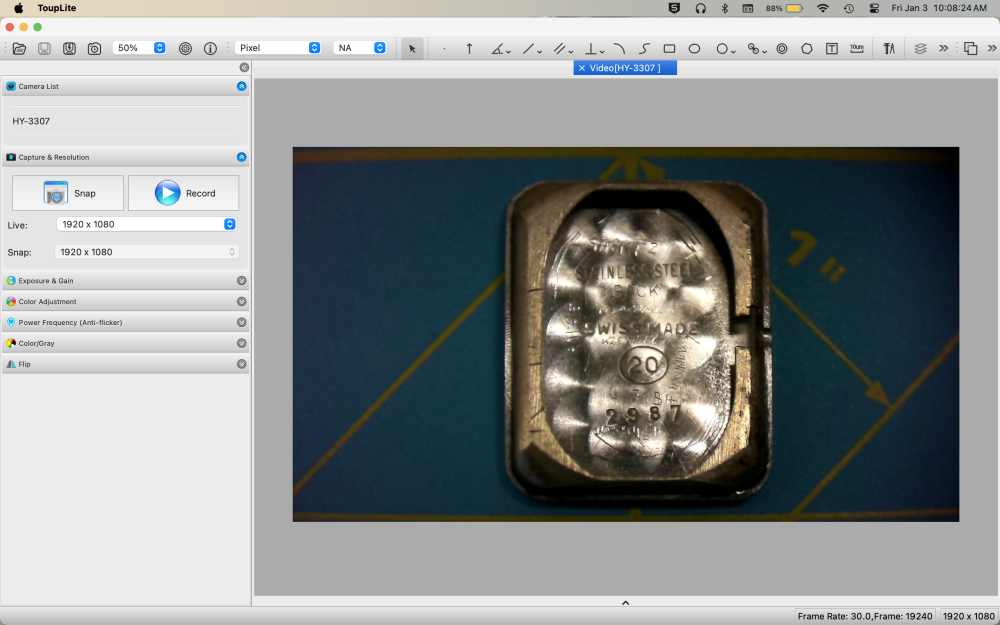
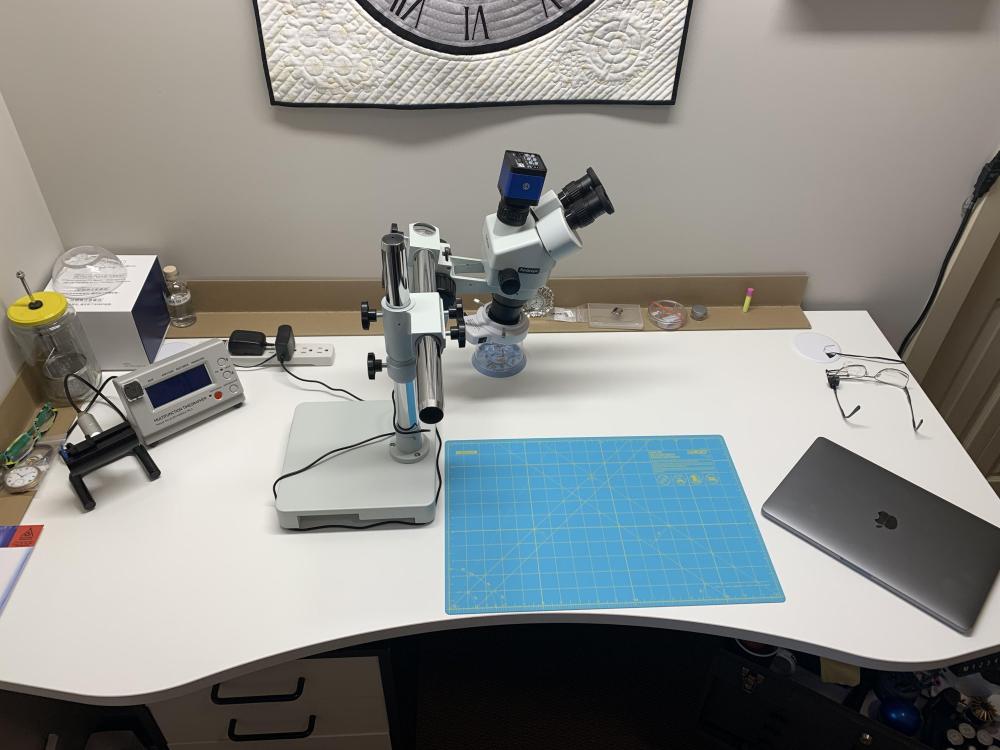
Back in this post, I promised a (brief!) review of the microscope I purchased from AmScope and camera from AliExpress. Brevity seems to have escaped me -- perhaps this was more complex than I thought! The AmScope order was placed on November 18, shipped the next day via FedEx International Economy, and delivered November 22. At US$120, shipping was expensive. But microscopes are heavy, and I wasn't up for the 10,000 km round trip to pick it up! And it got here pretty quick considering it travelled from the east coast of the United States to the west coast of Canada. Canadian federal and provincial taxes were collected by AmScope, so the order sailed through customs without delay. Everything was well packed and arrived undamaged. As expected, the camera from AliExpress took a little longer to arrive, but no complaints from me as I prioritized low cost vs. speed of delivery for this component. Ordered November 18 and delivered December 4 (still quick all things considered). The microscope was easy to assemble but took me a few rounds of trial and error to get it situated on my workbench 'just right.' I have the microscope head tilted back toward me on a 10° angle which seems just enough to allow me to control placement of screwdriver blades in screw slots. This means that the very top and bottom of my view are ever so slightly out of focus, but not enough to have an impact on any work I've been doing. So far I'm really impressed with the microscope. It is a huge ergonomic upgrade for my tired old body, and at least doubles my ability to do precision cleaning, inspection and lubrication. The ring light feels a little cheaper than the microscope (light weight plastic vs. heavy metal construction). But it does a good job and was inexpensive. It has a rheostat to adjust brightness which I really appreciate. I typically run it closer to it's lowest setting when zoomed out and on full brightness zoomed in. The power cord is unsightly but generally out of the way without much effort. There is a switch to turn the light on and off (separate from the rheostat) and a little green LED that lights up when the unit is connected to power. In my perfect world, the green LED would turn off when the light is switched off, but that is really more of an observation than complaint. The camera arrived after I was pretty familiar with the microscope, and I think that was beneficial to my learning curve. The microscope had a long adjustable tube with no optics that was to be used for mounting the camera. I didn't use that at all. Rather, I installed a 'Focus Adjustable 0.35X C-mount Adapter' between the camera and microscope. This alone did not provide enough adjustment to allow simultaneous focus of the camera and eyepieces, and I ended up adding a 2mm spacer between the camera and 0.35X adapter to get the camera focus synced with what I was viewing in the microscope. I wasn't sure what size spacer would work best with my setup, so I purchased four sizes: 1mm and 2mm spacers, and 5mm and 10mm threaded adapters. These all came from the same vendor on AliExpress (link below), and were so inexpensive that paying extra for the ability to have some trial and error flexibility worked well for me. Instructions with the HAYEAR camera were not great but enough to get going. There are basically two different ways to use the camera: First, I tried connecting camera with an HDMI cable to an external monitor. Works as advertised but I didn't like having a big LCD monitor on my workbench, and my HDMI cable is a bothersome brute that I also didn't like having around the workbench. When using this setup you need to power the camera with the supplied power adapter, and photos and videos could be captured to an SD card (not supplied) placed in the camera. There's a remote control (that didn't come with a battery, or even an indicator of what kind of batter was appropriate) that is used for taking pictures and such. I didn't like anything about this setup, but it did work. Second, I tried connecting camera to my MacBook Pro with the supplied USB cable. This eliminates the power adapter, the LCD monitor and the unwieldy HDMI cable from my workbench. Much better! Tricky part here was getting software on the computer that could capture photos and video. HEYEAR's website has software, but it is a bit hard to find and install, and didn't work well. I ended up downloading software called ToupLite from another microscope vendor. It is the software that HEYEAR's is based on, but with all the functionality I required working properly. I took some photos with my iPhone through the eyepiece of the microscope to compare what I see vs. what the camera sees. First two photos are with the microscope zoomed all the way out, first through the eyepiece then the HAYEAR camera: Next, zoomed all the way in: Here's a screenshot of the software: Here's a shot of the microscope in its working orientation: And swung out of the way: And finally, links for everything: AmScope SM-3TPX Simul-Focal Zoom Trinocular Stereo Microscope 3.5X-45X Magnification on Single Arm Boom Stand (includes 0.5X Barlow lens) AmScope 144 LED Intensity-adjustable Ring Light for Stereo Microscopes with White Housing HAYEAR HY-3307 Digital HDMI USB Microscope Camera 16MP 1080P HAYEAR 0.35X C-mount Adapter C-mount Spacers If you've stayed with me this far, thanks for reading! Let me know if you have any questions. Cheers!


 3 points
 -
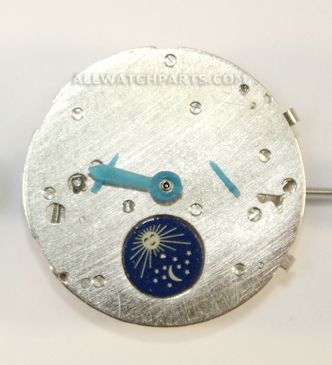
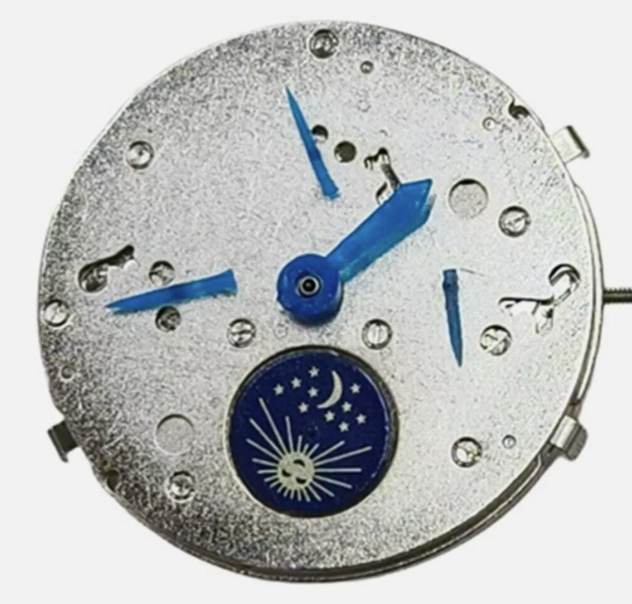
No as it's a very odd ball movement with the day and date very close to the centre compared with others. Edit I think the only option would be to go for an SP10 and lose the month pivot @12. You need to be careful what SP10 you get as some have an actual date number @3. https://www.ebay.co.uk/itm/186544047593 https://www.ebay.co.uk/itm/135169453863 https://www.aliexpress.com/i/1005006106541225.html
 2 points
 -
I went back in today and managed to rotate the pin by 90 degrees. I had to knock the pin out with the finest stake I had which was about 0.4mm diameter. I closed the hole in the lever just a touch with a couple of domed stakes before driving the pin back in nice and tight rotated 90 degrees. I then spent over an hour looking for the date jumper that had pinged. I used the Bergeon fridge magnet without any luck and when I finally found the part on the floor I found that it was not magnetic Anyway all's well that ends well. Date correction is now working perfectly with no slipping.2 points
-
Counting teeth is something that I often do. One reason for such counting is to determine the BPH of a movement. Another reason is to determine parameters of missing wheel. Another - when something is obviously wrong with timekeeping and the BPH is correct for the movement - then always gets clear that someone put wrong wheel(s) and messed things up and got rid of the watch... It mus be clear that not only teeth count is important, but correct mesh is needed and coincidence of modules of wheels/pinions. A lot of reverse engineering is needed in antique watches restoration sometimes.2 points
-
A couple of dentists on here, they could help counting teeth.2 points
-
It is often possible to make a wheel that is missing by assembling table from one wheel and pinion from another. You will need to figure (or calculate) the OD and teeth count of the pinion and table and then search the collection of wheels You have. The bigger the collection is - the better.2 points
-
That seems way too faffy, give it a couple of years and that idea will change . Oil and grease supposed use is like fashion, one year its in the next year it's out, 10 years later it's back in again2 points
-
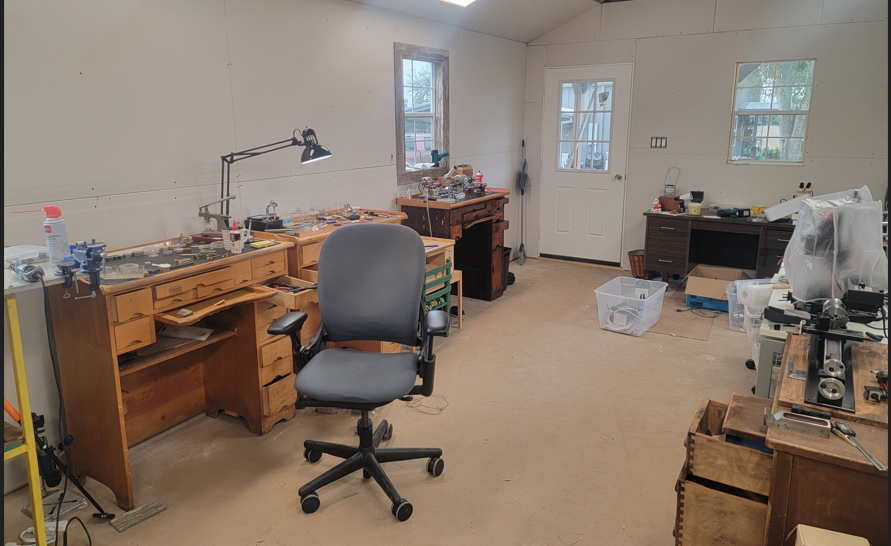
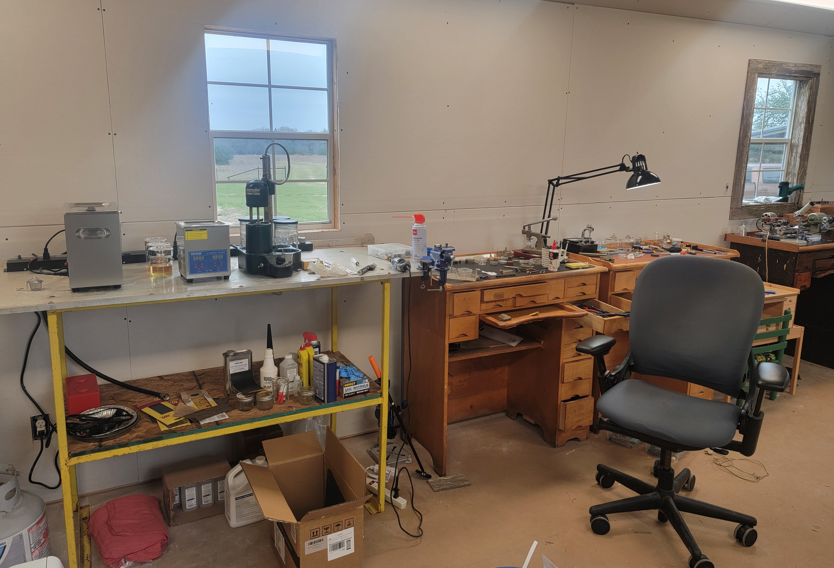
LOL smartypants! The history of me and watchbenches is interesting. I started with one...the bench my Dad left to me. It was a complete setup. Every tool you need to service a watch. Then I saw a custom watch bench on ebay, made by a guy in Maine. I had to have it, so I bought it and it was shipped to Texas. That makes two. Then I discovered another on ebay and it was in Wyoming. Bought it shipped to Texas (this was not a good deal financially!!) That makes three. Bench one was setup for long term repairs. Bench two was the go-to bench for any repair. Bench three was for lathe work only. Maybe I am done...no. Saw one in Dallas on FB. Bought it. It is the least aesthetic and is used only for clock work. That makes four. Then I saw another on FB in a nearby town. Drove over there to get it. It was full of tools and some watches. Probably worth 3-4 times what I paid for it. That makes five. I decided to refinish it (or at least improve it). I moved it to my second home close to my son and grand kids. Then another bench showed up in a nearby town. I put it in the garage. That makes six. Then the other day, a watchmaker's estate came up in Austin. I bought it. Got another watch bench. Value of the last buy was maybe four or five times what I paid. That is seven. I am done. No more watchbenches!!! Each bench is close to a singular purpose. In this picture, one is for lathe work, one for watches, and one for clocks. So there you have it. Needless to say, I have poured enormous amount of $$ into this 'hobby' but I don't care. It is fun.2 points
-
Oh dear you're not reading the tech sheets that answer is incorrect. At least according to the Swiss tech sheets where they use oil instead of grease on sliding components like the keyless. Then because the oil will not stay word supposed to be they use epilam to keep it in place. Typically it's thought of as that way except It's in the bottom of their guide on choice of lubrication's. I'm not going to post the guide if somebody really wants that they can go and downloaded as I would probably object to their choice of lubrication's. Then my interpretation is a slightly different than yours in that it appears to be that HP oils are preferred for ruby bearings and the other is for brass. I really wish they would explain why? My personal suspicion is that HP oils unless you epilam have a habit of running away where as the other products I think stayed put better but that may be only a speculation on my part. Plus I have to go and look up the characteristics of D5 as I think that would also apply with D4. The spec sheet for D5 is quite worthless as what I was looking for I am pretty sure there's a tiny amount of molybdenum disulfide in the five which would embed itself into the brass. In any case it's an amusing choice because when you read the spec sheet for D5 it does mention vegetable oil and its organic. He would think synthetic oil would be better but apparently not. Personally I find it rather amusing as the only place you find this is at the bottom of the lubrication chart and conveniently it's not mentioned anywhere else in the universe. That would include the other Swatch group companies that are recommending the HP oils in places where it would conflict with what were reading below. Maybe this other companies didn't get the memo? https://www.moebius-lubricants.ch/en
 2 points
 -
I had also a serious wobble issue so I eventually returned it. I decided not to post this in the first place in case it was only one bad piece but obviously there has been some manufacturing issues. The seller thought it had something to do with the wheels and sent me new ones but it didn't correct the wobble. It was somewhere in the shaft. So I got a refund and learned to use the burnisher, not really that hard after all.2 points
-
Forgive me if i misunderstood your explanation...but you dont have to place the impulse pin directly into the fork slot, that would be quite difficult for most folk. The goal is to have the impulse pin on the correct side of the fork so that it can enter the fork slot as it swings around. Personally I think having some power wound into the movement can make the process a little more difficult, as it makes the pallet fork too reactive, it can jump to the wrong side if caught when the balance is manoeuvred into position. You could try a little trick here if you wish, i often do this when I want to halt the balance to work on it without powering down. Cut a piece of paper approx 1mm x 5mm, fold it in half, a tight fold and crease it quite hard but so that it still springs open slightly. Now place it under the arm of the pallet fork. The spring is just enough to stop the fork from moving but not so that it can damage. Fit the balance then carefully remove the paper, I put the open end of the paper in first so that you can clamp it together with tweezers as it's pulled out.2 points
-
OK then, I hope these links work. The videos are only visible through these links and they're not public.2 points
-
I also have no camera on my scope, but I use it all the time, for almost everything! Much more than I thought I would.2 points
-
Still not finished. Need to figure out how to finish the ceiling. It is mostly functional but I have yet to service a watch.

 2 points
 -
Not quite correct. There does seem to be a trend a very very slow trend of going from incredibly light lubricants for the keyless. The definition of incredibly light would be in the late 50s 9010 and yes they were Apple lemming just about everything of the watch otherwise that would spread like. Now they're all the way up to HP 1300 their increasing in viscosity still using the epilam. So their following a trend of becoming heavier lubricants for the keyless at least. At the rate they're going they should reach the proper lubricants for a keyless which I would suggest would be grease and probably another hundred or 1000 years at the rate they're going. The other amusement is the quantity of lubricants. When I was in school it was explained basically if the instructor could not see that you lubricated you were fine. But in any of the newer documents your to fill up the oil sank as long as you can still see the pivot your okay so something today that would be acceptable would end up in the sawdust Box just a few years ago. I have a suspicion that in the past the watch companies with manufacture their watches and send them out but for the most part they never service their own watches. If anything they would just blame the idiots in the field that would be all of us for the problems but now that they are servicing their watches I would like to think that there noticing the consequences of poor lubrication choices. On the other hand companies are going to much longer service intervals and they just replace anything they don't like so maybe they're not learning at all.1 point
-
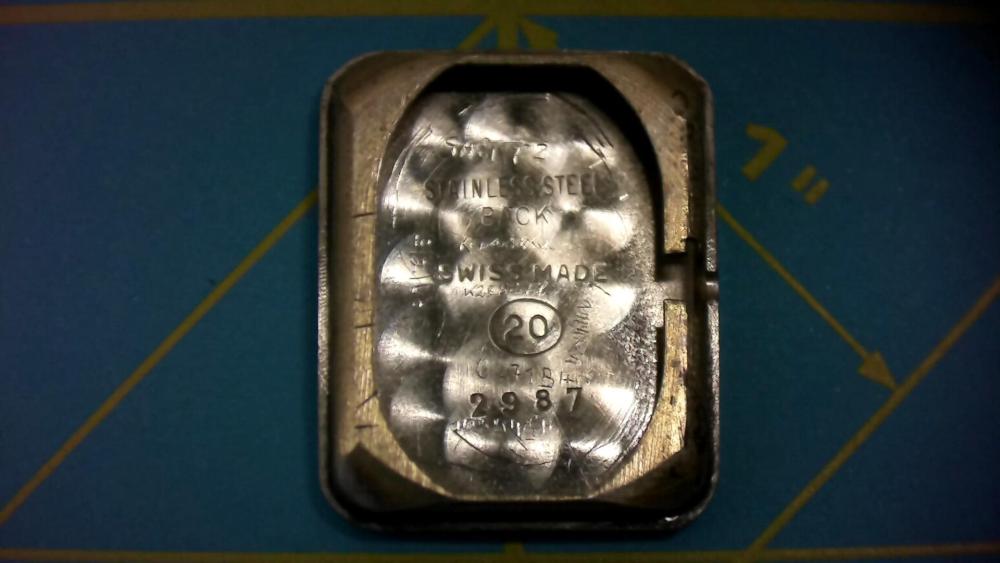
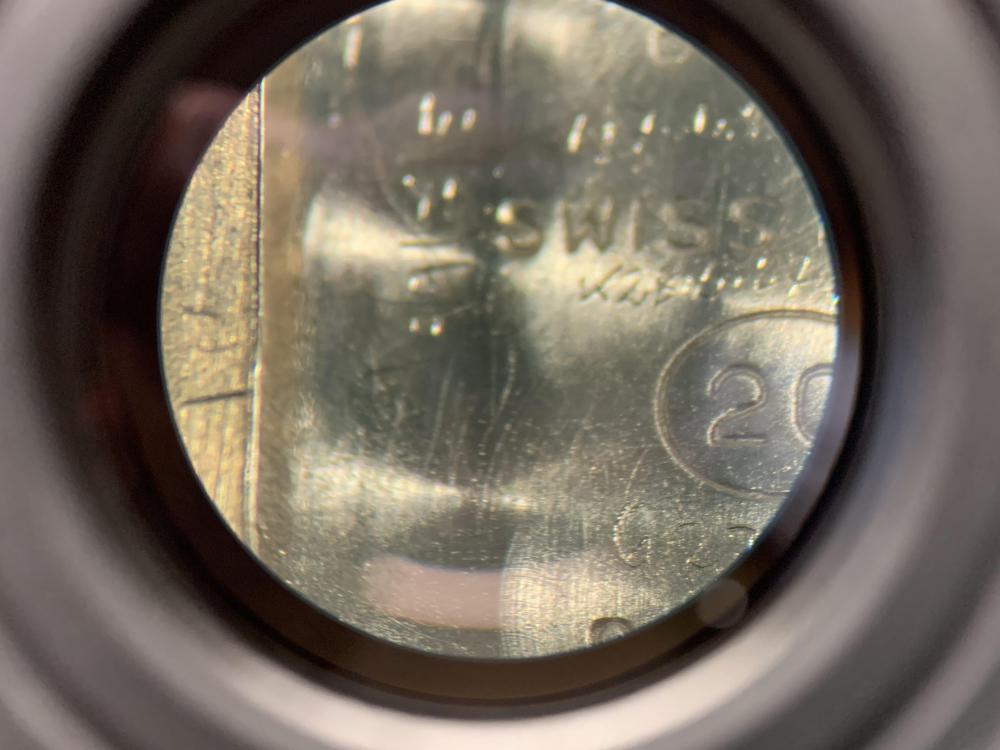
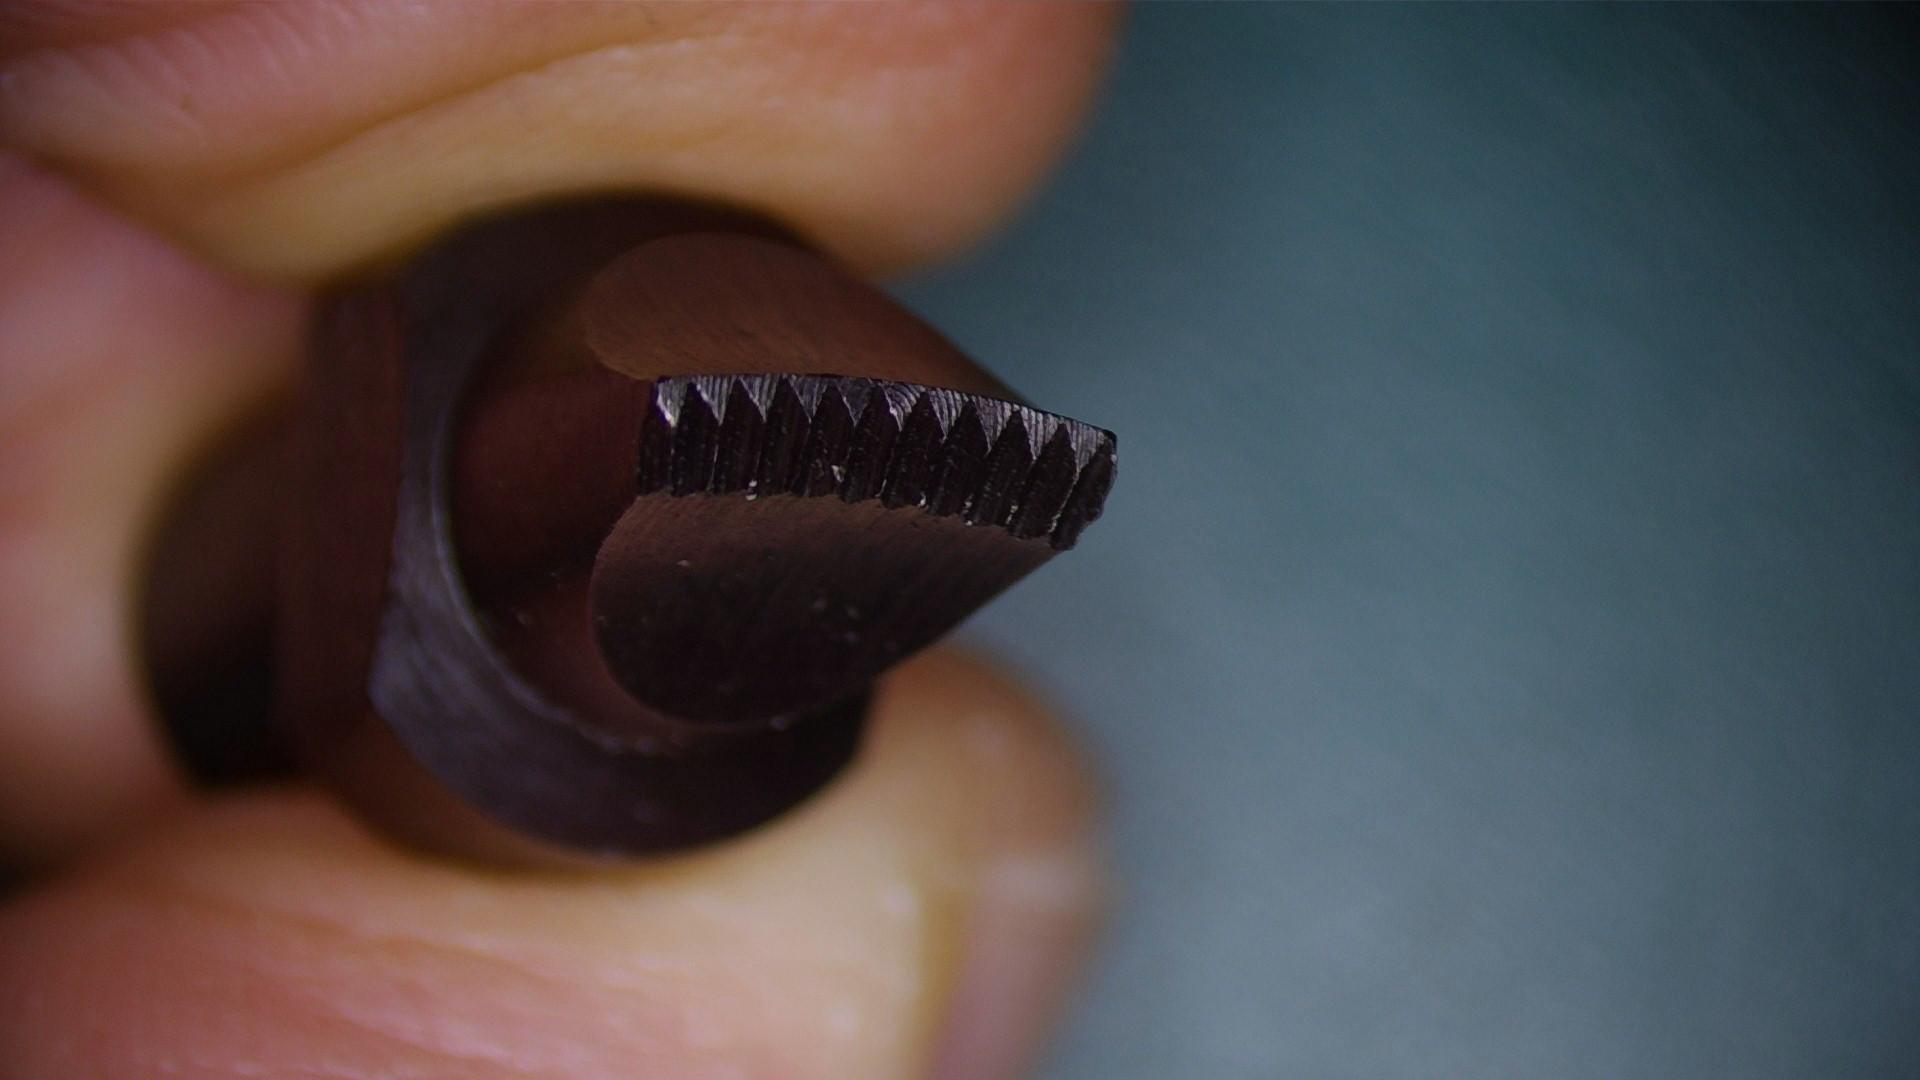
That's what I believe but on this scale not even my stereo scope is magnification enough to reveal all the details. Anyway, it's a solid fit so I'm more than happy. The ones I published before are as close as I can get so I'm afraid not. I believe that tube is some of the tiniest pieces I've ever handled, except perhaps for the dreaded Seiko Diafix springs for the escape wheel.1 point
-
Hello and welcome from Leeds, England.1 point
-
The first image was just showing others what the SP16 looked like. Looking at the SP10s I've shown links for I'm unsure about some of them due to their description. 'The watch hands shown in the pictures are just for display.'1 point
-
Agree. However, somebody thought differently and I now have lots and lots of parts sorted by type (wheels, balance wheels, pallet forks, etc.).1 point
-
As long as it's fewer than 32 or so. Escape wheels or pinion leaves.1 point
-
I've bought some sealed Seiko crowns from Cousins and I couldn't even fit them on the crown tube because the gaskets were rock hard. They can be changed but there's no easy way.1 point
-
Depending on the age, yes. If it's older than 10 years, I do out of principal. The client is paying for it to be like new1 point
-
Interesting...but I will have to count teeth until the cows come home!!1 point
-
Hello and thanks for having me i forgot to say im from Tamworth uk1 point
-
I don't think you said what the movement is, with a shim, brass? , then we'd guess at something Soviet. The shims for these have two slots in line with the screws. In this case slide the shim inbetween after the balance and screws are in position but not fastened down.1 point
-
Hello and welcome from Leeds, England.1 point
-
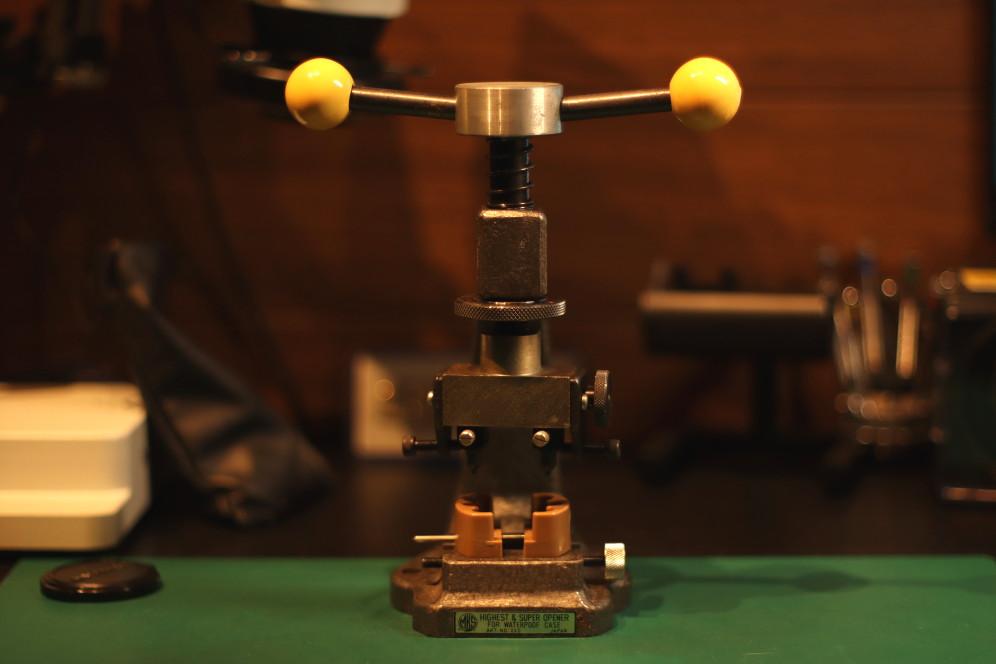
I couldn't resist. MKS-220. Looks very similar to the FRT one and also to the Seiko branded. Gotta love that sign "Highest & super opener". I got the frame very cheap (~40€) but the case holders (2x) and opener bits (4 pairs) I had to buy afterwards. Luckily they are still made and can be bought for a reasonable price. The holders were like 50 EUR and the bits about 32 EUR (+import and shipping from Japan). Interesting fact: the bits are numbered from 1 to 5 with #4 not available anymore. A while ago I bought a tool (junk) lot from Japan and there were some opener bits, also the #4 included. These #4 seem to be for a Rolex type caseback. The other bits from the lot were mostly broken. I already sold the Bergeon copy. It gets the job done but I'd suggest one of these if you can get one for a good price. So much heavier and sturdier with tighter tolerances. The way the opener bits are attached to the rotating part is superior in my opinion. They are tightened with a screw and there are screws also on the sides.
 1 point
 -
Hello and welcome from Leeds, England.1 point
-
One of the things that would help a question like this is new balance for what? Wristwatch, pocket watch, clock yes some clocks have balance wheels. It would help to know what watch for dealing with here1 point
-
I'm affraid I cant comment, I tried mine once when it arrived and have never needed it. I tend to do most polishing with eveflex pins. I will dig mine out now for a full inspection.1 point
-
Welcome to the forum. It should be a split stem. Have a look at this old post on the forum.1 point
-
I got a whopping 43 hours off that new mainspring - result!1 point
-
Yeah the threads are all over the place which causes the small ball bearing at the end of the knob to bind. There was a serious concentricity issue with the bore and the threads.1 point
-
Hi, new forum member here, The discussion seems to have died, but I went ahead and bought one of these Hungarian contraptions. My verdict is that you get what you pay for. It's not brilliant, but a good start. The frame is solid if a bit light. I had to do a few modifications and I will still do a few more once I get around to it. The main issue was some serious wobble on the main shaft when adjusting it horizontally. Also the bearing fit was pretty loose. I made new tighter bushings, changed the entire horizontal adjustment system and replaced the shaft with a hardened precision ground shaft. Also the handle was pretty bad so I made a better one. I have contacted the maker about these mods so who knows if they'll change the machine in the future. I shot a few videos as well but I'll have to upload them somewhere if there's any interest.
 1 point
 -
It's looking amazing!1 point
-
This has the potential to be a really interesting and informative conversation Tom1 point
-
Its possible. One thing I have learned when sizing and cutting wheels, is the module and diameter are very important to get right. I'd like to think that most watch manufacturers had some set size and module they used universally, but I haven't taken the time to measure my assortment of wheels to find out. You could sort them by tooth count I suppose, then move from there. But the entire train is dependent on how many teeth the main barrel has, and its designated beat rate it wants to achieve. Plus the pinion on the wheel will need to match what the watch you're using it for needs it to be. From my understanding, the first thing they do when designing a train, is calculate the tooth counts, then select a module to cut them to. The final diameter is kind of the product of those two. So I'm not sure if two different wheel manufacturers would be the same. Could always fire up the lathe and make on yourself!1 point
-
Have you thought about trying to rotating the pin 90 degrees? Or even just getting a new lever?1 point
-
A man who makes no mistakes, makes nothing at all. I like the saying, if you try to do things sooner or later you will f&&k up. The only way to make no mistakes, is to do nothing.1 point
-
@captainneek the person who hasn’t made a mistake hasn’t made anything, ever. Tom1 point
-
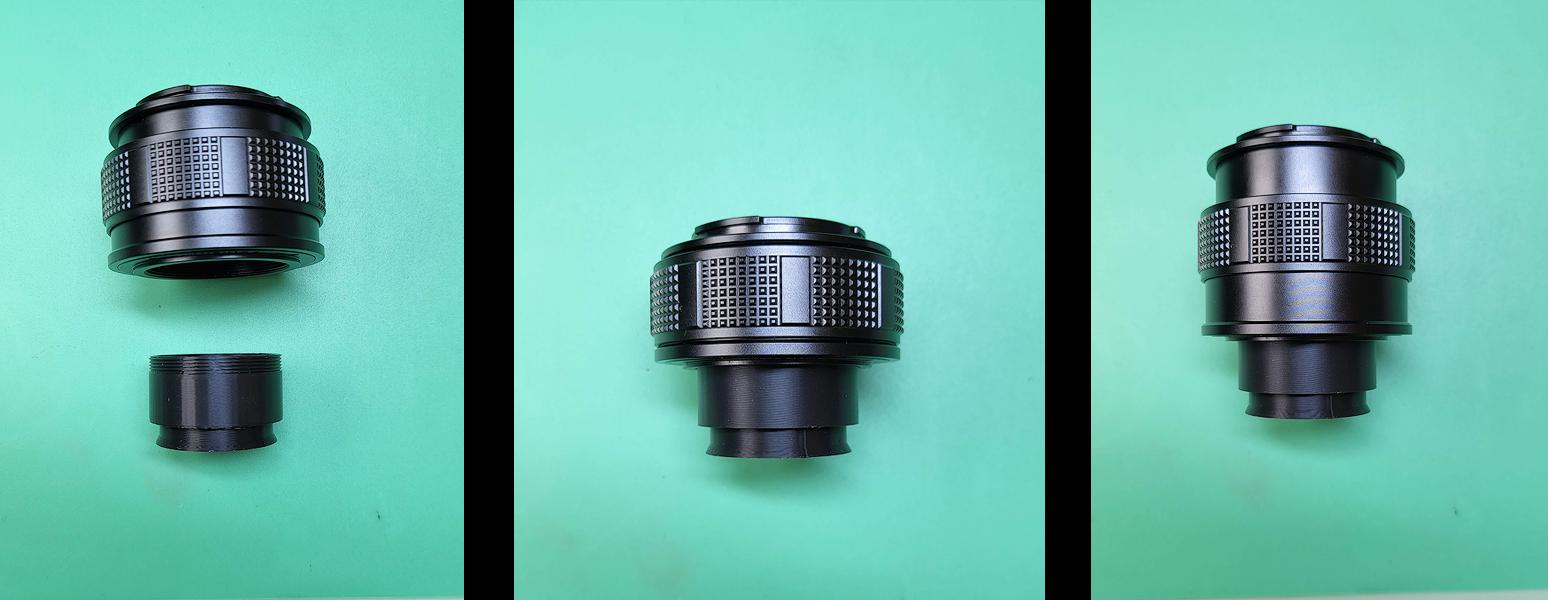
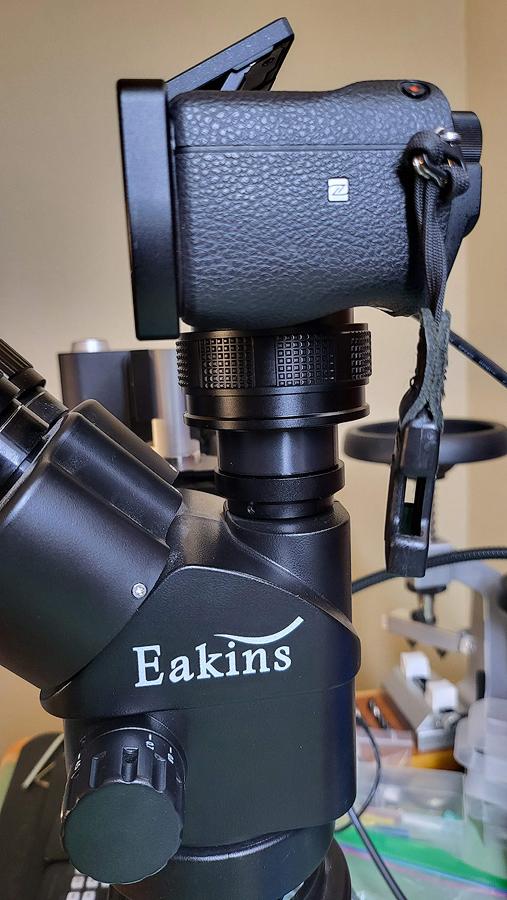
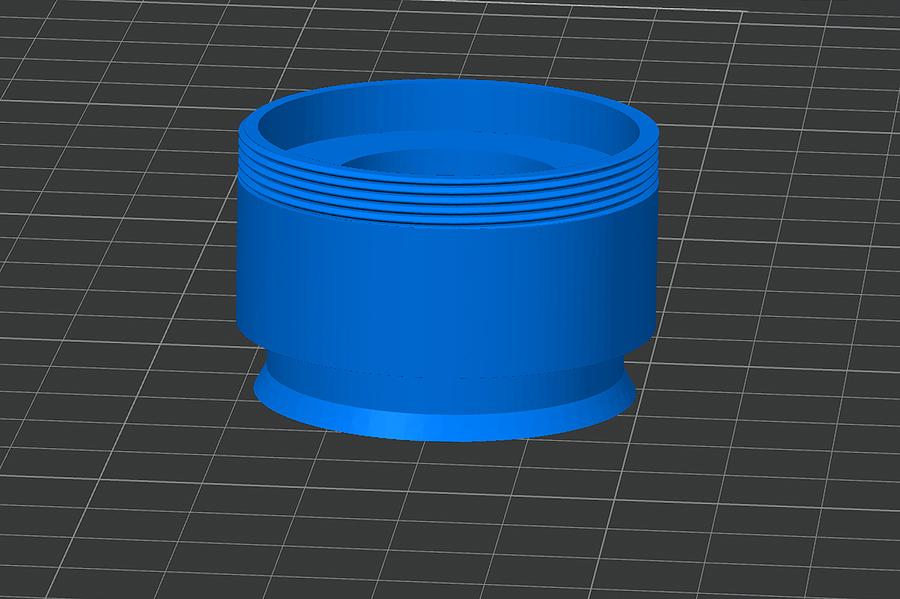
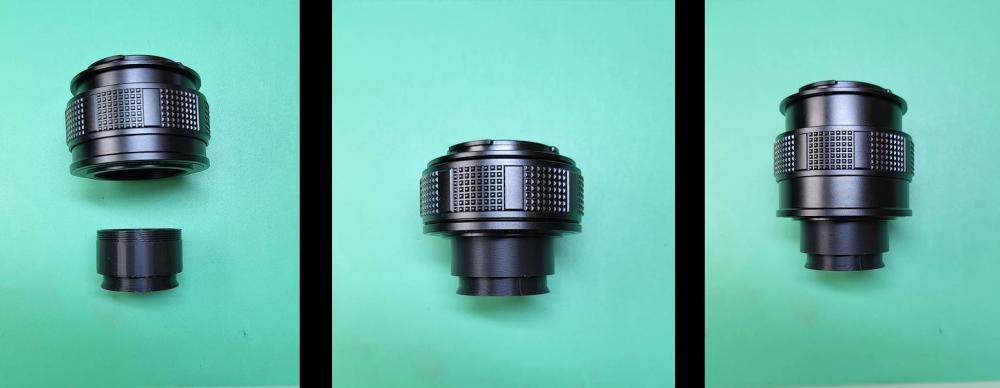
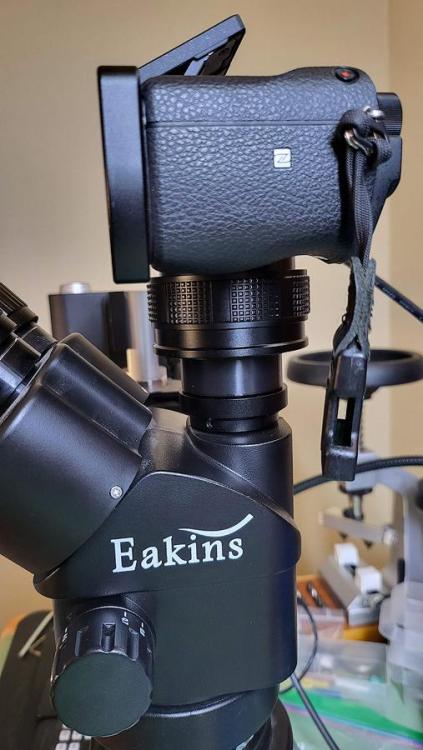
I've been looking for a way to connect one of my mirrorless cameras to my microscope since I got the scope. I've never been particularly happy with the camera that came with the scope, not just from an image quality perspective, but there are some functional issues that really bugged me as well. One of the biggest issues was that if the exposure was perfect when zoomed in, if you zoomed out it was way overexposed. So I would constantly have to adjust exposure by going into the camera menu, dig down to the exposure menu, and then adjust. Every time I zoomed in and out. Then there is the file naming issue where it will reuse the file name as soon as you delete the files from the card. So if you were working on more than one watch at a time and moving the files off of the card, you would get files with the same name when you came back to work on one of the watches. Then the camera just started to randomly stop recording for no reason so I would look up at the monitor and realize the camera had not been recording for who knows how long. So, I went down the rabbit hole looking for adapters to connect my Sony a6300 to the microscope. Most adapters seem to be for Amscope microscopes which, I believe, has a different trinocular port than the Eakins. But the reviews for the Amscope adapters are hit and miss regardless. I don't think the optics in the adapter are particularly good. But I really couldn't find anything that was as simple as, "use this adapter for the Eakins microscope and a Sony aps-c camera". I came across this video which looked very promising, although it was for a different microscope and camera. But the video does explain why adapters even use optics. Which it turns out, you really don't need. You can just project the image from the microscope directly onto the sensor and avoid subpar optics. I had a concern for the design he used as the length of the adapter needs to be perfect. If it is off even a fraction of a mm then the camera will be slightly out of focus when the image is in focus through the eyepieces. Seemed like it could entail a lot of trial and error getting the correct dimensions. I've come across M42 adapters in the past that have a helicoid focusing ability, often used in macro photography. Using one of these will move the camera (and sensor) closer to or further away from the microscope and will then let you dial in exactly where you want the sensor to be. So the adapter drops into the trinocular port on one end (and is fixed with a grub screw) and on the other end it screws into the M42 adapter which you can then focus using the helicoid. The image is parafocal between the eyepieces and the camera. It works perfectly. I actually get a slightly wider FOV in the camera compared to the eyepieces. When zoomed fully out there is some vignetting and I get a FOV of 68mm, compared to 61mm through the eyepieces. When zoomed all the way the FOV is 10mm in the camera and 8mm through the eyepieces. If anyone is interested I have freecad and stl files on Thingverse but it looks like there is a 24 hour hold until it is published so it should be available tomorrow.
 1 point


.JPG1-Copy.thumb.jpg.330305bf8a880c34300b419c9fcbc578.jpg)
.thumb.jpg.19a9c4ff164d78d516aa9f05a063752b.jpg)