Leaderboard


Popular Content
Showing content with the highest reputation on 01/20/25 in Posts
-
Just a quick update and to say thanks again; I managed to get the hairspring back into shape. I disconnected the spring from the balance bridge just to see if I could (man the screw that holds the spring in place is small) as I figured I had nothing to lose; but it was actually easier to work on the spring without the balance bridge in the way. Then I put it all back together and did some final tweaking. My test movement is now running again and lives to fight another day. Thanks.3 points
-
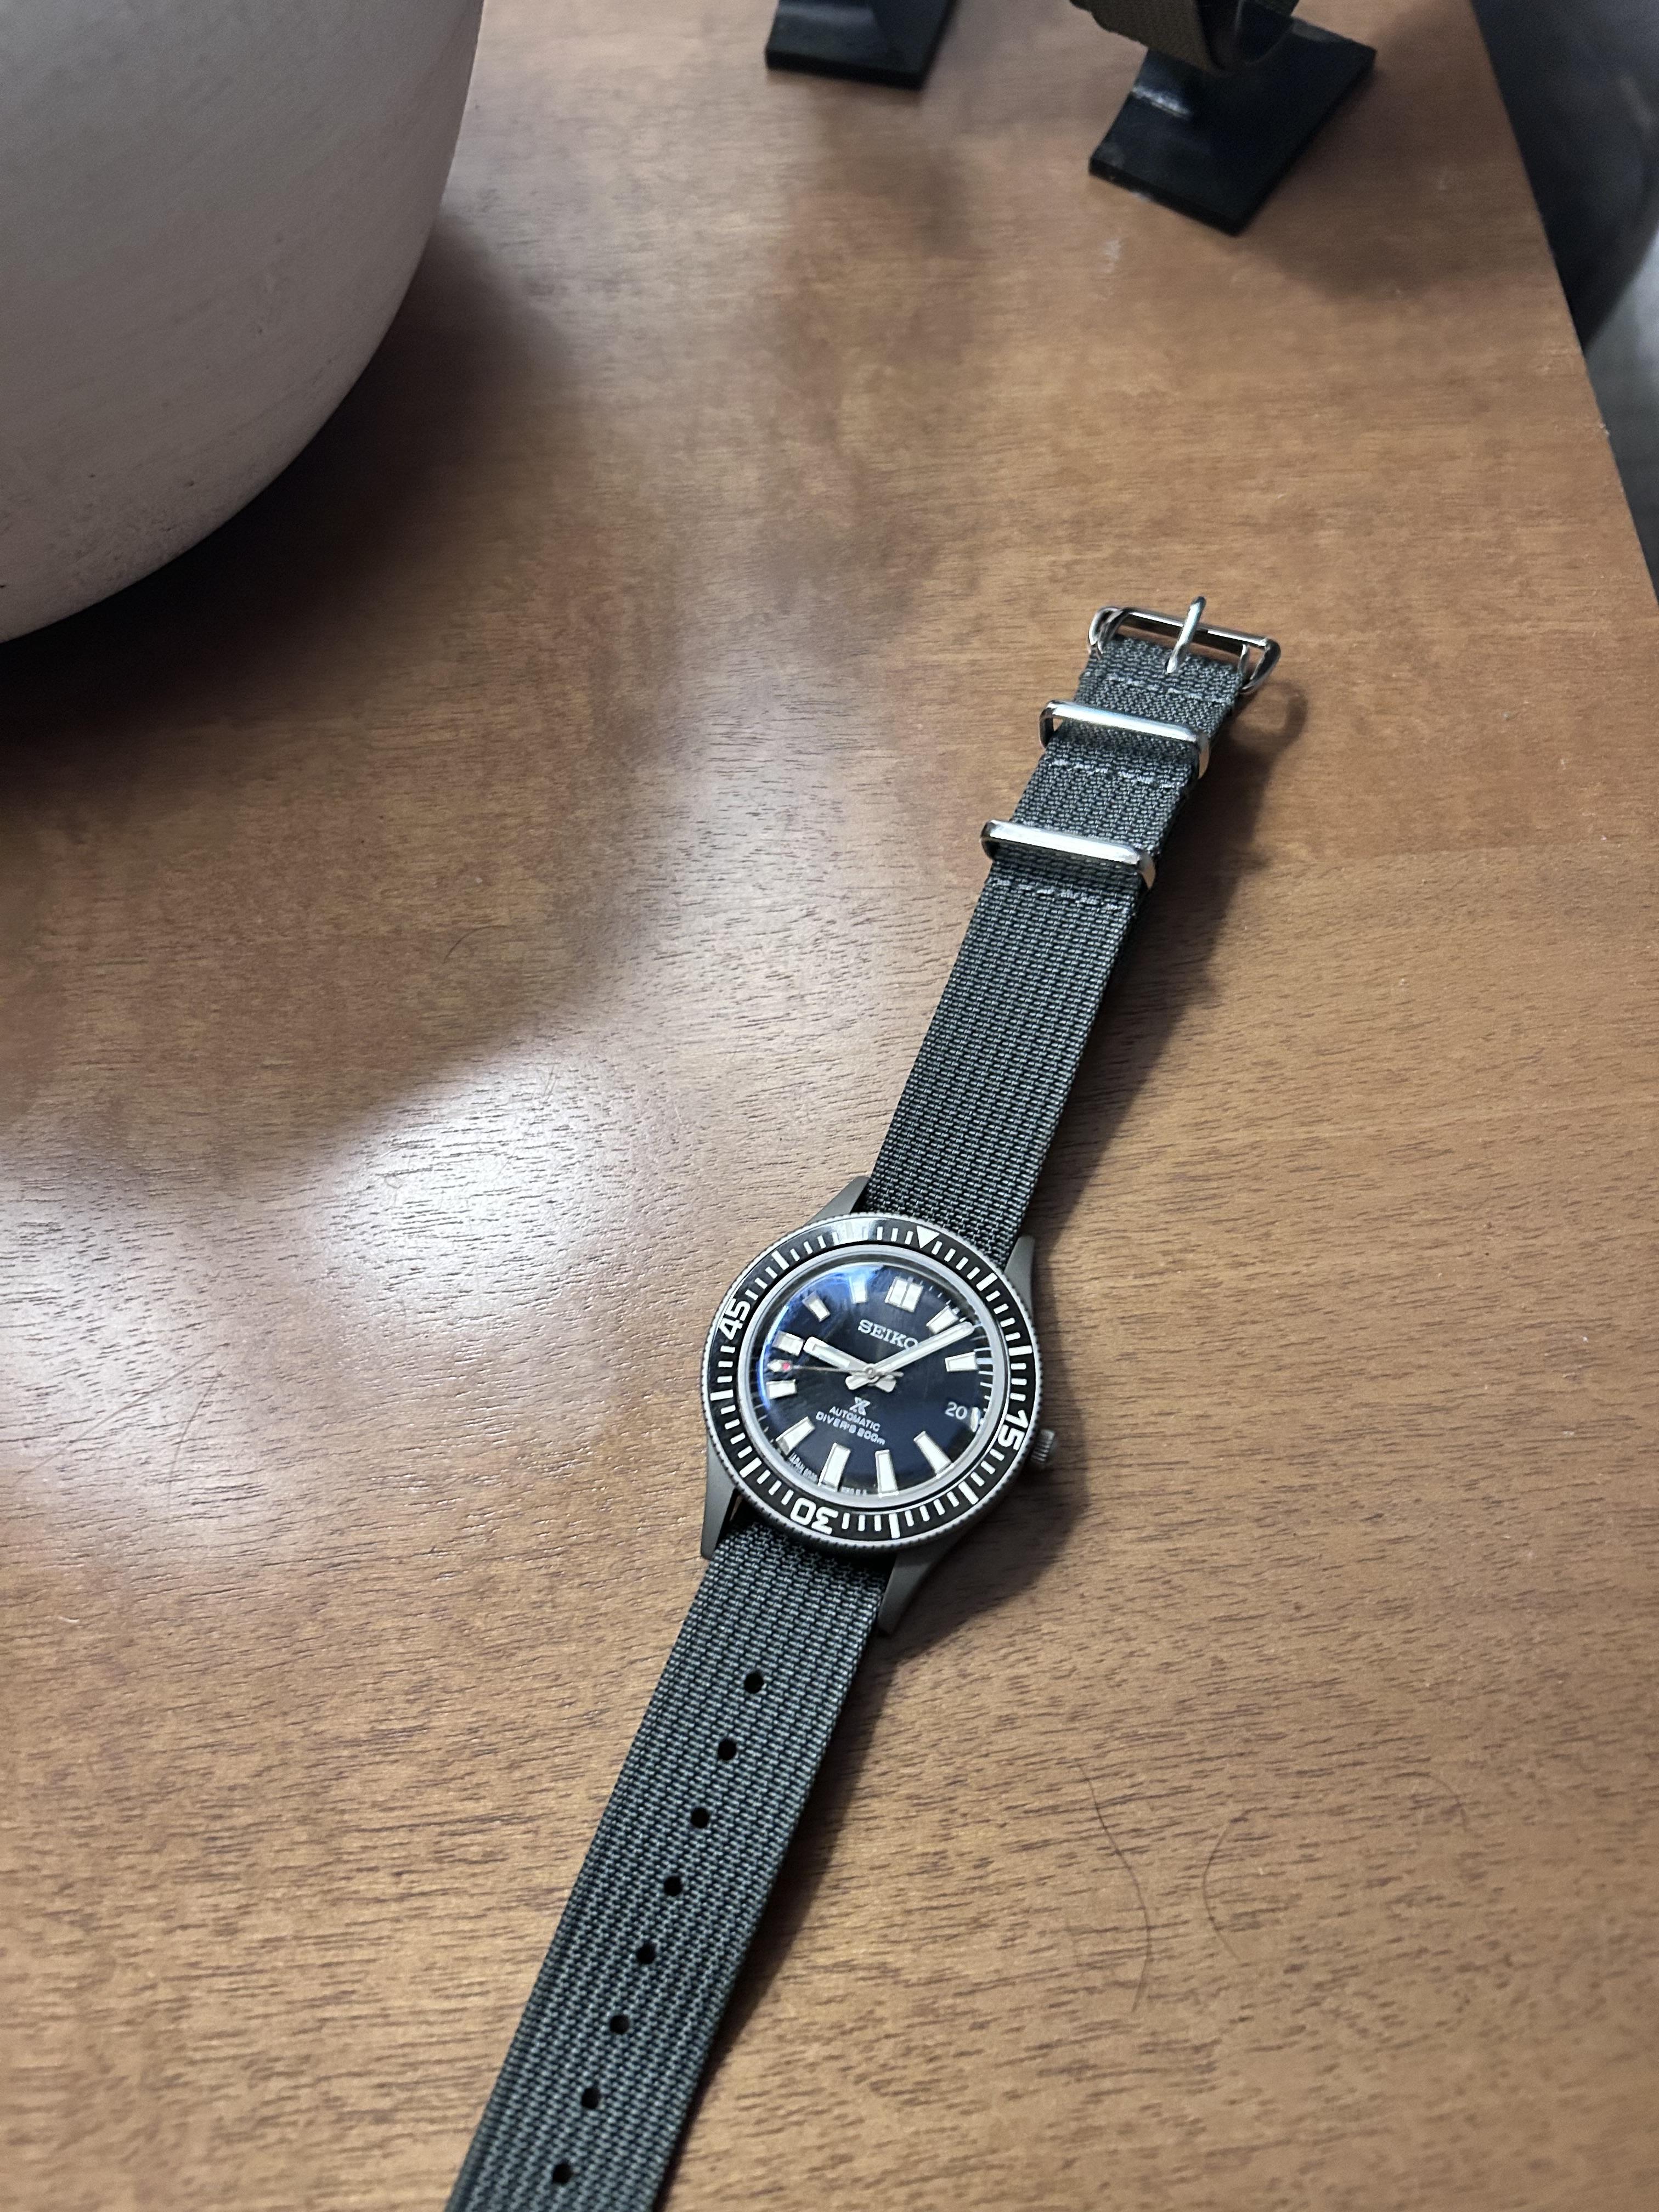
Thanks everyone! Appreciate everyone’s very kind, patient support to get me here. I know not the most challenging thread, but I’ve learnt a huge amount and have a lot more confidence. Watch is back together and I’m going to enjoy wearing it again for a bit.
 3 points
 -
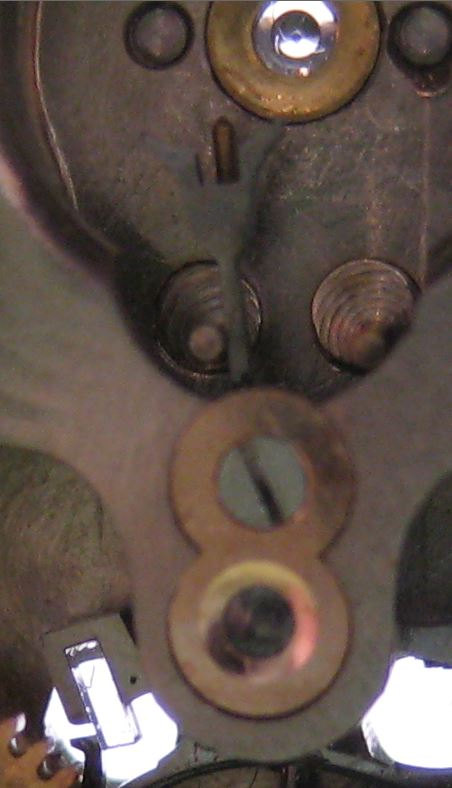
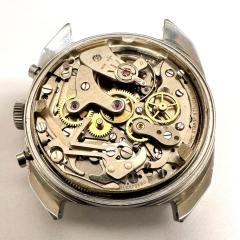
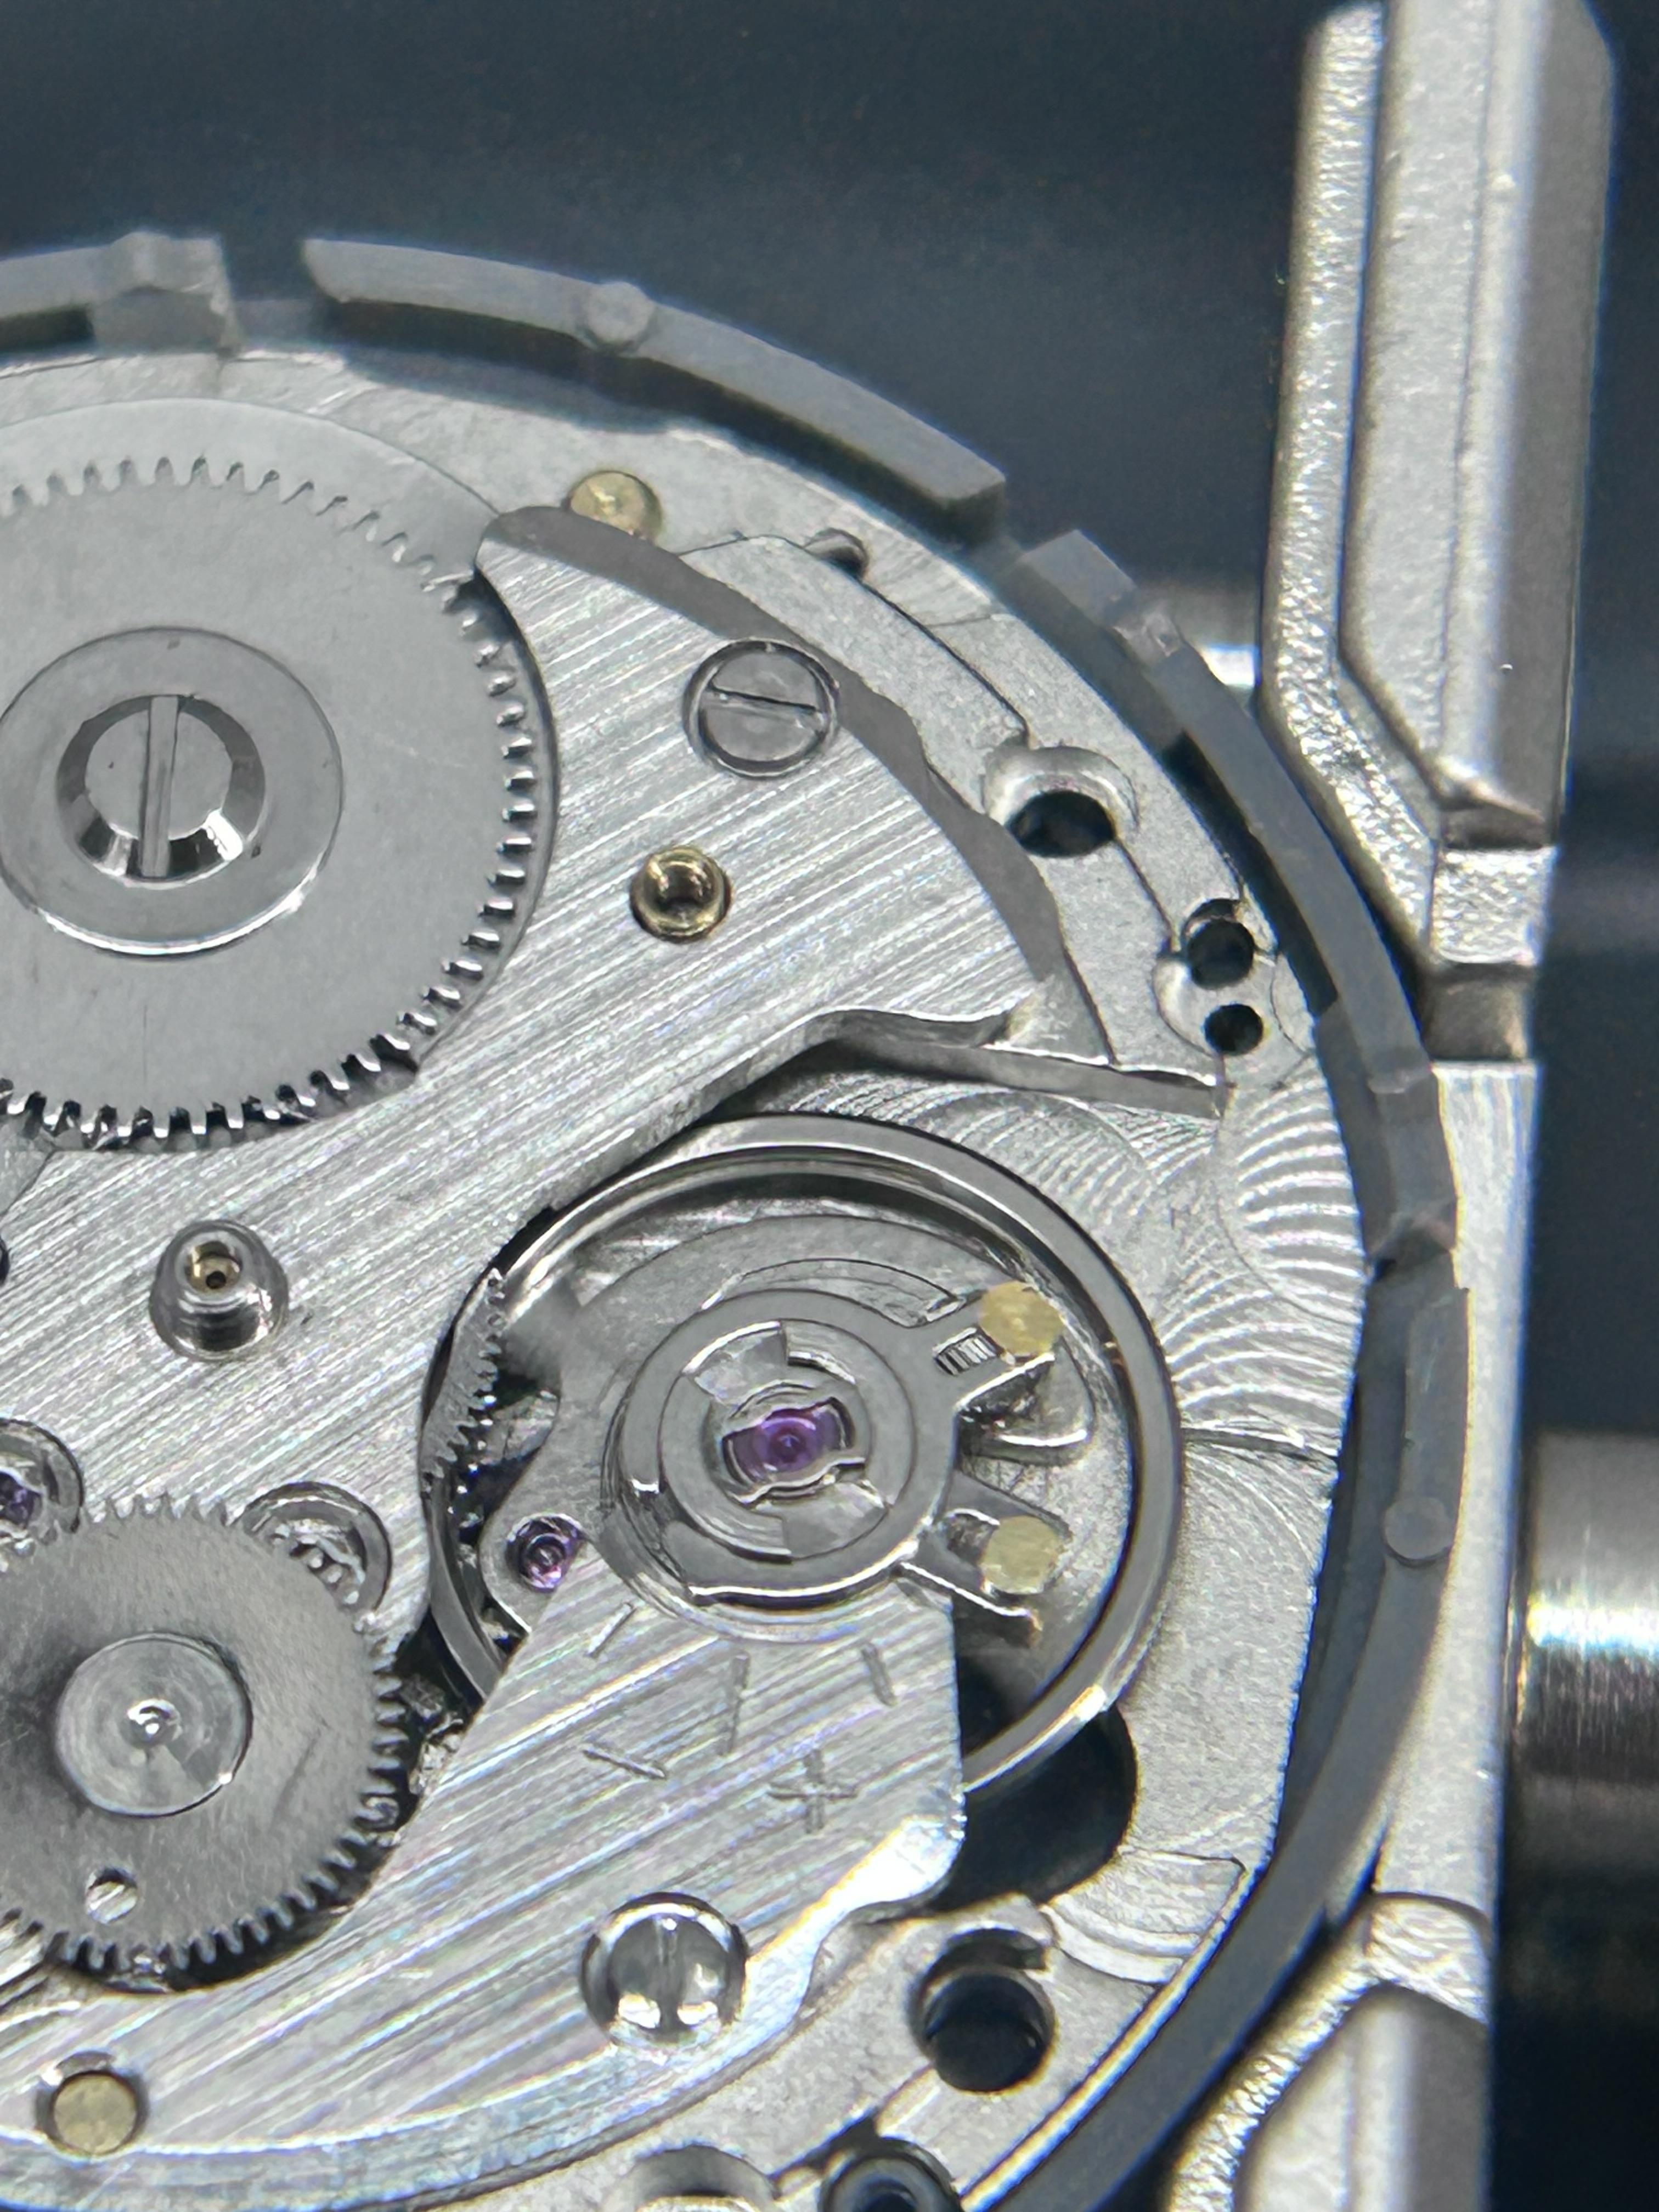
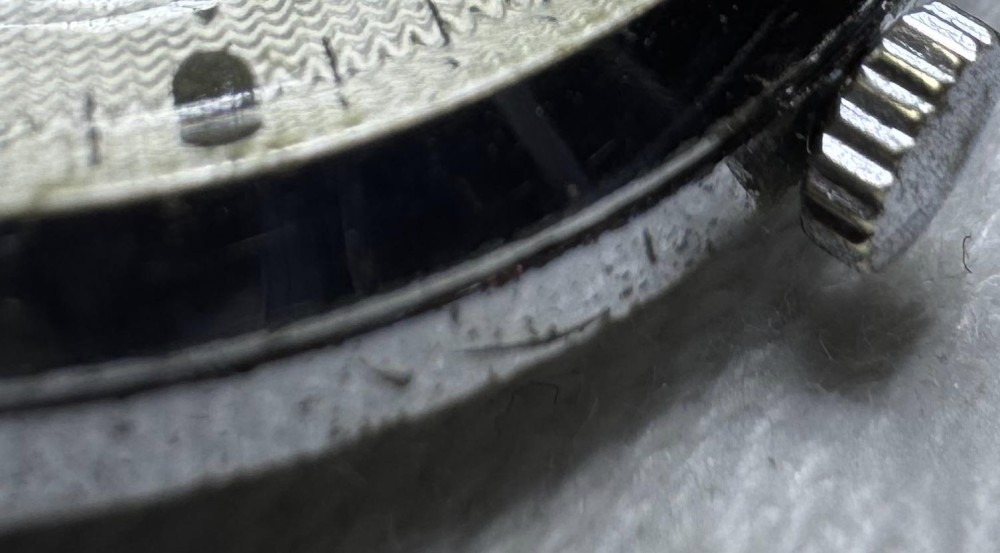
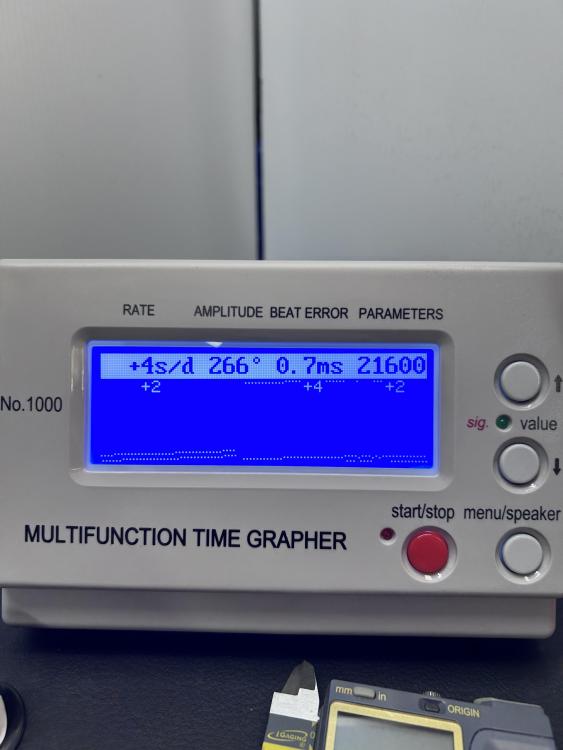
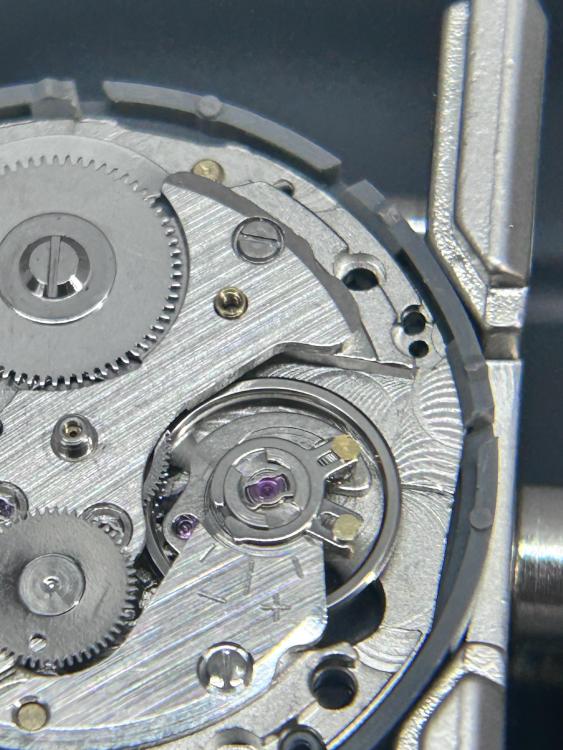
so experiment? first thing I did was put a small dot of florescent ink on the balance wheel then using a UV light I find that much easier to see what the amplitude is although there is a minor consequence of the ink is really slow to dry and eventually it ends up all over the top of the balance wheel but while I was there it worked really nicely and this watch someday desperately needs to be cleaned anyway so it's not an issue. So on my list of watches that I had checked the lift angle at work I had 48° for 992 and now I have 47° for this watch. before I started the experiment one of things I did do was I checked the banking pins to make sure they were in the correct location. For which the one that I was going to move I thought was a perhaps a little too close. Which was verified when I accidentally turned in the wrong direction in the watch instantly stopped. Then adjusting in the other direction waiting until it did not stop and since I moved to what seem like a long distance I decided to put it on the timing machine to see what if anything happened. At the 47° the timing machine now indicated 135° of amplitude. I did notice that winding the watch up to get it up 288 again to reset the lift angle it did require quite a bit of winding. So initially was doing the first one 80 I was just doing one click in a time as I was approaching and this time it was it was quite a bill winding so the amplitude was definitely very bad then at 180 the new lift angle is now 51°. So in real life even if the lift angle has changed the timing machine still showed a dramatic drop in amplitude because of the position banking pin which will be obvious in the picture of what the problem is. so in this picture the angles are a bit misleading. the weirdness the angle means the end of the escape wheel two and the pallet fork appear to be overlapping and visually I saw a sliver of light so I don't think they're actually touching. But as we can see Locke has increased dramatically and the pallet fork is no longer resting at all on the banking pin. Then yes the watch really does need to be cleaned. then here's the pallet fork on the other banking pins that I did not touch and to me it looks like the locking depth is a little too much.
 3 points
 -
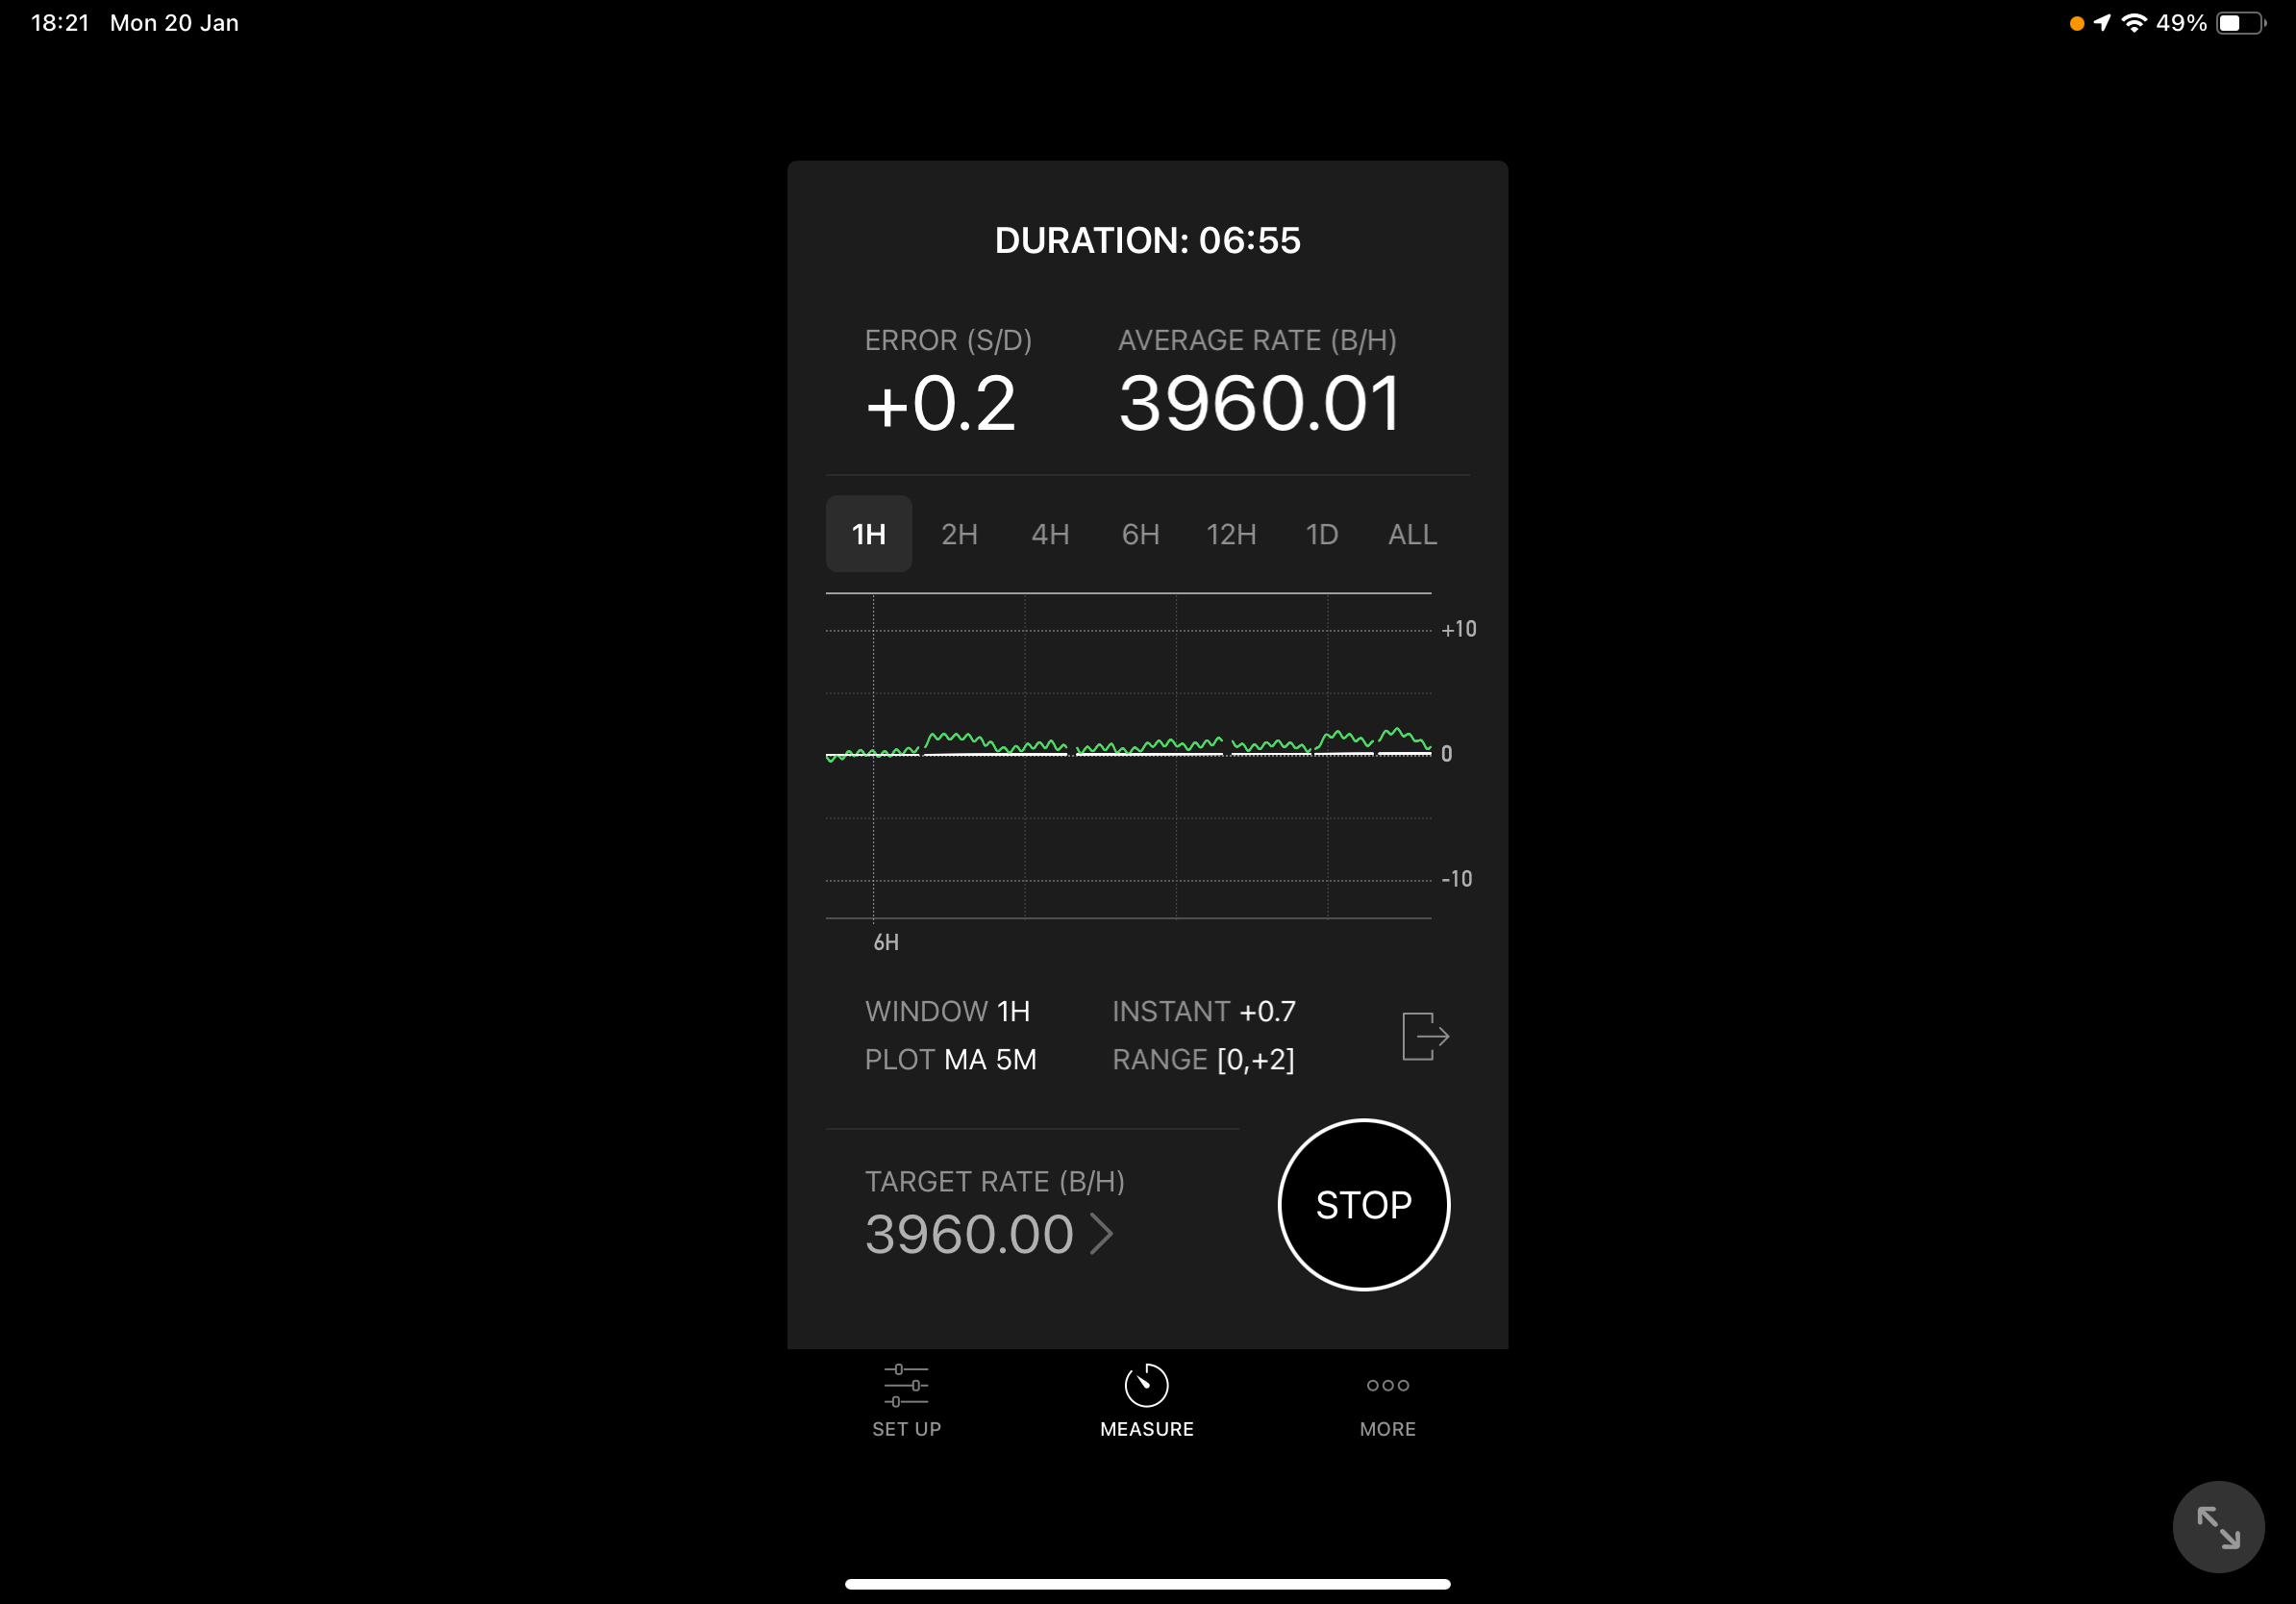
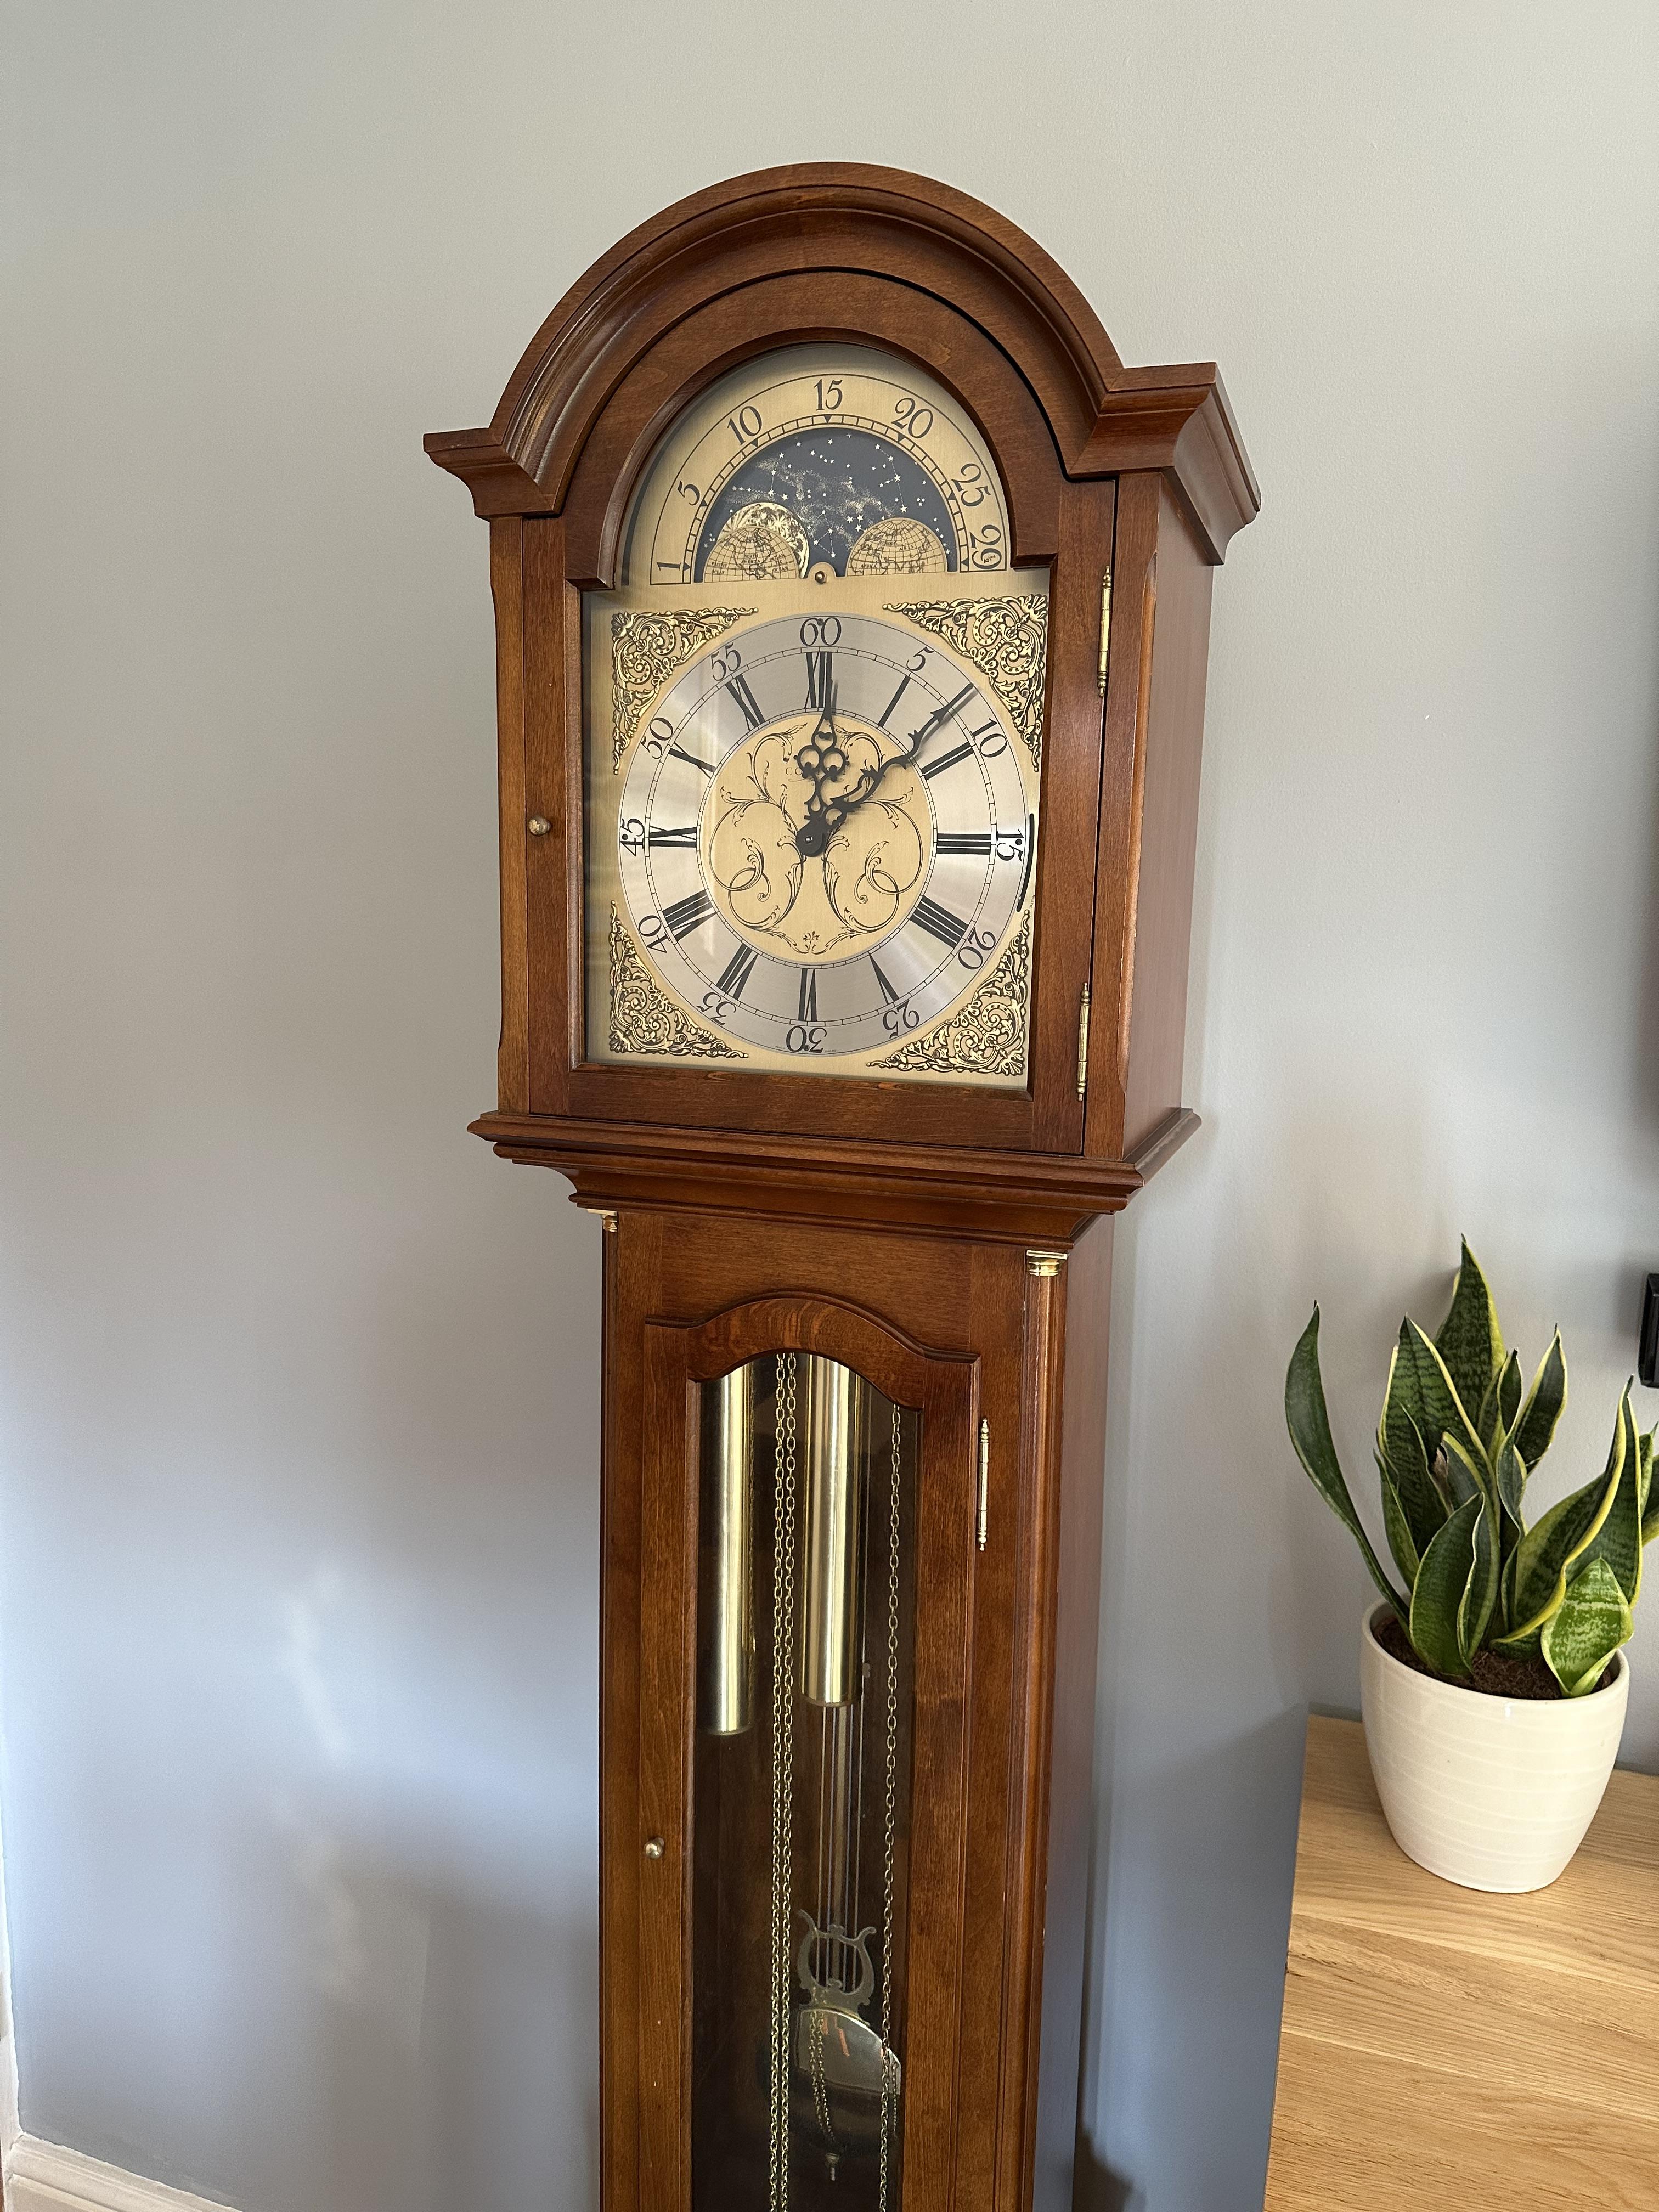
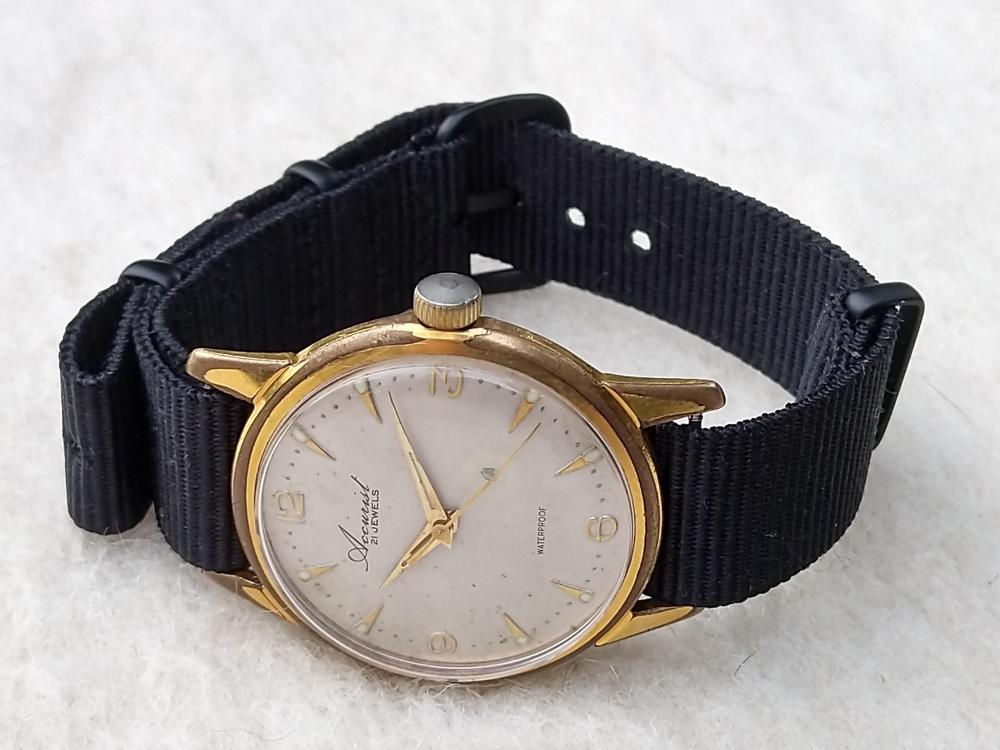
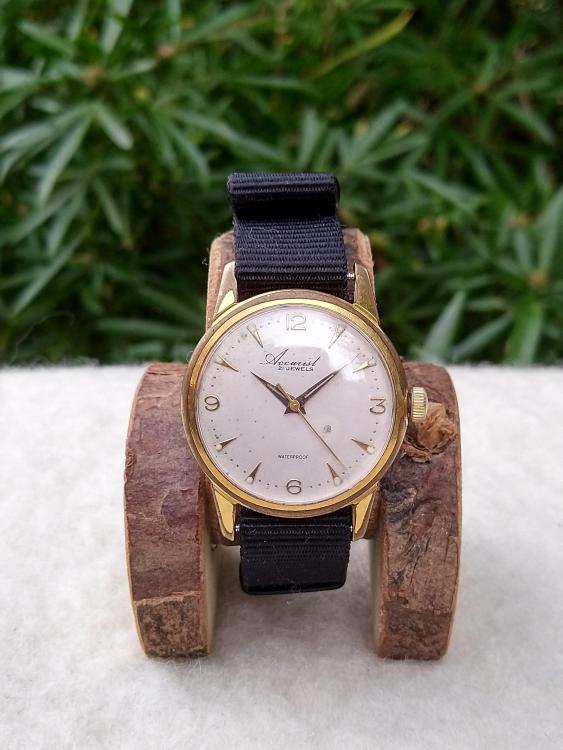
I was lucky enough to have the opportunity to buy this beautiful grandfather clock made by Comitti, London. It’s rare I see a clock able to maintain +/- 1 or two seconds a day, but this one does so consistently.

 2 points
 -
I use a modified Exacto blade , I will add a picture tomorrow as it’s 6.15 PM here and dark. Dell2 points
-
For a standard diamond graver I use 45 deg but I do have other shapes & angles. Dell2 points
-
This is a very old thread and as stated by @tomh207 above it's unlikely you'll get a response.2 points
-
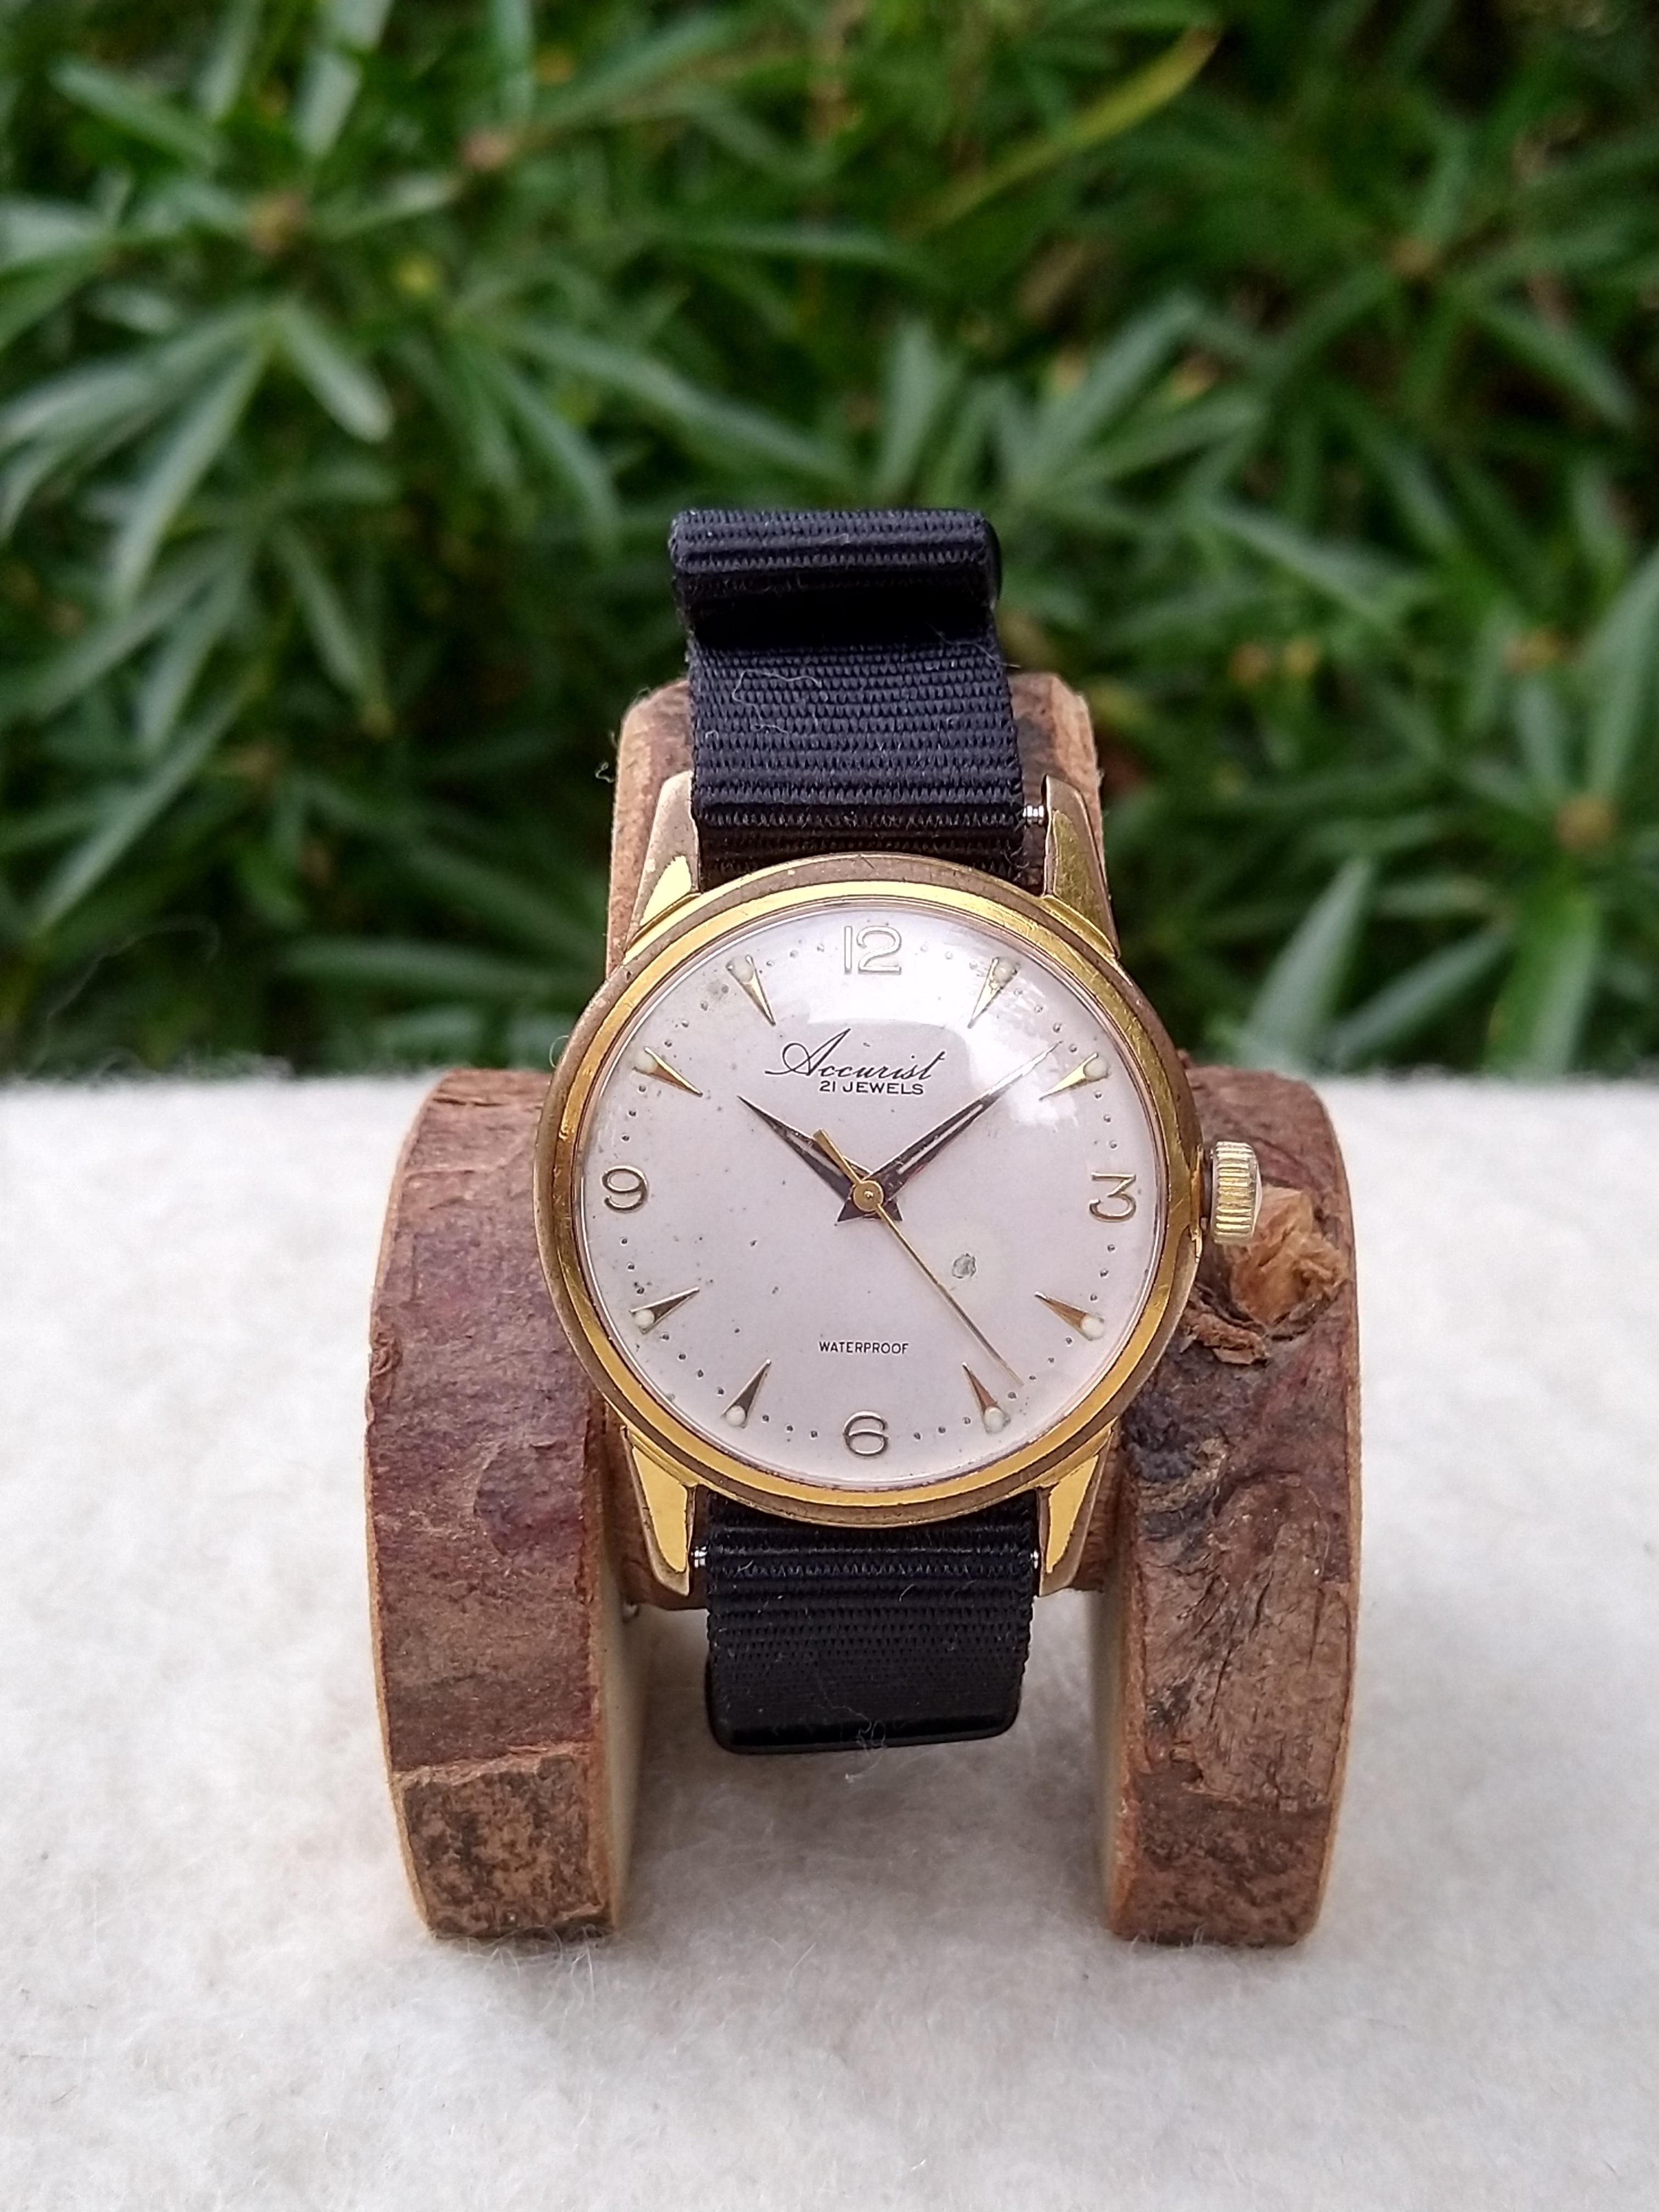
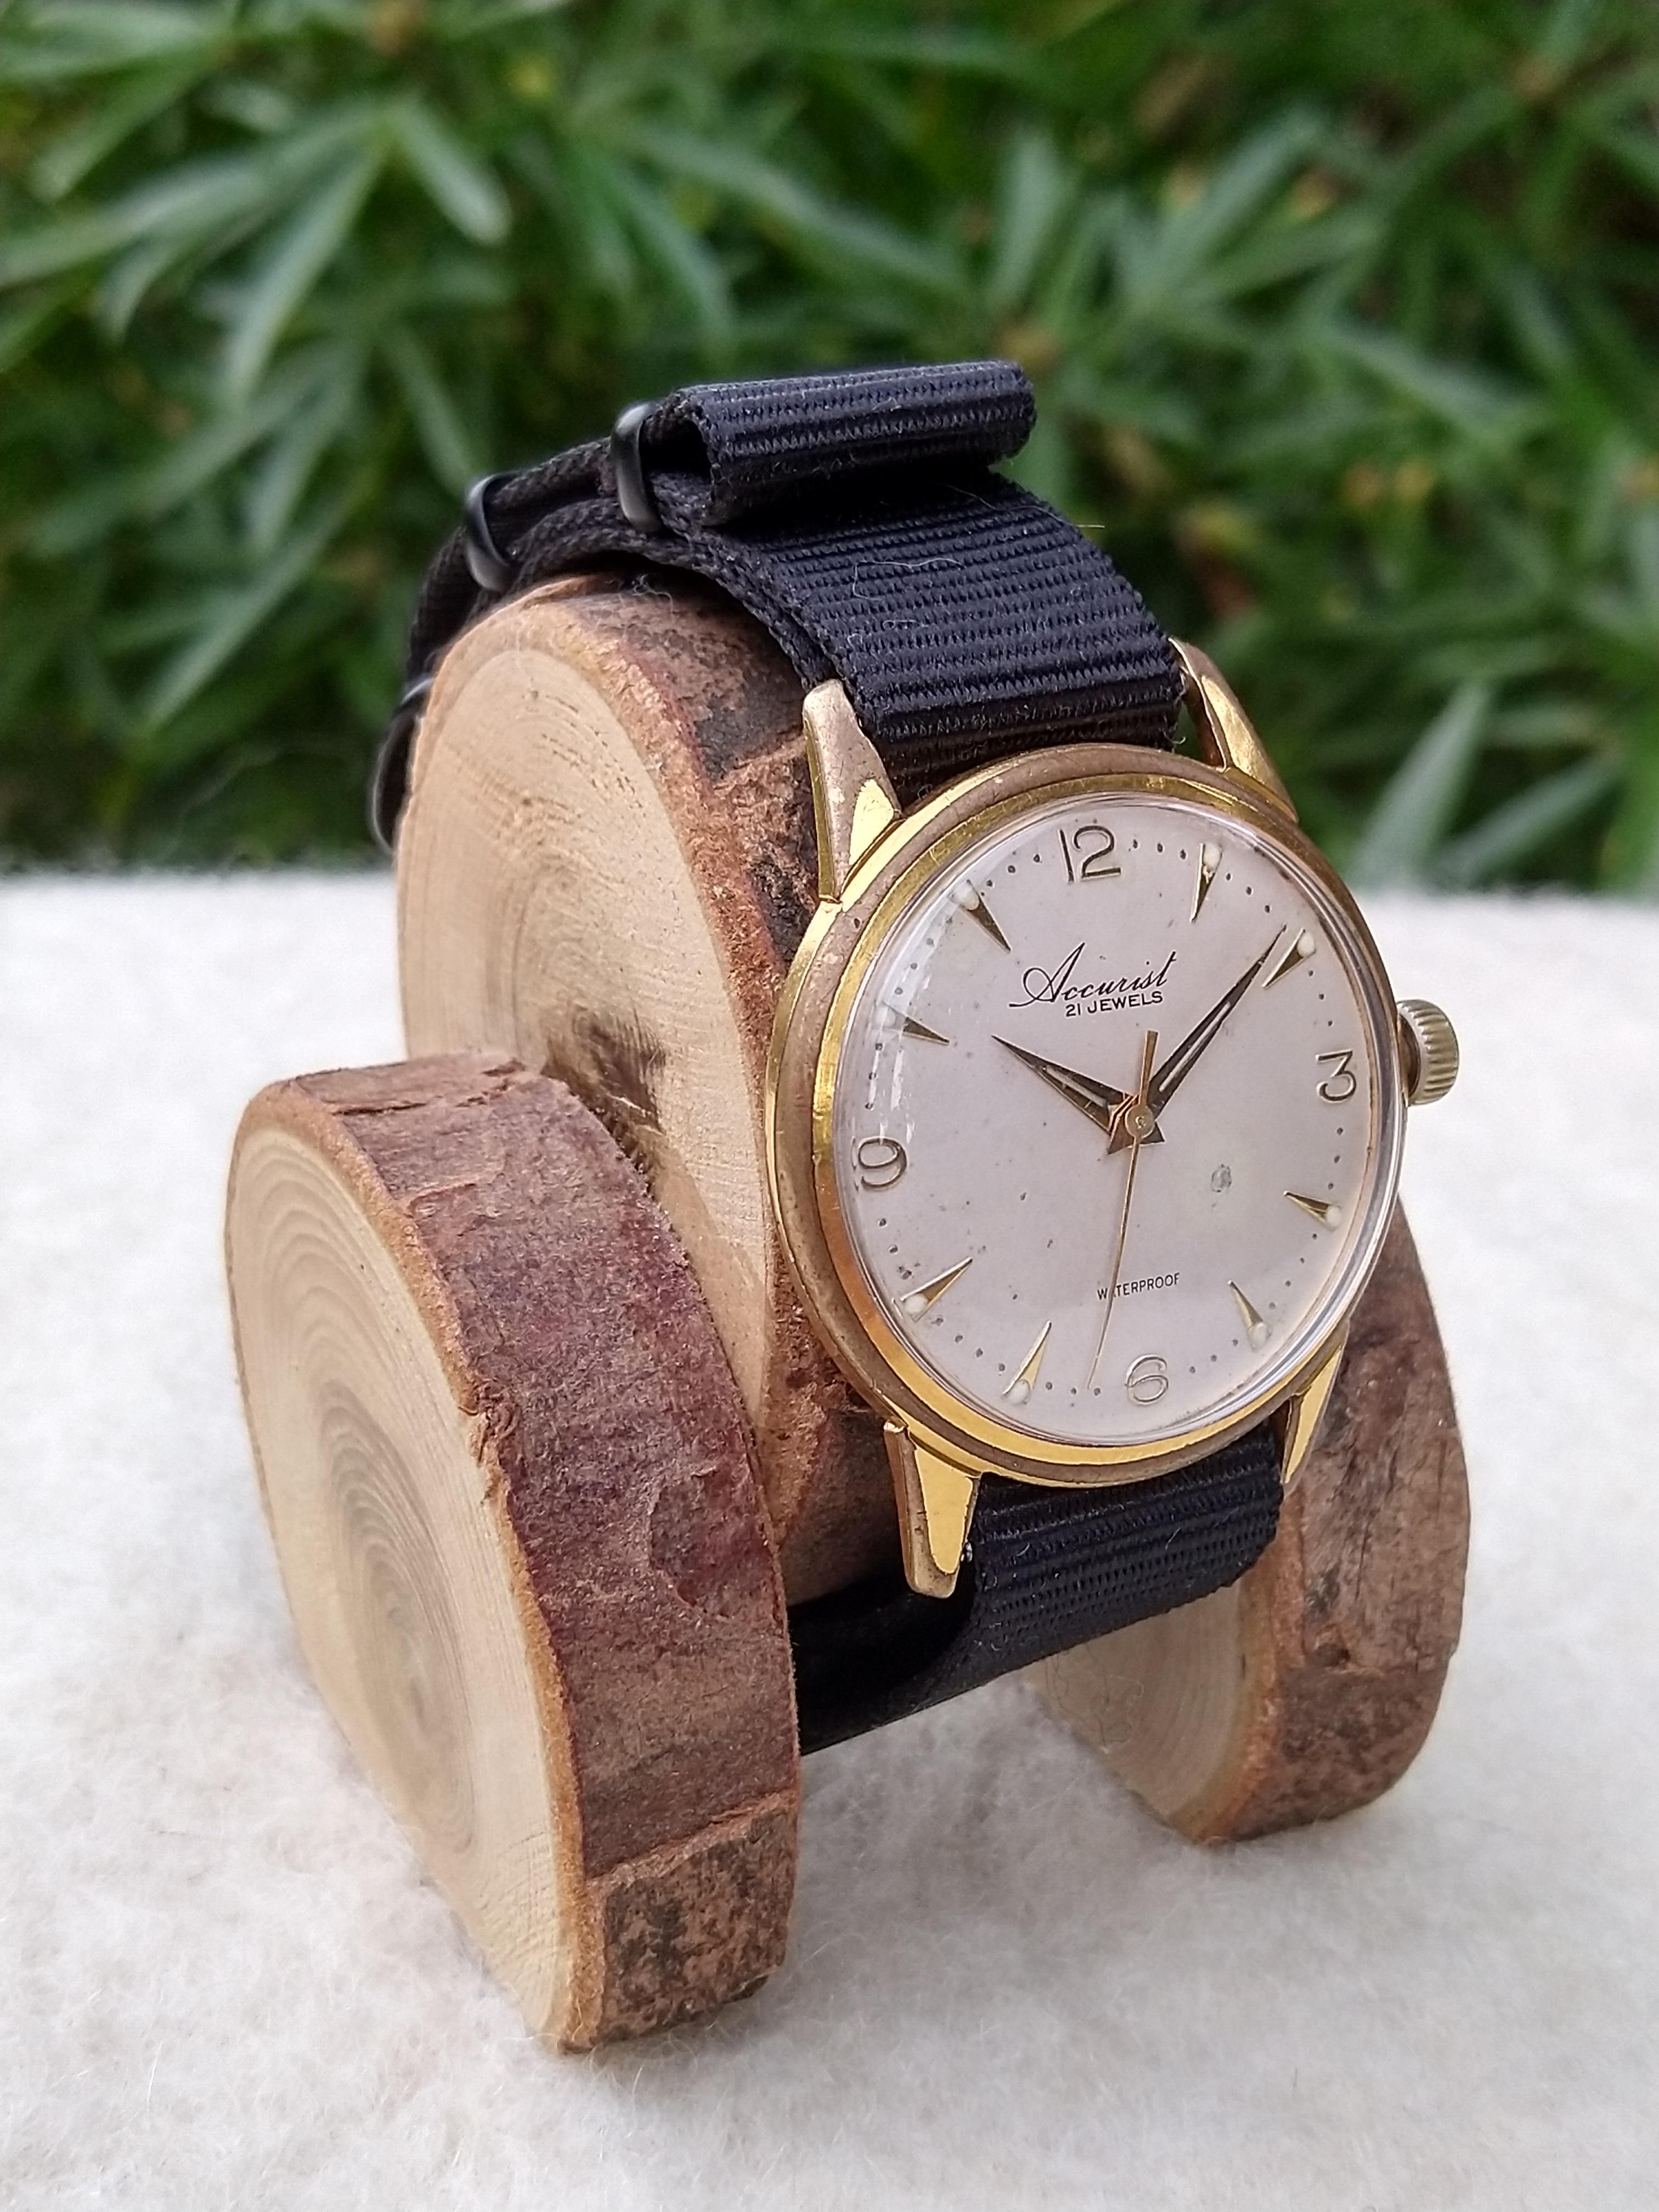
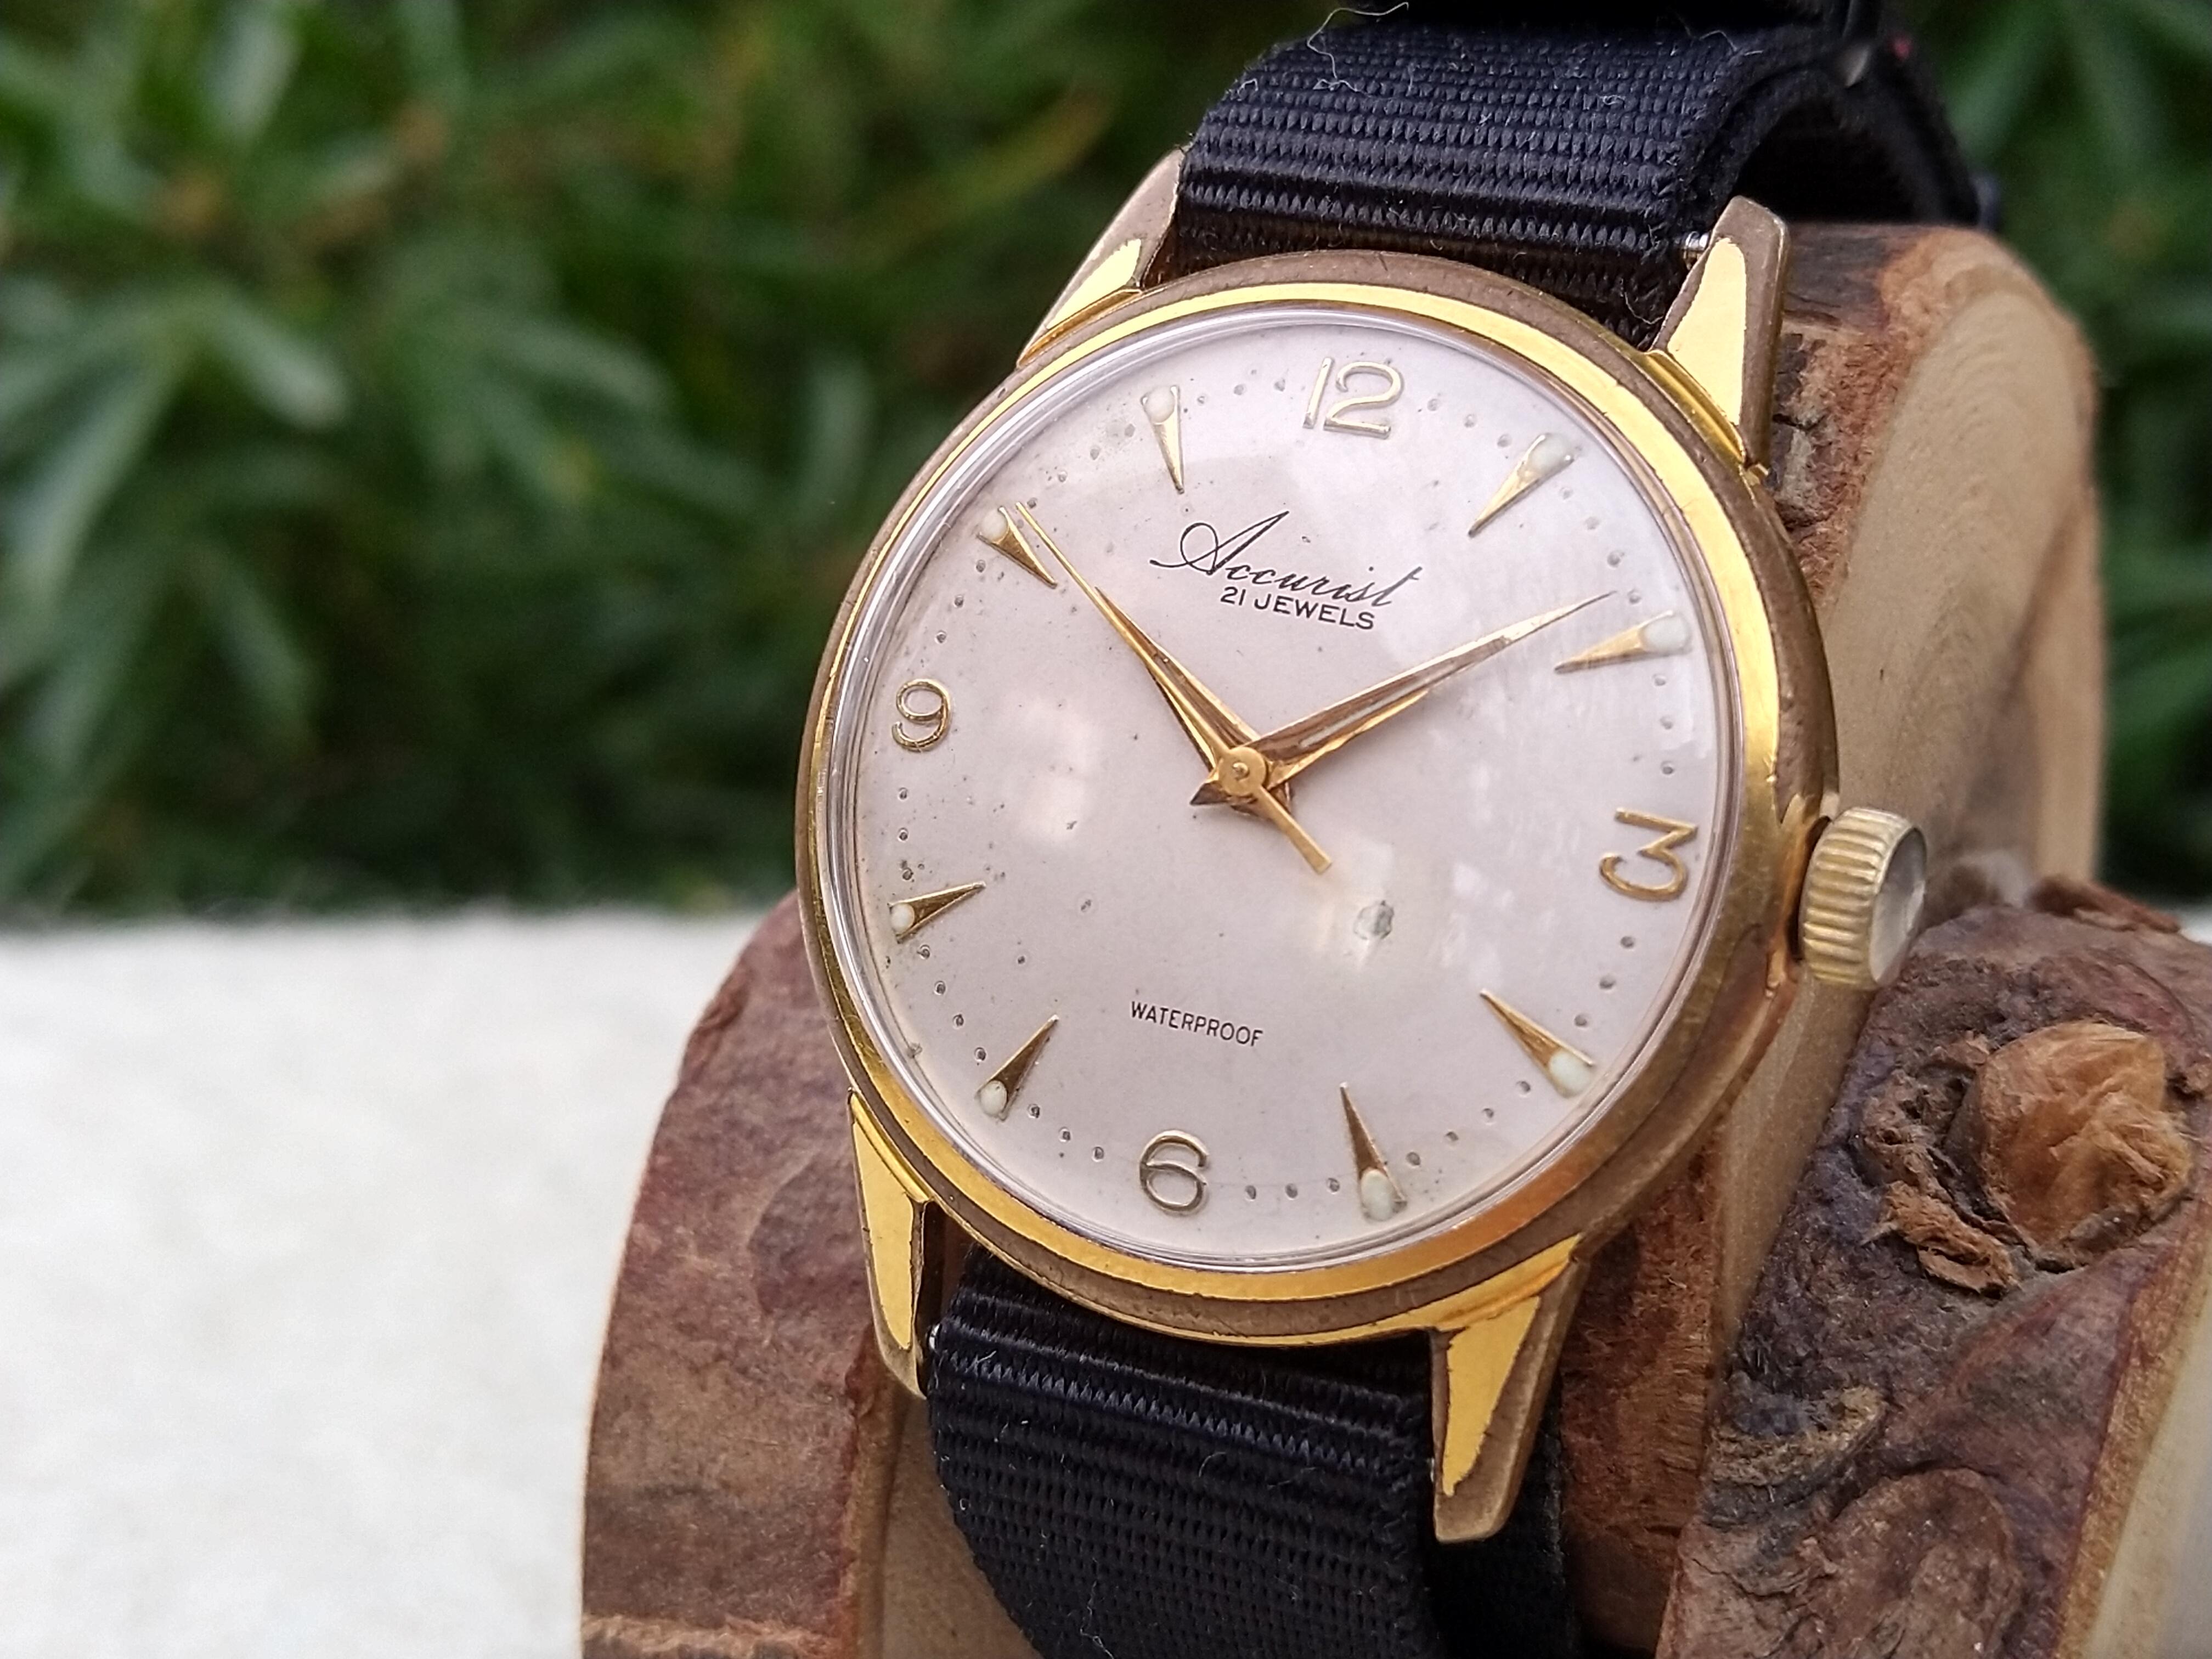
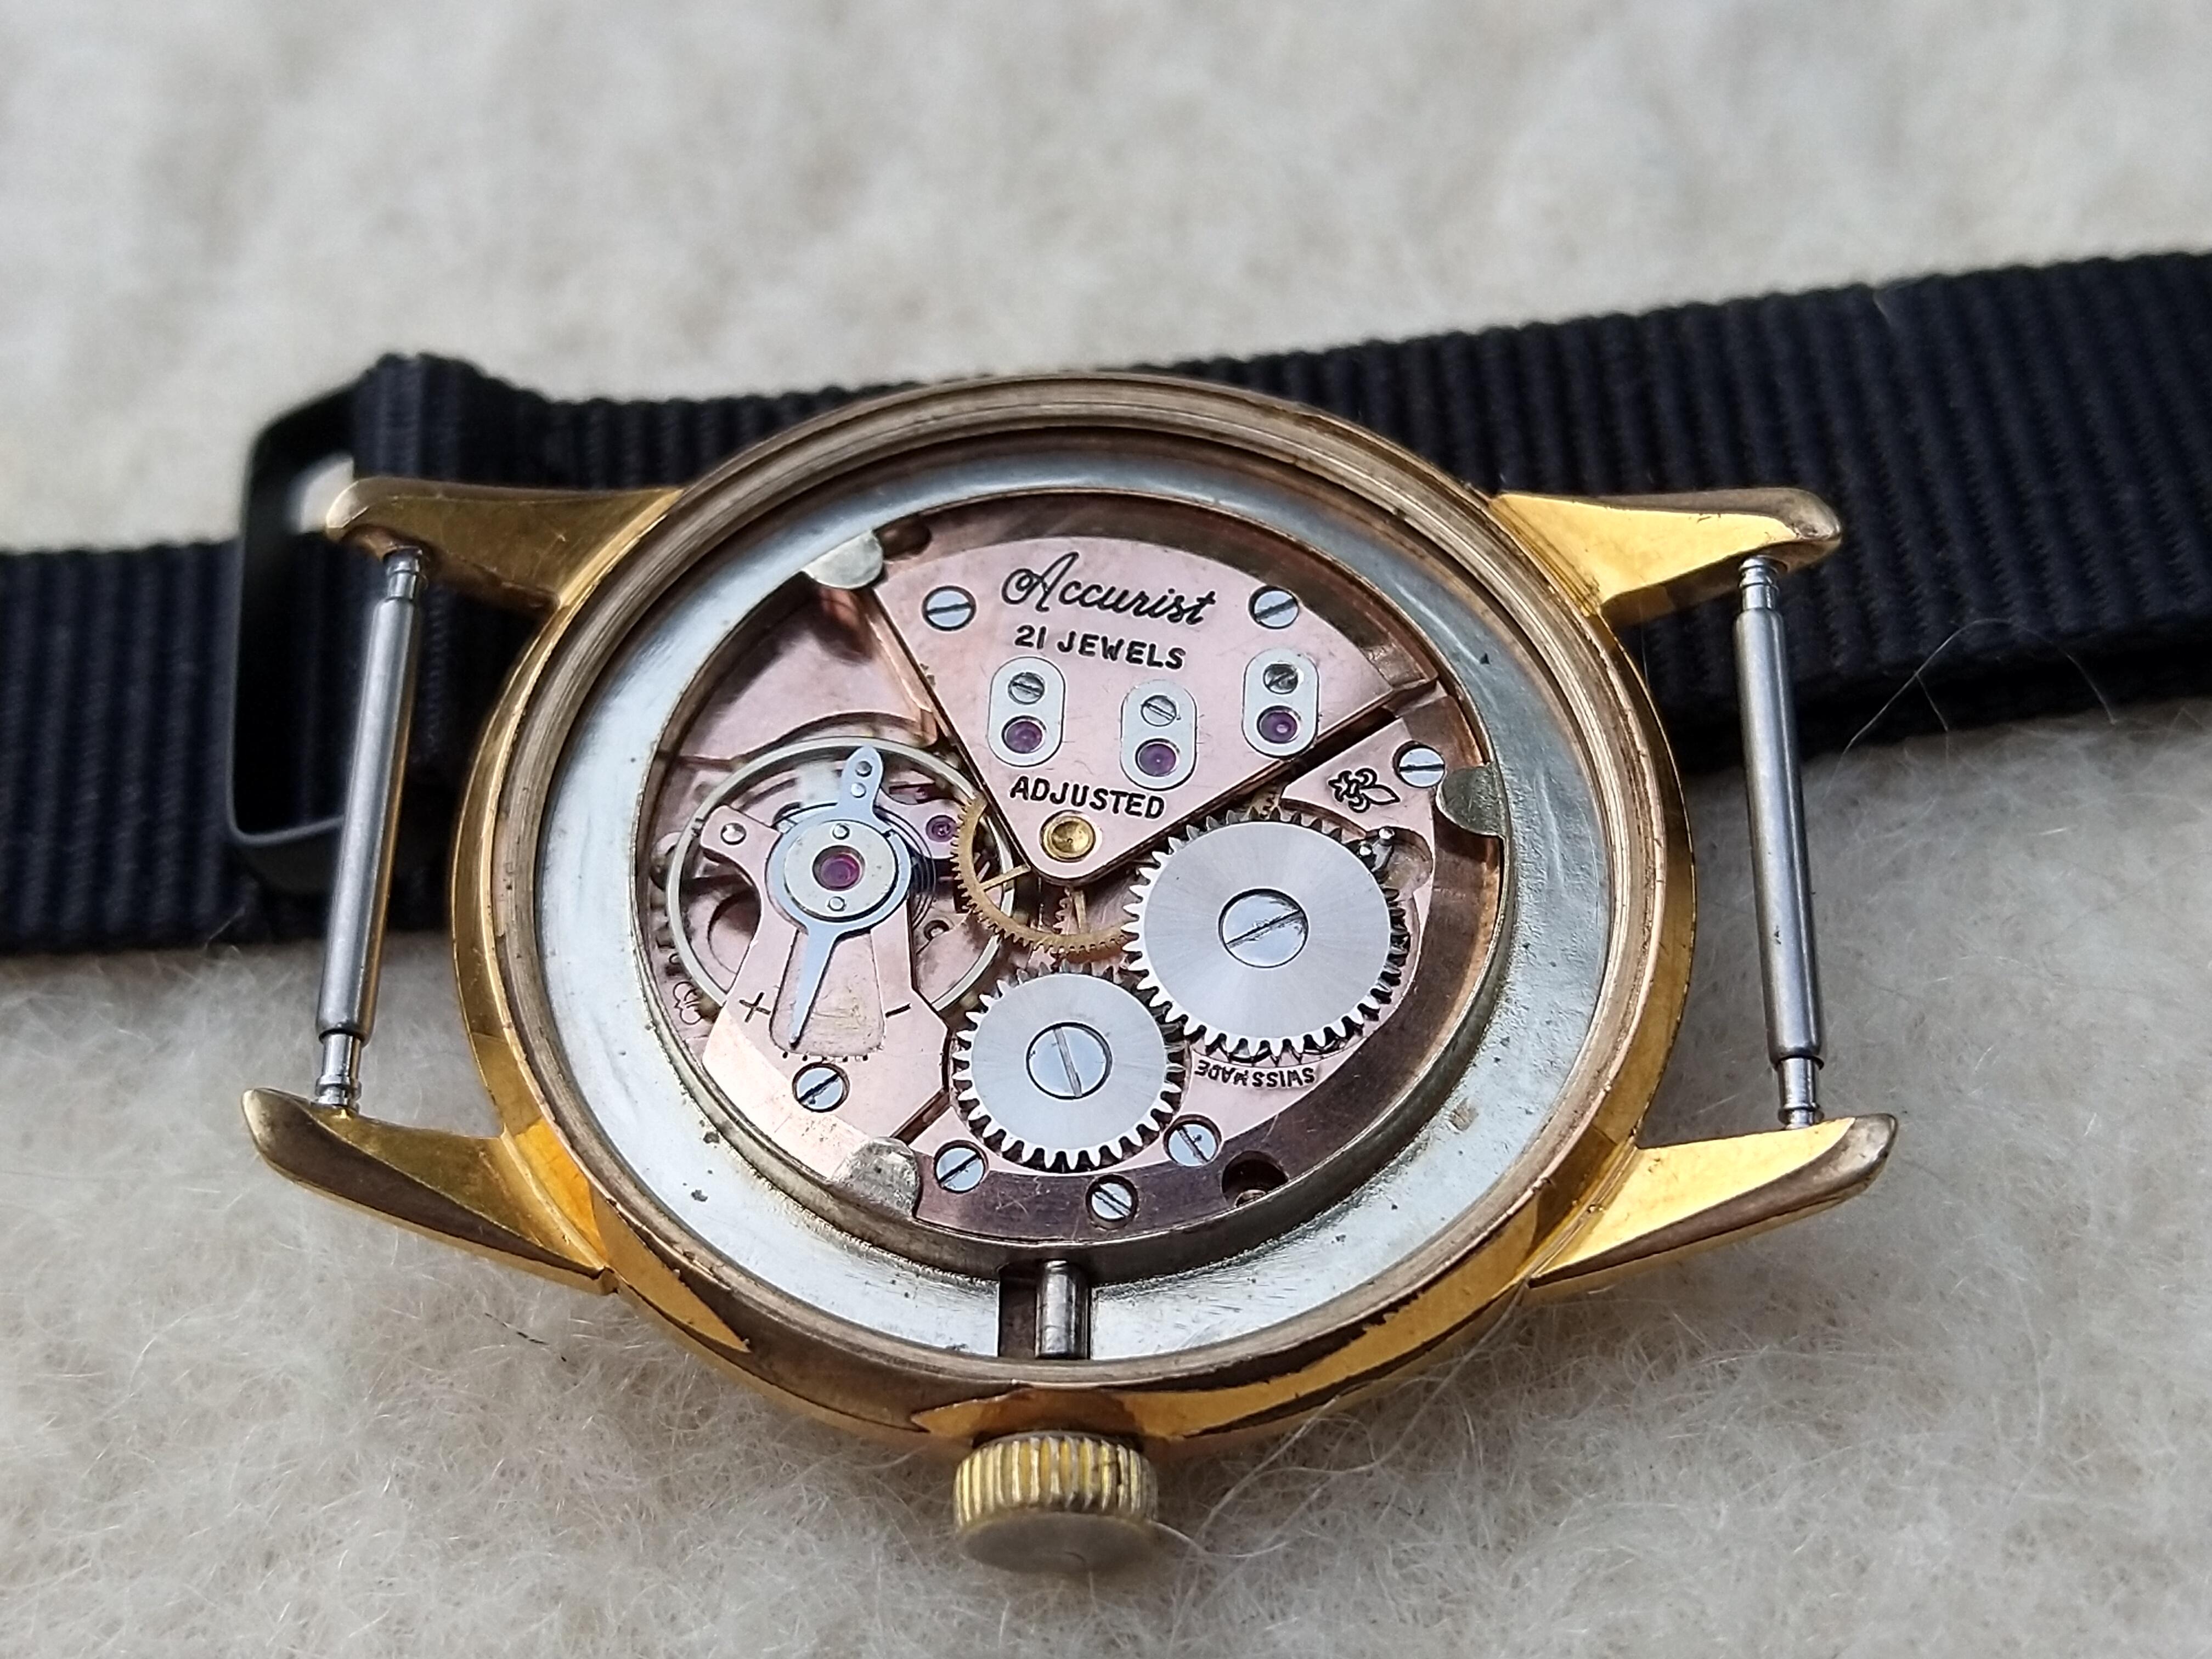
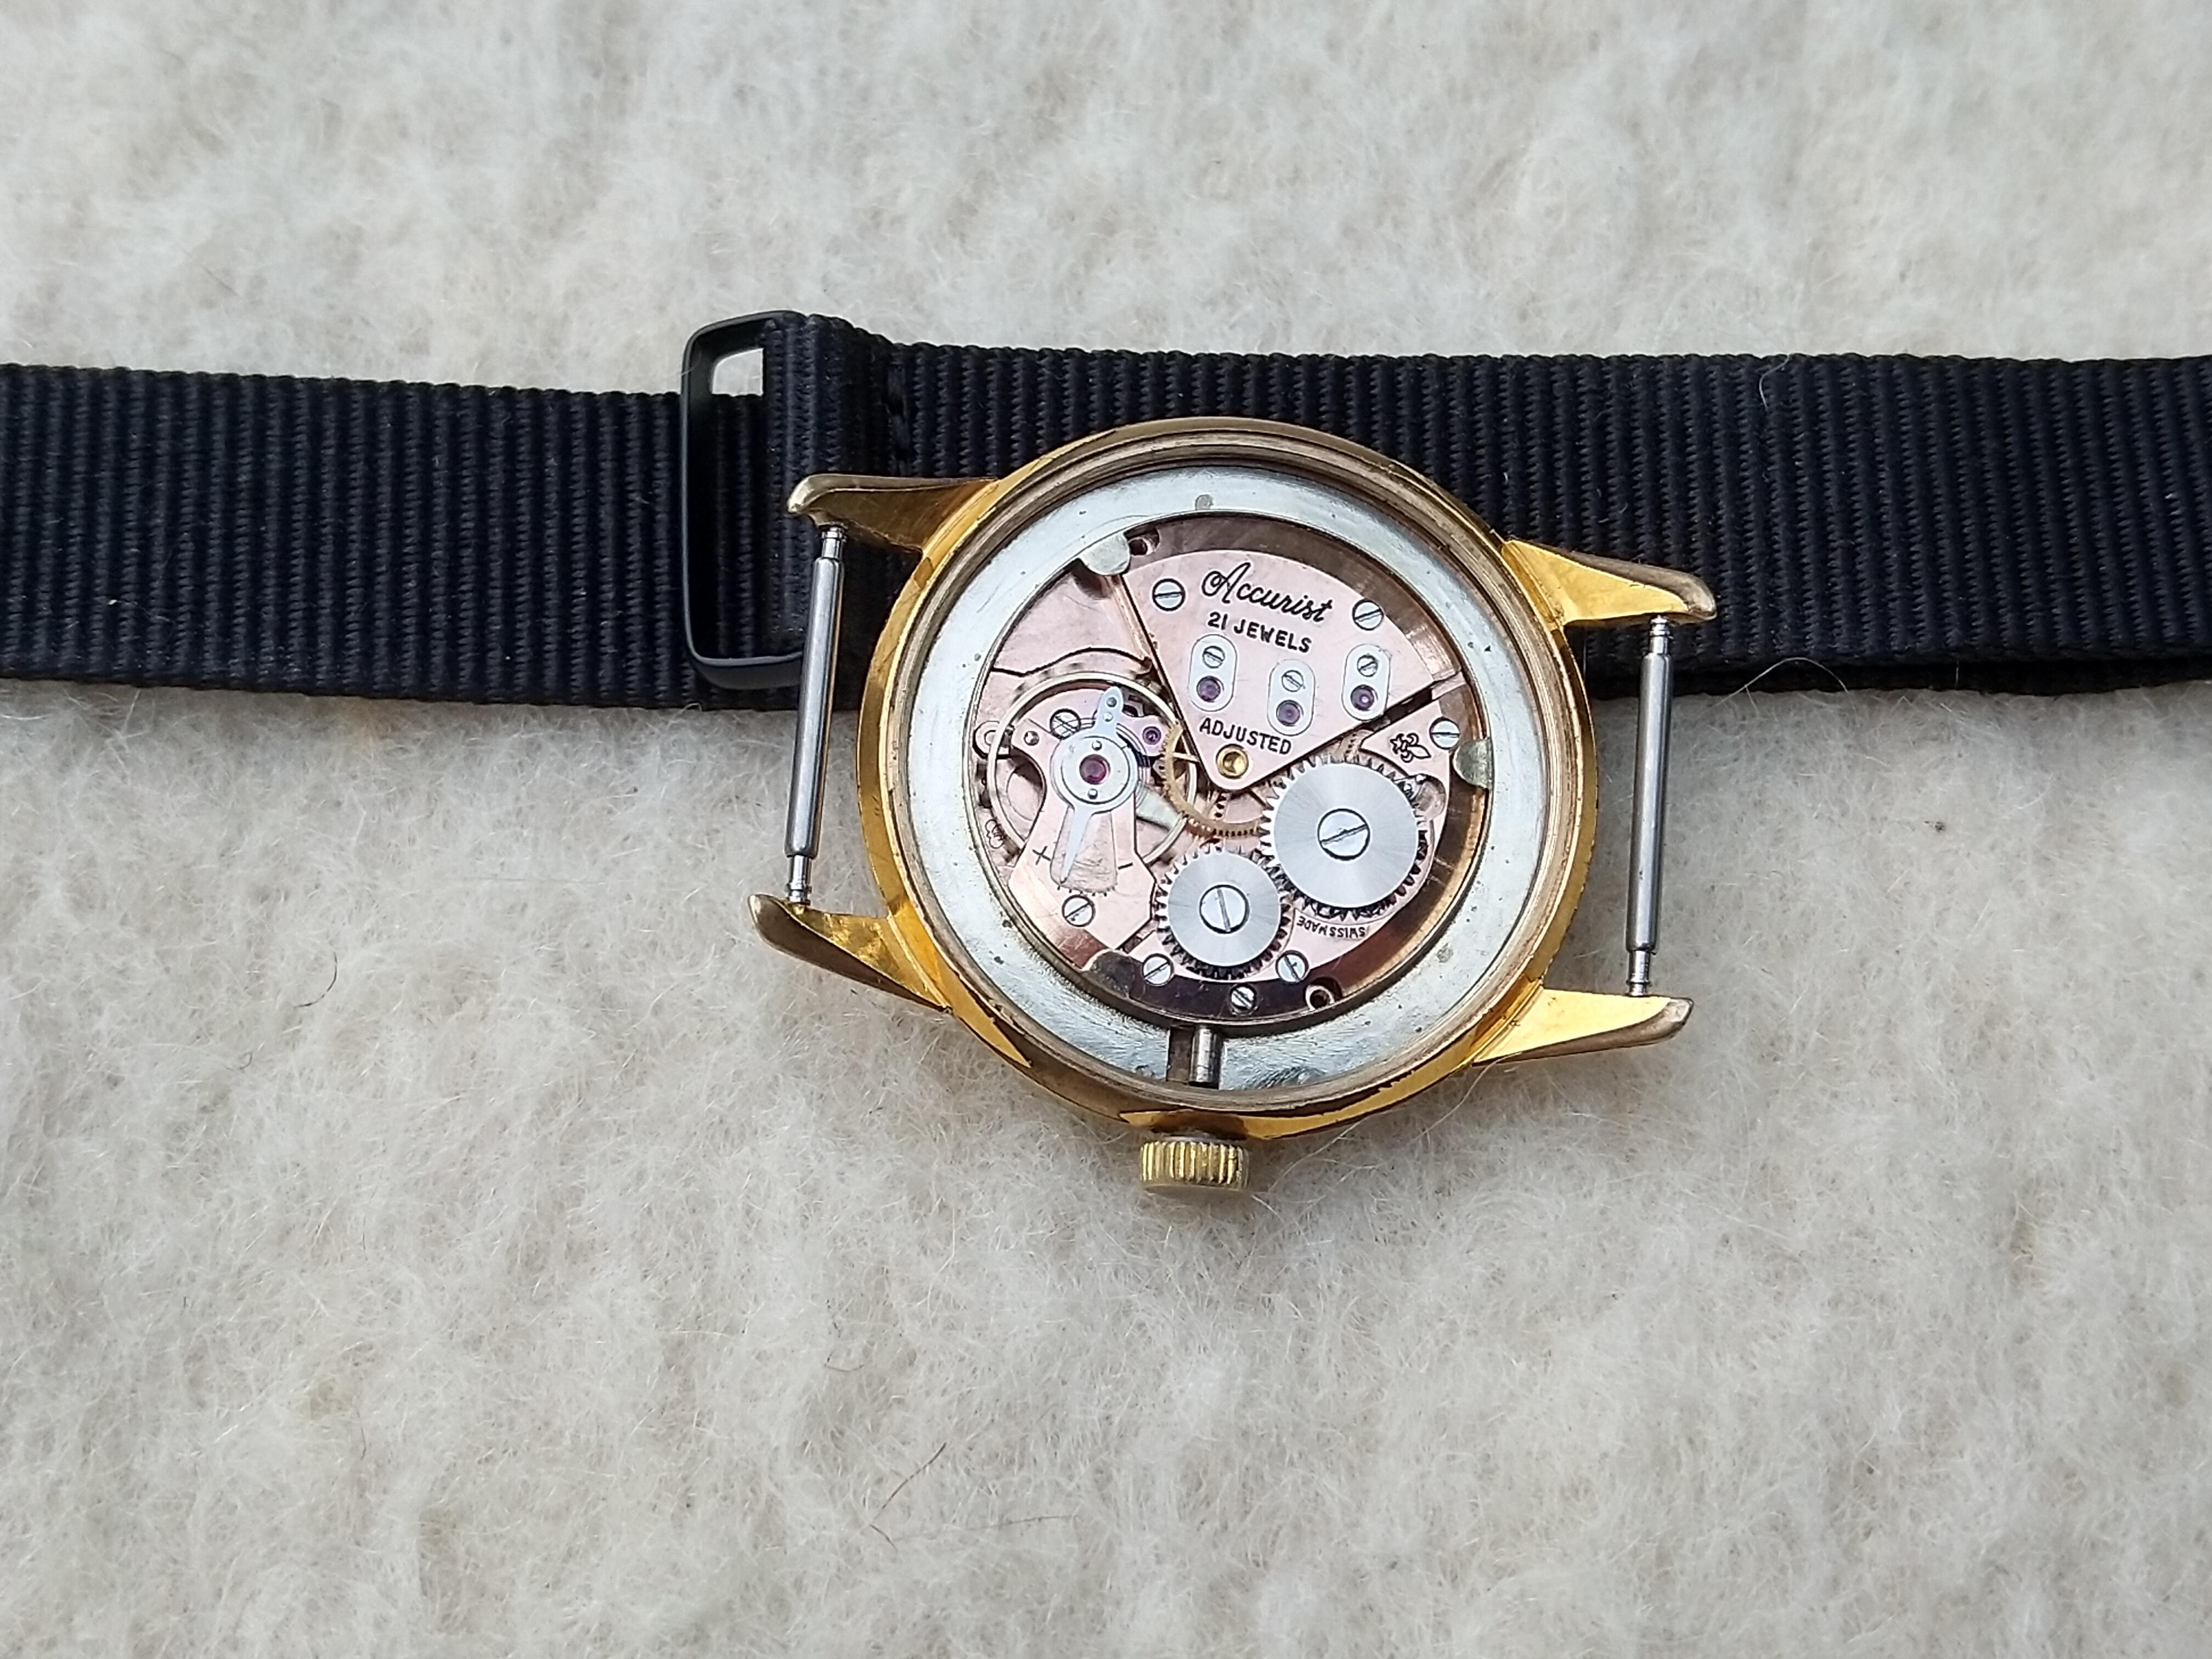
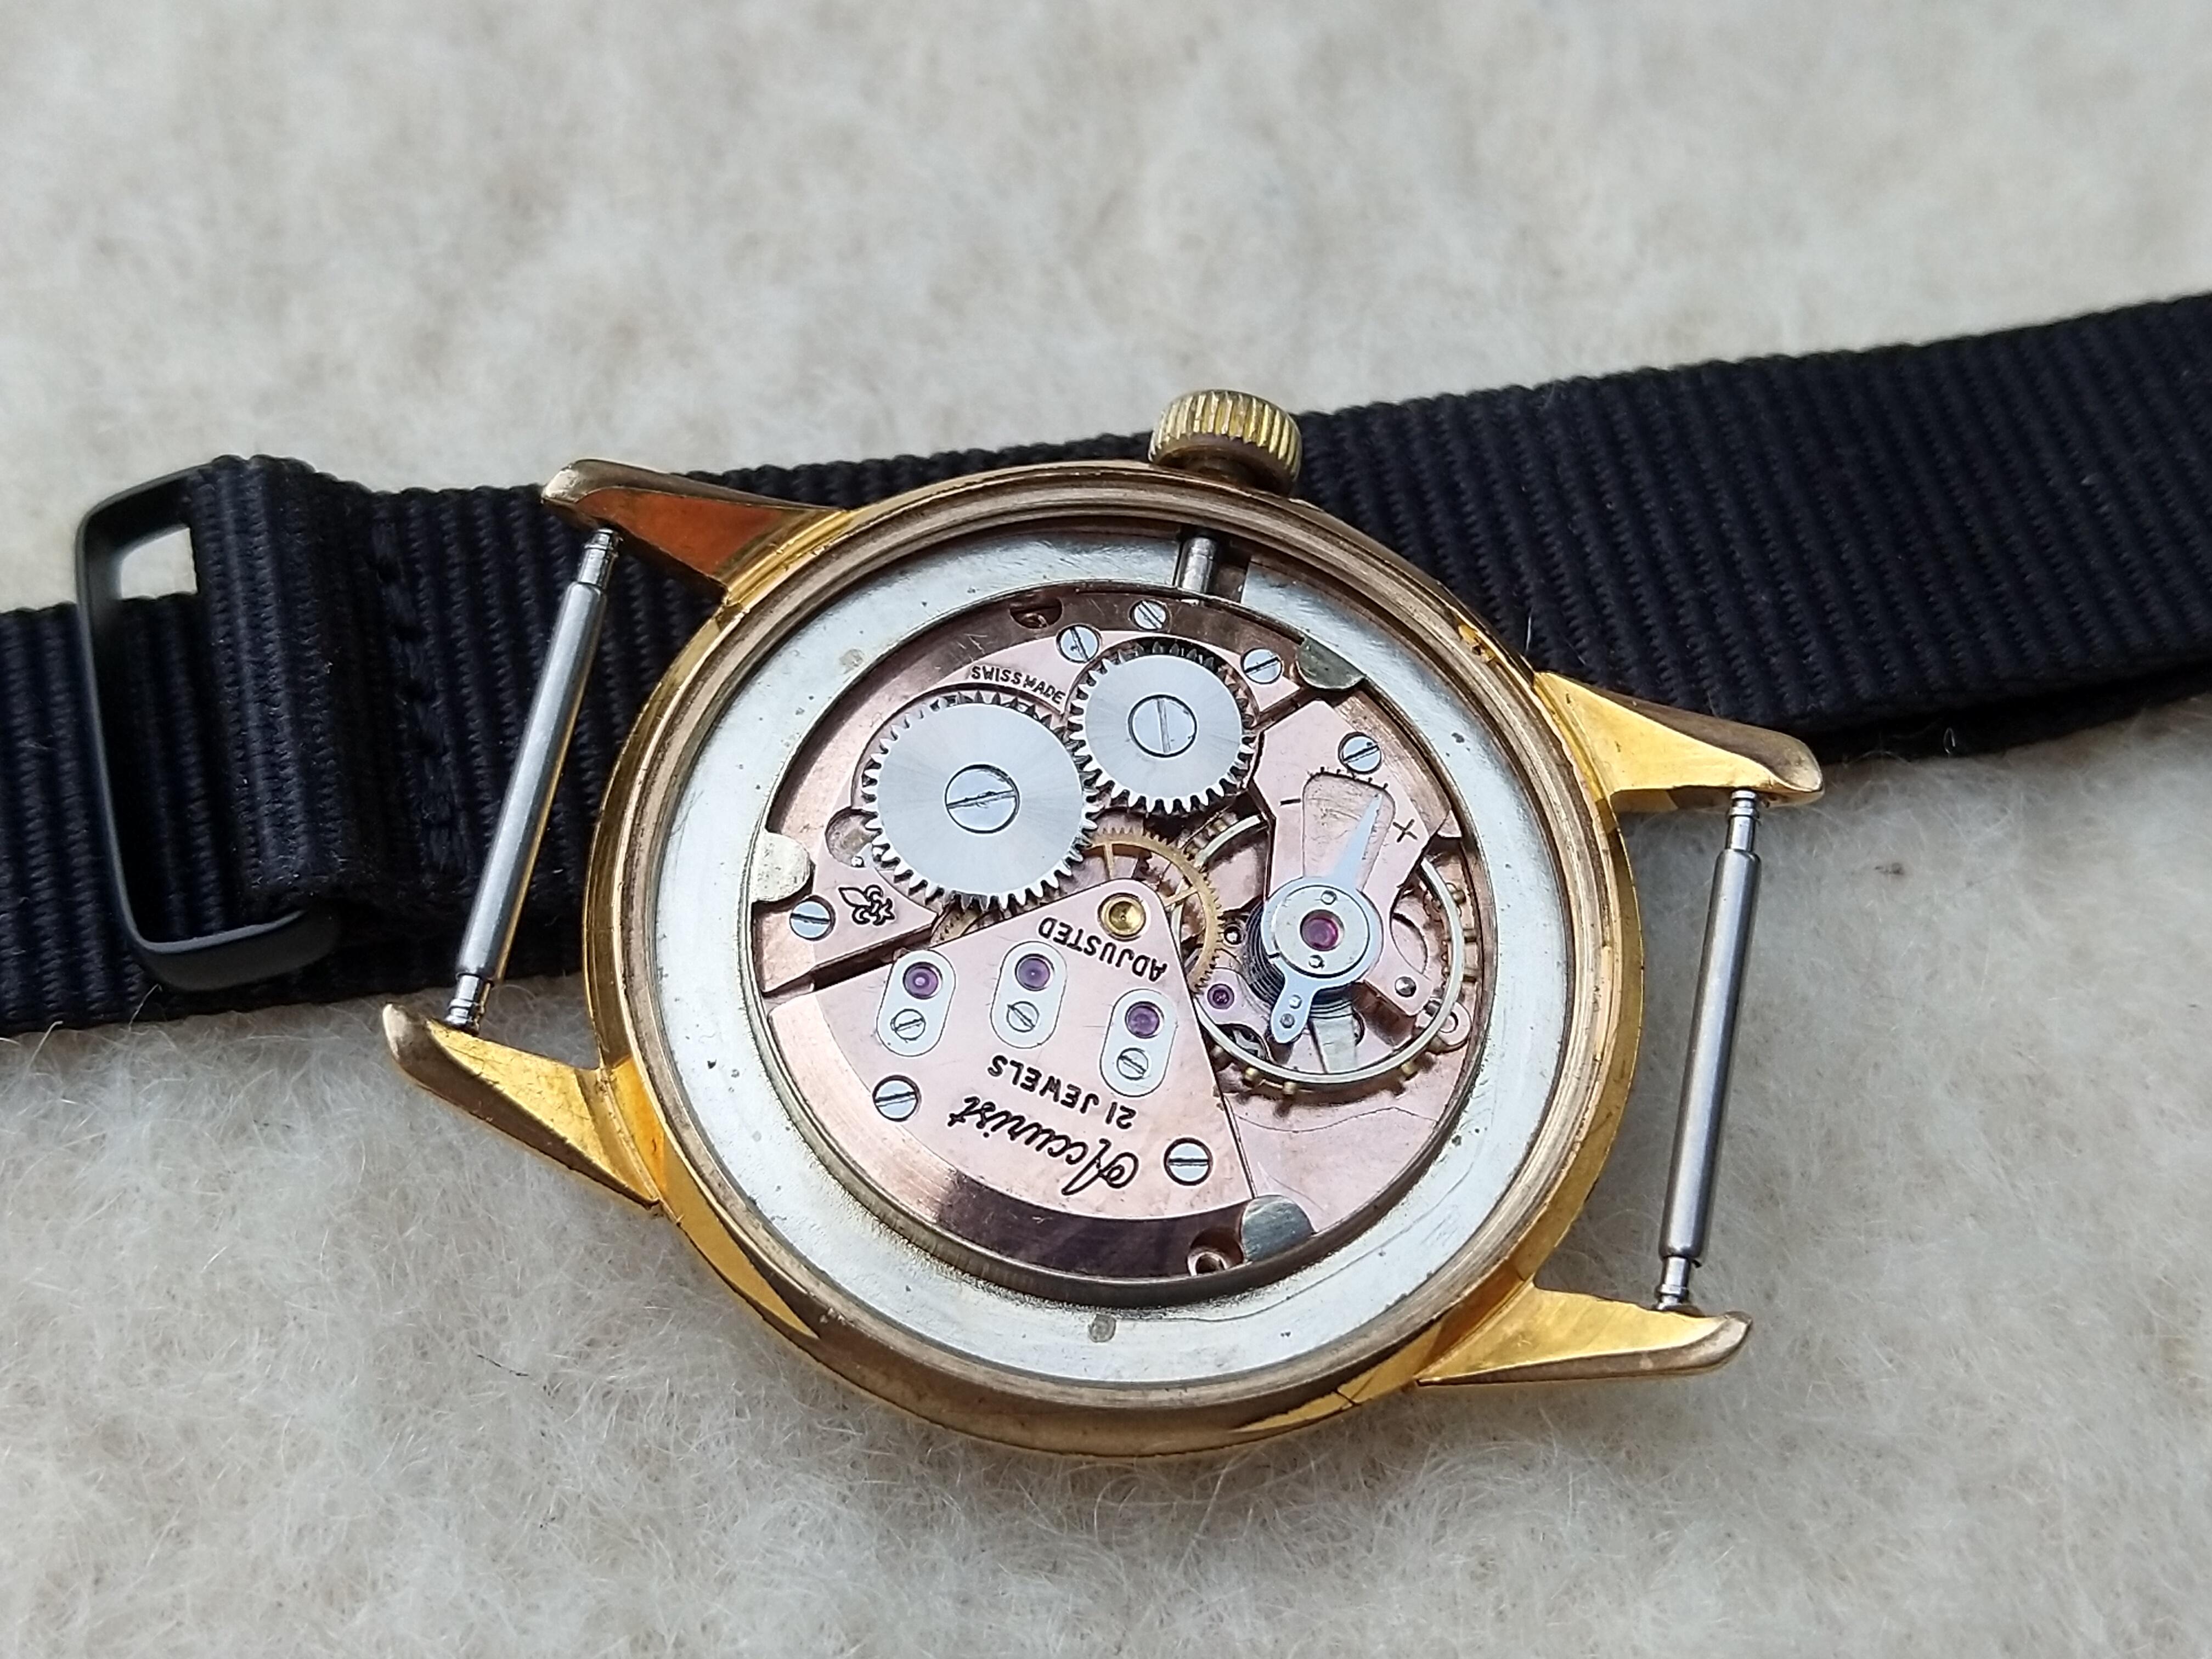
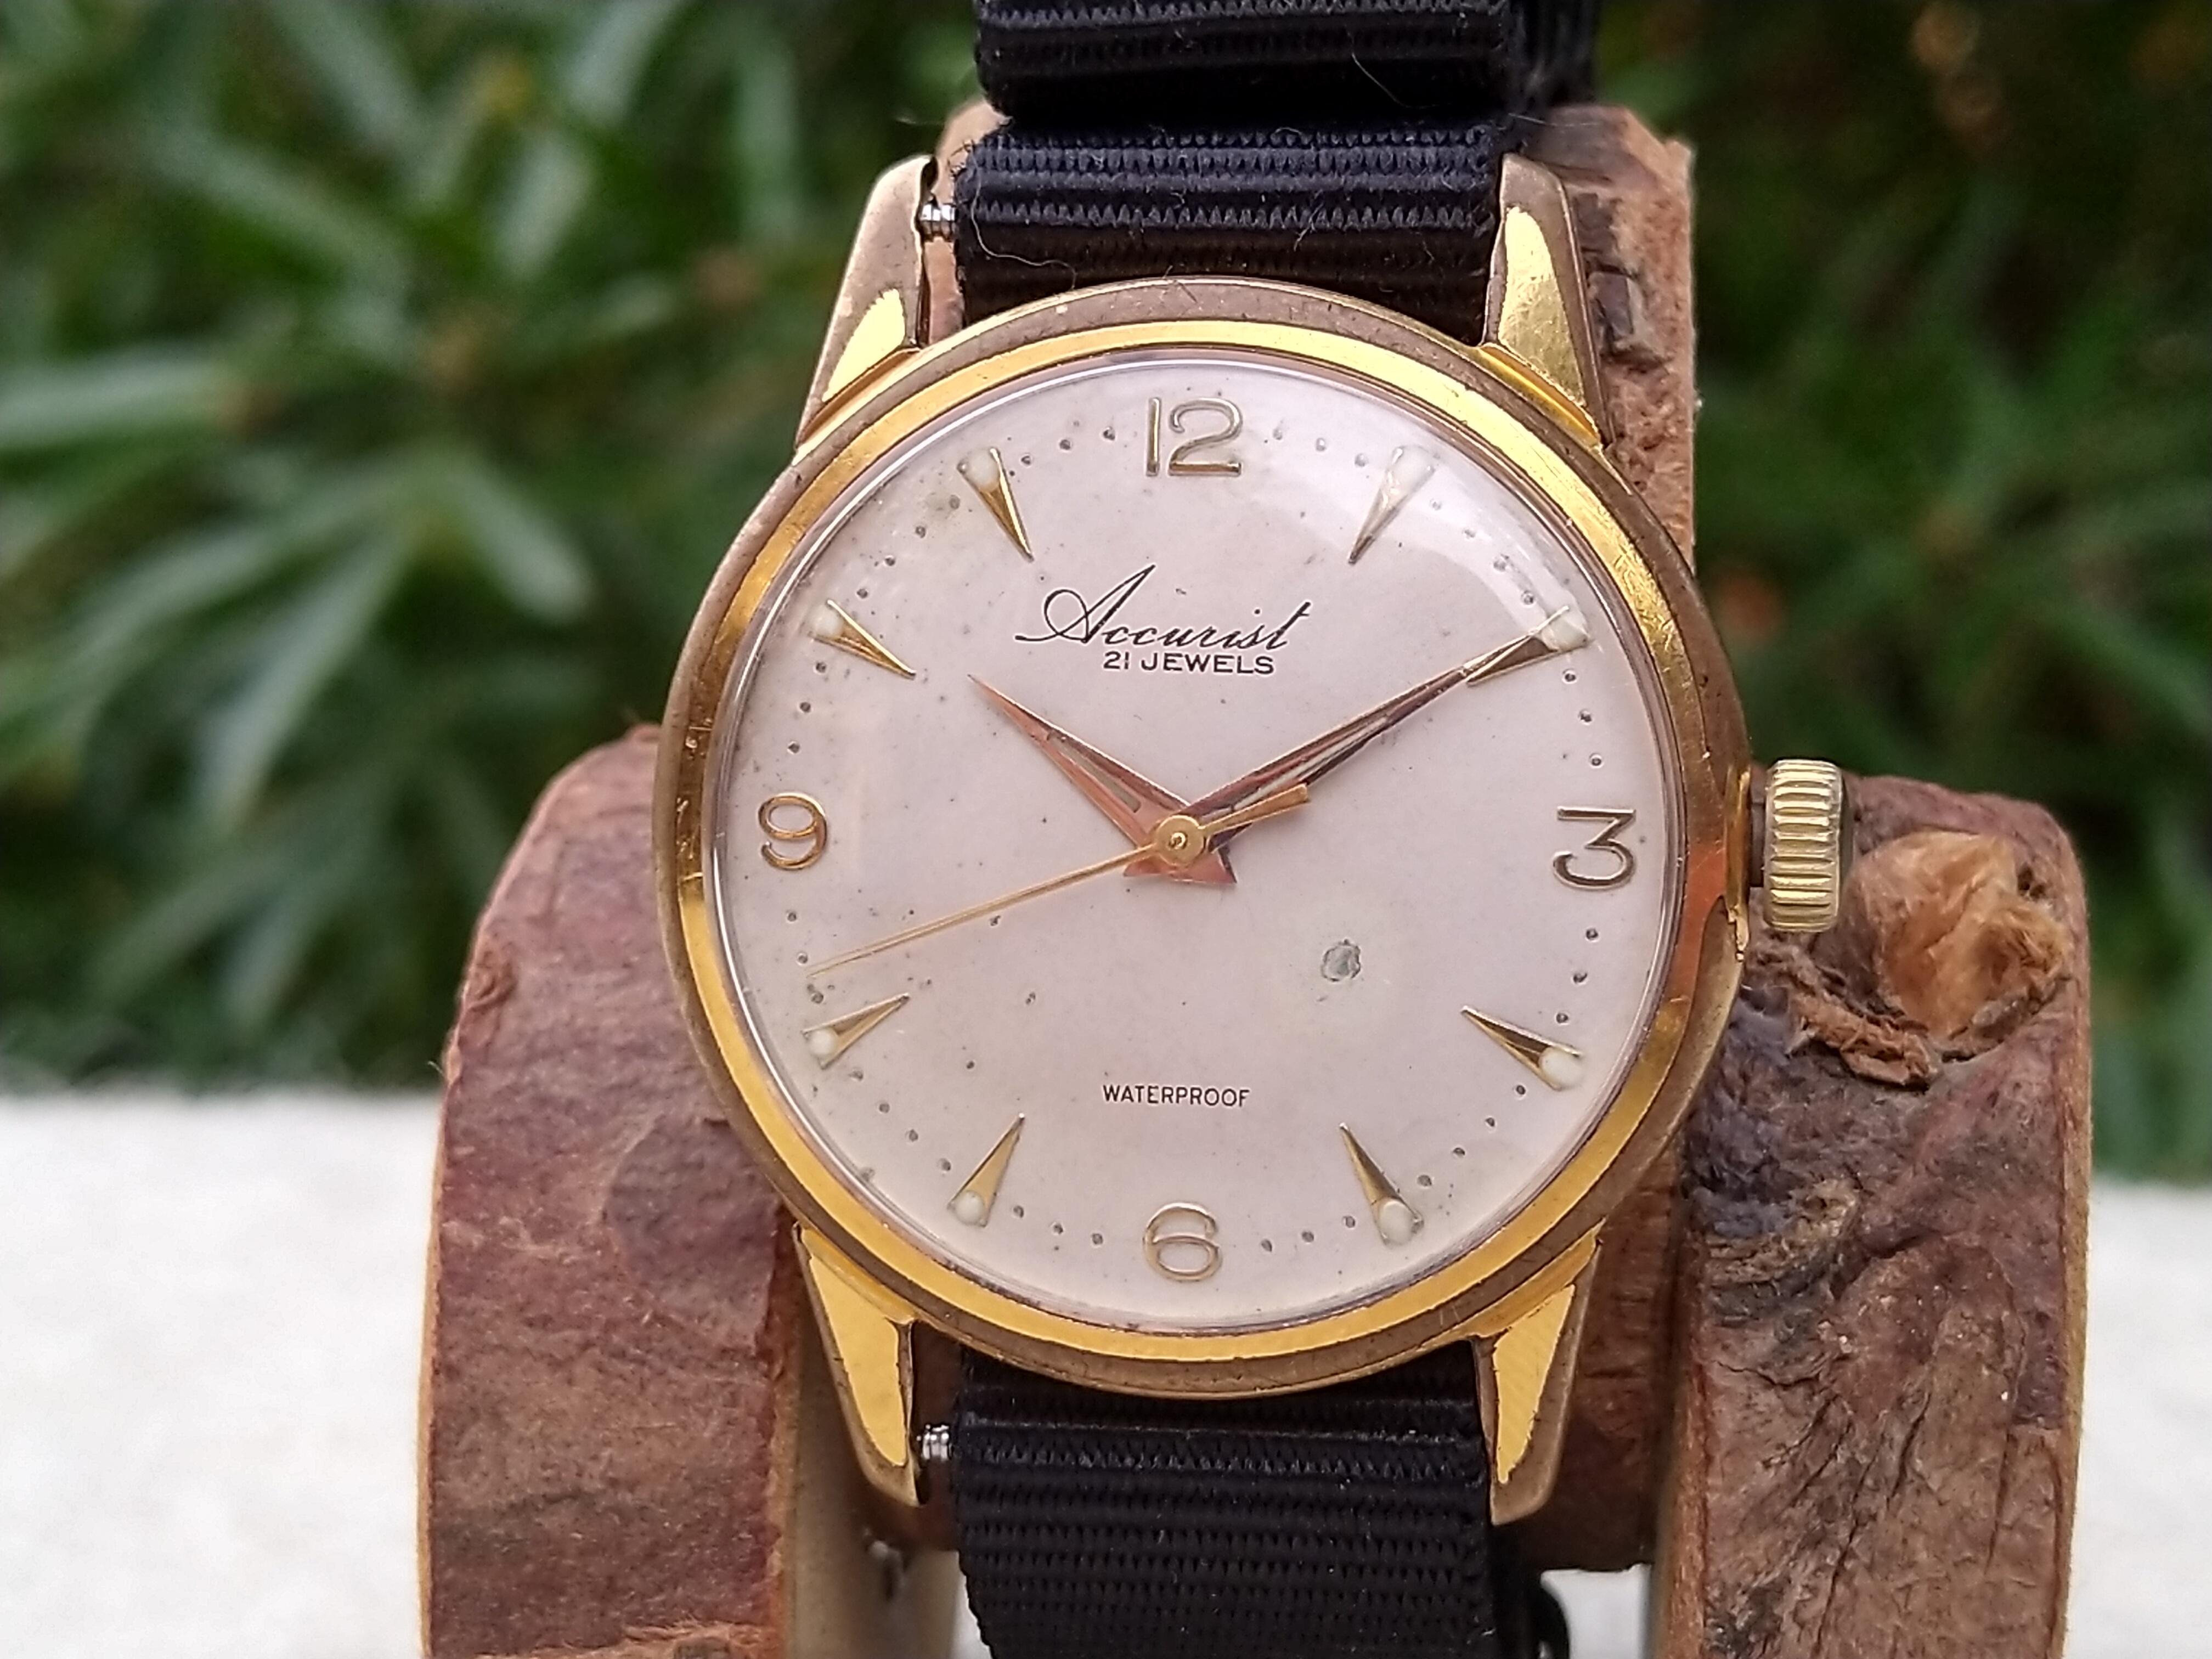
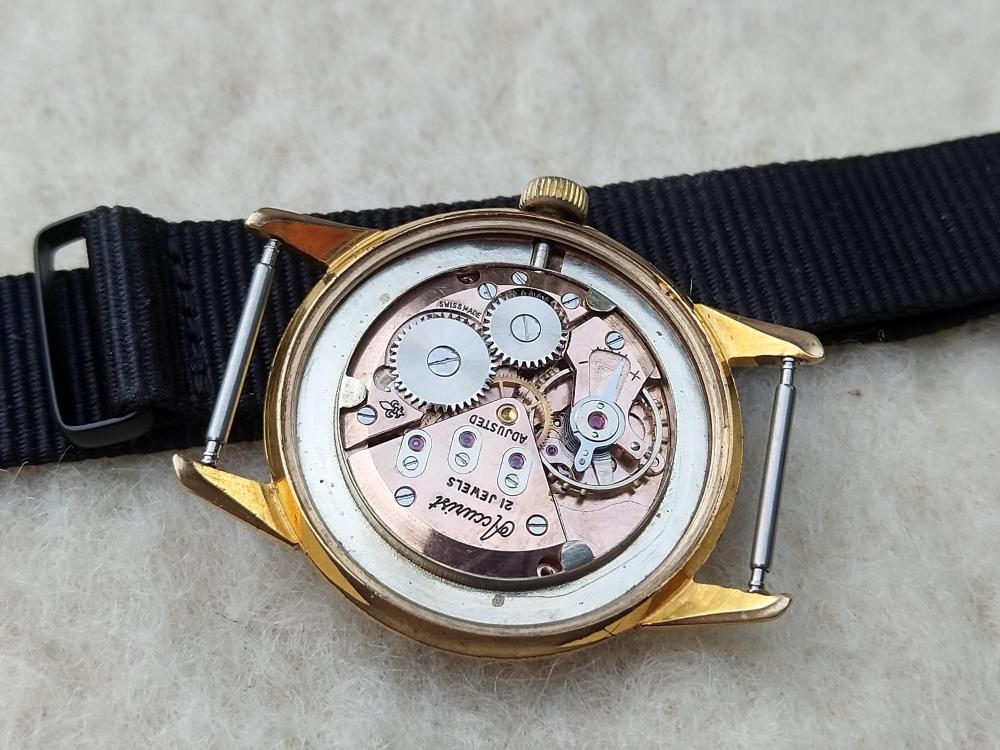
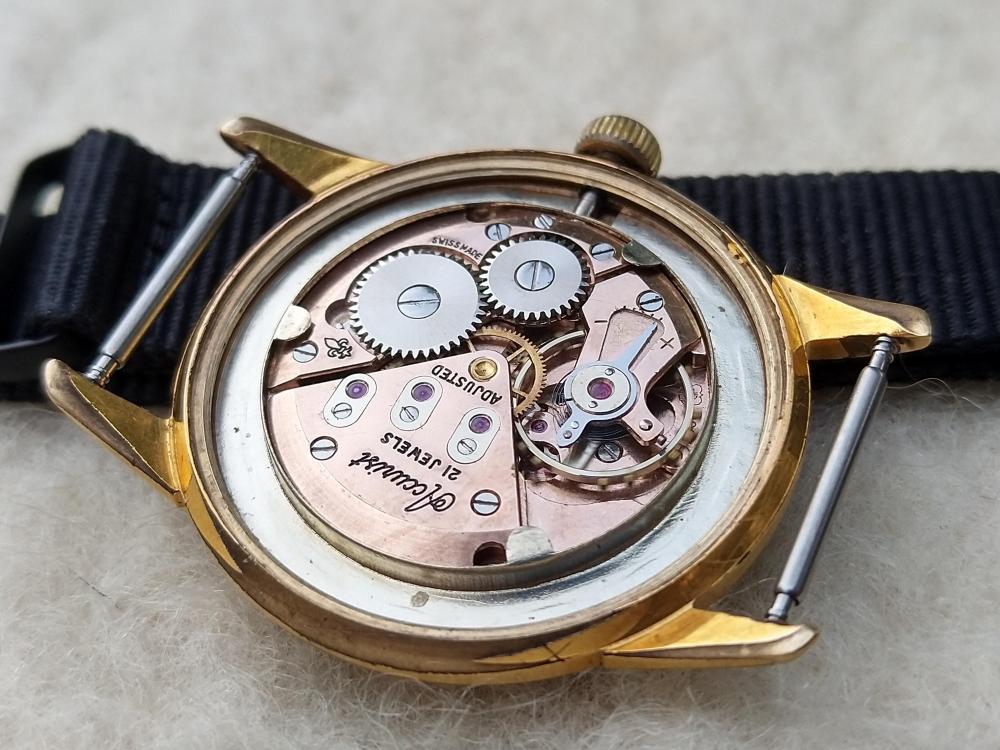
HWGIKE#35 ETA 2390 Full service, hands and dots on the dial are re-lumed. Hole for the MS tightened. HS was in a bad shape, but i managed to bring it back to flat and concentric and I got lucky too I put the collet back in such a way that the beat error came exactly zero the first time with around 280 amplitude, straight line. Woah! Very happy! The case is very very worn including the inside of the lugs, someone must enjoyed this beauty for a long time. Dial also have a dot on it something went through the paint cannot help it.


 2 points
 -
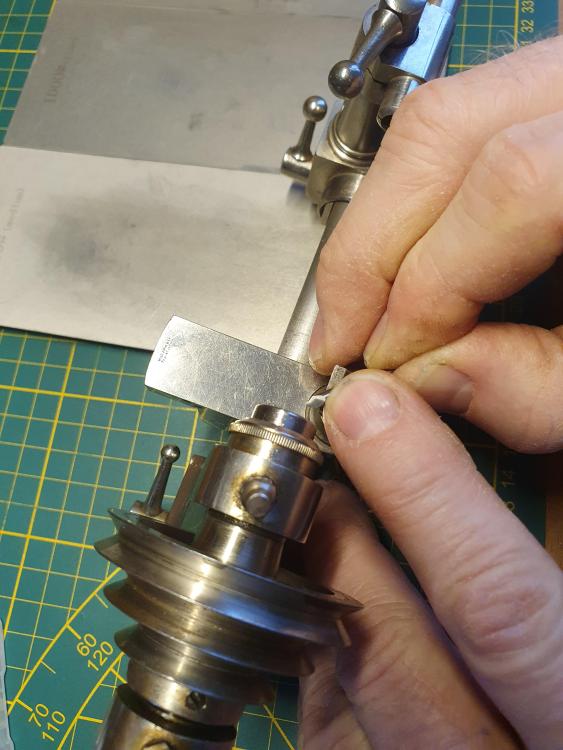
If you look vertically down on the spring between stud and adjuster, you can see where it is twisted slightly from the light reflection. I find this adjustment easier with the balance mounted on the movement. You can then see when you have adjusted it enough. (Of course you will turn the tweezers the other direction working from the top)2 points
-
Please allow me to be Dutch for a moment I do believe earlier on you already got some tips that, when followed up on, would have helped you to find this issue: And: Again, and I can't stress that enough: we do want to help. But it would also help (and keep us motivated to offer it) if we see that you actually do something with it.. If I sound a bit harsh: sorry, just living up to the reputation the Dutch have for being direct (blunt..).1 point
-
there are parts books - yes that is a Timex #1 point
-
if you want us to look at another discussion you have to give us a link which you did not so we Look up the other discussion. But your issue is a common issue. Newbie? You need to slow down you need to carefully look at everything. But as a newbie you have no idea what you're actually looking at so even if there is a problem you're typically not going to see it anyway. Then you're going to jump to conclusions as to what you think the problem is based on? By the way up to clean the watch again? Yes that's a common one cleaning the watch hoping the problem will fix itself. There's a lot of common things that people do in the beginning when their learning watch repair. Nice pallet fork picture except we need a side view because the view you show has a beautiful pivot we can't see the other side what does its pivot look like? yes the most important thing to learn is what is the problem? then extremely common for all of us is to bend the hairspring. So playing with the stud isn't going to help with a bent hairspring. but ideally you should have a practice hairspring to play with something you can destroy and not care about. Something you can bend and then bend it back. As opposed to your hairspring is bad which is very common but where is it bent? You basically need to slow down.1 point
-
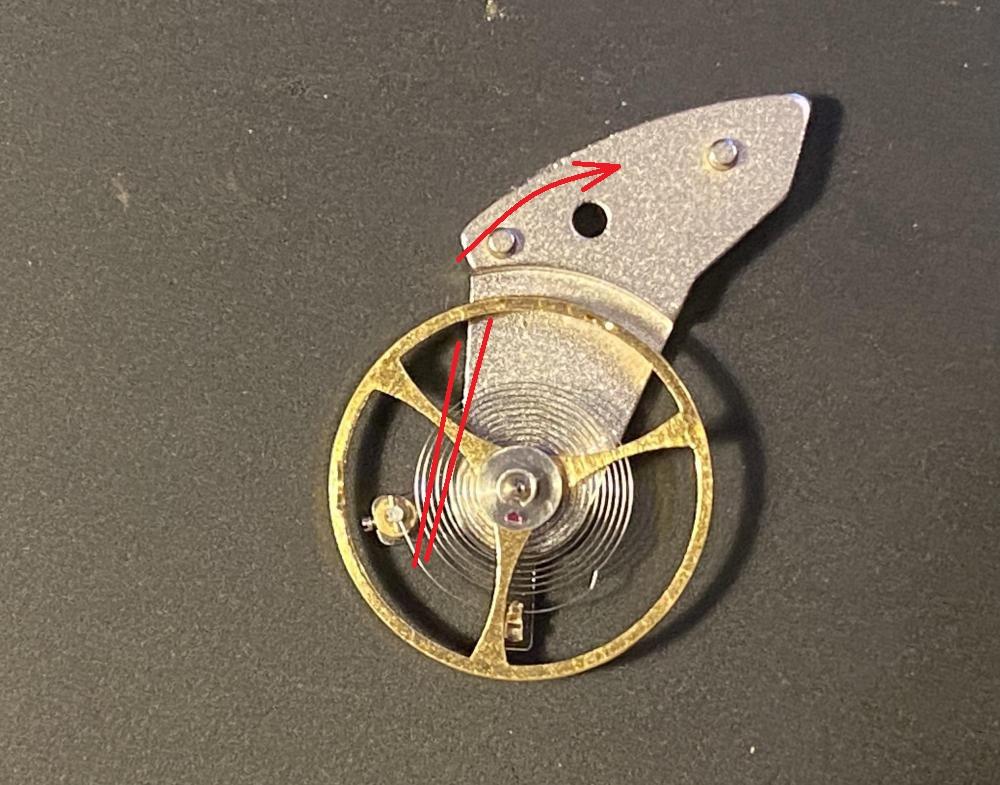
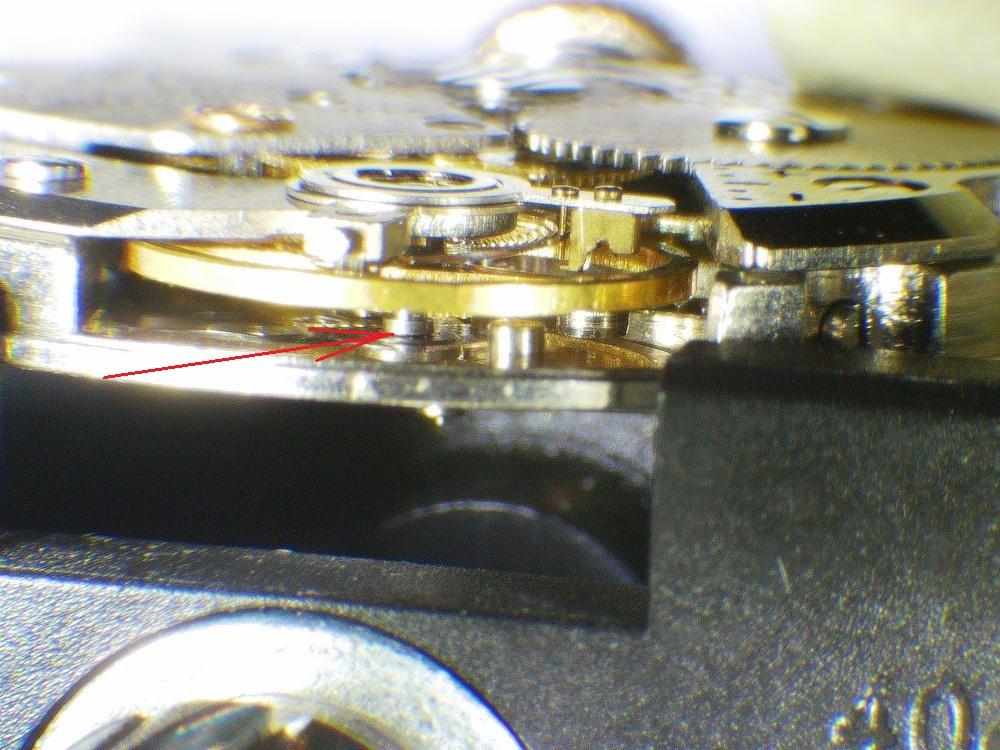
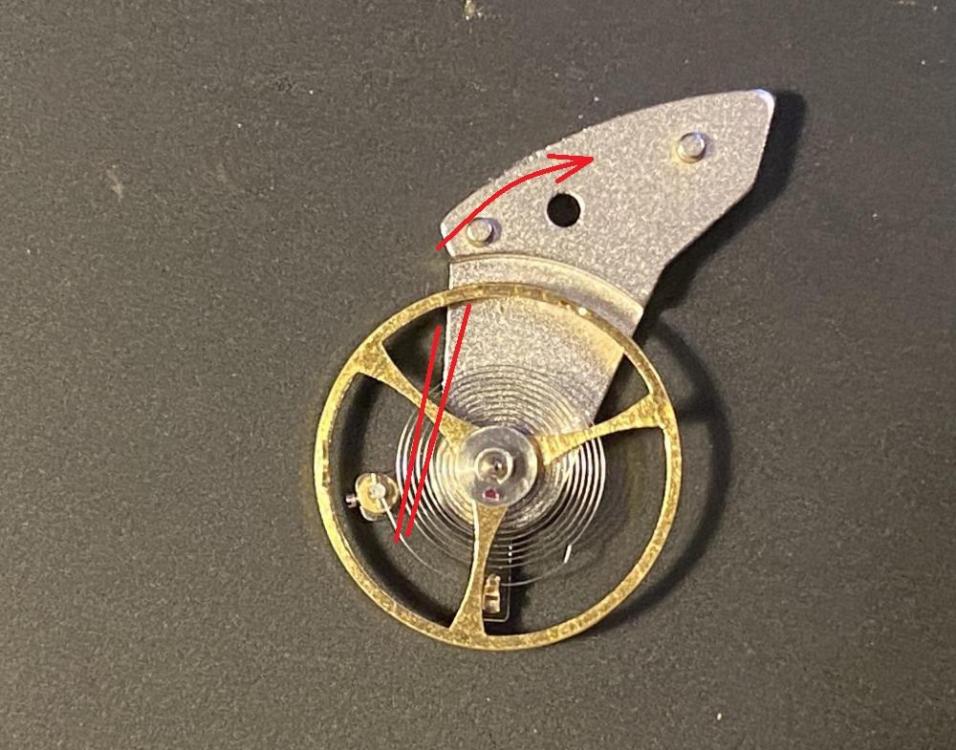
OP, just calm down and try to listen. You don't have problem with the pallet fork. This is something in You own imagination. You need to understand what is wrong with the balance/hairspring. Moving the hairspring stud up or down will not make the spring stay parallel. The spring is to be bent and twisted near the stud in order to make it stay as it should. This is normal thing to do when installing new balance/hairspring couple in the movement. Now You say the balance oscillates free when in DU position? Look where the red arrow points. Does the roller rub on the down side shock device?
 1 point
 -
The bezel just snaps back into place (much like a snap on casebook) - It doesn't take much pressure to just push it on with your fingers and it makes a satisfying click as it goes it. I tried giving it a tighter squeeze with a crystal press but it doesn't press on any further1 point
-
Hello and welcome from Leeds, England.1 point
-
Difficult to tell from these photos but to me it doesn't look like it's full seated.
 1 point
 -
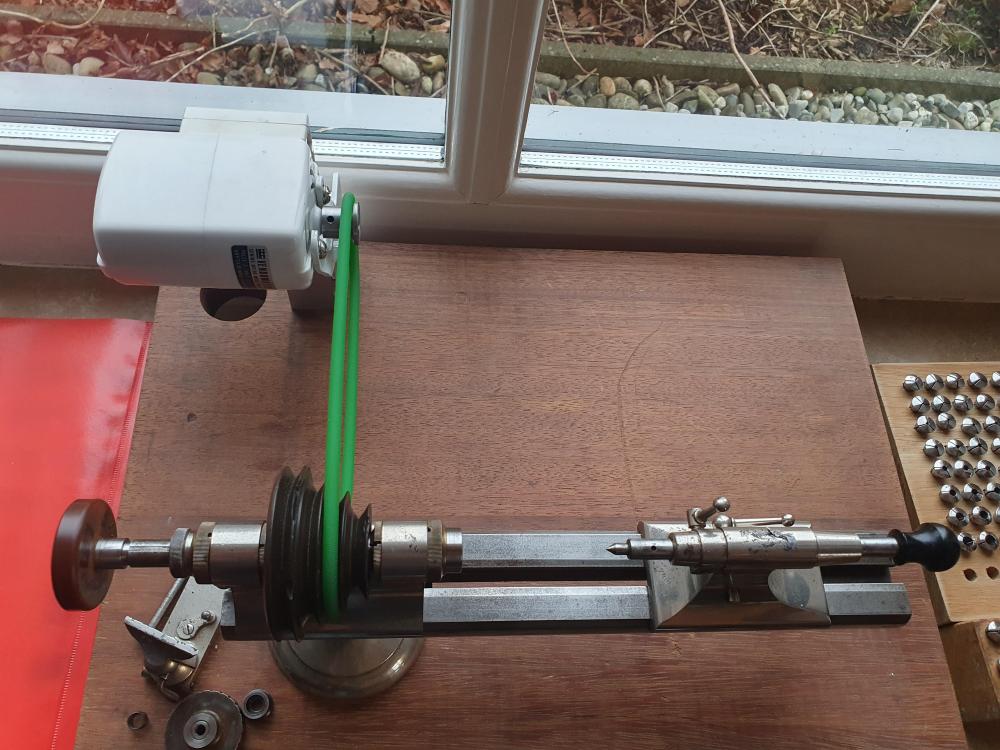
Good to know @Dell . I have been looking for definitions around this and not found anything yet. Keen to get into watchmaking lathe work this year as a bit of a project. Tom1 point
-
Photos and details of what your working with would help. Edit Should have asked if this is a watch you've just got and have you done anything with it?1 point
-
It all depends how much you're willing to spend and if you're happy to try the old mainspring and see what results you get with the possibility of having to swap it at a later stage. The key sizes are the height and thickness with some flexibility on the length depending on the barrel size. If you look at the likes of Cousins for springs around the GR4486 Edit There are still some GR4486 out their. https://www.ebay.com/itm/126715574424?ff3=2&toolid=10044&customid=&lgeo=1&vectorid=229508&item=126715574424&ufes_redirect=true
 1 point
 -
Older mainsprings look like that. The S shaped mainspring is a modern invention that is, as far as I know, better at providing the same torque across all states of wind. By modern I mean 1950-ish (someone will correct me on that I'm sure). Your old spring looks ok to my eyes: no kinks, healthy space between the coils. I'd just put it back, though others might replace it.1 point
-
Make sure you check the auto rotor bearing before you disassemble so you know it's OK. There are a couple of options for the mainspring from Cousins compared to the stupid eBay prices.

 1 point
 -
I wouldn't say a worry, the other vertical rates and amplitudes are very good, so close to the horizontal figures which is great for positional timekeeping. Maybe a little poise error somewhere between cl and cr and a noticeable drop in amplitude...how long did you leave it to settle after changing positions ? For some first attempts really good, i wouldn't mess any further with it apart from to check again after 24 hours...which is a better indication of how its performing. We dont perform so well when we haven't eaten for 24 hours and feel hungry, the watch probably feels the same way.1 point
-
I'm no Rolex expert but that sounds like it would be worth a try.1 point
-
Looking at the vid clip I would say it’s the rota that is worn. Is the clip missing. This drama was 6 years ago & I think ! I modified a clip but not 100% sure.1 point
-
That looks very good to me. I’m pretty sure you are correct with crown right, that is where poise issues end up with watches adjusted to 5 positions. Tom1 point
-
Just checked through the two lathe books I have, Jendritski and De Carle, neither mention graver sharpening angles specifically. They really talk more about the shapes. For cross slide work which is a different cutter then they go into angles much more, rake etc. Tom1 point
-
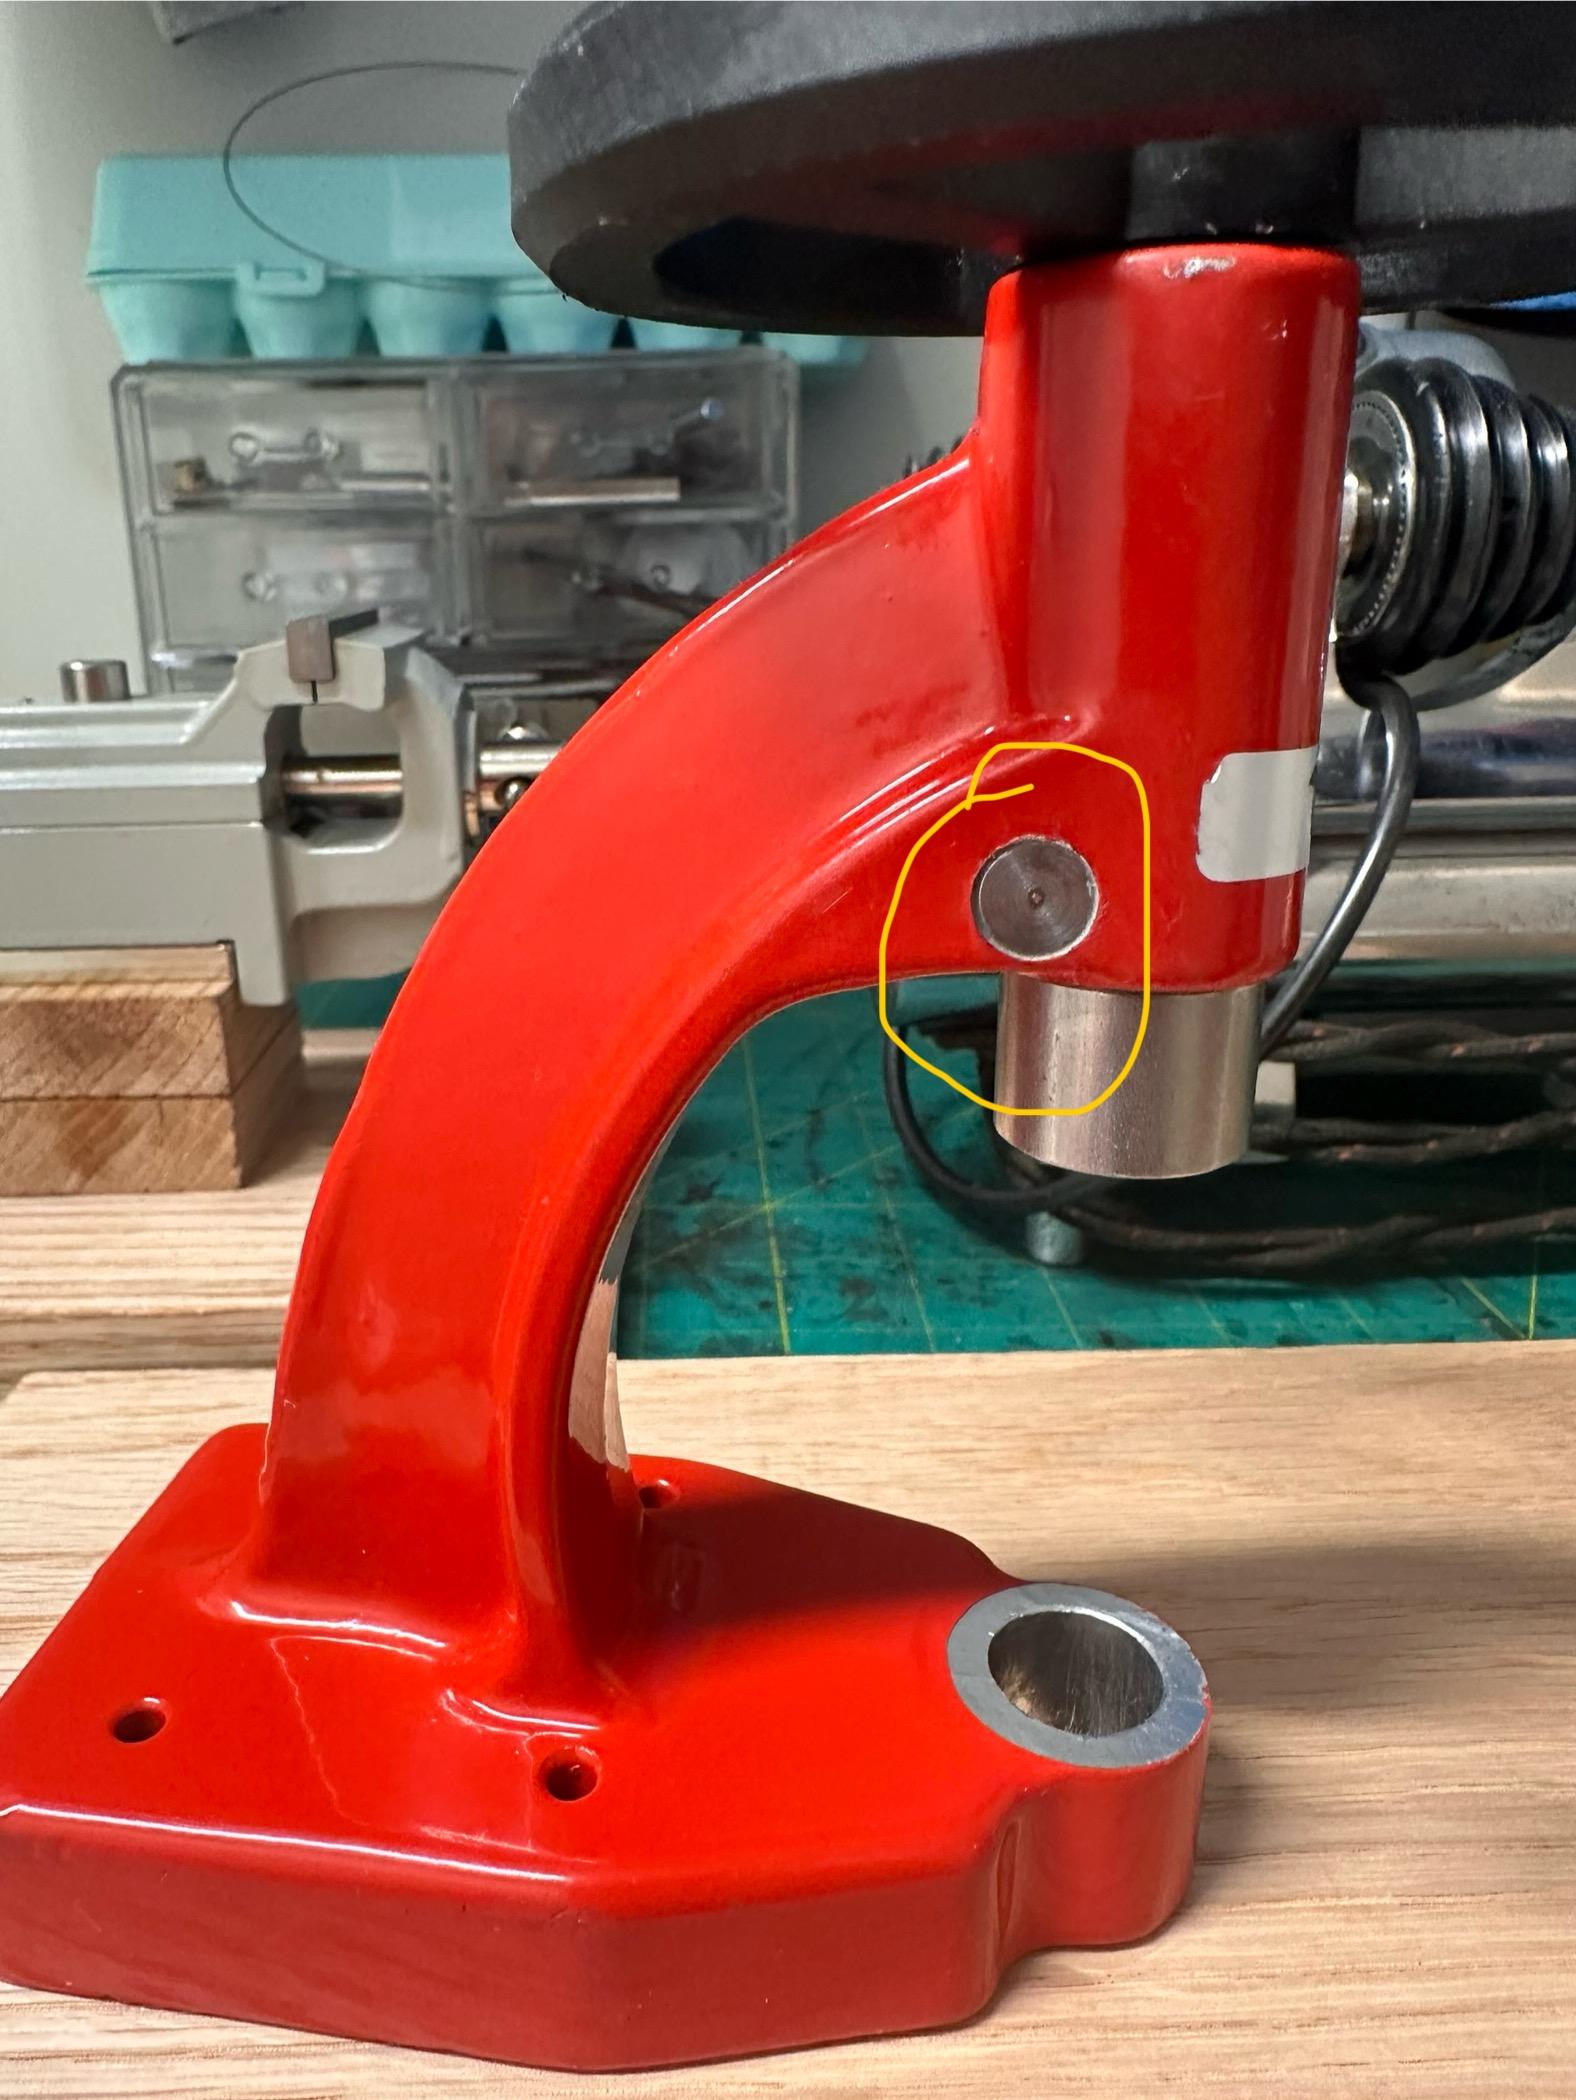
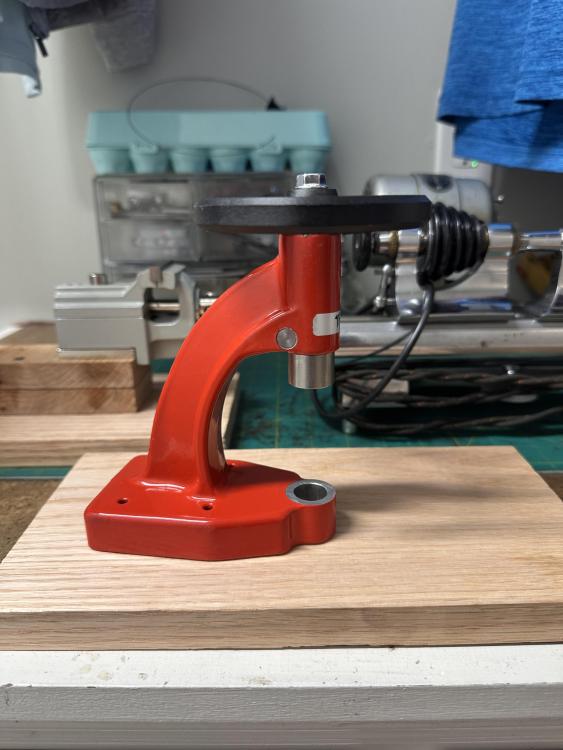
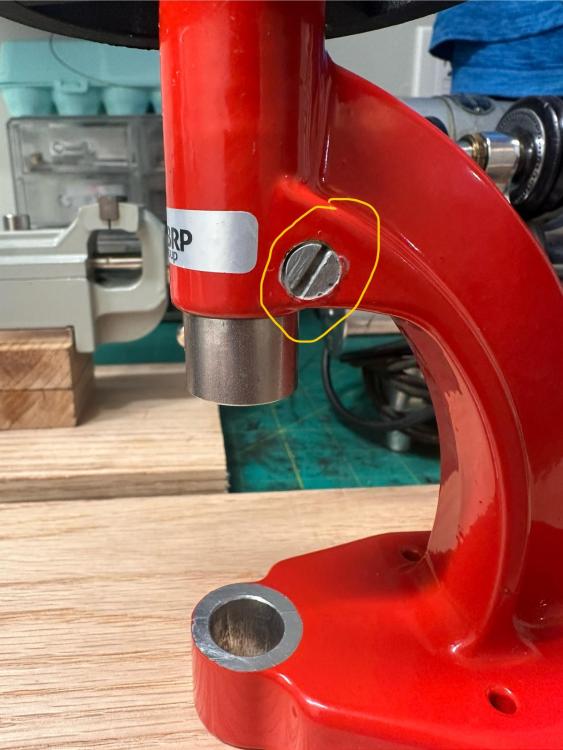
It’s just to keep the spindle from wobbling. The spindle has a flat side that slides against that pin. I feel that it’s a very cheap way to make a tool. They should have a different system like dove tail for the spindle to slide, but instead the turn the hole for the spindle to fit then they just put that pin across the hole to rub against the flat part of the spindle “keeping it from wobbling “. To me it doesn’t work very well because this tool I bought had an awful amount of side shake. What I did was to drill the old pin out, and made a new one thicker and with a flat side that rubs against the flat side of the spindle. It was a little nerve wracking because I was afraid to damage the tool I had just bought, but at the end it worked better than I expected. I am more than pleased with the results. Now I just have to order the big set of dies to start using it on my watches.1 point
-
I also use my finger to block the wheel. Apply the same torque as on bridge screws1 point
-
@VWatchieLook what this " Tool Junkie " just found in a watchmaker's lot, and check out the range on the scale
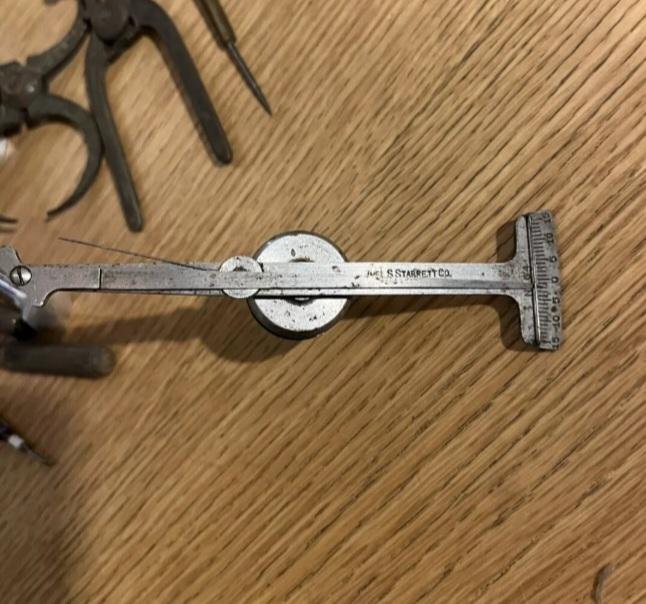
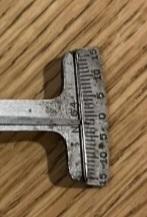 1 point
 -
Here is an update on my Robur press. They emailed again and said they are still waiting on the manufacturer to confirm if they would issue a refund or a return of the tool. Since it had been three weeks from the time I made my complaint, I told them not to worry about it, and that I was going to try to fix the tool my self. I put it apart and replaced the pin that goes across in the spindle hole. I guess it was to thin creating to much space in the spindle hole which would cause an excess of side shake. I went ahead and drilled the old pin out, turned a new one from tool steel and replaced it. I am more than pleased with the results. The side shake it’s from super very little to none now. And it is super smooth when turning the wheel on the top to make the spindle go up and down. I am going to buy some paint that matches the original to paint the new pin. Here are some pictures of it now:
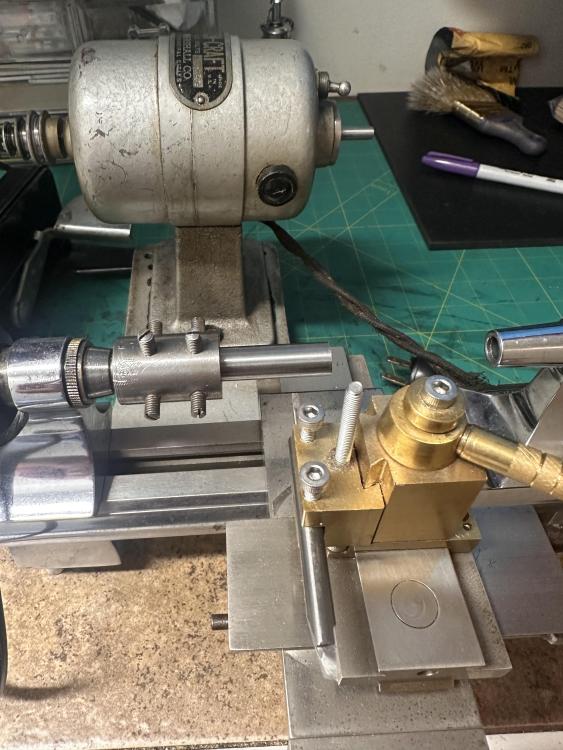

 1 point
 -
Sorry, I didn't put the picture in... The red lines represent the tweezers grasped the spring
 1 point
 -
Nothing frightful happened. In the position of the balance as on the picture, grasp where show with tweezers (tweezers are vertical) and twist the portion between the stud and tweezers by rotating the tweezers as shown with arrow. Check and do until the spring stays parallel to the cock. I guess You expect that balance must stay upright in this position - no, this is not so. But if You support the balance upright, the spring mus stay parallel and not touching anything.1 point
-
Tight but not over, the ratchet screw is one that you really dont want to snap....we've all been there1 point
-
Pressed onto the flat top but using a finger seams like a better option.1 point
-
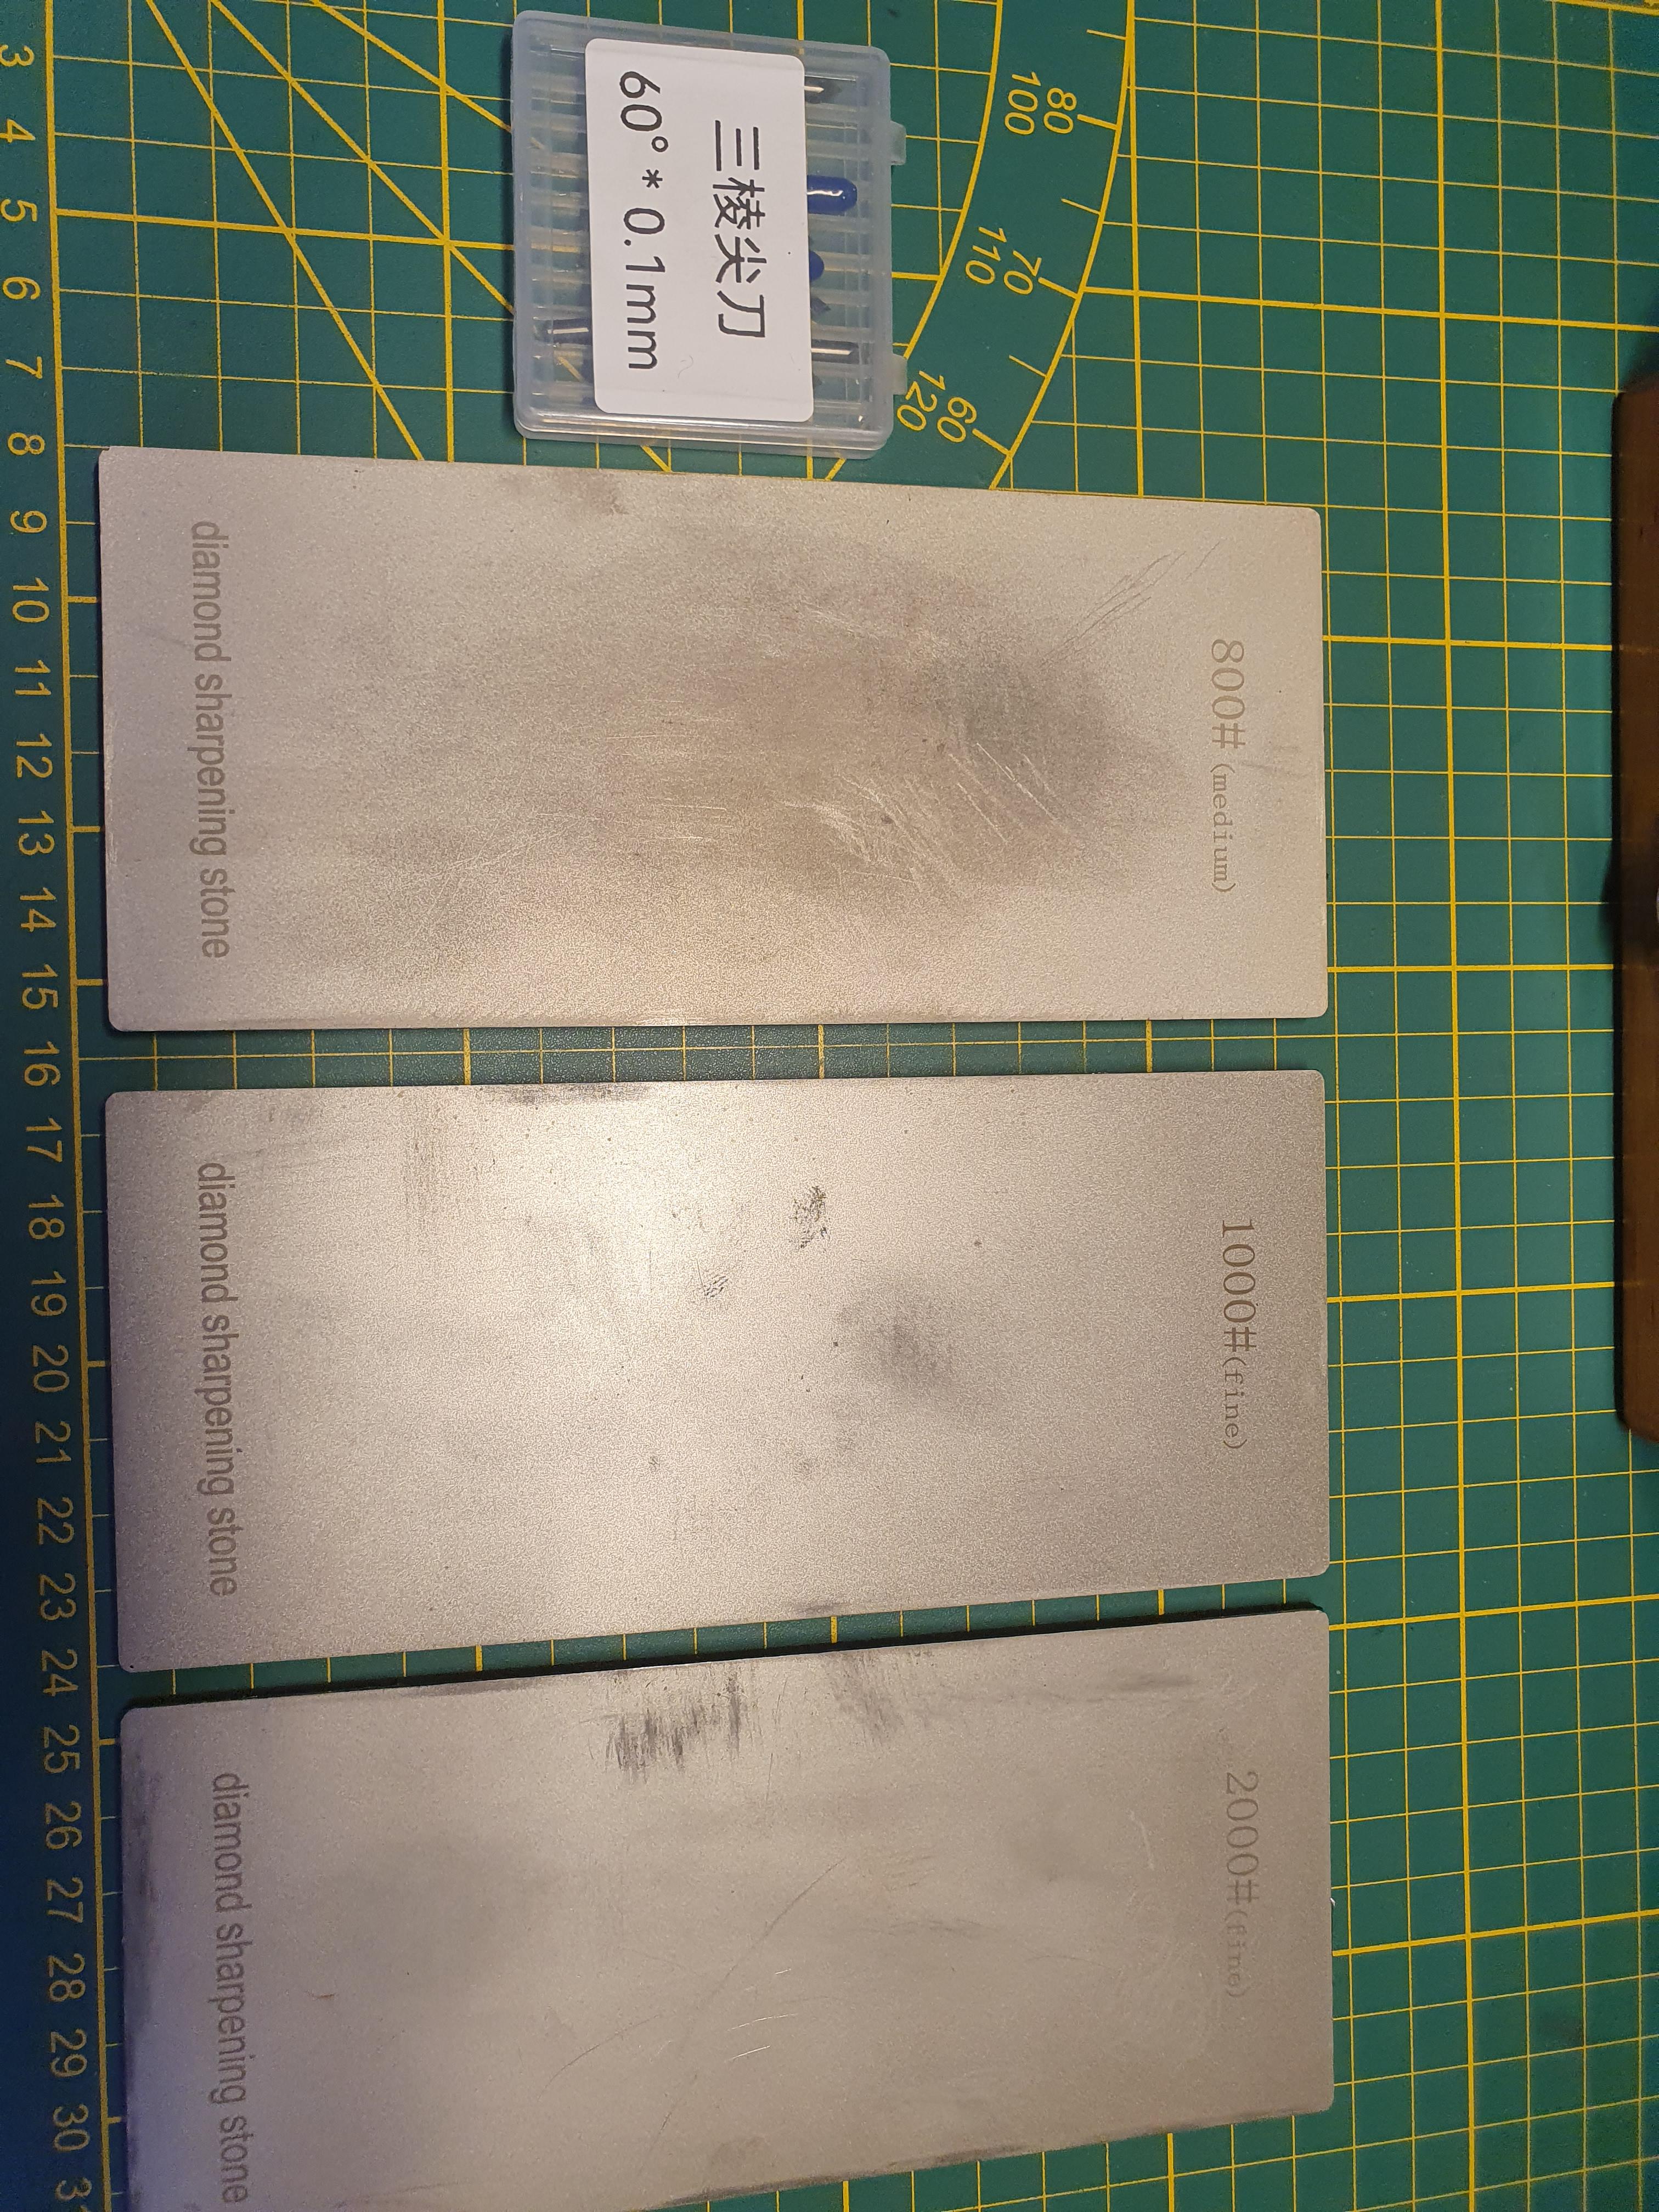
I use the 60 degr. 0.1mm type. For sharpening or reshaping I use these diamond sharpening plates (see pic.) I use these gravers without any handle. Holding the end between 2 fingers of my right hand and keeping pressure on it with the index finger of my left hand gives me all the control I need. The motor for my lathe is a simple sewing machine motor.

 1 point
 -
I generally hold the ratchet wheel with a finger. Appropriately covered, of course. As for visualising 16 N.mm ... that's a torque of one Newton at a radius of 16mm ... roughly a 32mm cotton reel being turned on a pivot with enough force to winch a 100g mass. Or a 6mm diameter screwdriver handle turned with sufficient force to winch a mass of about 270g. (I am a Maths teacher.) To be slightly less mathematical, "good and tight but don't overdo it" would seem to be what is called for.1 point
-
I do use Photobooth for snaps. But you do need to make the settings flip your image to normal. You can also turn off the annoying countdown as well, or at least use a button combination that bypasses it. (ChatGPT/Google Gemini are your friends) Otherwise I just take a screengrab from Quicktime (cmd/shift/4)1 point
-
The first thing you need to do is have a good look at the dial, you can tell just by looking at it in its case. From experience I don't think there is much you can do. I see the bottom of the case has water damage. What happened?1 point
-
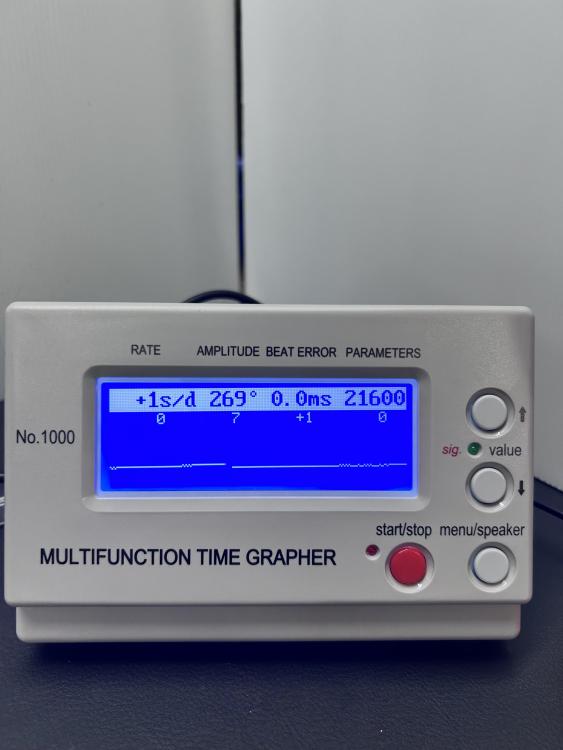
I think I understand the issue with the beat error then. That makes sense why I can’t get rid of a huge beat error by putting the stud back to roughly where it was before. I took my time to align the stud and boy what an effort that was. It’s so small and tiny movements just bounce the hairspring between the regulator pins. But eventually I was able to get something that looked right. Then I was able to get this on the timegrapher: I’m sure something is still not right though as to get these values my stud adjuster is almost against the cock and I have to adjust the rate down a bit. But again I’m happy I’m getting results that are going in the right direction. Edit (update): I have been able to regulate the watch pretty well. I suspect the curve on the hairspring is not 100% perfect as I’m getting a bit of jumping around as I adjust the rate, but this is a million times better than I’ve seen since I started this thread. Wondering what next?
 1 point
 -
Well on this picture it is clearly seen the hairspring is bent up. Probably the other side goes down and rests on the balance arm. The other thing to check is if there is some axial free play of the balance. OP, just replacing parts without understanding what is needed for their correct function in watchmaking doesn't work. The mechanical watches are not made with 'plug and play' parts. So if You replace part and the movement doesn't work, You start diagnosing as if it is movement with unknown problem. You need to be prepared to discover any problem.1 point
-
The amplitude readings of 140 seems more or less correct on the video. The balance wobble is just balance not trued after staff replacement or balance bent for some reason (not proper handling). But it (wobble) is not the reason for lo amplitude.1 point
-
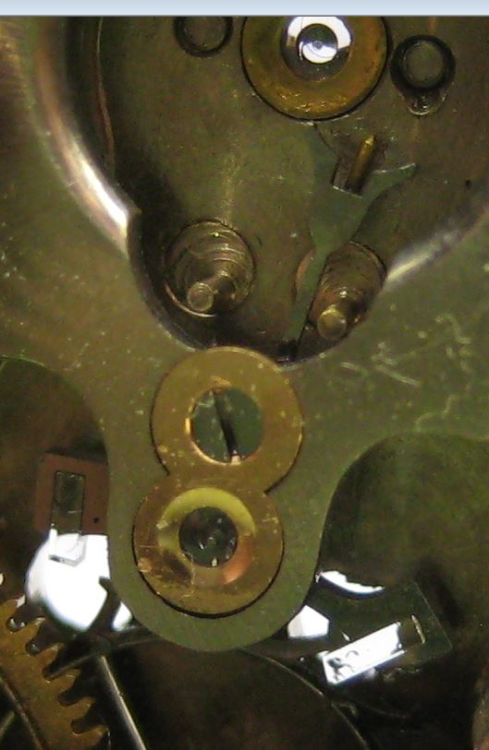
Hi according to the book. The plate identifies as a Kern & Sonhne 4 Ball miniature clock . use suspensions. Units 12A. 12B. 12C. Page 120, plate 1348. Units 12 A,B,C minature 54, minature 56, minature 57. All use the same suspension. Although the beats are the same at 6 beats per min all suspensions are the same length. Bot the top block and fork differ in fitting, a full-size copy of the page would be essential in setting the suspension or perhaps a scanned copy of the original suspension fron which to build the new one. Positions of the fork must be correct.1 point