Leaderboard


Popular Content
Showing content with the highest reputation on 01/25/25 in all areas
-
That's fine and normal.3 points
-
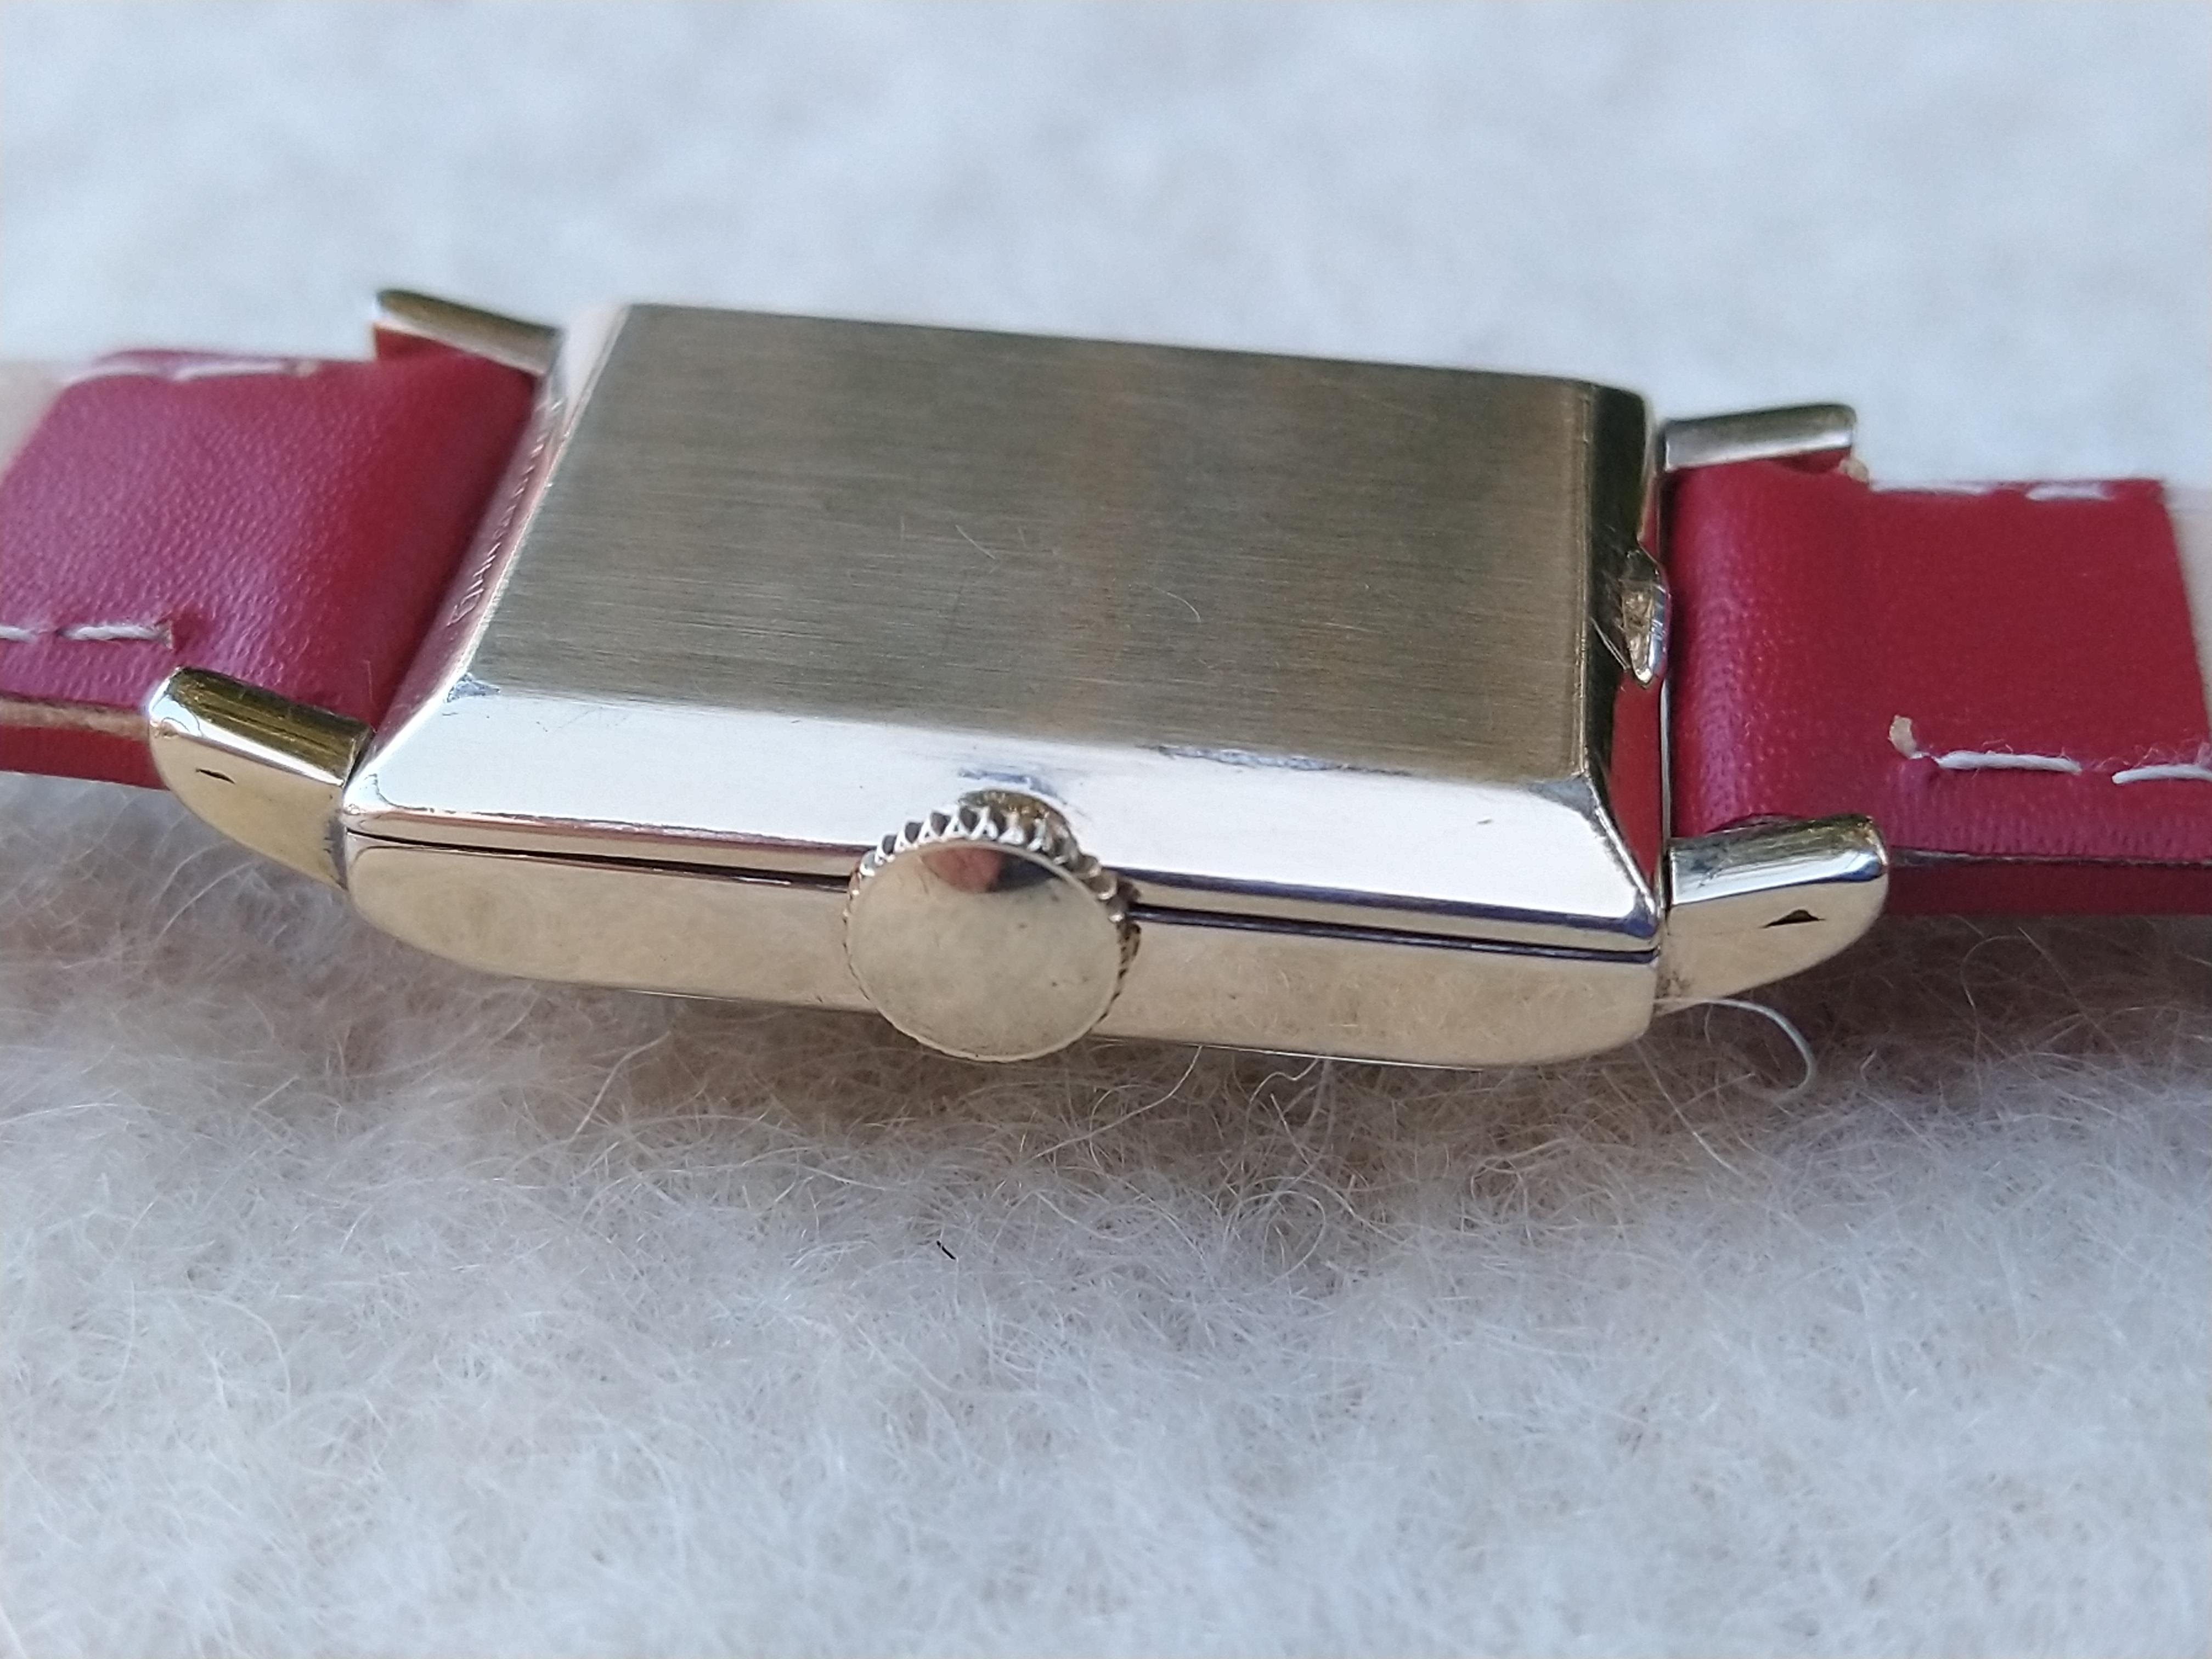
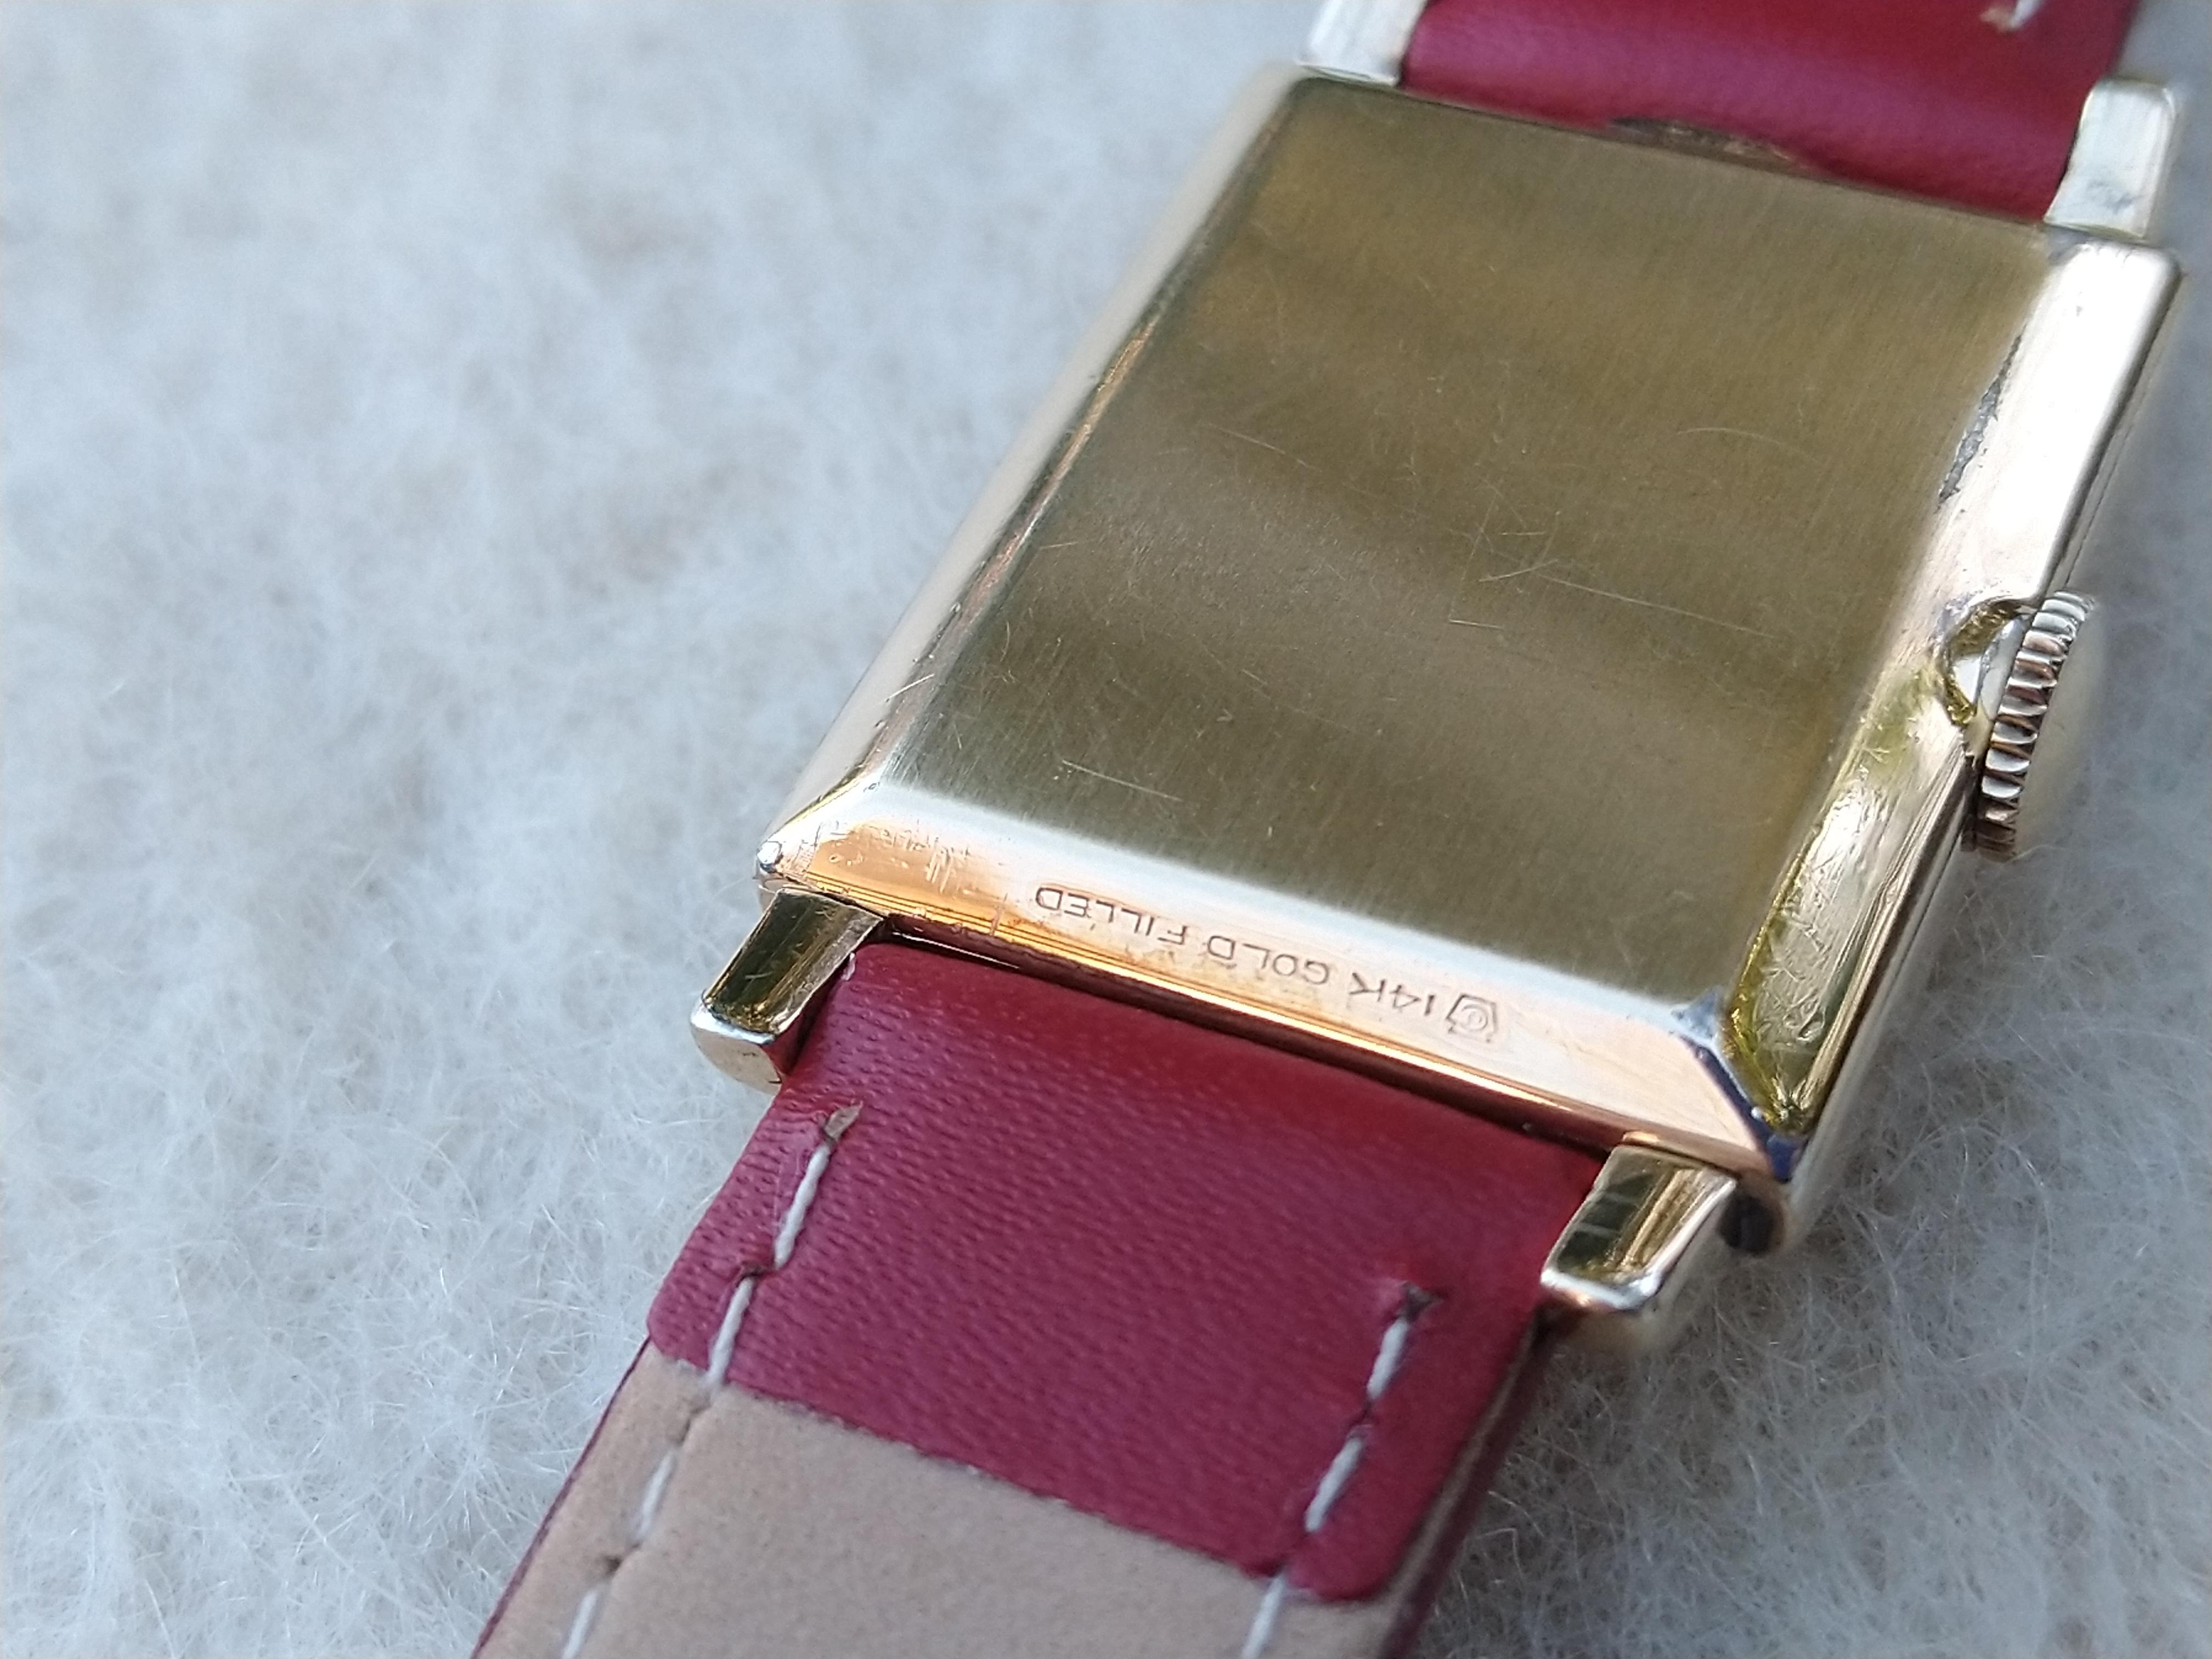
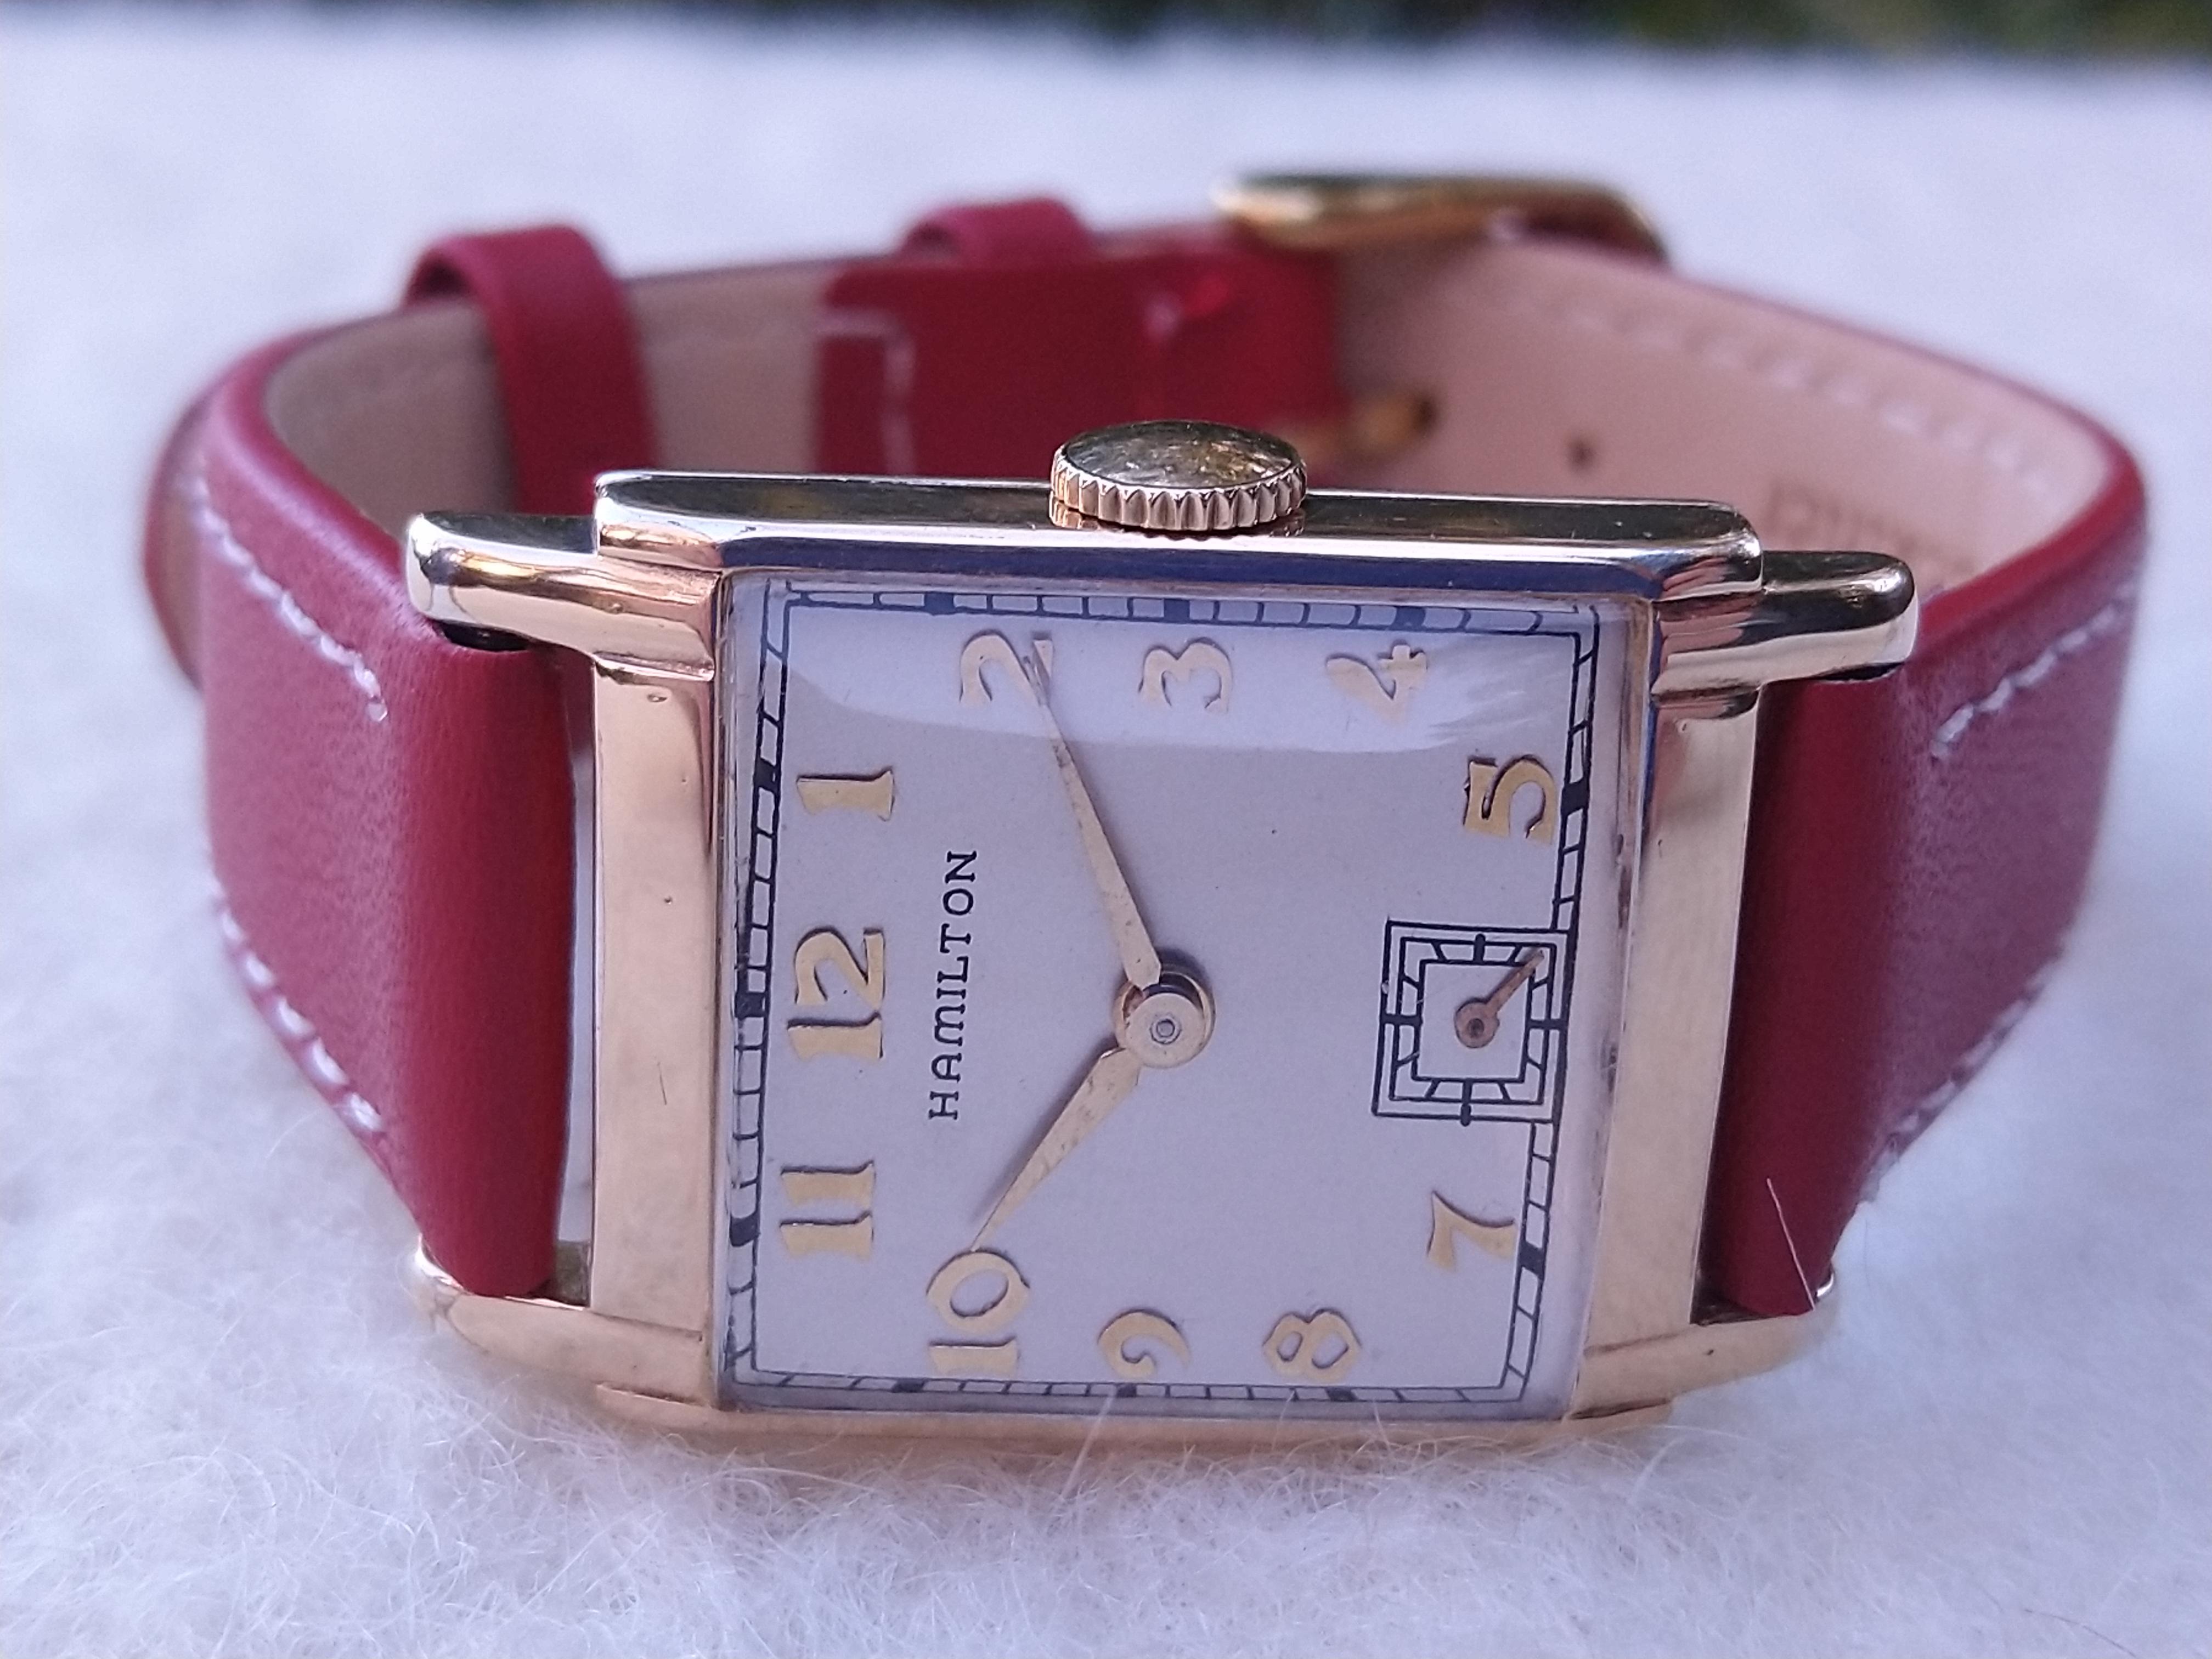
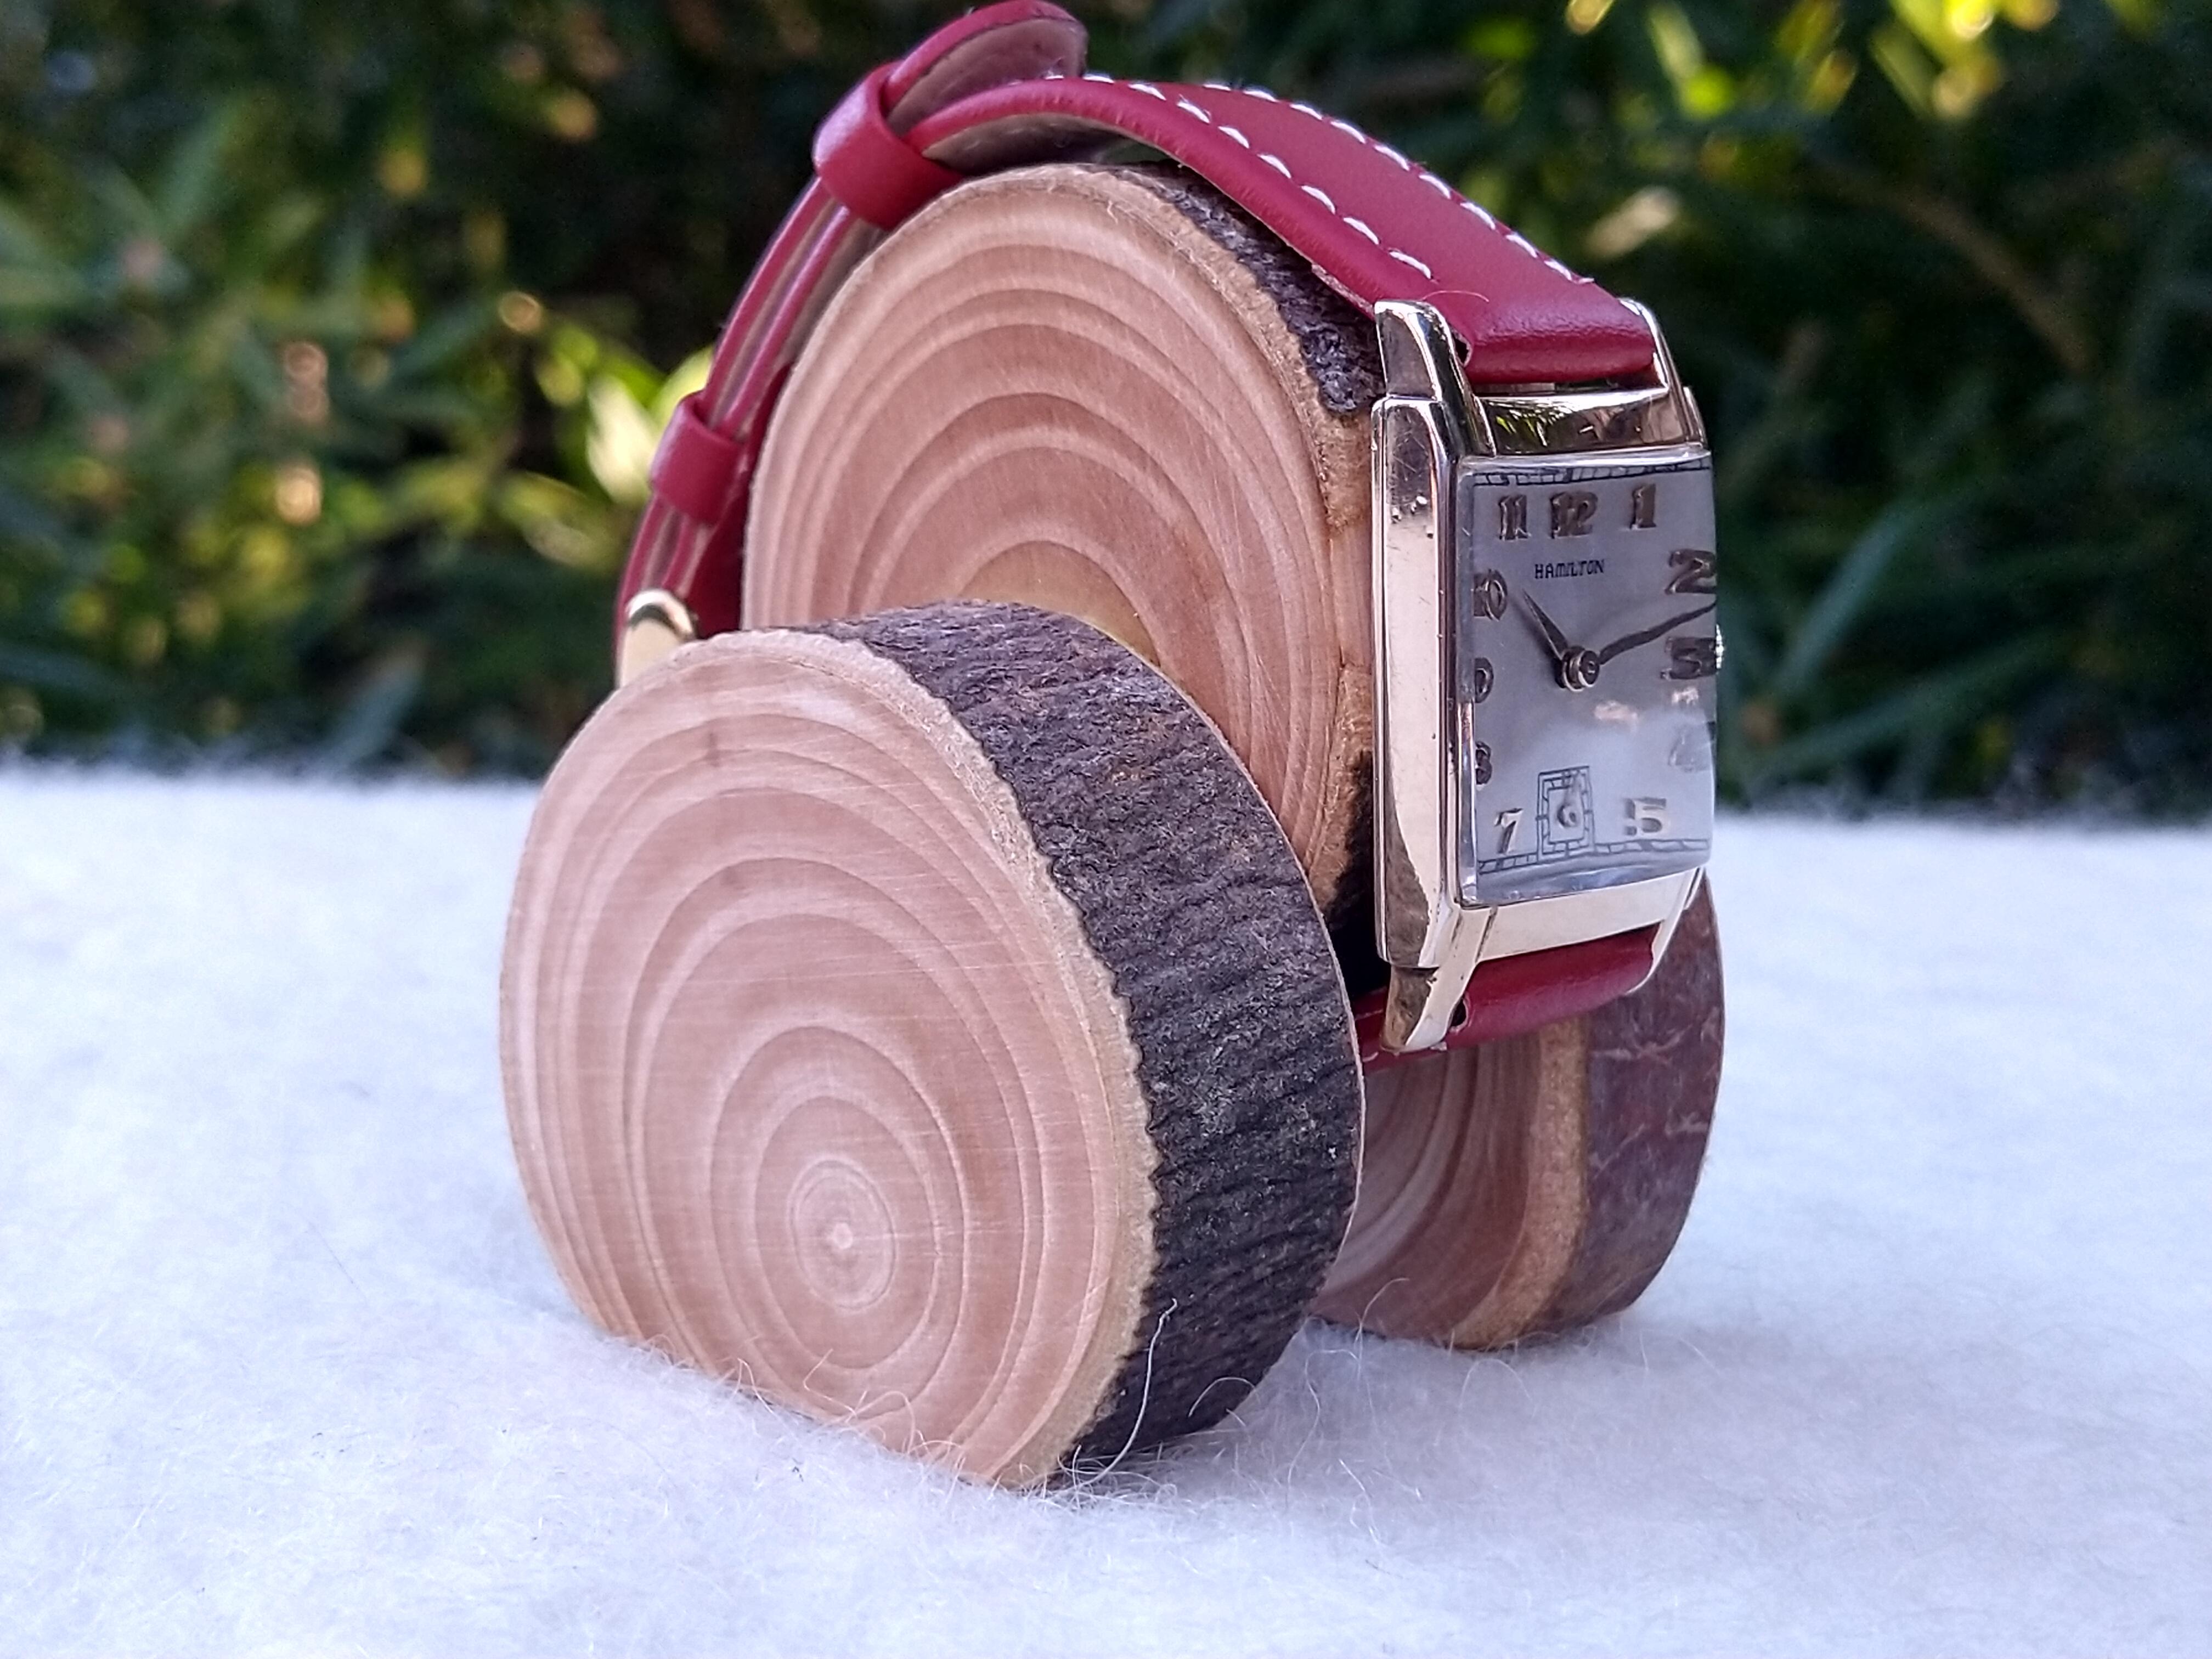
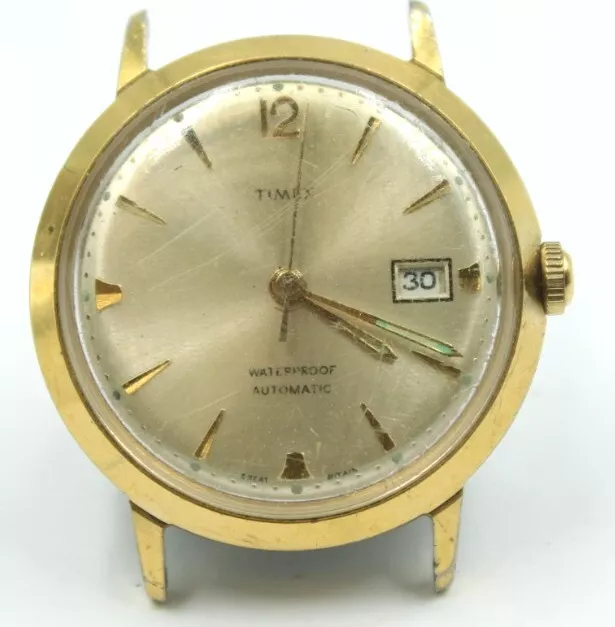
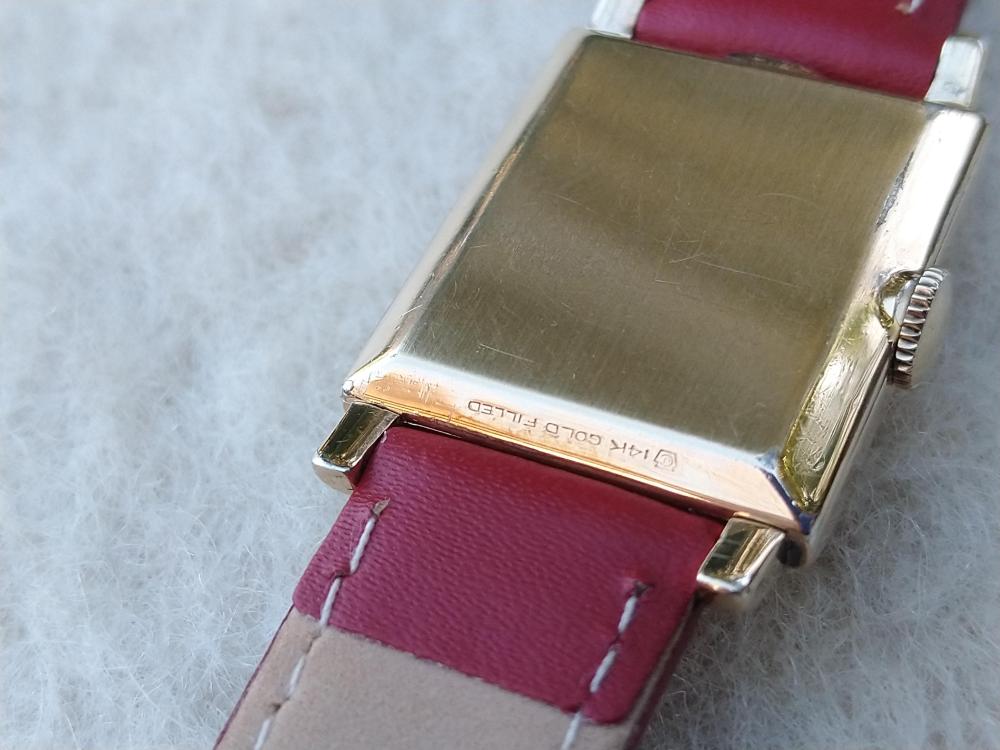
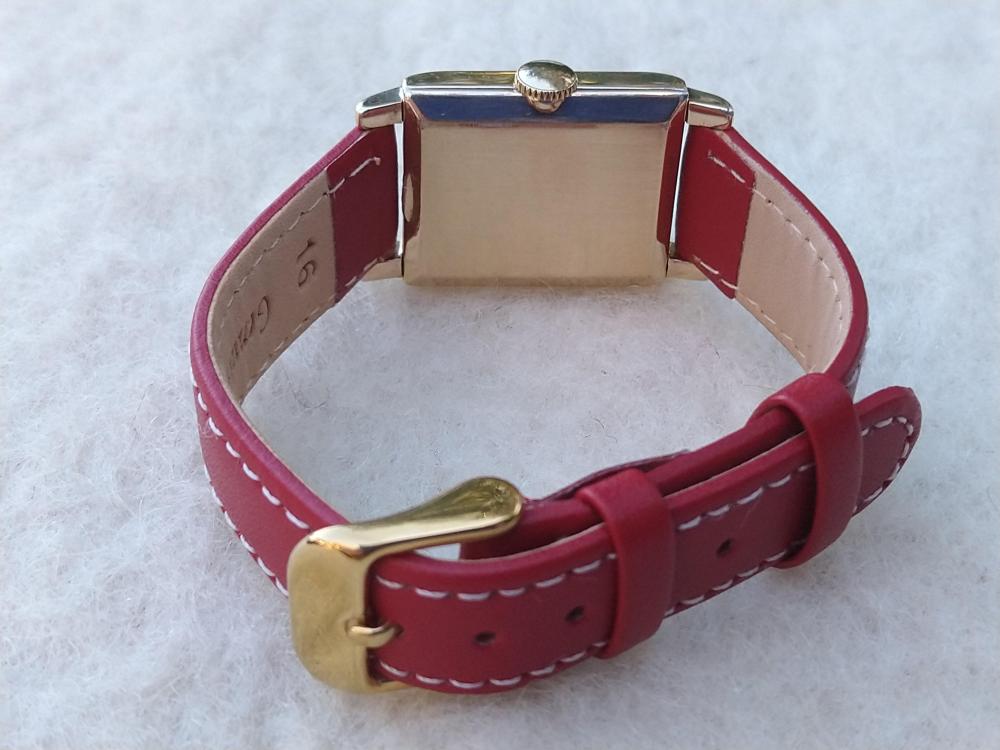
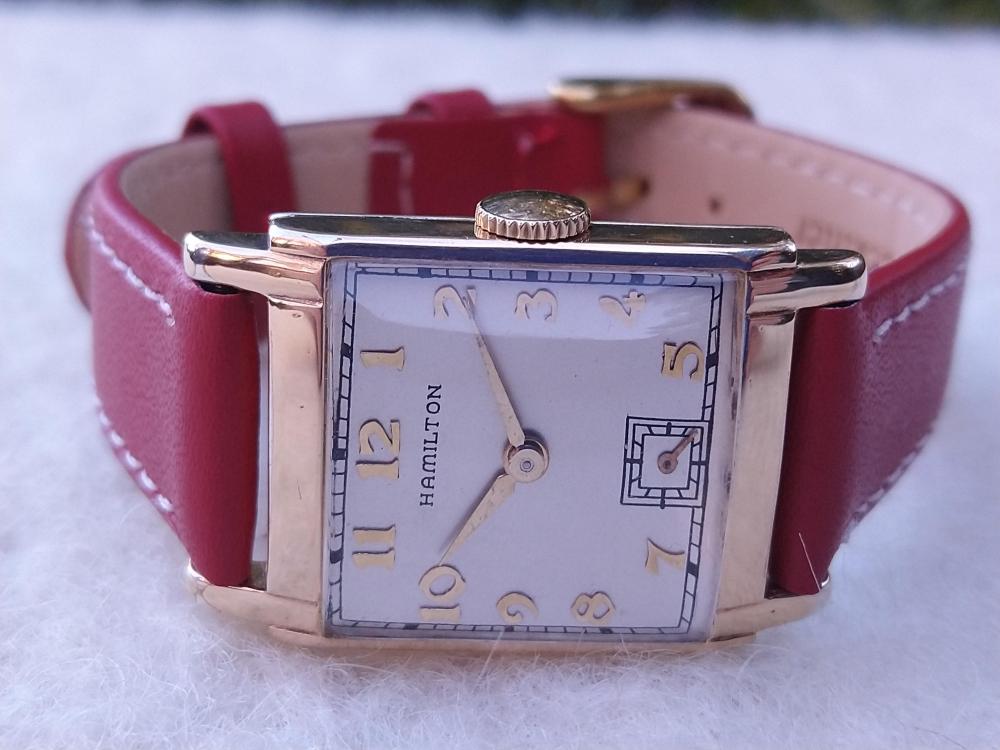
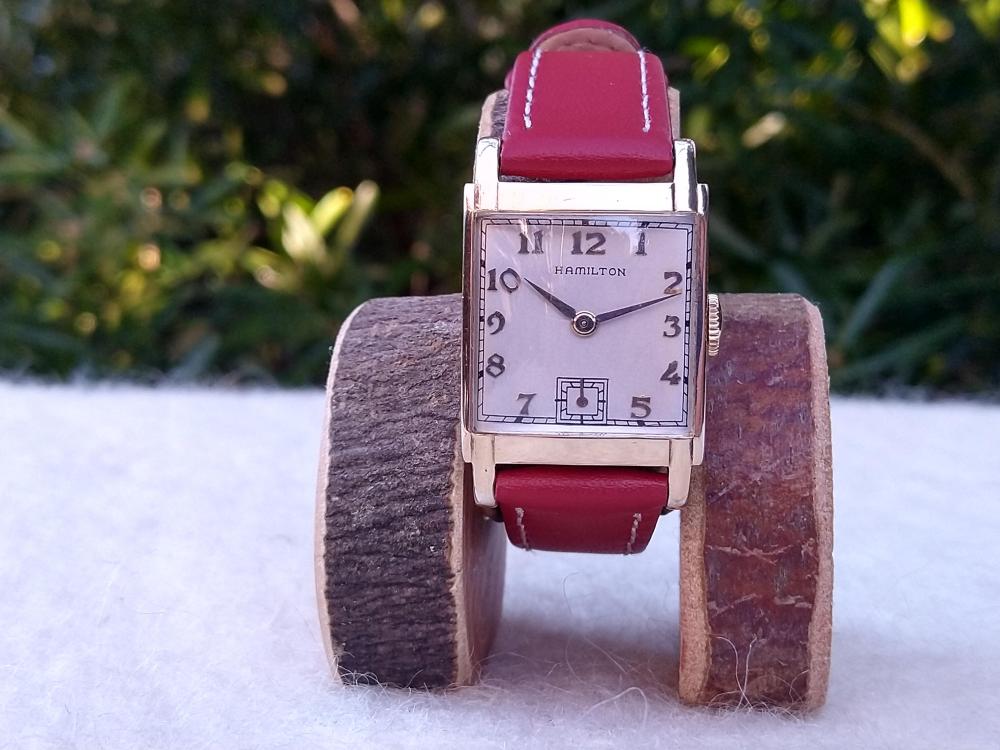
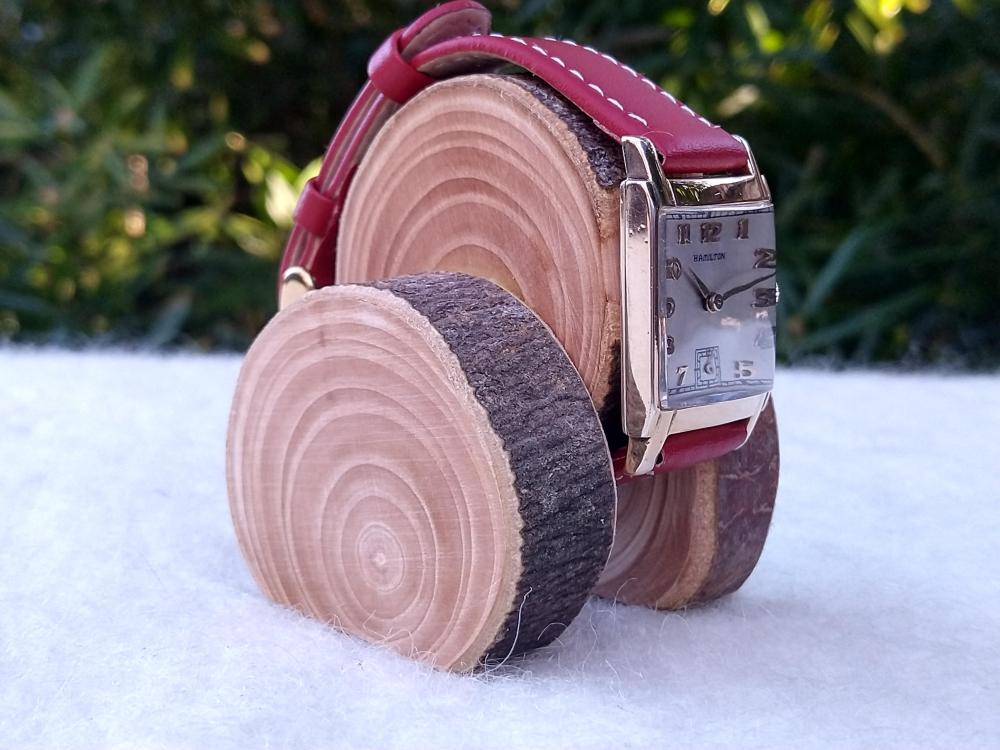
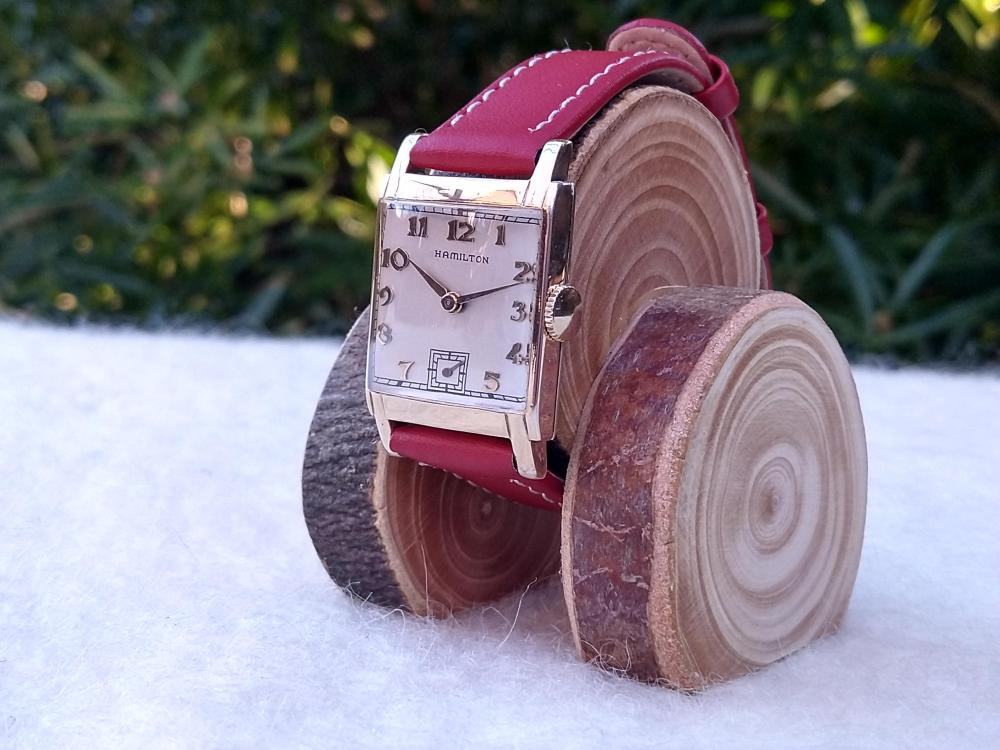
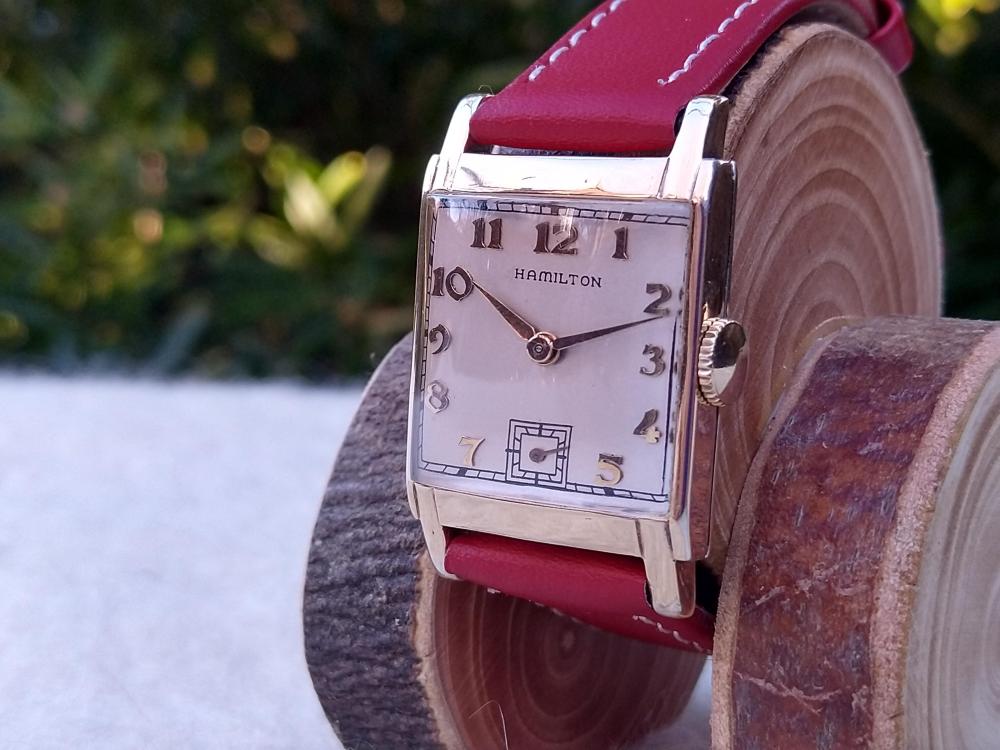
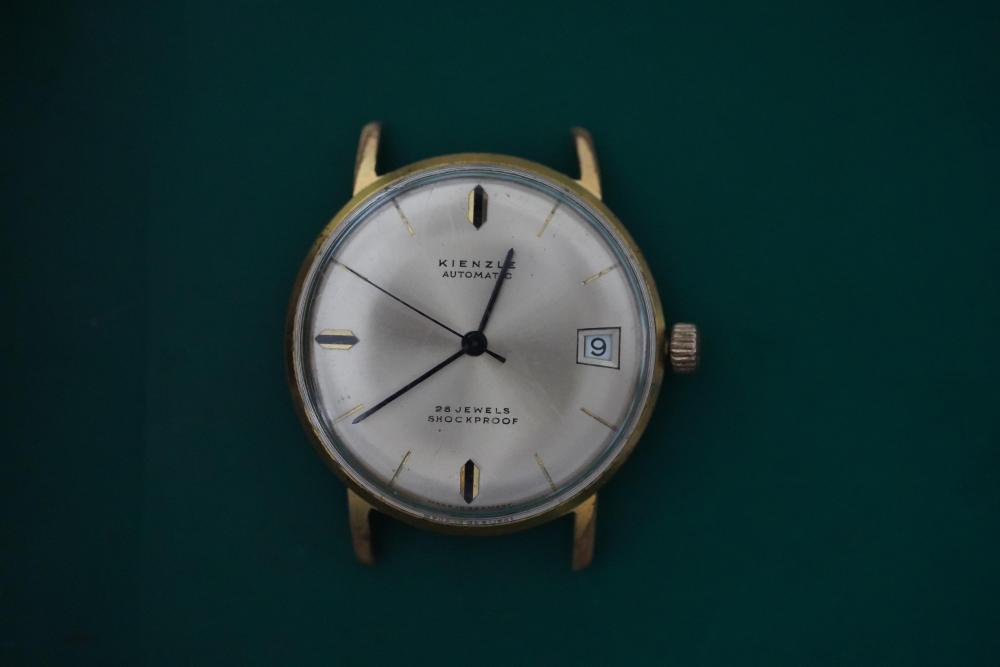
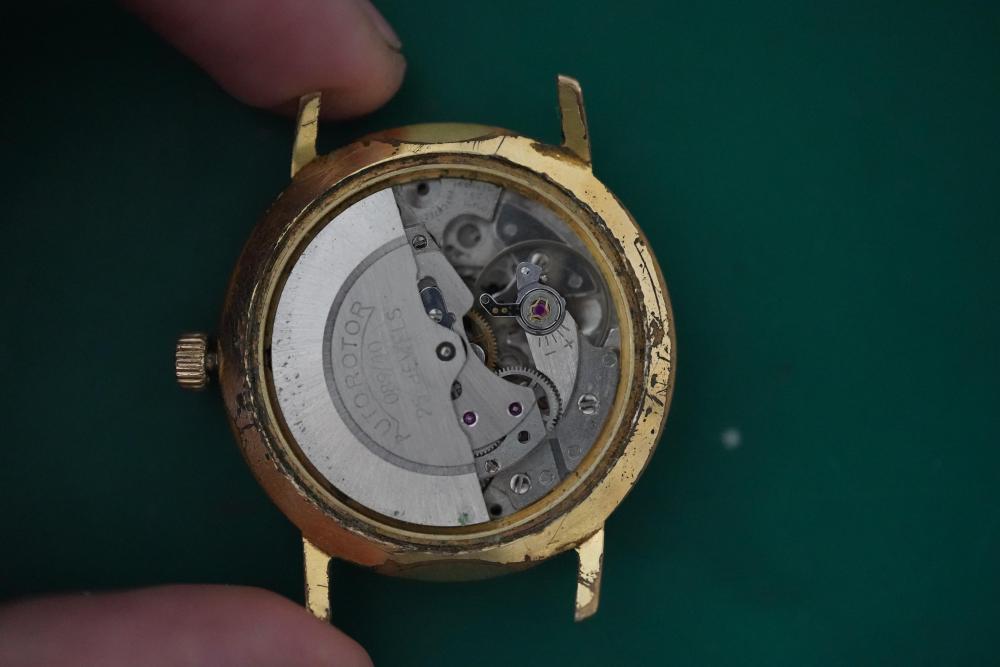
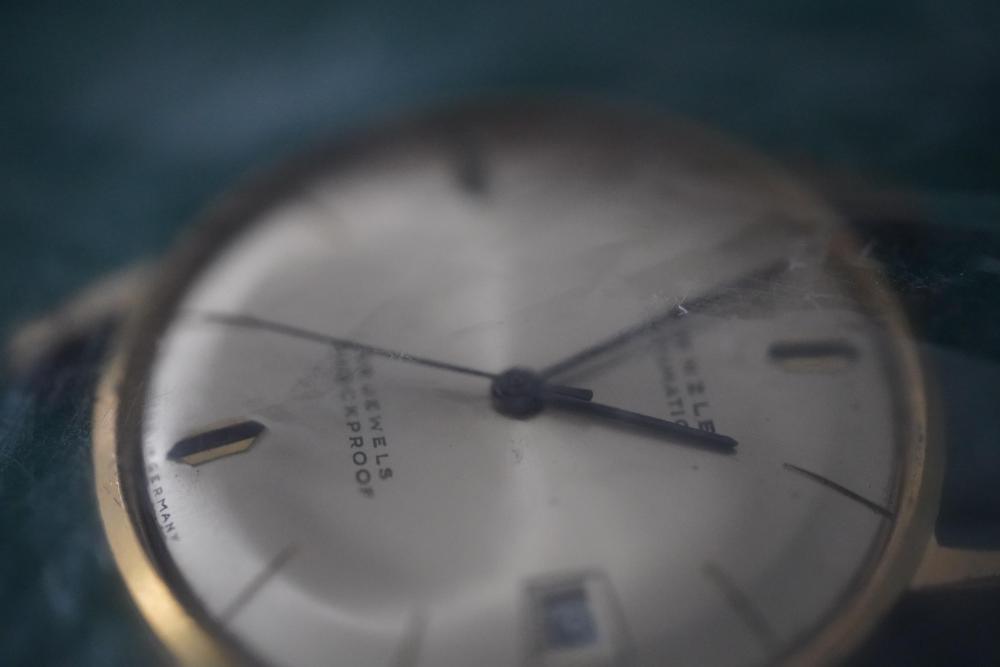
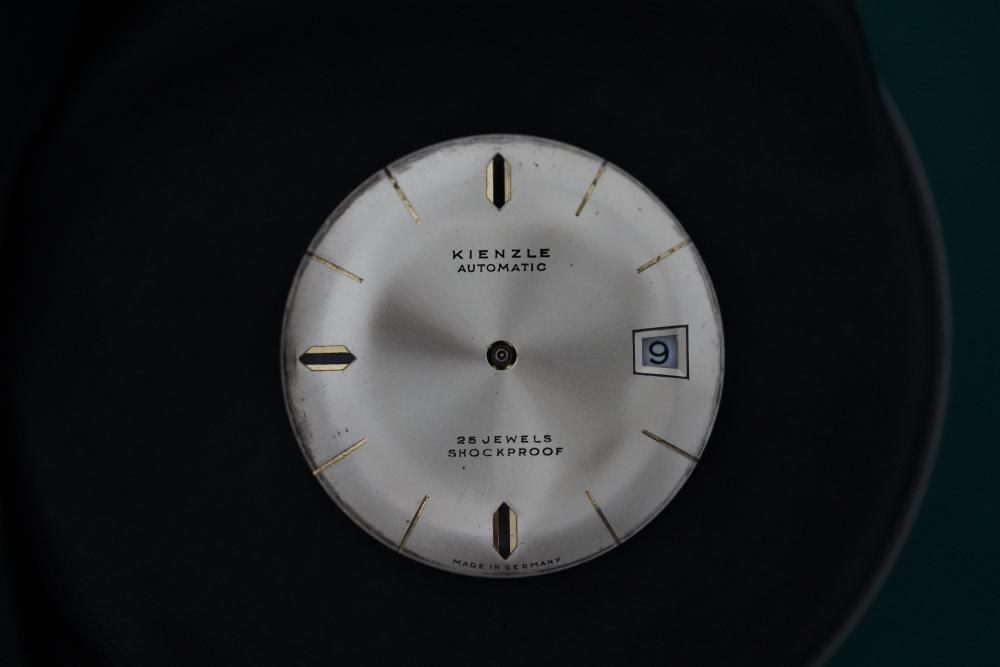
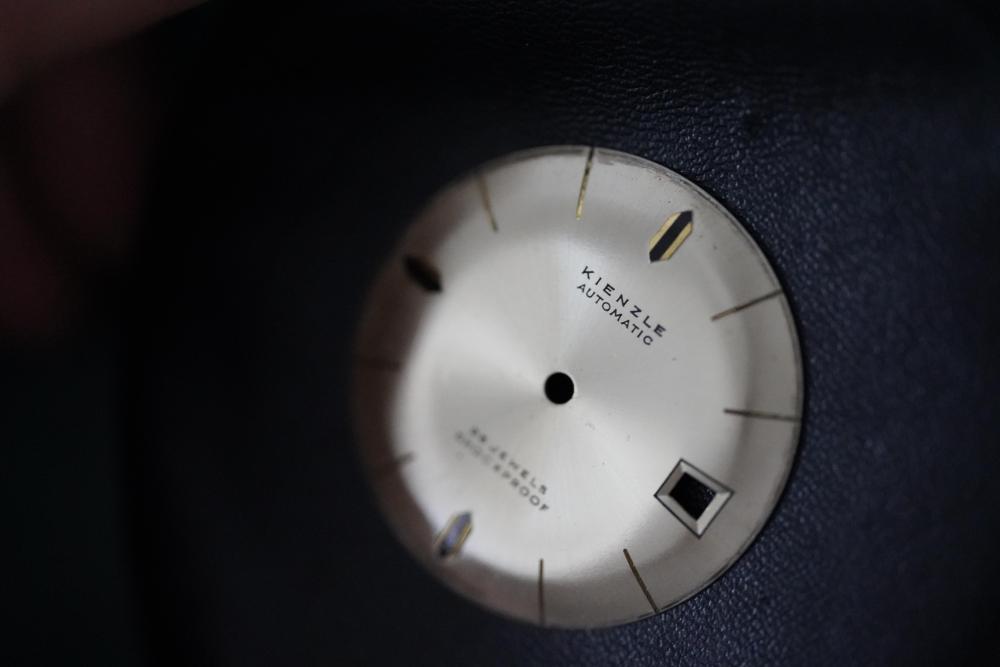
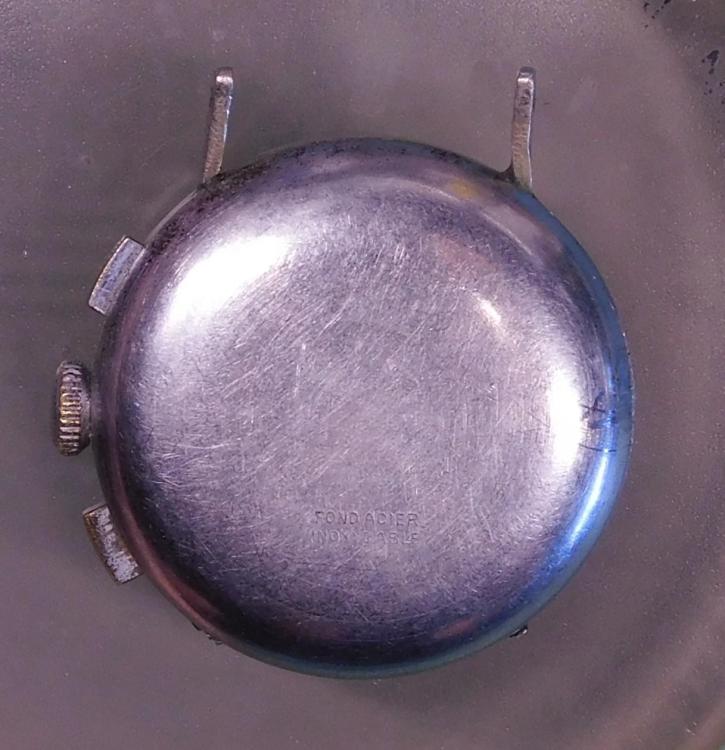
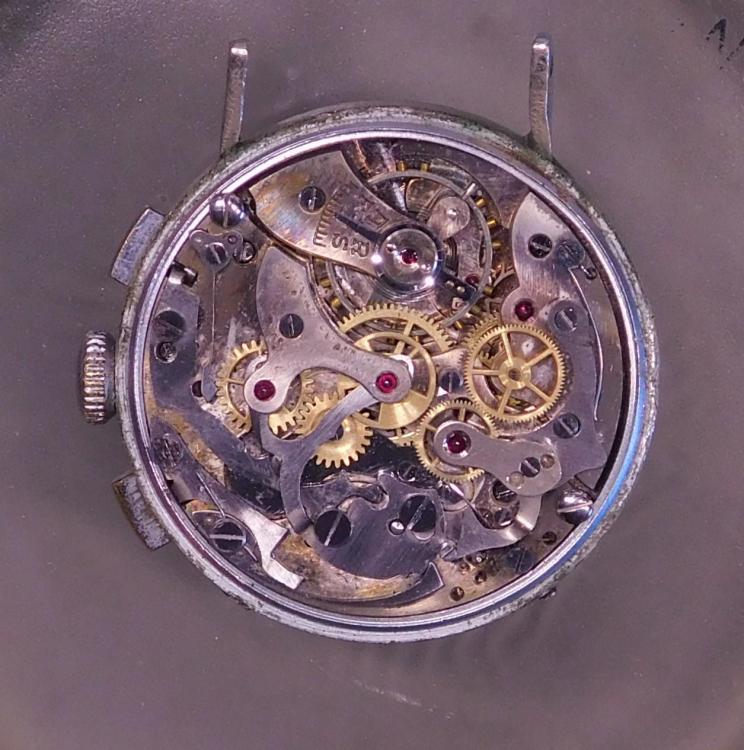
I know I've got others somewhere but picked this up for £9.99 as my first Timex when I receive my Service Manual.
 2 points
 -
Putting the cap back on the G-S glue.2 points
-
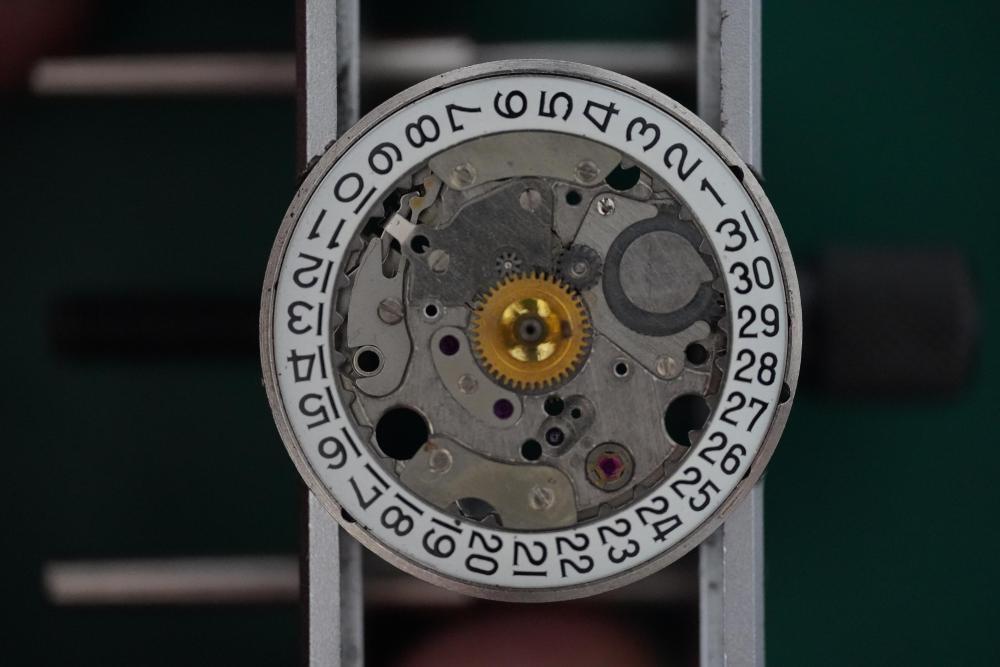
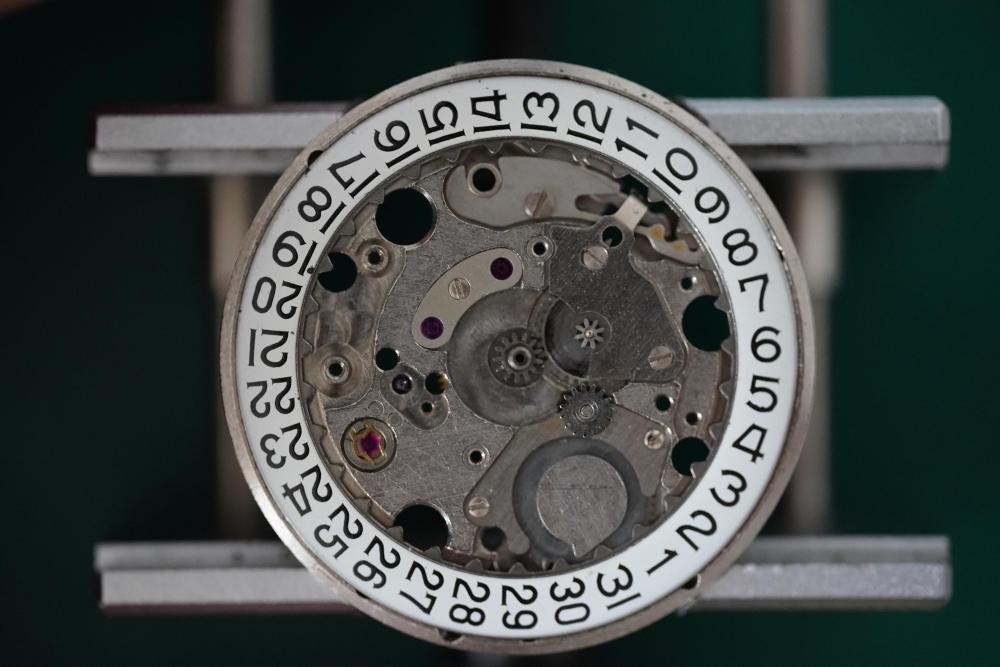
If You put a wheel with the pivot in it's bearing hole, the wheel will be free to tilt to +/-10 degr, at least this is what is normal. The tilt that cock shifting in the video causes is much less than this. Turning the wheels back after they stop is not only from the train freedom. The spring in the barrel is part of this happening. Well, try to check freedom (barrel and pallet fork not in movement) then in DU position, and in vertical too. There must be inertia, the wheels must stop slowly, not suddenly.2 points
-
Both nice watches but I'd go for the Seiko being the simplest due to the double barrel and quickset date on the Slava.2 points
-
An image is worth a thousand words. Check the image this link contains. https://www.google.com/imgres?imgurl=https%3A%2F%2Fwww.awci.com%2Fwp-content%2Fuploads%2F2017%2F12%2FDrop-Lock.jpg&tbnid=ubmUK88uQ16g4M&vet=1&imgrefurl=https%3A%2F%2Fwww.awci.com%2Fwatchmaking-excellen%2Ftotal-lock-run-to-the-banking%2F&docid=hBKxPjG5MF81yM&w=600&h=347&hl=en-GB&gl=iq&source=sh%2Fx%2Fim%2Fm6%2F4&kgs=8c8c07b7b8445ae8 Rgds2 points
-
What's the watchmaking task you always think is going to be straightforward, but throws up some unexpected frustration or obstacle for you whenever you do it? I would especially be interested in hearing from the professionals! For me, a hobbyist with 3 years experience on maybe 50 watches, it is stem and crown fitting. Replace a broken stem, cut to length and file. Everything is feels right, put it into the case with the movement and find that something doesn't work once the caseback is screwed down. Maybe it's 0.1mm too short now, maybe the crown is binding on the case tube, maybe it turns out that the case tube is actually damaged out of round. Maybe the gasket is too elastic and pulling outward on the crown, fouling the keyless in some way. It should be easy. It never is. What's your frustrating task?1 point
-
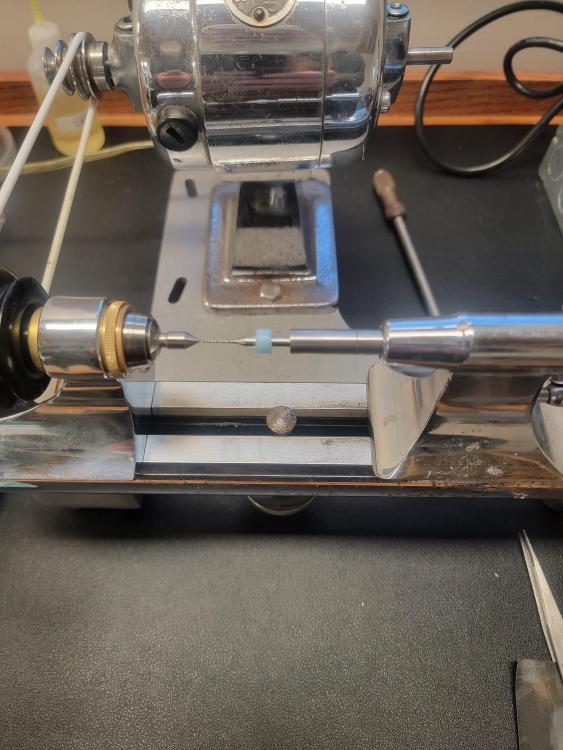
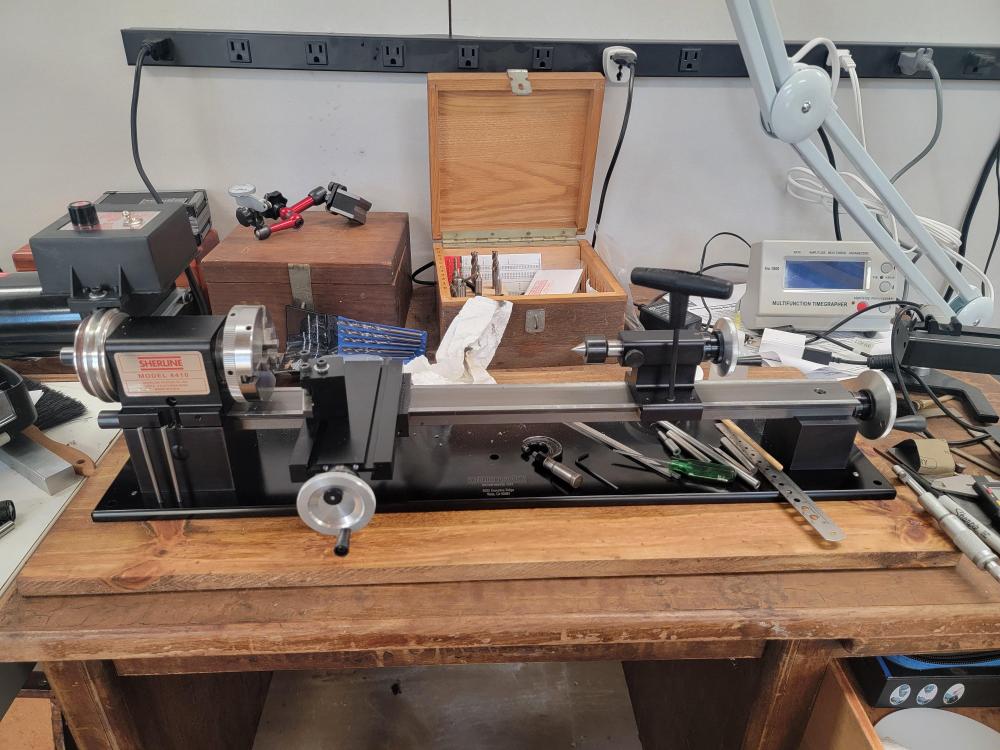
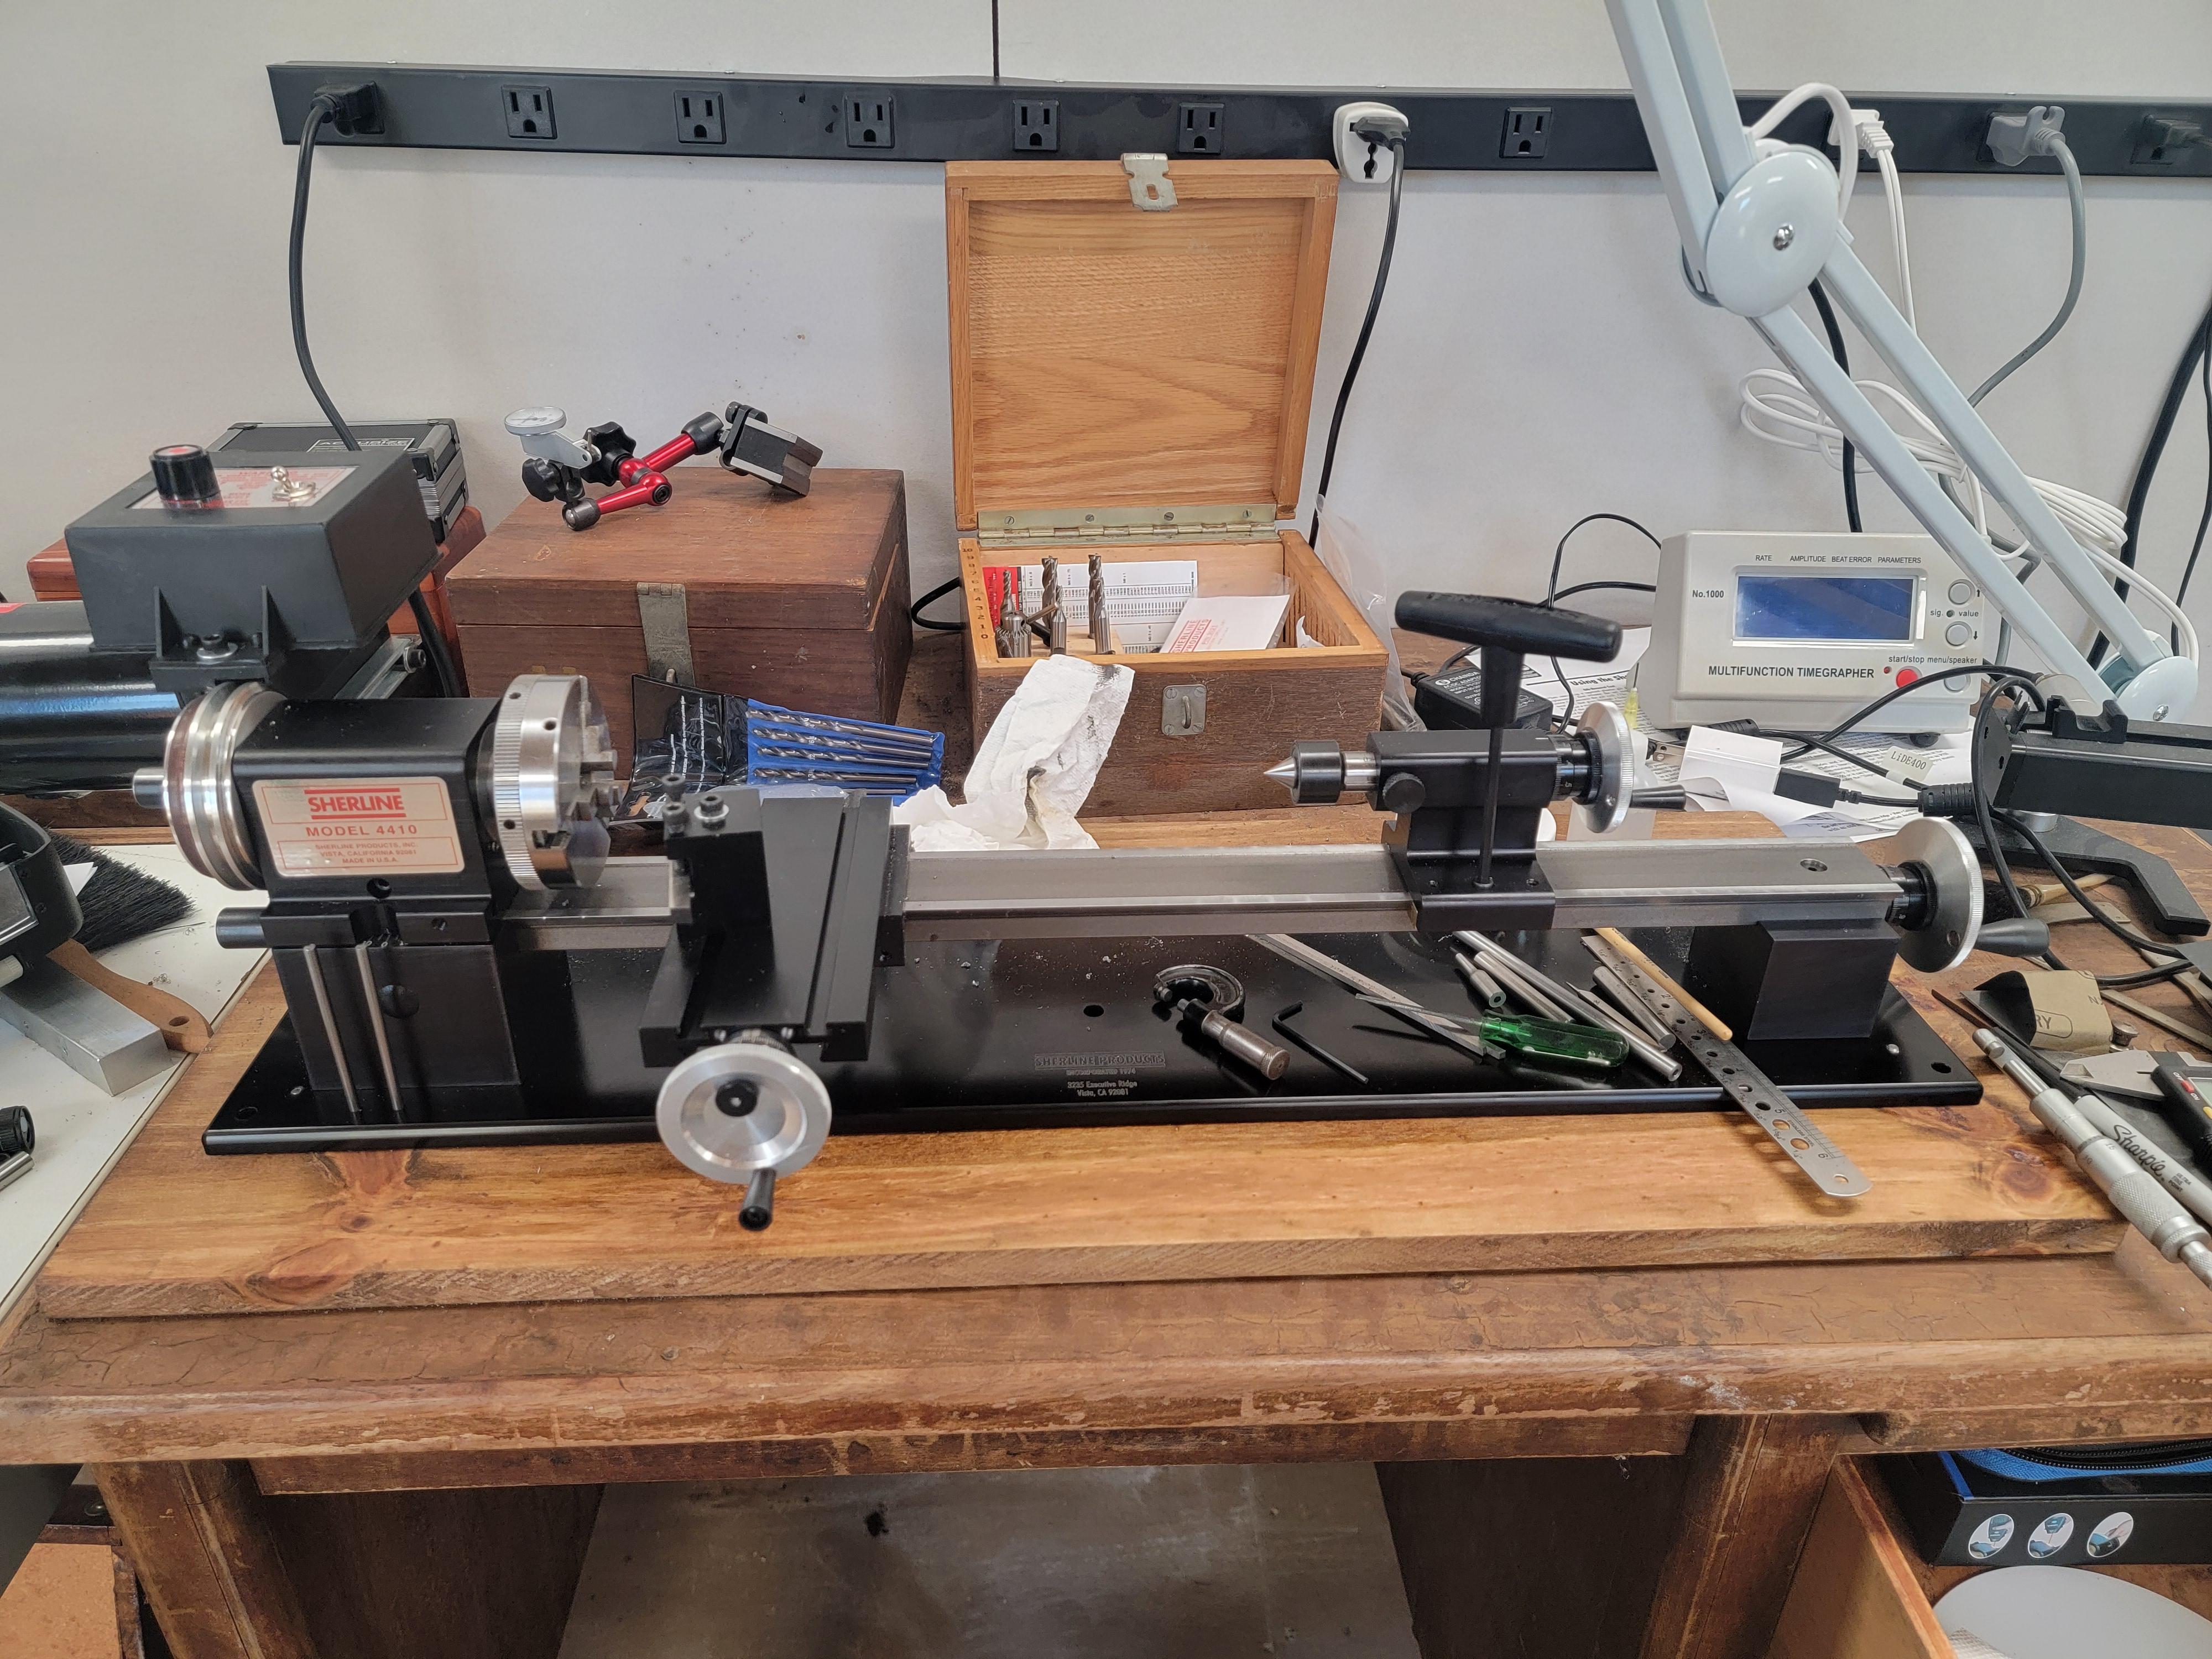
I got a new Sherline--not to replace my WW lathes--but to complement them. I wanted something that could handle bigger stock as well as have access to many inexpensive accessories. Had to make a mental leap from hand turning to cross slide turning. So far, I am having fun. My first project is a WW tailstock runner that supports a 1/8" carbide bit. The first attempt was a fail. I got too aggressive and removed too much material. My second attempt appears to be a success. I only needed to remove about 300 um from this 1144 steel rod. Then drill a near perfect 1/8" hole. I turned the rod between a 3-jaw chuck and a live center. I may follow up with a set screw to hold the bit. Stay tuned for other cool projects. Here is my Sherline setup
 1 point
 -
Yes but it is also exactly the kind of thing that would get stamped onto a Swiss Fake to mislead buyers. (I still don't think that's what this is)1 point
-
Interesting that Advance was an Elgin brand.
 1 point
 -
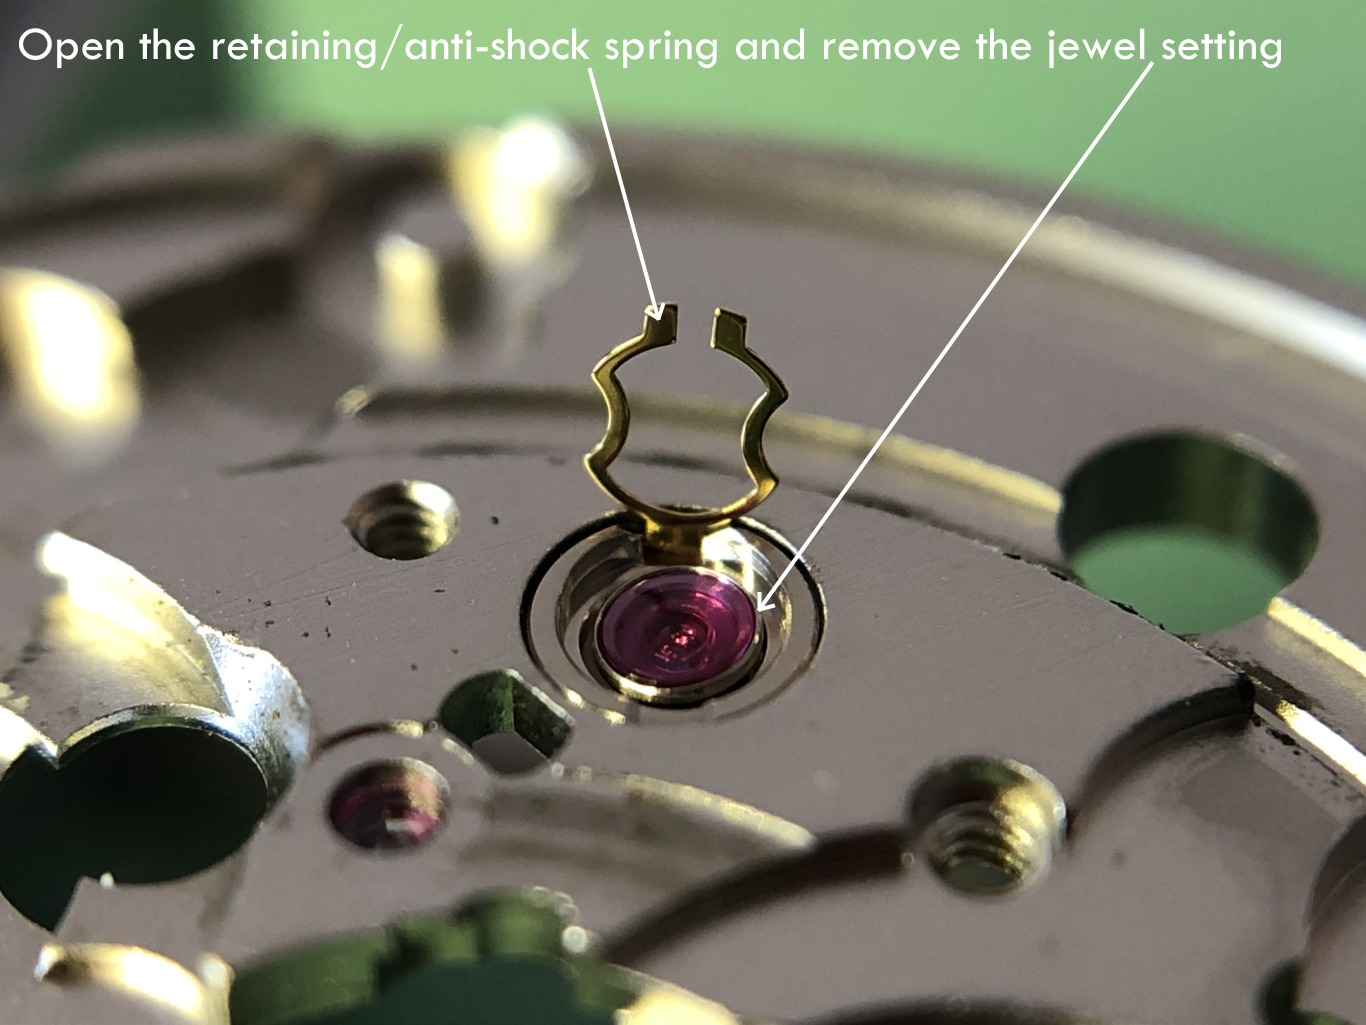
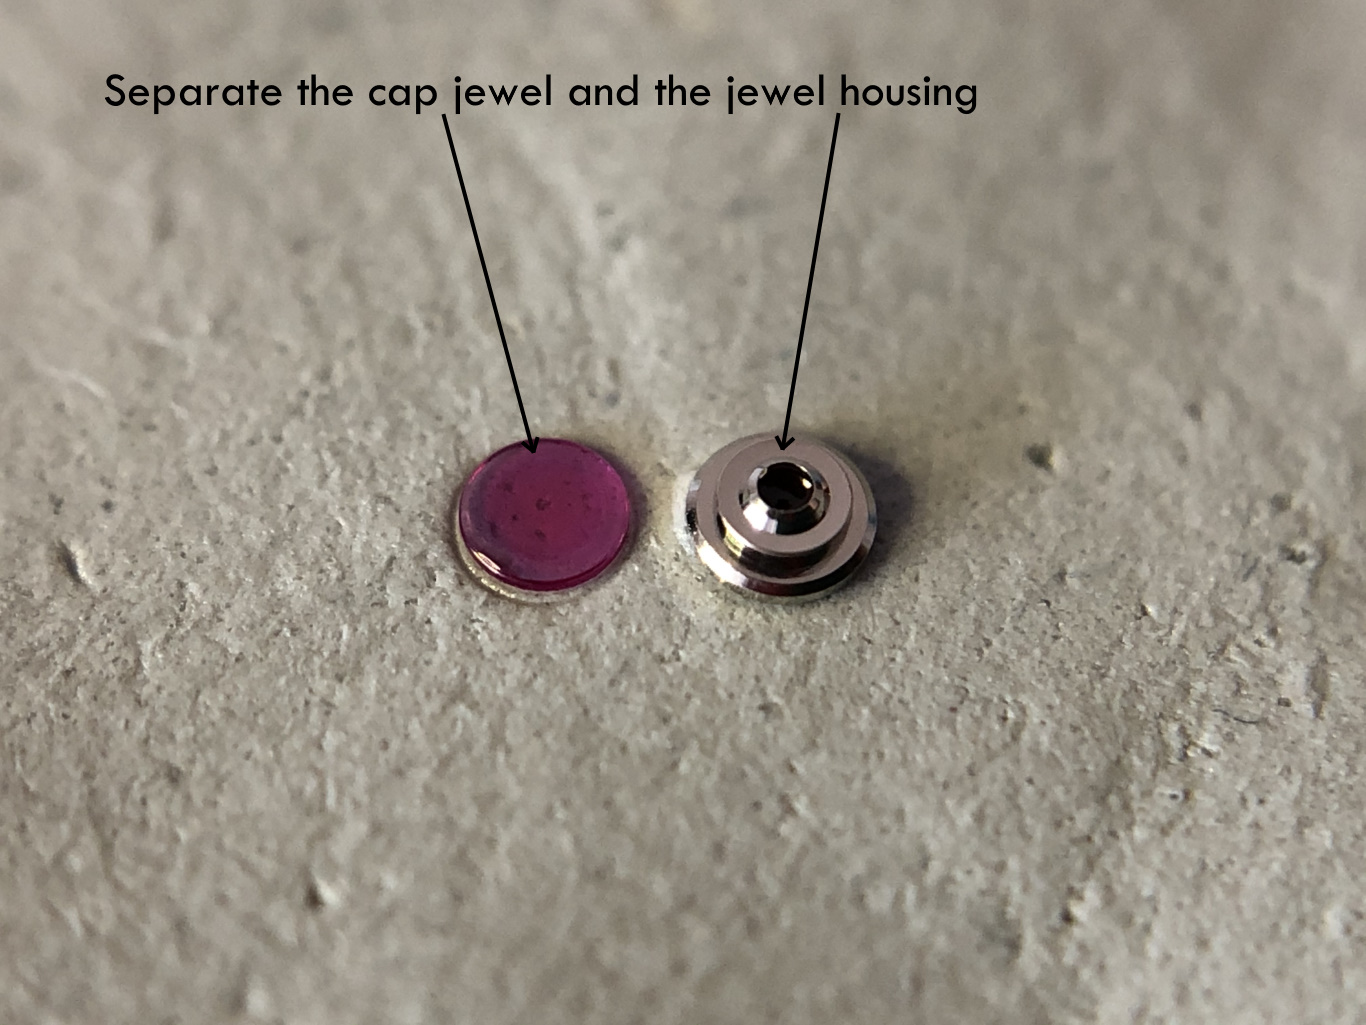
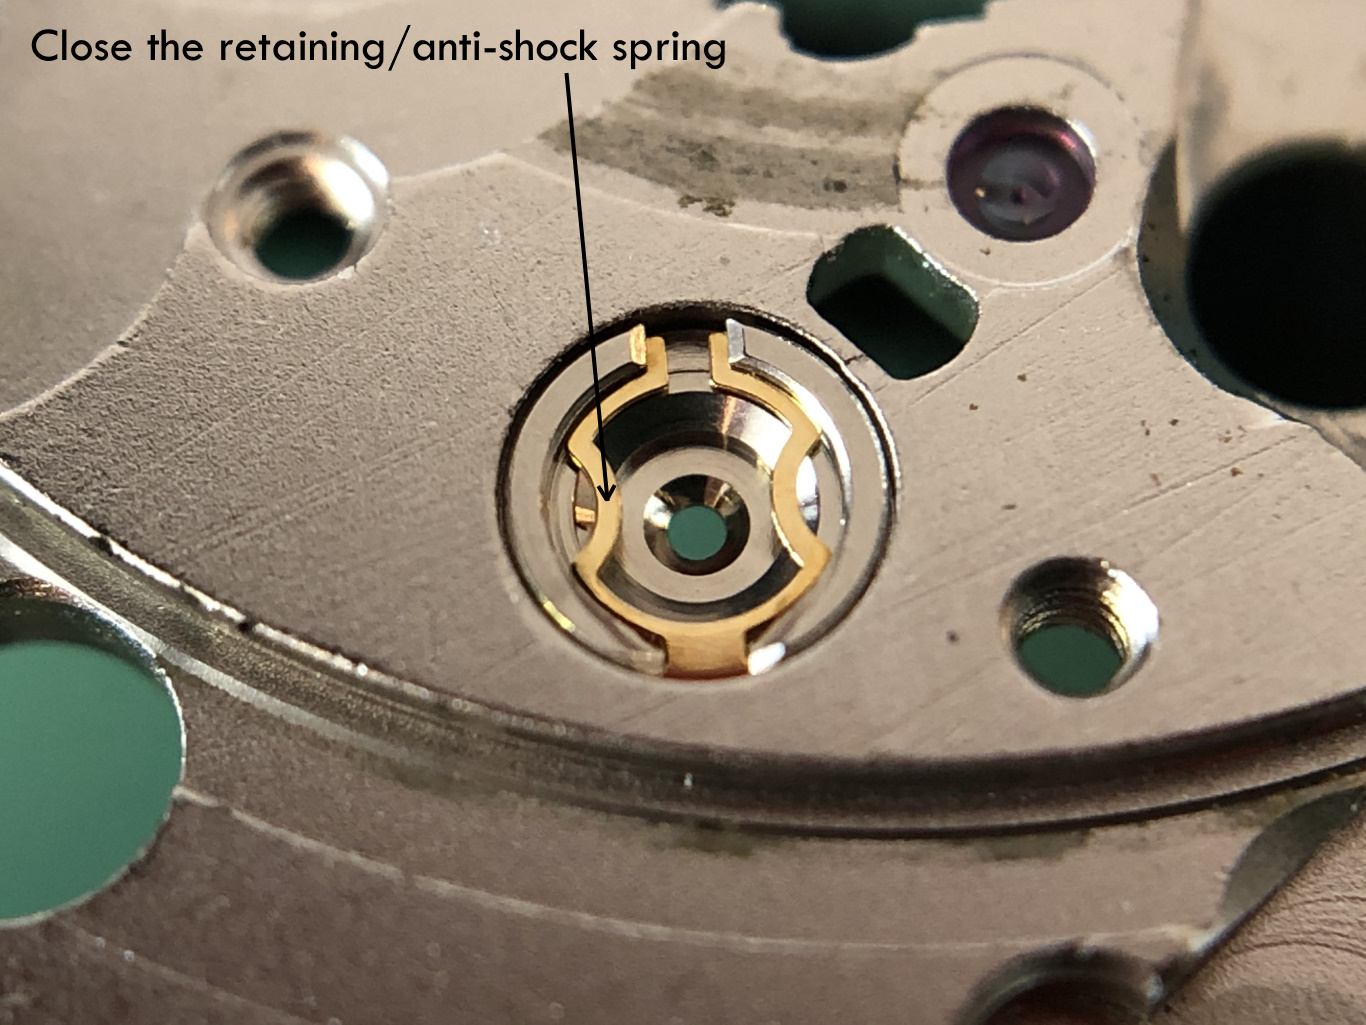
Or removing the cap1 point
-
Question about the bed shape. Are these beds worn horribly or did they come from the factory rounded like that? I've read somewhere that the beds should be V-shaped and if that's the case this tool was beaten to death.
 1 point
 -
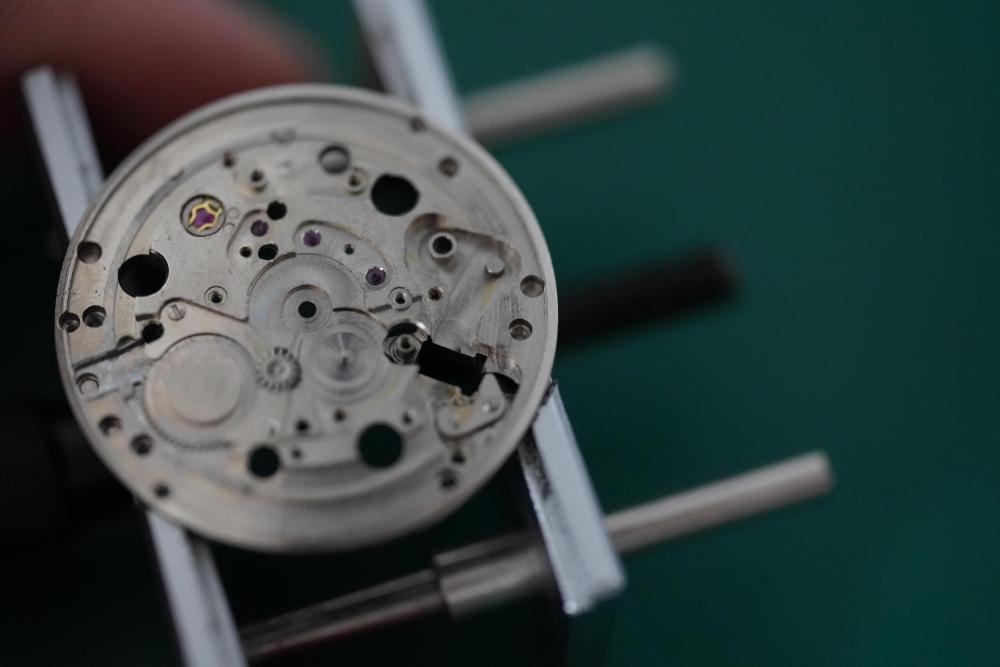
Wow, I think this going to give me nightmares. Are you sure that none of this moving around has bent any pivots?1 point
-
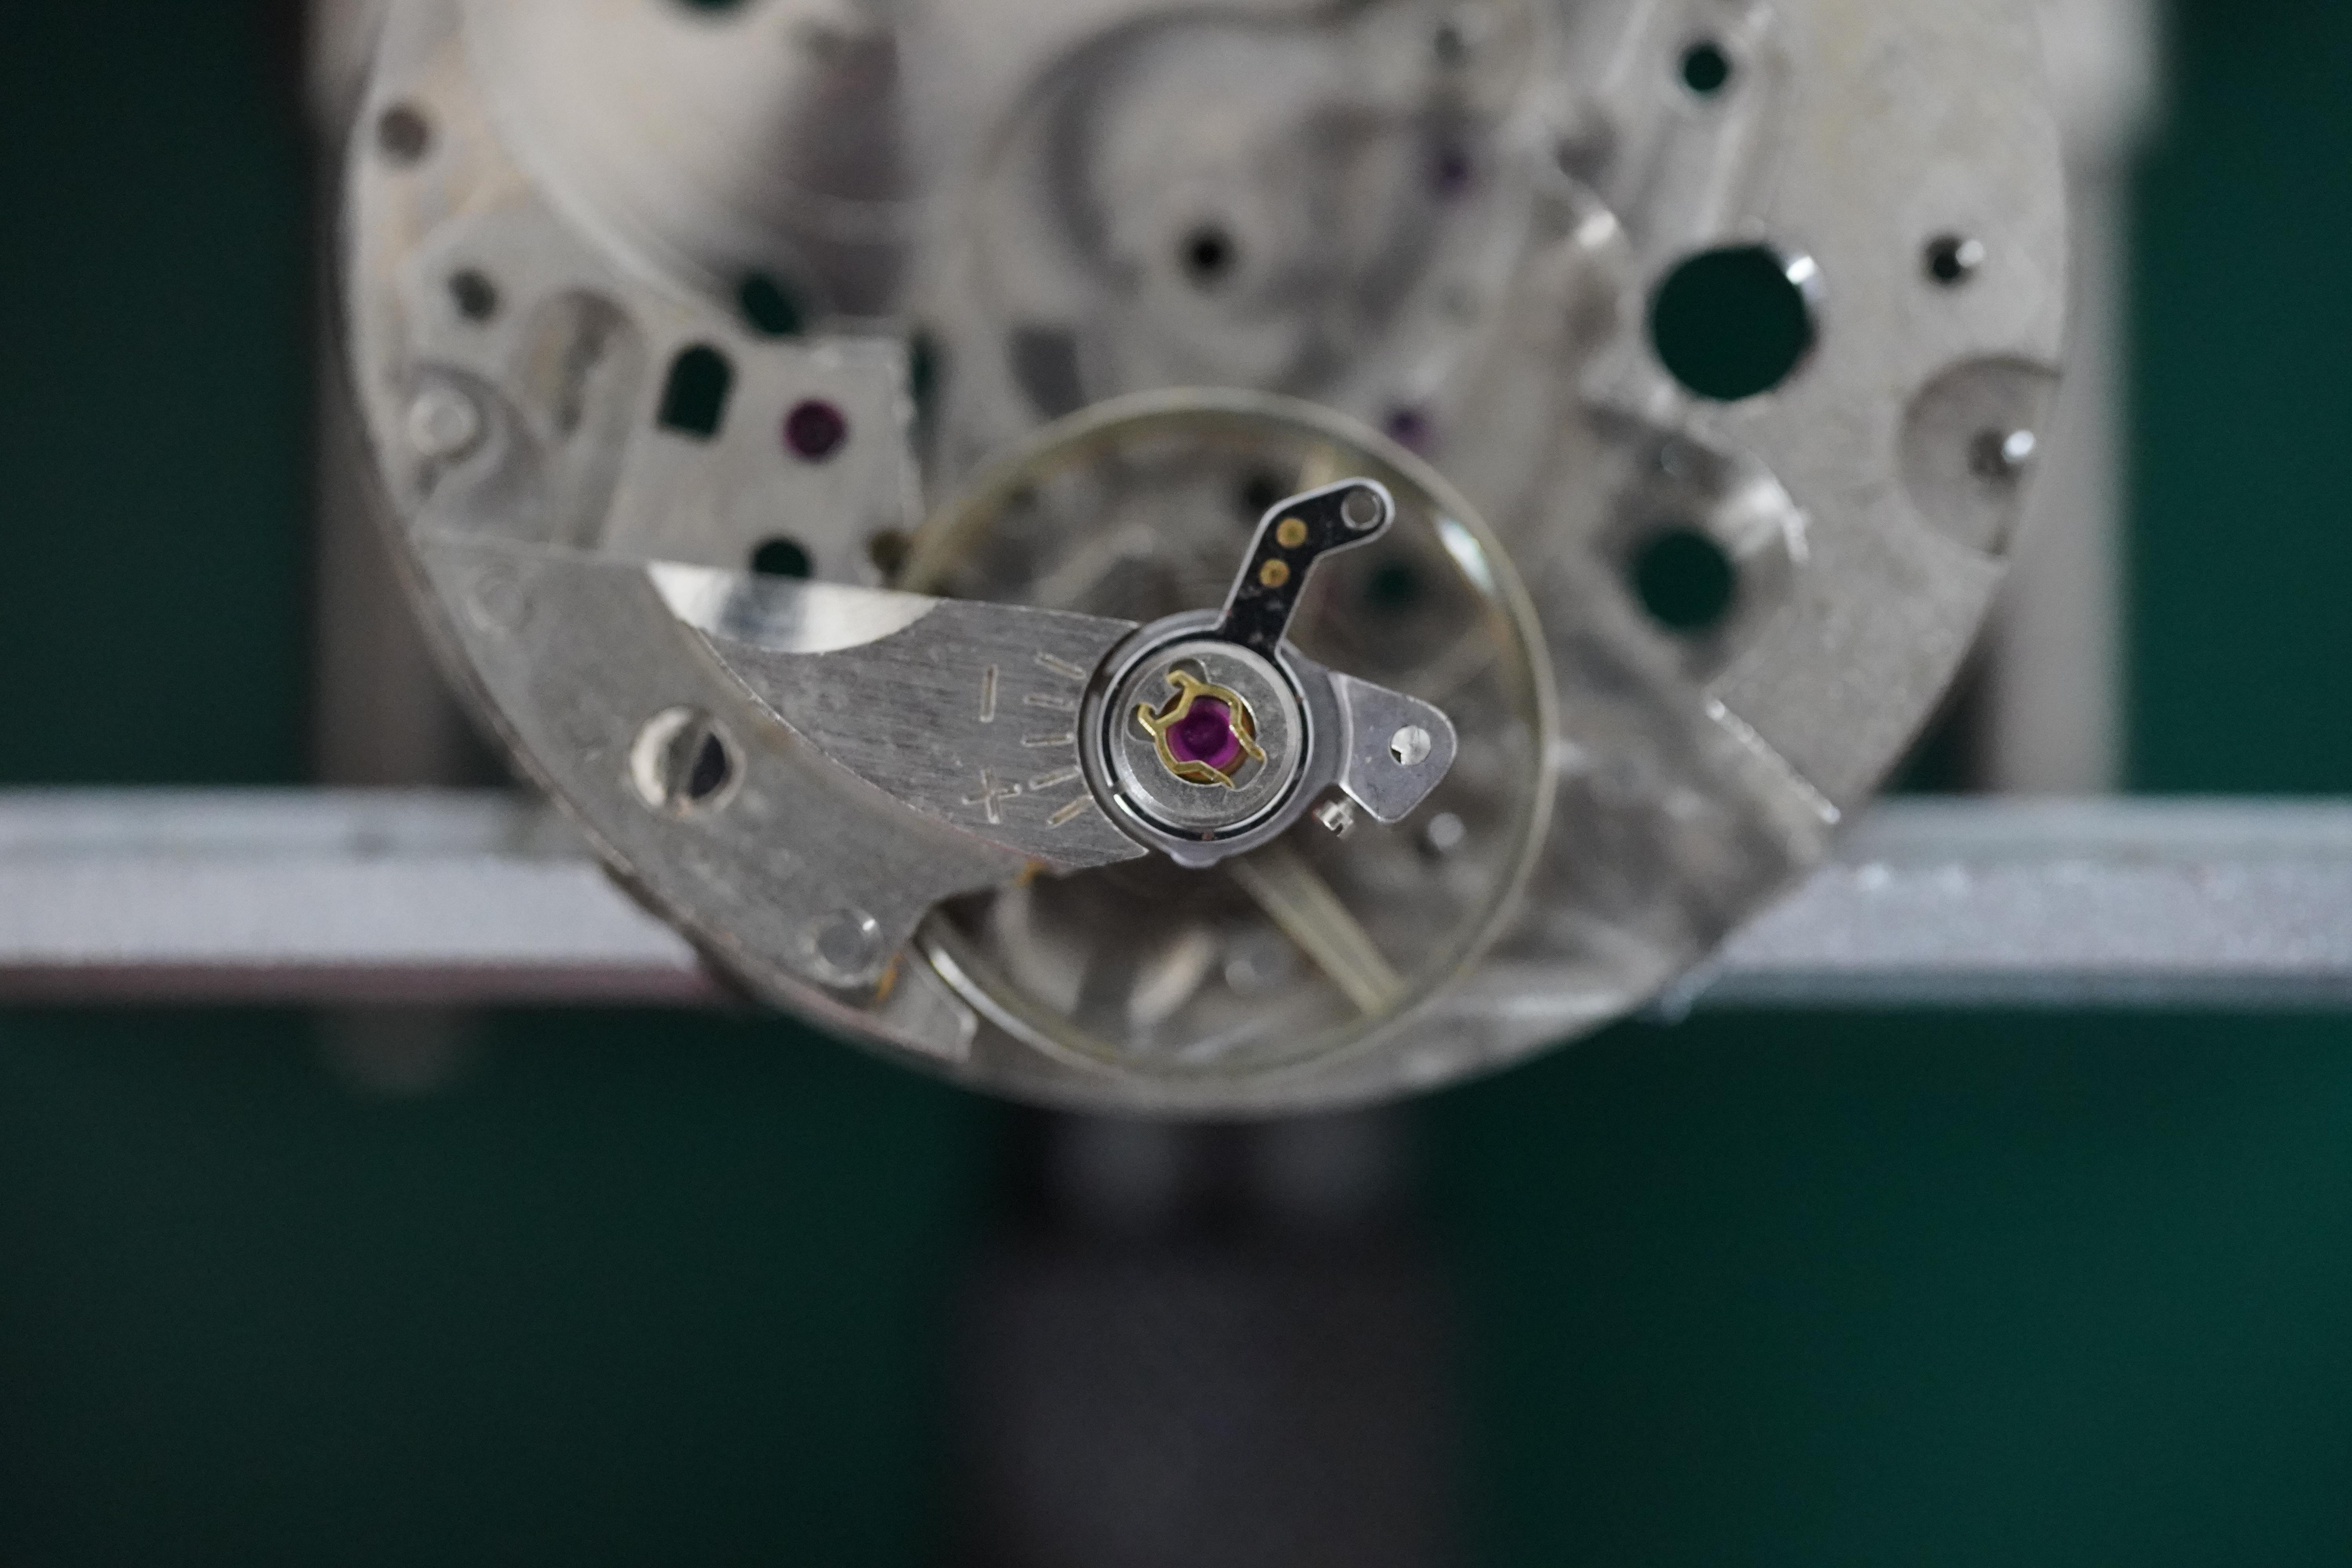
In normal, the mesh changes should for sure not affect that much the freedom. What You show is not normal. You should close the holes for the pins and make sure the wheels are upright. If they are not, then You force the cock so the pins will take the correct position as to fix the cock correctly - the wheel to be upright. Then the mesh should be more or less correct. For sure, the freedom should be good and not depend on the mesh in certain limits of variations of the mesh, and this is not so in You movement and needs investigation. What I see is that You move the 4th wheel cock. The long pivot for the seconds hand is something that bends and breaks when the watch is dropped as the dial shifts. Is it possible that the wheel is replaced? Is the teeth count correct?1 point
-
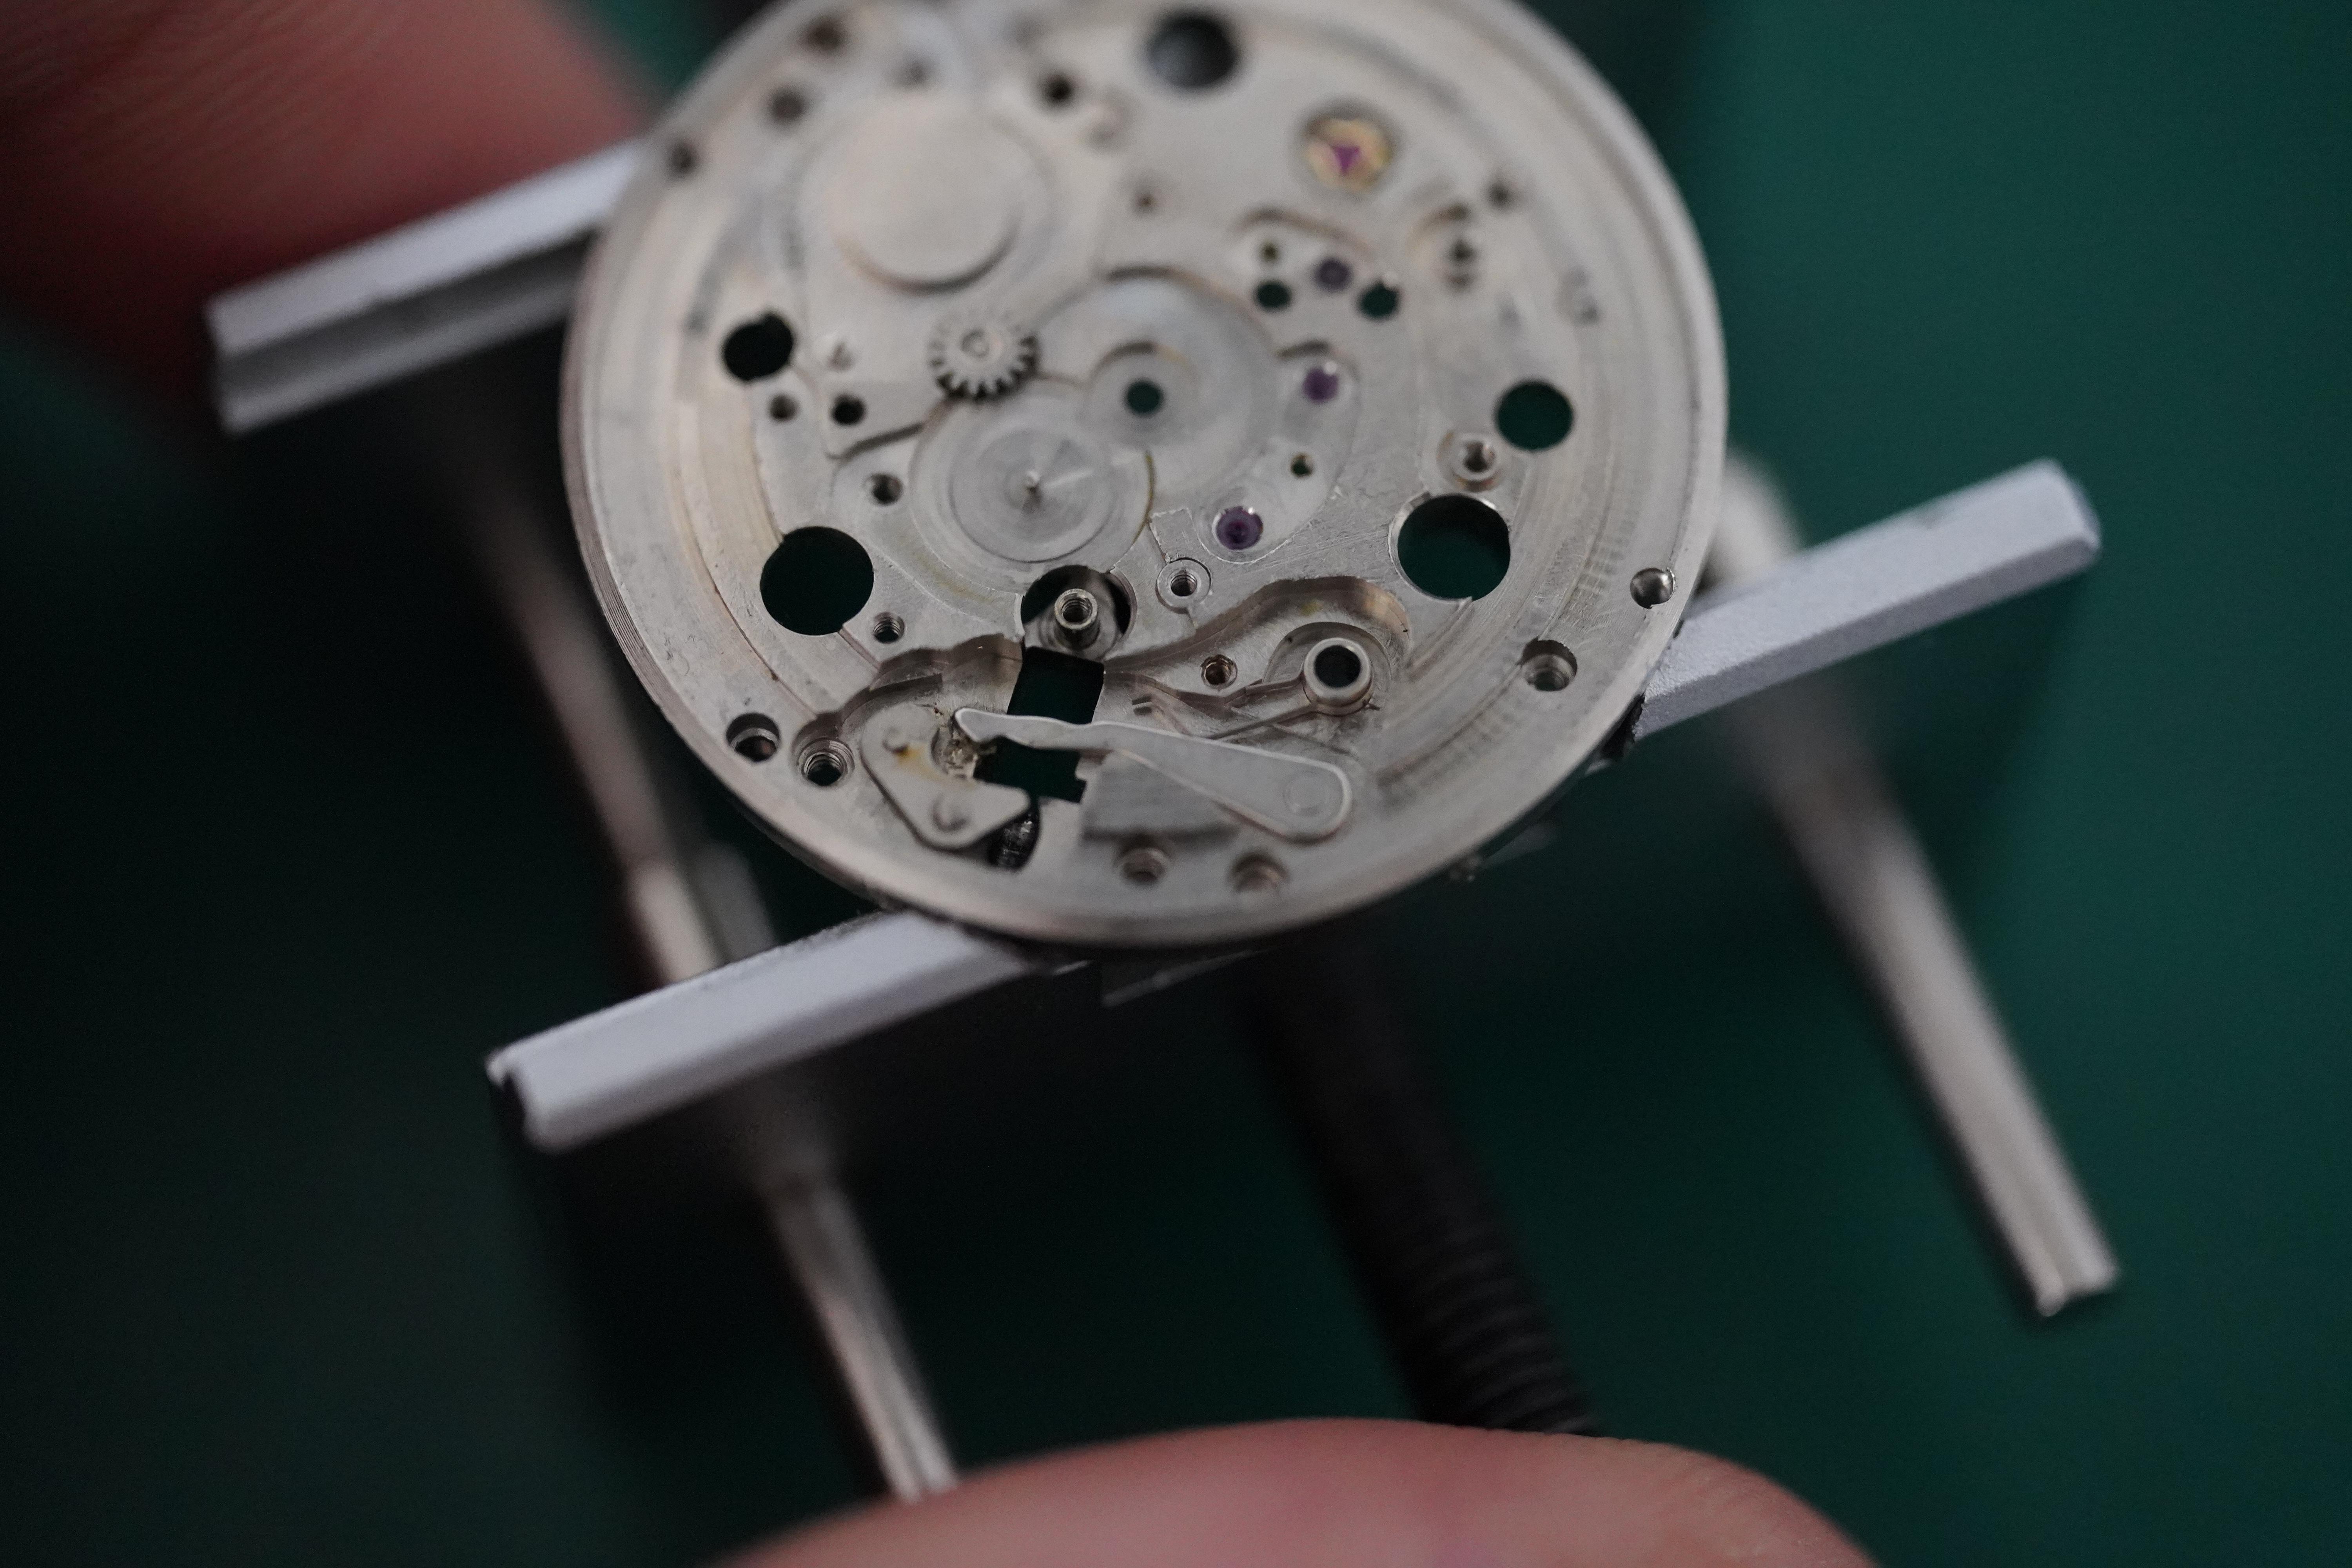
Sorry I can not participate all the time... OK, a lot new things here. About the guard pin and roller. The guard pin would never touch the roller. There should be 'draw' - very weak force that attracts the pallet fork to the banking pins (like if the pins are magnets) and it must keep the guard pin away of the roller. Draw must be present in both sides (to both banking pins). In banking positions, there should be safe distance (free play) between safety roller/safety pin. This distance should be equal in both sides. If it is smaller in one of the sides, this may be because the guard pin is bent or the banking pins are not correctly regulated/bent. If the Draw is not present or not enough in one of the sides, thou the free play between guard couple may be normal, the pin will touch the roller and cause friction and great amplitude loss. The draw must be checked in all 15 escape wheel teeth and both sides of the fork. If the drop lock and run to the banking together are bigger than needed, this may mean that banking pins are opened to allow bigger swing of the fork than needed. But it will be true if the free play of the guard couple is bigger than normal too. In such case the amplitude will suffer as the efficiency of the escapement is worsen and simple closing the banking pins will return the things to normal. But it is not easy to explain what is normal for all this parameters, so You can get some normally working watch movements, put only the balance and the fork in movement and check the free plays as to get idea of what is normal. Now for the wheel train rotation freedom. Yes, it is seen that the train is not free enough. More - this is not normal such small tilting of the wheels by the cock shifting to cause the wheel to not rotate free. It is not correct the cocks to be able to move like that but this can be corrected by closing the holes for the fixing pins of the cocks. Here I don't speak about the mesh, but about freedom of rotation - it should not be affected by such shifting. So please, check if there is enough axial free play. If the lack of axial free play is not the reason, this will mean the holes are small for the pivots and the pivots will have to be burnished until correctly fit the holes.1 point
-
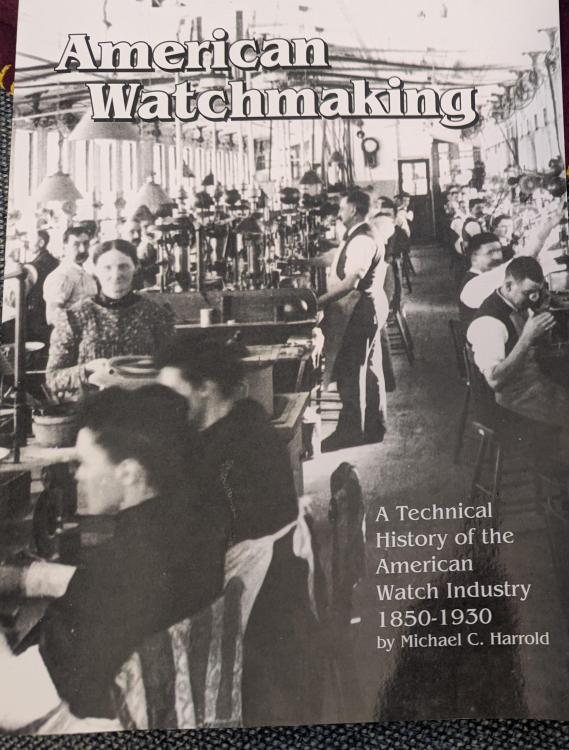
American Watchmaking: A Technical History of the American Watch Industry 1850 - 1930, Michael C Harrold. It reads like a scholarly publication, and is deeply detailed. But if you want to know exactly which people founded which companies and with how much in investment capital, and how much they lost their investors in what year before being bought out by Waltham or Elgin, this is your book. Photos are only black & white so it isn't much for a gazing, but it does have a number of good machinery diagrams and loads of grainy photos of American watches at every stage of development. And lots of graphs of trends for things you probably don't think much about, like how common 3/4 plate vs full plate vs split plate movements were in any given decade. Descriptions of weird inventions like stem wind adapters for key wind movements. Also photos (and drawings) of the enormous factories.

 1 point
 -
I know! It's hard for me, too. There are some amazing watches with radium. E.g. I love the "fat lug" Omega Seamaster from thr 50s (ref 2846/2848), but always radium. There are three dangers from radium: - the least: direct radiation from wearing them - medium: Radon gas emission from the decay of radium (it's suggested keep radium watches in well ventilated rooms) - the most: somehow ingesting or inhaling the actual radium when opening cases or working on them.1 point
-
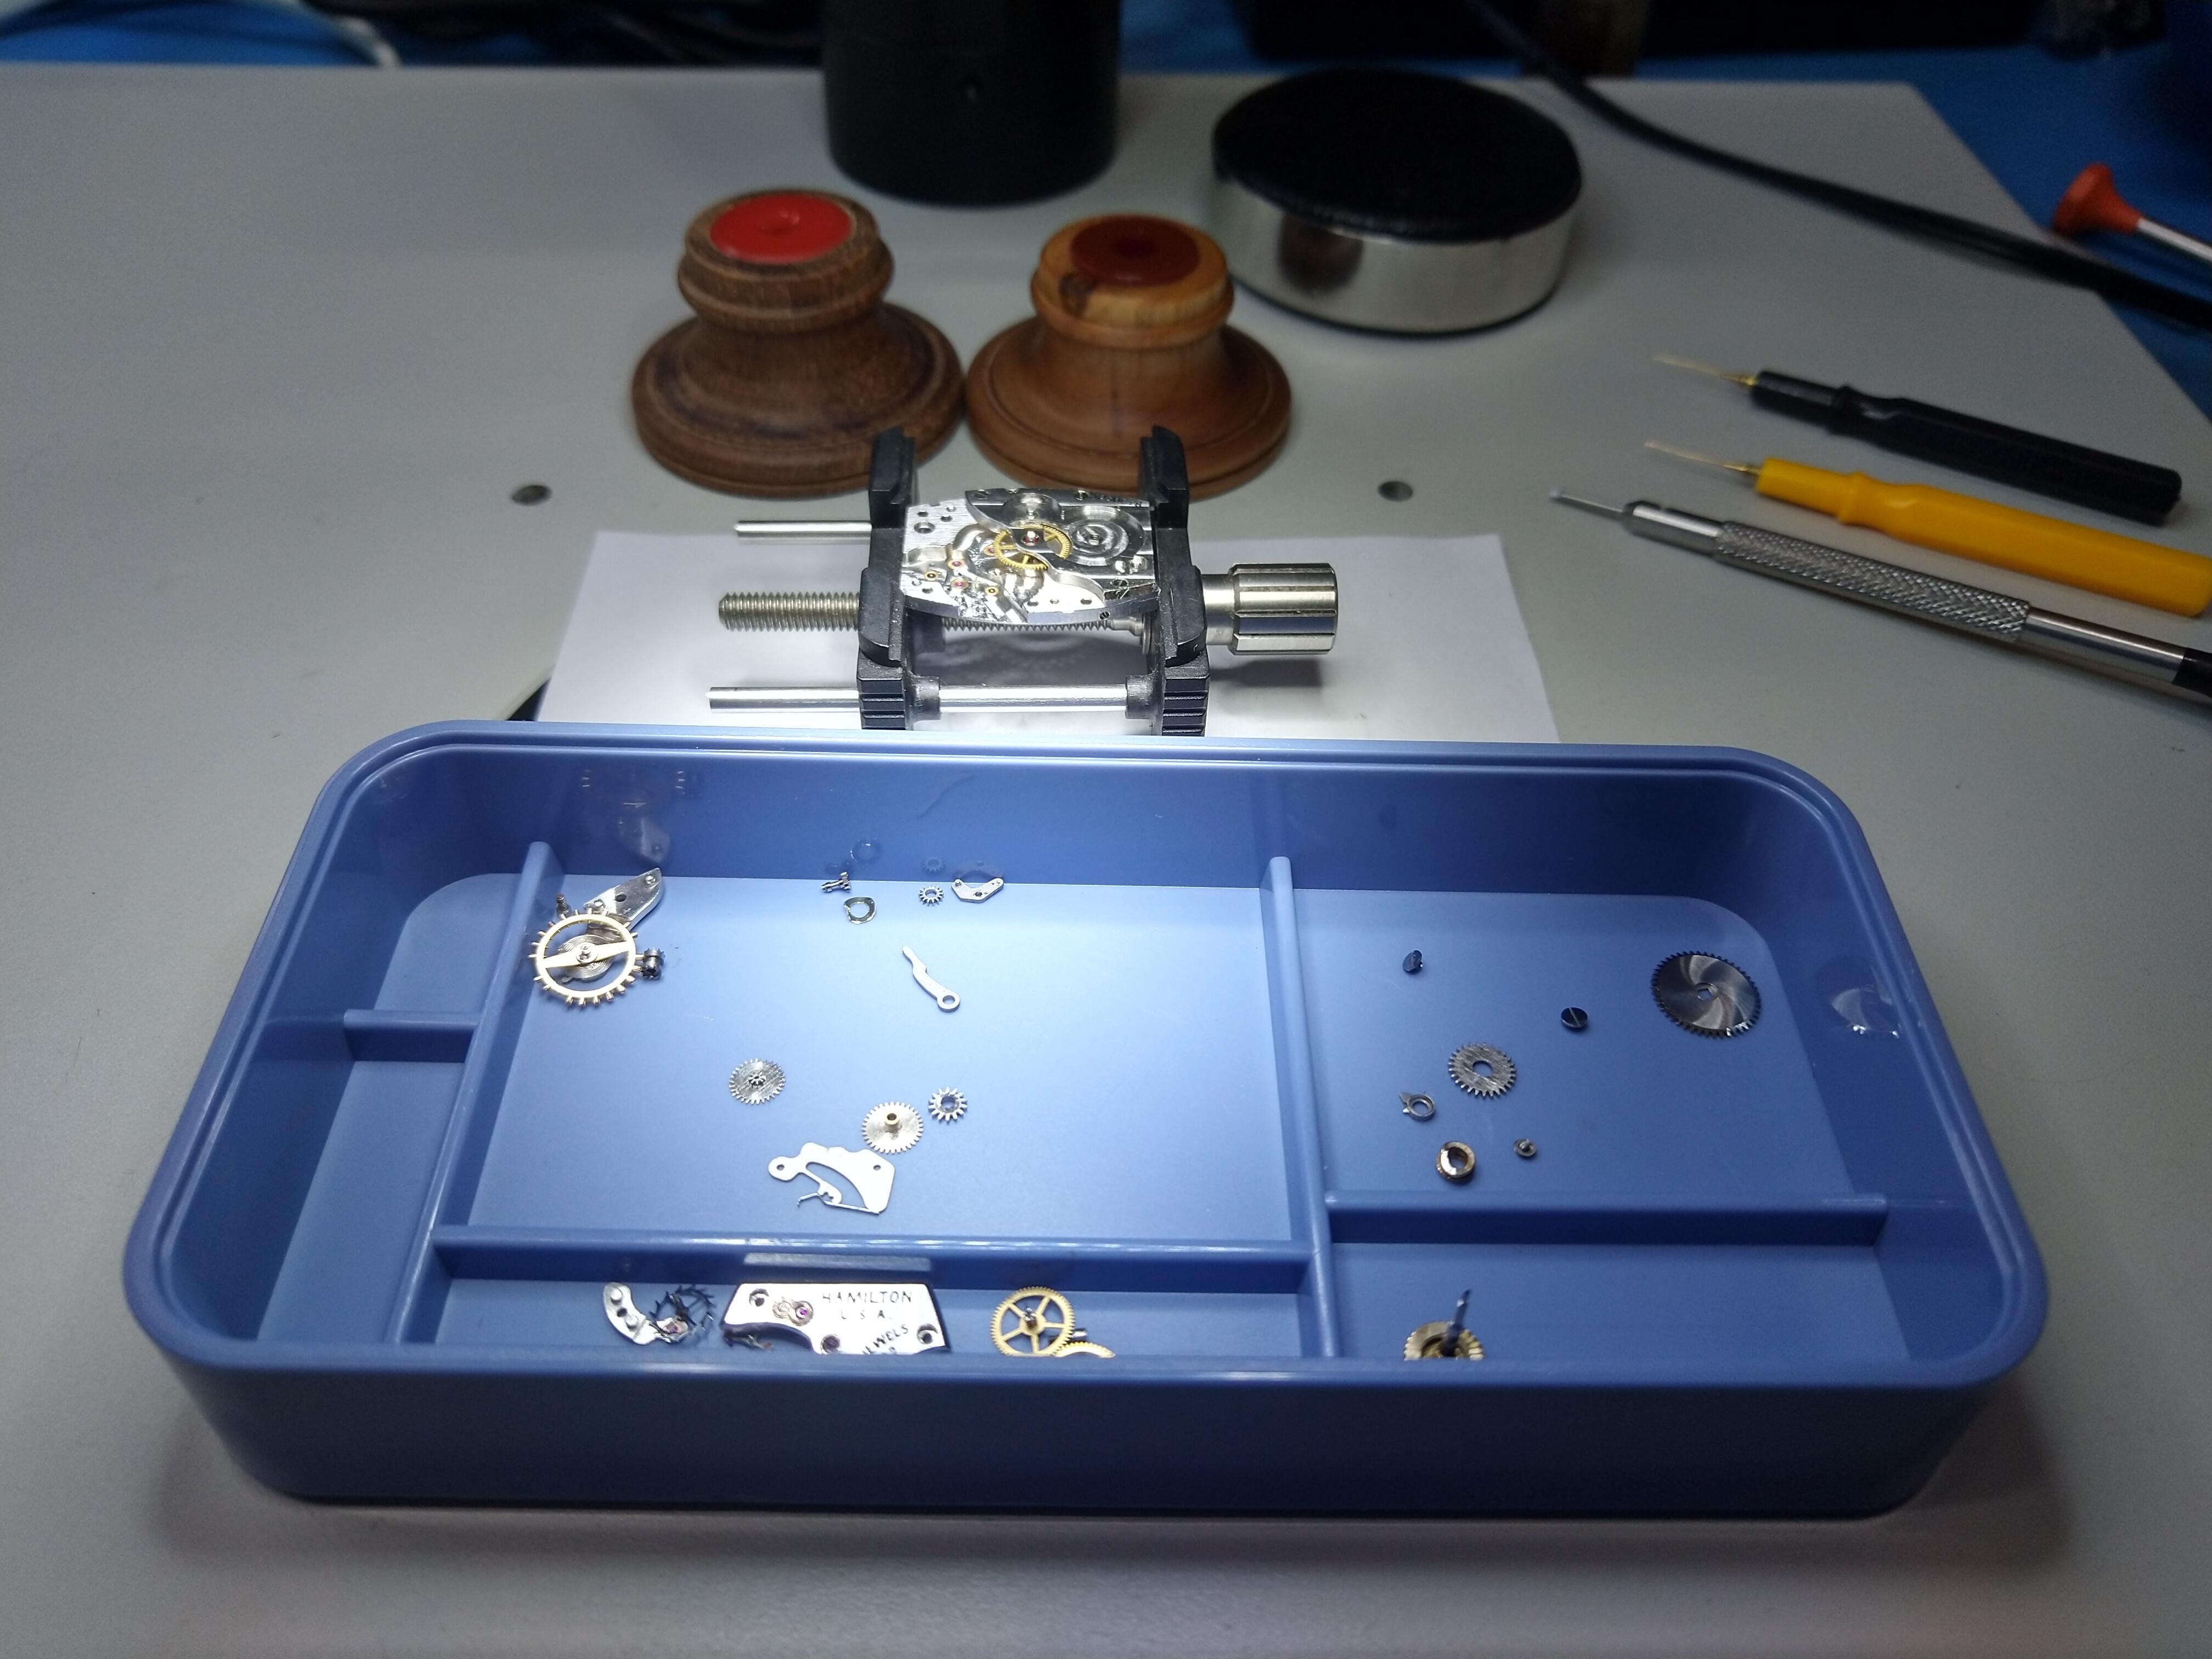
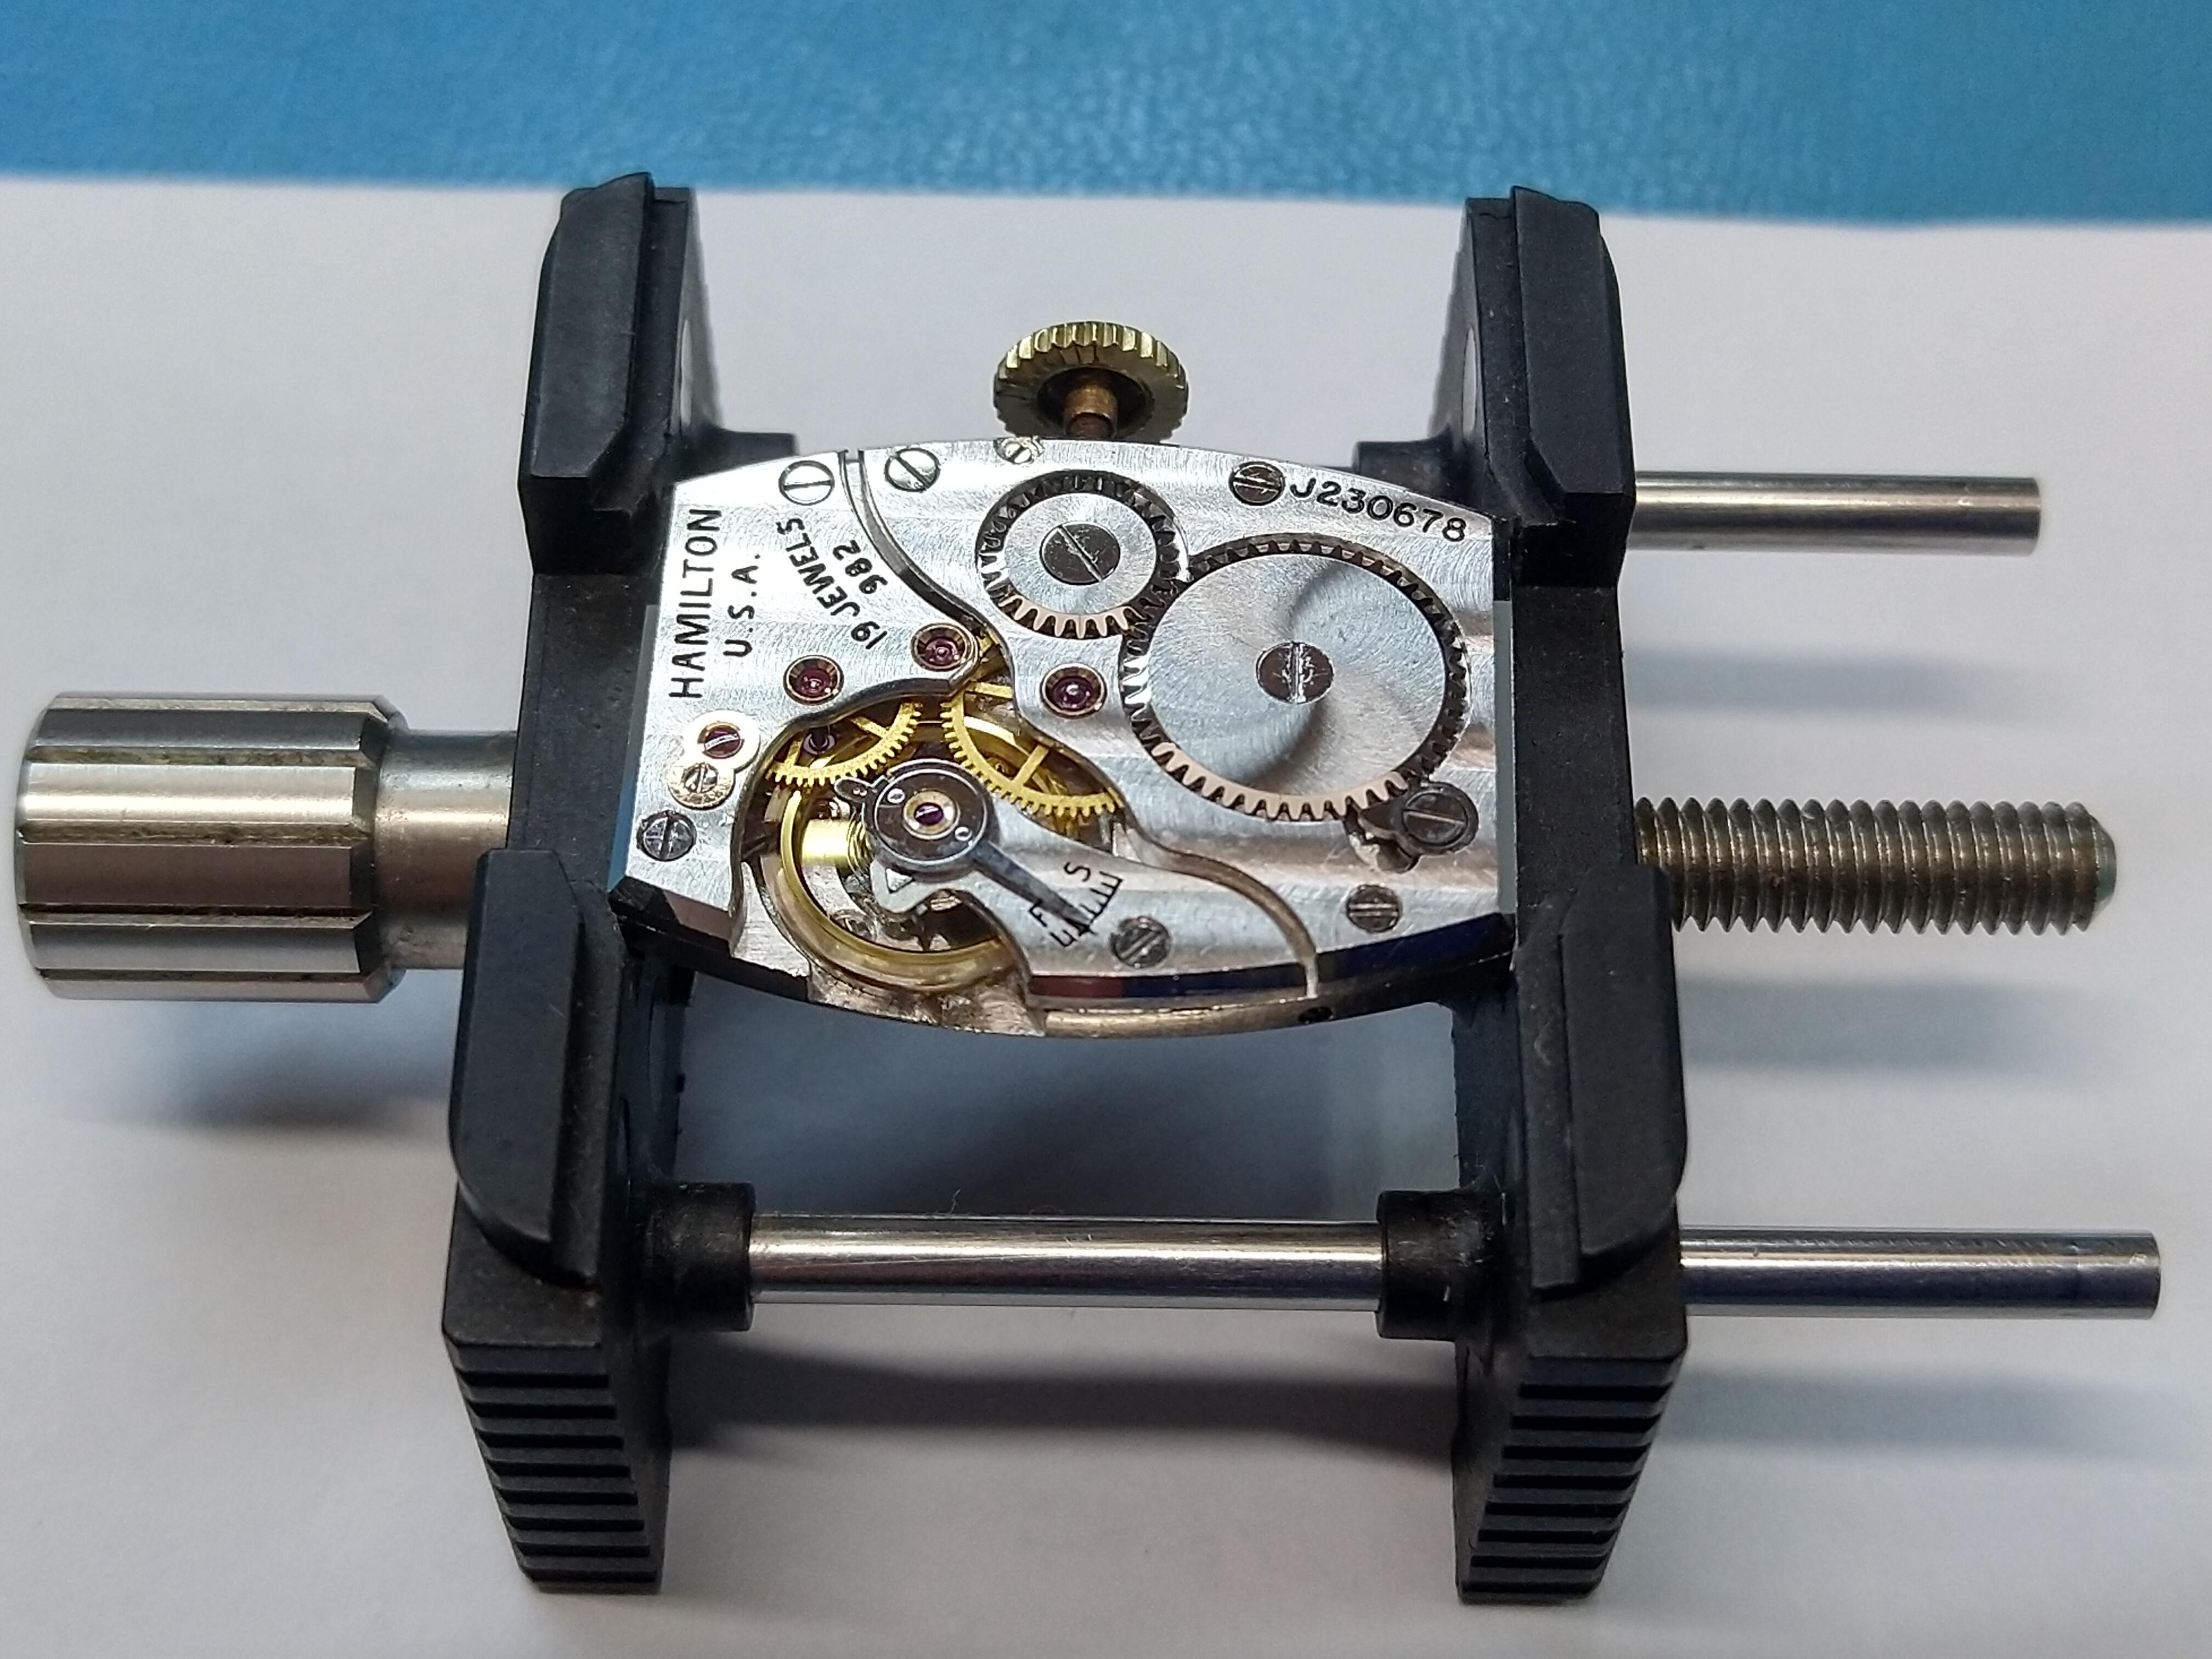
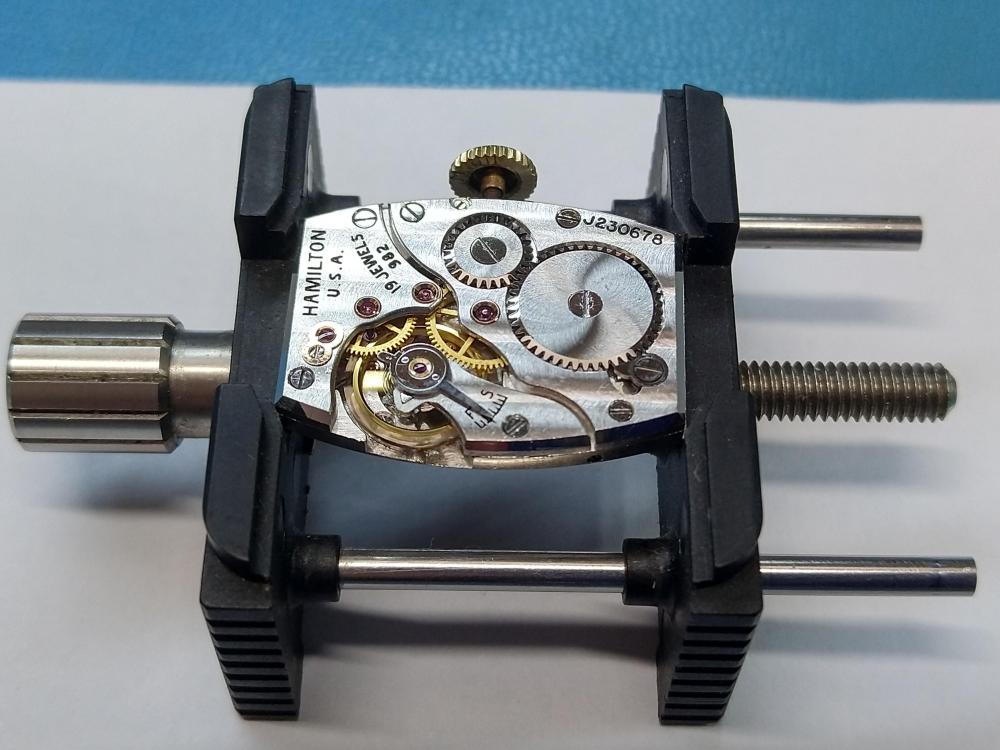
HWGIKE#37 Hamilton 982 Full service, acceptable performance. Amplitude 265 fully wound, beat error 0.2 ms. Had to use the old MS because the one I ordered came damaged, dirty and even rusty and I would not expect a better replacement. Broke the escape wheel when I first tried to get the movement out from its basket... that little hole seemed to be a nice place to put my screwdriver in.... Bought a donor half a year later. I had to replace the screw for the escape wheel top jewel plate dial side... meaning that i had to find a candidate and file it down to size... luckily i am using a microscope... I still don't understand how could they handle these tiny parts in the past without modern technology...

 1 point
 -
Welcome to the forum. Depending on the size you could use a tube with a solid bar inside for the piece that protrudes.1 point
-
Have you checked out Cousins. Edit the setting bridge should be flat but if you can't sort it there are replacements but if it's not listed in the Omega packet then chances are it's going to be generic as sold by Cousins. https://www.ebay.com/itm/116339472730?ff3=2&toolid=10044&customid=&lgeo=1&vectorid=229508&item=116339472730&ufes_redirect=true https://www.ebay.com/itm/163194075590?ff3=2&toolid=10044&customid=&lgeo=1&vectorid=229508&item=163194075590&ufes_redirect=true


 1 point
 -
Just curious: why would you remove the lume?1 point
-
This is so helpful thank you. It looks like I was misjudging that part's function. I assumed it was drilled eccentric so that it could be rotated for alignment like the knurled top piece works. But that bevel means it is fixed in one position. I measured the horizontal position of the hole on the underside of the die plate where the punch comes through and am surprised to find it is not centered. It's about 1mm offset and I guess that bottom receiver compensates by being off center. What a weird design.1 point
-
I scrolled back to that video and concur with @GPrideaux . I would expect to see the escape wheel slow to a stop in that test but it just stops dead. Testing each wheel independently without its mesh neighbors for a free spin, where a puff of air should set it into a nice spin that lasts a long time. The largest wheels may not spin as long but the escape wheel should just whizz along. If each spins well by itself, then install one neighbor to ensure the two mesh and spin freely, again slowing to a stop.1 point
-
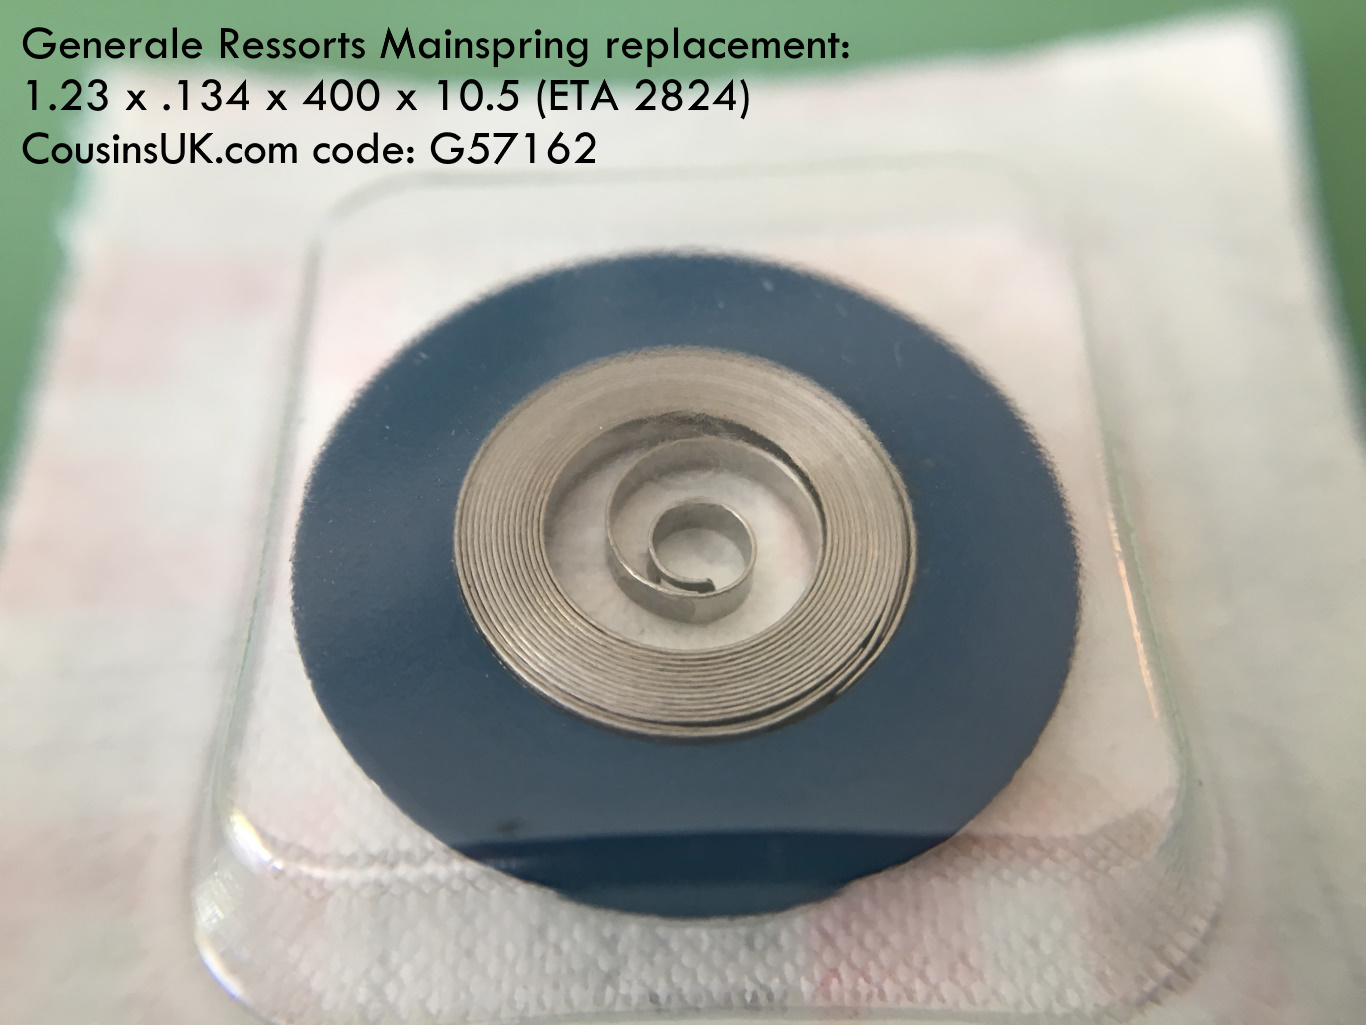
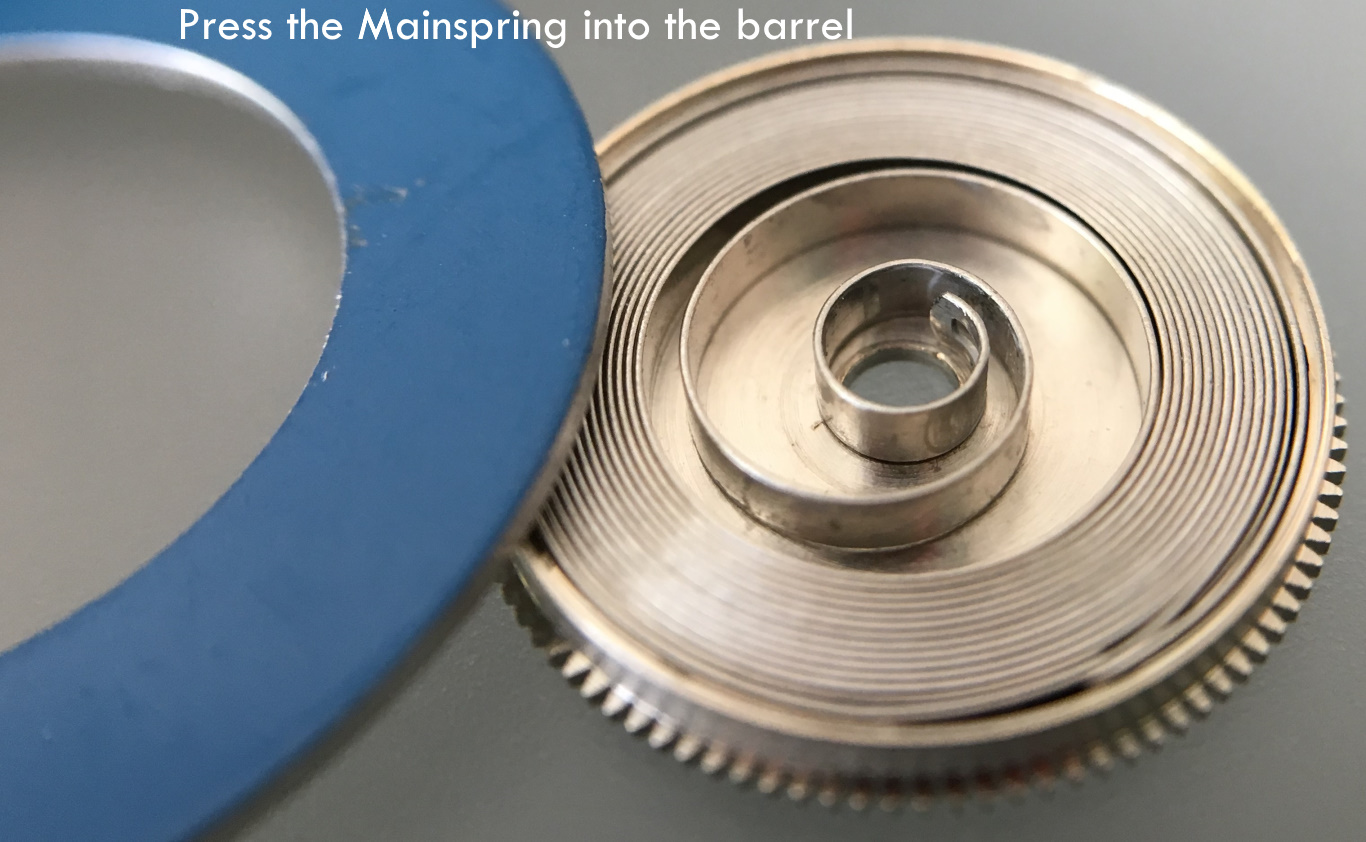
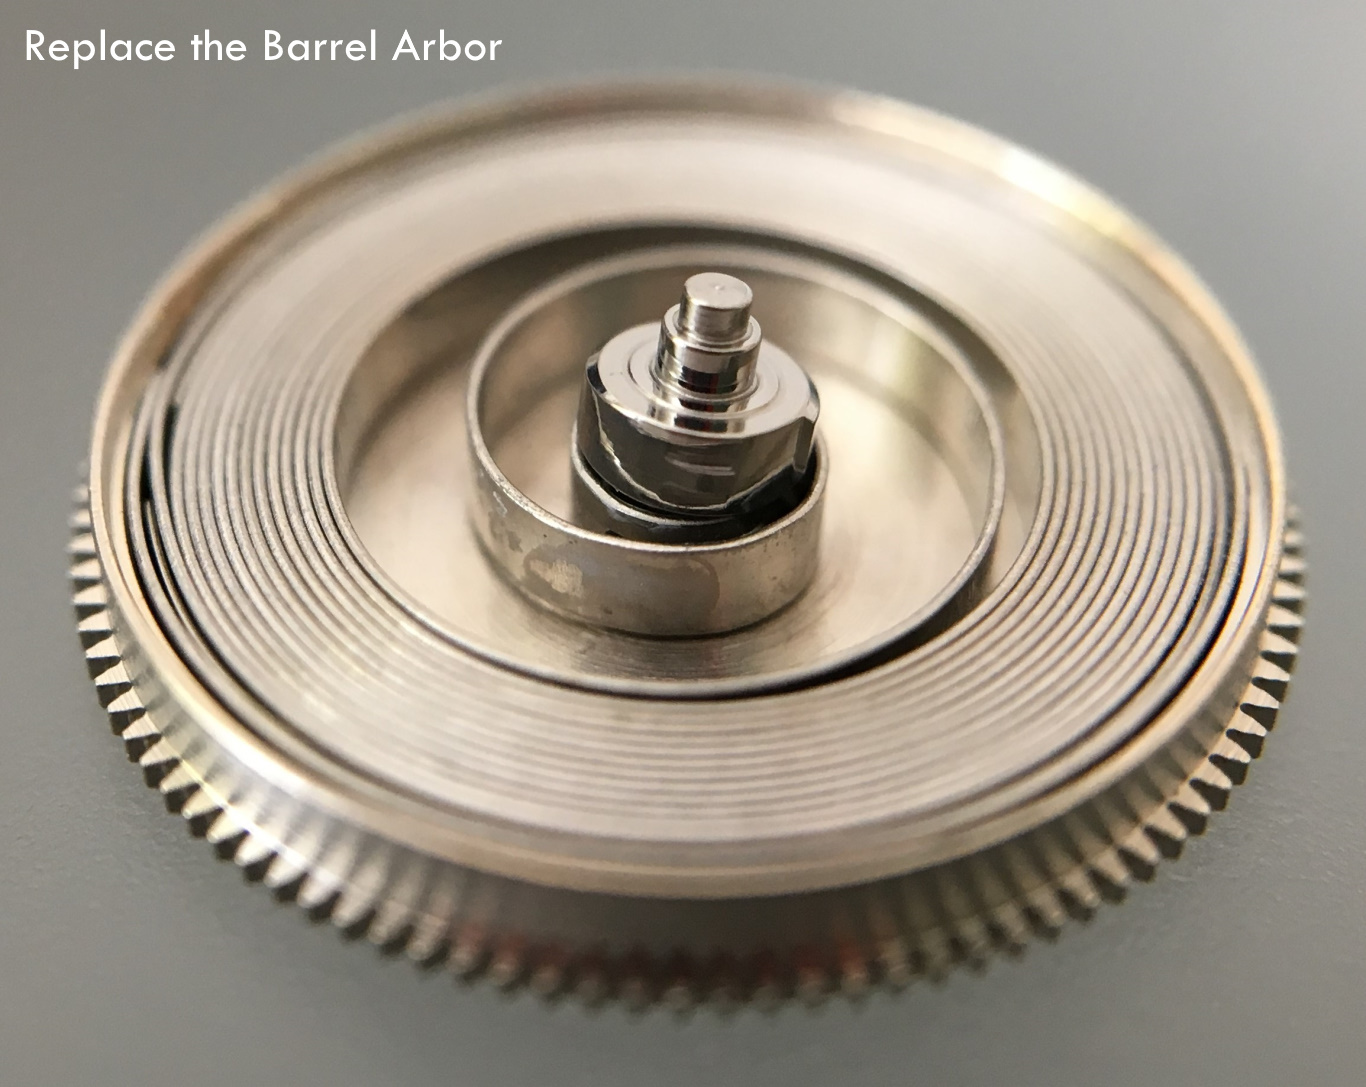
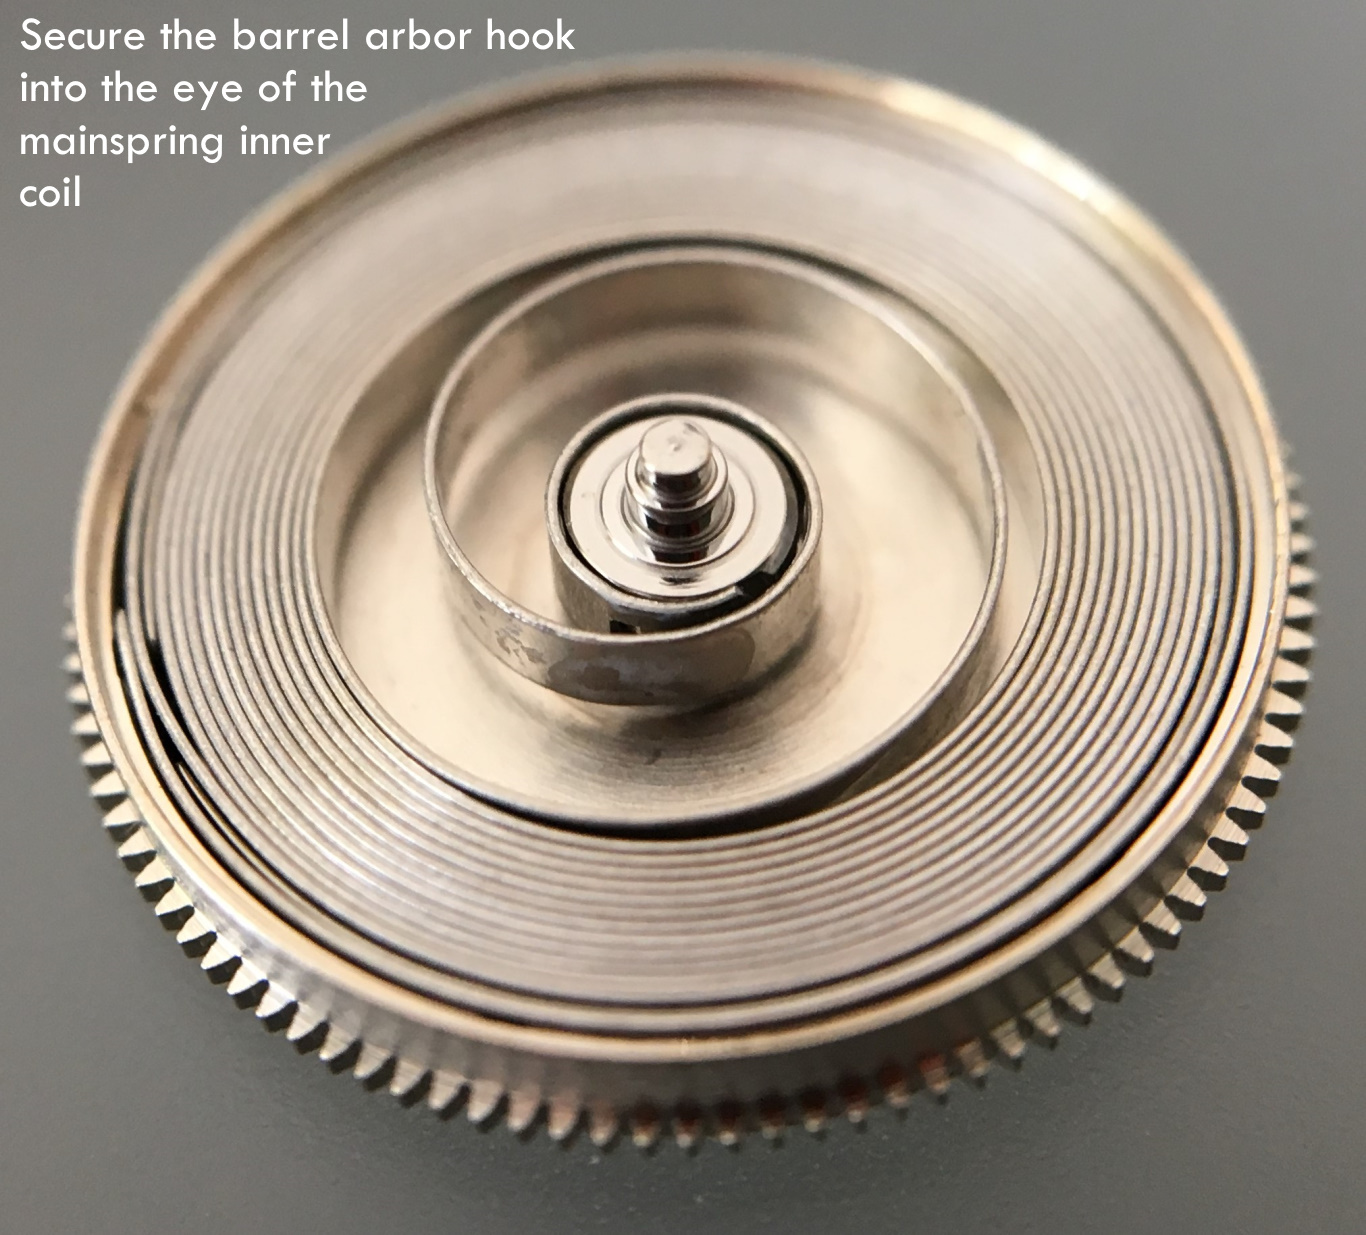
Pleased to say the dimensions work great for the one I have:
 1 point
 -
I don't put dials under water. I put cling film on the desk, and work wearing latex gloves and a mask. I use cotton buds or cleaning swabs to wet each number in turn. Let them soak for a while, and the radium paint goes really soft. Then I gently push it off the dial with some sharpened pegwood - picking it up with a cotton bud, which goes in to a zip seal bag with all anything else contaminated for disposal.1 point
-
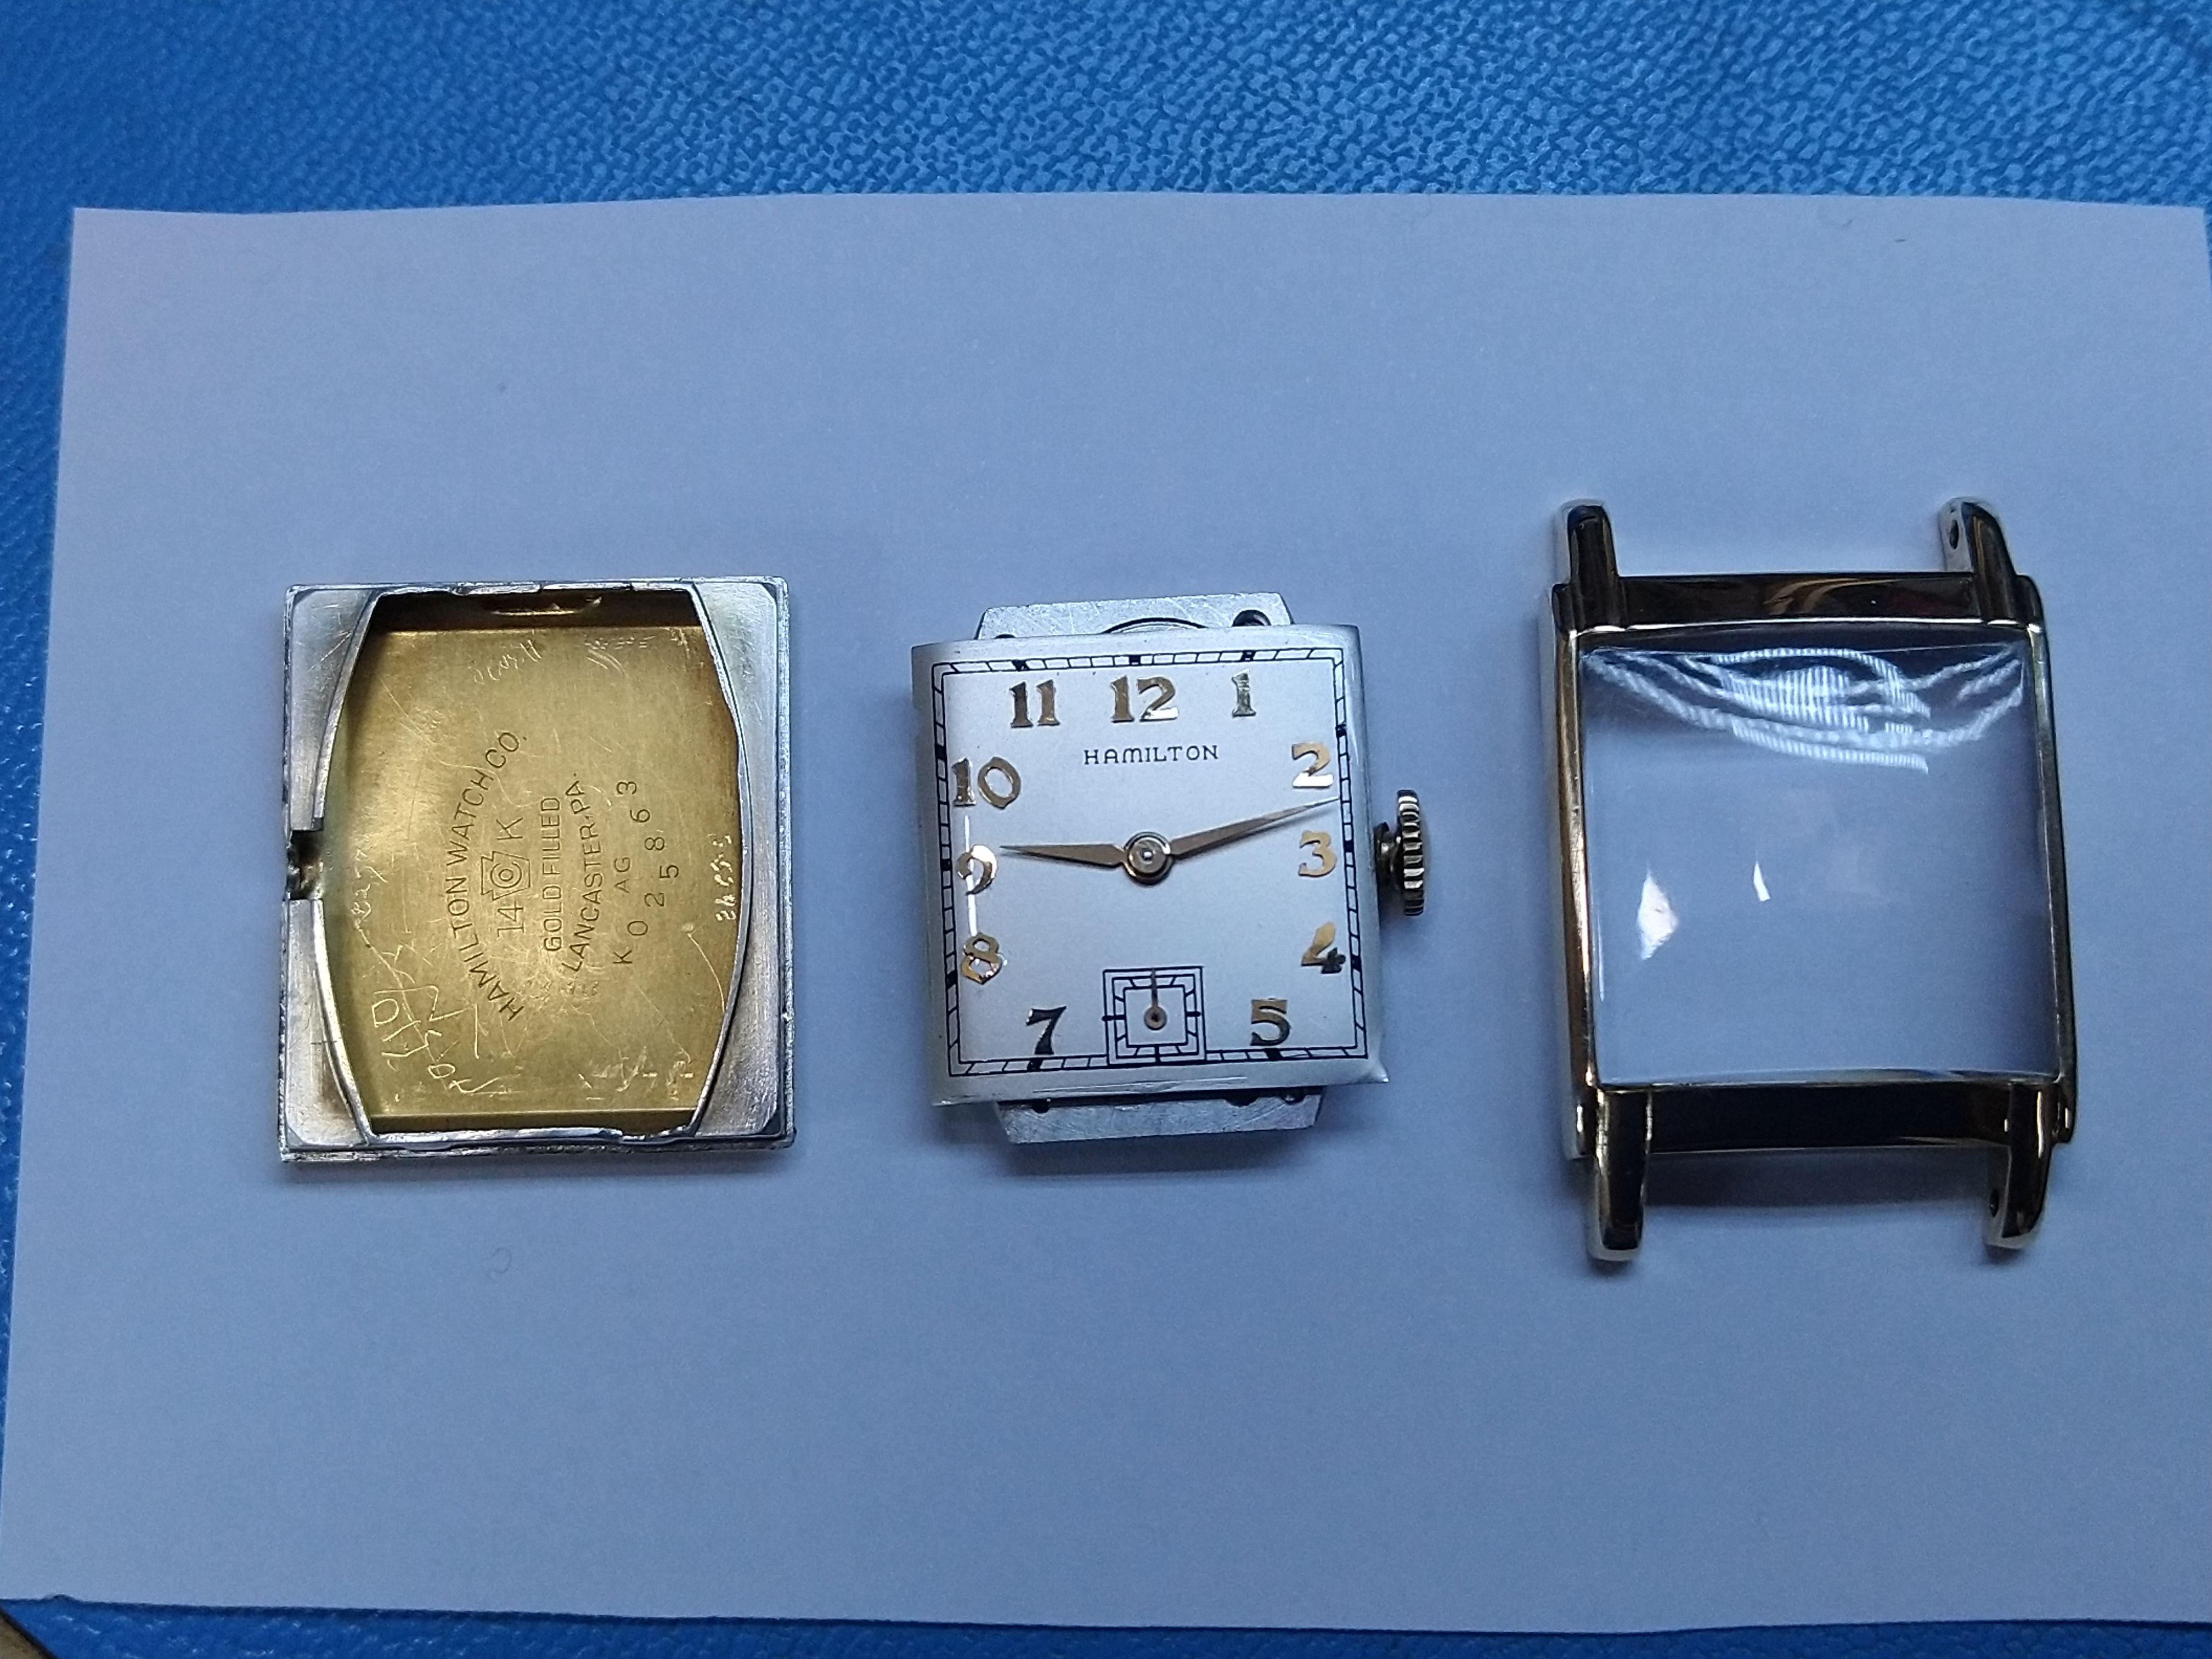
It was just copied but this should give you an idea based on the case thickness. Edit Yes it could be hard to wind because it needs a service .
 1 point
 -
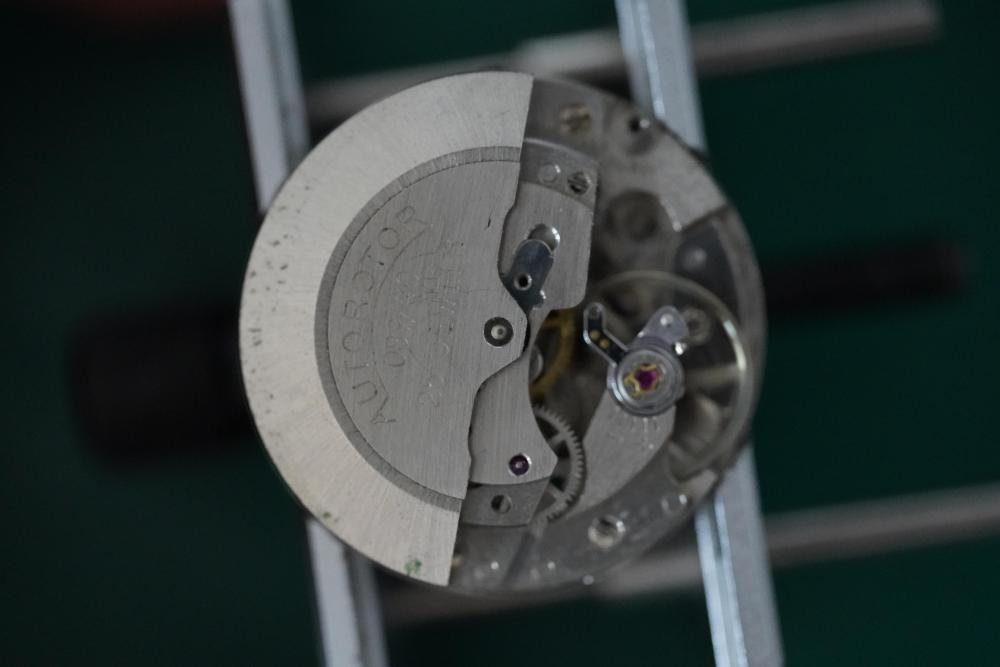
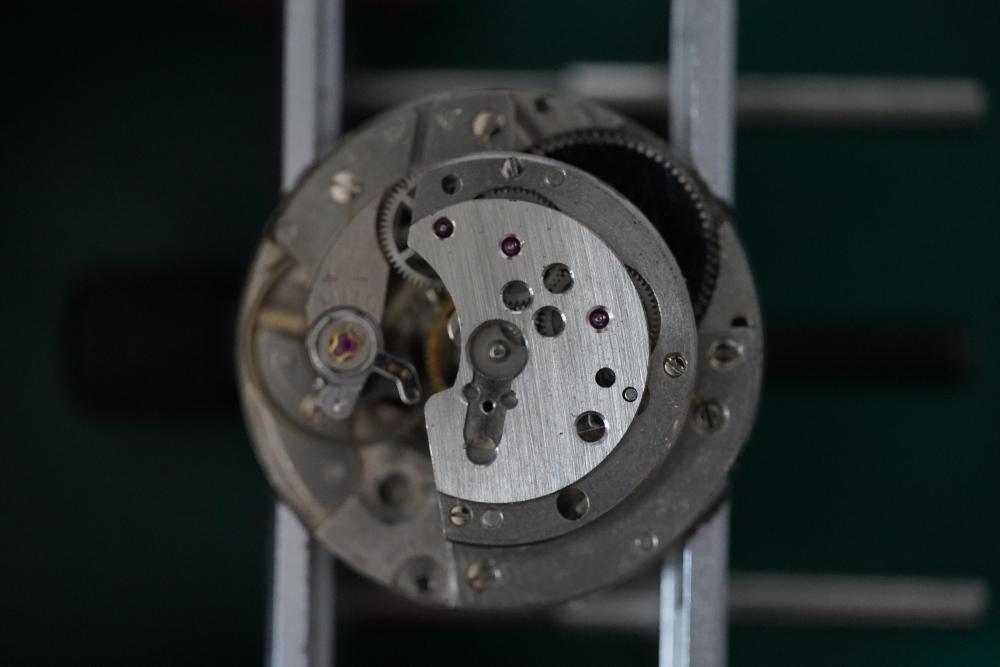
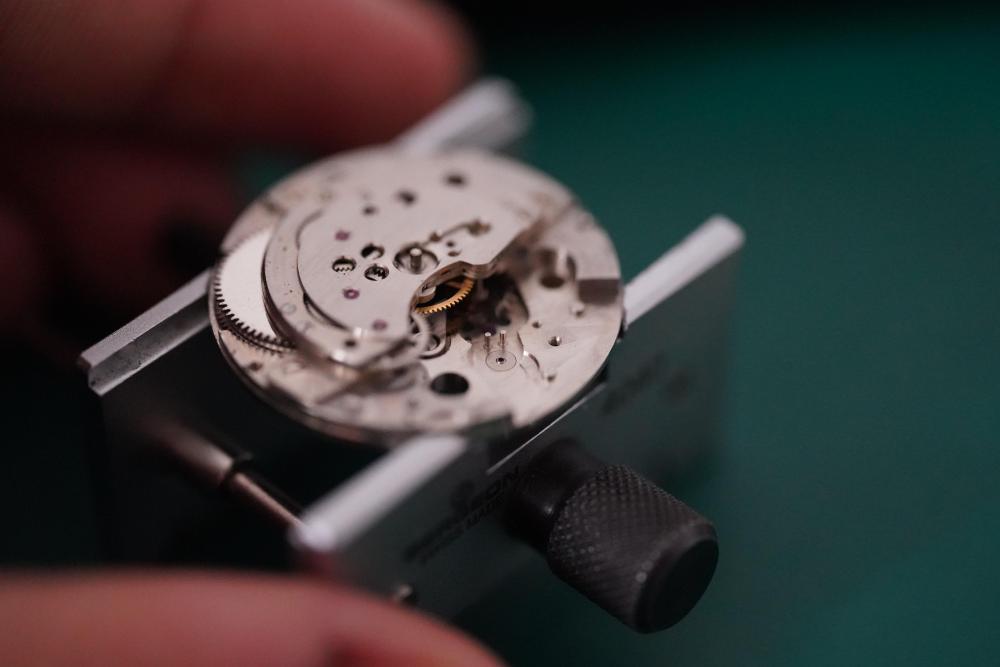
I will do some free movement tests in various positions. No, I cleaned the balance gently with a tiny brush and some lighter fluid. Same with the pallet fork. I made certain I didn't soften the shellac or move the jewels. Should the guard pin be brushing the roller? Free oscillations... DD 45 DU 45 CU 18 CD 13 CR 12 CL 13 Oh, and dial down it did 28 seconds with the pallet fork in, but no escape wheel. I just wanted to know how free the pallet fork was. Right, I've been reading my book (practical watch repairing). I'd read about the escapement the pallet fork, the guard pin, lock, run to the banking etc before. However, I hadn't opened a watch at that point so I really didn't understand. 're reading it now, I get it. I also understand that asking you what the run to the banking was, or how the guard pin should be, isn't something easily answered in a message. It appears though that this watch has issues. I suspect it's had parts replaced. I don't think the whole escapement set up has been done perfectly. The guard pin is definitely too long for a start. I think I'm going to have to follow the book, inspect every part, check all the angles and clearances, adjust as necessary, and hopefully get it working optimally. Considering all ive done before this is service a sekonda, practiced stripped and reassembled 2 destroyed movements, and serviced a josmar, this watch is proving something of a baptism of fire. It's doing exactly what I wanted though, making me learn. I didn't think I was ready for hair spring manipulation, but managed it. Seems I am now going to learn about setting adjusting the escapement!1 point
-
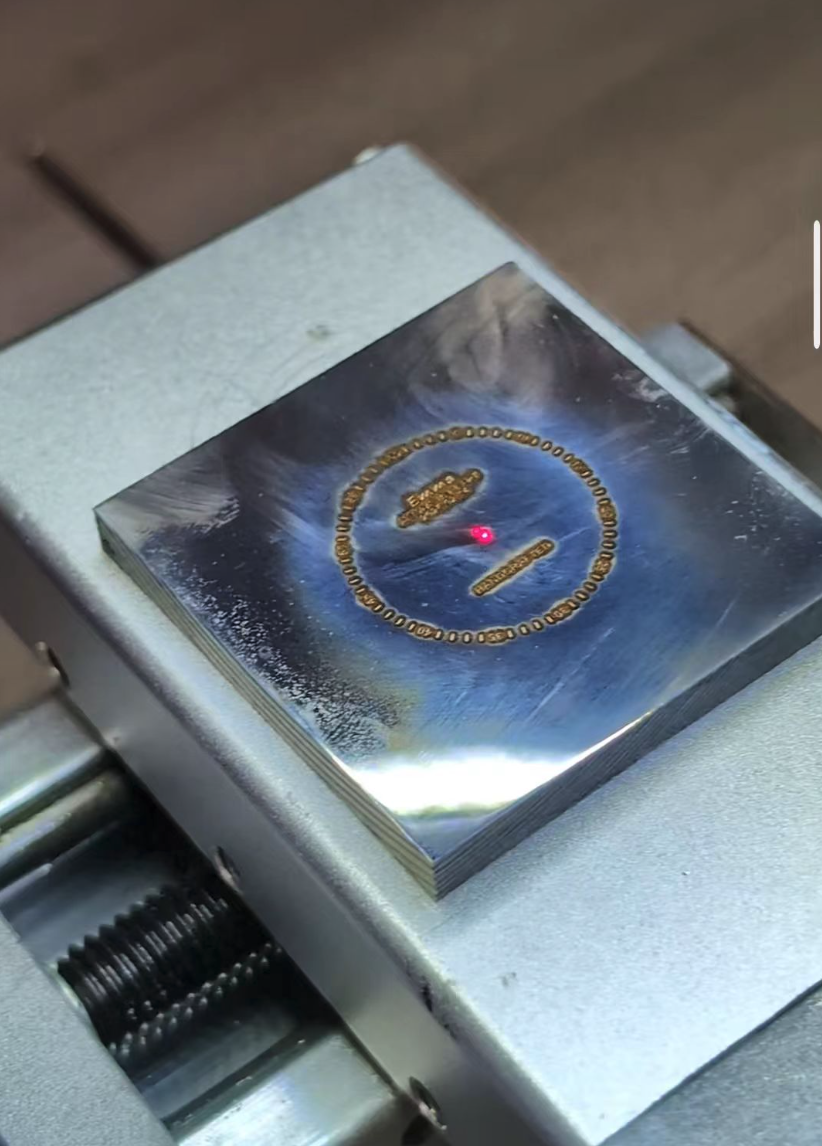
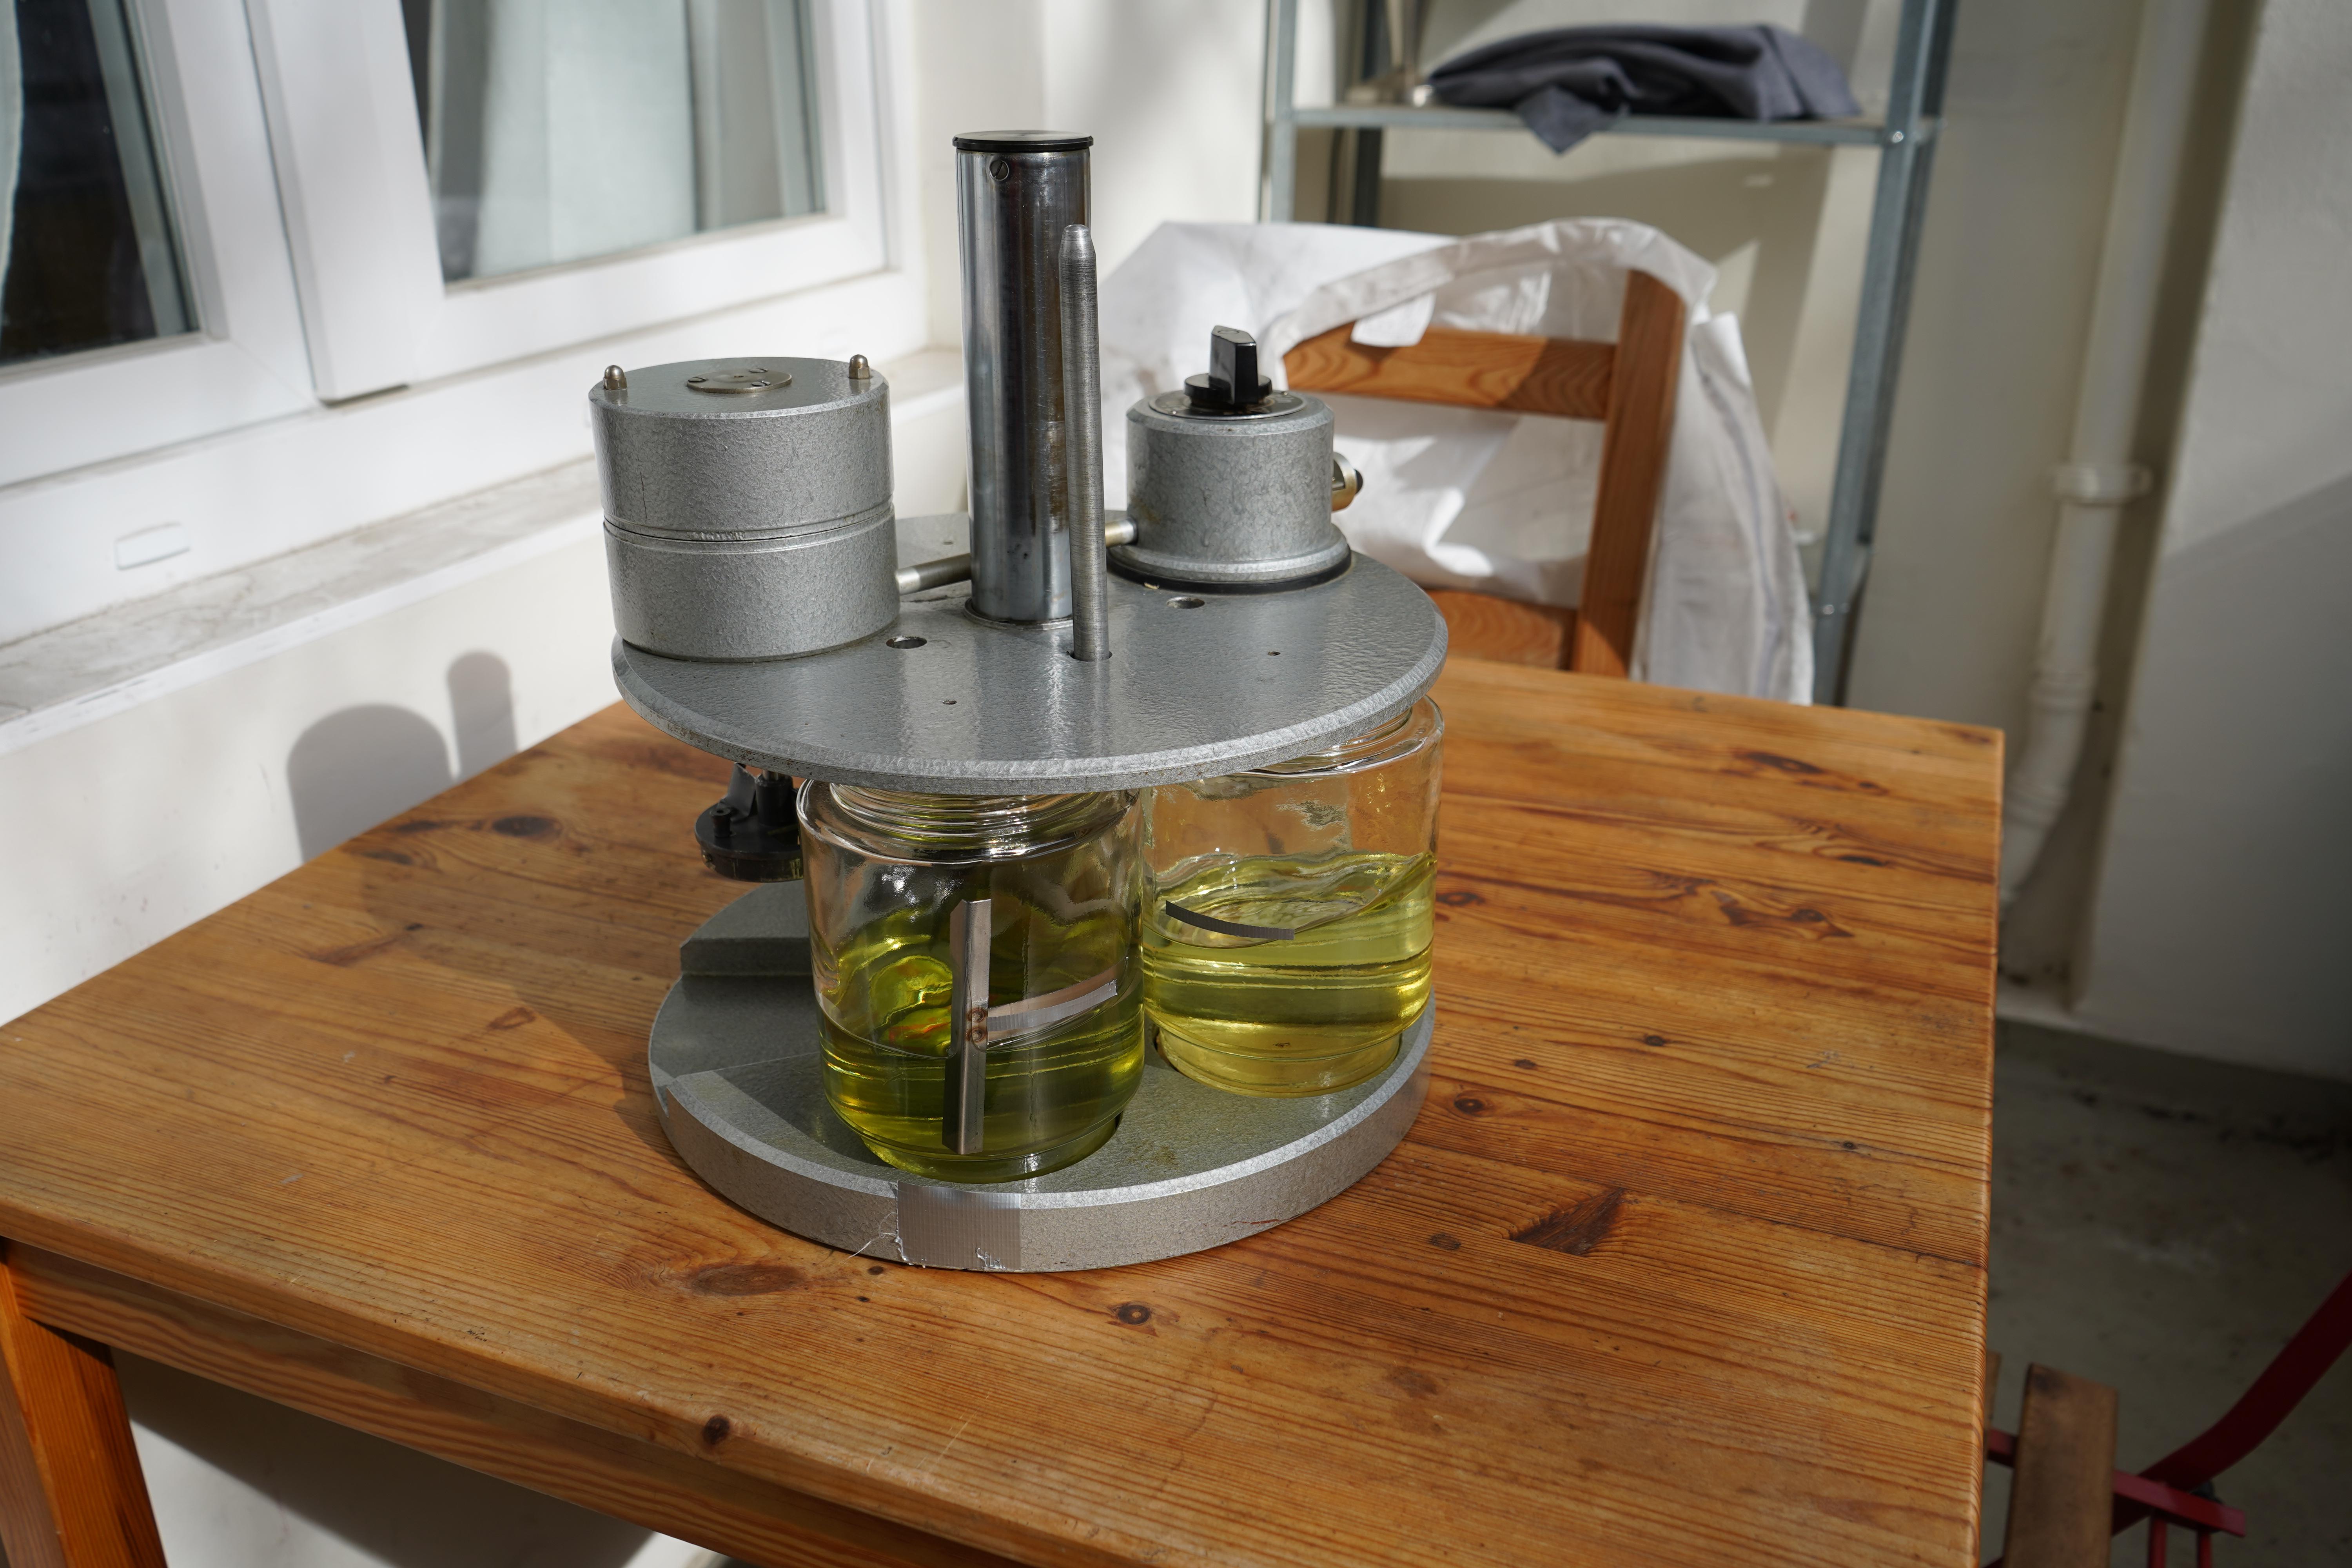
In the process of laser engraving the plate, it is crucial to set the correct engraving depth. If the depth is too deep, it may result in a murky pad printing effect, while if it is too shallow, the lines may become disconnected, leading to broken lines. On flat dials without texture, using a harder silicone pad for pad printing will yield better results. The hardness of the silicone pad directly affects the thickness of the lines, and adjusting the hardness appropriately is key to achieving precise printing. Additionally, the ink ratio is another critical factor in successful pad printing. Adding too much thinner will cause the lines to become unclear, while too little thinner may cause the ink to cure too quickly, resulting in broken lines during printing. In summary, laser engraving, silicone pad hardness, and ink ratio are all interrelated, and each step can affect the final result. These steps require extensive practice and experimentation to find the most suitable formula. I hope these insights can provide some useful reference and help!

 1 point
 -
I had the exact same thing happen a few years ago, lost about a day trying to figure it out. Almost invisible little fiber sticking out from under the barrel bridge.1 point
-
I don't imagine the hands and dial are on the watch at the moment, but if they were I'd want the seconds hand removed while fault finding to eliminate the possibility that the problem was caused by the seconds hand rubbing on the dial. It's just about getting down the minimal working system: barrel/mainspring, train and escapement.1 point
-
Got this lot on my watch list but with shipping from the US it works out about £150.00
 1 point
 -
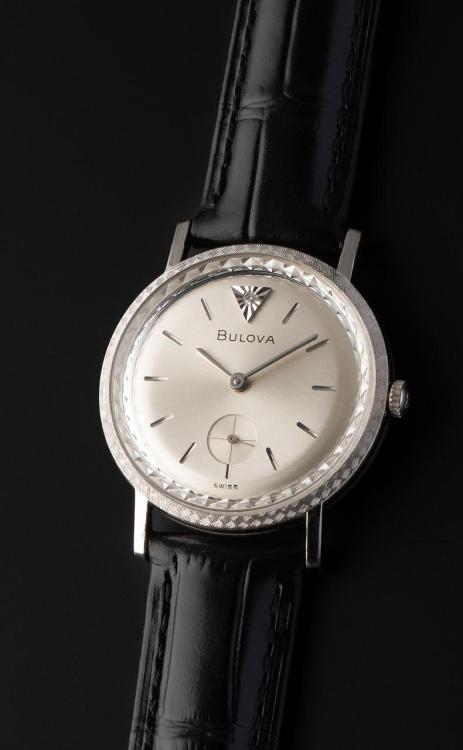
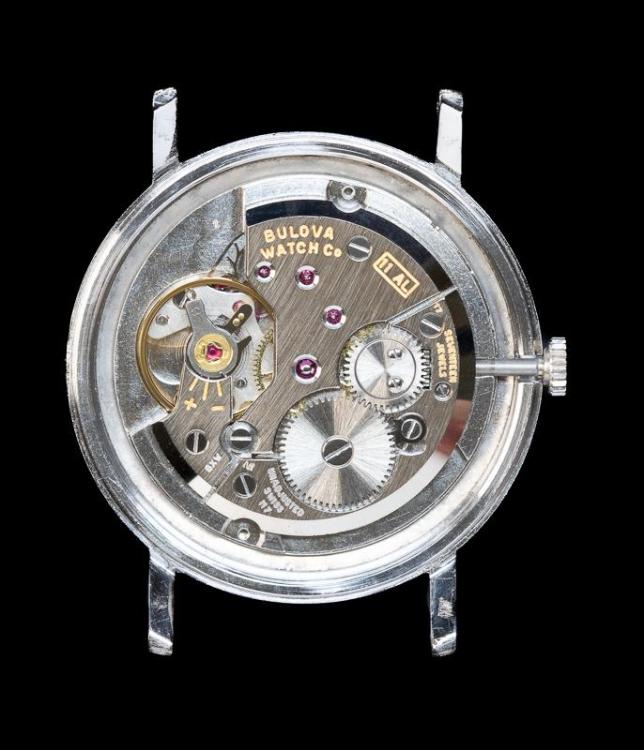
No one has posted in over a month, let's change that. Here is a nice example of the 1965 Bulova Diamond Excellency 'B' with a 17 jewel 11AL movement. I love the faceted crystal, the light play as it bounces off the facets and that diamond at 12 o'clock really adds some pizzazz.
 1 point
 -
I just remembered I made a video showing how to perform the test I'm talking about. I hope it helps!1 point
-
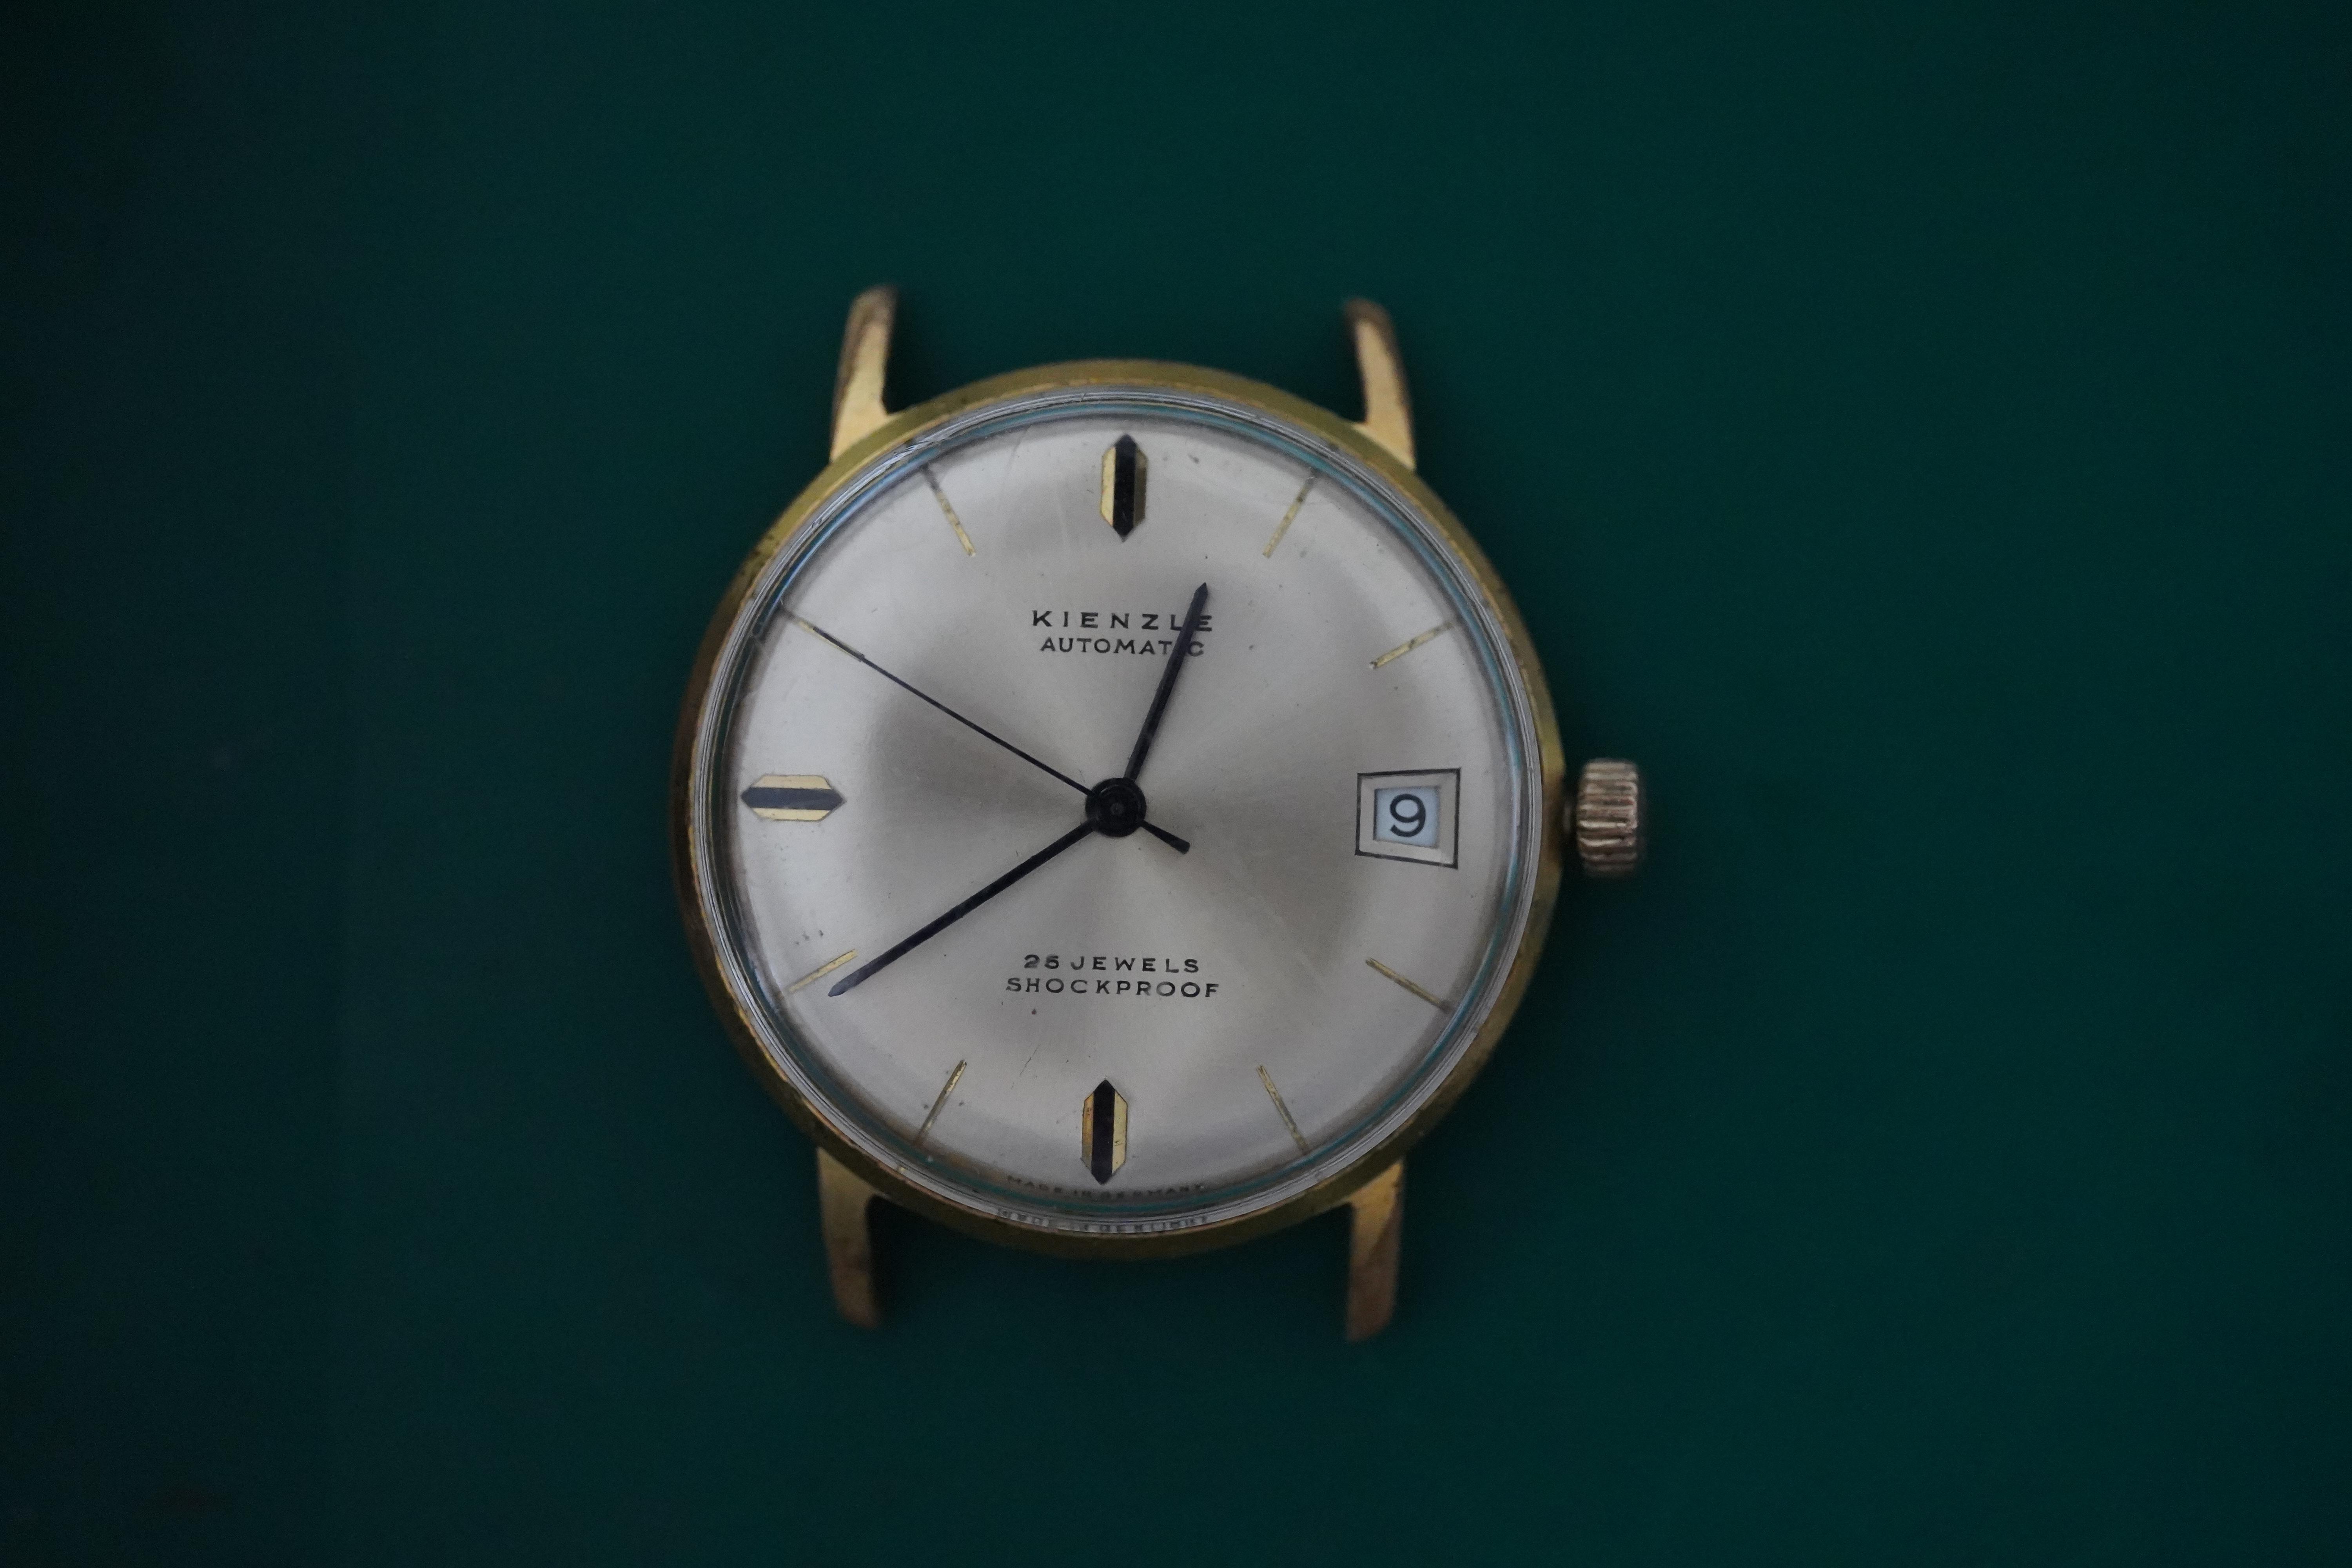
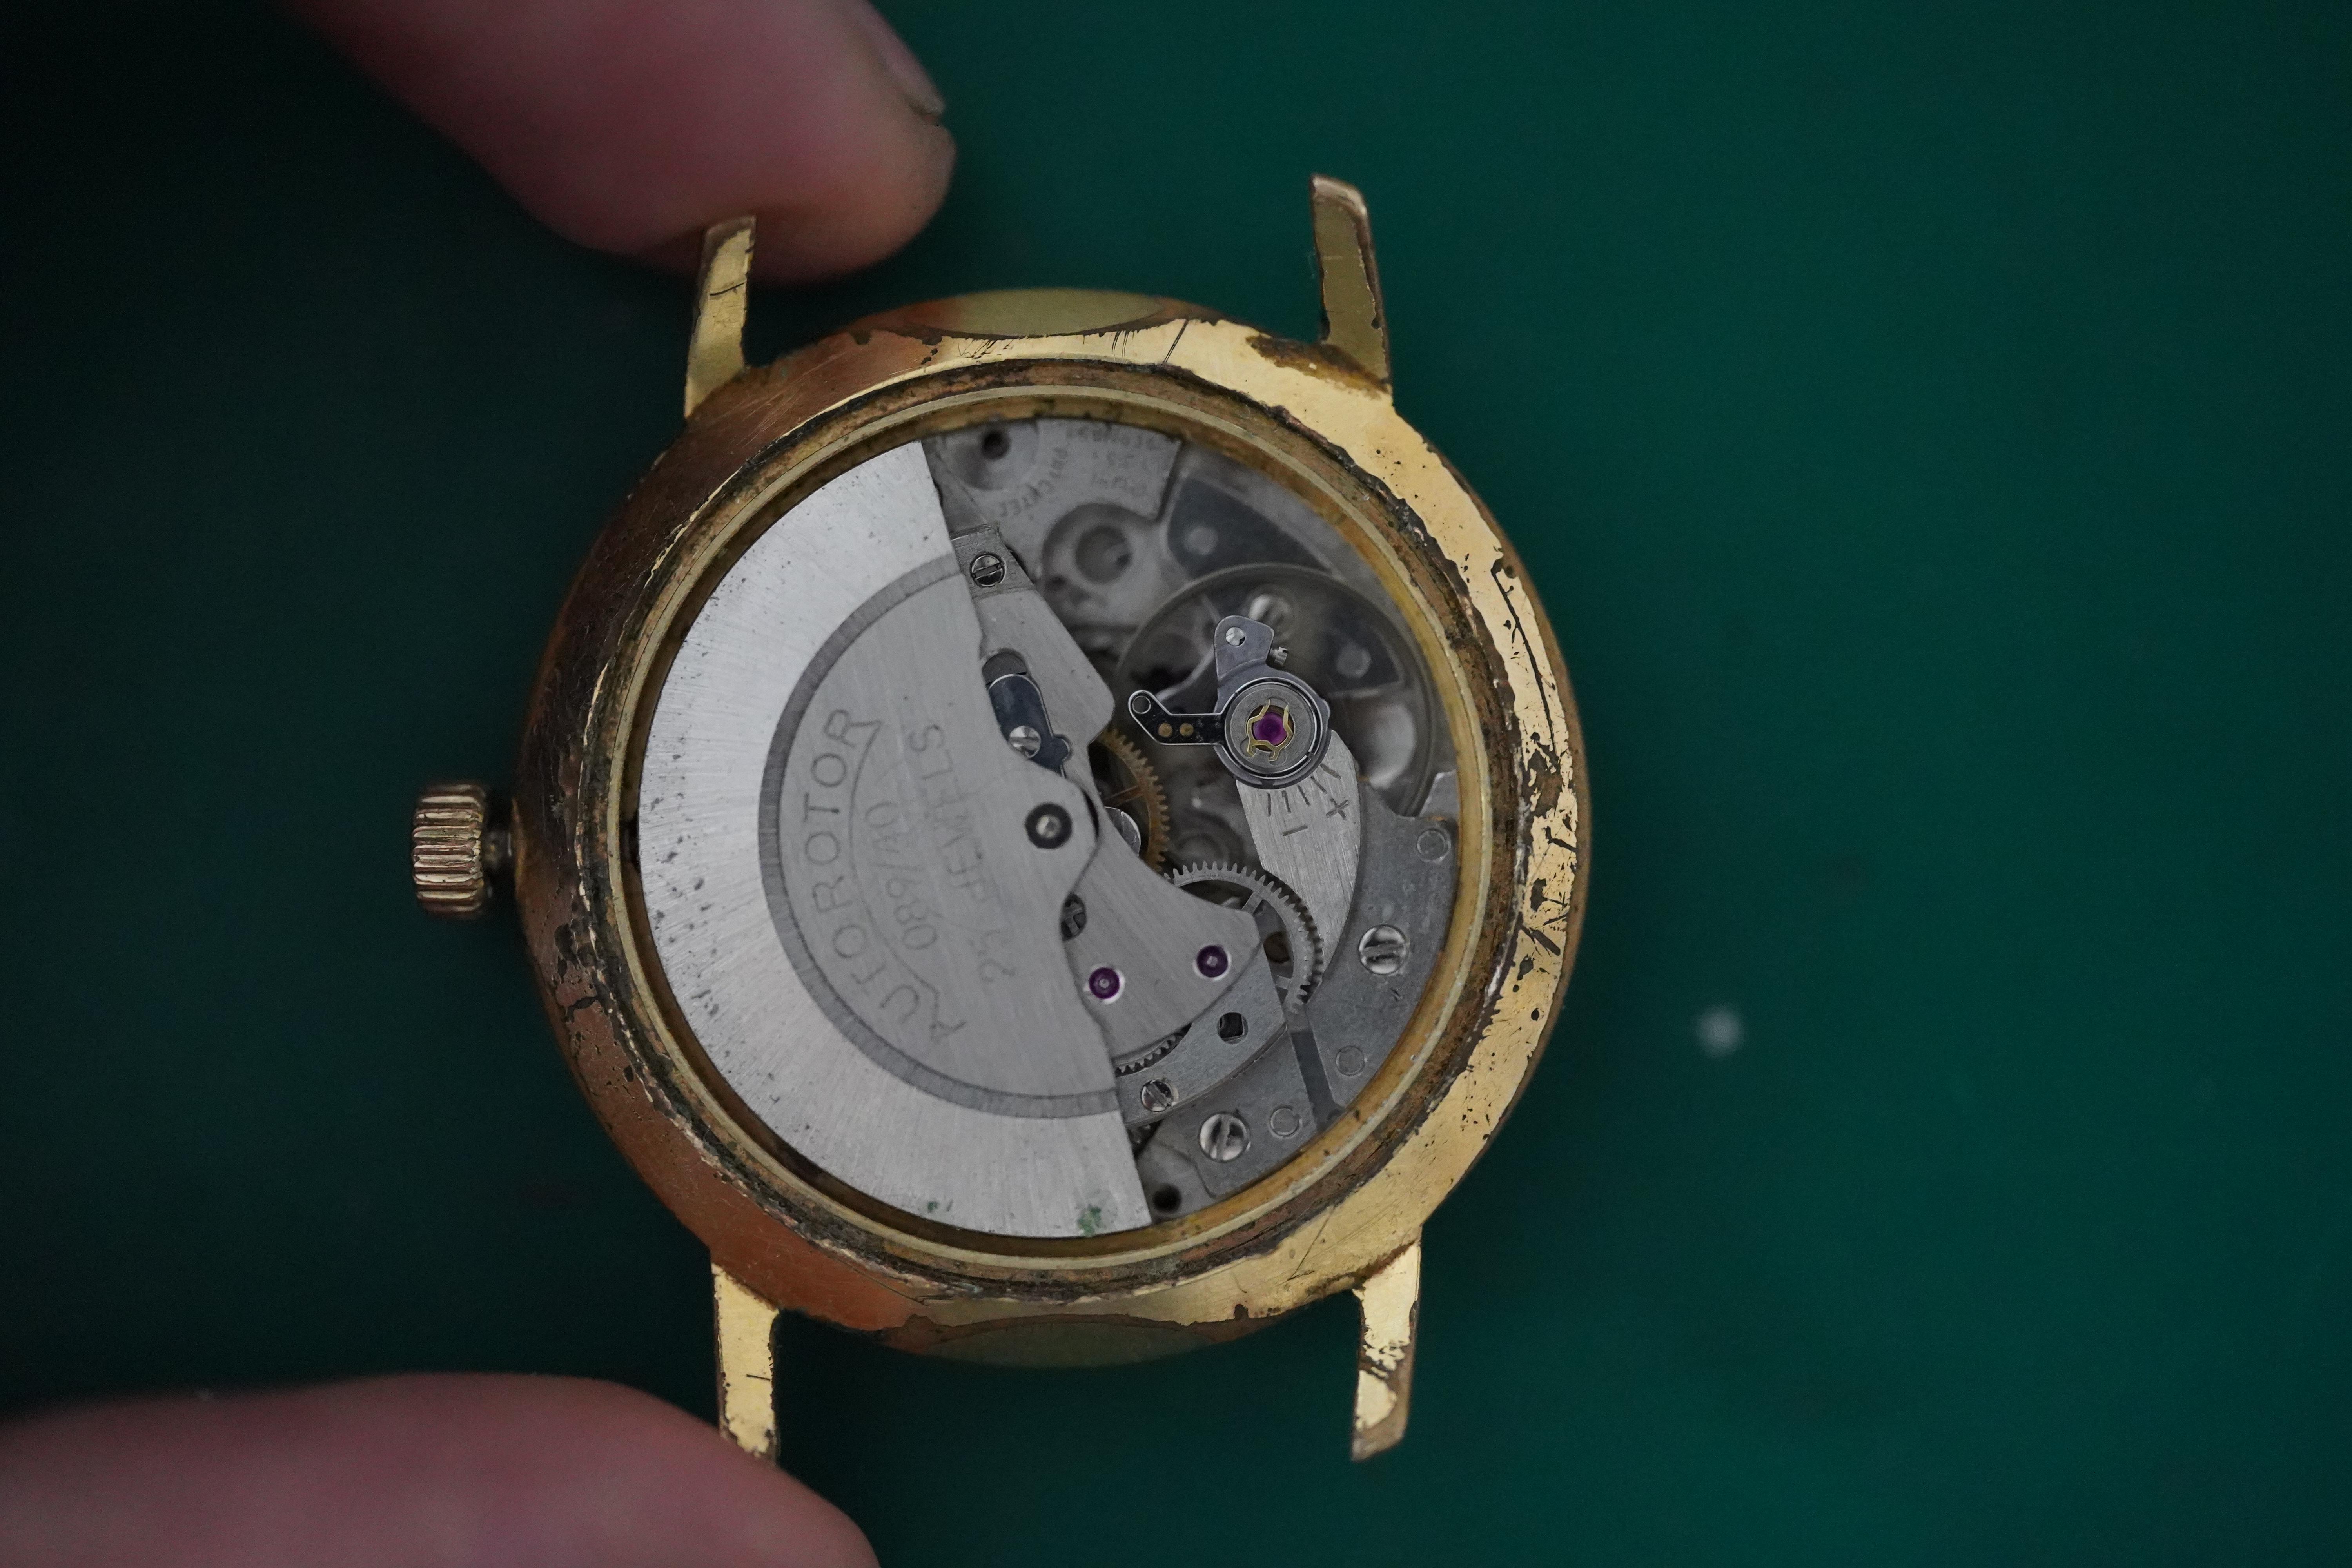
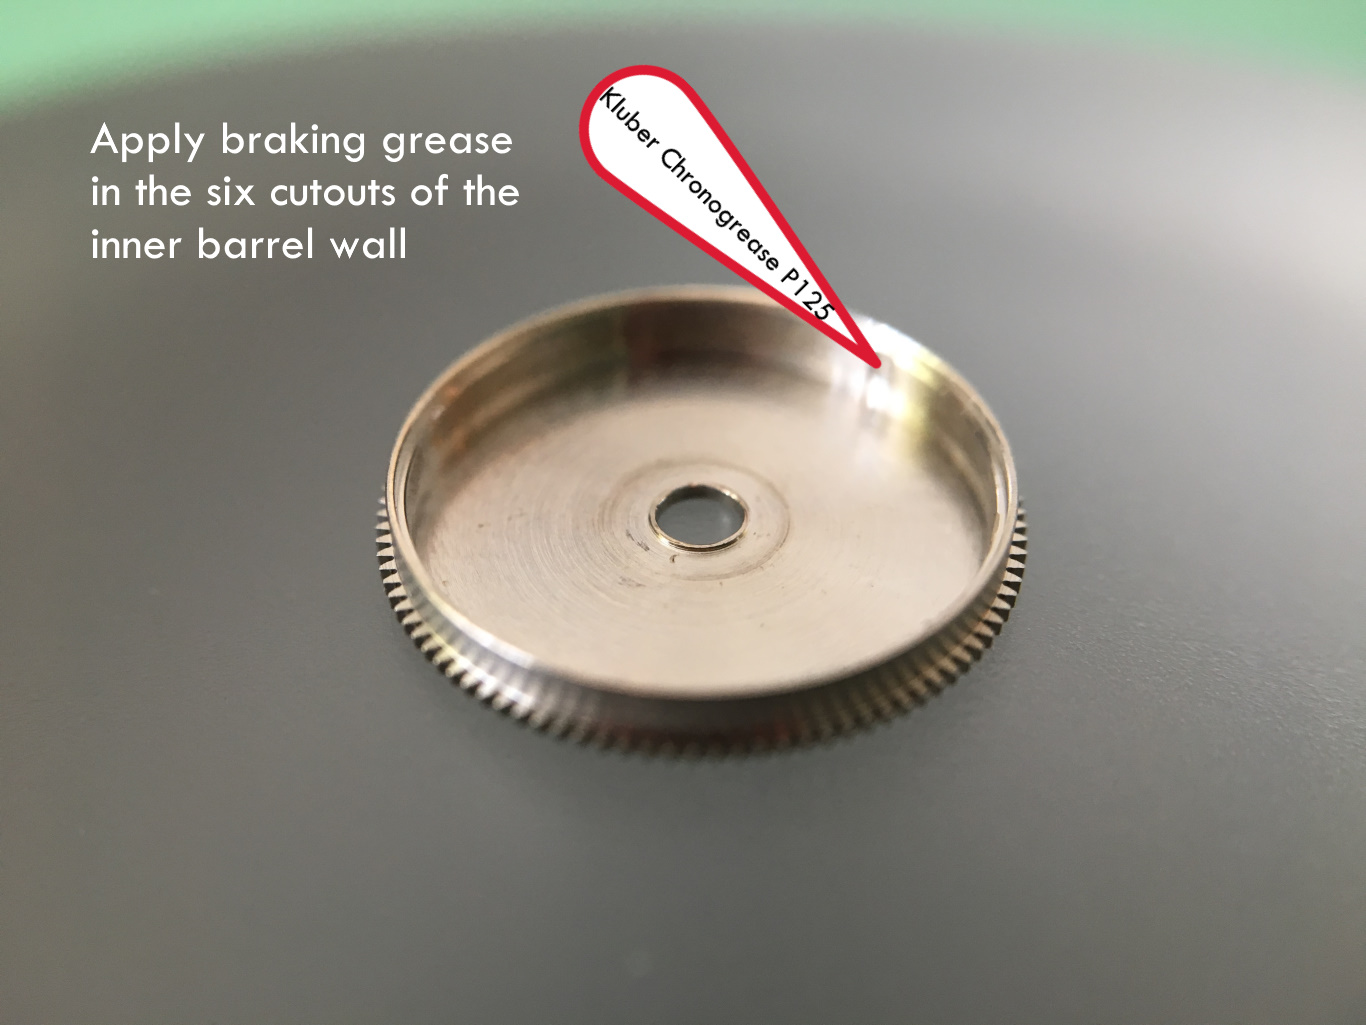
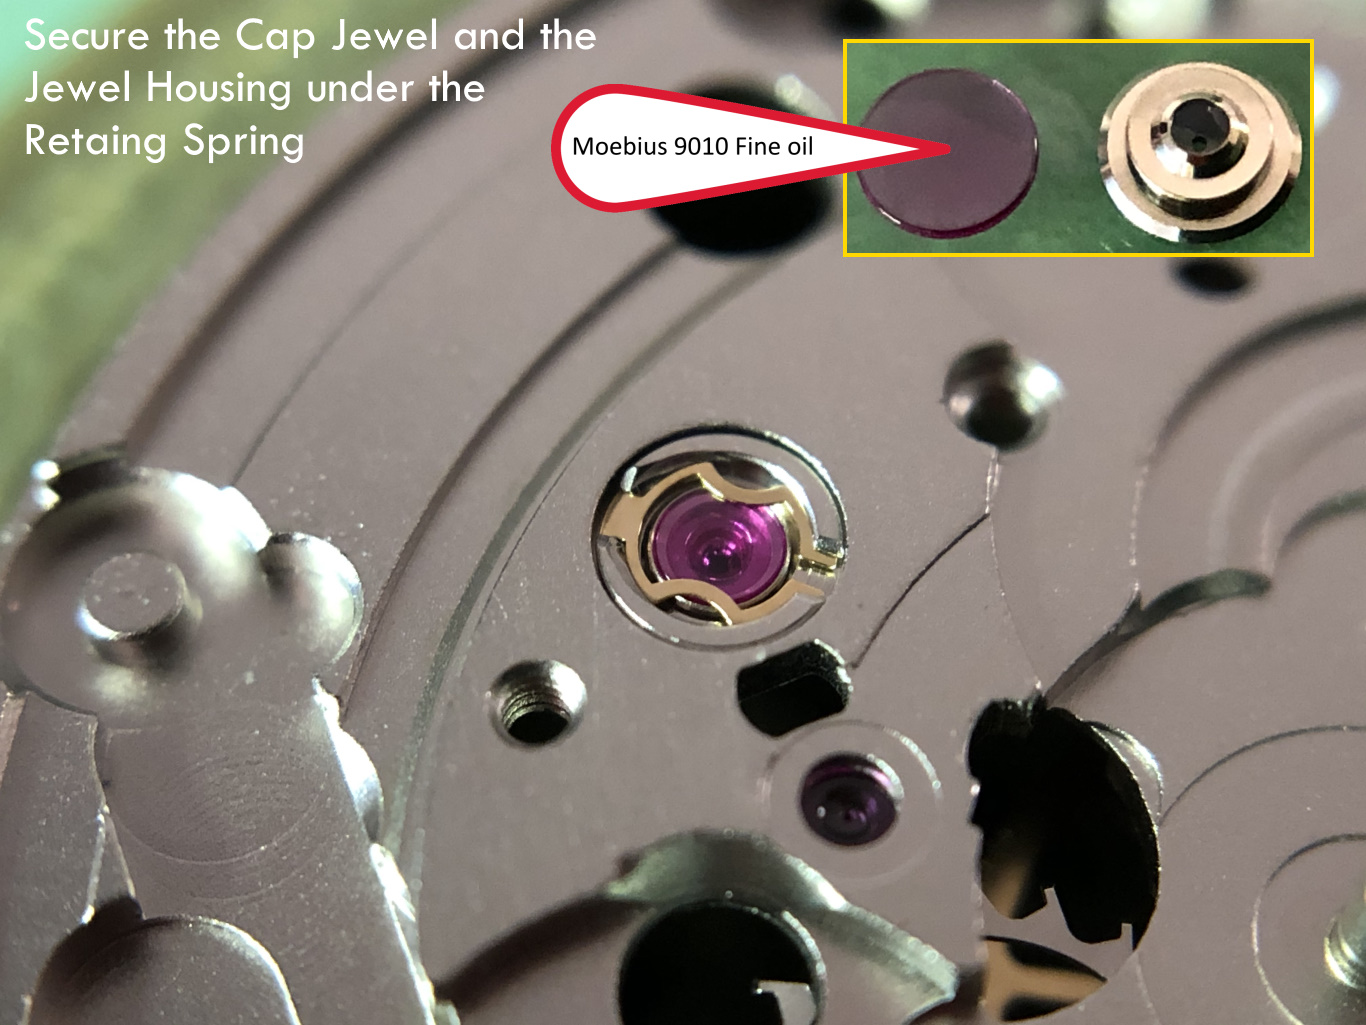
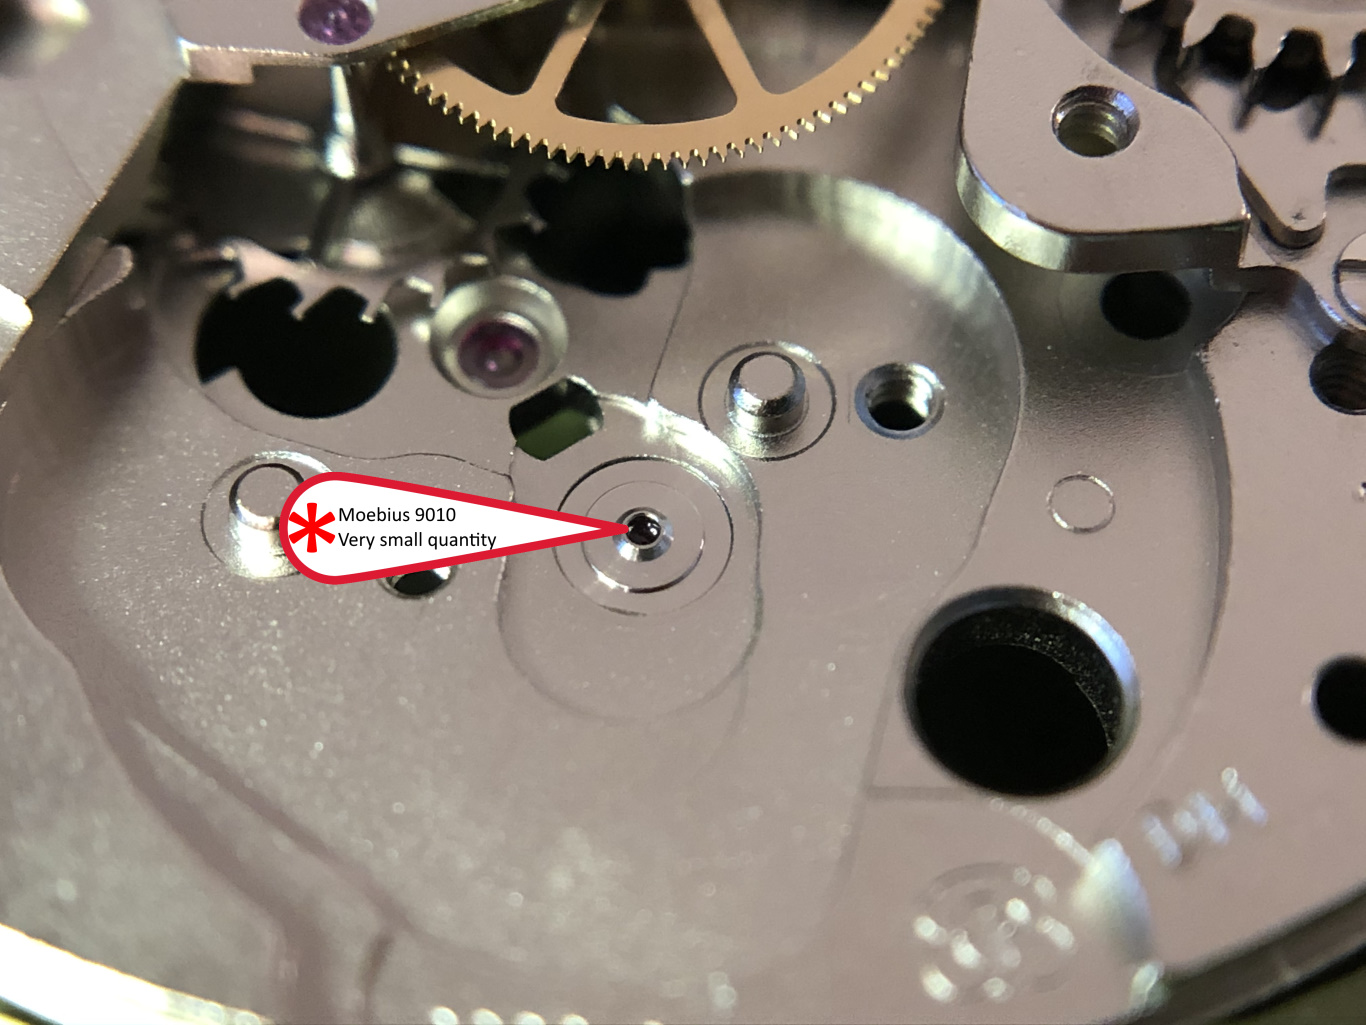
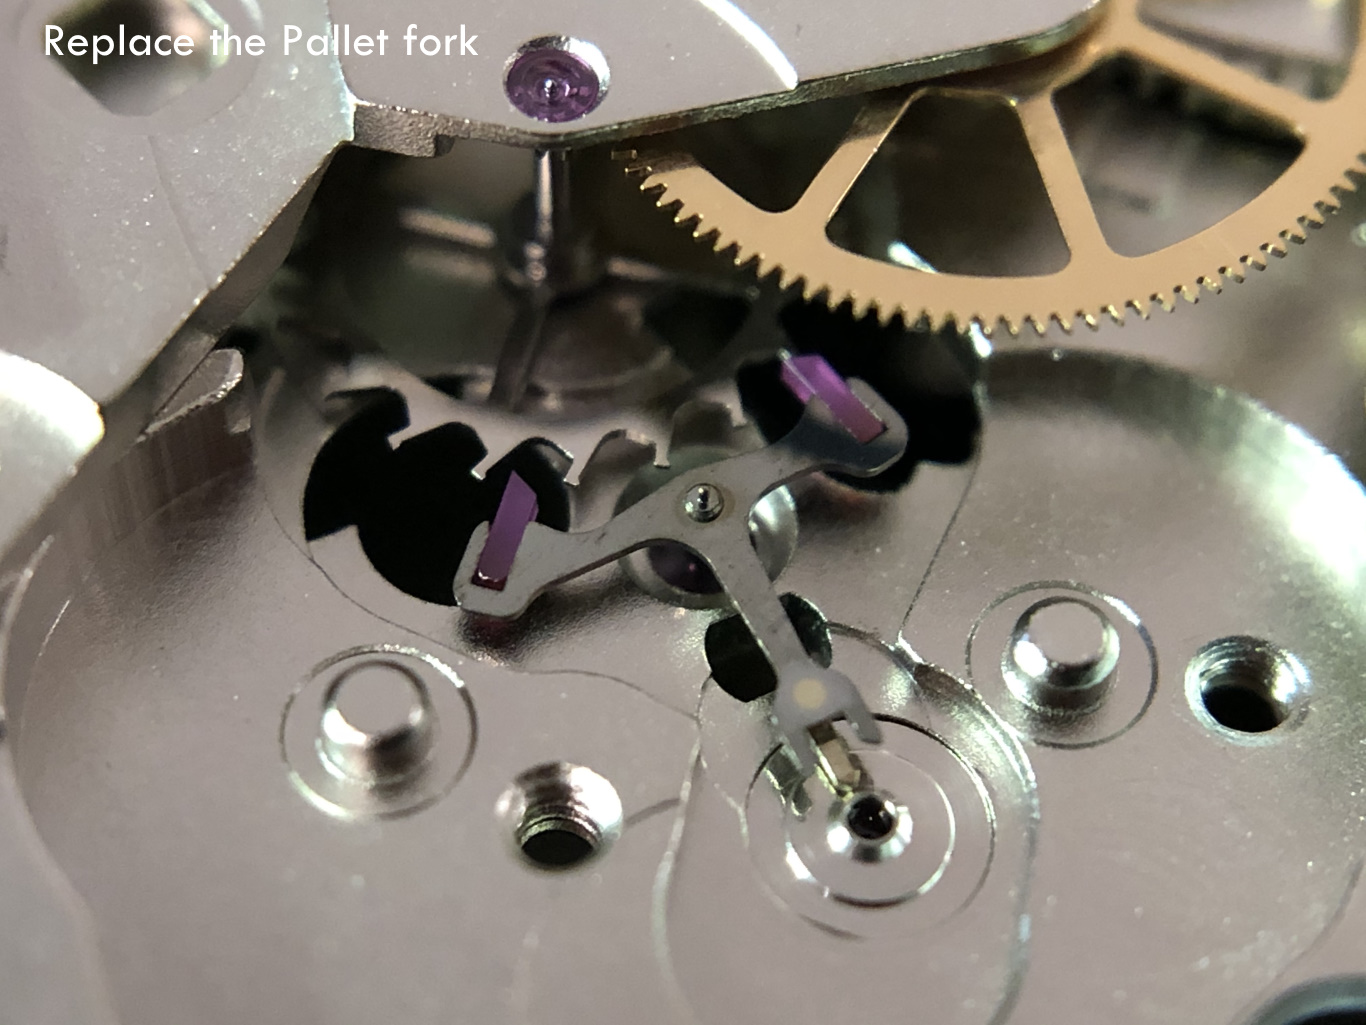
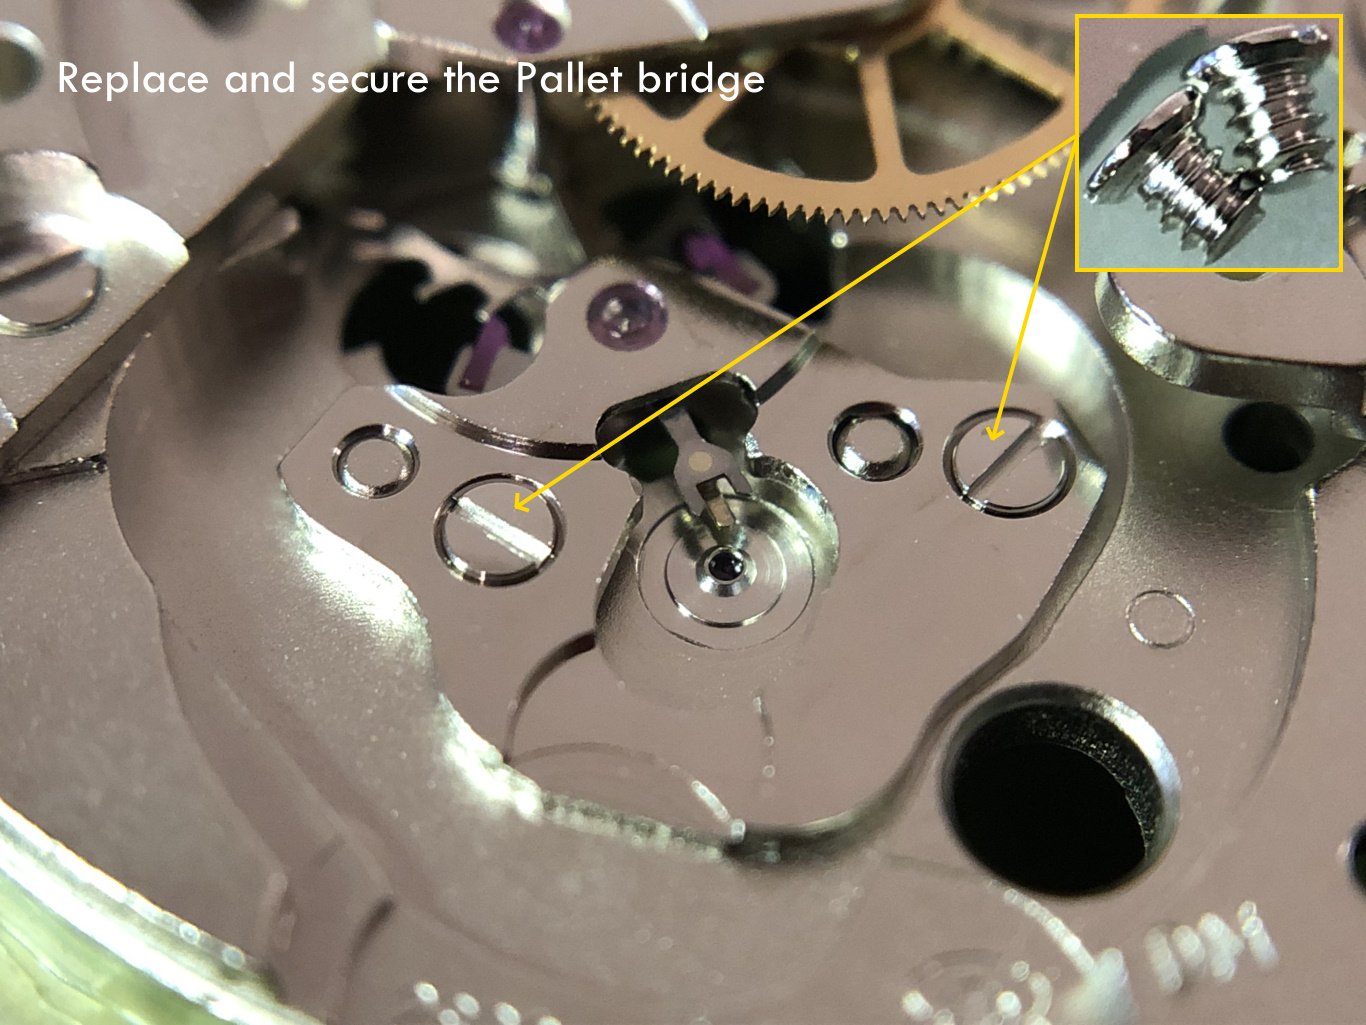
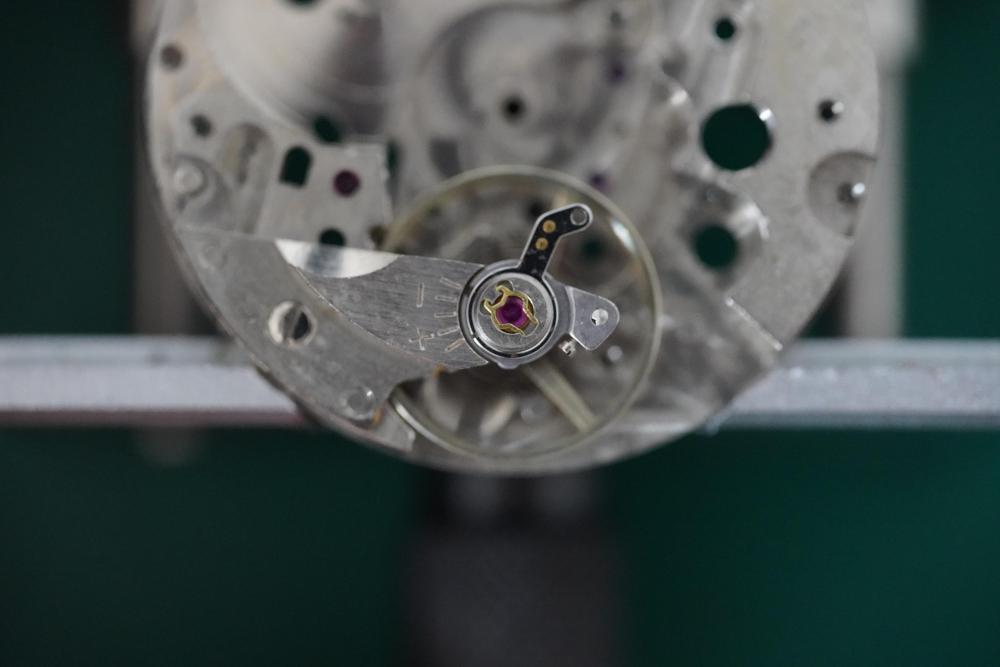
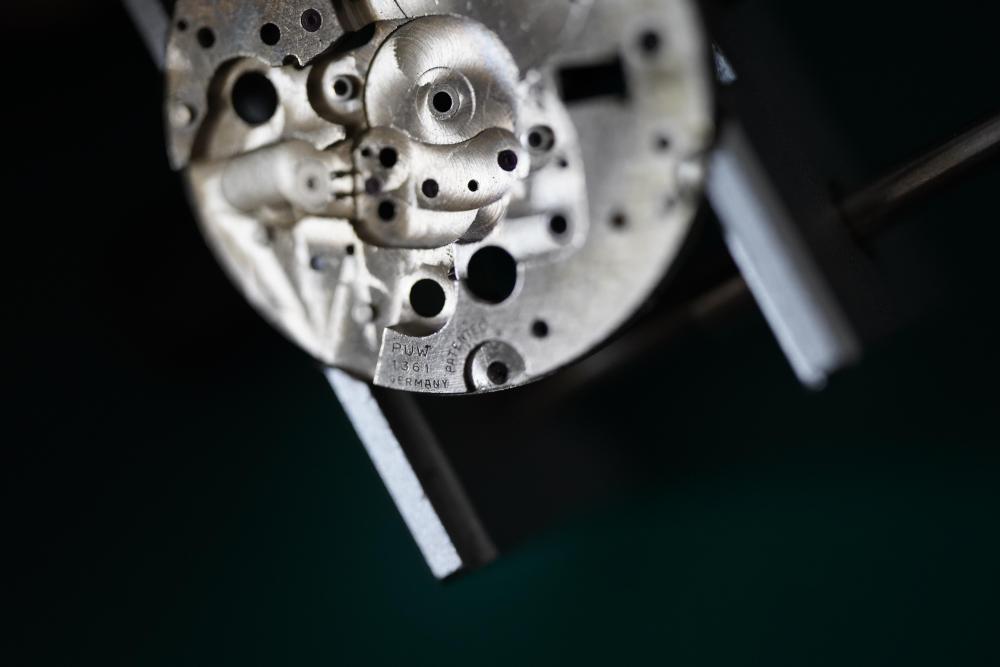
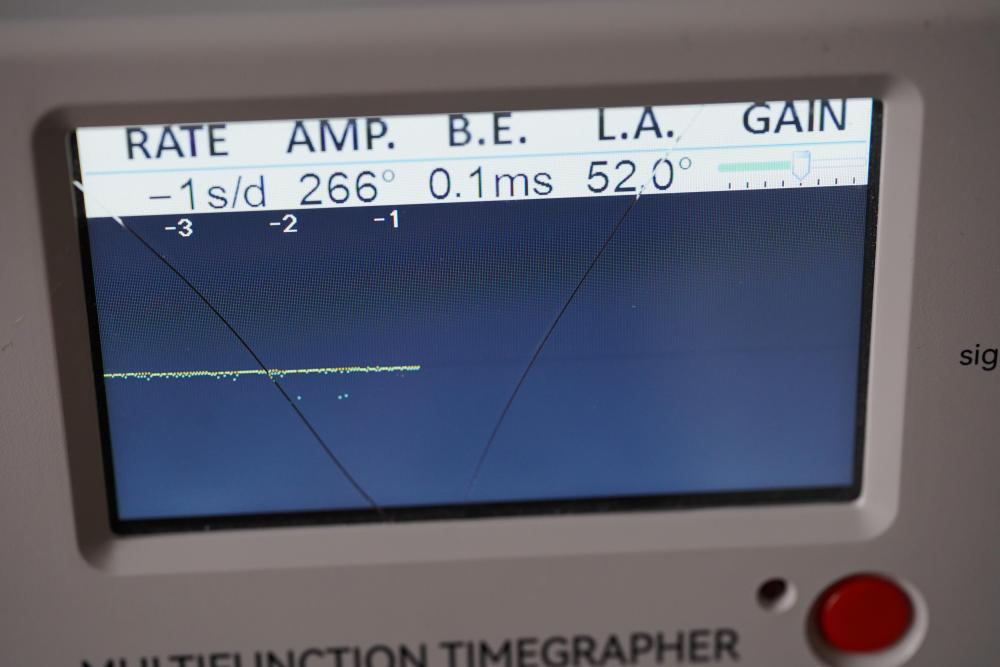
Hello dear watchbangers! First of all, happy delayed new year! Here I am with another post to a watch that I tried to service well! ( To the best of my abilities!).Of course before you read the whole report, you can also watch it live as a video: This time I received another German watch whose owner told me that he had sent it in to service at a pretty prestigious watchmaker a few years ago. Unfortunately, he said that the watch was acting up soon after the service but just kind of forgot about it and just asked me If I could have a go at it! So I said yes and got to work! Now the watch did work, but was very inaccurate. Now the outer appearance seemed pretty neat! The watch has a gold ( or something gold looking) plated case with what I presume being a stainless steel caseback. Next to the qualities the watch provided such as being “ water proof, shock proof, stainless steel and shock proof” the case back also had an engraving of a company: Zeppelin Caterpillar Metallwerke GmbH. I assume that this watch was to commemorate an employment or an important event/ milestone of the company or employee. So I opened up the case back to check out what was inside! The movement powering the watch was a PUW 1361 movement which in my opinion had quite the nice design, especially the pretty large train wheel bridge which covered around half of the movement. It would be interesting to know if they did this out of a clear technical stand point or if they also tried to construct close to the very typical ¾ plate found in older German watches. Also interesting to mention is the engraving on the inside of the case back which included some previous watchmaker marks as well as the company name and the hint to remove the movement through the front ( Stupid me tried to do it from behind before checking the engraving before realizing that there were no holding screws or rings. ) So I popped off the bezel and lifted off the hands. Then I turned the watch to let the movement with the dial pop out, unscrewed the dial and put the sensible parts away. The dial itself looks fantastic in my opinion! It has a great sunburst silver finish with a date window at 3, set indices at 6, 9 and 12 and the rest are milled. As it was in great condition, I was not going to touch it, maybe just clean it with a Q-tip or blow dust off it. Now turning my attention to the movement, I started by taking of the clunky rotor of the movement by unscrewing and removing the small locking slide under the rotor. This held the rotor against the post. For protection I already removed the balance wheel and the pallet fork and its bridge here already Next I removed the two reduction wheels, the direction wheel, some sort of friction spring and the transmission wheel down to the barrel. Embedded in the underside of the automatic bridge, there is a small spring which I also fiddled out, I assume this stopped the reduction wheels from turning free somehow. With all the moving parts removed from the automatic works, I noticed the nasty amount of oil which was on the main bridge. I literally cannot fathom how, why and what kind of oil would even end up there haha. Now, next up I removed the post of the rotor, You can also see the blurry milling marks on the metal components on the movement parts, which I personally also dig. It gives it a pretty technical vibe. Next I took off my favorite little jewel caps again! Yay! This time the jewel caps acted as a bearing for the escapement and third wheel pivots. With that done I unscrewed all the screws for the main bridge and took them, and the bridge off to reveal the inner-workings of the watch movement. This revealed the further nasty contamination of the mysterious oil was had already been spotted on the main bridge. Underneath the main bridge there was the inbuilt ratchet- click system for the mainspring barrel. The click and its spring where fixed but I did remove the pictured wheel and screw. Here is the movement without the barrel, the third wheel, the second wheel, the escapement wheel and the transmission wheel and spring for the barrel. Lastly I removed the minute bridge which is still depicted. The minute wheel however was still stuck in place as the canon pinion was pressed onto it from the front side. I flipped the movement over to deal with the front side! Here I first removed the hours wheel the little friction spring. Then I took out the date lever, its spring and the cover plate as well as the date ring. Next I removed the setting wheel bridge, the setting wheel, transmission wheel, the cannon pinion, the setting lever bridge, the yoke, yoke spring, both clutches, and the jewel cap from the plate side. Here the minute wheel also falls free being released from the clutches of the canon pinion above xD Lastly I removed the date wheel and the spring hidden beneath it! Of course before the cleaning, I took out the shock jewels from the KiF Settings. I also opened the mainspring barrel, that thing was so nasty… it definitely needed a cleaning! Interesting to see the combined barrel lid and some sort of ratchet wheel. A cool picture of the visible milled main plate with the manufacturers movement stamped into the metal. PUW Caliber 1361. A picture of cleaning the watch parts outside on the balcony. The fumes where filling up the flat each time so I decided to clean them outside this time! I did a 1:2 Elma Wf Pro and Suprol cleaning cycle. Now after everything was sparky again I reassembled the watch back to completion and lubricated along the way. I just reversed the disassembly steps! Should I also maybe add assembly and lubrication pictures in the future for reference? Lubrication list: Moebius 9010: Cap Jewels for escapement and third wheel , seconds hand wheel, rotor post for rotor. Moebius 8213: Mainspring barrel inner walls as breaking grease ( maybe using something stronger like Kluber would also yield better results) Moebius HP1300: slower turning wheels like minute wheel, third wheel and the rotating posts for setting/transmission wheel and date lever/ date ring surface for example. Molykote DX : High friction points like the gearless system, the transmission wheel from automatic works to mainspring barrel, cannon pinion/ minute wheel friction . Moebius 9415: Pallet fork jewels ( maybe using 9010 would have yielded better amplitude results as 9415 is actually made for 28.8k beat watches. ) A comment regarding the reassembly: When I first finished the basic train wheel and gave the barrel a spring to see if the train wheel turns freely, I was shocked to see that the third and escapement wheel where moving in a sort of “jittery” behavior! I desperately searched for the cause, disassembling and reassembling the basic movement a few times to see if I managed to build it incorrectly or to see if I had snapped off a pinion or two. Only after an hour or so did I realize that I had not screwed the cap jewels back on, eliminating the excess end shake! There is a pretty cool clip in my video where I have both “versions” next to each other, comparing the smooth vs. jittery flow of the train wheel assembly! After reassembly and lubrication I slapped the movement onto the timegrapher and got it regulated pretty nicely on the dial up side! There are some slight noises on the reading and the amplitude could be higher but I am satisfied! Once I am a bit more experienced and safe with my regulation, I will try and regulate to 6 positions as best as I can and also explain/document my thoughts and procedures! So after the regulation I made sure that the case was all cleaned up by chucking it into the ultrasonic bath after some manual cleaning and after polishing the old crystal up with some polywatch! Then I attached the dial to the movement, re-cased it and pressed the acrylic crystal back on. It snapped into place perfectly! This is a final picture after I attached a Nato strap to it to test it actively on my wrist! In conclusion, this was a nice watch to work on! I loved the milling marks and the cool little details such as the cap jewels and the screwed on rotor post ( maybe there is also a hand wound variation?). I was especially disgusted at the amount and placement of strange oil in the watch from a previous watchmaker/ technician which I find pretty shocking in my opinion because according to the owner, it is quite the high level watchmaker he sent it to. Now if you have any comments, criticism or thoughts do just put them down in the comment and don’t hesitate to reach out! See you next time people and I hope you have a great start into our new year!


 1 point
 -
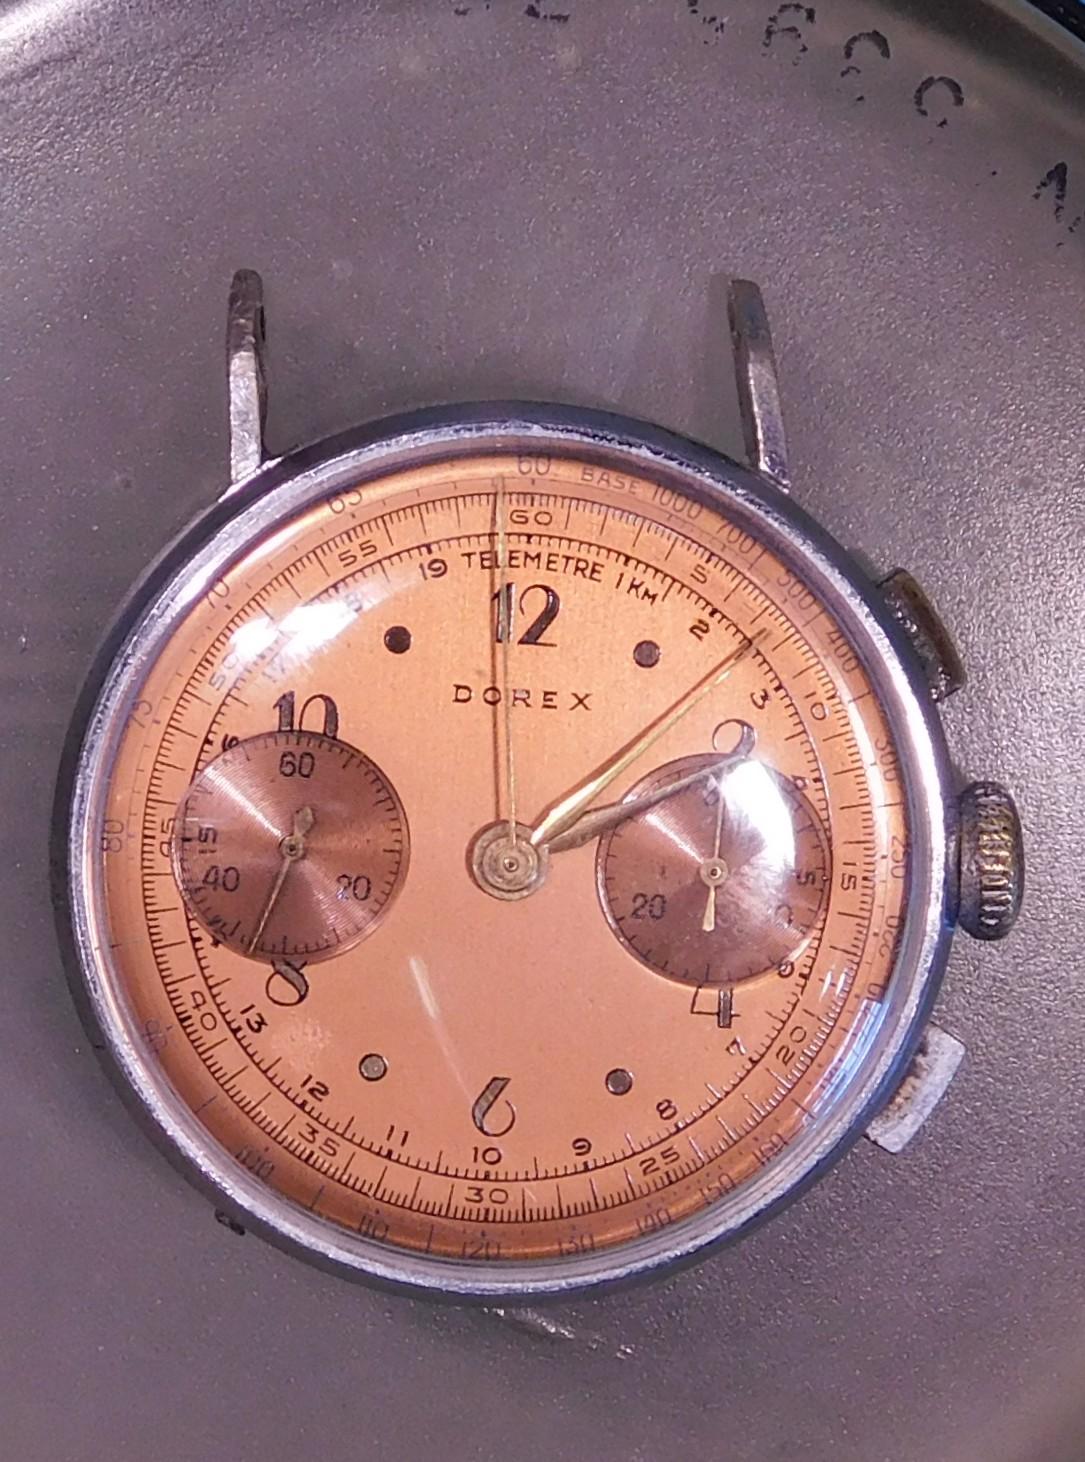
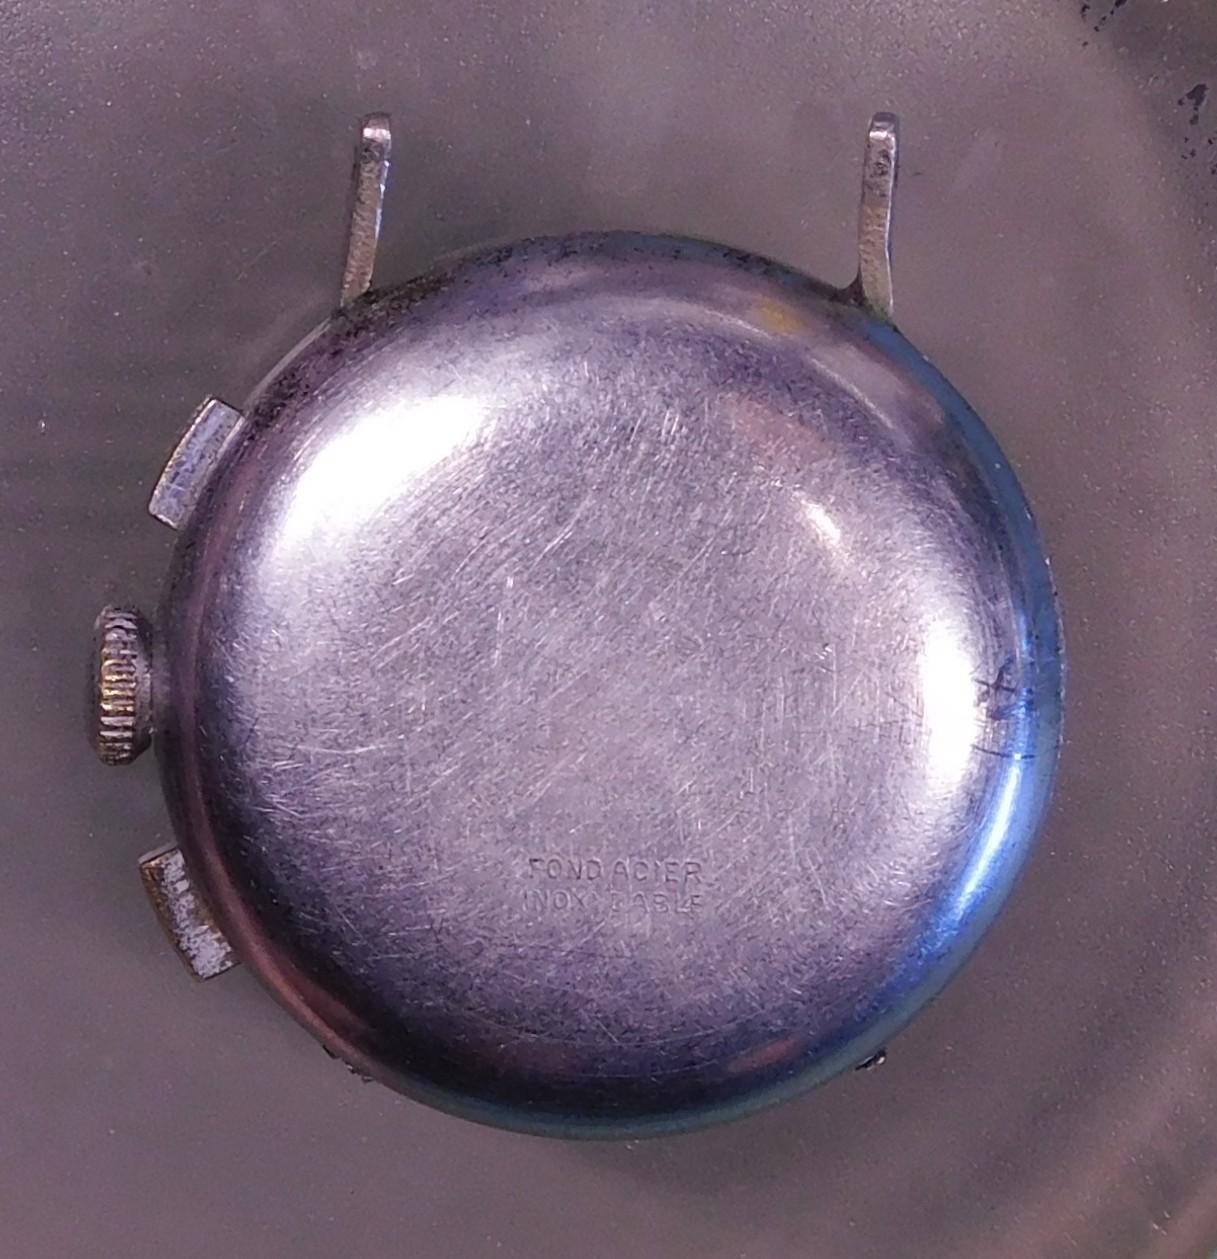
I just can't beleive my luck. A landeron 48 chrono in working order for $10US or £7.83. Picked it out of a box at a swap meet this morning. Seemed gummed up and not working. Messing with it proceeded to drop it on the ground, lucky it hit my foot first and seems to have survived. Only has 2 lugs, but they are on the top of the watch case. Is plated brass so not sure if new lugs can be added or not. Here is what it looked like out of the box. Then I got it home and started messing with it and changed out the crystal and went through it. Appears to need just a servicing and case work. The best for last is the dial is pretty spectacular! No water damage. Anyone hear of Dorex? Is 33.8mm not including crown and pushers.

 1 point
 -
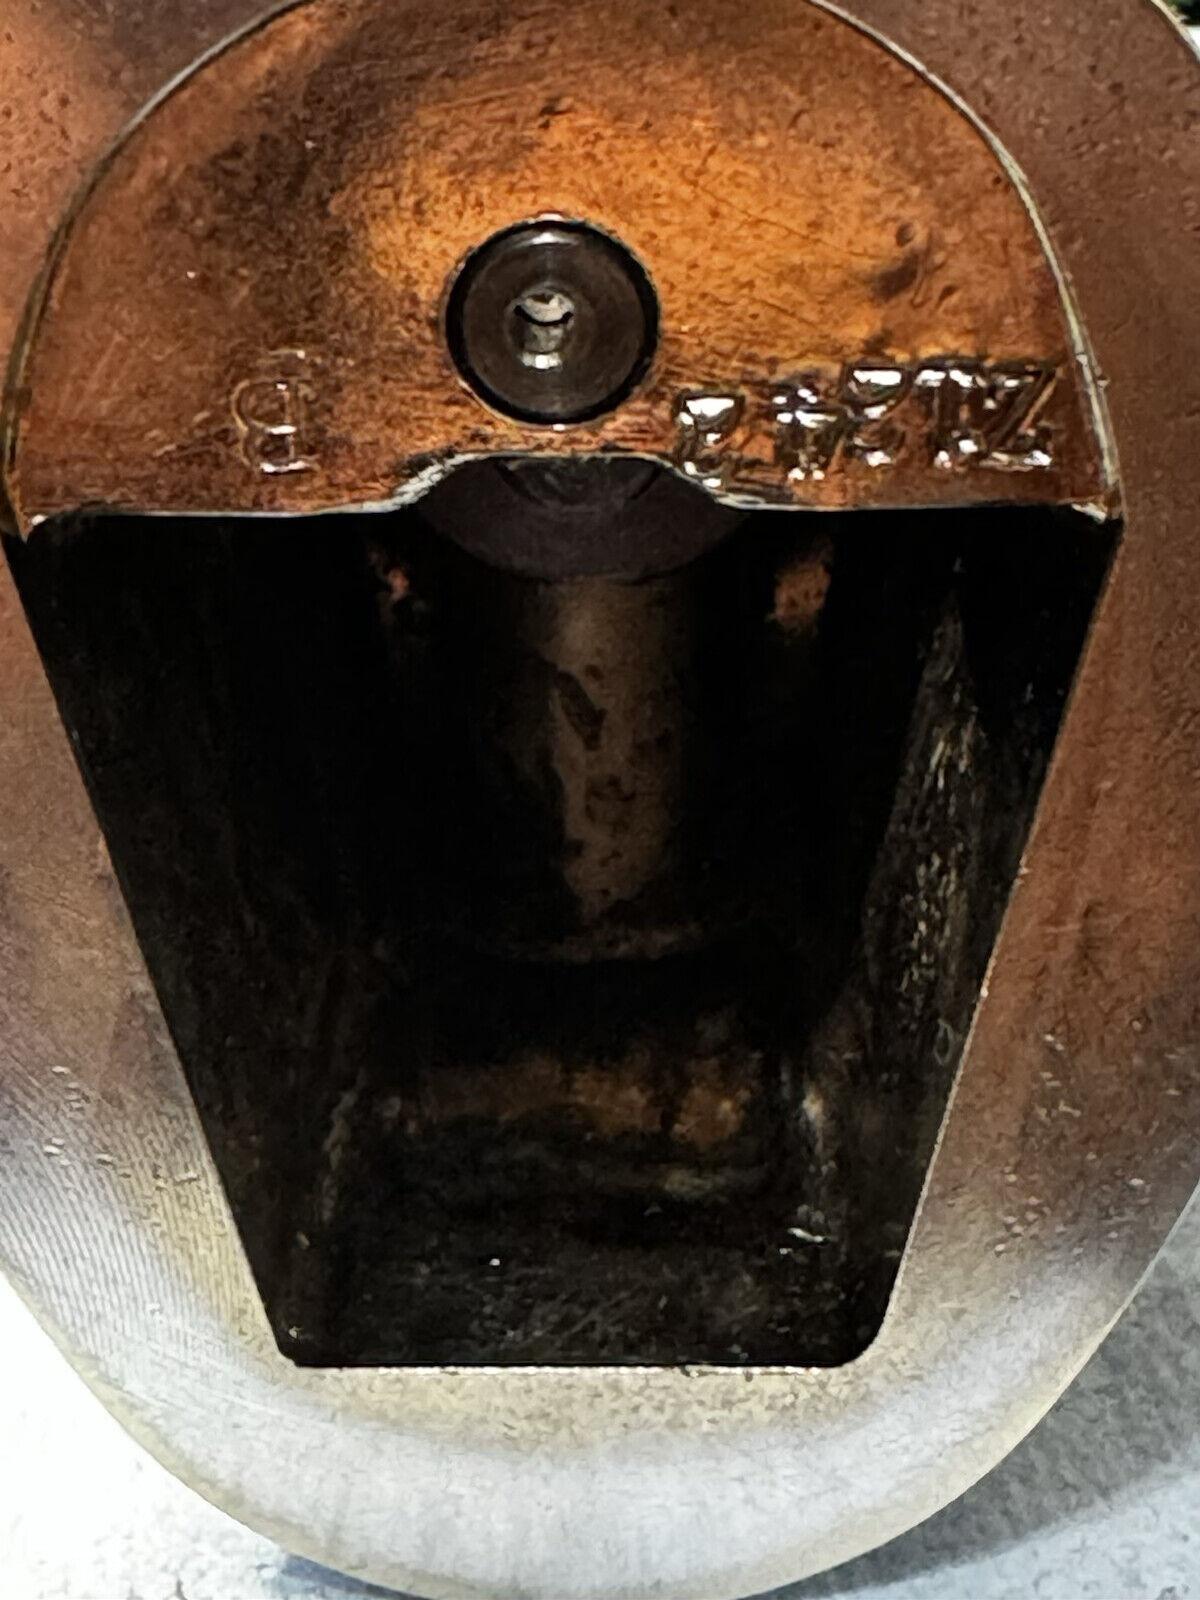
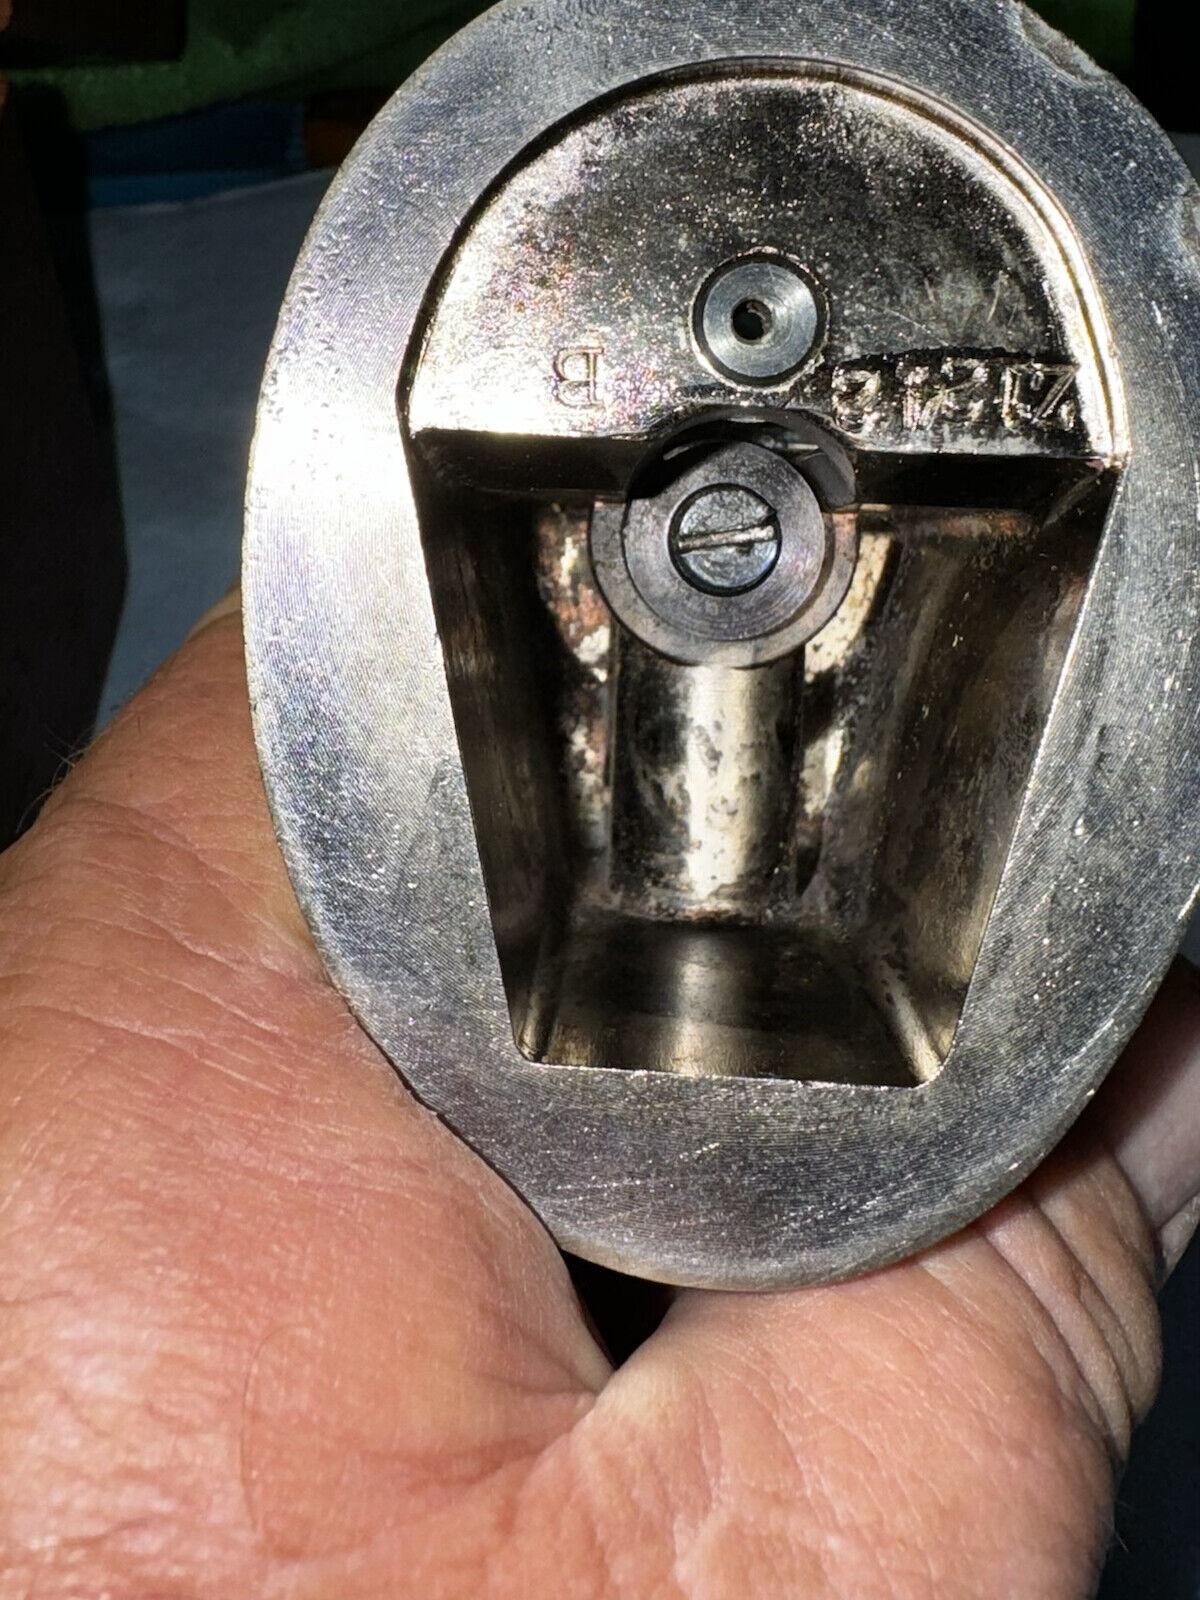
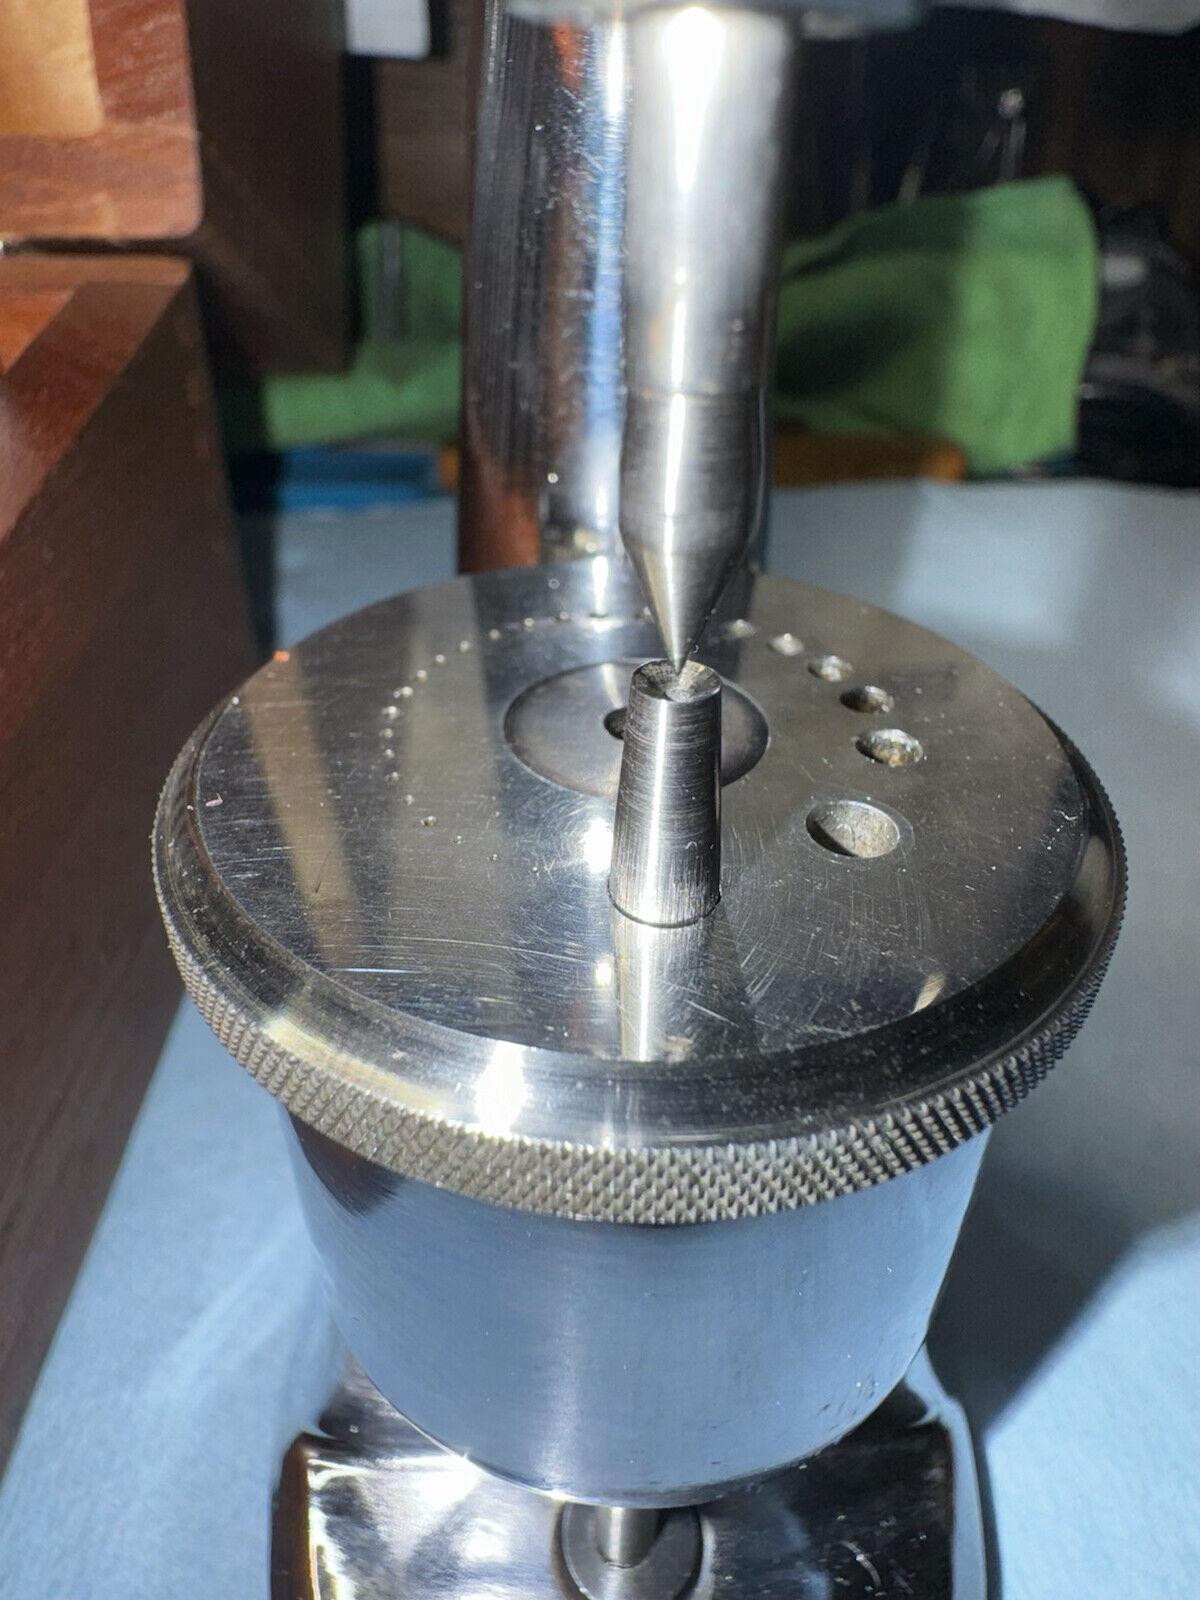
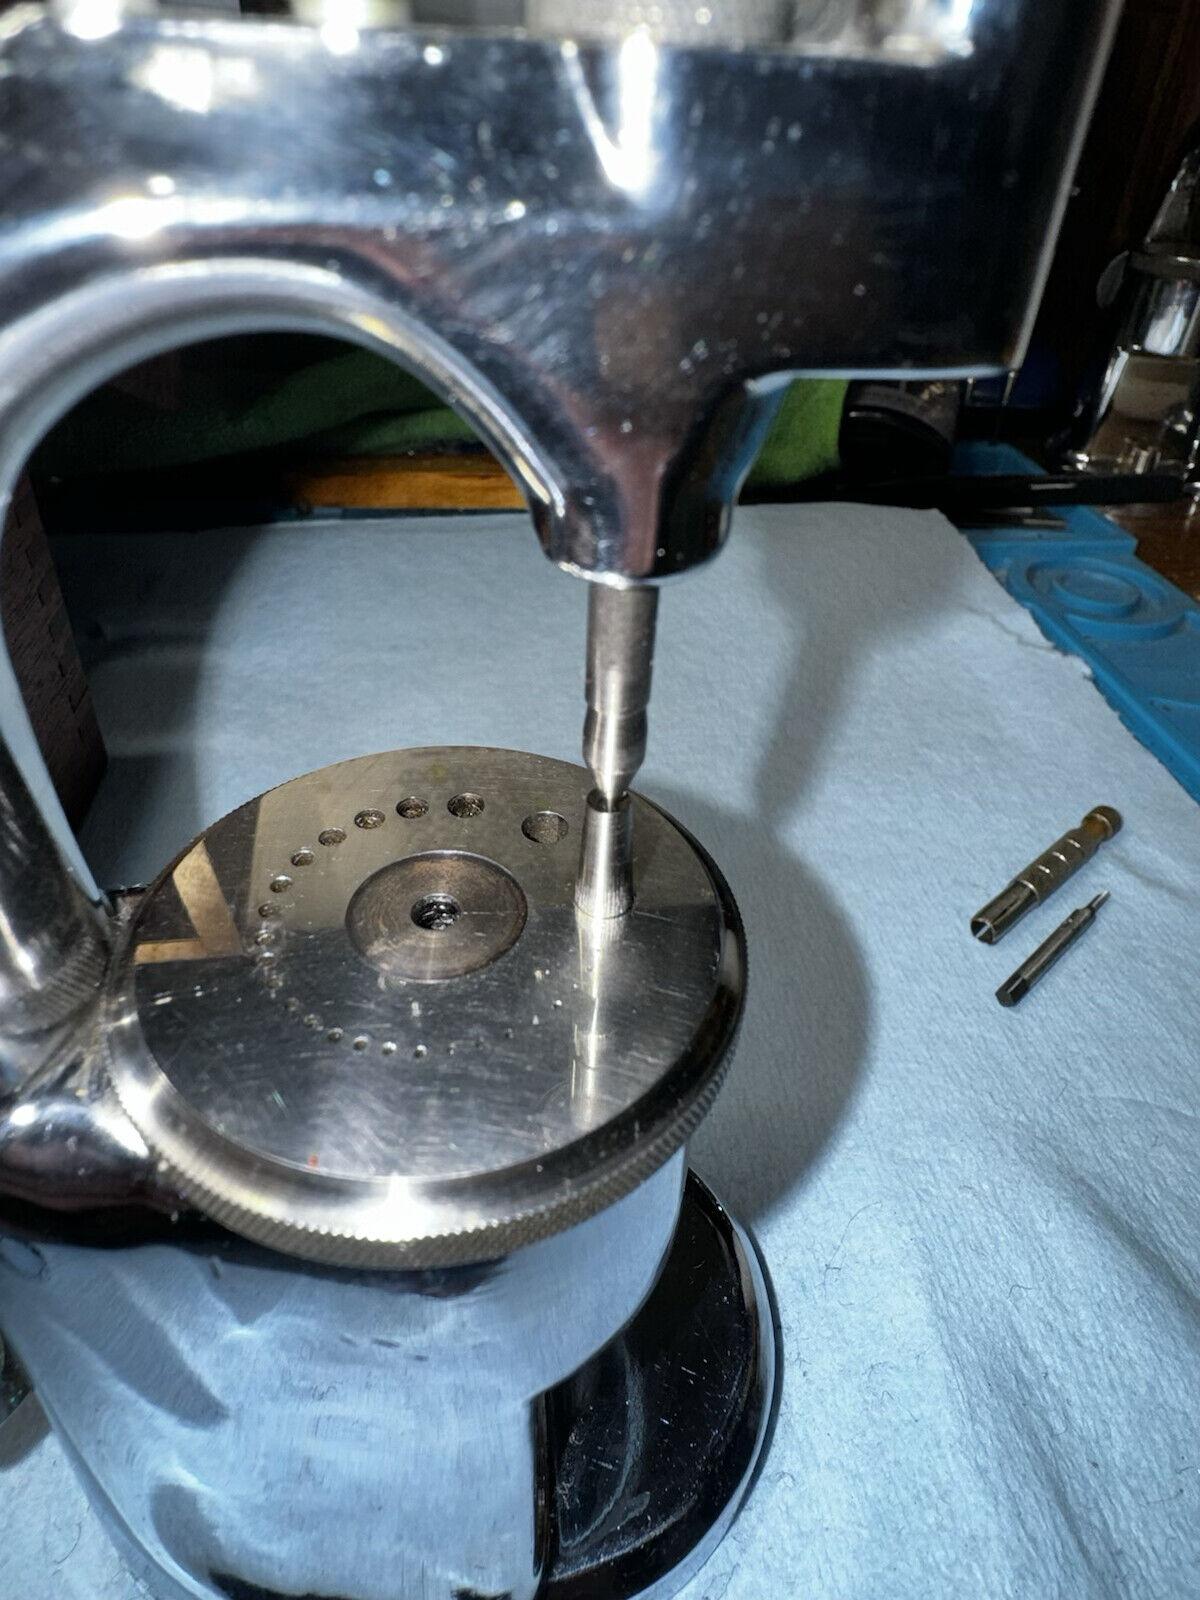
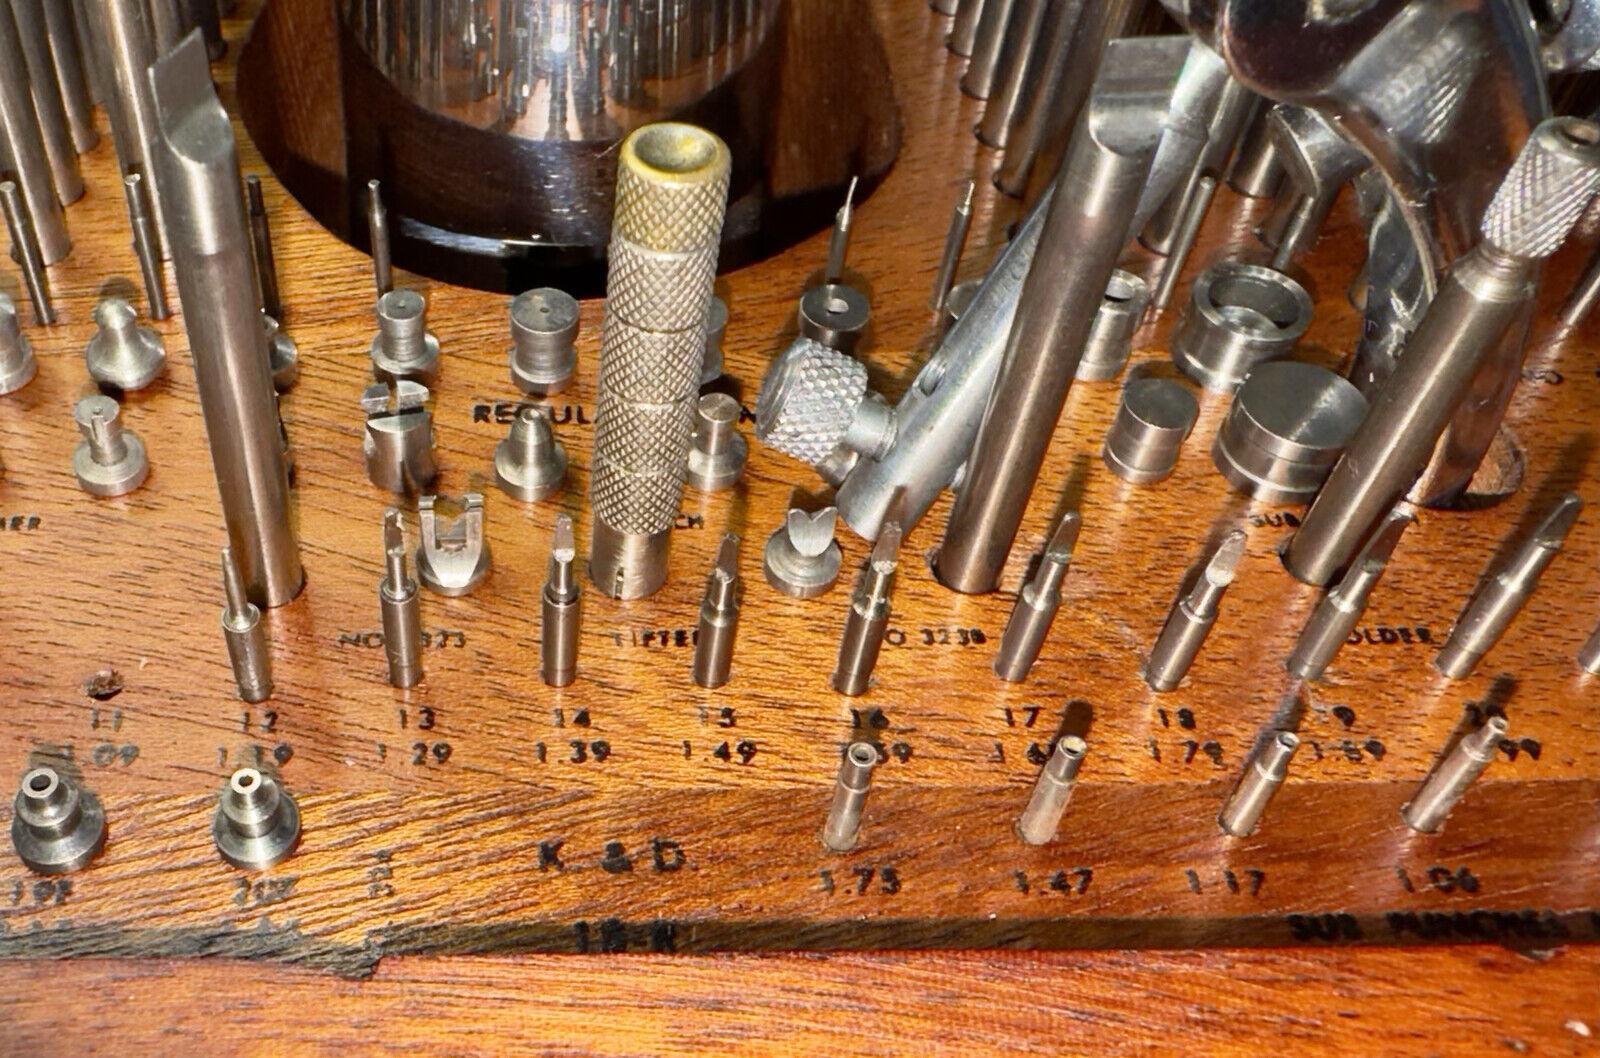
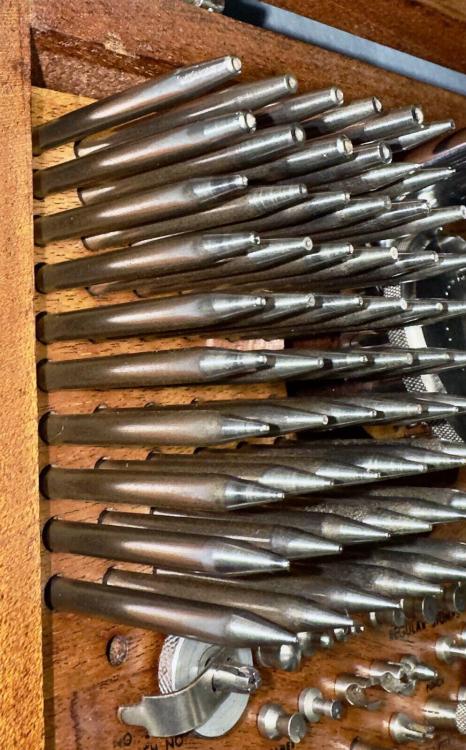
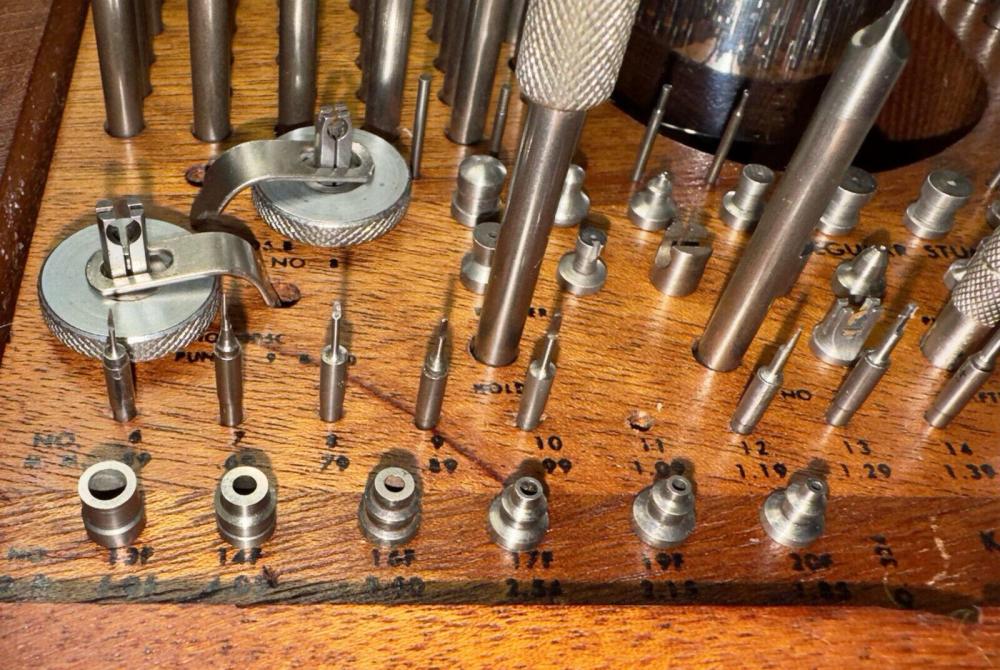
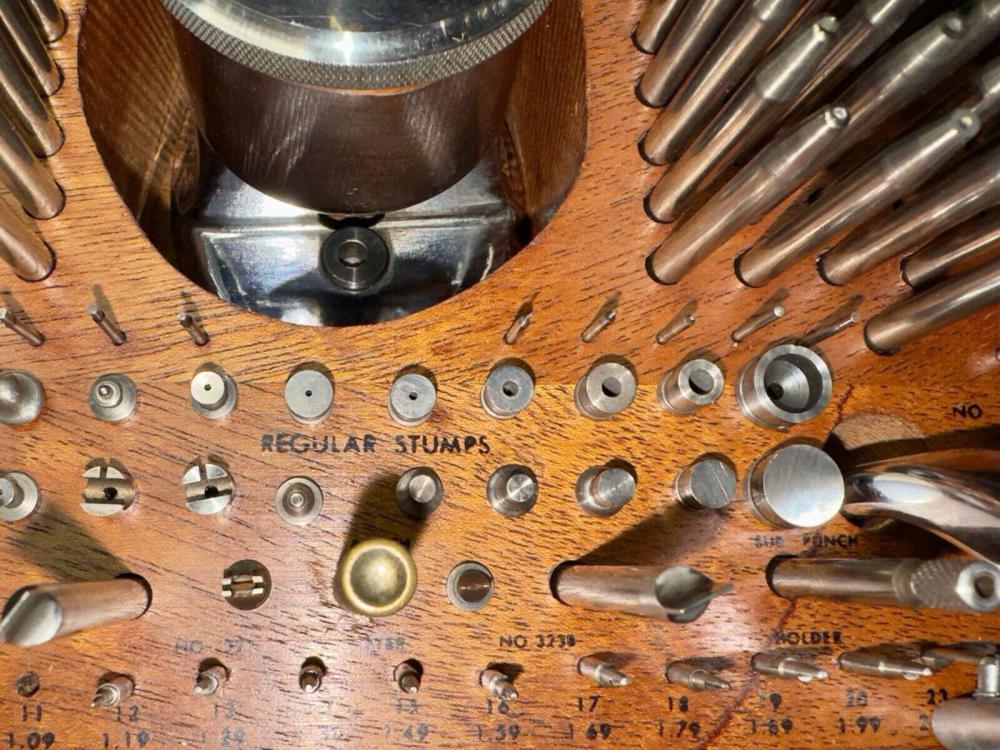
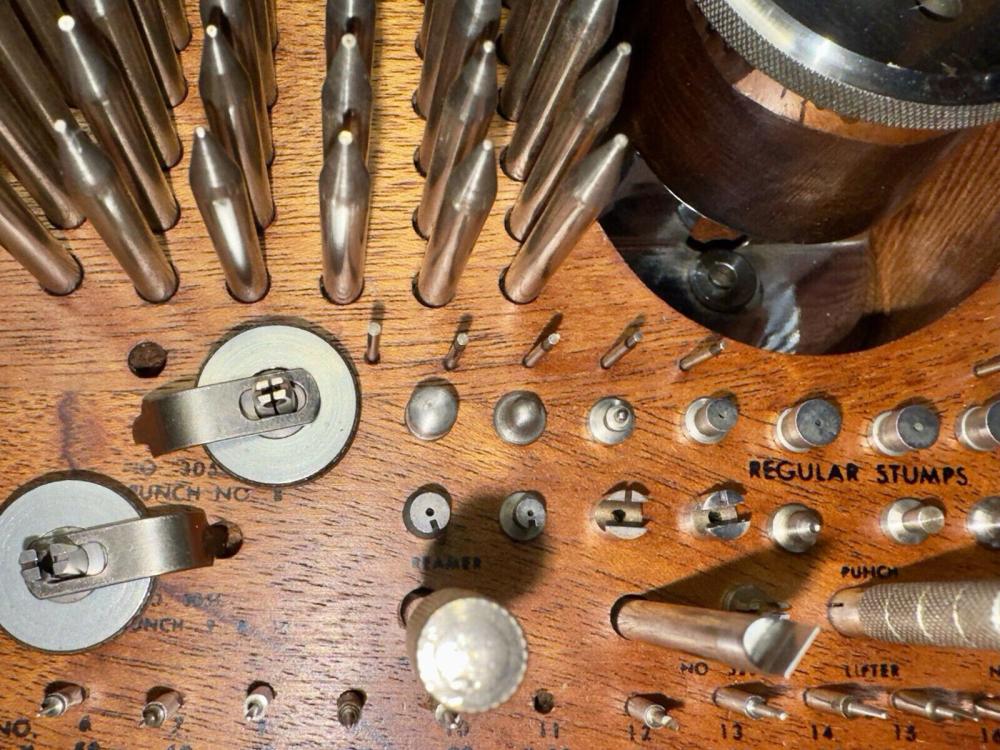
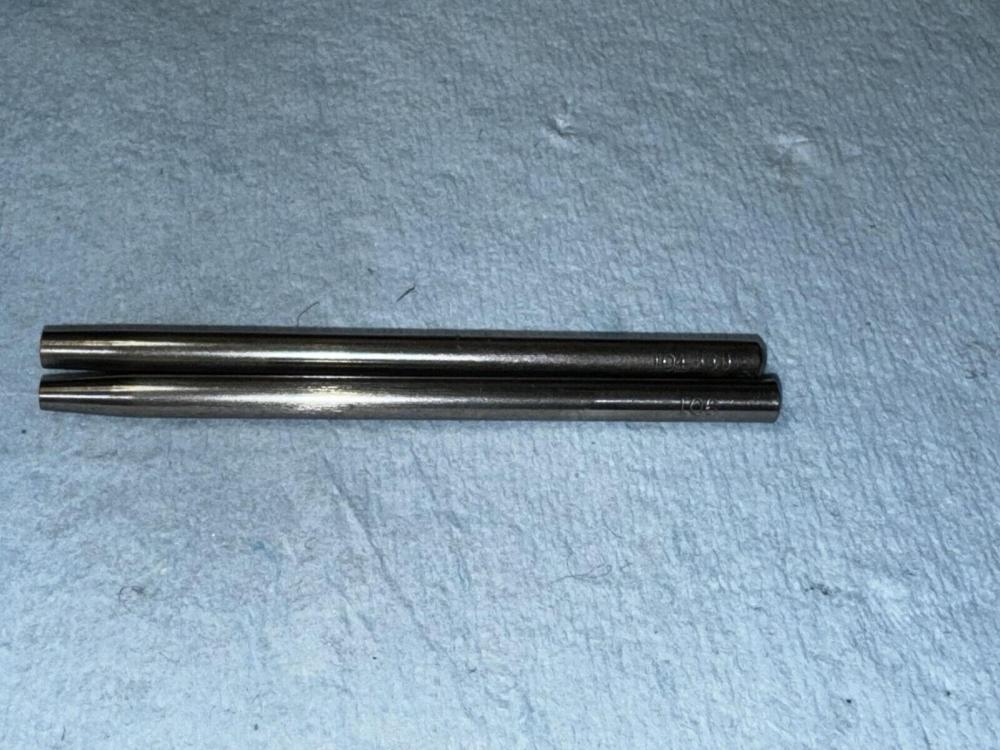
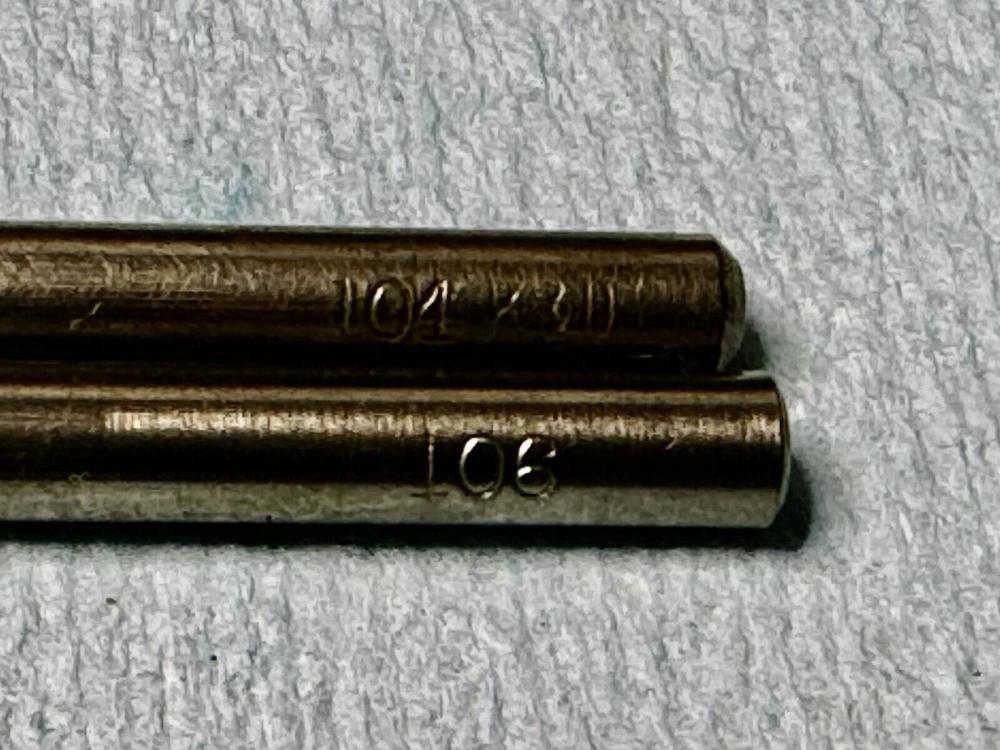
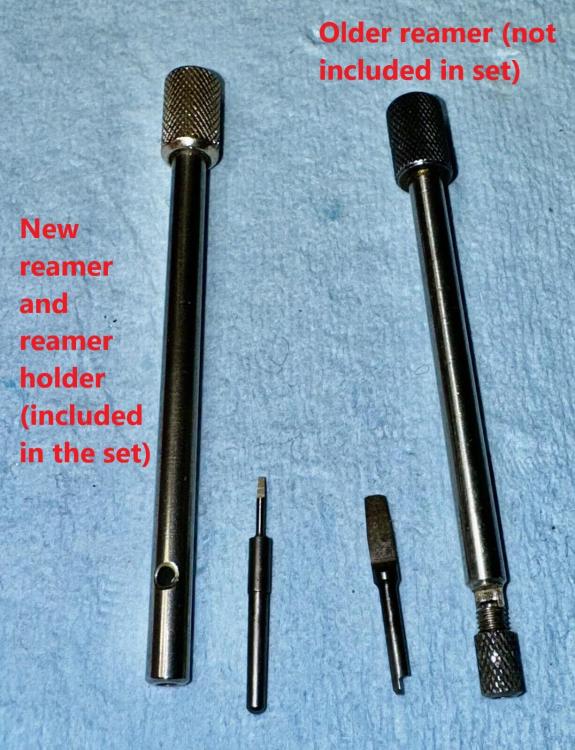
Here are the images provided by the seller. I asked for pictures of the bottom of the main tool, and of the stakes stumps and accessories. He also said that some of the staked have different labeling, and he included a picture of two stakes with the different labeling. Finally he included a picture of the "newer" reamer and holder vs. the "older" type. Any help greatly appreciated. claudio
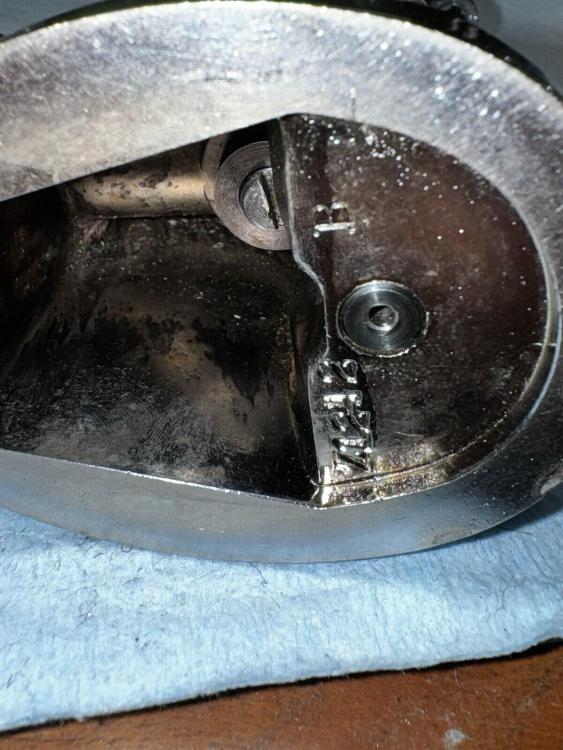


 1 point
 -
There is a hell of a lot that goes into restoring watch dials. It's not something that paint and a brush can fix. I suggest you look at a few videos on Youtube that is if you can put up with the bloody adverts. Get a downloader and it cuts the crap out.1 point
-
1 point
-
1 point
-
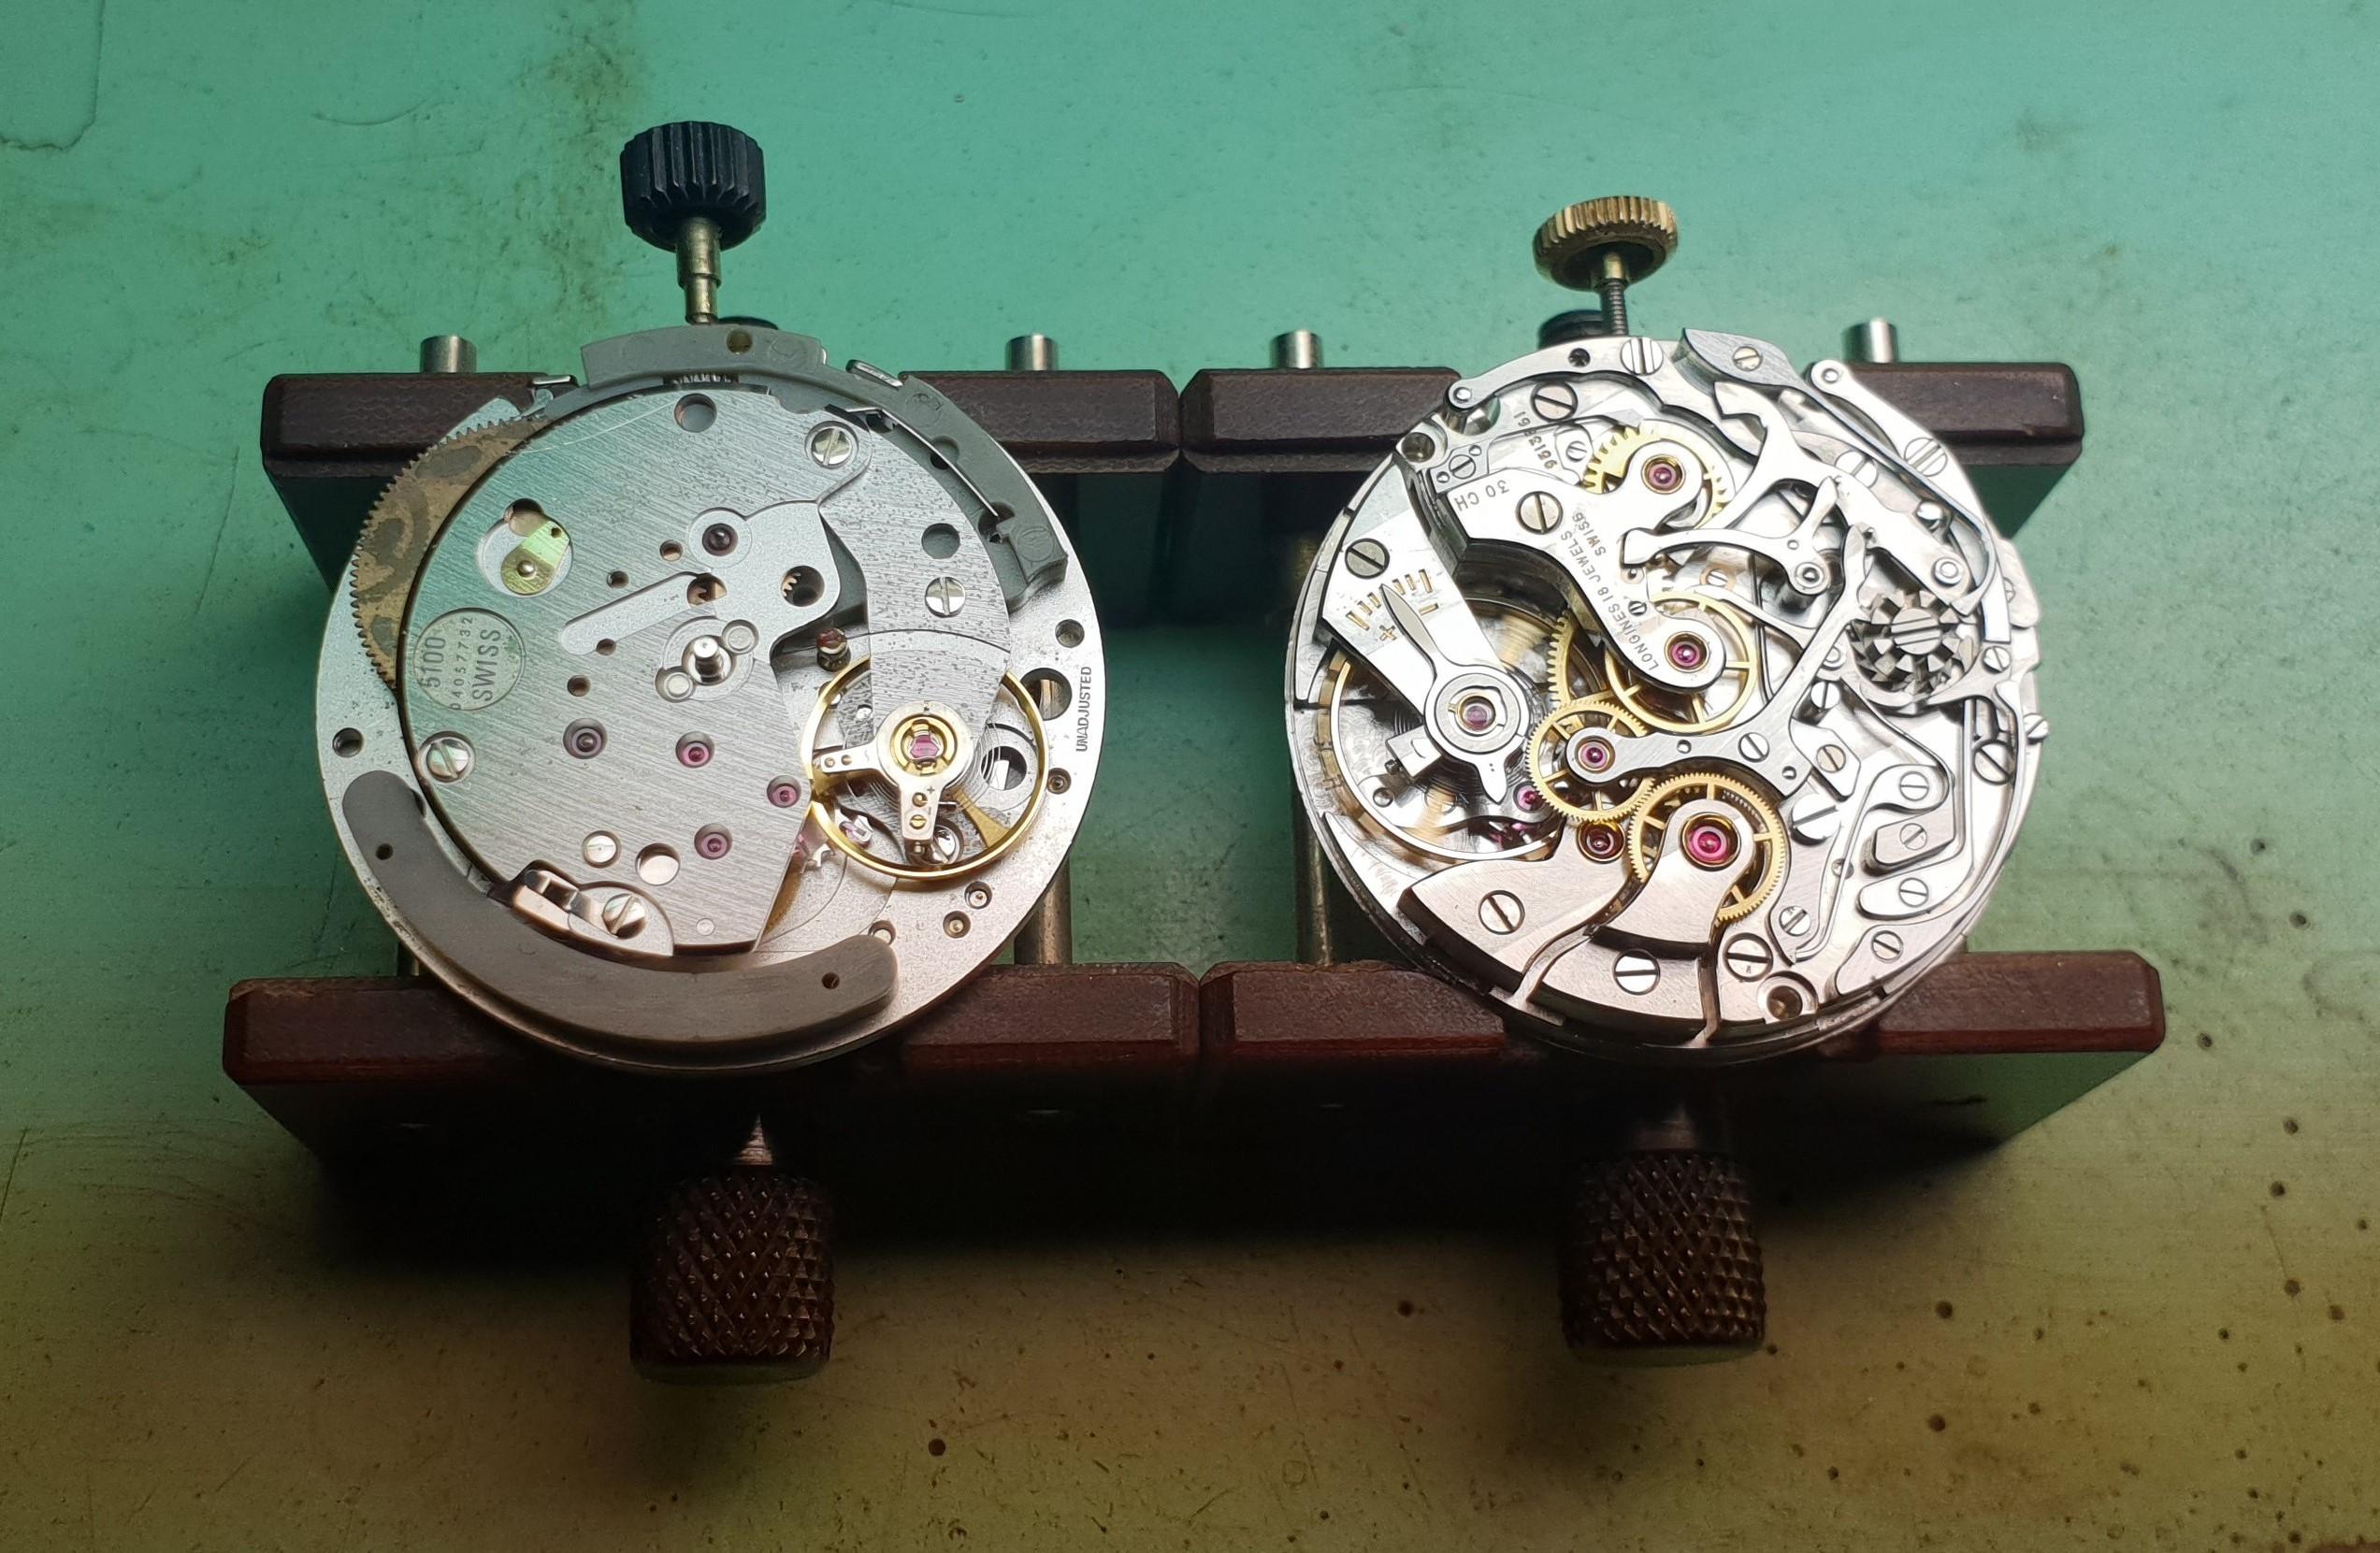
Have these two on the bench this week, thought it was a funny contrast. The left is the Lemania 5100, perhaps the epitome of industrialization and use of injection molded plastic in a mechanical chronograph; almost the whole chrono mechanism is on the dial side, under an acrylic plate that supports the date rings. Vertical clutch with nylon gearing in it, plastic all over. Extremely reliable however! This one had suffered some sort of chemical exposure in the past, with pock marks in the rhodium plating and harsh staining on the barrel great wheel. Ended up running fine with 11 second delta in 6 positions. The right hand one is a Longines 30CH, one of the most beautiful chronos ever made in my opinion. This one was in fine shape other than a non-original, ugly, and nonfunctional minute counter jumper. The one present in the photo is the replacement I made. This beauty had a whopping 16 second delta, and still hit near 270 degrees amp at 24 hours. Amazing.
 1 point


.thumb.jpg.cb17a66989f1e796fd4217db2e9ca9df.jpg)