Leaderboard


Popular Content
Showing content with the highest reputation on 02/01/25 in all areas
-
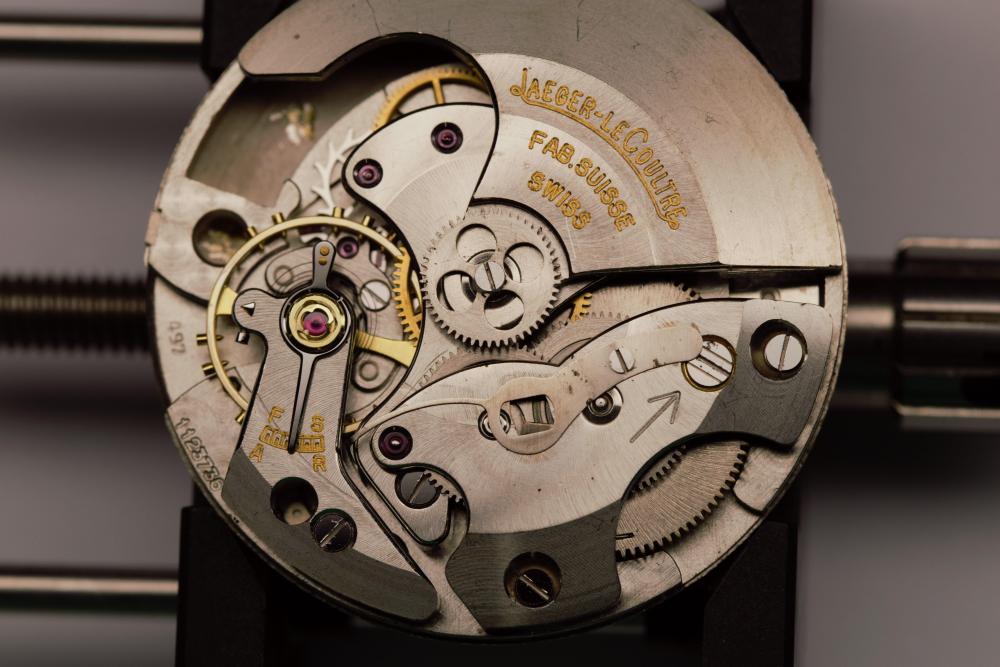
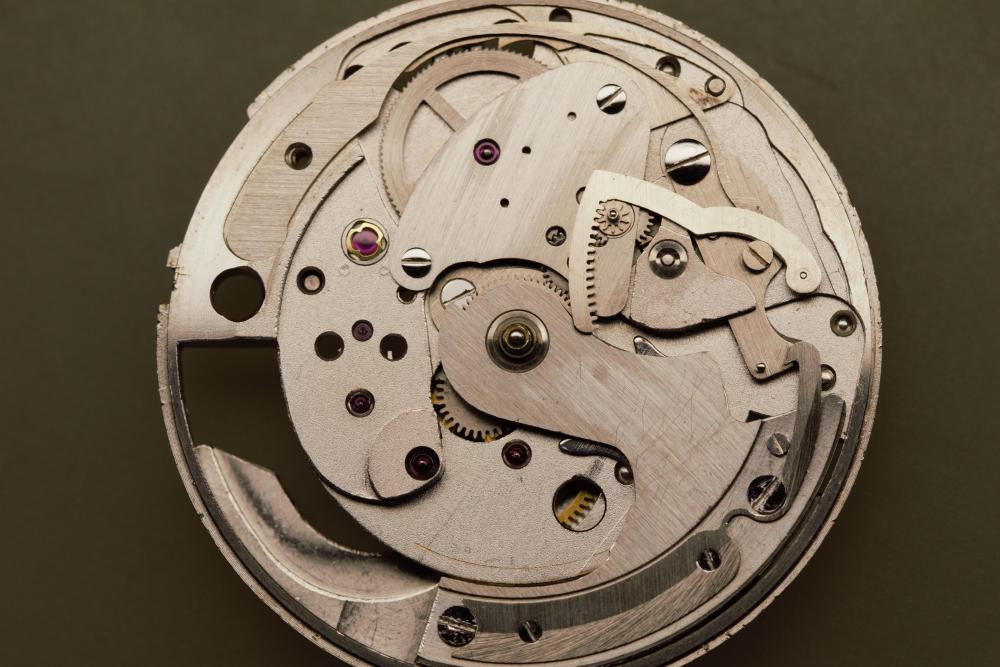
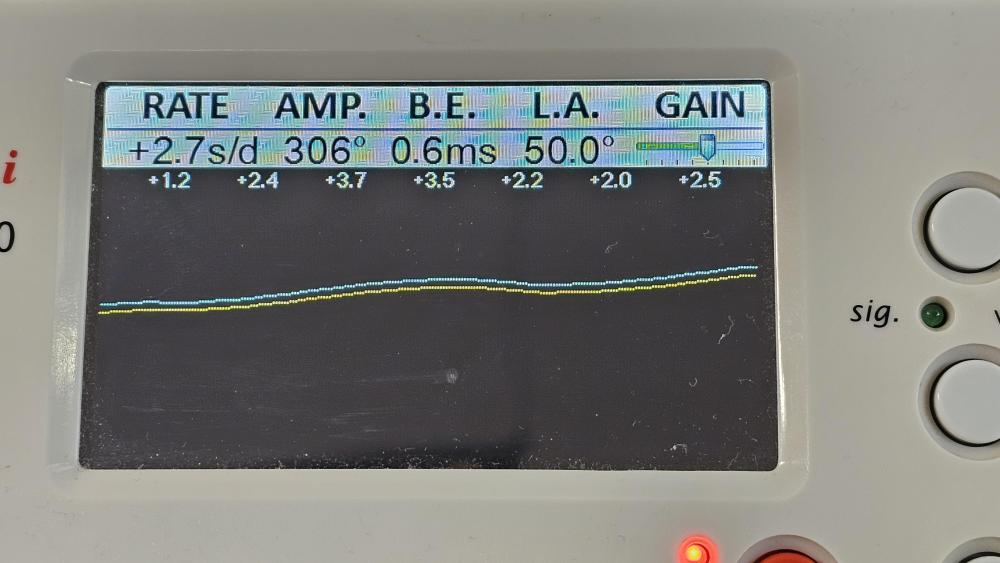
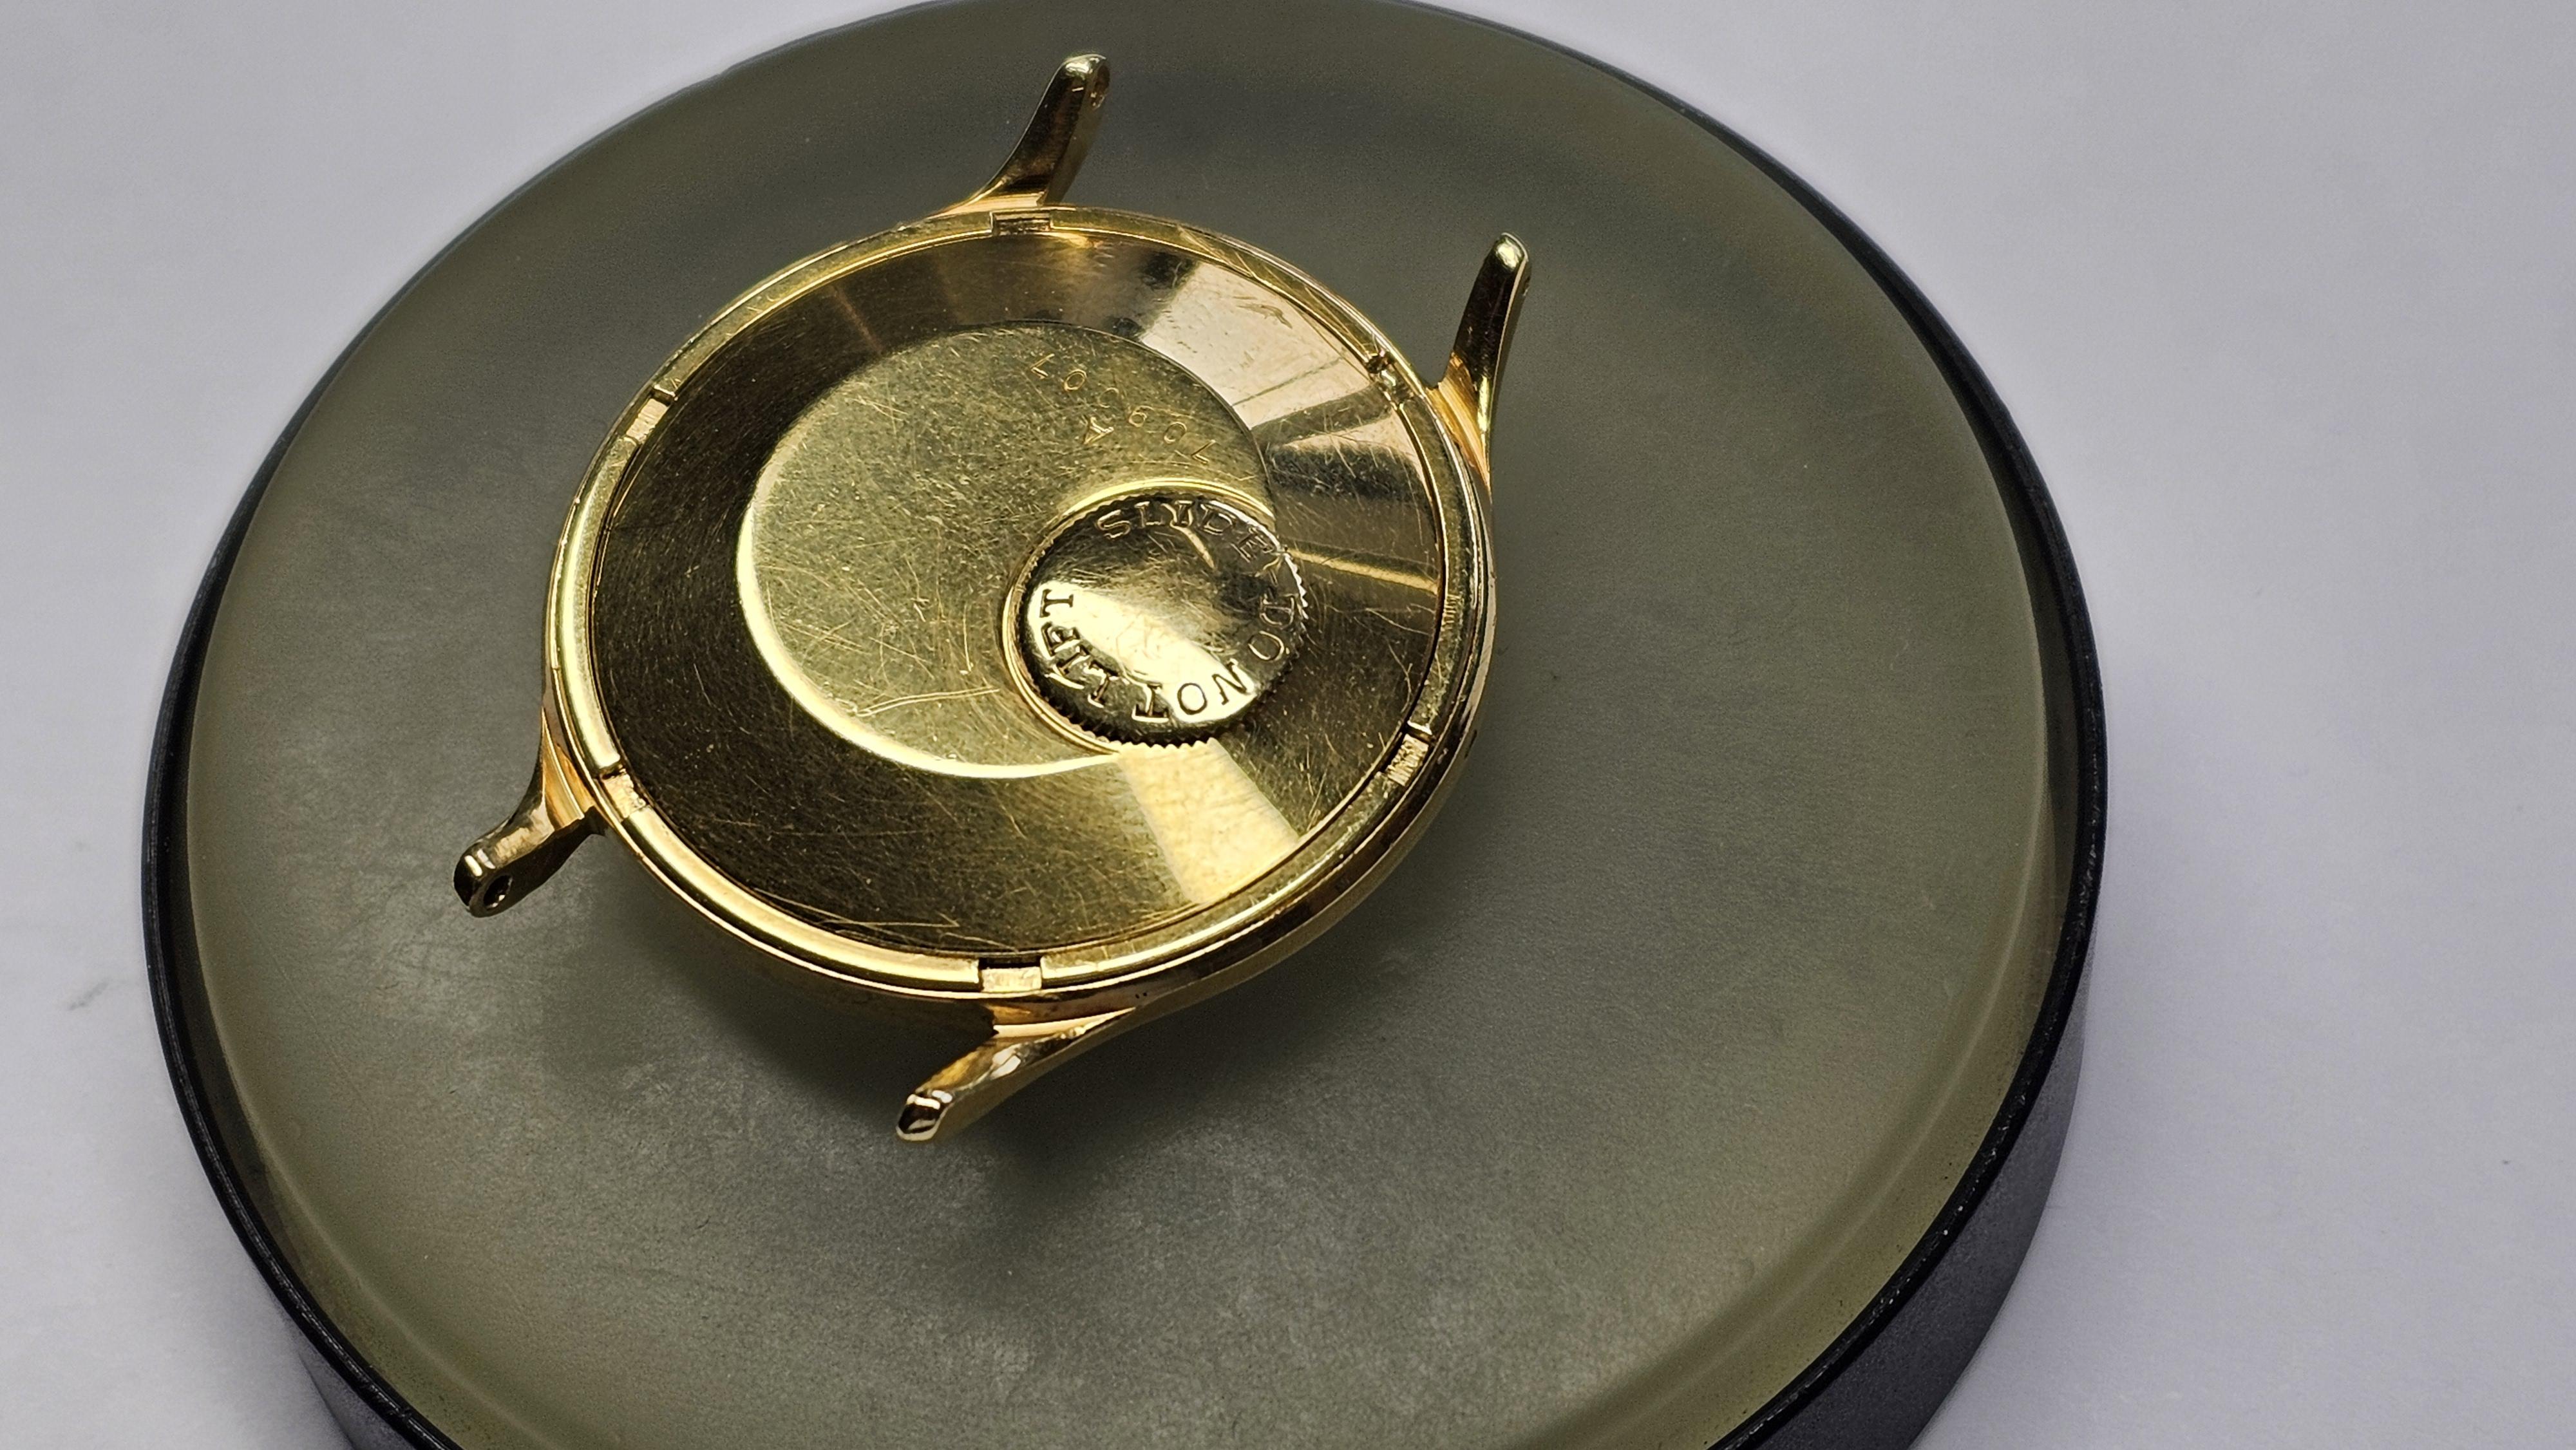
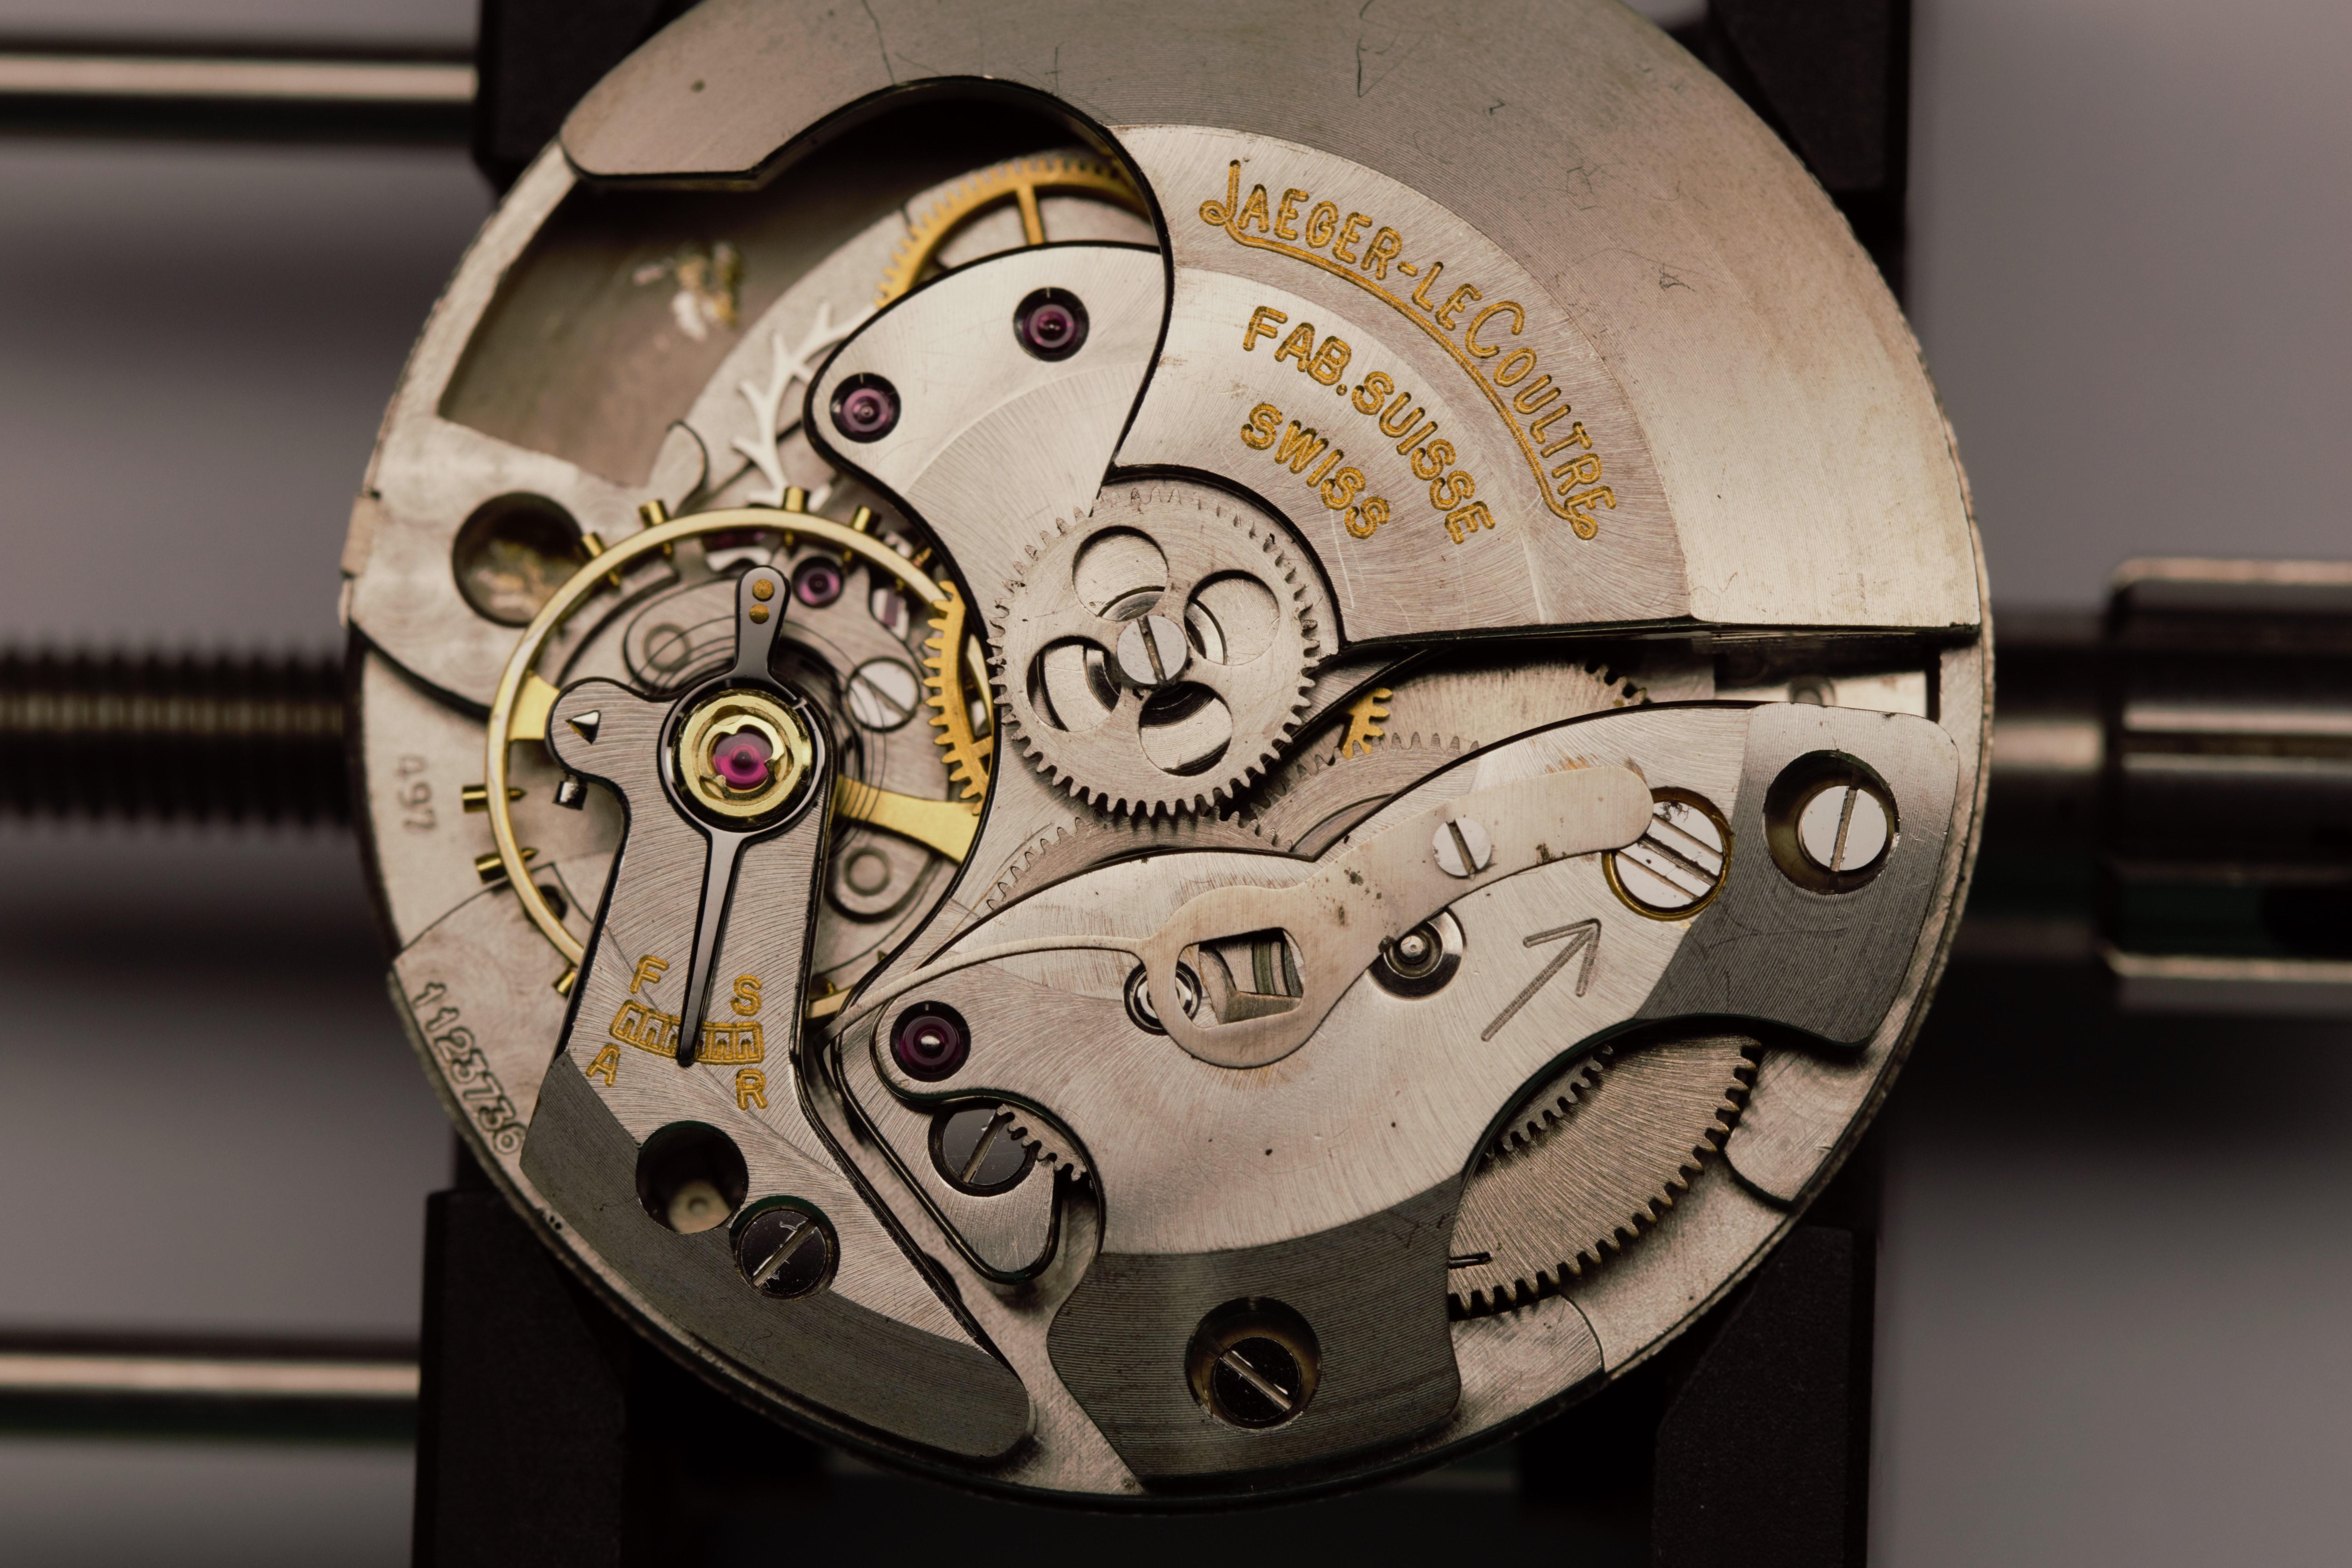
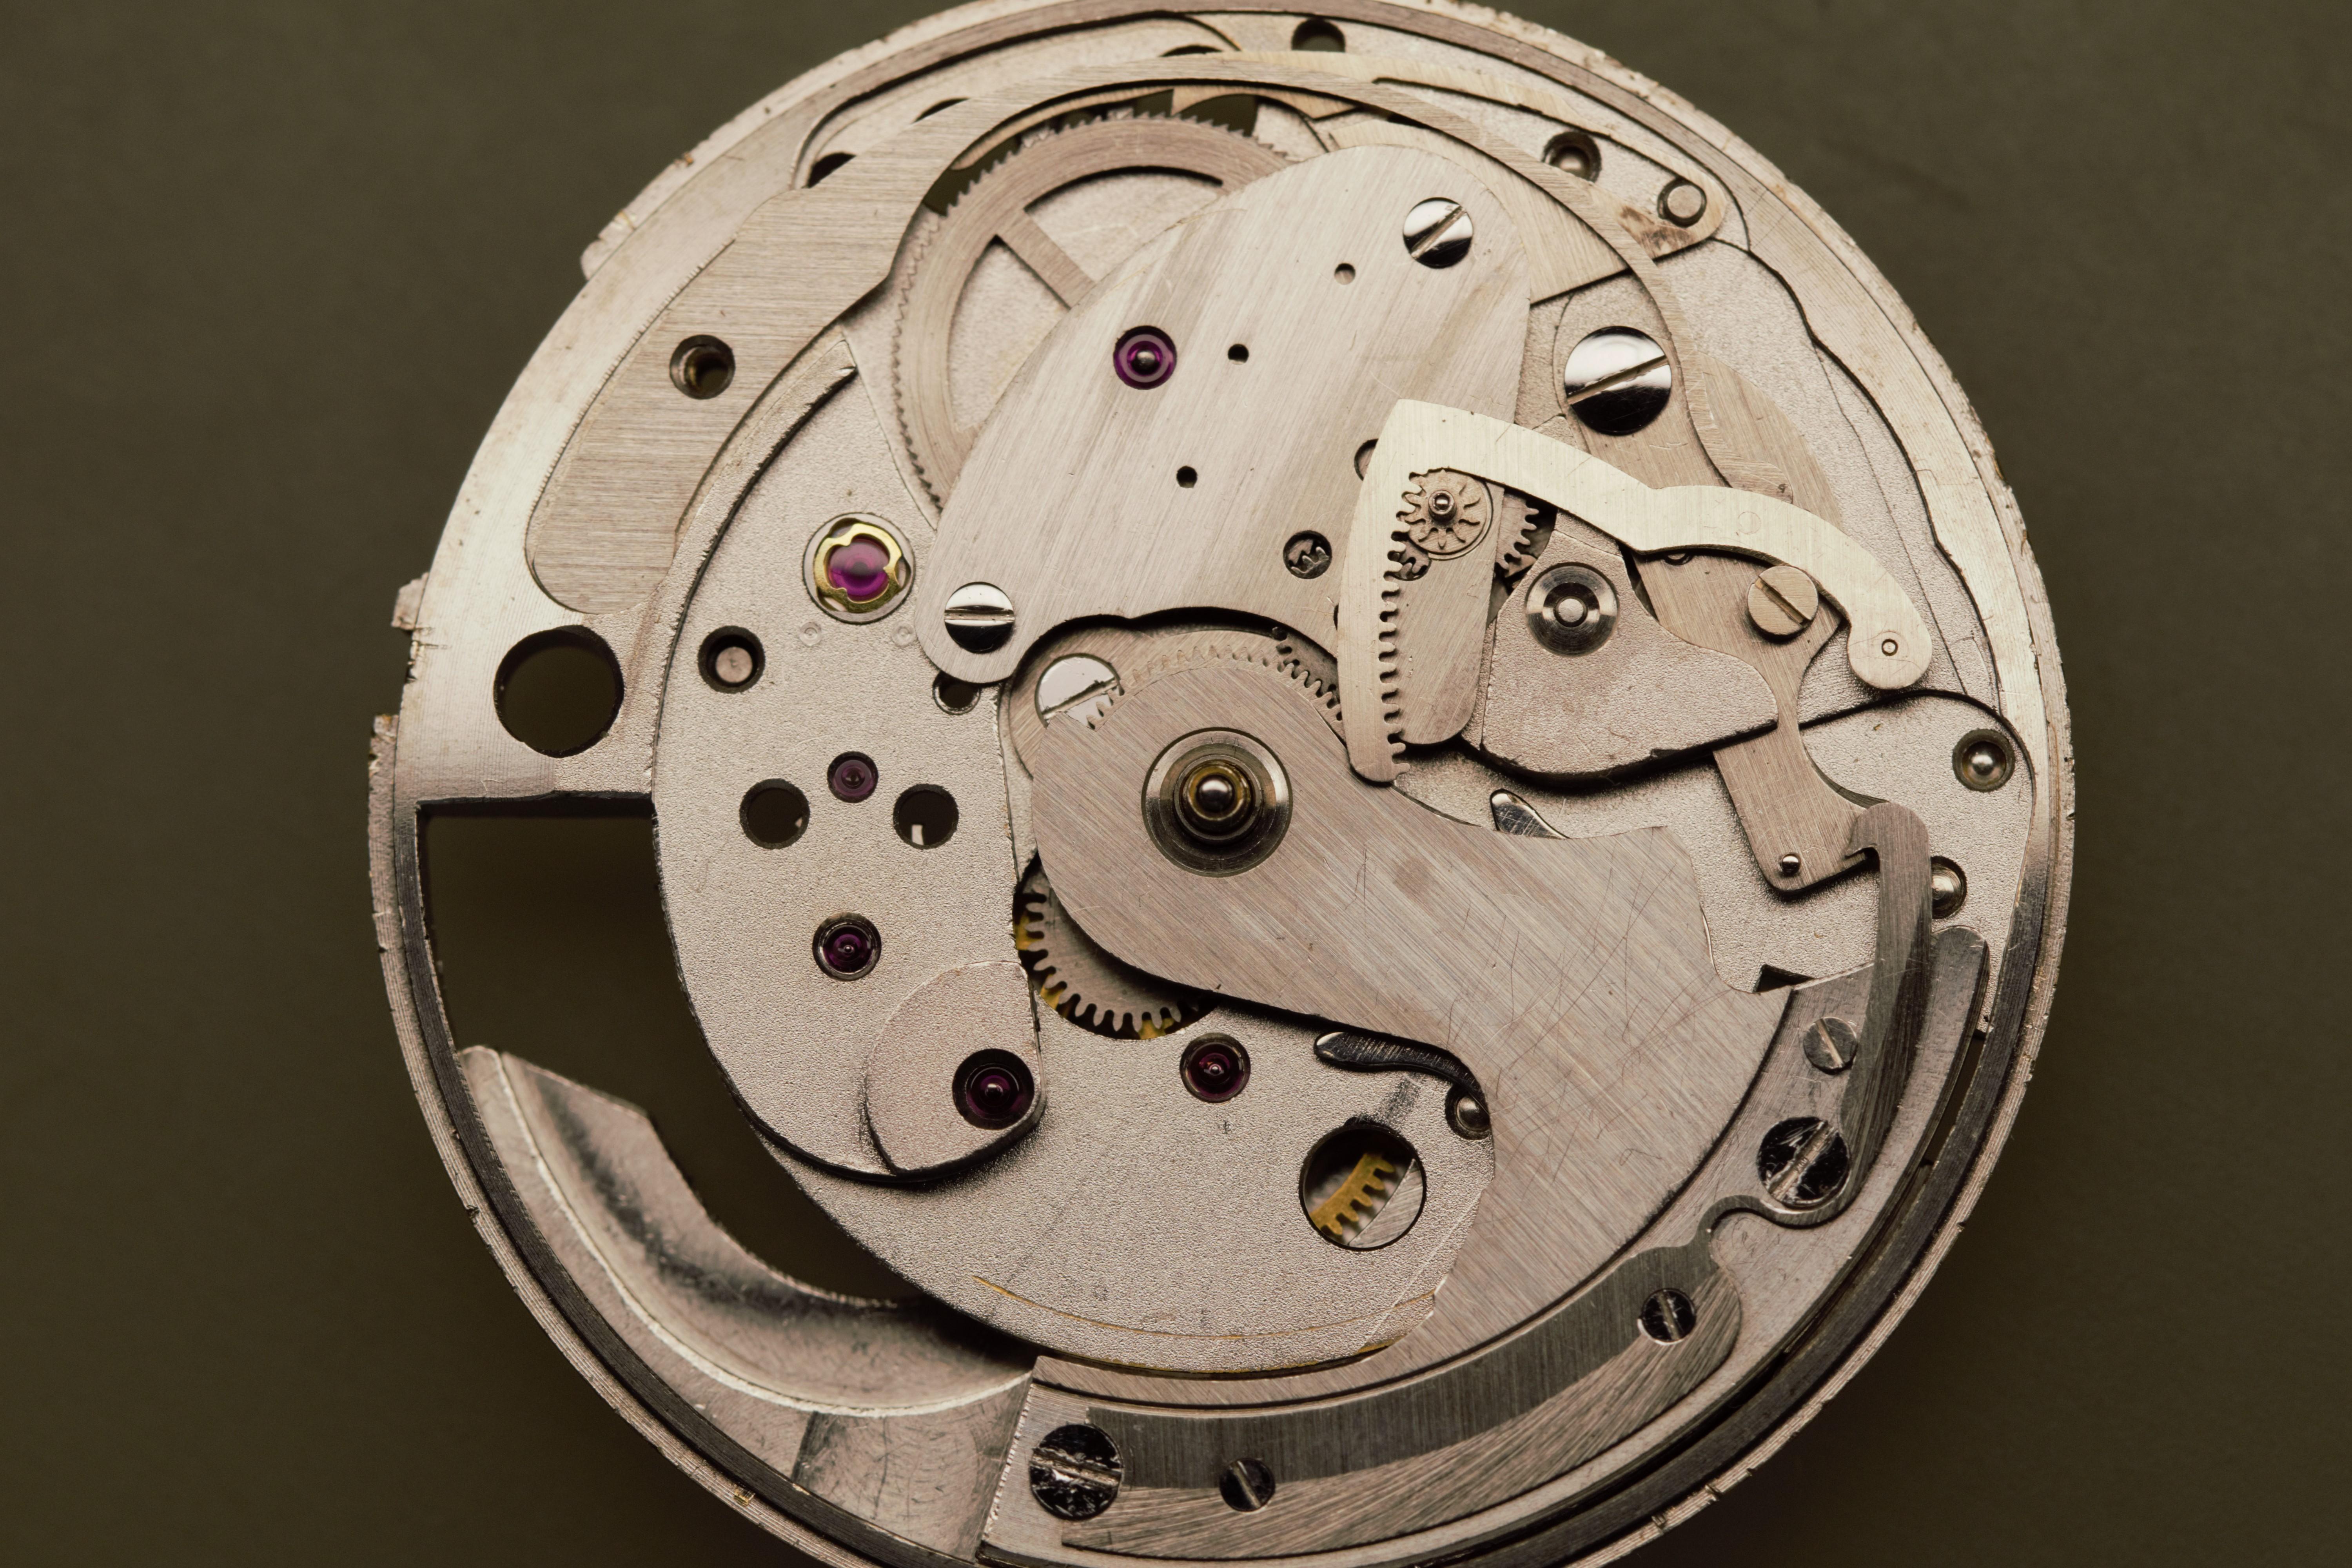
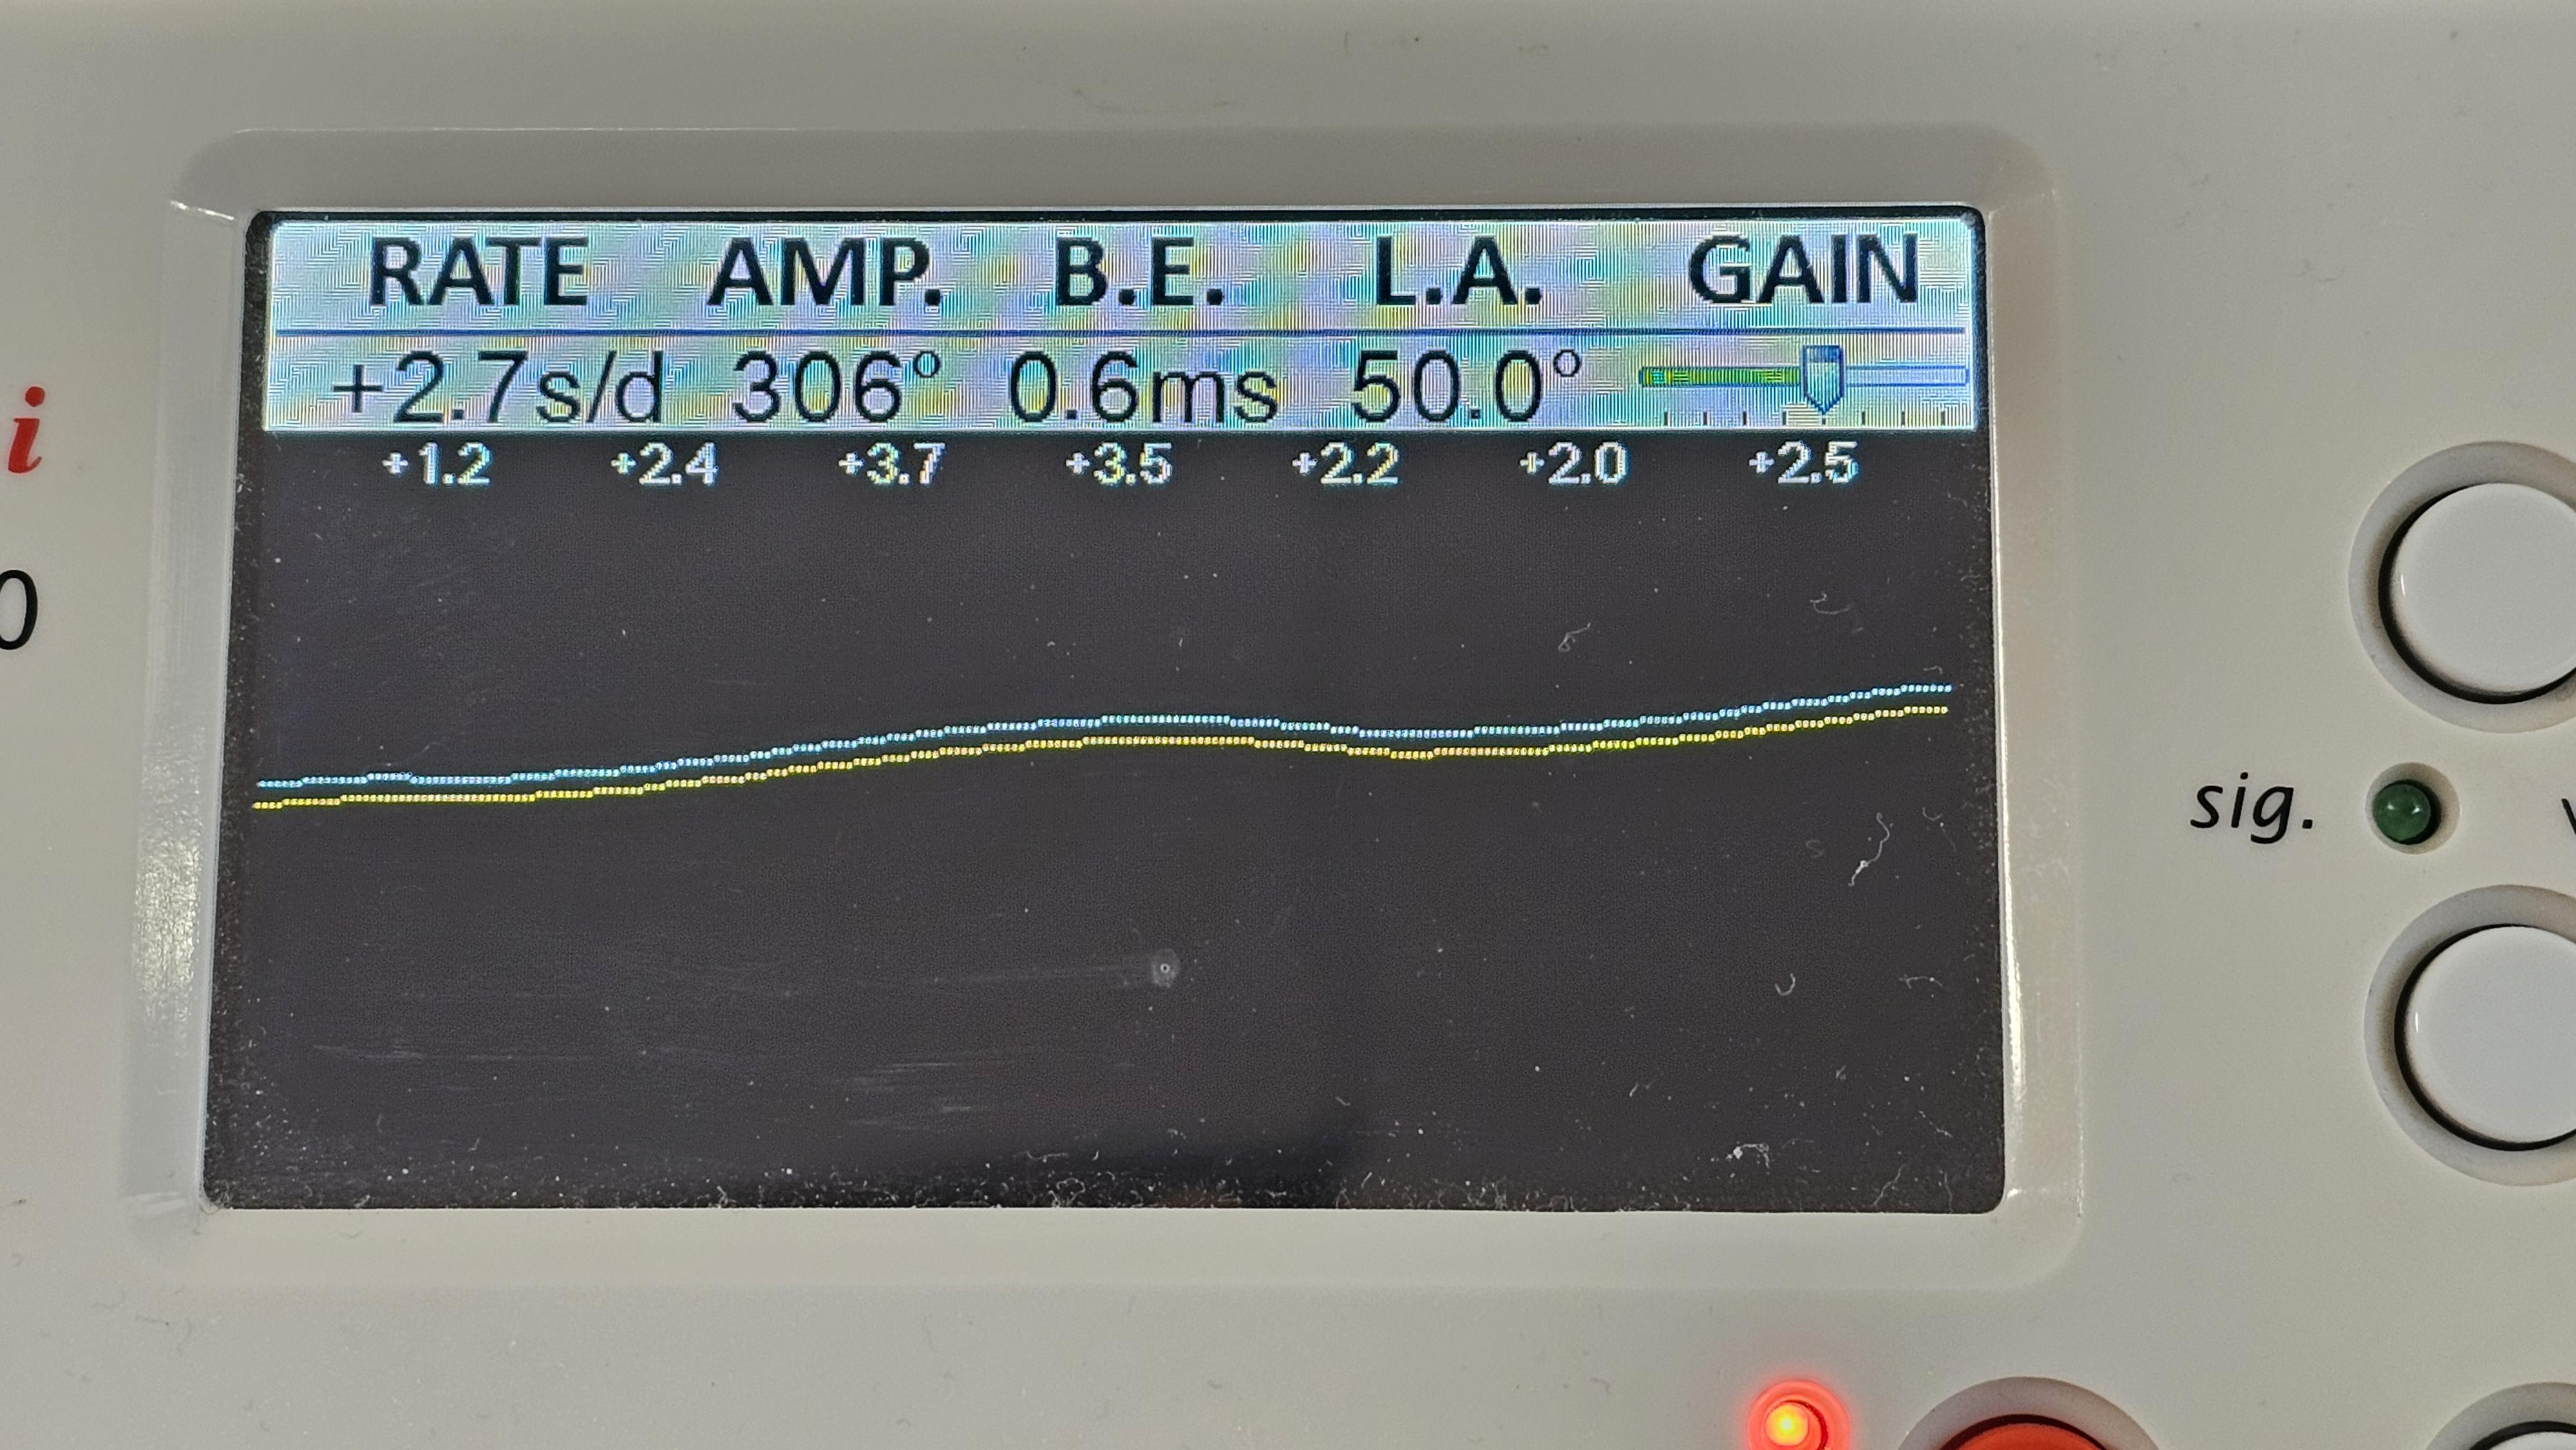
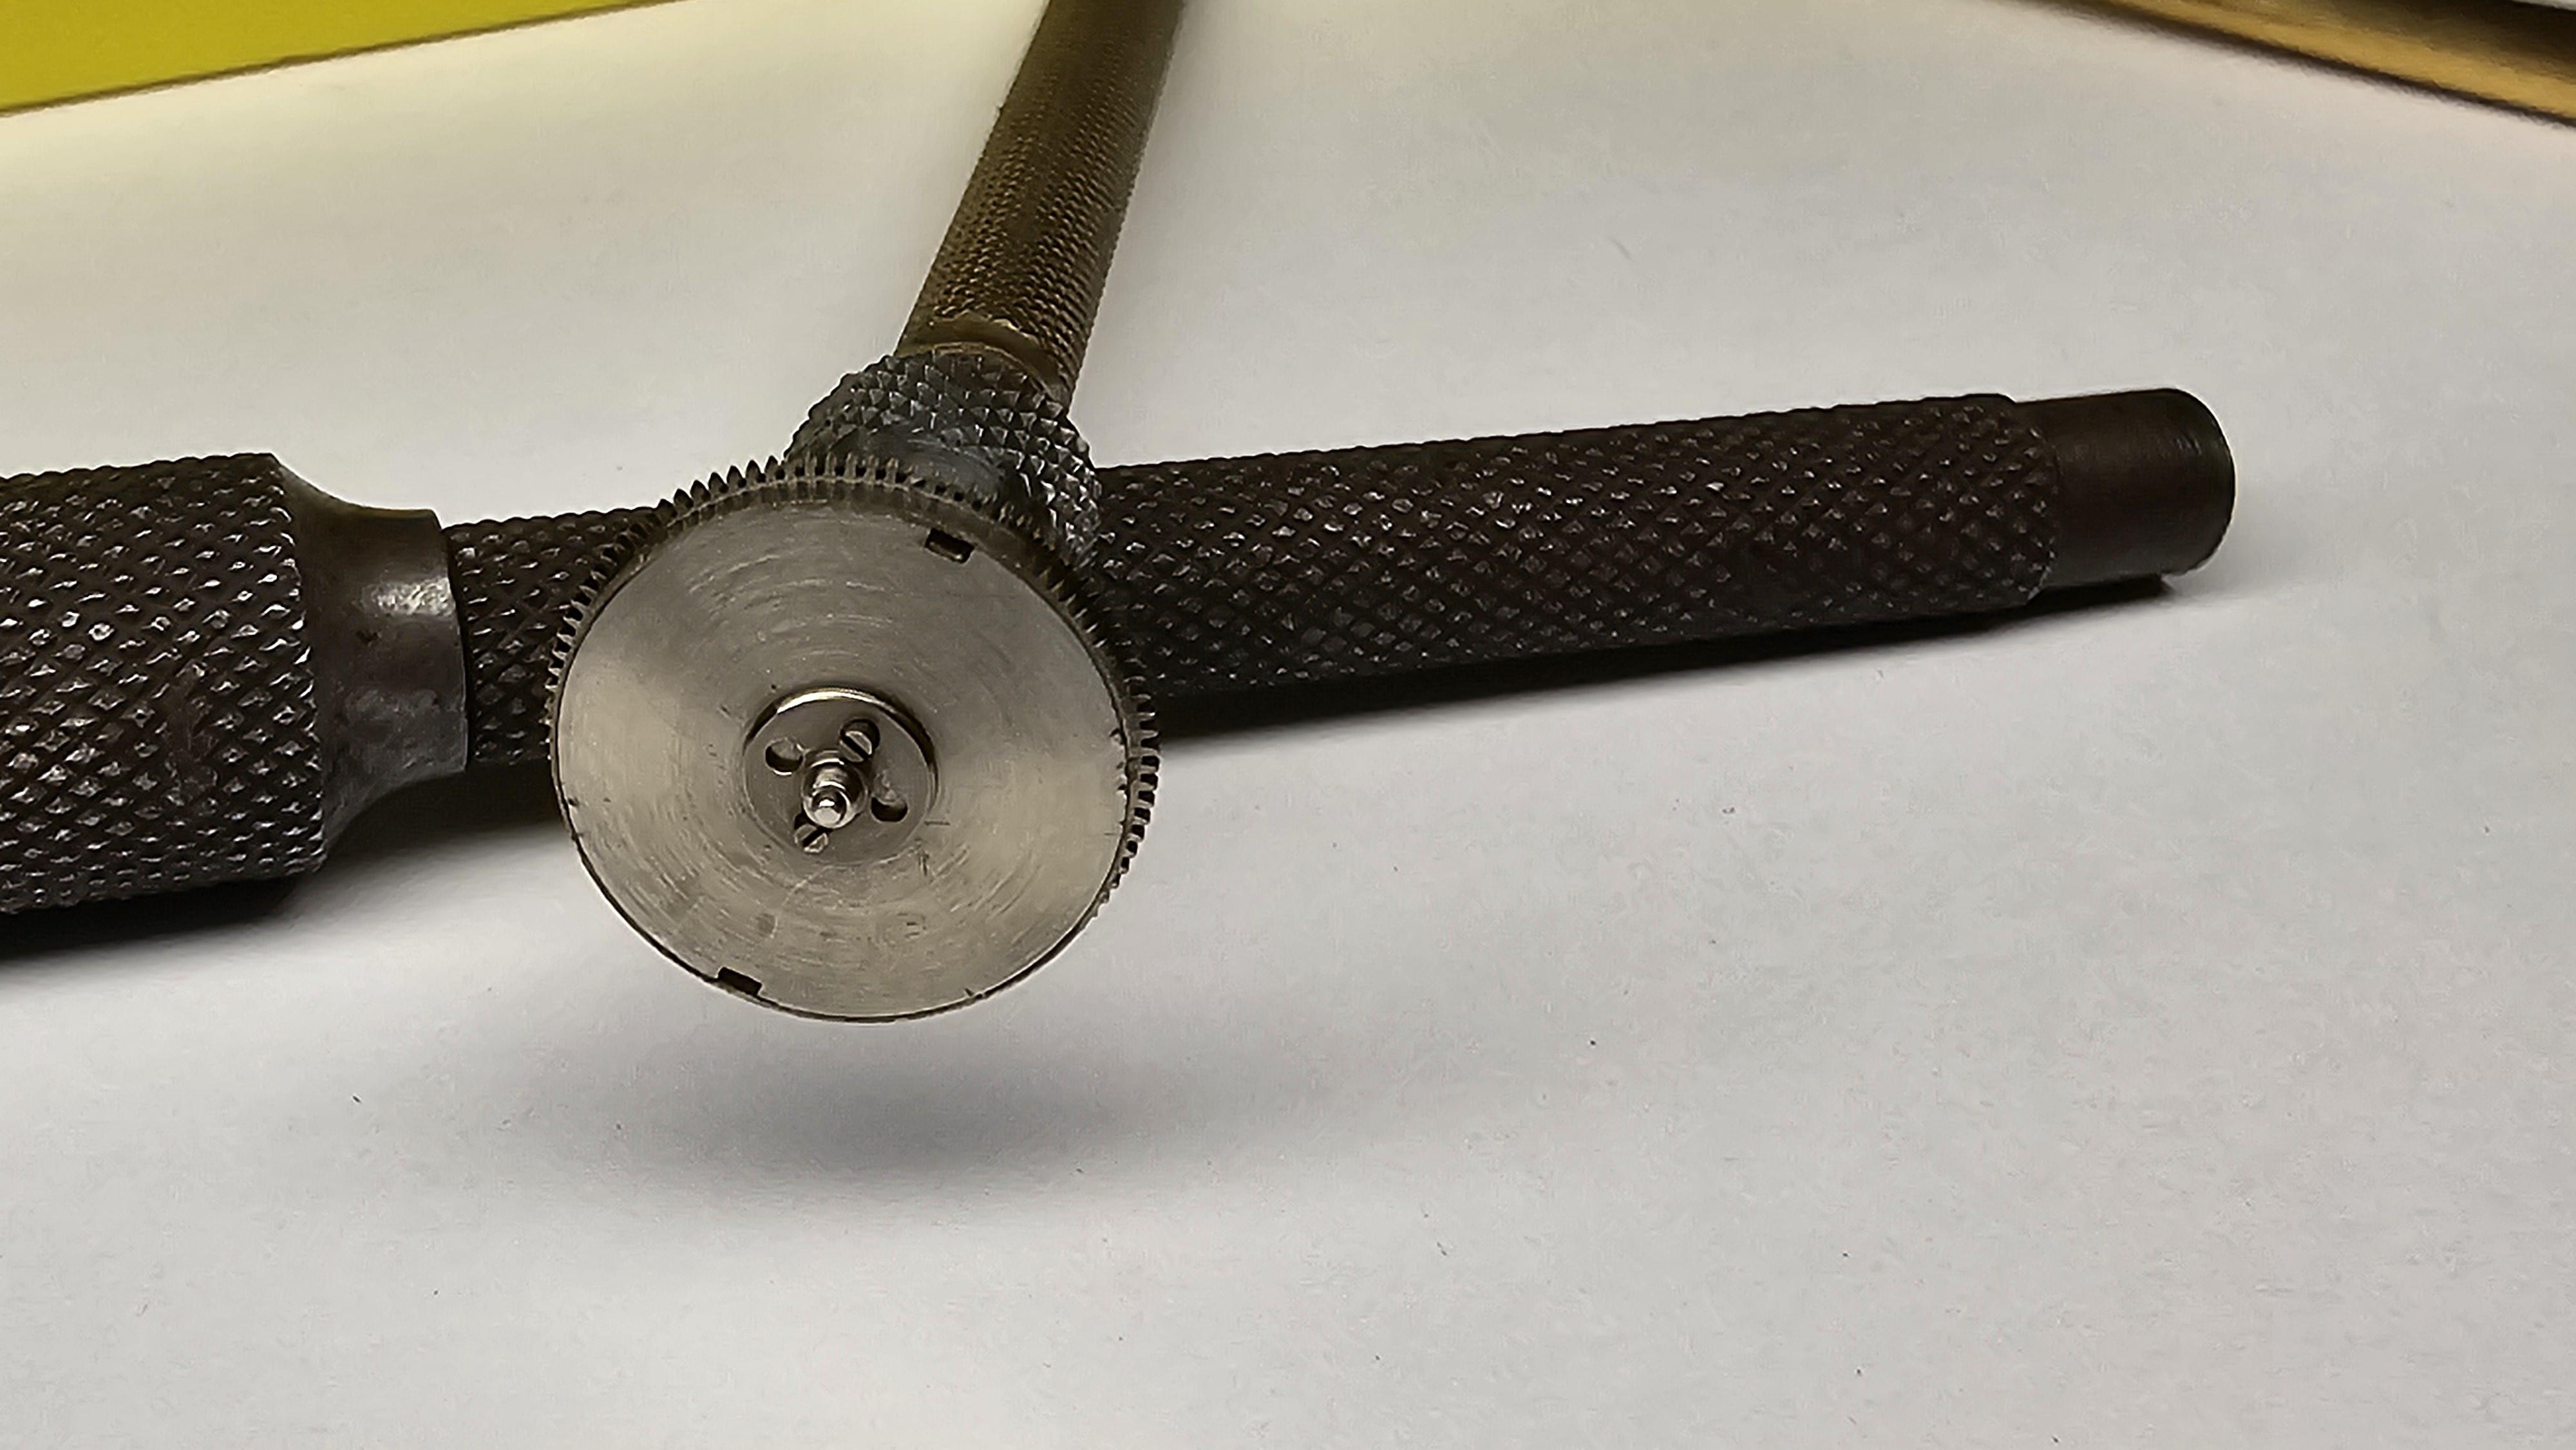
I put the minute wheel on and see the height of the cannon pinion leaves with the teeth of the minute wheel, which gives a good indication the cannon pinion is sitting correctly or not. Lovely looking watch! I've just finished this JLC Futurematic for the mid 1950s. They say if you gave an engineer an unlimited amount of funds, they would come up with this movement. I have to admit it is over-engineered! It has a manual mainspring in an automatic movement, that when it gets to full wind the bumper rotor hooks onto a pin that is eccentrically pushed over when full wind is achieved, so the mainspring doesn't break. The mainspring is also pretensioned by 1 1/4 turns to create a stop-work, so the spring never comes to be fully unwound and when the watch is picked up after stopping, it will kick into life instantly. The spring also never gets to be fully wound as well, so there is a more even and linear torque over the 33 hours of running. The hands a set by sliding that winder across at the back of the monocoque case, It also has a hack which stops the balance when the winder is slid across. You can see that in the third photo. The second from last photo shows the power reserve rack and that hook that hooks onto the pin to stop the rotor turning and breaking the mainspring. The last photo shows a good timegrapher reading. A little problematic fourth wheel as you can see from the trace, but not bad fro a 70 year old lady. This has been one of the most looked after JLCs to date. Absolutely gorgeous unstated watches! I've got another JLC bumper auto to service this week. I'm spoilt!


 7 points
 -
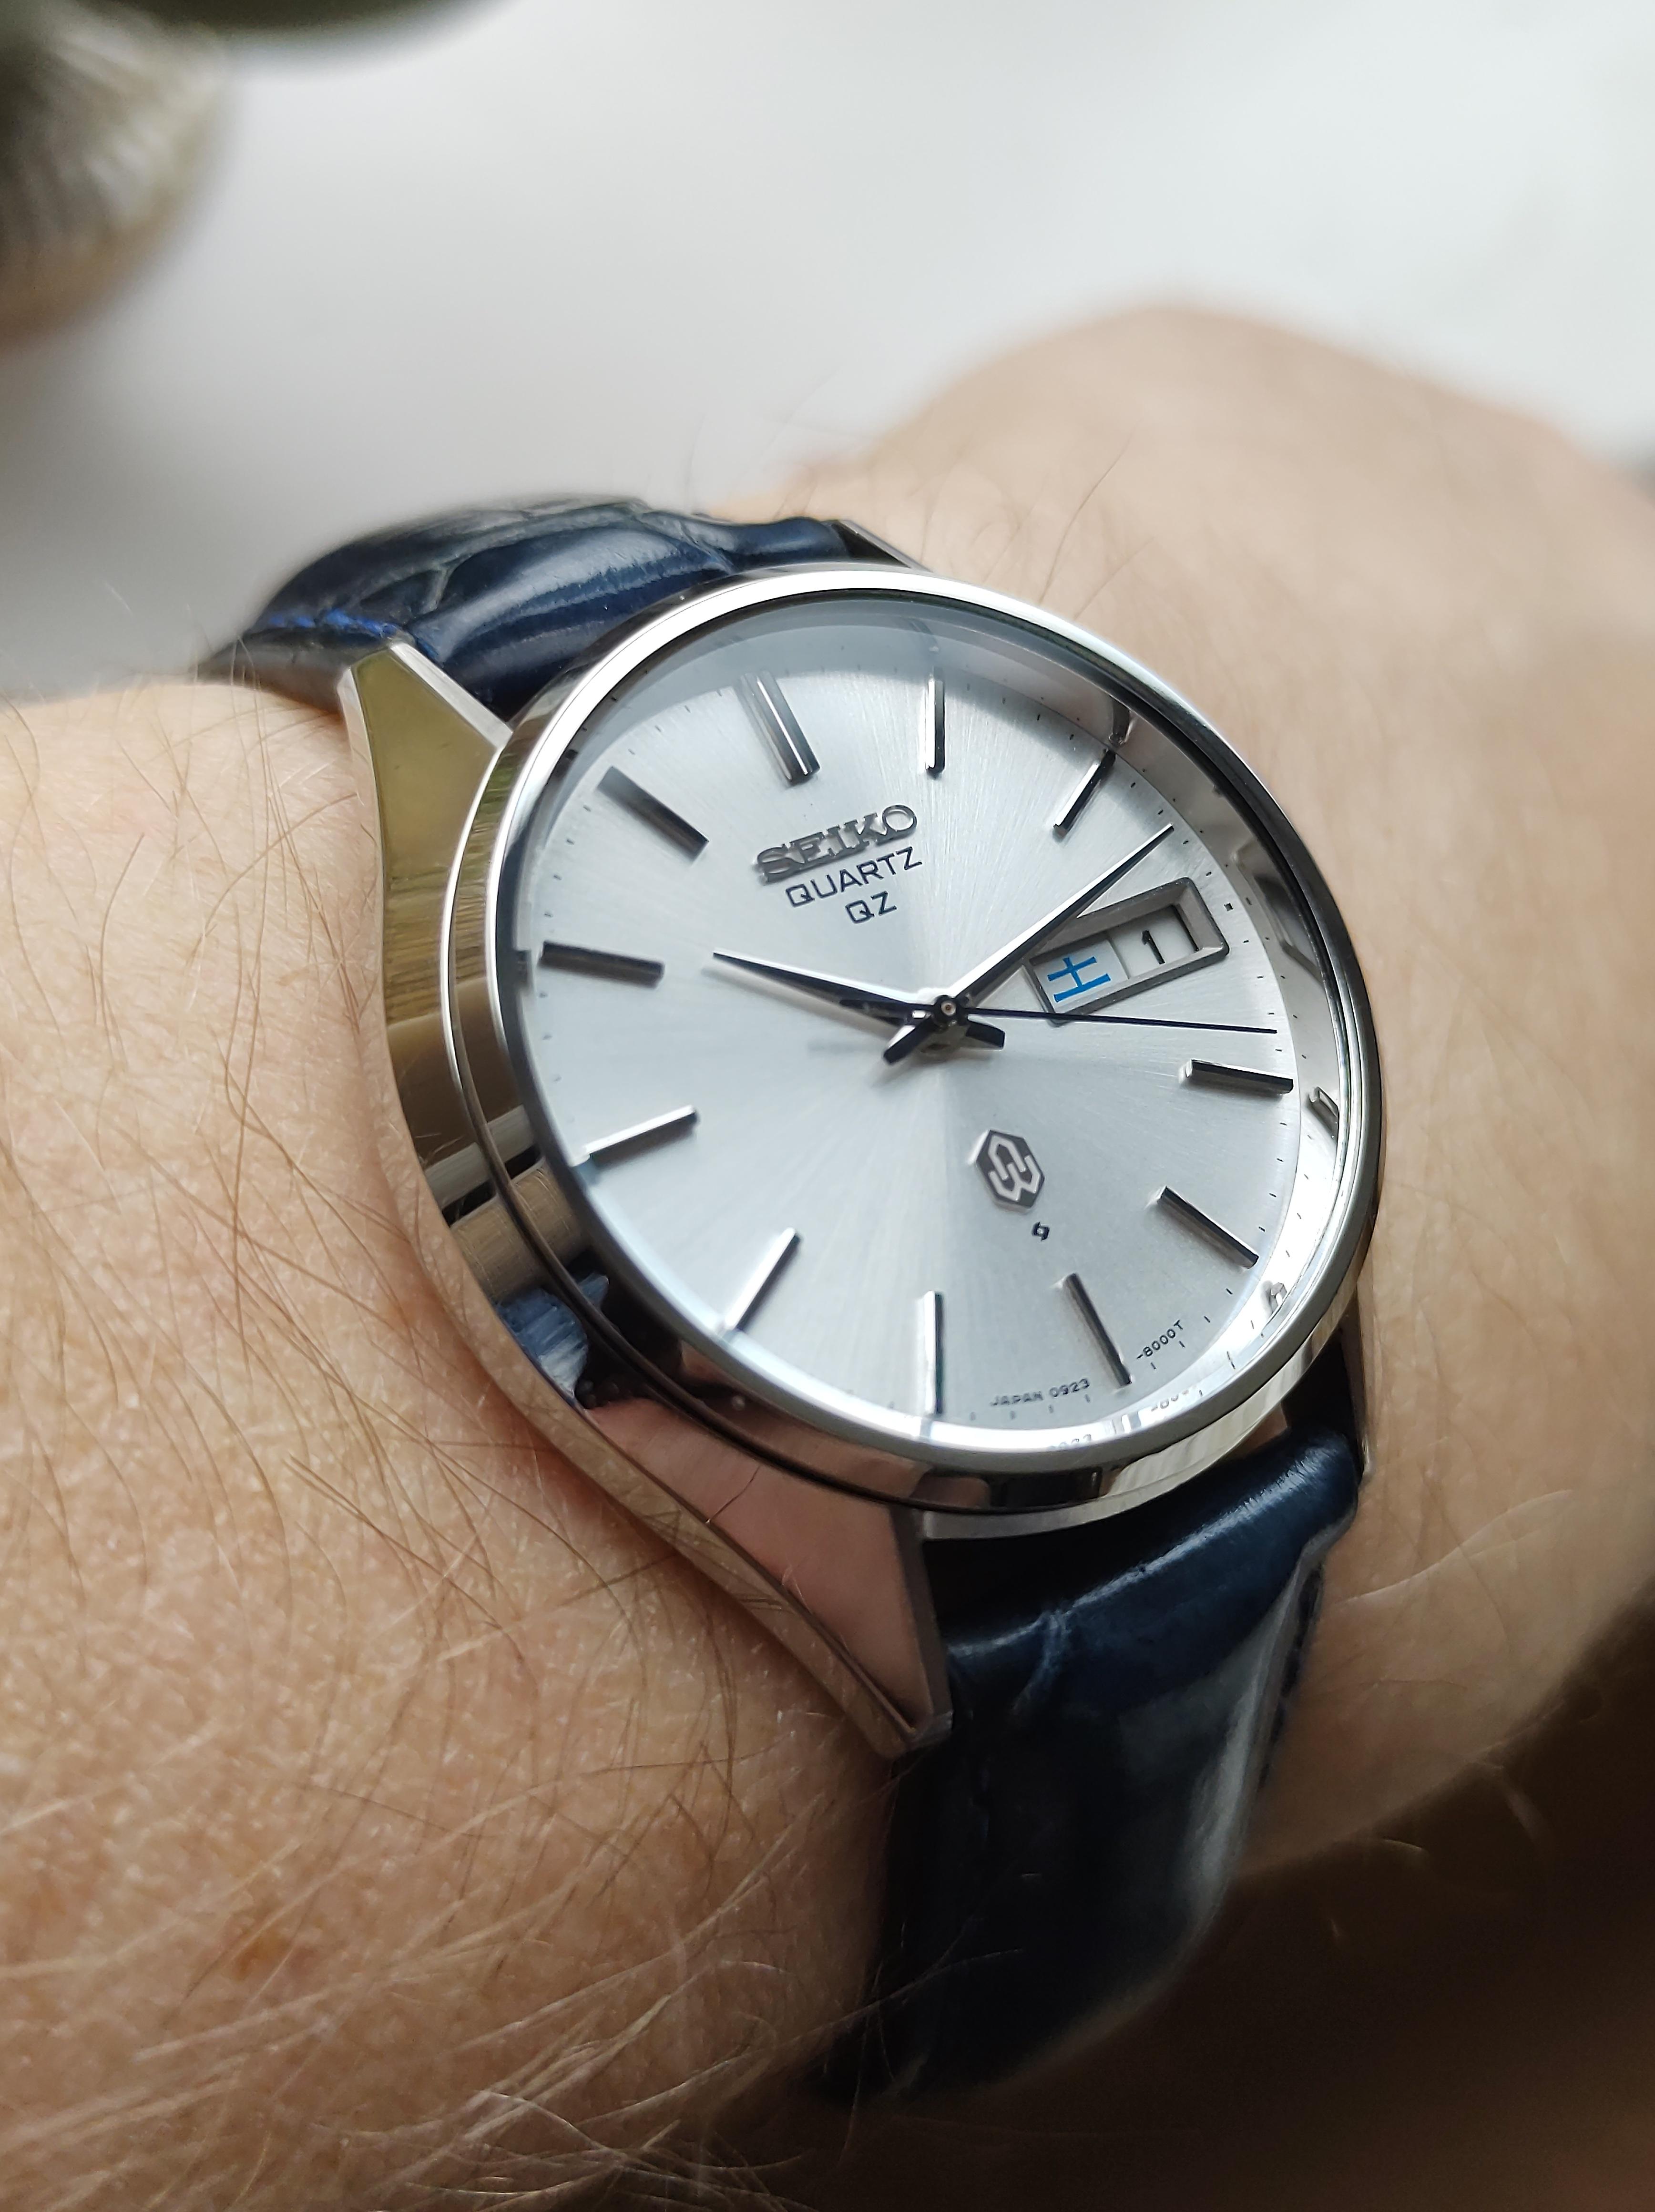
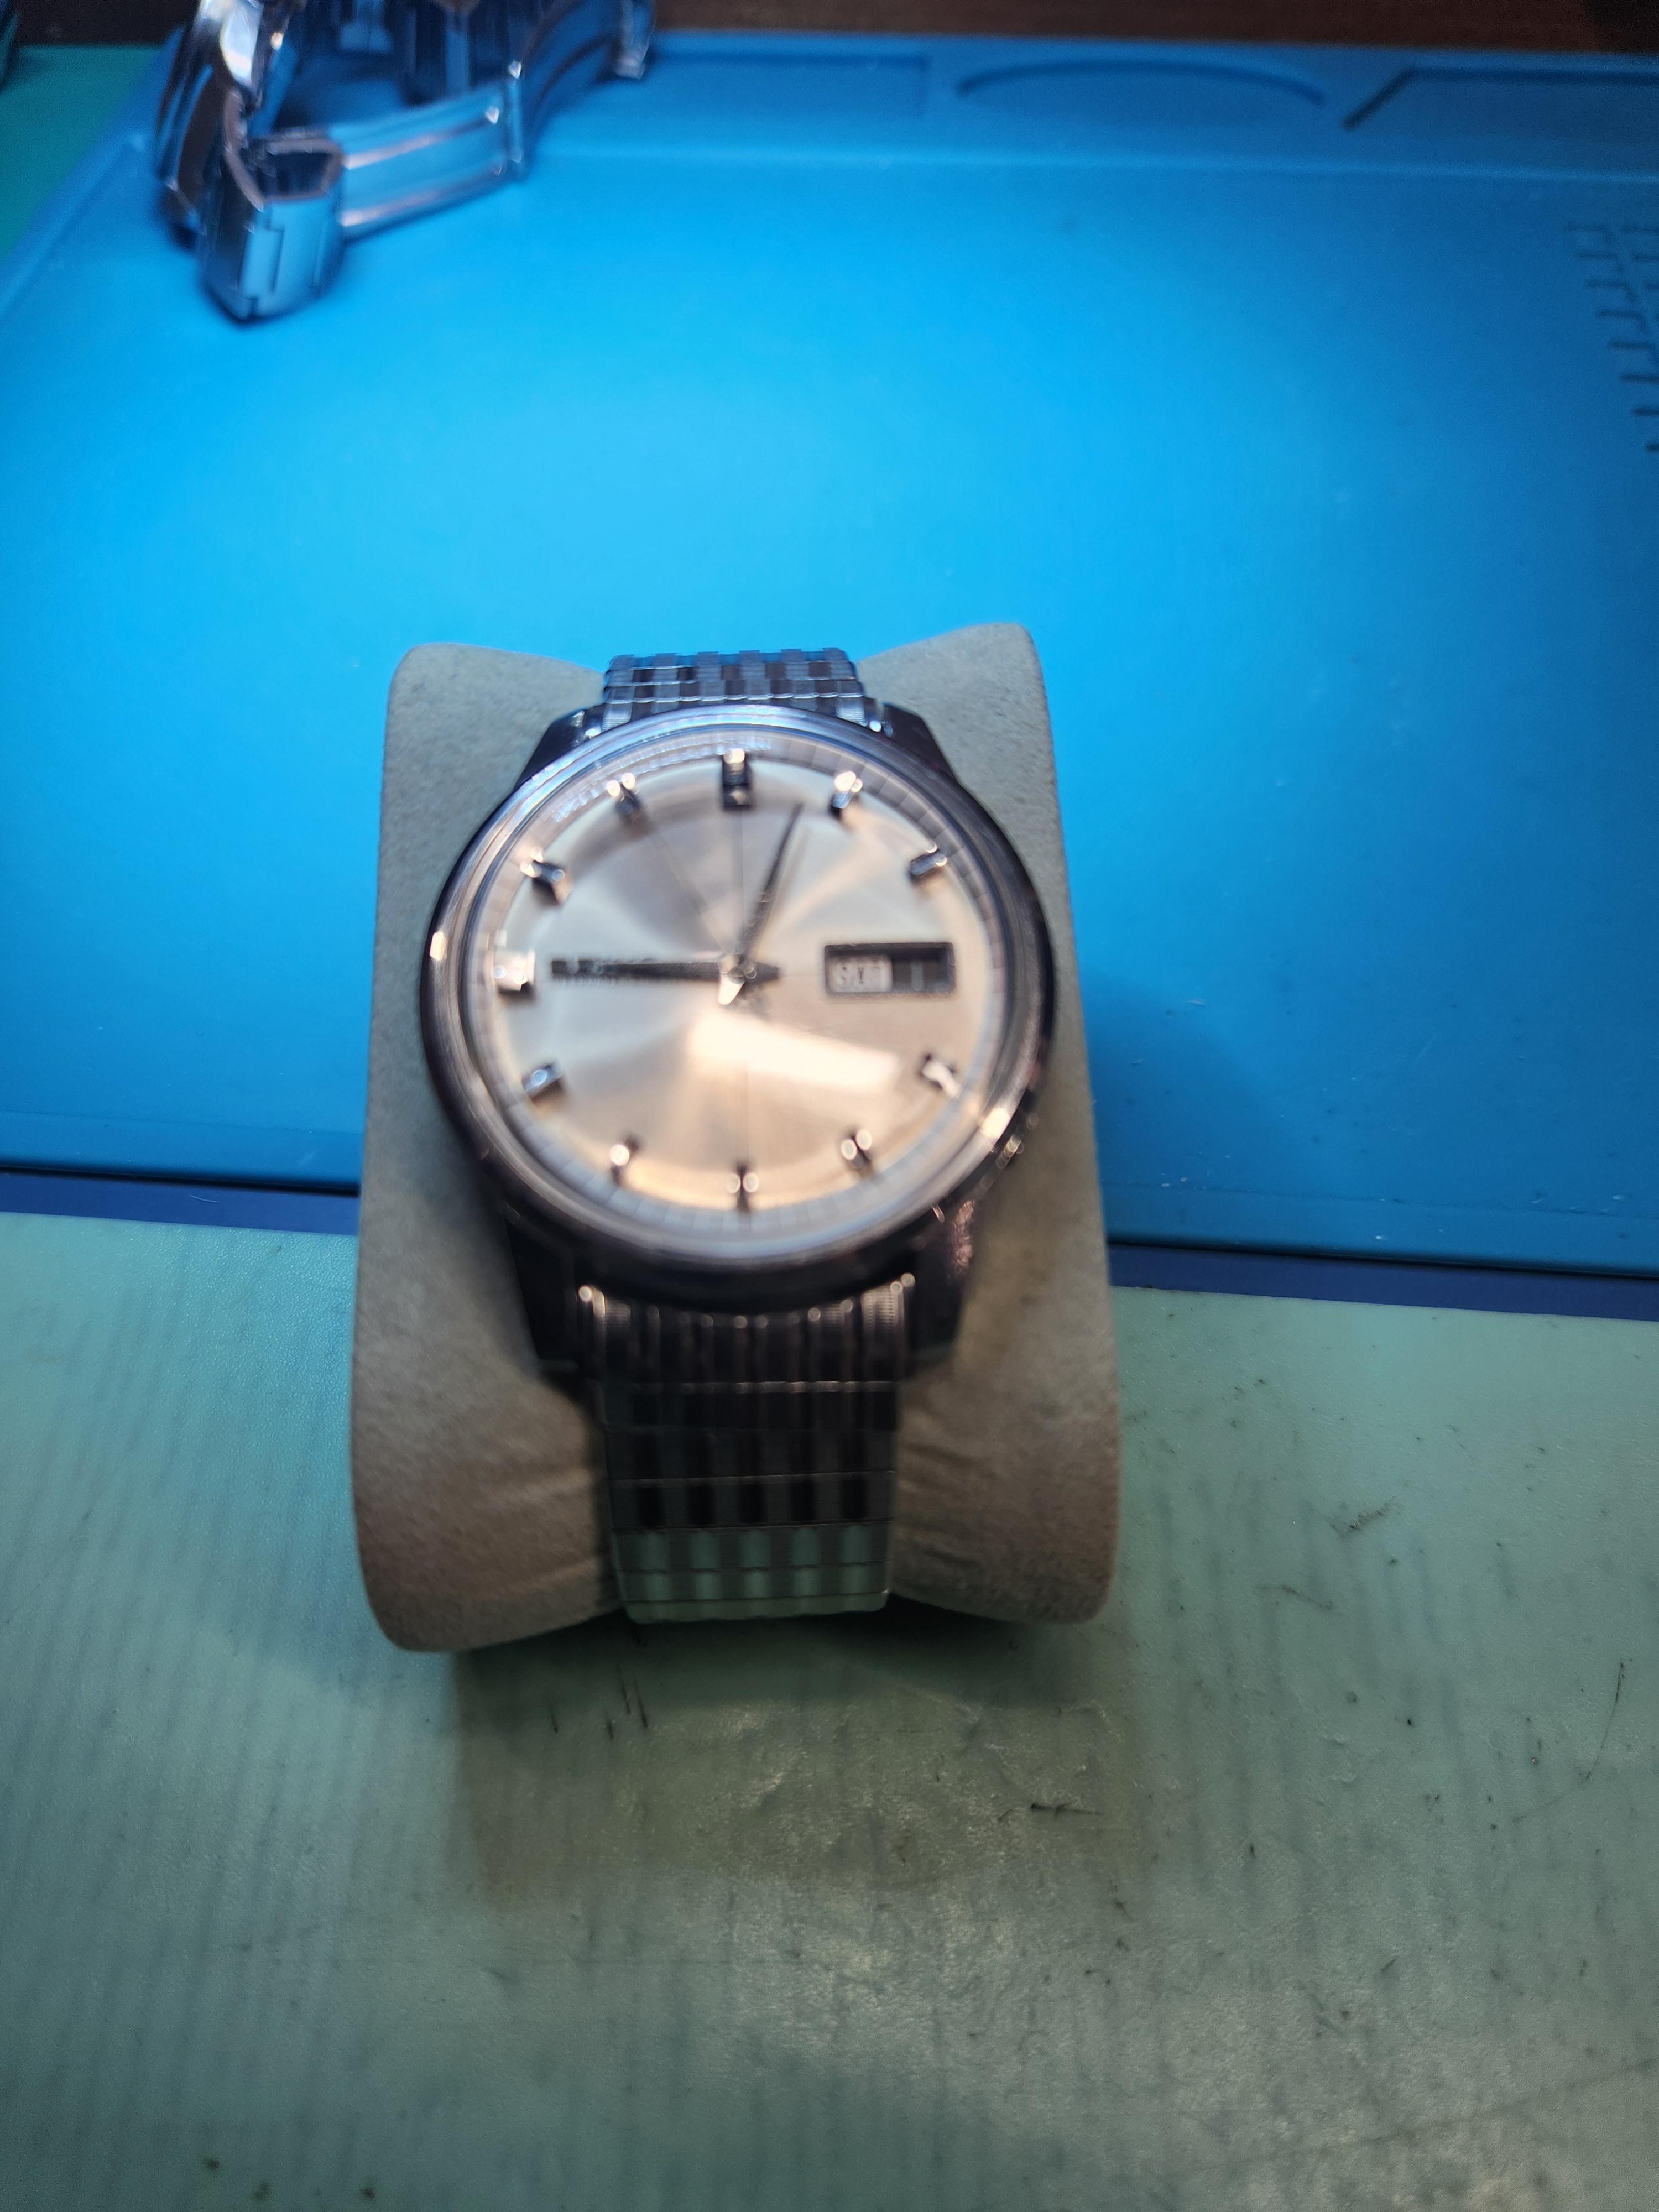
Seiko QZ from April 1975 Just finished this morning. Had an issue with no end shake on the centre wheel that was causing the second hand to just twitch. Turned out that I hadn't pushed the canon pinion fully home. After adding the hour wheel and calendar plates everything was just getting clamped together. All fixed now after giving the canon pinion a satisfying click into place.
 5 points
 -
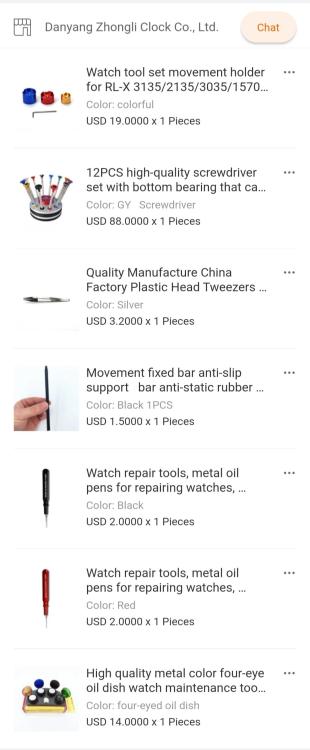
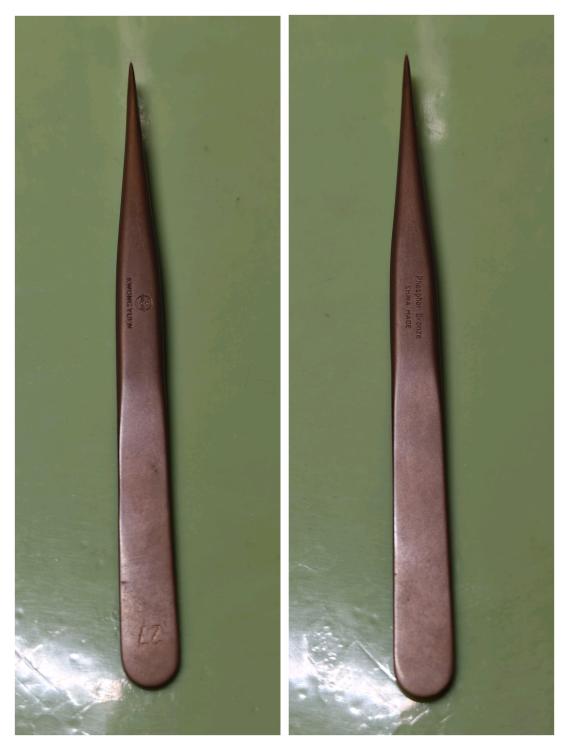
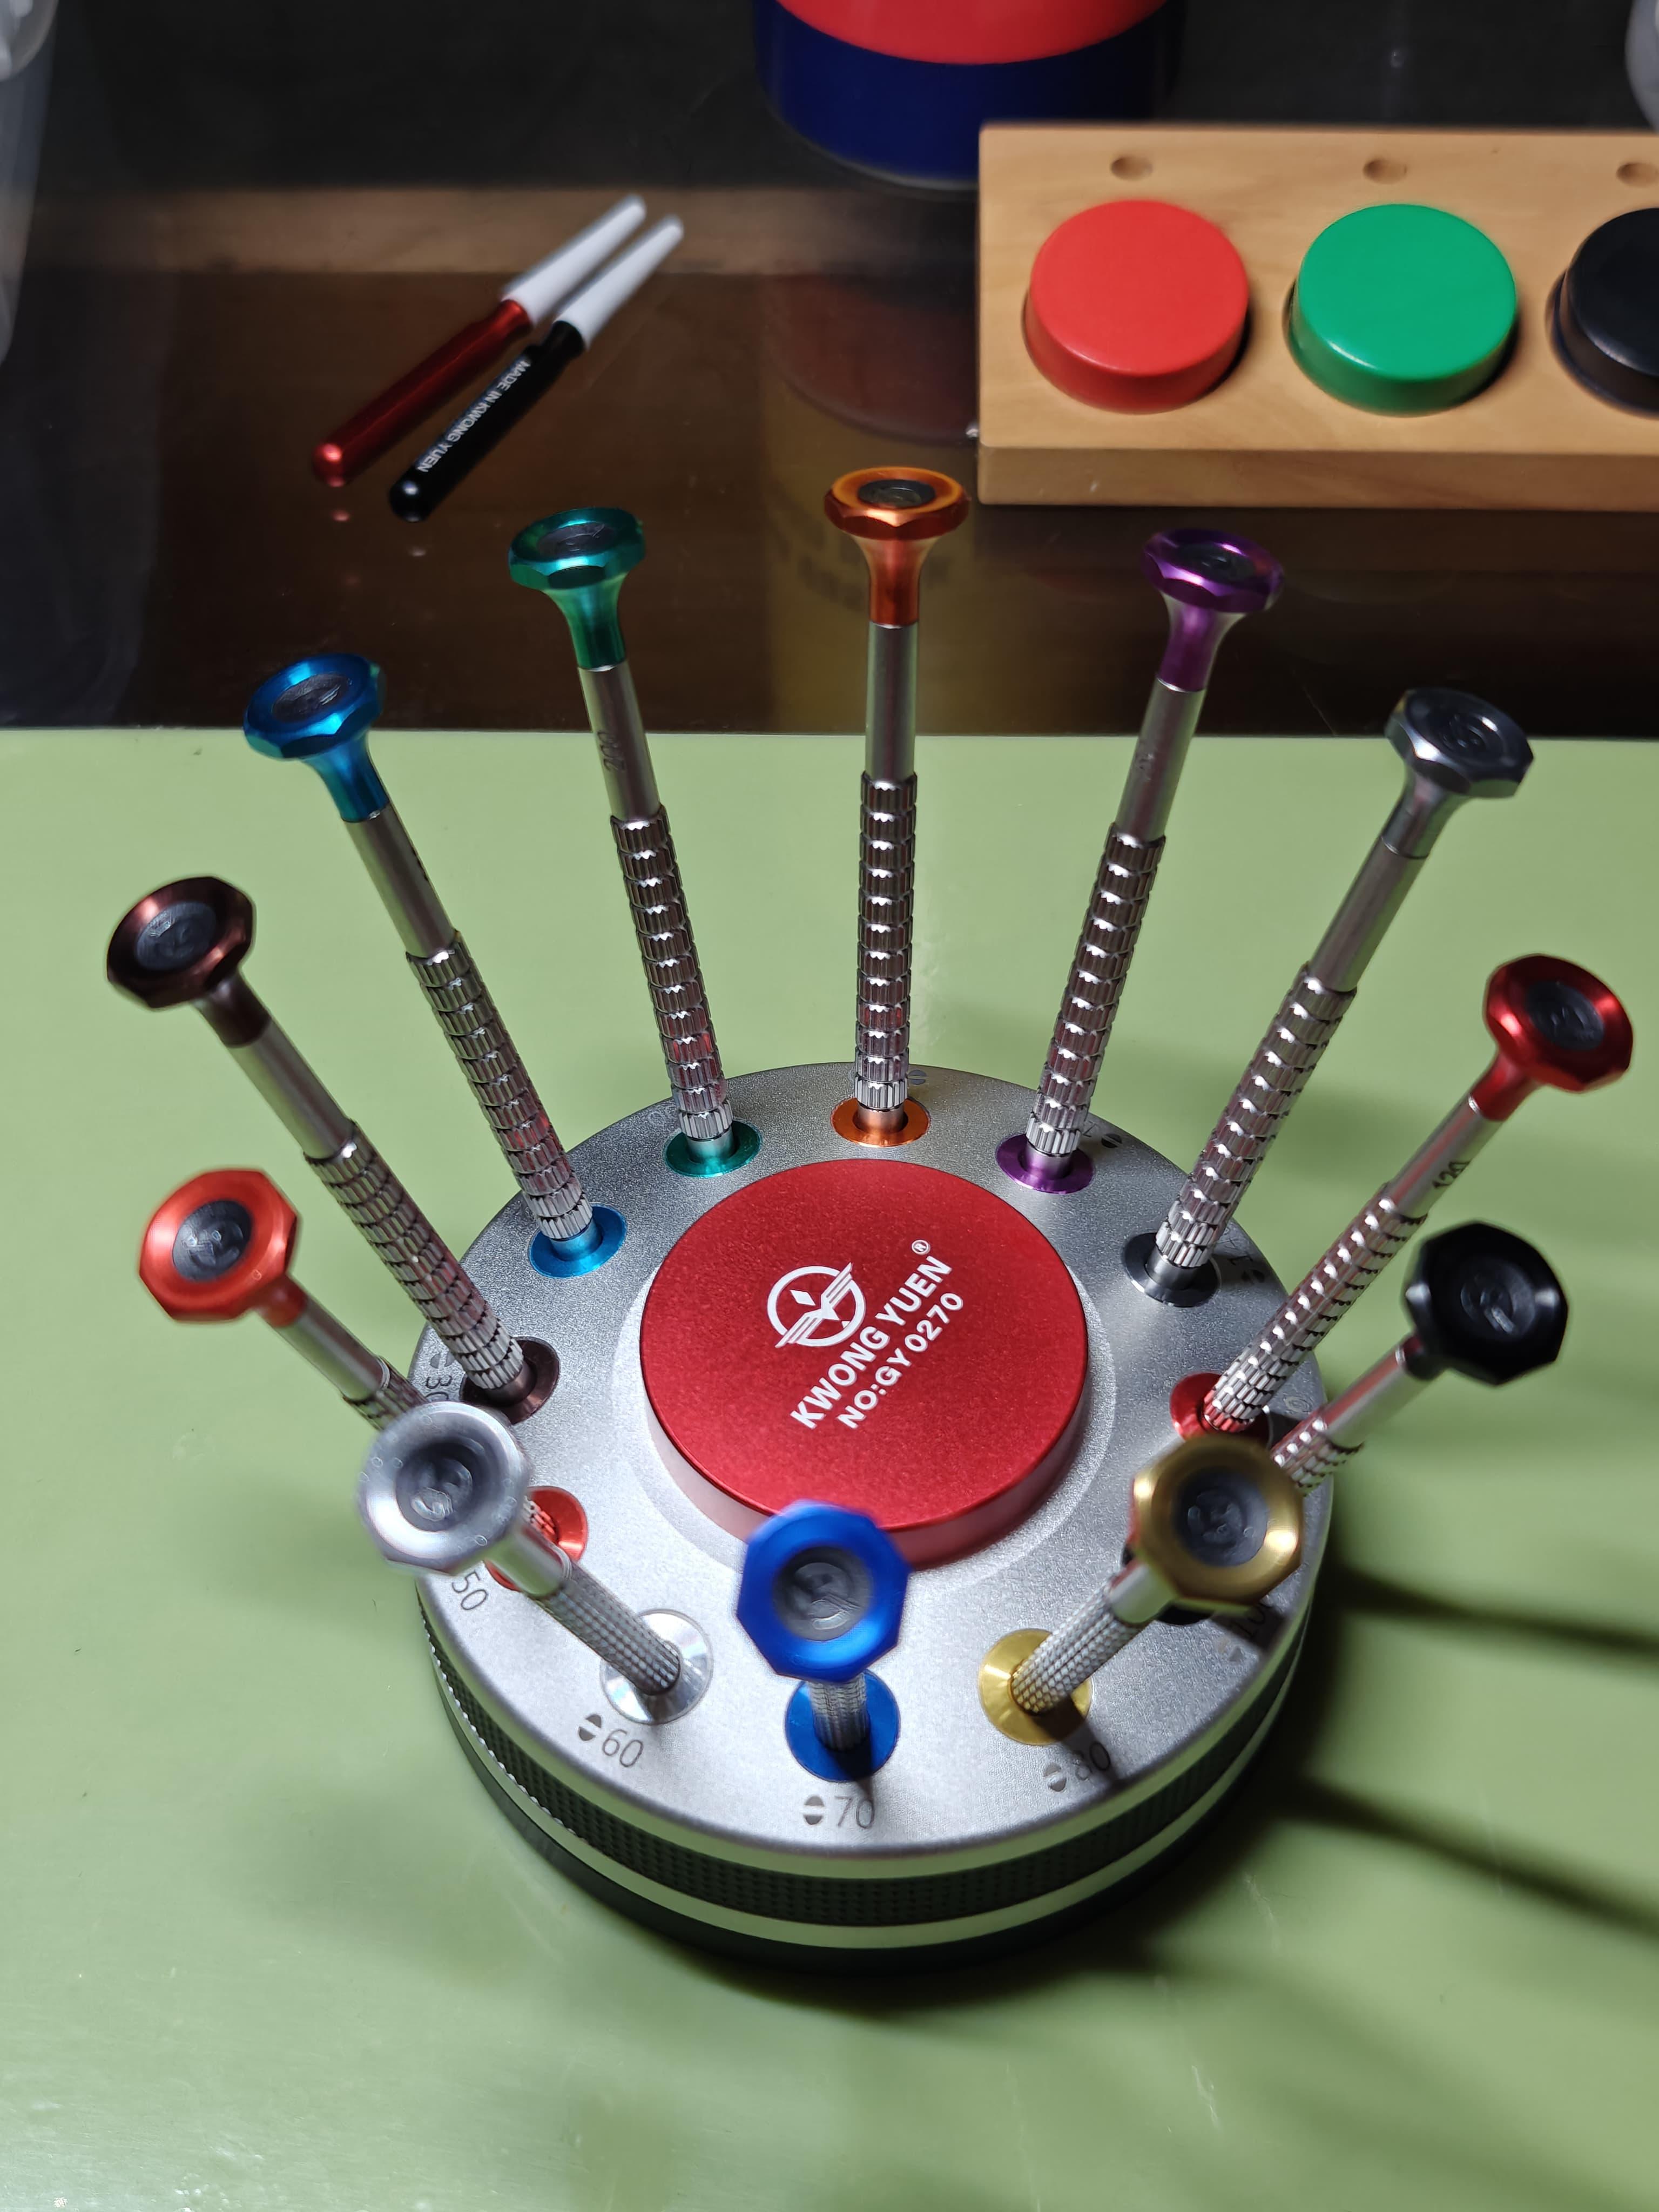
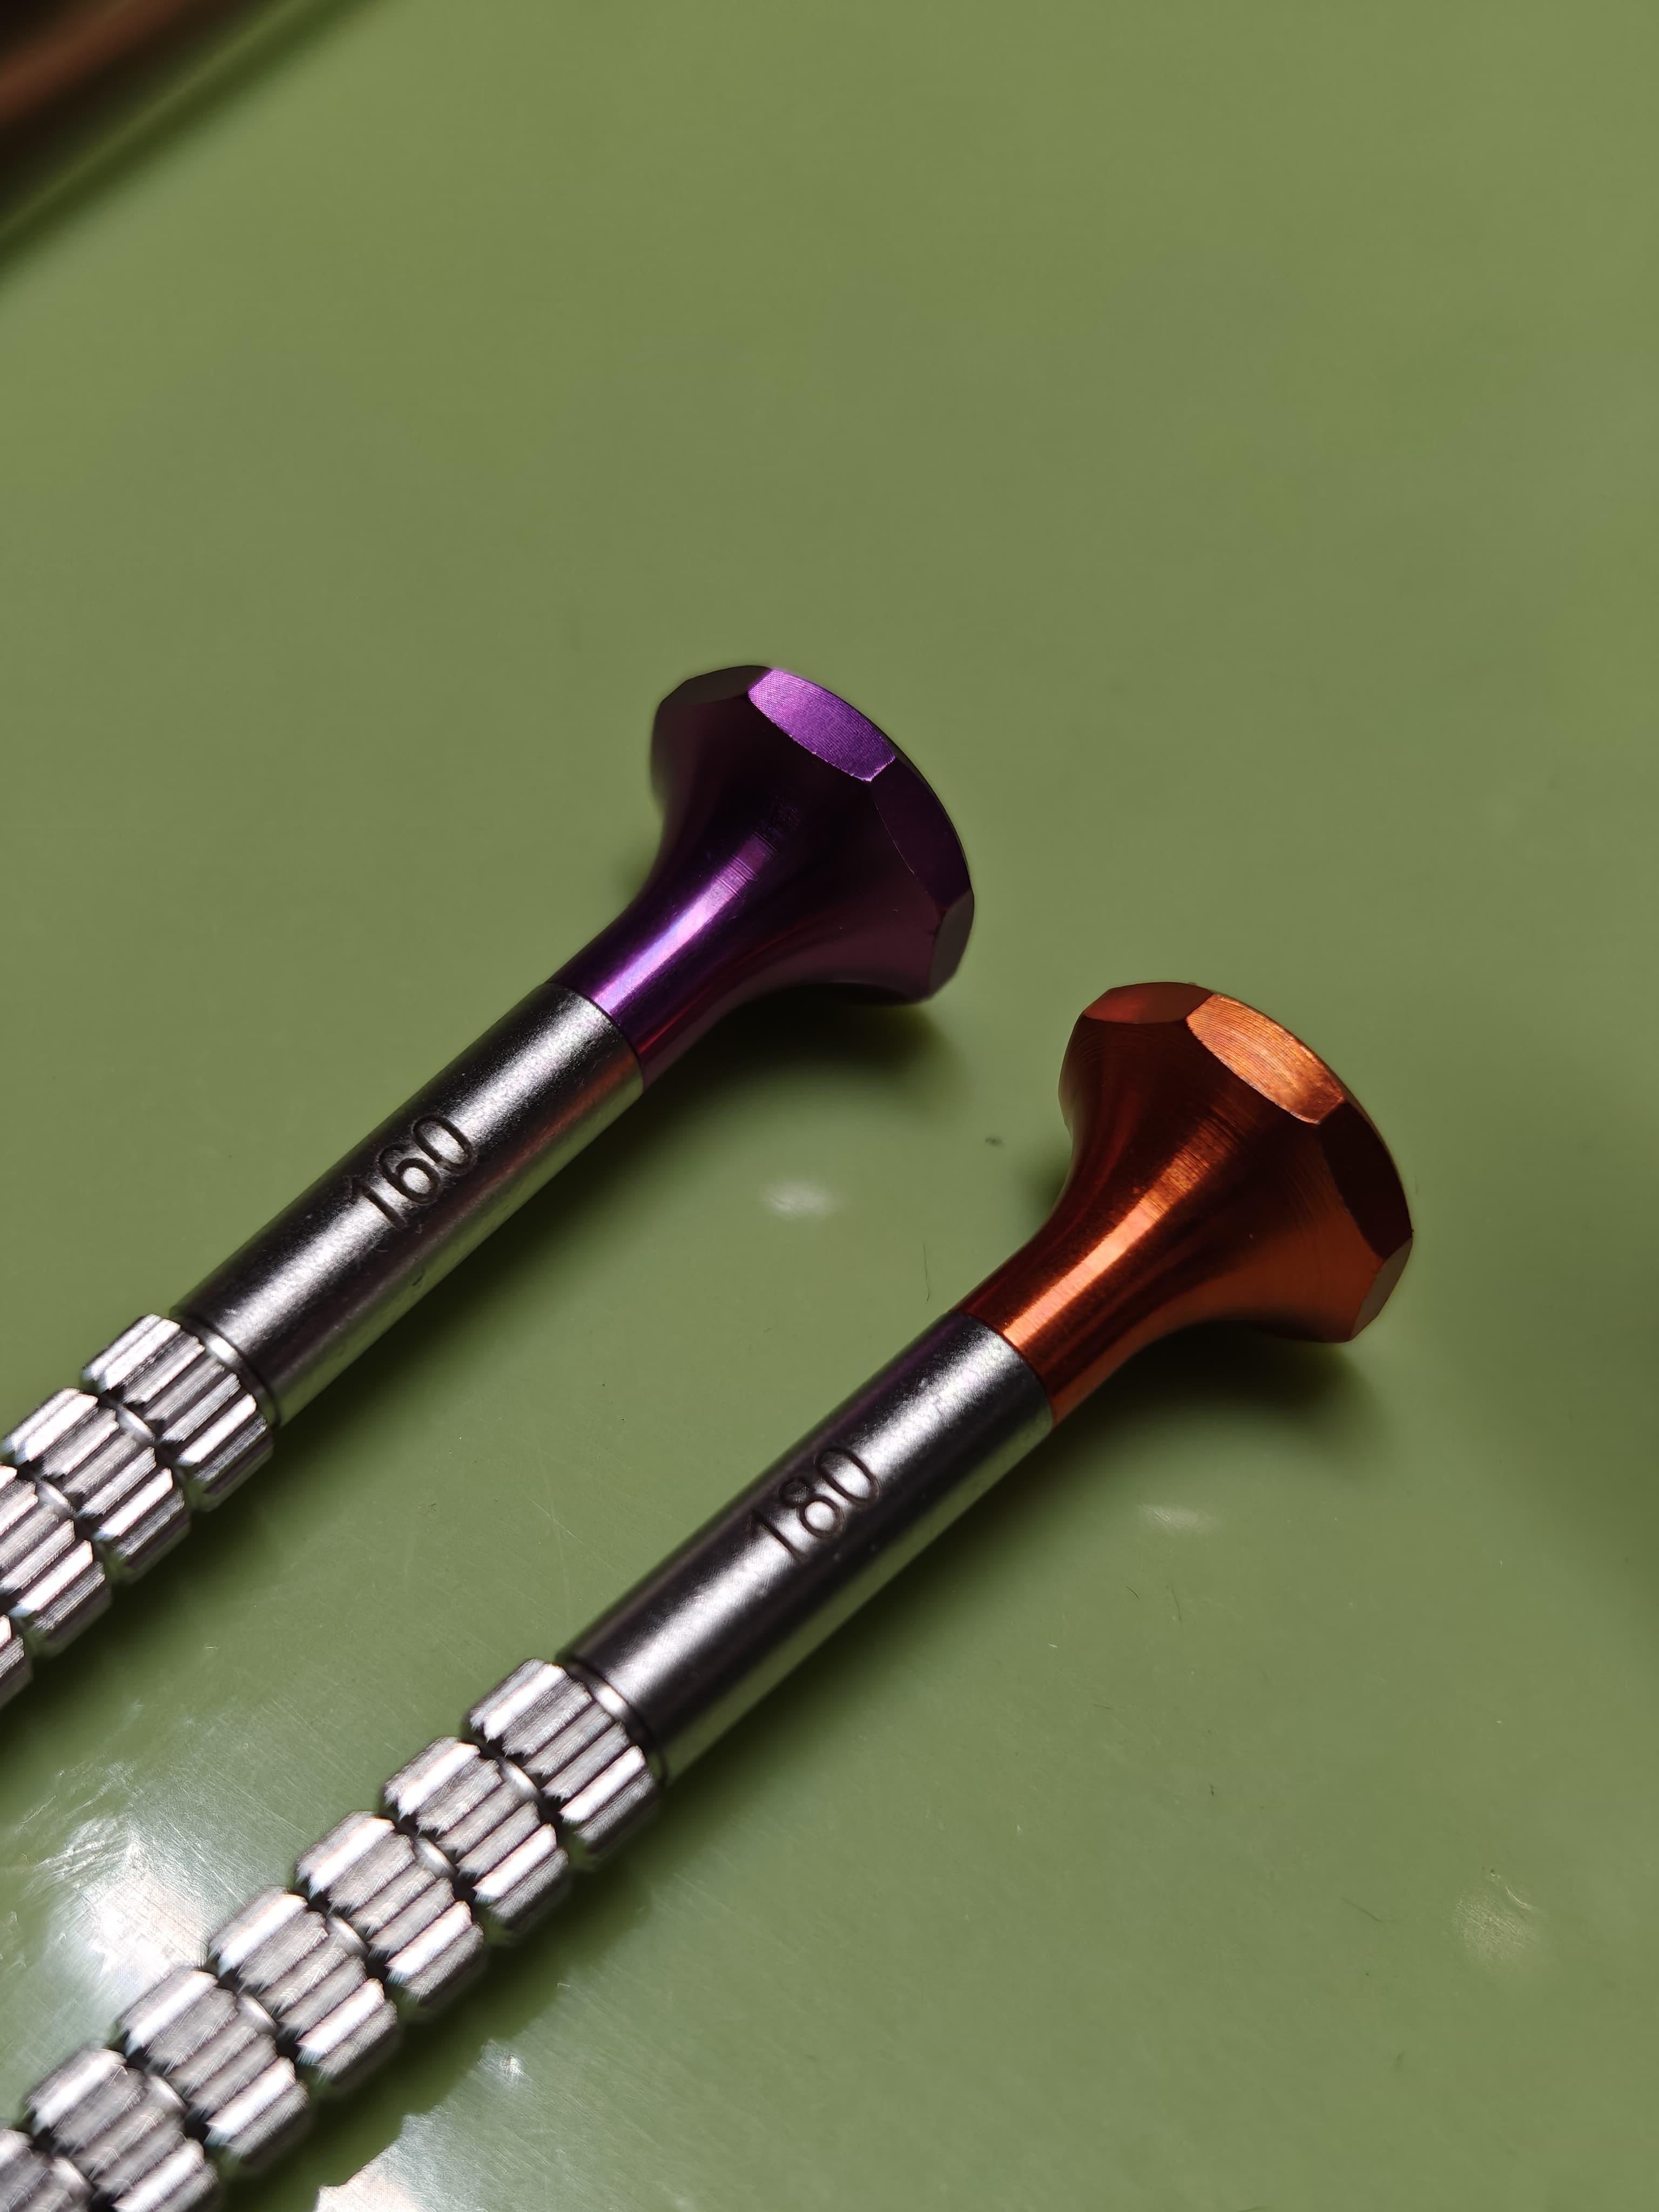
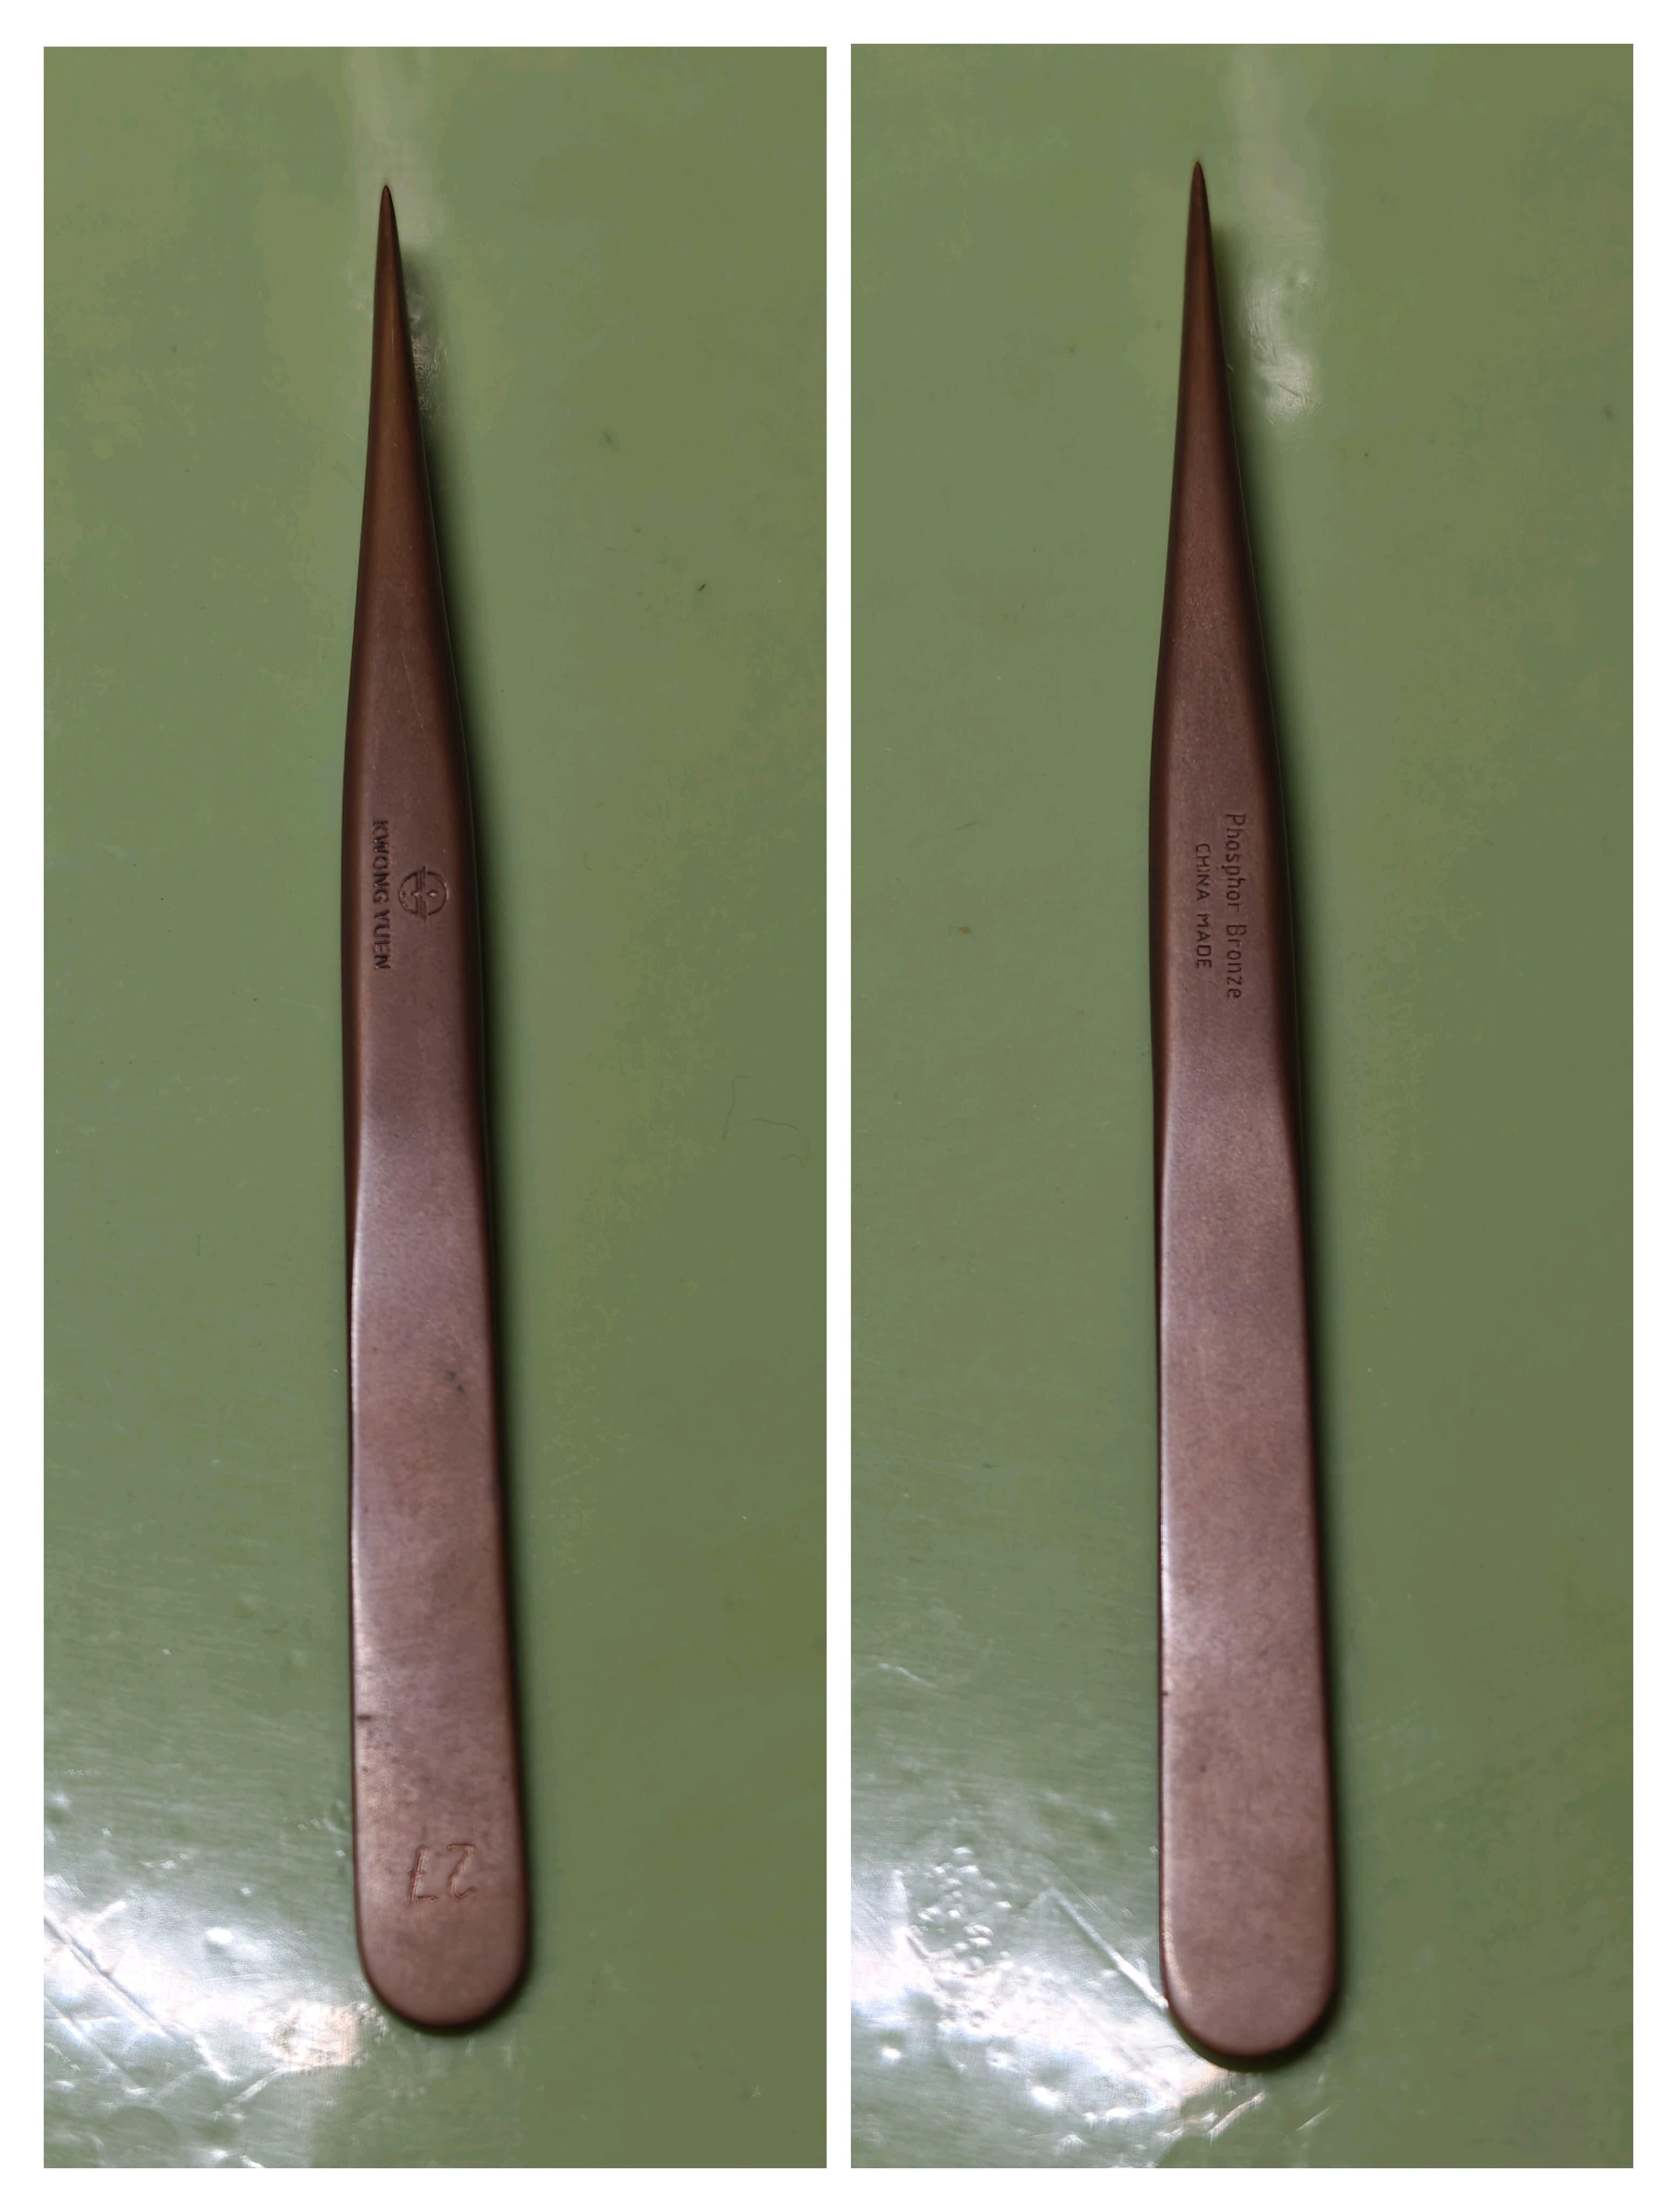
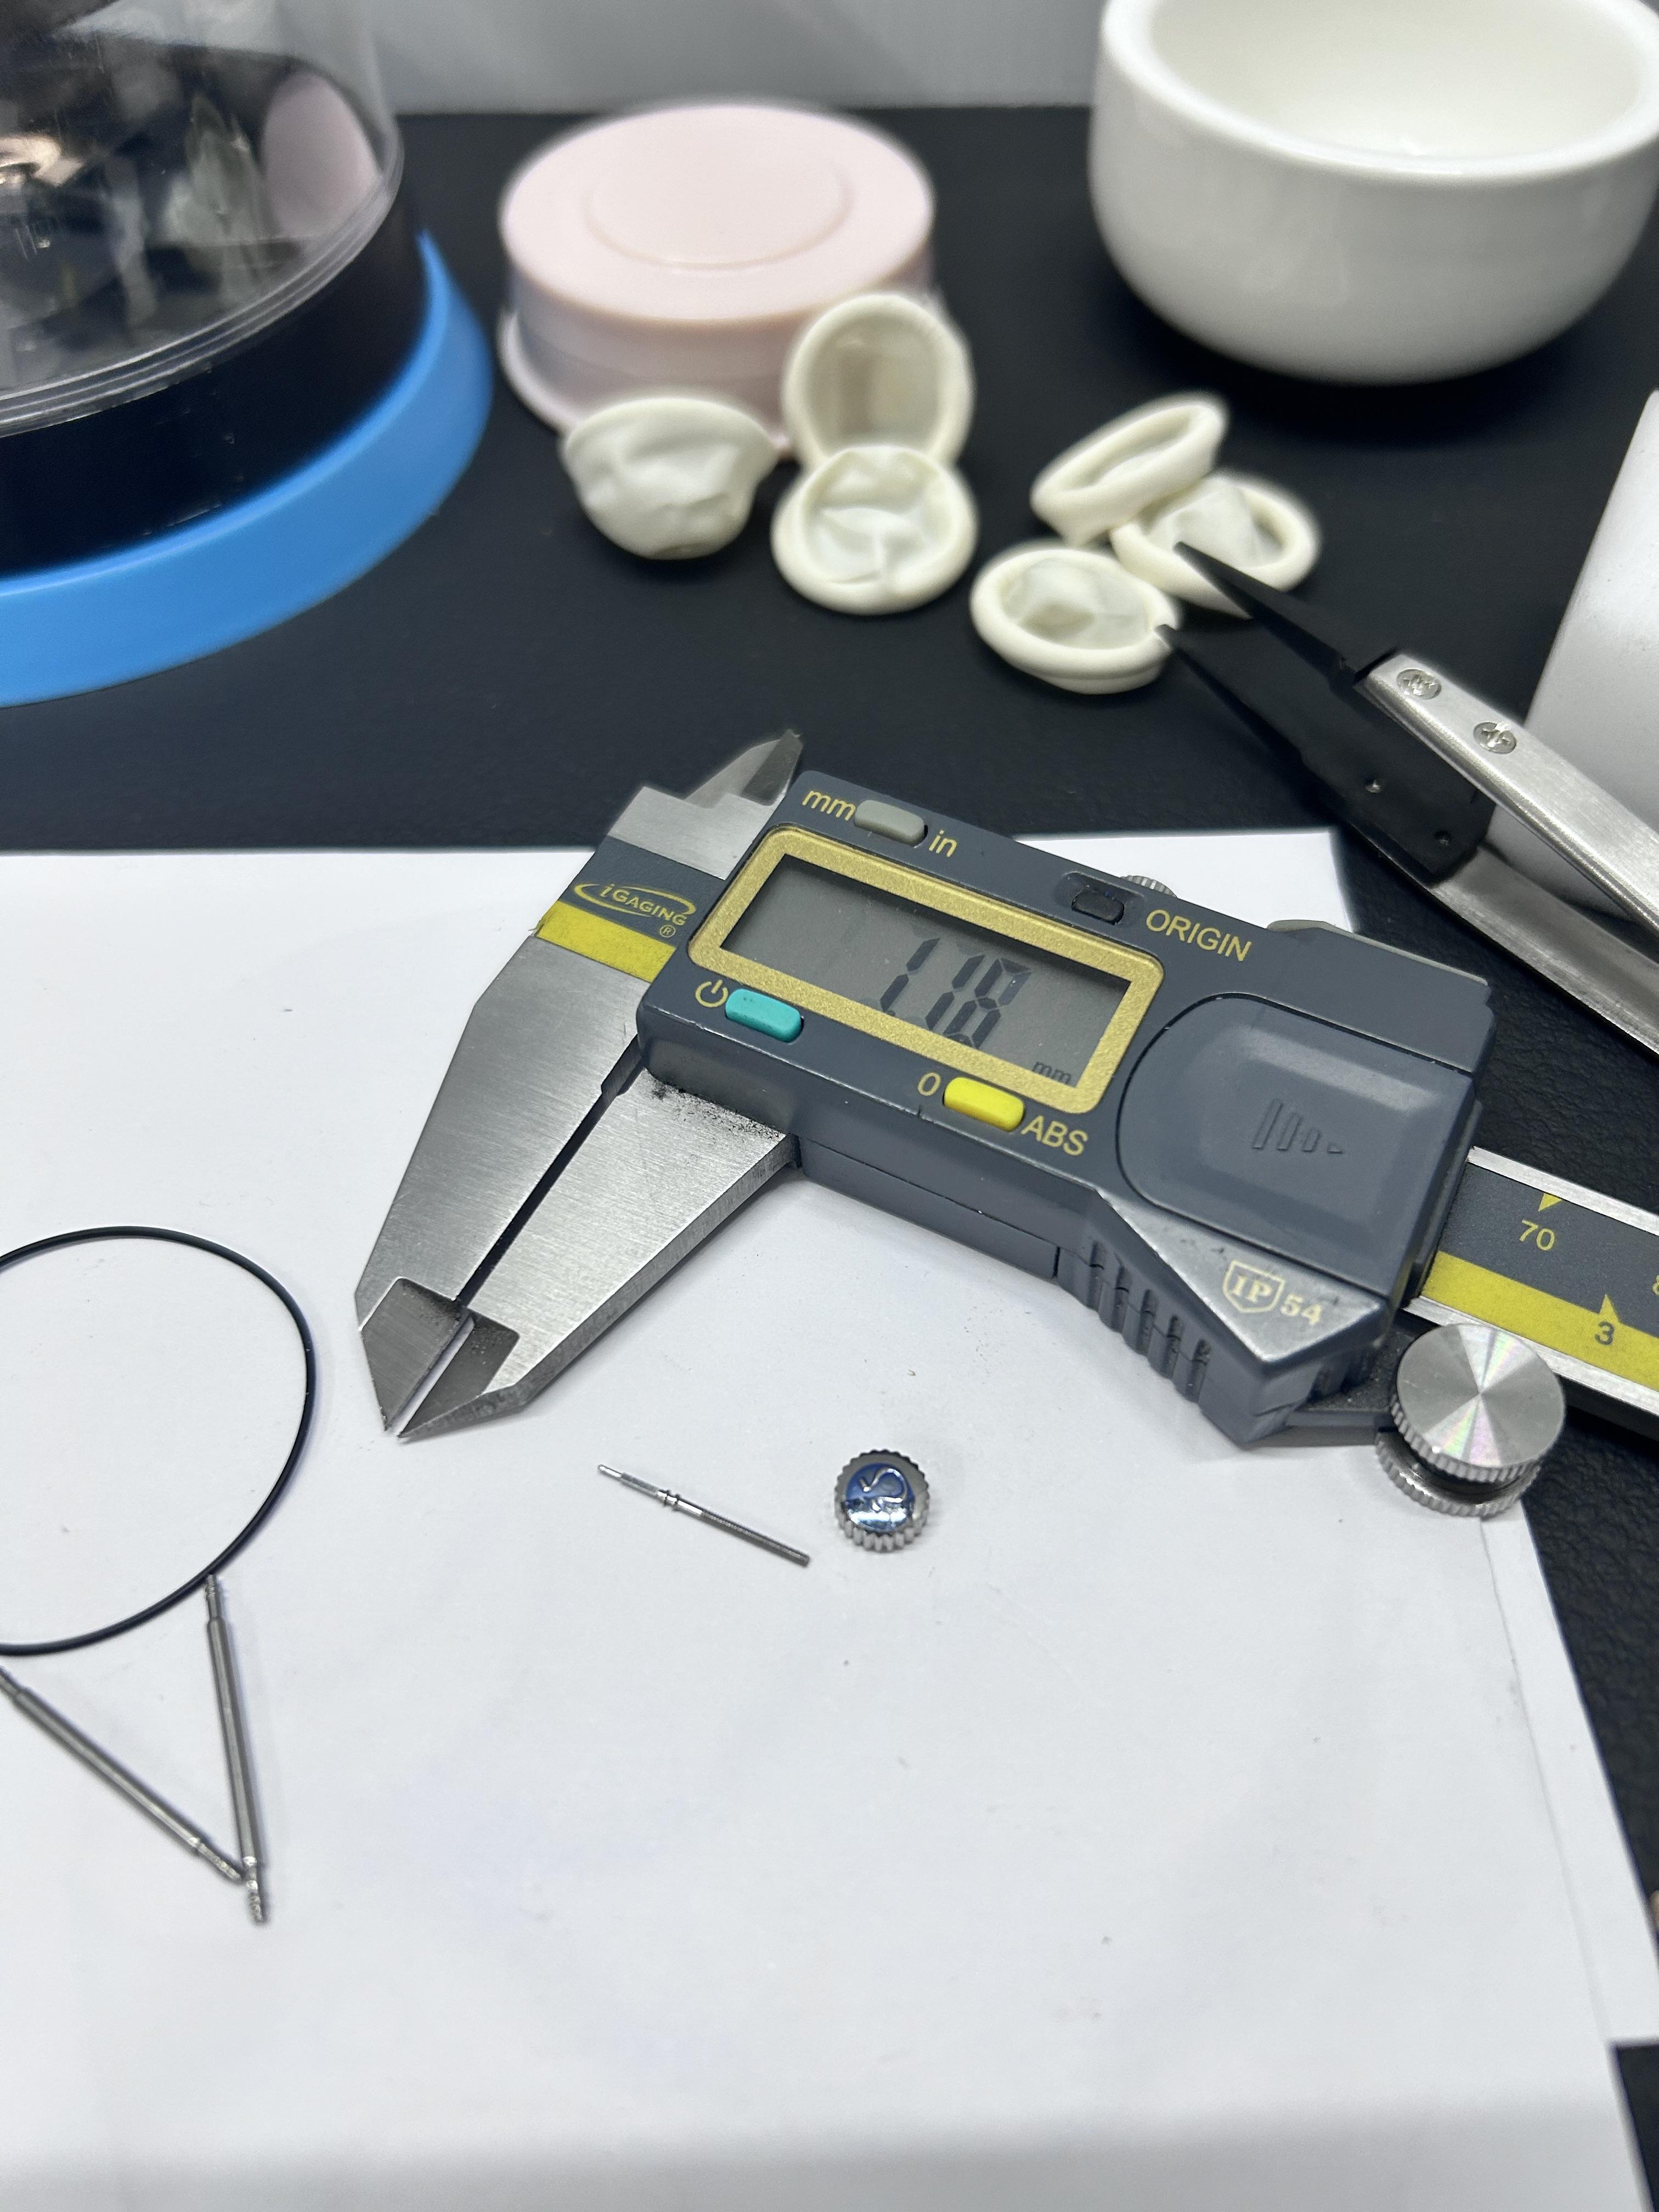
I recently purchased some tools from a Chinese store on Alibaba, detailed review of the items below: 1. Kwong Yuen 12pc screwdriver set with ball bearing. Ever since I tried my watchmaker's old style Horotec 12pc screwdriver set I wanted the ball bearing ones. This set is one of the more expensive offerings from the brand but worth it. I think the black cap with the logo is an improvement over the Horotec design with the open top. Even the tolerances seem better since the ball bearings are more concealed than Horotec. The base is comparable to Horotec. Blades are hardened steel and stock finishing is quite good, even the slotted system to create a stopper is implemented. Some might not like the stepped nature of the blades as the screwdrivers are made to fit 1.2 and 2mm shafts. 2. Oil pot from Ruihua Highlight being actual ceramic reservoirs and all metal solid build quality at the price. Also comes in a 5 pot variant, Which in retrospect would be a better buy for the longer run. 3. Oilers from Kwong Yuen: Feels solid, stock finishing is quite good. Caps a bit flimsy compared to the metal body. Better polished tips in person, camera is making it look worse. 4. Generic tweezers with plastic tips. Body is not well finished but the tips are nice and the stock calibration is quite good. 5&6. Generic Rolex movement Holder and plastic stick. No complaints, works as it should. 7. Kwong Yuen Bronze tweezers. Another high end offering from the brand. I used these for some time but they felt too soft (less force to pick up parts) and had a very low attack angle where the ends meet. Eventually, I modified it a bit by bending the ends inwards using pliers and opening it to compensate for the closed tips. This increased the attack angle and made them a bit firm. These tweezers are my personal favorite because of how they feel and handle. The quality is top notch. However I do feel that most people will need to modify it in order to get the best out of the tool.


.thumb.jpeg.ae28295e96987bf1afea0a71fc83f91e.jpeg)
.thumb.jpeg.303f3c6af660f156b23763259f8ddfa9.jpeg)
.thumb.jpeg.0e96248a59ff9f2842bbcdfe8b6cd4c9.jpeg)
.thumb.jpeg.ba734320afd2a6b7beec421552179139.jpeg)
.thumb.jpeg.fcbc9de81acff462aad9c975c9807e65.jpeg)
.thumb.jpeg.b782b56dad4af5cd85dc04a99bd02112.jpeg)
.thumb.jpeg.ec6da2100b5d13b4059a30b480d5a8d5.jpeg)
.thumb.jpeg.76e483e4eb64cd02e4b651bcfda20dd3.jpeg)
.thumb.jpeg.cc747f910eb46452b21d551ecd7d8bc0.jpeg) 5 points
5 points -
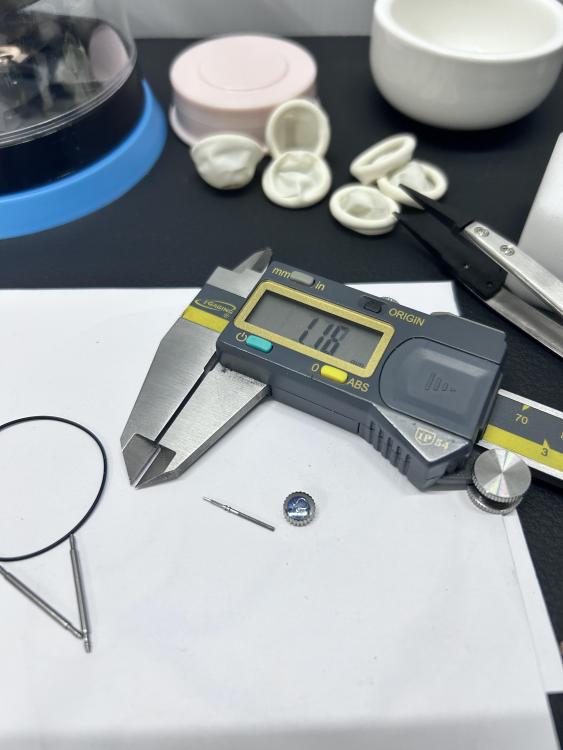
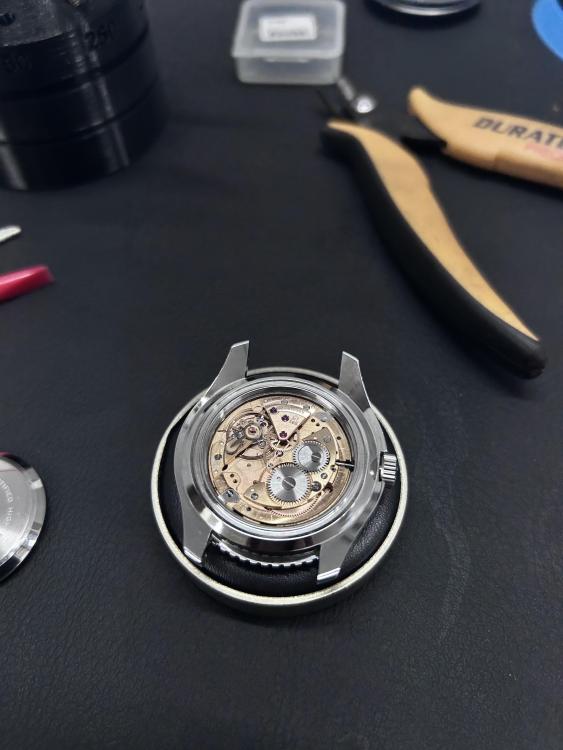
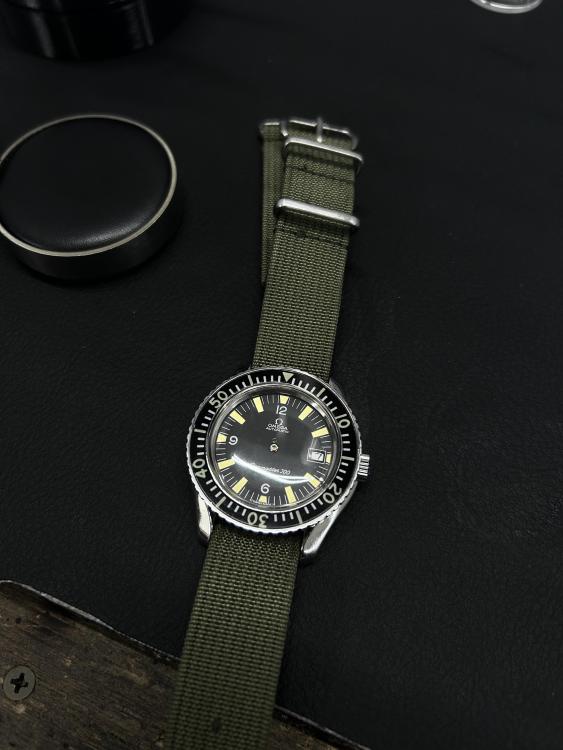
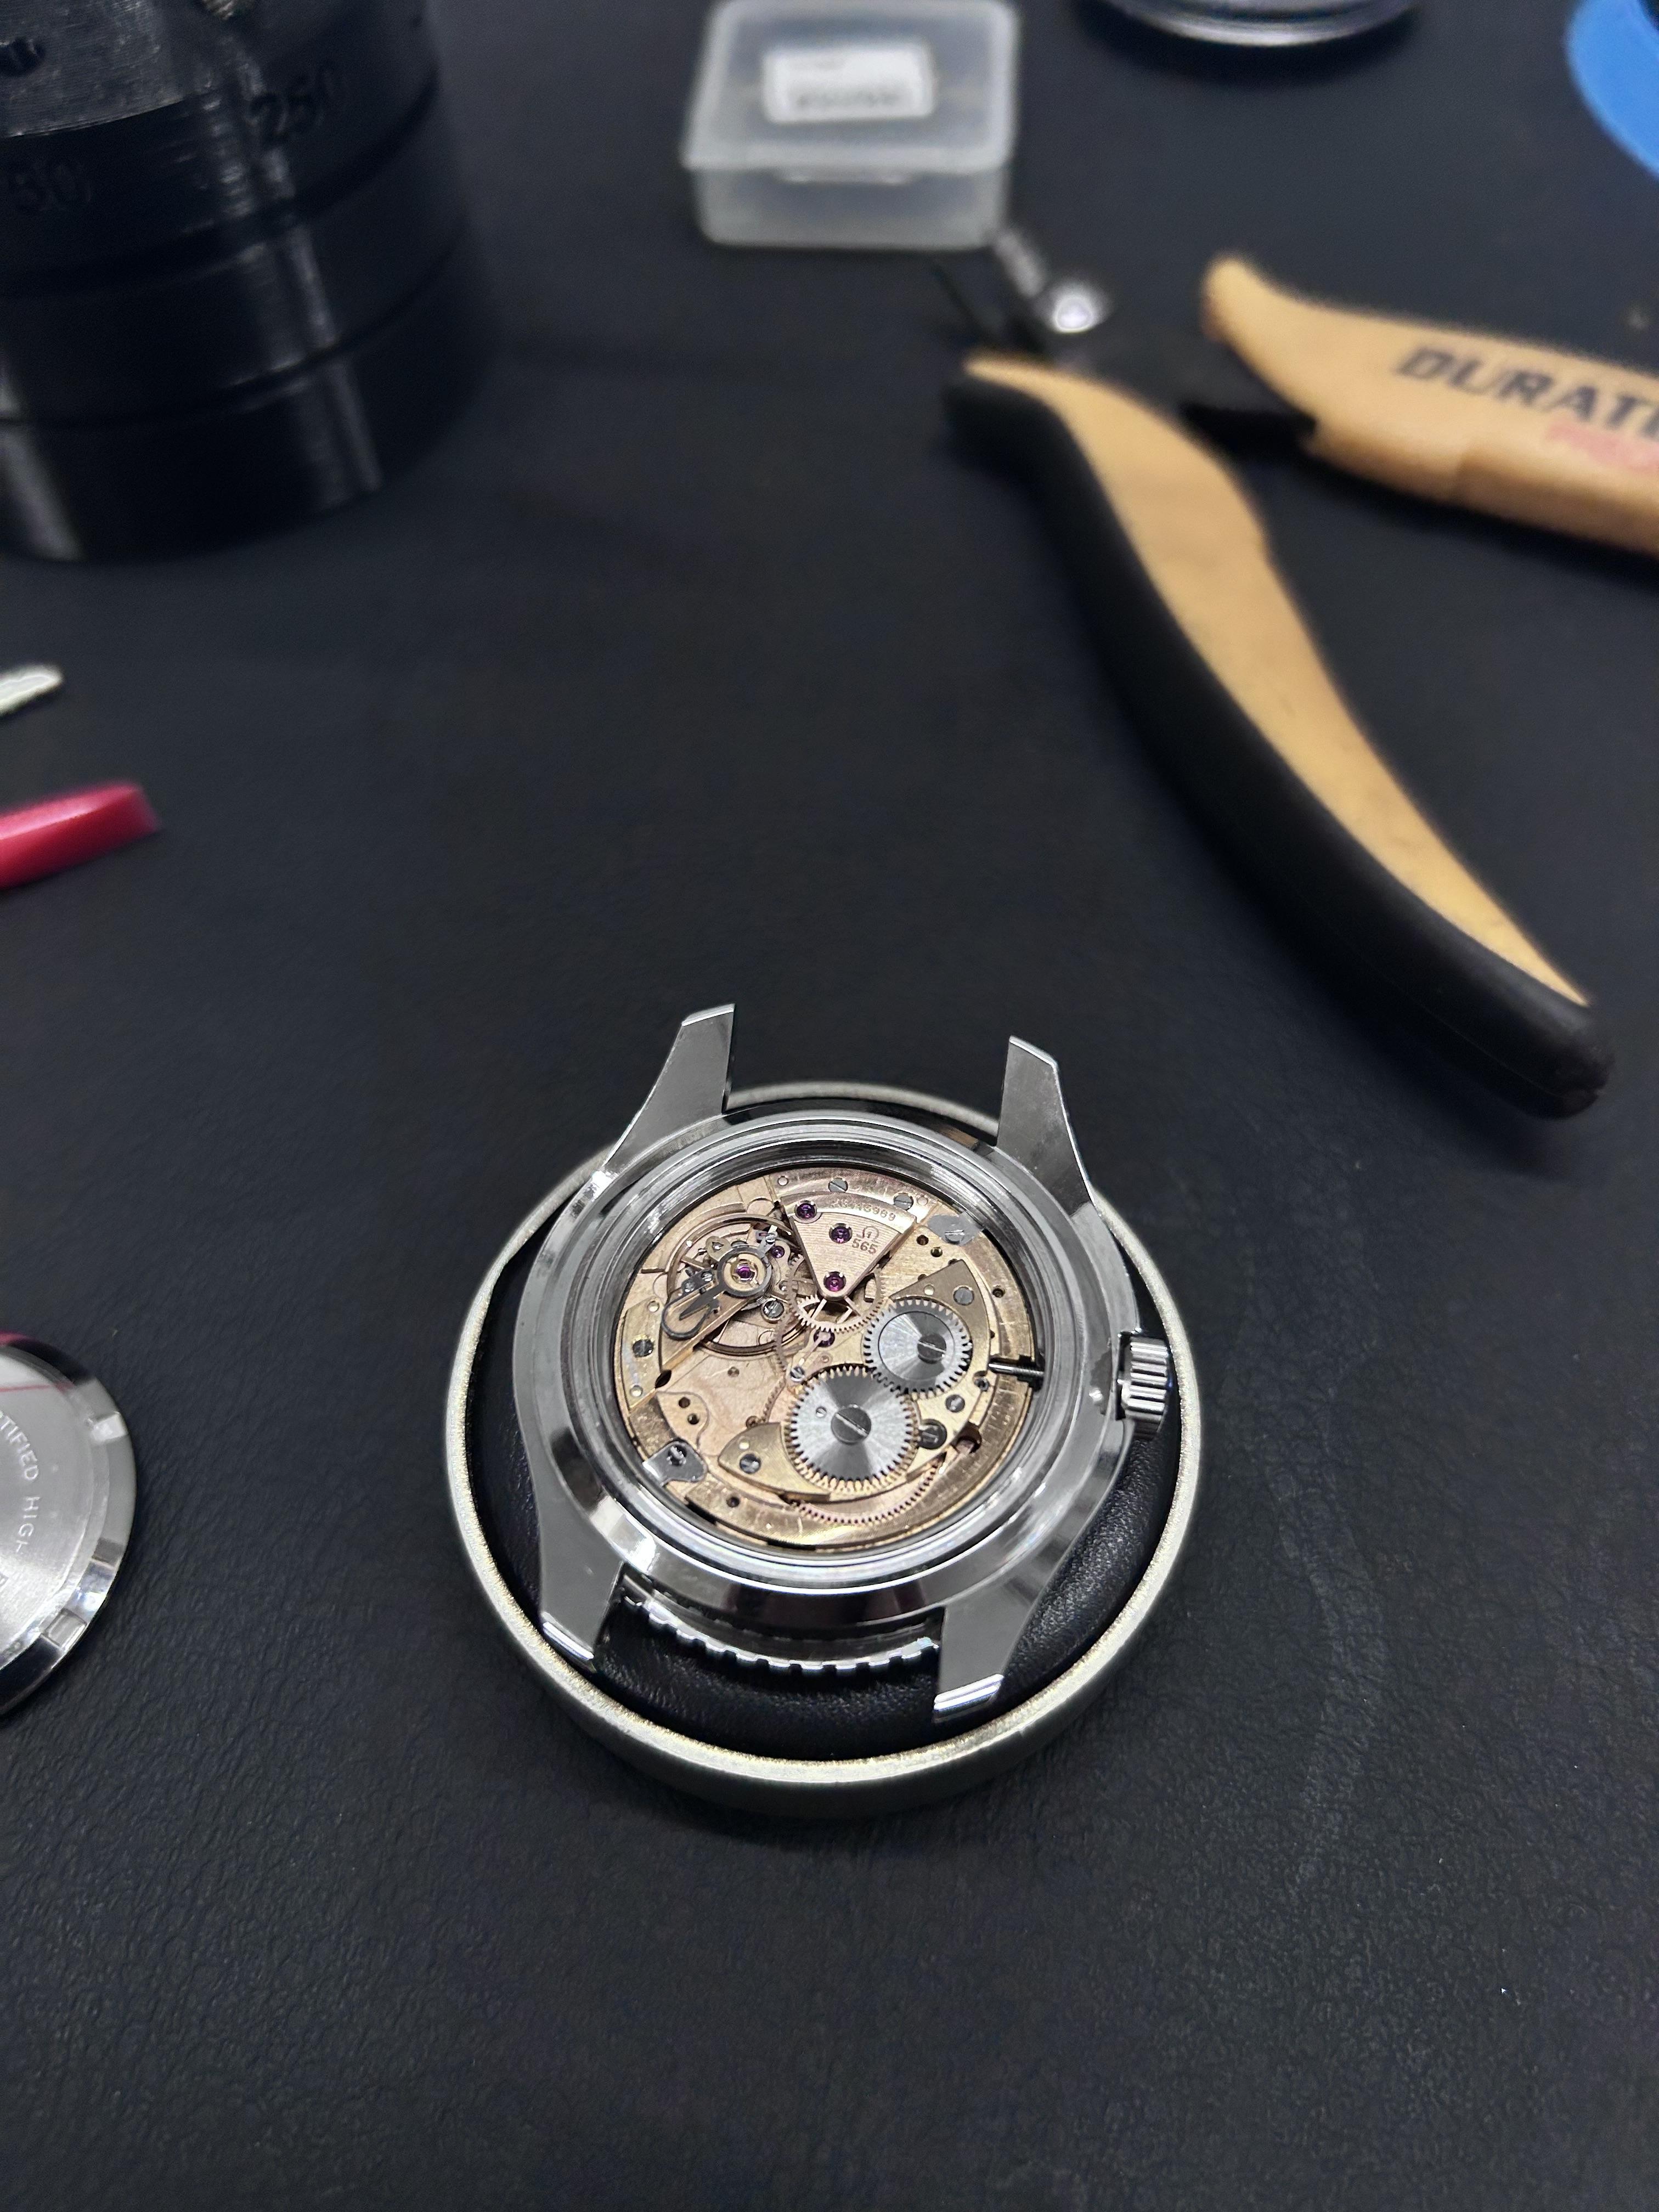
I’ve been servicing my 1962 Omega Seamaster, with the sturdy cal 562 automatic movement. As part of this, I decided to replace the mainspring with a new one. Two were ordered from Cousins, and neither would go in to the barrel from the aluminium ring with the aid of the rounded end of my brass tweezers (I don’t have a mainspring winder). In both cases, despite careful efforts to seat the bridle first, there remained part of the spring sticking out. I removed both springs and tried to hand fit them. Whilst this technique is generally ok with most non-auto springs (in my experience), these automatic ones seem to be made of a soft alloy that deforms easily. My simple solution was to make a plunger on the lathe from a piece of 10mm brass rod, using the discarded GR aluminium rings as a size guide. I’ll use the jewelling tool to fit the next spring, hopefully with more success.
 3 points
 -
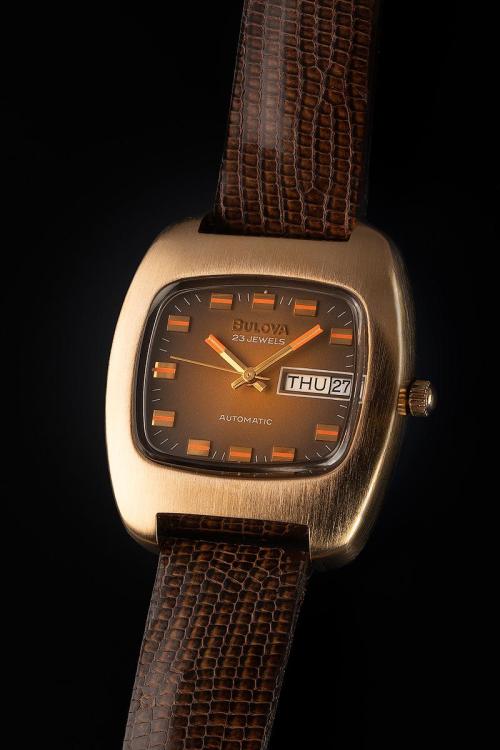
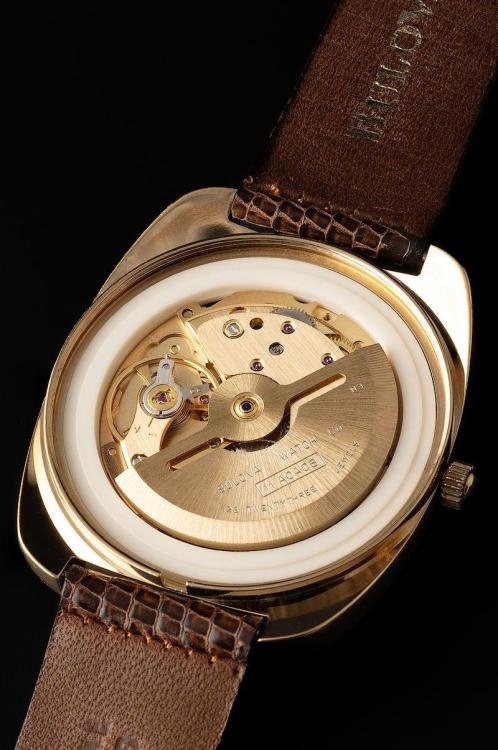
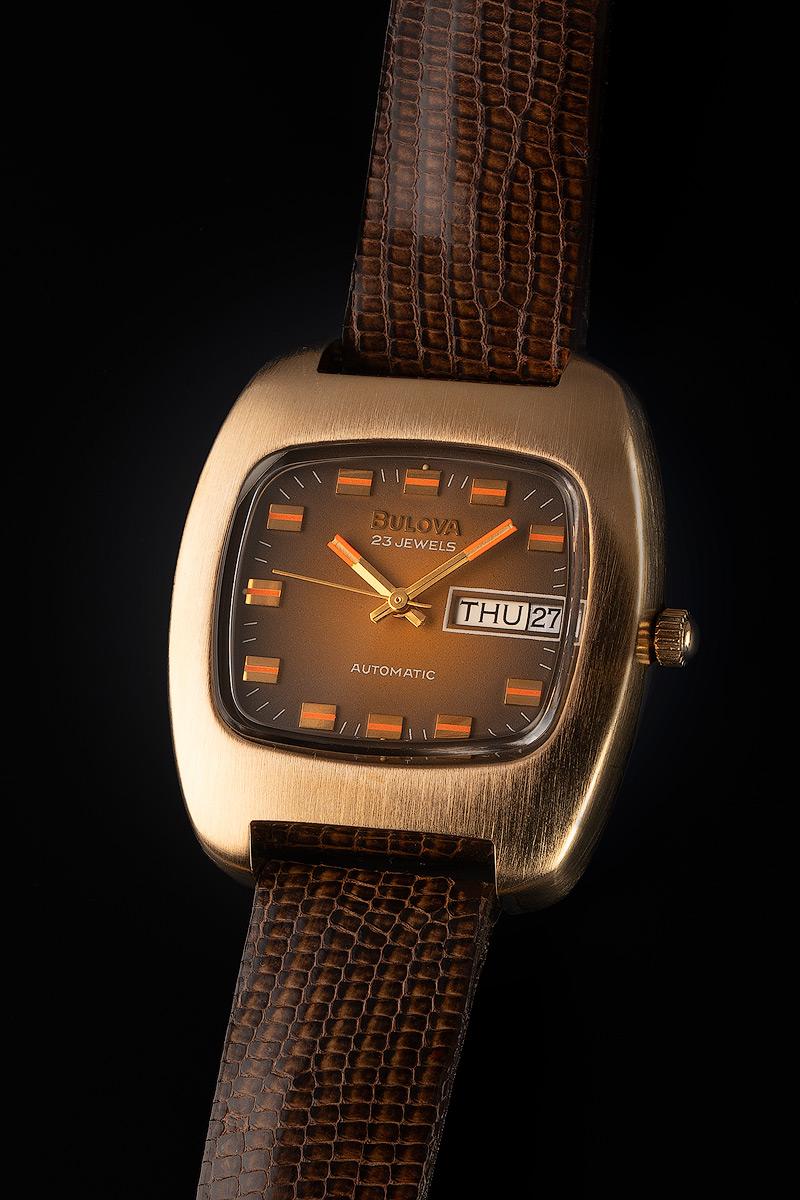
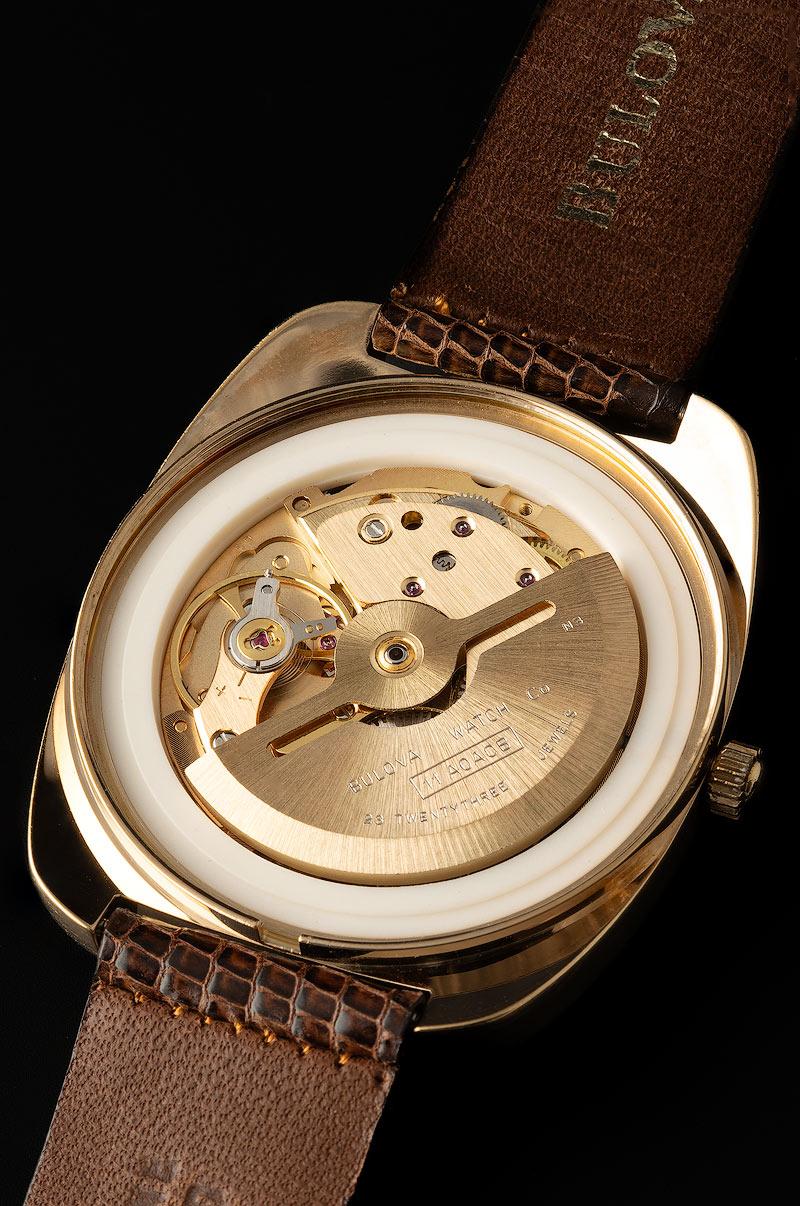
Here is my 1973 NOS Bulova 'Minute Man' on the original lizard skin strap. The '70s vibe is strong in this one.
 3 points
 -
I actually thought these were all plastic and have been dragging my feet on ordering one. I'm going to buy one.3 points
-
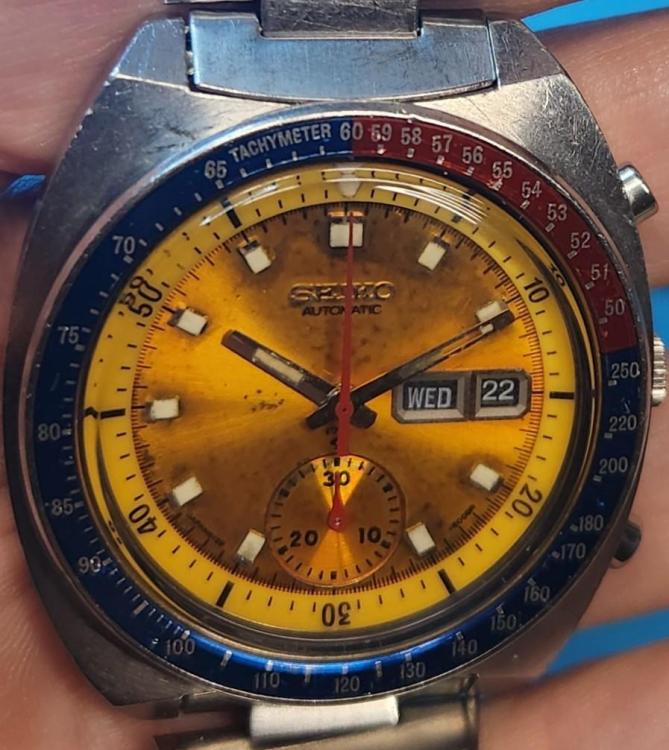
I have this Pogue that I have been working on. Aftermarket pushers because the originals were bent. Working on sourcing those and have some on the way. The dial has some patina but is all original and a nice orange "tropic".
 3 points
 -
OK, the hole is cylindrical, but the stone will get out easier in direction to the dial, as this is where it came in. If You use flat face punch that lies directly on the stone, it may be will correct the stone position and make it parallel well before it is out and it may be enough, but check the distance between end stone and hole stone to ensure it is correct.2 points
-
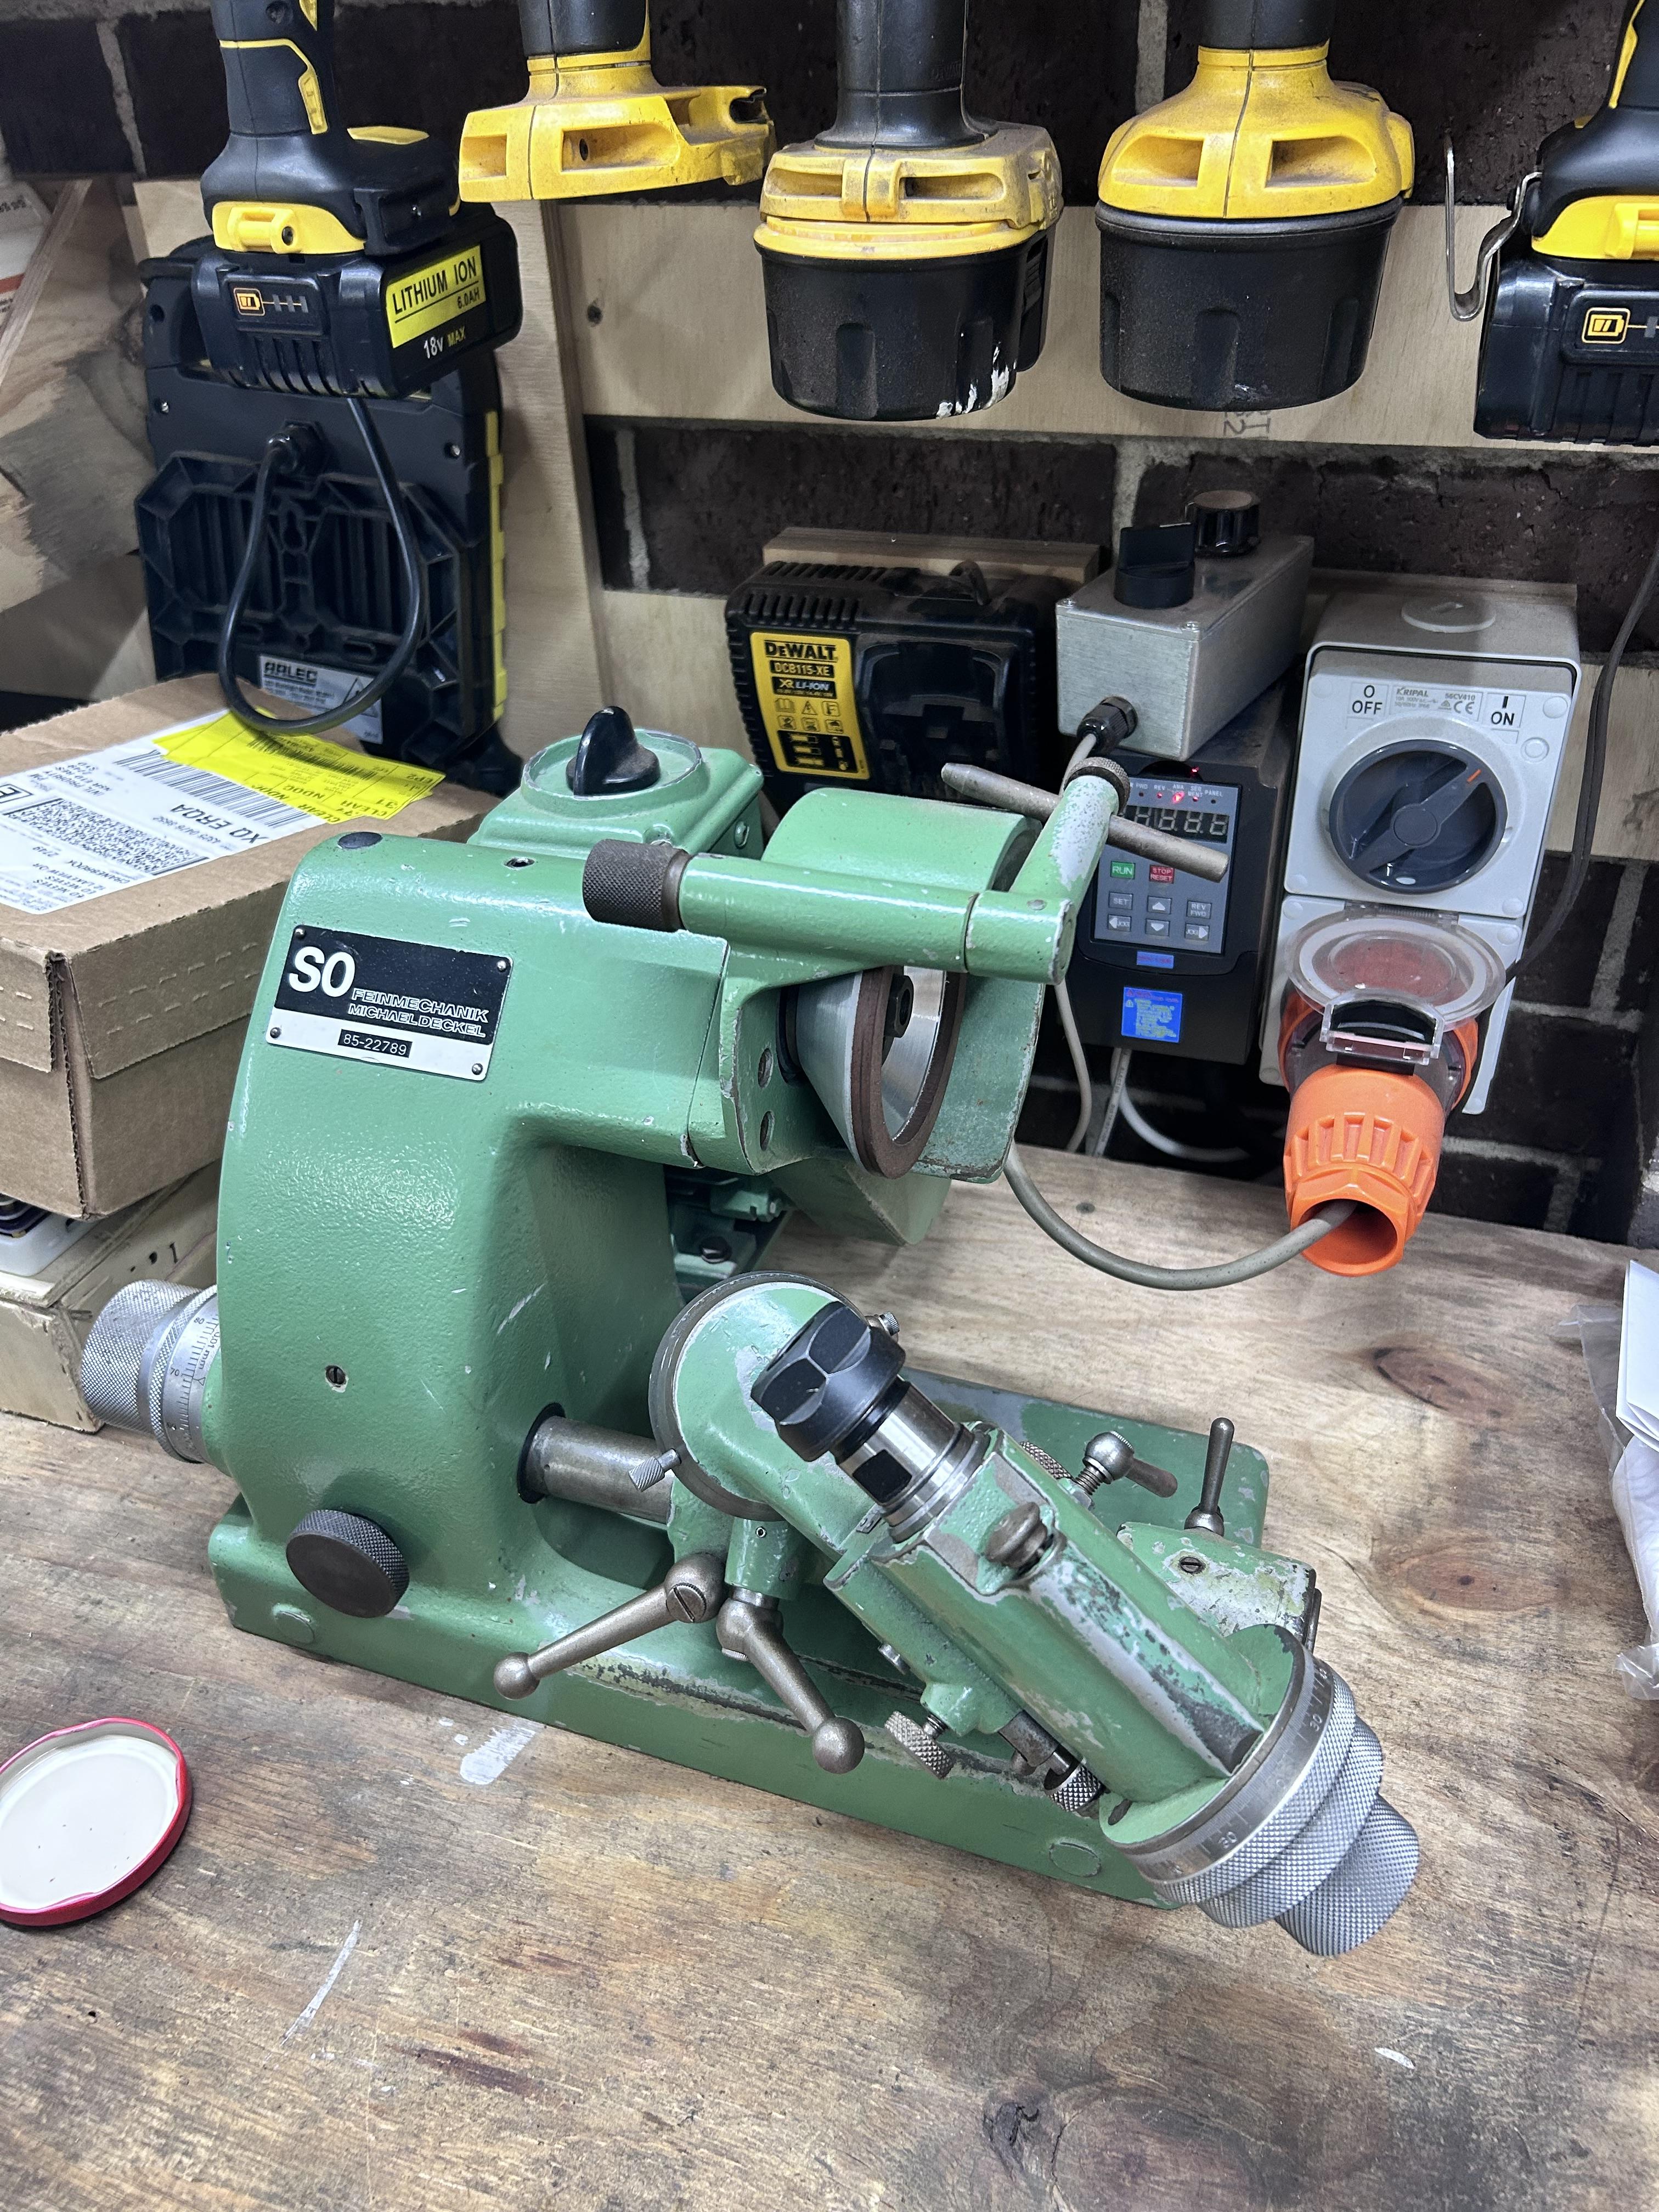
I have most of the watch built up and for now and I am just waiting on my Incabloc spring to turn up before I can properly button up the movement. Ive put the dial on so I can have a dry run test fit of all the parts. First job was the shorten the stem. Completely overkill but I used my Deckel S0 which makes short work of the stem and I can put a neat chamfer on the end afterwards using the diamond stone edge: Its a shame all of this is going to be hidden: Whilst the movement is in there the original case clamps I got with the movement are not correct. So I need to swap them out for ones I already have on the way. Currently the movement has a tiny bit of wiggle and it’s because the case clamps cannot be orientated to pull the movement tight against the case. The new ones will fix that. A test fit with my olive Nato strap. I have a few more options on the way so I can decide which one I want to use at the end. Hands are obviously not on yet as I’m waiting to finish up the movement. I also had an issue with the quick set date which was not fully rotating the date wheel. It was working fine then it wasn’t and now it’s working fine again. Something for me to triple check before I put it away in the case. Update: Found the problem with the date quick adjust. The user! Turns out the hands were near the midnight part and therefore part of the date mechanism was engaged. Luckily no damage.

 2 points
 -
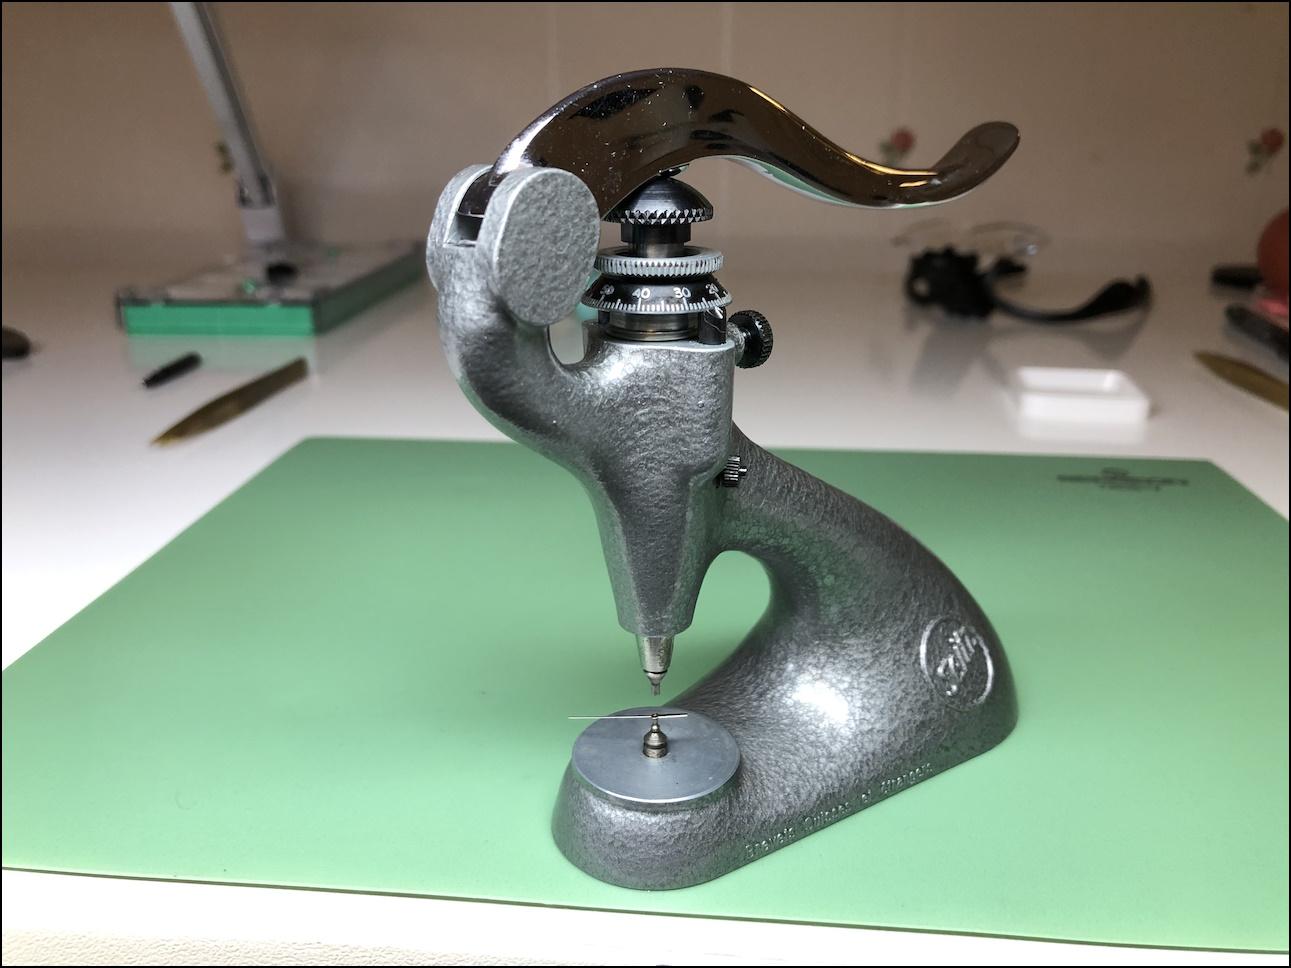
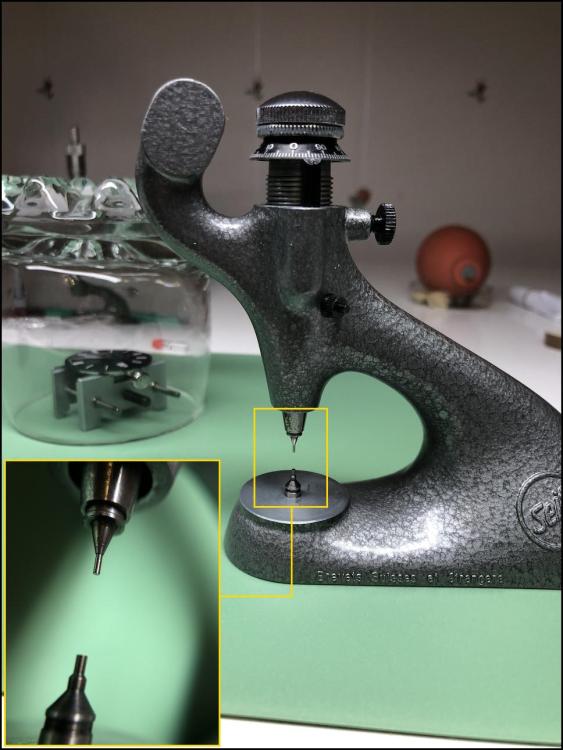
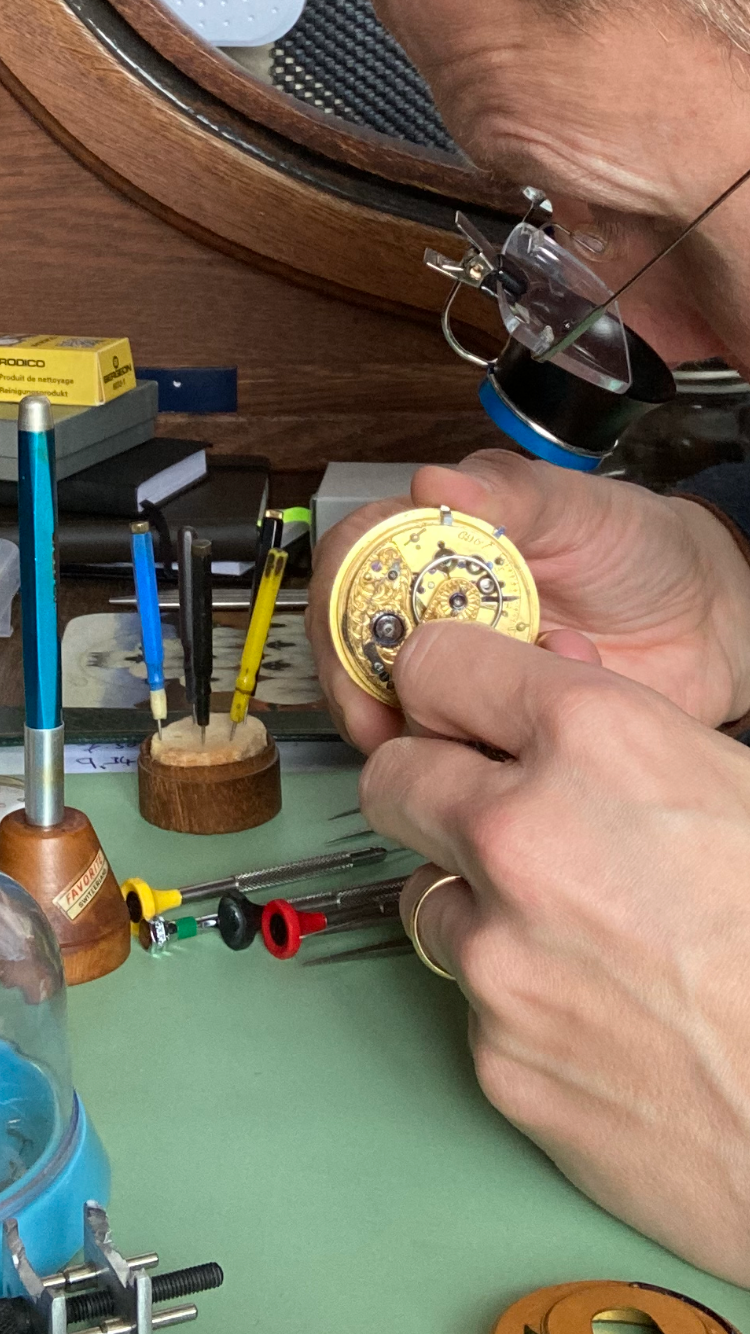
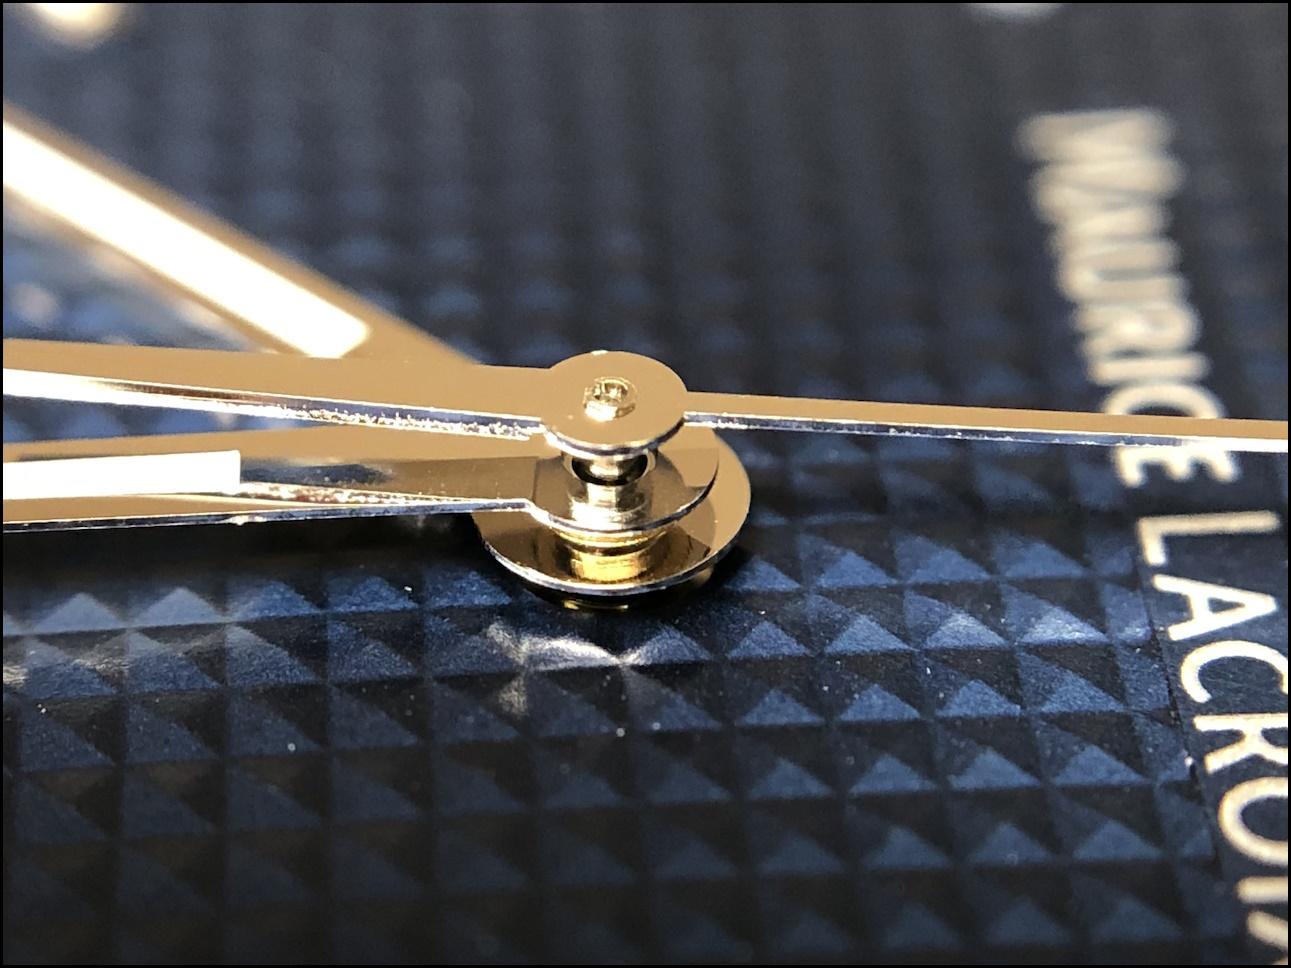
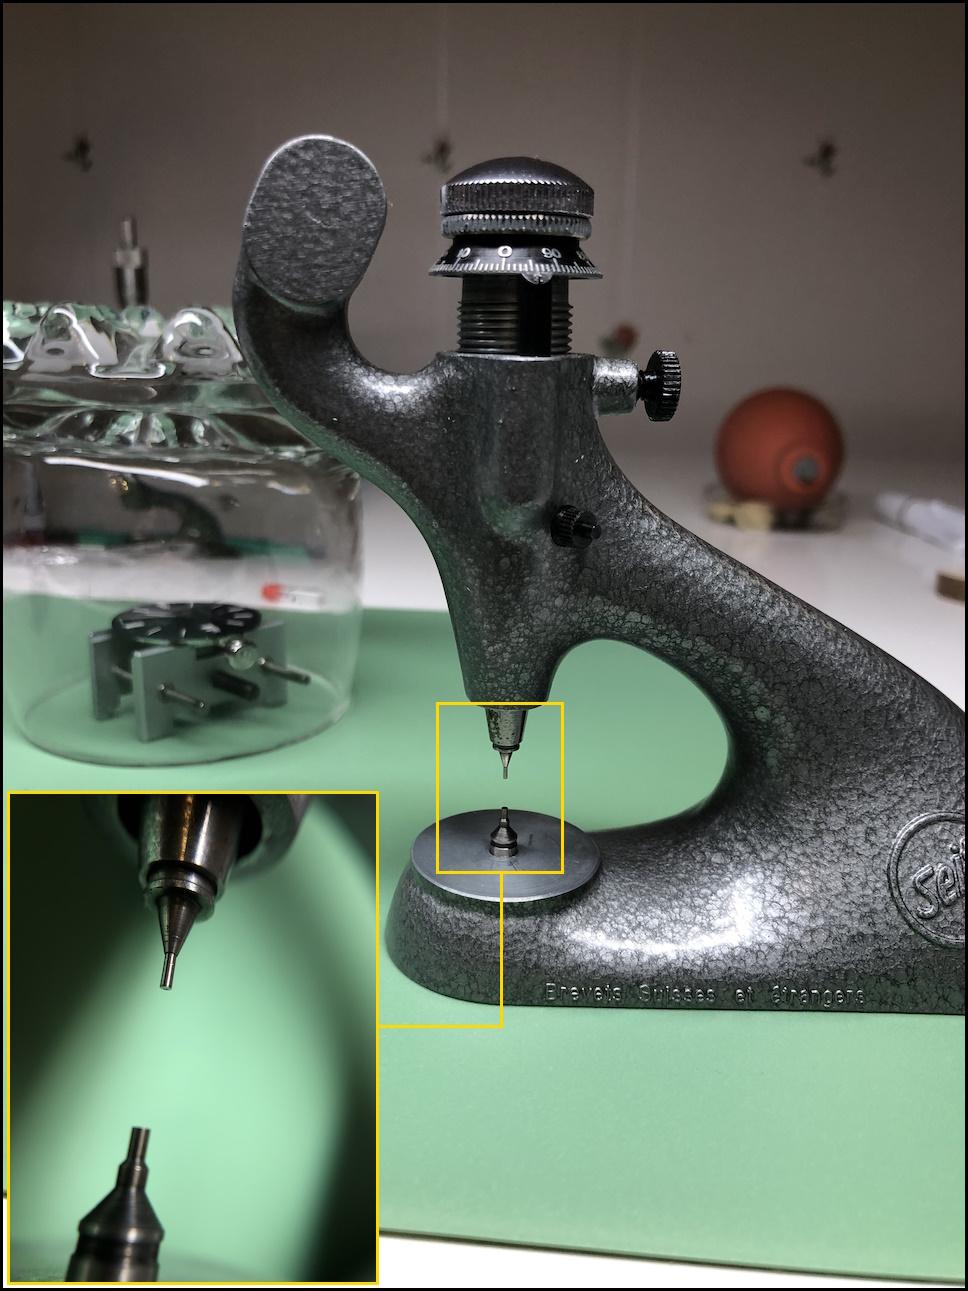
So, this project is finally complete, and to wrap up this thread, here’s a brief description of how I reattached the second hand to the fourth wheel pivot. Normally, I just press the second hand on, but this time, I thought it would require quite a bit of force since it was firmly in place when I removed it. I figured that if I didn’t manage to push the hand down far enough, it would end up touching the underside of the crystal. Keeping this in mind, I realized there was a significant risk of disturbing the jewel on the barrel bridge—or, in the worst case, even pushing it out. My first thought was to order a movement holder with hand-setting support, but impatience and budget constraints put an end to that idea. Instead, I used my Seitz jewelling tool in screw press mode to support the jewel properly. Initially, I was a bit worried that I wouldn’t be able to keep the movement level enough, but fortunately, that concern turned out to be unfounded. When the pressure becomes high enough, the movement naturally settles into a flat position—just like when adjusting end-shake on a jewel. Isn’t it amazing how versatile a jewelling tool can be!? Looking back, I think I could have just pressed the second hand back on without supporting the jewel, but at least I’ve gained some experience from it. Here’s a picture of my freshly serviced "Royal Oak." More pictures are available here if anyone is interested.

 2 points
 -
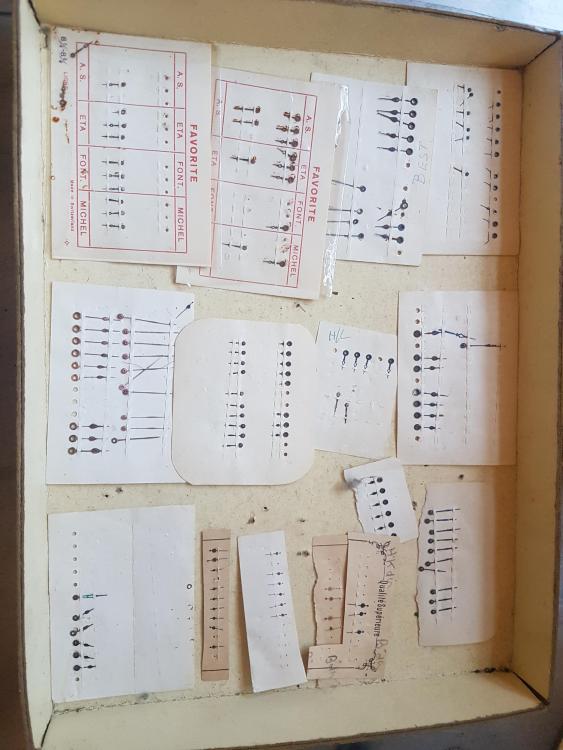
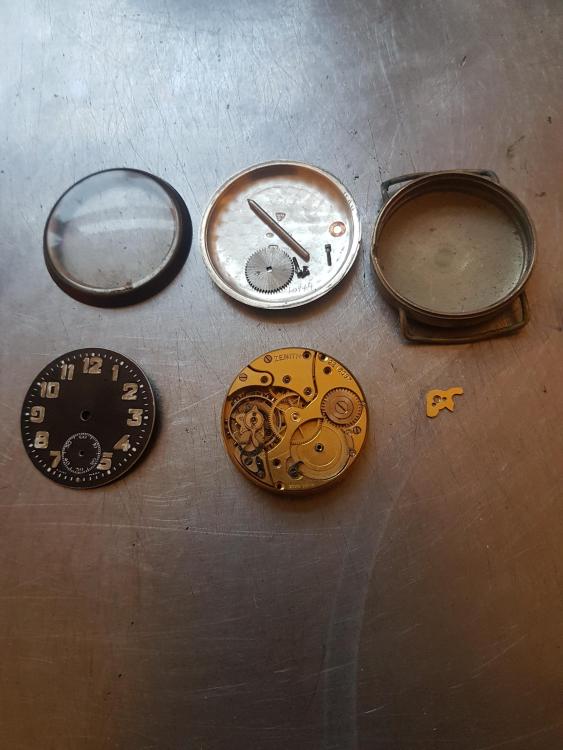
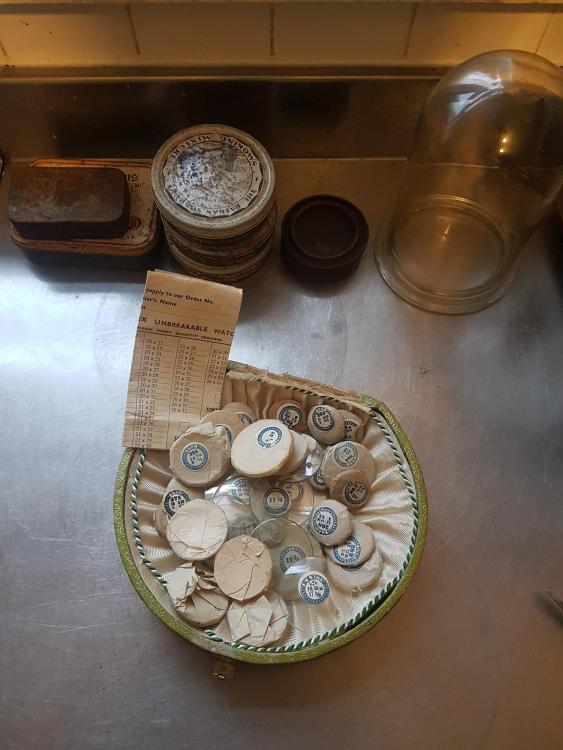
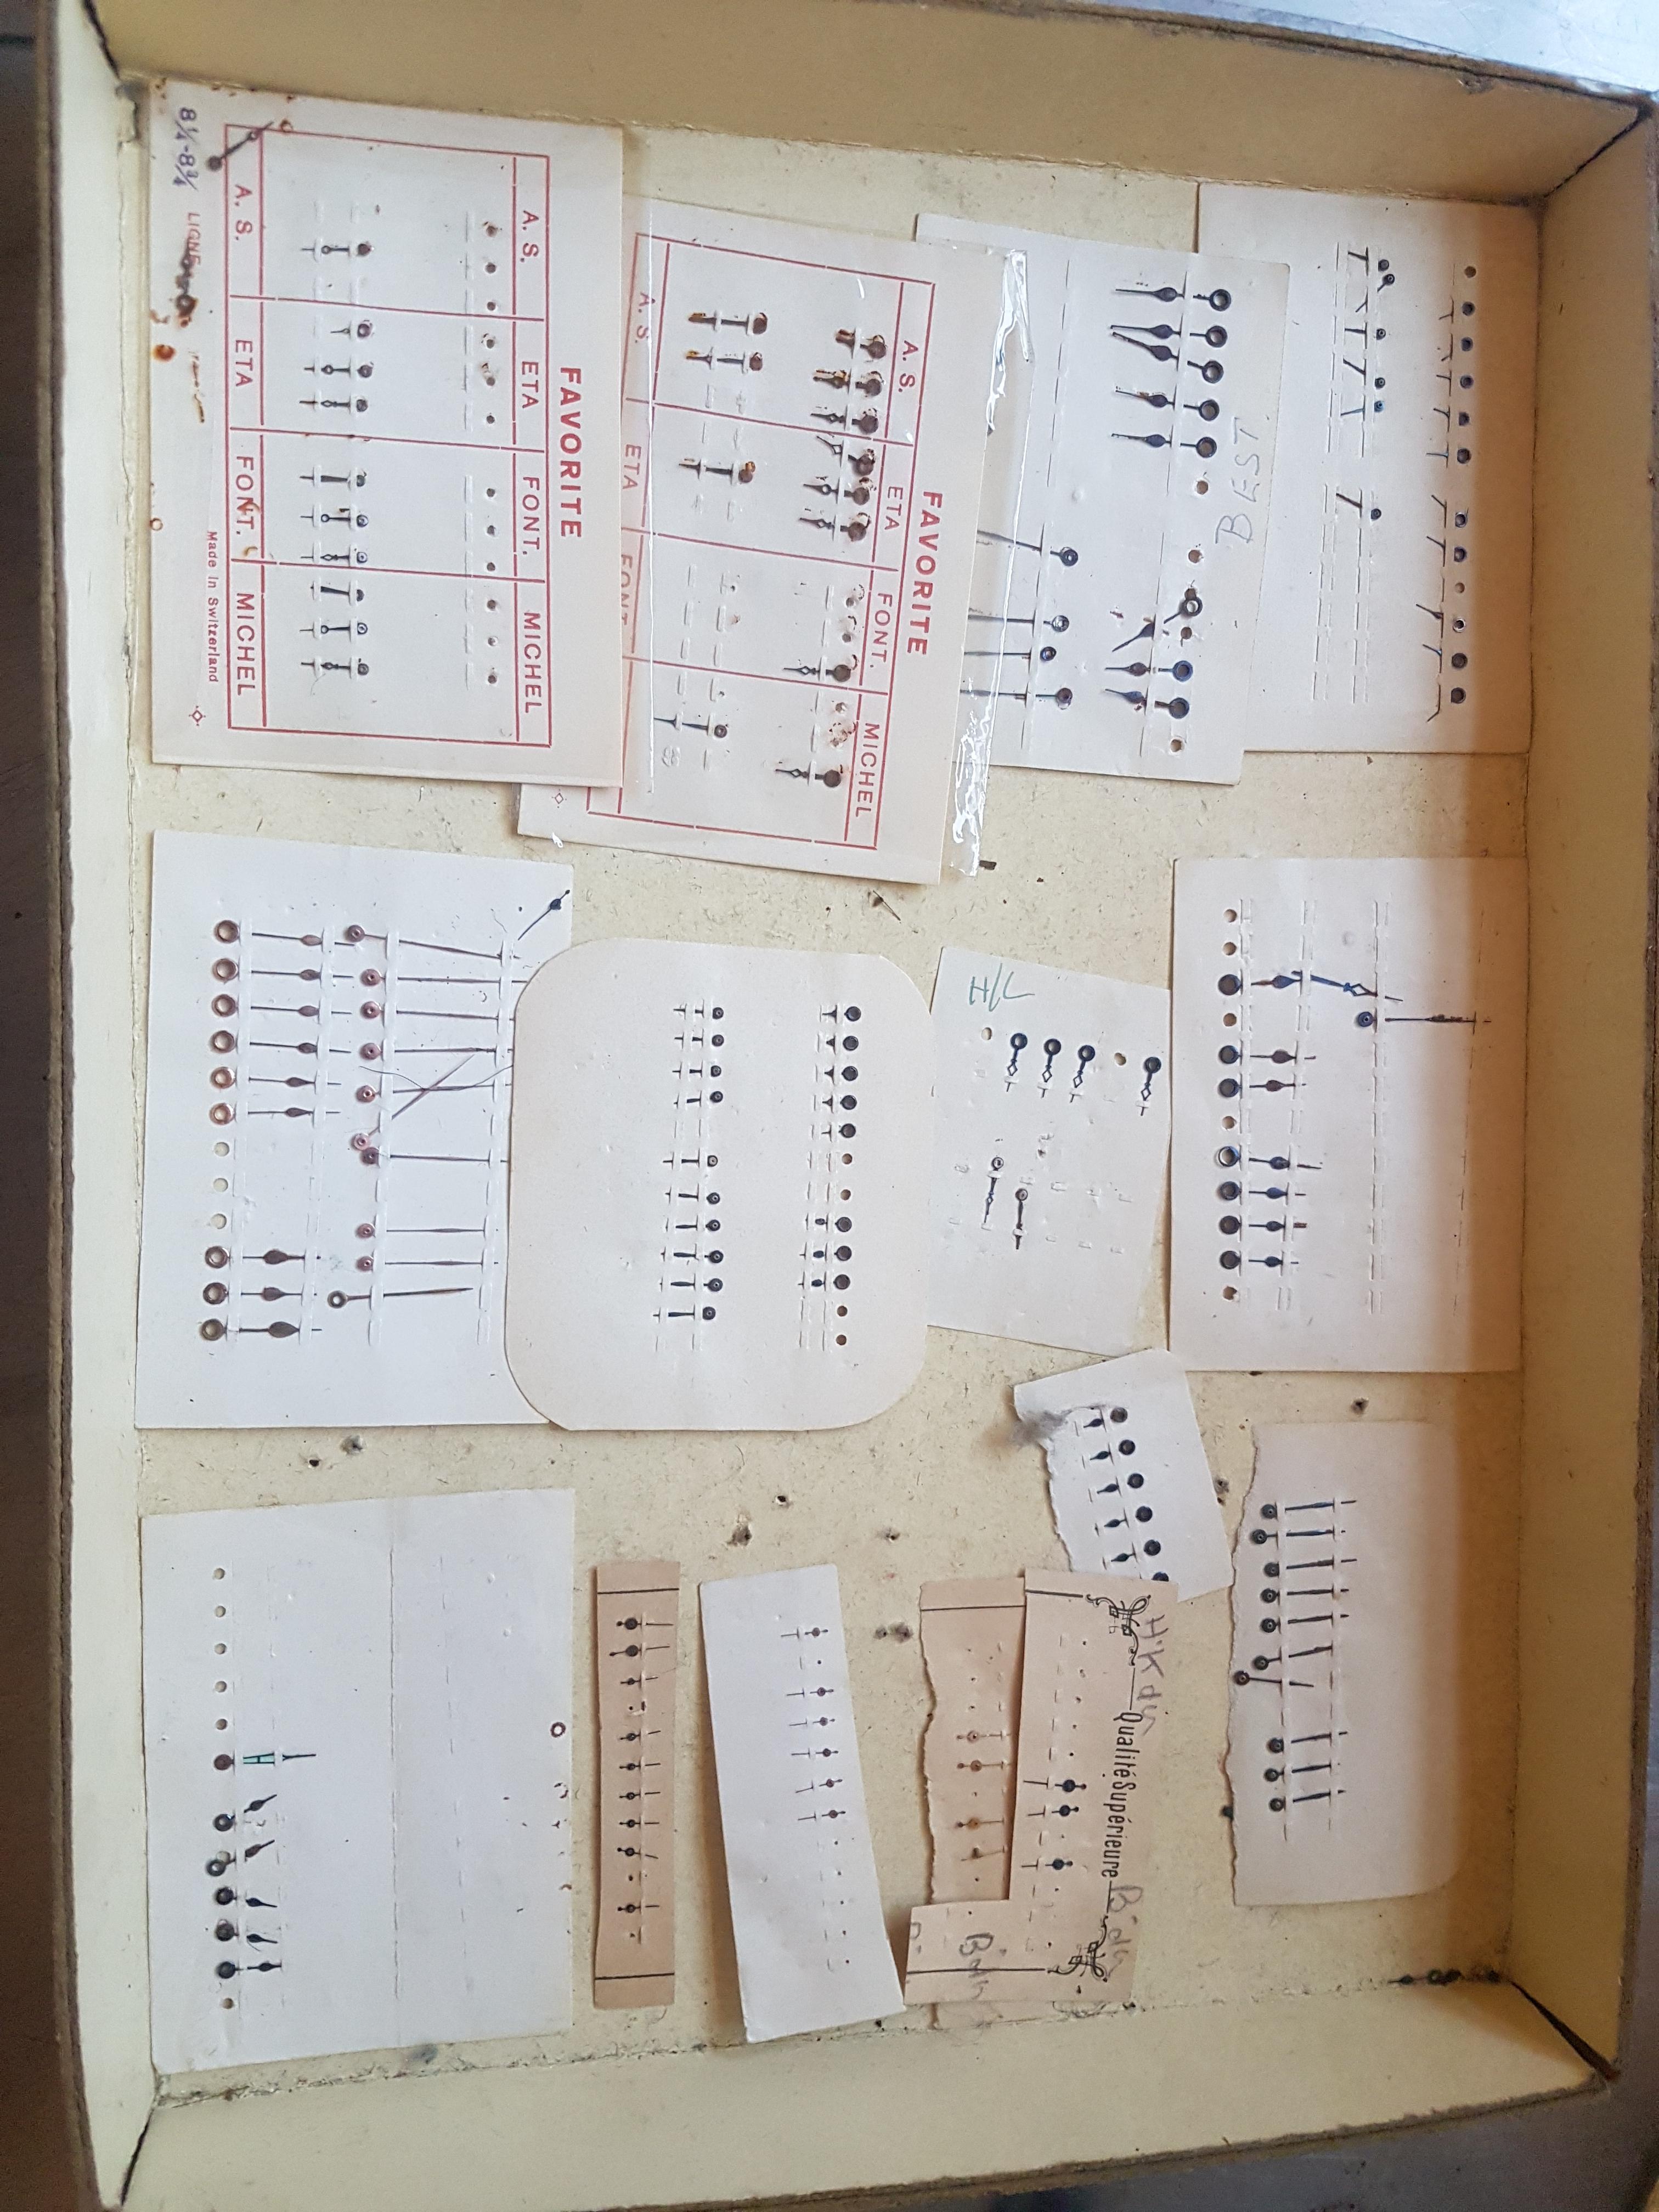
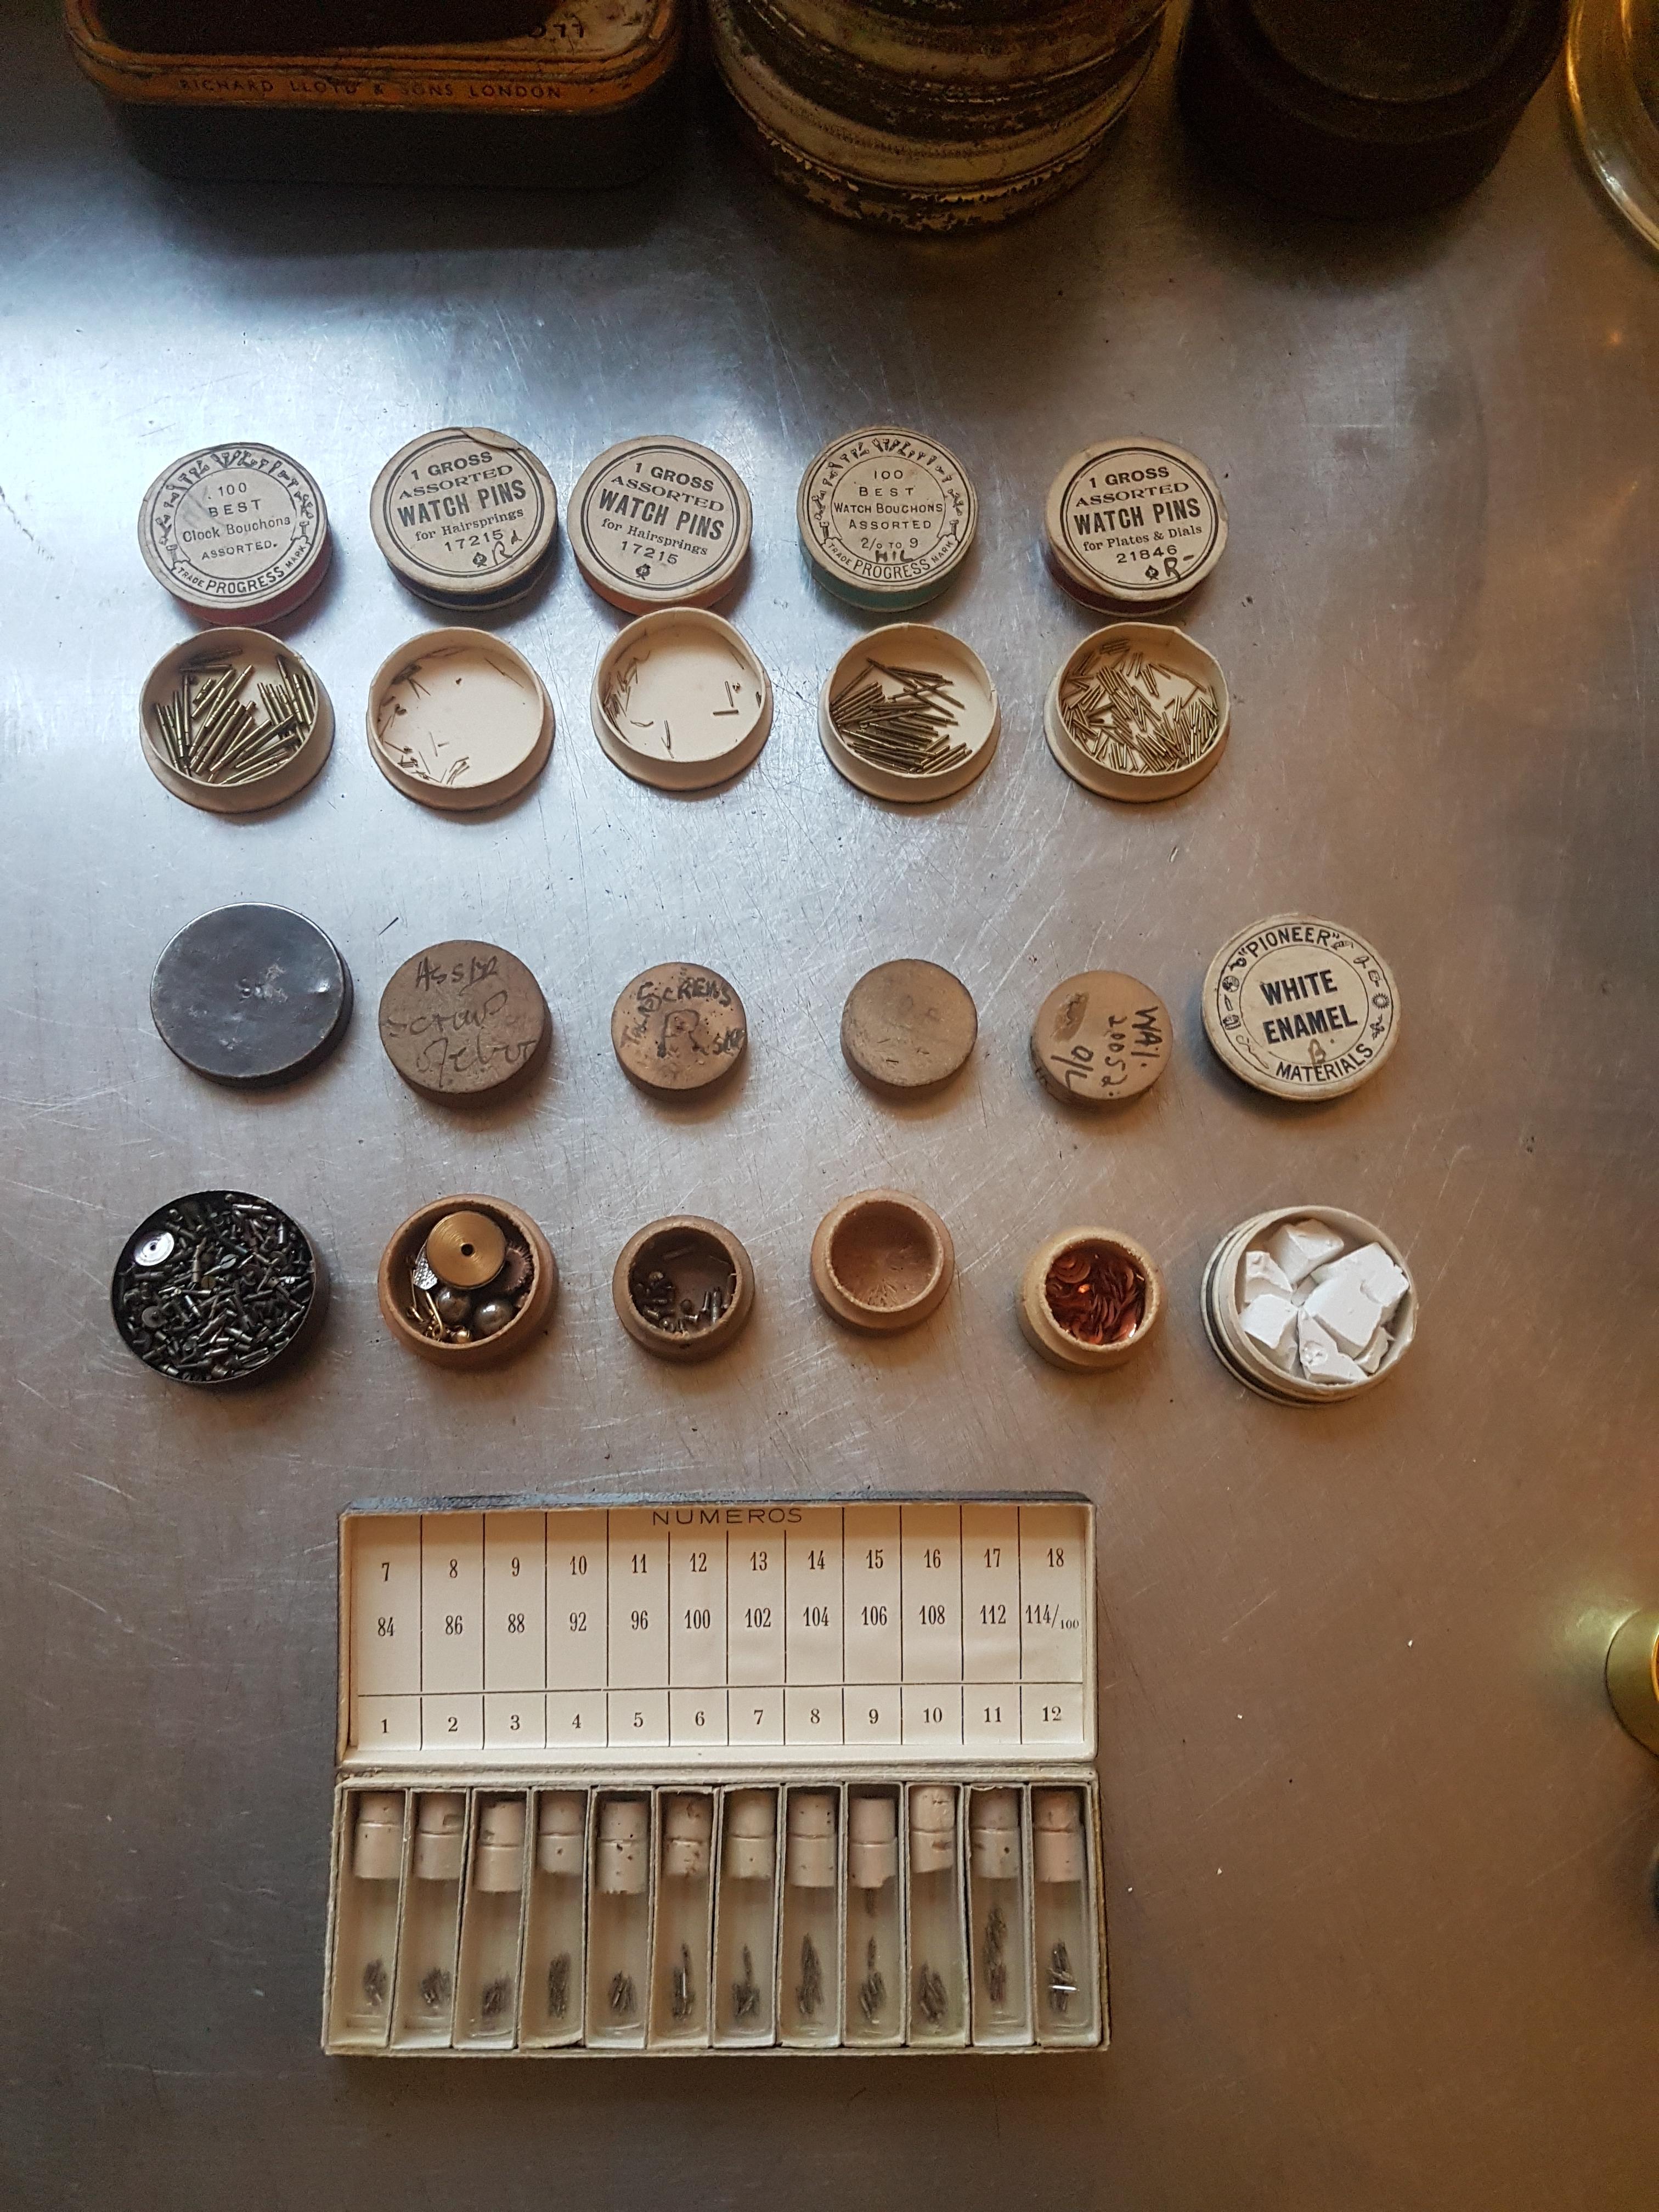
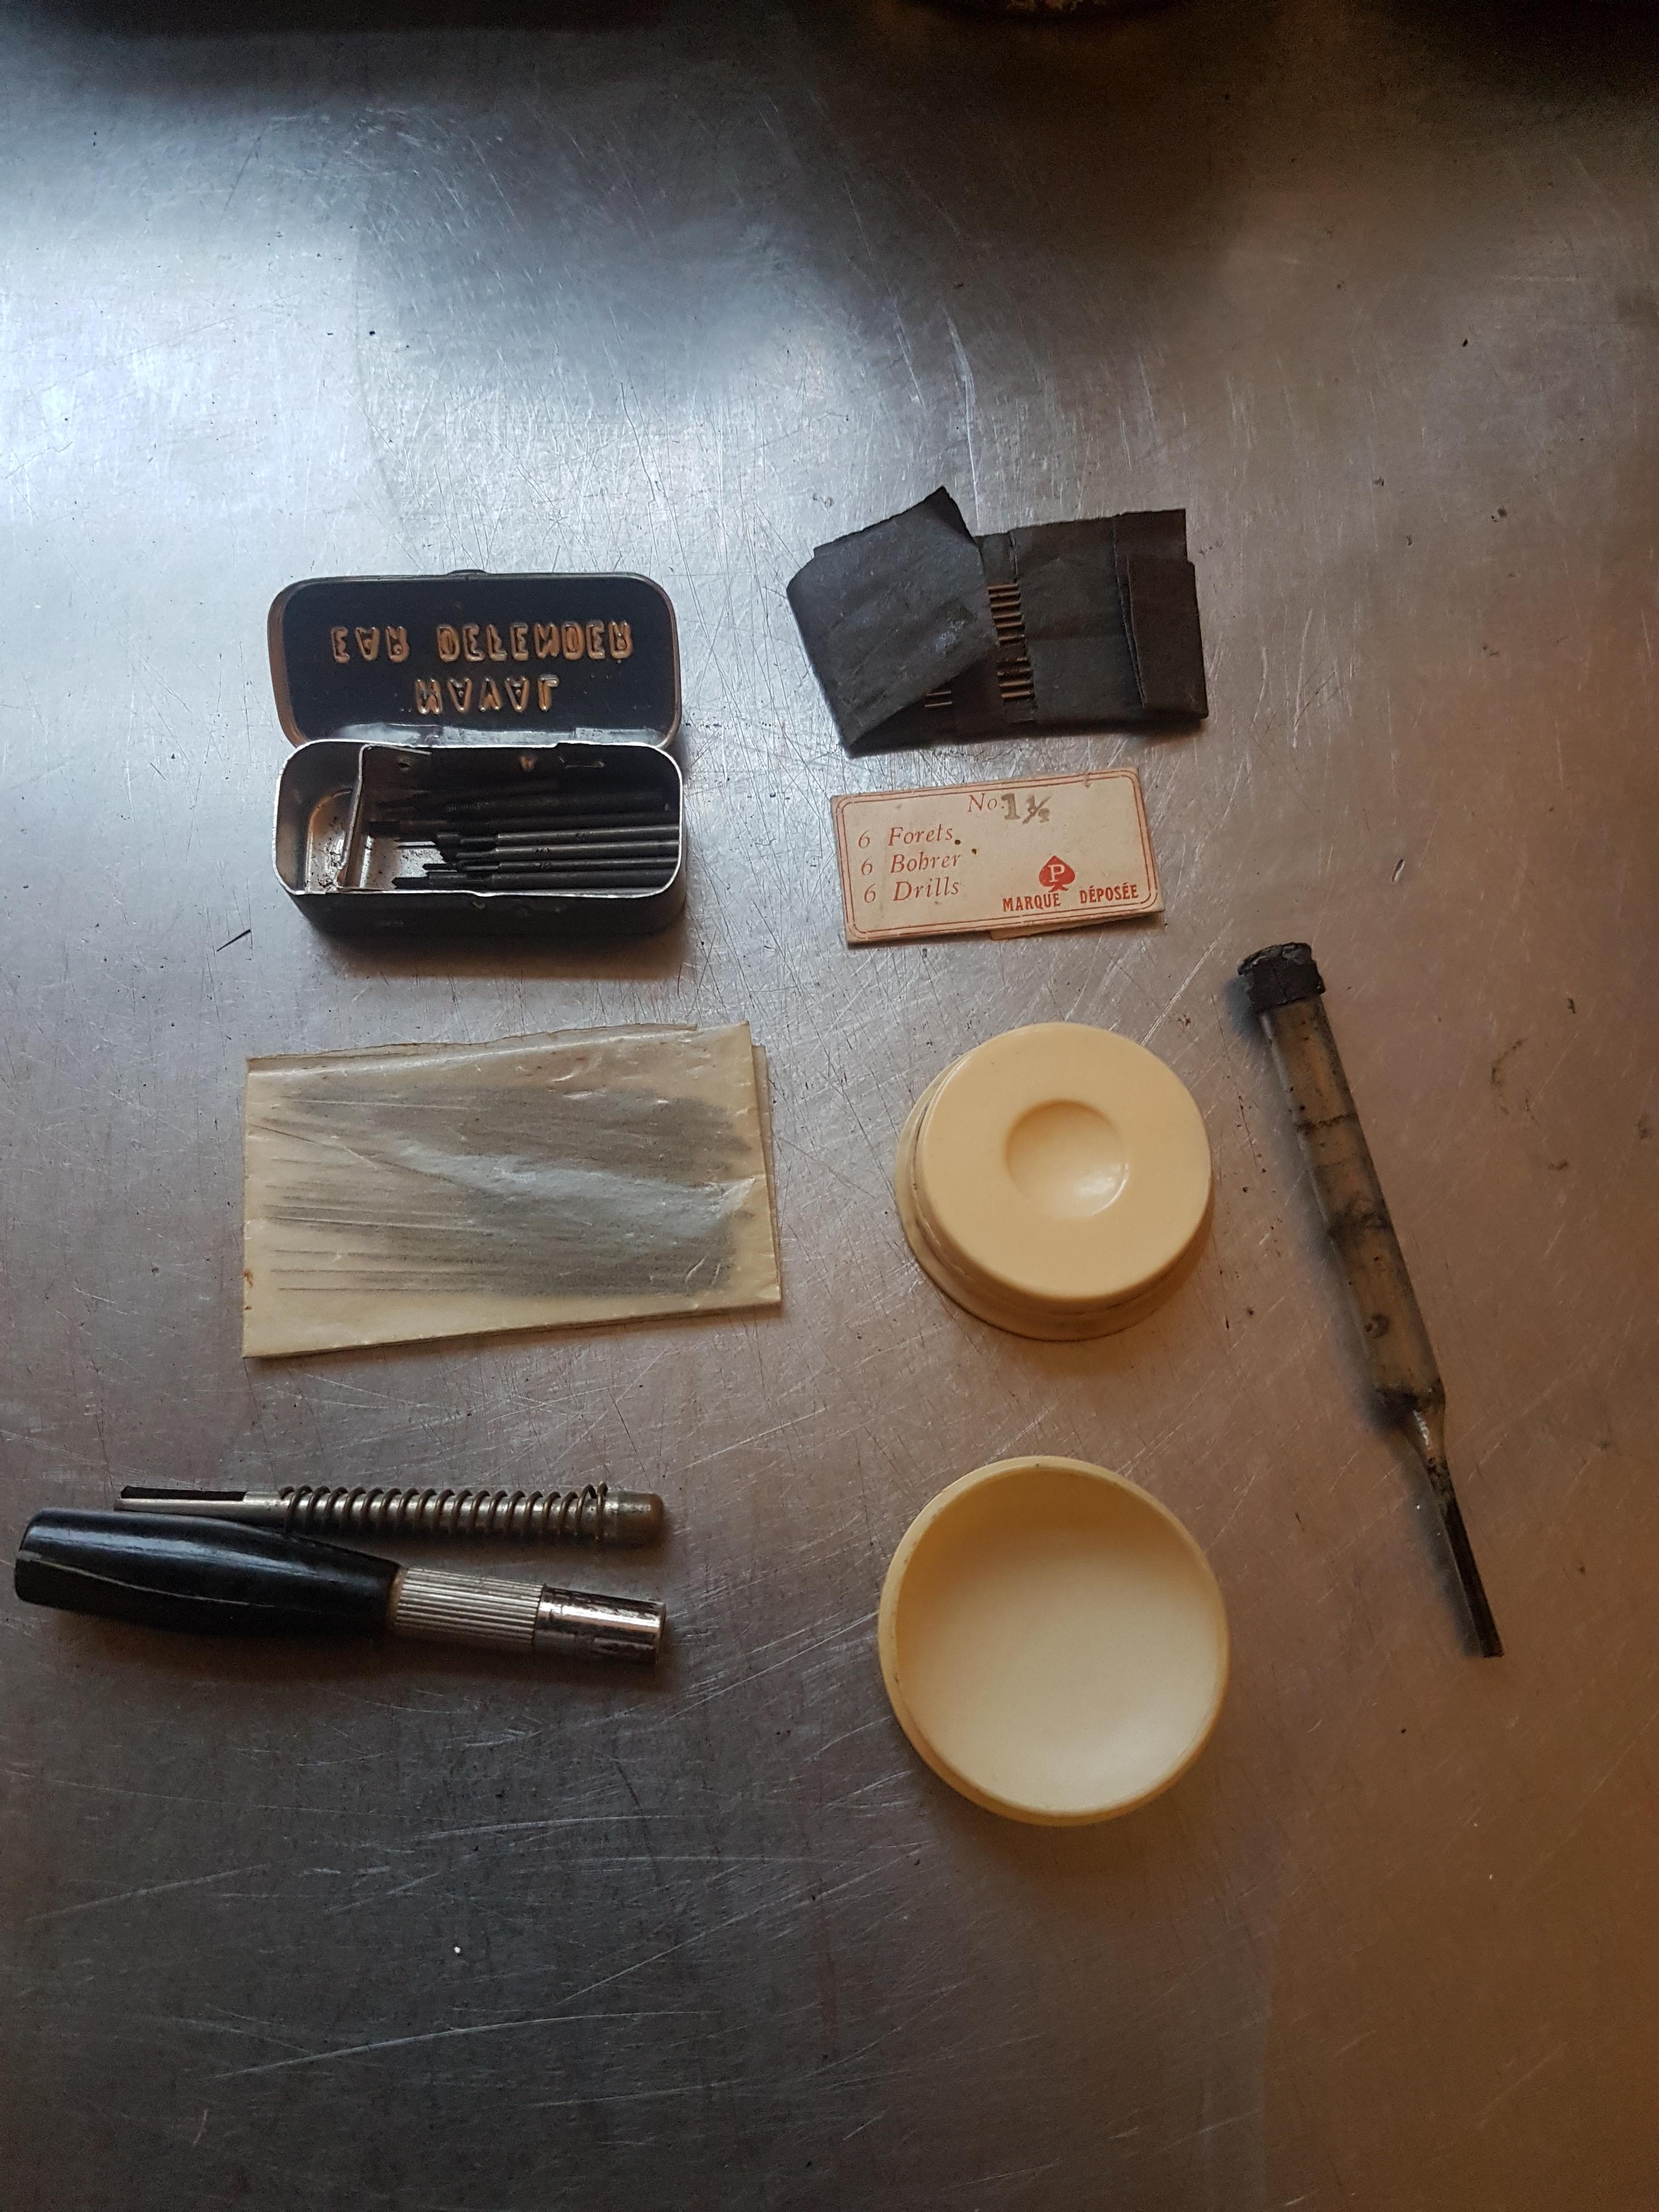
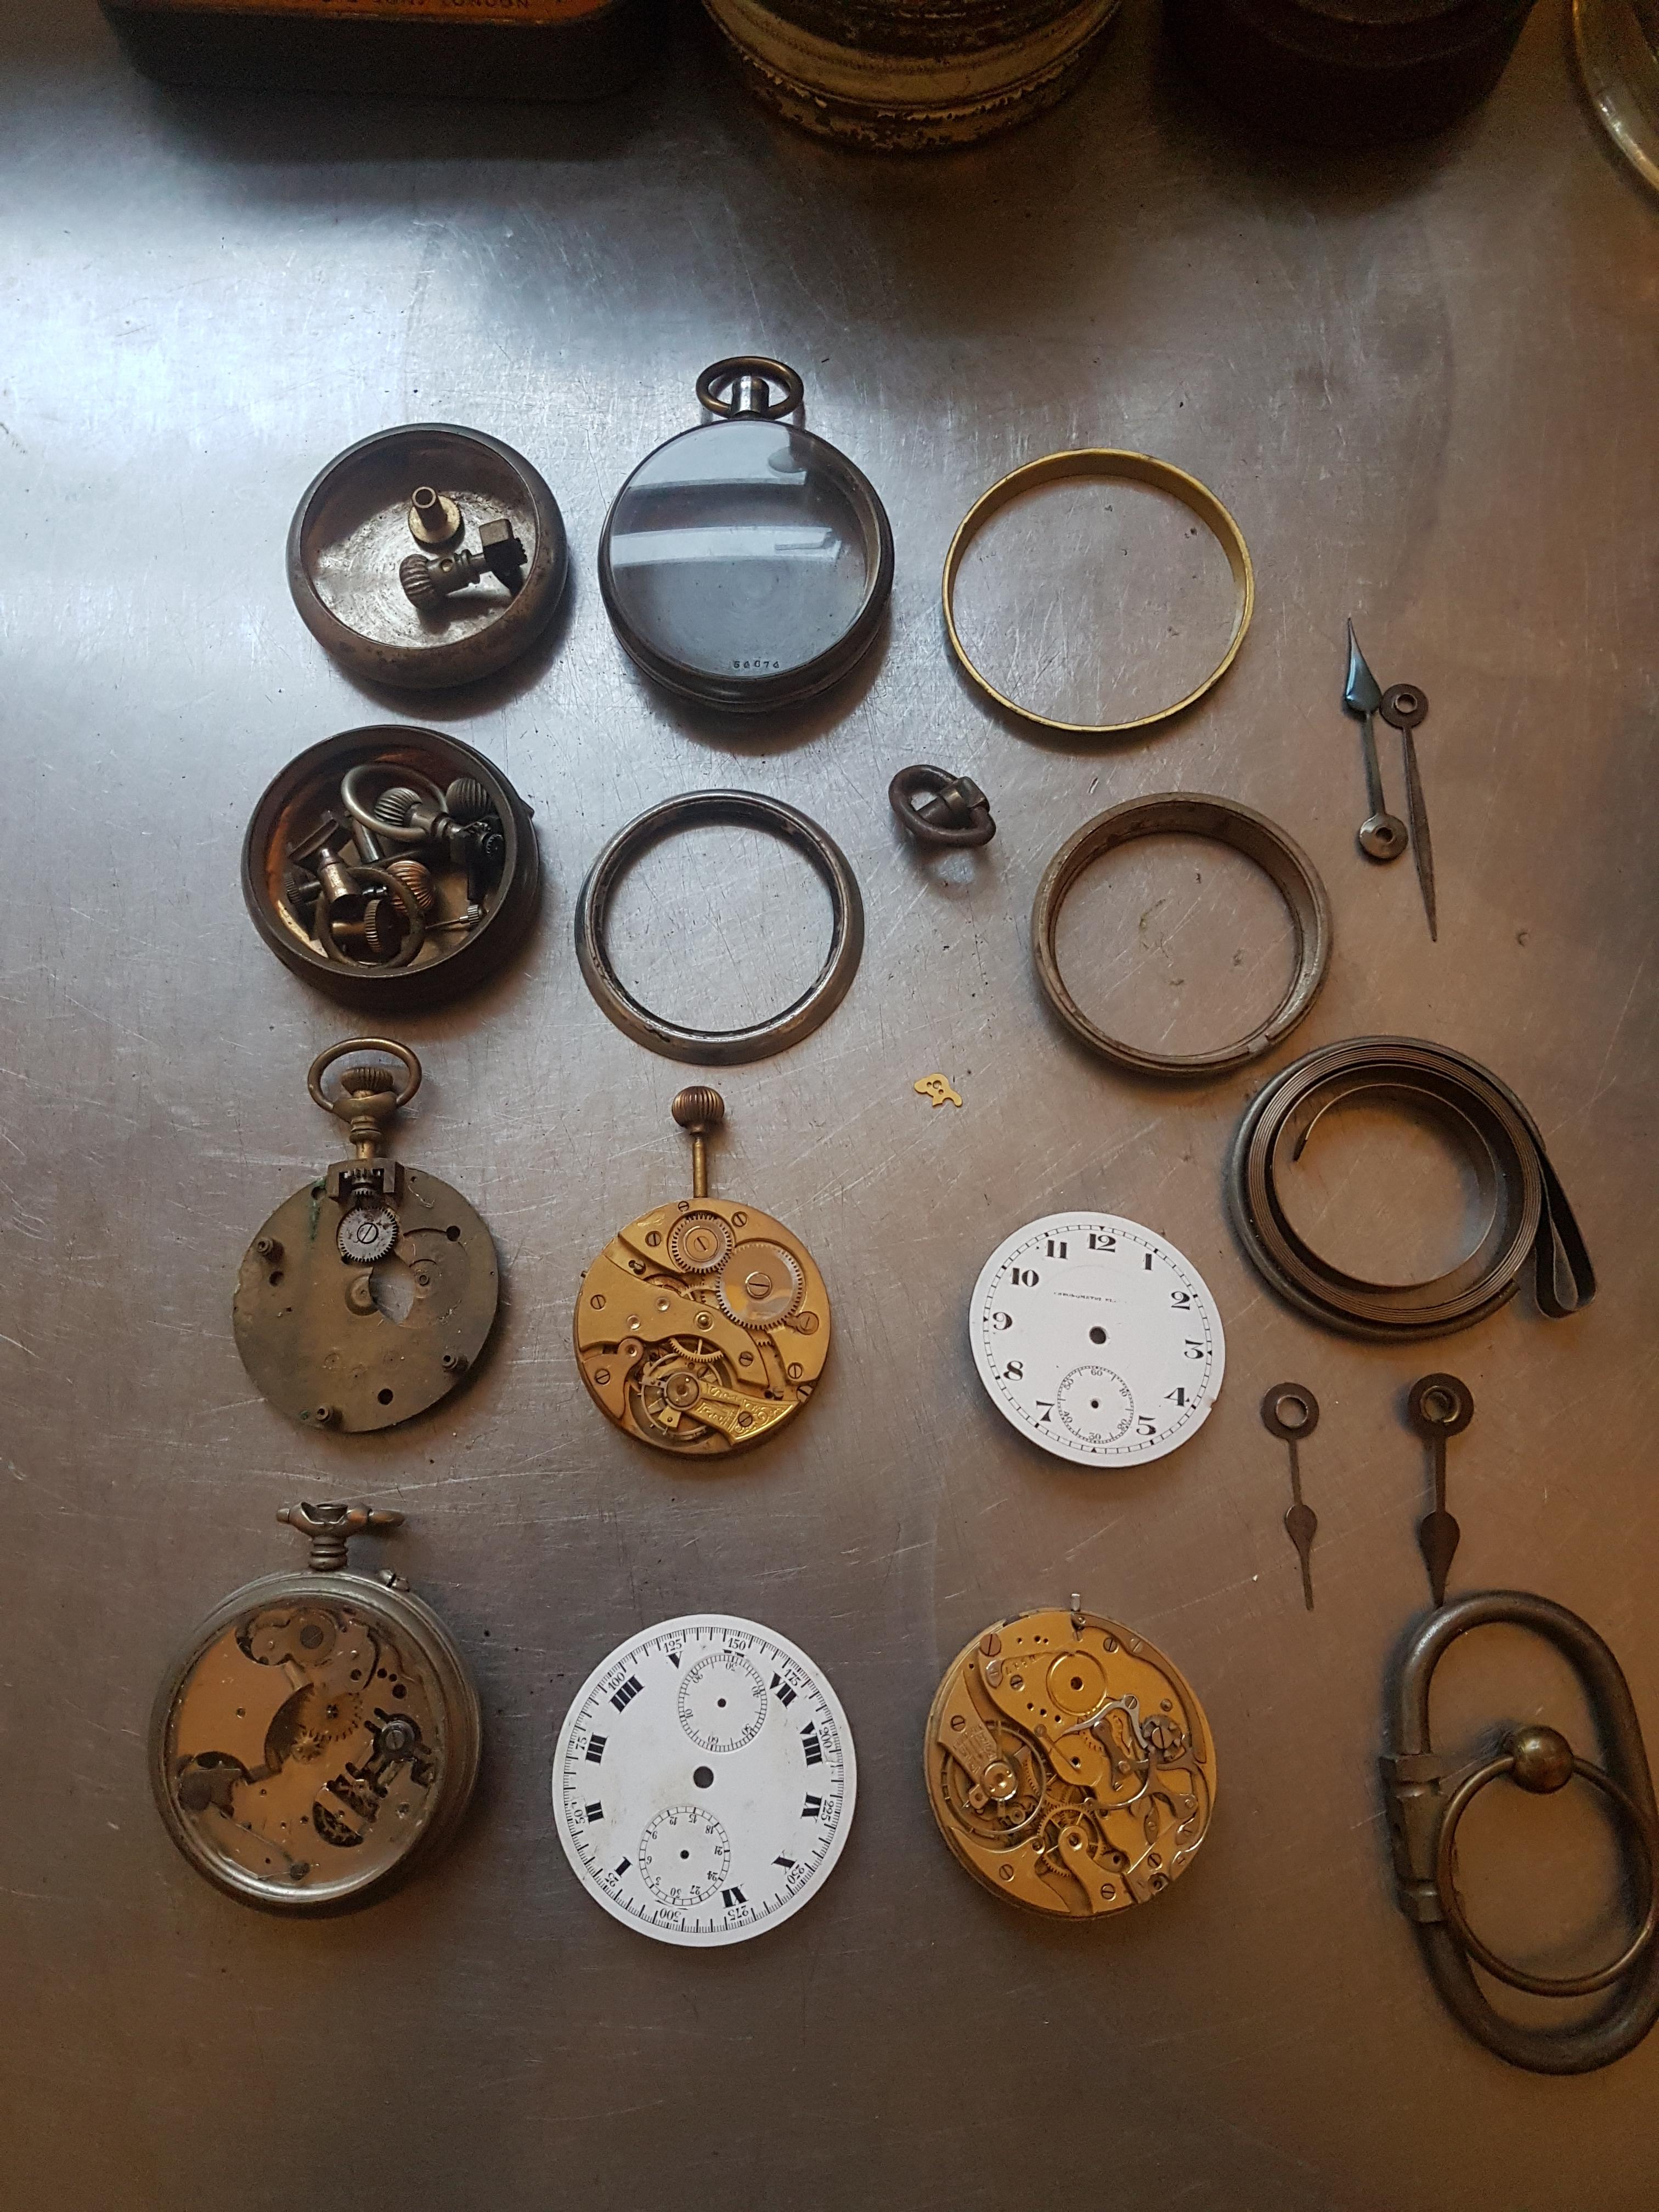
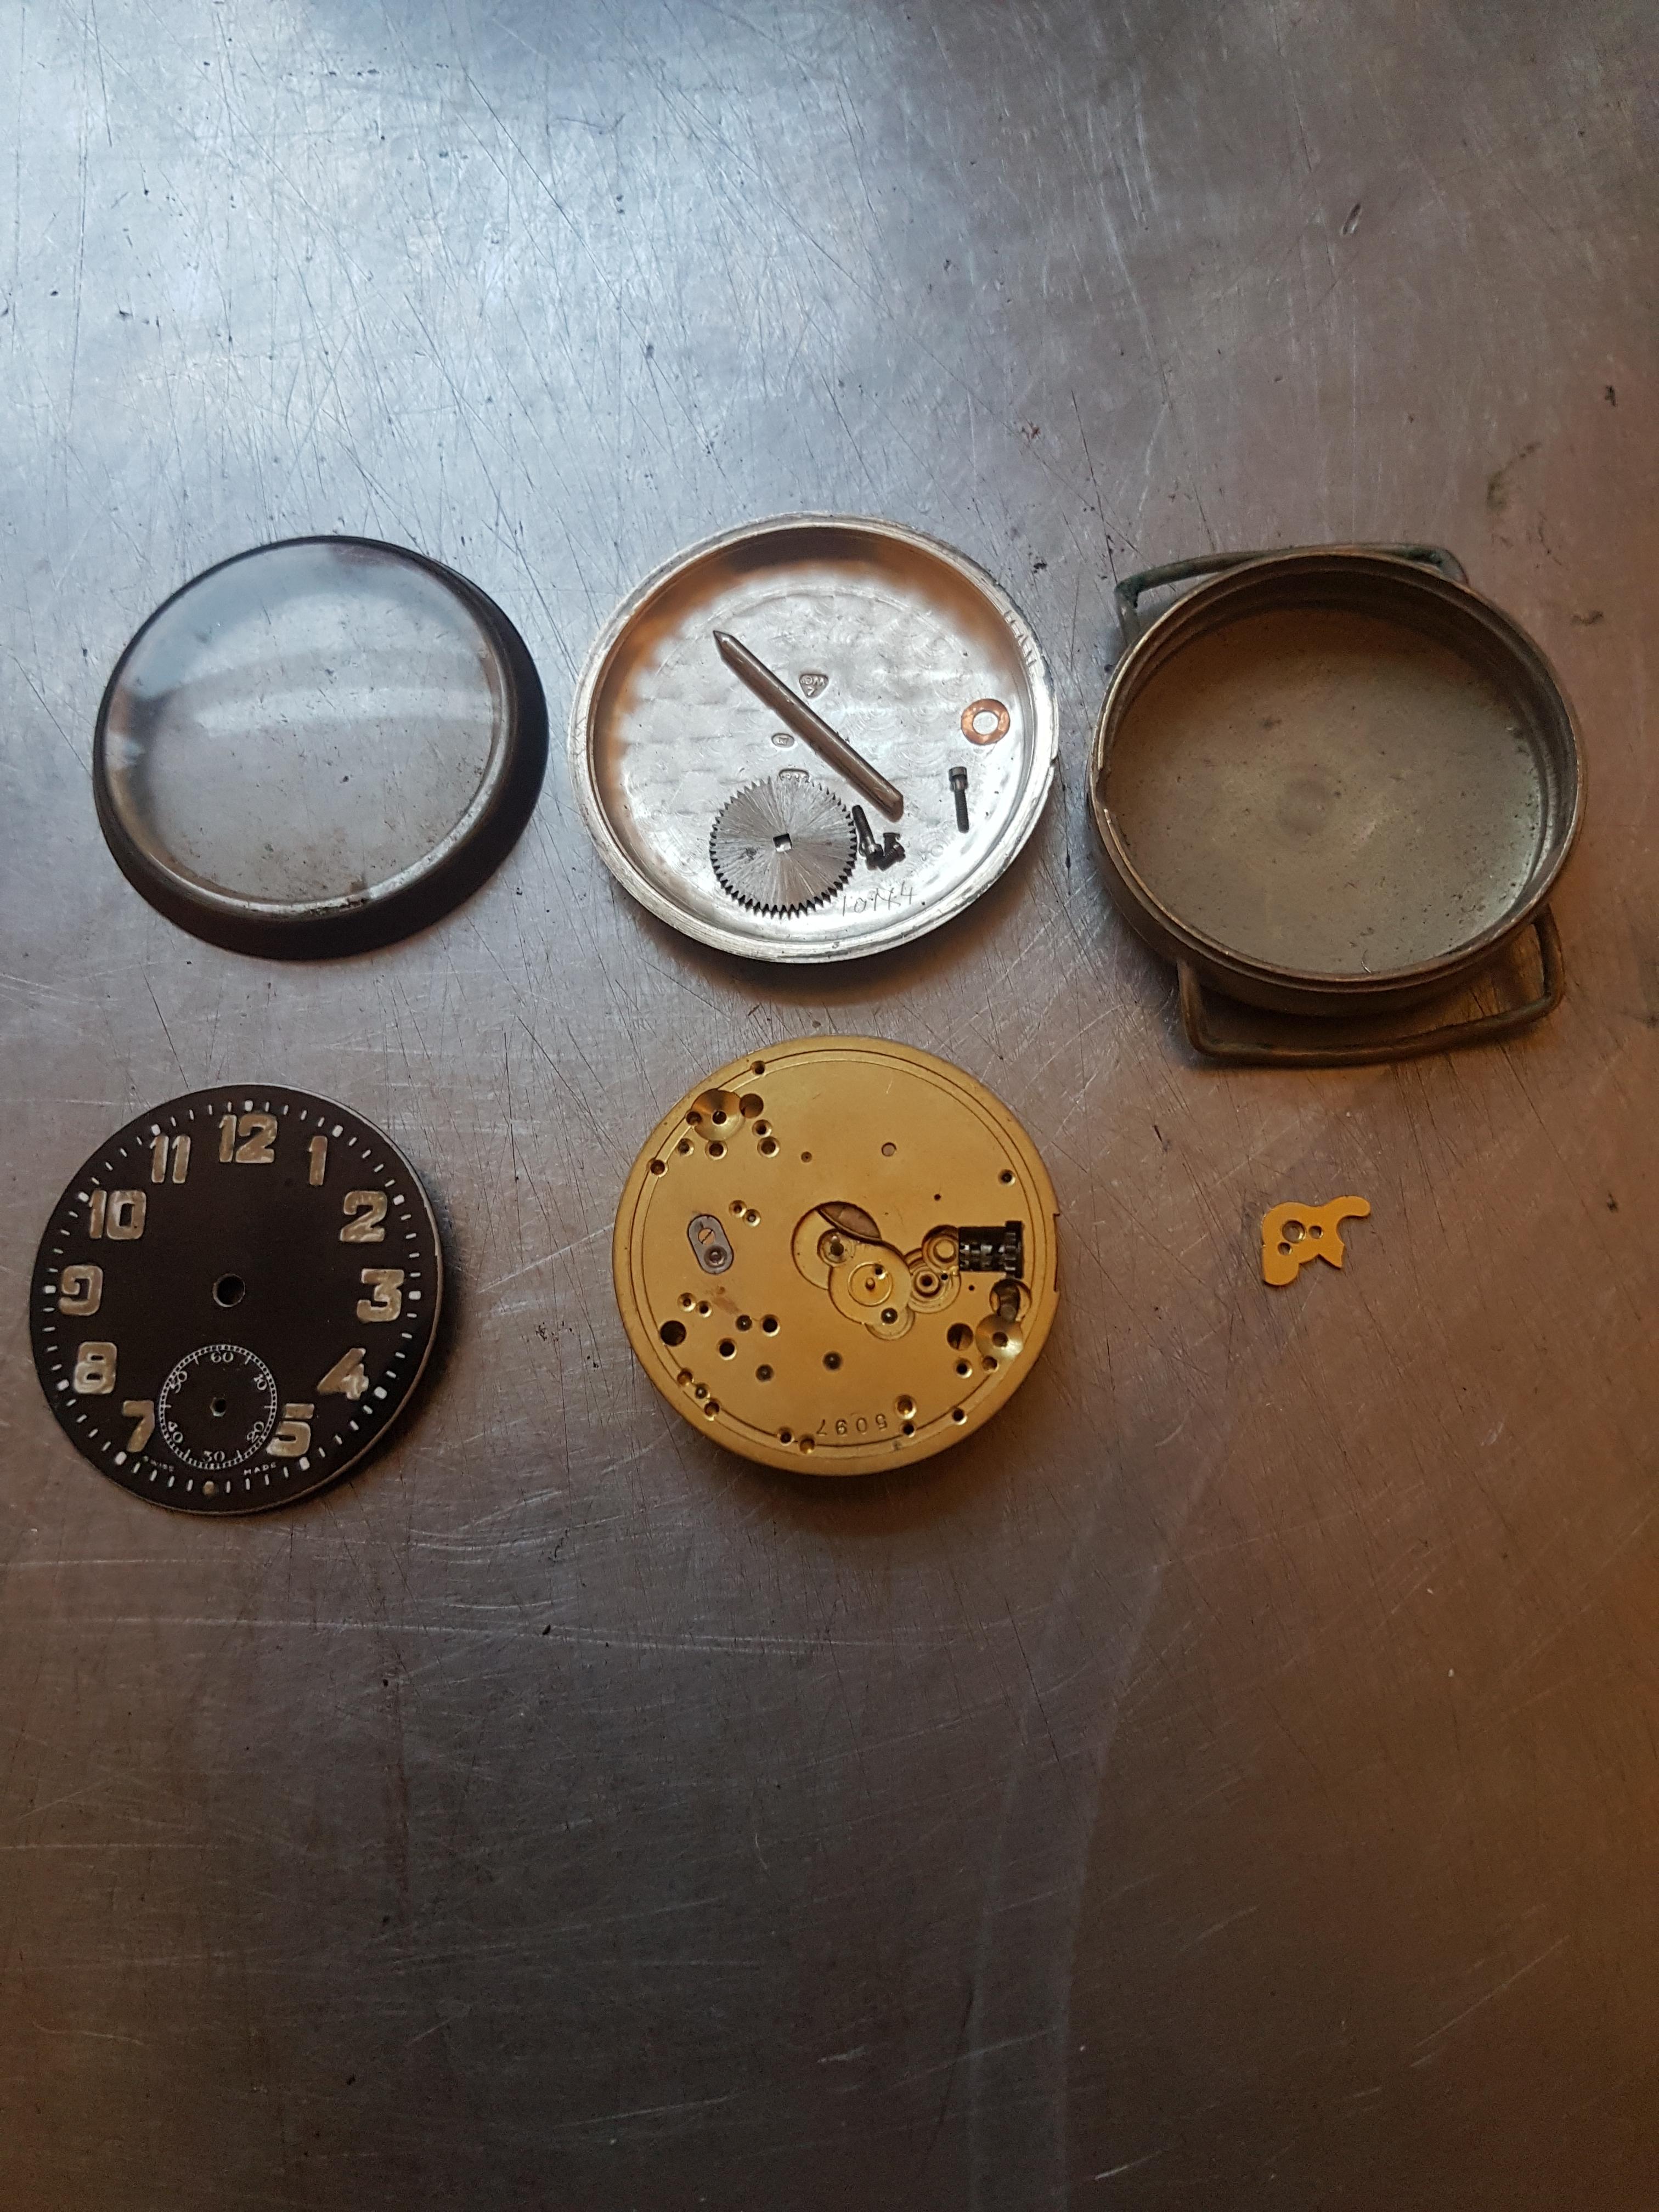
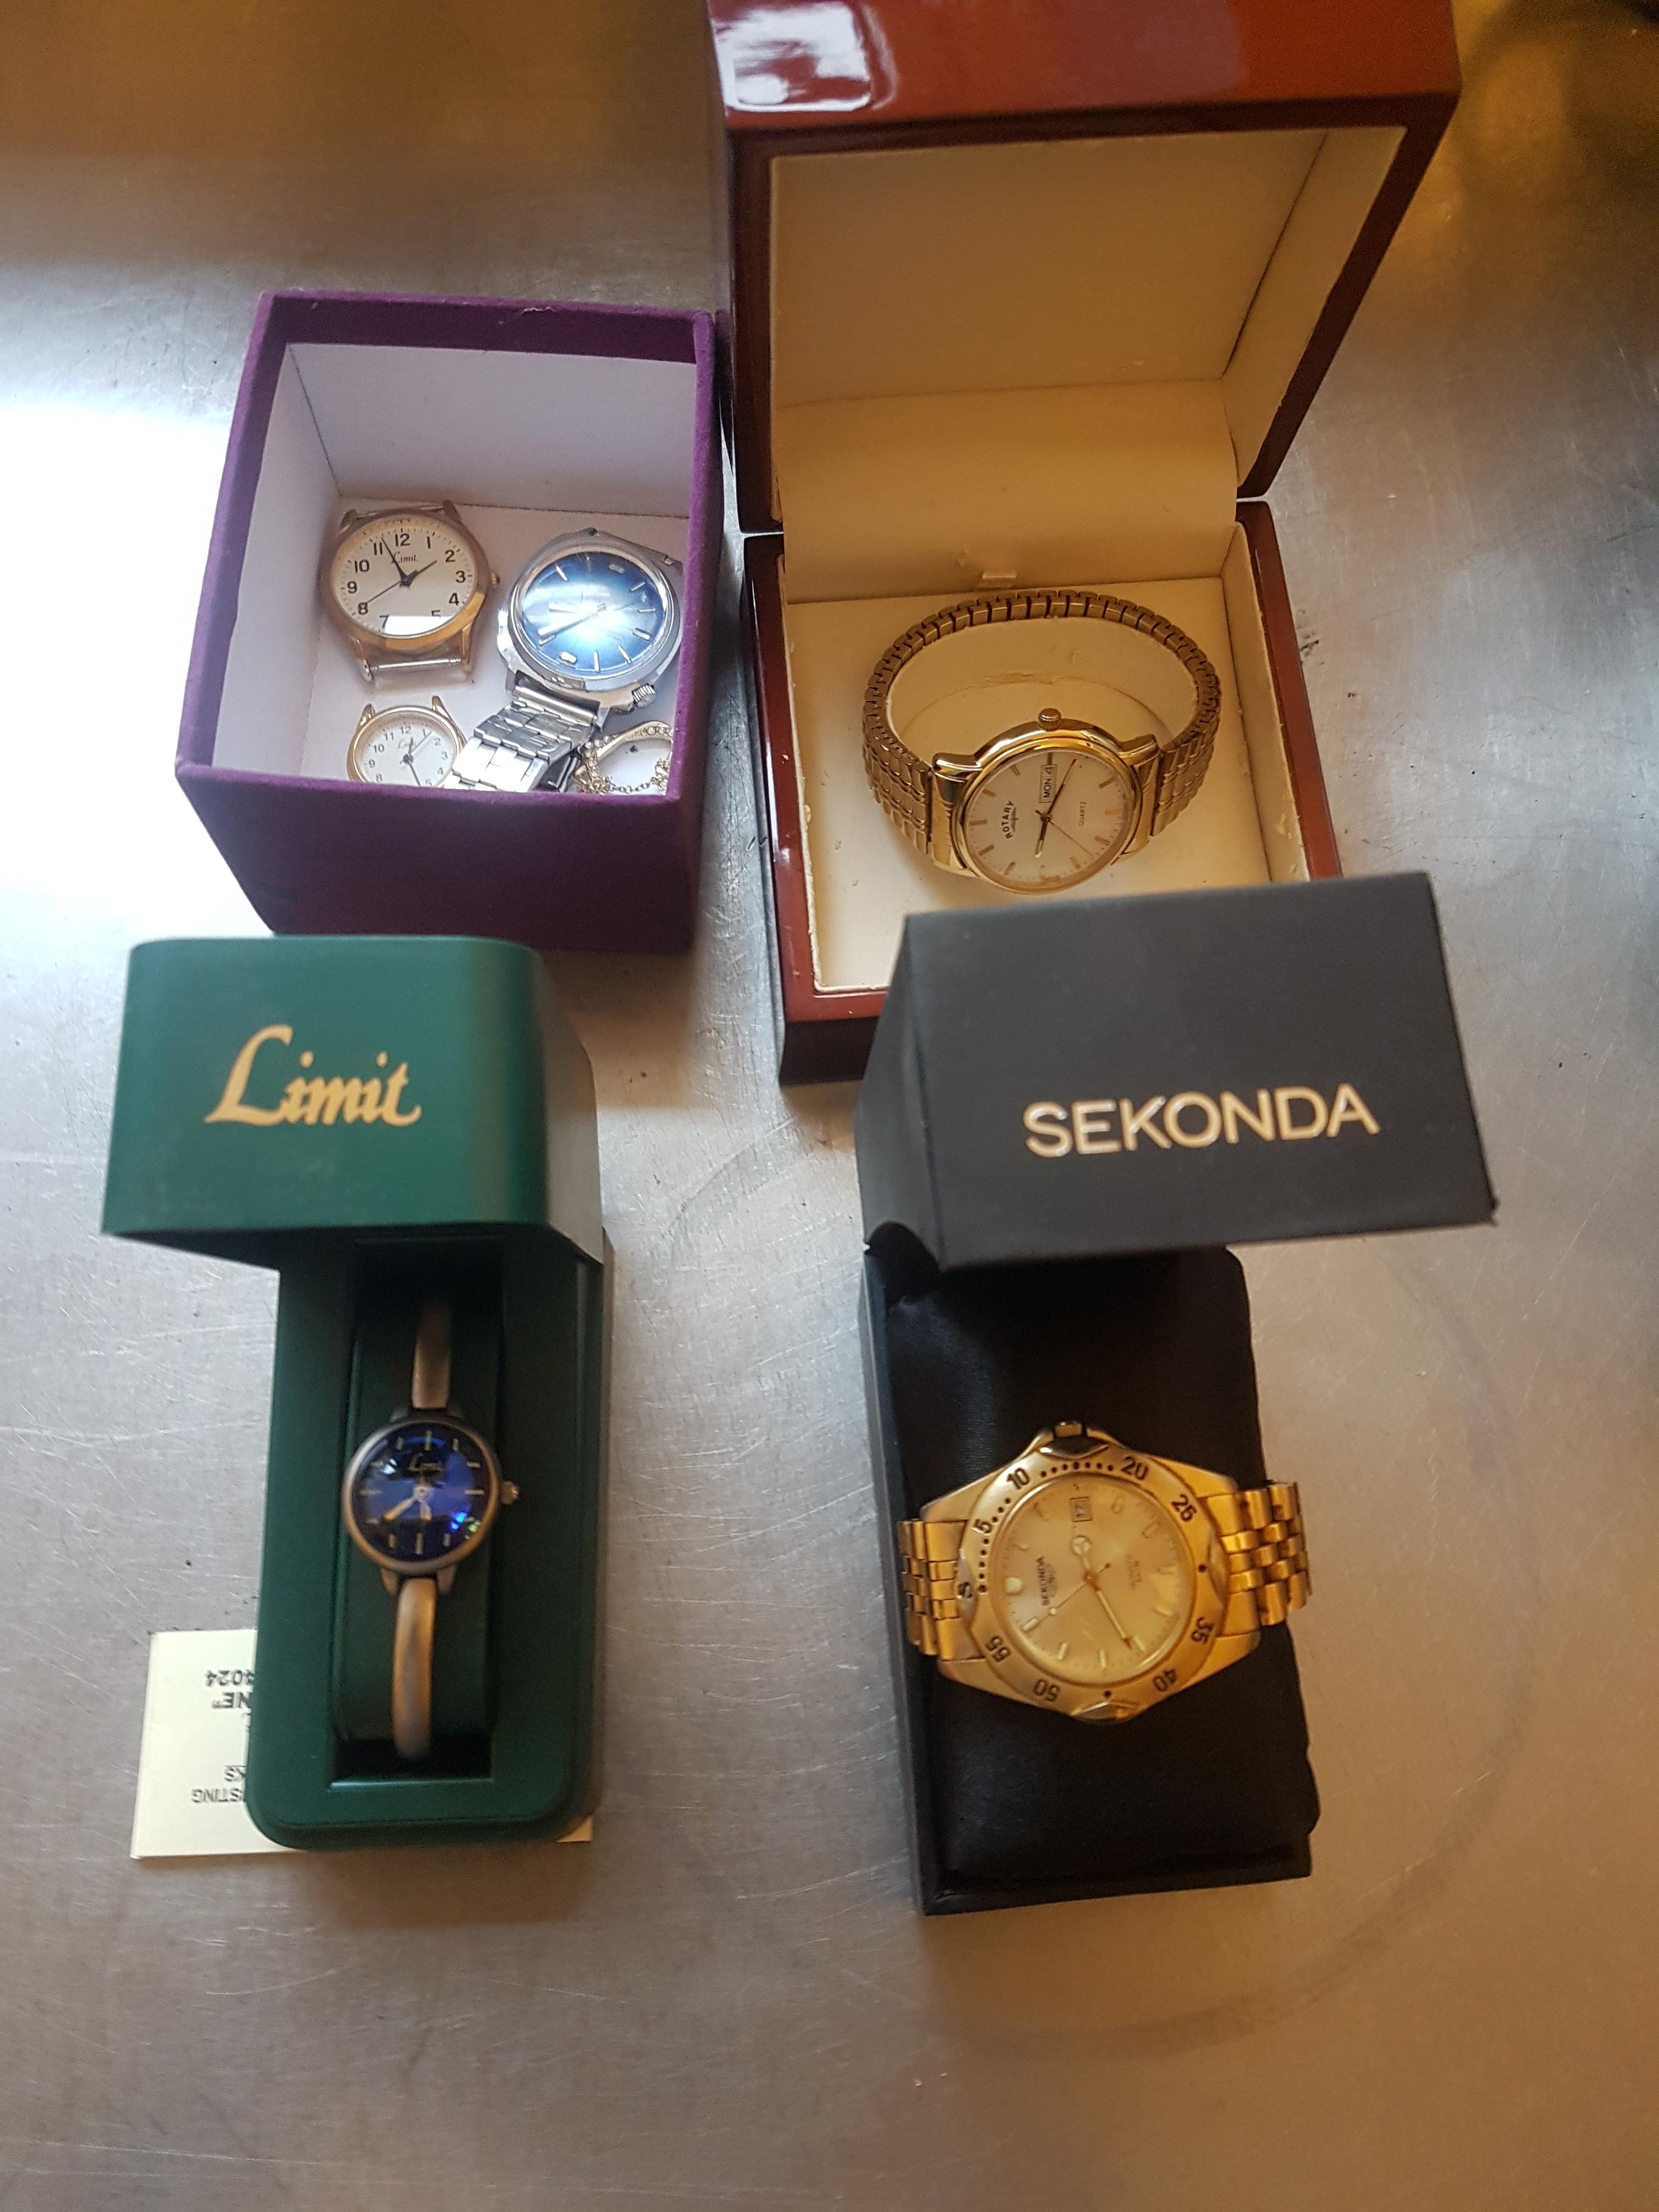
Local auction had a box of random watchmakers tat. Nothing amazing, but I spotted a few bits in the box, so I bought it. Just had a dig through to assess what's there. First off, some watches. I ignored these. Some limit, a sekonda quartz, and a rotary quartz. I may or may not see if these work. I know nothing about them but I know if they weren't tat, they wouldn't be in the box. Next layer of items were some empty tins, a glass globe (this might actually be handy!) And a tray of glass watch crystals. It's slim chance I'll have the right size if I need them, but I play with early 20th century watches, so glass is nice rather than plastic. Next grouping is all the little boxes. The watch pins will be handy, as will the dial washers and the screws. An entire tub of setting lever screws there. There is some other bits and bobs too. Don't know how the enamel is ment to be used. No idea what clock bouchons are, or what the cylinder pivots are. Bottom of the box has this assortment of hands. I need some sub seconds hands. I bought a new selection, but I think there might be something better in here. That brings us to the small selection of tools. A broken something, adjustable winder maybe? Not sure if both bits belong together, but it's broken, and not all there whatever it is. A glass pippette maybe? An old oil pot, ill mix lume in this rather than using a teaspoon. There is a packet with a load of broaches though. I figured these would be handy. Not sure if cutting, smoothing or both. Might be handy for the seconds hands! There are also some small drill bits, and a nice surprise, a tin of taps! I need a 0.8, hopefully there will be one in there. Then some pocket watch and clock bits. The dials are nice. One is a chronograph, the other says chronometer. The movements are incomplete, but I think that's the one for the chronograph. Looks way more complicated than what im used to, even with a load of bits missing. Has depose stamped on it. And lastly, the other thing that made me tempted to buy the box. A zenith trench watch movement. I think the black dial might go with this. Not sure about the case parts though. Few bits missing on the movement but some of them might be in here somewhere. I love black dial trench watches so as soon as I saw this, along with the broaches and hands, I figured I'd buy the lot. all in all, worth the £26 I think. I expected more radium, but luckily only 1 hand and the dial.


 1 point
 -
An alternative is UV cement on the back of the dial.1 point
-
I use Jewellers Cement and an old oiler. Sometimes they fix OK from the back but on occasion they need fixing from the dial side. Make sure you clear the holes first and any existing glue from to have the best chance of fixing from the back.
 1 point
 -
Damn autocorrect. "Cocked" Not planar with the plate1 point
-
Nice!! I love JLC for their inventions. Fascinating idea about the power reserve. I recently serviced a more modern (90s) JLC with a power reserve and it was done quite different, but also appeared over-engineered. Pretty cool stuff.1 point
-
With all these shortened weight screws on one side, you can bet the staff was once changed by a specialist (hello punchers!). In the course of the needed work you should do a static poise test, too. Frank1 point
-
I need to check this issue or tightened the CP on this weekdater 6619-8010. It seems to slip as well.
 1 point
 -
I have the 5 pot version, the quality is good, i can't see the bergeon one been any better.1 point
-
Ask the seller for a photo of the movement in the case.1 point
-
@Knebo Will depend on the lifestyle, winding efficiency, mechanism type, wearing habits etc. I tend to clock between 5k-7k steps a day with the watch on. For a watch with no power, I wind the crown 2-3 full turns before putting it on and letting it wind automatically. (I have observed this puts between 2-4 hours of power in my watches) For all my sub 48 hour power reserve watches, I tend to put in close to 100% power even when I am around 5k. steps. For my 72 hour watch with power reserve indicator, I tend to put in 2-2.5 days worth of power. You can probably try the following out, it should work at least in theory. Take a amplitude and rate reading on a full wind Take those readings every 2-6 hours till its fully unwound. Plot that data to get a graph from full wind to zero. After a day's wear you can check where you land on that graph.1 point
-
Thanks for the review. Very helpful. I have the 5-pot oil pot and love it.1 point
-
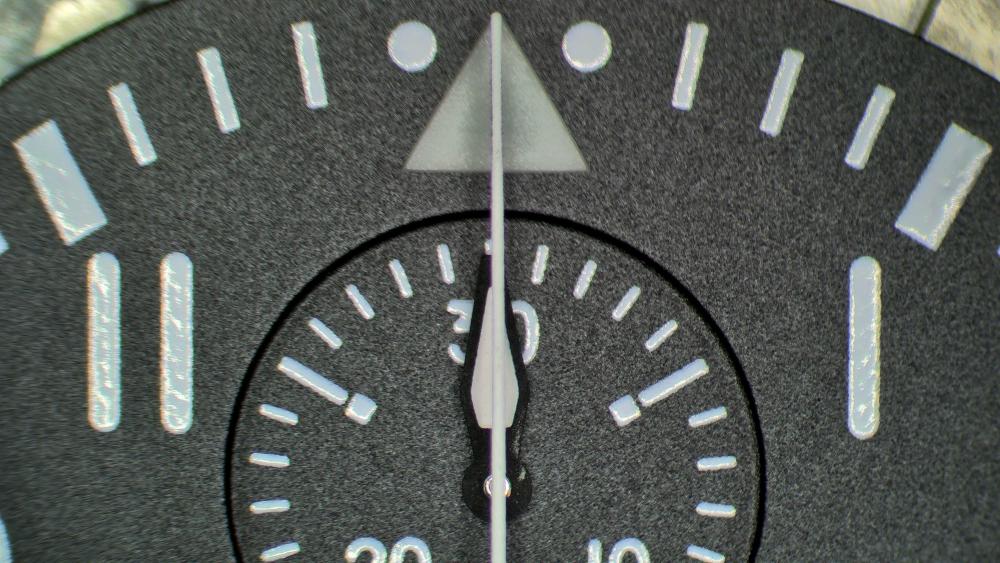
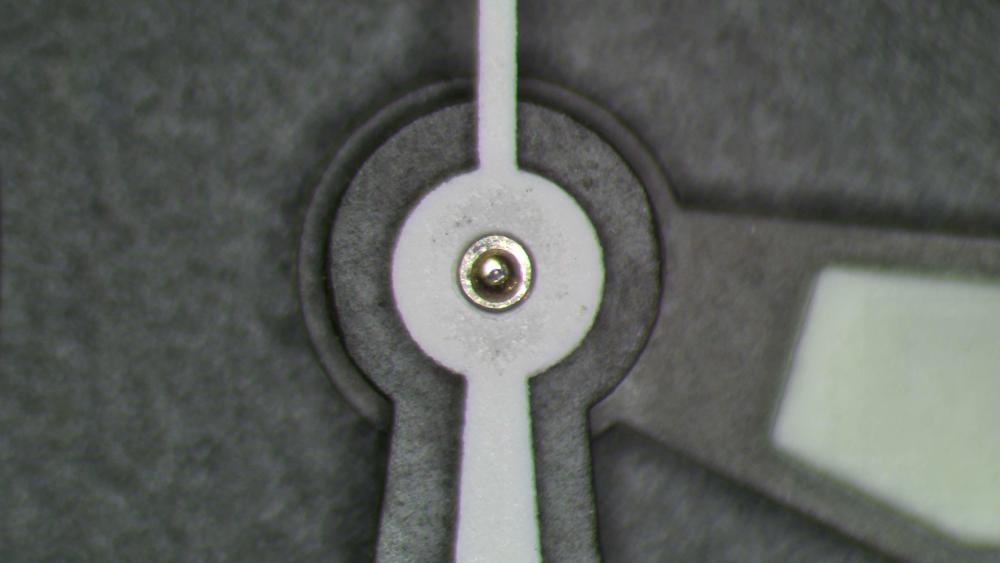
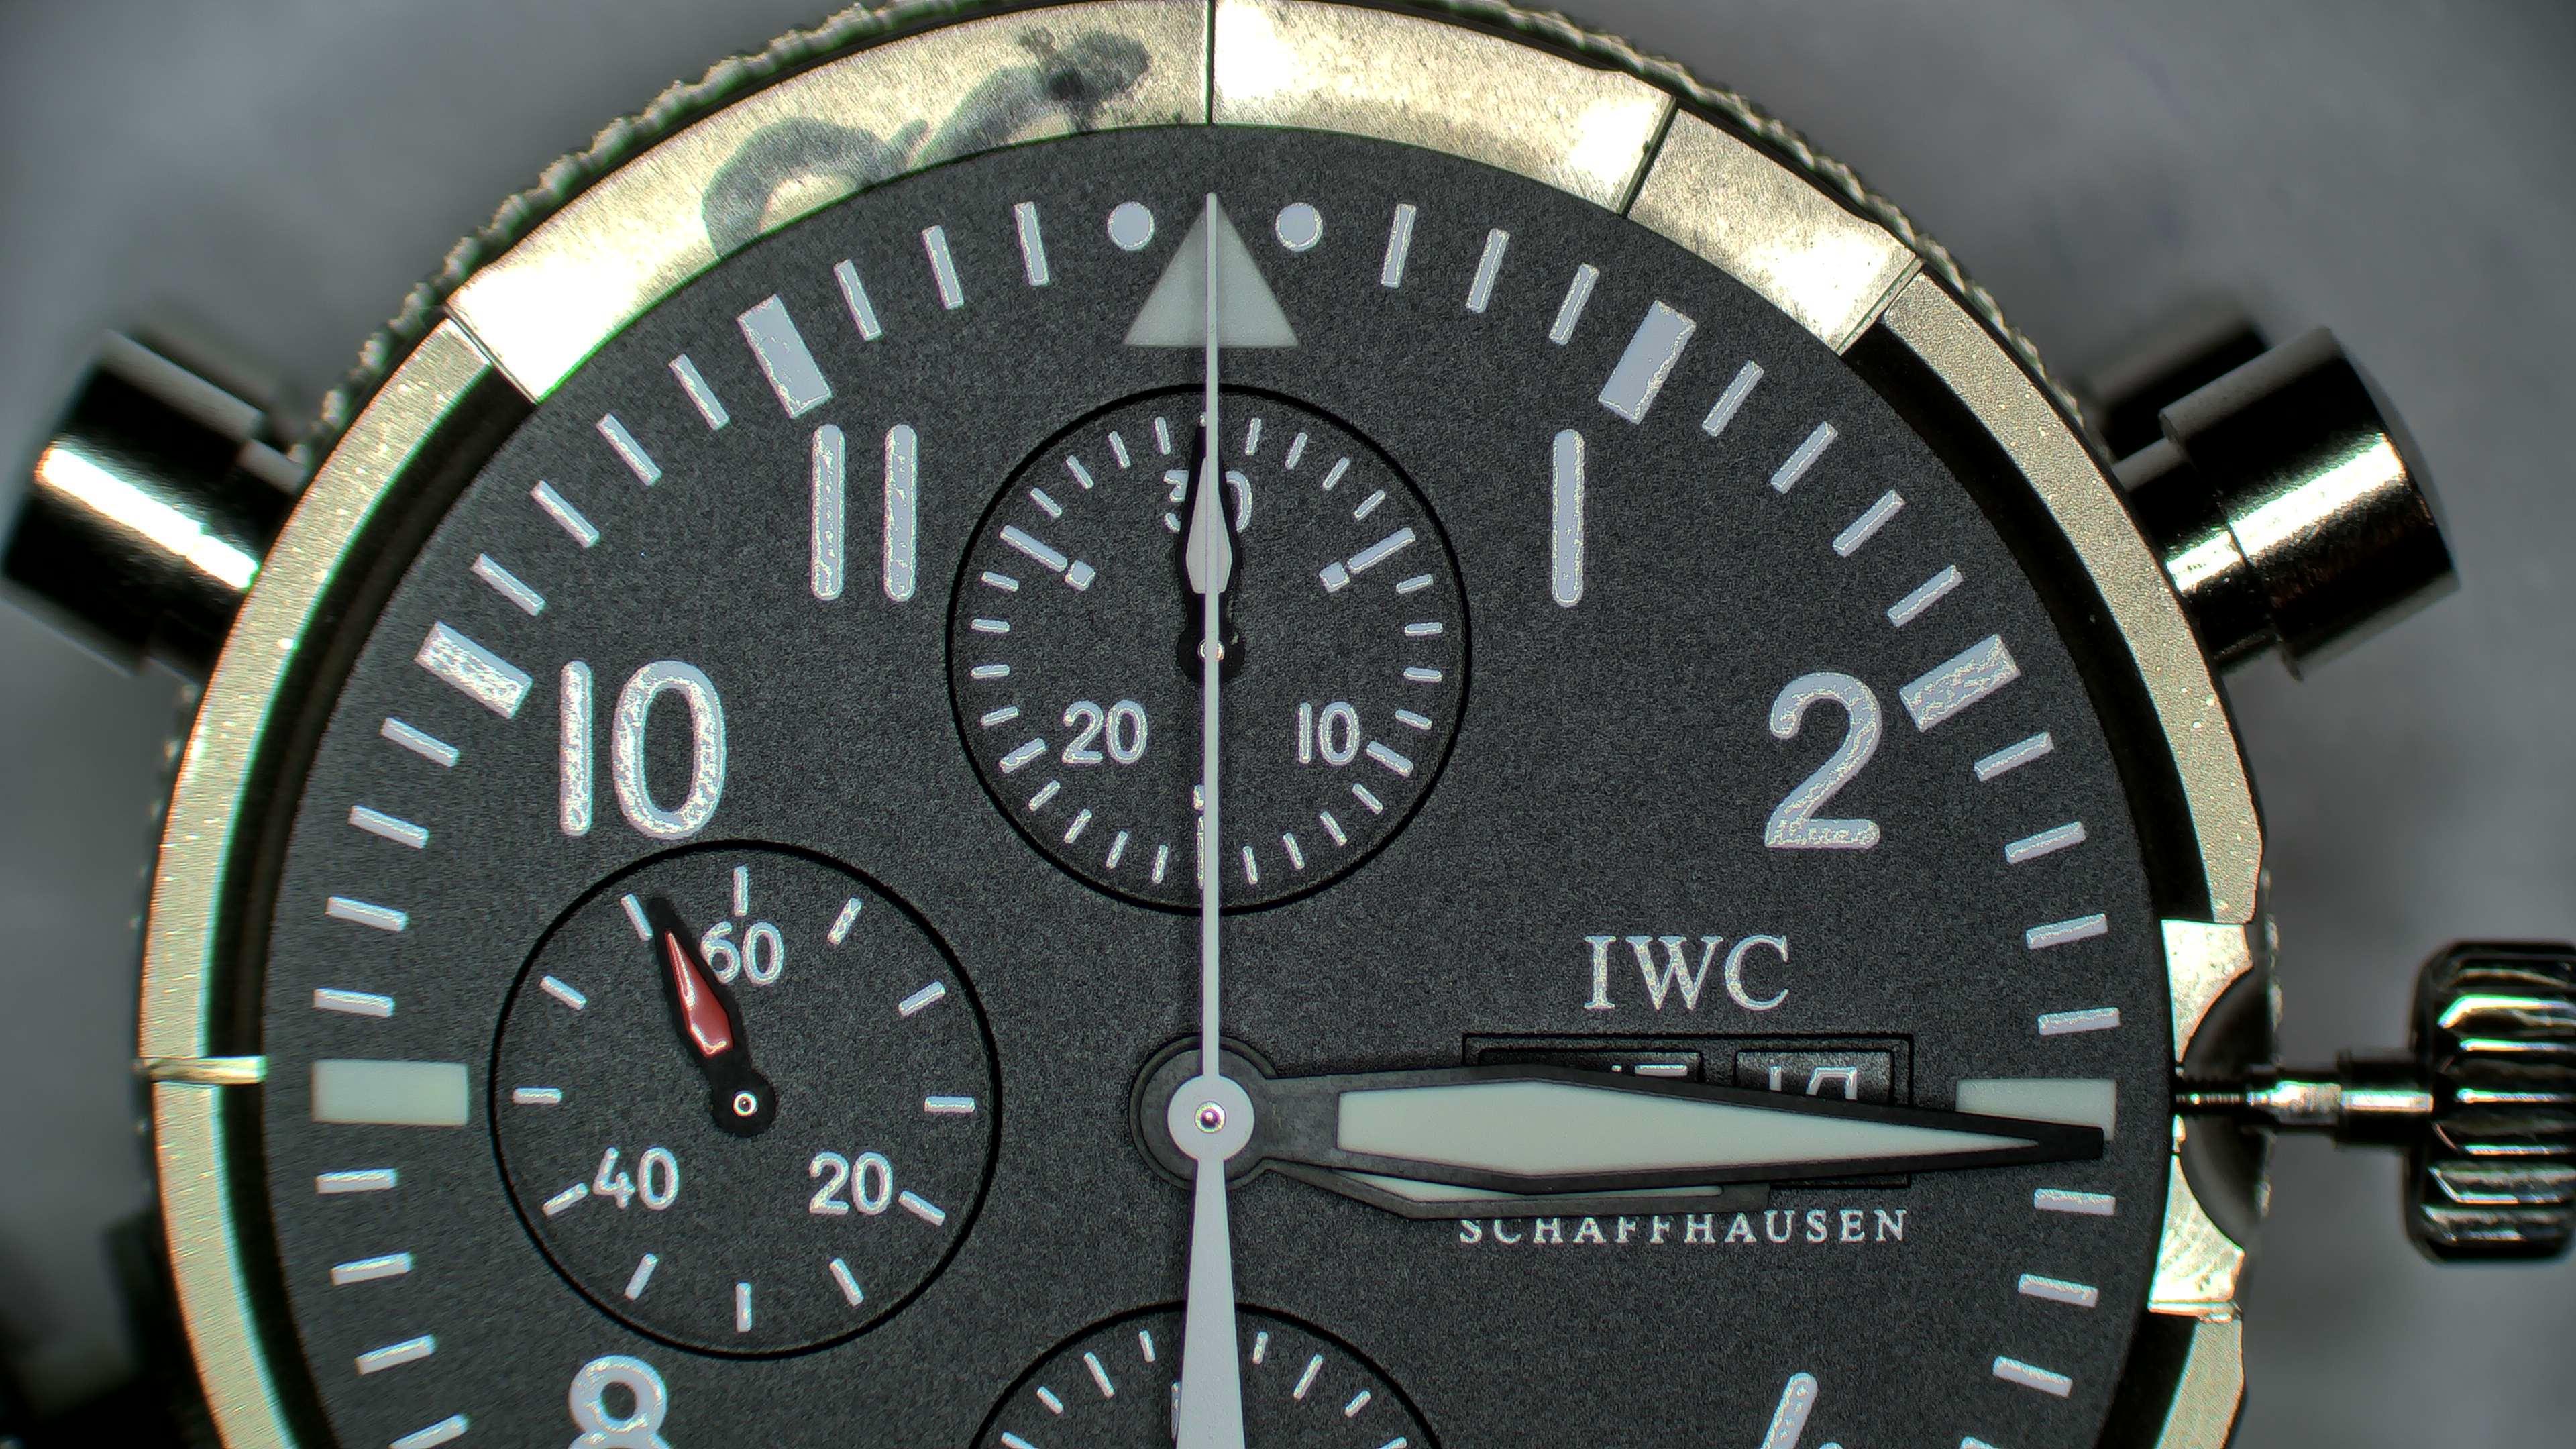
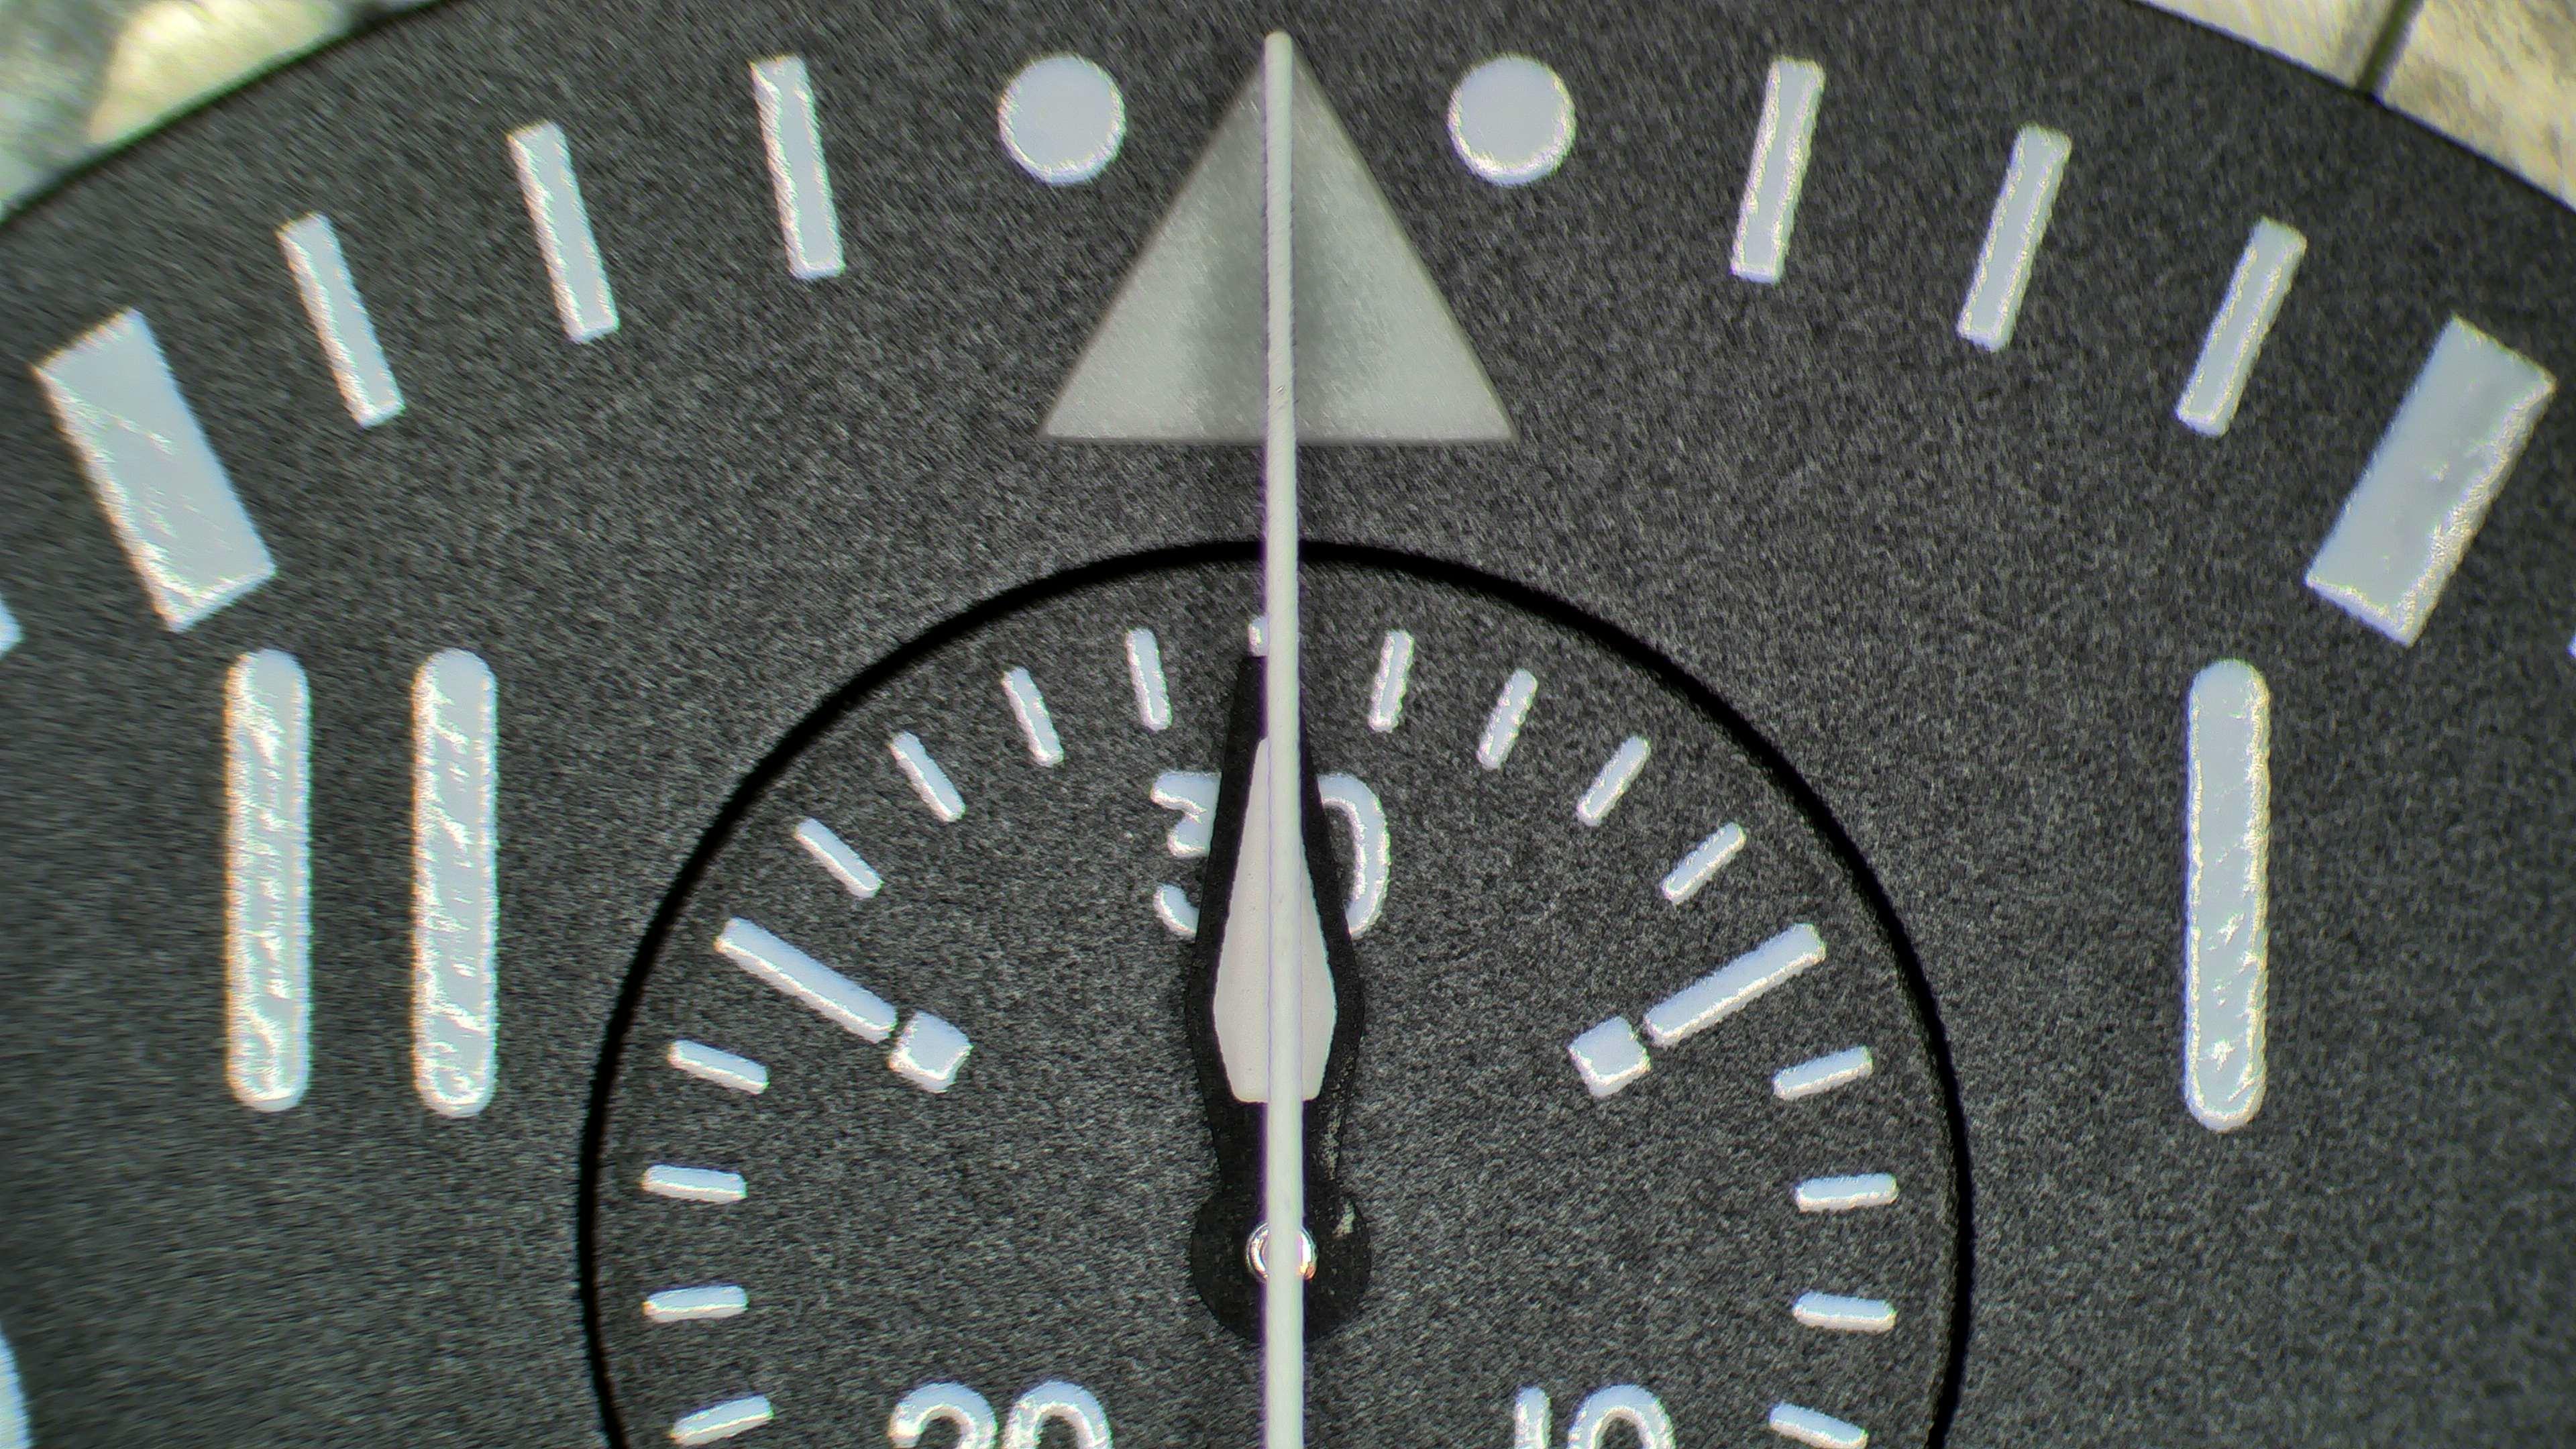
Hi Guys, I was just setting the chronograph hand on this IWC 7750 and noticed how far out the minute counter sub-dial is from centre. The chronograph hand is set pretty much exactly at 12 O'clock, but if you look at the track of the sub dial it is off to the left. Clearly the chronograph sweep second hand is central as it is also central to the rivet of the sub-dial hand. Incidentally, I had to close up the pipe of the sweep second hand by 0.01 mm to have a tighter fit on the arbor and re-rivet the rivet on the top of the hand, so the hand wouldn't slip whilst returning to zero. I find a lot of these sweep second hands need work to get them to fit really tight and not drift, as this one was. The last pic shows the rivet that I re-rivetted. You can see how it is slightly flattened on the top to create a tight fit between the rivet and pipe, so the hand doesn't flap about on the pipe when returning to zero.

 1 point
 -
It doesn't look like anyone addressed this directly. Damage like this to enamel dials is common, almost ubiquitous in watches that have taken a hard drop. The dial attaches to the movement with usually copper wire "feet" - the tips of which are visible in the missing enamel holes. When the watch is dropped then the dial feet will either flex horizontally or be pushed up or vertically and dump some of that energy right into the enamel, which shatters where it contacts the dial feet. They may bend a little dimple into the brass dial too. And Richard suggested checking the balance staff because a drop strong enough to have done this to the enamel almost certainly will break the staff too. Or at least bend the pivots.1 point
-
Yeah no doubt that's real - I discovered this weekend that they don't all have the datestamp funnily enough. Hand wise OG minute and hour hands are quite an easy find in my experience, seconds less so.1 point
-
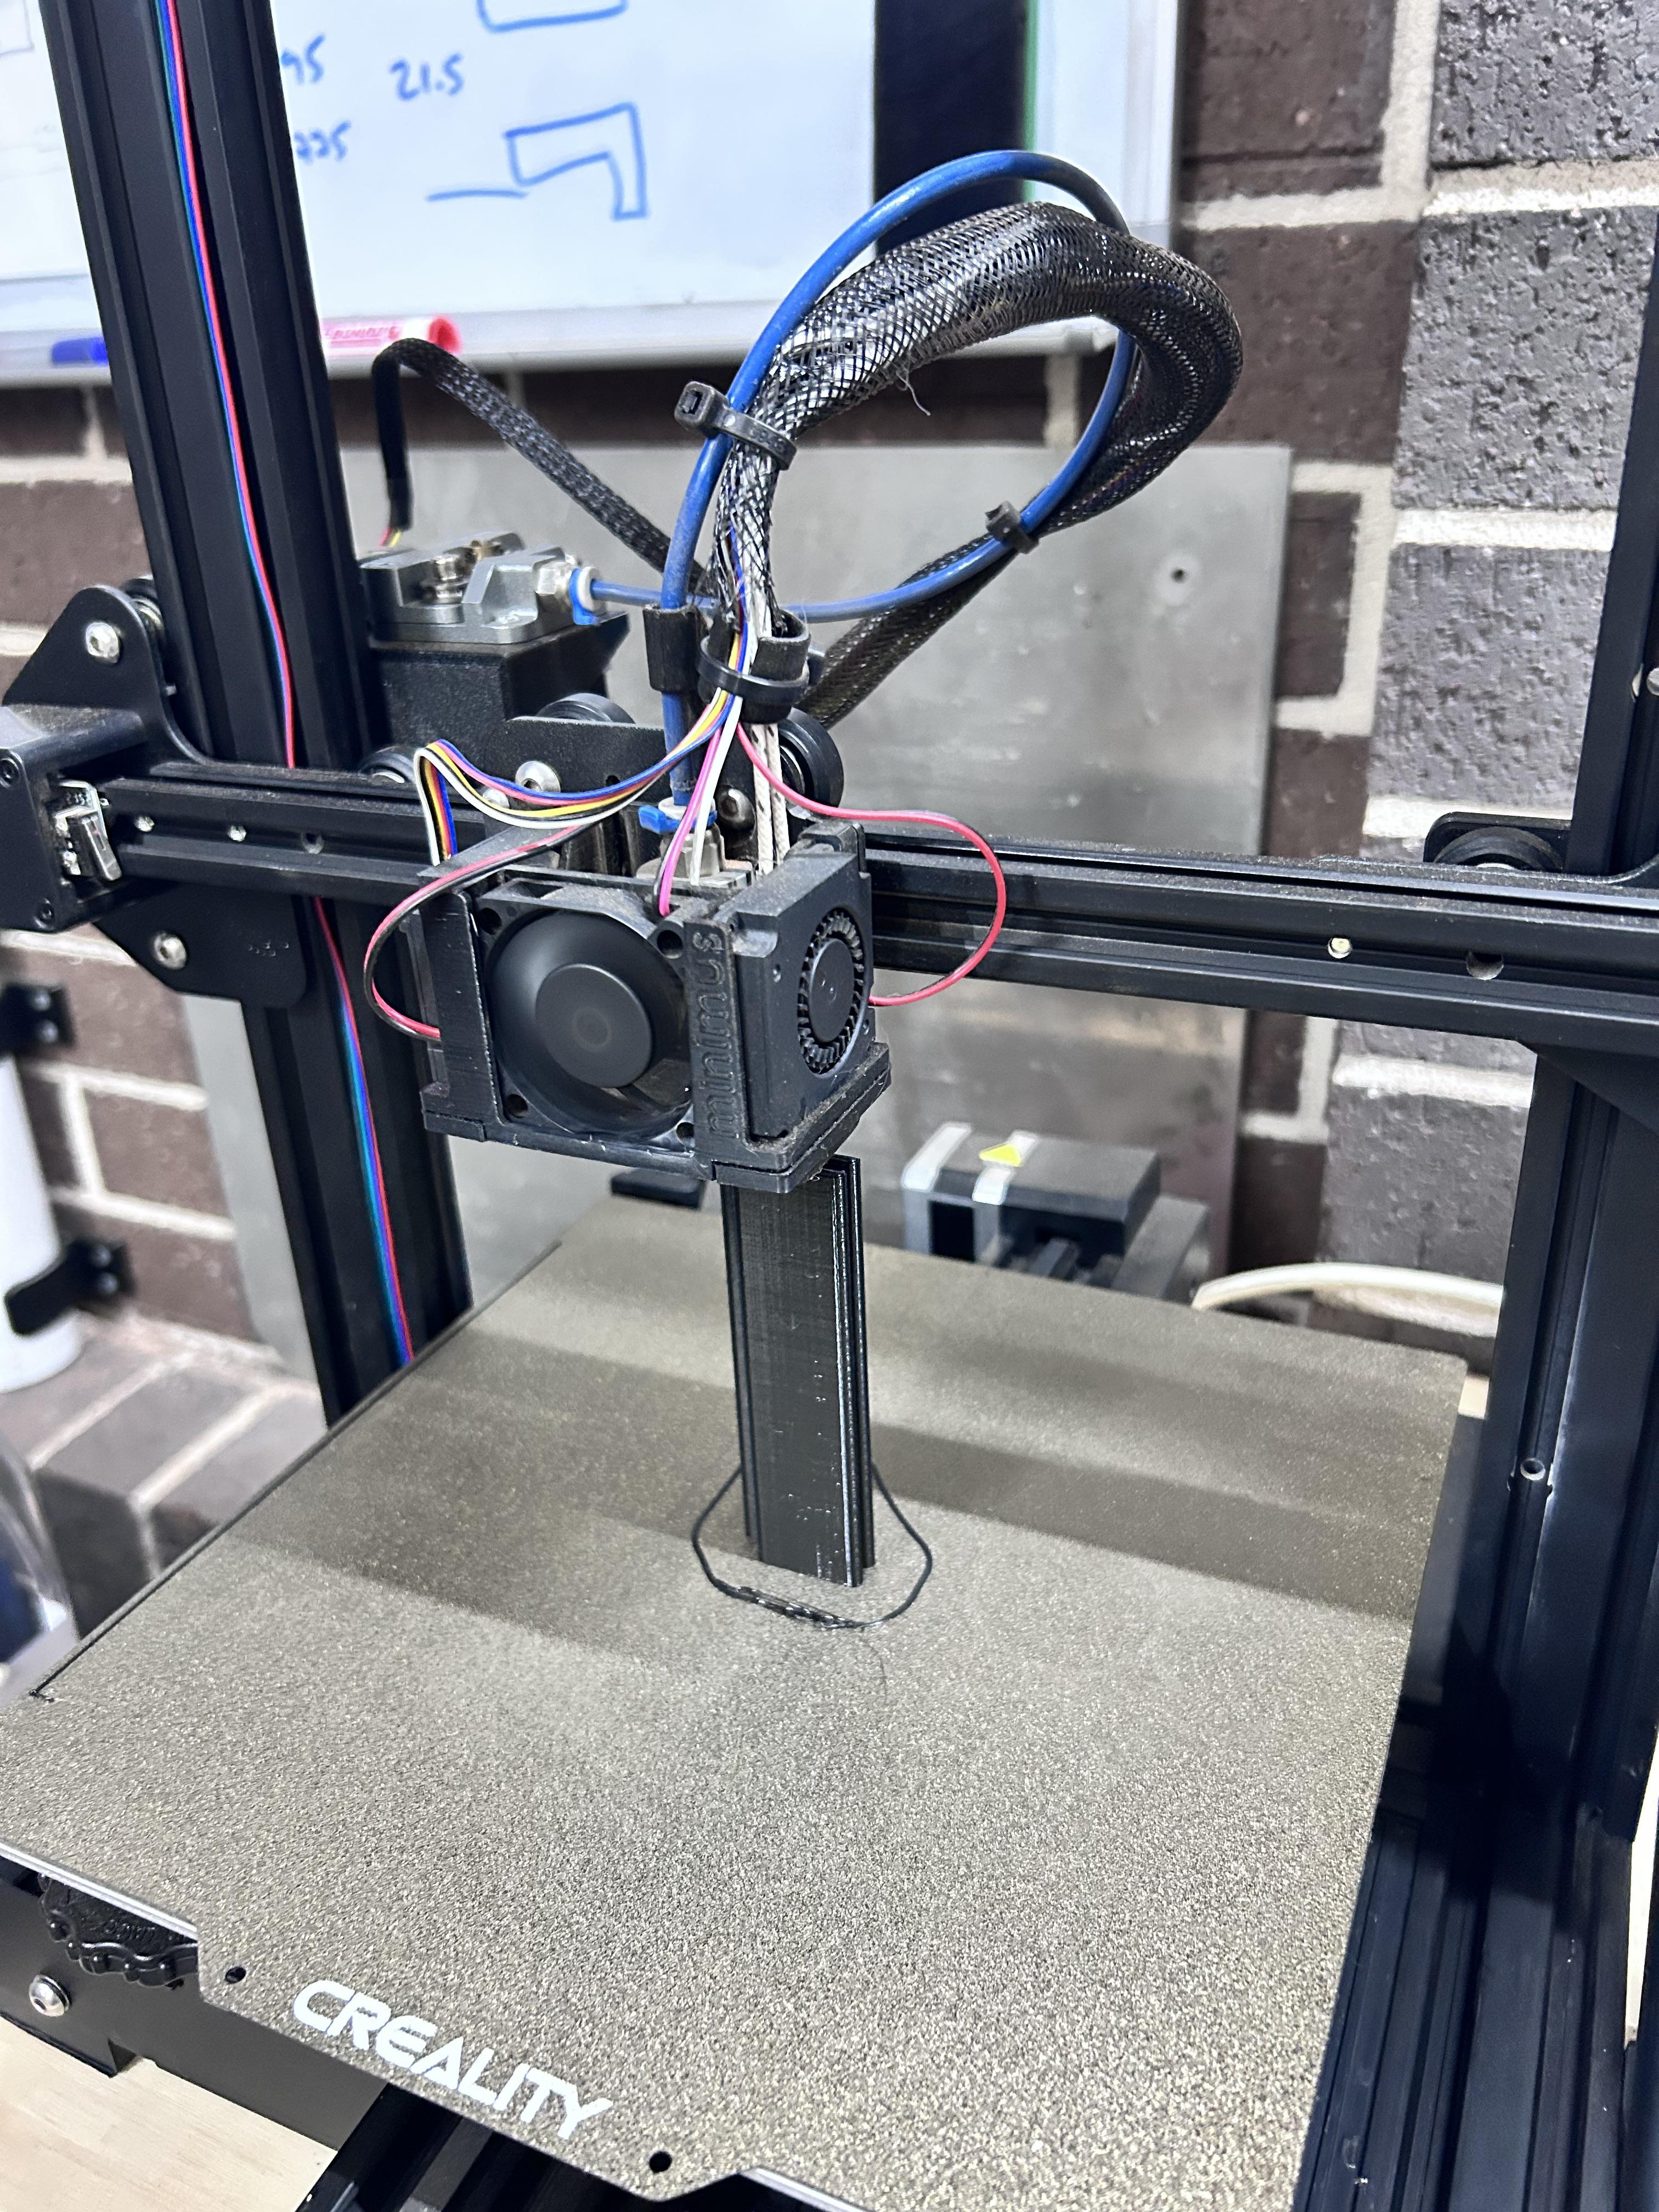
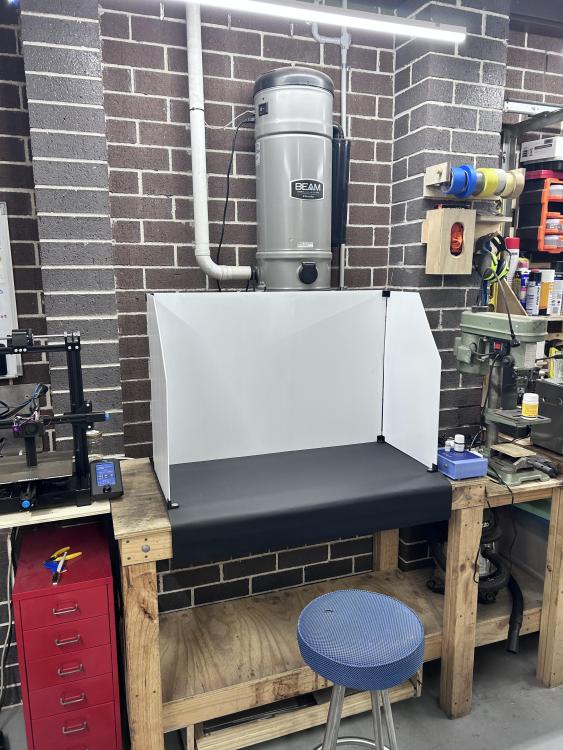
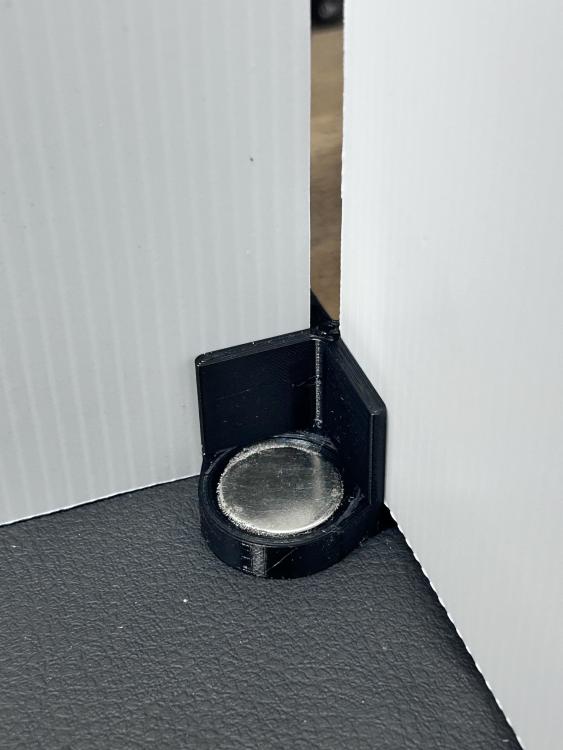
Updates. Here is my cleaned up work space. Trying to make some room for my feet so it’s a bit more comfortable. I may even move some items to down there at the back like my US cleaner. The base is faux leather. I thought this was best as it wouldn’t snag any parts. I really wanted green but they didn’t have any. As you can see the sides are coreflute and held together with 3D printed clips. The corners have magnets to hold them to the metal welding plate. The gaps in the corners are also going to be covered with these long connectors so that the only place an item can go is 700mm in the air over the top, or forwards. The balance is also looking not too bad as far as my uneducated eye looks. I haven’t done anything to it, it’s just settled this way and it looks pretty even to me and the sticky coils don’t appear to be there anymore unless I am missing something obvious (again!). Still begs the question why they were stuck together. Should I demagnetise or give it a swish in some IPA or Shellite?
 1 point
 -
As the proverbs say, "necessity is the mother of invention" and "where there is a will, there is a way." After much thought and several failed strategies and attempts, I finally managed to figure out and carry out the mounting or riveting of the second hand. As I mentioned earlier, I don't consider myself particularly skilled when thinking outside the box (and thus probably one of Bergeon's best amateur customers), but practice makes perfect, so I can't help but feel a little proud today OK, it's not rocket science, but still. I placed the second-hand tube into the hole of a suitable pusher from my jewelling tool. To work under my stereo microscope, I placed the pusher in a hole in a wooden block. Without the stereo microscope, the operation would have been impossible, at least for me. Then, I manipulated the second hand with two brass tweezers until the hexagonal hole in the hand aligned with the hexagonal top of the tube and gently pressed the hand, hoping it would attach well enough not to fall off. Fortunately, I got the hand to attach, albeit slightly crooked and very loosely. After this, I very carefully transferred the pusher to the jewelling tool so the hand wouldn’t fall off in the process. I had pre-set the micrometre to minimize the risk of crushing or damaging the hand if it became necessary to apply relatively high force on the jewelling tool lever. Finally, I carefully lowered the lever, and almost immediately, without applying much force at all, the second hand clicked into place. It was a distinct click—the kind that gives you a satisfying feeling in your body. My only concern was that the tube or hand might have been damaged when I removed them, causing the hand to spin freely on the tube. Luckily, my concern proved unfounded, and the hand fit perfectly onto the tube. Now, all that remains is to press the tube onto the fourth wheel’s pivot when the time comes.

 1 point
 -
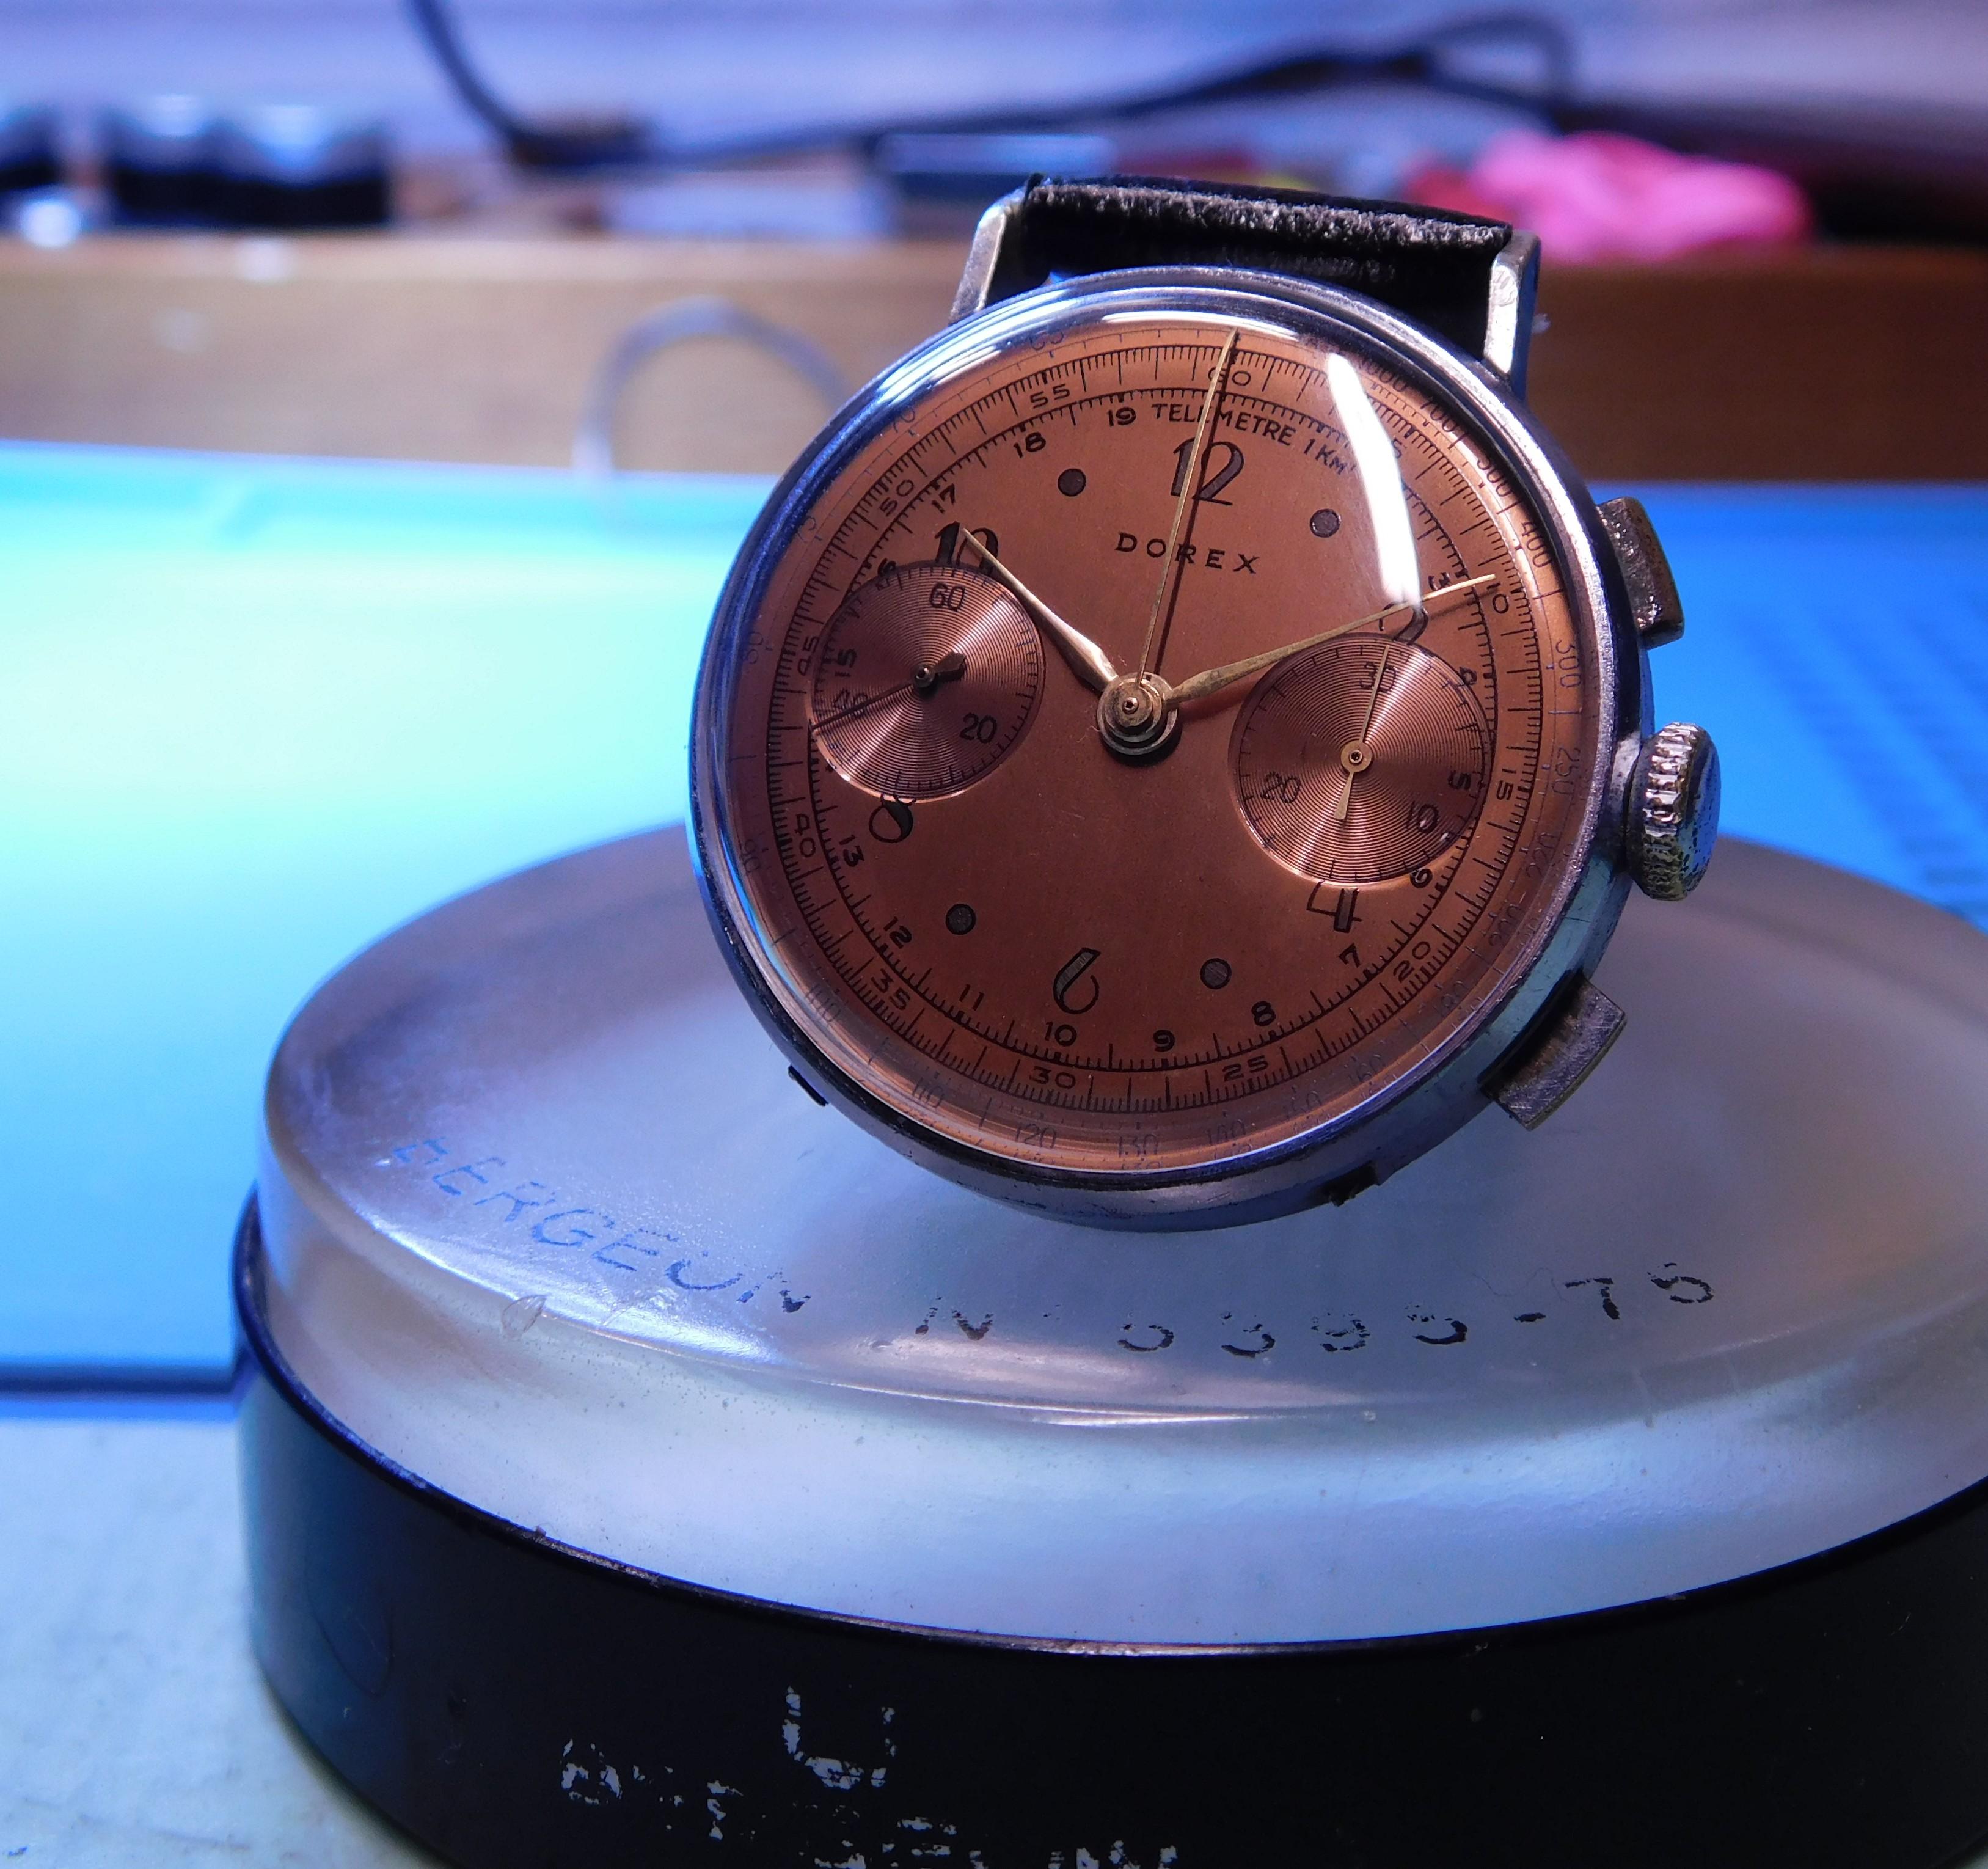
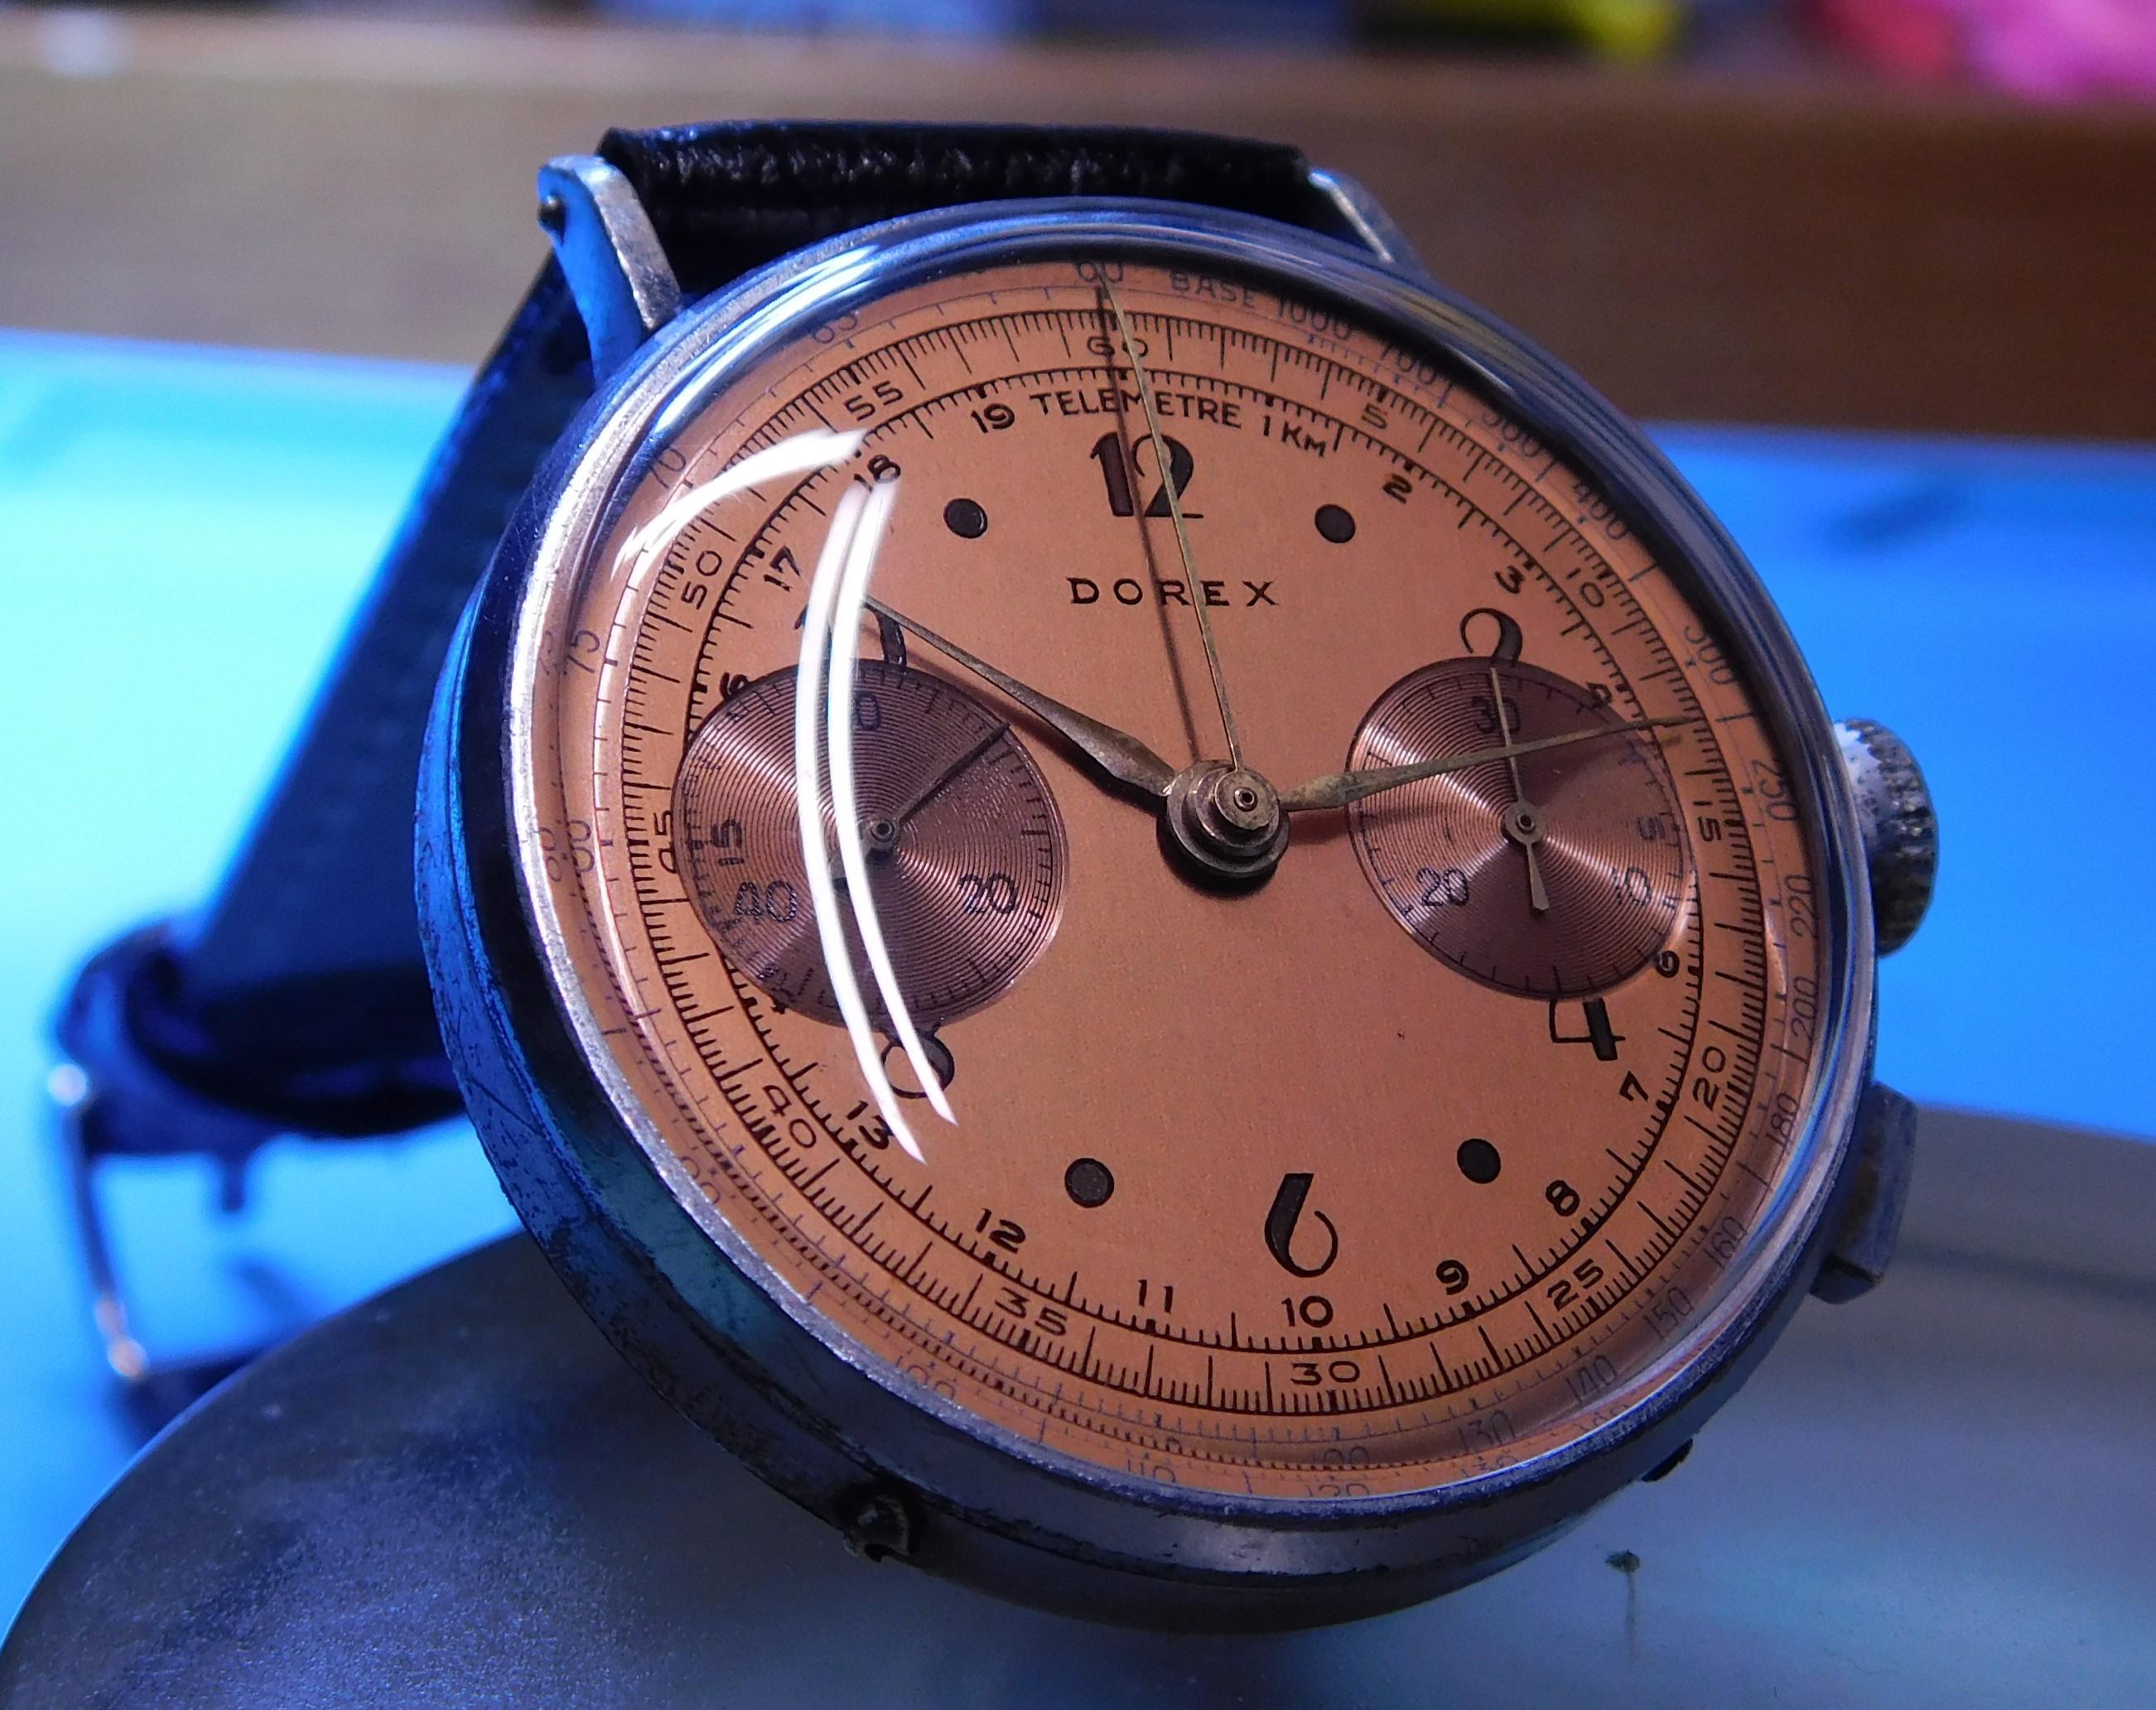
I picked this up on Sunday and changed the crystal and cleaned up the dial with rodico and tuned it up to get it working, even the chronograph. Now I am dying to get it on the wrist but the lugs are missing! Looks completely original. Not sure if art deco or the 40s but the Landeron48 was made from 1937 to 1970s so either way this just blows me away...


 1 point
 -
From experience, no thoughts: friction here can eat much power. It is a kind of hidden fault. Test: without power the pallet must fall from one side to the other by its own weight. Frank1 point

.jpeg.25e64dd87252b79570f7e94891aa2e63.jpeg)
.jpeg.694e5b422b6a66760d44ffd77f3a29c7.jpeg)
.jpeg.d841cc7f8ca83043f5eff5023dbe6b83.jpeg)
.jpeg.b2c8872d31fdb5381a84ca23223971df.jpeg)
.jpeg.d08e99738b8d72424ff6bcf558d92f75.jpeg)

.jpeg.d00d8cd5c182d375725ab56a94111855.jpeg)
.jpeg.4041d758c98bad22578c11f7ac6ac004.jpeg)
.jpeg.8ec8d0ef27b42fc8f15a4540d93e299e.jpeg)
.jpeg.731f52eb929cde2098a718112cf7187f.jpeg)


.thumb.jpg.cb17a66989f1e796fd4217db2e9ca9df.jpg)


.thumb.jpg.19a9c4ff164d78d516aa9f05a063752b.jpg)