Leaderboard
.thumb.jpg.cb17a66989f1e796fd4217db2e9ca9df.jpg)


Popular Content
Showing content with the highest reputation on 02/19/25 in all areas
-
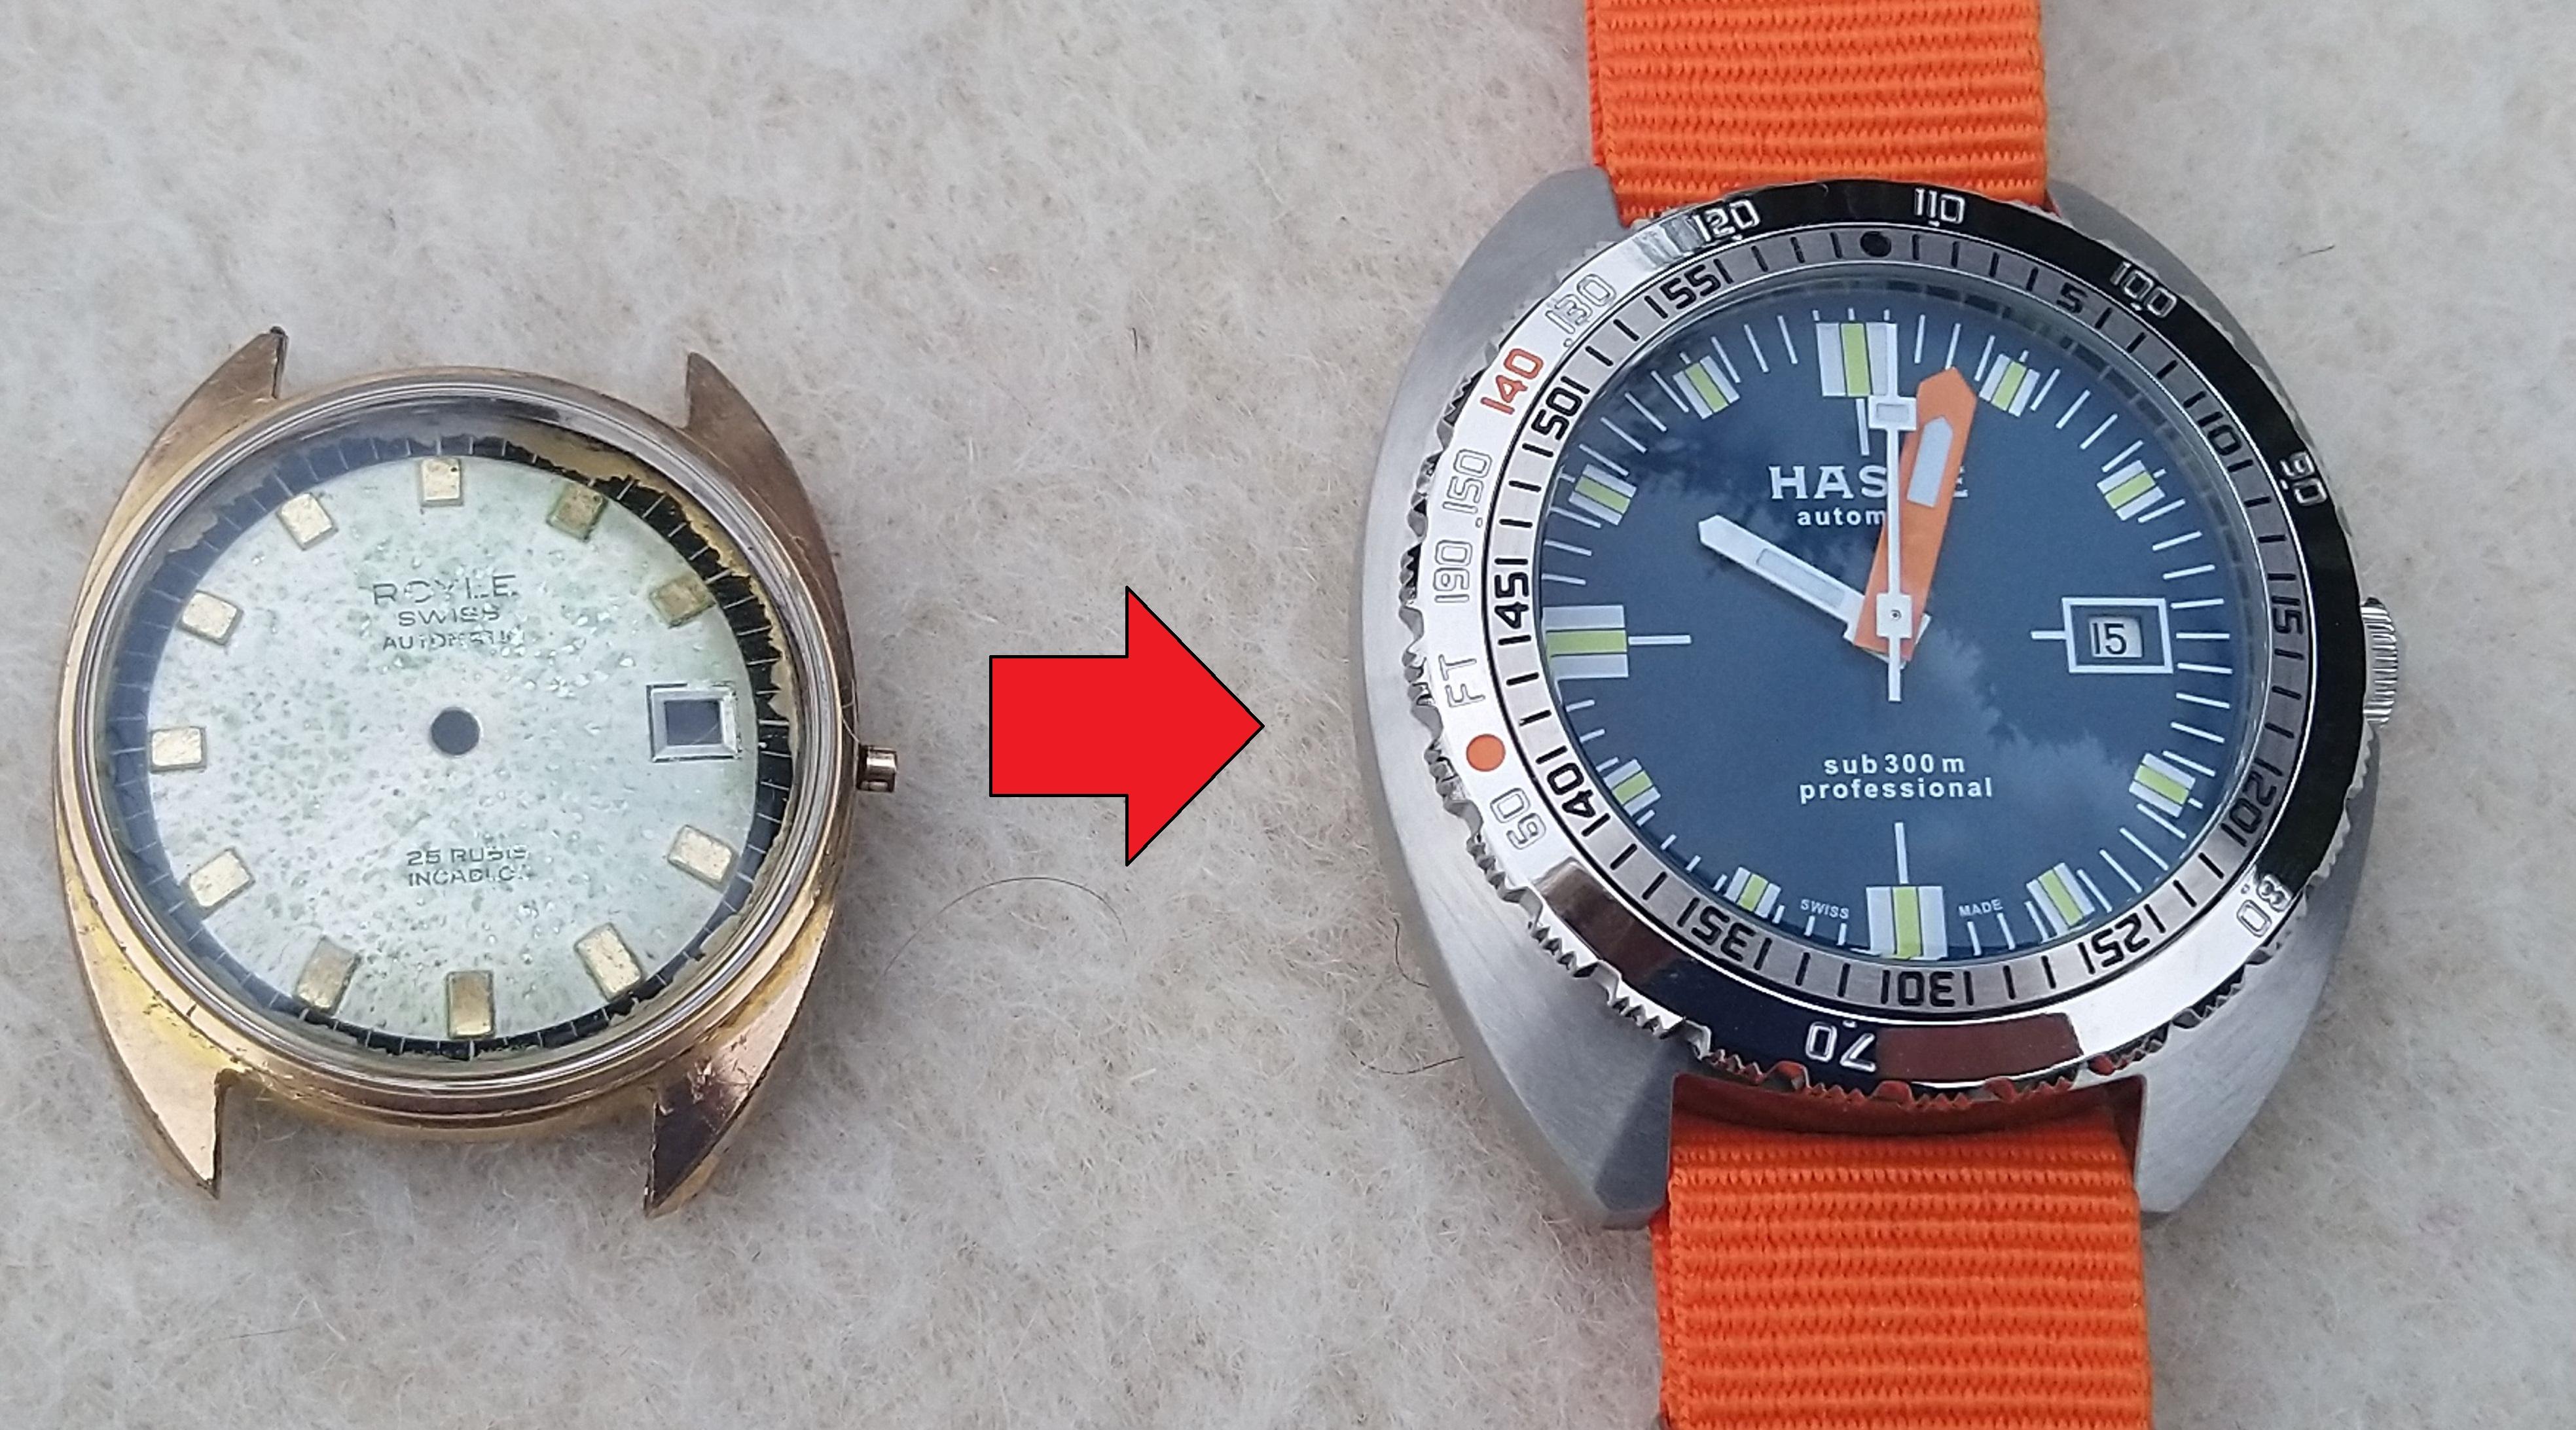
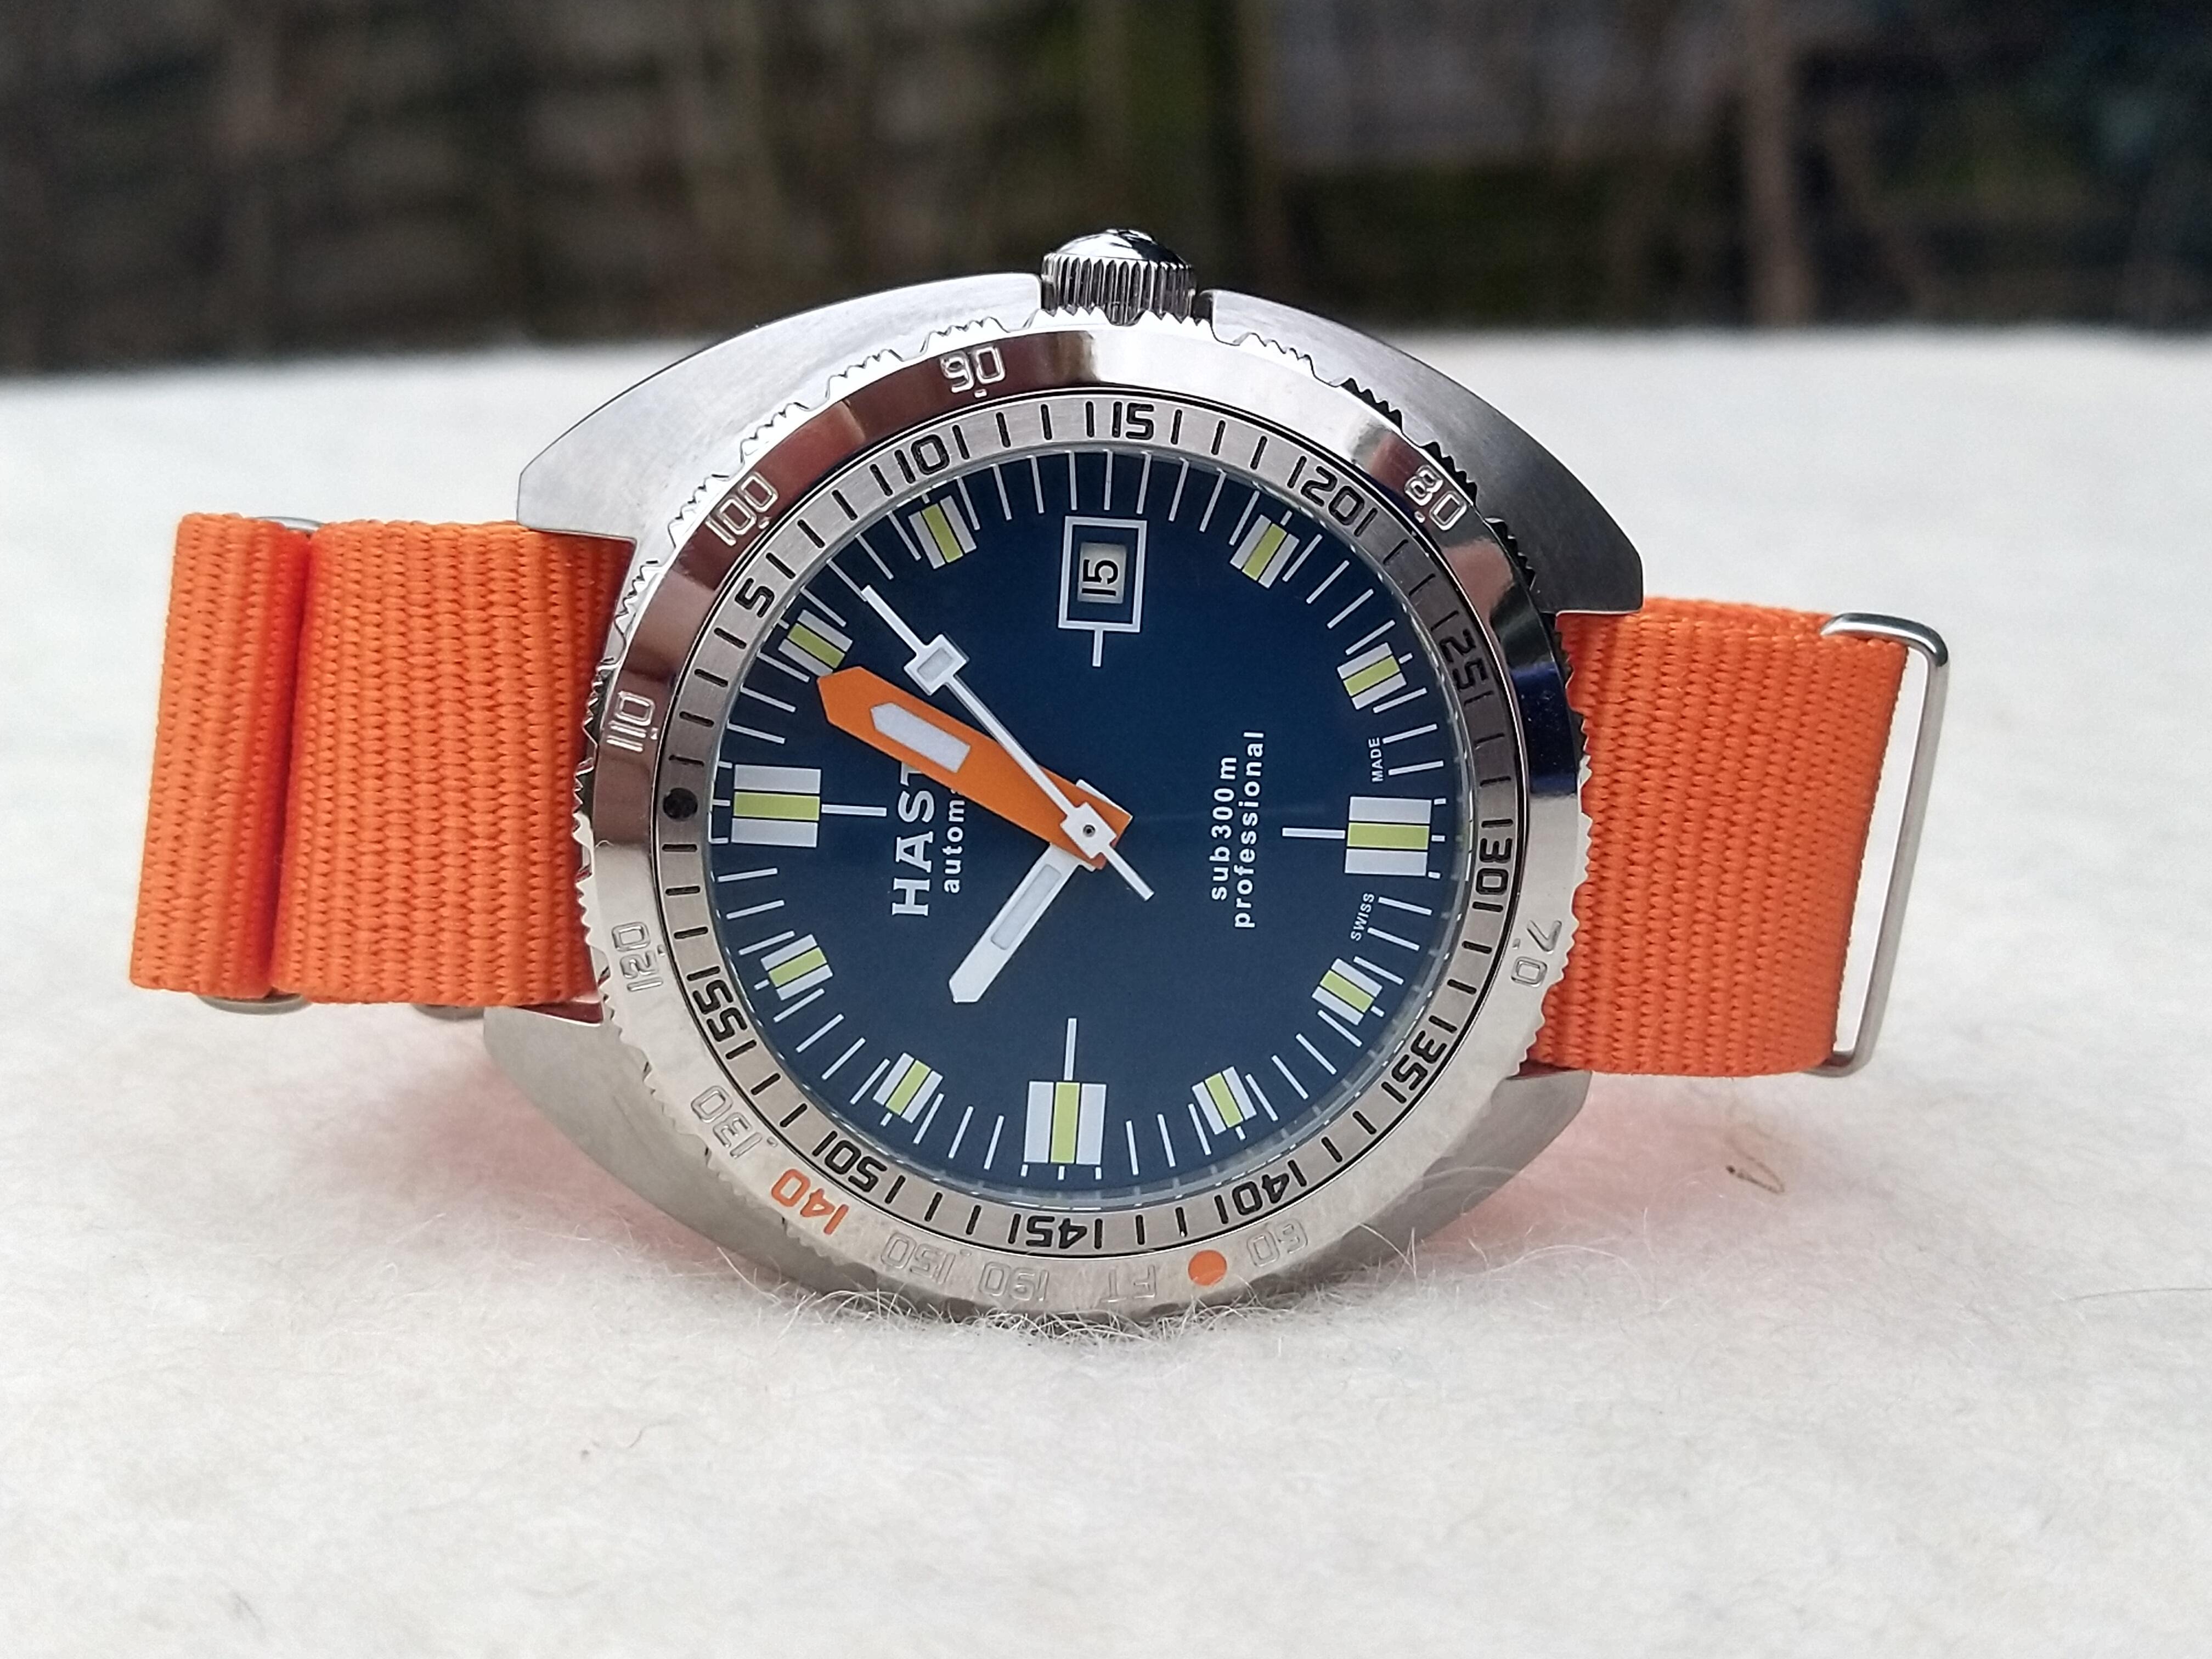
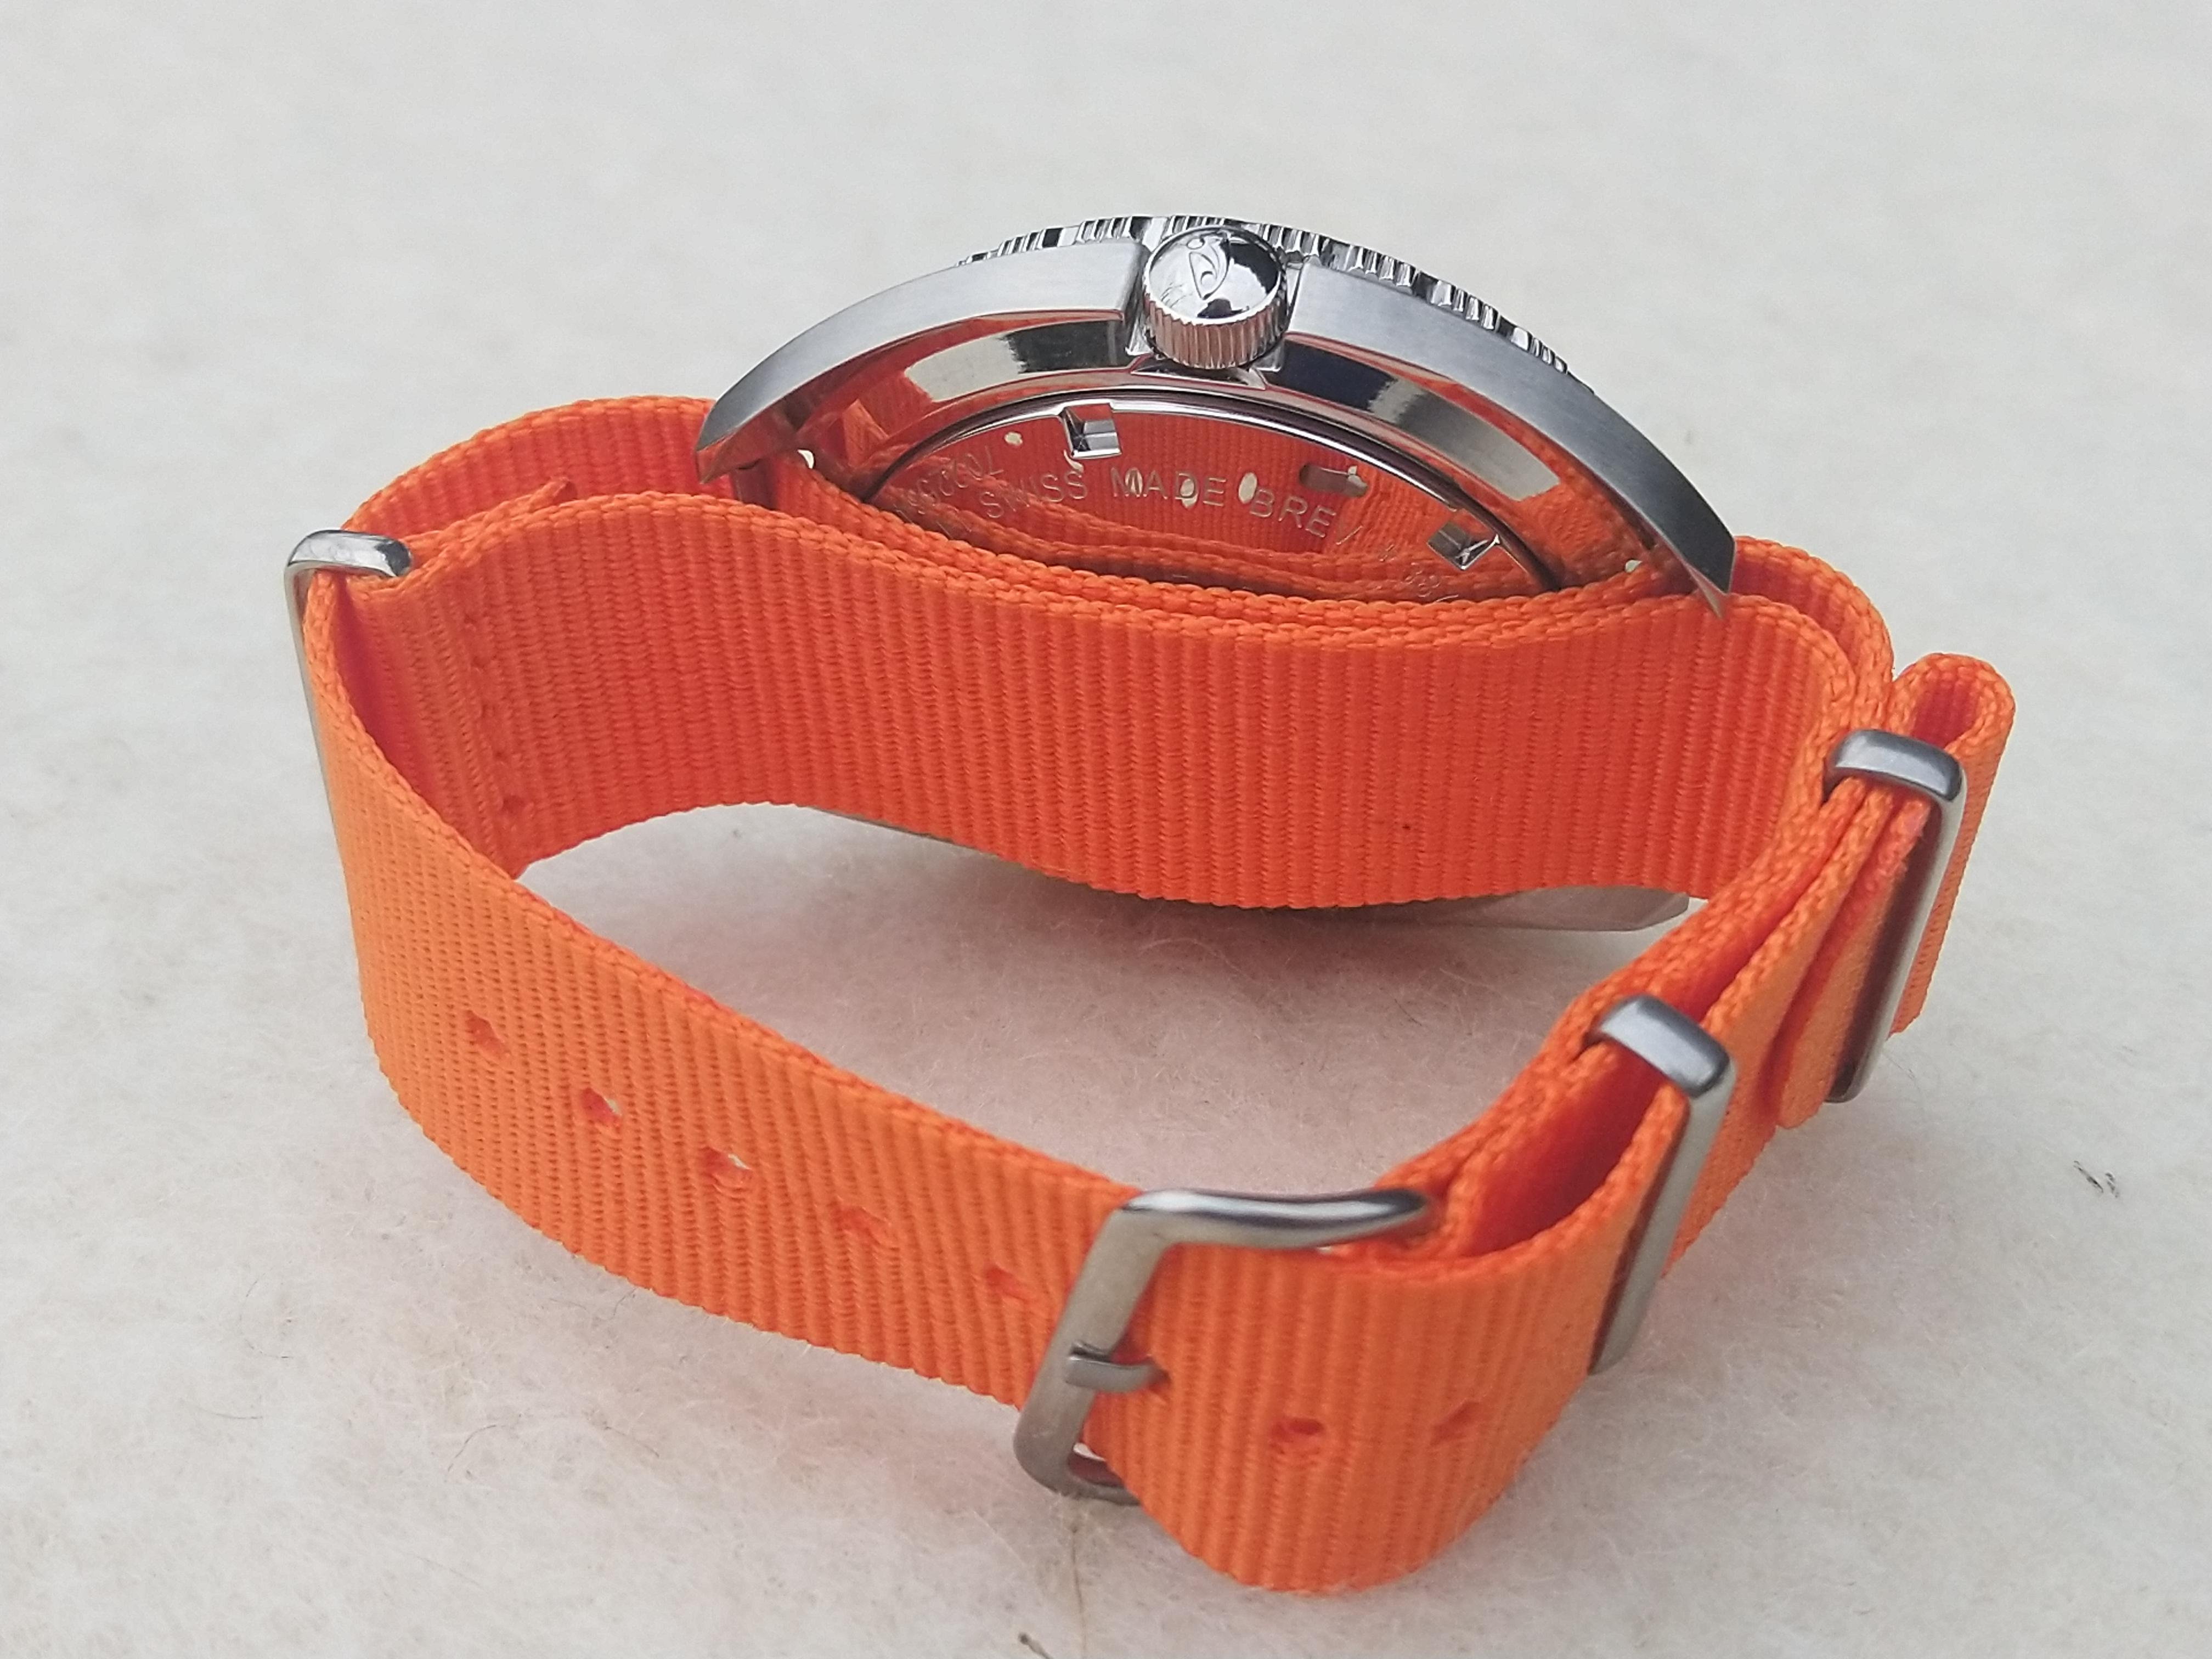
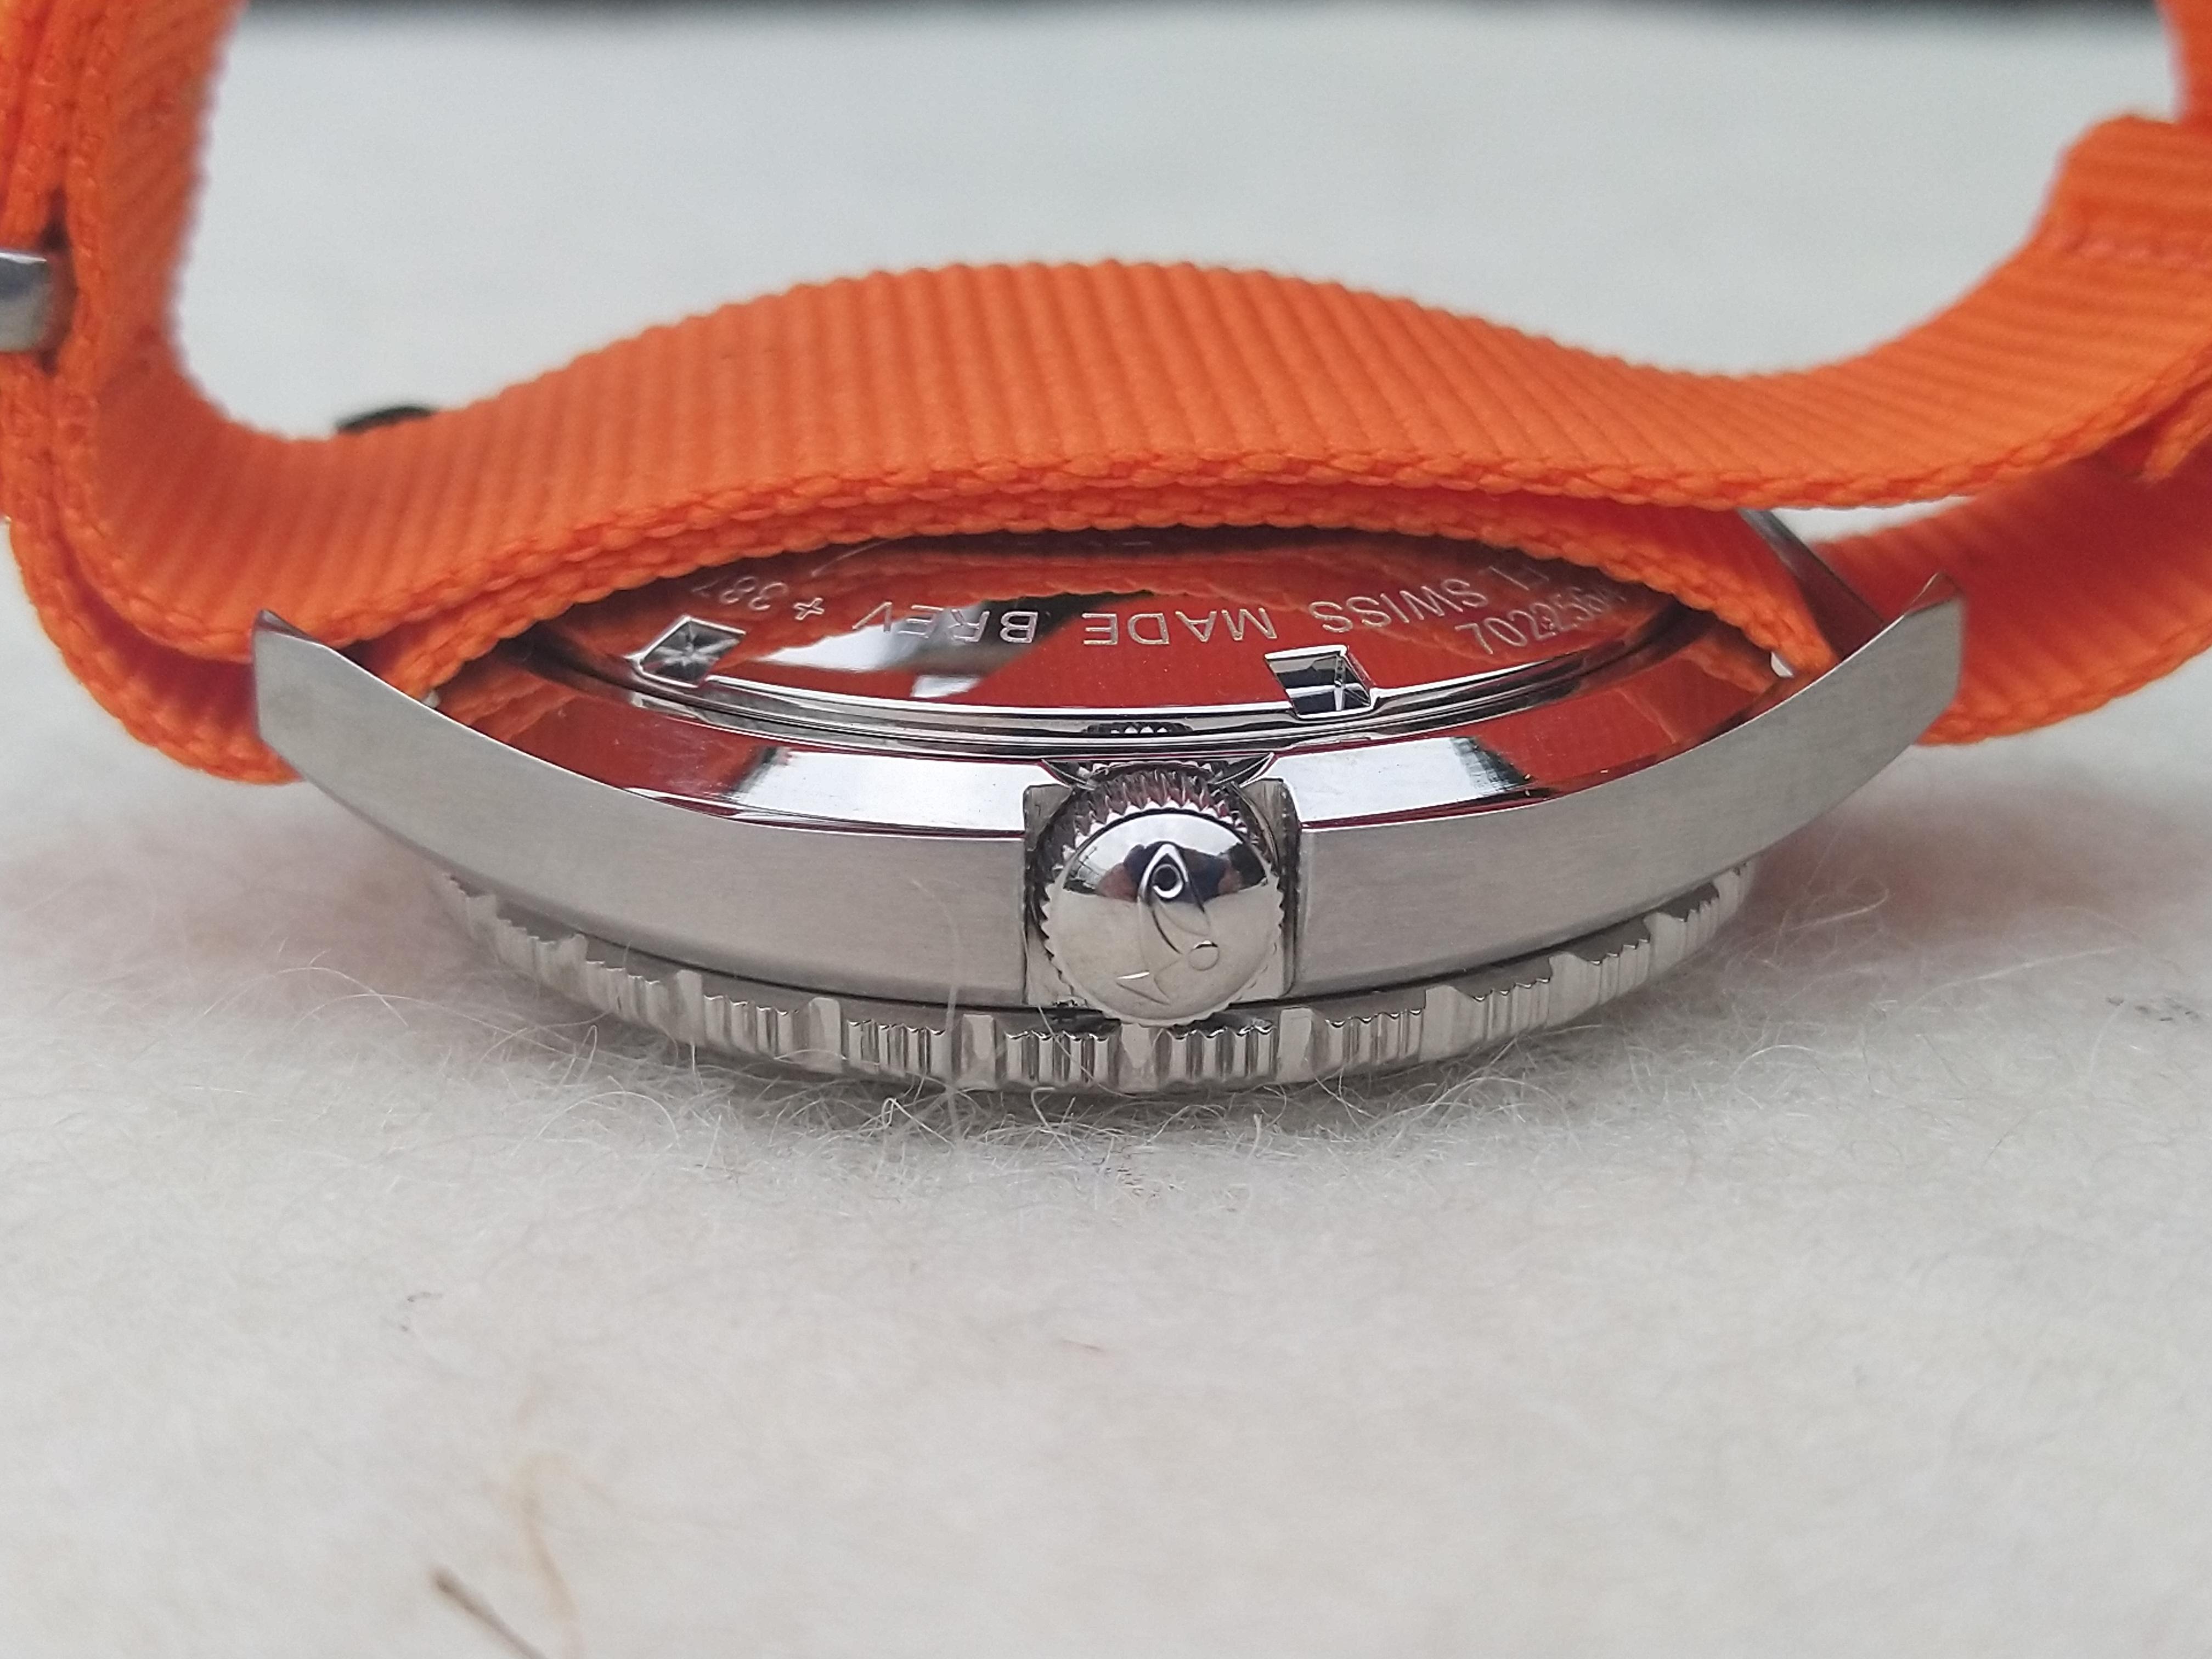
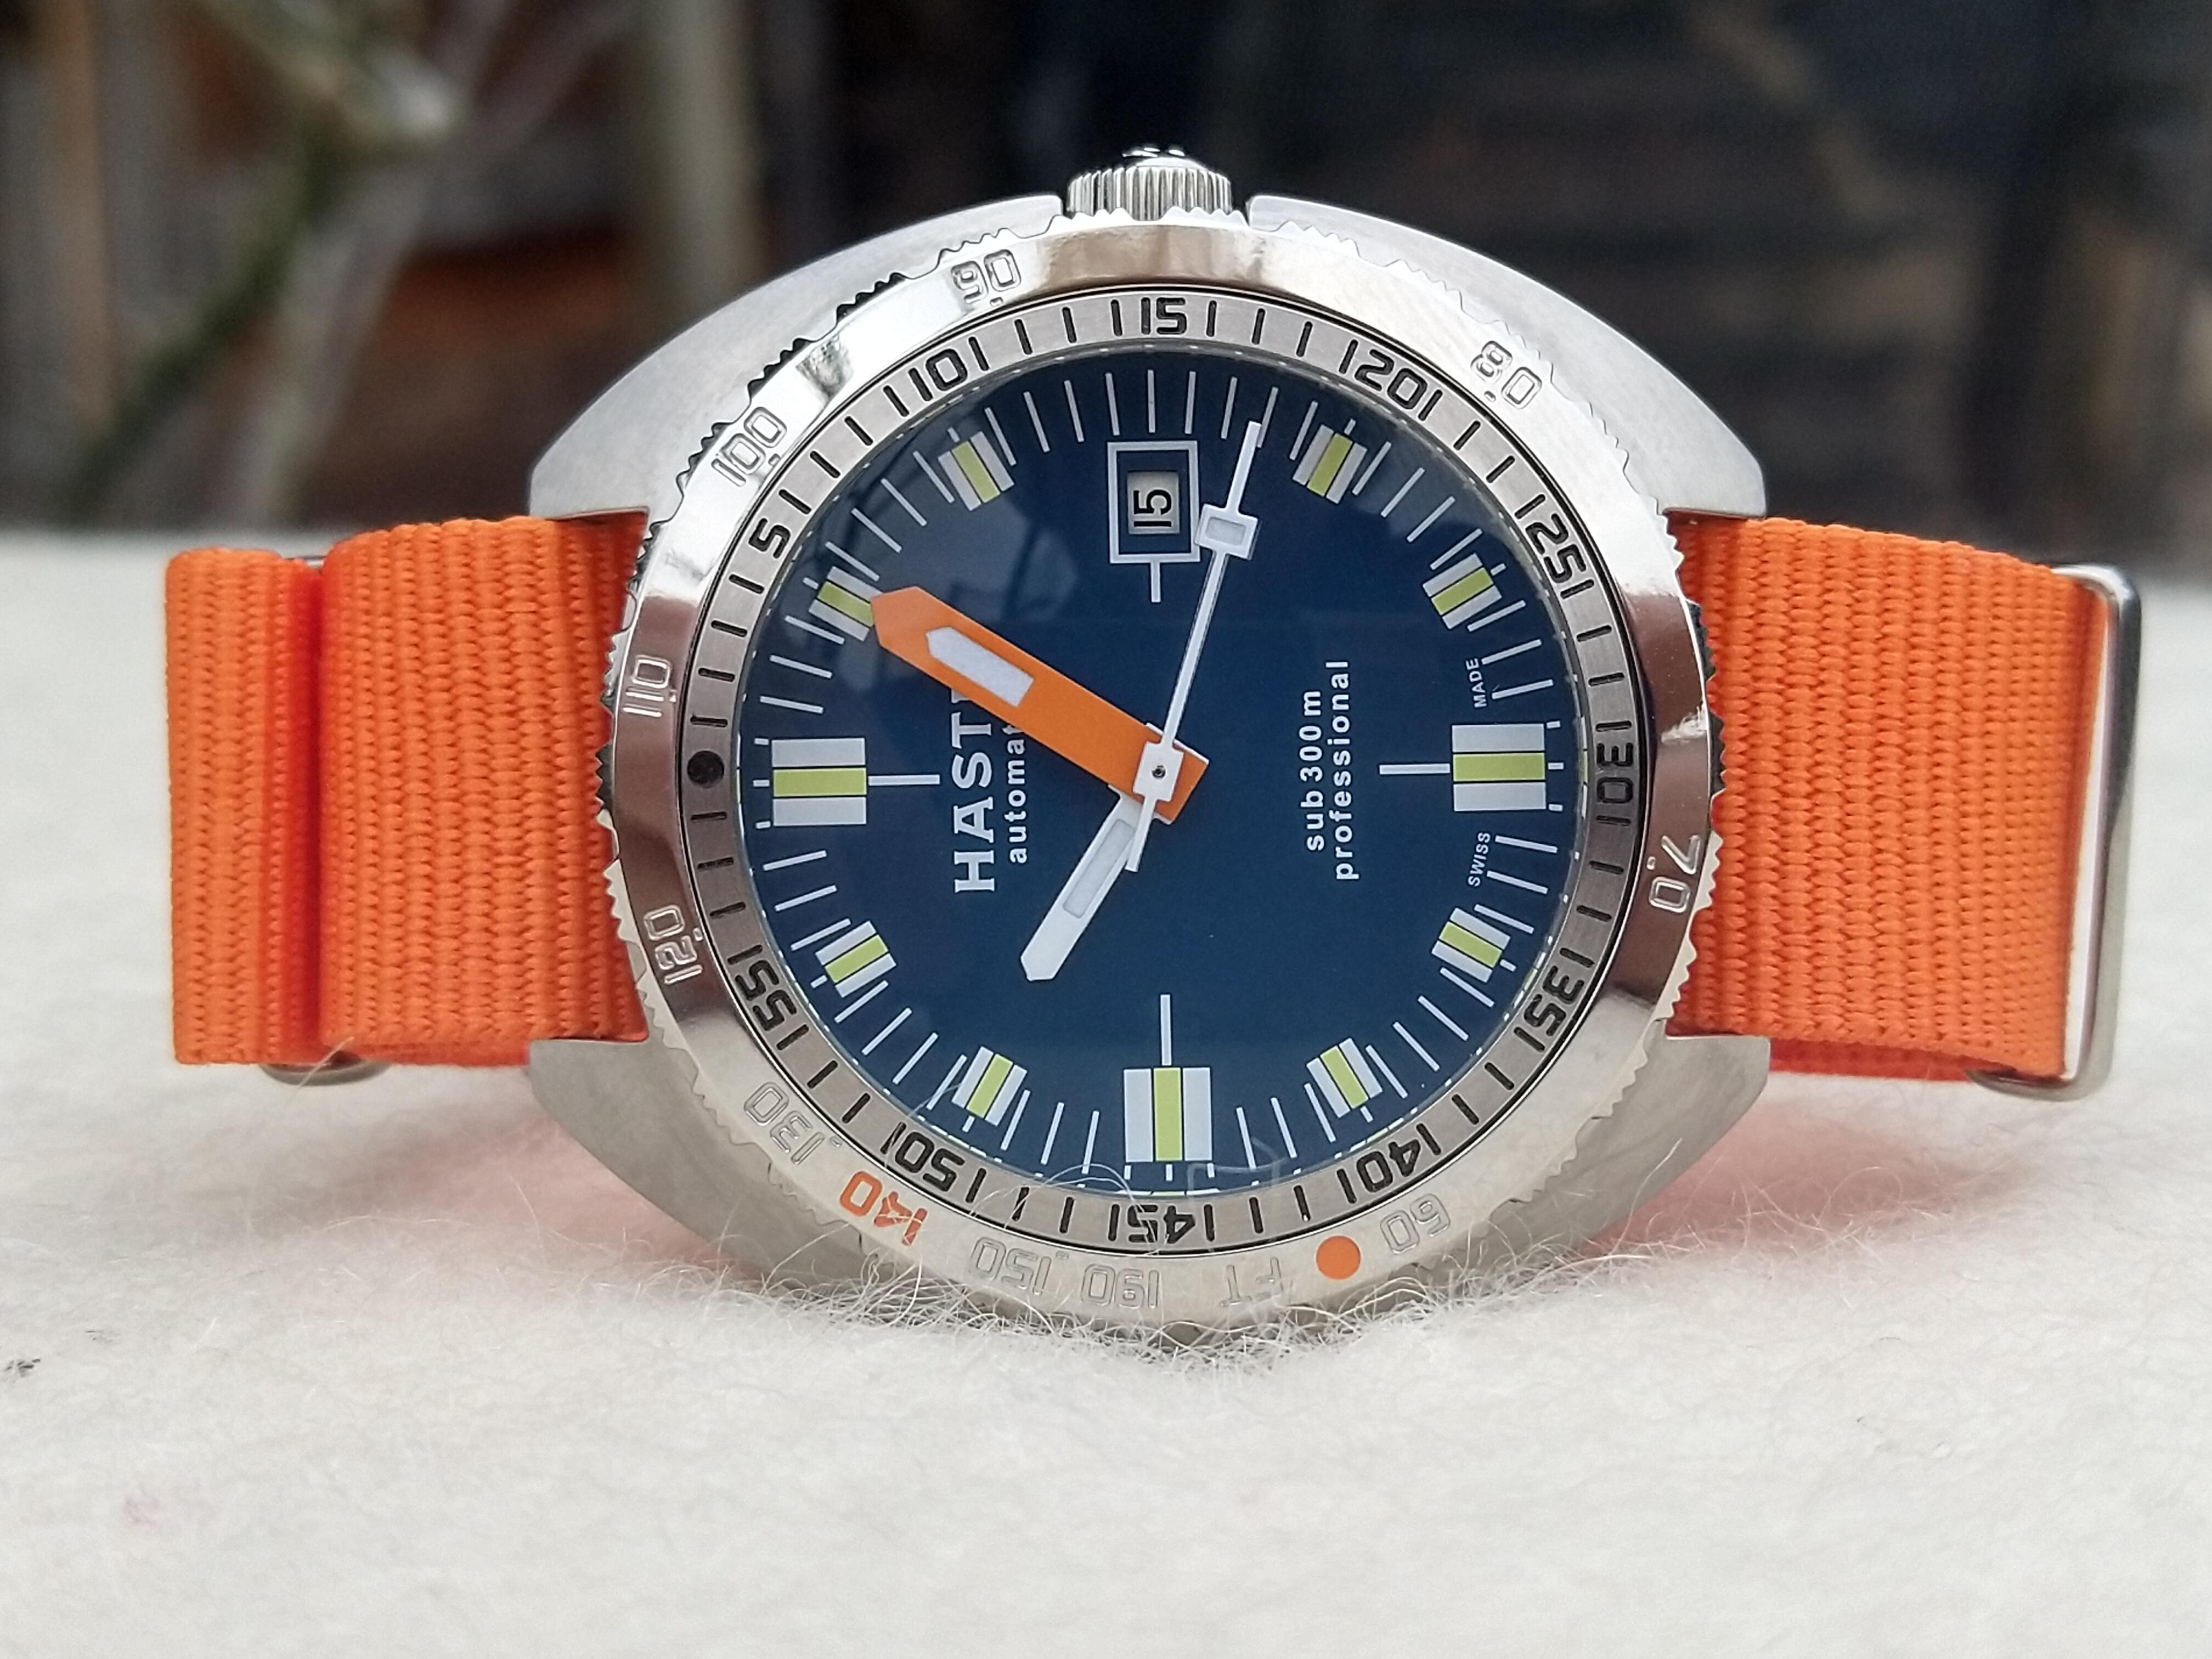
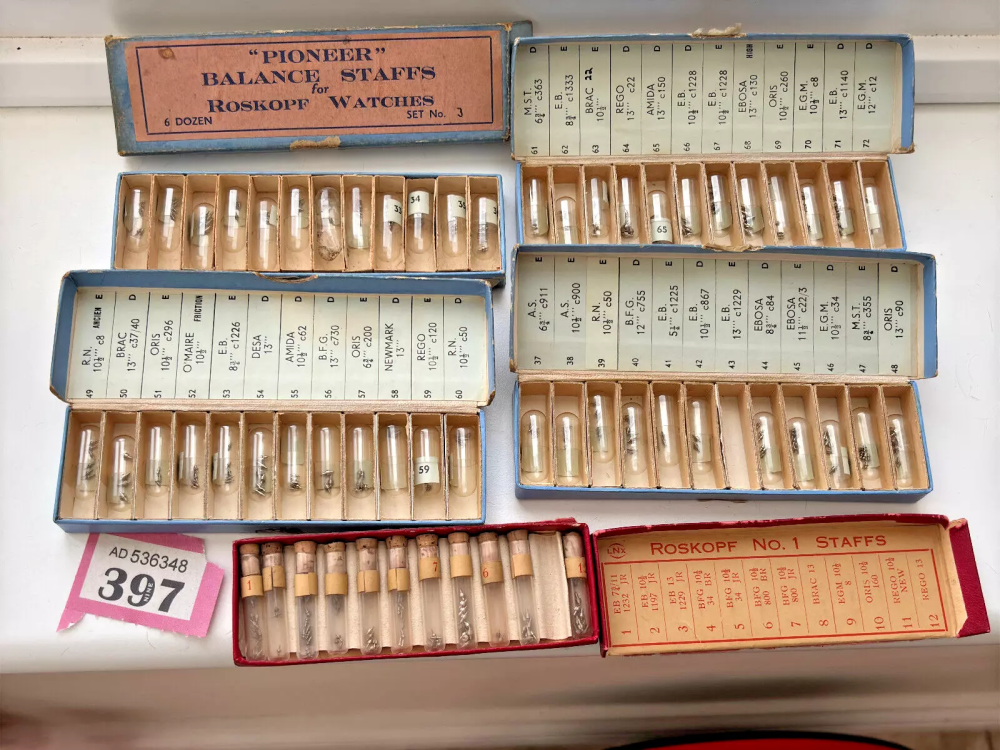
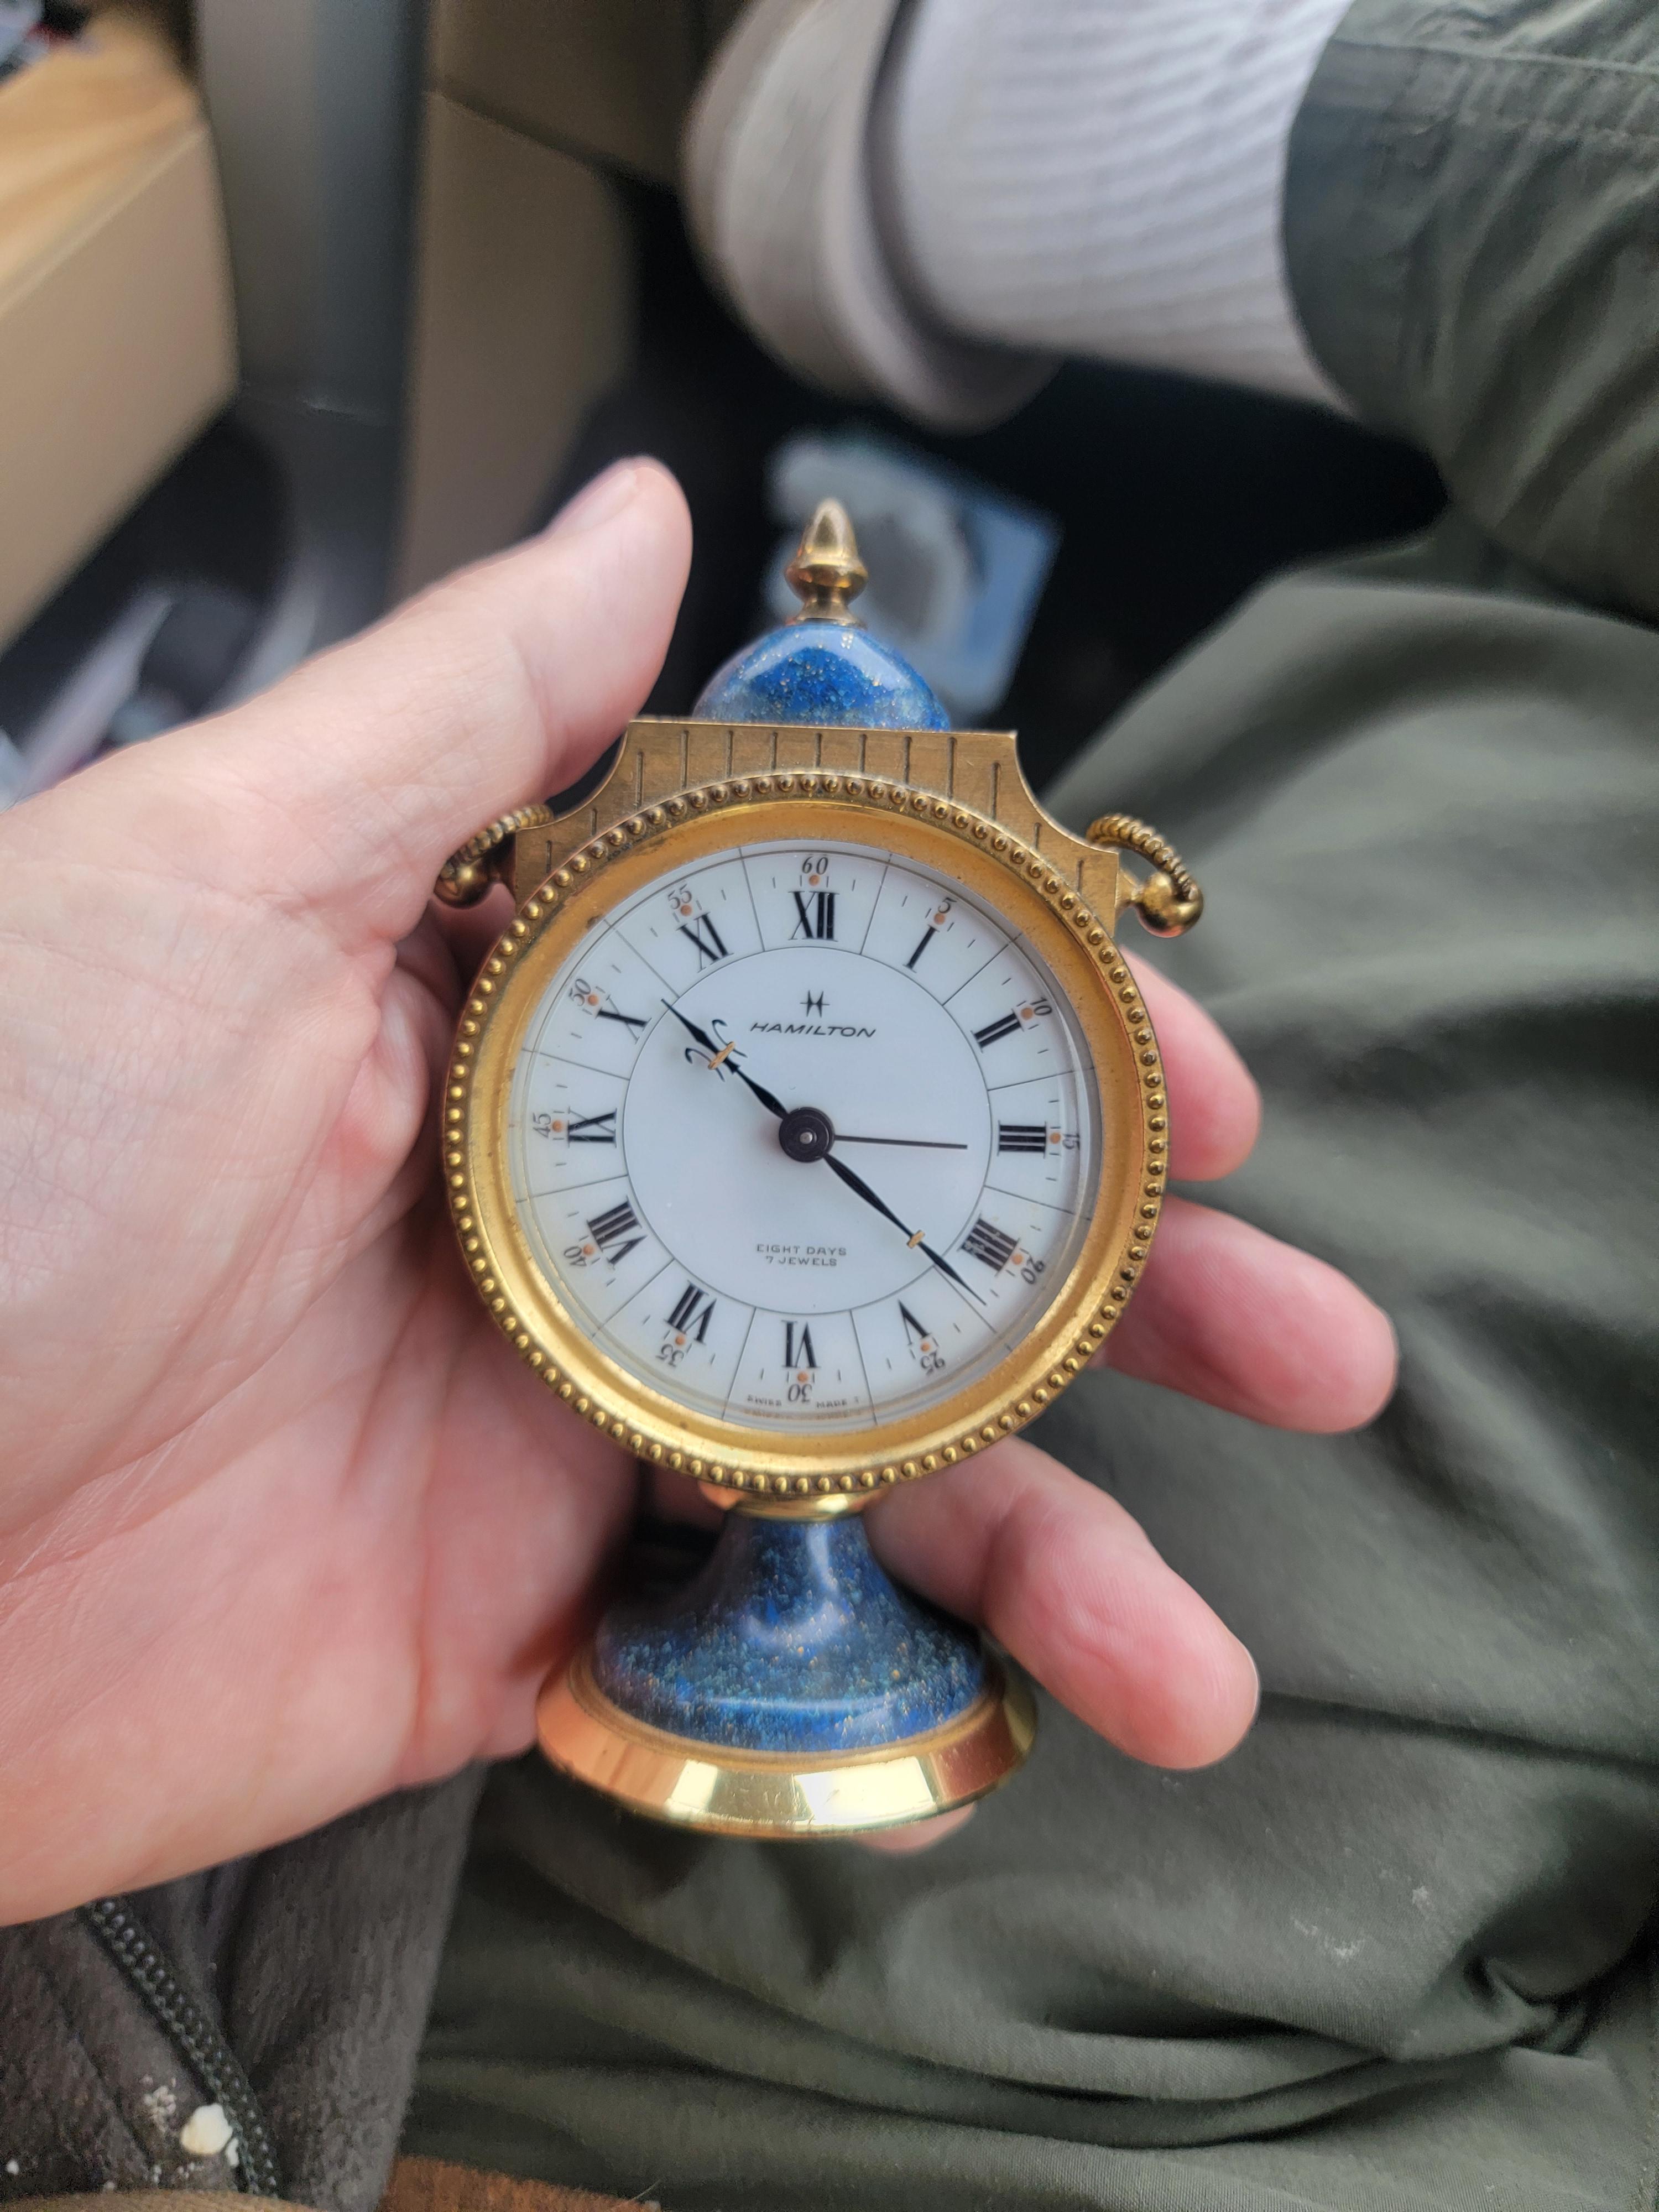
Picked this up on FB marketplace for $60. It is working and beautiful.
 4 points
 -
It's not a lot, but it's a start!

 4 points
 -
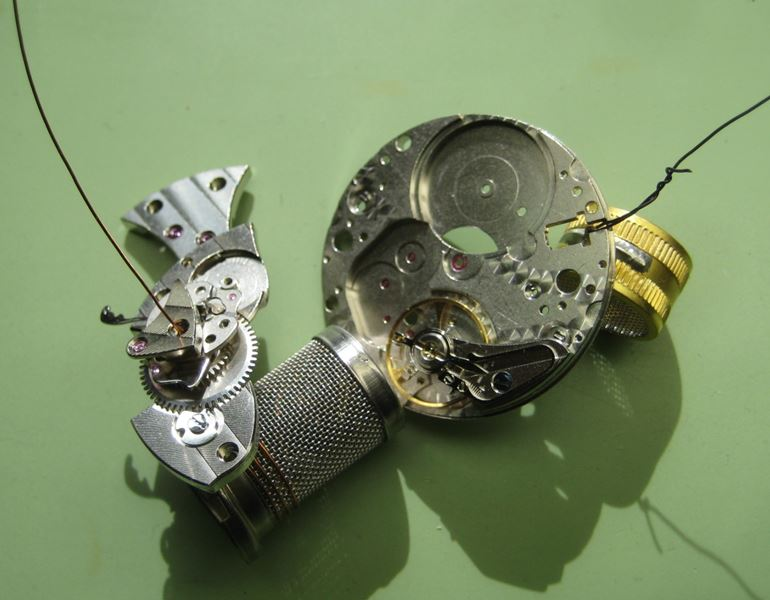
I'm super proud of myself today! Not meaning to show off, just wanting to share my joy: 1. First time replacing a balance staff -> success (and cleaned/restored my staking set in the progress) 2. First time refitting a pallet stone - > success (and build myself a little tool for it) Then came the confusion that started this thread... so thanks all for your guidance! Then... 3. Bending the old/correct hairspring into good shape in both dimensions (concentricity and flatness) -> success Next challenge was unexpected. Every once in a while, I was getting traces like this (especially in vertical positions): So back to fault finding.. Identified two things: i. centre wheel has quite a wobble, out of flat ii. a LOT of endshake on most train wheels, particularly the 4th wheel. On the latter, it actually resulted in the oil creeping from the jewel diwn the pivot to the pinion spokes. The pivot shoulder was so far from the jewel that there was no capillary action left to hold the oil (notably not even HP1300) So next corrections: 4. Managed to bend the centre wheel into a good flat shape (in situ) 5. Adjusted the train jewels with my Seitz press. Very little endshake now. In sum, pretty much every aspect of the train and escapement needed fixing. And I did it Now, I'm delighted with the results: Vertical direct comparison/improvement to the above: And dial up: This shitty, excuse me, Vostok has taught me a lot!!!


 3 points
 -
I'll probably never use them but was bored searching eBay and couldn't resist.
 3 points
 -
Most of my screwdrivers are 60 years old and. more than hale of them have fixed blades, that was the norm. The modern trend is for replacement blades which is a good idea but when all is said and done it’s the operator and the business end of any screwdriver that counts Carpenter or watchmaker3 points
-
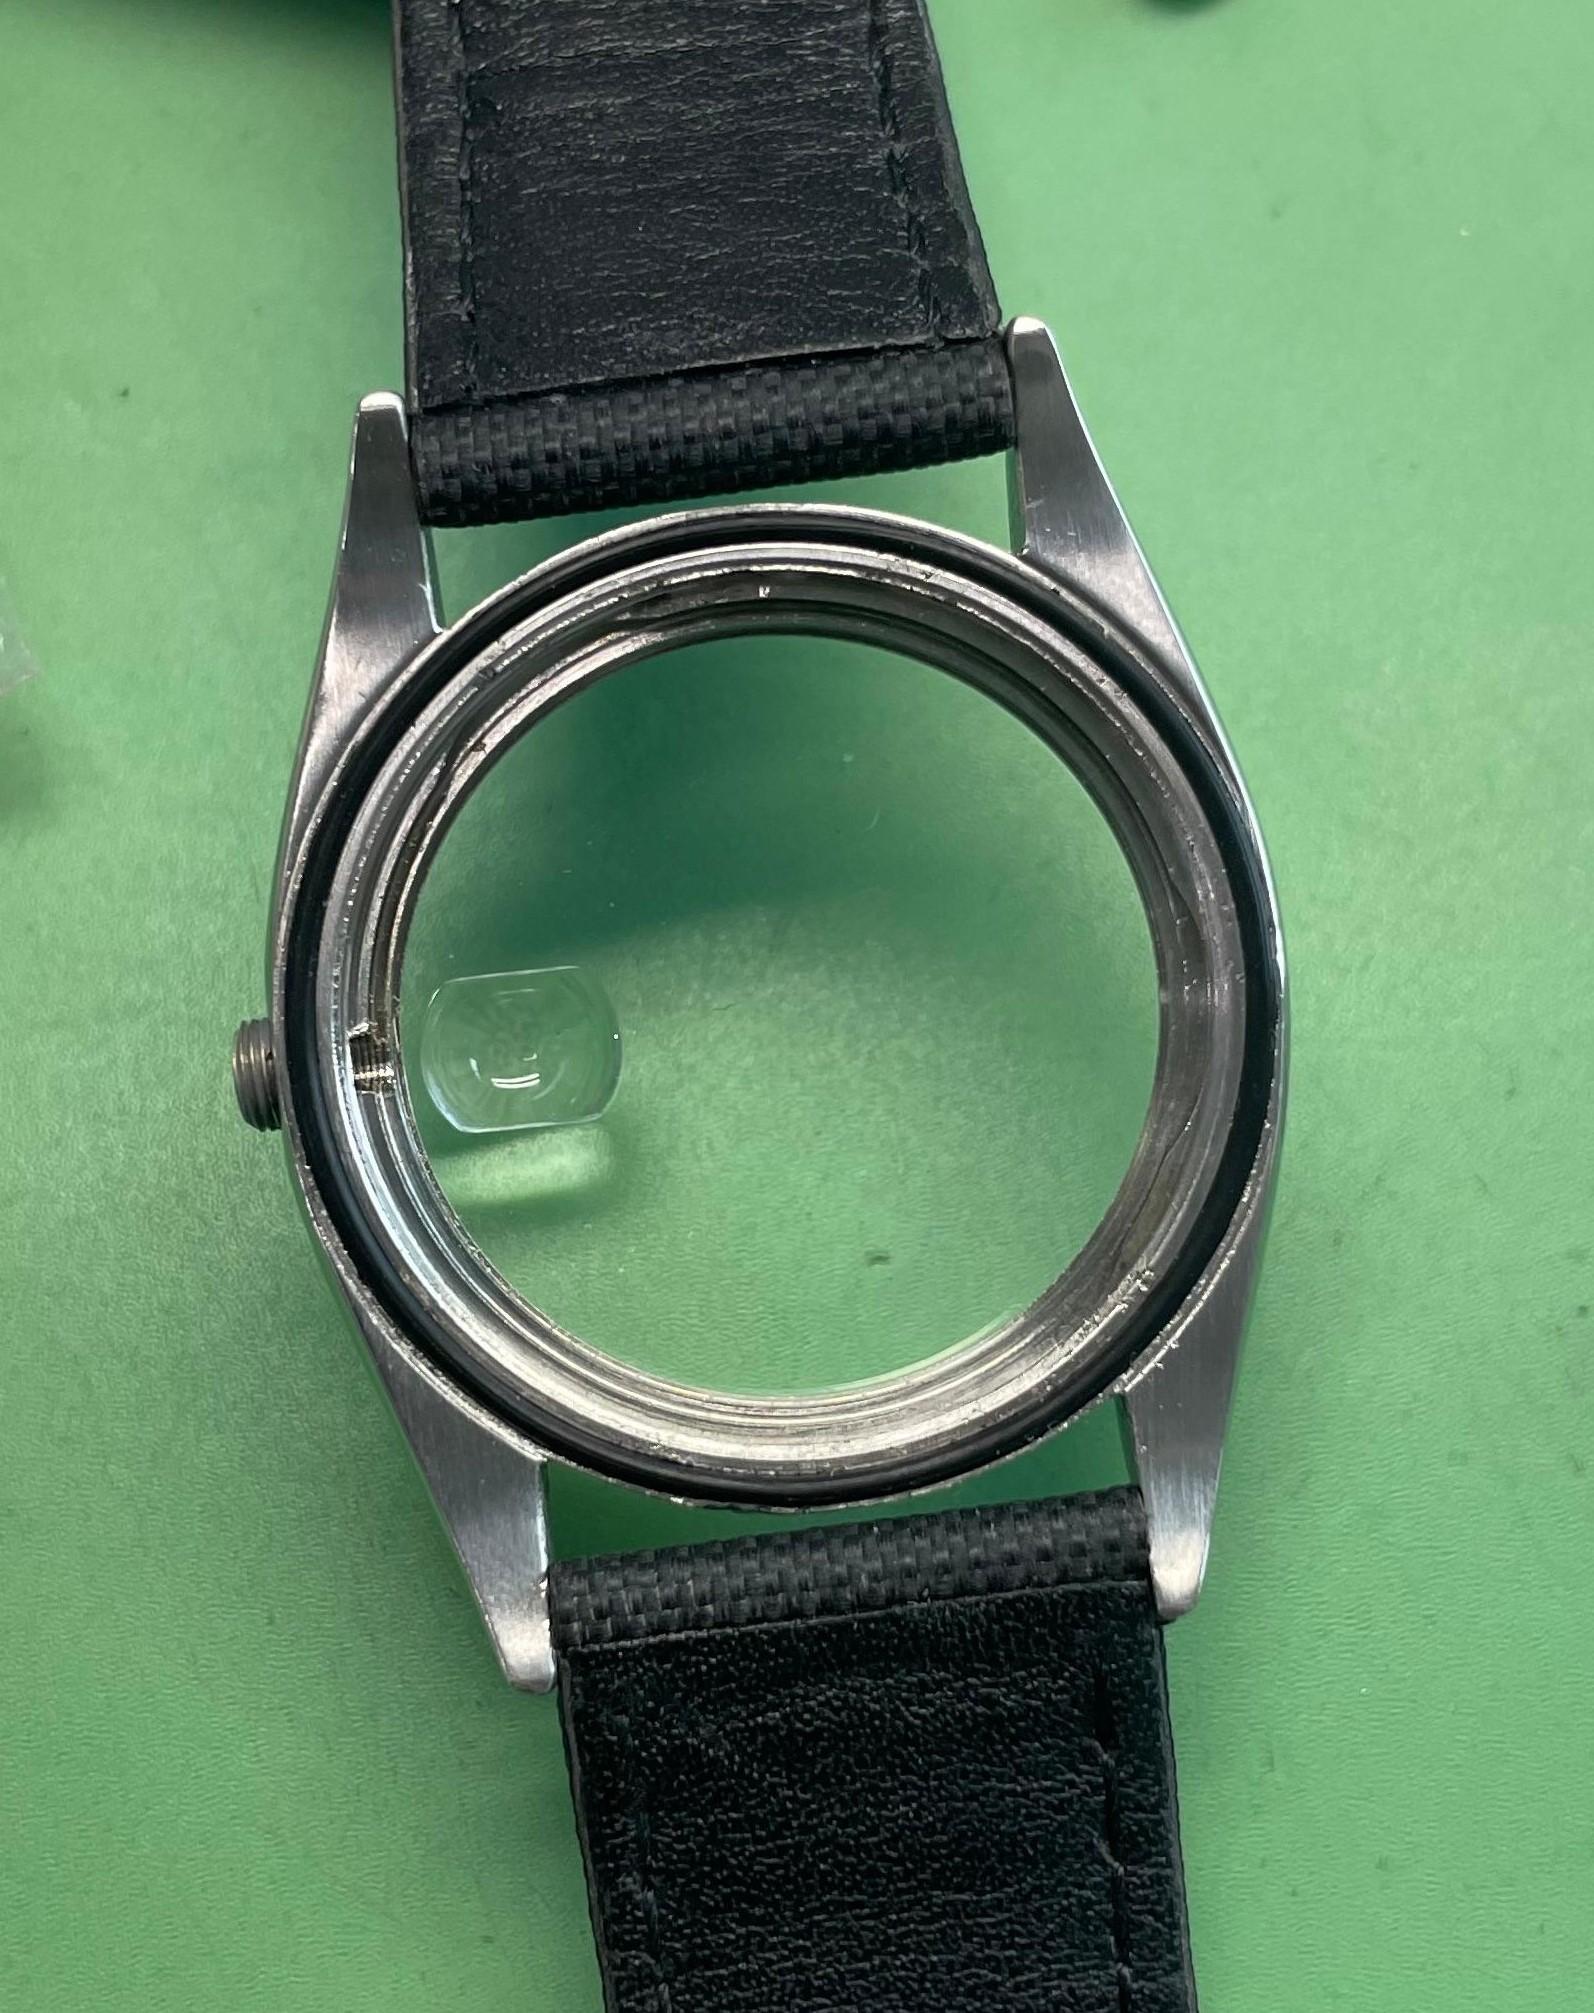
I have taken up this rather odd endeavor of re threading the case-back and mid-case of my 1960’s Rolex. This is not a well-documented topic so I will be posting more information and updates as I go along. Rolex threads are 60-degree metric profile with 0.5mm pitch. Since both parts are being re threaded, as long as the pair is threaded correctly it will work. (Metric or imperial) There is a lot of thread cutting theory required which will be discussed later. A threading calculator will be helpful then. There is one documented repair like this HERE. Pictures are quite helpful. Since I am doing it for the first time, this is also a call for help with questions in the end. The parts with pitting: Both mid case and case back has 4-5 patches of varying sizes like these. (steel after the seam is the opening tool and not to be confused with an additional step) Pitting runs deep even after filing off the threads. Pictures of thread dimensions: Consider the fact that both threads are worn and damaged from multiple places so these are approximate. Questions and help: For deep pitting, the plan is to get diamond burrs and remove material and fill since that is the only way to get rid of pitting, better ideas appreciated. There is some talk on Rolexforums about 304 Steel in 60’s should I be getting that welded since my piece is from that era? https://www.rolexforums.com/showthread.php?t=643301 Any laser welders out there who have practical experience of using different shielding gases and materials please hit me up. Suggestions appreciated. Thank you!
.thumb.jpeg.19bbe0b1c410018f2c81a9f54a266d20.jpeg)

.thumb.jpeg.52e38b002a031c9502d9f88948b83498.jpeg)
.thumb.jpeg.851b285da4b4dd14d73dc4ecd60f9f41.jpeg)
.thumb.jpeg.cf064f56f00d64b92ca02c5f21b36d52.jpeg)
.thumb.jpeg.1397be55eb9ee02baae1c67cfd03e636.jpeg)
.thumb.jpeg.1a2e68f201318415254082b843f0c7eb.jpeg) 2 points
2 points -
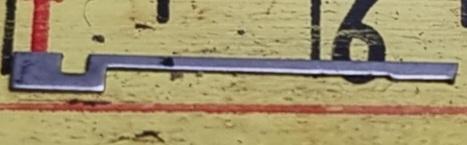
Thats is the correct click, the cousins photo is poor, the minute wheel bridge also has a broken jumper spring.2 points
-
Have not explored it since I have heard all types of warping and cracking, tempering and annealing issues with different temperatures etc. However it's worthhy of an attempt if I go the threaded ring route since I will only be heating the ring I can always change the ring if something goes wrong. @Neverenoughwatches A complete new case was quite cheap even after the lug building. Pictures of which I have posted. This is being done in academic pursuit and since I want to learn casemaking and lathe work not just movement work. My watchmaker has offered to weld a new ring pair and says he can pull it off easily so there is that fall back plan if I fail in this initial plan. Since I am going to Watchmakers and job shops to use their equipment it might be slow but there will surely be an update.2 points
-
Sounds like a complicated process with the potential of destroying a case, caseback or both. I'm actually pleased i understand little of the process so i dont have to get my head around it.2 points
-
Arnhem. A very interesting read, though I feel I need to reference maps and other sources from time to time. I can't read through it in the same way I'd plough through a book by Macintyre where looking something up is for some extra detail rather than a necessity.2 points
-
Well, smarty pants, I am driving from one watch shop to the other. I cannot open it up on the road. It is running beautifully while driving. Will post something later. However, it is not obvious how to open it up. Unless it is simple, I will not dive in until it needs service.2 points
-
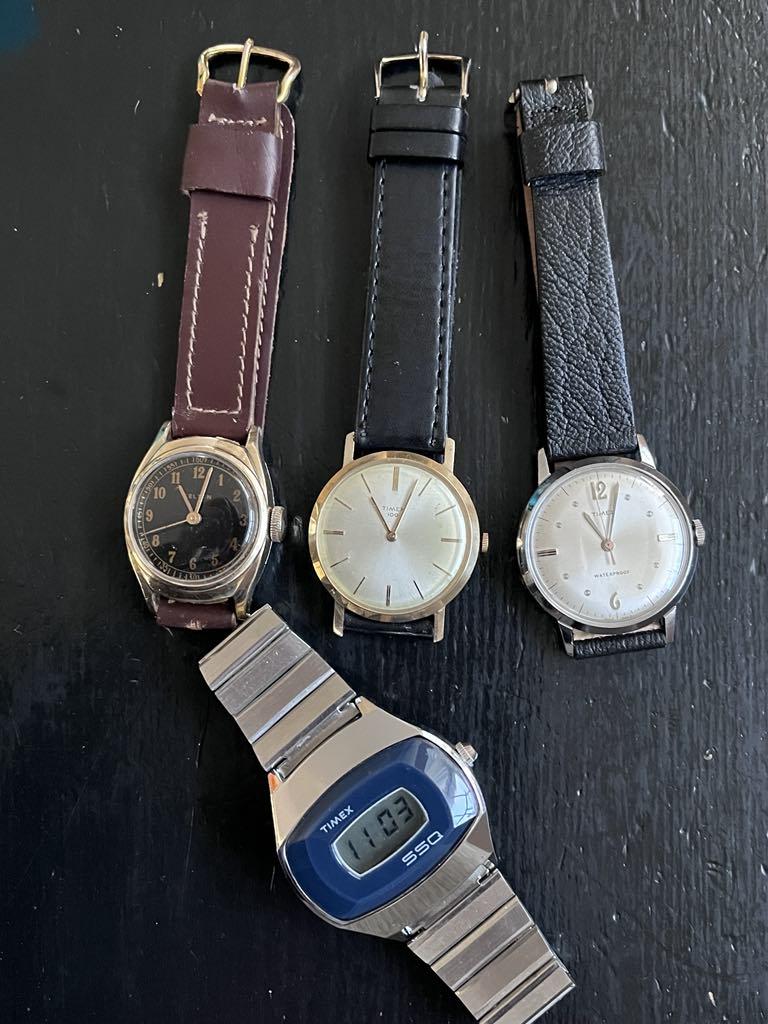
Since the weather has been freezing my outdoor time has been limited. What better way to pass the time than to work on a few projects. Here are three I completed in the last few days. left to right - a 1942 Kelton ( owned by US Time \ aka Timex) it features the model 20 movement and a non-radiolite dial. In the middle is the 1960 US Time '100' Wafer Thin that features the then newly introduced model 23 movement and split case. On the right is the 1967 Timex 'Marlin' currently nick named the "Dot - Dash'. It features the model 24 movement and is a grail watch for many Timex collectors. The SSQ is used to help me check the time keeping. No need for fancy time graph machines or devices. My philosophy is to wear a vintage watch as a reminder that time is best spent doing what one enjoys!
 2 points
 -
I do PUC welding on cases. For this much repair, you will want 100% argon. I don't use it when filling in dents and gashes, but it will leave a bit of soot, and you'll want this to go as smoothly as possible. My suggestion for this repair, and how I would do it: Turn down some 304l round stock to 0.2mm larger OD of the finished thread. Then bore out the center to slip over the case where the threads were. Then seam weld on the top and bottom points. Then chuck it in the lathe and clean up the welds. Then I would cut the threads, but turning the headstock by hand. Do this process for both the case back and the case. Once the threads are cut, you'll want to file them down to the correct OD, as single point threading tends to make very sharp and weak major diameters.2 points
-
A curious onlooker, maybe it has thoughts as to what the issue might be. Eyes in the field, get him a driver and pair of tweezers .2 points
-
Try putting it directly in the timegrapher without the holder and see what results you get.2 points
-
I used to do 5-10mins cleaning in my ultrasonic, but after reading your advice I switched to 4 mins cleaning (Elma Suprol Pro), then 2x 2 min rinses (Elma WF Pro), and 30s IPA. All parts nice and shiny and no damage2 points
-
what I find interesting with this discussion is when I was in school I don't remember being told not to run certain things through the cleaning machine sort of. okay technically not supposed to run anything painted dial hands dates indicator etc. but metal watch parts I don't recall ever hearing you can't run the balance wheel a pallet fork through the cleaning machine. So we had a variety of different machines all of them had ultrasonic. Then the second school that I went to we were running things continuously through the cleaning machine as we were practicing on practice watches versus the previous school where were working on customers watches. People would bring watches to the school to get them repaired. the only thing I remember interesting other than the Messiah the machine and the second school was that the timers for each the cycles had been taped at four minutes. In other words you could have gone longer but there was no need. There are certain cautions though with cleaning. Like commercial cleaning product is designed for cleaning watch parts that would be the best. Homemade recipes may have undesirable consequences you will have to figure that out for yourself. then commercial watch cleaning solutions typically have ammonia or something else like in the non-ammonia version will have something in there to make things bright and shiny. Yes bright and shiny watches a really nice but there are cautions here. the typical recommendation for cleaning products is room temperature. Then if somewhat time-limited because the bright and shiny chemicals will start to etch things or dissolve the copper in the solution. Leave it too long in the cleaner and it will not look clean and shiny worst-case the solution turns a blue-collar I assume that's the copper and you can frost your plates. The interesting lessons you learn in school. So typically when I was at home cleaning watches I would go between four and about five minutes. So I found around 4 to 5 minutes for the cleaning bath seems to work fine things are bright and shiny. when I was cleaning watches at home I didn't have anything resembling a watch cleaning machine. Instead I had a tiny ultrasonic machine with a beaker. So I can pour the solution in drop the watch parts in take the parts output on paper towel put the solution back in its storage jar pour in the rinse but the parts back in. Used a hair dryer for drying worked quite nicely. Acquired a whole bunch of watch cleaning baskets of various sizes to hold all the miscellaneous parts. Anything bag I would string on wires. I have a picture below process works very well. As you can see this is a modern watch with the newer style shock protected balance system is so the jewels are in the baskets. Typically want to keep the upper jewels separate from the lower as there can be size differences. Then if the balance wheel was removed because older type I would typically string it on the wire as the last item so I can keep track of it and make sure they didn't set anything on top of it hen yes I have seen multiple references typically on YouTube of the evils of ultrasonic and cleaning watches and the evils of a whole bunch of things with cleaning the balance wheels of pocket watches. But it does bring up an amusing problem of the Swiss who make watch cleaning machines. Quite a few of those cleaning machines have ultrasonic. oh and unfortunately with the Swiss making cleaning machines they do tend to be very expensive. for instance where I work the owner purchased a state-of-the-art Swiss cleaning machine. So the state-of-the-art cleaning machine I'll give you a link to a video is really quite fascinating how it works and it makes really interesting sounds when it runs. This is because it uses vacuum to pull the cleaning fluid up into the cleaning chamber. Then as you'll see in the video uses two separate ultrasonic frequencies. Then because of the vacuum on the fluid the fluid will get into everything and yes it really does do a phenomenal cleaning job. So the machine is using L&R cleaning solution and their rinse for two cycles. then we run into an interesting problem of the rinse solution. I had noticed this when is cleaning watches at home it wasn't evaporating. I was thought that was interestingin that school I don't remember a problem but I'm assuming that they change the formula used to be more environmentally friendly. One of my friends cleaning watches recommended a quick bath in alcohol which solved my problem. In the case of the Elma cleaning machine their recommendation was the last bath is isopropyl alcohol. so here's a link to a video Swiss made to frequencies of ultrasonic and some isopropyl alcohol and it's designed to clean watches. Versus all the other videos on YouTube that will tell you this is evil and bad. One of the minor problems of YouTube videos everyone I guess has different experiences.
 2 points
 -
One big lesson to learn in watch repair is.... patience. I guess, "lesson learnt" ..and one of the most difficult things in watch repair is fault finding. Anyway... the behaviour of your barrel lid is definitely quite unusual. I never had this problem. 1. There's definitely too much grease now, as you can see it squeezing out between the barrel and the lid. No grease should be in the "step" of the barrel where the lid goes. 2. Are you sure that the lid is fully pressed into the "step" of the barrel -- all around? Photos from the side of the barrel would help. 3. Are you sure that the mainspring is correct and not too high (which could prevent the lid from being fully pressed down)? The fact that you found this mainspring in the watch doesn't guarantee that it's correct (a previous watch-destroyer may have put a wrong one). 4. "I was just putting four dots of (around 1mm diameter) of braking grease on the barrel walls" --> this sounds about right to me. I do like to spread out those dots to a thin line, though. It helps prevent that you effectively push down the dots (to the barrel floor) when installing the mainspring.2 points
-
I said mine was terrible sometimes . Bet it's ( it has - contraction ) never worked so well. Call the punctuation police1 point
-
This continues to behave - fitted the correct dial spacer and movement holder today as well. I've actually ran it through every date without issue now, though am also checking it keeps running fine with normal use.1 point
-
Wow, maybe that's enough to make @Nucejoe's legendary "radioactive omlet1 point
-
A bag of brown gloop? Many years ago, when I ran experiments in the physics department, one of the experiments included a radioactive source. Can't remember what it was, steel blocks of various size was placed between the source and the detector. Thus the amount of radiation penetrating the steel could be calculated. Some students were scared shitless.1 point
-
Make sure you Patent it !!!!!!! Some may bend without heat but you should have a feel for it once you start. If you do need heat then as @watchweasol said a small torch would be best. All my clock stuff is in storage at work along with my tubes but I'll dig something out tomorrow and post some photos. If nothing else you'll get practice if the next clock has the odd crooked tooth.1 point
-
I have an idea for a let down tool for this type of clock. I'll post one of my superb drawings tomorrow.1 point
-
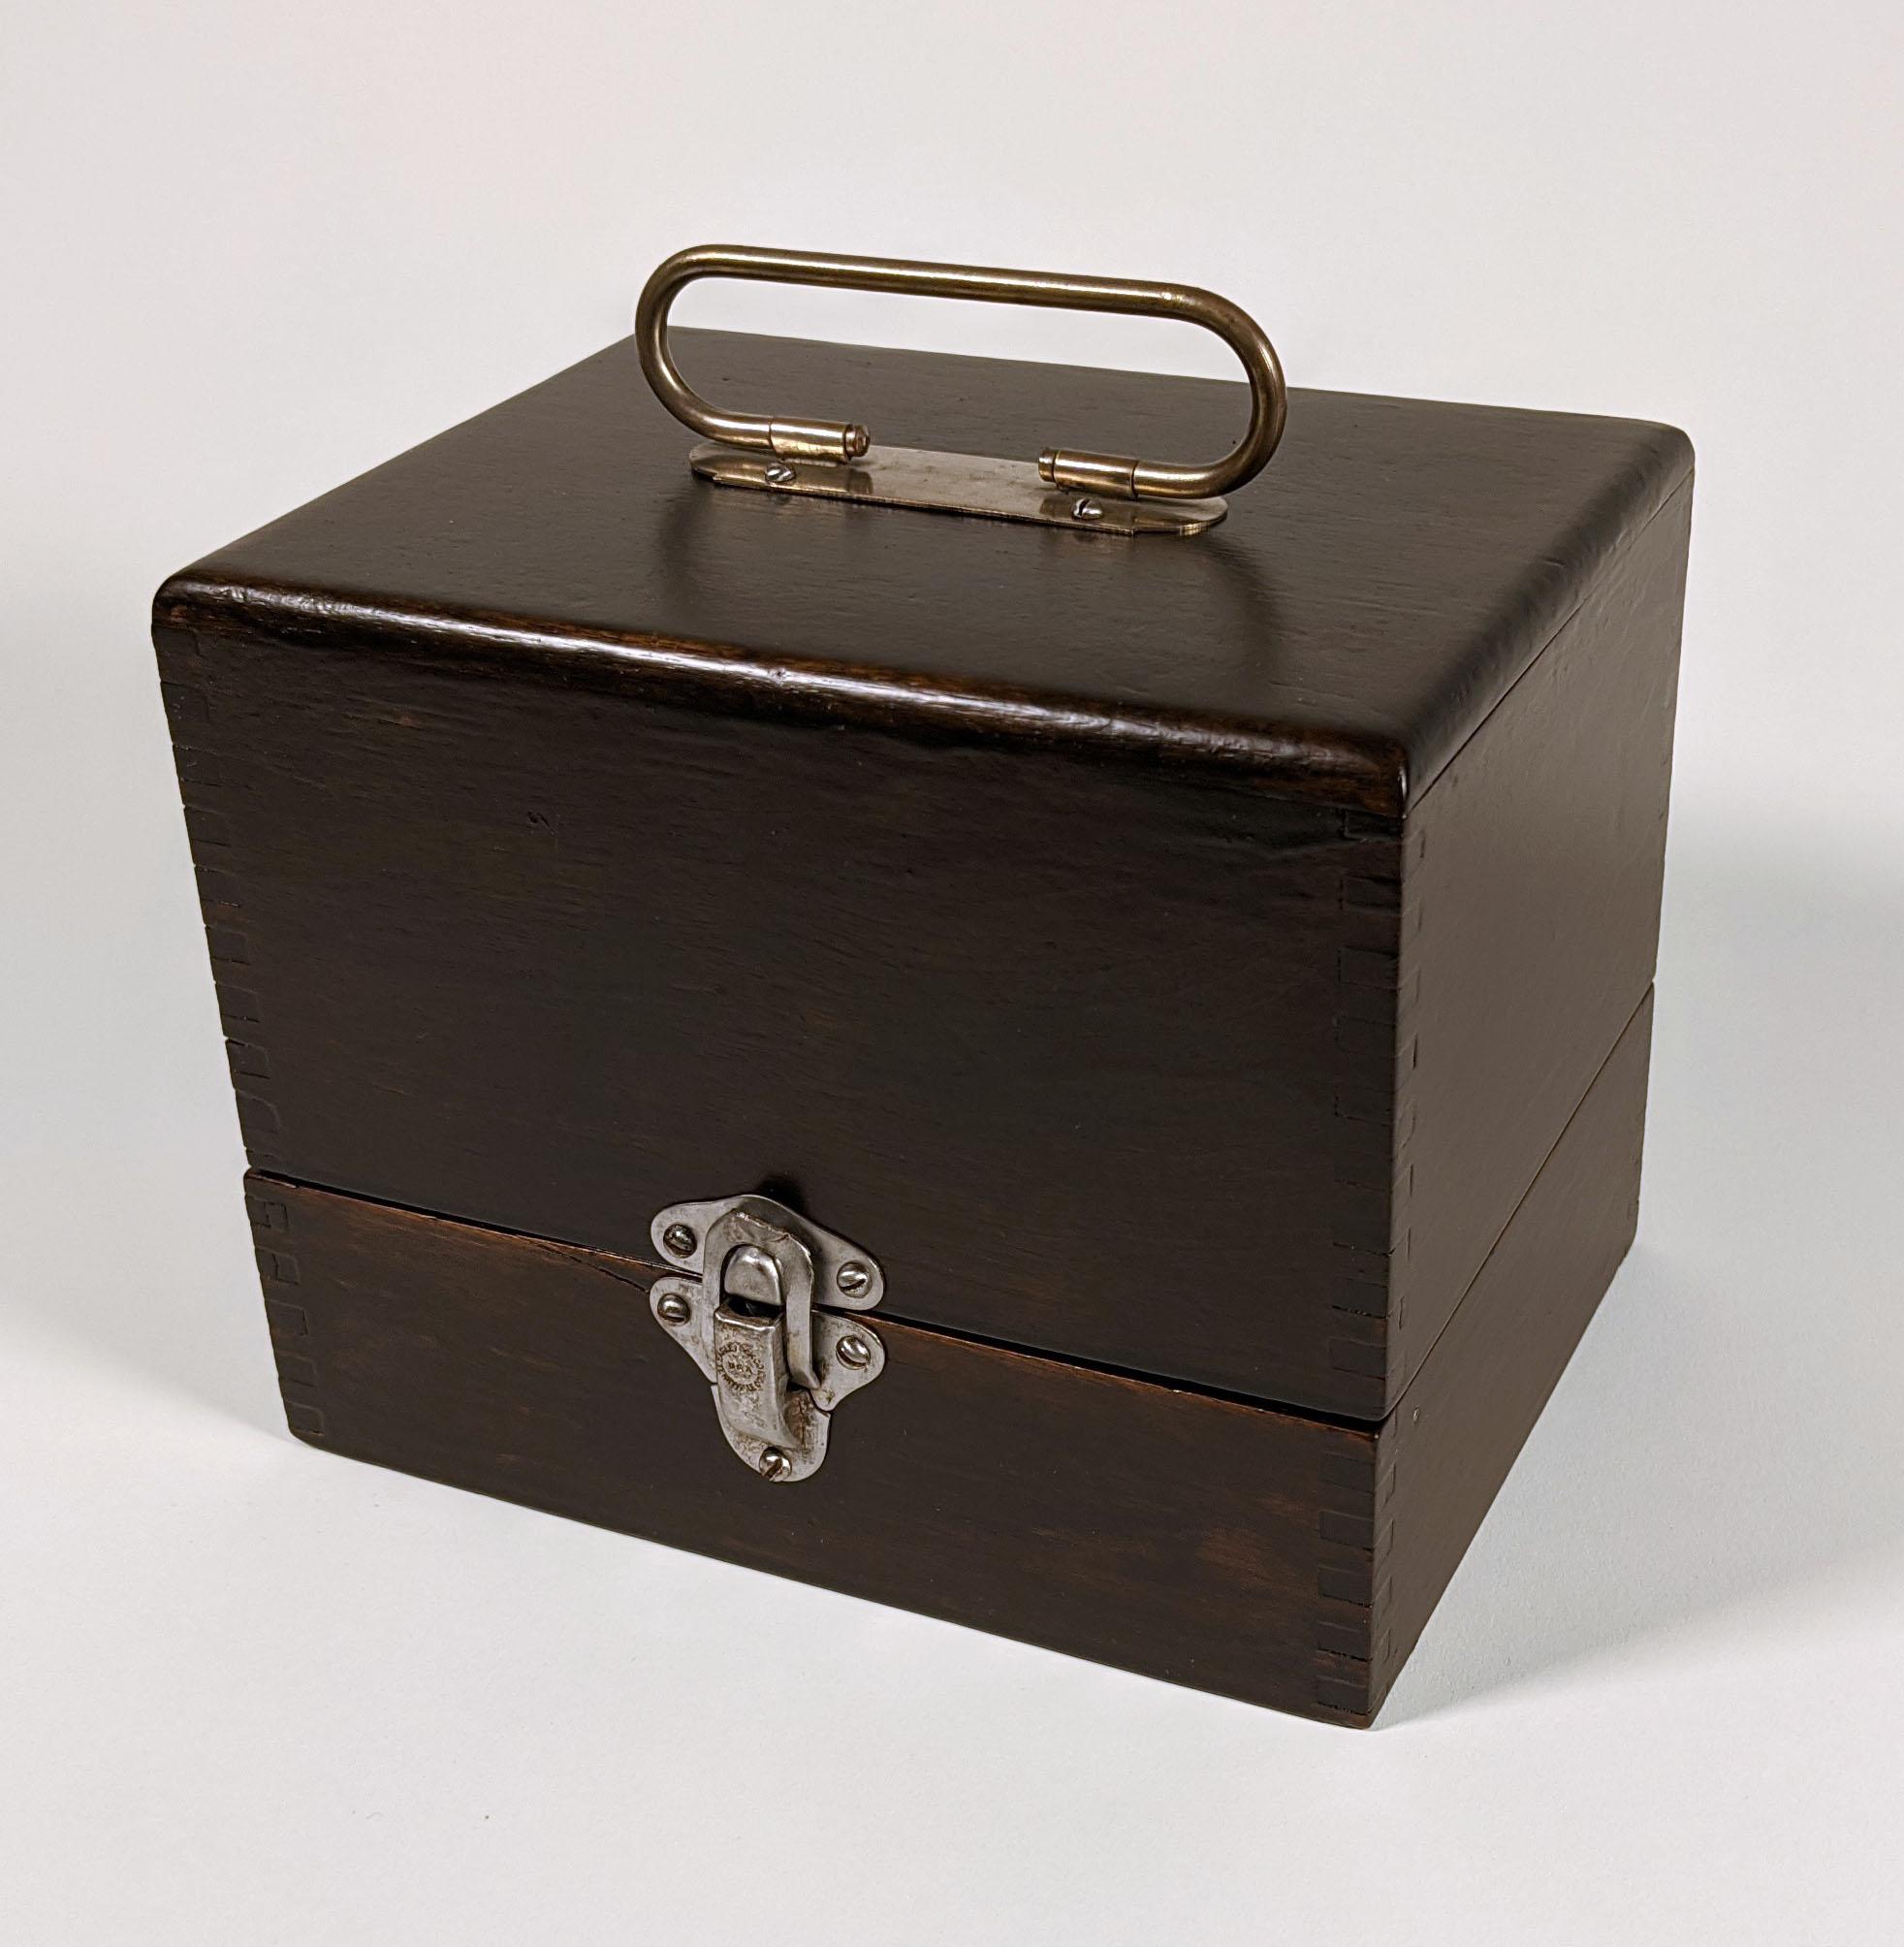
Definitely looks beautiful! How much did you pay? If it makes you feel better, I saw someone selling one such boxes with all empty glass tubes - so no watchmaking parts at all.... for 50 bucks.1 point
-
Hi well Andy, what has Tyler got to loose so better to try even if it fails. Tyl if you still like clocks after this, and no reason why not as I would think most of us have done the same . Forgetting to power down or thought you had but did not back check so take heart from that fact we have all been there believe me. That little clock although simple to most of us not so for a begginer due to its construction. Next time get a time only clock between two plates. Post us pictures and we will start again. Don’t loo feel too bad it’s all experience. All the best WW. Hi tyl. Best tool would be a small butane torch. And roll each tooth back with a small tube or screwdriver blade just be careful.1 point
-
The OP's looks worn, but I can double check when I get home, I think I have some clicks in my Smiths stash. It is ....it will.
 1 point
 -
Well, my fault. That is certainly bad news and I give up. Many thanks for all the help. If I have learned anything, it is that i actually enjoy working on these clocks and wish I was better at it. Thanks again.1 point
-
Hi. It does seem a bit of a bad end for sure, the standard advice before working on clocks is power down the move ment. Many a clock has suffered like yours either by not doing so. Or mainspring breakage due to a power surge. The wheel Iam afraid looks like it’s not recoverable. Two possibilities come to ming as finding another wheel is remote, one is to remove the damaged section and graft in a replacement section of wheel with the same pitch. Not doable by you at all and the other is to Ger a new wheel cut , probably cost more than the clock is worth. A sad end.1 point
-
I decided to stay away from this one but I have been reading all the help and suggestions. Very good they have been. Unless you are prepared to spend out big money and have a wheel cut I’m sorry my friend you have come to the end of the road. I say this because this is not a popular movement here in England but in the USA you have a better chance picking up another movement or the parts you need.1 point
-
Good spot Andy, I wish @tyl had asked how to let down the mainspring .1 point
-
Pretty sure it's the 12.15 so should fit.1 point
-
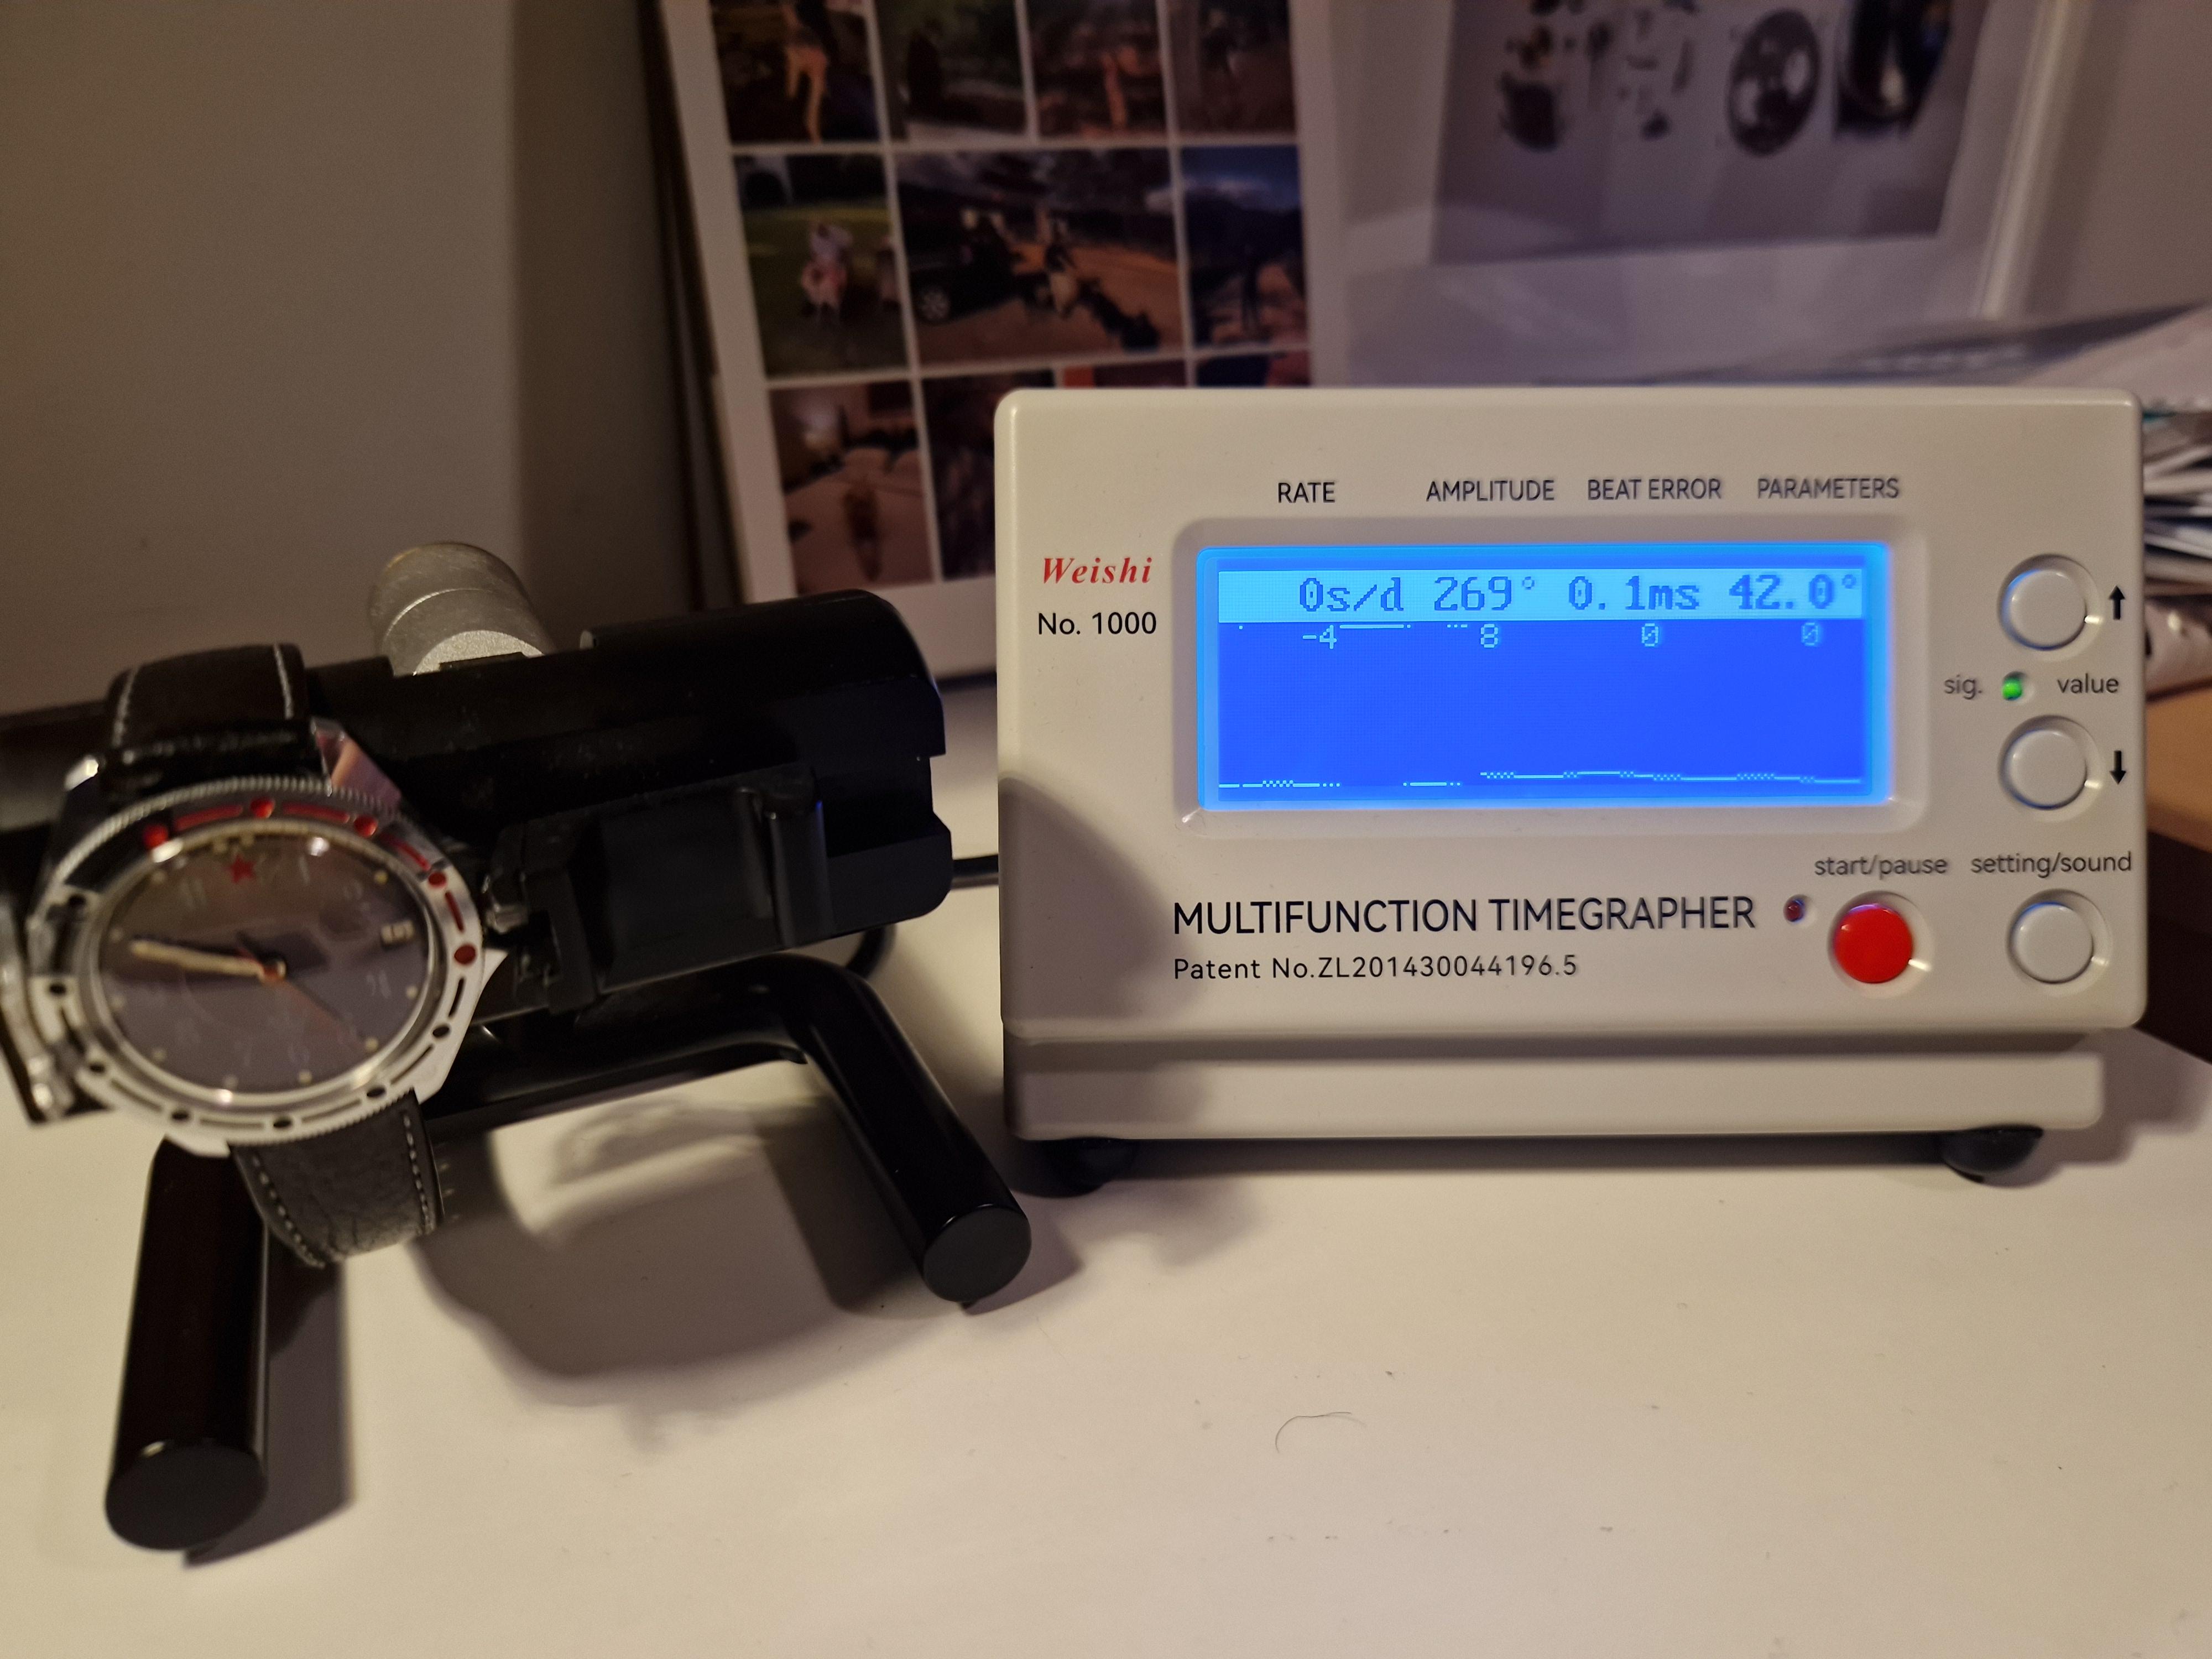
HWGIKE#40 ETA 2783 Reloaded.


 1 point
 -
Ok, good. I'm keen to see @nevenbekriev's reply to this to learn the significance and what to do to address it.1 point
-
Hi Ammar. Untill you receive it and open it up and see what powers the watch its guess work. But it’s a classic face and will probably do ok. The case has had a bit of a hammering where it has been opened multiple times but a bit of tlc will improve it somewhat. Cheers1 point
-
Sorry, I could have saved you the time but that's what the A34 is above the TR.1 point
-
I use it for extra sticky hairsprings and it’s the best I’ve tried. I recommend staying away from things called ‘one dip’ in the US… I also use Liquinox in my ultrasonic but I’m still using the L&R regimen in my Pearl cleaner for movements…1 point
-
Gathering tools and fortitude. Looking for anything on Youtube.1 point
-
typically on American pocket watches up until sometime I guess in the 50s you'll find serial numbers are all the plates. So even the pallet fork bridge underneath should have at least the last digit or two of the serial number even typically the balance wheel have the serial number scribed on to it as all these components were made and assembled together. But people sometimes do get creative. I was helping a friend once and he had an 18 size Hamilton I believe there is some issues which I didn't initially see. Then later I noticed that the balance wheel just didn't look right with the way it was? Then looking carefully I noticed it had an entirely different balance bridge. This required purchasing of a new orate used movement and better condition because this wasn't a conveniently fixable problem. I never did get to hear the history of the watch how it came to be this way the person does doing this for just wanted the problem to go away. So yes people can be creative and start swapping things around usually though when you have discoloration on plates and things it's because somebody probably left it too long in the cleaning machine or something similar or equivalent. one of the things you do if you're looking for watch shows is go to the national Association of watch and clock collectors website. See if you're lucky enough to have a chapter in your state or maybe a neighboring state. chapters will typically be having a meeting is a regular basis where a lot of times it's chapter meeting to buy and sell stuff. Then a lot of times the chapters will come together and have regional meetings. You can also look on their event page and see if there's any regional meetings coming up that you'd like to go to as now their typically open to the public.1 point
-
Well, does the watch liok different from the pictures you saw before buying? I guess that would determine if you feel scammed ir not. When you open it and see the movement and dial (without crystal), you'll know more. It's possible that it'll look quite nice with a new crystal (even if it looks like the dial is also damaged/dirty. You'll probably find a Tissot calibre 783 in there, which is quite a nice movement!! I serviced one a while ago. It turned out very well and kept great time. 50 bucks doesn't sound too bad, I think. Just about fair, probably.1 point
-
Tweezers are in my opinion a much more important investment than screwdrivers. I have cheap no name tweezers, I-fixit from one of there kits, cousinsuk titanium and dumont with a couple of other Swiss tweezers. I like the titanium but overall I unconsciously reach for the dumonts, they just seem to work really naturally for me. For screwdrivers I have anchor(India made), a bergeon set and some random no name stuff that has come with tool job lots off the ‘bay. The anchors are fine, I am replacing the blades with cousinsuk branded which are decent, it does make a difference, less chipping. The bergeon ones are nice and feel good in the hand. Between the two I just really pick what I think has the closest dressing needed, I do use the bergeon for movements but will use the anchors more if I am futzing around restoring tools. I think the most important things for a good screwdriver are they don’t have a wobbly head and you can change/upgrade the blades easily. Tom1 point
-
As you'll need to remove the barrel and clean I suggest as @Knebo has mentioned you check it's the correct size spring for the movement.1 point
-
I like the disclaimer at the beginning1 point
-
Some cases use the case back to secure the movement ring in place. I just worked on an Oris that had this setup.1 point
-
Welcome to the WRT forum.1 point
-
Hello and welcome from Leeds, England.1 point
-
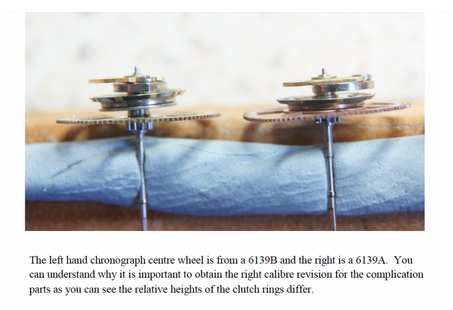
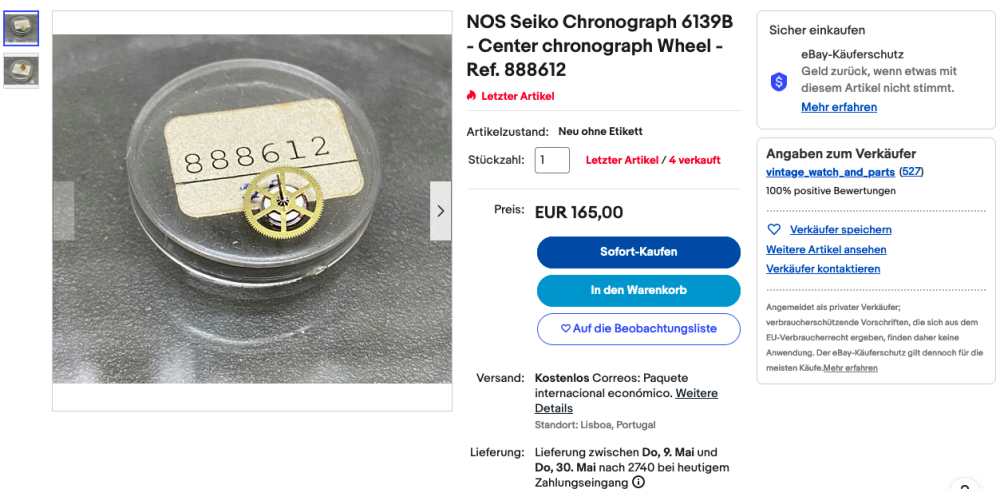
I am certainly not the first one who happen to ruin the chronograph center-wheel of a Seiko 6139B. The internet, when you search for it, is littered with stories, even here on WRT there are some. One of the problems is that the service manual of the 6139A is readily available on the net, not so with the service manual of the 6139B. On top, reading other forums & stories, there are people who claim that there is hardly any difference between the 6139A and the 6139B movement, so the 6139A service manual will suffice. However, one of the crucial differences is the design of the chronograph center-wheel. Also the Seiko reference numbers are different. For the 6139A, the reference number for the chronograph center-wheel is 888610 and for the 6139B: 888612. To lubricated the 6139A chronograph center-wheel, the following graphic picture in the 6139A service manual is given; One has to press down the sprocket and oil it. Unaware of the difference in chrono center-wheel design, I pressed down on the sprocket, but there was no movement. Perhaps not understanding or interpreting the drawing correctly, I pressed with the tweezers on the 4th wheel. This caused the 4th wheel, which turned out to be a press fit to the sprocket by the 6139B, to strip off the sprocket. Thereby me joining the line of all the others, who tried this before and are now searching for "how to fix" this misfortune. In an older thread on WRT, member @ricardopalamino place a picture in which he shows the difference in center-wheel design between the 6139A and the 6139B. To the left the 6139B and to the right the 6139A. As can be seen on the left center-wheel, the 4th wheel is pressed onto a sprocket. Pressing down on it, as shown in the 6139A service manual, gives a ruinous result. People did several attempts to repair the damage, but so far, I haven't found a success story. Here is one of the attempts; Reading what already has been tried, I tried a different approach ..... but sadly failed too. Nevertheless, I'll show what I've done; perhaps somebody may fine-tune or expand on the idea and has success? In my staking set was an anvil with a 4.5mm hole, exact the size needed to fit the chrono center-wheel "up-side-down". The distance between the clutch parts and the 4th wheel was 0.25mm. To support the 4th wheel as close as possible up to its center, I used feeler gauge blades, on one side a 0.25mm blade, and on the other side a combination of 0.15mm + 0.10mm blades. This allowed me to tap the sprocket back onto the 4th wheel ...... The thickness of 0.25 blades doesn't prevent some "spring" action, and so my 4th wheel was slightly deformed. The re-attachment seemed successful, but when trying to true the wheel, the connection failed again Currently there is a NOS 6139B chronograph center-wheel on eBay. Last Sunday the price was €150, on Monday the seller increased the price to €165 !! Prevention is better than the cure and I do hope that anyone in the future, searching for a 6139 manual, with read my "Warning". As for my Seiko, I'm not going to invest €165 for one part and since the rest is pretty good, I will sell the watch for "parts or repair"


 1 point
 -
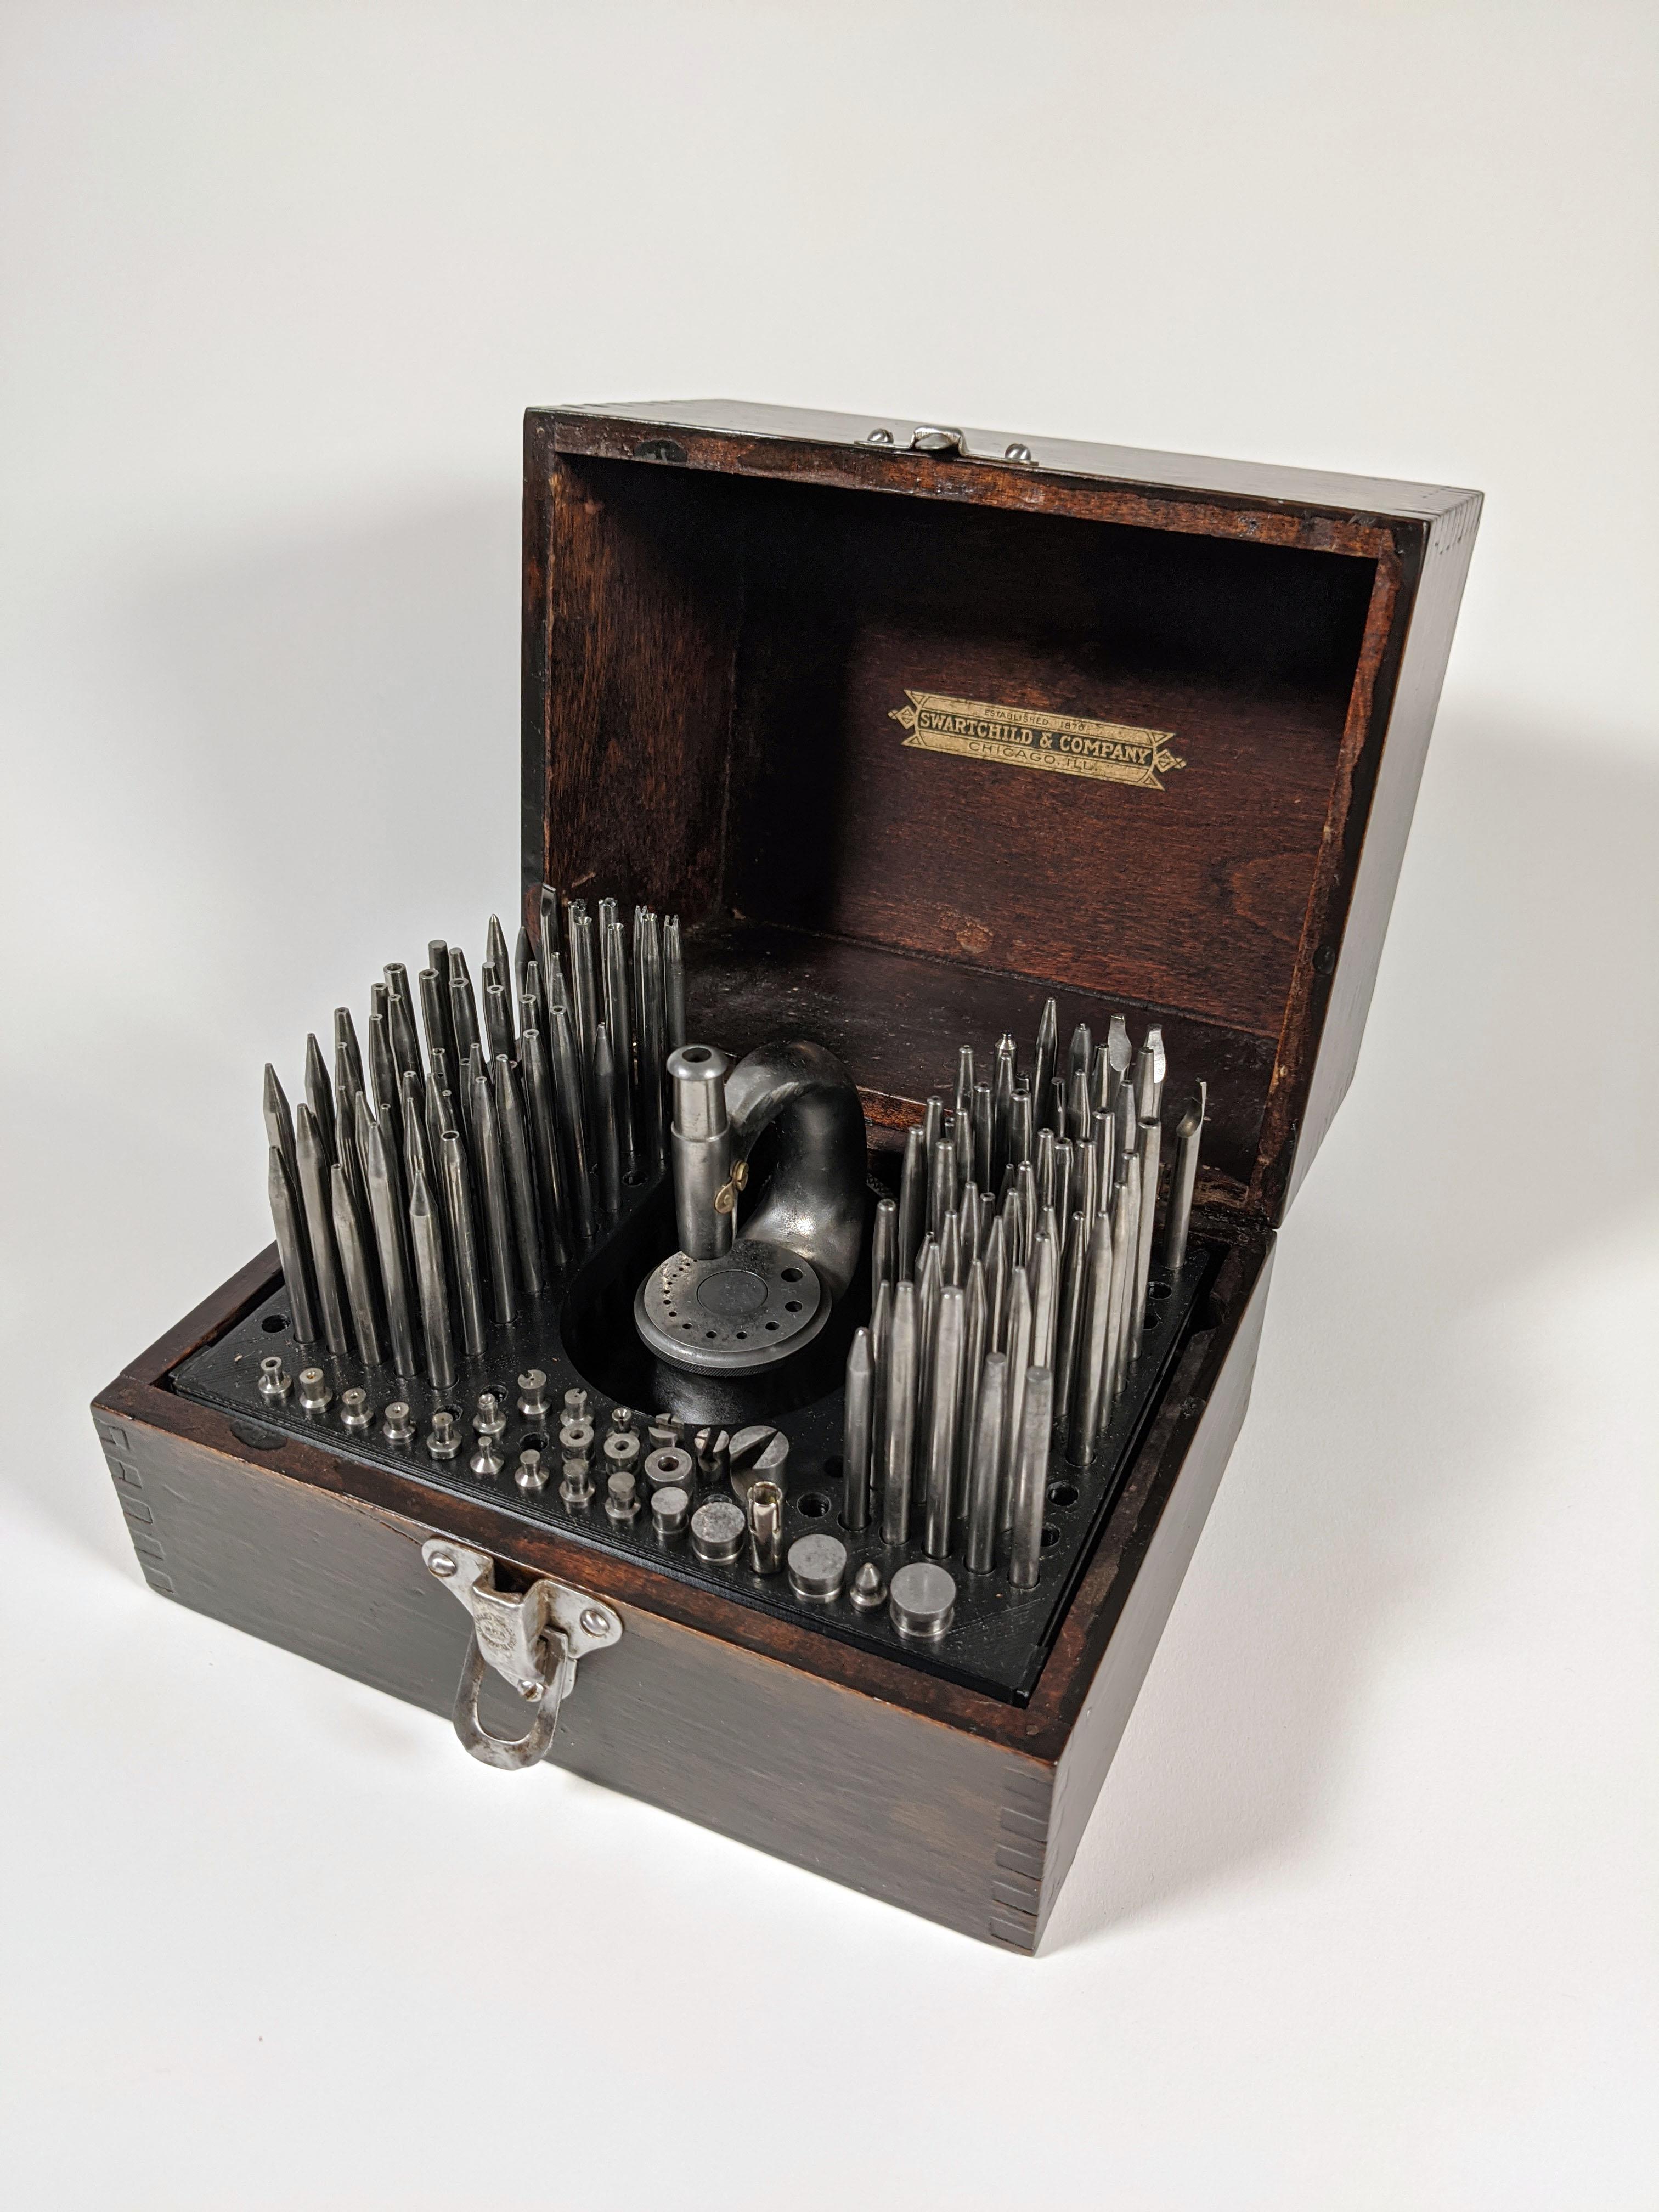
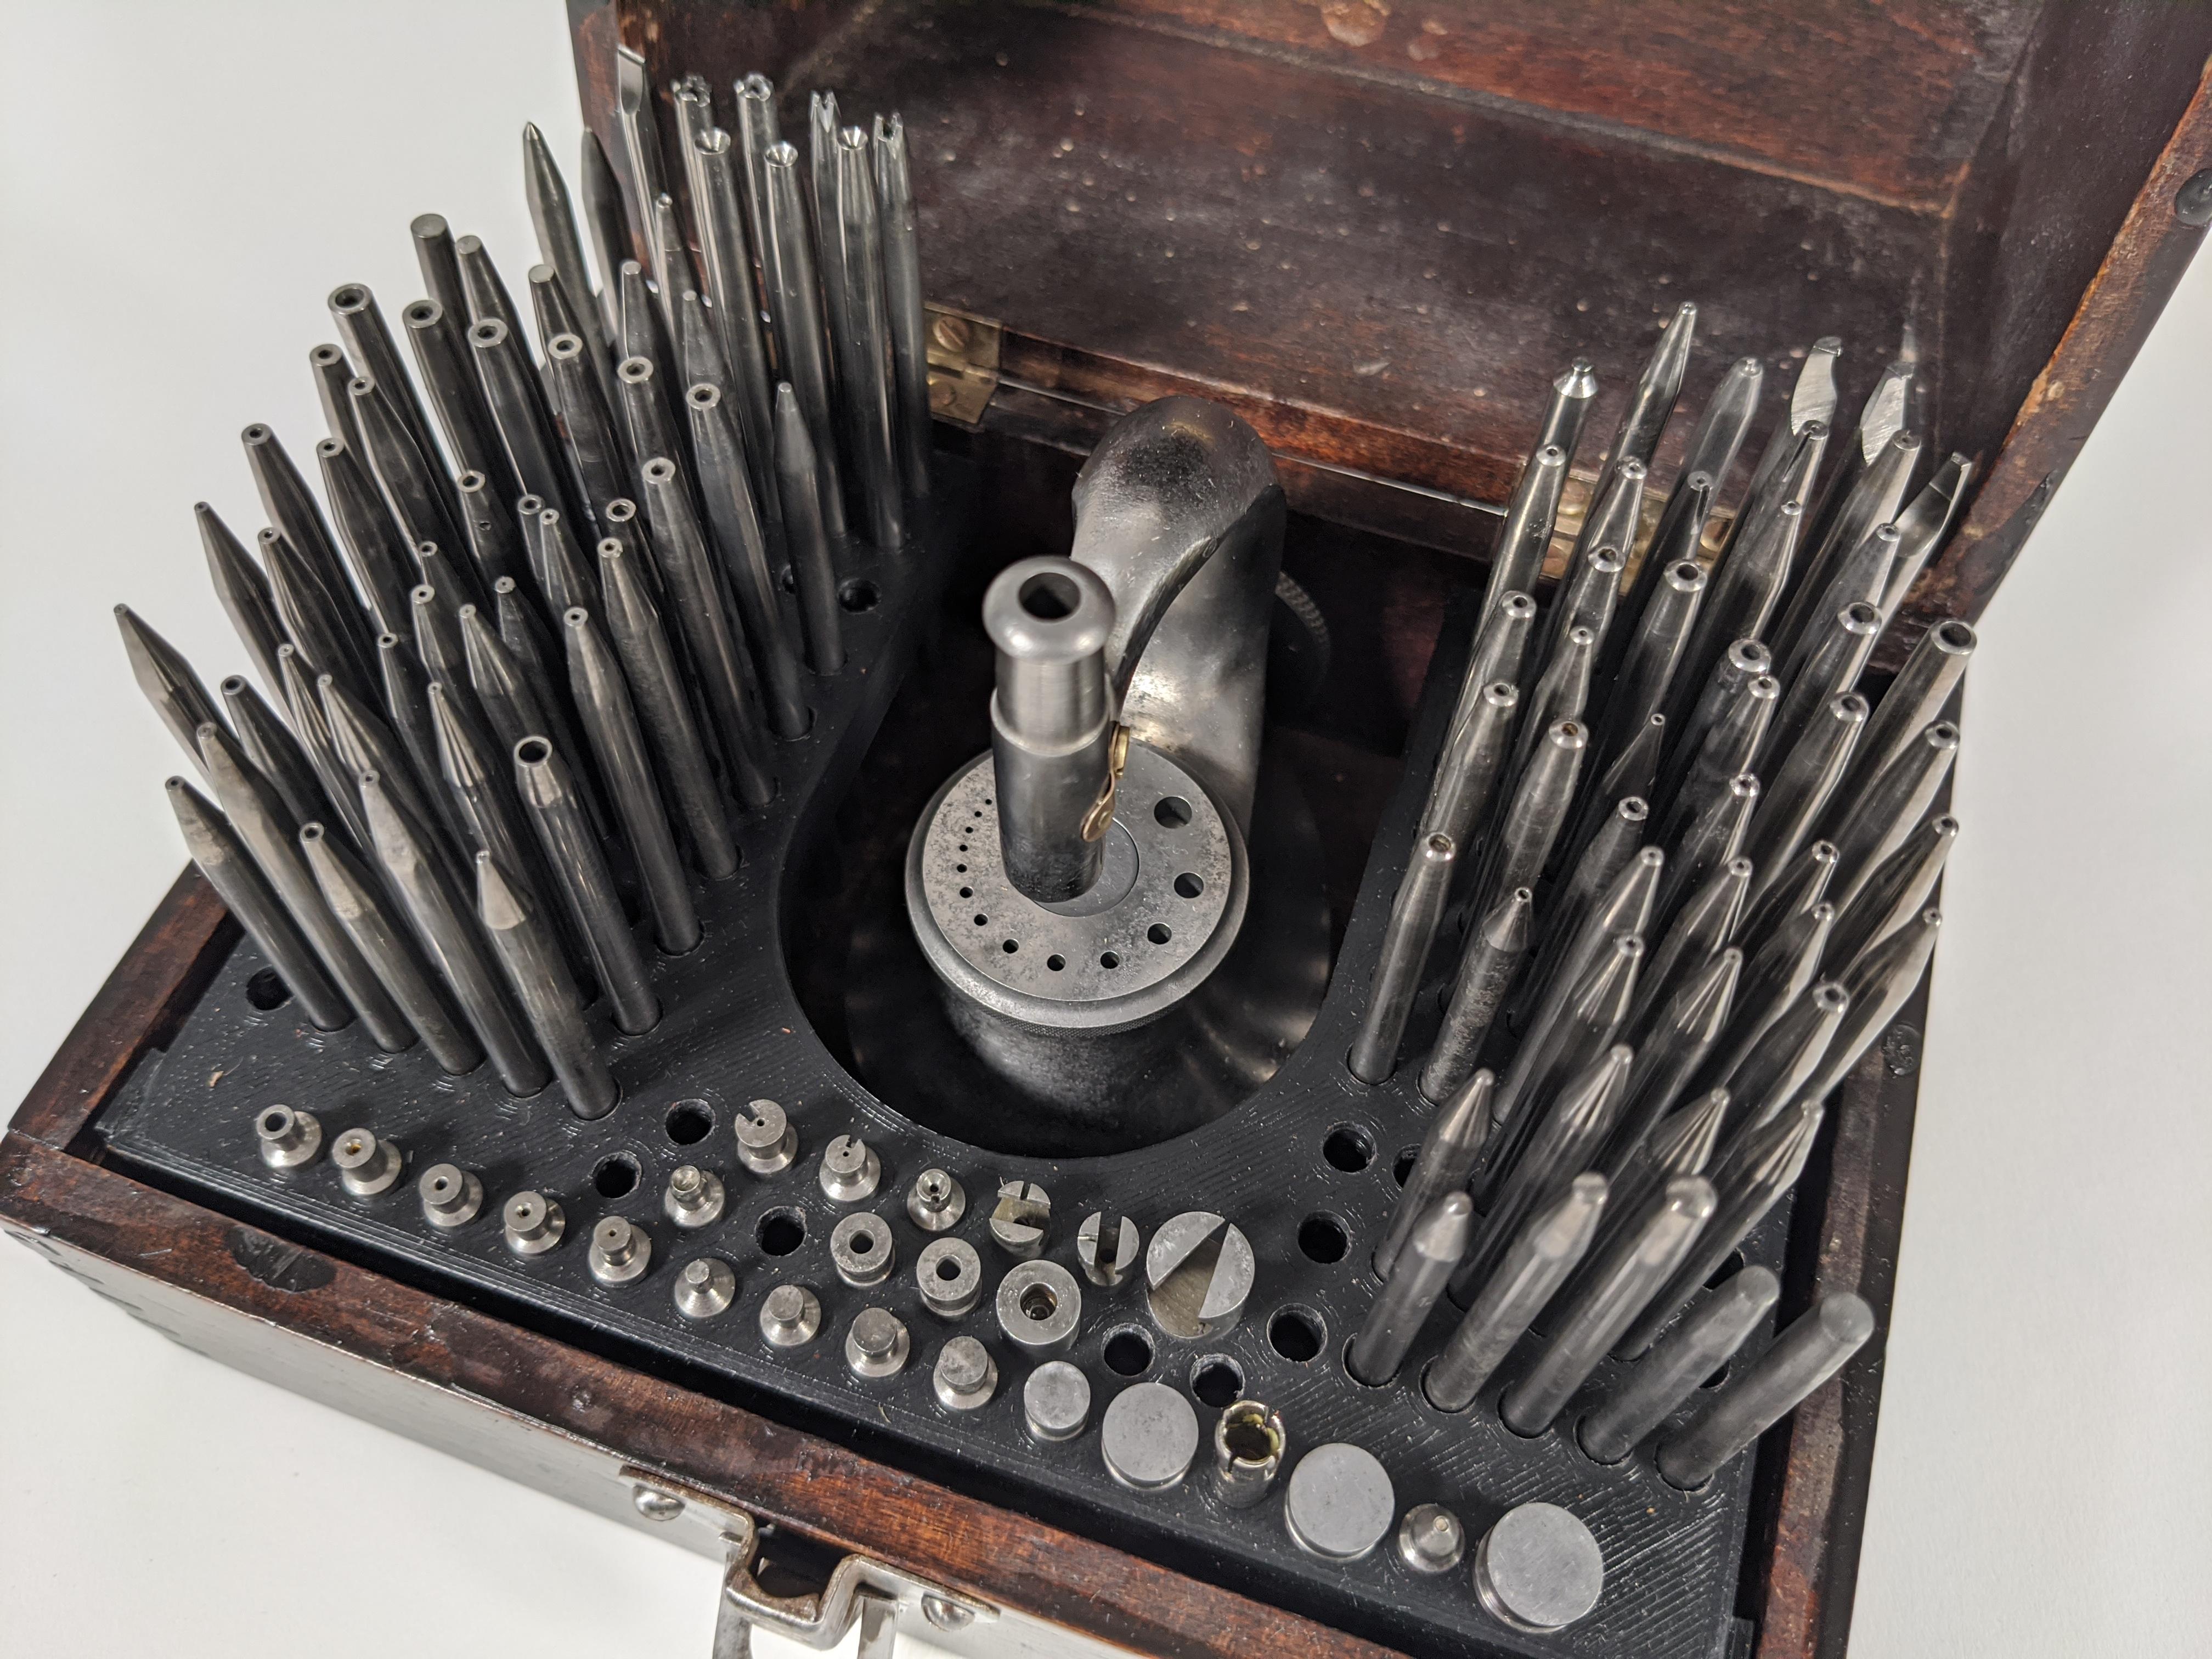
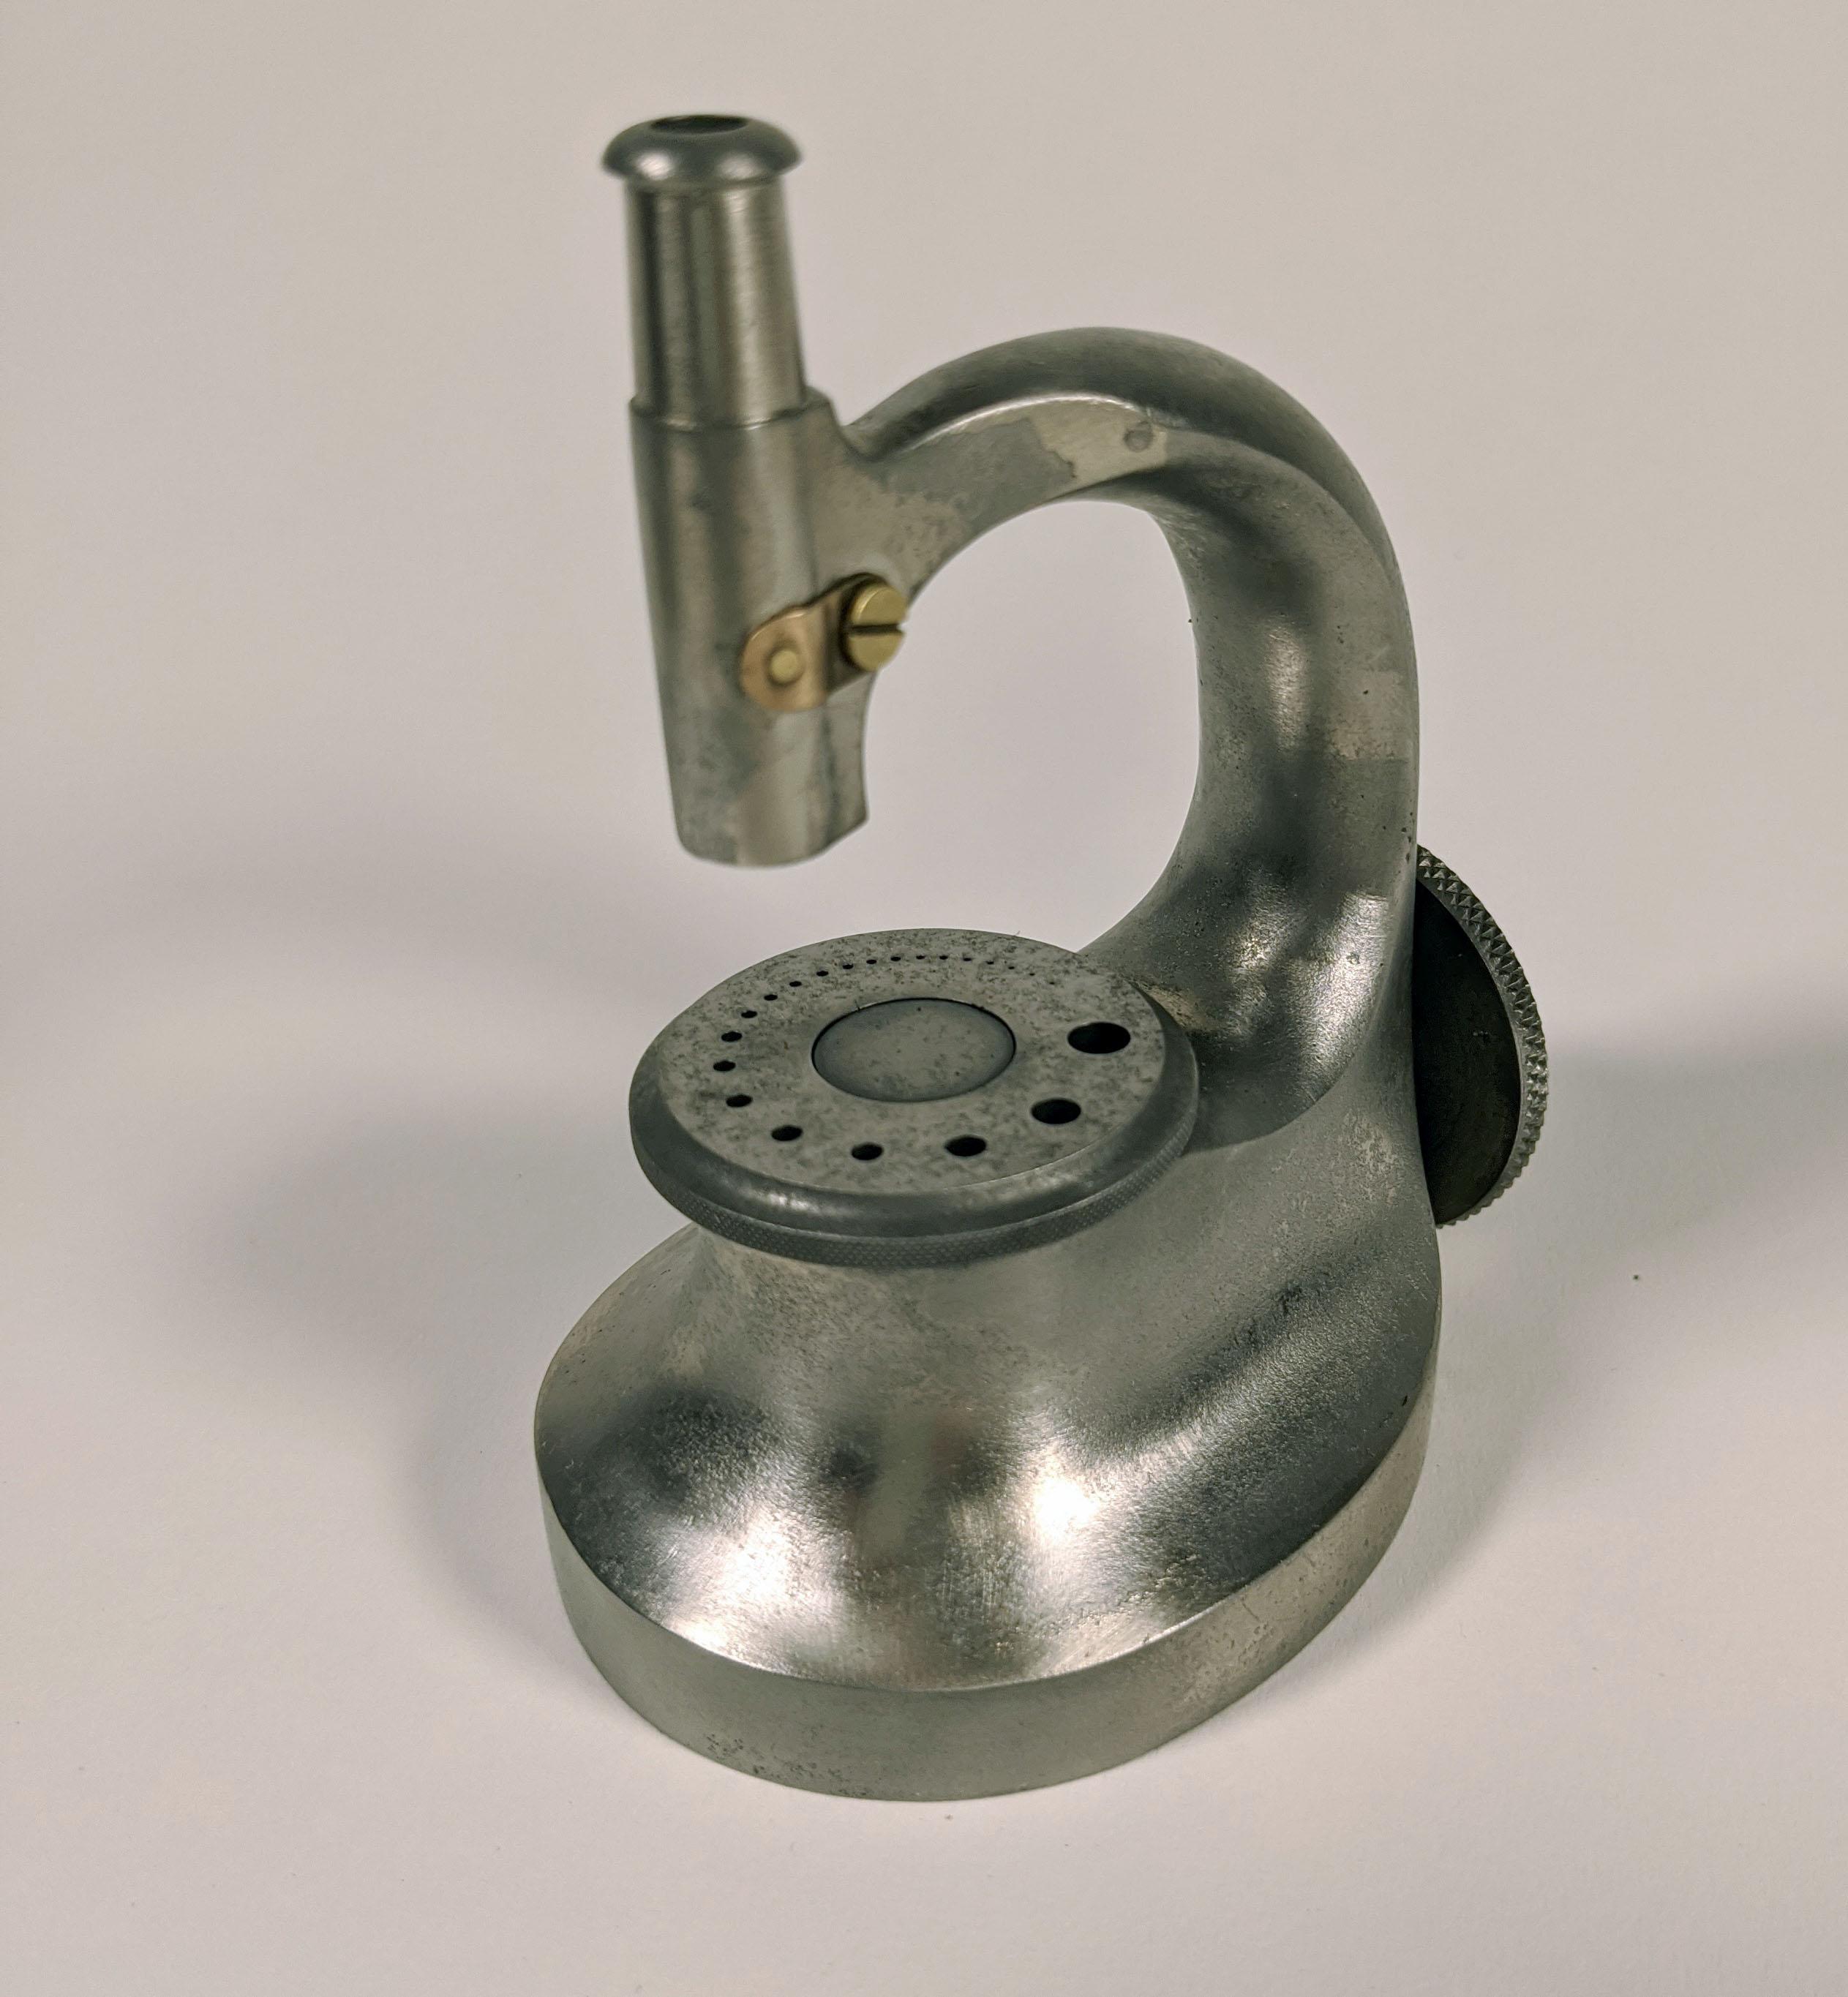
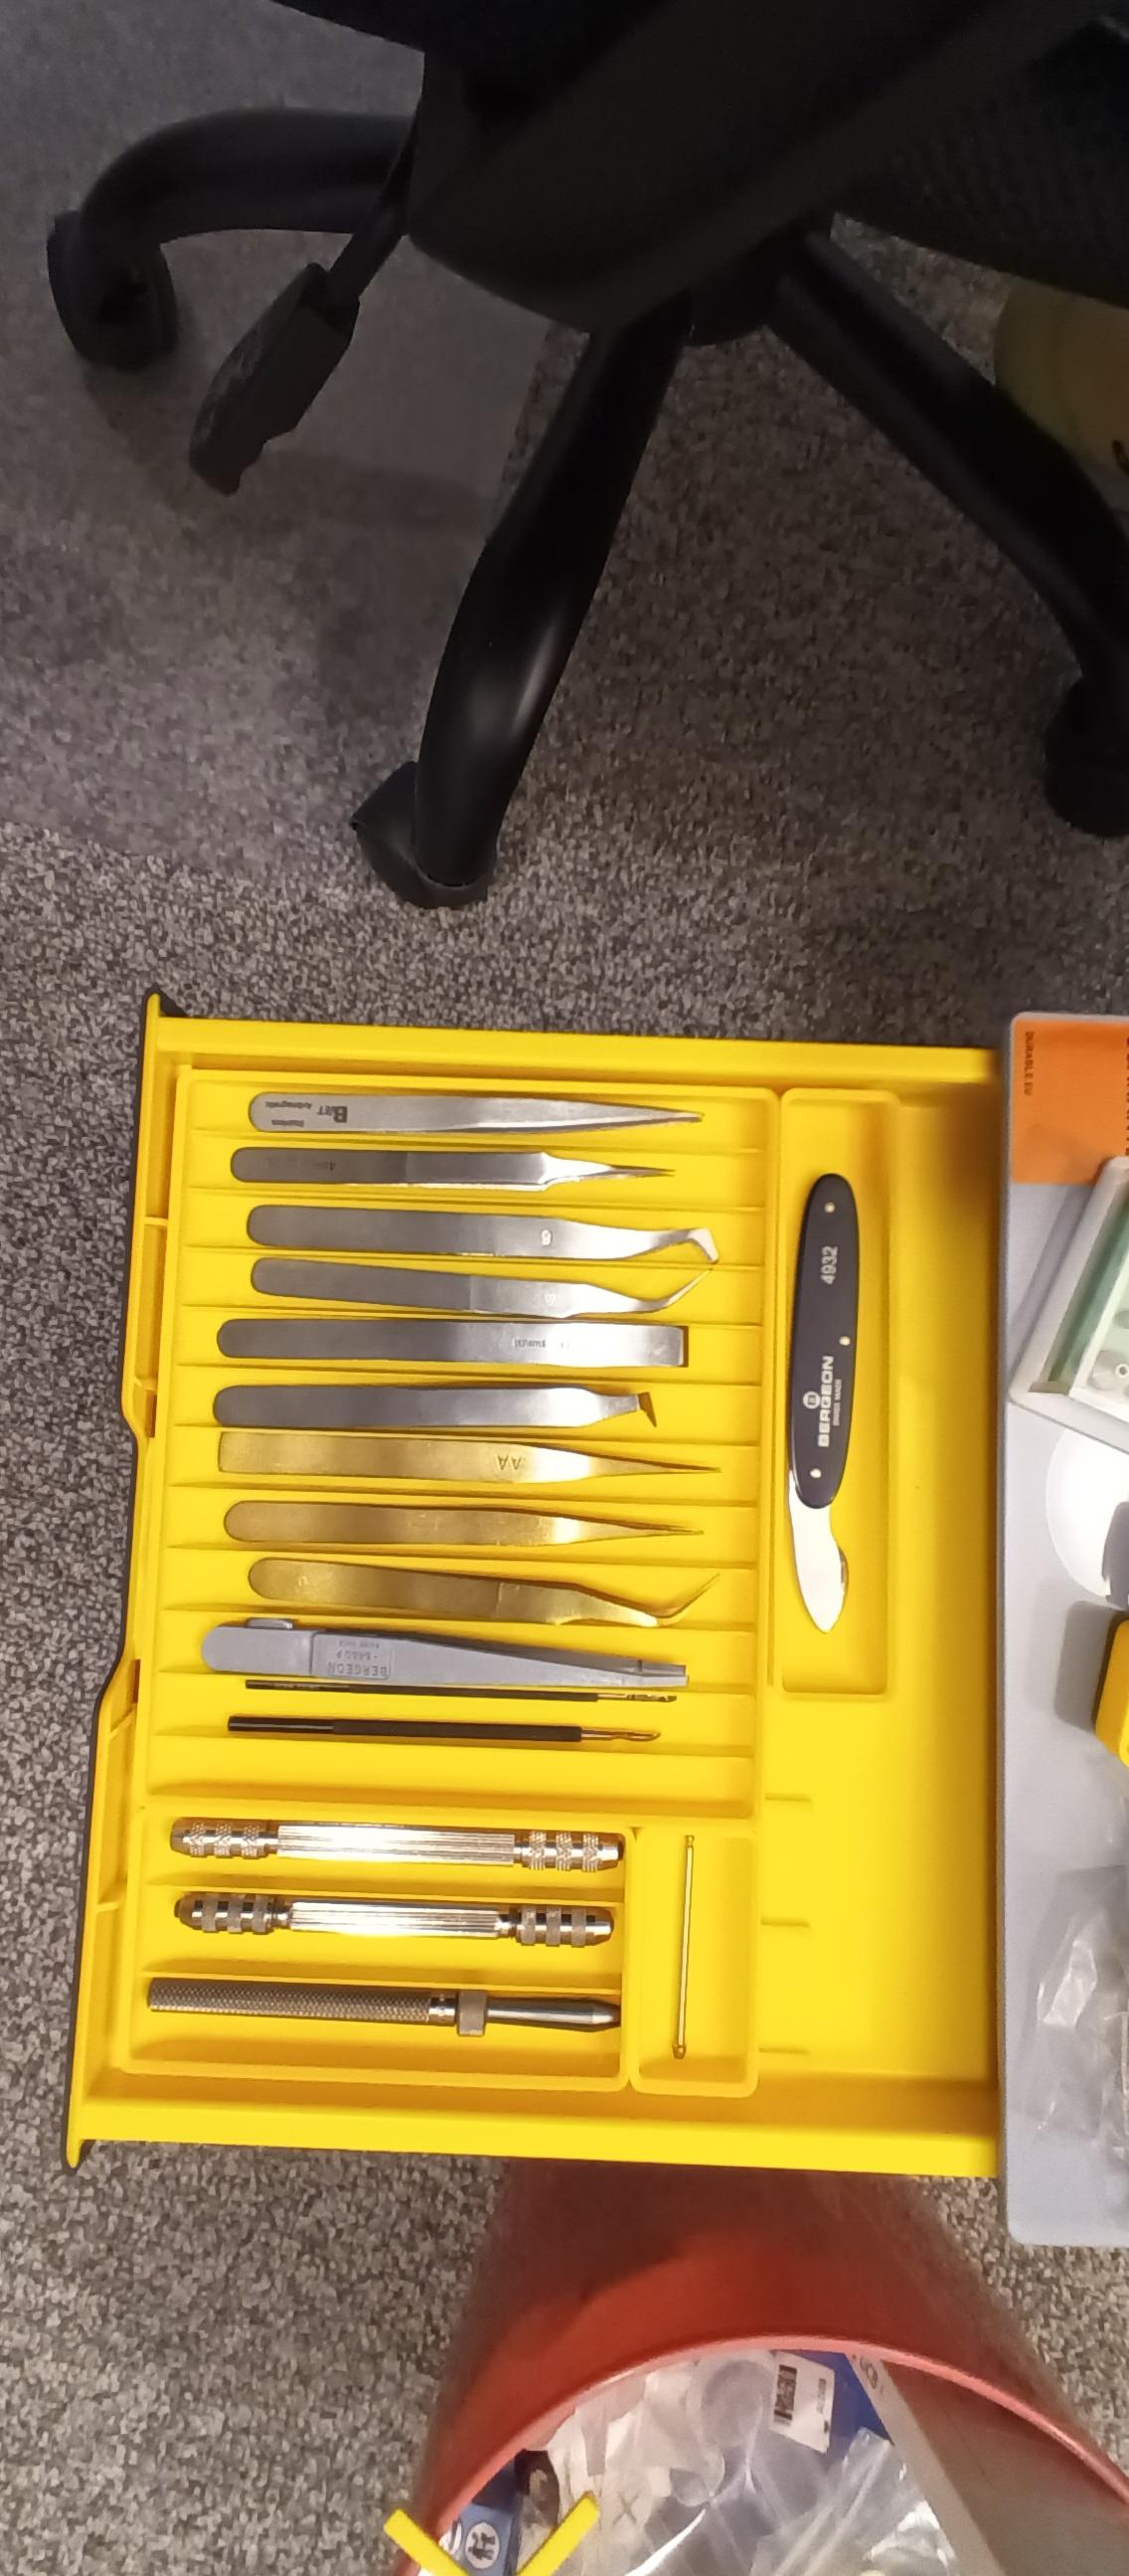
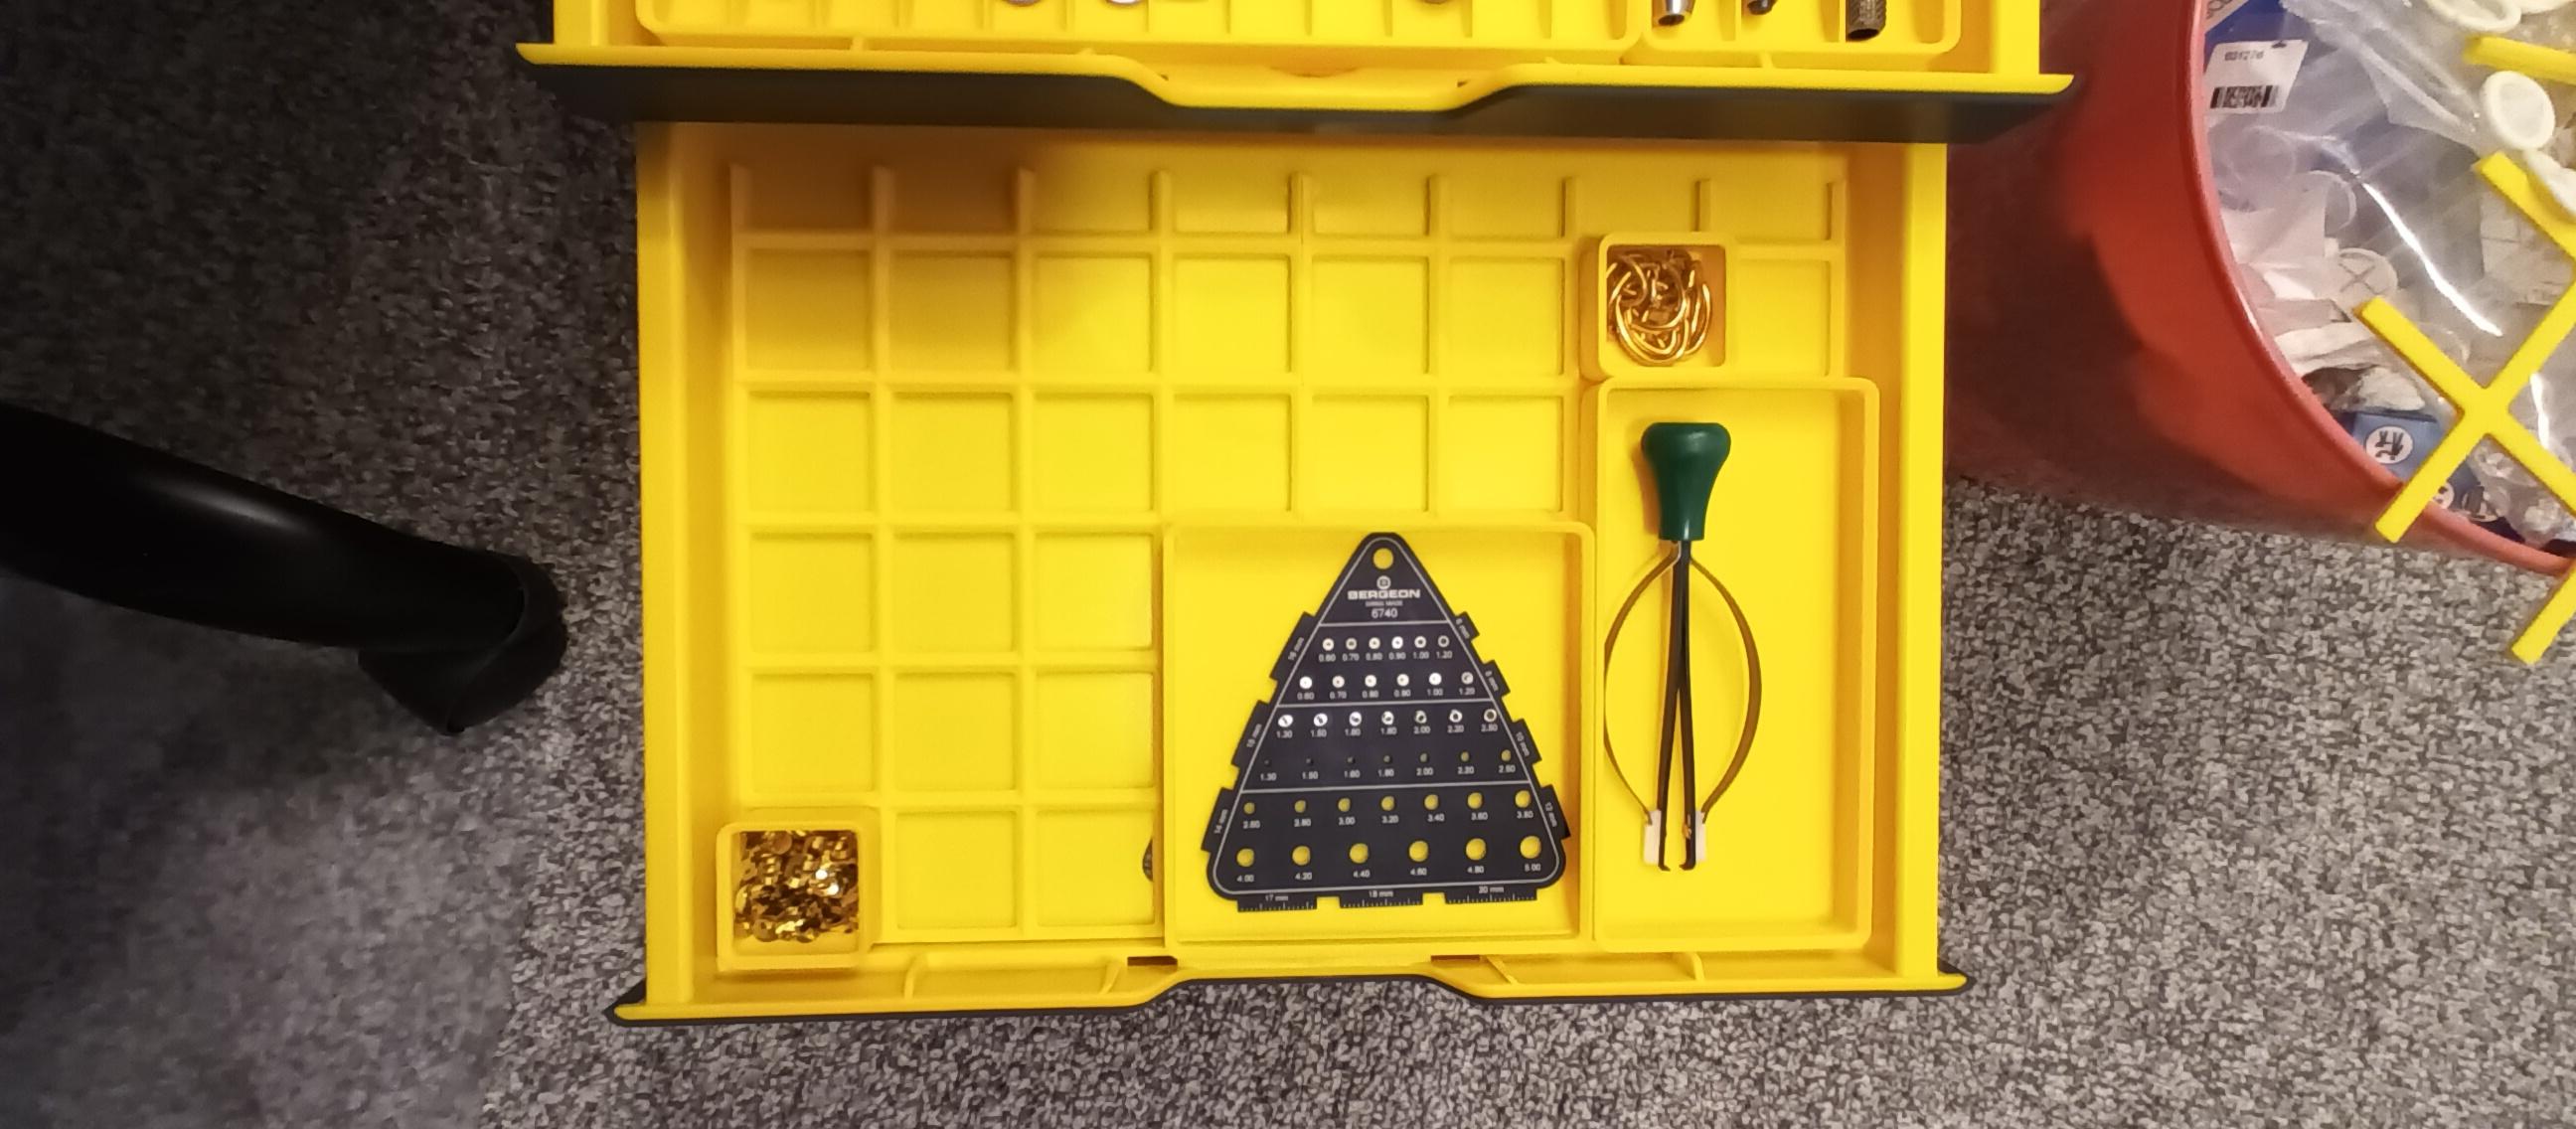
I am close to finished. I am really pleased how well the tools cleaned up. I ended up 3D printing a replacement for the broken pieces. While it may not be authentic, it certainly is utilitarian.


 1 point


.jpeg.7d4501bc74180afd846a90619d7a1d31.jpeg)
.jpeg.848bea5472c9bc65c38392a40192fe56.jpeg)

.jpeg.8b278d8fe3c114be2652ff8701ecc4a3.jpeg)
.jpeg.26633973eb4f09344ded4c953d830b91.jpeg)
.jpeg.b3627bb17748f824251e000efc660316.jpeg)
.jpeg.d10558fc2a70e030badbd9f8dae203c5.jpeg)


.thumb.jpg.19a9c4ff164d78d516aa9f05a063752b.jpg)