Leaderboard


.thumb.jpg.cb17a66989f1e796fd4217db2e9ca9df.jpg)

Popular Content
Showing content with the highest reputation on 02/27/25 in all areas
-
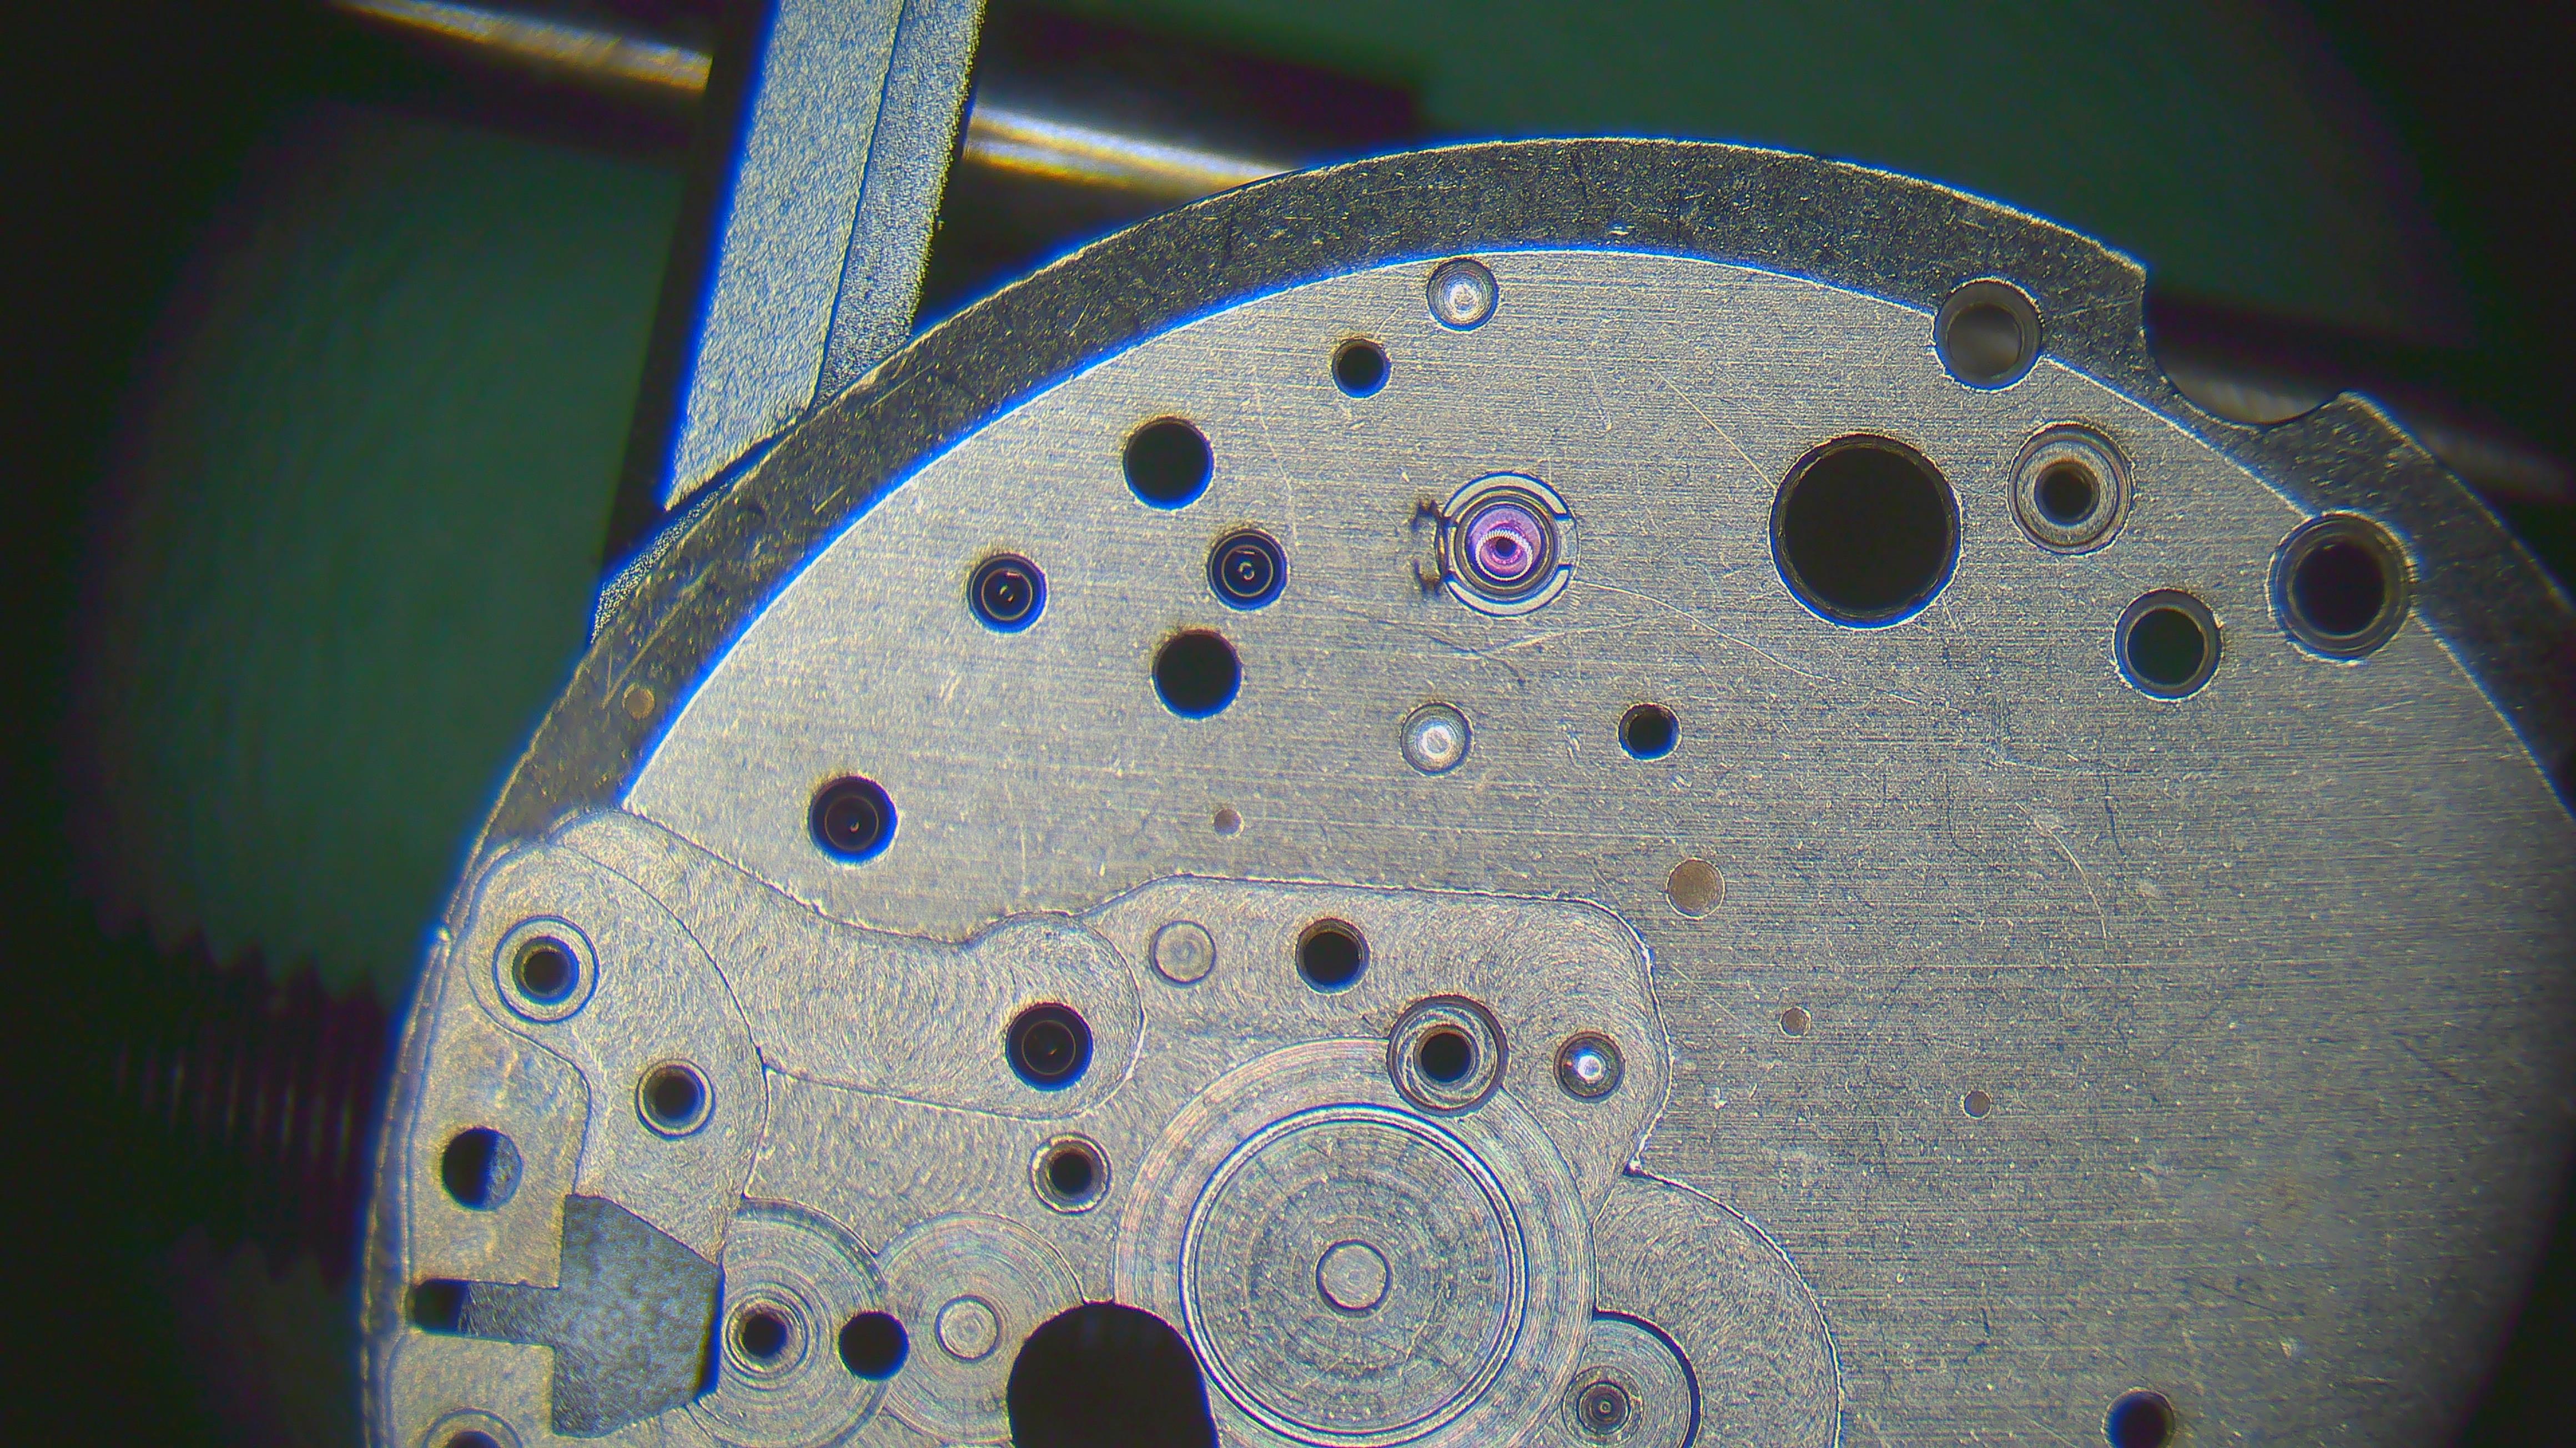
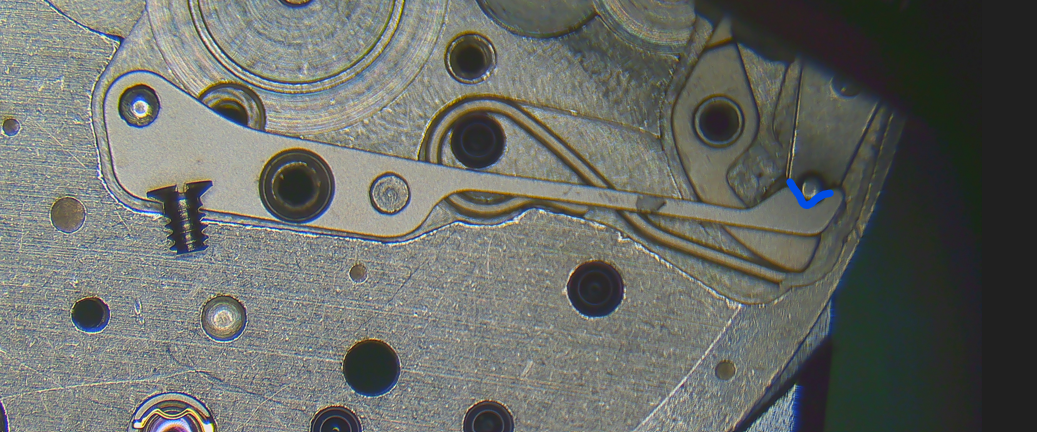
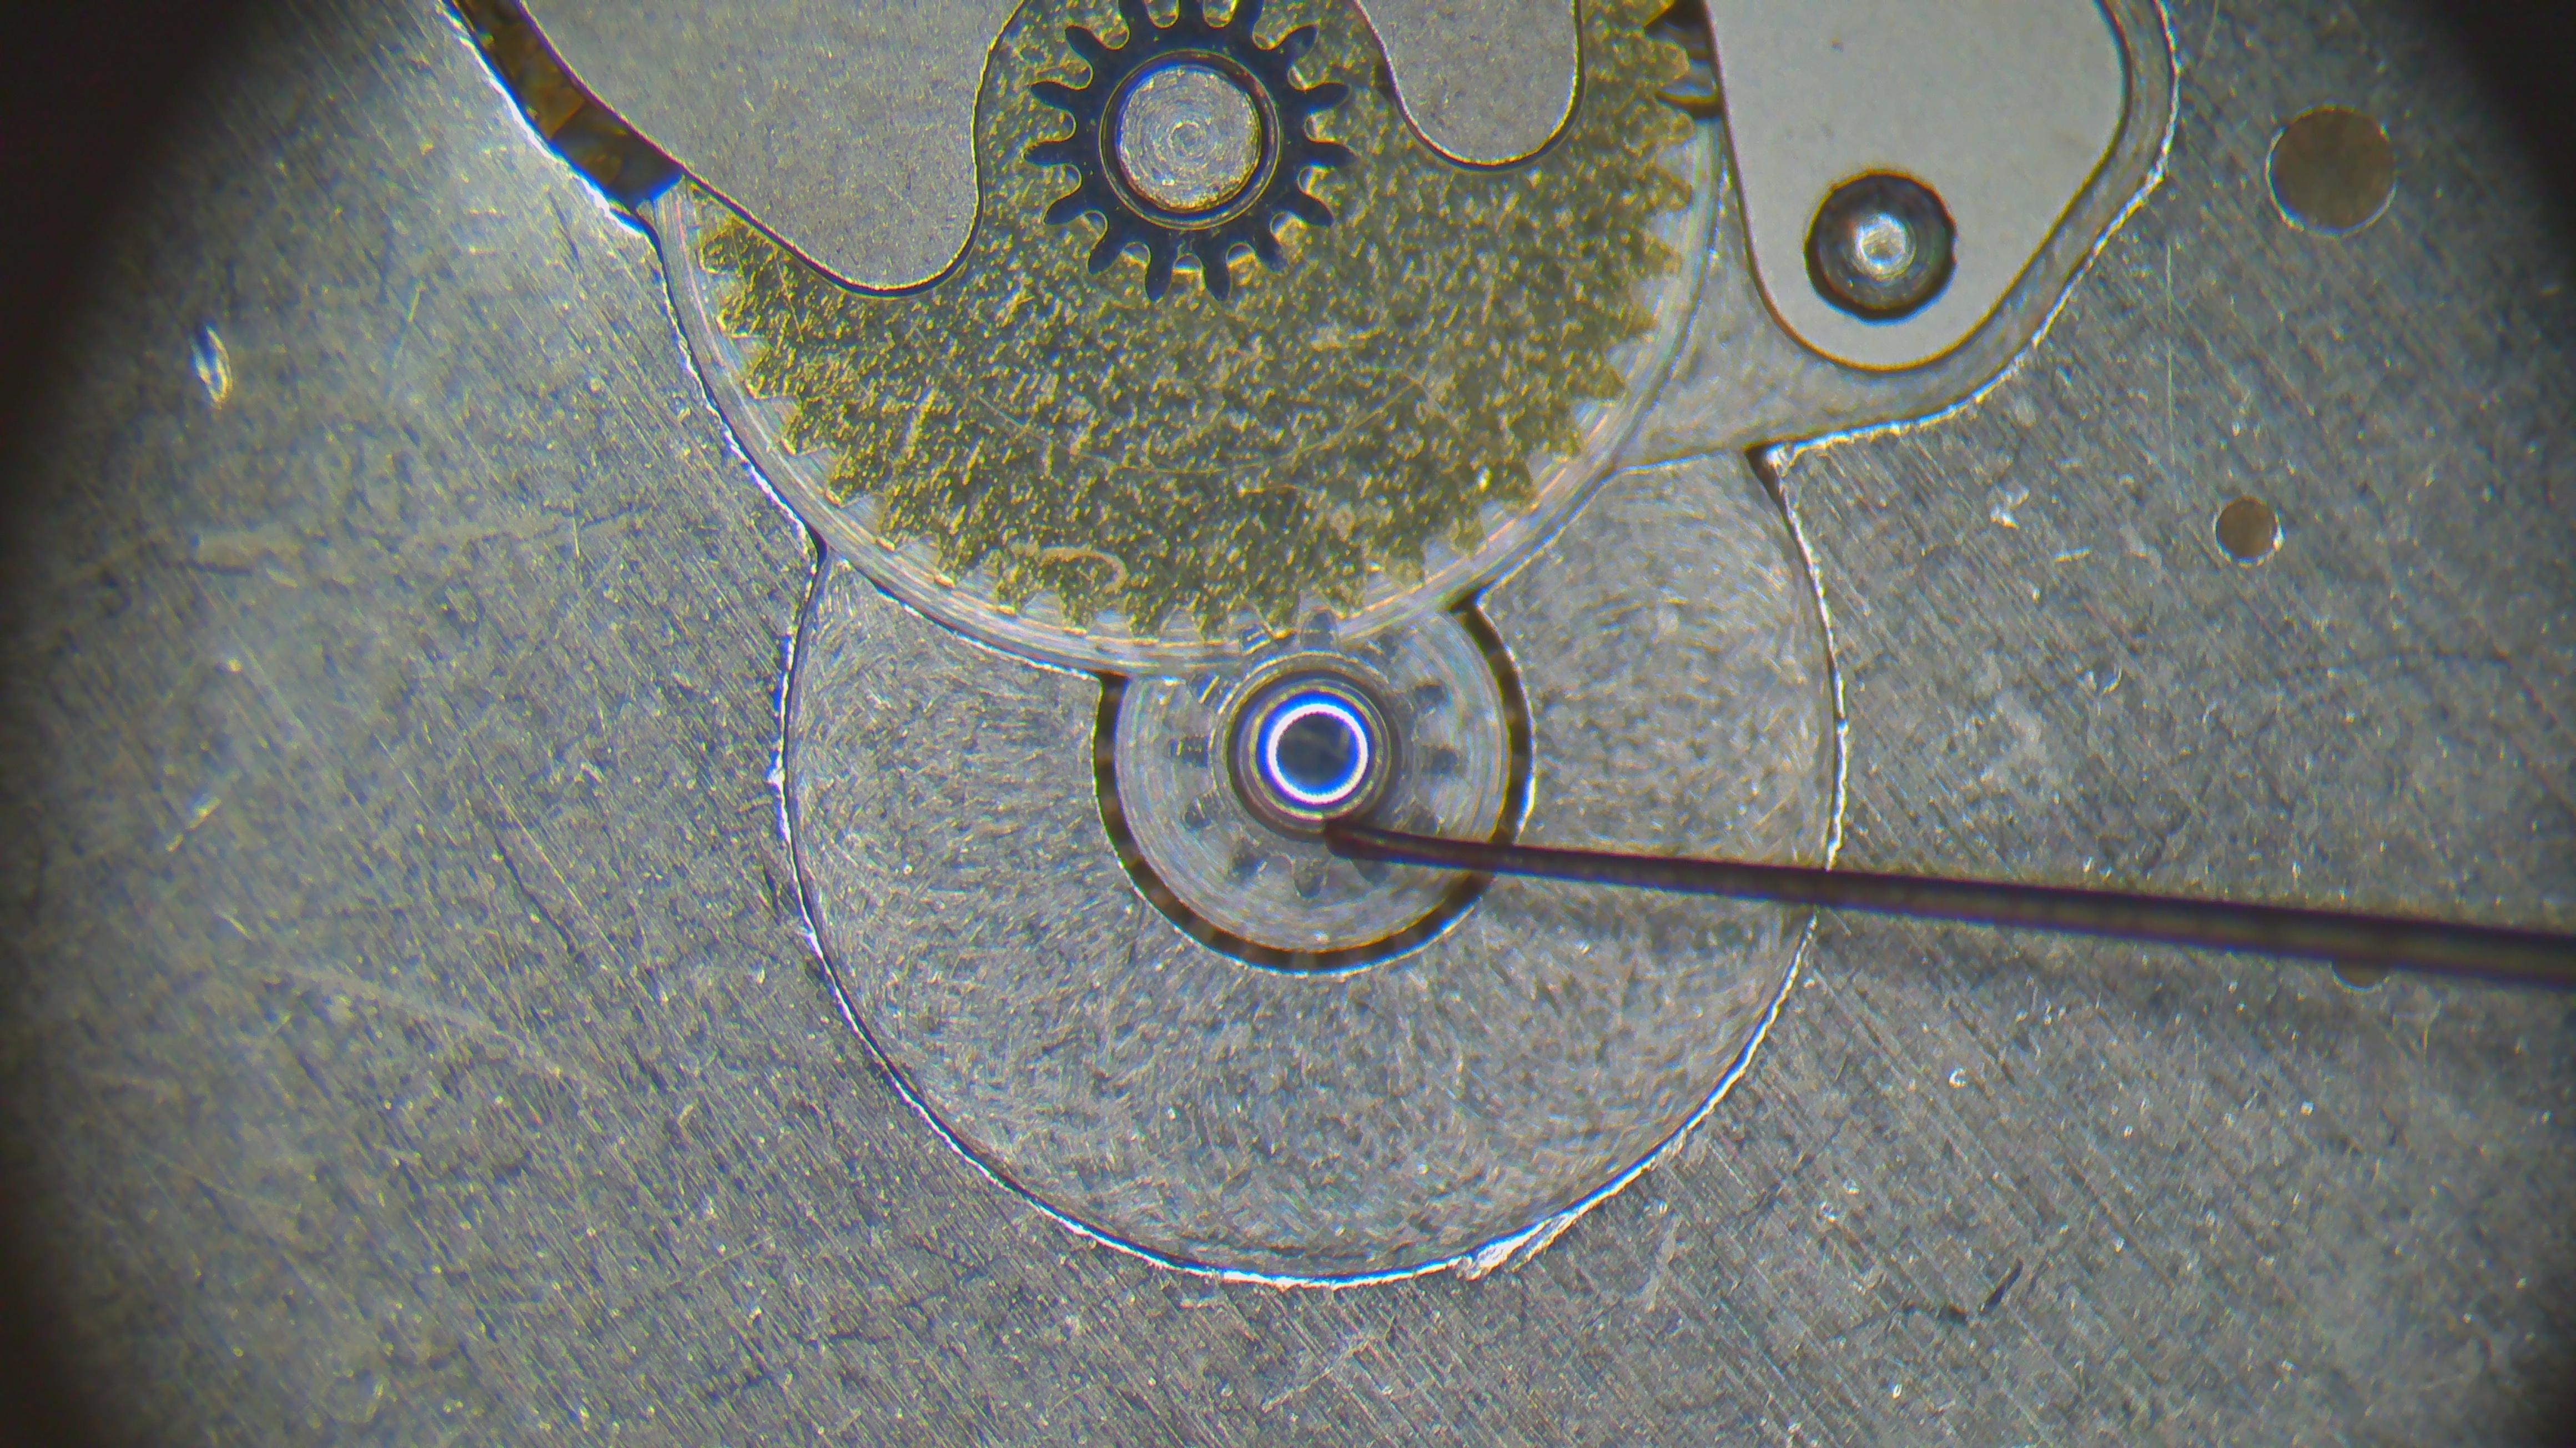
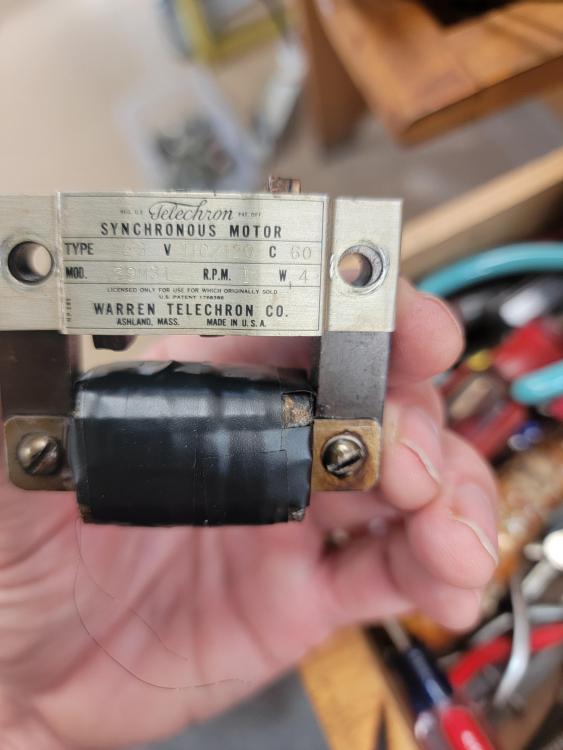
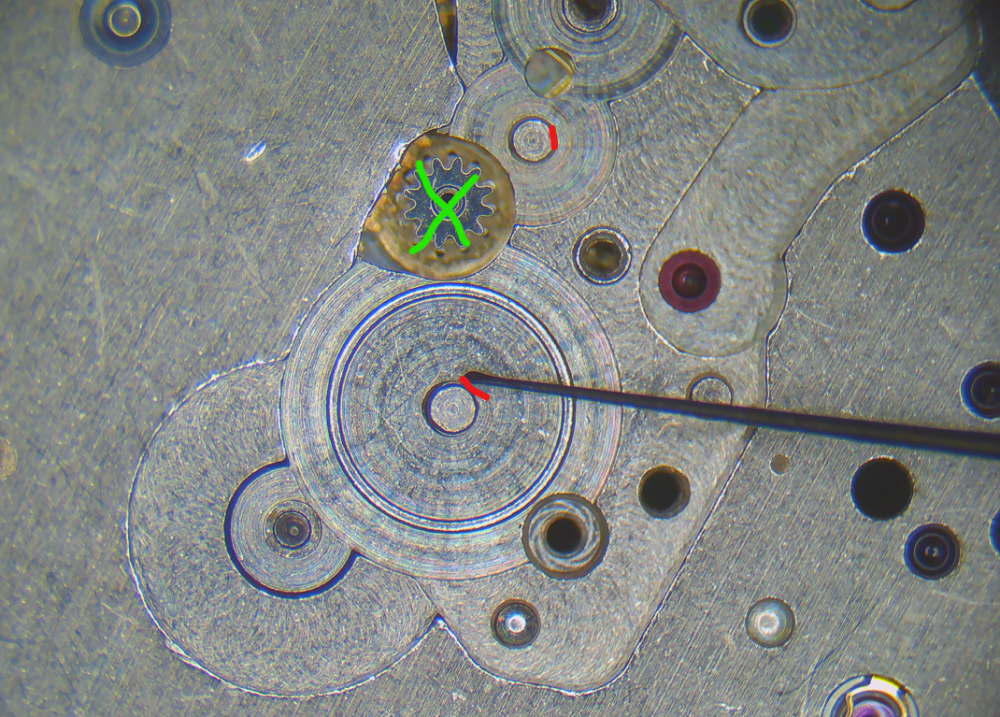
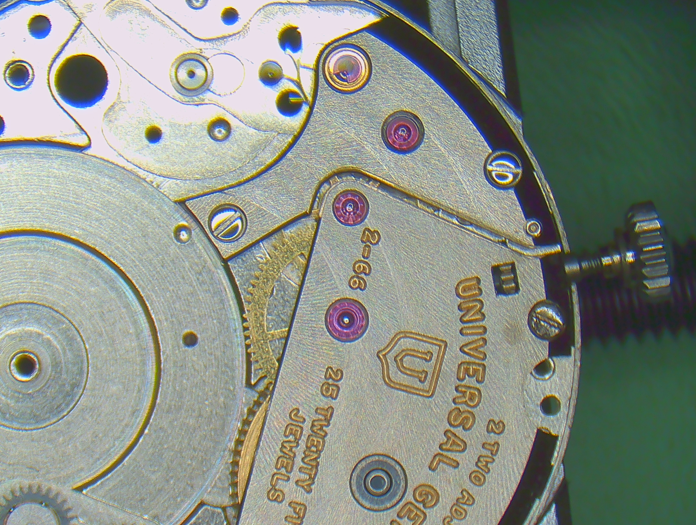
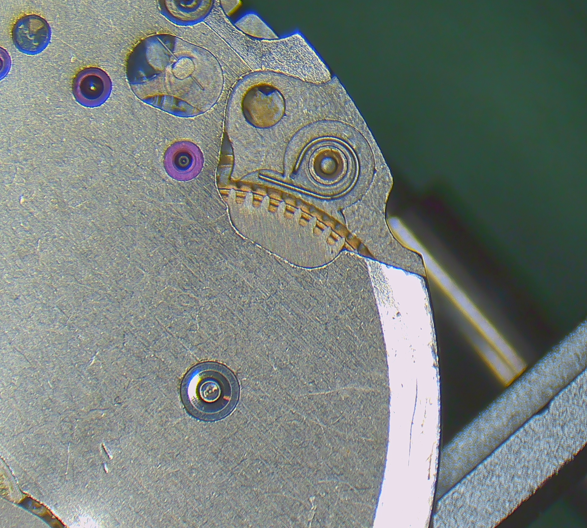
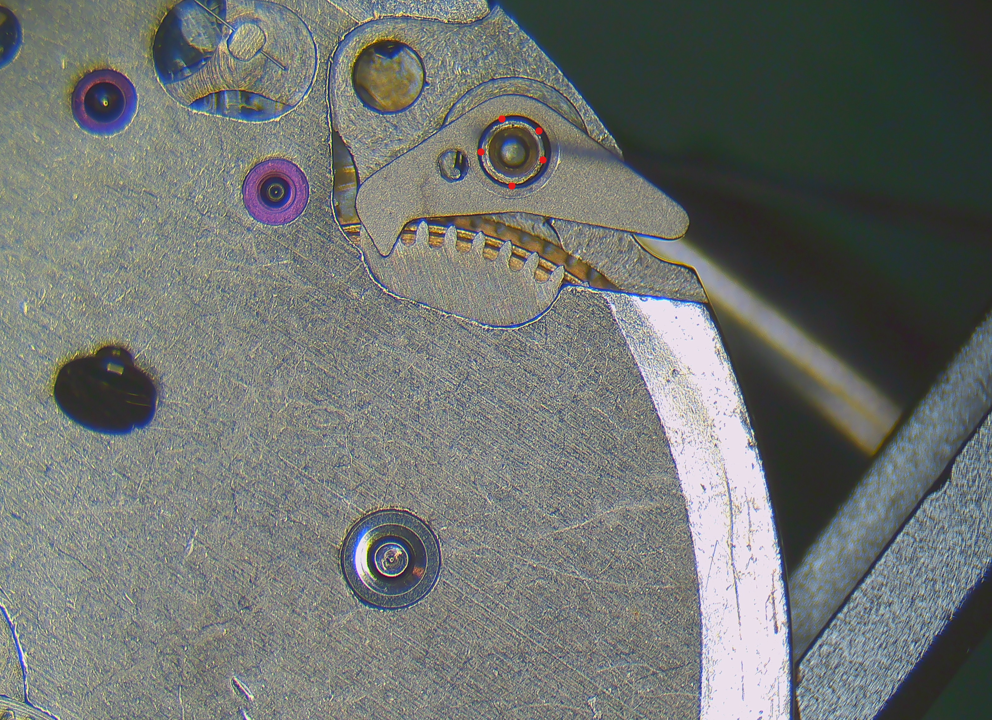
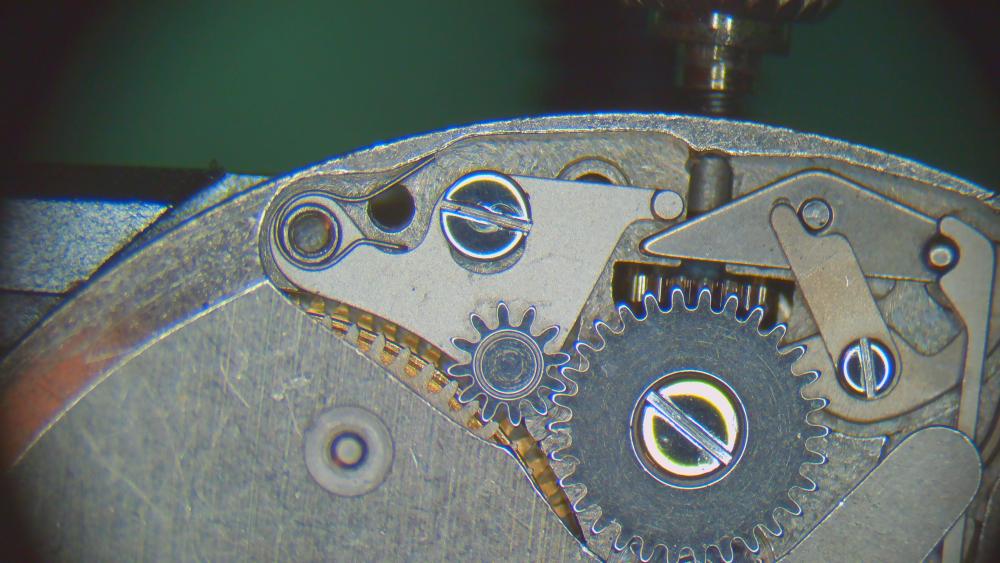
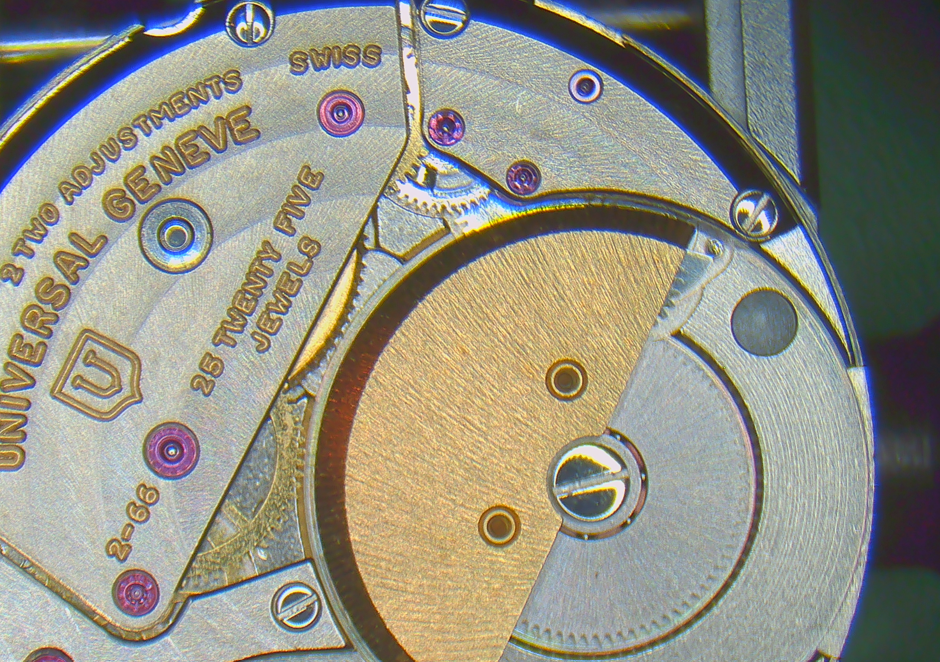
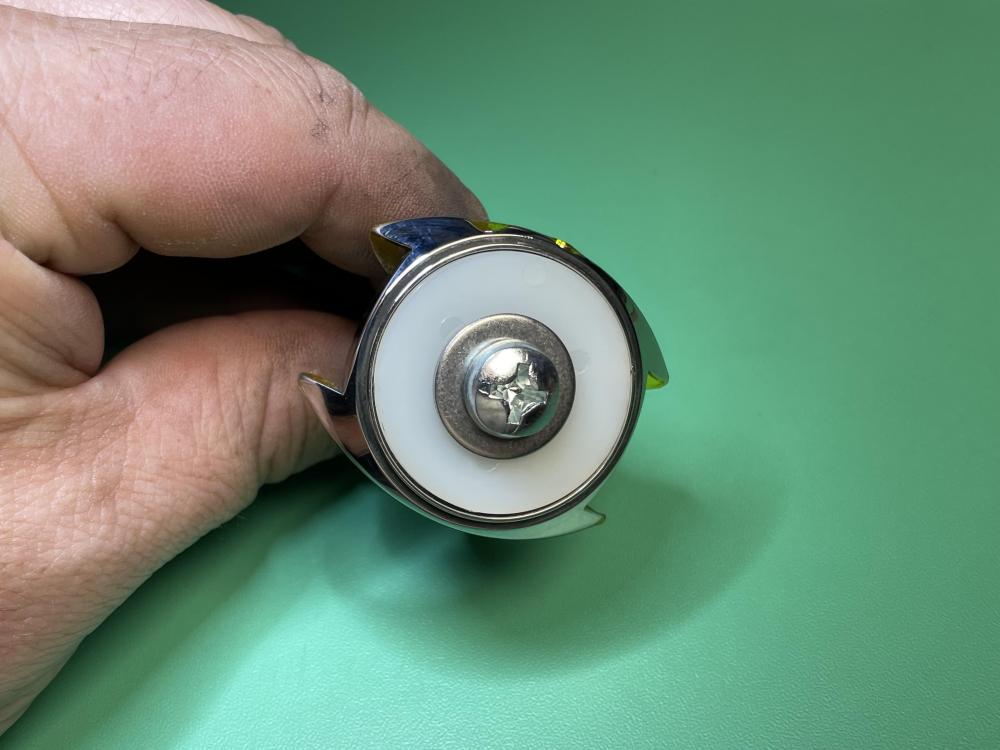
Technically you have your clock disassembled from its case. Now the movement has to be entirely disassembled the mainspring has to be removed. The whole thing has to go through an appropriate watchmakers cleaning machine then everything gets reassembled providing the mainspring is still in proper condition otherwise that may get replaced. Out of curiosity do you have any watch repair experience? The reason I ask is this really isn't the best first-time project to learn watch repair on. Oh and here's an interesting link not sure of the same model as yours but there is a nice picture of all the parts. So in other words this will give you a clue of what it means to be disassembled for cleaning although in the particular picture the mainspring still hasn't come out yet and that's not your typical watchmakers mainspring anyway http://cockpitclock.com/WAKMANN.html Oh and When I was looking at the pictures at the link above I noticed something. Your picture isn't quite as clear but notice how the particular screw that I've circled has lines engraved on either side of the screw head slot? This is a warning that this is a left-handed screw which is really nice when the companies do it.
 4 points
 -
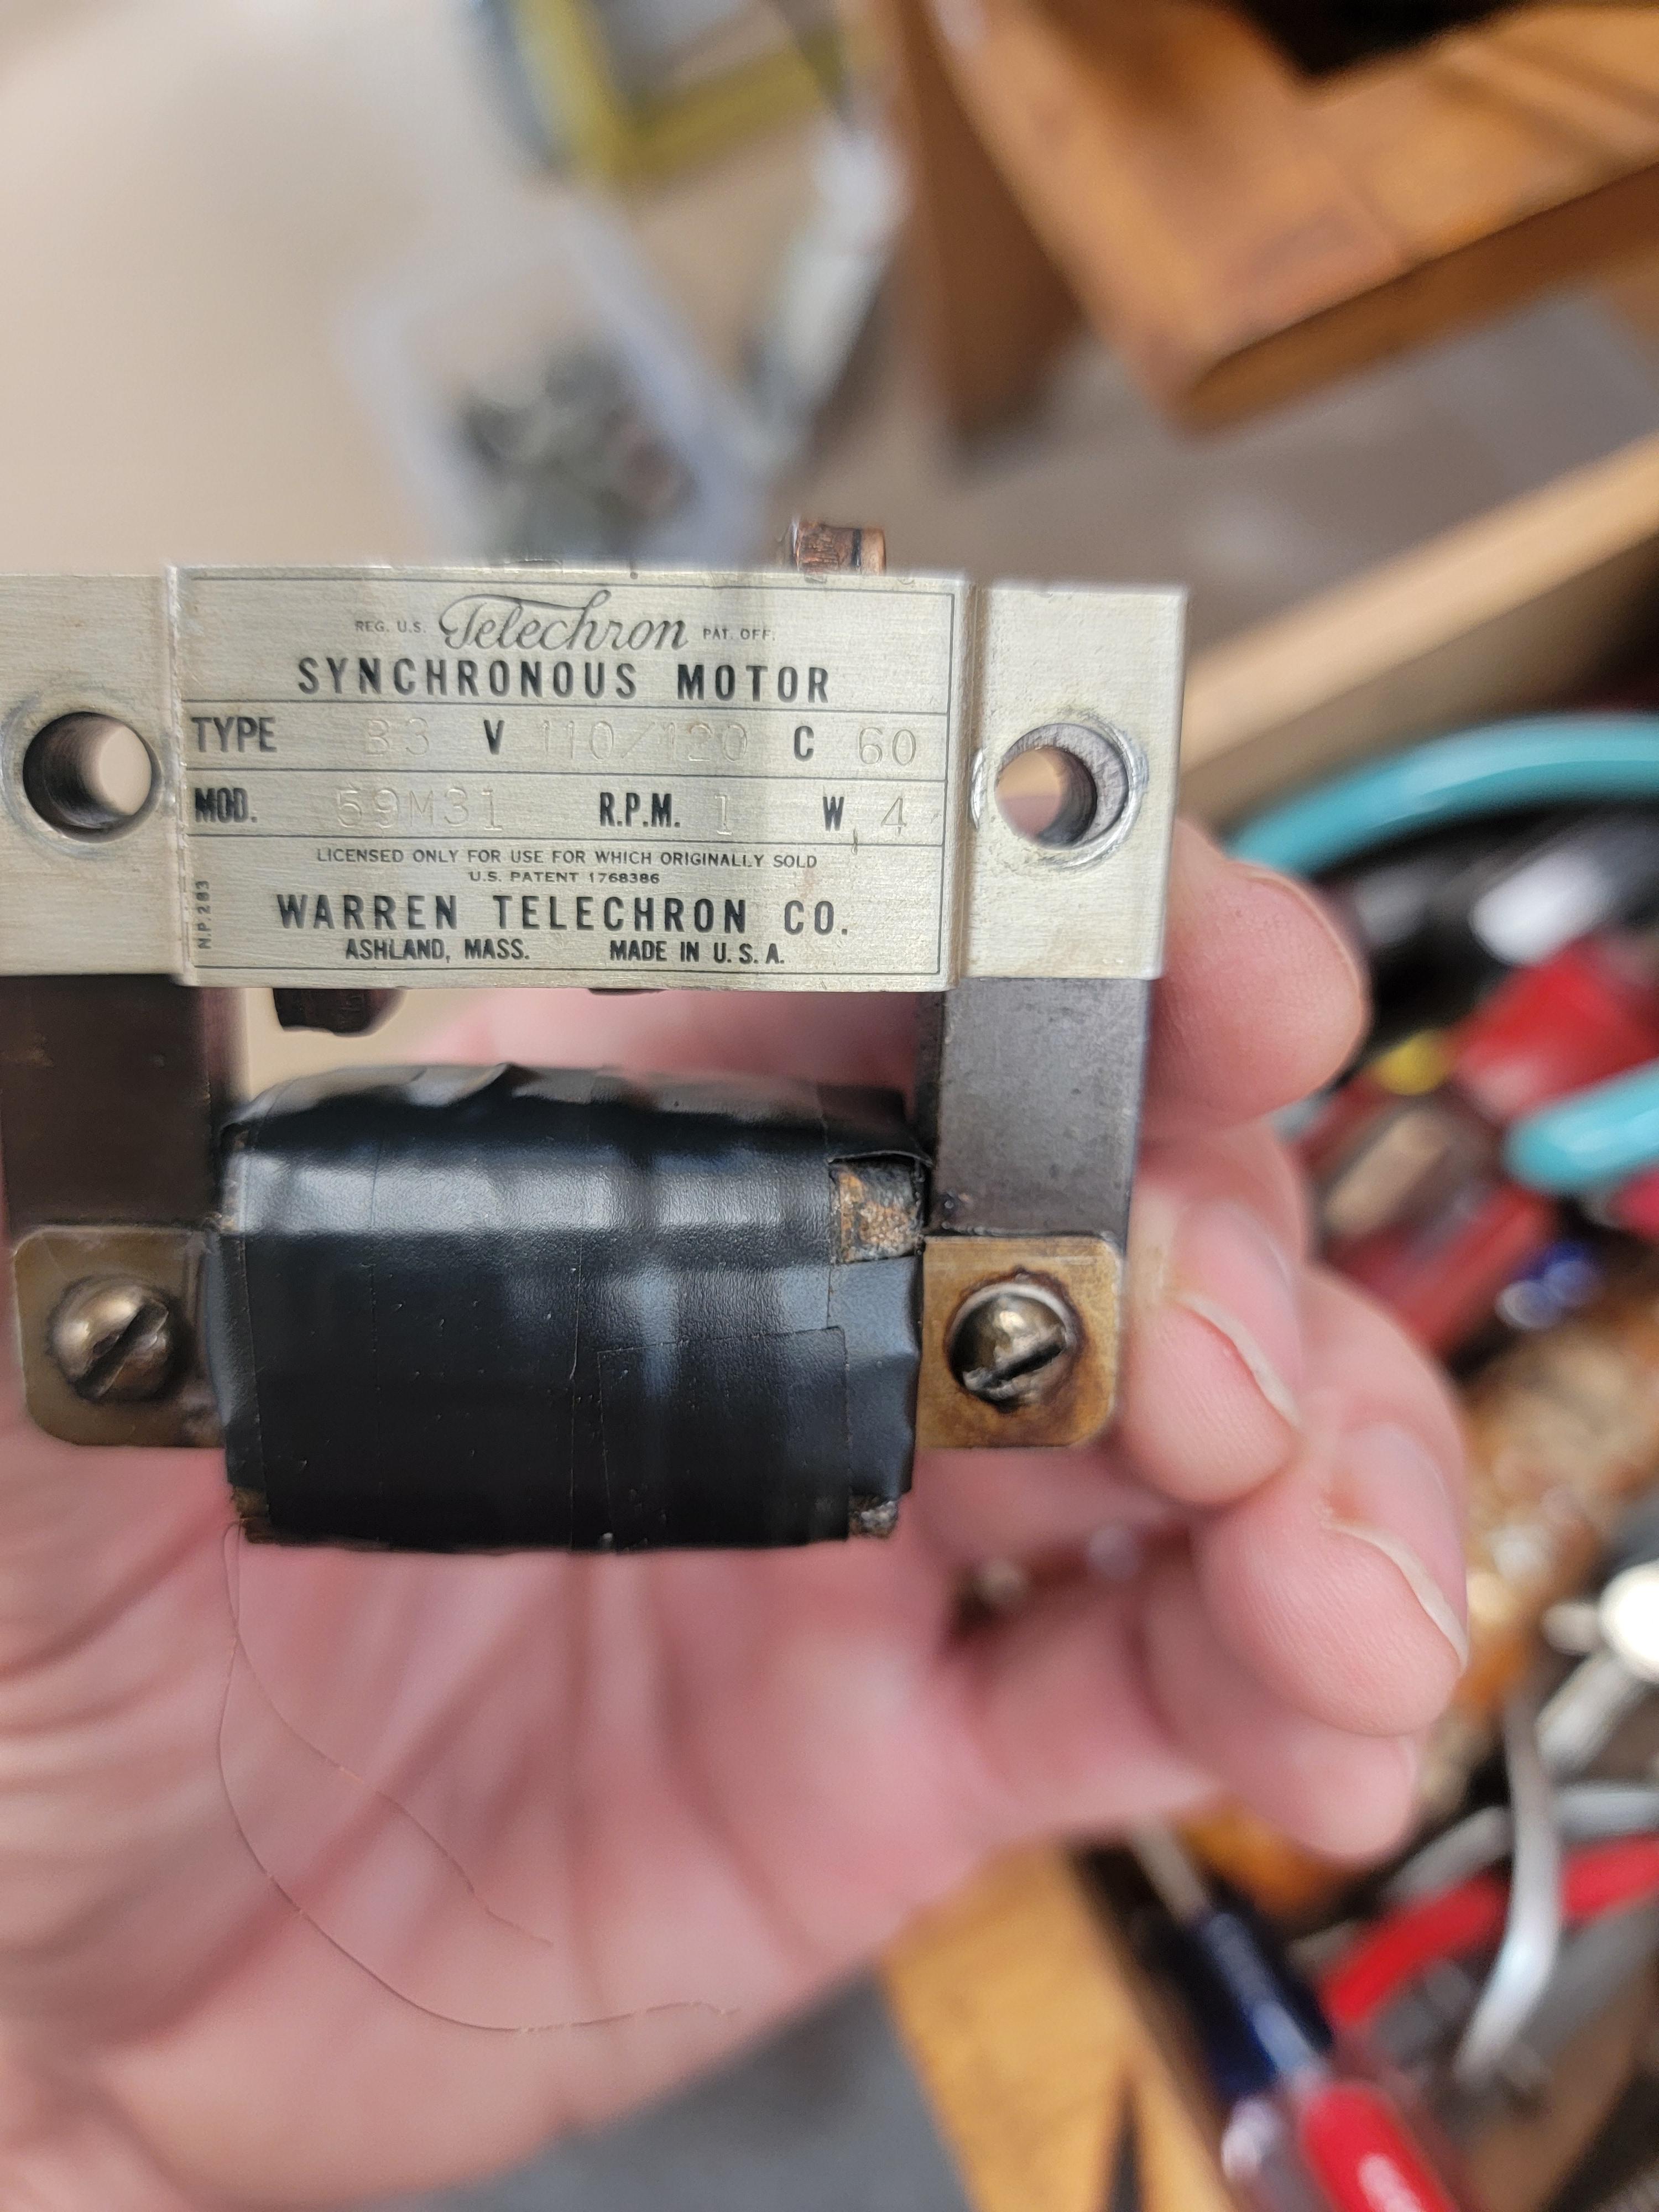
Bought a GE Westminster mantle clock for $15 the other day. I expected to find an issue with the Telechron motor. Turns out, one of the wires coming off the coil had broken right at the inside coil. The only way to save it was to remove the paper insulation from the inside and unwind a few turns of the coil. Then re-insulate the inside with electrical tape. Here is the final result with new leads to attach to the AC cord. As far is the sealed unit, it seems to work, but I am going to heat it up and oil atbthe bushing as it cools. Once complete, I will show a picture.
 3 points
 -
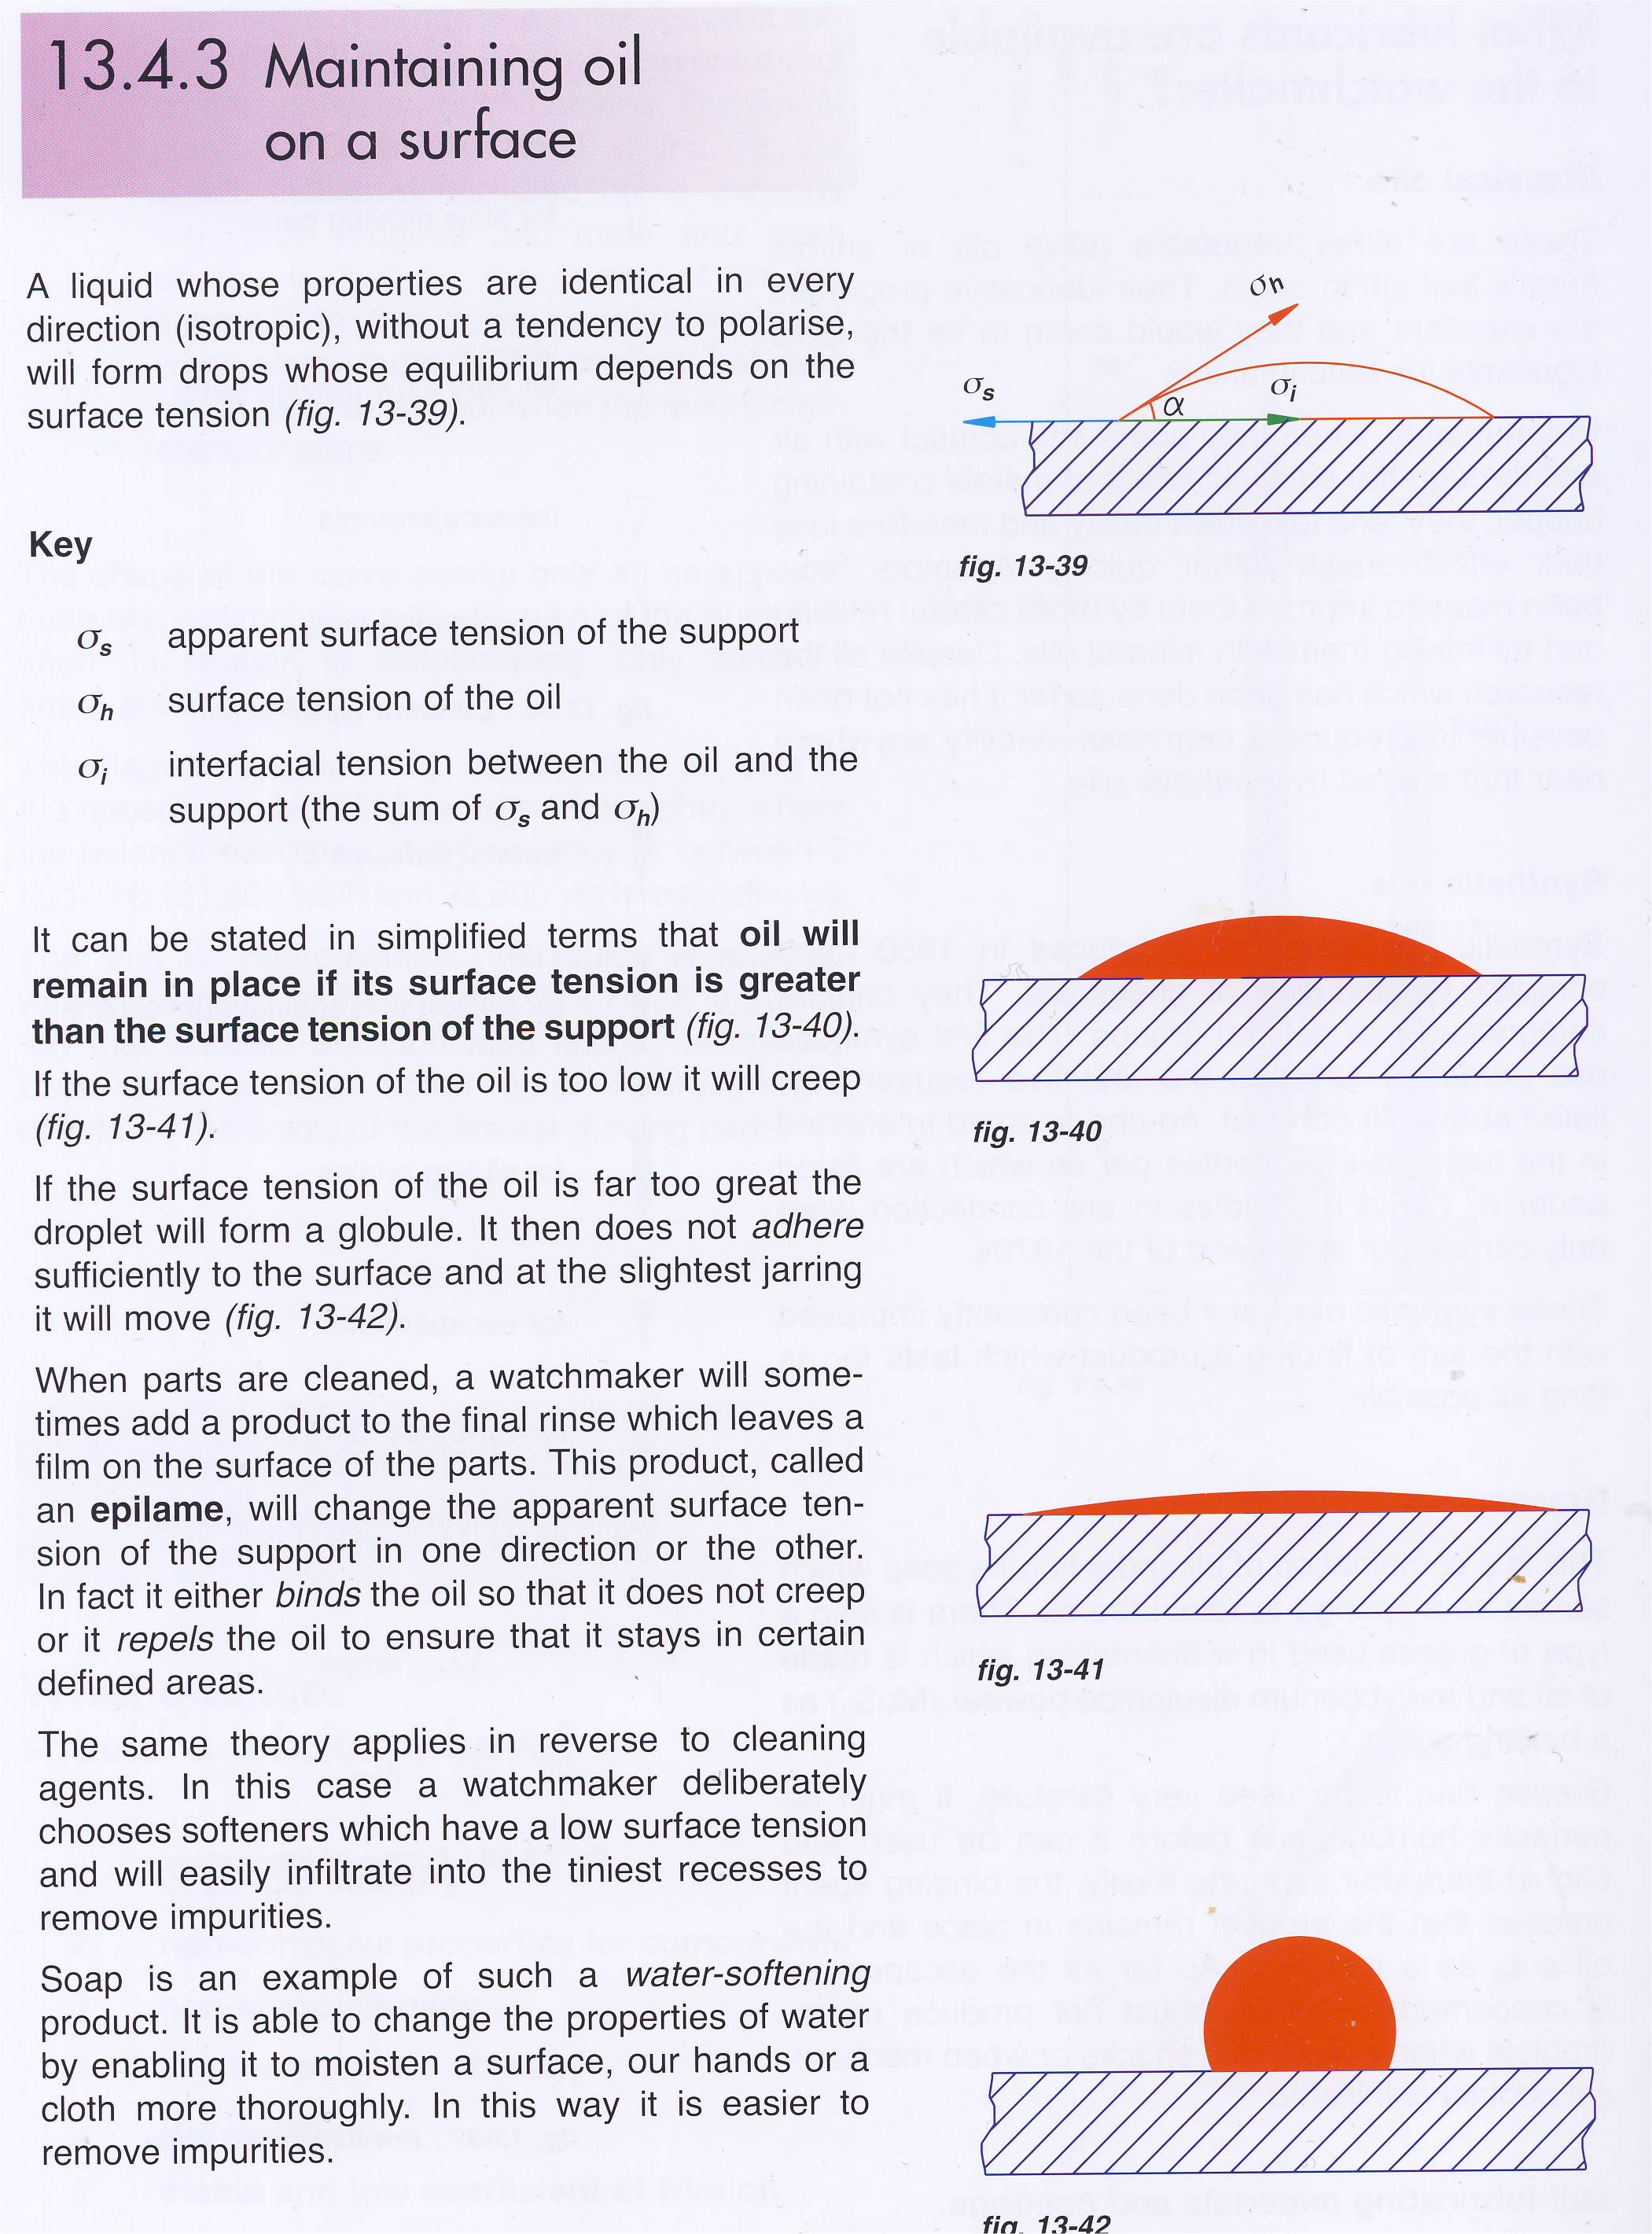
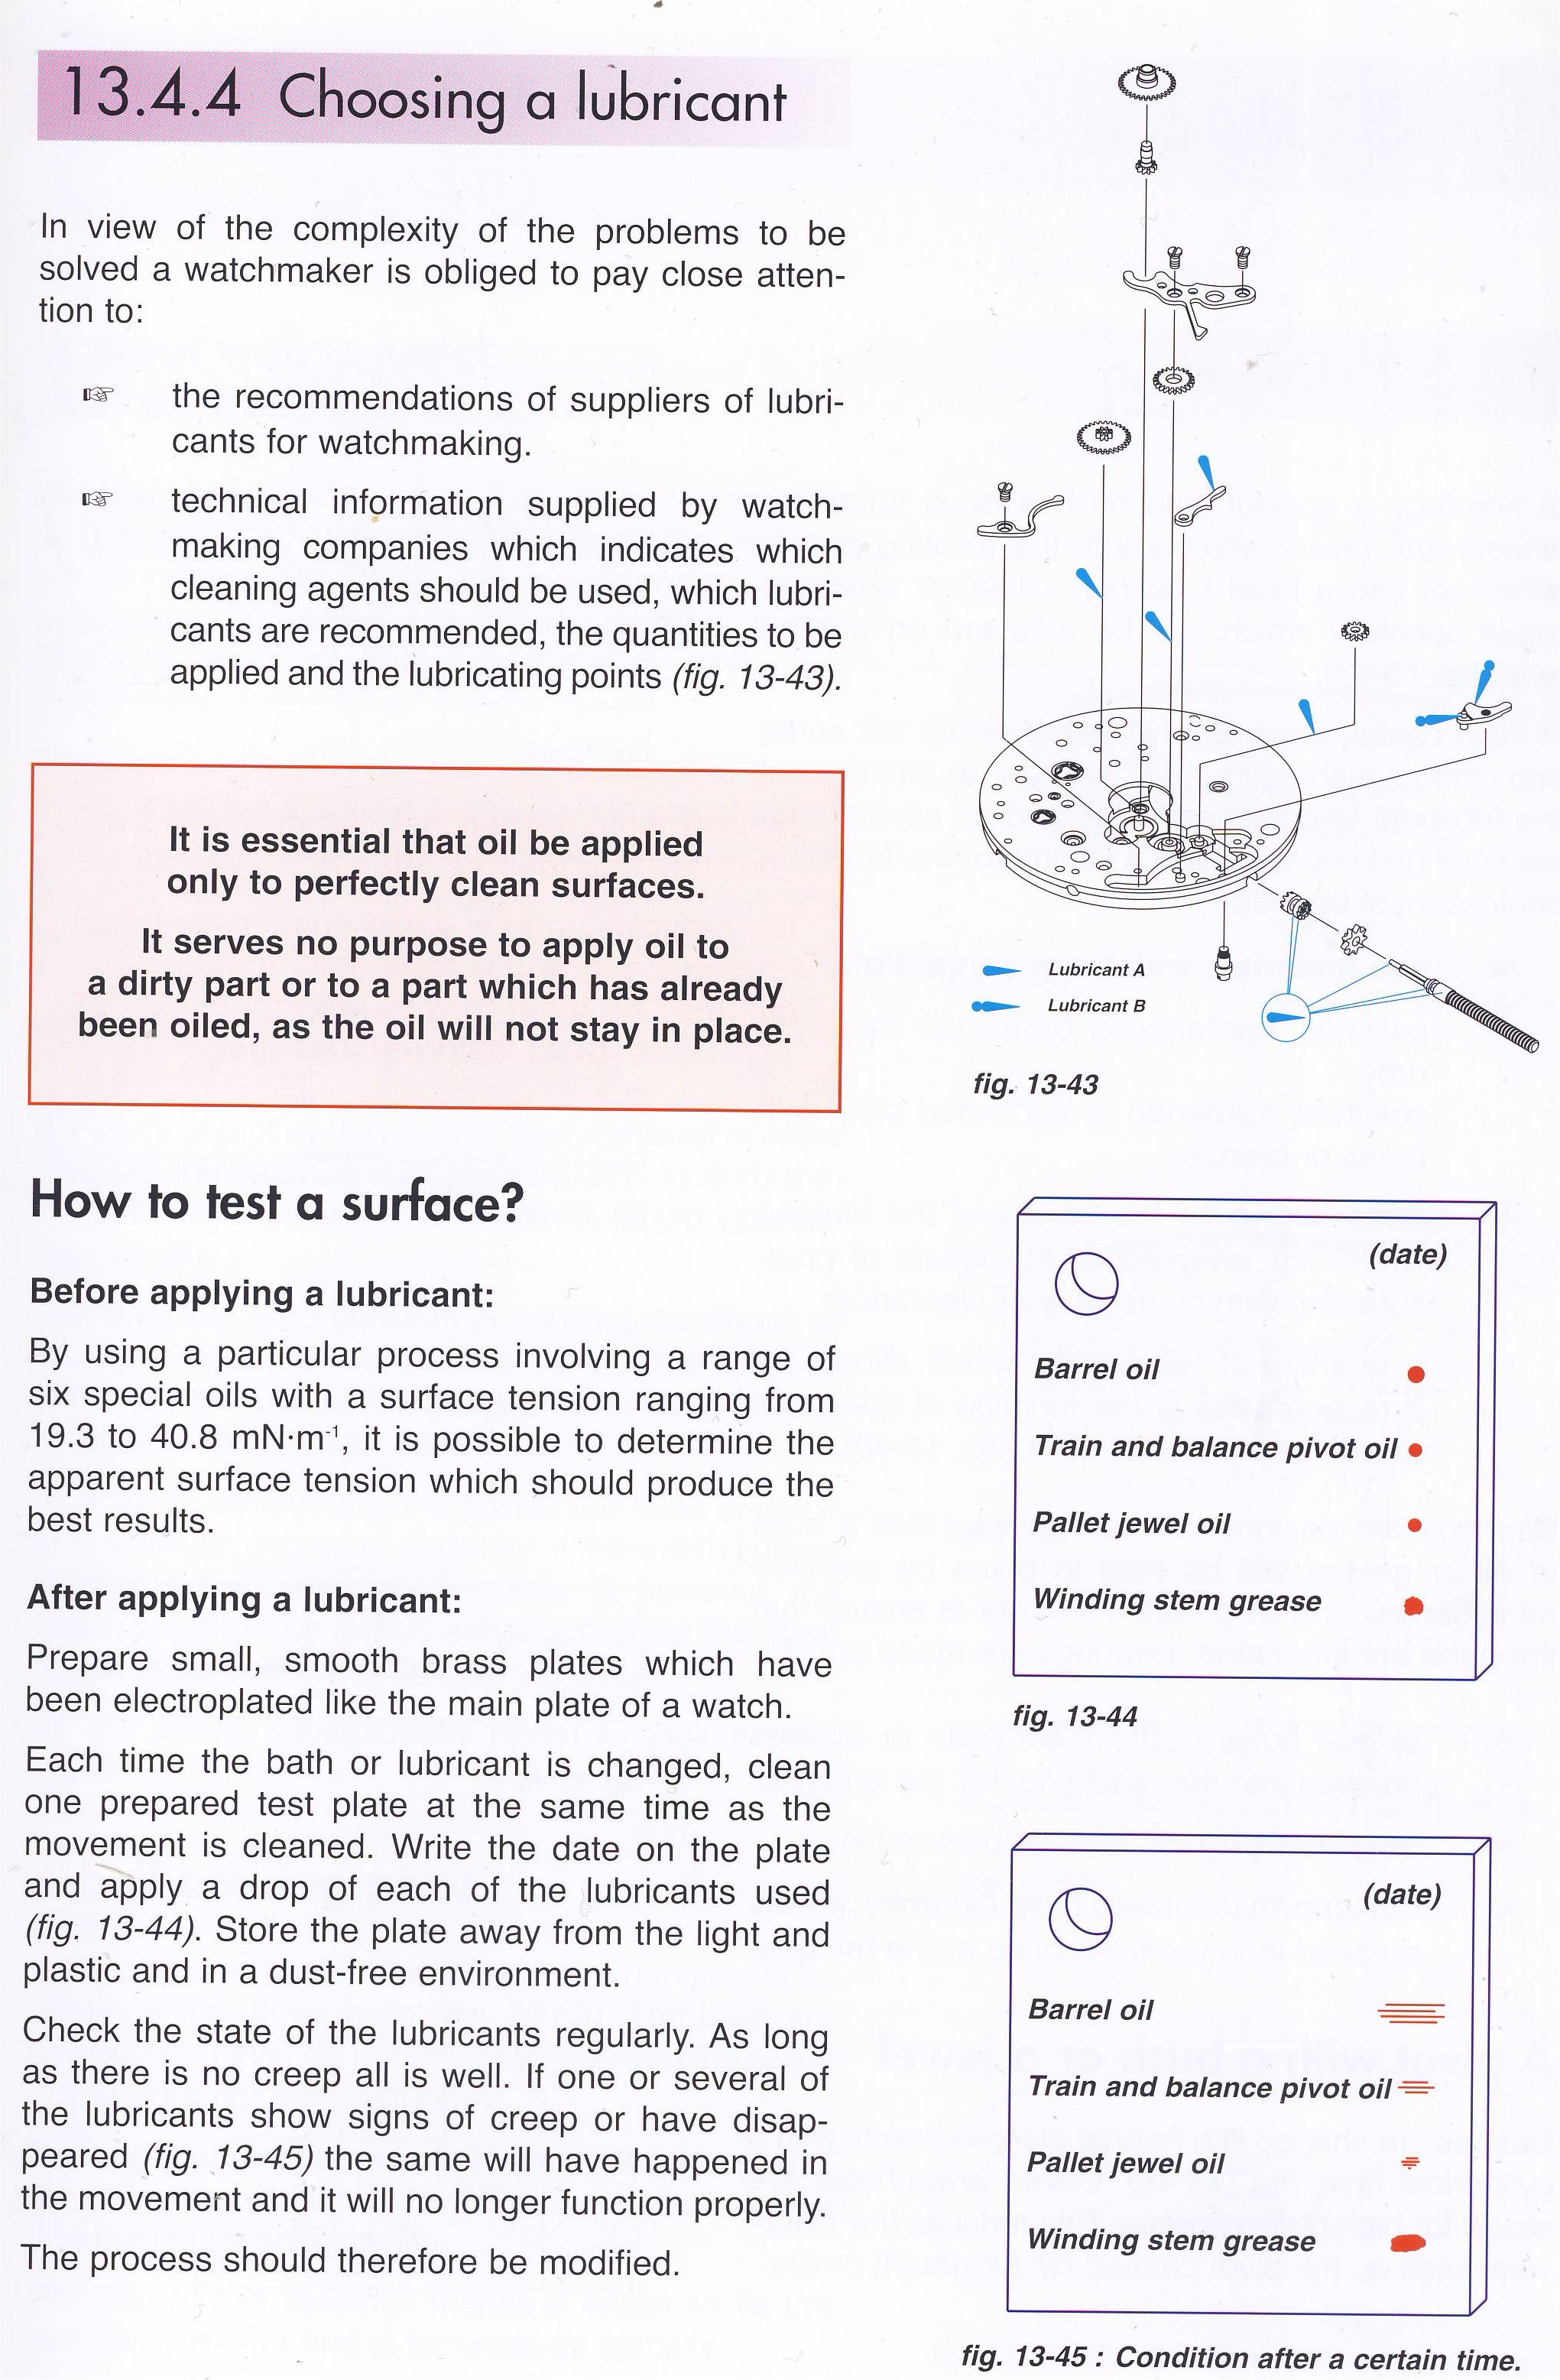
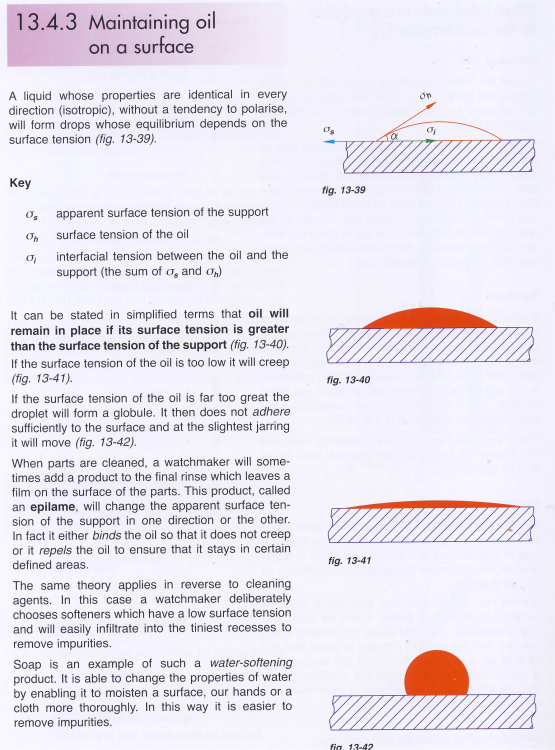
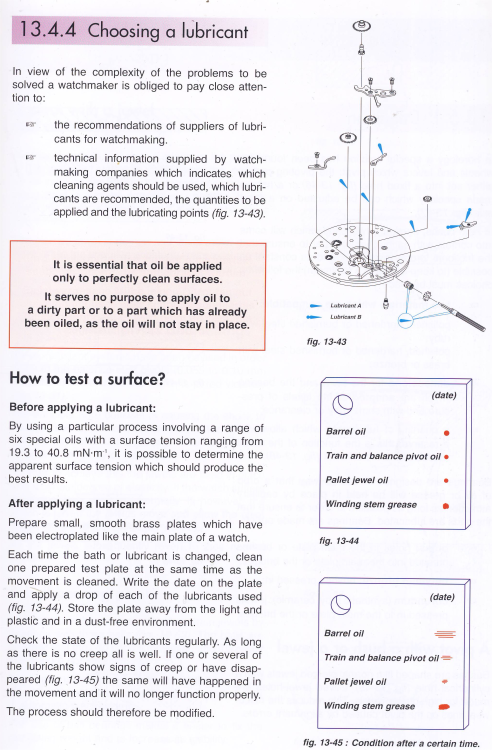
Surface tension how about a picture from a book? How about another page from the same book where they have a Idea?
 3 points
 -
I don't think anyone here was hostile.. From my point of view, you'd need to provide more information on your product, beyond viscosity. Viscosity is important, but far from the only thing. I think this super interesting table from @JohnR725 would give you something to test and share with us. In particular, I'd be interested in the contact angle. You should be able to put a drop on a steel pivot and on a ruby and provide images of that under a microscope (or at least sufficient magnification). We can then try to estimate the angles. Or test adhesion. Do you actually have 9010 for a direct comparison? E.g. take a polished sheet of steel and put equally sized drops of 9010 and your competitor on it. Then put the sheet into a vertical position to see if/how each drop flows down. Just a few ideas..3 points
-
They are coming along. Ive been busy with services. And a part I was making for the lapping table came loose in the lathe and got destroyed, so I have to remake it. I did just get a quick change tool post for my lathe, and had to make an adapter for that, but the projects should be much faster now2 points
-
Not ready to test and review the tool yet (except that it looks fantastic, and is superbly packaged). But I can report that for this hundred dollar tool, I experienced no delays or confusion in delivery from China to the USA. It was delivered in 10 days, which is on the quick end typically for Aliexpress shipping to Minneapolis/Saint Paul. It's probably just down to currency fluctuation but the tool is selling for about $10 more today than when I ordered it 3 weeks ago.2 points
-
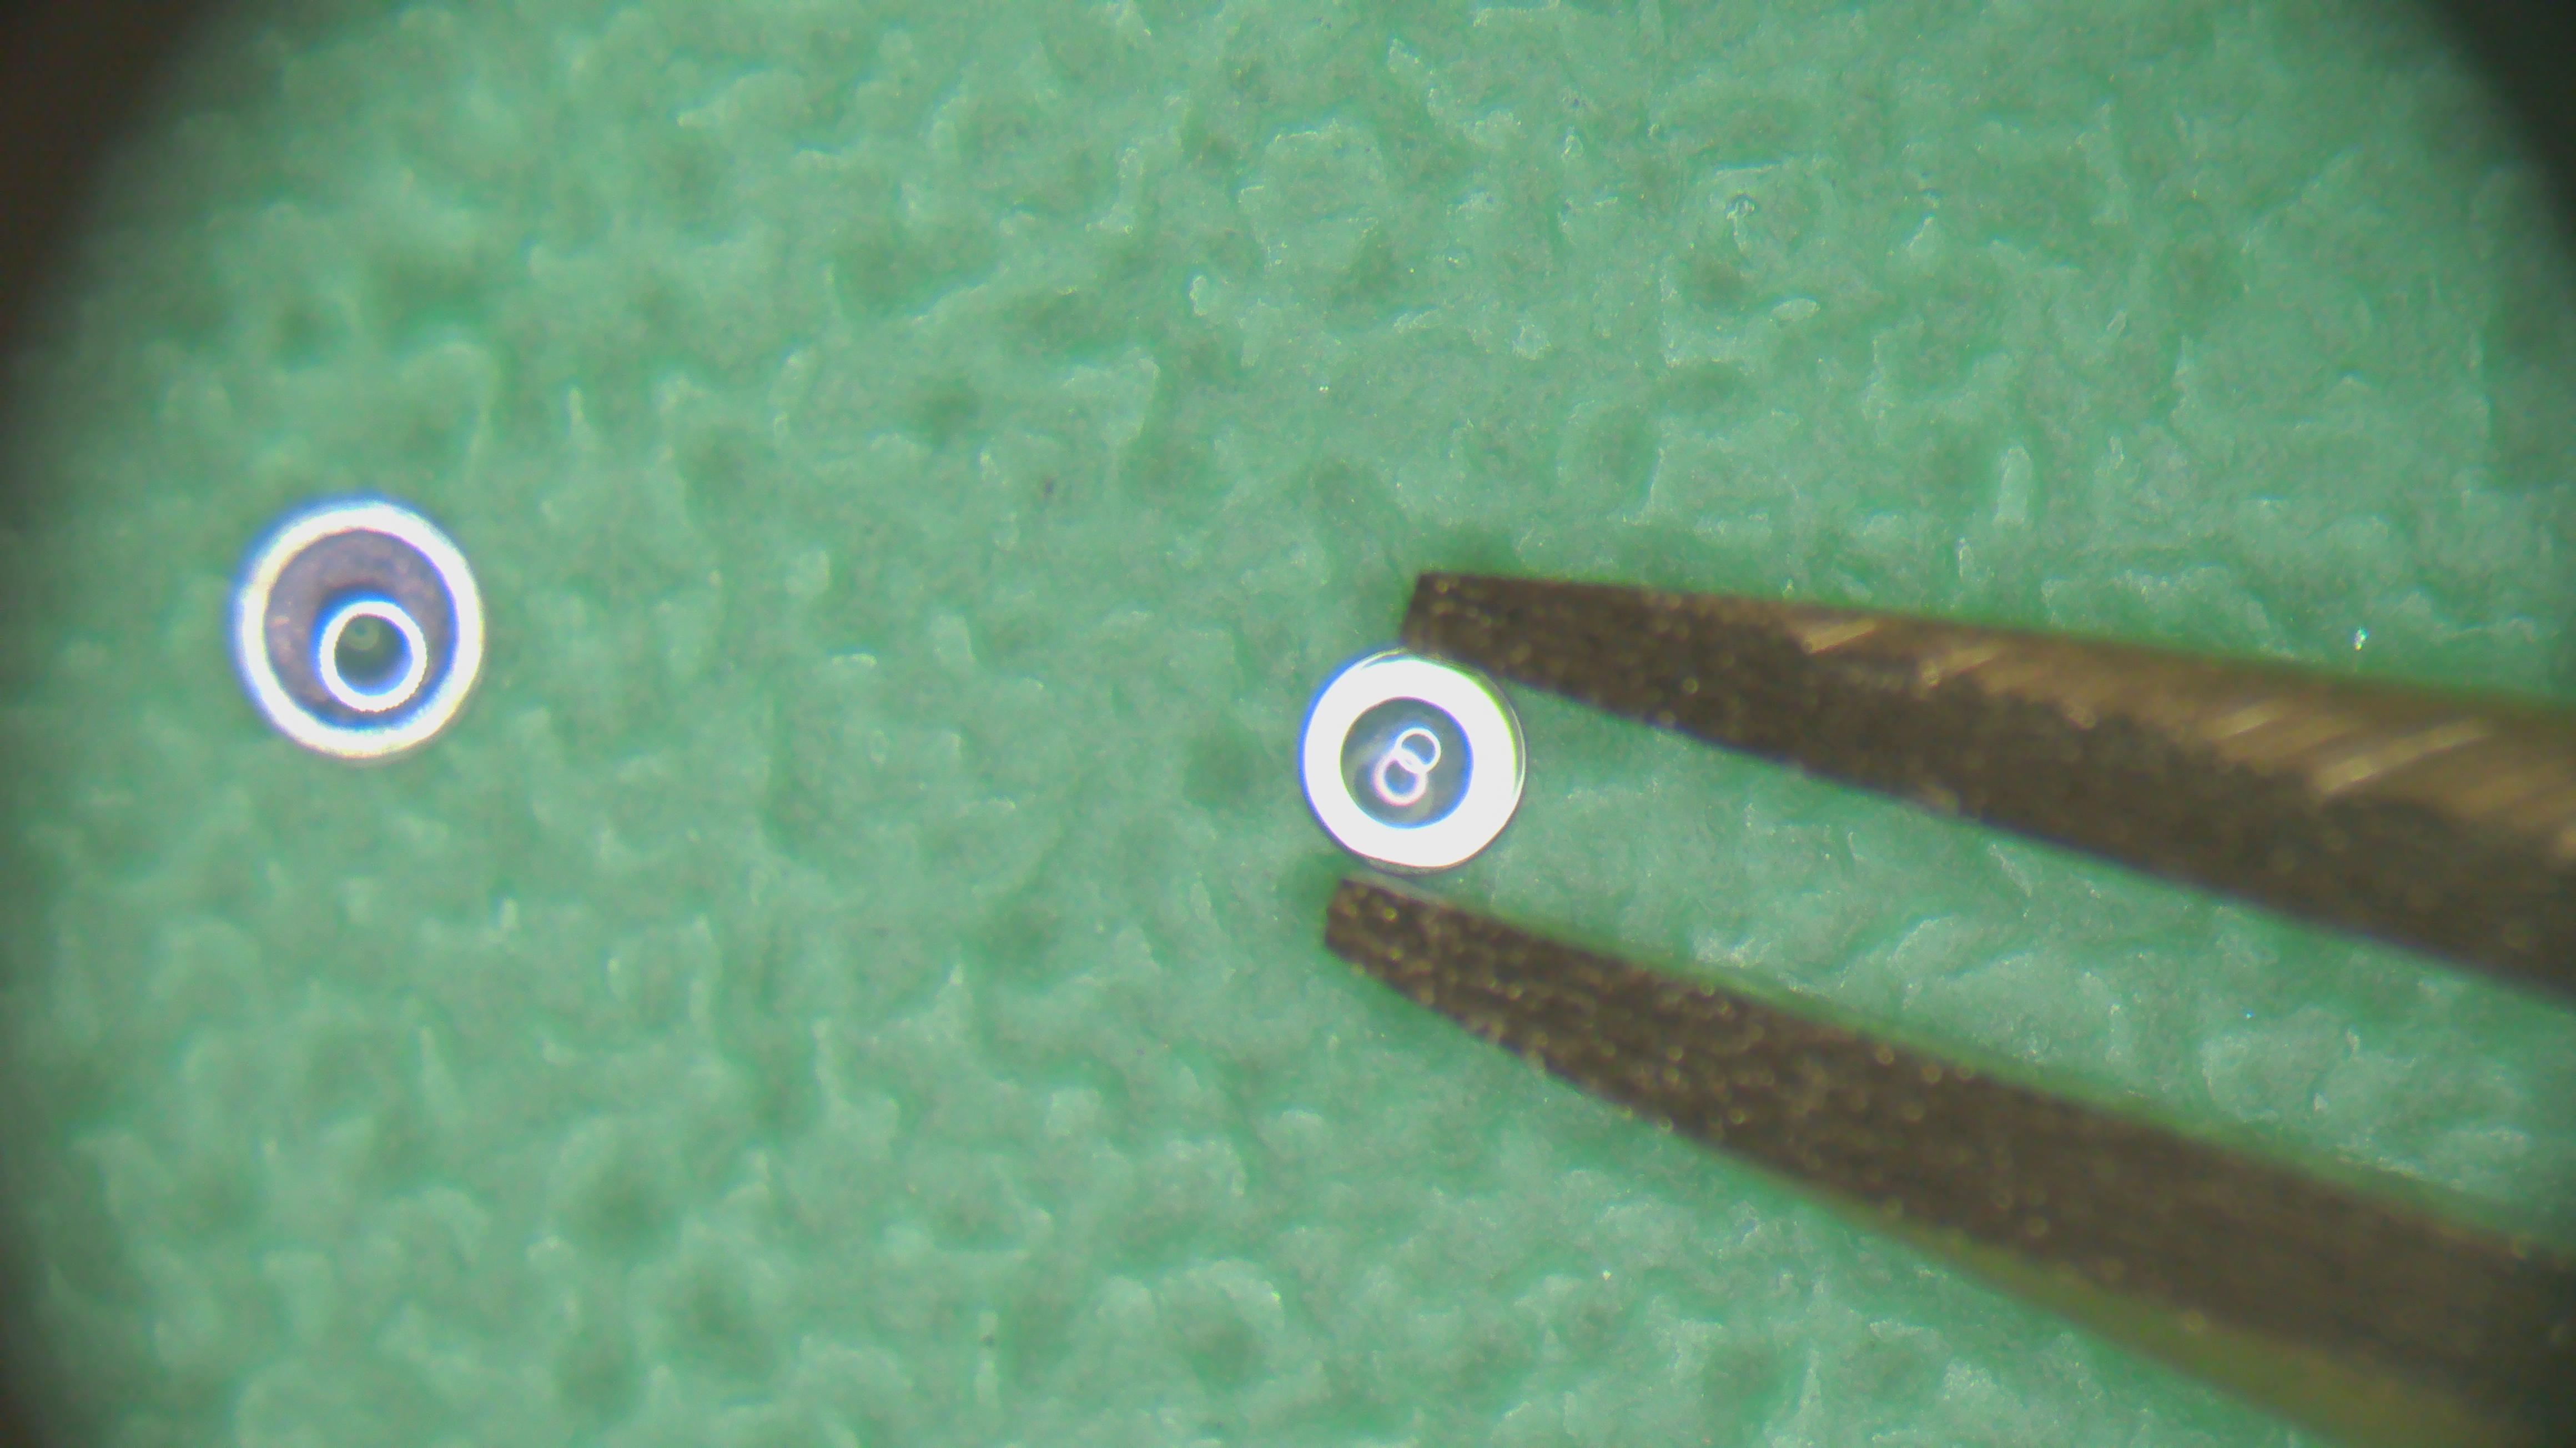
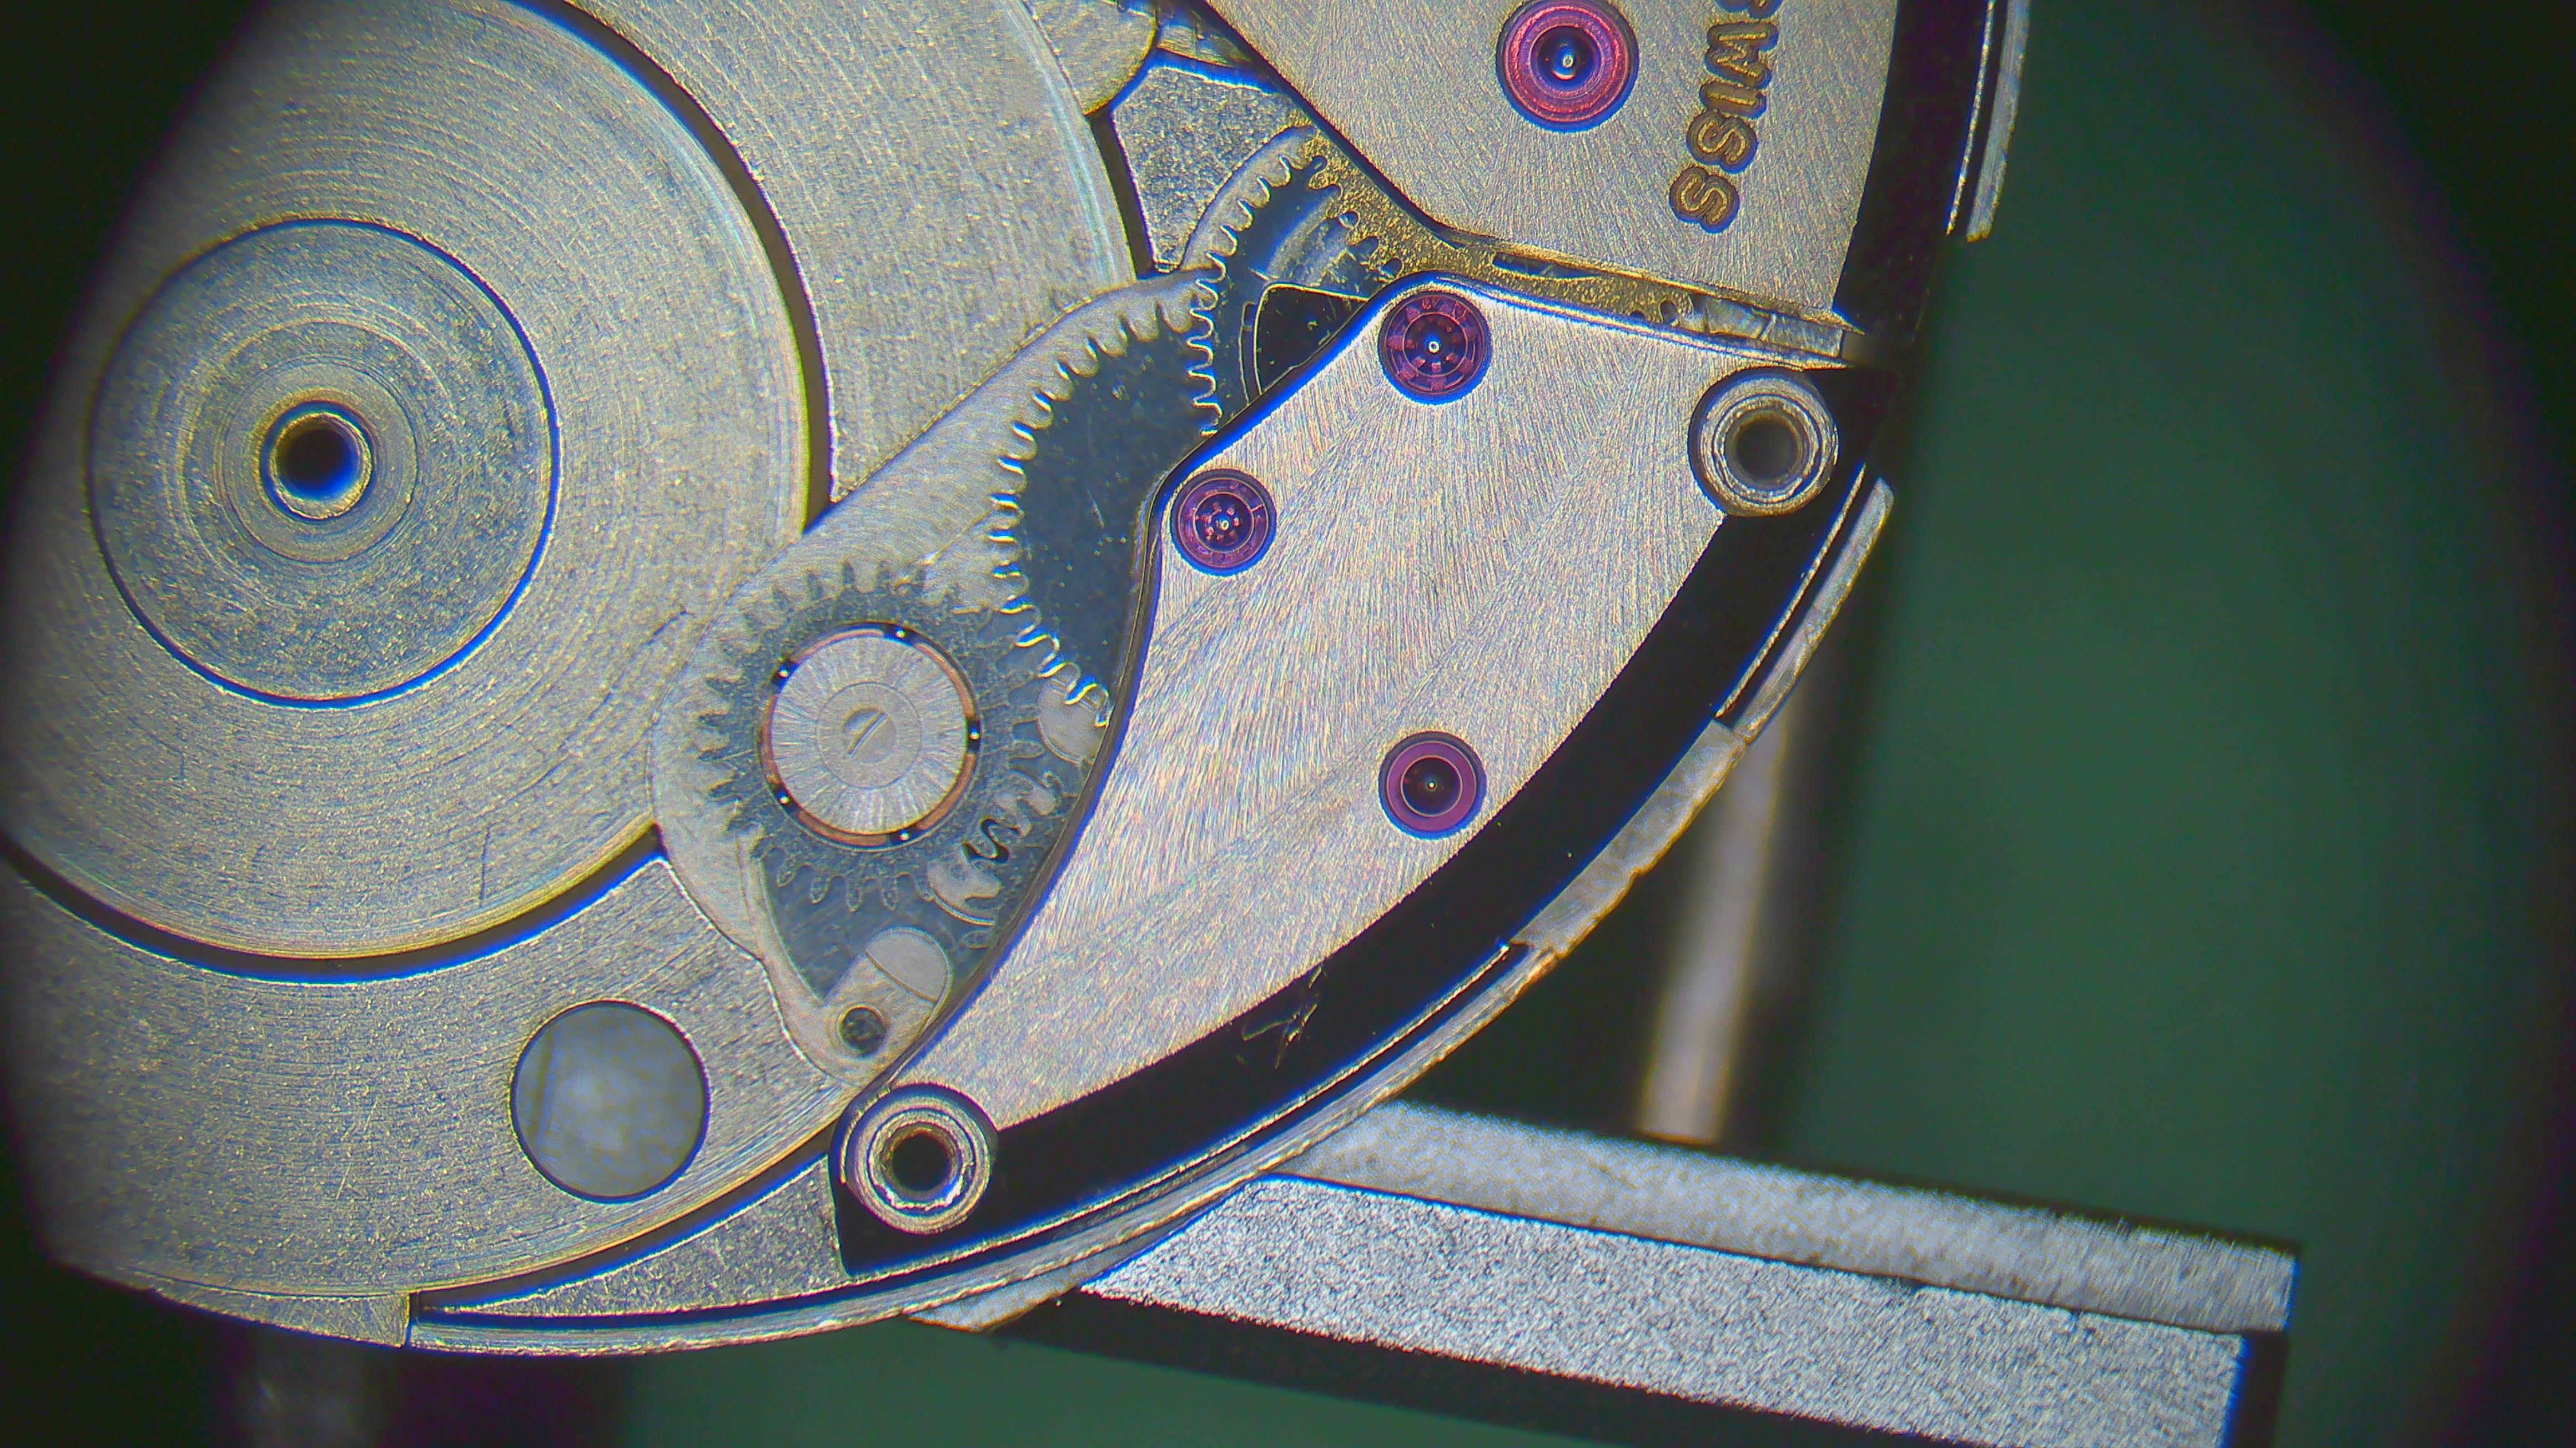
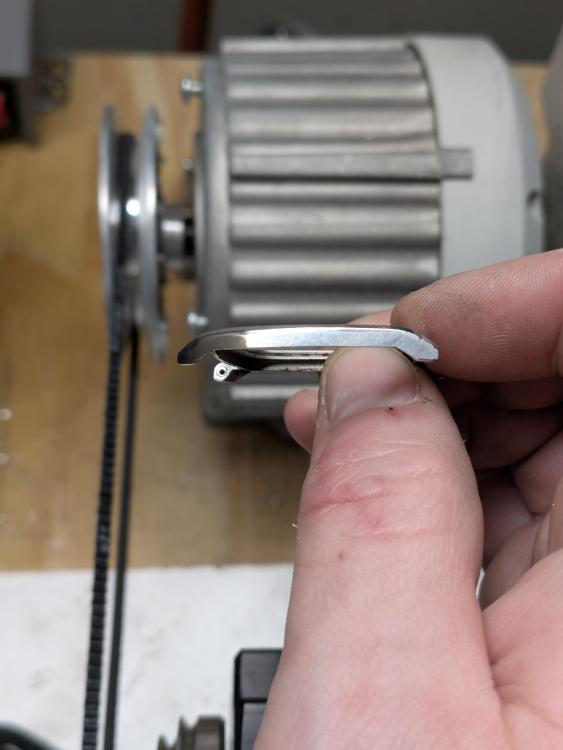
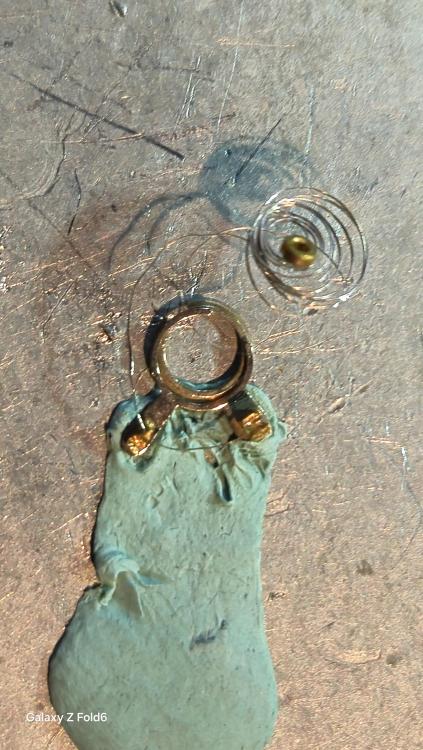
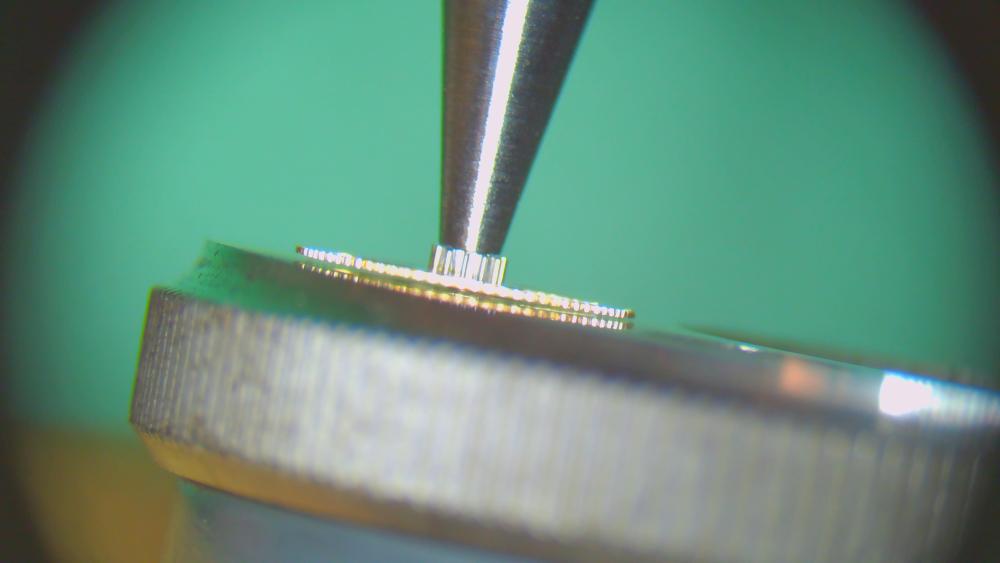
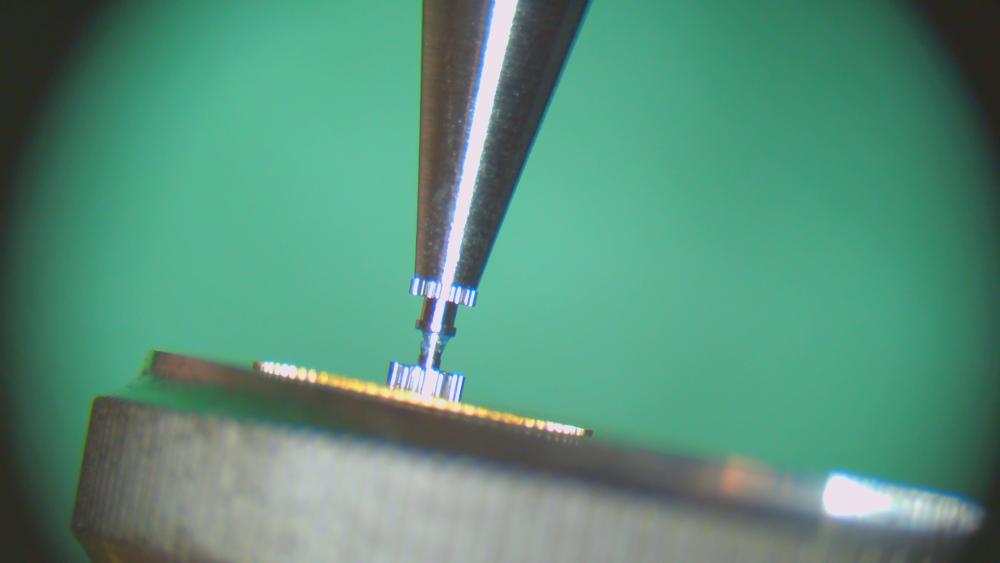
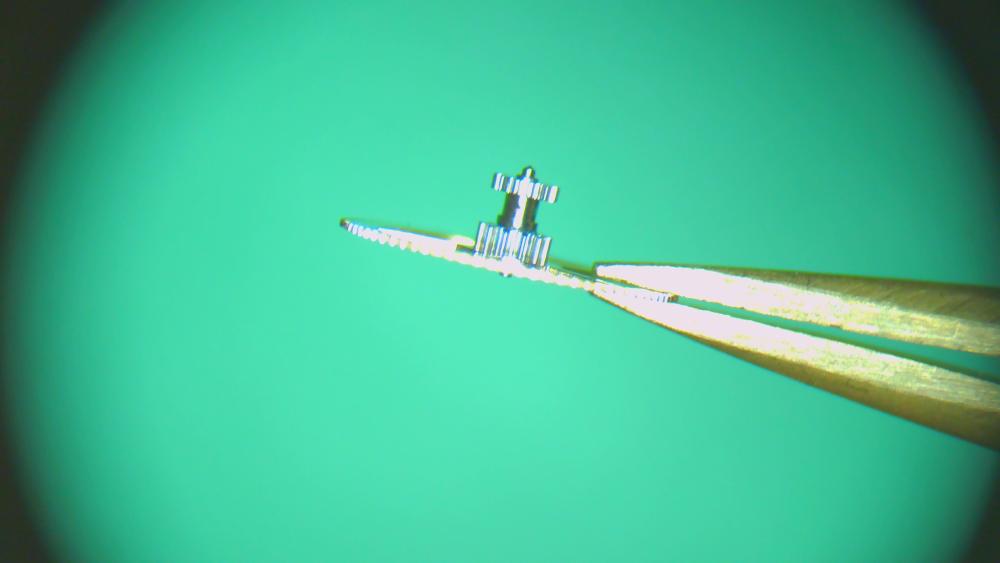
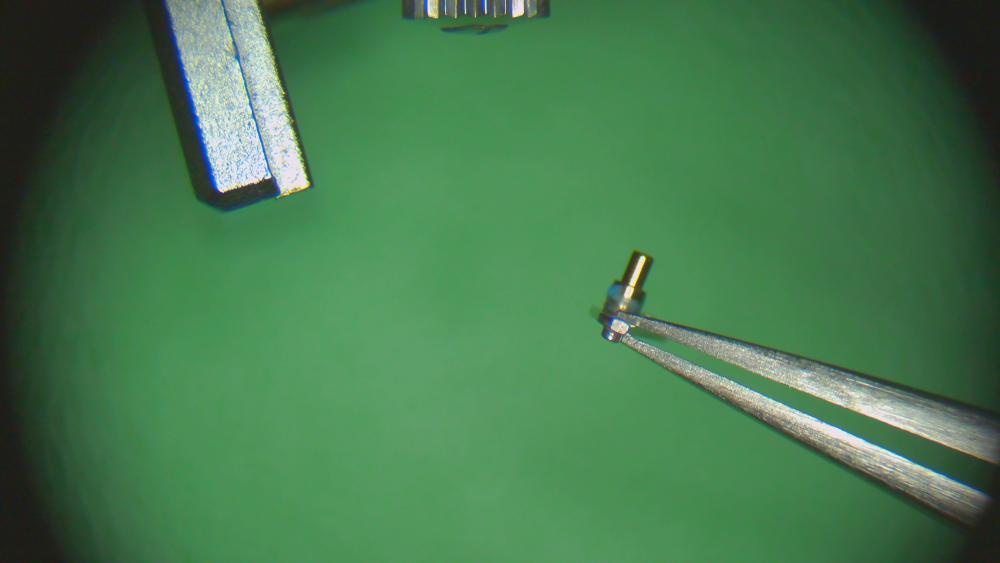
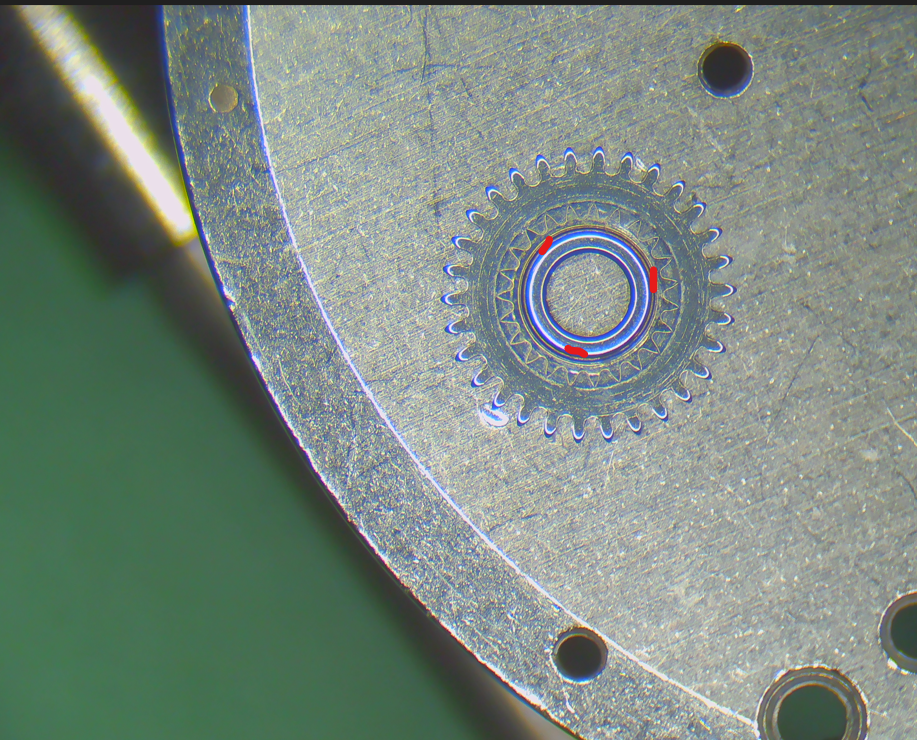
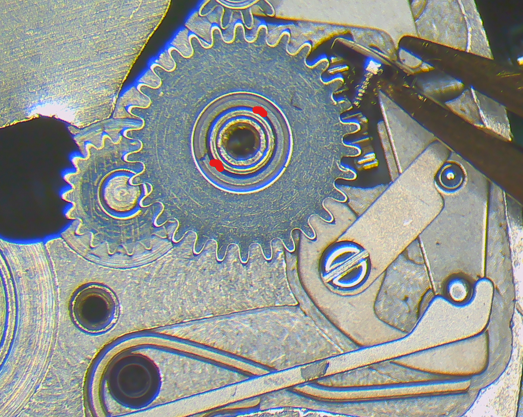
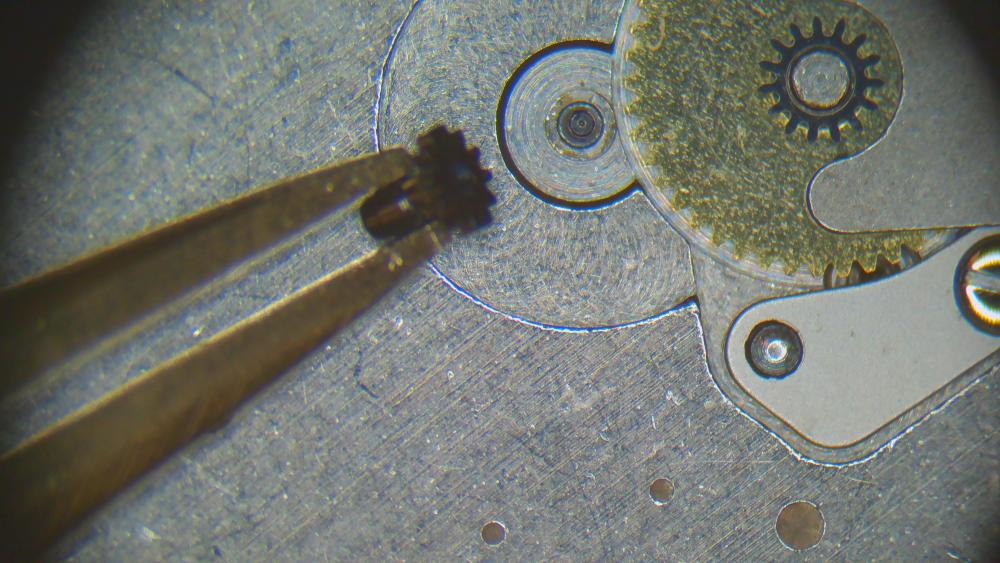
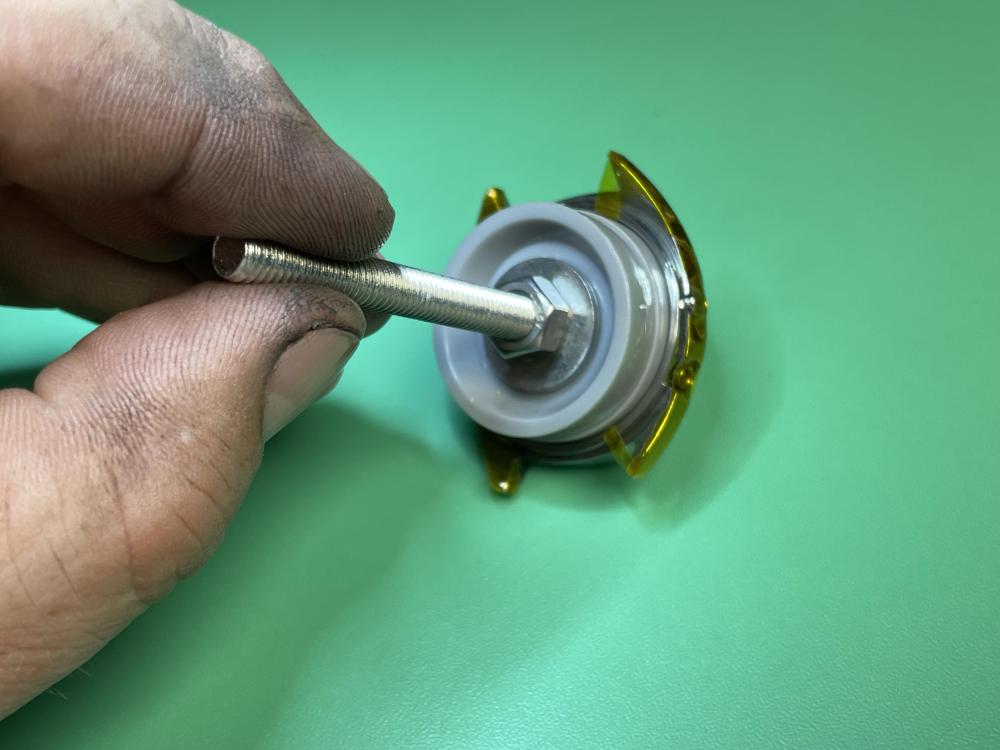
This is how I usually remove a friction pinion. The photo is of the friction pinion from an AS1916, which I believe is the same/similar as in the 1903.
 2 points
 -
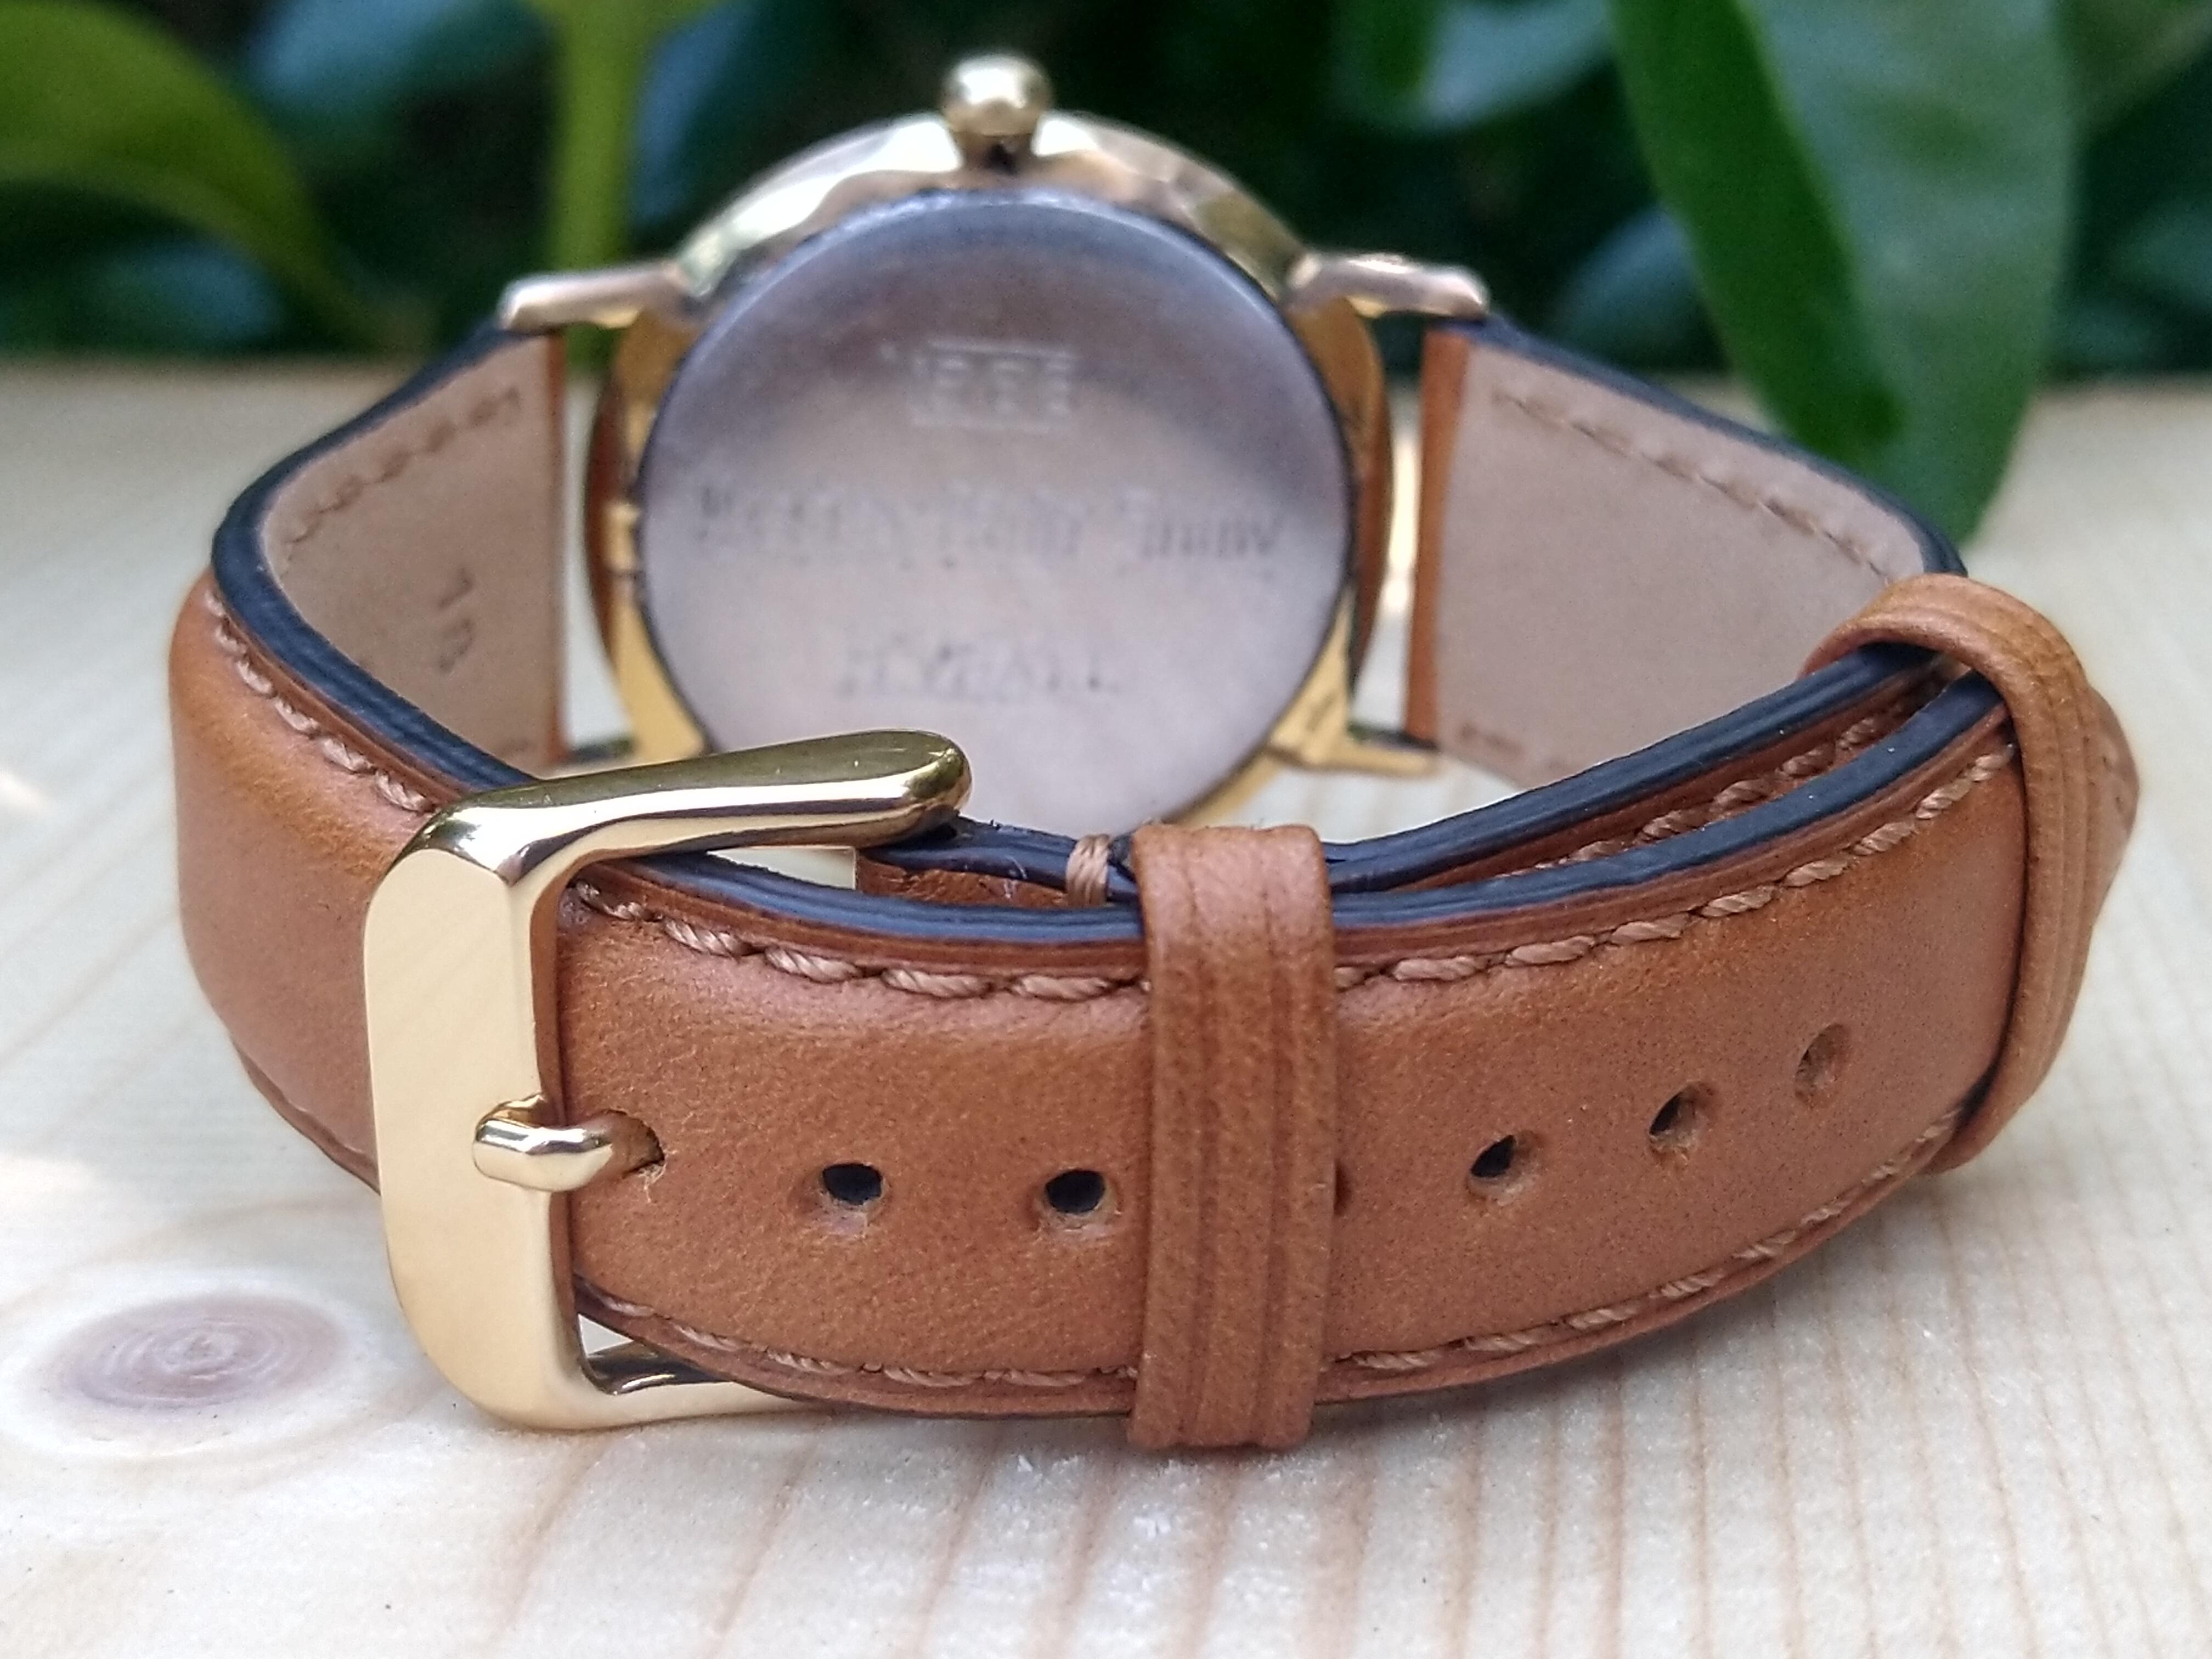
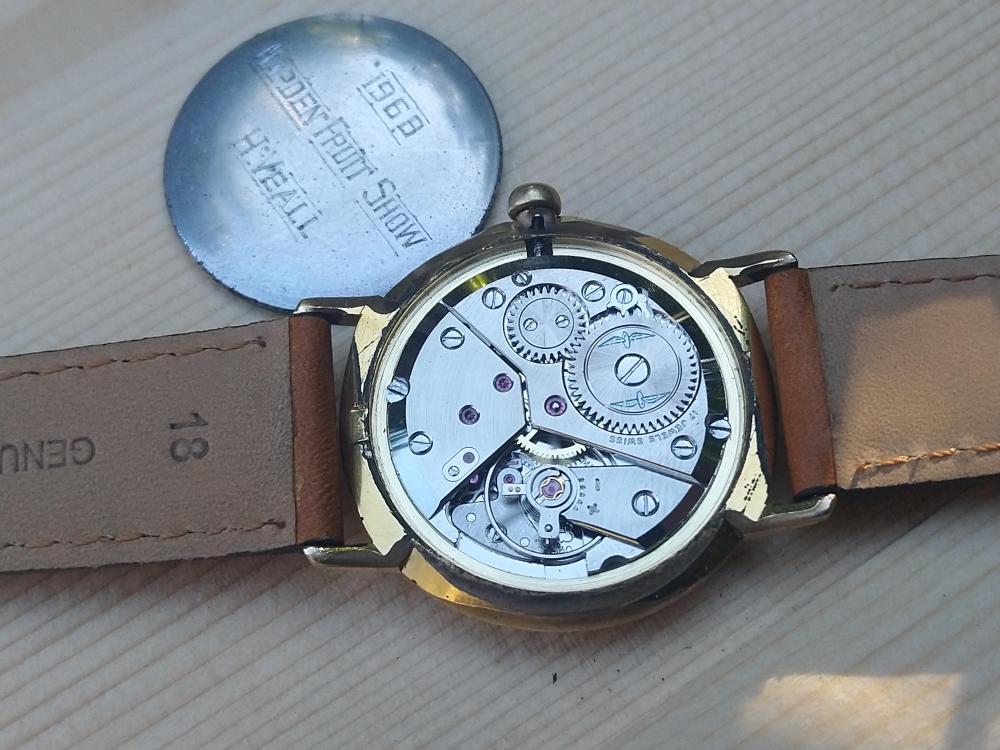
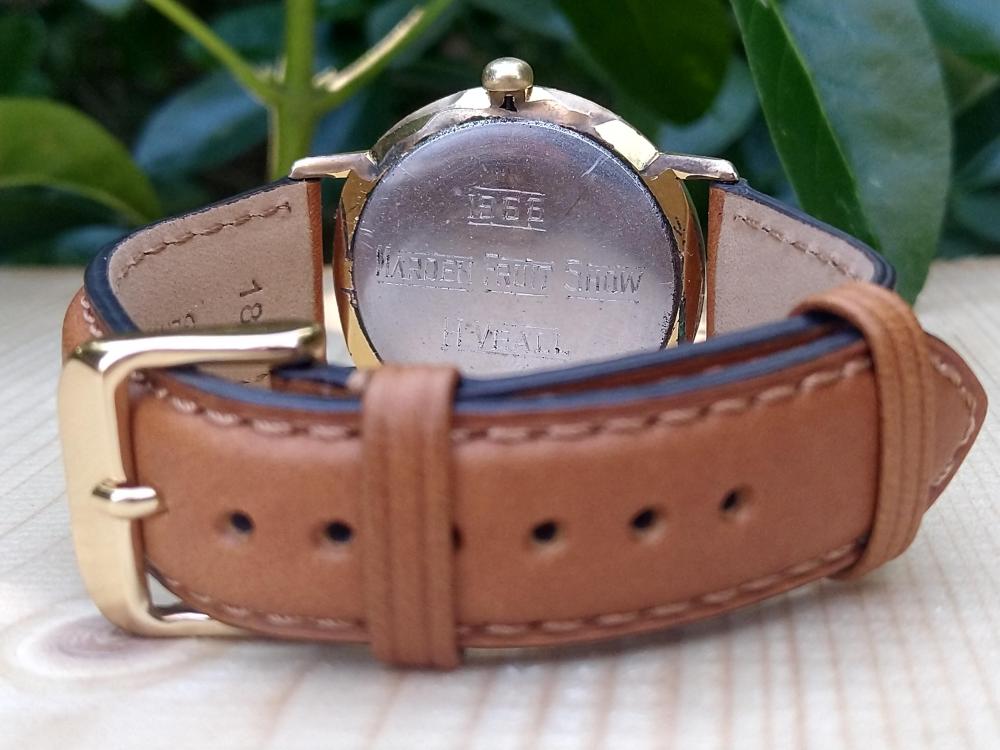
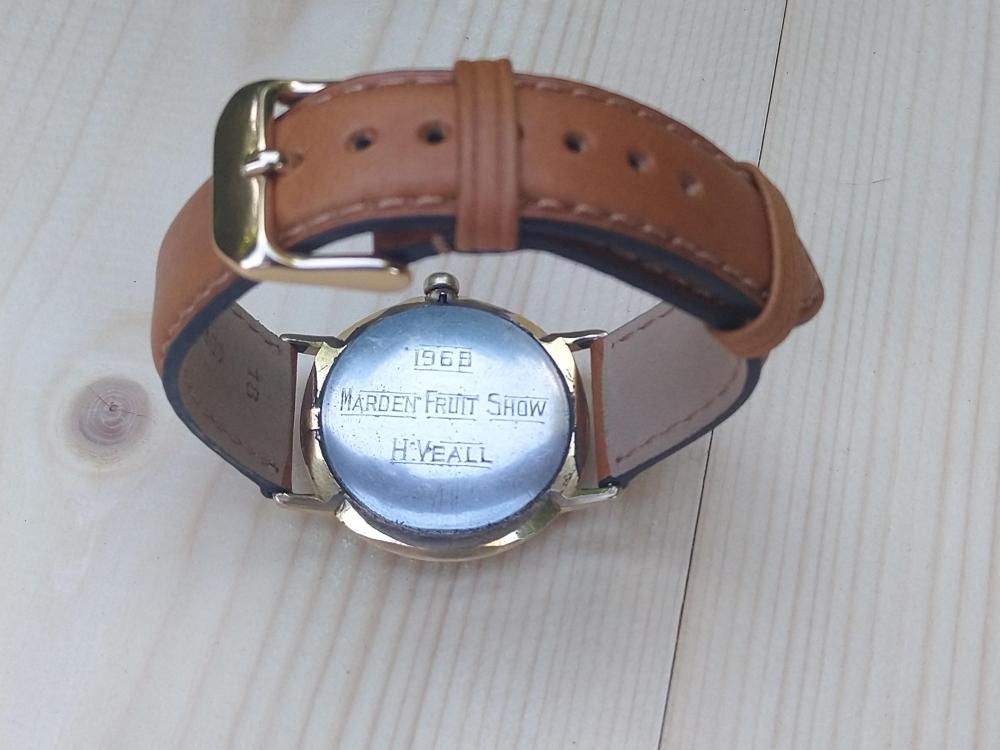
Great news! The watch has found its way home! From National Fruit Show: "It is so generous of you to offer the watch to us free of charge. We would be delighted to accept your kind offer and will keep it in our archives alongside other historical items. This year will be our 92nd show; when we celebrate our 95th we will be displaying old photographs etc, and perhaps the watch could be part of the display too. It would be interesting if we could find out more about H Veall and the circumstances of it being presented, but I'm not sure how well records were kept back in the '60s or if we still have them!"2 points
-
Good that they all have the same number, that's a matched set. Now check that the numbers on the ends are continuous. That's to say there's no gap in the sizes. I have two "big" Steiner sets, one with 4 runners and one with 3. Both cover the same size range, but one goes in 0.005 increments on the small sizes. That one goes: 4-10 1/2 in 0.005mm steps 10- 151/2 in 0.005mm steps 16- 36 then the double ended (center wheel) runner has: 38-65 / 68-100 The three runner set goes: 4- 15 16- 36 38- 65 / 68- 100 I'm wondering if your box was for either set, and has an empty space because it was delivered with a 3 runner set, or if you have a 4 runner set missing a runner. Edit for clarity- I'm talking about the long runners. The short runner is for tapered extended (4th wheel) pivots.2 points
-
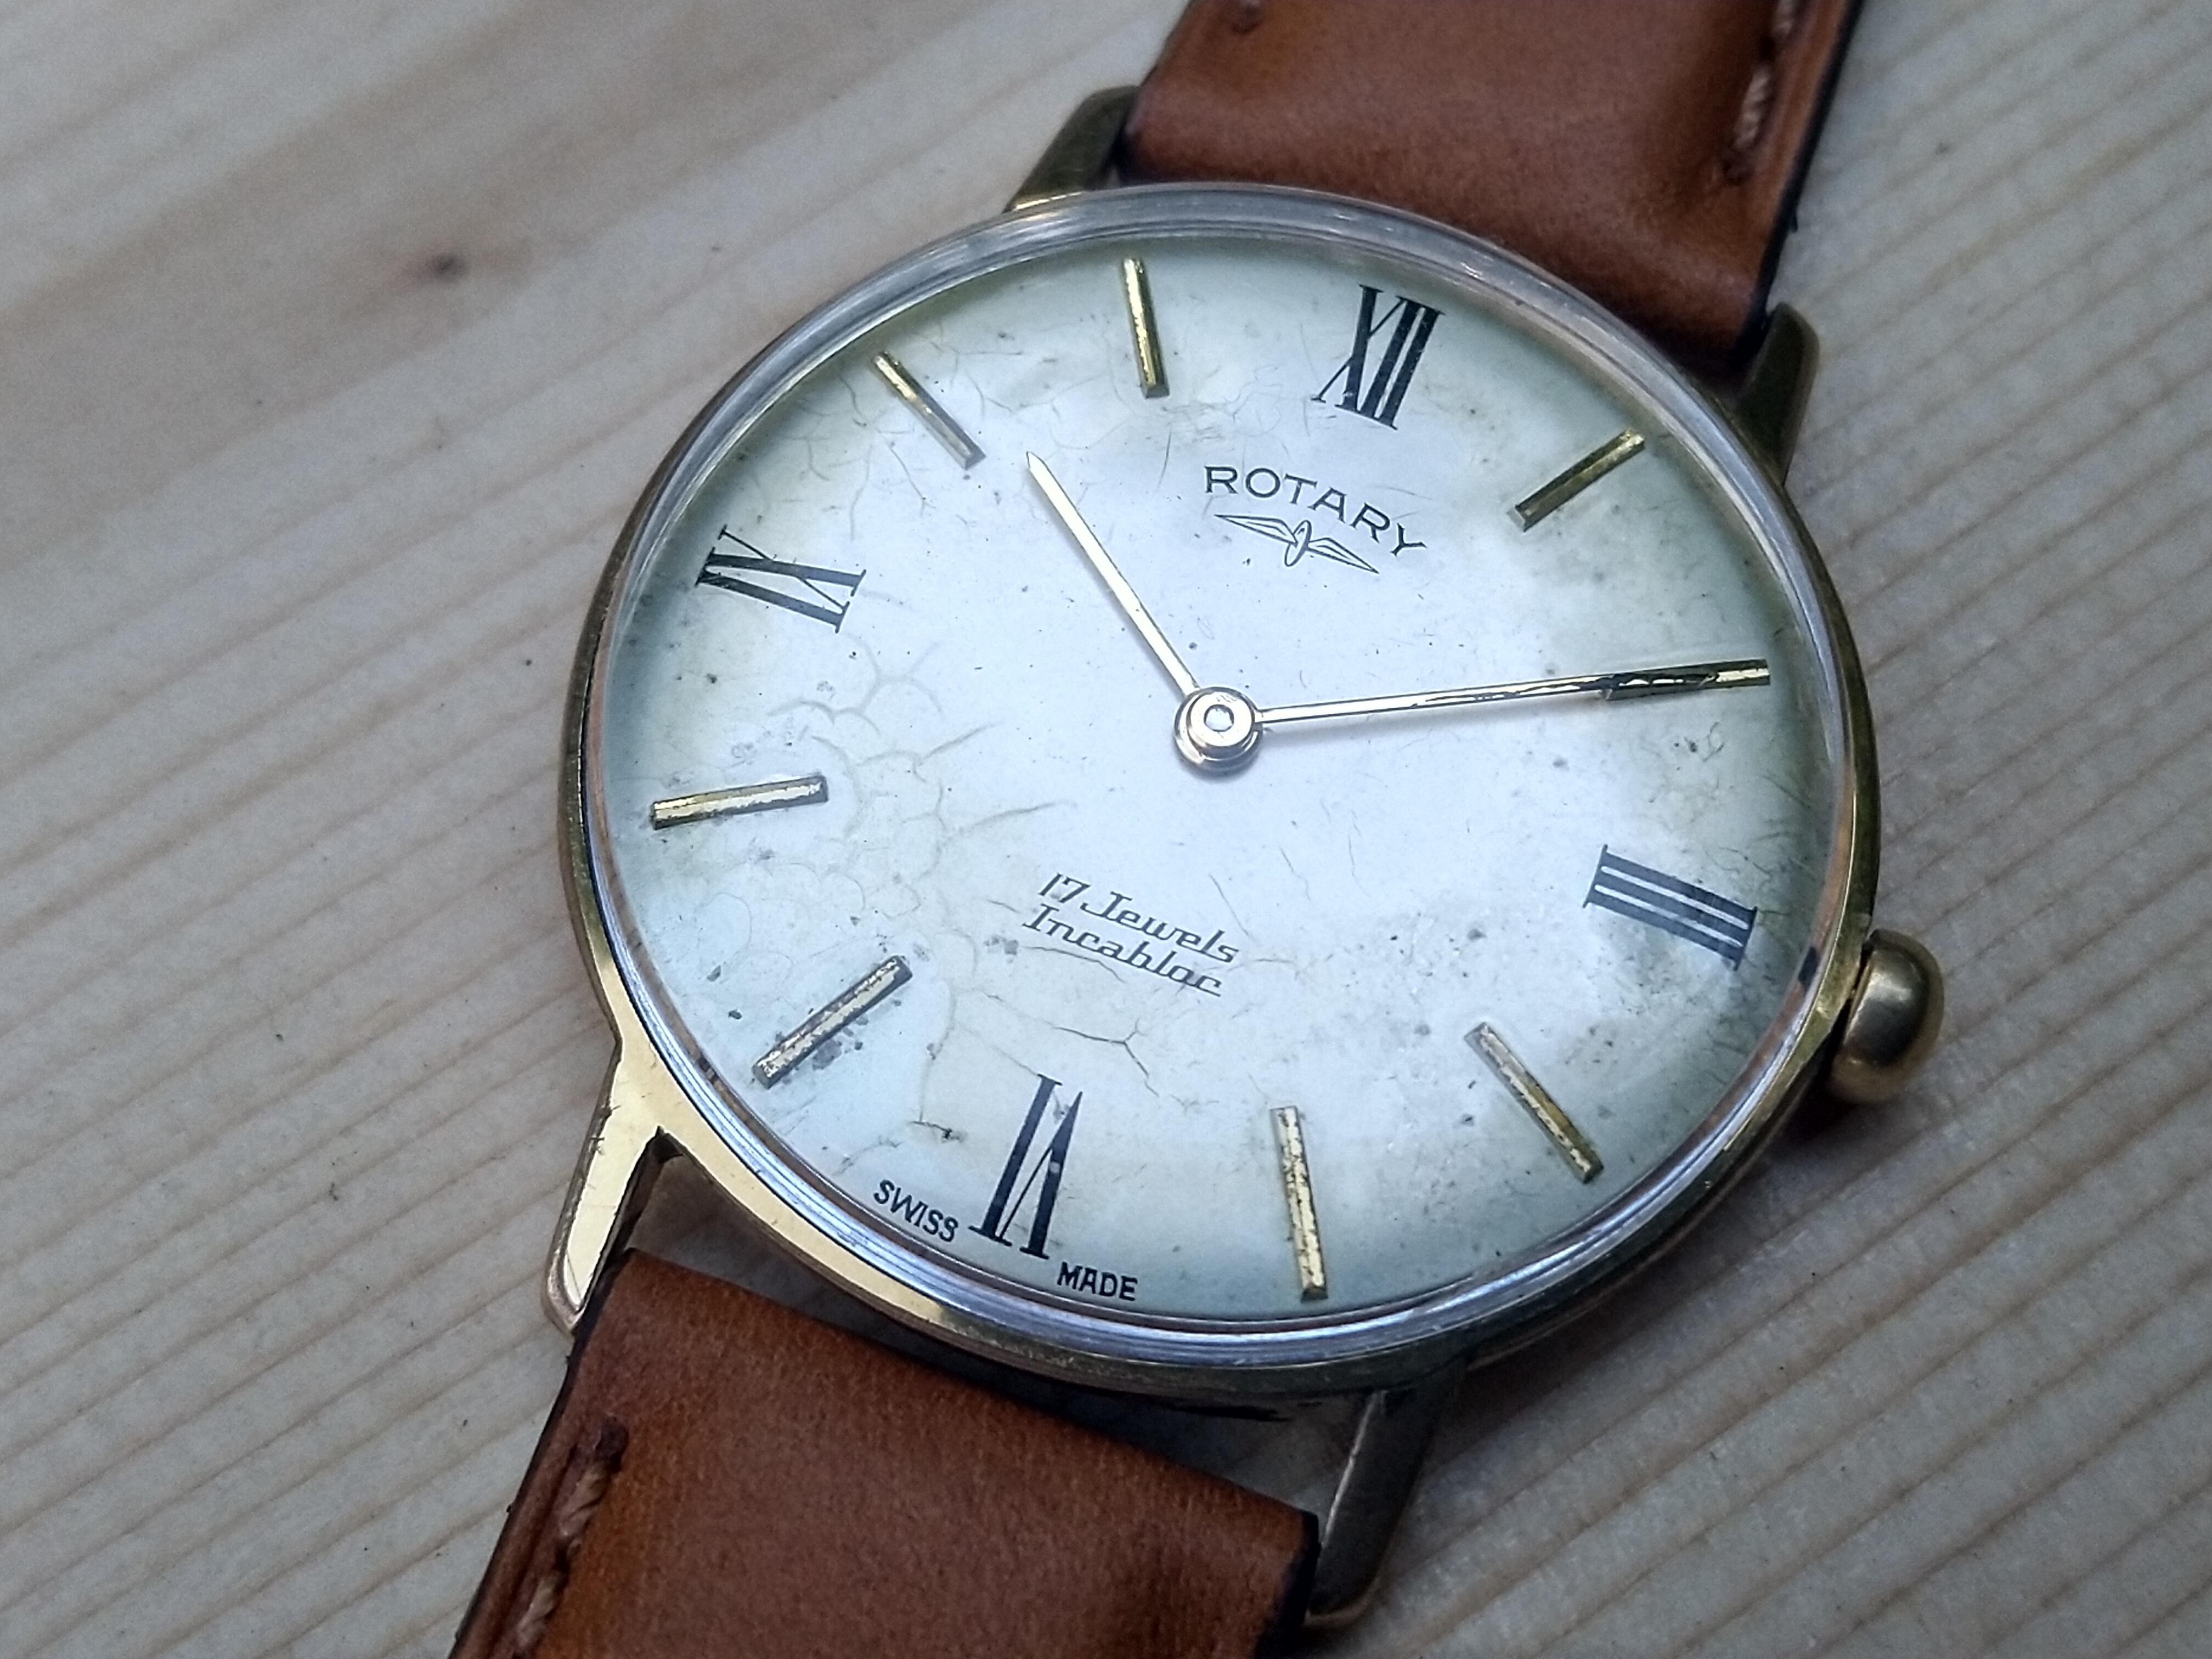
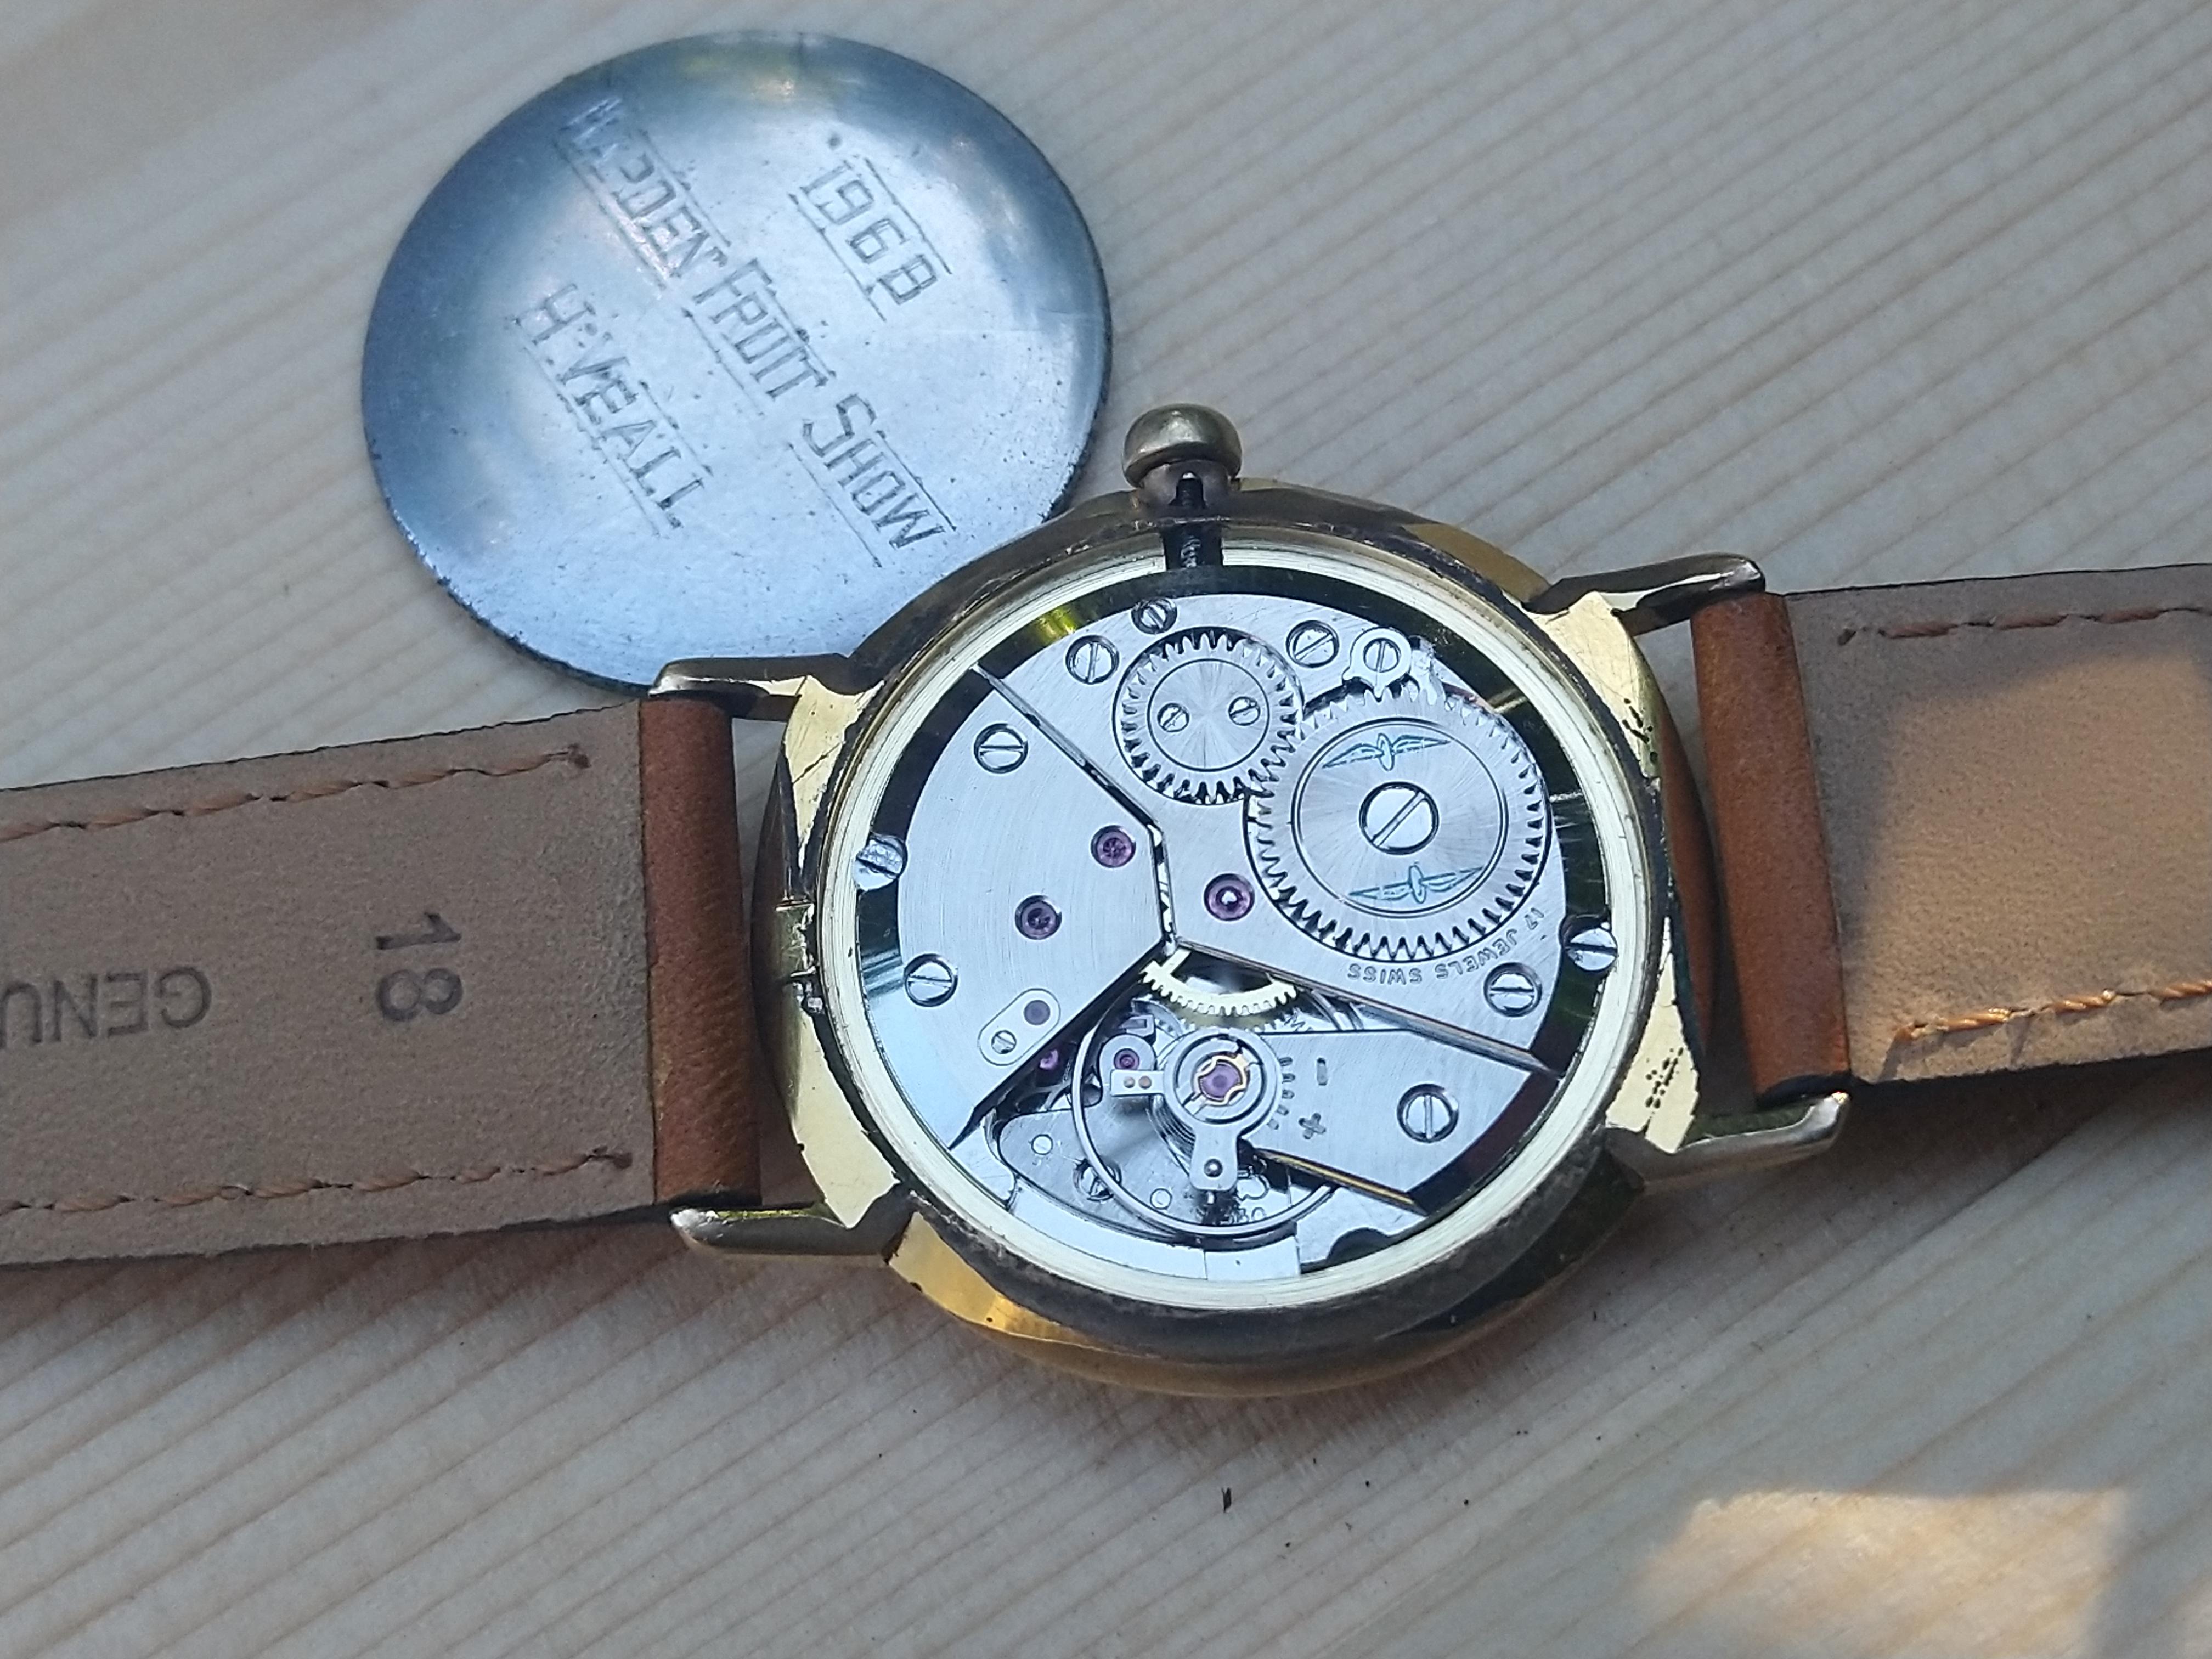
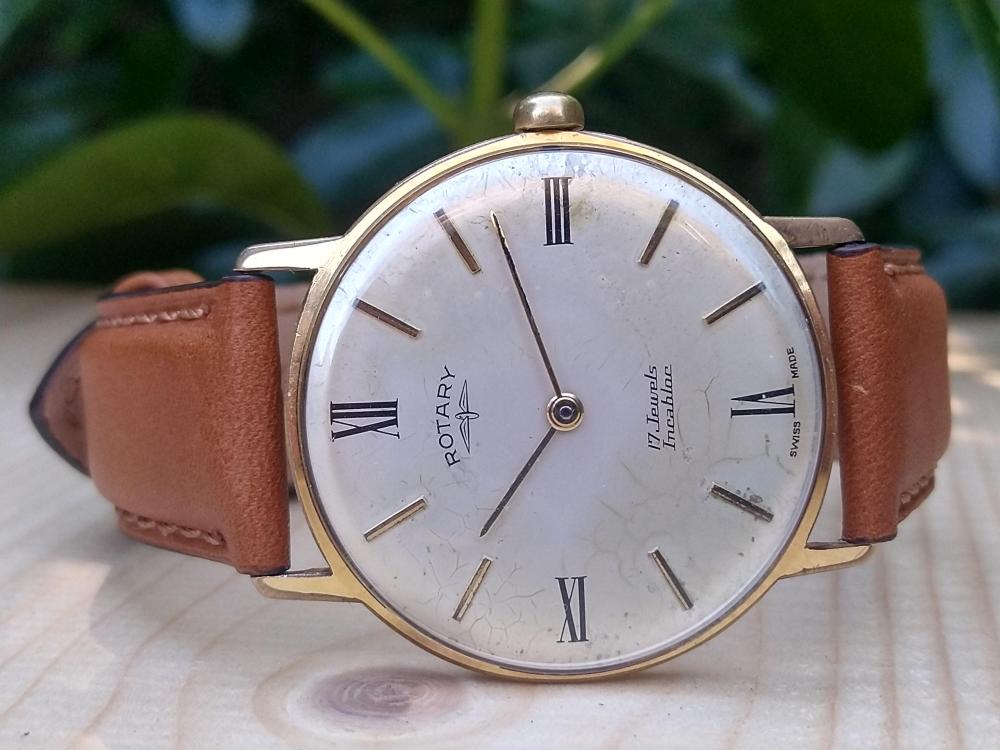
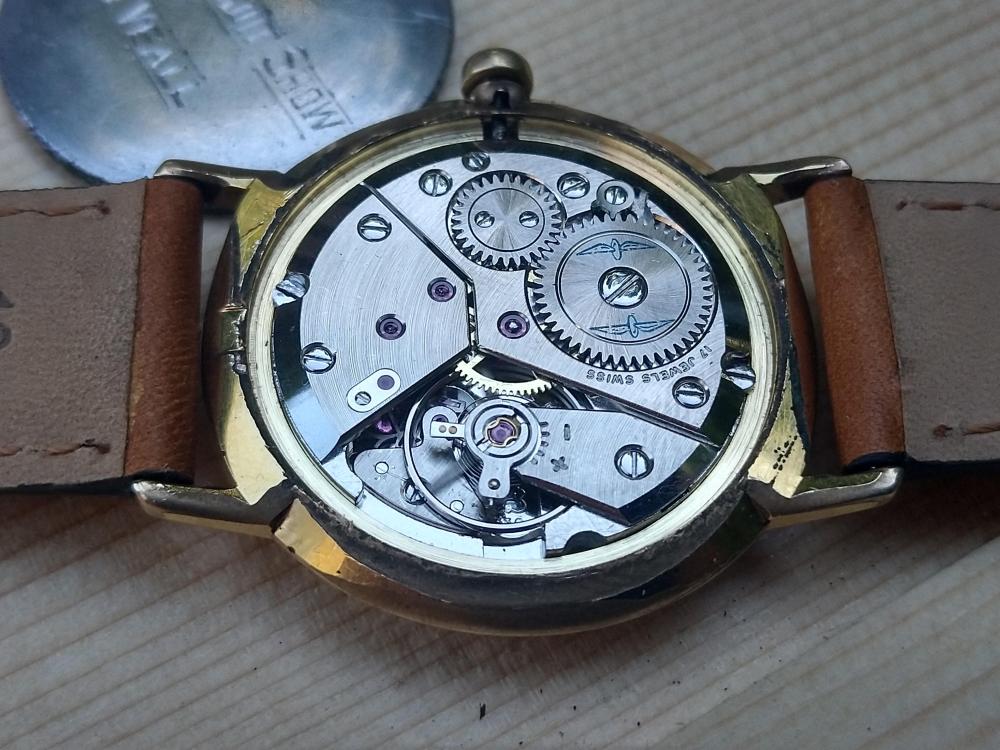
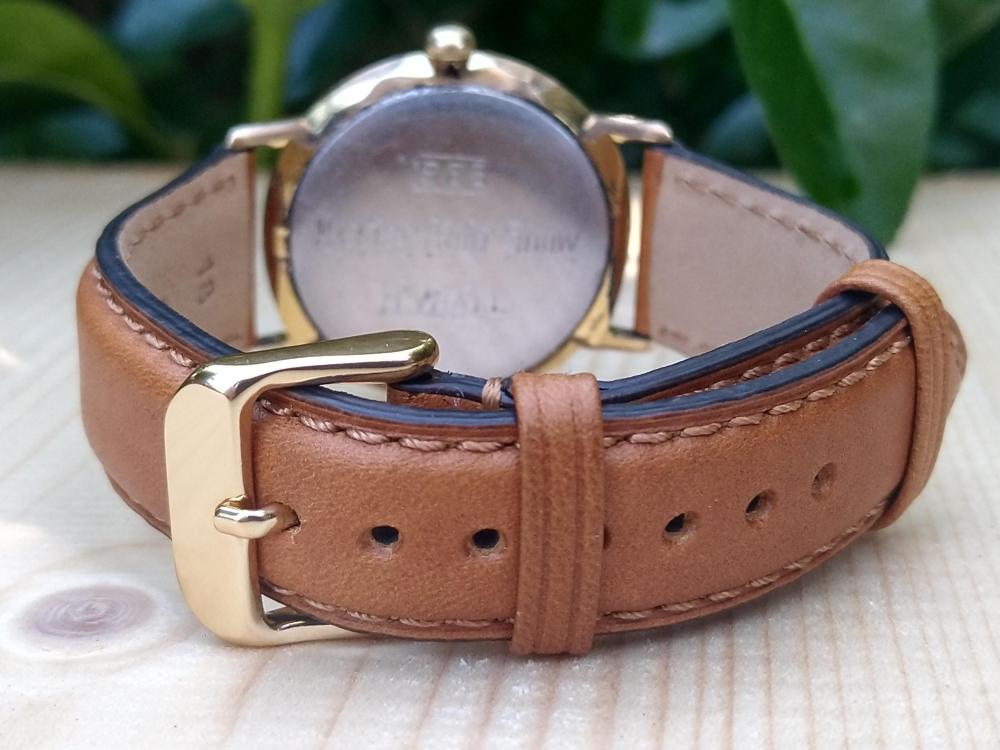
HWGIKE#45 Rotary Peseux 330 full service, acceptable performance. When I took the caseback off the hairsping fell out, I immediately knew that this is the project I want. 8 hours later at 5 o'clock in the morning i was totally and utterly defeated... my mind kept me going, but at the end both my body and soul was squeezed and i slowly sunk into the swamp of tiredness making one mistake after another. When the HS fell out I checked if I have complete balances for Peseux 330 and I noted that i got two... that time I did not know that both of them were faulty... of course it was not an option to place one of them into the watch... i had to go on the hard way... I almost made it work and the HS was almost flat and sort of concentric but it was not good enough.... When the HS was totally destroyed I tried my complete balances but both and then a third one I also found were faulty. Then I tried to marriage the HS from one of my faulty complete balances with the original balance wheel, but the wheel where I borrowed the HS from was not the same type as the original wheel so the HS was not compatible with it and I ended up like @Knebo with his Vostok: ... so I bought a donor from eBay and replaced the complete balance. The case and the crown are very very worn, when I took it apart I decided not to restore it so it would change its appearance, somebody got it in 1968 and it was a lifetime companion, I changed its glass though. Marden Fruit Show still exist, going to reach out to them to see if they want this watch, I am happy to hand it over, it has no real economical value anyway.

 2 points
 -
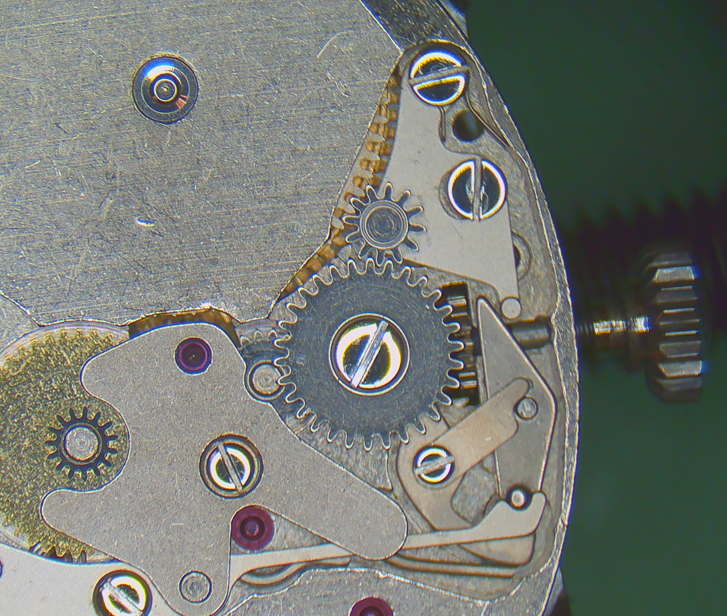
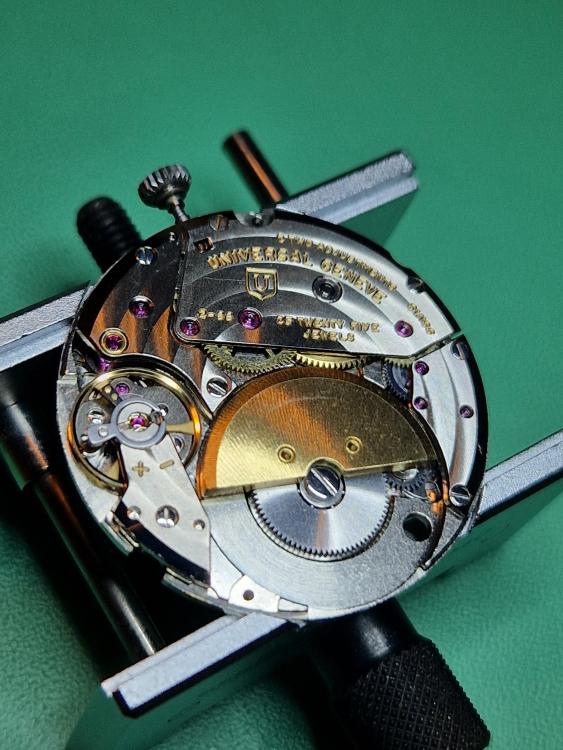
I don't know this exact movement, but the cannon pinion construction looks similar to a Universal Genève 66 that I recently worked on. See here my description for disassembly, lubrication and assembly: https://www.watchrepairtalk.com/topic/31700-universal-geneve-2-66-1-66-66-walk-through/?do=findComment&comment=2727832 points
-
Hi have you checked for a dry joint when cold, the joint may be open circuit when cold. If you can re solder the joint. Clean off and re do2 points
-
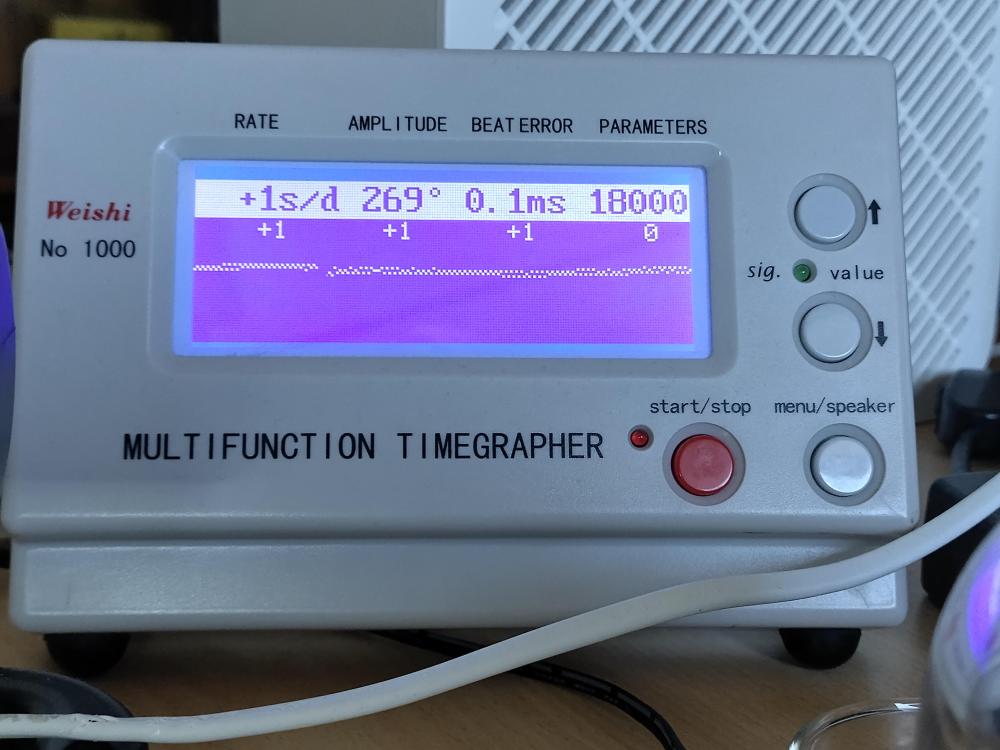
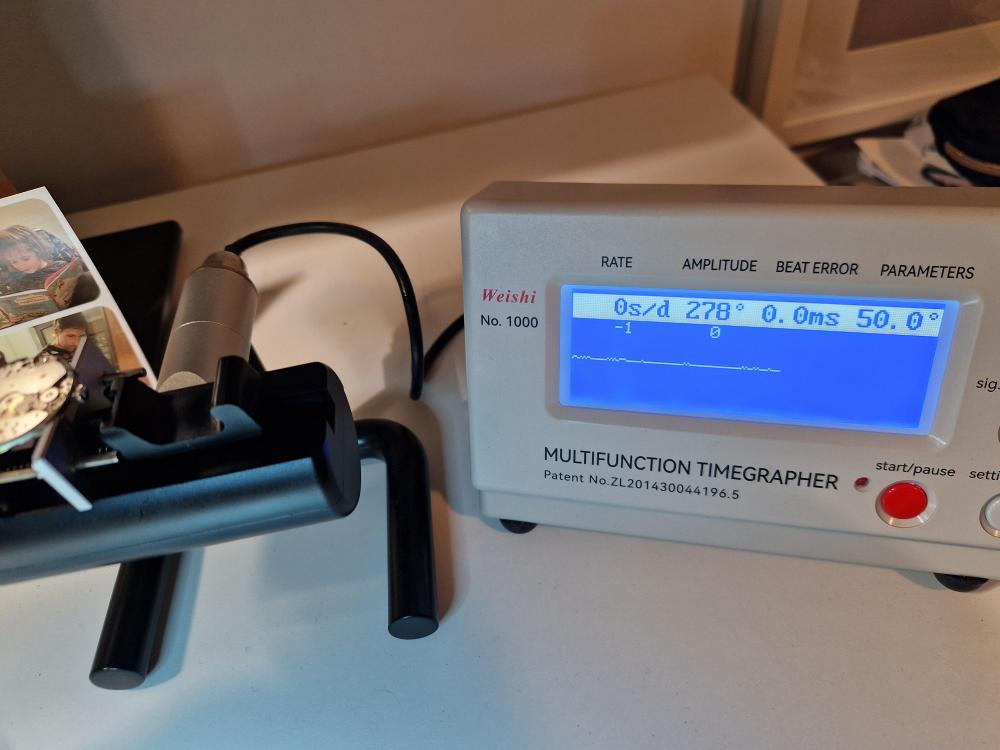
I assume you mean adjusting the microstella screws. Very likely not. More likely your movement will need a full overhaul. When was it last serviced? Demagnetizing might help if it is otherwise in good condition. Low amplitude and hight rate (as in your case) would indicate it has been magnetized.2 points
-
keep the bottom one, it looks like it has the internal drive feature and an extra spindle more modern so might have had less use ,but rob the burnisher from the top one. no ! in fact keep both, watchmakers need at least two of everything..at least...so start looking for two more...at least.2 points
-
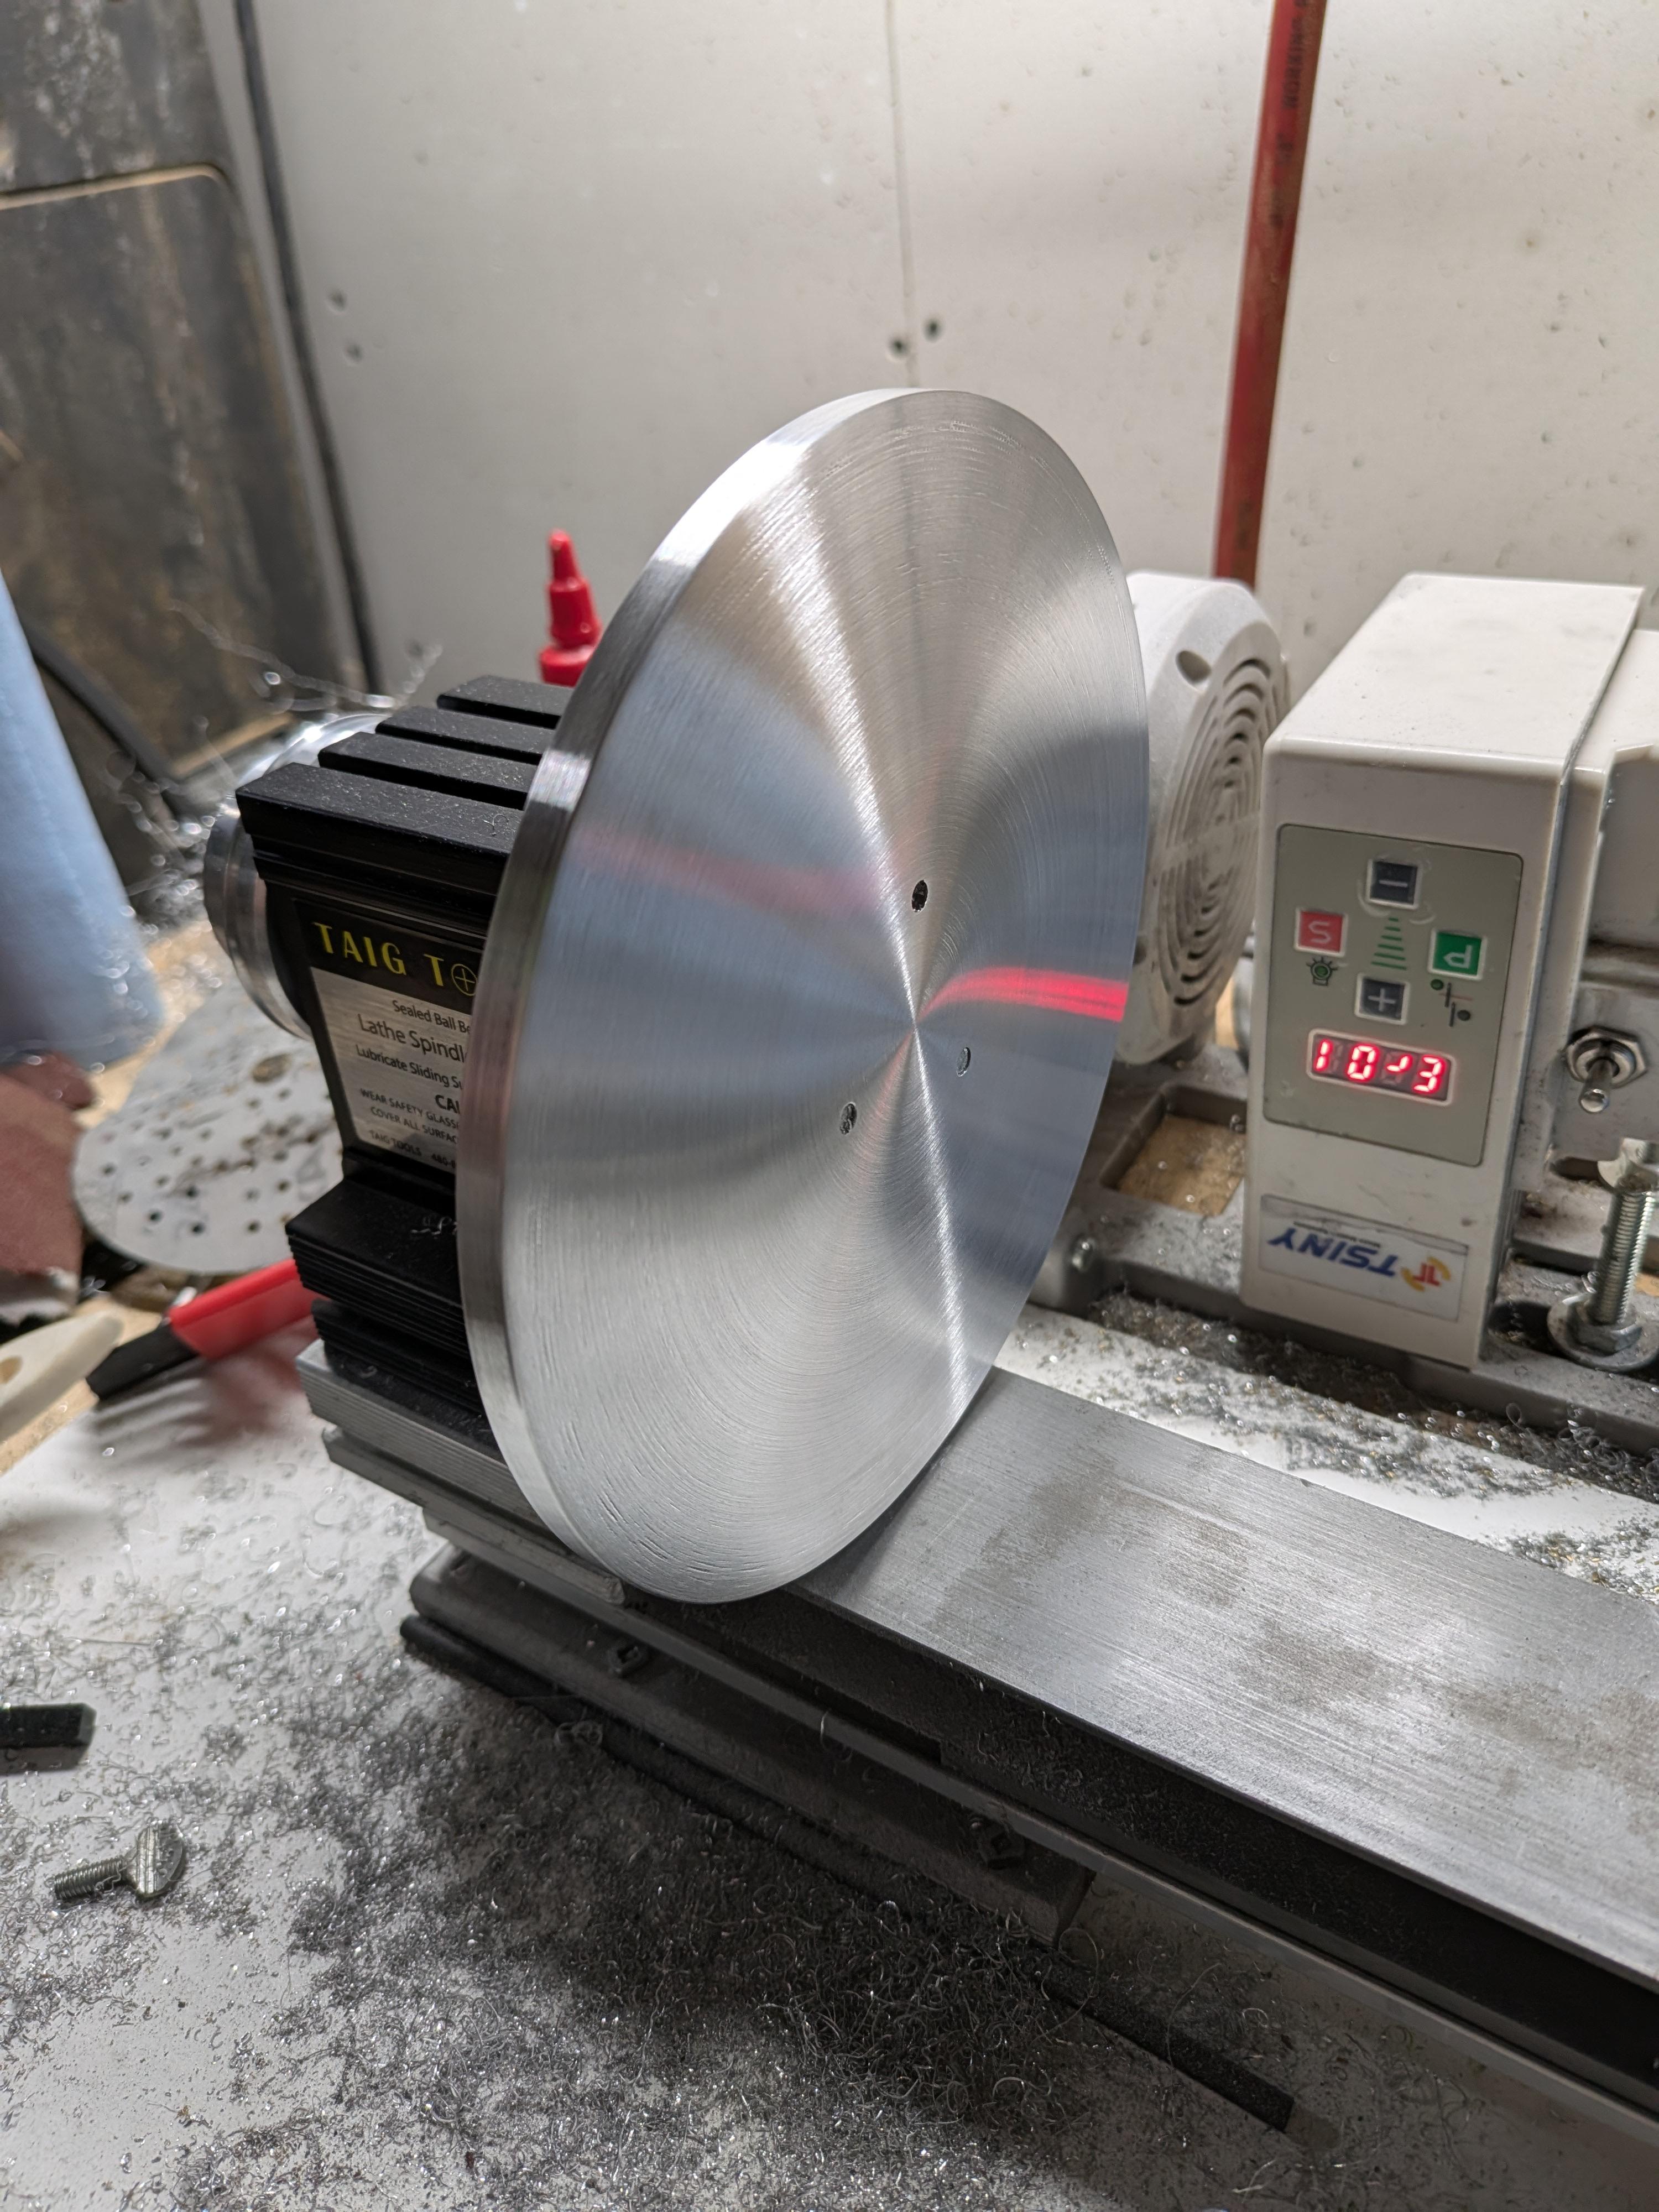
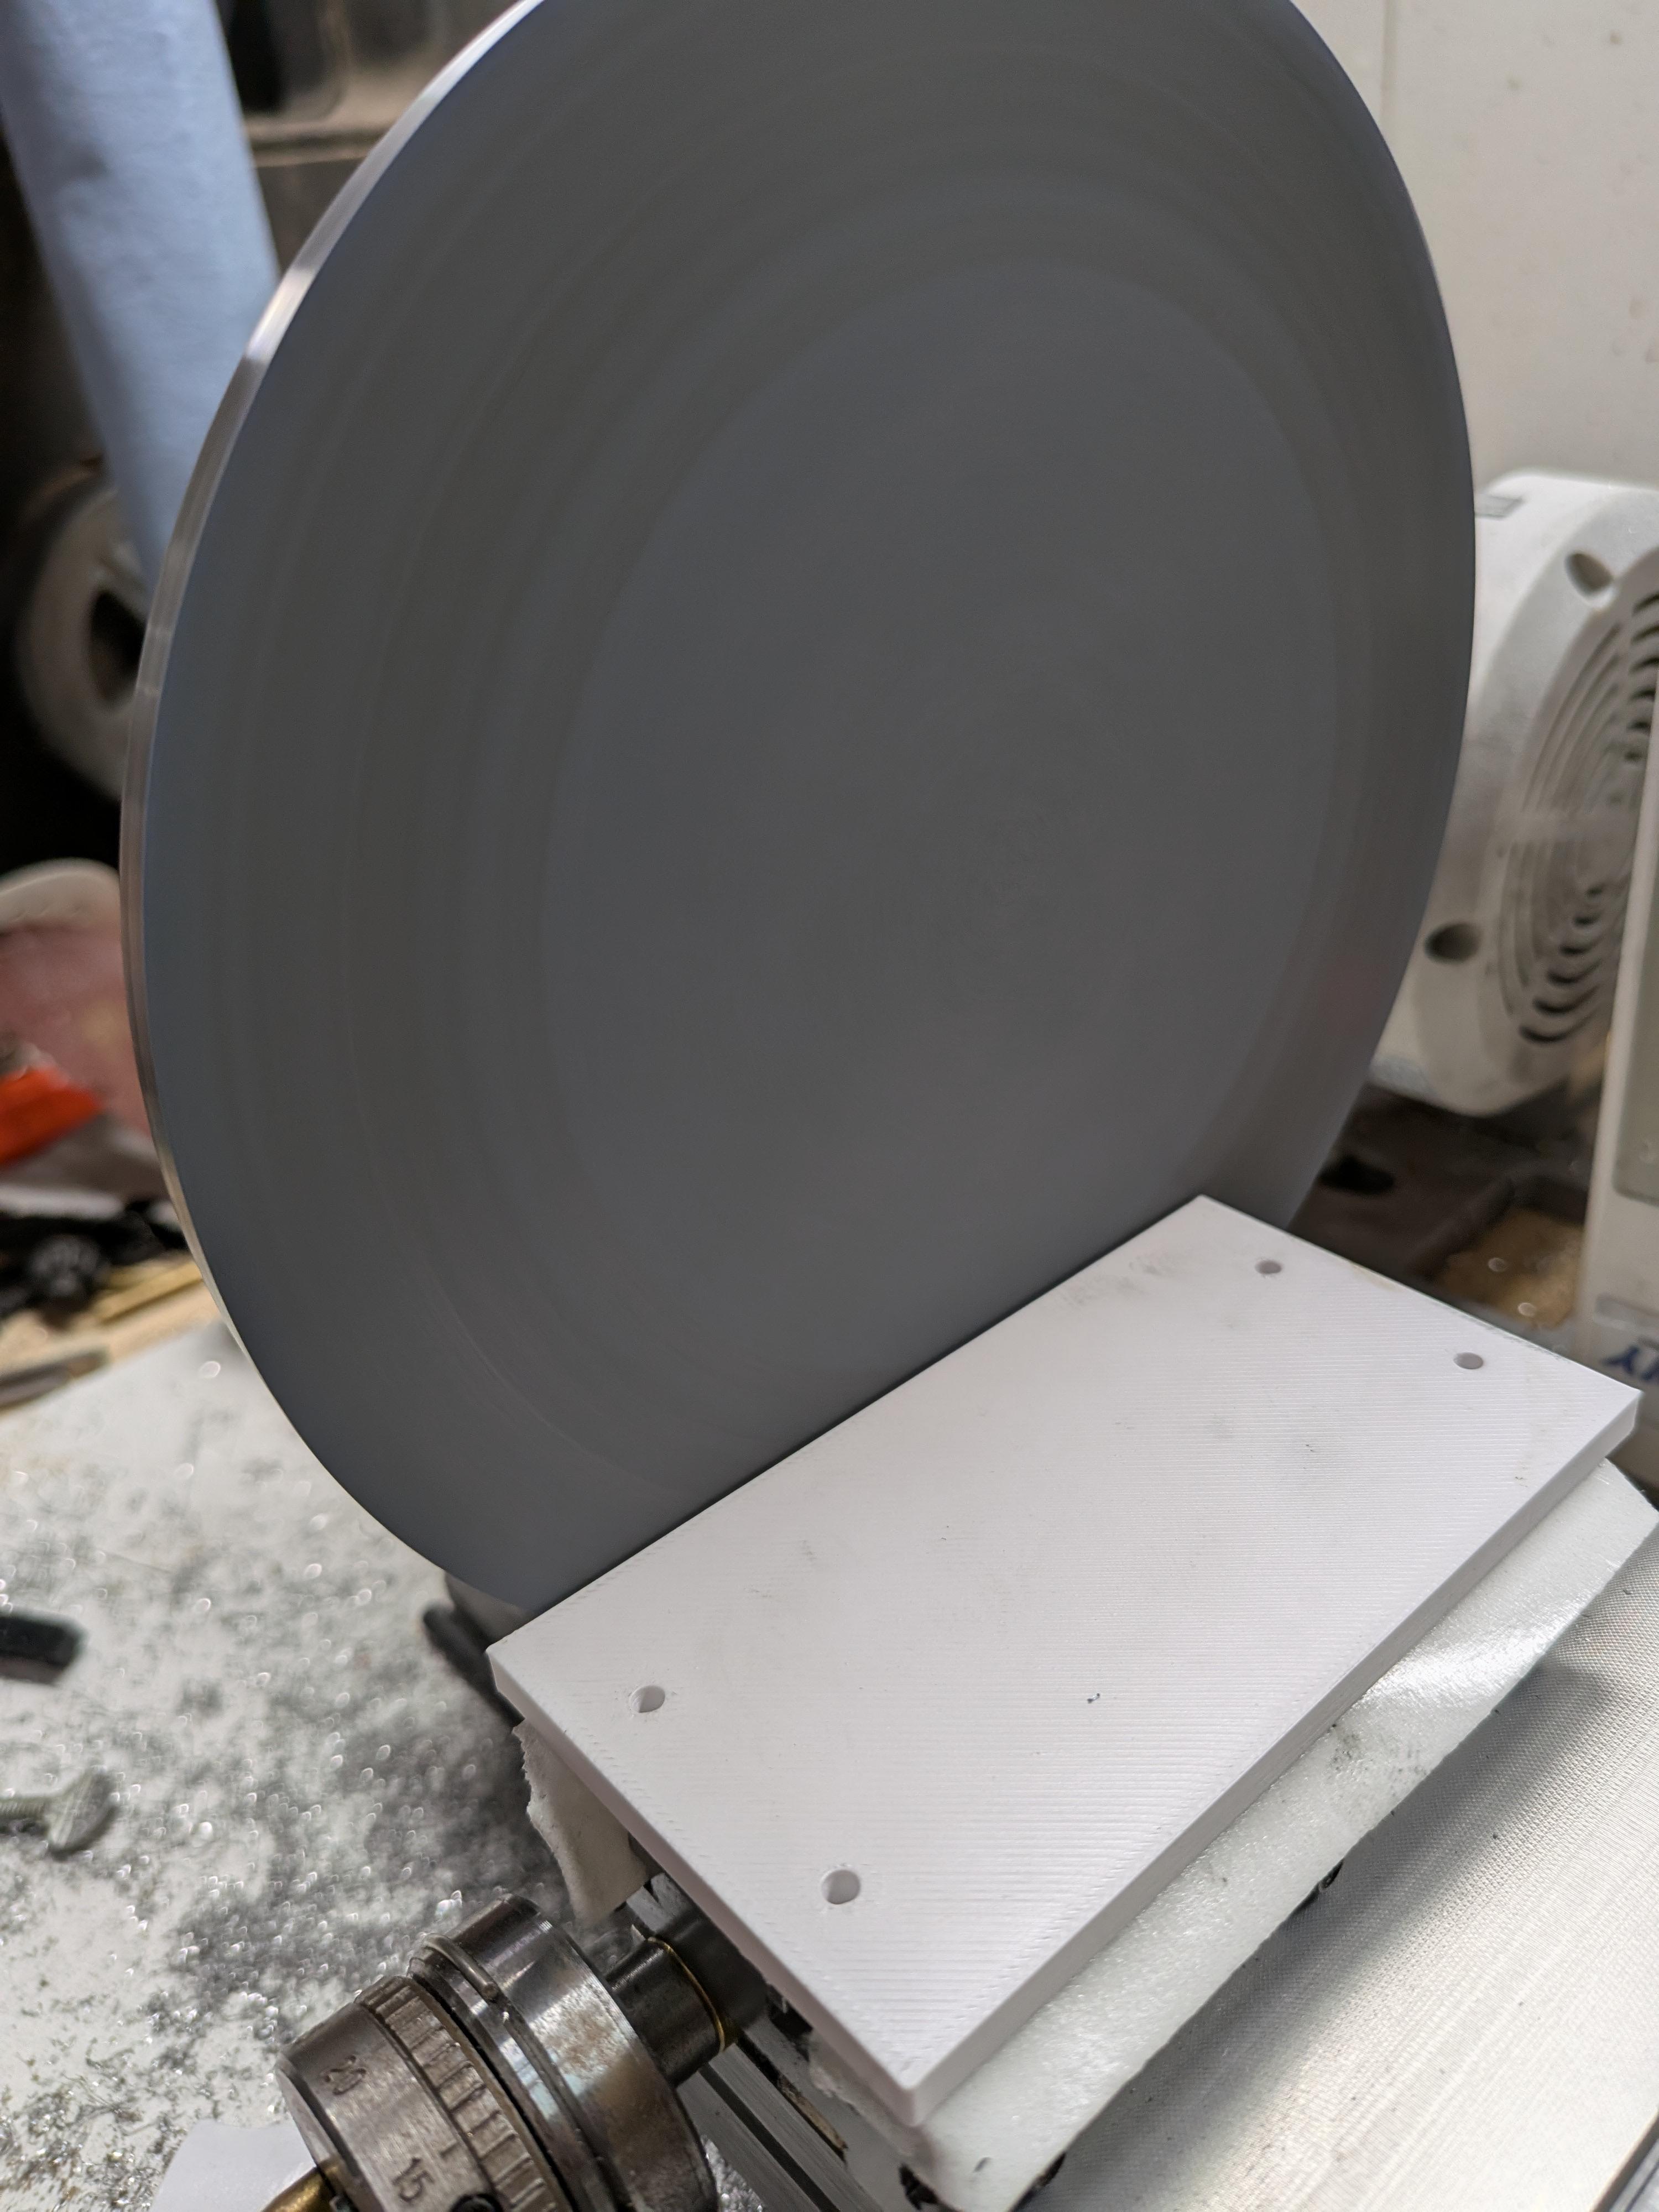
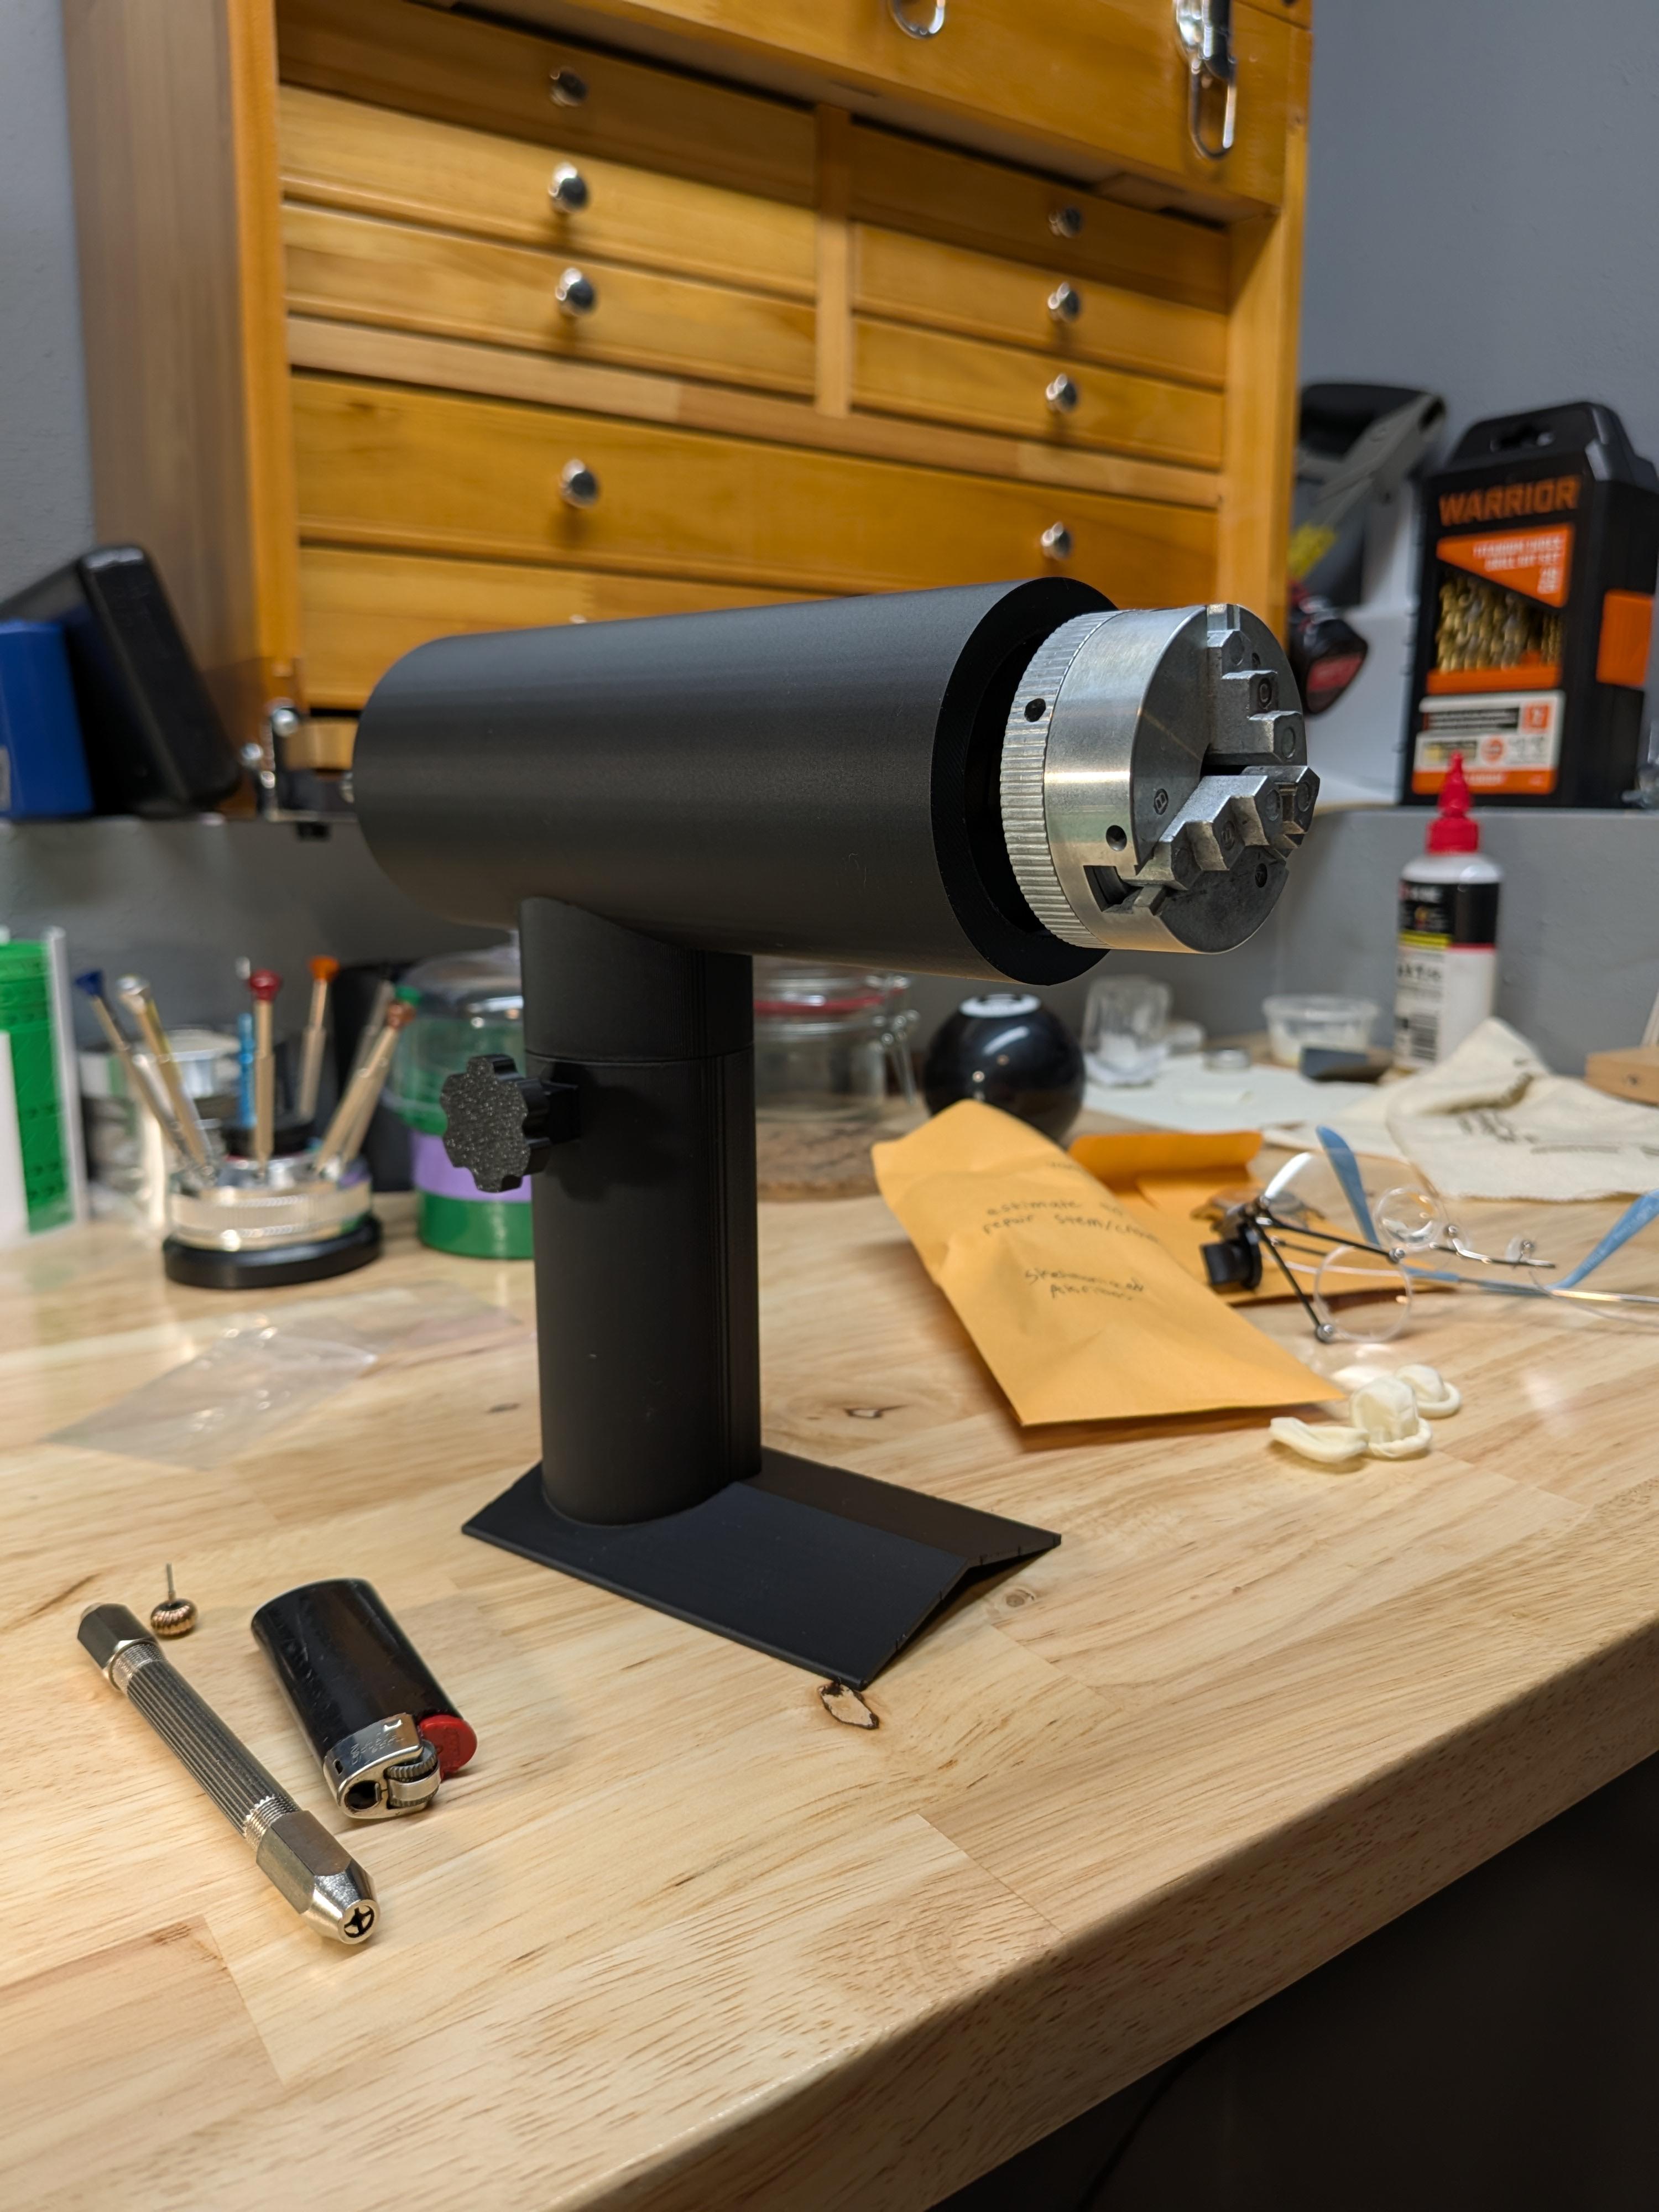
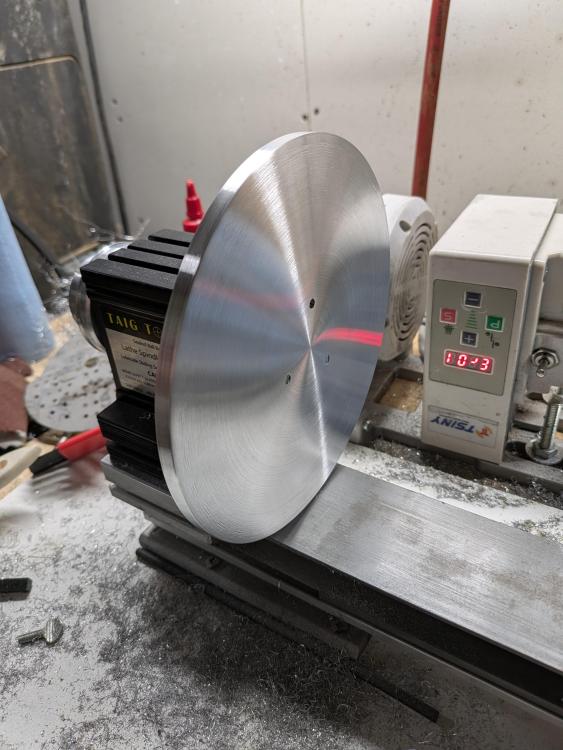
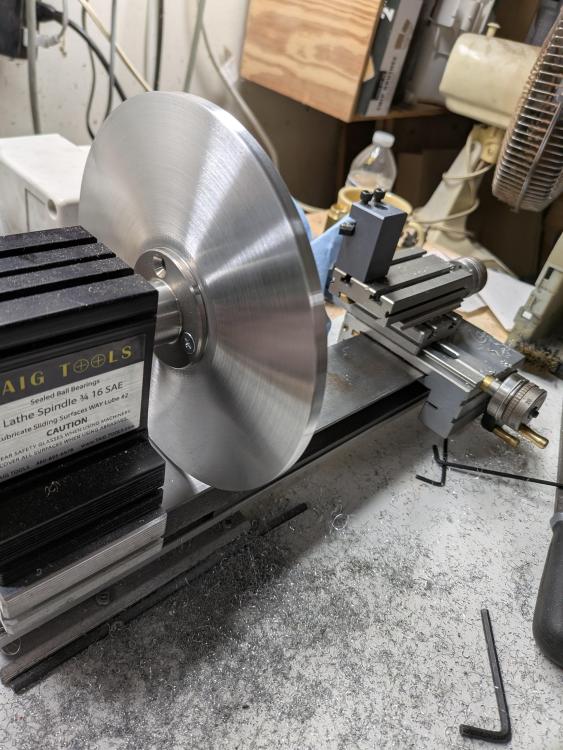
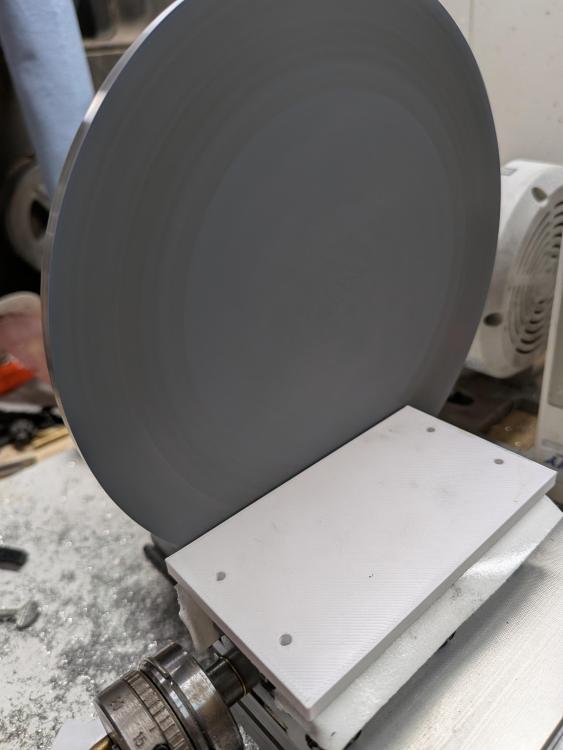
Hello all. As stated in other topics, I'm working on a lapping table setup, as I do a fair amount of restorations, and things are needing to get more precise. With my recent addition of an impulse micro welder, lapping is necessary. To start off, I have a few lathes, and the one I'll be using is my Taig Micro Lathe. I purchased it unassembled, as I wanted to modify it readily. I use a sewing machine motor to drive it, and it has a lot of adjustment on speed. In order to do this, you need this tailstock riser to use on the headstock, and this spindle mount to attach your Lapping Plate to. I ordered some 6 inch aluminum disks that are 1/4 in thick. After finding the center, I placed the spindle mount on the center, then drilled and tapped the holes. Then I used a vertical belt sander to reduce the OD of the disc enough to mount the piece on the lathe so it spins freely. Then I faced the part as best as I could(cross slide only has so much travel) and finished it off with 240 grit sandpaper. I attached some 2k grit sandpaper for now, but will be replacing it with lapping film. As for the table, I'm 90% done with the build, and should have it done this week. I'll add that to my post. The white plate below is just the base and is not centered on the headstock axis. The lapping vise as seen in some European restoration videos is extremely expensive. I have designed and made a fixed polishing device, similar to the one by horotec. I have designed and am prototyping a 2 axis vise for rotational bevels. My last design is going to be the 3 axis vise, but I'll get to that one later. Attached are some photos of the lapping plate for the lathe.
 1 point
 -
Almost done before I put this one up for sale. Movement is back in and on test.


 1 point
 -
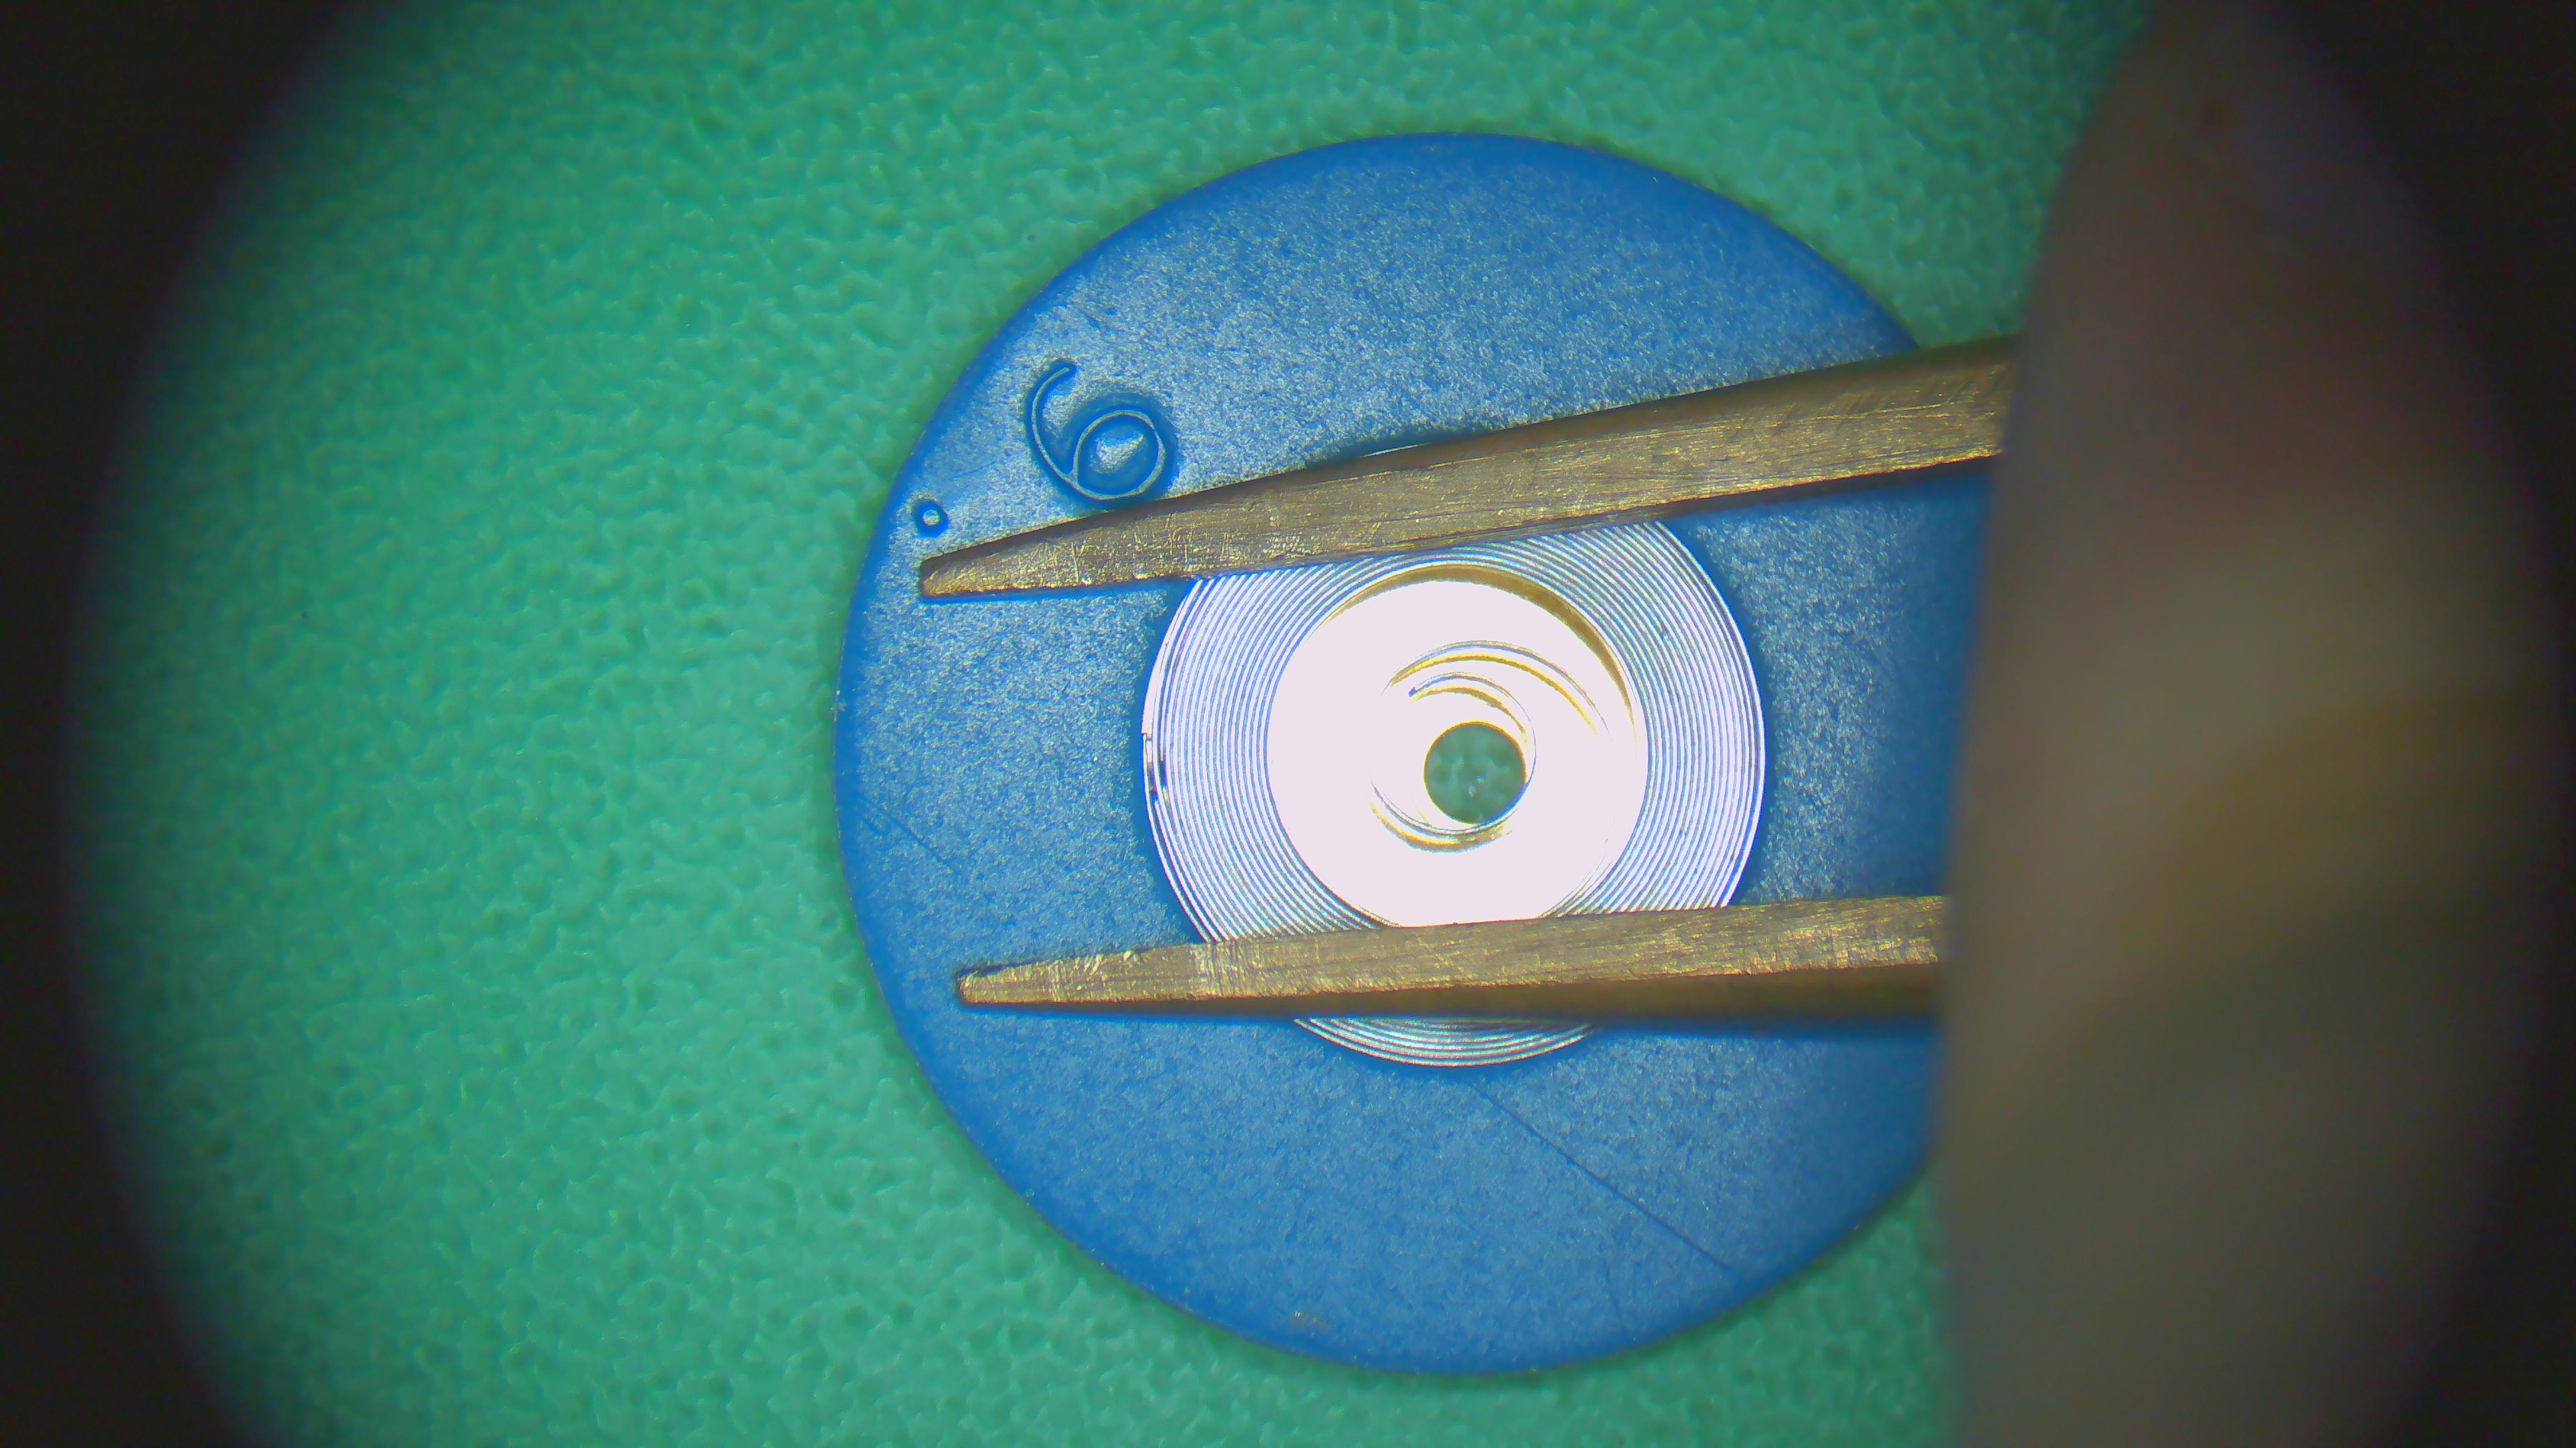
The hairspring is badly deformed. I mean in a manner that is beyond repair, sorry. We need to see it on the balance without the cock, but no much hope.1 point
-
Be good to see them through their progression, I'm particularly interested in the lapping table. I have a small one in mind, made from a cheap piece of equipment used for something other than machining . Its about time I got stuck into doing stuff with my bigger lathe as well.1 point
-
I think GuyMontags suggestion this might be the way forward.1 point
-
I also have a 3L Vevor machine that I use nearly daily. Hopefully your new one works well, as mine has been rock solid for well over a year. Sometimes its on for an hour at a time, as I'm doing casework shaping and just need to pop it in for a few seconds between filings.1 point
-
What a great thing to do, kudos to you.1 point
-
The normal problem with rotors is they're clogged with metal filings.1 point
-
Yes. I think that’s the next port of call if you can scavenge another crystal piggyback the original one just to prove the theory. Bergeron used to supply a crystal pen just to do that . The pen consisted of a fancy tube with a crystal glued in the end .1 point
-
everytime I start manipulating a hairspring1 point
-
When you start buying the jarred peaches from costco, those glass jars are also great for watch repair1 point
-
Thanks. I have resoldered it a couple of times with new solder and that's how I know that the heat from the soldering iron makes it work for a few minutes. I am thinking it must be something internal to the quartz crystal or the IC.1 point
-
You can purchase the book at the link below. https://www.booksimonin.ch/en/9493-english-the-theory-of-horology.php#corps Then When I was looking at the homepage I noticed something sad. The founder the company died last year I had wondered how old he was. If you're curious I have a link. https://watchesbysjx.com/2024/05/obituary-antoine-simonin-wostep.html1 point
-
So i have learned. Thats why i have chosen a forum far from home. Correct. Didnt say so. This is great stuff. The info box states the importance of oiling practices. Regardless of what oil you use, doesn´t matter if not applied correctly. Very interesting. I would very much like to have that book. This document may also be of intrest. https://watchmaker.hu/wp-content/uploads/2017/12/olajzási útmutató.pdf1 point
-
This is why the best way to evaluate lubrication is to evaluate watches which you've serviced many years later. Or to deliberately lubricate a watch with things to see what happens which I assume in this discussion has been done?1 point
-
I think I know what you mean Richard I was thinking the same as I read Tom's post. Two very flat surfaces will hold together, I thought that is something to do with creating a vacuum between them. Something different to what Tom was explaining. I've sen this mentioned a few times, the oil film becomes the bearing surface. Thin oil , small molecule bearings , thick oil , larger molecule bearings, like flowing rollers . Sounds feasible but is it true ? I like this idea...how about on a piece of glass . Viscosity is going to play a big part of the result unless they are both equal. Drop size as well, I found measuring drop size was important when I tested some cleaners. Mostly determined by the surface tension , so a lot depends on what is below and what is above the droplet.1 point
-
I see balance is already removed, so next time, giving the watch a 10 hrs soak in Coca Cola, loosens every screw. Works far better than any oil. Oil on ratchet screw will at best loosens it, but wont get to barrel arbour, Coca Cola soaks, however, soaks the thread of barrel arbour as well , when you drop the whole movement( less balance& fork) in Coca Cola thus , less force is required to loosen the screw than takes to break it. Loosening without breaking, thats an advantage . Welcome to the WRT forum.1 point
-
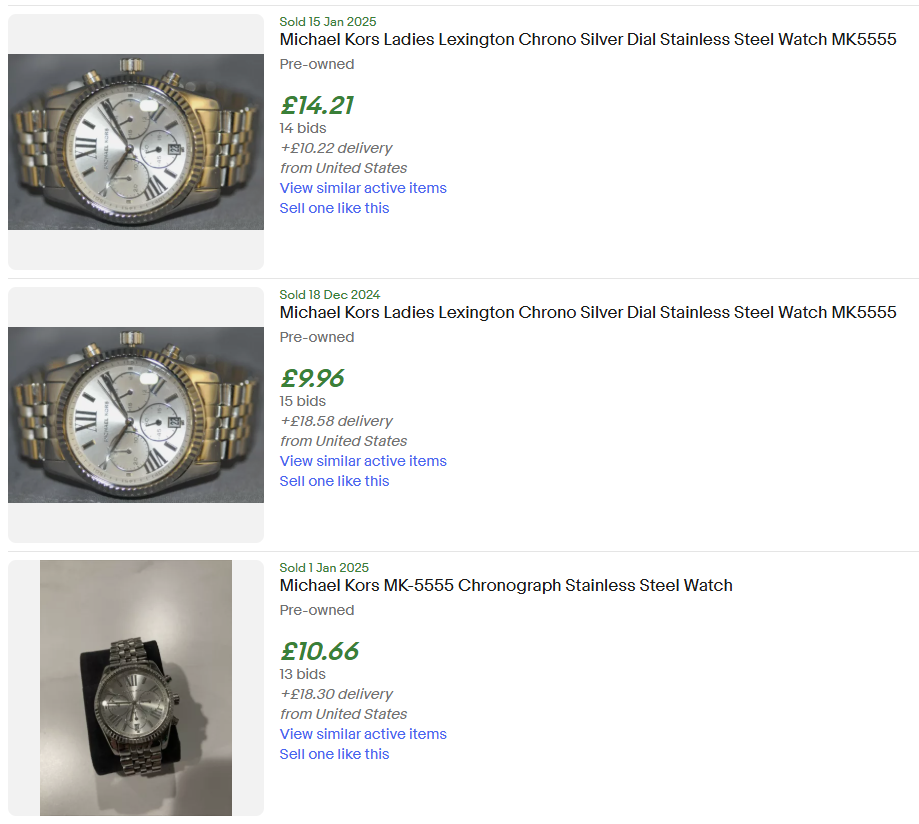
MK’s are made by Fossil whose manufacturing plants are in China. They seem to be responsible for a lot of various fashion watches that they make for a lot of big brands. They do own the Zodiac watch company of Switzerland which they bought to give themselves an air of “Swiss watch maker”. Tom1 point
-
Sorry but no, two smooth surfaces have low friction but will stick together due to no air being inbetween them. A rough and smooth surface, medium friction, two rough surfaces,high friction. A pivot isn't acting against a jewel or hole when lubricated, it's acting against a thin film of the lubricant.1 point
-
So 2 are new and I think the £65.00 even with the box and instructions is the exception to the rule. Have you at least got the strap for it.
 1 point
 -
@Neverenoughwatches the polished surfaces bit is not universal. If you take two or more guage blocks and slide them together they will stick. This is used to stack them additively to use them as a precision measurement device. Much more accurate than any micrometer. where you have two smooth surfaces friction is high, same as with two rough surfaces for opposite reasons. What you want is dissimilar materials both highly polished then at a surface molecular level friction is reduced. Tom1 point
-
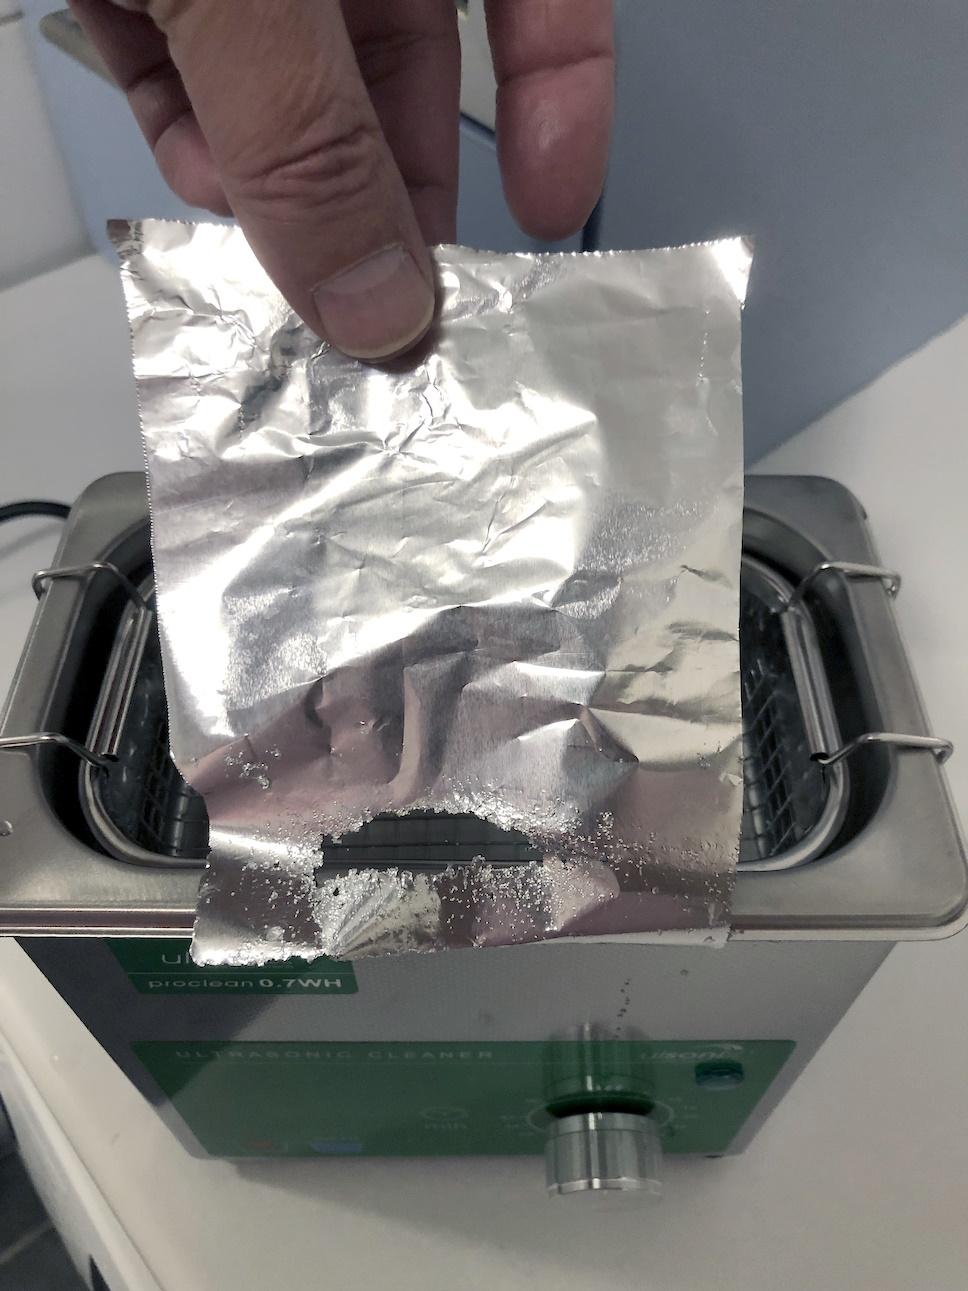
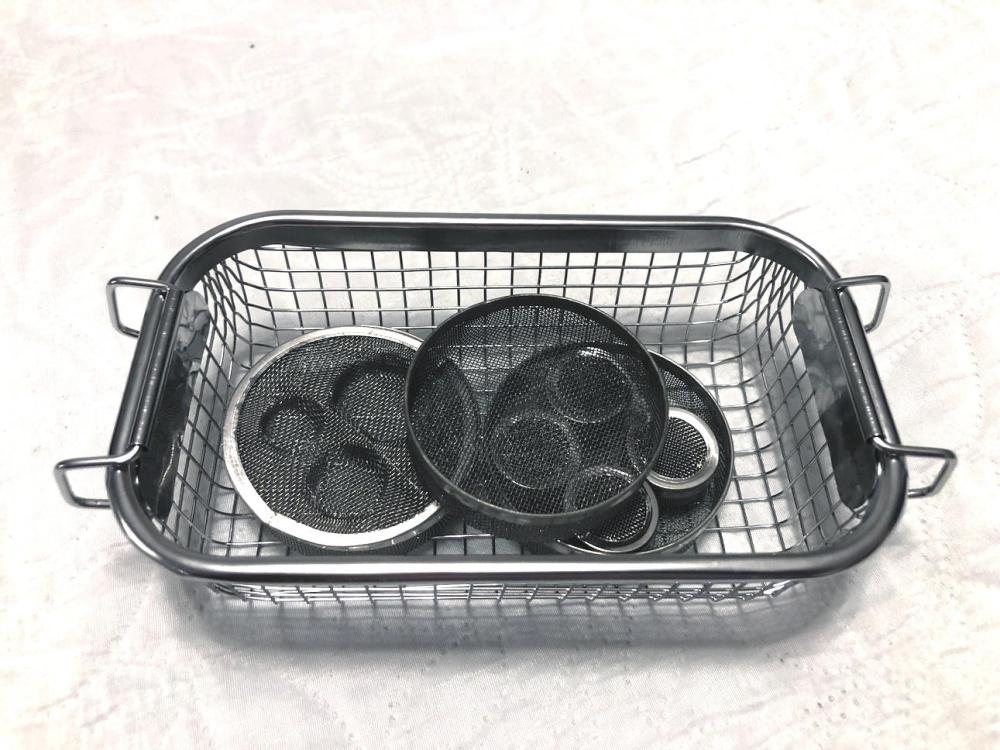
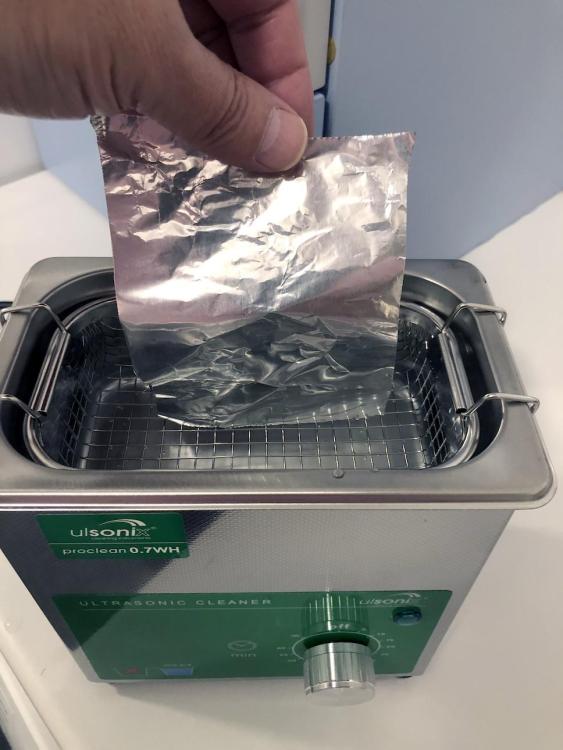
Even though I don’t have any encouraging news, here’s an update for those who are following (and not following) this thread. In short, I’m not particularly impressed with—and quite disappointed with—my newly purchased ultrasonic cleaner. It doesn’t fit the glass jar in which I had planned to submerge the basket from my watch cleaning machine. This is because the listed dimensions of the ultrasonic cleaner refer to the tank’s size, not the basket’s. The basket itself is only 12 cm wide, 6 cm deep, and 4.5 cm high. Instead, I had to fill the entire tank (approximately 0.7 litres) with my cleaning solution (ELMA Red 1:9) and stack the baskets on top of each other. So, how effective was the cleaning? Almost nonexistent. The results were so poor that I suspected something might be wrong with the ultrasonic cleaner. I tested it by holding a thin aluminium foil sheet (1/100 mm thick) in the tank for a minute. It became clear that it's only effective directly above the transducer. So technically, it functions as intended, but it does not meet my needs. I refuse to invest in an ELMA ultrasonic cleaner, as I find it too risky (now having this experience) given the high cost. For now, I’ve decided to stick with my old method: first, brushing off the parts in a degreaser (Horosolv) with a brush—time-consuming, tedious, smelly, and toxic—and then using my over 70-year-old ELMA watch cleaning machine (without ultrasound). At least this gives me good results. If I still find parts that aren’t perfectly clean after this process, I’ll clean them by hand—which I had hoped to avoid. So far, no good experiences with ultrasonic cleaning.

 1 point
 -
If one or few holes in the disc are broken, is of less importance. In almost all cases you can use just one hole. They don‘t have to fit the pivot, just the edge behind the pivot must run inside the funnel. Frank1 point
-
Yah it is an interesting exercise albeit polarizing. I think I’ve done this a couple times with rollers and one with a very hard canon pinion that wouldn’t take a dent. Those punches are quite sharp and can make an impression just by pressing them into the part. The lightest of taps will bring up the burs that secure it. If there’s concern over crushing the roller I think one is working too hard. I don’t think there’d be a problem reversing it with a smoothing broach and a bit of dressing to the edge…1 point
-
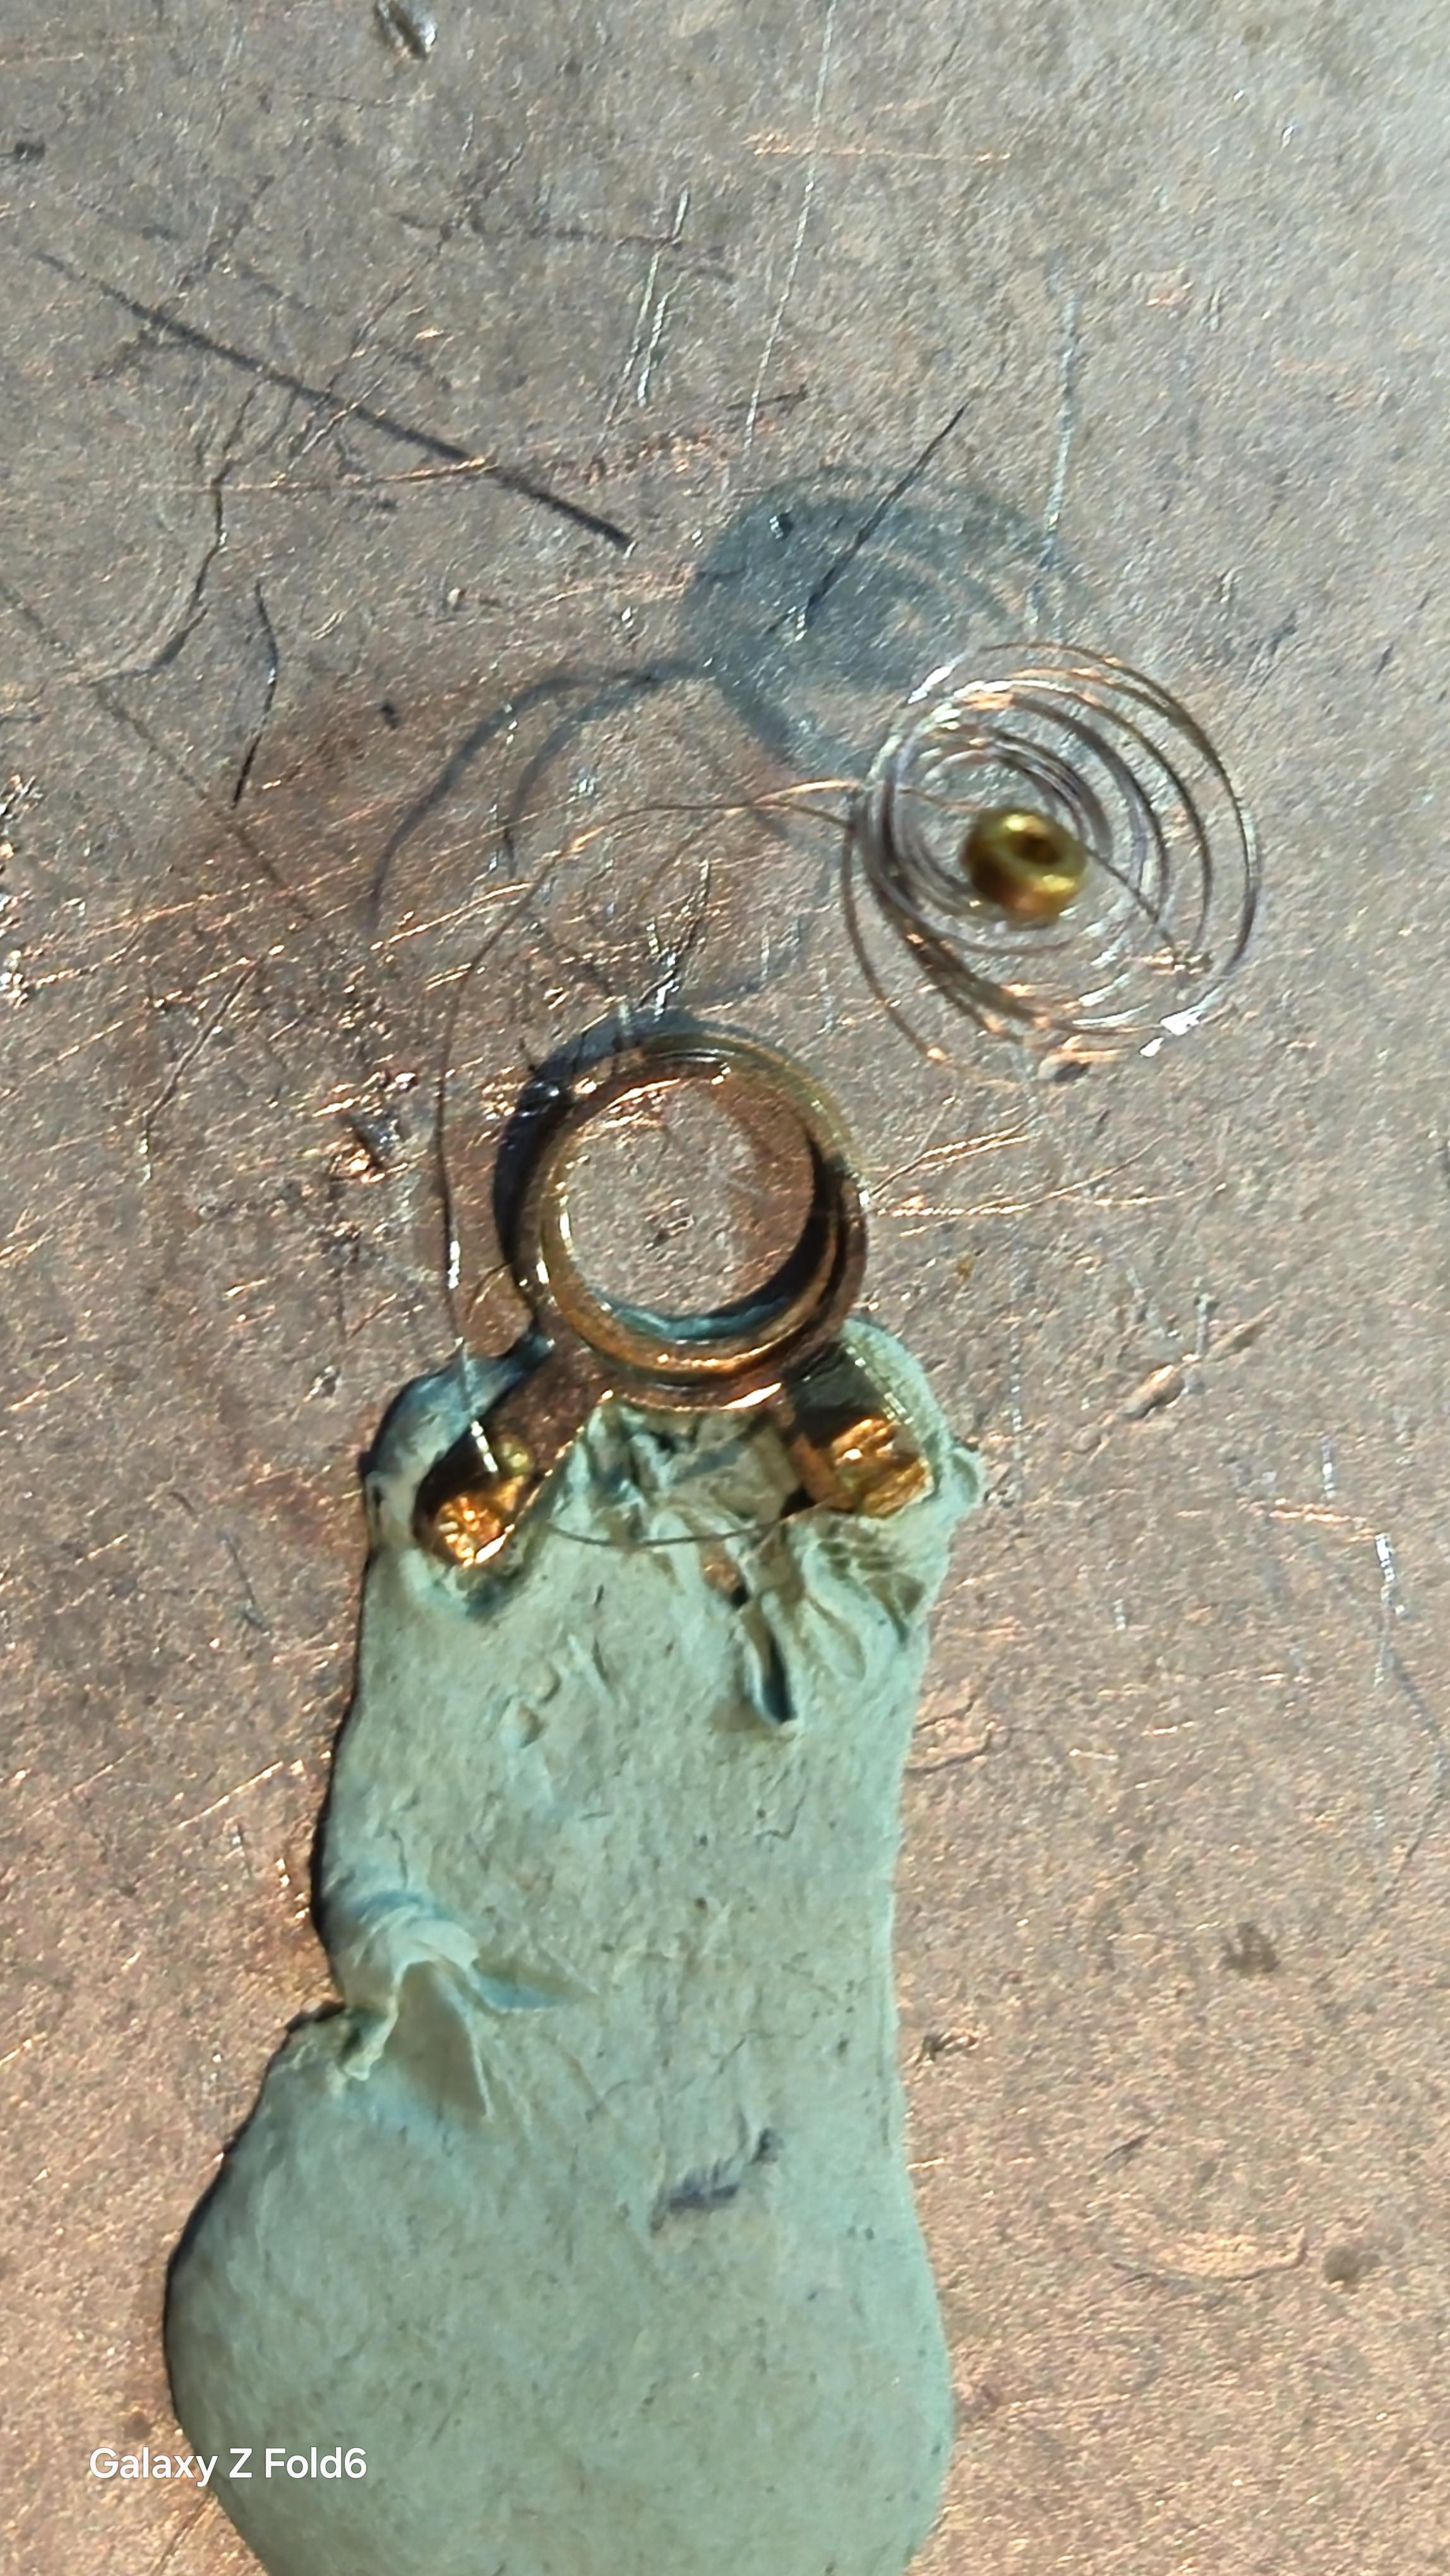
Thanks for the interest! Here's the position after phase 1: the HS seems to be shellacted into the stud & I didn't want to get into removing & re-attaching it; also I couldn't move the boot on the regulator to release the HS. Hence the arrangement at the outer end of the HS shown in the photo which gets these parts out of the way. After trying to undo the tangle around the collet for an hour or so I decided the only option would be undo the whole HS from the outer end & I'm now at the last stage of that having worked back to the final few coils around the collet.....
 1 point
 -
I actually need the the opposite. I have a 3mm base for the anvils but I need a converter to accept 4 mm anvils so I can use the Incabloc set. Does anybody know where I can get one, or where I can get one made? I really don’t want to buy a used 4mm base or a Horia clone.1 point
-
"Diddly squat" is not a term of art in the watchmakers lexicon, but accurately conveys the fact that a change in staff has an infinitesimal effect on resonant frequency of the balance/hairspring oscillator. Assuming the pivots are properly dressed. It is a common term here in Texas. "I don't give a diddly squat about your bob wire fence, those are my cows and I am commin to get them."1 point
-
Here is a small update on my polishing vice build. I've already made the base 2mm thicker as this as too much flex. But I will install some roller bearings so it can slide along a rail
 1 point
 -
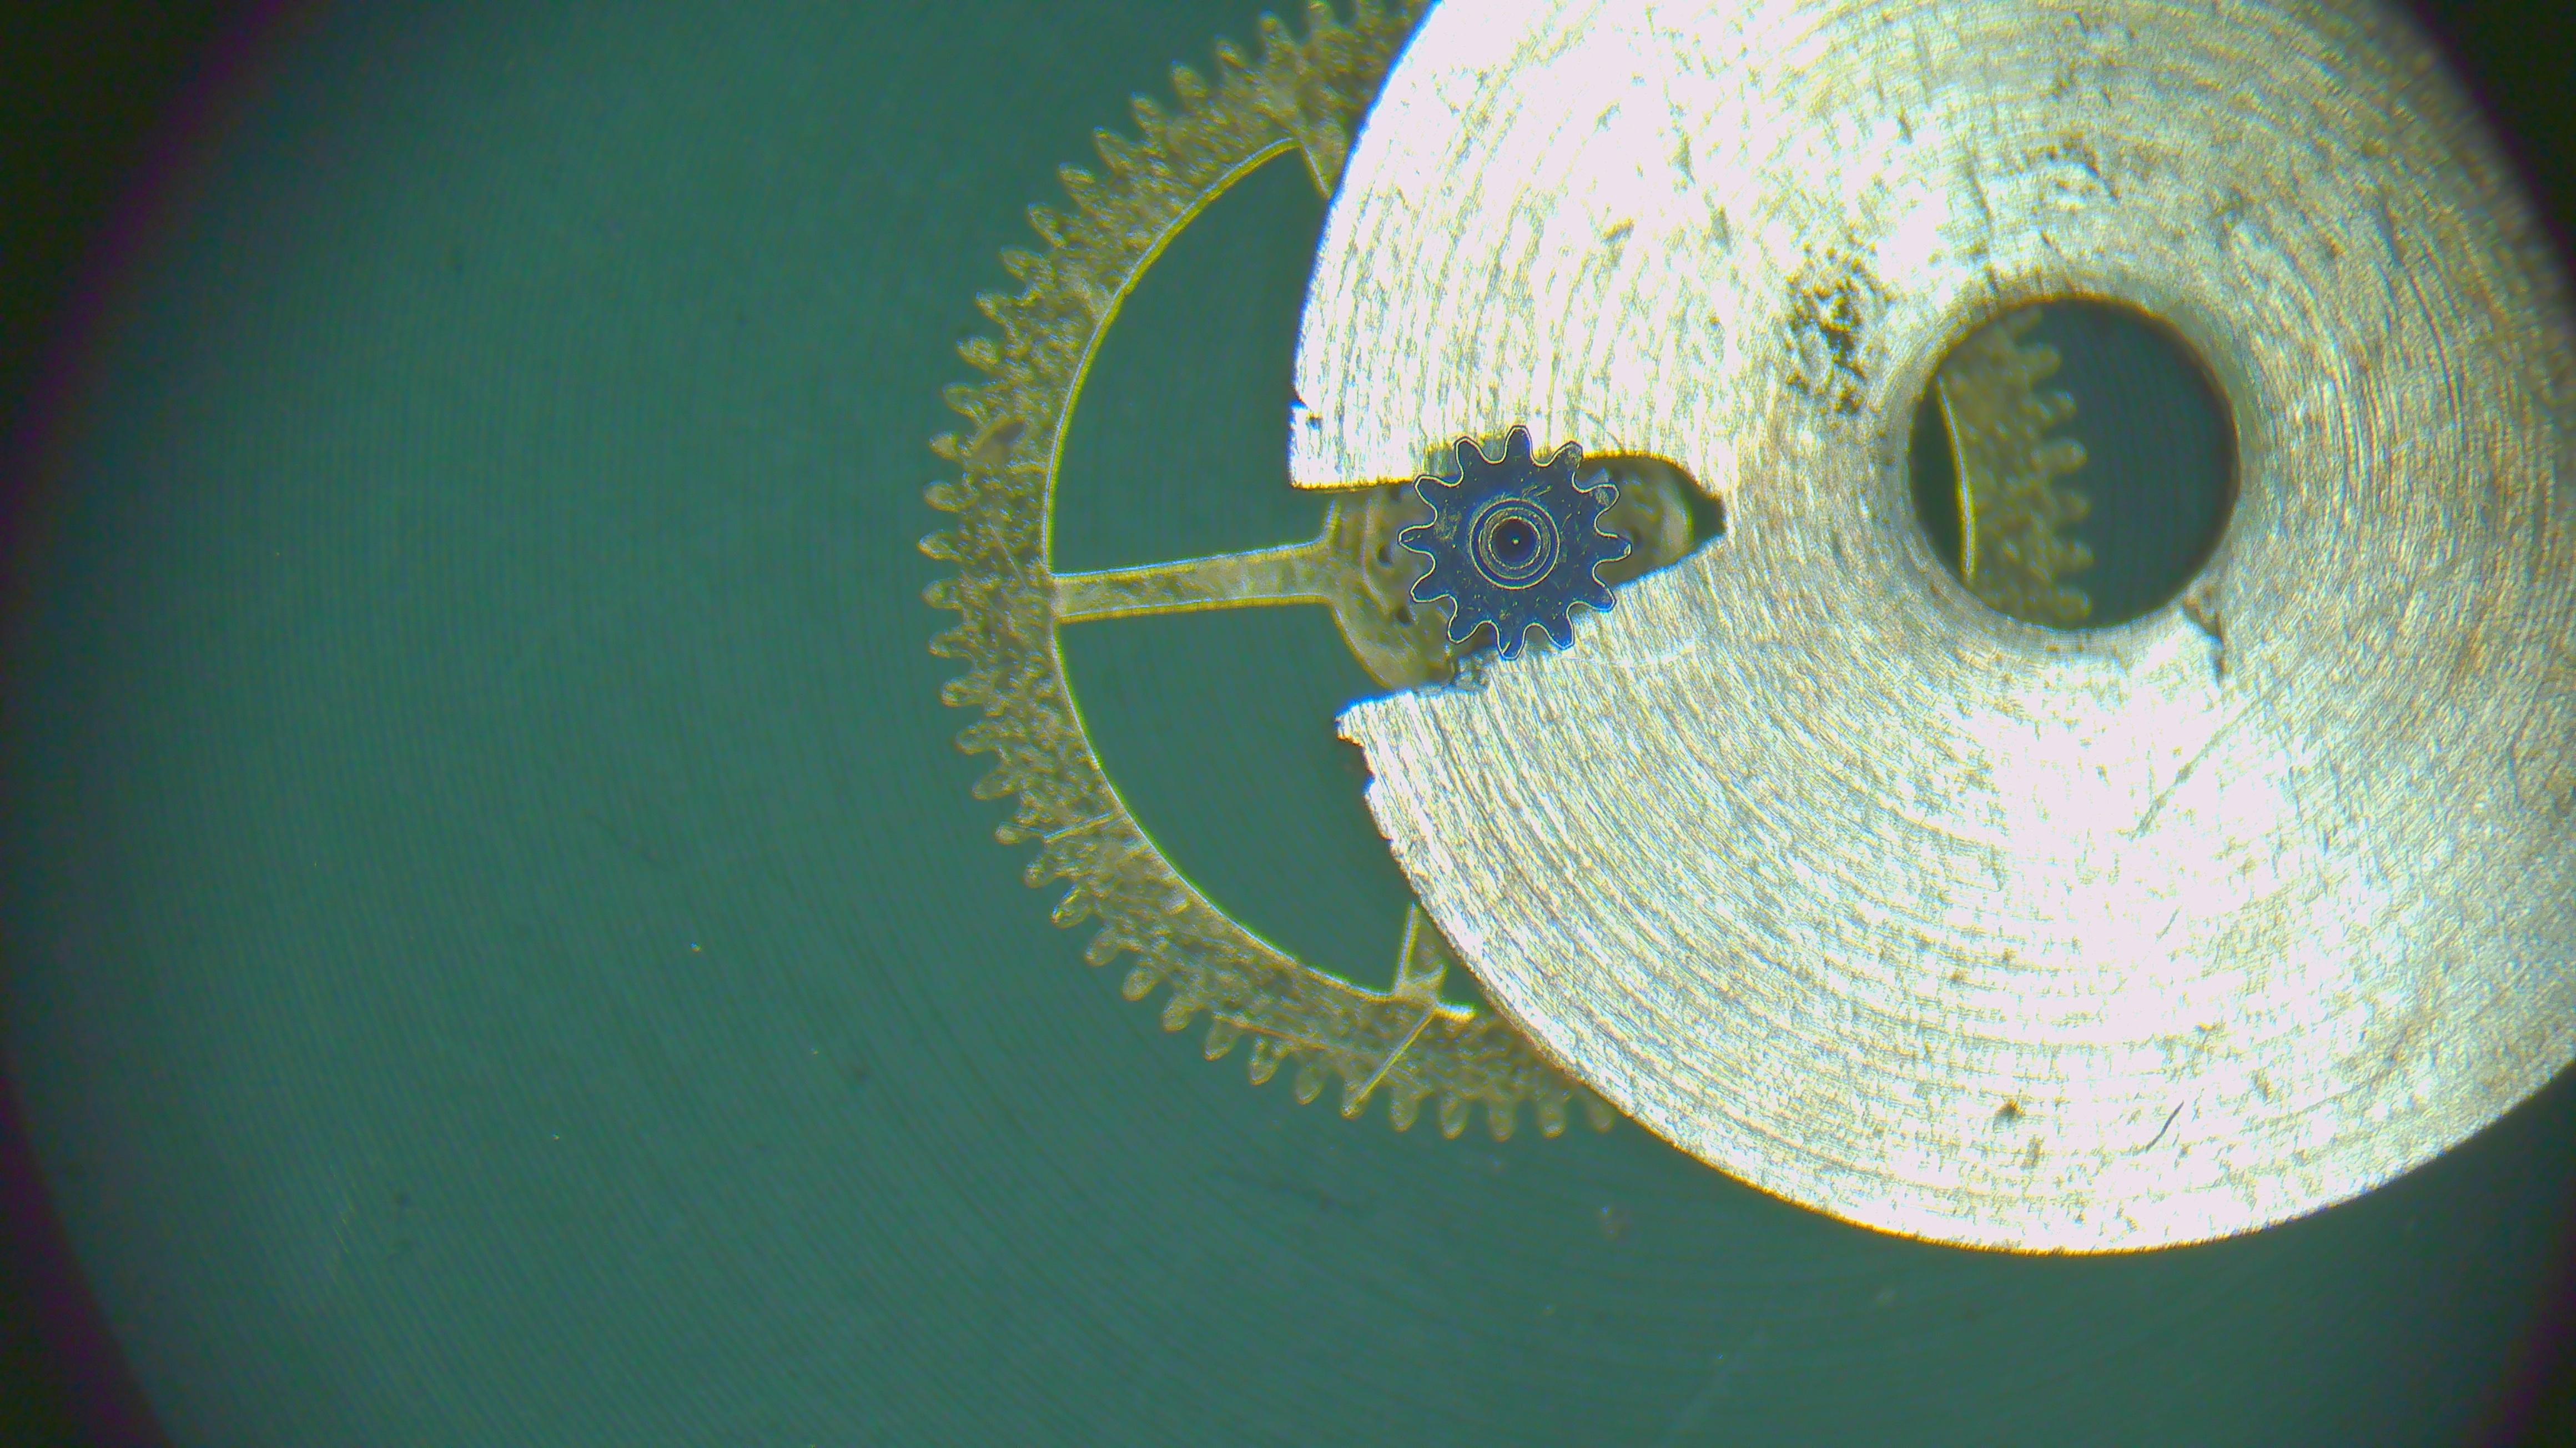
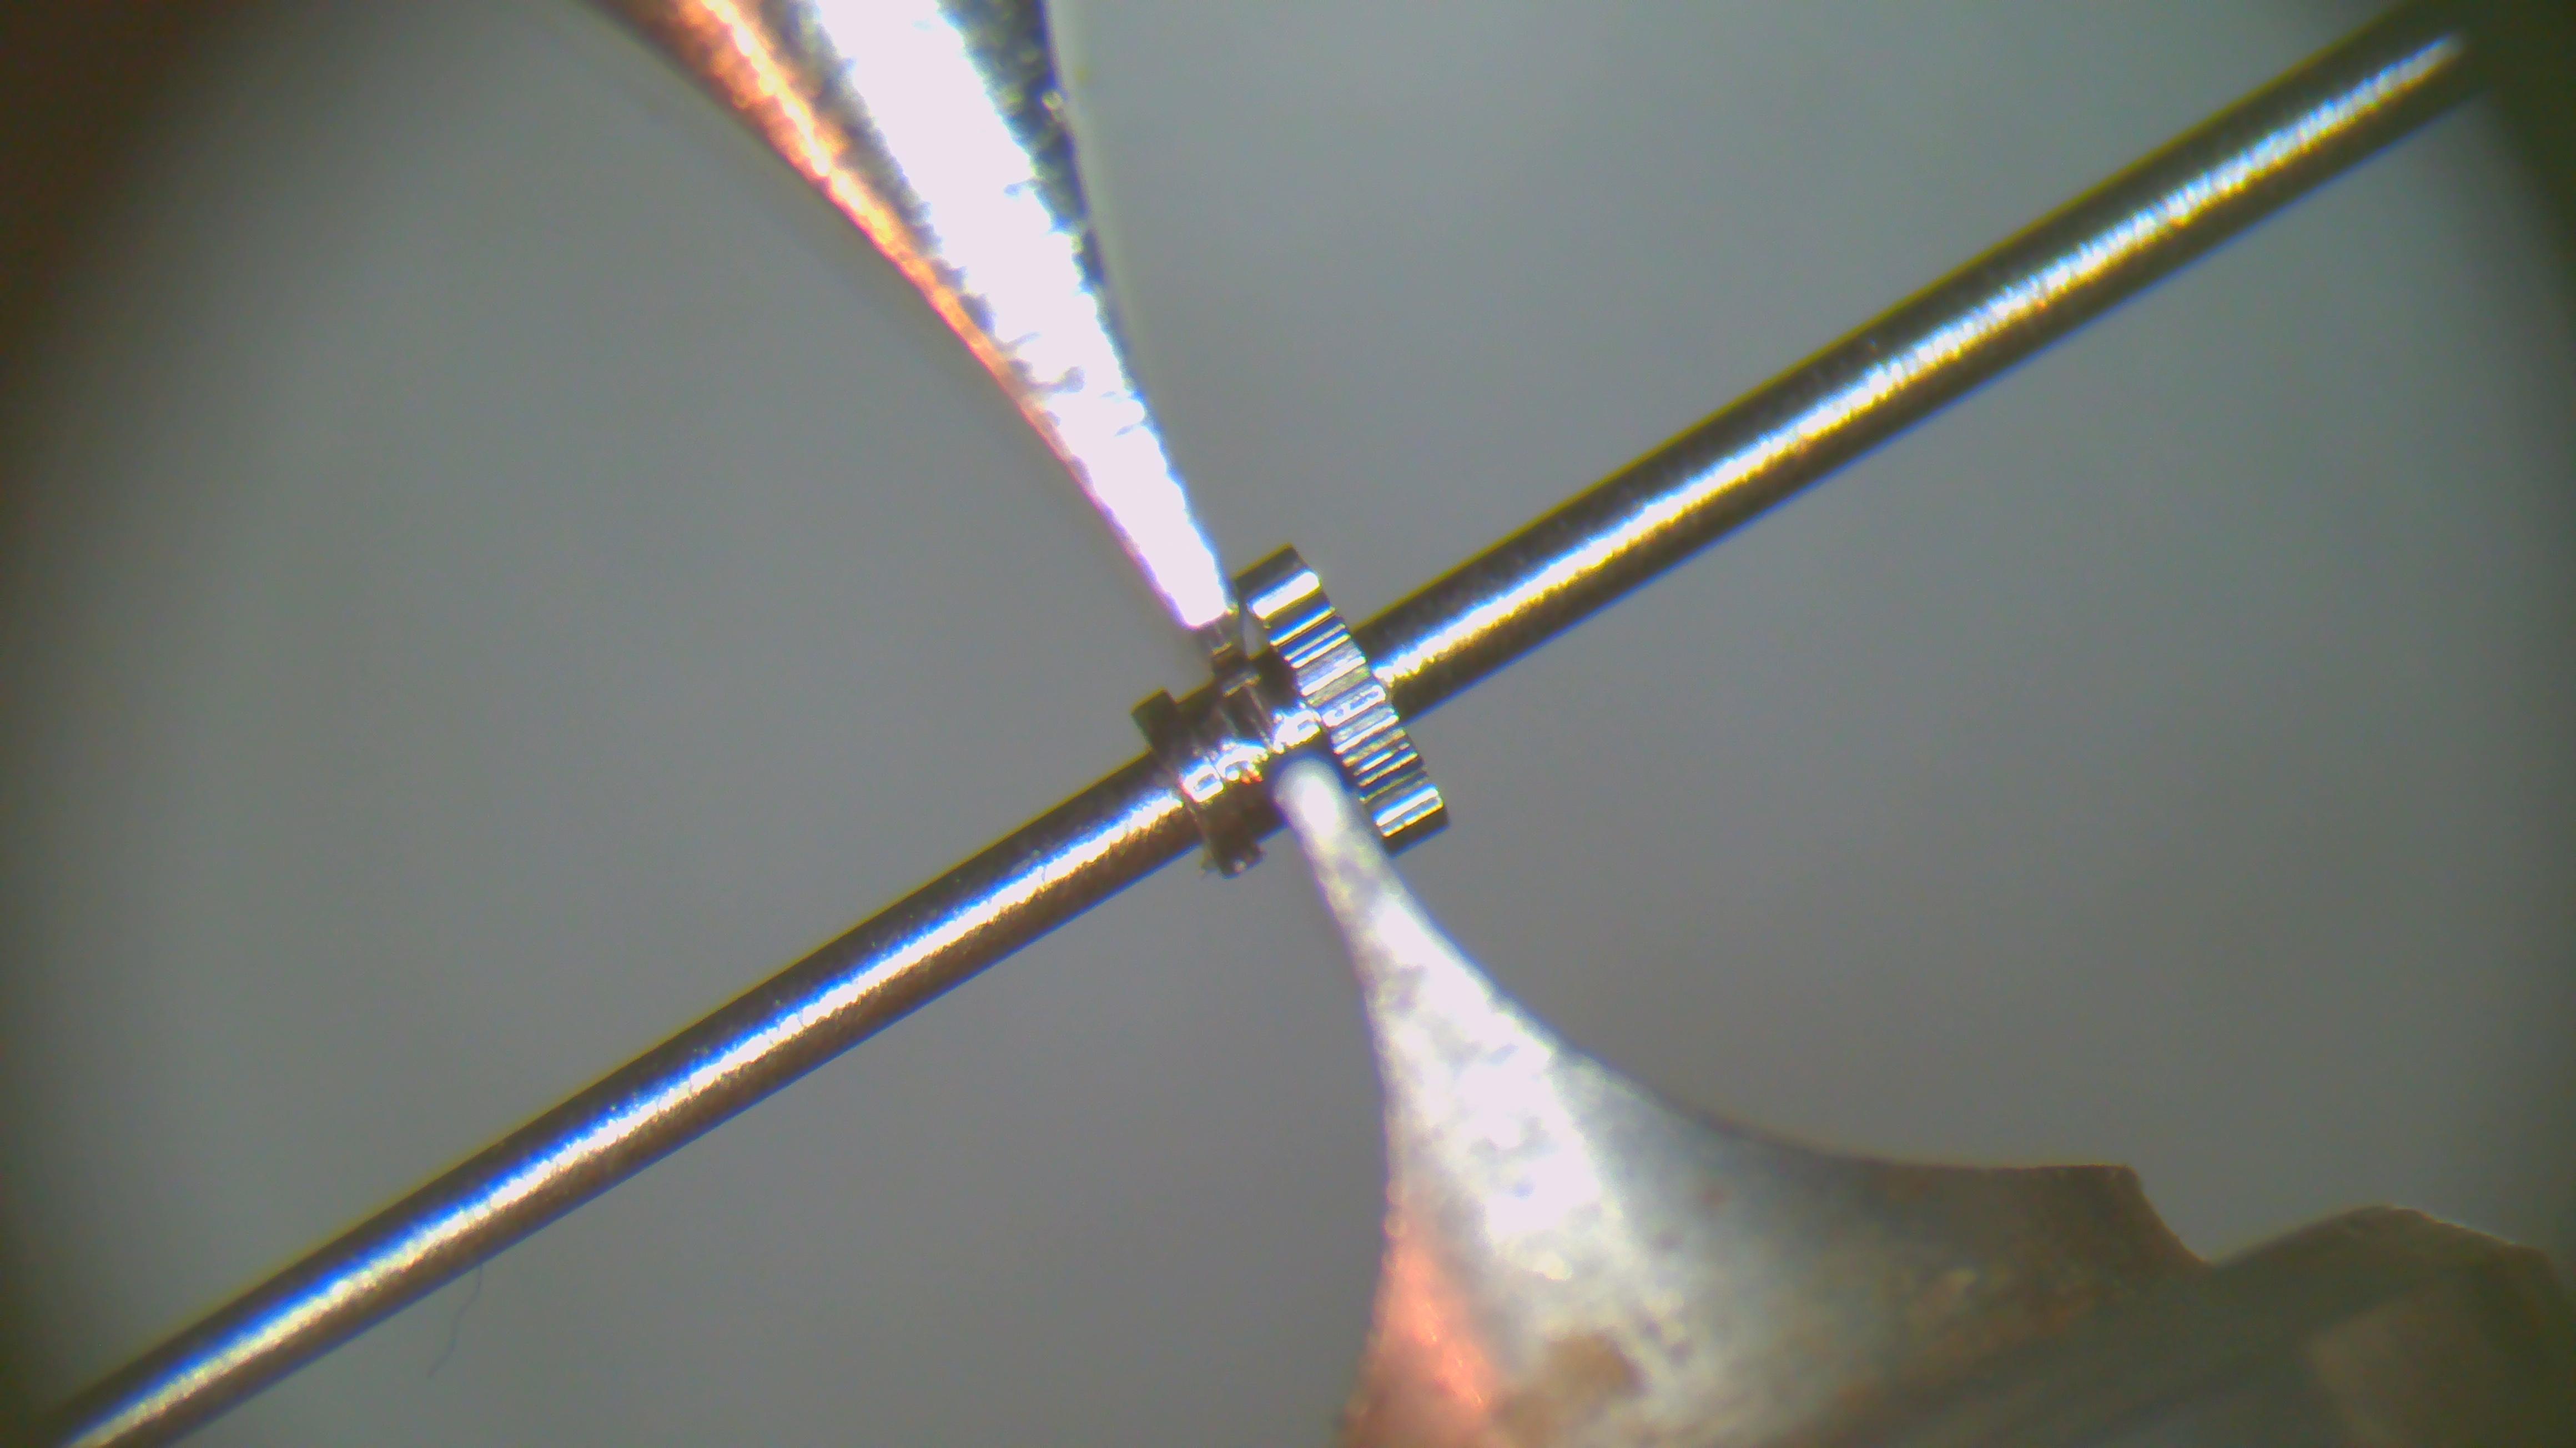
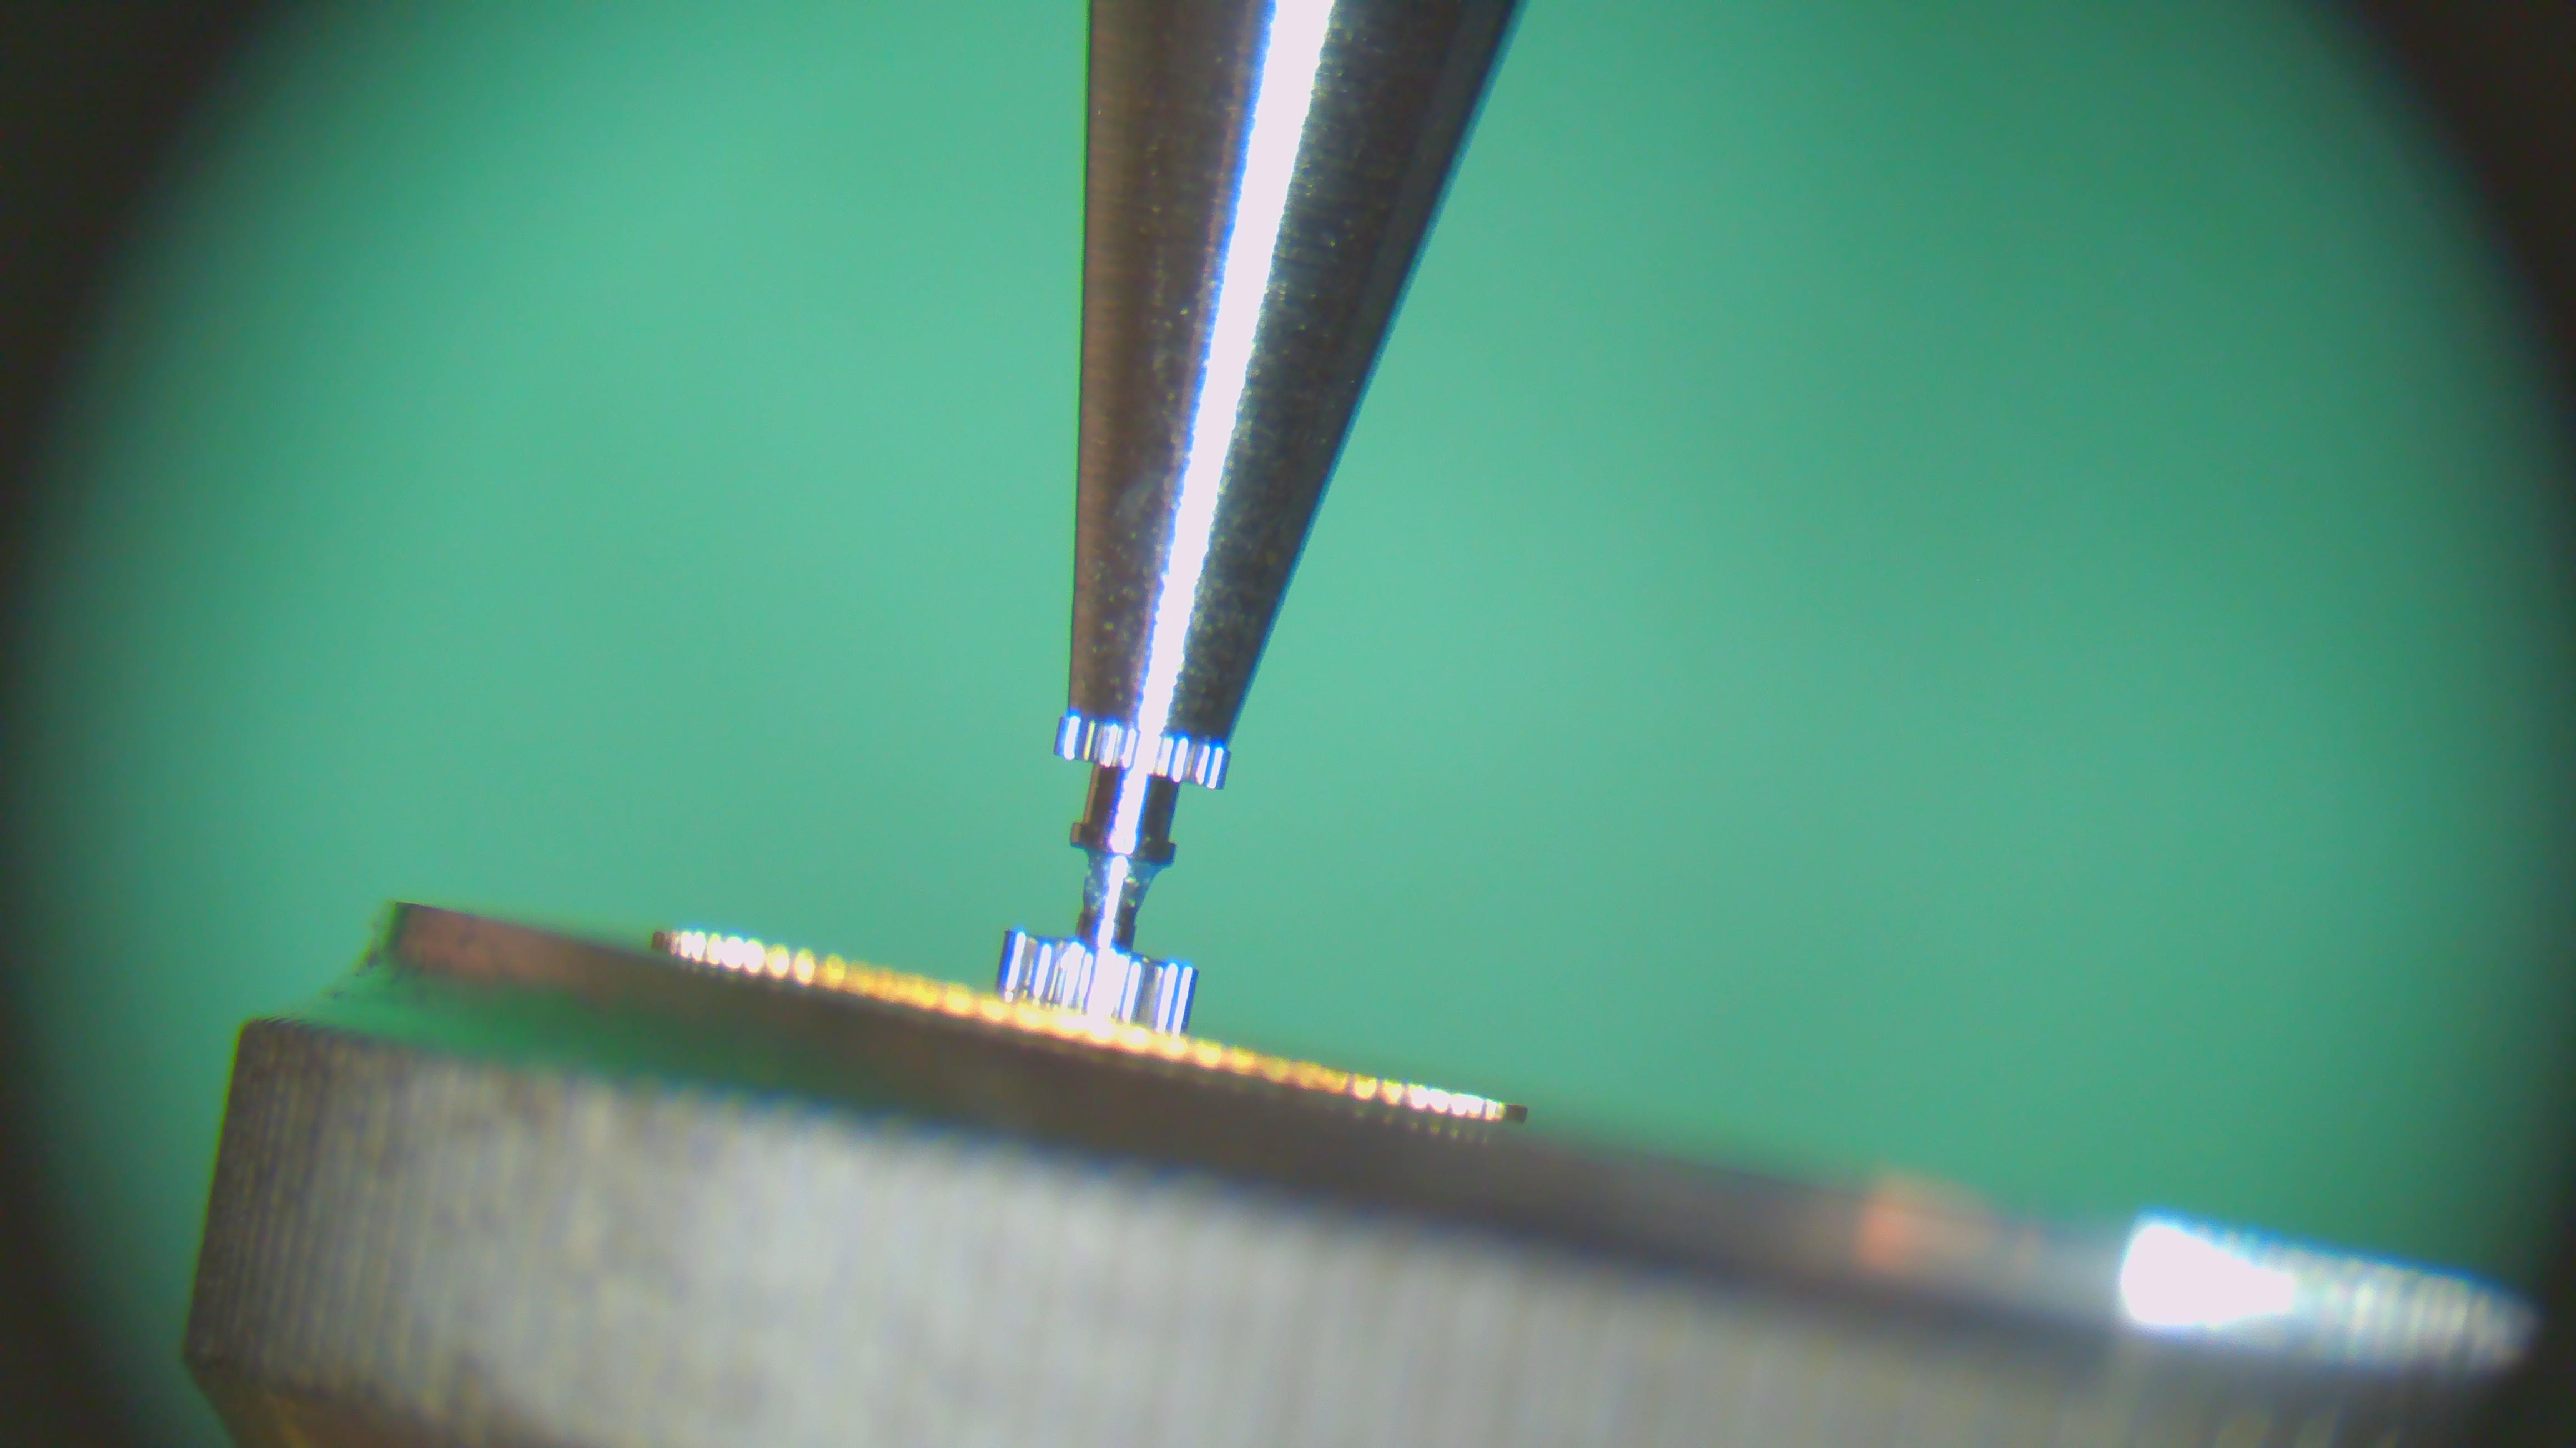
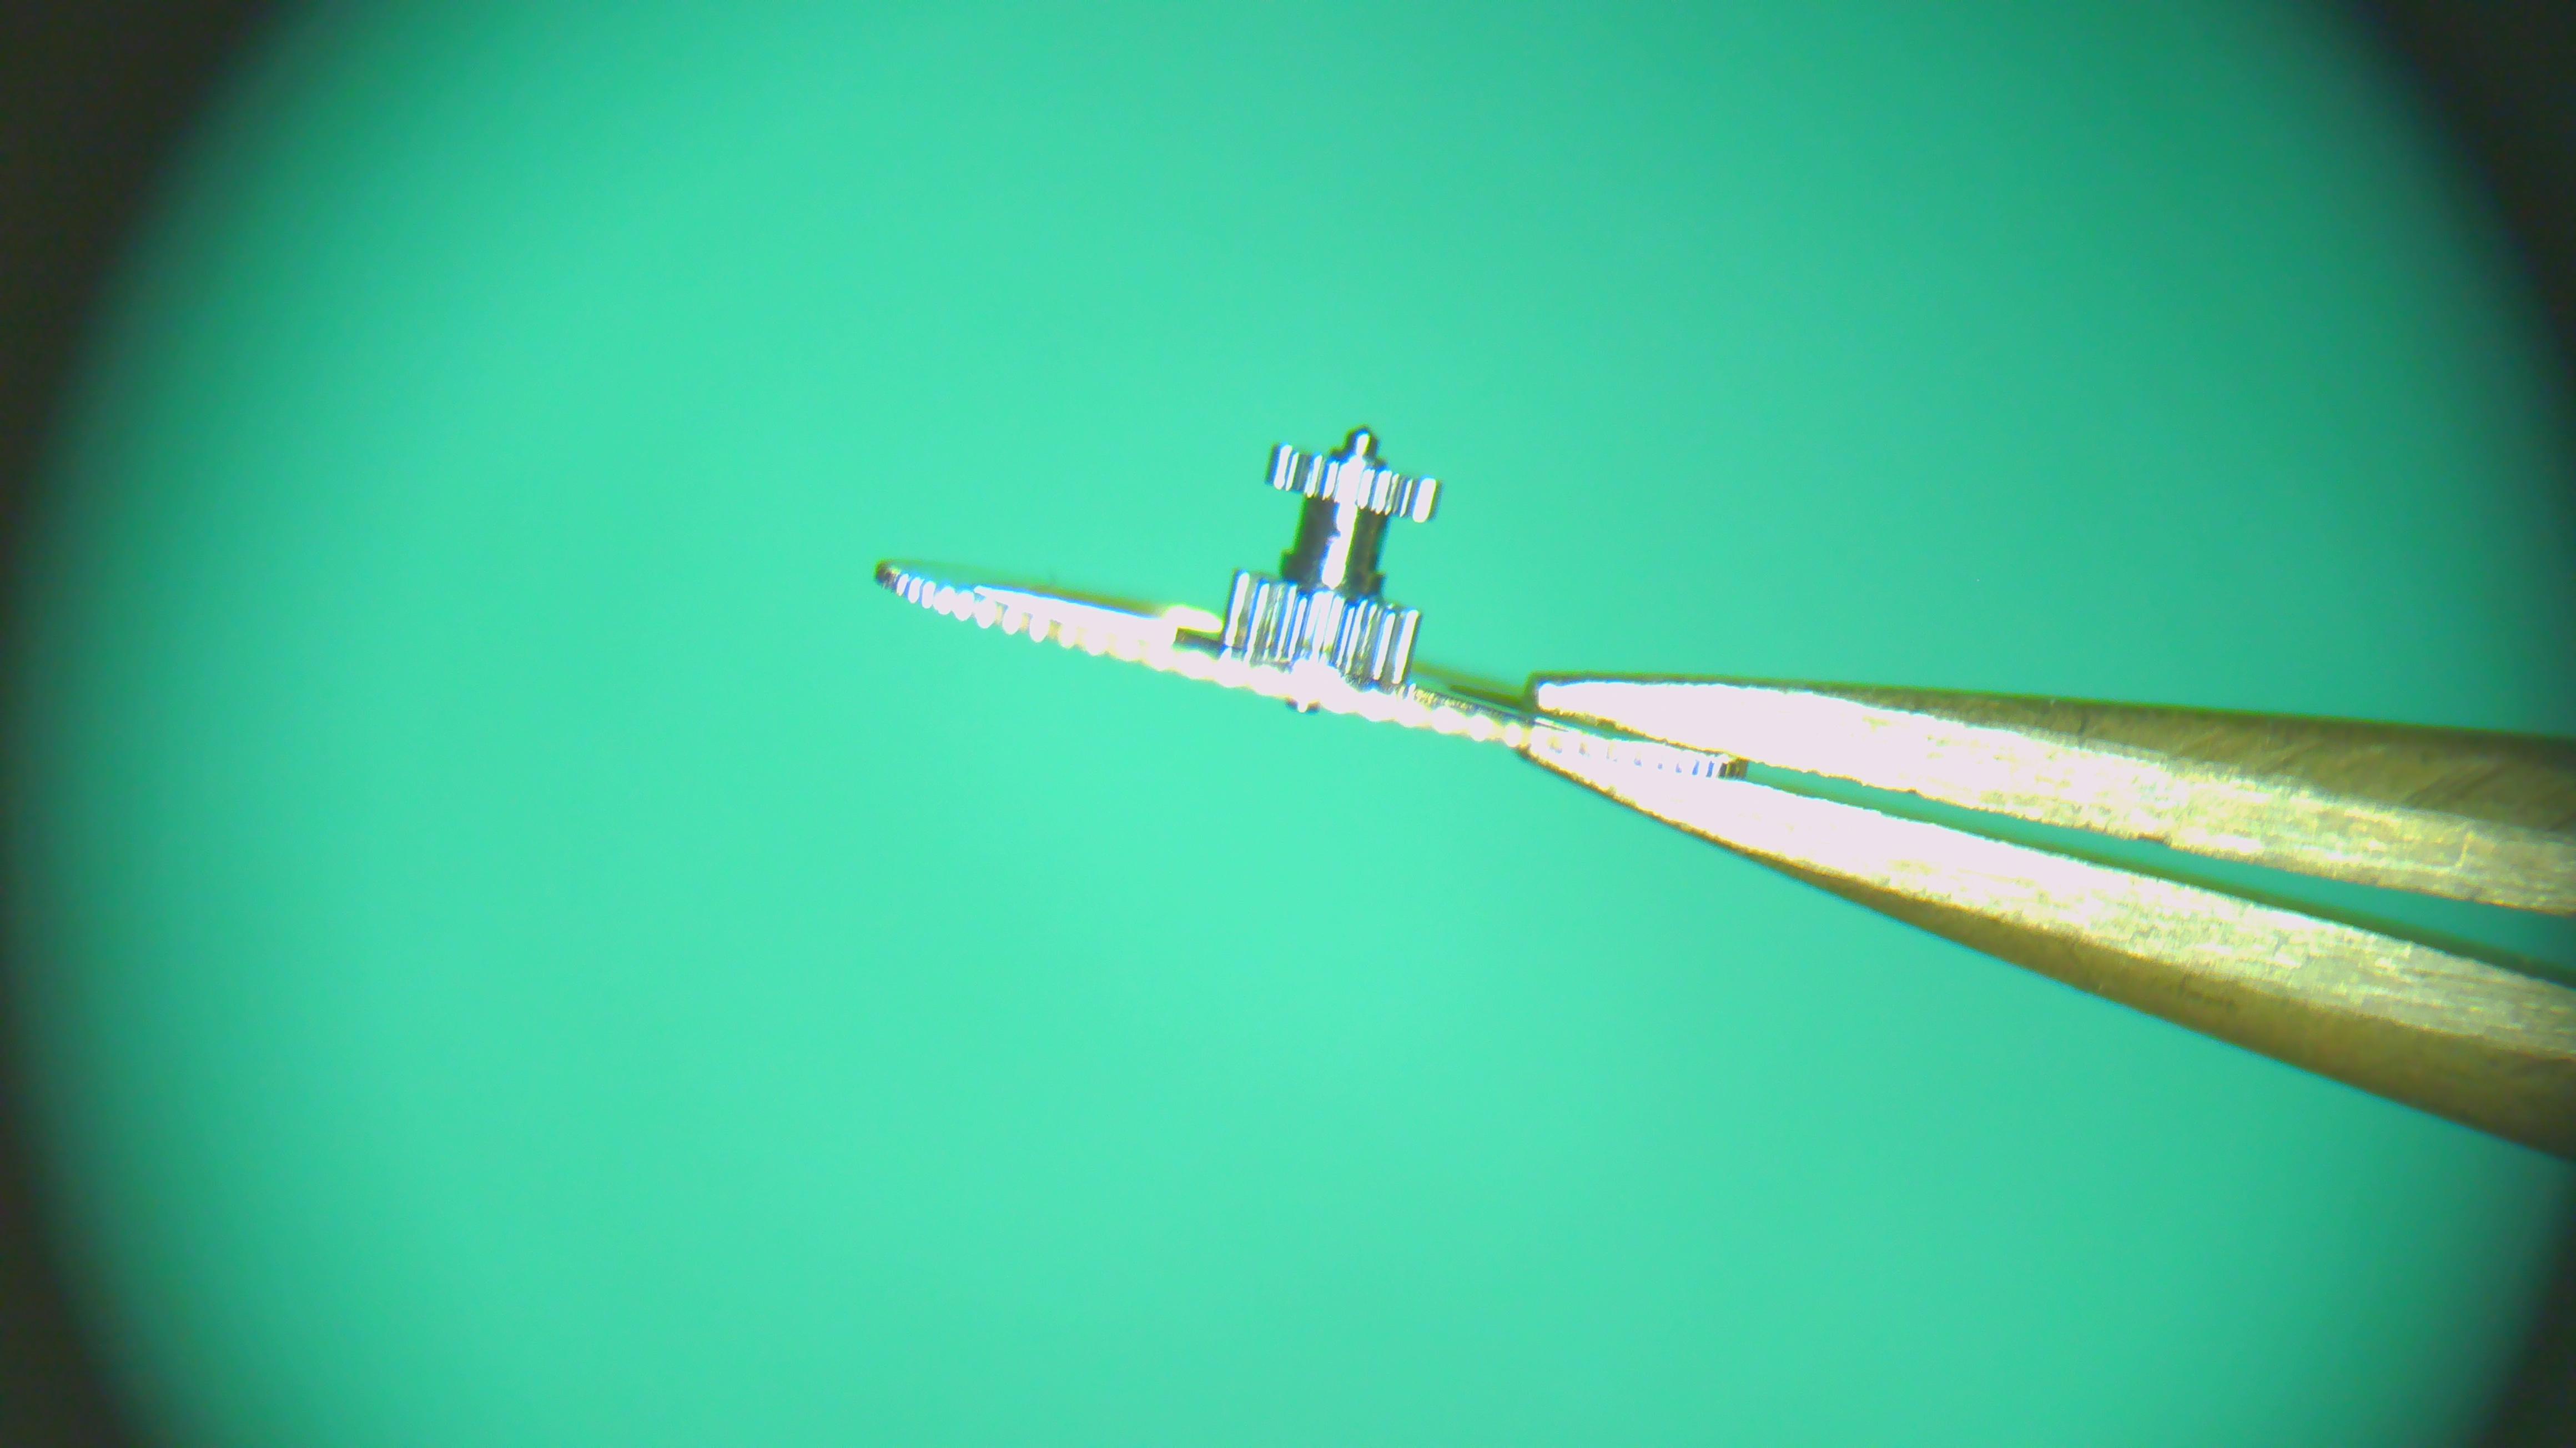
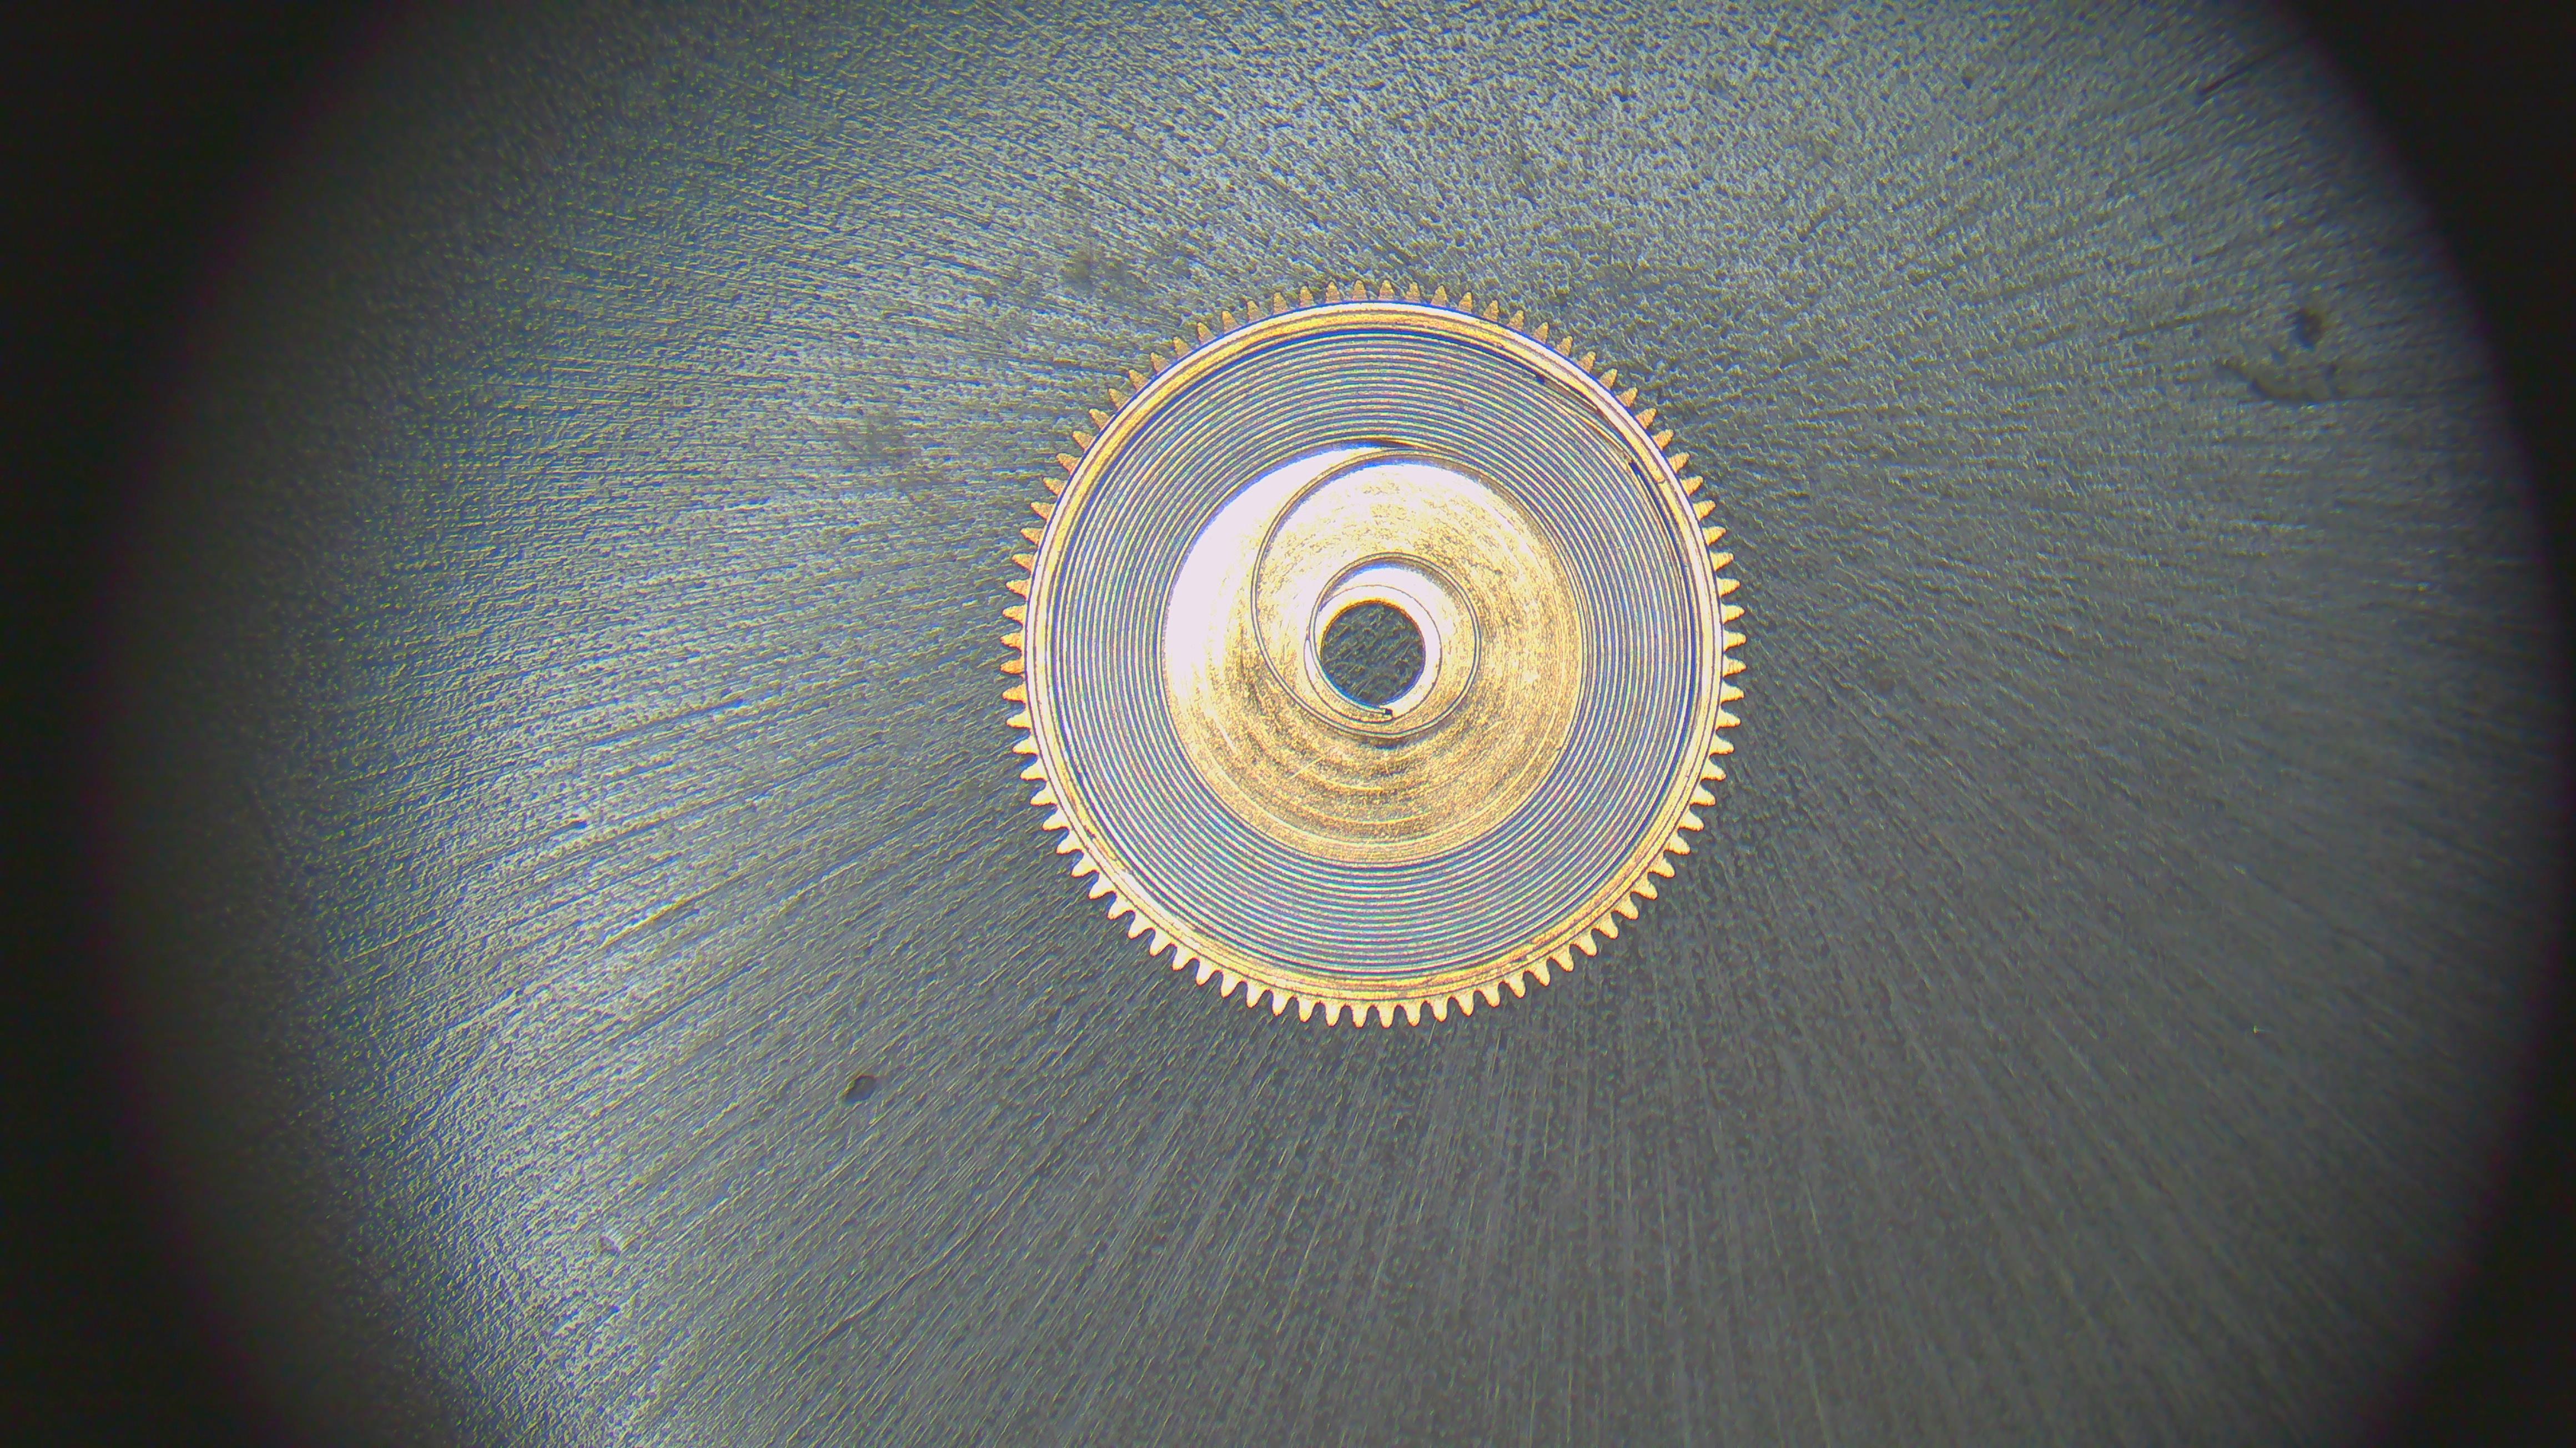
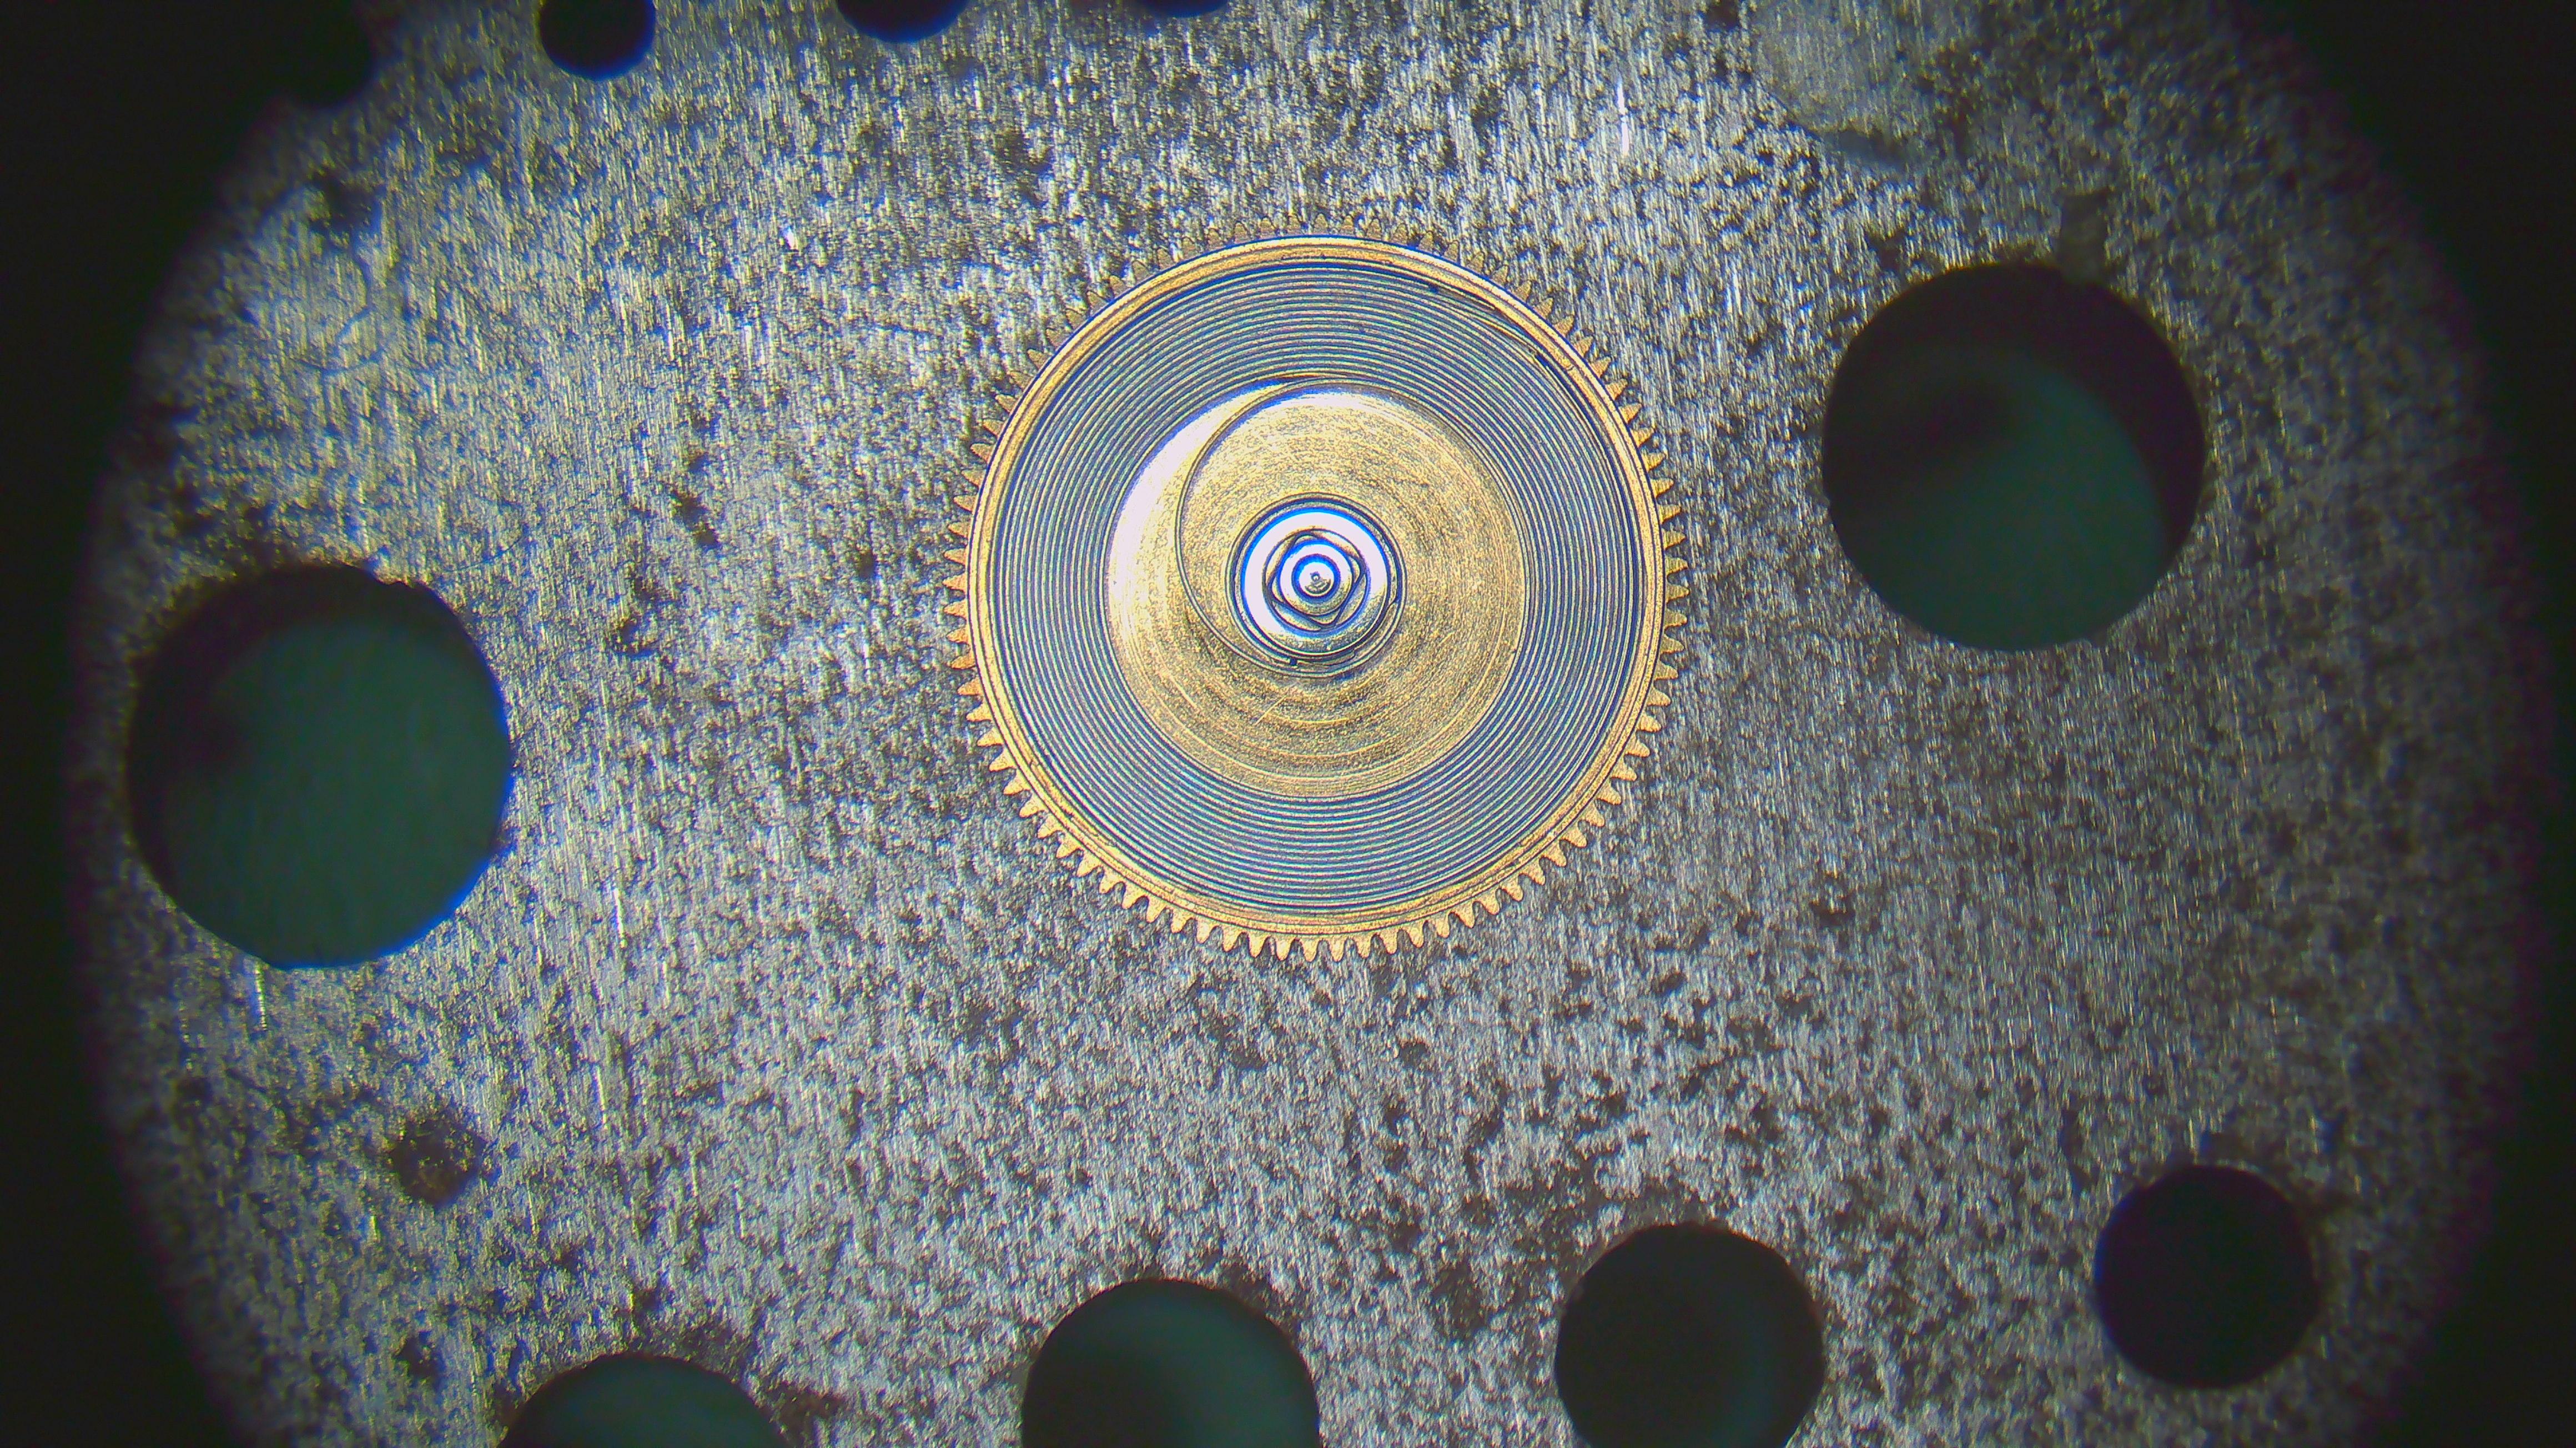
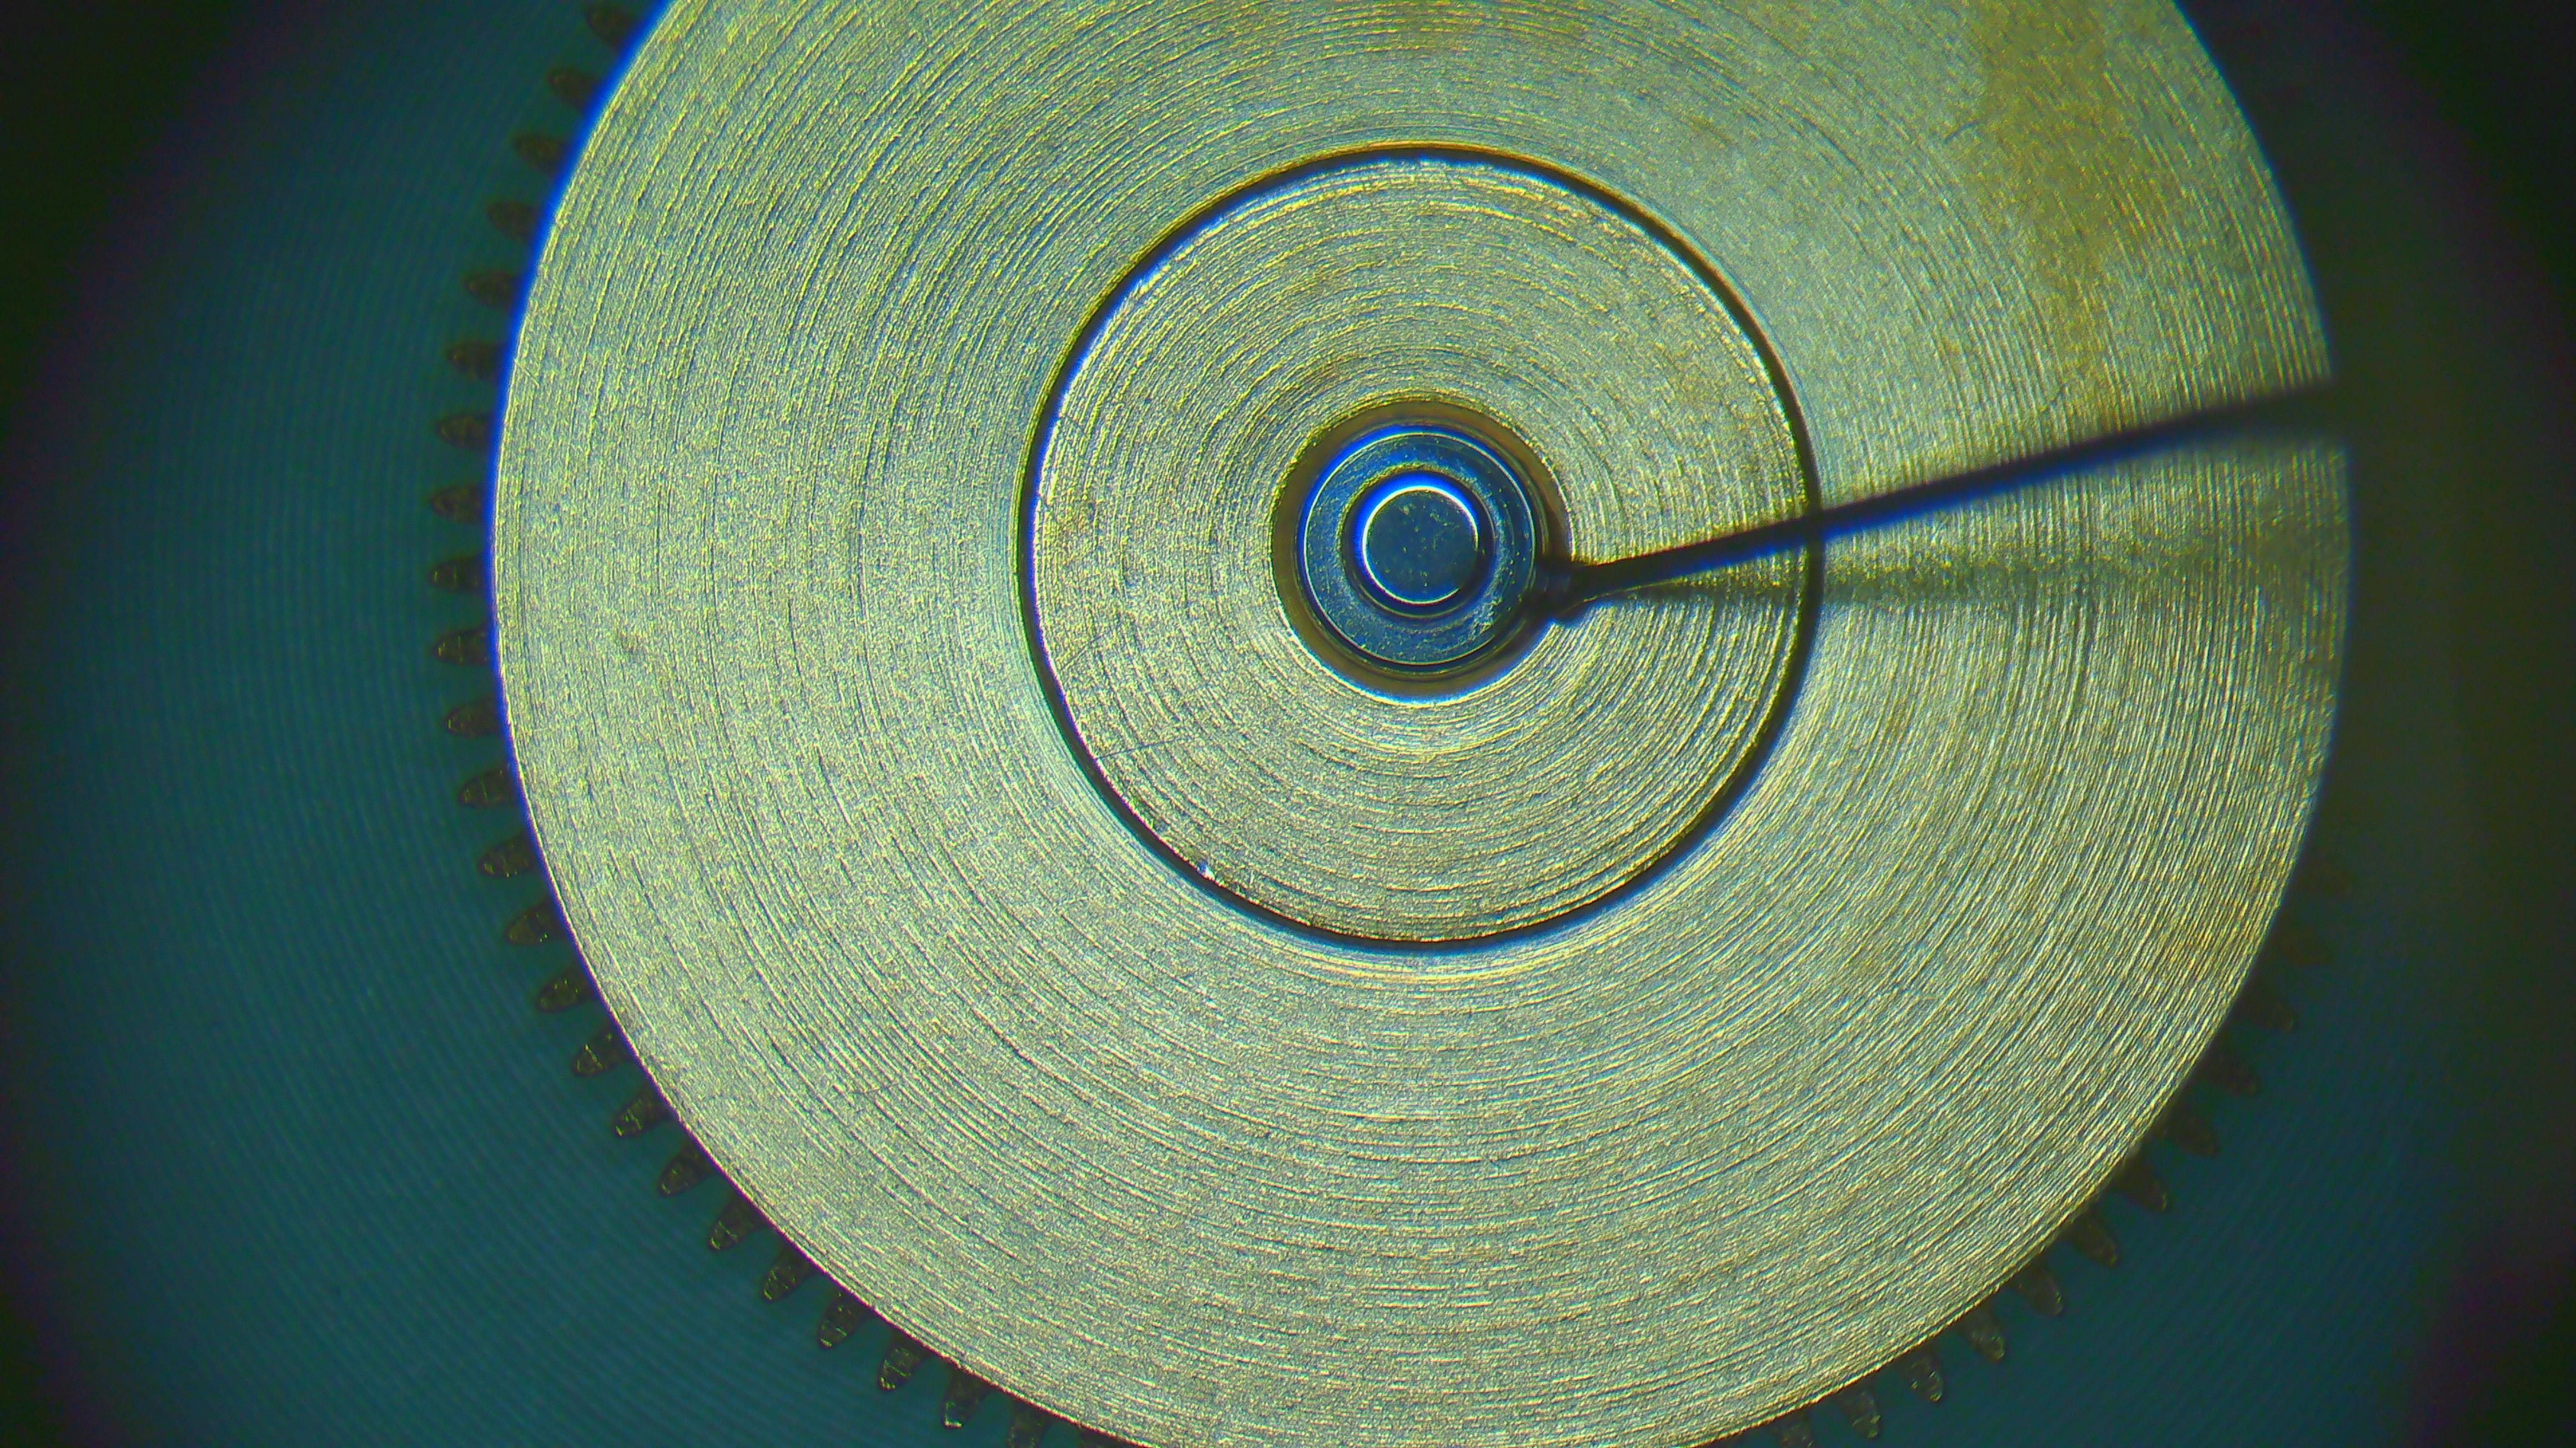
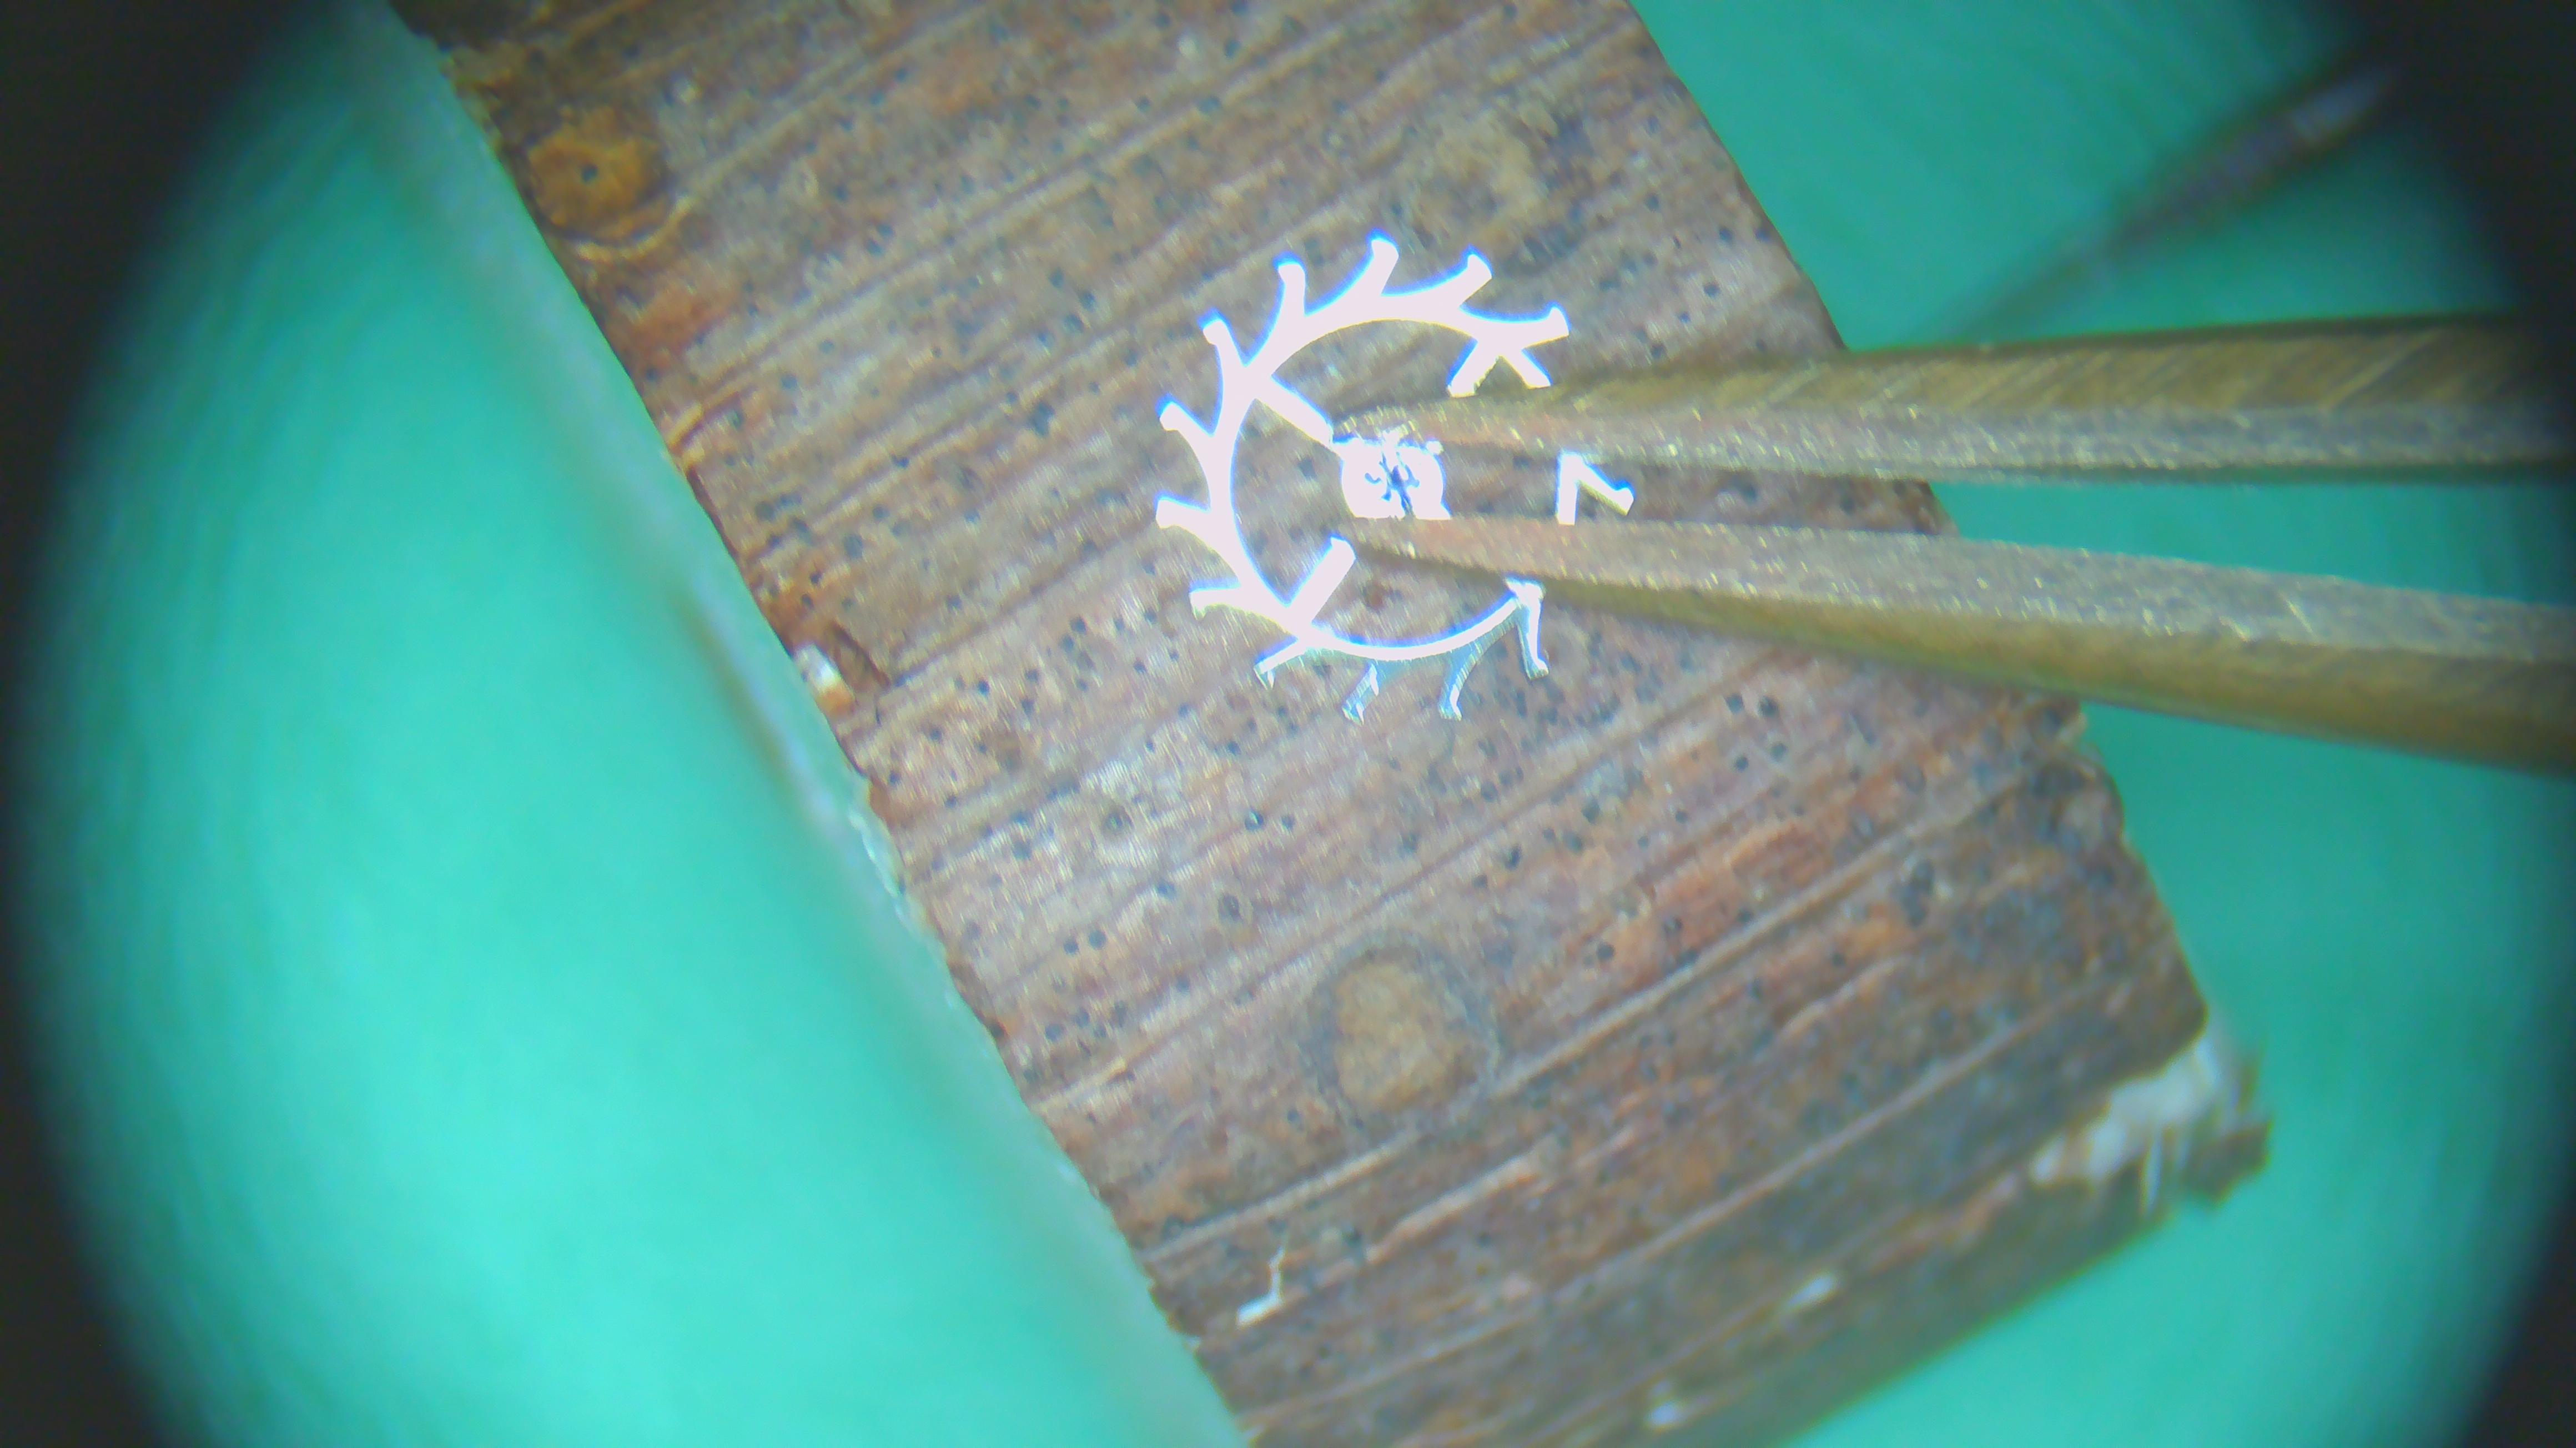
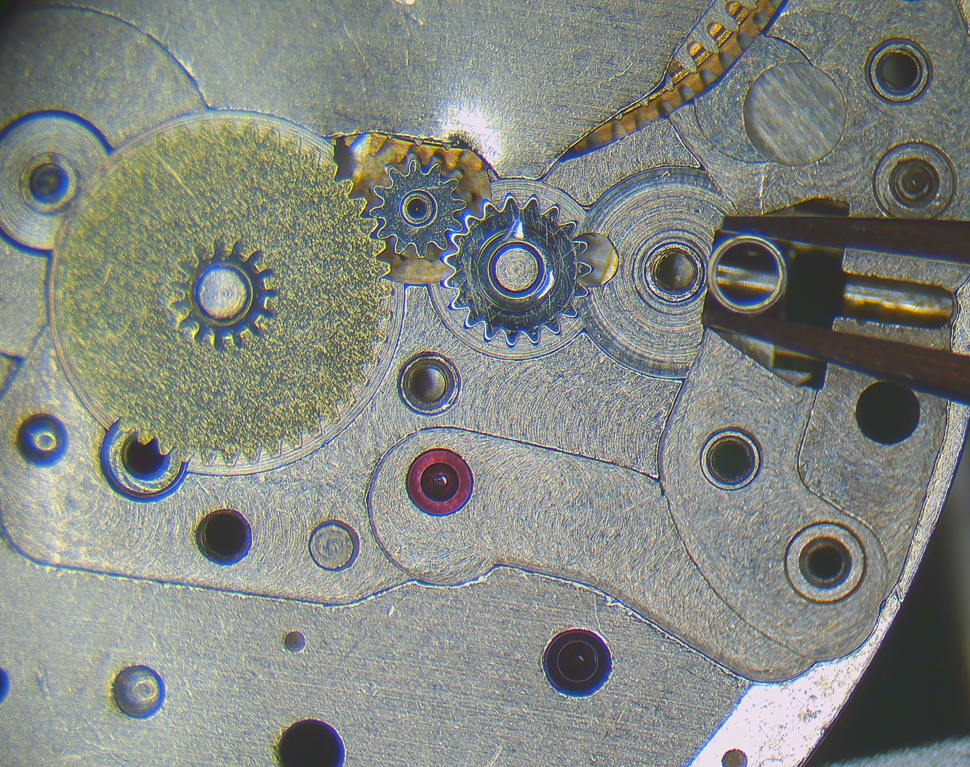
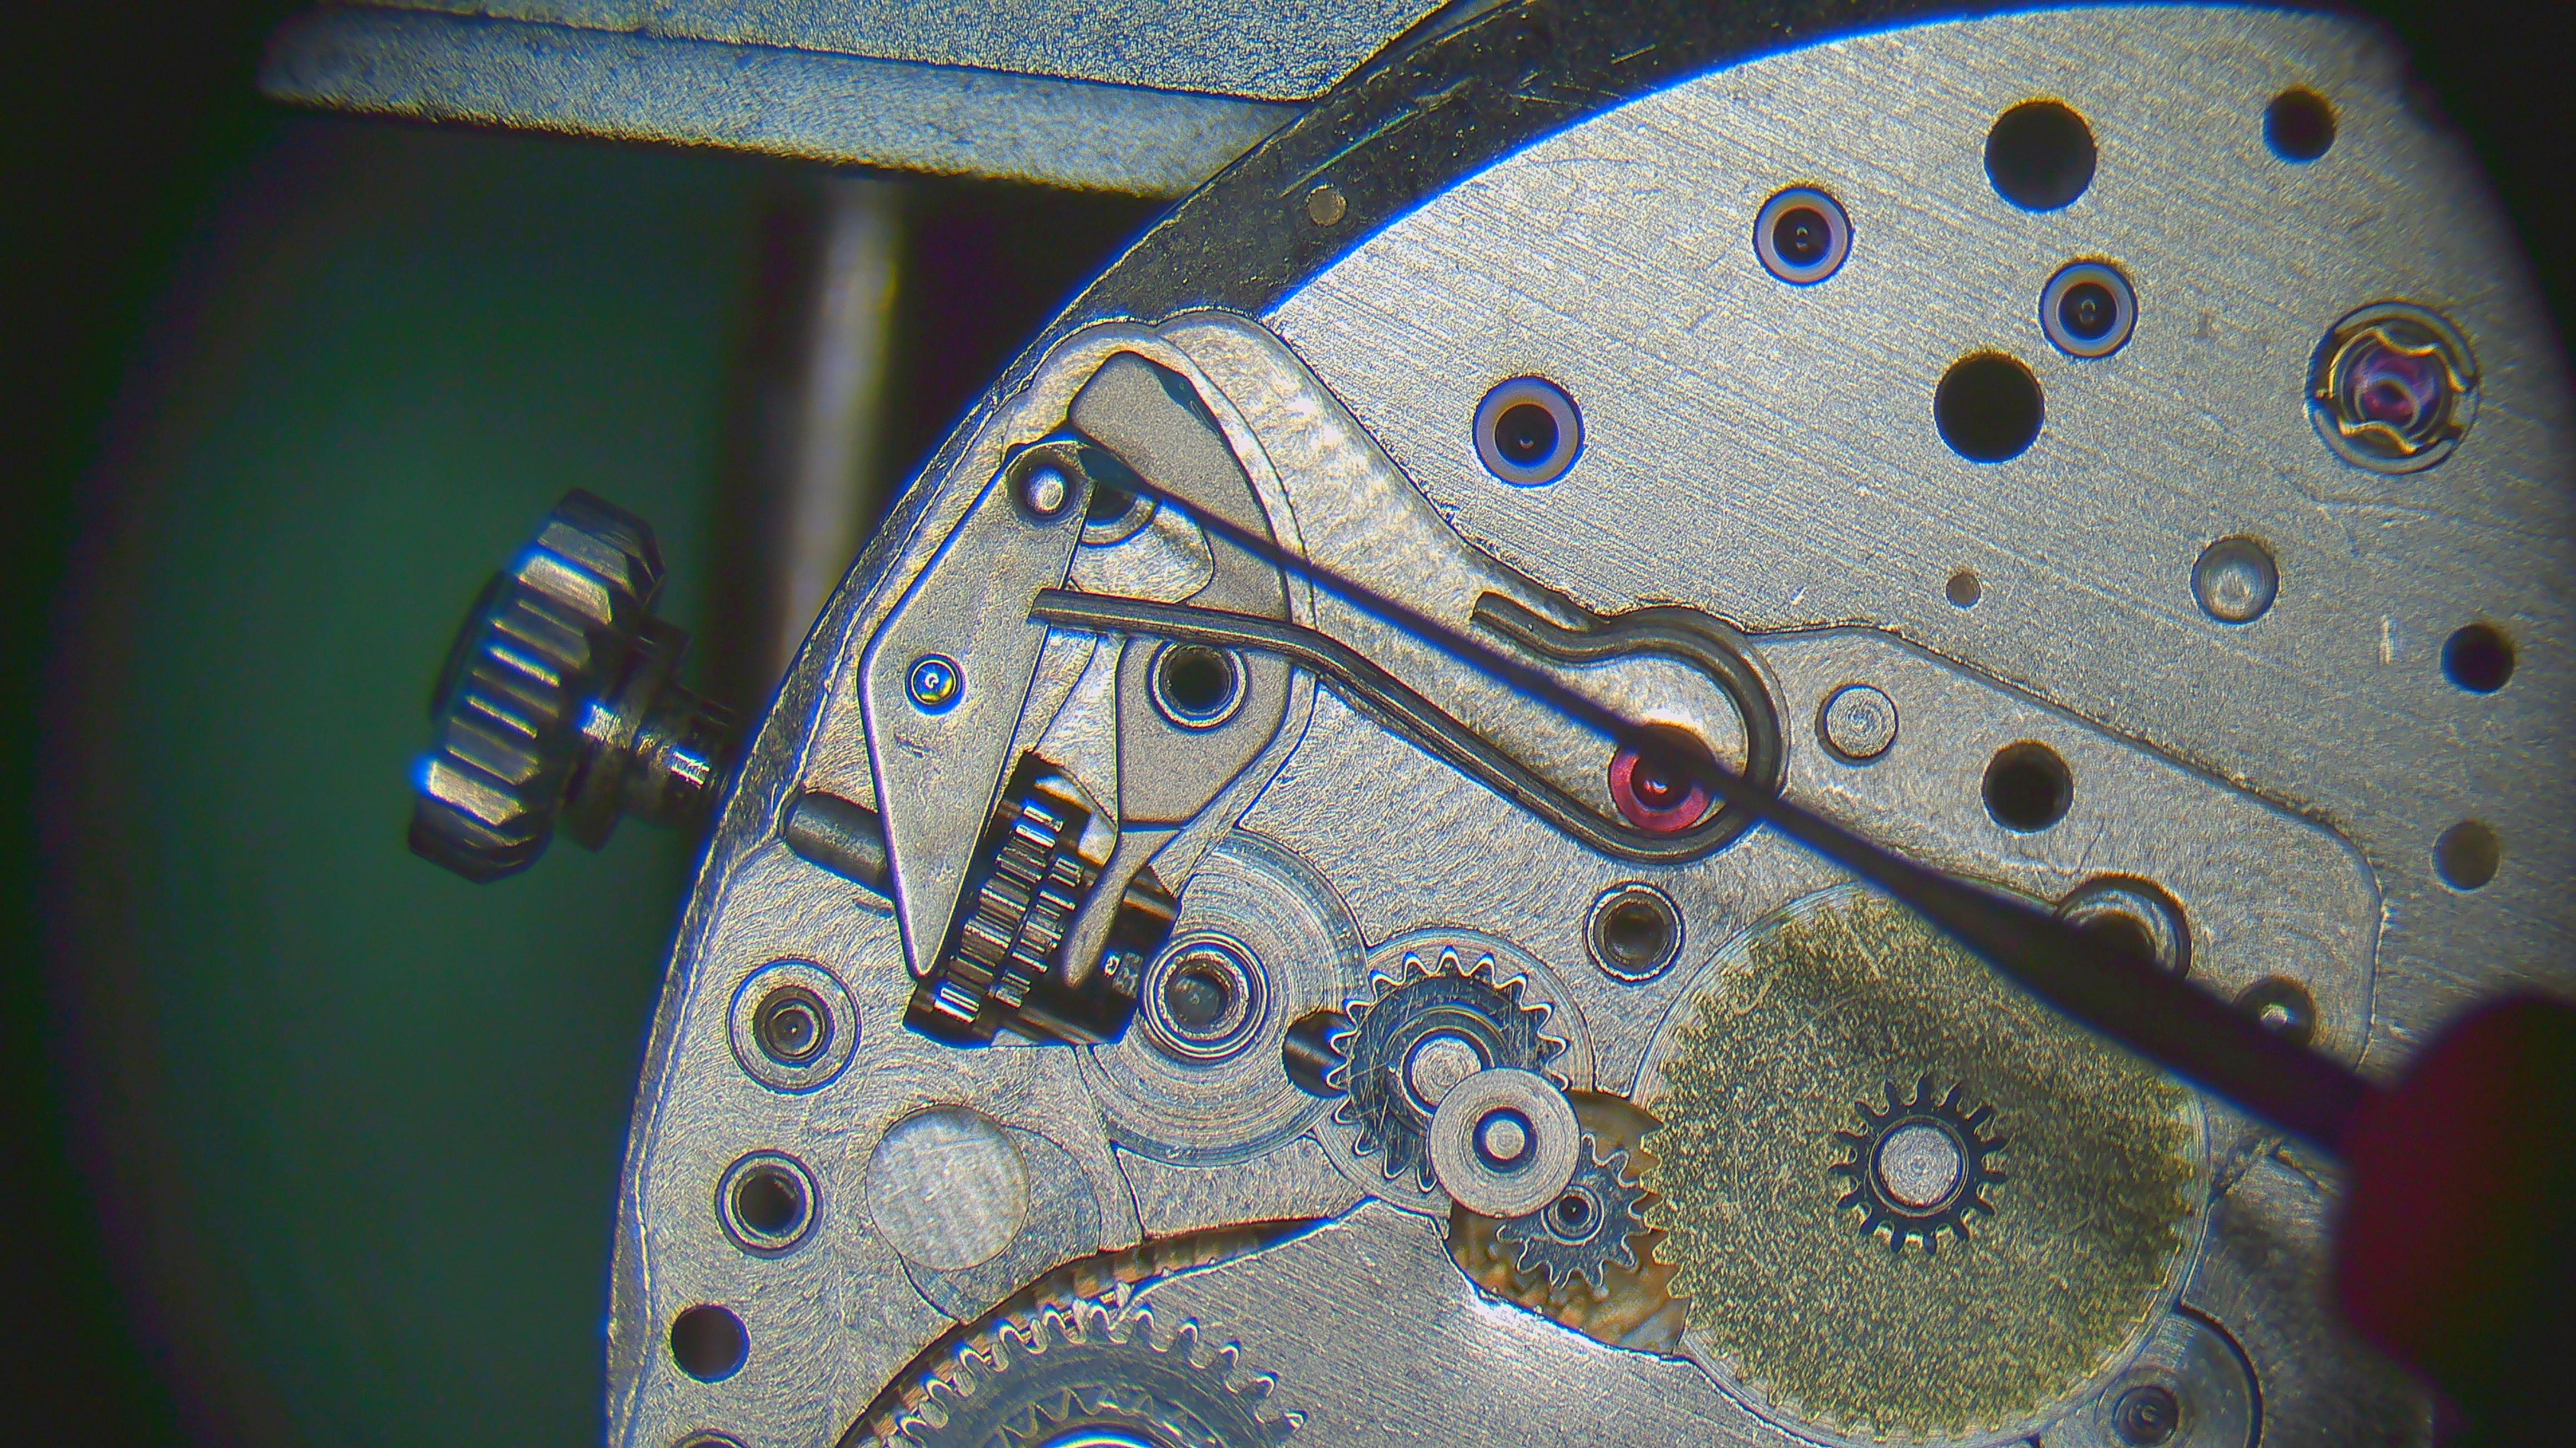
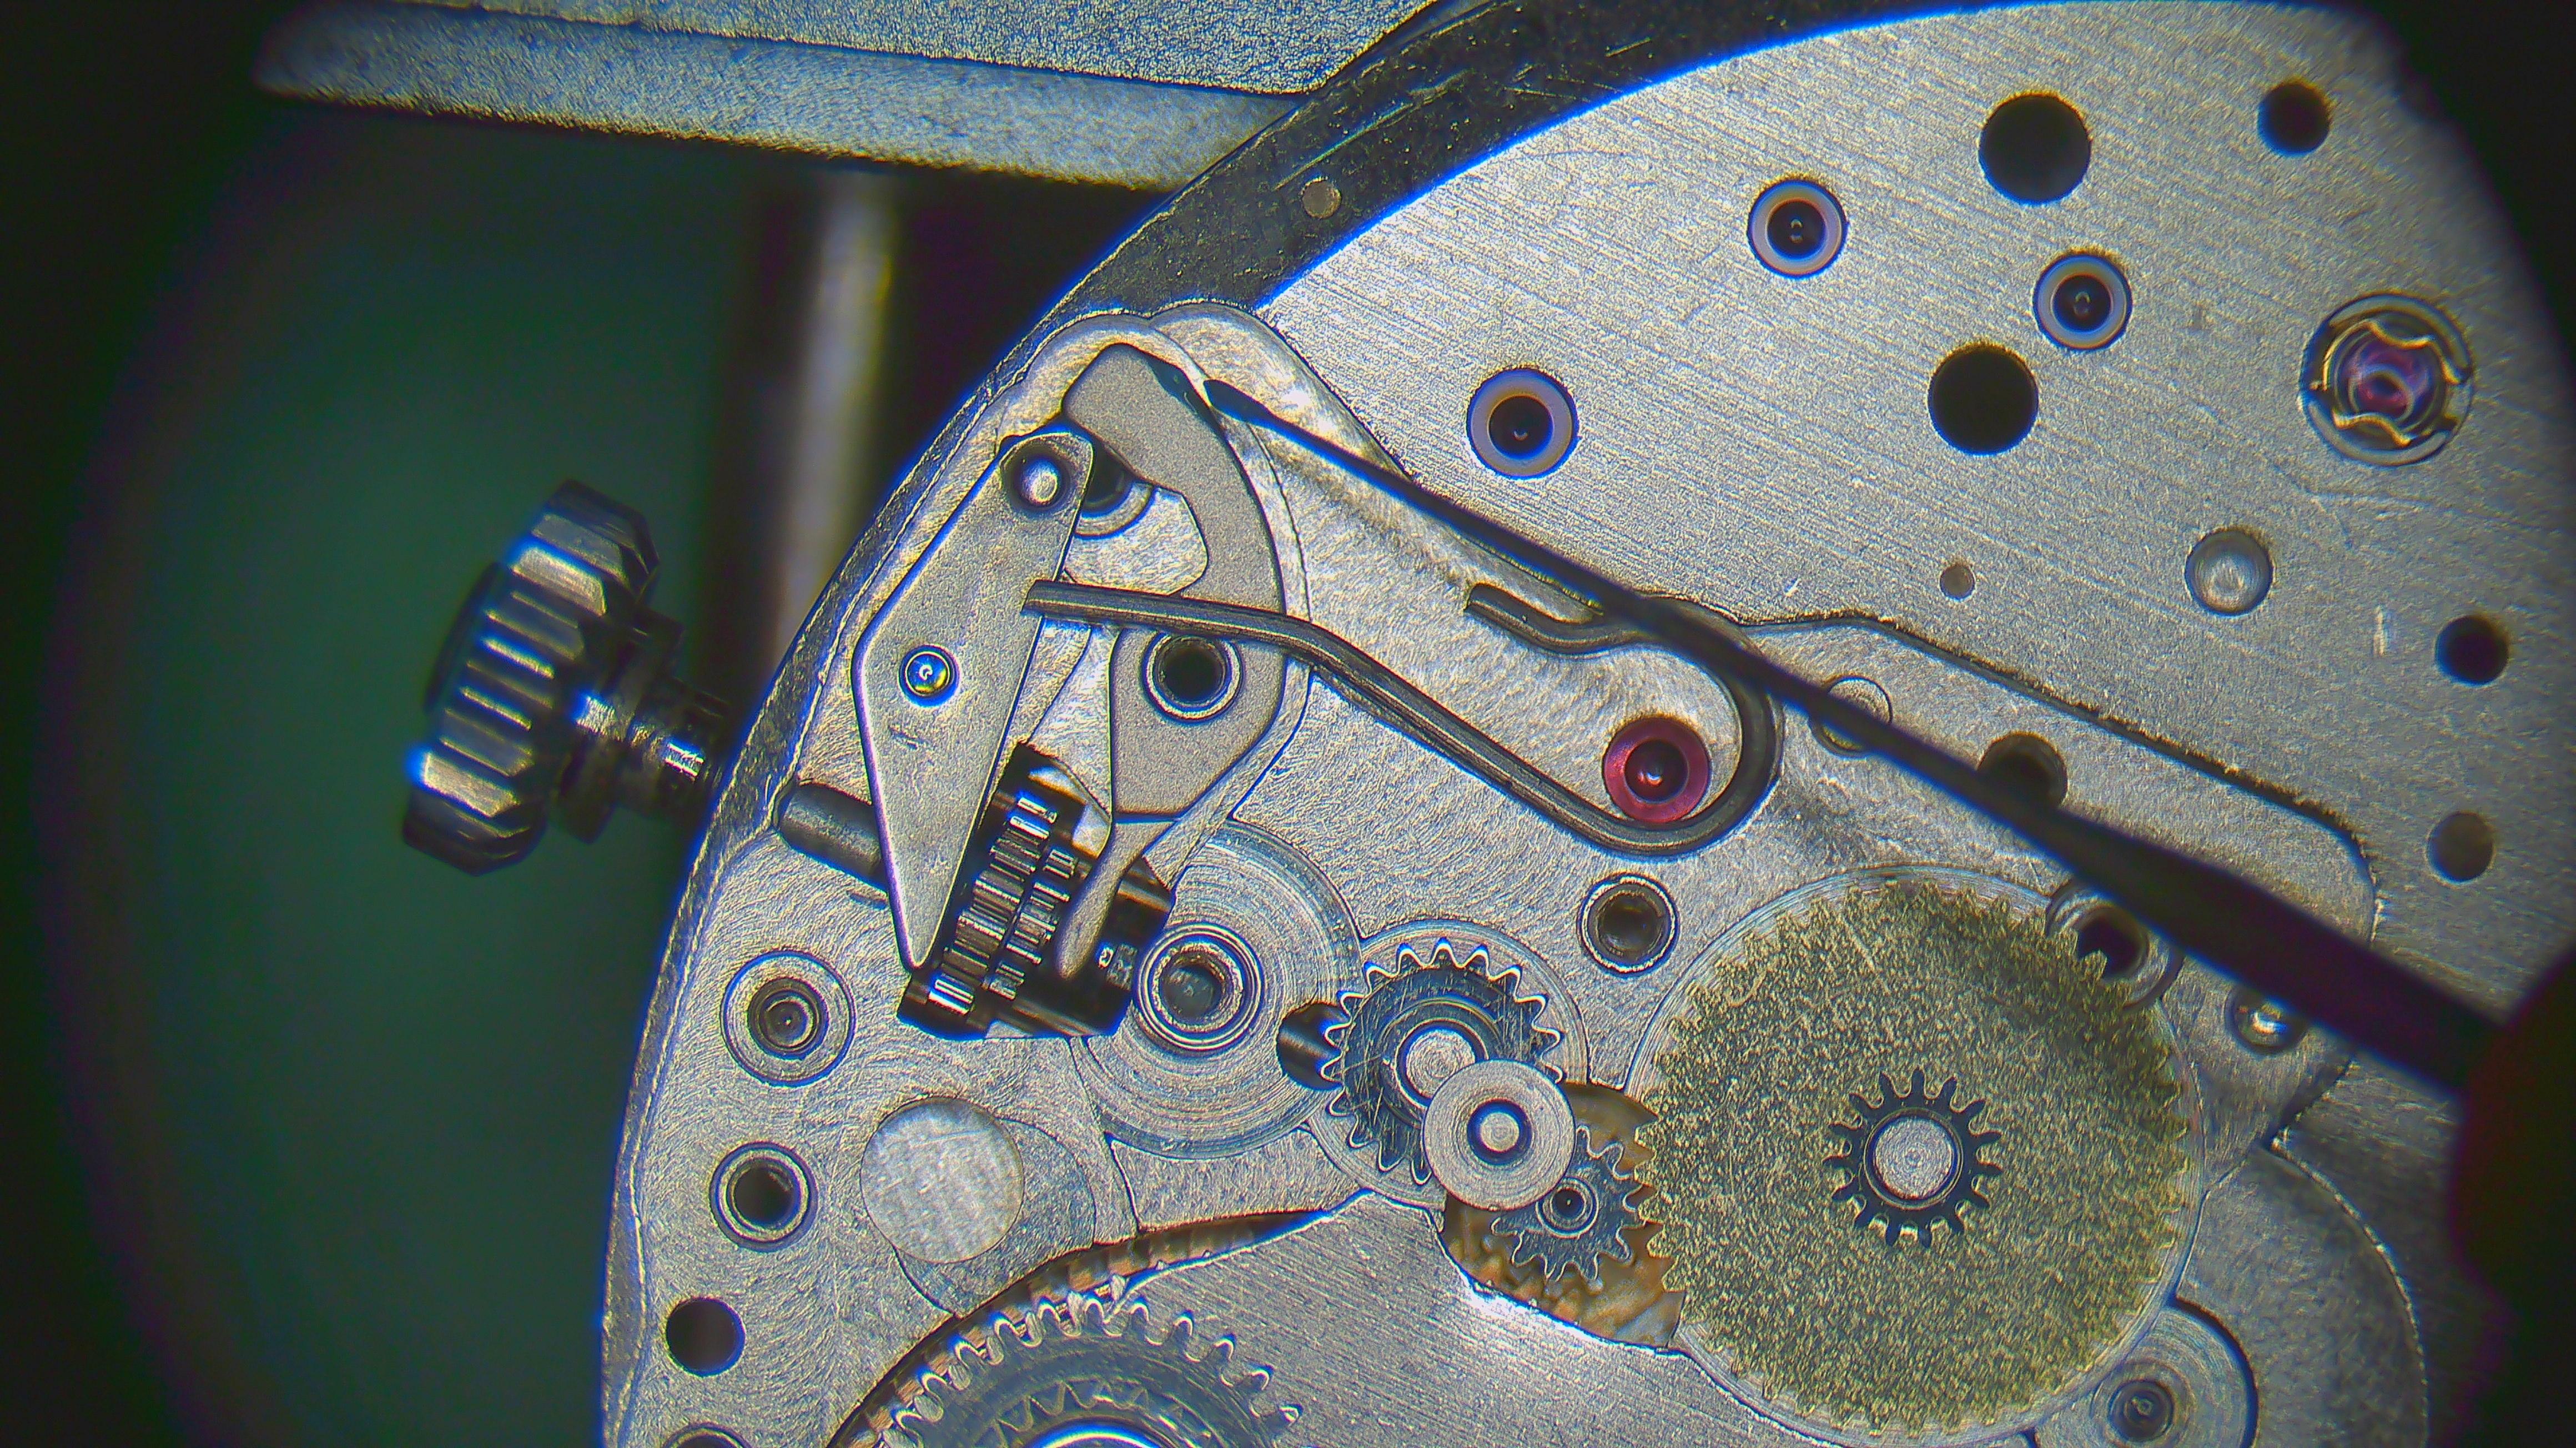
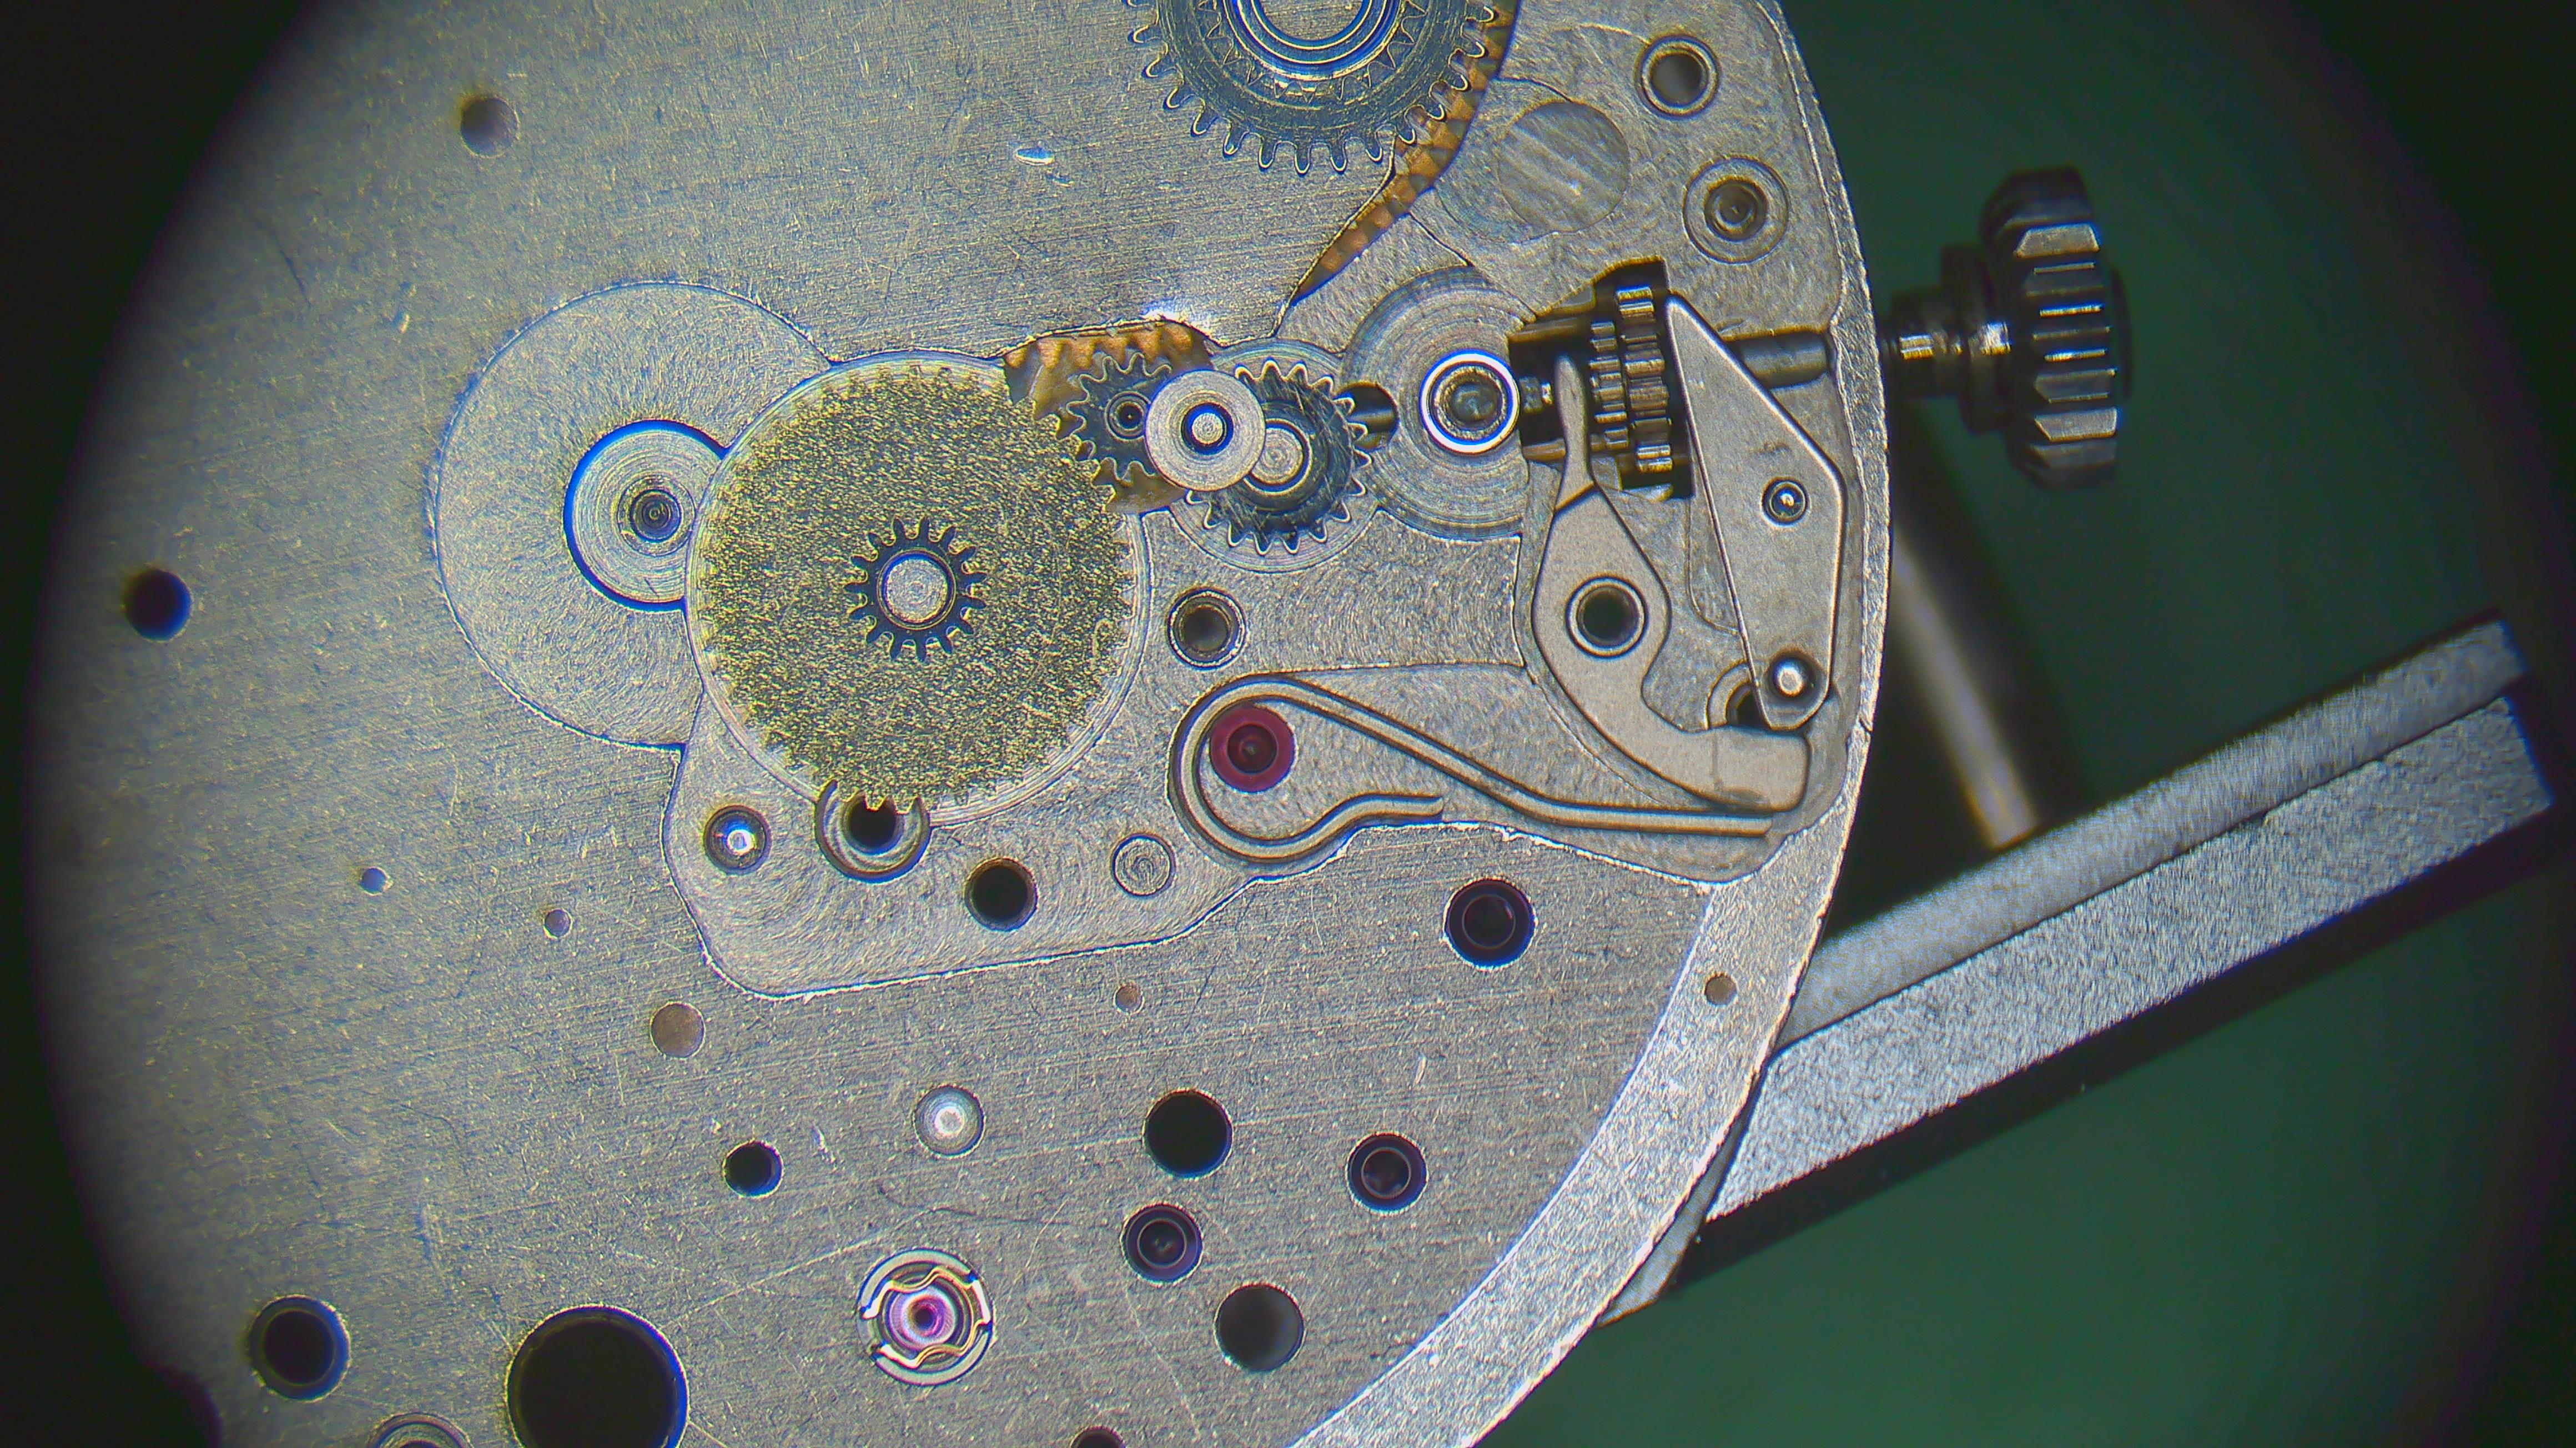
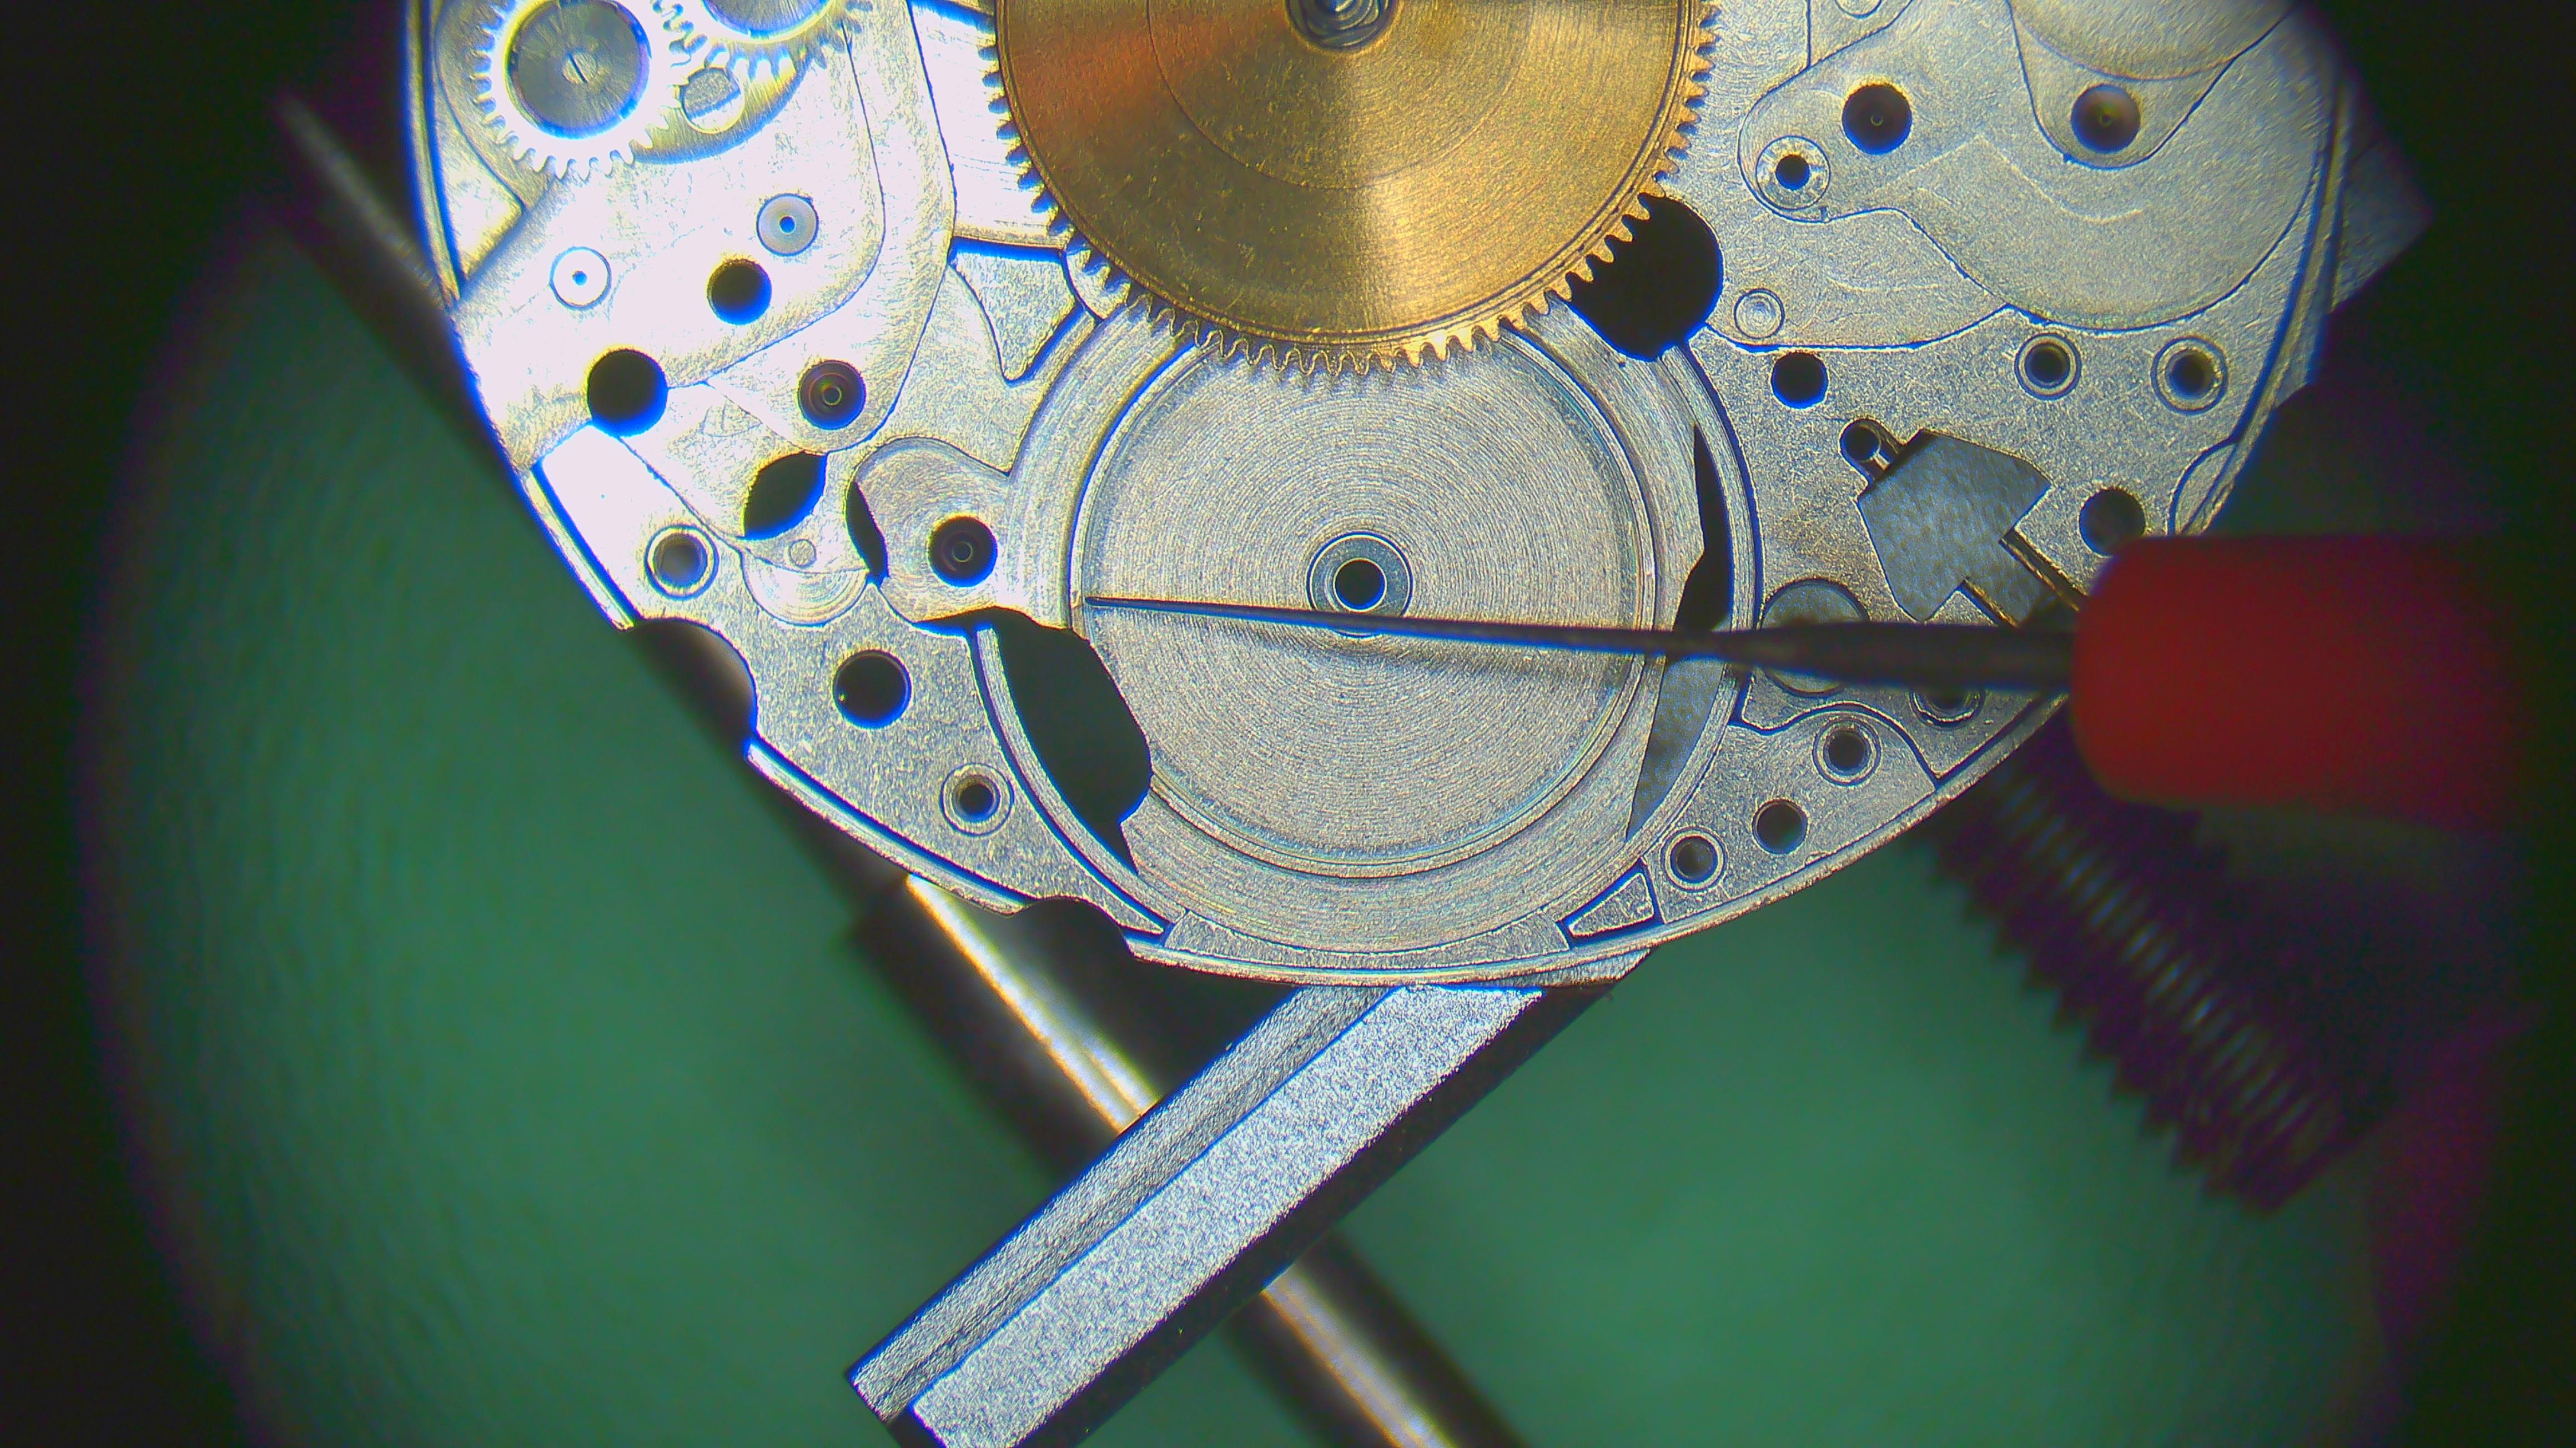
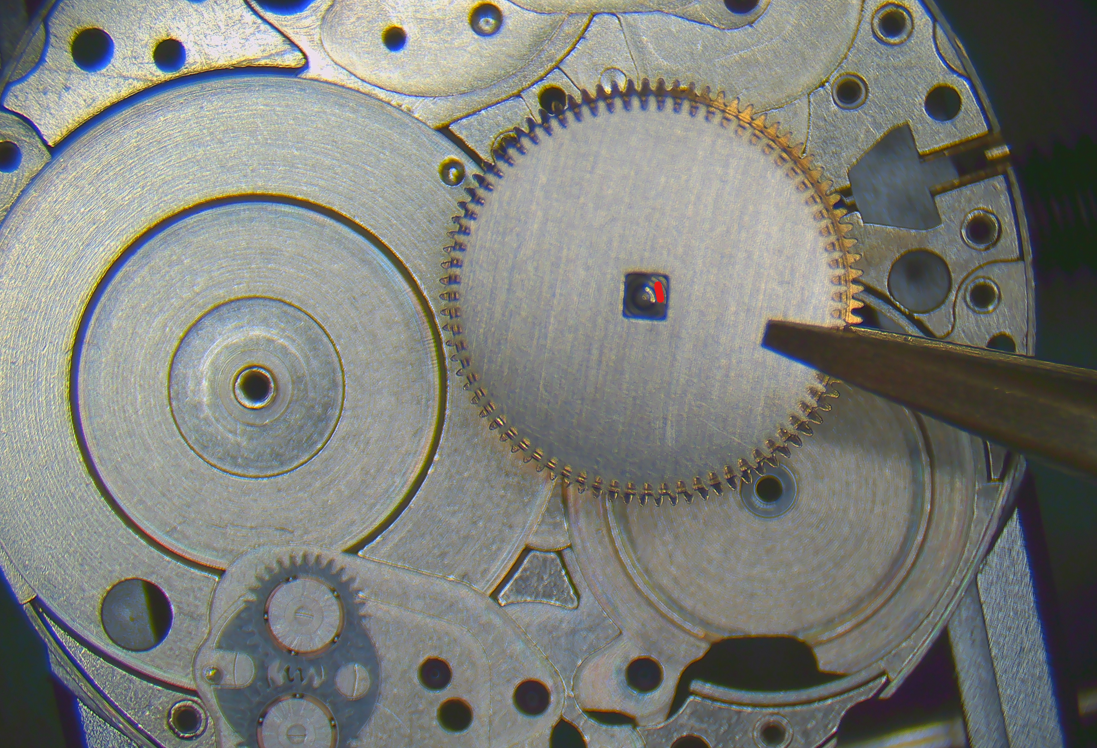
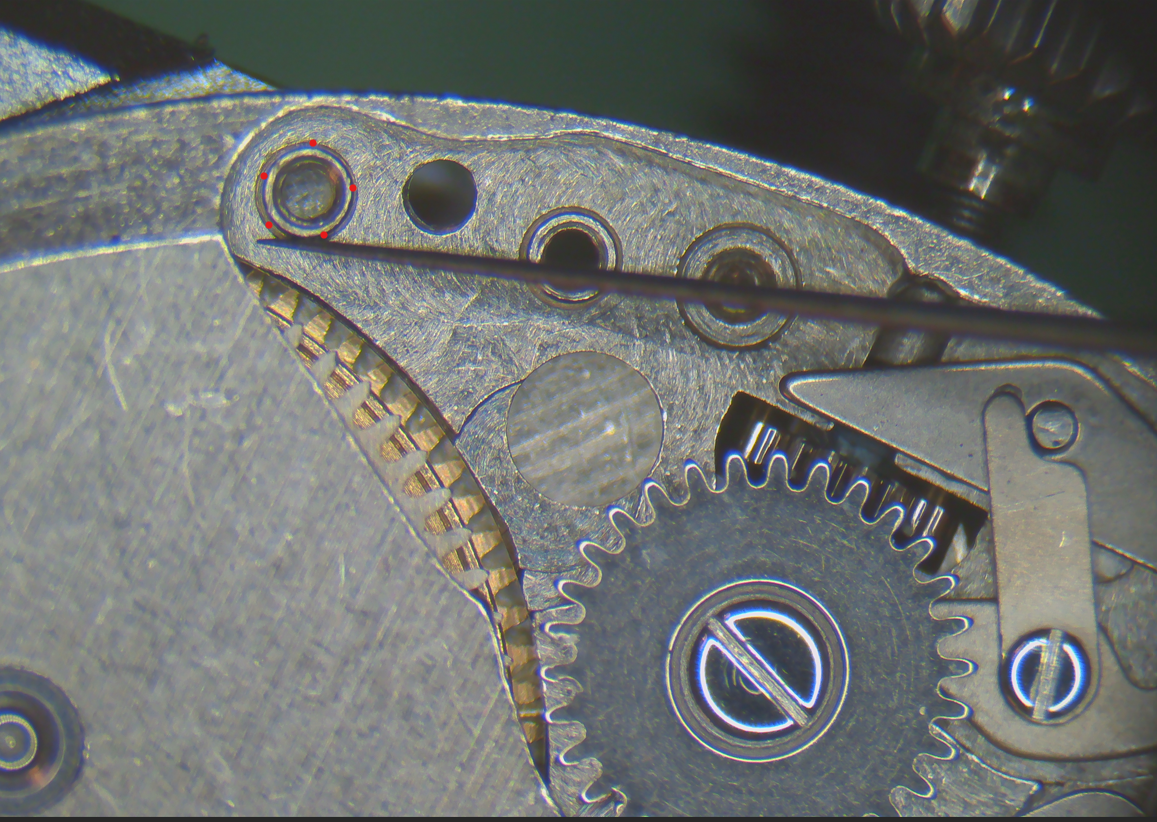
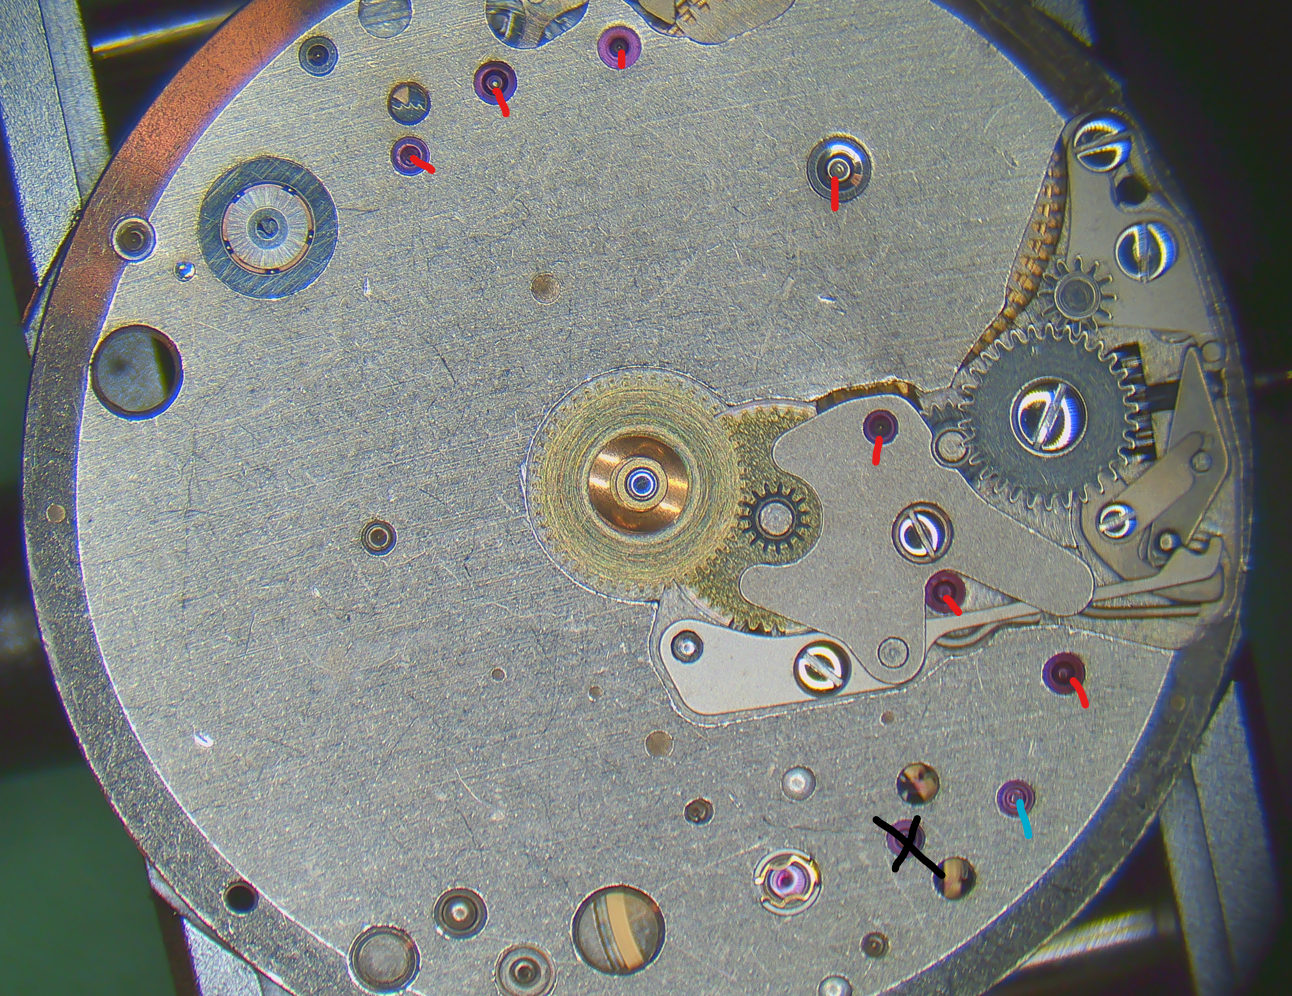
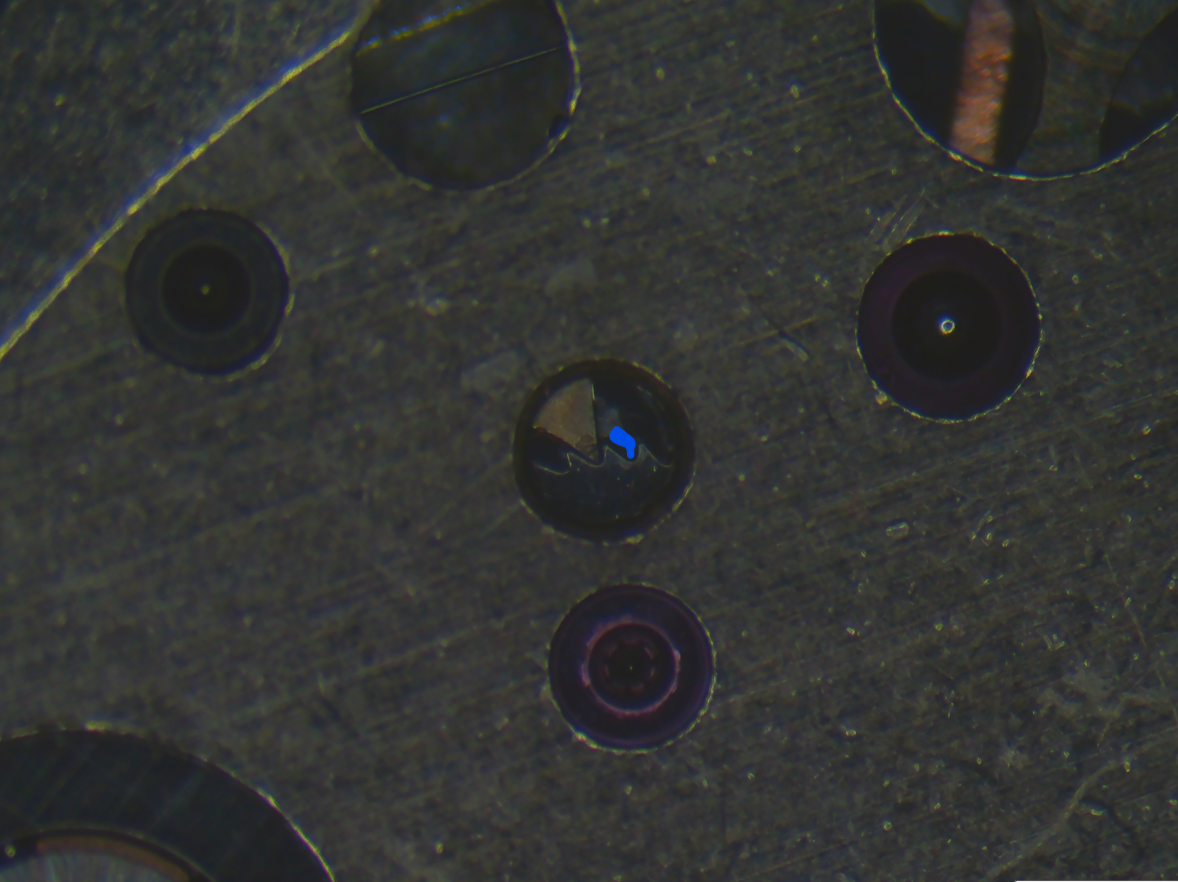
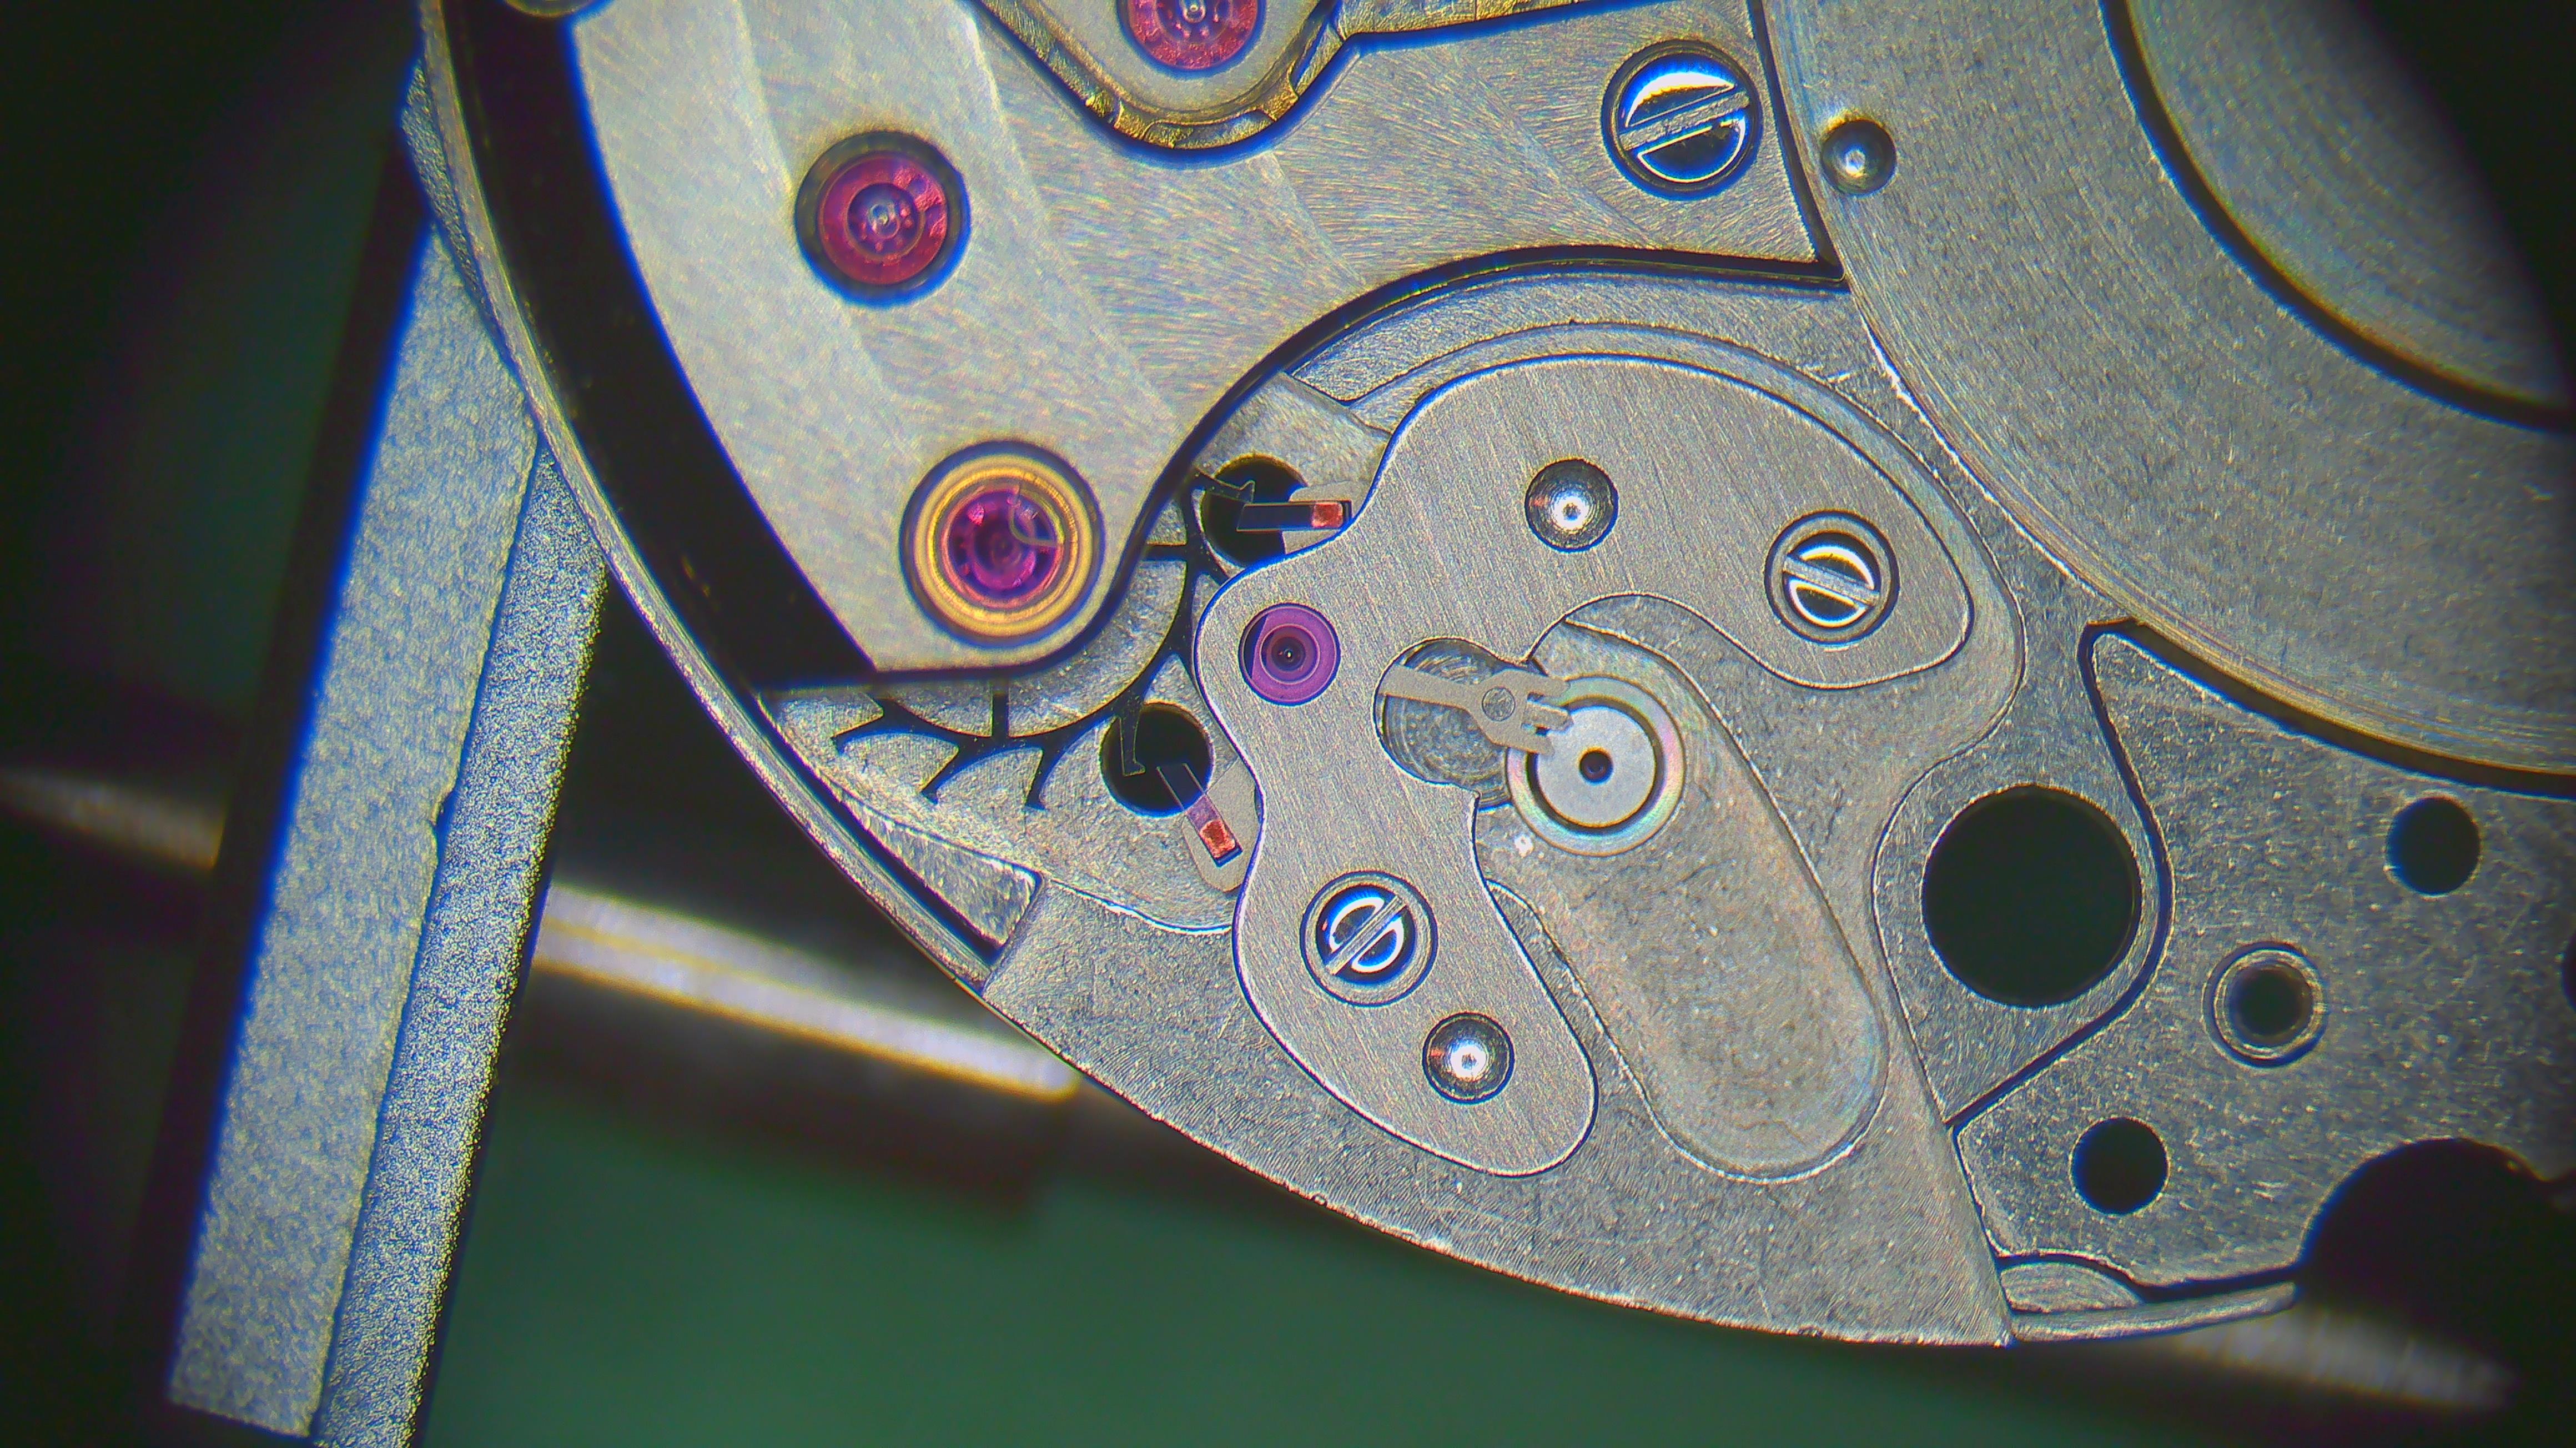
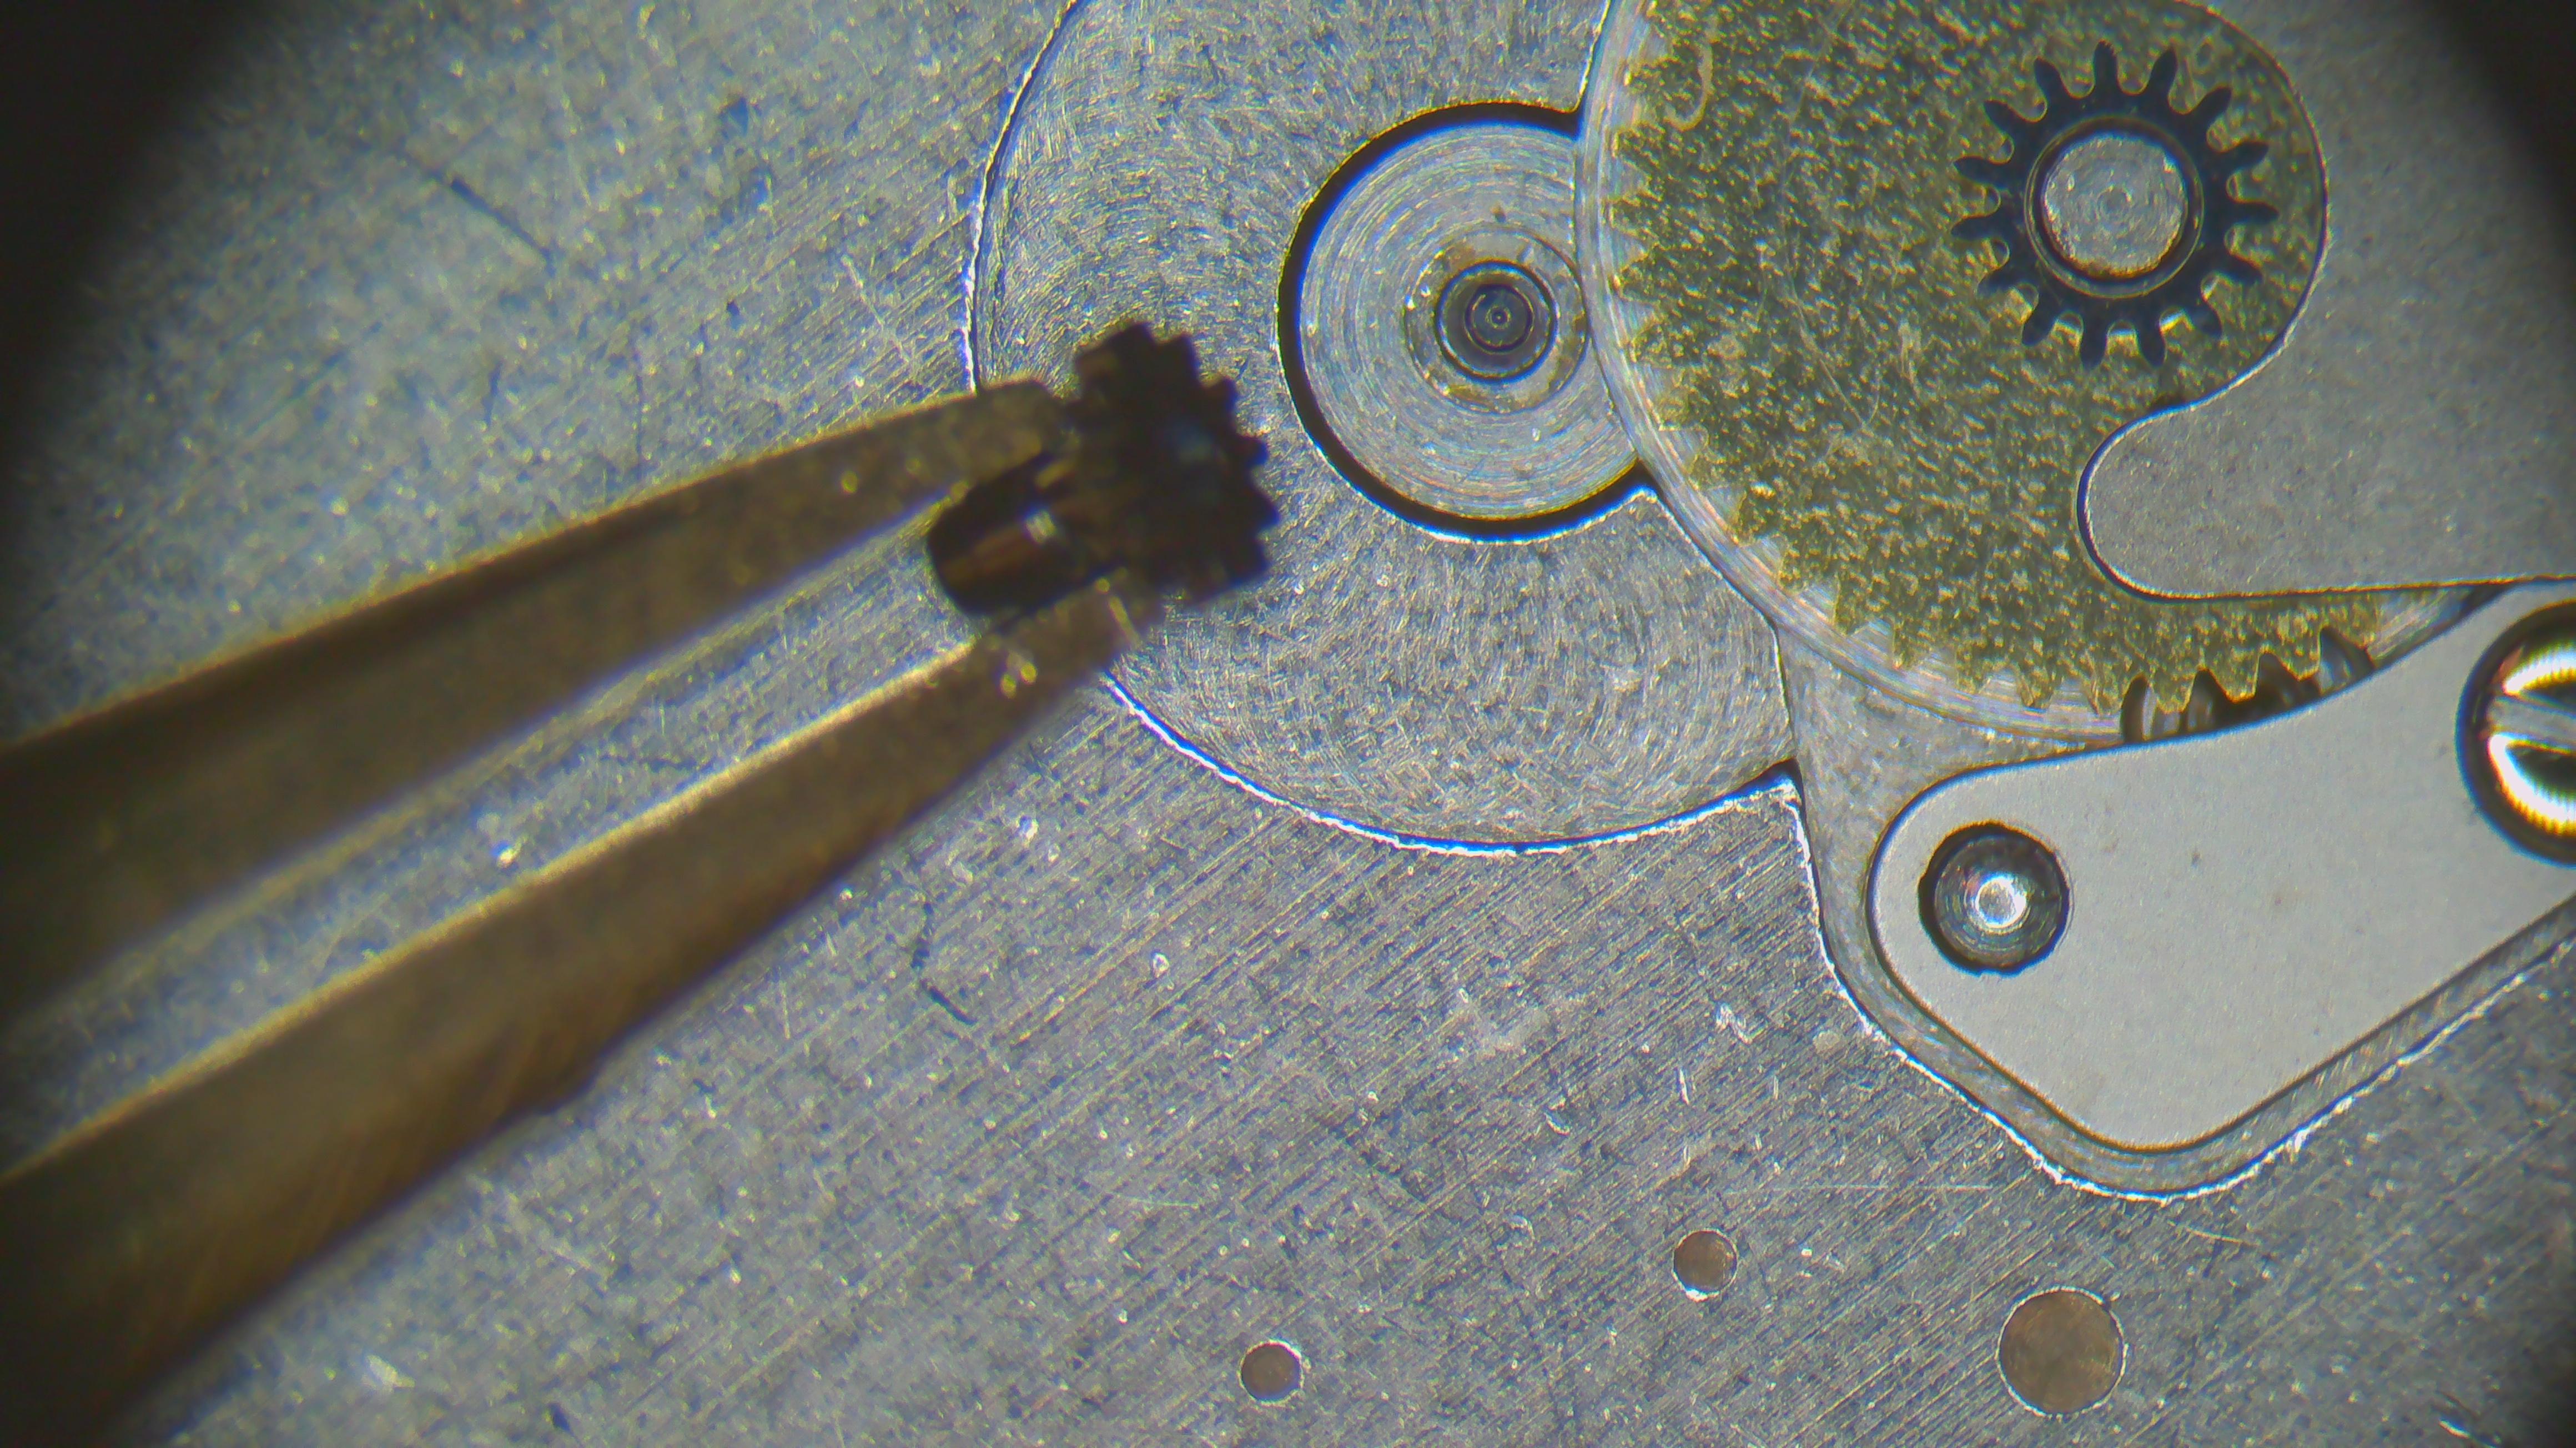
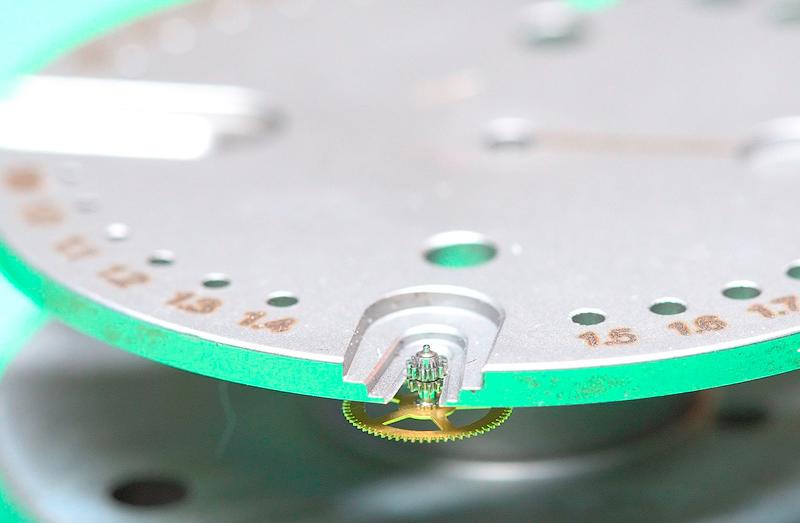
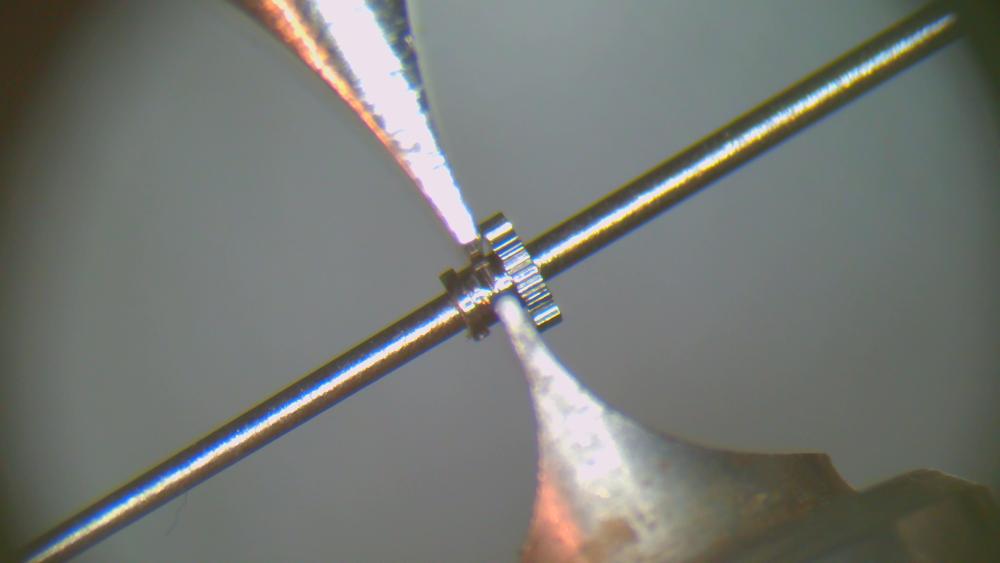
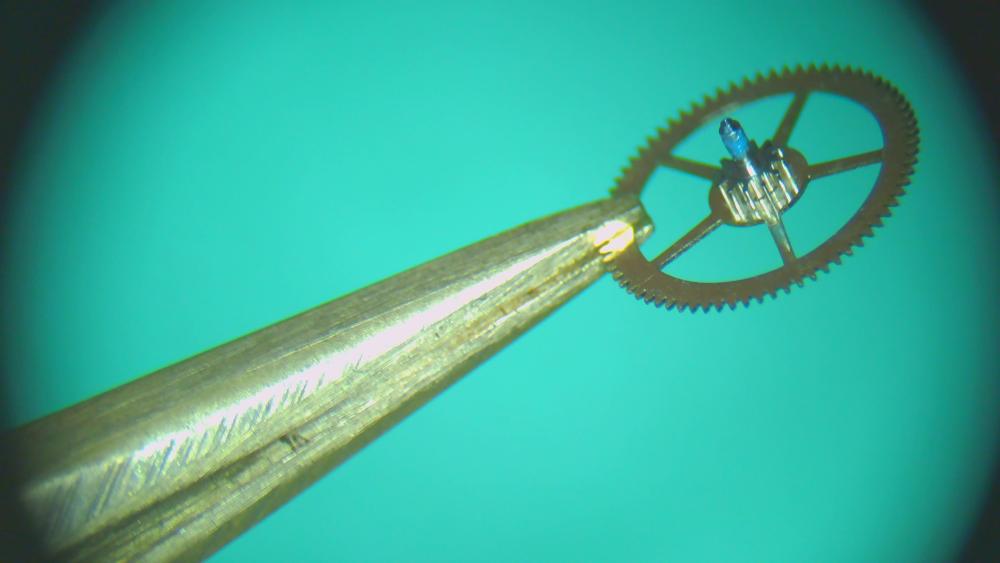
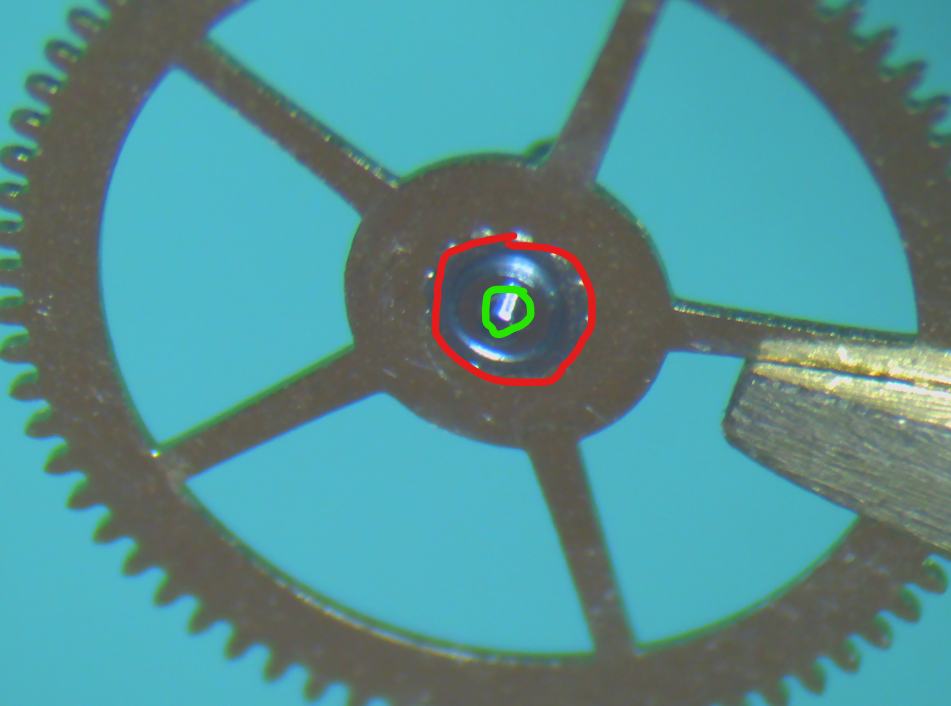
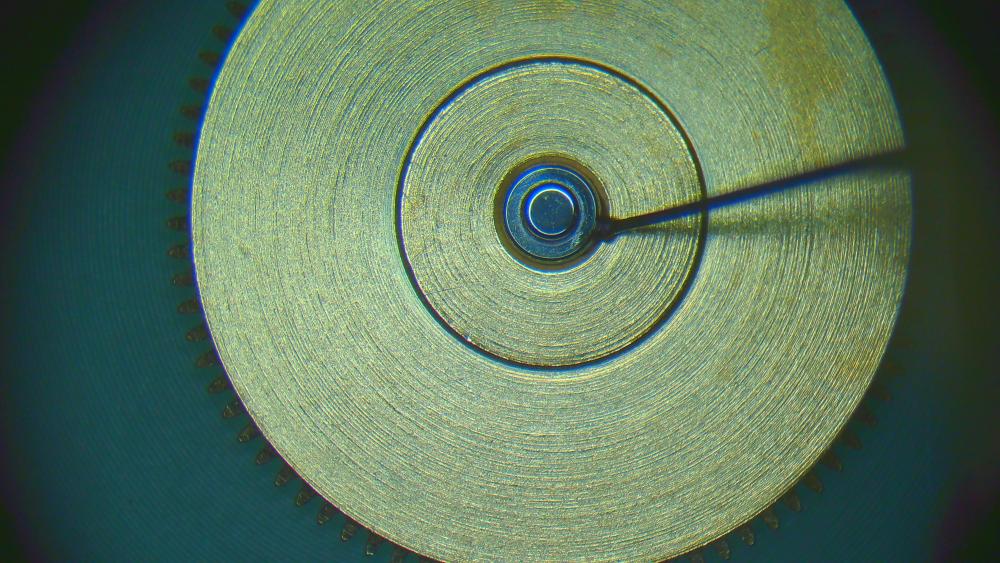
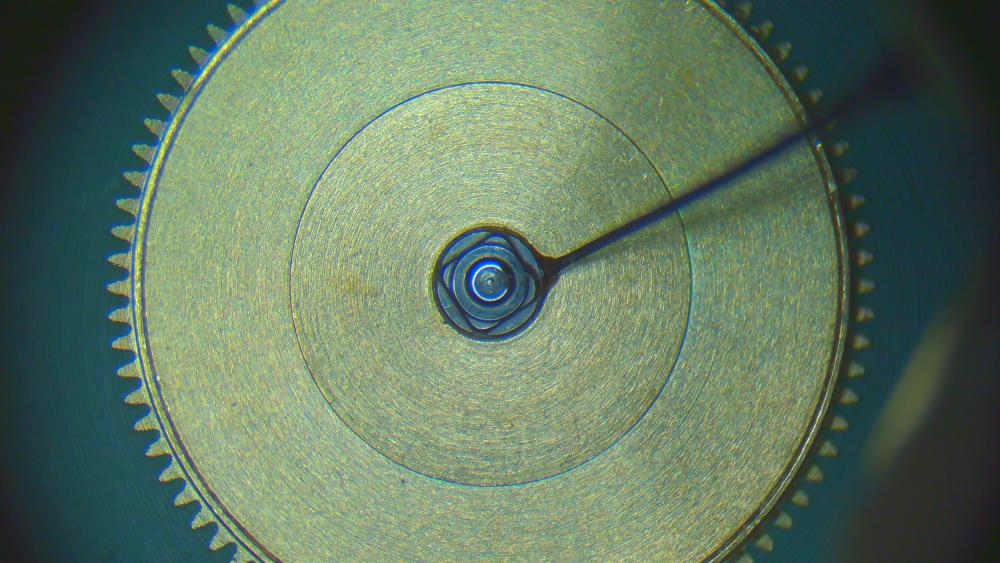
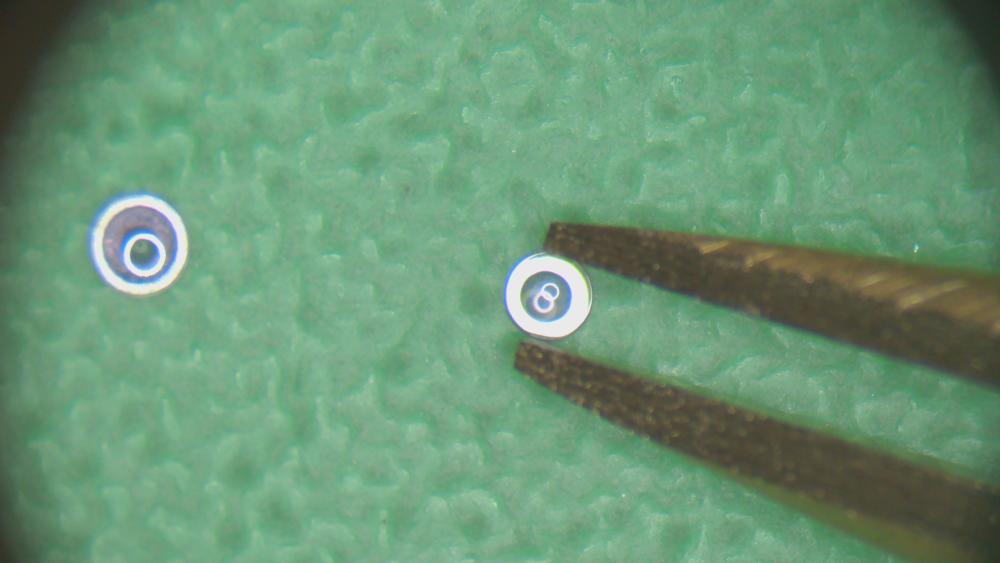
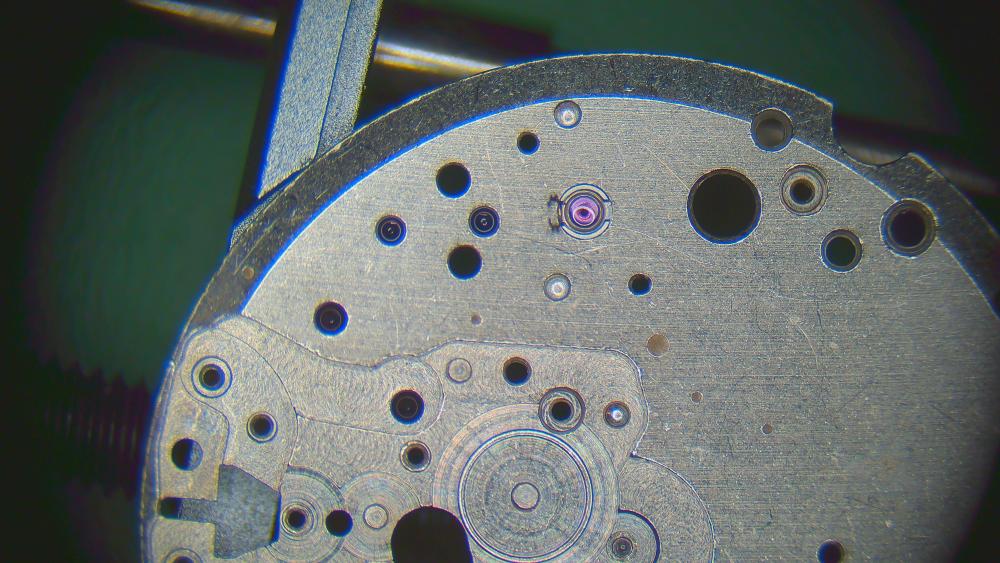
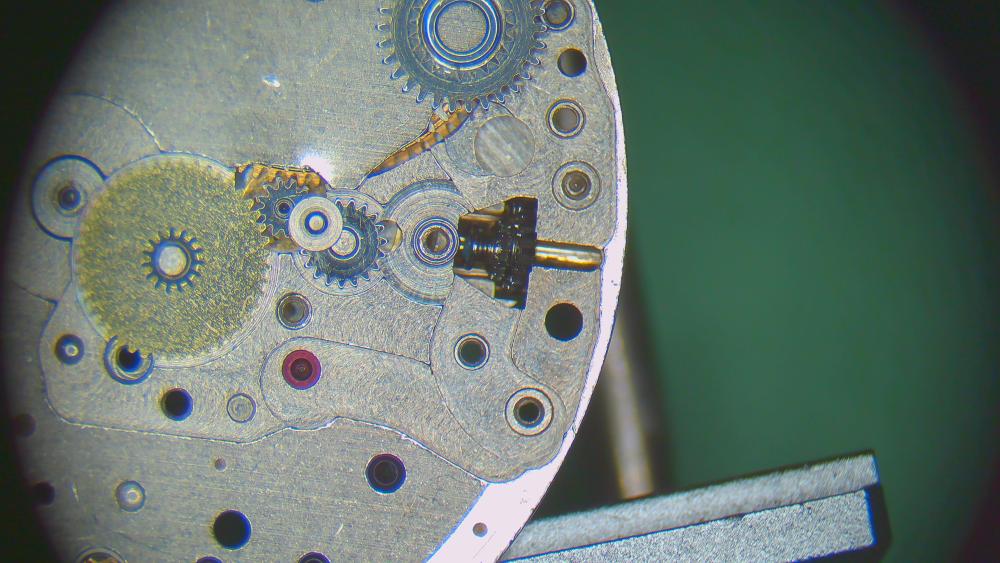
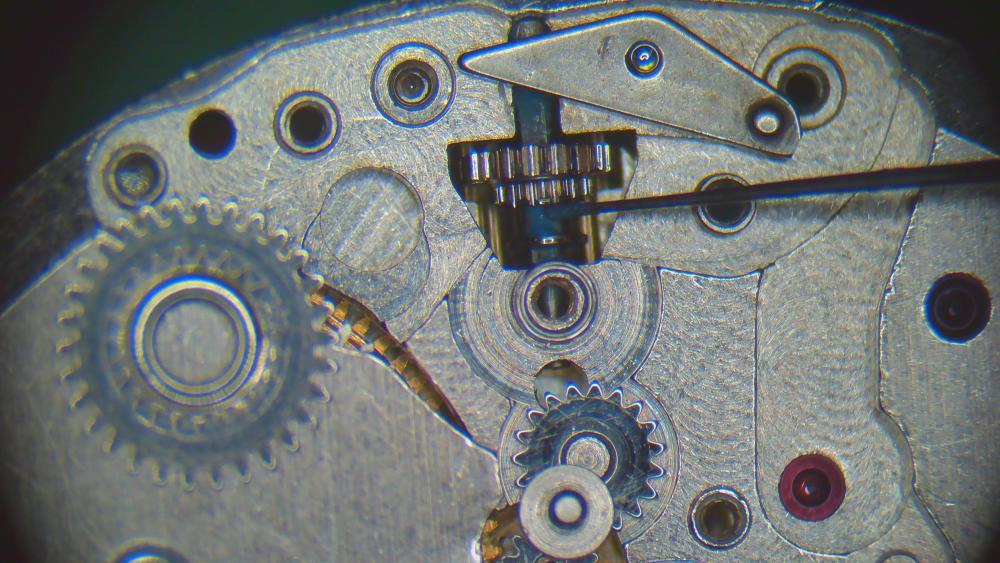
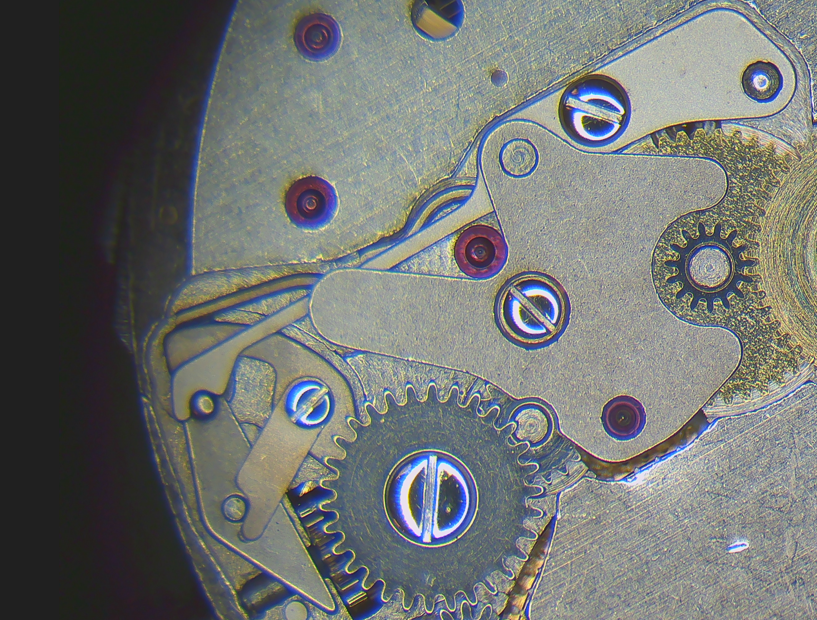
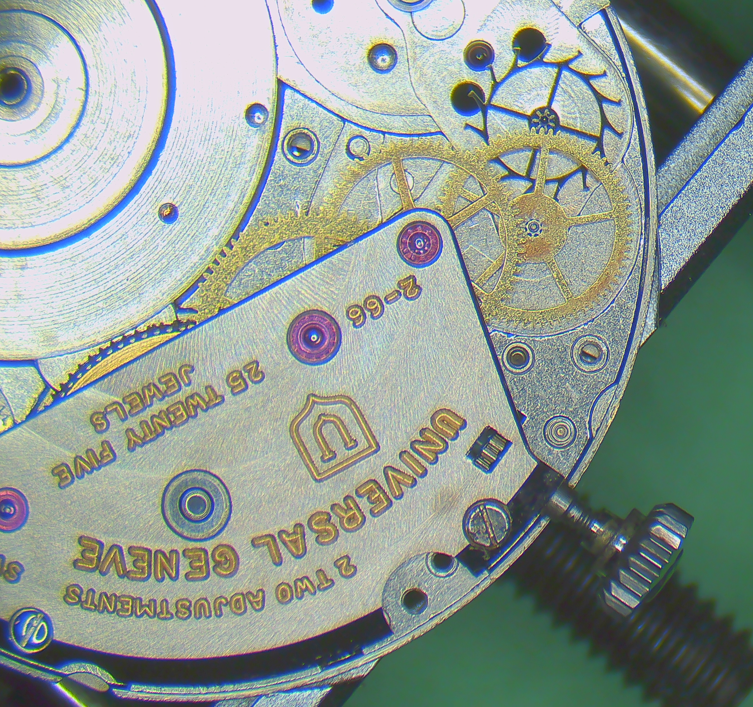
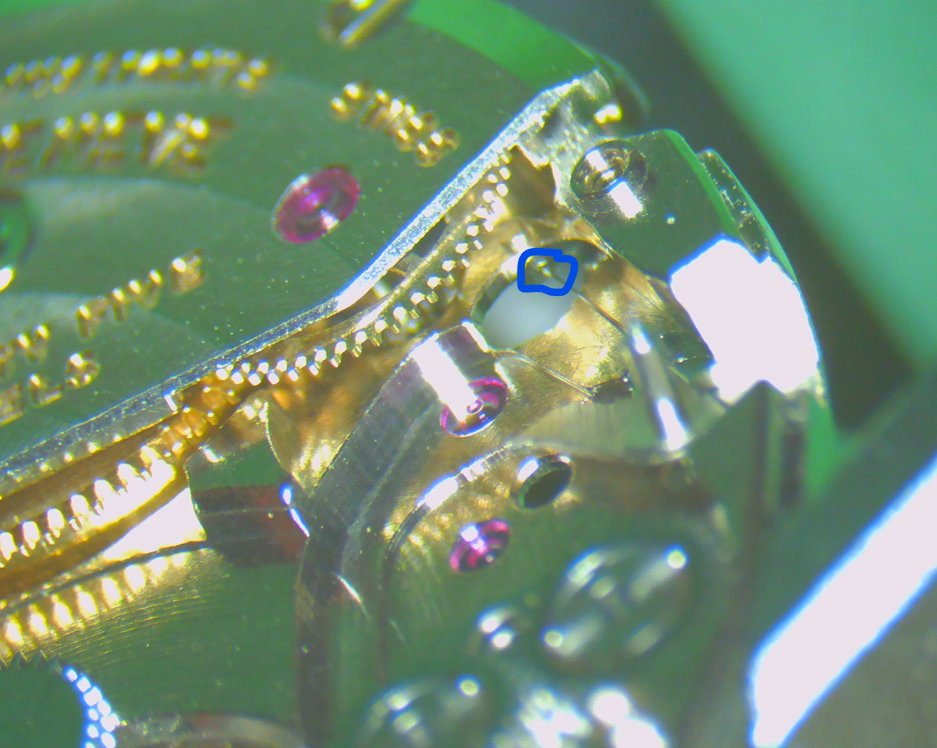
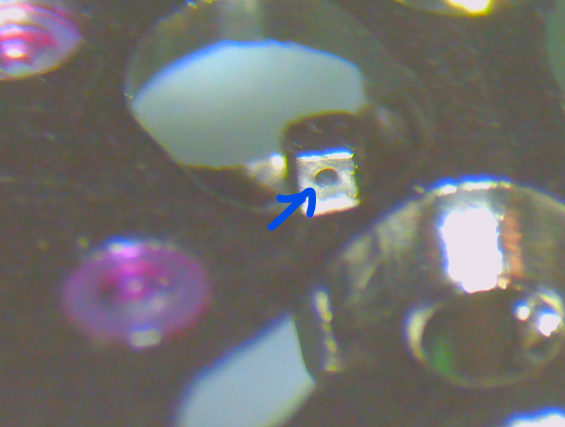
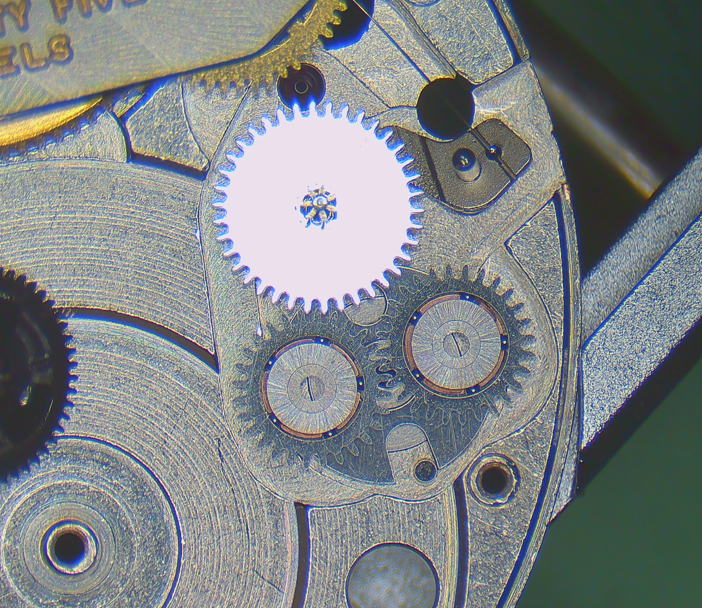
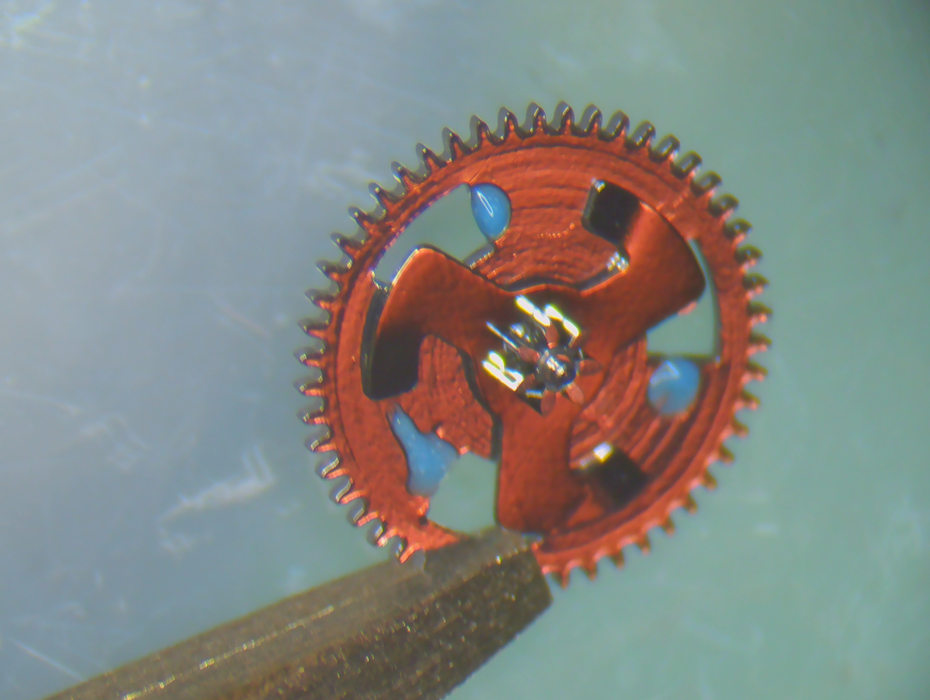
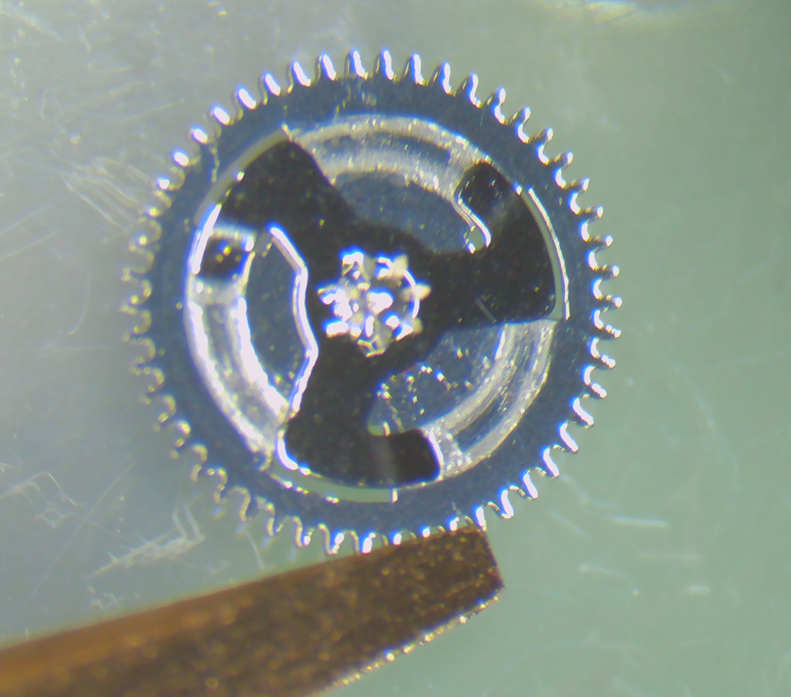
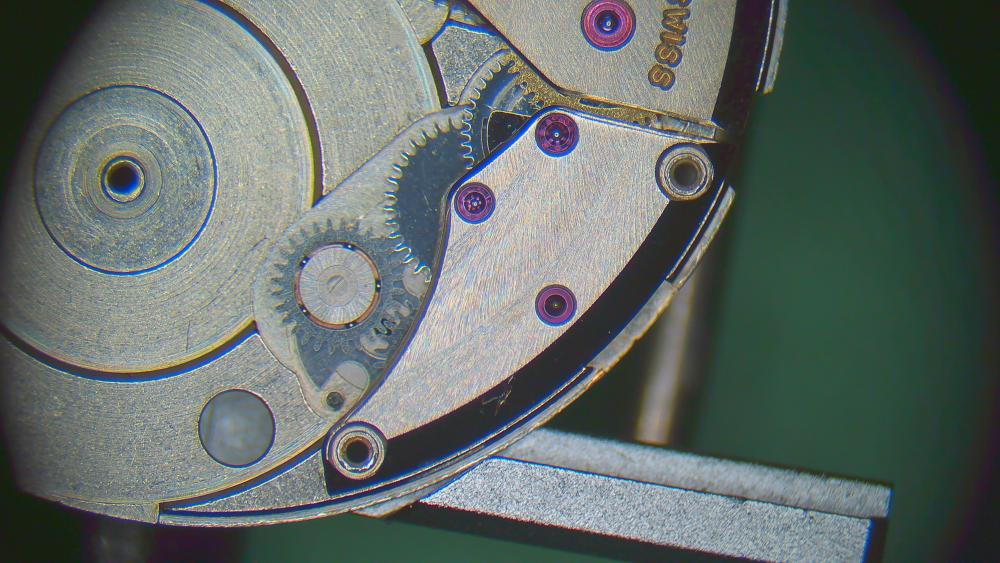
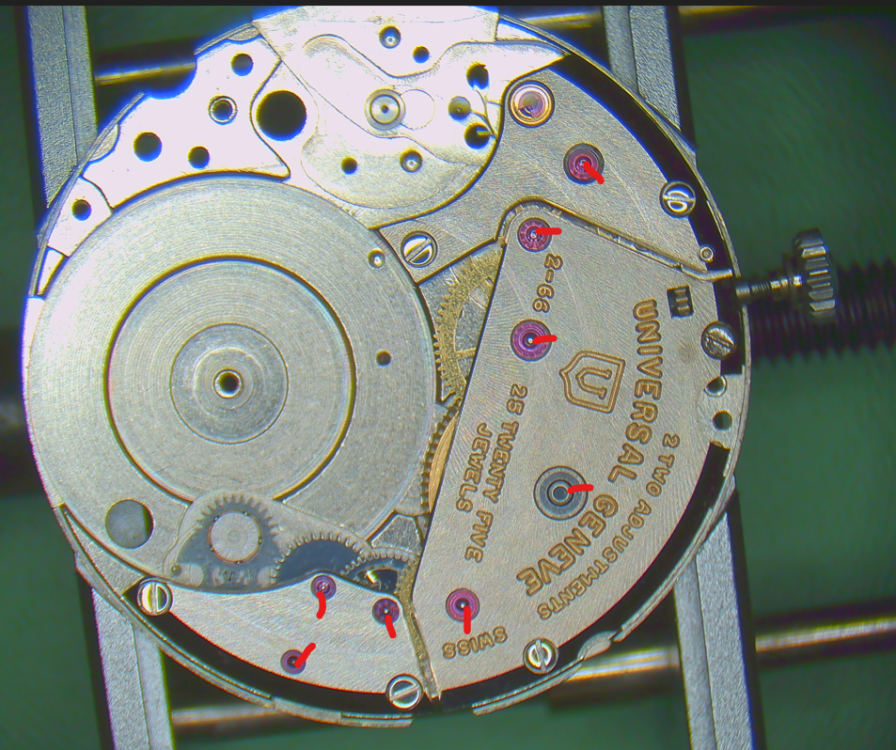
Ok, next one! First, the cannon pinion! Remember, this is the decentralized cannon pinion with integrated cannon pinion (and it goes where the green arrow indicates): First challenge: how to disassemble!? - do not use a Presto tool with its "feet" against the spokes/rim of the wheel! It'll bend the wheel. - using a scalpel or razor blade to slide between wheel and cannon pinion is also not working well --> I cut a triangular wedge into a spare barrel lid (of course, any other thin sheet of metal will do). Then I slide it between the two steel pinions, like so: Now I can use a presto tool to lift off the cannon pinion. Make sure the wedge is properly between the two steel pinions! No force should be on the brass wheel. Clean. In my case, the cannon pinion needed some tightening: Grease the staff of the (decentralized) centre wheel. I used 9504. To combined the two parts again, on the staking set, make sure the top punch fits over the whole staff of the centre wheel. It'll protrude from the cannon pinion and you don't want to punch on the staff.. Secondly, note that the wheel seems to "hover" over the staking block. You want to chose a hole on the staking block that just fits the green circle here, and NOT the red one (if you do the latter, you may punch out the staff from the wheel...) Push. Done. Now over to the barrel assembly. I distribute a thin layer of breaking grease around the barrel wall (I used 8217) New spring in (this is 0.70 x 0.1025 x 375, item number 266771 at CousinsUK) remember that the square part of the arbor points upwards close lid. then I oil with HP1300. Epilame treatment of pallet stones... ...and escape wheel (full submersion and then removing epilame again from the pivots) I take advantage of the balance still being installed on the movement (from cleaning) to oil the balance jewels on both sides of the movement. Just two pictures. It should be clear otherwise. 9010, of course. Now, disclaimer. Like in the assembly, I realized half-way through assembly, that another order would have been better. So I'll post the pictures in the order that I think is better. So please ignore the presence of some parts that were already installed in my less efficient, actual assembly process. I suggest starting with the keyless works before installing barrel bridge, train and automatic works. Why? The "decentralized" centre wheel and cannon pinion is held on the keyless side by a jewel in the cover plate for the keyless works. If you don't have that installed first, it's making the installation of the barrel bridge a bit tricky. So, first the pictures of the keyless works assembly. HP1300 on the posts (ignore presence of centre wheel here) add respective wheels and the seat for the other post place the pinions/wheels for the winding stem setting lever with some 9504 setting lever and stem replaced and adding some more 9504 (I spread this amount around by turning the stem while holding the oiler there) placing the yoke, adding some 9504 on the sliding points (excess will be removed later with rodico) and then the yoke spring unfortunately, I forgot to take pictures of the next steps, so I'm borrowing pics from disassembly. set lever jumper with 9504 as indicated and a bit of 9504 here combine the two parts of the crown wheel and the winding wheel and add HP1300 between them as indicated then add HP1300 on the seat and install them install the cover plate turn movement over add the tiniest amount of HP1300 to this rim (or don't, but don't let it flow over) combine ratchet wheel and barrel and replace them jointly (to get ratchet wheel into the right spot immediately and not smear the oil on the aforementioned rim). HP1300 on the arbor pivot as indicated. place wheels and then the bridge now the train wheels the 2-66 movement has this unusual fixed cap jewel for the escape wheel. I oil it from below and push the 9010 through with a sharpened oiler. Inspect size and position of oil circle from the top side. install train bridge I choose to proceed with the automatic works now first the secondary click (for auto winding intermediate driving wheel). the tiny spring needs to go through a small hole where indicated view from the other side of the movement place the intermediate winding wheel now there's this special wheel which which disengages the automatic works when the watch is wound automatically (same as JLC 889 that I serviced recently). The slipping "arms" need some grease (or oil). I used 9504 I then spread it around by gently moving the arms around (clockwise in below picture) place the wheel and install bridge I decided to use HP1300 on all these pivots (escape wheel pivot was oiled previously with 9010). I prefer the higher viscosity oils to avoid any creeping. Happy to drop a few degrees of amplitude for that. turn movement over and install primary click at the ratchet wheel very light use of HP1300 (sorry, screw not pictured) now back to the keyless works again small amount of HP1300 tiny bit of grease as indicated secure with screw and place spring (careful with this one.... it's a highly qualified candidate for the Swiss space programme) arm the spring and secure with screw dial side oiling with HP1300 (red) for everything except the escape wheel (9010, blue) I add a tiny bit of 9504 to the click/teeth here turn over again. pallet fork. as usual, I install the balance, let it run a few minutes. remove the balance. oil the exit pallet stone with 9415. one small drop every 4-5 teeth. then the rotor. NOTE: I didn't oil any of the four ball bearings! This is up to debate.... in some service manuals across different brands, ball bearings are oiled (with 9010 or Lubeta V106 or 9415), in other manuals they aren't. I chose to not oil because the watch case is barely dust-proof. And if any dust gets inside, it'll attract to oil. If it gets on the ball bearings, it'll quickly clog up. But happy to receive other opinions. and the complete train side then back to dial side again. Oiling the inside of the "false" cannon pinion with HP1300. then the outside with HP1300 and place hour wheel and dial washer a bit of regulating. Note from disassembly that the pallet stones lock was a bit excessive. The amplitude could probably be increased by moving them inwards a bit. But I'm happy with this result as it is and will let it be. Since I haven't done pallet stone manipulation yet, I don't want to practice on a movement where spare parts are extremely rare and expensive (the company has been out of business for about 50 years). dial (two screws) and hands on That's my new baby!


 1 point
 -
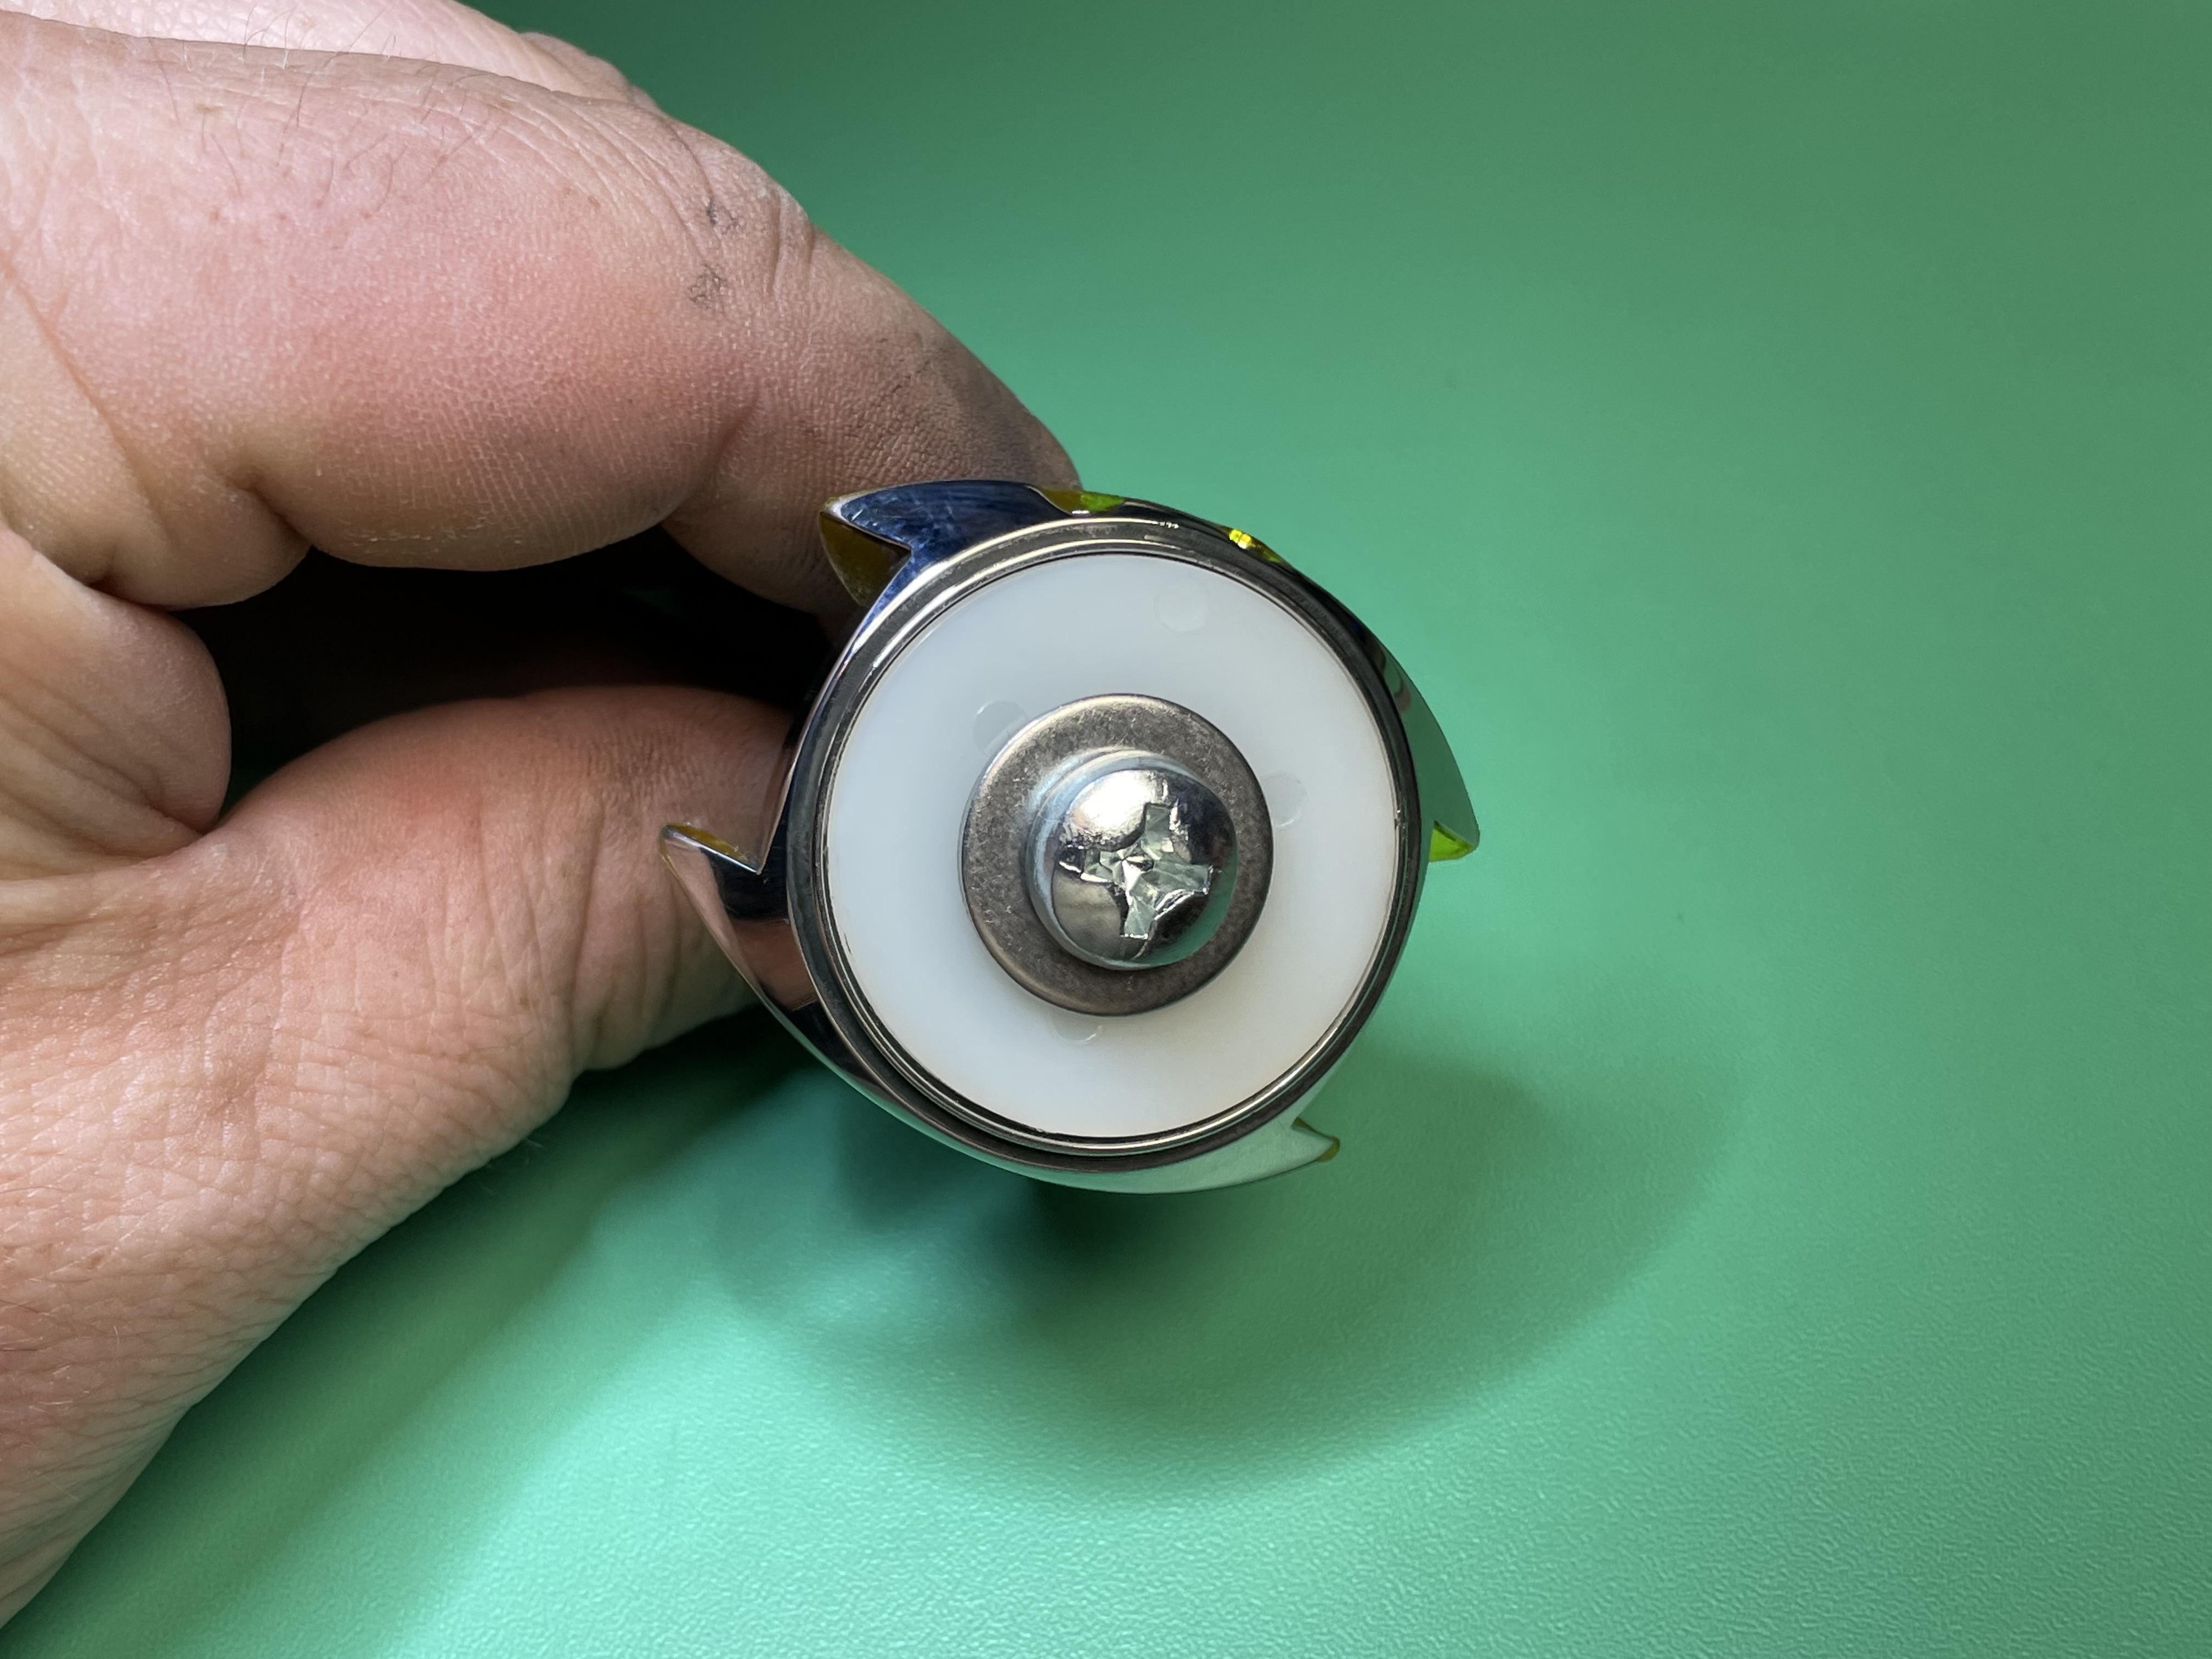
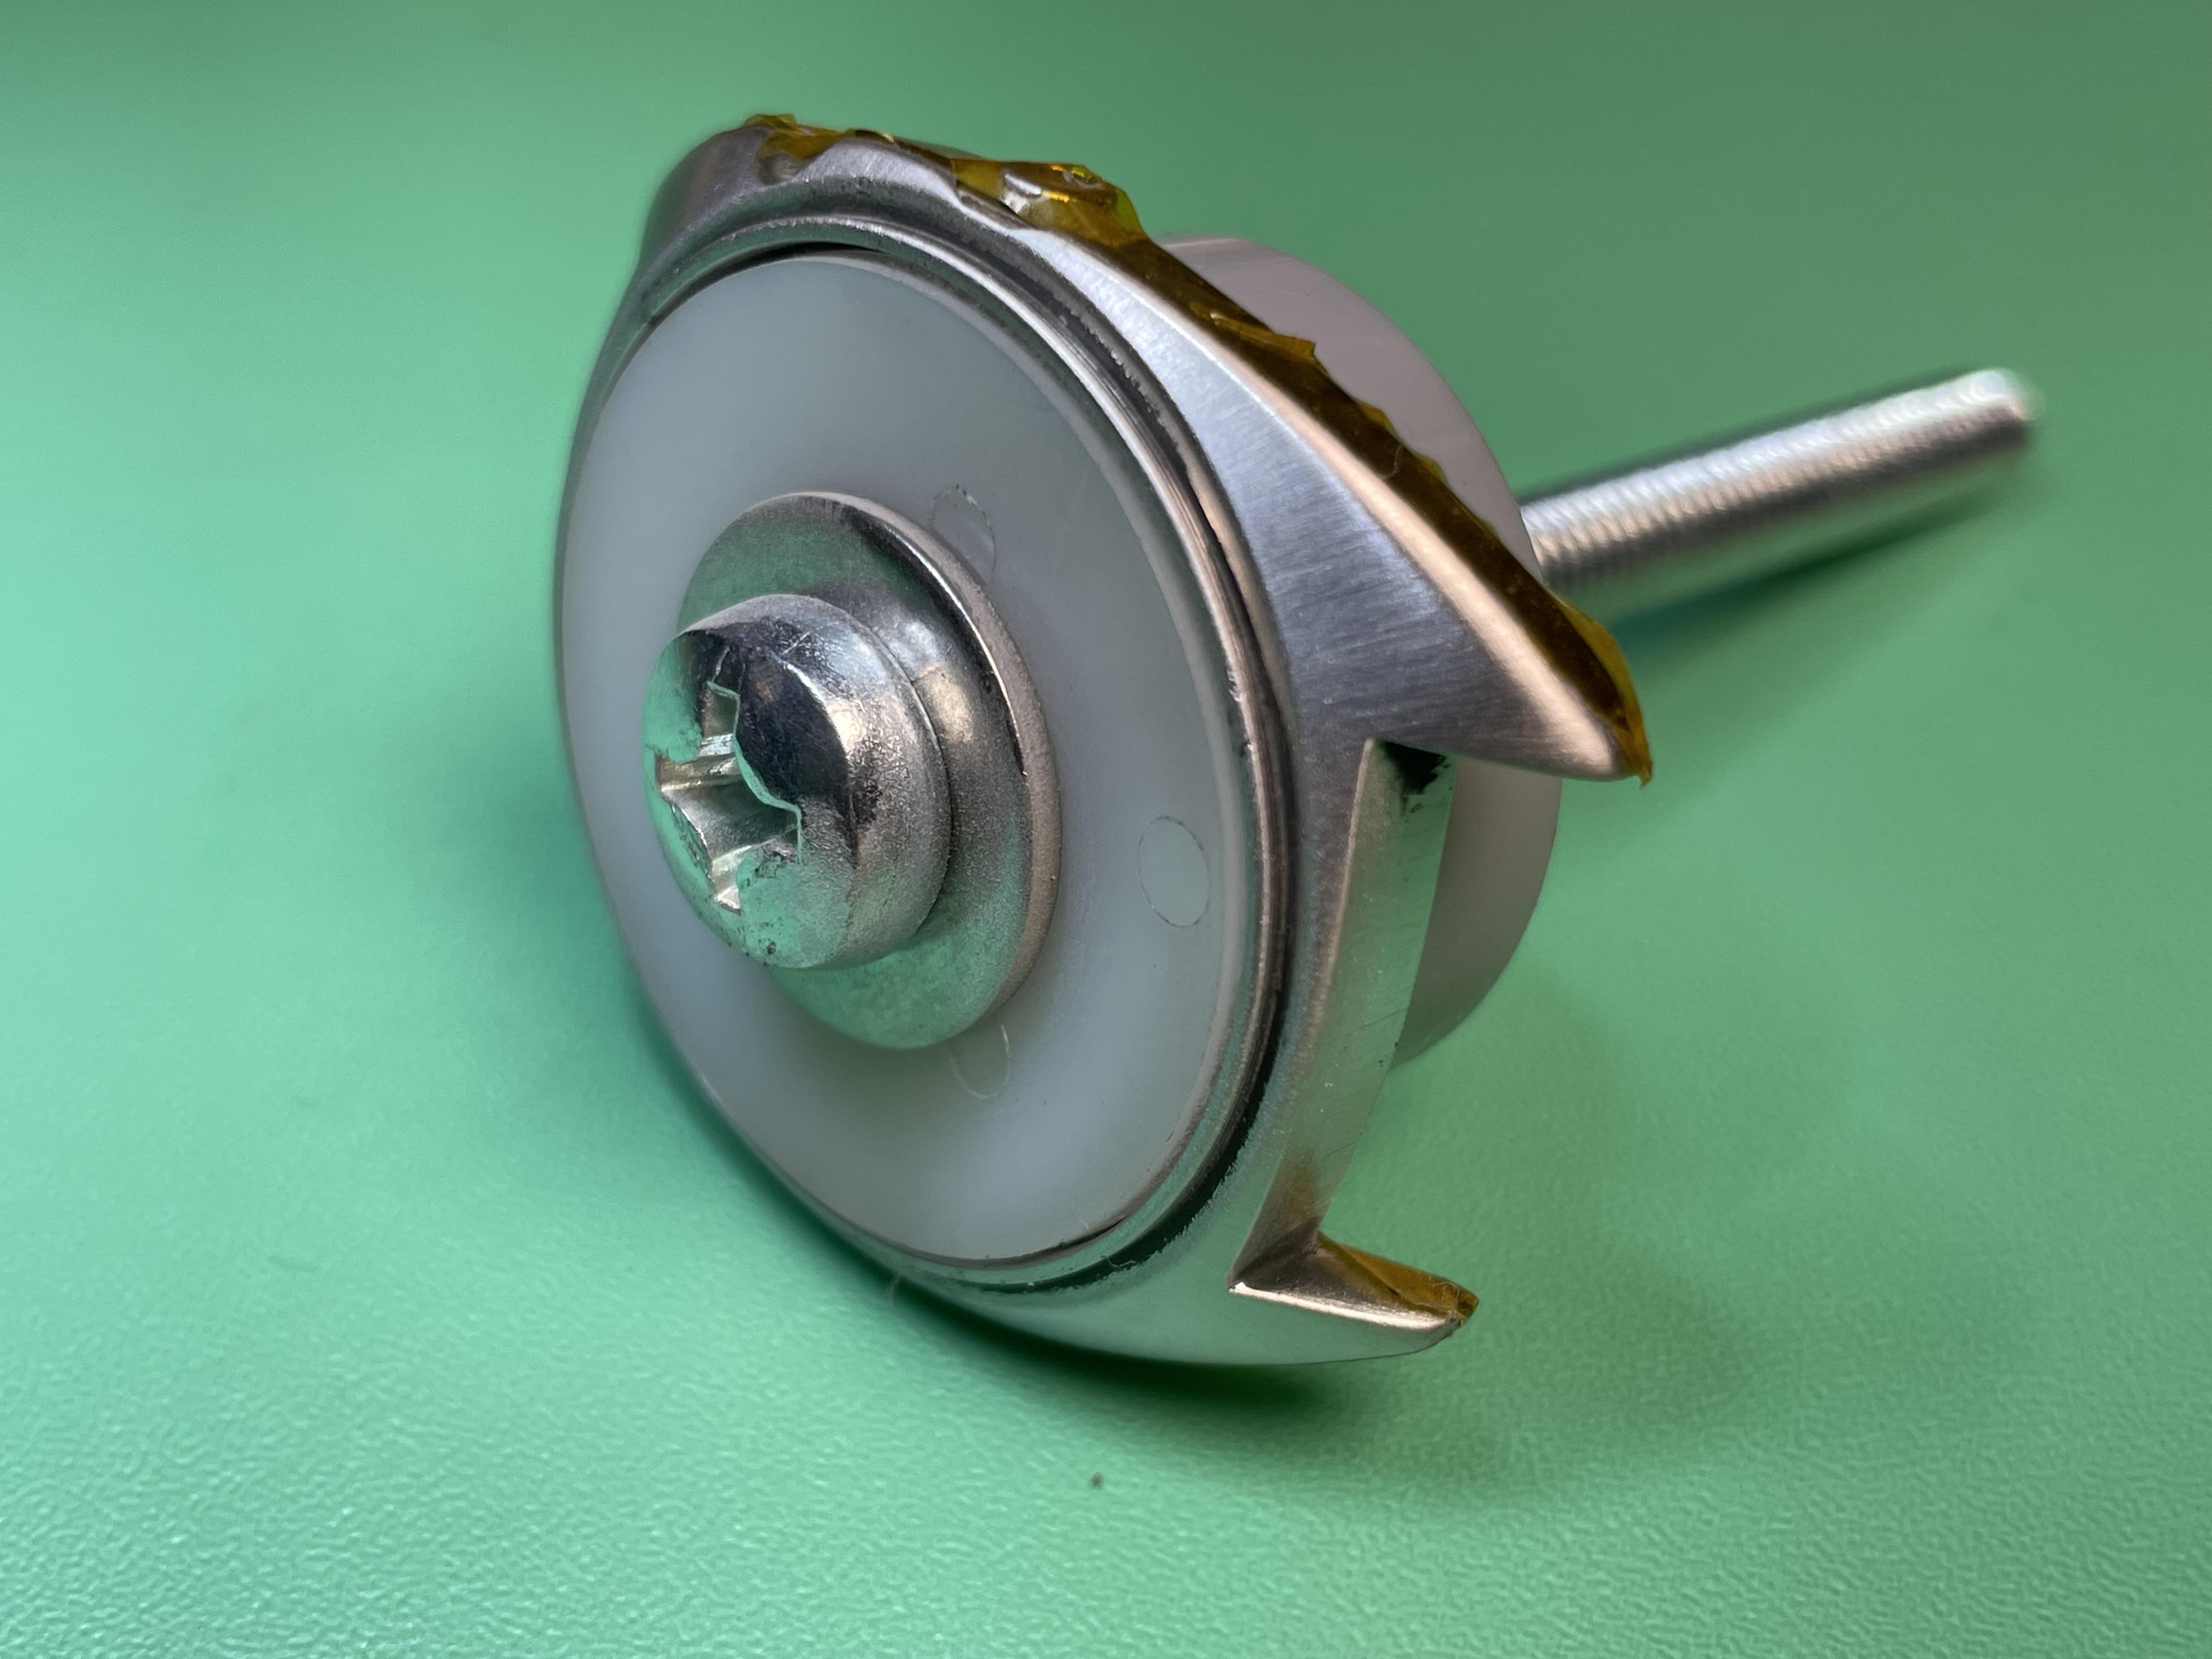
I’ve got a case that I’d like to do some radial brushing on. A lapping machine is far out of my budget, so I tried to improvise this evening. I secured the case between a nylon washer and one of my plastic crystal dies. I chucked it into a drill, and then used that to align it at the proper angle against a brushing wheel. It’s clearly not perfect, but I think the concept is sound. I’ll probably need something different other than a thick brushing wheel to get the desired effect, so I’ll play around with it a bit more. I am encouraged that this may be a workaround to a very expensive tool. Obviously a lapping machine can do many other things, but I’m just trying to accomplish this radial brushing for now. About two weeks ago I came up with a very crude way of holding a case back centered and allowing it to spin, so I can apply radial brushing to that part. It seemed to work pretty well. The first two pictures are before my brushing attempt on the case.
 1 point
 -
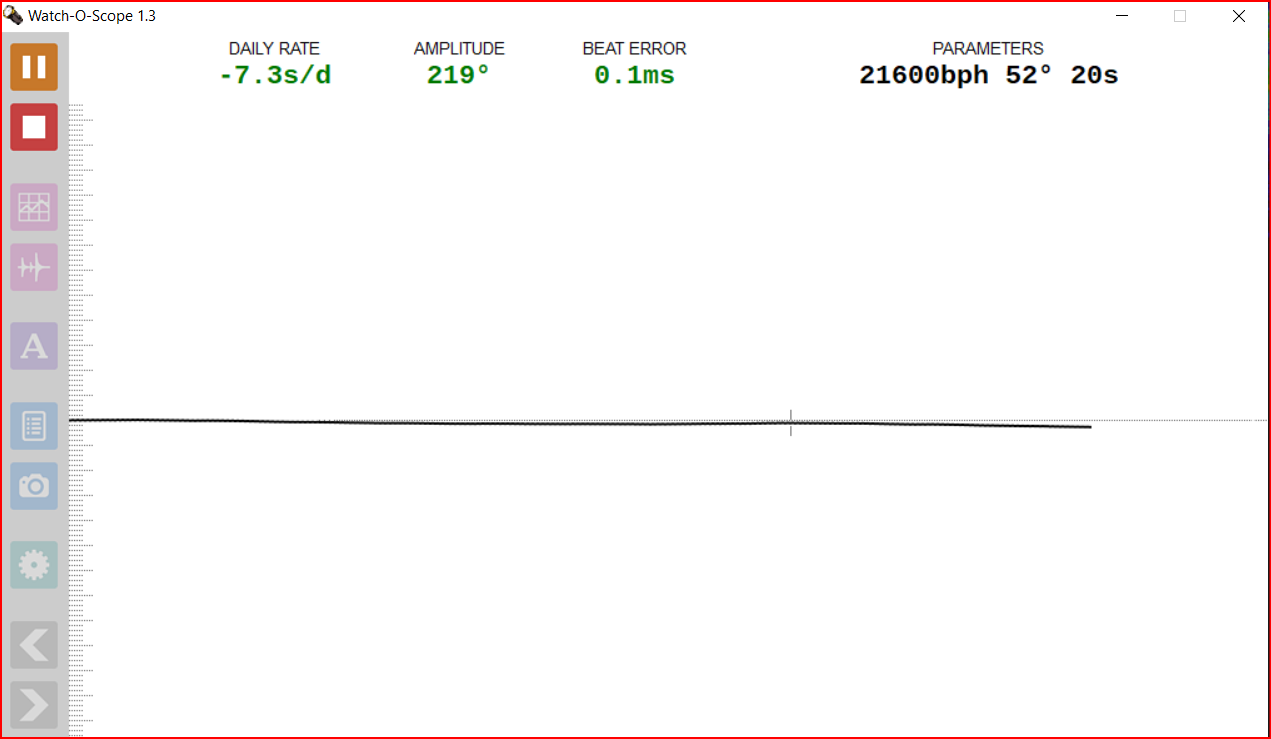
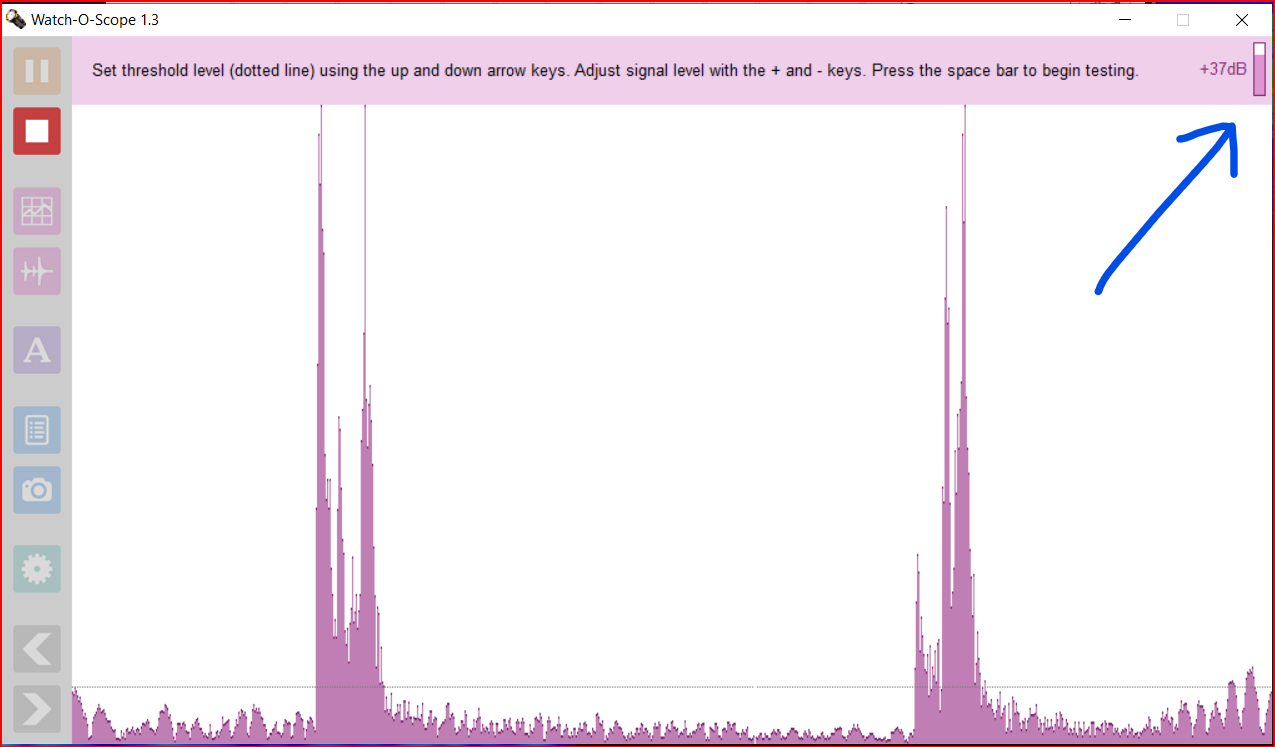
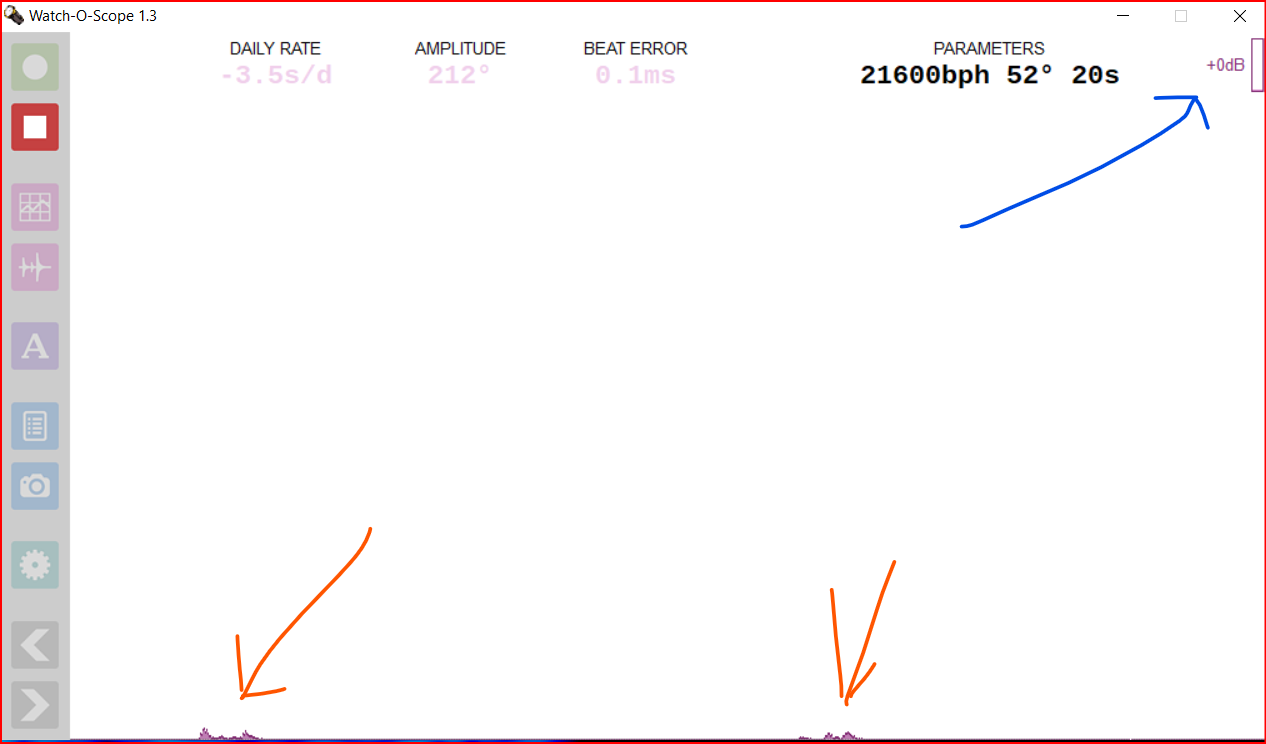
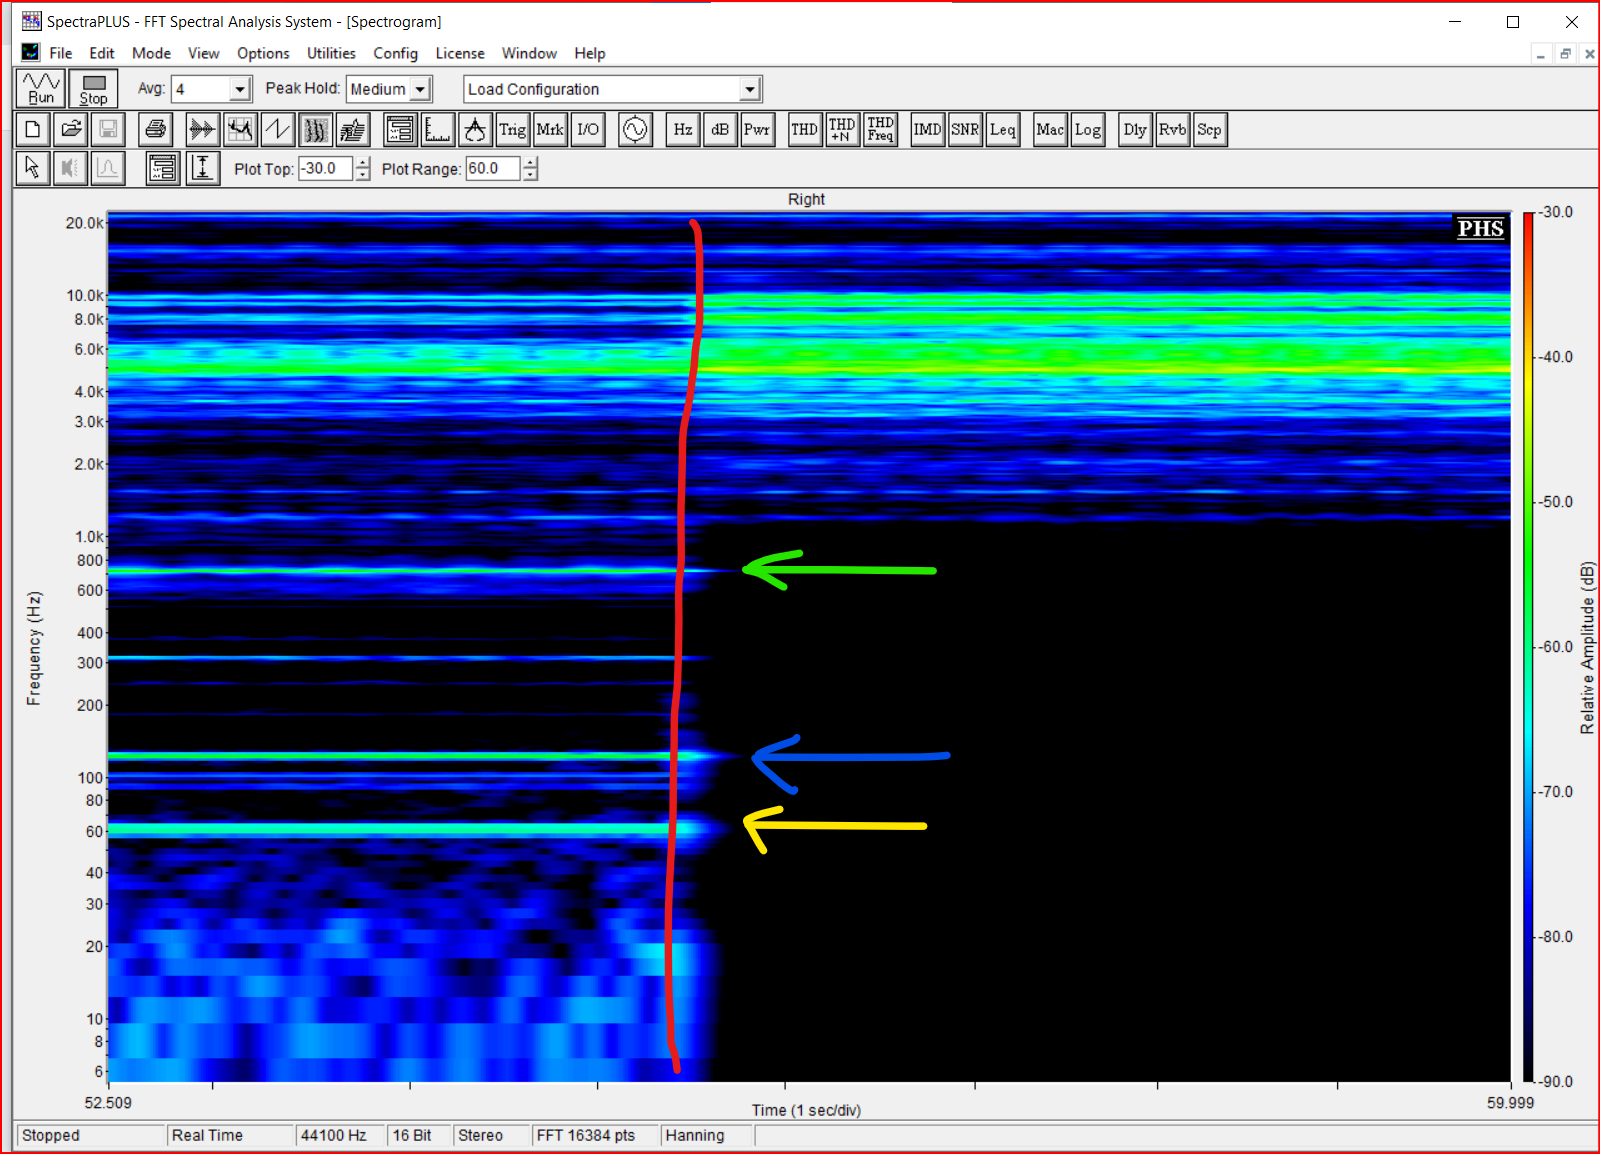
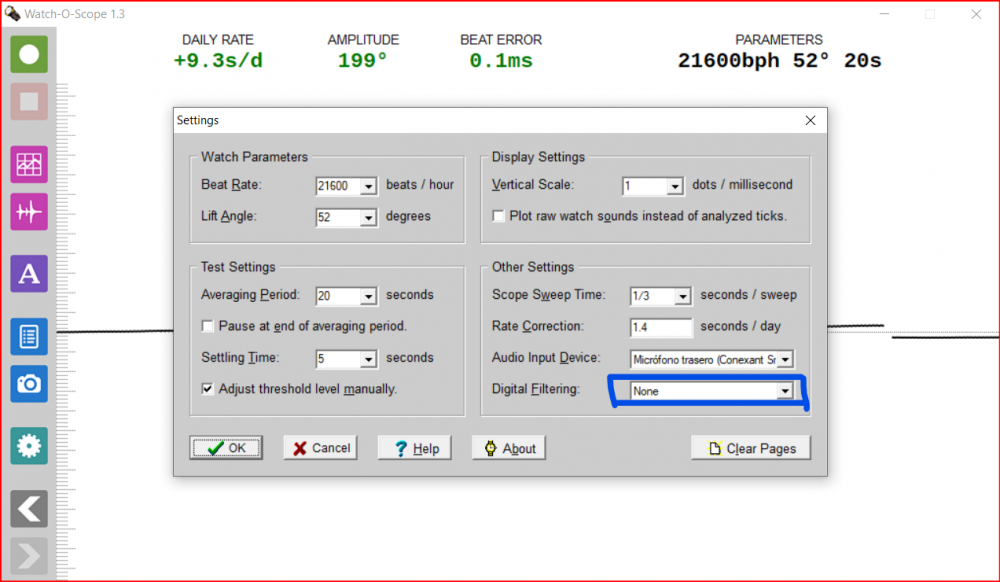
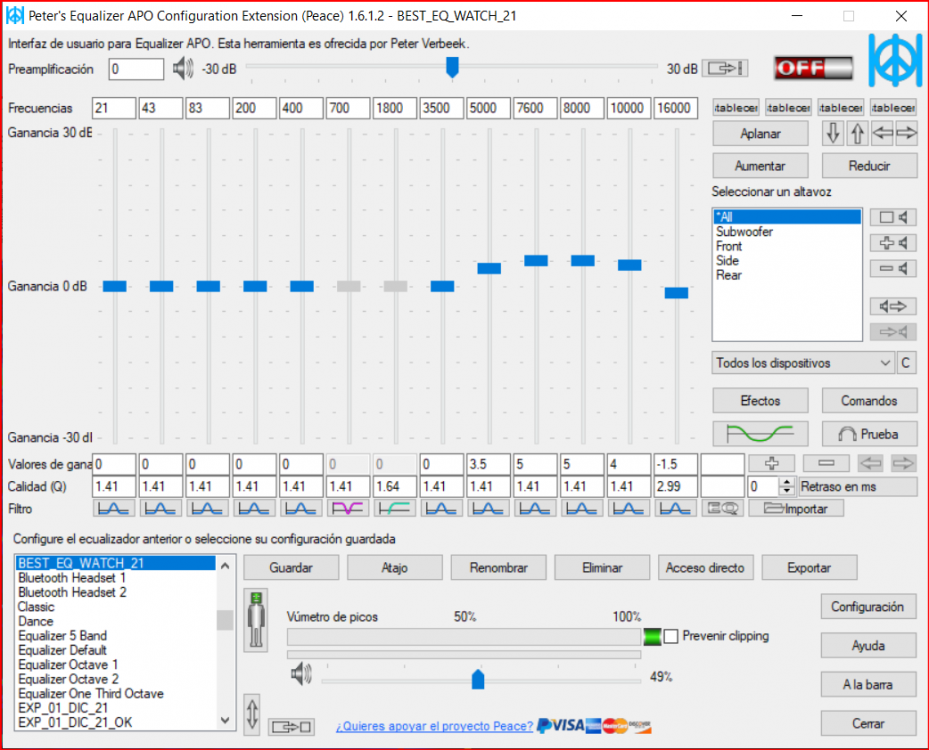
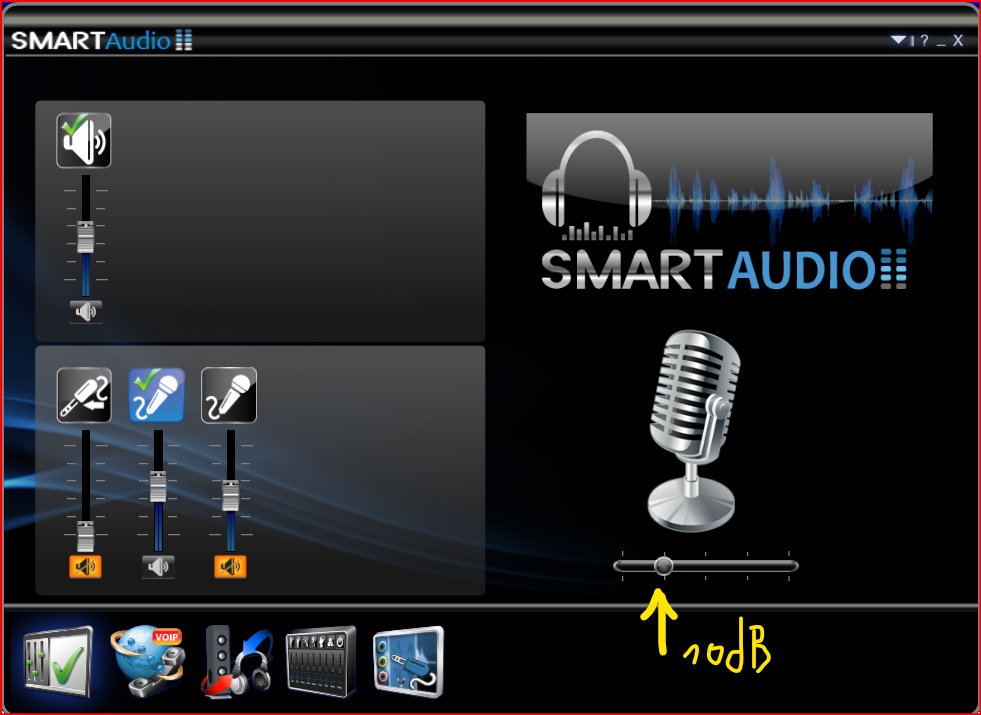
Effectively, the noise can be treated. I use Peace EQ. The equalizer can eliminate unwanted noise. Here I show how the sound of a microphone constructed from a piezo electric disc and using a transistor as a preamplifier can be handled. Filtering with Peace EQ However, IMHO, WOS alone can solve a very noisy signal situation. Apply a pre-amplication if necessary. And it also integrates filters that can be tested to obtain better results if the signal is not good. Example of poor signal in with 0 dB in WOS When analyzing, WOS applies 37 dB and much better. Increase the signal, also increase the noise, but the difference between signal and noise is clear. EQ is not being used here. The Signal is being used as it is delivered by the transistor Mic, without a preamplifier injected directly to the pc. This is the audio setup in the example above And I share a video to see what is explained.


 1 point
 -
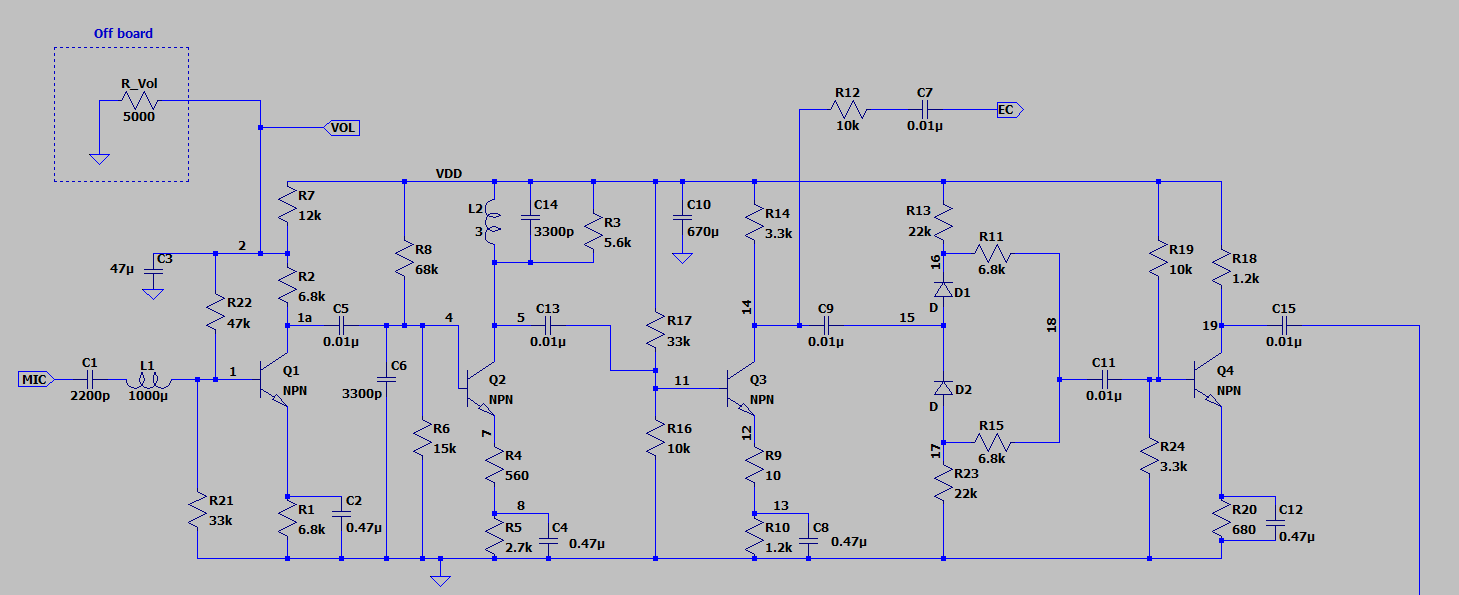
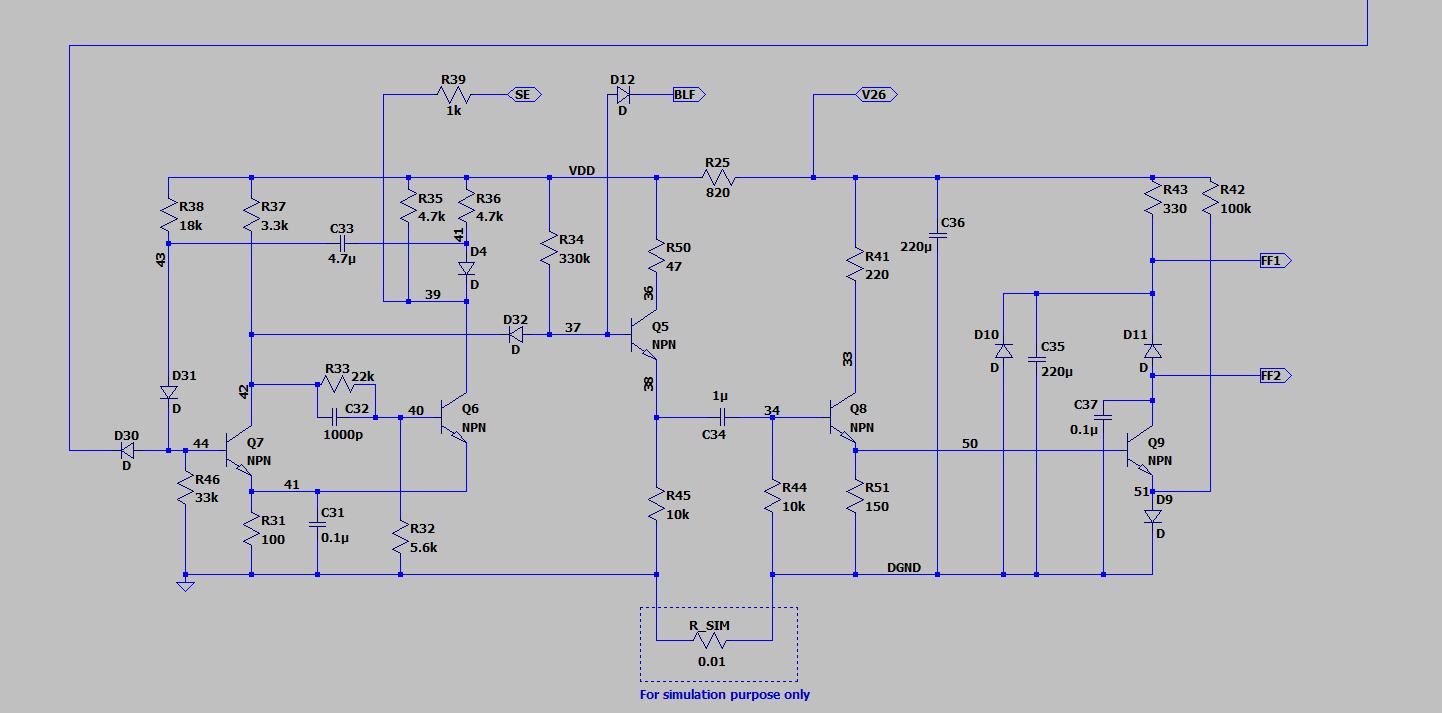
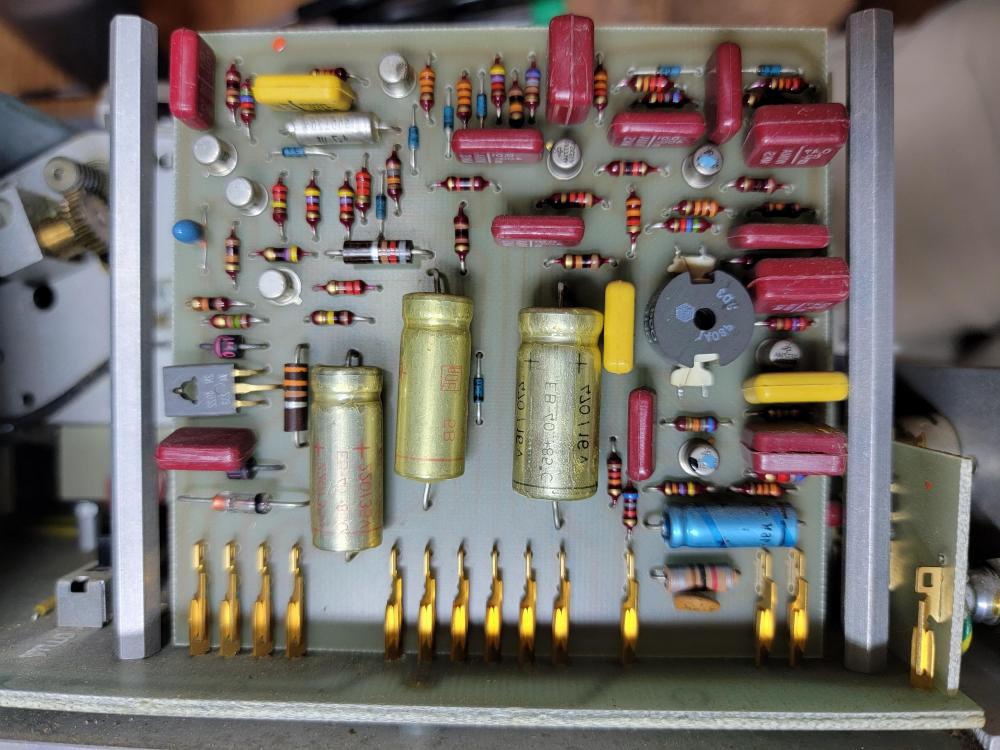
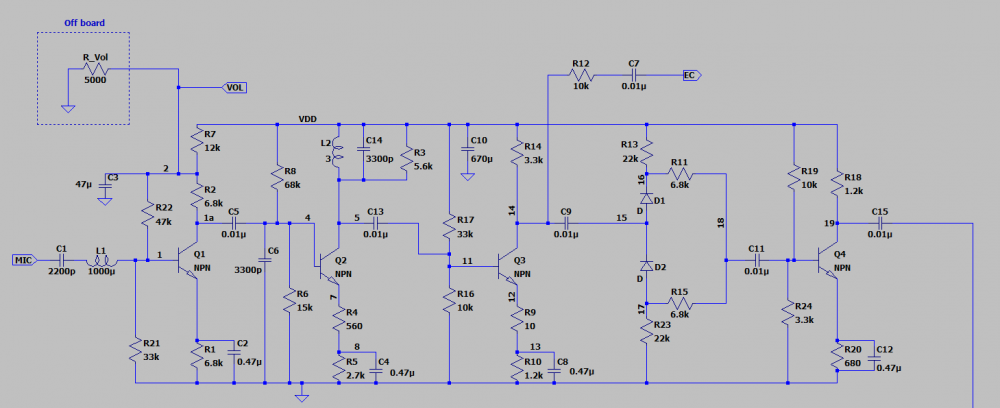
I decided to extract the schematic for the Vibrograf B200 amplifier board so that I can simulate it. Here are the results of my work. I have included an frequency response simulation. I did the majority of the extraction myself, but did benefit from earlier work done here.
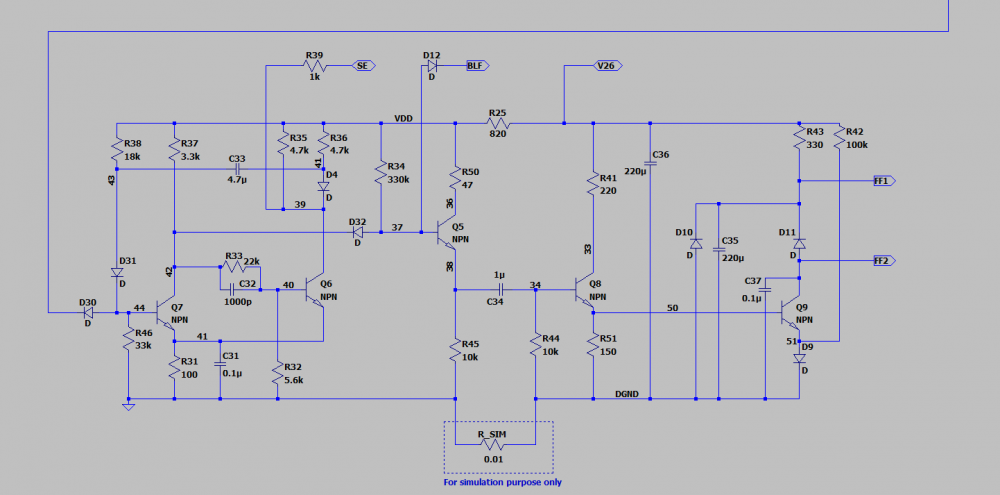
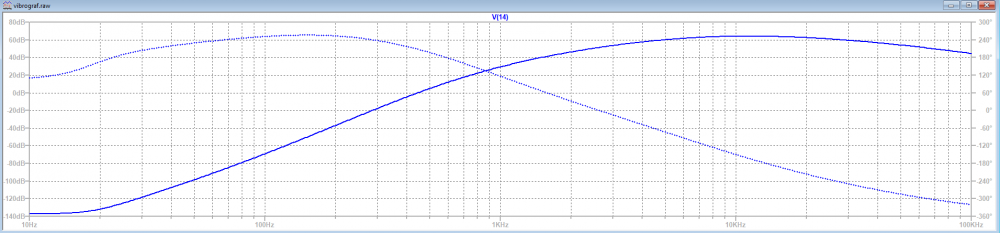 1 point
 -
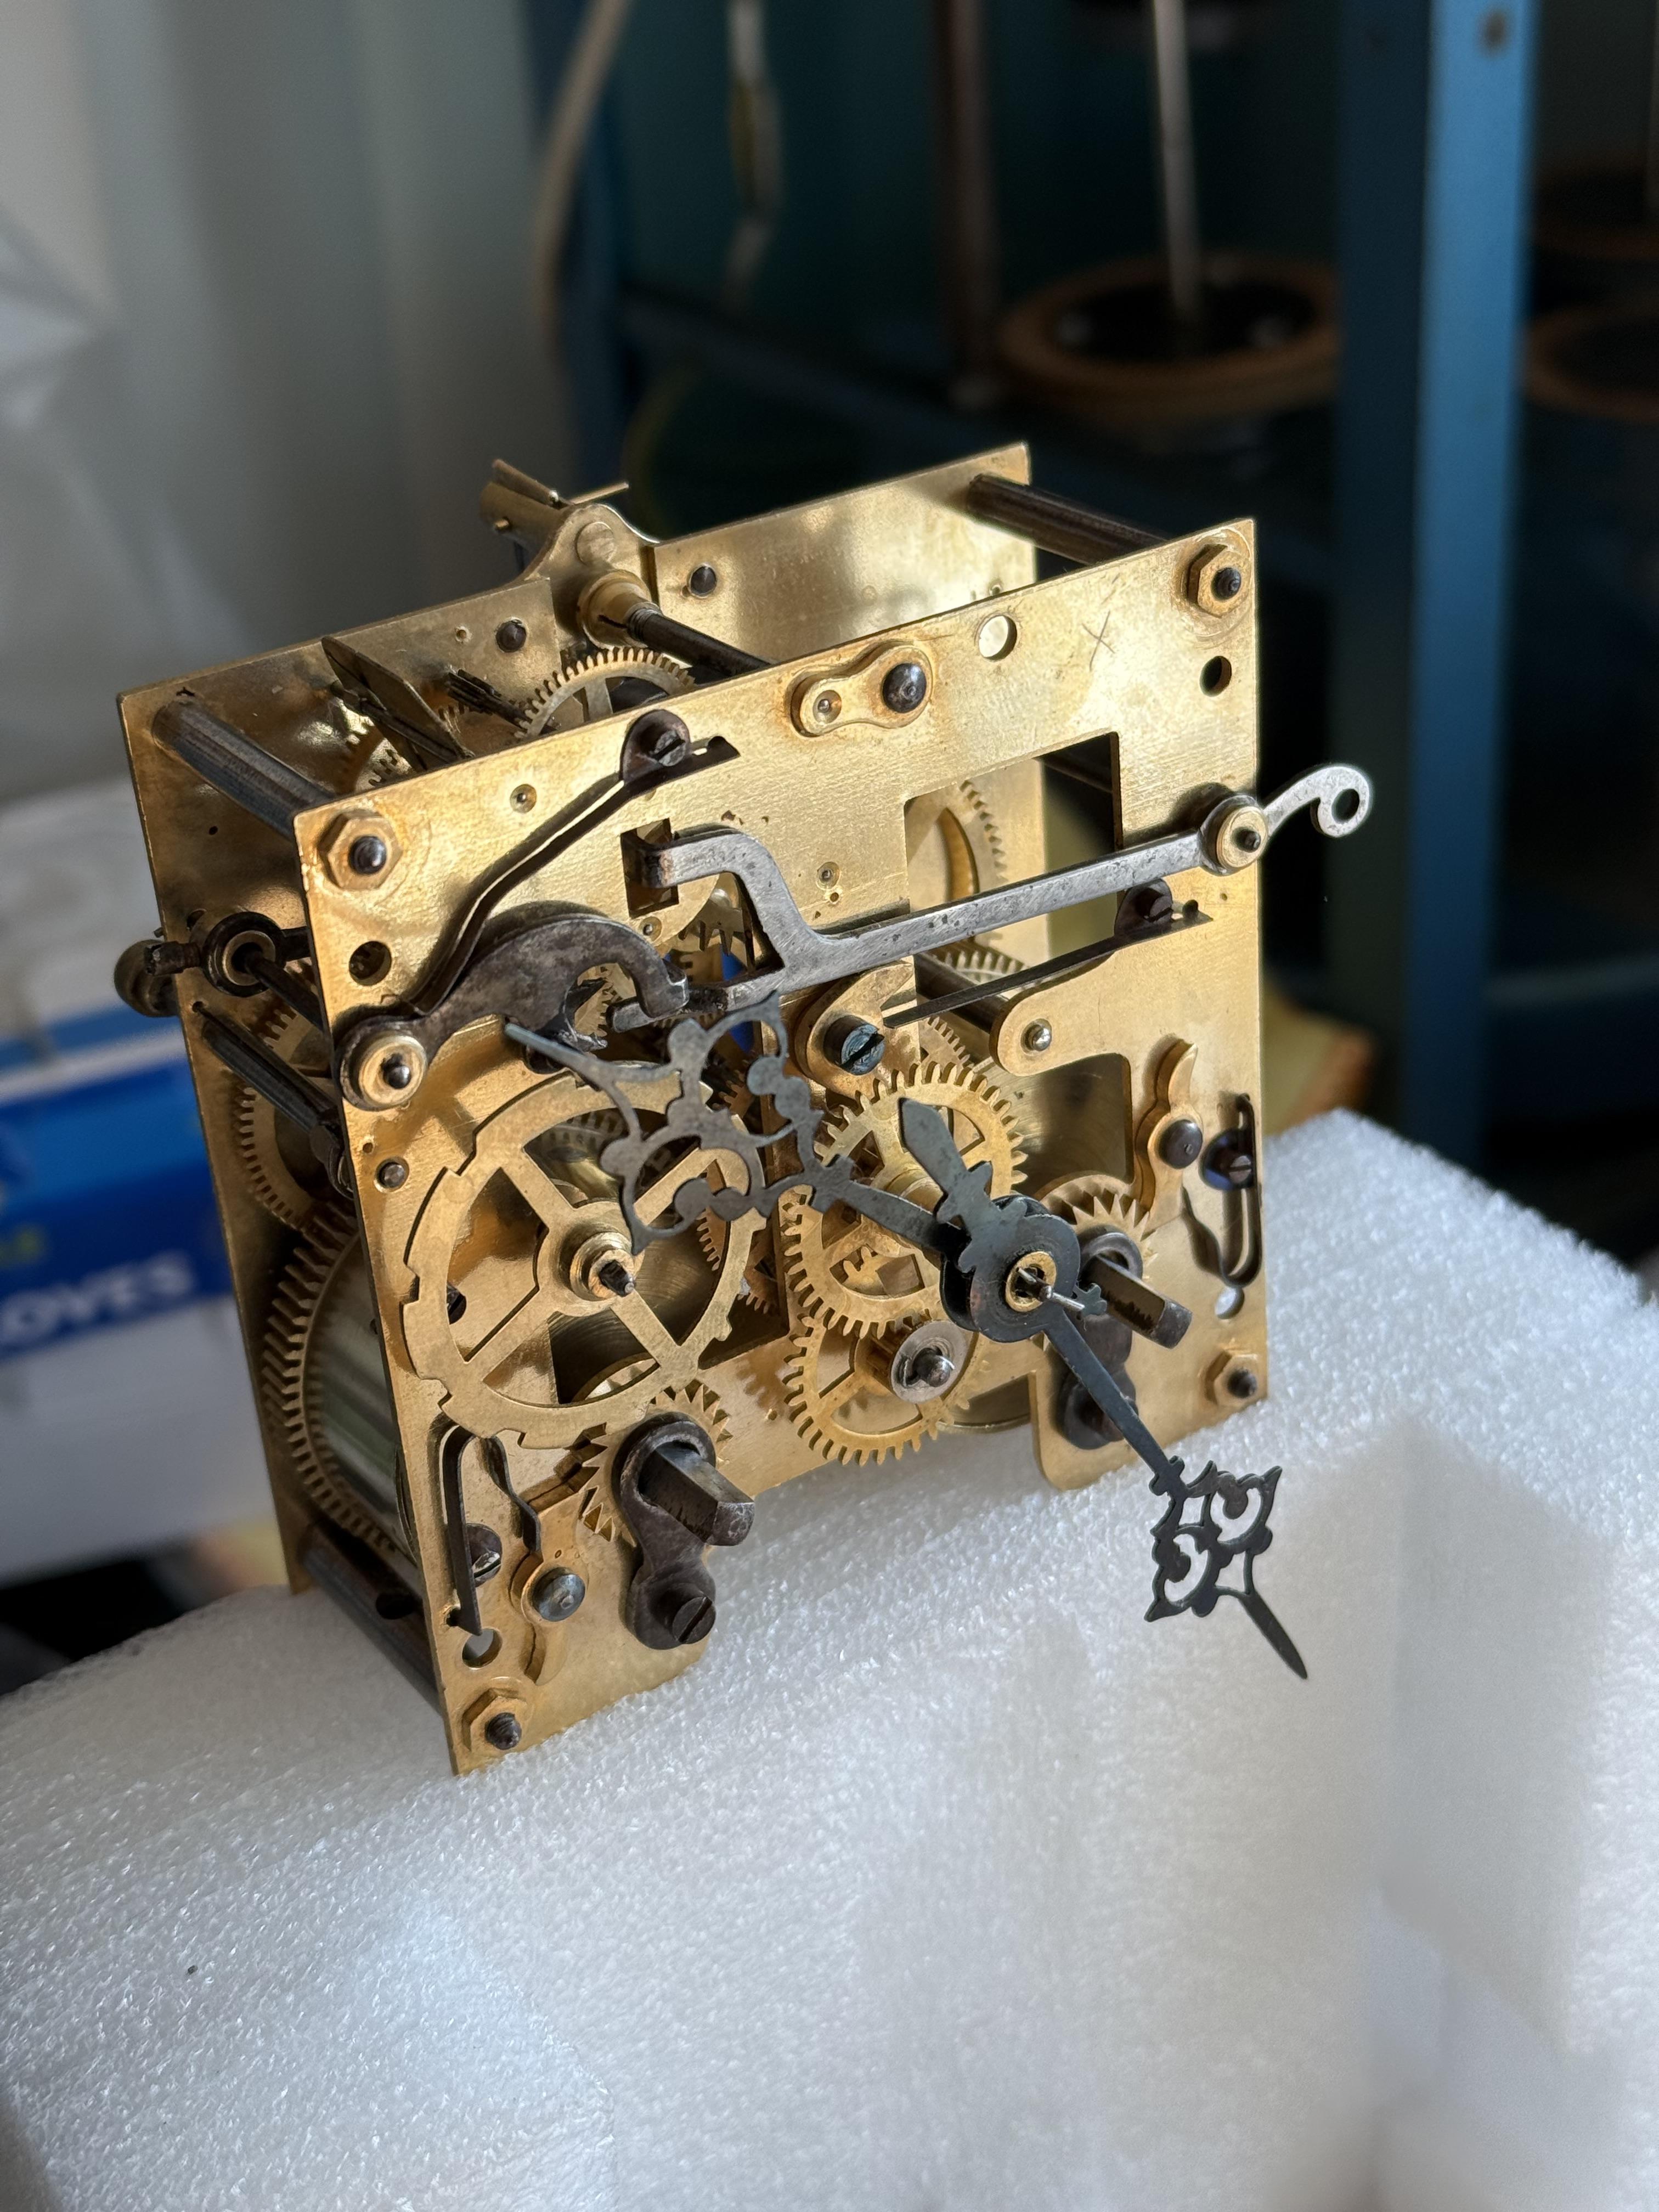
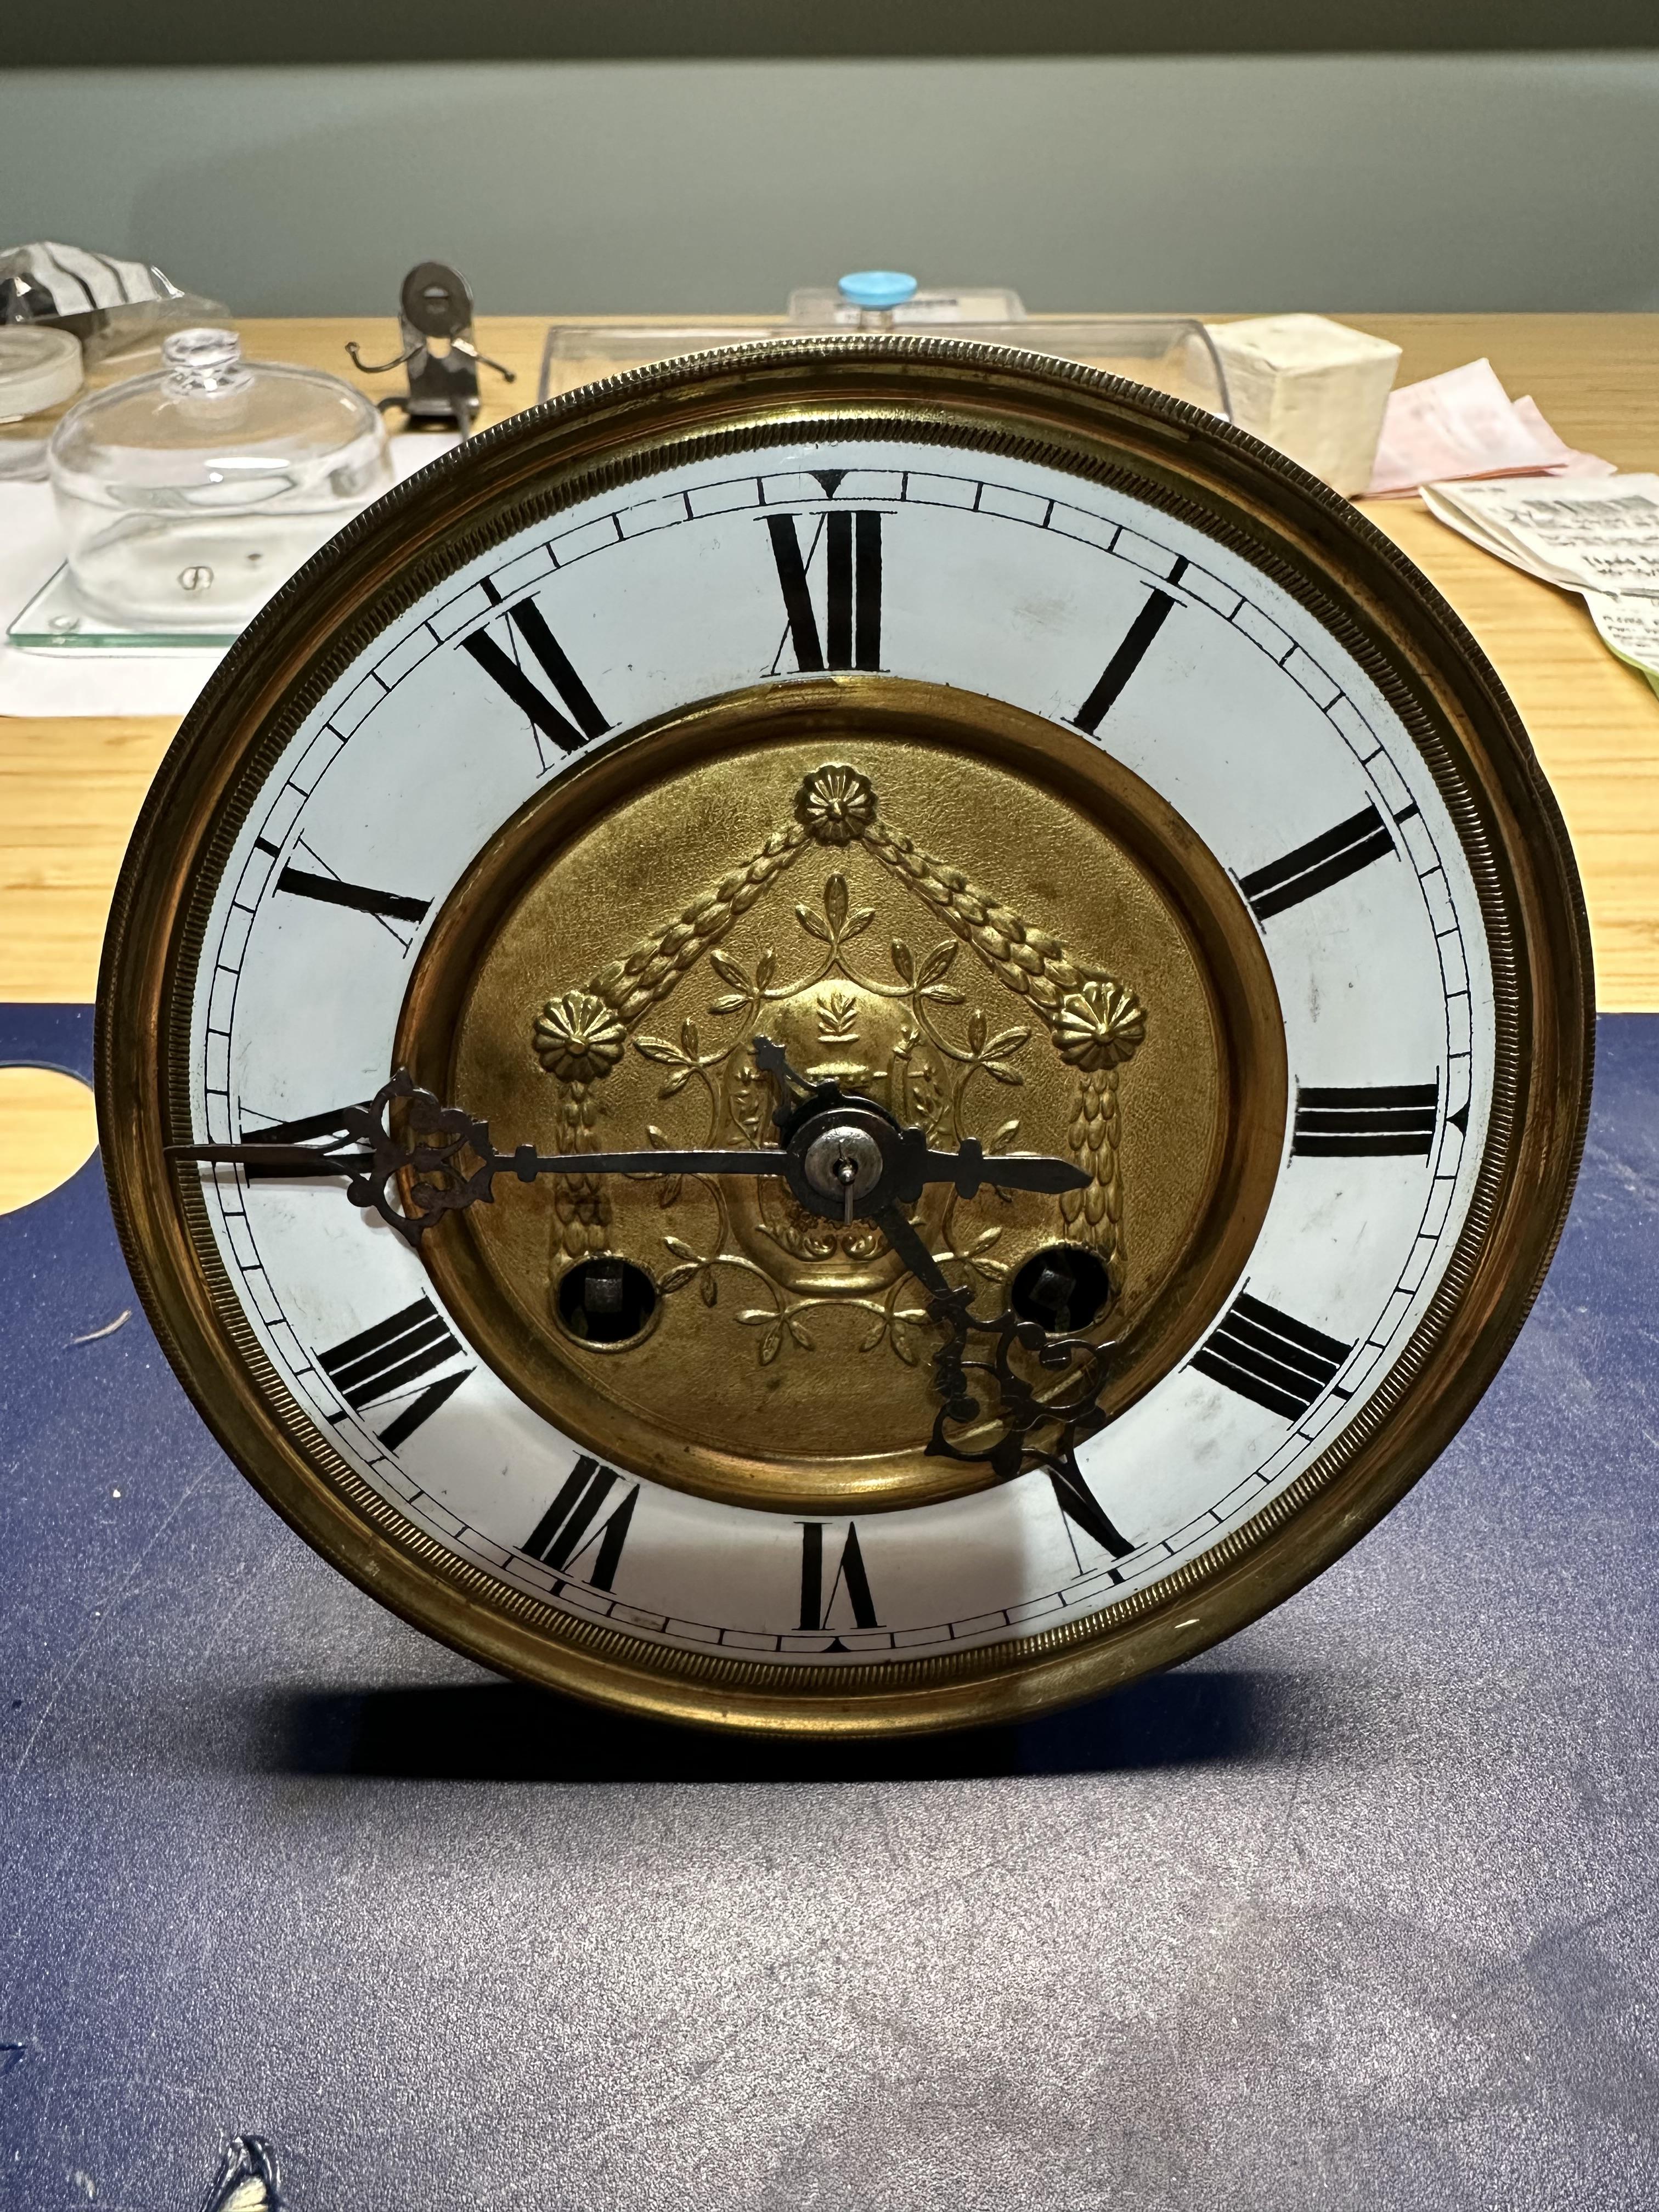
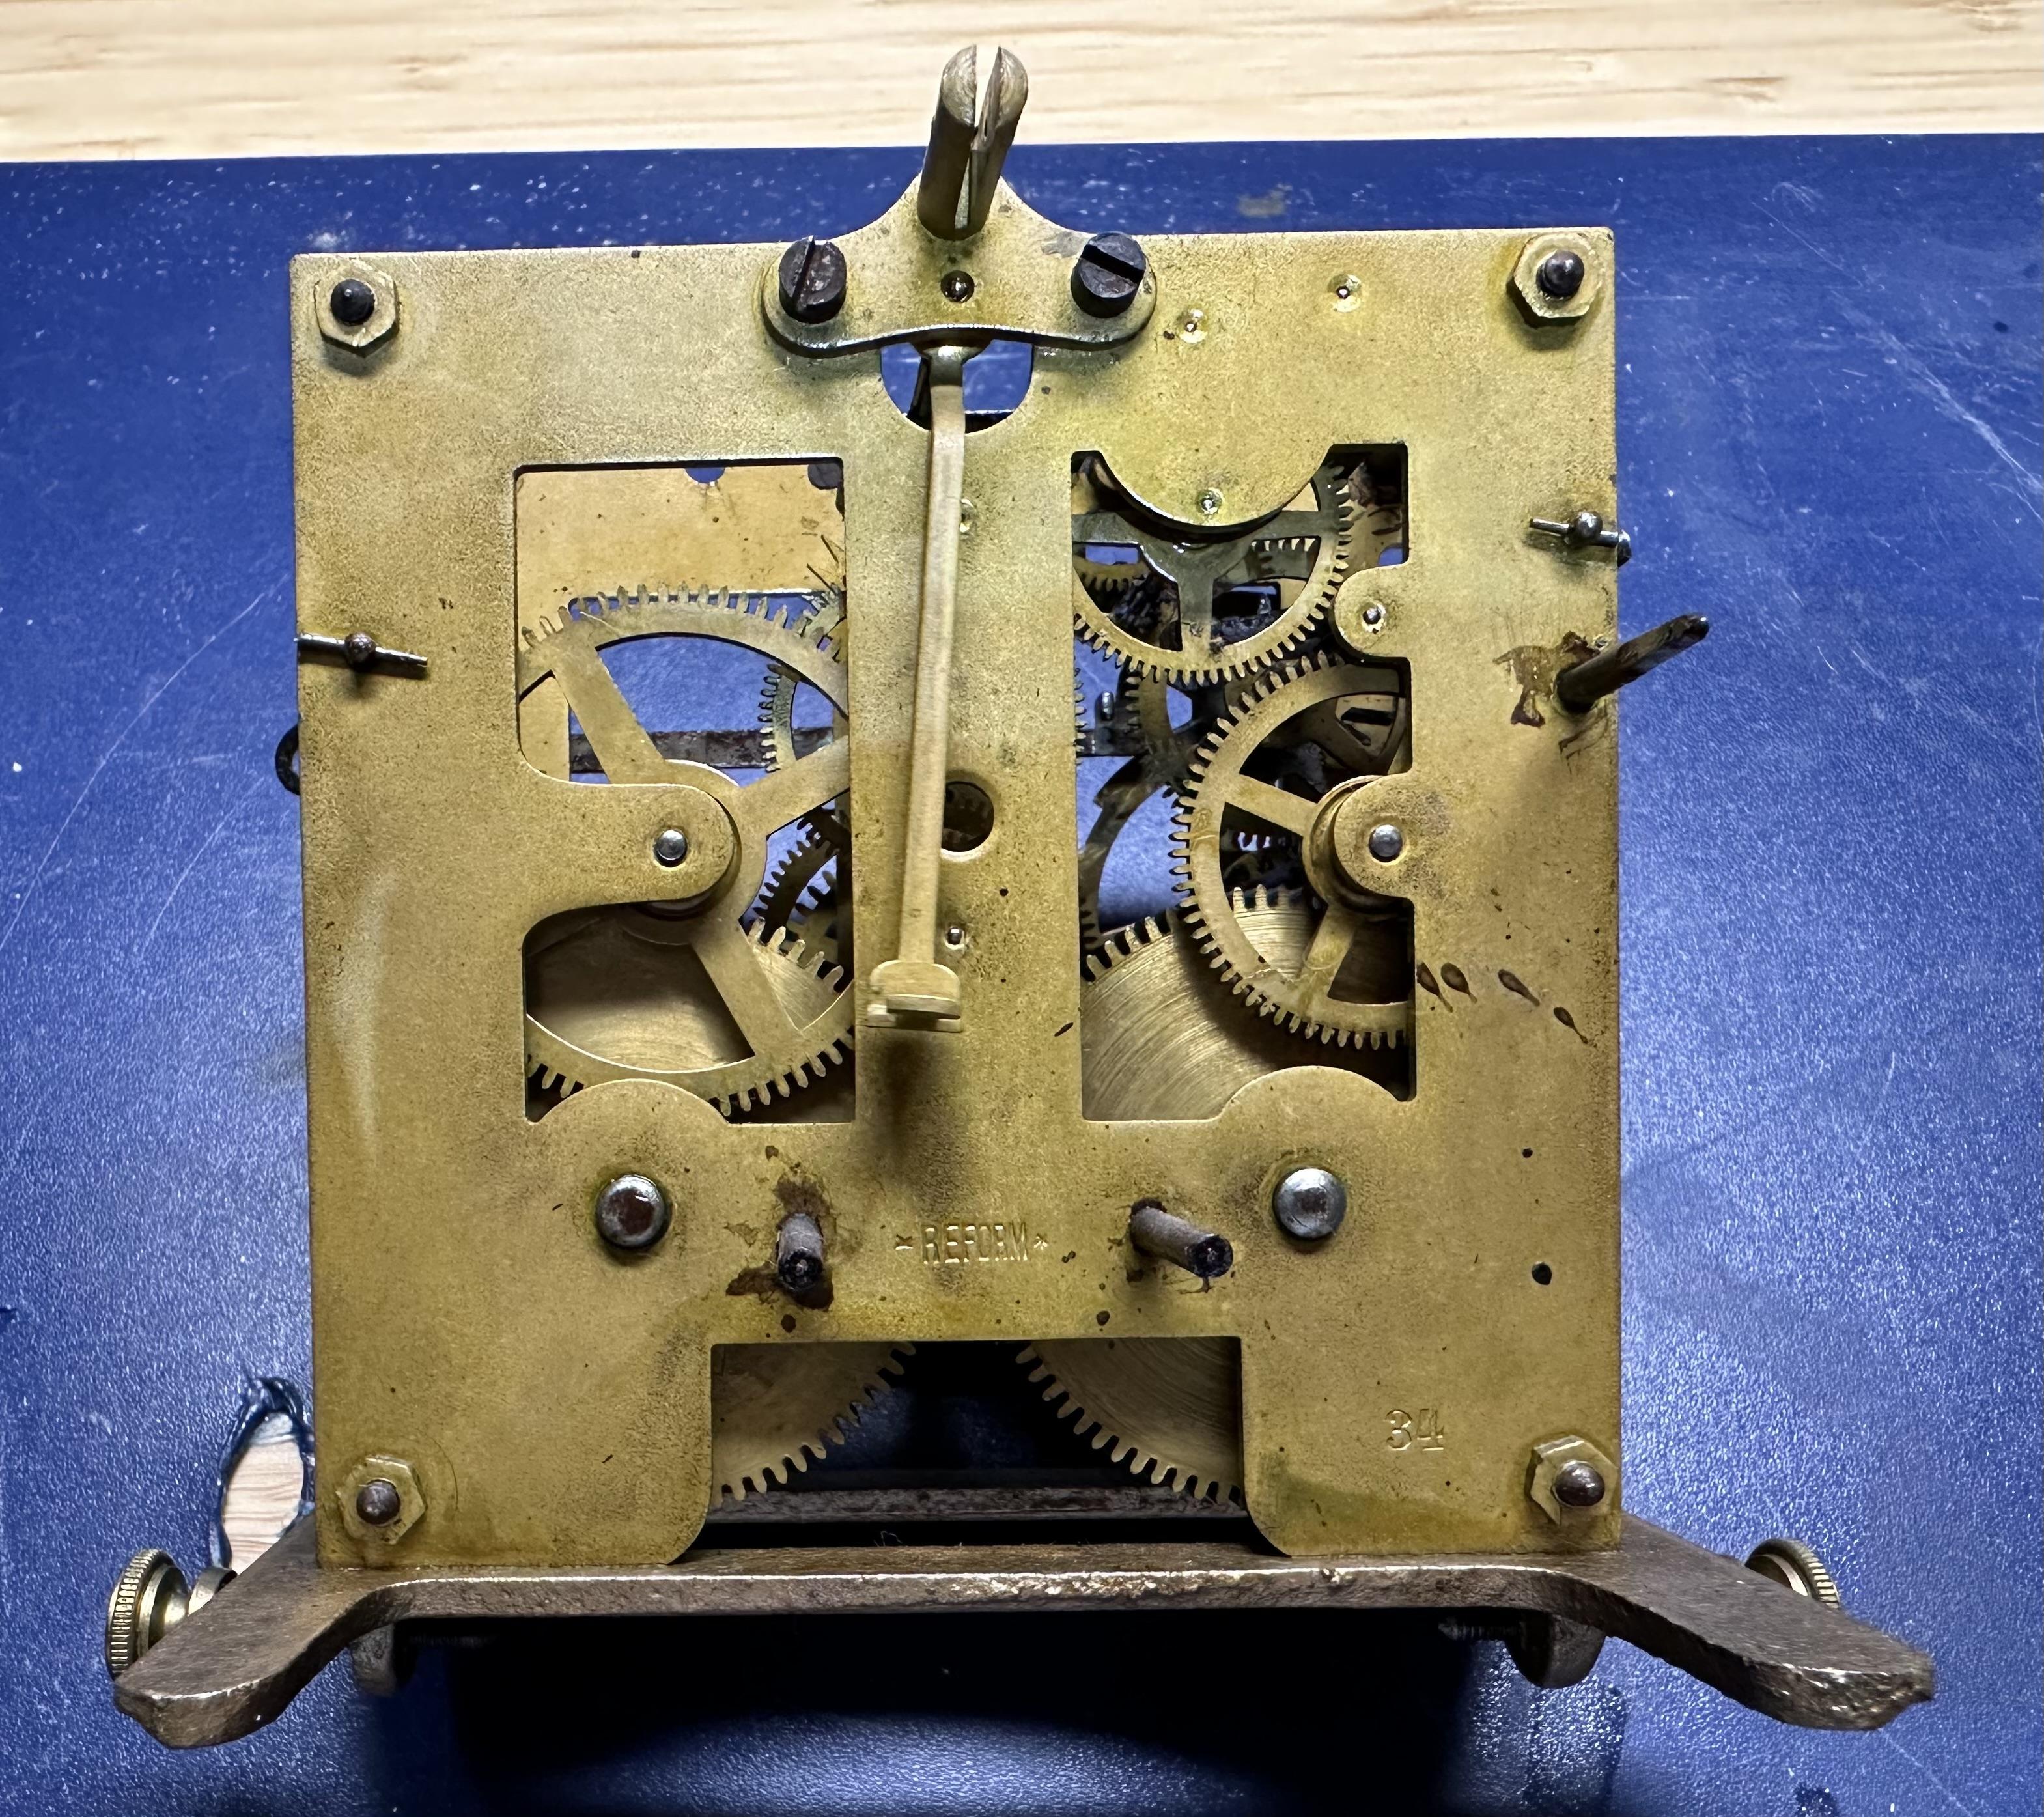
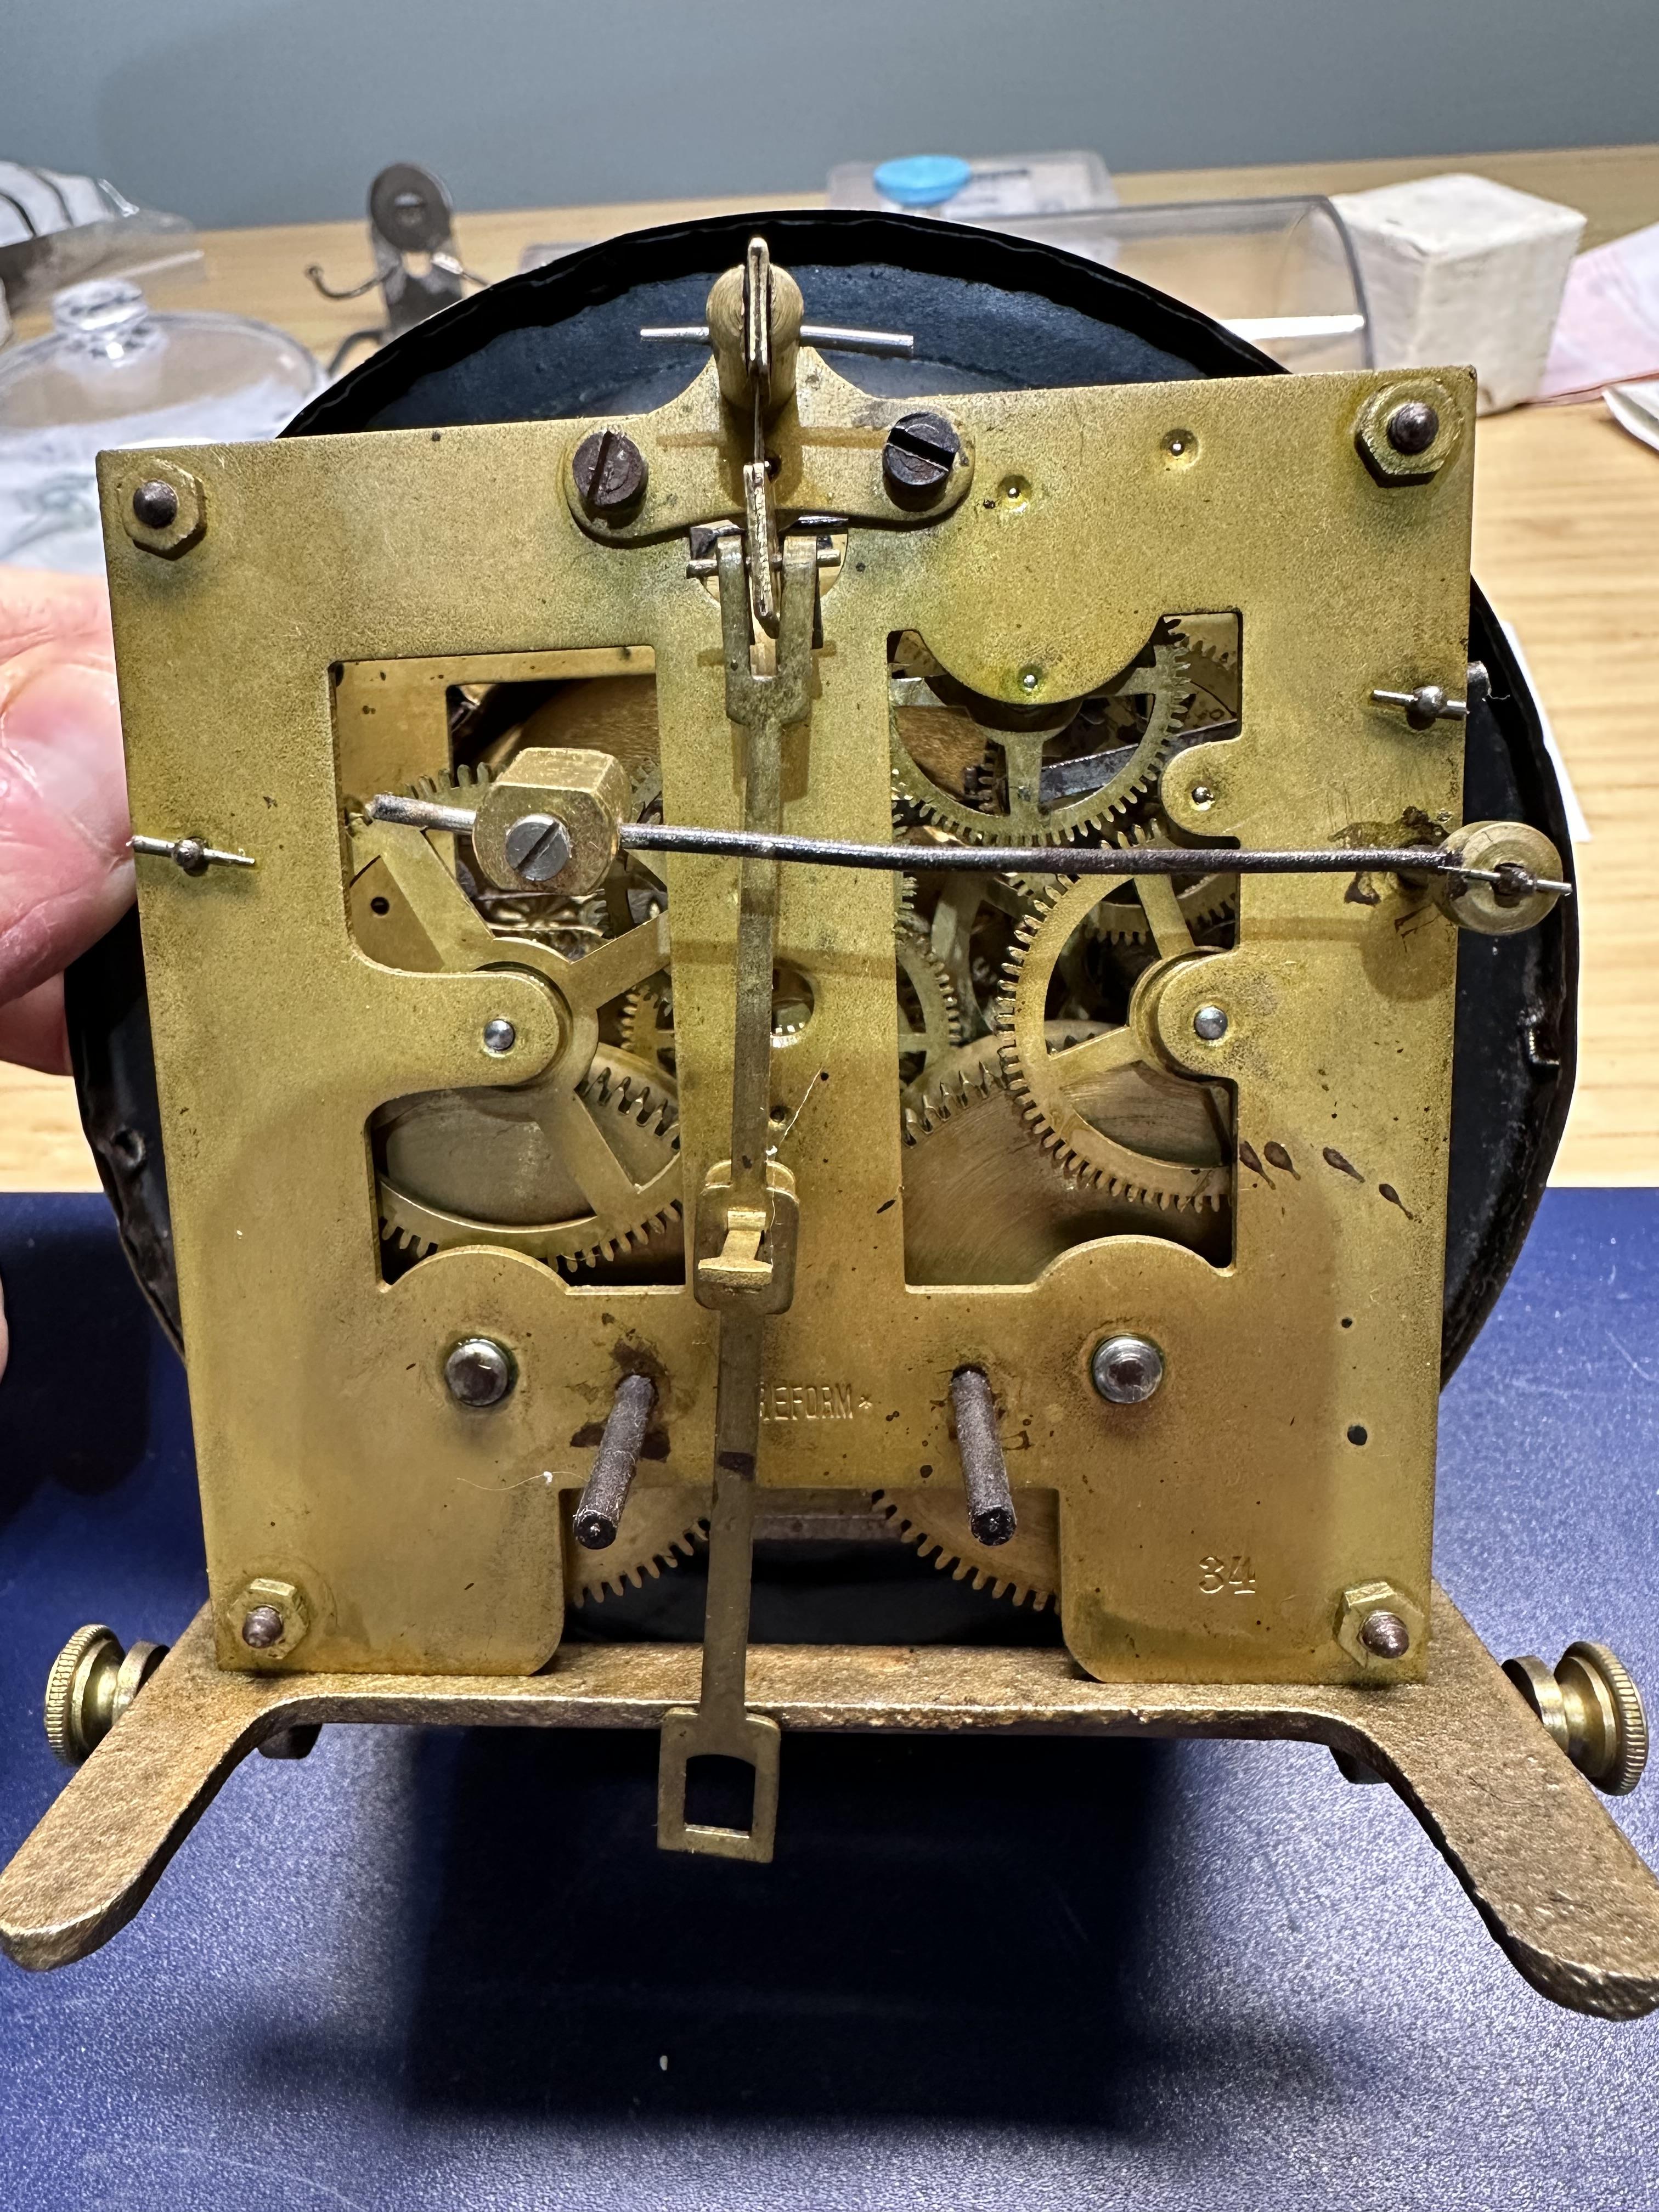
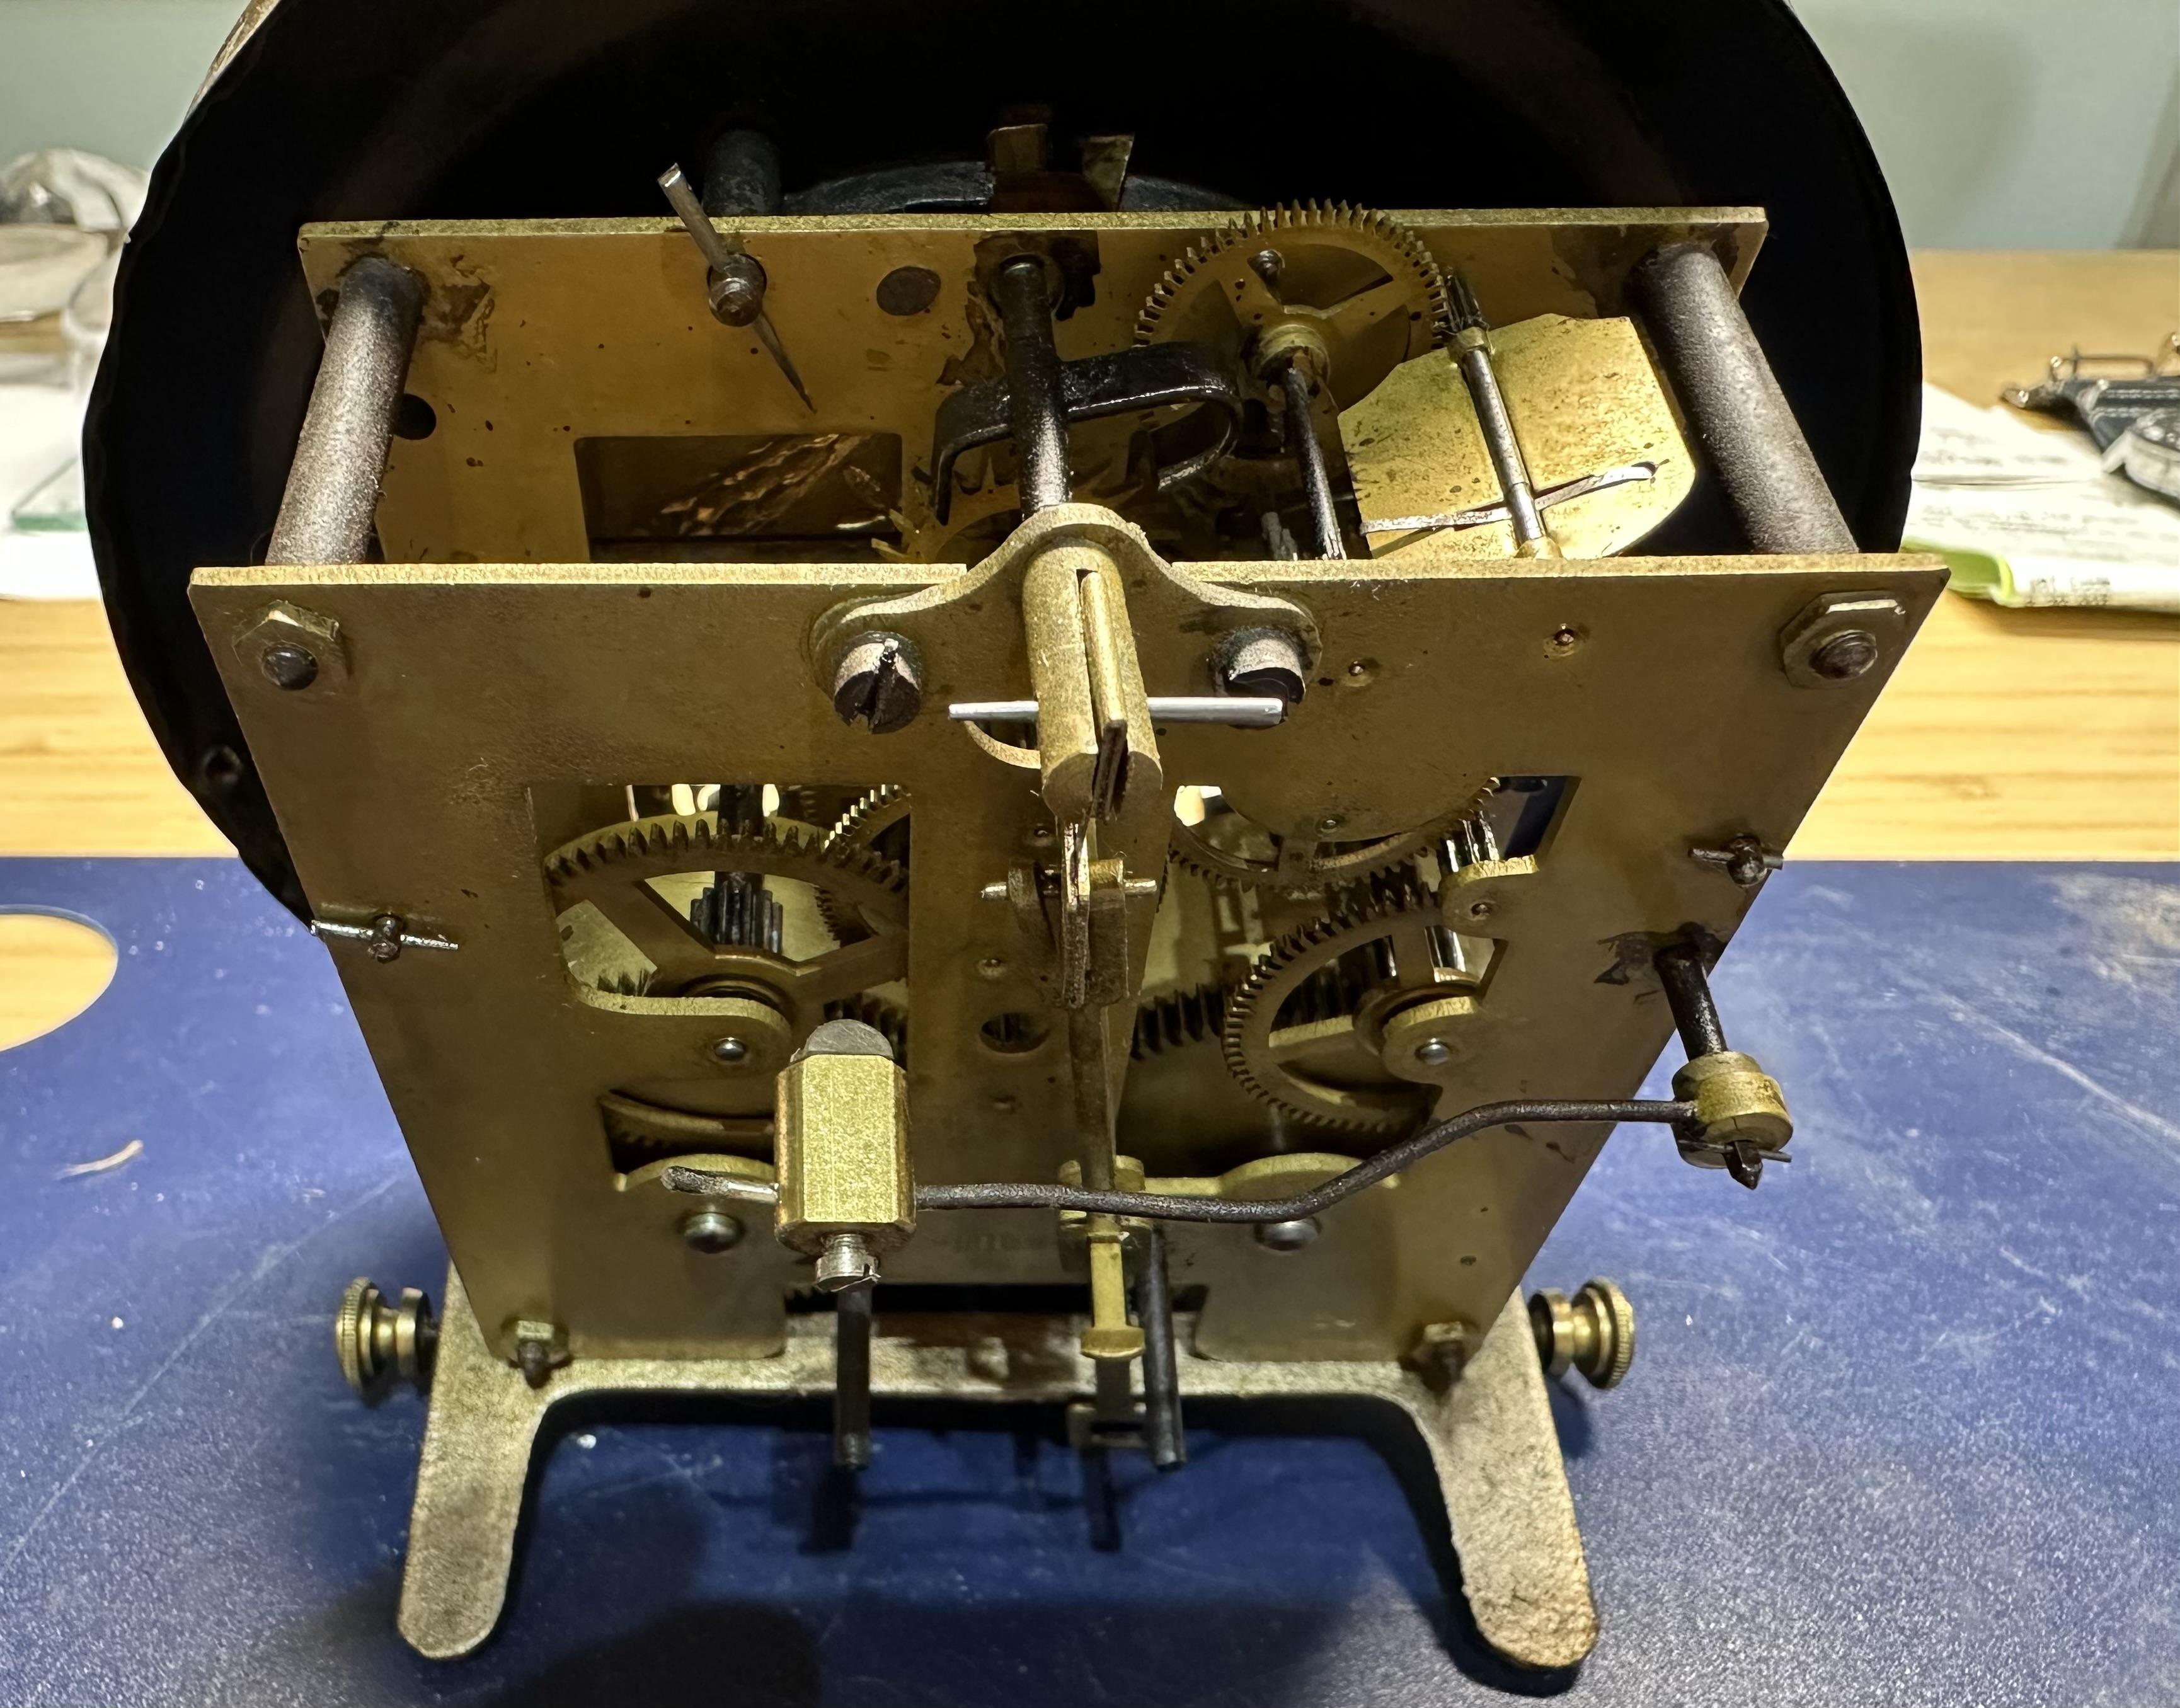
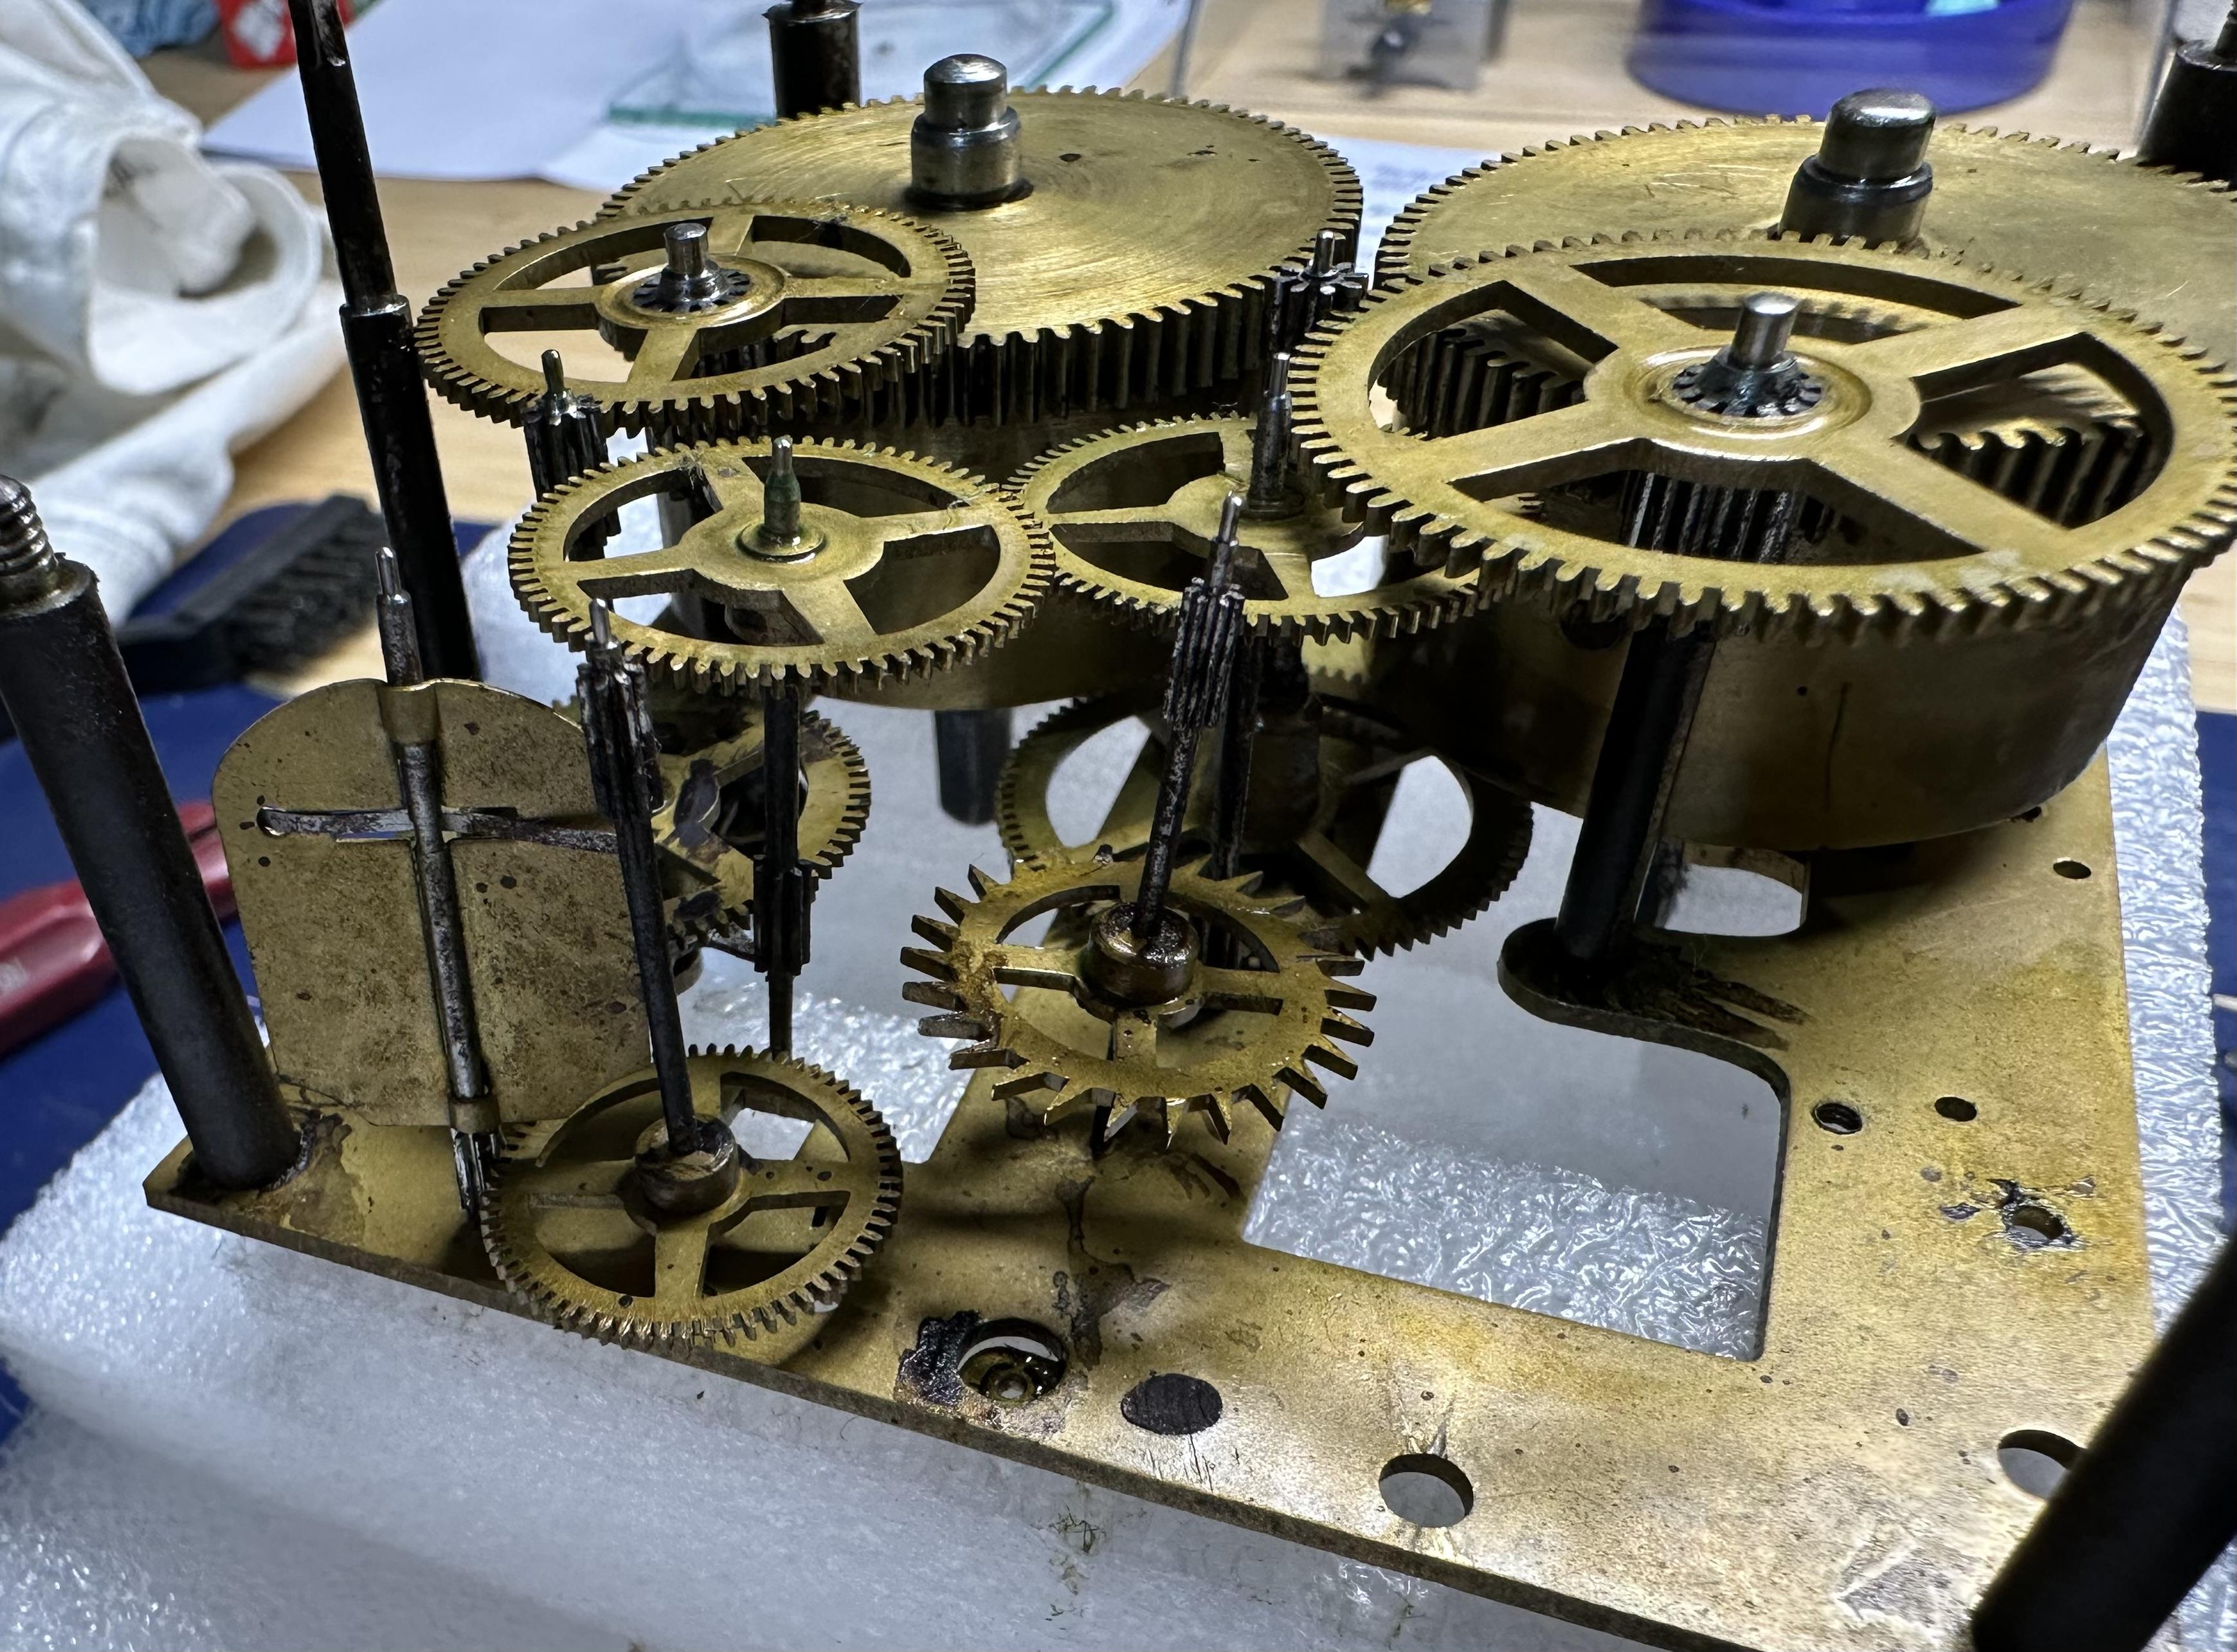
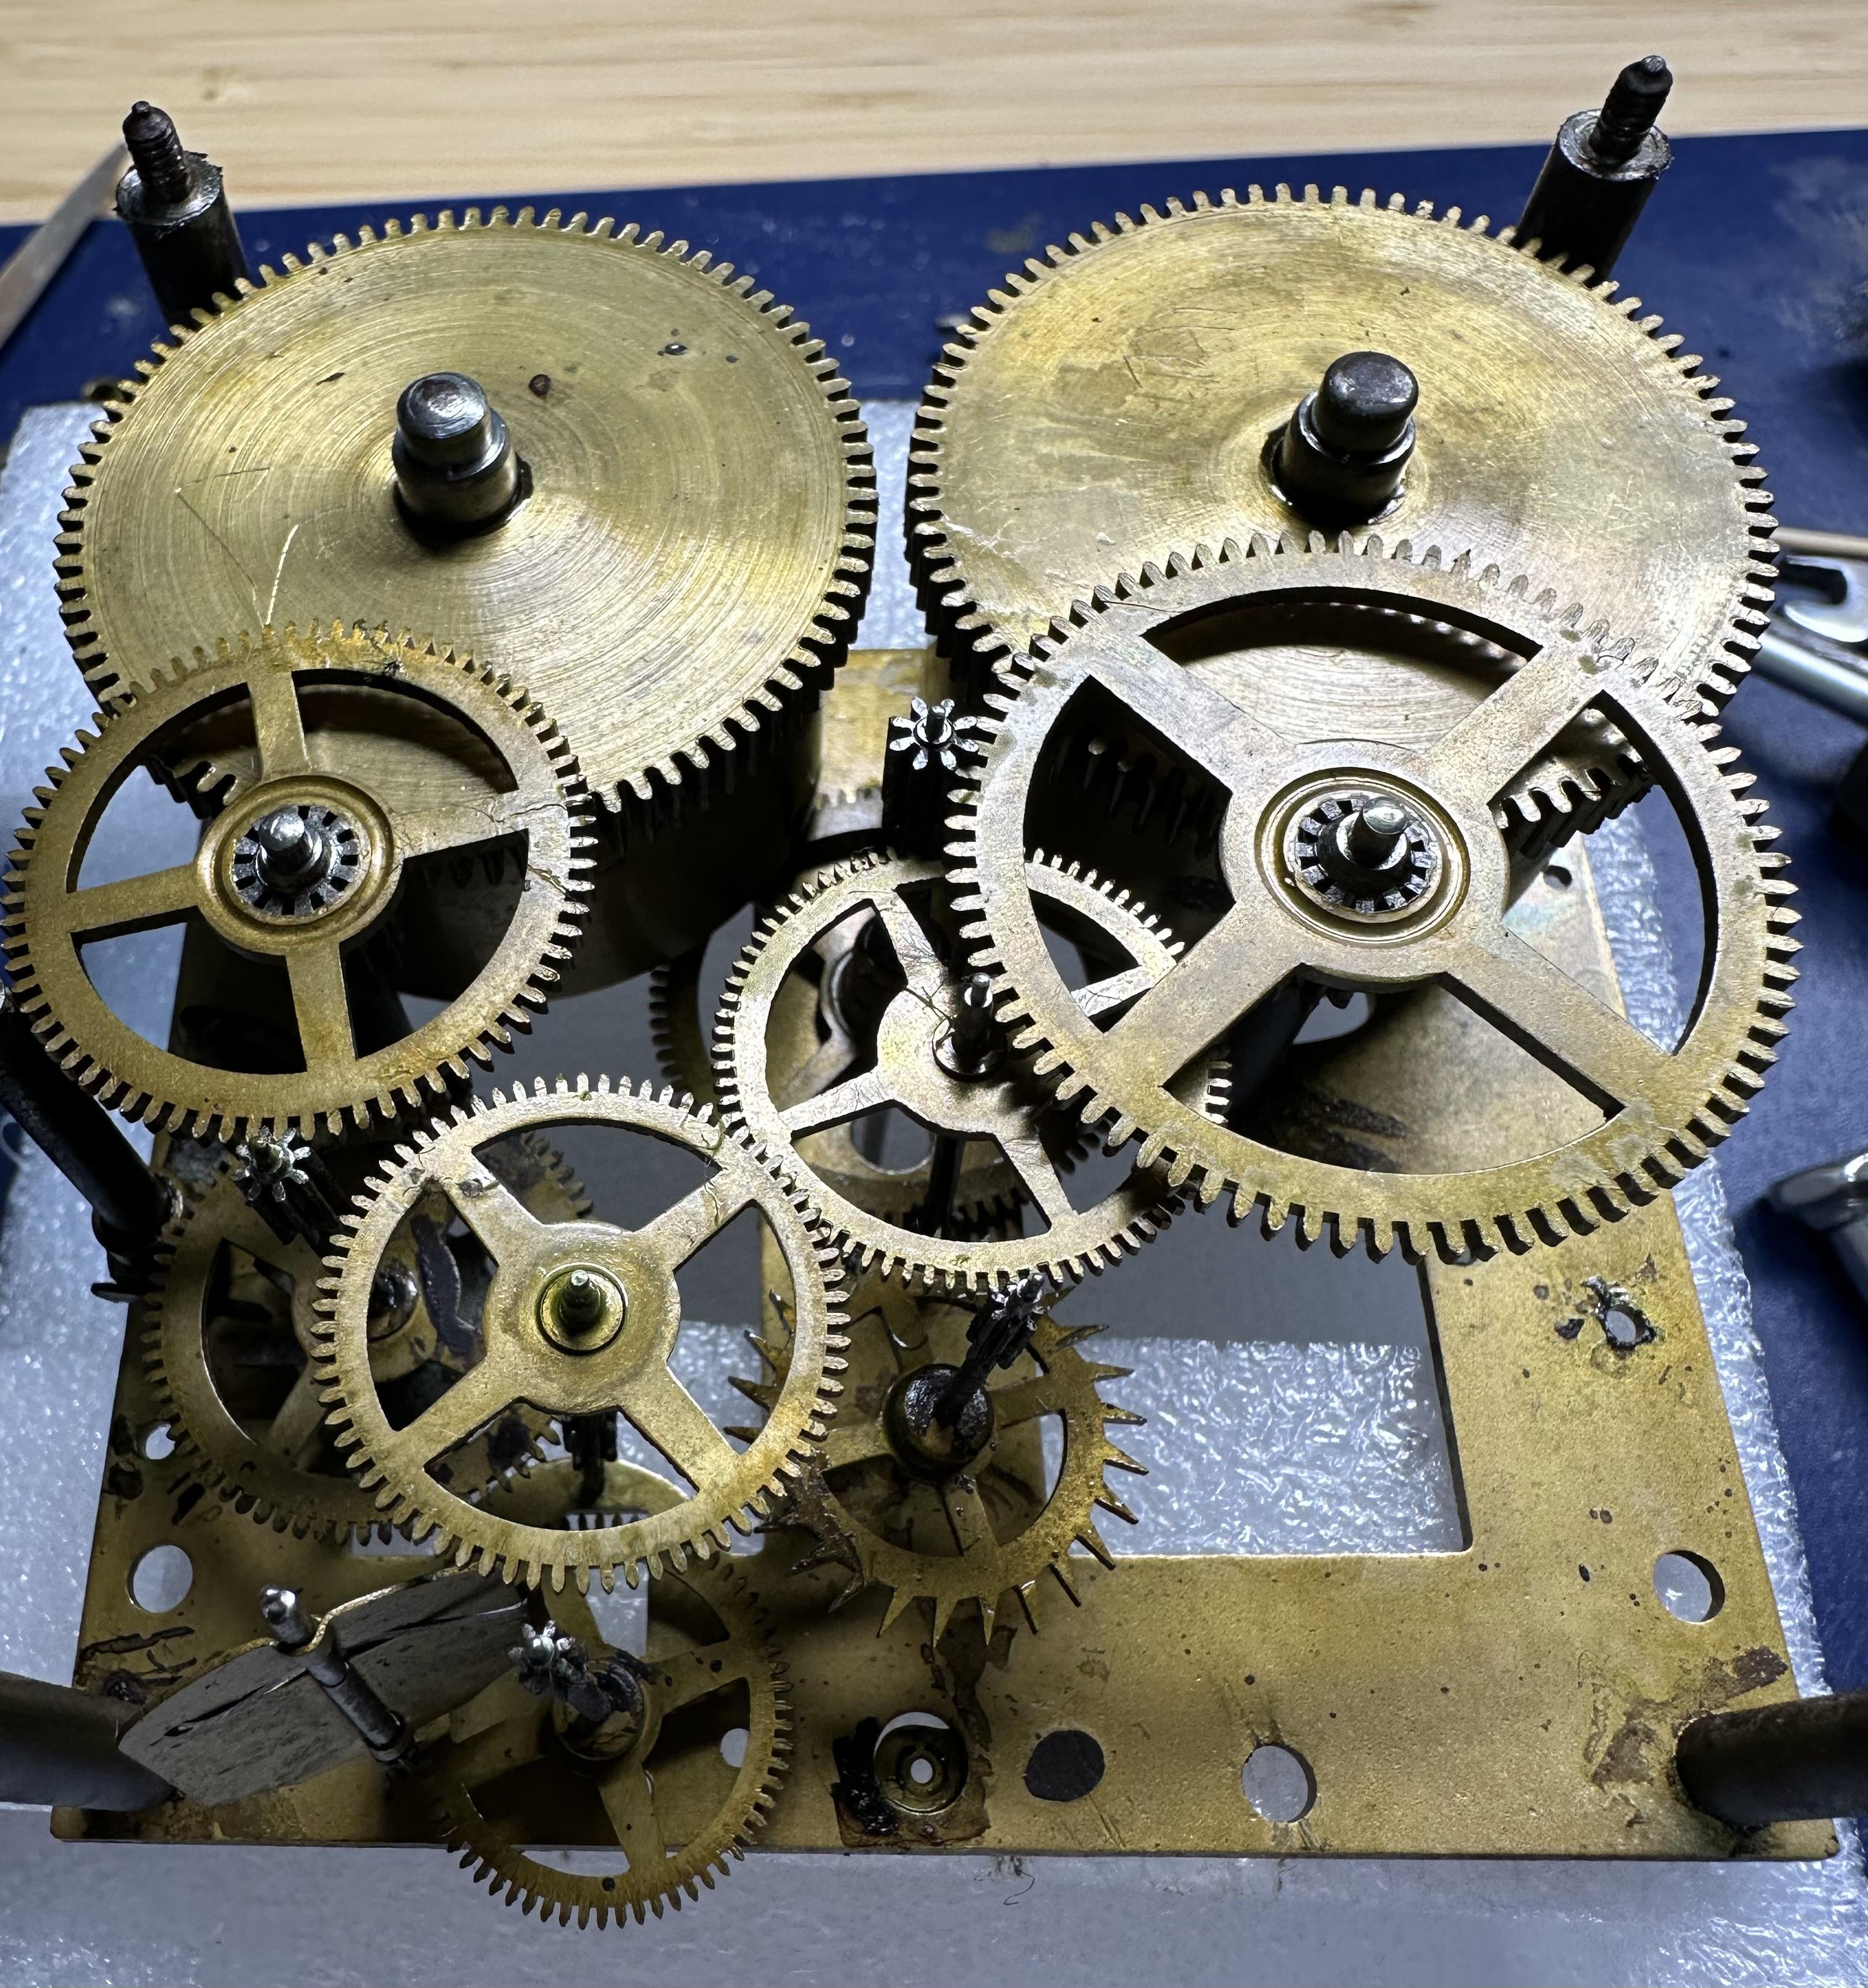
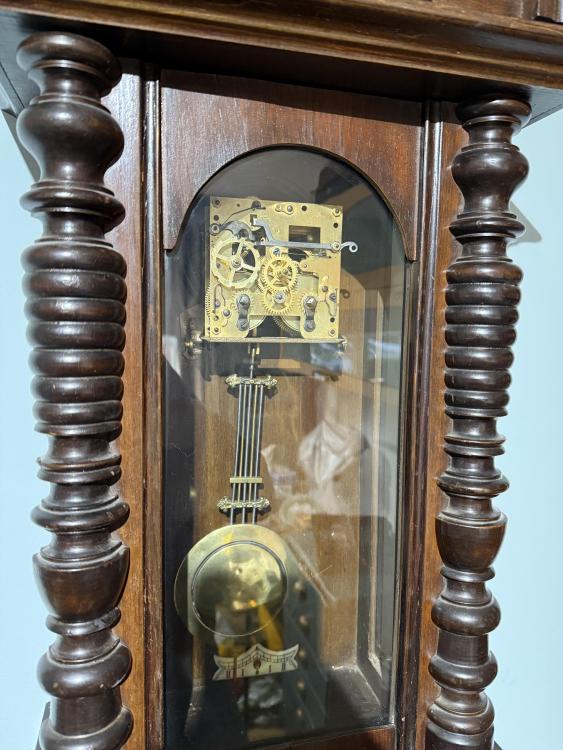
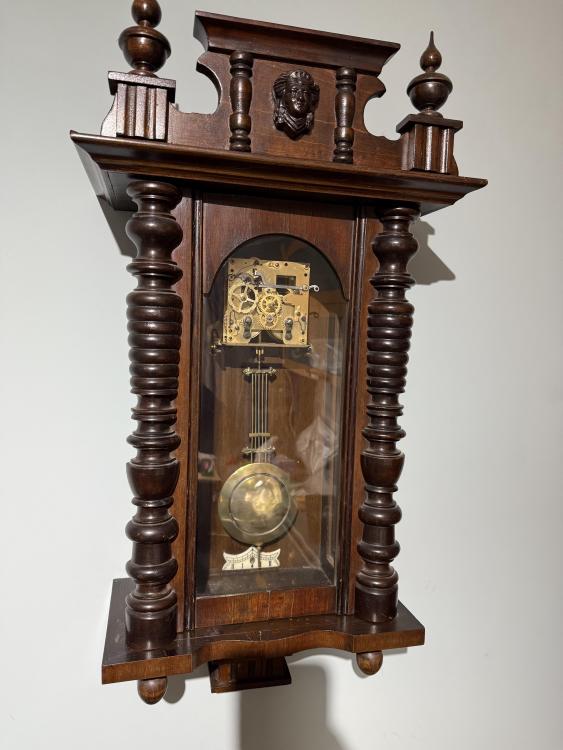
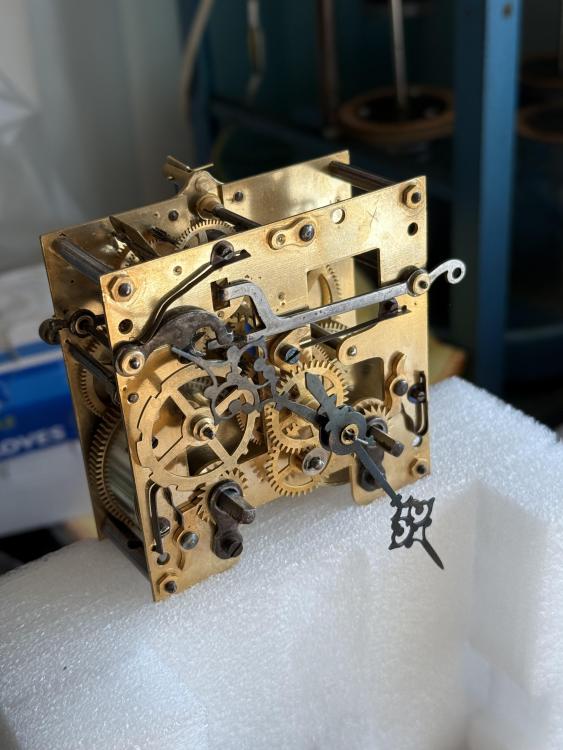
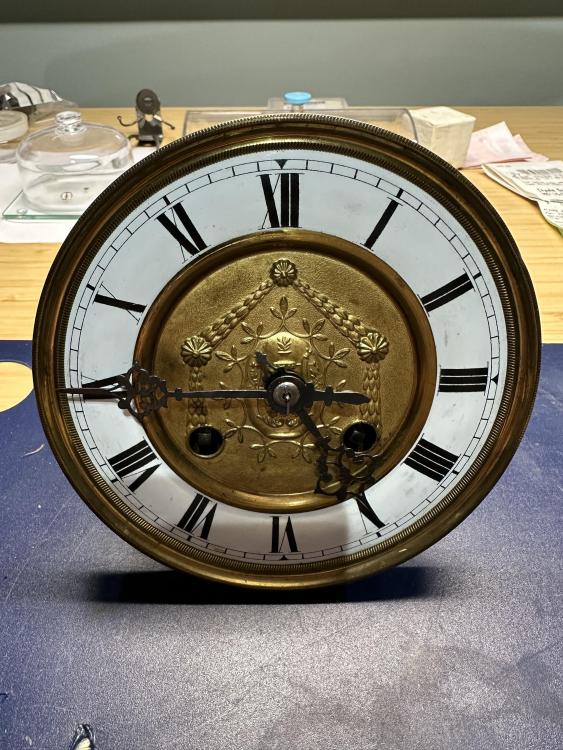
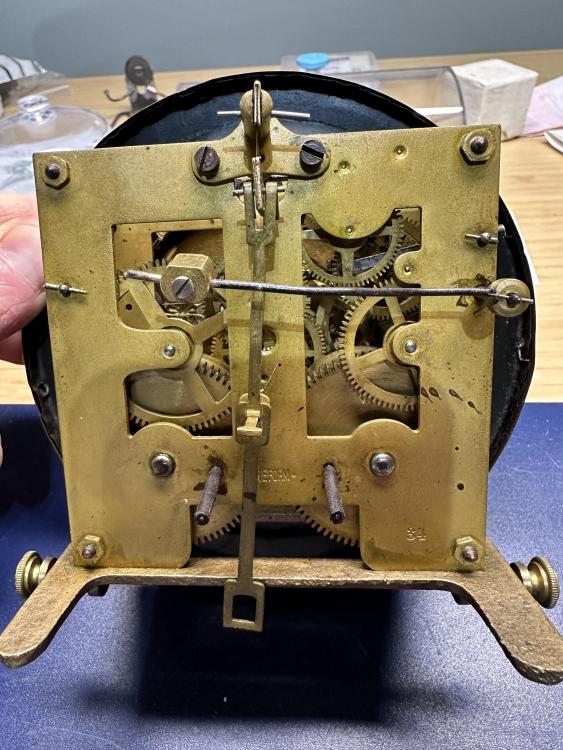
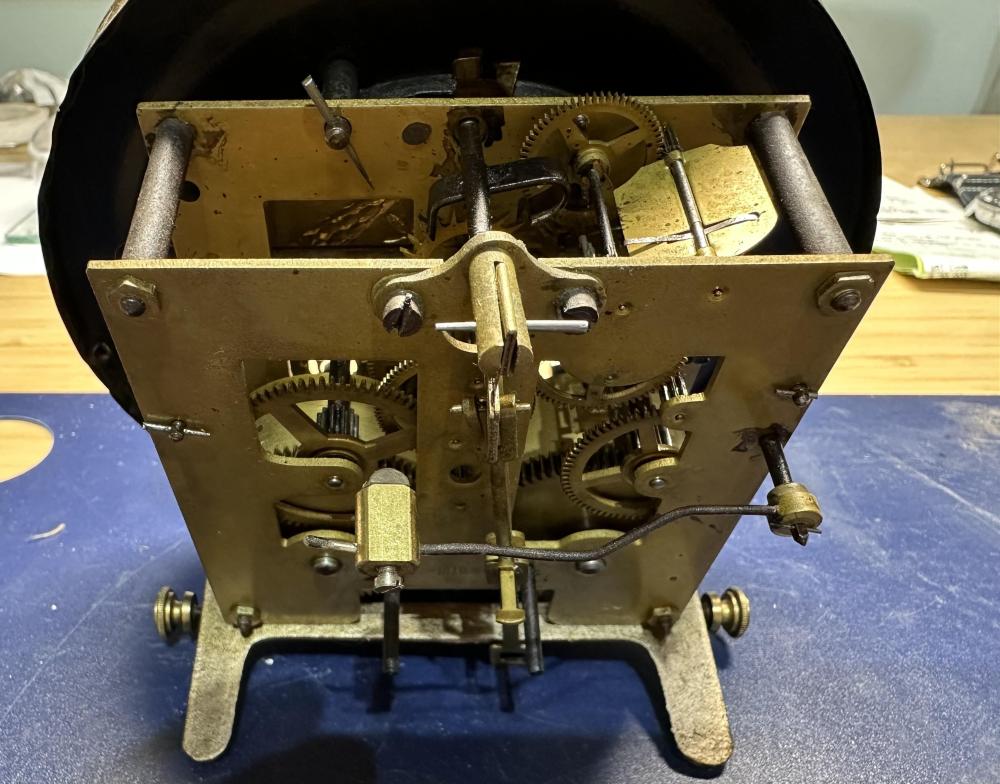
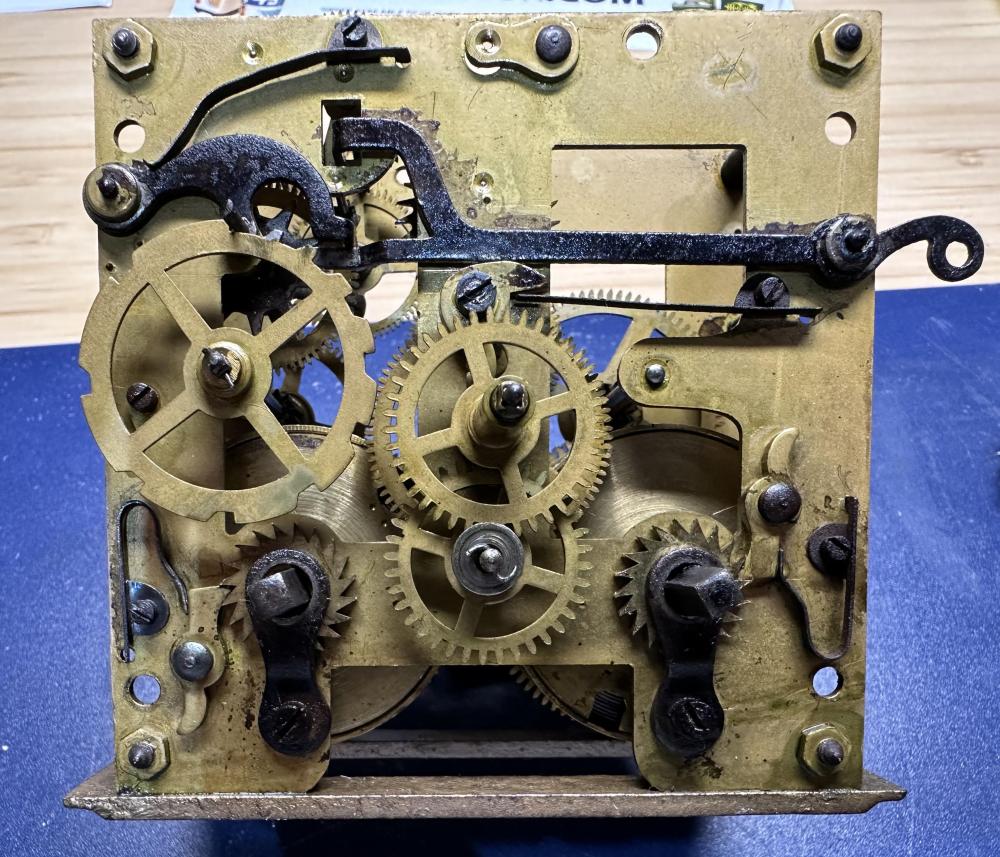
It's a common misconception that a clock/watch can be over wound. I think it is sometimes perpetuated by clockmakers/watchmakers who are too busy to answer a customer's question of what went wrong with their timepiece. I think the lubricants in your clock has dried up and gummed up. Heat can temporarily lower the viscosity of the oil until the movement is able to run. But your clock would need a full service. If you want to attempt servicing it yourself, there are plenty of competent clockmakers here to help you with the task. It would help if you posted some photos of your clock.1 point
-
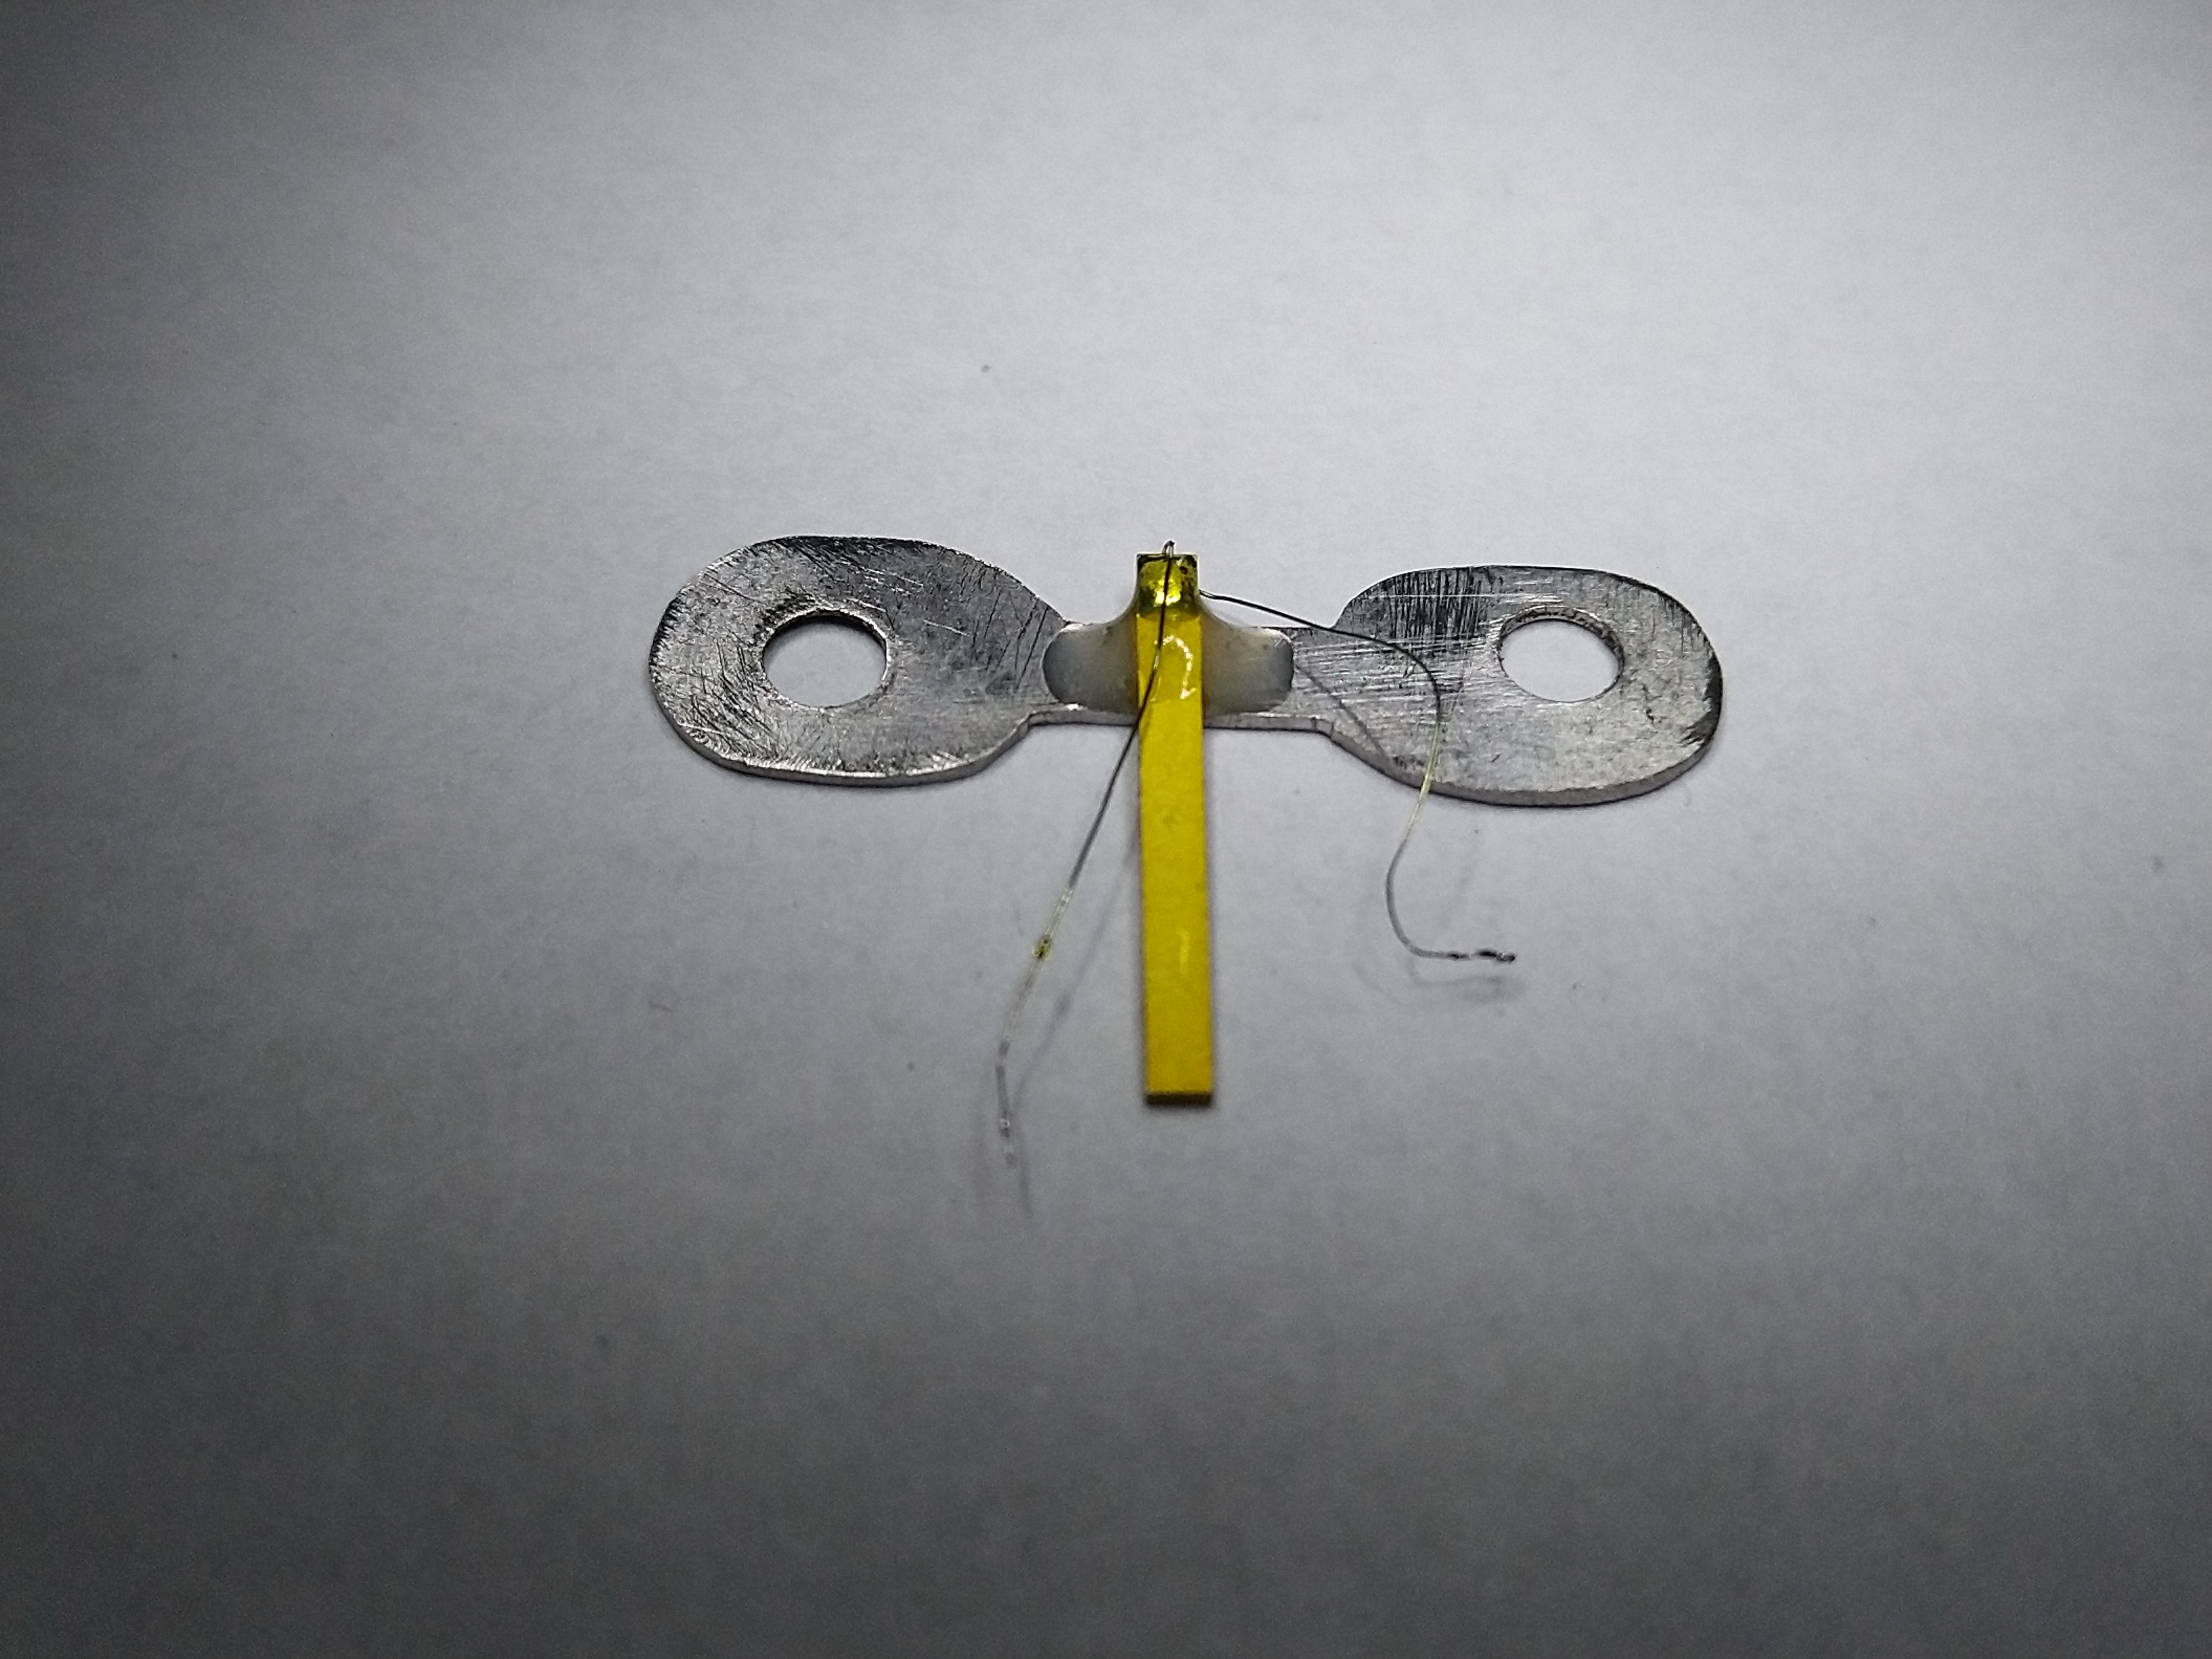
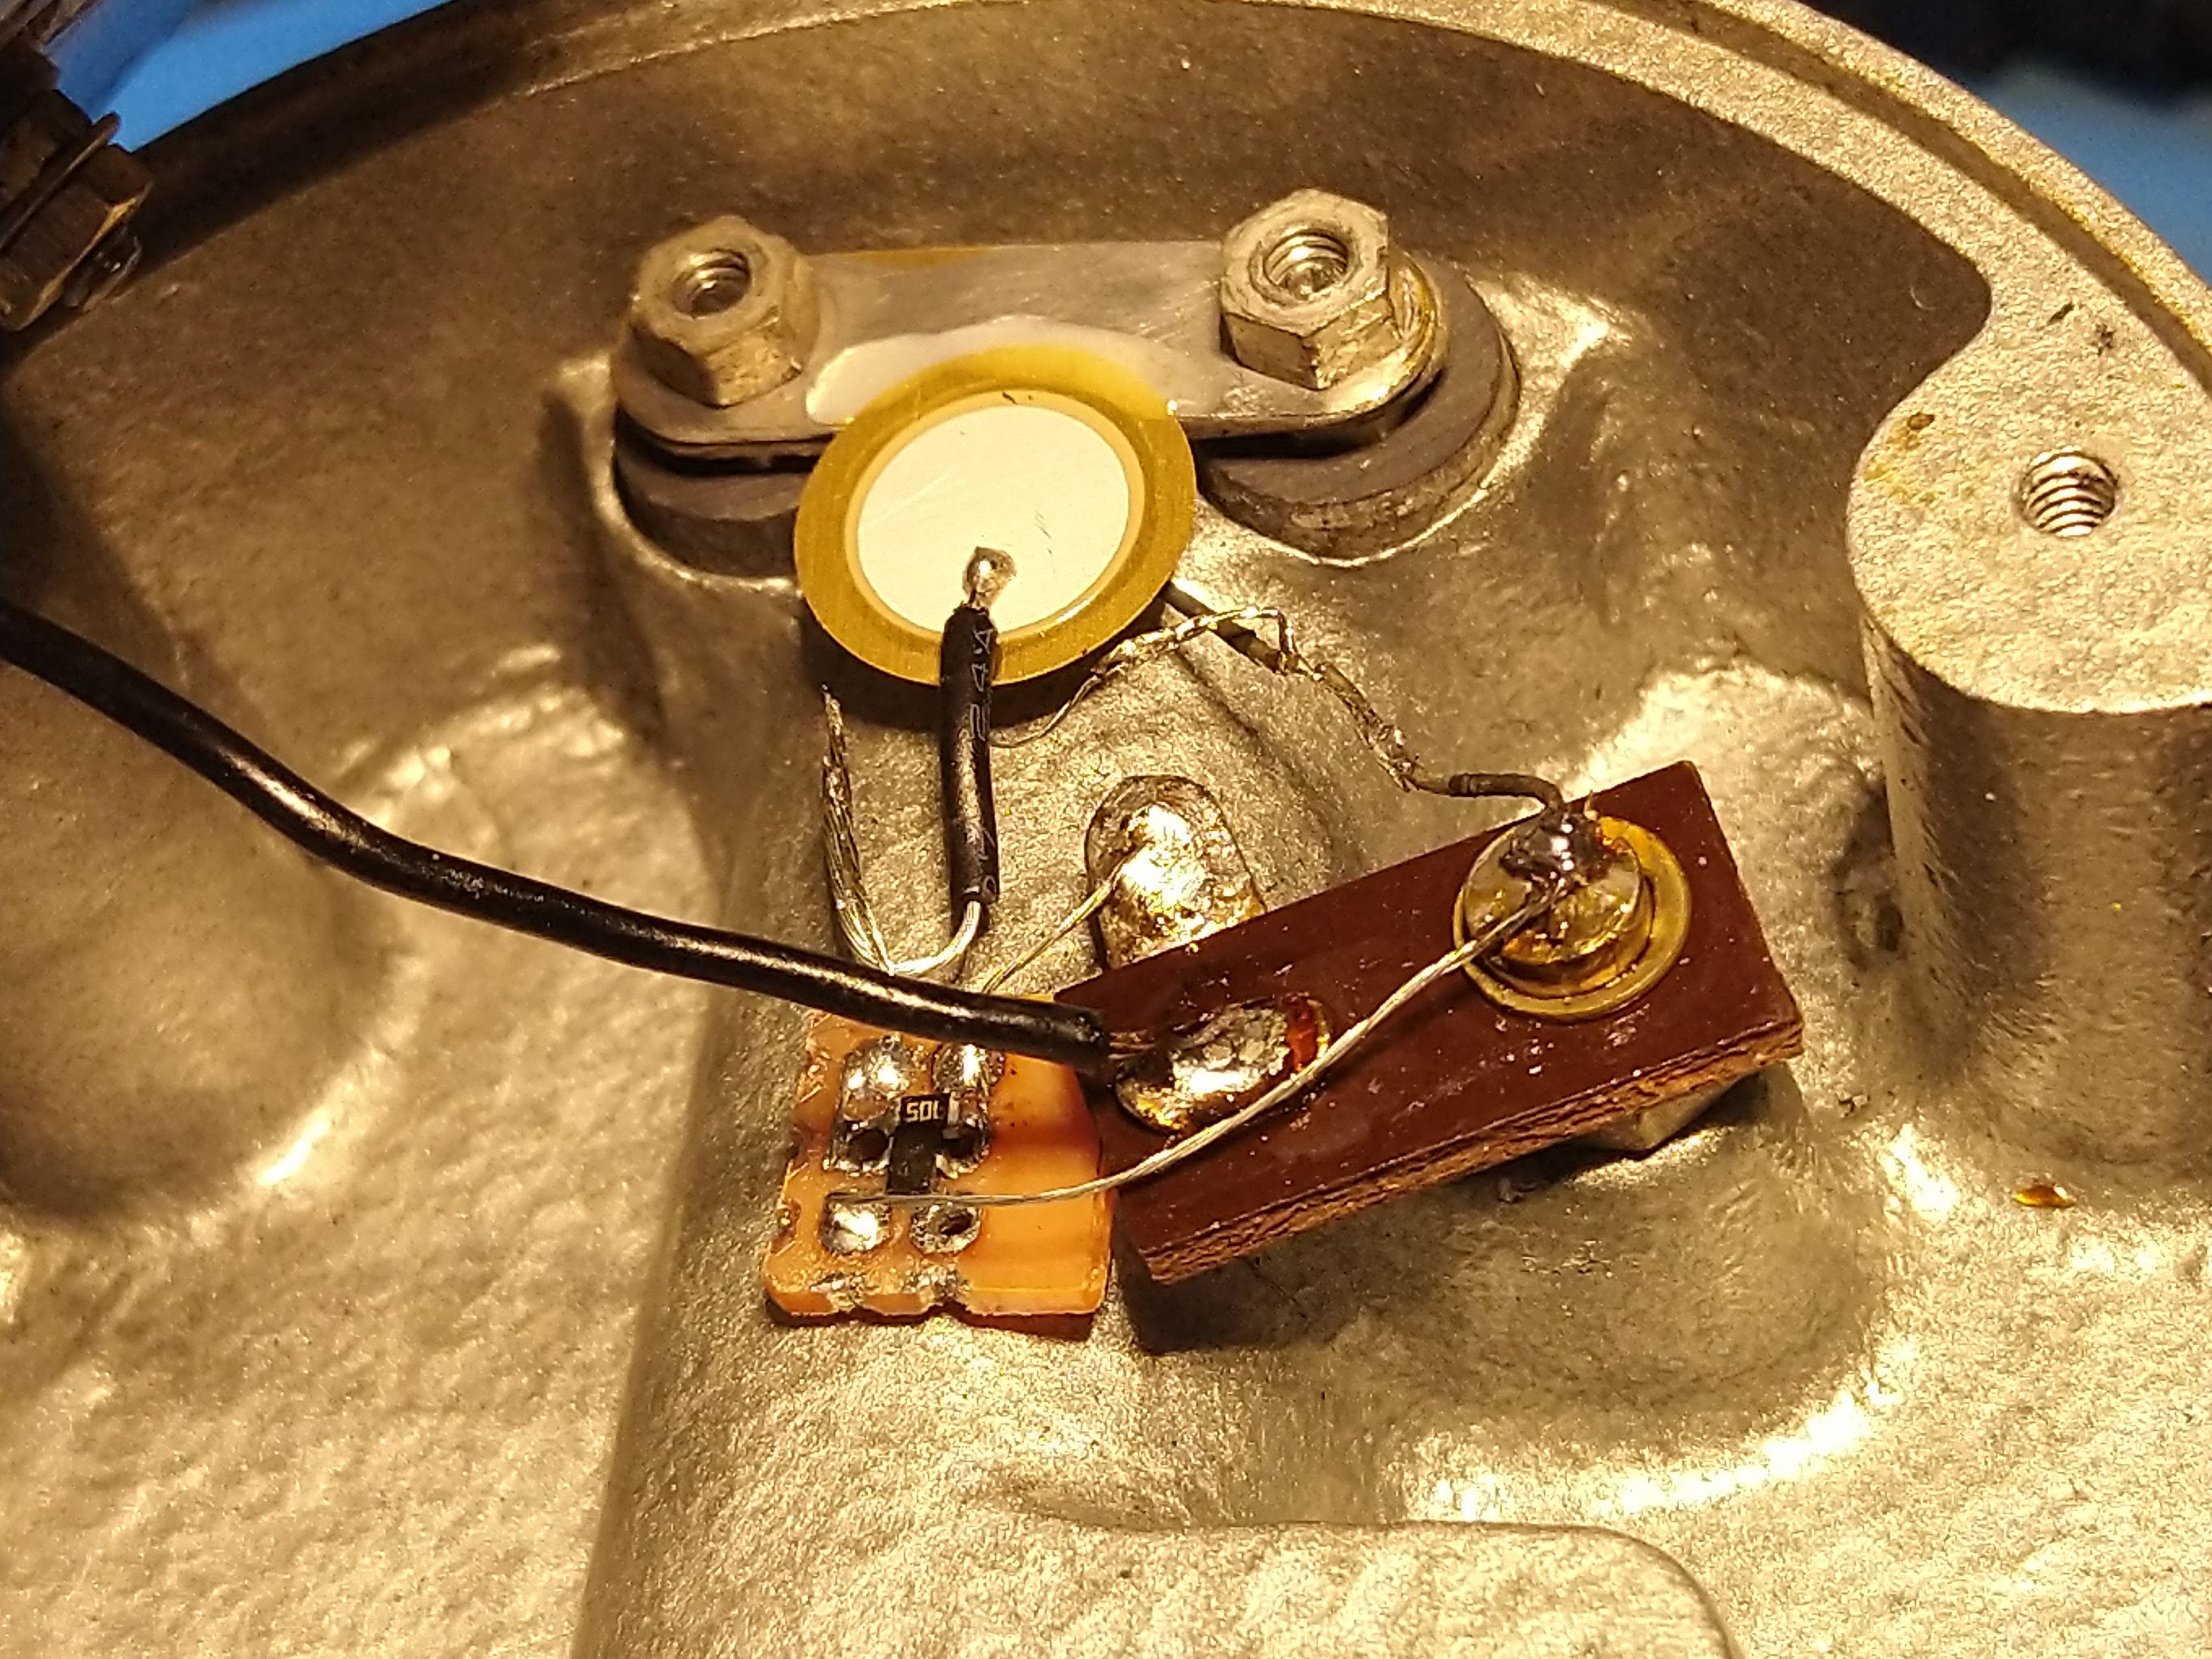
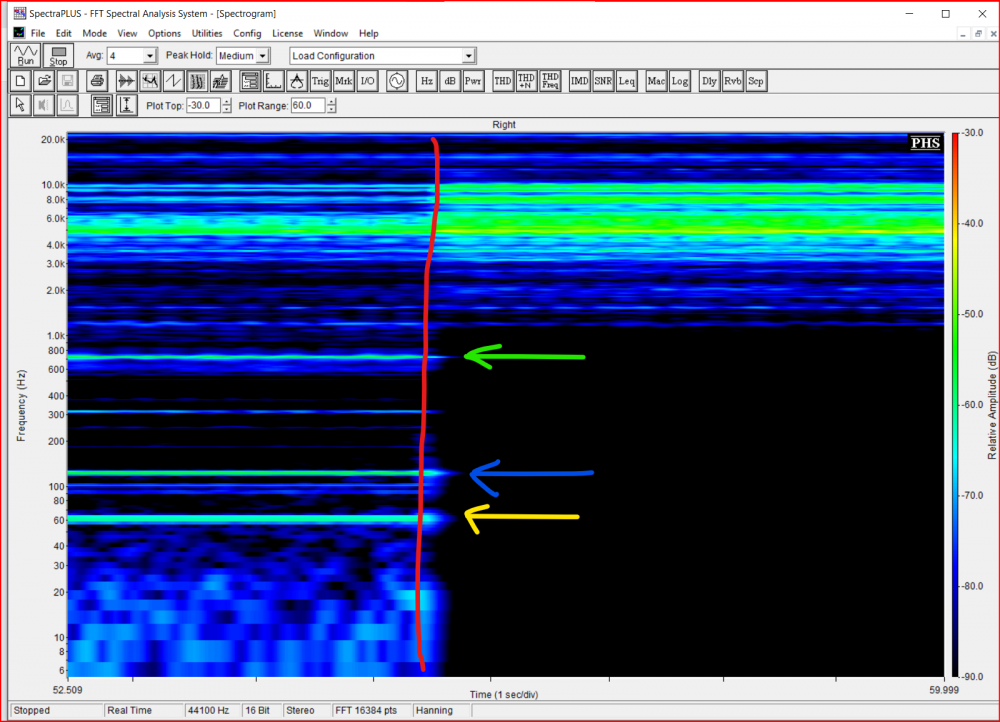
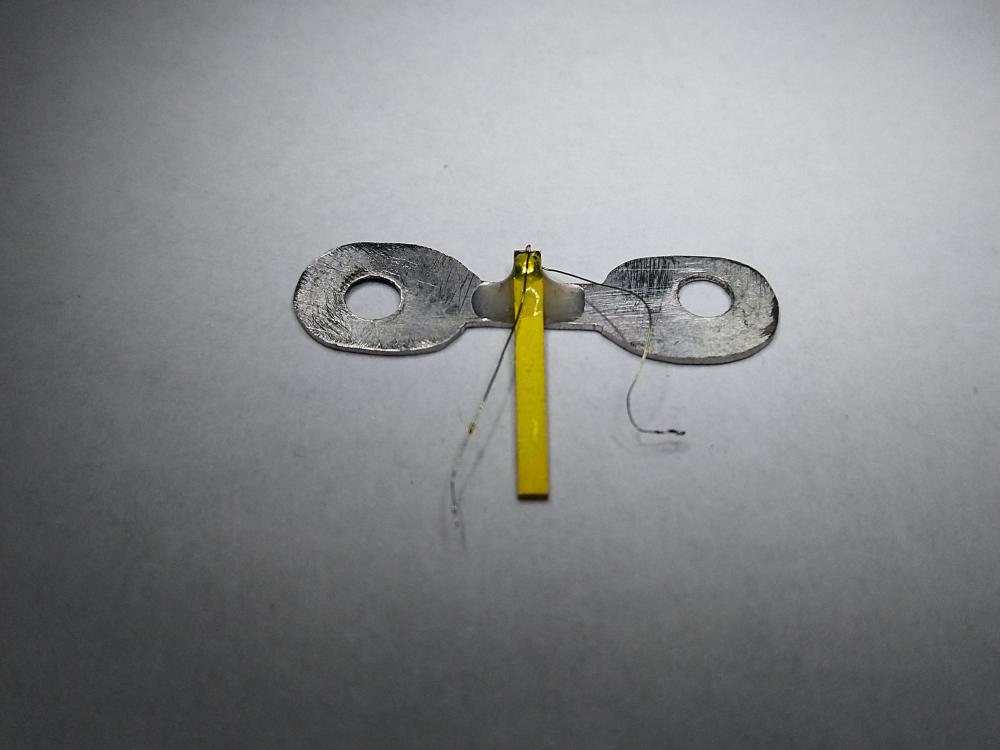
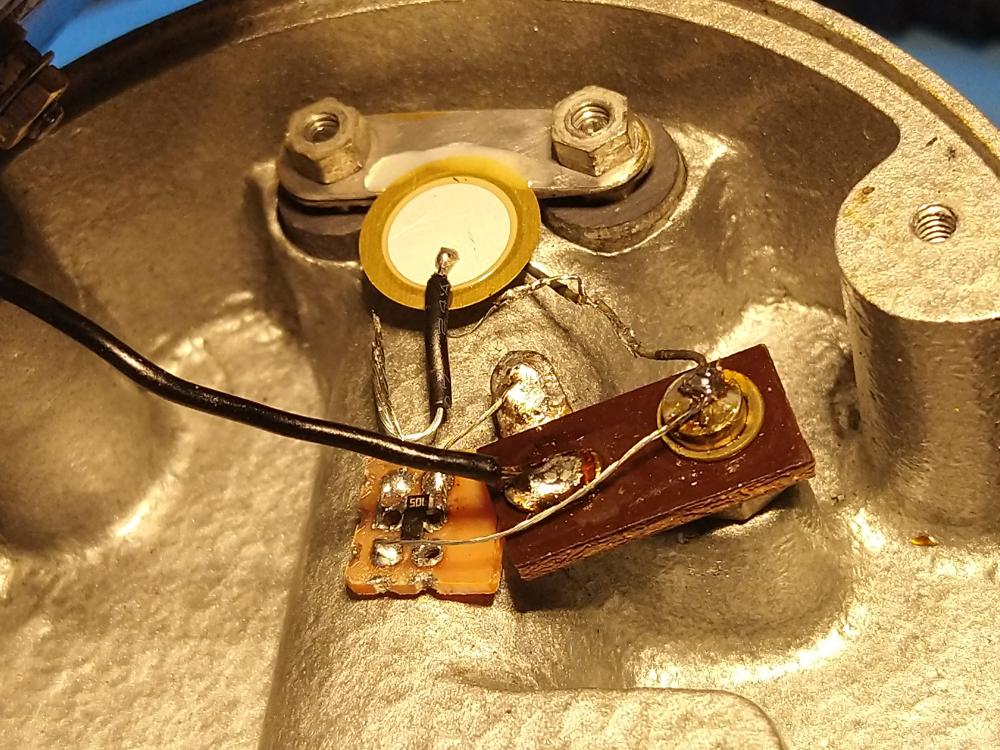
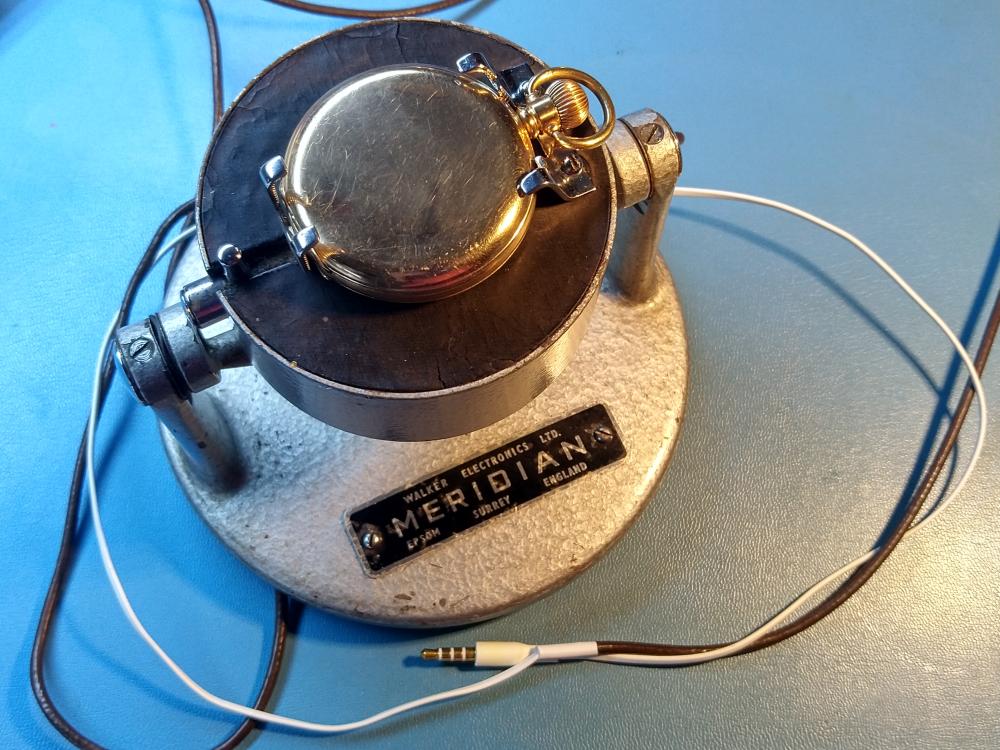
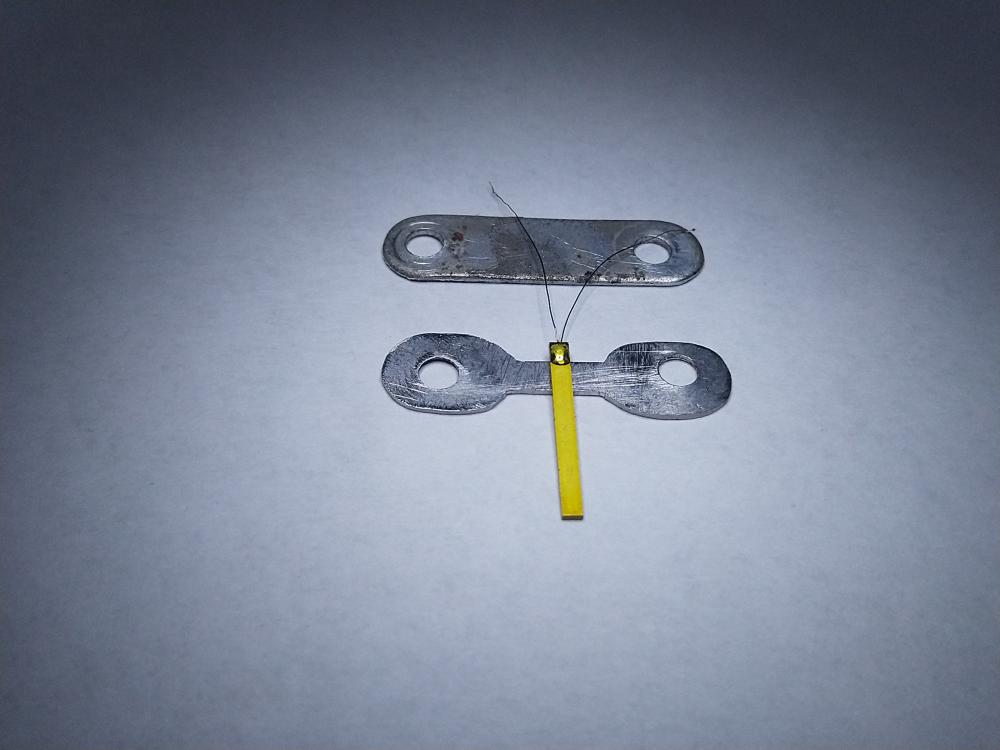
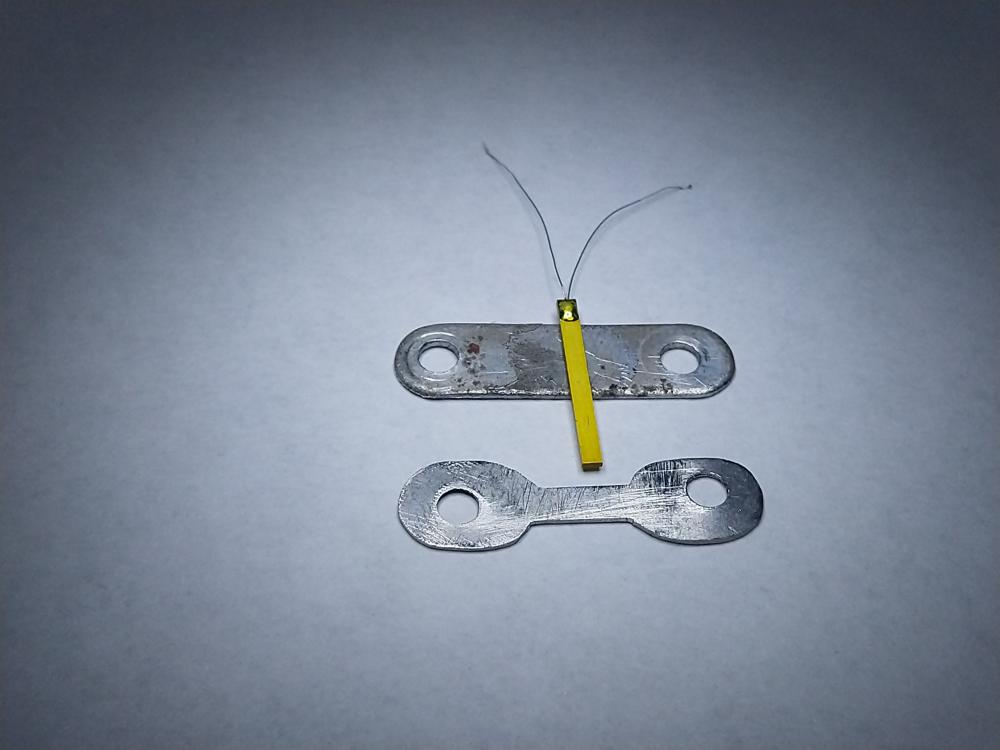
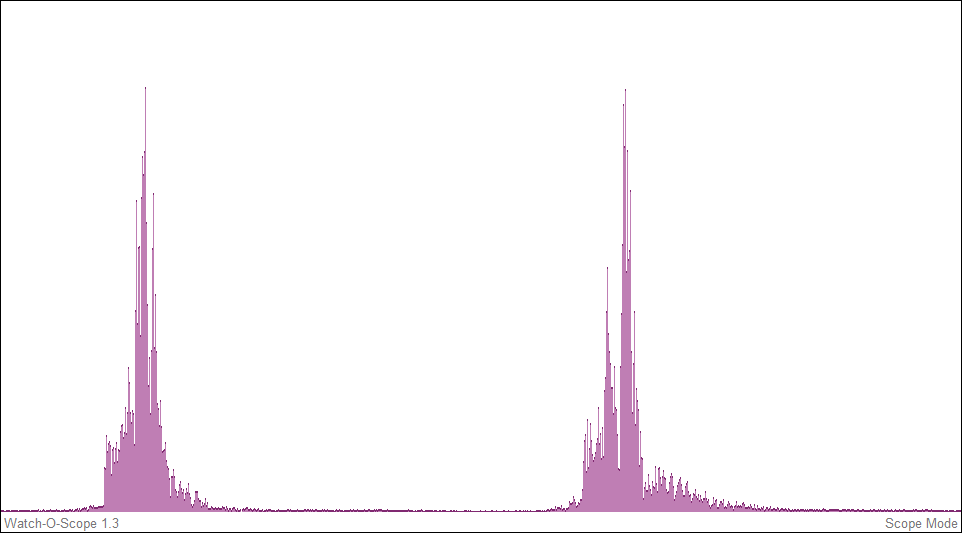
I was planning to drop my tools for the first sight of any signal and consider the job done. ? You are right actually, the space i have in my mic does not allow me to try all of the piezos unless i trim them. I could clip them to a watch though and compare the signal I get. So far I tried to use my smallest piezo (12 mm) and the bimorph. I started with the bimorph. As the original plate was too wide i created a bone for it so I could properly glue the bimorph to the plate by one end: I mounted it in my mic, placed a noisy pocket watch on the mic and without adding amplification I checked if I could see anything with my oscilloscope, found nothing at all so I added the one transistor amp with a 1M resistor, nothing. I double checked the wiring and my little circuit board, but could not find anything wrong so I added the piezo next and bumm it gave me a nice clear signal not too strong though and I could see the signal with my oscilloscope using the two pins of the piezo. Whats wrong with the bimorph then? Or the way I am using it? with 10db: It has no problem with a noisy timex, but i think it is struggling with an ingersoll 17 jewels ronda 1217-21. This is how far I could go, i am struggling to find time to spend with this beautiful hobby. I need to find a high quality jack connector, i repurposed a cable of a faulty headset for the time being. Forgive me for the quality of wiring and soldering its not final yet. I probably will need to add an extra transistor to the circuit. The good thing with this mic that it was designed for this purpose and it is designed in a way so the noise level would be on a minimum.

 1 point
 -
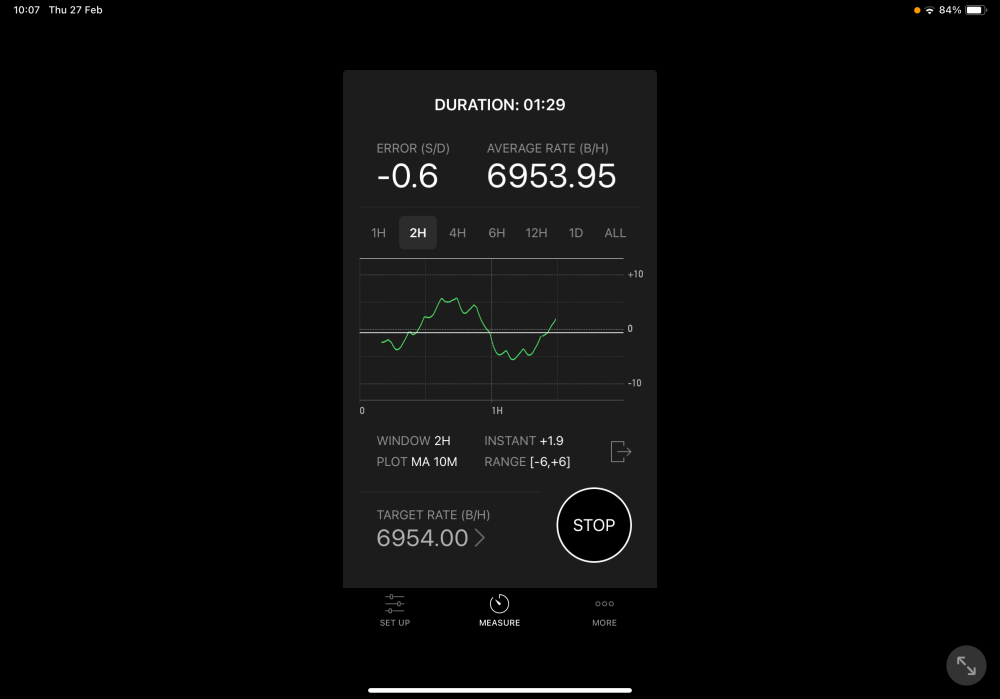
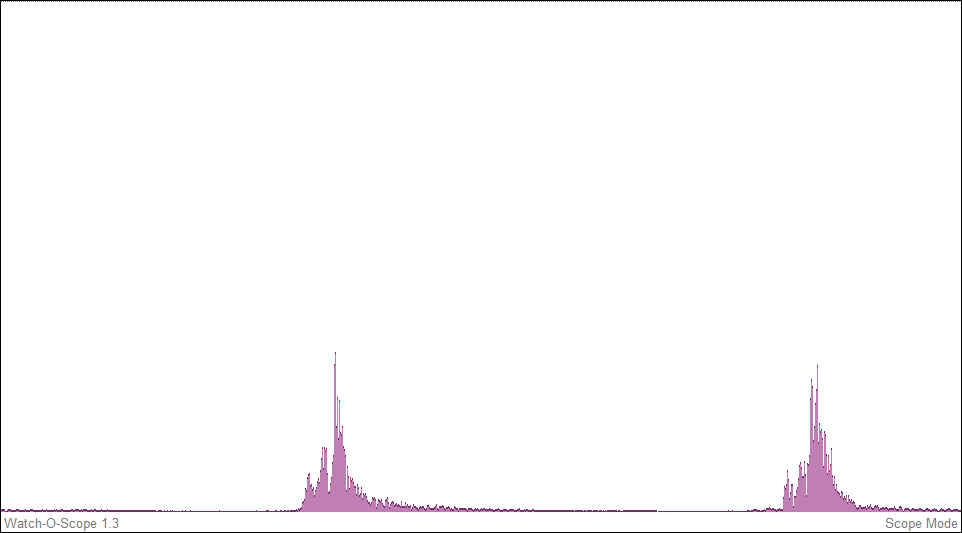
Here is a cheap and easy way to calibrate the sound-card clock. The $13 GPS receiver/antenna just needs 5 V power and it outputs a 1 pps signal. There is no setup procedure or software required. The output goes to a 3.5-mm-plug audio cable and is plugged into the line input of the sound card. The power comes from a USB cable plugged into the computer. I took an old A-B USB cable and cut off and stripped the B end and used the red and black wires to create this "power supply." The first time I turned this on it would not work (generate the 1 pps pulses) until I brought it near a window. After that first turn-on, it starts up in a few seconds on my desk and it doesn't matter which side of the unit is up. Here is what it looks like on Watch-O-Scope: My Focusrite Scarlett Solo (3rd gen) audio interface (external sound card) reads +2.1 s/d fast. This compares to the 1.9 s/d I was getting using a quartz watch.

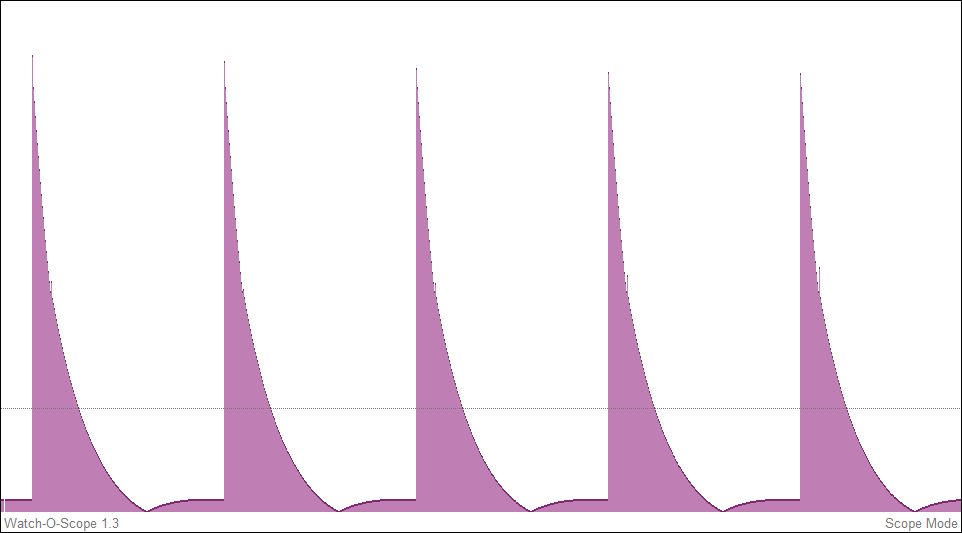 1 point
 -
Hi You might find the attached a useful read, The official training manual. Witschi Training Course.pdf1 point