Leaderboard


Popular Content
Showing content with the highest reputation on 03/23/25 in all areas
-
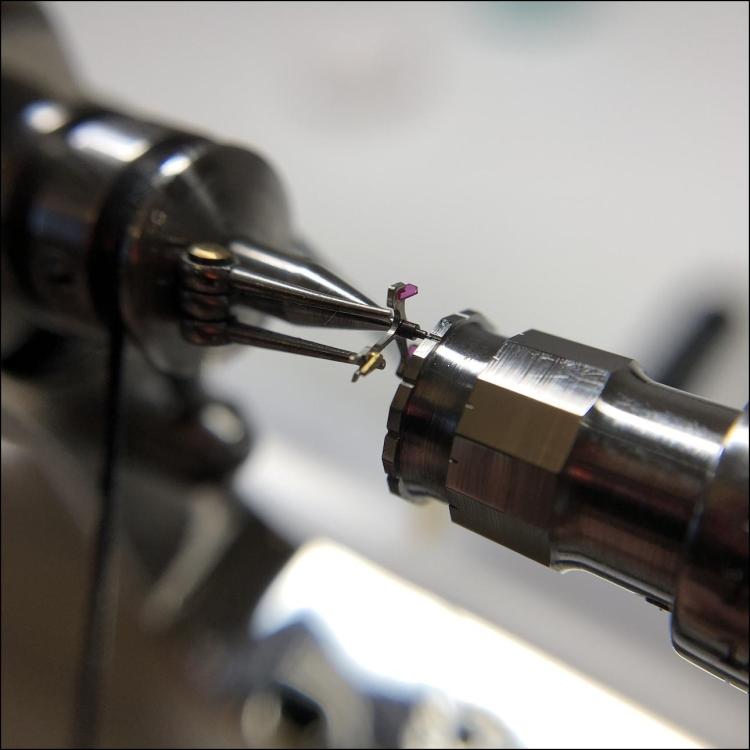
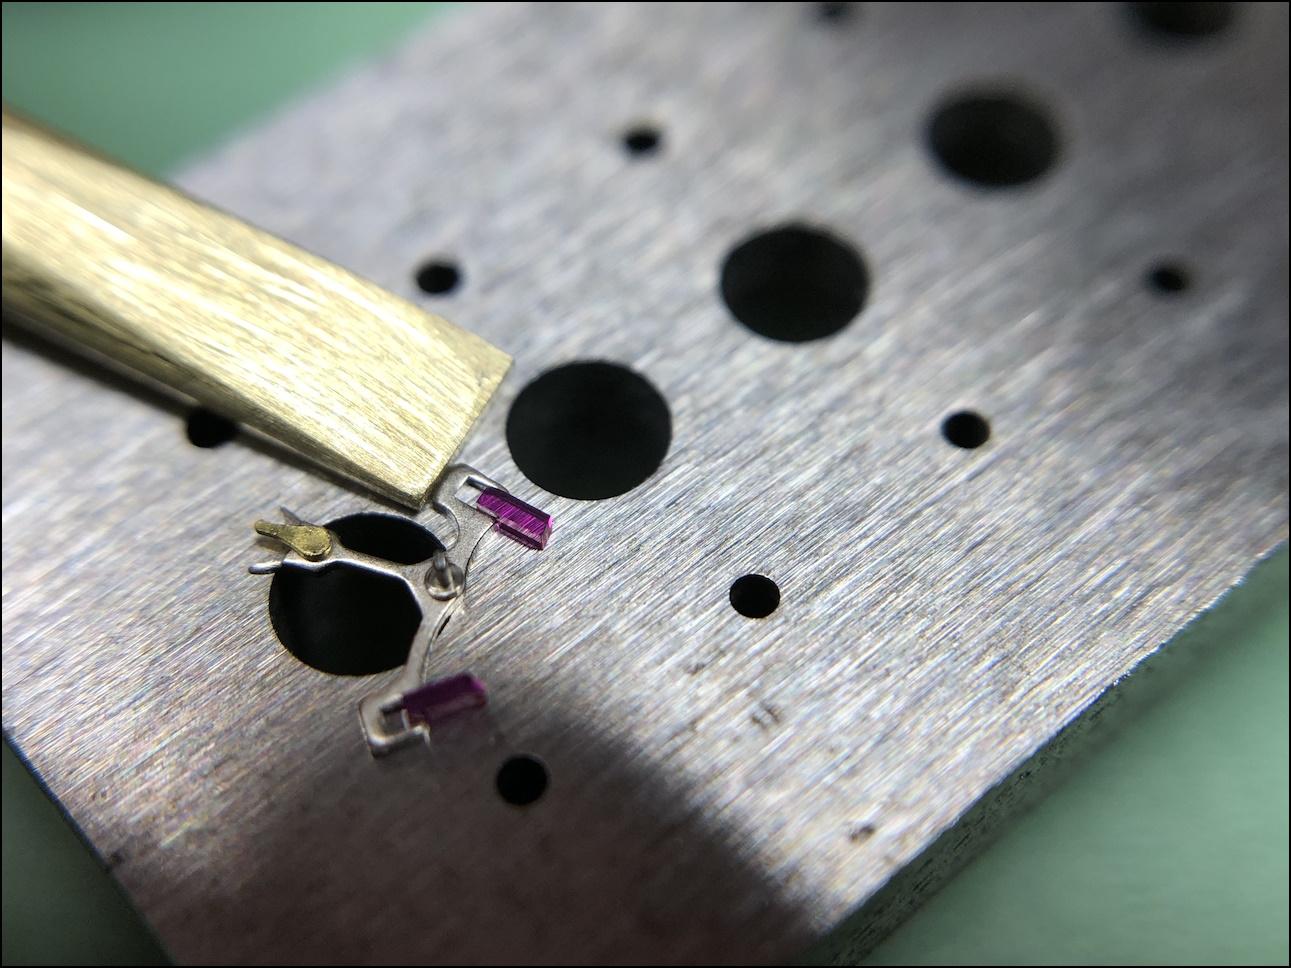
Time to add a small tip to this thread—one that I hope someone will find useful. I've always found it tricky and somewhat nerve-wracking to press the pallet stones into the pallet fork. But then I remembered a video featuring Teddy Baldassarre on a tour of Jaeger-LeCoultre. Wasn't there a segment in that video showing someone inserting pallet stones into pallet forks in an assembly-line fashion? I looked up the video, and sure enough—for once, my memory was correct! Inspired by what I saw, I took a brass rod of suitable size, ground one end into a wedge shape (similar to a screwdriver), and polished the rest of the rod with wet sandpaper to give it an aesthetic finish more in line with Jaeger-LeCoultre. My new brass tool may not have passed the quality control at Jaeger-LeCoultre, but it worked just as intended! One thing that isn’t visible in the image—and which I should clarify—is that I grip the stone with tweezers and press it in while supporting the opposite side with my new brass tool. It feels safe, easy, and precise.
 6 points
 -
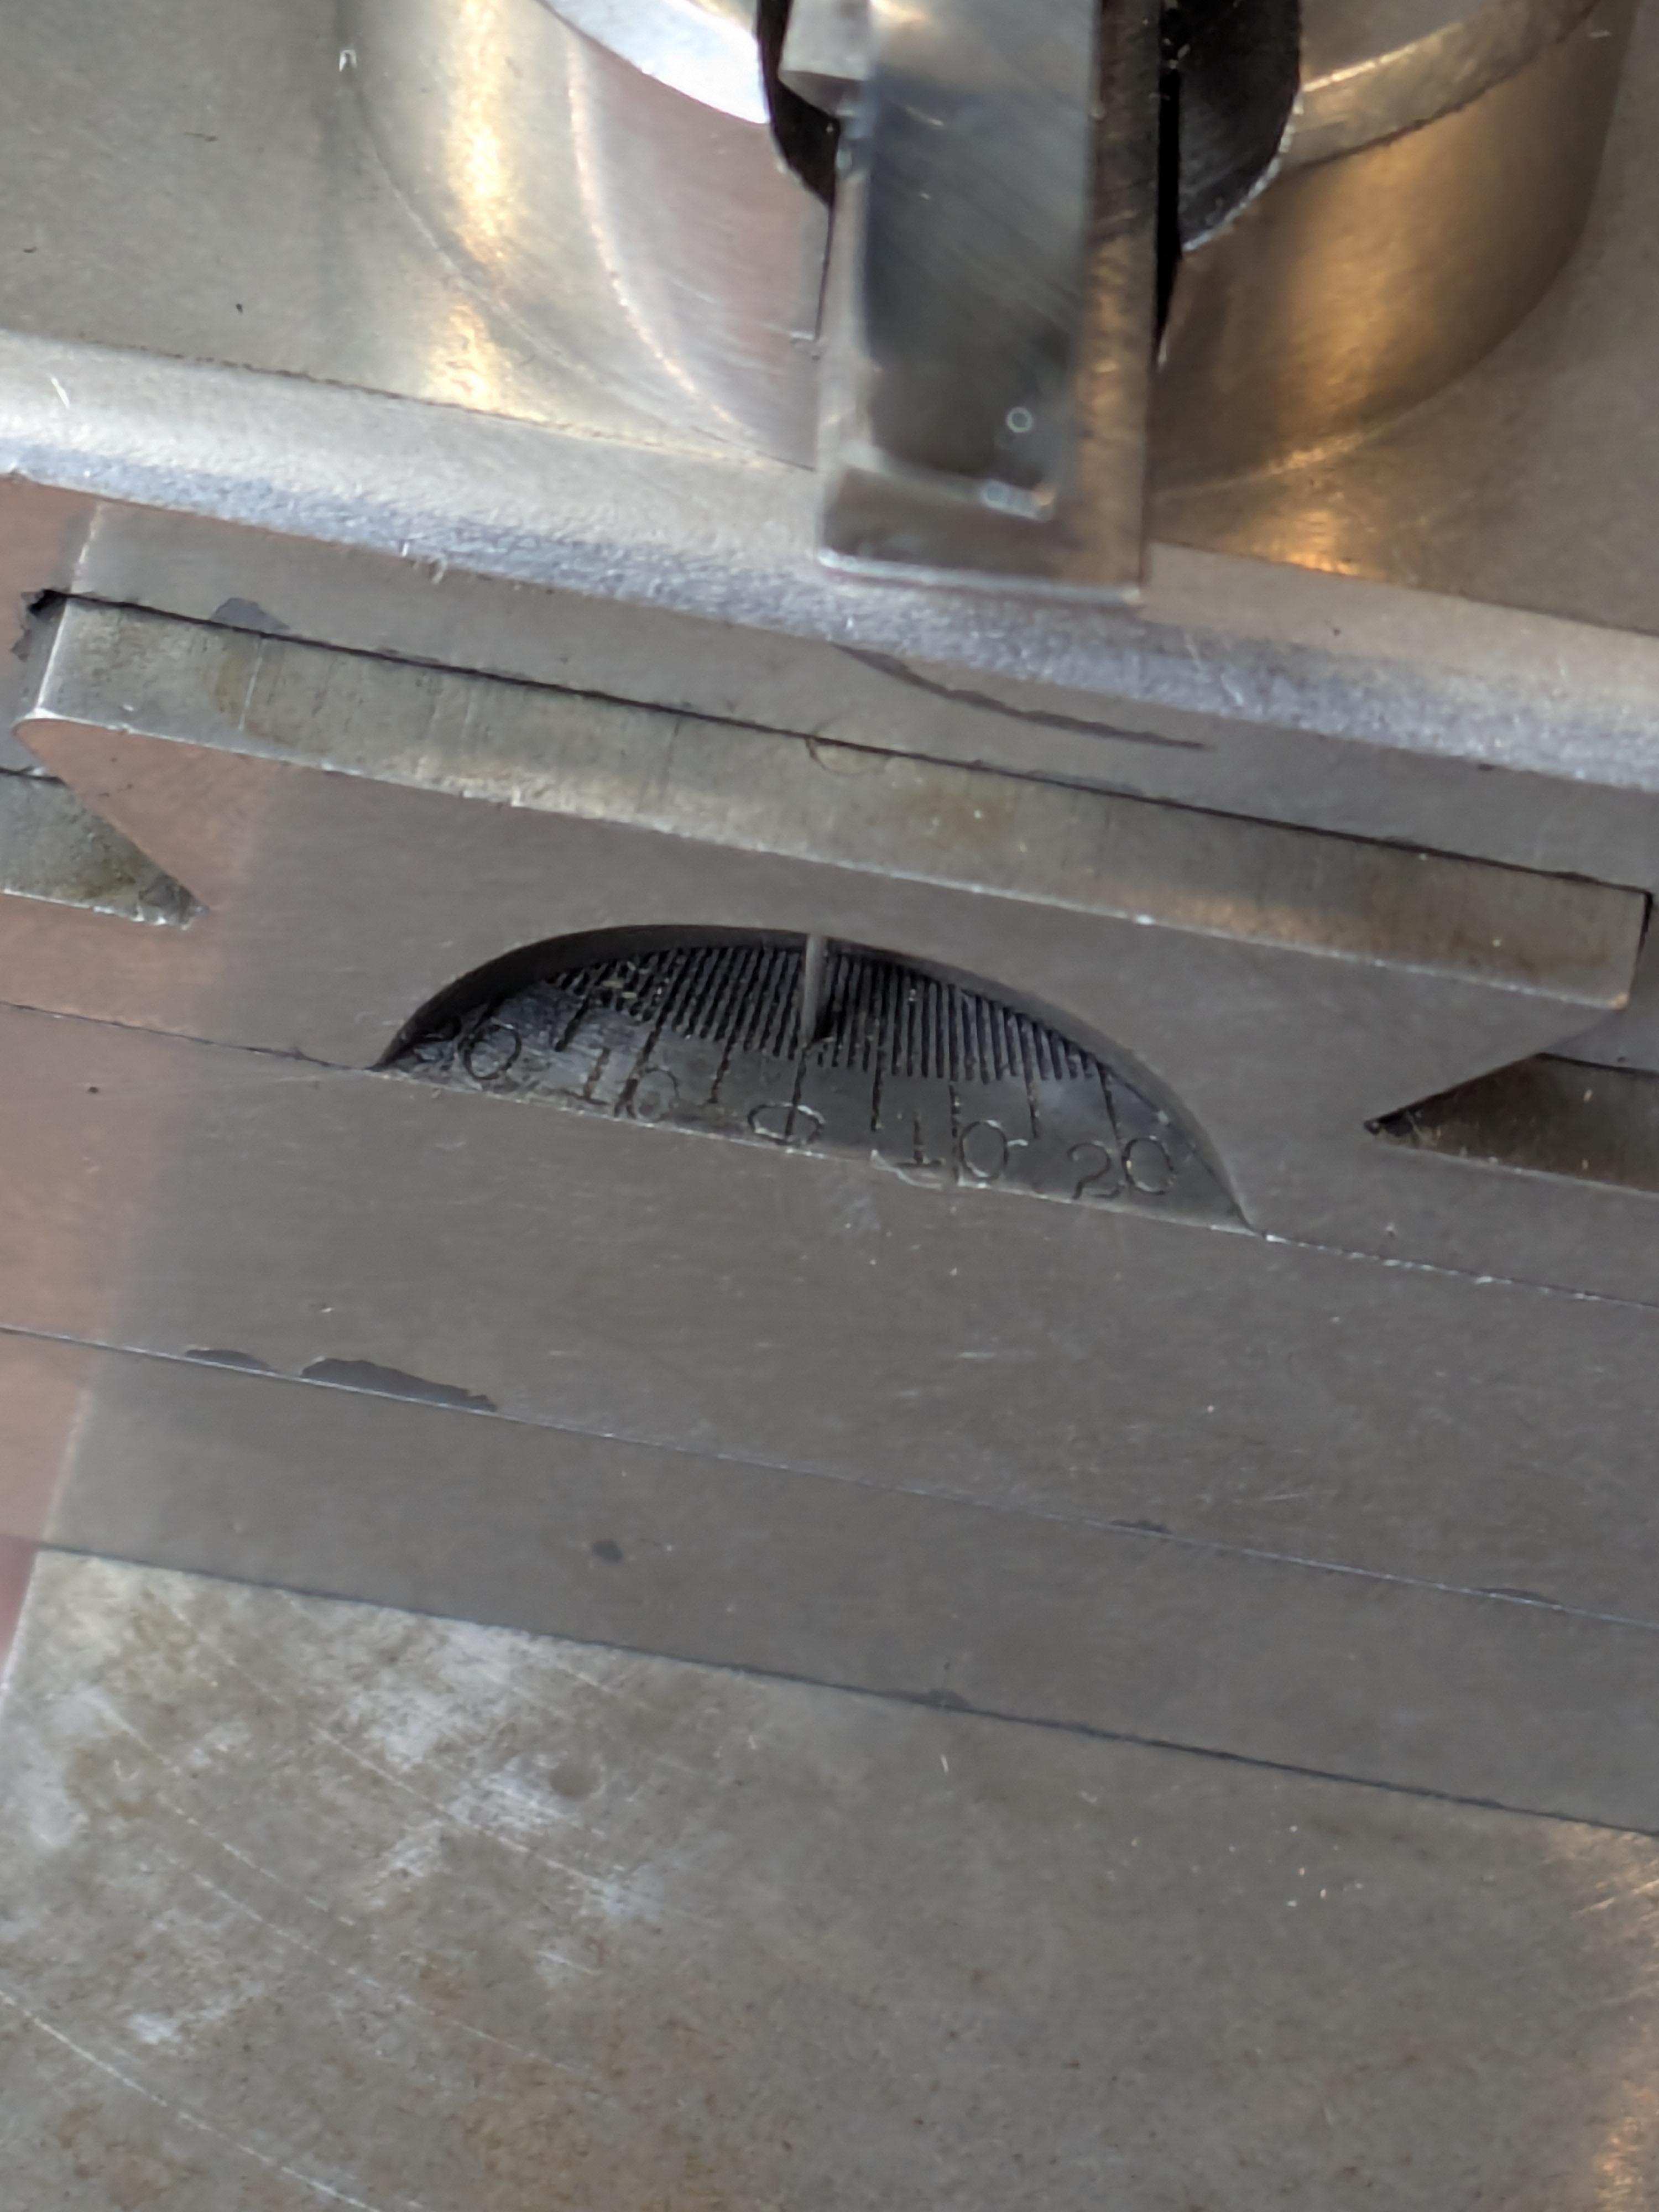
While taking my daily walk yesterday, I was thinking about a pallet fork pivot that didn’t seem in great condition and what I could do about it. My next thought—incorrect, as it would turn out—was how unfortunate it was that you couldn't burnish pallet pivots using a Jacot tool. But then I took the thought one step further and realized that a pallet fork is just as symmetrical as a wheel and that it might be possible to use the pallet fork's arm as if it were a wheel spoke. It felt a bit of a long shot, especially since I had never seen anyone do it or talk about it. But when I got home, I figured it was worth a try—and to my astonishment, it worked perfectly! I was so thrilled that I felt I had to share this, what was for me, a groundbreaking discovery. It’s probably nothing new to many of you, especially not to the professionals, but I hope those of you who, like me, thought it couldn’t be done, now know that it absolutely can
 4 points
 -
An update on this topic. I took the advice from @AndyGSi above and added a drop of oil on each of the pivots a week ago. Apparently this was enough to solve the problem. Since last week it's keeping the time well without any stop. Thanks for the suggestion. The watch is running like new.3 points
-
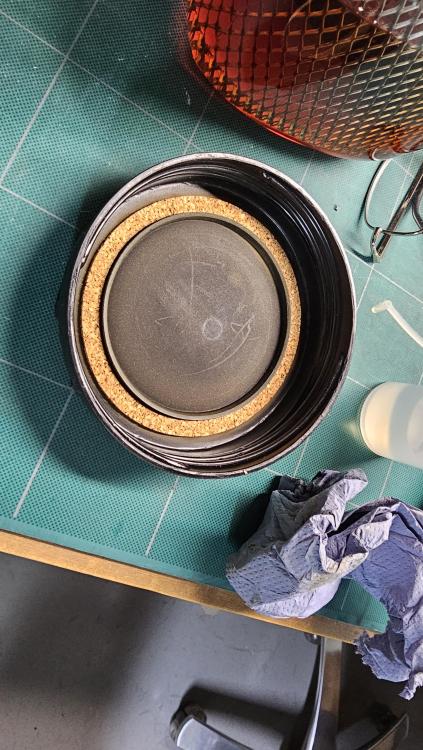
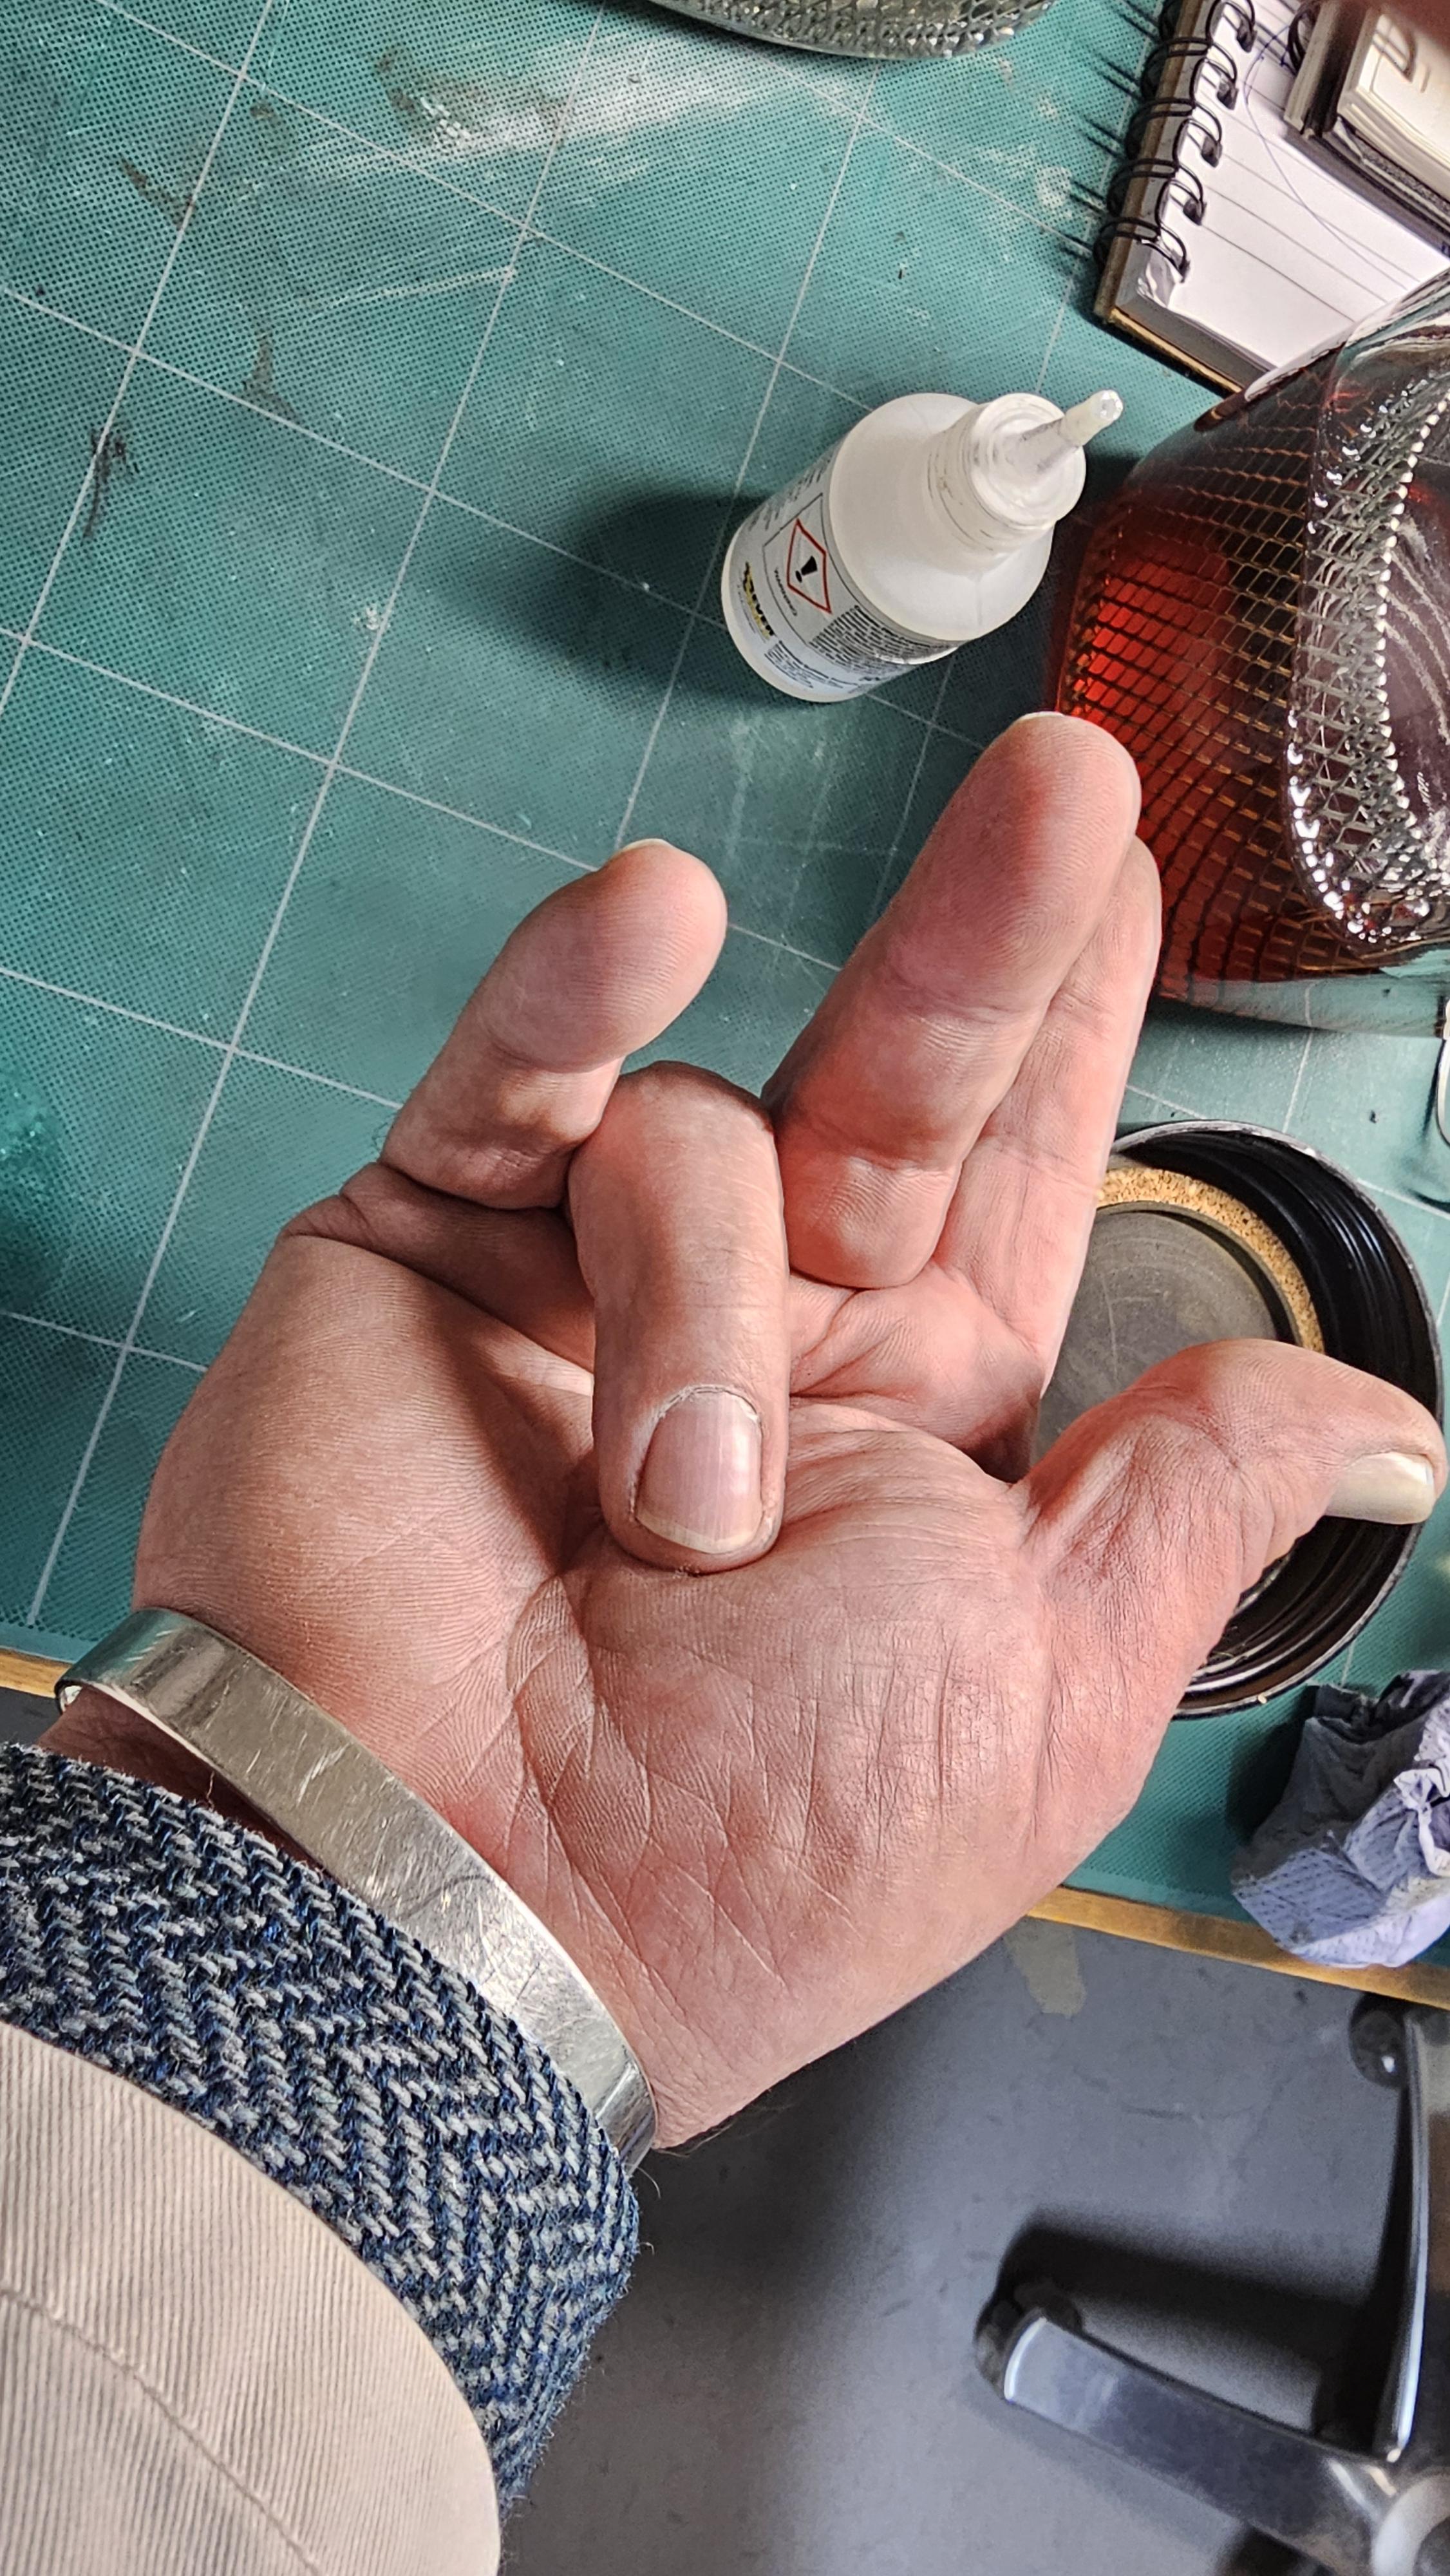
I recently had this little mishap when glueing a cork seal into a watch cleaning glass jar lid. I thought all had gone well until I looked at my other hand I saw I had glued my finger to my palm... duh! It took 20 minutes with a pit of acetone to gently pry my finger off You can't make this stuff up

 3 points
 -
Thanks Andy, thats good information. Not sure yet Rich, trying to talk the guy through it. Just spoke to the guy on the phone, the watch belonged to his grandfather, when he died his wife then gave it to her daughter (the guy on the phone his aunt ). His aunt was having a clear out and her nephew helping found a bag of watches in her attic, thrown in a bag of crap watches, I gave him a couple of pointers and it's now ticking away nicely he said. Happy ending... he's pulled it off ebay and will be seeking professional advice to have it serviced and valued in Norwich. My " good deed of the day "3 points
-
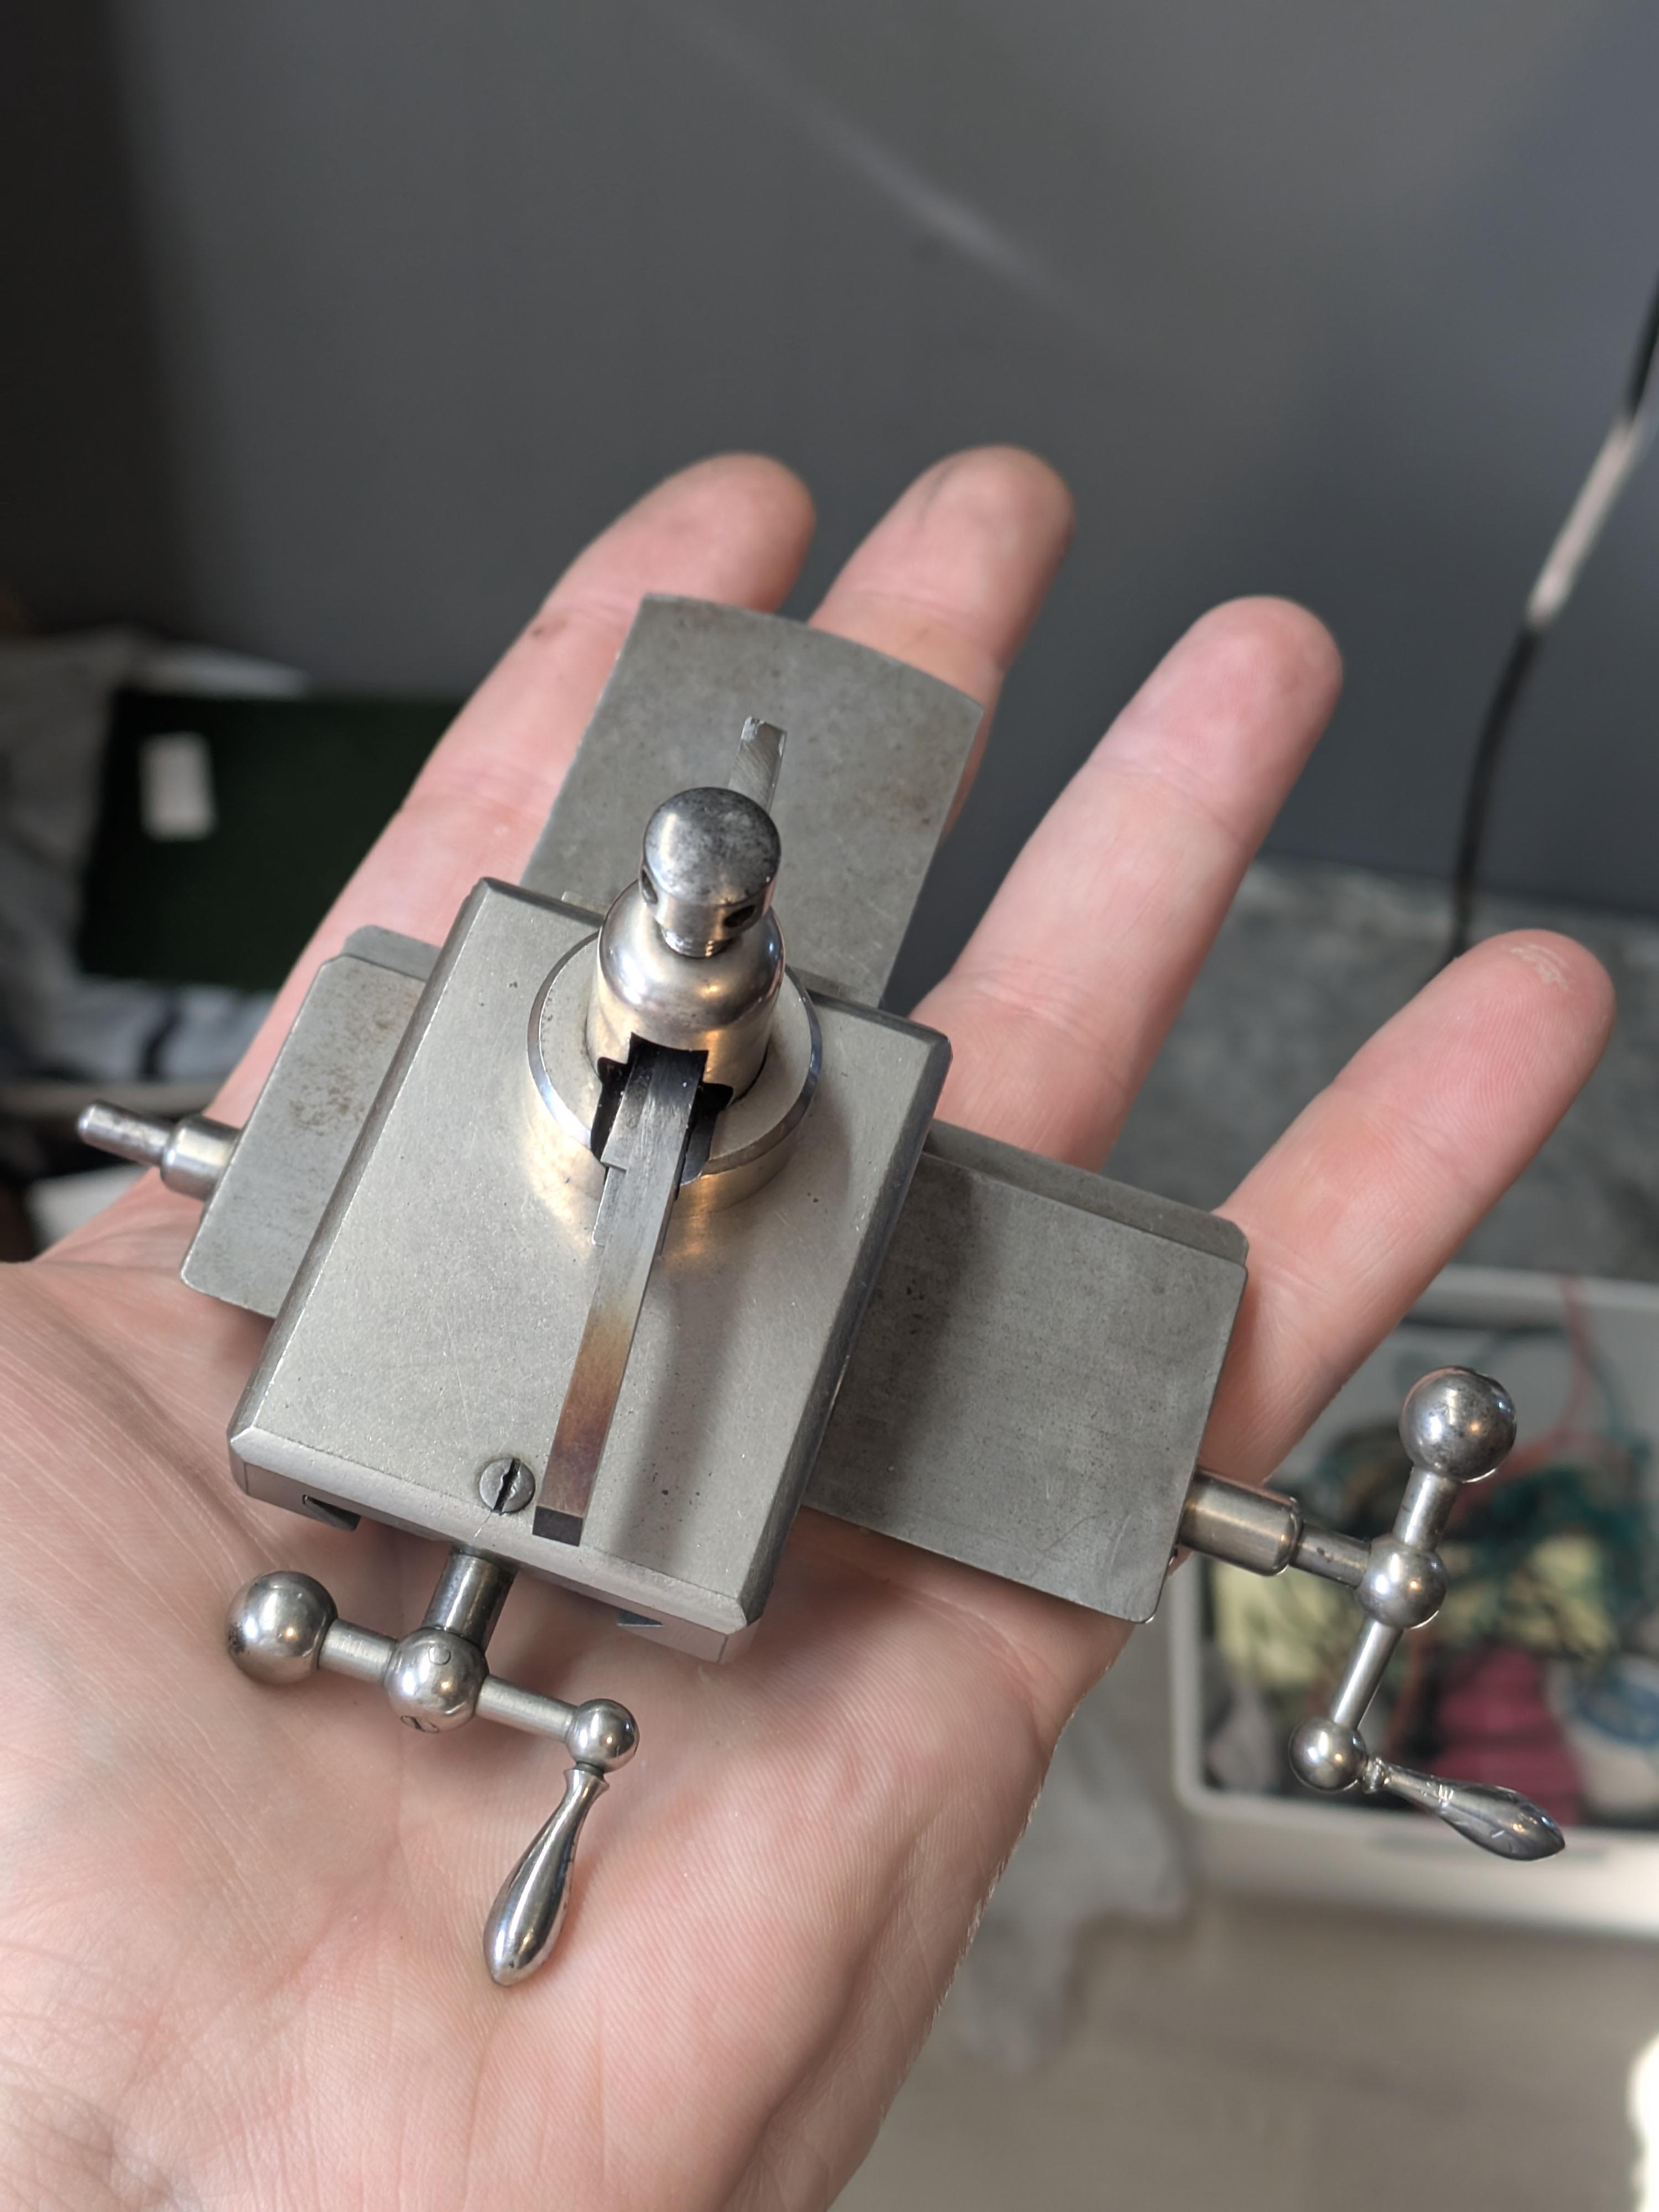
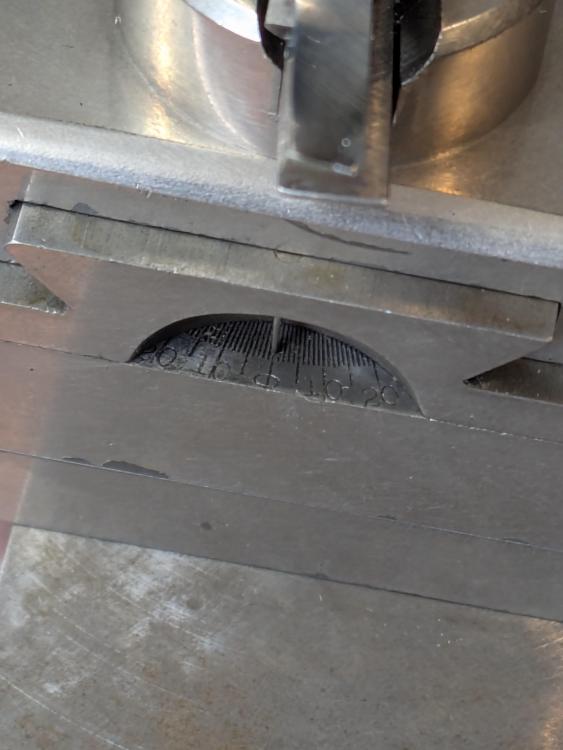
Dull a used nail clipper to make your own tool as shown bellow. Control over tightening is regulated by micrometer action of the two screws. Good luck3 points
-
https://www.esslinger.com/isa-3-hand-quartz-watch-movement-isa1198-106-small-second-hand-at-12-00-overall-height-5-5mm/ Here is the link to the movement. It says the seconds hand is at the 12. Not sure how that would rotate eeyore. The seconds hand ticks back and forth. Not sure if the coil is damaged or if someone had done some work to it prior but there is a blemish on it. As far as I could find, they don't make just a coil for that movement. Maybe if I sourced it from eBay, but I haven't done any modifying to quartz movements. Only replaced them. That gold piece is solid. There is a shadow at the bottom left that makes it look like a space or an indent, but it is not. AndyGSi, I could dismantle it that way but what if I can't get the seconds hand on the new movement? Yes, I looked it up as well and this is why I am being cautious. I would rather admit defeat than empty my pockets3 points
-
I splashed 98% sulphuric acid on my face, the safety googles protected my eye. I washed it off within seconds, strange thing, it didn't burn, just left a white crescent under the googles. Sucked all the moisture out of my skin.2 points
-
It reminds me of my then 13-year-old daughter, who had been nagging me for days to drill a couple of holes in the ceiling of her room for screws to hang her curtains. Eventually, she got tired of waiting for me and decided to take matters into her own hands—by grabbing a bottle of super glue and attempting to attach some sort of contraption to the ceiling. Suddenly, I heard a desperate scream from her room, and 30 seconds later, I was on the phone with emergency services, trying to find out how dangerous it is to get super glue in your eye. She was in a terrible pain. I didn’t get a definitive answer, but they advised me to take her to the emergency room at one of Stockholm’s largest hospitals, Karolinska. A specialist ophthalmologist spent over an hour carefully removing the glue from her eye. Fortunately, everything turned out fine. Had her vision been permanently affected, I would have had a hard time forgiving myself. So nowadays, I make sure to drill holes in walls and ceilings before any serious accidents happen.2 points
-
Good question, sadly not - just a simple case/press in case back. It's an old accurist so nothing expensive or anything, just holds sentimental value. I've told my friend that I'll have a go at sorting it if it ever actually needs it, rather than make a mess of it in working order, albeit with a frosty crystal from the glue fumes.2 points
-
You need to be very careful. I recently tried to remove some glue from the back edge of a dial with some acetone on a cotton bud. I wasn't aware until I turned it over that some of it (or just fumes) damaged the lacquer on the front.2 points
-
I read somewhere they used it in the Vietnam war to stick wounds together so they could get the f**k out of there quick style without the patient bleeding out2 points
-
Not directly addressing the discussion, but I thought this general vid on superglue was great: Veritasium, Youtube It's much more rigorous and comprehensive than its title suggests (history, chemical & physical properties, formulations) - I found it informative, but that corresponds to my inability to say whether any of it might be wrong.2 points
-
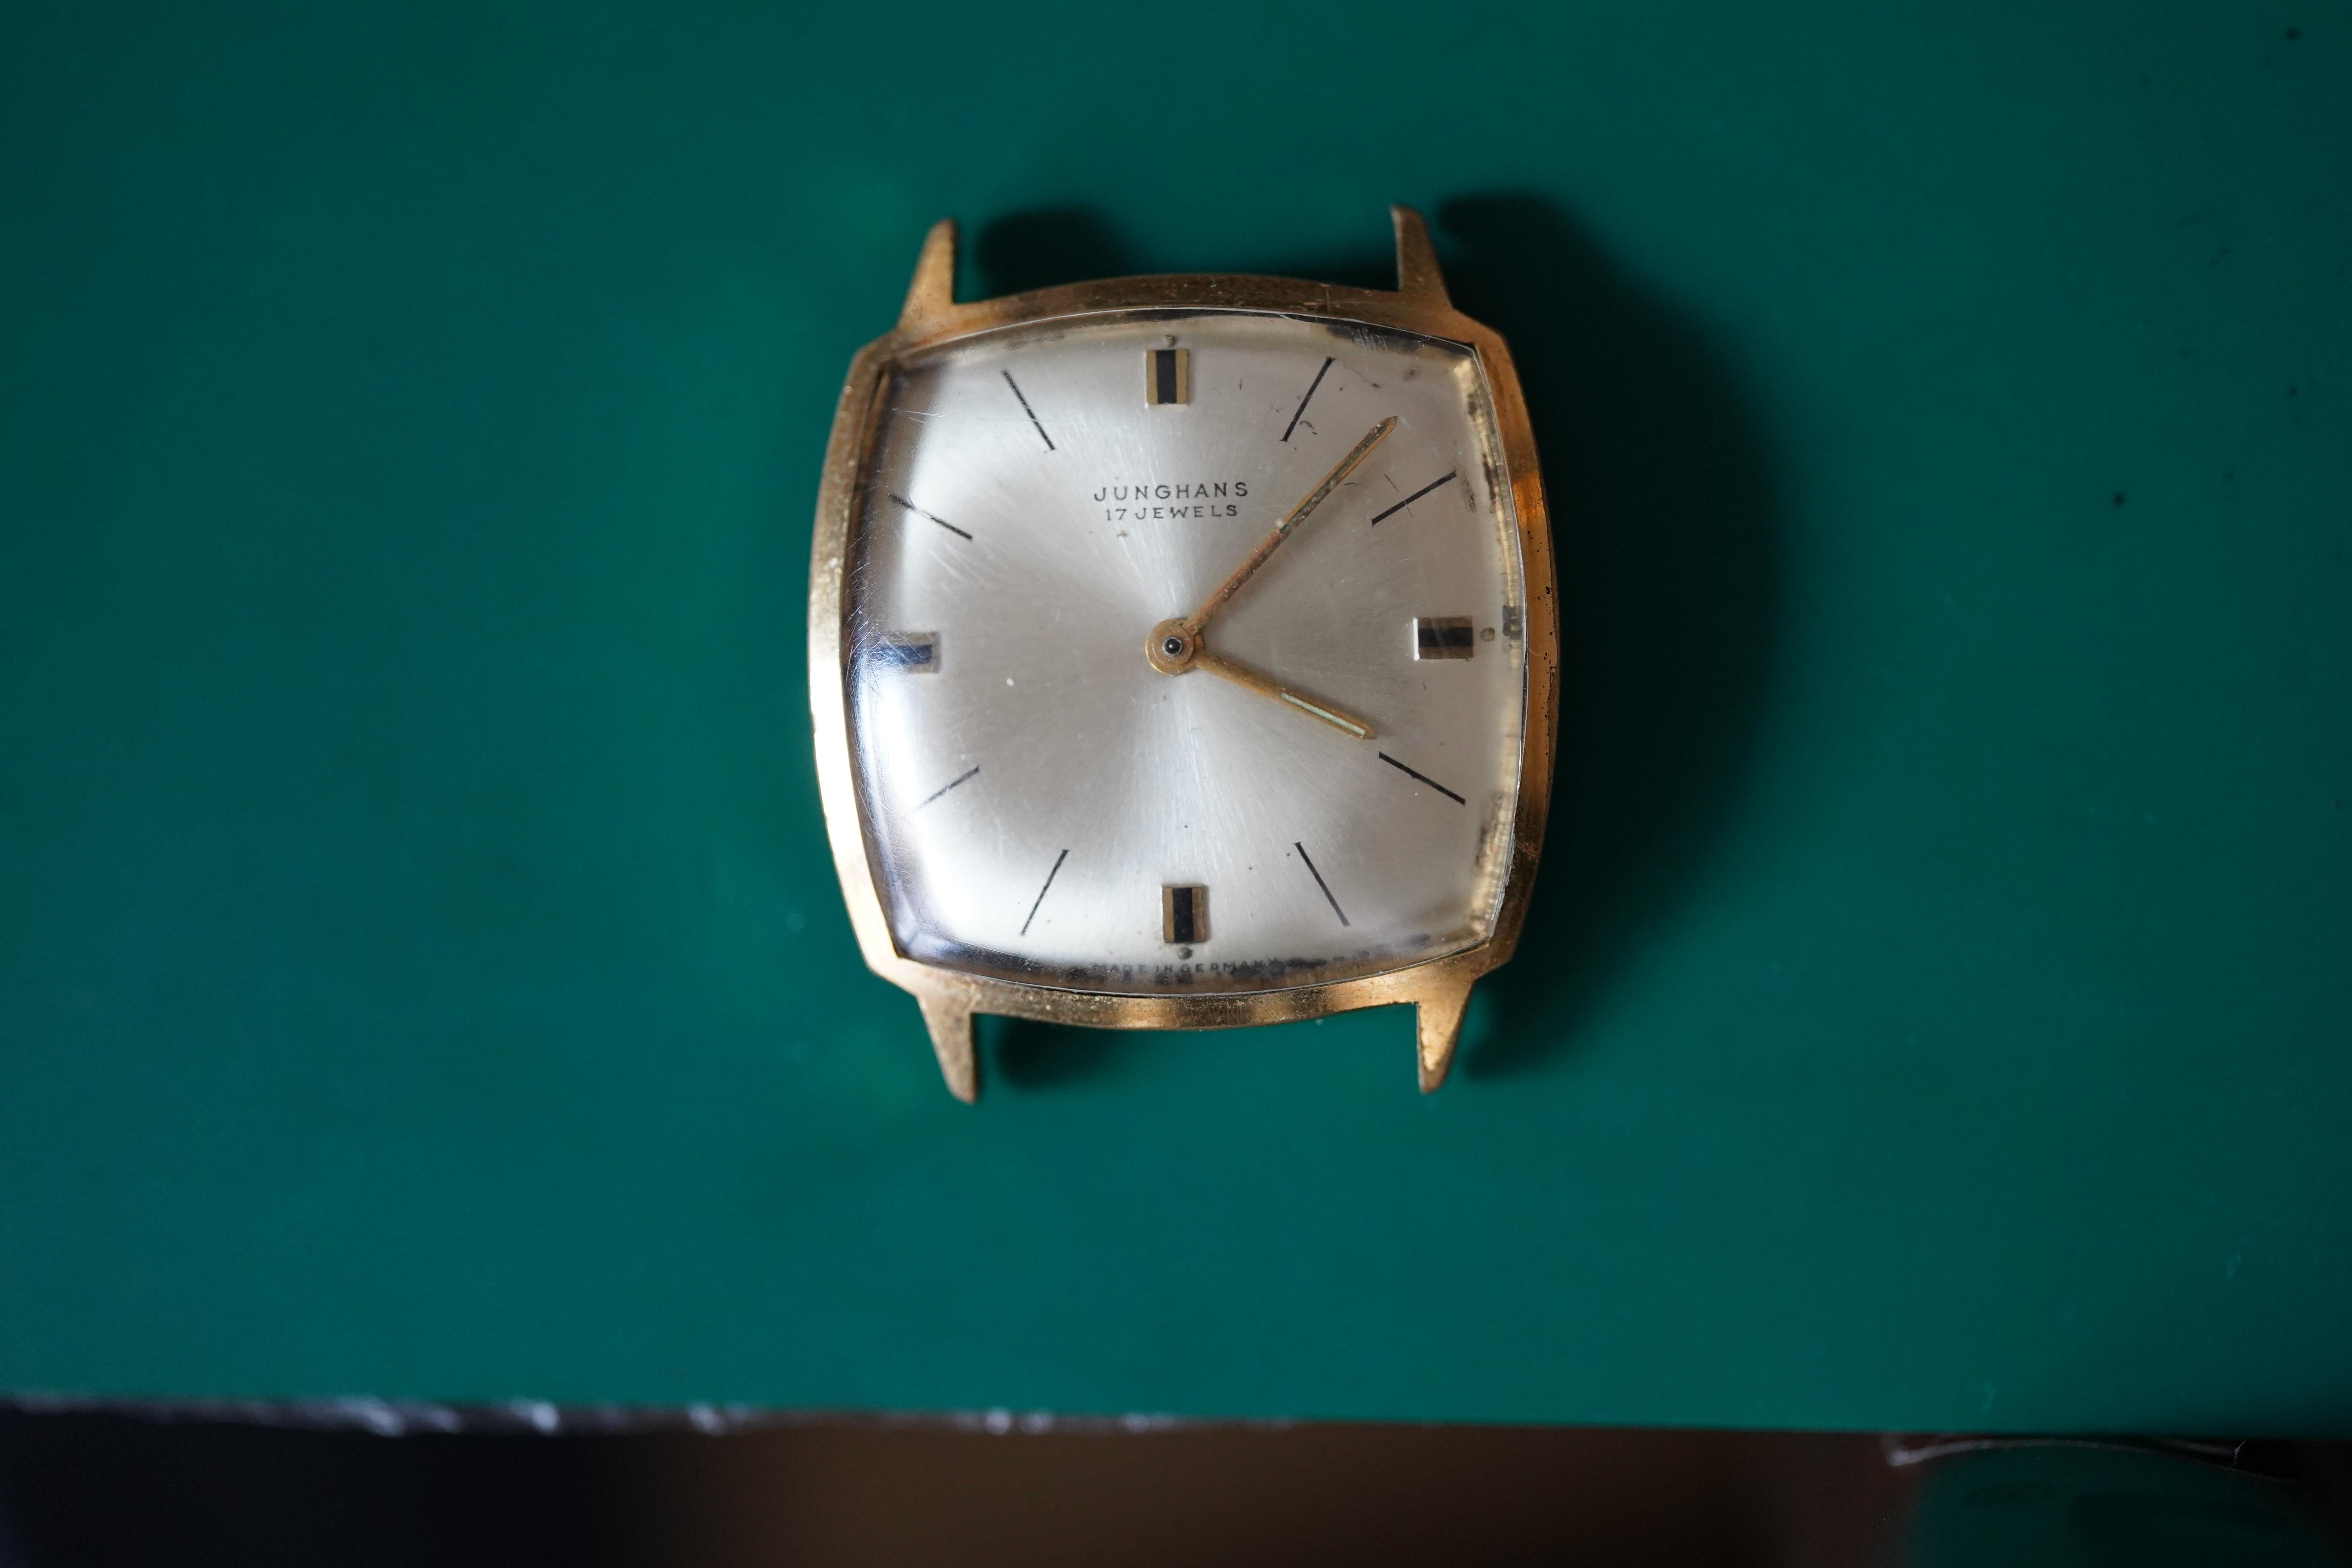
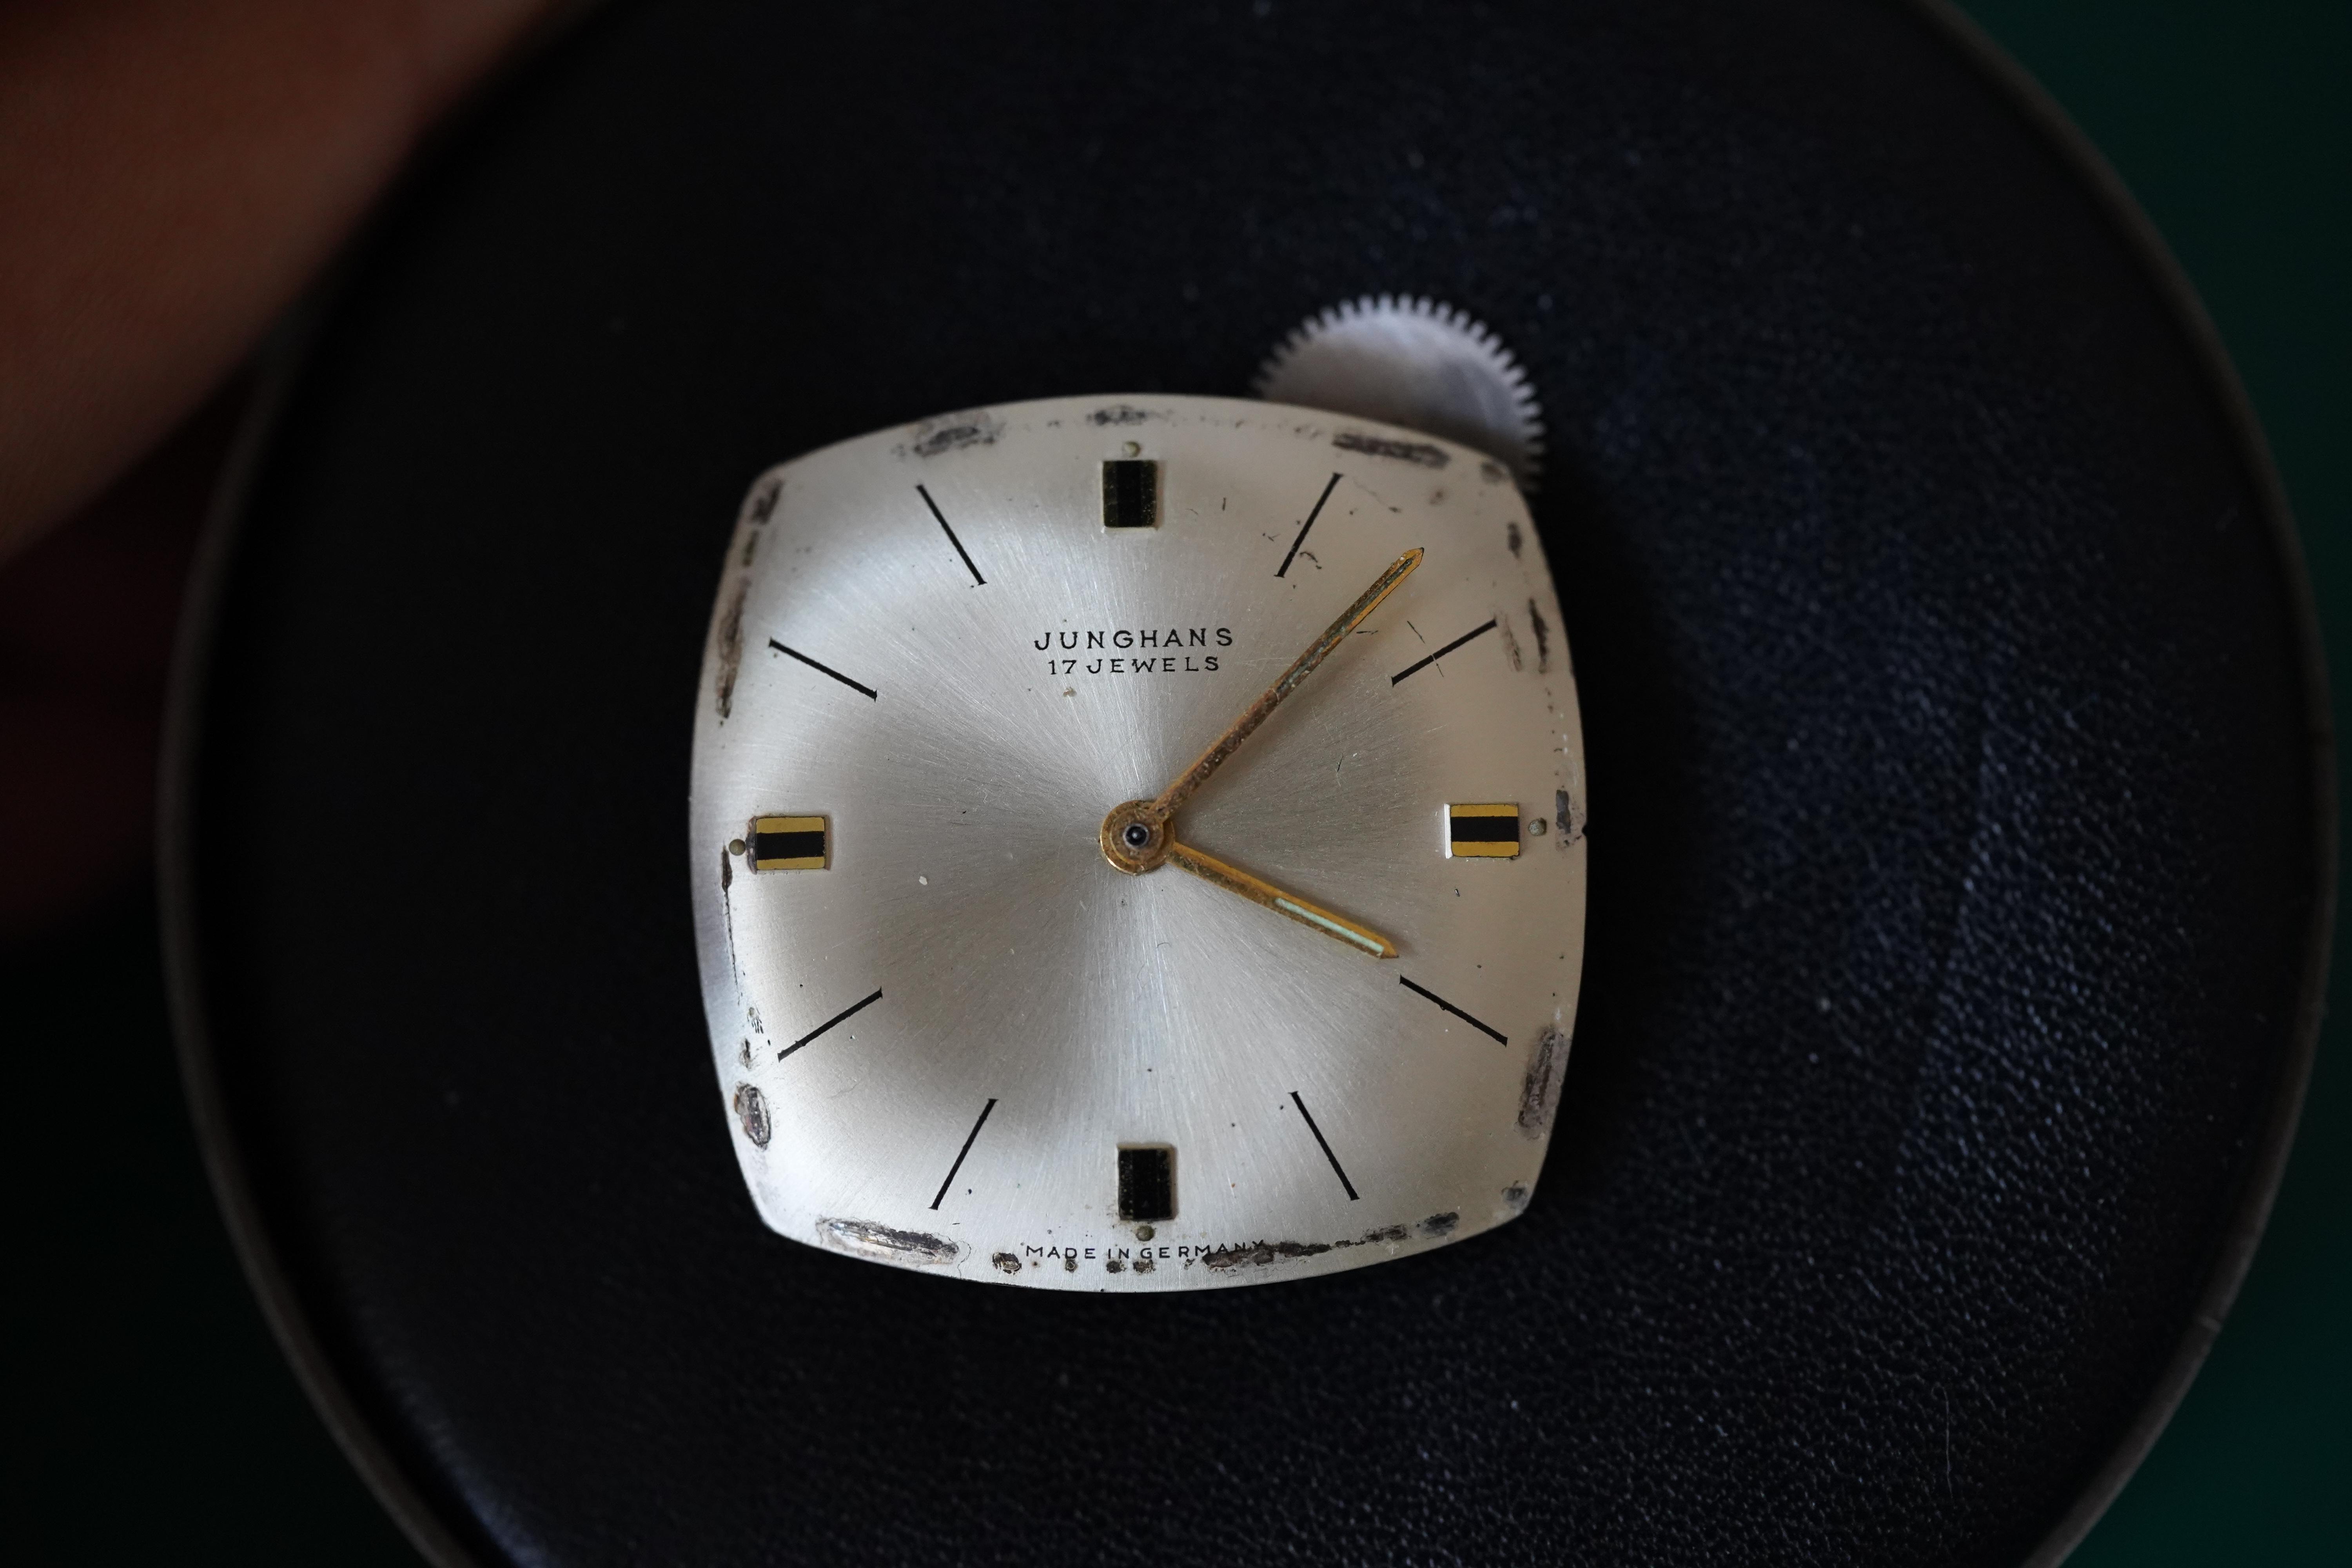
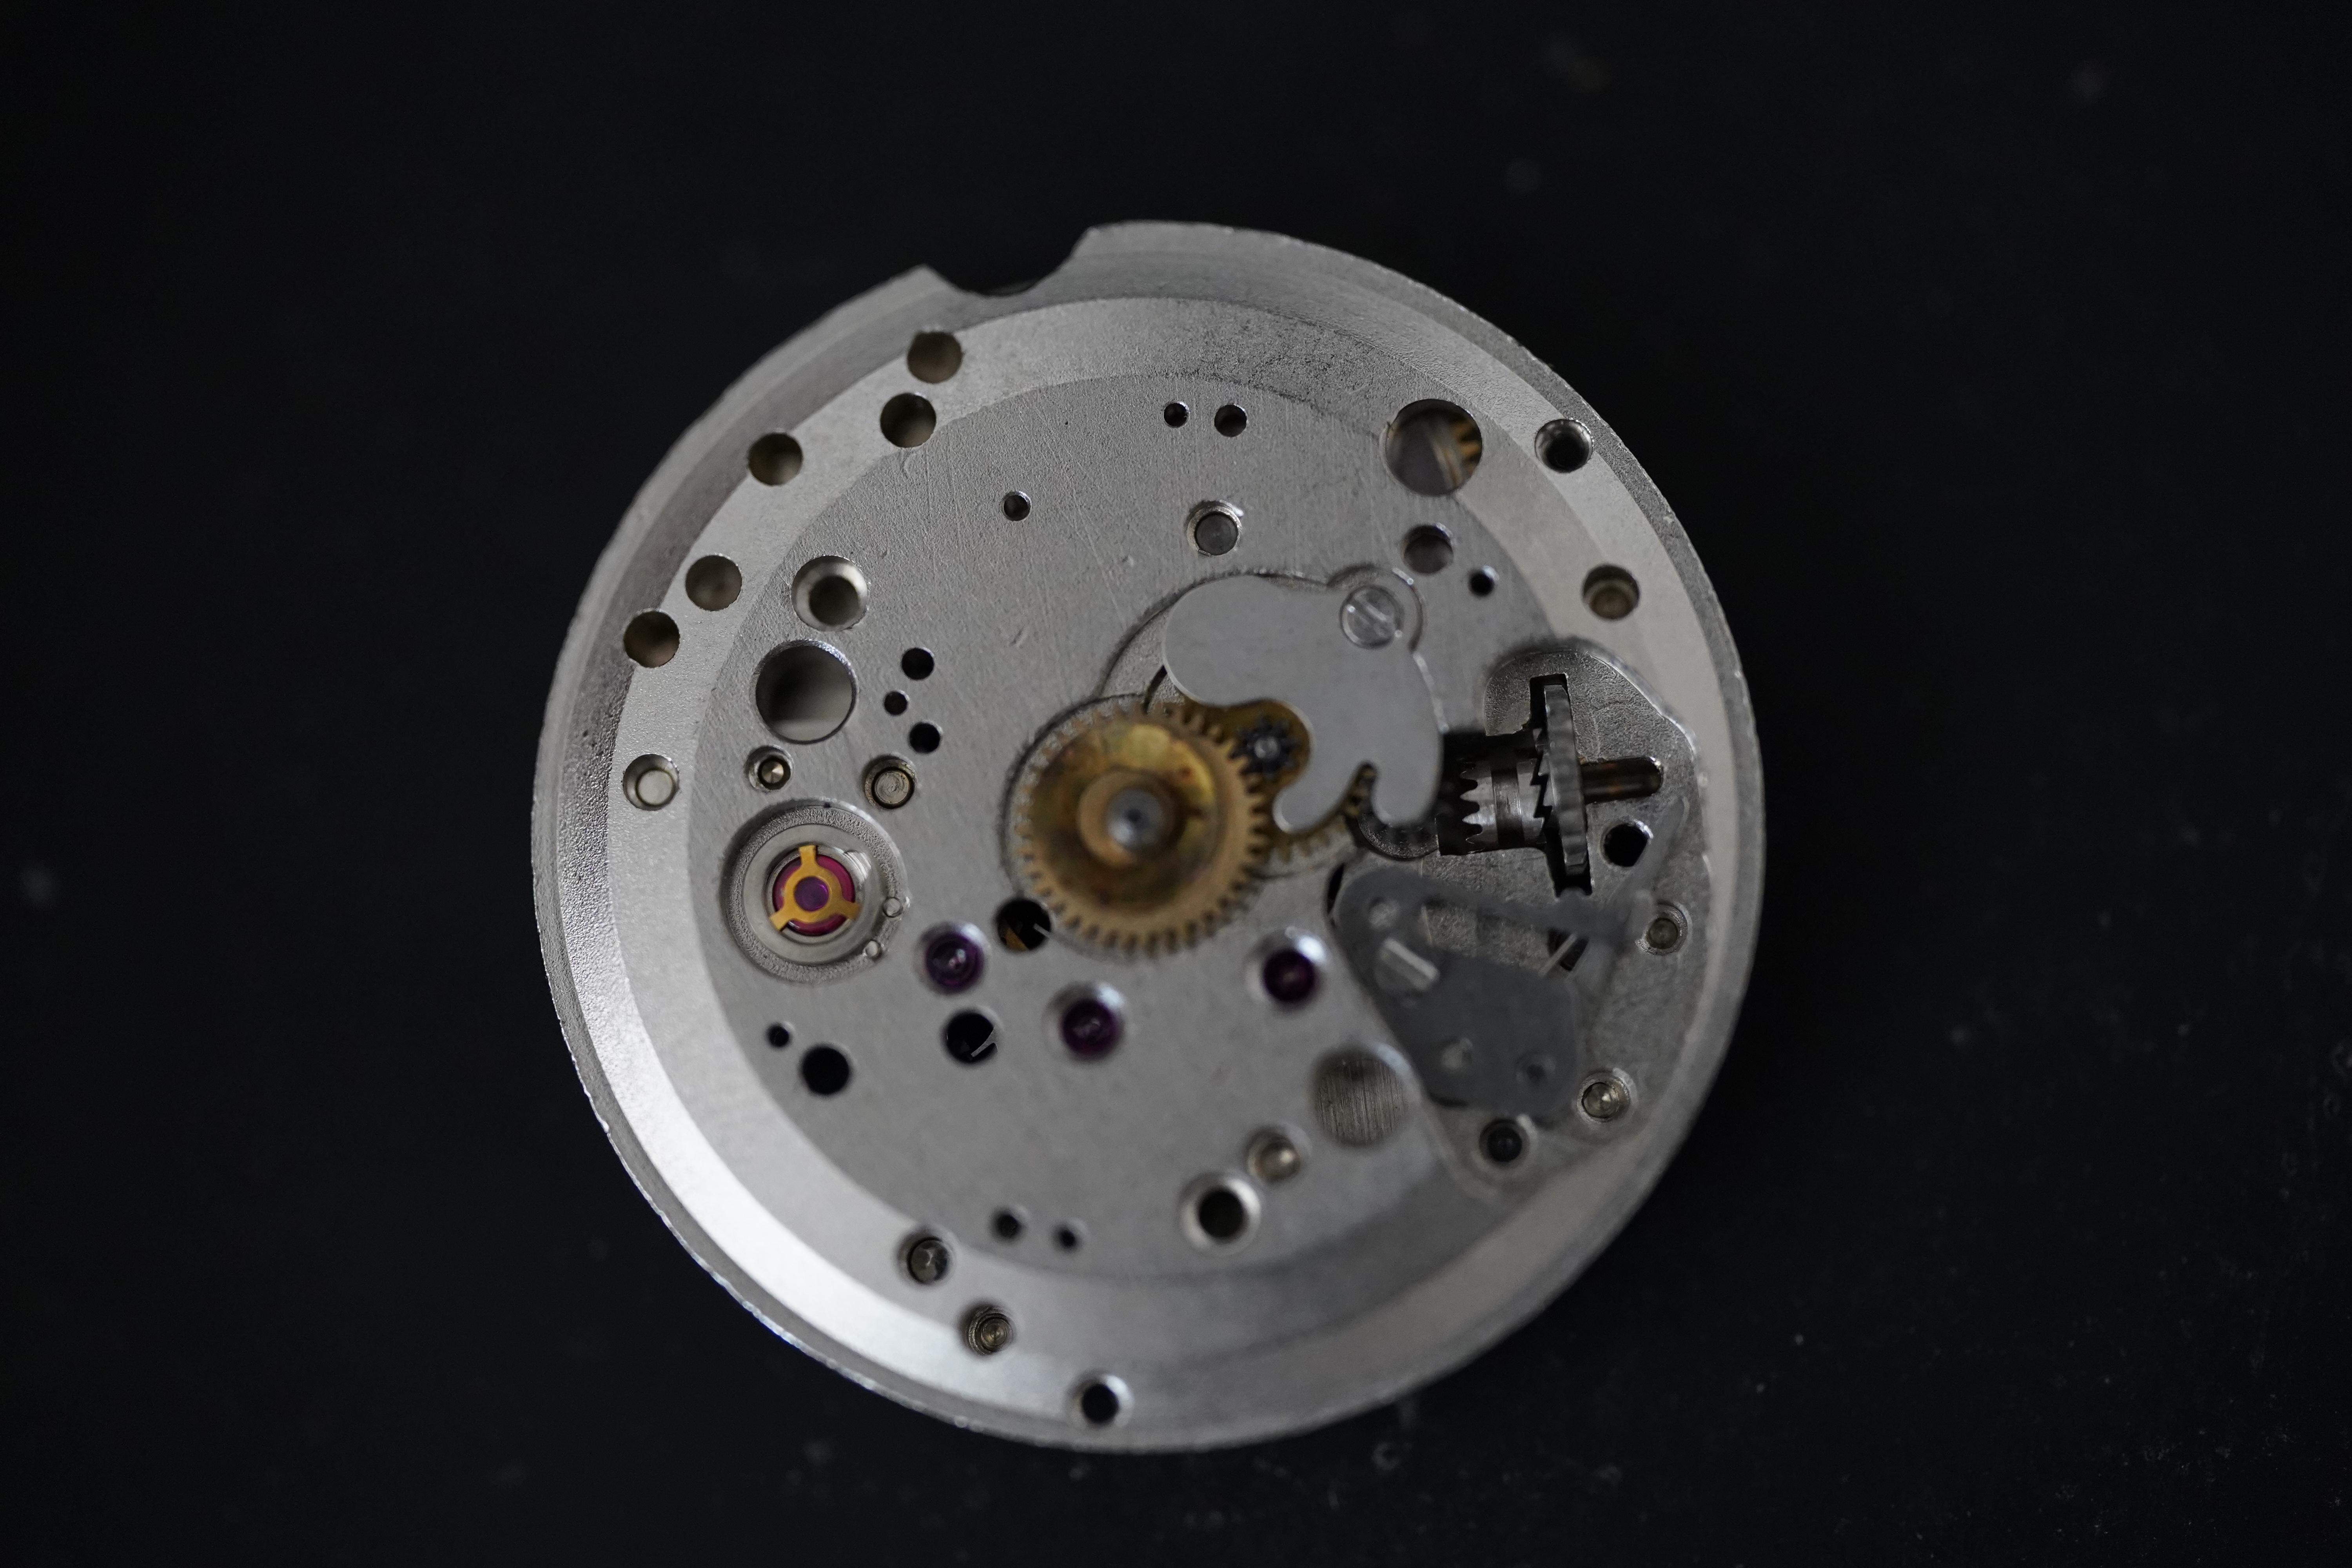
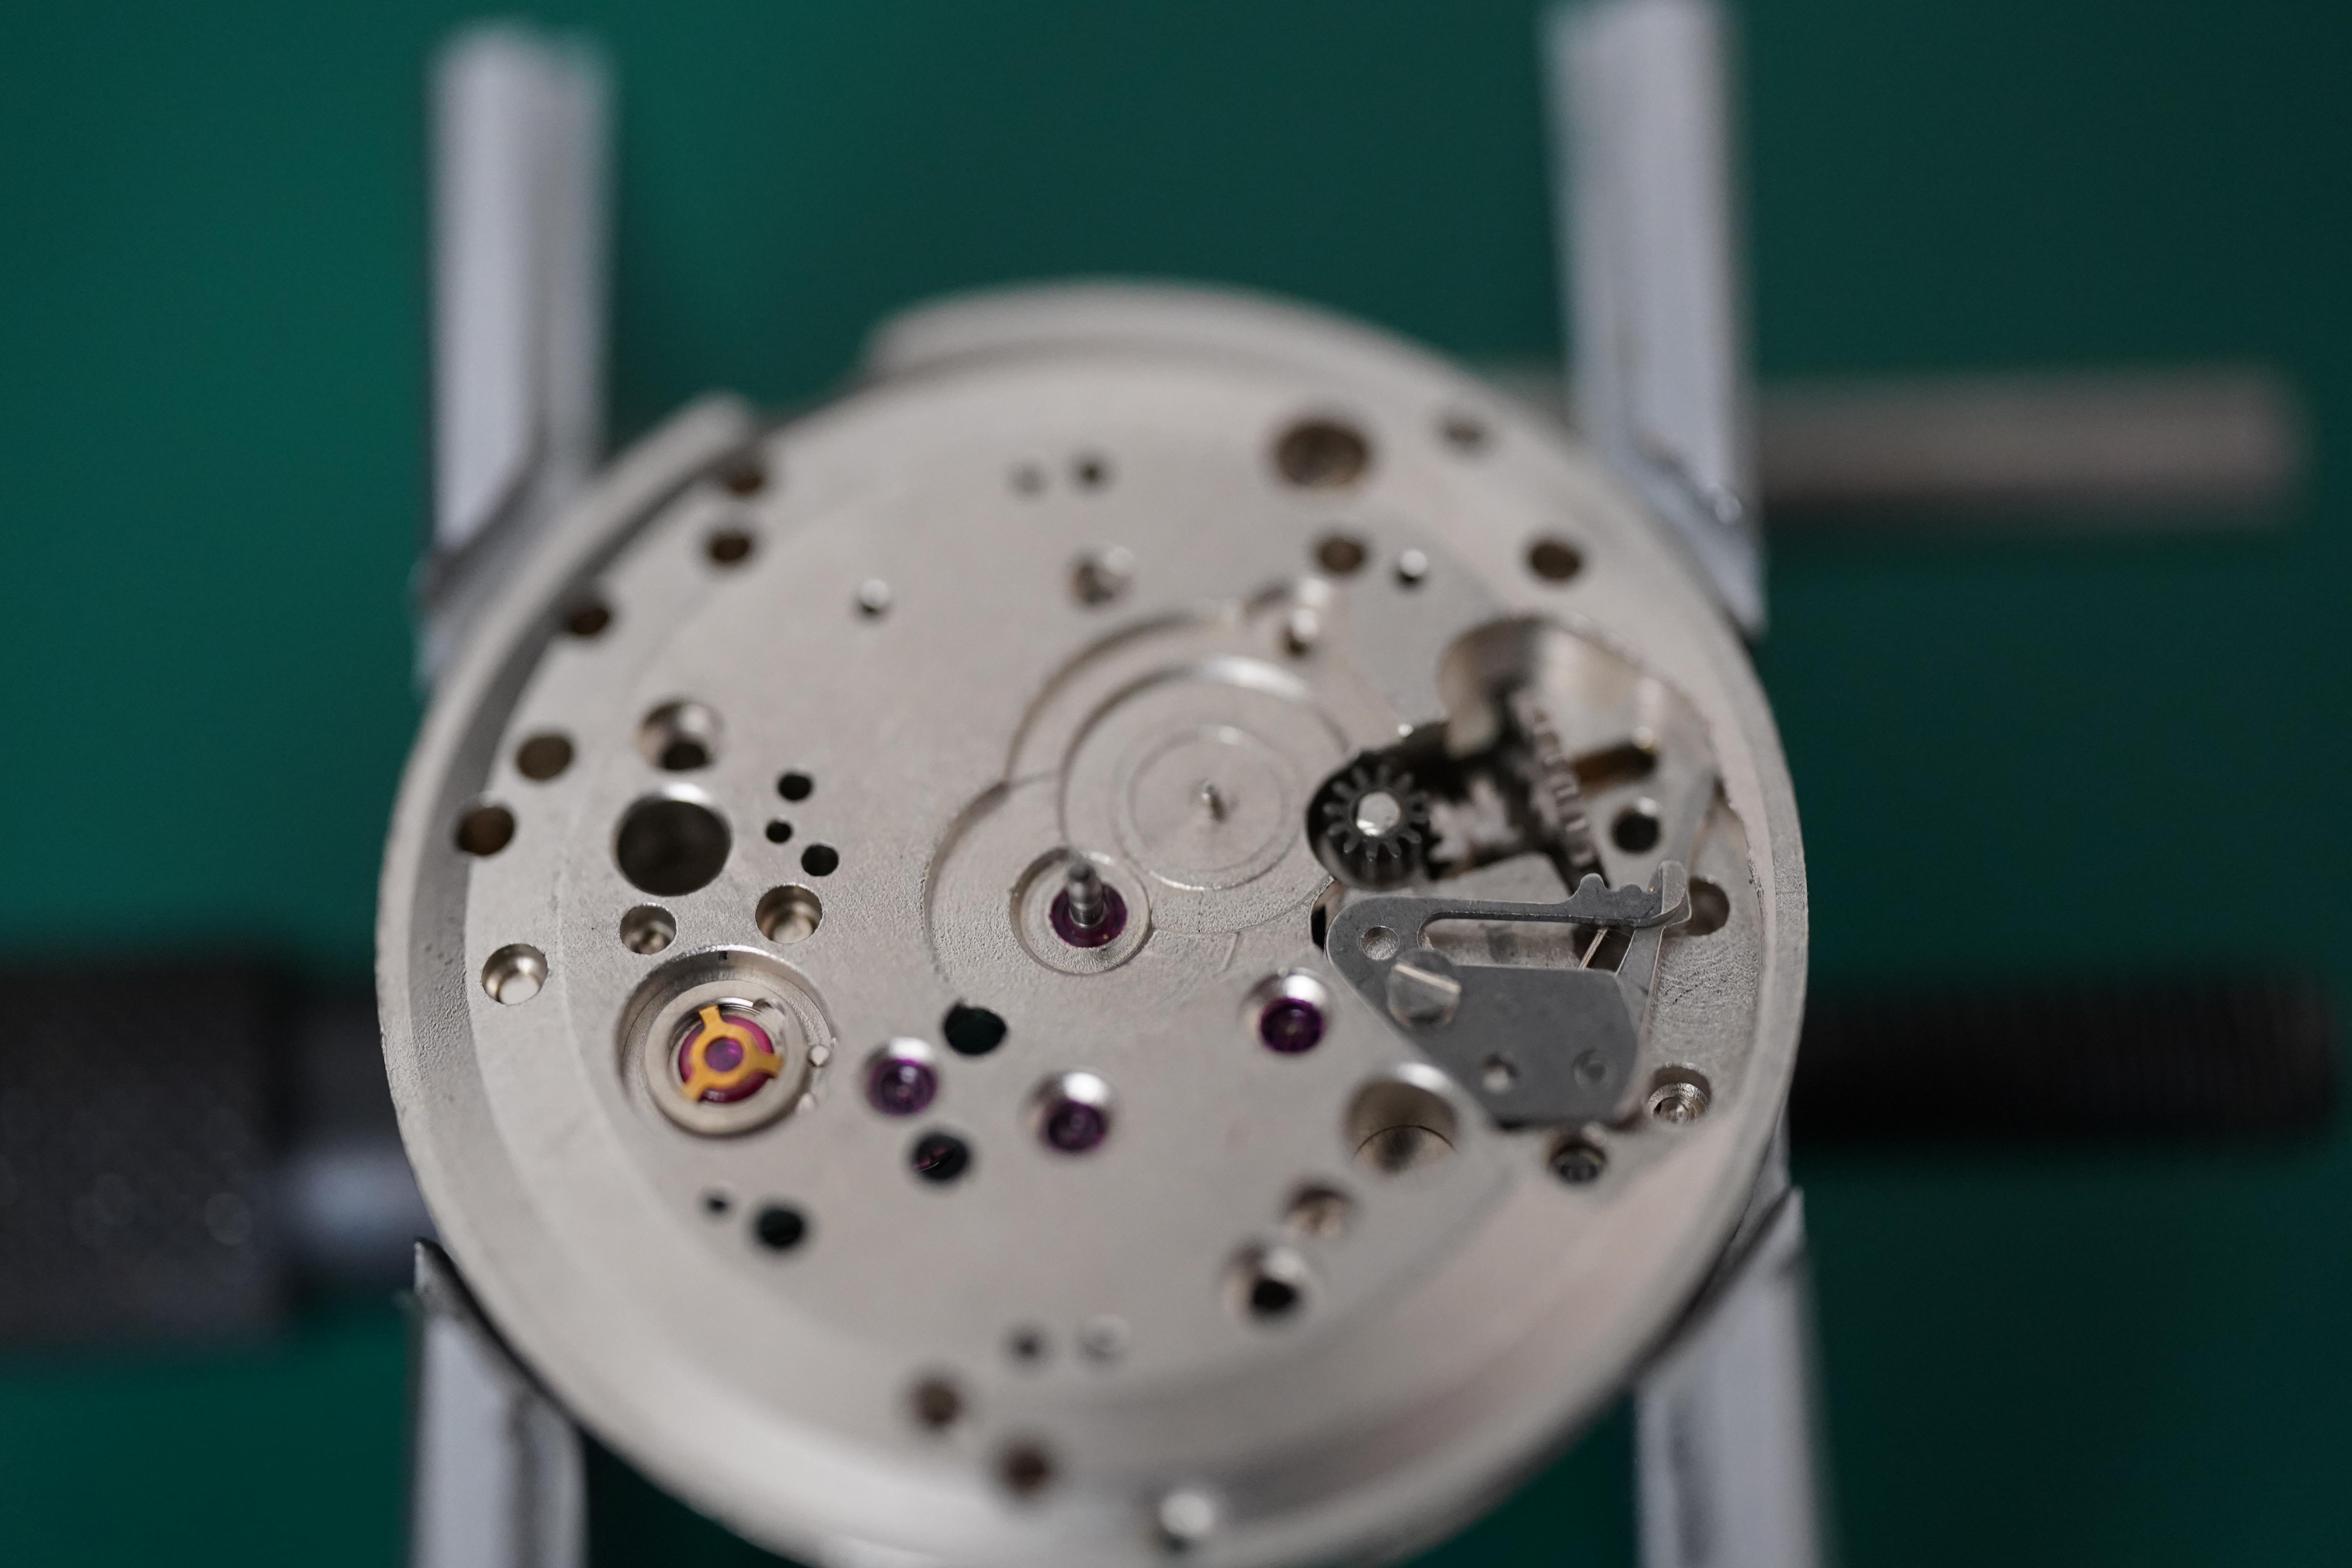
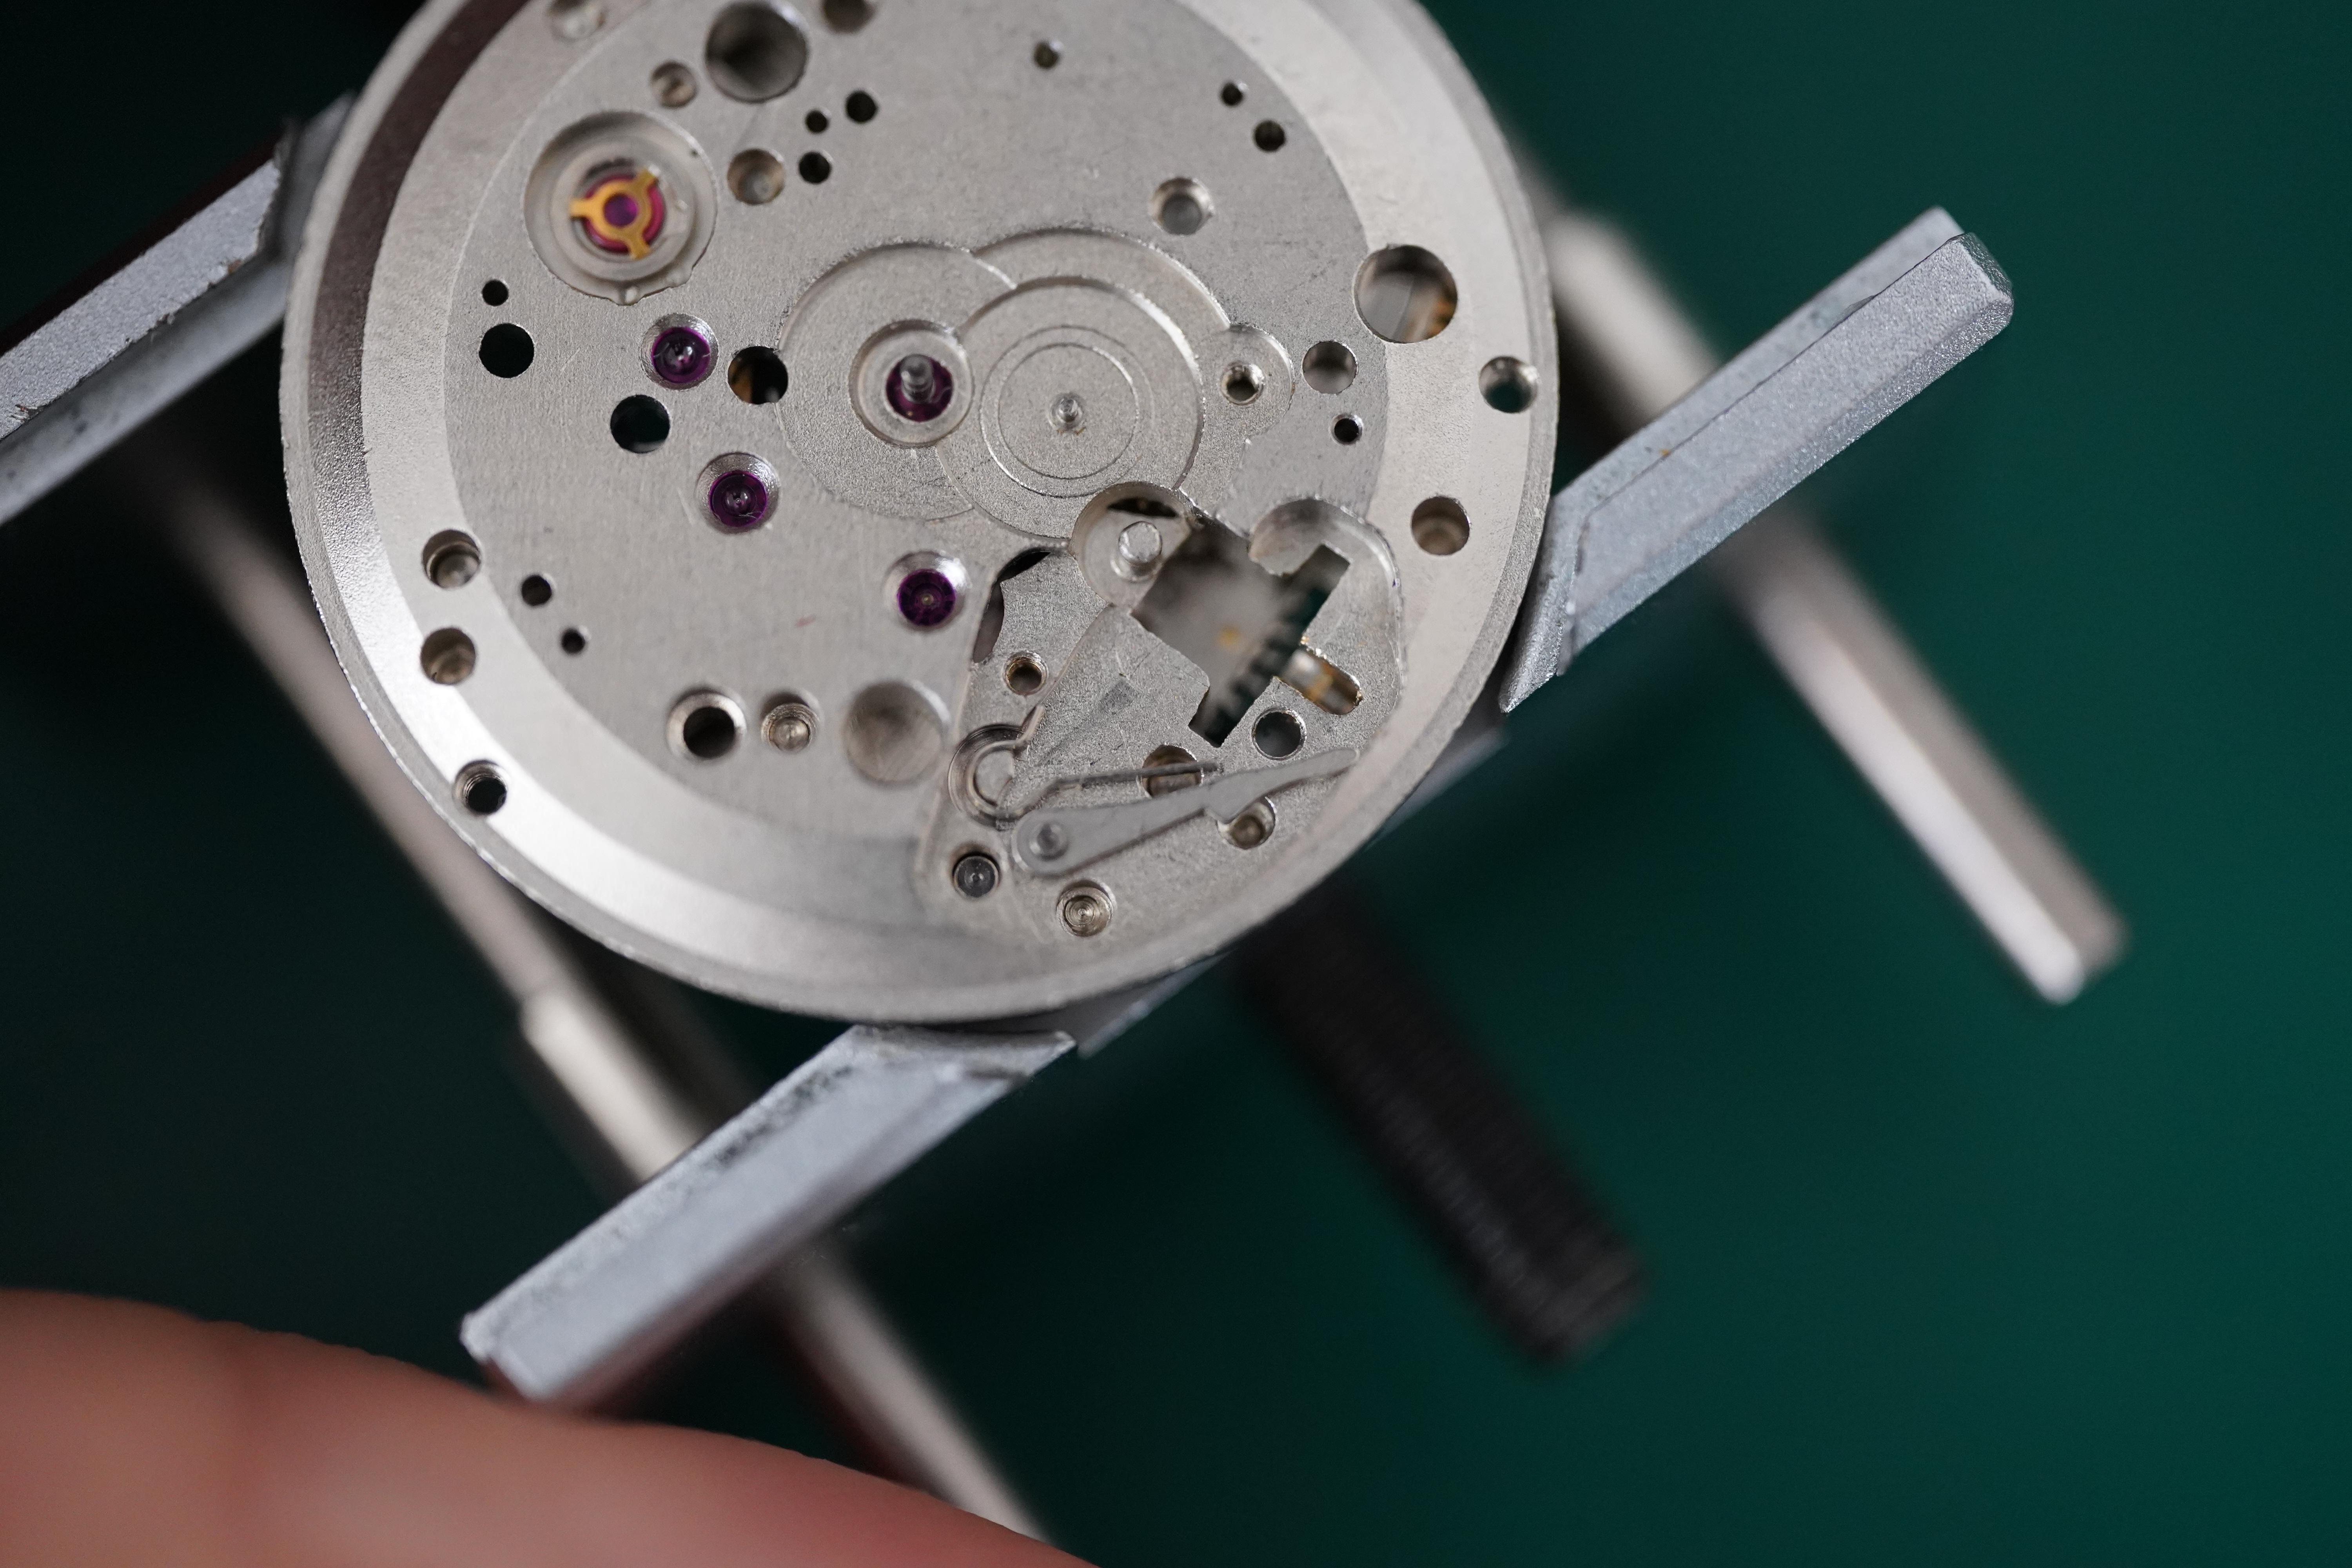
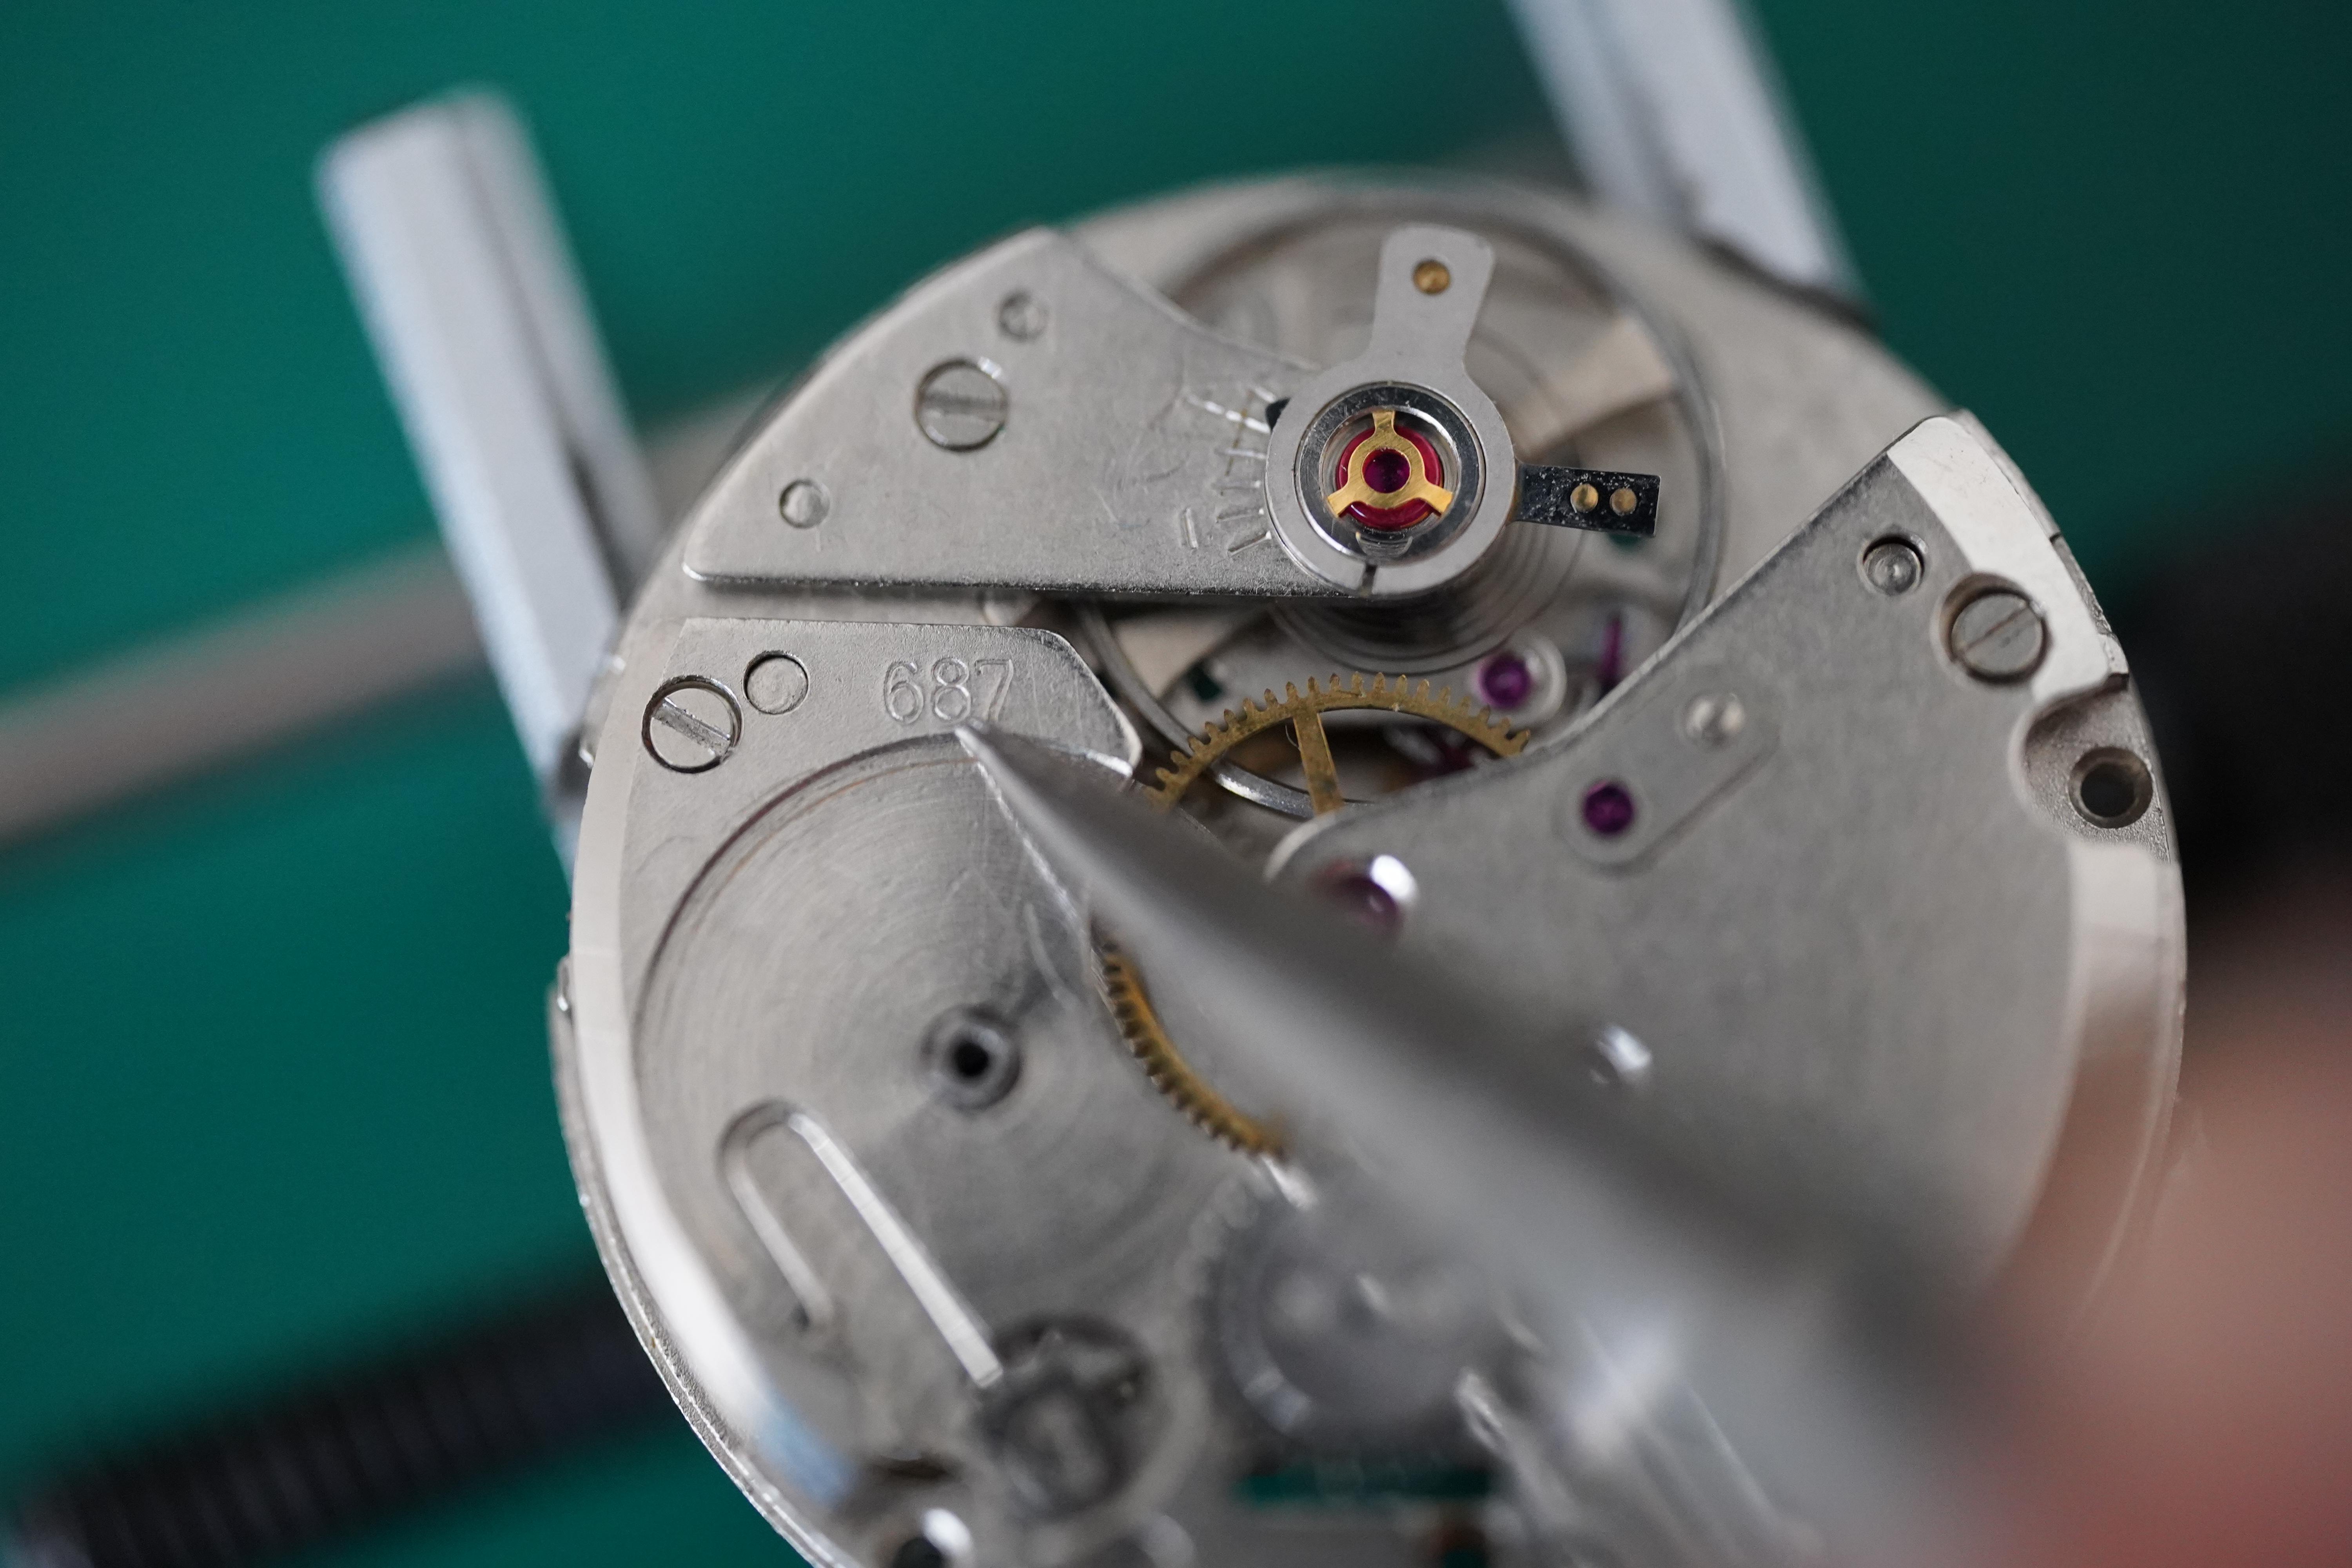
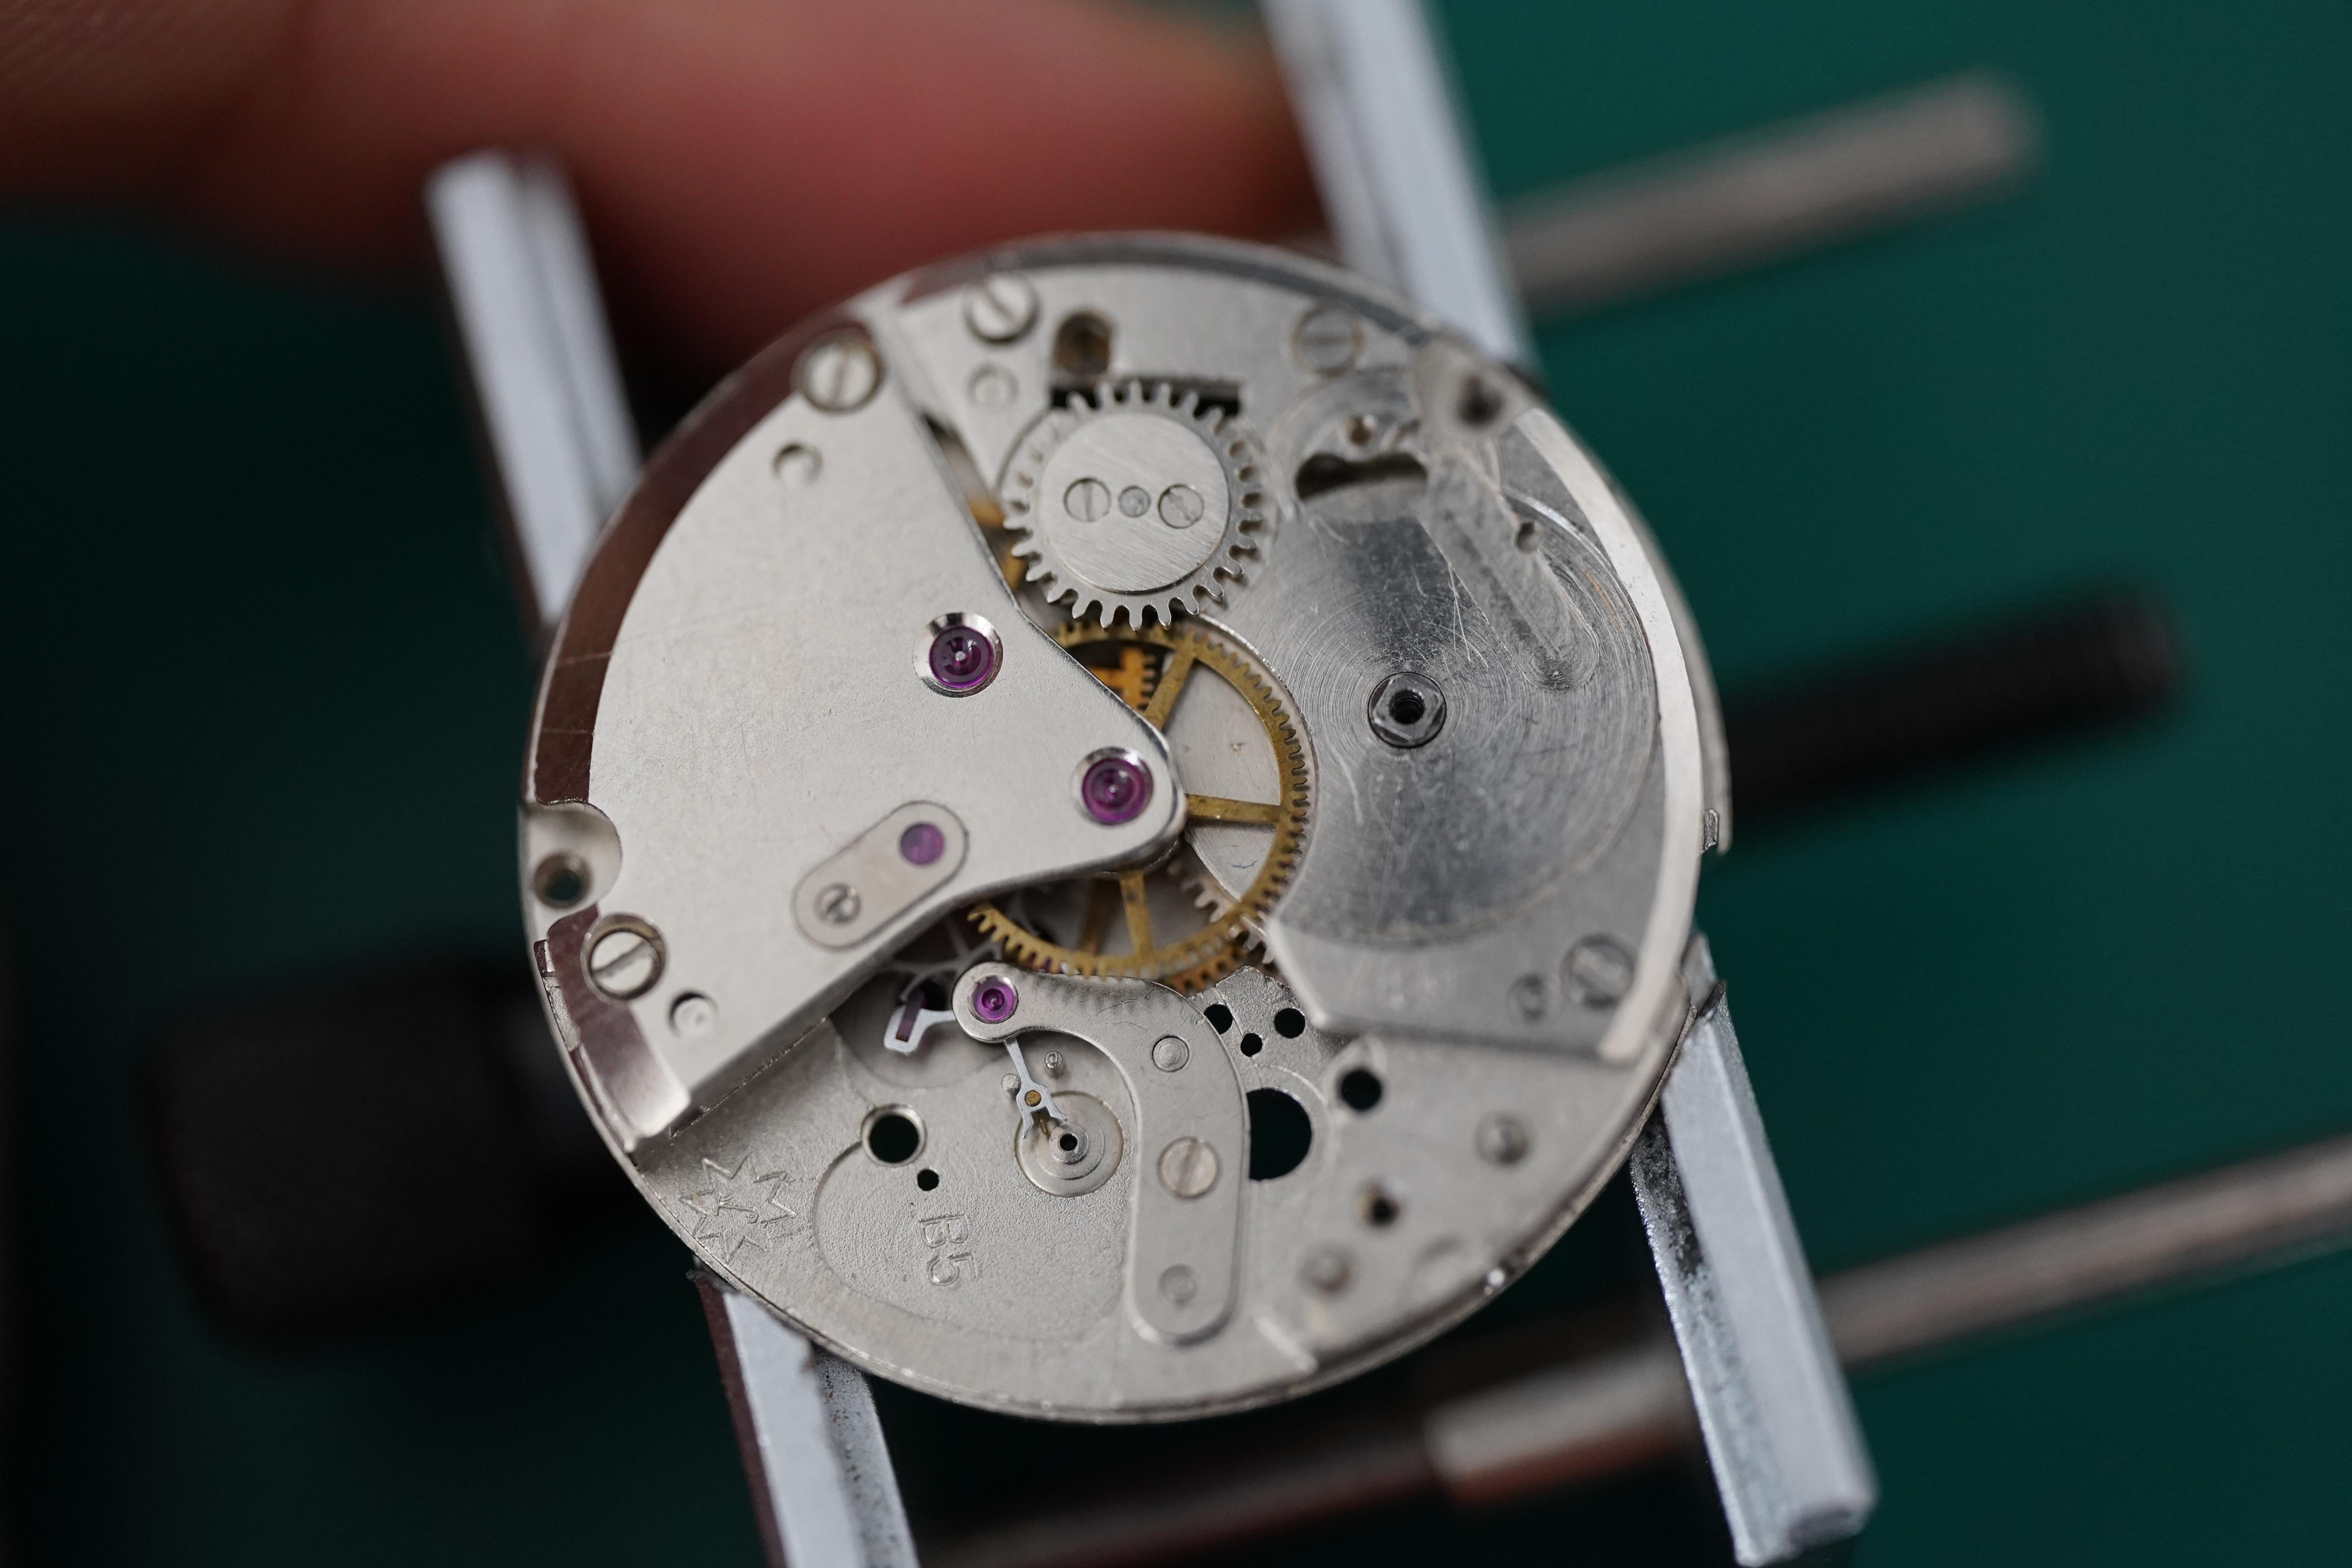
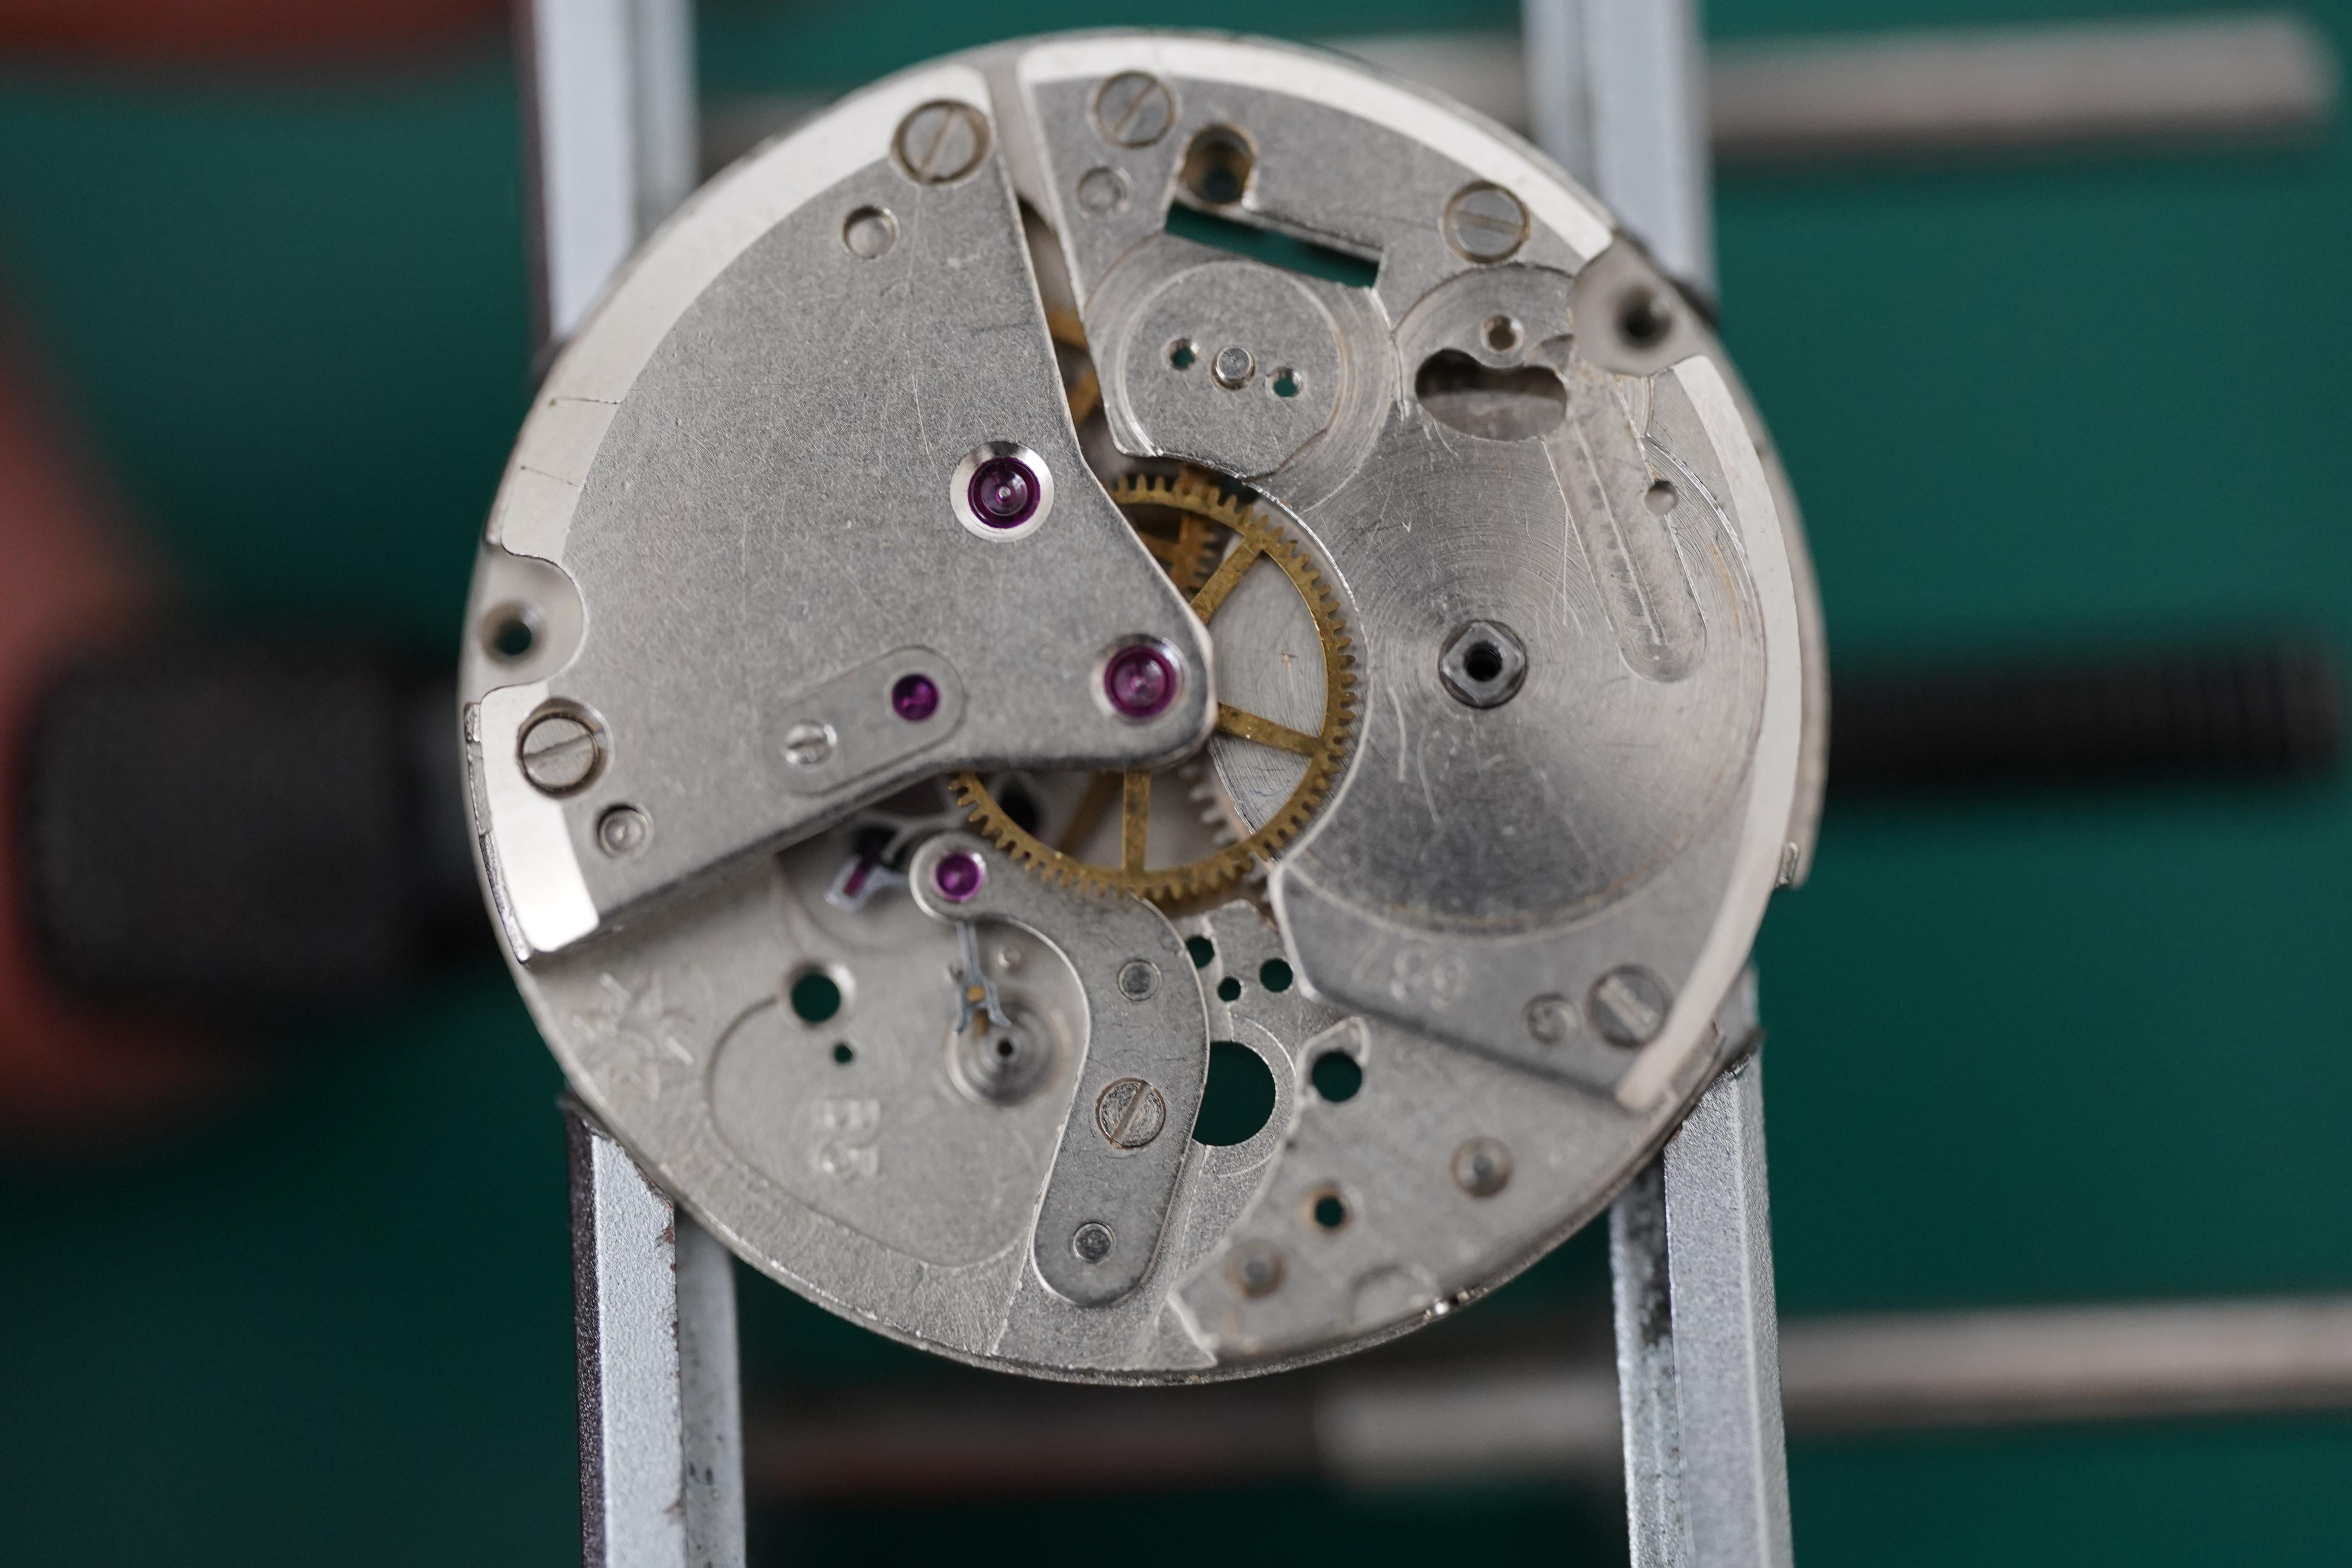
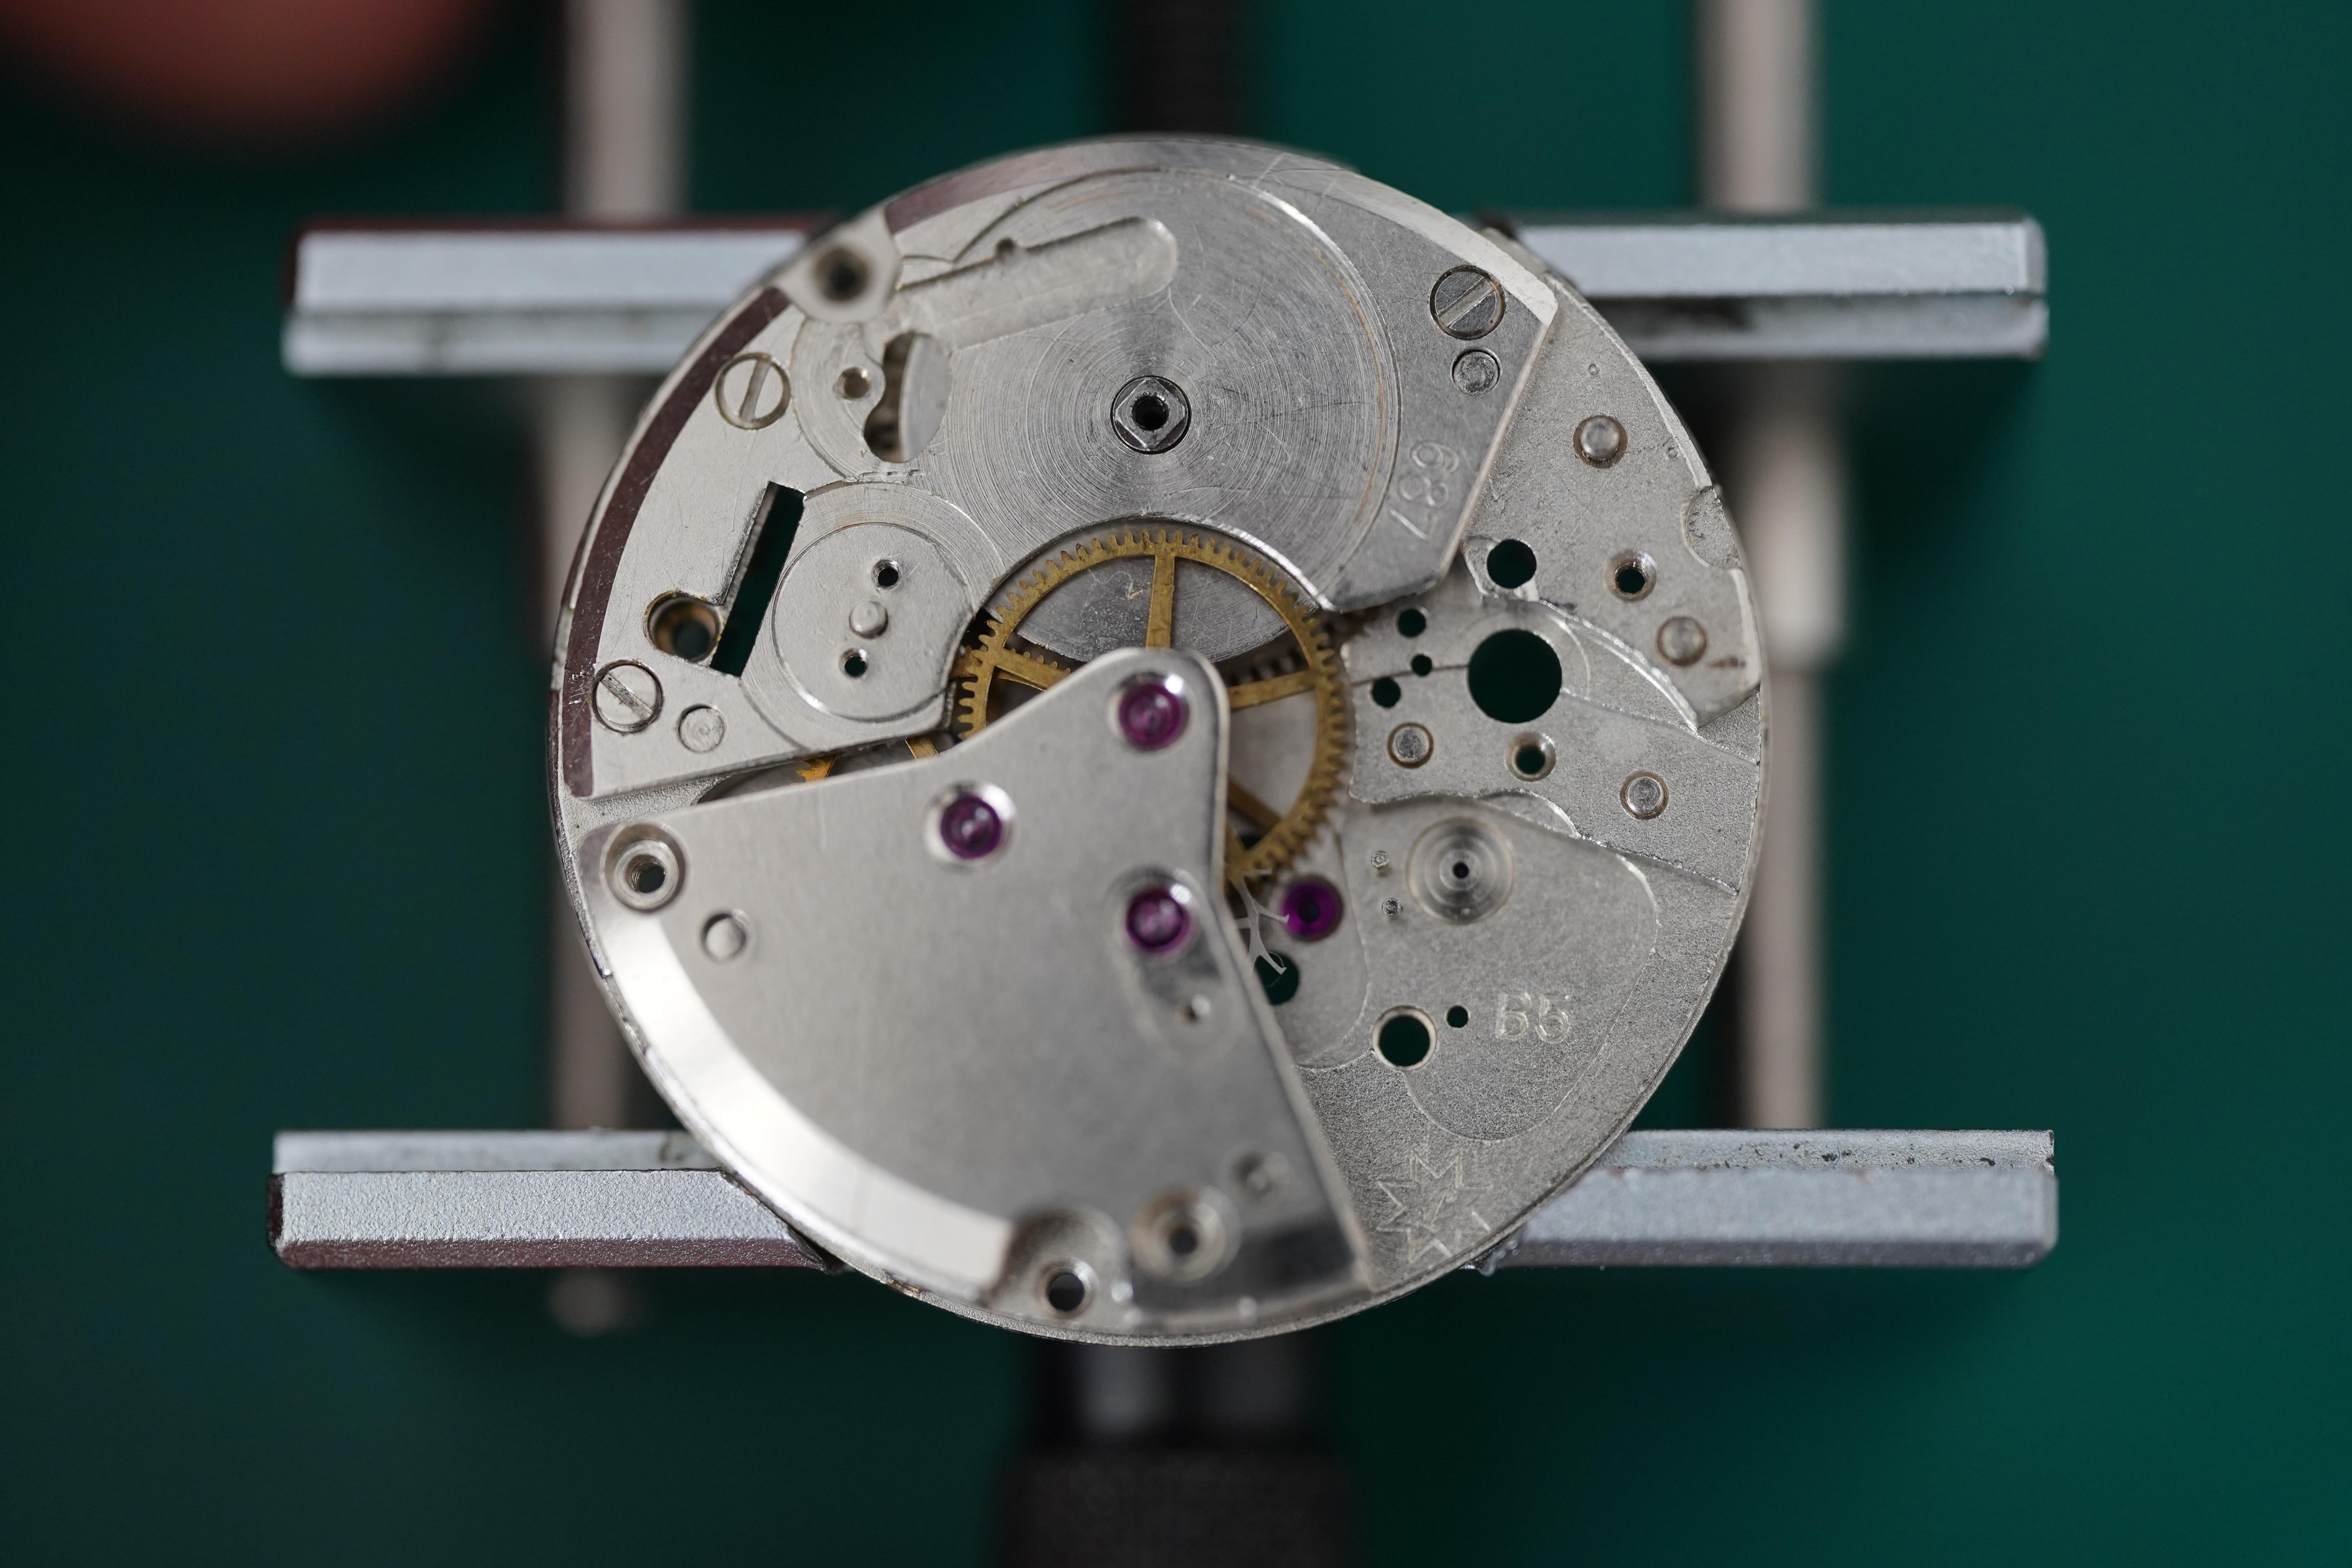
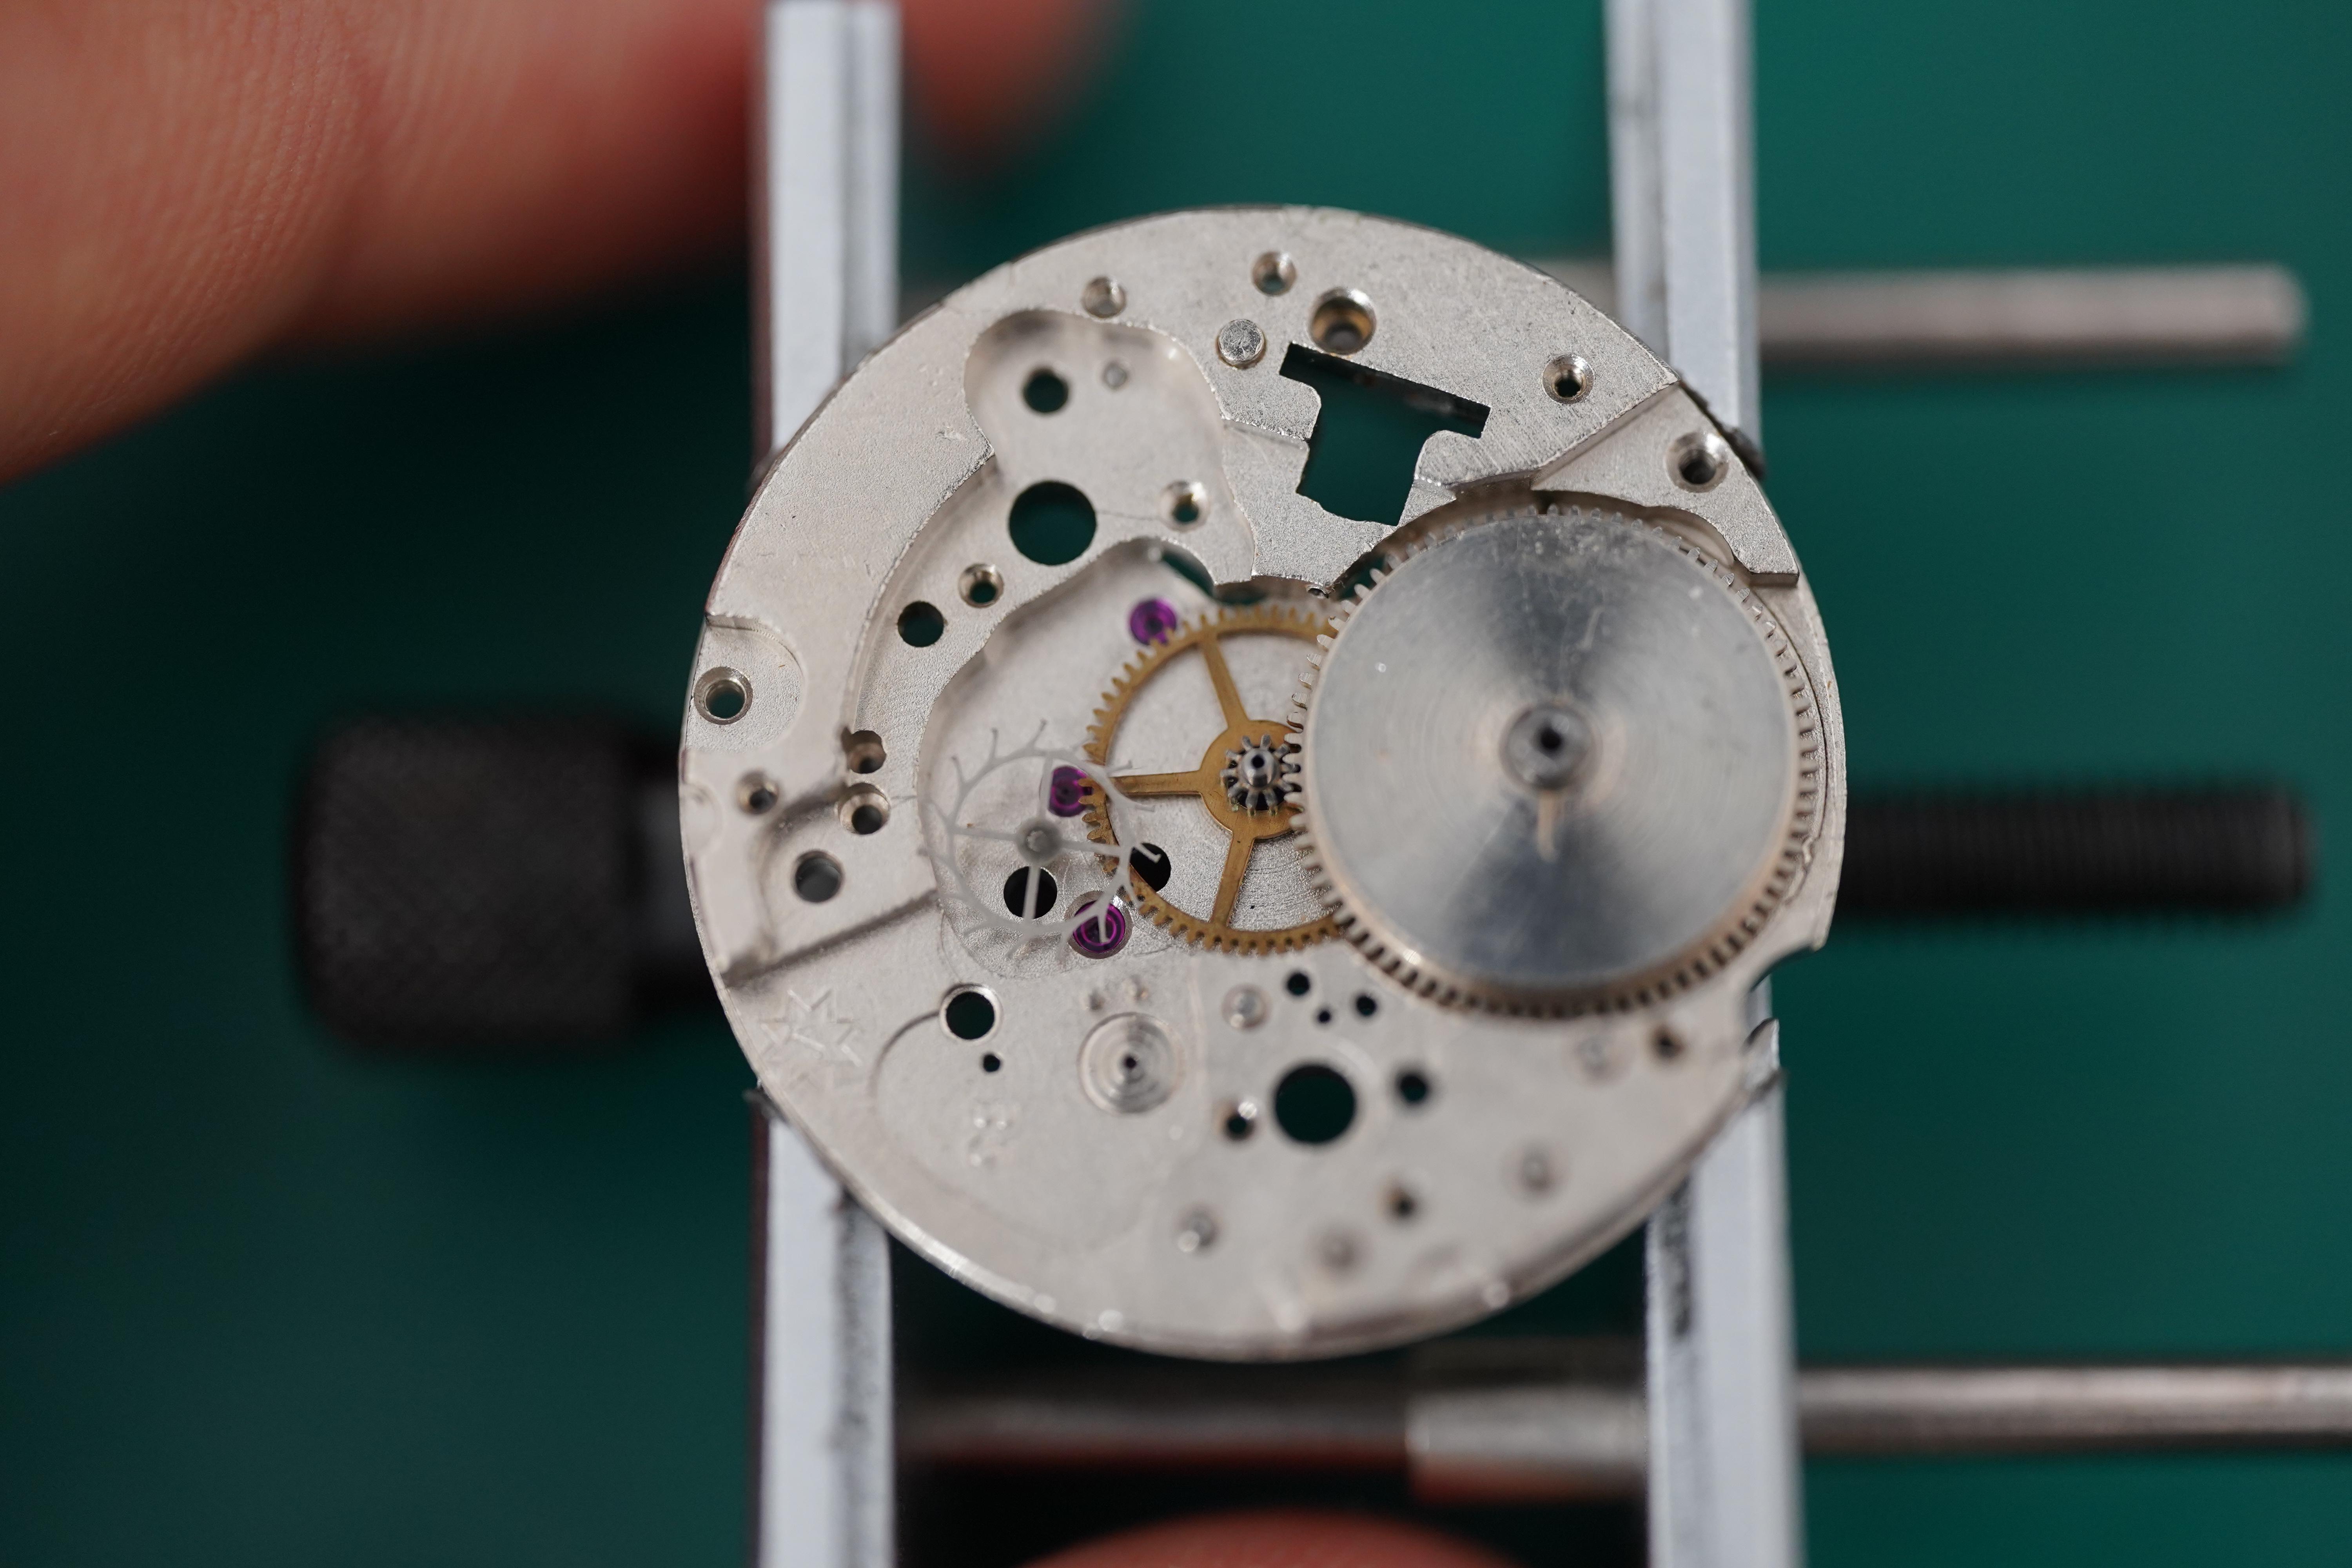
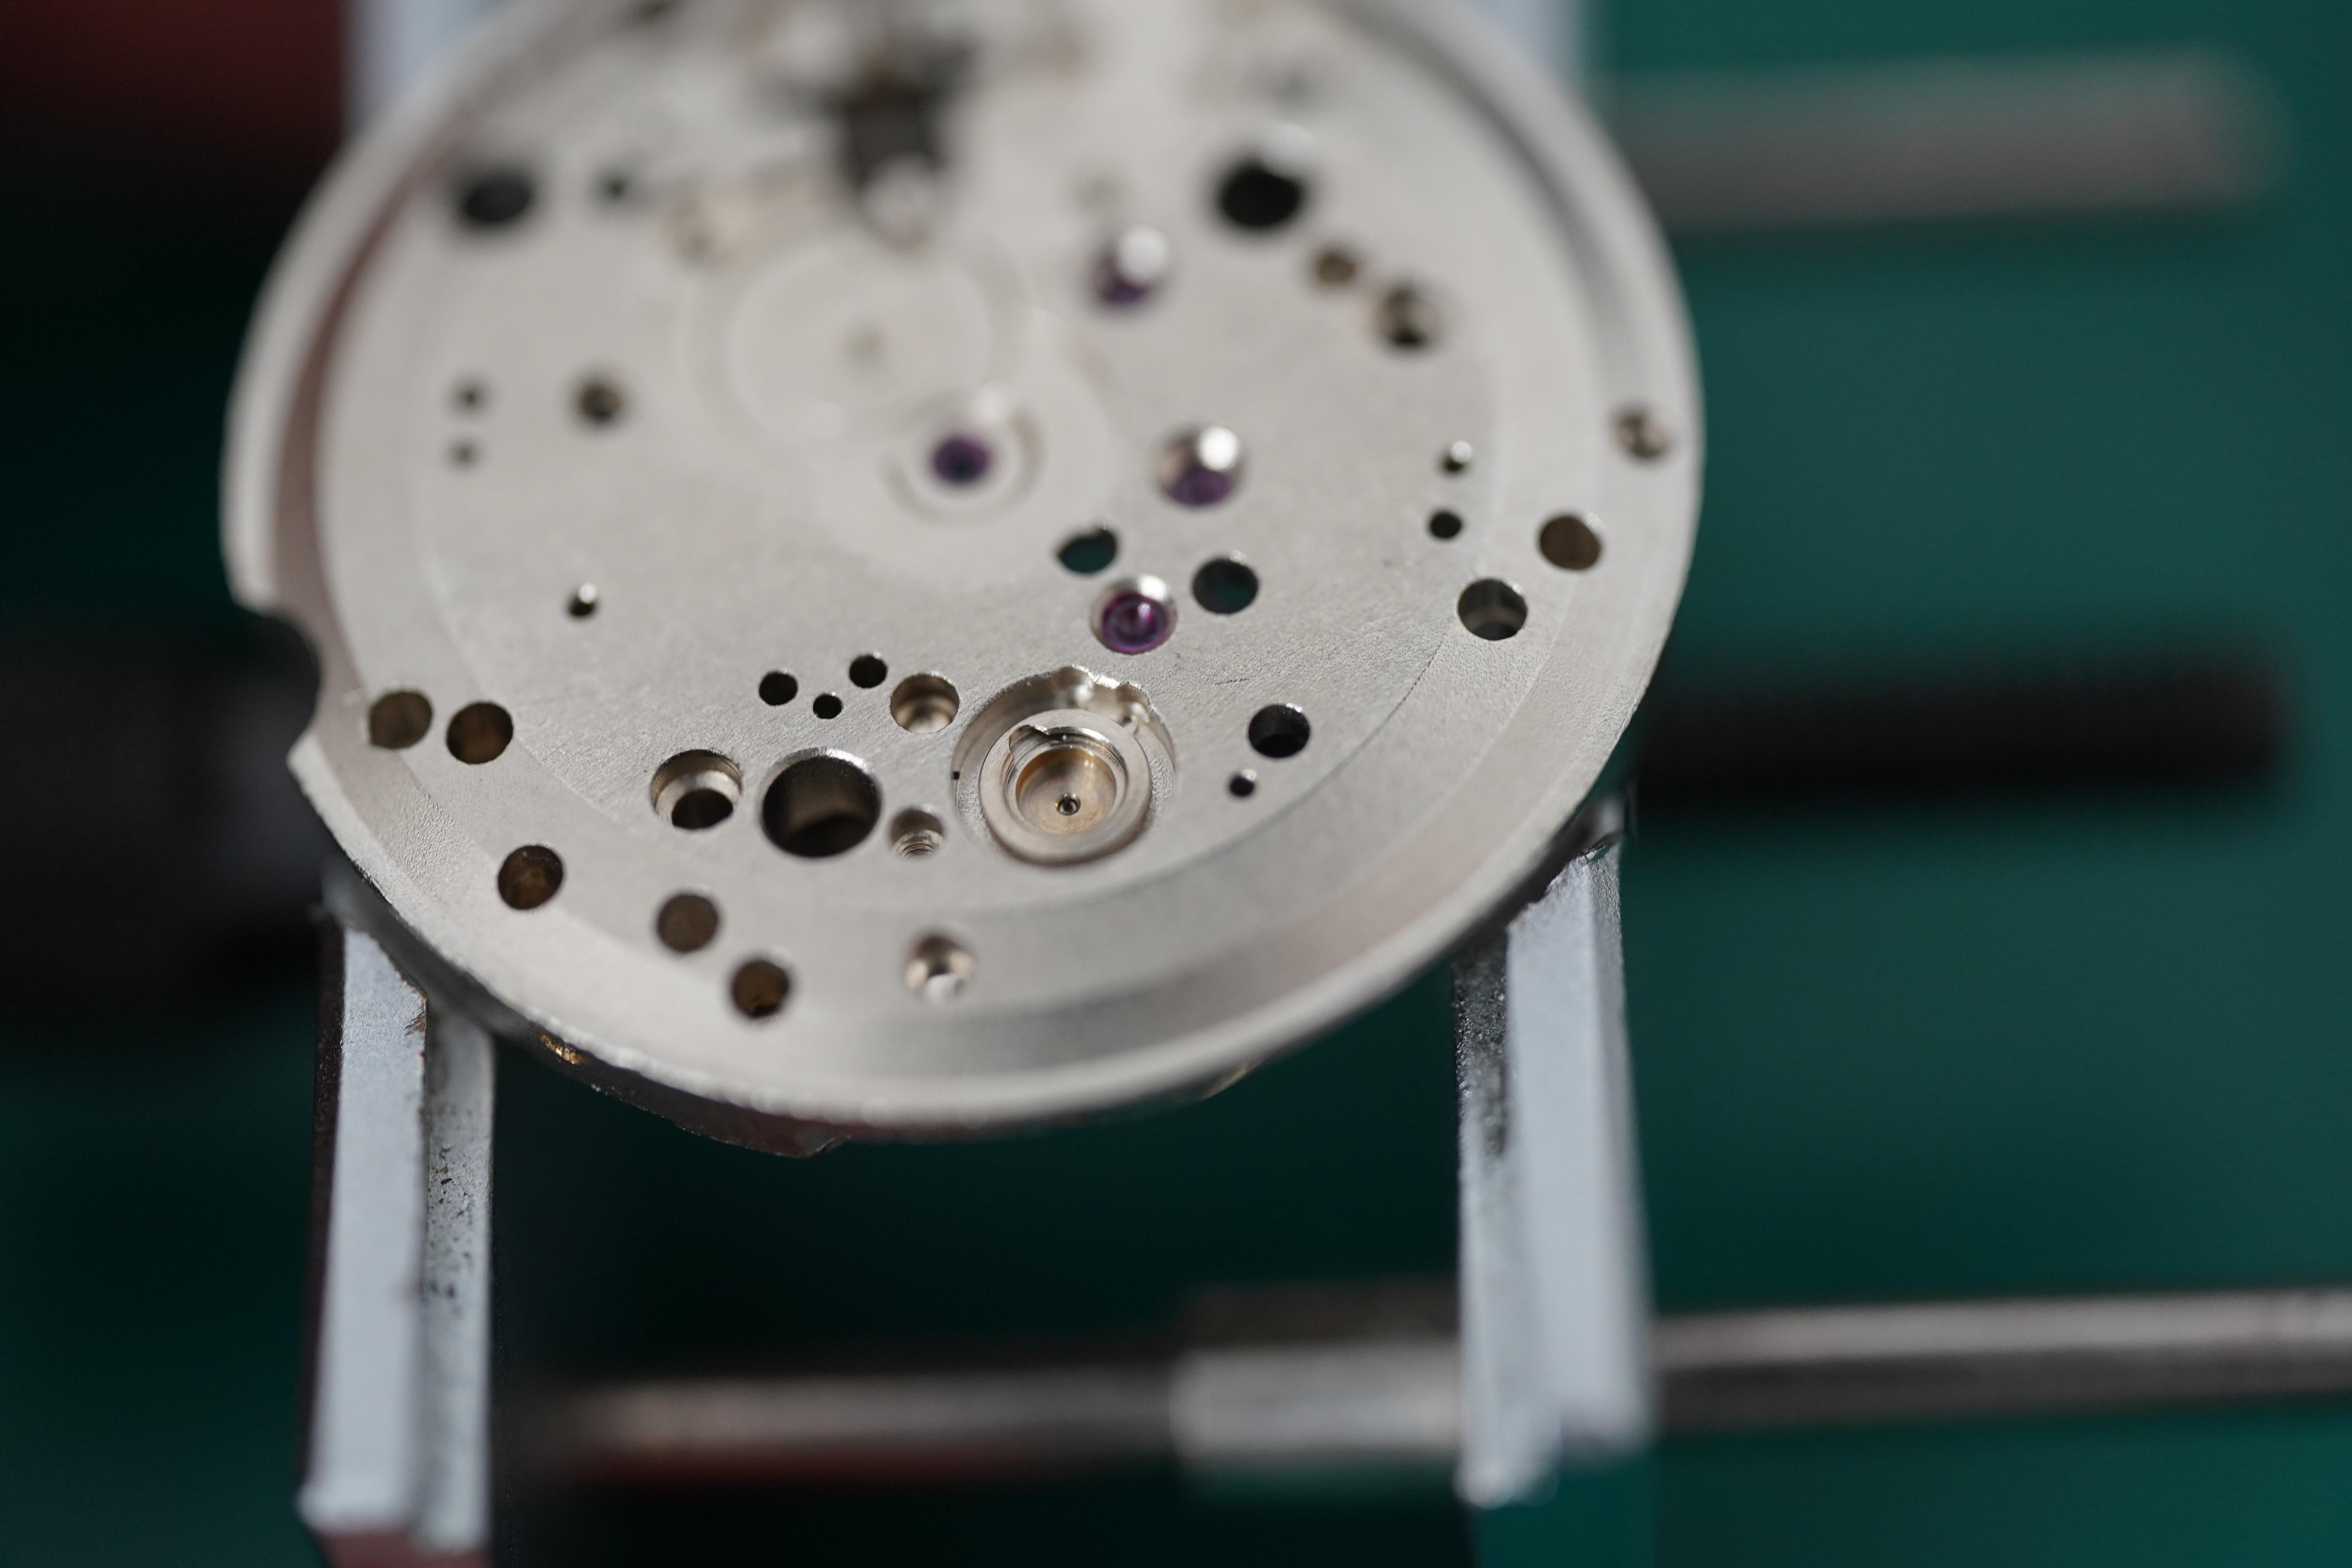
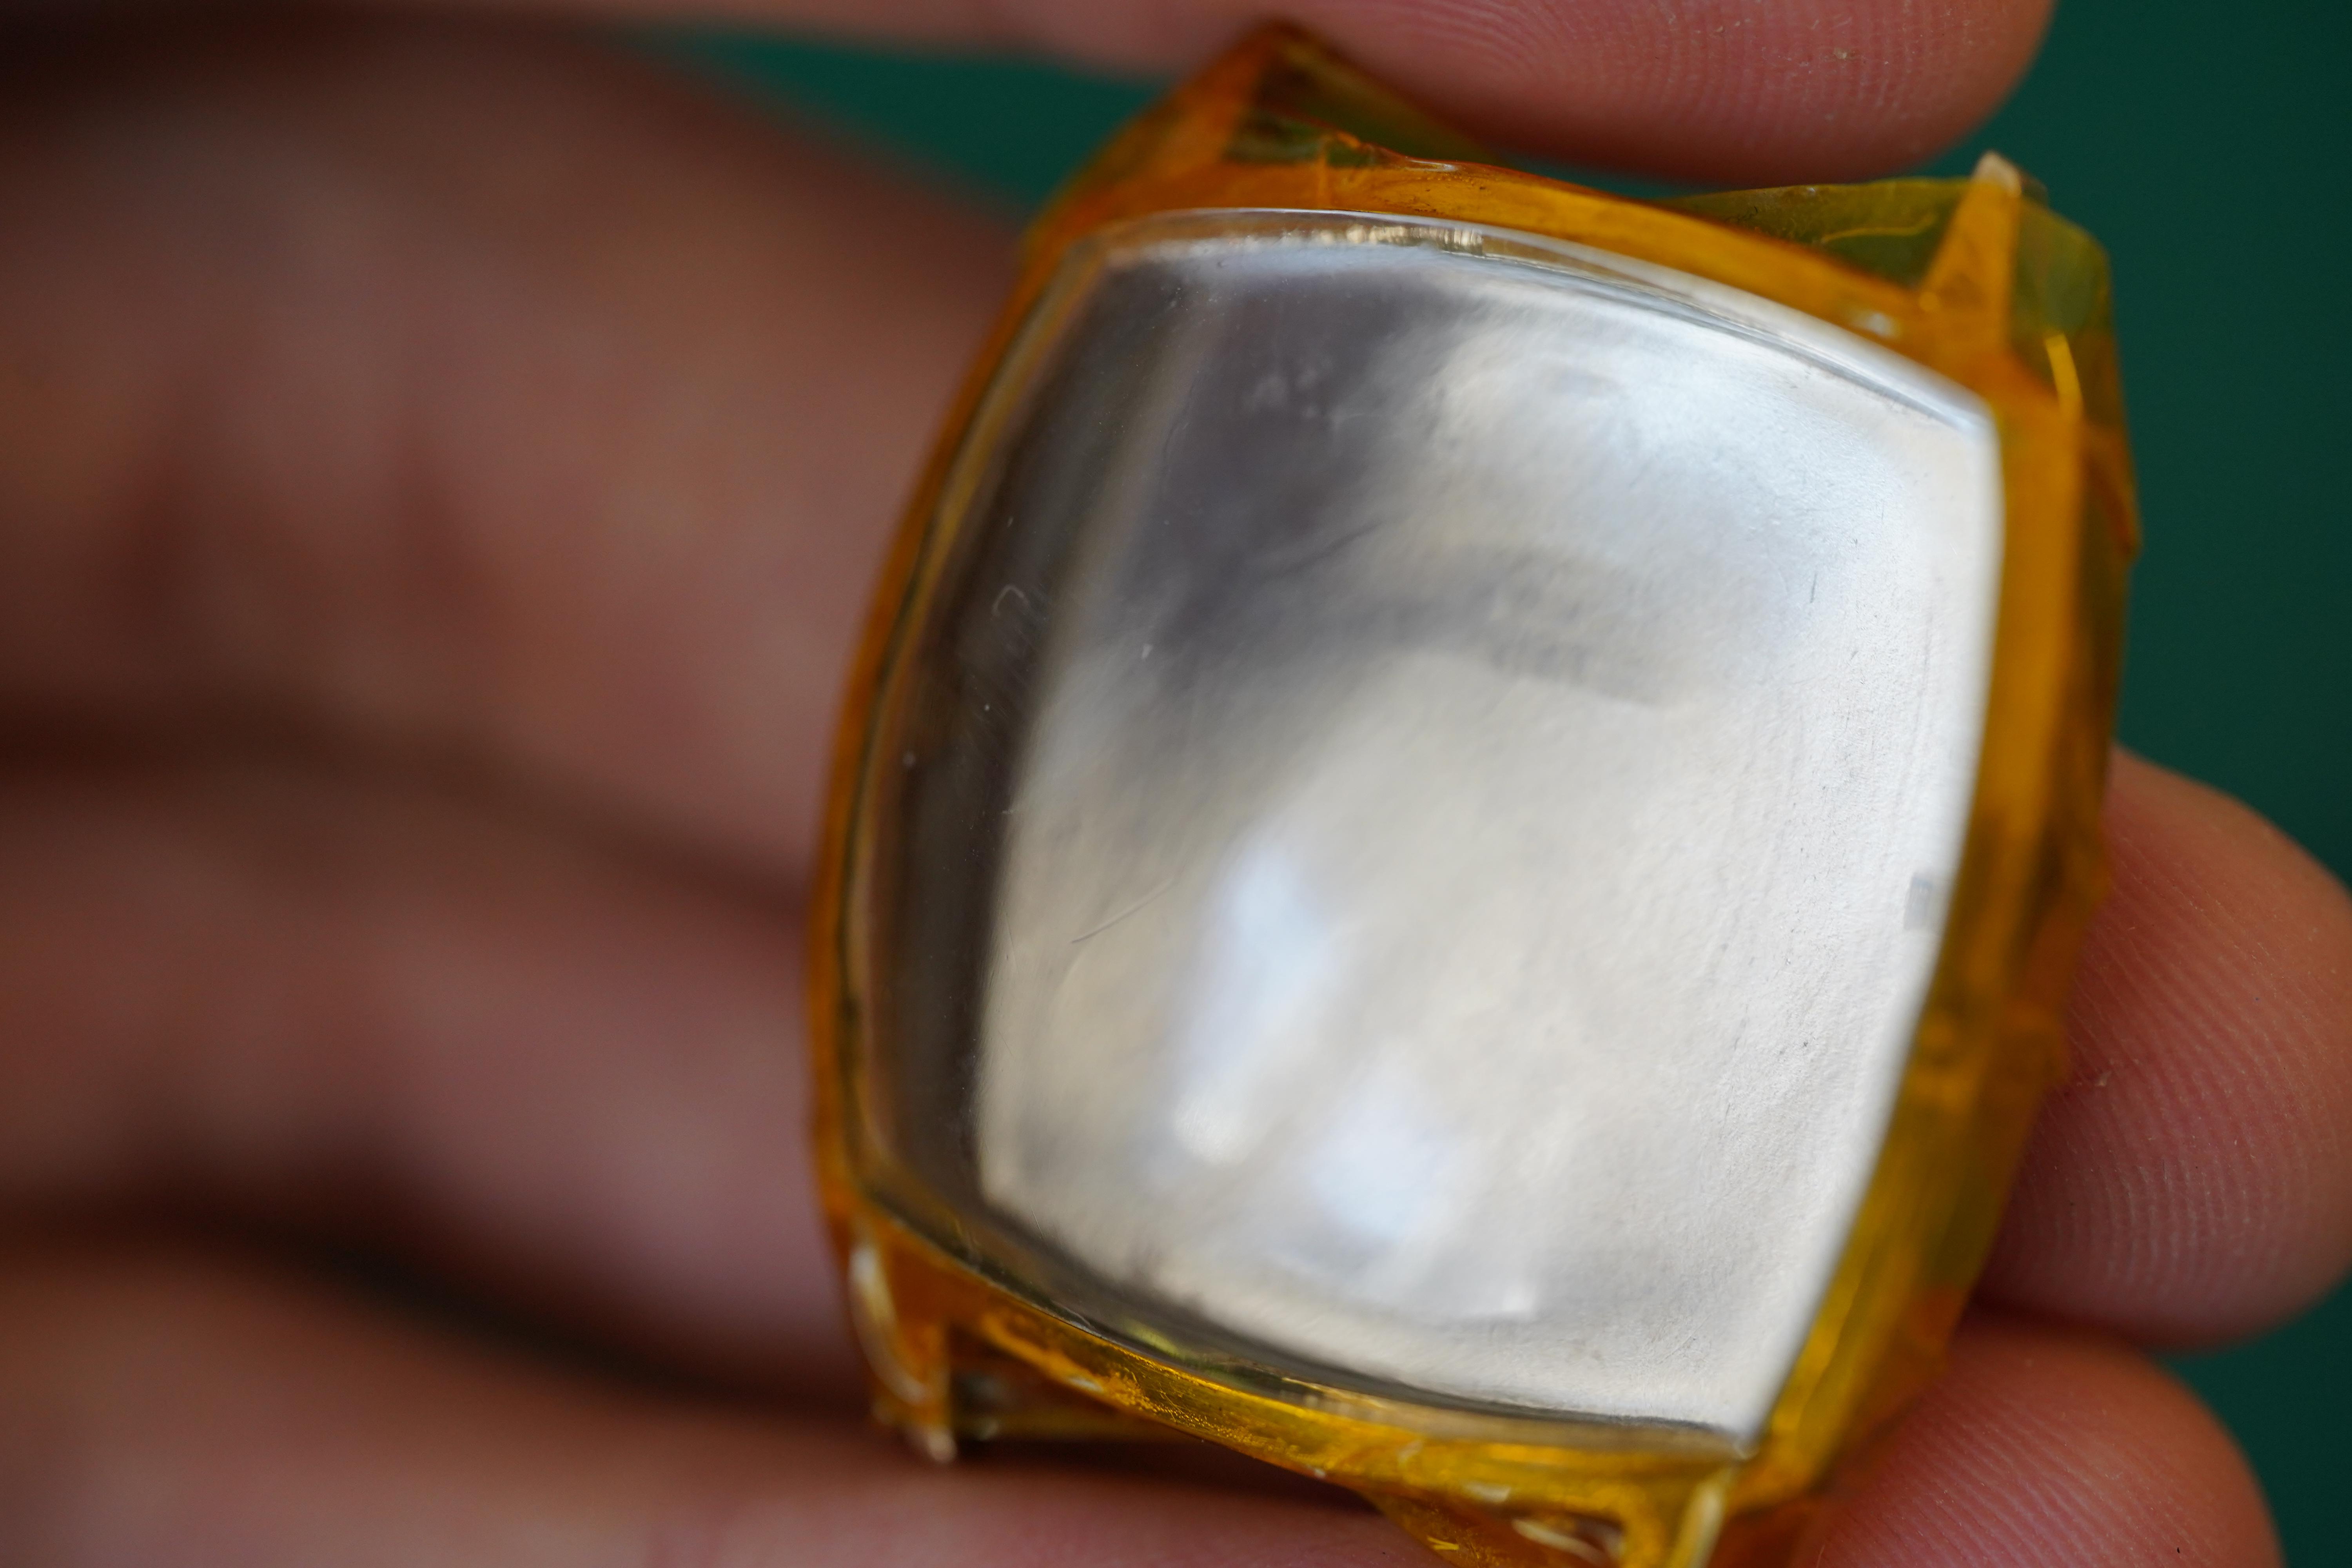
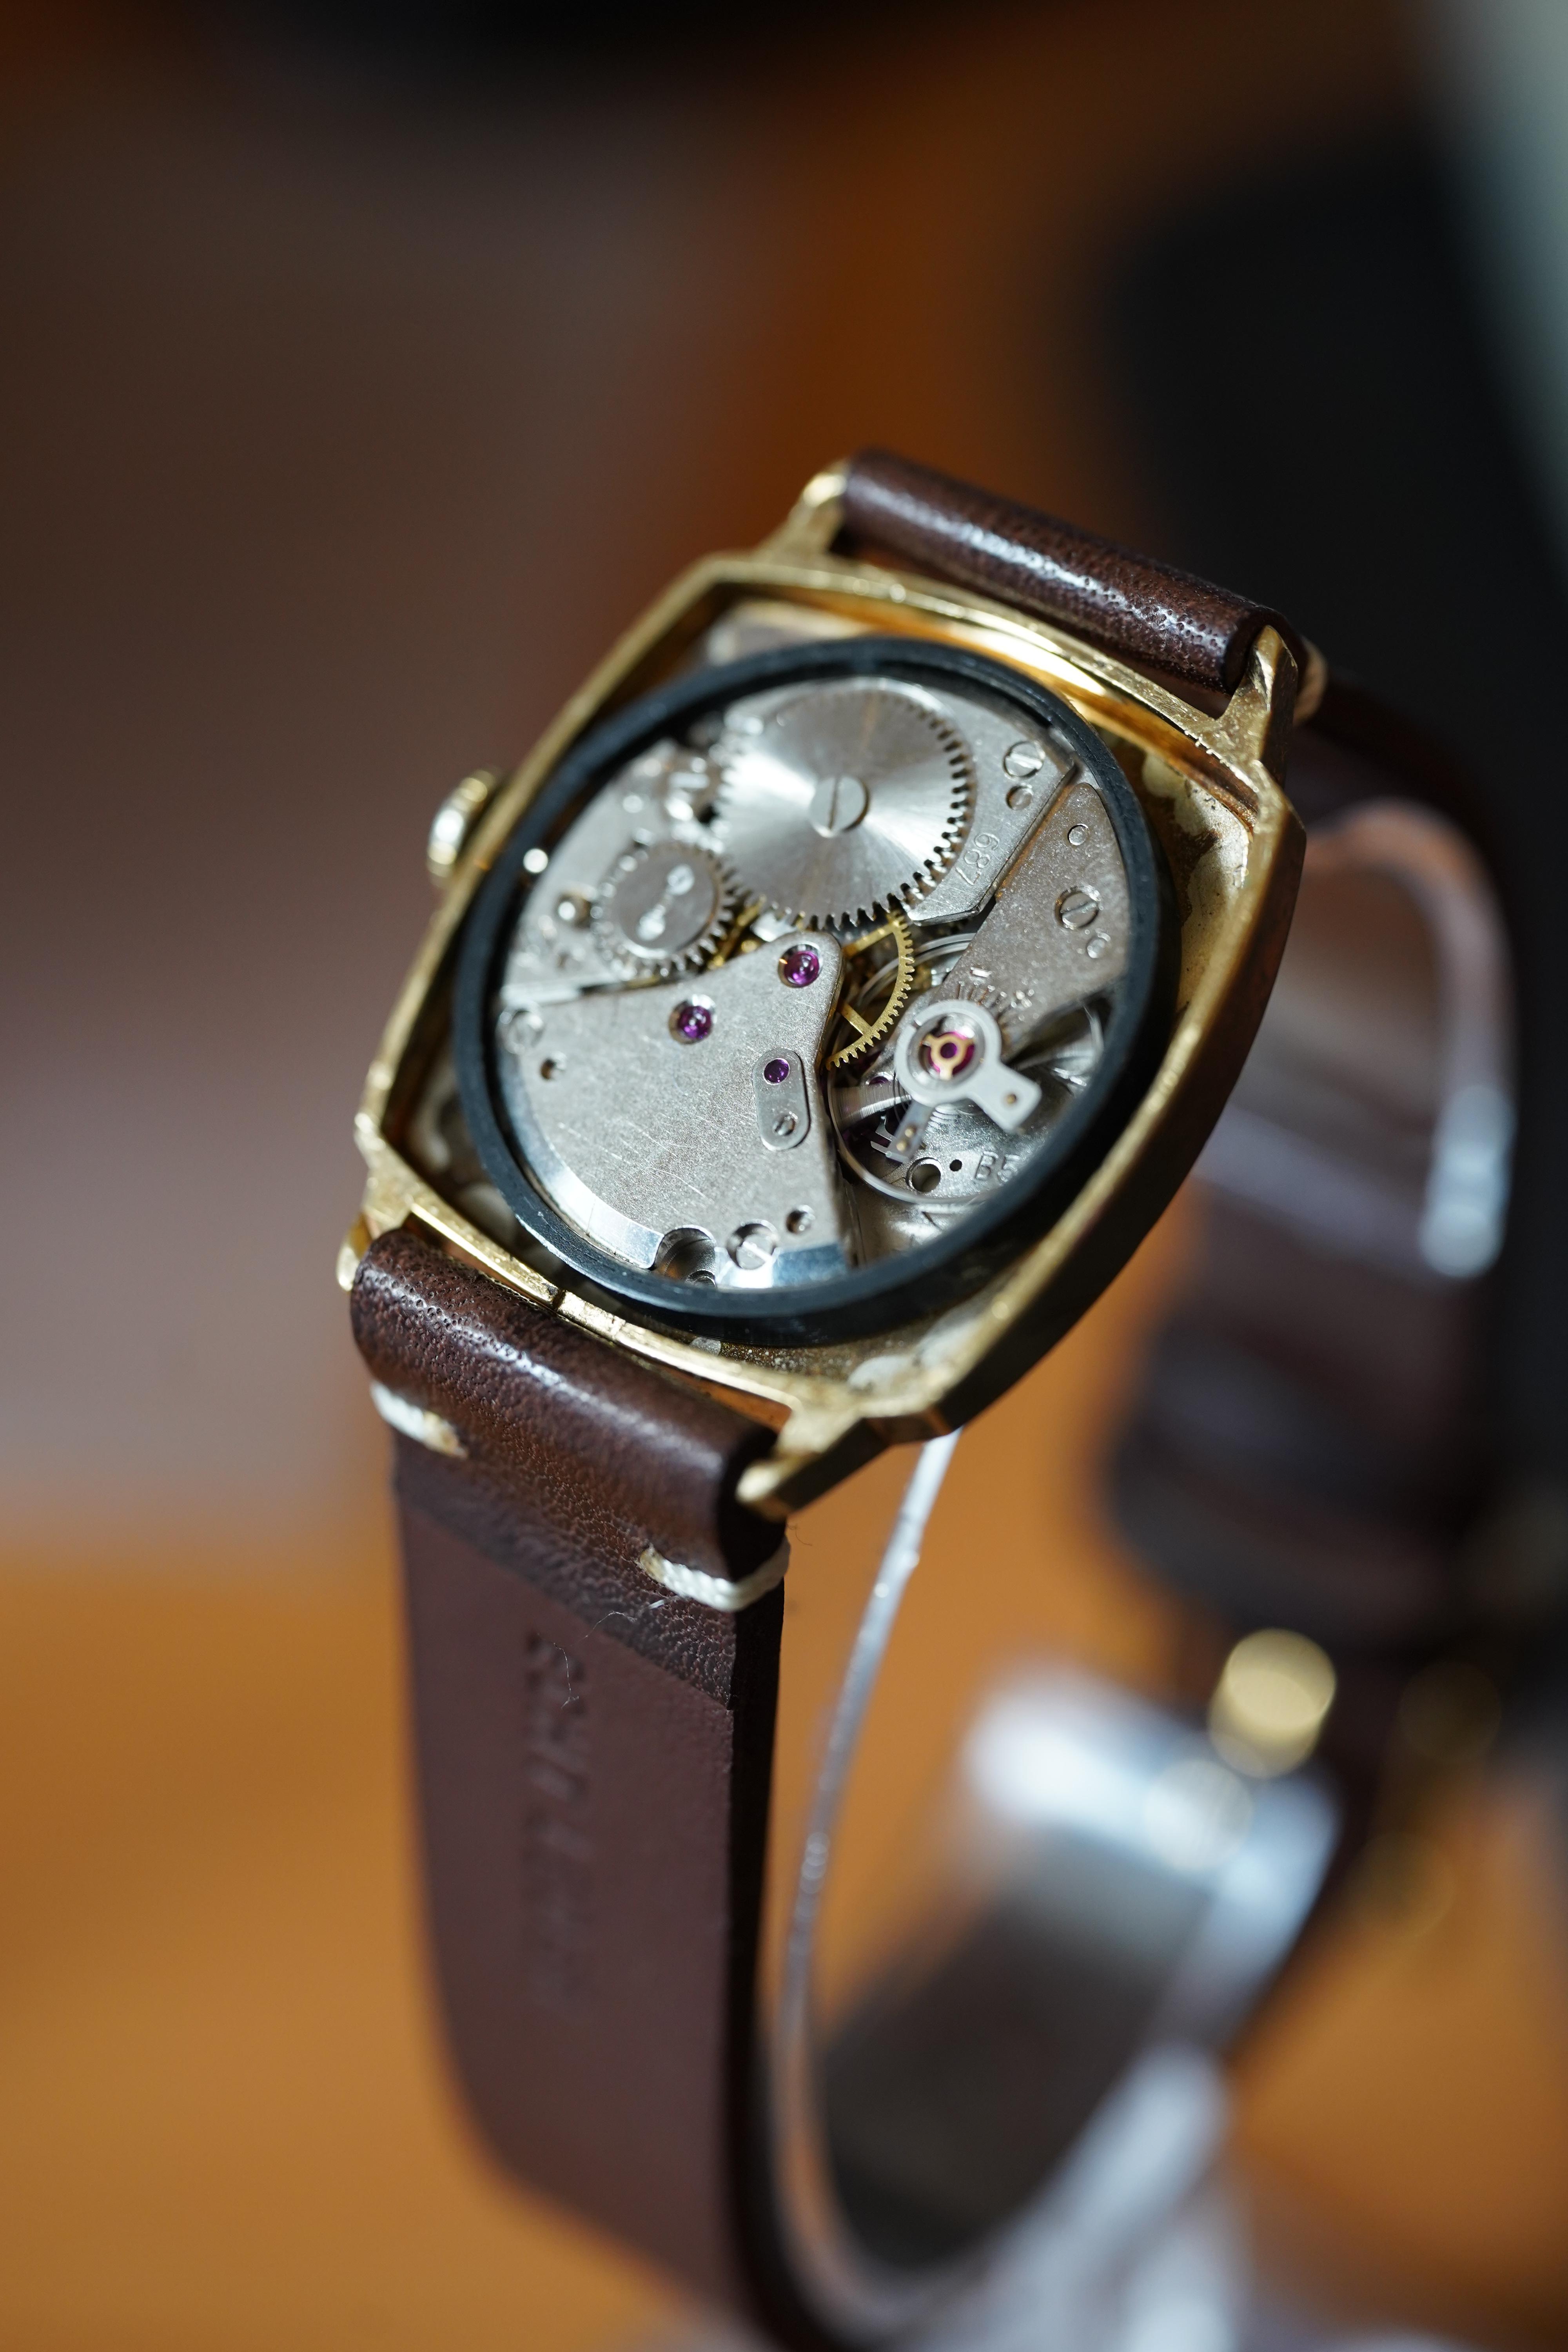
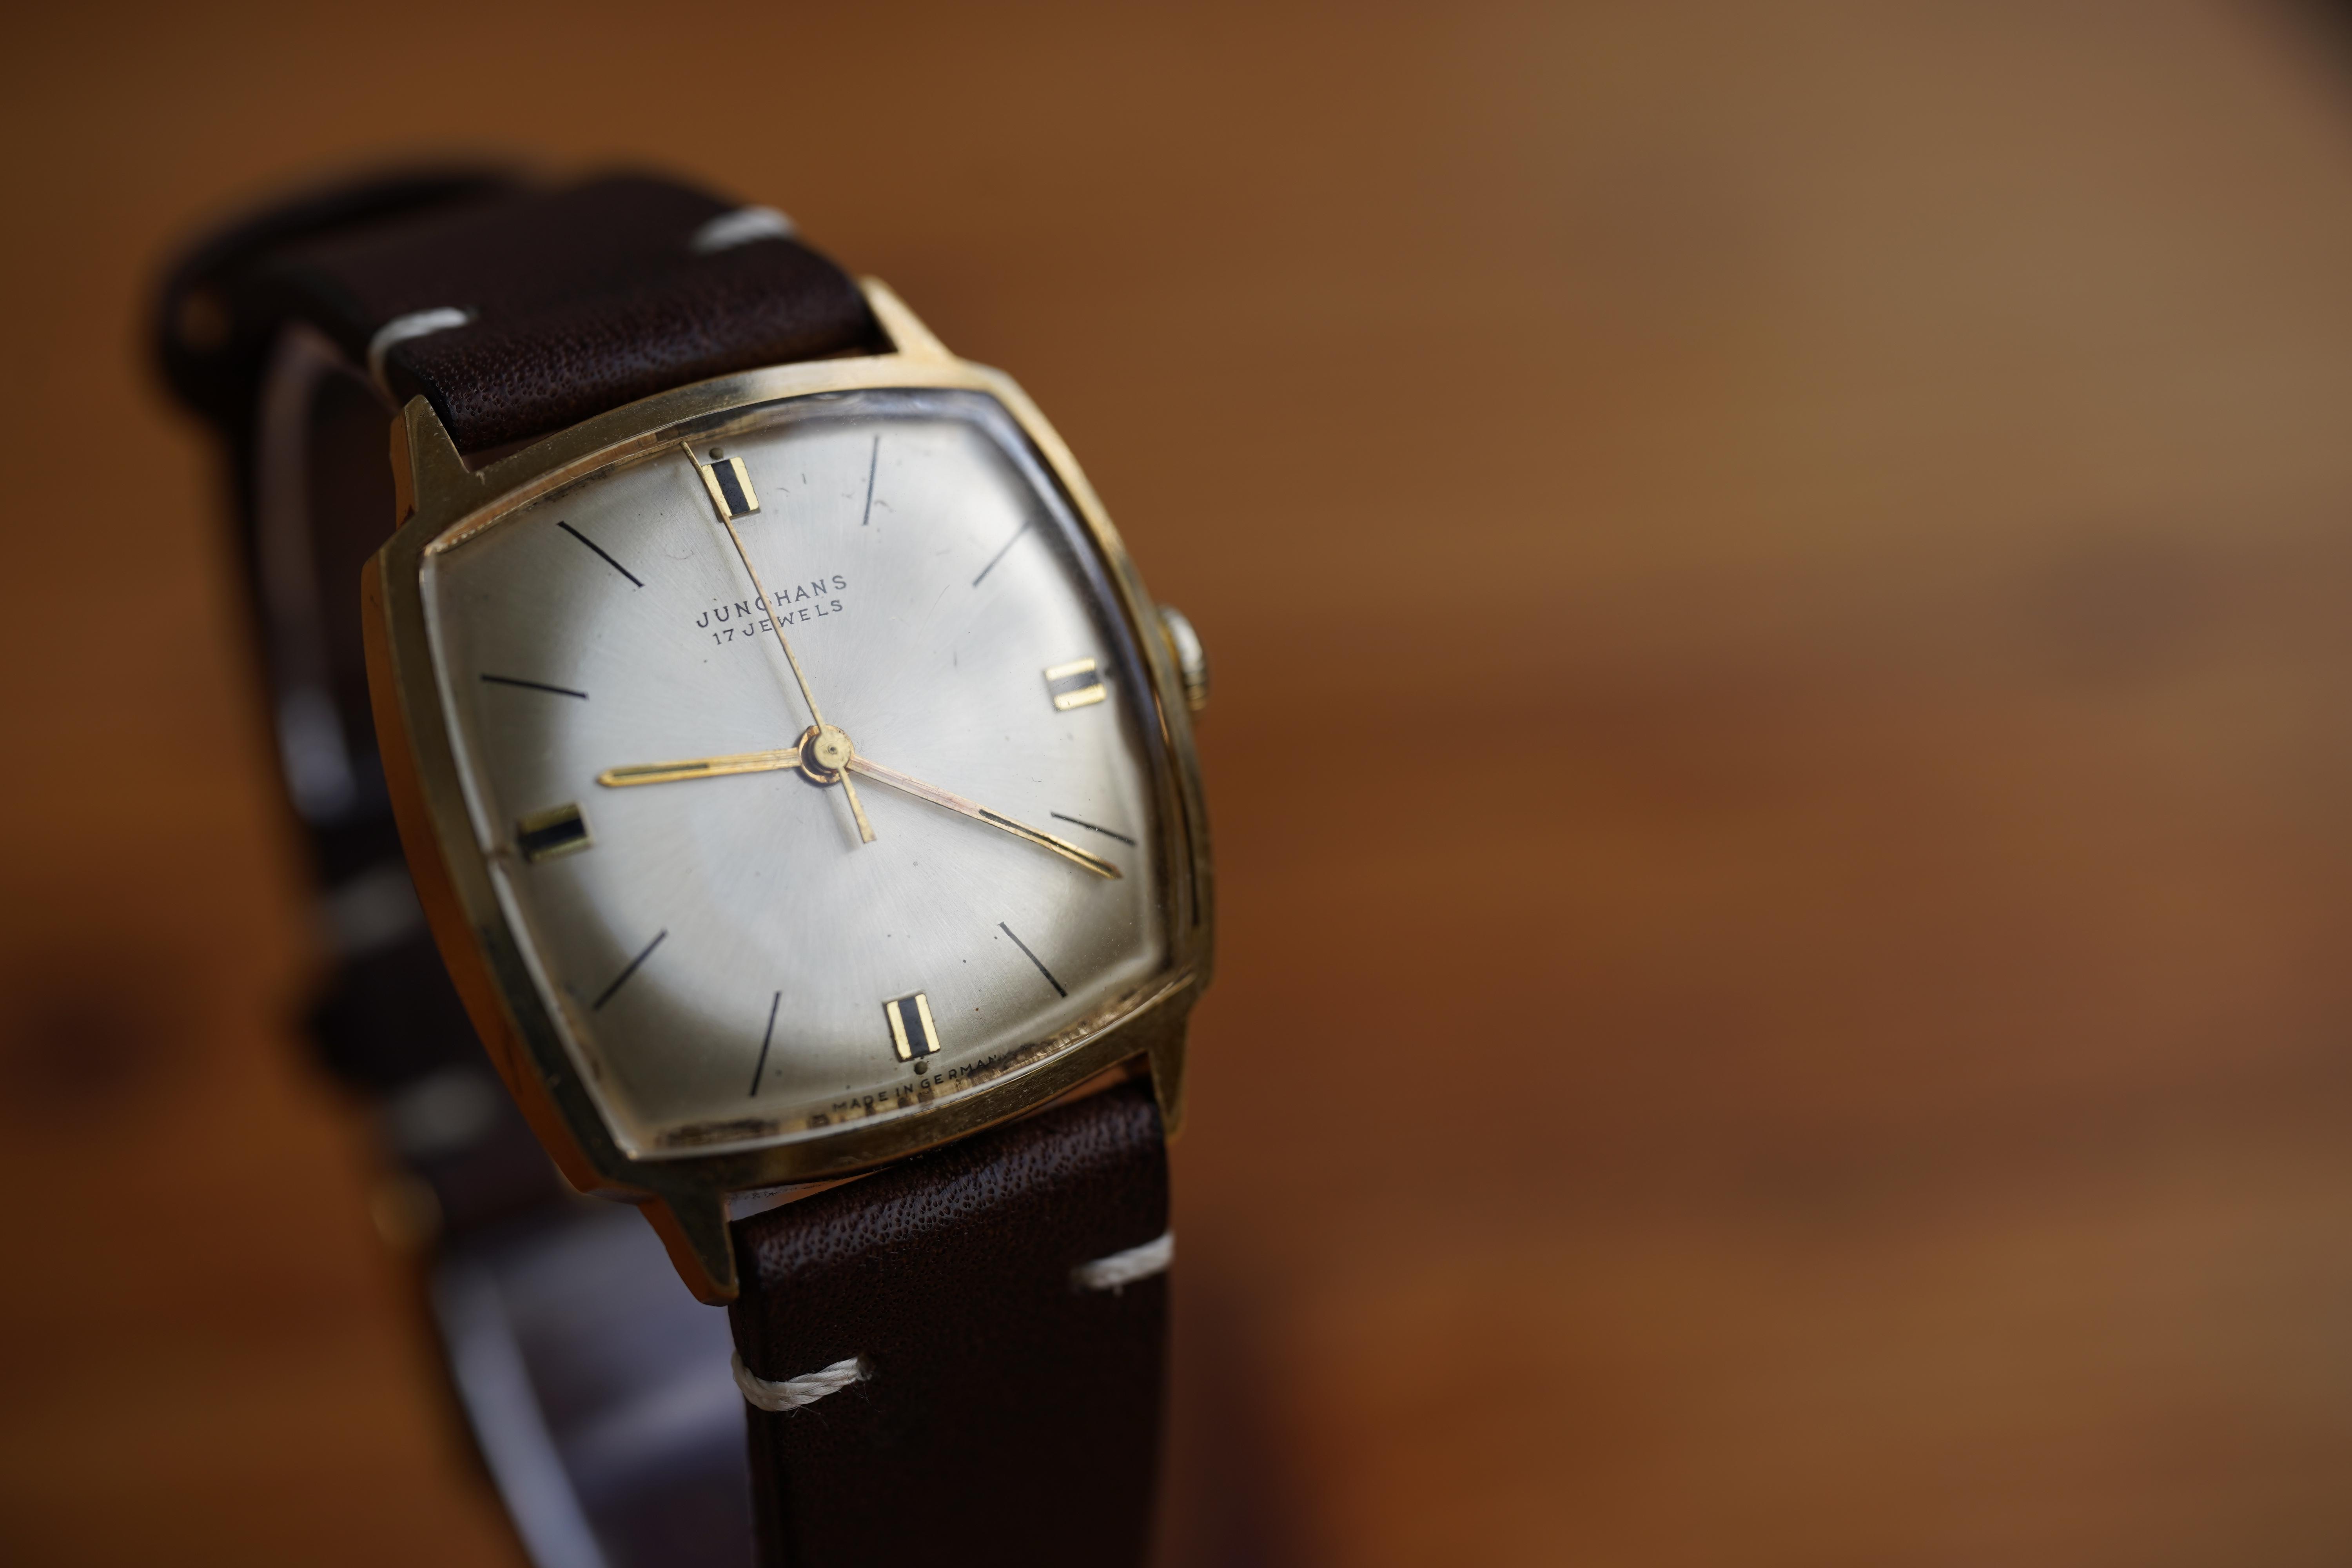
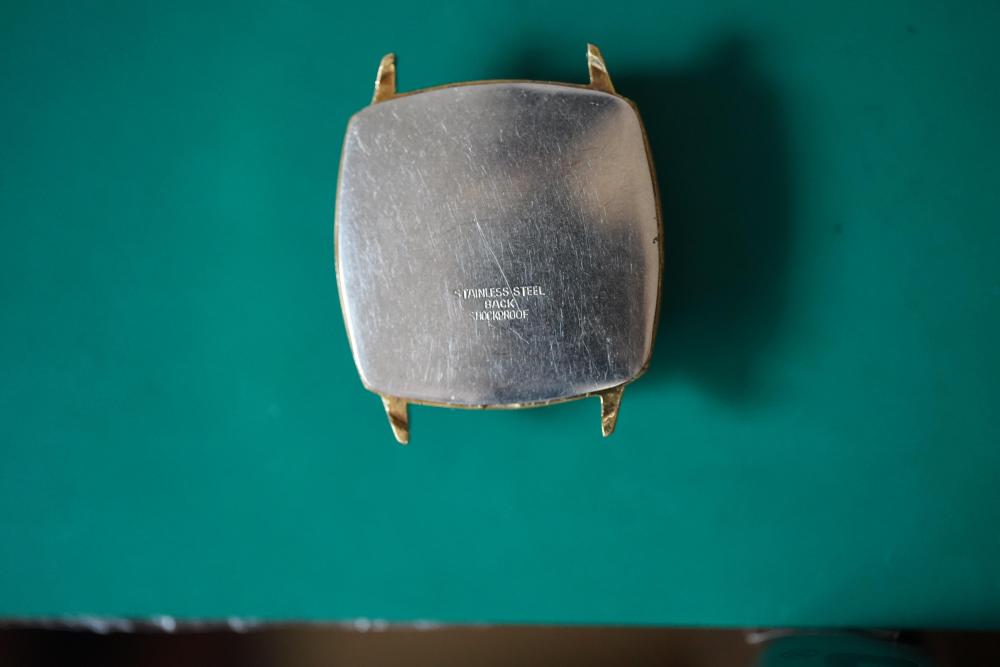
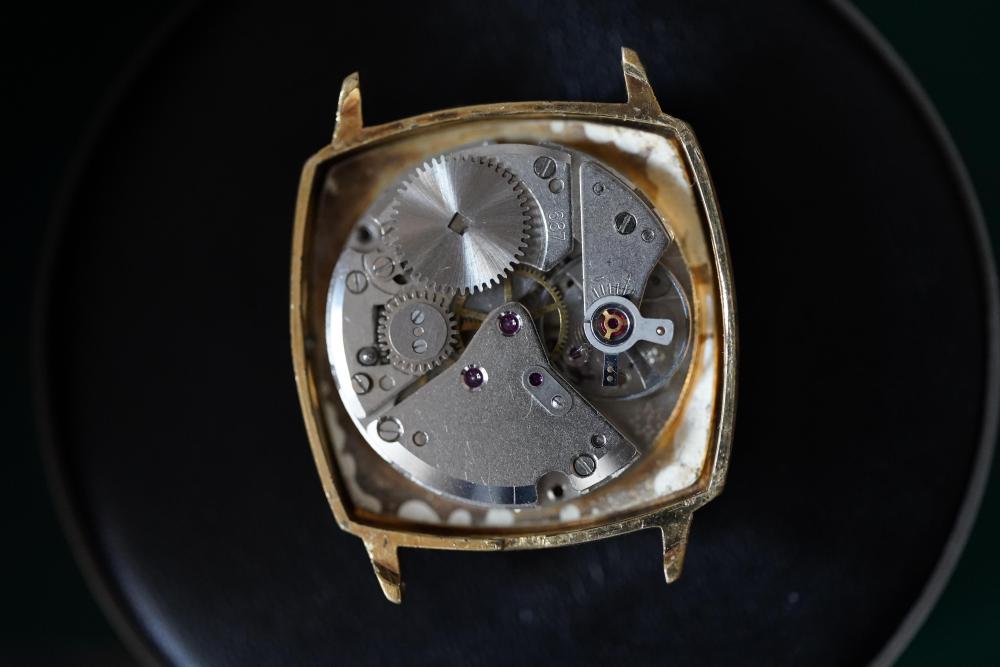
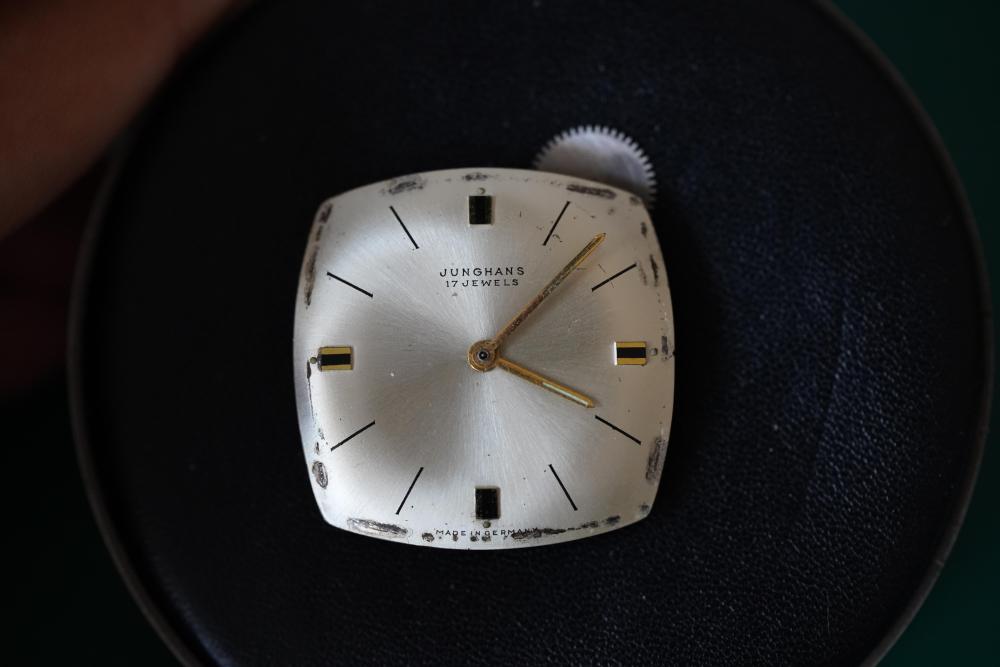
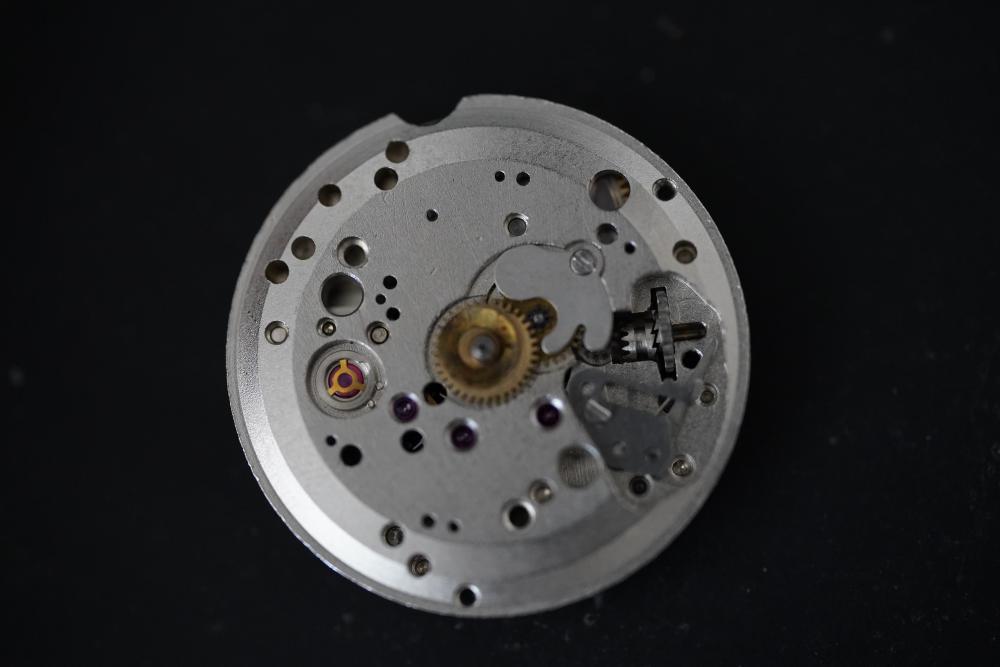
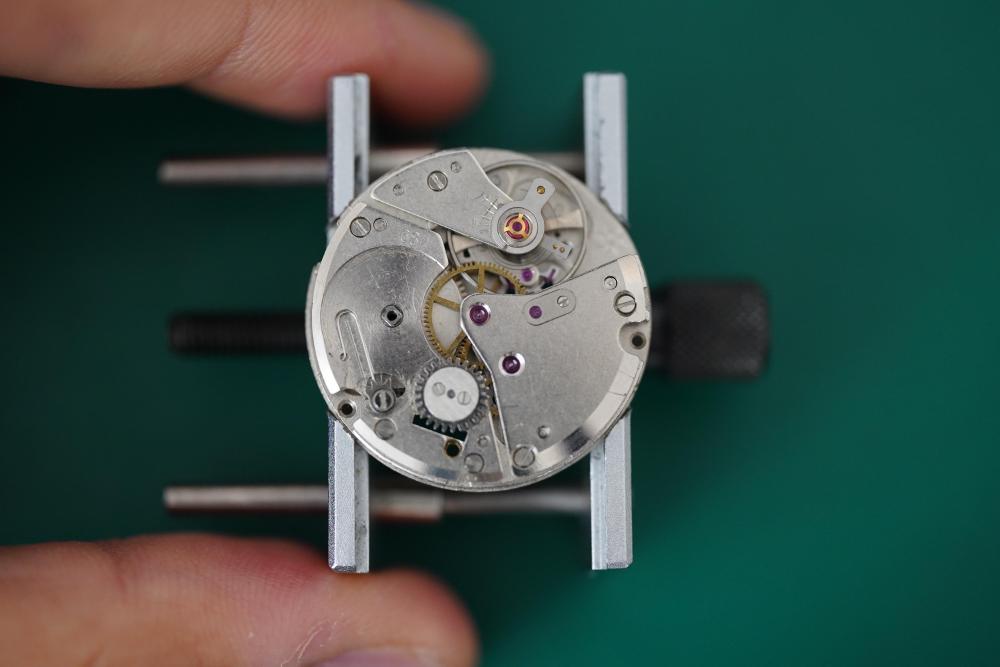
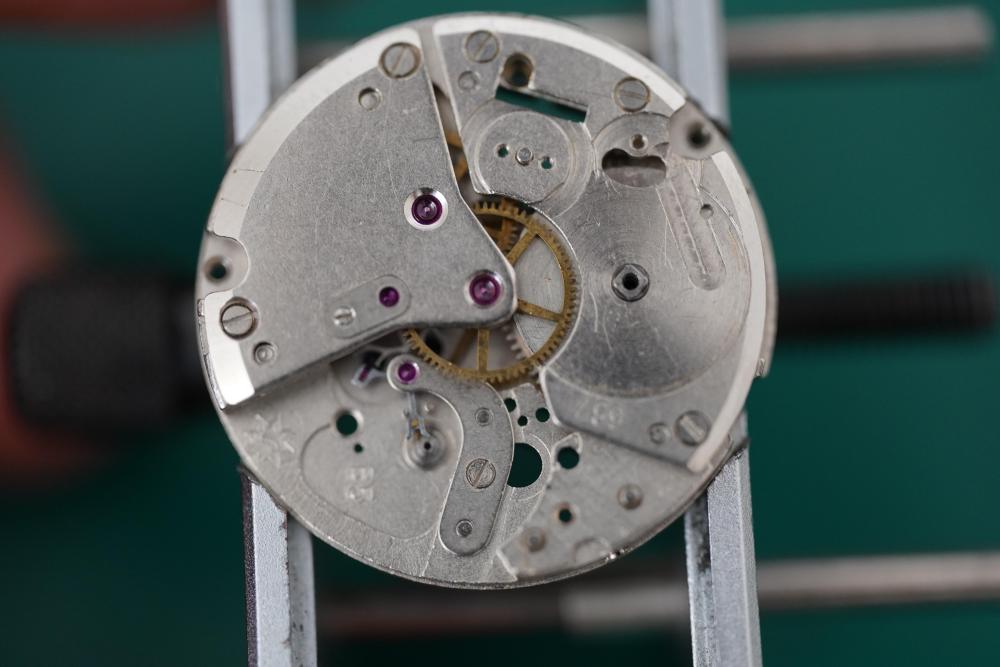
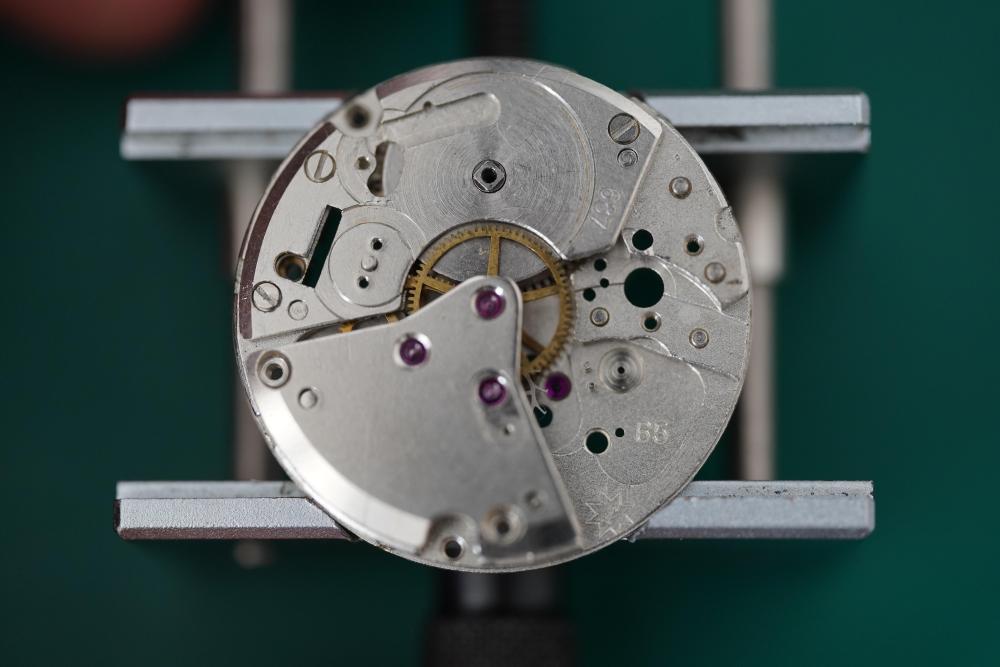
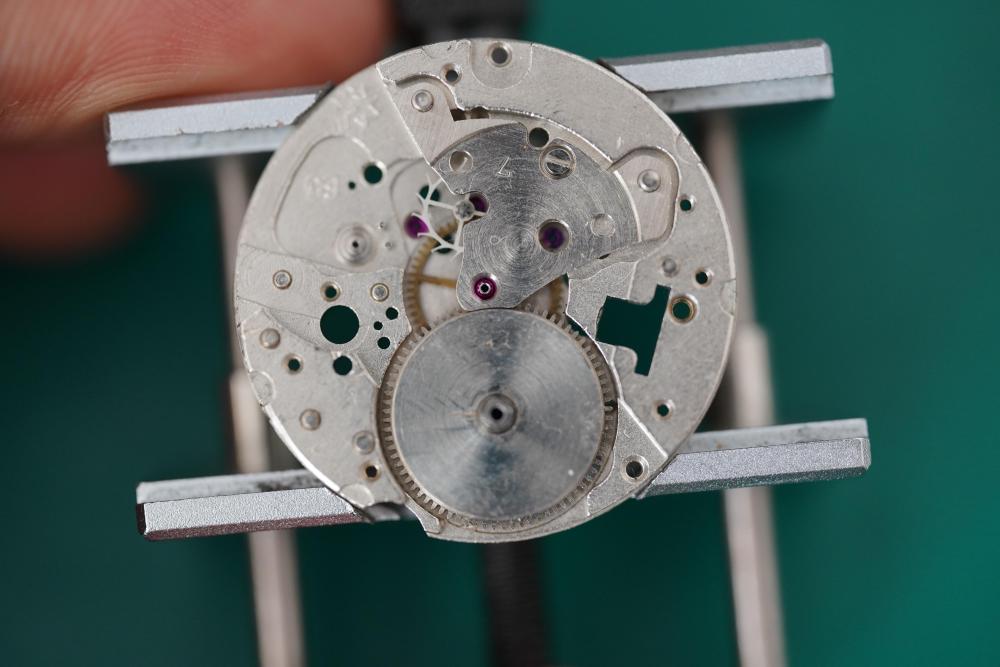
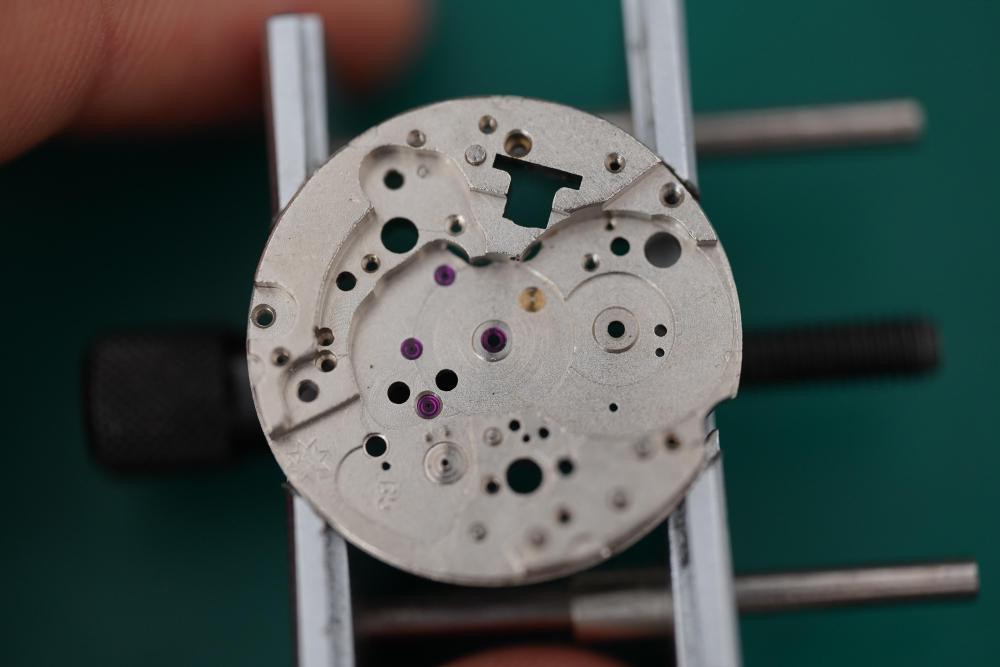
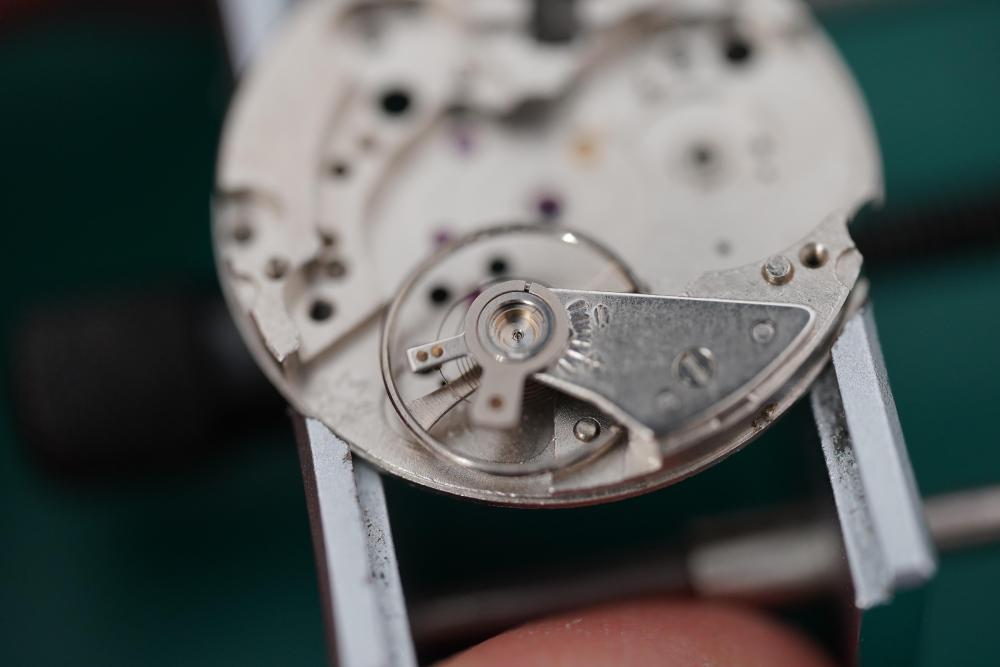
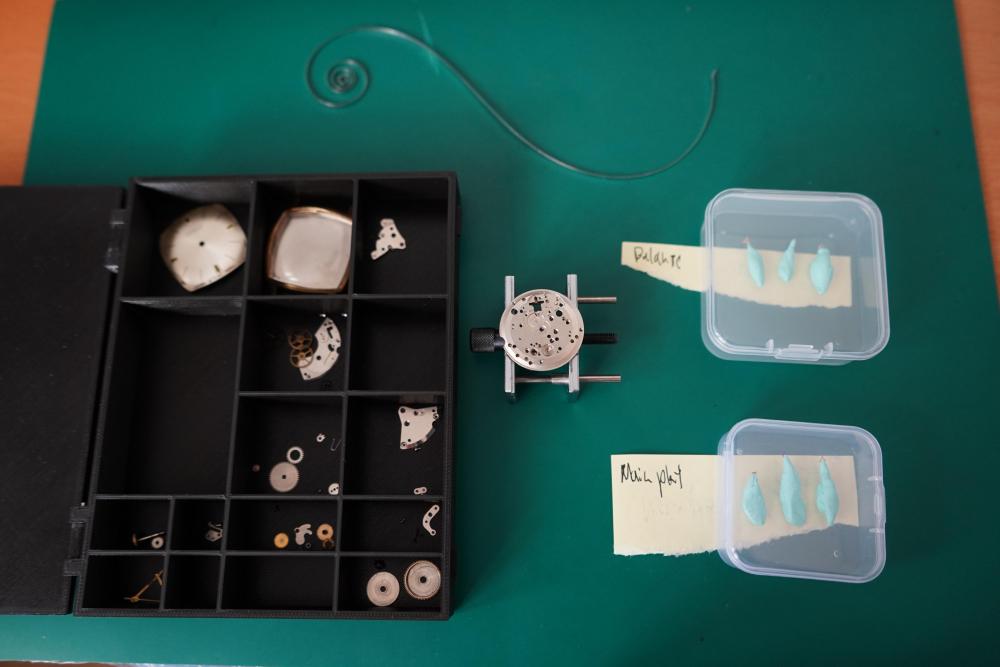
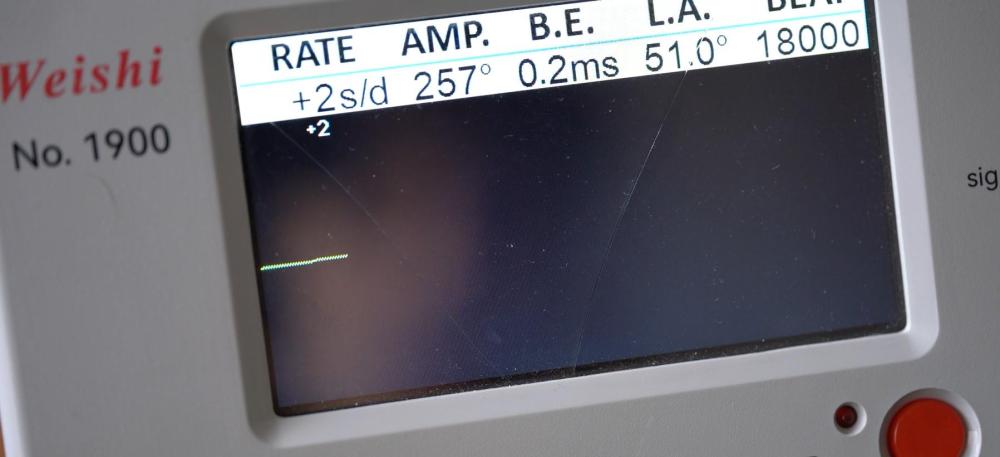
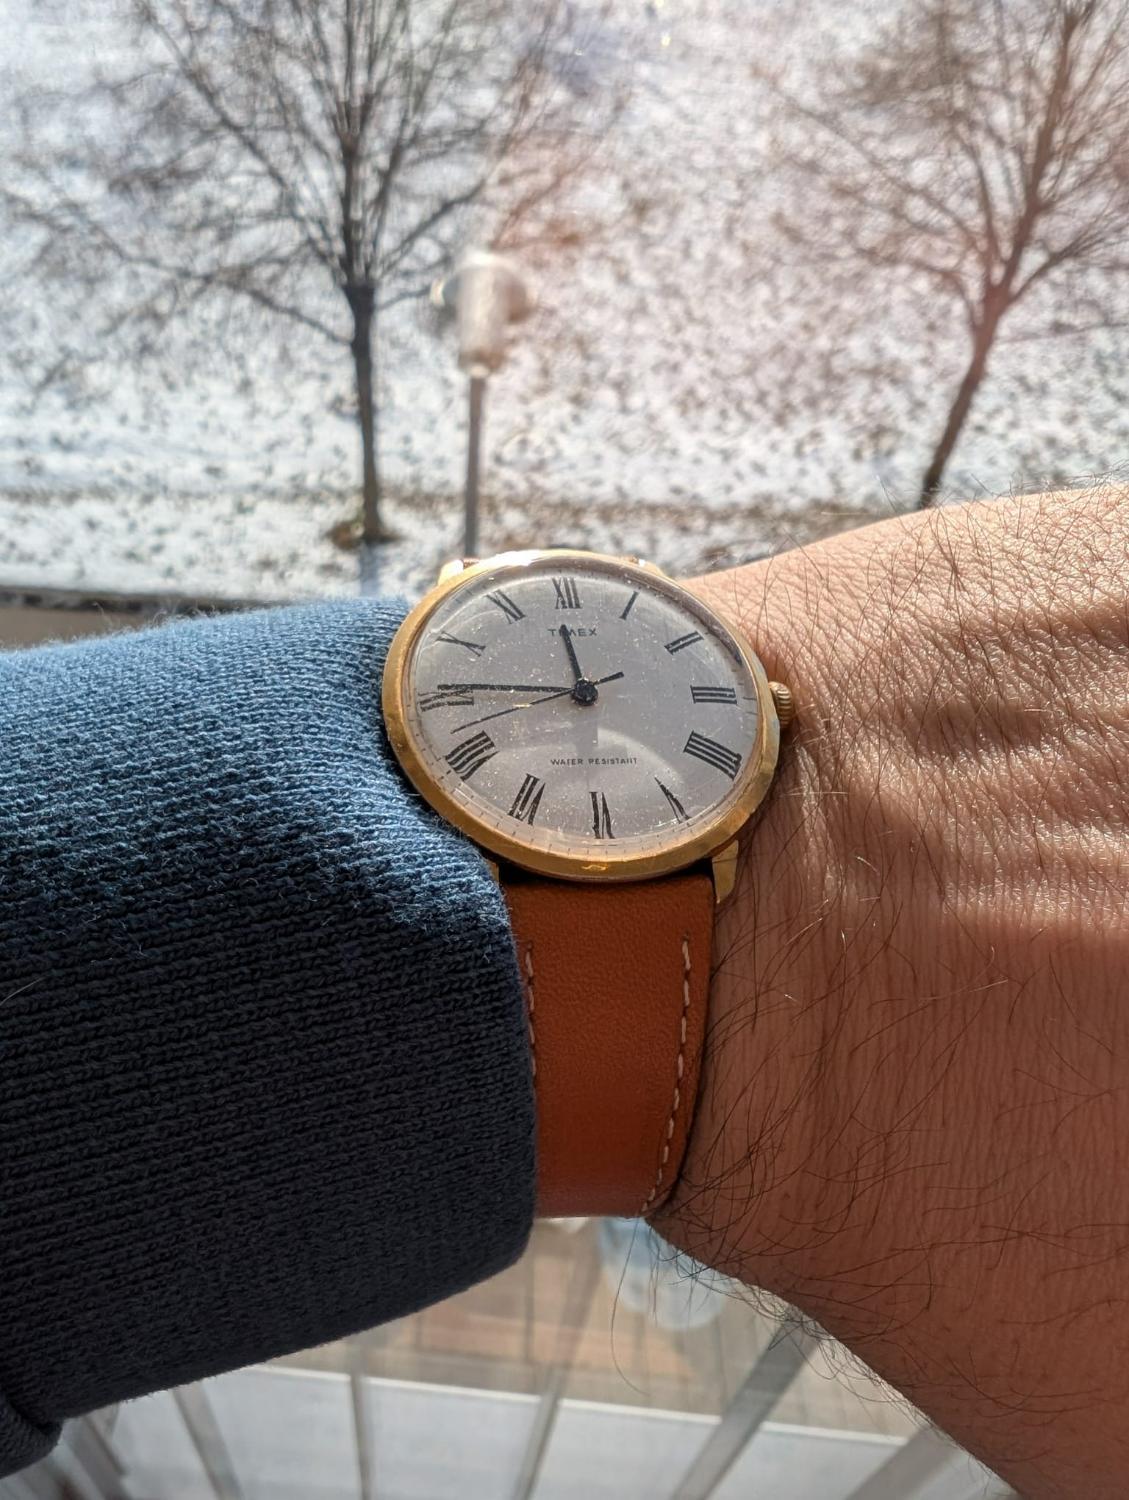
Hello watchbangers! I am back again with another walkthrough of a project which I completed almost two years ago already now! Wow does time fly, I would love to regulate that to go a bit haha xD. Now as I fixed up a watch for my younger brother a few posts ago, I decided that I would give my dad a pretty watch for his birthday aswell! Funnily enough, this watch came from the same lot of vintage Junghans non/runners that I surprisingly won on Ebay, from which my brother watch originated from! As always, for the ones to lazy to read or interested in a visual accompaniment the link to the 4k video: Now to the watch! It has a very nice curved rectangular case shape with ( what I assume ) is some sort of gold look a like. The caseback is stainless steel. The acrylic crystal is pretty scratched up and the dial does seem to have some sort of.. corrosion? Around the edges. I assume thta its either just wear from the dial edges rubbing against the case or that these used to be some sort of adhesive, which over time, just ripped of the finish or ate itself into the dial. Otherwise he obviously missing seconds hand is missing, the watch is a non runner and when shaken does have some clanking sound. I opened up to be surprised with a missing ratched wheel screw. So thats already one things less I have to worry about haha. The design in pretty simple, what I liked about this calibre is the crown wheel which is held down by its core, the huge balance wheel and the big cap jewel used in the shock system. What I do want to point out is that there is literally no method of movement fixation to this model. There are taps for screws which fixate the movement to some sort of holder but those are both missing. I came up with a pretty neat fix for that later on down the road. Now I removed the stem and de cased the watch from the back. You can steel see the ratchet wheel that I didnt remove at that point behind the movement haha. I removed the hands and the dial to completely free the movement from any outer parts. It reveled a pretty smooth looking movement! And again that fat cap jewel on the movement side aswell. Took of the cannon pinion, the hour wheel, the minute wheel and the setting wheel with its cover Removed the clutch wheels ( dont need them to remove the mainspring power as the ratchet wheel was nit attached) and the cover plate for the gearless works. Then took out the yoke and the yoke spring before turning the movement around. On the barrel bridge we see the caliber number for this watch „687“. This movement was made around the 1960s, however I cannot pin point the exact date as I do not rememeber and did not take a picture of the stamp under the balance cock which shows the manufactury date. Of course the balance comes off first as a precaution. This revealed the typical Junghans Star logo. As the incomplete click assembly system was smiling at us here, I immediatly took out the click and the click spring. Next, I removed the crown wheel and its core by unscrewing both screws. Then I took of the cap jewel from the escapement wheel and the pallet fork bridge and pallet fork. Off with the train wheel bridge. The brass from the second hand wheel is pretty stained , hopefully it will get its shine back after a good cleaning! Off with the second hand wheel and the third wheel. Then I removed the minute wheel bridge. What I found cool is that this bridge also had the number „1“ stamped into it. Maybe that would help for the reassemnnly or it could help pinpoint the production batch? Removing the last three components: the mainspring barrel, the minute wheel and the escapement wheel. Taking in the mainplate all naked shows the nicely sandblasted surface. Of course I cannot wash the watch without taking out the shock systems. Here picturs of the extremely empty looking blocs without their huge stones haha. A total overview of all the watch components including the unwound mainspring. Then another picture of the watch during the cleaning cycle. I think it just finished the first rising phase here. Now for the reassembly I literally just worked my way backwards from the step I just described and just lubricated aswell. Here the lubrication I used with the places: Moebius 9010 : Second hand wheel, escapement wheel pivots, Moebius HP 1300: Slower turning wheels such as the minute wheel, third wheel the the barrel arbor and the barrel pivots. Additionally I added some to the pivot swhere the transmission wheel and the setting wheel (in the front side) would run around. Moeius 9415 : The Pallet fork jewels Molykote DX : Friction points in the gearless works. As the crystal was a bit scratched up I worked it over with some polywatch and got some case shine back by using some jewelers cloth to polish the gold colour. Now regarding that movement fixation issue that I described before! After researching a bit online for donor holder rings or screws, I came up empty. I settled on designing and printing my own holder ring which would not hold the movement in place with the screws, but by the locking force when the case back would be wedges between the the case and the holder ring. Here are a few pictures of its creation. With the watch „complete“ again, I put it onto the timegrapher again! While the preregulation did have a slow rate, I was very happy with the amplitude of around 260! This is the regulation of the dial down side at the end: Here is the picture of after everything was done and it was ready to be packed away until my dads birthday! I also had a nice Junghans watch case which I received from the company itself when I sent in a watch long ago. I dont have picture with the box but I just wanted to say that haha. Now im conclusion, I had some fun with the watch! It was pleasantly surprised with the level of detail to such a simple watch. Of course nothing in comparison to modern counter parts but they definetly cared for the aesthetic quality aswell. A few things which spoke for this was the sandblasting, the polished crease around the train wheel jewels, the shape of the setting wheel. Of course the final result does show a lot of potential for improvement but I will just deal with that when the watch comes in for service in a few years. If anyone has any questions/ comments or anything to say in particular, you can always write a comment or hit me up privately!


 1 point
 -
Don't think these have a guard pin.
 1 point
 -
Good point H , 70 ° C Been there many, many times Jon, without it my job in double glazing used to be slow, unpredictable and not pretty...hence I love the stuff.1 point
-
It would melt the shellac, I would think!? Perhaps not a problem with no power on the mainspring, but I'd still be worried doing it.1 point
-
Being an Accurist it could be simple enough to get a replacement dial if needs be when the time comes.1 point
-
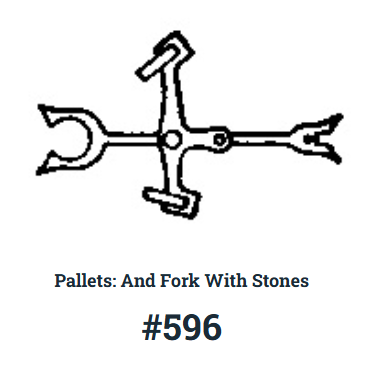
Make sure to dull the nail clipper's cutting edge, ( see photo ) I cut two half holes on cutting edges, so to secure the canon pinion in place, Magnify the photo to see complete hole the two half make when joined. Then forum member canthus added screws to the my design, considerably improving it. Here is a photo of the original one I made. So, go with canthus version, and file the two half holes on cutting edge, dull cutting edges. You furthure improve the design. You get micrometer action by tightening the only screw on my gadget buy no preset limit on how much you tighten. Good luck
 1 point
 -
The clock so almost certain French.These movements are really well made and once serviced are remarkably good time keepers.1 point
-
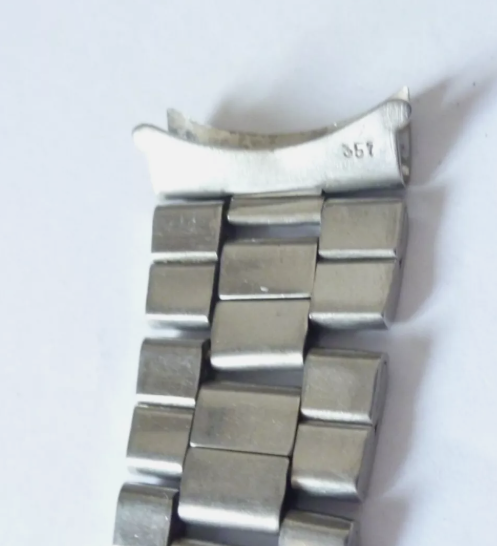
I'm not familiar with this model. I agree with @AndyGSi that the strap and end pieces look OK. I'm not so sure about the spacing in the writing on the back. The 'V' isn't spaced correctly. I never buy a watch unless I get some good pics of the movement.
 1 point
 -
Without looking any further the first thing I'd say is the strap, or at least the end pieces looks right. Edit Have you got a photo of the movement and inside the case back.
 1 point
 -
I also read about Vietnam, used it for years on minor to moderate cuts. People kept telling me " you can't do that ".1 point
-
Has it got a removable bezel ?1 point
-
Not sure what you mean by put the screwdriver in but if it's a 2813 it should have the lever for adjustment. Edit To enhance further.
 1 point
 -
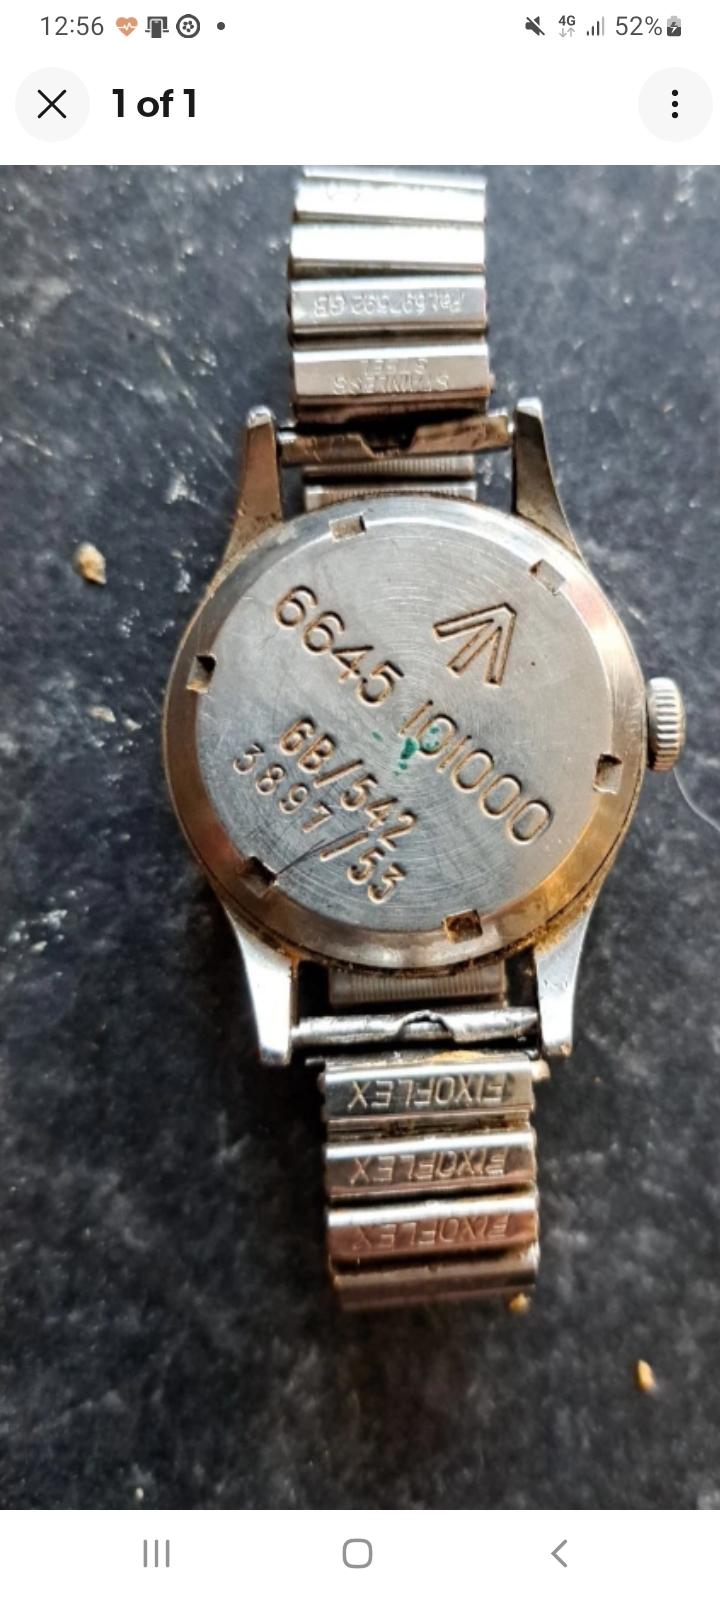
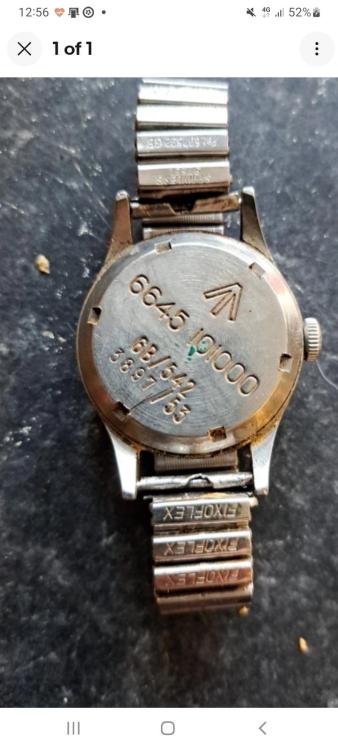
Any thoughts on this piece guys. I'm trying to help a kid on ebay that would have been ripped off. Listed this with a load of junk...he had no idea what it was until I told him it wasn't just any old watch . He had some guy offer him 100 quid apparently.


 1 point
 -
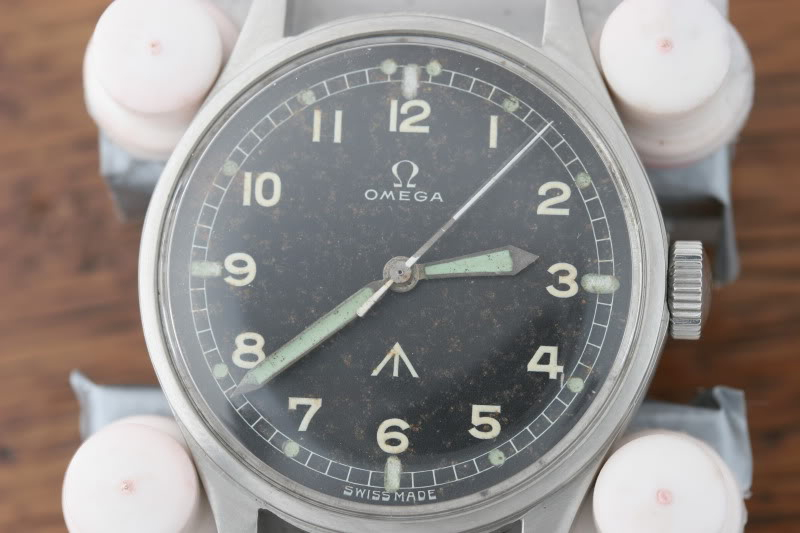
Yes they were for the RAF and the 53 Thin Arrow is a rare model. https://finest-hour.co.uk/a-truly-hair-raising-omega-53-thin-arrow/1 point
-
Just realised there's a TA Thin Arrow & FA Fat Arrow version on the 53.
 1 point
 -
Before doing this be sure to add a drop of IPA to the rear pivots to try and free any congealed oil.1 point
-
I just thought of one. Sinclair Harding but be careful there are fakes.1 point
-
Probably true, according to the video it wasn't an accepted idea in the medical industry until the 90s , which sounds about right to me , in the UK anyway,when I heard about it. Ahh the 90s, when I was a young carefree, superfit , stud muffin.1 point
-
I heard its invention was a war thing where it was used for the purpose of treating cuts. (I thought Vietnam but Google says ww2.)1 point
-
Hi Melissa. Have you tried spinning it up on a line release tool to check if everything drives ok , best done with battery removed.1 point
-
These are just like the old Disney watches with a clear disc on the standard seconds.
 1 point
 -
Ahh...ok. Beginning to make sense. So there is probably a pinion pressed onto the sub seconds pivot that drives a geared wheel on the seconds disk. I worked on a couple of Zodiac watches with. seconds disks before. I used 2 very thin dental cement spatulas as levers to remove the date disks. But even with utmost care, the seconds pivot got bent. Luckily it didn't break and I managed to straighten it. Perhaps a similar technique could be used to remove this disk.1 point
-
With both hour and minute hands affected, I'd first look at the cannon pinion.1 point
-
I do not recommend this particular Chinese option. The spring is slightly smaller, so it won't sit properly. The picture above exemplifies it. The lower spring is Chinese.
 1 point
 -
Hi. The modern day clocks are built from different levels of brass and steel in order to cut costs and increase the profit margin , I have said before the buying public are wowed by the look of it aka fashion watches selling at 100 s of pounds all swish and nice powered by a Hattori plastic movement costing a few quid at most. Modern clocks are no better. You could put the best movement possible in a crappy case and it wouldn’t sell well. Unfortunately it is the modern way, don’t like it but we have to accept it .1 point
-
Have you tried with just the crystal lift too see if you can brake the bond?1 point
-
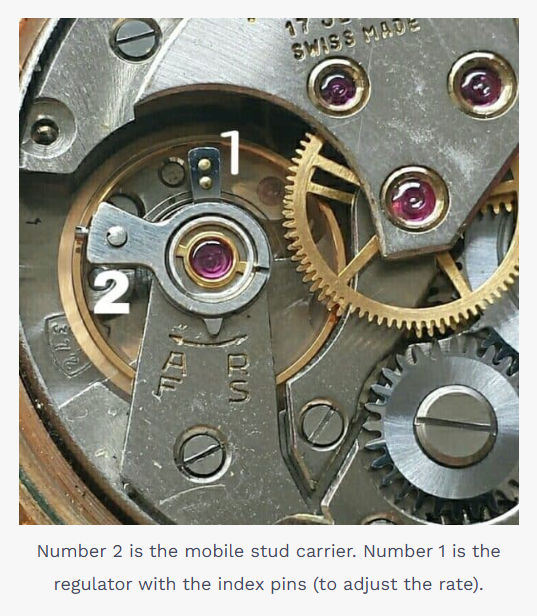
For me the rate adjustment elements are secondary to having the hairspring set correctly with the balance. Things to check beforehand would be that the hairspring is centered with the balance jewel, and that the regulator arm tracks the hairspring's terminal curve through the arm's arc movements when adjusting the rate. Hairspring centering is quite easy to see, looking down on the balance, the coils will have nice even spaces, so no bunching up of them, if there is then that needs to be delt with first. If the terminal curve is good and the rate arm tracks it well then its ok to start adjusting the regulation pins. Setting them close, with the spring at rest sitting in the middle with a very small gap at each side of it, with the gaps adding up to a total of about the hairspring thickness ( half thickness at each side ).1 point
-
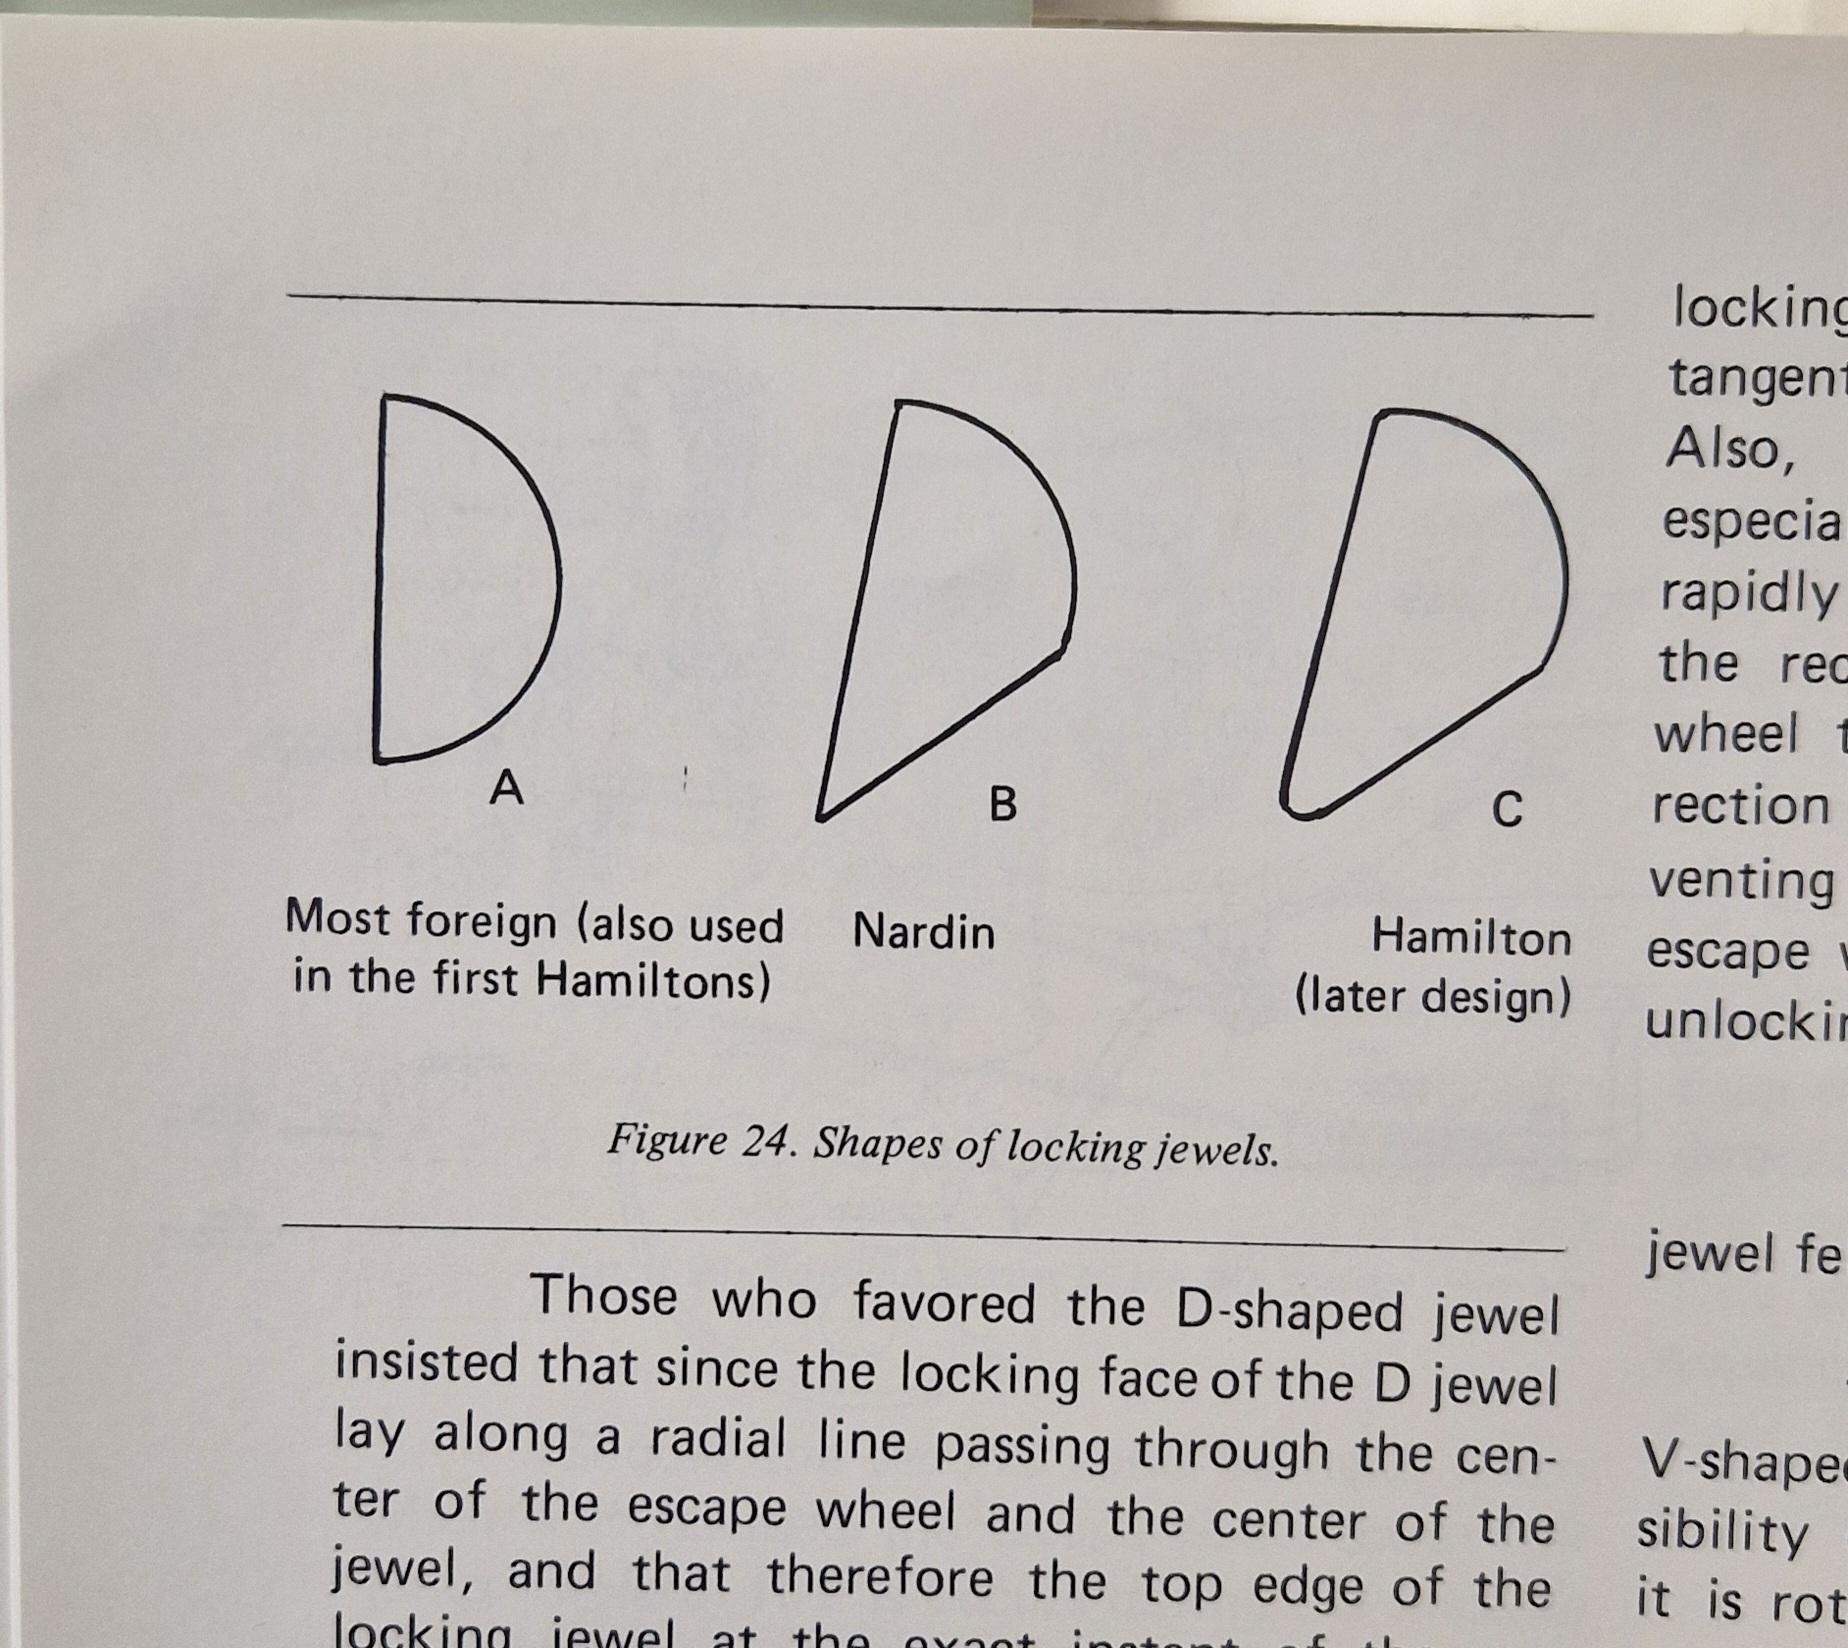
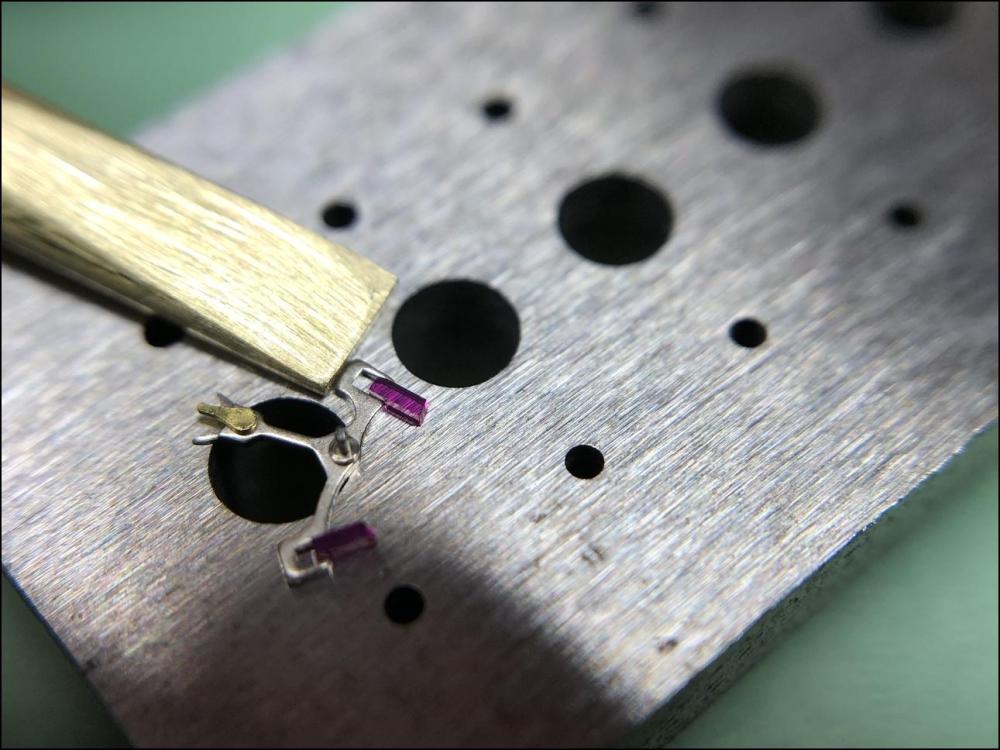
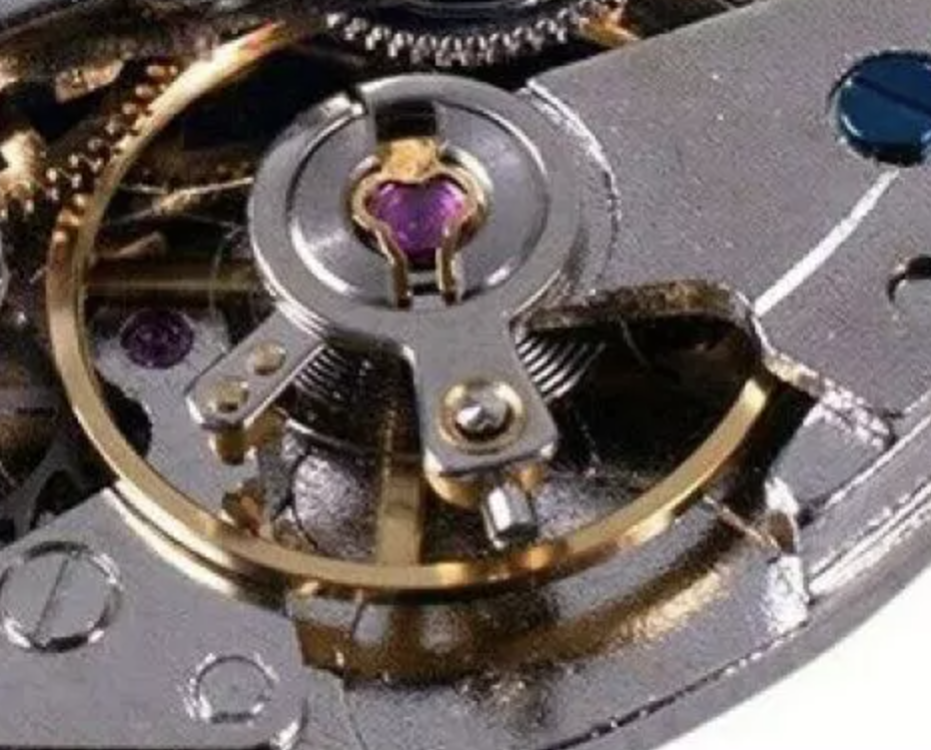
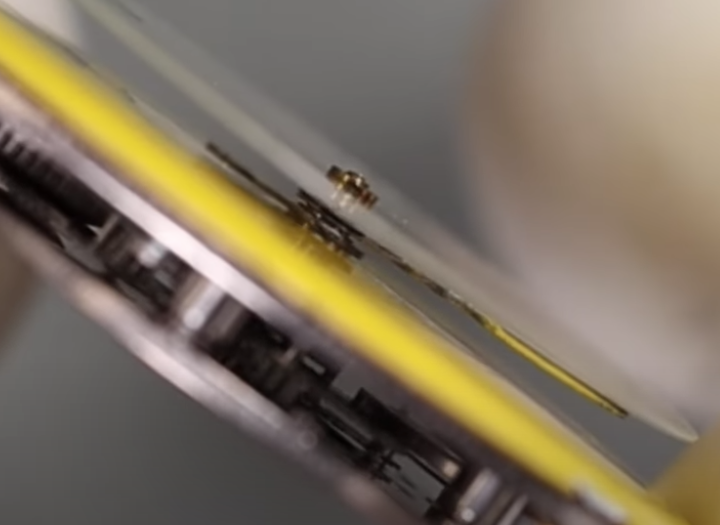
Just some info which you quite likely already know The locking stone is held in by a brass wedge, which can be undersized on diameter as the locking stone can be too. "Too precise" can be counterproductive here, there's a lot of margin. Ruby/sapphire does well in compression, the wedge serves well and only needs a small amount of force- a little shellac and all is well.
 1 point
 -
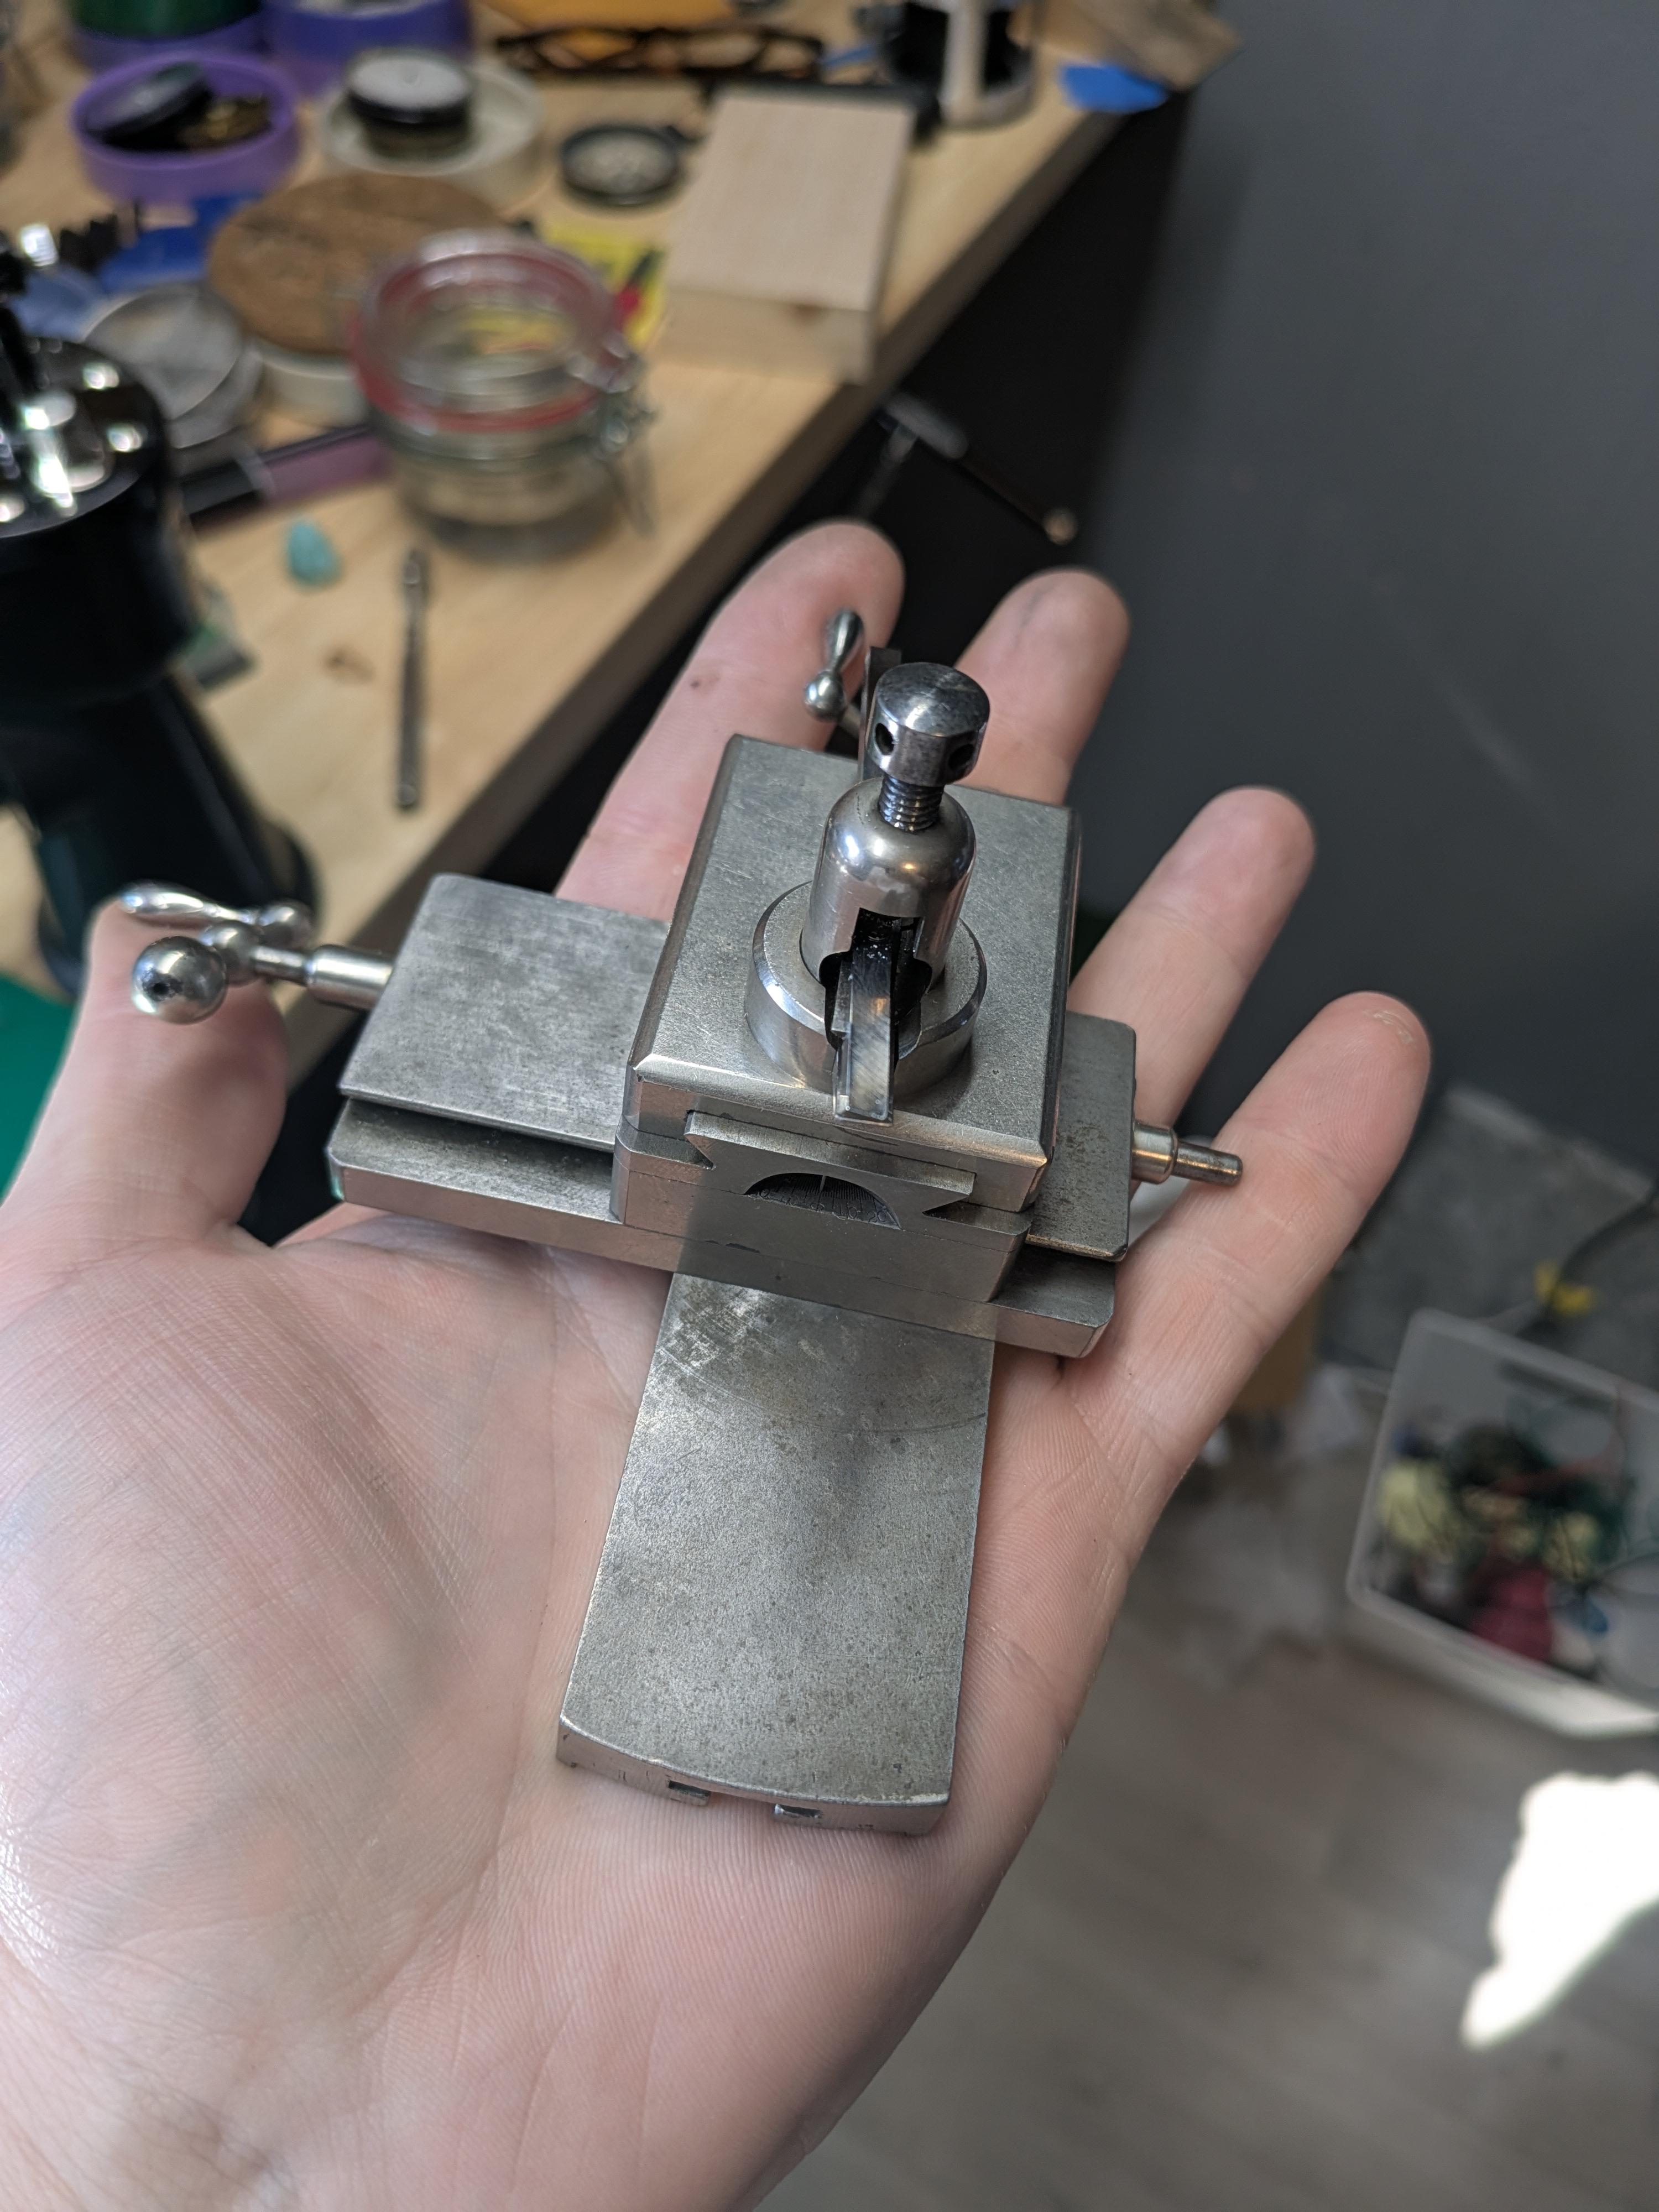
I was finally able to located a cross slide for my lathe, and boy is it special. It has a detent for 0°, then it can be compound on both the X and Y slides. I've never seen this setup before.


 1 point
 -
got to be very careful though as there For that kind of work, OH, I agree with the required level of work. In reality, the vast majority of regular servicing work just doesn't justify that level of time and effort. It wouldn't be financially viable for many of the clocks I work on. For the odd occasional special high-end clock, absolutely. I like to ensure I provide a good quality service and take care of and take pride in my work, but there's a realistic limit as to what's viable for a general service. I've also learned to contain my enthusiasm with Brasso and wire wool. I could quickly generate more work for myself than we were paid to do.1 point
-
Aliexpress have bridge plates for the 46943 and some of them appear to include the diafix springs, only cheap in the region of £3.50 each. Search for 46943 upper clamp plate.1 point
-
@DaimonYes, you can take both (main spring and diafix springs) either from the same movement or a compatible movement 46943 - from this movement you can actually use many parts: main spring, balance wheel, etc. I would (probably) NEVER buy spare parts from CousinsUK anymore, for several reasons, but mainly the increased taxes to EU. It was also my fault that I ordered based on hope that parts will fit...and they didn't so I lost around 50euros for parts that did not fit If I would have to go through the same troubles again, I would buy broken movements that I know they will fit and take those parts from there. Of course there is a possibility that the part you need, it's either missing (if you can't spot it from the photos) or it's broken but you can find complete movements at around 30euros on eBay.1 point
-
Absolutely nothing.0 points


.thumb.jpg.19a9c4ff164d78d516aa9f05a063752b.jpg)