Leaderboard


Popular Content
Showing content with the highest reputation on 03/25/25 in Posts
-
9 points
-
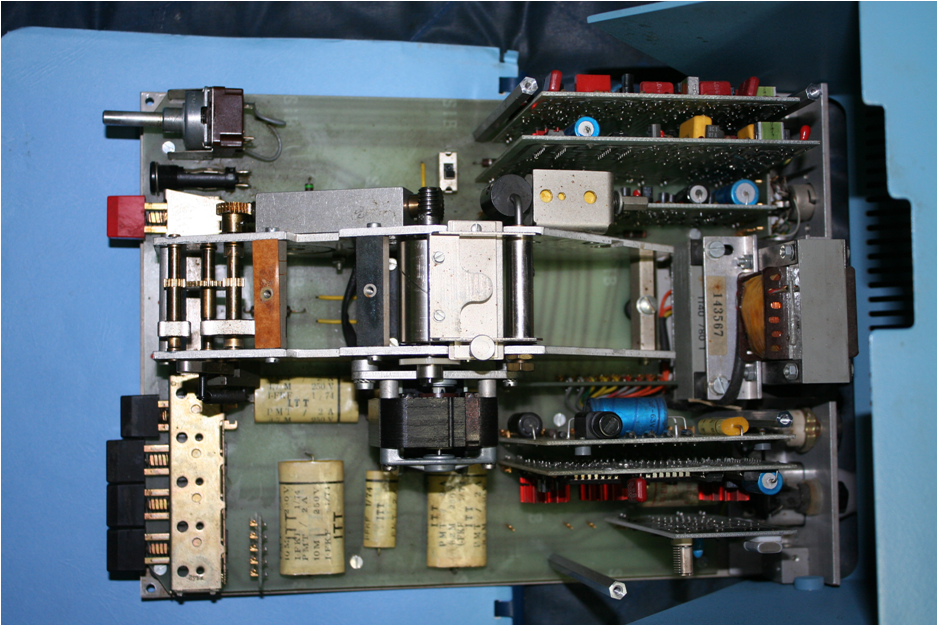
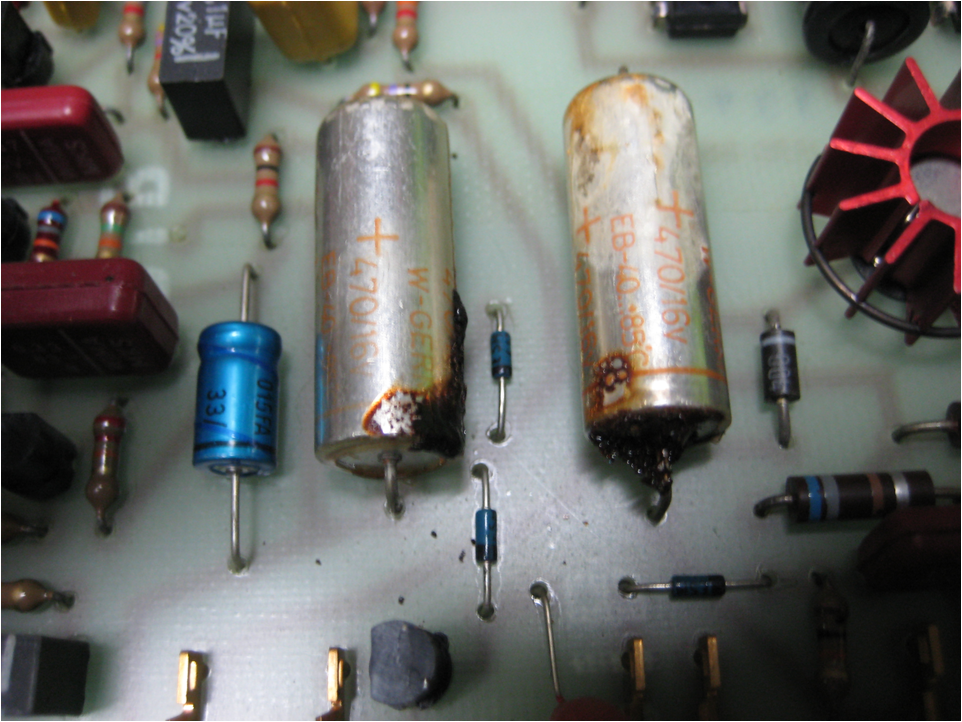
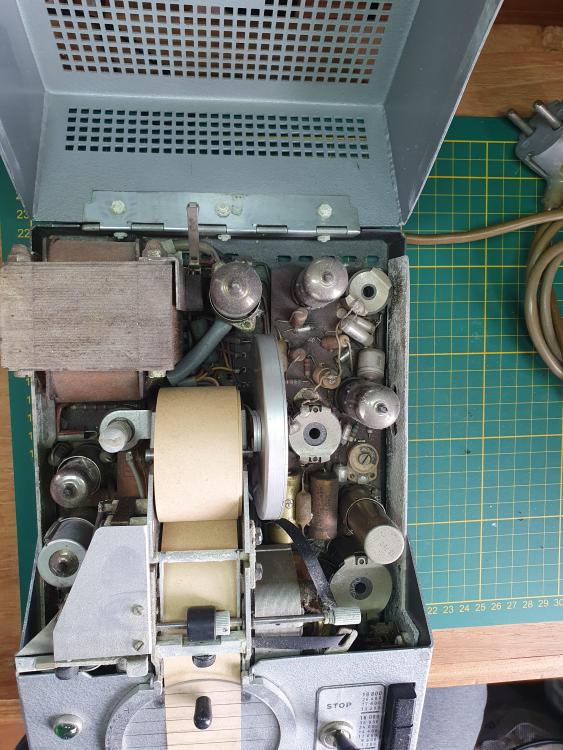
that machine looks familiar I think I have one lurking somewhere in the house okay let's look at something newer like a B200 a classic timing machine minus its case how many electrolytic capacitors can you spot? Does look like a few more of them than found in a vacuum tube machine here's one of the boards out of the machine notice the electrolytic's don't look their best at least two of them. Which of course brings up the problem of they eventually will fail and typically they will not always visually show that they have failed. In other words the fluid just typically dries up and doesn't typically leak out then while were here time standards and the evolution of the B200 timing machine. With way more electrolytic capacitors on the vintage crystal version. I wonder how long the tantalum capacitor will last? That would be on the one on the left
 4 points
 -
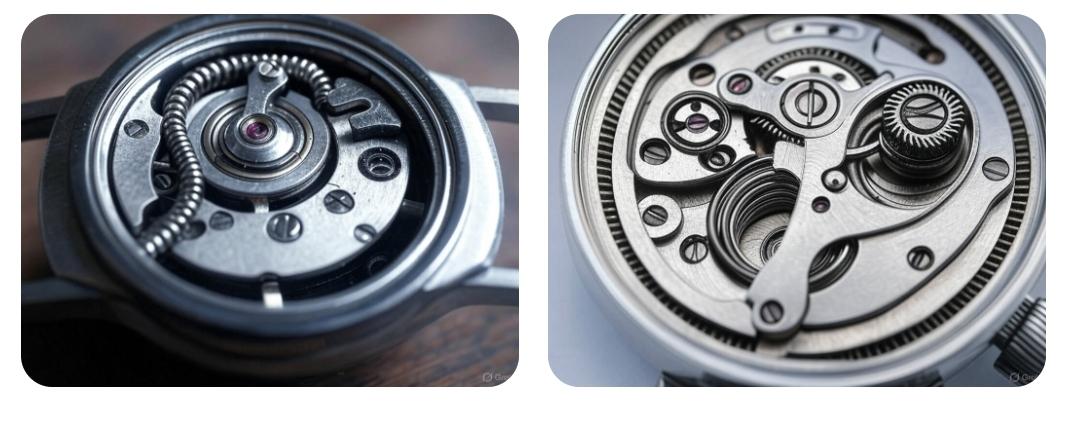
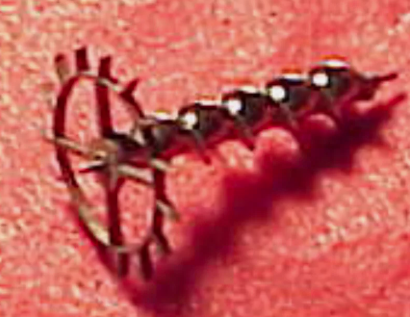
I have never seen a good photo or drawing (though I bet @JohnR725 has?) - but the New York Standard watch company in some of their first pocket watches used a crazy gimmick worm drive escape wheel that resembled @VWatchie's fantastical mainspring barrel. They gave up on this silly idea very quickly and switched to making normal dollar watches. Blurry photo from ebay listing for just the part:
 4 points
 -
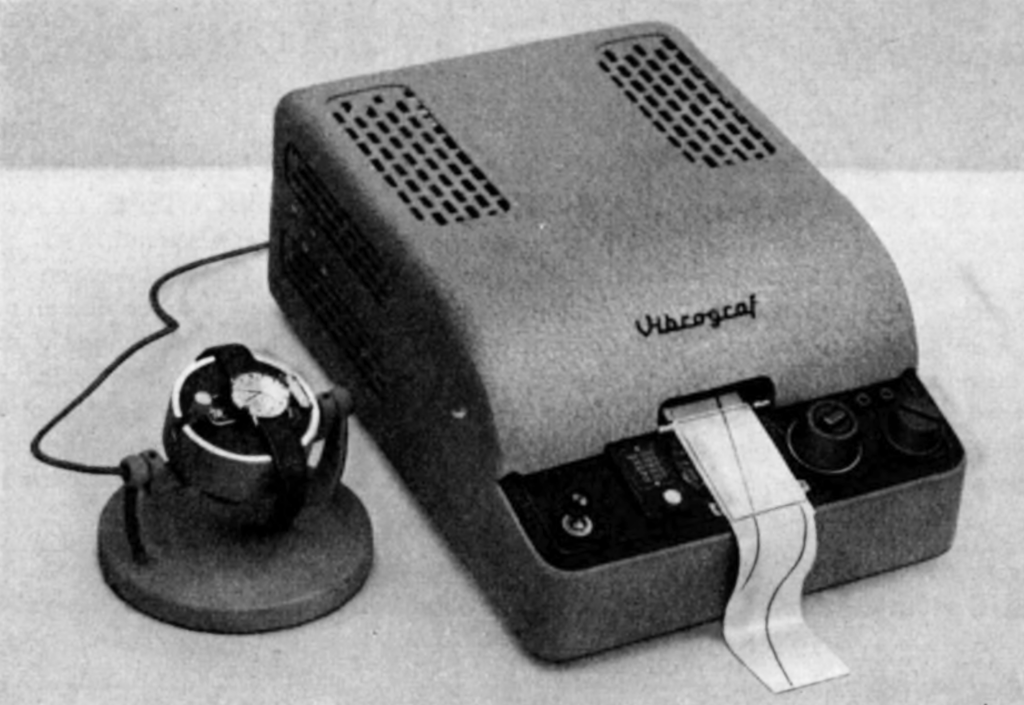
This thread becomes a nice trip through history of TMs. Unfortunately these devices are worth nearly nothing today. Their most valuable part is the microphone (many are still ok): you can use them easily with software TMs and will get a comfortable modern device. My favorite machine was a Vibrograph VS32, the most advanced flagship TM of the 40s: I had invested much time restoring it and adjusting its frequency divider - many years ago. Few years ago, short of sufficient space, I decided to dump the above unit . The possible 50.- on Ebay - if at all - was not worth any effort. A nice walk through TM history can be found here (German text, many pictures). Frank
 3 points
 -
My two were different models to those shown. One of mine burned holes in paper showing the printout didn't use inks so it must have been an antique Here you are. The first is the one that burned the dots.
 3 points
 -
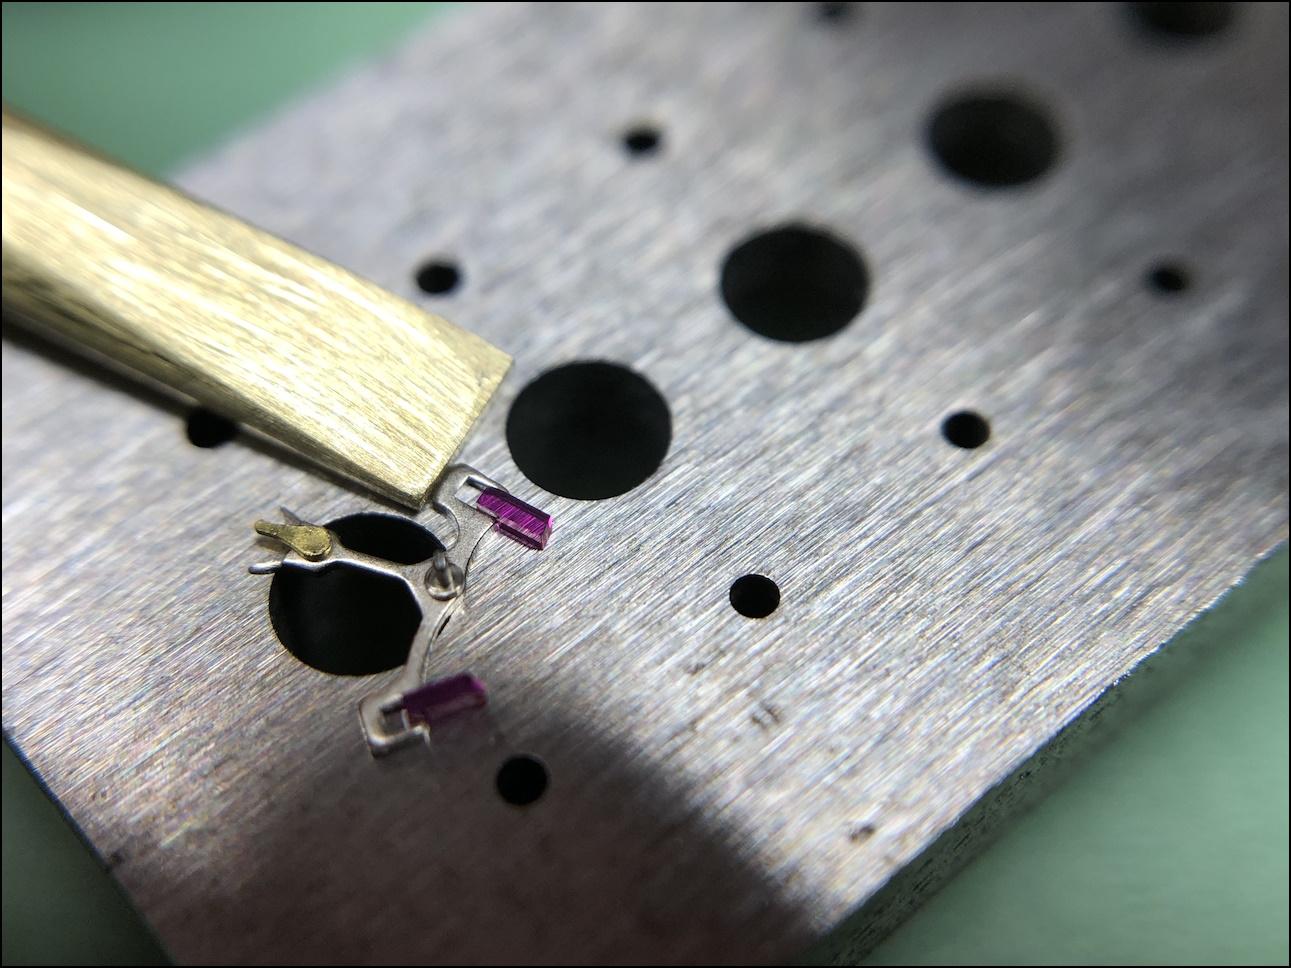
The Gaston tool is more for adjusting the stones, when placing a new stone I think it's easier to do just on a block.3 points
-
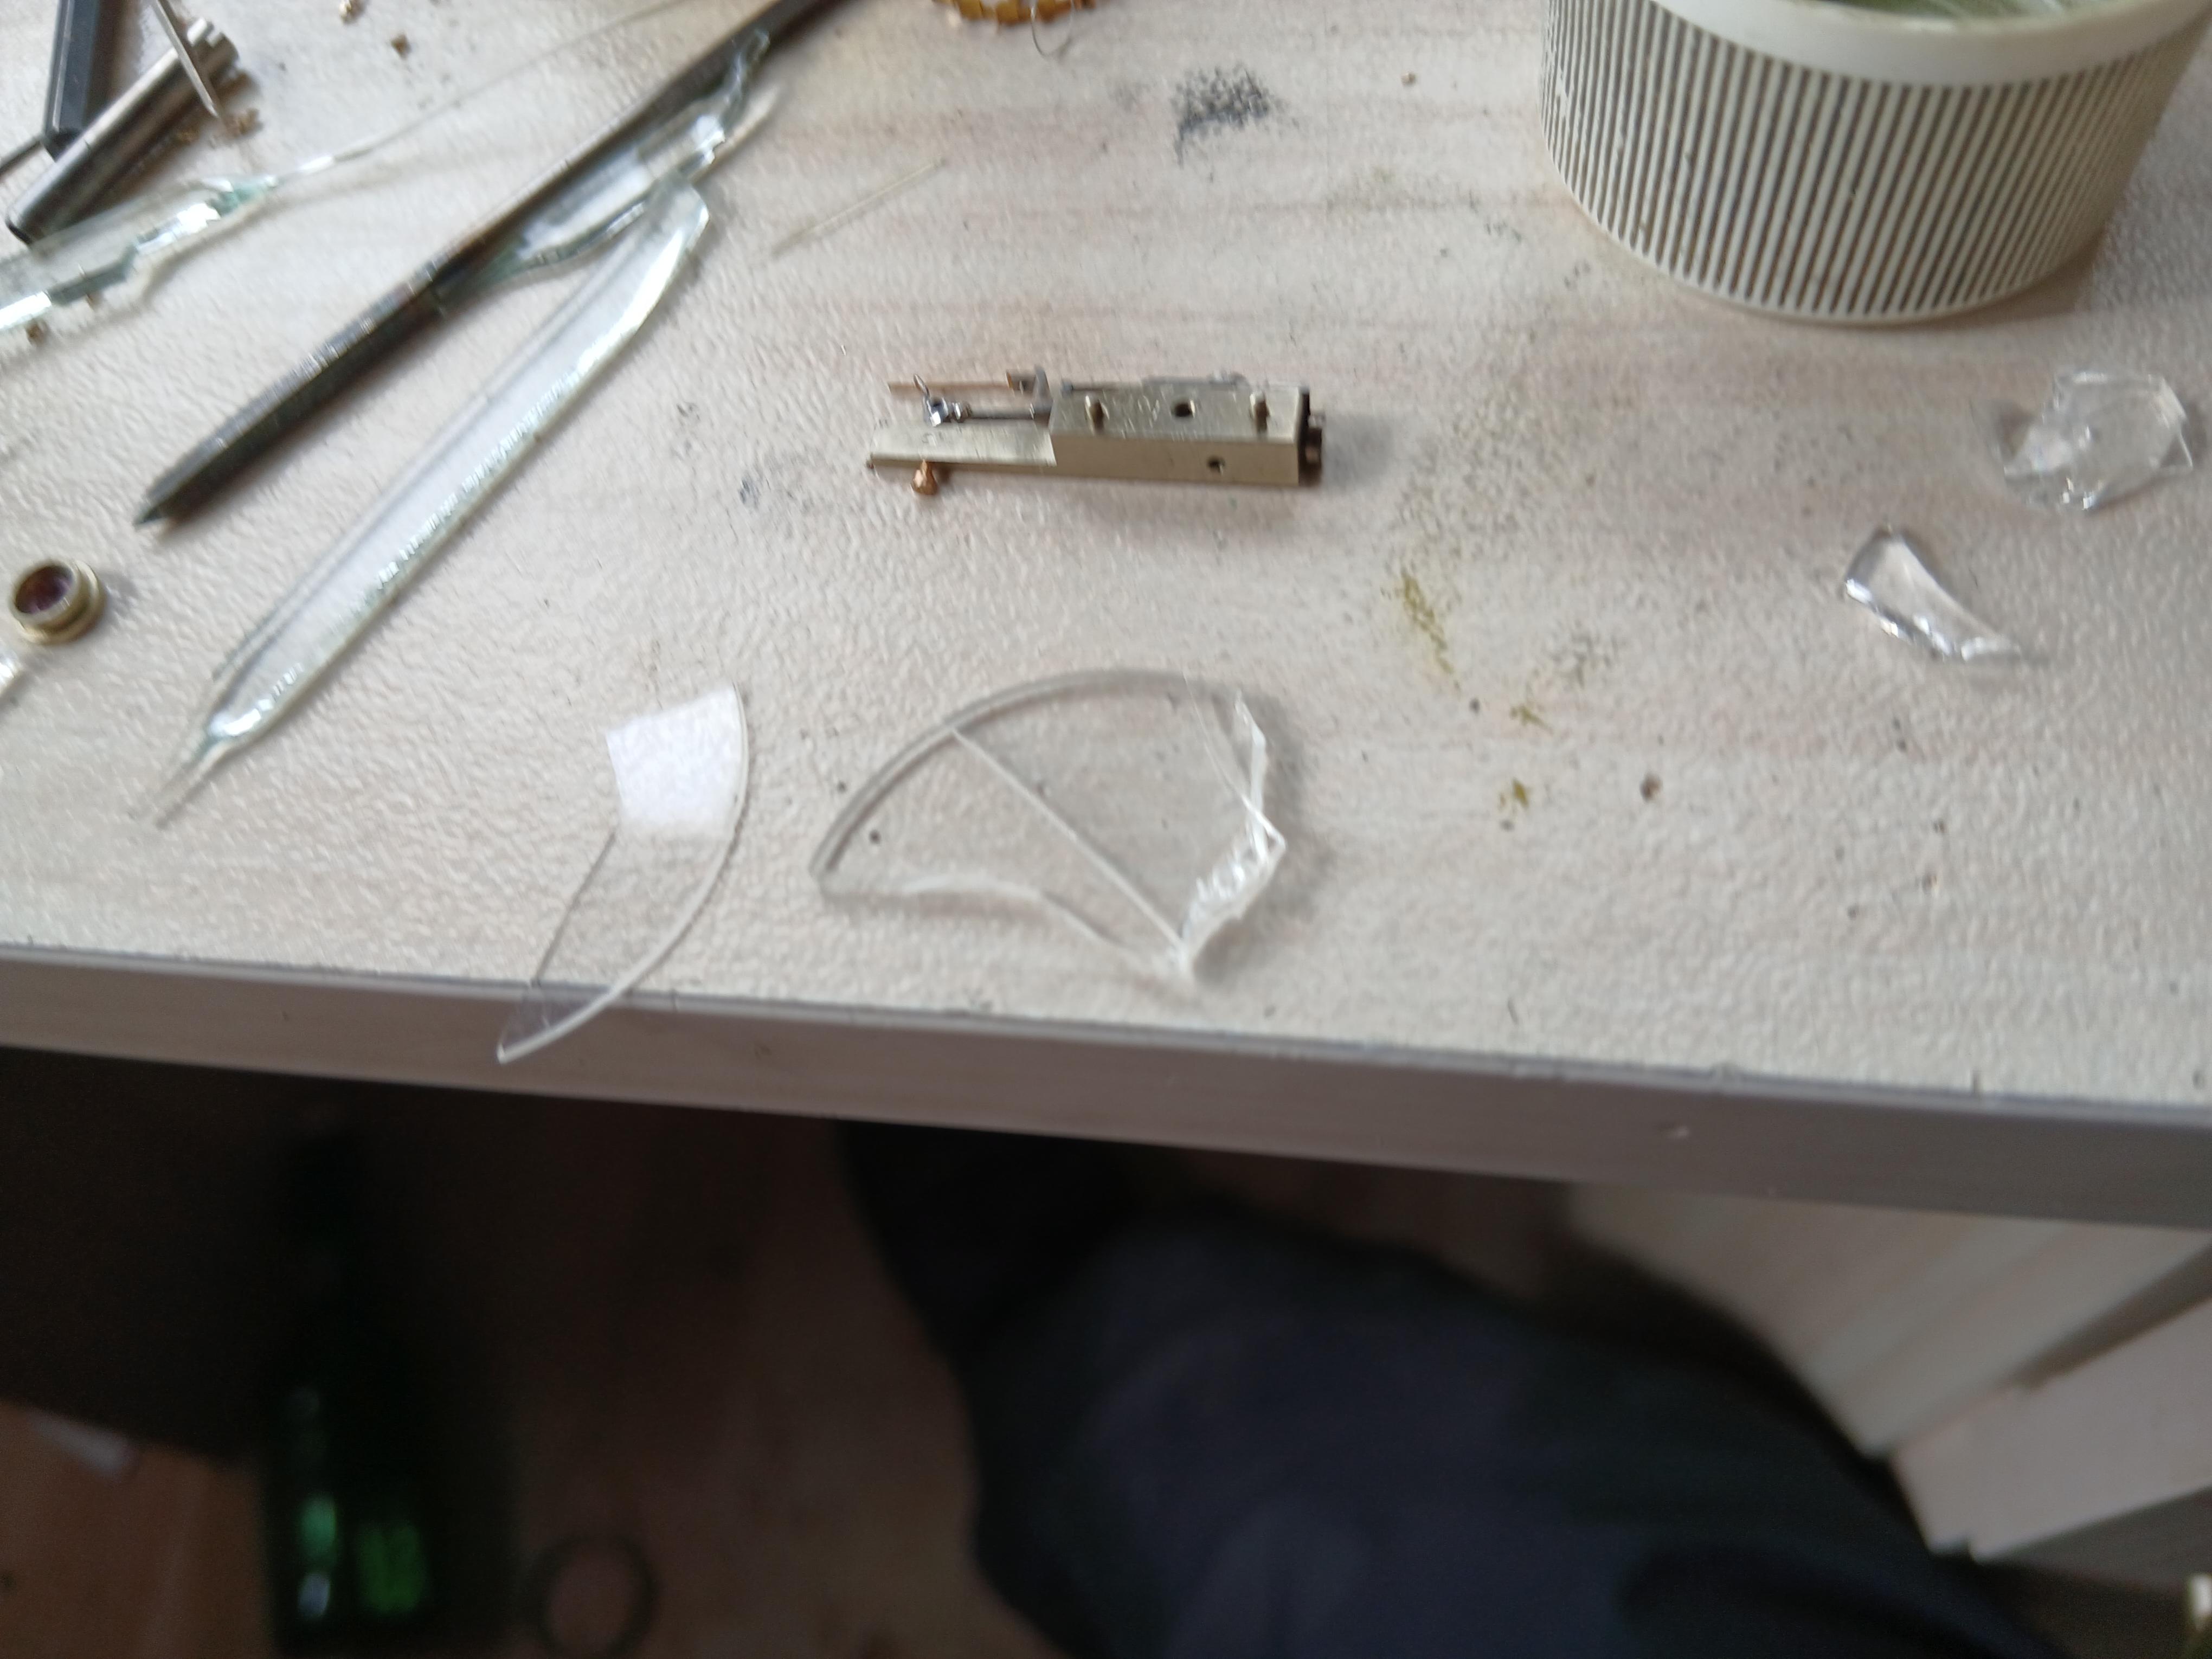
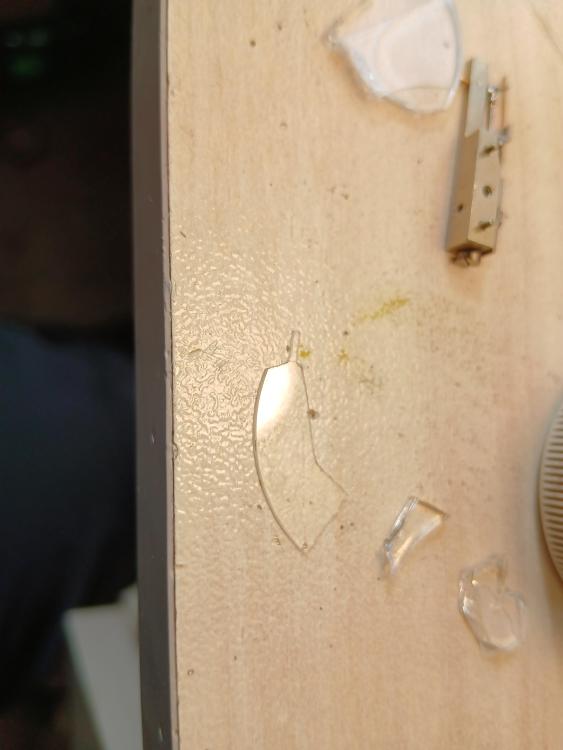
OK, today I visited a friend who is watchmaker and asked him if he has useless old sapphire crystal. He took out one from an old Seiko Kinetic for parts and gave it to me. I came home and started work. The first I did was to break the crystal with the hope some small piece will have suitable shape to work on. For my surprise, appears there is thin (0.35mm) sapphire layer on top of a thick glass piece. I first was disappointed, as the stone I need is with diam 0.65mm (and then ground to half to obtain D cross-section) but then figured that it may be actually better for me. Realized that I can use one of the flat and polished faces as locking face of the jewel and thus there is still enough meat in thickness of the sapphire. So, I ground small rectangle piece and glued it with shellac on the side of a 0.6mm steel plate, then filed it round and lapped it to form the 'back' of the stone. I think the stone is good enough and will do the job it is meant for. I cleaned all the parts of the movement as there was gummed oil everywhere. The spring is very strong and it was challenge to get it wound while holding the barrel and collect it in the winder barrel to extract it. It left for tomorrow to test everything
 3 points
 -
Have a look here https://mb.nawcc.org/wiki/Encyclopedia-Subjects/Clock-Repair/Chime-Clock-Basics2 points
-
Here is Grok's answer to the same question In a manually wound watch, the mainspring is a coiled strip of metal (usually steel) that stores energy when wound and releases it to power the watch's movement. One end of the mainspring is anchored to the barrel wall, which is a cylindrical container that houses the mainspring. This anchoring ensures that the spring can be wound and unwound effectively, transferring energy to the gear train. Explanation The mainspring's outer end is typically anchored to the inner wall of the barrel using one of the following methods: Hooked or T-Shaped End: The outer end of the mainspring is shaped into a hook or a "T" form. This end fits into a corresponding notch, slot, or hole in the barrel wall. The slot is precisely machined to hold the spring securely during winding and unwinding. As the barrel is rotated (via the winding mechanism), the hooked end catches against the barrel wall, allowing the spring to coil tightly inside. Riveted or Pinned Attachment: In some designs, the mainspring end is riveted or pinned directly to the barrel wall. A small stud or pin is fixed to the inner surface of the barrel, and the spring has a hole or loop that slides onto this pin. This method provides a firm connection and is common in older or high-end movements. Friction Fit or Bridle: In certain modern or automatic watches (though less common in purely manual ones), the mainspring might use a "slipping bridle" (a folded-over end that grips the barrel wall via friction). However, in traditional manual watches, a fixed anchor is more typical. The inner end of the mainspring is usually attached to the barrel arbor (the central shaft), while the outer end’s anchorage to the barrel wall allows the spring to wind and store energy as the barrel is turned.
 2 points
 -
now I'm going to be haunted by? I know I've seen pictures somewhere in the past just don't remember where. Then it's not the only watch to have a warm gear if are going to add in tuning fork watches. In order to shrink the ladies version of the 221 they had to use two worm gears. Unfortunately the service manual doesn't have a really good picture and was scanned in a very poor resolution . Plus and not finding any nice pictures online.2 points
-
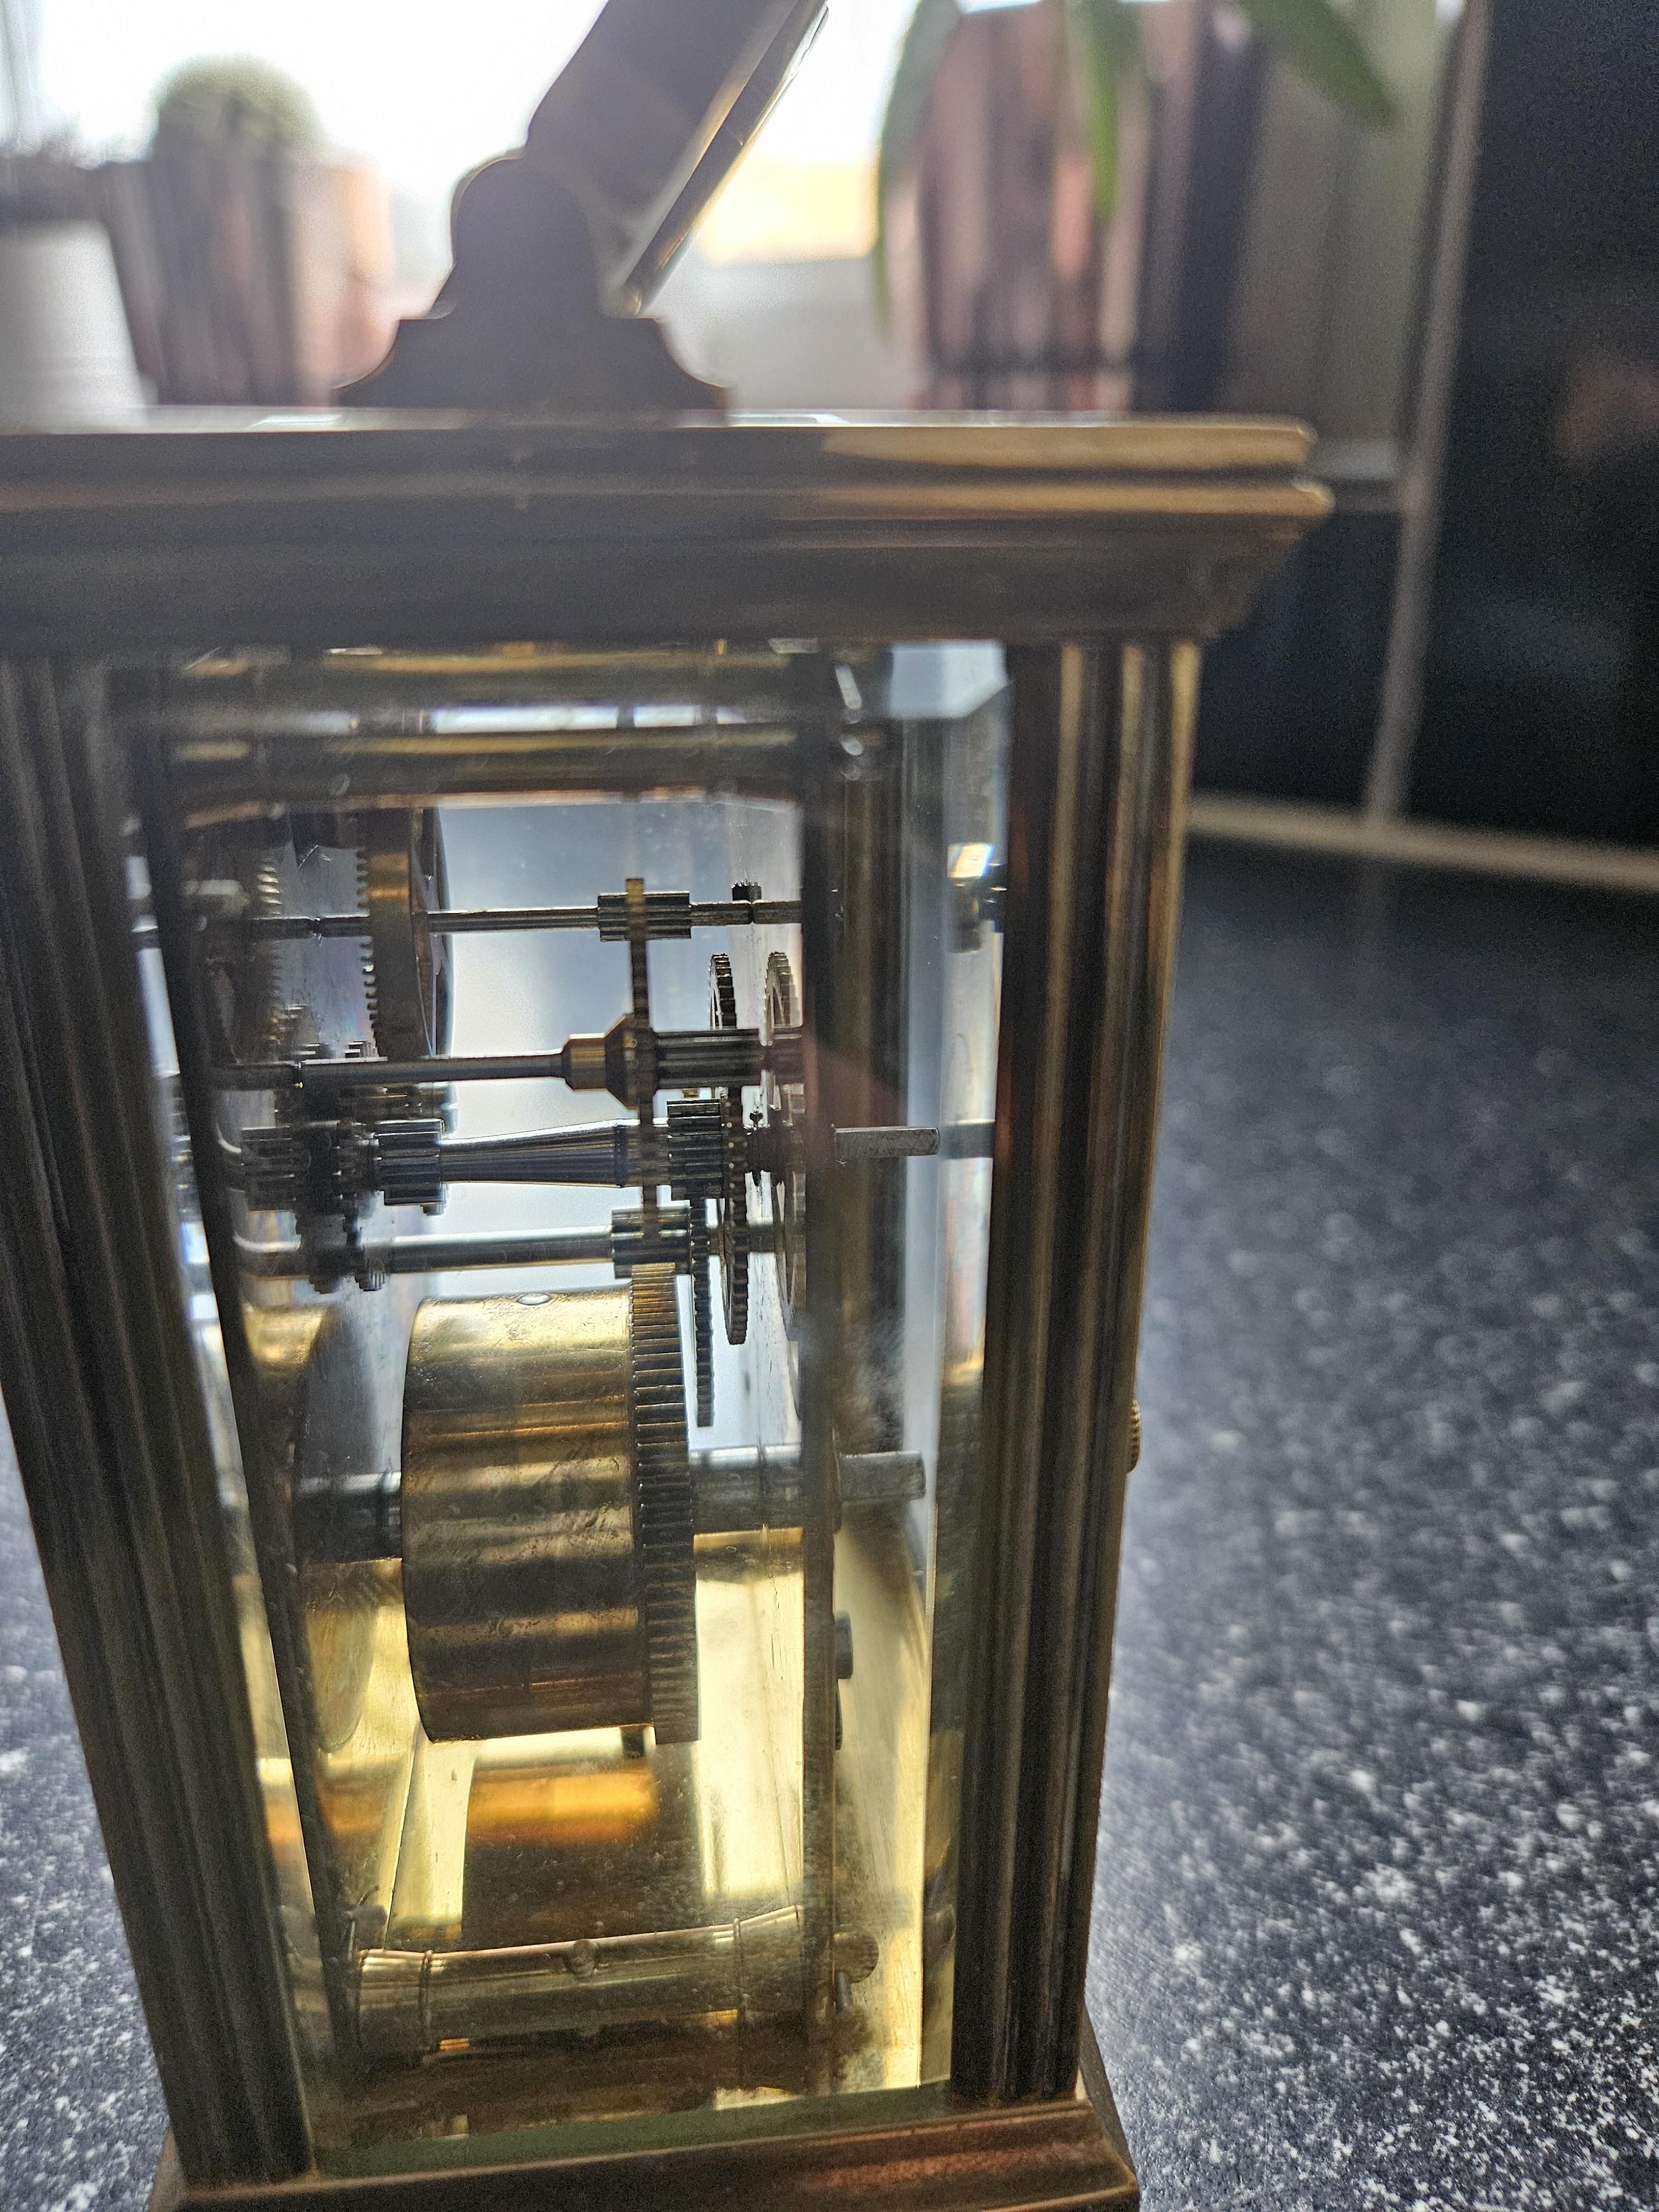
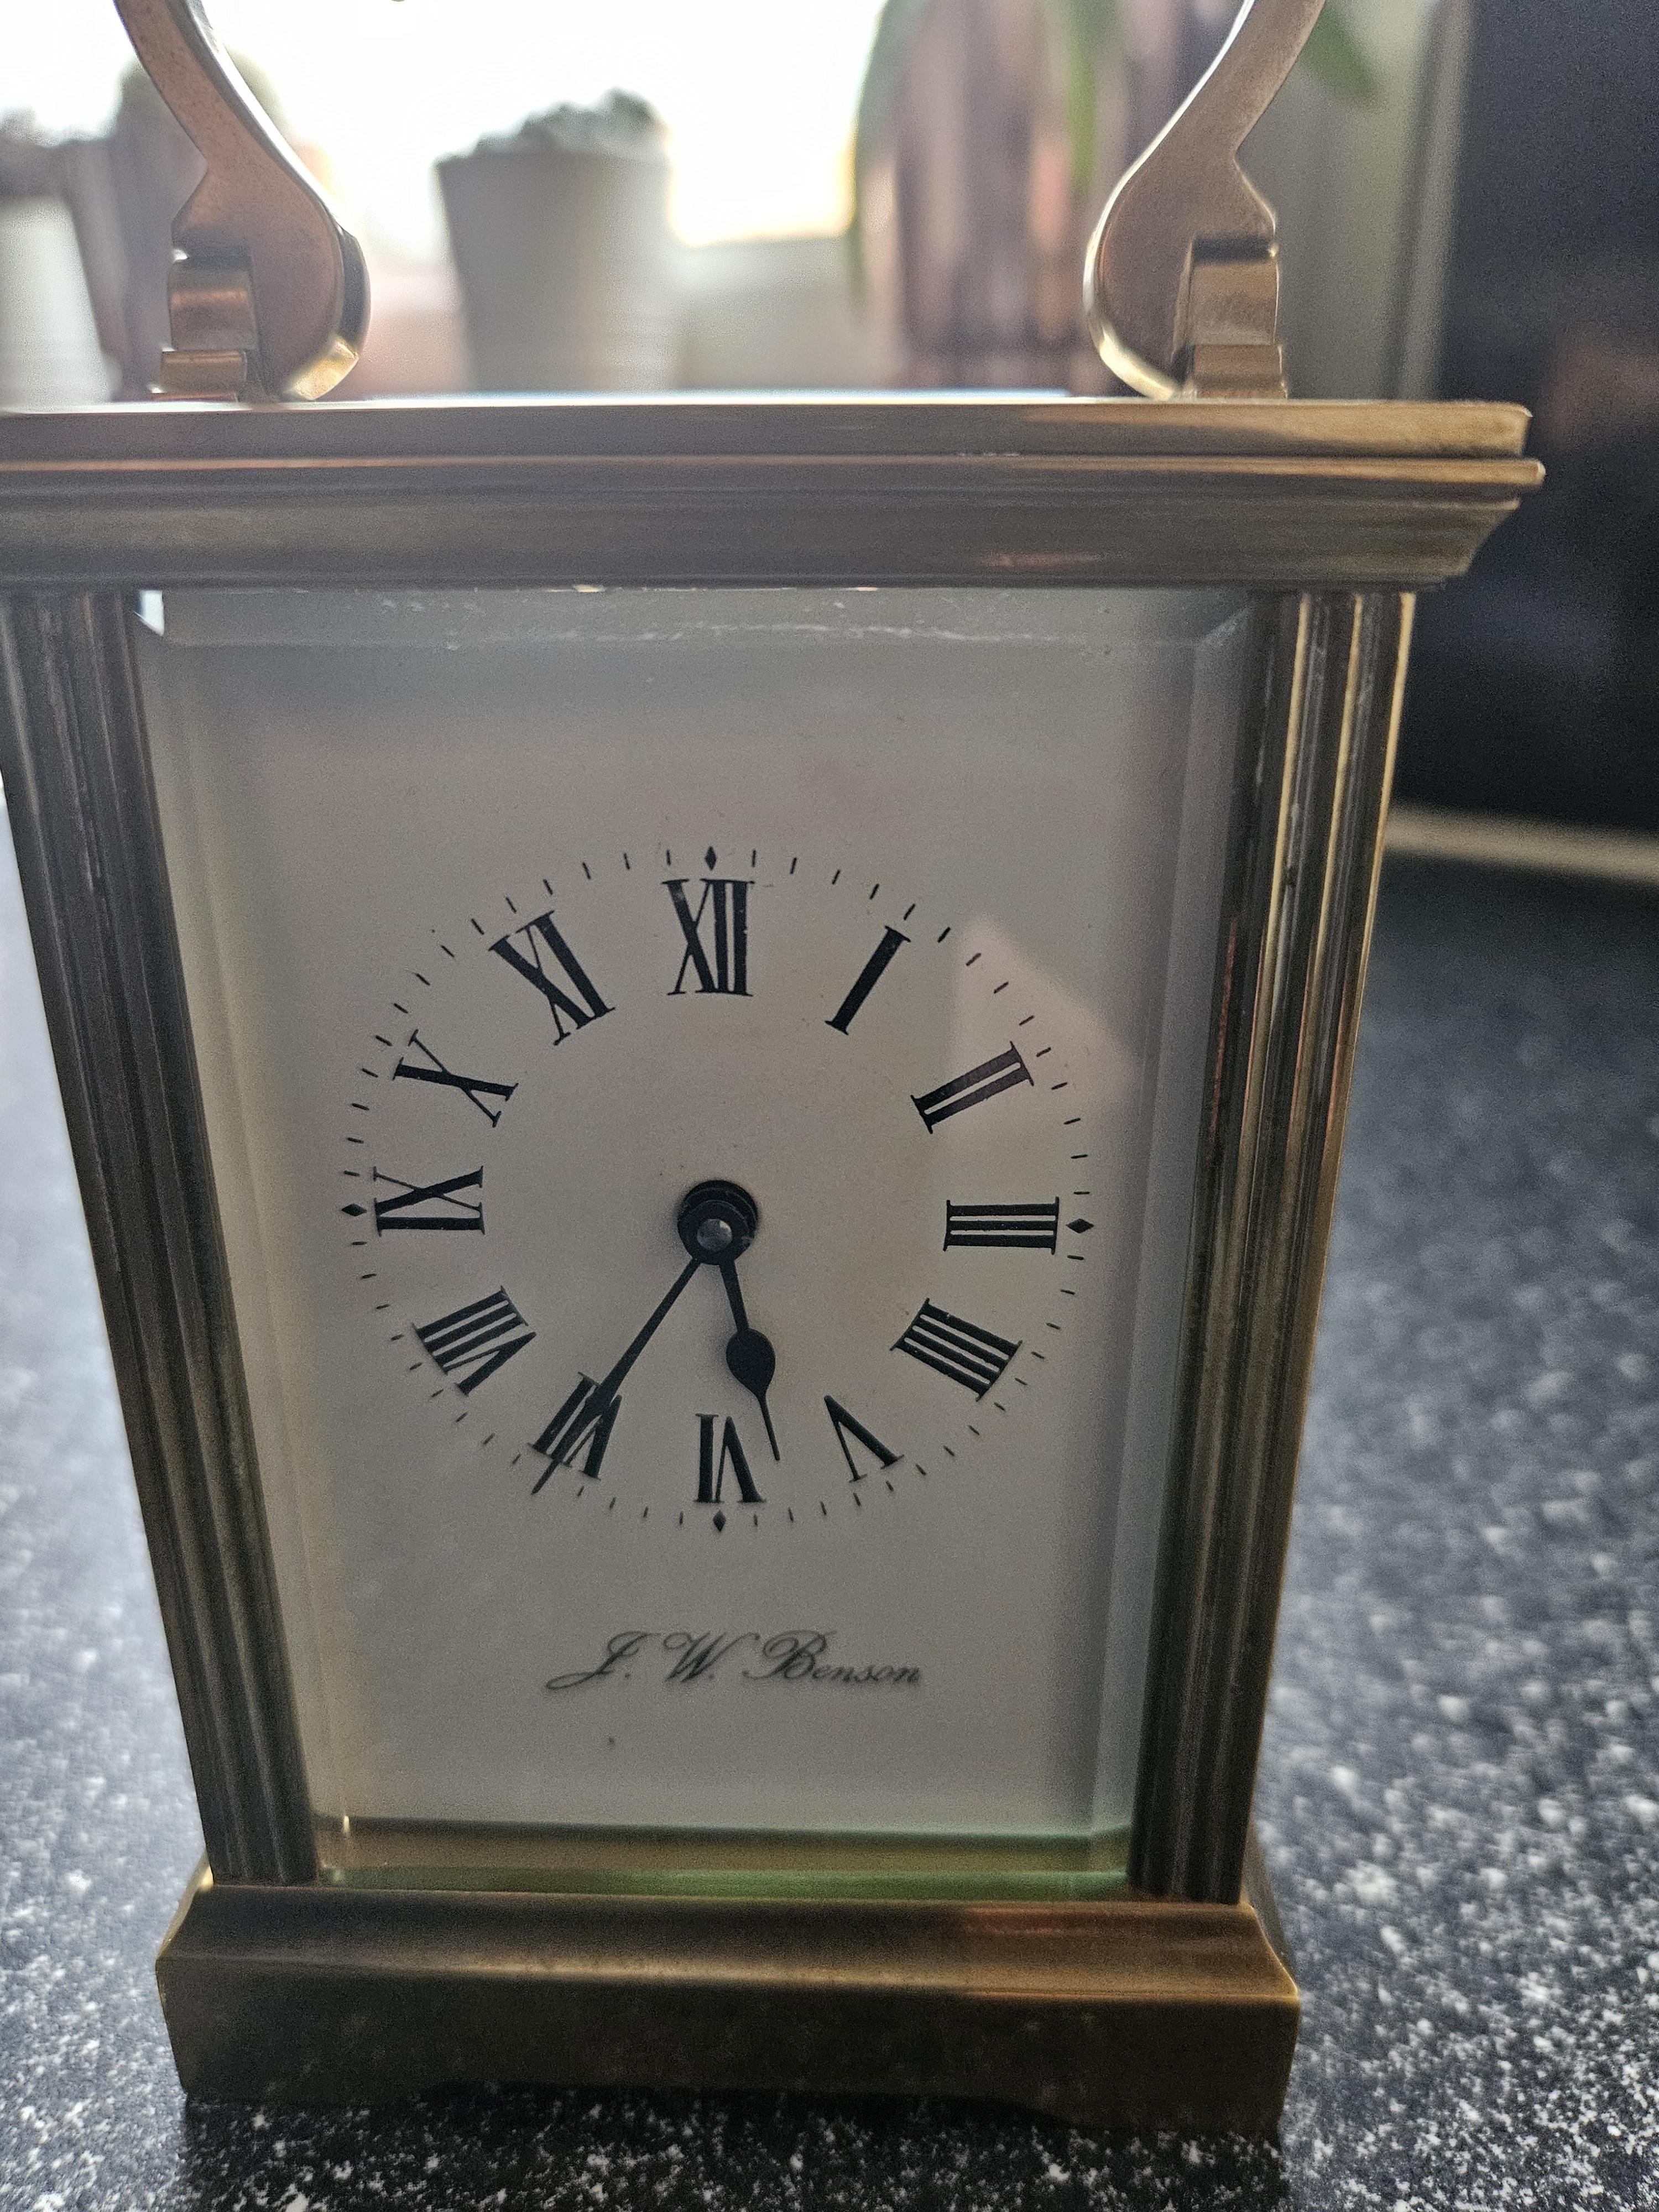
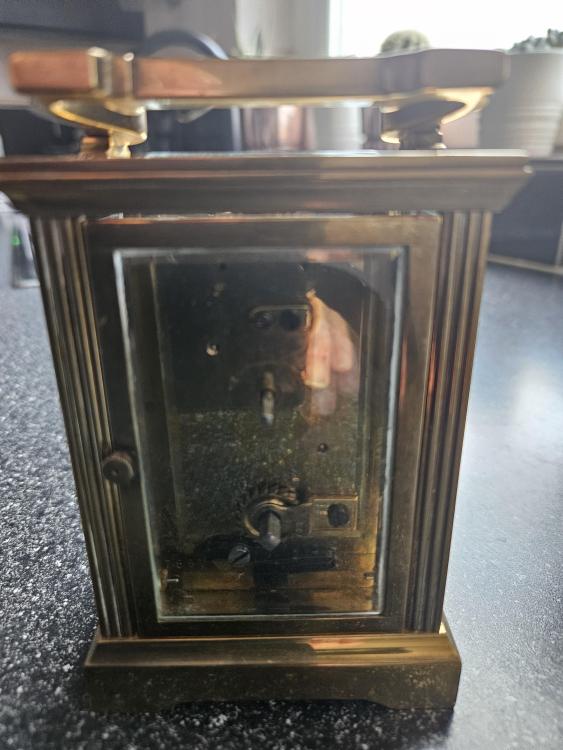
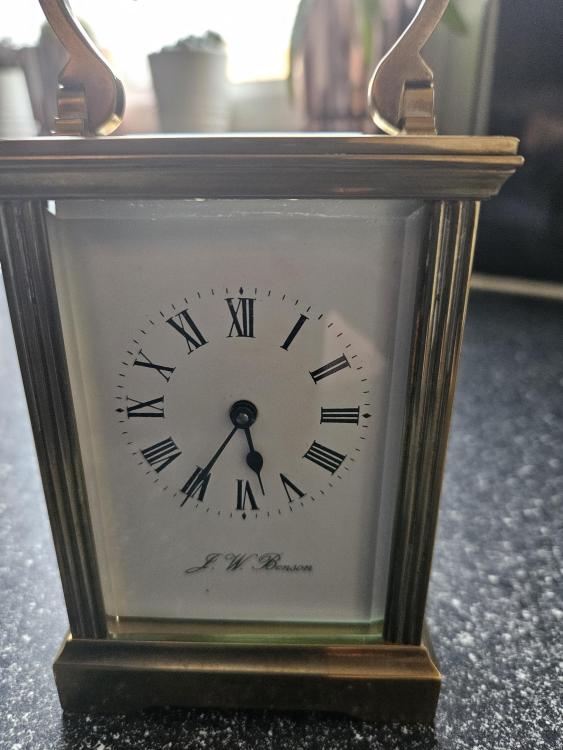
Bought the clock in the photos, ran it past @oldhippy first, he said it was decent and a good price, I obviously took his word. Since the glass isn't removable, do I mask it to polish the case? I know it's been discussed before but recommendations for lacquer? Who made it?


 1 point
 -
Difficult to see from the photos but is there a boss missing from here which should hold the spring away from the winding pinion?
 1 point
 -
Get what are called screw holding screwdrivers, they grip the screw.1 point
-
17 being accurate, this is a pretty high grade watch for a Swiss import. Thanks for the additional photo showing the burnished jewels. It looks like you must have a jeweled center wheel as well. Plus the whip fine regulator. Nice. I'm really not sure about the maker. I don't recognize it among the usual suspects of imports, like Langendorf/Stratford/Lanco, Buren but there were a zillion others. I have seen pocket watches for sale with unlabeled dials where the movement as well as the case were labeled "American Watch Case Co" - whereby the case company must have imported ebauche movements to sell as their own.1 point
-
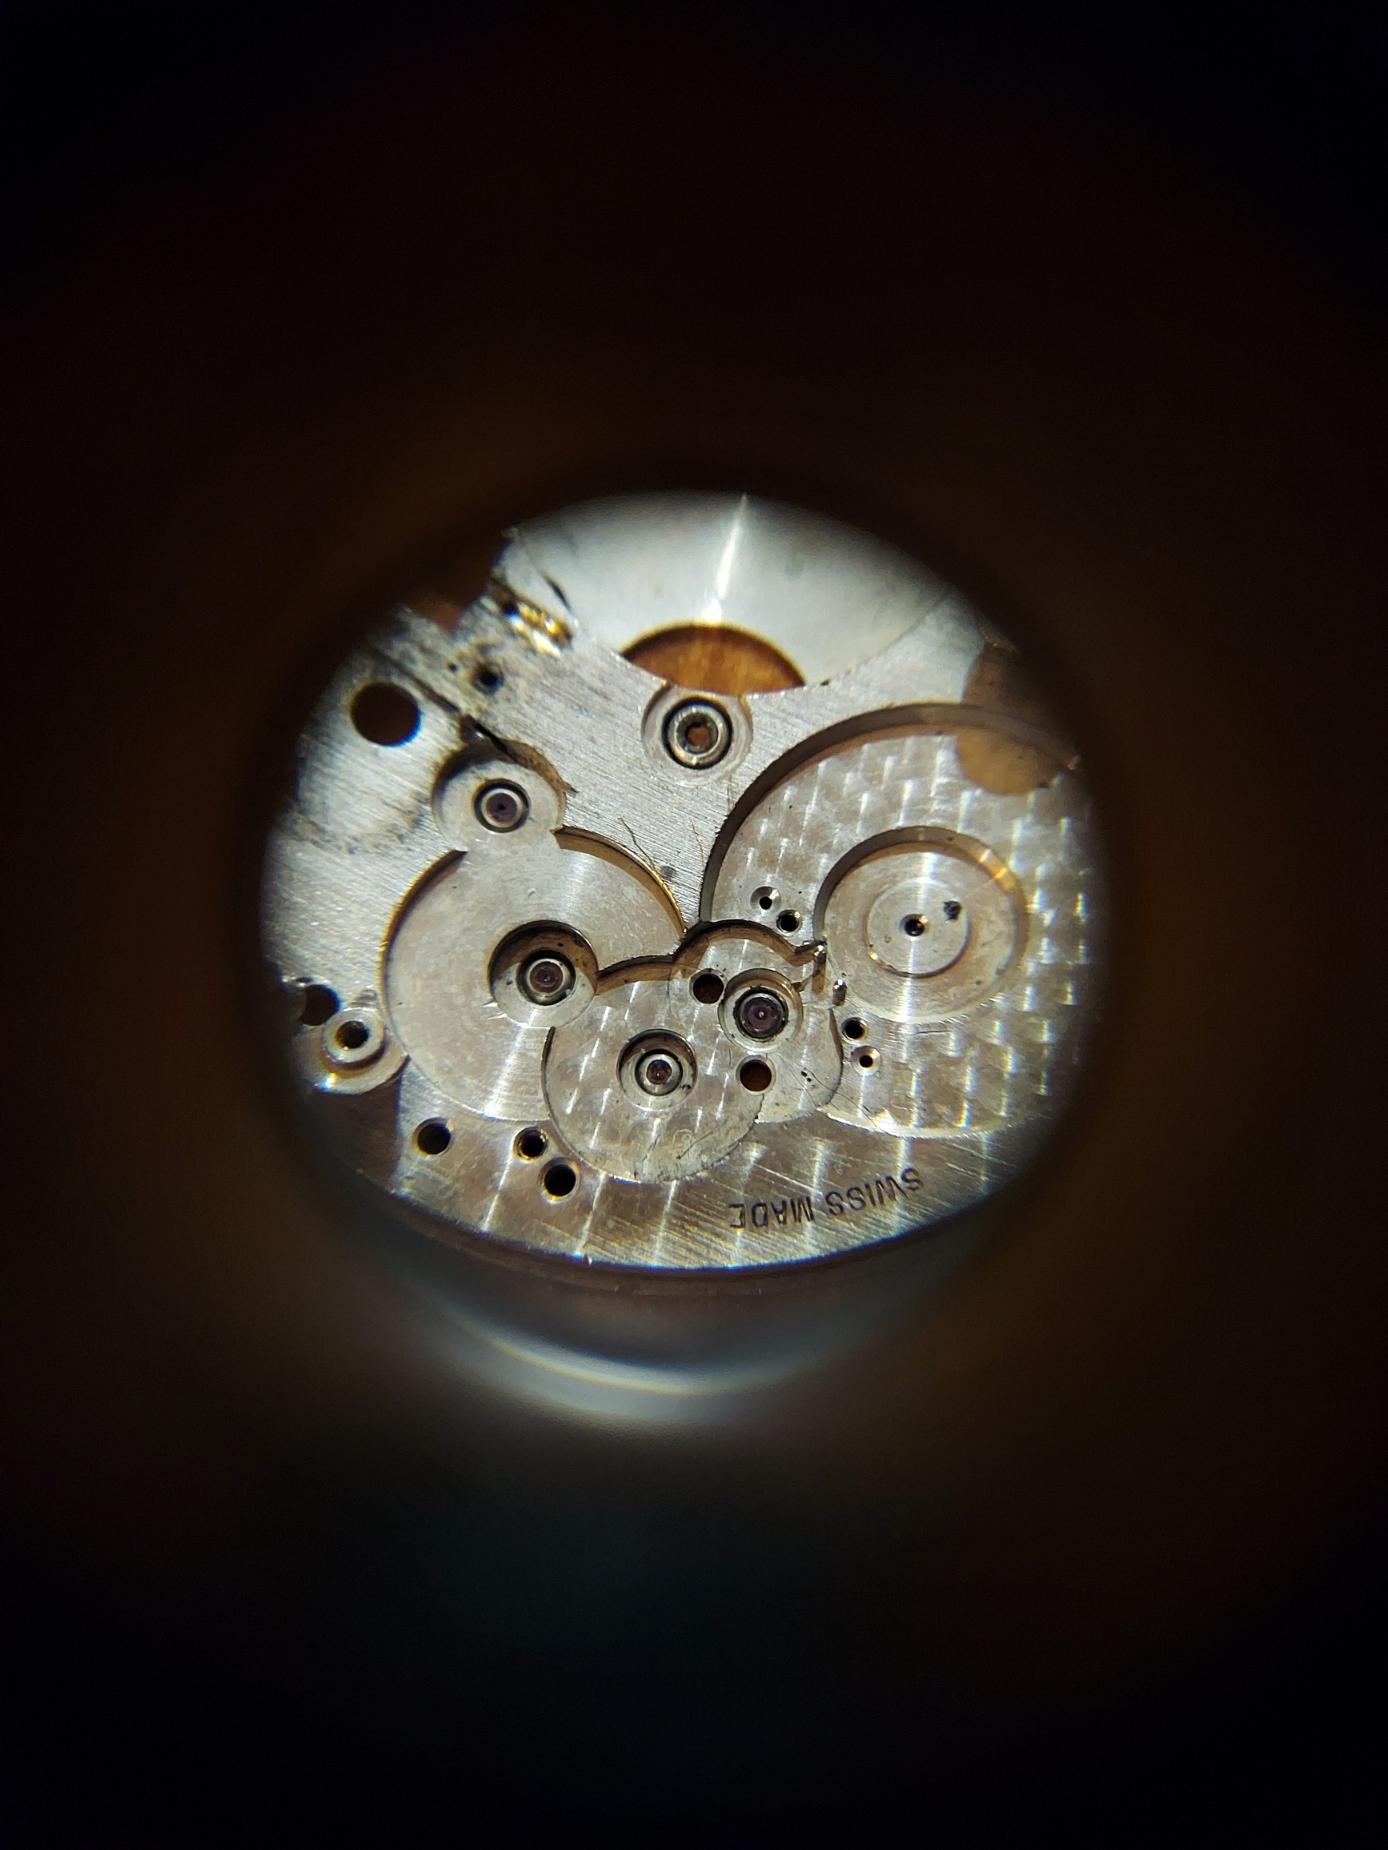
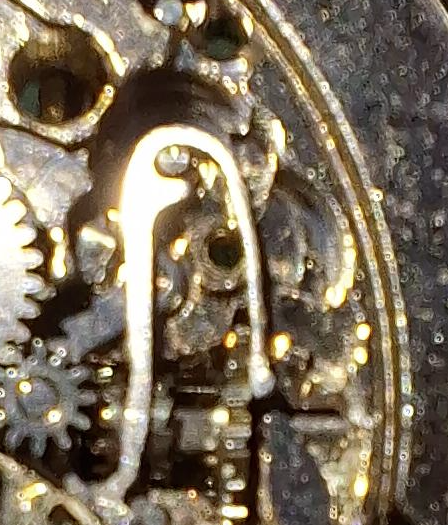
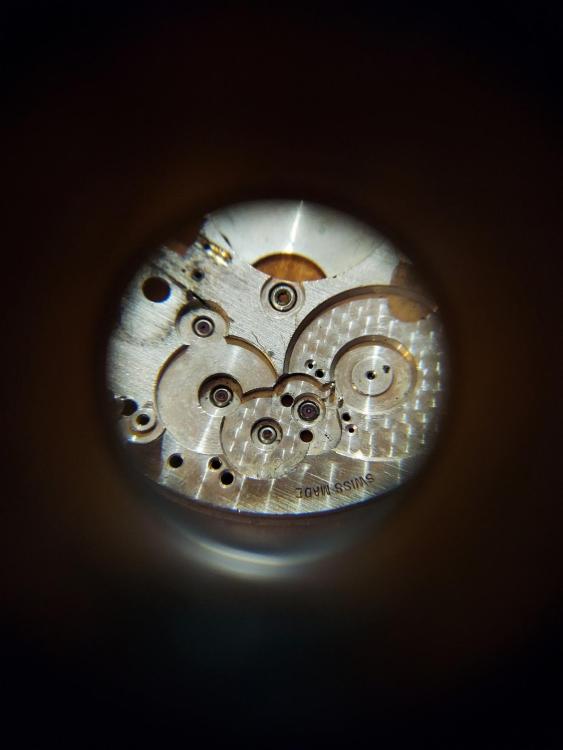
Thanks for the reply! Yes, the crown and stem are part of the case. The movement was removed by popping the crystal+bezel off the front, then the movement simply comes out. I took the crown off the stem and looked under it for a hallmark; found nothing. I looked at it more closely (sorry the photos were blurry), and yes, there are jewels in the dial side; the count looks to be accurate. I took a photo using a loupe. The jewels are filthy, but they are there.
 1 point
 -
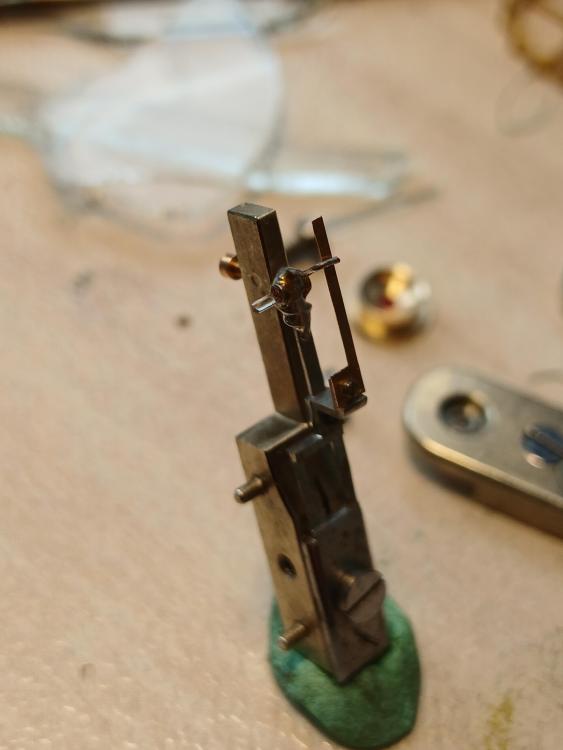
Yes, this is the balance cock. Base plate is the base of the movement. The down side pivots of the parts have bearing holes in the base plate. The up side pivots have bearing holes in cocks or bridges. Cock will have only one screw that fixes it to the base plate. Bridge will have 2 or more screws. The most of advices in the thread are given as it is lever movement, but it is not. There is no impulse jewel here and no roller table. So, please ignore this words, no point to try to relate them to You movement. The correct zero position of the balance is when the mouth of the cylinder is pointed straight against the bearing of the escape wheel. But for now, just attach the balance to the cock and try what will happen, may be it will be 'in beat'. If not, then we will figure how to get it right.1 point
-
Yes that's the balance cock. Before removing the old stud it's worth comparing the size of the stud on your new balance.1 point
-
I still have my screwdrivers that I used for clocks very handy to have these when it comes to screwing the movements back into there cases, they were flat blade and philips type.1 point
-
Great for Steam Punk.1 point
-
I love the one on the left; it has strong Delorean Time Machine vibes.1 point
-
I like those Tom, I wanted something different to my general purpose ones. Something to think about.1 point
-
Thanks for the offer. I will persist at the moment, but I will no doubt cry like a child if it fails.1 point
-
You could always make your own Richard, handles are available and square bar, o1 tool steel would probably work. You’ll need to harden and temper them though. The best screwdrivers I have ever owned and used were gunsmith ones. Maybe look for a local shooting supplier/gun dealer? Shotgun sizes should be common and be in the range for clocks I would think. Maybe these guys can help and are local for you @RichardHarris123 https://www.henrykrank.com/finely-made-miniature-rosewood-handle-gunsmiths-turnscrews-1306p/ Tom1 point
-
The coolest part about the mainspring barrel hallucination drawing is that it includes a misspelled "Mainsring" that looks like it has been erased and corrected. Surely the AI did that on purpose right.1 point
-
I know what you mean - the curved foil washers that keep the hour wheel in place. Not many clocks use them. You can buy brass foil on Ebay and make your own.1 point
-
I can’t directly vouch for the jewels however Sea-Gull is the largest manufacturer of watch movements currently so likely not terrible. Tom1 point
-
My favorite is PB Swiss, they aren't cheap, but hold up well, and have a parallel blade at the tip. Their hex keys are also the best I've used. I have Snap-On from my mechanic days, also good, but I find the blades are too thick for a given head diameter on European stuff.1 point
-
I use WIha, Good quality at a reasonable price.
 1 point
 -
Depends how much you want to spend ,Snap on and Knipex are good quality. Snap on mechanic's gear, Knipex is usually electrical stuff. I have some old Draper drivers from when I started work, they're still in good condition . I use mostly Wera now, good quality at a fair price. I can get quite abusive with drivers , and this brand stands up to me.1 point
-
Hi, I'm Daniel, I'm a watch newbie/enthusiast. I'm a lefty that wears watches on my right wrist and have committed to only wearing destro watches. I currently have a Tudor Pelagos LHD and Rolex GMT Master 2 with the left hand crown. I've been going down the rabbit hole on converting other watches to left hand drive, but it's hard to find people who obsess about it as much as I do.1 point
-
Dear All, Now the chimes have completed I can introduce myself. Chris Lyon. Known online in some circles as wyleu. I am examining a Smith Mantle clock for the first time and I was guided here...
 1 point
 -
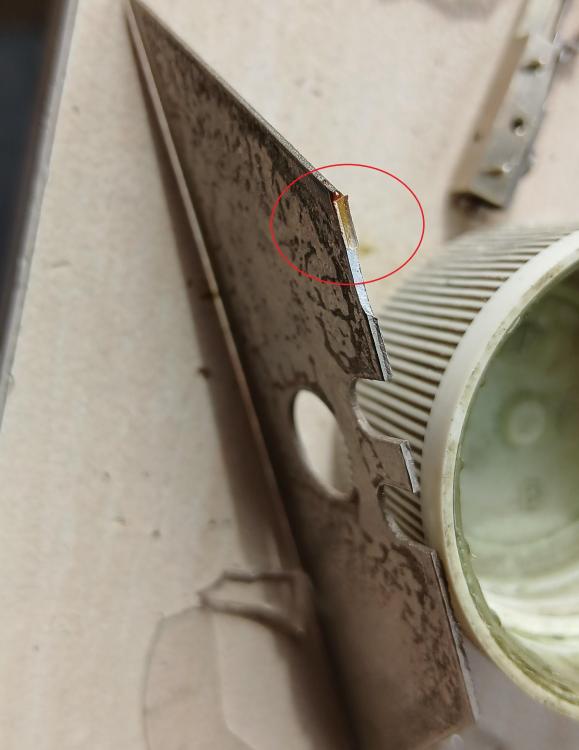
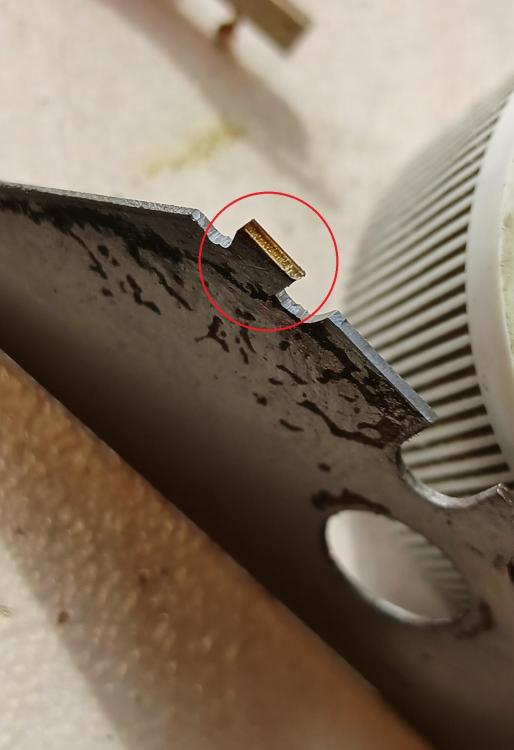
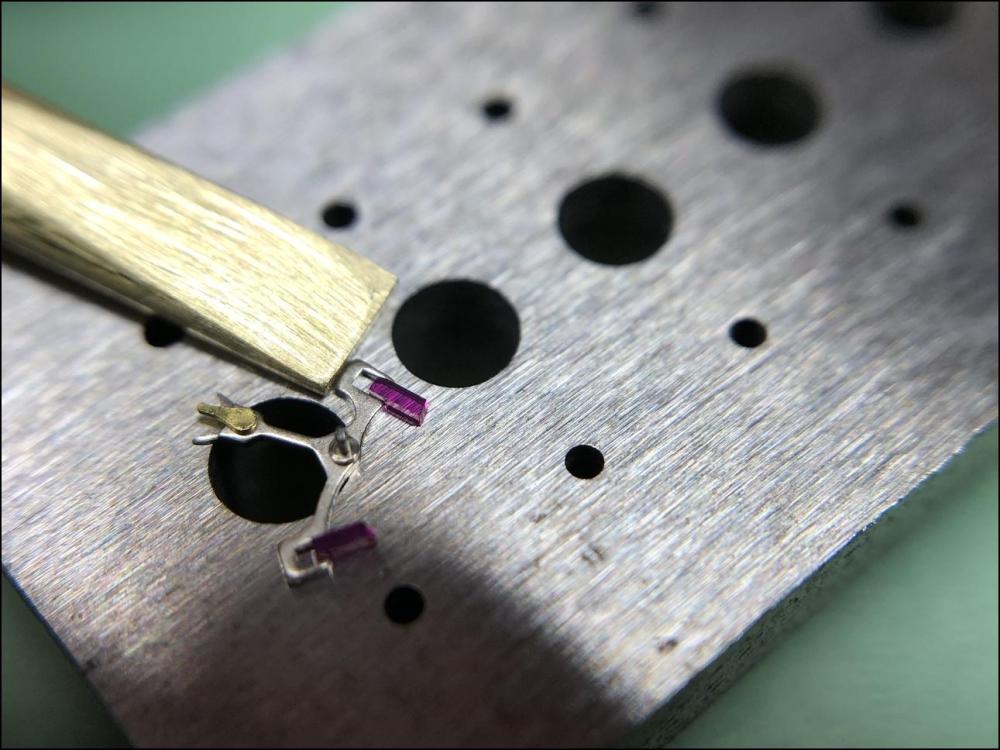
Just as watch collectors can never have too many watches, we can never have too many tools! Joking aside, I use the brass rod to start placing the stones in the fork before fine-adjusting them with the Gaston pallet tool. However, the Gaston tool isn’t as precise as one might expect. The angle between the pallet stone's impulse surface and the arms of the Gaston tool isn’t always perfect—this seems especially true for the exit stone. If I recall correctly, the impulse surface angle of the exit stone is steeper in low-beat movements than in high-beat ones. As a result, the arm of the Gaston tool can sometimes push the exit stone in the wrong direction, preventing it from seating properly in the fork. Additionally, attempting to adjust the stone using tweezers while the fork is fixed in the Gaston tool doesn’t seem to work well either.1 point
-
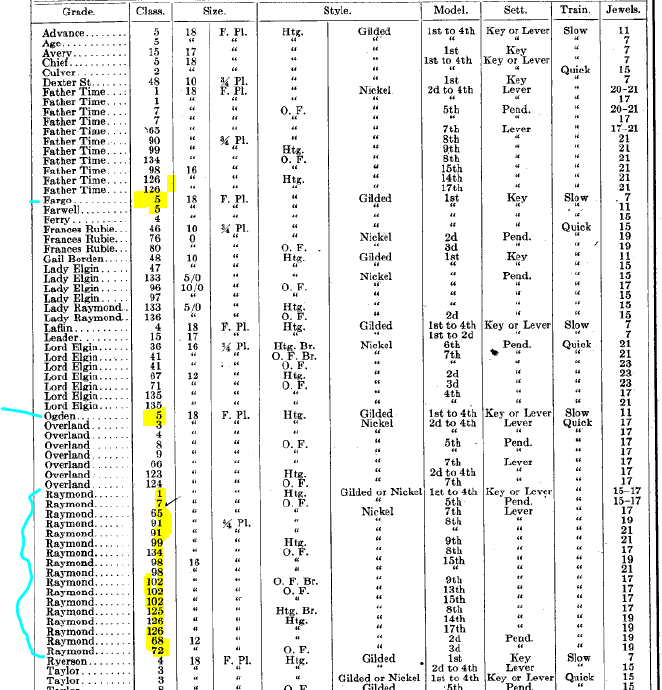
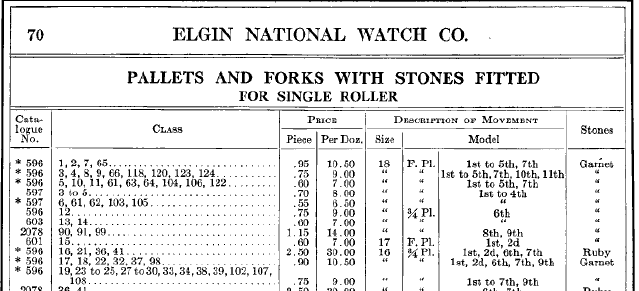
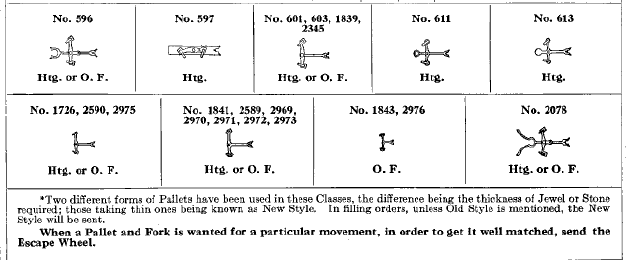
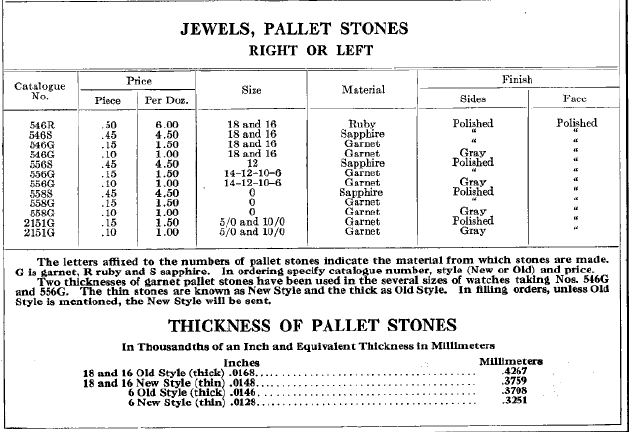
ideally it would be nice to have serial numbers because typically that's needed to identify the exact watch to get the exact parts but probably not in this case. I'm currently making a speculation as I haven't gone all the way through the process but I have replaced pallet stones in the past. So let's see if my speculation works out that they're probably all the same in the absence of a serial number I don't know exactly which watch you have. But let's go to 1915 parts book at that time Elgin was using a class system for parts identification. Some time in the well after this parts book they entirely reorganized and have a different system. so the early watches had name grades later on they just had numbers. It had to do with people counterfeiting their watches they went to non-named watches to confuse the counterfeiters. So two of yours are a class 5. But the Raymond is a whole bunch of different classes none of which have the number five. This is why if we were looking for anything else other than a few components everything conceivably would be different then for learning purposes pallet forks for 18 size single roller which I assume is what you have. Typically on vintage watches it's not good to replace the entire pallet fork because all the escapement components were hand fit. Which means unlike a modern watch for modern pallet fork can be a swapped out with no consequences on vintage you would have to adjust so it is best to make use of whatever you have fortunately they go by watch size and you can see the problem of having watches of multiple classifications or we don't know which classification it is there are quite a few different 18 size pallet forks. then on the bottom of the page we get drawings of what the pallet forks look like and the other problem of variations especially in the early watches then even though we have a classification system lots and lots of variations when we come to the actual pallet stones themselves they're basically all identical almost. So basically one part number you have to specify which stone you'd want that is if we had a time machine and you could go back in time to when the factories existed and the material it's made out of. So basically it says any 18 size Elgin pallet fork would have a usable jewel. Conceivably other American watch companies may have all been using jewels made by the same company. This is where it be nice typically on eBay to find a pallet fork assortment and if you're lucky you'll find a pallet stone otherwise you're going to have to try to find an 18 size pallet fork to get the jewels from. the problem with parts and vintage American pocket watches is I don't know if any of the material houses Woodstock pallet jewels and if they did they definitely would not be online you would have to ask. Here's one place you could try emailing Dave and see if he has any pallet stones https://www.daveswatchparts.com/index.html oh and 18 size American pocket watches are big unlikely that anything modern would fit.
 1 point
 -
I spy with my little eye, some things that begin with an "E"...
 1 point
 -
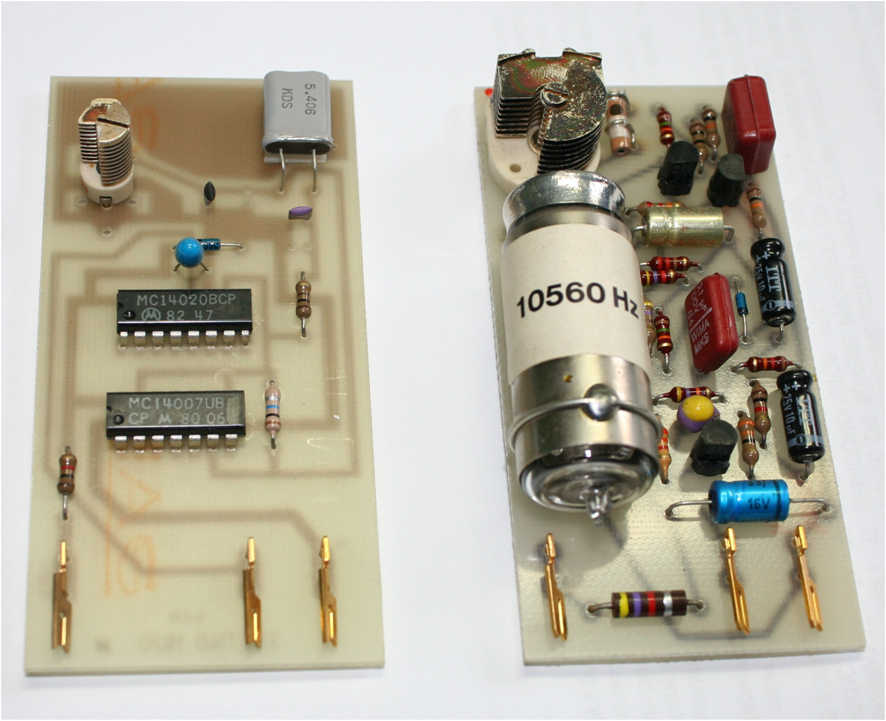
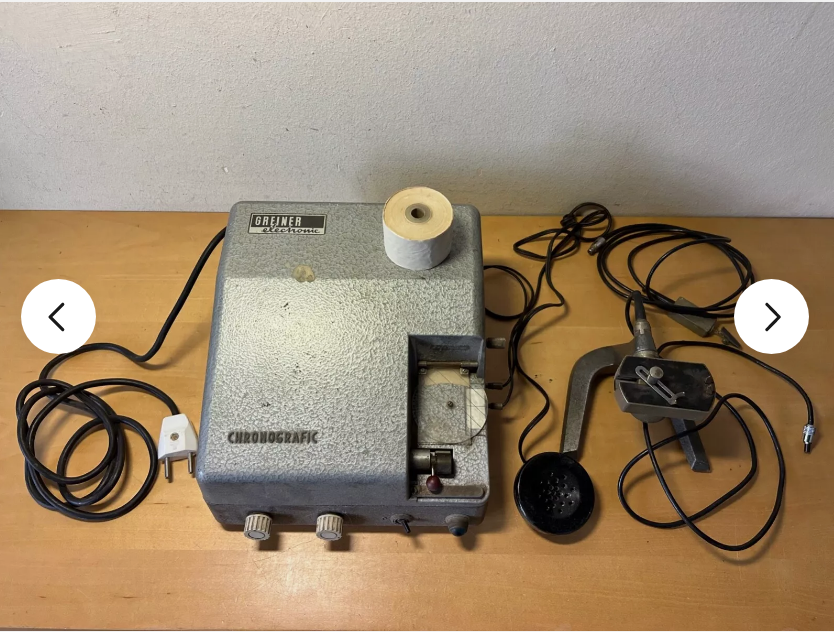
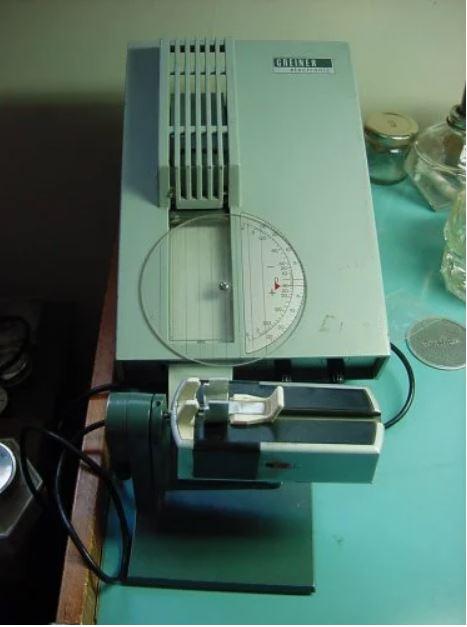
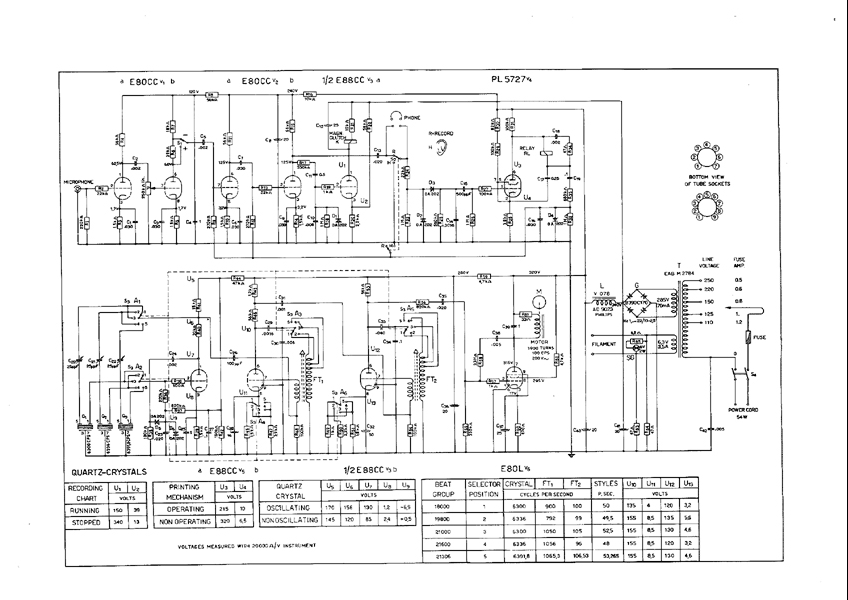
it's interesting in that it has moving parts and lights up and it makes ticking sounds it prints and? this brings up an interesting problem? Yes typically the transistorized ones or the newer generation tend to be filled with electrolytic capacitors. So for instance the B200 machine I think I at least two of them I had gone through and replace all the capacitors for people I vaguely recall one of the capacitors had leaked. They just don't last forever but how many electrolytic capacitors are in a vacuum tube machine? from the other discussion where I found the manual unfortunately not in English and not super sharp but still. How many electrolytic capacitors would you find in something with a vacuum tube? I don't see the usual large ones in the metal cans typically are sitting upright like the vacuum tubes themselves. It does look like in the image up above there may be one laying down but I can't tell if that's electrolytic. I almost think there's no electrolytic sotalol which I find quite interesting but it's hard to tell from the schematic it's a bit fuzzy and the images there may be one lurking underneath someplace is usually one associate with the power supply somewhere. then for @praezis I believe commented on calibration there does appear to be three separate crystals but I can't quite tell what the frequencies are the schematic really is fuzzy. Why can't people scanned things in higher resolution? yes that would definitely be one reason for purchasing this. Then it looks remarkably clean for its age and it's a piece of timing machine history. It's actually quite a nice looking machine.
 1 point
 -
It is a Felsa, the number should but stamped on the outer edge of the mainplate under the balance.1 point
-
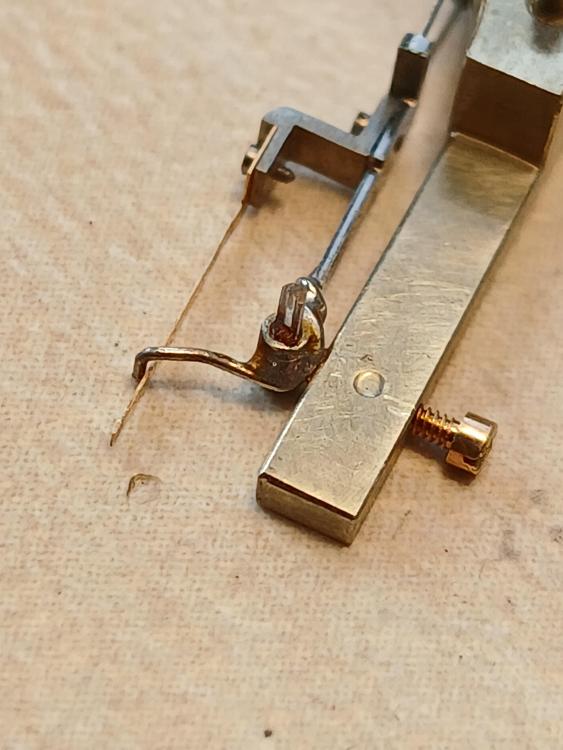
You look to have the yoke out of place somehow. When the winding stem is pushed in, the yoke should be outwards (to the right) to hold the sliding clutch against the clutch wheel ratchet teeth, and snap the opposite way when the stem is pulled out. It's difficult to tell from the photos, but possibly the spring "tail" on the yoke is out of position? It should be holding the sliding clutch against the clutch wheel by its spring pressure unless the stem is pulled?1 point
-
It has a loudspeaker connection so it enables you to listen to what is actually going on in the movement. Something to be aware of, is that these old things are quite......old. Old electronics, especially electrolytic capacitors, will eventually fail.1 point
-
So you’re still crawling around on the floor but with a pair of tights on the vacuum nozzle? There’s a visual. …I’ll stick to my way- I get the cap jewel back and a clean floor. No crawling …1 point
-
No staking set is required. You can pull the old stud out with a long nose plier. To refit the new stud, put the cock upside down on any anvil, get the new stud in the hole and press it home with any tool you have most control using. Tighten stud screw, done. Do not unpin the hairspring from the stud. Tampering with new balance complete is big No no. No unpining. No turning the collet. No turning the roller table. Regs1 point
-
If there's nothing wrong with the stud carrier already on the cock then I just use that.1 point
-
Hi Nick here. Uk born but now living in a small village in Spain. I have always loved mechanical watches and I have now been on my journey to learnt to repair them for the last few months. I look forward to engaging with everyone on this forum saludos1 point
-
Fantastic work Neven!1 point
-
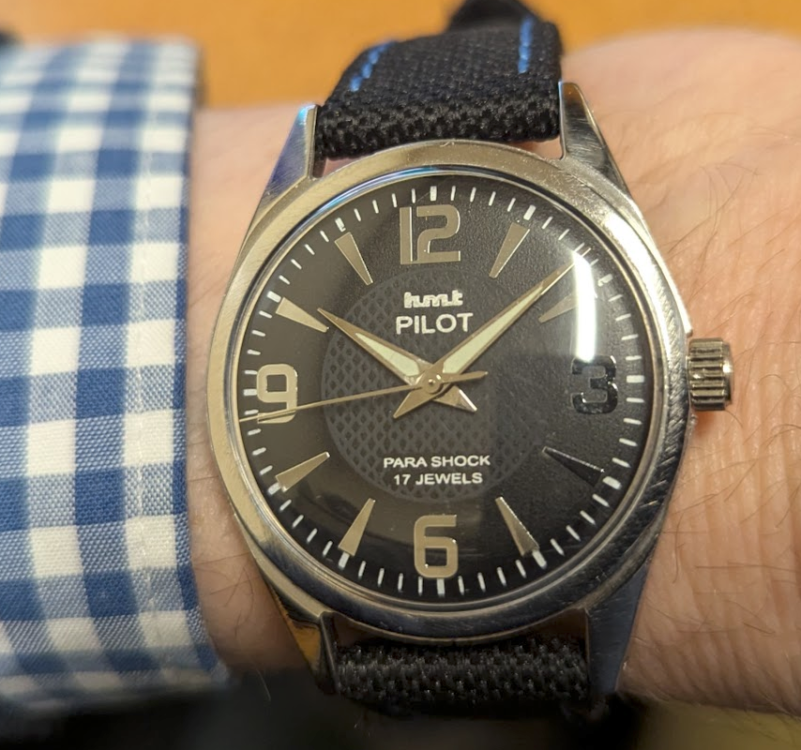
Another HMT, posting mainly to contrast with the one I posted last week. I paid about $14 for this watch and it is the nicest Pilot dial I've had (lots of them can be really, really terrible). HMT 0231 manual wind same as last week's Kohinoor. But where that one was great out of the box, this one was all problems inside. It was clean for a start, as many times you'll find soil inside. But it ran like a roller coaster on the timegrapher. 120° of amplitude horizontal and rate fluctuations between +200 and -300. In the movement, the hairspring stud was shellacked into the balance cock, the hairspring was out of flat, cannon pinion had no friction, the center wheel pinion was badly rusted, every wheel in the train had zero end shake - none. And the barrel arbor was a tight fit into the lid without free movement. The mainspring was fine. One by one I went though all of these, dissolved the shellac and put in a hairspring stud screw and center wheel from a spare movement, improved all the end shakes, broached open the barrel lid arbor hole, got it to about 1.0ms beat error. Now it runs about 220° which is as good as I ever get on this caliber. The dial does look better than I could capture with a camera, a rich textured black. Also this was $14.
 1 point
 -
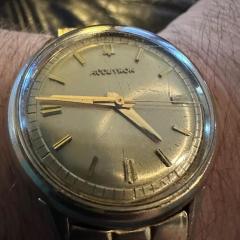
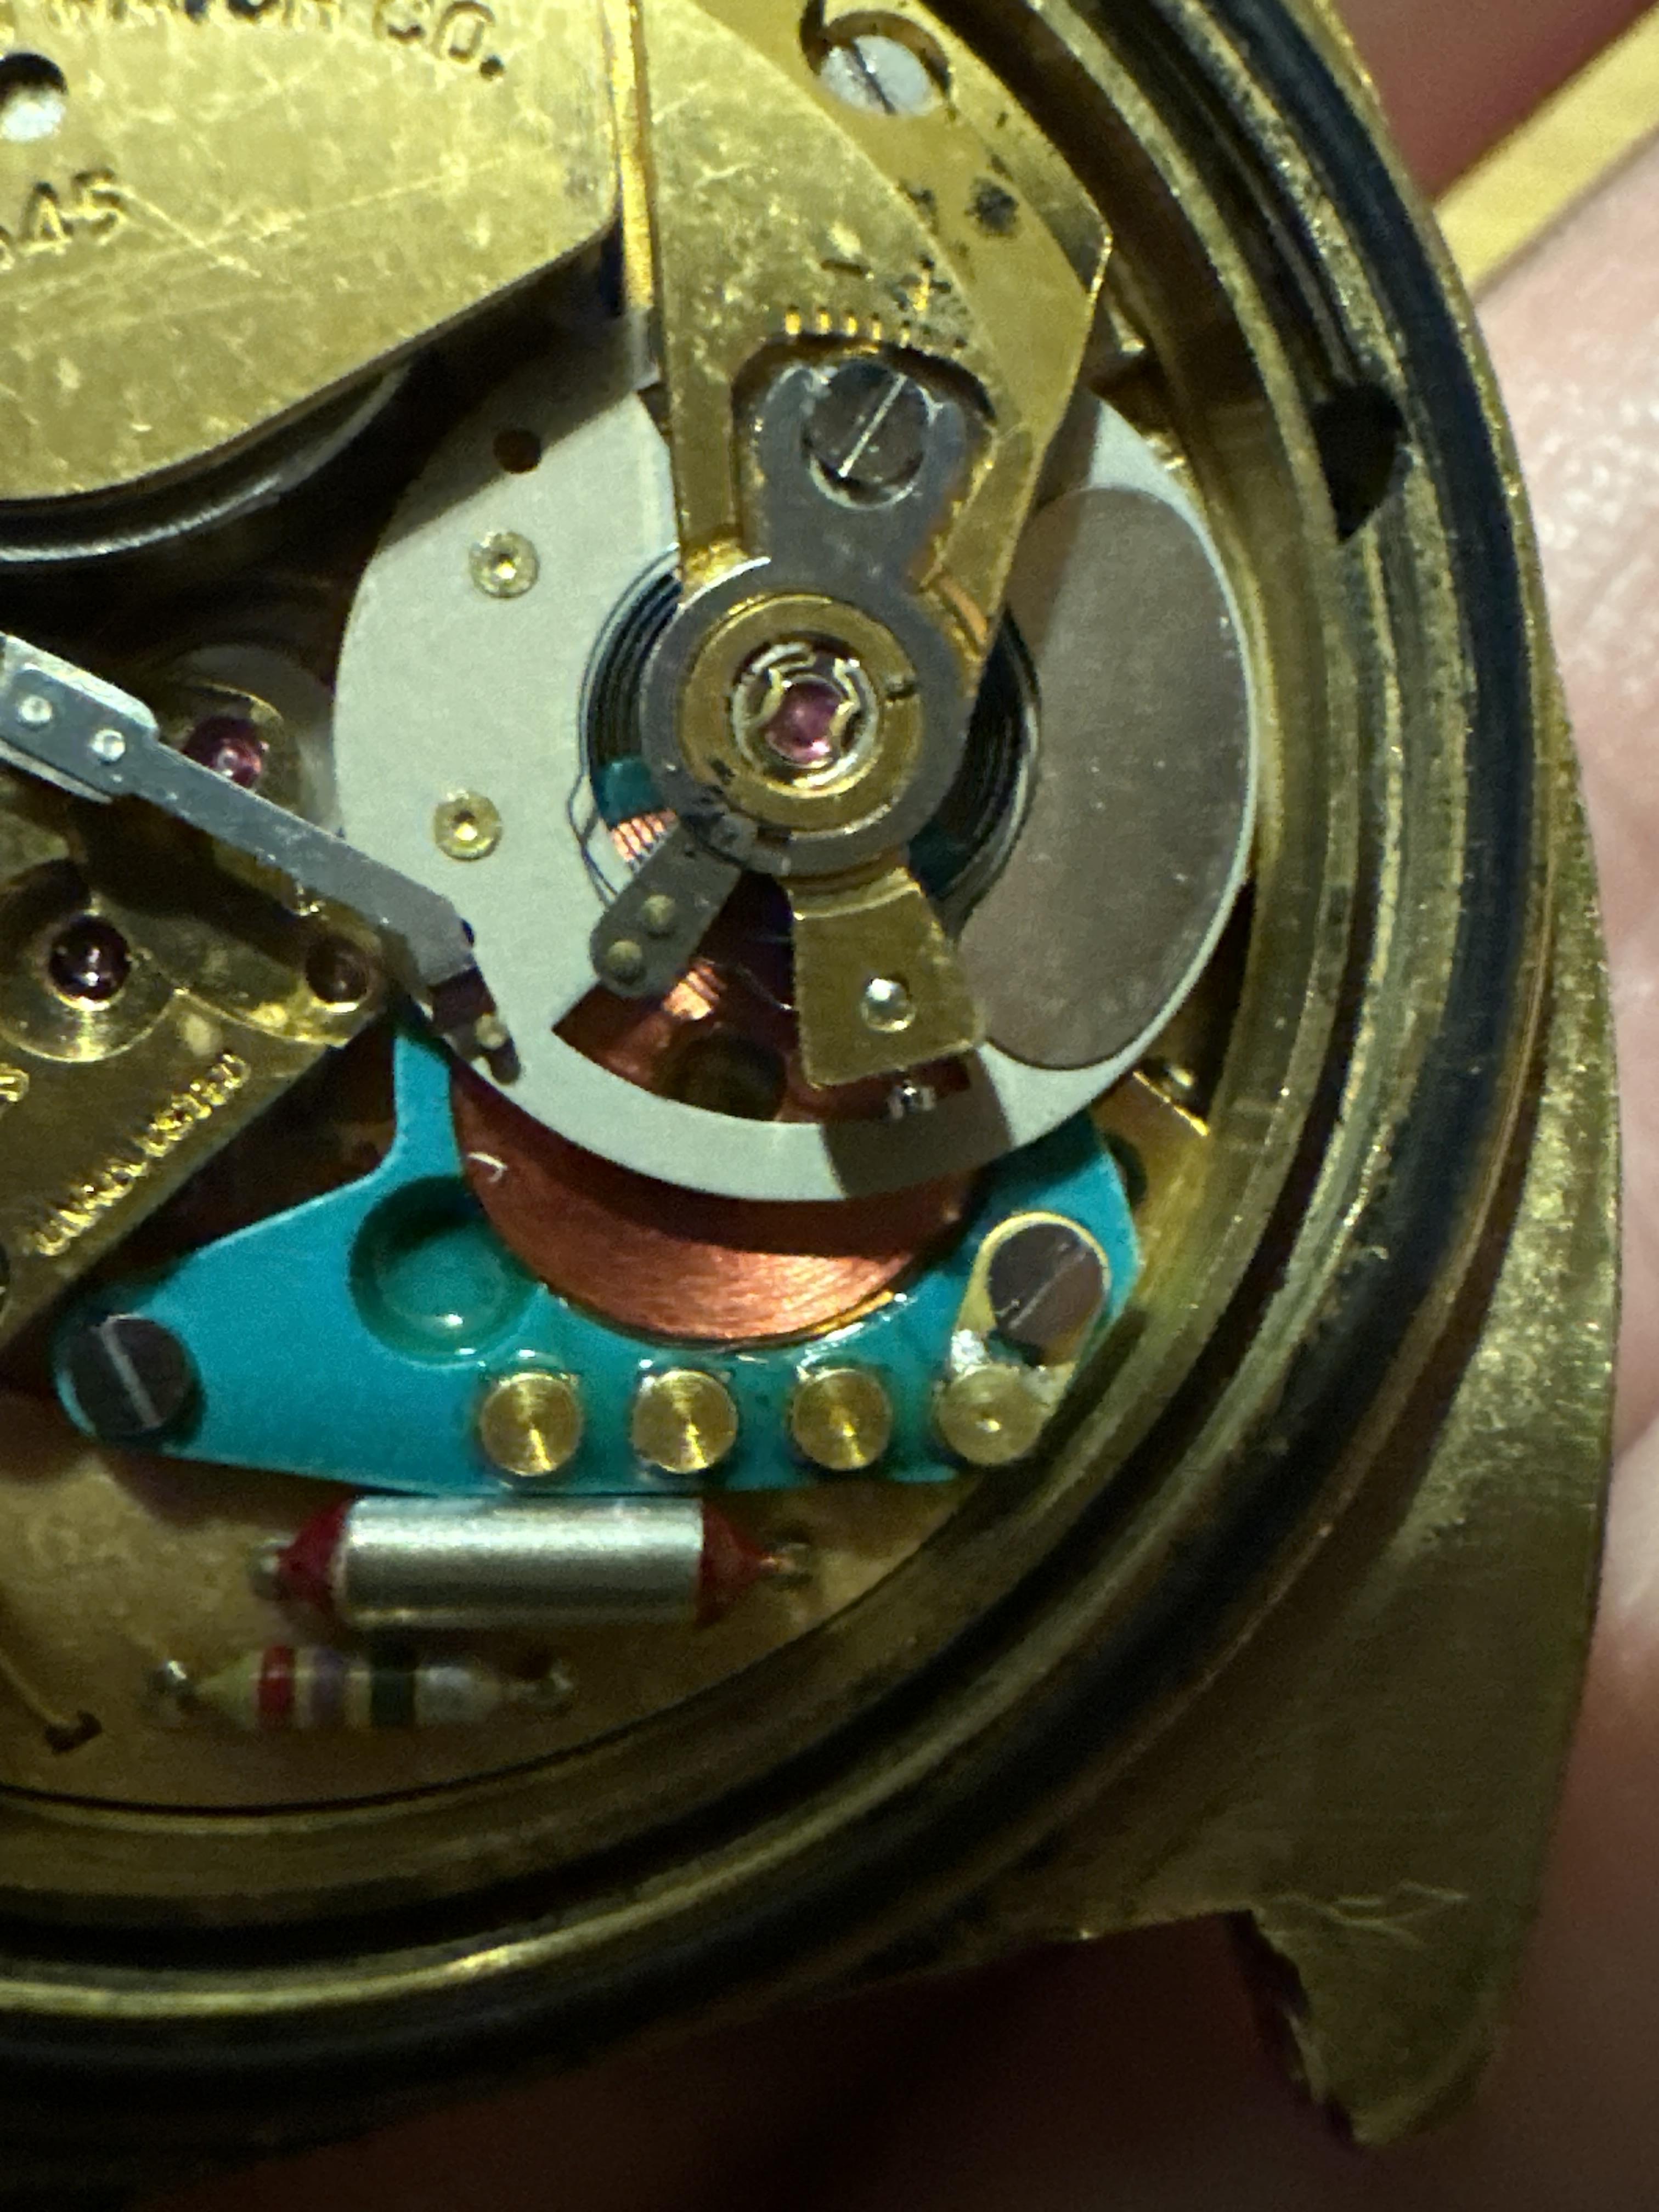
is not really a Hamilton electric it was only sold by Hamilton it's really a Swiss watch. then more than likely it's never been serviced so it needs to be serviced. That means it has to be completely disassembled cleaned etc. I'm attaching the service manual. ESA 9150.pdf1 point
-
Yes I agree. I will need to release the hairspring stud and take the balance off the cock again, so I can get at the jewel plate screws. Hopefully I can then just loosen them enough to let me tuck the regulator arm in between the jewel plate and the cock, without actually taking the screws out again. Thank you, everyone who pointed this out. I had completely missed the regulator arm split issue. Clearly I need to improve my observation skills. I think the boot is definitely pinching the spring against the index pin at the moment, and that is part of the reason why the spring is being pulled up into a bowl shape. I will correct that when I reassemble after re-seating the regulator arm. The regulator arm was detached when I took out the jewel plate for cleaning, as it is the jewel plate that holds it on the balance cock. I was always going to have to reset it because of that. I just haven't done it yet, because my faults in assembly had completely messed up the performance of the balance. This may be partly due to the regulator boot pinching the spring against the index pin. I think the end curve may be under compression between the regulator and the stud.1 point
-
Time to add a small tip to this thread—one that I hope someone will find useful. I've always found it tricky and somewhat nerve-wracking to press the pallet stones into the pallet fork. But then I remembered a video featuring Teddy Baldassarre on a tour of Jaeger-LeCoultre. Wasn't there a segment in that video showing someone inserting pallet stones into pallet forks in an assembly-line fashion? I looked up the video, and sure enough—for once, my memory was correct! Inspired by what I saw, I took a brass rod of suitable size, ground one end into a wedge shape (similar to a screwdriver), and polished the rest of the rod with wet sandpaper to give it an aesthetic finish more in line with Jaeger-LeCoultre. My new brass tool may not have passed the quality control at Jaeger-LeCoultre, but it worked just as intended! One thing that isn’t visible in the image—and which I should clarify—is that I grip the stone with tweezers and press it in while supporting the opposite side with my new brass tool. It feels safe, easy, and precise.
 1 point
 -
That maybe the curb pin and boot gap needs closing up to bring the vertical positions more in line with the horizontal ones, but more probably the wear and friction when in vertical positions, especially if your seeing a big drop in amplitude at the same time I've bought plenty of pin pallets in my early days because they looked good and still have loads in 'the little pots graveyard'1 point
-
1 point