Leaderboard


Popular Content
Showing content with the highest reputation on 04/07/25 in all areas
-
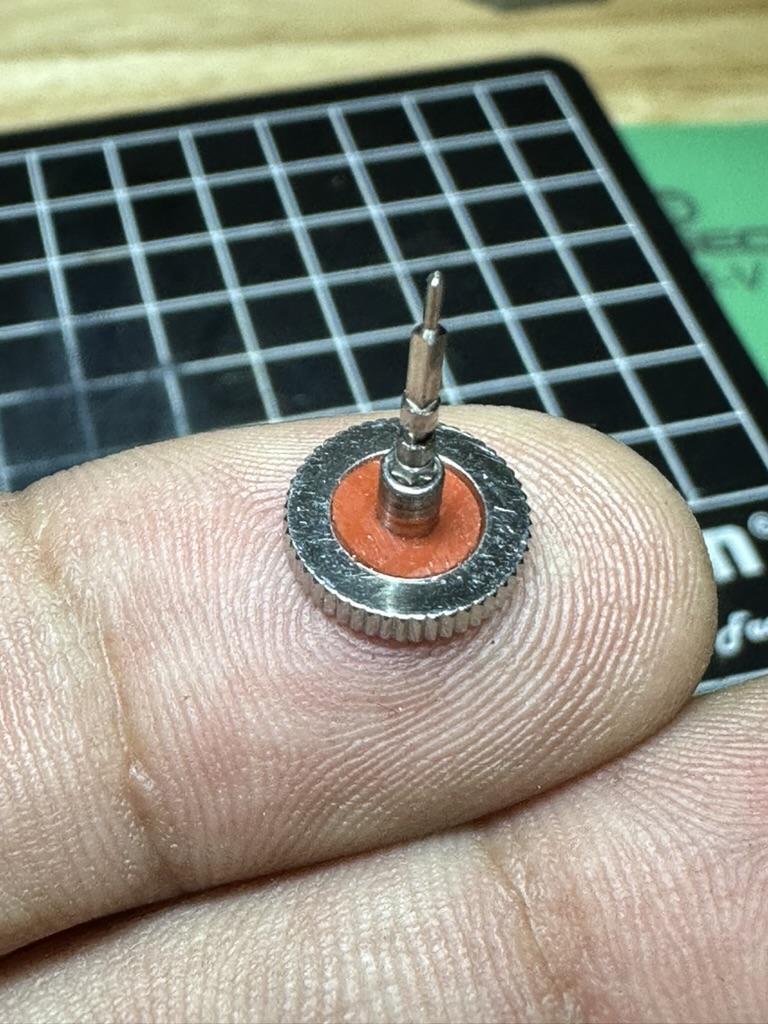
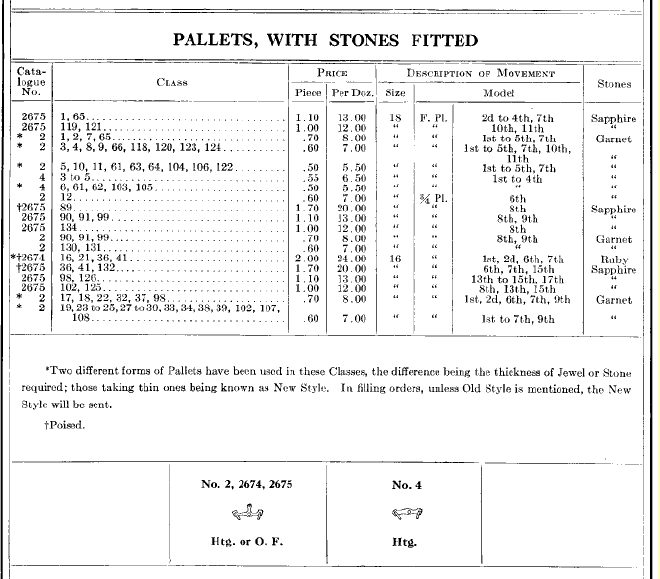
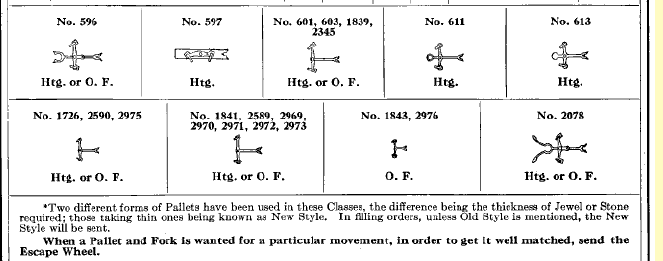
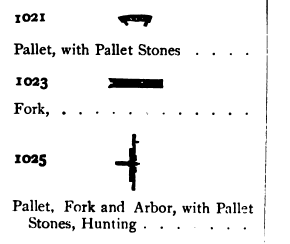
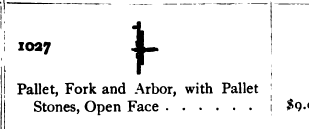
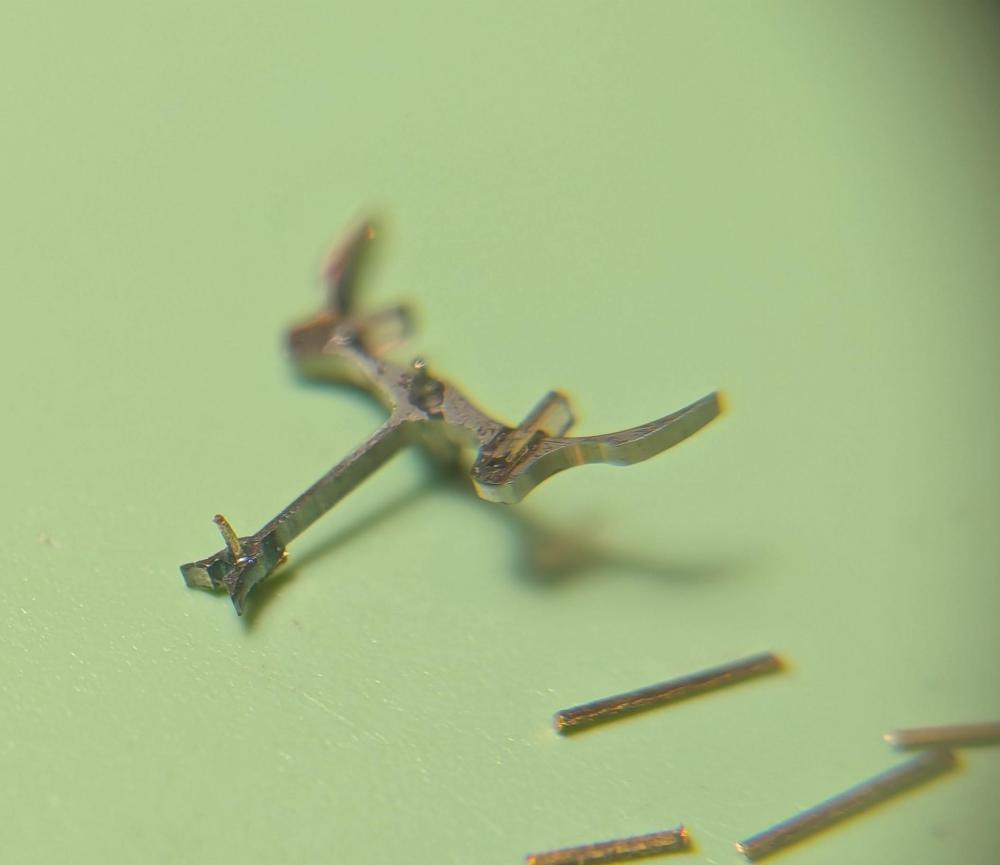
It's hard to help out when you get such a general description like this. Which is why I always ask for photographs model number is oh look we did get a number much much farther down. One of the problems with early American pocket watches will be lots of parts variations. Your pallet fork is a number four which on the parts list has an X indicating that it has variations. Then the parts book really sucks because it doesn't show the entire pallet fork and yes other than the modifications with file that does look like the right pallet fork. Oh and of minor confusion on the part book notice the reference to class? Sometime in the mid-20s Elgin change their entire parts system before this they used a class system. So in other words a 335 is equal to a class of 105. The pallet fork section actually covers several pages with lots and lots of drawings a pallet Forex. On the second page of the section we see another one of those forks were we can see a better example of the entire thing. Interesting description for a pallet fork the kindergarten design well I learn something new every day. Plus it could be worse like let's look what Waltham did with their kindergarten design pallet fork Yes this is one of the 18 size Waltham pocket watches notice how you get the pallet with stones and you get the separate fork? But for quantity a pallet forks there are two of them? That's because the open face in the hunting have the gears arranged in a different fashion and the pallet stones have to be on the right side. So even if you find a donor watch to steal a pallet fork from you may have to disassemble and reassemble it so the stones are in the right direction. Then I can't remember which company uses two screws to hold the assembly together and that allows you to adjust the depth of the pallet fork. If that wasn't enough things for somebody to screw around with like banking pins you can have more things to screw around with.

 4 points
 -
So this is where I’m up to. Just using saliva and a piece of paper towel wrapped around a small plastic stick. It’s still not a thing of great beauty but better than it was! I’ll go over it again but it almost feels like all the staining is in the top layer of lacquer, so it might be interesting to try and remove that without destroying what’s underneath. Somehow .
 4 points
 -
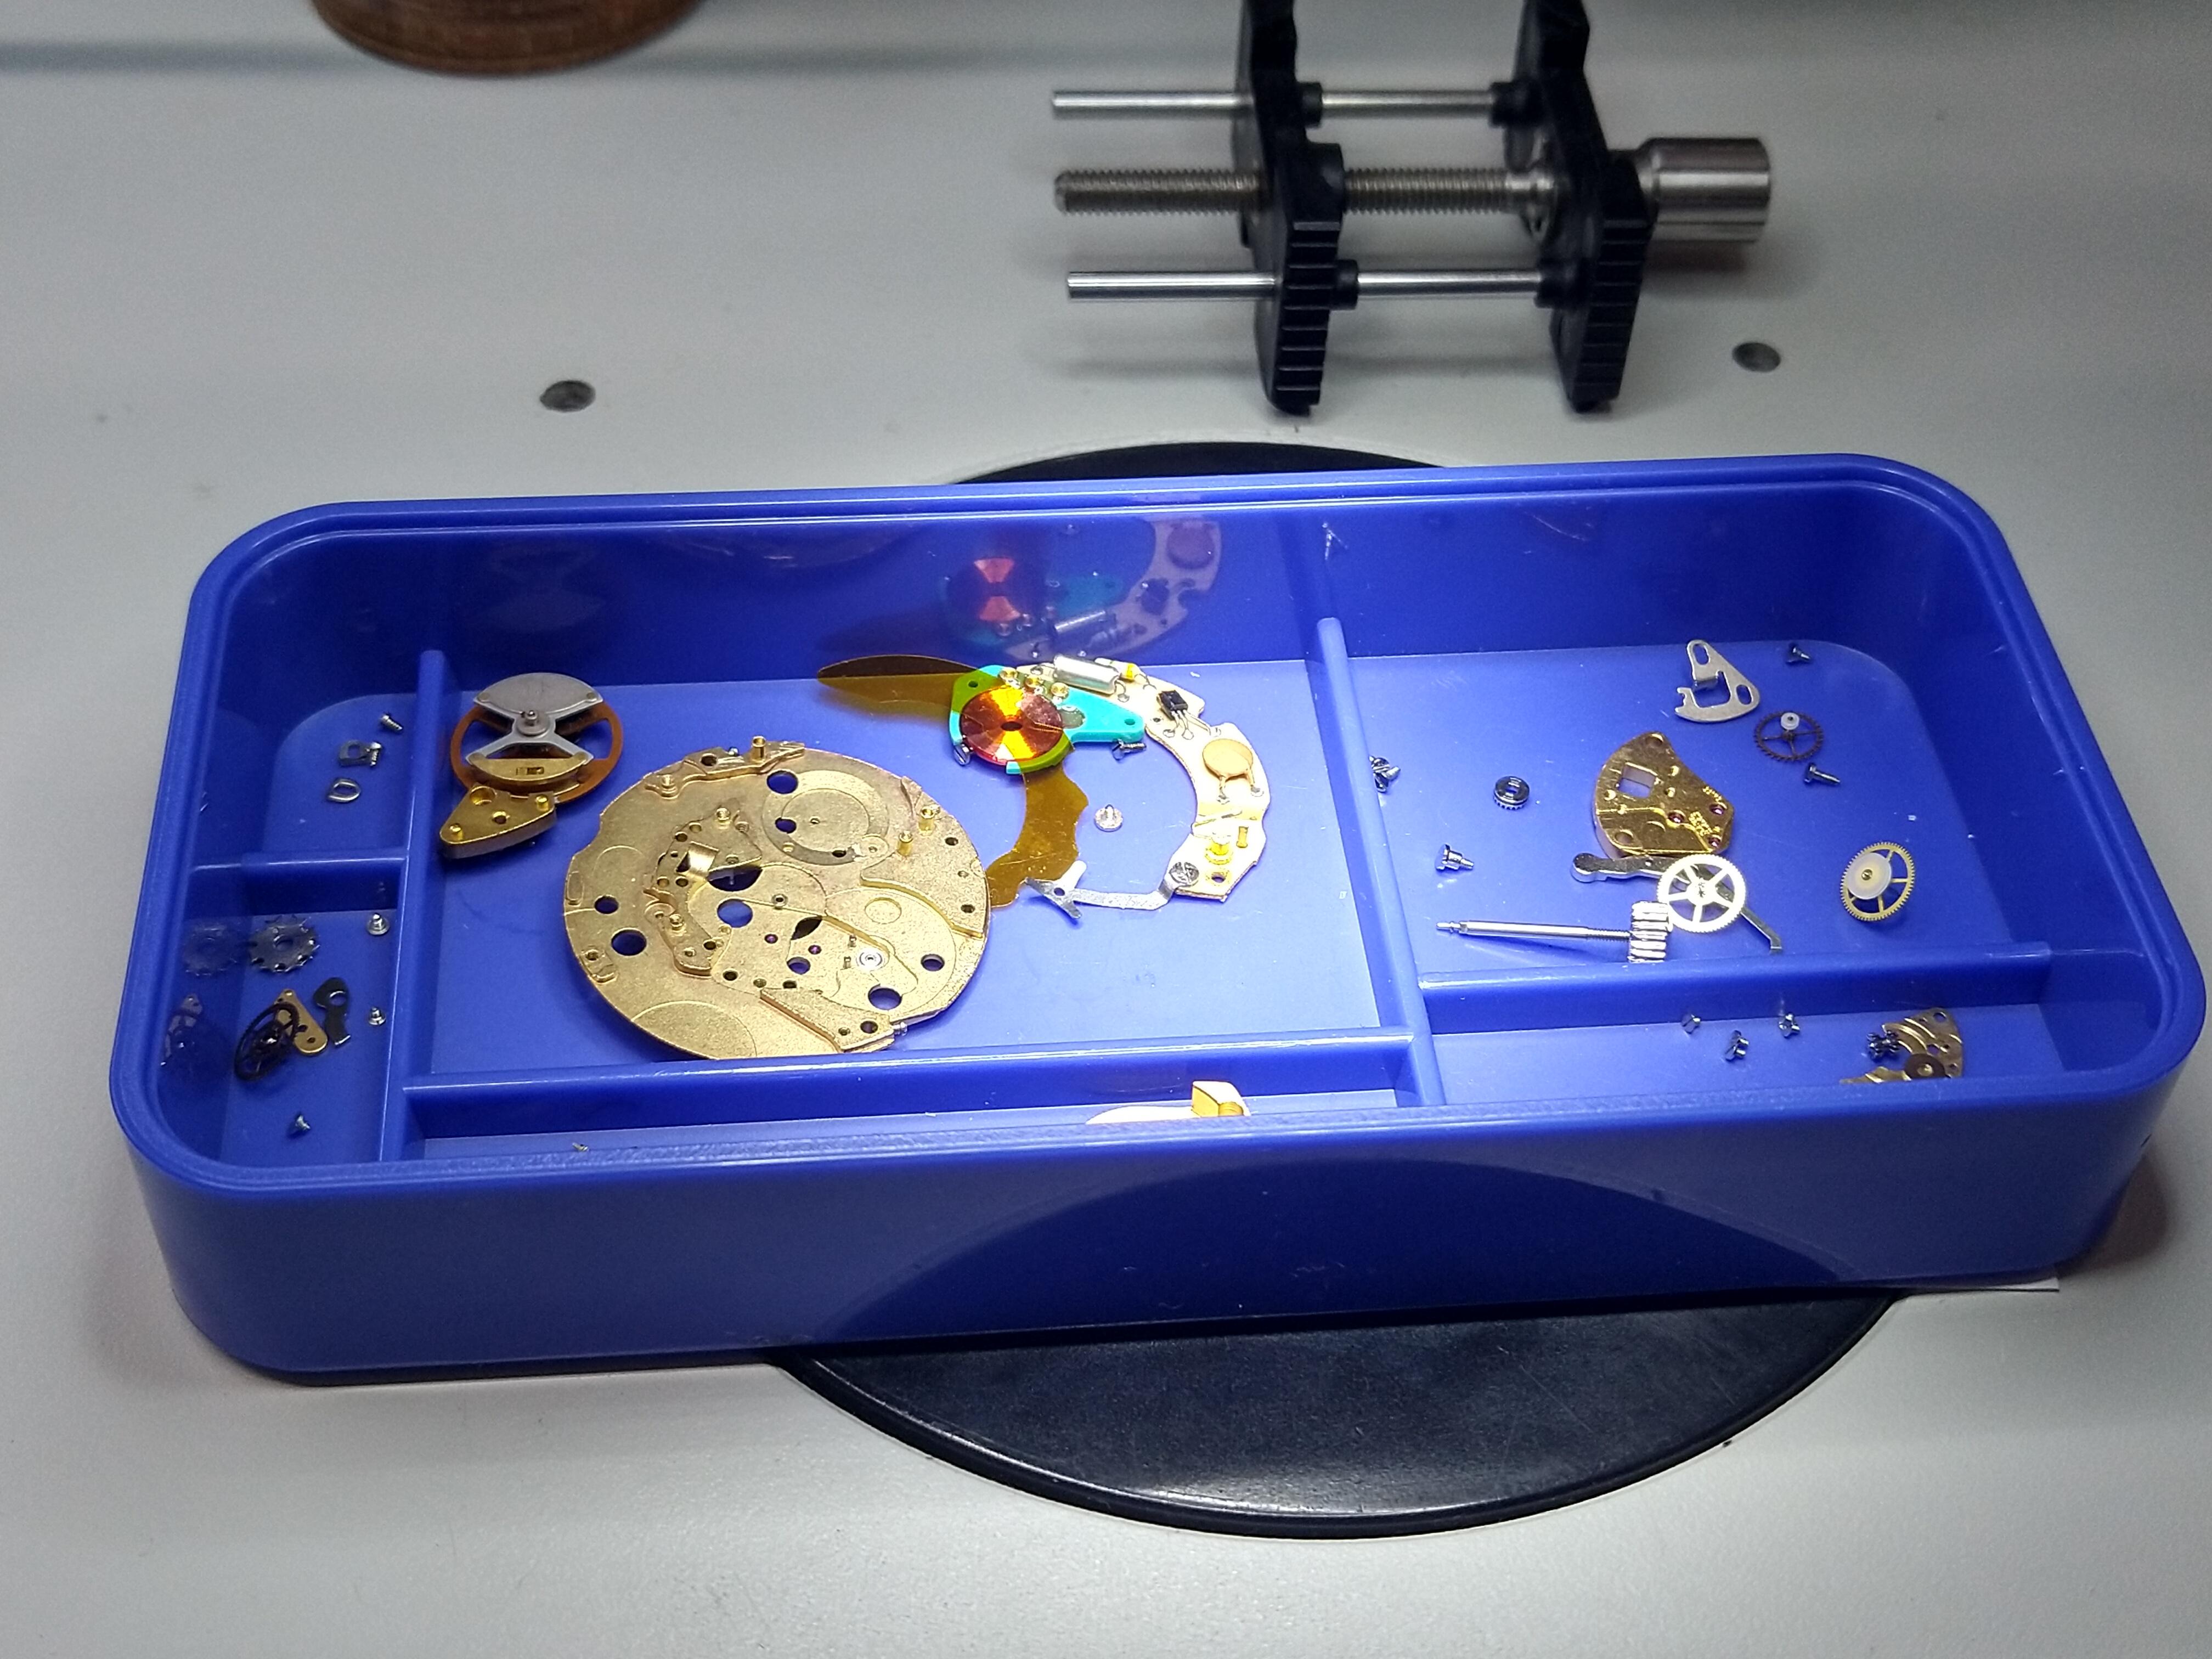
Ha, and barely anyone knows I exist! Mostly I do prototype/ short run production work. But next in line of "interesting" work, need to make a pallet fork for a little PP (it also needs a staff, someone cobbled in another but had to glue the roller table- off center, oh, and a new fork cock, another cobble job) , and another PP that needs the Geneva stripes redone. Both due to previous watchmakers too .4 points
-
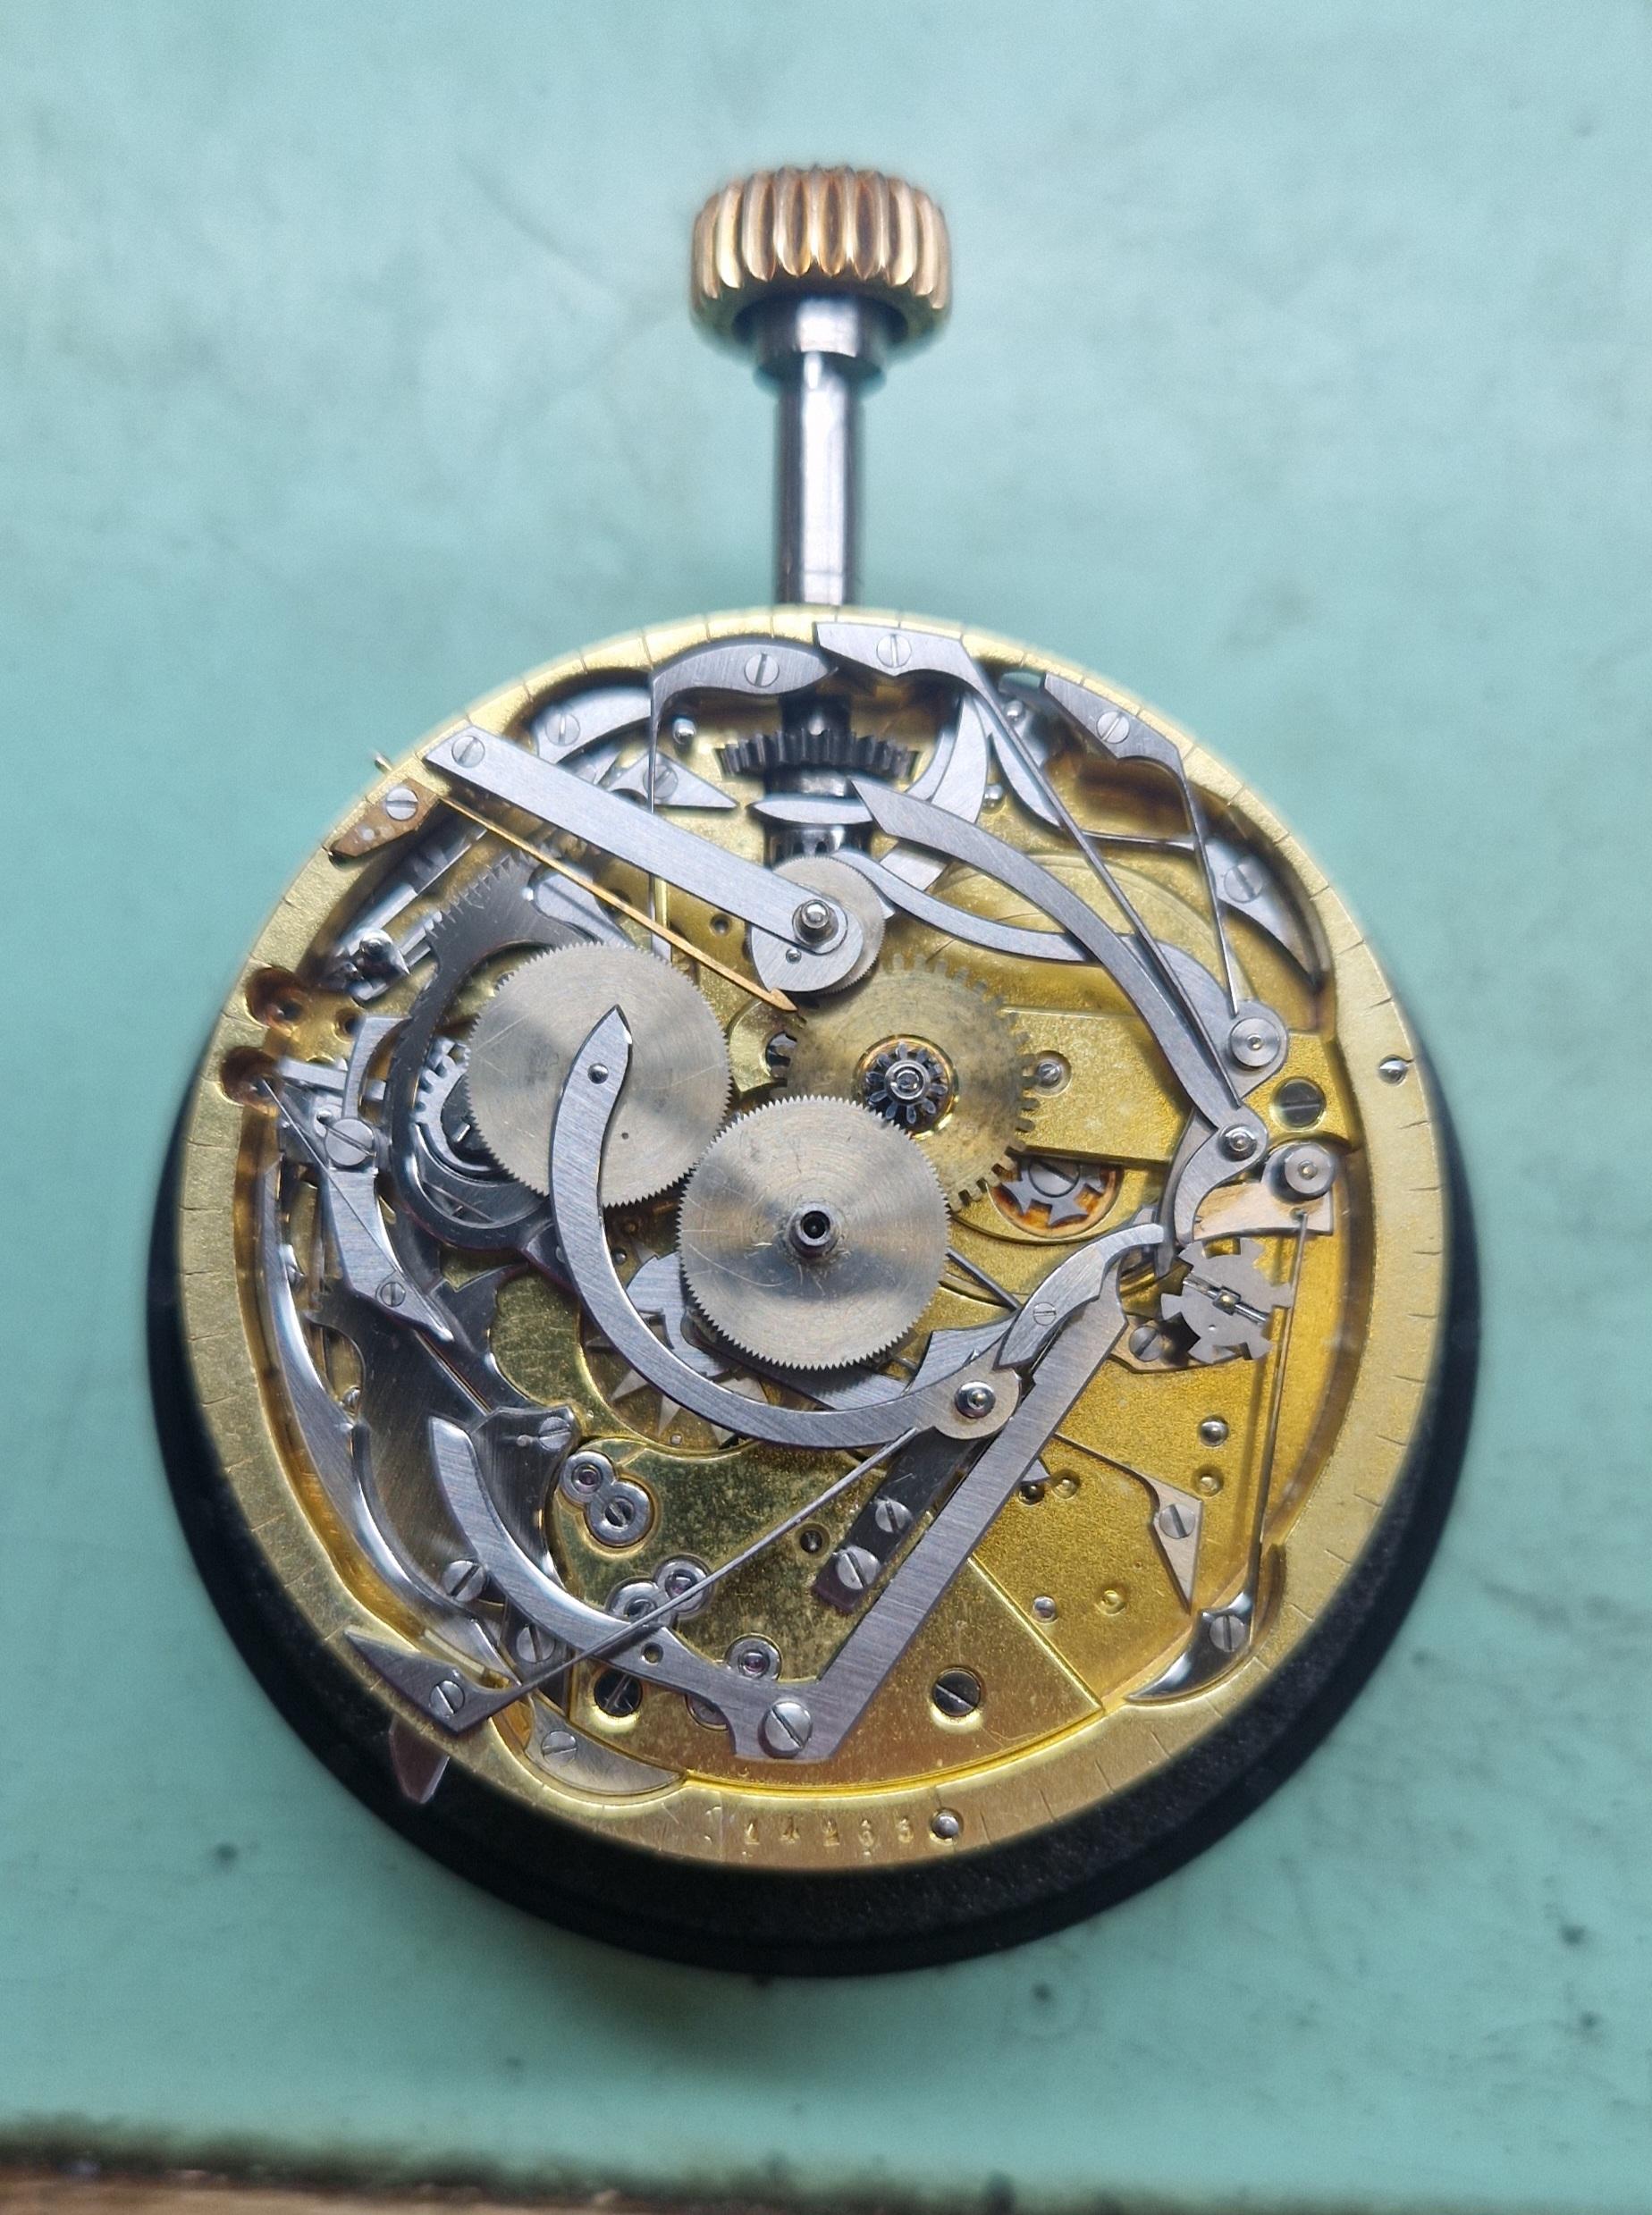
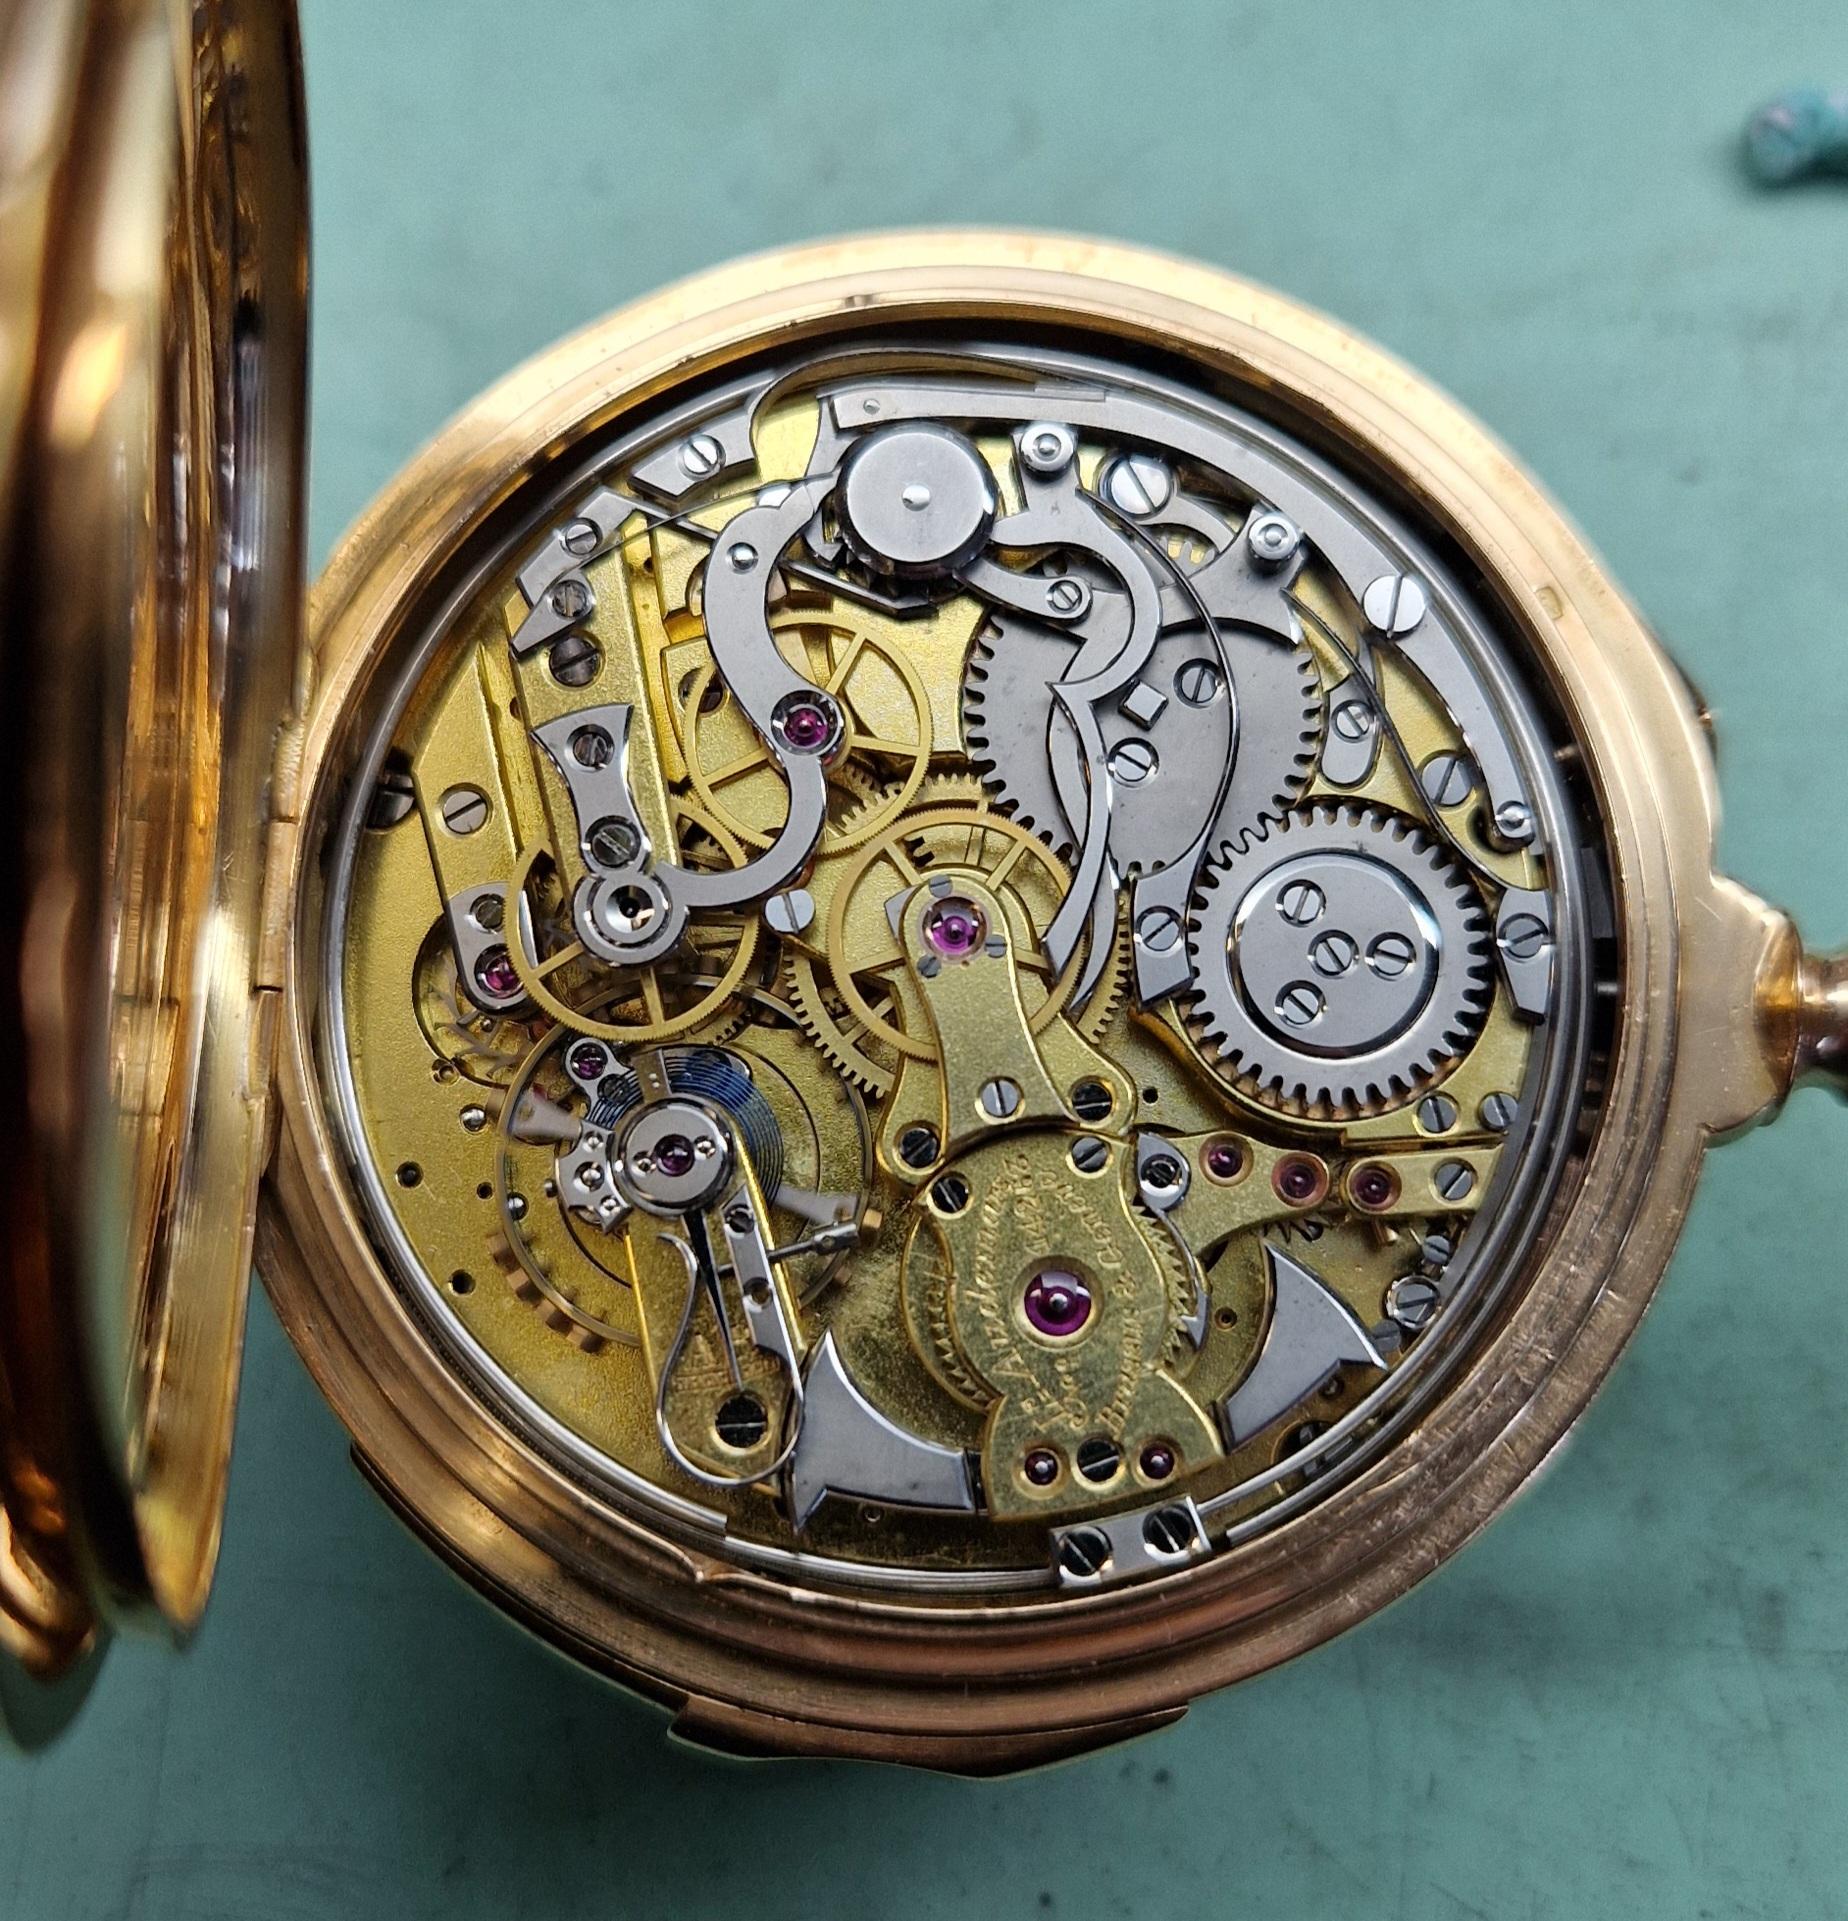
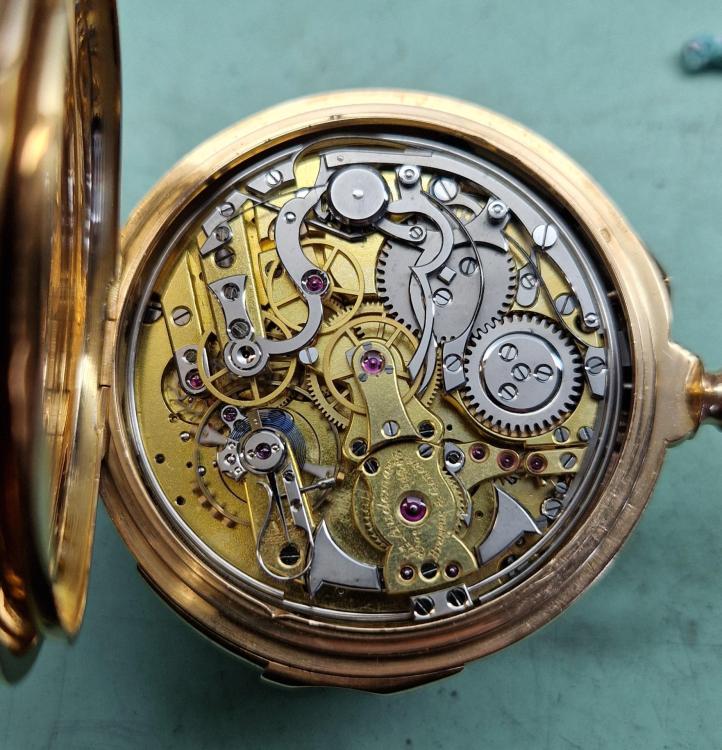
One I just finished today, L. Audemars pocket minute repeater with chronograph. The case is in great shape, so I'm laying the destruction at the hands of the last watchmaker. I think they clamped it tightly in a movement holder and squeezed the hammers, but still kind of a mystery. Maybe the bare movement hit the floor? The damage: New arbors both hammers (both pivots gone on both- the plate pivots are like 0.60mm) New lift pin one hammer New bridge jewels both hammers New weight repeater escapement fork New banking pin for repeater escapement eccentric Repivot 4th wheel (3.70mm long) New staff I managed to get jewels in the original rub-in settings, so overall I doubt anyone down the line (except you guys) will ever know. Beautifully made watch.

 4 points
 -
I used to use white for most polishing, but found it hard to remove deeper scratches from stainless steel. Green is much better at that, and also gives a mirror finish when used with the chamois. It also works on chrome and nickel plating - just be careful and do it lightly. I still use white a lot as a final polish, as it can be used on almost any finish. For gold I use red.4 points
-
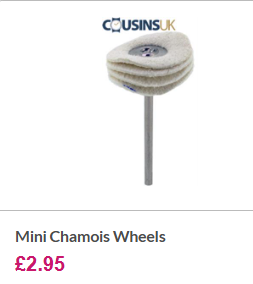
Some of those felt wheels are quite hard and take a bit of use before they wear and the Dialux covers all the surface. I use them with Dialux Green for scratches on stainless steel. For final polishing on all surfaces, I use the mini chamois wheels. They are excellent, robust, you can get them in to tight corners, and they will give a mirror finish.
 4 points
 -
Syringes as pusher tools or as replacement pins? I took a first try at fitting a new pin. I have a huge bag of tiny brass wire segments I use for heat bluing. They are flat or rectangular so I tried stoning them closer to a round taper with a pin vise and India stone. The taper is a little too pointy and severe so will probably redo this but I am pleased with myself for repairing a 135 year old part.
 4 points
 -
3 points
-
Success without drilling! I realized the brass pin couldn't be too firmly fit into steel in any case so I arranged it on a staking block and pushed the broken pin with a ball head sewing pin Next to see if I can fit a replacement. I measure 0.23mm tapering to 0.20, and about 1.15mm length.
 3 points
 -
Polishing is as much an art as it is science. There are a lot of variables to consider. Like the type of material being polished, type of polishing agent used, type of polishing wheel, rotation speed, pressure applied. For a hard metal like stainless steel, I like to use a hard wheel like felt or even MDF particle board. It's less likely to round off a sharp edge. Actual polishing is very fast, usually taking less than a few minutes. Getting the surface prepped to take a polish, that's the killer.2 points
-
I think for the age of the watch and considering what it looked like previously I'd just leave it as is.2 points
-
That's something I'd like to know. I looked at bench polishing machines, but there's a huge range of speeds. For the fixed speeds, about 3000 rpm seems popular. But what size wheels are most used? If we assume a 4" wheel on a 3000rpm bench machine, then on my rotary tool with a 1" wheel, I need to run at 4x speed (i.e. 12,000rpm) to get the same wheel surface speed.2 points
-
Well boys, it appears I have made a mistake! This appears to be the correct pallet fork! My experience with these older Elgin's, they always have an elegant pallet fork. This one appears to be from the factory this way, which is interesting considering its a 17 jewel movement. Hopefully I don't lose any reputation for this mistake. It just appeared very unlike Elgin to use such a pallet fork.2 points
-
The fact that your shop's ho-hum-workaday-off-to-the-rat-race watches are Audemars minute repeaters and Patek pocket watches - I cannot comprehend.2 points
-
Same ingredient as autosol , it's a step down from diamond. Corundum is a form of aluminum oxide....rubies and sapphires. I suspect what watch jewels are grown from. Felt wheels, hard mops coat better with speed, introducing some heat. You could warm the bar at a low heat. Expect it to not all stick, it can flick off quite a bit.2 points
-
I looked up the MSDS of polywatch, and the abrasive is aluminum oxide. I assume Jon that you have Diamatine on hand, so you can make your own! That is what I do. I mix it with a bit of oil to make a paste. They obviously have other additives in there to keep the solution suspended, but the homemade version works quite well. If you're using a cotton mop, it will pull the oil from the powder and dry it out.2 points
-
Welcome to the forum. This is an old thread and the original poster hasn't been on for 12 months.2 points
-
thanks for the reply, I got it working, I was just trying to remove the stem inside the keyless works by partially disassembling the movement to get there, but since I was not able to move the hands to the 12 o'clock before removing them I was wondering what was the right procedure on a GTM, but I got it, just removed them as they were and at the time of installing them just move them until date changes and installed them at the 12o'clock and it worked perfect, I though it was a bit different with the GMT hand.2 points
-
What you think about part 2 then,

 2 points
 -
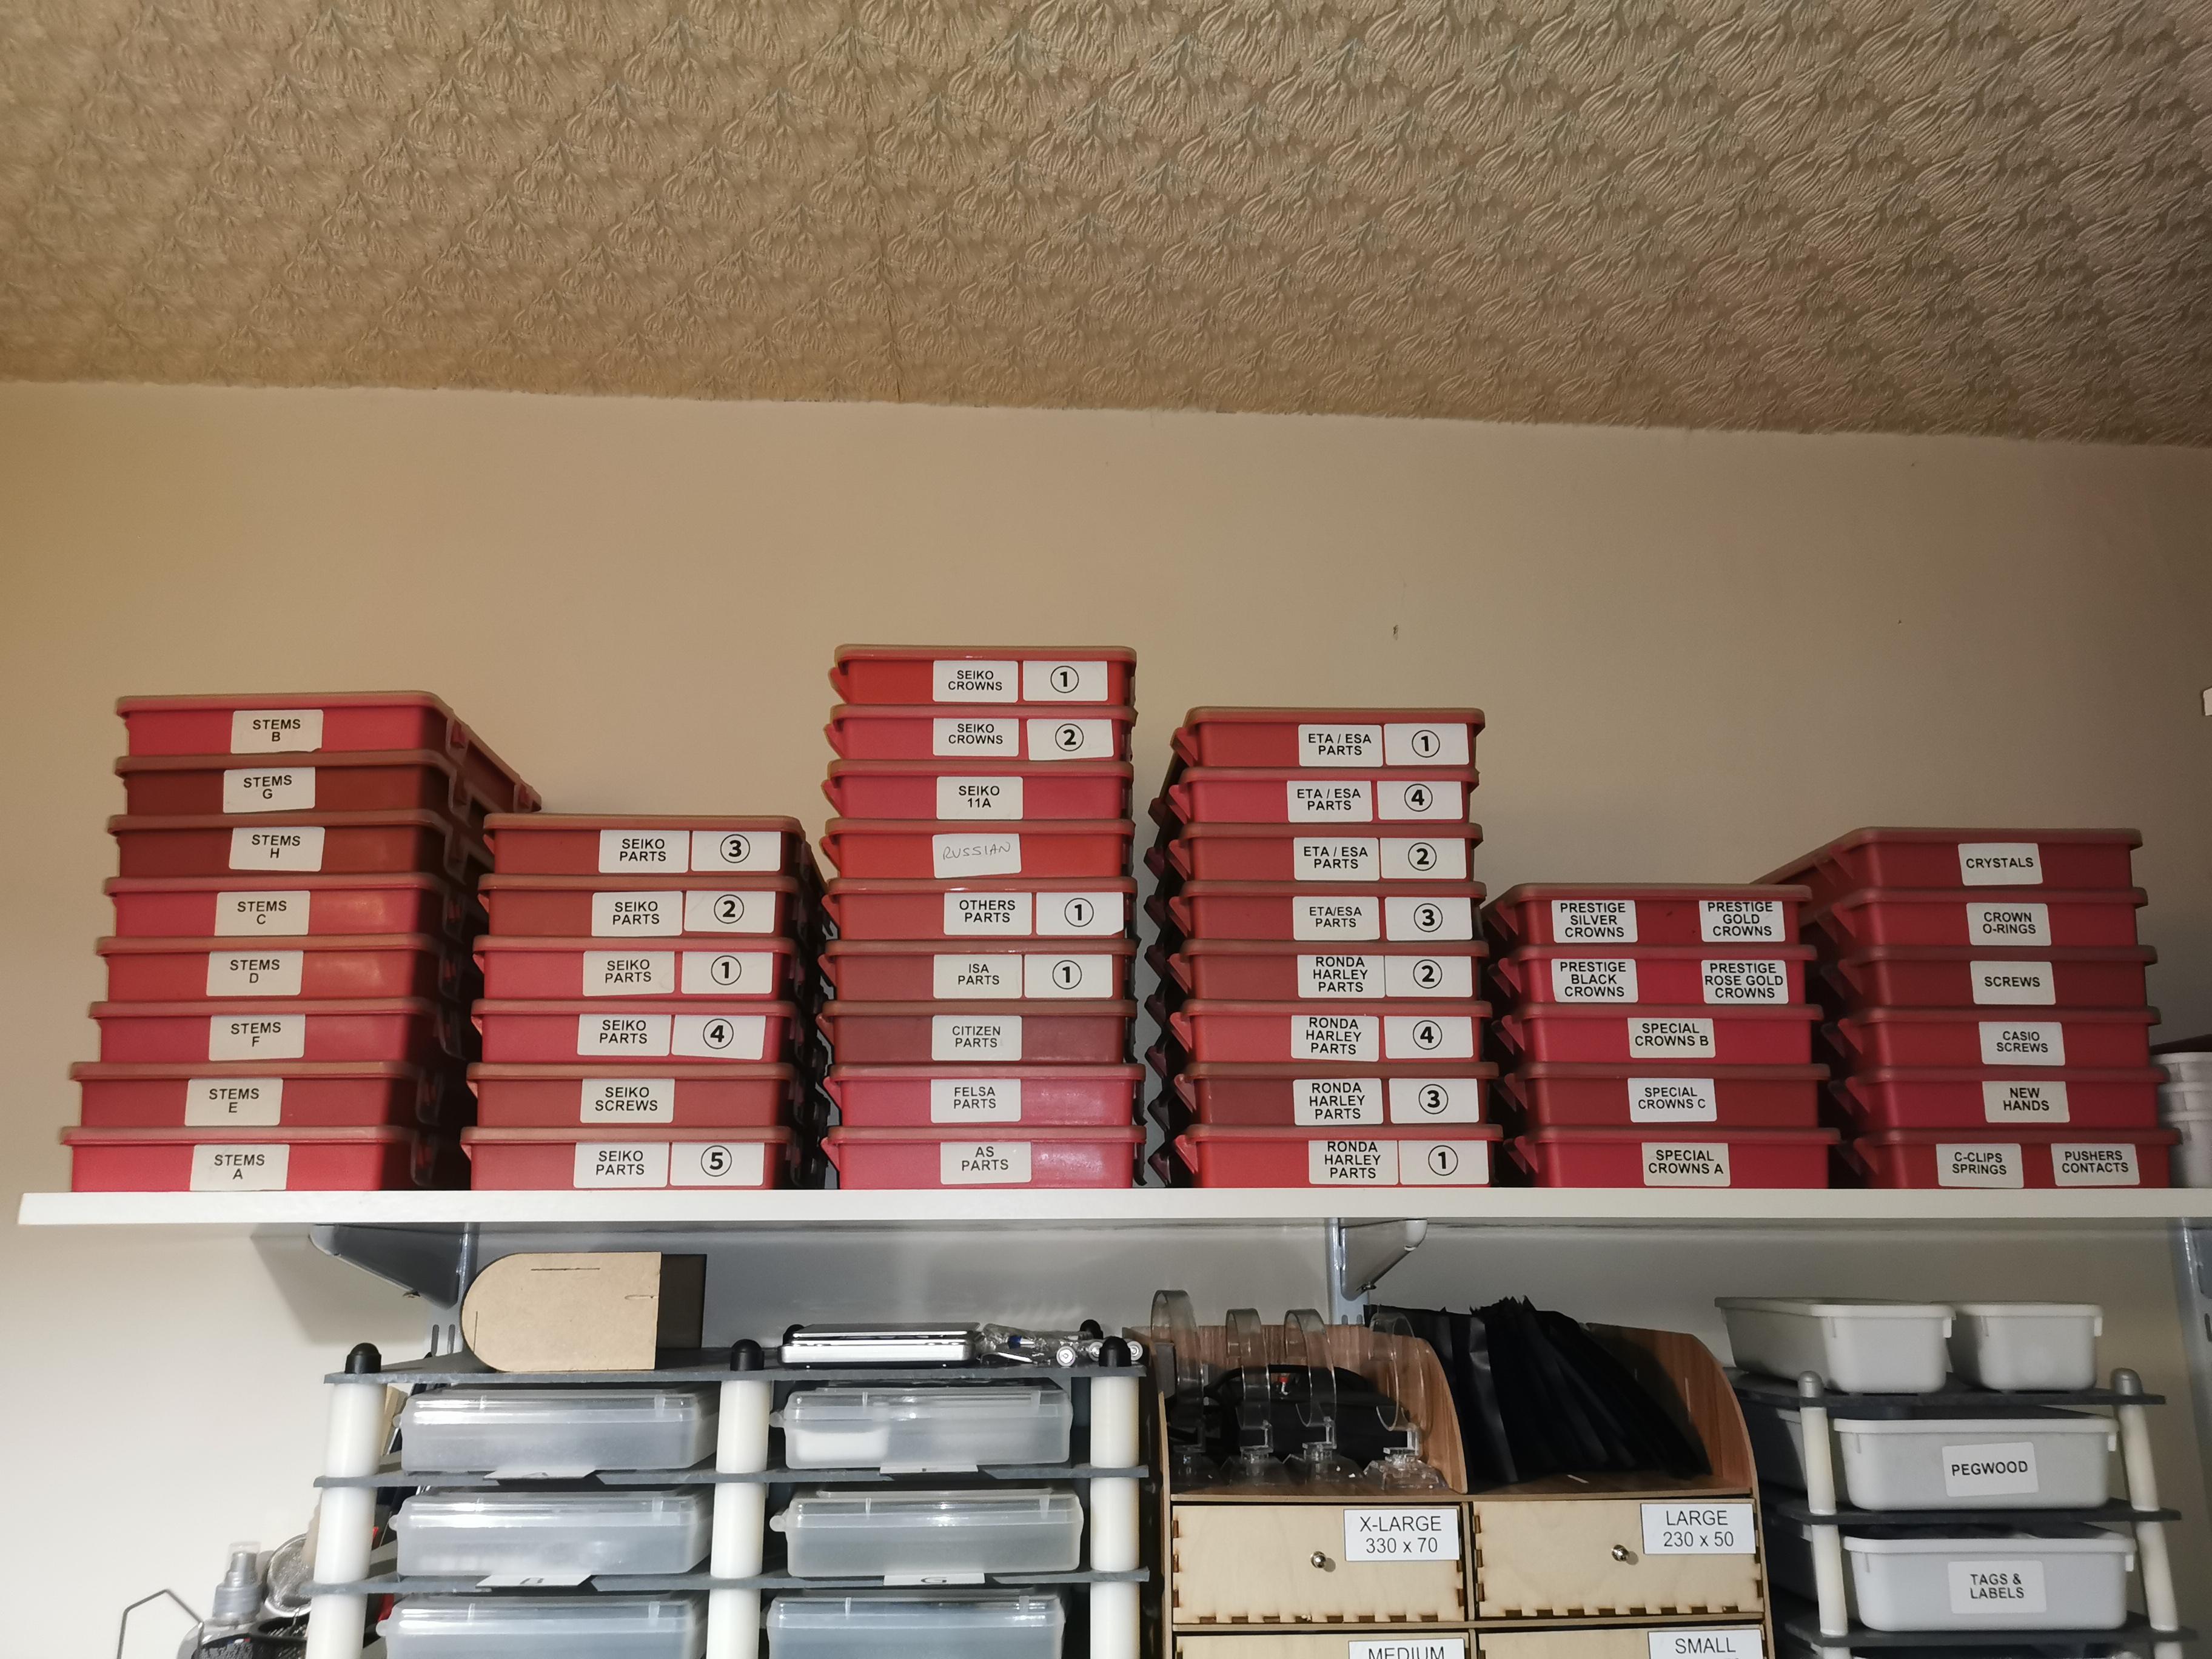
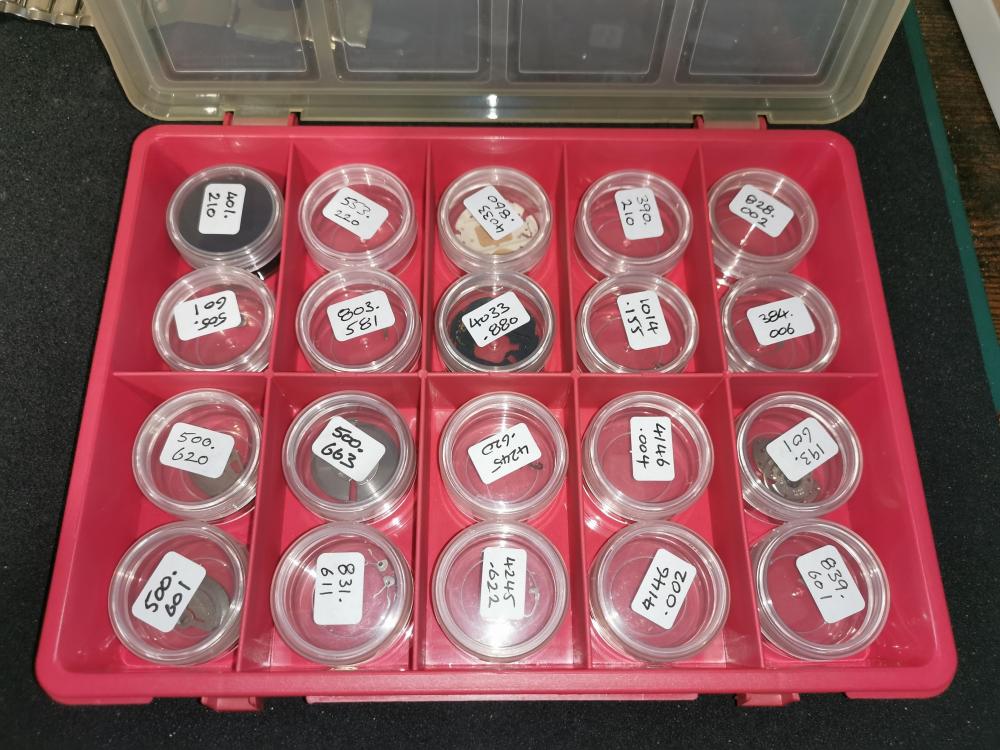
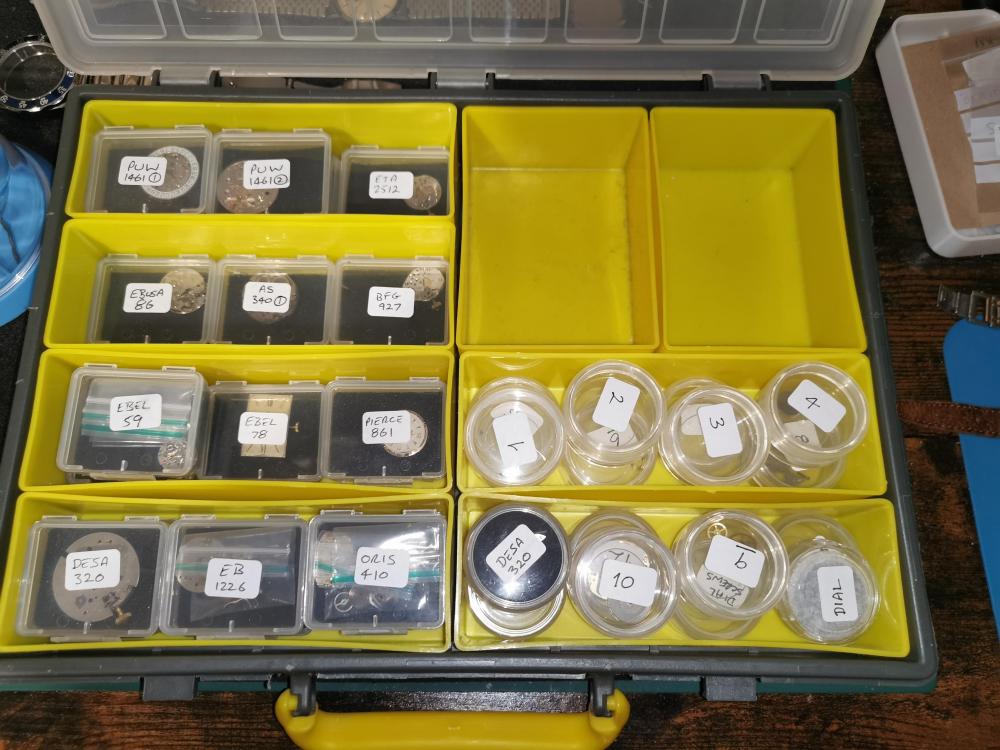
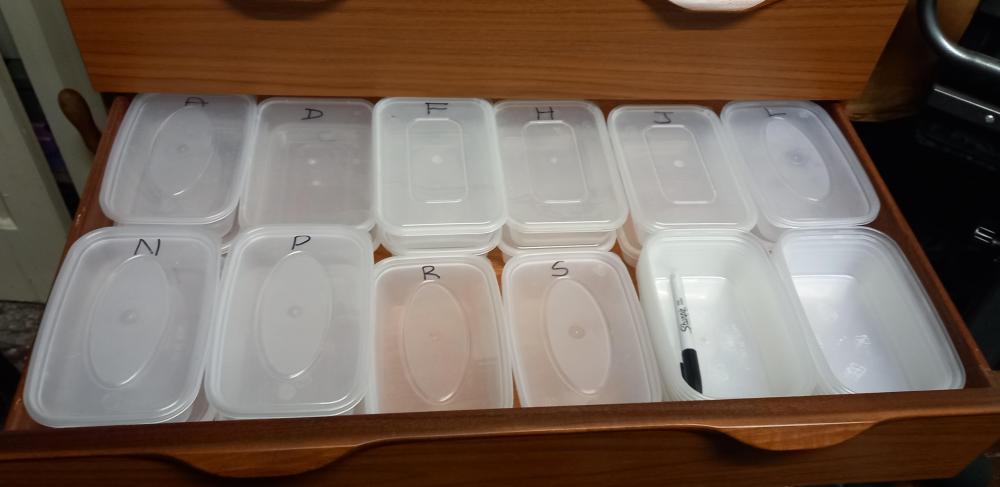
I keep everything in branded boxes with the odd stuff in an others box. Just overs 2 years back into this I'm still sorting and cataloguing what I've got into a spreadsheet.

 2 points
 -
Got them today, I am going to scan all pages of the manuals in a week or so and going to share.


 2 points
 -
Just had in a very nice thin Patek pocketwatch. Came in for a staff; found out it had a random staff installed along with a random roller table- it didn't even engage with the fork. And best of all, a tooth was broken off the escape wheel. It was extremely lucky that I had an escape wheel in my stock that was the correct diameter, also found a roller table that was able to be modifed and work very well with the fork, and made a new staff. Darn thing runs great now- around 270 flat, 30 degree drop in verts. At least the former watchmaker did no permanent modifications.2 points
-
I'm no expert, but I found that the carbide gravers mentioned in this post by @nevenbekriev work great and are dirt cheap. Cutting blued steel was absolutely no problem for them. For a lot of applications you can use them "out of the box" without the need to reshape them. I only rounded one off for making the radius on balance staffs. https://www.watchrepairtalk.com/topic/29977-balance-staff-just-can’t-get-to-02/?do=findComment&comment=2546242 points
-
Although I have carbide gravers I very rarely use them because I find them to brittle because the tips break off but it may be me being to aggressive, I find HSS gravers a lot more forgiving & easily sharpened & don’t forget to get a good finish it needs to honed as well. It’s always nice to have conversations like this. because it’s always possible to learn things from other people . Dell2 points
-
As above, the graver needs to be very sharp. I cut mostly diamond up and slow to medium speed. Too fast and the graver will start to burnish rather than cut. Maintain the cutting edge, any thoughts you have that it's losing its edge will be after it's already gone. A carbide edge will outlast a hss one . I look for curly shavings to know that it's sharp.2 points
-
Typically with dials it's recommended not to do anything at all because typically they don't do well to anything especially if they're painted dials. If there are enameled dials like found in American pocket watches then they can go in water and all sorts of cleaning and will clean up quite nicely. Or some American pocket watches use engraved brass dials filled in with wax or something like they did with clock dials and then silvered. With fee is you can strip off the lacquer and dip them in one dip silver cleaning brightening solution. That actually works really well and then unfortunately you have to lacquer it again because with the silver exposed it will tarnish. Seeing as how you are able to clean up or dial the way you did you may build a try some of the liquid silver tarnish remover. But whatever you do you typically want to be careful as even if you think you know what you're doing bad things can still occur. Which would result in either finding a replacement dial or sending it out to be refinished after somebody on your part of the planet that does that kind of thing.1 point
-
That would include me as well, It's also in one of my watchmaking books.1 point
-
I have one and it works well.1 point
-
I have the extra fine, the medium, and 0.25 micron diamond powder. The medium works quite well. Ill try out some autosol as well1 point
-
I have, but it's 0.25 micron/100000 grit, so would take forever surely to remove scratches from an acrylic crystal. I know Diamantine used to come in three grades, but I believe they only do the fine now I just got the Autosol acrylic polish through late today, so I'll try that on the morrow1 point
-
What is the grade, I'm curious? If it is older than 1880-ish then I wouldn't be too surprised to see something on the uglier side. Though 17j on a really old grade wouldn't be too common.1 point
-
Tried it on a rusty old nut spinner and it worked so will give it a go on a case tomorrow.1 point
-
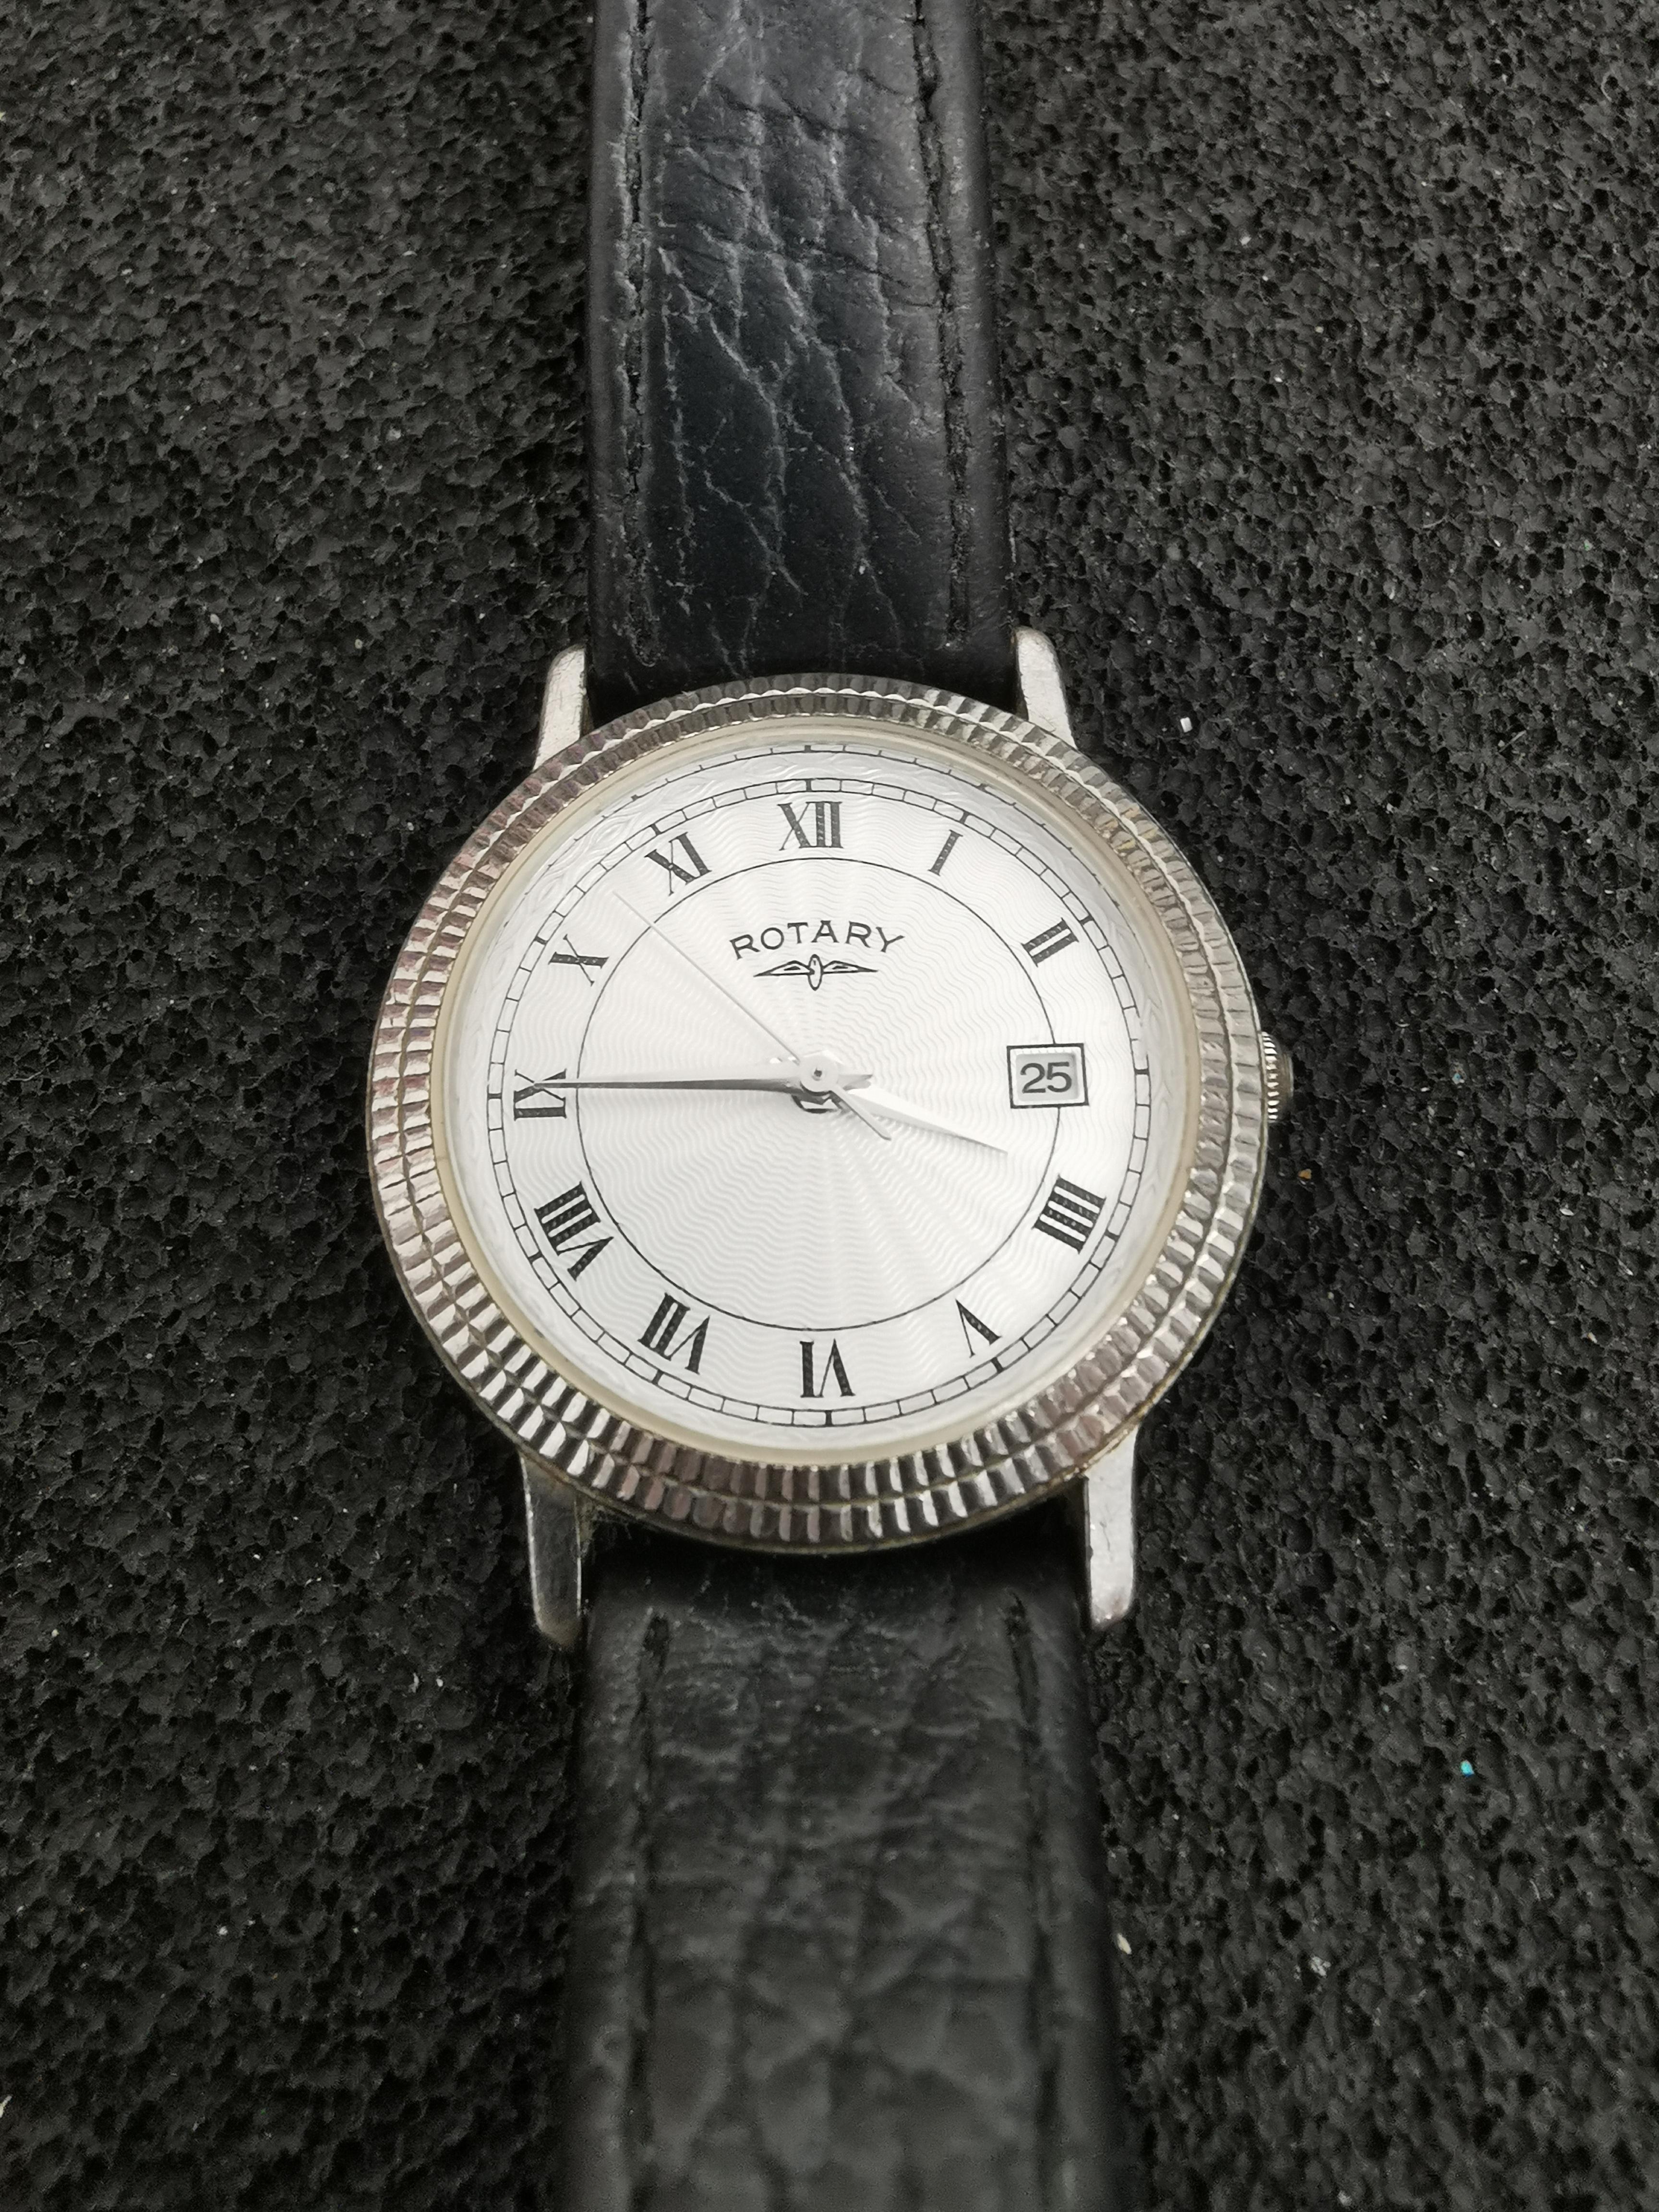
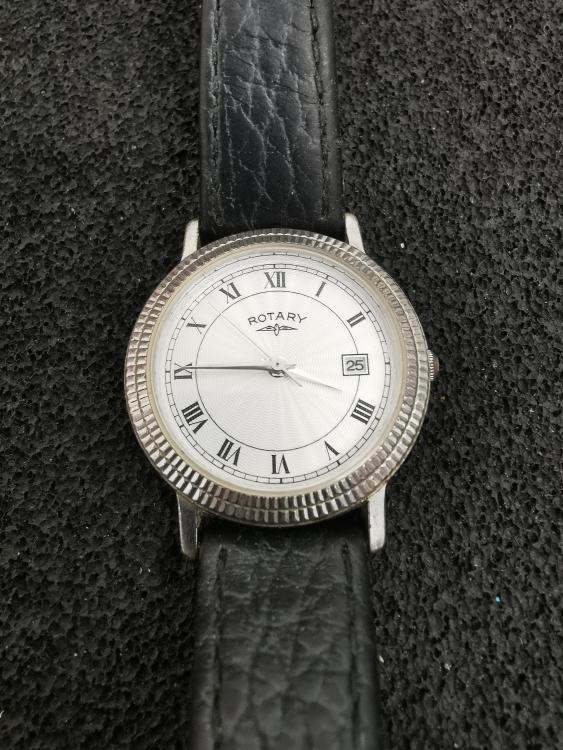
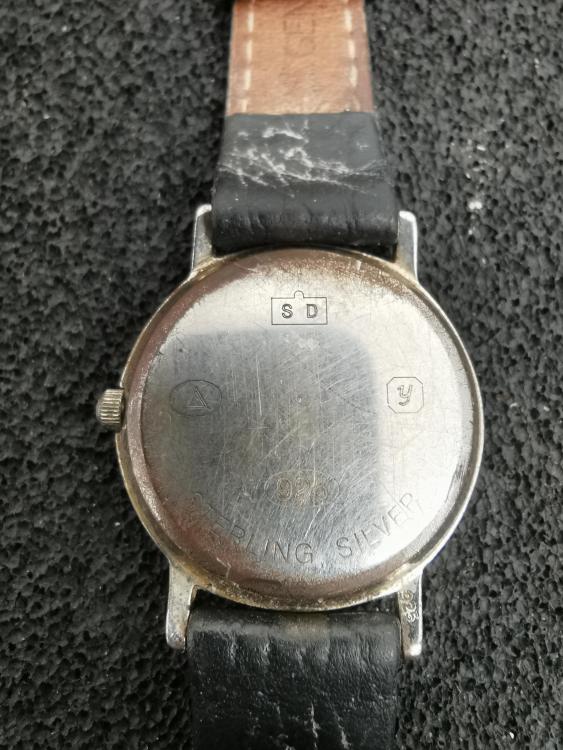
Just got this as part of a job lot and find it strange to have 1998 import marks on a Rotary watch?
 1 point
 -
Hi. Have you any pals who own a 3D printer or as Andy suggested resin casting . Most likely the only options available.1 point
-
…as a push too. They can be quite brittle but a larger gauge can a piece of brass like a hairspring pin.1 point
-
In my experience you'll only find a Bulova Part No. if it's a special crystal.
 1 point
 -
…that pallet fork is quite something. It looks like the little plastic pin pallet thing inside Bradley Mickeys with bfg movements…1 point
-
It ticks. But doesn't get a read on the timegrapher1 point
-
…sometimes syringe needles work, too1 point
-
You have a versatile tool there. Three in one, a good buy.1 point
-
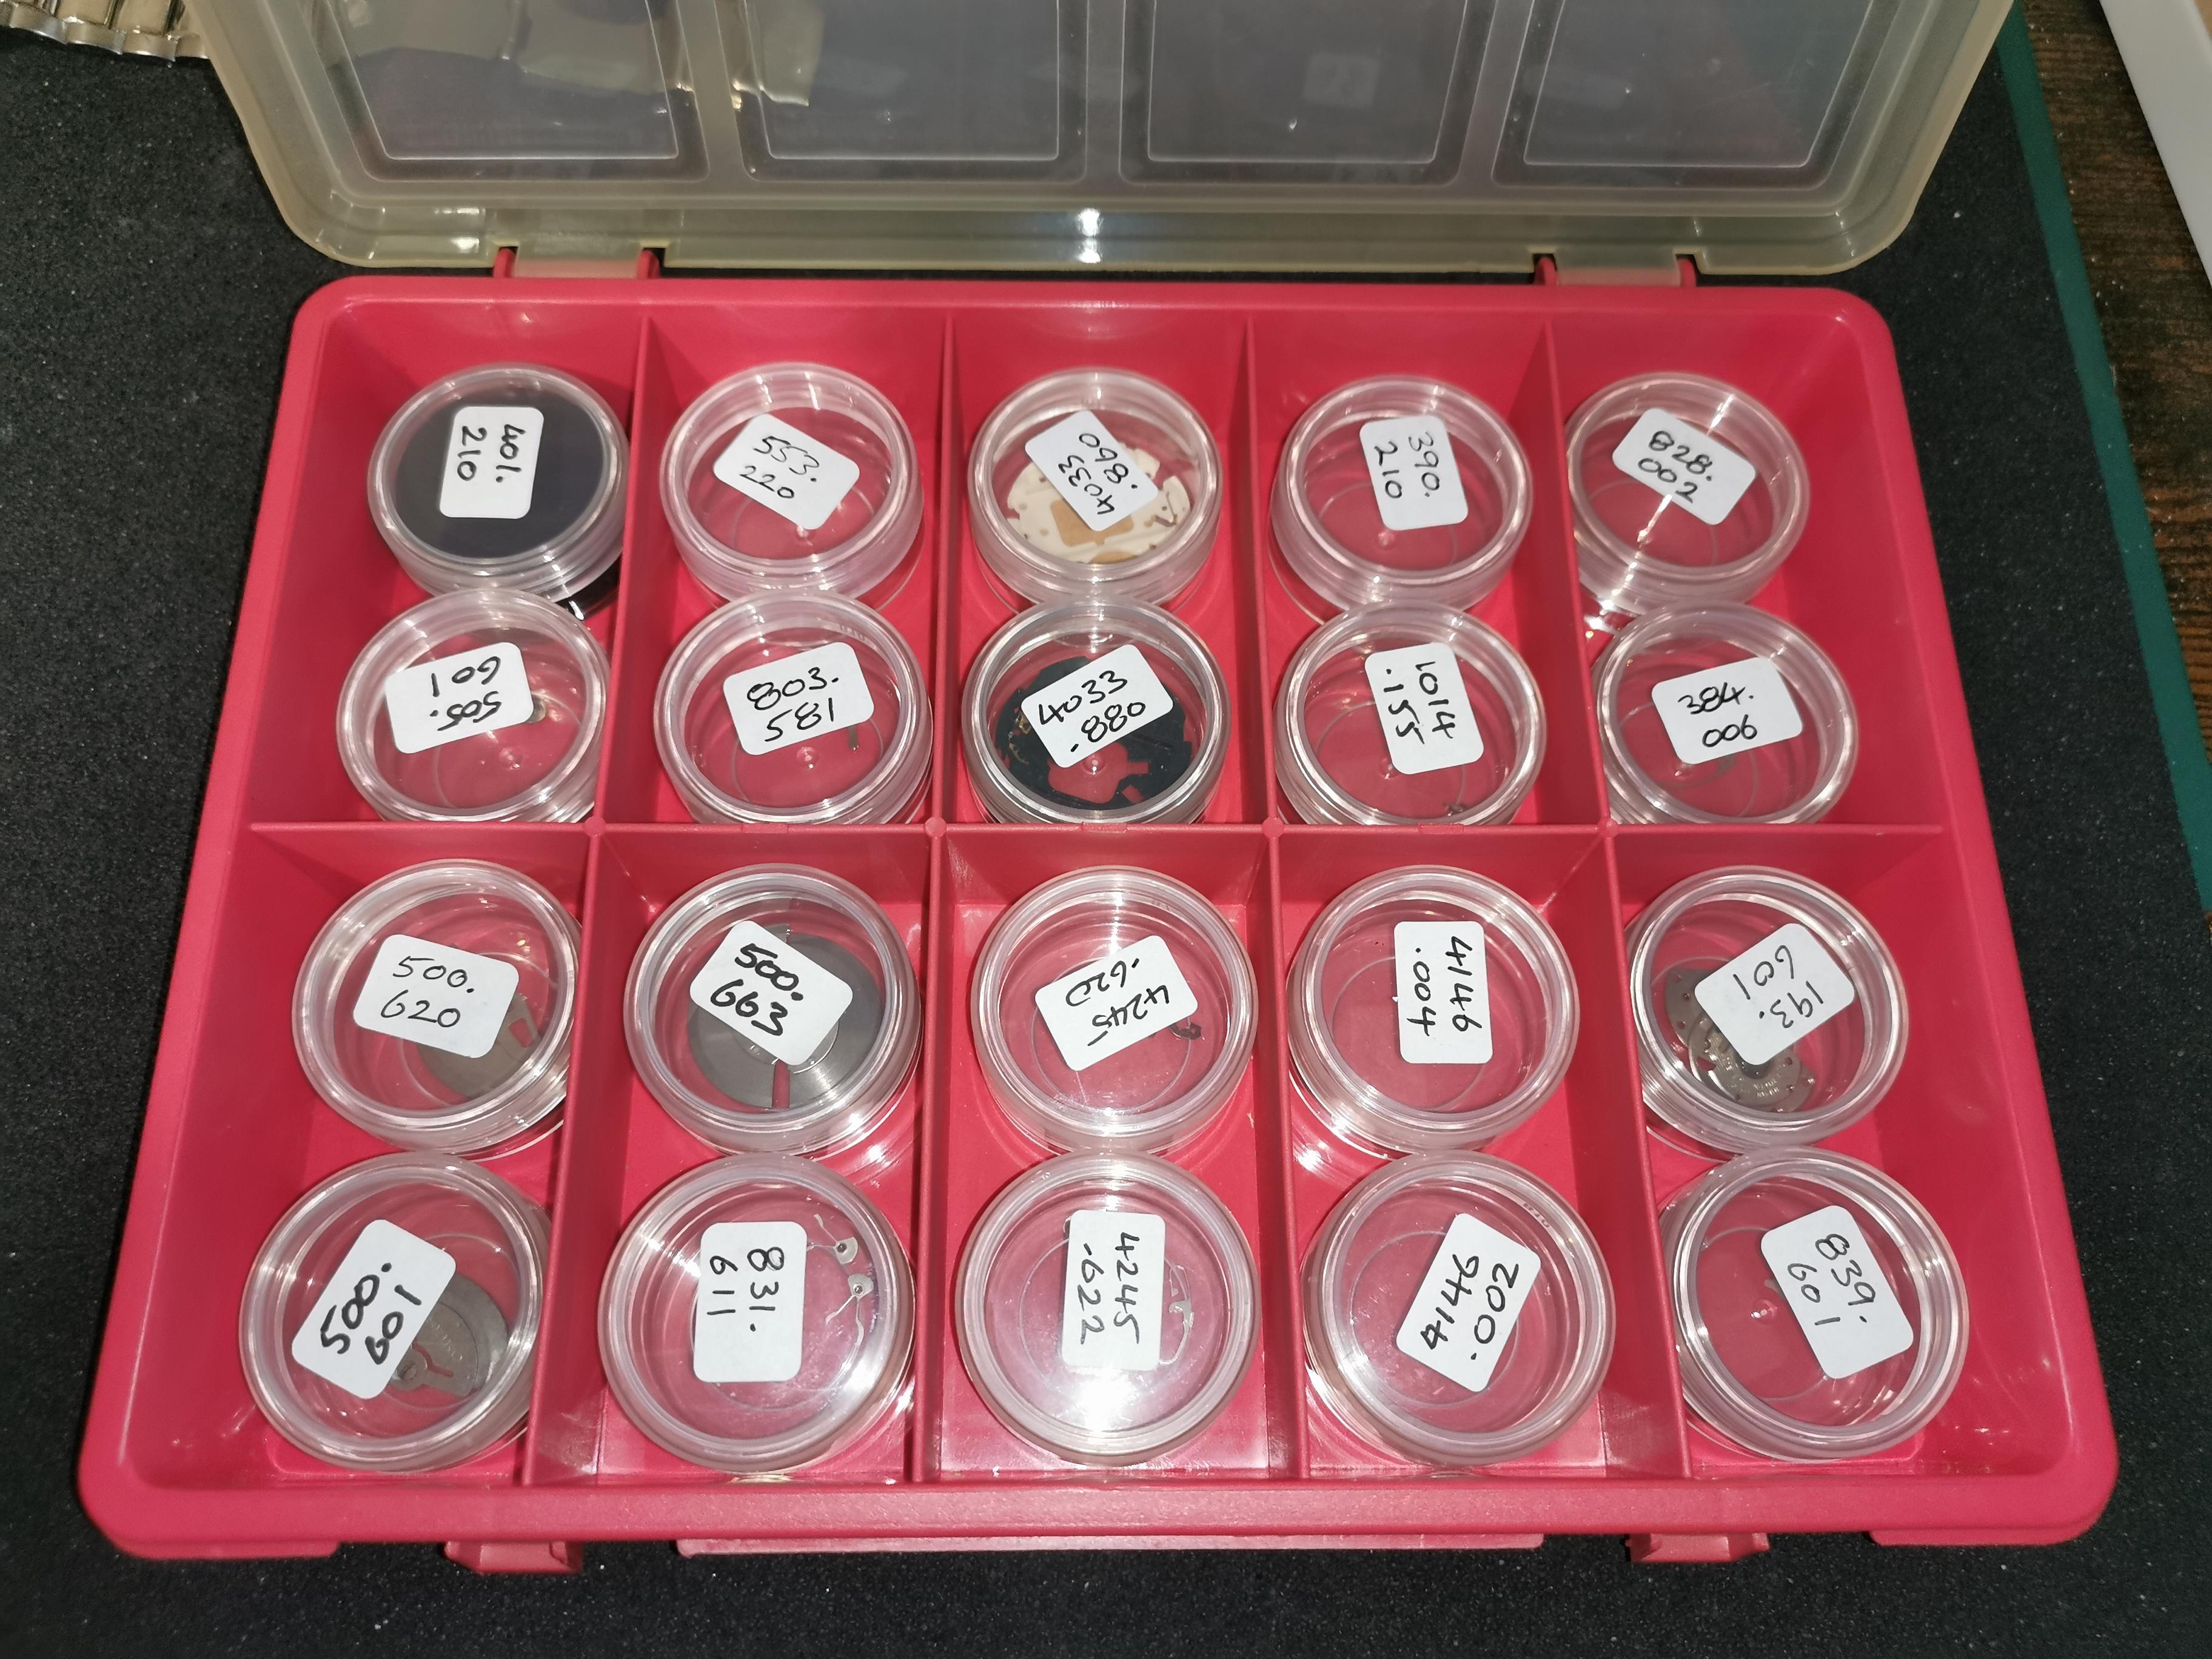
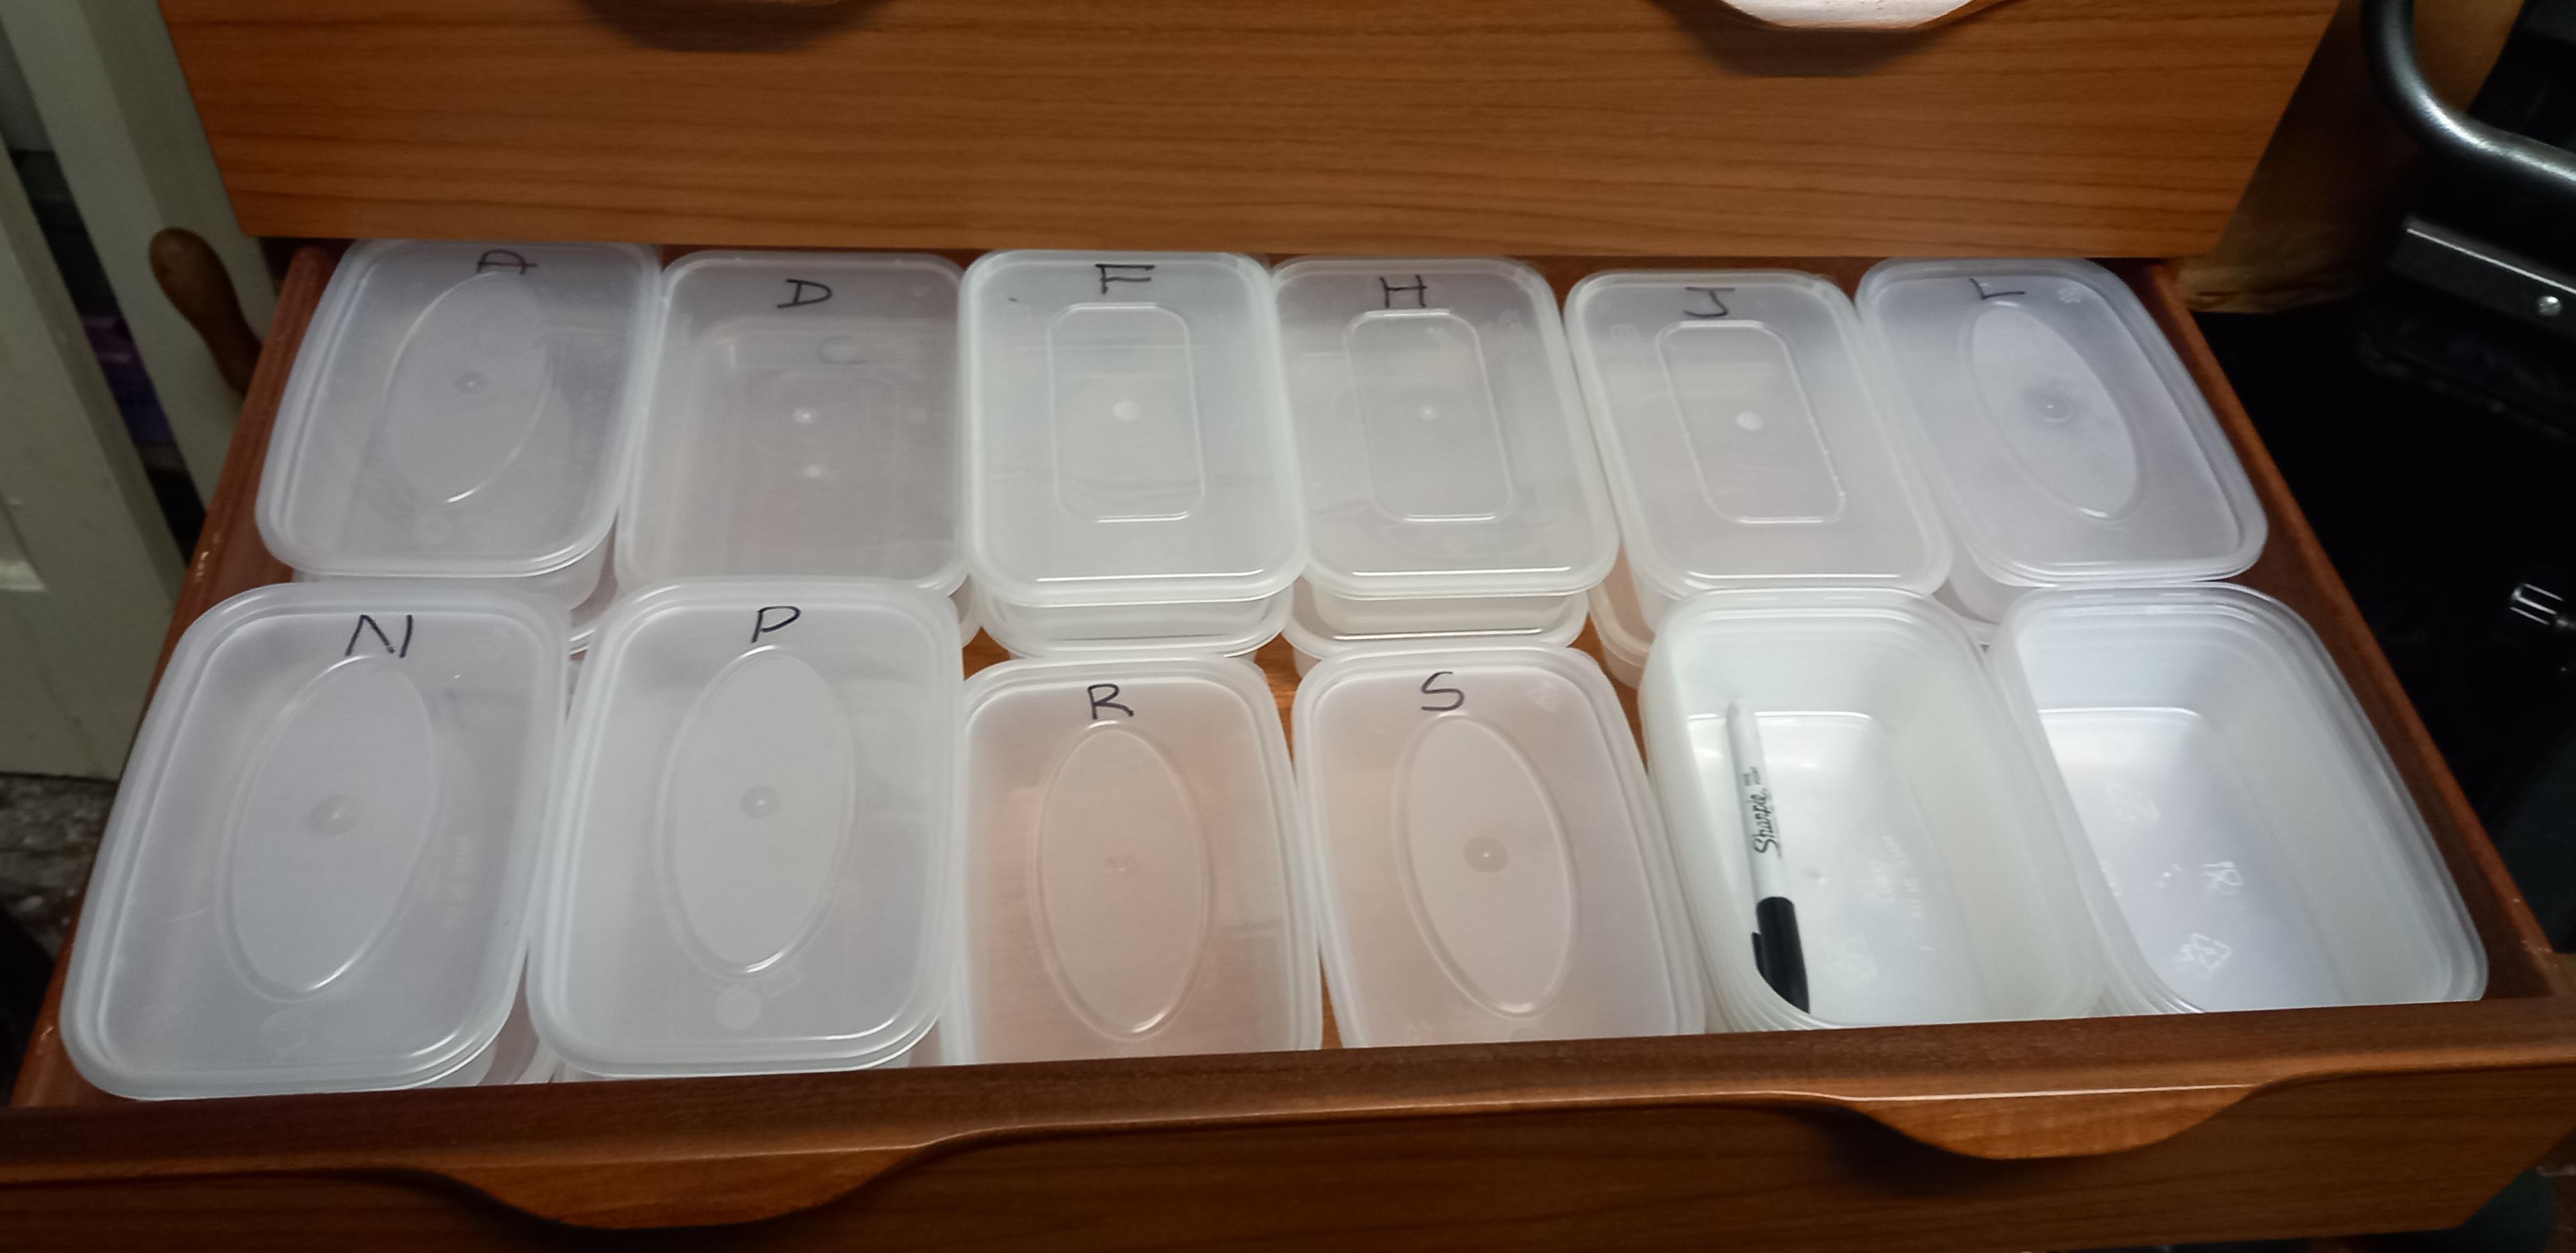
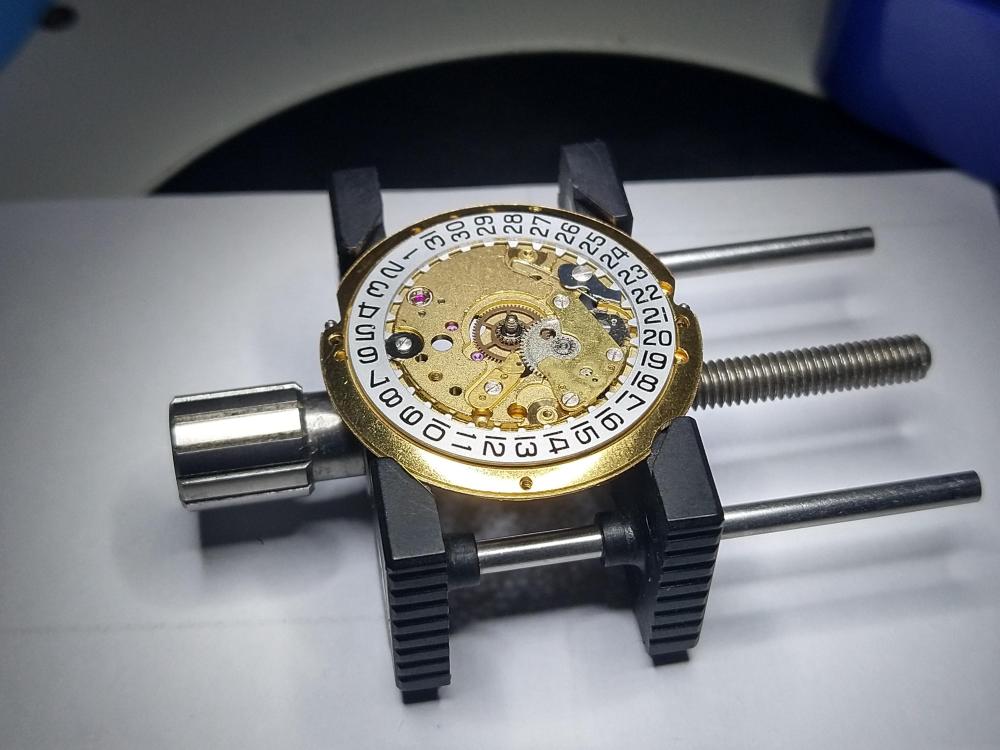
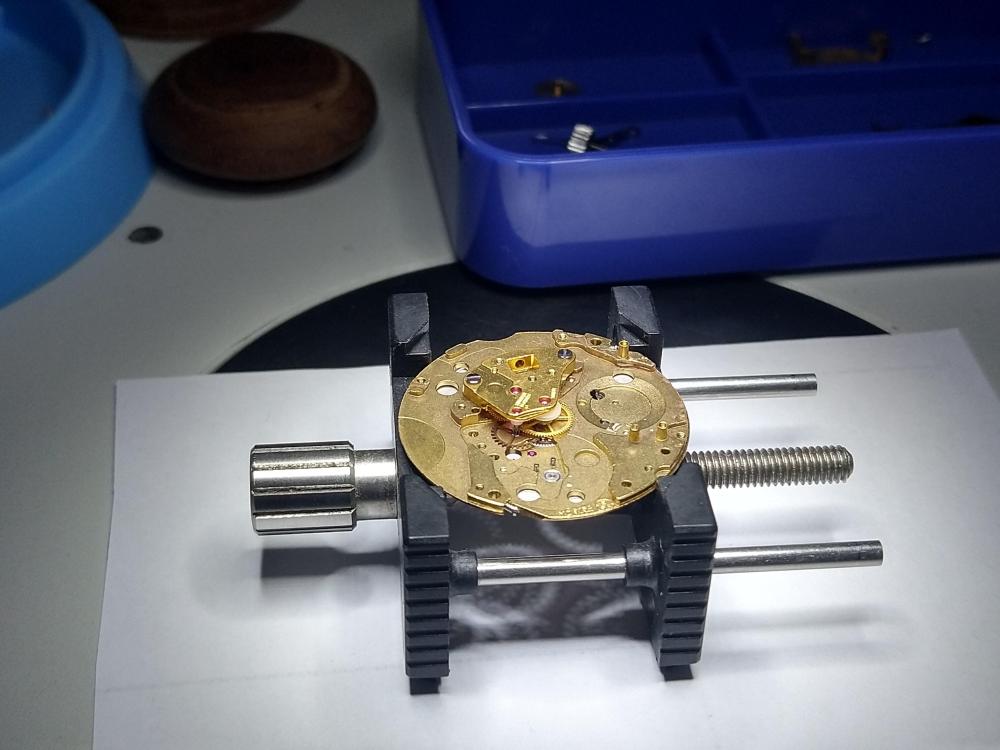
Zip lock bags are the cheapest and optimise the space you have. The parts stored on the mainplates if you have them, which provides the best protection. I write the caliber info on the bags then keep them in plastic chinese takeaway tubs, in brand alphabetical order ( all the A, s together, all the B,s together etc ) My wife reminds me of how sad I am, it doesn't feel that way in my head though . You then need a hardback note book to list them in, making any notes of what is missing on the plate, saves you digging through the tubs, to see if you have a required donor and the part required. If you do this from the start it will save you a lot of time later on going through them. For small individual parts on their own, do as has been done for decades , clear gelatin capsules. Here is a drawer ready to start filling up.
 1 point
 -
Actually, it is easier to drill the brass in the steel hole. At some point, the piece remain will get out. No need to make the pin in lathe. Use tapered pin like one for hairspring pinning. One is easy to prepare out of brass wire with close diameter.1 point
-
Something else to add. OP, You are trying to make screw out of blue steel. This is wrong. You will learn sooner or later to work it with gravers and there will be no problem to shape it to 0.6mm rod. But then it will be not possible to cut thread on it. Unless You have carbide or very special fancy die. You have to start wit soft steel, and after making the screw and the thread and cutting the slot on the head, only then harden and temper the screw.1 point
-
Welcome to the forum It'll be a Ronda 763 which takes a 364 battery and then a Chronograph module which we'll need to see photos of. Edit So the full details are it's a Gucci 012.839R so the other battery would be a 377.1 point
-
For this reason, I believe that every video should begin with a clear disclaimer stating that viewers should not assume the content reflects best practices and that the content is primarily intended for entertainment. My approach may come across as unnecessarily harsh, but this is to prevent those poor souls who actually want to learn and develop their knowledge and skills from being misled into thinking they've found an educational channel. Why do I care, and should I care, you might wonder. Well, because servicing and repairing movements is complex and challenging enough without the enthusiastic beginner having to struggle with methods that can unnecessarily lead to failures and various inconveniences. That said, most channels seem to offer a few golden nuggets, but to understand what a golden nugget is and isn’t, you first need to have a reasonably solid and sound foundation to stand on, and that foundation is not easily found on many YouTube channels. It’s true, but I generally regard Mark as an exceptionally knowledgeable and skilled repairer, and this is probably the exception that proves the rule. I can’t recall seeing anything else he has done that is even remotely "blameworthy." I have no problem turning a blind eye to this.1 point
-
The diamond graver is the correct one did you use the graver diamond up or diamond down because how you present the graver to the work is different as is how you present it to different materials . Brass & bronze needs natural or positive rake whereas steel needs negative rake & the graver needs to be very sharp but a blunt graver will cut soft aluminium quite easily. Have a look at one of my videos, I don’t profess to be an expert but I do get the job done, also a lot of people say you need speed when using a graver but I don’t agree because to much speed can lead to work hardening making it difficult to cut what is needed is good torque, you will see from my video I run the lathe quite slow but it still cuts very well the steel is EN1. try altering the angle that you present the graver to the work & make sure the graver is sharp also practice practice practice. Dell1 point
-
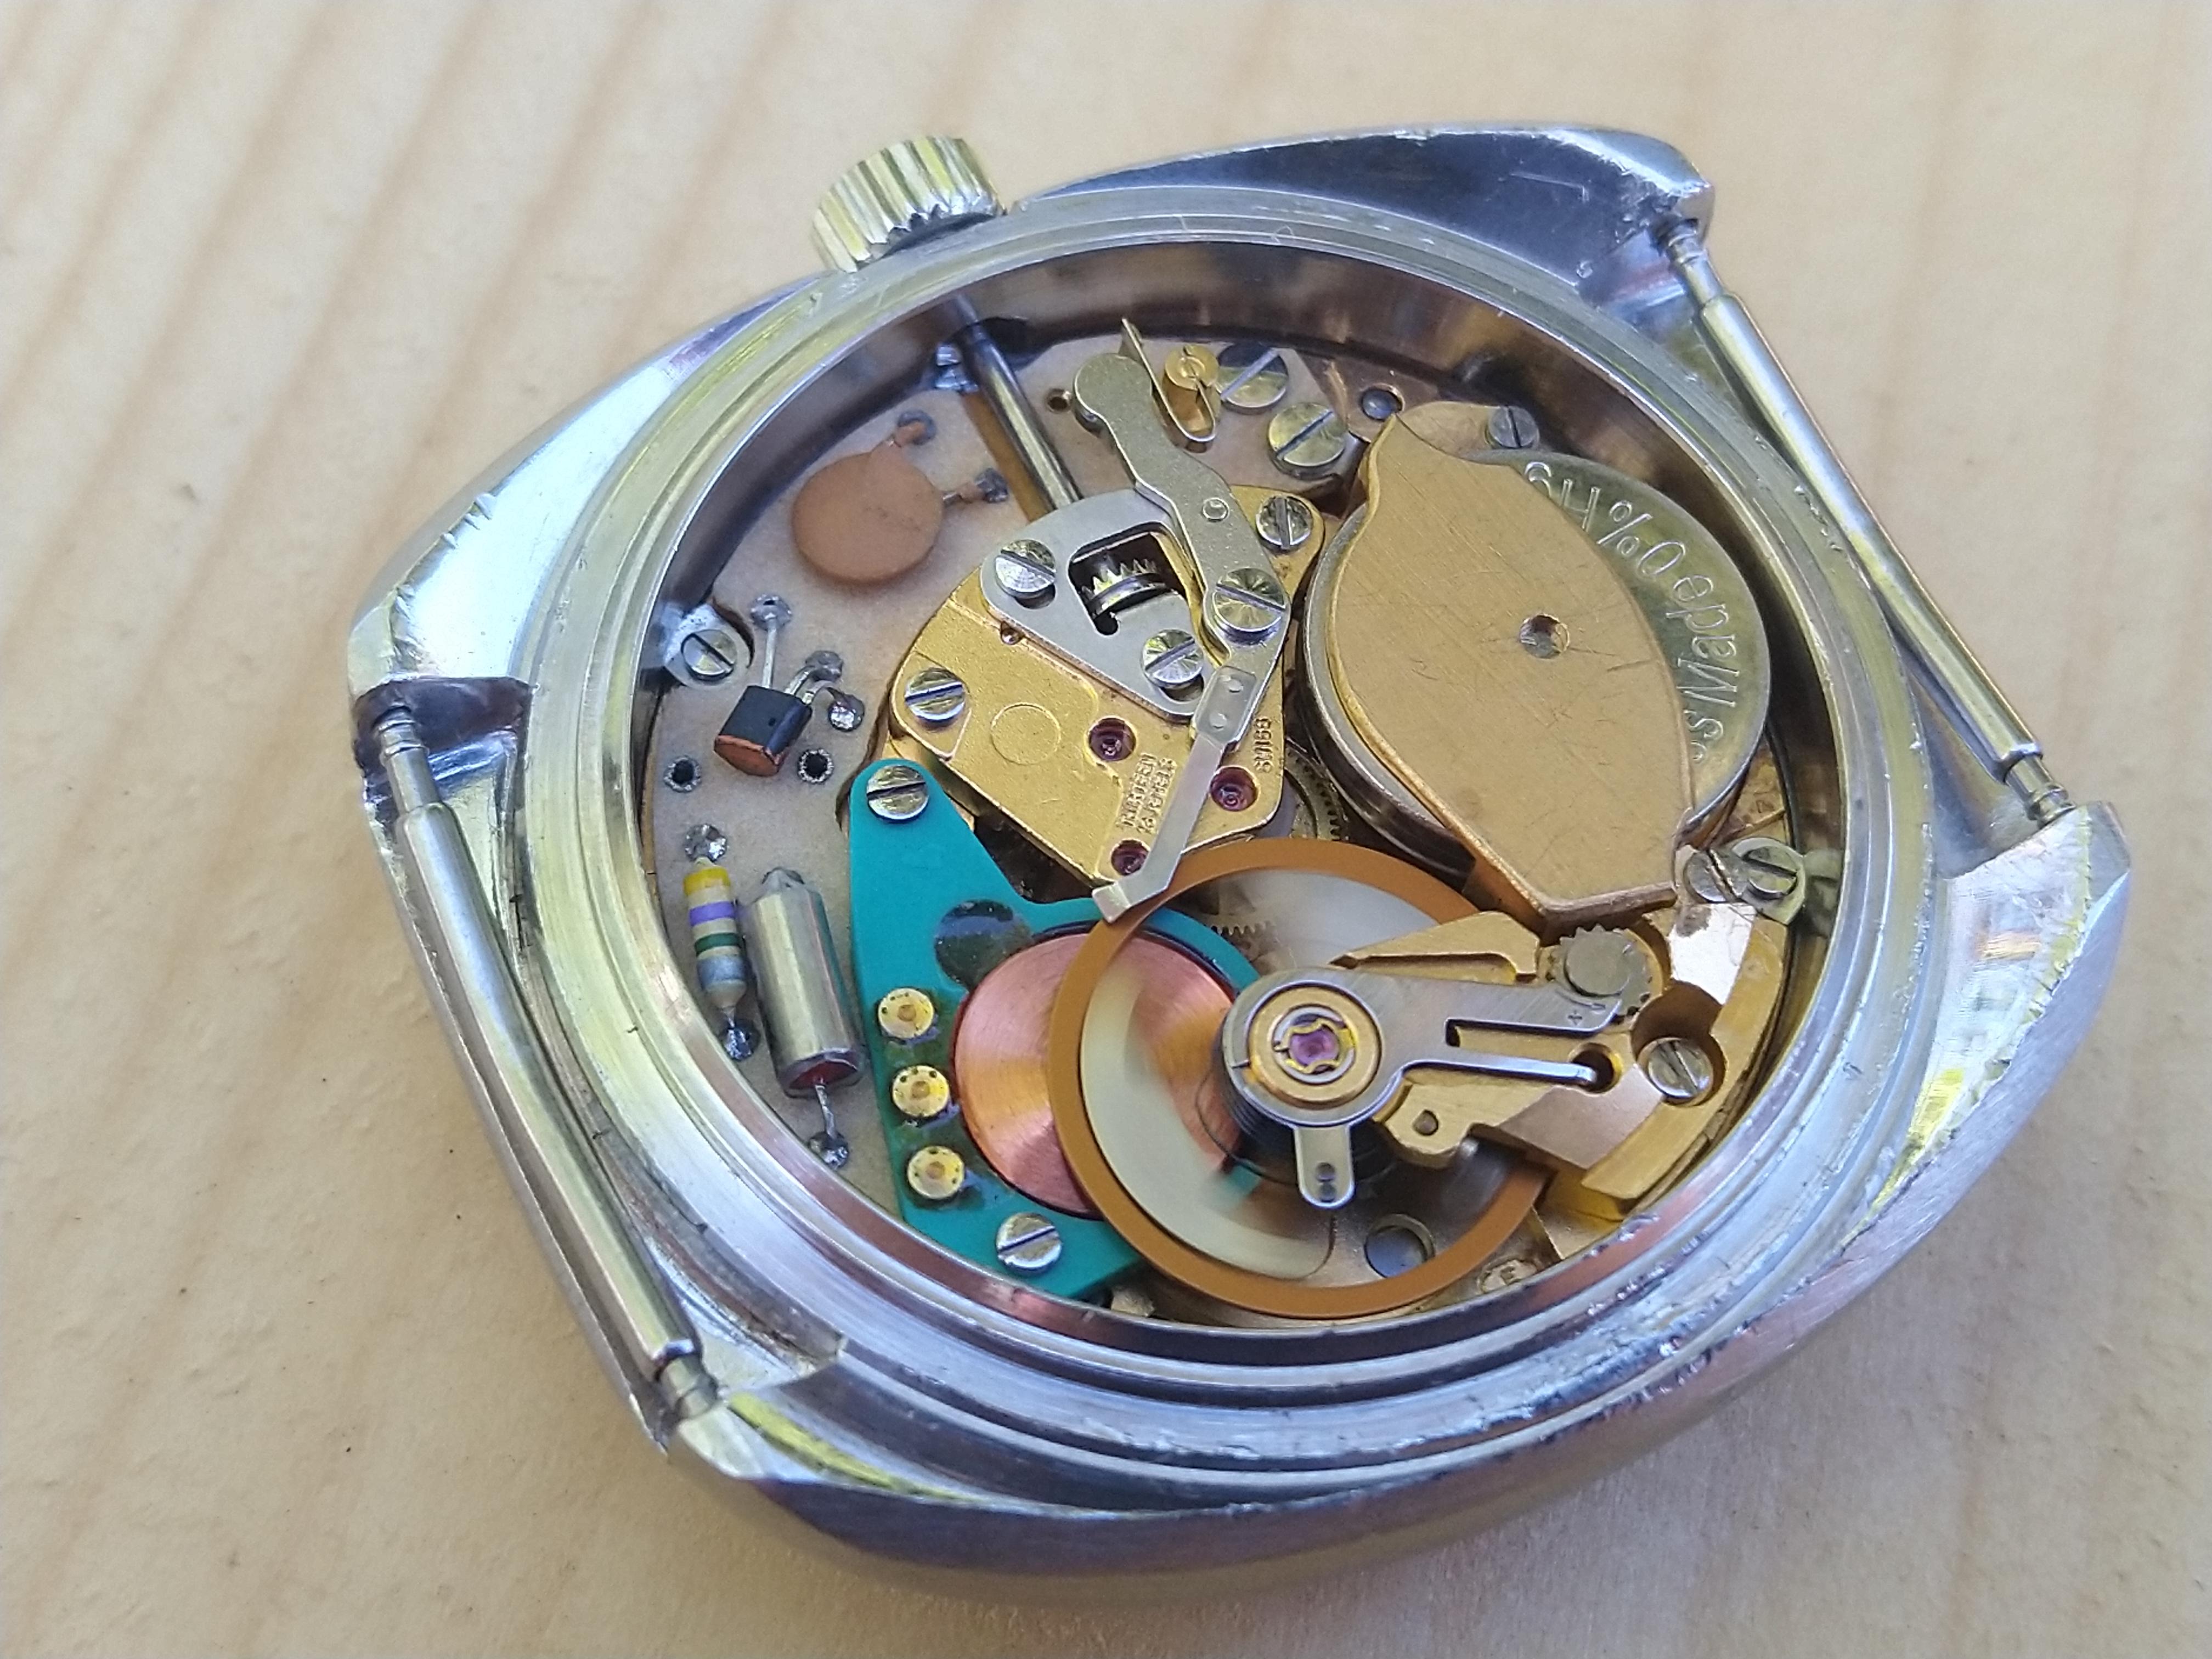
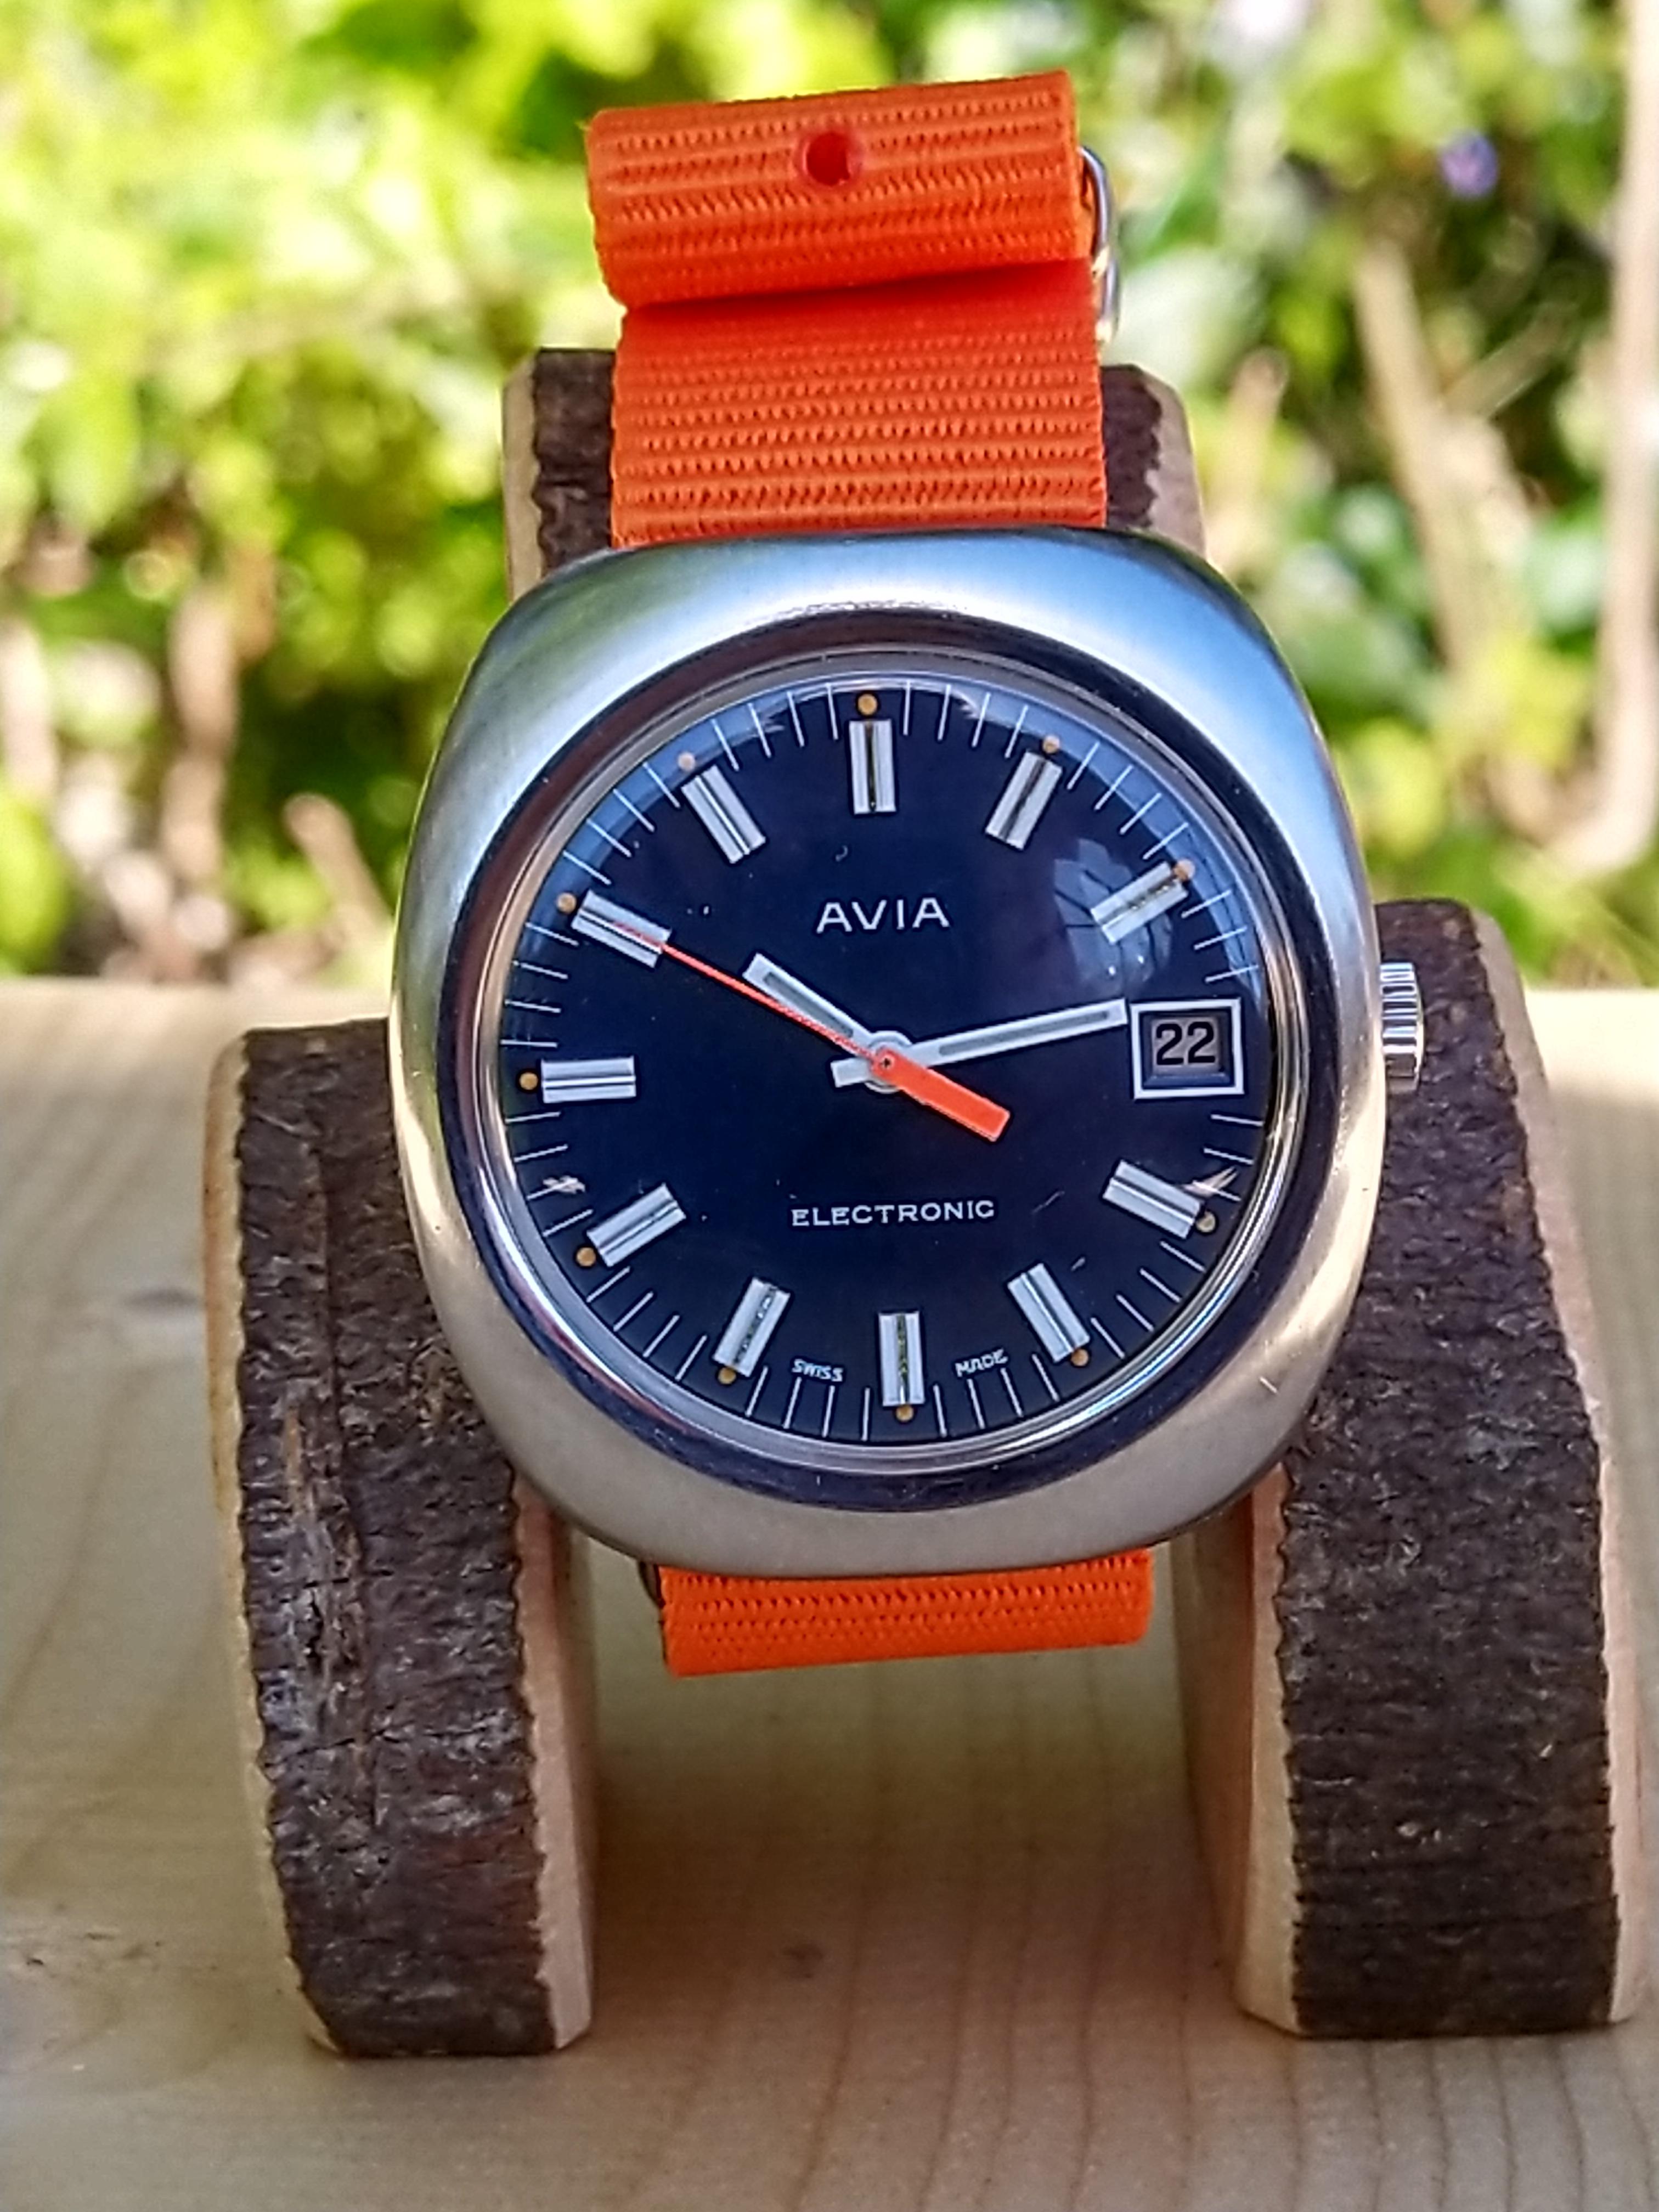
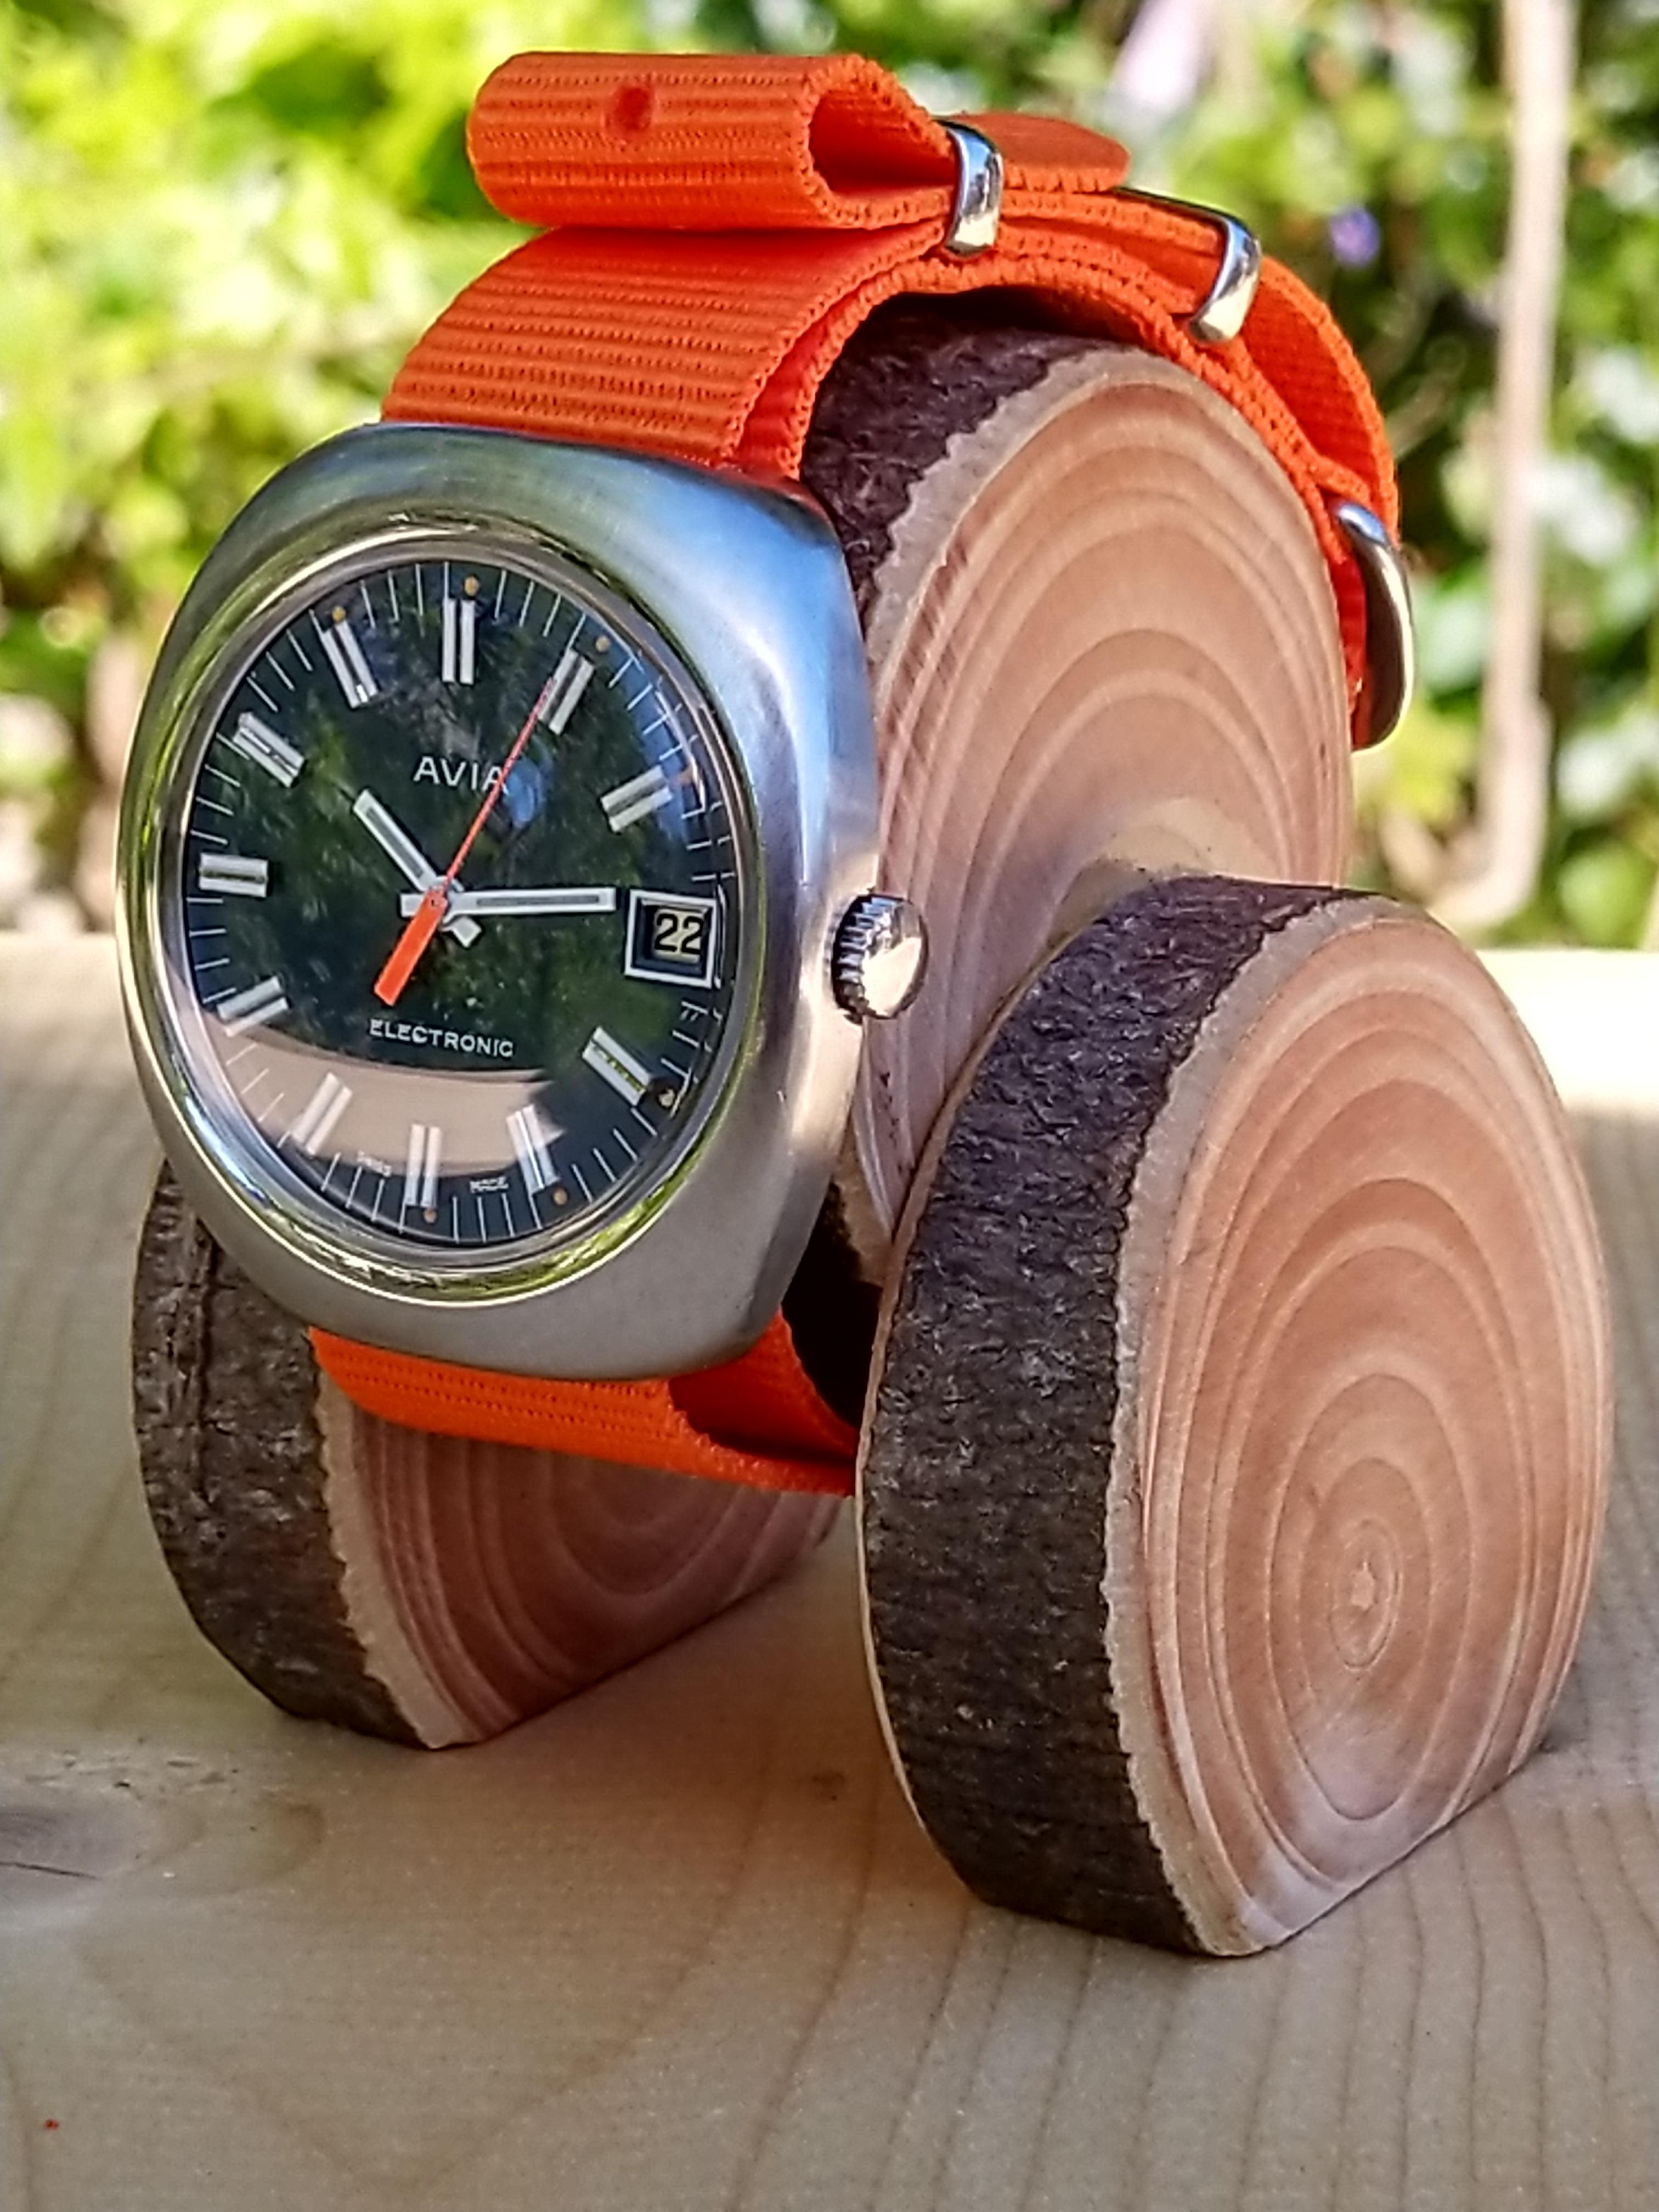
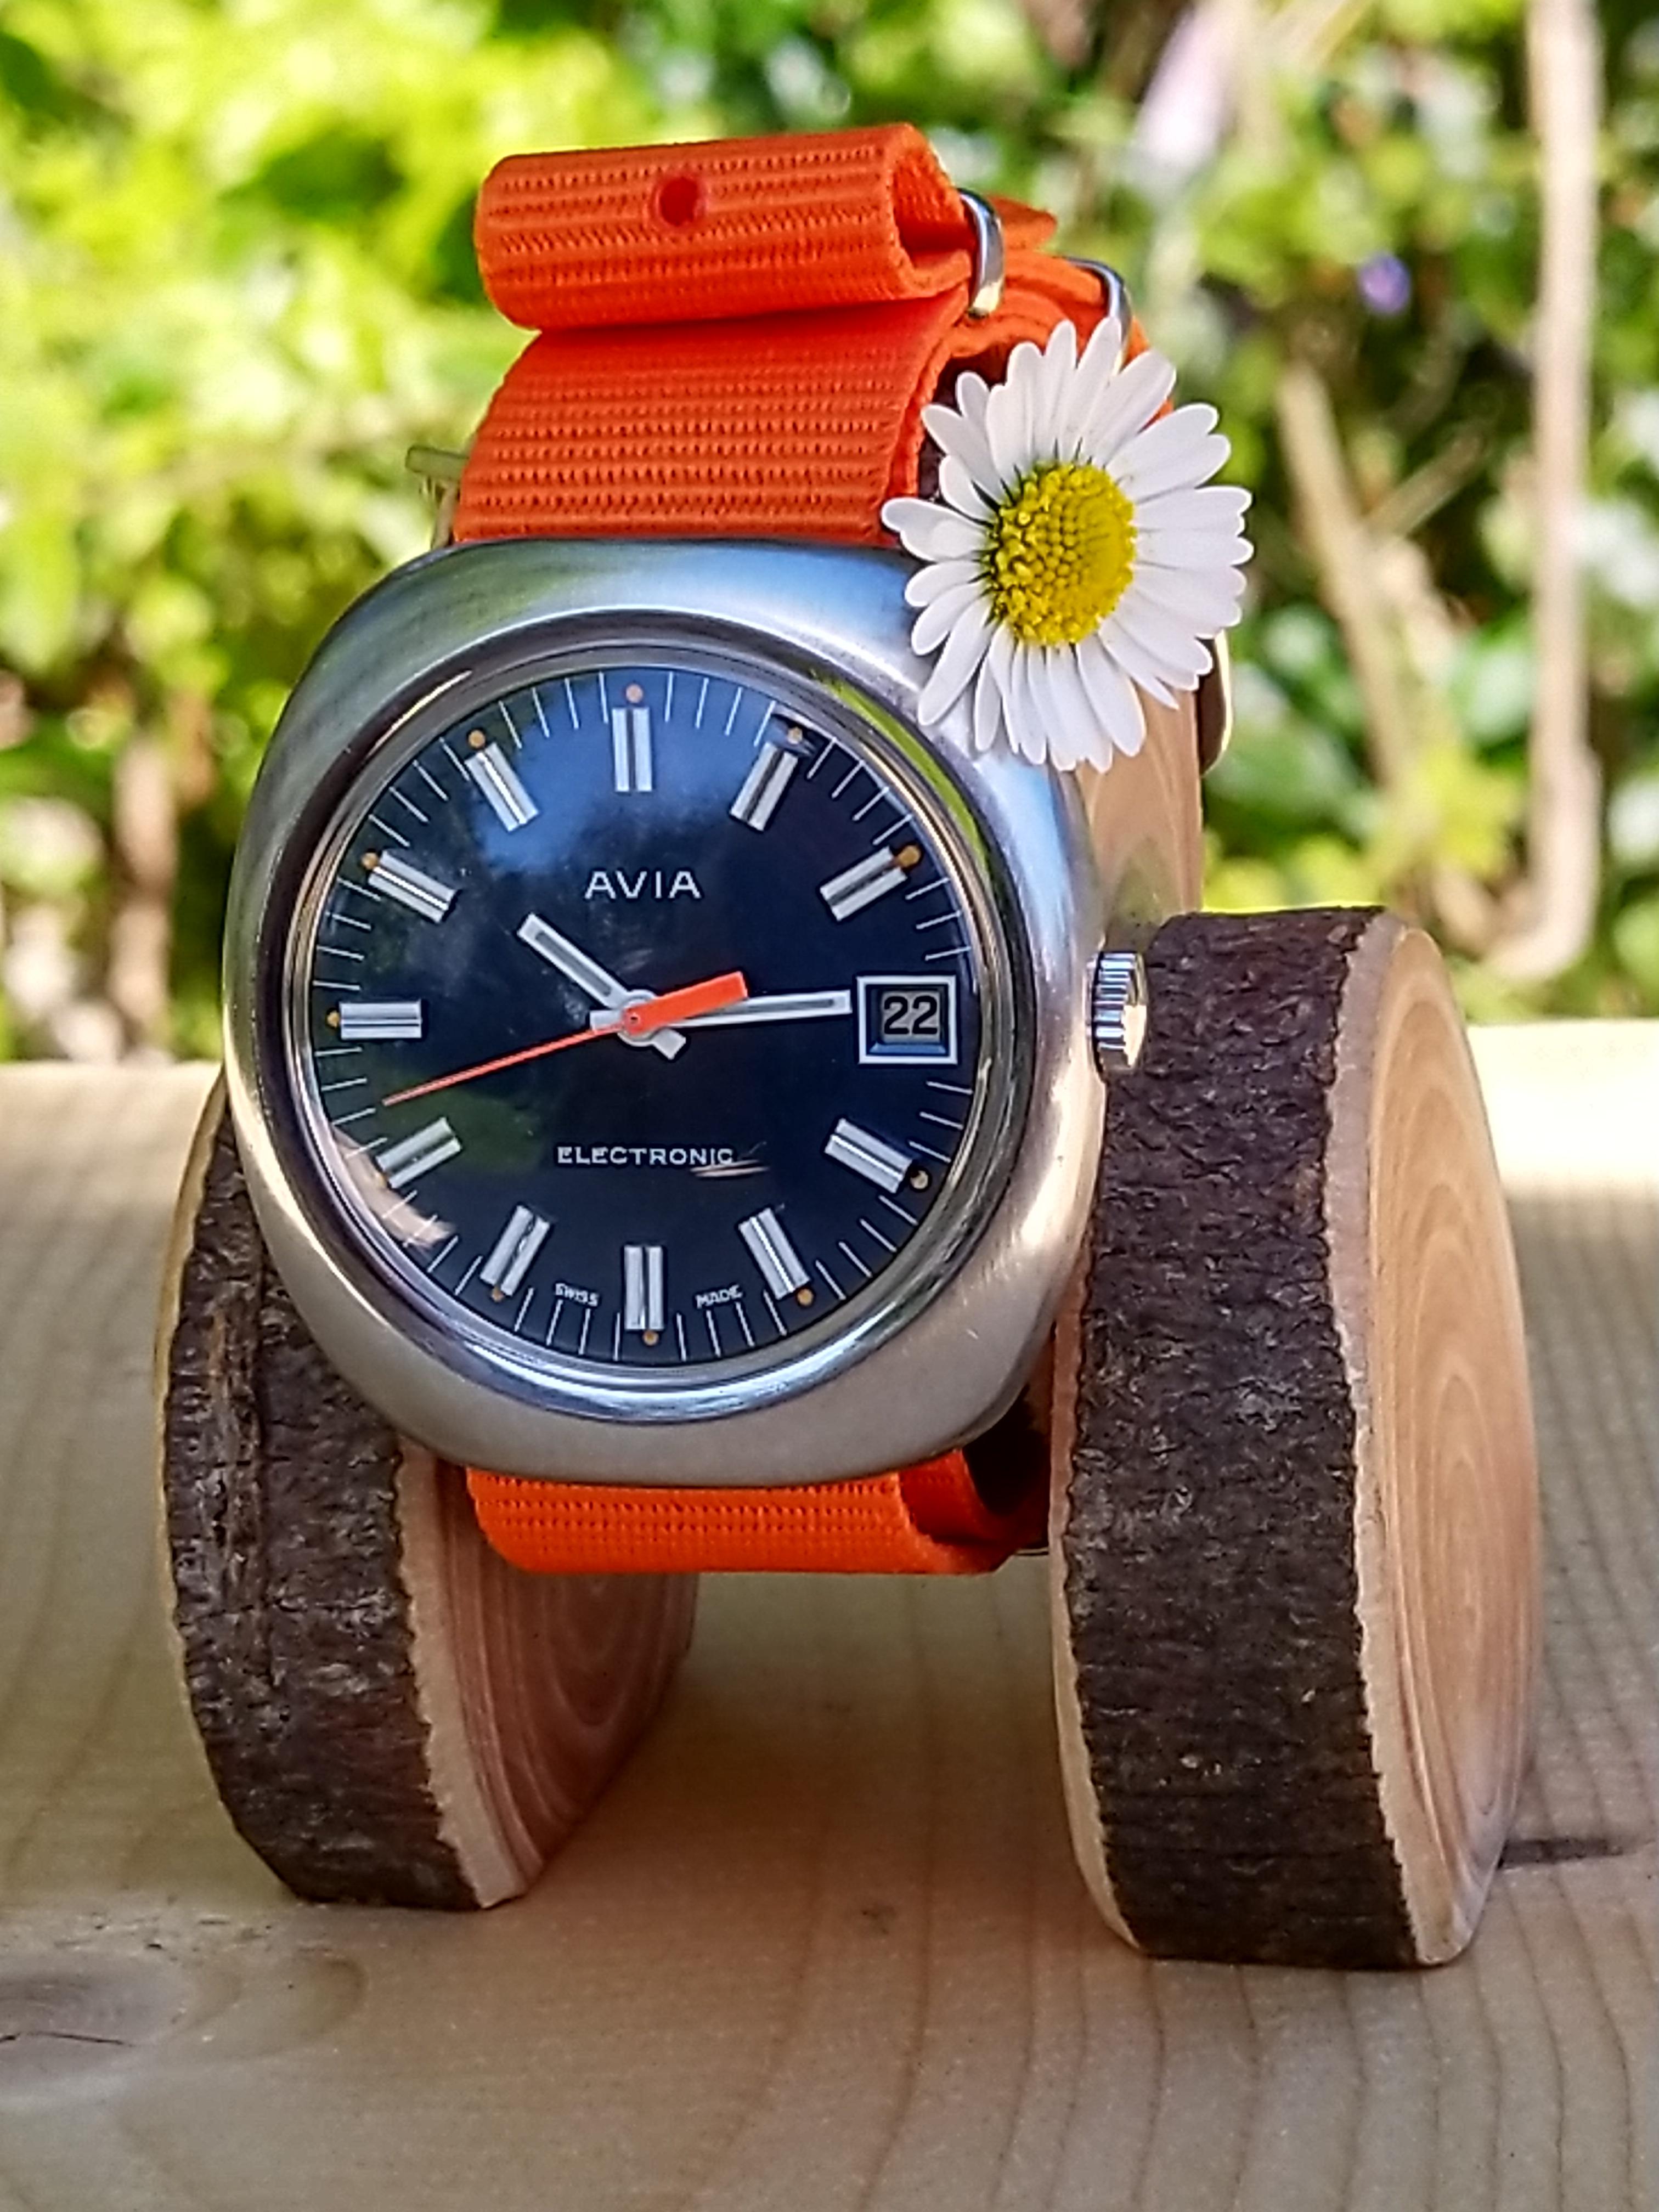
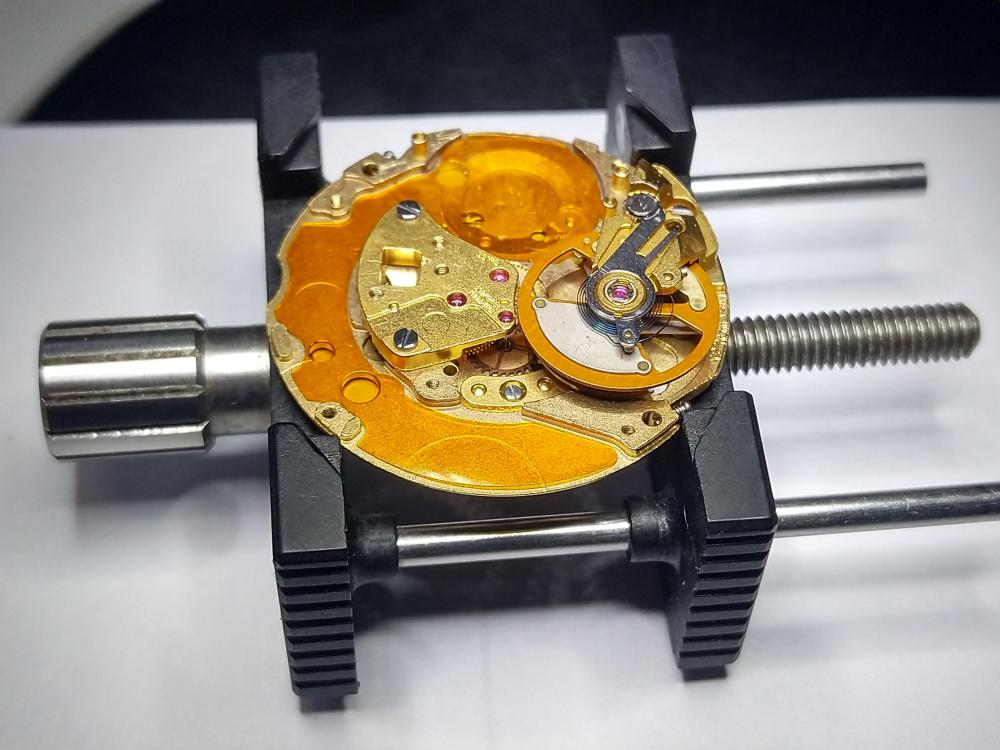
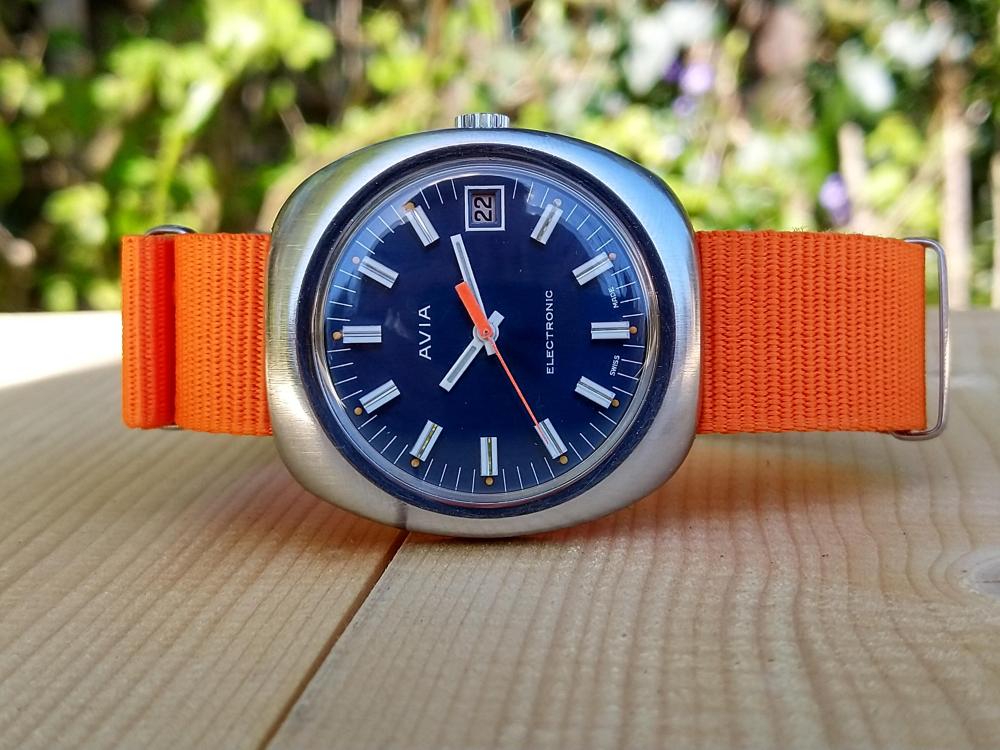
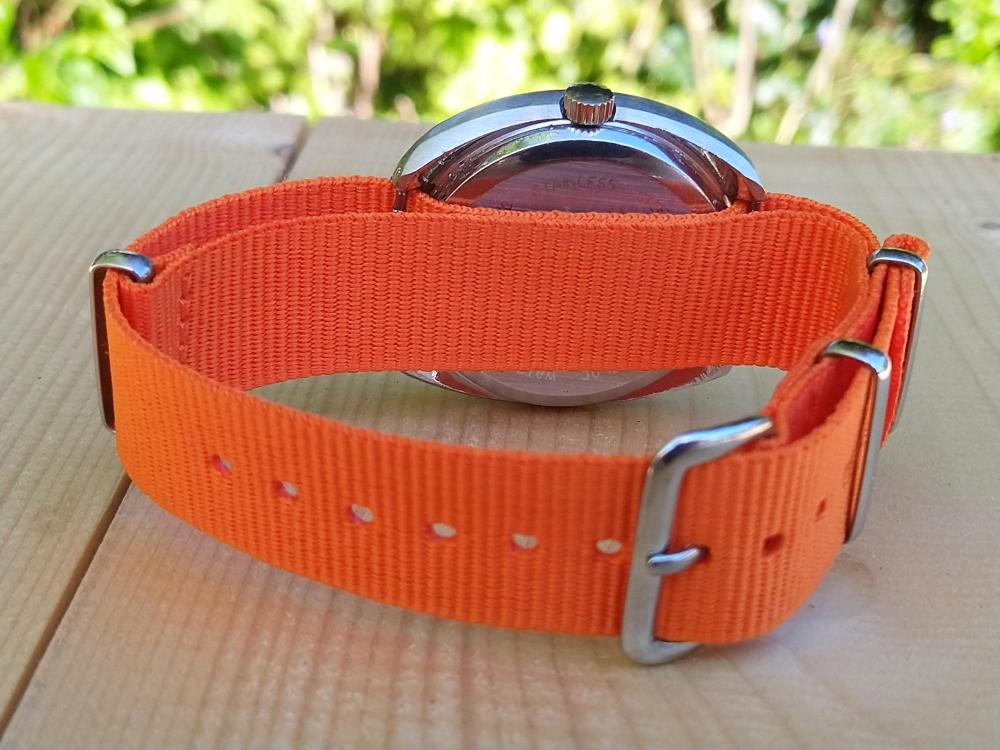
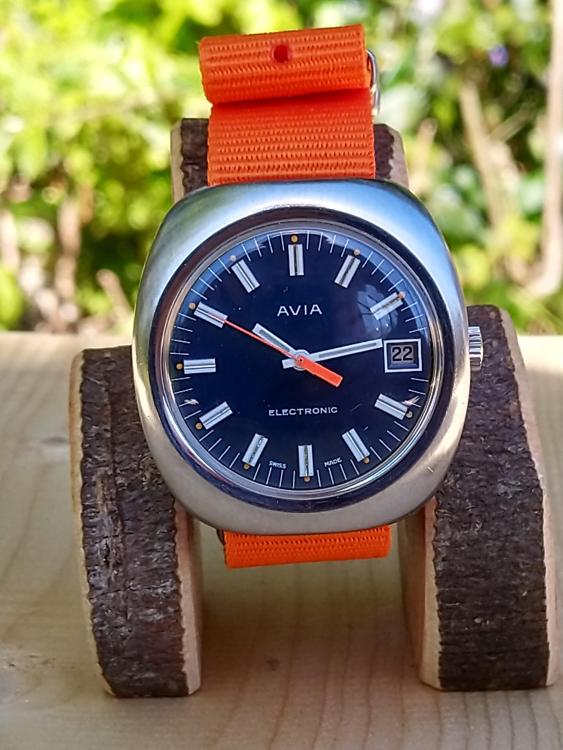
HWGIKE#56 AVIA ESA 9154 love child of an electric and a mechanical Could not resist... I still had 2 nights and a couple of hours today to service this one before travelling. I have 9158s but this one is a 9154, pallet fork has a built in magnet. This is a real miracle, a bit tricky to get out from the case, but didn't take long to figure it out. Was very very fast after the service, didnt check it before though. Had no choice but to re-lume the hands.


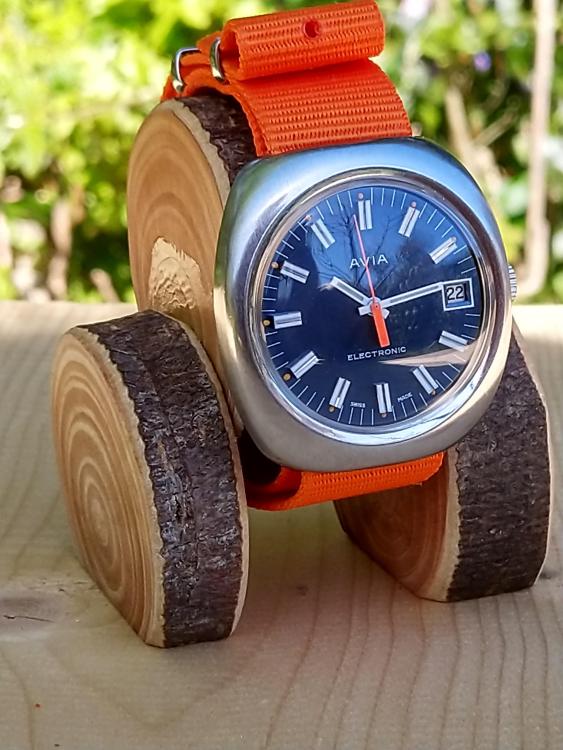

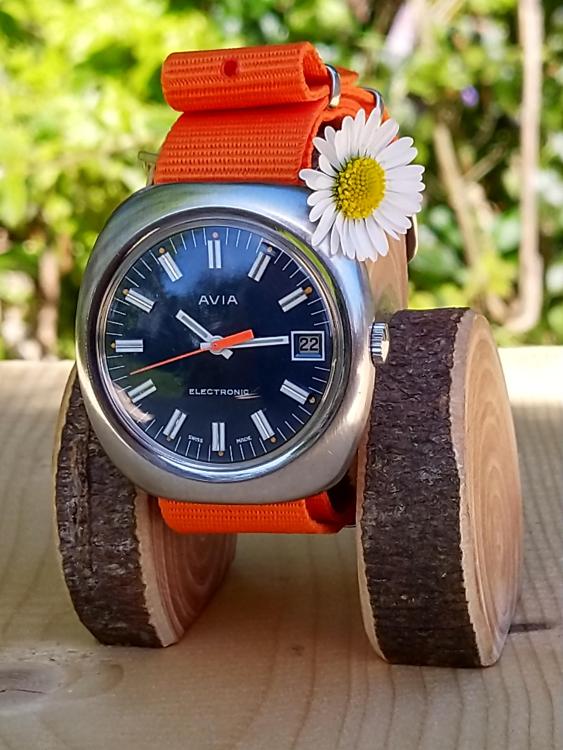
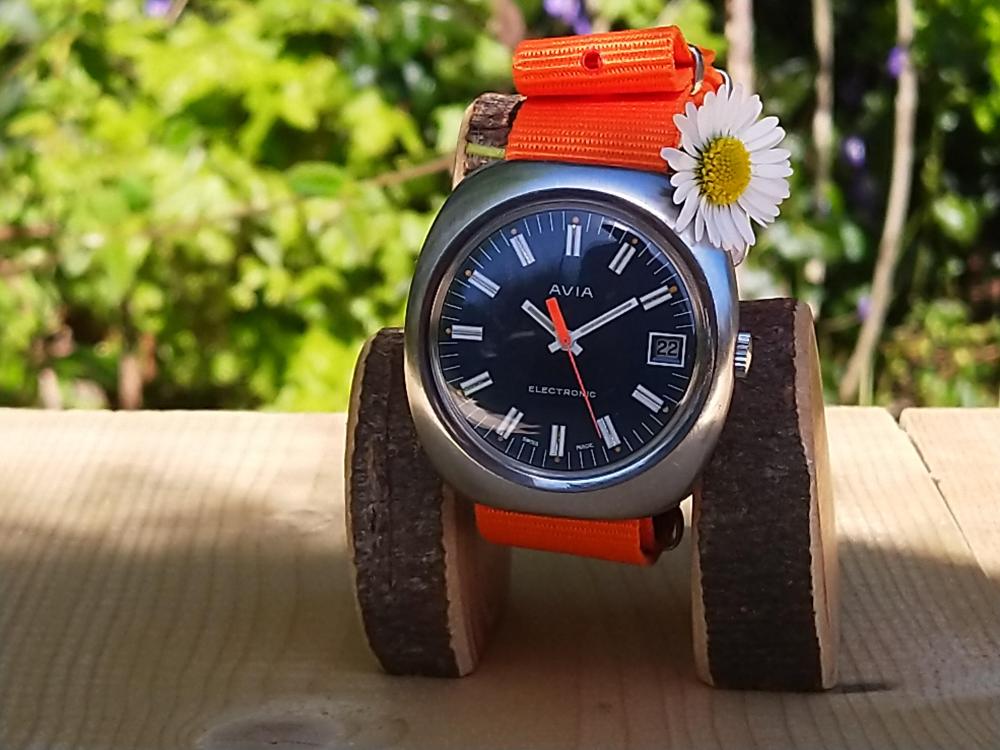 1 point
 -
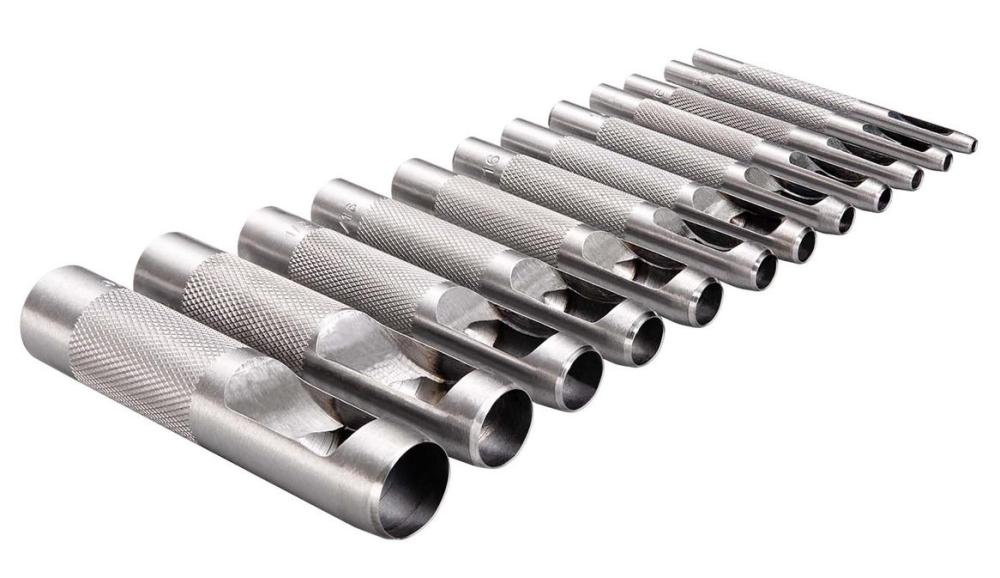
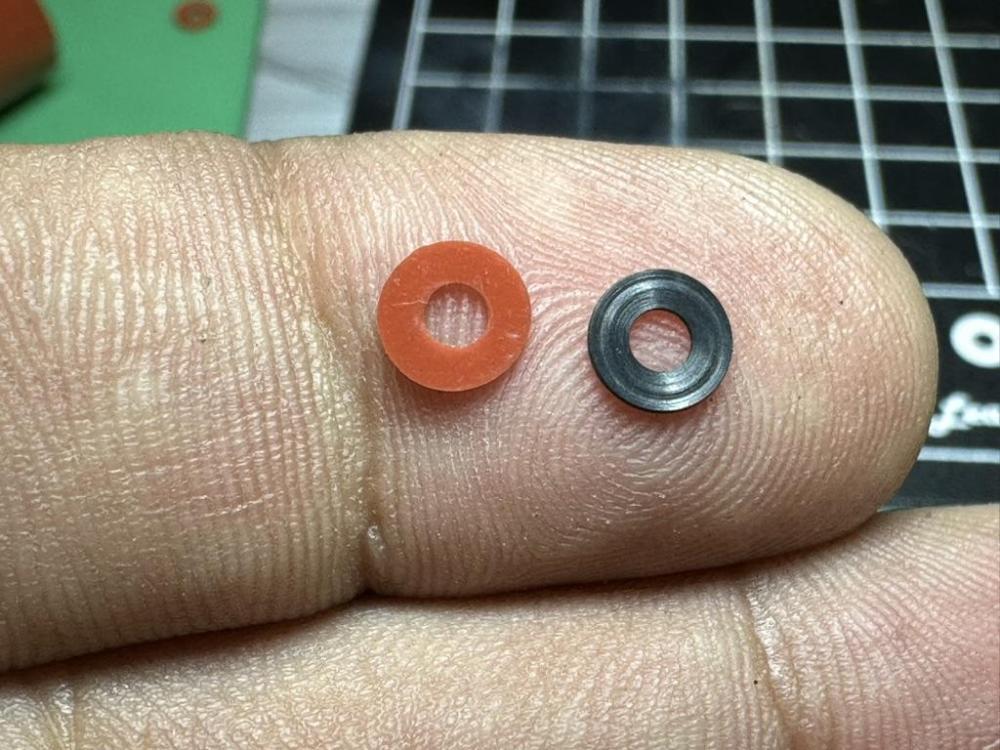
Well, I received no help... but eventually made my own. silicone gasket sheet in 0.5mm leather punch set success.
 1 point
 -
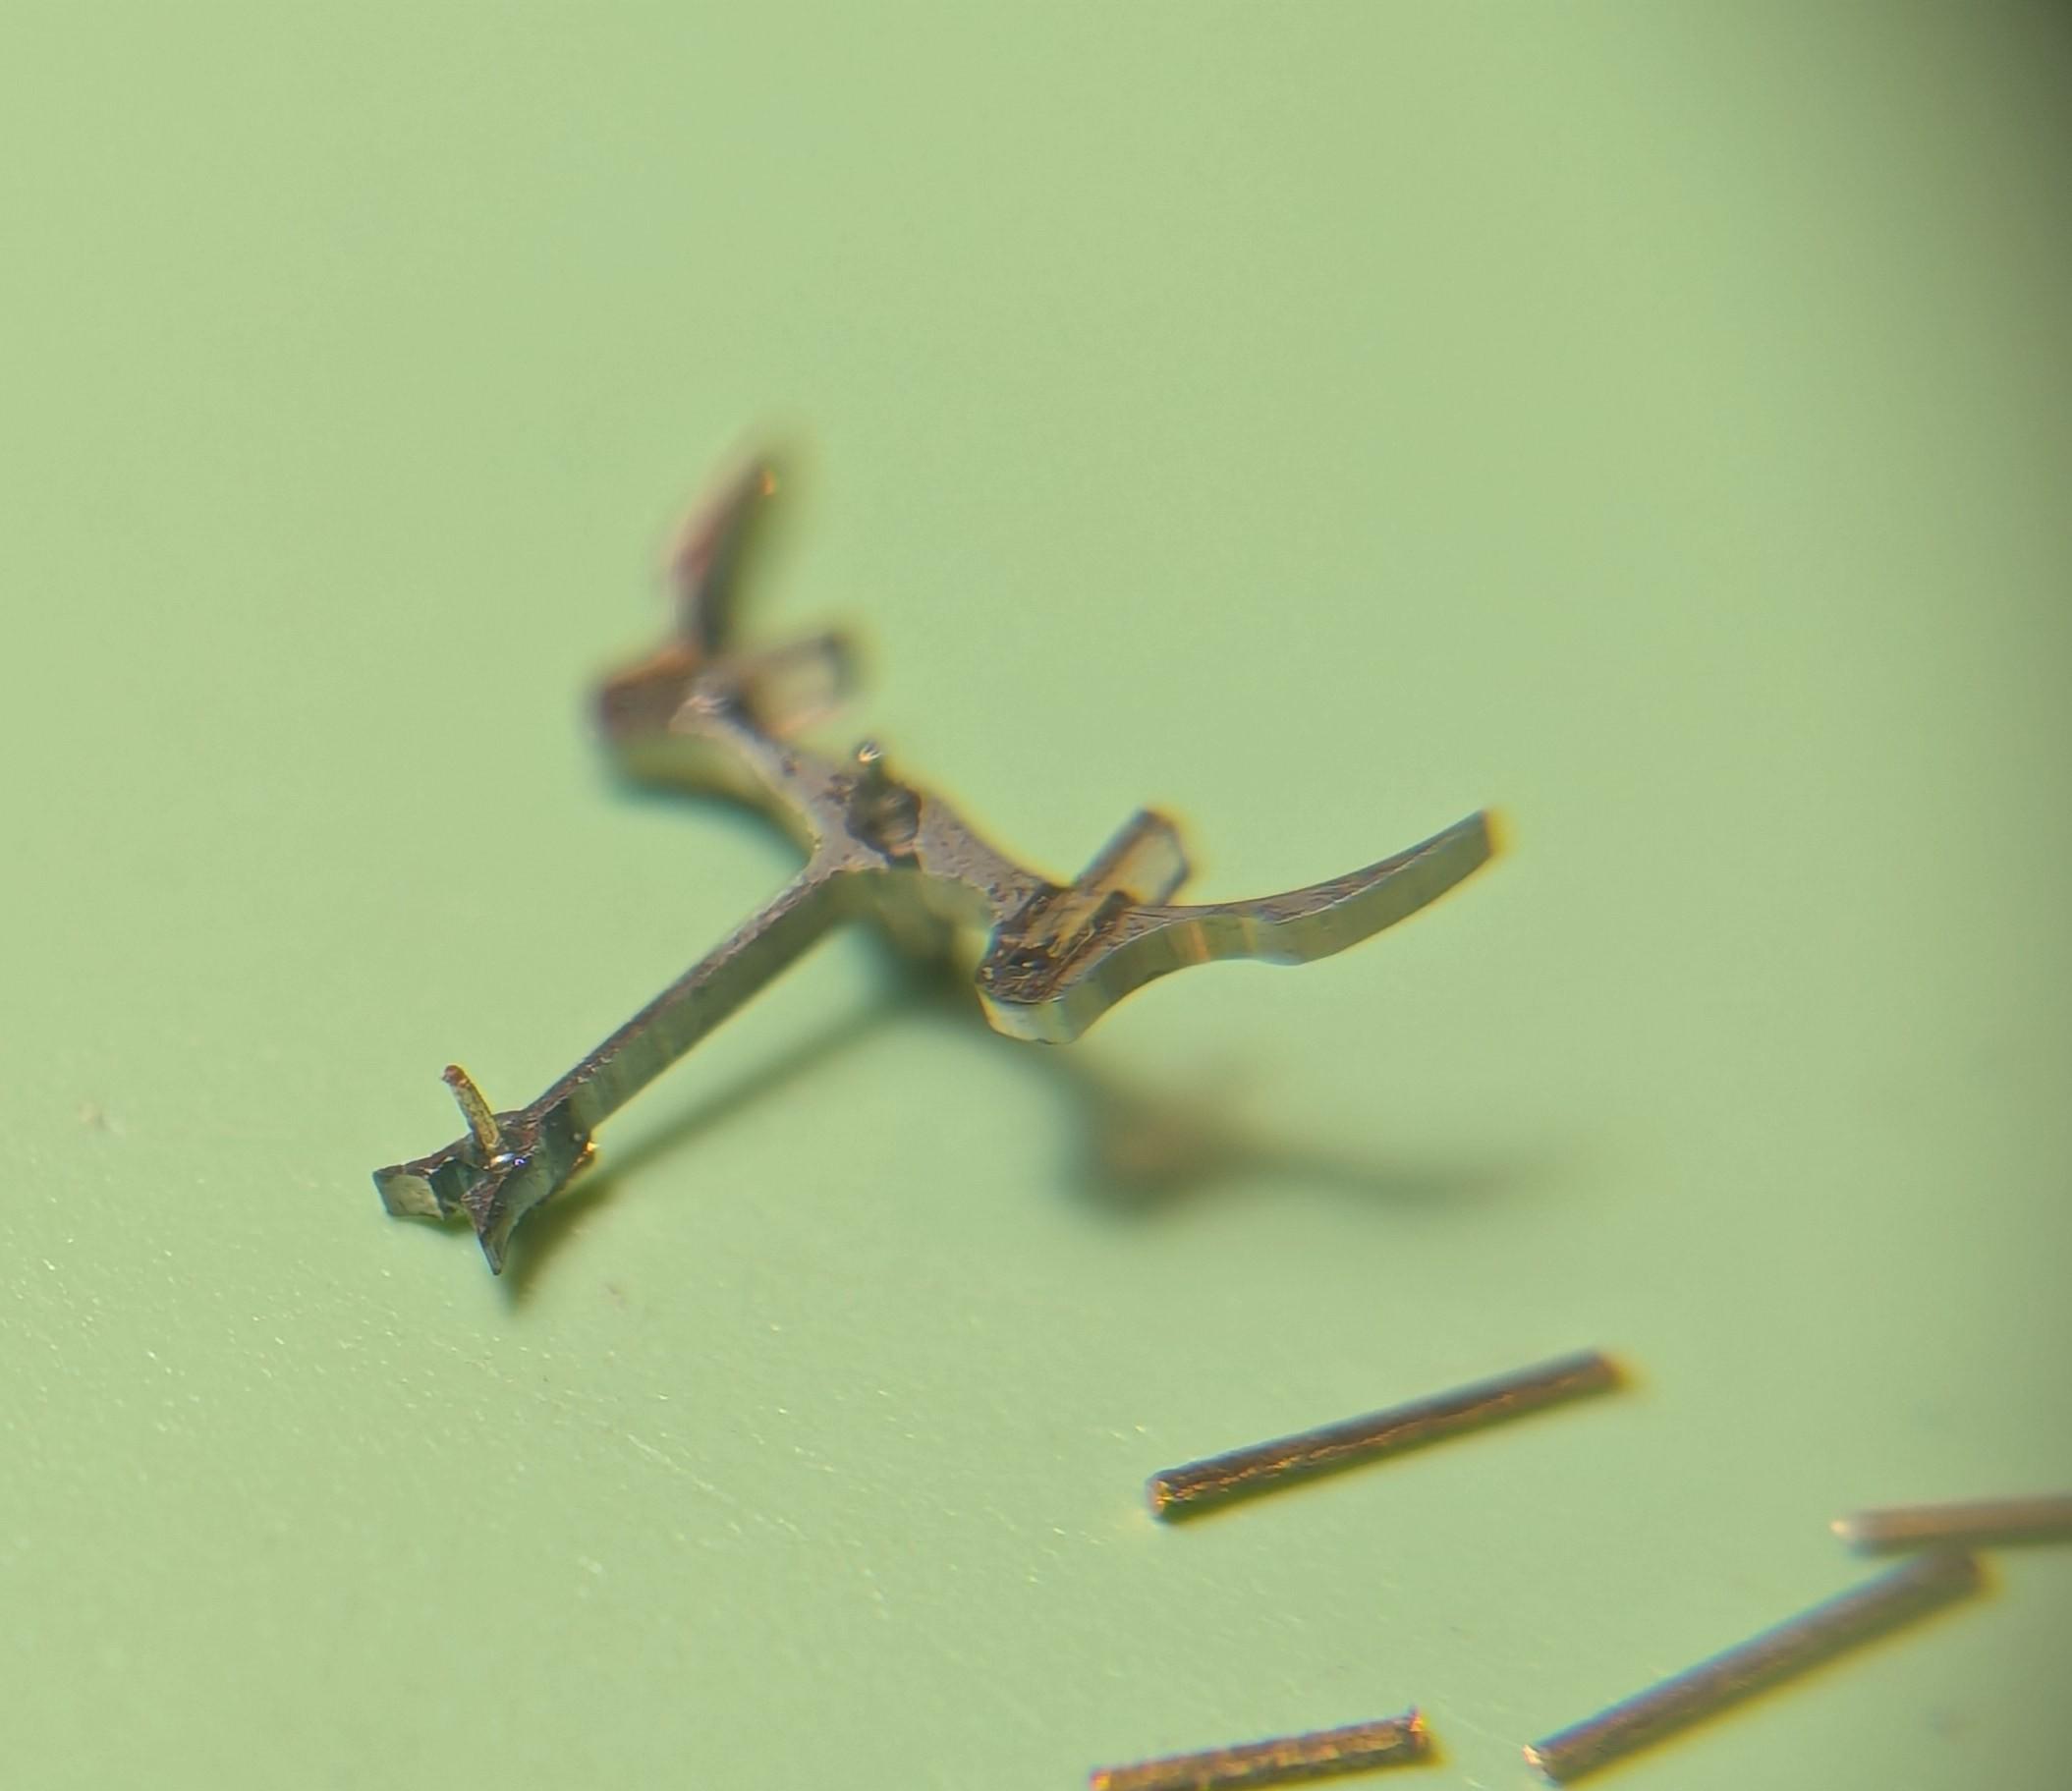
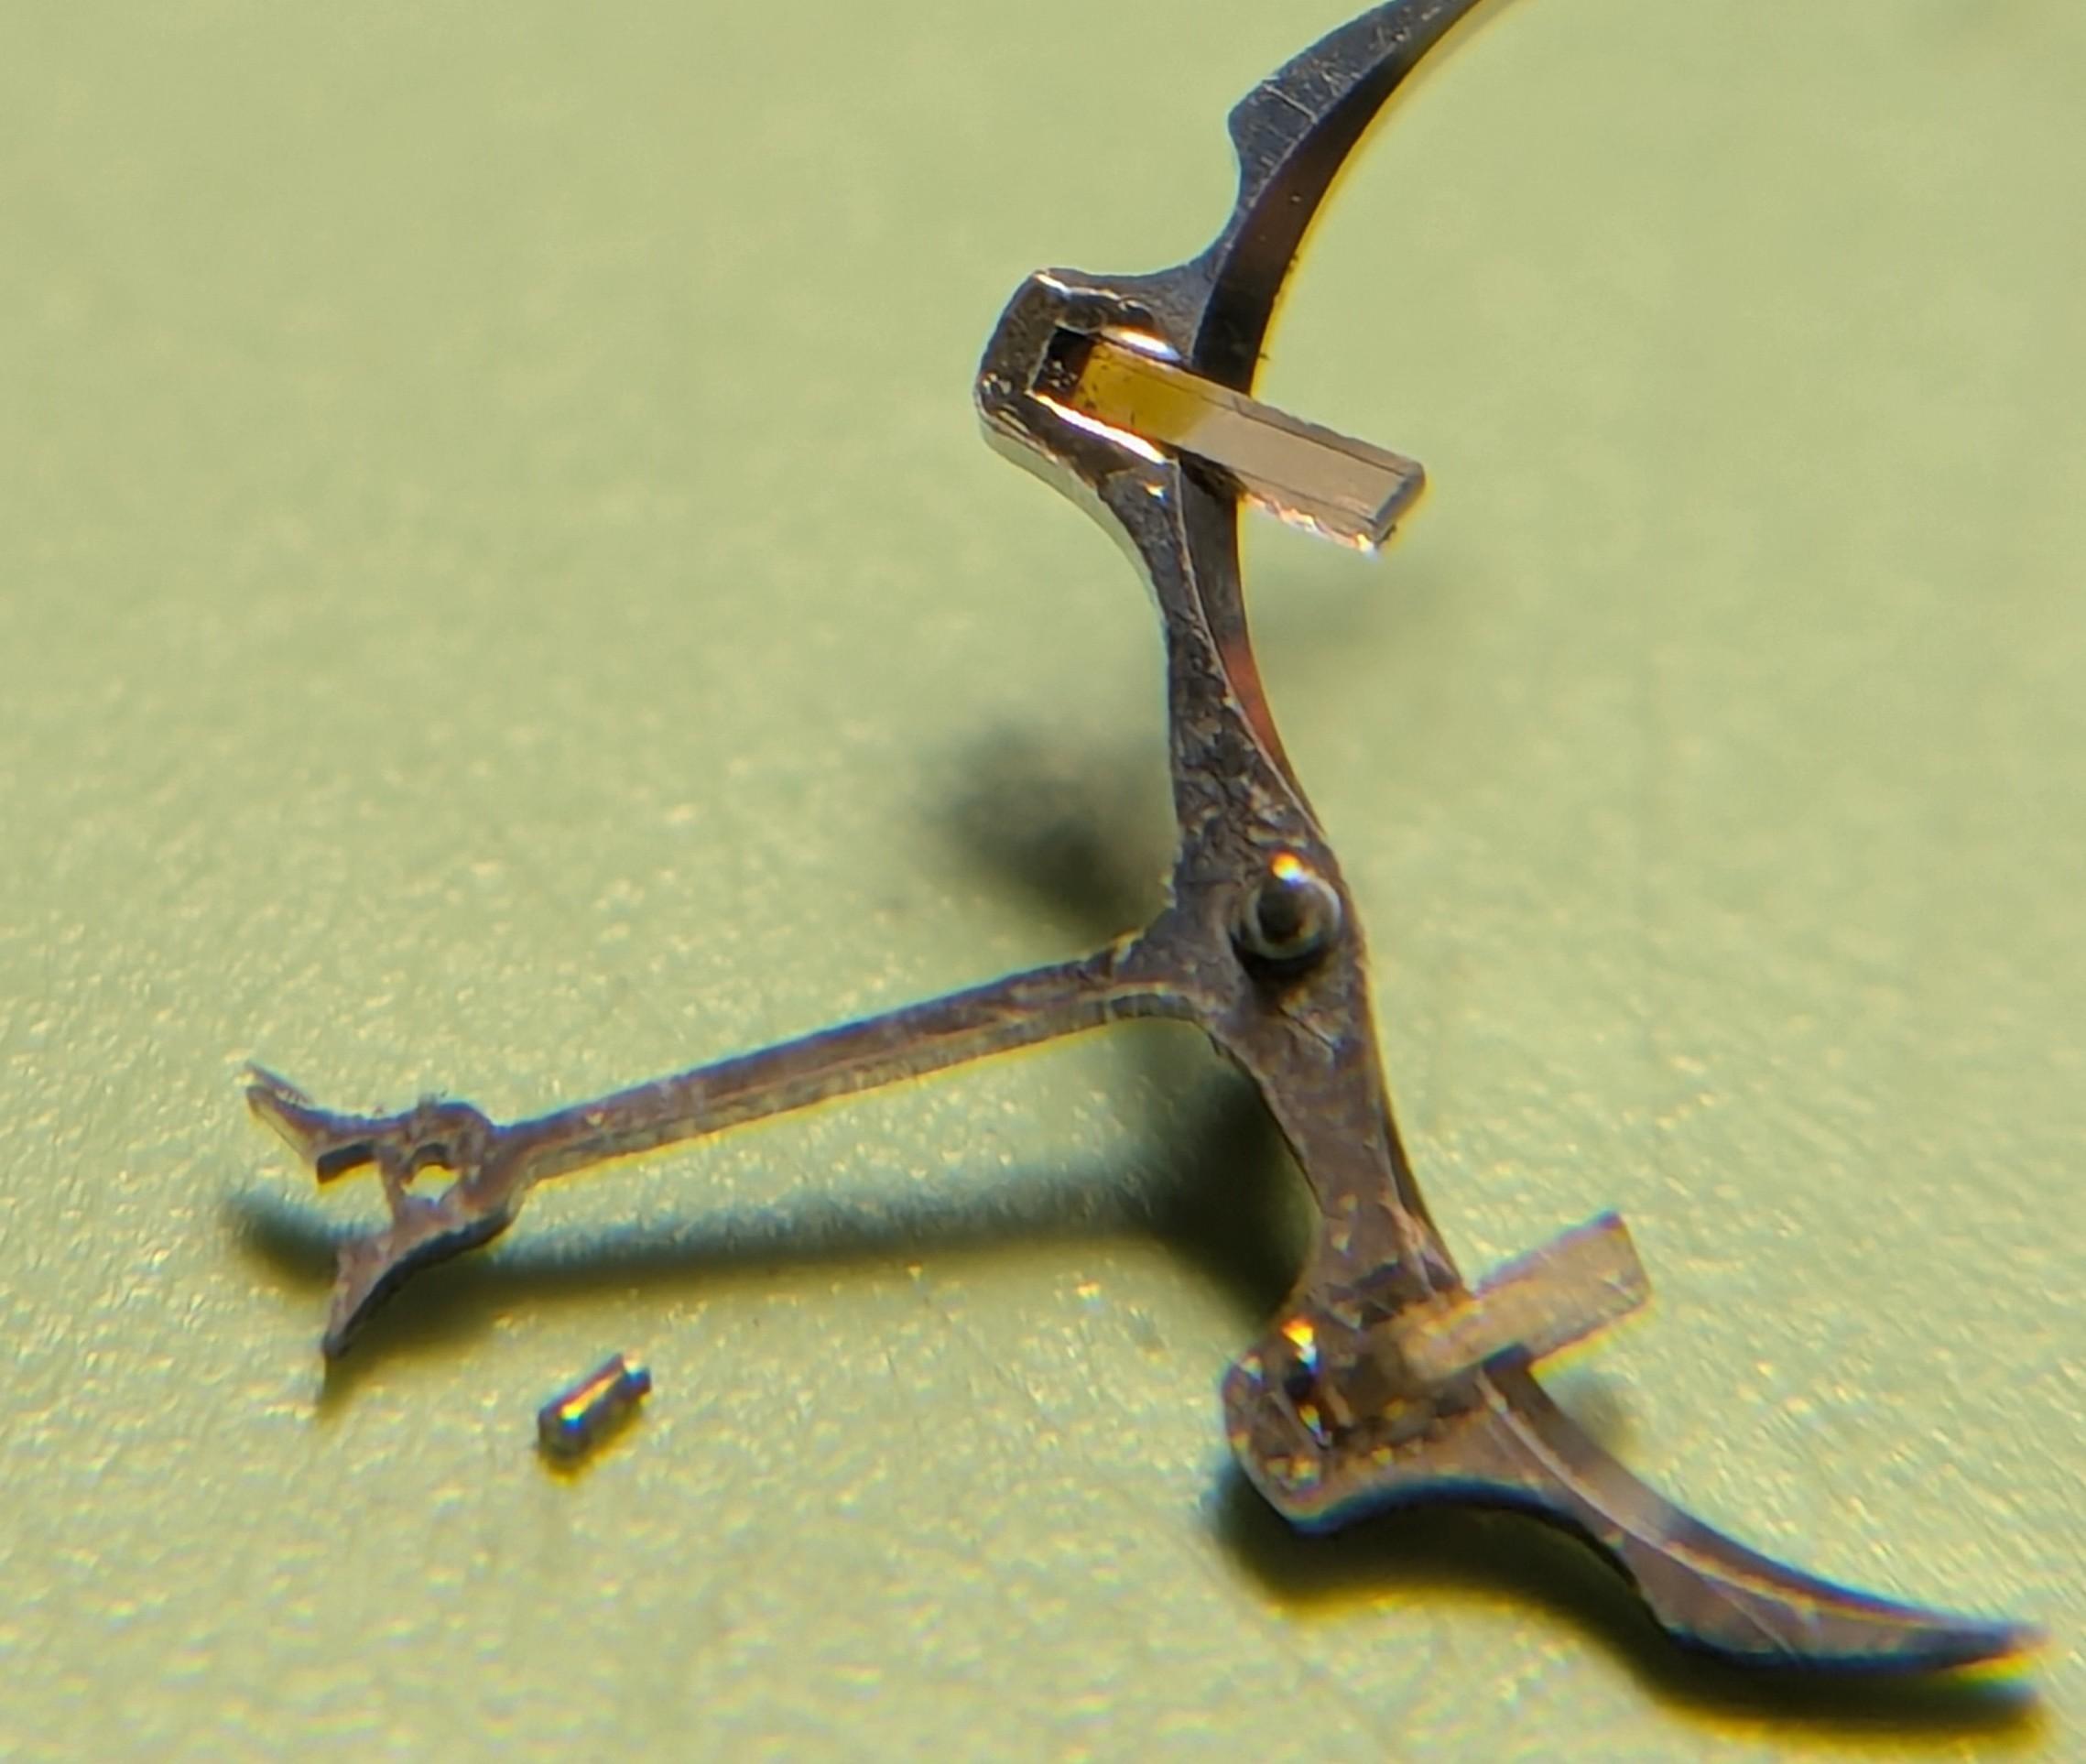
Are you sure it’s the pivot that’s broken off? From the picture it looks like the end of the wheel arbour has sheared off. If you gently remove the broken piece from the wheel bridge and show a picture, I’m expecting to see a broken piece of the arbour with the pivot itself still on the end of it. If so then it’s not as simple as repivoting as there will be too much end shake on the resulting wheel arbour. It would need the arbour repairing and a pivot turned to the end of it, or adding with some blue steel.1 point
-
In my experience the inside curve must be supported by something round such as the shaft of a screwdriver. Without this support it either reduces out of shape or as you have found it snaps. I use brass tweezers and just gradually reduce. I have never annealed a spring.1 point