Search the Community
Showing results for tags 'photographs'.
Found 2 results
-
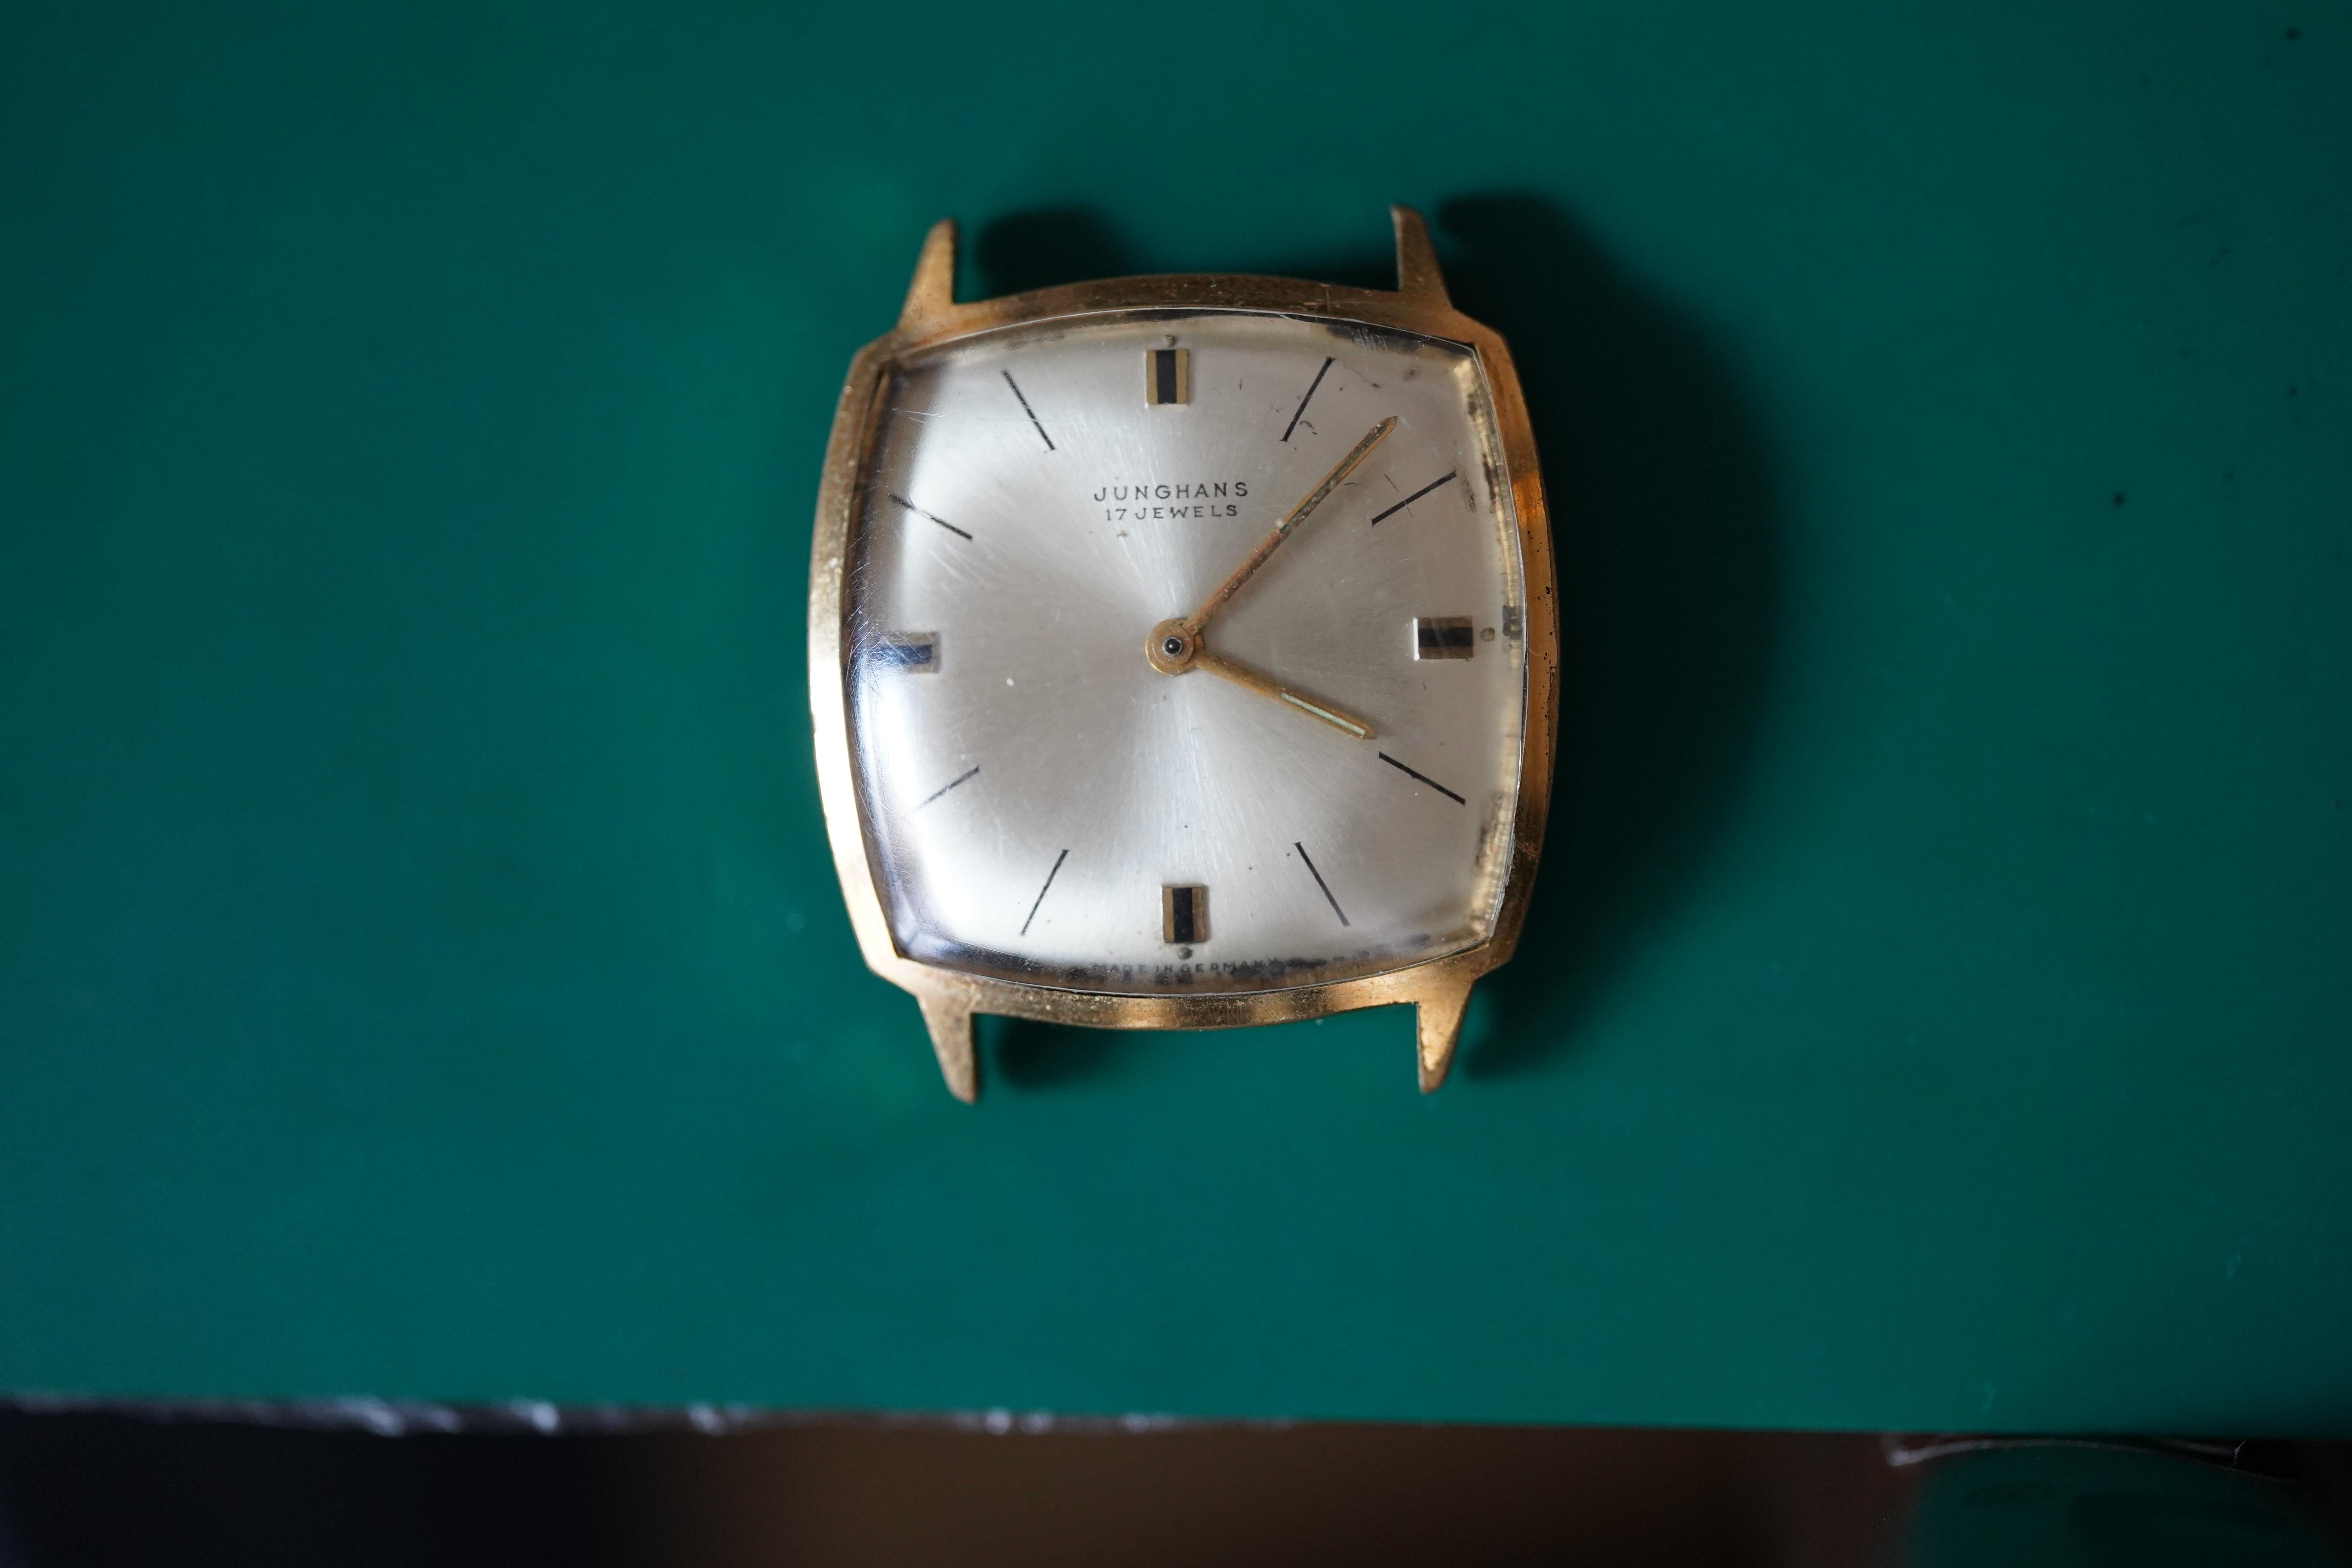
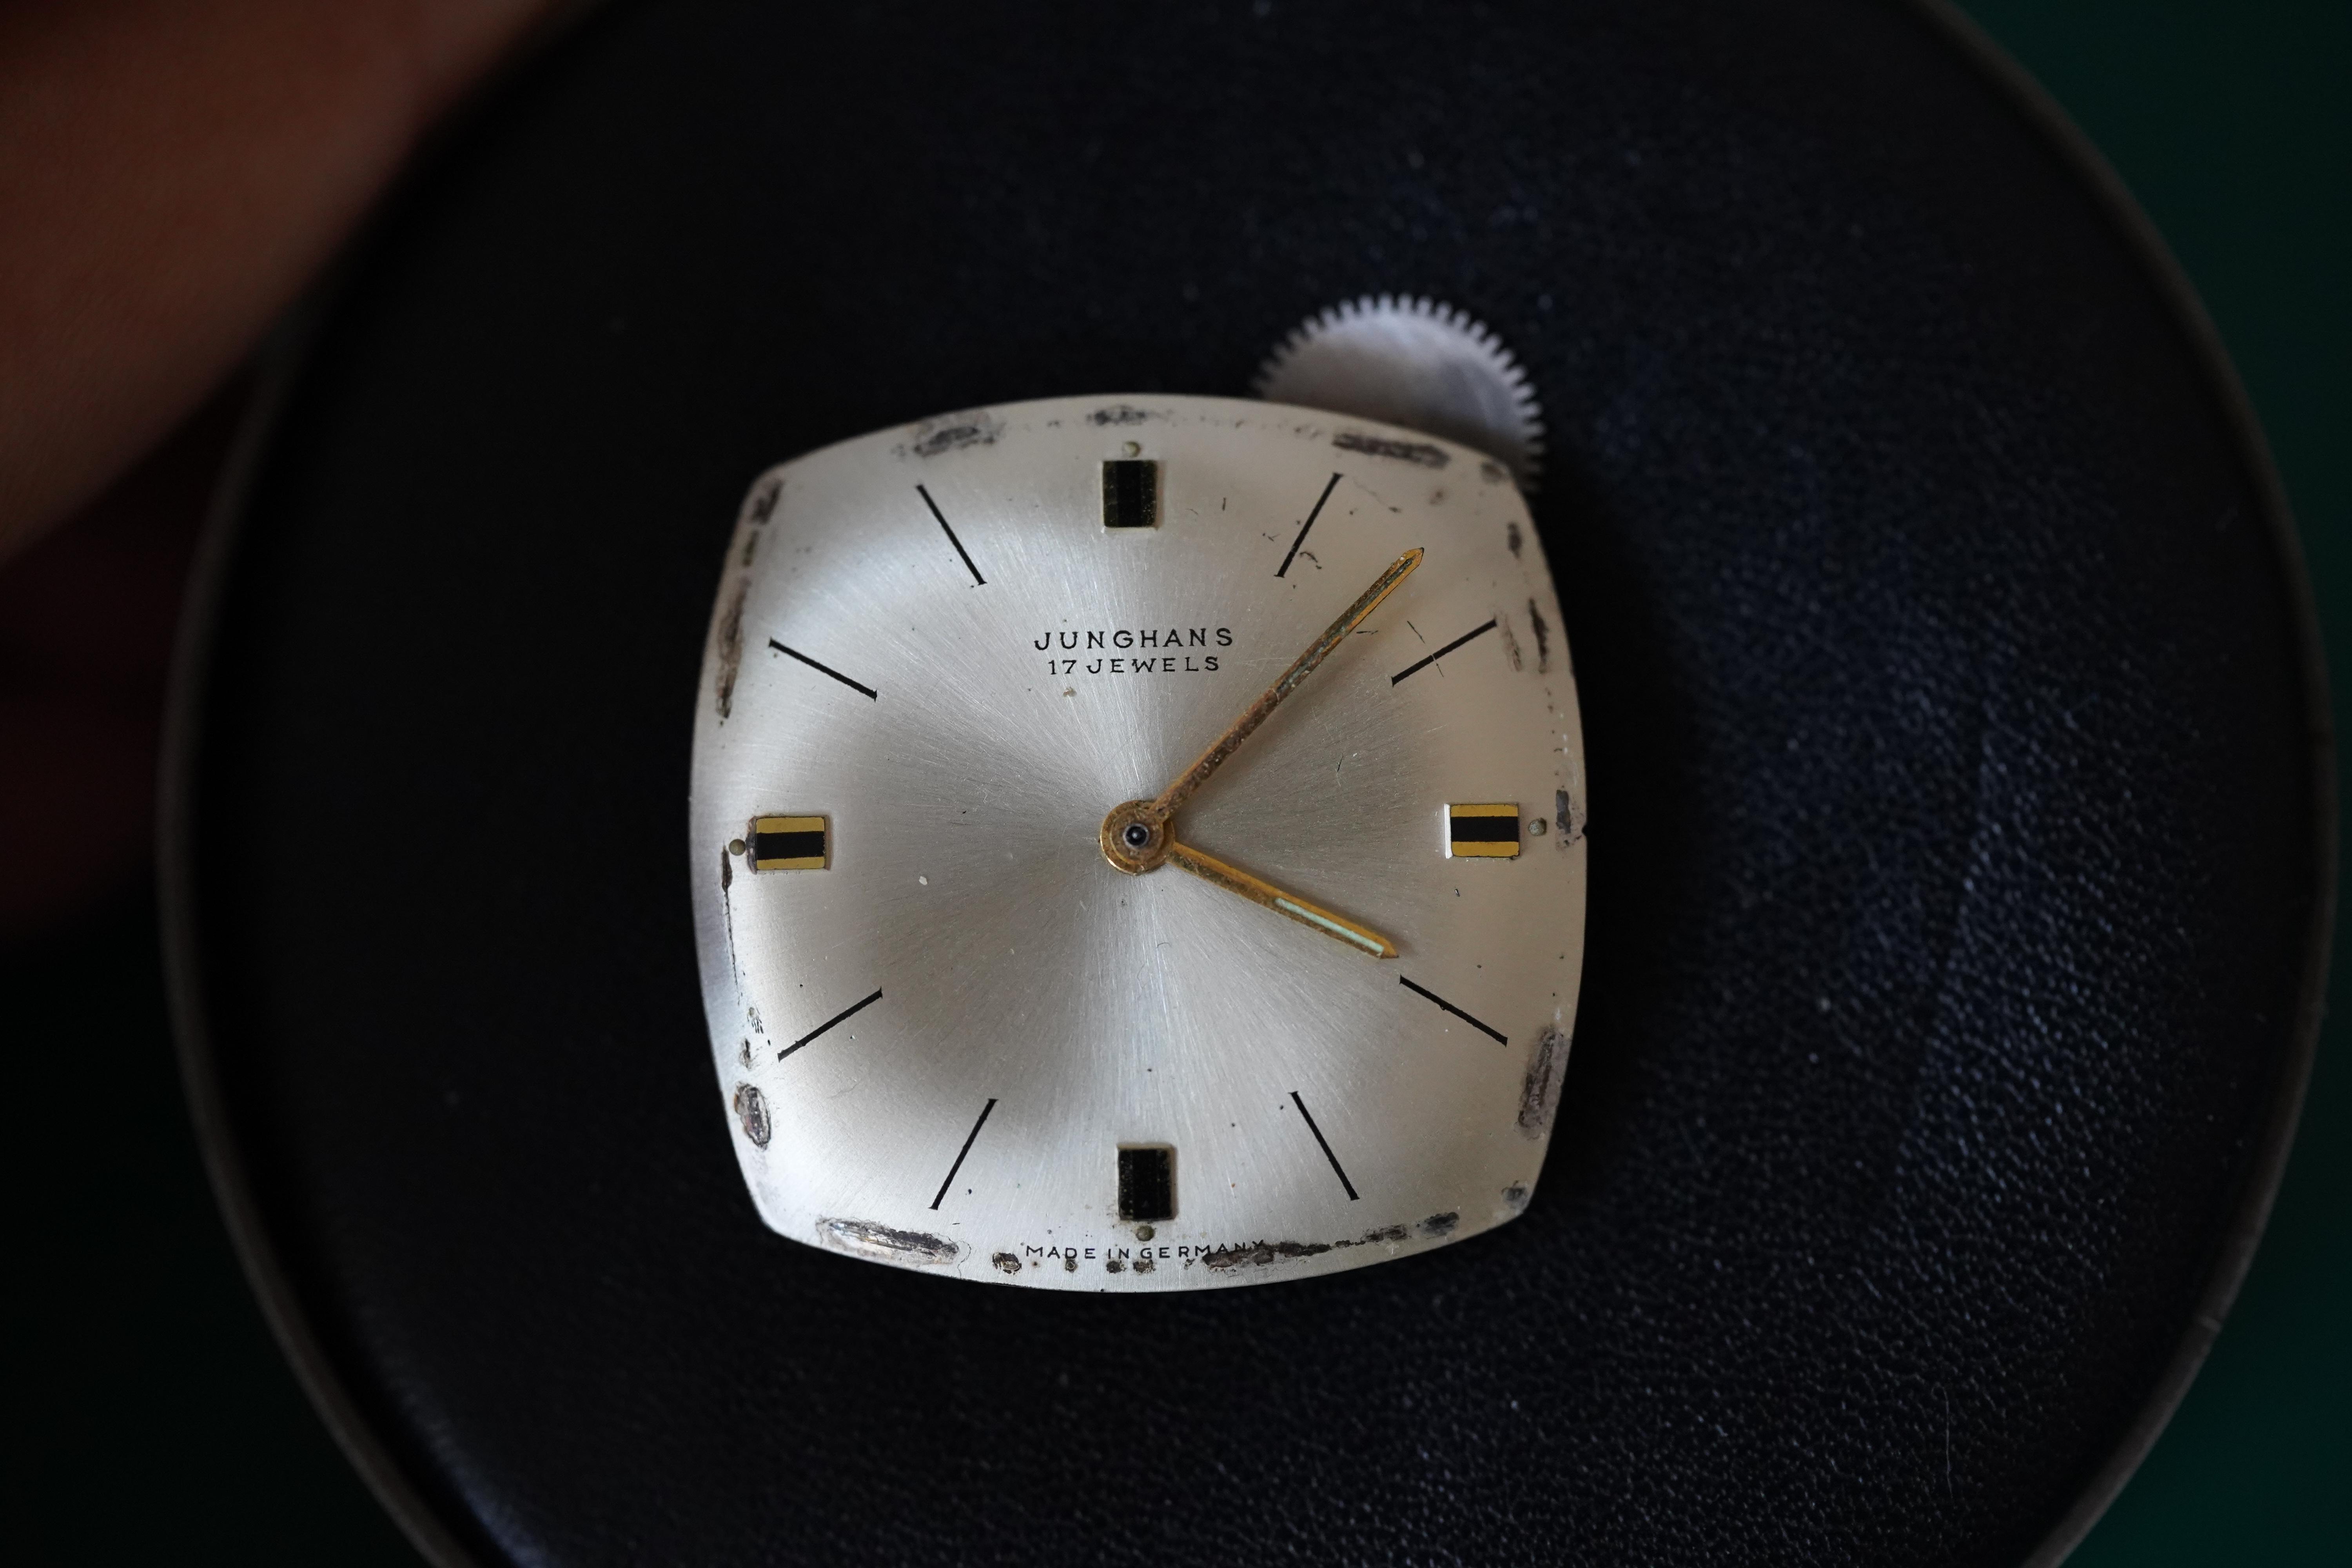
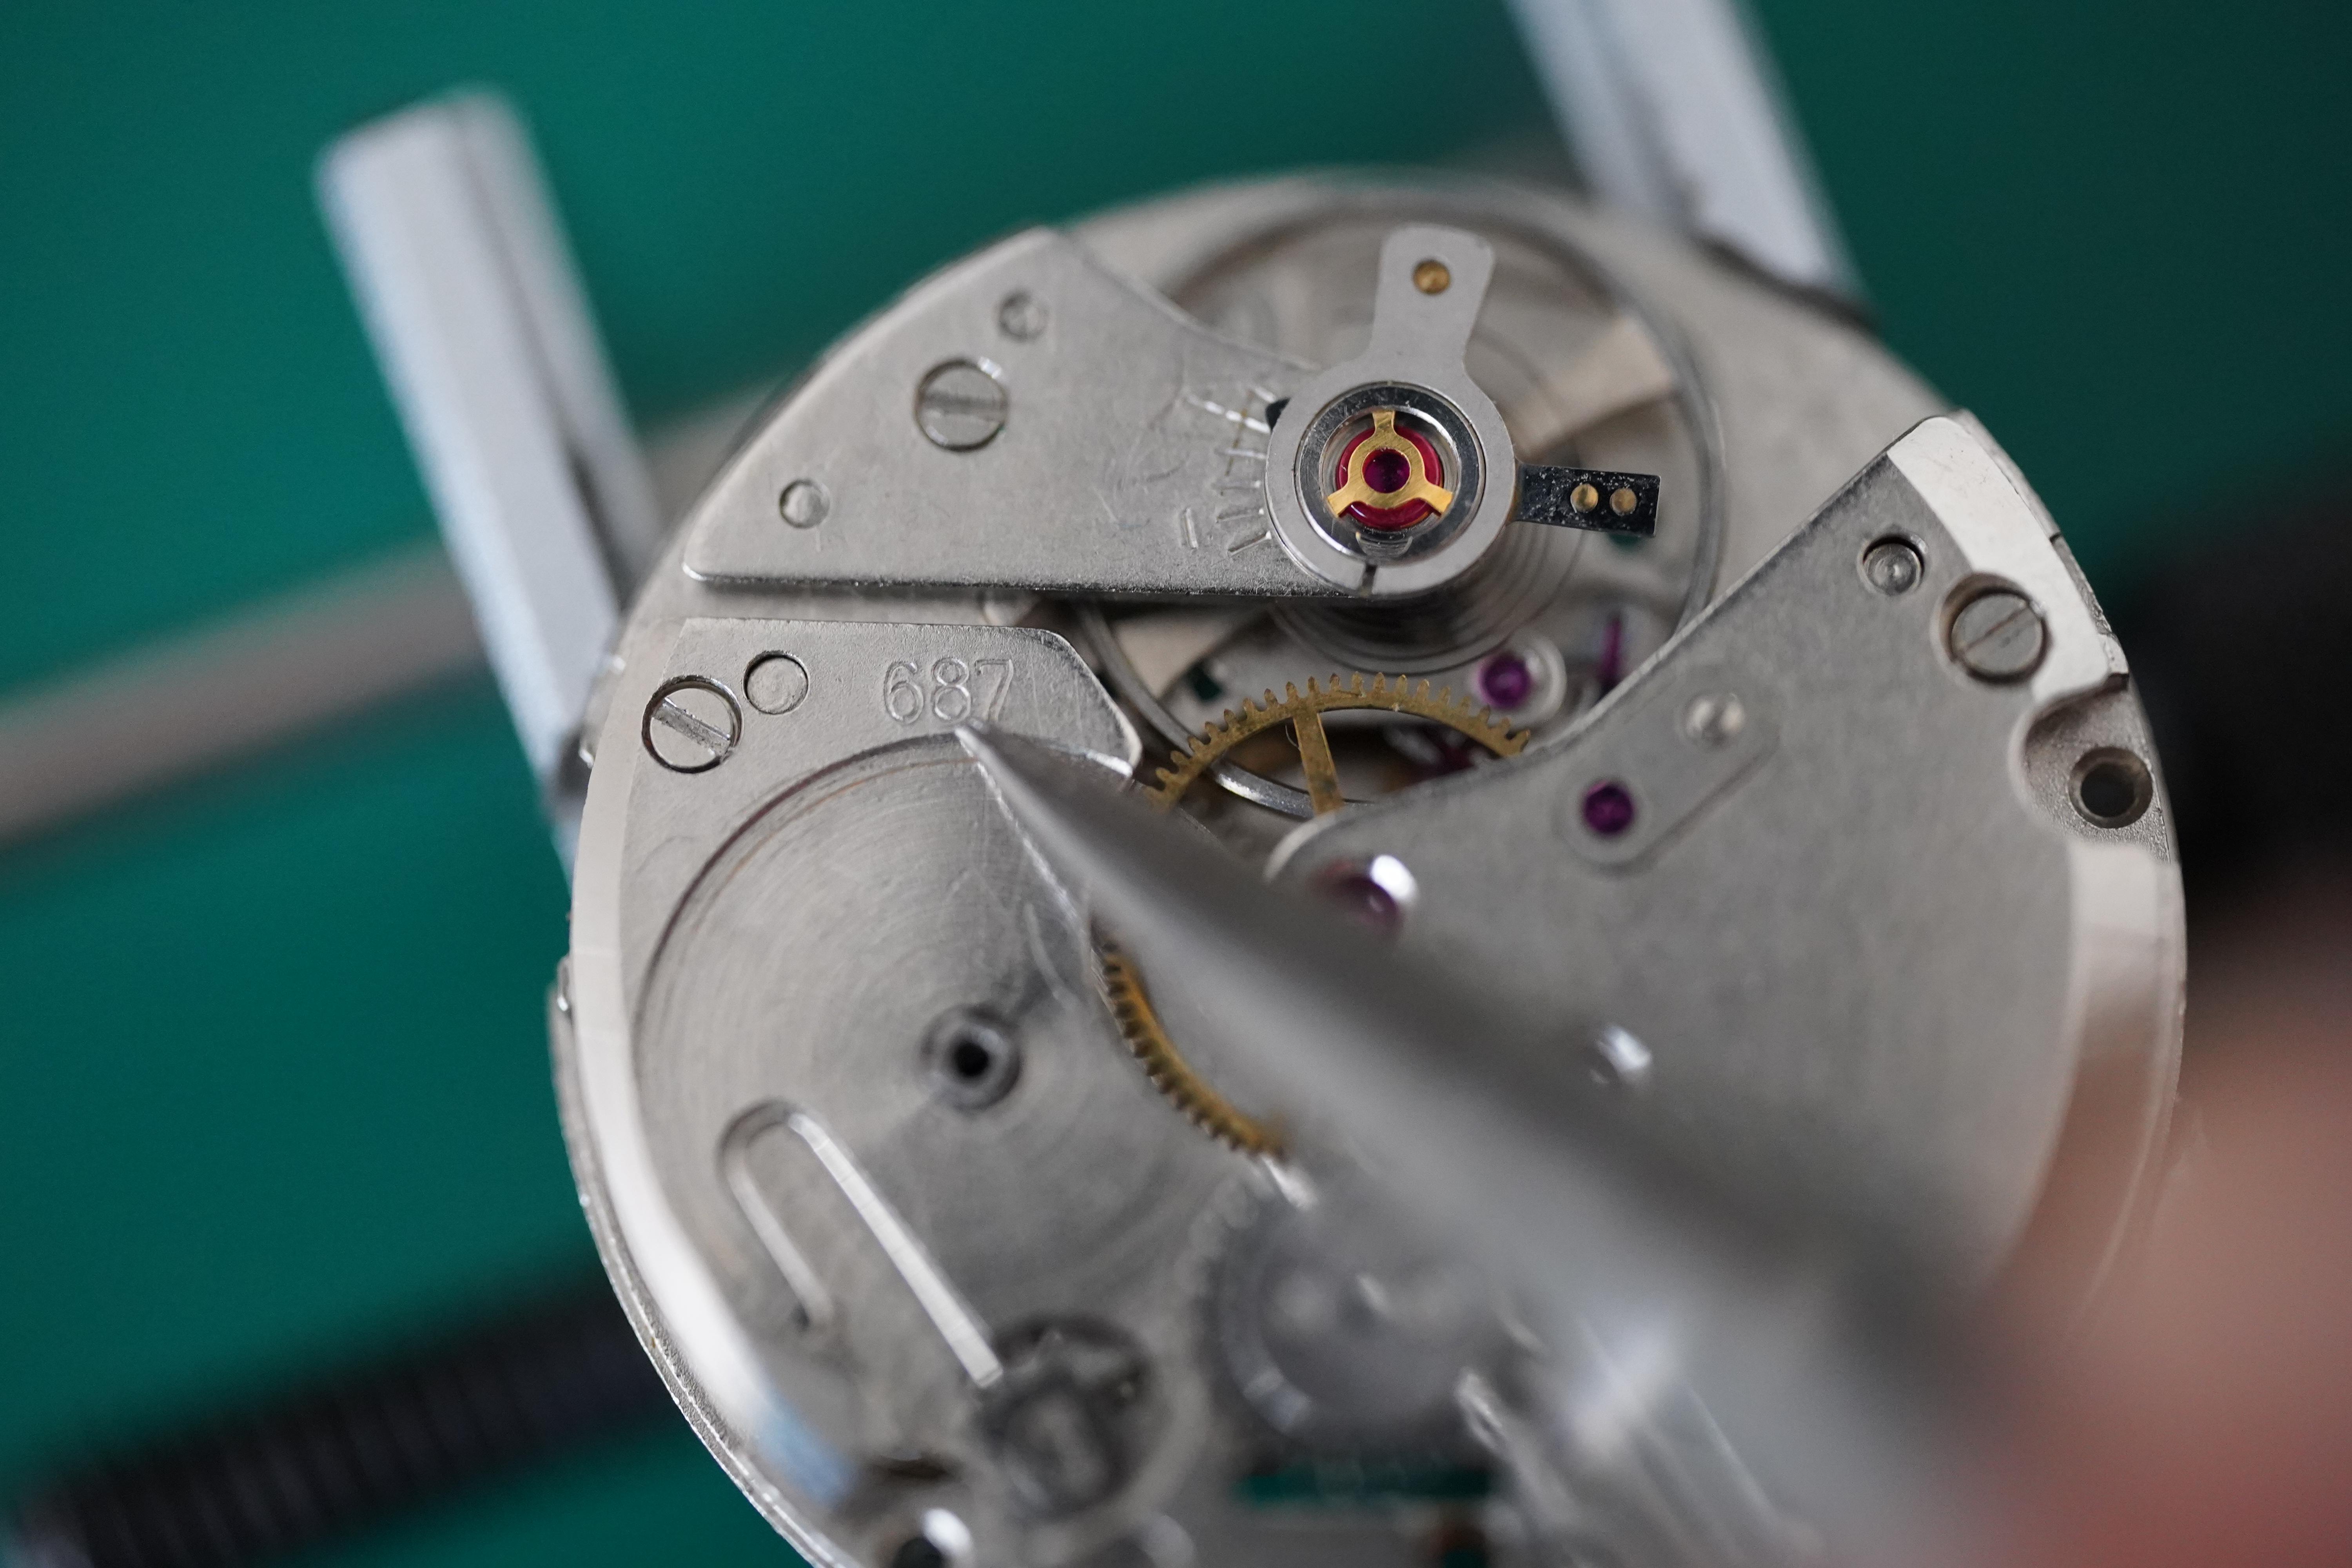
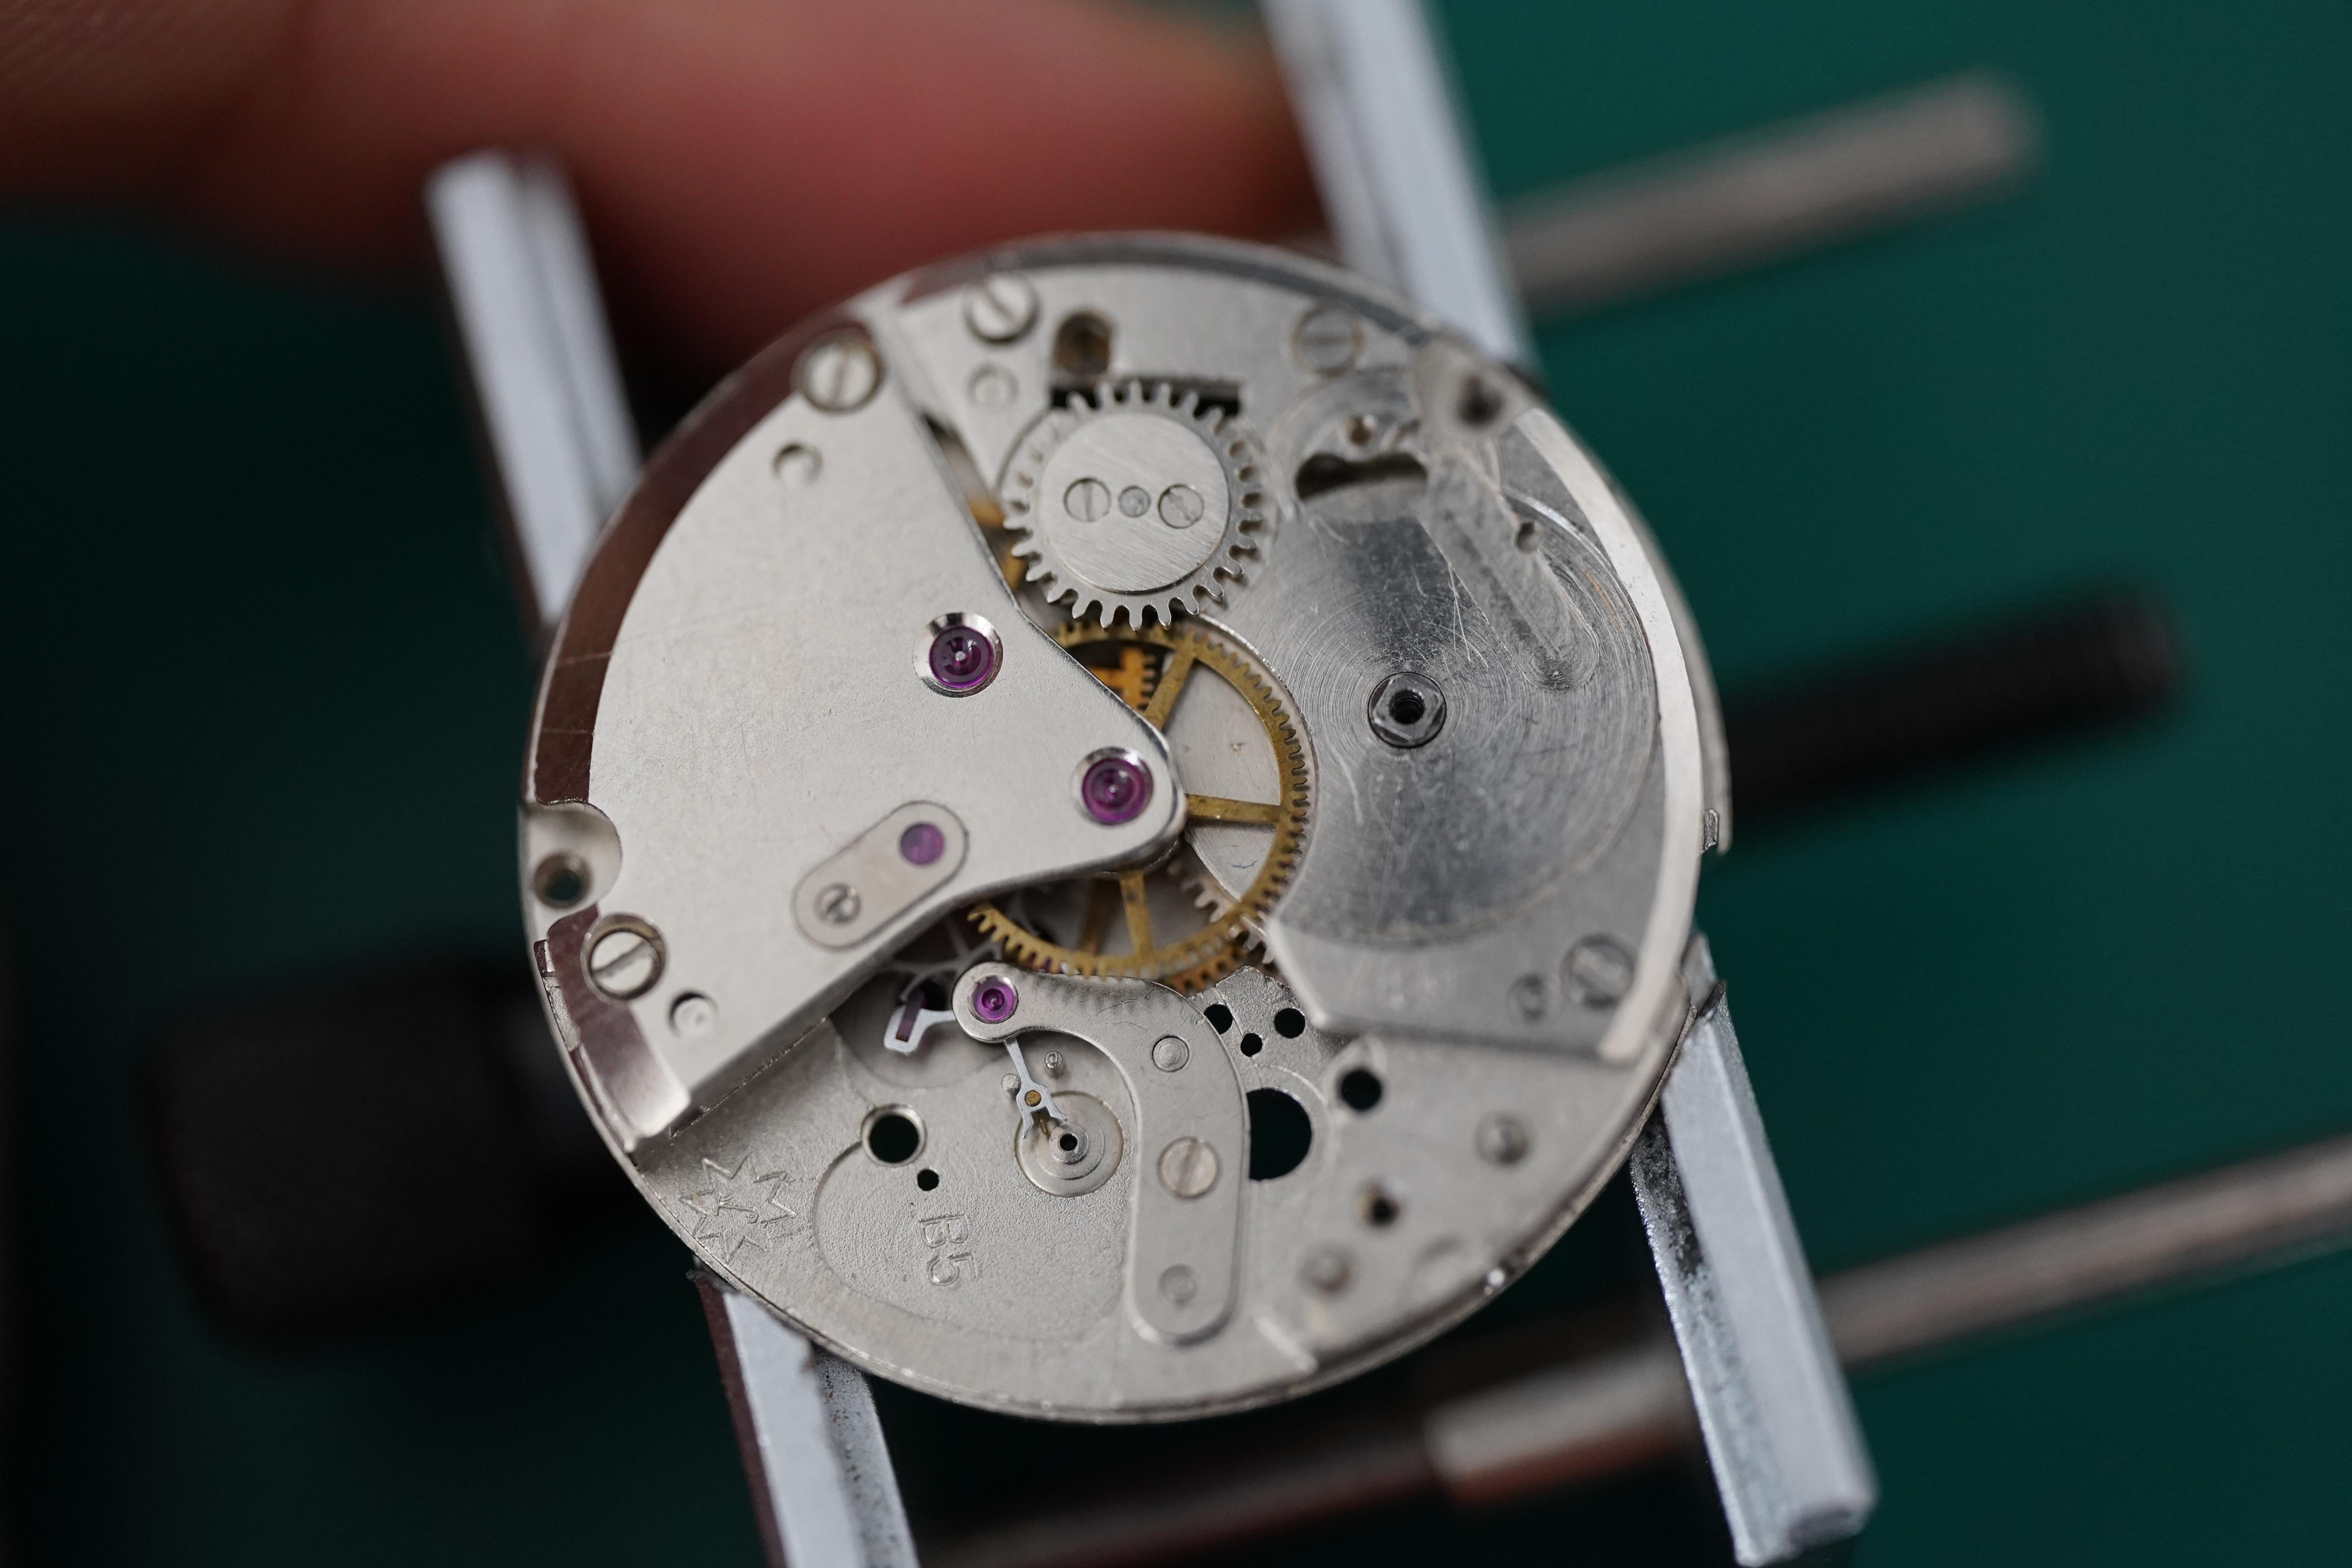
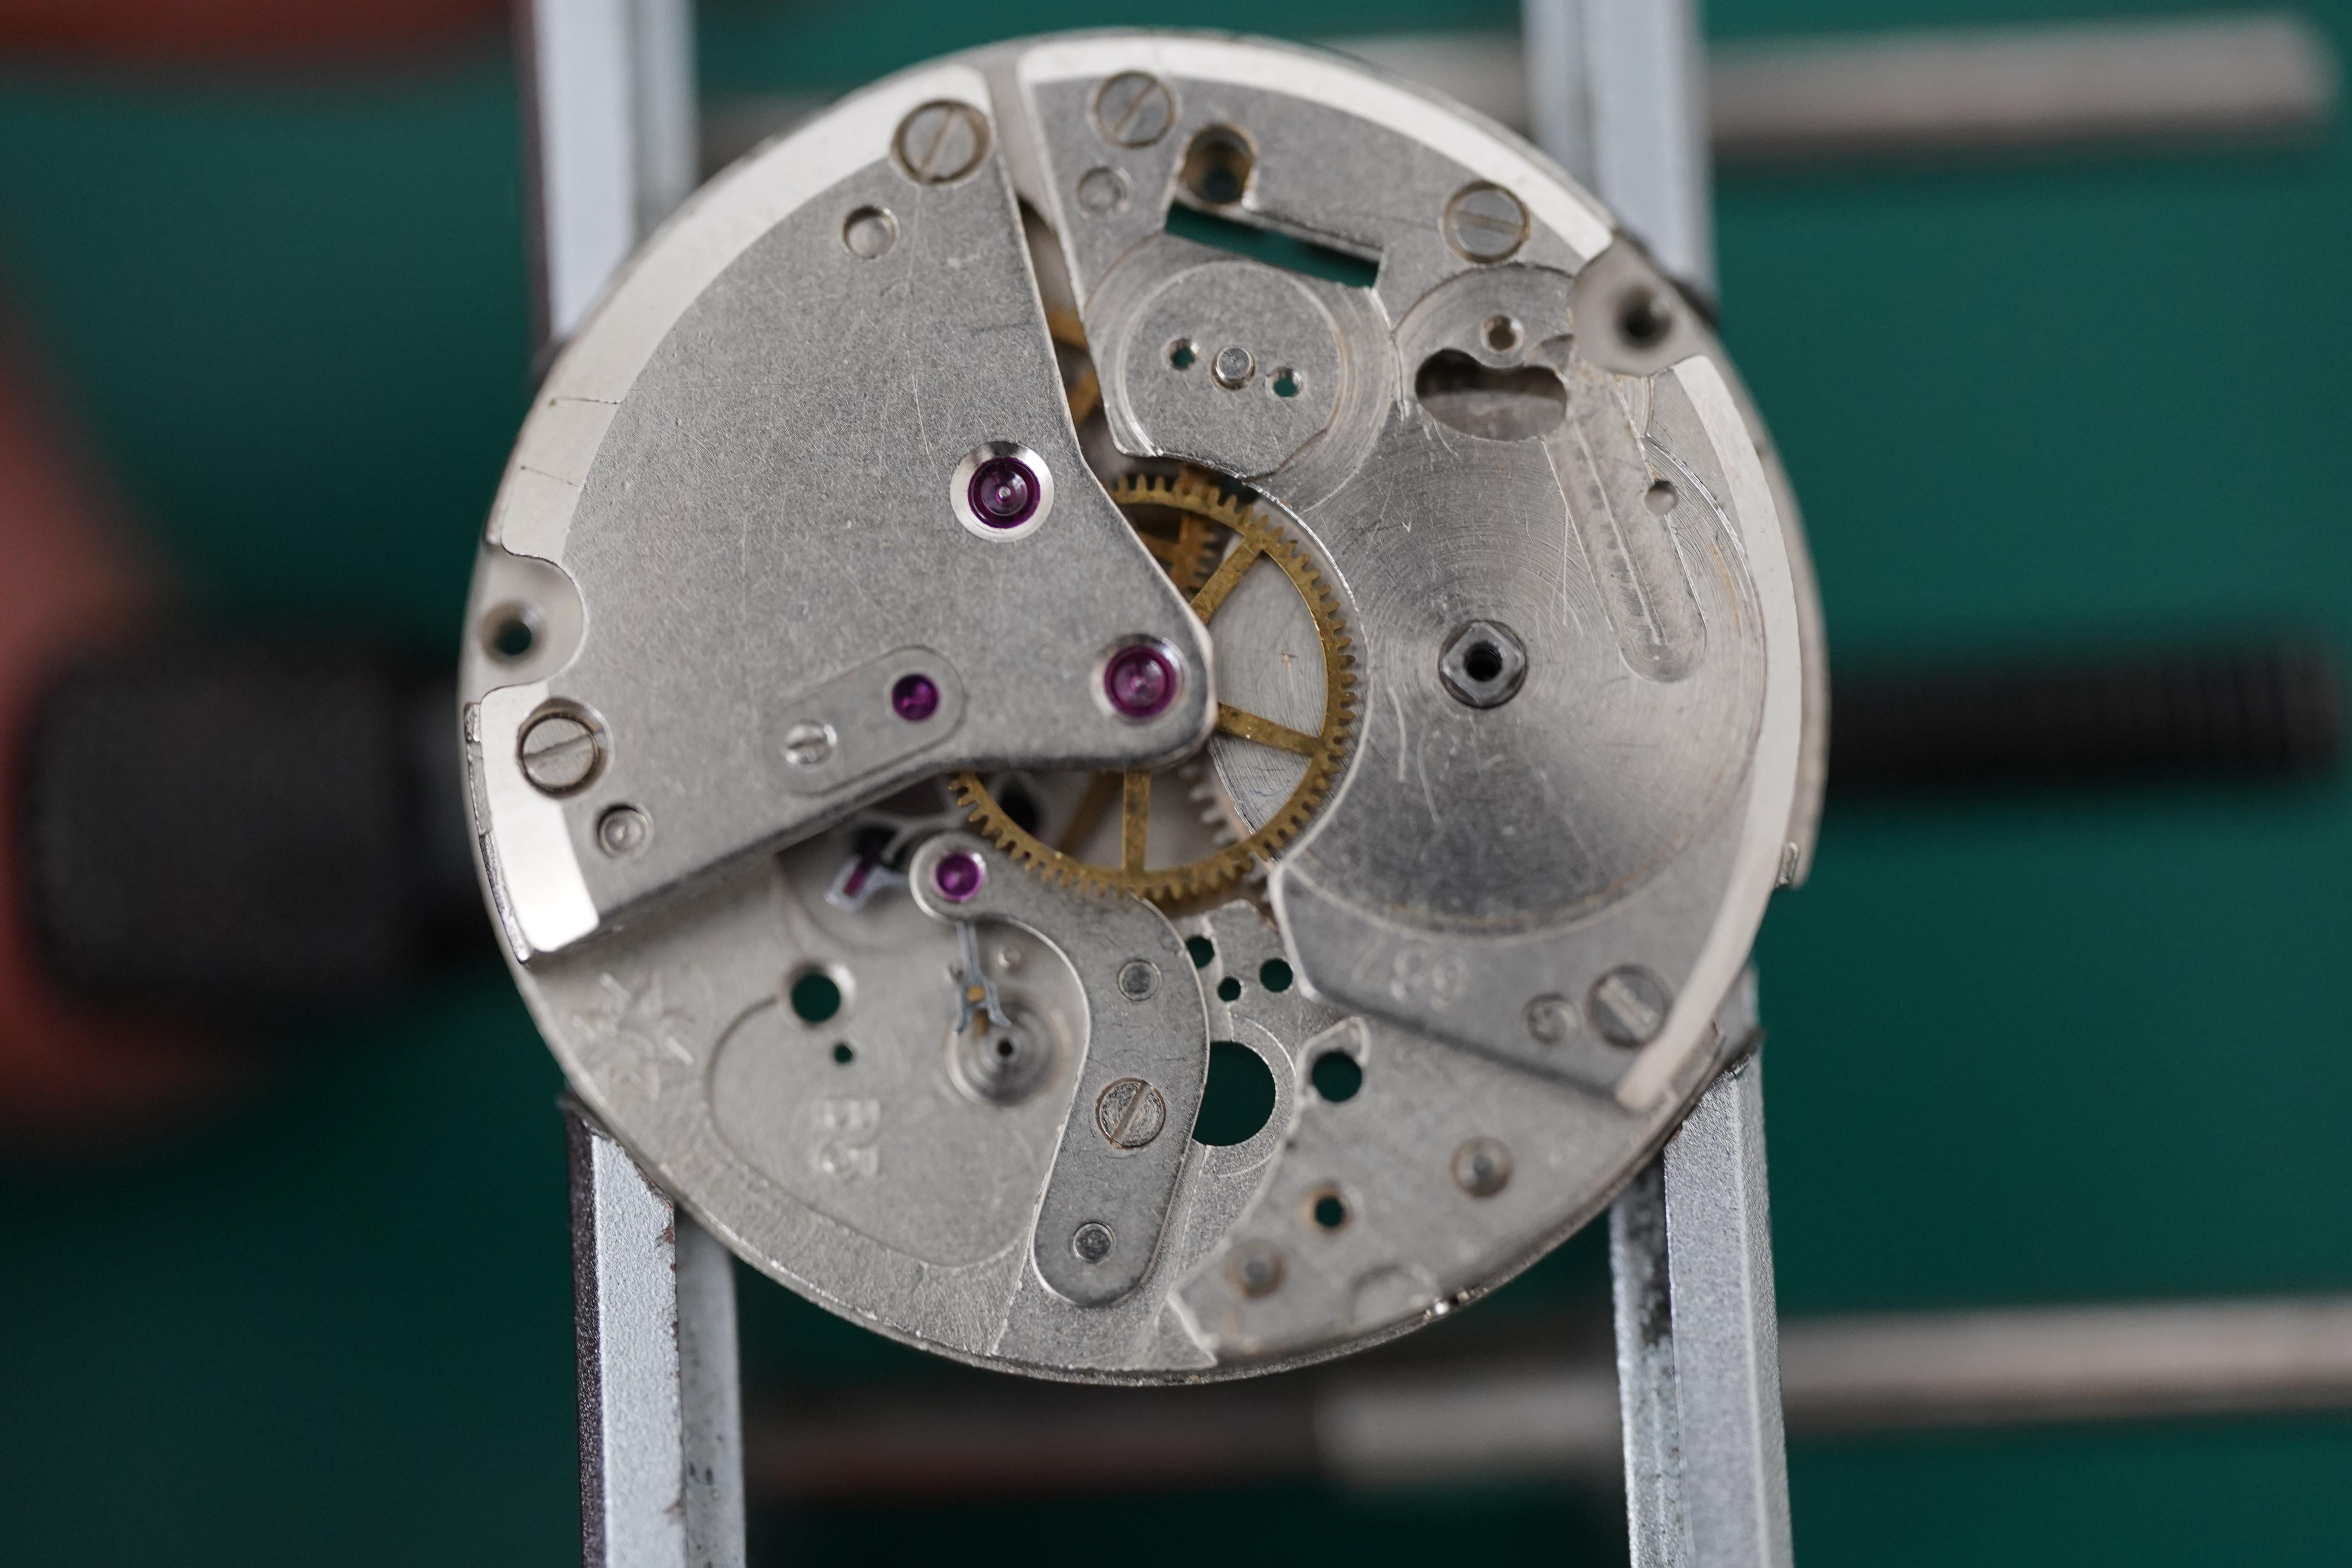
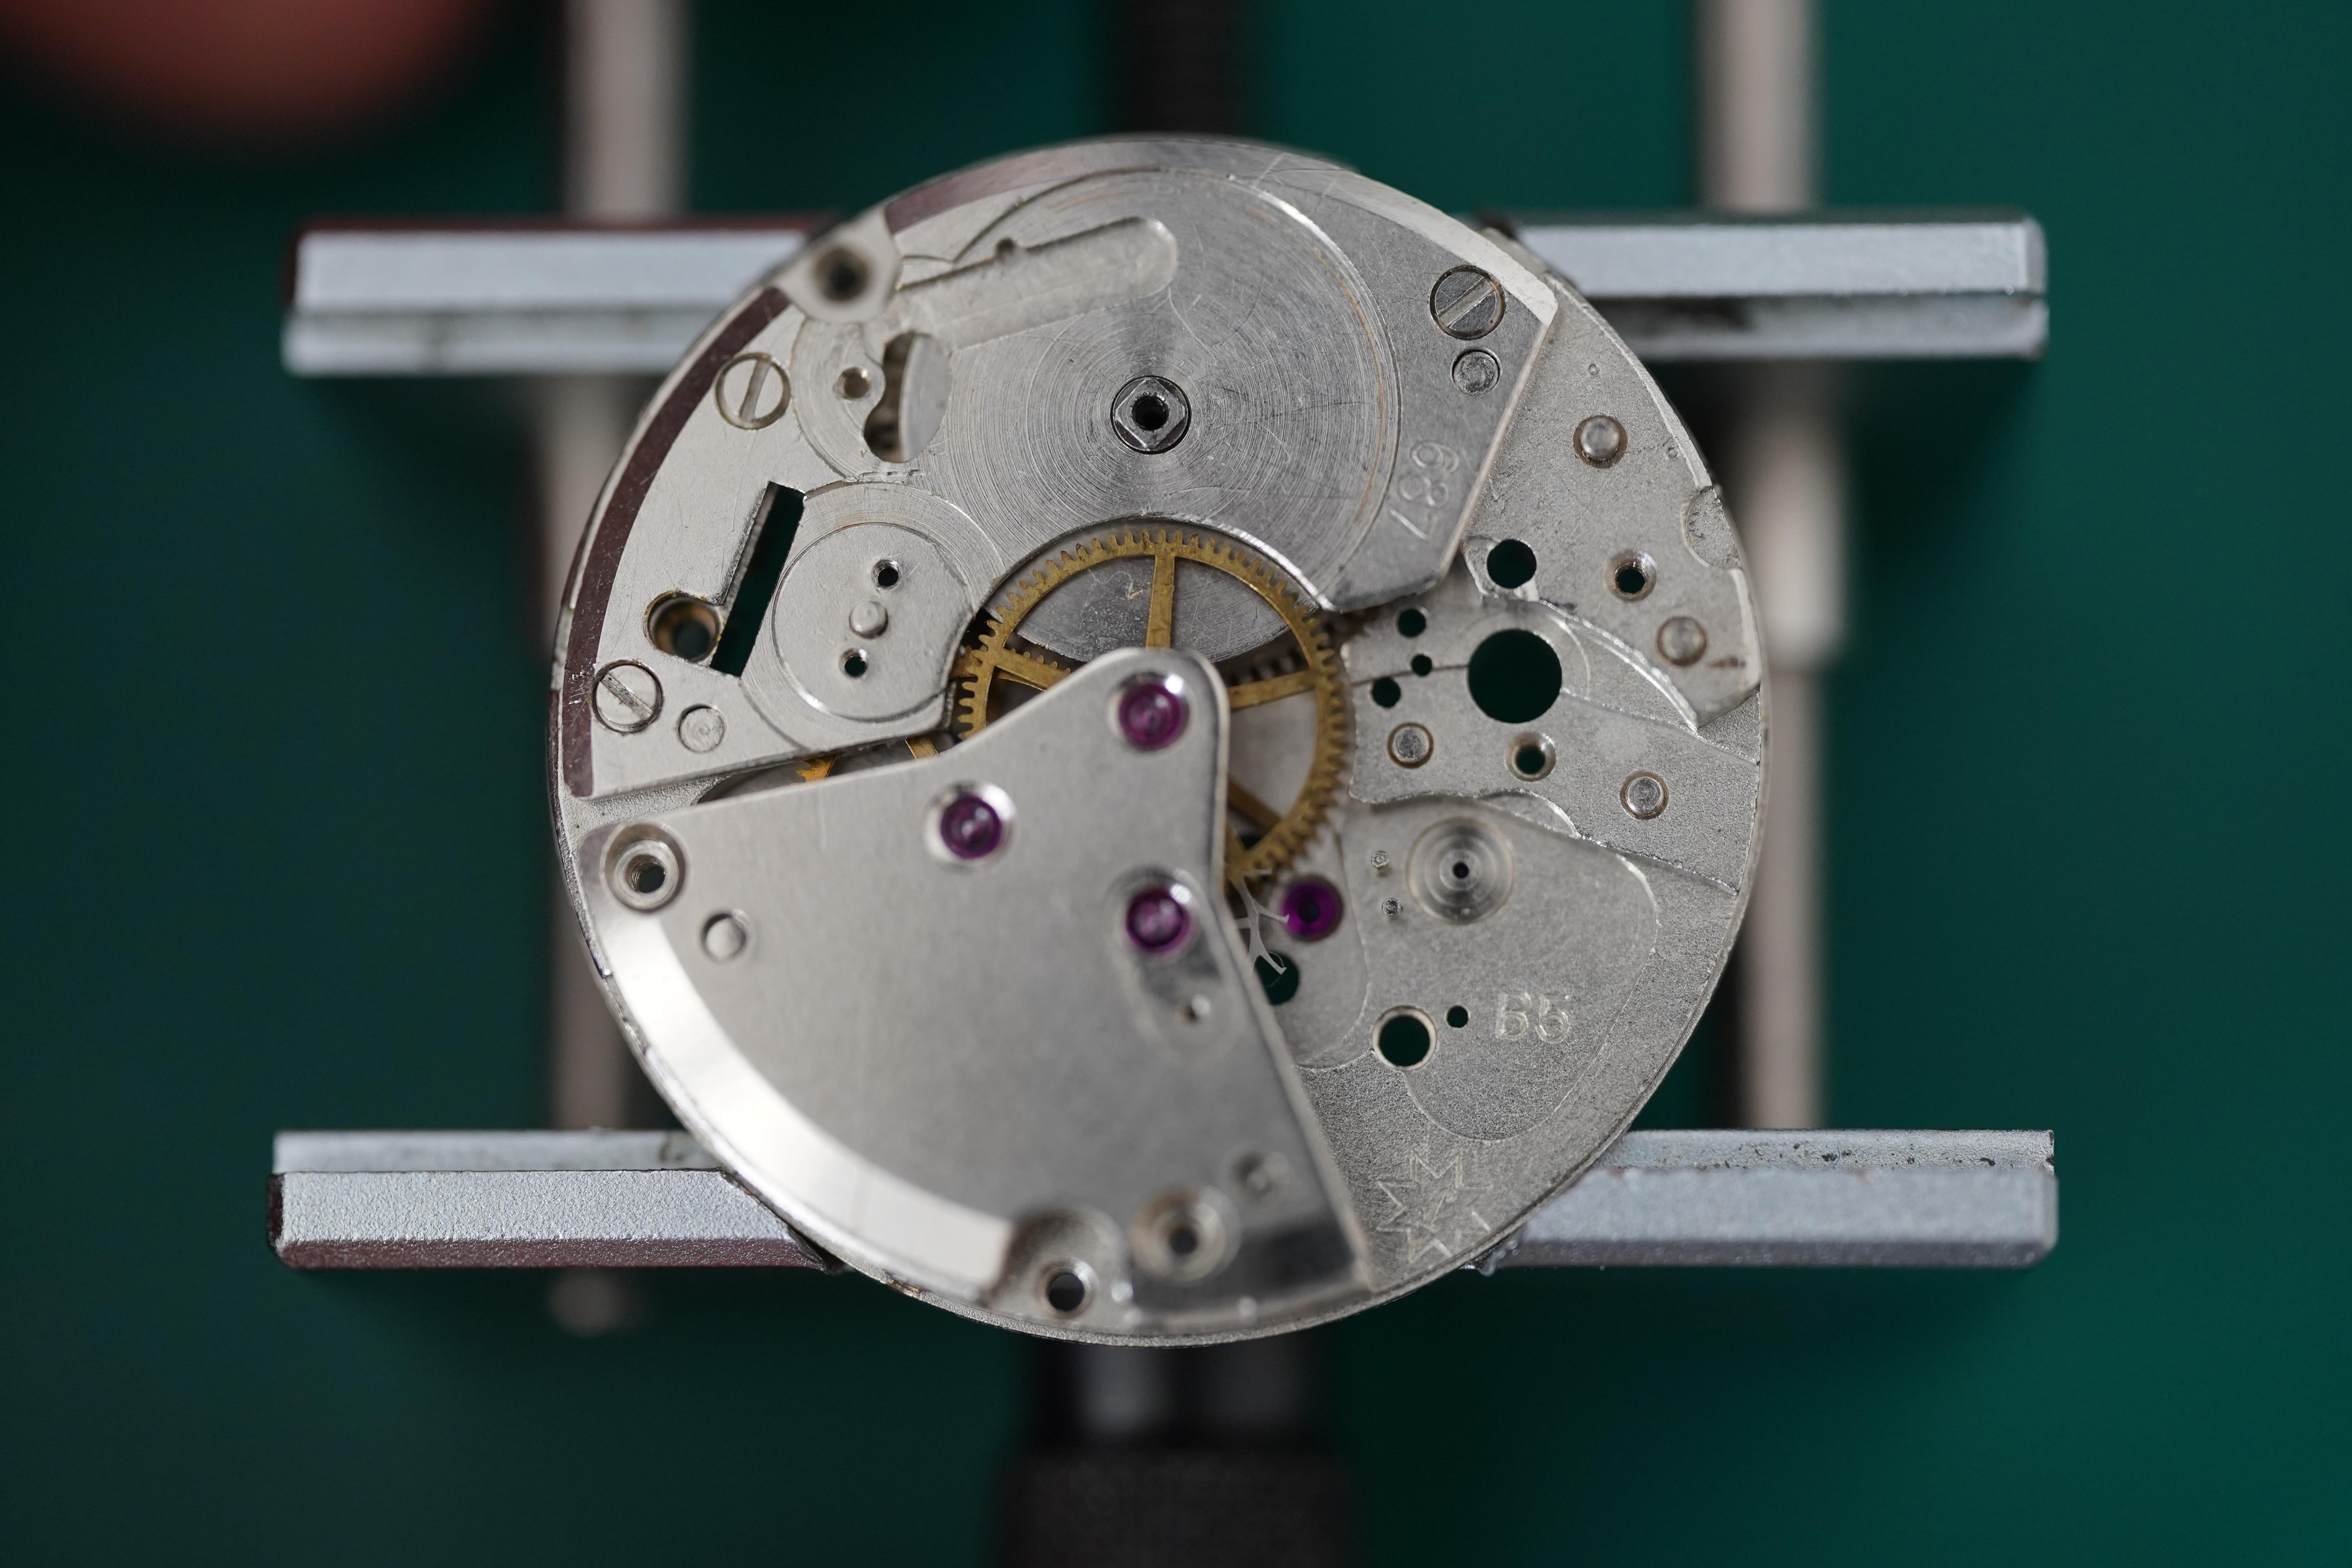
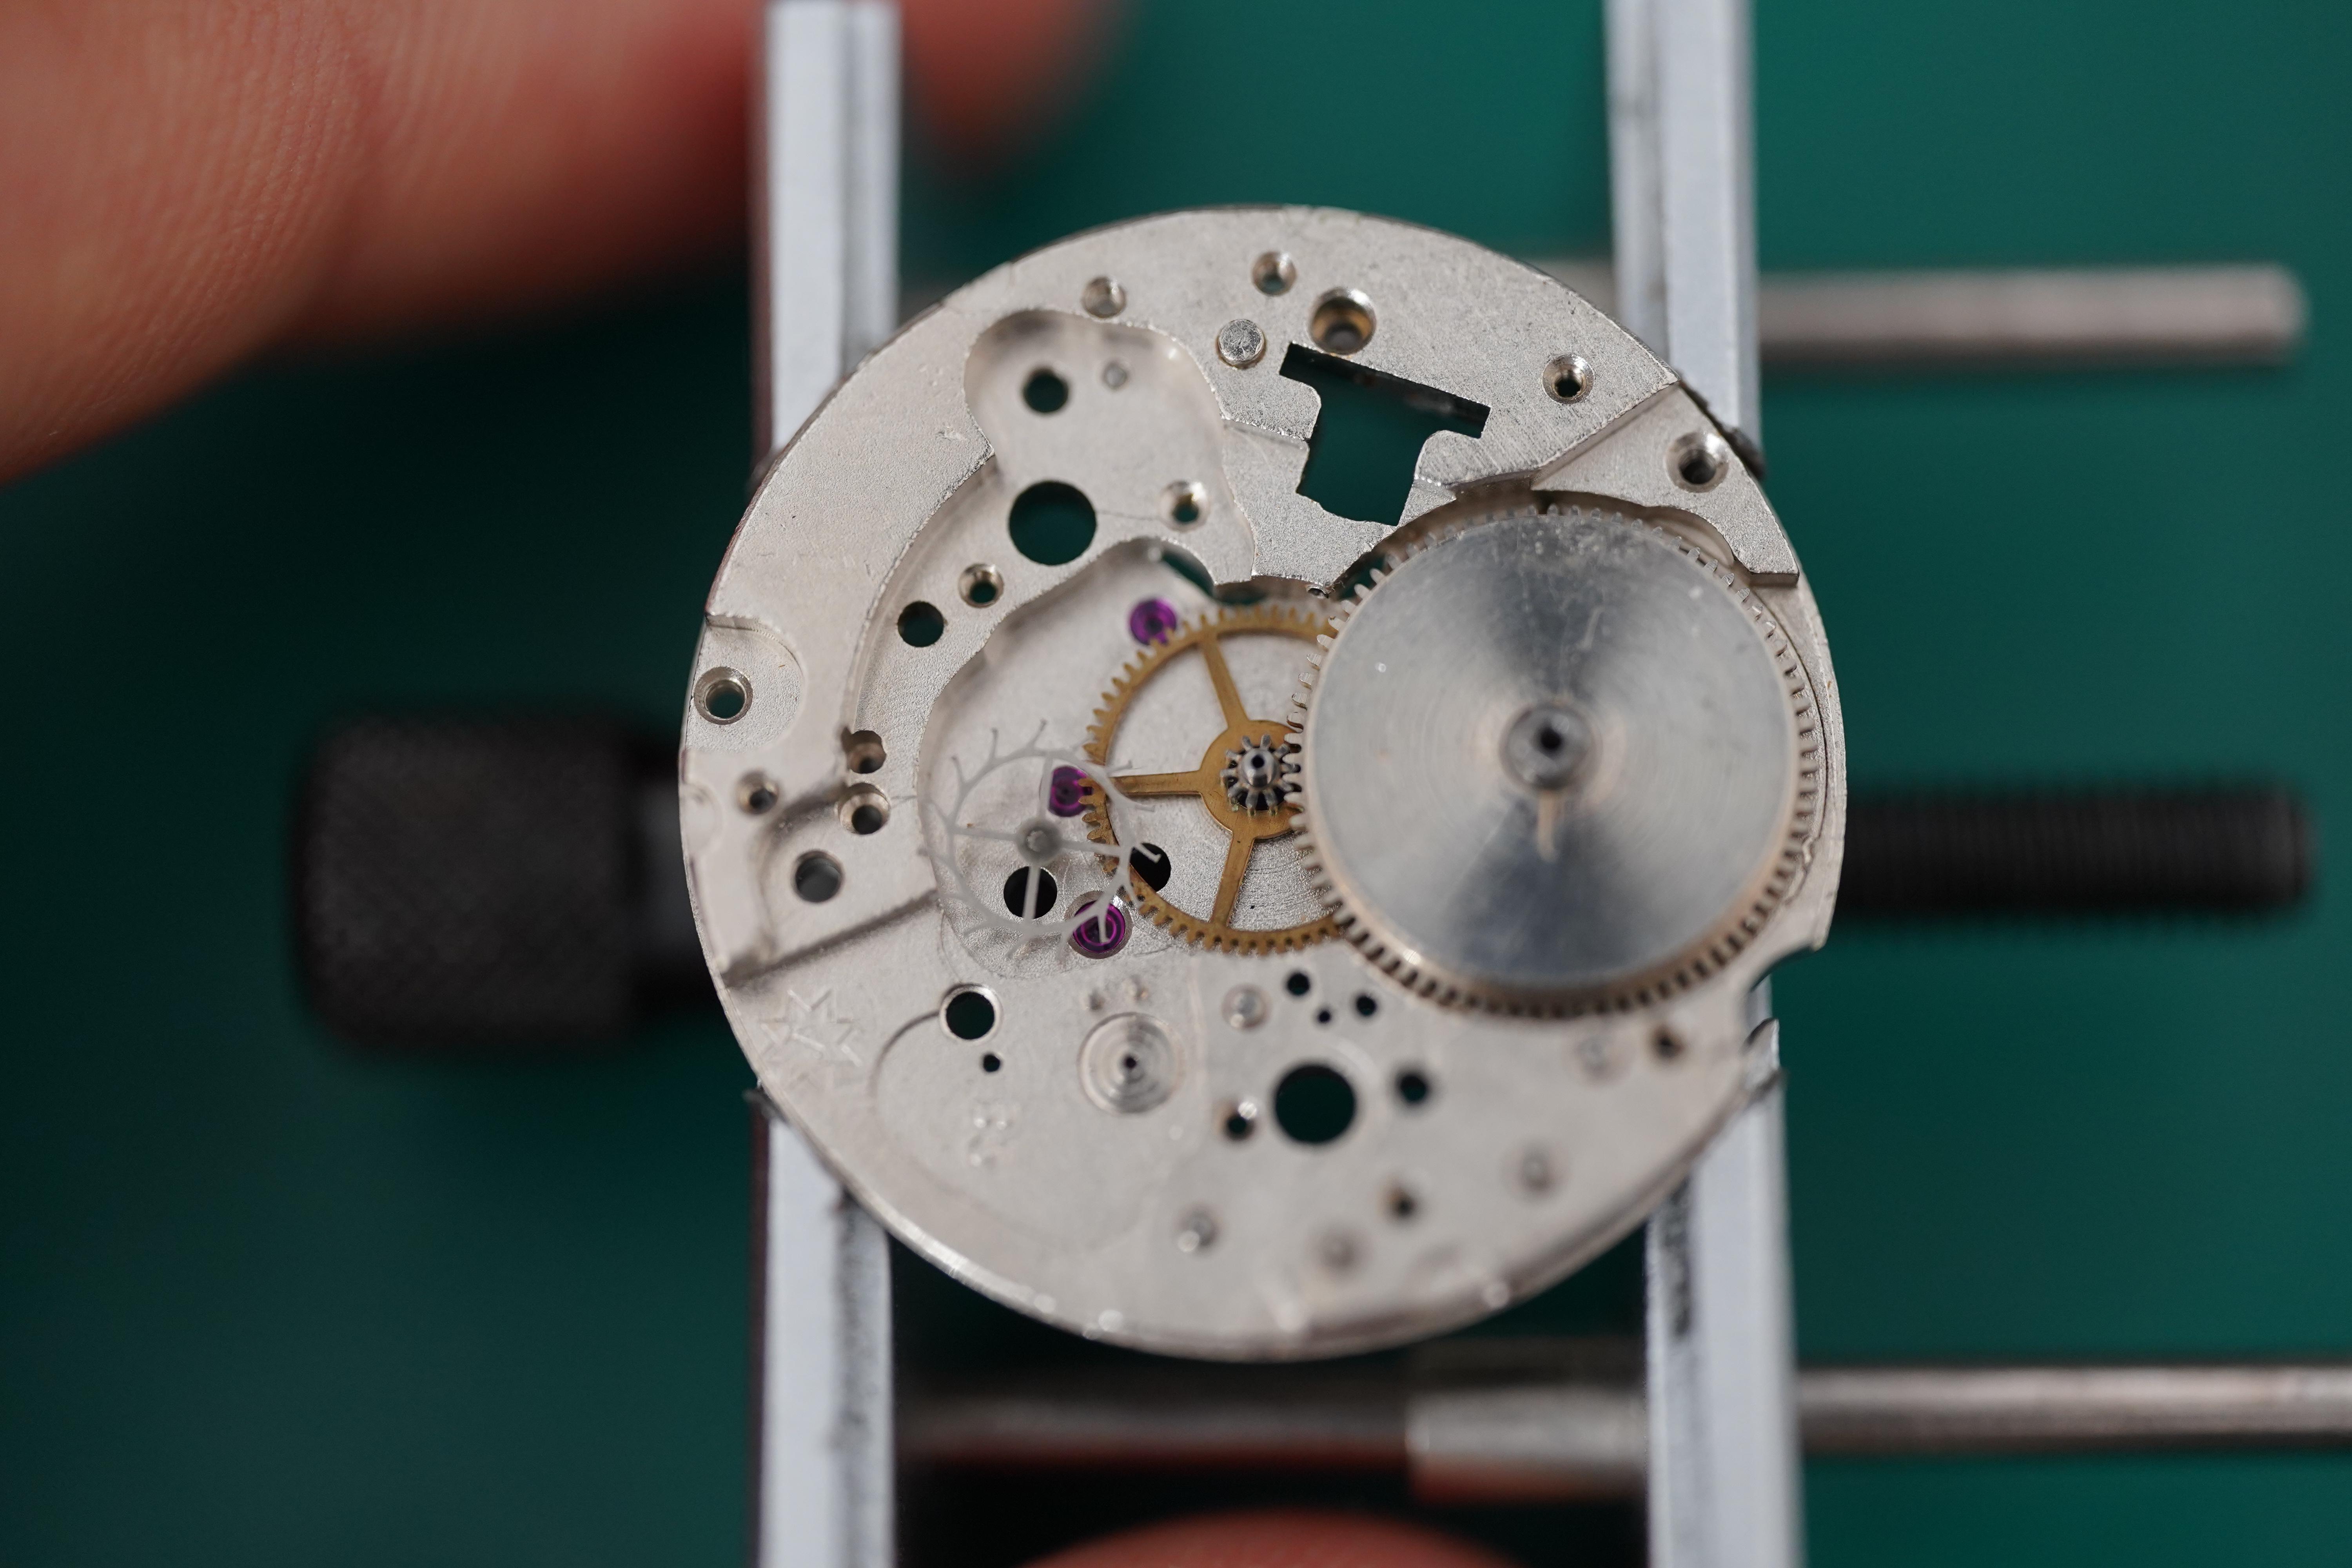
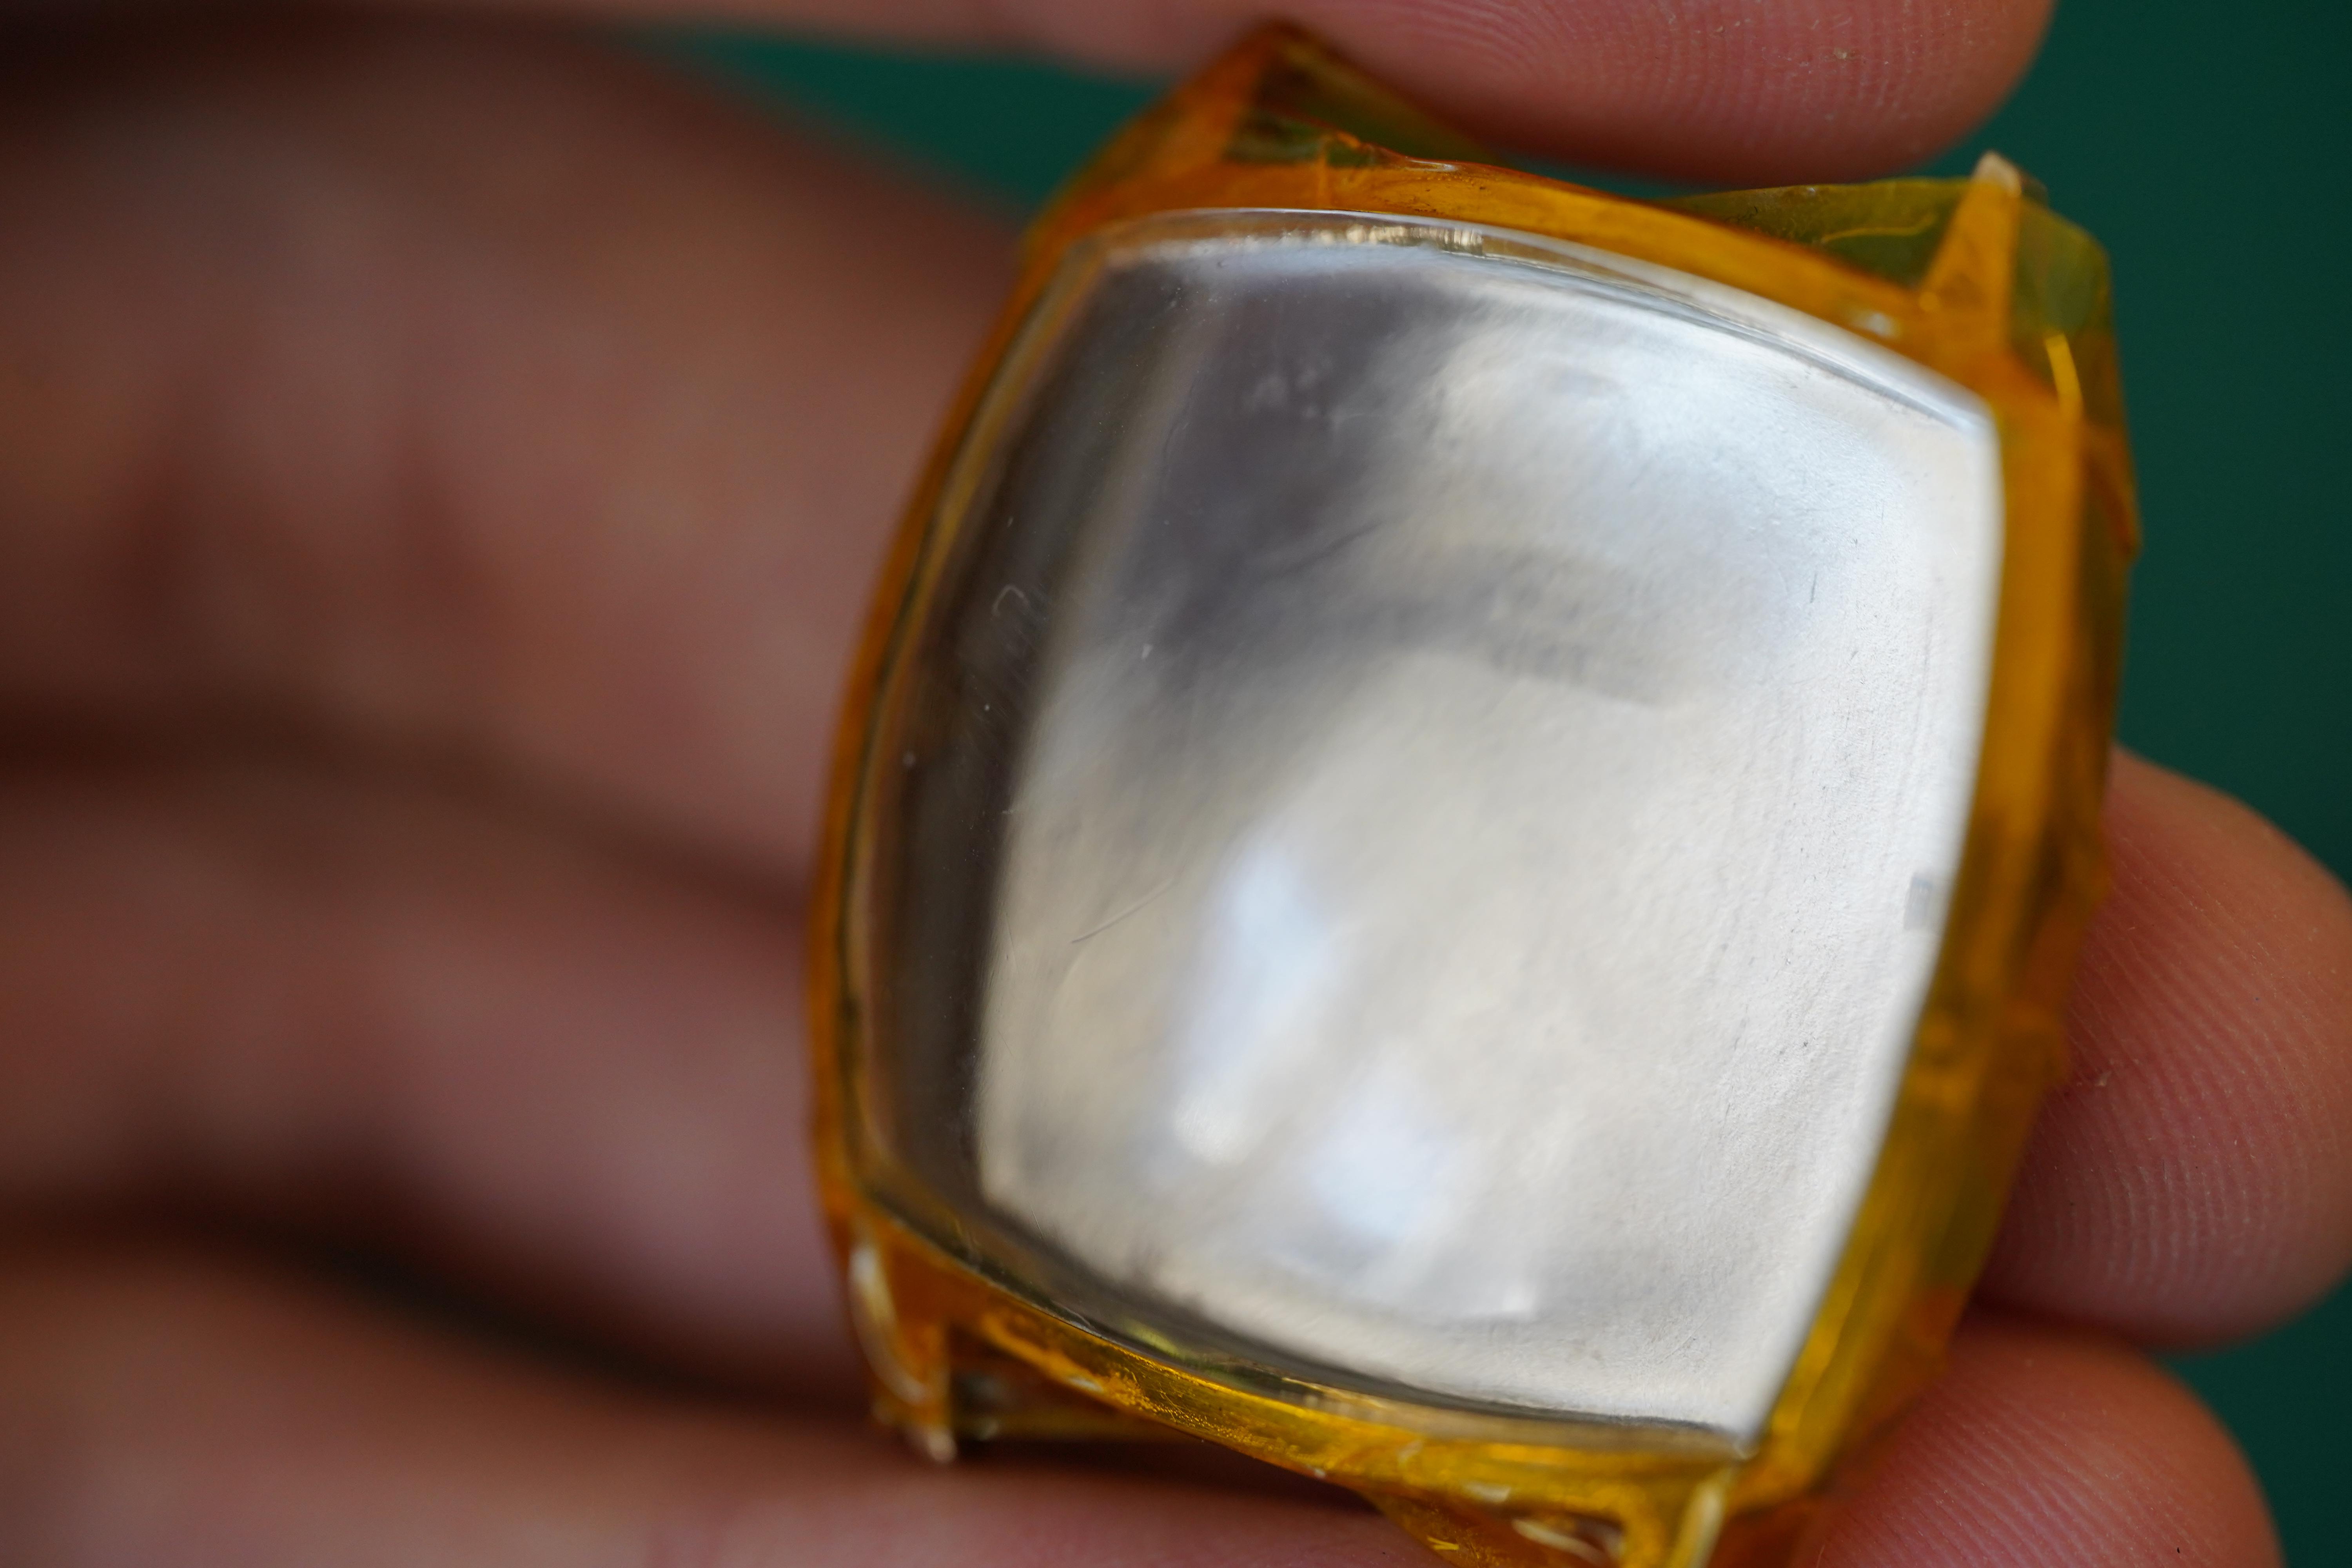
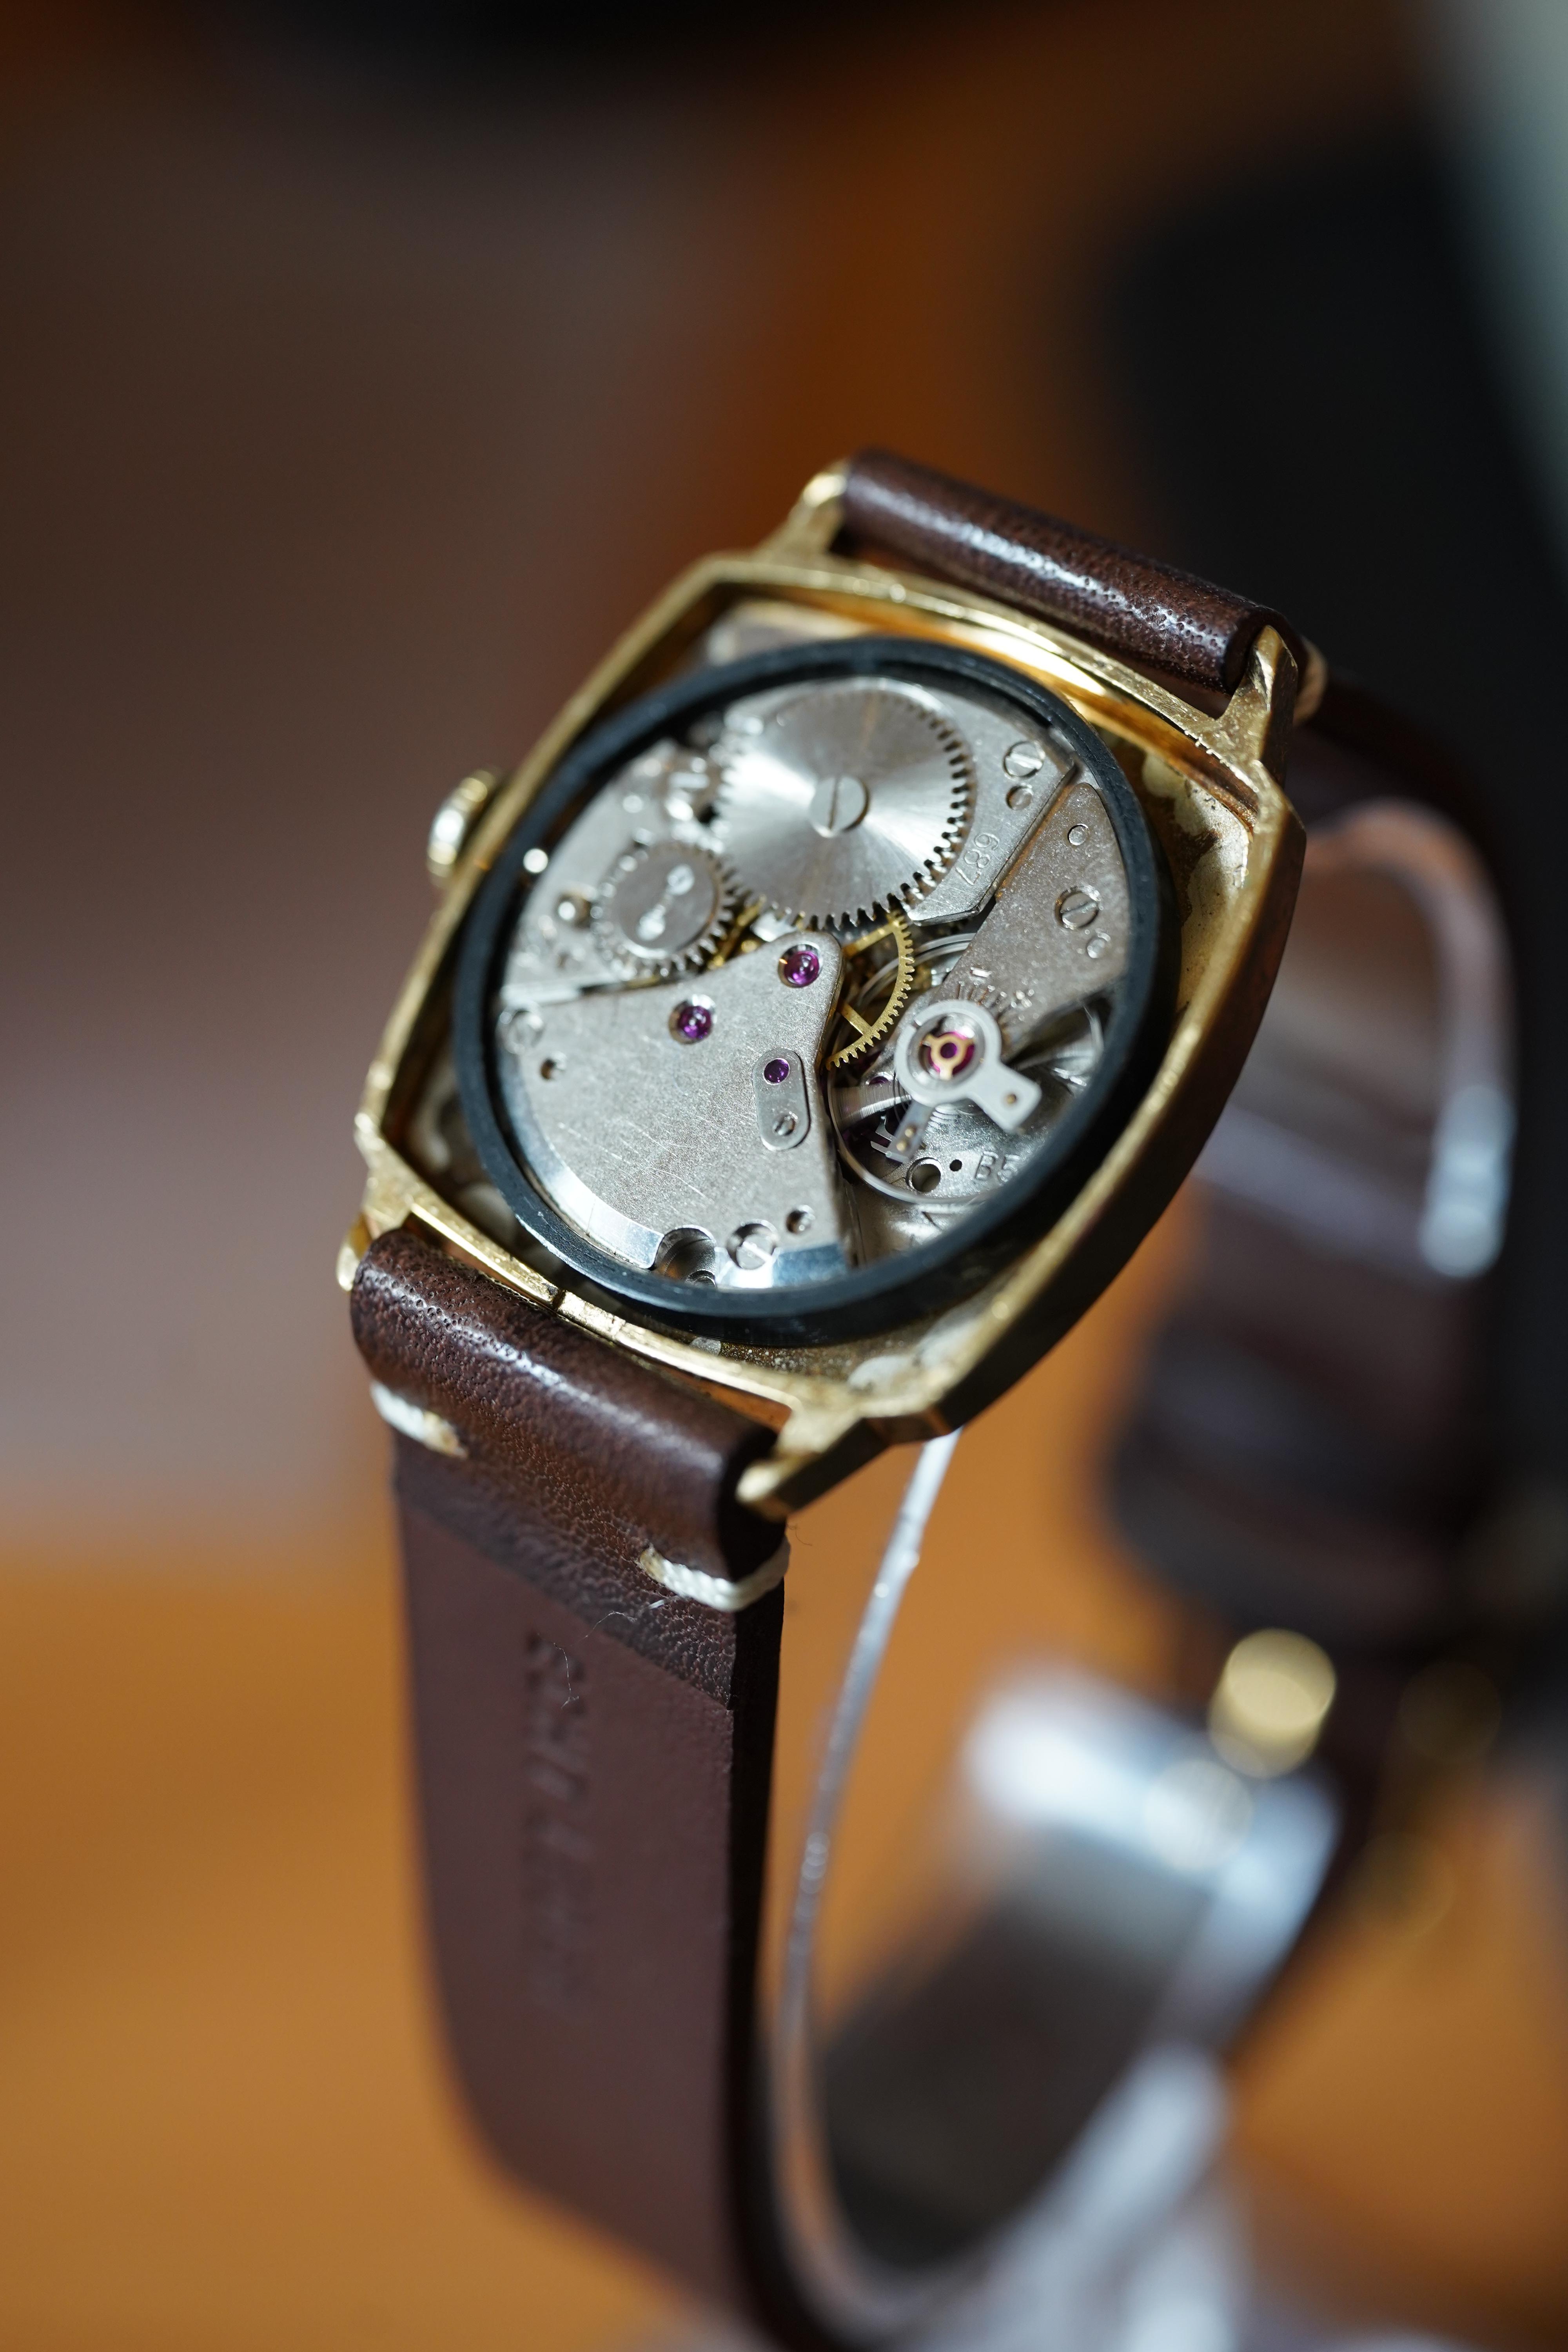
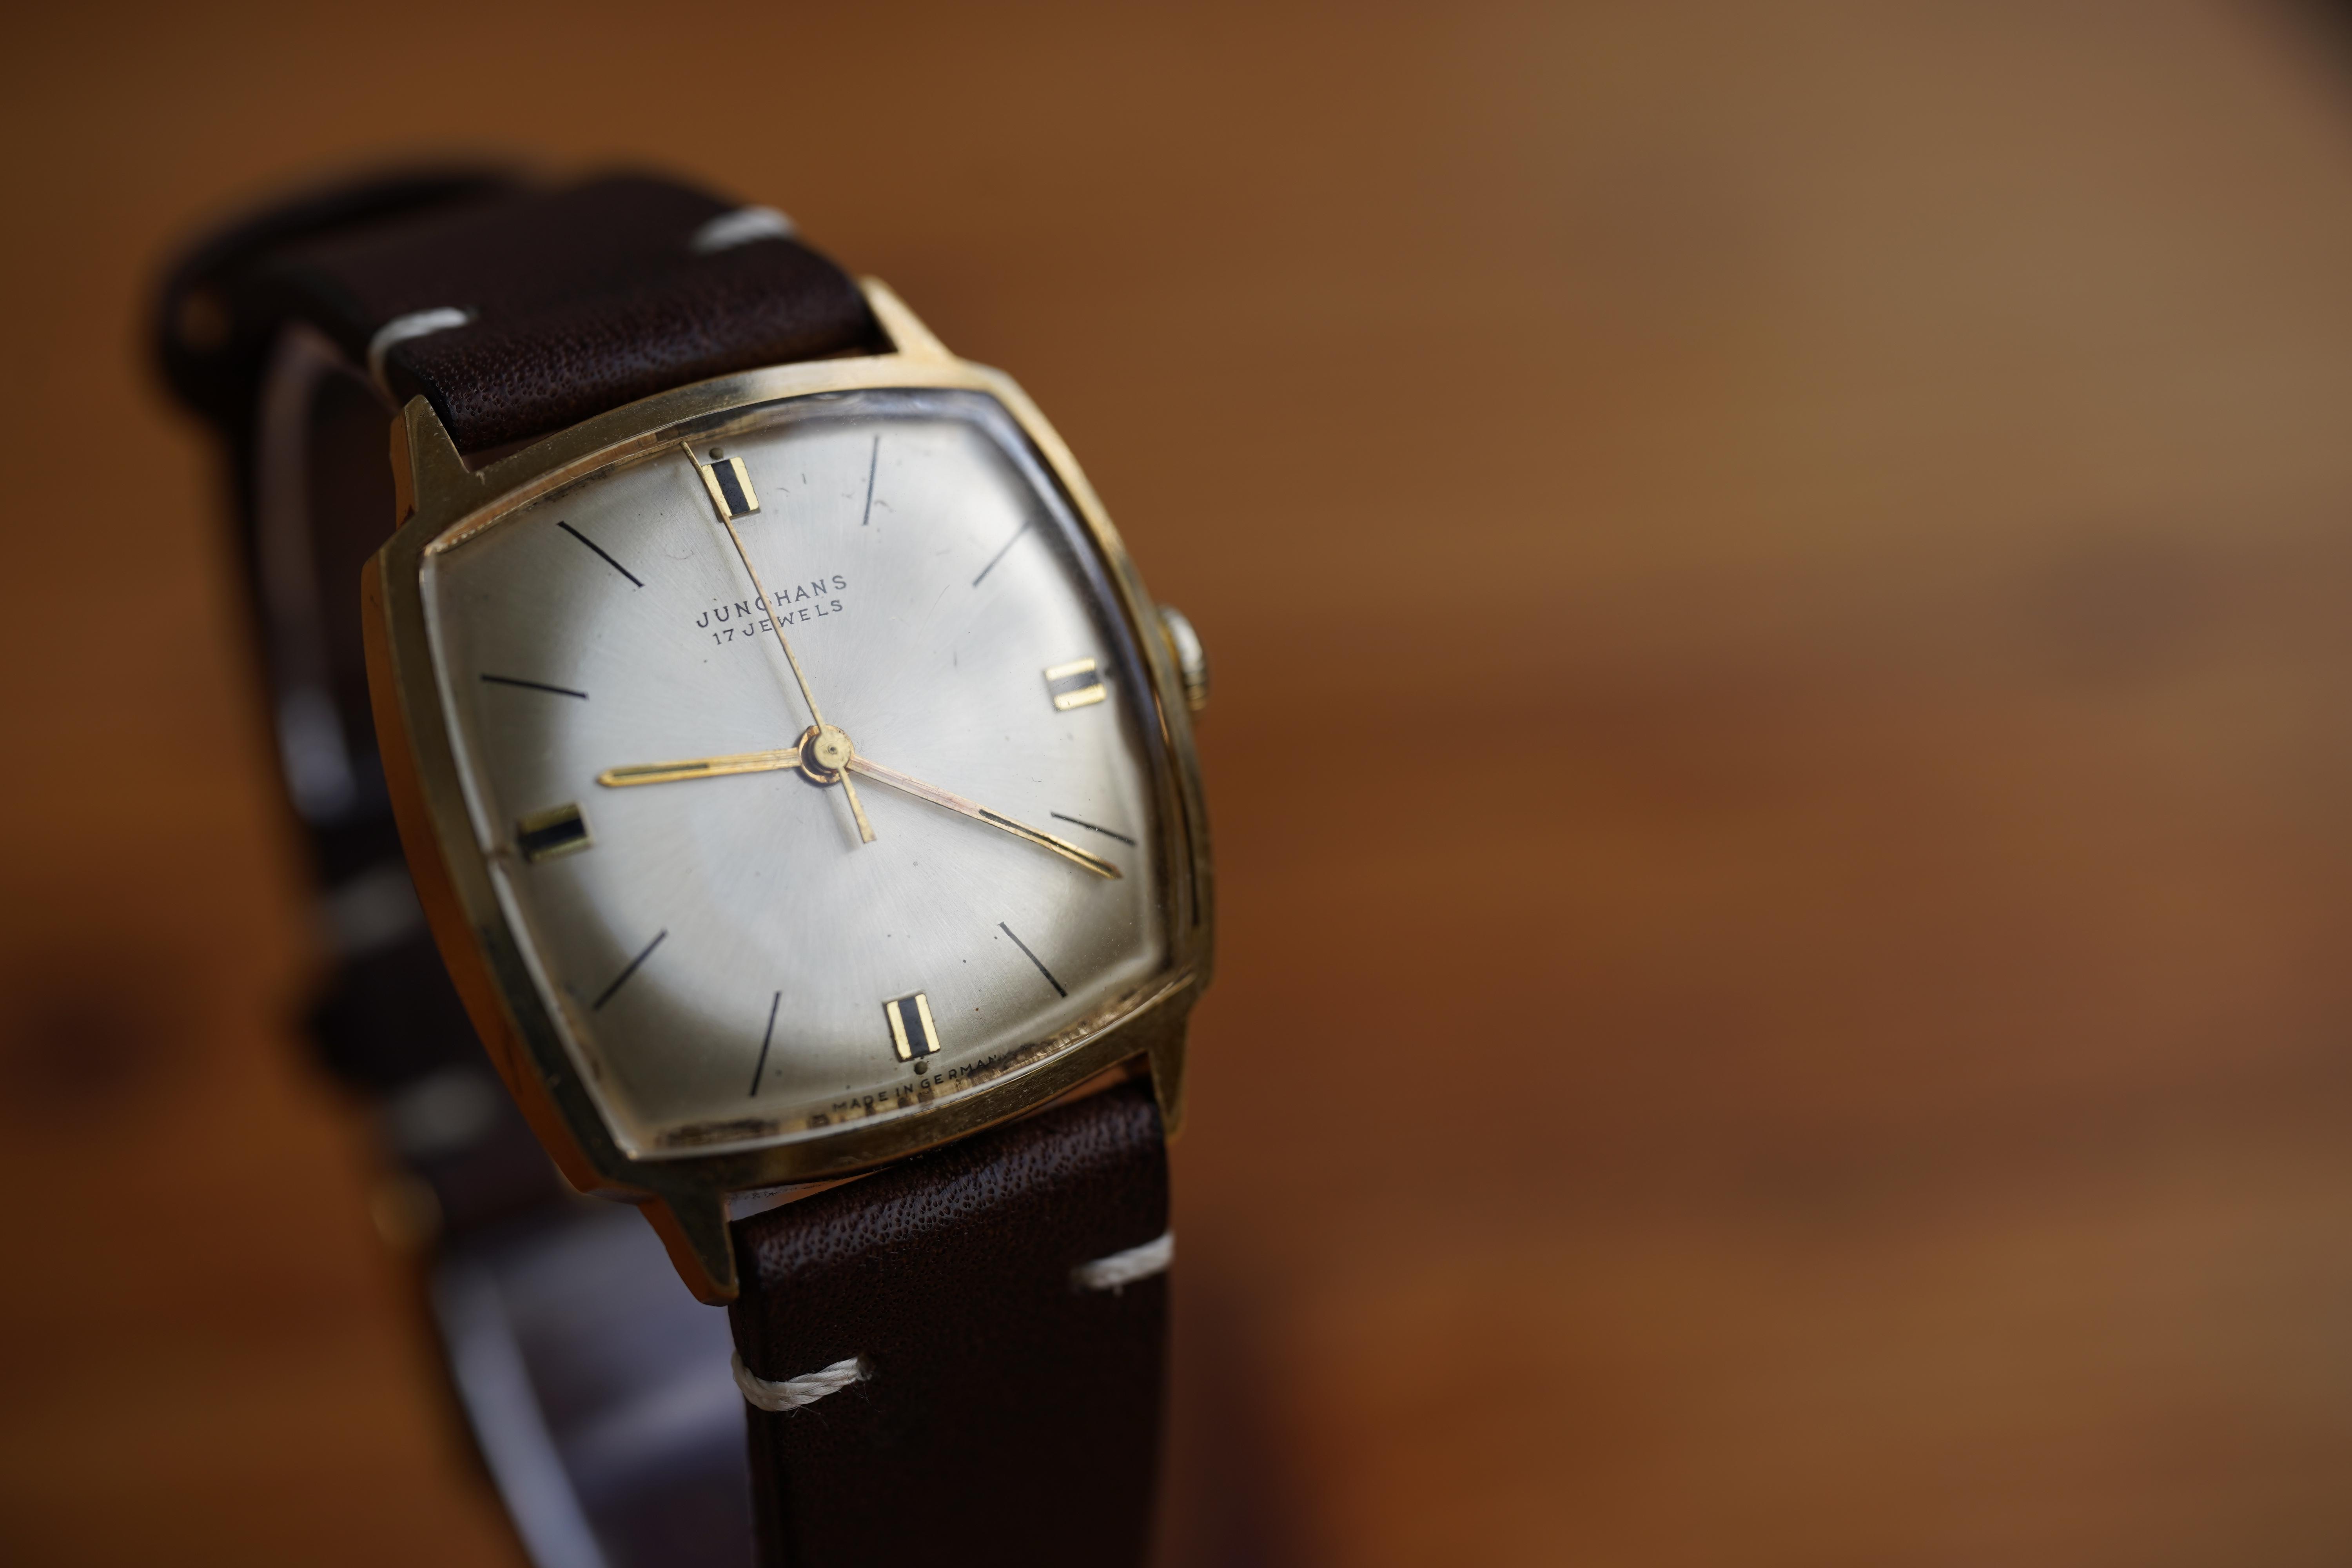
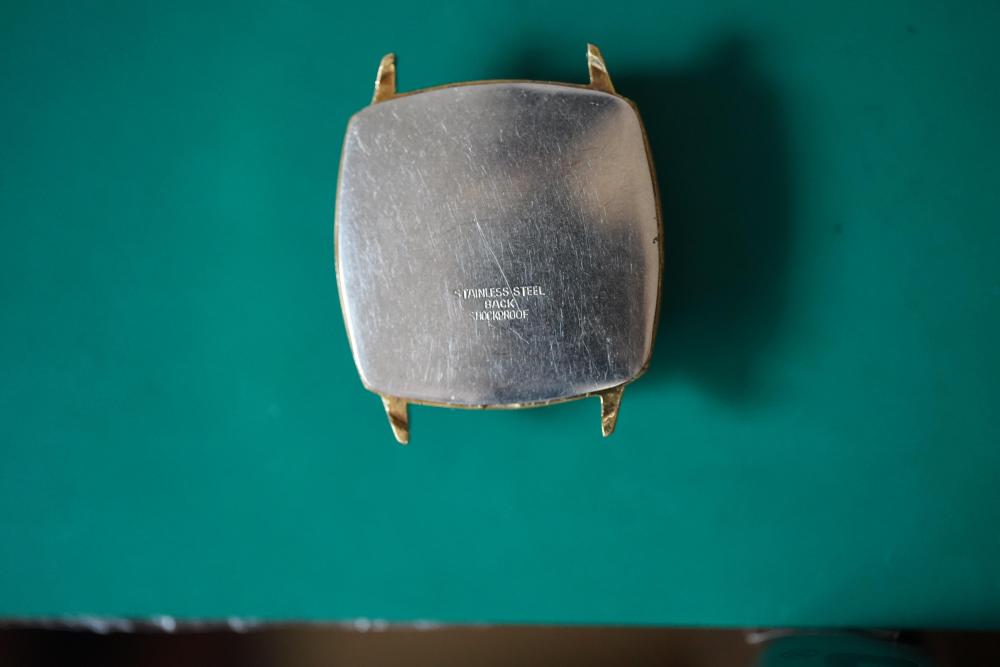
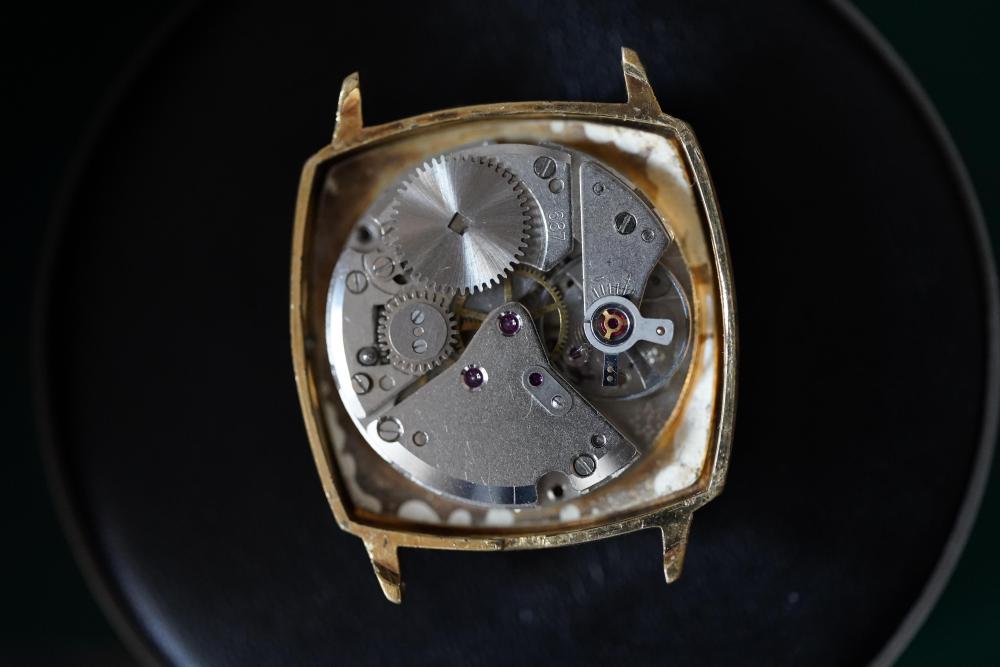
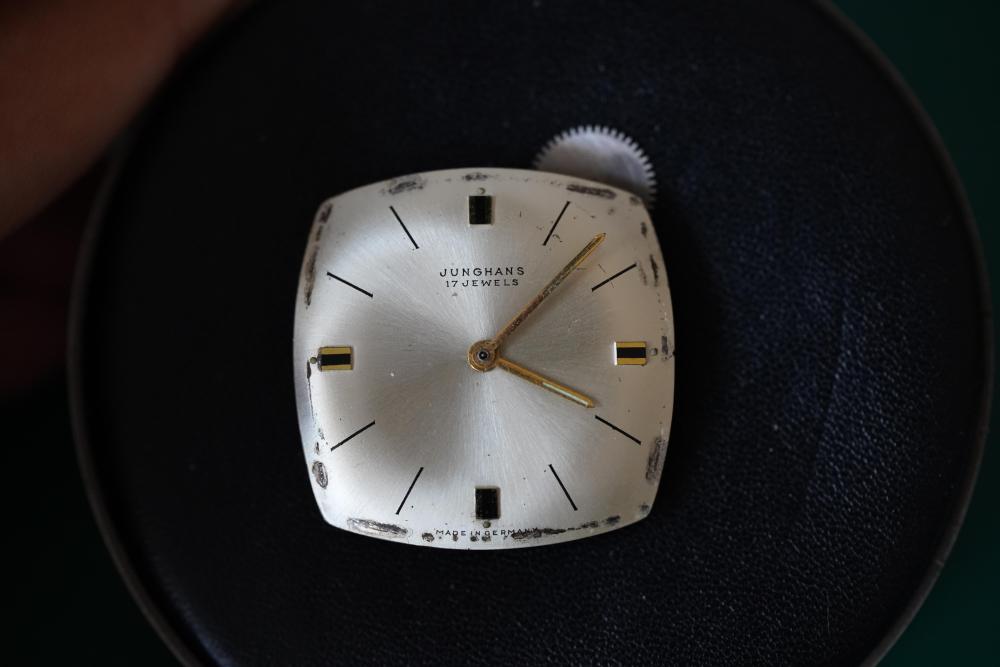
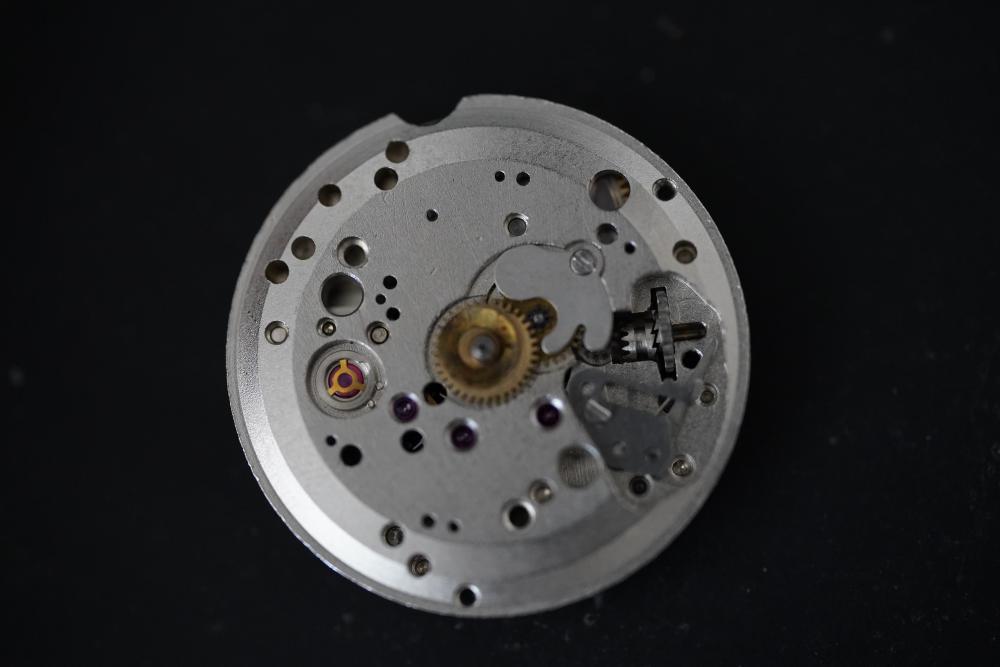
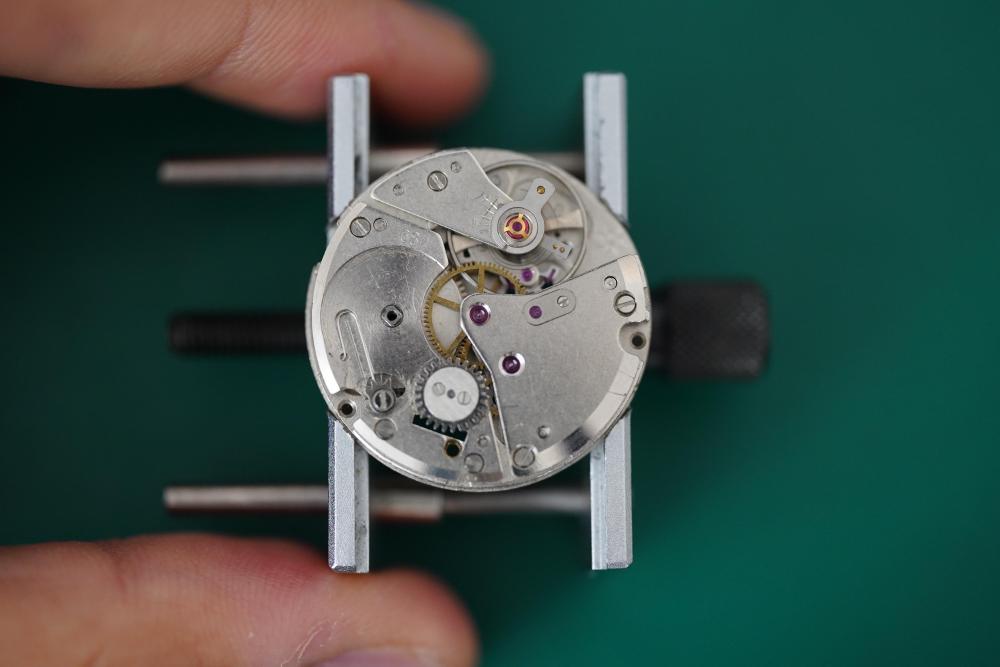
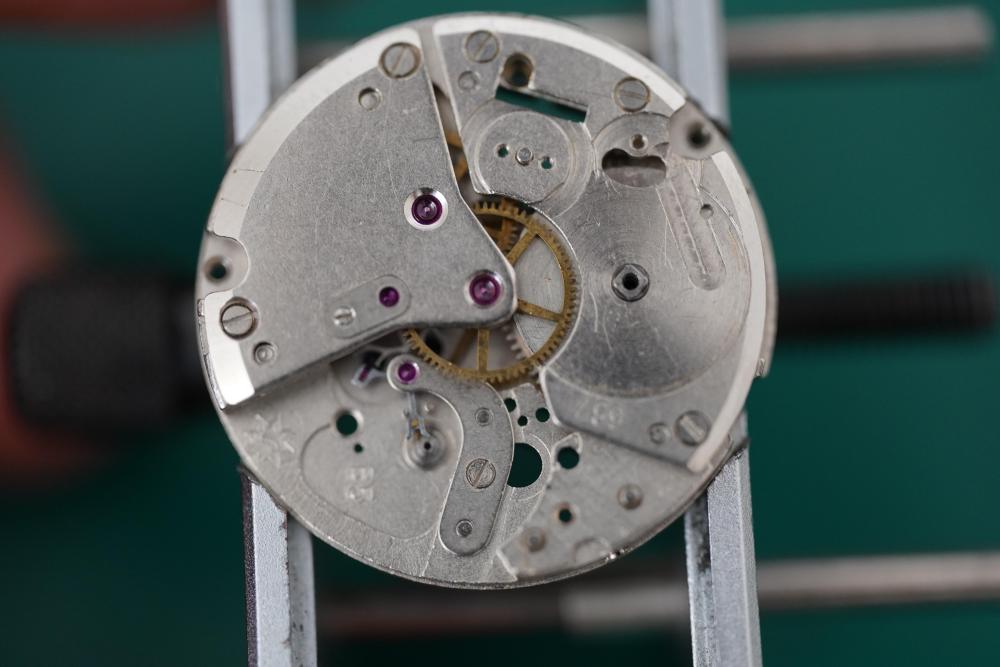
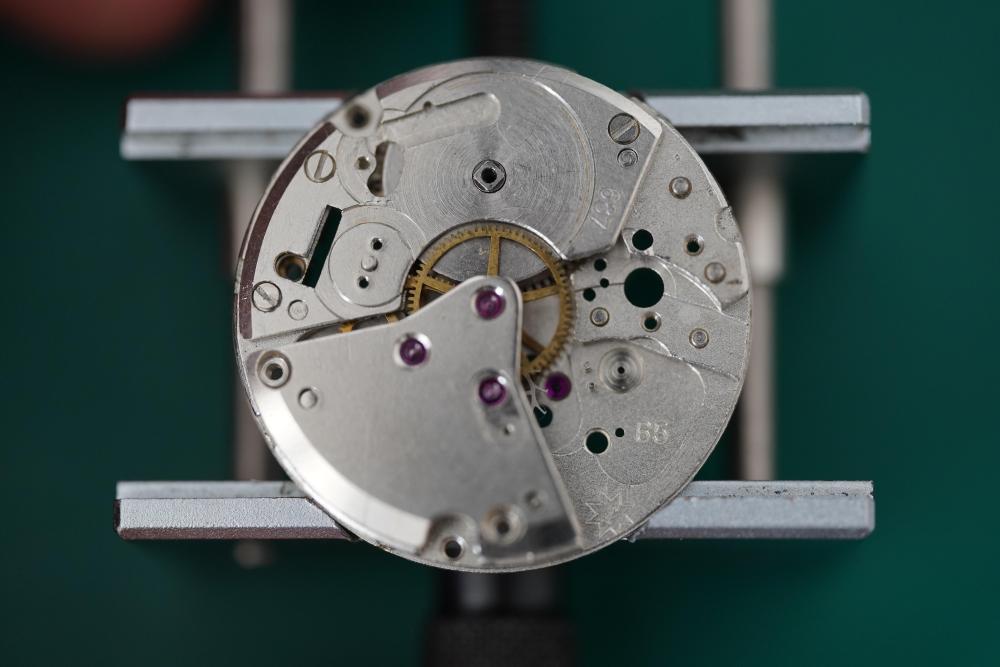
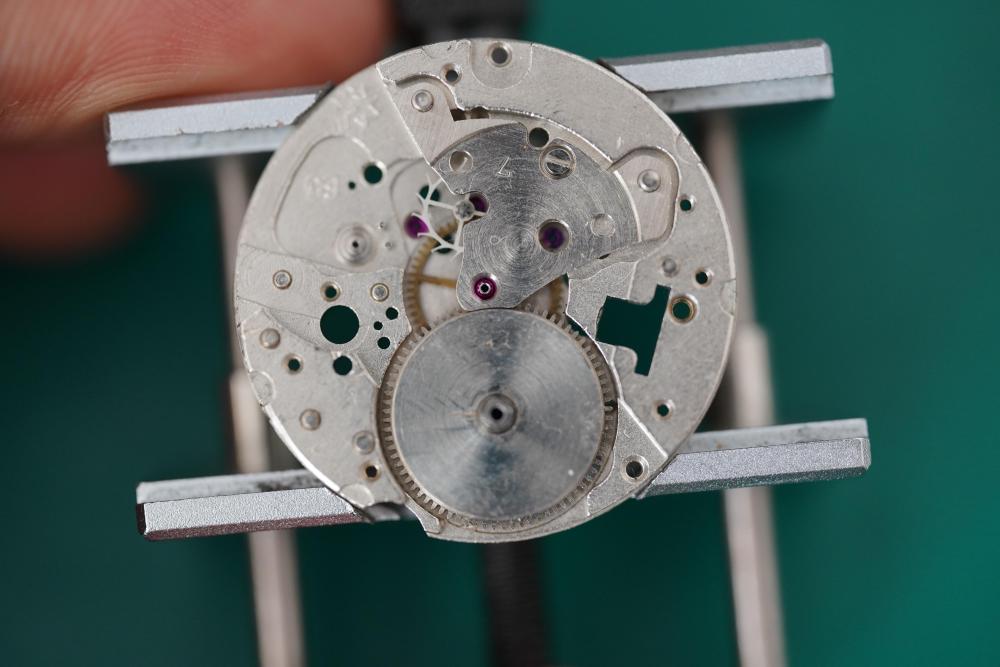
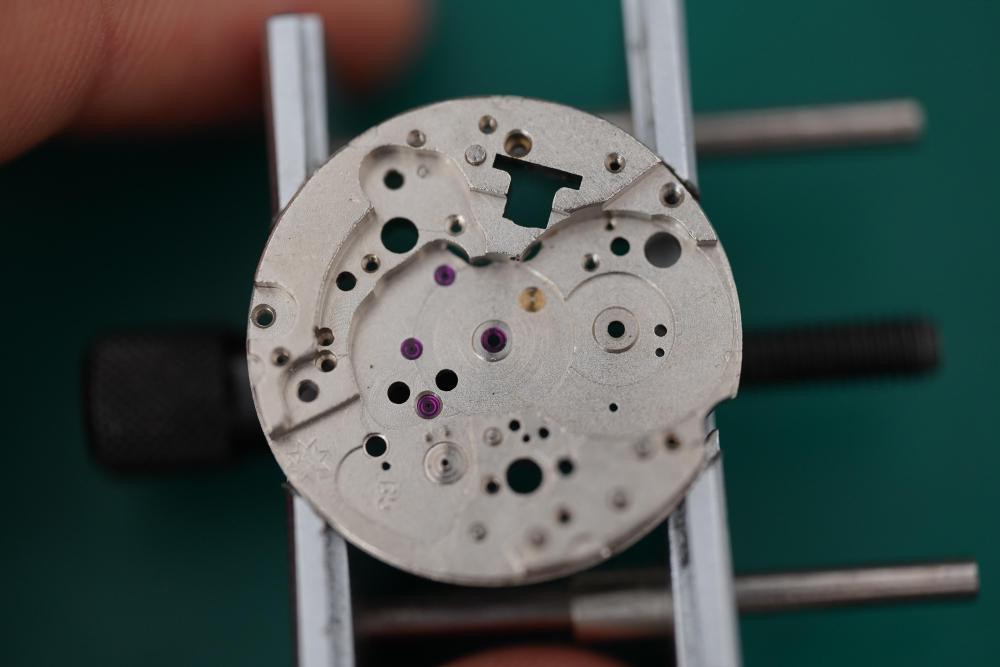
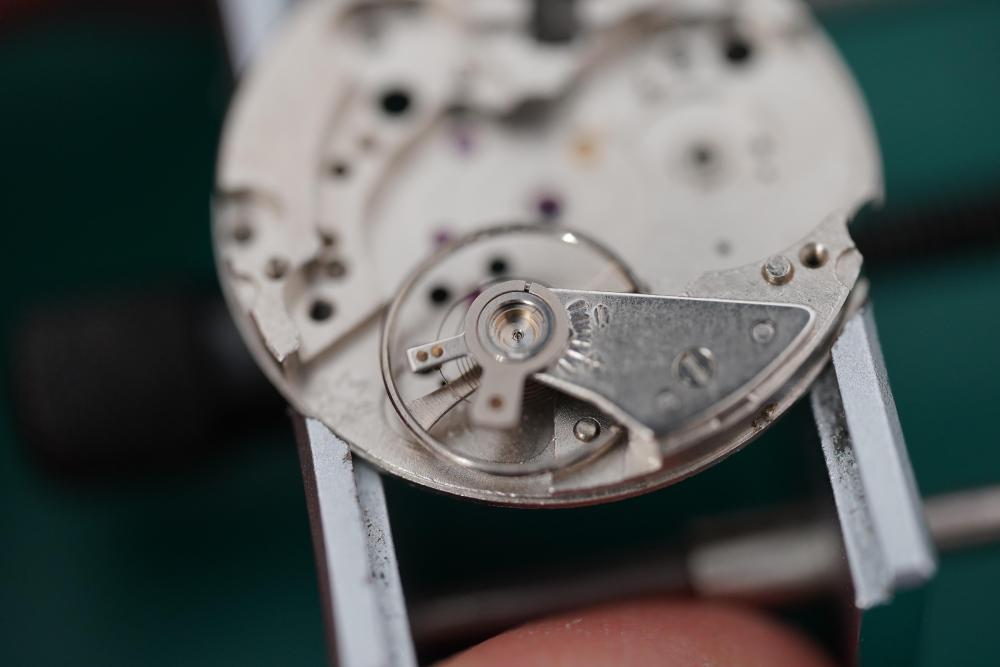
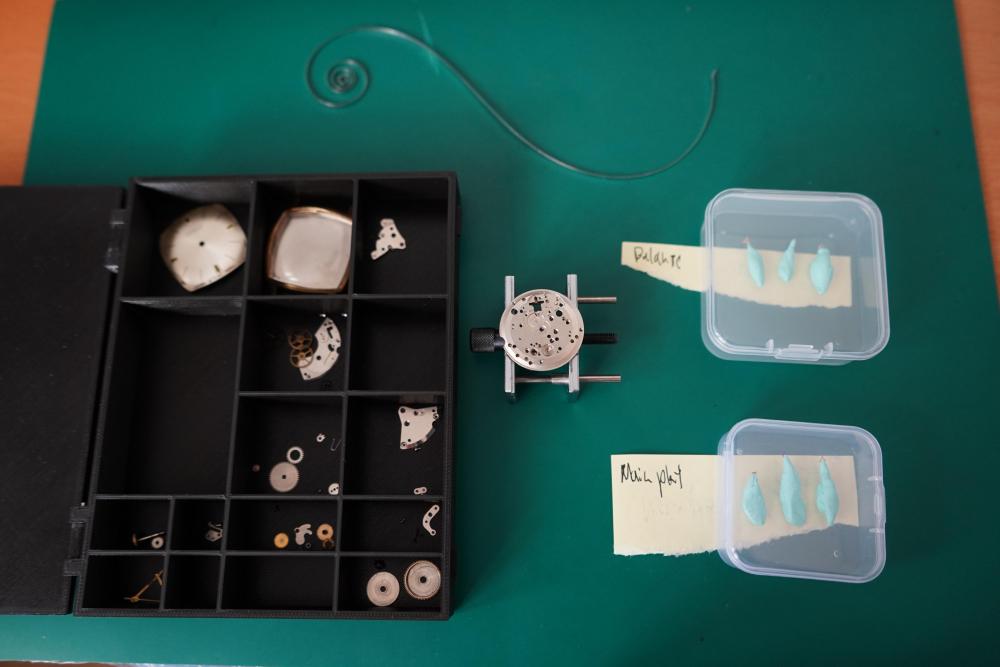
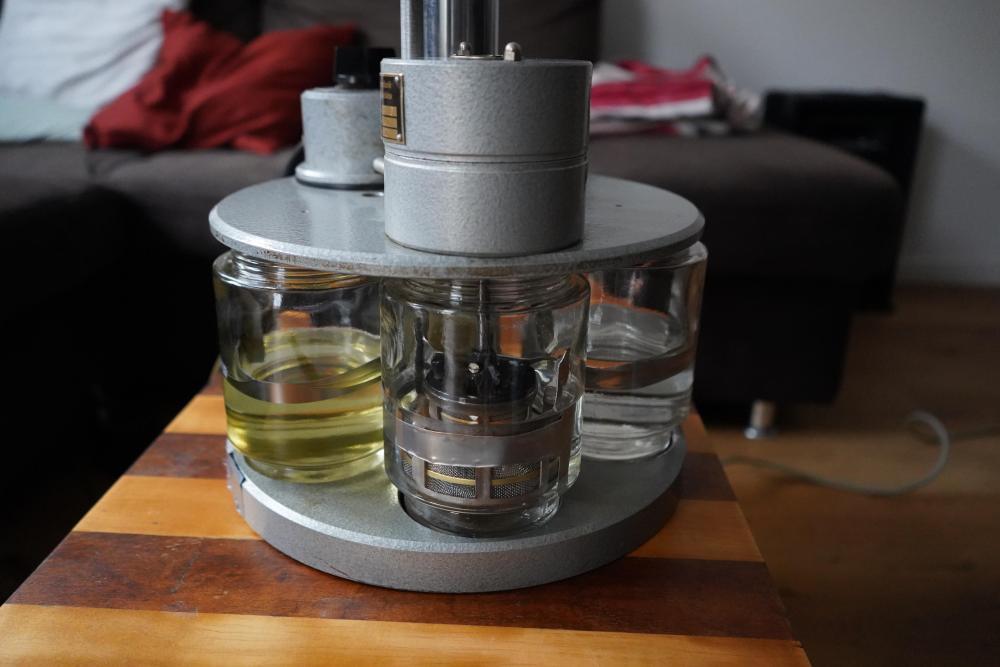
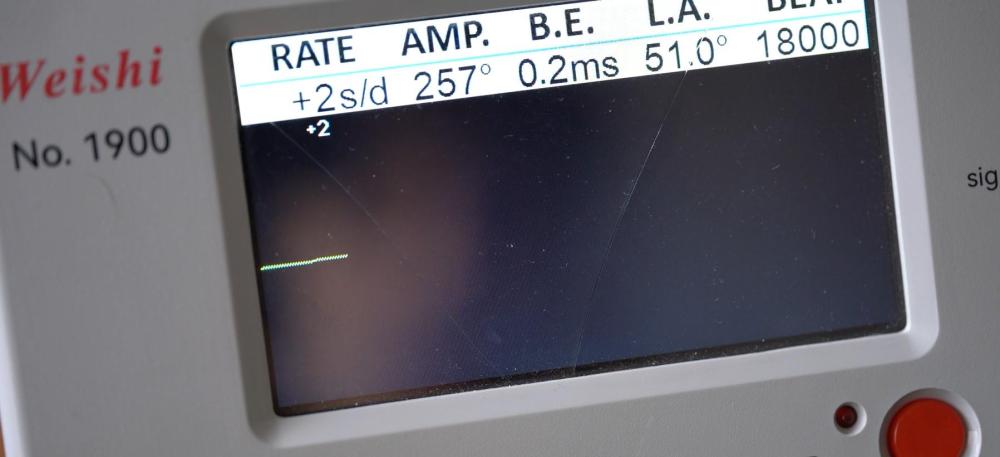
 Hello watchbangers! I am back again with another walkthrough of a project which I completed almost two years ago already now! Wow does time fly, I would love to regulate that to go a bit haha xD. Now as I fixed up a watch for my younger brother a few posts ago, I decided that I would give my dad a pretty watch for his birthday aswell! Funnily enough, this watch came from the same lot of vintage Junghans non/runners that I surprisingly won on Ebay, from which my brother watch originated from! As always, for the ones to lazy to read or interested in a visual accompaniment the link to the 4k video: Now to the watch! It has a very nice curved rectangular case shape with ( what I assume ) is some sort of gold look a like. The caseback is stainless steel. The acrylic crystal is pretty scratched up and the dial does seem to have some sort of.. corrosion? Around the edges. I assume thta its either just wear from the dial edges rubbing against the case or that these used to be some sort of adhesive, which over time, just ripped of the finish or ate itself into the dial. Otherwise he obviously missing seconds hand is missing, the watch is a non runner and when shaken does have some clanking sound. I opened up to be surprised with a missing ratched wheel screw. So thats already one things less I have to worry about haha. The design in pretty simple, what I liked about this calibre is the crown wheel which is held down by its core, the huge balance wheel and the big cap jewel used in the shock system. What I do want to point out is that there is literally no method of movement fixation to this model. There are taps for screws which fixate the movement to some sort of holder but those are both missing. I came up with a pretty neat fix for that later on down the road. Now I removed the stem and de cased the watch from the back. You can steel see the ratchet wheel that I didnt remove at that point behind the movement haha. I removed the hands and the dial to completely free the movement from any outer parts. It reveled a pretty smooth looking movement! And again that fat cap jewel on the movement side aswell. Took of the cannon pinion, the hour wheel, the minute wheel and the setting wheel with its cover Removed the clutch wheels ( dont need them to remove the mainspring power as the ratchet wheel was nit attached) and the cover plate for the gearless works. Then took out the yoke and the yoke spring before turning the movement around. On the barrel bridge we see the caliber number for this watch „687“. This movement was made around the 1960s, however I cannot pin point the exact date as I do not rememeber and did not take a picture of the stamp under the balance cock which shows the manufactury date. Of course the balance comes off first as a precaution. This revealed the typical Junghans Star logo. As the incomplete click assembly system was smiling at us here, I immediatly took out the click and the click spring. Next, I removed the crown wheel and its core by unscrewing both screws. Then I took of the cap jewel from the escapement wheel and the pallet fork bridge and pallet fork. Off with the train wheel bridge. The brass from the second hand wheel is pretty stained , hopefully it will get its shine back after a good cleaning! Off with the second hand wheel and the third wheel. Then I removed the minute wheel bridge. What I found cool is that this bridge also had the number „1“ stamped into it. Maybe that would help for the reassemnnly or it could help pinpoint the production batch? Removing the last three components: the mainspring barrel, the minute wheel and the escapement wheel. Taking in the mainplate all naked shows the nicely sandblasted surface. Of course I cannot wash the watch without taking out the shock systems. Here picturs of the extremely empty looking blocs without their huge stones haha. A total overview of all the watch components including the unwound mainspring. Then another picture of the watch during the cleaning cycle. I think it just finished the first rising phase here. Now for the reassembly I literally just worked my way backwards from the step I just described and just lubricated aswell. Here the lubrication I used with the places: Moebius 9010 : Second hand wheel, escapement wheel pivots, Moebius HP 1300: Slower turning wheels such as the minute wheel, third wheel the the barrel arbor and the barrel pivots. Additionally I added some to the pivot swhere the transmission wheel and the setting wheel (in the front side) would run around. Moeius 9415 : The Pallet fork jewels Molykote DX : Friction points in the gearless works. As the crystal was a bit scratched up I worked it over with some polywatch and got some case shine back by using some jewelers cloth to polish the gold colour. Now regarding that movement fixation issue that I described before! After researching a bit online for donor holder rings or screws, I came up empty. I settled on designing and printing my own holder ring which would not hold the movement in place with the screws, but by the locking force when the case back would be wedges between the the case and the holder ring. Here are a few pictures of its creation. With the watch „complete“ again, I put it onto the timegrapher again! While the preregulation did have a slow rate, I was very happy with the amplitude of around 260! This is the regulation of the dial down side at the end: Here is the picture of after everything was done and it was ready to be packed away until my dads birthday! I also had a nice Junghans watch case which I received from the company itself when I sent in a watch long ago. I dont have picture with the box but I just wanted to say that haha. Now im conclusion, I had some fun with the watch! It was pleasantly surprised with the level of detail to such a simple watch. Of course nothing in comparison to modern counter parts but they definetly cared for the aesthetic quality aswell. A few things which spoke for this was the sandblasting, the polished crease around the train wheel jewels, the shape of the setting wheel. Of course the final result does show a lot of potential for improvement but I will just deal with that when the watch comes in for service in a few years. If anyone has any questions/ comments or anything to say in particular, you can always write a comment or hit me up privately!


- 1 reply
-
- 6
-

-
- watchmaking
- restoration
- (and 3 more)
-
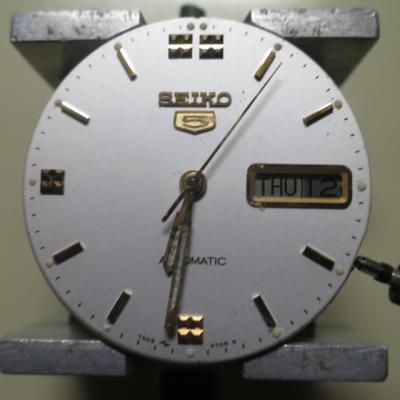
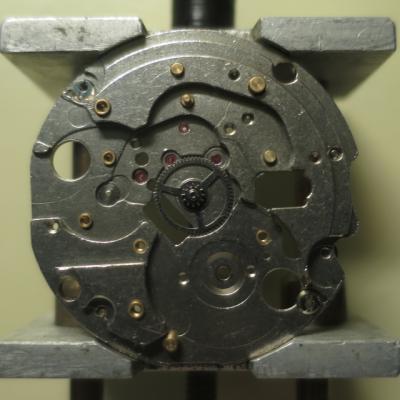
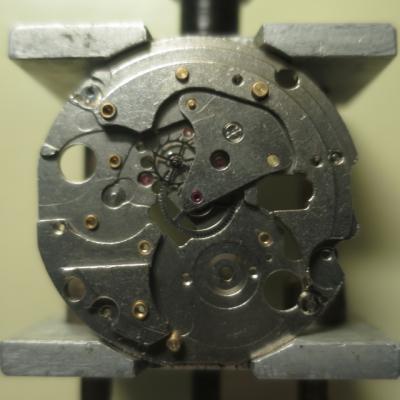
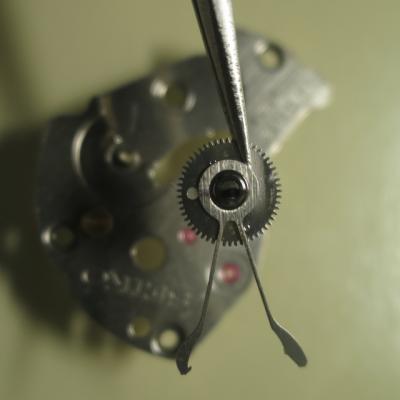
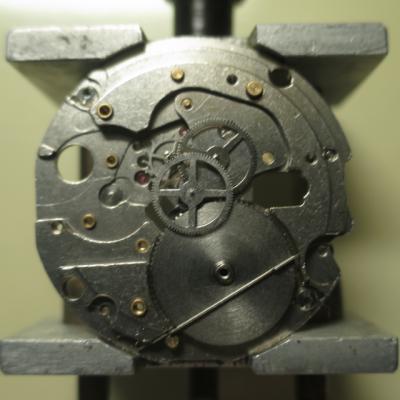
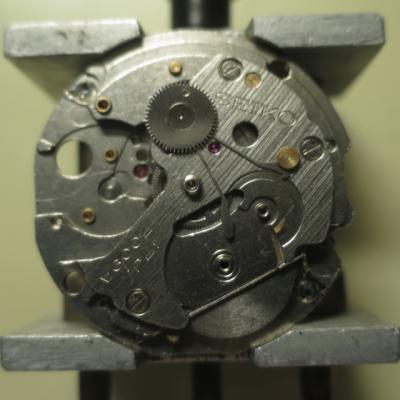
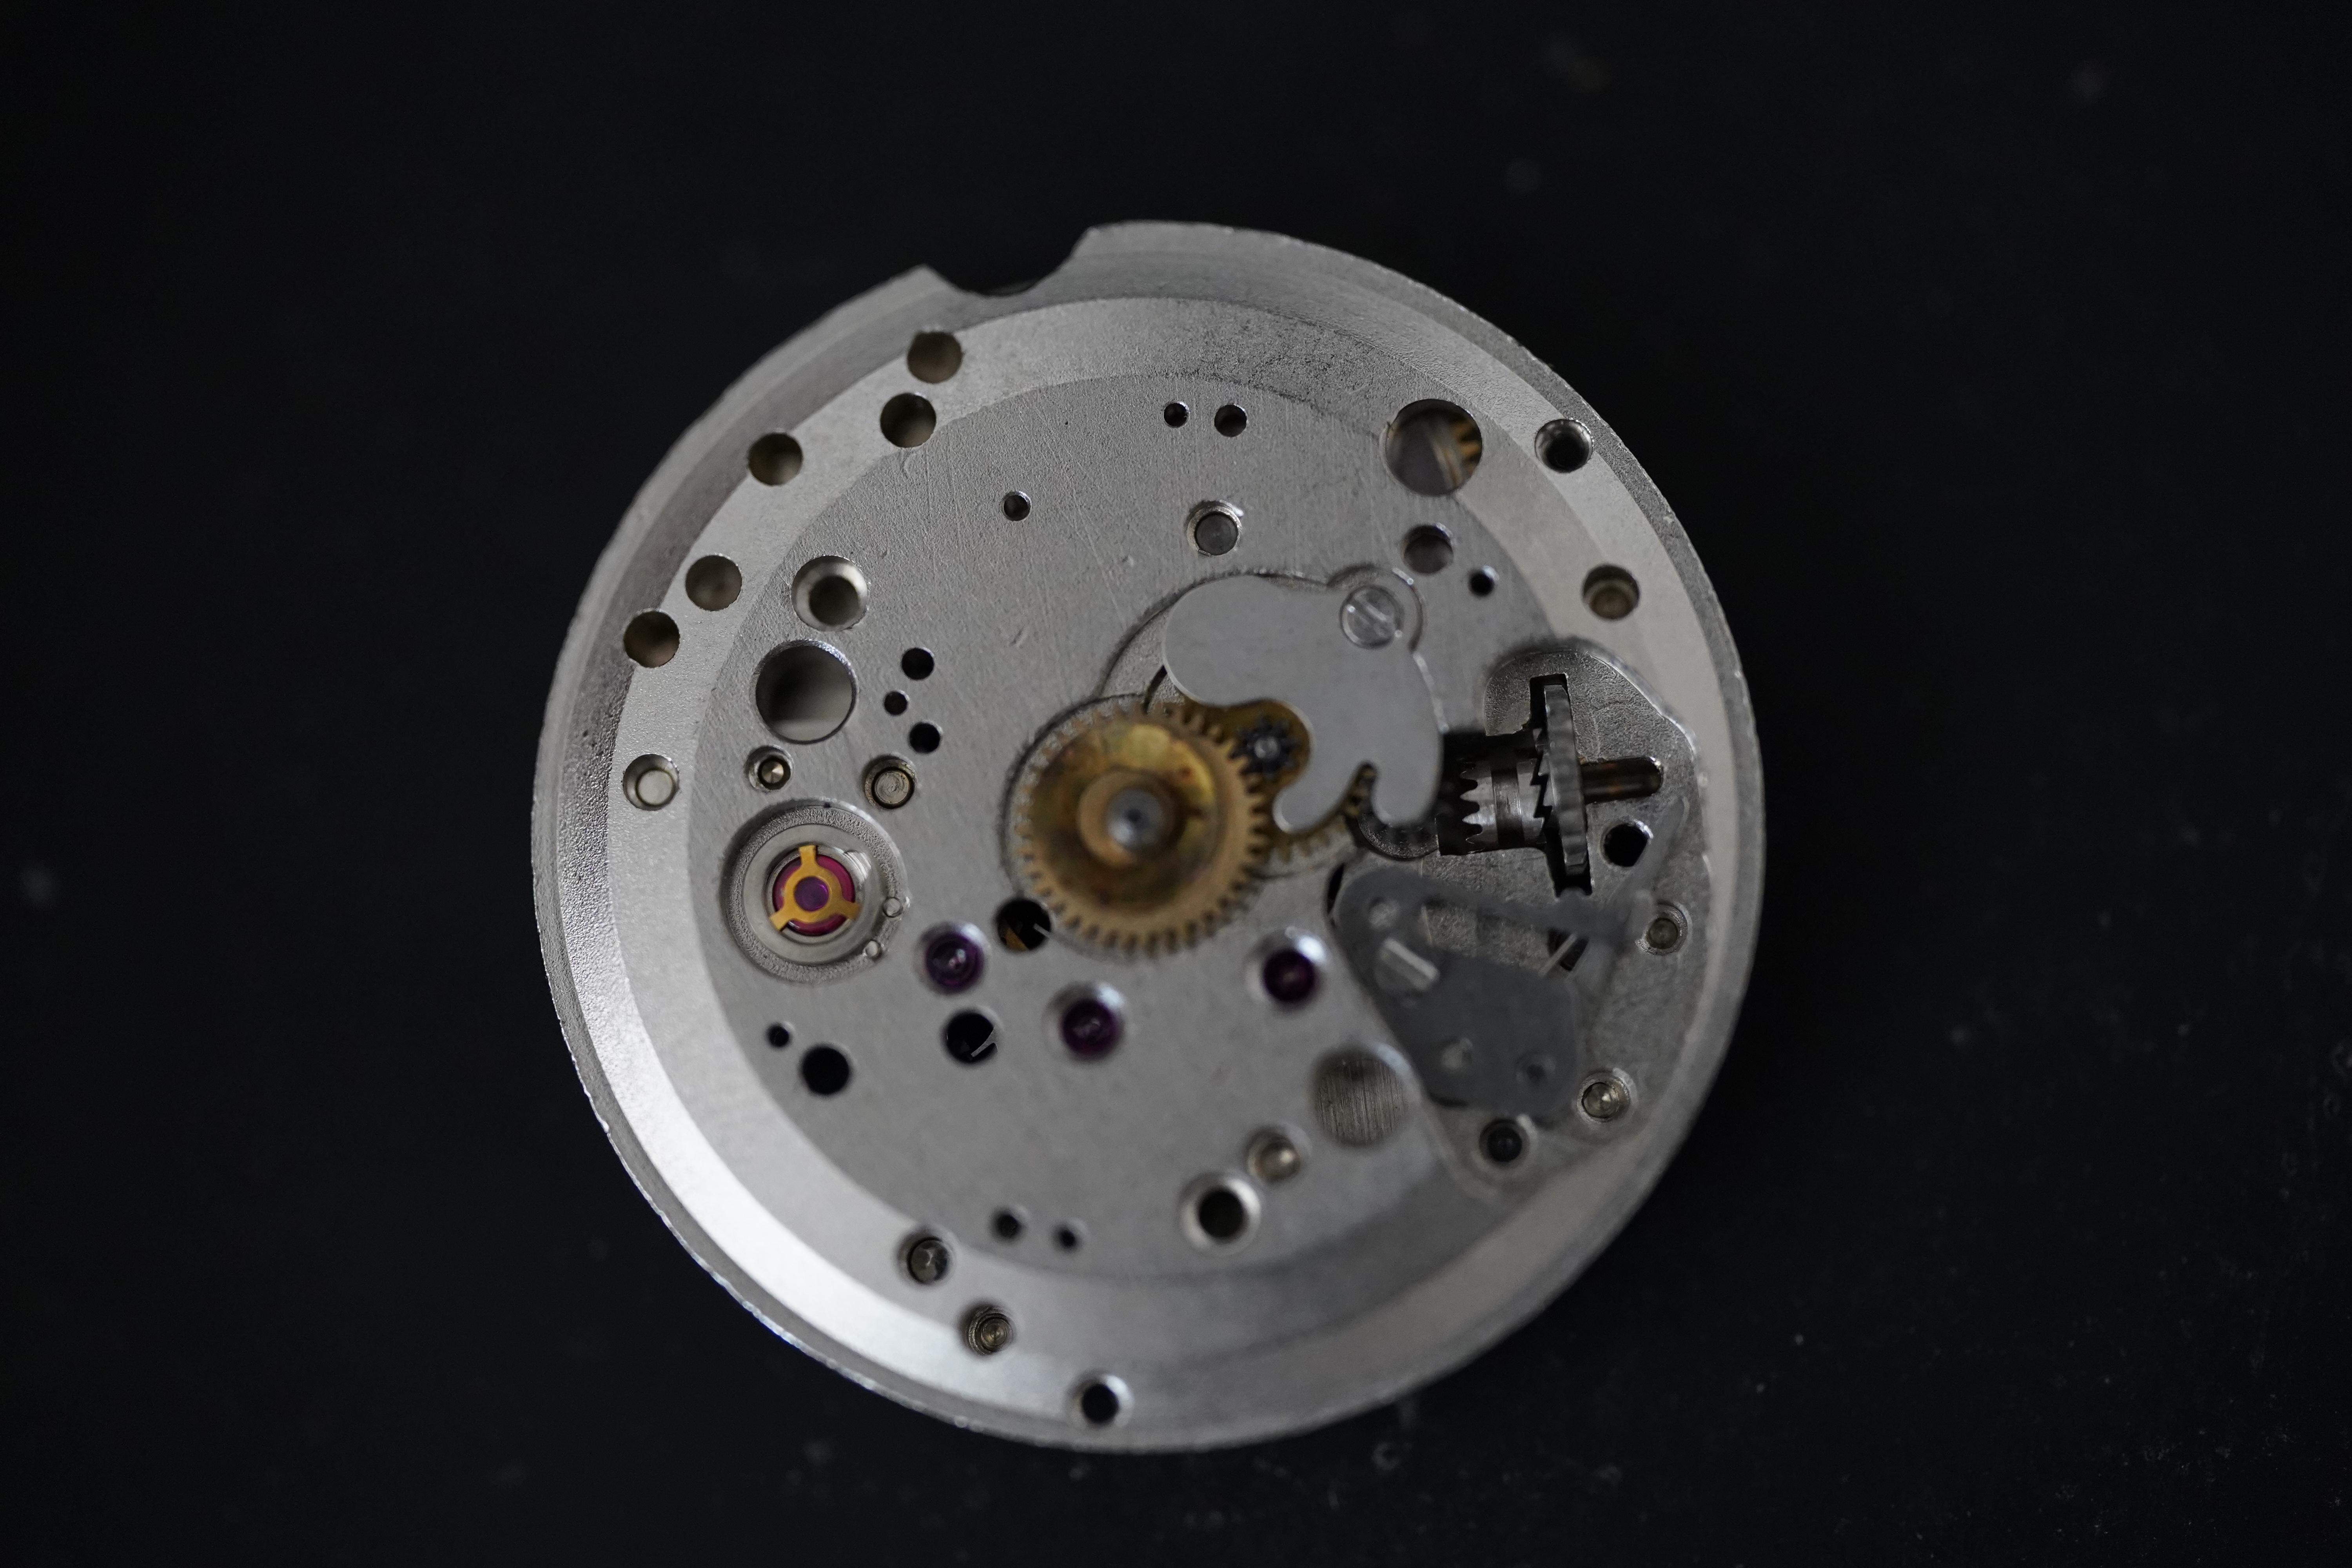
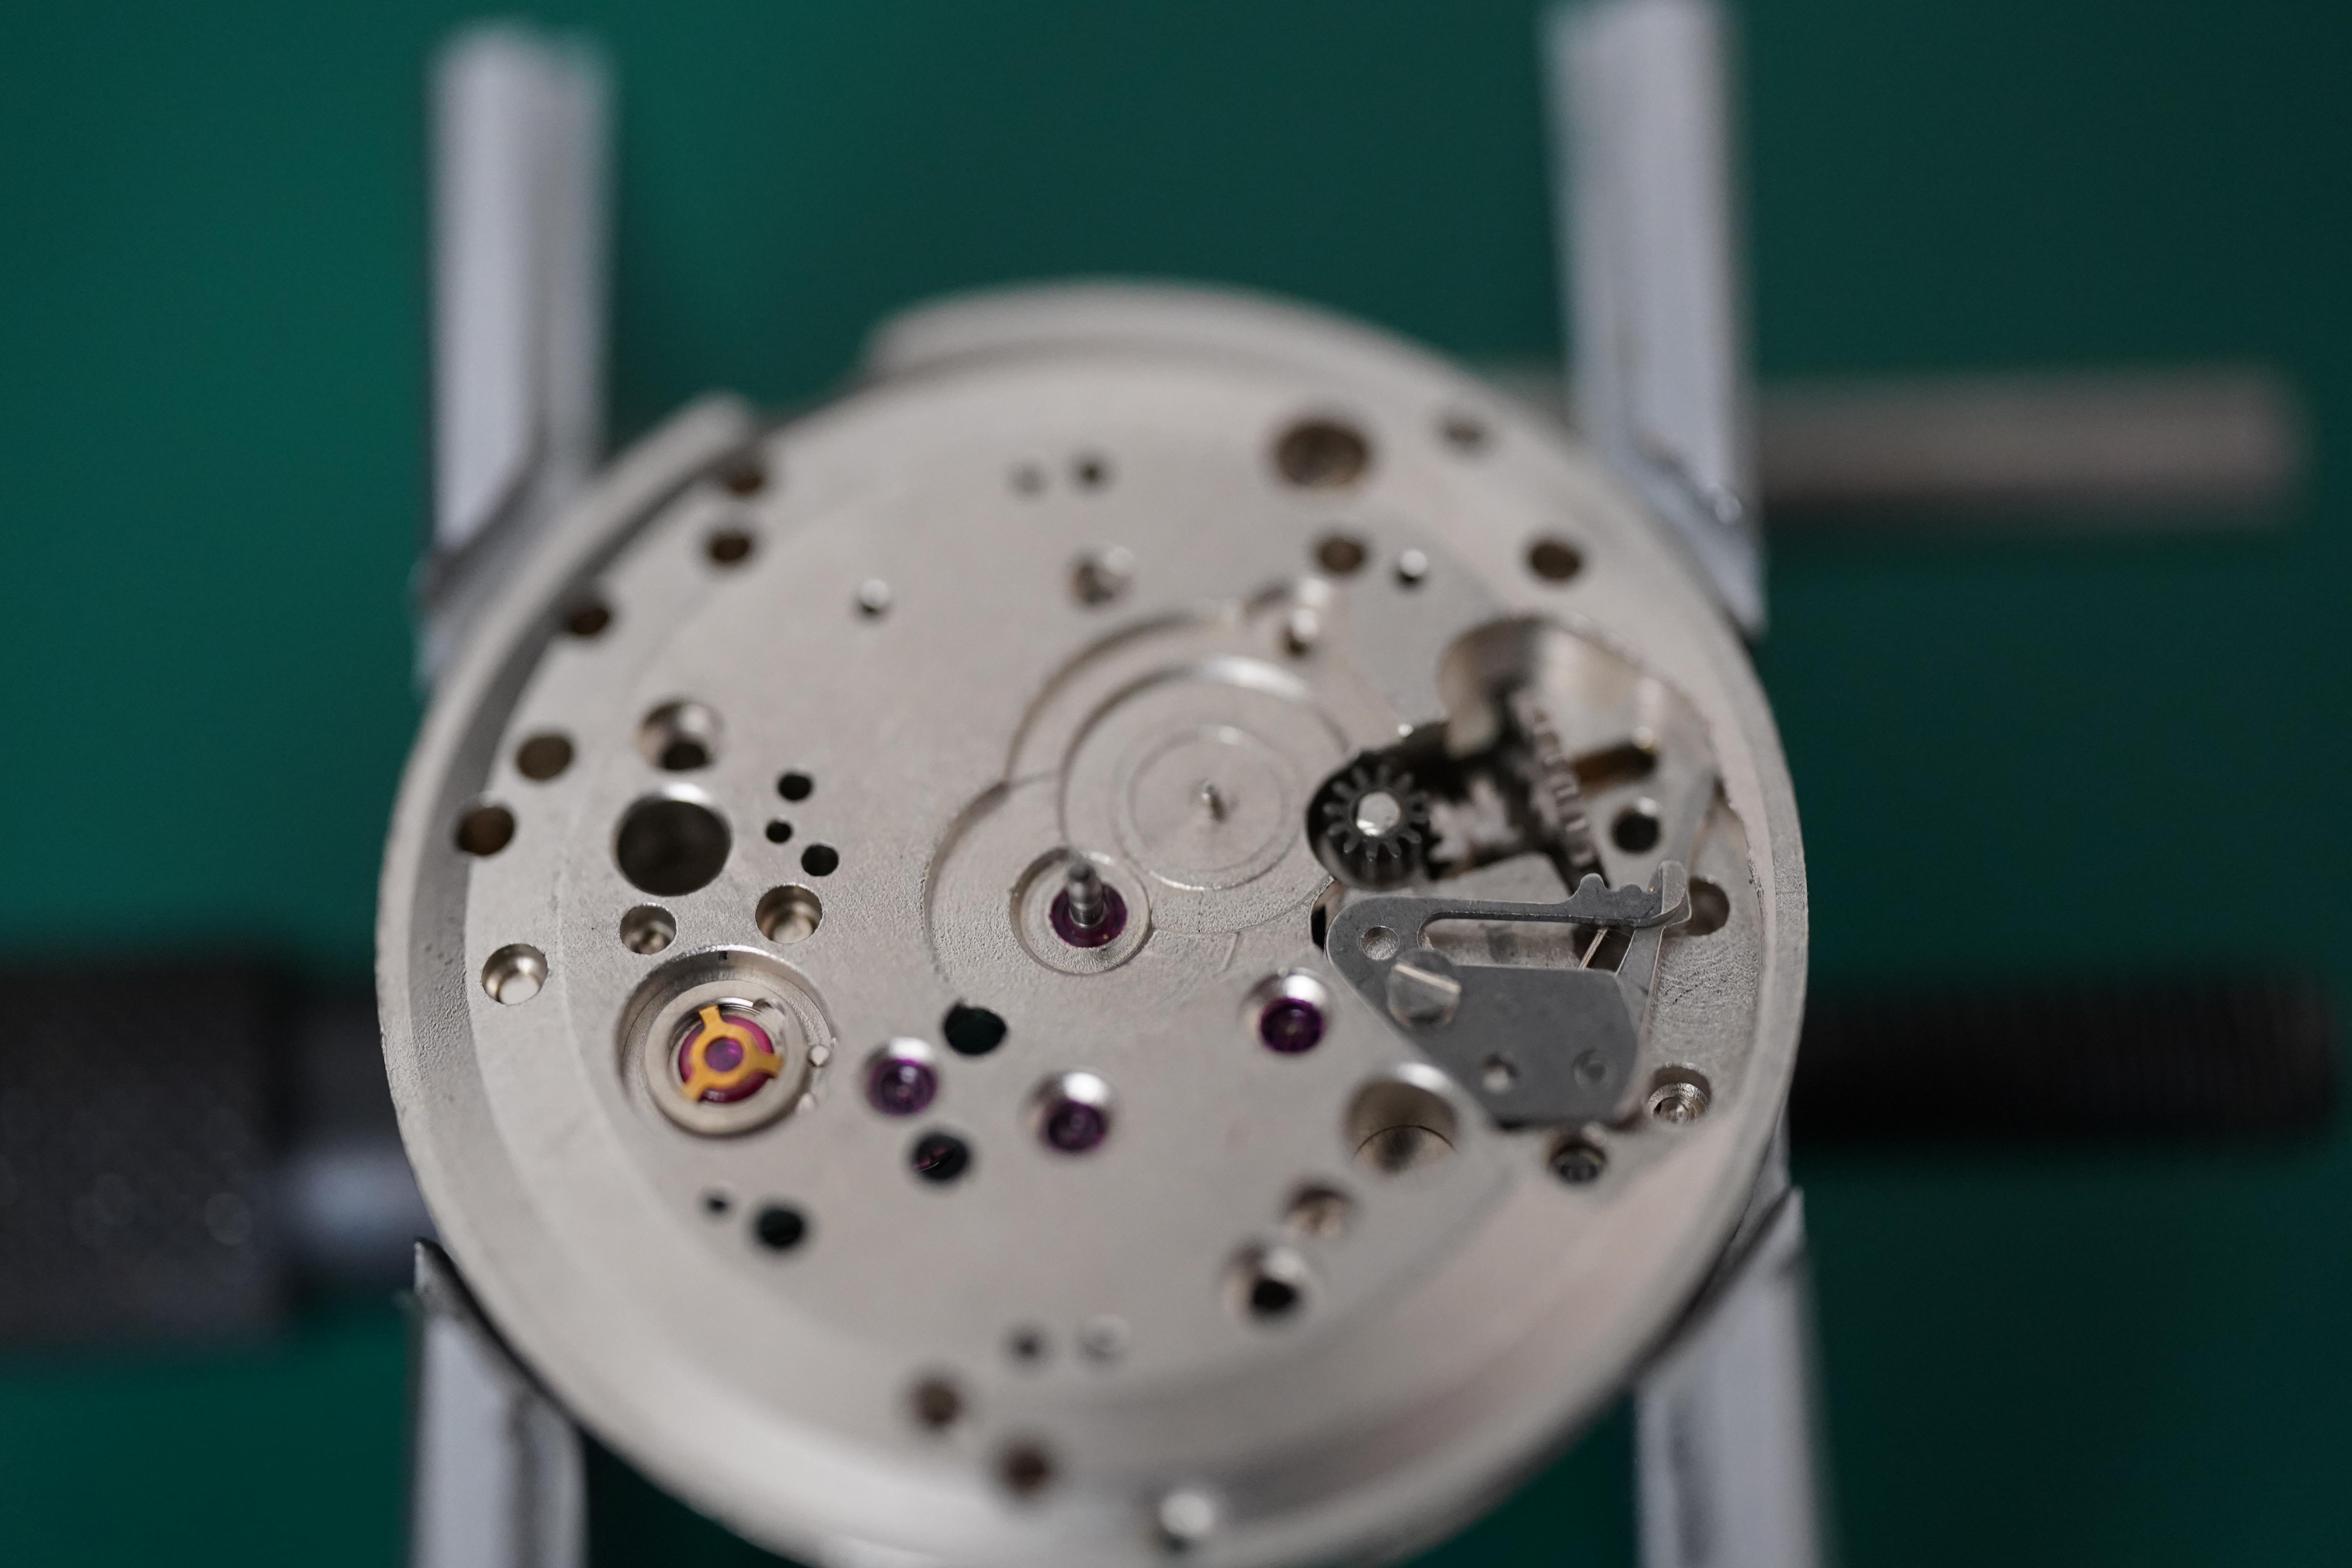
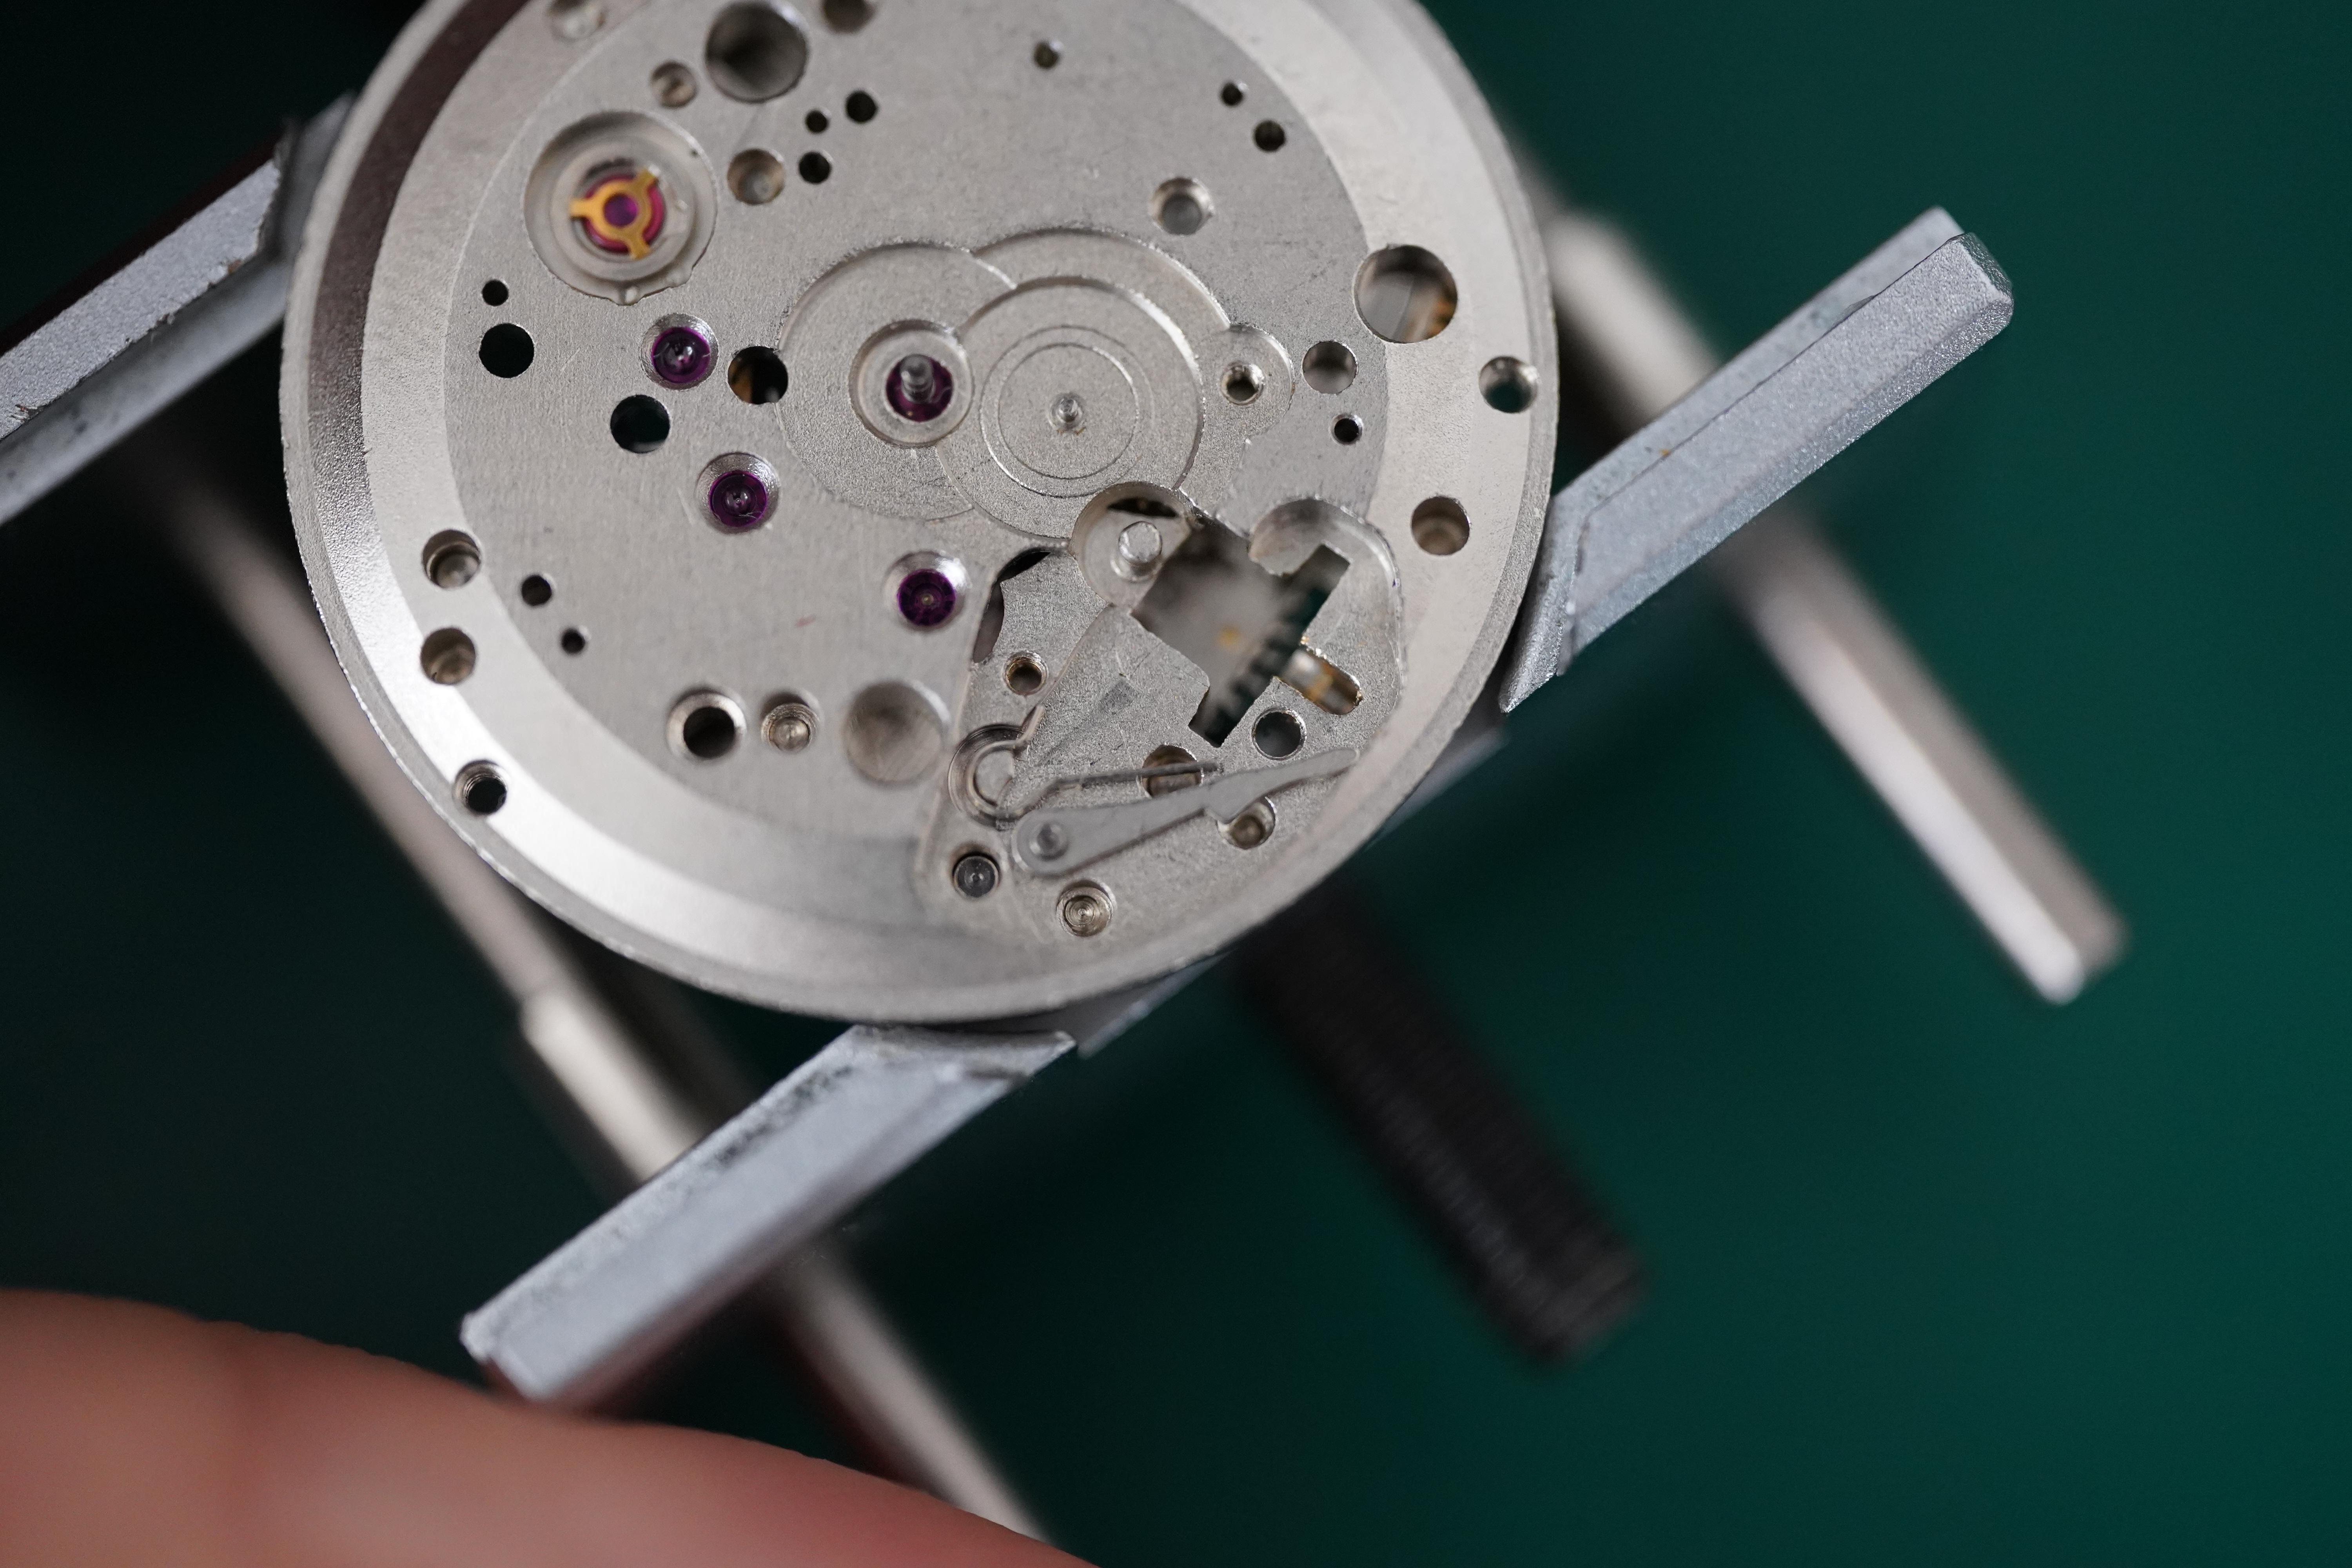
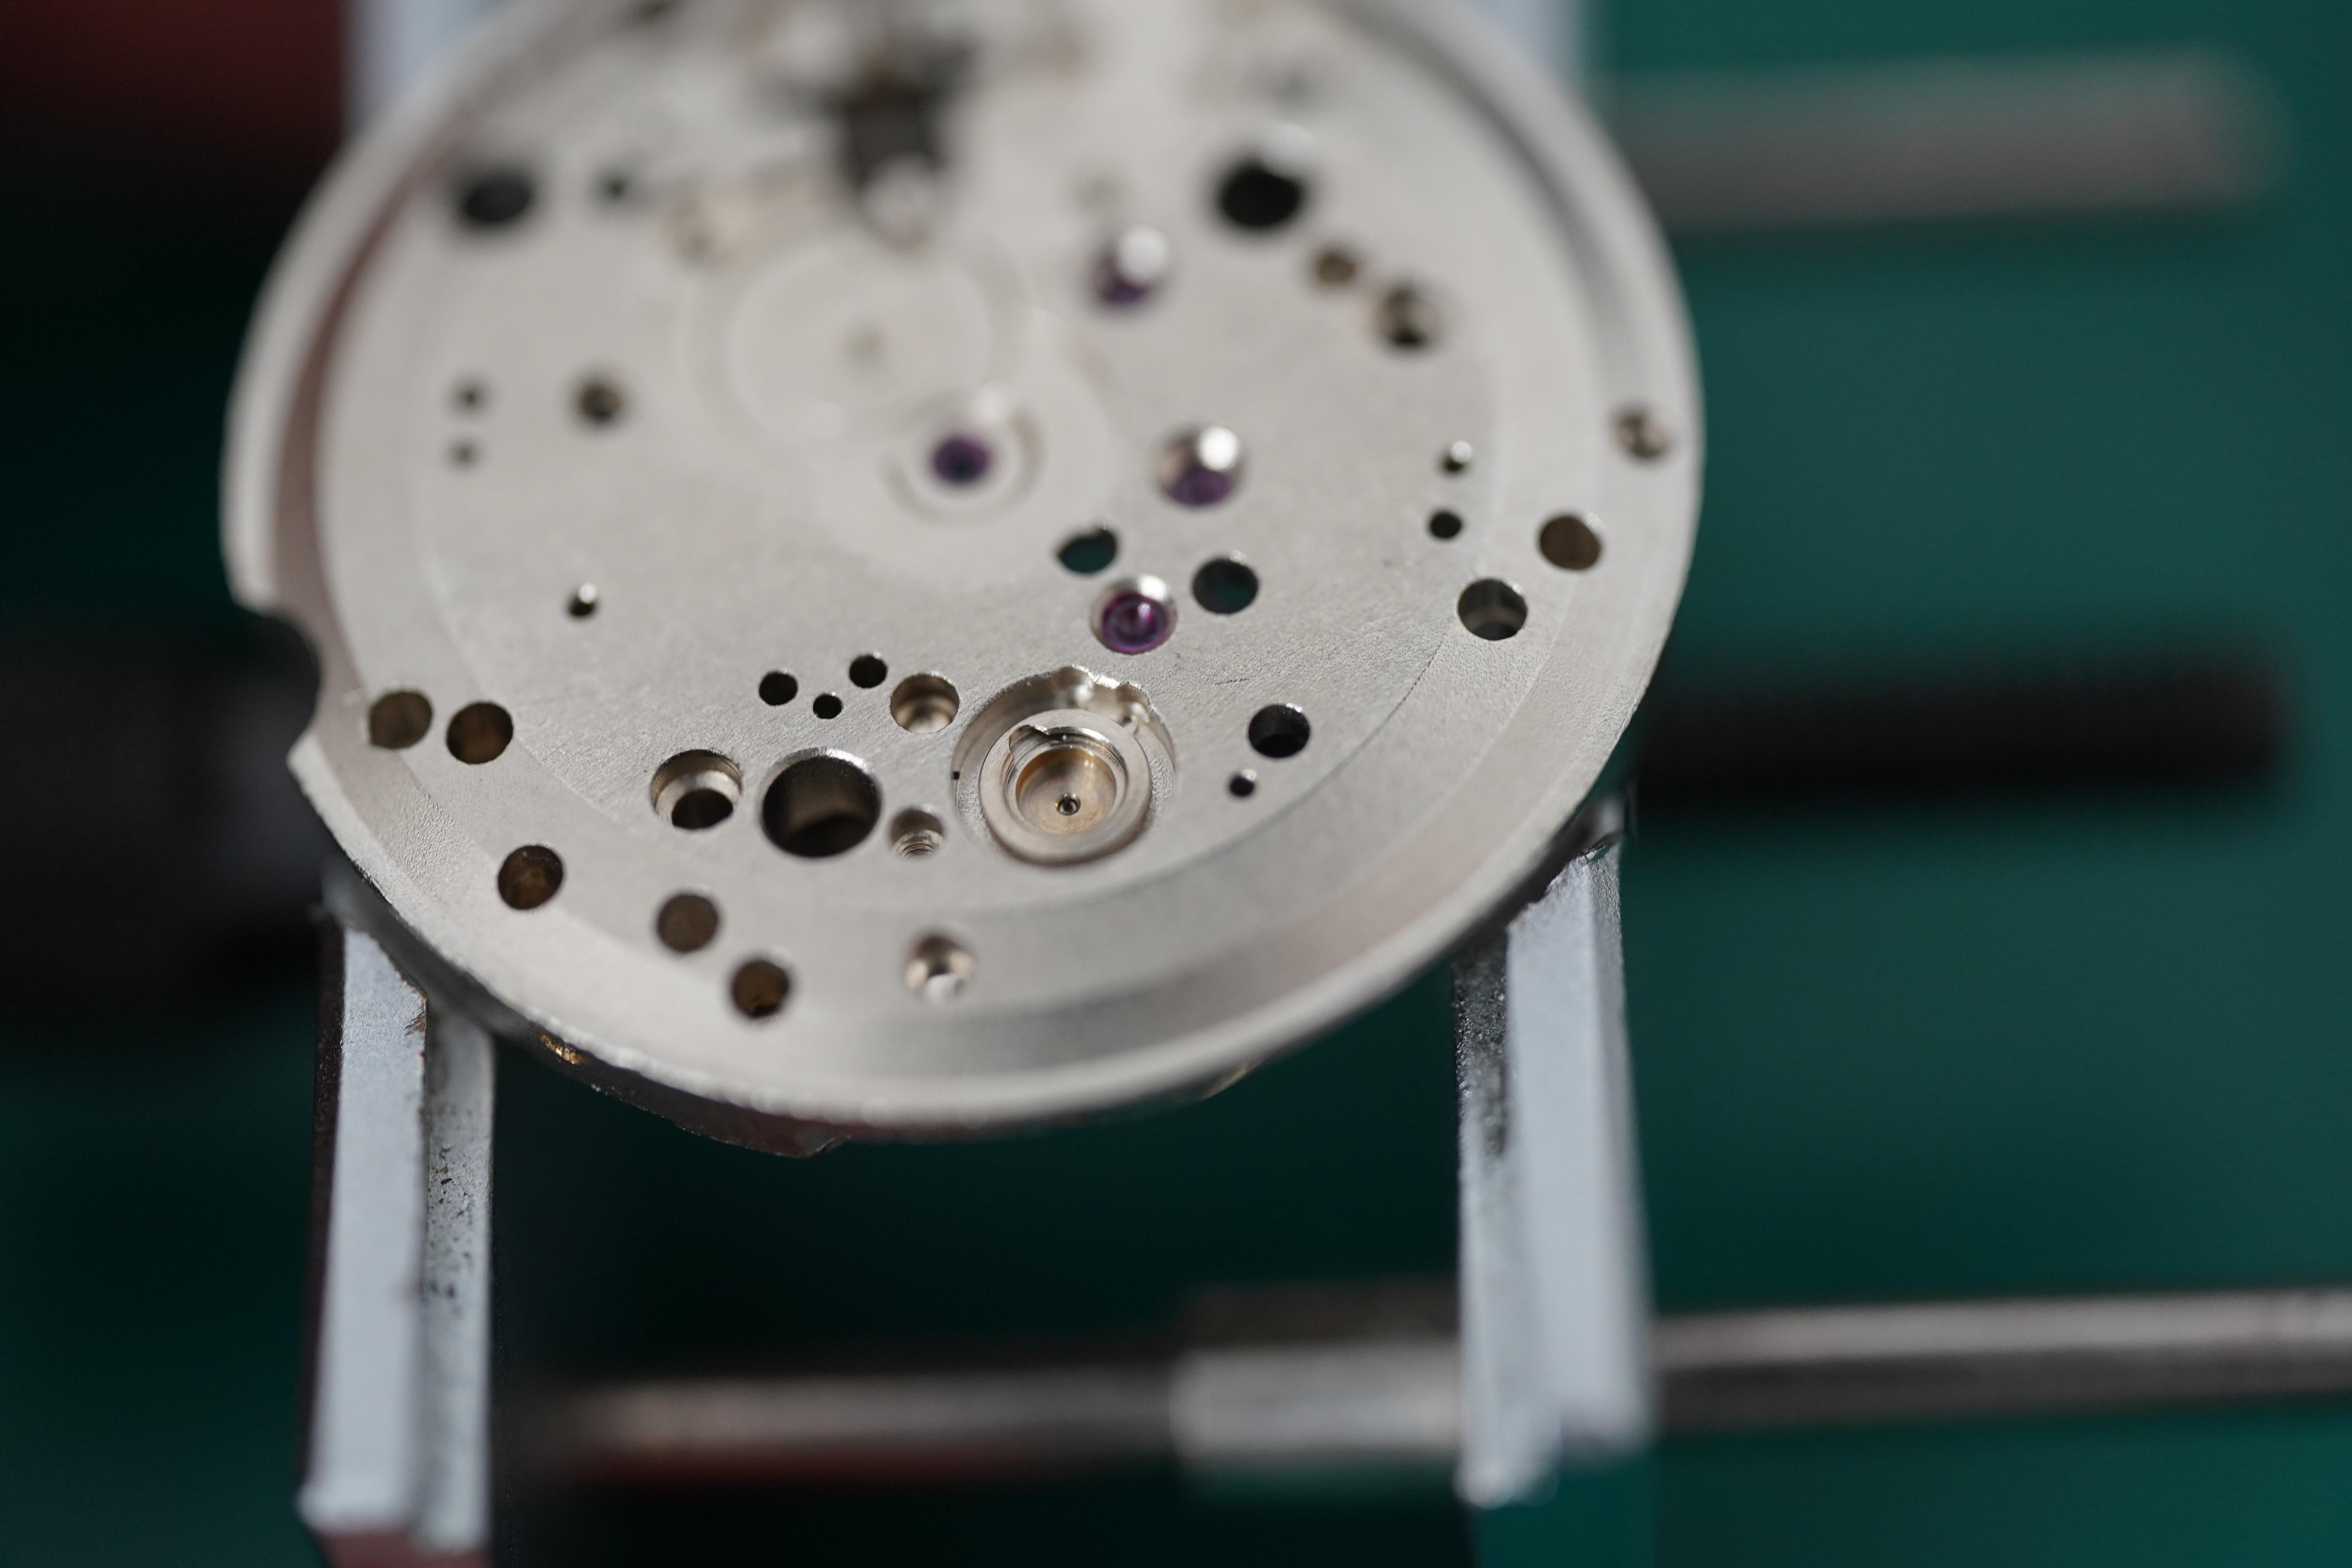
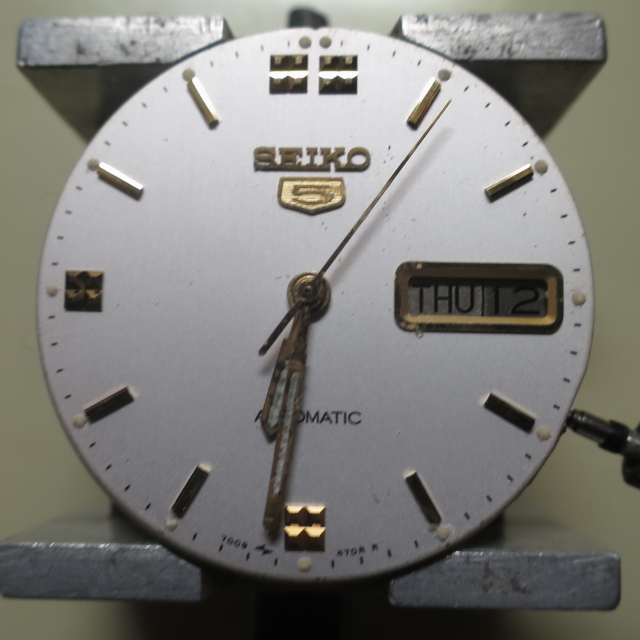
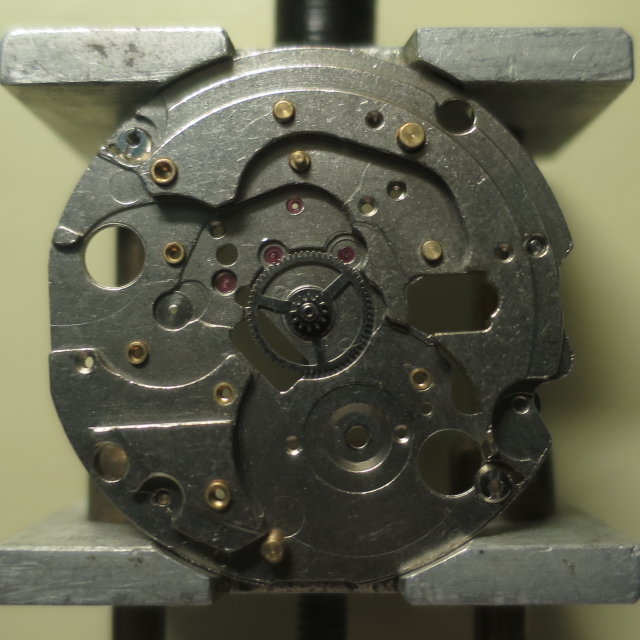
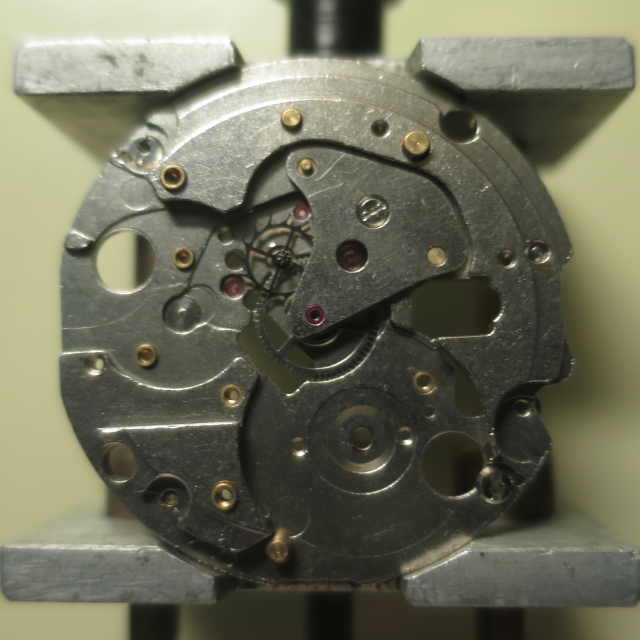
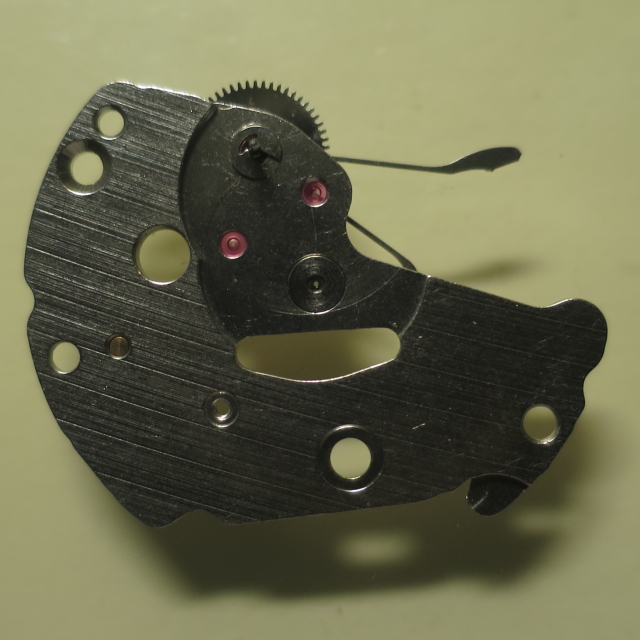
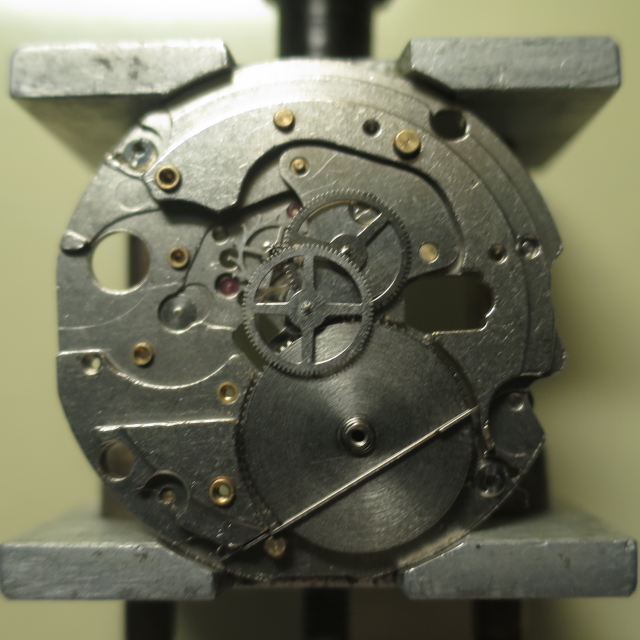
 Good day, guys! This is my little way of giving back to this wonderful community. We usually receive for repair a watch handed down by a father to his son. In this case, its a watch given by the son to his father - a Seiko 5 from the early 1990s. The watch has seen better days, with its hardilex crystal beaten and the watch not moving at all regardless of the amount of shaking you give it. The hands are corroded and the dial mounted on the movement using contact cement. I'll skip the disassembly and show you how the Seiko 7009 movement works. The Seiko 7009 technical guide is easy to find on the net though. First to be mounted is the center wheel that drives the cannon pinion. After which I install the escape wheel and the center wheel bridge. The third wheel and fourth wheel is installed next. Note that the fourth wheel drives the second hand directly. Then the click comes next. Prior to installing the unified barrel and train-wheel bridge, you have to install the pawl lever and first reduction wheel assembly. The assembly is held in place by the first reduction wheel holder. Take note of the orientation of the pawl lever. I find it difficult to install the barrel and train wheel bridge while ensuring that the click spring doesn't get in the way. <end of part 1>