-
Recently Browsing
- No registered users viewing this page.
-
Topics
-
Posts
-
I am being offered a Levin lathe with maybe 20 collets, tool rest, motor, and pedal. The guy is asking $750. Is it worth that much? Thank you for the help!
-
By ScrewDropper · Posted
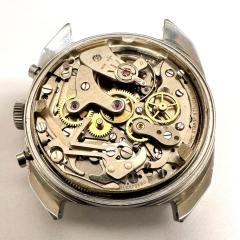
I recently repaired this movement but the screw for the ratchet wheel was the wrong size and it was bugging me (pic 1). I tried to find a replacement but I couldn't match the head width and tap size, so I decided to make one. I wasn't sure of the tap size for the screw, but it looked to be either 1.0 or 1.2 so I made a test screw out of a brass bar, with a matching threaded hole on the other end. I didn't photograph this but you can see the bar in picture 4. I settled on a size and proceeded to cut a steel bar down to length. I softened the bar first to make it easier to work with and the cut it to size, using the chart on my tap and die set for reference Once cut I set up the die in its holder and used my tailstock to hold it straight while I created the thread. Once the thread was cut, I tested it using the brass bar Happy with the diameter and thread I cut the screw off the bar and then twisted it into the bras bar to use it as a holder, for securing it in the lathe to protect the thread I made a face cut to clean the head up Next step was to make the slot. I currently do not have a table saw for the lathe so I was going to have to use a saw. To keep the cut straight and centred, I made a jig out of a piece of brass bar by drilling a hole big enough to slot over the stew, with a slot in it to guide the saw while cutting the slot on the screw head I then cut the slot with a fine saw (I forget what they're called, pin saw?). Once that was done, it was ready for hardening and tempering and then a first polish from 800 grits to 2000 on the lathe. The picture below is just before the first polish. Once I got it to polished with 2000 grit, I removed it from the lathe and then polished it with diamond paste and a Dremel, using the brass bar to hold it. (this turned out to be a really useful tool) Finally, it was ready to go into the movement. I am pleased with the result. I should have made it flatter to match the crown wheel screw better but, overall, it is a vast improvement on the screw that was in there. The main thing I took away from this was how useful the brass bar was, not just for testing the thread but as a holder in the lathe, for cutting the slot and for handling when polishing. No trying to hold it with tweezers or a vice. It was a really simple tool to make and really worth the 10 minuets or so to make it and cut the threads. The slot guide was a huge bonus because it worked much better than expected. -
By nickelsilver · Posted
I finished a couple of pinions I started yesterday, read up on Breguet hairsprings, made a balance staff, fixed my tool and cutter grinder, and in between checked in here. Having a (2rd) pint with the missus now 😍. -
By RichardHarris123 · Posted
I've been called a vintage tool many times . -
By MariusJacob · Posted
I must update myself, I guess nowadays the lubrication procedures and assembly protocols have improved or, at least, changed. I hope there is still hope for vintage tools in this area.
-


Recommended Posts