Jump to content

Recommended Posts

Posted

There’s no shortage of service walkthroughs for this and similar ETA quartz calibres on the Internet, and here on WRT. Nevertheless, I thought it would be good fun and educational to create my own walkthrough, and here it is now!

Only having experience of servicing mechanical and automatic movements, I truly learnt that a quartz movement is not “just a time telling battery device”, but indeed a mechanical movement, except that the power source isn’t a mainspring but a battery and that the escapement is made up of electronics (no escape wheel, pallet, and balance). So, just like a mechanical movement, a quartz movement has a train of wheels, a setting mechanism, a dial train (motion works), and in this case calendar works.

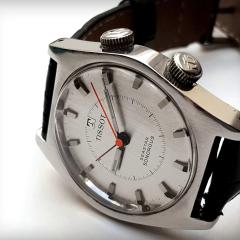
The watch belongs to my father who got it as a gift from my mother at his 40th birthday in 1979 (41 years ago!). He asked me if I could fix the crown which had come loose from the stem. So, I glued the crown back to the stem using Loctite 638. Perhaps not the ideal glue but at least the crown will never come loose again. Anyway, I thought to myself; why not try and give it a complete overhaul!? After all, it had never been serviced and I wanted to learn more about quartz watches and return a perfectly working and clean watch to my much-appreciated dad.

One of the things that surprised me while taking this movement apart was that the parts are very small. Smaller than the parts in an averagely sized mechanical movement and that was a bit of an extra challenge. So, before servicing a quartz movement I think it’s a good idea to gain some experience servicing a few averagely sized mechanical movements first.

Both the disassembly pictures and the assembly pictures basically mimic and complements @Mark's videos How to service a quartz movement. ETA 955 412. Watch repair tutorials” and How to service a quartz movement. Part 2. Assembly. ETA 955.412” which I used for guidance (Thank you!). However, my walkthrough includes lubrication suggestions according to ETA’s technical communication which are intentionally omitted in the videos to save time. For reference I also used the video Quartz Service ETA 955.112, @HSL's quartz movement walkthrough, and @Lawson's walkthrough (Thank you!). All part names I’ve taken from ETA’s technical communication.

So, without further ado.

ETA Calibre 955.112 Disassembly

IMG_3082.thumb.JPG.0353fe2826a2a11bd538de4db7b51671.JPGIMG_3083.thumb.JPG.838730984296277daf8f8c82bac9a953.JPGIMG_3084.thumb.JPG.a70d05341f88aab887bc0d354703f74c.JPGIMG_3087.thumb.JPG.f2fe2ccd728ea6ca705bea74c6852571.JPGIMG_3088A.thumb.JPG.92524ed0453907db5f4c35c09c676974.JPGIMG_3088B.thumb.JPG.9b67a9cf6cad3653218e0b95ffe8d8b5.JPGIMG_3089.thumb.JPG.eb7e8eeef5cad404eec312c049c79bac.JPGIMG_3092.thumb.JPG.f2f1a16a14248f65a4f4909ea25d2884.JPGIMG_3093.thumb.JPG.532244ab0312d9c0b8217766ab3bb41c.JPGIMG_3098.thumb.JPG.db96bb98c8e94e2617565edd0fbb4eba.JPGIMG_3101.thumb.JPG.14a66b8b109cffc7b5c943f95f19d47f.JPGIMG_3103.thumb.JPG.b5eed4c42fb4707f8c9d82313994d707.JPGIMG_3104.thumb.JPG.260e0e2f732ee79f7746778a2b1f46c3.JPGIMG_3105.thumb.JPG.877f7e262f7fb49fc4e4d3e12beea307.JPGIMG_3107.thumb.JPG.a6b6bf5eed4f7764259dd954eda00121.JPGIMG_3108.thumb.JPG.554cbb09c5f5fab8ff047b330a5752c3.JPGIMG_3109.thumb.JPG.40fe2010f61964e36c6cc1dcb5c5623d.JPGIMG_3112.thumb.JPG.c498b672b276f1fe8523a07898c70d40.JPGIMG_3114.thumb.JPG.7cf75268b311c918e42880a3c7d74926.JPGIMG_3115.thumb.JPG.58689e50987c3c4ffd1856f2a19f8e90.JPGIMG_3116.thumb.JPG.424a2b4b46001440d83e521194bc0153.JPGIMG_3117.thumb.JPG.edf2abba32238f010380684e628114e1.JPGIMG_3118.thumb.JPG.bd51a28cbf93ac2e57af27215cc3f359.JPGIMG_3119.thumb.JPG.b26ca85cc20ab13d9580e06663908803.JPGIMG_3124.thumb.JPG.8a2aaae36c8937f76d22a0e1571e4847.JPGIMG_3125.thumb.JPG.ff446534c4be5ad1c780943d454199bb.JPGIMG_3126.thumb.JPG.55a10fb632c03bcfaf42704aec1fee4b.JPGIMG_3127.thumb.JPG.cfefb27af324f26b5d01f8c9c7874b98.JPGIMG_3128.thumb.JPG.1e298939ba029ecf47fd73536a2aee73.JPGIMG_3129.thumb.JPG.be4697da41bb4ae1854ddfd5abed1acd.JPGIMG_3136.thumb.JPG.0a5c4dcc0d8ec74724028b74ddcd79e7.JPGIMG_3138.thumb.JPG.1e235a6e405b1bb60e729df64261a462.JPGIMG_3138B.thumb.jpg.3fea4221c726ec3ce49c9bc149de0e2f.jpgIMG_3138C.thumb.jpg.8d90c6dd672b4875c5d736f840b2eb97.jpgIMG_3139.thumb.JPG.e8633edf05027a56ea72562dd262f76a.JPGIMG_3140.thumb.JPG.b456c1096056e7b72b4db528c1c49490.JPGIMG_3141.thumb.JPG.0f209ef5b82c8c71d46ee1e1d69d64e4.JPGIMG_3142.thumb.JPG.c61ead638f8e2dbaeed47e0268f68025.JPGIMG_3143.thumb.JPG.33390491a37ef51beccc6d2c52a857ba.JPGIMG_3145.thumb.JPG.09e1f1029880bcc41e48123fe44beba8.JPGIMG_3148.thumb.JPG.fde5fd162f4258095663aff0bf8fa512.JPGIMG_3149.thumb.JPG.41967f528922c4fc040d7903c06baceb.JPGIMG_3150.thumb.JPG.57f438e0693ac093de86efa958fa9654.JPGIMG_3151.thumb.JPG.31258cf0bda0f06349d002c88c04358b.JPGIMG_3156.thumb.JPG.5d470cb5e2d67a51e2488236cb4cf957.JPGIMG_3157.thumb.JPG.dc7c6a56a54c0dedad6b794688acb329.JPGIMG_3158.thumb.JPG.d8b642c48c6f327c39b95eb541eb041c.JPGIMG_3160.thumb.JPG.c426f02d758a89ef3107ea93dd41ee35.JPGIMG_3161.thumb.JPG.45fff3e7a59652c49f89bcada4e19557.JPGIMG_3163.thumb.JPG.b0dc58180ded735740f4c5928e4d4c07.JPGIMG_3164.thumb.JPG.c68200dde30be18012f6a044193d5ba4.JPGIMG_3167.thumb.JPG.0c4753b1d8006be3204fbbf1c31e30c2.JPGIMG_3168.thumb.JPG.3ebd1d3d4c0bb4ef26e2474417696125.JPGIMG_3169.thumb.JPG.7abbf193bfc1c17dca9ebe2a5aaff782.JPGIMG_3170.thumb.JPG.89d6b7fc3a35c8b510fb9b3019d8b68f.JPGIMG_3171.thumb.JPG.3c3799728abdf281adaf2181d27a86a0.JPGIMG_3172.thumb.JPG.9d86b9d4f9c0354937ab6f603d189731.JPGIMG_3176.thumb.JPG.d6f03762fed4980689dd3d832bd8ee41.JPGIMG_3178.thumb.JPG.1d8c007bd0f4e915737343e3bb6fb524.JPGIMG_3180.thumb.JPG.660cf6edf10197f4574087bd751f7219.JPGIMG_3182.thumb.JPG.a5043262dac2bccb30edd16a21b8872b.JPGIMG_3185.thumb.JPG.1b68e4e0b298a444cd5f57a42e85f857.JPGIMG_3189.thumb.JPG.0db1a97155b1d1f3e4f588d06ead7dd3.JPGIMG_3190.thumb.JPG.86aa411aa70b50a83cf00af52977d339.JPGIMG_3195.thumb.JPG.22ebef01cc640588694bb3bbdcf9e6ae.JPGIMG_3198.thumb.JPG.f6a6b3817e846ae7c2940aeea683669c.JPGIMG_3199.thumb.JPG.96308be71fade224ef15df56e22edde4.JPGIMG_3201.thumb.JPG.13cc5aa3581fbb40a1ab13ceedafd86a.JPGIMG_3202.thumb.JPG.1c562b9961631f9ac4ffef792a2ffc07.JPGIMG_3203.thumb.JPG.a57aecf894887b8d0e322939a898663b.JPGIMG_3204.thumb.JPG.87012986e176cf5a30bcd4e18342bfa6.JPGIMG_3205.thumb.JPG.c41fdf4b4c1f40d10391ef5e386034f1.JPGIMG_3206.thumb.JPG.6ce92b52f50f58de1da5634d4246aa36.JPGIMG_3207.thumb.JPG.36df3bde5c2fa4639b04982380d041d4.JPGIMG_3208.thumb.JPG.43dc003f2a26af24ecdcd1083a0aea73.JPGIMG_3209.thumb.JPG.72d2c4c640b6424cd91dd22a4b3e672b.JPGIMG_3210.thumb.jpg.2056217eb454ff722369fae2f90f992c.jpg

  • Like 3
  • 3 months later...
Posted (edited)

With this superb walk-through you should be on top of the score board. Excellent job and this one is a treat for anyone ever to strip / service one of these movements !

Very well done and I'm sure your father will be happy & proud of his son !!  :Bravo::bow:

Edited by Endeavor
  • Like 1
Posted

Thanks guys, much appreciated! :thumbsu::wub:
Lawson’s walkthrough of this Calibre has a very nifty trick for reinstalling the rotor that I forgot to use in my walkthrough.

  • 2 years later...
Posted

@VWatchie, thank you so much for posting this! I just finished up servicing of a 555.415 movement, and your detailed write-up was a great help. Quality of your photos is outstanding. Much appreciation!

  • Like 1
  • 2 months later...
Posted

Thank you very much for taking the time to make this posting VWatchie, and to Mark and others who were sources for you.  I know I will be referring back to this excellent documentation when servicing quartz watches.

  • Like 1
Posted
2 minutes ago, TimeWerks said:

Thank you very much for taking the time to make this posting VWatchie, and to Mark and others who were sources for you.  I know I will be referring back to this excellent documentation when servicing quartz watches.

Thanks for your kind words @TimeWerksand good luck servicing!

  • Recently Browsing

    • No registered users viewing this page.
  • Topics

  • Posts

    • My understanding is that In the Etachron system the spring is only centered n order to set the stud angle when the the pins are wide open and the regulator block in at the midway point.  After that the pins are rotated in one direction only so that the width between the spring and one of the studs is 1/2 width of the spring. This results in the spring always being closer to one stud than other one.   
    • The idea is that the spring is centred between the pins when at rest. Then when the watch is running it will oscillate equally between the pins i.e. bounce off one pin then the other, as the hairspring breathes. If the spring is only hitting one pin, then it isn't centred, and most likely the pins are too far apart. Yes, the regulator pins are there to adjust the effective length of the hairspring. The spacing of the regulator pins should not affect the amplitude.  The vertical positions typically have lower amplitude than the horizontal ones. This has nothing to with the regulator - hairspring interaction. Increased friction in the verticals sucks energy from the system and reduces the amplitude. If the amplitude is less, the breathing is less. More tim between the pins = more effective length. Depending on how well the hairspring is centred, and which direction it sags, some vertical positions might run faster than the horizontal ones, and others slower. For example, if the spring is off centre towards on pin, and pressed against it by gravity, it might never bounce off that pin => faster. At the position 180 deg. away, the spring will spend more time in between the pins => slower.
    • Thank you all for the tips and insights. I'm looking carefully at the Sherline lathes with a milling attachment. I need to figure out exactly what I'd need to get in terms of the base lathe and attachments to be able to fabricate basic parts and learn how to fabricate some of the less basic ones- like a cannon pinion. Thank you again.
    • Welkom Sebastiaan! Veel plezier met deze hobby!
    • Welcome to the friendly forum.  Enjoy
×
×
  • Create New...