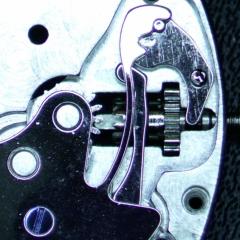
Hairspring out of flat
-
Recently Browsing
- No registered users viewing this page.
-
Topics
-
Posts
-
By watchweasol · Posted
Hi. It’s either riveting or welding . I have seen some small home made welding tools on UTube at times may be I should have a go at building one, they are small spot welding machines. Suitable for the likes of these type jobs. -
By transporter · Posted
Hi watchweasol, yes that is a way of doing it I suppose, I have a pair of mainspring hole making pliers on their way off eBay, the ones with the different shaped punches. I may be able to use them to make a hook. -
This is a modern watch, the crown is definitely made from solid 316l steel. You must have heated the crown to some 200C caused the surface colour to change to light yellow. It's similiar to steel tempering. Yes it is the chromium oxide that forms during the heating that gives rise to the colours you see as you know stainless steel contains chromium. The fact the crown is SS lead me to a question, you've never heard of the alum method? Because alum would work perfectly in this case, instead of drilling, which, there is always a risk of damaging the crown, I would just let the crown chilling in some warm alum solution for 1-2 days and the job is done. Sure can but the thing is the crown is not just mirror finishing, the lock symbol is polish while its background is some sand-blasted finishing so it would be hard to replicate that. You can buff it all shiny but losing the sand-blasted finishing means it won't look exactly like before. Gasket is always tricky to me. I would try to use some gasket that look closest to the broken one in term of thickness and diameter, and check if the replacement gasket fit with some friction to the case tube. Lastly you can still use alum at this point.
-


Recommended Posts
Join the conversation
You can post now and register later. If you have an account, sign in now to post with your account.
Note: Your post will require moderator approval before it will be visible.