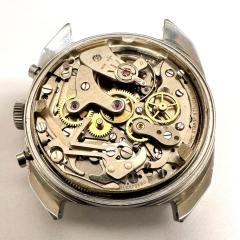
Low Cost Homemade Watch Parts
-
Recently Browsing
- No registered users viewing this page.
-
Topics
-
Posts
-
I sure appreciate your comment! I will look into one of those or maybe something similar. I of course will check your video to have a better idea. by the way, that’s a beautiful lathe! Mine is a little peersless, but I just bought a Boley & Leinen that is on its way. That’s the one I am looking a motor for. It comes with a motor, but I want to replace it for one that has a speed controller.
-
By LittleWatchShop · Posted
Indeed. I would not attempt one. Here is my messy Sherline setup -
This conversation is becoming a very confusing. The etachron system is a very nice system for manufacturing watches. As you know it consists of two components the stud and the regulator pins. Beautiful thing of this system is you can open up your regulator pins center the hairspring and as you close the pins they will close equally on both sides providing you centered it in the first place. It's not like you're going to become closer to one side or the other as the definition of the regulator pins is a bit confusing it's not exactly a slot sort of. I'm thinking maybe a little eight reading will be helpful for you. Then the file name was changed by me at the US patent but the wording of Seiko may or may not actually be attached to it soared up? I just did that so I can find it in my files. Normally patents are in people's name if they work for a company the company name will be there you'll notice the person lives in Japan which is interesting as the name would imply that this is a Swiss product. Somewhere I think I have the patents for the stud and I believe that is Swiss like a lot of things their Japanese and Swiss and then the Japanese let the Swiss name stand as it seems you more popular in case as you read up on the patents of the regulator pins or pin will see and it should explain exactly how and why it works also why it's important to always close at an open in specific directions because the pins actually have a shaped to them it's very hard to see the shape as it's very tiny. As a reminder with this system it's mass-produced. I wouldn't be at all surprised if they use cameras and computers to do all of the adjustments. The meaning of this is that the majority of watches will function as there supposed to and do what they're supposed to do the system will allow us for some minor in tolerance and has more than likely as I said no human hand is ever touched those watches that's the way they left the factory and they work fine. US2007091729A1 seiko etachron.pdf
-
These still seem stupid expensive for a bottle, but still £100 cheaper than than the Moebius ones. Anyone have any experience of these: https://www.cousinsuk.com/product/epilame-fixodrop-special-bottle-horotec
-
By nevenbekriev · Posted
Yes, this is not a basic part. Here are some pictures of making one
-


Recommended Posts
Join the conversation
You can post now and register later. If you have an account, sign in now to post with your account.
Note: Your post will require moderator approval before it will be visible.