Jump to content

Recommended Posts

I want to show others how you can modify the inner diameter of a hole jewel. For this movement, I have a high grade Waltham that has it's pallet fork jewel broken. Sure, I could order a new jewel, but I have a large assortment on hand. To start, you'll need to remove the old jewel, if yours is broken. Find a jewel that is the required thickness and OD, and one that has an ID that is smaller than the pivot it will match with. Now there is a few ways to modify the jewel. You can place it in a jewel chuck, or you can mount it in it's plate, and then center the hole on the lathe. I for some reason have never purchased jewel chucks, so I have it mounted in its cock, and that is mounted in a face plate. For widening the hole, you also have a few options there. You can use a piece of thin wire that is charged with diamond paste, or you can turn a piece of hardened steel to fit the pivot. I have done it both ways, and I haven't had much luck with the wire method that Daniels demonstrates. When making the steel burnisher, turn it on a slight taper. The end of the rod should protrude just past the back of the jewel. Then, with the rod mounted in you tailstock, add some diamond paste to it. I purchase diamond powder of varying micro size, and then mix it with a bit of oil to make the paste. With the headstock turning roughly 1-200 rpms, advance the diamond charged steel rod into the jewels hole. Retract it every second or so to keep it even. Little pressure is needed, but the paste will work its way off the steel rod, so it needs to be reapplied often. I like to rotate the tailstock spindle while I do this as well, advancing and retracting the spindle to continue cutting the jewel. This isn't a fast process, but should only take you 5 minutes or so. You'll notice in the beginning, that it seems like the steel rod is advancing quick quickly, but this is due to it also being polished and shaped by the diamond paste. It will eventually confirm itself to the jewel hole shape, and it will be less noticeable that it's diameter is being reduced. You may be thinking, isn't the steel much softer than the sapphire jewel? Won't the steel be the only thing that's being removed? And you'd be right to a point. But the steel becomes charged with the diamond paste, embedding it into the surface. After you reach the point of the steel rod conforming to the jewels hole, little diamond paste is added from then on. Below are some pictures of how I have it set up.

Here is the setup with wire. I don't really like this method.

PXL_20250401_014722673.thumb.jpg.e2e53bb2a0bf65199020363e792d82f3.jpg


PXL_20250401_014738957.thumb.jpg.5dfdea81219a54bdf6f1d687f31aef96.jpg


 And here is the setup with a hardened steel rod

PXL_20250401_024545998.thumb.jpg.52169d932c3014fcd6dff90f82a5e5b2.jpgPXL_20250401_024559223.thumb.jpg.e454893a219130652ee2fc692f9f6b6f.jpgPXL_20250401_024609813.thumb.jpg.e1eb134b49901ad7af1695adb94be790.jpg

  • Like 4
  • Thanks 1
Link to comment
Share on other sites

3 hours ago, Neverenoughwatches said:

How about using the pivot of a balance staff in place of the rod ?

That might be possible, but with the cone of a balance staff, it would eventually start to touch the jewel, possibly before you have reached your desired ID. Plus, I don't have balance staffs on hand, I generally make them. Its much faster for me to just turn a piece of steel the correct size. And the very slight taper is important, similar to a reamer.

40 minutes ago, Nucejoe said:

Thanks for sharing Pal, didn't know any of this. 

Regs

Absolutely. I don't think many people are aware you can do this, which is why I wanted to share. You arent going to be able to make huge changes in the size, but if you have a jewel that's very close, this is an excellent way to make it fit. You may also wonder why I dont just turn down the pivot of the part im making the jewel for, and thats because I dont want to alter the strength of the pivot. 

  • Like 1
  • Thanks 1
Link to comment
Share on other sites

You demonstrate on a relatively large pocket watch jewel (even though the pallet cock is near the smallest in the watch) - would you use the same technique on a small wristwatch jewel with a hole size of only .07 or so?

Link to comment
Share on other sites

25 minutes ago, Neverenoughwatches said:

Is the taper just to start the grinding in the hole ?


Mostly, and to maintain a constant pressure on the hole, and to keep the rod aligned 

11 minutes ago, mbwatch said:

You demonstrate on a relatively large pocket watch jewel (even though the pallet cock is near the smallest in the watch) - would you use the same technique on a small wristwatch jewel with a hole size of only .07 or so?

Yes I use the same technique on balance pivot holes as well. This is just what is currently on the bench for this type of repair. The smallest I've done is 0.09, but It should scale down, although I haven't done a 0.07 hole yet. I have some sapphire rod, maybe ill cut a slice off and see how small of a hole I can make someday. I would someday like to start a YouTube series on lathe work, from basic gravers, to making your own jewels and threading attachments. But I'm swamped, have roughly 35 watches in the backlog.

  • Like 4
Link to comment
Share on other sites

Is the taper within the hole negligible ? I was reading a little something the other day of reducing side friction on a pivot to increase vertical amplitude. Replacing the jewel for a thinner one, though it has the con of potentially eating up the side of the pivot.  I just wondered if the hole taper has much effect on reducing friction.

With the bottom of the jewel hole being narrower than the top.

Or whichever end the grindout is started.

The wire method is the way Seitz made their jewels. Theres a great video on it kicking around in the forum somewhere. 

Edited by Neverenoughwatches
Link to comment
Share on other sites

2 hours ago, Neverenoughwatches said:

Is the taper within the hole negligible ? I was reading a little something the other day of reducing side friction on a pivot to increase vertical amplitude. Replacing the jewel for a thinner one, though it has the con of potentially eating up the side of the pivot.  I just wondered if the hole taper has much effect on reducing friction.

With the bottom of the jewel hole being narrower than the top.

Or whichever end the grindout is started.

The wire method is the way Seitz made their jewels. Theres a great video on it kicking around in the forum somewhere. 

The taper is pretty negligible. You would reverse the jewel setting in the lathe, and grind again from the opposite side, to counter the taper if it was too much. I haven't tested as far as amplitude gains for either one, or if it's a detriment to not reverse the jewel and regrind from the other side. I'm usually taking off very little, and the burnisher conforms to the jewel surface, so I don't think it makes a ton of difference, but it's a very good point to bring up!

  • Like 1
Link to comment
Share on other sites

7 hours ago, SwissSeiko said:

The taper is pretty negligible. You would reverse the jewel setting in the lathe, and grind again from the opposite side, to counter the taper if it was too much. I haven't tested as far as amplitude gains for either one, or if it's a detriment to not reverse the jewel and regrind from the other side. I'm usually taking off very little, and the burnisher conforms to the jewel surface, so I don't think it makes a ton of difference, but it's a very good point to bring up!

If you could get the tapers to meet in the center you'd end up with something very similar to an olive jewel.

But I as you said, I guess there is more  grinding, conforming going on of the burnisher than of the jewel , so the hole probably finishes pretty cindrical anyway.

Good subject, i think you gave some information a while back about reducing the OD as well. I think jewel modification is a terrific step in being independent.  With all the talk about parts running out it's becoming increasingly important to learn how to make what isn't available. 

Edited by Neverenoughwatches
Link to comment
Share on other sites

19 hours ago, SwissSeiko said:

turn a piece of hardened steel to fit the pivot.

Thanks for describing your method in such detail. I can imagine needing to do something similar in the future, and you will have saved me a lot of trouble.

Why does the steel need to be hardened? Also, what were the difficulties you had with the wire method? Could it work better for olive jewels?


  • Like 1
Link to comment
Share on other sites

I was thinking of a way to increase the ID without installing the jewel in the movement and mounting to a face plate, something that i dont have. I came up with a 2-3  mm brass rod in the lathe, drill off the center to the pivot diameter or slightly larger. Shellac the jewel and center it on the rod then grind in the new ID. I wonder how accurate a drill press would do this, it's not drilling a new hole, so I'm thinking the grinding rod would keep the jewel on center.

Like Klassiker I thought a mild steel, bronze or brass rod might impregnate with cutting paste better than a hard steel. 

Link to comment
Share on other sites

19 minutes ago, Neverenoughwatches said:

I was thinking of a way to increase the ID without installing the jewel in the movement and mounting to a face plate, something that i dont have. I came up with a 2-3  mm brass rod in the lathe, drill off the center to the pivot diameter or slightly larger. Shellac the jewel and center it on the rod then grind in the new ID. I wonder how accurate a drill press would do this, it's not drilling a new hole, so I'm thinking the grinding rod would keep the jewel on center.

Like Klassiker I thought a mild steel, bronze or brass rod might impregnate with cutting paste better than a hard steel. 

I’ve seen for sale jewel collets that are brass and rather than using a draw bar you insert it into a normal collet. Collet in collet if you know what I mean. You should be able to knock those up on your lathe but would need a fine slitting saw and interesting work holding.


Tom

  • Like 1
Link to comment
Share on other sites

👍 I missed out on a set of jewel chucks a few weeks ago. They're used for making chatons as well.

I have some phosphor bronze rod on order for making something similar.  No split, just a step inside the rod to seat the jewel into. Accurately slicing the rod might be difficult with the gear I have, so i would shellac the jewel in.

I fancy having a go with some brass now this afternoon lol.

Link to comment
Share on other sites

9 hours ago, Neverenoughwatches said:

If you could get the tapers to meet in the center you'd end up with something very similar to an olive jewel.

But I as you said, I guess there is more  grinding, conforming going on of the burnisher than of the jewel , so the hole probably finishes pretty cindrical anyway.

Good subject, i think you gave some information a while back about reducing the OD as well. I think jewel modification is a terrific step in being independent.  With all the talk about parts running out it's becoming increasingly important to learn how to make what isn't available. 

Bingo on the tapers meeting to make an olive jewel.

6 hours ago, Klassiker said:

Thanks for describing your method in such detail. I can imagine needing to do something similar in the future, and you will have saved me a lot of trouble.

Why does the steel need to be hardened? Also, what were the difficulties you had with the wire method? Could it work better for olive jewels?


I harden it so it doesnt deform as easily. The issue I have with the wire method is work holding. I dont like having the wire run through the headstock, as you have to be very careful not to let it rub on the drawbar, or it will break. It's a much more delicate operation and takes longer, so the steel rod is my preferred way.

2 hours ago, Neverenoughwatches said:

I was thinking of a way to increase the ID without installing the jewel in the movement and mounting to a face plate, something that i dont have. I came up with a 2-3  mm brass rod in the lathe, drill off the center to the pivot diameter or slightly larger. Shellac the jewel and center it on the rod then grind in the new ID. I wonder how accurate a drill press would do this, it's not drilling a new hole, so I'm thinking the grinding rod would keep the jewel on center.

Like Klassiker I thought a mild steel, bronze or brass rod might impregnate with cutting paste better than a hard steel. 

If you cant drill the brass with the tailstock, you could cut the center with a graver first, then use the drill press. Or you can drill it freehand with a pin vise. 

Now I'm seeing you want to grind it with a drill press. I'm not sure on the runout on you drill press, but they seem to average about 0.16mm, where as my Moseley is 0.001mm

  • Like 2
Link to comment
Share on other sites

40 minutes ago, SwissSeiko said:

Now I'm seeing you want to grind it with a drill press. I'm not sure on the runout on you drill press, but they seem to average about 0.16mm, where as my Moseley is 0.001mm

I'm not sure about mine, but a press certainly wont have anywhere near the accuracy of a lathe . Would be interesting to see how it turns out.

Link to comment
Share on other sites

4 hours ago, tomh207 said:

I’ve seen for sale jewel collets that are brass and rather than using a draw bar you insert it into a normal collet.

Jewel chucks seem to be the only consistently affordable watchmaker's lathe accessory. $50 for a set is on the high side.

Link to comment
Share on other sites

Join the conversation

You can post now and register later. If you have an account, sign in now to post with your account.
Note: Your post will require moderator approval before it will be visible.

Guest
Reply to this topic...

×   Pasted as rich text.   Restore formatting

  Only 75 emoji are allowed.

×   Your link has been automatically embedded.   Display as a link instead

×   Your previous content has been restored.   Clear editor

×   You cannot paste images directly. Upload or insert images from URL.


  • Recently Browsing

    • No registered users viewing this page.
  • Topics

  • Posts

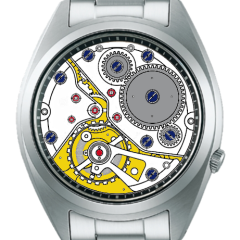
    • Hi all of you, This watch is no part of my collection, but a friend of mine sent me these pictures to check whether this is a valuable time piece. I think so, and you? This is an automatic LIP (R153A caliber). 
    • This shows the strength as 0.17 which appears to contradict everything else?
    • If you look carefully on their website they have a nice PDF to download which I will attach. Then you can take your dimensions and figure out which mainspring you're supposed to have. It also give you the various numbers of the mainspring so you can go look on eBay One of the problems with part numbers for American pocket watches will be or can be typically with balance staffs and mainsprings will be size variations for the same part number. Typically with Elgin when they give you a part number they will give you the thickness of the spring. If you look at the above example I have you'll notice that for some of the Springs for the same part number you did have various thicknesses or strengths. As time has gone on the quantity of mainsprings available especially the aftermarket springs the quantities or the choices of thicknesses will go away. In other words you're lucky sometimes to get a mainspring at all. Then from a different listing for the particular part number we can see that the blued steel spring originally came in three different thicknesses. With the initials DP standing for Elgin's alloy DuraPower. Personally especially on the smaller size American watches I would try to go with the original spring as they will be more likely to be sized correctly. Then DuraPower Would be the preferred choice. Then even though the listing up above only shows one thickness/strength according to the seller below there were three different thicknesses and other words you get a choice. https://www.ebay.com/itm/156090848585   Mainsprings Cas-Kar Catalog 2018.pdf
    • Could be an end shake problem, as @AndyGSisaid, was it running before? 
    • What condition was the movement in when you started? Can you post a photo of the bridge and are you sure the pivots are engaged before screwing it down?
×
×
  • Create New...